Posted on — Leave a comment

Swordfish Recipe: How to Cook Swordfish Steaks 5 Ways

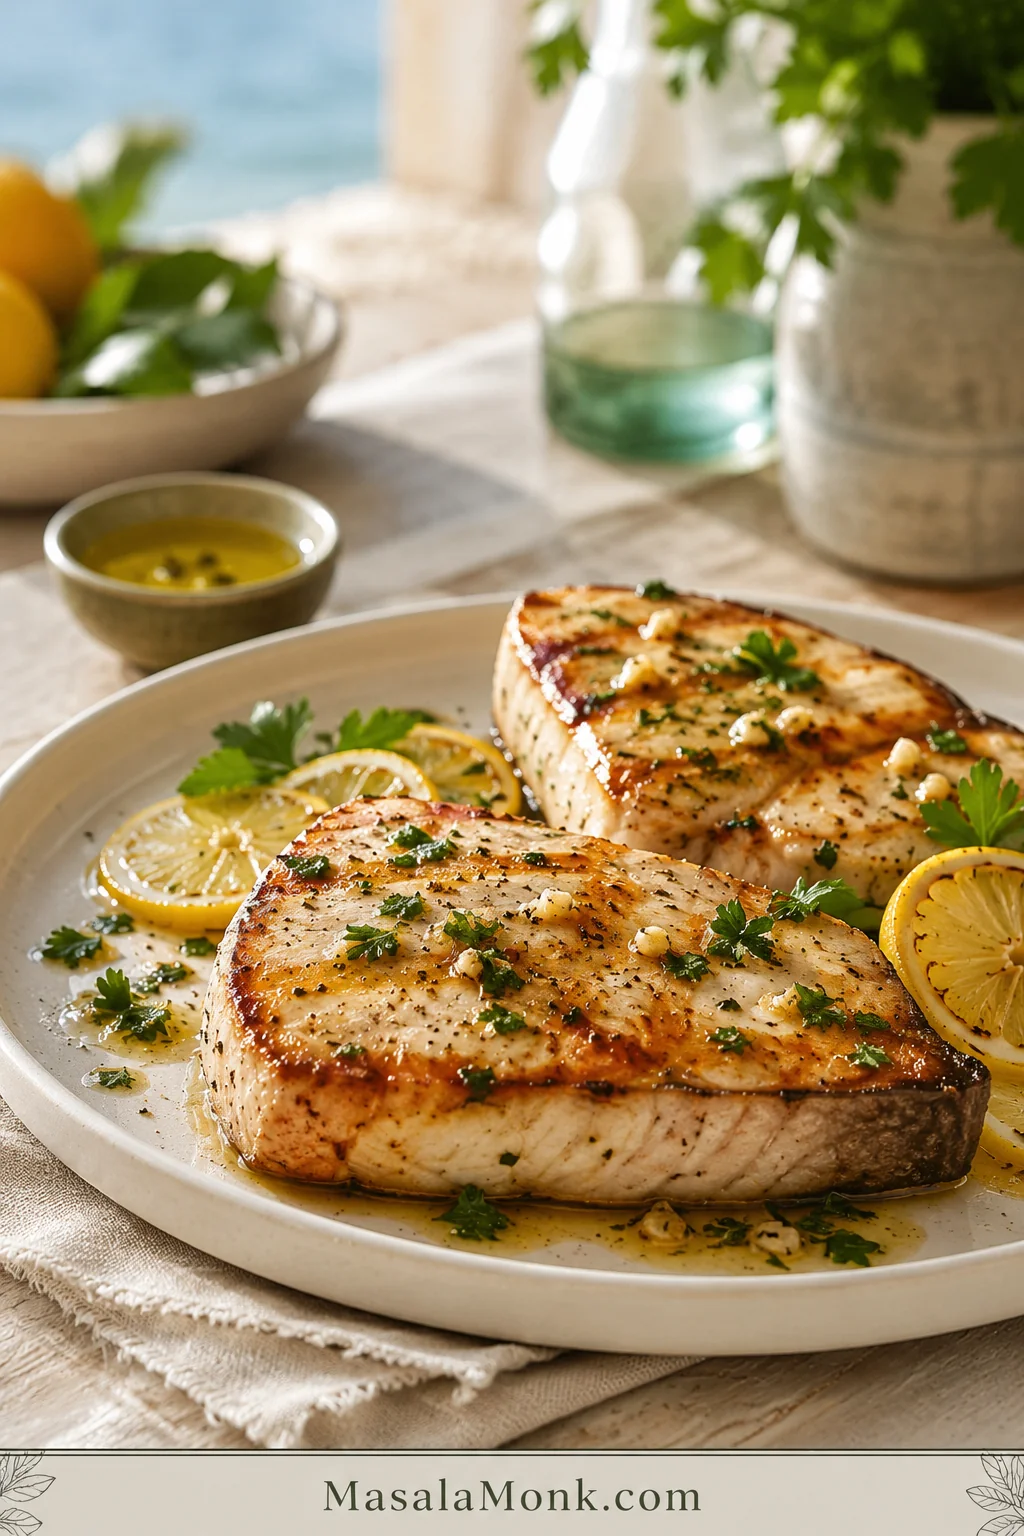
Cooked lemon garlic swordfish steaks on a light plate with lemon slices, herbs, and pan juices.

You have swordfish steaks on the counter, a lemon ready to cut, and one big question: how do you cook them without turning them dry? Swordfish feels special because it is thick, meaty, and steak-like, but that also makes it a little nerve-racking the first time.

This swordfish recipe keeps the process clear without taking away the pleasure of dinner. Start with a bright lemon garlic seasoning, then cook the steaks the way that fits your kitchen: grilled, pan-seared, baked, broiled, or in the air fryer.

Use it as a choose-your-method guide. A ¾-inch steak and a 1½-inch steak should not be treated the same way, and a grill, skillet, oven, broiler, and air fryer all need slightly different timing. The goal is simple: a golden outside, a juicy center, and a lemony finish that makes the fish feel worth the fuss.

Once you know the rhythm, it becomes easy: dry the surface, season boldly, cook hot enough to brown, stop before the center tightens, and finish with lemon, herbs, butter, capers, salsa, or a bright relish.

In This Guide

Quick Answer: What Is the Best Way to Cook Swordfish?

The right way to cook swordfish depends on the dinner you want. Grill it for smoke and char, pan-sear it for a golden crust, bake it for an easy indoor meal, broil it for fast grill-style browning, or use the air fryer for a quick small-batch dinner.

For most home cooks, the easiest starting point is lemon garlic swordfish steaks cooked on the grill or in a hot skillet. Choose steaks about 1 inch / 2.5 cm thick, season them with olive oil, lemon, garlic, salt, pepper, and herbs, then cook until the thickest part looks opaque and separates easily with gentle pressure.

  • Most reliable method: pan-seared or grilled swordfish
  • No-grill choice: baked swordfish at 400°F / 200°C
  • Fast indoor choice: broiled swordfish
  • Quick appliance choice: air fryer swordfish at 400°F / 204°C
  • Good steak size: 6–8 oz / 170–225 g per person
  • Ideal thickness: about 1 inch / 2.5 cm
  • Food-safety temperature: 145°F / 63°C; without a thermometer, look for an opaque center that flakes easily

Before choosing a method, compare the five paths side by side. This guide shows where the grill, skillet, oven, broiler, and air fryer each make sense.
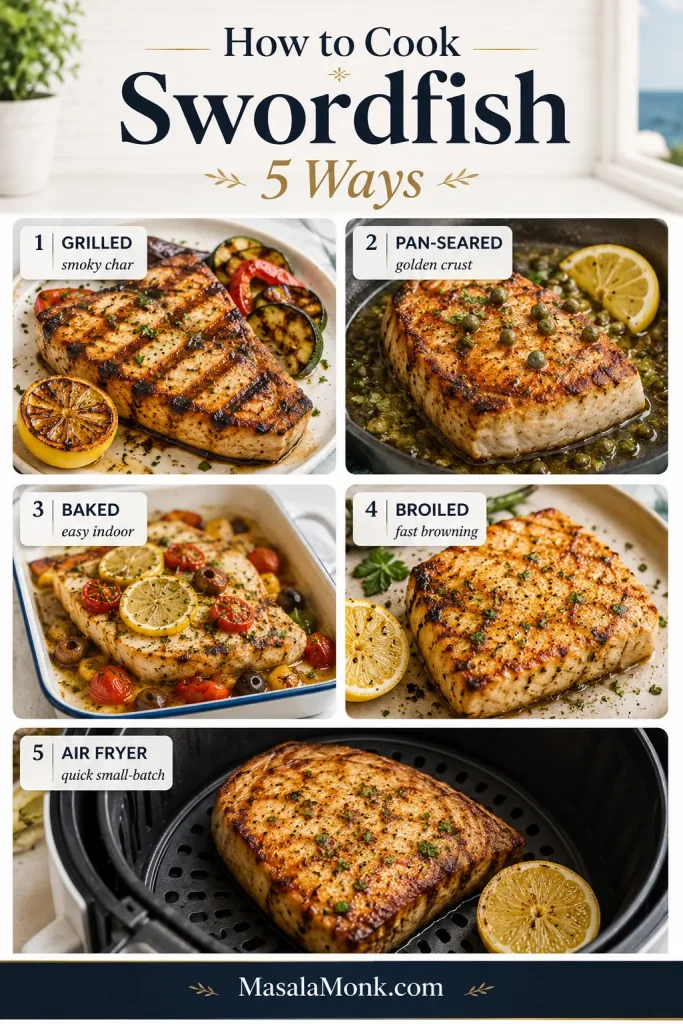
Visual guide showing five swordfish cooking methods: grilled, pan-seared, baked, broiled, and air fried.
The visual guide shows how to cook swordfish five ways: grilled, pan-seared, baked, broiled, and air fried. Use it to choose the method that fits your time, equipment, and the texture you want.

If this is your first time, start with pan-seared or baked. Both give you more control than a roaring grill or broiler, and both still give you a dinner that feels special: browned fish, lemony sauce, and a firm juicy bite.

Swordfish at a Glance

Main recipeLemon garlic swordfish steaks
Servings4
Steak size4 steaks, 6–8 oz / 170–225 g each
Ideal thicknessAbout 1 inch / 2.5 cm
Marinade time15–30 minutes
Cook timeMost methods take 8–15 minutes; thick steaks may take closer to 18 minutes
Flavor styleLemon, garlic, herbs, olive oil, butter, capers, tomato, olives, mango salsa, Cajun seasoning
Doneness cueCenter looks set and opaque; flakes separate with gentle pressure
Food-safety temperature145°F / 63°C

Lemon Garlic Swordfish Steaks — Grill, Pan-Sear, Bake, Broil, or Air Fry

This is the base recipe for all five cooking methods below. The seasoning is simple enough for a weeknight, but it gives you the kind of golden, lemony, garlicky swordfish that can sit next to roasted potatoes, cucumber salad, warm bread, or a spoonful of salsa and feel like a restaurant plate.

Prep time: 10 minutes
Marinating time: 15 to 30 minutes
Cook time: 8 to 15 minutes for most steaks
Total time: about 30 to 45 minutes
Servings: 4
Difficulty: Easy, but timing matters

Ingredients

IngredientAmountNotes
Swordfish steaks4 steaks, 6–8 oz / 170–225 g eachEven thickness helps them cook evenly
Olive oil3 tbsp / 45 mlHelps carry the seasoning and protect the surface
Fresh lemon juice2 tbsp / 30 mlBrightens the fish; do not marinate too long in citrus
Lemon zestFrom 1 lemonAdds lemon aroma without extra acidity
Garlic3 cloves, finely mincedUse 2 cloves for a milder version
Kosher salt1 tsp, or to tasteUse less if adding capers or soy-based marinade
Black pepper½ tspFreshly ground is best
Fresh parsley or chives2 tbsp, choppedPlus more for serving
Optional butter finish2–3 tbsp / 28–42 gGood for pan-seared, broiled, or baked swordfish
Optional capers1–2 tbspBest with lemon butter or pan sauce

Instructions

  1. Dry the fish. Pat both sides very dry with paper towels. This is what helps the outside brown instead of steam.
  2. Make the lemon garlic seasoning. In a small bowl, mix olive oil, lemon juice, lemon zest, garlic, salt, pepper, and chopped herbs.
  3. Season the steaks. Brush the mixture over both sides. Let the fish sit for 15 to 30 minutes while you prepare your cooking method. If marinating longer than a quick preheat rest, cover and refrigerate it.
  4. Cook with your chosen method. Use the grill, skillet, oven, broiler, or air fryer instructions below.
  5. Check the thickest part. It should no longer look glossy or translucent. For food safety, cook fish to 145°F / 63°C.
  6. Rest and finish. Let the fish rest for 3 to 5 minutes, then finish with melted butter, capers, extra lemon, fresh herbs, salsa verde, tomato olive relish, or mango salsa.

Before the fish hits the heat, the lemon garlic seasoning should coat the surface without soaking it for too long. This is the quick flavor step that keeps the fish bright while still letting it brown.
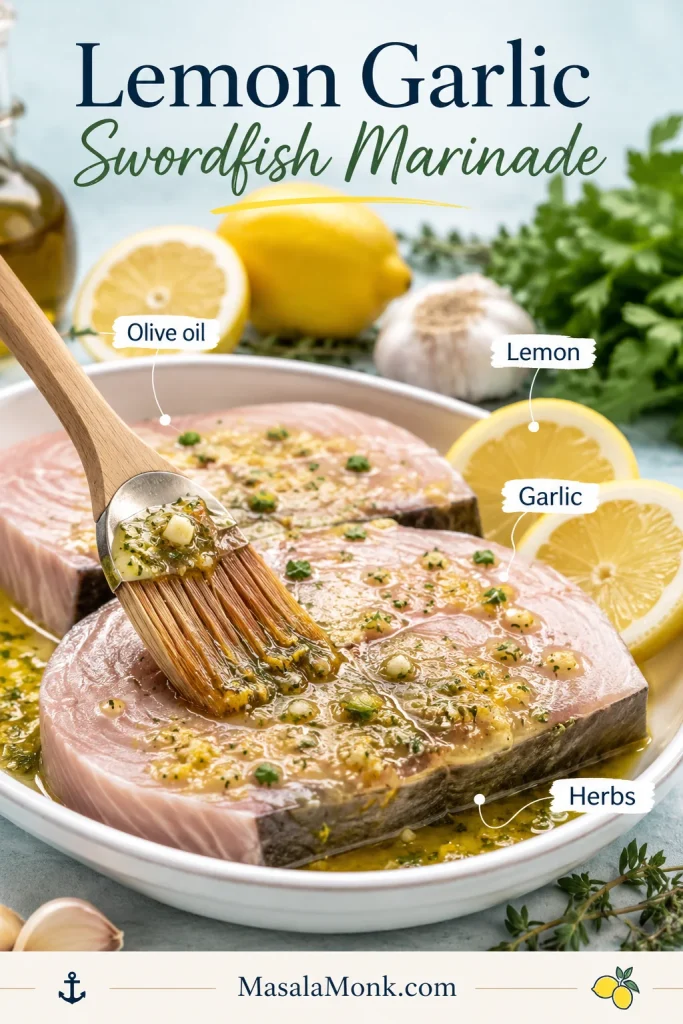
Lemon garlic marinade being brushed onto raw swordfish steaks with lemon, garlic, herbs, and olive oil nearby.
A short lemon garlic swordfish marinade adds brightness without hiding the fish’s clean, meaty flavor. Brush it on before cooking so the surface stays seasoned, but still dry enough to brown well.

What success looks like: you are aiming for swordfish that is browned at the edges, opaque in the center, and still moist enough that lemon butter, capers, or tomato relish glide over the flakes instead of rescuing them.

After the ingredients and method, use this recipe-card image as a saveable recap. It keeps the swordfish steak thickness, timing range, and safe finish temperature in one easy place.
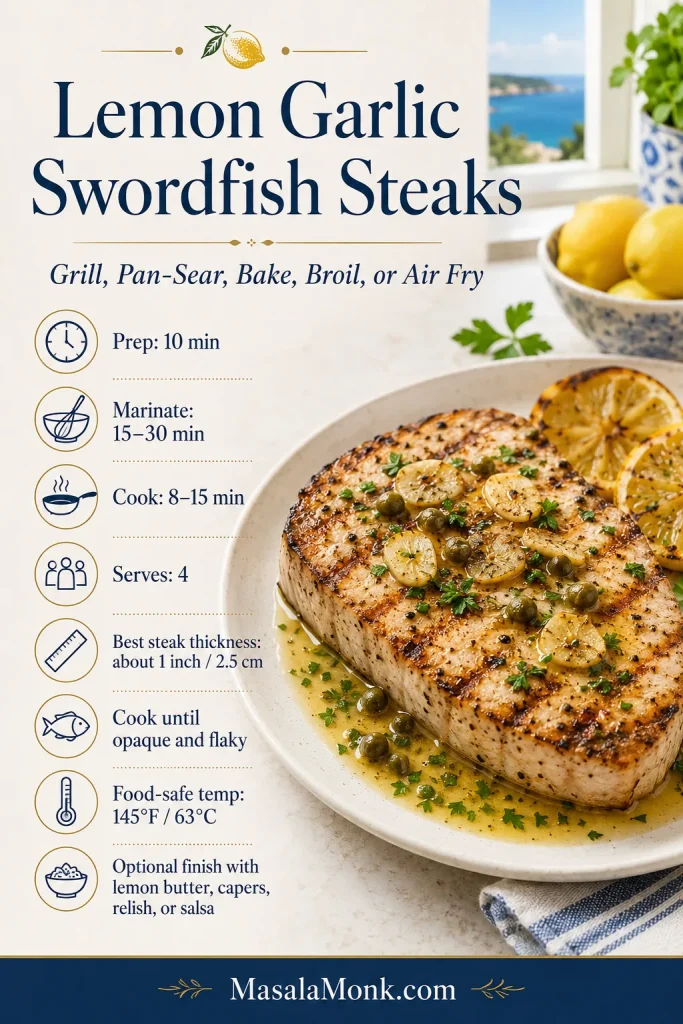
Recipe card for lemon garlic swordfish steaks with prep time, marinade time, cook time, steak thickness, servings, and internal temperature.
This lemon garlic swordfish recipe card keeps the essentials in one place: 1-inch steaks, a short marinade, 8–15 minutes of cooking, and a food-safe 145°F / 63°C finish. Keep it nearby before you choose the grill, skillet, oven, broiler, or air fryer.

Why This Recipe Works

The easiest way to cook swordfish confidently is to separate flavor from technique. The lemon garlic seasoning stays the same; the cooking method changes based on your kitchen, steak thickness, and comfort level.

  • One seasoning works five ways. Lemon, garlic, olive oil, herbs, salt, and pepper suit grilling, searing, baking, broiling, and air frying.
  • Timing is built around thick steaks. Swordfish behaves more like a seafood steak than a delicate fillet, so thickness matters.
  • A method table helps you decide fast. You can choose grill, skillet, oven, broiler, or air fryer without scrolling through five separate recipes.
  • Bright finishes keep the fish lively. Lemon, herbs, capers, butter, tomato relish, mango salsa, or a cool yogurt sauce add moisture and brightness without hiding the clean flavor.

This is the kind of seafood dinner to make when you want something that feels restaurant-level without restaurant nerves: a golden steak of fish, a bright lemony finish, and one clear method you can trust.

Before You Cook: Buying and Prep Tips

Good swordfish starts at the seafood counter, before the pan or grill ever enters the picture. Ask for steaks that are close in thickness so they finish at the same time. For dinner portions, 6–8 oz / 170–225 g per person works well.

You do not need the most expensive piece in the case; you need one that looks fresh, smells clean, and cooks evenly.

  • Look for firm, moist flesh. It should look fresh and slightly glossy, not dry or tired around the edges.
  • Smell matters. Fresh swordfish should smell clean and mild, not sharp, sour, or ammonia-like.
  • Choose even thickness. Uneven steaks are harder to cook because the thin end dries before the thick end is done.
  • Check the bloodline. A little darker meat is normal, but avoid pieces where the bloodline looks very brown, dried out, or unpleasantly strong-smelling.
  • Skin on or off is fine. Some steaks have a strip of skin around the edge. You can cook with it on to help the steak hold together, then remove it before eating if you prefer.

At the seafood counter, the best swordfish steaks look firm, moist, and even. This buying guide helps you avoid dry edges and uneven cuts before cooking starts.
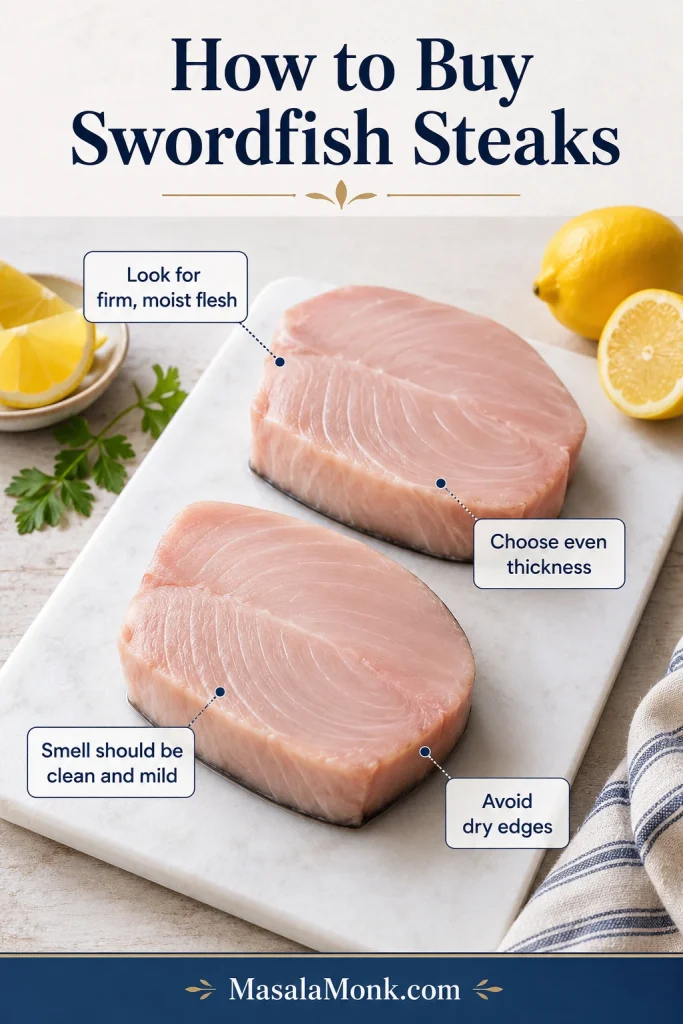
Raw swordfish steaks on a board with buying tips for firm flesh, even thickness, clean smell, and no dry edges.
Good swordfish starts before cooking. Look for firm, moist swordfish steaks with even thickness, a clean mild smell, and no dry edges so the fish cooks evenly instead of turning tough at the sides.

Swordfish Steak vs Swordfish Fillet

At many seafood counters, “swordfish steak” and “swordfish fillet” are used loosely. For this recipe, look for steak-like pieces about ¾ to 1½ inches thick. Thinner pieces suit the skillet, broiler, and air fryer. Thicker pieces are excellent on the grill or in the oven, but they are easier to judge with a thermometer.

Thickness is the timing clue many cooks miss. Use this guide to separate quick ¾-inch steaks from all-purpose 1-inch steaks and thicker cuts that need gentler finishing.
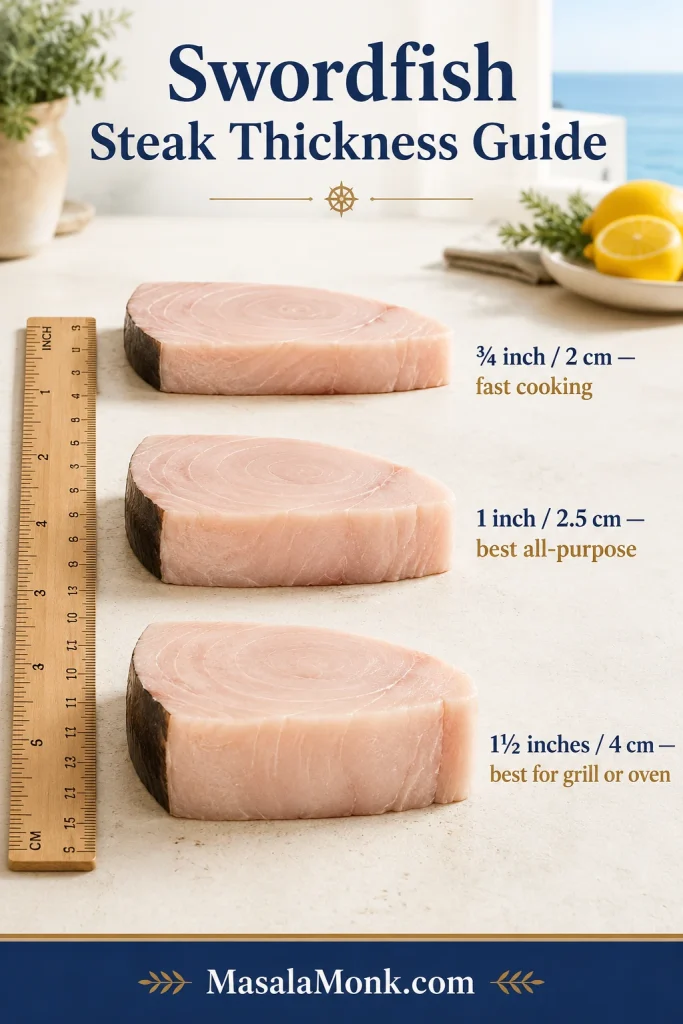
Side-angle thickness guide showing raw swordfish steaks labeled ¾ inch, 1 inch, and 1½ inches beside a ruler.
Swordfish steak thickness changes cook time more than almost anything else. A ¾-inch steak cooks quickly, a 1-inch steak is the easiest all-purpose cut, and a 1½-inch steak usually benefits from gentler finishing.

Fresh or Frozen Swordfish

Frozen swordfish can work well if it is thawed properly. Thaw it in the refrigerator overnight, then pat it very dry before seasoning. Cooking from frozen is less predictable because the outside can firm up before the middle is ready.

Equipment That Helps

You do not need fancy equipment. Paper towels and an instant-read thermometer do most of the heavy lifting.

  • Instant-read thermometer: the easiest way to avoid overcooking thick steaks
  • Paper towels: essential for drying the surface
  • Fish spatula or tongs: useful for gentle flipping
  • Heavy skillet: cast iron, stainless steel, or sturdy nonstick for searing
  • Rimmed baking sheet: helpful for baking and broiling
  • Grill brush: important if grilling, because clean grates release the fish better

Choose Your Swordfish Cooking Method

Not sure whether to grill, sear, bake, broil, or air fry? Use this table first. It combines the method choice and situation guide so you can get to cooking faster.

SituationChooseWhy It WorksWatch Closely
You want smoke, char, and summer flavorGrillDirect heat gives grill marks and a steakhouse-style seafood plateClean and oil the grates; flip only when the fish releases
You want a golden crust indoorsPan-searThe skillet gives strong contact and sets you up for lemon caper butterDo not move the fish too early
You want the easiest indoor methodBakeSteady oven heat is calmer and good for several steaks at onceDo not keep baking just to chase color
You want fast indoor browningBroilHigh top heat gives grill-style edges without going outsideStay nearby; broilers move fast
You want a quick small-batch dinnerAir fryerCirculating heat cooks smaller steaks quickly with little messThin pieces dry quickly
Your steaks are thick, closer to 1½ inchesGrill with a cooler zone, bake, or pan + ovenThicker fish needs gentler finishing after browningUse a thermometer instead of guessing

How to Keep Swordfish Juicy

Swordfish is sturdy, but it is still a lean fish. It does not need rescuing if you stop at the right moment; it needs just enough heat to brown the outside while the middle stays moist.

Browning starts before the fish touches heat. Patting swordfish dry removes surface moisture so the crust can form instead of steaming.
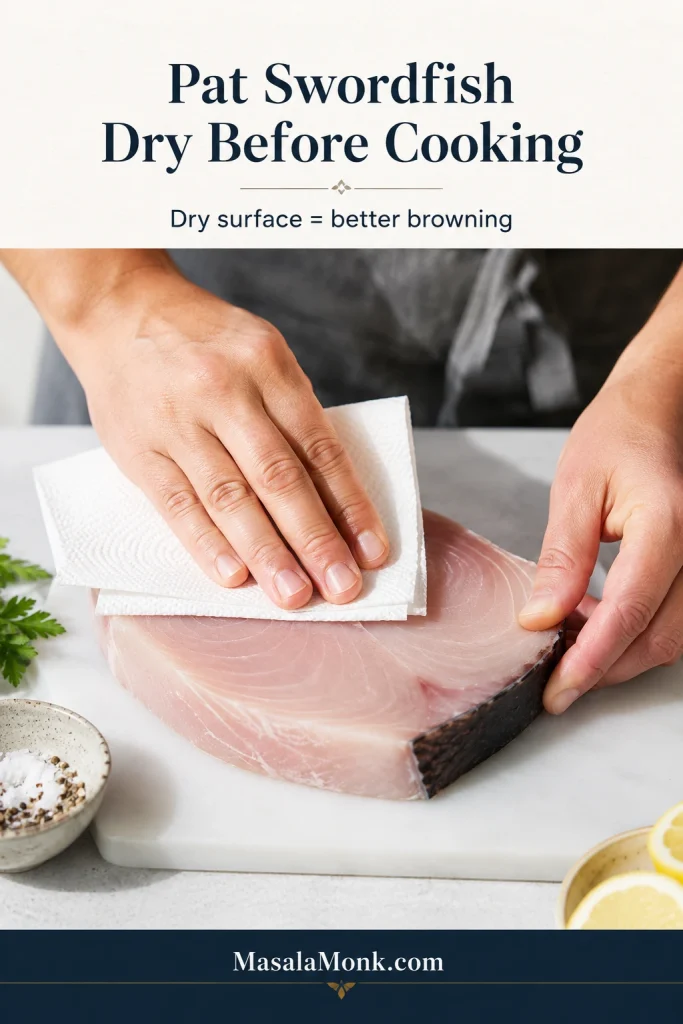
Hands patting a raw swordfish steak dry with a paper towel on a clean prep surface.
First, pat swordfish steaks dry before adding oil, salt, or marinade. Removing surface moisture helps the fish brown instead of steam, which gives you a better crust in the skillet, on the grill, under the broiler, or in the air fryer.
  • Choose thicker, even steaks when possible. Very thin pieces cook fast and give you less margin.
  • Dry the surface before seasoning. Moisture blocks browning.
  • Use enough heat to brown. A hot grill or skillet creates color before the inside dries out.
  • Avoid long acidic marinades. Lemon and lime are wonderful, but too much time in acid can change the texture.
  • Stop before it feels tight. The fish should be firm, not hard.
  • Rest briefly. A few minutes off the heat helps the juices settle.
  • Finish with brightness. Lemon butter, capers, tomato olive relish, salsa verde, mango salsa, or herbs make the final plate feel juicy and lively.

Swordfish Cook Time by Thickness

If one table matters most while you cook, make it this one. The clock is a starting point; steak thickness and heat level decide the final minute.

ThicknessGrillPan-SearBakeBroilAir Fryer
¾ inch / 2 cm3–4 min per side3–4 min per side9–11 min2–3 min per side6–8 min
1 inch / 2.5 cm4–5 min first side, 3–5 min second4–6 min per side12–15 min3–4 min per side8–10 min
1½ inches / 4 cmSear over hot zone, finish over cooler zoneSear, then finish in oven15–18 minNot ideal unless monitored carefullyNot ideal for most baskets

For thick steaks, use a thermometer. With thin steaks, start looking before the timer ends and pull the fish before the texture turns stiff.

After checking thickness, use the cook-time chart as a starting point. The final minute still depends on heat, steak size, and the way the center looks.
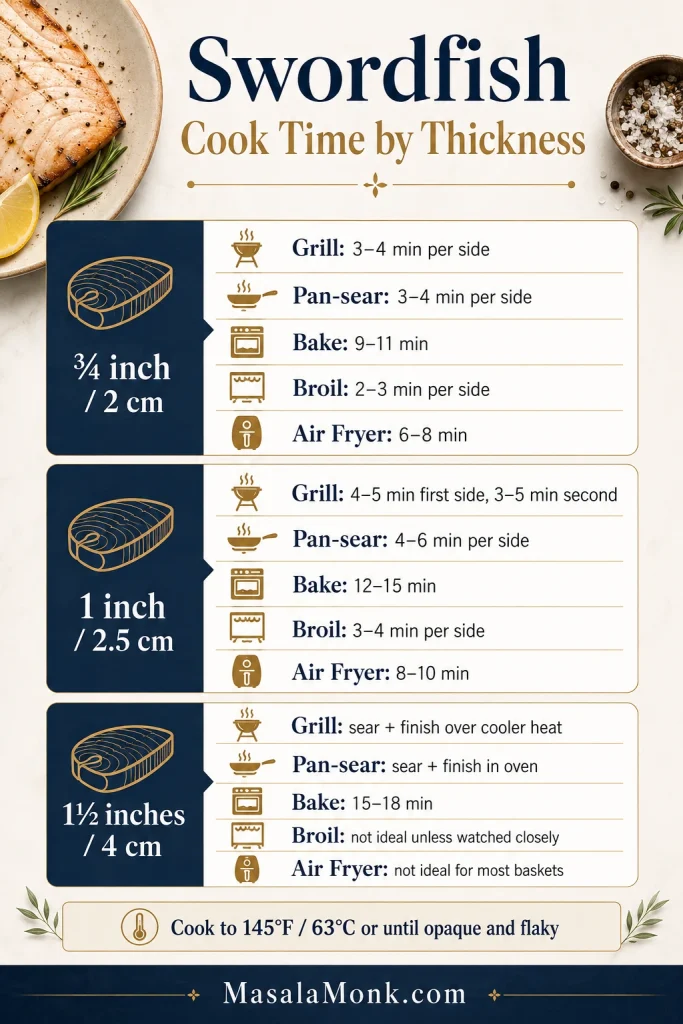
Infographic listing swordfish cook times by steak thickness for grilling, pan-searing, baking, broiling, and air frying.
Use this swordfish cook time by thickness guide before choosing grill, skillet, oven, broiler, or air fryer. Check the thickest part near the end because heat level, steak size, and carryover cooking can change the final minute.

How to Grill Swordfish

Grilled swordfish is for smoke, char, and summer plates. The fish is sturdy enough for direct heat, and the grill gives you those browned edges that taste especially good with lemon, herbs, and a cold salad.

For smoky char, the grill needs clean oiled grates and one confident flip. The image below shows the browned edges you are aiming for.
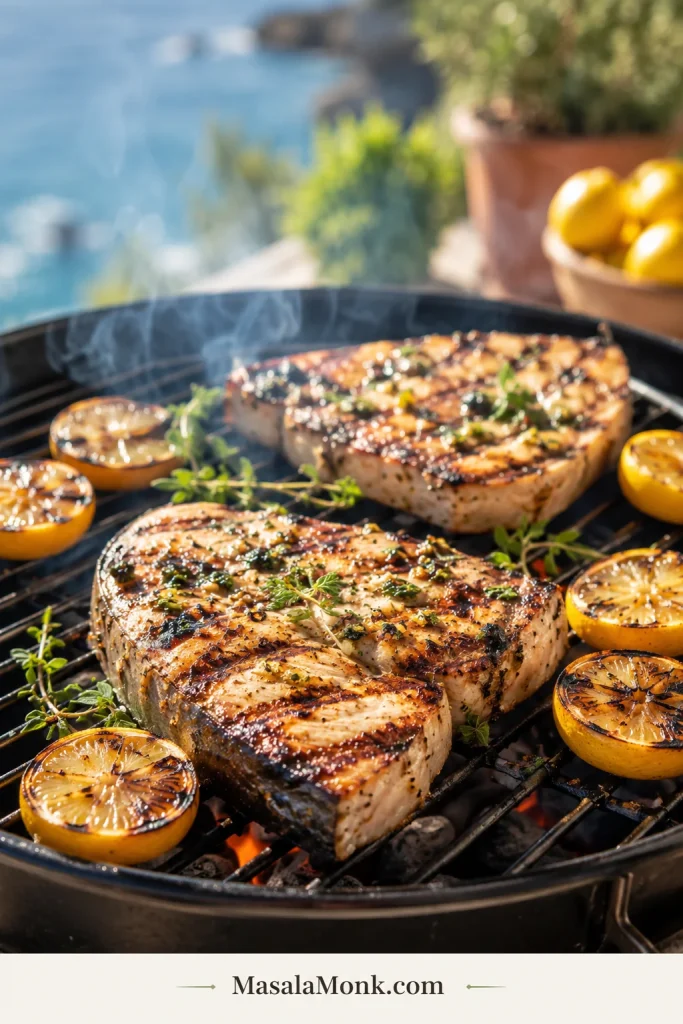
Grilled swordfish steaks with char marks, lemon, herbs, and a bright outdoor-style serving setup.
Grilled swordfish is best when you want smoky char, browned edges, and a steakhouse-style seafood dinner. Let the fish release naturally from clean, oiled grates before flipping so the steak stays intact.

For Smoke, Char, and Summer Plates

  1. Preheat the grill to medium-high heat, about 400°F / 200°C.
  2. Clean the grates well, then oil them lightly.
  3. Brush the seasoned steaks with a little extra oil if the surface looks dry.
  4. Place the fish on the grill and leave it alone for 4 to 5 minutes.
  5. Flip once with tongs or a fish spatula.
  6. Cook the second side for 3 to 5 minutes, depending on thickness.
  7. Check the thickest part, then rest briefly before serving.

Grill cue: If the fish sticks when you try to lift it, do not force it. Give it another minute. Swordfish usually releases once the surface has browned enough.

Finish it with: salmoriglio, chimichurri, lemon garlic butter, tomato olive relish, or mango salsa. A squeeze of lemon over charred edges is often enough.

Swordfish Kabob Variation

For kabobs, cut thick steaks into large 1½-inch cubes, marinate briefly, thread onto skewers, and grill until cooked through. Smaller cubes move fast, so stay close and pull them before they feel tight or dry.

How to Pan-Sear Swordfish

Pan-searing is the move when you want swordfish to feel like a restaurant main: browned outside, firm juicy center, and a lemon caper butter you can spoon over the top.

For the skillet method, aim for firm fish with a browned surface before adding lemon caper butter. That contrast keeps pan-seared swordfish rich but fresh.
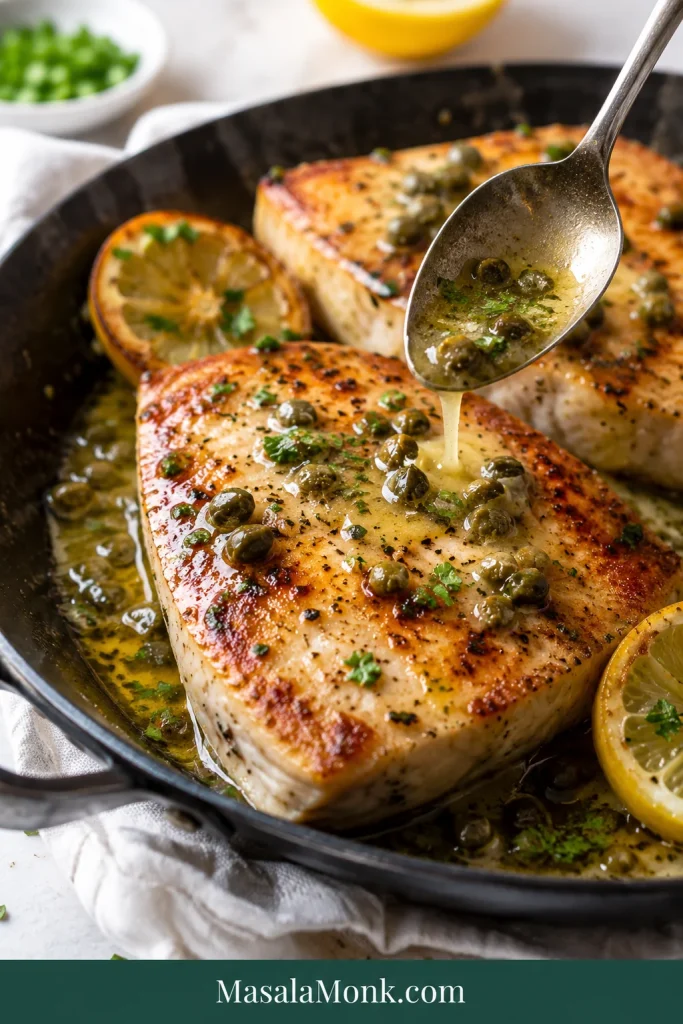
Pan-seared swordfish in a skillet with lemon caper butter, capers, herbs, and a browned crust.
Pan-seared swordfish gives you fast browning and a rich lemon caper butter finish. Lemon and capers balance the meaty fish so the final bite tastes fresh rather than heavy.

For a Golden Crust and Lemon Caper Sauce

  1. Heat a heavy skillet over medium-high heat.
  2. Add a thin layer of oil.
  3. Place the fish in the pan and cook without moving for 4 to 6 minutes.
  4. Flip once and cook the second side for another 4 to 6 minutes.
  5. Check the thickest part for doneness.
  6. Rest briefly before saucing.

Pan cue: You want browning, not rushing. If the first side looks pale after 4 minutes, give it another minute before flipping. When it is ready, the edges should look golden and the fish should lift with less resistance.

Quick Lemon Caper Pan Sauce

After removing the fish, lower the heat. Add 2 tablespoons butter, 1 tablespoon lemon juice, 1 to 2 tablespoons capers, and a splash of water or broth. Stir for about a minute, then spoon the sauce over the rested steaks.

Before serving, check the texture: browned outside, opaque flakes inside, and moisture in the center. Sauce should add shine, not hide dryness.
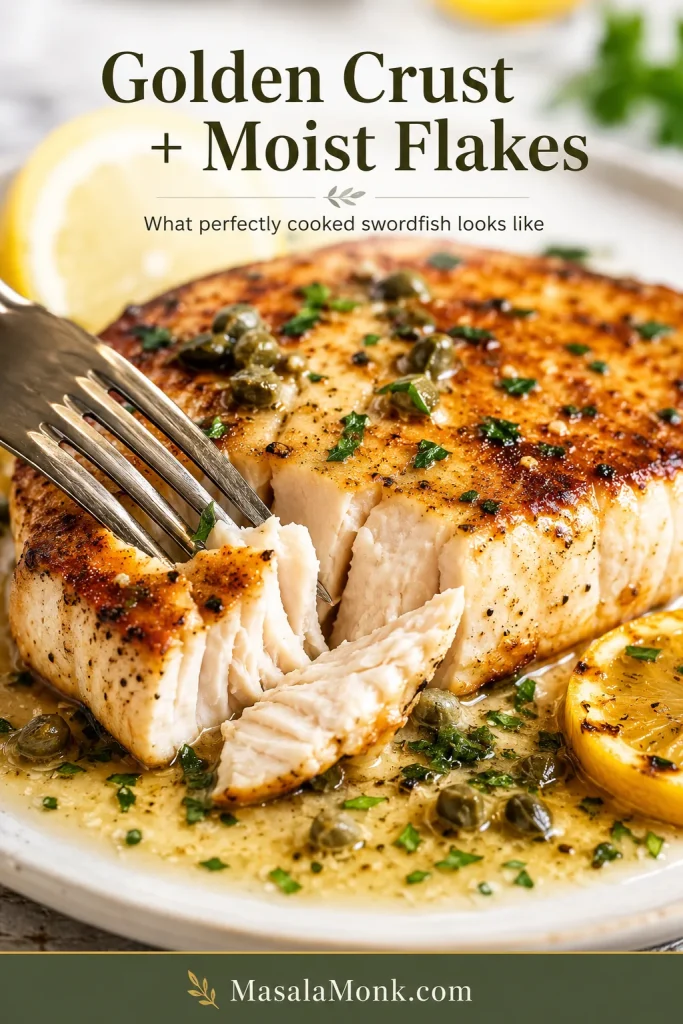
Close-up of cooked swordfish with golden crust, moist flakes, lemon butter sauce, capers, and a fork.
Perfectly cooked swordfish should show a browned crust and moist, opaque flakes when you pull it apart. The sauce should make good fish better, not cover up dryness.

Blackened Swordfish Variation

For blackened swordfish, skip the lemon juice in the pre-cook seasoning and coat the steaks with oil, paprika, garlic powder, onion powder, oregano, black pepper, cayenne, and salt. Sear in a hot skillet until deeply browned, then finish with lemon butter or a lighter version of this Cajun garlic butter sauce.

With blackened swordfish, the crust should be dark from spice, not scorched. The inside still needs to stay moist and tender.
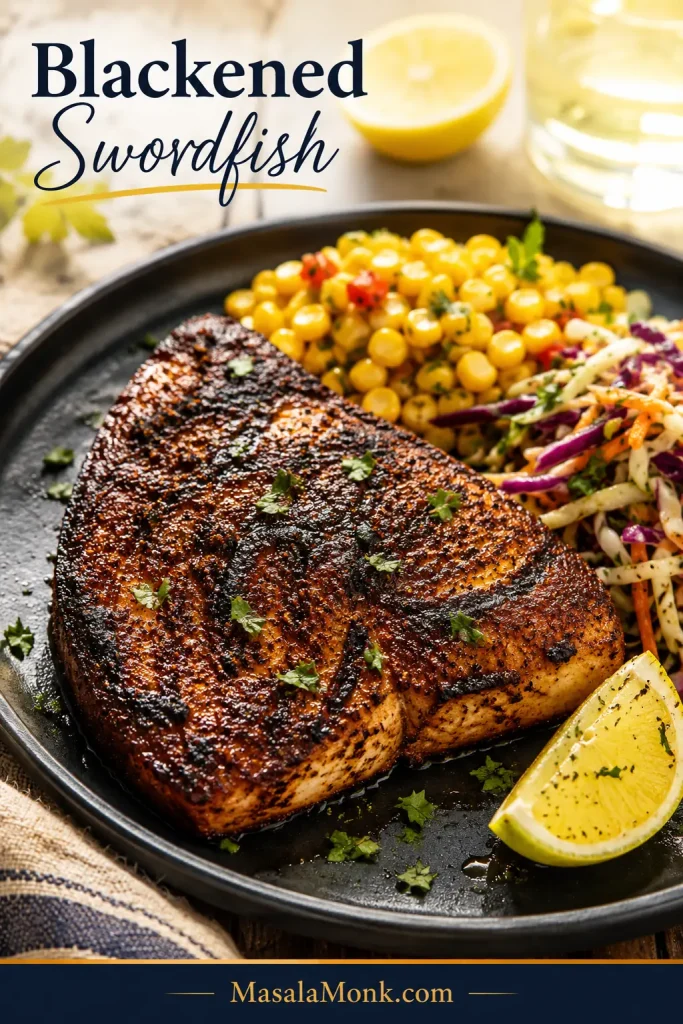
Blackened swordfish steak with dark spice crust, lemon wedge, corn, slaw, herbs, and a dark plate.
Blackened swordfish is the bold option when you want deeper Cajun-style flavor. The spice crust should look dark and well seasoned, while the inside stays moist instead of dry or burnt.

Pan + Oven Finish for Thick Swordfish

For steaks closer to 1½ inches thick, sear the first side for about 3 minutes, flip, then move an oven-safe skillet to a 400°F / 200°C oven for 5 to 6 minutes. This gives the middle time to cook without making the crust too dark.

How to Bake Swordfish

Baked swordfish is the easiest indoor dinner. It will not look as dramatic as grilled swordfish, but it gives you steady heat, less splatter, and plenty of room for a tomato olive topping or lemon butter finish.

For the baked method, think steady heat instead of dramatic char. Tomato olive relish adds color, acidity, and moisture once the fish is cooked.
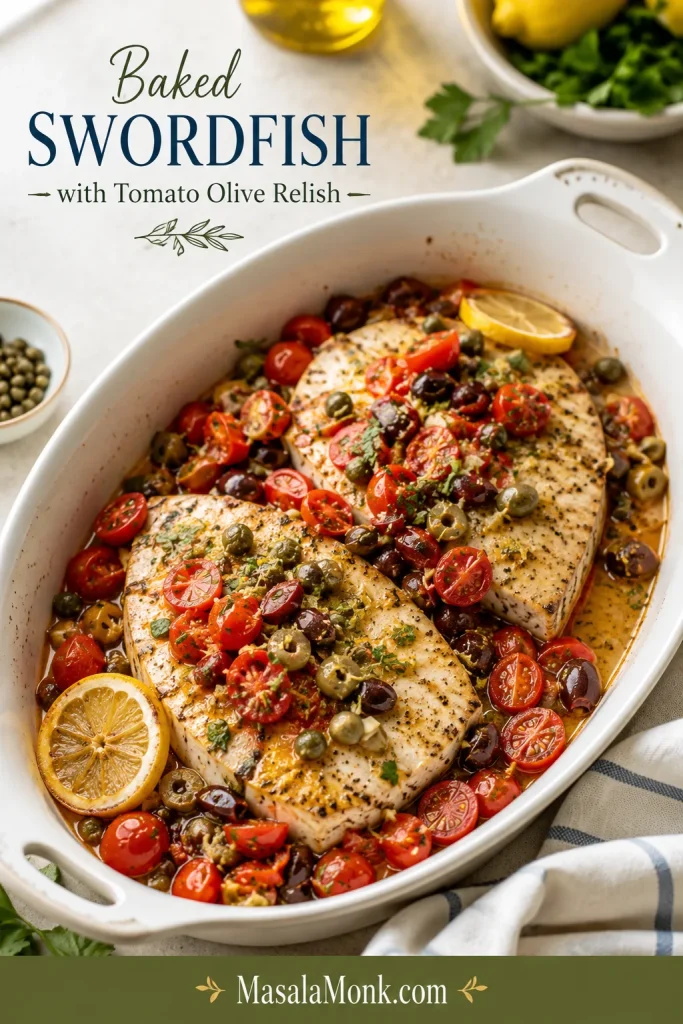
Baked swordfish steaks in a white dish with tomato olive relish, cherry tomatoes, olives, capers, lemon, and herbs.
This baked swordfish method gives you a gentler indoor cook. The tomato olive relish adds acidity, color, and moisture, so the fish feels bright without needing a heavy sauce.
  1. Preheat the oven to 400°F / 200°C.
  2. Place the seasoned steaks in a lightly oiled baking dish or on a rimmed baking sheet.
  3. Bake 1-inch steaks for 12 to 15 minutes.
  4. Start looking at thinner pieces around 9 to 10 minutes.
  5. Check the center for doneness.
  6. Rest briefly before serving.

Baking cue: If the top looks pale but the middle is done, do not keep baking just for color. Finish with sauce, herbs, or relish instead. A moist, gently cooked center matters more than a dramatic top.

Easy Tomato Olive Topping

Mix 1 cup chopped tomatoes, ¼ cup chopped olives, 1 tablespoon capers, 1 tablespoon olive oil, 1 tablespoon lemon juice, 2 tablespoons chopped parsley, and black pepper. Spoon it over baked swordfish just before serving for a bright Mediterranean finish.

How to Broil Swordfish

Broiled swordfish is for fast grill-style browning without going outside. It is not difficult, but it is quick. Stay close and let the top heat do its job.

Under the broiler, swordfish browns fast from above. Keep it on a sheet pan, watch the surface, and stop before the center tightens.
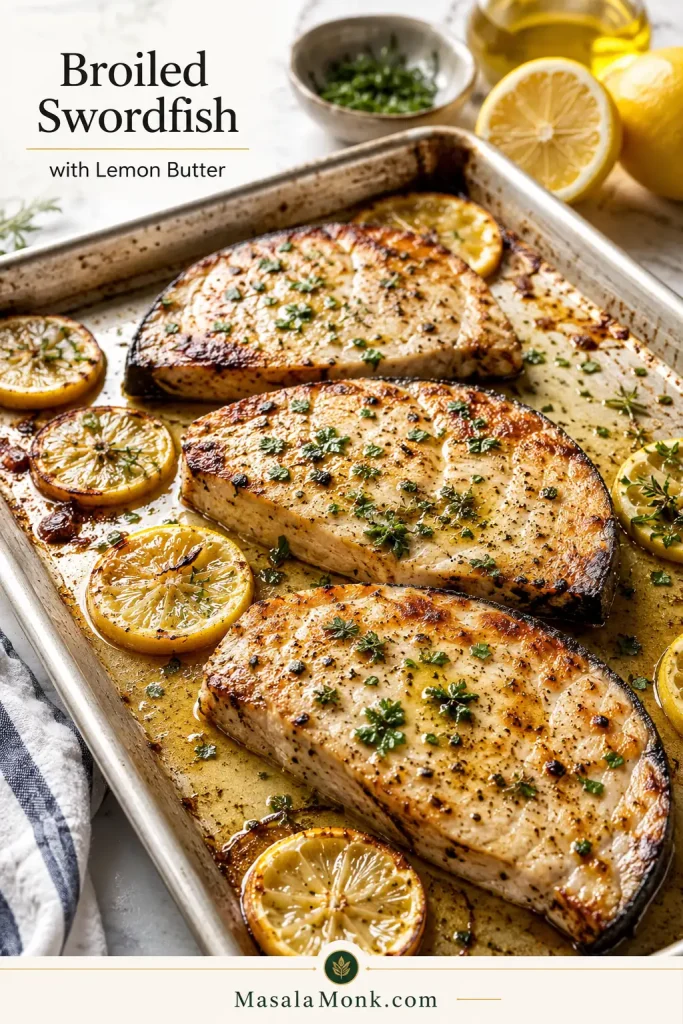
Broiled swordfish steaks on a rimmed sheet pan with browned tops, lemon slices, herbs, and lemon butter.
Quick sheet-pan browning is the advantage of broiled swordfish. Since broilers move fast, watch the top closely and finish with lemon butter once the fish is cooked through.

For Fast Grill-Style Browning

  1. Preheat the broiler fully.
  2. Place the oven rack 4 to 6 inches from the heat source.
  3. Line a rimmed baking sheet with foil, or use an oven-safe grill pan.
  4. Place the seasoned steaks on the pan.
  5. Broil for 3 to 4 minutes on the first side.
  6. Flip carefully and broil for another 3 to 4 minutes.
  7. Check doneness immediately and rest before serving.

Broiler cue: If the top browns too fast, lower the rack or finish the fish in a 400°F / 200°C oven for a few minutes. Broilers vary, so your eyes matter as much as the timer.

Broiled swordfish is excellent with garlic butter, lemon herbs, Cajun butter, or a small spoonful of garlic aioli on the side.

How to Air Fry Swordfish

Air fryer swordfish is the small-batch, low-mess option. It is especially useful when you want a quick seafood dinner without heating the oven or dealing with grill grates.

Inside the air fryer basket, swordfish works best in a single layer. Thin steaks need early checking because circulating heat dries them faster than the oven.
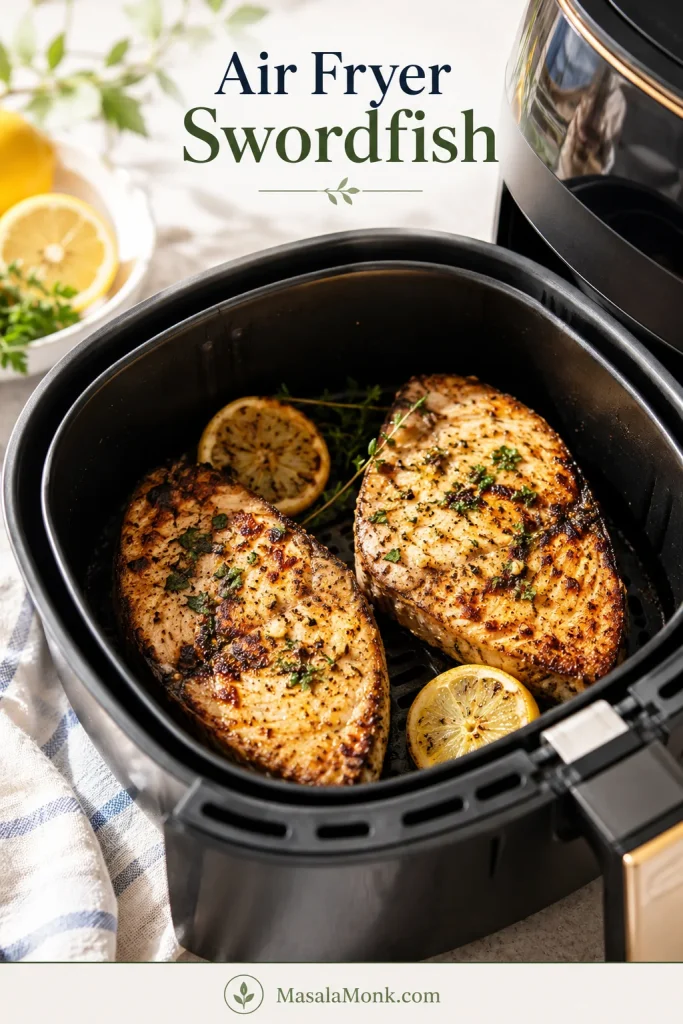
Air fryer basket with two cooked swordfish steaks, lemon slices, herbs, and browned seasoning.
Air fryer swordfish is useful for quick, small-batch dinners. To get the best results, keep the steaks in a single layer, flip halfway, and start checking early if the pieces are thinner than 1 inch.

For a Quick Small-Batch Dinner

  1. Preheat the air fryer to 400°F / 204°C.
  2. Lightly oil the air fryer basket.
  3. Place the seasoned steaks in a single layer.
  4. Air fry fresh ¾-inch to 1-inch steaks for 8 to 10 minutes.
  5. Flip halfway through cooking.
  6. Check the middle of the thickest steak.
  7. Rest briefly before serving.

Air fryer cue: Thin swordfish dries out faster in the air fryer than in the oven. If the surface looks dry before the middle is ready, finish with lemon butter, salsa, or sauce after cooking instead of adding more time.

Cajun seasoning, oregano, lemon pepper, mango salsa, and cabbage slaw all work especially well with air fryer swordfish.

How to Know When Swordfish Is Done

Swordfish is done when the center turns opaque and the fish separates easily with a fork. For food safety, fish should reach 145°F / 63°C according to FoodSafety.gov.

The safest standard to follow is 145°F / 63°C. In restaurant-style cooking, swordfish is sometimes pulled earlier, around 130°F to 140°F, so carryover heat can finish the center and keep the texture juicier. That is a texture choice, not the official food-safety recommendation. When cooking for children, older adults, pregnant or breastfeeding people, or anyone immunocompromised, follow the 145°F / 63°C guidance.

Doneness is easier when you combine temperature and visual cues. Look for an opaque center, separating flakes, and a firm but not hard texture.
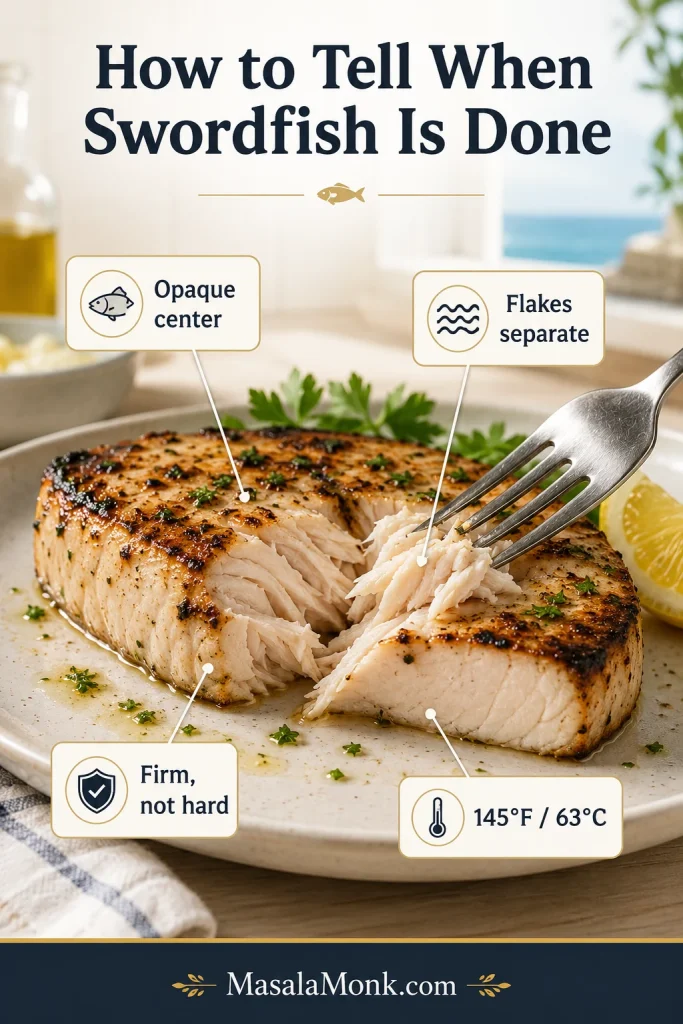
Doneness guide showing cooked swordfish flaking with a fork and callouts for opaque center, flakes separate, firm texture, and 145°F / 63°C.
Use visual doneness cues along with temperature: the center should look opaque, the flakes should separate, and the texture should feel firm but not hard. For food safety, cook fish to 145°F / 63°C.

No Thermometer?

Cut gently into the thickest part of one steak. The center should look set and opaque, not glossy or translucent, and the flakes should separate with gentle pressure. If it still looks raw in the middle, cook for 1 more minute and check again.

Mercury note: One more thing to know before making swordfish a regular habit: it is a high-mercury fish. The FDA fish advice lists swordfish as a fish to avoid for pregnant or breastfeeding people and young children. For other adults, swordfish is best enjoyed occasionally as a special seafood dinner, not as an everyday fish.

Marinades for Swordfish

Swordfish does not need a long soak. It needs a short, confident flavor coat. Use lemon garlic for classic flavor, soy ginger for sweet-savory depth, and Cajun spice oil for smoky heat.

  • Quick flavor: 10 to 15 minutes
  • Everyday range: 15 to 30 minutes
  • Stronger marinade: up to 1 hour, covered in the refrigerator
  • Avoid: very long lemon or lime marinades that can change the texture
MarinadeUseFormula for 4 Steaks
Lemon Garlic HerbClassic all-purpose flavor3 tbsp olive oil, 2 tbsp lemon juice, zest of 1 lemon, 3 minced garlic cloves, 1 tsp kosher salt, ½ tsp black pepper, 2 tbsp parsley
Soy GingerGrilled, broiled, or air fryer swordfish2 tbsp soy sauce, 1 tbsp oil, 1 tbsp lemon juice or rice vinegar, 1 tsp grated ginger, 1 minced garlic clove, 1 tsp honey, black pepper
Cajun Spice OilPan-seared, broiled, blackened, or air fryer swordfish2 tbsp oil, 1 tsp paprika, ½ tsp garlic powder, ½ tsp onion powder, ½ tsp oregano, ¼ tsp cayenne or chili powder, salt to taste

After marinating, let the excess drip off. If the surface looks wet, pat it lightly before cooking so it can brown.

Sauces and Flavor Variations for Swordfish

Once the fish is cooked, the sauce changes the whole mood of dinner. Keep it bright and classic, go Mediterranean, add smoky heat, or make it summery with fruit and herbs.

A little acidity matters here: lemon, capers, tomato, vinegar, herbs, or fruit can wake up the meaty fish without burying it.

Once the fish is cooked, choose a sauce by mood. Lemon caper butter, salmoriglio, tomato olive relish, and mango salsa all brighten swordfish in different ways.
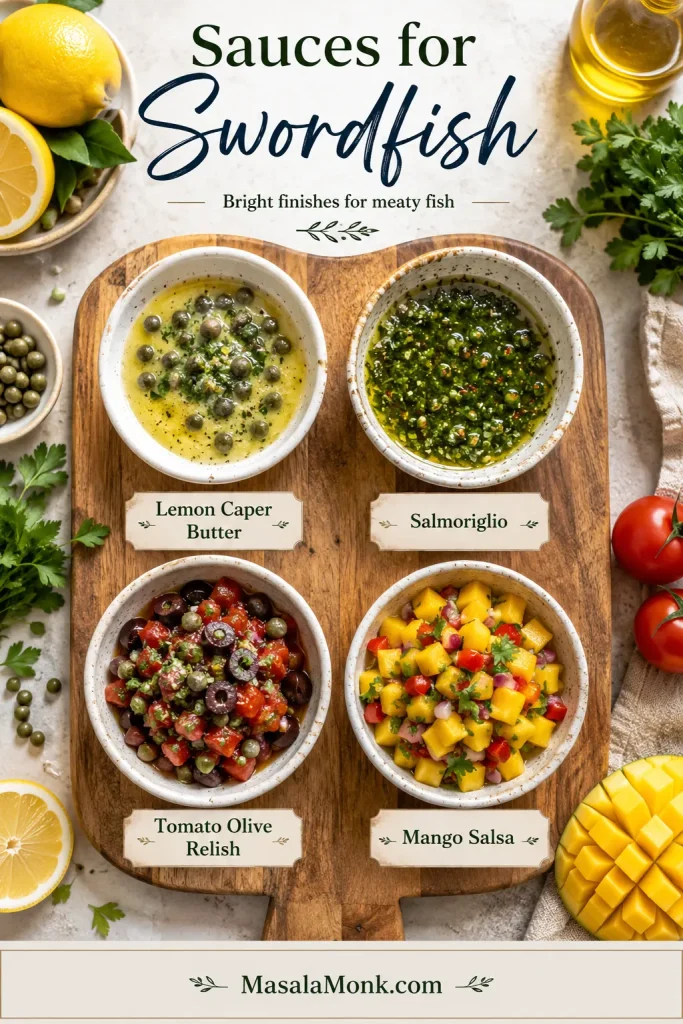
Overhead sauce board with bowls labeled lemon caper butter, salmoriglio, tomato olive relish, and mango salsa.
Sauces for swordfish should brighten the meaty fish without burying it. Try lemon caper butter for richness, salmoriglio for herbs, tomato olive relish for savory acidity, or mango salsa for a fresh summer finish.
MoodSauce or FinishHow to Use It
Bright and classicLemon garlic butter or lemon caper butterSpoon over grilled, pan-seared, baked, or broiled swordfish
MediterraneanSalmoriglio, tomato olive relish, or tzatziki sauceUse with grilled or baked fish, cucumber, herbs, and warm pita
Spicy and smokyCajun butter or blackened seasoningBest with pan-seared, broiled, or air fryer swordfish
Summer freshMango salsa, chimichurri, or salsa verdeAdd after cooking for color, moisture, and freshness
Cold and creamyGarlic aioli, yogurt sauce, or herb sauceUse lightly for sandwiches, broiled fish, or leftovers

Easy Lemon Caper Butter

Melt 2 tablespoons butter with 1 tablespoon lemon juice and 1 to 2 tablespoons capers. Spoon over hot swordfish and finish with parsley. This is the simplest way to make pan-seared swordfish feel dinner-party ready.

Salmoriglio for Grilled Swordfish

Whisk 3 tablespoons olive oil with 1 tablespoon lemon juice, 1 small grated or minced garlic clove, 1 tablespoon chopped parsley, ½ teaspoon dried oregano, salt, and black pepper. Spoon over grilled swordfish after it rests.

Tomato Olive Relish

Mix 1 cup chopped tomatoes, ¼ cup chopped olives, 1 tablespoon capers, 1 tablespoon olive oil, 1 tablespoon lemon juice, 2 tablespoons chopped parsley, and black pepper. It is especially good when the fish needs freshness and color.

What to Serve With Swordfish

Think about the sauce first. If you finish the fish with butter, capers, aioli, or a creamy sauce, choose something fresh on the side. For simply grilled fish with lemon and herbs, you can go heartier with potatoes, rice, pasta, couscous, or corn.

A crisp cucumber salad is one of the easiest light sides, especially with grilled or broiled swordfish.

To build the plate, match the sides to the finish. Rich butter sauces want fresh salads, while simple grilled swordfish can handle potatoes, grains, or tacos.
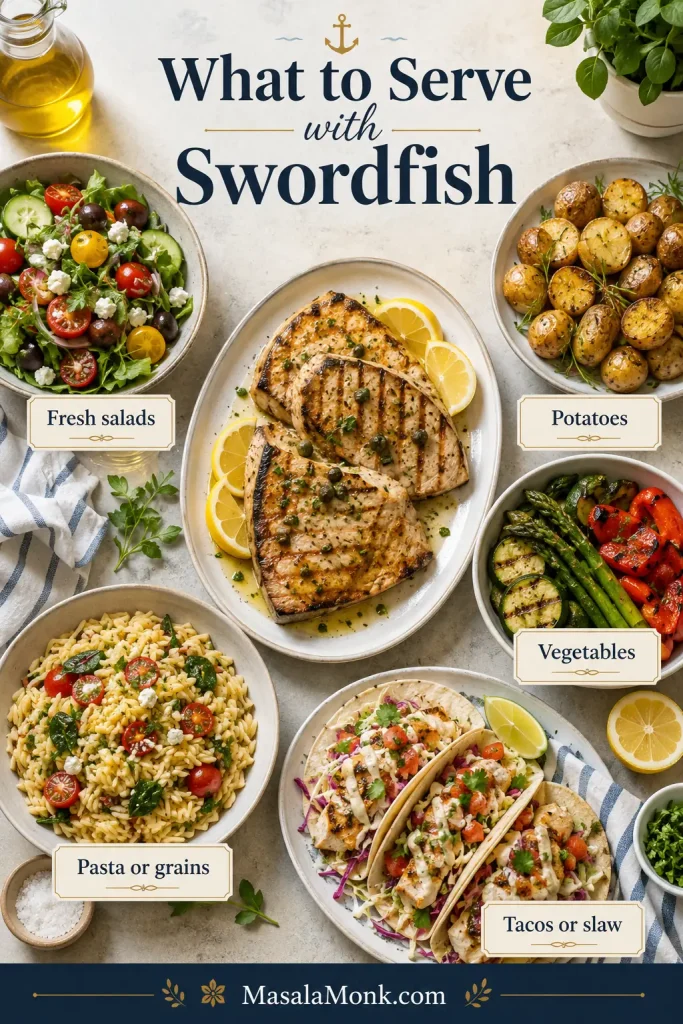
Overhead meal board showing swordfish with fresh salad, roasted potatoes, vegetables, pasta or grains, and tacos or slaw.
Swordfish becomes a complete dinner when the sides match the sauce and cooking method. Fresh salads, roasted potatoes, vegetables, pasta or grains, and tacos or slaw all work depending on the meal you want.
MoodGood Sides
Light and freshGreen salad, cucumber tomato salad, asparagus, green beans, lemony herbs
MediterraneanOrzo, couscous, Greek potatoes, olives, roasted peppers, tomato salad, or chickpea salad
Cozy dinnerRice pilaf, garlic mashed potatoes, garlic bread, pasta, roasted potatoes
Summer grillCorn, zucchini, tomato salad, potato salad, mango salsa, grilled vegetables
Low-carbCauliflower rice, leafy greens, grilled vegetables, cucumber salad

Easy Swordfish Dinner Plates

  • Grilled swordfish plate: cucumber salad, roasted carrots, and salmoriglio.
  • Pan-seared swordfish plate: lemon caper butter, rice pilaf, and green beans.
  • Air fryer swordfish plate: mango salsa, cabbage slaw, lime, and warm tortillas.
  • Cozy baked swordfish plate: tomato olive relish with pesto pasta or lemony pasta.

Storage, Leftovers, and Reheating

Swordfish is best right after cooking, but leftovers can still be useful if you handle them gently.

  • Refrigerate: Store cooked swordfish in an airtight container for up to 2 days.
  • Reheat gently: Warm at low heat until just heated through.
  • Use cold: Leftover swordfish is often better cold or room temperature in salads, sandwiches, tacos, or grain bowls.

Flake leftovers into fish tacos with cabbage and lime, add them to pasta with olive oil and herbs, or build a seafood-style grain bowl with cucumber, rice, quinoa, couscous, and sauce.

Common Mistakes to Avoid

  • Buying uneven steaks: thin ends overcook before thick centers are done.
  • Skipping the dry step: surface moisture prevents browning.
  • Moving it too early: on the grill or in a pan, let the crust form before flipping.
  • Over-marinating: long acidic marinades can change the texture.
  • Cooking by time only: use timing as a guide, then check the fish.
  • Chasing color in the oven: baked swordfish may look pale but still be perfectly cooked.
  • Reheating too aggressively: leftover swordfish dries out when overheated.
  • Ignoring mercury guidance: swordfish is high in mercury, so it is not the best fish for pregnant or breastfeeding people and young children.

FAQs

These are the questions that usually come up right before the fish hits the pan, grill, oven, broiler, or air fryer.

What is the best way to cook swordfish?

Grilling and pan-searing are the strongest methods if you want browning. Baking is easiest indoors, broiling is fastest for grill-style edges, and the air fryer works well for smaller steaks.

How long should swordfish steaks cook?

For 1-inch steaks, grill for about 4–5 minutes on the first side and 3–5 minutes on the second side, pan-sear for 4–6 minutes per side, bake at 400°F / 200°C for 12–15 minutes, broil for 3–4 minutes per side, or air fry at 400°F / 204°C for 8–10 minutes.

How do you know when swordfish is done?

The center should look opaque and separate easily with a fork. For food safety, cook fish to 145°F / 63°C.

Should swordfish be pink in the middle?

Its middle should not look raw, glossy, or translucent. Some restaurant-style cooking pulls swordfish earlier for a juicier texture, but 145°F / 63°C is the official food-safety temperature.

How do you keep swordfish from drying out?

Choose evenly thick steaks, dry the surface, cook hot enough to brown, stop before the fish feels stiff, and finish with something bright or moist like lemon butter, capers, salsa, or relish.

Is swordfish better grilled or pan-seared?

Grilled swordfish is better for smoke and char. Pan-seared swordfish is better for a golden crust and lemon caper sauce. Both are excellent for 1-inch steaks.

Should swordfish be marinated before cooking?

A short marinade helps, but it is not required. Fifteen to 30 minutes in olive oil, lemon, garlic, herbs, salt, and pepper is enough for most swordfish steaks.

Can you bake swordfish?

Yes. Bake 1-inch swordfish steaks at 400°F / 200°C for about 12–15 minutes, then finish with lemon butter, herbs, or tomato olive relish.

Can you air fry swordfish?

Absolutely. Air fry fresh ¾-inch to 1-inch steaks at 400°F / 204°C for 8–10 minutes, flipping halfway. Start checking sooner if the pieces are thin.

Can you cook swordfish from frozen?

You can, but thawing first gives better seasoning coverage and more even cooking. Frozen steaks can cook unevenly, with the outside firming before the middle is ready.

What sauce goes with swordfish?

Lemon caper butter, salmoriglio, tomato olive relish, mango salsa, chimichurri, salsa verde, Cajun butter, and light garlic aioli all work well.

What can I do with leftover swordfish?

Use leftovers in tacos, salads, pasta, sandwiches, or grain bowls. Reheat gently, or serve cold with lemon, herbs, and a bright dressing.

Final Thoughts

Once you cook swordfish this way, it stops feeling risky. You know what to buy, which method to choose, when to flip, when to stop, and how to finish the plate with something bright.

That is the shift: swordfish stops being the expensive fish you are afraid to overcook and starts feeling like the seafood steak you know how to handle — grill for smoke, pan-sear for crust, bake for ease, broil for speed, or air fry for the simplest path to a lemony, juicy dinner.

If you make this swordfish, tell us which method you used — grilled, pan-seared, baked, broiled, or air fried — and whether you finished it with lemon butter, salsa, relish, or something completely your own.
Posted on — Leave a comment

Crab Cake Recipe: Easy Lump Crab Cakes With Little Filler

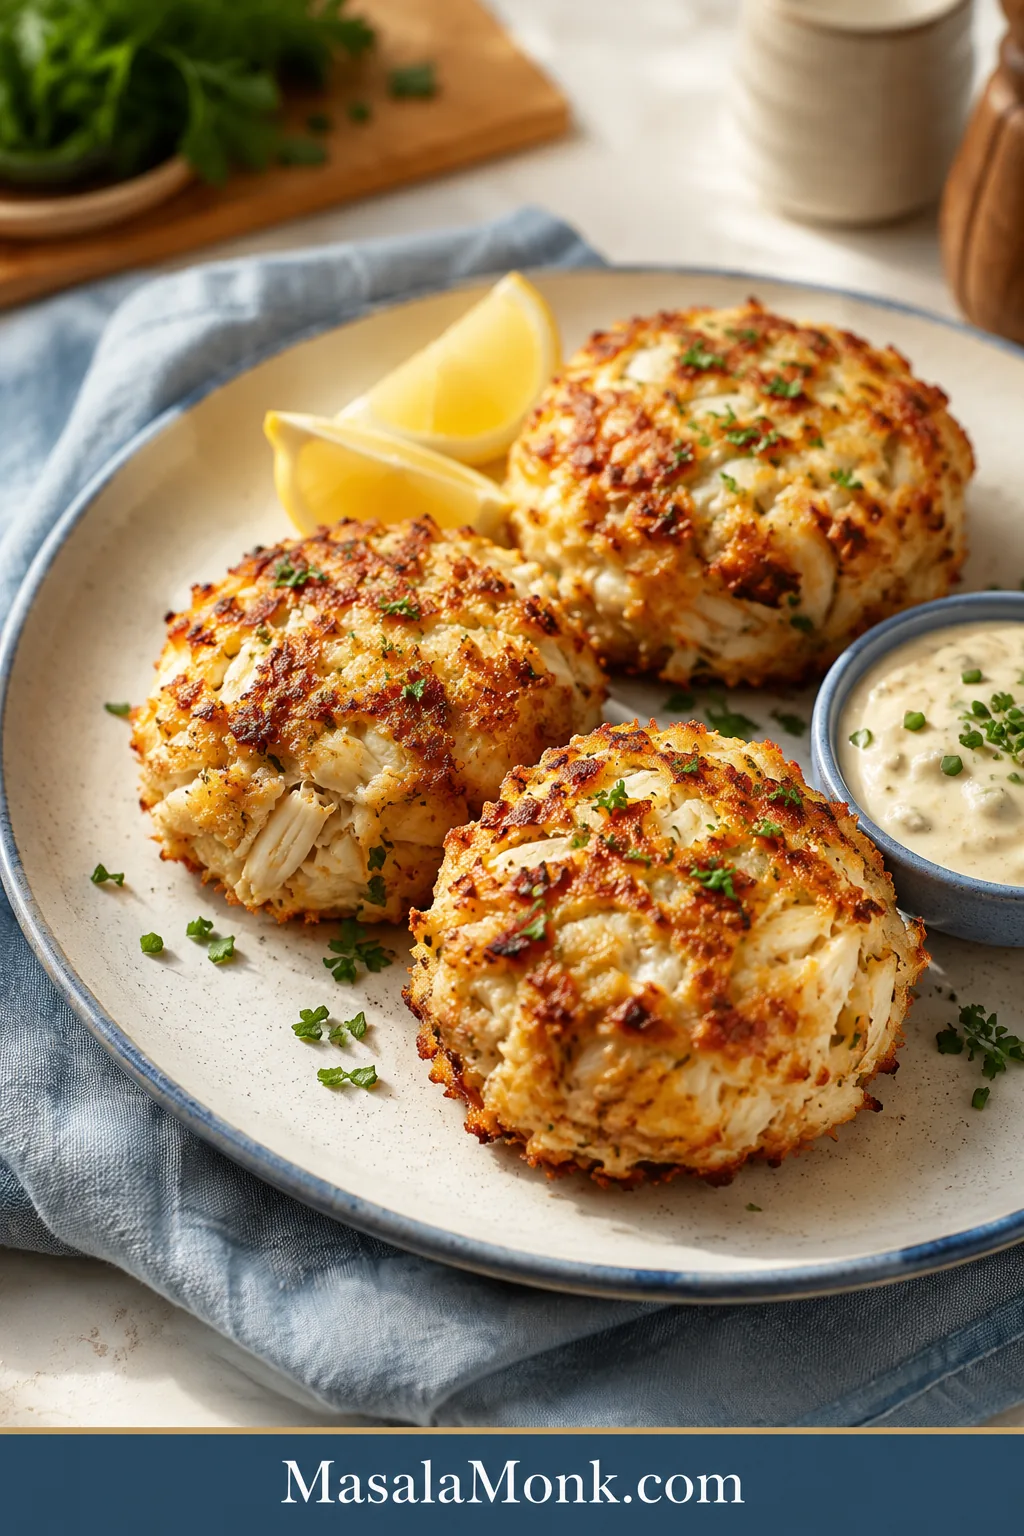
Golden lump crab cakes on a cream plate with lemon wedges, herb garnish, and creamy dipping sauce.

Crab cakes should feel generous, not stressful. When you buy good crab, the last thing you want is a bready patty, a dry center, or a cake that falls apart the second you flip it. This recipe protects what matters most: 1 lb / 454g lump crab, just enough mayo-egg binder, a small amount of panko or crushed saltines, and a proper chill so the cakes hold together without losing their sweet crab texture.

The goal is simple: big crab flavor, little filler, crisp edges, and no first-flip panic. The win is a cake that lifts cleanly from the pan, cracks lightly at the edge, and still tastes warm, tender, and unmistakably like crab in the center.

Pan-frying gives the deepest golden crust, but the same crab cake mixture can also be baked, air-fried, or seared and finished in the oven. Choose the method that fits the meal, then let the ratio, chill time, and visual cues do the work.

Quick Answer: How to Make Crab Cakes That Hold Together

For reliable crab cakes, use 1 lb / 454g lump crab meat, 1 egg, 1/4 cup / 60g mayonnaise, Dijon, Worcestershire, lemon juice, Old Bay, herbs, and a small amount of panko or crushed saltines. For every pound of crab, use 1/2 cup / 30–40g panko or 2/3 cup / 41g crushed saltines. That is enough filler to help the cakes hold together without turning them bready.

Fold gently, shape into 6 thick cakes, chill for 30–60 minutes, then pan-fry for 3–4 minutes per side until crisp and golden. To keep crab cakes from falling apart, drain the crab well, use just enough binder and crumbs, chill the shaped cakes, and wait until the first side is golden before flipping.

The method is simple on purpose: protect the crab, bind only as much as needed, chill before cooking, and let the crust form before you move the cakes. That is the difference between a crab cake that tastes like crab and one that needs too much filler just to survive the pan.

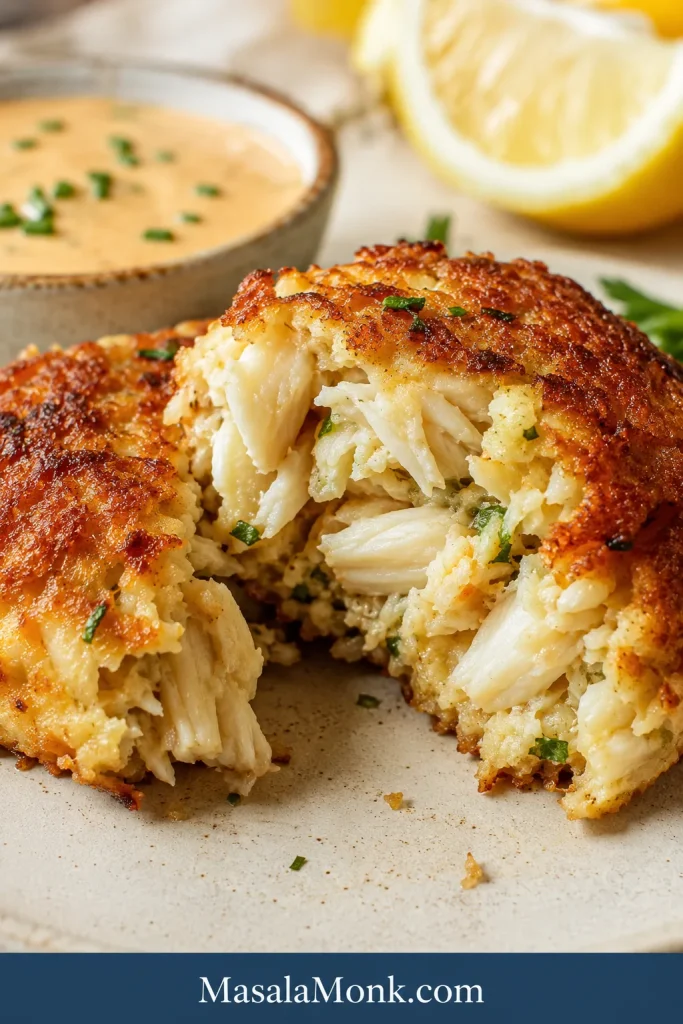
Split-open lump crab cake showing a crab-heavy interior with little filler and a crisp golden crust.
Breaking one open shows the real goal here: big crab pieces, a soft center, and just enough binder to hold the cake together.

The Few Details That Make Crab Cakes Work

If you remember only a few things, remember these: keep the crab cold and well-drained, use only enough filler to hold the cakes together, and let the first side brown before you move it.

Crab cake detailBest choiceWhy it matters
Crab meatLump crab; jumbo lump for a splurgeSweet, tender pieces without a bready bite
FillerPanko or crushed saltinesHelps the cakes stay intact without taking over
BinderEgg + mayoSets the cakes and keeps the center moist
Chill time30–60 minutesMakes the cakes easier to lift and flip
Main methodPan-friedGives the crispest golden edges
Easiest methodBakedNo flipping, less stress, better for batches
SauceTartar, remoulade, or lemon aioliAdds brightness without covering the crab

Recipe Card: Easy Crab Cakes With Lump Crab and Little Filler

These homemade crab cakes are crisp outside, tender inside, and packed with lump crab meat. They use little filler, just enough binder, Old Bay, lemon, Dijon, Worcestershire, and herbs for a recipe that still tastes like crab.

Yield6 large crab cakes
Prep time20 minutes
Chill time30–60 minutes
Cook time6–15 minutes, depending on method
Total timeAbout 1 hour to 1 hour 35 minutes
Main methodPan-fried
Other methodsBaked, air fryer, pan-seared with oven finish

Ingredients

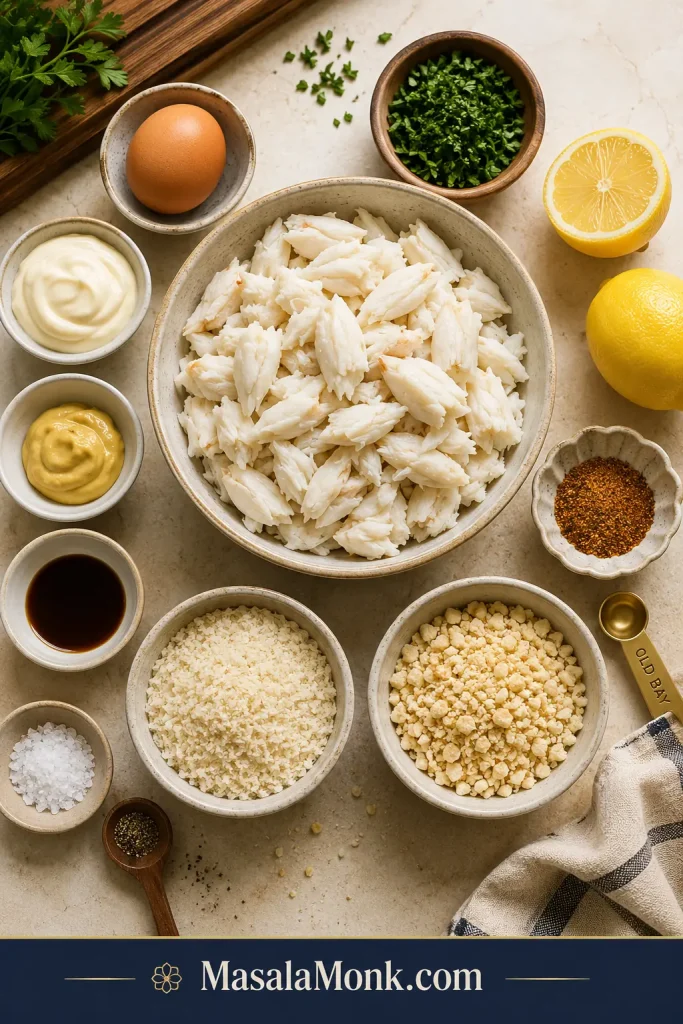
Overhead crab cake ingredient board with lump crab, egg, mayonnaise, lemon, Old Bay, panko, and saltines.
The ingredient list stays short on purpose, because the best crab cake flavor comes from crab, seasoning, and a light hand with crumbs.
  • 1 lb / 454g lump crab meat, picked over for shells
  • 1 large egg
  • 1/4 cup / 60g mayonnaise
  • 2 tsp Dijon mustard
  • 2 tsp / 10ml Worcestershire sauce
  • 1 tbsp / 15ml fresh lemon juice
  • 1 tsp Old Bay seasoning, plus more to taste
  • 1/8 tsp salt, optional
  • 1/4 tsp black pepper
  • 2 tbsp chopped parsley or chives
  • 1/2 cup / 30–40g panko breadcrumbs or 2/3 cup / 41g crushed saltines
  • Neutral oil, for pan-frying
  • Optional: 1 tbsp butter for richer browning or brushing baked crab cakes
  • Lemon wedges, for serving

Quick Remoulade-Style Crab Cake Sauce

This quick crab cake sauce is creamy, tangy, savory, and bright enough to lift the crab without covering it.

Make the sauce while the crab cakes chill, then keep it cold until the cakes are ready to serve.

  • 1/2 cup / 120g mayonnaise
  • 1 tbsp Dijon mustard
  • 1 tbsp / 15ml lemon juice
  • 1 tsp Worcestershire sauce
  • 1 tsp hot sauce
  • 1 tsp chopped capers or pickle relish
  • 1 small garlic clove, grated
  • Pinch of Old Bay or paprika
  • 1 tbsp chopped parsley or chives

Mix everything in a small bowl. The sauce should taste bright before it tastes heavy, because crab cakes are rich and sweet. Adjust with more lemon juice, hot sauce, or Old Bay, then chill until ready to serve.

Instructions

Mix and Shape the Crab Cakes

  1. Check the crab. Place the crab meat in a bowl and gently pick through it for small shell pieces. Try not to break up the larger lumps.
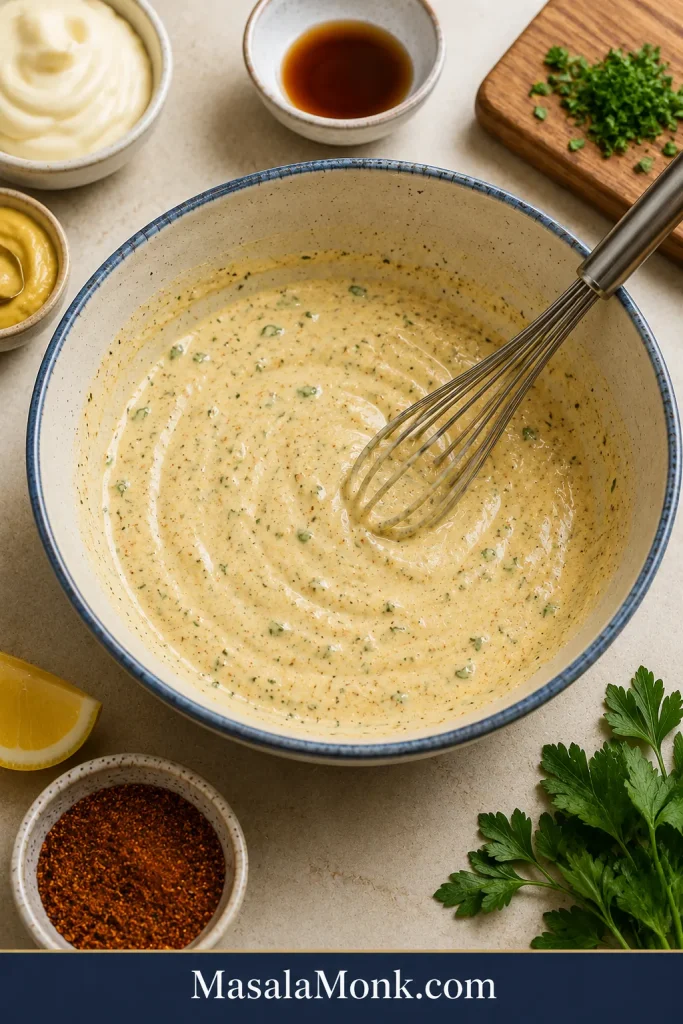
  2. Make the binder. In a large bowl, whisk together the egg, mayonnaise, Dijon mustard, Worcestershire sauce, lemon juice, Old Bay, salt, black pepper, and herbs.
Mixing bowl with crab cake binder made from egg, mayonnaise, Dijon, Worcestershire, lemon, and seasoning.
Mixing the binder first keeps the seasoning even, so the crab stays in beautiful pieces when everything comes together.
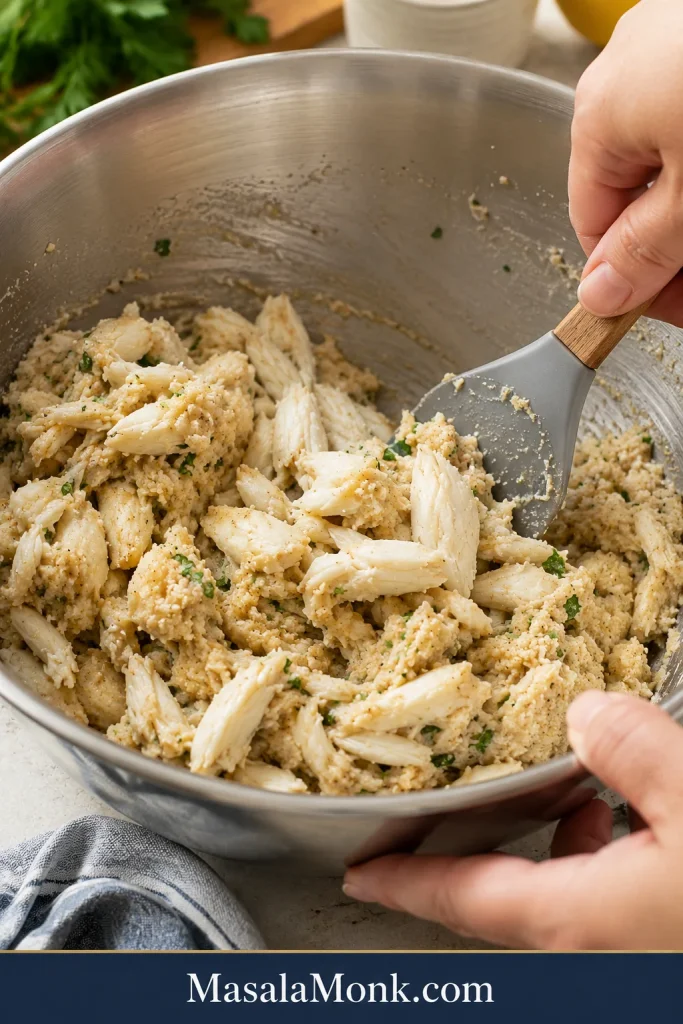
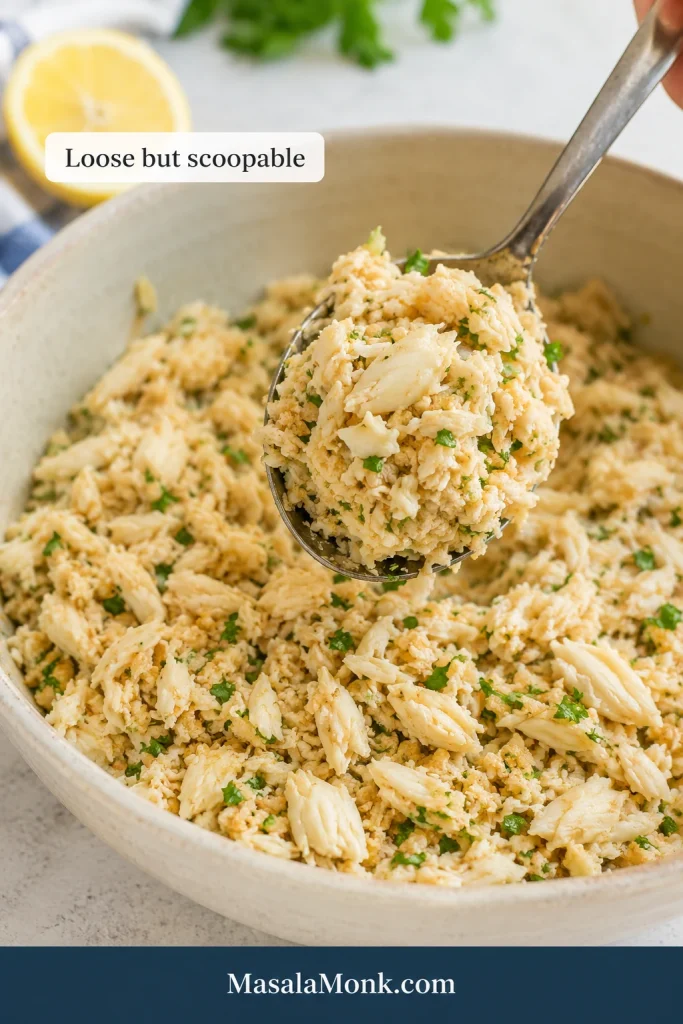
  1. Fold in the crab and crumbs. Add the crab meat and panko or crushed saltines. Fold gently with a spatula until the mixture is evenly moistened. It should look loose but scoopable, not smooth or pasty.
A spatula gently folding lump crab into crab cake mixture in a bowl.
Gentle folding protects the lump crab, which is why this step matters so much in a little-filler crab cake.
  1. Cook a tiny test cake if needed. If you are unsure about salt or seasoning, cook one small spoonful of the mixture first. Adjust gently before shaping the full batch.
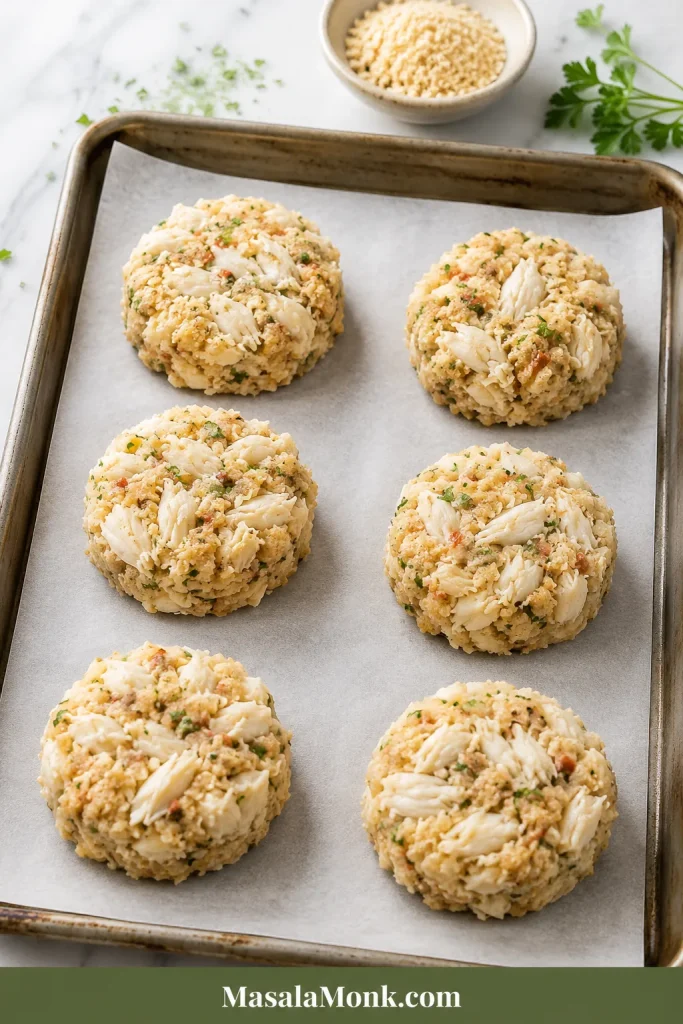
  2. Shape the cakes. Divide the mixture into 6 large cakes, about 1/2 cup each. Shape gently but firmly. The cakes should hold their edges without feeling packed hard.
Six shaped lump crab cakes arranged on parchment before chilling.
Shaping the cakes before chilling helps them hold their shape later, especially when the batch is soft and crab-heavy.

Chill and Cook the Crab Cakes

  1. Chill. Place the crab cakes on a plate or parchment-lined tray. Refrigerate for 30–60 minutes so the binder and crumbs can settle.
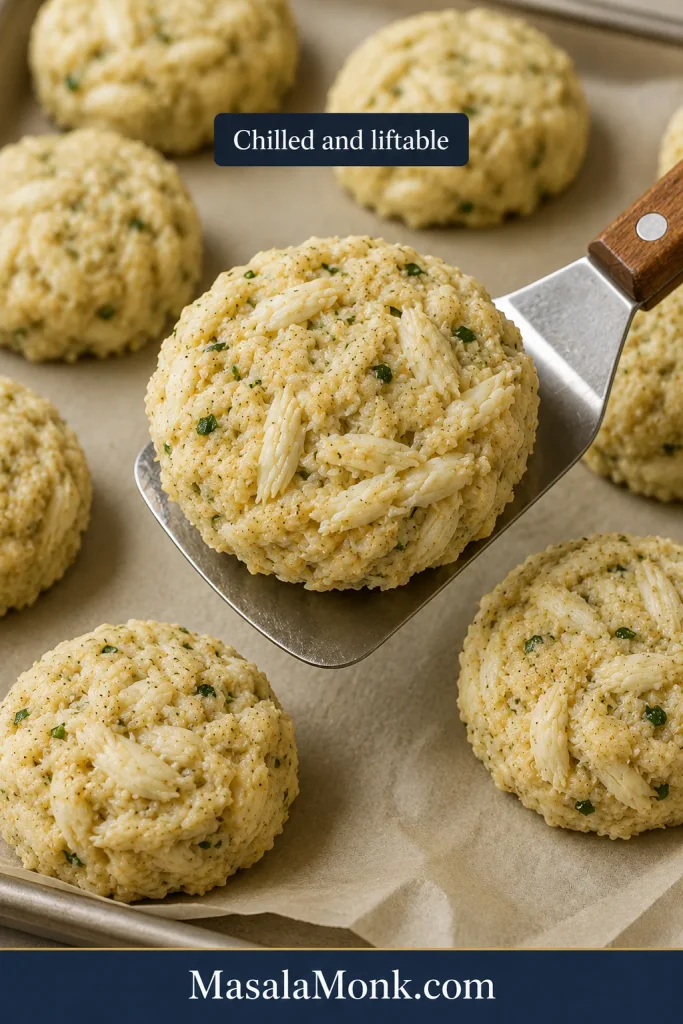
Chilled crab cakes lifting from parchment with a wide spatula before cooking.
Once the cakes are chilled, they should still feel delicate but lift cleanly enough to move without breaking apart.
  1. Pan-fry. Heat a thin layer of oil, about 1–2 tablespoons for a large skillet, over medium heat. Add the chilled cakes in a single layer without crowding. Cook for 3–4 minutes per side, until deeply golden and crisp at the edges. If a cake resists the spatula, give it another minute.
  2. Serve. Serve hot with the quick crab cake sauce, lemon wedges, and extra herbs.

Baked Crab Cake Option

  • Heat oven to 450°F / 230°C.
  • Place chilled crab cakes on a parchment-lined baking sheet.
  • Brush or dot the tops with a little melted butter.
  • Bake for 12–15 minutes, until heated through and golden on top.
  • For deeper color, broil for 1–2 minutes at the end, watching closely.

Baking is the easiest method because there is no flipping. Broil only at the end and only for color, or the tops can brown before the centers are properly heated.

Air Fryer Crab Cake Option

  • Preheat air fryer to 375°F / 190°C.
  • Spray the basket and crab cakes lightly with oil.
  • Air fry for 10–12 minutes, flipping halfway.
  • Check smaller crab cakes around the 8-minute mark so they do not dry out.

Once the recipe is in front of you, these choices help you adapt the batch without guessing or adding filler just to feel safe.

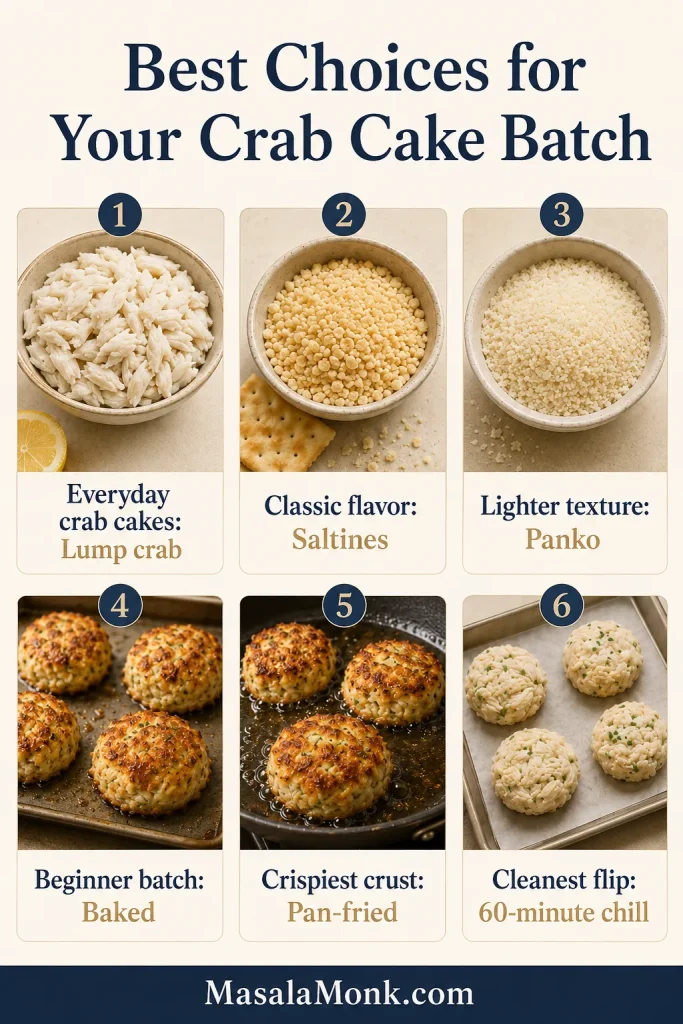
Best Choices for Your Crab Cake Batch

Use this as the fast decision guide for your crab cakes. It keeps the recipe flexible without making the mixture feel like a guessing game.

Crab cake decision guide showing best choices for crab, filler, cooking method, and chill time.
Use this guide to choose the right crab, filler, and cooking method before you shape the batch, so the result fits your plan.
Your situationGo with this
Everyday crab cakesRefrigerated lump crab
Classic flavorCrushed saltines
Lighter texturePanko
Beginner batchBake at 450°F / 230°C
Crispiest crustPan-fry over medium heat
Cleanest flipChill the full 60 minutes
Using canned crabDrain hard, reduce salt, shape smaller
Making sandwichesShape slightly flatter and sturdier

This ratio is built for little-filler crab cakes: enough egg, mayo, and crumbs to hold the shape, but not so much that the crab turns into a breadcrumb patty. The full 60-minute chill gives the cleanest flip, especially if your crab is wet or your cakes are large.

If this is your first batch, bake them or chill the full 60 minutes before pan-frying. If you want the most restaurant-style crust, pan-fry and wait for the golden edge before touching them.

Texture Target: What the Mixture Should Look and Feel Like

A loose mixture is not automatically a bad mixture. Little-filler crab cakes are supposed to feel delicate before they chill. The goal is not a stiff patty; the goal is a tender cake that uses only enough binder to stay together.

Crab cake mixture in a bowl being lifted with a spoon, showing a moist, scoopable texture with crab pieces.
A loose but scoopable mixture is exactly what you want before chilling, since crab cakes set best when they are handled gently.
  • Before chilling: moist, loose, and scoopable, with no liquid pooling at the bottom of the bowl.
  • After shaping: the cakes should hold their edges without feeling packed hard.
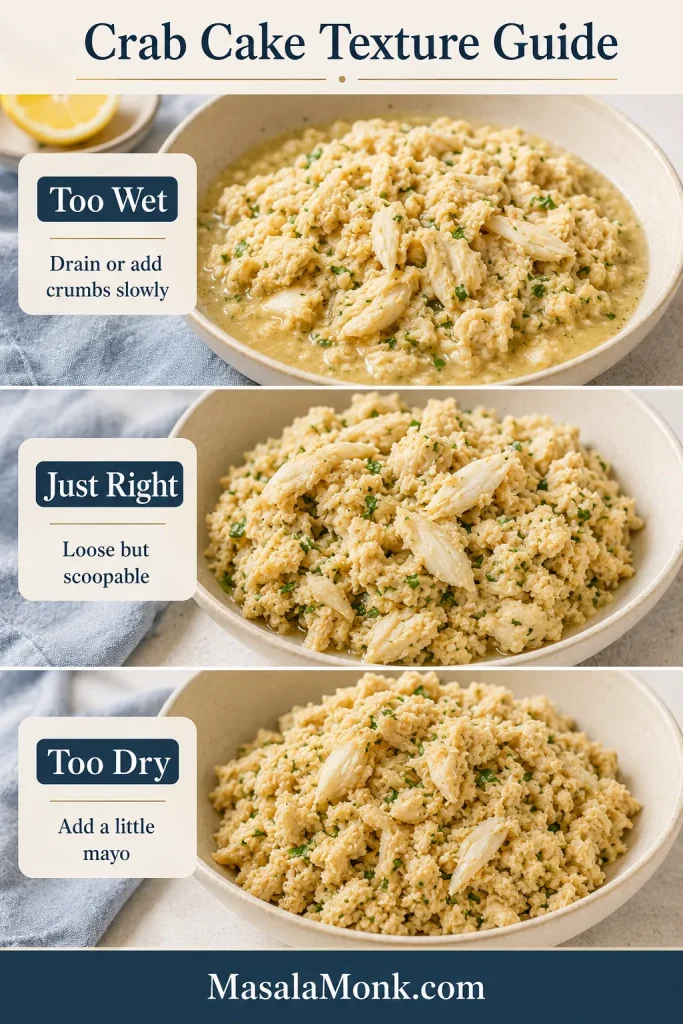
  • When the mixture is wet: drain better or add 1 tablespoon crumbs at a time.
  • For a dry mixture: add a small spoon of mayo or a few drops of lemon juice.
  • If the cakes stick: wait. The crust probably has not finished forming.

Use the visual guide below before adding more crumbs. Most soft crab cake mixtures need draining or chilling first, not heavy packing.

Three-panel crab cake texture guide showing too wet, just right, and too dry mixture stages.
If the mixture is too wet, drain it; if it feels dry, add a little mayo. This guide makes the fix easy to see at a glance.

Do not fix a loose crab cake mixture by smashing the cakes tighter. That makes the center dense. Chill first, then add crumbs only if the cakes still slump or fall apart.

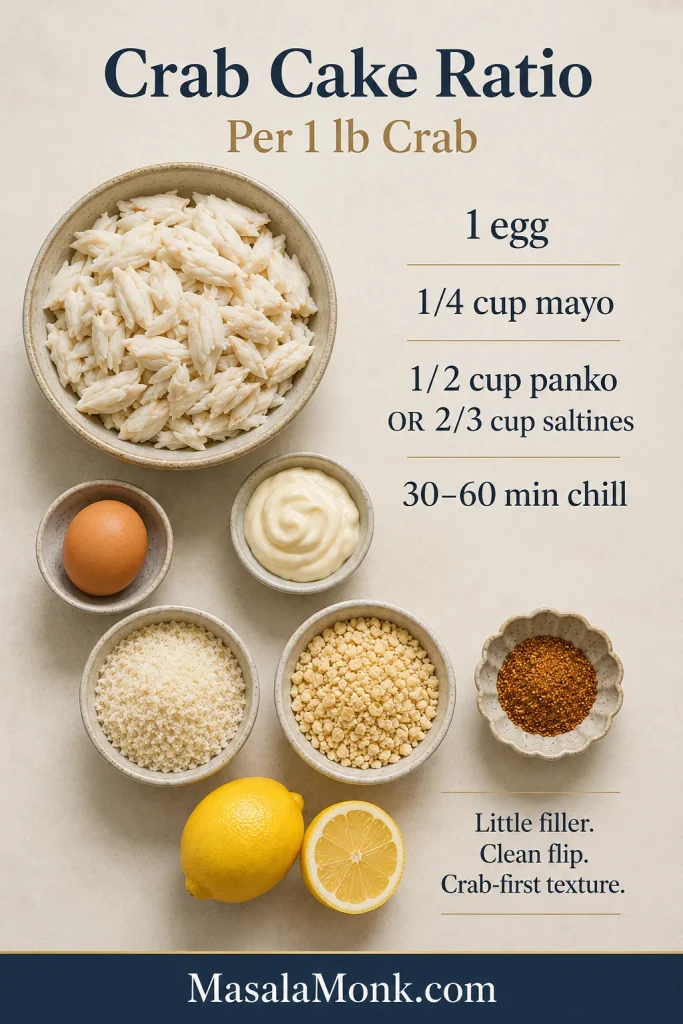
Crab Cake Ratio Per 1 Pound of Crab

Once you know the ratio, crab cakes become much less intimidating. For every 1 lb / 454g crab meat, use one egg, about 1/4 cup mayo, a small amount of mustard and seasoning, and just enough crumbs to hold the cakes together.

For 1 lb / 454g crabUse
Egg1 large egg
Mayonnaise1/4 cup / 60g
Dijon mustard2 tsp
Worcestershire sauce2 tsp / 10ml
Lemon juice1 tbsp / 15ml
Old Bay1 tsp, plus more to taste
Panko1/2 cup / 30–40g
Crushed saltines2/3 cup / 41g
Yield6 large cakes or 8 medium cakes
Chill30–60 minutes

Use this ratio as the baseline before making small moisture adjustments for your crab meat.

Crab cake ratio infographic showing the ingredient formula per pound of crab.
This ratio is the simple rule that keeps the cakes tender: one pound of crab, a light binder, a little filler, and a full chill.

This ratio keeps the cakes tender and crab-heavy without turning them bready. Very wet crab may need 1 extra tablespoon of crumbs and a longer chill. Dry crab may need a small spoon of mayo. Make either adjustment gently.

The Ingredients That Keep Crab First

Every ingredient has a job: protect the crab flavor, hold the cakes together, or help the edges brown.
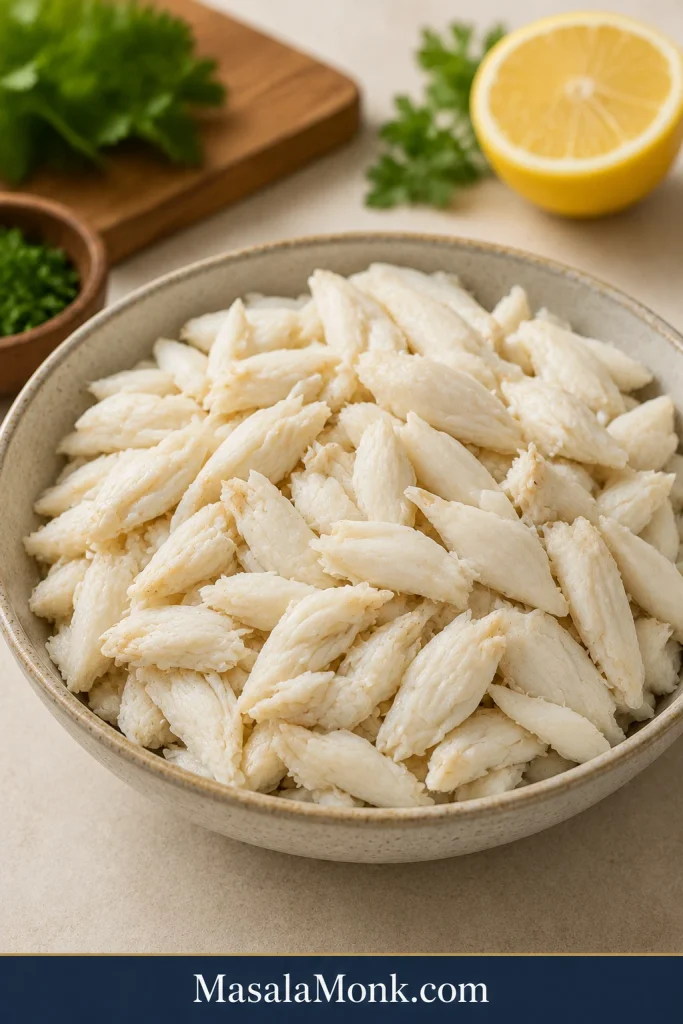
Lump Crab Meat

Lump crab is the best everyday choice for homemade crab cakes. It has enough large pieces to feel special, but it is usually more affordable than jumbo lump. If using pasteurized refrigerated crab, drain it well and gently pat away extra moisture before mixing.

Bowl of lump crab meat on a light stone surface.
Lump crab is the best everyday choice because it gives sweet pieces, a clean bite, and the right balance of texture.

Egg and Mayonnaise

Egg helps the cakes set, while mayo keeps the center moist and helps the seasonings spread. Regular mayo gives the closest texture, while homemade mayonnaise can make the binder and sauce taste fresher.

Dijon, Worcestershire, Lemon, and Old Bay

Dijon adds sharpness, Worcestershire adds savory depth, lemon wakes up the sweetness of the crab, and Old Bay gives the cakes their familiar Maryland-style seasoning. Start gently with salt because crab meat, saltines, and seasoning blends can already be salty.

If you are nervous about seasoning, cook one tiny test cake before shaping the full batch. It is the easiest way to check salt, heat, and brightness without risking all the crab.

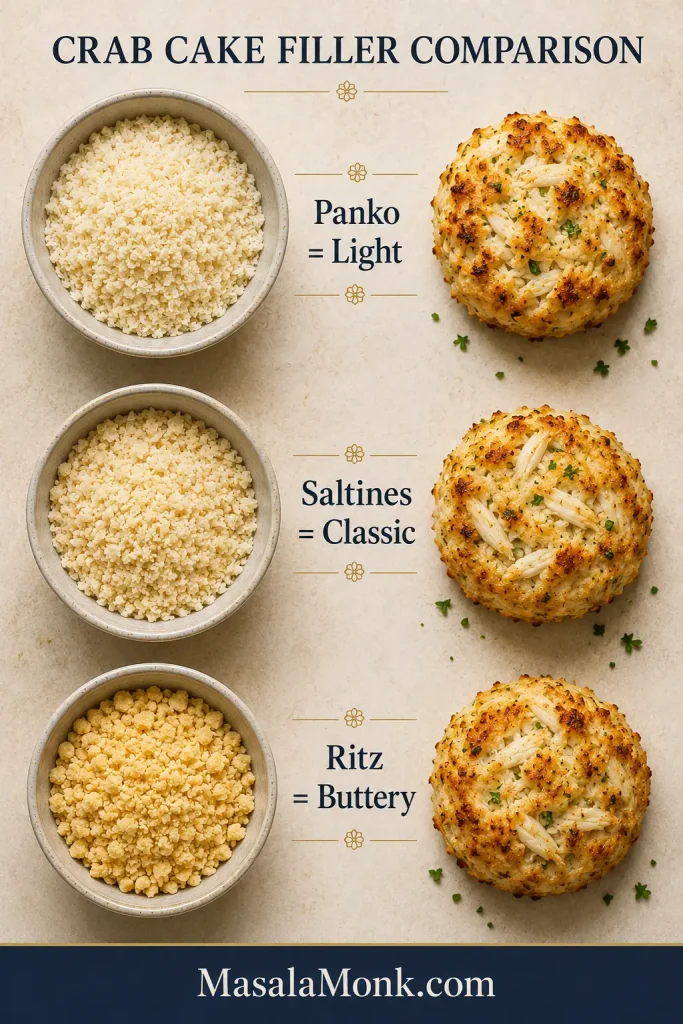
Panko, Saltines, or Ritz

Panko gives a light, clean texture and crisp edges. Crushed saltines taste more classic and slightly saltier. Ritz crackers make a softer, richer, buttery variation. Whatever you choose, the filler should support the crab, not become the main texture.

Comparison board showing panko, saltines, and Ritz crackers for crab cake filler.
The filler changes the texture more than most people expect, which is why panko, saltines, and Ritz each have a different job.

Parsley or Chives

Fresh herbs add color and lift. Parsley is classic and mild; chives are delicate and slightly oniony without taking over.

Smart Swaps Without Losing the Crab

Make small swaps, then chill before deciding the mixture needs more crumbs. Many crab cake mixtures feel soft at first and firm up after resting.

  • No panko: use crushed saltines for a classic flavor or Ritz for a richer, buttery version.
  • Out of saltines: use panko for a lighter texture or fine dry breadcrumbs in a pinch.
  • For a mayo swap: use Greek yogurt, sour cream, or eggless mayonnaise. Yogurt and sour cream will taste tangier.
  • No Old Bay: use seafood seasoning, Cajun seasoning, or paprika with celery salt. Add slowly and taste before adding extra salt.
  • Gluten-free: use gluten-free panko or crushed gluten-free crackers, and check the Worcestershire sauce and seasoning blend too.
  • No egg: use eggless mayo with 1–2 extra tablespoons crumbs, chill fully, shape smaller cakes, and flip carefully.

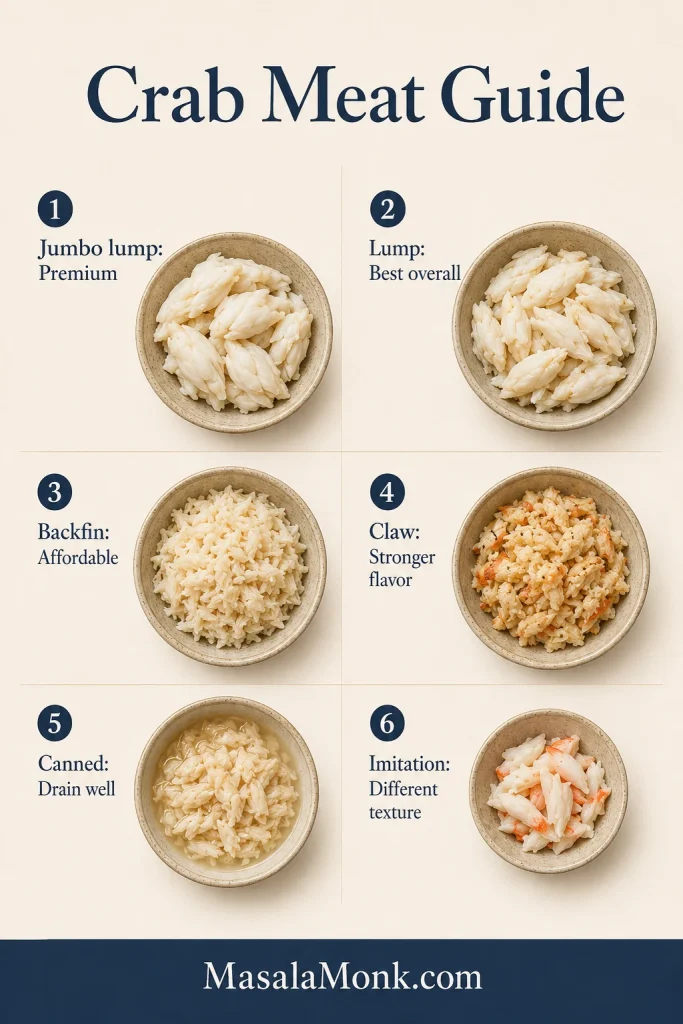
Which Crab Meat Should You Use?

The crab you choose changes the texture, price, and flavor of the finished cakes. For this recipe, lump crab is the best balance. Jumbo lump is beautiful for special occasions, while backfin or claw meat can work when you want something more affordable.

Crab meat guide showing jumbo lump, lump, backfin, claw, canned, and imitation crab.
Choosing the right crab meat is easier when you can see how each type changes texture, flavor, and moisture.
Crab meatShould you use it?Works well for
Jumbo lump crabYes, premiumSpecial occasion cakes with large visible pieces
Lump crabYes, best overallThe main recipe
Backfin crabYesAffordable crab cakes with good flavor
Claw meatYes, but strongerBudget cakes or mixing with lump crab
Canned crabYes, with adjustmentsPantry crab cakes when drained very well
Imitation crabNot ideal for this recipeBetter for a different budget crab-style patty
Dungeness crabYesSweet West Coast-style crab cakes
Blue crabYesClassic Maryland-style flavor

When buying crab specifically for this recipe, choose fresh or refrigerated pasteurized lump crab meat when possible. Avoid watery crab meat, and always drain it well before mixing. When buying fresh or refrigerated seafood, keep it cold, check that it smells clean rather than sour or ammonia-like, and refrigerate it promptly. The FDA seafood safety tips are helpful when choosing fresh or frozen seafood.

Pan-Fried, Baked, and Air Fryer Crab Cakes

Choose pan-fried for the deepest crust, baked for the least stress, and air fryer for a lighter, less-oil option. The mixture stays the same; only the cooking method changes.

MethodWorks well forTimeTexture
Pan-friedCrispiest golden edges3–4 minutes per sideCrisp outside, tender inside
BakedBeginners and batches12–15 minutes at 450°F / 230°CTender, less crust underneath
Air fryerLess oil10–12 minutes at 375°F / 190°CLightly crisp; check early
Pan + oven finishThicker cakes2–3 minutes per side, then 5–8 minutes at 400°F / 200°CCrisp crust with evenly heated center

Pan-Fried Crab Cakes

Pan-frying gives the best crust. Keep the heat at medium, use a thin layer of oil, and leave space between the cakes. Once the cakes hit the pan, the hardest part is leaving them alone.

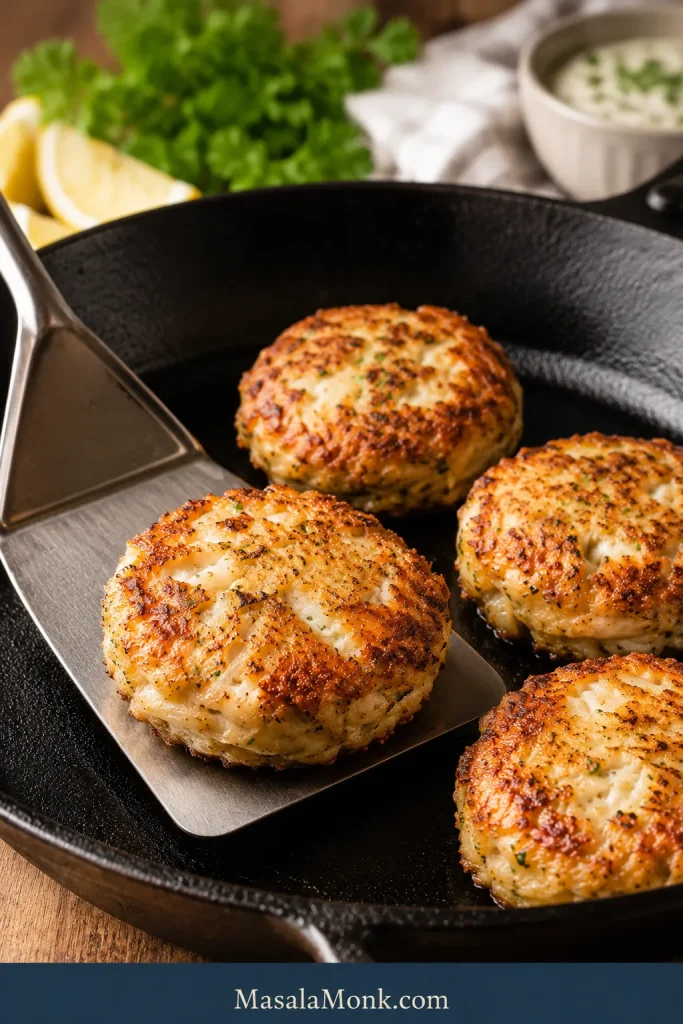
Golden pan-fried crab cakes in a skillet with crisp edges.
Pan-frying gives the richest crust, which is why the golden edges look so good when the cakes are done right.

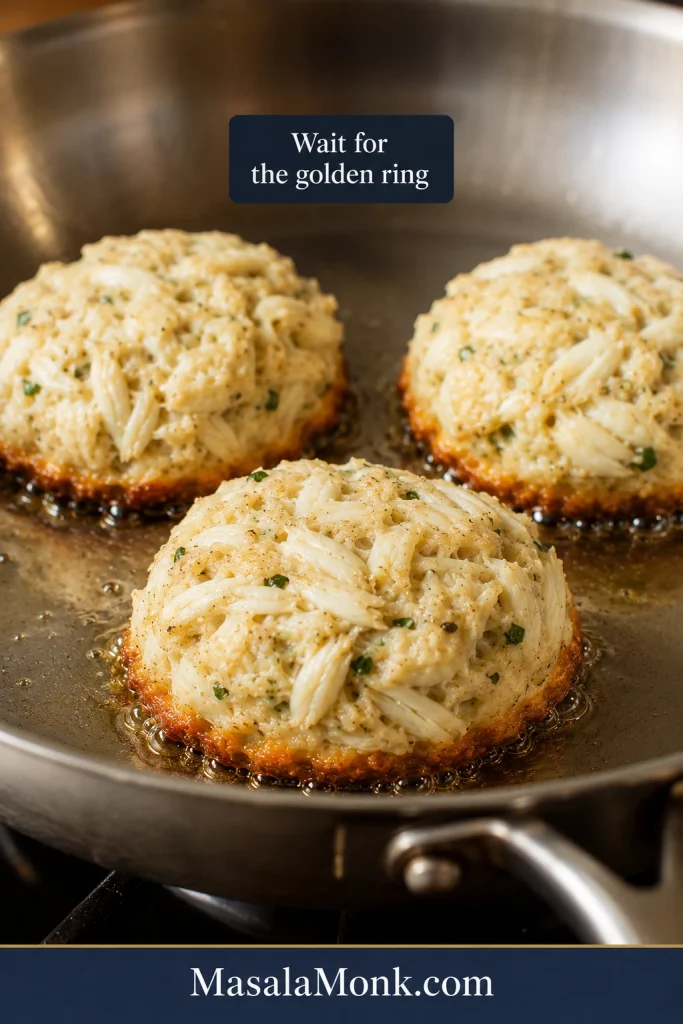
Look for a golden ring around the bottom edge before you touch them. That little ring is your sign that the crust is forming and the cake is getting strong enough to lift. If the cake resists the spatula, that is not failure; it usually means the crust has not finished forming.

Crab cakes cooking in a skillet with a golden ring forming around the bottom edge before flipping.
That golden ring around the edge is your cue to wait a little longer, because the crust needs time before the flip.

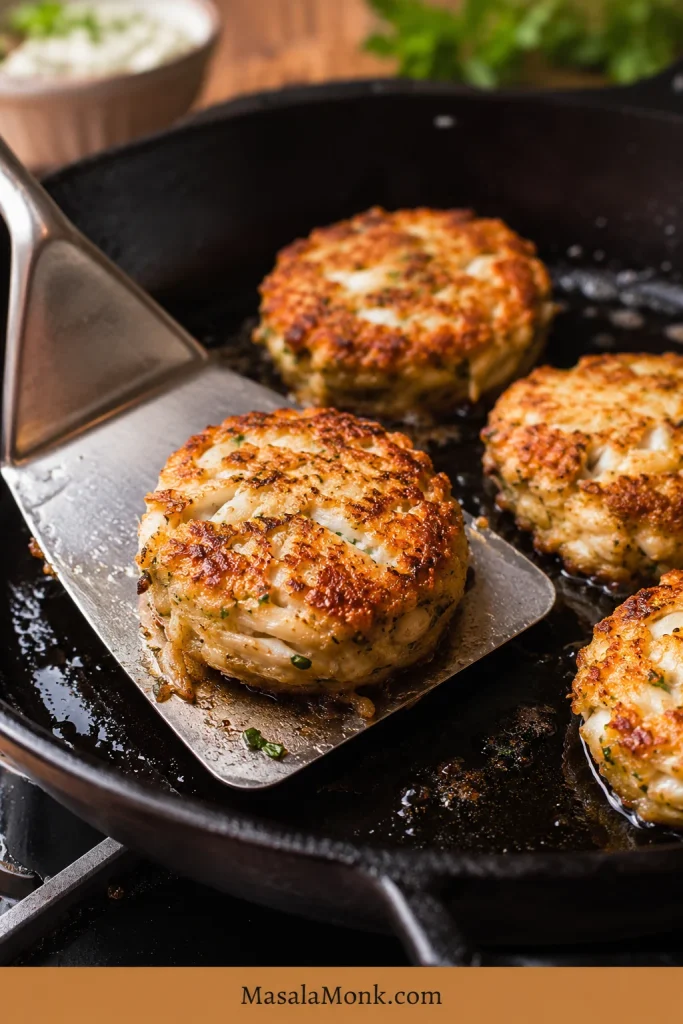
When the first side is ready, the spatula should slide under with less resistance, and the bottom should look deeply golden instead of pale or patchy.

A crab cake being flipped cleanly with a wide metal spatula in a skillet.
A wide spatula gives the cleanest flip, which is one of the easiest ways to keep delicate crab cakes intact.

If cooking in batches, keep finished crab cakes on a rack in a 200°F / 95°C oven while the rest cook. Avoid stacking them, or the crust will soften.

Baked Crab Cakes

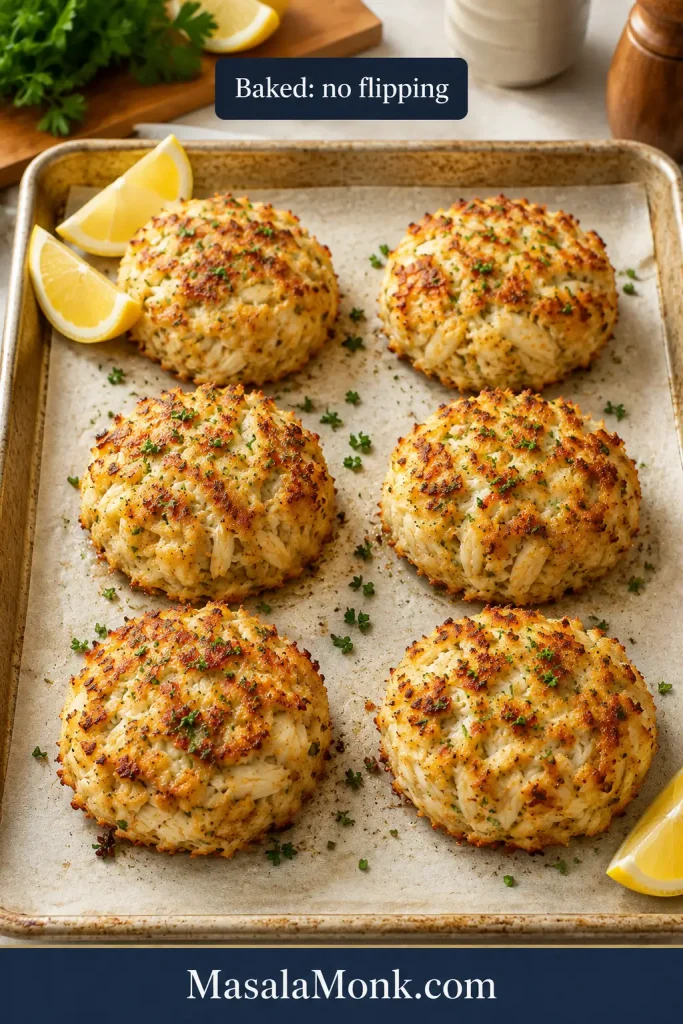
Baking is easier because there is no flipping. The cakes will be a little less crusty underneath, but they stay tender and golden on top. If you like gentle baked seafood, this baked haddock recipe uses the same idea: high enough heat for a tender finish, with lemon, butter, and a light panko or Ritz topping.

Baked crab cakes on a parchment-lined sheet pan with lightly browned tops.
Baking is the easiest option when you want less fuss, because the cakes can brown evenly without any flipping.

Air Fryer Crab Cakes

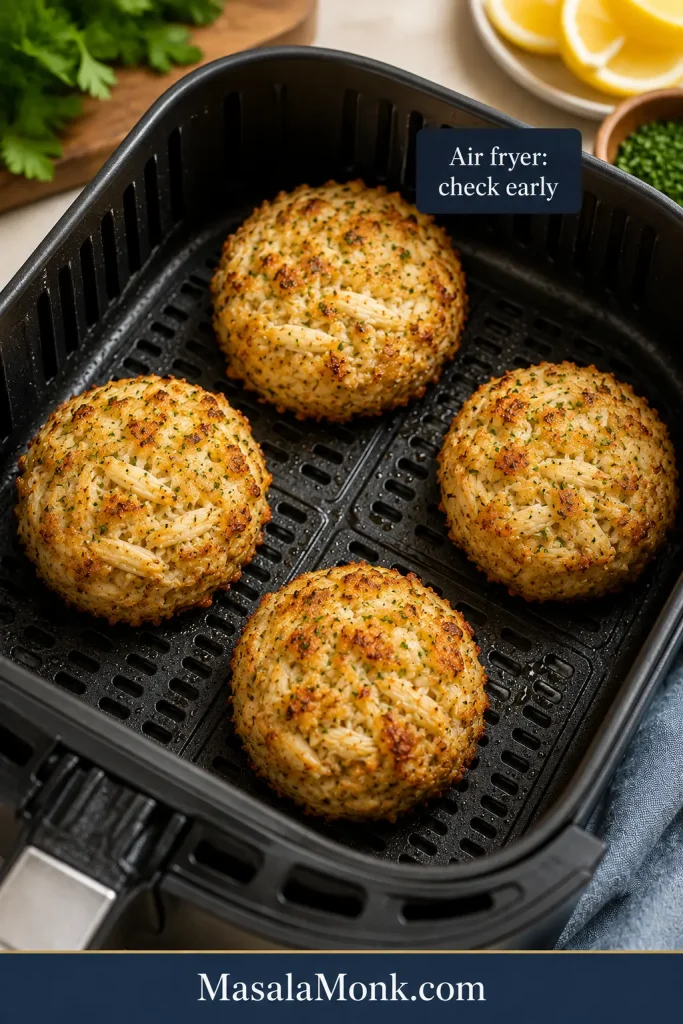
Air frying uses less oil than pan-frying, but the cakes still need a light spray and enough space for air to move around them.

Crab cakes in an air fryer basket with lightly crisp golden edges.
Air fryer crab cakes are a useful middle ground when you want a crisp surface but still want a tender center.

Thick Crab Cakes

For extra-thick cakes, sear them first, then finish them in a 400°F / 200°C oven for 5–8 minutes. Because most lump crab meat is already cooked, the goal is to heat the cakes through and set the binder. For very thick cakes, 145°F / 63°C is a useful safety-minded check, but do not keep cooking thin cakes until they dry out. You can see the general seafood guidance on FoodSafety.gov.

How to Keep Crab Cakes From Falling Apart

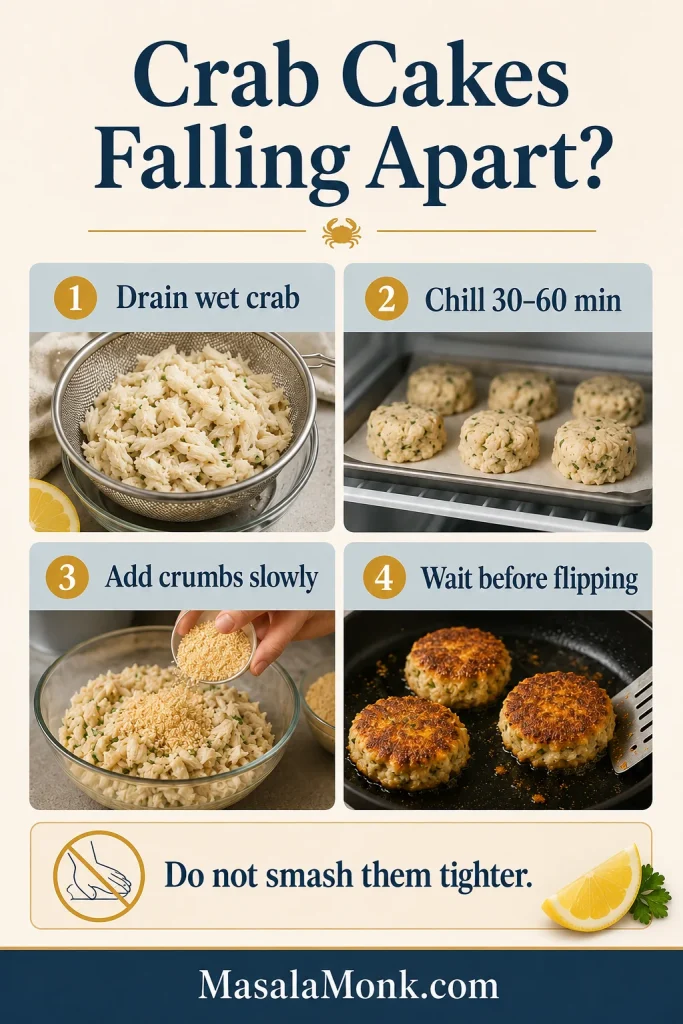
Most crab cake problems are fixable and usually come from one of four places: too much moisture, too little chill time, too much or too little filler, or flipping before the crust forms.

Crab cakes falling apart troubleshooting board with quick fixes for moisture, chilling, crumbs, and flipping.
Most crab cakes fall apart for the same few reasons, so this quick fix guide helps you solve the problem before the pan gets hot.
ProblemLikely causeFix
Cakes fall apartWet crab, short chill, or early flippingDrain well, chill longer, wait for the golden edge
Cakes taste breadyToo much filler or overmixingUse less crumbs next time and fold gently
Cakes feel dryToo much breadcrumb or overcookingAdd a small spoon of mayo; check air fryer cakes early
Cakes are soggyWet crab, low heat, or crowded panDrain better, use medium heat, leave space
Outside browns too fastHeat too high or cakes too thickSear, then finish in a 400°F / 200°C oven
Cakes stick to panMoved before crust formedWait another minute before lifting

If the mixture still feels loose after chilling, add 1 tablespoon panko or crushed saltines at a time. Stop as soon as the cakes hold together. Too much filler will make the crab disappear.

Canned Crab, Imitation Crab, and Maryland-Style Notes

Can You Use Canned Crab?

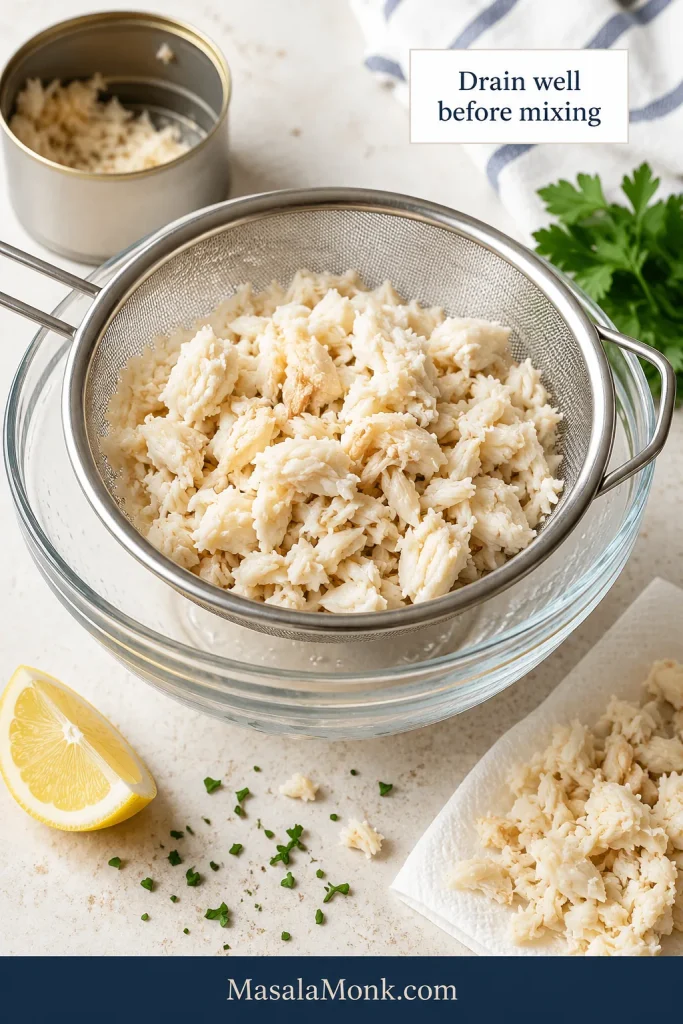
Yes, canned crab can work, but it needs care. Drain it very well, gently press out excess liquid, taste before adding salt, and add the lemon juice gradually instead of all at once. If the crab is very wet, add 1 extra tablespoon panko or crushed saltines, chill for the full 60 minutes, and shape slightly smaller cakes so they are easier to flip.

Canned crab drained in a fine-mesh sieve over a bowl before mixing.
Canned crab works better when you drain it well first, because excess moisture is what usually weakens the cakes.

The same moisture-control idea matters in salmon croquettes too: drain first, bind gently, shape evenly, and cook only once the pan is ready. For the cleanest crab flavor and best texture, though, lump crab is still the better choice when you can get it.

Can You Use Imitation Crab?

Imitation crab can be tasty in its own style, but it does not behave like lump crab. It is softer, sweeter, and more uniform, so this exact formula will not give the same flaky texture or sweet seafood flavor. If imitation crab is what you have, chop it small, reduce the mayo slightly, and make smaller cakes. The result will be more of an affordable crab-style patty than a lump crab cake.

Maryland-Style Crab Cake Notes: What This Recipe Keeps and Skips

This is a Maryland-style home version, not a claim that every Maryland cook makes crab cakes the same way. It keeps the important direction: sweet crab first, Old Bay, lemon, mustard, Worcestershire, and very little filler. It skips onions, peppers, and heavy seasoning so the crab stays clear.

Blue crab is classic, saltines are traditional in many versions, and panko is a lighter modern option when you want crisp edges without heaviness. The main rule is simple: let the crab lead. If the finished cake tastes mostly like bread, the balance has gone too far.

Crab Cake Sizes: Dinner Cakes, Mini Cakes, Crab Balls, and Sandwiches

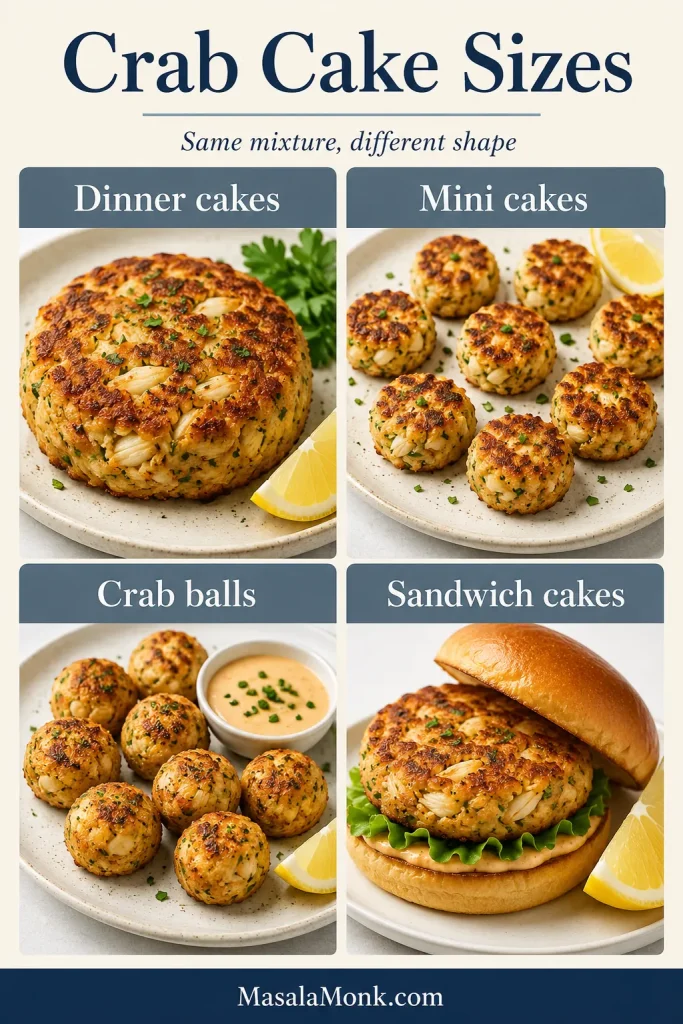
Choose the size before you shape the mixture. Large cakes feel like dinner, medium cakes work for plates and appetizers, mini cakes are party-friendly, and slightly flatter cakes are best for sandwiches.

Crab cake size guide showing dinner cakes, mini cakes, crab balls, and sandwich cakes.
The same mixture can become dinner cakes, appetizer bites, crab balls, or sandwich cakes, depending on how you shape it.
SizeMixture per cakeYield from 1 lb crabWorks well for
Large crab cakesAbout 1/2 cup6 cakesDinner or main course
Medium crab cakesHeaping 1/3 cup8 cakesAppetizer or lighter meal
Mini crab cakes2 tbsp16–20 cakesParty bites
Crab balls1–2 tbsp24–36 ballsSnack boards and appetizers
Sandwich cakesAbout 1/3–1/2 cup6–8 cakesToasted buns with slaw and sauce

Smaller cakes cook faster, so check early. Mini crab cakes usually need only 2–3 minutes per side in a pan or about 8–10 minutes in a hot oven. The chill-and-shape logic also helps with other delicate patties and croquettes: control moisture, chill before cooking, and turn only when the first side is ready.

Sauces That Keep the Crab First

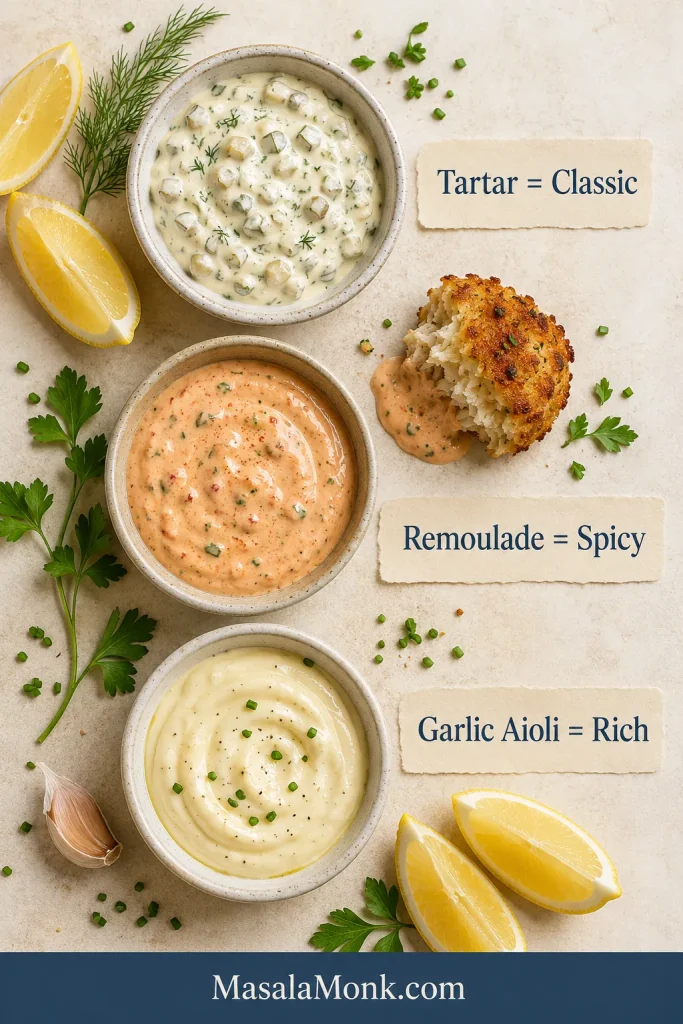
The best sauce for crab cakes is creamy, bright, and tangy: tartar sauce for classic flavor, remoulade for heat, and lemon or garlic aioli for a richer modern dip. The sauce should wake up the richness of the crab, not bury it.

Sauce board showing tartar sauce, remoulade, and garlic aioli with lemon and herbs.
A classic tartar, a spicier remoulade, or a rich aioli can each change the plate without taking the crab out of focus.
  • Tartar sauce: classic, mild, and family-friendly.
  • Remoulade: spicier, tangier, and more restaurant-style.
  • Lemon aioli: rich, bright, and modern.
  • Garlic aioli: bold, creamy, and simple.
  • Mustard sauce: punchy and Maryland-style.

For a classic pairing, serve these crab cakes with homemade tartar sauce. Choose easy garlic aioli for a richer, garlicky dip. A small drizzle of honey mustard dressing works well with cabbage, greens, or a crab cake sandwich when you want a lighter slaw-style pairing.

Serve crab cakes while the edges are still crisp, with lemon on the side and just enough sauce to brighten each bite without hiding the crab.

What to Serve With Crab Cakes

Serve crab cakes as an appetizer, seafood dinner, sandwich filling, or brunch base. Keep the sides fresh and simple so the crab stays the star.

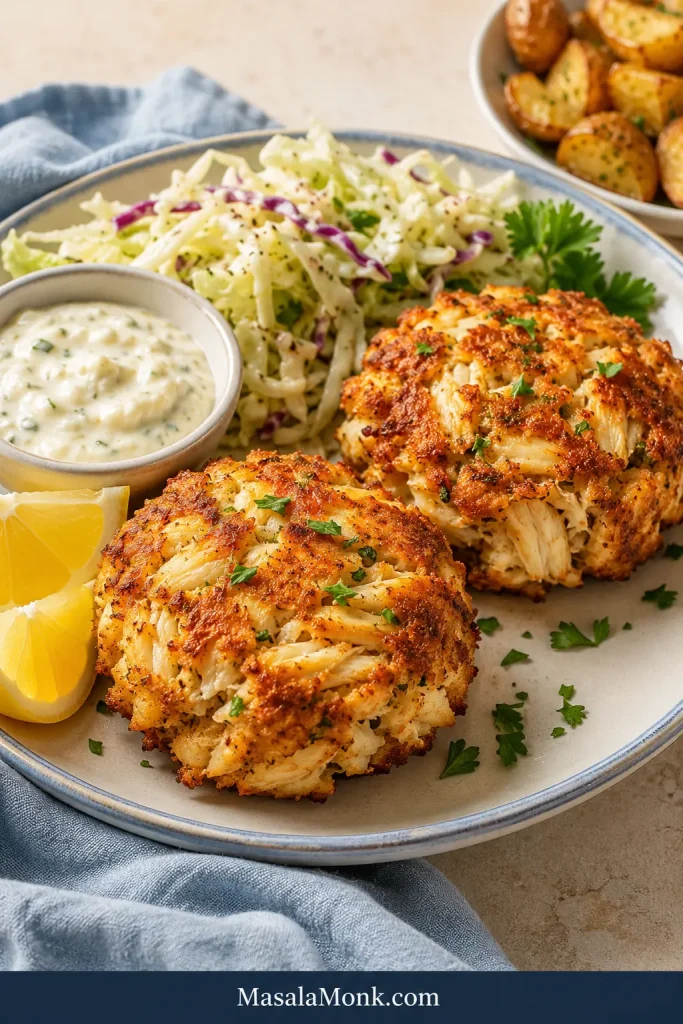
Crab cake dinner plate with two golden crab cakes, slaw, lemon wedges, sauce, and a blue linen napkin.
Serve the cakes while the crust is still crisp, then add lemon and slaw for a fresh finish that keeps each bite balanced.

For a picnic-style plate, add corn, pickles, and potato salad. For brunch, serve crab cakes with poached eggs and hollandaise sauce. For sandwiches, use toasted buns, lettuce, tomato, pickles, sauce, and a little slaw.

Make Ahead, Storage, Freezing, and Reheating

  • Make ahead: shape the crab cakes up to 24 hours ahead. Cover and refrigerate until ready to cook.
  • Refrigerate cooked crab cakes: store in an airtight container for up to 3 days. Let them cool before covering so steam does not soften the crust, but do not leave seafood sitting out for long.
  • Freeze uncooked crab cakes: freeze shaped cakes on a tray until firm, then transfer to a freezer-safe bag or container. Thaw overnight in the refrigerator before cooking.
  • Freeze cooked crab cakes: possible, but the texture is usually better when frozen before cooking.
  • Reheat: use a 350°F / 175°C oven for 8–12 minutes, an air fryer at 350°F / 175°C for 4–6 minutes, or a skillet over medium-low heat. The microwave works in a pinch but softens the crust.

FAQs

What is the best crab meat for crab cakes?

Lump crab meat is the best everyday choice because it gives tender pieces without the highest price of jumbo lump. Jumbo lump is beautiful for special occasions, while backfin or claw meat can work for more budget-friendly crab cakes.

Are crab cakes better baked or fried?

Pan-fried crab cakes have the crispest edges and deepest color. Baked crab cakes are easier for beginners and batches because there is no flipping, so they are less likely to break.

How much filler should crab cakes have?

For 1 lb / 454g crab meat, use about 1/2 cup / 30–40g panko or 2/3 cup / 41g crushed saltines. More than that can make the cakes taste bready.

What keeps crab cakes from falling apart best?

The biggest fixes are draining the crab well, chilling the shaped cakes, and waiting until the first side is golden before flipping. Add more crumbs only after chilling if the mixture still feels too loose.

Do crab cakes need egg?

Egg helps bind the crab cakes and makes them easier to cook without breaking. For an egg-free version, shape smaller cakes, add 1–2 extra tablespoons crumbs, chill for the full 60 minutes, and flip carefully.

What can replace mayonnaise in crab cakes?

Greek yogurt, sour cream, or eggless mayonnaise can replace regular mayo. Yogurt and sour cream taste tangier, while eggless mayo keeps the texture closer to the original.

Should I use panko or saltine crackers?

Use panko for a lighter, crisper texture and saltines for a more classic, slightly saltier Maryland-style crab cake. Ritz crackers are richer and more buttery.

How long should crab cakes chill before cooking?

Chill crab cakes for at least 30 minutes. A full 60 minutes is better when the mixture is soft, the crab is wet, or you are nervous about flipping.

Can crab cakes be made ahead?

Yes. Shape the crab cakes, place them on a tray, cover, and refrigerate for up to 24 hours before cooking. This makes them easier to handle and helps them stay intact.

Can you freeze crab cakes?

Yes. Freeze them uncooked after shaping for the best texture. Thaw overnight in the refrigerator before cooking.

How do I make gluten-free crab cakes?

Use gluten-free panko or crushed gluten-free crackers instead of regular panko or saltines. Check that your Worcestershire sauce and seasoning blend are gluten-free too.

The Crab Cake Promise

Crab cakes are easier when you remember the basic promise: 1 lb crab, 1 egg, 1/4 cup mayo, a small handful of crumbs, bright seasoning, and enough chill time. Start with good lump crab when you can, drain it well, fold gently, and let the first side brown before flipping.

When the edges are crisp, the center is warm and tender, and the crab still tastes sweet and clear, that is the whole win.

If you make them, leave a note with your crab type, cooking method, and whether you used panko, saltines, or Ritz. Your note can help the next person choose their version.

Posted on — Leave a comment

Seafood Boil Sauce Recipe: Garlic Butter Cajun Sauce for Shrimp, Crab & Crawfish

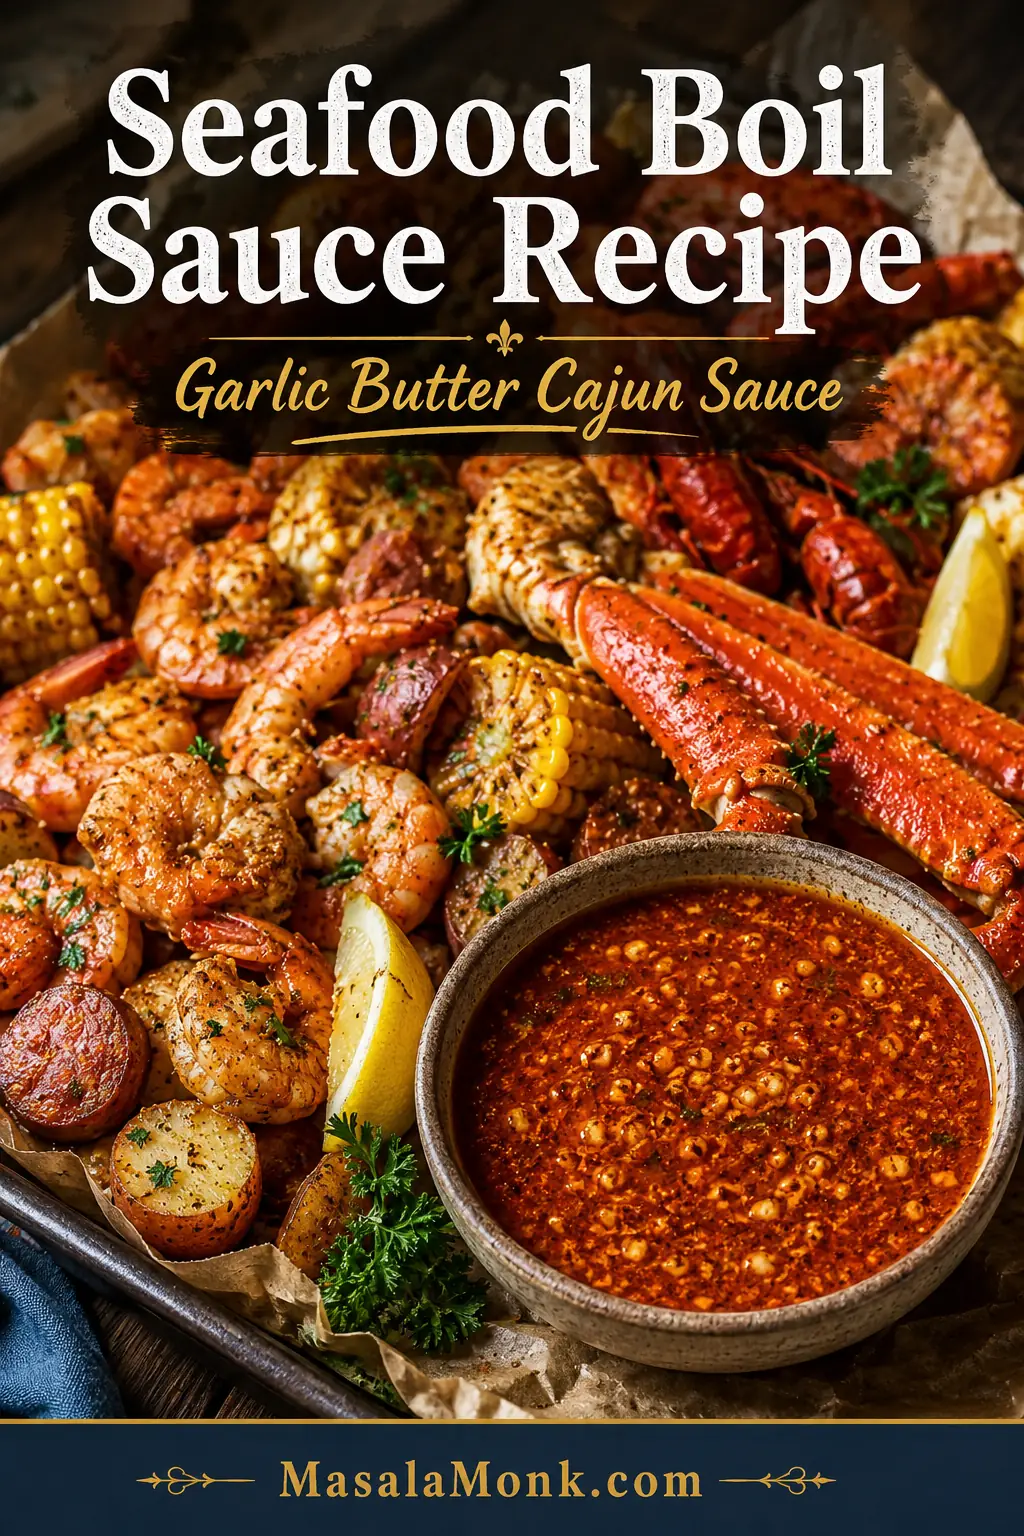
A tray of shrimp, crab legs, corn, baby potatoes, sausage, lemon wedges, parsley, and red-orange garlic butter Cajun seafood boil sauce.

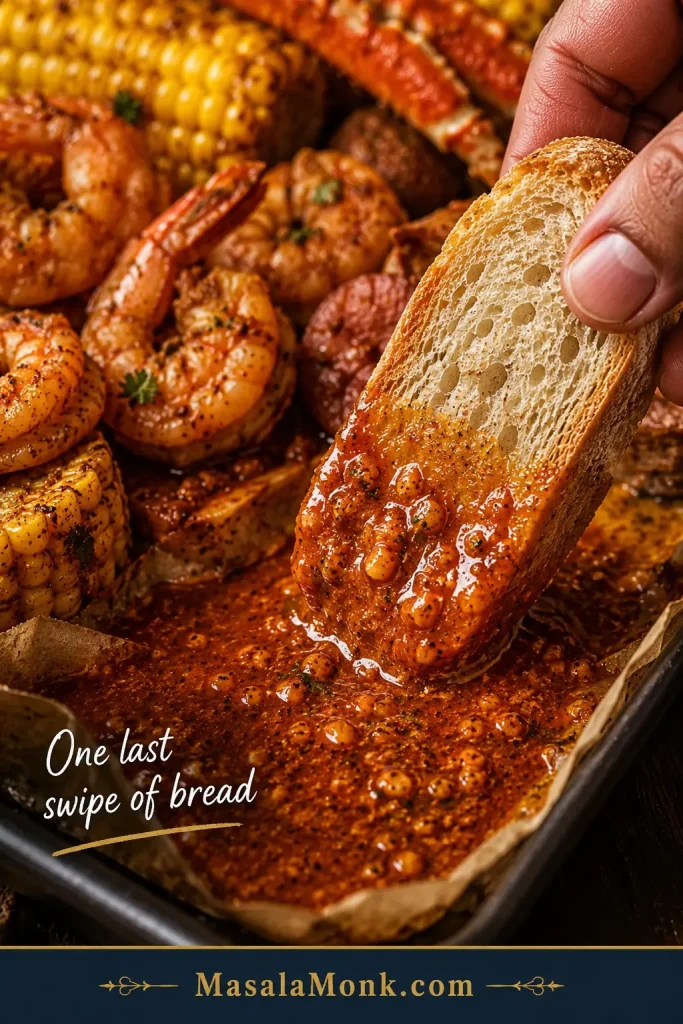
A great seafood boil sauce should do more than taste buttery. It should cling to crab legs, gloss over shrimp, soak into corn and potatoes, and leave enough garlicky Cajun butter at the bottom of the tray for one last swipe of bread.

This is the sauce that turns a pile of boiled seafood into the messy, glossy, pass-the-napkins kind of meal. It is rich, garlicky, smoky, lemony, a little spicy, and easy to adjust for dipping, pouring, tossing, or serving on the side.

The goal is not just heat or butter. The goal is a sauce that tastes bold but still lets the seafood taste like seafood. The base is simple — butter, garlic, Cajun seasoning, Old Bay, smoked paprika, lemon, and a splash of broth or reserved seafood boil liquid — but the control is what makes it work.

Quick Answer: What Is Seafood Boil Sauce?

Seafood boil sauce is a bold garlic butter sauce made with butter, garlic, Cajun seasoning, Old Bay seasoning, lemon juice, paprika, and a little heat. It should taste rich first, then garlicky and smoky, with enough lemon to make every bite of shrimp, crab, corn, and potatoes feel bright instead of heavy.

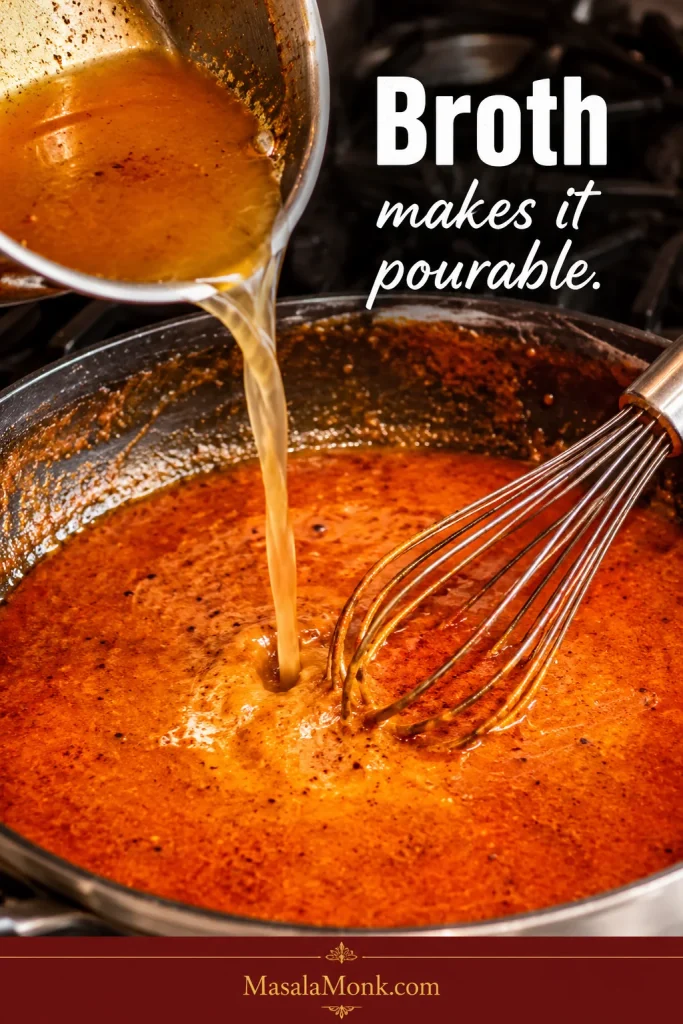
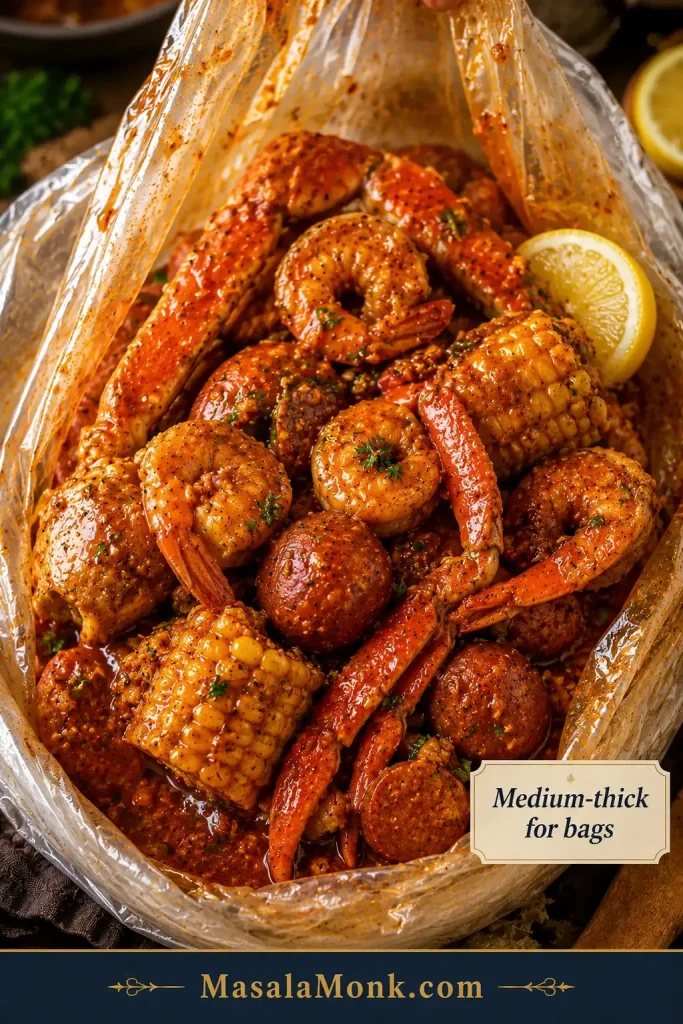
For a thick dipping sauce, use less liquid. For a pour-over sauce, add more broth, seafood stock, or reserved seafood boil liquid. For a seafood boil bag sauce, keep it medium-thick so it coats shrimp, crab, crawfish, corn, potatoes, and sausage without becoming watery.

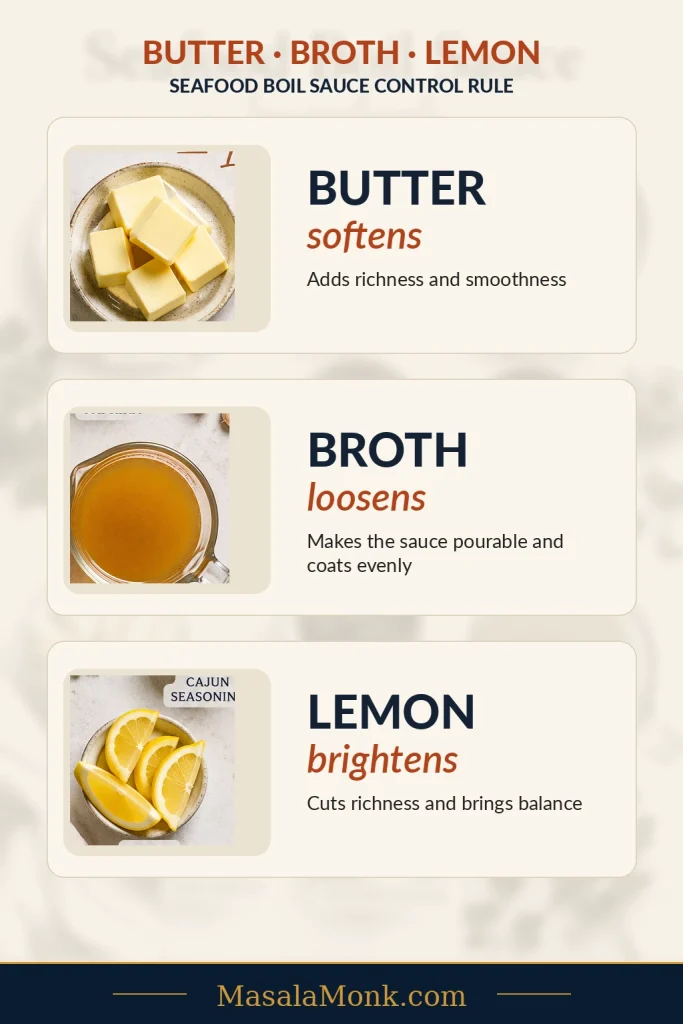
Butter-Broth-Lemon Rule

Use the butter-broth-lemon rule: butter softens, broth loosens, and lemon brightens. Choose your sauce style first — thick and buttery for crab-leg dipping, loose and glossy for shrimp and corn, or medium-thick for seafood boil bags. The recipe below starts in the middle so you can adjust either way.

Butter, broth, and lemon showing the butter-broth-lemon rule for seafood boil sauce.
When the sauce needs a fix, this is the fastest rule to remember: butter softens, broth loosens, and lemon brightens.

The best version is bold, glossy, and adjustable: rich enough for crab, bright enough for shrimp, loose enough for corn and potatoes, and balanced enough that it does not hide the seafood.

Make It Now: Seafood Boil Sauce Recipe

This is the main garlic butter Cajun seafood boil sauce. It makes about 2 cups / 480 ml, enough for about 2½–3 lb / 1.1–1.35 kg seafood as a light-to-generous pour-over sauce, depending on how much corn, potatoes, sausage, and eggs are on the tray.

You only need one pan, low heat, and about 20 minutes. Melt the butter, soften the aromatics, bloom the spices, loosen with broth, then finish with lemon.

Prep time: 10 minutes
Cook time: 12 minutes
Total time: 22 minutes
Yield: About 2 cups / 480 ml sauce
Serves: 4–6 as pour-over sauce, 8–10 as dipping sauce because dipping uses less per person
Equipment: Large skillet or medium saucepan, whisk, measuring spoons, microplane or garlic press

Scaling: Double the sauce for a large tray or seafood boil bag. Keep the heat low and use a wider pan so the garlic and spices cook evenly.

Before you pour: Taste the sauce with one shrimp, potato, or piece of corn. The salt order is simple: season first, loosen second, salt last.

Ingredients

IngredientUS MeasureMetric
Unsalted butter1 cup / 2 sticks / 8 oz226 g
Garlic, minced or grated8–10 cloves30–40 g
Yellow onion, very finely minced½ small onion / about ⅓ cup50–60 g
Cajun seasoning1½ tablespoons12–15 g
Old Bay seasoning2 teaspoons5–6 g
Smoked paprika1 tablespoon6–7 g
Onion powder1 teaspoon2–3 g
Brown sugar1–2 teaspoons4–8 g
Hot sauce1–2 teaspoons5–10 ml
Reserved seafood boil liquid, seafood stock, low-sodium chicken broth, or vegetable broth½ cup120 ml
Lemon juice2 tablespoons30 ml
Lemon zest1 teaspoonOptional
Fresh parsley, chopped2 tablespoons6–8 g

Optional heat: Add ¼–½ teaspoon cayenne or red pepper flakes if you want a spicier Cajun butter sauce.

Salt note: Do not add extra salt until the sauce is finished and tasted. Cajun seasoning, Old Bay, broth, and reserved boil liquid can all bring salt.

Measurement note: Gram weights for seasoning blends are approximate because Cajun seasoning and seafood seasonings vary by brand. Use the spoon measures first, then adjust after tasting.

Instructions

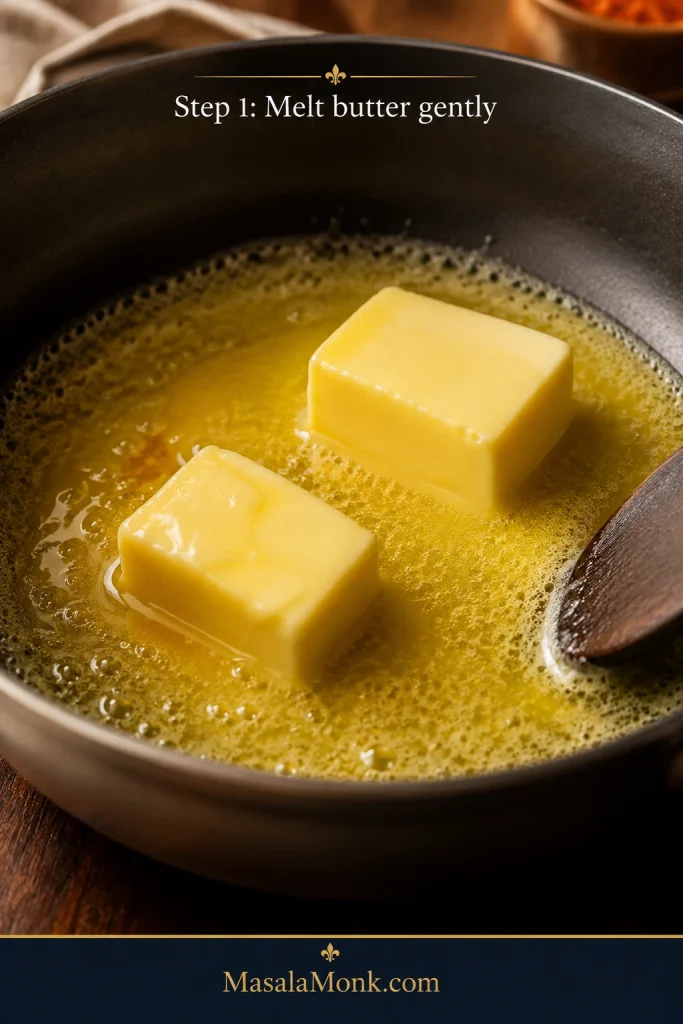
  1. Melt the butter in a large skillet or medium saucepan over low to medium-low heat.
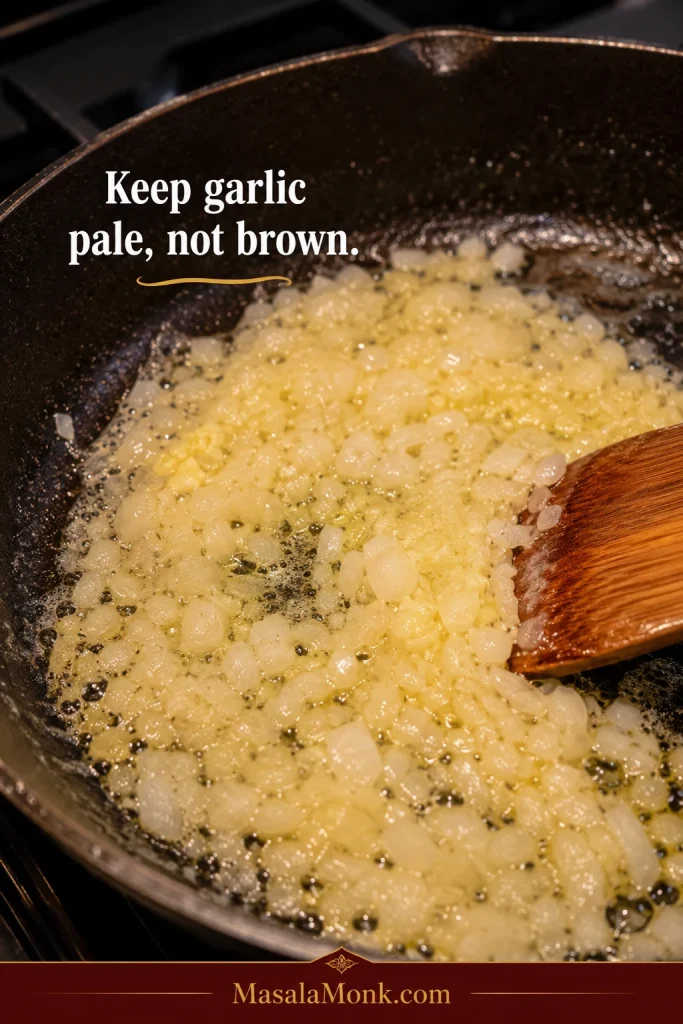
  2. Add the finely minced onion and cook for 3–4 minutes, until softened and glossy but not browned.
  3. Add the garlic and cook for 60–90 seconds, just until fragrant. Keep it pale, not brown.

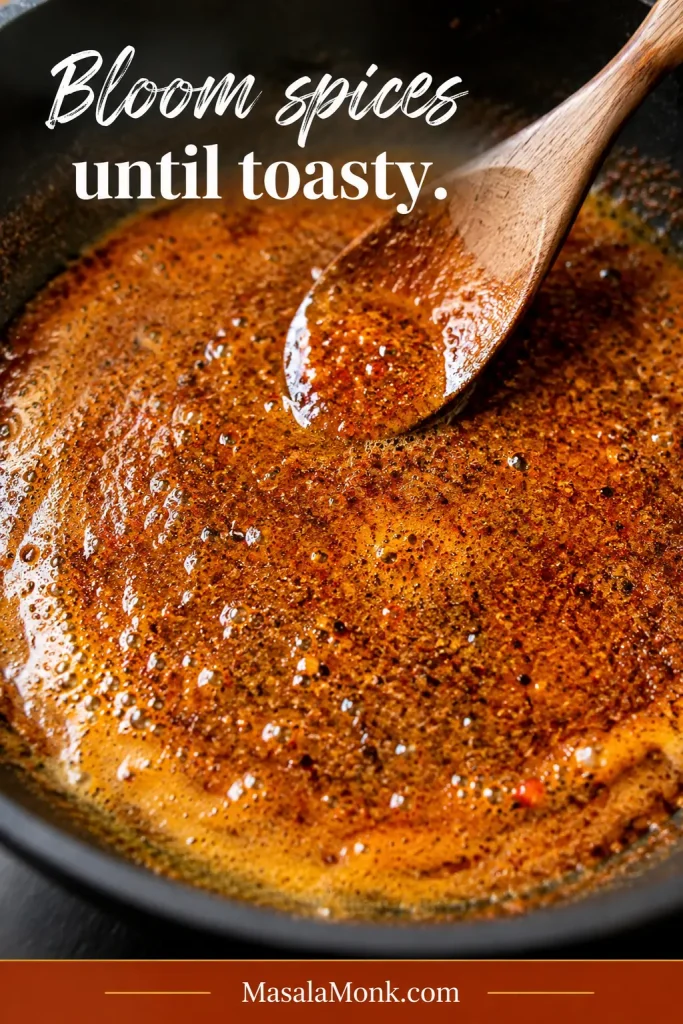
  4. Stir in the Cajun seasoning, Old Bay, smoked paprika, onion powder, brown sugar, and optional cayenne or red pepper flakes.
  5. Cook the spices in the butter for 30–60 seconds, until the butter smells toasty and the spices look absorbed into the butter, not sandy on the surface.
  6. Slowly whisk in the reserved boil liquid, stock, or broth.
  7. Let the sauce gently simmer for 3–5 minutes, stirring often, until glossy and spoonable.
  8. Turn off the heat. Stir in the lemon juice, lemon zest, hot sauce, and parsley.
  9. Taste and adjust. Add more lemon for brightness, broth for a looser sauce, butter for richness, or hot sauce for more heat.
  10. Taste with one shrimp, potato, or piece of corn before coating the full seafood tray.
  11. Serve warm as a dipping sauce, pour-over sauce, or seafood boil bag sauce.

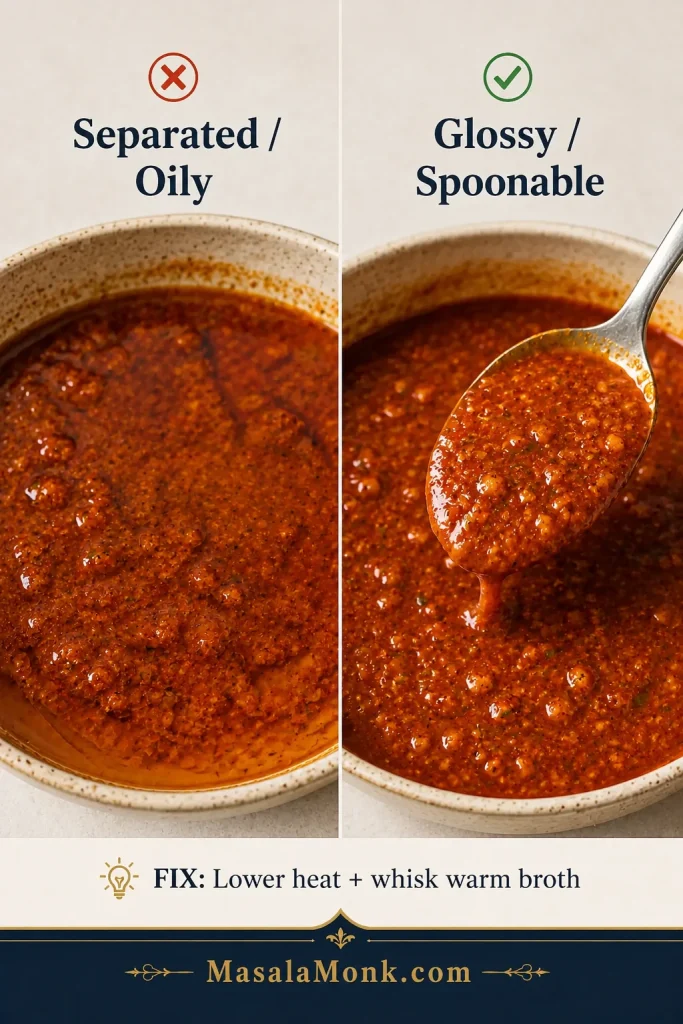
Important: Keep the sauce at a gentle simmer and it stays glossy. A hard boil can make the butter separate and the garlic taste harsh.

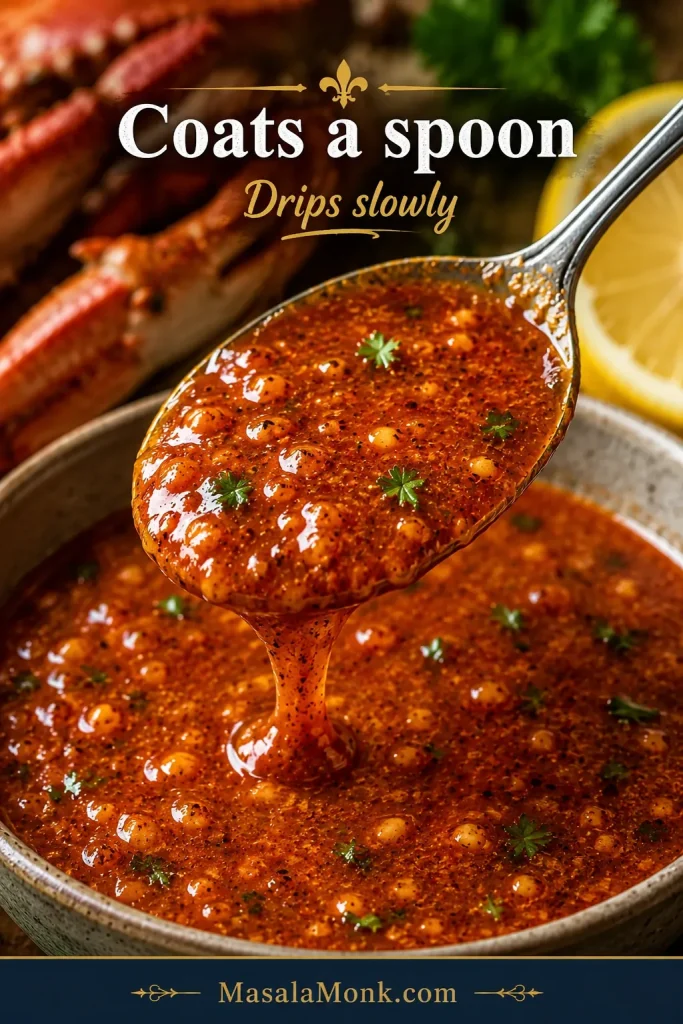
The sauce should look bold before it tastes aggressive: red-orange, glossy, garlicky, and loose enough to spoon over the tray without drowning the seafood.

Seafood Boil Sauce Success Cues

Use these cues while cooking. They matter more than the clock.

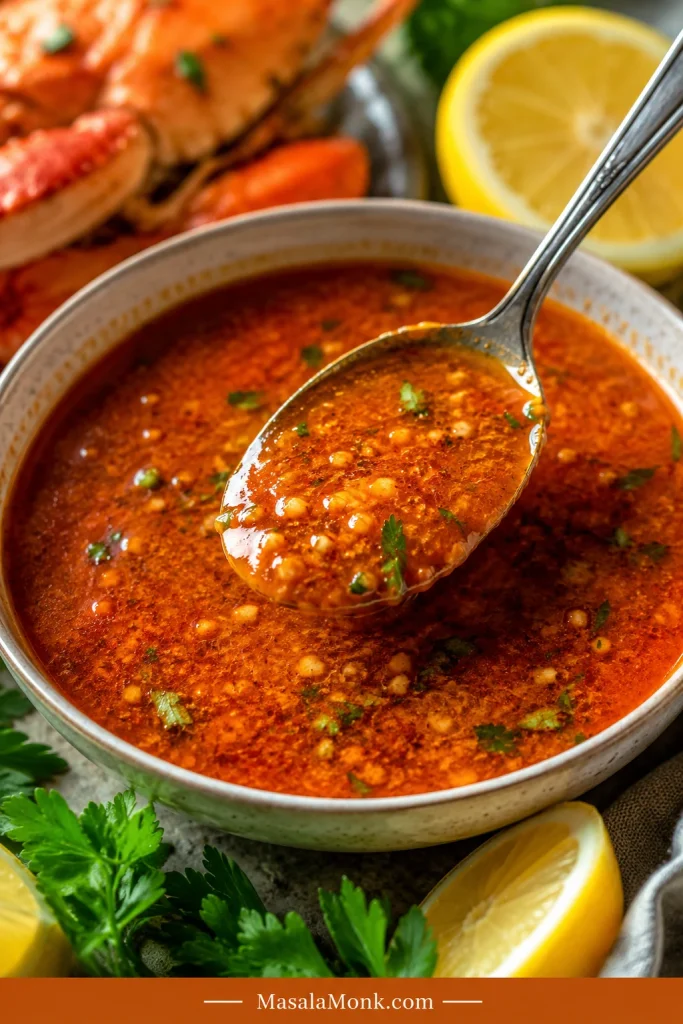
A close-up bowl of red-orange garlic butter Cajun seafood boil sauce with parsley, garlic, and lemon.
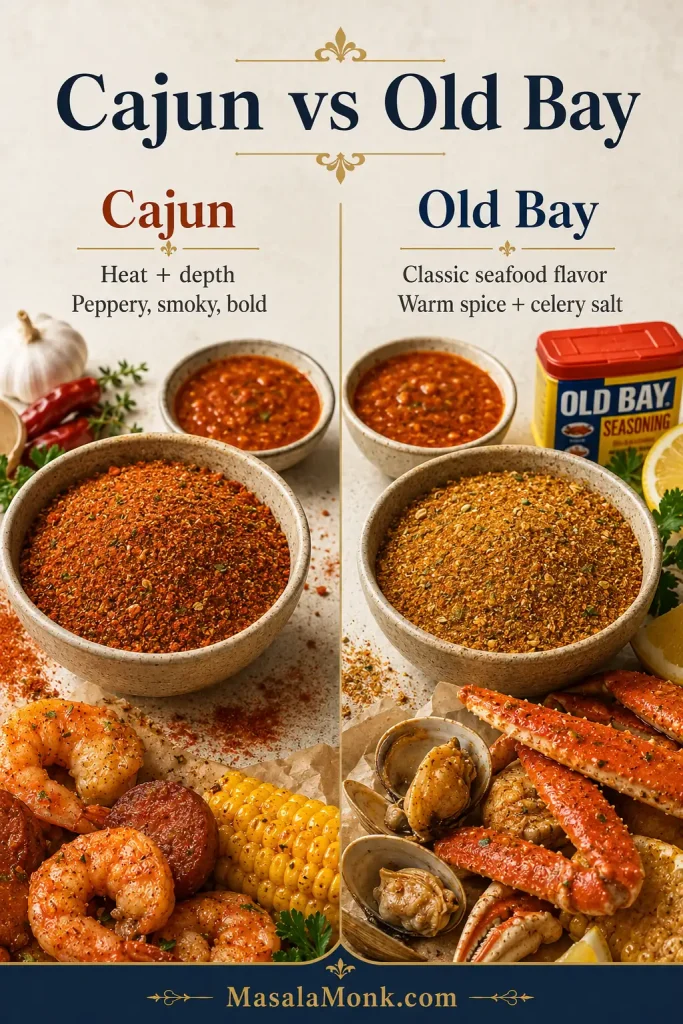
The finished sauce should look glossy and spoonable, with visible spice and garlic but no greasy separation.

CueWhat You Want
GarlicFragrant and pale, not brown
OnionSoft, glossy, and slightly translucent
SpicesToasty and buttery, not dry or sandy
Sauce textureGlossy and spoonable, not broken or greasy
SaltBold and savory, not sharp or harsh
HeatWarm Cajun spice first, extra fire only if you want it
LemonBright enough to cut the butter
Finished sauceButtery, garlicky, smoky, lemony, and easy to drizzle

When the sauce hits these cues, it tastes big without tasting heavy — rich enough for crab, bright enough for shrimp, and loose enough to find its way into the corn and potatoes.

Adjust, Fix and Serve the Sauce

Use the rest of this guide to choose the right texture, adjust the flavor, fix common problems, and store leftovers safely.

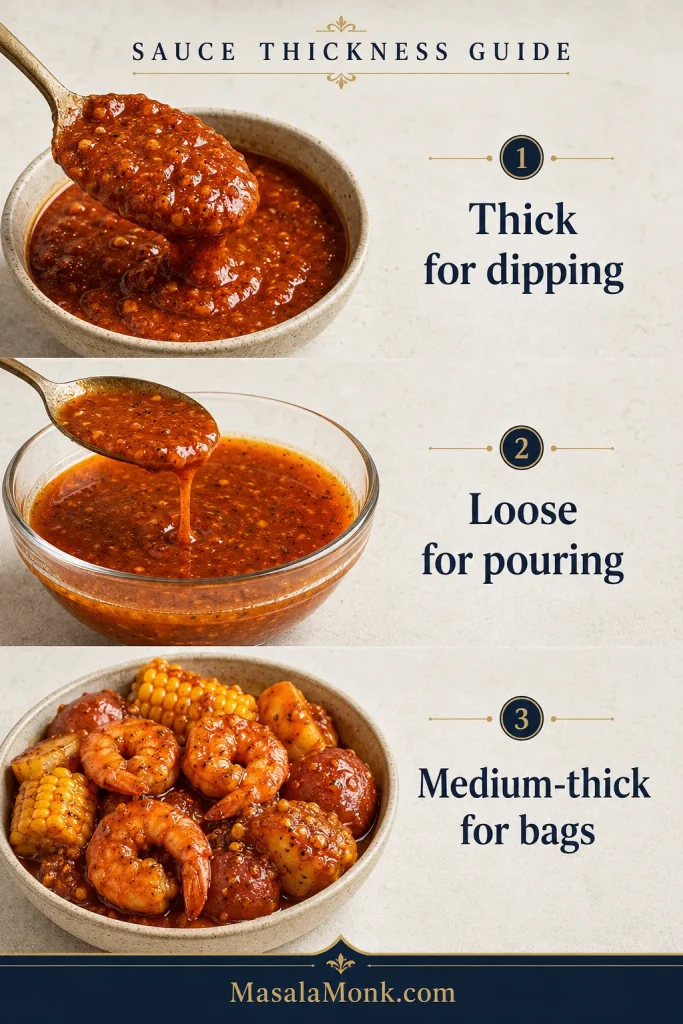
Dipping Sauce vs Pour-Over Sauce

This is where the sauce becomes yours. Some people want a thick bowl of butter for crab legs; others want a loose, glossy sauce that runs into the corn and potatoes. The same base can do both.

Seafood boil sauce thickness guide showing thick dipping sauce, loose pour-over sauce, and medium-thick bag sauce.
Thickness decides the job, so keep it thicker for dipping, looser for pouring, and medium-thick for bags.
UseTextureHow to Adjust
Dipping sauceThick, buttery, clingyUse ¼ cup / 60 ml liquid and simmer slightly longer.
Pour-over sauceGlossy, loose, spoonableUse ½ cup / 120 ml liquid.
Seafood boil bag sauceMedium-thick, coating sauceUse ½–¾ cup / 120–180 ml liquid.
Big tray sauceLooser and more spreadableUse ¾–1 cup / 180–240 ml liquid.
Crab leg dipping sauceRich and butteryKeep it thicker and serve lemon wedges on the side.

Crab people usually want the thick bowl. Shrimp, corn, and potatoes usually want the loose spoon-over version. If your table is divided, make the base sauce medium-thick, then loosen half for pouring and keep half rich for dipping.

Think of the broth or boil liquid like a volume knob. Add a little for a thick dip. Add more for a sauce that covers a whole tray.

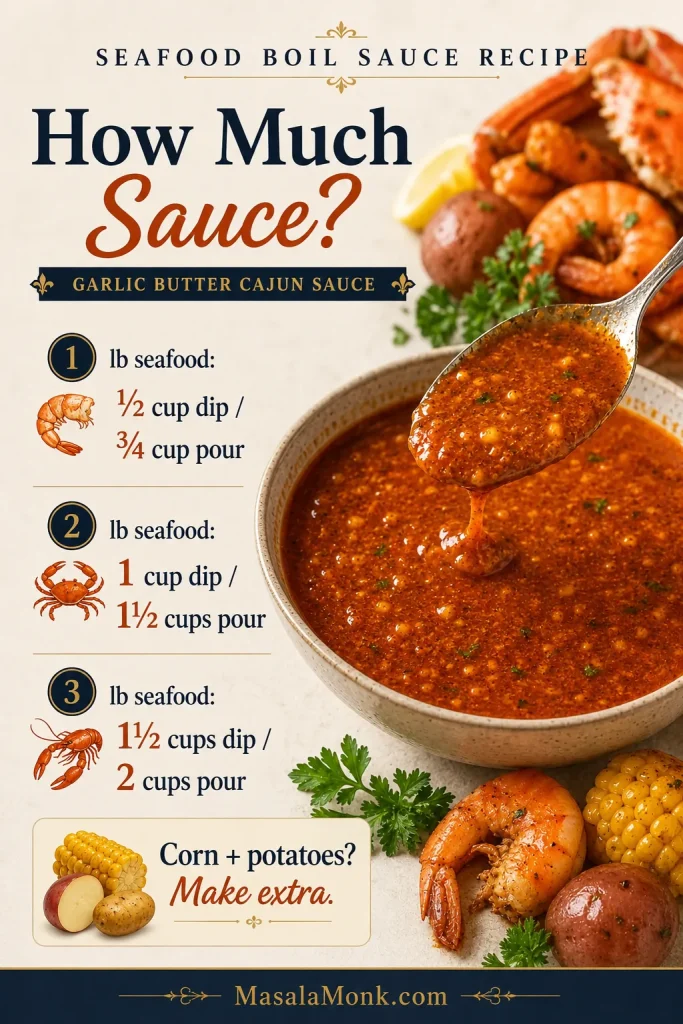
How Much Seafood Boil Sauce Do You Need?

The only sad seafood boil sauce is the one that runs out too early. If the tray has corn and potatoes, make extra. They absorb sauce faster than the seafood does.

Guide showing how much seafood boil sauce to make by pounds of seafood.
Corn and potatoes always change the math, so make extra when the tray has more than just shrimp or crab.

By Seafood Weight

Seafood AmountDipping SaucePour-Over Sauce
1 lb / 450 g seafood½ cup / 120 ml¾ cup / 180 ml
2 lb / 900 g seafood1 cup / 240 ml1½ cups / 360 ml
3 lb / 1.35 kg seafood1½ cups / 360 ml2–2¼ cups / 480–540 ml
5 lb / 2.25 kg seafood2½ cups / 600 ml3–4 cups / 720–960 ml
Party trayMake extraServe extra on the side

By Number of People

PeopleSauce for DippingSauce for Pouring/Tossing
2 people½–¾ cup / 120–180 ml1 cup / 240 ml
4 people1–1½ cups / 240–360 ml2 cups / 480 ml
6 people1½–2 cups / 360–480 ml3 cups / 720 ml
8 people2–3 cups / 480–720 ml4 cups / 960 ml

This recipe makes about 2 cups / 480 ml sauce. That is enough for about 2½–3 lb / 1.1–1.35 kg seafood as a pour-over sauce, or more if you are mainly serving it for dipping.

Extra sauce never feels like a mistake at a seafood boil. Running out does.

Once you know how thick the sauce should be and how much to make, the next step is understanding why the balance works.

Why This Seafood Boil Sauce Works

The flavor works because it balances richness, garlic, heat, salt, sweetness, and acidity.

Butter gives the sauce body. Garlic makes it bold and fragrant. Cajun seasoning brings peppery heat and Southern-style depth. Old Bay adds the classic seafood-boil flavor many people expect with crab, shrimp, and crawfish. Smoked paprika gives the butter sauce its warm red-orange color. Lemon keeps it from feeling heavy.

The small amount of brown sugar is not there to make the sauce sweet. It rounds out salt and spice, especially if your seasoning blend is intense. A little broth or reserved boil liquid turns plain melted butter into something glossy, spoonable, and better connected to the seafood.

When it is right, the sauce should taste buttery first, then garlicky, smoky, salty-spicy, and finally bright from lemon.

The method matters too. Garlic needs gentle heat, spices taste better when they bloom briefly in butter, and lemon tastes brighter when added near the end.

That balance is why the sauce can be bold enough for sausage and potatoes but still bright enough for shrimp, crab, and lobster.

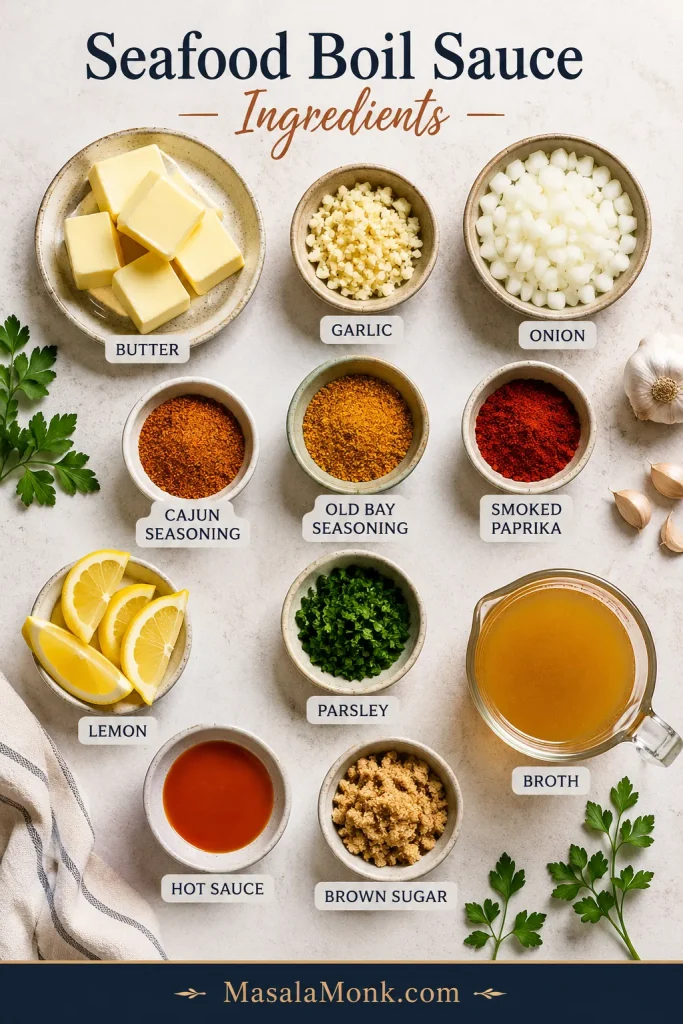
Ingredients You Need

The recipe card gives you the amounts. This section explains what each ingredient does and how to adjust if your seasoning blend is stronger, smokier, hotter, or saltier than expected.

Ingredients for seafood boil sauce including butter, garlic, Cajun seasoning, Old Bay, lemon, parsley, and broth.
Every ingredient earns its place here, because Cajun seasoning, Old Bay, garlic, lemon, and broth all help the sauce stay bold without getting heavy.

Butter

Unsalted butter gives you the best control because seafood boil seasonings can be salty. If you only have salted butter, make the sauce first, then taste before adding anything salty at the end.

For a richer party-style version, whisk in 2–4 extra tablespoons of butter after the sauce simmers.

Garlic

Fresh garlic gives this Cajun butter sauce its best flavor. Minced garlic gives a rustic texture; grated garlic or garlic paste makes the sauce smoother and more restaurant-style.

Keep the garlic pale and fragrant. Dark brown garlic can taste bitter.

Onion

Onion is optional, but it gives the sauce body and natural sweetness. Mince it very finely so it melts into the butter, or grate it for a smoother finish.

Cajun Seasoning

Cajun seasoning gives the sauce its bold, peppery, spicy base. Different brands vary a lot, so taste yours before you add extra heat or salt.

Old Bay Seasoning

Old Bay gives the sauce that classic seafood flavor. It works especially well with shrimp, crab legs, crawfish, potatoes, and corn.

No Old Bay in the pantry? You can still make a good boil sauce with Cajun seasoning, smoked paprika, garlic powder, onion powder, and a small pinch of celery salt or celery seed.

Smoked Paprika

Smoked paprika adds color, warmth, and a gentle smoky note. It helps create the deep red-orange look people associate with Cajun seafood butter.

Brown Sugar

Brown sugar is optional but useful. It rounds out salt, spice, and heat without making the sauce taste sweet, and it helps create a slightly glossy finish.

Broth, Seafood Stock, or Reserved Boil Liquid

This is what changes the sauce from a thick buttery dip into something you can spoon over a whole tray. Reserved boil liquid, stock, or broth loosens the sauce so it pours instead of sitting like straight melted butter.

Reserved boil liquid gives the strongest seafood-boil flavor because it already carries seasoning from the pot. If it tastes very salty, use half boil liquid and half low-sodium broth or water.

Lemon Juice and Lemon Zest

Lemon cuts through the butter and brightens the whole sauce. Add lemon juice near the end so it tastes fresh. Lemon zest is optional, but it makes the sauce smell brighter.

Hot Sauce, Cayenne, or Red Pepper Flakes

Hot sauce gives smoother heat. Cayenne adds stronger fire. Red pepper flakes bring visible spicy texture. Add heat slowly because it is much easier to make the sauce spicier than it is to calm it down.

Equipment

  • Large skillet or medium saucepan
  • Whisk
  • Measuring cups and spoons
  • Microplane, garlic press, or sharp knife
  • Heatproof spatula or spoon
  • Optional immersion blender for a smoother sauce

A skillet gives the spices room to bloom and lets the sauce reduce slightly; a medium saucepan works well for smaller batches or easier pouring.

How to Make It Glossy, Not Greasy

The recipe card above has the short version. These details help if you want a smoother, glossier, more controlled sauce.

Spoonable Sauce Texture

Before you pour the sauce over seafood, check the spoon. A glossy sauce should coat it lightly, then drip back slowly instead of running like water or sitting like straight melted butter.

Seafood boil sauce coating a spoon and dripping slowly back into the bowl.
If it coats the spoon and drips slowly, the sauce is in the right place: clingy enough for seafood, but not oily or thin.

1. Melt the Butter Gently

Melt the butter over low to medium-low heat. Starting gently keeps the butter from separating and gives the garlic time to flavor the sauce without burning.

Butter melting in a skillet for seafood boil sauce.
Start low and gentle, because butter should melt slowly before the garlic and spices go in.

2. Soften the Onion and Garlic

Cook the onion until soft and glossy, then add the garlic for 60–90 seconds. The garlic should smell fragrant but stay pale.

Garlic and onion cooking gently in melted butter for seafood boil sauce.
Once the onion softens and the garlic stays pale, the base turns sweeter and the sauce stays out of bitter territory.

3. Bloom the Seasonings

Stir the Cajun seasoning, Old Bay, smoked paprika, onion powder, brown sugar, and optional heat into the butter. Cook briefly until the butter turns red-orange and the spices look absorbed, not dry or dusty.

Cajun seasoning, Old Bay, and smoked paprika blooming in melted butter.
Blooming the spices in butter is what gives seafood boil sauce its deep red-orange color and that toasty Cajun flavor.

4. Loosen and Finish

Whisk in the broth or reserved boil liquid slowly, then simmer gently until glossy. Turn off the heat before adding lemon juice, lemon zest, hot sauce, and parsley.

Broth being whisked into Cajun garlic butter seafood boil sauce.
As soon as the broth goes in, the sauce loosens into a glossy pour-over texture that works better for shrimp, crab, and vegetables.

Finish With Lemon and Parsley

After the sauce is glossy, take it off the heat before adding lemon and parsley. That small timing choice keeps the seafood boil sauce brighter and fresher.

Lemon juice and parsley being added to seafood boil sauce.
Lemon and parsley go in at the end, because that final bright note keeps the sauce fresh instead of flat.

5. Test Before You Pour

Dip one shrimp, one potato, or one piece of corn into the sauce before coating the full tray. Fix the sauce in the pan, not after it has already coated three pounds of seafood.

Do You Add Seafood Boil Sauce Before or After Cooking?

This is a finishing sauce, not the cooking liquid. Let the boil season and cook the seafood, then let the garlic butter sauce coat it.

Add this garlic butter Cajun sauce after the seafood is cooked and drained. The sauce is for pouring, tossing, bagging, or dipping after cooking.

If you are unsure whether the seafood itself is fully cooked, FoodSafety.gov’s safe minimum internal temperatures chart is a useful reference for fish and shellfish.

The best method is simple: cook the seafood, drain it well, taste the sauce, then spoon or toss the warm sauce over the hot seafood. Keep extra sauce on the side for dipping crab, shrimp, corn, and potatoes.

Best Sauce for Shrimp, Crab, Crawfish and More

The same base works across the tray, but each seafood and side likes a slightly different sauce texture.

Guide showing the best seafood boil sauce texture for shrimp, crab, crawfish, lobster, corn, and potatoes.
Shrimp usually wants a looser, lemon-bright sauce, while crab does better with a thicker, buttery finish that stays on the meat.
FoodBest Sauce StyleAdjustment
ShrimpPour-over or tossAdd slightly more lemon and keep the sauce looser.
Crab legsDipping sauceKeep it thicker, buttery, and rich.
CrawfishSpicy Cajun sauceAdd extra Cajun seasoning, paprika, or hot sauce.
Lobster tailsGarlic lemon butterUse less Cajun, more lemon and parsley.
Mussels and clamsLoose pour-over sauceAdd more broth so it reaches the shells.
CornPour-over sauceMake it looser so it soaks into the kernels.
PotatoesPour-over sauceAdd enough broth so the sauce coats well.
SausageSmoky spicy sauceSmoked paprika and Cajun seasoning work well.
Boiled eggsMedium-thick sauceSpoon sauce over just before serving.

For Shrimp

Shrimp tastes best with a sauce that is garlicky, lemony, and not too heavy. Keep the texture slightly loose so the shrimp stays juicy.

For another shrimp dinner built around garlic, butter, and lemon, this shrimp scampi recipe keeps the same bright butter-sauce idea in a pasta-friendly direction.

For Crab Legs

Crab legs are perfect for a thicker dipping sauce. Keep it buttery and clingy, then serve extra lemon on the side so each bite can be brightened at the table.

For Crawfish

Crawfish can handle stronger heat. Add extra Cajun seasoning, hot sauce, cayenne, or red pepper flakes if you want a spicy crawfish boil sauce.

For Lobster

Lobster is sweeter and more delicate than crawfish or sausage, so go easier on the Cajun seasoning. More garlic, lemon, parsley, and butter usually works better than extra heat.

For a lobster meal that stays buttery but much simpler, this lobster roll recipe covers both the warm buttered Connecticut style and the cool Maine-style version.

For Corn and Potatoes

Corn and potatoes need a looser sauce. Add more broth or reserved boil liquid so the sauce can soak in instead of sitting on top.

Cajun vs Old Bay Seafood Boil Sauce

Cajun seasoning and Old Bay are both common in seafood boil sauce, but they do different jobs. Think of Cajun seasoning as the heat and depth, and Old Bay as the classic seafood-boil note. Together they make the sauce taste fuller, but together they can also make it salty fast.

Do not increase Cajun seasoning and Old Bay heavily at the same time unless you know both blends are low-salt.

Cajun versus Old Bay seafood boil sauce guide.
Cajun seasoning brings heat and depth, while Old Bay brings that classic seafood flavor, so the two work best when the salt stays under control.
  • For more Cajun flavor: Increase Cajun seasoning slightly, add smoked paprika, and finish with hot sauce.
  • For more Old Bay flavor: Increase Old Bay, reduce Cajun, and keep the lemon bright.
  • For a less salty sauce: Use unsalted butter, low-sodium broth, less Old Bay, and more lemon.
  • If you have no Old Bay: Use Cajun seasoning, smoked paprika, garlic powder, onion powder, and a tiny pinch of celery salt or celery seed.
  • If you have no Cajun seasoning: Use Old Bay, smoked paprika, garlic powder, onion powder, black pepper, and cayenne.

Seafood Boil Sauce Variations

Think of the recipe as one base sauce with two kinds of choices: texture choices for how you serve it, and flavor choices for how spicy, garlicky, or Old Bay-forward you want it.

Want the Sauce…Do This
More garlickyUse 10–12 cloves garlic or grated garlic.
More CajunAdd extra Cajun seasoning and smoked paprika.
More Old BayIncrease Old Bay and reduce Cajun seasoning.
MildSkip cayenne, use mild Cajun seasoning, add more broth and lemon.
SpicyAdd cayenne, hot sauce, red pepper flakes, or spicy Cajun seasoning.
Thicker for dippingUse ¼ cup / 60 ml liquid.
Looser for a trayUse ¾–1 cup / 180–240 ml liquid.
Restaurant-style sauceUse grated onion, extra paprika, brown sugar, less liquid, and optional blending.

Garlic Butter Seafood Boil Sauce

A stronger garlic butter version starts with 10 cloves of garlic and slightly less Cajun seasoning. Keep the lemon juice strong and add parsley at the end. This version is excellent for crab legs, lobster tails, and shrimp.

Spicy Seafood Boil Sauce

For a spicier sauce, add cayenne, red pepper flakes, hot sauce, spicy Cajun seasoning, or hot paprika. Add heat slowly and taste after simmering before adding more.

Mild Seafood Boil Sauce

The mild version uses mild Cajun seasoning, slightly less Old Bay, no cayenne, and extra broth and lemon. It is better for kids, mild eaters, lobster, and anyone who wants buttery garlic flavor without too much heat.

Old Bay Seafood Boil Sauce

An Old Bay-forward sauce works best when Old Bay increases to 1 tablespoon and Cajun seasoning drops to 1 teaspoon. Keep the butter, garlic, lemon, and parsley the same.

Lemon Pepper Seafood Boil Sauce

Add 1–2 teaspoons lemon pepper seasoning and increase the lemon zest. Reduce extra salt because lemon pepper blends can be salty. This version works beautifully with shrimp, lobster, and crab.

Creamy Seafood Boil Sauce

A creamy version needs only 2–4 tablespoons of cream at the end over low heat. This makes the sauce richer and softer, but it is less traditional than garlic butter Cajun sauce.

Restaurant-Style Sauce Adjustments

This is the part that makes the tray look like something people want to gather around. Restaurant-style seafood boils feel different because the sauce arrives hot, glossy, and clingy. It coats the shells, runs into the potatoes, stains the corn, and still leaves enough at the bottom for dipping.

  • For redder color, add a little more smoked paprika.
  • For deeper flavor, bloom the spices a little longer over low heat.
  • For a clingier sauce, use less broth.
  • For smoother texture, use grated garlic and grated onion.
  • For a glossy finish, add 1–2 teaspoons brown sugar.
  • For a smooth restaurant-style sauce, blend briefly with an immersion blender.

Taste Adjustment Ladder

This is the part where the sauce stops being a formula and starts tasting like yours. Most fixes come back to the butter-broth-lemon rule: butter softens, broth loosens, and lemon brightens.

If the Sauce Tastes…Add This
Too saltyUnsalted butter first, then warm broth, then lemon.
Too buttery or heavyLemon juice first, then a splash of broth.
Too thinSimmer a few minutes longer.
Too thickWarm broth, seafood stock, or reserved boil liquid.
Too spicyButter and broth, then a tiny pinch of brown sugar if needed.
Too flatLemon first, then Cajun seasoning or Old Bay.
Too sharpA small knob of butter or a tiny pinch of brown sugar.
Not garlicky enoughA small amount of garlic powder, or gently cooked grated garlic.
Not smoky enoughA little more smoked paprika.

Make one adjustment at a time, then taste again. This keeps the sauce from swinging too far in the other direction.

Quick 2-Minute Seafood Boil Sauce

When the seafood is already cooked and you just need something buttery fast, this shortcut version gets you there.

IngredientAmount
Melted butter½ cup / 113 g
Old Bay or Cajun seasoning1–2 teaspoons
Garlic powder or 1 minced garlic clove½ teaspoon garlic powder or 1 clove
Lemon juice1 tablespoon / 15 ml
Hot sauceOptional, to taste

This quick version is not as deep or layered as the full sauce, but it works well as a fast seafood dipping sauce when the seafood is already cooked. For better flavor, warm everything together gently for 1–2 minutes instead of just stirring it cold.

When you want a cold, creamy seafood dip instead of warm butter, this homemade tartar sauce recipe fits that lane better.

Substitutions and Swaps

The base is forgiving. Missing one ingredient does not ruin the sauce; it just changes which direction you lean.

Missing IngredientUse Instead
No Old BayCajun seasoning + smoked paprika + pinch of celery salt or celery seed
No Cajun seasoningOld Bay + smoked paprika + garlic powder + onion powder + cayenne
No seafood boil liquidSeafood stock, low-sodium chicken broth, vegetable broth, beer, or water with lemon
No fresh garlicGarlic paste or garlic powder
No onionSkip it, or use ½ teaspoon onion powder
Not enough butterUse part butter and part olive oil. If using no butter, use vegan butter or olive oil, but expect a lighter sauce.
No lemonLime juice or a small splash of vinegar
No brown sugarHoney, maple syrup, or skip it
No parsleyChives, green onion, or skip it

If you are using store-bought seafood boil seasoning packets, start with less seasoning than you think you need. Packets can be very salty. Use unsalted butter, taste before adding salt, and loosen the sauce with broth or lemon juice if it tastes too intense.

How to Toss and Serve It Restaurant-Style

This is the point where the sauce becomes the meal. The crab legs get glossy, the shrimp pick up the garlic butter, the corn turns red-orange in the grooves, and the potatoes catch everything the seafood leaves behind.

A restaurant-style finish is not about making the sauce complicated. It is about timing, texture, and serving it while everything is still hot and glossy.

Restaurant-Style Seafood Boil Sauce Finish

Use the sauce while it is warm and glossy, then coat the seafood in layers so the tray looks generous without turning watery.

Restaurant-style seafood boil tray with shrimp, crab, corn, potatoes, sausage, and glossy garlic butter sauce.
A great seafood boil tray looks glossy and generous, with enough sauce to coat the seafood and leave some behind for dipping.
  • Warm the seafood before saucing. Cold seafood makes butter firm up quickly.
  • Drain the seafood well so water does not dilute the sauce.
  • Toss or spoon in layers instead of dumping all the sauce at once.
  • Keep extra sauce warm on the side for dipping.
  • Add parsley and lemon at the end so the tray looks and tastes fresh.
  • Serve immediately. Garlic butter sauce is at its best while warm and glossy.

Seafood Boil Bag Sauce

For seafood boil bag sauce: use the medium-thick texture. Add cooked seafood and warm sauce to the bag, seal carefully, and toss until everything is coated. The sauce should move when tossed, coat the shells red-orange, and leave a little buttery pool at the bottom for dipping. If it is too watery, it will pool instead of clinging to shrimp, crab, corn, and potatoes.

Seafood boil bag with shrimp, crab, corn, and potatoes coated in red-orange garlic butter sauce.
Medium-thick is the sweet spot for seafood boil bags, because the sauce needs to move when tossed and still coat every shell.

Common Mistakes to Avoid

Most sauce problems are easier to fix in the pan than on the tray. Use this as a quick check before the sauce goes over the seafood.

  • Starting too salty: Use unsalted butter when you can, and taste before adding any extra salt.
  • Using heat that is too high: Low to medium-low heat keeps the garlic pale and the butter glossy.
  • Skipping the taste test: Try the sauce with one shrimp, potato, or piece of corn before coating the full tray.
  • Pouring sauce over watery seafood: Drain the seafood well so the sauce stays bold instead of diluted.
  • Using one texture for every purpose: Dipping, pouring, and seafood boil bags all need slightly different thickness.

Troubleshooting Seafood Boil Sauce

Butter sauces can go sideways quickly, but you usually do not need to start over. Catch the problem while the sauce is still in the pan, and the fix is usually simple.

Comparison of separated oily seafood boil sauce and glossy spoonable seafood boil sauce.
When the sauce looks oily or split, lower the heat and whisk in warm broth, because glossy always wins over greasy.
ProblemLikely CauseFix
Too saltySalted butter, salty Cajun seasoning, too much Old BayAdd unsalted butter, broth, lemon juice, or a little brown sugar.
Too spicyToo much cayenne, hot sauce, or spicy Cajun seasoningAdd butter, broth, lemon, or a little sweetness.
Too oilyToo much butter, not enough liquidWhisk in warm broth slowly.
Too thinToo much broth or boil liquidSimmer uncovered for a few minutes.
Sauce separatedHeat too high or liquid added too fastLower the heat and whisk in warm liquid gradually.
Bitter garlicGarlic browned or burnedCook garlic gently for only 60–90 seconds.
Grainy spicesSpices were not bloomed or too much dry seasoning was addedBloom spices in butter and loosen with broth.
Not flavorful enoughToo much liquid or weak seasoningAdd Cajun seasoning, Old Bay, lemon, garlic, or hot sauce slowly.

How to Fix Salty Seafood Boil Sauce

Do not add water first. Water can make the sauce thinner without fixing the flavor. Instead, add unsalted butter, warm broth, lemon juice, or a small pinch of brown sugar. If you are serving the sauce with a full seafood boil, extra potatoes and corn can also help absorb some of the salty flavor on the tray.

How to Fix Separated Seafood Boil Sauce

Lower the heat. Whisk in 1–2 tablespoons of warm broth at a time until the sauce looks glossy again. If it still looks broken, use an immersion blender for a few seconds.

How to Make It Thicker

Simmer it uncovered for a few minutes. You can also use less broth next time or add a little more butter. For a thicker dipping sauce, start with only ¼ cup / 60 ml liquid.

How to Make It Thinner

Whisk in warm broth, seafood stock, reserved boil liquid, or water with lemon juice. Add a little at a time until the sauce pours the way you want.

How to Store and Reheat the Sauce

Do not worry if the sauce turns solid in the fridge. That is just the butter doing what butter does. The texture comes back when the sauce is reheated and whisked.

Refrigerating

Store unused sauce in an airtight container in the refrigerator for 4–5 days.

If the sauce has touched seafood, shells, fingers, or a shared dipping bowl, treat it like a seafood leftover. Cool it quickly, refrigerate it promptly, and use it within 1–2 days for best quality.

For broader leftover safety, the USDA’s leftovers and food safety guide is a useful reference.

Reheating

For clean, unused sauce, reheat gently in a saucepan over low heat, stirring often. Add a splash of broth, water, or reserved boil liquid if the sauce is too thick.

For sauce that has touched seafood or leftovers, reheat until steaming hot, ideally to 165°F / 74°C, then whisk to bring the texture back. A food thermometer is the safest way to check.

You can also microwave clean unused sauce in short bursts, stirring every 15–20 seconds. If reheating sauce with seafood leftovers, stir well and make sure the food is steaming hot throughout before serving.

Freezing

Freeze unused seafood boil sauce for up to 2–3 months. Thaw overnight in the refrigerator, then reheat gently over low heat. If the sauce separates slightly, whisk in warm broth or blend briefly with an immersion blender.

What to Serve With Seafood Boil Sauce

The best use is still the simplest: hot seafood, warm sauce, extra napkins, and something starchy to catch the butter.

Classic Seafood Boil Uses

  • Shrimp
  • Crab legs
  • Crawfish
  • Lobster tails
  • Mussels
  • Clams
  • Corn on the cob
  • Baby potatoes
  • Smoked sausage
  • Boiled eggs

Other Good Uses

  • Garlic bread
  • Rice
  • Roasted potatoes
  • Grilled corn
  • Roasted vegetables
  • Grilled fish
  • Pan-seared scallops
  • Salmon
  • Lemon wedges on the side

For other seafood dinners, this baked haddock recipe keeps the butter-and-lemon idea gentler, while this honey garlic salmon recipe goes sticky, sweet, and skillet-style.

For a full crispy seafood comfort plate instead of a boil, this fish and chips recipe pairs fried fish with tartar sauce, curry sauce, vinegar, and lemon.

For a full seafood boil tray, serve some sauce poured over the seafood and extra sauce on the side for dipping. For a cleaner dinner, serve the sauce in small bowls and let everyone dip shrimp, crab, corn, potatoes, and bread as they eat.

Frequently Asked Questions

What is seafood boil sauce made of?

It is usually made with butter, garlic, Cajun seasoning, Old Bay seasoning, lemon juice, paprika, hot sauce, and broth or reserved seafood boil liquid. Some versions also include onion, brown sugar, parsley, cayenne, or lemon pepper.

Is seafood boil sauce the same as garlic butter sauce?

It is a type of garlic butter sauce, but it is usually more seasoned. Basic garlic butter may only have butter, garlic, lemon, and herbs. Seafood boil sauce usually adds Cajun seasoning, Old Bay, paprika, heat, and sometimes broth or boil liquid.

Is this a Blove’s-style seafood boil sauce?

This is not a Blove’s copycat sauce. Blove’s-style seafood boil sauces are usually heavier, sweeter, and more spice-loaded, often with extra butter, garlic, hot sauce, Worcestershire, ginger, lemon pepper, and a larger seasoning mix. This version is a balanced Cajun garlic butter seafood boil sauce made for dipping, pouring, and tossing without hiding the flavor of the seafood.

Do you put seafood boil sauce in the pot?

No. It is better to add the sauce after the seafood is cooked and drained. This is a finishing sauce, not the cooking liquid.

What sauce goes with shrimp boil?

Garlic butter Cajun sauce is one of the best sauces for shrimp boil. Use a slightly looser sauce with lemon juice so the shrimp stays bright and juicy instead of feeling too heavy.

What sauce is best for crab boil?

A thick garlic butter seafood sauce is best for crab boil because it clings well to crab meat. Keep it buttery, garlicky, and slightly lemony, with Old Bay or Cajun seasoning for classic seafood flavor.

Is this good as a dipping sauce?

It is excellent as a dipping sauce. Reduce the liquid to about ¼ cup / 60 ml and simmer the sauce a little longer. This keeps it thick, buttery, and clingy.

Does it work as a pour-over sauce?

It works well as a pour-over sauce. Use about ½ cup / 120 ml broth or reserved boil liquid, then add more if you want it loose enough to cover a big tray of shrimp, crab, crawfish, corn, potatoes, and sausage.

How do I make it thicker?

Use less liquid or simmer the sauce uncovered for a few minutes. For a thick dipping sauce, start with ¼ cup / 60 ml liquid instead of ½ cup / 120 ml.

How do I make it less salty?

Add unsalted butter, warm broth, lemon juice, or a small pinch of brown sugar. If serving with a full seafood boil, potatoes and corn can also help absorb some of the salty flavor.

Can I make seafood boil sauce without Old Bay?

You can. Use Cajun seasoning, smoked paprika, garlic powder, onion powder, black pepper, and a tiny pinch of celery salt or celery seed if you have it. The flavor will be slightly different, but still good.

Can I make seafood boil sauce without Cajun seasoning?

You can. Use Old Bay, smoked paprika, garlic powder, onion powder, black pepper, and a little cayenne or hot sauce for heat.

Why did it separate?

The heat may have been too high, or the liquid may have been added too quickly. Keep the sauce at a gentle simmer and whisk in broth gradually. If it separates, lower the heat and whisk in a little warm liquid.

How much sauce do I need for a seafood boil?

For dipping, plan on about ½ cup / 120 ml sauce per 1 lb / 450 g seafood. For pouring over a seafood boil tray, plan on about ¾ cup / 180 ml per 1 lb / 450 g seafood. Make extra if you are serving corn, potatoes, sausage, and eggs because they absorb sauce.

Did You Make This Seafood Boil Sauce?

Once you make this sauce once, it stops feeling like an add-on. It becomes the thing that pulls the whole seafood boil together: the shrimp, the crab, the corn, the potatoes, the sausage, the bread at the end, and everyone reaching back for one more dip.

A piece of bread dipped into leftover garlic butter seafood boil sauce.
The final swipe of bread is the payoff, because the best seafood boil sauce always leaves one more bite at the bottom of the tray.

Taste it while it is warm, adjust it until it feels balanced, then pour it over the tray and serve extra on the side. That is the moment the meal comes together.

Did you make it thick for dipping, loose for pouring, or extra spicy for crawfish? Leave a rating and a comment with your seafood mix, sauce thickness, and heat level so other readers can adjust their own seafood boil sauce with confidence.

Posted on — Leave a comment

Cherry Jam Recipe That Sets

Glossy homemade cherry jam with visible cherry pieces spread on toast beside an open jar and spoon.

Cherry jam is one of those recipes that feels easy until the pot starts asking questions. Is it thick enough? Will it set after cooling? Should you add pectin? Can frozen cherries work? What if you want less sugar? And if the jar is going into the pantry, is the recipe actually safe for canning?

This cherry jam recipe is built to answer those questions before they ruin a batch. The main method is a small-batch, no-pectin cherry jam for the refrigerator or freezer: glossy, spoonable, fruit-forward, and bright enough to taste like cherries instead of cooked sugar.

Once you know what ready jam looks and feels like, the whole process becomes much calmer. The bubbles get heavier, the spoon leaves a little trail, the fruit looks glossy, and the jam starts moving more slowly in the pan. That is the moment you are looking for.

The goal is not a stiff, factory-style jam. The goal is a soft, beautiful cherry spread that tastes fresh, sets enough to spoon and spread, and does not leave you guessing. This recipe is flexible where a refrigerator jam can be flexible, and strict where safety needs it.

Jump to Recipe · Make It Now · Set Tests · Fix Runny Jam · Canning Notes

Quick Answer: How Do You Make Cherry Jam That Sets?

To make a simple cherry jam without pectin, combine 500 g / about 3 cups pitted cherries, 200 g / about 1 cup sugar, and 2 tablespoons / 30 ml lemon juice in a wide pan. Cook until the cherries soften and the syrup turns glossy, then use the Glossy-and-Wrinkle Method: cook until the bubbles look slow and shiny, then confirm the set with a cold plate wrinkle test.

The jam usually reaches this stage around 220°F / 104–105°C. Temperature helps, but the cold plate test tells you how the jam will behave once cooled.

You will usually need about 600–700 g / 1 1/3–1 1/2 lb whole cherries to get around 500 g / about 3 cups pitted cherries, depending on cherry size and pit weight.

This gives you a soft-to-medium set cherry jam for the refrigerator or freezer. It should be thick enough to spread on toast, but still soft enough to spoon over pancakes, yogurt, cheesecake, ice cream, or rice pudding.

Storage note: Keep this no-pectin version chilled or frozen. Pantry jars need a canning-tested cherry jam recipe with proper processing.

Make It Now

If you are standing in front of a bowl of cherries and just want jam today, start here. Use 500 g pitted cherries, 200 g sugar, and 2 tablespoons lemon juice. Cook in a wide pan until the jam looks glossy, thickened, and heavy-bubbled, then confirm the wrinkle on a cold plate. Cool, cover, and refrigerate.

The rest of the guide is there for the moments when the pot starts looking confusing: frozen cherries releasing extra juice, sugar changes, pectin questions, loose jam, texture choices, or pantry storage.

Cherry Jam Recipe Card: No-Pectin Cherry Jam

This is the small batch to make when you want cherry jam today without turning the kitchen into a full canning project. It cooks on the stovetop, uses no boxed pectin, and sets into a soft, glossy spread once chilled.

Keep the heat lively but not wild. You want steady bubbling, not angry splattering. Near the end, slow down and test instead of rushing the jar.

Prep time15 minutes
Cook time25–35 minutes
Total time40–50 minutes
YieldAbout 1 1/2 cups / 360 ml
MethodStovetop
StorageRefrigerator 2–3 weeks or freezer up to 3 months

Ingredients

  • 500 g / about 3 cups pitted cherries, fresh or thawed frozen, chopped or halved
  • 200 g / about 1 cup granulated sugar
  • 2 tablespoons / 30 ml lemon juice
  • 1 small pinch salt, optional
  • 1/8 to 1/4 teaspoon almond extract, optional
  • 1 teaspoon vanilla extract, optional
Pitted cherries in a bowl with sugar, lemon halves, salt, and a small flavoring bottle on a light surface.
Cherries give the jam body, sugar helps it thicken, and lemon juice adds the brightness and acidity a no-pectin batch needs.

Whole cherry note: Buy about 600–700 g / 1 1/3–1 1/2 lb whole cherries to get around 500 g / about 3 cups pitted cherries. The exact yield depends on cherry size, pit weight, and how much you trim.

Instructions

  1. Prepare the cherries. Pit the cherries and chop them roughly. Chop smaller for smoother jam or leave some halves for a chunkier preserve-style texture.
  2. Combine. Add cherries, sugar, lemon juice, and salt to a wide heavy-bottomed pan. Stir well.
  3. Rest briefly. Let the cherries sit for 15–30 minutes if you have time. This draws out juice and helps the sugar dissolve.
  4. Heat gently. Cook over medium heat until the sugar dissolves and the cherries release more liquid.
  5. Mash for texture. Use a potato masher or spoon to break down the fruit lightly. For smoother jam, mash more; for chunkier jam, leave more pieces intact.
  6. Boil and reduce. Increase the heat to medium-high and cook, stirring often, until the bubbles become slower, glossier, and heavier.
  7. Test the set. Aim for about 220°F / 104–105°C, then check with a cold plate test. If the cooled sample wrinkles gently and does not run like syrup, it is ready.
  8. Finish the flavor. Turn off the heat. Stir in almond extract or vanilla, if using. Start small, especially with almond extract.
  9. Jar and cool. Rest the jam for 5 minutes, spoon into clean jars, cool, cover, and refrigerate. For longer storage, freeze in freezer-safe containers with a little headspace.

What Success Looks Like

The finished jam should be glossy, deep red, spoonable, and slightly loose while warm. It should not look stiff in the pan. Once cooled, it should thicken into a soft spread that holds on toast but still falls easily from a spoon.

It helps to test on a cold plate even when the thermometer says 220°F, because cherry batches vary. If the spoon trail closes immediately, keep cooking. If it pauses for a second before filling in, you are close.

And if it cools softer than you hoped, you have not wasted the cherries. Reboil it for a thicker set, or use it as a cherry sauce over breakfast and desserts. A loose cherry jar can still be wonderful.

Need visual help before you jar? Jump to Set Tests · check if it is runny or just hot

Why You’ll Love This Cherry Jam

The best part is the first cooled spoonful: deep red, glossy, sweet-tart, and still tasting like cherries. This small batch is not for a huge pantry project. It is for toast tomorrow, yogurt tonight, cheesecake on the weekend, and the quiet satisfaction of saving good cherries before they disappear.

  • Simple ingredients: cherries, sugar, lemon, and optional flavoring.
  • Fresh or frozen cherries both work.
  • A soft, glossy, spreadable set without boxed pectin.
  • Visual cues show when the jam is ready, so you are not relying only on a timer.
  • The small-batch method keeps the process manageable.
  • Clear help is included for loose jam, frozen cherries, pectin, sugar changes, and canning boundaries.
  • Use it as jam, dessert topping, breakfast swirl, cake filling, or cheese board spooning sauce.

In This Guide

The recipe above is the simple path. The guide below is grouped by what you need in the moment.

Make the jam: Why It Works · Ingredients · Equipment · Step-by-Step Cues

Choose your method: Fresh, Frozen, or Canned · Sweet vs Sour · Method Choice · Pectin vs No Pectin · Scaling · Low Sugar

Fix the set: Set Tests · Runny or Just Hot? · Fix Runny Jam · Canning Notes

Use and store: Texture · Adjustments · Variations · Uses · Storage · Mistakes · FAQs · Final Thoughts

Why This Cherry Jam Works

This recipe works because it asks you to watch the jam, not just the timer. Some cherries are juicy, some are firm, some are sweet, and frozen cherries often release more liquid than fresh ones. The clock helps, but the pan tells the truth.

  • A wide pan helps water evaporate. More surface area means the jam thickens faster and tastes fresher.
  • Sugar builds body. It sweetens the fruit, but it also helps with shine, texture, and set.
  • Lemon juice keeps the flavor awake. Sweet cherries especially need acidity so the finished spread does not taste flat.
  • Small batches are easier to control. The fruit cooks down faster and is less likely to set unevenly.
  • Set tests prevent guessing. A thermometer, cold plate, spoon trail, and cooled texture matter more than the exact minute count.

No-pectin jam gives a concentrated, cooked-fruit flavor because it thickens by reduction. Pectin-set jam usually cooks faster and can keep a fresher fruit note, but the texture and sugar formula are more exact.

The same texture-first thinking also helps in a fig jam recipe, where the fruit thickens into a rustic spread instead of a clear jelly.

Ingredients for Cherry Jam

Cherry jam is simple, but it is not random. Each ingredient has a job: cherries bring the fruit, sugar helps the texture and shine, lemon keeps the flavor bright, and a small pinch of salt makes the sweetness taste rounder.

Cherries

Fresh cherries give the best texture, but frozen cherries are often easier and work very well. Sweet cherries make a deep, mellow jam. Sour cherries make a brighter, tangier batch. If using frozen fruit, thaw and drain it first so the extra juice does not stretch the cooking time too far.

Whole Cherries to Pitted Cherries

This yield check is useful before you cook, because cherries lose weight to pits, stems, and trimming.

Whole cherries, pitted chopped cherries, cherry pits, stems, and a kitchen scale showing 500 grams.
Before pitting, plan for the weight loss: 600–700 g whole cherries usually gives about 500 g pitted fruit for one small batch.

Bing and other dark sweet cherries make a rich, dark red jam. Rainier cherries can work too, but the color will be lighter and the flavor softer. Sour cherries, tart cherries, pie cherries, and Morello cherries make a brighter spread with more tang and may need slightly more sugar depending on taste. For a broader look at the fruit itself, this guide to the benefits of cherries explains sweet and tart cherries in a more general way.

Sugar

Sugar is not only a sweetener. In jam, it helps the mixture thicken, shine, and hold a spreadable texture. You can reduce it slightly for a softer refrigerated batch, but do not heavily cut sugar in any recipe you plan to can.

Lemon Juice

Lemon juice gives the jam brightness and balance. It is especially important with sweet cherries, which can taste heavy once cooked. For a fridge batch, fresh lemon juice is fine. For canning, follow the tested recipe exactly, especially if it asks for bottled lemon juice.

If you enjoy citrusy preserves, the peel-and-acid balance in this orange marmalade recipe is a useful next read.

Salt, Almond, and Vanilla

A small pinch of salt is optional, but useful. It should not make the jam salty; it simply helps the cherry flavor taste fuller. Almond extract gives a classic cherry-almond note, but it can take over quickly, so start with 1/8 teaspoon. Vanilla is gentler and gives the jam a rounder finish.

Equipment You Need

For refrigerator cherry jam, the most important tool is a wide heavy-bottomed pan. It helps extra cherry juice evaporate before the fruit tastes overcooked.

  • Cherry pitter, sturdy straw, or chopstick
  • Wide heavy-bottomed pan
  • Wooden spoon or silicone spatula
  • Potato masher
  • Thermometer, optional but helpful
  • Two chilled plates for set testing
  • Clean jars or freezer-safe containers

No cherry pitter? Push a sturdy straw or chopstick through the stem end and pop the pit out over a bowl. It is slower than a pitter, but it works well for a small batch.

For shelf-stable canning, use a canning-tested recipe and proper water-bath equipment, not just clean storage jars.

How to Make Cherry Jam Step by Step: What to Watch For

Once the cherries are in the pan, the recipe becomes less about exact minutes and more about watching the fruit change. The recipe card gives the practical steps. This section slows them down so you know what to look for.

1. Pit and Chop the Cherries

Remove every pit before cooking. Then chop the cherries roughly. Smaller pieces give a smoother jam that spreads easily. Larger pieces give a chunkier preserve-style texture with visible fruit.

2. Mix With Sugar and Lemon, Then Rest

Add the cherries, sugar, lemon juice, and optional salt to a wide pan. Stir until the cherries are coated. If you have time, let the mixture sit for 15–30 minutes so the fruit releases juice and the sugar begins to dissolve.

Pitted cherries mixed with sugar and lemon juice in a bowl with red syrup pooling around a spoon.
After resting with sugar and lemon, the cherries release ruby syrup, so the fruit softens more evenly when cooking begins.

3. Start Gently

Cook over medium heat at first. This lets the sugar dissolve without catching on the bottom. Stir often, especially once the mixture starts to bubble and the kitchen begins to smell like warm cherries.

Cherry mixture boiling in a dark pan with thin red liquid, small bubbles, steam, and visible fruit pieces.
At first, the mixture may look thin, foamy, and watery; however, that loose boil is normal before the syrup concentrates.

4. Mash for Texture

When the cherries soften, use a potato masher or spoon to break them down lightly. You do not have to turn them into puree. For a smoother jam, mash more; for a chunkier preserve-style texture, leave some larger fruit pieces.

5. Boil Until Glossy

Increase the heat and let the jam bubble steadily. At first, the bubbles will look thin and watery. As moisture evaporates, they become slower, glossier, and heavier. Stir more often near the end because the sugar is more concentrated. The jam should smell fruity and bright, not caramelized.

A little foam is normal while the jam boils. Stir through it, then skim near the end only if you want a clearer-looking jar.

Close-up of thick dark ruby cherry jam bubbling in a pan with shiny syrup and pieces of cherry.
As moisture cooks off, the bubbles slow down and turn glossy, giving you the first clear sign that the jam is close.

6. Test Before You Jar

Do not judge the jam only while it is hot. Hot jam always looks looser than cooled jam. Use a thermometer, cold plate, spoon test, or pan trail test before you stop cooking.

Once the jam starts looking glossy, stop watching the clock and start watching the texture.

Spoon pulled through thick cherry jam in a dark pan, leaving a clear trail through the jam.
Next, pull a spoon through the pan; if the trail pauses before closing, the texture is ready for the cold plate test.

7. Finish the Flavor

Once the set is right, turn off the heat before adding almond extract or vanilla. Starting with a small amount keeps the cherry flavor in charge.

8. Jar and Cool

Let the jam settle for a few minutes, then spoon it into clean jars. Cool it before covering tightly, then refrigerate or freeze according to the storage notes.

Before you stop cooking: use the set tests · see the cold plate test

Fresh, Frozen, or Canned Cherries: What Works Best?

Frozen cherries work well for jam if you thaw, drain, and add back only enough juice to keep the pan from drying out. Fresh and canned cherries can work too, but they need different handling.

Fresh vs Frozen Cherries for Jam

This visual comparison helps explain why thawed frozen cherries often need drainage before they go into the pan.

Fresh cherries, thawed frozen cherries, and a small bowl of drained red cherry juice arranged with labels.
Frozen cherries work well, but thawing and draining them first prevents extra juice from stretching the cooking time.
Cherry typeHow to use itWhat to watch
Fresh cherriesPit, chop, and macerate with sugar and lemonBest texture and cleanest fruit flavor
Frozen cherriesThaw, drain, reserve the juice, then cookThey release more water, so cooking may take longer
Canned cherriesDrain well before cookingTexture is softer and flavor depends on syrup or packing liquid
Sour cherriesTaste before adjusting sugar and lemonBright, tart, excellent for jam
Sweet cherriesUse lemon juice for balanceCan taste flat if cooked without enough acidity

How to Make Cherry Jam From Frozen Cherries

Thaw the cherries first, then drain them well. Start the jam with the drained fruit, sugar, and lemon juice. Keep the reserved juice nearby and add back only a splash if the pan looks dry. If you add all the thawed juice at once, the jam may take much longer to thicken.

Frozen cherries are not a problem. They simply bring more water to the pan, so the fix is patience and drainage, not panic. If you are using frozen cherries, notice how much juice they release after thawing; that one detail explains a lot about cook time and final set.

For another quick fridge-friendly fruit spread, this strawberry and apple preserve keeps the same simple, small-batch spirit.

Canned cherry note: Use plain canned cherries packed in juice, water, or syrup, and drain them well. Do not use cherry pie filling as a direct substitute. Pie filling already has sugar, starch or thickener, and flavoring, so it cooks and sets differently from plain cherries.

If frozen cherries made the jam look loose: compare warm vs cooled texture · see the reboil fix

Sweet Cherry Jam vs Sour Cherry Jam

Sweet cherry jam and sour cherry jam have different personalities. Sweet cherries give a dark, mellow, rounded result. Sour cherries, tart cherries, pie cherries, and Morello cherries give a brighter batch with sharper fruit flavor.

If you are using sweet cherries, lemon juice is important because it keeps the jam from tasting heavy. If you are using sour cherries, taste the fruit first. Some need a little more sugar, while others are tart in a way that makes the finished jar more exciting.

Which Cherry Jam Method Should You Use?

The easiest way to avoid confusion is to choose the goal before choosing the method. A fridge jar can be flexible. A pantry jar needs rules.

  • Jam today: use the no-pectin refrigerator recipe.
  • Firmer classic jam: use a pectin method.
  • Less sugar: choose low/no-sugar pectin or a reduced-sugar method.
  • Pantry jars: use a canning-tested recipe.
  • Quick topping: stop softer and use it as cherry sauce.

This is not meant to scare you away from canning. It is meant to keep the two projects separate: a quick cherry jam for the fridge today, and a tested pantry-safe recipe when you want jars for the shelf.

Cherry Jam With Pectin or Without Pectin?

You do not need pectin for soft-set refrigerator cherry jam, but pectin is useful when you want a firmer set, a lower-sugar structure, or a canning-safe formula. Pectin is not cheating; it is just a different kind of jam.

Think of pectin as a different route, not a shortcut. No-pectin jam gives you a soft, reduced-fruit spread. Pectin gives you more structure and predictability, especially when sugar or pantry storage matters.

Pectin types are not casual swaps. Powdered pectin, liquid pectin, and low/no-sugar pectin are built for different methods, and each one has its own sugar, acid, and boiling expectations.

MethodBest forWhat to expect
No pectinSimple small-batch refrigerator or freezer jamSoft, concentrated, fruit-forward
Powdered pectinFirmer jam and many canning formulasMore predictable, but method matters
Liquid pectinSpecific jelly, jam, or freezer jam recipesNot a direct swap for powdered pectin
Low/no-sugar pectinReduced-sugar jamBest route when sugar is reduced heavily

Because cherries are naturally lower in pectin, a no-pectin batch sets mainly by reduction. The water cooks off, the sugar concentrates, the lemon sharpens the flavor, and the mixture thickens into a soft spread as it cools.

What Changes When You Use Pectin?

A classic pectin cherry jam is more exact than this flexible fridge recipe. It usually starts with prepared cherries, lemon juice, and a setting aid. The mixture is brought to a full rolling boil, sugar is added, and then the jam returns to a hard boil for the time stated in the tested recipe or package instructions.

For shelf-stable jars, follow a tested canning source rather than improvising. The National Center for Home Food Preservation’s cherry jam with pectin method uses prepared cherries, powdered pectin, sugar, hot jars, 1/4 inch headspace, and boiling-water processing with altitude guidance.

Changing sugar or storing jars on the shelf? read the low-sugar notes · check the canning boundary

Can You Scale This Cherry Jam Recipe?

The easiest ratio for a small no-pectin cherry jam is about 5 parts pitted cherries to 2 parts sugar by weight, plus enough lemon juice to brighten the fruit and help the mixture behave in the pan.

Batch sizePitted cherriesSugarLemon juiceNotes
Very small test batch250 g / about 1 1/2 cups100 g / about 1/2 cup1 tbsp / 15 mlGood for testing sweetness and set
Standard small batch500 g / about 3 cups200 g / about 1 cup2 tbsp / 30 mlBest starting point for this recipe
Double batch1 kg / about 6 cups400 g / about 2 cups4 tbsp / 60 mlBetter made as two separate batches

For best results, do not begin with the double batch. This jam sets more predictably when the fruit cooks down quickly in a wide pan. Two smaller batches are easier than one overloaded pot.

Choose Your Cherry Jam Texture

Now that the method is clear, texture is the fun part. You can make this jam smoother, chunkier, looser, or thicker depending on how you plan to use it.

  • Smoother jam: chop the cherries small and mash them well as they cook.
  • Chunky jam: leave some cherry halves or larger pieces so the fruit stays visible.
  • Sauce-like topping: stop a little softer and use it over pancakes, yogurt, ice cream, or rice pudding.
  • Preserve-style jar: mash less and let some fruit pieces stay large enough to spoon.
  • Cake filling: cook a little thicker and always confirm the set on a cold plate.

Can You Use This Cherry Jam as Cake Filling?

Yes, but cook it slightly thicker than a spooning sauce and let it cool completely before using. For layer cakes, spread a thin barrier of frosting around the edge of the cake layer before adding jam so it does not slide out. If the jam is very loose, use it as a topping instead of a filling.

Substitutions and Adjustments

Flavor has room to play. Set and storage are less casual. Before you adjust sugar, acid, or pectin, decide where the jar is going to live: refrigerator, freezer, or pantry.

  • Less sugar: works in a modest way for a softer refrigerated jam, but the set will be looser.
  • Honey or maple syrup: possible in small amounts for fridge jam, but the texture and flavor will change.
  • Lime instead of lemon: fine for flavor in a fridge batch, but follow canning-tested recipes exactly for pantry jars.
  • Vanilla or almond: add after cooking, and start small so the cherry flavor stays clear.
  • Double batch: not recommended for your first try. Make two small batches for better control.

How to Know Cherry Jam Is Set

This is the moment most homemade jam goes wrong: the jam looks too loose while it is hot, so you keep boiling, and then it cools into something sticky and overcooked. Cherry jam should leave the pan looking glossy and slightly softer than your final goal.

The easiest way to remember it is the Glossy-and-Wrinkle Method: cook until the bubbles turn slow and glossy, then confirm the set with the cold plate wrinkle test.

If you only remember one thing, remember this: hot jam lies. It moves more freely in the pan than it will after cooling. Give it a proper test before deciding it needs more time.

Glossy-and-Wrinkle Method

This three-part cue keeps the process practical: look for glossy bubbles, check the spoon trail, then confirm the set with a chilled plate.

Three-step cherry jam method board showing glossy bubbles, a spoon trail, and jam wrinkling on a plate.
For a reliable no-pectin set, follow the Glossy-and-Wrinkle Method: glossy bubbles, spoon trail, then a cold plate wrinkle.

You Are Close When…

  • The bubbles look slower, heavier, and glossier.
  • The jam looks shiny instead of watery.
  • A spoon trail pauses before closing.
  • A cold plate sample wrinkles gently when pushed.
  • The smell is fruity and bright, not caramelized.

The goal is not to boil the jam into submission. Once it is glossy, heavy-bubbled, and passing the cold plate test, stop.

Set testHow to do itWhat you want
Thermometer testCook until the jam reaches about 220°F / 104–105°CJam is near the setting stage
Cold plate testDrop jam on a chilled plate, wait, then push itThe surface wrinkles slightly and does not run like syrup
Spoon testLift a spoon and let the jam fall backIt falls in thicker drops or sheets instead of thin drips
Pan trail testDrag a spatula through the jamThe trail briefly holds before filling in

Cold Plate Test: Not Ready vs Ready

Use this test after the bubbles turn glossy, because a cooled sample shows the final texture more honestly than the hot pan.

Split comparison of cherry jam on a white plate, with runny jam labeled Not Ready and wrinkled jam labeled Ready.
Finally, the cold plate test gives the clearest answer: syrupy jam needs more time, while a gentle wrinkle means it is ready.

For the cold plate test, keep two small plates in the freezer before you start cooking. When the jam looks close, spoon a little onto a chilled plate, wait 30–60 seconds, then push it. A gentle wrinkle means it is ready. When the sample runs quickly, cook for a few more minutes and test again.

When your first batch sets softer than expected, write down the cook time and texture. The second batch is usually much easier because you already know how your pan and cherries behave.

Still not sure? compare warm and cooled jam · fix a truly runny batch

Is It Actually Runny, or Just Hot?

Before fixing cherry jam, let it cool completely. Warm jam can look thin even when it is going to set. After cooling, check the texture with a spoon.

Warm Jam vs Cooled Jam

This is the check that prevents overcooking: judge a cooled spoonful, not the bubbling jam in the pan.

Side-by-side comparison of warm cherry jam dripping from a spoon and cooled cherry jam holding thicker on toast.
Hot jam always looks looser than the finished set, so judge the texture only after a cooled spoonful has thickened.
  • Runs like syrup: it probably needs more cooking.
  • Slowly slides from the spoon: it may be a soft-set jam, not a failed batch.
  • Holds softly on toast: it is set enough for fridge jam.
  • Feels sticky or chewy: it may be overcooked.

Most jam panic happens too early, while the jar is still warm. A soft set is not a mistake. It is the style of this jam.

Why Your Cherry Jam Did Not Set

Cherry jam is usually runny because it was undercooked, made with too much liquid, cooked in too large a batch, reduced too heavily in sugar, or made with the wrong pectin method. Most of the time, the jar is not ruined.

Runny, Soft-Set, or Overcooked?

A visual texture check helps you decide whether the batch needs more cooking, has reached a soft fridge set, or went too far.

Three labeled cherry jam samples showing runny jam, soft-set jam, and overcooked jam on white spoons.
Soft-set jam should be glossy and spoonable; by contrast, runny jam spreads too fast and overcooked jam turns stiff.
ProblemLikely causeWhat to do nowNext time
Very runnyToo much liquid or undercookingReturn to a wide pan and simmer longerDrain frozen cherries and test the set
Syrupy after coolingDid not reach setting stageReboil and use cold plate testCook to texture, not only time
Weak set with pectinWrong pectin method or old pectinFollow the pectin brand’s remake instructionsUse fresh pectin and exact boil timing
Loose low-sugar jamToo much sugar reductionUse as sauce or remake with low-sugar pectinUse pectin made for reduced sugar
Too thickOvercookingLoosen warm jam with a little hot water or lemon juiceStop when glossy and softly set
Flat flavorNot enough acidAdd lemon juice a teaspoon at a timeUse enough lemon with sweet cherries

How to Fix Runny Cherry Jam

Let the jam cool completely before you fix it. If you used pectin, wait up to 24 hours because some pectin jams continue to set after jarring. If it is still too loose, choose the fix based on the style you made.

For No-Pectin Cherry Jam: Reboil and Retest

Use a wide pan so extra water can evaporate quickly without flattening the cherry flavor.

Runny cherry jam being poured from a jar into a wide dark pan with a spatula for reboiling.
If the cooled batch is truly too loose, pour it back into a wide pan, simmer briefly, and retest before the fruit overcooks.
  1. Pour the loose jam back into a wide pan.
  2. Bring it to a steady boil over medium-high heat.
  3. Cook for a few minutes, stirring often.
  4. Test on a chilled plate.
  5. Stop when the jam wrinkles slightly or sheets from the spoon.

Do not boil it endlessly. A longer boil is not always better; sometimes it just cooks away the fresh cherry flavor.

For Pectin Cherry Jam

If you used packaged pectin, follow that pectin brand’s remake instructions. Pectin formulas vary, and adding more pectin without the correct sugar, acid, and boiling method can make the texture gummy or uneven.

For Jam That Will Not Set Firmly

Use it as cherry sauce. This is not a failure if the flavor is good. A loose cherry jam can be better than stiff jam on pancakes, yogurt, ice cream, cheesecake, waffles, oatmeal, and desserts.

Once the texture is right: return to the recipe card · see ways to use cherry jam

Can You Can This Cherry Jam?

The main no-pectin recipe in this post is written for the refrigerator or freezer. It is not a shelf-stable canning recipe.

This does not mean canning is difficult. It only means pantry storage needs a recipe built for pantry storage. The recipe card version is flexible because it stays cold; a pantry recipe has to be exact because it is stored at room temperature.

The difference is the whole formula: sugar level, acid, jar size, headspace, processing time, and altitude. For shelf-stable jars, use a canning-tested cherry jam recipe and follow the exact instructions. The National Center for Home Food Preservation’s cherry jam with pectin method is a better reference point for pantry jars than a flexible fridge-jam recipe.

Fridge Jam vs Pantry Canning

The safest way to think about storage is simple: chilled jars can stay flexible, but pantry jars need a tested process.

Split image showing cherry jam stored in a refrigerator on one side and jars processed in a water-bath canner on the other.
For safe storage, keep this small-batch jam in the fridge or freezer; shelf-stable jars need a tested canning recipe.

What Changes for Canned Cherry Jam?

  • The recipe usually uses pectin for a reliable set.
  • The sugar level is part of the pantry-safe formula, not just a taste choice.
  • Jam jars need correct headspace, often 1/4 inch / about 6 mm.
  • Filled jars need boiling-water processing for the correct time.
  • Processing time may change with altitude.
  • Jar inversion is not a substitute for proper water-bath processing.
  • Low-sugar canning needs a reduced-sugar canning route or low/no-sugar pectin system.

Think of this as two different goals: a chilled homemade jar today, or a pantry-safe jar for later. Make the recipe card version when you want a quick homemade spread. Use a water-bath canning route when you want pantry jars.

Keeping this as a chilled batch? jump to storage · see serving ideas

Can You Make Low Sugar Cherry Jam?

Low sugar cherry jam can be lovely, especially when the cherries are flavorful. Just do not treat sugar like decoration. Sugar does more than sweeten the fruit; it helps the jam set, shine, and store properly.

Reducing sugar for a fridge jar is a taste choice. Reducing sugar for a pantry jar is a preservation change. That is why low-sugar cherry jam should not come from cutting sugar from a regular recipe at the end.

For a softer refrigerated batch, you can reduce sugar modestly and accept a looser finish. For a more reliable low-sugar set, use pectin designed for low-sugar or no-sugar jam and follow that pectin’s instructions. Oregon State University Extension explains why reduced-sugar fruit spreads need different handling here: Low-Sugar Jams and Jellies.

  • Slightly less sweet fridge jam: reduce sugar modestly and expect a softer set.
  • Firm low-sugar jam: use low/no-sugar pectin.
  • Sugar-free jam: use a tested sugar-free pectin method.
  • Low-sugar canned jam: use a canning-safe recipe designed for reduced sugar.

Cherry Freezer Jam Is Different

Freezer jam is its own style, not just cooked jam stored cold. It often uses fresh crushed fruit, sugar, and pectin, then sets in the fridge or freezer without water-bath processing. It is fresh-tasting and easy, but it still belongs in the freezer or refrigerator, not the pantry.

Cherry Jam, Jelly, Preserves, Compote, and Chia Jam

If you are comparing cherry jam with jelly, preserves, compote, or chia jam, here is the quick difference.

NameWhat it meansTexture
Cherry jamChopped or crushed cherries cooked with sugarSpreadable with fruit texture
Cherry preservesLarger cherry pieces in syrupy jamChunkier and fruitier
Cherry jellyStrained cherry juice set with sugar and pectinClear and smooth
Cherry compoteFruit cooked briefly with sugar or syrupLoose sauce
Cherry chia jamQuick fridge spread thickened with chia seedsSoft and seedy

If you want fruit pieces, make cherry jam or preserves. If you want a clear, smooth spread, cherry jelly is the better recipe. If you only need a quick topping, compote or chia jam may be enough.

Cherry Jam Flavor Variations

Plain cherry jam is the best first batch because it teaches you the set and sweetness. After that, small flavor changes can make the same base recipe feel completely different.

  • Vanilla cherry jam: add 1 teaspoon vanilla extract after cooking.
  • Cherry almond jam: add 1/8 to 1/4 teaspoon almond extract at the end.
  • Amaretto cherry jam: stir in a small splash of amaretto after cooking for a dessert-style jam.
  • Black forest cherry jam: pair cherry jam with chocolate desserts instead of adding too much cocoa to the jar.
  • Lemon cherry jam: add lemon zest for a brighter finish.
  • Jalapeño cherry jam: add finely chopped jalapeño for a sweet-savory cheese board jam.
  • Mixed berry cherry jam: replace part of the cherries with raspberries, strawberries, or blueberries.
  • Rhubarb cherry jam: add tart rhubarb for a sharper preserve.

When adding extracts, start small. Cherry jam has a delicate fruit flavor, and almond or alcohol-based flavors can take over quickly. If you want the chocolate-cherry direction, pair the jam with chocolate cream cheese frosting instead of adding too much cocoa to the jar.

How to Use Cherry Jam

A spoonful of cherry jam can make a plain breakfast feel like something you planned. It is especially good anywhere you want a dark, sweet-tart spoonful against something creamy, buttery, or crisp.

Serving Ideas for Cherry Jam

The best uses pair the jam with creamy, buttery, or lightly crisp foods so the cherry flavor stays bright.

Cherry jam served with toast, yogurt, pancakes, cheesecake, rice pudding, and a small cheese board.
Once set, the jam adds a bright fruit finish to toast, yogurt, pancakes, cheesecake, rice pudding, and cheese boards.
  • Spread on toast, sourdough, biscuits, croissants, or English muffins.
  • Spoon over protein-rich cherry pancakes for a double-cherry breakfast.
  • Swirl a spoonful into overnight oats for a cherry-yogurt breakfast jar.
  • Spoon it over a no bake cheesecake for an easy cherry cheesecake topping.
  • Spread between cake layers with whipped cream, buttercream, or cream cheese frosting.
  • Fill thumbprint cookies, sandwich cookies, hand pies, or pastries.
  • Serve with brie, cream cheese, goat cheese, or a cheese board.
  • Warm slightly and brush over chicken, pork, or ham as a glaze.
  • Spoon a loose batch over rice pudding with cooked rice, vanilla ice cream, or pound cake.

How to Store Cherry Jam

Once the jar is cool, the storage choice matters more than the jar itself. A refrigerated jam, freezer jam, and properly canned jam should not be treated the same way.

Storage methodHow longNotes
Refrigerator2–3 weeksBest for the no-pectin recipe in this post
FreezerUp to 3 monthsUse freezer-safe containers and leave headspace
Properly canned jarsFollow tested canning guidanceOnly for correctly processed shelf-stable recipes
Opened canned jarRefrigerate after openingUse as you would regular jam

Always use clean utensils when scooping jam from the jar. If jam smells fermented, grows mold, becomes fizzy, or looks unusual, discard it.

Common Cherry Jam Mistakes to Avoid

Most cherry jam problems come from the same few moments: too much liquid, not enough testing, too much heat, or treating a fridge jar like a pantry jar. Watch for these and the whole batch becomes much easier to control.

  • Using a deep narrow pot. A wide pan helps extra water evaporate faster.
  • Skipping lemon juice with sweet cherries. Sweet cherries need acidity for a brighter flavor.
  • Adding all the thawed frozen cherry juice. Too much liquid makes the jam take longer to set.
  • Using cherry pie filling as the fruit. Pie filling already contains sugar and thickeners, so it is not the same as plain cherries.
  • Reducing sugar randomly. Sugar affects texture, shine, set, and storage.
  • Doubling the batch without adjusting technique. Larger batches take longer to reach the setting stage.
  • Boiling too long. Overcooked jam can become sticky, dull, and too firm.
  • Judging set while hot. Jam thickens as it cools.
  • Using expired pectin. Old pectin can lead to a weak set.
  • Swapping pectin types without checking the method. Powdered, liquid, and low/no-sugar pectin behave differently.
  • Treating cold-storage jam like pantry jam. Fridge and freezer jams stay chilled; shelf-stable jars need a canning-tested method.

Cherry Jam Recipe FAQ

Why is my cherry jam runny?

Cherry jam is usually runny because it was undercooked, made with too much liquid, cooked in too large a batch, reduced too heavily in sugar, or made with the wrong pectin method. Let the jam cool fully before deciding it failed, because jam thickens as it cools.

Does cherry jam need pectin?

No. Cherry jam does not need pectin for a soft refrigerator set, but pectin helps when you want a firmer jam, reduced-sugar structure, or pantry-safe canning recipe. For the no-pectin version here, cook the fruit down properly and test it on a cold plate.

What cherries are best for jam?

Sweet cherries make a deep, mellow jam, while sour cherries make a brighter and tangier jam. Bing cherries, dark sweet cherries, tart cherries, pie cherries, and Morello cherries can all work. Rainier cherries are fine too, but the jam will be lighter in color and softer in flavor.

How many cherries do I need for this recipe?

You need 500 g / about 3 cups pitted cherries for this recipe. Start with about 600–700 g / 1 1/3–1 1/2 lb whole cherries to allow for the pits and stems.

Do frozen cherries work for cherry jam?

Yes. Frozen cherries work well for cherry jam if you thaw and drain them first, then add back only a splash of reserved juice if the pan looks dry. They often release more liquid than fresh cherries, so the jam may take a little longer to thicken.

Can I make cherry jam with canned cherries?

Yes, but use plain canned cherries and drain them well before cooking. Cherries packed in syrup, juice, or water can work, but cherry pie filling is not a direct substitute because it already contains sugar, thickeners, and flavoring.

How much sugar do I need for cherry jam?

For the no-pectin fridge jam in this post, use 200 g / about 1 cup sugar for 500 g / about 3 cups pitted cherries. That gives a balanced soft-to-medium set. Less sugar can work for a softer fridge jam, but the texture will be looser. Pectin canning recipes often use more sugar because the sugar level is part of the formula.

Is lemon juice necessary in cherry jam?

Lemon juice is strongly recommended, especially with sweet cherries. It brightens the flavor and helps the jam set better. Without lemon, sweet cherry jam can taste flat or overly heavy after cooking.

What temperature should cherry jam reach?

Cherry jam usually sets around 220°F / 104–105°C. At higher altitudes, the setting point may be closer to about 8°F above your local boiling point of water. Temperature is helpful, but it should be used with a cold plate test instead of replacing it.

Can this cherry jam recipe be canned?

The main no-pectin recipe is for refrigerator or freezer storage. For shelf-stable pantry jars, use a canning-safe recipe with proper boiling-water processing, correct headspace, and altitude adjustments.

Is low-sugar cherry jam safe for canning?

Only when the recipe is designed for that. Low-sugar cherry jam can be canned when you use a tested reduced-sugar canning recipe or a low/no-sugar pectin method designed for canning. Do not simply cut sugar from a traditional recipe and store the jars in the pantry.

What is the difference between cherry jam and cherry jelly?

Cherry jam is made with chopped or crushed cherries, so it has fruit texture. Cherry jelly is made from strained cherry juice, so it is smooth and clear. Jelly usually needs a different method and often uses pectin for a firm set.

Can I make cherry jam without a thermometer?

Yes. Use the cold plate test. Place a small plate in the freezer before cooking, spoon a little jam onto it, wait briefly, then push the jam with your finger. If it wrinkles and does not run like syrup, the jam is ready.

Can I double this cherry jam recipe?

It is better to make two small batches instead of one large batch. Small batches cook faster, evaporate more evenly, and are easier to set. Large batches can stay watery longer and may overcook before they thicken properly.

Did you make this with sweet cherries, sour cherries, or frozen cherries? Tell us which one you used, whether you used pectin, and whether your jam set soft, medium, or firm. Your note can help the next person decide how long to cook their batch.

Final Thoughts

That is the real point of jam: catching fruit at its best and giving it a second life in a jar. A good cherry jam does not have to be perfect like store-bought jelly. It should taste bright, look glossy, spread easily, and remind you why cherries were worth saving in the first place.

Posted on — Leave a comment

Easy Garlic Aioli Recipe: Garlic Mayo, Traditional Aioli & Uses

Bowl of creamy garlic aioli served with fries, a burger, shrimp, lemon wedges, roasted vegetables, and garlic on a wooden table.

You want a creamy garlic sauce for fries, burgers, sandwiches, seafood, or roasted vegetables, and then the internet immediately turns it into an argument: traditional garlic and oil, garlic mayo, or the restaurant version that calls itself “real.” The useful answer is simpler. The word can mean different things depending on the kitchen, so this recipe gives you the easy creamy version first, then shows you the traditional version too.

This easy garlic aioli recipe starts with mayonnaise, fresh garlic, lemon juice, Dijon mustard, and salt, but what you really get is the cool, creamy dip you want beside hot fries, the garlicky swipe that makes a burger taste finished, and the lemony sauce that wakes up seafood. For the older, sharper, more classic style, there is also a traditional garlic-and-oil method later in the post.

No need to shame either style. Mayo aioli is fast, stable, and weeknight-friendly; traditional aioli is sharper, more technical, and more olive-oil-forward. Choose the one that fits the food, then adjust from there.

The aioli rule is simple: it should taste bright first, garlicky second, and creamy all the way through.

Make It Now · Full Recipe · Which Version? · Garlic Control · Traditional Aioli · Vegan & Eggless · Flavor Variations · What to Serve It With · Troubleshooting

Make It Now

Need the sauce now? Mix this version first, then use the rest of the post only if you want to adjust the garlic, make it vegan, try a flavor variation, or go traditional from scratch.

Fast Garlic Aioli Ratio

Fast ratio: ¾ cup mayo + 3 grated garlic cloves + 1 tablespoon lemon juice + ½ teaspoon Dijon mustard + ¼ teaspoon salt.

Rest 10 minutes, then taste. Brighten with lemon if it feels heavy, soften the bite with more mayo if the garlic is too sharp, and add salt if it tastes flat.

Recipe ratio card showing mayonnaise, grated garlic, lemon, Dijon mustard, salt, and a whisk on a light stone surface.
Start with mayo, garlic, lemon, Dijon, and salt, then let the sauce rest briefly. That short pause helps the garlic aioli taste smoother and more balanced.

Using it for fries? Go a little bolder. On sandwiches, keep it smoother and milder. With seafood, let lemon lead before the garlic takes over. A small bowl of this can make plain fries, leftover chicken, roasted vegetables, or a simple sandwich feel intentional.

Need a different path? Jump to garlic control, vegan and eggless options, flavor variations, or traditional aioli.

Quick Answer: What Is Aioli?

Aioli is a garlic sauce. Traditionally, it is garlic and oil emulsified with salt and sometimes lemon. In modern recipe use, garlic aioli often means a creamy sauce made by stirring garlic, lemon, and seasonings into mayonnaise.

Both meanings are common. Traditional aioli tastes sharper and more olive-oil-forward; mayo aioli tastes creamier, milder, and more familiar. For fries, burgers, sandwiches, seafood, roasted vegetables, and party dips, the easy mayo version is the best place to start.

Most fixes are simple: acid lifts, mayo softens, salt sharpens, rest settles, and roasted garlic mellows.

Still deciding which style fits your food? The version guide makes that choice easier.

Which Aioli Version Should You Make?

Use this as a decision guide, not a rulebook. For everyday fries, burgers, and sandwiches, the mayo version is the easiest answer. When garlic and oil should be the star, choose traditional aioli. Egg-free, vegan, smoky, spicy, and mellow paths are there when the table needs them.

Choose thisWhen you wantBest with
Easy garlic aioli with mayoFast, creamy, reliable garlic sauceFries, burgers, sandwiches, seafood, wraps
Traditional aioliSharper garlic-and-oil flavorArtichokes, grilled vegetables, roasted potatoes, seafood
Vegan mayo aioliFast egg-free creamy dipFries, sandwiches, wraps, party platters
Soy-milk or aquafaba aioliPlant-based sauce from scratchBowls, vegetables, vegan sandwiches
Roasted garlic aioliSweeter, softer garlicSandwiches, potatoes, grilled cheese, vegetables
Chipotle or sriracha aioliSmoky or spicy heatTacos, burgers, fries, shrimp
Lemon-dill aioliBrighter seafood finishSalmon, crab cakes, shrimp, fish tacos

Easy Garlic Aioli Recipe

Start with this version. It gives you the creamy garlic sauce people expect with fries, burgers, sandwiches, and seafood, but with enough lemon and garlic control to keep it from tasting heavy or harsh. This is the one to make when the fries are already hot and you just need a dip that tastes intentional.

Perfect technique is not the point here. Good garlic, enough lemon, and a few minutes of patience matter more. The first bite should feel cool and creamy, then bright with lemon, then warm with garlic.

Here is the key move: let grated garlic sit with lemon juice and salt before you whisk in the mayonnaise. During that short rest, the raw edge softens and the flavor spreads through the bowl. After 10 minutes, the garlic should taste rounder but still present. If it tastes perfect immediately after mixing, remember that it may taste stronger later.

Start with 3 cloves for balance, 5 for a bolder dip, or roasted garlic for something sweeter and softer. If your cloves are very large, begin with 2 to 3 and add more after tasting.

Recipe Details

  • Prep time: 5 to 8 minutes
  • Garlic rest: 10 to 15 minutes
  • Optional chill: 20 to 30 minutes
  • Total time: 15 to 20 minutes without chilling; about 40 minutes with optional chill
  • Yield: scant 1 cup
  • Servings: 12 to 16 tablespoons
  • Equipment: small bowl, whisk or spoon, microplane or garlic press, optional fine mesh strainer

Garlic Aioli Ingredients

Ingredients for garlic aioli including mayonnaise, garlic cloves, lemon halves, Dijon mustard, salt, pepper, and a small whisk.
In a short ingredient list, every flavor has a job: garlic brings heat, lemon lifts the mayo, Dijon adds depth, and salt pulls the aioli together.
IngredientUS amountMetric amount
Mayonnaise¾ cupabout 180 ml / 165 to 170 g
Fresh garlic, grated or pressed3 to 5 small-to-medium clovesabout 9 to 15 g
Fresh lemon juice1 tablespoon, plus more to taste15 ml
Dijon mustard½ teaspoon, optional2.5 ml
Fine salt¼ teaspoon to startabout 1.5 g
Black pepper⅛ teaspoona small pinch
Lemon zest½ teaspoon, optionaloptional
Olive oil1 teaspoon, optional5 ml

Method

Step 1: Grate or press the garlic

Grate, press, or very finely paste the garlic. Smoother garlic makes a smoother sauce and gives the finished aioli a cleaner bite.

Hand grating a peeled garlic clove on a microplane over a small bowl with lemon and mayonnaise nearby.
Grated garlic blends more evenly than chopped garlic. As a result, the sauce tastes bold without leaving harsh little pieces in the finished aioli.

Step 2: Mix the garlic, lemon, Dijon, and salt

Add the garlic, lemon juice, Dijon mustard, and salt to a small bowl. This is where the raw garlic starts turning into a balanced sauce base.

Step 3: Rest the garlic mixture

Let the mixture rest for 10 to 15 minutes so the lemon can soften the raw bite before the mayonnaise goes in.

Grated garlic resting in lemon juice and salt in a small bowl with a lemon half, spoon, and salt dish nearby.
Before the mayo goes in, lemon juice and salt soften the raw garlic edge. This step is small, but it makes the finished garlic aioli taste cleaner.

Step 4: Whisk in the mayonnaise

Whisk in the mayonnaise until the dip looks smooth and creamy. Scrape the sides of the bowl so the garlic and lemon flavor spreads evenly.

Mayonnaise being whisked into a garlic and lemon mixture in a bowl with garlic cloves and lemon nearby.
Whisk the mayo into the rested garlic mixture until the sauce looks smooth and glossy. Then taste again, because garlic and lemon settle as they mix.

Finished Garlic Aioli Texture

Before you chill or serve it, check the texture. The sauce should look creamy and thick enough to hold its shape on a spoon.

Close-up of creamy garlic aioli in a bowl with a spoon showing thick, glossy texture and small pepper flecks.
A good aioli should hold a spoon trail, yet still spread easily. That middle texture is why it works for fries, sandwiches, burgers, and bowls.

Step 5: Taste and adjust

Taste after resting. Brighten with more lemon, round it out with more mayo, or sharpen the flavor with another pinch of salt.

Step 6: Chill or serve

Serve right away, or chill for 20 to 30 minutes for a thicker, rounder texture.

Chilled Garlic Aioli Texture

After chilling, the dip will thicken slightly and usually taste less sharp. If you are making it ahead, err slightly mild on the garlic and adjust again before serving.

Chilled garlic aioli in a bowl with a spoon groove showing thicker texture, with garlic and lemon nearby.
Chilling thickens the sauce and rounds off some of the garlic bite. Before serving, stir it once and adjust with lemon or salt if needed.

To make it milder and extra smooth, strain the garlic-lemon mixture before whisking the flavored lemon juice into the mayonnaise. You will still get garlic flavor, but without little garlic pieces or a strong raw bite.

Taste and Adjust

Taste after the 10-minute rest, not before. Garlic gets louder as it sits, so a sauce that feels gentle at first can become bolder by the time it reaches the table. Serving guests? Start with 3 cloves and build up only after tasting.

  • Sharp garlic bite: soften it with more mayo or a longer rest.
  • Heavy finish: wake it up with lemon juice a few drops at a time.
  • Sour edge: round it out with another spoonful of mayo.
  • Flat flavor: season with salt, Dijon, or a tiny bit more garlic.
  • Thick texture: loosen with water or lemon juice ½ teaspoon at a time.
  • Mild flavor: add more grated garlic or lemon zest.

How to Adjust Garlic Aioli

Use small changes and taste between each one. A little lemon, mayo, salt, or rest can change the whole bowl.

Garlic aioli adjustment guide with a bowl of aioli, lemon wedge, spoonful of mayonnaise, salt, and simple fix labels.
Fix the flavor by changing one thing at a time: lemon for lift, mayo for softness, salt for focus, and rest for a calmer raw garlic bite.

Maximum garlic is not the goal. You want a dip bright enough to cut through rich food, creamy enough to cling, and garlicky enough that it has a reason to exist.

How to Control the Garlic Bite

This sauce is simple, but garlic decides whether it tastes balanced, bold, sweet, sharp, or too aggressive. Garlic is the one ingredient here that can make the sauce sing or take over the room, so choose the style that fits how you plan to serve it.

Raw, Roasted, Grated, or Pasted Garlic

Different garlic prep changes the same aioli base quickly, so pick the garlic style before adding more cloves.

Garlic control comparison with grated garlic, roasted garlic, garlic paste with salt, and small bowls of aioli.
The garlic choice controls the mood of the sauce. Use grated garlic for punch, roasted garlic for sweetness, and garlic paste for a smoother aioli.

Mild vs Bold Garlic Aioli

Start mild for people, bold for potatoes. Fries and roasted potatoes can handle strong garlic. Sandwiches, burgers, wraps, and fish tacos usually need a gentler spread. Serving a shared dipping bowl? Keep the base gentle and put hot sauce, chili crisp, extra lemon, or grated garlic on the side. If you want a brighter herb-driven dip instead of a creamy garlic one, MasalaMonk’s green chutney recipe gives you that cilantro-mint-lime direction.

Two serving areas showing mild garlic aioli with sandwiches and vegetables and bold garlic aioli with fries and roasted potatoes.
For a shared table, keep the first bowl mild. After that, make a bolder aioli for fries, potatoes, or grilled food that can handle extra garlic.
  • Balanced sauce: start with 3 garlic cloves.
  • Bolder dip: use 5 cloves and grate them finely.
  • Mellow flavor: rest raw garlic in lemon juice for 10 to 15 minutes.
  • Smooth garlic taste: strain the garlic-lemon mixture before adding mayo.
  • Sweeter sauce: use roasted garlic instead of raw garlic.
  • Seafood version: let lemon and herbs lead before raw garlic power.

Why This Aioli Works

This aioli works because it treats garlic like a powerful ingredient, not just a flavoring. Freshly cut garlic can be hot, sharp, and harsh. Lemon and salt tame that raw edge before the mayo goes in, so the final dip tastes like one smooth sauce instead of mayonnaise with garlic stirred through it.

Dijon mustard fills the gap between sharp and creamy. You should not taste mustard first; you should just notice that the sauce feels finished. A short chill thickens the dip and gives the flavors time to settle.

  • Lemon rest: softens raw garlic and spreads the flavor.
  • Mayo base: gives stable body without building an emulsion from scratch.
  • Dijon and salt: make the dip taste complete instead of just creamy.

Ingredient Notes and Smart Swaps

With only a few ingredients, there is nowhere for tired garlic or bland mayo to hide. The base gives creaminess, the garlic gives identity, the lemon gives lift, and the salt pulls the whole thing together.

Mayonnaise

Choose a mayonnaise you already like. This is not the place for a mayo you tolerate but never enjoy; the base flavor follows you into every bite. Full-fat mayo gives the richest garlic aioli and the best dipping texture. Light mayo works, though the result may taste tangier and less full. To build the base from scratch, start with MasalaMonk’s homemade mayo recipe, then add garlic, lemon, Dijon, and salt.

Garlic

Fresh garlic gives the cleanest flavor, but the way you prepare it changes the result. The same three cloves can taste mellow, sharp, or almost spicy depending on how you cut them. Grated garlic tastes strongest and blends smoothly. Pressed garlic is easy and punchy. Minced garlic gives a more rustic texture. Roasted garlic turns the sauce sweeter and softer. Garlic powder works in an emergency, but it will not taste as fresh.

Roasted Garlic Aioli

Roasted garlic makes aioli sweeter and rounder, but it can also make the sauce feel less bright. After adding it, taste for lemon again before deciding the sauce is finished.

Roasted garlic cloves being added to a bowl of creamy aioli with a roasted garlic bulb, lemon, and garlic nearby.
Roasted garlic aioli tastes sweeter, softer, and less sharp than the raw version. To keep it lively, finish with enough lemon to balance the richness.
Garlic formBest forFlavor result
Grated garlicClassic garlic aioliStrong, smooth, bold
Pressed garlicQuick aioliPunchy and easy
Minced garlicRustic dipChunkier, less smooth
Roasted garlicSandwiches, potatoes, vegetablesSweet, mellow, less sharp
Garlic powderEmergency shortcutMilder, less fresh

Lemon Juice

Fresh lemon juice is best because it tastes bright without becoming harsh. The lemon should lift the sauce, not turn it sour. Vinegar can work when lemon is not available, but start with less because vinegar can make the sauce sharper.

Dijon Mustard

Dijon mustard is optional, but useful. It adds depth and helps the sauce taste more complete. Use just enough to support the garlic and lemon. The dip should not taste like mustard unless you are making a mustard variation.

Olive Oil

A teaspoon of olive oil adds a little restaurant-style richness. A heavy pour can make the dip greasy, especially when the mayonnaise is already rich. Keep it small unless you are making the traditional garlic-and-oil version.

Small-Batch Garlic Aioli

Need enough for one burger, one sandwich, one small plate of fries, or one snack bowl? Mix ¼ cup mayo, ¼ to ½ teaspoon grated or pressed garlic, 1 teaspoon lemon juice, a tiny dab of Dijon, salt, and pepper. Let it sit for 5 to 10 minutes before tasting.

Small bowl of garlic aioli served with a sandwich half, fries, lemon wedge, garlic clove, and spoon on a wooden board.
Make a small batch when you only need aioli for one sandwich, one burger, or one plate of fries. It gives you fresh flavor without leftover sauce sitting around.

This is useful for a quick sandwich spread, a breakfast sandwich, a grilled cheese upgrade, or a dipping sauce when leftovers are not needed.

Using Store-Bought Mayo

Store-bought mayo is the fastest path to restaurant-style garlic aioli. Use the same base ratio from the main recipe, then adjust after the 10-minute rest: more garlic for a bolder dip, lemon for lift, or another spoonful of mayo if the bite feels too sharp.

Split scene showing plain mayonnaise with garlic and lemon on one side and finished garlic aioli with fries and a sandwich on the other.
Store-bought mayo is only the starting point. Fresh garlic, lemon, salt, and a little resting time turn it into a brighter garlic aioli.

This is the easiest way to upgrade a sandwich, burger, wrap, or dipping platter without buying a separate bottle of aioli.

Traditional Aioli from Scratch

Choose traditional aioli when you want garlic and oil to be the star: sharper, richer, more Mediterranean, and more technique-driven. Choose the mayo version when you want a fast, stable dip or spread for everyday food.

The classic version is not simply garlic mayonnaise. At its most basic, it is garlic and oil emulsified into a thick sauce, often with salt and lemon juice. Some home versions use egg yolk to make the emulsion more stable and easier to whisk.

The garlic-and-oil path is less forgiving because you are building the sauce, not seasoning an already-stable base. Its flavor is sharper, more garlicky, more olive-oil-forward, and less creamy than the easy mayo path. It works beautifully with grilled vegetables, artichokes, seafood, roasted potatoes, or a Mediterranean-style plate.

This is the version to make when you want the sauce to feel like part of a Mediterranean platter, not just a creamy dip on the side.

Traditional Aioli Mortar and Pestle

The mortar-and-pestle method makes the garlic and oil feel more direct than the mayo shortcut, so expect a sharper and more rustic sauce.

Traditional aioli being made in a mortar and pestle with garlic paste, coarse salt, olive oil, bread, potatoes, and artichokes nearby.
Traditional aioli is sharper and more olive-oil-forward because it begins with garlic, salt, and oil instead of prepared mayonnaise.

If you enjoy sauce technique, the same patience with fat, acid, and emulsion shows up in MasalaMonk’s béarnaise sauce recipe, though that sauce uses butter and egg yolk instead of garlic and oil.

Easier Traditional-Style Aioli with Egg Yolk

This is not the oldest purist version, but it is the easiest traditional-style path for most home cooks. The egg yolk helps the garlic and oil emulsify into a thicker, glossier sauce.

Egg yolk aioli mixture being whisked in a glass bowl while olive oil is poured in a thin stream, with garlic and lemon nearby.
Egg yolk gives traditional-style aioli more stability, but patience still matters. Add the oil slowly until the mixture turns thick, glossy, and emulsified.

Egg-Yolk Aioli Ingredients

IngredientUS amountMetric amount
Garlic2 clovesabout 6 g
Salt¼ teaspoonabout 1.5 g
Egg yolk1 largeabout 18 g
Lemon juice1 to 2 teaspoons5 to 10 ml
Dijon mustard½ teaspoon, optional2.5 ml
Mild extra-virgin olive oil¼ cup60 ml
Neutral oil3 tablespoons45 ml
WaterA few drops as neededAs needed

If raw egg is a concern, anyone avoiding it — including children, pregnant people, older adults, or immunocompromised guests — should choose the mayo-based version, vegan mayo version, or no-egg path.

Method

  1. Mash or grate the garlic with salt until it forms a paste. A mortar and pestle is traditional, but a microplane and bowl also work.
  2. Whisk in the egg yolk, lemon juice, and Dijon mustard if using.
  3. Start adding the oil drop by drop while whisking constantly. Do not rush the first few tablespoons.
  4. Once the mixture thickens and looks glossy, add the remaining oil in a very thin stream.
  5. When the sauce gets too thick, whisk in a few drops of water or lemon juice.
  6. Taste and adjust with salt, lemon, or a few more drops of oil.

The first oil addition is the most important part. Too much oil too quickly can split the emulsion. A damp kitchen towel wrapped into a ring under the bowl helps keep it steady while you whisk. Using a measuring cup with a spout also makes slow pouring easier.

The sauce should turn glossy and thicker as the oil goes in. If it starts looking loose or greasy, stop adding oil and whisk until it tightens before continuing.

No-Egg Traditional Aioli

To make no-egg traditional aioli, mash 3 to 4 garlic cloves with a generous pinch of salt until you have a sticky paste. Add mild olive oil very slowly, drop by drop at first, while grinding or whisking constantly. As the paste tightens, use a few drops of lemon juice or water to loosen it and help the sauce come together.

This older-style method is sharper and more garlic-forward than the egg-yolk path. It may look thicker, rougher, or less glossy than mayo aioli, especially on the first try. That is normal. If it refuses to thicken, turn it into a rustic garlic oil dip instead of forcing it; it will still be delicious with bread, potatoes, grilled vegetables, or seafood.

Rustic no-egg traditional aioli in a shallow bowl with olive oil, bread slices, roasted potatoes, artichokes, lemon, garlic, and salt.
No-egg traditional aioli can stay looser and more rustic than the mayo version. Serve it like a garlicky olive-oil dip with bread, potatoes, or artichokes.

For a milder classic sauce, use a mix of mild olive oil and neutral oil. Strong extra-virgin olive oil can taste bitter or peppery, especially when blended aggressively. With an immersion blender, blend the neutral oil first and stir in the olive oil by hand at the end.

Back to top · Jump to recipe

Vegan, Eggless, No-Mayo, and Lighter Options

Choose this section when regular mayo does not fit the people at your table. You can still make a creamy garlic dip, a sharper no-mayo sauce, or a lighter bowl drizzle without losing the main garlic-lemon idea.

These versions are about hospitality, not compromise. Regular mayonnaise usually contains egg. Vegan mayo is egg-free. Greek yogurt is lighter, but it is not dairy-free. Traditional egg-yolk aioli contains raw egg, while no-egg traditional aioli and vegan versions avoid egg entirely. For a dedicated egg-free creamy base, use MasalaMonk’s eggless mayonnaise recipe and follow the same garlic-lemon balance.

Best Eggless Aioli Base to Use

If you are using vegan mayo, follow the same fast aioli ratio and swap the base. If you want no mayo at all, use the traditional aioli section as your starting point.

Four-panel guide showing vegan mayo, soy milk, aquafaba, and cashews with small bowls of vegan or eggless aioli.
Vegan aioli changes depending on the base. Vegan mayo gives the closest shortcut texture, while soy milk, aquafaba, and cashews create different eggless styles.
  • Closest to the main recipe: vegan mayo.
  • From-scratch vegan emulsion: unsweetened soy milk.
  • Creamy bowl sauce: cashews.
  • No-egg traditional path: garlic, salt, oil, and patience.

Use this table to pick the right base, not to make every version.

Vegan Aioli Base Ratios

OptionQuick ratioBest use
Vegan mayo shortcut¾ cup vegan mayo + 3 garlic cloves + 1 tbsp lemon + saltFast vegan dip or spread
Soy-milk vegan aioli½ cup unsweetened soy milk + 1 cup oil + garlic + lemon or vinegar + saltFrom-scratch vegan emulsion
Aquafaba aioli3 tbsp aquafaba + ½ to ¾ cup neutral oil + garlic + lemon or vinegar + mustardEggless aioli-style sauce
Cashew aioli-style sauce1 cup soaked cashews + ½ to ¾ cup water + garlic + lemon + saltCreamy vegan bowl sauce
Lightened garlic aioli½ cup Greek yogurt + ¼ cup mayo + garlic + lemon + Dijon + saltLighter dip for vegetables, chicken, potatoes, wraps, and bowls
No-mayo traditional aioliGarlic paste + salt + slow olive oil + lemon or waterSharper traditional-style sauce

Plain unsweetened soy milk matters here. Sweetened or flavored plant milk will pull the sauce in the wrong direction before the garlic even has a chance. Vegan mayo tastes closest to the main recipe. Soy milk and aquafaba behave more like emulsions. Cashew aioli is creamy and bowl-friendly, but less like classic aioli.

The Greek yogurt version is tangier and less rich than classic garlic aioli. It works especially well as a dip or bowl sauce. For another cool, garlicky yogurt-based sauce, MasalaMonk’s Greek tzatziki sauce recipe is a better fit when you want cucumber, dill, and a lighter Mediterranean finish.

Back to top · Jump to recipe

Aioli Flavor Variations

Once the base tastes right, the variations should feel easy, not like twelve new recipes. You are giving the same sauce a new mood: smoky for tacos, lemony for seafood, mustardy for burgers, herby for vegetables, spicy for fries.

Best Aioli Variations to Start With

Six bowls of aioli variations on a dark board, including orange spicy aioli, lemon-dill aioli, roasted garlic aioli, dark garlic aioli, and herb aioli.
Once the base aioli is balanced, flavor variations are easy. Chipotle, sriracha, lemon-dill, roasted garlic, black garlic, and herb versions each fit different meals.

If you only try three, make chipotle aioli for tacos and fries, lemon-dill aioli for seafood, and roasted garlic aioli for sandwiches and potatoes. Those three cover smoky, bright, and mellow.

Aioli Variation Ratios

VariationAdd to 1 cup baseGood with
Chipotle aioli1 tbsp adobo or 1 to 2 tsp chipotle powder + 1 tbsp limeTacos, burgers, fries
Sriracha aioli2 tbsp sriracha + 1 tbsp limeShrimp, chicken, fries
Spicy aioli1 to 2 tsp hot sauce, chili paste, or chili crispWraps, sandwiches, fries
Dill aioli1 to 2 tbsp fresh dill + ½ tsp lemon zestSalmon, crab cakes, potatoes
Lemon garlic aioli½ to 1 tsp lemon zest + 1 tsp lemon juiceSeafood, asparagus, chicken
Black garlic aioli3 to 5 mashed black garlic clovesBurgers, fries, roasted vegetables
Mustard aioli1 to 2 tbsp Dijon or whole-grain mustardSandwiches, burgers, potatoes
Truffle aioli¼ to ½ tsp truffle oil or 1 to 2 tsp truffle pasteFries, burgers, mushrooms
Cilantro lime aioli2 tbsp cilantro + 1 tbsp lime + ½ tsp lime zestFish tacos, grain bowls, wraps
Roasted garlic aioli1 to 2 tbsp roasted garlic pastePotatoes, sandwiches, vegetables
Salsa aioli¼ cup well-drained salsa + 1 tsp limeTacos, nachos, burgers
Calabrian chili aioli1 to 2 tbsp chopped Calabrian chilies or paste + lemonSandwiches, fries, grilled vegetables

Chipotle and sriracha both get stronger after a short rest, so begin with less heat and build from there. For fruitier heat, borrow the sweet-hot idea from MasalaMonk’s mango habanero sauce recipe and add it lightly to the aioli base.

Drain salsa first so salsa aioli does not turn watery. If you already have a bright mango salsa, drain it well before folding a spoonful into aioli. For truffle aioli, use a light hand; too much can overpower the garlic and lemon.

Once you pick a flavor, the serving chart will help match it to fries, burgers, seafood, vegetables, or bowls.

What Tastes Best with Aioli?

Start with the food in front of you. Fries want a thick, bold aioli that clings to the crispy edges. Burgers want a smooth spread that does not fight the meat. Seafood wants lemon first, garlic second. Roasted vegetables can handle deeper flavors like black garlic, roasted garlic, herbs, or chili.

What to Serve with Garlic Aioli

Wooden board with garlic aioli, fries, slider, shrimp, croquettes, roasted vegetables, potato wedges, sandwich pieces, lemon, and herbs.
Use garlic aioli wherever food needs creaminess, brightness, and a little bite. Fries, sliders, shrimp, potatoes, roasted vegetables, and sandwiches all work well.

Best Aioli Pairings by Food

Use this as a flavor-matching chart, not a rulebook.

FoodServe withWhy it works
French friesGarlic, truffle, spicyClings to salty fries and cuts through the crunch
Sweet potato friesChipotle, srirachaBalances sweetness with smoke or heat
BurgersGarlic, mustard, chipotleAdds the creamy layer that makes the burger feel finished
Fish tacosChipotle, cilantro limeBrings creaminess, acid, and fresh heat
SalmonLemon dillCuts through rich fish without hiding it
ShrimpLemon garlic, srirachaGives cool brightness against sweet shrimp
Crab cakesLemon dillAdds a creamy seafood-friendly finish
ArtichokesTraditional, lemonTurns each leaf into a rich, garlicky bite
Chicken sandwichGarlic, spicyTurns a dry sandwich into a finished one
Grilled cheeseGarlic, roasted garlicAdds savory depth without needing another filling
Breakfast sandwichGarlic herbWorks with eggs, cheese, and toasted bread
BLTRoasted garlicSoft garlic plays well with tomato and bacon
Roasted vegetablesBlack garlic, herbAdds depth to sweet, browned edges
Potato saladGarlic aioli mixed with mayo or yogurtMakes creamy salads taste brighter and less flat
Deviled eggsGarlic aioli in place of some mayoDeepens the filling without making it heavy
Grain bowlsVegan, cilantro limeTurns grains and vegetables into a real meal

Garlic Aioli for Fries

Classic garlic aioli is the safest first batch for fries because it is thick, creamy, and bold enough to cling to crisp edges.

Hand dipping a golden French fry into thick creamy garlic aioli with lemon, garlic, pepper, and more fries in the background.
Fries need a thicker aioli so the sauce catches on crisp edges instead of sliding off. Keep it creamy, spoonable, and bright.

Garlic Aioli for Burgers

For burgers, a thick garlic, mustard, or chipotle version works especially well with a simple burger patty recipe.

Garlic aioli being spread with a knife on a toasted burger bun with a burger patty, lettuce, tomato, onion, lemon, and garlic nearby.
On burgers, aioli should be a thin, even spread. That way, it adds garlic flavor and moisture without covering up the patty or toppings.

Use the same base with crispy homemade French fries, roasted potatoes, burgers, grilled chicken, or sandwiches.

Chicken and seafood both love this sauce, but in different ways. On chicken, use it as the creamy layer in one of these chicken sandwich recipes, especially with spicy, roasted garlic, or mustard variations. For tacos, the chipotle and cilantro-lime versions fit naturally with MasalaMonk’s shrimp tacos recipe.

Seafood usually wants the lemony side of aioli. Lemon dill aioli is a natural dip for salmon croquettes. Fried fish can go either way: aioli gives you the garlicky option, while MasalaMonk’s tartar sauce recipe gives you the classic pickle-caper direction.

Dip, Spread, or Drizzle

The same sauce can work as a dip, spread, or drizzle with small texture changes. Fries need enough thickness to drag through crispy edges. Seafood tastes better when lemon arrives before the garlic. Sandwiches need a smooth spread, not a garlic bomb.

Three-panel guide showing garlic aioli used as a fry dip, spread on bread, and drizzled over a vegetable and grain bowl.
One sauce can become a dip, spread, or drizzle with small texture changes. Keep it thick for fries, smooth for buns, and looser for bowls or vegetables.
  • Dip: use the aioli as written and chill it before serving.
  • Sandwich spread: keep it thick, smooth, and not too garlicky.
  • Drizzle: add water or lemon juice ½ teaspoon at a time.
  • Bowl sauce: loosen with lemon juice, water, or yogurt.
  • Burger sauce: keep it thick and add mustard, chipotle, black garlic, or roasted garlic.

Thin aioli slowly. A little liquid changes the texture quickly. If the sauce looks loose after thinning, stop adding liquid and let it chill before fixing again. When the creamy version gets too loose, stir in more mayonnaise. With traditional aioli, add more oil only when the emulsion is stable. For a lighter dipping plate, thick garlic aioli works with crunchy vegetables or MasalaMonk’s crispy zucchini chips.

Need to reset the base? Go back to the main garlic aioli recipe. If the texture has already gone too far, use the troubleshooting table.

How to Store Aioli Without Losing Freshness

A short rest improves the flavor, but storage depends on the base. Aioli should still taste fresh, cold, and awake — not like something forgotten at the back of the fridge. Mayo-based garlic aioli is easiest to make ahead. Traditional raw egg aioli is more delicate. No-egg traditional aioli tastes best fresh.

Best Storage Window by Version

VersionStorage guidance
Mayo-based garlic aioliBest within 2 to 4 days for fresh garlic flavor; some versions may keep up to about a week if handled cleanly and kept cold
Homemade raw egg/yolk aioliUse pasteurized eggs when available; refrigerate and use within 3 to 4 days
No-egg traditional aioliBest fresh; use within 24 hours for best texture
Vegan soy-milk aioliRefrigerate airtight for 4 to 7 days
Cashew-style vegan aioliRefrigerate for about 1 week; re-blend if needed
Mayo or egg emulsionDo not freeze when texture matters

Keep aioli refrigerated until serving. Stir before using because garlic, lemon, and oil can settle slightly. At parties, keep the main container cold and refill a smaller bowl as needed; the sauce tastes better that way, and it is safer.

As a general safety habit, do not leave aioli at room temperature for more than 2 hours, and shorten that window when the room is very warm. FoodSafety.gov explains the 2-hour rule for perishable foods. Freezing is not recommended for mayo-based or egg-based aioli because the emulsion can break when thawed. Cashew-style vegan aioli handles freezing better, but the texture may still need a quick blend after thawing.

Troubleshooting Aioli

Most aioli problems are fixable. Decide what is wrong first: sharp garlic, flat flavor, loose texture, or a broken emulsion. Then fix only that problem. Mayo-based aioli is forgiving; the traditional garlic-and-oil path needs slower oil, steadier whisking, and more patience.

Aioli Troubleshooting Guide

Four-panel aioli troubleshooting guide showing sharp garlic ingredients, thick aioli, thin aioli, and a split emulsion with whisk and egg yolk.
Troubleshoot aioli by naming the problem first. Sharp garlic, thick sauce, thin sauce, and a split emulsion each need a different fix.

Quick Fixes for Common Aioli Problems

ProblemFix
Sharp garlic biteRest longer, add more mayo, use roasted garlic next time, or strain the garlic-lemon mixture
Flat flavorAdd salt, lemon juice, Dijon, or a tiny bit more garlic
Salt pushed too farAdd more mayo, yogurt, or a small splash of lemon when it also tastes heavy
Texture too thickAdd lemon juice or water a few drops at a time
Texture too thinAdd more mayo for the creamy version; for traditional aioli, keep emulsifying slowly
Traditional aioli splitStop adding oil, whisk hard, or start with a new yolk and slowly whisk the broken sauce into it
Olive oil tastes bitterUse milder olive oil or blend with neutral oil; avoid high-speed blending with strong extra-virgin olive oil
Bitter even without olive oilCheck for old garlic, sprouted garlic, too much raw garlic, or too much lemon pith/zest
Vegan aioli will not thickenUse unsweetened soy milk, keep oil and milk at a similar temperature, and blend in a narrow cup
Garlic chunks are unpleasantGrate, press, paste, or strain the garlic before mixing

When traditional aioli breaks, do not throw it away immediately. Start with a fresh egg yolk in a clean bowl, then slowly whisk the broken sauce into the yolk as if it were the oil. Add it gradually and stop when the texture begins to loosen too much.

Back to top · Jump to recipe

FAQs

Is aioli just garlic mayonnaise?

Traditional aioli is not garlic mayonnaise. It is a garlic-and-oil emulsion. Many modern garlic aioli recipes use mayonnaise as a shortcut because it is fast, creamy, stable, and familiar.

What is the difference between aioli and mayo?

Traditional aioli is built around garlic and oil, while mayonnaise is usually made from oil, egg yolk, and acid. Mayo-based garlic aioli combines mayonnaise with garlic, lemon, and seasonings to create a quick modern version. Real Simple has a useful explainer on aioli vs mayo.

How do you turn mayo into aioli?

Stir grated garlic, lemon juice, Dijon mustard, salt, and pepper into mayonnaise, then let it rest for 10 to 15 minutes. Start with ¾ cup mayo, 3 garlic cloves, 1 tablespoon lemon juice, ½ teaspoon Dijon, and ¼ teaspoon salt.

How much garlic should you use in aioli?

Use 3 small-to-medium cloves for balanced garlic aioli, 5 cloves for a bold dip, and 1 to 2 cloves for a milder sandwich spread. Resting the garlic in lemon juice helps soften the raw bite.

Do you need egg to make aioli?

No. Some traditional methods use only garlic and oil. Many from-scratch home versions use egg yolk because it helps the sauce emulsify more easily. Vegan aioli can be made with vegan mayo, soy milk, aquafaba, or cashews.

Can you make aioli without mayo?

Yes. Make traditional aioli by emulsifying garlic with oil, salt, and lemon, with or without egg yolk. Vegan no-mayo versions can use soy milk, aquafaba, or cashews as the base.

How long does homemade aioli last?

Mayo-based garlic aioli is best within 2 to 4 days for fresh garlic flavor, though some versions may keep longer when refrigerated and handled cleanly. Traditional raw egg aioli is best used within 3 to 4 days. No-egg traditional aioli tastes best fresh.

Why did my traditional aioli split?

Traditional aioli usually splits when oil is added too quickly or the emulsion is not stable yet. Add oil drop by drop at the beginning, whisk constantly, and repair a broken sauce by slowly whisking it into a fresh yolk.

Why does aioli taste bitter?

Bitterness can come from strong olive oil, high-speed blending, old or sprouted garlic, too much raw garlic, or lemon pith. Choose milder oil, fresh garlic, and a smaller garlic amount for a smoother sauce.

How do you make garlic aioli less strong?

Use fewer cloves, rest the garlic in lemon juice, add more mayo, or strain the garlic out. Roasted garlic gives the mildest, sweetest result, especially for sandwiches or shared dipping bowls.

What is the best aioli for fries?

Classic garlic aioli is the safest first choice for fries because it is thick, creamy, and bold enough to cling. For sweet potato fries or loaded fries, chipotle, sriracha, truffle, or spicy aioli works especially well.

Make the mayo version once, then pay attention to the bite: more lemon for seafood, more garlic for fries, roasted garlic for sandwiches, herbs for vegetables, heat for tacos. Once you learn that balance, aioli stops being a recipe you look up and becomes the sauce you know how to make.