Posted on 12 Comments

Katsu Curry Rice (Japanese Recipe, with Chicken Cutlet)

Overhead shot of a plate of chicken katsu curry with sliced crispy chicken, rice, shredded cabbage and curry sauce, with hands holding the dish and spoon, for The Ultimate Chicken Katsu Curry Recipe on MasalaMonk

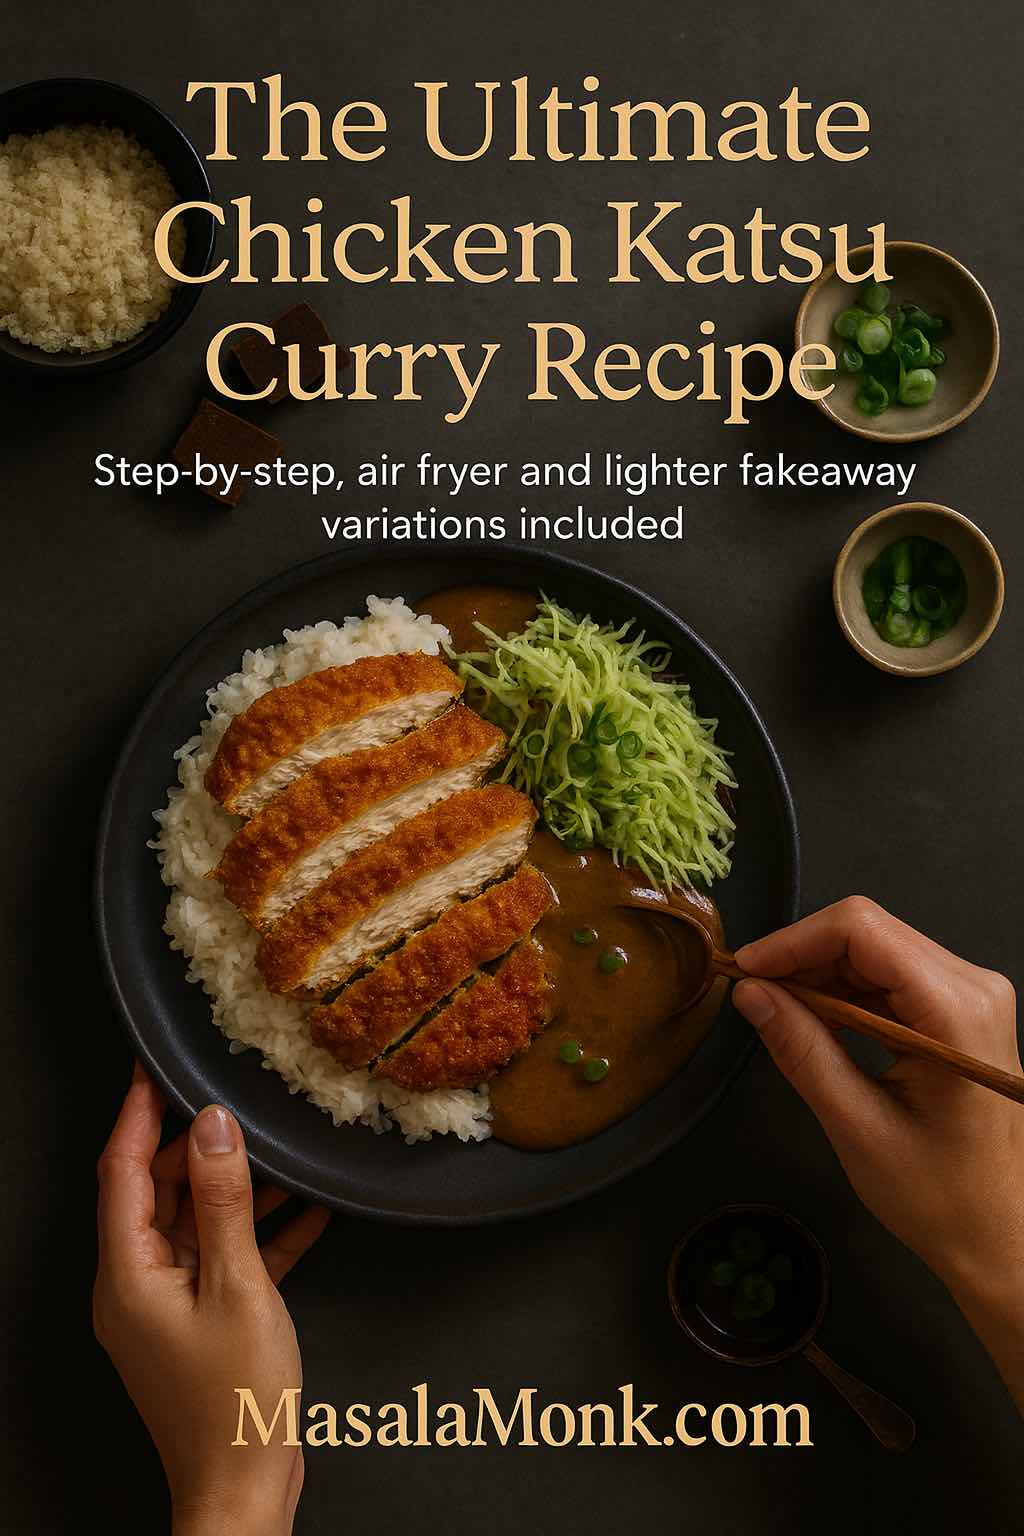
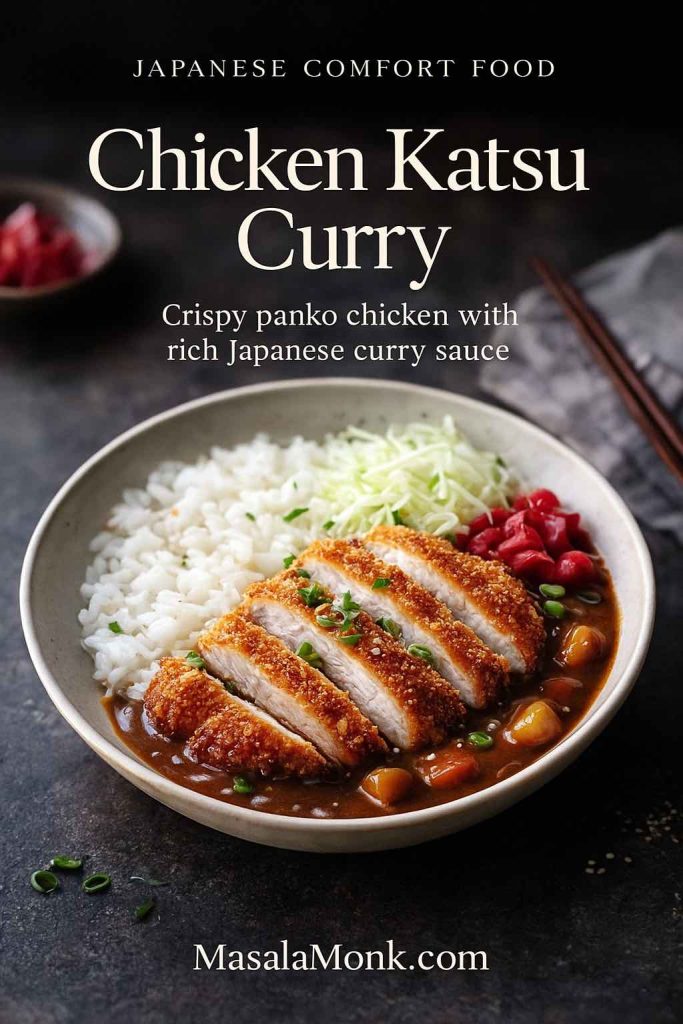
There are some recipes you cook because you need to eat, and then there are recipes you cook because you want a small event at the table. A good chicken katsu curry recipe always feels like the second kind. You get the sizzle of hot oil, the comfort of a thick Japanese-style curry, and a mound of rice that soaks it all up.

In this post we’ll walk through a detailed, home-cook-friendly chicken katsu curry recipe, then build out variations: pork and tofu versions, air-fryer and lighter “fakeaway” spins, plus quick cheats using curry roux. You’ll also see ideas for what to serve alongside, how to turn leftovers into entirely new meals, and a bit of backstory on how this dish went from Tokyo comfort food to global obsession.


What exactly is chicken katsu curry?

In Japan, katsu curry means curry rice served with a breaded, fried cutlet on top. The cutlet is the “katsu” (usually pork, sometimes chicken), and the curry is a thick, mellow, slightly sweet Japanese-style sauce ladled over rice. According to the entry on katsu curry, the dish is typically built as rice on one side, curry sauce on the other, and sliced cutlet laid neatly across.

Unlike many Indian curries, Japanese curry is usually based on a roux: flour and fat cooked together with curry spices, then loosened with stock to form a glossy, spoon-coating sauce. Over time, Japanese manufacturers turned that idea into the curry roux blocks you see in Asian supermarkets. Writers like Nagi from RecipeTin Japan break down how home cooks now rely on these blocks to make a quick katsu curry with chicken cutlet, using them much like we use bouillon cubes.

Chicken katsu curry recipe card with sliced panko chicken, rice and Japanese curry in a bowl.
Crispy panko chicken, glossy Japanese curry and fluffy rice – this is the finished chicken katsu curry you’re cooking towards.

Origins of Japanese chicken katsu curry and its recipe

The origin story often credited for katsu curry is surprisingly specific. One popular telling goes back to Grill Swiss, a Western-style restaurant in Tokyo’s Ginza district. A regular customer complained that ordering curry and tonkatsu separately took too much time, so the kitchen served the cutlet on top of the curry, all on one plate. That little act of laziness birthed a dish that spread across Japan, as explored in an essay on the origins of katsu curry.

Outside Japan, the story takes another turn. In the UK especially, “katsu curry” exploded on high-street menus in the 2000s; JETRO even has a piece on how katsu curry conquered the UK, tracing its rise through chains like Wagamama and Wasabi. Somewhere along the way, people started using “katsu” to mean “any Japanese curry” or even just “that brown katsu sauce,” which isn’t how the term is used in Japan at all.

Here, we’ll lean towards the Japanese understanding: crispy breaded cutlet + Japanese curry + rice. Once that foundation is clear, the rest of the variations fall into place very naturally.

Also Read: Crispy Homemade French Fries From Fresh Potatoes (Recipe Plus Variations)


Ingredients for this chicken katsu curry recipe

To make this chicken katsu curry recipe feel doable on a regular weeknight, it helps to see the dish in three parts:

  1. The chicken katsu (breaded cutlet)
  2. The Japanese curry sauce
  3. Rice and toppings

Once you get comfortable with that structure, you can mix and match ingredients, proteins and cooking methods without getting lost.

Chicken katsu (serves 4)

  • 4 small chicken breasts or 2 large, butterflied and pounded to about 1 cm thick
  • 1 teaspoon fine salt
  • ½ teaspoon ground black or white pepper
  • ½ teaspoon garlic powder (optional but tasty)
  • 60 g (½ cup) plain flour
  • 2 large eggs, beaten
  • 120 g (about 2 cups) panko breadcrumbs
  • Neutral oil for frying (sunflower, canola, rice bran)

Panko is key here. Regular breadcrumbs will work, but panko gives you that light, craggy crust you see on proper tonkatsu and classic chicken katsu.

Japanese curry sauce

We’ll build a hybrid sauce: part scratch, part shortcut. You can go fully homemade or lean on curry roux blocks when life gets hectic.

  • 2 tablespoons neutral oil or butter
  • 1 large onion, thinly sliced
  • 2 cloves garlic, minced
  • 1 teaspoon grated fresh ginger
  • 2 medium carrots, cut into chunks
  • 2–3 small waxy potatoes, peeled and cubed
  • 2 tablespoons plain flour
  • 1–2 tablespoons mild curry powder (Japanese curry powder if available)
  • ½ teaspoon garam masala (optional)
  • 750 ml (3 cups) chicken or vegetable stock
  • 1–2 teaspoons soy sauce
  • 1–2 teaspoons honey or sugar
  • 1 tablespoon grated apple or a splash of apple juice
  • Salt to taste

If you prefer, you can replace the flour and curry powder with roughly 4 squares of Japanese curry roux from a pack, stirring them in as described later.

Rice and toppings

  • 300–400 g uncooked short-grain Japanese rice (or any medium/short-grain rice you enjoy)
  • Finely shredded cabbage
  • Sliced spring onions
  • Japanese pickles (fukujinzuke, takuan) if you can find them

The contrast of hot, savoury curry sauce with cool, crisp cabbage might seem unusual if you’re used to Indian curries, but once you try it, it makes perfect sense.

Also Read: Simple Bloody Mary Recipe – Classic, Bloody Maria, Virgin & More


Step-by-step chicken katsu curry recipe

Now let’s bring it all together. Although this plate looks impressive, the workflow is surprisingly logical: curry first, rice while it simmers, then katsu at the end so it stays crisp.
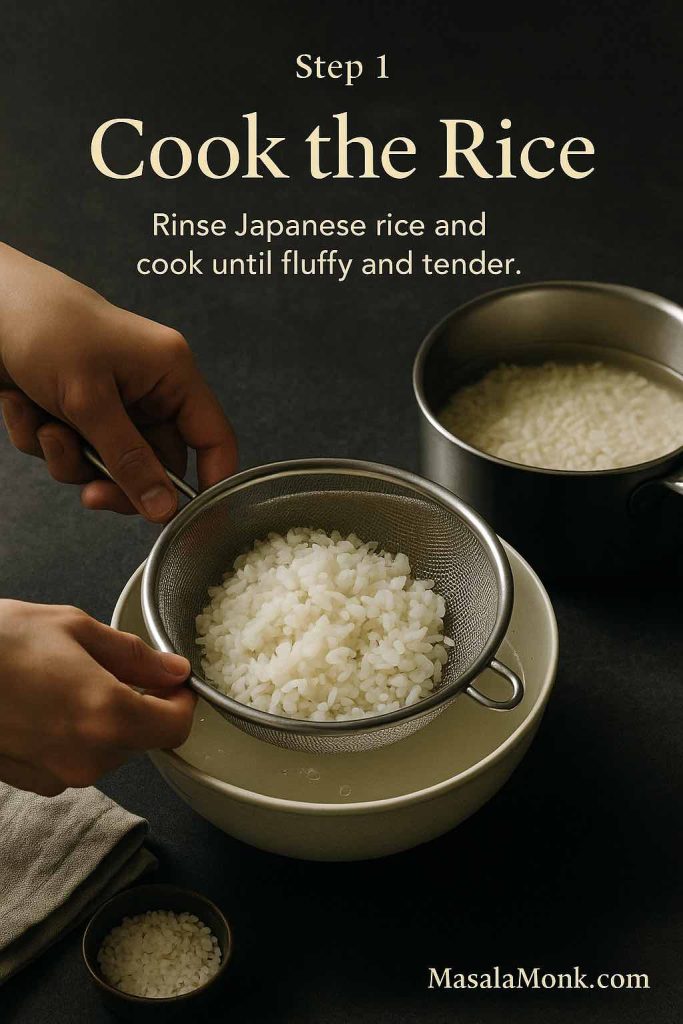
Cook the rice

Begin with the rice so it’s ready to welcome everything else. Rinse it in cold water until the water runs mostly clear, then cook in a rice cooker or in a saucepan using the absorption method. The goal is fluffy but slightly sticky grains, similar to what you see in recipes like chicken katsu curry rice from The Woks of Life.

Once it’s done, keep the lid on and the heat off. The rice will stay warm and steam gently while you handle the rest.

Hands rinsing Japanese rice in a sieve over a bowl as part of chicken katsu curry prep.
Start your chicken katsu curry with well-rinsed Japanese rice so every grain cooks up fluffy and ready to soak up the sauce.

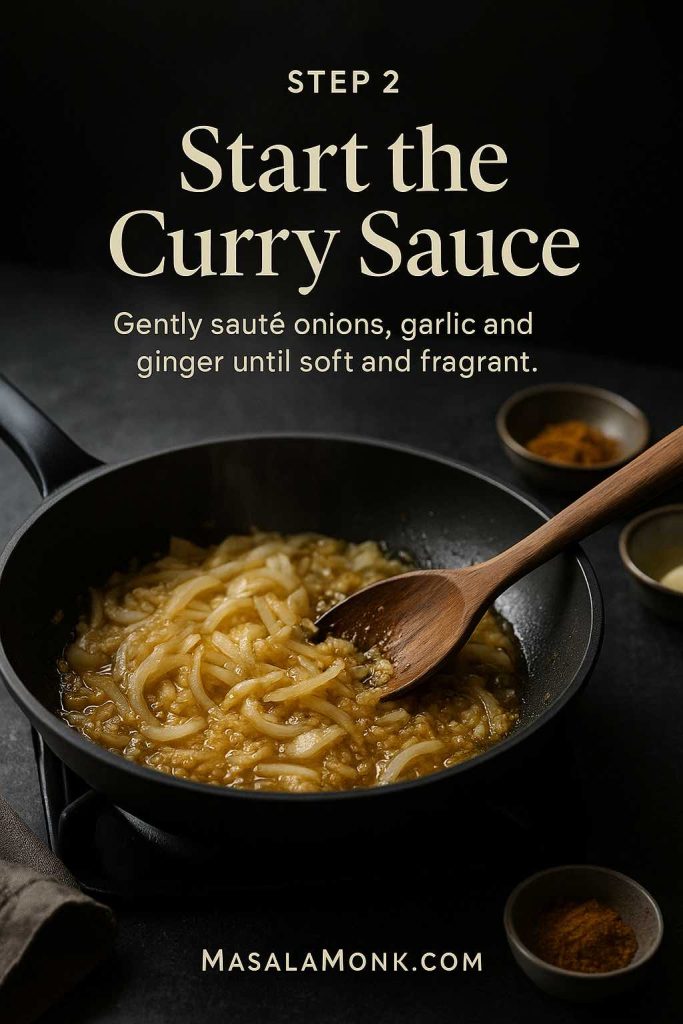
Make the Japanese curry sauce

While the rice cooks, start the curry:

Sweat the aromatics

Set a wide saucepan or deep skillet over medium heat and add the oil or butter. Scatter in the sliced onion with a pinch of salt and cook slowly for 8–10 minutes. Stir now and again until the onion softens and turns pale gold. This patient step builds sweetness and depth into your curry.

Add garlic, ginger and vegetables

Stir in the garlic and ginger and cook for about 30 seconds, just until fragrant. Immediately add the carrot and potato chunks, tossing them through the onion mixture for a couple of minutes so they start to absorb those flavours

Onions, garlic and ginger sautéing in a pan to begin the Japanese curry sauce.
Slowly sautéing onions with garlic and ginger builds the sweet, savoury base that makes the katsu curry sauce so comforting.

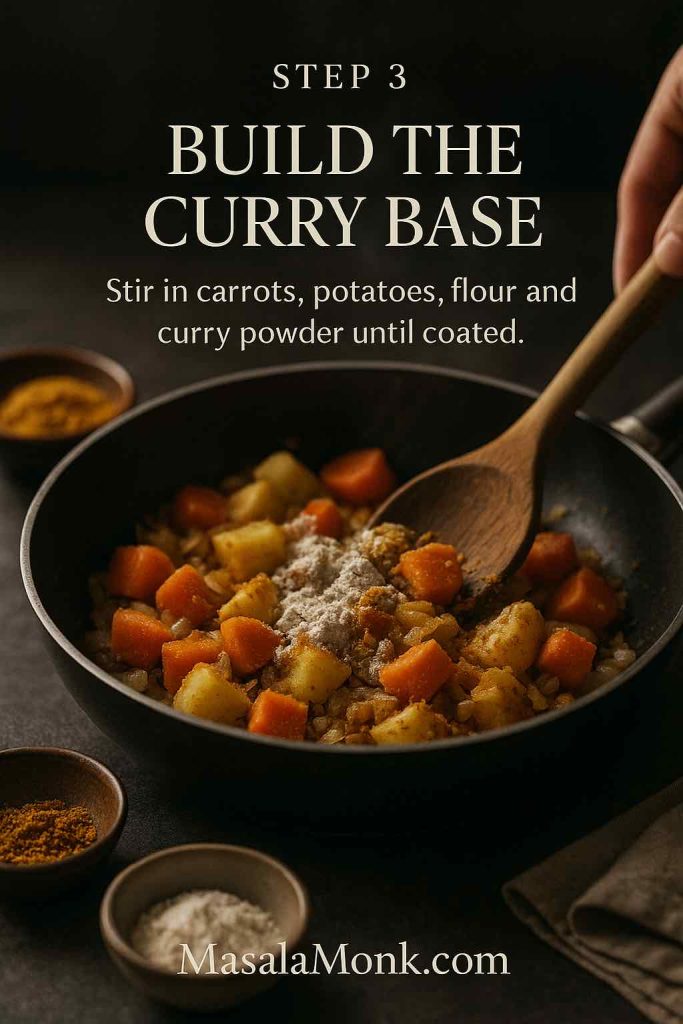
Create a curry roux base

Sprinkle the flour and curry powder over the vegetables. Stir well so everything gets coated and the flour begins to absorb the oil. Let it cook for 1–2 minutes; the mixture will look slightly pasty and stick to the pan. That’s the beginning of your roux.

Build the sauce

Pour in a splash of stock while stirring to release any sticky bits from the bottom, then gradually add the rest, stirring all the while to avoid lumps. Add soy sauce, honey or sugar, and the grated apple. The apple brings gentle sweetness and helps mimic the rounded flavour you get from Japanese curry blocks.

Carrots and potatoes coated with flour and curry powder in a pan for katsu curry base.
Coating the carrots and potatoes in flour and curry powder turns the vegetables into a rich roux that thickens the Japanese curry beautifully.

Simmer until tender

Bring the sauce to a gentle simmer, then lower the heat and cook for 15–20 minutes, stirring occasionally. The vegetables should become tender, and the sauce should thicken into a glossy, spoon-coating consistency. If it ever feels too thick, loosen it with a little extra stock or water.

Adjust the seasoning

Taste and tweak. Perhaps it needs a touch more soy for savoury depth, a pinch of salt, or a little extra honey if your curry powder is particularly sharp. For warmth, sprinkle in garam masala towards the end and simmer for another minute.

At this point, you have a solid Japanese curry base. If you’d like a smoother texture, you can mash some of the potato and carrot against the side of the pan or briefly blend a ladleful and stir it back.

Also Read: French 75 Cocktail Recipe: 7 Easy Variations

Pan of Japanese katsu curry sauce simmering with carrots and potatoes, a ladle lifting the thick glossy curry.
After adding stock, let the Japanese curry simmer gently until it turns thick and glossy and the carrots and potatoes are perfectly tender.

Preparing the chicken katsu

With the curry gently bubbling away, you can turn your attention to the cutlets. This part feels almost like making schnitzel, just with panko and Japanese flavours.

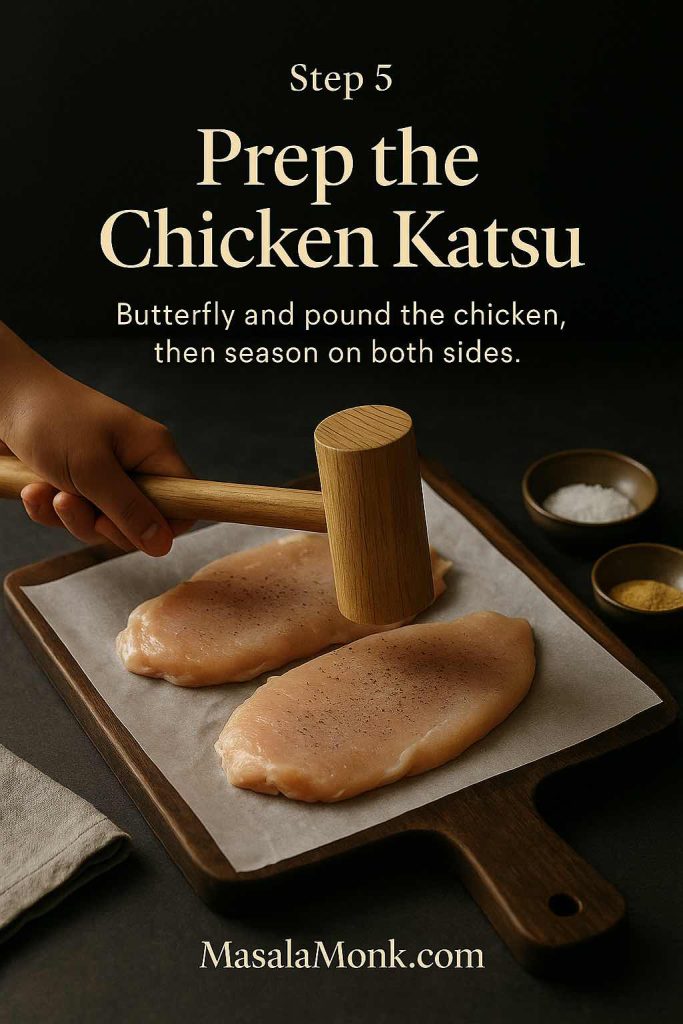
Season and pound the chicken

Lay each chicken breast between two sheets of baking paper or cling film. Gently pound with a rolling pin or meat mallet until it’s an even 1 cm thickness. Even thickness means even cooking and less chance of dry patches.

Season both sides with salt, pepper and garlic powder. Leave the chicken to sit while you set up your breading station; the salt will start to work its way in.

Chicken breasts being pounded flat on a board and seasoned for chicken katsu.
Butterfly and gently pound the chicken so it cooks evenly, then season both sides before you start breading the katsu.

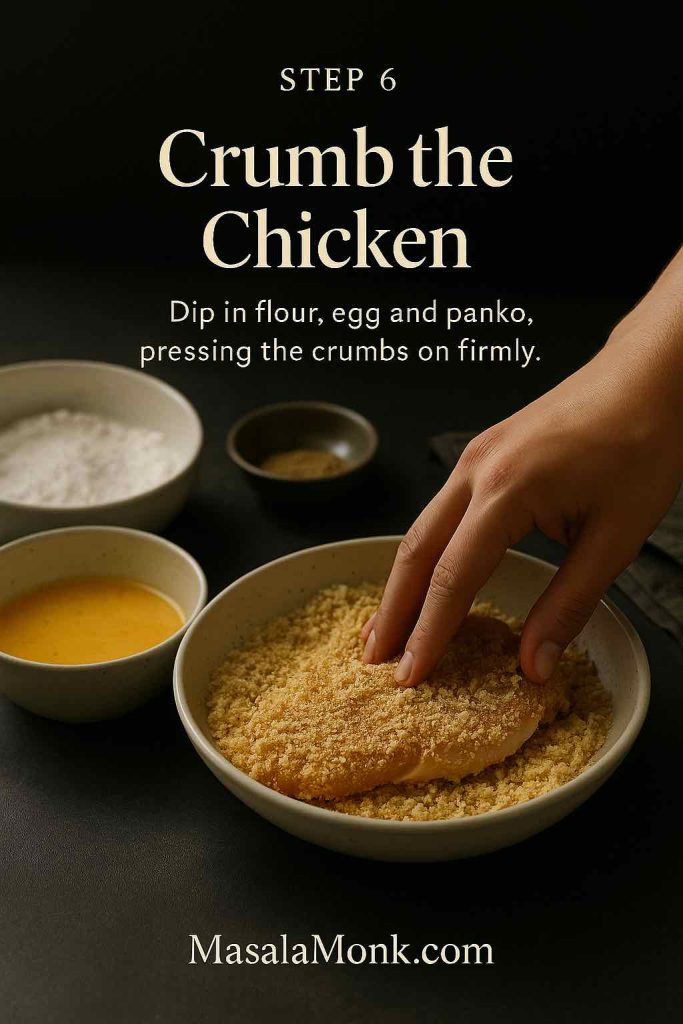
Set up the breading station

Arrange three shallow bowls:

  1. Flour in the first
  2. Beaten eggs in the second
  3. Panko breadcrumbs in the third

To keep the crumbs especially crisp, you can mix a small pinch of salt and a drizzle of oil into the panko. The oil helps them brown more evenly in the pan or air fryer.

Dip each seasoned cutlet into the flour, shaking off excess so only a thin, even layer remains. Then pass it through the beaten egg, letting any drips fall back into the bowl. Finally, press the cutlet into the panko, turning to coat all sides. Press firmly so the crumbs really hug the surface.

Hand pressing a chicken fillet into a bowl of panko breadcrumbs with bowls of flour and beaten egg beside it for chicken katsu.
Coat each seasoned fillet in flour, egg and a generous layer of panko, pressing the crumbs on firmly so the chicken katsu fries up extra crisp.

Place the breaded cutlets on a wire rack or plate and let them rest for 5–10 minutes. This pause allows the coating to hydrate slightly and stick better, reducing the risk of it sliding off in the oil.


Frying or air-frying the katsu

A hallmark of any good chicken katsu curry recipe is that contrast between a juicy centre and a shatteringly crisp crust. There are two main paths to get there: traditional frying or a lighter air-fryer version.

Shallow or deep-frying

Set a large skillet or saucepan over medium-high heat and pour in enough oil to reach 1–2 cm up the sides. Heat until a breadcrumb dropped in the oil sizzles immediately and turns golden within about 30 seconds (around 170–180°C).

Carefully lay in the cutlets, two at a time if your pan is large. Fry for roughly 3–4 minutes on the first side until deep golden, then flip and cook another 3–4 minutes. As they fry, adjust the heat to keep the colour even; if they’re browning too quickly, lower the temperature slightly.

Once they’re beautifully golden and cooked through, transfer each cutlet to a rack or paper-towel-lined tray. Sprinkle with a tiny pinch of salt while they’re still hot.

Golden panko-coated chicken katsu frying in hot oil in a skillet, being turned with tongs.
Shallow-fry the crumbed chicken katsu in hot oil until the coating is deep golden and the meat inside is just cooked through and juicy.

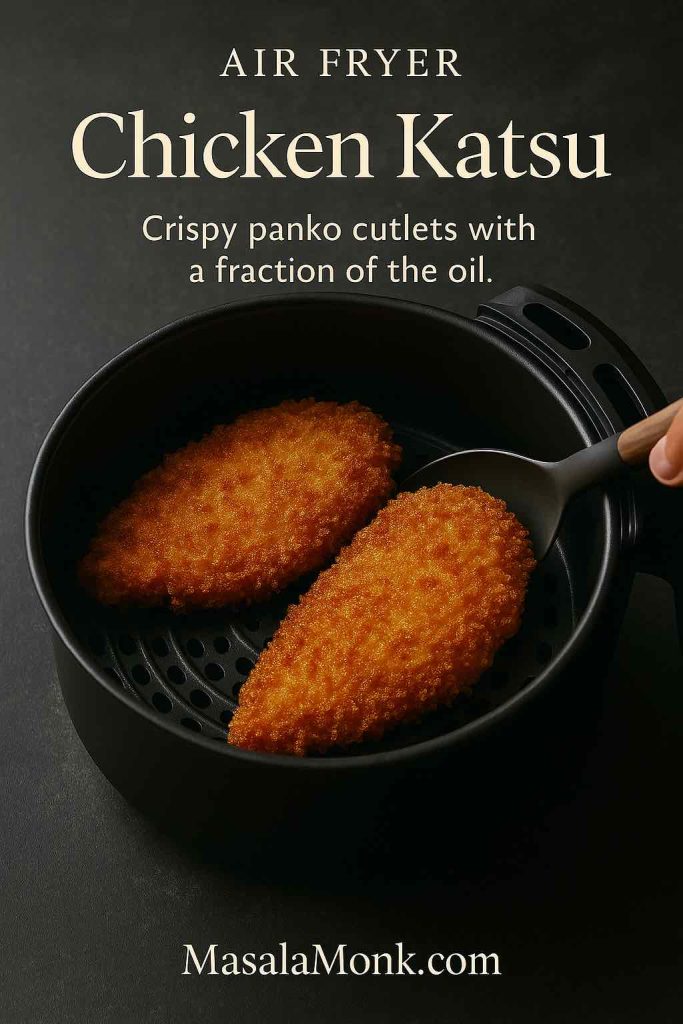
Air-fryer recipe for chicken katsu curry

If you’re craving something lighter without sacrificing crunch, an air fryer is extremely handy. Food bloggers like CJ Eats and Okonomi Kitchen have shown that air fryer chicken katsu and air-fried panko cutlets can emerge every bit as crisp when cooked at around 190–200°C.

To air-fry:

  1. Lightly mist both sides of each breaded cutlet with oil spray.
  2. Preheat the air fryer to 190–200°C.
  3. Arrange the cutlets in a single layer, leaving a little room around each one.
  4. Cook for 12–15 minutes, flipping halfway, until golden and cooked through.

Because every air fryer model is slightly different, peek a little earlier the first time you make this. Once you’ve dialled in your perfect timing, this method becomes a reliable “fakeaway” option: all the joy, far less grease.

Also Read: Peanut Butter Cookies (Classic Recipe & 3 Variations)


Assembling your bowl of chicken katsu curry

Now comes the best part: putting it all together so every bite has crunch, sauce and rice.

  1. Slice the katsu
    Place each cutlet on a board and slice across on a slight diagonal into 1.5–2 cm strips. Keep the pieces in order so you can re-create that neat “fan” on the plate.
  2. Plate the rice and curry
    Spoon a generous mound of rice into a shallow bowl or wide plate. Ladle the hot curry sauce alongside, letting a bit of it seep into the rice but keeping some white patches for contrast.
  3. Lay the katsu on top
    Lift the sliced katsu with a wide knife and transfer it onto the plate, arranging it across the curry and rice. You want the bottom edges to catch a little sauce while the tops stay crisp, just like in that idealised katsu curry plate you see in Japanese cookbooks and in dishes like the one on The Woks of Life.
  4. Add fresh toppings
    Finish with a tumble of finely shredded cabbage, a sprinkle of sliced spring onions and, if you have them, a spoonful of pickles. The fresh crunch cuts through the richness and keeps the whole dish from feeling heavy.
Sliced chicken katsu on a board next to a bowl of rice, curry sauce and cabbage, showing the final step of serving chicken katsu curry.
Let the fried chicken katsu rest for a moment, then slice it into neat strips and lay it over rice with plenty of hot Japanese curry sauce.

At this stage, your classic chicken katsu curry recipe is complete. Nevertheless, once you’ve done it once or twice, it’s hard to resist playing with variations.

Also Read: Green Tea Shot with Jameson | Recipe & 10 Variations


Variations on the chicken katsu curry recipe

Because this dish is modular, it’s incredibly forgiving. A small swap in the sauce, a different protein, or a new cooking method can produce a meal that feels distinct without forcing you to learn an entirely new recipe.

Pork katsu curry (tonkatsu)

Strictly speaking, the original Japanese katsu curry is usually made with pork. To follow that path:

  • Use boneless pork loin or fillet sliced about 1–1.5 cm thick.
  • Pound lightly to even them out.
  • Season, bread and cook exactly as you would the chicken.
Bowl of pork katsu curry with sliced golden pork cutlet, Japanese curry sauce, rice, shredded cabbage and pickles.
Make a classic tonkatsu-style pork katsu curry by swapping the chicken for a juicy pork cutlet and serving it with the same rich Japanese curry sauce and rice.

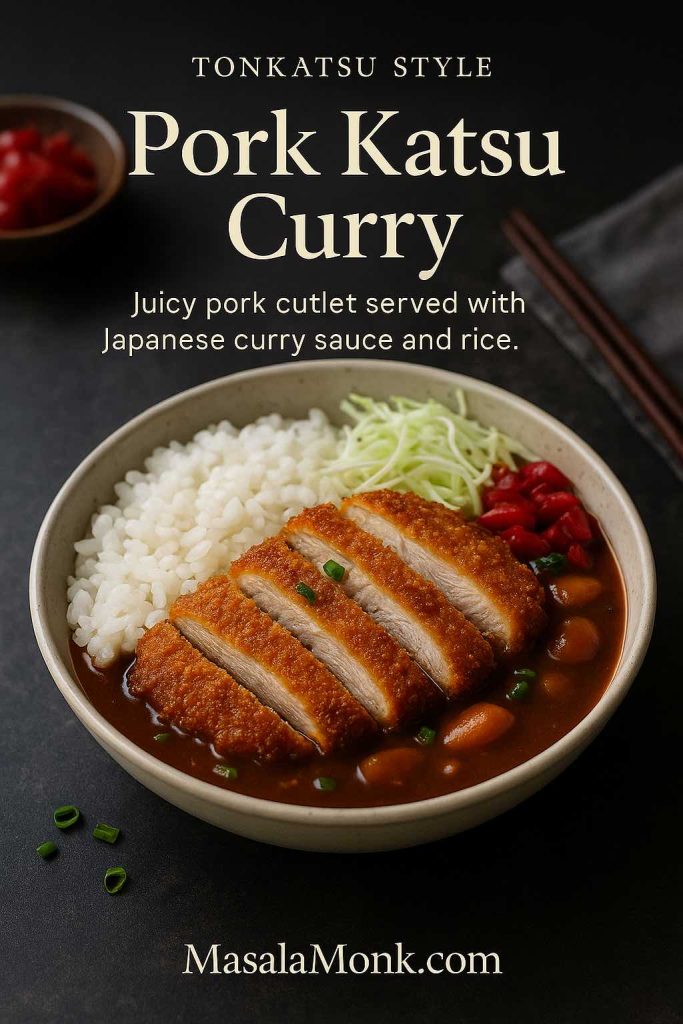
Pork tends to cook slightly faster than chicken breast at the same thickness, so start checking for doneness after 3 minutes per side if you’re shallow-frying. Slice, serve over rice and curry, and you’ve got a comforting tonkatsu curry that leans a little richer and more savoury.

Plain Japanese chicken curry recipe (no katsu)

On evenings when frying feels like too much effort, you can turn this chicken katsu curry recipe into a simpler Japanese chicken curry.

Bowl of Japanese chicken curry with tender chicken pieces, rice, shredded cabbage and pickles in a creamy brown curry sauce.
When you don’t feel like frying, this Japanese chicken curry gives you the same cosy flavours as katsu curry with tender chicken simmered directly in the sauce.

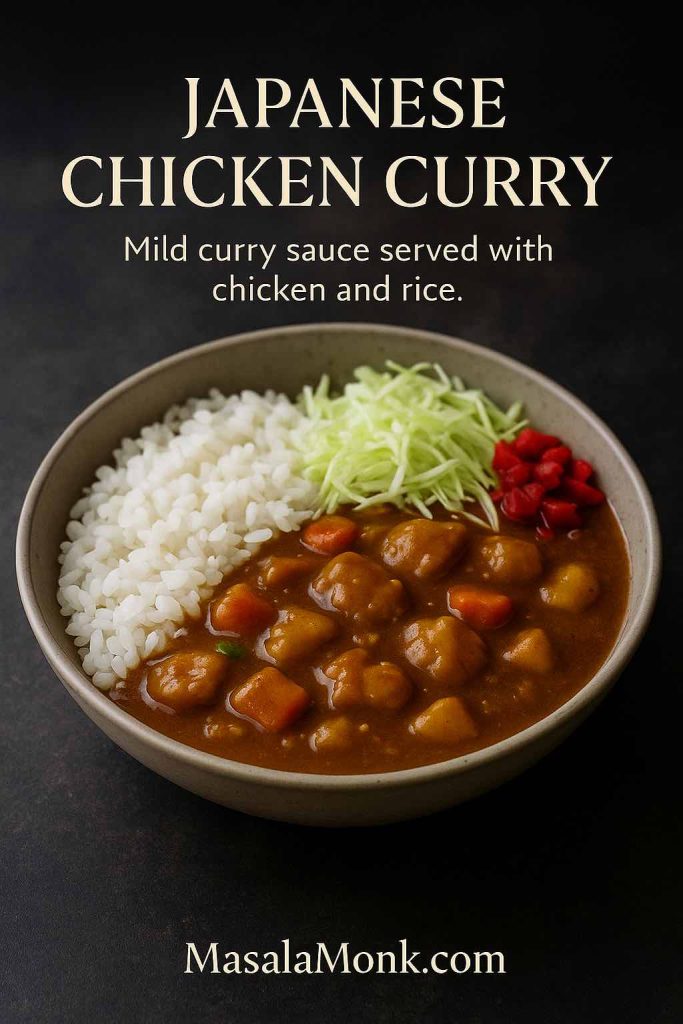
Instead of breading the chicken:

  1. Cut the raw chicken into bite-sized pieces.
  2. After the onions, carrots and potatoes have simmered for about 5 minutes in the curry base, stir in the chicken.
  3. Simmer for another 10–15 minutes, until the chicken is just cooked and the sauce is thick.

You lose the crunch, but you gain a one-pot comfort bowl that sits somewhere between Japanese curry and Indian-inspired dishes like a lighter spinach chicken curry.

Recipe for Slimmer “fakeaway” chicken katsu curry

If you’re tracking calories or simply don’t love the idea of deep-frying on a Tuesday night, a slimmer version keeps the flavour but trims the excess.

Two golden panko-coated chicken katsu cutlets in a black air fryer basket, showing the air fryer version of chicken katsu.
Use the air fryer for chicken katsu that’s just as crisp and juicy, but made with a fraction of the oil—ideal for lighter katsu curry nights.

You can:

  • Air-fry or oven-bake the breaded cutlets on a rack, using oil spray instead of pouring centimetres of oil into a pan.
  • Drop the oil in the curry base to 1 tablespoon and rely more on stock and vegetables for body.
  • Serve with extra shredded cabbage and steamed vegetables, and slightly reduce the rice portion.

On weeks when you’re deliberately alternating richer dinners with lighter ones, you might pair this “fakeaway” with a genuinely lean meal on another night, such as a Kerala-style coconut vegetable stew or a big pot of authentic Punjabi rajma.

Vegetarian and vegan katsu curry

Katsu doesn’t have to mean meat. In fact, the structure of this dish lends itself beautifully to vegetarian and vegan cooking.

Tofu katsu

  • Press firm tofu for at least 20–30 minutes to remove excess moisture.
  • Slice into slabs about 1.5 cm thick.
  • Season lightly with salt and a splash of soy sauce.
  • Dust with flour, dip into a plant-based milk and flour mixture or aquafaba instead of egg, then coat in panko and fry or air-fry.

Serve the tofu katsu over the same curry sauce made with vegetable stock, and you have a fully meat-free plate that still delivers serious crunch.

Vegetarian katsu curry with sliced tofu katsu, rice, shredded cabbage and Japanese curry sauce in a bowl.
Swap the chicken for tofu or vegetable katsu and you still get all the crunch and rich Japanese curry flavour in this vegetarian katsu curry bowl.

Vegetable katsu

Root and starchy vegetables make wonderful katsu bases:

  • Thick slices of aubergine
  • Rounds of sweet potato or pumpkin
  • Sturdy slabs of celeriac

Par-cook them briefly in boiling water or the steamer if they’re very firm, then cool, bread and fry. The sweet, soft interior surrounded by crisp crumbs is addictive.

For readers who are exploring plant-based eating more broadly, it’s worth looking at seitan and other high-protein meat alternatives. Guides like the one on seitan as “the vegan’s chicken” show just how many curry-style dishes can be made without animal protein at all.

Also Read: ‘Tofu’ Instead of ‘Eggs’: 5 High Protein Plant-Based Breakfast Ideas


Sauce options: scratch, roux blocks and katsu dipping sauce

Many people first fall in love with this dish because of the sauce. It’s gentle, cosy and not as fiery as some Indian curries, which makes it ideal for families and spice-shy eaters.

Fully from-scratch Japanese curry sauce

The version at the start of this post is already close to a scratch sauce: you’re making a roux in the pan, then adding stock and flavourings. To lean even more into that direction, you can:

  • Toast whole spices like coriander, cumin and black pepper gently before grinding them.
  • Add a teaspoon of tomato paste with the garlic and ginger for deeper colour.
  • Stir in a little grated dark chocolate or a dab of miso at the end for extra umami.

Food writers who specialise in Japanese home cooking, like those behind RecipeTin Japan, often mention how this style of roux-based curry evolved from European-influenced cooking in the late nineteenth century. Today, it feels as firmly Japanese as miso soup or ramen.

Using Japanese curry roux blocks

On busy nights, it’s absolutely fine to lean on curry blocks. The technique is slightly different:

  1. Sauté onion, garlic, ginger and vegetables as before.
  2. Add stock and simmer until the vegetables are almost tender.
  3. Turn off the heat and stir in rough chunks of curry roux until they dissolve completely.
  4. Turn the heat back on and let the sauce bubble gently until thick and glossy.

Different brands offer varying levels of spice and sweetness, so you may find one that becomes “your” flavour. You can still customise it with a splash of soy, a little grated apple or a pinch of garam masala.

Simple katsu dipping sauce

Sometimes, when people search for a chicken katsu curry recipe, what they really want is the crispy cutlet with a thick, tangy brown sauce rather than the full curry. That sauce is tonkatsu or katsu sauce, and it’s very easy to replicate at home.

Crispy piece of katsu being dipped into a small bowl of dark katsu dipping sauce.
This quick katsu dipping sauce adds a sweet-tangy hit that’s perfect for drizzling over hot chicken or pork katsu, even when you’re not serving it with curry.

Stir together:

  • 2 tablespoons ketchup
  • 1 tablespoon Worcestershire sauce
  • 1 teaspoon soy sauce
  • ½–1 teaspoon sugar or honey
  • Optional: a tiny splash of rice vinegar or lemon juice

Taste and adjust until it’s sweet-tangy and savoury. This is perfect drizzled over sliced katsu, whether you’re serving it with curry or simply over a bowl of rice and shredded cabbage.

Also Read: Mustard Fish Curry Bengali Style (Shorshe Bata Rui Maach)


What to serve with chicken katsu curry

Because this dish is already a full meal in a bowl, you don’t need elaborate side dishes. That said, a few smart additions can turn dinner into more of a Japanese-inspired feast or an easy weekend gathering.

Fresh, cooling sides

Shredded cabbage and pickles are the traditional companions, but you can easily widen the spread.

A crisp salad with a yoghurt-based dressing works beautifully. For instance, you could borrow the idea of a garlicky, herb-heavy yoghurt from a mezze table and adapt it to your pantry. If that appeals, you might enjoy exploring a master recipe like the one for Greek tzatziki with ten variations, then adjust the herbs and garlic to suit your katsu night.

On evenings when you’re hosting a group and want nibbles on the table while the curry simmers, a warm bread and dip platter works nicely. Something like a spinach dip collection with cold and baked options gives guests something to scoop up with bread or veggie sticks while you focus on slicing katsu.

Drinks that pair well with katsu curry

Rich, fried food is often happiest next to drinks that are bright, slightly acidic or effervescent.

If you enjoy cocktails, a citrus-forward gin drink can cut right through the creaminess of the curry sauce. A set of creative gin cocktail recipes gives you plenty of options, from herbaceous to lightly sweet, so you can choose something that suits the mood.

For brunchy or celebratory lunches, leftover katsu can top rice bowls or even appear beside scrambled eggs. In that case, a sparkling drink like a mimosa fits the vibe. A guide to ten easy mimosa variations shows how quickly you can shift from classic orange to seasonal twists like apple or berry.

If you prefer something bolder and tomato-based, especially on a lazy weekend, a well-made Bloody Mary is another fun option. A recipe collection that covers classic, tequila-based and virgin Bloody Mary versions lets everyone at the table pick their own level of kick and alcohol.

Desserts that follow katsu curry beautifully

After a salty-sweet, savoury meal like this, a cool and milky dessert is incredibly satisfying. One excellent option is a slice of tres leches cake: soft sponge soaked in three kinds of milk, chilled and topped with whipped cream. The gentle sweetness and cold temperature balance the warmth and spice of the curry.

On cooler days, you might lean towards baking that fills the kitchen with warm spice. Having a jar of homemade pumpkin pie spice ready makes that as simple as stirring a spoonful into your batter. A guide to mixing your own pumpkin pie spice blend shows how to get the cinnamon-nutmeg-ginger balance just right.

Also Read: Baked Jalapeño Poppers (Oven) — Time, Temp & Bacon Tips


Make-ahead, freezing and leftovers

One of the biggest advantages of mastering a detailed chicken katsu curry recipe is that it’s extremely meal-prep friendly. A little planning turns a single cooking session into multiple easy meals.

Tray of uncooked breaded katsu cutlets beside labeled containers of katsu curry sauce, showing meal prep for freezer-friendly katsu curry.
Bread the chicken katsu and portion the curry sauce into containers, then freeze them so you can throw together an easy katsu curry bowl any weeknight.

Freezing katsu for later

You can freeze katsu either before or after cooking:

  • Before frying
    • Bread the chicken as usual.
    • Arrange the cutlets in a single layer on a tray and freeze until solid.
    • Transfer to freezer bags or containers with baking paper between layers.
    • Cook from frozen in the oven or air fryer, adding a few minutes to the cooking time.
  • After frying
    • Let the cooked cutlets cool completely.
    • Wrap each one tightly or place in an airtight container.
    • Reheat in the oven or air fryer until hot and crisp again.

The key is to avoid microwaving, which tends to make the crust soggy.

Storing and reheating the curry sauce

The curry sauce keeps well:

  • In the fridge: up to 3–4 days in a sealed container
  • In the freezer: up to 1–2 months, ideally in portioned tubs

When reheating, warm gently over low heat, adding a splash of water or stock if it has thickened in the fridge.

Turning leftovers into new meals

Leftover components are a gift. A few ideas:

  • Katsu rice bowls
    Warm the curry and rice, then reheat sliced katsu in the oven or air fryer. Finish with a soft-boiled or jammy egg (an air fryer makes those straightforward; recipes for air-fried hard-boiled eggs walk you through timing and peeling tricks).
  • Breakfast with a twist
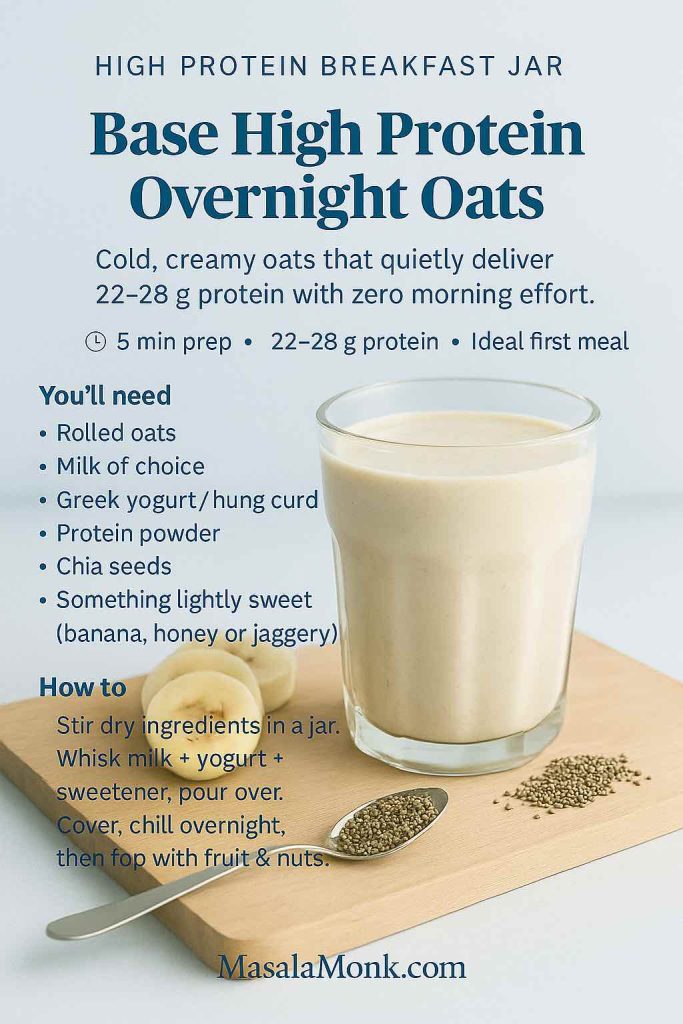
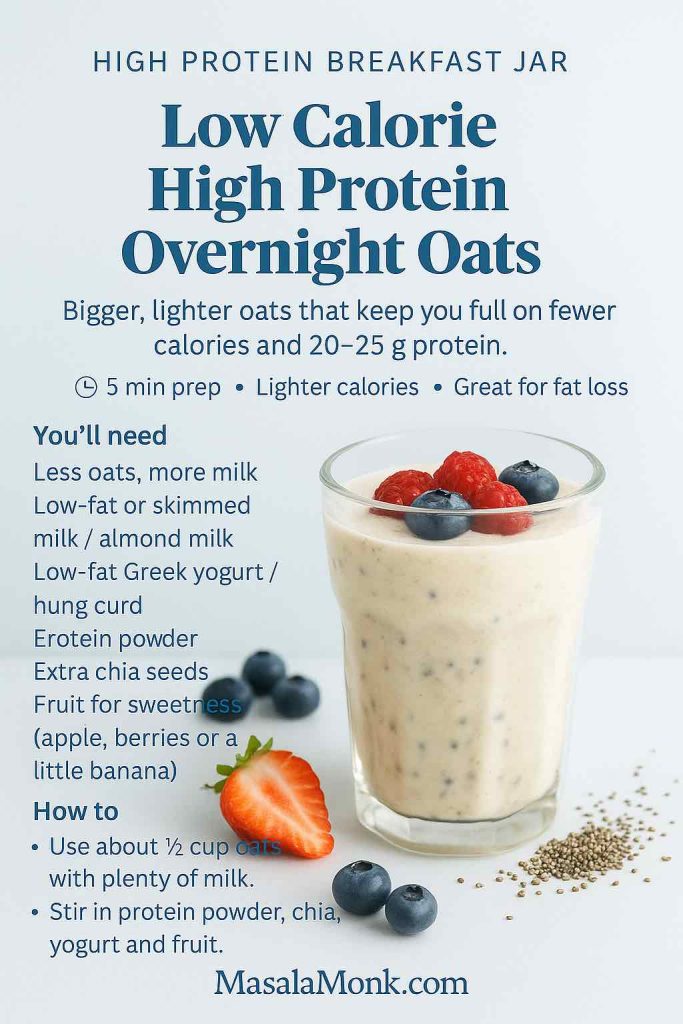
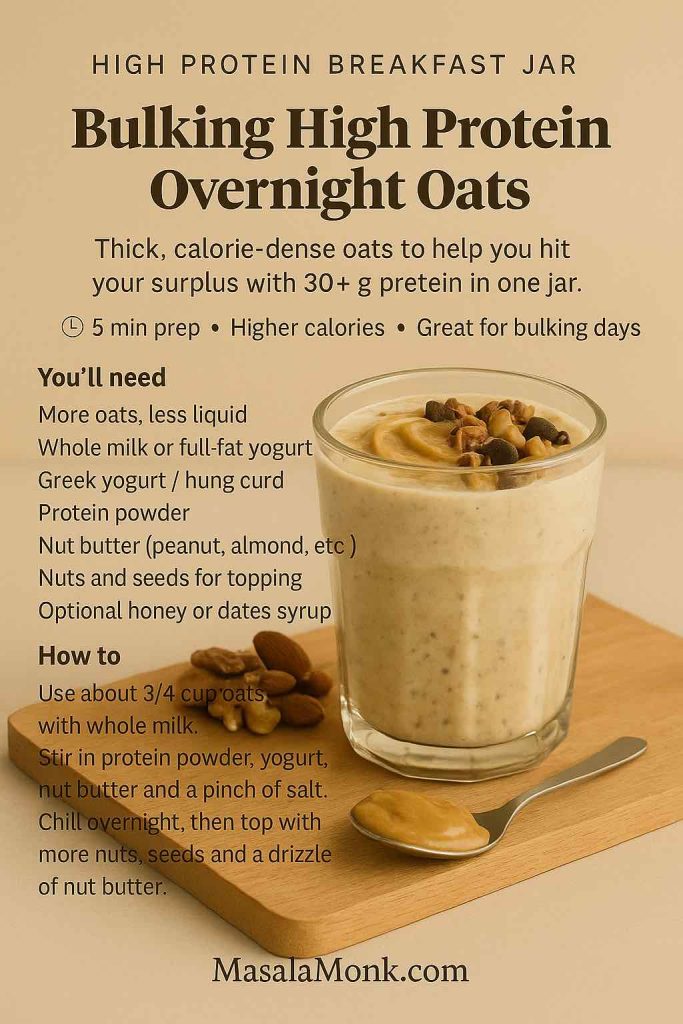
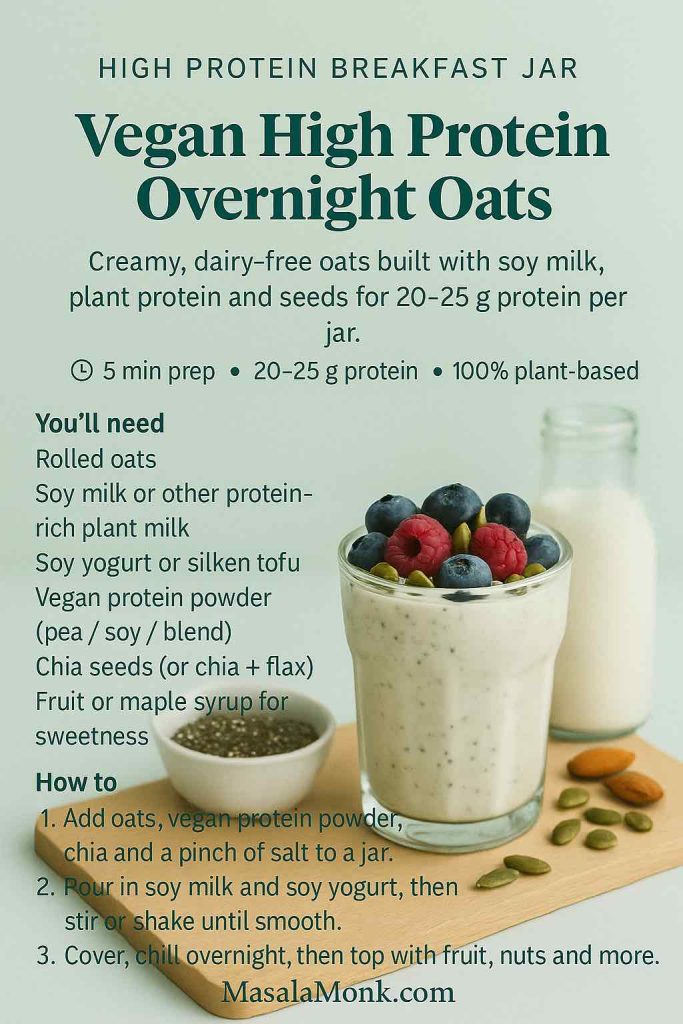
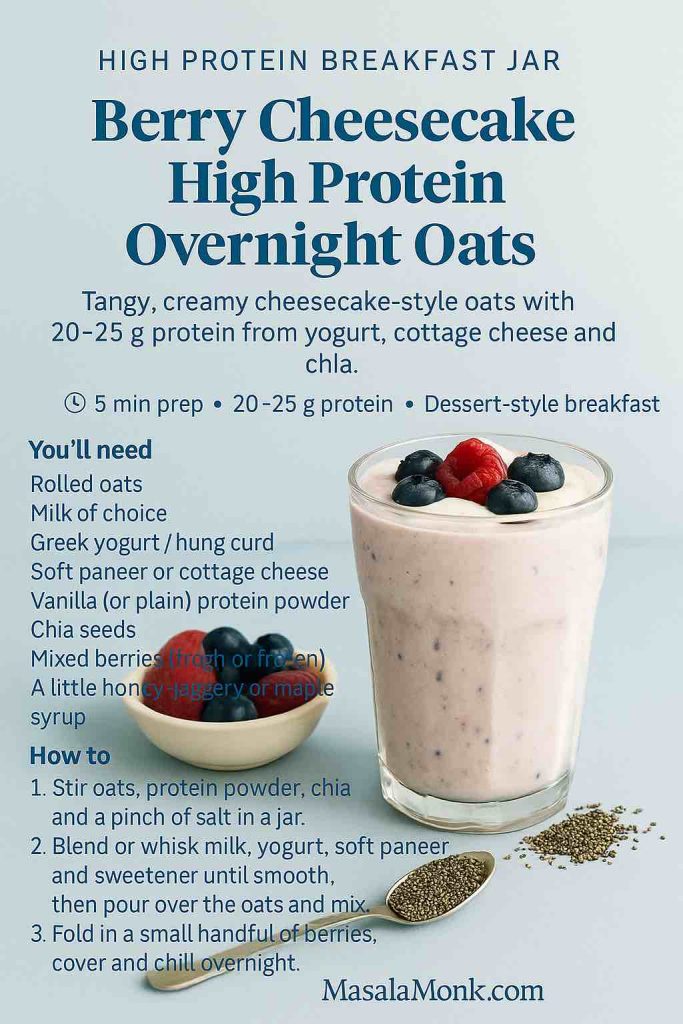
    The morning after a rich dinner, you might want something lighter but still satisfying. High-protein overnight oats with multiple flavour variations are simple to prep in jars while the curry simmers; then breakfast is sorted for the next day or two.
  • Second-day curry night
    Use leftover curry sauce as a base and add new ingredients: chickpeas, roasted vegetables, or seared paneer. You can even pour it over crisp roasted potatoes for a Japanese twist on curry chips, though you may find you don’t miss the chips at all once you’ve fallen in love with katsu.

If your overall routine includes training, fasting days or careful hydration around heavier meals, there’s room to think about drinks as well as food. Homemade electrolyte mixes, such as the ones in MasalaMonk’s recipes for natural electrolyte drinks or fasting-friendly electrolyte blends, can sit in the fridge ready for gym sessions or long walks.


A brief look at katsu curry’s journey

To round things out, it’s worth taking a step back and appreciating how this humble plate of rice, curry and cutlet travelled so far.

Historically, Japanese curry itself is a product of global zigzagging. Articles like the one on how India gave Japan its beloved katsu curry describe how British naval officers introduced an Anglicised form of Indian curry to Japan in the late nineteenth century. Japanese cooks then adapted it, thickening the sauce, toning down the heat and eventually turning it into something that feels distinctly Japanese.

Katsu, on the other hand, came from Western cutlet culture. When those two strands met on a plate at places like Grill Swiss in Ginza, the result was a dish that bridged European technique and Japanese comfort. Writers at Food Sake Tokyo talk about how katsu curry became popular with students, office workers and families precisely because it was affordable, filling and easy to serve from canteens.

Later, as Japan’s food culture spread abroad, katsu curry became a kind of ambassador dish, particularly in the UK where fast-casual restaurants turned it into an icon. The story of that journey is laid out in JETRO’s piece on katsu curry taking over British menus, and you can see its influence every time a non-Japanese restaurant lists “katsu” as shorthand for “Japanese-ish curry.”

Cooking it at home, though, brings the focus back to what made the dish appealing in the first place: the tactility of breading and frying, the inhale of curry steam when you lift the lid, the first bite where crisp crumb, soft rice and velvety sauce come together.


Bringing it all together

By now, you’ve seen that a chicken katsu curry recipe is really a template:

  • A comforting Japanese curry sauce, built either from scratch or with roux blocks
  • A crisp, breaded cutlet – chicken, pork, tofu or vegetables
  • A bowl of rice and a handful of crunchy toppings to tie it all together

Once you’ve cooked it once, you can improvise almost endlessly: swap in air-fried cutlets for a lighter take, lean into vegetarian versions, or double the curry and freeze half for an easy future dinner. You can follow it with Indian favourites like creamy butter chicken on another night, or pivot into cocktails and dessert with a lemon drop martini and a tray of tres leches cake when you’re feeding friends.

Most importantly, this is the kind of dish that rewards repetition. The second or third time you make it, your hands move more confidently: you salt the rice water without thinking, you know exactly when the curry is thick enough, and you recognise the moment the katsu turns the right shade of gold. That’s when a recipe stops being just words on a screen and becomes part of your personal kitchen repertoire—ready to be pulled out whenever you want the table to go a little quiet on the first bite.

FAQs about Katsu Curry Recipe with Chicken

1. What is chicken katsu curry, exactly?

Chicken katsu curry is a Japanese-style dish made of three parts: a crispy breaded chicken cutlet (chicken katsu), a thick and mildly spiced Japanese curry sauce, and steamed rice. In a classic chicken katsu curry recipe, the cutlet is sliced and served on top of rice, with the curry ladled to one side so the crumbs stay partly crisp while still soaking up the sauce.


2. Is chicken katsu curry Japanese or Indian?

Chicken katsu curry is considered Japanese, although the curry itself was originally inspired by Indian flavours that arrived via Britain. Over time, Japan developed its own curry powder blends, curry roux blocks and a characteristic thick, mellow sauce. As a result, a chicken katsu curry recipe today tastes very different from most Indian curries, with less heat and more comforting sweetness.


3. How spicy is a typical chicken katsu curry recipe?

Generally, chicken katsu curry is mild to medium in heat. Japanese curry powders and roux mixes are often sold in mild, medium and hot versions, but even the hot styles are usually gentler than many Indian or Thai curries. If you prefer a mild chicken katsu curry, use a mild curry powder and skip extra chilli; if you enjoy more kick, add chilli flakes, fresh chillies or a hotter curry powder while still keeping the sauce thick and cosy.


4. Can I make chicken katsu curry without deep frying?

Yes, absolutely. A chicken katsu curry recipe works very well with air-fried or oven-baked cutlets instead of deep-fried ones. Coat the chicken in flour, egg and panko as usual, then bake on a rack or cook in an air fryer with a light spray of oil until golden and cooked through. This method keeps the katsu crunchy but uses far less oil, which suits anyone looking for a lighter version or a “fakeaway” style katsu curry at home.


5. How do I make katsu curry sauce from scratch?

To make katsu curry sauce from scratch, start by slowly frying sliced onions in a little oil or butter until soft and lightly golden. Next, add garlic, ginger, carrots and potatoes, then sprinkle over flour and curry powder to form a simple roux. Gradually whisk in stock, then season with soy sauce, a touch of sugar or honey and a little grated apple. Simmer until the vegetables are tender and the sauce is thick and glossy. This forms the heart of any homemade chicken katsu curry recipe.


6. Can I use curry roux blocks, powder, paste or cubes for katsu curry?

You can use any of these, as long as you adjust the liquid and seasoning. Curry roux blocks and cubes are the most traditional for Japanese curry; they already contain flour, fat and spices, so you just dissolve them into stock after sautéing your vegetables. Even curry powder works well if you cook it with flour and oil to form a roux. You can pick up curry paste as well, which is stronger, so use less and balance it with extra sweetness and stock. In every case, taste the katsu curry sauce towards the end and adjust thickness and flavour so it coats the back of a spoon.


7. How can I make a healthier or Slimming World–style chicken katsu curry?

A lighter chicken katsu curry recipe focuses on reducing oil and increasing vegetables. First, bake or air-fry the breaded chicken instead of deep frying it, using oil spray instead of submerging it in oil. Second, use a smaller amount of fat in the curry base and rely on onions, carrots and potatoes for body, boosting flavour with stock, soy and spices rather than cream. Finally, serve the curry with extra shredded cabbage or steamed vegetables and a slightly smaller portion of rice. These small shifts keep the katsu experience but bring the meal closer to Slimming World–style “fakeaway” comfort food.


8. How do I make vegetarian or vegan katsu curry?

To make vegetarian or vegan katsu curry, replace the chicken with tofu or vegetables and use vegetable stock in the curry sauce. For tofu katsu, press firm tofu, slice it into slabs, then bread and fry or air-fry it just like chicken. If you are making vegetable katsu, use slices of aubergine, sweet potato or pumpkin. And for a fully vegan version, swap the egg wash for plant milk mixed with a little flour or use aquafaba (chickpea water) to help the panko stick. As long as you check that your curry roux or powder contains no animal products, you can enjoy a plant-based katsu curry that still feels indulgent.


9. Can I use pork or other meats instead of chicken in this katsu curry?

Definitely. In fact, pork katsu curry (tonkatsu curry) is probably the most common version in Japan. Simply substitute chicken with boneless pork loin or fillet, pound it slightly, then bread and cook in the same way. You can also adapt the method for turkey, firm white fish or even prawns, although you may need to tweak cooking times. Since the curry and rice remain the same, changing the protein is a simple way to create new meals from the same basic katsu curry recipe.


10. What are the best chicken cuts and breading tips for katsu?

Chicken breast is the most popular choice for katsu because it pounds out evenly, slices neatly and cooks quickly. However, chicken thigh cutlets give a juicier result if you don’t mind trimming them a bit. For breading, start with well-dried, evenly pounded pieces, then follow a flour–egg–panko sequence. Press the crumbs on firmly and let the coated chicken rest for a few minutes before cooking so the breading adheres. This approach gives a crisp, even crust that doesn’t slide off when you slice the katsu for your curry bowl.


11. Can I freeze chicken katsu curry and how should I reheat it?

You can freeze both components, but it’s best to freeze them separately. Freeze the breaded chicken either raw (before frying) or cooked and cooled; in both cases, reheat in an oven or air fryer so the crust becomes crisp again. Freeze the curry sauce in containers, leaving a little space at the top, and defrost it gently on the stove, adding a splash of water or stock if it has thickened. When you’re ready to eat, warm fresh rice, reheat the katsu and curry, and assemble as usual. This way, a homemade chicken katsu curry recipe becomes an easy grab-from-the-freezer dinner.


12. Is chicken katsu curry halal and how can I adapt it?

Chicken katsu curry can be halal as long as all ingredients meet halal requirements. Use halal-certified chicken, ensure the stock contains no non-halal meat or alcohol, and avoid adding mirin or sake to the curry sauce. The breading ingredients (flour, eggs, panko) are usually fine, so the main considerations are the meat and any liquids used for flavour. Once those are checked, the rest of the chicken katsu curry recipe can stay the same, giving you a halal-friendly version of this Japanese comfort dish.

Posted on 7 Comments

Air Fryer Hard-Boiled Eggs (No Water, Easy Peel Recipe)

Top view of a person holding toast topped with a halved air fryer hard boiled egg, next to an open air fryer basket filled with eggs, a bowl of eggs in ice water, and text reading "Air Fryer Hard Boiled Eggs – Time & temp guide inside".

If there’s one tiny kitchen trick that quietly changes your weekly routine, it might be this: making air fryer hard boiled eggs instead of dragging out a pot of water every time you want a few eggs. You lay them gently in the basket, set the time, walk away, and come back to perfectly cooked eggs that slide out of their shells with almost no effort.

No hovering over the stove. No pan to scrub. Just reliable, easy-peel eggs you can eat on toast, turn into deviled eggs, throw into salads, or stash in the fridge for busy days.


What Are Air Fryer Hard Boiled Eggs, Really?

The phrase “hard boiled eggs” is a bit of a lie here, because there’s no actual boiling. Instead of simmering in water, the eggs sit in the dry, circulating heat of the air fryer. The shells protect the whites and yolks, and the hot air cooks them kind of like a tiny oven.

The result is surprisingly close to classic boiled eggs:

  • Whites set and firm
  • Yolks as soft, jammy, or firm as you like, depending on time
  • Shells that usually peel very cleanly after a cold plunge

Curious about how other recipe developers handle it too? It’s interesting later to compare this method with recipes like Feel Good Foodie’s air fryer hard boiled eggs, but first it’s helpful to get your own timing dialed in.


Why Bother With Air Fryer Hard Boiled Eggs?

You might already have a foolproof stovetop method. So why move to the air fryer?

Less watching, more living

On the stove, you need to:

  • Bring water to a boil
  • Lower in the eggs gently
  • Track the timing
  • Adjust the heat to maintain a gentle simmer

With an air fryer, you:

  1. Preheat
  2. Put the eggs in
  3. Set the time
  4. Walk away

That makes it incredibly convenient if you’re also juggling toast, coffee, kids, or work messages in the morning.

Easily scale up or down

Some days you just need one egg for a snack. Other days you want a whole batch for meal prep. Either way, air fryer hard boiled eggs handle it effortlessly:

  • One egg cooks just as easily as eight
  • The method stays the same; you may only tweak the time by a minute if you pack the basket

It’s especially handy if you’re prepping a full week’s worth of eggs for breakfast boxes or high-protein snacks. If you’re tracking macros or protein intake, it’s useful to know exactly how much protein two boiled eggs give you, so a weekly batch practically becomes a pre-portioned protein stash in the fridge.

Great for meal prep and snacking

Because hard cooked eggs store well, they’re perfect for:

  • Lunchboxes
  • Salad toppers
  • Quick snacks with just a pinch of salt and spice
  • Deviled eggs for parties

The USDA notes that once eggs are hard-cooked and refrigerated, they can be safely stored for up to one week. That guideline, explained in their note on how long you can keep hard cooked eggs, makes a weekly egg-prep session genuinely worthwhile.


Ingredients and Equipment

You might already have everything you need.

Ingredients

  • Eggs – any number that fits in a single layer in your air fryer basket
  • Ice and cold water – for an ice bath to stop cooking and help with peeling

That’s all. No oil, no vinegar, no baking soda tricks required.

Equipment

  • Air fryer – basket or drawer style
  • Tongs or a spoon – to lift hot eggs safely
  • Large bowl – to hold the ice water bath

If you’re new to air fryers in general, it’s worth giving a quick read to 12 common air fryer mistakes and how to fix them. Simple things like overcrowding, skipping preheating, or using the wrong temperature can make a big difference with eggs too.


Step-by-Step Recipe: Air Fryer Hard Boiled Eggs

Let’s walk through the whole process from cold eggs to easy-peel perfection.

Step 1: Preheat the air fryer for Hard Boiled Eggs

Begin by preheating your air fryer to 270°F (about 130–135°C) for 3–5 minutes.

Step 1 for making air fryer hard boiled eggs – hand pressing the start button on a black air fryer preheated to 270°F (130–135°C).
Step 1: For perfectly cooked air fryer hard boiled eggs, preheat the air fryer to 270°F (130–135°C) for 3–5 minutes so the eggs go into evenly hot air, not a cold basket.

This short preheat helps ensure the eggs start cooking in a stable, even environment. If you’ve ever had eggs with slightly undercooked whites or overcooked yolks, a proper preheat alone can fix a lot of that inconsistency.

Step 2: Arrange the eggs in the basket

Once the air fryer is hot, carefully place the eggs in the basket:

  • Lay them in a single layer
  • Leave a little space between each egg so hot air can circulate
  • Avoid stacking or using multiple racks for this method
Step 2 for air fryer hard boiled eggs – eight brown eggs arranged in a single layer inside a black air fryer basket with space between each egg.
Step 2: Arrange the eggs in a single layer in the air fryer basket with a little space between them. This helps every egg cook evenly and reduces the chance of shells cracking while they “boil” in the air fryer.

Packing too many eggs too tightly can cause uneven cooking, especially at the edges of the basket. A little breathing room gives you more consistent results.

Step 3: Set the time and temperature

Now comes the key part: the timing.

At 270°F (about 132°C), these ranges work well:

  • Soft “boiled” eggs with runny yolks:
    About 11–12 minutes
  • Jammy eggs with custardy yolks:
    Around 13–14 minutes
  • Fully hard boiled eggs with firm yolks:
    Roughly 15–17 minutes
Step 3 for making air fryer hard boiled eggs – close-up of an air fryer set to 270°F and 15 minutes, with sliced eggs in the background showing soft, jammy, and hard yolks.
Step 3: Set the timer based on how you like your air fryer hard boiled eggs – about 11–12 minutes for soft eggs, 13–14 minutes for jammy centers, and 15–17 minutes for fully hard yolks, then adjust by a minute to match your own air fryer.

As a starting point, many people enjoy hard boiled eggs at about 15 minutes, then adjust slightly up or down on the next batch. Air fryers vary a bit in intensity, so once you test your machine, you’ll know your own perfect “house timing”.

If you’re curious how other cooks adapt the same idea, recipes like Skinnytaste’s air fryer hard boiled eggs or Cook At Home Mom’s air fryer eggs use similar combinations of temperature and timing, which can reassure you that you’re in a safe, sensible range.

Step 4: Shock the eggs in an ice bath

As soon as the timer beeps, move quickly:

  1. Carefully lift the eggs from the basket with tongs or a spoon.
  2. Transfer them straight into a bowl filled with ice and cold water.
  3. Let them rest there for at least 5–10 minutes.
Step 4 for air fryer hard boiled eggs – hand lowering a cooked egg into a glass bowl filled with ice water to cool the eggs quickly.
Step 4: Transfer the cooked eggs straight into an ice bath and let them cool for 5–10 minutes. Rapid chilling stops the cooking and makes air fryer hard boiled eggs much easier to peel.

This “shock” does two important things:

  • It stops the cooking instantly, so your yolks don’t overcook and turn chalky.
  • It helps the membrane pull away from the shell, making the eggs significantly easier to peel.

The FDA’s egg safety guidance on what you need to know about egg safety also emphasizes proper chilling and refrigeration to minimize foodborne risk, which is another good reason not to skip the ice bath.

Step 5: Peel or store Air Fryer Hard Boiled Eggs

After the eggs have cooled down:

  • Crack each egg gently on the counter, then roll it to create a network of cracks.
  • Start peeling from the wider end; there’s often a little air pocket there that makes it easier to get under the shell.
  • If the shell clings in spots, peel under a gentle stream of running water to loosen it.
Step 5 for air fryer hard boiled eggs – hands peeling a hard boiled egg on a countertop with eggshells scattered and a bowl of whole eggs in the background.
Step 5: Gently crack and roll each egg, then peel from the wider end where the air pocket sits. This helps the shell slip off cleanly so your air fryer hard boiled eggs look smooth and photo-ready.

You can now:

  • Eat the eggs right away
  • Store them whole and unpeeled in the fridge
  • Peel them all at once and keep them in an airtight container for quick snacks

For food safety, the USDA’s note on how long to keep hard cooked eggs clearly states they can be refrigerated for up to one week. That applies whether the eggs are peeled or still in their shells, as long as they’ve been chilled promptly.

Also Read: Negroni Recipe: Classic Cocktail & Its Variation Drinks


Air Fryer Hard Boiled Eggs: Soft, Jammy, and Hard

The beauty of this method is how easy it is to fine-tune the yolks.

How to make Soft air fryer eggs

If you love a runny yolk for dipping toast, try:

  • 11–12 minutes at 270°F, followed by the same ice bath
Soft air fryer egg sliced in half to show a runny yolk, with text indicating 11–12 minutes at 270°F and serving ideas over toast, ramen, and roasted veggies.
Soft air fryer eggs: Cook for 11–12 minutes at 270°F for a set white and runny yolk that’s perfect for dipping toast, topping hot ramen, or serving with roasted veggies on the side.

The white should be set while the center stays liquid or very soft. These are gorgeous served:

  • Over toast with butter and black pepper
  • On top of hot ramen or noodle soup
  • Alongside roasted veggies and bread

Also Read: How to Cook Perfect Rice Every Time (Recipe)

How to make Jammy air fryer eggs

Jammy eggs fall right in the middle: the yolk is thick and creamy rather than runny or crumbly.

  • Aim for 13–14 minutes at 270°F, then chill in ice water
Jammy air fryer egg sliced in half with a thick, creamy yolk, with text showing 13–14 minutes at 270°F and serving ideas for grain salads, rice bowls, and snack plates with hummus.
Jammy air fryer eggs: Cook for 13–14 minutes at 270°F to get a thick, custardy yolk that’s perfect for grain salads, rice or quinoa bowls, and snack plates with hummus and veggies.

This texture shines in:

  • Salads (especially grain-based ones)
  • Rice and quinoa bowls
  • Snack plates with vegetables, hummus, and a few olives

How to make Classic Air Fryer Hard Boiled Eggs

For air fryer hard boiled eggs that slice cleanly and mash well:

  • Go with 15–17 minutes at 270°F, depending on how firm you prefer the yolk
Hard air fryer egg sliced in half with a fully set yolk, with text showing 15–17 minutes at 270°F and serving ideas like egg salad, deviled eggs, and sandwiches.
Hard air fryer eggs: Cook for 15–17 minutes at 270°F for firm yolks that hold their shape. These hard boiled air fryer eggs are perfect for egg salad, deviled eggs, and slices on sandwiches or buttery toast.

These are ideal for:

  • Egg salad
  • Deviled eggs
  • Sliced eggs on sandwiches or toast
  • Protein-packed lunch boxes

Once you’ve tested your air fryer, you can even jot down separate timings for “soft,” “jammy,” and “hard” on a sticky note and keep it near the machine.

Also Read: Whiskey Sour Recipe: Classic Cocktail, Best Whiskey & Easy Twists


Ways to Use Air Fryer Hard Boiled Eggs

Having a container of air fryer hard boiled eggs in the fridge is like having a little protein toolkit ready whenever hunger hits.

Deviled eggs and party platters

Perhaps the most classic way to dress up hard boiled eggs is to turn them into deviled eggs. After you cook and chill your eggs in the air fryer, you can follow the fillings and flavor variations from this deviled eggs recipe with eight delicious twists.

Because air fryer hard boiled eggs usually have:

  • Evenly cooked yolks
  • Shells that peel cleanly

they’re perfect for deviled eggs that look neat enough to take to potlucks, brunches, or holiday tables.

Everyday breakfasts (and special brunches)

It’s very easy to build breakfast around a couple of eggs:

  • Slice them over buttered toast with a sprinkle of chilli flakes.
  • Pair them with a small fruit bowl and coffee.
  • Serve them alongside sautéed greens or leftover veggies.

On weekends or special mornings, you can go further and pair your air fryer hard boiled eggs with something sweet from the same appliance, such as french toast sticks that work in both the oven and the air fryer.

If you’re cooking for someone who avoids eggs but still loves brunch, you could switch them to vegan french toast with air fryer options or eggless french toast that’s crispy and fluffy while you enjoy your eggs on the side.

High-protein snacks

Hard boiled eggs are basically ready-made high-protein snacks. Two eggs alone make a surprisingly satisfying mini-meal. For more detailed macro info, you can peek at this breakdown of protein in three scrambled eggs, then adapt the numbers for your boiled eggs.

For a snack plate, try combining:

  • A couple of egg halves
  • Some cut vegetables
  • A handful of nuts or seeds
  • A little hummus or yogurt dip

When you’d rather keep things plant-based, it’s nice to still lean on the air fryer. For example, high-protein vegan meal prep ideas using an air fryer offer plenty of tofu and legume-based options to enjoy alongside, or instead of, eggs.

Salads, bowls, and sandwiches

Because they slice and chop so neatly, hard boiled eggs slot beautifully into:

  • Green salads
  • Pasta salads
  • Grain bowls with roasted vegetables
  • Sandwiches and wraps

For a slightly more global twist, you might draw inspiration from a list of popular Mediterranean breakfasts, adding olives, cucumbers, tomatoes, olive oil, and fresh herbs around your eggs.


Simple Seasoning Ideas (and a Deep Dive if You Want One)

Plain boiled eggs with just a pinch of salt are comforting. Still, once you start sprinkling on spices and toppings, they get much more exciting.

If you want a full playground of ideas, there’s a dedicated guide to seasoning options that make eggs come alive, but here are a few easy combinations you can try immediately:

  • Classic: Sea salt, black pepper, a drizzle of olive oil
  • Desi-inspired: Chaat masala, red chilli powder, a squeeze of lime
  • Smoky: Smoked paprika, garlic powder, a tiny bit of butter
  • Crunchy: Toasted sesame seeds, soy sauce, chopped spring onions
  • Herby: Fresh coriander or parsley, lemon zest, cracked pepper

You can also slice eggs onto toasted buns or pav and spoon over a light hollandaise or yoghurt-based sauce if you’d like to riff on some of the ideas from a desi twist on Eggs Benedict.


Nutrition and Health: Are Air Fryer Hard Boiled Eggs Good for You?

Eggs are one of those foods that look simple but come with a lot of nutrition and a lot of opinions.

What’s inside an egg?

Each egg contains:

  • High-quality protein
  • Fat (mostly in the yolk)
  • A mix of vitamins and minerals, including B vitamins, choline, and some fat-soluble vitamins

For a closer look at what each part gives you, you can check:

Together, those explain why egg whites are popular in weight loss diets, while yolks carry their own valuable nutrients.

How many eggs are okay per day?

That question comes up constantly. The answer depends on your health profile, cholesterol levels, and the rest of your diet. However, modern research tends to be kinder to eggs than older headlines suggested.

If you’d like a nuanced, readable explanation, this article on eggs and daily consumption walks through what studies actually say instead of relying on myths. It’s a great companion if you’re eating eggs regularly and want to understand where they fit in.

For people following low-carb or keto-style eating, eggs are almost a foundation food. There’s even a separate deep dive on why eggs are such a keto staple, which is useful if you’re combining this air fryer method with keto meal prep.

Are air fryers themselves healthy?

The air fryer is often marketed as a “healthy” appliance because it lets you cook crispy foods with much less oil than deep frying. That’s mostly true, but there are a couple of details worth knowing:

  • For starchy foods like fries, research has shown air frying can sometimes lead to higher acrylamide levels than boiling or steaming. Acrylamide is a compound formed in browned, carbohydrate-rich foods. A research summary on air frying and acrylamide in foods goes into detail on this.
  • However, eggs are not starchy, and they don’t contain the sugars and amino acids in the same way that potatoes or bread do, so acrylamide isn’t really a concern when you’re making air fryer hard boiled eggs.

For a balanced look at the broader question, you can read a practical overview in “Do Air Fryers Cause Cancer?” on Poison.org, which essentially concludes that moderation, variety, and proper cooking habits matter far more than any single appliance.

Also Read: 10 High Calorie Protein Shakes & Smoothie Recipes for Healthy Weight Gain


Storage, Safety, and Freshness

It’s easy to get excited about convenience and forget the boring-but-important part: food safety.

How long do hard boiled eggs last?

As mentioned earlier, the USDA has a clear answer: hard cooked eggs, once cooled and refrigerated, are safe to eat for up to one week. Their short note on how long you can keep hard cooked eggs is worth reading if you’re prepping a big batch.

In addition:

  • Don’t leave cooked eggs at room temperature for more than two hours. The FDA’s egg safety page on what you need to know about egg safety emphasizes that time window to reduce the risk of bacteria growing.
  • Store eggs in the refrigerator, not on the counter, once they’re cooked.

Storing raw eggs before cooking

It also helps to start with fresh eggs. For raw eggs, USDA guidance on how long eggs can be stored in the fridge explains that whole eggs in their shells typically keep for several weeks when refrigerated promptly.

If you’re curious about egg quality, cost, and labels, it can be useful to read whether expensive eggs are truly worth your money. That guide walks through cage-free, organic, and other terms so you can decide whether the premium is worthwhile for you.


Troubleshooting: Common Air Fryer Hard Boiled Eggs Issues

Even though the method is simple, questions do pop up. Fortunately, most problems have easy fixes.

My shells have brown spots

Sometimes, you’ll see little brown or tan spots on the shells after cooking in the air fryer. This usually happens where the hot air or heating element browned the shell. The inside is almost always fine.

If it bothers you aesthetically, you can:

  • Lower the temperature slightly and cook a bit longer, or
  • Experiment with moving the basket further from the top element if your machine allows

Once peeled, the egg usually looks completely normal.

I’m getting a greenish ring around the yolk

That green or grey ring around the yolk is a classic sign of overcooking. It’s safe to eat, but the texture can be a bit chalky.

To prevent it:

  • Shorten the cooking time by 1–2 minutes next time
  • Make sure you’re using a prompt, cold ice bath to stop the cooking

If it happens occasionally, don’t worry; you’re still very close to the right timing, and a tiny adjustment usually fixes it.

Some eggs cracked in the air fryer

Small hairline cracks can happen when:

  • Eggs are packed too tightly
  • There are tiny existing cracks you didn’t notice
  • The temperature in your air fryer is very intense in one spot

To reduce cracking:

  • Space the eggs out
  • Avoid dropping them into the basket
  • Try starting with room-temperature eggs if you consistently see cracks coming from fridge-cold eggs

Minor cracks are mostly cosmetic; as long as you chill and store the eggs properly, they’re usually fine to eat.

Also Read: High Protein Overnight Oats | 5 Recipes (Low Calorie, Vegan, Bulking & More)


Variations and Related Air Fryer Recipes

Once you’re comfortable knocking out air fryer hard boiled eggs, it’s only natural to cast around for more things to cook in there—especially for breakfasts, snacks, and meal prep.

Chicken wings and party snacks

For game nights or casual gatherings, a tray of eggs alone feels a bit bare. Adding something crispy and shareable works beautifully. That’s where super crispy air fryer chicken wings with no baking powder come in. They’re crunchy, flavorful, and much easier than dragging out a deep fryer.

On the side, you can offer more nibbles like:

Those snacky ideas turn a simple batch of eggs into part of a full spread.

Plant-based air fryer inspiration

Just as eggs are a powerhouse for omnivores, the air fryer is also a great ally for plant-based meal prep. On days when you want to rely less on animal protein, you can reach for:

Those resources make it easy to keep your air fryer busy even when you’re giving eggs a rest.

Beyond breakfast: falafel, potatoes, and more

As your confidence with the air fryer grows, it’s fun to explore more adventurous recipes, such as:

Add a few air fryer hard boiled eggs on the side, and you suddenly have mezze-style spreads, brunch boards, and snack platters that feel far more impressive than the effort required.


Bringing It All Together

In the end, air fryer hard boiled eggs are one of those quiet, unflashy techniques that earn their spot in your regular routine simply because they work so well:

  • The method is straightforward and hands-off.
  • The results are consistent once you know your air fryer’s timing.
  • The eggs themselves are endlessly versatile—breakfasts, snacks, salads, deviled trays, and everything in between.

As you start making them week after week, you’ll probably find your own little twists: a preferred level of doneness, a favorite seasoning, or a go-to way to serve them. And once the air fryer is already hot and humming, you might find yourself adding a few wings, potatoes, or plant-based bites to the basket as well.

All from the simple idea of “boiling” eggs without ever boiling water.

Also Read: Tres Leches – Mexican 3 Milk Cake Recipe

FAQs for Air Fryer Hard Boiled Eggs

1. What are air fryer hard boiled eggs, exactly?

Air fryer hard boiled eggs are whole eggs cooked in their shells using the hot, circulating air of an air fryer instead of boiling water on the stove. The heat gently cooks the whites and yolks until they reach your preferred level of doneness—soft, jammy, or fully hard—so you get the same result as traditional boiled eggs, just with a much simpler, hands-off method. In short, it’s a no-water way to make “boiled” eggs in an air fryer.


2. How long does it take to make air fryer hard boiled eggs?

To begin with, timing depends on how you like your yolks. For most air fryer hard boiled eggs, a good range is 15–17 minutes at a moderate temperature like 270°F (about 130–135°C). If you prefer softer centers, you can drop that to around 11–12 minutes for soft “boiled” eggs or 13–14 minutes for jammy yolks. After cooking, an ice bath finishes the job and helps them peel easily.


3. What is the best temperature for hard boiled eggs in the air fryer?

For reliable results, a medium temperature usually works best. Rather than cranking the heat all the way up, aim for about 270°F (around 132°C) when making air fryer hard boiled eggs. This gentler heat cooks the eggs evenly from shell to center and reduces the risk of rubbery whites or overcooked yolks. You can adjust a little up or down based on how powerful your specific air fryer feels.


4. Do I need water to make boiled eggs in the air fryer?

Interestingly, no water is needed at all for air fryer boiled eggs. The eggs sit directly in the basket in their shells, and the hot air does the cooking. Water baths, simmering, and boiling are replaced by a simple timer plus an ice bath afterward. The only water you really want is in the bowl for cooling the eggs quickly once they’re done.


5. Can I cook soft, jammy, and hard eggs in the air fryer using the same method?

Yes, you can use the same basic method and simply change the time. Soft air fryer eggs with runny yolks usually need around 11–12 minutes. Jammy eggs with a creamy, custardy center often do well at about 13–14 minutes. Finally, truly hard boiled air fryer eggs typically sit in the basket for 15–17 minutes. Everything else about the process—preheating, arranging the eggs, and chilling them—stays the same.


6. How many eggs can I cook in an air fryer at once?

Generally, you can cook as many eggs as fit in a single layer in your air fryer basket. They should sit comfortably without stacking or crowding so that the hot air can move around them. If your basket is big, you might easily handle a dozen eggs; if it’s smaller, you might cook six or eight. When the basket is very full, you might add a minute or so to your usual time for fully hard boiled eggs in the air fryer.


7. Why do my eggs crack or “explode” in the air fryer?

Every so often, eggs in an air fryer can crack, and occasionally a little egg white leaks out. Frequently, this happens when the eggs are packed too tightly, dropped into the basket, or have tiny hairline cracks already. In addition, a very high temperature can make pressure build up quickly inside the shell. To reduce cracking, space the eggs out, handle them gently, and stick to a moderate temperature instead of blasting them on maximum.


8. How do I make air fryer hard boiled eggs easier to peel?

Peeling is all about two key steps. First, don’t overcook the eggs; overdone eggs tend to cling to their shells. Second, transfer the eggs straight into an ice bath as soon as they come out of the air fryer. The sudden chill helps the egg pull away from the membrane inside the shell, which makes air fryer hard boiled eggs peel with far less frustration. Rolling the egg on the counter to crack the shell all over before peeling also helps.


9. Can I cook eggs in an air fryer without the shell?

Absolutely, you can cook eggs in an air fryer without the shell by using ramekins or silicone cups. For example, you can crack an egg into a greased ramekin for a baked or “boiled” style result, whisk eggs with milk and cheese for scrambled eggs in the air fryer, or pour a seasoned mixture into silicone molds for egg cups or egg bites. In each case, the air fryer becomes a tiny oven for your eggs, rather than just a replacement for boiling.


10. Is it safe to cook eggs in an air fryer?

Yes, cooking eggs in an air fryer is safe as long as you treat it like any other cooking method and follow basic food safety. Eggs should be cooked until the whites are fully set and yolks reach your chosen level of doneness, and any mixed egg dishes like egg bites or air fryer omelettes should be cooked until firm and steaming hot. Once they’re done, they need to be cooled and refrigerated promptly if you’re not eating them right away.


11. How long do air fryer boiled eggs last in the fridge?

Once you’ve cooled them down, air fryer boiled eggs keep well in the refrigerator. Typically, they can be stored for up to one week in a covered container. You can keep them in their shells or peel them in advance; either way, the key is to chill them promptly after cooking and then keep them cold. If they’ve been sitting at room temperature for more than a couple of hours, it’s safer to discard them.


12. Can I make scrambled eggs in the air fryer?

Yes, scrambled eggs in the air fryer are very doable. Instead of putting eggs straight in the basket, you whisk them in a bowl with a splash of milk, seasonings, and perhaps cheese, then pour the mixture into a greased, oven-safe dish or ramekin. After that, you cook the eggs at a moderate temperature, stirring once or twice if you like smaller curds, until they’re just set. The result is a gentle, baked-style scramble that pairs nicely with toast or vegetables.


13. Can I cook poached-style eggs in an air fryer?

You can’t poach eggs in the traditional sense inside an air fryer basket, but you can get a very similar result in cups. To create an air fryer poached egg effect, you grease a small ramekin or silicone cup, add a spoonful of water, and gently crack in an egg. Then, you cook it at a moderate heat until the whites are set and the yolk is still soft. The texture won’t be identical to a water-poached egg, yet it comes pleasantly close and works well for toast or brunch dishes.


14. How do I make air fryer egg bites or egg cups?

For air fryer egg bites, you whisk eggs with a little milk or cream, then stir in extras like cheese, chopped vegetables, herbs, or cooked meats. Next, you pour this mixture into greased silicone molds, muffin cups, or small ramekins, filling them about three-quarters full. After that, you cook them in the air fryer at a gentle temperature until they’re puffed and set in the center. These egg cups are easy to refrigerate and reheat, which makes them perfect for quick breakfasts.


15. Can I make an omelette or frittata in an air fryer?

Yes, an air fryer omelette or frittata is a great way to use the same appliance for a heartier dish. You simply whisk eggs with milk or cream, season well, and fold in fillings like vegetables, cheese, or leftover meats. Then, you pour everything into a greased, oven-safe pan that fits in the basket. Once it’s in, you cook the mixture until the center is set and the top is lightly golden. Thinner mixtures resemble an omelette, while thicker ones turn into a frittata-style bake.


16. Are air fryer hard boiled eggs healthier than regular boiled eggs?

Nutritionally, air fryer hard boiled eggs and classic stovetop boiled eggs are very similar. In both cases, you’re cooking the egg in its shell without added fat, and the protein, vitamins, and minerals remain largely the same. The main advantage of the air fryer method is convenience and ease rather than a big shift in nutrition. As always, how healthy your meal is overall depends more on what else is on the plate alongside those eggs.


17. Why do my air fryer boiled eggs sometimes have a green ring around the yolk?

When you see a green or grey ring around the yolk, it’s usually a sign that the eggs have been slightly overcooked. In an air fryer, this often means the temperature was a bit high or the time a little long. To fix it next time, you can reduce the cooking time by a minute or two and make sure the eggs go straight into an ice bath at the end. Even with the ring, the eggs are still safe to eat; the change is mainly cosmetic and affects texture more than anything else.


18. Can I use air fryer hard boiled eggs for deviled eggs?

Definitely, air fryer hard boiled eggs are excellent for deviled eggs. In fact, once you dial in the timing, the whites tend to be evenly cooked and the yolks nicely centered, which makes them ideal for neat deviled halves. After cooking and cooling, you simply peel the eggs, slice them, and mash the yolks with your chosen ingredients to make the filling. From there, you can keep things classic or experiment with spices, herbs, and toppings to create a tray of deviled eggs that really stands out.

Posted on 13 Comments

High Protein Overnight Oats | 5 Recipes (Low Calorie, Vegan, Bulking & More)

High protein overnight oats in a glass jar with berries and peanut butter, showing 5 easy ways for weight loss, bulking, vegan and more

If you like the idea of breakfast quietly getting ready for you while you sleep, high protein overnight oats are one of the easiest wins you can build into your routine. You stir a few ingredients into a jar at night, tuck it into the fridge, and wake up to something cold, creamy, filling and actually useful for your goals—whether that’s dropping a bit of weight, building muscle, eating more plant-based, or simply avoiding chaos in the morning.

At their core, high protein overnight oats are just oats soaked in liquid with enough protein-rich ingredients added to push the bowl into the 20–30 gram range. Because oats already bring slow-digesting carbohydrates and fibre, you get a steady release of energy instead of a blood-sugar spike and crash. When you add protein and a few smart toppings, you end up with a breakfast that feels like dessert in a jar but behaves like something a dietitian would approve of.

In this guide, you’ll first see a flexible base recipe for high protein overnight oats. After that, we’ll walk through four simple variations: a low-calorie, weight-loss–friendly version, a bulking/bodybuilder version, a vegan and dairy-free version, and finally a no-protein-powder version for days when you want everything to come from regular foods. Along the way, you’ll find links to deeper resources on oats, chia, peanut butter and more so you can tweak things to perfectly fit your macros and taste.


What Makes High Protein Overnight Oats So Powerful?

Before getting into measurements and jars, it’s worth understanding why this basic idea has so much staying power.

Oats are one of those old-school ingredients that have quietly earned their place in modern nutrition. They provide complex carbohydrates, a decent amount of plant protein, and a type of soluble fibre called beta-glucan. That fibre forms a gentle gel in your digestive system, slowing the release of glucose into your bloodstream and helping you feel full for longer. If you want to geek out on the details, the Harvard overview of oats explains how they support heart health, cholesterol and digestion without being complicated to cook.

Because oats are a whole grain, they also bring B-vitamins and minerals along for the ride. The key, though, is not to drown them in sugar. A piece on oatmeal as a smart breakfast choice makes the point that the base is excellent; it’s the flavoured instant sachets and excessive sweeteners that usually cause problems. In overnight oats, you’re in control of every ingredient, which makes it easy to keep things balanced.

Now add protein to that picture. Breakfasts that contain around 20–30 grams of protein are consistently associated with better appetite control and fewer random cravings later in the day. If you’re aiming to manage weight or just avoid mid-morning snack attacks, that’s a big deal. A simple explainer on protein at breakfast and weight loss breaks down why that 20-gram mark is such a useful target. High protein overnight oats are basically a painless way to hit that threshold.

Also Read: 10 High Calorie Protein Shakes & Smoothie Recipes for Healthy Weight Gain

Toppings for Extra Protein

On top of all that, you have chia seeds, nuts and seeds, Greek yogurt, soy products and protein powders—each of which brings its own extra protein, fibre and healthy fats. A quick look at chia seeds and their benefits shows how much fibre and omega-3 fat you get from just a couple of spoonfuls. When you combine all these pieces inside one jar, you get a breakfast that’s easy to prepare, genuinely satisfying, and far more interesting than a plain bowl of porridge.


Choosing Your Oats and Other Building Blocks

Although “oats are oats” is a nice simple idea, the supermarket shelves tell a different story. You’ll see steel-cut, rolled, old-fashioned, quick-cooking and instant oats, plus flavoured packets and granola mixes. The good news is that most plain, unflavoured oat types can work in high protein overnight oats, as long as you adjust the liquid and soaking time.

If you’re a bit confused by the options, MasalaMonk has a detailed guide to oat types and nutrition that walks through steel-cut, rolled, quick and instant oats in simple language. Pair that with their breakdown of oats vs oatmeal and you’ll never stand in the cereal aisle unsure what to buy again.

For overnight oats specifically:

  • Rolled or old-fashioned oats are the sweet spot. They soften nicely overnight and keep some texture.
  • Quick oats will give you a softer, more pudding-like texture and tend to thicken faster.
  • Steel-cut oats need more liquid and time; if you like a bit of chew, they can be great, but you may want to pre-soak or use slightly warm liquid.

If you want to see what happens when oats and chia get together specifically for weight loss and texture, take a look at MasalaMonk’s article on harnessing the power of oats and chia seeds for weight loss. It’s essentially a deep dive into the same idea we’re using here: using fibre and volume to keep hunger in check.

Beyond the oats themselves, you’ll be choosing:

  • Liquid – milk, oat milk, soy milk, almond milk, coconut milk or a mix. If you enjoy DIY projects, the homemade oat milk tutorial at MasalaMonk gives you a one-ingredient version that works beautifully in jars.
  • Protein source – Greek yogurt, skyr, cottage cheese, silken tofu, protein powder (whey or plant-based), or combinations of these.
  • Thickeners and boosters – chia seeds, ground flax, nut butters, seeds.
  • Flavour and sweetness – fruit, cocoa powder, vanilla, cinnamon, cardamom, a small amount of honey, jaggery or dates.

Once you see high protein overnight oats as a formula rather than a single strict recipe, it becomes much easier to customise them.

Also Read: How to Cook Perfect Rice Every Time (Recipe)


The Base High Protein Overnight Oats Recipe

Let’s start with a foundation you can come back to repeatedly. This base high protein overnight oats recipe is designed to land around the 22–28 gram protein mark for most people, depending on your protein powder and yogurt.

Ingredients for One Jar

  • ½ cup (around 40 g) rolled oats
  • ¾ cup (about 180 ml) milk of choice (dairy, soy, or another plant milk)
  • ¼ cup (60 g) thick Greek yogurt or hung curd
  • 1 scoop (20–25 g) protein powder
  • 1 tablespoon chia seeds
  • ½ medium banana, mashed or 1–2 teaspoons honey/jaggery powder
  • A pinch of salt
  • ½ teaspoon vanilla extract or ground cinnamon
  • Optional toppings in the morning: berries, sliced banana, a few chopped nuts, a teaspoon of nut butter, extra seeds

If you’re sensitive to sweetness, err on the side of less banana or sweetener at first. You can always drizzle a bit of honey or maple syrup on top the next day.

Base High Protein Overnight Oats recipe card showing a glass of creamy overnight oats with banana slices and chia seeds on a wooden board, plus a simple list of ingredients and 3-step method.
Screenshot or pin this base high protein overnight oats formula—oats, milk, Greek yogurt, protein powder and chia—then tweak the toppings to match your calories and macros for the day.

Step-by-Step Method

  1. Combine the dry ingredients.
    Add oats, protein powder, chia seeds, salt and any spices into a jar or container. Stir them together so the powder and seeds are evenly distributed.
  2. Whisk the wet ingredients.
    In a small bowl, whisk milk, yogurt and mashed banana or liquid sweetener. This little step helps your protein powder dissolve more evenly and keeps clumps away.
  3. Bring everything together.
    Pour the wet mixture over the oats mixture. Stir thoroughly, scraping down the sides and bottom of the jar. If it looks very thick, add a splash more milk; if it looks thin, remember that chia and oats will thicken it overnight.
  4. Let the fridge do the work.
    Seal the jar and refrigerate it for at least 4 hours. Overnight (8–12 hours) is ideal. A simple overnight refrigerator oatmeal recipe from Mayo Clinic notes that this kind of mixture can keep for a couple of days if stored properly, which makes prepping multiple jars at once very practical.
  5. Top and adjust in the morning.
    When you’re ready to eat, open the jar and give your high protein overnight oats a quick stir. If it’s too thick, loosen it with a little extra milk or yogurt. Then add toppings: a handful of berries, a spoonful of chopped nuts, some seeds, or a drizzle of peanut butter.

If you enjoy this kind of “prepped once, ready for several days” breakfast, you’ll probably also like MasalaMonk’s healthy oat protein bars. Those bars use oats and protein in a portable, no-sugar way that pairs naturally with this overnight oats approach.

From this base, you can move in four directions depending on your goals and preferences.

Also Read: Homemade Hot Chocolate with Cocoa Powder Recipe


Low Calorie High Protein Overnight Oats for Weight Loss

Sometimes you want your breakfast to be filling and high in protein, but not too heavy on calories. In that case, the idea is to keep protein high while dropping the overall energy density and increasing fibre and water content.

A low calorie high protein overnight oats version is especially useful when:

  • You’re in a fat-loss phase
  • You tend to snack a lot mid-morning
  • You’d rather save more calories for lunch and dinner

How to Lighten the Base Recipe

Starting from the base, you can make a few simple adjustments:

  • Reduce oats to ⅓ cup instead of ½ cup.
  • Use 1 cup unsweetened almond milk, oat milk or skimmed dairy milk instead of ¾ cup regular milk.
  • Keep ¼ cup of low-fat Greek yogurt, or use a slightly smaller portion if you’re very calorie-conscious.
  • Leave the protein powder scoop as-is so protein stays high.
  • Increase chia seeds to 1½ tablespoons; they add fibre and volume for very few additional calories.
  • Swap mashed banana for grated apple and cinnamon or use a zero-calorie sweetener if needed.
  • Focus toppings on fruit and a few seeds rather than heavy nut butters.
Low Calorie High Protein Overnight Oats recipe card showing a glass jar of creamy overnight oats topped with berries, with a simple list of lighter ingredients and quick method for a weight-loss friendly breakfast.
Save this low calorie high protein overnight oats formula for busy mornings—use less oats, more milk, extra chia and fruit for sweetness to stay full on fewer calories while still hitting 20–25 g of protein.

This gives you a jar of high protein overnight oats that feels generous in size, thanks to extra liquid and chia, but doesn’t eat up your entire calorie budget for the morning. If you like reading about how oats and chia can support fat loss specifically, the MasalaMonk post on oats and chia seeds for weight loss goes into both the science and practical tips.

Importance of Protein

On the protein side, starting your day with a substantial amount can help you feel satisfied for longer and spontaneously eat a little less later on. An accessible explainer on protein at breakfast and weight loss points out that aiming for around 20 grams or more can be particularly helpful for hunger and cravings. With this lighter jar, you remain in that target zone without feeling like you’re dieting.

If you’re building a broader plan around this approach, you might enjoy moving on to other whole-grain, high-protein options during the week, like oat-based snack bars or savoury legumes. The important thing is that this low calorie high protein overnight oats version gives you a stable, predictable base to fall back on during busy mornings.


Bulking and Bodybuilder High Protein Overnight Oats

Of course, not every phase is about eating less. When you’re trying to add muscle mass, train harder or simply maintain weight on an active schedule, you often need more calories in a compact, digestible form. That’s where a bulking version of high protein overnight oats shines.

Instead of nibbling on toast after toast, you can get a serious hit of calories and protein in one bowl or jar, without feeling like you’re stuffing yourself.

Also Read: Peanut Butter Cookies (Classic Recipe & 3 Variations)

Turning the Base Into a Bulking Jar

Using the base high protein overnight oats recipe, make the following changes:

  • Increase oats to ¾ cup for more carbohydrates and volume.
  • Use 1 cup whole milk or even add a splash of cream if you’re really struggling to get enough calories.
  • Keep ¼ cup Greek yogurt, or go up to ⅓ cup if you enjoy the tang.
  • Keep the full scoop of protein powder.
  • Add 1–2 tablespoons peanut butter or almond butter into the mixture.
  • Top with 1–2 tablespoons chopped nuts (almonds, walnuts, peanuts) and a spoon of seeds in the morning.
  • If you tolerate sugar well, a small drizzle of honey or dates syrup can add pleasant sweetness and extra energy.
Bulking High Protein Overnight Oats recipe card showing a creamy jar of overnight oats on a wooden board with nuts and chia seeds, plus a short list of higher-calorie ingredients and a simple how-to for mass-gainer breakfast.
Use this bulking high protein overnight oats formula on heavy training days—extra oats, whole milk, Greek yogurt, protein powder and nut butter give you a dense, 30+ gram protein jar that helps you hit your calorie surplus without feeling stuffed.

This kind of bodybuilder high protein overnight oats can easily reach the 500–700 kcal range depending on your exact ingredient choices, while still leaving you feeling comfortable rather than bloated. It’s the sort of breakfast that pairs nicely with heavy training days or long work mornings when lunch is far away.

Why this combination of Oats and Peanut Butter works

The combination of oats and peanut butter, in particular, is a classic for a reason. It brings complex carbohydrates, protein, fibre and healthy fats together in a simple package. MasalaMonk has a full article on oatmeal and peanut butter as a powerful combination that, while written with weight management in mind, also explains why the pairing is so effective for energy and satiety.

For extra protein and crunch, it’s worth looking at which nuts and seeds give you the most per serving. The MasalaMonk guide to protein-packed nuts and seeds breaks down the standouts, making it easier to choose toppings that aren’t just tasty but also macro-friendly for a bulking phase.

Also Read: Béchamel Sauce for Lasagna: Classic, Vegan & Ricotta Sauce Recipe


Vegan and Dairy-Free High Protein Overnight Oats

If you avoid dairy or just prefer a plant-based diet, you might wonder whether high protein overnight oats are still realistic. The good news is that they absolutely are. You simply shift the emphasis towards soy, pea protein and seeds instead of yogurt, cottage cheese or whey.

A vegan high protein overnight oats jar can still hit the same 20–25 gram range while feeling light and fresh.

Building a Plant-Based High Protein Jar

Here’s how you can adapt the base recipe without any dairy:

  • Use ½ cup rolled oats, as usual.
  • Swap dairy milk for 1 cup unsweetened soy milk; it’s one of the highest-protein plant milks.
  • Replace Greek yogurt with ¼ cup soy yogurt or a few spoons of silken tofu blended into the liquid.
  • Choose a plant-based protein powder, such as pea, soy or a rice-pea blend.
  • Keep at least 1 tablespoon chia seeds, and consider adding some ground flax for extra omega-3 fats.
  • Sweeten naturally with mashed banana, blended dates or a small spoonful of maple syrup.
Vegan High Protein Overnight Oats recipe card showing a jar of creamy dairy-free overnight oats with berries and seeds, plus a simple list of plant-based ingredients and a quick how-to for a 20–25 g protein breakfast.
Screenshot this vegan high protein overnight oats formula for dairy-free mornings—rolled oats, soy milk, plant-based protein powder, chia seeds and fruit give you a creamy 20–25 g protein jar without any yogurt or whey.

Chia seeds play an especially important role in vegan high protein overnight oats, because they add both protein and fibre, helping you reach your targets without relying on dairy. For a deeper look at why these tiny seeds are often described as nutritional heavyweights, you can read a concise summary on chia seed nutrition and benefits, which explains their fibre, protein and omega-3 content in a straightforward way.

If you’re looking to generally increase your plant-based protein intake at breakfast, MasalaMonk’s article on high protein plant-based breakfast ideas fits nicely alongside this jar formula. You could rotate between tofu scrambles, chickpea patties and this vegan high protein overnight oats recipe throughout the week to keep things interesting.

Also Read: Cottage Cheese Lasagna Recipe | Chicken, Spinach, & Ricotta


High Protein Overnight Oats Without Protein Powder

Protein powders are convenient, versatile and usually taste good in overnight oats. Even so, you might prefer to get all your protein from “regular” foods, or you may occasionally run out of your favourite tub. In those situations, high protein overnight oats without protein powder are absolutely possible.

The key is to lean heavily on Greek yogurt, curd, cottage cheese or paneer, along with seeds and milk.

A Whole-Food, No-Powder Version

Use this pattern when you’d rather skip the scoop:

  • ½ cup rolled oats
  • ½–¾ cup milk or fortified plant milk
  • ½ cup thick Greek yogurt or hung curd
  • Optional: ¼ cup soft paneer or cottage cheese, crumbled finely
  • 1–2 tablespoons chia seeds or a mix of chia and ground flax
  • A little honey, jaggery or mashed fruit for sweetness
  • Cinnamon, cardamom or vanilla for flavour
  • Fruit and a small handful of chopped nuts on top
High Protein Overnight Oats without protein powder recipe card showing a creamy jar of oats with seeds and fruit, plus a simple list of whole-food ingredients like yogurt, milk, paneer and chia.
Keep this high protein overnight oats formula handy for days you don’t want to use protein powder—Greek yogurt, milk, a little paneer or cottage cheese and chia seeds give you a 20–25 g protein breakfast built entirely from everyday foods.

Greek yogurt can provide 8–10 grams of protein in just 100 grams, and cottage cheese or paneer adds even more. Between that, the milk and the seeds, you can still reach a meaningful protein intake without relying on any processed powders.

You might see recipes online that add raw egg whites straight into overnight oats to raise the protein. It’s best to be cautious there. If you do experiment, use pasteurised liquid egg whites and heat the mixture gently before serving rather than eating them fully raw from the fridge.

For the bigger picture—how this jar fits into your whole day—it’s worth checking out MasalaMonk’s article on how to eat 100 grams of protein a day. That guide shows you how a strong breakfast like high protein overnight oats can take some pressure off lunch and dinner, especially if you’re trying to hit more ambitious protein targets.

Also Read: French Toast Sticks (Air Fryer + Oven Recipe) — Crispy Outside, Custardy Inside


Flavour Ideas to Keep High Protein Overnight Oats Interesting

Once you understand the structure of high protein overnight oats, you can create an almost endless range of flavours without losing the macro balance. Keeping things exciting is important; even the healthiest recipe will get abandoned if it feels boring after three days.

Here are a few flavour profiles you can use across all four variations:

Chocolate Peanut Butter High Protein Overnight Oats

Stir cocoa powder into the base mixture along with a spoon of peanut butter. In the bulking version, you can be generous with both; in the low-calorie version, go lighter on the peanut butter and rely more on cocoa and a few crushed peanuts for flavour. A little chopped dark chocolate on top makes it feel like dessert.

If you want to understand why oats and peanut butter are such a satisfying combination, the MasalaMonk piece on oatmeal and peanut butter explores how they work together for fullness and nutrition.

Chocolate Peanut Butter High Protein Overnight Oats recipe card showing a jar of chocolate overnight oats on a wooden board with peanuts, cocoa and peanut butter, plus a simple list of ingredients and a quick how-to.
Turn your basic high protein overnight oats into a chocolate peanut butter jar—just add cocoa, peanut butter and a chocolate or vanilla protein powder for a dessert-style breakfast that still delivers around 25–30 grams of protein.

Apple Cinnamon High Protein Overnight Oats

Grate half an apple into the jar before refrigerating and add a generous pinch of cinnamon. The apple softens overnight, adding natural sweetness and volume. In the morning, you can top with a few raisins and a sprinkle of chopped walnuts to echo classic apple-pie flavours while still keeping the jar balanced.

Apple Cinnamon High Protein Overnight Oats recipe card showing a jar of creamy oats with apple slices and cinnamon on a wooden board, plus a simple list of ingredients and a quick how-to.
Save this apple cinnamon high protein overnight oats formula for cozy mornings—grated apple, cinnamon, oats, Greek yogurt, protein powder and chia give you warm apple-pie flavour with 20–25 grams of protein in each jar.

Pumpkin Pie High Protein Overnight Oats

For a seasonal twist, add a few spoons of pumpkin purée, cinnamon, nutmeg and a touch of sweetener. This works especially well with the no-powder or vegan versions, as the pumpkin adds thickness and comfort without much extra fat. A small handful of toasted pumpkin seeds on top brings extra crunch and protein.

Pumpkin Pie High Protein Overnight Oats recipe card showing a jar of pumpkin-coloured overnight oats topped with nuts and cinnamon on a wooden board, with a simple ingredient list and quick how-to for a cozy high protein breakfast.
Pin this pumpkin pie high protein overnight oats formula for autumn—stir pumpkin purée, cinnamon, nutmeg, oats, Greek yogurt, protein powder and chia together for a dessert-style jar that still delivers around 20–25 grams of protein.

Tiramisu-Inspired High Protein Overnight Oats

Add a shot of strong coffee (or a spoonful of instant coffee dissolved in your milk), along with cocoa and vanilla. In the morning, dust the top with a little more cocoa powder and add a spoon of yogurt for a “cream” effect. This variation leans heavily on the idea that high protein overnight oats can feel like a treat rather than a chore.

Tiramisu-Inspired High Protein Overnight Oats recipe card showing a jar of coffee-and-cocoa overnight oats with a creamy topping and cocoa dusting, alongside a simple ingredient list and quick how-to for a 20–25 g protein breakfast.
Turn your morning coffee into breakfast with this tiramisu-inspired high protein overnight oats—espresso, cocoa, oats, Greek yogurt, protein powder and chia come together for a dessert-style jar that still delivers around 20–25 grams of protein.

Berry Cheesecake High Protein Overnight Oats

Use a mix of Greek yogurt and cottage cheese in the base, plus a little vanilla and lemon zest. Top with a small handful of mixed berries. This flavour profile sits very naturally inside the no-powder version, because the dairy itself creates that cheesecake-like tang and creaminess.

You can also borrow ideas from other jar-style recipes. For instance, MasalaMonk’s chia pudding with steel-cut oats and mango uses layered textures and fruit in a way that translates beautifully to high protein overnight oats. The formats are similar; only the exact macro balance and ingredients change.

Berry Cheesecake High Protein Overnight Oats recipe card showing a jar of creamy cheesecake-style overnight oats topped with mixed berries, alongside a short ingredient formula and step-by-step method including folding in berries and topping them in the morning.
Screenshot this berry cheesecake high protein overnight oats formula for days you want dessert at breakfast—Greek yogurt, soft paneer or cottage cheese, oats, protein powder and chia make a tangy cheesecake-style base, then you fold in berries and add a fresh berry topping in the morning for 20–25 grams of protein per jar.

Also Read: 10 Best Chicken Sandwich Recipes (BBQ, Parm, Buffalo & More)


Making High Protein Overnight Oats Part of Your Week

A single jar is great, but where high protein overnight oats really shine is in repeatable meal prep. Because the ingredients are simple and inexpensive, you can batch-prepare several jars at once and line them up in the fridge.

A few practical strategies make life easier:

  • Choose one or two base patterns for the week—perhaps the low calorie version on workdays and the bulking version on heavy training days.
  • Prep 3–4 jars of the same base high protein overnight oats, then vary the toppings in the morning with different fruits, nuts and spices so you don’t get bored.
  • Keep a small box of mixed nuts and seeds ready to sprinkle over the top; the guide to protein-rich nuts and seeds can help you stock up on the most efficient options.
  • On days when you’re in the mood for something different, switch to a bar or baked format like the healthy oat protein bars or an oat-based snack, but keep the overall ingredients similar.

Overnight oats also sit comfortably inside a more general pattern of eating that emphasises whole grains, plenty of plants and adequate protein. If you enjoy exploring that style of eating, resources like the Harvard Healthy Eating Plate give a simple visual summary of how to balance your plate (or jar) without obsessing over exact numbers.

Also Read: Vegan French Toast: 6 Easy Recipes (Pan, Air Fryer, GF & High-Protein)


Bringing It All Together

High protein overnight oats are one of those rare habits that manage to be practical, enjoyable and nutritionally solid at the same time. Once you’re comfortable with the base method—mix, soak, top—you can adapt them in countless ways.

You’ve seen:

  • A base recipe that can easily reach 20–30 grams of protein.
  • A low-calorie version that supports weight loss and appetite control while still feeling generous.
  • A bulking and bodybuilder version for days when you need more energy and strength.
  • A vegan and dairy-free version that keeps everything plant-based without sacrificing protein.
  • A no-powder version built entirely from regular foods like yogurt, paneer, milk and seeds.

From there, you can apply as many flavour layers as you like—chocolate peanut butter, apple cinnamon, pumpkin pie, tiramisu and beyond—while still respecting your macro goals. You can keep things simple on busy weekdays and get creative when you have more time, all without changing the underlying habit of prepping your high protein overnight oats the night before.

With a few jars, some rolled oats, a protein source you like and a handful of toppings, you’re only a five-minute stir away from a breakfast that quietly takes care of you every morning.

Also Read: Pumpkin Spice, Your Way: Master Blend, Variations & Real-World Recipes


FAQs

1. How much protein should be in high protein overnight oats?

For most people, high protein overnight oats make sense when each serving delivers at least 20 grams of protein. Plenty of bowls will land between 20–30 grams, depending on how much yogurt, milk and protein powder you use. That kind of overnight oats protein content is usually enough to support better appetite control and muscle repair after training.

To nudge your jar into the high end of that range, simply combine rolled oats with a scoop of protein powder, Greek yogurt and a little milk. Together, those ingredients turn regular oats into genuinely high protein overnight oats instead of just a carb-heavy breakfast.


2. Are high protein overnight oats good for weight loss?

Yes, high protein overnight oats can fit very well into a fat-loss plan, especially when you build low calorie high protein overnight oats on purpose. Protein and fibre help you feel full, which makes it easier to avoid random snacking later in the day. Meanwhile, the slow-digesting carbs from oats give you steady energy rather than a crash.

To keep your bowl helpful for weight loss, emphasise high protein low calorie overnight oats: reduce the amount of oats slightly, choose a lean protein source, increase chia seeds or fruit for volume, and be modest with nut butters and sugary toppings. In that way, you enjoy a big jar, satisfying texture and a proper hit of protein without blowing through your calorie budget.


3. Which oats are best for high protein overnight oats?

Rolled or old-fashioned oats tend to be the best choice for high protein overnight oats because they soften nicely overnight while still keeping some bite. Quick oats also work, particularly if you enjoy a smoother, pudding-like texture, although they can get a bit mushy if you leave the jar for several days.

Steel-cut oats are an option too, yet they usually need more liquid and a longer soak. If you like a chewier texture, you can mix a spoonful of steel-cut oats into rolled oats and adjust the liquid accordingly. In short, any plain oat variety can be used, but rolled oats give the most reliable texture for high protein overnight oats recipes.


4. What is the best protein powder for overnight oats and oatmeal?

There isn’t a single “best protein powder for overnight oats,” because it depends on your taste, digestion and dietary needs. Even so, there are a few reliable patterns. Whey concentrate or isolate dissolves easily and creates creamy whey protein overnight oats with a dessert-like texture. Casein, on the other hand, thickens the mixture a little more and keeps you full for longer.

If you prefer a plant-based option, pea, soy or a rice–pea blend often makes the best protein powder for oats and oatmeal because those powders usually mix smoothly without chalkiness. Flavours such as vanilla, chocolate or cinnamon roll pair especially well with oats. Regardless of which you choose, start with a small scoop and adjust the liquid until your high protein overnight oats feel just right.


5. Can I make high protein overnight oats without protein powder?

Absolutely. High protein overnight oats without protein powder are easy to build if you lean on whole foods. Thick Greek yogurt, hung curd, cottage cheese or paneer, plus milk and seeds, can all add meaningful protein. When you combine these with oats, it’s still simple to reach 20 grams of protein per serving.

To do this, simply increase your yogurt or curd to at least half a cup, keep a generous splash of milk, and include one or two tablespoons of chia or other seeds. That way, you end up with high protein overnight oats that rely entirely on familiar ingredients and still feel indulgent and creamy.


6. Can I use whey protein in overnight oats, or will it get gritty?

You can definitely use whey protein in overnight oats, and it usually blends in very well. To avoid any gritty texture, first whisk the whey with your milk and yogurt before pouring it over the oats. Once everything is smooth, stir in the oats and chia seeds. After chilling, whey protein overnight oats become thick, creamy and easy to eat straight from the jar.

Because whey tends to dissolve quickly, it is particularly good for people who want high protein overnight oats with a simple, milkshake-like flavour. If your scoop is very sweet, you may not need extra sugar, honey or banana at all.


7. Is it possible to make high protein overnight oats low carb?

It’s tricky to make overnight oats truly low carb, since oats themselves are a carbohydrate-rich grain. Nevertheless, you can move toward high protein low carb overnight oats by adjusting the ratios. For example, you can use a slightly smaller portion of oats, then increase protein sources such as Greek yogurt, protein powder and seeds.

In addition, focus on toppings like berries and nuts rather than bananas, dried fruit or large amounts of honey. The result will still contain some carbs from the oats, yet the overall balance shifts toward higher protein, more healthy fats and fewer sugars. As a result, your high protein overnight oats feel steadier on blood sugar while still being enjoyable.


8. Are high protein overnight oats suitable for vegans and people who are dairy-free?

Yes, it’s straightforward to make vegan high protein overnight oats. Instead of dairy milk and yogurt, choose soy milk, almond milk or oat milk and use a plant-based yogurt or silken tofu. Then add a scoop of vegan protein powder made from pea, soy or a blend, and finish with chia seeds, flaxseeds and nuts.

This approach gives you vegan high protein overnight oats that still reach a solid protein target, without any dairy at all. On top of that, you add extra fibre and good fats, which makes the jar satisfying and nutrient-dense even without animal products.


9. How long do high protein overnight oats last in the fridge?

Typically, high protein overnight oats keep well for around three days in the fridge when stored in a sealed container. The texture often improves on day two as the oats and chia seeds absorb more liquid. After that, the mixture can become very thick, and fruit mixed in from the beginning may start to soften too much.

If you want to meal prep several portions, it’s better to prepare the base high protein overnight oats in jars and then add fresh toppings on the day you plan to eat each one. In that manner, you get the convenience of batch-prep while keeping the flavours and textures bright.


10. Can high protein overnight oats really replace a full breakfast?

For most people, a well-balanced serving of high protein overnight oats can absolutely stand in for a complete breakfast. You’re getting complex carbohydrates from oats, a solid chunk of protein, and depending on your toppings, fibre, healthy fats and micronutrients from fruit, nuts and seeds. That combination tends to keep you full and focused for several hours.

To turn the jar into a more substantial meal, you can simply scale the recipe slightly upward or add an extra side such as a small piece of fruit or a handful of nuts. Consequently, high protein overnight oats become a flexible foundation that you can adjust up or down depending on your hunger, training schedule and goals.

Posted on 12 Comments

How to Eat 100 Grams of Protein a Day

HOW TO EAT 100 GRAMS OF PROTEIN A DAY

If you’ve ever set out to “eat more protein,” you know it sounds simple—until you actually try to get 100 grams by dinner without living on chicken breast, shakes, or mystery powders. But here’s the truth: hitting 100 grams isn’t just doable, it can actually be delicious, rewarding, and even fun if you approach it like a real person—not a spreadsheet.

Let’s break it down, bust some myths, and make this a high-protein journey you’ll actually enjoy (and stick to).


Why Are So Many People Chasing 100 Grams of Protein?

There’s a reason you keep hearing about “100 grams of protein a day” on fitness podcasts, Instagram reels, and even at your office lunch table. For most active adults, that’s a sweet spot: enough to build and repair muscle, keep hunger in check, boost metabolism, and maintain your energy—even if you’re just trying to feel a bit stronger and not run a marathon.

It’s not just for bodybuilders—100g is about taking charge of your nutrition, one satisfying meal at a time.

Want to geek out on the science? What Is Protein? covers all the reasons protein is the true MVP of your diet.


How to Actually Hit 100 Grams a Day—No Math Degree Required

The secret isn’t protein powders, it’s habits. Here’s how real people do it:

1. Build Every Meal Around Protein

Breakfast
Start your day strong! Instead of toast-and-go, try a bowl of Greek yogurt (10g+ per cup), eggs (6g each), or an oat bowl made with ultra-filtered milk. Top with nuts or chia seeds for extra points.

Example day-starter: 2 eggs + 1 cup Greek yogurt = 22g protein before 10am.

Feeling adventurous? Explore ways to boost your breakfast game in Benefits of Nuts and Seeds – Protein‑Packed Superfoods.


Lunch
Don’t let lunch be an afterthought! Go for a power salad with grilled chicken, tofu, or tempeh (100g of either gets you 19–27g), or pile chickpeas onto a hearty grain bowl. Even a quick dal and rice or a paneer wrap can pack serious protein.

Want more plant-based inspiration? Check out The Power of Tempeh: 10 High‑Protein Plant‑Based Meal Prep Ideas.


Dinner
Finish strong. Grill or bake fish (salmon = 22g/100g), toss cubes of paneer into curry, or scramble three eggs with veggies and a sprinkle of cheese for 25g+ in a single pan.

Stuck for dinner ideas? Protein in 3 Scrambled Eggs: Nutritional Insights and Benefits can help you level up your evening meal.


Snacks That Pull Their Weight
Snack time is a secret weapon. Grab cottage cheese (12g per half cup), roasted chickpeas, edamame, or a mini protein smoothie (blend Greek yogurt, milk, spinach, nut butter for 15g+). Suddenly, 100 grams looks… totally doable.


2. Distribute Your Protein Like a Pro

Why space it out? Because your body uses protein best when you give it steady doses (20–30g per meal), instead of flooding it all at once. This means better muscle recovery, less snacky hunger, and stable energy. It’s like charging your phone little by little instead of one frantic sprint at the end of the day.


3. Prioritize Whole Foods (and Flavor!)

You don’t need a cupboard full of supplements to get to 100g. In fact, real foods are your secret weapon: they keep you fuller, taste better, and pack bonus vitamins, minerals, and fiber.

Top picks:
Eggs, chicken, fish, paneer, Greek yogurt, cottage cheese, tofu, tempeh, lentils, beans, seeds, nuts, quinoa, and high-protein grains.

Want the numbers for eggs? How Much Protein in Two Boiled Eggs? breaks it down.

And if you want your grains to pull their weight, get creative with 10 Plant‑Based Meal Prep Ideas: Using Quinoa as a Protein Source.


4. Mix, Match, and Make It Yours

One size doesn’t fit all.

  • Vegetarian or vegan? Mix beans, lentils, tofu, tempeh, nuts, and seeds—combine them for complete protein.
  • Omnivore or pescatarian? Pair plant and animal sources for variety and maximum nutrition.

No matter your eating style, with a little mix-and-match, 100g is yours for the taking.


Real-Life Protein Hacks (That Don’t Suck)

  • Prep in Bulk: Cook a batch of chicken, lentils, or eggs so you’re always a step ahead.
  • Snack Smart: Keep cheese sticks, boiled eggs, protein bars, or roasted seeds in your bag or desk.
  • Upgrade Your Carbs: Use high-protein wraps, breads, or pasta to sneak in extra grams—effortlessly.
  • Smoothies Save Lives: A handful of spinach, scoop of yogurt, nut butter, and milk can turn a basic smoothie into a protein-packed meal in a cup.
  • Eat What You Like: Don’t force foods you hate. There’s always another protein source that fits your vibe.

Why the Fuss? The Benefits You’ll Actually Feel

More protein isn’t just a trend—it’s a real game-changer. Expect…

  • Sustained energy throughout the day (no more afternoon crashes)
  • Fewer cravings and snack attacks
  • Stronger muscles and faster recovery (even if you’re just chasing kids, not barbells)
  • Better hair, skin, and nails (thank those amino acids!)
  • More satisfaction from every meal

The Takeaway: Eat, Enjoy, and Repeat

Hitting 100 grams of protein a day isn’t about punishment or perfection—it’s about small, tasty upgrades and habits that actually make your life better. Build every meal (and snack) around protein, go for variety, and listen to what feels good in your body. The numbers will add up, and so will the results.


Hungry for more high-protein inspiration, meal prep tips, and myth-busting nutrition stories?

Head to MasalaMonk.com and dive into the rest of the blog—you’ll find dozens of guides, meal ideas, and science-backed answers to make eating well the easiest part of your day.

10 FAQs About Eating 100 Grams of Protein a Day

1. Is 100 grams of protein per day safe for everyone?
For most healthy adults, yes. People with kidney issues or other medical conditions should consult their doctor before significantly increasing protein intake.

2. Can vegetarians or vegans hit 100g protein without supplements?
Absolutely! By combining lentils, beans, tofu, tempeh, quinoa, nuts, and seeds throughout the day, plant-based eaters can easily reach 100g without protein powders.

3. What are the best protein sources for breakfast?
Eggs, Greek yogurt, cottage cheese, tofu scramble, nut butter, protein-enriched oats, and ultra-filtered milk are all great choices.

4. How can I get enough protein if I have a small appetite?
Distribute protein through smaller, more frequent meals/snacks—Greek yogurt, cheese, nuts, eggs, smoothies, or edamame work well in smaller portions.

5. Are protein bars and powders necessary to reach 100g?
Not at all! Whole foods should be your foundation, though bars or powders can help on extra-busy days or when you need portable options.

6. How much protein should I eat at each meal?
Aim for 20–30g per meal and use snacks (10–20g) to fill the gaps for the most even, effective intake.

7. Can I eat all my protein at dinner?
You’ll absorb it, but research shows your body uses protein better if you spread it throughout the day for muscle maintenance and fullness.

8. How can I add more protein to plant-based meals?
Incorporate legumes, lentils, tofu, tempeh, nuts, seeds, quinoa, and high-protein whole grains into your regular rotation.

9. Will eating 100g of protein help with weight loss?
Higher protein can help you feel fuller, preserve muscle, and support healthy weight loss—especially when paired with balanced carbs and fats.

10. How do I know if I’m getting enough protein?
Track your intake for a few days using a food diary or app, and adjust meals to fill the gaps. Over time, it gets easier and more intuitive.

Posted on Leave a comment

Innovate Your Keto Breakfast: 5 Pine Nut, Pomegranate Seed, and Pea Protein Shake Recipes for Meal Replacement

INNOVATE YOUR KETO BREAKFAST Pine Nut, Pomegranate Seed, and Pea Protein Shake Recipes for Meal Replacement

Are you tired of the same bacon and eggs every morning on keto? Looking for something plant-forward, fresh, and truly energizing—but still low in carbs and high in satiety? Let’s break the mold with keto meal-replacement shakes that bring together three powerhouse ingredients: pine nuts, pomegranate seeds, and pea protein.

These shakes aren’t just novel—they’re delicious, nutrient-dense, portable, and can be precisely customized to fit your macros. This post will walk you through why these ingredients are perfect for keto, how to combine them, and then give you five inventive, tested recipes (with pro tips and macro guides!) to make your mornings as satisfying as they are healthy.


Why These Ingredients?

Pine Nuts

Small but mighty, pine nuts are rich in healthy monounsaturated fats, vitamin E, magnesium, and plant sterols. Their creamy texture and subtly buttery taste add luxury to your morning, while their fat content supports ketosis and long-lasting fullness.

Pomegranate Seeds

While pomegranate isn’t typically “keto,” a tablespoon or two of the seeds offers a pop of color, antioxidants, and tart-sweet flavor with only a minor carb contribution. When used judiciously, they brighten your shake without breaking ketosis.

Pea Protein

Unlike dairy-based proteins, pea protein is plant-based, low in carbs, and suitable for most allergies. It has a neutral flavor, blends smoothly, and provides complete protein to keep you energized all morning.


The Art of Building a Keto Shake

  • Base: Start with 1–1.5 cups unsweetened nut or seed milk (almond, coconut, macadamia, or even hemp milk).
  • Protein: Add 1 scoop pea protein isolate (usually 18–22g protein, <2g net carbs per scoop).
  • Fats: Include 1–2 tablespoons of pine nuts (or pine nut butter for extra creaminess).
  • Flavor and Antioxidants: 1–2 tablespoons of pomegranate seeds—just enough for tang, color, and health benefits.
  • Extras: Add spices, nut butter, avocado, or coconut cream for variety. Sweeten only if needed with monk fruit, stevia, or allulose.

Pro Tip: For a meal replacement, aim for ~20g protein, 20g fat, and <8g net carbs per serving.


5 Innovative Shake Recipes

Each recipe below is formulated for one generous serving, perfect as a stand-alone breakfast.


1. Ultra-Creamy Pine Nut & Pomegranate Morning Shake

Ingredients:

  • 1.25 cups unsweetened almond milk
  • 1 scoop vanilla pea protein
  • 1 Tbsp pine nuts, finely ground
  • 1 Tbsp pomegranate seeds
  • 1 Tbsp chia seeds (optional, for fiber and texture)
  • Ice cubes (to desired thickness)
  • 1–2 tsp allulose or monk fruit sweetener (optional)

Directions:

  1. Add all ingredients except pomegranate to a blender.
  2. Blend until creamy and smooth.
  3. Stir in or sprinkle the pomegranate seeds on top before serving.

Macros: ~6g net carbs, 21g protein, 17g fat

Why you’ll love it: Silky and slightly tangy with bursts of juicy pomegranate—perfect for a refreshing start!


2. Pine Nut Butter & Citrus Protein Shake

Ingredients:

  • 1 cup unsweetened vanilla almond milk
  • 1 scoop unflavored or vanilla pea protein
  • 1 Tbsp pine nut butter
  • Zest of ½ lemon or lime
  • 1 Tbsp pomegranate seeds (garnish)
  • Sweetener to taste
  • Ice

Directions:

  1. Blend all ingredients except pomegranate seeds.
  2. Pour into a glass and top with pomegranate seeds for color.

Macros: ~5g net carbs, 20g protein, 16g fat

Pro Tip: Pine nut butter adds a unique richness that’s both creamy and luxurious—try swapping the citrus zest for orange if you like a softer note.


3. Green Keto Power Shake with Pine Nuts & Pomegranate

Ingredients:

  • 1.25 cups unsweetened nut milk
  • 1 scoop pea protein
  • ½ cup baby spinach or kale
  • 1 Tbsp pine nuts, ground
  • 1 Tbsp pomegranate seeds
  • 1 tsp vanilla extract
  • 1–2 tsp sweetener (optional)
  • Ice

Directions:

  1. Blend all except pomegranate until smooth.
  2. Stir or layer in the seeds for a beautiful visual effect.

Macros: ~7g net carbs, 20g protein, 15g fat

Why you’ll love it: The greens add nutrients and color, but the pine nut and pomegranate balance the flavor beautifully.


4. Avocado & Pine Nut Keto Meal Replacement Shake

Ingredients:

  • 1 cup unsweetened almond milk
  • ¼ cup coconut cream or 2 Tbsp heavy cream
  • ½ avocado
  • 1 scoop pea protein
  • 1 Tbsp ground pine nuts
  • 1 Tbsp pomegranate seeds
  • Sweetener to taste
  • Ice

Directions:

  1. Combine everything but pomegranate in the blender and blend until creamy.
  2. Top with pomegranate seeds.

Macros: ~8g net carbs, 22g protein, 23g fat

Pro Tip: This is the most satiating shake on the list—great for days when you need to stay full for hours.


5. Spiced Pomegranate Keto Breakfast Shake

Ingredients:

  • 1.25 cups nut milk (almond or coconut)
  • 1 scoop pea protein
  • 1 Tbsp pine nut butter or chopped pine nuts
  • 1 Tbsp coconut cream
  • Pinch of cinnamon and ginger
  • 1 Tbsp pomegranate seeds (stirred in after blending)
  • Ice
  • Sweetener to taste

Directions:

  1. Blend everything except pomegranate.
  2. Stir seeds in or sprinkle on top.

Macros: ~6g net carbs, 20g protein, 18g fat

Why you’ll love it: Warm spices make this shake feel cozy and comforting—perfect for cool mornings.


Practical Tips for Shake Success

  • Prep ahead: Pre-portion your dry ingredients in jars. Add milk and blend in the morning.
  • Go portable: Use a shaker bottle if you don’t have time to blend—just shake extra hard and use pine nut butter instead of whole nuts.
  • Customize: Adjust fat and protein to your needs by changing the amounts of pine nuts/cream and pea protein.
  • Carb count: Pomegranate is the main carb contributor. Stick to 1–2 Tbsp seeds per shake for best results.

Conclusion: The Future of Keto Breakfast Is Here

Don’t settle for boring mornings! With these five shakes, you can start each day with something creamy, colorful, and deeply nourishing—while still supporting your keto goals. The combination of pine nuts, pomegranate, and pea protein is not only innovative but also easy to fit into any meal-prep plan.

Try one tomorrow—then make it your own!
Got a tweak, a favorite spice, or a new add-in? Share your version in the comments and let’s innovate together!


Ready to shake up your keto breakfast? Let’s make mornings exciting again—one pine nut, pomegranate, and pea protein shake at a time!

10 FAQs and Answers

1. Can I have these shakes every day on keto?
Yes. As long as you manage the carb content (mainly from pomegranate seeds and milk), these shakes can be enjoyed daily. They provide balanced macros for a meal replacement and keep you in ketosis if you stick to the portion sizes.


2. How can I further lower the carbs in these shakes?
Reduce or omit the pomegranate seeds, use unsweetened nut milks, and double-check your protein powder for hidden carbs. Adding more fat (like coconut cream or avocado) also improves satiety without raising carbs.


3. What are the benefits of using pea protein instead of whey or collagen?
Pea protein is plant-based, hypoallergenic, and low in carbs. It’s a great choice for vegans, those with dairy allergies, or anyone looking to avoid animal-based ingredients while still getting a complete amino acid profile.


4. Do pine nuts have any health concerns I should be aware of?
Pine nuts are generally healthy, but they are calorie-dense and contain moderate oxalates, so people with nut allergies or oxalate sensitivities should limit their intake or substitute with macadamia nuts or sunflower seeds.


5. Is it okay to prepare these shakes in advance?
Absolutely. Prepare and refrigerate them up to 24 hours ahead for best texture. For longer storage, keep the dry ingredients separate and blend with fresh liquid in the morning.


6. Can I swap out the pomegranate seeds for another keto-friendly fruit?
Yes. Use berries like raspberries or blackberries, which are lower in carbs. You can also try freeze-dried berry powder for flavor without extra carbs.


7. How do I make these shakes creamier?
Add avocado, coconut cream, or use nut butters. Blending longer and using ice also creates a thick, creamy texture. For extra smoothness, grind pine nuts before blending.


8. What sweeteners work best for these shakes?
Monk fruit, allulose, and stevia are all keto-friendly and won’t impact blood sugar. Taste and adjust, since some protein powders are already sweetened.


9. Are these shakes good for intermittent fasting?
Yes, if used as your “break-fast” meal. They provide balanced nutrition and are easy on the stomach, making them ideal for breaking a fast while staying low-carb.


10. Can I use these shakes for weight loss?
Definitely. These shakes are high in protein and healthy fats, which help control hunger and support muscle maintenance while reducing calories. Track your portions to align with your weight loss goals.