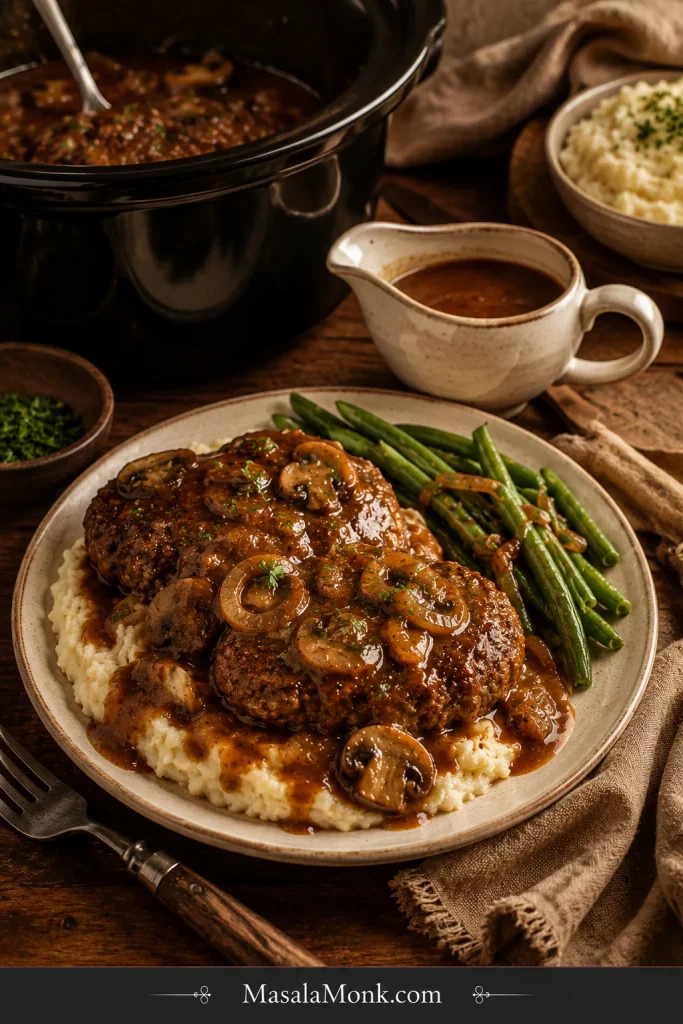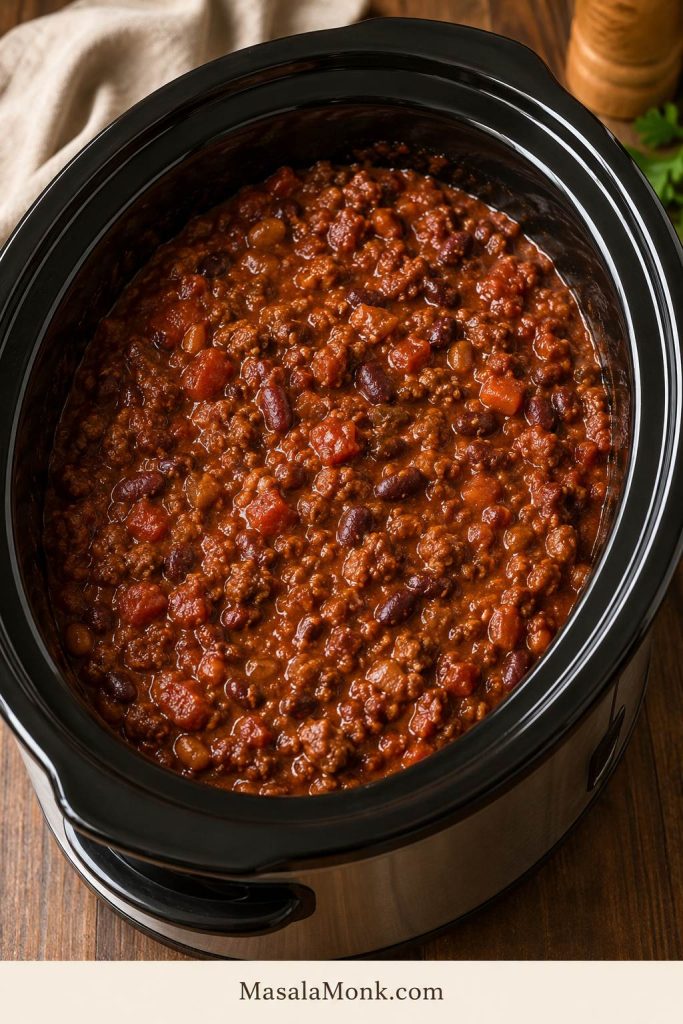
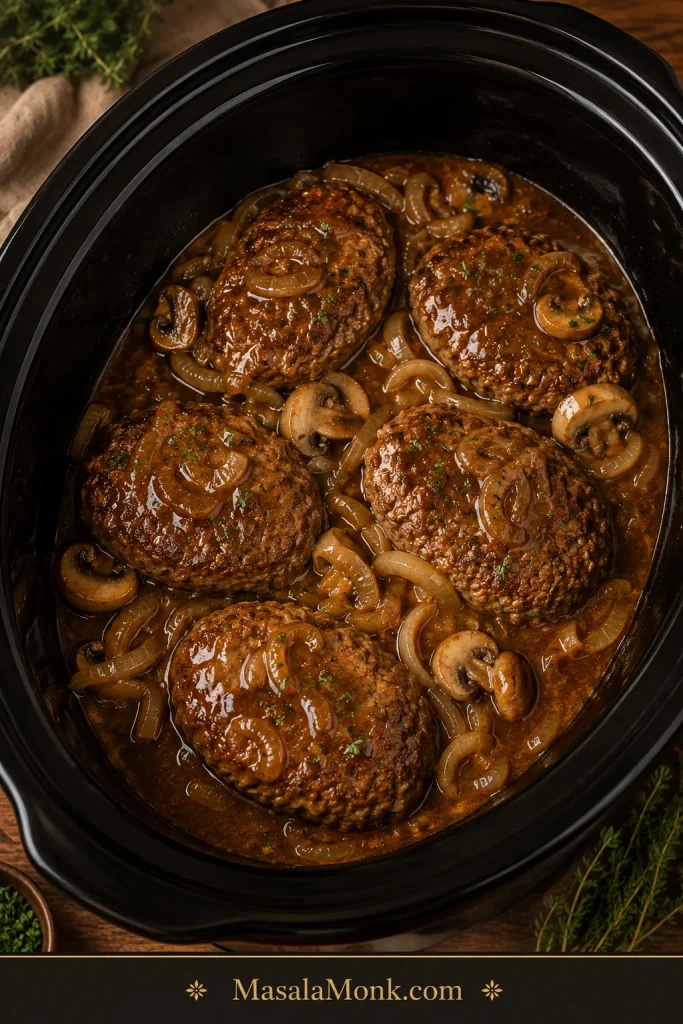
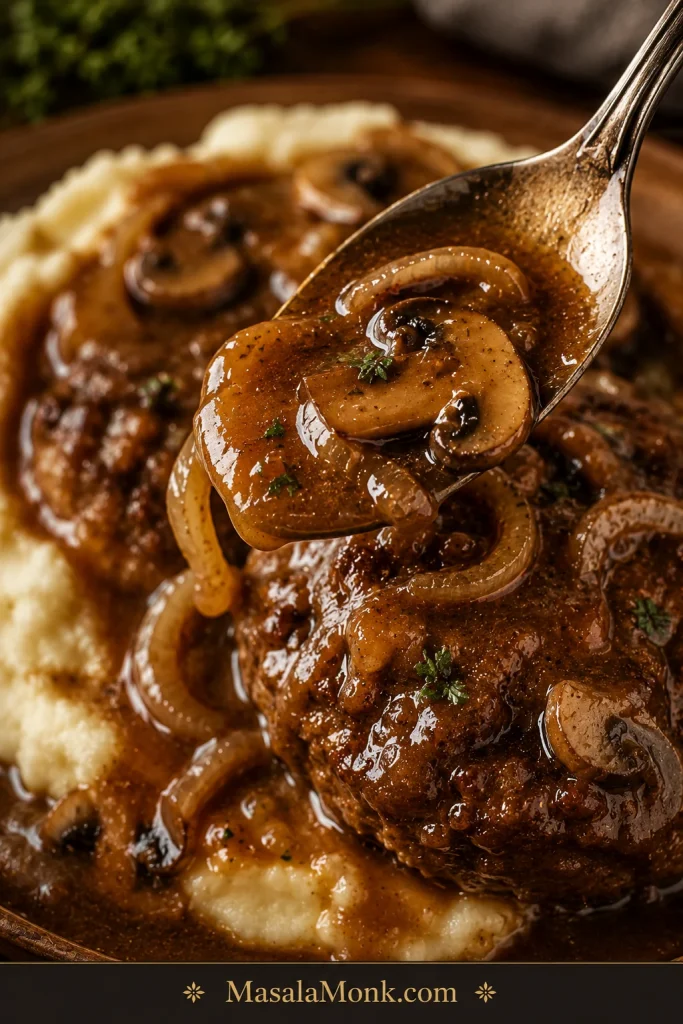
This crock pot Salisbury steak is the slow cooker dinner you make when mashed potatoes are already on your mind. Tender ground beef patties cook in rich brown gravy with soft onions, mushrooms if you like them, and enough sauce to spoon over everything on the plate.
A good crock pot Salisbury steak is really a gravy dinner with beef patties in the middle, so the sauce has to be treated like the main event. It should taste beefy, oniony, and rich — not thin, salty, or steamed.
You also get clear shortcut options for thawed hamburger patties, cream of mushroom soup, brown gravy mix, onion soup mix, French onion soup, and meatballs, because some nights dinner starts with the pantry or freezer. The goal is not to pretend packets and cans do not exist. Instead, use them in a way that still tastes balanced, cozy, and cared for.
If you want the classic side ready too, this mashed potatoes recipe is built for creamy, fluffy potatoes that can hold a lot of gravy.
Quick Answer: Can You Make Salisbury Steak in a Crock Pot?
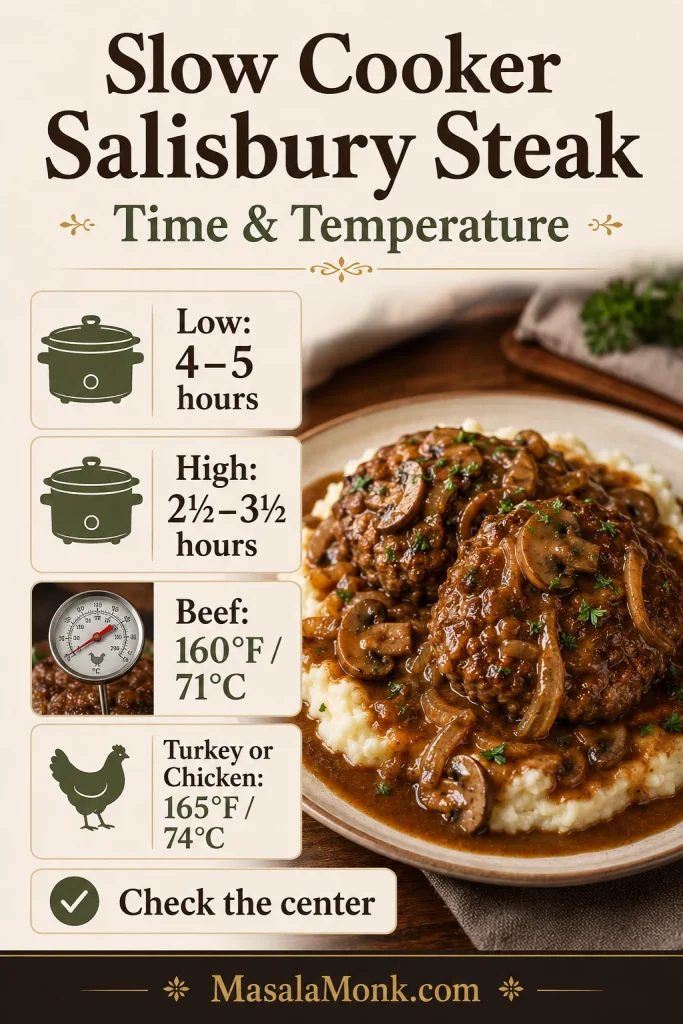
Yes. Salisbury steak works well in a crock pot when the patties are shaped firmly, browned first if possible, and cooked in a flavorful sauce. For homemade browned patties, cook on low for 4 to 5 hours, or on high for 2½ to 3½ hours, until the centers reach 160°F / 71°C.
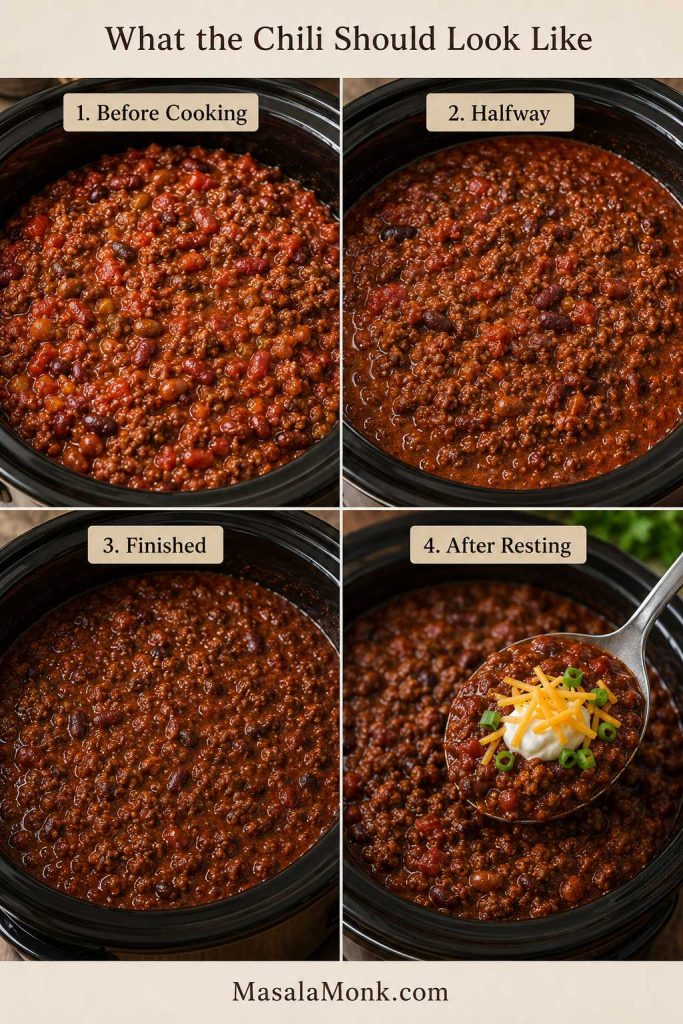
The sauce will usually look thinner while it cooks because slow cookers trap moisture. Give it its final 15 to 20 minutes after the cornstarch slurry; that is when it turns from slow cooker liquid into spoonable gravy.
This is not a fussy dinner. It is the kind of meal that feels best when the gravy is generous, the potatoes are soft, and nobody is asking what else is for dinner.
Remember this: mix the beef gently, brown first if you can, cook on low when possible, and save the real thickening for the end.
Make This When
Make this when you want the slow cooker to help, but you still want the plate to feel like real comfort food.
- You want an easy slow cooker dinner that still feels old-fashioned and cozy.
- A sauce-heavy meal for mashed potatoes, noodles, or rice sounds right.
- Pantry shortcuts need to taste balanced, not flat or too salty.
- Frozen hamburger patties need to become a proper dinner.
- Broken patties, watery gravy, tough beef, or bland sauce need clear fixes.
This is the kind of dinner that smells like it has been waiting for mashed potatoes all afternoon. Keep the sides simple and do not ration the gravy.
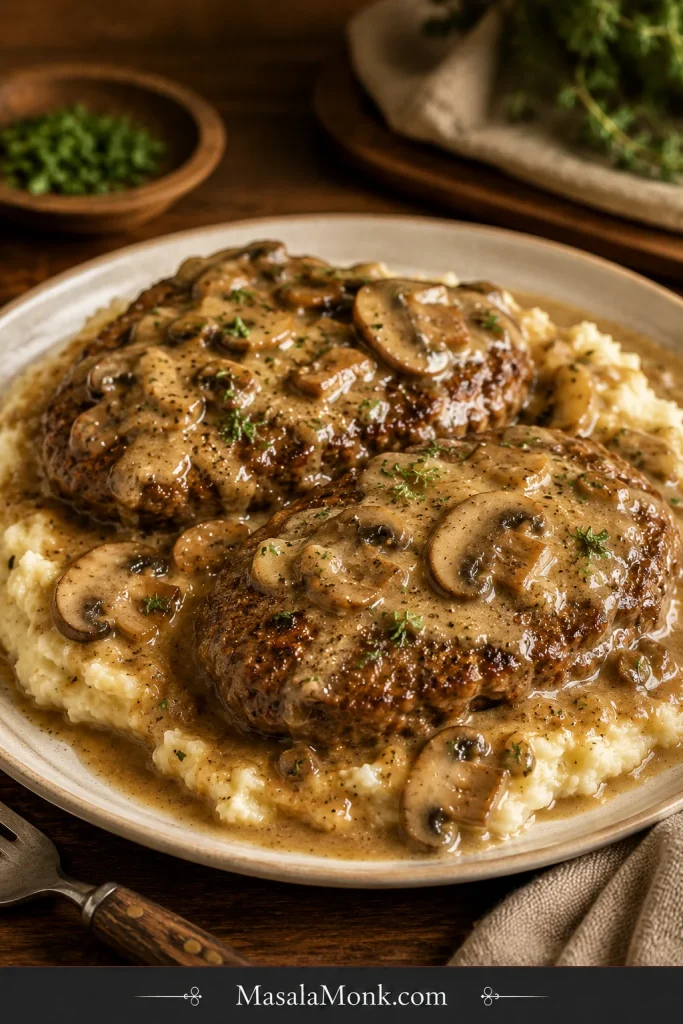
Crock Pot Salisbury Steak Recipe
Tender ground beef patties slow cooked in rich brown mushroom onion gravy until the sauce is glossy, spoonable, and ready for mashed potatoes, egg noodles, rice, or cauliflower mash.
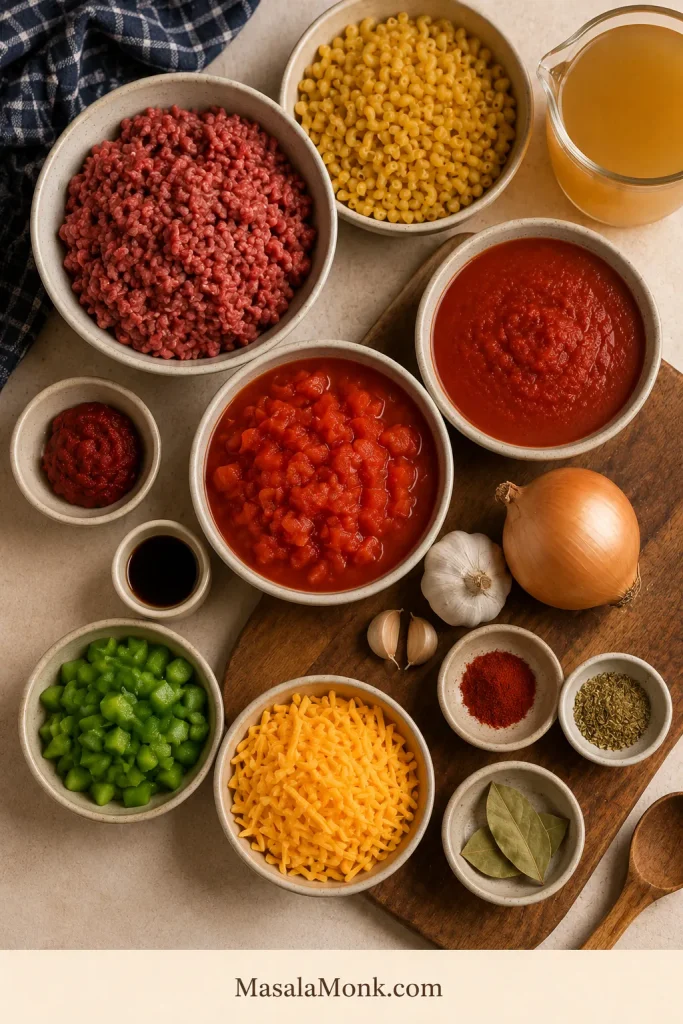
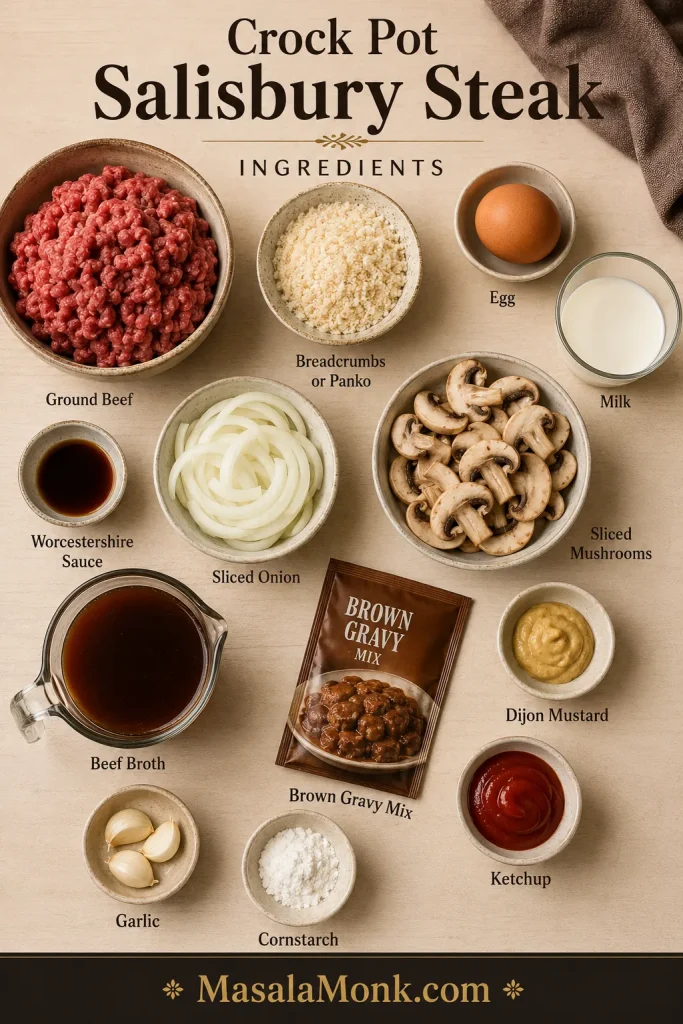
Ingredients
For the Salisbury Steak Patties
- 1½ lb / 680 g lean ground beef
- ½ cup / about 45 to 55 g plain breadcrumbs, or ⅓ cup / about 20 to 25 g panko
- 1 large egg
- 3 tbsp / 45 ml milk
- 1 tbsp / 15 ml Worcestershire sauce
- ½ tsp salt, or less if using onion soup mix
- ½ tsp black pepper
- ½ tsp garlic powder
- ½ tsp onion powder
- 1 tbsp oil, for browning
For the Brown Gravy
- ½ medium onion, thinly sliced, about 60 to 75 g
- 4 to 8 oz / 113 to 227 g mushrooms, sliced, optional
- 2 cups / 480 ml low-sodium beef broth
- 1 packet brown gravy mix, about 0.87 to 1 oz / 25 to 28 g
- 1 tbsp / 15 ml Worcestershire sauce
- 1 tbsp / 15 ml ketchup
- 1 tsp / 5 ml Dijon mustard
- 1 small garlic clove, minced, or ½ tsp garlic powder
- 1 to 2 tbsp / 8 to 16 g cornstarch
- 1 to 2 tbsp / 15 to 30 ml cold water
Optional Shortcut Add-Ins
- ½ packet onion soup mix, for stronger onion flavor
- 1 can cream of mushroom soup, usually 10.5 oz / 298 g, for a creamier gravy
- 1 can golden mushroom soup, usually 10.5 oz / 298 g, for deeper mushroom flavor
- 1 can French onion soup, usually 10.5 oz / 298 g, to replace part of the beef broth
- 1 can cream of chicken soup, usually 10.5 oz / 298 g, for a milder creamy shortcut
- 1 packet au jus mix, to use instead of brown gravy mix
Instructions
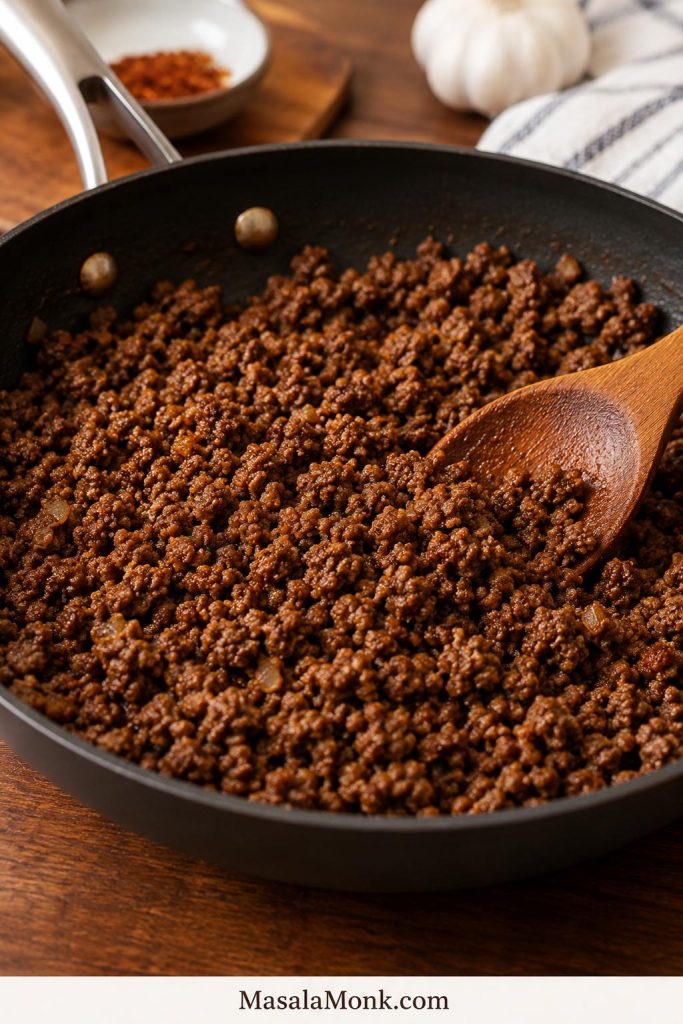
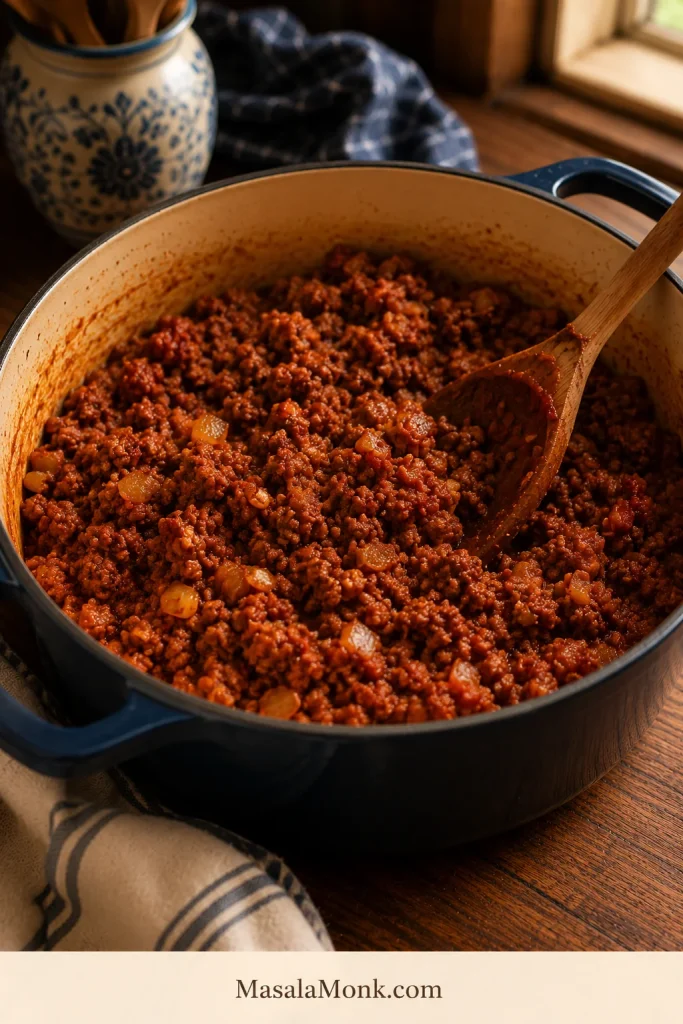
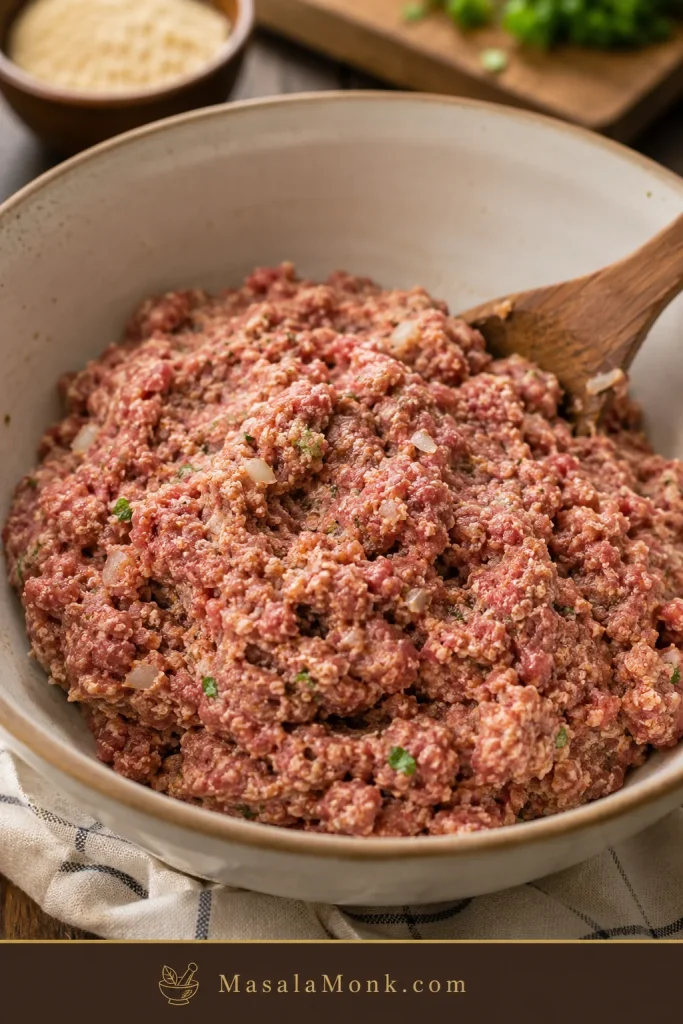
- Mix the patties gently. In a large bowl, combine ground beef, breadcrumbs, egg, milk, Worcestershire sauce, salt, pepper, garlic powder, and onion powder. Mix only until combined. Avoid squeezing or overworking the meat.
- Shape the patties. Divide into 6 oval patties, about 4 oz / 113 g each. Keep them even in thickness so they cook at the same pace.
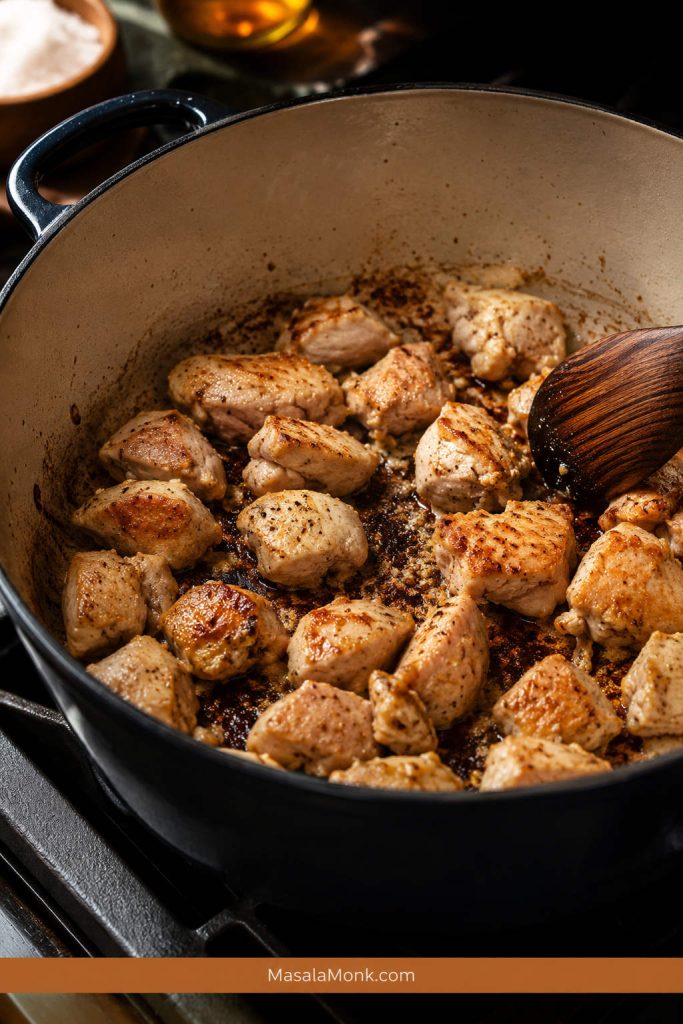
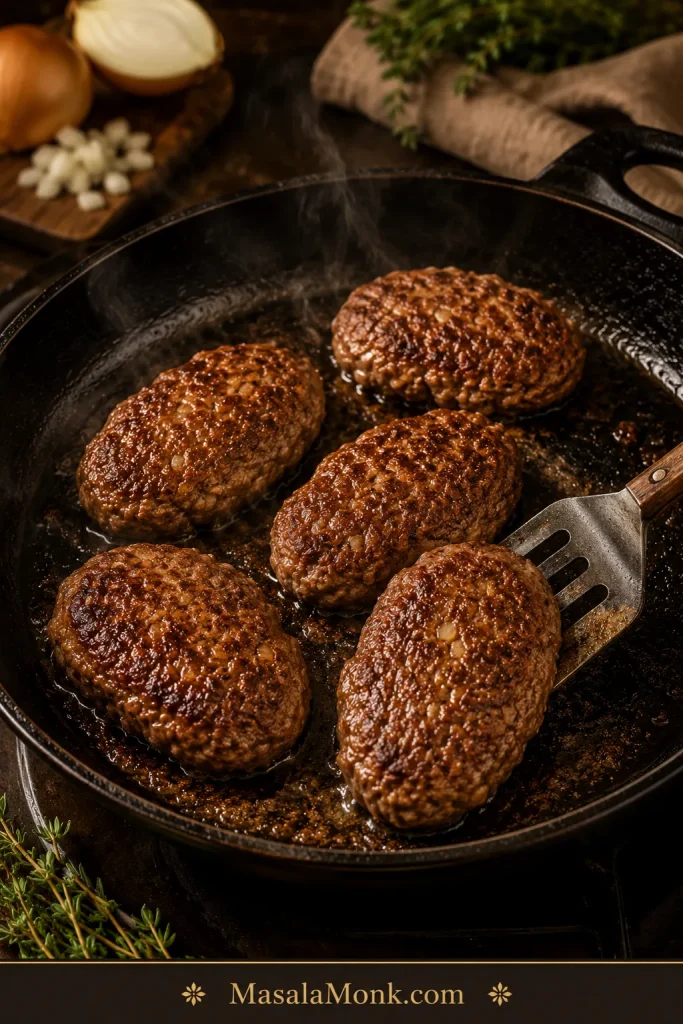
- Brown the patties. Heat oil in a skillet over medium-high heat. Brown patties for 2 to 3 minutes per side. They do not need to cook through.
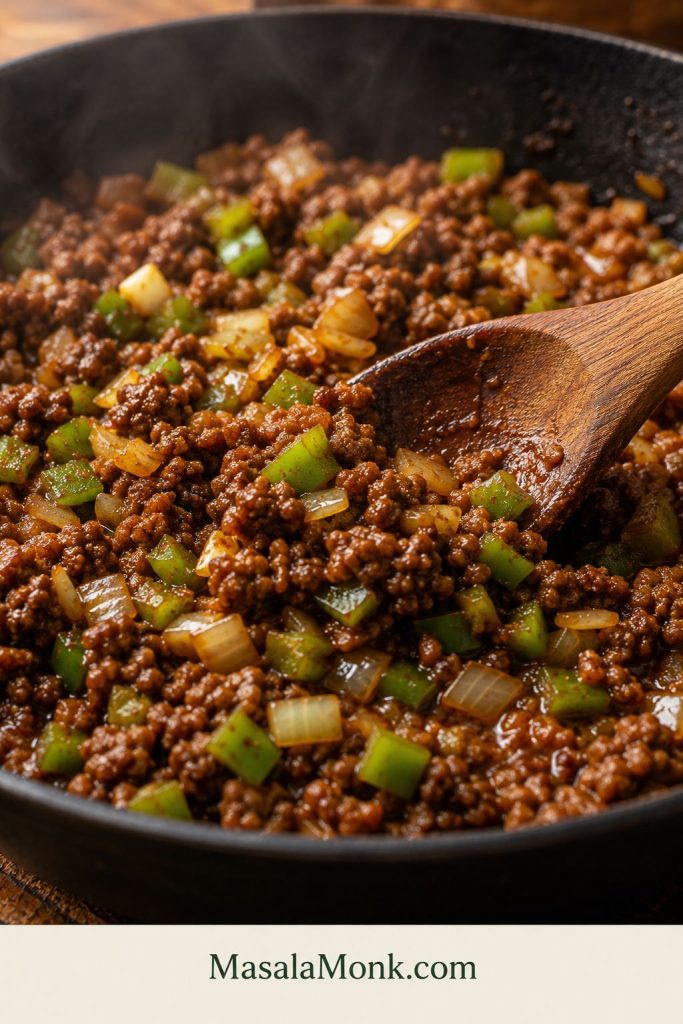
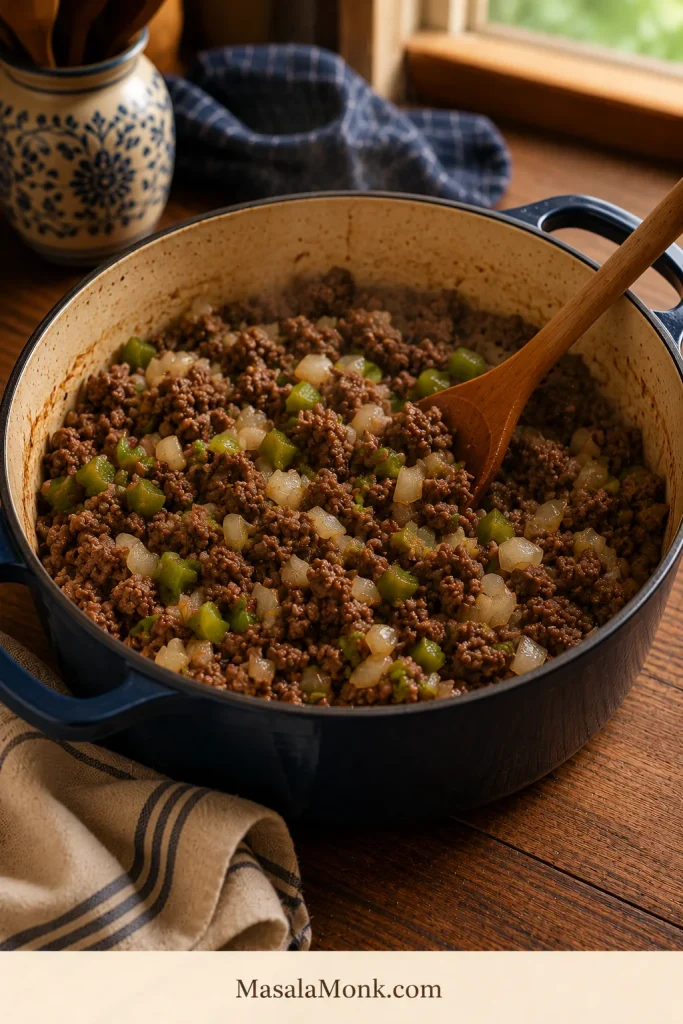
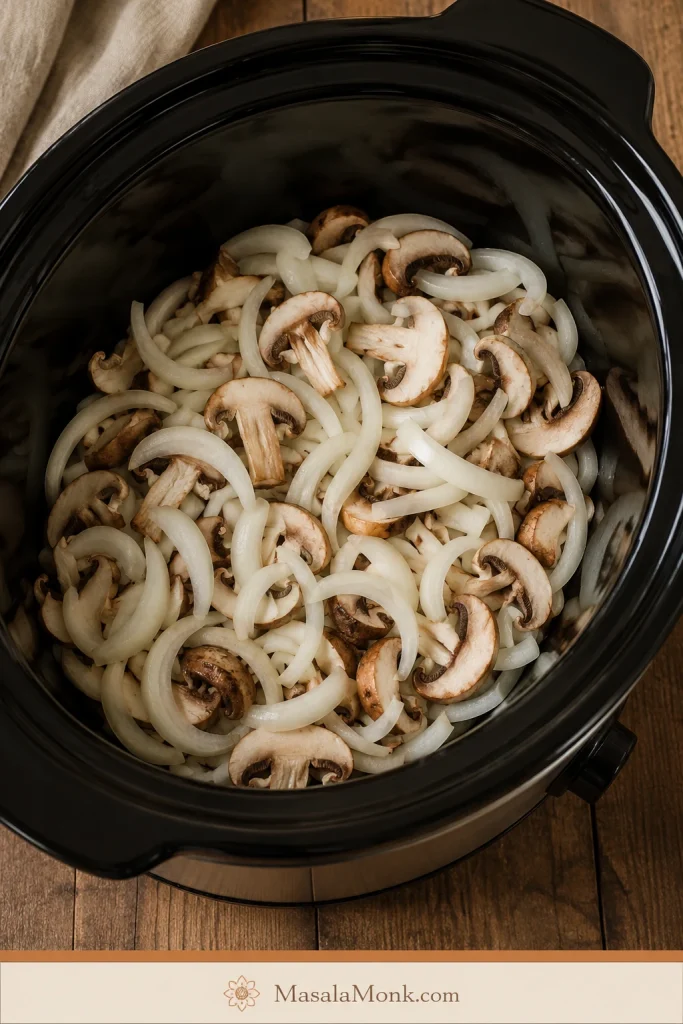
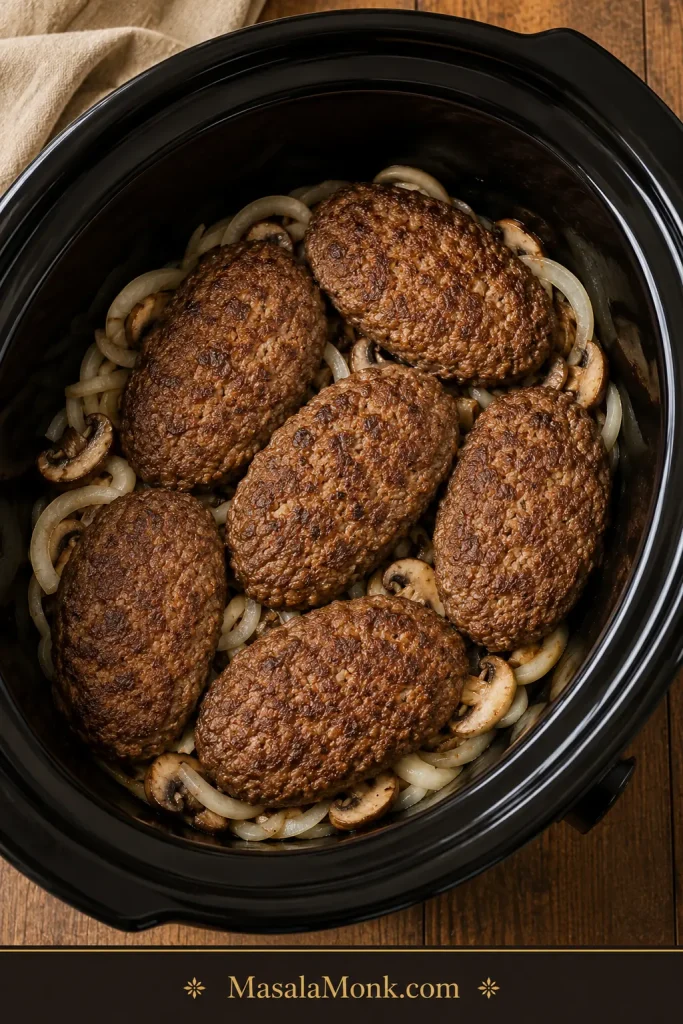
- Layer the crock pot. Add onions and mushrooms to the bottom of a 6-quart oval slow cooker. Place browned patties on top, overlapping only if needed.
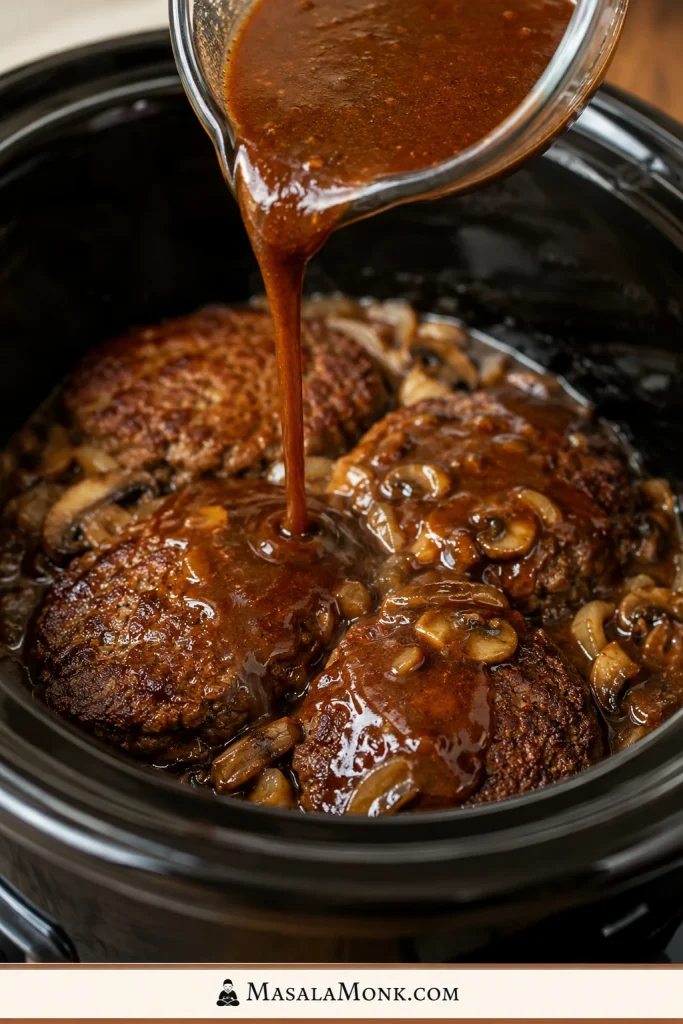
- Whisk the gravy. In a bowl, whisk beef broth, brown gravy mix, Worcestershire sauce, ketchup, Dijon, and garlic until smooth.
- Slow cook. Pour gravy over the patties. Cover and cook on low for 4 to 5 hours, or on high for 2½ to 3½ hours, until the patties reach 160°F / 71°C.
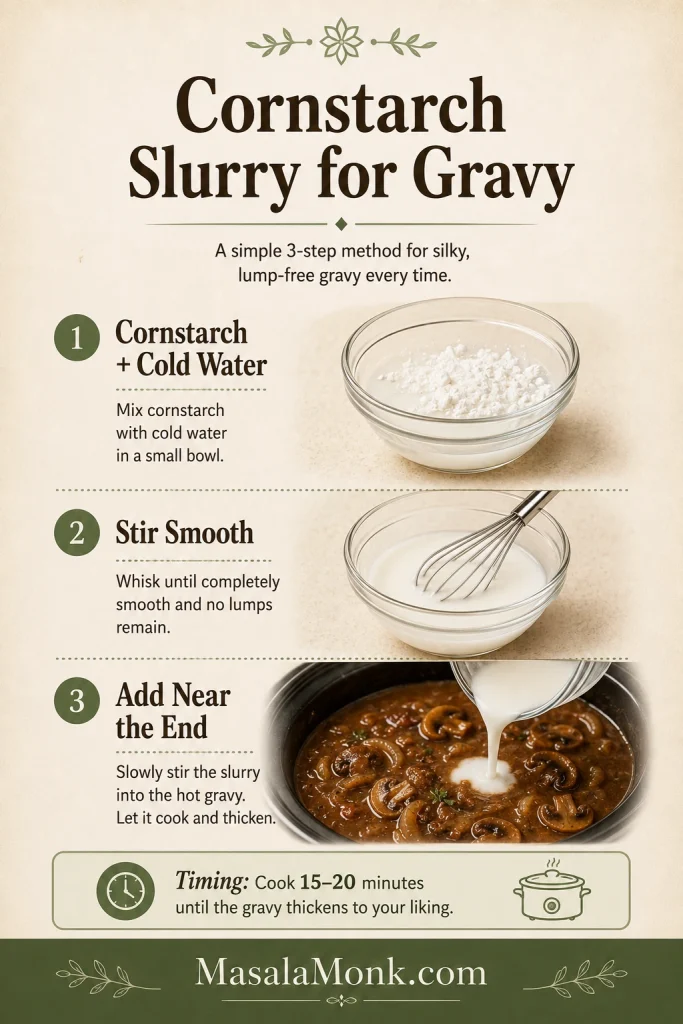
- Thicken the gravy. Mix 1 tablespoon cornstarch with 1 tablespoon cold water. Stir into the hot gravy, cover, and cook for 15 to 20 minutes. Repeat with another tablespoon of cornstarch and water if you want it thicker.
- Serve. Let the patties rest in the gravy for a few minutes, then serve over mashed potatoes, egg noodles, rice, or cauliflower mash.
Recipe Notes
- Low heat gives the best texture. High heat works, but the patties can become firmer.
- If your slow cooker runs hot, start checking near the early end of the time range.
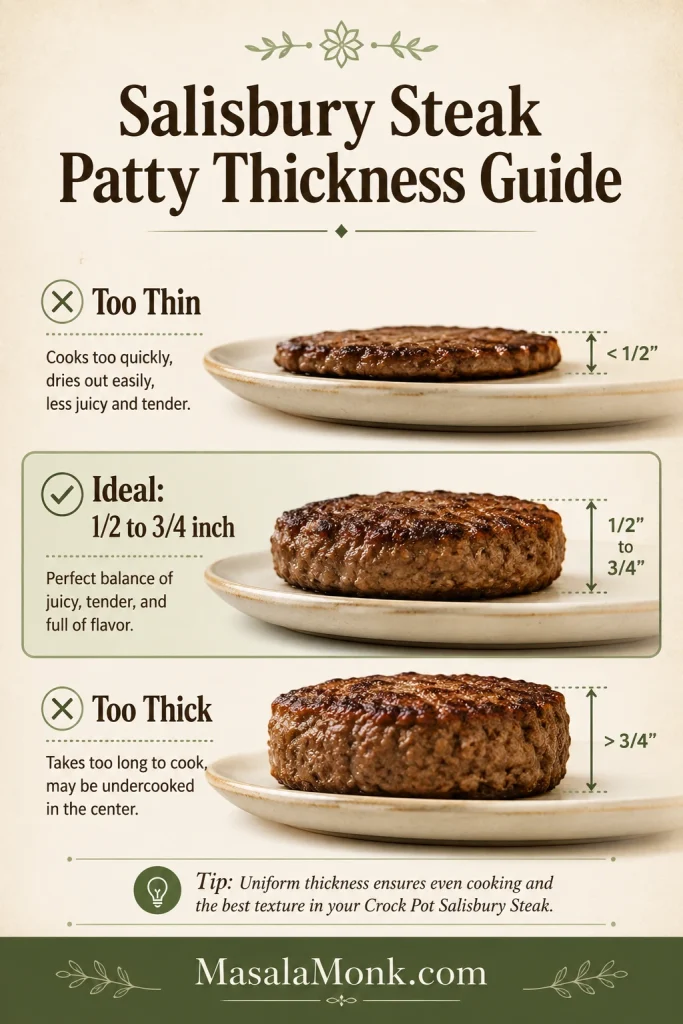
- Keep the patties about ½ to ¾ inch thick so they hold together and cook evenly.
- Do not overfill the slow cooker. The patties need enough space for heat and gravy to move around them.
- Use low-sodium beef broth if adding gravy mix, onion soup mix, au jus, or canned soup.
- For extra gravy, increase broth to 2½ cups / 600 ml and use extra slurry before serving.
- You can shape or brown the patties up to 1 day ahead and refrigerate them covered until ready to assemble.
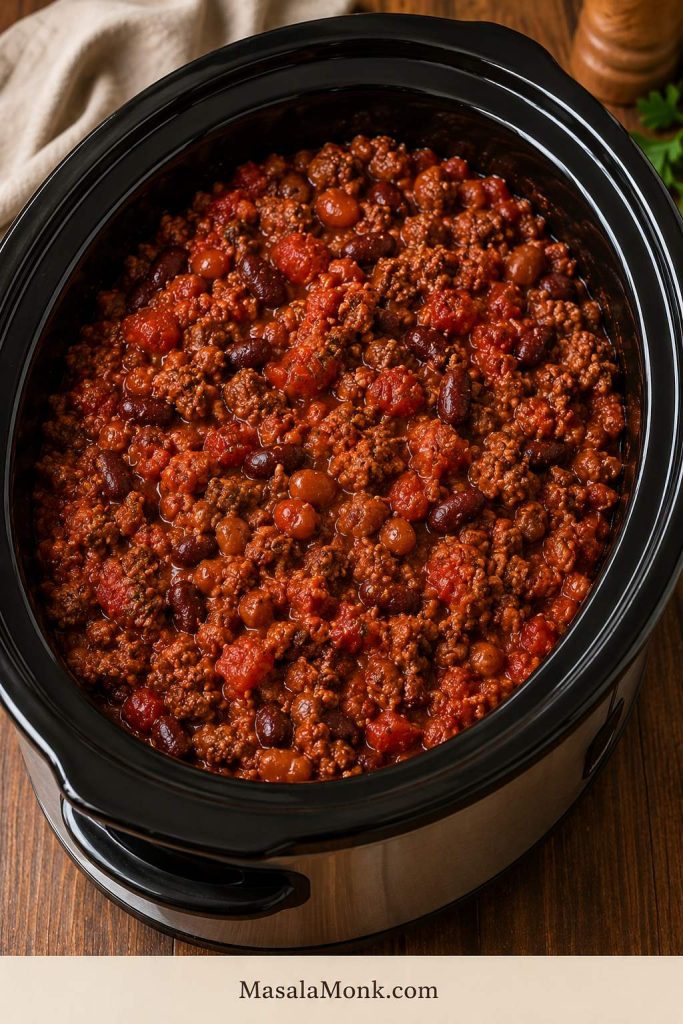
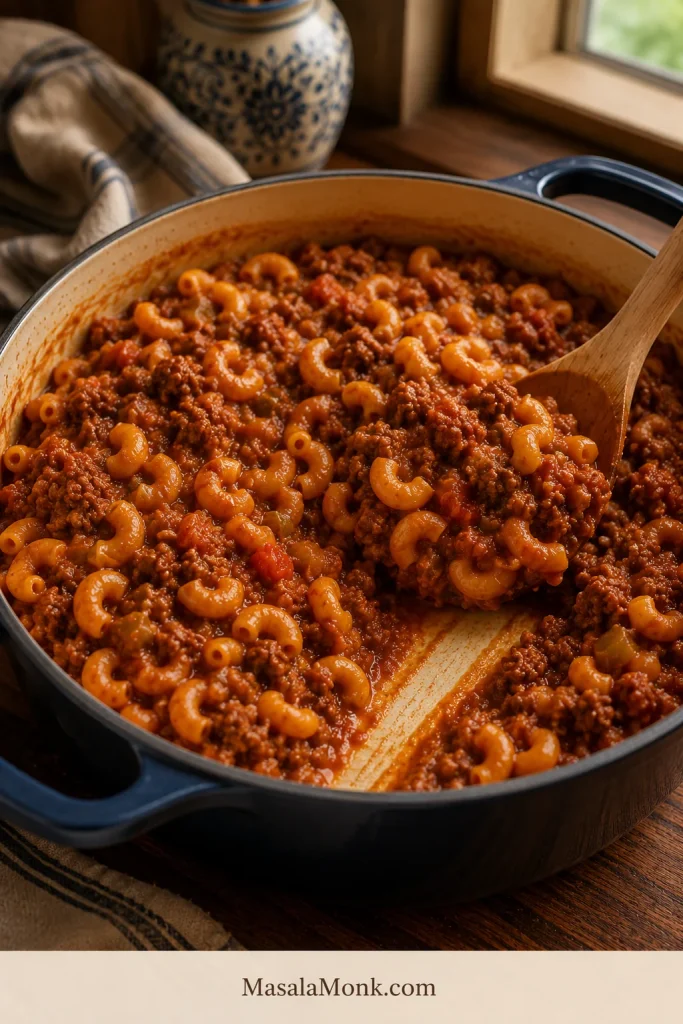
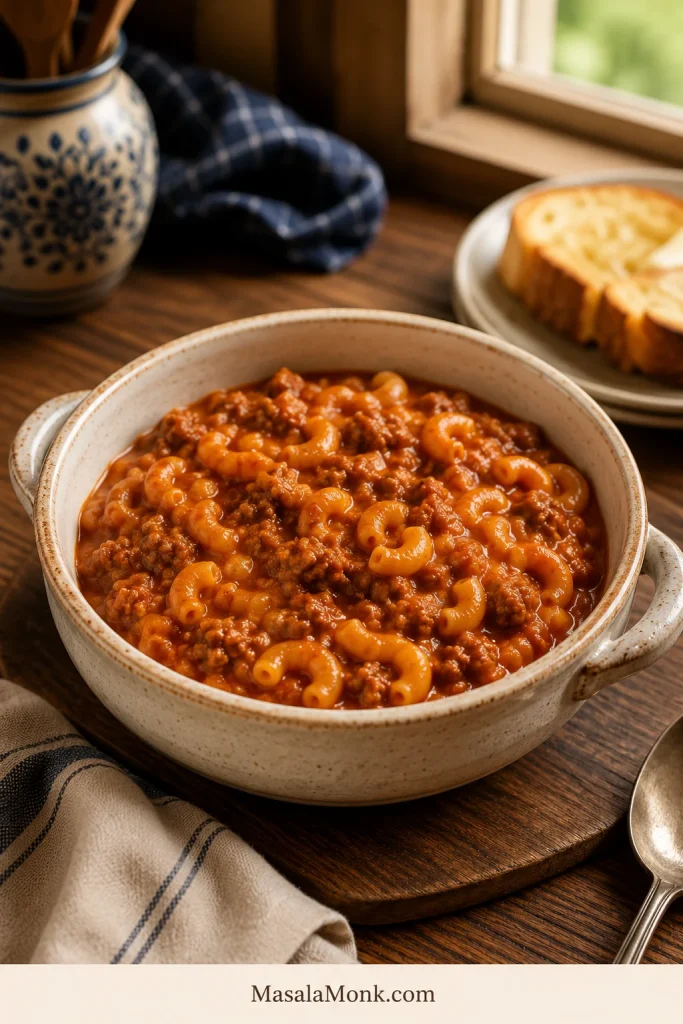
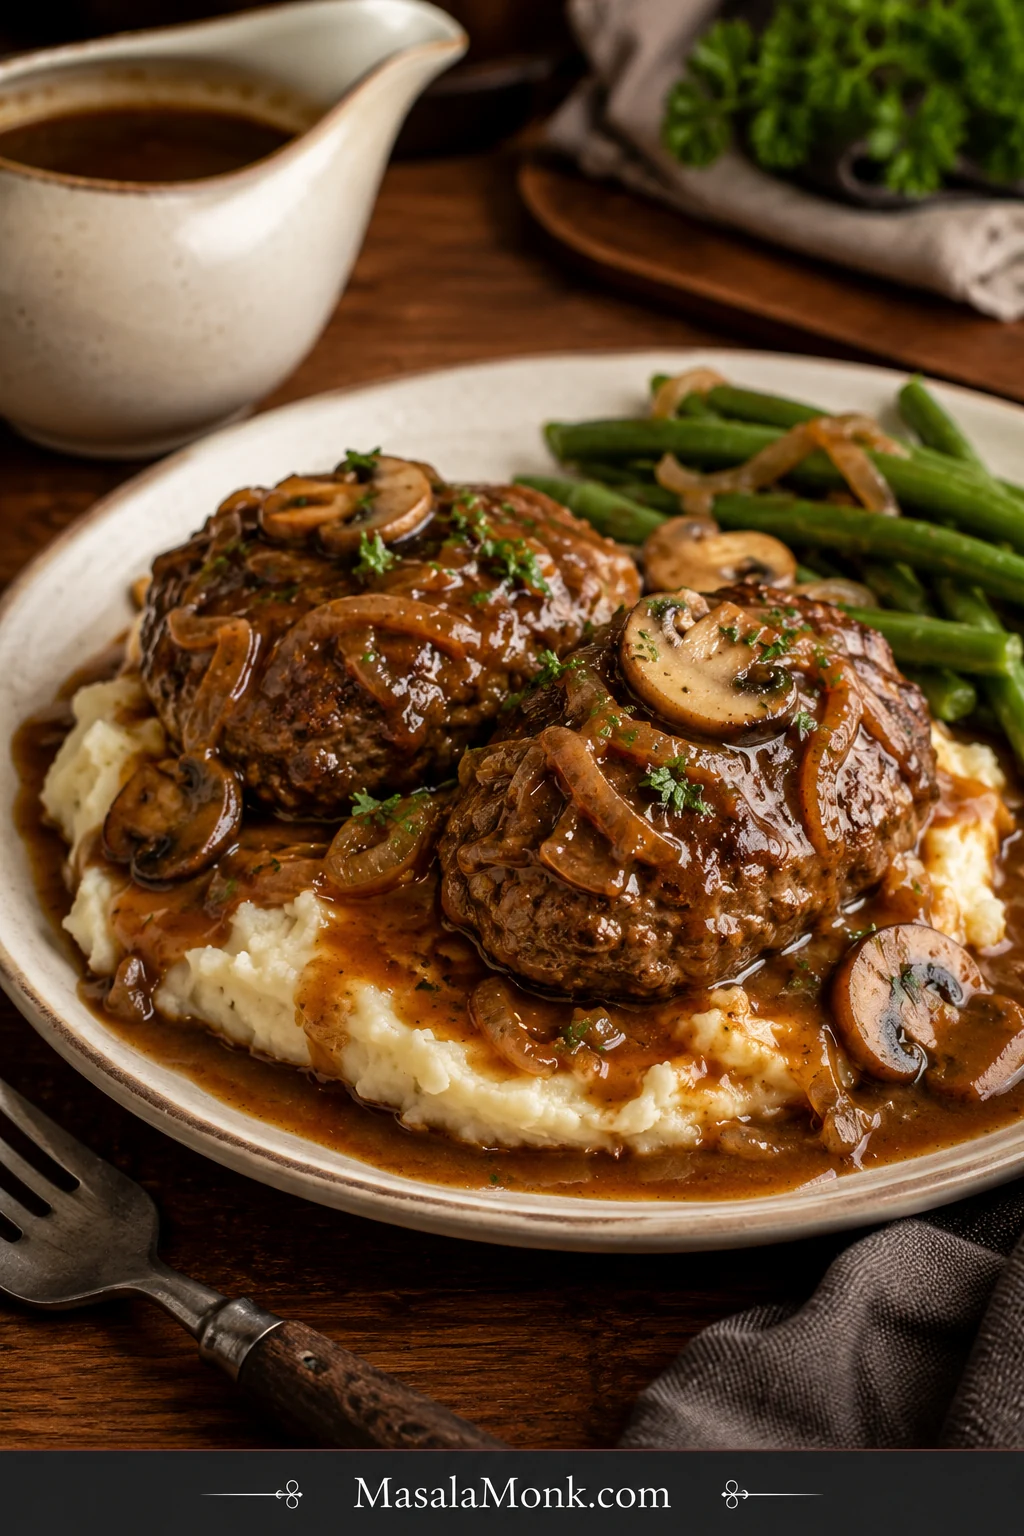
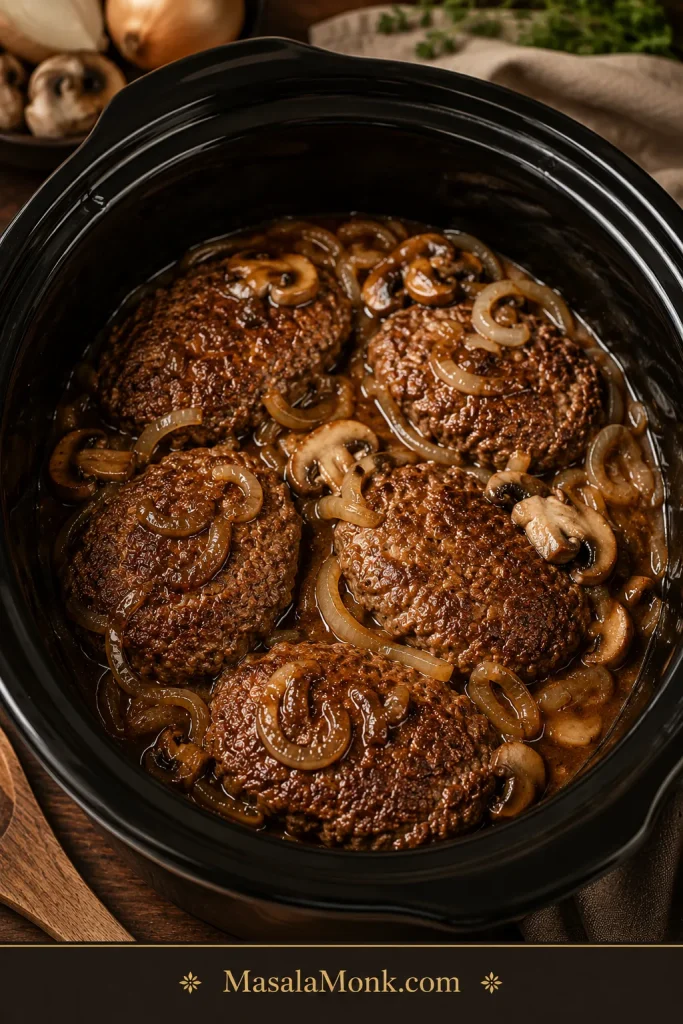
This finished-dish view gives readers a quick visual reference after the recipe card: tender patties, generous brown gravy, and a plate that works with potatoes, noodles, or rice.

Need a specific fix? Jump to gravy thickening, frozen patties, shortcut gravy options, or troubleshooting.
Before You Start: Crock Pot Salisbury Steak Basics
| Best beef amount | 1½ lb / 680 g for 6 patties |
| Best patty size | About 4 oz / 113 g each |
| Best thickness | About ½ to ¾ inch thick |
| Best slow cooker | 6-quart oval slow cooker |
| Best setting | Low for 4 to 5 hours |
| Fast setting | High for 2½ to 3½ hours |
| Safe beef temperature | 160°F / 71°C in the center |
| Best gravy finish | Use a cornstarch slurry near the end |
| Best serving base | Mashed potatoes, egg noodles, or rice |
Slow cookers vary, so use the time range as a guide. Thick patties, tightly stacked patties, thawed frozen patties, and smaller cookers may need more time.
The win is simple: beef that stays together, sauce that tastes deeper than a packet, and enough gravy for the potatoes to disappear under it.
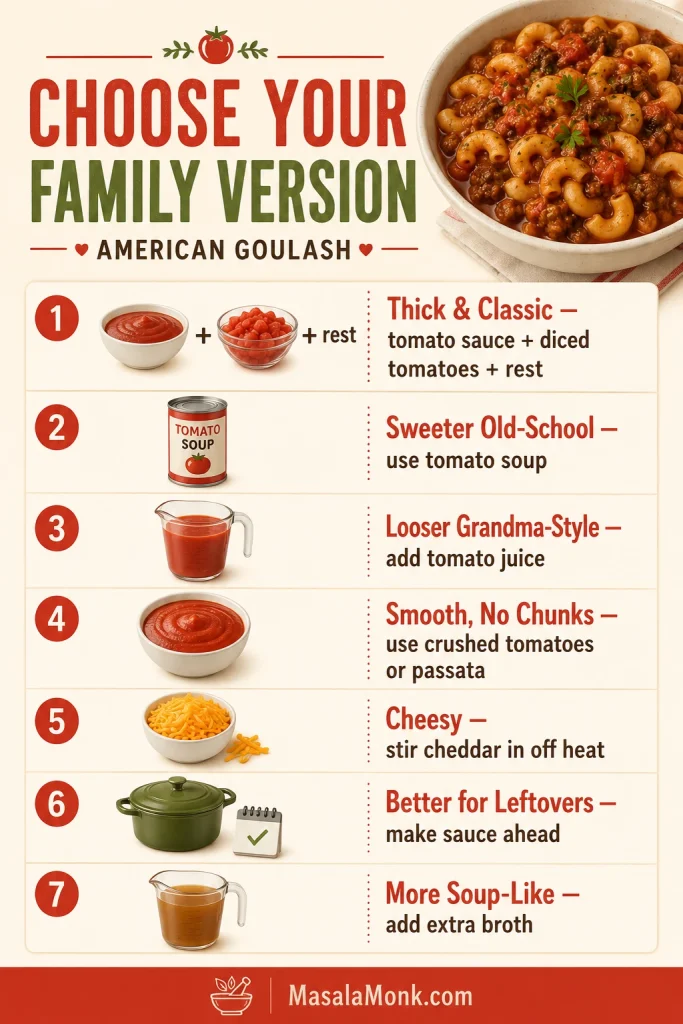
Choose Your Salisbury Steak Version
Below, the main recipe branches into homemade patties, easy brown gravy, and the shortcut ingredients already in your pantry or freezer.

| Goal | Use This Route | Watch This |
|---|---|---|
| Classic crock pot Salisbury steak | Homemade browned patties, beef broth, brown gravy mix | Thicken near the end if the sauce looks loose |
| More homemade flavor | Add Worcestershire, Dijon, ketchup, onions, mushrooms, garlic | Mix the beef gently |
| Frozen hamburger patty shortcut | Thaw raw frozen patties safely first, then brown and slow cook | Expect extra liquid if patties were frozen |
| Fully cooked frozen patties | Heat thoroughly in gravy according to package guidance | Pull them before they turn firm |
| Creamier gravy | Add cream of mushroom or golden mushroom soup | Reduce salt |
| Milder creamy shortcut | Add cream of chicken soup | Less beefy; add Worcestershire or au jus |
| Onion gravy flavor | Add onion soup mix or French onion soup | Use low-sodium broth |
| No mushrooms | Skip mushrooms and add extra onions | Add flavor with Worcestershire and Dijon |
| Meatball version | Use frozen or homemade meatballs | Cook until hot and thicken the sauce |
Best Route for the First Time
For your first batch, start with the classic browned-patty version. If you came here because of freezer patties or canned soup, use the shortcut sections below and keep the salt low.
Once you know your route, the job is simple: keep the beef sturdy, keep the sauce spoonable, and keep the salt from taking over.
Choosing a shortcut? Go straight to cream of mushroom, French onion, frozen hamburger patties, or meatballs and variations.
Why This Crock Pot Salisbury Steak Works
Slow cookers are great at tenderness, but they are not great at reducing sauce. That is why this recipe gives the beef a quick browned edge first, then waits until the end to thicken the gravy.
The beef stays tender because it is mixed gently with breadcrumbs, egg, and milk instead of being packed tight. Browning adds flavor and helps each oval hold its shape once it settles into the sauce.
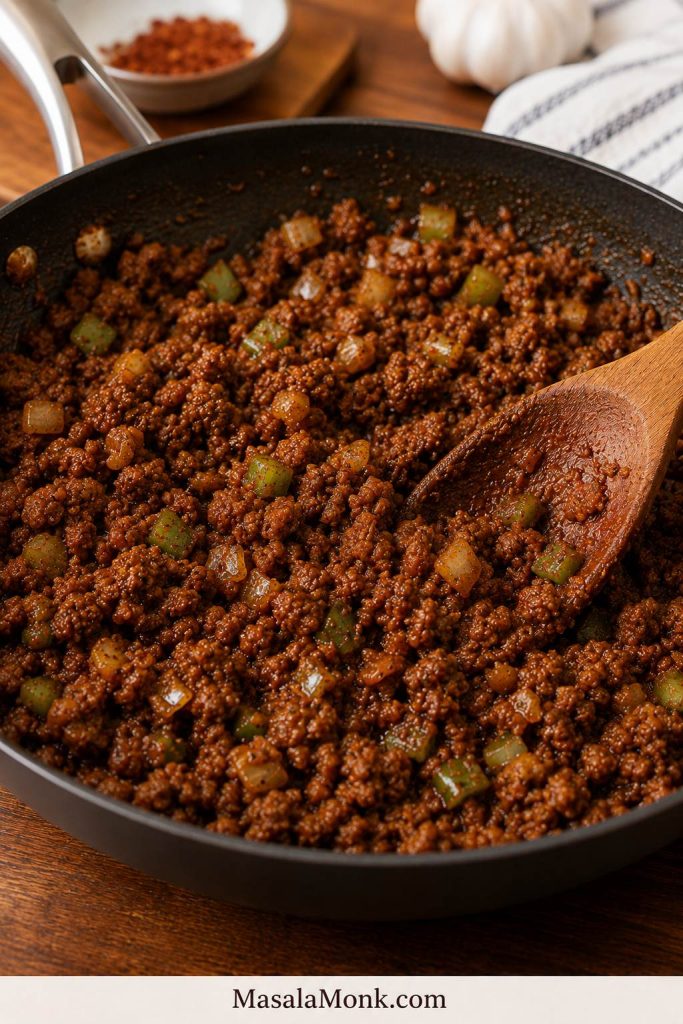
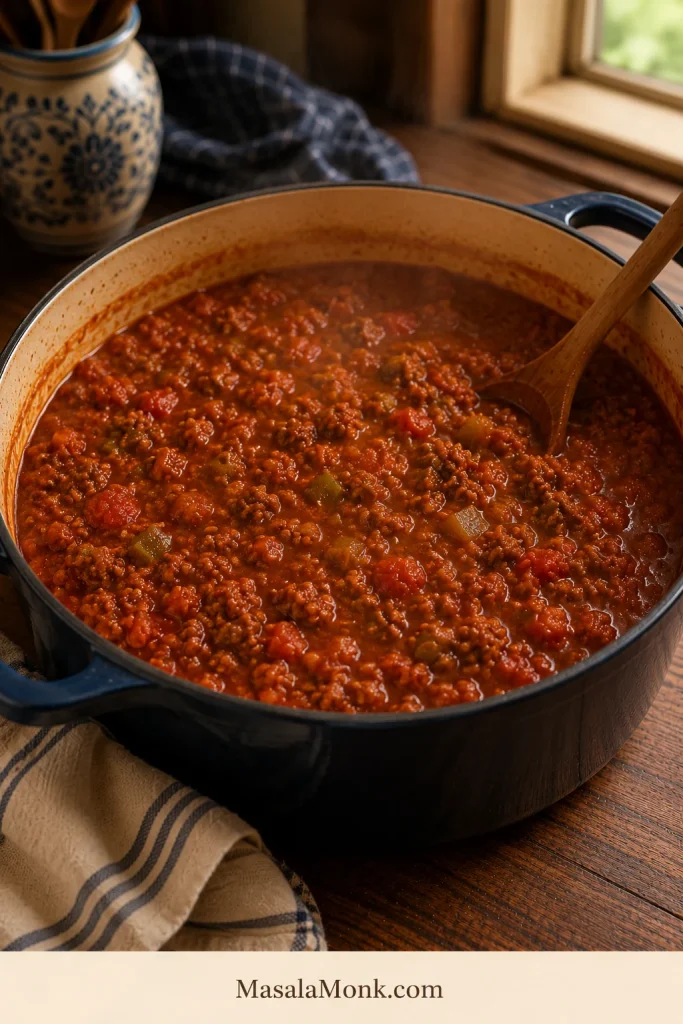
The sauce starts simple — beef broth and brown gravy mix — then gets enough Worcestershire, Dijon, ketchup, onion, mushroom, and garlic to taste more like dinner than a packet.
Save the real thickening for the end. By then, the beef is cooked, the onions have softened, and you can turn the cooking liquid into glossy spoon-over-potatoes gravy without guessing.
Think of it this way: give the beef structure, give the sauce body, and keep the salt under control.
That same slow-cooker liquid-control problem shows up in slow cooker cottage pie too; the lid keeps everything tender, but it does not let sauce reduce like an open pan.
The comfort-food rule: Salisbury steak should taste browned, beefy, and gravy-rich — not steamed, watery, or packet-salty.
Ingredients You’ll Need
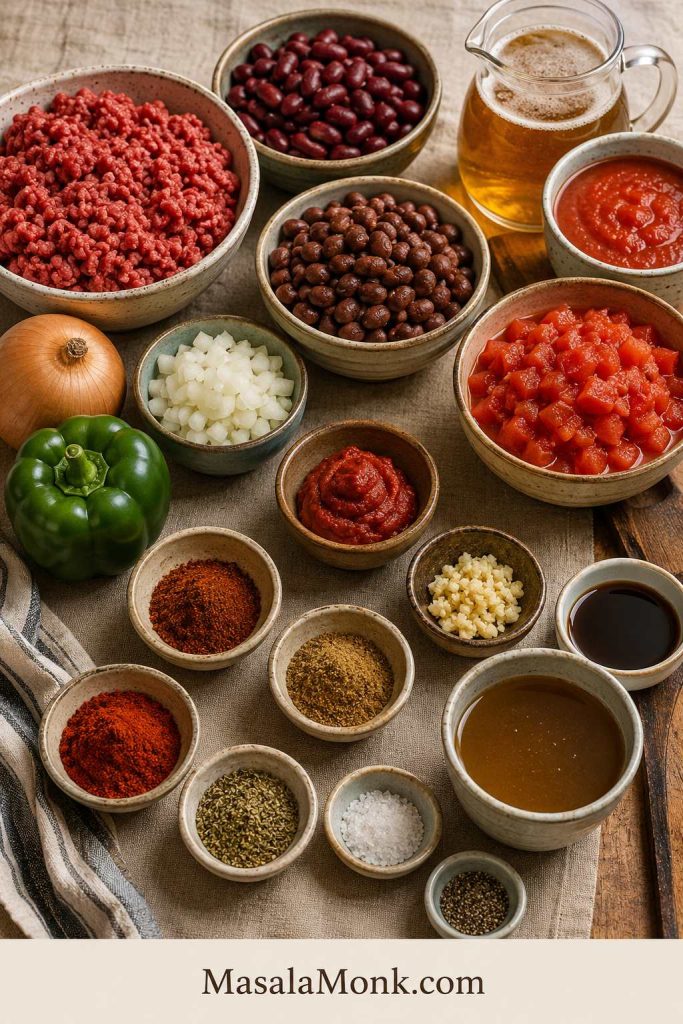
Nothing here is fancy. The balance is what matters: enough binder to keep the beef together, enough seasoning to make the sauce savory, and enough restraint that the shortcut ingredients do not take over.
Ground Beef
Use lean ground beef, preferably 85/15 or 90/10. It has enough fat for flavor without making the sauce greasy. If your beef is fattier, brown the patties first and skim excess fat before tightening the sauce.
Breadcrumbs, Egg, and Milk
Breadcrumbs help the patties hold together, egg binds the mixture, and milk keeps the crumbs from making the beef dense. The mixture should feel moist and shapeable, not wet or crumbly.
Worcestershire, Dijon, and Ketchup
These small ingredients make the brown sauce taste more complete. Worcestershire adds savory depth, Dijon gives balance, and ketchup adds a little sweetness and body. In the final dish, they should blend into the gravy instead of standing out separately.
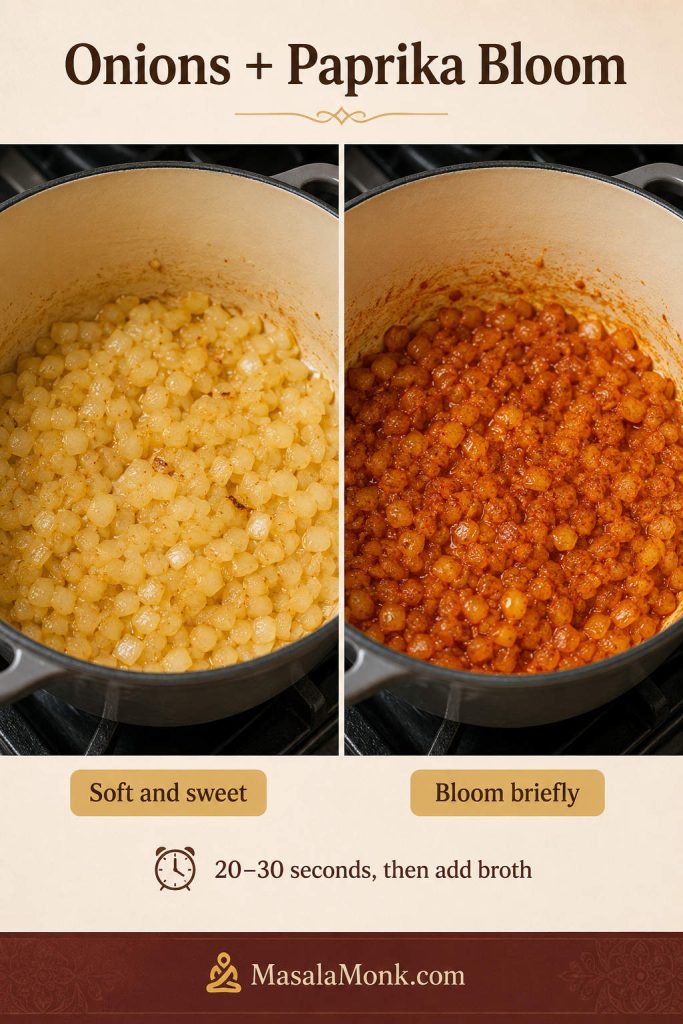
Onions and Mushrooms
Onions soften into the gravy and make it taste fuller. Mushrooms add that classic Salisbury steak flavor, but this dinner does not fall apart without them; extra onions can carry the sauce just fine.
Love a mushroom-heavy gravy? This creamy mushroom sauce goes deeper into building that rich mushroom flavor.
Beef Broth and Brown Gravy Mix
Beef broth gives the sauce a stronger base than water, especially after a few hours in the slow cooker. Brown gravy mix keeps the recipe easy and familiar, while the extra seasonings make it taste less like a packet and more like dinner.
How to Make Crock Pot Salisbury Steak
The slow cooker does the long work, but the first few minutes decide the final texture. Shape the patties gently, brown them quickly, and let the sauce carry the rest.
1. Mix the Patty Ingredients
In a large bowl, combine the ground beef, breadcrumbs, egg, milk, Worcestershire sauce, salt, pepper, garlic powder, and onion powder. Stir only until the ingredients come together. Overmixing makes the patties heavy and tough.
2. Shape Even Oval Patties
Divide the mixture into 6 oval patties. Aim for about 4 oz / 113 g each. The oval shape is classic, but even thickness matters more than perfect shape.
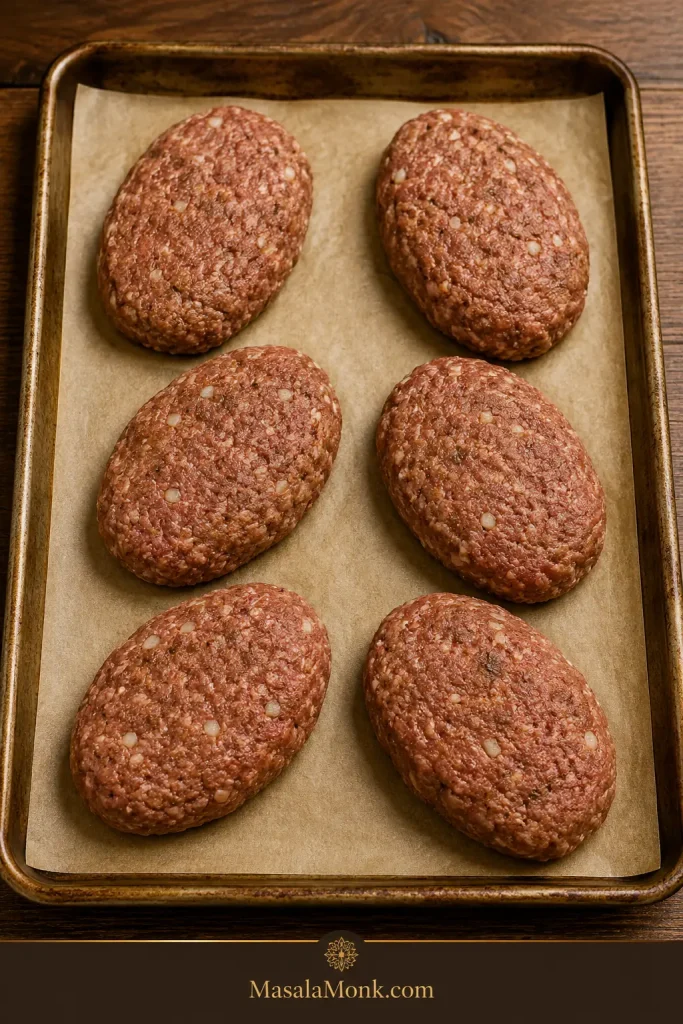
Aim for about ½ to ¾ inch thick. Very thin patties can break more easily, while very thick ones may need extra time in the center.
If the mixture feels very soft, chill it for 10 to 15 minutes before browning. Cold patties are easier to lift and less likely to crack.
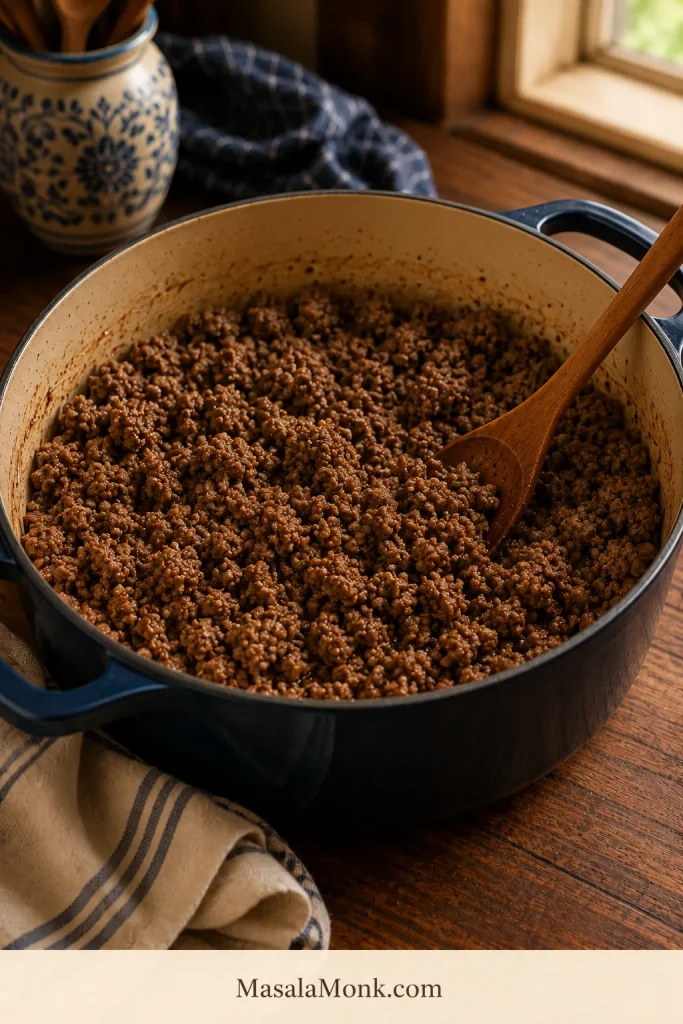
3. Brown the Patties
In a skillet, heat oil over medium-high heat. Brown the patties for 2 to 3 minutes per side. They should get color on the outside but do not need to cook through. Use a wide spatula and turn them gently.
For a slightly thicker, more old-fashioned gravy, lightly dust the patties with flour before browning. Skip this if you want the simpler version or need the recipe to stay gluten-free.
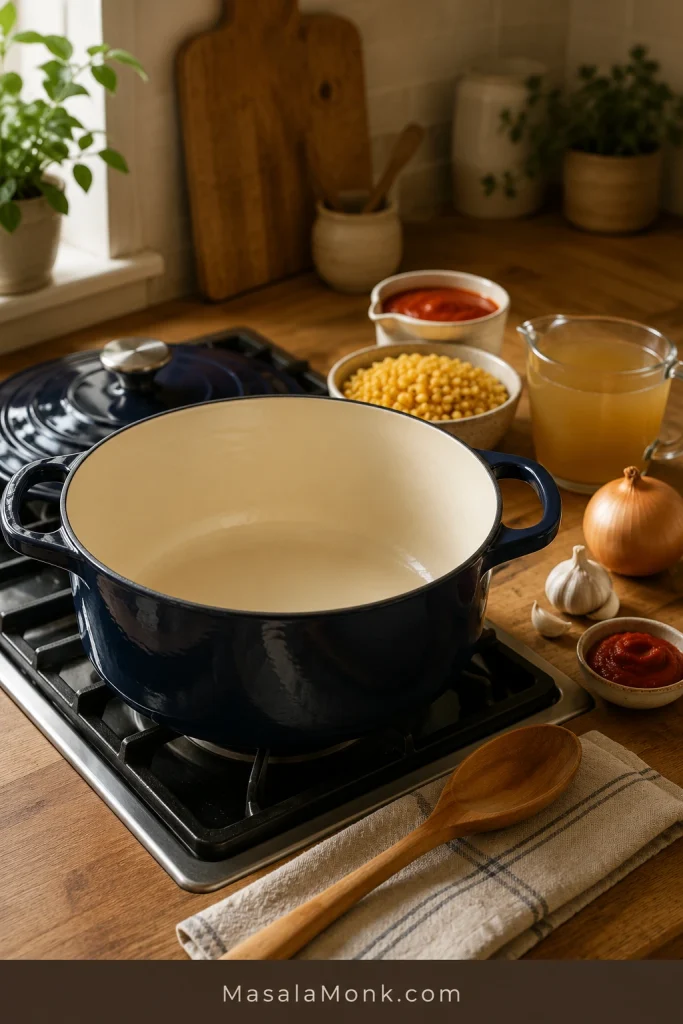
4. Build the Slow Cooker
Add onions and mushrooms to the bottom of the crock pot. Place the browned patties over them, overlapping only if needed. A little overlap is fine; a tight stack can make the middle patties cook more slowly and break more easily.
Whisk the sauce ingredients separately, then pour the mixture over the beef. You should still be able to see the patties underneath; they do not need to be completely buried.
The liquid should look generous at this stage. It may seem a little loose, but that is better than starting too thick and having the sauce catch around the edges before the beef is done.
5. Cook Low and Slow
Cook on low for 4 to 5 hours, or high for 2½ to 3½ hours. Low gives the most tender texture. High works when dinner needs to move faster, but the patties can become firmer if they cook too long.
6. Bring the Gravy Together
When the patties are done, stir cornstarch and cold water together until smooth. Stir the slurry into the hot sauce, cover, and cook another 15 to 20 minutes. This is when thin slow cooker liquid turns into proper spoon-over-potatoes gravy.
At first the slurry may leave pale streaks. Stir gently and give it time; the sauce will turn darker, smoother, and glossier as it cooks.
Once the patties are cooking, the rest of the recipe is mostly about small adjustments: keeping the sauce spoonable, choosing the shortcut that fits your pantry, and knowing what to do if the slow cooker gives you more liquid than expected.
Browning vs Raw Patties: What Works Best?
Browned patties give the best flavor and the cleanest texture. Browning keeps the dish from tasting like boiled ground beef and gives the outside a sturdier edge before it sits in the sauce.
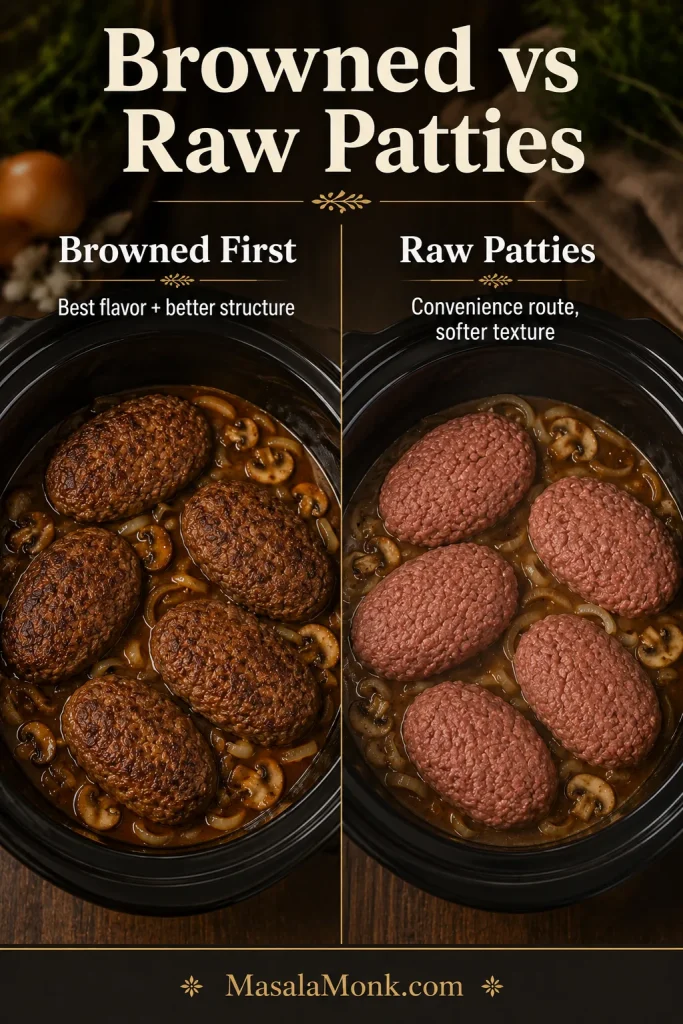
Raw patties can still go into the crock pot when convenience matters. Keep them slightly thicker, avoid tight stacking, and use lean beef if possible because raw patties release more liquid and fat as they cook.
If it is one of those nights where browning feels like one pan too many, skip it without guilt. Just expect a softer patty, a little more fat to skim, and slightly less browned flavor. Check the center temperature before serving.
Slow Cooker Size, Cook Time, and Doneness
A 6-quart oval slow cooker is best because the patties have more room and do not need to be pressed into a tight pile. For 4 patties, a 4-quart cooker can work, but a narrow round crock may need more overlap and gentler handling.
As another slow-cooked beef dinner, this beef shoulder roast crock pot recipe uses the same gentle-heat logic with a tougher cut that needs time to turn tender.
Cook Time Guide
Once the patties are in the crock, time matters, but it is not the only thing that matters. Patty thickness, cooker shape, stacking, and whether the patties were previously frozen can all shift the finish.
| Method | Time | Best For |
|---|---|---|
| Homemade browned patties on low | 4 to 5 hours | Best texture and gravy flavor |
| Homemade browned patties on high | 2½ to 3½ hours | Faster dinner |
| Raw homemade patties | Usually 4 to 5 hours on low | No-brown shortcut, softer texture |
| Raw frozen hamburger patties | Thaw safely first, then follow thawed-patty timing | Food-safety-conscious freezer shortcut |
| Fully cooked frozen patties | Heat thoroughly in gravy | Fastest patty shortcut |
| Frozen meatballs | 4 to 6 hours on low, depending size and package directions | No-shaping variation |
Safe Internal Temperature
Use the timer as a guide, then check the center temperature. Ground beef Salisbury steak is done at 160°F / 71°C. For turkey or chicken versions, the center should reach 165°F / 74°C.
Brown gravy can make a patty look done before the center is fully cooked, so temperature is safer than color. For reference, the USDA safe minimum internal temperature chart lists ground meats such as ground beef at 160°F / 71°C, while ground poultry should reach 165°F / 74°C.
Helpful Tools
- Large skillet: for browning the patties.
- Mixing bowl: for the beef mixture.
- Whisk: for the gravy mixture.
- Wide spatula: for moving patties without breaking them.
- Instant-read thermometer: for checking doneness.
How to Make the Gravy Thick, Rich, and Not Watery
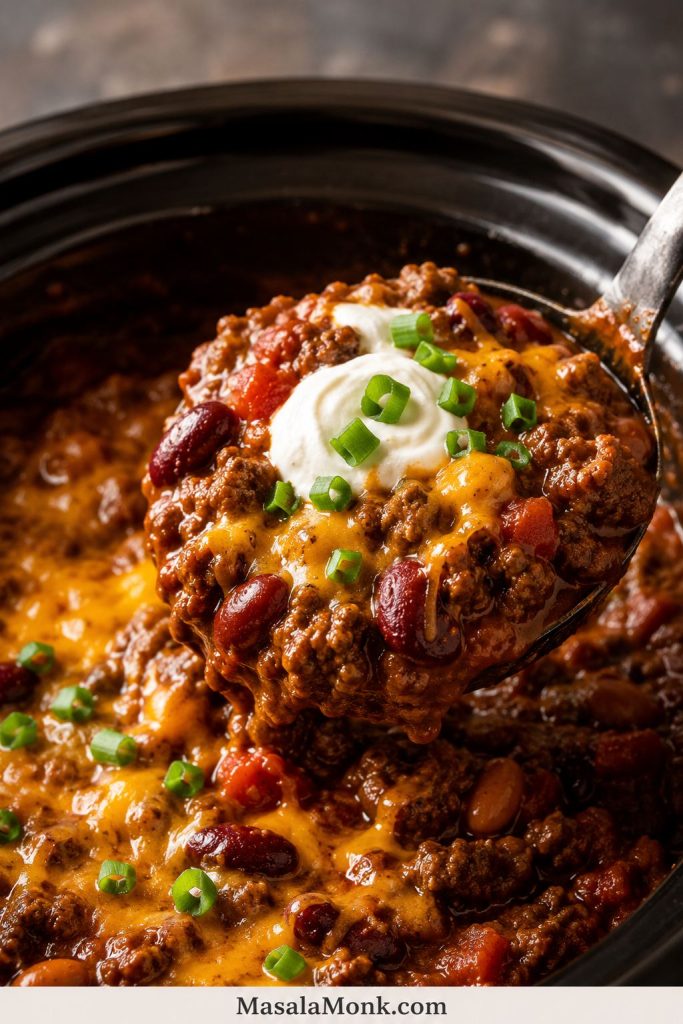
The gravy is the reason this recipe exists. It should coat the spoon, cling to the beef, and move slowly through mashed potatoes instead of running around the plate.
Slow cooker gravy often looks thin because moisture stays trapped under the lid. That does not mean the recipe failed. Let the beef cook first, then thicken the sauce near the end.

The same problem shows up in slow cooker beef recipes like slow cooker beef stew: tender beef is wonderful, but the sauce still needs enough body to feel like gravy instead of broth.
For Thicker Gravy
- Mix 1 tablespoon cornstarch with 1 tablespoon cold water.
- Stir it into the hot gravy once the patties are cooked.
- Cover and cook for 15 to 20 minutes.
- Repeat with another small slurry if the gravy still looks thin.
For Richer Gravy
- Use beef broth instead of water.
- Worcestershire sauce adds savory depth.
- Dijon mustard brings balance.
- Ketchup gives gentle sweetness and body.
- Cook onions and mushrooms in the gravy from the start.
- Browned patties add more flavor than raw patties when time allows.
When it is right, the gravy should drag slowly through the potatoes, cling to the beef, and leave the plate looking like someone already went back for seconds.
For Less Salty Gravy
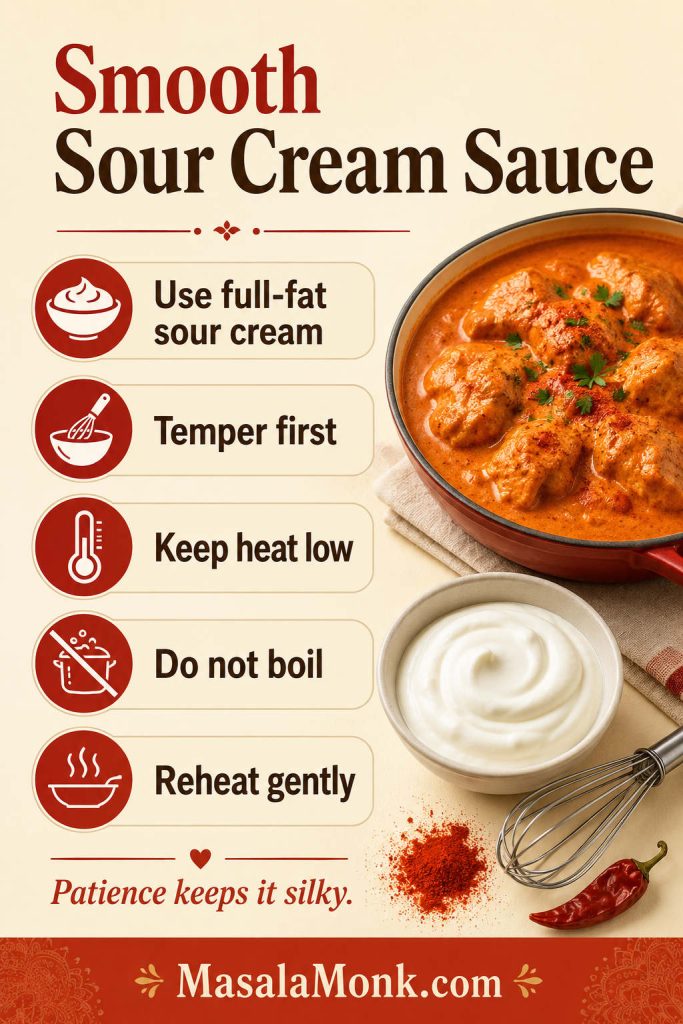
Use low-sodium broth and reduce the salt in the patties when using brown gravy mix, onion soup mix, au jus, cream soup, or canned French onion soup. If the sauce tastes salty after cooking, stretch it with unsalted broth, a splash of cream, extra mushrooms or onions, or plain potatoes on the plate.
Mix cornstarch with cold water before adding it. A smooth slurry disappears into hot gravy; dry cornstarch can clump.
Gravy not behaving? See watery vs thick gravy, shortcut gravy options, or common fixes.
Shortcut Gravy Options
There is no shame in using the packet, the can, or the soup mix. The mistake is letting several salty shortcuts pile up without adjusting anything else.
Use the table below to see what each shortcut adds and what you need to watch.
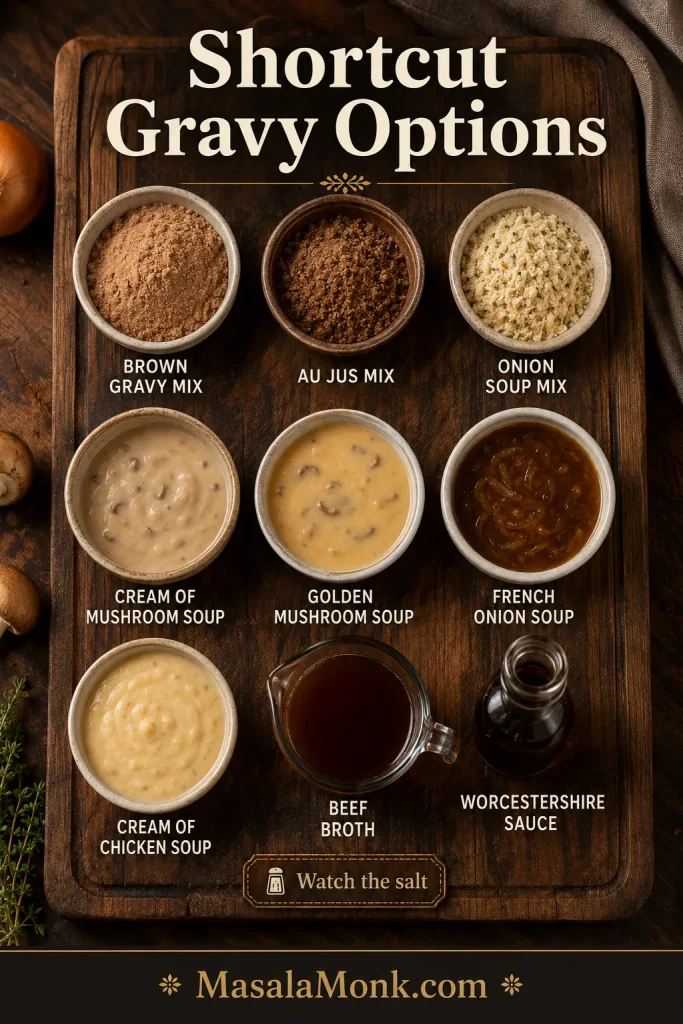
| Shortcut | Works? | Best Use | Watch Out For |
|---|---|---|---|
| Brown gravy mix | Yes | Classic easy brown gravy | Can be salty |
| Au jus mix | Yes | Beefier flavor | Usually thinner |
| Onion soup mix | Yes | Strong onion flavor | Reduce added salt |
| Cream of mushroom soup | Yes | Creamier gravy | Less classic brown gravy flavor |
| Golden mushroom soup | Yes | Deeper mushroom flavor | Still salty |
| Cream of chicken soup | Yes | Milder creamy shortcut | Less beefy; add Worcestershire or au jus |
| French onion soup | Yes | Rich onion gravy | Needs thickening |
Cream of Mushroom Version
For a creamier crock pot Salisbury steak, add 1 can of cream of mushroom soup, usually 10.5 oz / 298 g, to the gravy mixture. Use 1 can for a lighter creamy gravy or 2 cans for a thicker cream-soup style version.
If you use cream of mushroom soup with brown gravy mix or onion soup mix, reduce the added salt and use low-sodium broth. Add Worcestershire and Dijon so the sauce still tastes savory instead of flat.
If cream-of-mushroom dinners are your kind of shortcut, these cream of mushroom pork chops use the same creamy mushroom-gravy idea with browned meat, rice and potato notes, baked options, and crock pot tips.
French Onion Soup Version
For a French onion soup version, replace 1 cup / 240 ml of the beef broth with canned French onion soup, usually 10.5 oz / 298 g per can. You can replace all the broth for a stronger onion flavor, but skip or reduce onion soup mix so the gravy does not become too salty.
This version usually needs a cornstarch slurry near the finish because canned soup gives flavor but does not always thicken enough on its own.
For a deeper look at the onion side of the flavor, this French onion soup recipe shows how slow-cooked onions become sweet, savory, and rich.
Onion Soup Mix Version
Use ½ packet onion soup mix in the gravy or patties for a balanced onion flavor. For a stronger shortcut taste, use a full packet. Reduce added salt and choose low-sodium broth.
Brown Gravy Mix or Au Jus Version
Brown gravy mix gives the most familiar Salisbury steak gravy. Au jus mix gives a beefier flavor, but it usually makes a thinner sauce, so plan to give it body with slurry once the patties are cooked.
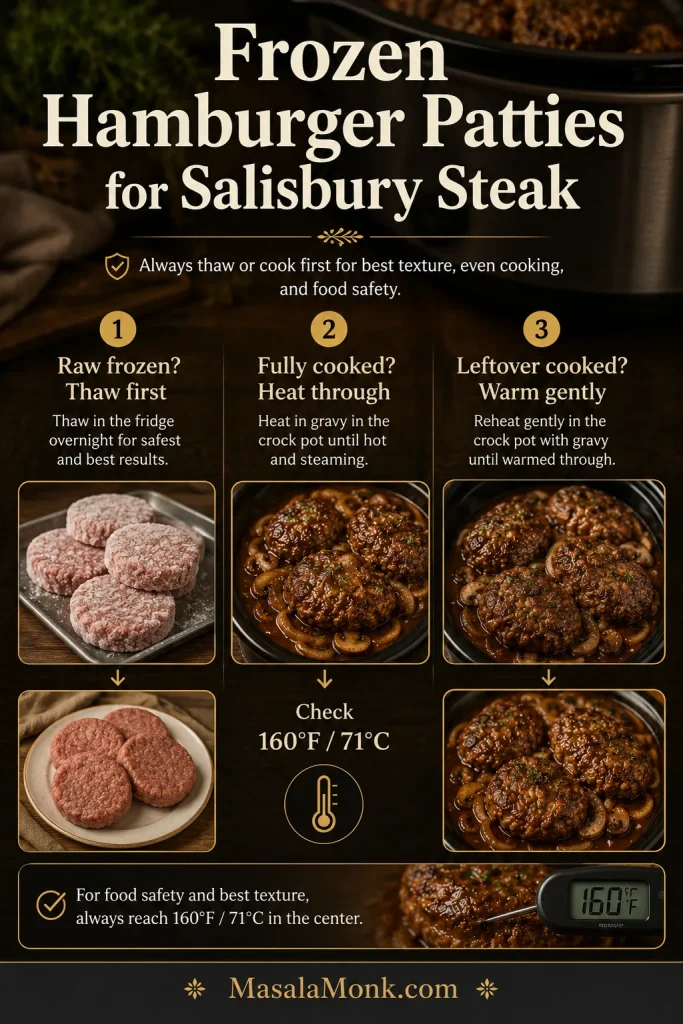
Can You Use Frozen Hamburger Patties?
Yes, freezer patties can still save dinner. The key is knowing whether they are raw or fully cooked, because those two need different handling.
Raw Frozen vs Fully Cooked Patties
For raw frozen hamburger patties, thaw them safely in the refrigerator before adding them to the crock pot. The USDA slow cooker safety guidance recommends thawing meat or poultry before it goes into a slow cooker. Once thawed, brown the patties if possible, then let them cook gently in the gravy until the centers reach 160°F / 71°C.
Fully cooked frozen patties are different. Follow the package directions, heat them thoroughly in the gravy, and avoid cooking them so long that they turn firm or dry. They are already cooked, so the goal is heating, flavoring, and giving the sauce body.
If the package gives a reheating temperature or stovetop/microwave timing, use that as your safety guide, then let the gravy do the flavor work.
Frozen Patty Method Table
Use this table to match the method to the patties you actually have, not the patties you wish you had thawed yesterday.
| Patty Type | Best Method | What to Watch |
|---|---|---|
| Raw frozen hamburger patties | Thaw in the refrigerator first, then brown and slow cook | Avoid adding raw frozen meat straight to the slow cooker |
| Homemade frozen raw patties | Thaw overnight in the fridge, then brown gently | They may be fragile after thawing |
| Thawed raw patties | Brown first, then cook in gravy | Check 160°F / 71°C in the center |
| Fully cooked frozen patties | Heat thoroughly in gravy according to package directions | Stop before they turn firm |
| Leftover cooked burger patties | Warm gently in gravy | Best added later so they do not dry out |
Previously frozen patties may release more liquid than freshly shaped patties, so plan on thickening the sauce before serving. Use a wide spatula when lifting them out because thawed or reheated patties can be softer than freshly browned Salisbury steaks.
Best Method for Thawed Hamburger Patties
- Thaw raw frozen patties safely in the refrigerator.
- Brown the thawed patties for 2 to 3 minutes per side, if possible.
- Add onions, mushrooms, patties, and whisked gravy to the slow cooker.
- Cook on low until the patties reach 160°F / 71°C.
- Skim extra grease if needed.
- Stir in slurry near the finish to give the sauce body.
Easy Variations
Once the basic method is clear, the recipe is flexible. Keep the same idea — sturdy beef, enough sauce, and salt control — then adjust the flavor around it.
Salisbury Steak Meatballs
Use frozen fully cooked meatballs or homemade meatballs with the same gravy. Meatballs are easier than patties because you do not need to shape ovals and there is less risk of breaking. Cook until hot all the way through, then thicken the sauce near the end.

No Mushroom Salisbury Steak
Skip the mushrooms and add extra onions. The gravy will be less earthy, but still savory and comforting. Worcestershire, Dijon, black pepper, and garlic help carry the flavor.
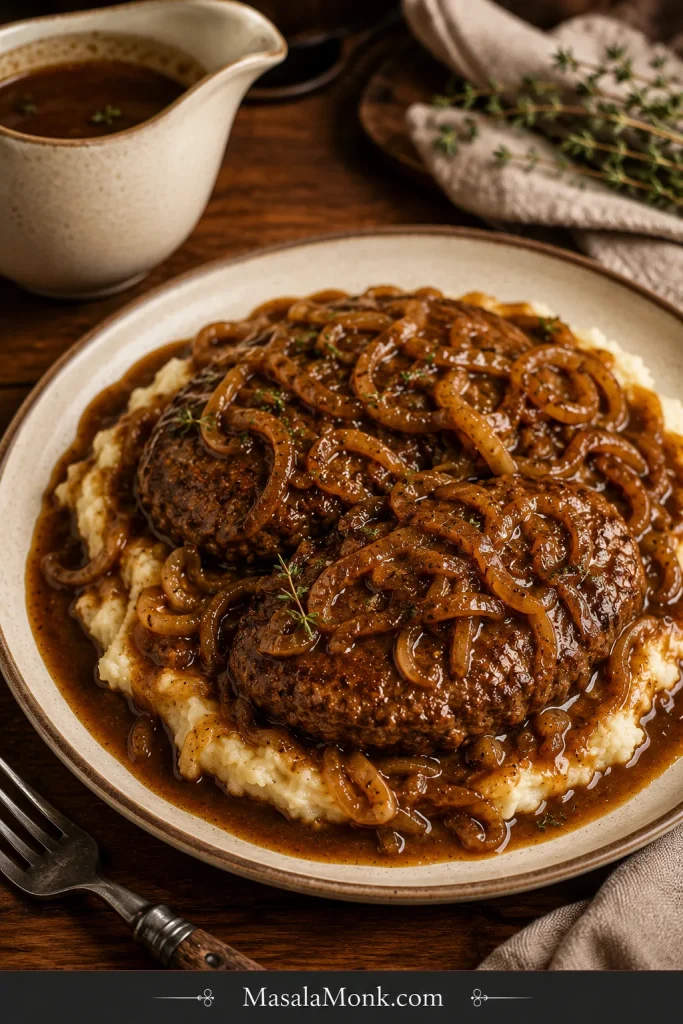
Extra Onion Gravy
Use a full sliced onion instead of half, and add ½ packet onion soup mix or replace part of the broth with French onion soup. This is the best route if you want onion gravy without mushrooms.
Gluten-Free Version
Use gluten-free breadcrumbs and check the labels on gravy mix, onion soup mix, canned soup, and Worcestershire sauce. Cornstarch is usually the easiest gluten-free thickener, but packet mixes vary by brand. Skip the optional flour dusting before browning.
Low-Carb or Keto Version
Use almond flour, crushed pork rinds, or another low-carb binder instead of breadcrumbs. Serve with mashed cauliflower, cauliflower rice, green beans, or sautéed cabbage. Use a low-carb thickener if cornstarch does not fit your plan.
Ground Turkey Version
For a lighter version, ground turkey works, but handle the patties gently because they are leaner and more delicate. Cook ground turkey patties to 165°F / 74°C and season the sauce well because turkey is milder than beef.
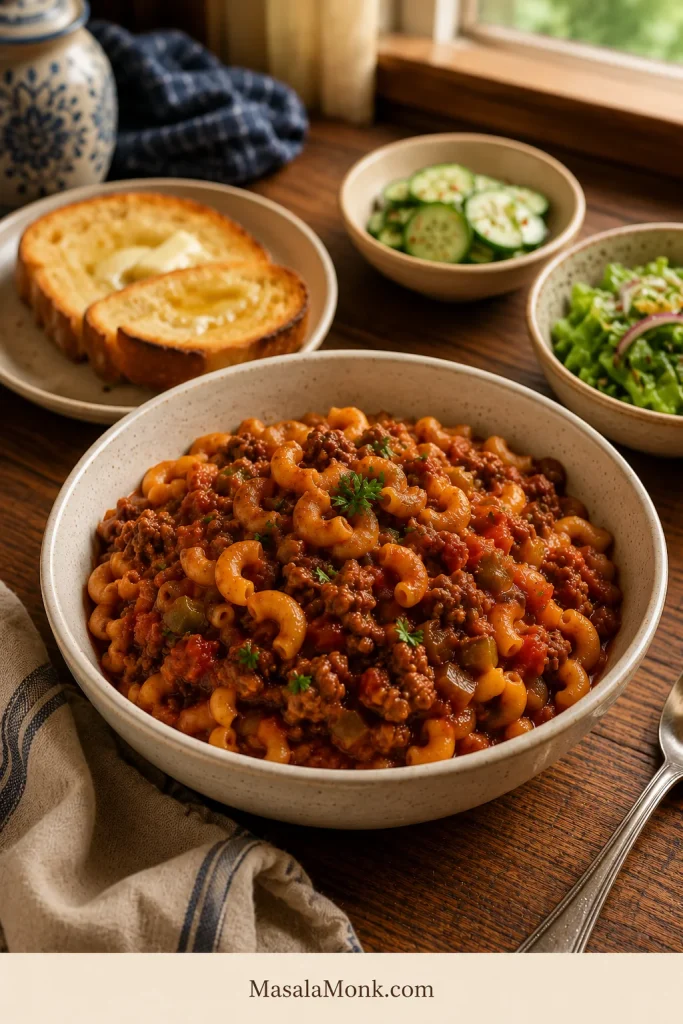
What to Serve With Crock Pot Salisbury Steak
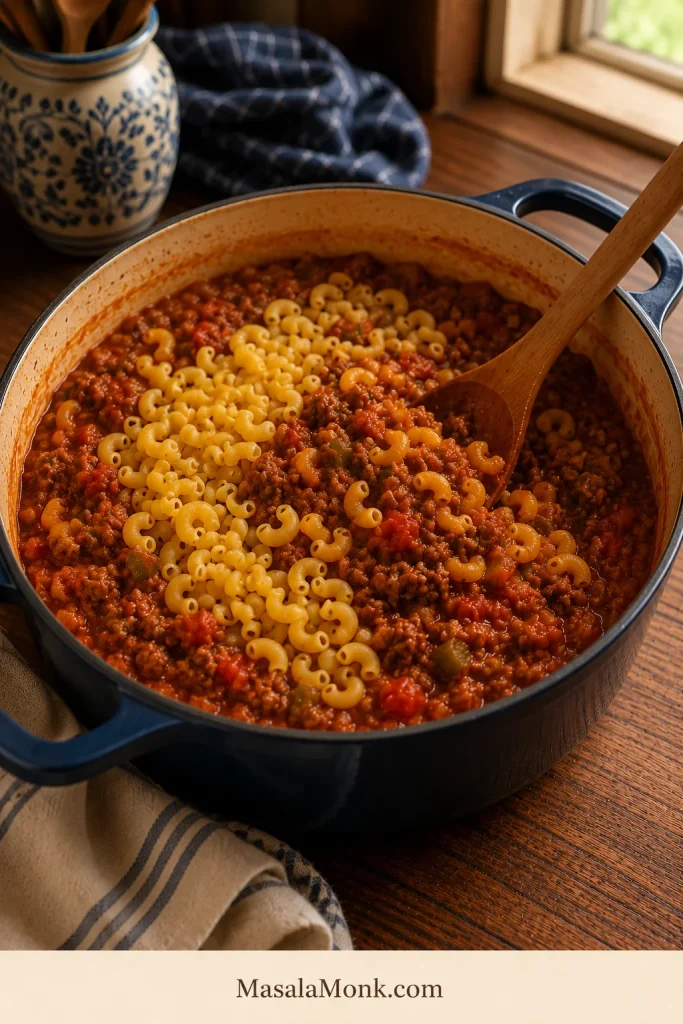
Mashed potatoes are the classic because they catch the gravy. If you want to stretch the meal, egg noodles or rice also work beautifully.
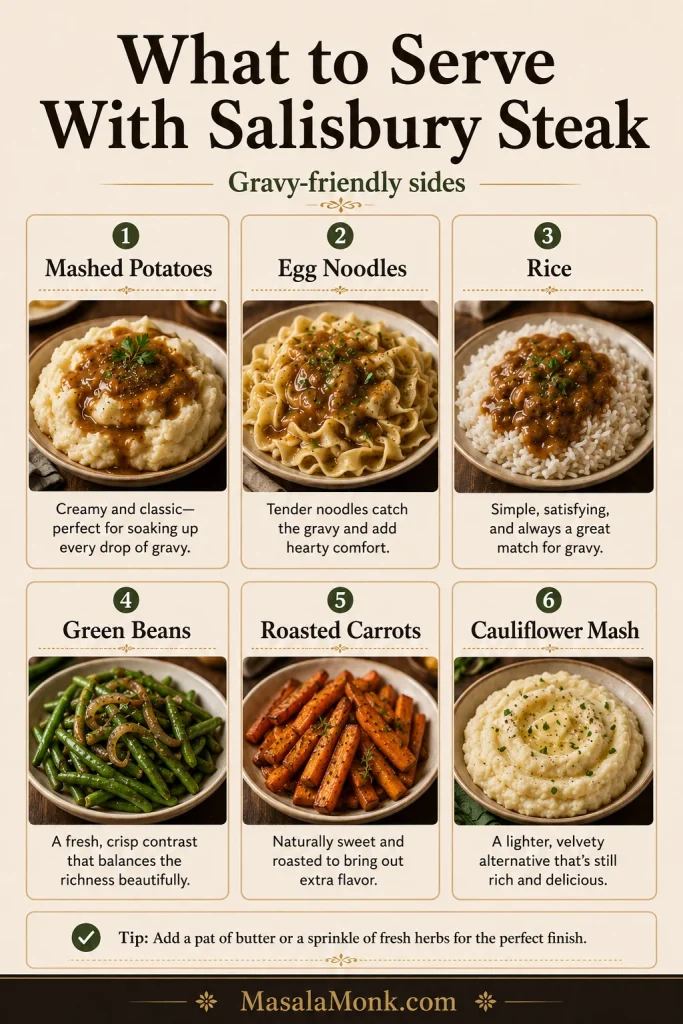
- Mashed potatoes: the best classic comfort-food pairing.
- Egg noodles: good when you want a beef-and-noodles feel.
- Rice: budget-friendly and excellent with extra gravy.
- Green beans: simple and fresh next to rich gravy.
- Roasted carrots: sweet, cozy, and easy.
- Peas or corn: family-style sides that keep dinner simple.
- Biscuits or dinner rolls: useful when there is extra gravy.
- Cauliflower mash: a good lower-carb base.
For a garlic-forward potato side, these garlic mashed potatoes are especially good when the gravy is rich and beefy.
If the plate needs something crisp and cold beside all that gravy, a wedge salad gives you that steakhouse-style contrast.
The best plate has something plain underneath. Give the gravy somewhere to go: into potatoes, over noodles, across rice, or around cauliflower mash.
Troubleshooting Crock Pot Salisbury Steak
If your last slow cooker Salisbury steak came out thin, salty, or broken, you are not alone. None of those problems means dinner is ruined; most of them just need a small adjustment.
Most problems come from fragile patties, trapped slow-cooker moisture, or salty shortcut ingredients. Here is how to fix them.
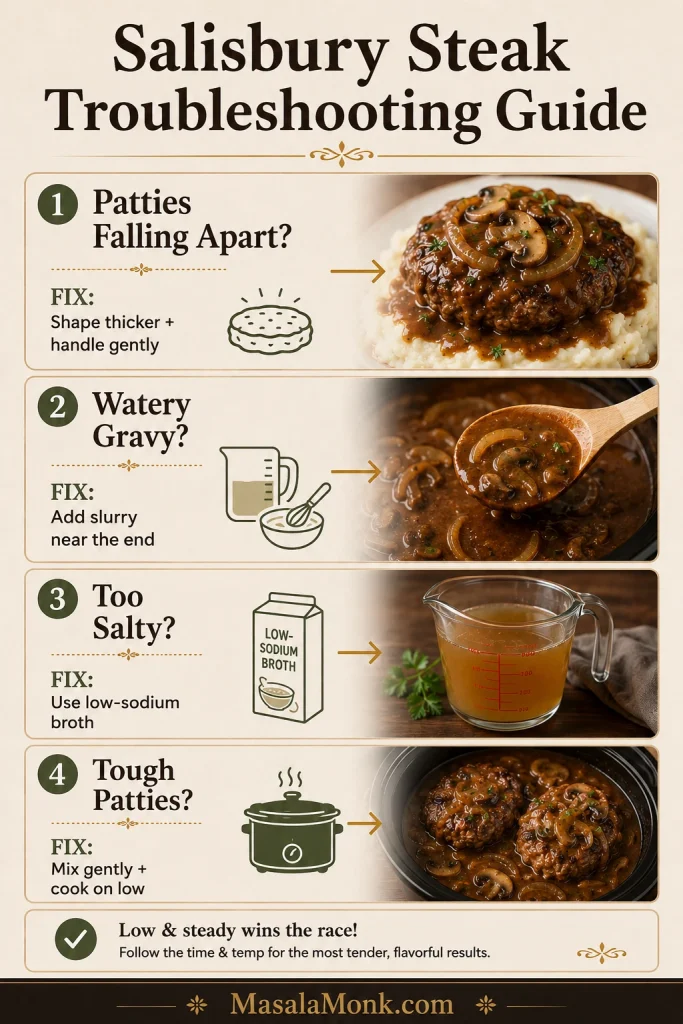
Why Did My Patties Fall Apart?
The patties may have been too thin, too loosely shaped, moved too often, or stacked too tightly. Browning helps, but even unbrowned patties hold better when they are thick enough and moved with a wide spatula.
Why Is My Gravy Watery?
Slow cookers trap moisture, and beef releases juices as it cooks. Add a cornstarch slurry once the patties are done, cover, and let the sauce tighten. Use a second small slurry if needed.
Why Is My Gravy Too Salty?
Packets, soup mixes, canned soup, and broth can all add salt. Use low-sodium broth and reduce added salt. To fix a salty batch, add unsalted broth, a splash of cream, extra mushrooms or onions, or serve over plain potatoes or rice.
Why Are My Patties Tough?
The meat was likely overmixed, packed too tightly, or cooked too long on high. Mix gently, shape without compressing too much, and use low heat when possible.
Why Is There Grease on Top?
Ground beef releases fat as it cooks. Browning first removes some of it before the patties go into the crock pot. If grease collects on top, skim it off before thickening the sauce.
Why Does the Gravy Taste Flat?
Add Worcestershire, Dijon, black pepper, garlic, or a little more onion flavor. A small spoonful of ketchup can round out the gravy without making it taste sweet.
Why Did the Mushrooms Get Too Soft?
Mushrooms soften a lot in the slow cooker. For firmer mushrooms, use thicker slices or add half at the beginning and half during the last hour.
Can I Make the Patties Ahead?
Yes. Shape the patties up to a day ahead and refrigerate them covered. You can also brown the patties ahead, cool them, and refrigerate until you are ready to assemble the crock pot.
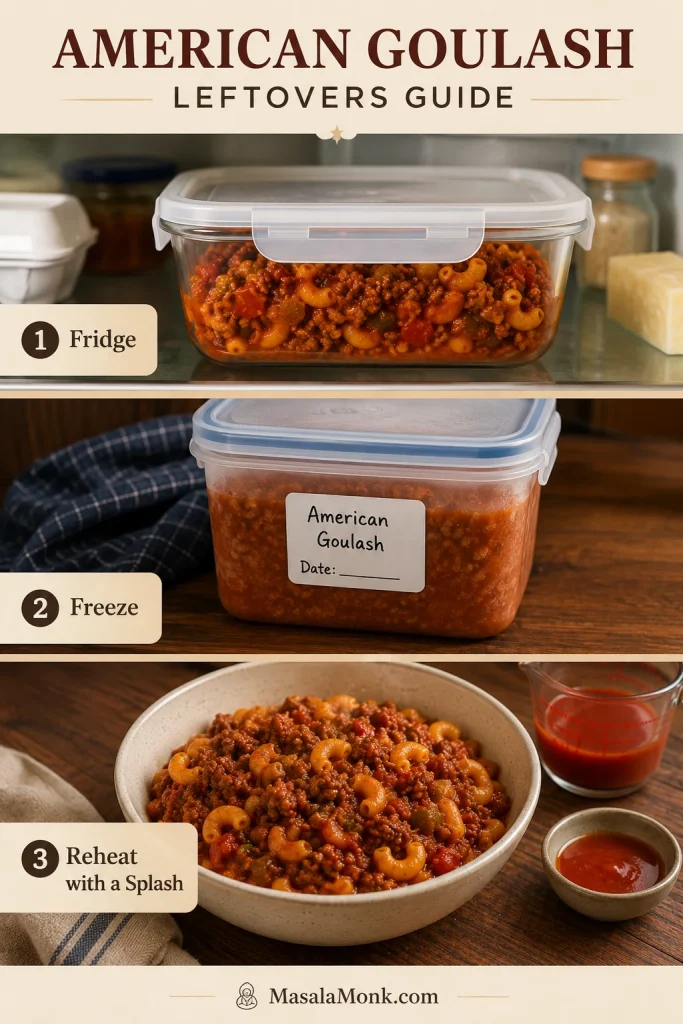
Storage, Freezing, and Reheating
- Refrigerator: Store leftovers in an airtight container for 3 to 4 days.
- Freezer: Freeze cooked patties with gravy for 2 to 3 months.
- Reheating: Warm gently with a splash of broth or water to loosen the gravy.
- After freezing: The gravy may thin after thawing. Simmer gently and thicken again with a small slurry if needed.
For the best freezer texture, freeze the patties with gravy instead of freezing the patties dry. The sauce protects the beef and makes leftovers feel more like dinner than a rescue mission.
FAQ
Should Salisbury steak patties be browned before slow cooking?
Browning is not required, but it gives better flavor and helps the patties hold together. If you skip it, make them slightly thicker and handle them gently.
Can frozen hamburger patties go straight into the crock pot?
For raw frozen hamburger patties, thaw them in the refrigerator first, then brown and slow cook them in the gravy. Fully cooked frozen patties are different; follow the package directions and heat them thoroughly in the sauce.
Is cream of mushroom soup a good shortcut?
Yes. Use 1 can, usually 10.5 oz / 298 g, for a lighter creamy gravy or 2 cans for a thicker cream-soup version. Reduce salt if you also use gravy mix or onion soup mix.
Can I use cream of chicken soup instead?
Yes. It makes a milder, creamier sauce. Add Worcestershire, au jus, or extra black pepper so it still tastes savory and not flat.
What does onion soup mix add?
Onion soup mix adds savory onion flavor and salt. Use ½ packet for balance or a full packet for a stronger shortcut version, then reduce added salt and use low-sodium broth.
How do you thicken slow cooker Salisbury steak gravy?
Mix cornstarch with cold water, stir it into the hot gravy once the patties are cooked, and cook for 15 to 20 minutes. Add another small slurry if you want it thicker.
What can replace mushrooms?
Use extra onions, onion gravy, French onion soup, or cream of onion soup. Brown gravy versions also work well without mushrooms.
What internal temperature should Salisbury steak reach?
Ground beef patties should reach 160°F / 71°C in the center. For ground turkey or ground chicken patties, use 165°F / 74°C.
Is Salisbury steak the same as hamburger steak?
They are closely related. Salisbury steak usually includes seasoned ground beef with a binder such as breadcrumbs or egg, then gravy. Hamburger steak is often simpler: seasoned beef patties with onion gravy or brown gravy.
Final Thoughts
Crock pot Salisbury steak does not need to be fancy to be memorable. It just needs tender beef, brown gravy, soft onions, and the kind of sauce that makes mashed potatoes disappear from the plate.
Whether you start with homemade patties or a freezer shortcut, the win is the same: tender beef, a spoonable brown sauce, and a plate of potatoes, noodles, or rice that catches every bit of it.