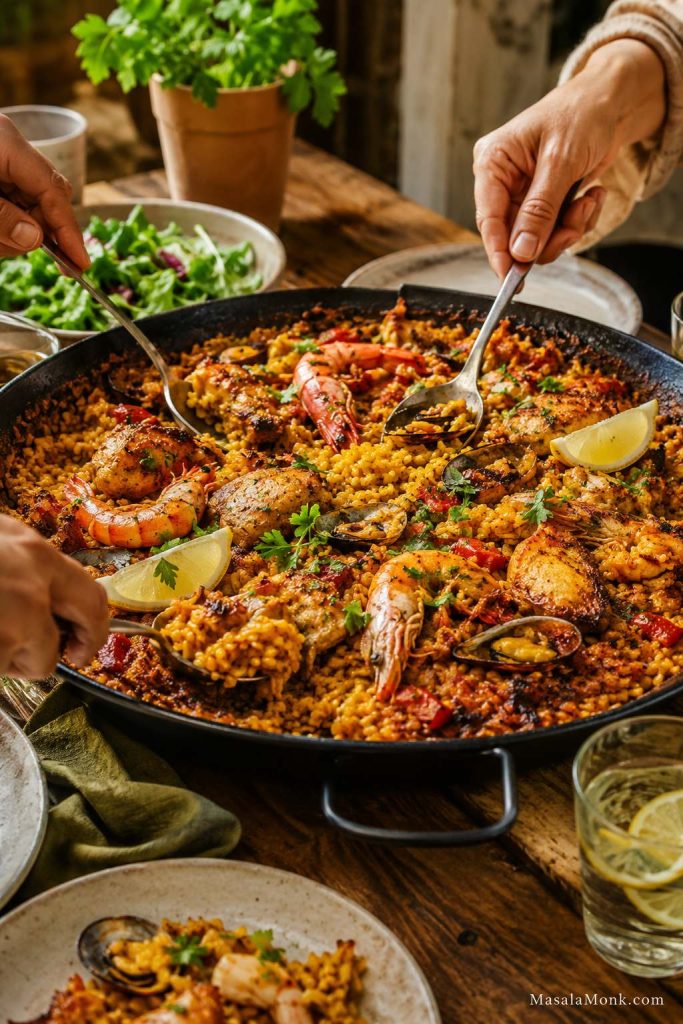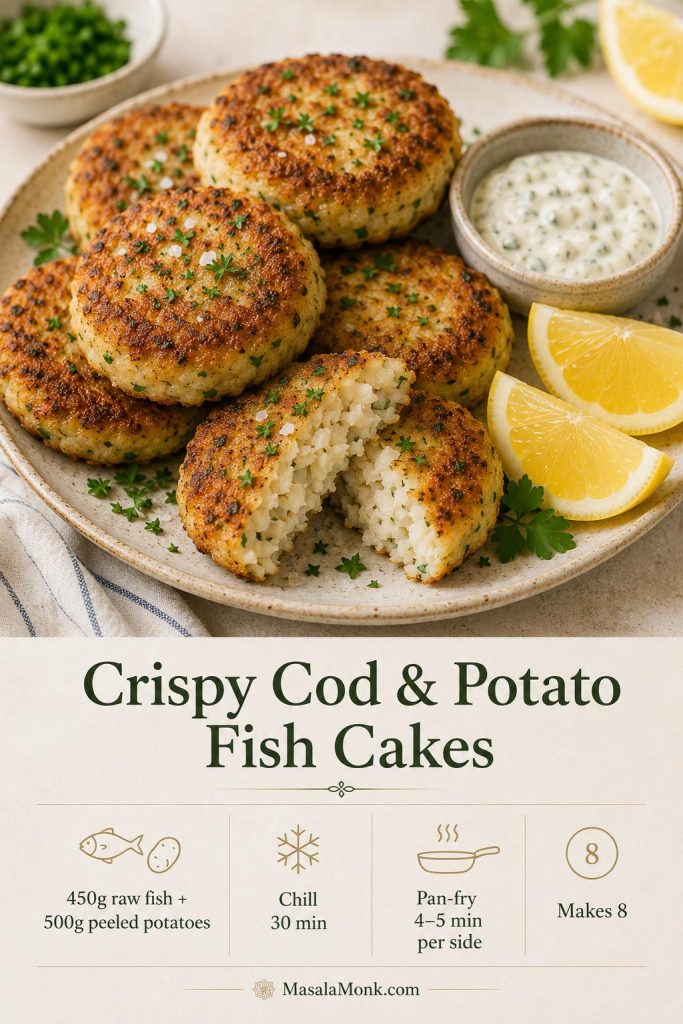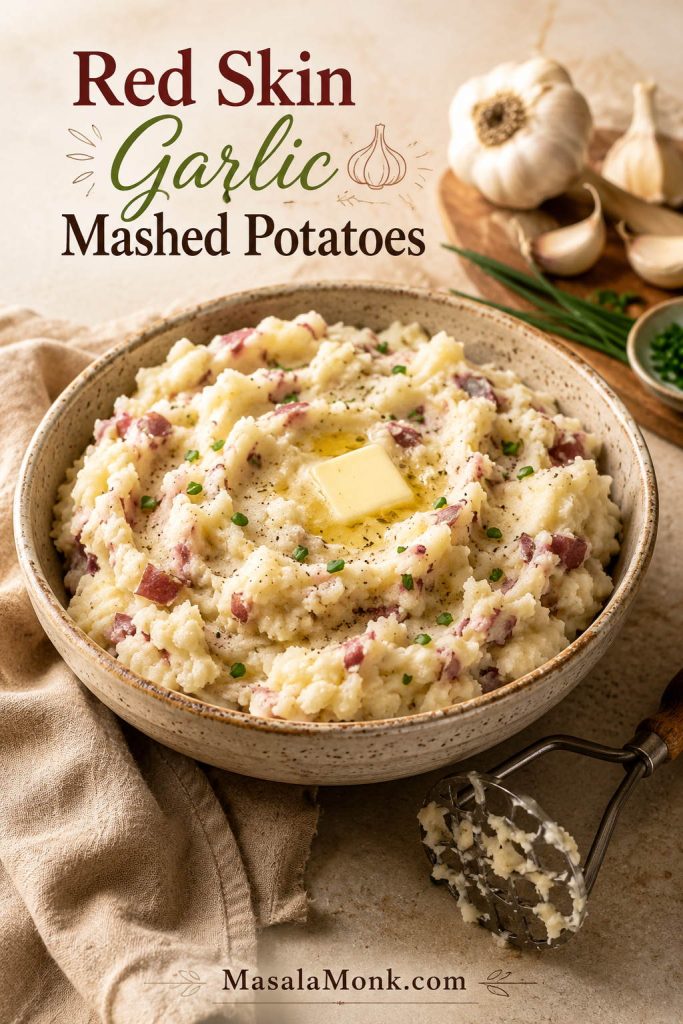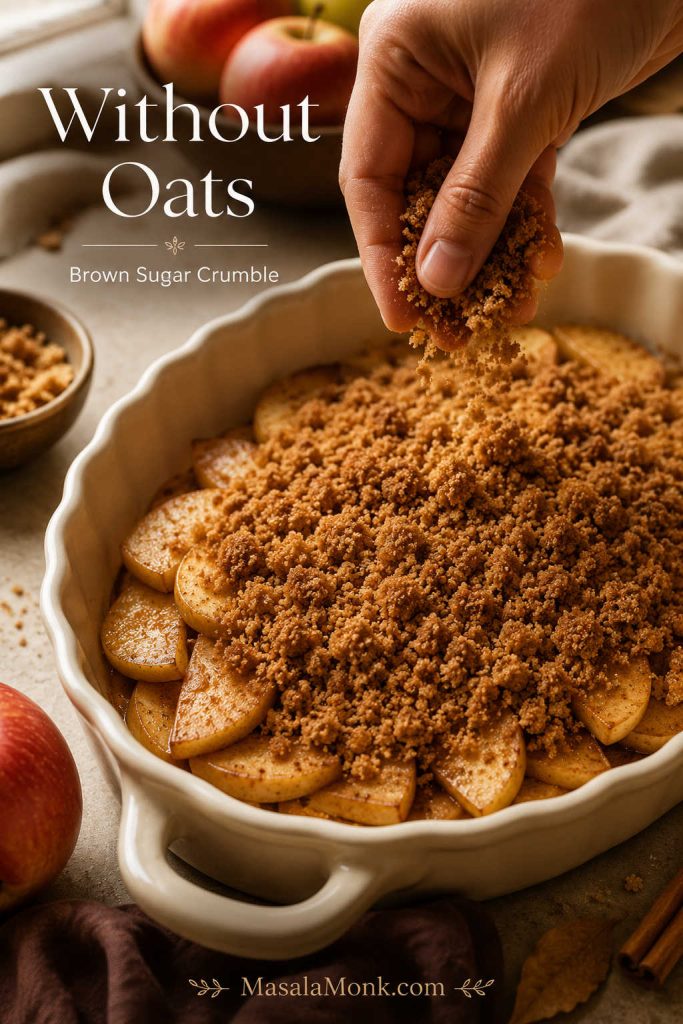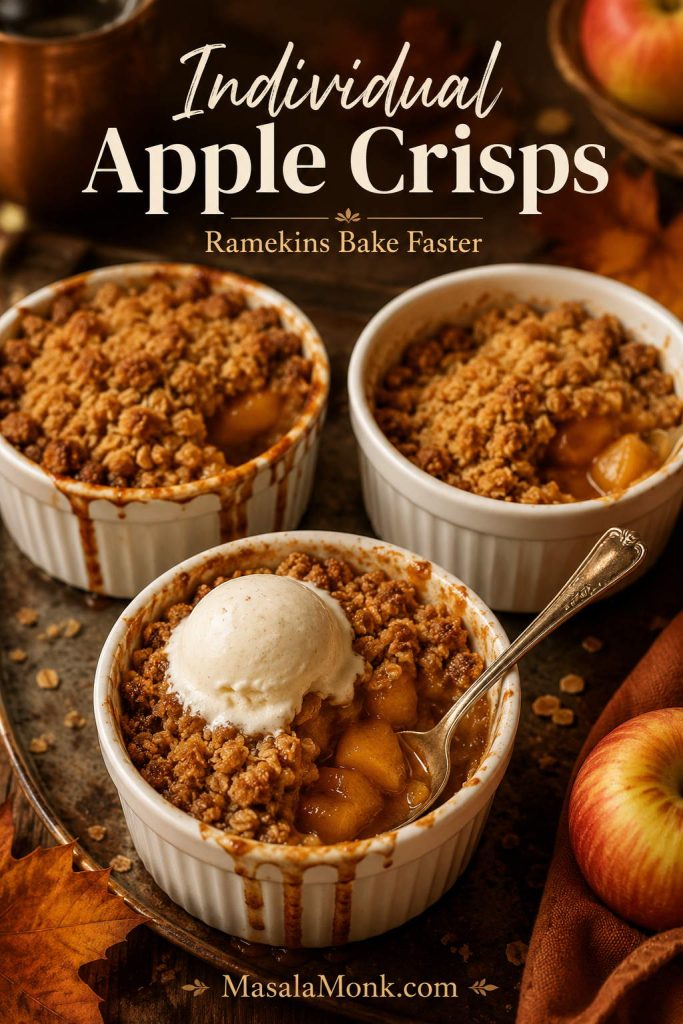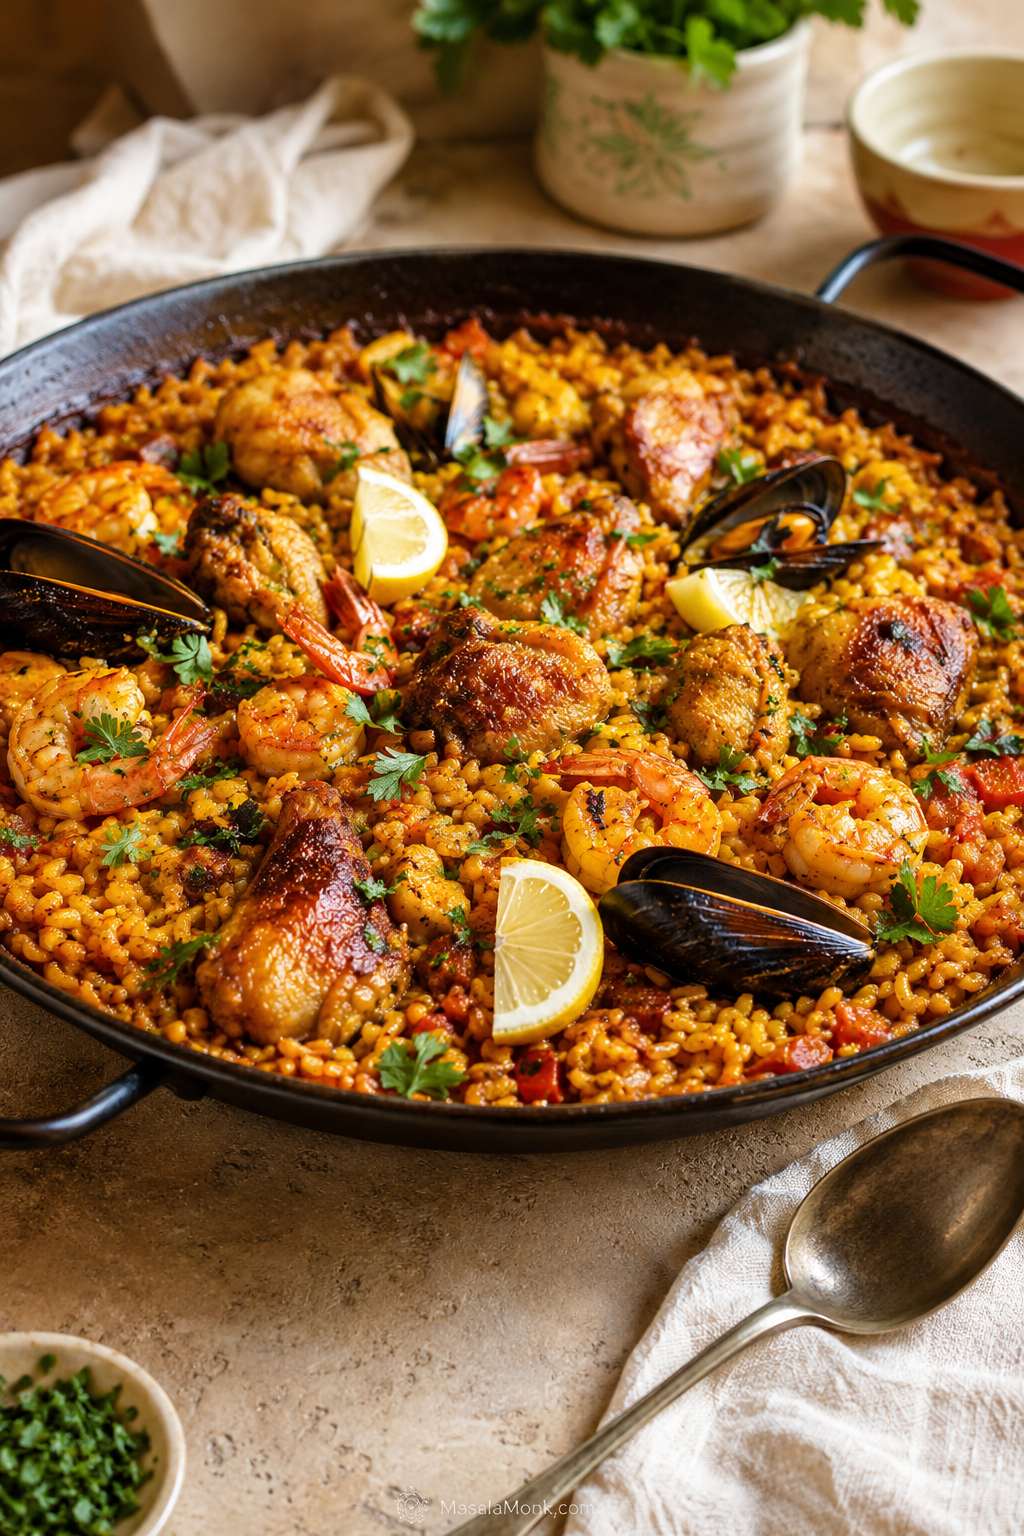
A good paella recipe should feel generous before anyone takes a bite: golden rice, saffron and paprika in the air, shrimp tucked into the top, lemon wedges on the side, and that quiet hope that there are toasted bits hiding at the bottom of the pan.
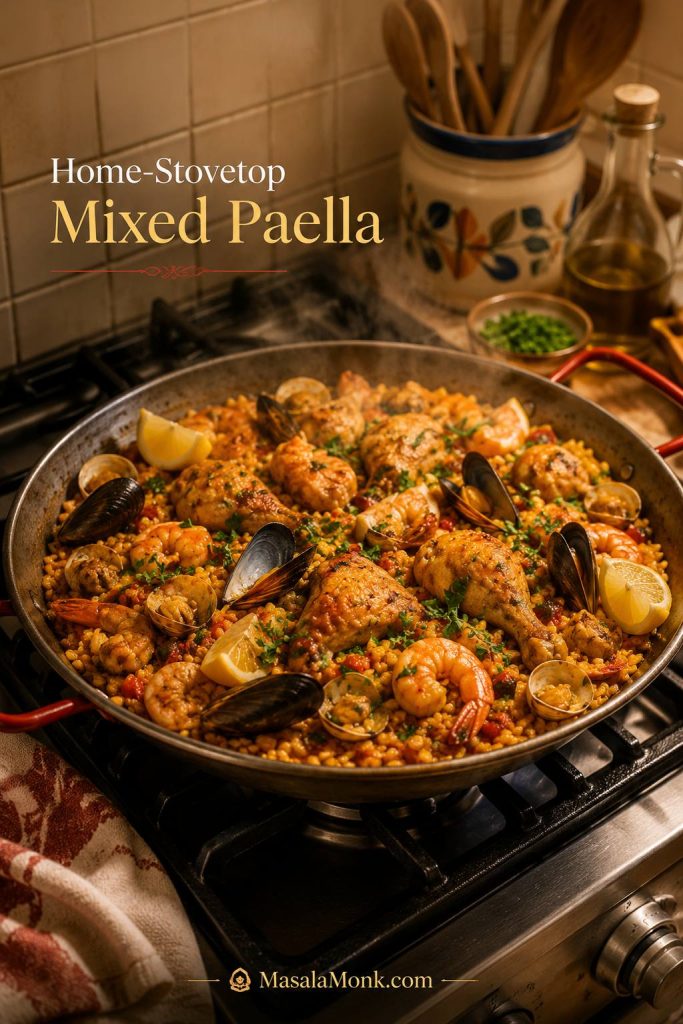
This version is built for a regular home kitchen, not a restaurant burner. It gives you browned chicken, tender shrimp, optional shellfish, a deep tomato-and-paprika sofrito, and a clear no-stir method so the rice cooks tender and separate instead of mushy.
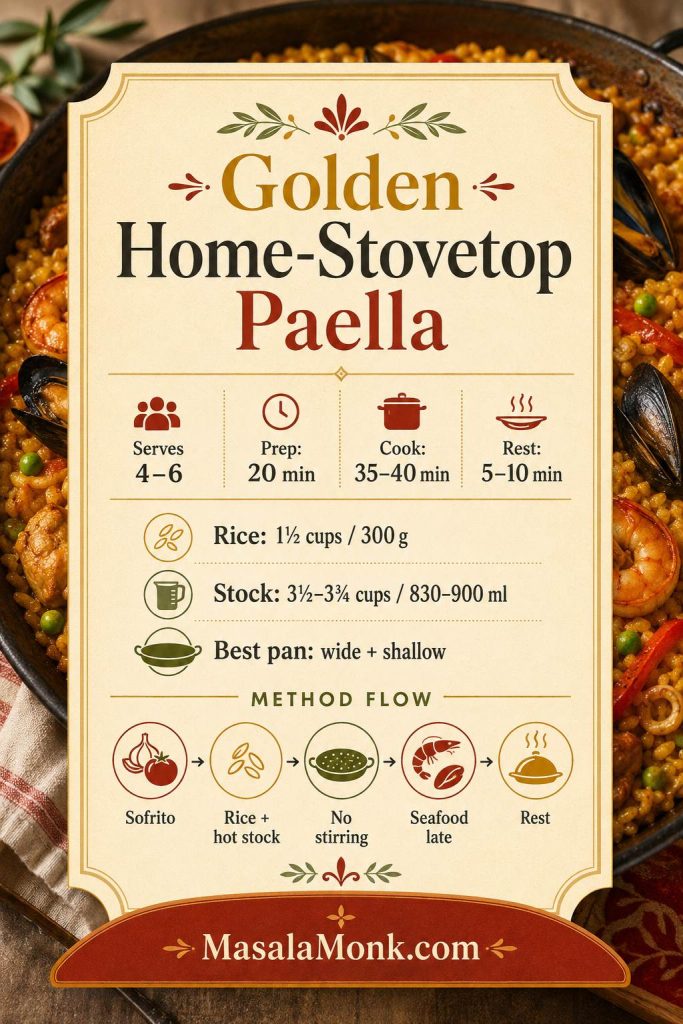
The rhythm is simple once you see it: build flavor first, add short-grain rice and hot stock, spread everything into a shallow layer, then leave it alone. This is a home-stovetop mixed paella with chicken, shrimp, optional shellfish, and saffron rice. It is inspired by paella mixta rather than strict Paella Valenciana, but it respects the principles that matter most: good rice, broad heat, careful seafood timing, and a proper rest.
In This Guide
Start Here
Ingredients & Technique
Serve, Store & Fix
Quick Answer: How to Make Paella at Home
To make paella at home, cook a thick sofrito with onion, garlic, tomato, paprika, and saffron, then add short-grain rice and hot stock. Spread the rice into a shallow layer, simmer uncovered without stirring, add shrimp or shellfish near the end, and rest the pan before serving.
The best rice is Spanish short-grain rice such as bomba, Calasparra, or Valencia. Although a paella pan helps, a wide skillet or low-sided sauté pan can work if the rice stays shallow. Once the stock goes in, your job is mostly to watch the bubbles, rotate the pan if needed, and let the rice cook in place.
If you want the exact rice and pan details before cooking, jump to Best Rice for Paella or Do You Need a Paella Pan?.
If You Want More Seafood or a Chicken-and-Seafood Paella
Use the same rice method and adjust the proteins. A seafood-forward paella can lean more heavily on seafood stock, shrimp, mussels, clams, squid, scallops, or firm white fish. For chicken and seafood paella, follow the recipe as written: browned chicken gives the rice body, while shrimp and optional mussels or clams go in near the end so they stay tender instead of rubbery. To adjust the pan further, see Paella Variations.
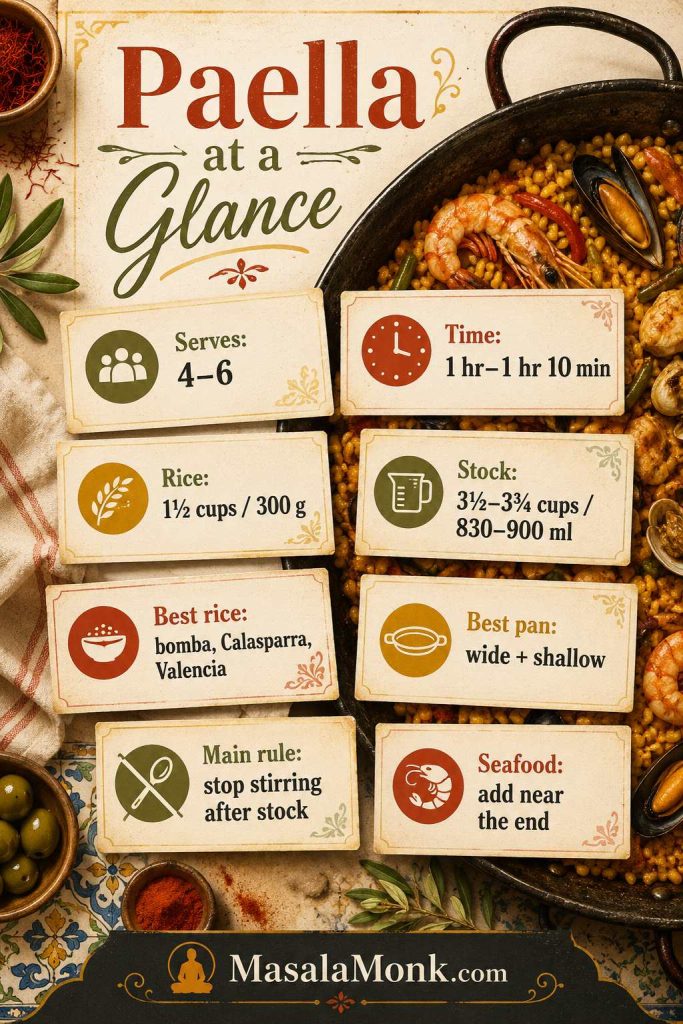
Paella at a Glance
- Style: Home-stovetop mixed paella with chicken, shrimp, and optional shellfish
- Serves: 4–6
- Total time: About 1 hour to 1 hour 10 minutes
- Best rice: Bomba, Calasparra, Valencia, or Spanish short-grain rice
- Rice amount: 1½ cups / about 300 g
- Stock amount: 3½–3¾ cups / 830–900 ml hot stock
- Best pan: Wide paella pan, skillet, or low-sided sauté pan
- Main rule: Stop stirring once the stock goes in
- Seafood timing: Add shrimp and shellfish near the end
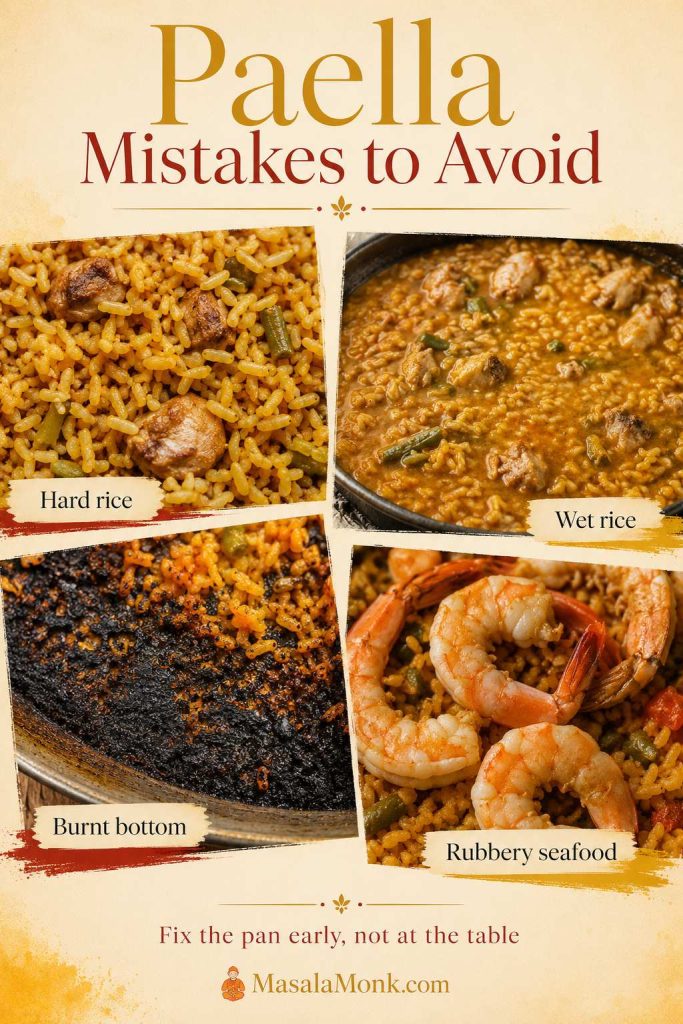
What This Method Helps You Avoid
Most disappointing paella comes down to the same few problems: rice that stays hard, rice that turns wet, a bottom that burns before the top is tender, or seafood that cooks too long. This method is designed to catch those problems early: the rice stays shallow, the stock is controlled, the seafood goes in late, and the pan is rotated instead of stirred.
If your main worry is fixing rice texture, heat, or seafood timing as you cook, keep the Paella Troubleshooting section nearby.
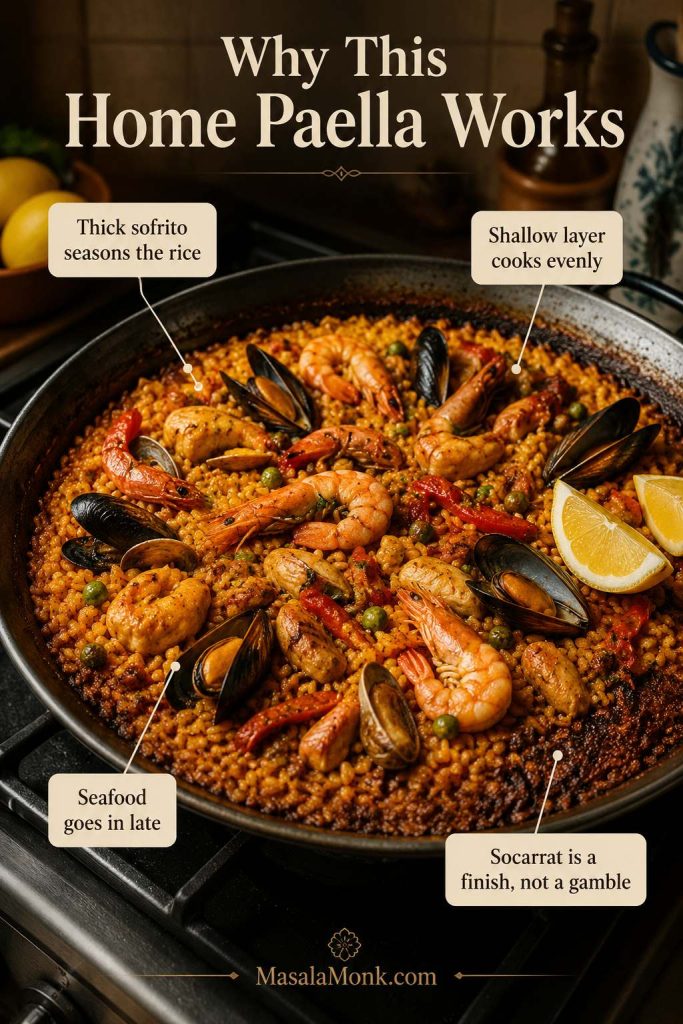
Why This Home Paella Works
This method works because it treats paella as a rice dish first. The chicken, shrimp, shellfish, saffron, paprika, and lemon all matter, but the rice texture decides whether the pan feels right. Keep the rice shallow, let it absorb the stock in place, and the grains have a much better chance of finishing tender, seasoned, and distinct instead of creamy.
- Chicken thighs build a forgiving base, so the pan still feels hearty even if you keep the seafood simple.
- A concentrated sofrito seasons the rice early, before the stock dilutes the pan.
- Short-grain rice absorbs flavor without falling apart, which is why bomba, Calasparra, or Valencia rice works better than long-grain rice.
- A shallow layer protects the texture, especially on a home stovetop with uneven heat.
- Seafood goes in late, so shrimp stays juicy and shellfish opens without turning tough.
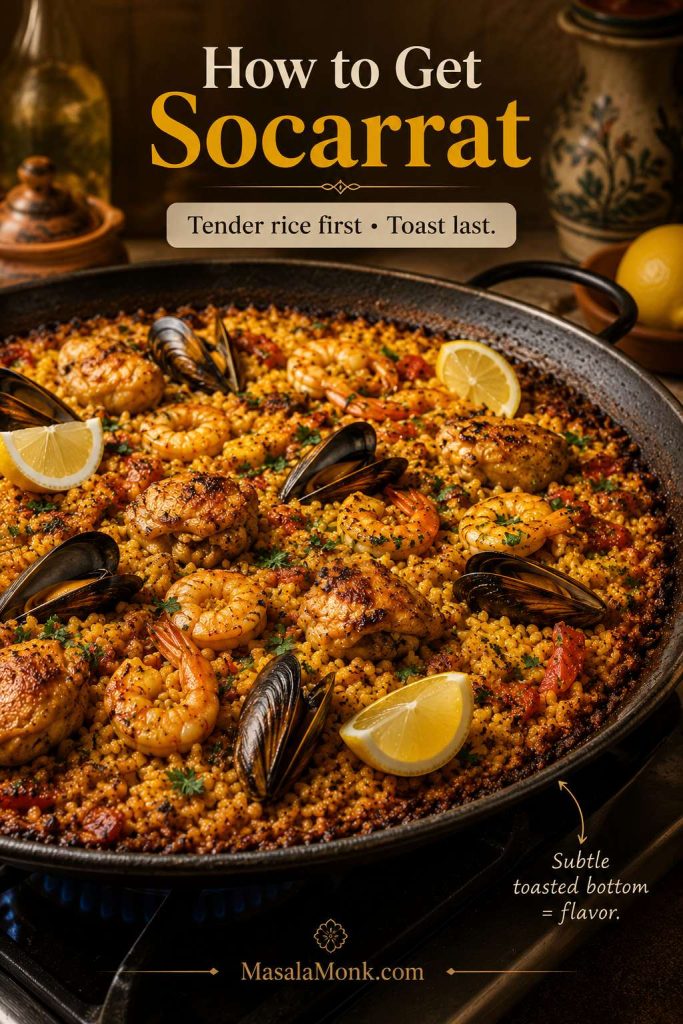
- Socarrat stays optional, because tender, well-seasoned rice matters more than forcing a crust too early.
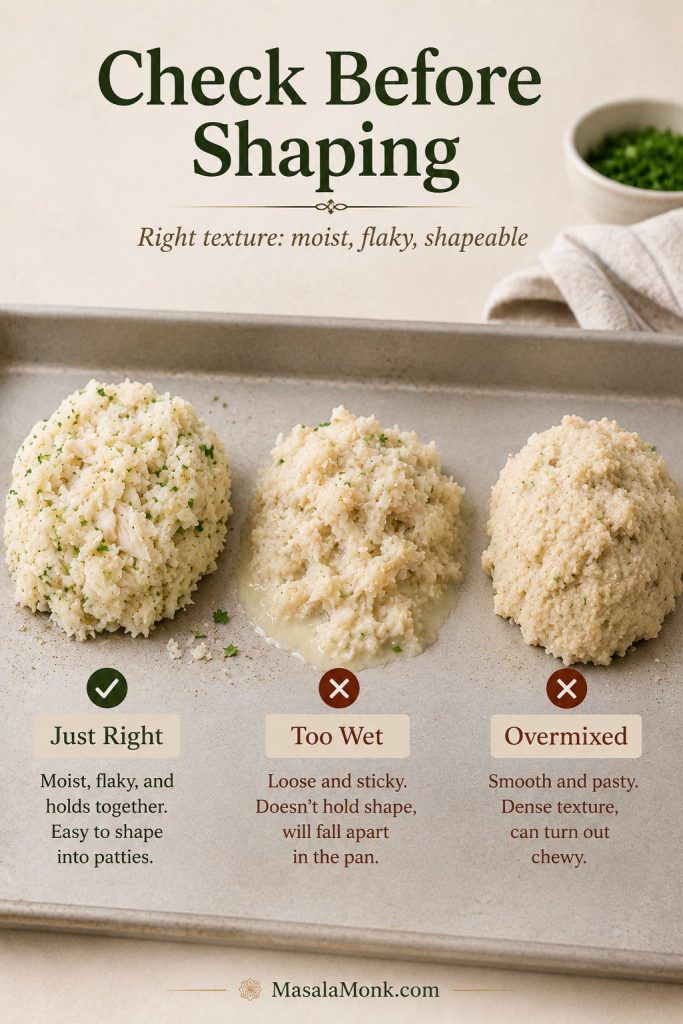
What This Paella Should Taste Like
Aim for paella that tastes savory, sunny, and deeply seasoned, not creamy or soupy. The rice should be tender but distinct, with saffron and paprika in the background, chicken giving the pan body, seafood adding a briny lift, and lemon cutting through at the end.
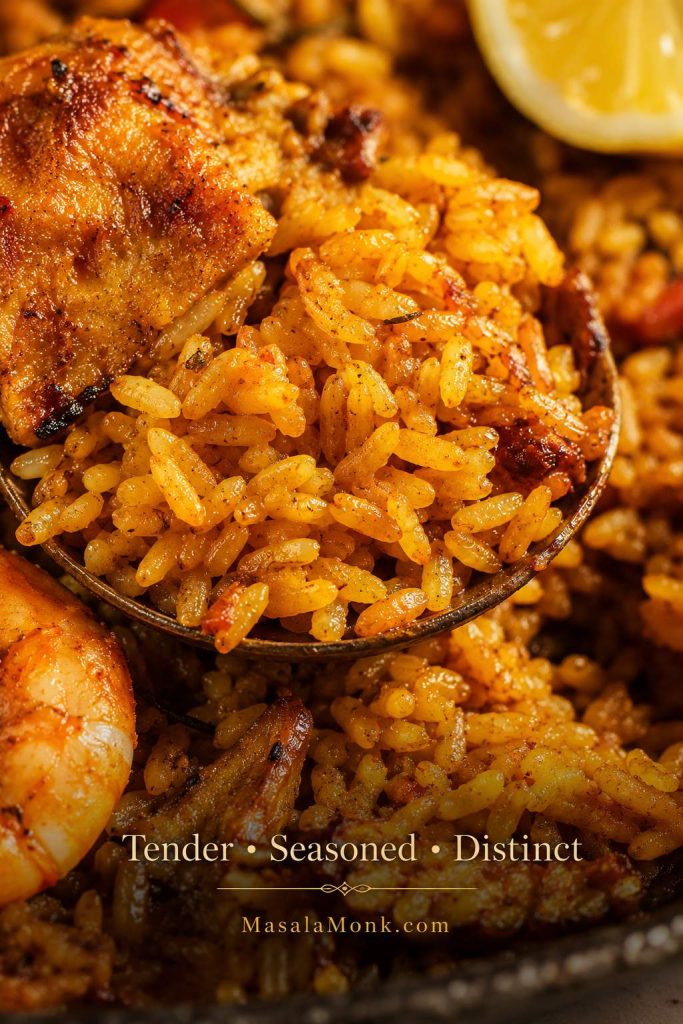
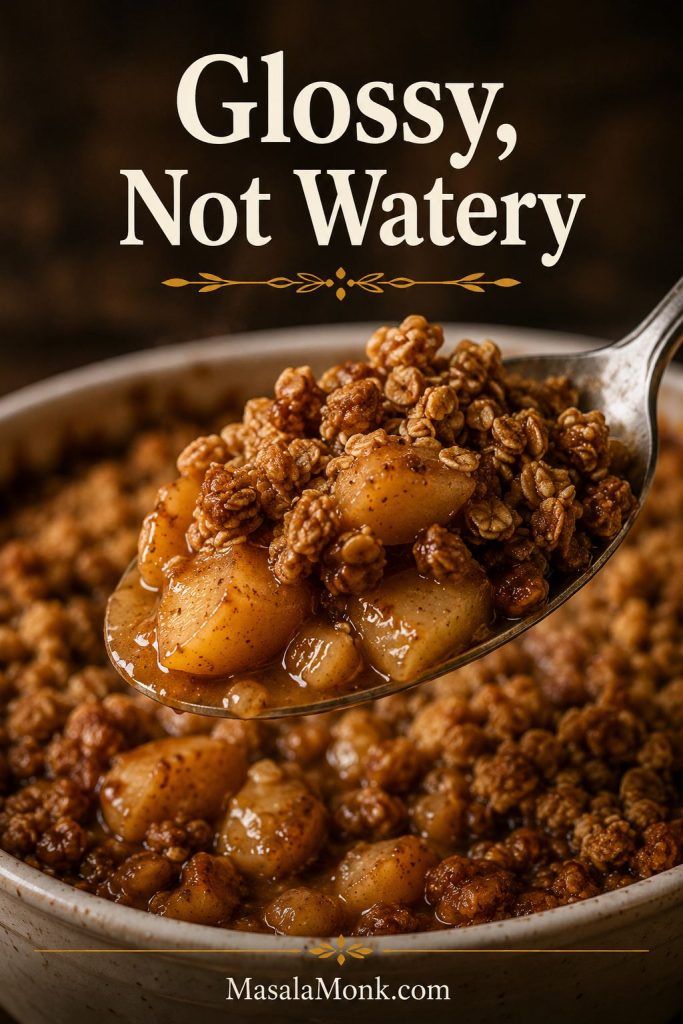
When socarrat forms, the bottom layer should taste toasted and nutty rather than bitter. Even without it, the paella can still be excellent. Tender rice and balanced flavor matter more than forcing a crust.
Success cues
Look for tender, separate rice; shrimp that is pink and opaque; savory stock flavor; lemon brightness; and, if you chase it, a toasted bottom that tastes nutty rather than bitter.
What Is Paella?
Paella is a Spanish rice dish from Valencia, traditionally cooked in a wide, low pan. The word is often used for both the dish and the pan, but the heart of paella is the rice: separate grains cooked in flavorful stock, usually with saffron, paprika, vegetables, and proteins arranged across the top.
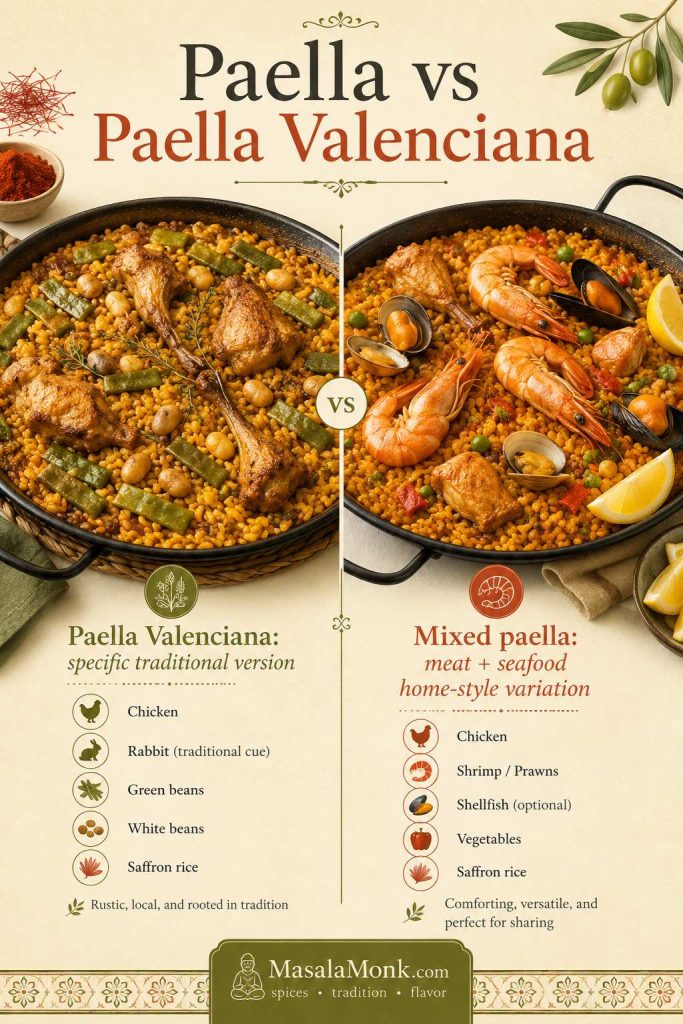
There are many versions now. Paella Valenciana is the classic Valencian version. Seafood paella focuses on shrimp, mussels, clams, squid, or fish. Mixed paella often combines meat and seafood. Home cooks also make chicken paella, vegetable paella, vegan paella, and Spanish-inspired chicken and chorizo paella.
In everyday recipe searching, “paella” often means the whole family of Spanish-style rice pans, while “Paella Valenciana” refers to a more specific traditional version. That distinction is helpful here because this pan is meant to be a practical mixed paella for a home stovetop, not a claim to be the one traditional version.
This version is designed for a regular stovetop. It gives you the feel of a generous mixed paella without asking you to find every traditional Valencian ingredient or cook outdoors over a wide fire. The goal is a practical home method with good rice texture, clear timing, and enough guidance that you know what to do if the pan behaves differently from the recipe.
Is This Authentic Paella or Spanish-Style Paella?
This is a Spanish-style home paella, not a strict Paella Valenciana. That is not a disclaimer so much as a way to be clear and respectful.
Traditional Valencian paella has a specific identity. Spain’s official tourism site lists a Valencian-style paella built around rice, chicken, rabbit, tomato, green beans, garrofó, olive oil, saffron, paprika, water, and salt, with optional ingredients such as snails, garlic, rosemary, and peppers. It also notes mixed paella separately as another variety that may include seafood such as mussels, shrimp, prawns, and squid. You can read that official reference on Spain.info.
Think of this as home-style mixed paella: chicken, shrimp, optional shellfish, saffron rice, and a stovetop method that works without outdoor fire. It borrows from the spirit of Spanish mixed paella while being honest that it is not strict Paella Valenciana.
What about chorizo?
Chorizo is popular in many English-language paella recipes, especially chicken and chorizo paella, but it is not part of traditional Paella Valenciana. Here, chorizo is treated as an optional Spanish-inspired variation, not the base recipe.
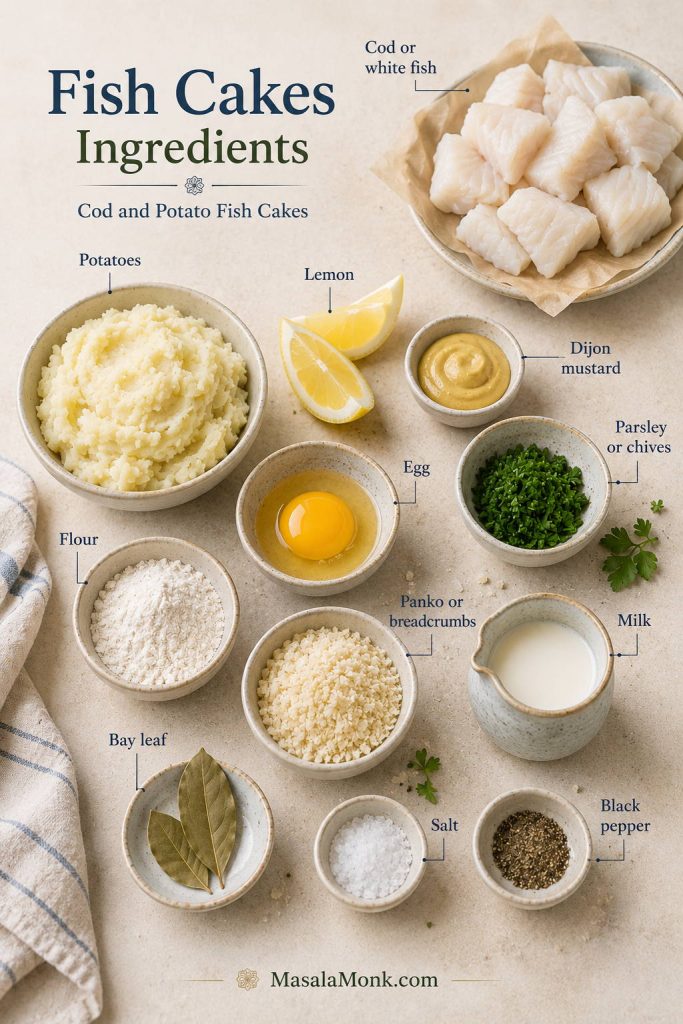
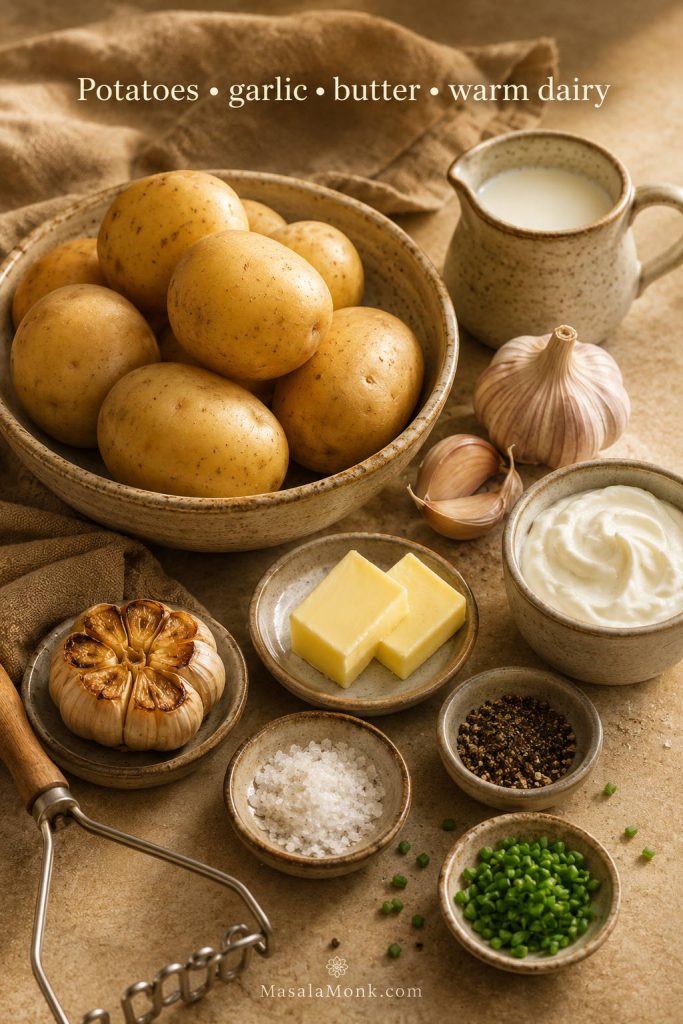
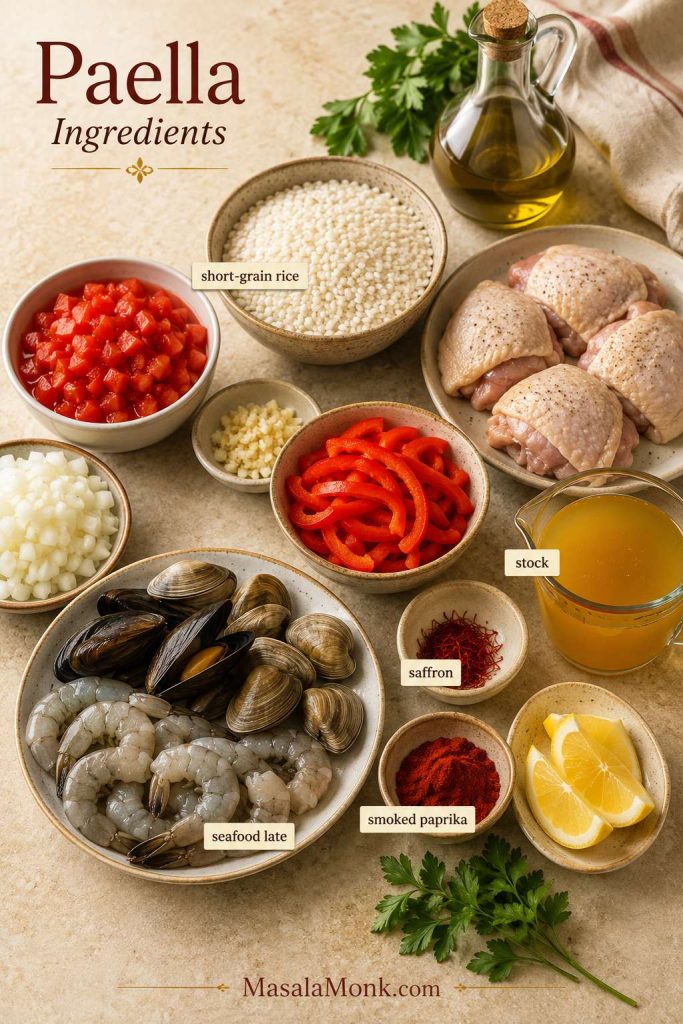
Paella Ingredients
The ingredient list is not long, but paella rewards choosing each part with care. Rice gives the pan structure, stock carries the flavor, saffron brings aroma and color, paprika adds warmth, tomato and aromatics create the sofrito, and the chicken and seafood make the meal feel generous.
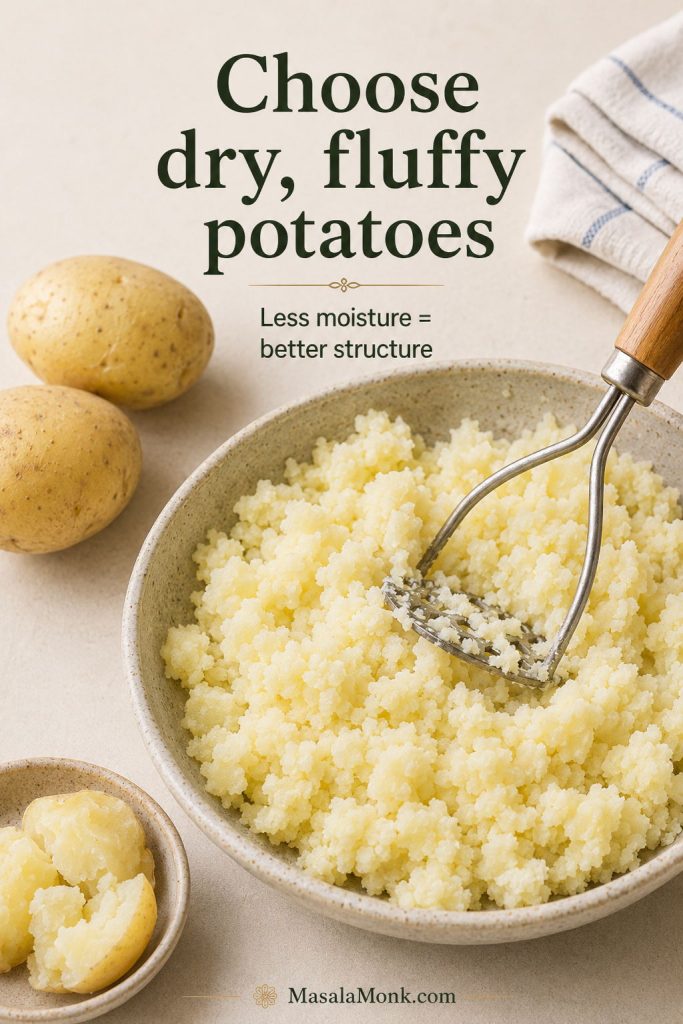
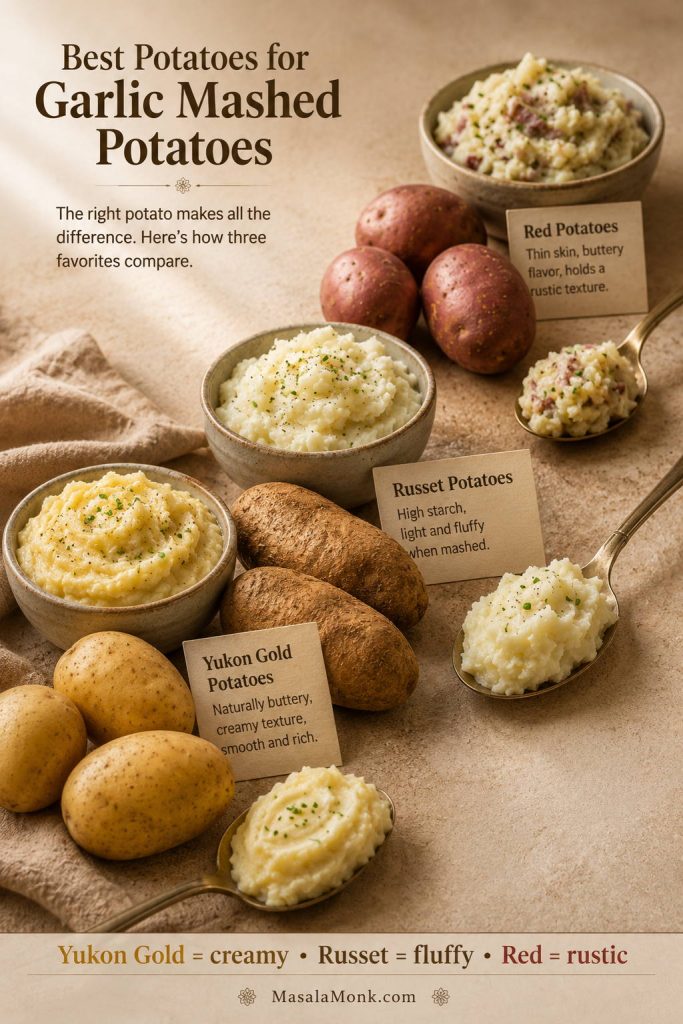
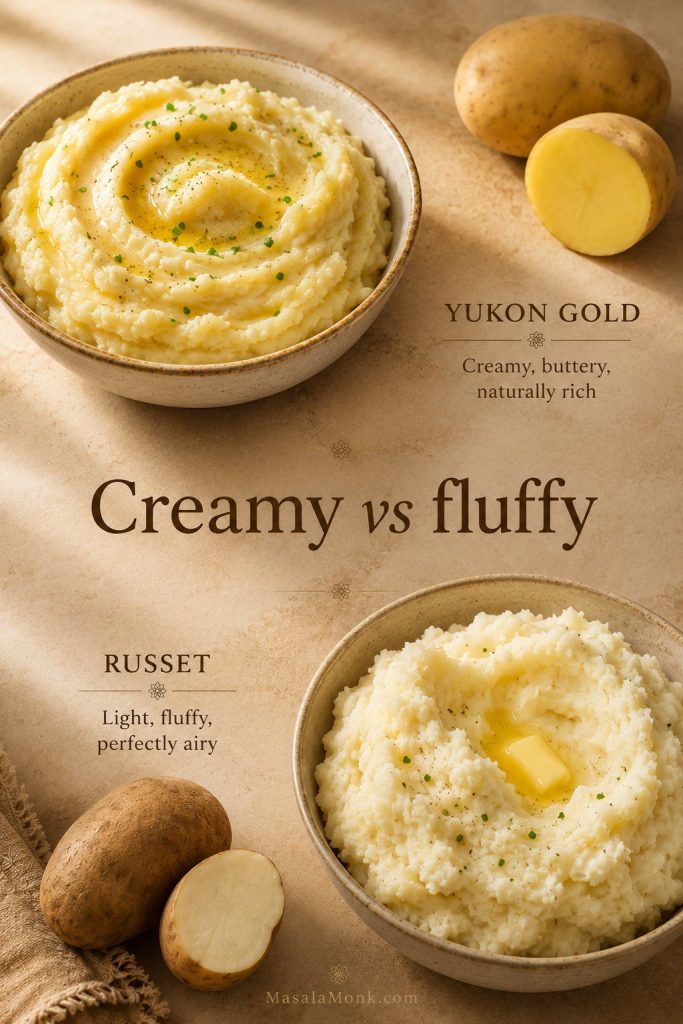
Rice for Paella
Use Spanish short-grain rice if possible. Bomba, Calasparra, and Valencia rice are the best choices because they absorb stock while holding their shape. Aim for grains that are tender and distinct, not creamy, sticky, or wet.
If you cannot find Spanish paella rice, medium-grain rice can work in a pinch. Arborio is only an emergency substitute because it is designed for risotto. With arborio, the no-stir rule becomes even more important.
Saffron and Paprika
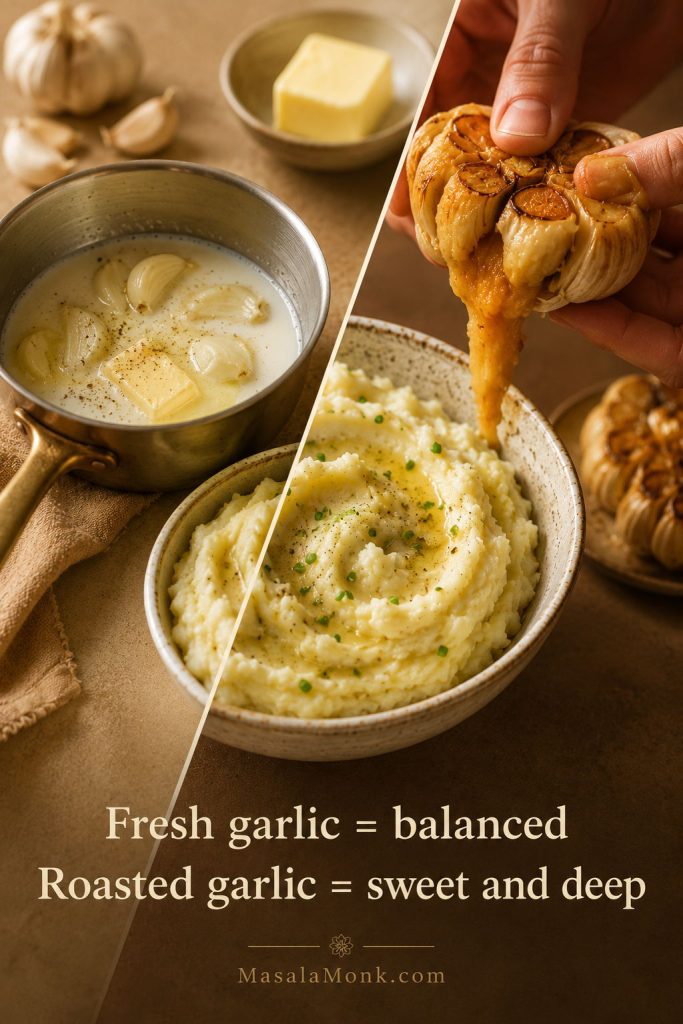
Saffron gives paella its classic golden color and floral aroma. You only need a pinch. Crush the threads lightly and soak them in a little hot stock or hot water before adding them to the pan so the color and fragrance spread more evenly.
Spanish smoked paprika adds warmth and depth. Sweet paprika also works if you want a softer flavor. Add paprika after the tomato and aromatics have softened, and do not let it burn because scorched paprika turns bitter quickly.
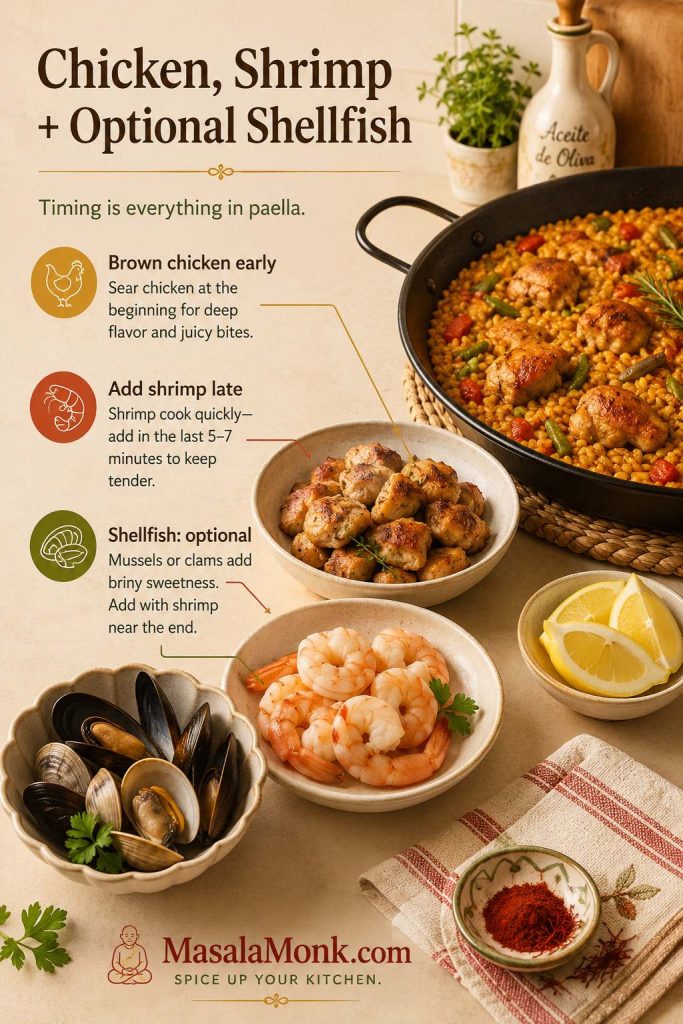
Chicken, Shrimp, and Optional Shellfish
Boneless chicken thighs are forgiving, juicy, and easy for a home paella. Shrimp adds a clear seafood note without making the recipe complicated. Mussels or clams are optional, but they make the pan more dramatic and release flavorful juices into the rice as they open.
Timing is what keeps the pan generous instead of overcooked. Chicken can be browned early, but shrimp should go in near the end so it stays tender. Mussels and clams can be nestled into the rice during the final simmer, just long enough to steam open.
Paella Sofrito: Onion, Garlic, Tomato, and Pepper
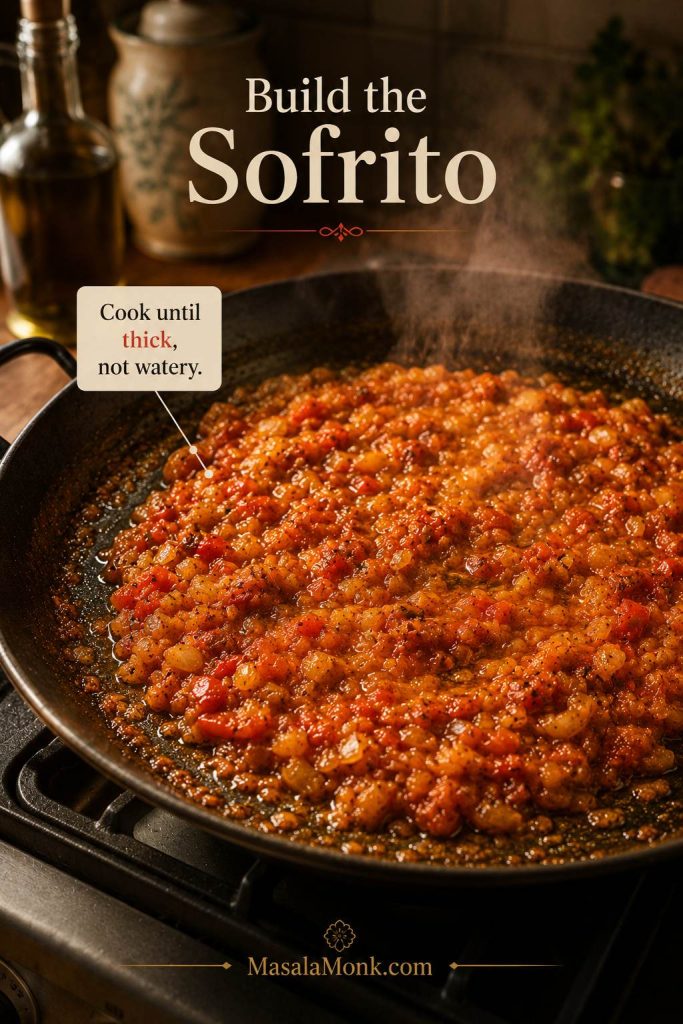
The sofrito is the flavor base. Onion, garlic, tomato, and bell pepper cook down in olive oil until soft and concentrated. Do not rush this stage. A watery sofrito makes the paella taste thin, while a thick, glossy sofrito gives the rice a savory backbone.
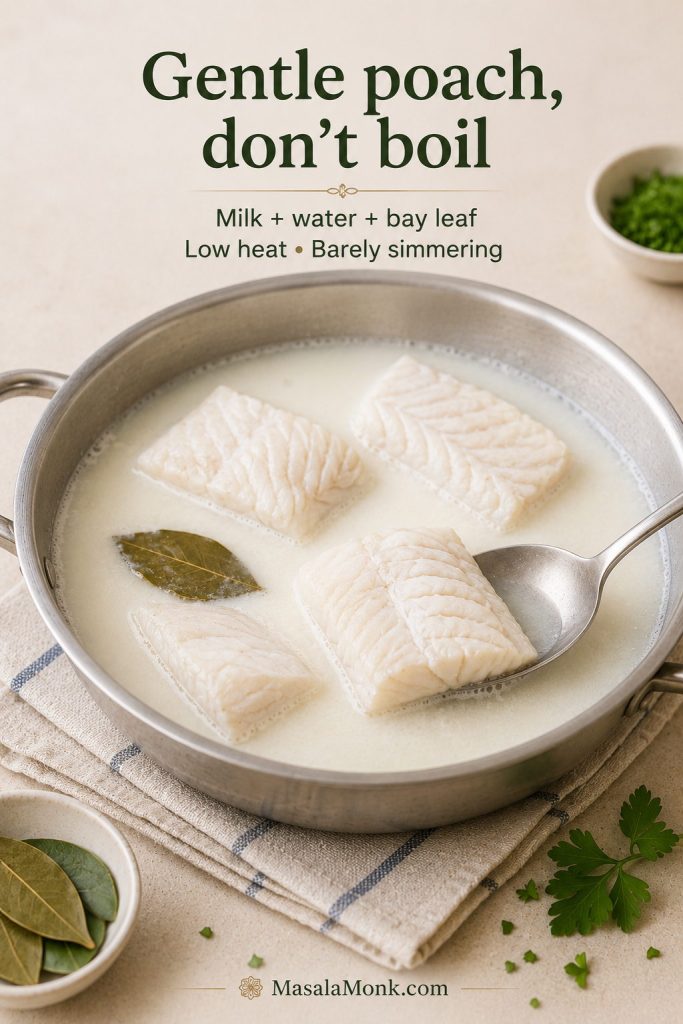
Stock or Broth
Use hot chicken stock, seafood stock, or a mix of the two. Seafood stock gives a deeper seafood-paella flavor, while chicken stock makes the recipe easier and more pantry-friendly. The stock should be hot when it goes into the pan so the rice starts cooking evenly.
Lemon, Parsley, and Finishing Touches
Lemon wedges are not just decoration. A squeeze of lemon brightens the rice, chicken, and seafood right before serving. Parsley adds freshness. Peas are optional and common in many home-style mixed paellas, but they are not required.
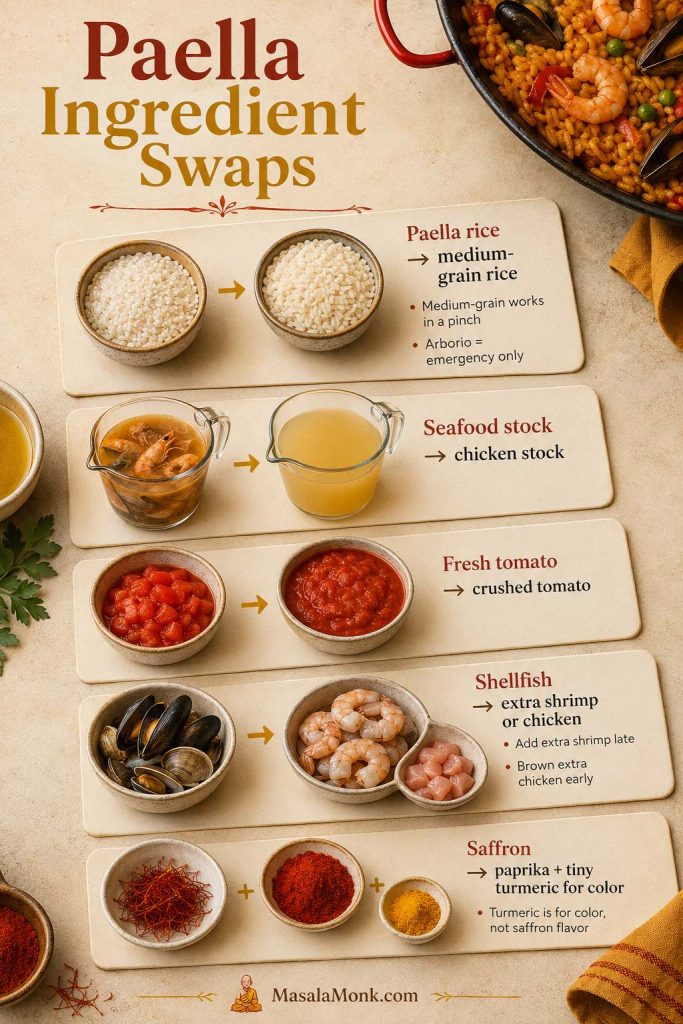
Paella Ingredient Swaps That Work
| If you do not have… | Use this instead | What changes |
|---|---|---|
| Spanish paella rice | Medium-grain rice or arborio in a pinch | Watch the liquid closely and do not stir after adding stock. |
| Seafood stock | Chicken stock or chicken stock mixed with a little clam juice | The flavor will be lighter but still good. |
| Fresh tomatoes | Crushed tomatoes | Cook them down until thick, not watery. |
| Mussels or clams | Extra shrimp or chicken | Use slightly more stock because shellfish will not release liquid. |
| Saffron | Good stock, paprika, and a tiny pinch of turmeric for color | You lose saffron aroma, but the dish can still taste good. |
Once the ingredients are ready, the recipe becomes less about juggling and more about timing: build the base, give the rice space, and add the seafood only when the pan is nearly there.
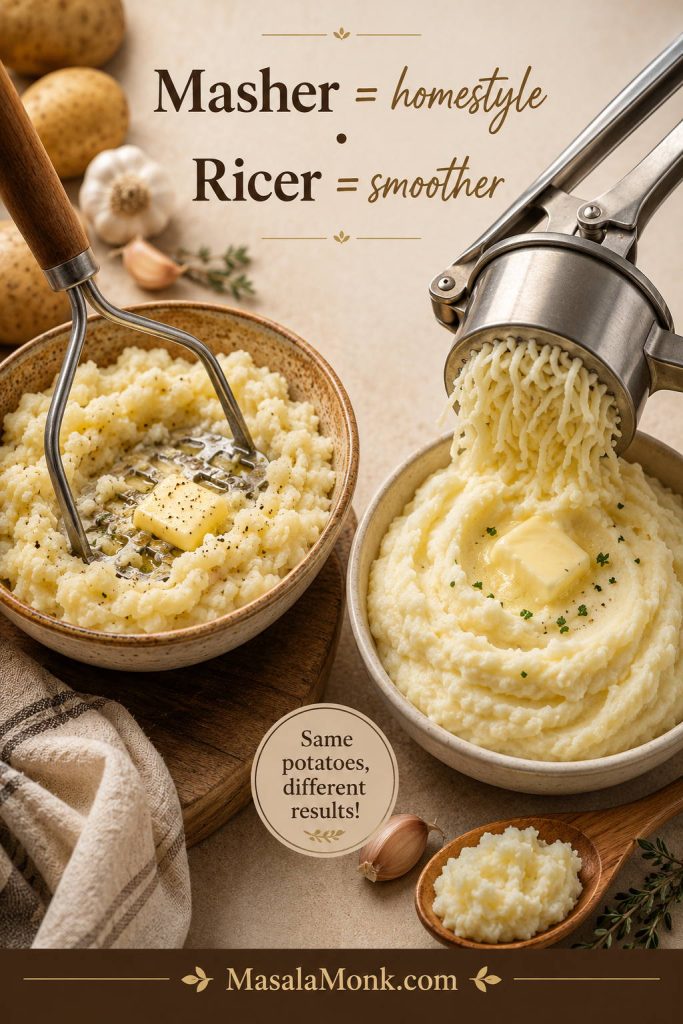
Best Rice for Paella
Choose short-grain Spanish rice that can absorb flavorful stock without collapsing into a creamy texture. Paella should not eat like risotto. The grains should be tender, separate, and deeply seasoned from the broth.
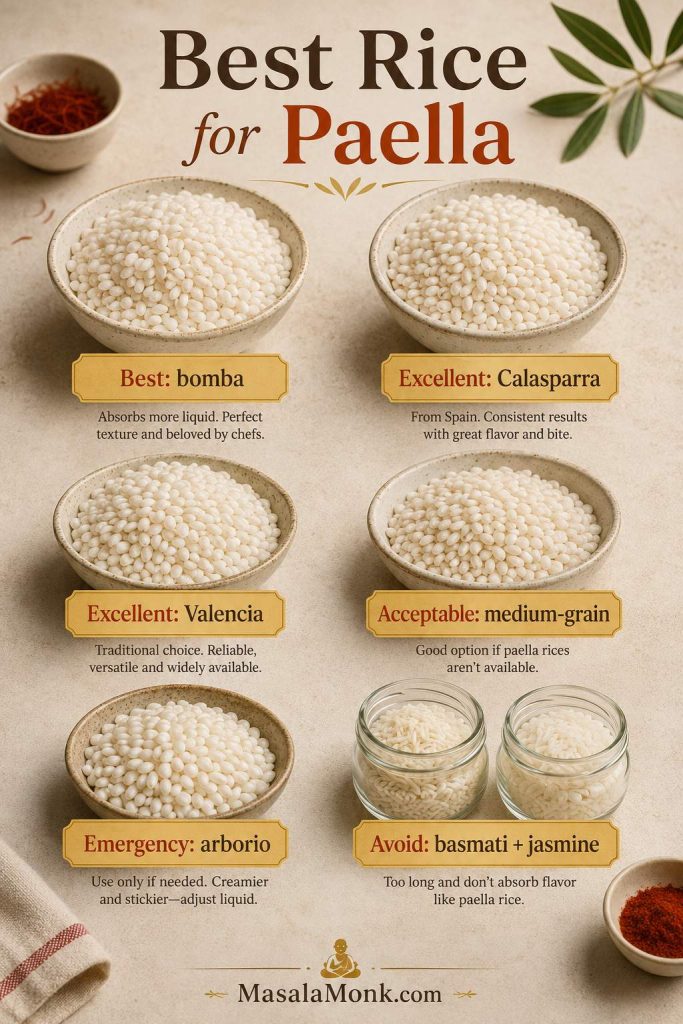
Unless your rice package specifically instructs you to rinse, start with dry grains. They coat more evenly in the sofrito and absorb the seasoned stock more predictably in the pan.
| Rice | Use it? | Notes |
|---|---|---|
| Bomba rice | Best choice | Classic paella rice that absorbs stock well and holds its shape. |
| Calasparra rice | Excellent | Another strong Spanish paella rice option. |
| Valencia rice | Excellent | Good short-grain Spanish rice for paella. |
| Medium-grain rice | Acceptable | Works if Spanish rice is unavailable; watch the liquid closely. |
| Arborio rice | Emergency substitute | Can work, but do not stir or it will turn creamy like risotto. |
| Basmati rice | Avoid | Too long and firm for classic paella texture. |
| Jasmine rice | Avoid | Too fragrant and soft for this method. |
| Brown rice | Avoid here | Needs a different liquid ratio and cooking time. |
Paella Rice to Stock Ratio
For this version, use 1½ cups / about 300 g short-grain rice with 3½–3¾ cups / 830–900 ml hot stock. Use the lower amount if adding mussels or clams because shellfish releases liquid into the pan. Use the higher amount if making chicken and shrimp paella without shellfish.
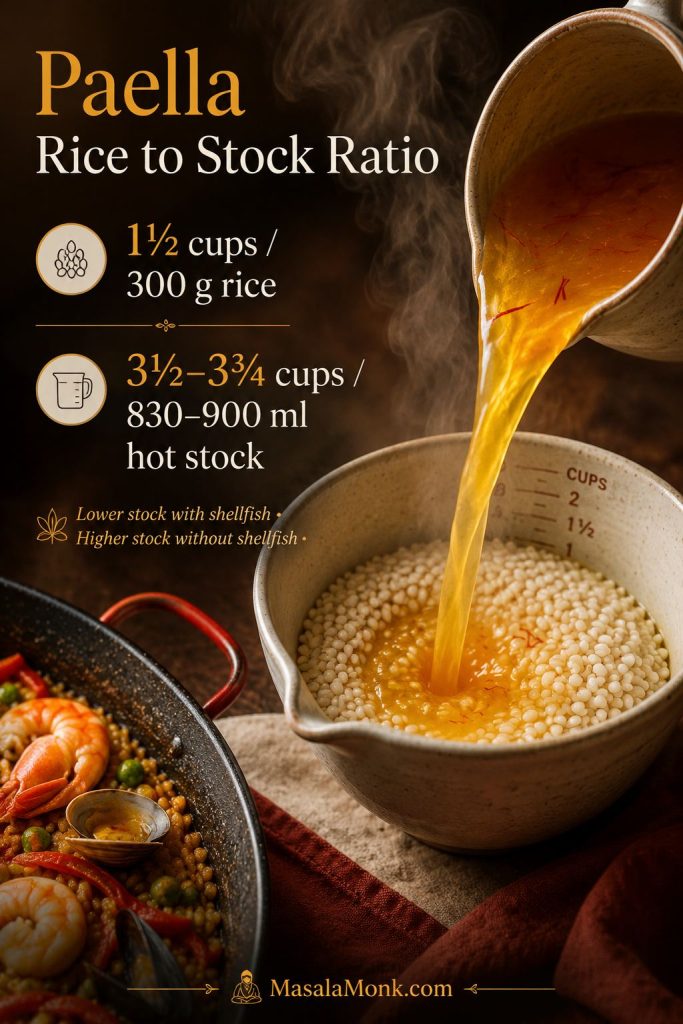
If you are cooking for two or scaling up for guests, check Scaling Paella for Two or a Crowd before changing the rice and stock amounts.
Keep an extra ½ cup / 120 ml hot stock or water nearby. A small splash can rescue firm rice in a dry pan, but a late flood of liquid usually makes the outside of the grains soften before the centers catch up.
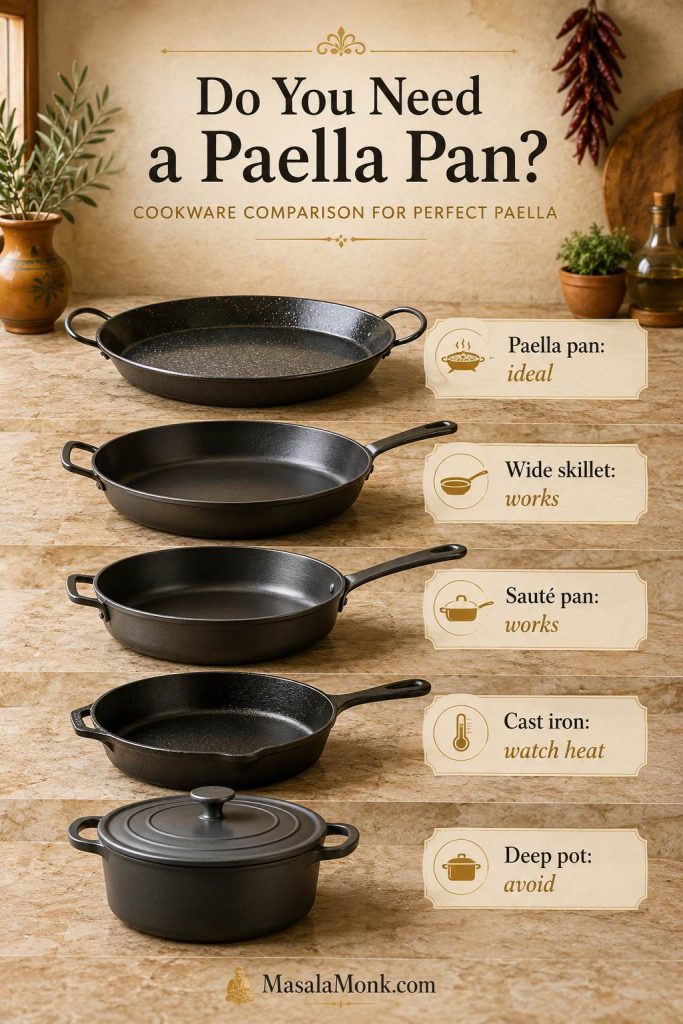
Do You Need a Paella Pan?
No. A paella pan is ideal, but you can make this recipe in a wide skillet, stainless-steel sauté pan, or cast iron skillet. The real requirement is not the pan name; it is a wide, shallow cooking surface that keeps the rice in a thin layer.
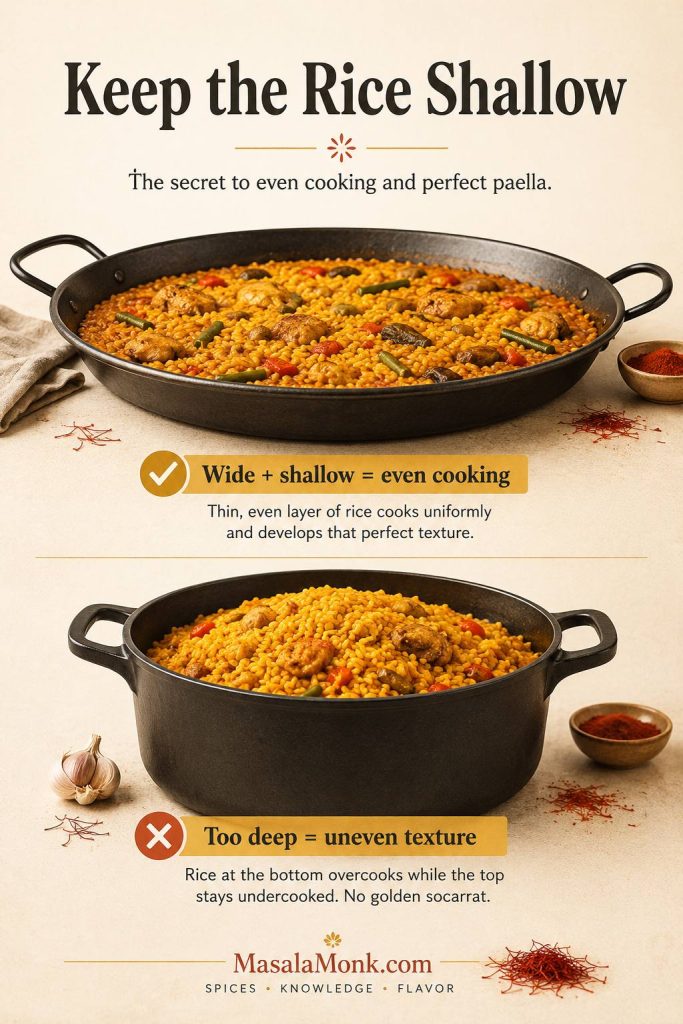
Keep the Rice Layer Shallow
Think surface area, not depth: the rice needs room to cook in a shallow layer. If it is piled too deep, the bottom can burn before the top grains are tender. If the pan is too wide for your burner, the center may boil hard while the edges barely simmer.
Manage Home-Stovetop Hot Spots
Serious Eats explains this stovetop problem well: large paella pans work beautifully over broad outdoor heat, but home burners create hot spots, so smaller stovetop paellas are often more reliable indoors. Their guide is worth reading if you want the deeper heat-management logic: Serious Eats’ stovetop paella guide.

Once you have the right pan, the next important move is technique: see How to Make Paella Step by Step for the no-stir cooking flow.
Choose the Right Pan Size
| Servings | Pan size | Best use |
|---|---|---|
| 2–3 | 10–12 inch wide skillet | Best for a small stovetop batch with more even heat. |
| 4 | 12–14 inch wide pan | Most reliable size for regular home burners. |
| 4–6 | 14–16 inch paella pan or skillet | Good if your burner, grill, or stovetop gives enough heat coverage. |
| 6+ | Large paella pan over grill or outdoor burner | Better than piling a double batch into a deep pot. |
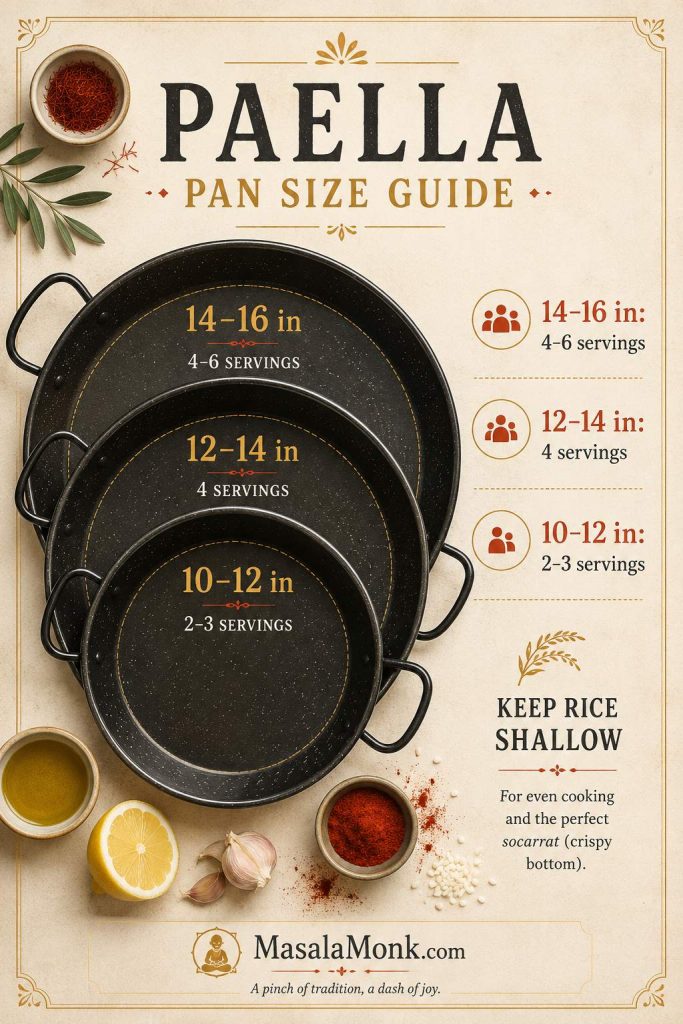
Pan depth matters more than pan name
A shallow rice layer cooks more evenly and has a better chance of forming socarrat. A deep pot may hold the ingredients, but it traps too much steam and makes the rice more likely to turn soft or uneven.
Before You Start: Avoid These Paella Mistakes
- Start with dry rice unless your package specifically tells you to rinse.
- Avoid deep pots if you want classic paella texture.
- Stop stirring after adding stock, or the rice can turn creamy and heavy.
- Add shrimp near the end, because it will overcook if it simmers from the beginning.
- Save socarrat for the finish; cook the rice first, then toast the bottom briefly.
How to Make Paella Step by Step
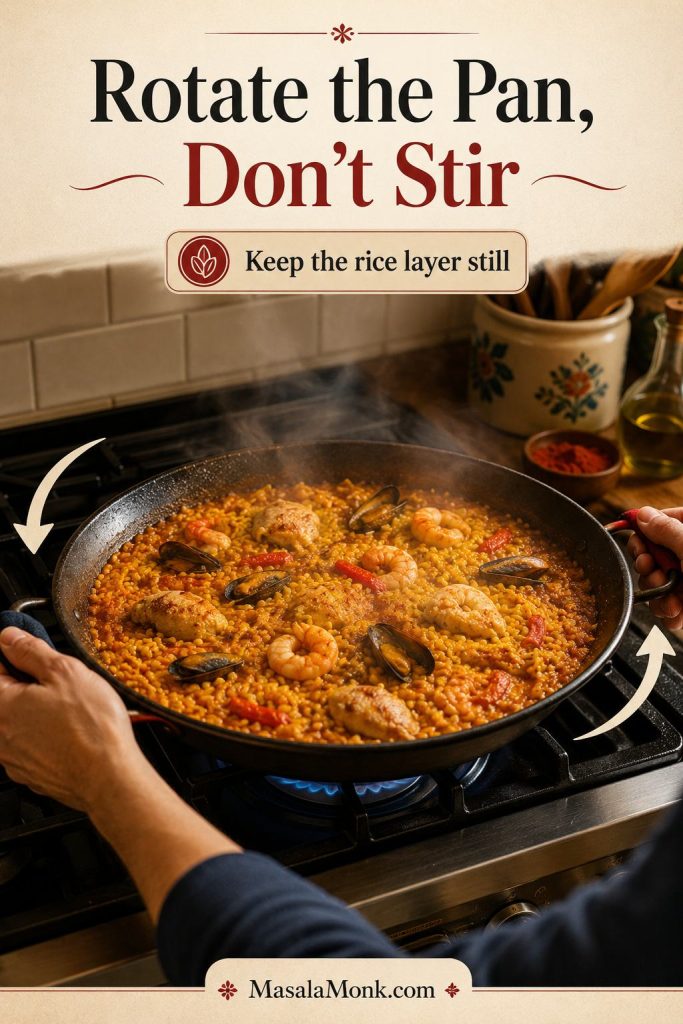
Read the method once before you start. Paella behaves differently from a stir-fry, biryani, pulao, or risotto: after the rice and stock go in, you stop stirring and let the pan do its work.
On a home stove, the center may bubble harder than the edges. That is normal. Rotate the pan instead of dragging a spoon through the rice, and keep the simmer steady rather than violent.
Paella looks dramatic when it comes to the table, but most of the cooking is quiet: the pan bubbles, the saffron deepens, and the rice slowly changes from loose broth into something golden enough to serve.
If you want the short version beside you while cooking, use the Paella Recipe Card, then come back to these step cues if the pan behaves unevenly.
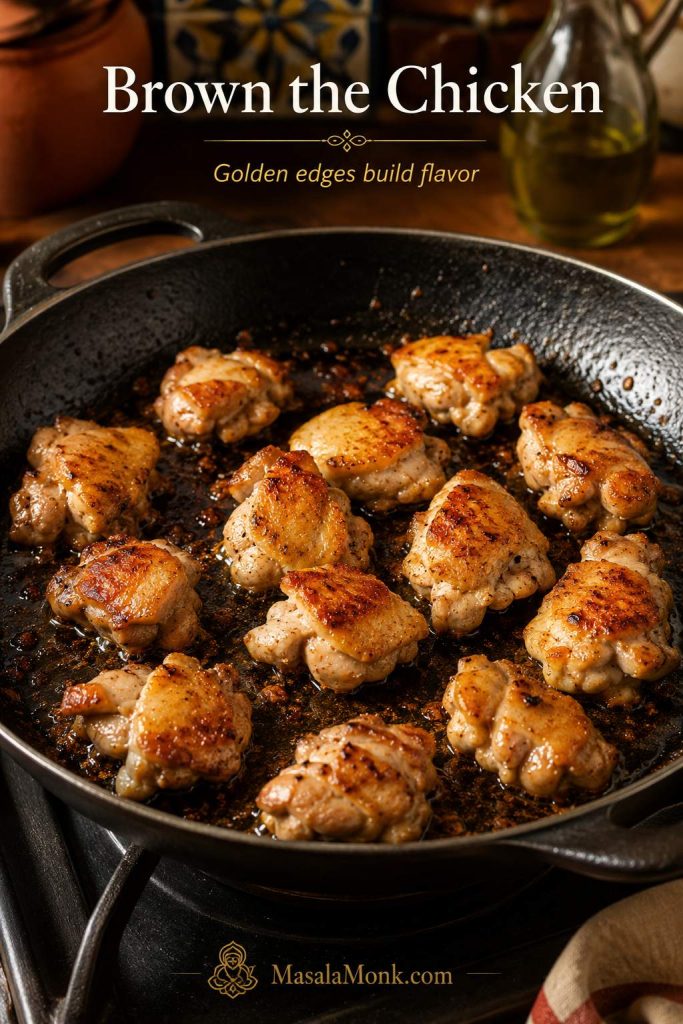
1. Season and Brown the Chicken
Cut the chicken thighs into bite-size pieces and season them with salt and pepper. Heat olive oil in a wide pan over medium-high heat, then brown the chicken for about 4–5 minutes, until it has color on the outside. It does not need to cook fully at this stage because it will finish with the rice.
Look for golden edges and a little browning on the bottom of the pan. Those browned bits will dissolve into the stock later and help the rice taste deeper.
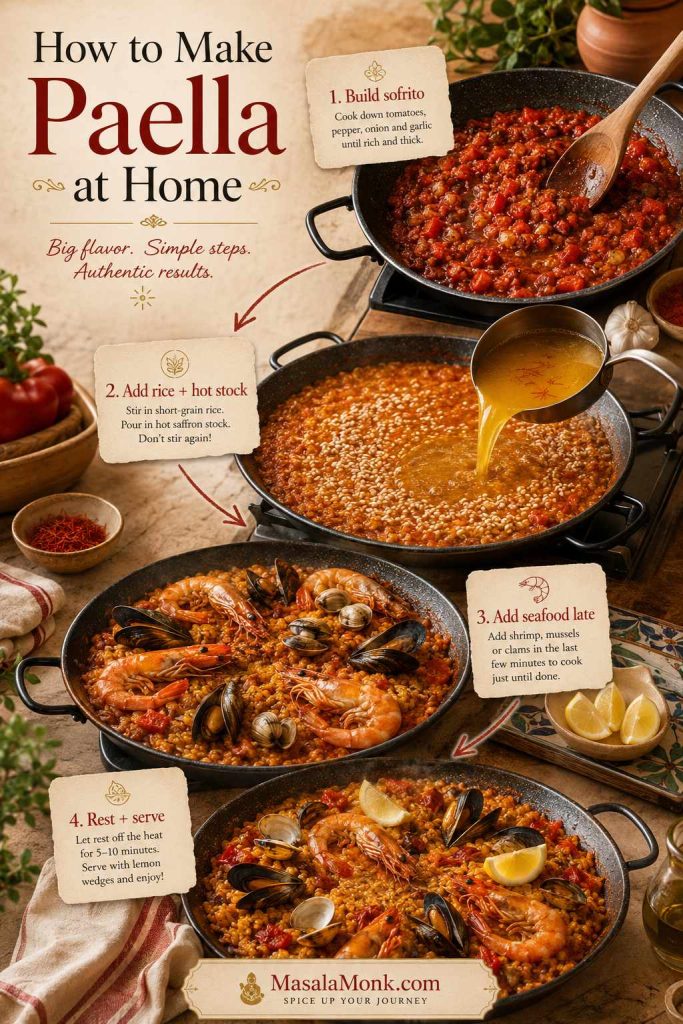
2. Build the Sofrito
Add onion and bell pepper to the pan and cook for 4–6 minutes, until softened. Stir in garlic, then add grated tomatoes or crushed tomatoes. Cook for another 5–7 minutes, until the mixture thickens and looks less watery.
This is one of the places where patience pays off. The pan should smell savory and sweet, not raw and watery. If the tomato still looks loose, give it another minute or two before adding the rice.
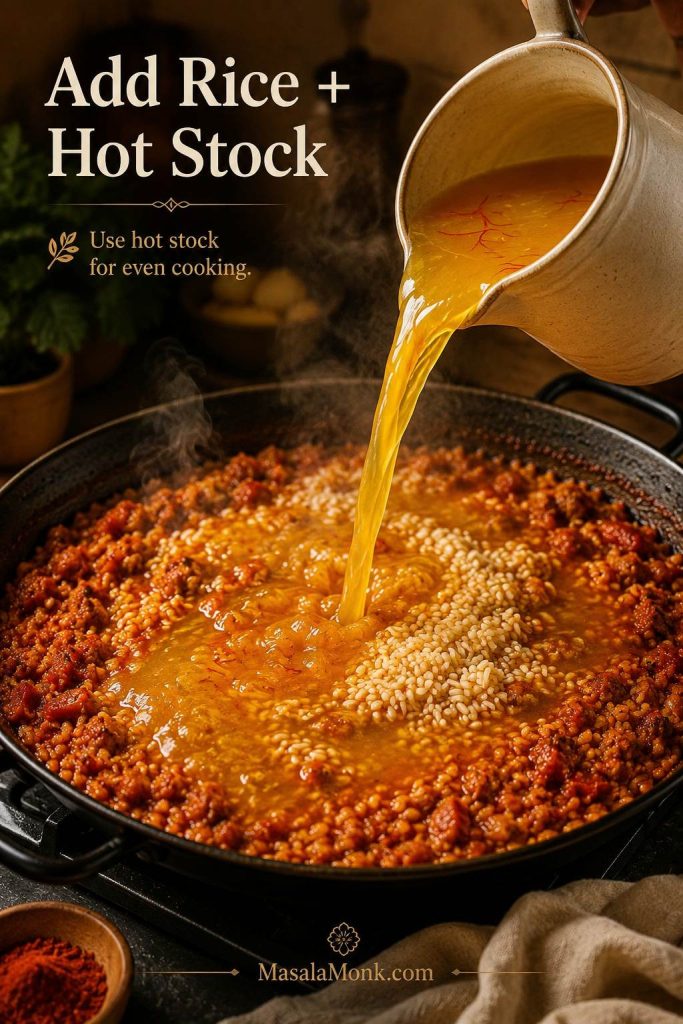
3. Add Paprika, Saffron, Rice, and Stock
Stir in smoked paprika and the soaked saffron. Add the rice and stir briefly so the grains are coated in the tomato-flavored oil. Pour in hot stock, scrape the bottom once to release any stuck flavor, and spread the rice evenly across the pan.
At this stage, the liquid should taste well-seasoned. If the stock tastes flat now, the rice will taste flat later. Add salt before the rice finishes cooking, not only at the table.
4. Spread the Rice and Stop Stirring
This is the turning point. Once the rice is spread into an even layer, stop stirring. Rotate the pan if one side is bubbling harder than the other, but do not drag a spoon through the rice.
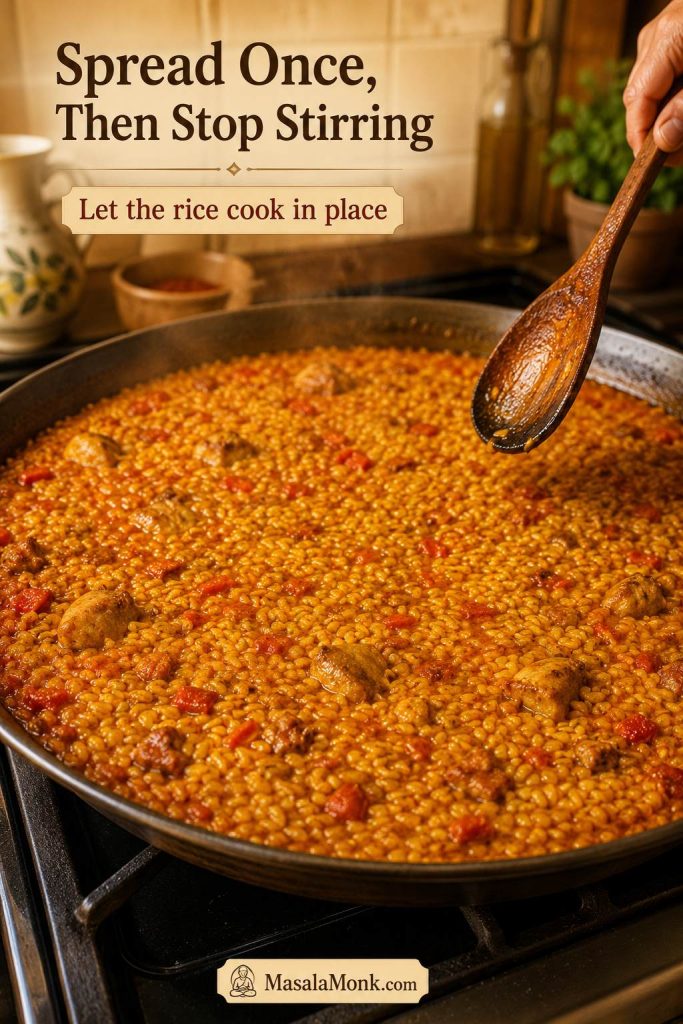
Stirring releases starch and makes the dish creamy. For paella, you want the grains to cook in place so they absorb the stock and stay separate.
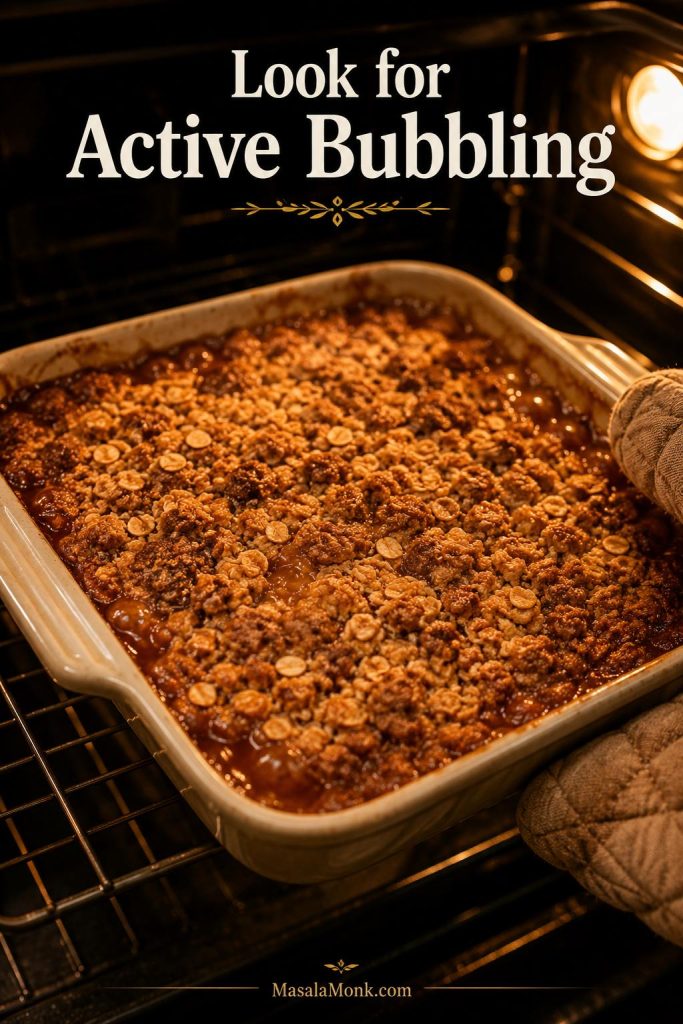
5. Simmer Until the Rice Is Almost Done
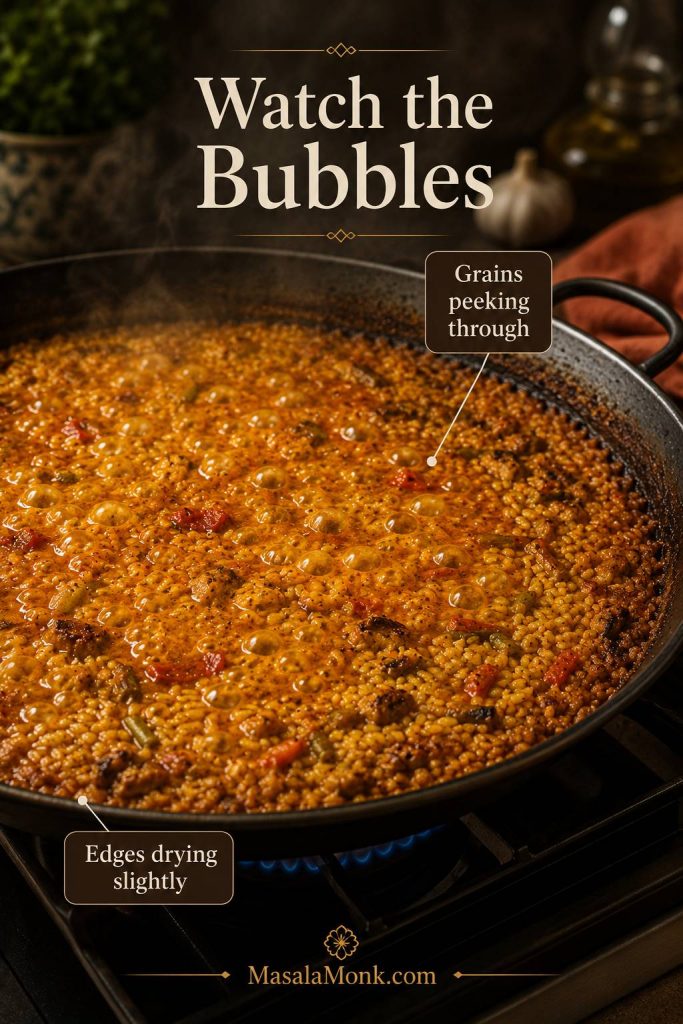
Let the rice simmer uncovered for about 8–10 minutes before adding the seafood. The liquid should bubble steadily, not violently. If the center is boiling aggressively while the edges are quiet, rotate the pan every few minutes.
As the rice cooks, the surface will look less soupy and more defined. You should see grains peeking through the liquid, and the edges of the pan will start looking a little drier. If the pan looks dry but the rice is still firm, add a small splash of hot stock or water around the edges.
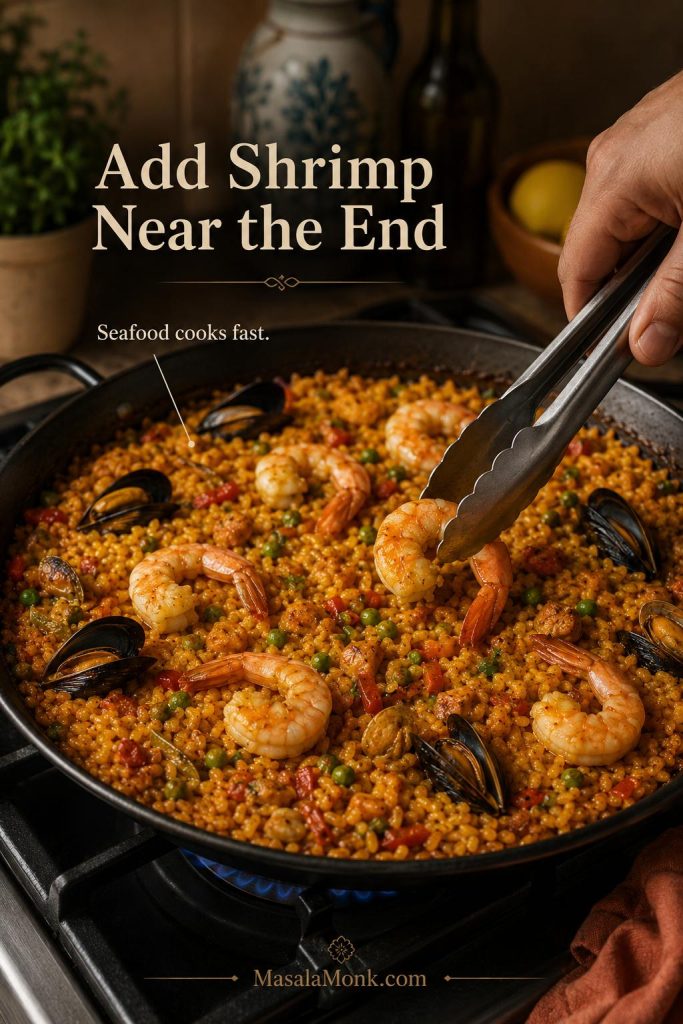
6. Add Shrimp and Shellfish Near the End
When the rice is partly cooked and most of the liquid has been absorbed, nestle the shrimp and optional mussels or clams into the top. Cook for another 6–8 minutes, until the shrimp is pink and opaque, the shellfish has opened, and the rice is tender.
Keep the shrimp near the surface and add it only near the end. Seafood cooks quickly, and once shrimp turns tight and rubbery, the rice cannot fix it. Discard any mussels or clams that stay closed after cooking.
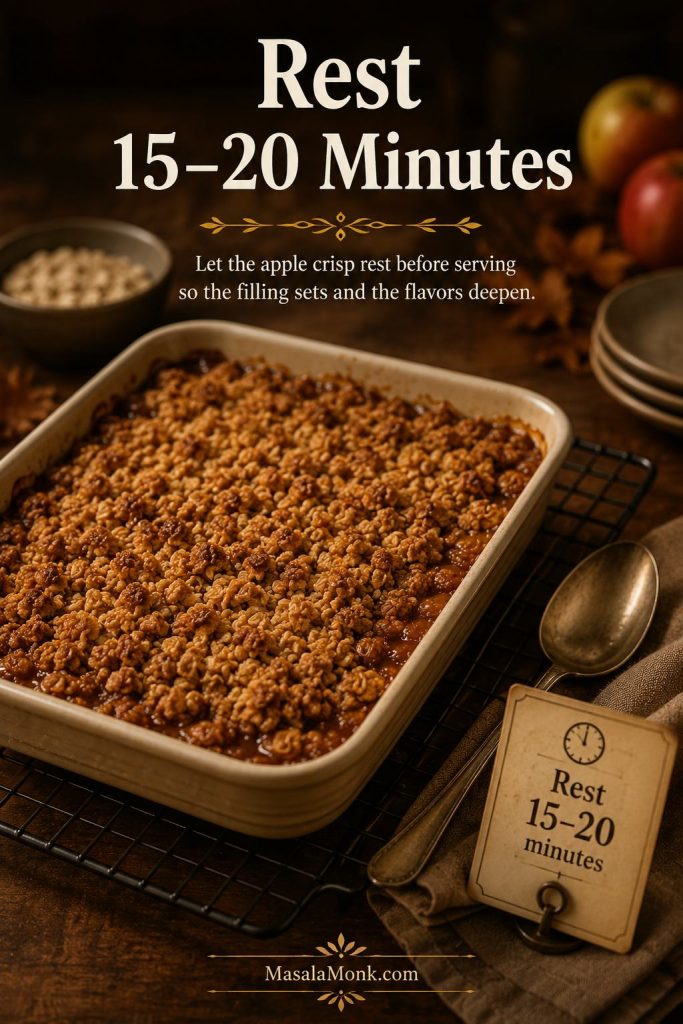
7. Rest the Paella Before Serving
When the rice is tender and the seafood is cooked, remove the pan from the heat and cover it loosely with foil or a clean towel. Rest for 5–10 minutes. This helps the top grains finish steaming and lets the last moisture settle into the rice.
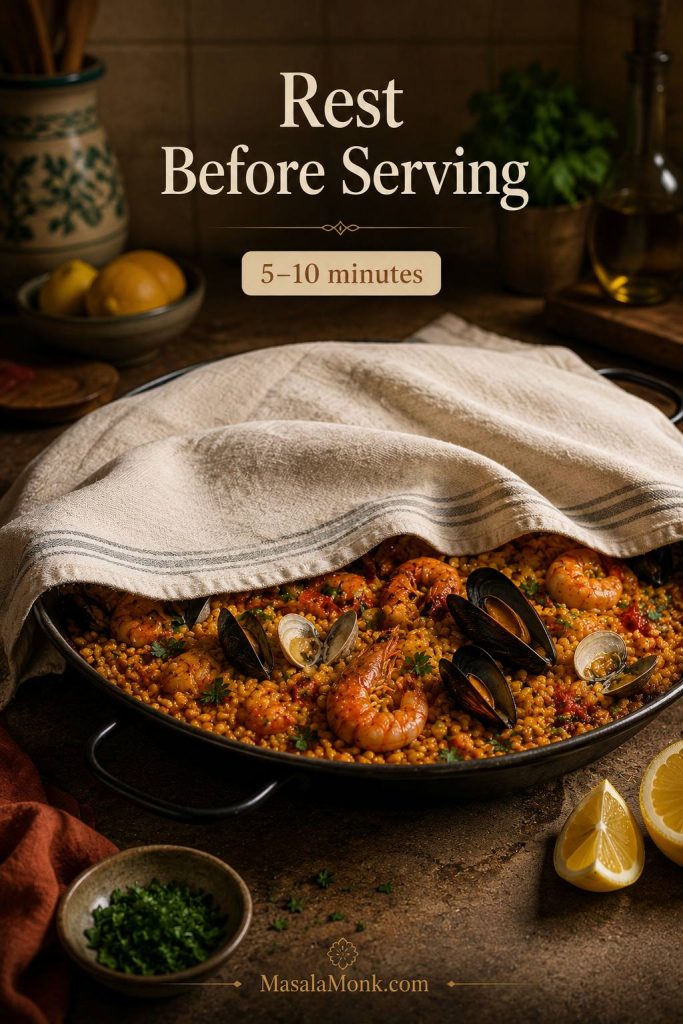
After resting, the rice should look moist but not soupy. The chicken should be cooked through by the time the rice is tender. If you use a thermometer, the thickest pieces should reach 165°F / 74°C.
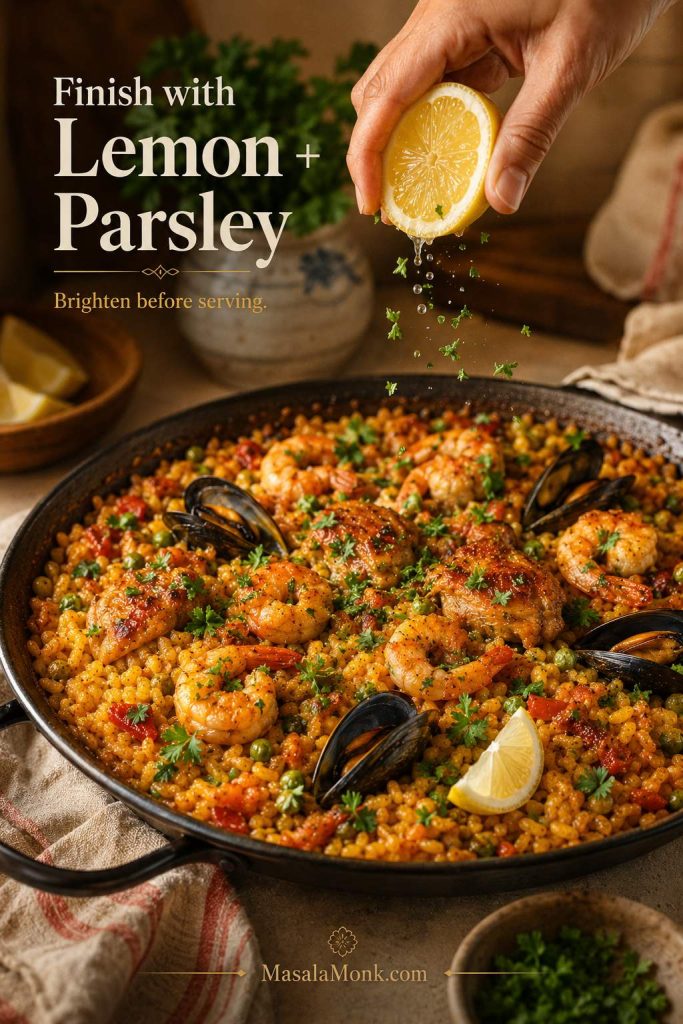
8. Finish with Lemon and Parsley
Scatter parsley over the pan and serve with lemon wedges. Bring the paella to the table in the pan if you can. It looks dramatic, but it also lets everyone scoop from the tender rice on top down to the toasted bits at the bottom.
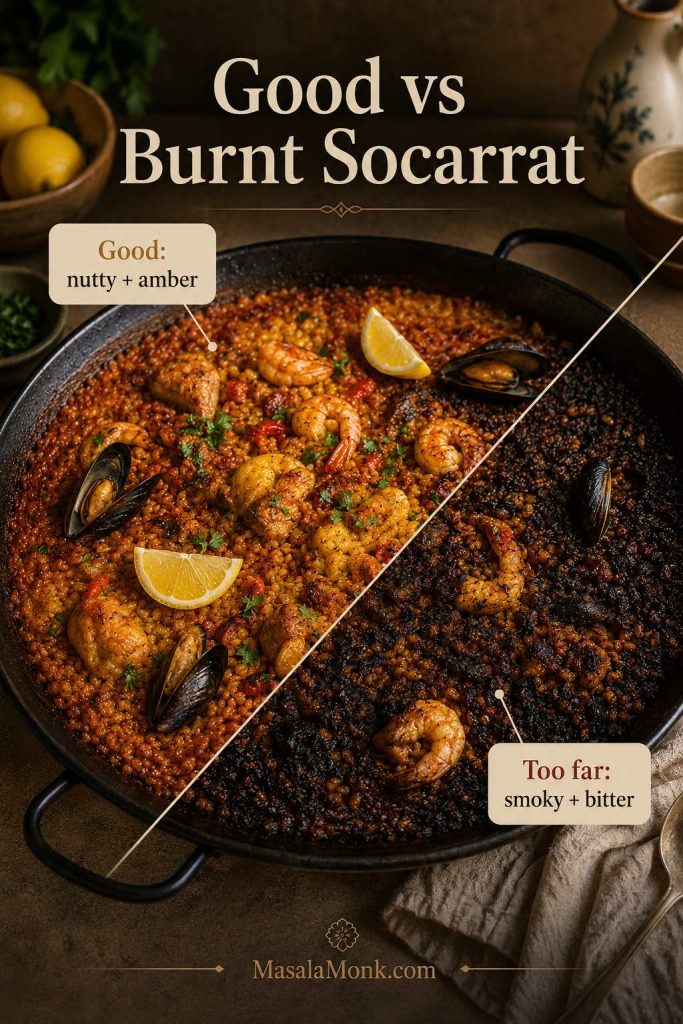
How to Get Socarrat
Socarrat is the toasted layer of rice at the bottom of a well-made paella. It should taste nutty and savory, not burnt. Treat it as a bonus on your first attempt, not the only measure of success.
For the safest socarrat, wait until the rice is cooked and the liquid is mostly absorbed. Then raise the heat for 60–120 seconds. Listen for a gentle crackle and smell for toastiness. Stop as soon as the aroma turns sharp, smoky, or bitter.
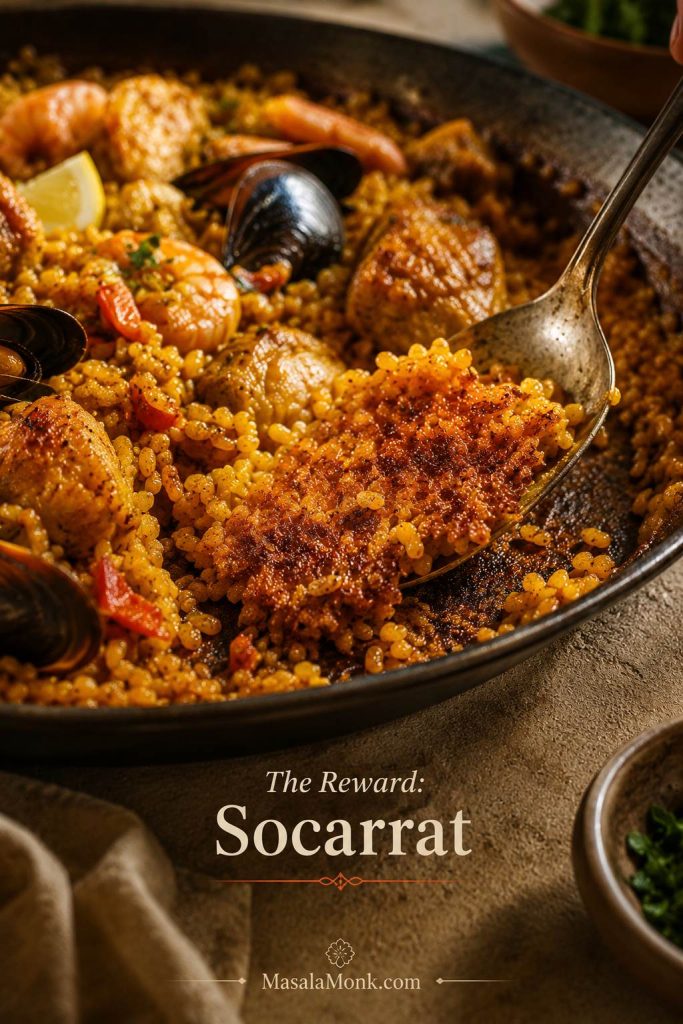
Do not try to create socarrat while the rice is still hard. You will burn the bottom before the top finishes. Tender rice comes first; the crisp bottom comes last.
If the bottom burns or the rice is still hard before you try for socarrat, jump to Paella Troubleshooting before pushing the heat.
Socarrat cues
- Good sign: faint crackling, toasted aroma, rice mostly dry on top.
- Bad sign: sharp burning smell, smoke, or blackened bitterness.
- Best pan: carbon steel, stainless steel, or cast iron gives better browning than nonstick.
- Beginner move: skip socarrat the first time and focus on tender rice.
When it works, the first scrape from the bottom should feel like a reward: golden rice on top, toasted grains underneath, and no bitterness in the pan.
Use the visual card below as a quick save, then follow the full recipe card for exact ingredients, timing, and notes. The guide above is still your safety net if the pan bubbles unevenly, the rice dries out, or the seafood needs careful timing.
Paella Recipe Card
Golden Home-Stovetop Paella
A golden Spanish-style home paella with saffron rice, browned chicken, tender shrimp, optional shellfish, tomato, paprika, lemon, and parsley. Designed for a regular stovetop with a wide pan and a clear no-stir method.
Best pan: Use a 14–16 inch wide, shallow pan for the full batch, or a 10–12 inch skillet for a half batch. Avoid deep pots because the rice needs to cook in a shallow layer.
Ingredients
- 2 tablespoons extra-virgin olive oil
- 450 g / 1 lb boneless skinless chicken thighs, cut into 1-inch / 2.5 cm pieces
- 250–300 g / 9–10 oz large shrimp, peeled and deveined
- Optional: 300–500 g / 10 oz–1 lb mussels or clams, cleaned
- 1 medium onion, finely chopped
- 1 red bell pepper, diced
- 3–4 garlic cloves, minced
- 2 medium tomatoes, grated, or ¾–1 cup crushed tomatoes
- 1 teaspoon smoked Spanish paprika or sweet paprika
- Pinch of saffron threads, soaked in 2 tablespoons hot stock or hot water
- 1½ cups / about 300 g Spanish short-grain rice, such as bomba, Calasparra, or Valencia rice
- 3½–3¾ cups / 830–900 ml hot chicken stock, seafood stock, or a mix
- ½ cup frozen peas, optional
- Salt and black pepper, to taste
- Lemon wedges, for serving
- Chopped parsley, for serving
Instructions
- Season the chicken. Pat the chicken dry and season with salt and black pepper.
- Brown the chicken. Heat olive oil in a wide shallow pan over medium-high heat. Add the chicken and brown for 4–5 minutes, until golden on the outside. It does not need to be fully cooked yet. Transfer to a plate if the pan is crowded.
- Cook the vegetables. Add onion and bell pepper to the pan. Cook for 4–6 minutes, until softened, then stir in garlic.
- Build the sofrito. Add grated tomatoes or crushed tomatoes. Cook for 5–7 minutes, until the mixture thickens and the raw tomato smell fades.
- Add spices and rice. Stir in paprika and soaked saffron. Add the rice and stir briefly so the grains are coated.
- Add stock. Pour in the hot stock and scrape the bottom once. Return the chicken to the pan. Spread the rice into an even shallow layer.
- Simmer without stirring. Simmer uncovered for 8–10 minutes without stirring. Rotate the pan if one side bubbles harder than the other.
- Add seafood near the end. Nestle shrimp and optional mussels or clams into the top. Cook for another 6–8 minutes, until the shrimp is pink and opaque, shellfish has opened, and the rice is tender.
- Check the rice. If the rice is still firm and the pan is dry, add a small splash of hot stock or water around the edges and cook a few minutes more.
- Optional socarrat finish. If the rice is cooked and you want a toasted bottom, raise the heat briefly for 60–120 seconds. Listen for a light crackle and stop before anything smells burnt.
- Rest. Remove from heat, cover loosely with foil or a clean towel, and rest for 5–10 minutes.
- Serve. Top with parsley and serve with lemon wedges.
Notes
- Use 3½ cups / 830 ml stock if adding mussels or clams because shellfish releases liquid.
- Use closer to 3¾ cups / 900 ml stock for chicken and shrimp paella without shellfish.
- Keep ½ cup / 120 ml hot stock or water nearby for a small rescue splash if the rice is firm and the pan is dry.
- If your pan is smaller, reduce the batch instead of piling the rice deep.
- Avoid basmati and jasmine rice for this method.
- Chorizo is a Spanish-inspired variation here, not part of traditional Paella Valenciana.
- Paella is best served fresh, but leftovers can be reheated gently with a splash of stock or water.
Paella Variations
Use these variations as directions, not entirely new recipes. The base method stays the same: build flavor, add rice and stock, leave the rice alone, add delicate ingredients near the end, and rest before serving.
Seafood Paella Variation
This is the most dramatic version for the table. Skip the chicken and use shrimp, mussels, clams, squid, scallops, or firm white fish. Seafood stock gives the rice a deeper briny flavor, and the same late-add timing keeps delicate seafood from turning rubbery.
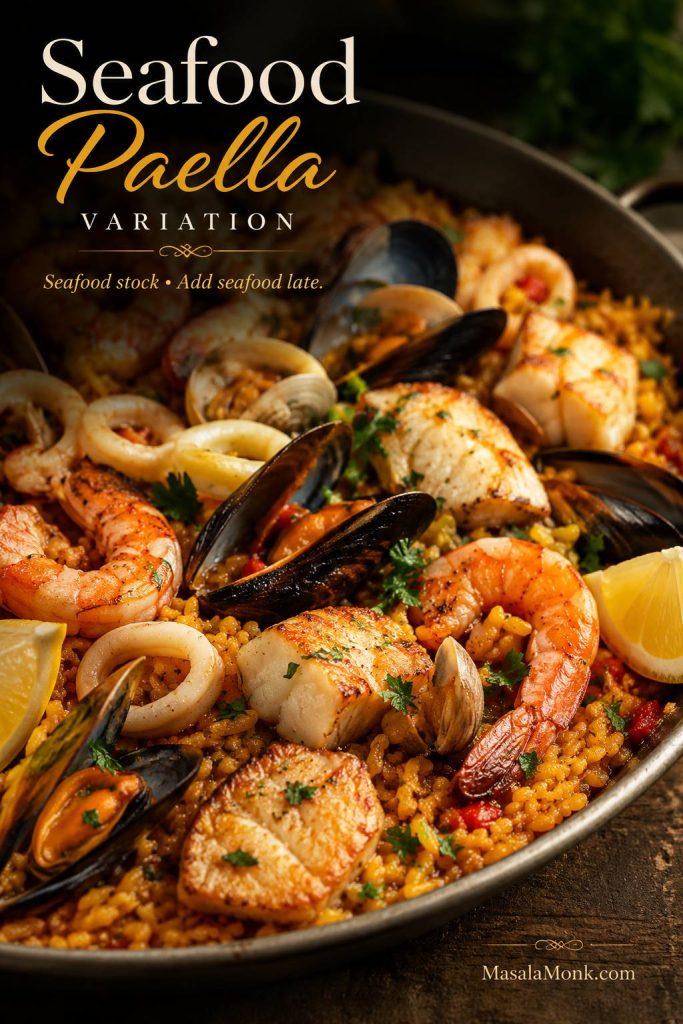
If that seafood lane is what you love, MasalaMonk’s fish and chips recipe gives another crisp, lemon-friendly fish dinner with detailed texture cues.
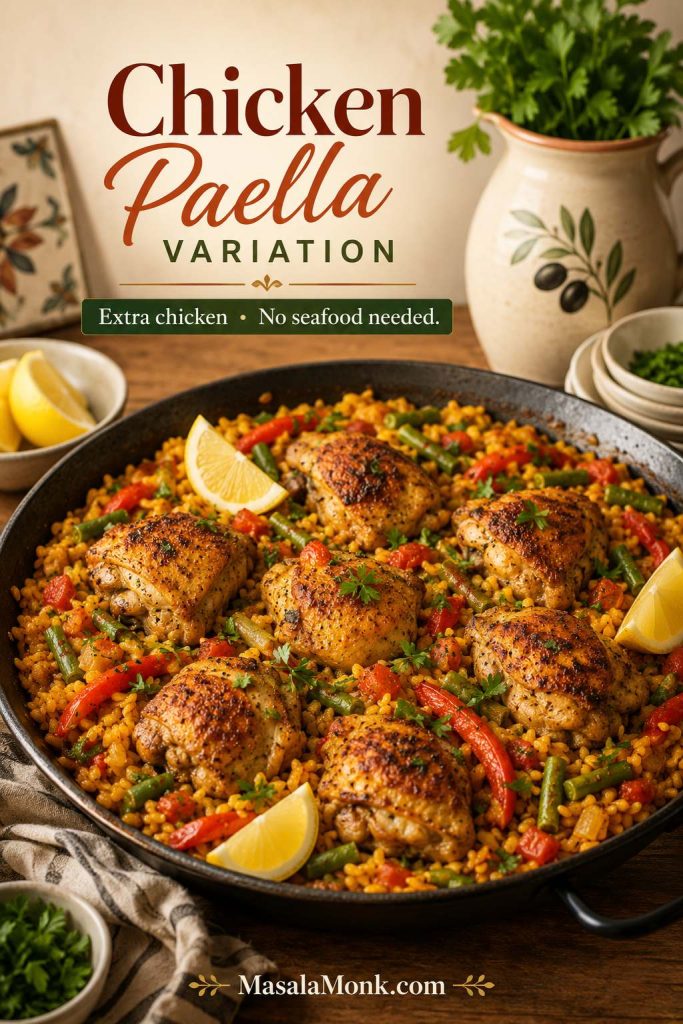
Chicken Paella Variation
This is the simplest version to shop for and the easiest choice for seafood-averse guests. Use extra chicken thighs, green beans, bell pepper, and chicken stock, and increase the stock slightly because shellfish will not release liquid into the pan.
For another rice-friendly chicken dinner with a simple stovetop method, MasalaMonk’s chicken adobo recipe is a strong companion recipe.
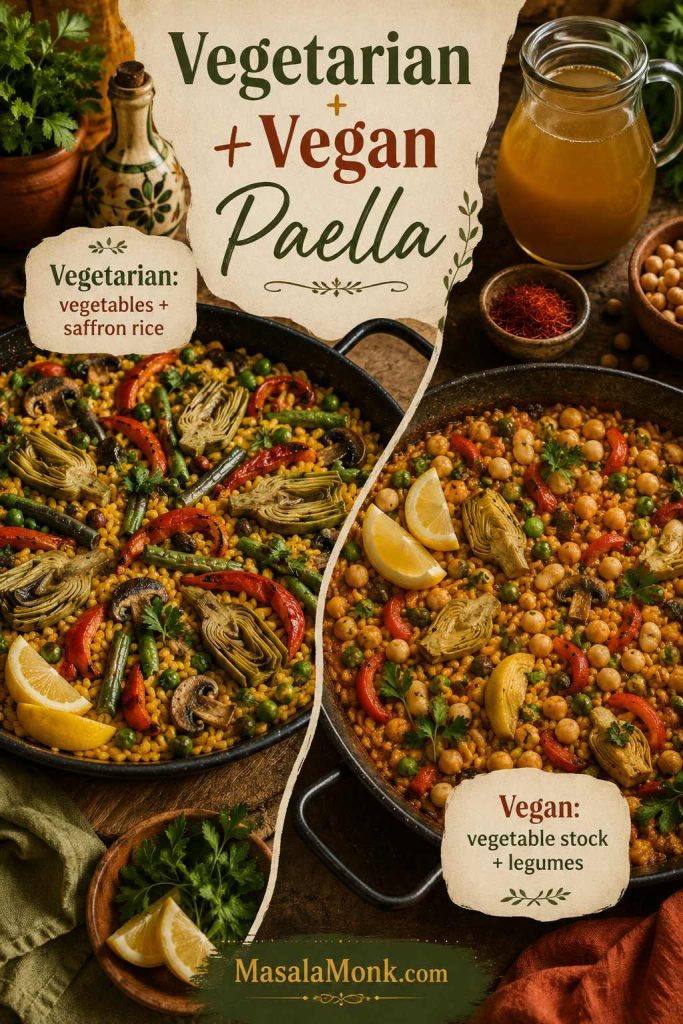
Vegetarian Paella
For a meatless pan that still feels colorful and satisfying, use vegetable stock and build around artichokes, green beans, roasted peppers, peas, mushrooms, or chickpeas.
Vegan Paella
For vegan paella, keep the olive oil, saffron, paprika, tomatoes, and vegetable stock, then let the vegetables and legumes do the work. Chickpeas, white beans, artichokes, mushrooms, and roasted peppers can make the pan feel generous without changing the rice method.
Chicken and Chorizo Paella
For chicken and chorizo paella, brown 100–150 g / 3½–5 oz sliced Spanish chorizo before the sofrito, then continue with the recipe. The flavor will be smoky and rich, but chorizo is a popular Spanish-inspired addition rather than a traditional Valencian one.
Paella Without Saffron
You can make paella without saffron, but the flavor and aroma will be different. Use good stock, smoked paprika, tomato, garlic, and a tiny pinch of turmeric only if you want a warmer yellow color. Too much turmeric will make the dish taste more like turmeric rice than paella.
Paella Without Seafood
If you do not like seafood, make the chicken version with extra vegetables and chicken stock. The method stays the same, but use a little more stock because shrimp, mussels, and clams will not be releasing moisture into the pan.
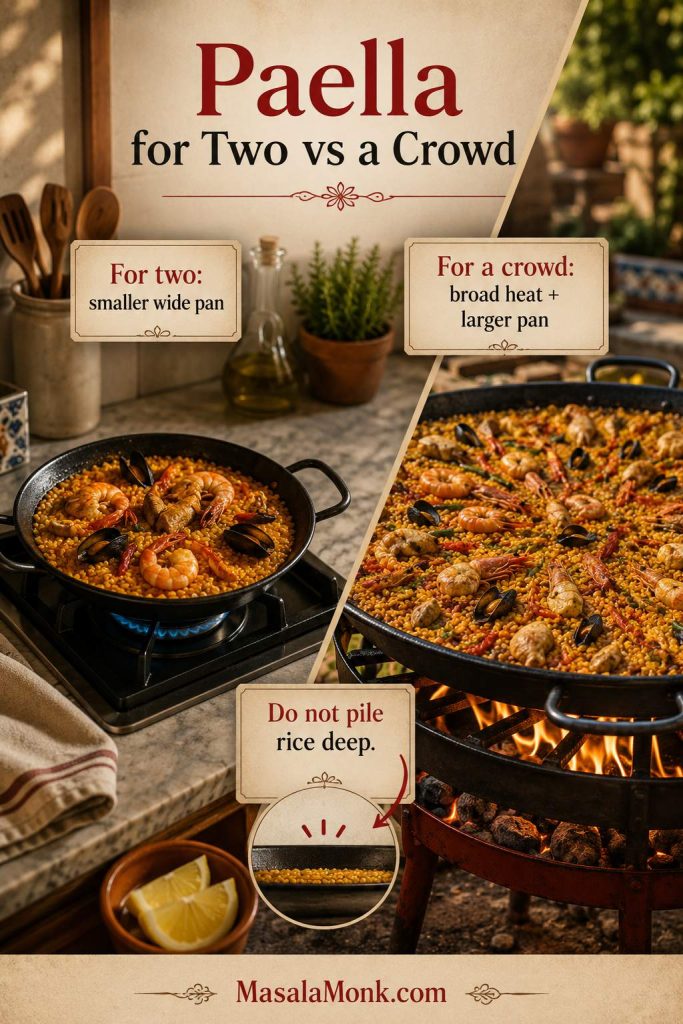
Can You Scale Paella for Two or a Crowd?
Paella does not scale like soup, curry, or stew because the rice needs a shallow layer. If you simply double the ingredients in a deep pot, the texture will suffer. The top may stay firm while the bottom turns soft or burns.
For two people, use a 10–12 inch skillet and reduce the batch by about half. For a crowd, use a large paella pan over a grill or outdoor burner, or make two smaller pans instead of forcing one overloaded pan onto a regular stovetop burner.
| Serving goal | Best approach | Why |
|---|---|---|
| Paella for two | Make a half batch in a 10–12 inch skillet. | The rice stays shallow and the burner can heat the pan more evenly. |
| Paella for 4–6 | Use the recipe as written in a 14–16 inch wide pan. | This is the best home-size balance of yield and control. |
| Paella for a crowd | Use an outdoor burner, grill, or two separate pans. | Large pans need broad heat; one small burner usually creates hot spots. |
What to Serve with Paella
Paella is a full meal, so the sides should be simple. Serve it with lemon wedges, a green salad, roasted peppers, olives, or something fresh and herb-heavy like this tabbouleh recipe. Crusty bread is optional, but it is useful if you want to catch the flavorful juices around the edge of the pan.
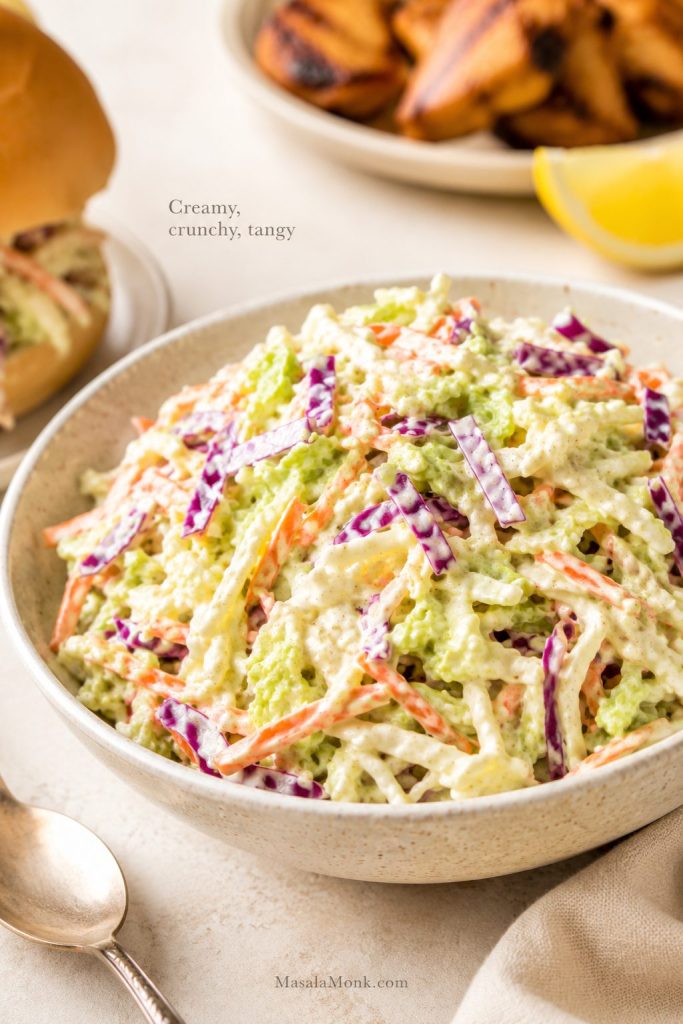
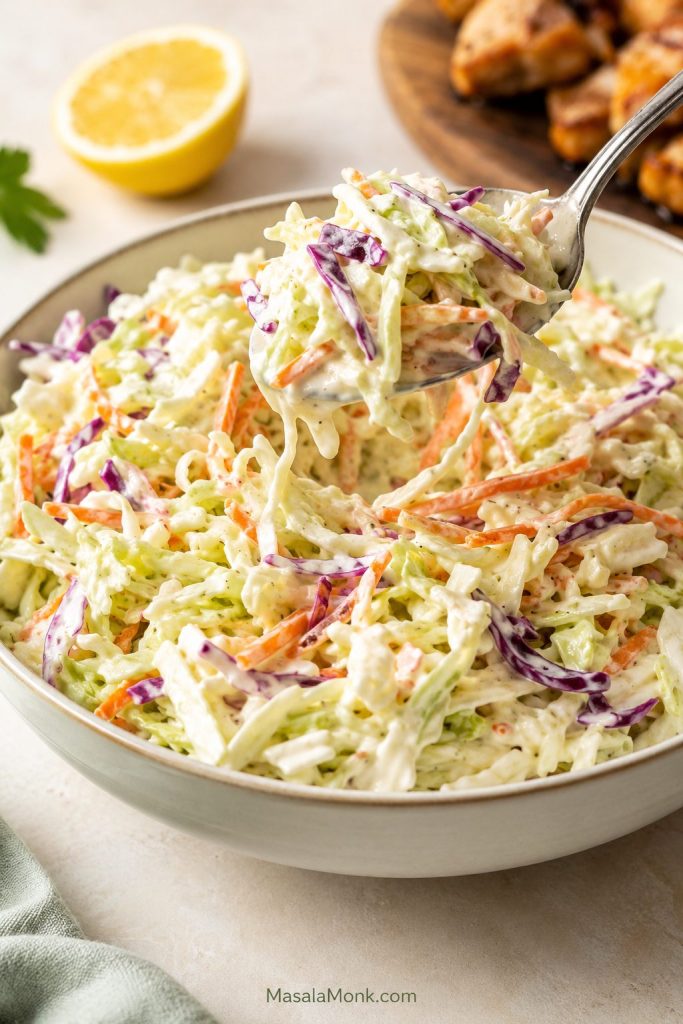
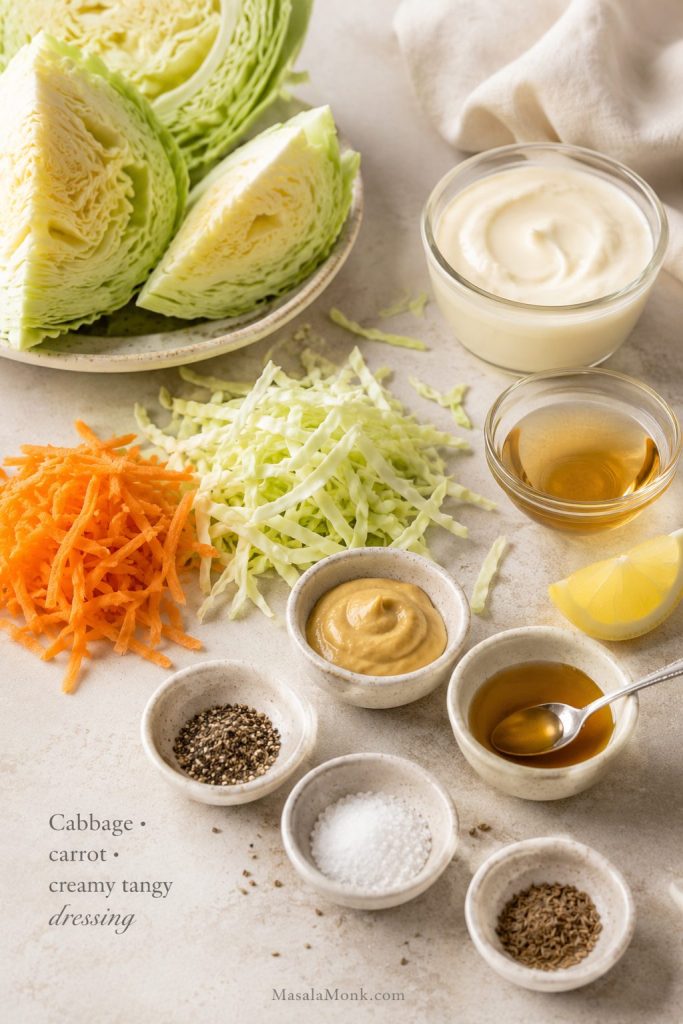
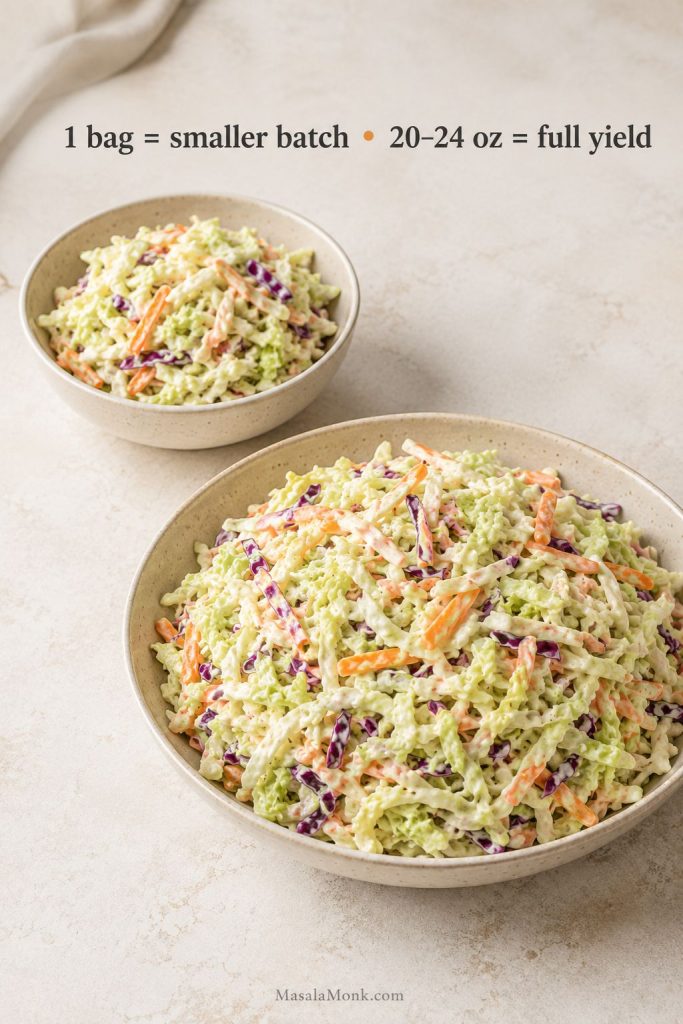
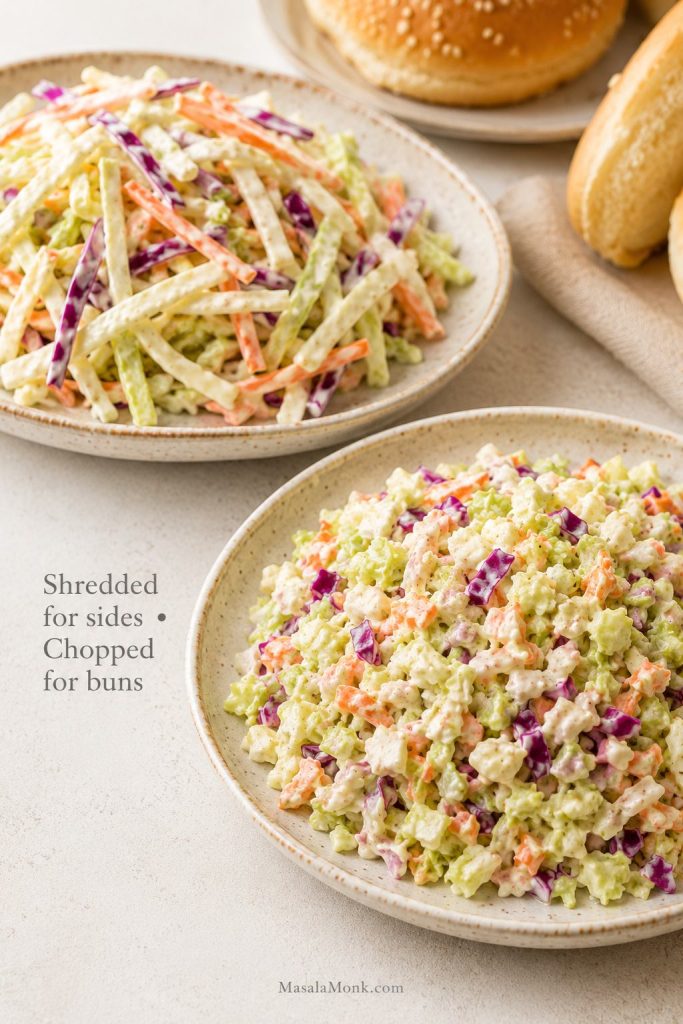
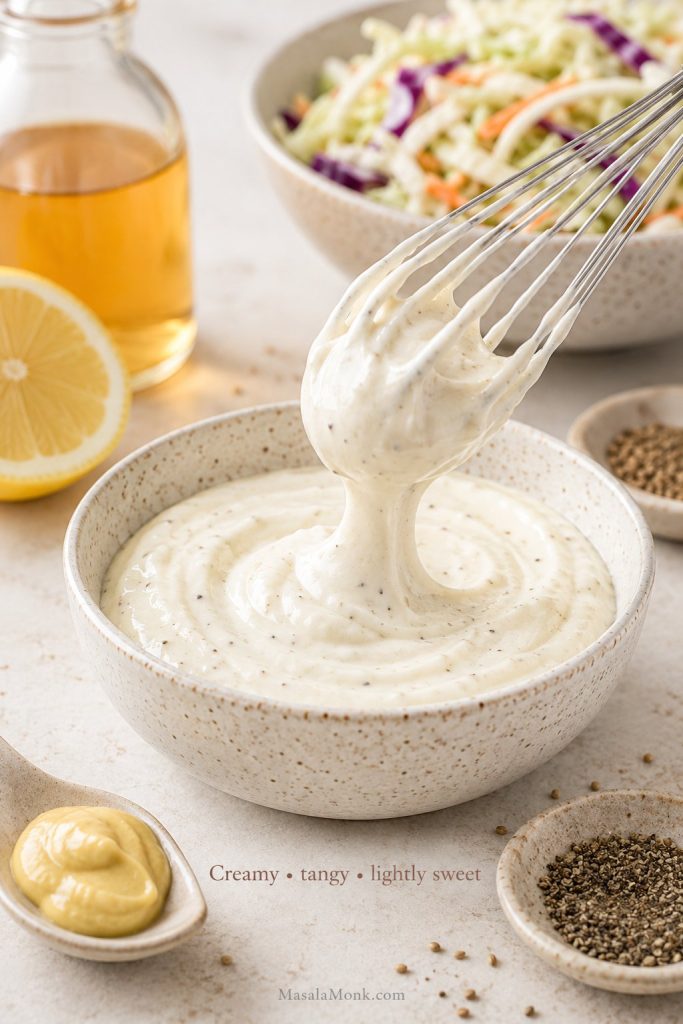
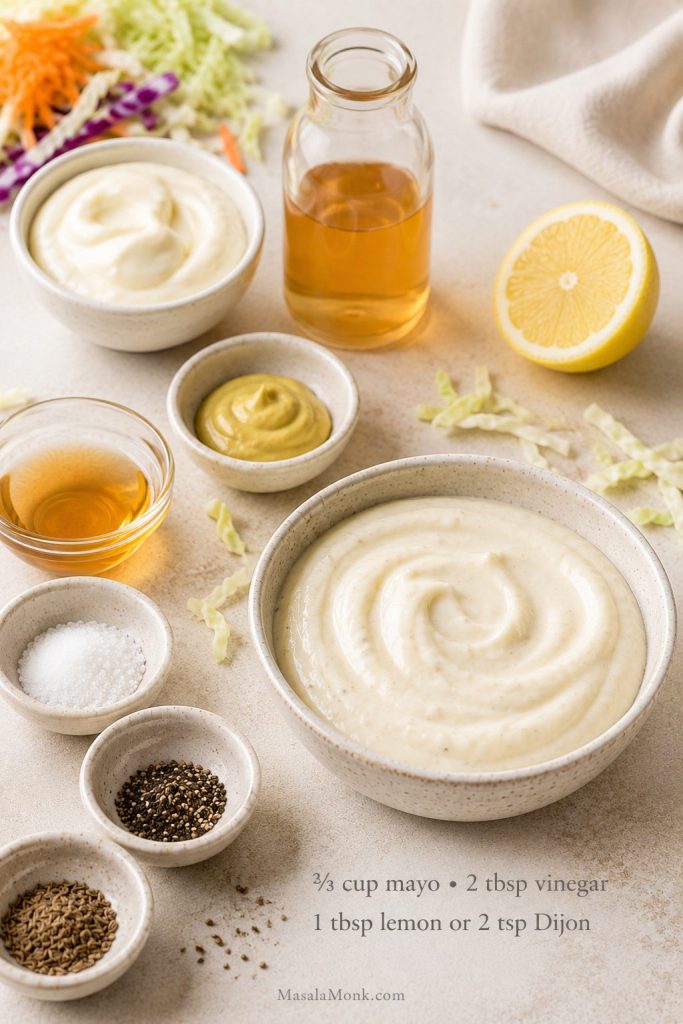
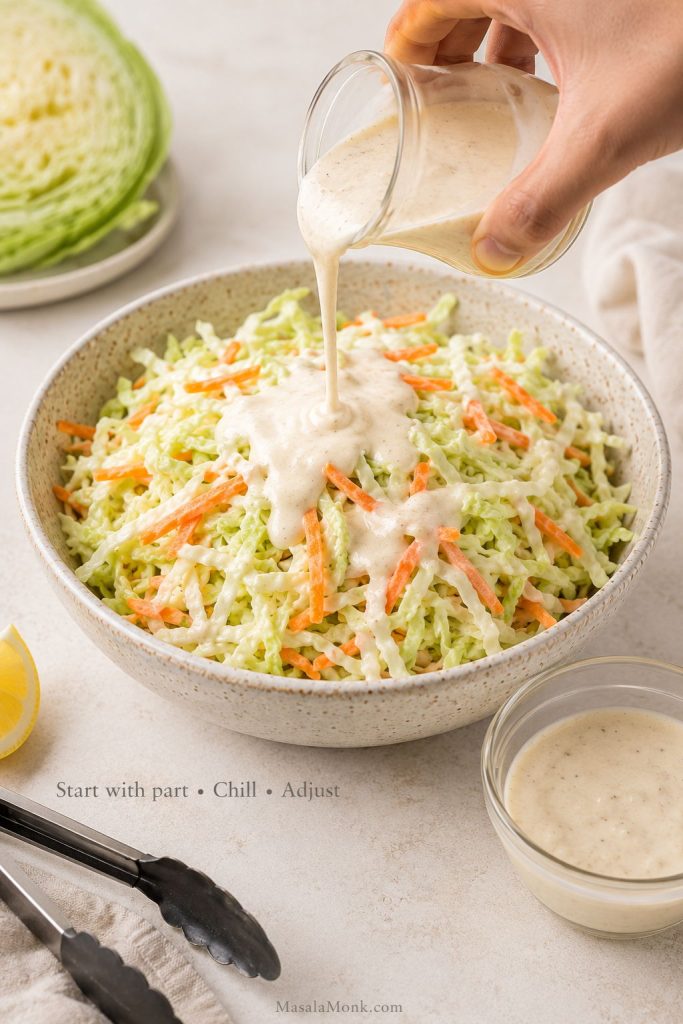
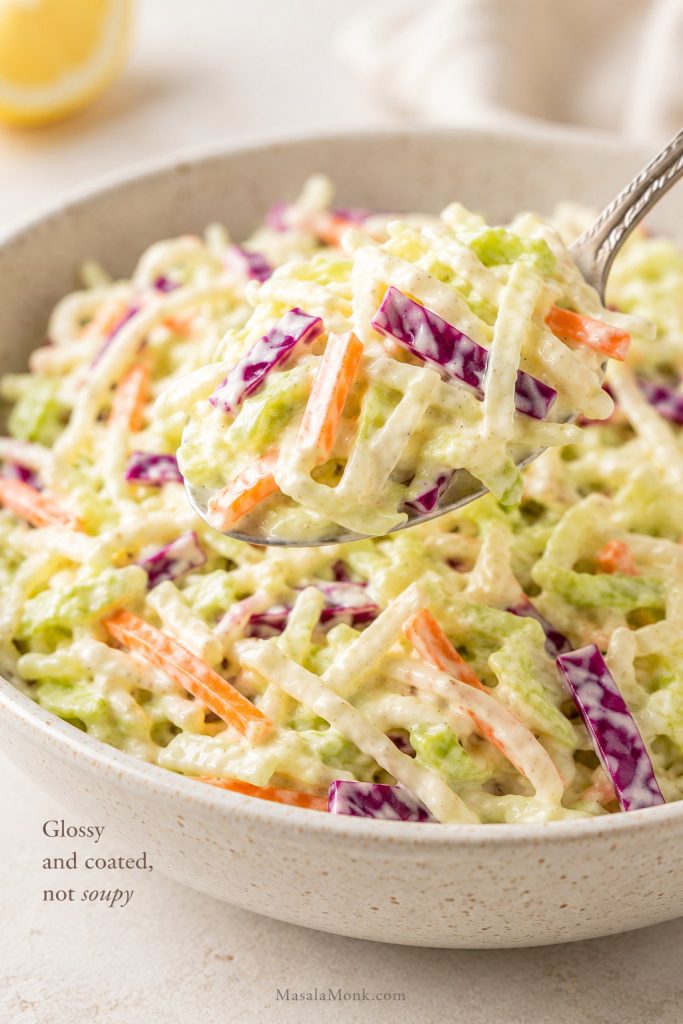
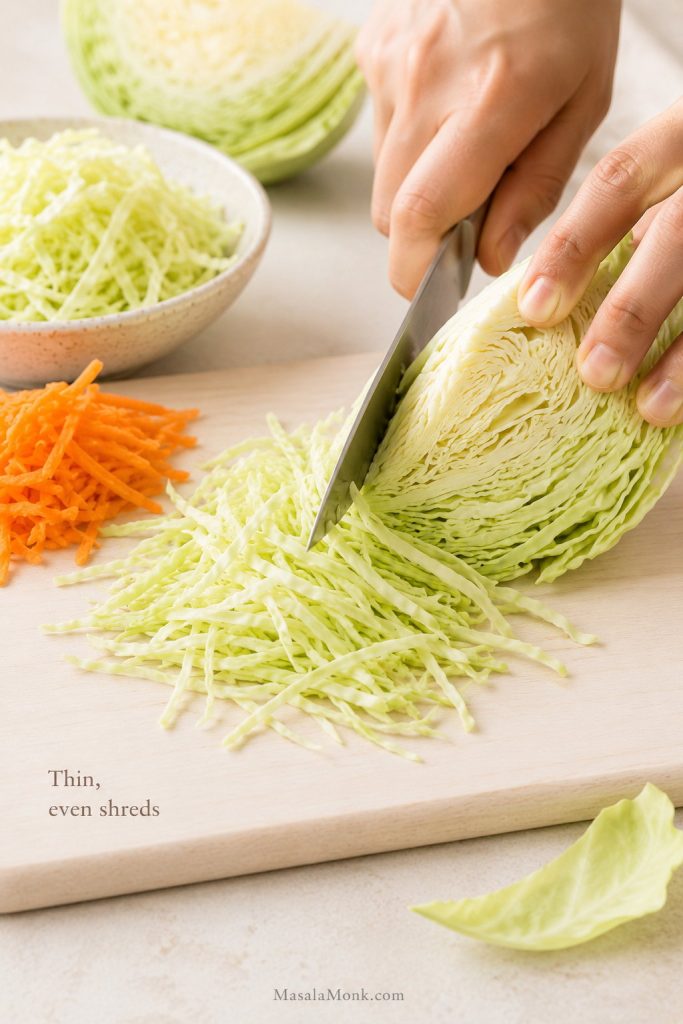
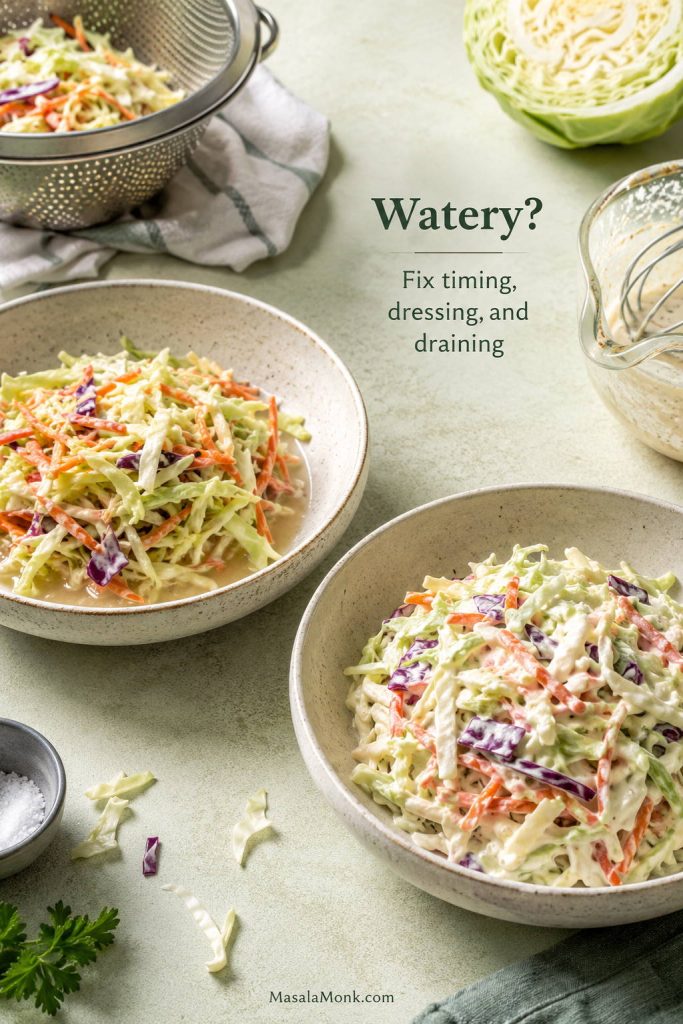
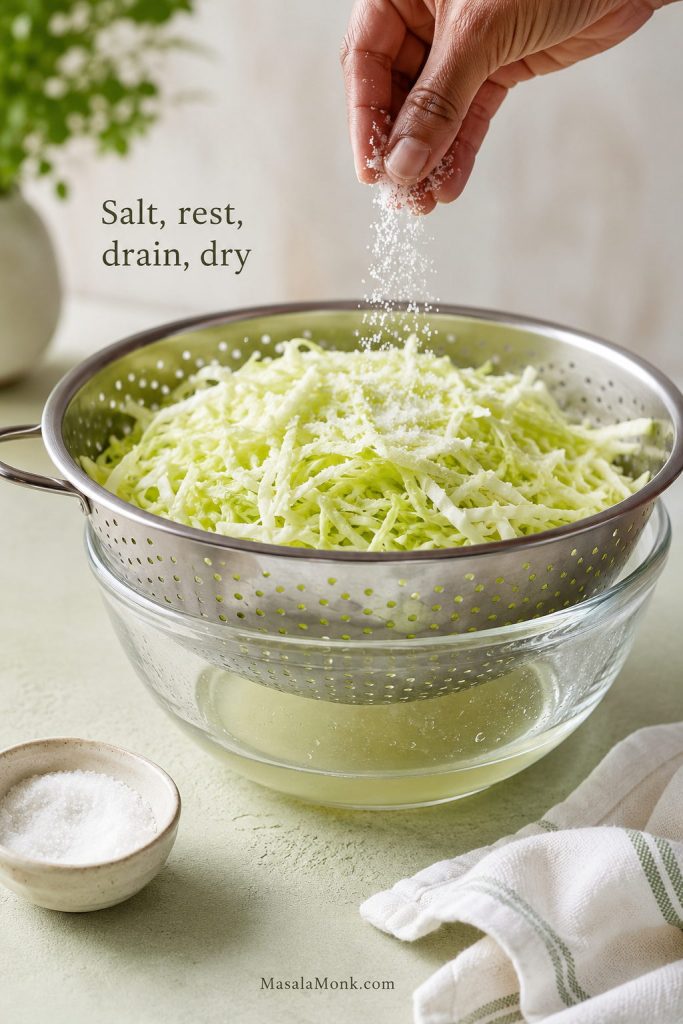
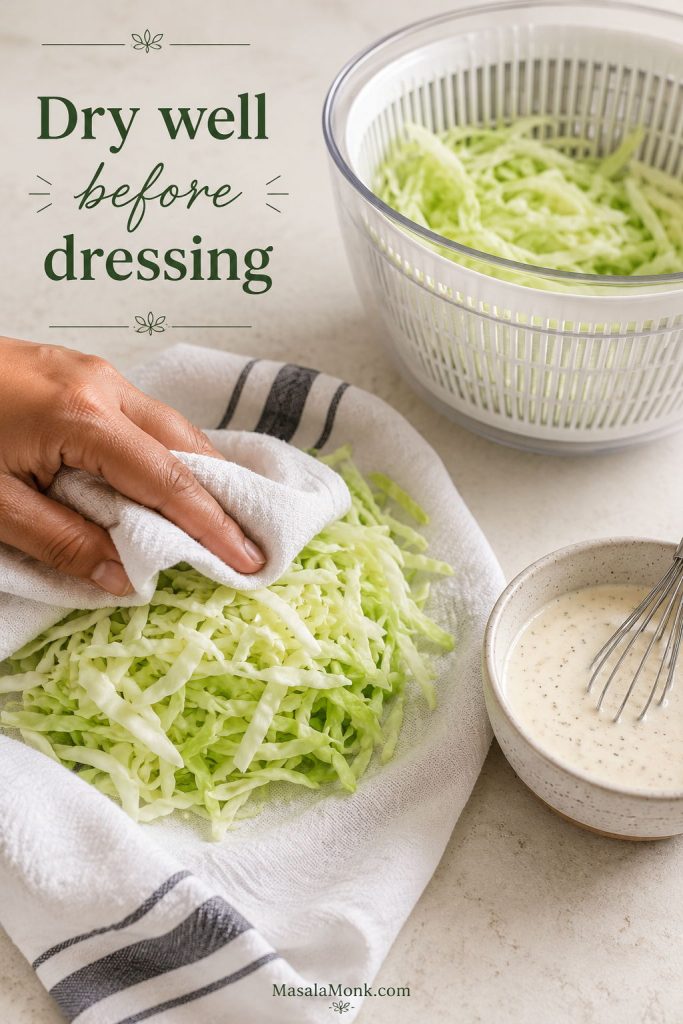
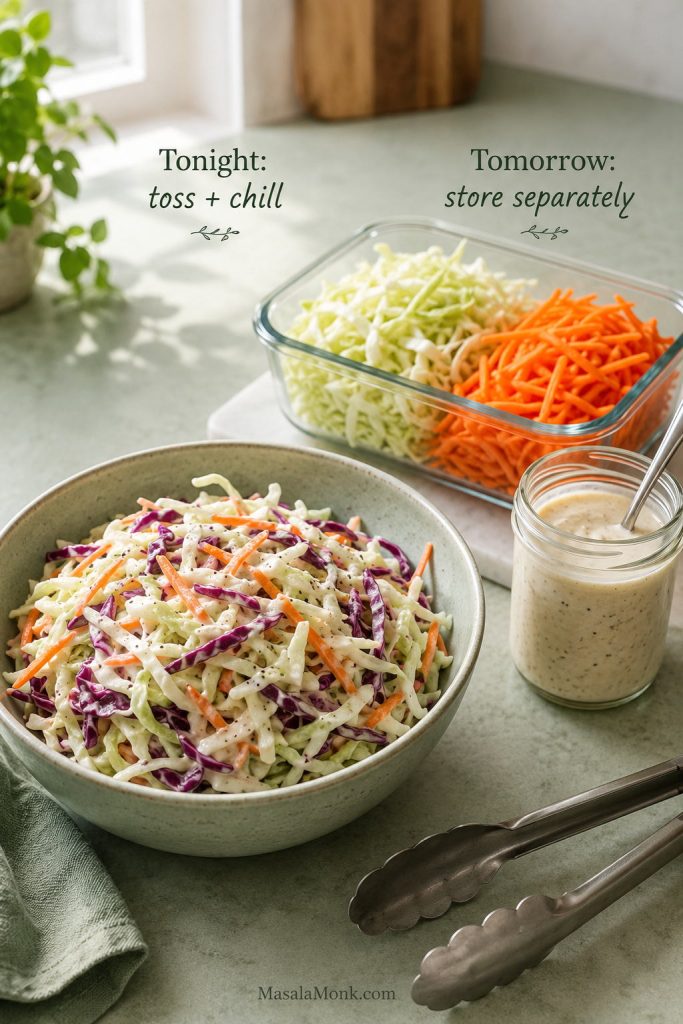
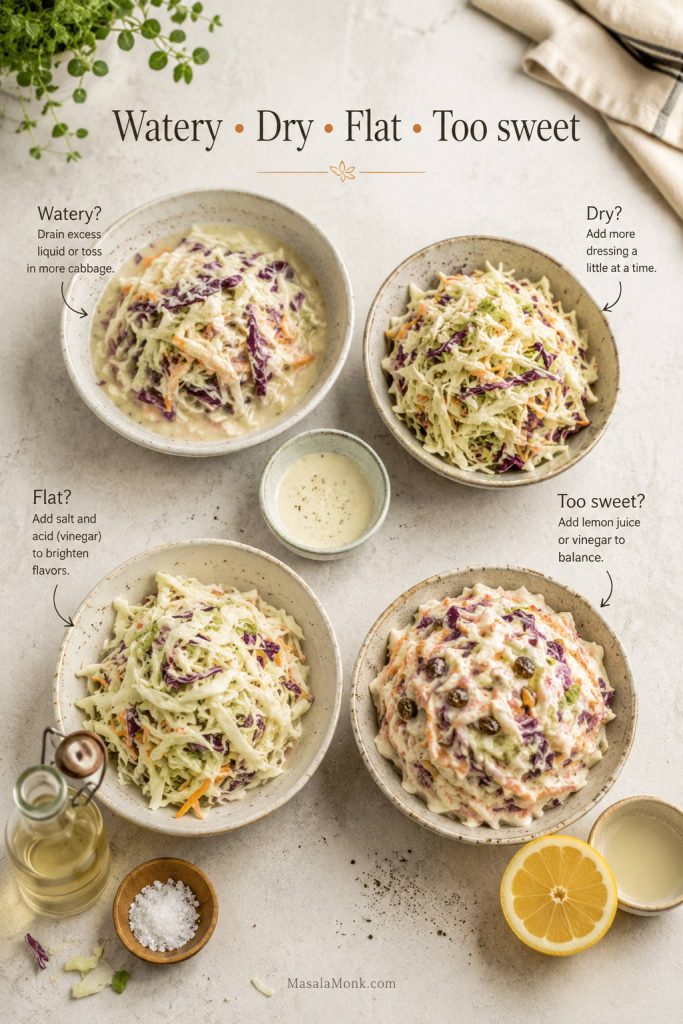
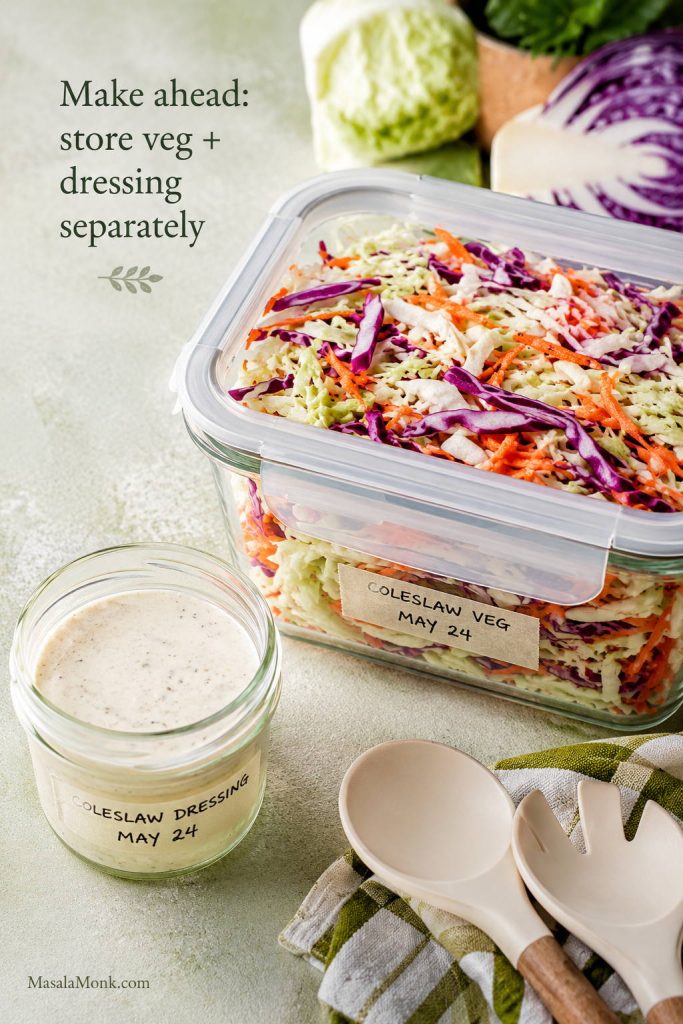
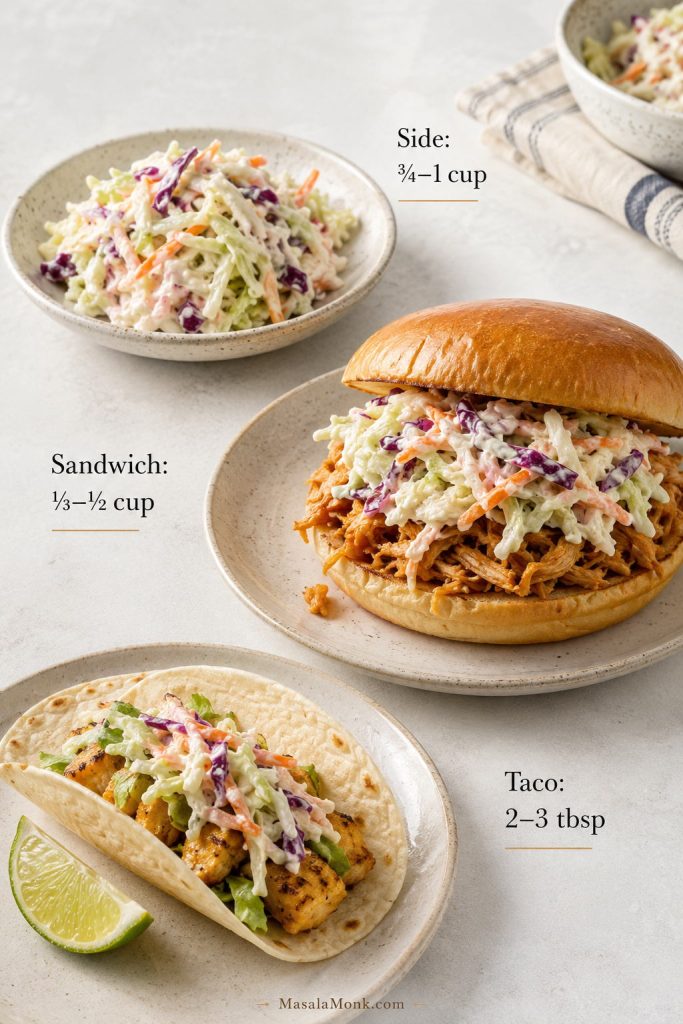
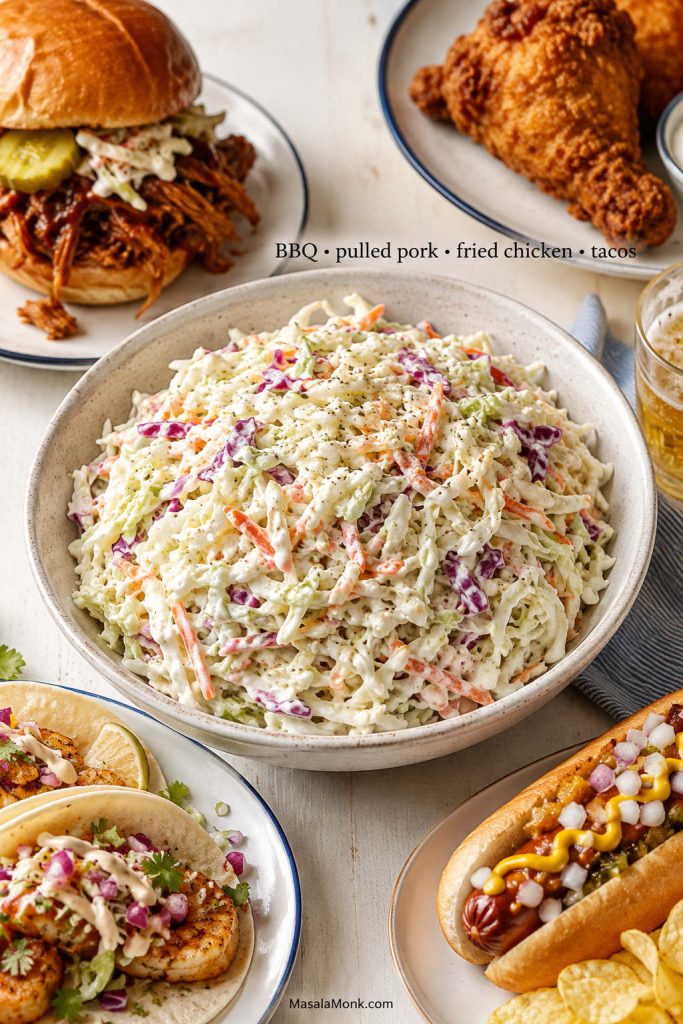
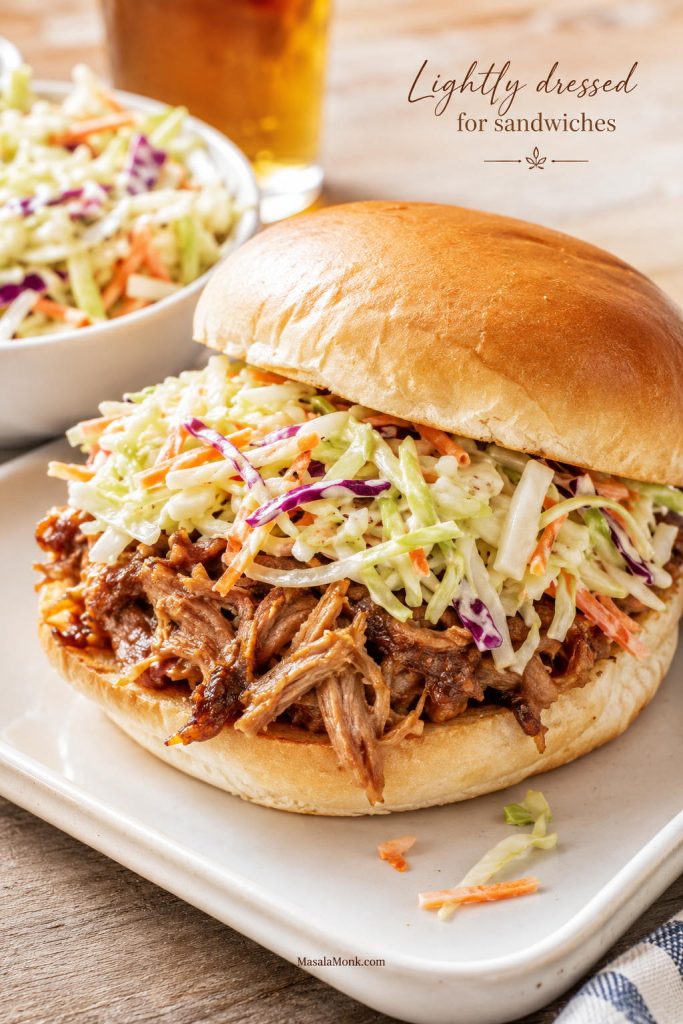
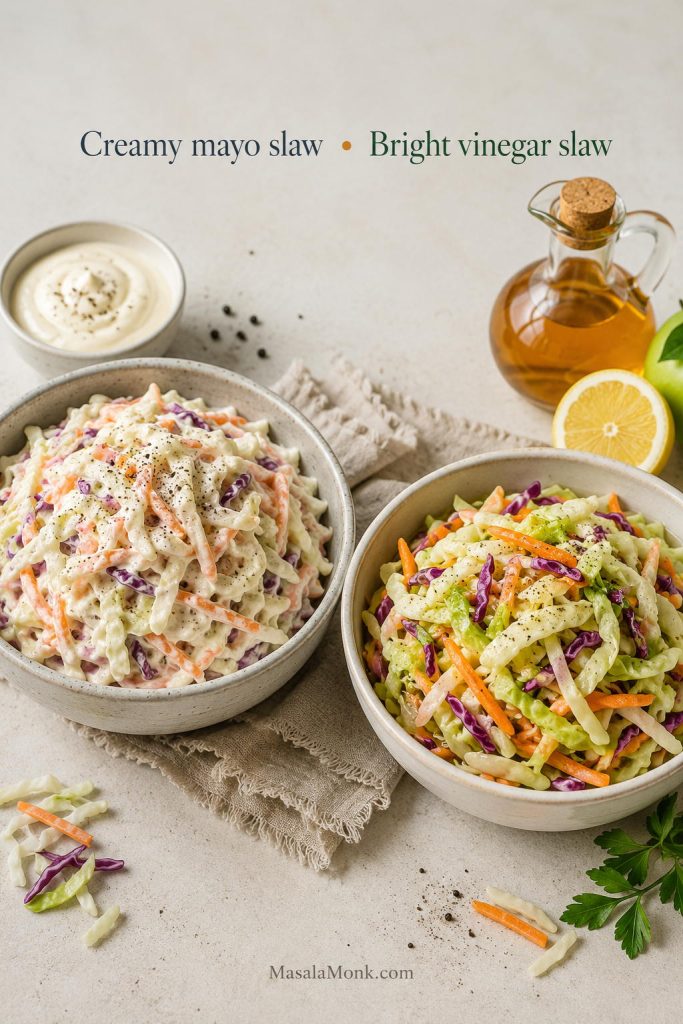
If you want a crisp make-ahead side instead of a green salad, this coleslaw recipe brings crunch and acidity without requiring oven or stovetop space.
For drinks, keep the flavors bright and not too heavy. Sparkling water with lemon, chilled white wine, or a fresh watermelon margarita can work well with saffron rice and seafood, especially for a warm-weather table.
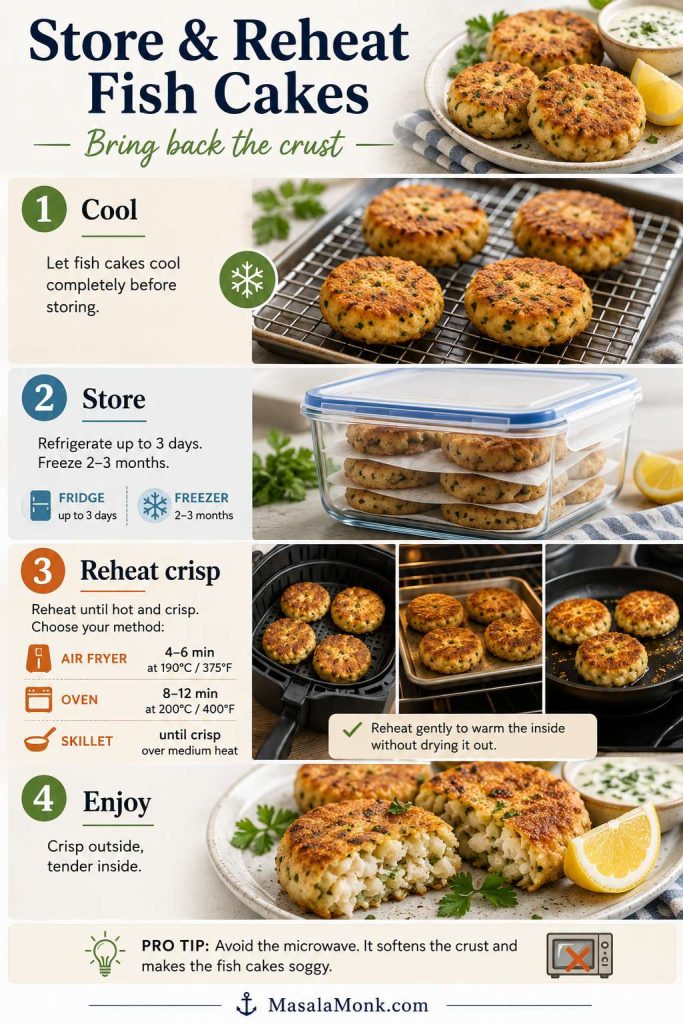
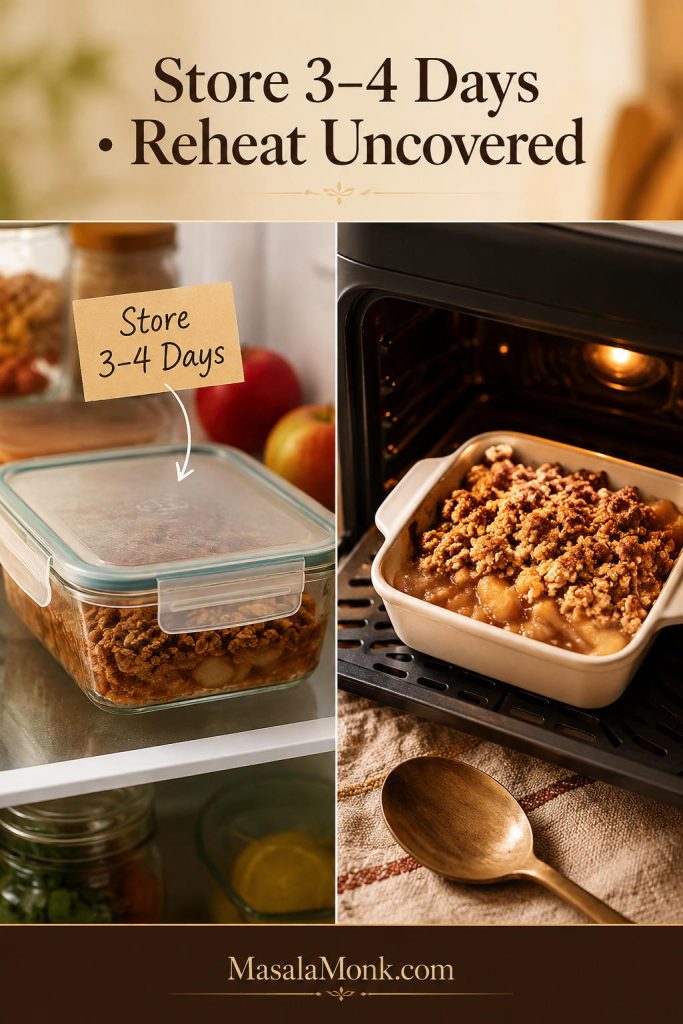
How to Store and Reheat Paella
This paella is best fresh from the pan after a short rest. The rice texture is at its best before refrigeration, and shrimp or shellfish are usually softer and juicier before reheating.
Because paella contains rice and often seafood, refrigerate leftovers within 2 hours of cooking. Spread them into a shallow airtight container so the rice cools quickly, and eat within 1–2 days for the best texture and safety.
If your paella has a lot of shellfish, remove the shells before storing leftovers so reheating is easier and the rice cools more quickly.
Reheat gently in a skillet with a small splash of stock or water. First, cover the pan briefly so the rice steams; then uncover it so extra moisture can evaporate. Avoid blasting seafood in the microwave for too long because shrimp can turn rubbery.
If you want to prep ahead, make the sofrito, clean the seafood, cut the chicken, and measure the rice and stock in advance. Do not fully cook paella hours ahead and expect the rice to taste freshly made.
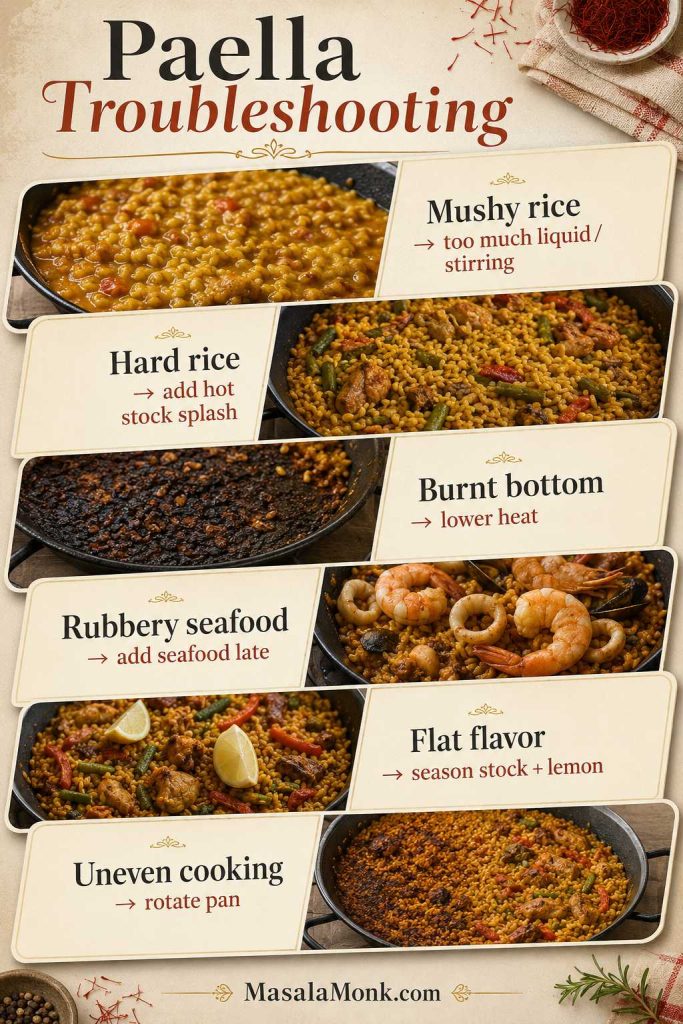
Paella Troubleshooting: Rice, Pan, and Seafood Fixes
Most paella problems come from the same few causes: the wrong rice, too much liquid, too much stirring, a pan that is too deep, or heat that is too aggressive for the pan size.
| Problem | Likely cause | Quick fix |
|---|---|---|
| Mushy rice | Too much liquid, too much stirring, or deep pan | Stop adding liquid, cook uncovered briefly, and rest off heat. |
| Hard rice | Liquid evaporated too fast | Add a small splash of hot stock around the edges and lower the heat. |
| Burnt bottom | Heat too high or socarrat attempted too early | Use steadier heat and save the high-heat push for the final 60–120 seconds. |
| Rubbery seafood | Shrimp or shellfish added too soon | Add seafood only near the end of cooking. |
| Flat flavor | Weak stock, rushed sofrito, or not enough salt | Season the stock, cook the tomato base down, and finish with lemon. |
| One side undercooked | Burner heat is uneven or pan is too wide | Rotate and shift the pan instead of stirring through the rice. |
Why Is My Paella Mushy?
Mushy paella usually means too much liquid, the wrong rice, too much stirring, or a pan that is too deep. Use short-grain paella rice, keep the rice shallow, and stop stirring once the stock goes in.
If the rice already looks soft and wet, stop adding liquid. Cook uncovered over low heat for a few more minutes so excess moisture can evaporate, then rest the pan off heat.
Why Is the Rice Still Hard?
Hard rice usually means the liquid evaporated before the grains cooked through. Add a small splash of hot stock or water around the edges, lower the heat, and give the pan a few more minutes. A large pour of cold liquid can soften the outside of the grains before the centers catch up.
Why Did the Bottom Burn?
The heat was probably too high, the pan was too thin for the burner, or you tried to get socarrat before the rice was cooked. Next time, use steadier heat during the rice stage and save the final high-heat push for the last minute or two.
Why Did I Not Get Socarrat?
There may have been too much liquid left in the pan, the heat may have been too low at the end, or the pan may have been nonstick. Socarrat forms best when the rice is cooked, the liquid is absorbed, and the bottom gets a brief controlled burst of heat.
Why Is My Seafood Rubbery?
Rubbery seafood is almost always a timing problem. Shrimp, mussels, clams, and calamari should not simmer from the beginning with the rice; they only need the final stretch of cooking.
Can You Stir Paella?
You can stir before the stock goes in. After the rice is spread into the stock, do not stir. Rotate the pan if needed, but leave the rice layer alone so the grains stay separate and the bottom has a chance to toast.
Why Does My Paella Taste Flat?
Flat paella usually starts with weak stock or a rushed sofrito. Season the stock well, let the tomato base cook down, and finish with lemon so the rice tastes bright instead of dull.
Why Is One Side Cooking Faster Than the Other?
Your burner may not be heating the whole pan evenly. Rotate the pan every few minutes instead of stirring the rice. If one area is boiling hard while another is barely moving, lower the heat slightly and shift the pan so the cooler side gets more contact with the flame or burner.
FAQs
What is the best rice for paella?
The best rice for paella is Spanish short-grain rice such as bomba, Calasparra, or Valencia. Medium-grain rice can work in a pinch, but basmati and jasmine are too long, fragrant, or soft for this method.
Do you need a paella pan?
You do not need a paella pan, but you do need a wide, low-sided pan. The rice should sit in a shallow layer, so a wide skillet or sauté pan is more useful than a deep pot.
Can you make paella in a cast iron skillet?
Yes, you can make paella in a cast iron skillet if it is wide enough to keep the rice shallow. Cast iron holds heat well, so watch the bottom carefully and avoid pushing for socarrat before the rice is tender.
Is paella Spanish or Mexican?
Paella is Spanish. It comes from Valencia, Spain. Some people search for Mexican paella or confuse it with other rice dishes, but traditional paella is part of Spanish cuisine.
What gives paella its yellow color?
Saffron gives paella its classic golden color and floral aroma. Some home versions use a little turmeric for color when saffron is unavailable, but saffron gives the most traditional flavor.
Is saffron required for paella?
Saffron is strongly recommended, but you can make a good rice dish without it. If you skip saffron, rely on good stock, tomato, garlic, paprika, and careful seasoning. A tiny pinch of turmeric can help with color, but it will not replace saffron’s aroma.
Should paella be stirred?
Stir during the sofrito stage, then leave the rice alone once the stock goes in. That stillness helps the grains stay separate and gives the bottom a chance to toast.
What is the crispy rice at the bottom called?
The crispy toasted rice at the bottom of paella is called socarrat. It forms when the rice is cooked in a shallow layer and the bottom gets a brief controlled burst of heat near the end.
Is chorizo traditional in paella?
Chorizo is not traditional in Paella Valenciana. It is common in many Spanish-inspired home paella recipes, especially chicken and chorizo paella, but it should be treated as a variation rather than the classic version.
What is the difference between paella and risotto?
Paella is cooked mostly undisturbed so the rice grains stay separate and absorb stock without turning creamy. Risotto is stirred repeatedly to release starch and create a creamy texture.
What is the difference between paella and Paella Valenciana?
Paella is the broad name for the Spanish rice dish and its many versions. Paella Valenciana is the traditional Valencian version with a more specific ingredient identity, often including chicken, rabbit, green beans, garrofó, tomato, saffron, paprika, olive oil, water, salt, and rice.
Can paella be made ahead?
Paella is best cooked fresh, but you can prep the ingredients ahead. Chop the vegetables, clean the seafood, cut the chicken, soak the saffron, and measure the rice and stock before cooking. Fully cooked paella loses its best texture after sitting for a long time.
Serve it while the pan still smells of saffron, paprika, lemon, and toasted rice. Once you understand the rice, pan, and no-stir method, paella stops feeling like a risky project and starts feeling like a generous one-pan meal. Bring the whole pan to the table and let everyone find the spoonful they were hoping for.