Posted on Leave a comment

Greek Yogurt Pizza Dough: 2 Easy No-Yeast Versions

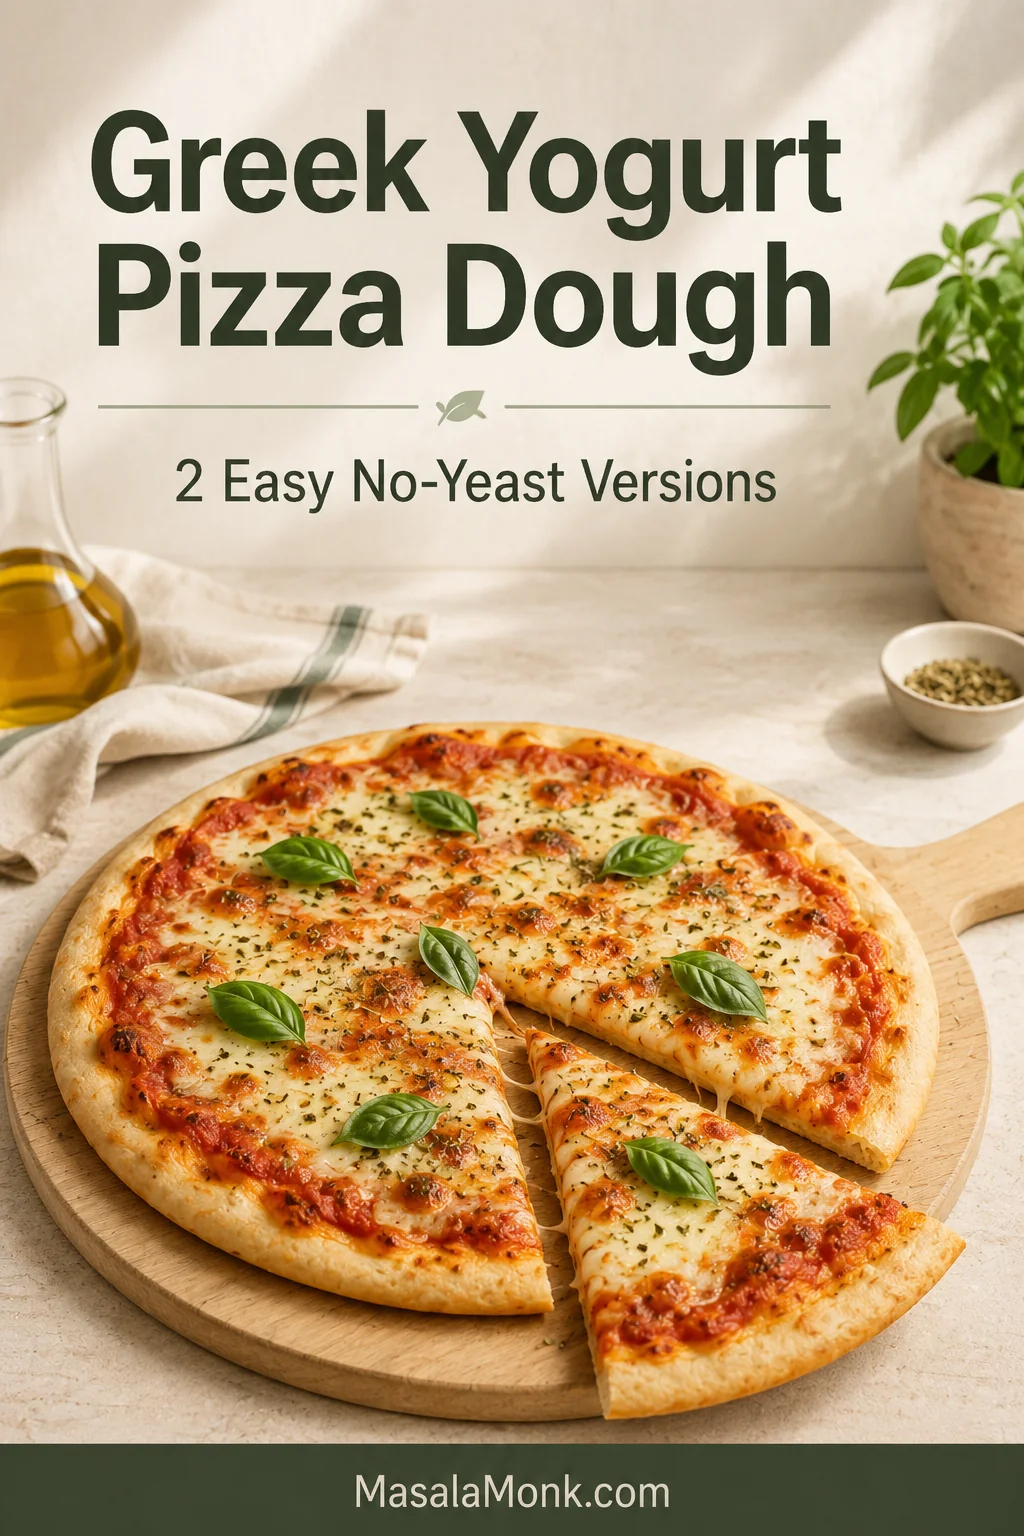
Round homemade pizza with tomato sauce, melted cheese, basil leaves and one slice pulled away.

Pizza cravings rarely arrive with two hours of notice.

This Greek yogurt pizza dough is for the night when the sauce, cheese and appetite are ready, but no dough is rising on the counter. Thick Greek yogurt and flour come together in minutes, there is no yeast to activate, and dinner does not need to become an afternoon project.

The crust bakes up soft through the center, lightly chewy at the rim and crisp around the edges. It is not as stretchy or deeply flavored as an overnight yeast dough, but it gives you something that matters more tonight: genuinely good homemade pizza without the wait.

The dough is ready in about 15 minutes, including its short rest. With a heated metal baking sheet, the whole pizza usually reaches the table in about 35–45 minutes. A stone or steel needs a longer head start.

Quick Answer

Mix all-purpose flour with baking powder and salt, then add thick plain Greek yogurt until a soft dough forms. Rest it for five minutes, roll it into an 11–12-inch crust and par-bake at 450°F (230°C) for 5–6 minutes. Add the toppings and bake for another 6–8 minutes, until the cheese bubbles and the base develops golden-brown patches. For the true two-ingredient version, use self-rising flour and begin with slightly less yogurt.

Soft dough. Set crust. Hot bottom. Keep the dough slightly tacky, give the bare crust a short first bake before wet toppings and use a fully heated baking surface.

Greek Yogurt Pizza Dough Recipe

Easy No-Yeast Greek Yogurt Pizza Dough

A soft, lightly chewy pizza crust with crisp edges and enough structure to carry sauce and bubbling cheese—all without yeast or rising time.

Active prep10 minutesDough rest5 minutes
Bake11–14 minutesTable-ready with metal sheetAbout 35–45 minutes
YieldOne 11–12-inch pizzaServes2 as a meal
Oven450°F (230°C)MethodPar-baked crust

Baseline method in this guide: Thick 2% Greek yogurt, the all-purpose flour formula, an 11–12-inch crust and a fully heated heavy metal sheet give the clearest route to a tender middle, crisp edge and browned base.

Choose Your Flour

VersionBest forMain advantage
All-purpose flourThe easiest first batchFull control over the salt and baking powder
Self-rising flourThe shortest ingredient listA true two-ingredient dough

Useful Equipment

Medium mixing bowl, spoon or spatula, rolling pin, heat-rated parchment, heavy metal baking sheet, wide spatula and wire rack.

All-Purpose-Flour Dough

  • 1½ cups all-purpose flour (180 g / 6.3 oz), plus up to 2 tablespoons (20 g / 0.7 oz) if needed
  • 1½ teaspoons baking powder (about 6 g)
  • ½ teaspoon fine salt (about 3 g)
  • ¾ cup plus 1 tablespoon thick plain Greek yogurt (200 g / 7.1 oz), preferably 2%
  • 1 teaspoon olive oil (5 ml), optional

Two-Ingredient Self-Rising Variation

Use this variation instead of the all-purpose ingredient list:

  • 1½ cups self-rising flour (180 g / 6.3 oz)
  • Start with about ⅔ cup plus 1 tablespoon thick plain Greek yogurt (170–180 g / 6–6.3 oz)
  • Add more yogurt a spoonful at a time, up to about ¾ cup plus 1 tablespoon (200 g / 7.1 oz), only until the final dry patches disappear

Do not add separate baking powder or salt. Place the self-rising flour in the bowl and, at Step 3, begin with the lower yogurt amount.

Toppings for One 11–12-Inch Pizza

  • ¼ cup thick pizza sauce or marinara (60 ml)
  • ¾ cup shredded low-moisture mozzarella (80–90 g / 2.8–3.2 oz)
  • Up to ½ cup cooked or well-drained toppings
  • Olive oil, oregano, chili flakes or grated Parmesan for the rim, optional

Make and Rest the Dough

  1. Heat the oven and metal sheet. Place a rack in the lower-middle of the oven. Turn a heavy metal baking sheet upside down and heat it at 450°F (230°C). Use it once the oven is fully heated, or give it another 5–10 minutes for stronger browning.
  2. Mix the dry ingredients. Whisk the all-purpose flour, baking powder and salt in a medium bowl.
  3. Add the yogurt. Stir in about 180 g yogurt and the optional olive oil. Add the remaining yogurt a spoonful at a time, stopping when the last dry patches disappear. For the self-rising variation, begin with 170–180 g and add more only as needed.
  4. Bring the dough together. Mix until a rough dough forms. Turn it onto a lightly floured surface and knead for 45–90 seconds, just until it holds together and looks mostly smooth.
  5. Rest, then assess. Cover the dough for 5 minutes. If it leaves wet paste on your fingers, add flour 1 tablespoon (8–10 g) at a time. If it cracks or refuses to hold together, add yogurt 1 teaspoon (about 5 g) at a time.

Shape and Par-Bake the Crust

  1. Shape the crust. Place the dough on parchment rated for at least 450°F (230°C), or use a lightly floured peel or inverted tray. Roll or press it into an 11–12-inch circle, with a center about ⅛–3/16 inch (3–5 mm) thick and a slightly thicker rim.
  2. Give the bare crust a head start. Pierce the center lightly with a fork, avoiding the rim. Transfer it to the hot surface and bake for 5–6 minutes. It will still look pale; the surface only needs to look dry and firm enough to hold the toppings.

Top, Finish and Cool

  1. Add the toppings. Spread the sauce thinly, leave a visible rim and avoid crowding the center. Add the cheese and any cooked or well-drained toppings.
  2. Finish baking. Bake for another 6–8 minutes, until the cheese bubbles, the rim turns golden and the base develops browned patches. Near the end, the cheese will bubble more actively and the exposed rim will begin to smell toasted.
  3. Cool briefly. Transfer the pizza to a wire rack for 2 minutes before slicing. This lets steam escape so the bottom stays crisp.

What success looks like: Lift an edge with a wide spatula. The base should show golden-brown patches, and the center should lift with the slice instead of folding like wet dough. After cutting, the middle should look set rather than wet or shiny, while remaining tender.

If the cheese is ready before the bottom, move the pizza lower in the oven. Trim exposed parchment and keep it away from the broiler.

Finished Greek yogurt pizza with callouts for golden rim, set center, browned bottom and bubbling cheese.
Time is only a guide; doneness is visual. Look for a golden rim, set center, browned bottom and bubbling cheese before pulling the pizza from the oven.

Using a stone or steel? Heat a pizza steel for 30–45 minutes or a stone for 45–60 minutes. Start it first; either surface needs longer to heat than the dough needs to come together.

Once the basic method makes sense, the sections below will help you adjust for your yogurt, flour, baking surface and toppings without making the dough feel complicated.

Need help before shaping? See how the dough should feel, or skip to baking without a gummy center.

The recipe works best when you keep one simple system in mind: soft dough, a crust that sets before heavy toppings sink in and enough bottom heat for browning.
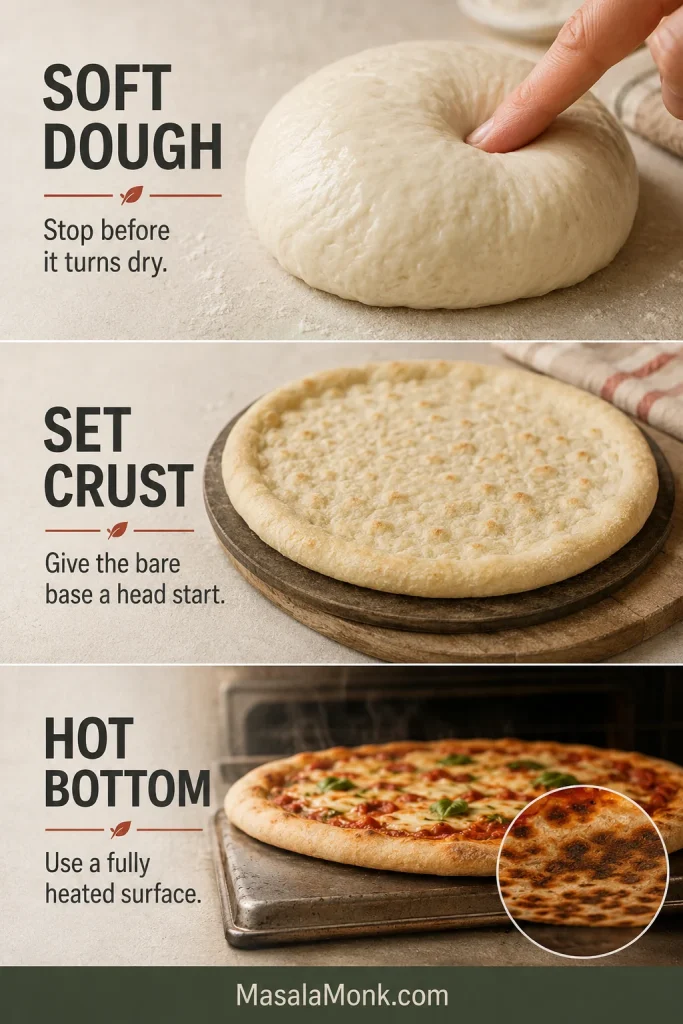
Instructional guide showing soft dough, set crust and hot bottom cues for Greek yogurt pizza dough.
Think of this crust in three parts: soft dough before baking, a set center after baking and a browned bottom underneath. Dough texture and baking surface both matter.

What Does Greek Yogurt Pizza Dough Taste Like?

The crust has a mild tang, a tender center and a light chew. Rolled to 11–12 inches and baked on a properly heated surface, it develops crisp edges and enough structure to lift as a slice without becoming dry.

The middle bends gently instead of snapping like a cracker. Once the sauce and cheese go on, the yogurt stays quietly in the background and does not make the finished pizza taste sour.

This dough is less stretchy than yeast dough, so rolling or pressing works better than tossing it. For a stretchier crust with deeper fermented flavor, use MasalaMonk’s sourdough pizza dough recipe. The sliced crust below shows the close, tender texture to expect from a quick yogurt dough.
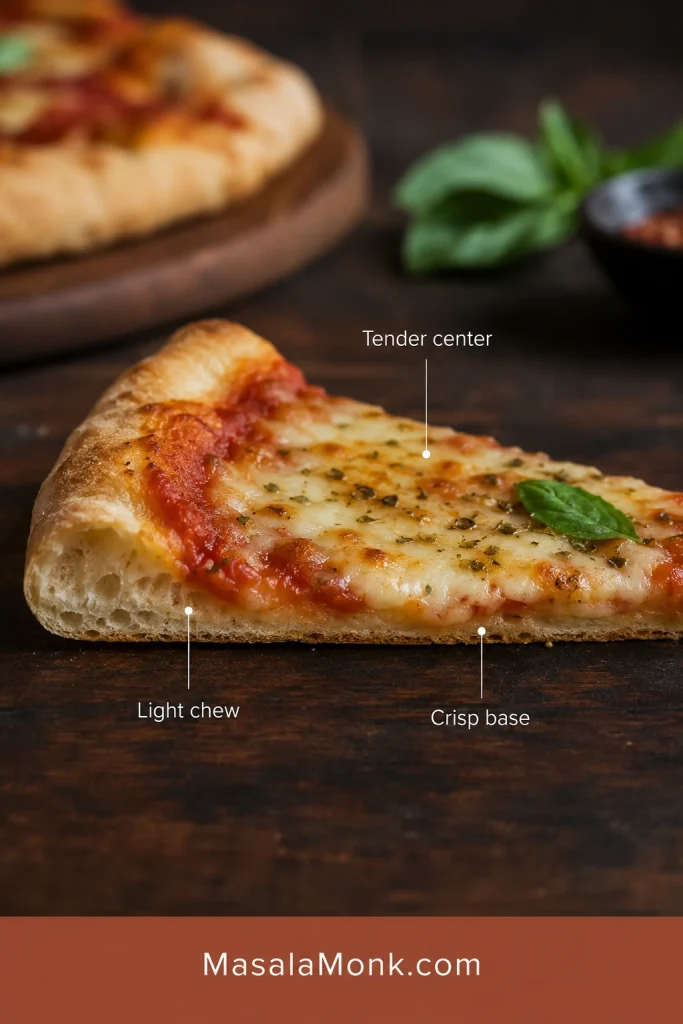
Close-up of a sliced Greek yogurt pizza crust showing a golden edge and tender close-textured crumb.
A compact, tender crumb is normal for a no-yeast yogurt crust; large open bubbles belong to longer-fermented dough.

Choosing the Yogurt and Flour

Thick Greek yogurt supplies the moisture while adding mild tang, richness and protein. Plain 2% yogurt is a practical starting point because it is thick enough to control the dough and rich enough to keep the crust tender.

Whole-milk yogurt often gives the edge a softer, more tender texture. Nonfat yogurt can bake a little firmer, and the optional teaspoon of olive oil helps soften the result.

The yogurt can go straight from the refrigerator into the bowl. A small amount of whey can be stirred back in. If there is a large pool of whey or the yogurt becomes pourable, drain it briefly or measure from the thicker portion. Vanilla, fruit-flavored and sweetened yogurts belong at breakfast, not in this dough.

Check yogurt texture before measuring; a little whey is fine, but pourable yogurt can push the dough too wet.
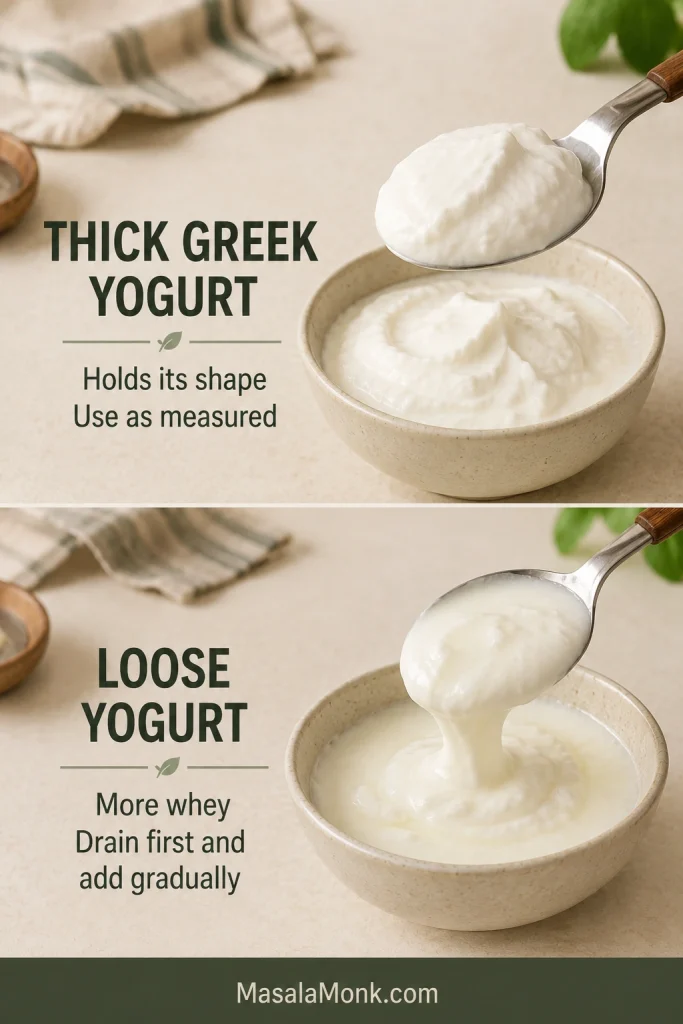
Comparison of thick Greek yogurt and loose yogurt in bowls for pizza dough texture.
Yogurt thickness changes the dough before kneading begins. Thick Greek yogurt gives structure; loose yogurt needs slower flour adjustments.

All-Purpose or Self-Rising Flour?

All-purpose flour is widely available and lets you control the baking powder and salt. Weighing it gives the most consistent result. When using cups, spoon the flour lightly into the cup and level the top without packing it down.

Self-rising flour gives you the classic two-ingredient version because the leavener and salt are already included. It may need less yogurt. In the UK and Australia, look for self-raising flour; “Greek yoghurt” is simply the regional spelling.

These two routes use the same bowl method, but the all-purpose version controls leavening separately while self-rising flour already includes it.
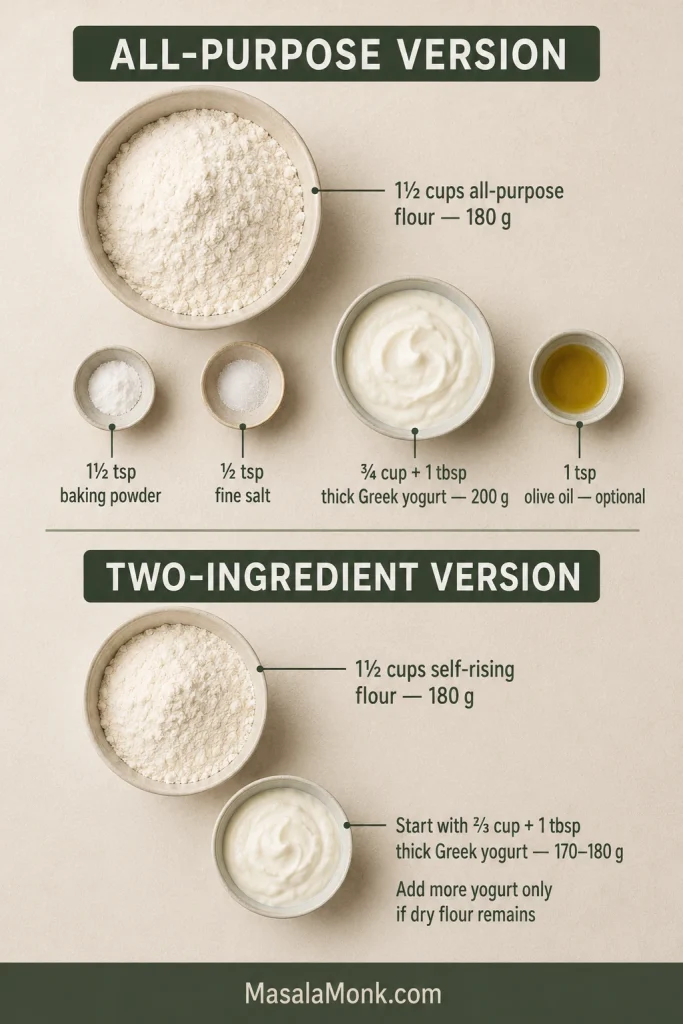
Ingredient guide showing two Greek yogurt pizza dough routes with flour, yogurt, baking powder, salt and olive oil.
Both routes start with thick Greek yogurt and flour, but they are not measured the same way. Choose the flour first, then build the dough around it.

Bread flour adds chew but may spring back while rolling. Replacing up to half the all-purpose flour with whole wheat produces a heartier crust. Gluten-free blends absorb moisture differently and need a separate, blend-specific ratio.

Why Greek yogurt dough ratios vary: Yogurt brands contain different amounts of whey, cup-measured flour can vary considerably, kitchen humidity can shift hydration slightly, and a thicker 9–10-inch crust needs a different balance from a thin 12-inch crust. Begin with the lower yogurt amount and adjust by feel rather than forcing every brand into one exact cup ratio.
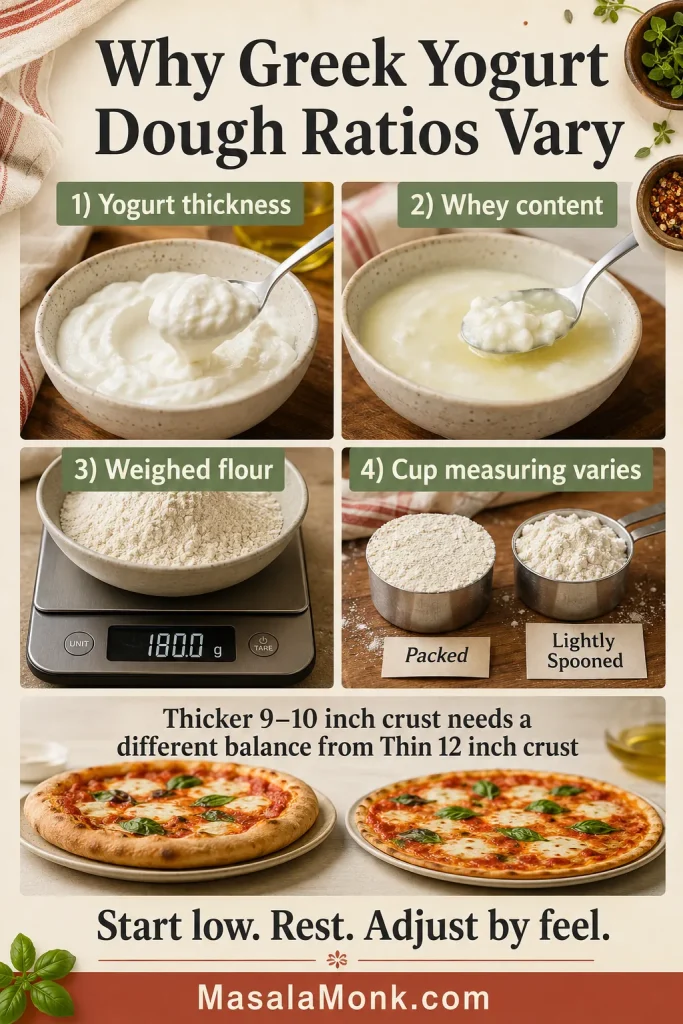
Infographic explaining how yogurt thickness, flour and humidity affect Greek yogurt pizza dough ratios.
Greek yogurt pizza dough is a feel-based dough because yogurt thickness, flour absorbency and humidity all shift the ratio. Use the numbers, then trust the texture.

A practical protein estimate: Depending on the flour and yogurt labels, the untopped all-purpose crust contains approximately 35–45 grams of protein in total. Cut into eight slices, that is roughly 4–6 grams per slice before toppings. The exact number changes with the brands used, so treat it as an estimate.

How the Dough Should Feel and How to Shape It

Once the ingredients are combined, texture matters more than whether the dough looks perfectly smooth.

Mix, Rest and Correct

At first, the bowl may look more like yogurt-coated flour than pizza dough. It will look untidy before it looks promising, and that is normal. Keep folding gently. This rough stage is where it is easiest to add too much flour too early.
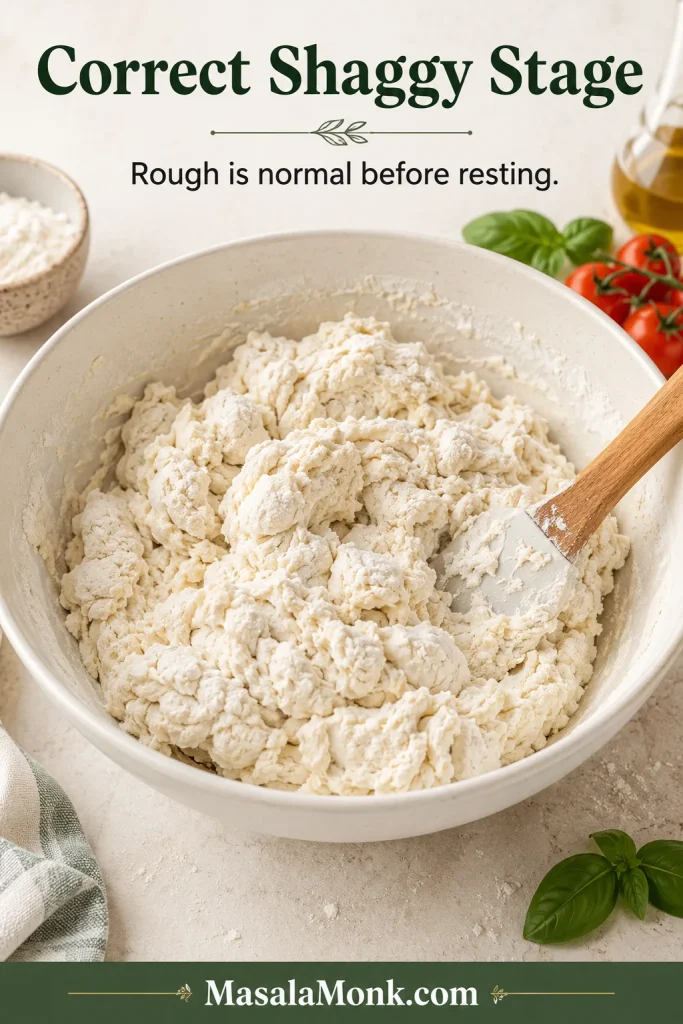
Bowl of shaggy Greek yogurt pizza dough with rough clumps, dry flour patches and a spatula.
Shaggy dough is not a mistake. Once it rests, dry patches hydrate and the rough mixture becomes easier to bring together.

Once the rough dough holds together, cover it for five minutes. Rest first, correct second; many sticky-looking batches settle as the flour absorbs moisture.
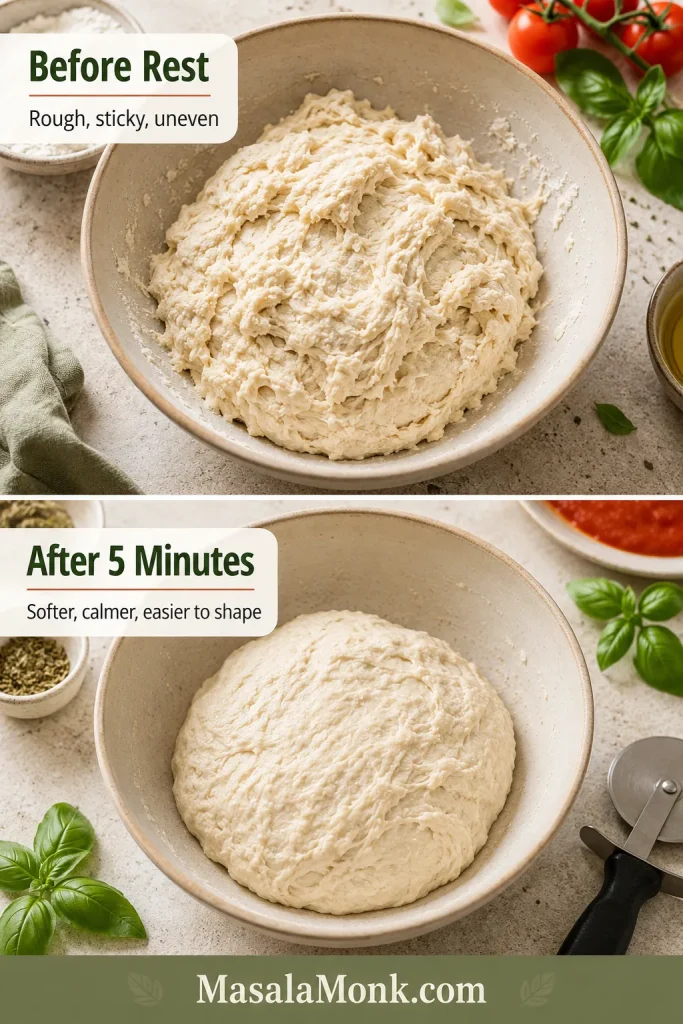
Before-and-after guide showing rough Greek yogurt pizza dough before resting and smoother dough after five minutes.
The five-minute rest does quiet work: flour absorbs moisture, stickiness drops and the dough becomes easier to shape without extra flour.

Correct the Dough Texture

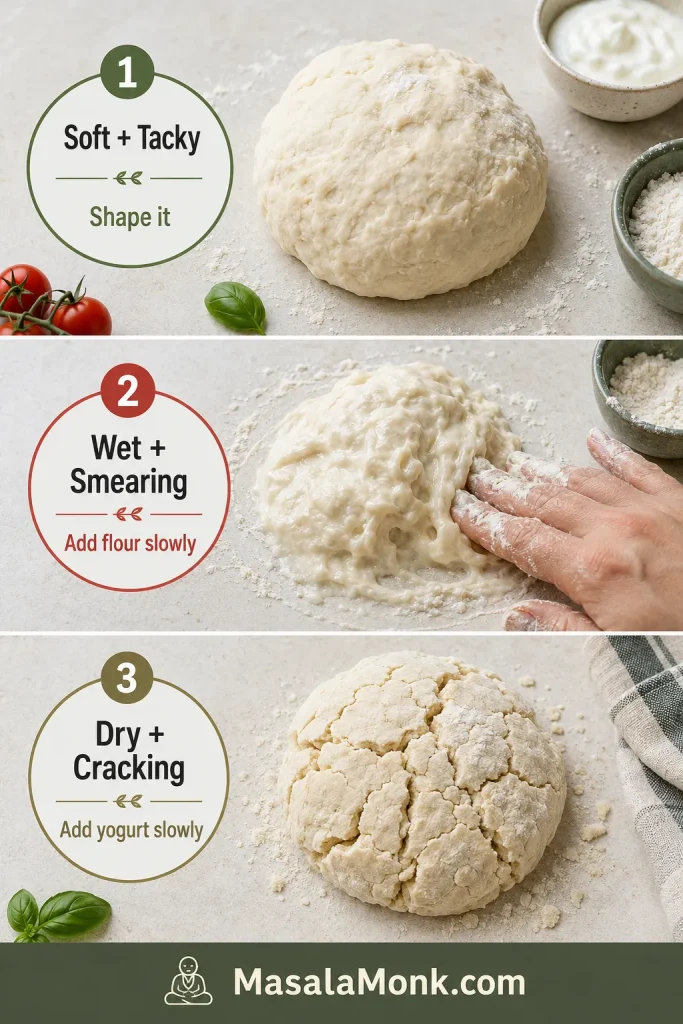
Dough conditionWhat it meansWhat to do
Soft and slightly tackyIt holds a ball and releases without leaving wet paste.Start shaping.
Wet and smearingIt spreads on the counter or heavily coats your fingers.Add flour 1 tablespoon (8–10 g) at a time.
Dry and crackingThe edges split and the dough breaks instead of bending.Add yogurt 1 teaspoon (about 5 g) at a time.
Three-panel dough texture guide showing soft tacky dough, wet smearing dough and dry cracked dough.
Target texture: soft, cohesive and lightly tacky. Add flour or yogurt only in small amounts when the dough clearly needs it.

Stop while the dough is still a little tacky. Knead only until it holds together; extra flour and extra kneading can make the crust tough.
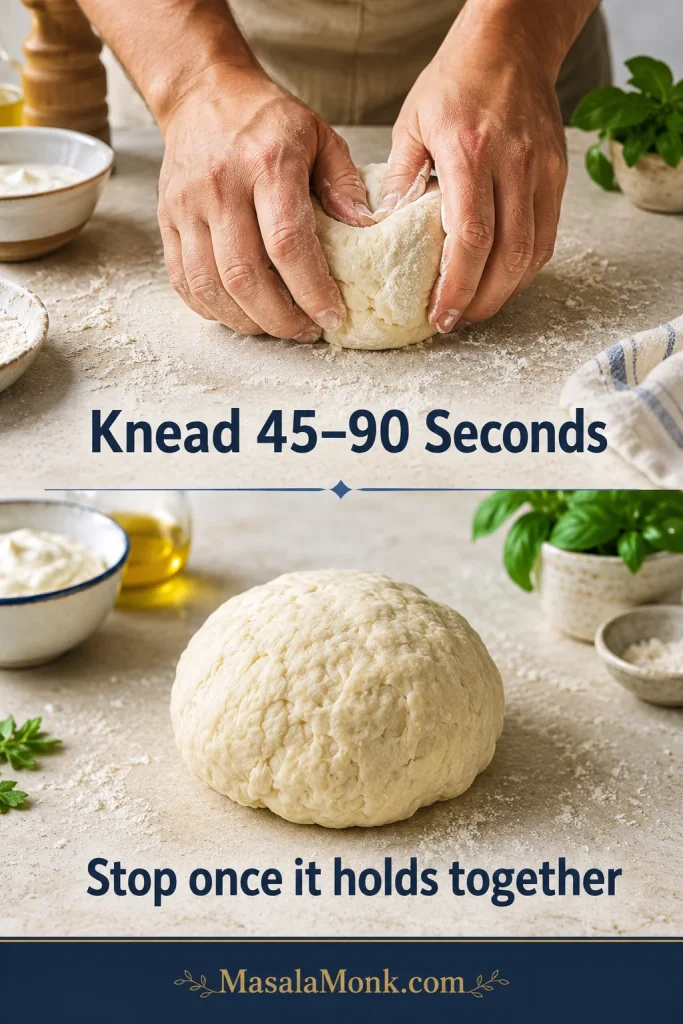
Hands kneading Greek yogurt pizza dough briefly, followed by a soft dough ball on a floured counter.
Stop when the surface looks mostly smooth but still soft, not tight, dry or floury.

Roll and Shape Without Chasing Perfection

Thickness matters more than achieving a perfect circle. An uneven homemade edge will taste better than a neat round made tough with too much flour.

  • Full batch, 11–12 inches: The most balanced crust, with a tender center and crisp edge.
  • Full batch, 9–10 inches: A softer, breadier crust that may need another minute during the first bake.
  • Half batch, 6½–7 inches: A personal pizza sized for most air-fryer baskets.
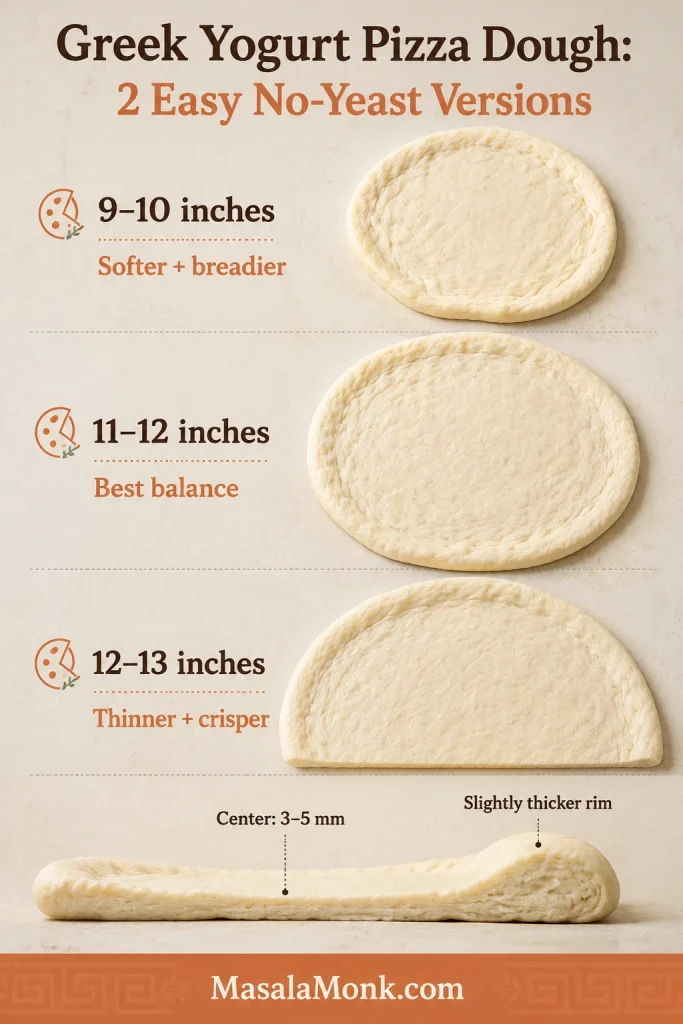
Thickness guide showing 9–10 inch, 11–12 inch and 12–13 inch Greek yogurt pizza bases.
Thickness changes the eating experience. A smaller crust stays softer, while an 11–12 inch base gives the best balance of tender middle and crisp edge.

Shape the dough on the parchment, peel or inverted tray you will use to transfer it. If the rolling pin sticks, dust it lightly or roll between two sheets of parchment. A slightly uneven circle is better than a tough, over-floured one.
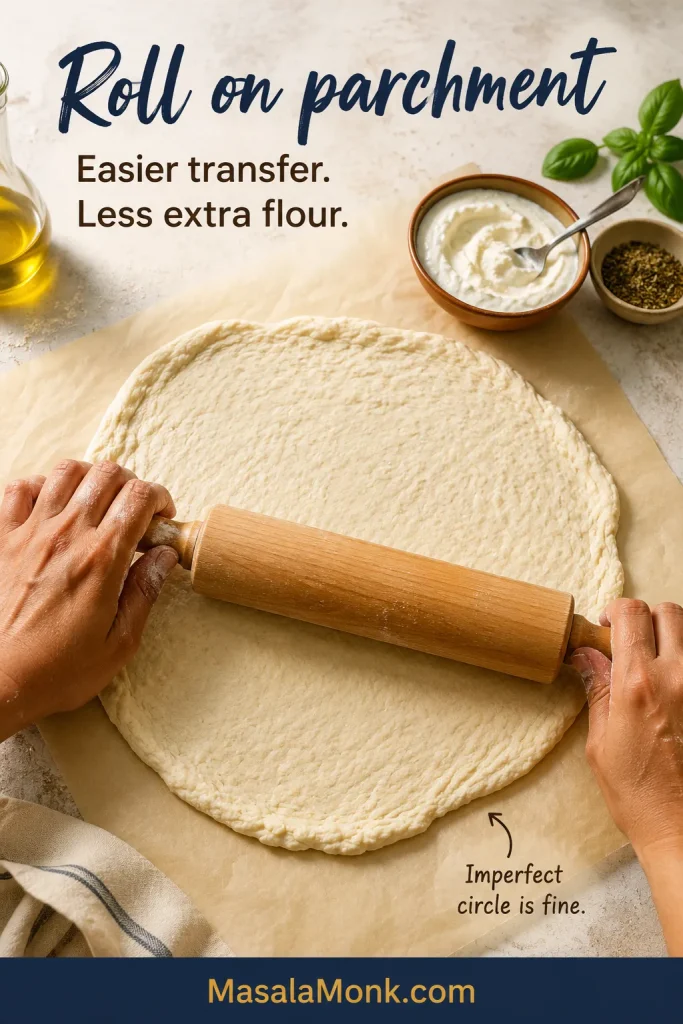
Greek yogurt pizza dough being rolled on parchment into a slightly uneven circle with a wooden rolling pin.
Parchment makes soft dough easier to move from counter to pan. A slightly uneven circle is better than a perfectly round crust that has been overworked.

Dough feels right? Move on to baking it without a gummy center.

How to Bake It Without a Gummy Center

Give the Bare Crust a Head Start

Give the bare crust five or six minutes first. That small head start keeps the sauce and cheese from sinking into a soft center. The first bake is only to set the crust, so it should still look pale.
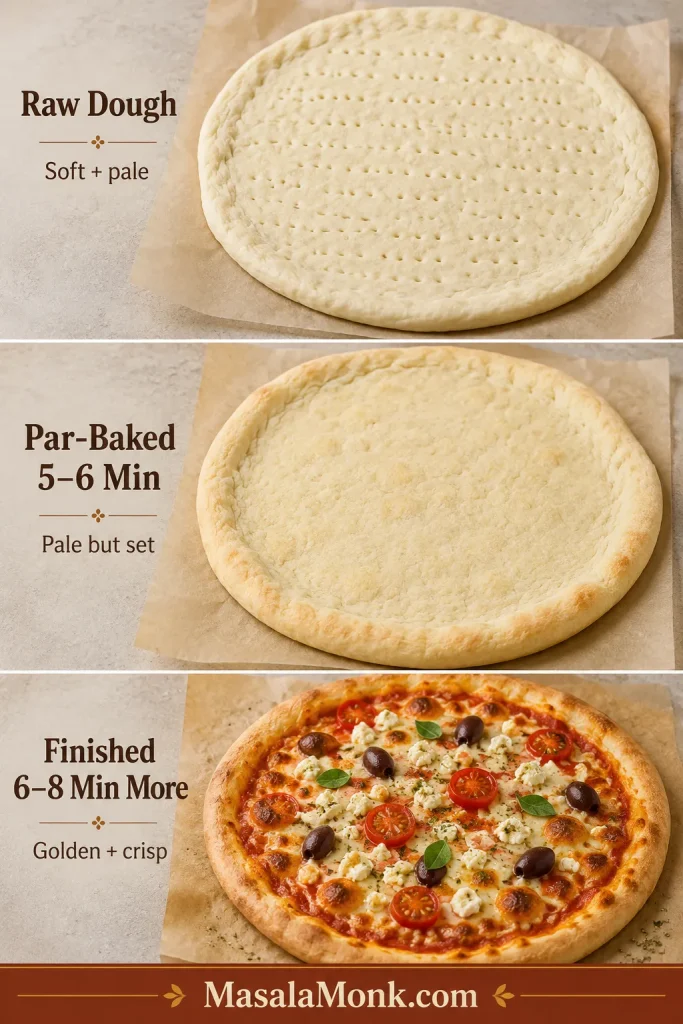
Three-stage guide showing raw Greek yogurt pizza dough, pale par-baked crust and finished baked pizza.
Par-baking is supposed to look pale, not finished. Once the crust is set, the second bake can melt the cheese without leaving the center soft.

Do you have to par-bake it? Not always. A thin crust on a fully heated stone or steel with light toppings can bake in one stage. For an 11–12-inch crust on a standard metal sheet—or whenever the toppings carry more moisture—the short first bake is the more reliable route.
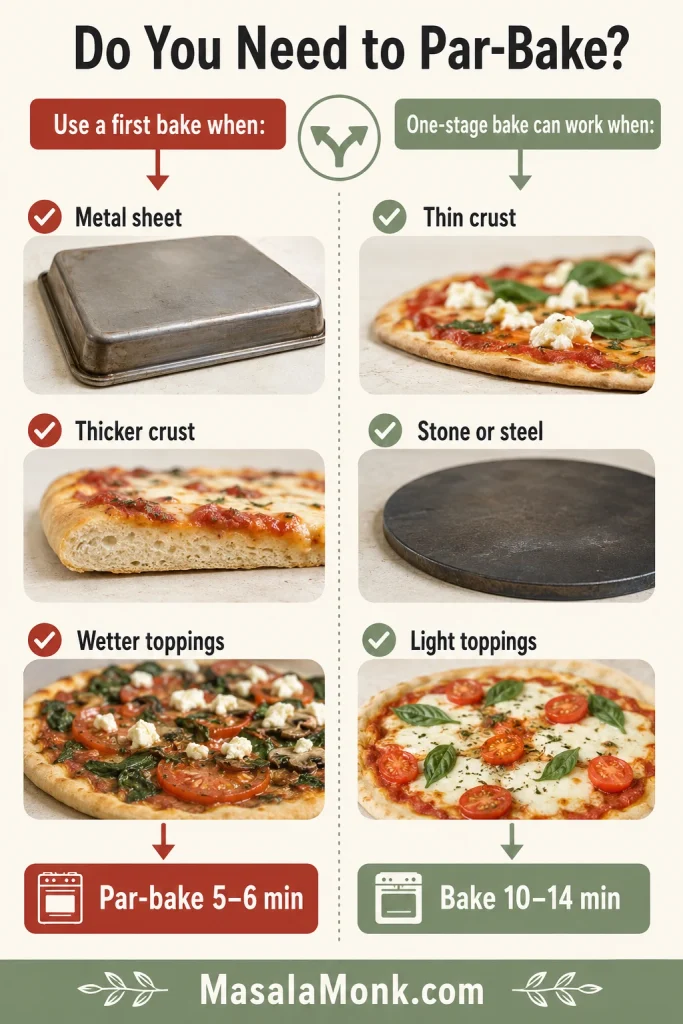
Decision guide showing when to par-bake pizza crust and when one-stage baking can work.
Par-bake for reliability when using a metal sheet, a thicker base or wetter toppings. Thin crust with light toppings can bake directly on a very hot stone or steel.

For a one-stage bake, roll the crust to 12–13 inches and bake it for about 10–14 minutes at 450°F (230°C). Use a fully heated surface, add a light layer of toppings and begin checking the base at 10 minutes.

Control Moisture on Top

Sauce should leave a thin, even coating across the dough. A crowded center traps moisture, so cook mushrooms and spinach before using them and drain fresh mozzarella on paper towels for 10–15 minutes.
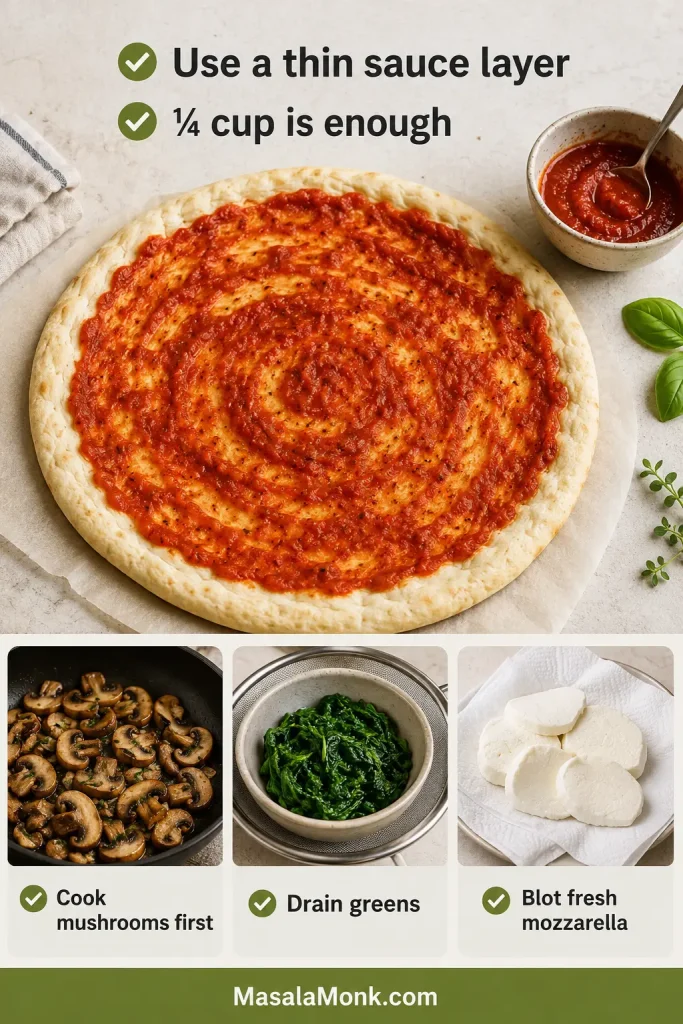
Pizza prep guide showing thin tomato sauce on crust with cooked mushrooms, drained greens and blotted mozzarella.
A restrained topping layer protects the crust. Spread sauce thinly, cook mushrooms, drain greens and blot fresh mozzarella before baking.

A thick homemade marinara sauce works better here than watery tomato purée.

Give the Bottom Real Heat

A cool tray absorbs heat from the dough and leaves the base pale. A hotter tray will do more for the crust than another handful of flour will ever do for the dough.

Turn a sturdy metal baking sheet upside down and heat it with the oven. A stone or steel needs longer to heat through fully; King Arthur Baking provides additional guidance on preparing pizza baking surfaces.
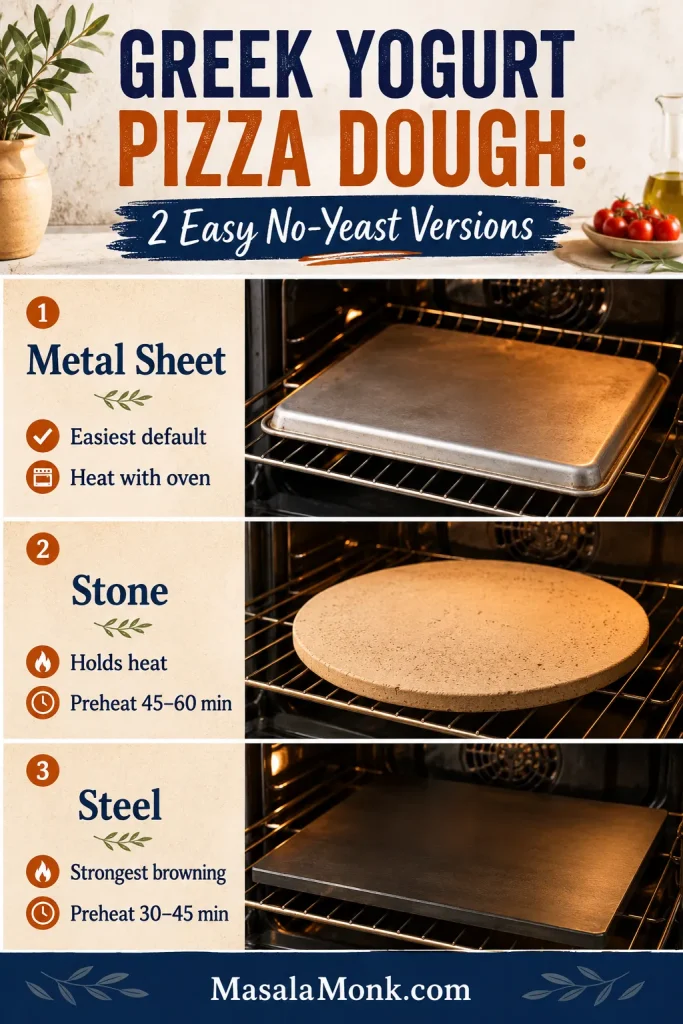
Three-panel guide comparing an inverted metal baking sheet, pizza stone and pizza steel for baking pizza crust.
The baking surface sets the bottom before moisture can make it gummy. A metal sheet is the easiest route; stone and steel need longer preheating but brown faster.

Parchment makes a soft round easier to move, but heat limits vary. Check the package, trim exposed paper and keep it away from the broiler. Once the crust has set, carefully pull away the parchment and finish directly on the hot surface.

Lift an edge before taking the pizza out. Once the base has distinct golden-brown patches and the slice holds itself, the nervous part is over.
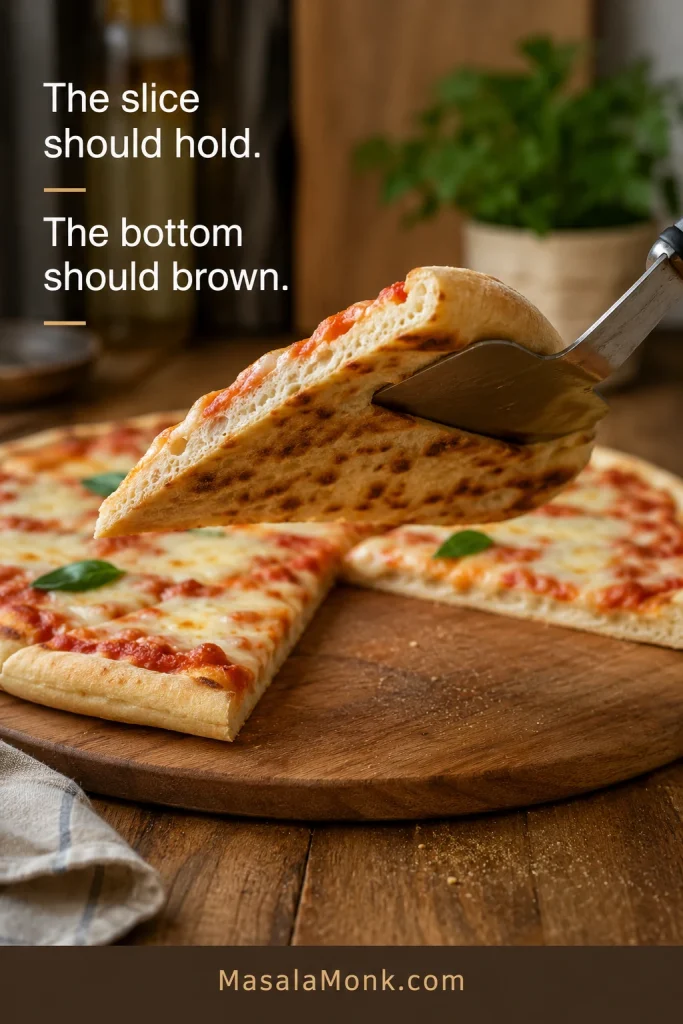
Pizza slice lifted with a spatula to show the browned bottom of a Greek yogurt pizza crust.
The underside tells you what the top cannot. If the slice holds and the base is browned, the crust has set; if it bends or looks pale, the pan needed more heat.

Toppings That Work Best on This Quick Crust

This dough can carry plenty of flavor, but the best combinations add interest without burying the center under a heavy layer. MasalaMonk’s pizza sauce guide covers red, white, pesto, buffalo and barbecue directions.

Four topping variations for Greek yogurt pizza labeled Margherita-style, Garlic Herb, White Pizza and Veggie.
Variations work best when the topping load stays light. Margherita-style, garlic herb, white pizza and veggie versions all need the same rule: flavor first, moisture under control.
  • Margherita-style: Thick marinara, low-moisture mozzarella, oregano and basil after baking.
  • Garlic herb: A thin layer of olive oil or white sauce, mozzarella, garlic, oregano and a little Parmesan.
  • White pizza: Use a restrained layer of ricotta or white sauce with low-moisture mozzarella and keep the center light.
  • Vegetable: Cooked mushrooms, peppers, onion and well-drained spinach.
  • Extra protein: Cooked chicken, turkey pepperoni, tofu or firm paneer with peppers and onion. MasalaMonk’s homemade paneer method produces cubes that stay tender under the cheese.
  • Pesto or buffalo: Use a thin layer and avoid heavy wet toppings in the center.

Air Fryer Greek Yogurt Pizza

The oven gives the most even result, but half the dough makes a good personal pizza in an air fryer. Keep it small enough to check underneath before adding toppings.

  • Half the dough batch
  • 2–3 tablespoons thick pizza sauce
  • 40–50 g (1.4–1.8 oz) low-moisture mozzarella
  • A small handful of cooked or well-drained toppings
  1. Preheat the air fryer to 375°F (190°C) when your model recommends preheating.
  2. Roll the dough into a 6½–7-inch circle, or slightly smaller than the basket, and dock the center lightly with a fork.
  3. Transfer it to the basket, using suitable perforated parchment when needed.
  4. Air fry the bare crust for 6–8 minutes, until the surface looks dry and set.
  5. Check underneath. If the base is still pale, flip the crust and cook for another 1–2 minutes.
  6. Turn it upright, add the toppings and cook for another 5–7 minutes.
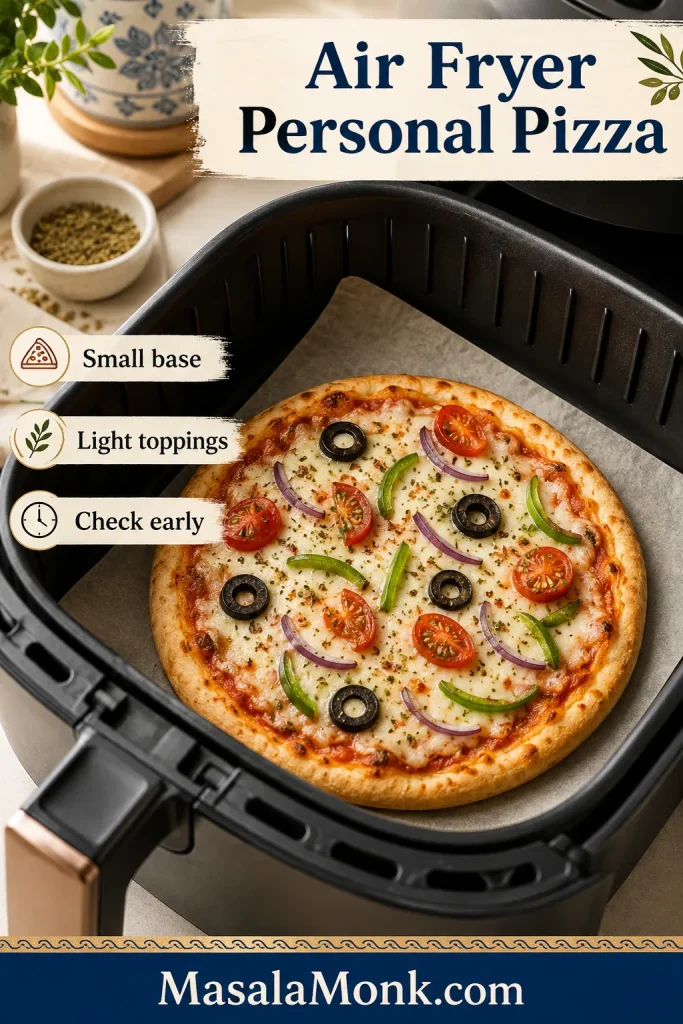
Small Greek yogurt personal pizza in an air fryer basket with parchment underneath and light toppings.
Air fryer pizza works best in personal size. Because the basket is small and heat moves fast, keep the base thin, toppings light and check early.

The first air fryer pizza is partly a conversation with your machine. Some baskets brown underneath quickly, while others need the flip. The center should feel set and the base should show visible color before it comes out.

Never preheat loose parchment by itself. It can lift toward the heating element unless the dough is holding it down.

Greek Yogurt Pizza Dough Troubleshooting

Most batches need no rescue. When something does go wrong, the problem usually traces back to hydration, thickness, bottom heat or topping moisture. The visual below groups those causes before the table gets specific.
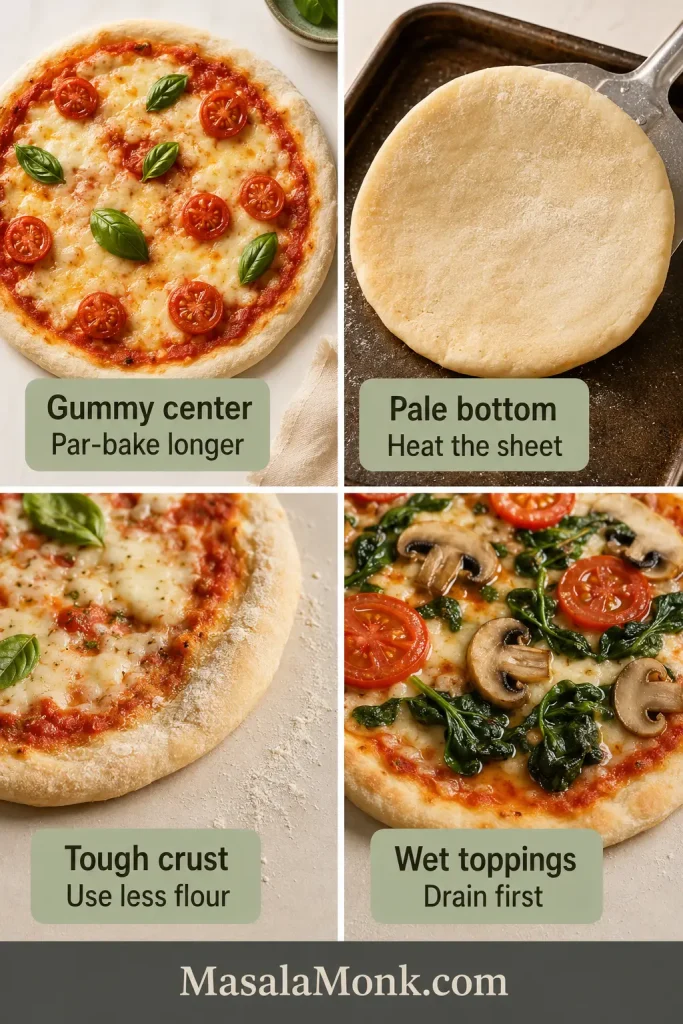
Four-panel troubleshooting guide showing gummy center, pale bottom, tough crust and wet toppings on pizza.
Most crust problems trace back to four causes: hydration, thickness, bottom heat or topping moisture. Fix the cause and the next pizza improves fast.
ProblemLikely cause and fix
The dough is extremely stickyThe yogurt may be loose or too much was added. Rest the dough, then work in extra flour a spoonful at a time.
The dough is dry and crackingThere is too much flour or the yogurt is exceptionally thick. Work in yogurt 1 teaspoon at a time.
The dough tears while rollingIt may be too dry or too tight. Cover it and leave it for 5–10 minutes before rolling again.
The dough springs backThis happens more often with bread flour. Let the dough relax before widening it again.
The crust is toughToo much flour or kneading is the usual cause. Stop while the dough remains slightly tacky.
The center is gummyThe crust is too thick or carrying too much moisture. Roll it wider, drain wet toppings and give the bare crust a head start.
The bottom is paleThe baking surface needs more heat. Preheat it longer and remove the parchment near the end when possible.
The edge browns before the center cooksRoll the center thinner or extend the first bake. Cover a dark rim loosely with foil while the middle finishes.
The dough barely risesThe baking powder may be old. Replace it and bake the dough soon after mixing.
The air fryer bottom stays rawYour machine heats more strongly from above. Flip the crust during the first cooking stage.

Ready to bake again? Return to the recipe card, or see storage and reheating.

Storage, Freezing and Reheating

Best Make-Ahead Route

This dough is best shaped and baked soon after mixing. If you need a short pause while the oven heats or toppings are prepared, keep the dough covered so it does not dry out. For true make-ahead prep, par-bake the crust, cool it completely and then refrigerate or freeze that base.
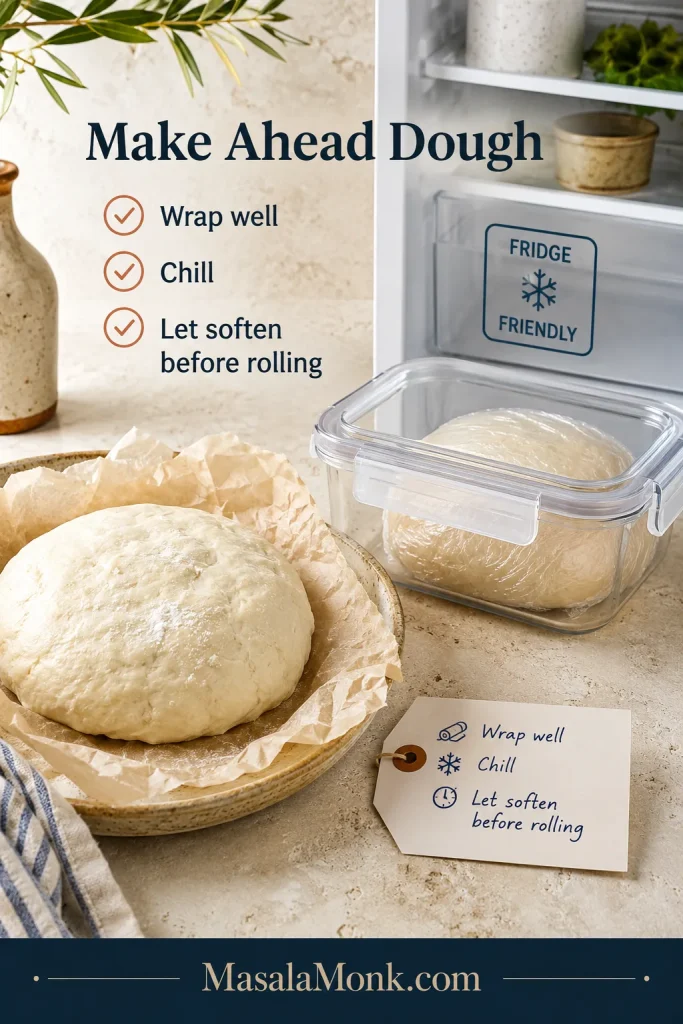
Covered Greek yogurt pizza dough and storage notes beside a refrigerator, showing short holding before the more reliable par-baked crust method.
Cover raw dough only for a short pause. For true make-ahead pizza, par-bake the base, cool it completely and store that instead.

Refrigerate leftover pizza within two hours and keep it in an airtight container for 3–4 days. Separate stacked slices with parchment so the cheese does not stick. These timings follow the FoodSafety.gov cold-food storage chart.

How to Reheat It

Leftover Greek yogurt pizza slice lifted from a skillet with a spatula to show a crisp reheated base.
Dry heat brings back the crisp base. Use a skillet or hot oven for the best texture; the microwave is fastest but softer.
  • Air fryer: 350°F (175°C) for 3–5 minutes
  • Oven: 375°F (190°C) for 6–10 minutes
  • Skillet: Warm over medium-low heat, then cover briefly to melt the cheese
  • Microwave: Fast, but the crust will be softer

Store or Freeze the Par-Baked Crust
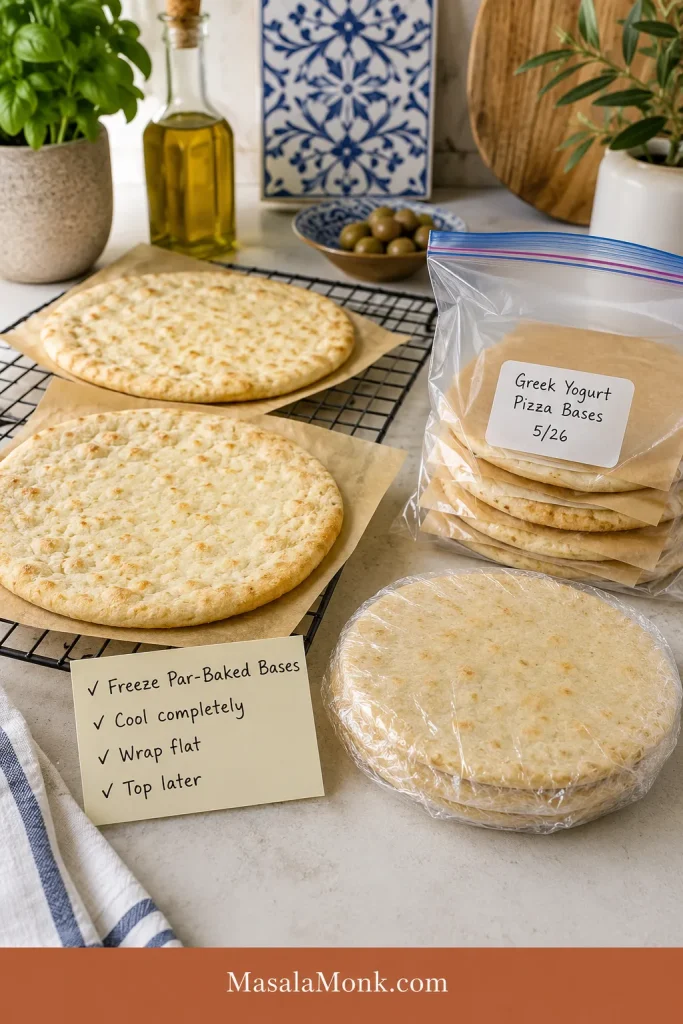
Par-baked Greek yogurt pizza bases cooling on a rack and stacked with parchment in a freezer bag.
Par-baked bases freeze better than raw flattened dough. Cool them completely, separate with parchment and wrap flat so they are ready to top later.

For shorter storage, cool the par-baked crust completely, wrap it well and refrigerate it for up to two days.

For longer storage, freeze the cooled crust flat. Once firm, wrap it well and keep it frozen for up to two months for the best texture. Add toppings while the crust is frozen or partly thawed, then finish at 450°F (230°C), checking from about 10 minutes.

For freezer mini pizzas, divide the dough into four rounds, par-bake and cool them, then add sauce and cheese before freezing flat. Raw dough is less dependable because the baking powder begins reacting as soon as the yogurt is mixed in.

Frequently Asked Questions

Does the finished crust taste like yogurt?

Only faintly. The plain crust has a mild tang, but sauce, cheese and toppings quickly move that flavor into the background.

Do I have to par-bake Greek yogurt pizza dough?

Not always. A thin crust on a fully heated stone or steel with light toppings can bake in one stage. On a standard metal sheet—or with a thicker crust or wetter toppings—the short first bake gives the center a more reliable structure.

What can I use instead of self-rising flour?

Use the all-purpose version with baking powder and salt. There is no need to prepare a separate homemade self-rising-flour mixture.

Does regular yogurt work?

Regular yogurt is usually looser than Greek yogurt. Drain it until thick, add it gradually and expect to use less.

Will nonfat Greek yogurt make the crust dry?

It can make the edge firmer, but it still works. The optional teaspoon of olive oil helps keep the crust tender.

How far ahead can I prepare the crust?

Cool the par-baked crust completely, then refrigerate it for up to two days or freeze it for up to two months.


The bowl may look messy, the first bake may look pale and the final circle may never resemble a pizzeria’s. None of that matters once the bottom is crisp, the cheese is bubbling and a homemade pizza is on the table while the craving still matters.

When the first slice lifts cleanly and the browned edge gives under the cutter, the rough bowl of yogurt and flour finally feels like pizza.

Which version did you make, and what topping did you reach for when the craving hit?
Posted on 24 Comments

Greek Tzatziki Sauce Recipe (1 Master Sauce + 10 Easy Variations)

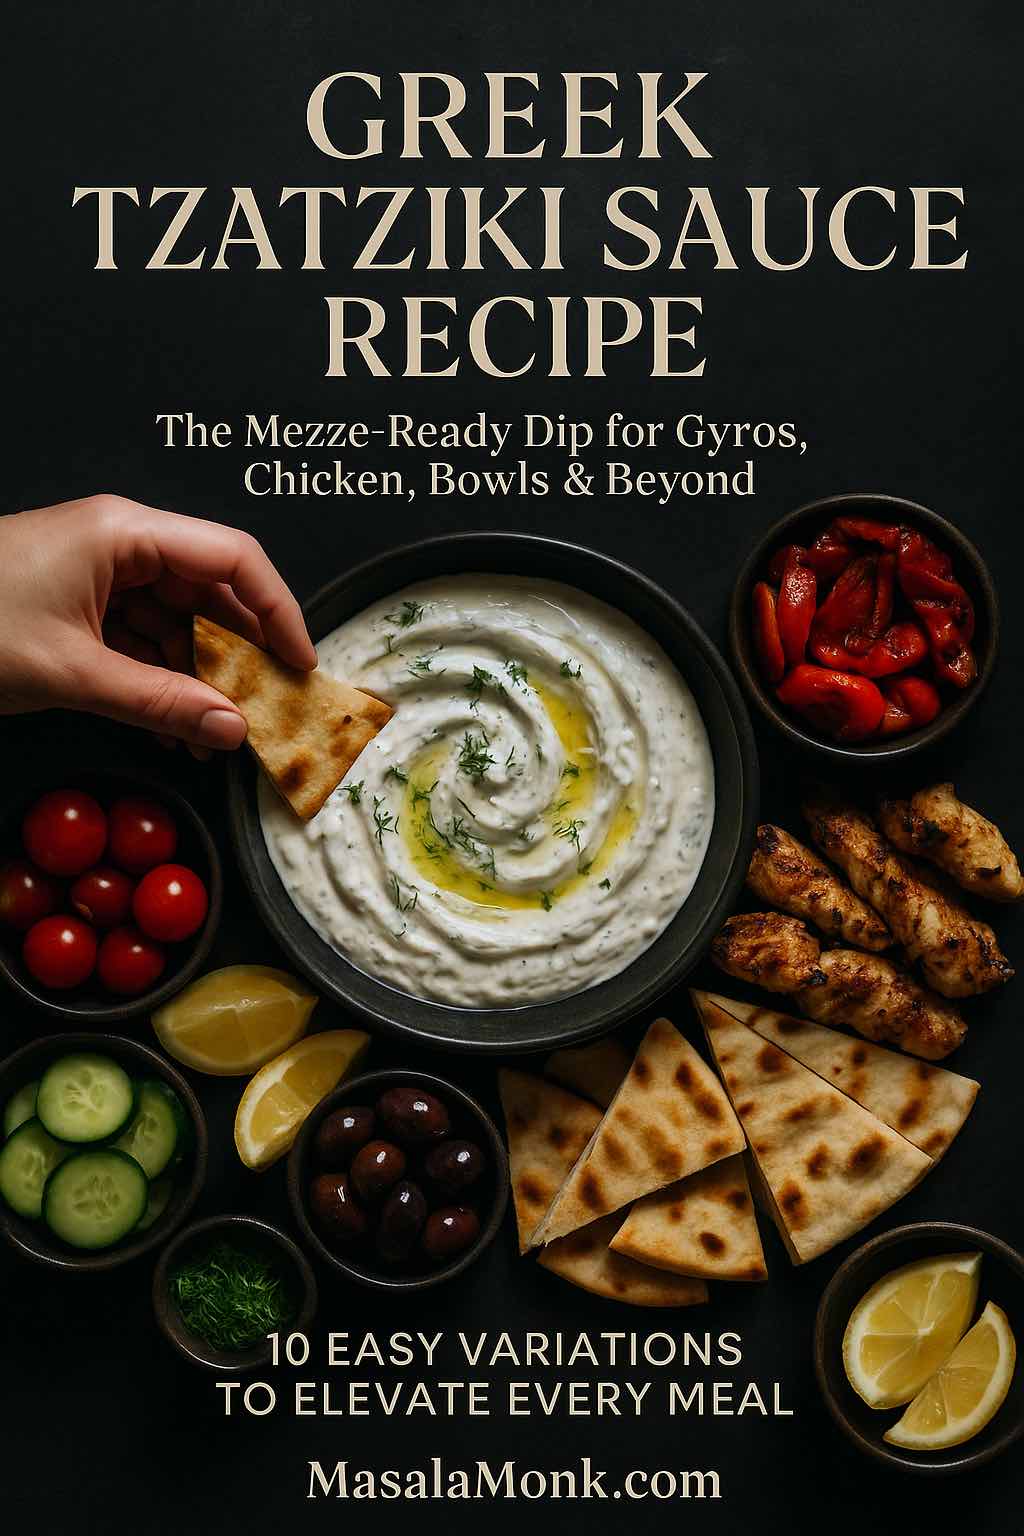
Greek tzatziki sauce recipe served in a black bowl at the center of a mezze platter, with a hand dipping warm pita into the creamy yogurt and cucumber dip surrounded by grilled chicken, olives, tomatoes, cucumber and lemon wedges.

There are recipes you make once, and then there are recipes that quietly move into your weekly rhythm. A good Greek tzatziki sauce recipe almost always falls into the second category. It’s cool and creamy, yet bright and garlicky; simple to stir together, but endlessly useful. One bowl can turn raw vegetables into a snack, plain chicken into dinner, or a random collection of leftovers into a mezze-style feast.

In this long guide, you’ll walk through:

  • What tzatziki actually is (and what makes it “Greek”)
  • A master Greek tzatziki sauce recipe you can rely on
  • Ingredient notes so your sauce tastes restaurant-good, not just “fine”
  • Ten easy variations built off that master bowl
  • Ideas for turning tzatziki into full meals, from mezze boards to brunch
  • Practical notes on storage and making it fit a Mediterranean-style way of eating

All of it is meant to be cooked and eaten, not just admired on a screen.


What Is Tzatziki?

Tzatziki is a chilled yogurt and cucumber sauce that shows up all over Greek and Eastern Mediterranean tables. Read more about it on Wikipedia. At its core, it’s simply:

  • Thick strained yogurt
  • Grated cucumber
  • Garlic
  • Olive oil
  • A little acid (lemon or vinegar)
  • Herbs like dill or mint
  • Salt and pepper

Most traditional versions of a Greek tzatziki sauce recipe follow the same pattern. You grate the cucumber, salt it and squeeze out the water; stir it into thick yogurt with garlic, olive oil and herbs; and let everything chill so the flavors settle and mellow. This basic method pops up again and again in classic Greek and Mediterranean recipes.

Although every family and restaurant has its own tweaks—some go heavy on mint, others prefer all dill, and some include a splash of red wine vinegar instead of lemon—the balance is always the same: refreshing, tangy, garlicky and creamy without being heavy.

At the same time, tzatziki sits naturally inside a broader Mediterranean way of eating. That style emphasizes vegetables, legumes, whole grains, nuts, olive oil and modest amounts of animal protein, with fermented dairy like yogurt appearing in small but regular amounts. Large reviews and long-term studies link this overall pattern with better heart health, improved blood sugar control and even longer life.

So when you stir together a bowl of tzatziki, you’re not just making “a dip for pita.” You’re putting together a flexible, lighter-feeling sauce that pairs effortlessly with vegetables, grains and lean proteins—exactly the kind of food many people are trying to eat more of anyway.

Also Read: How to Make Churros (Authentic + Easy Recipe)


Ingredients for the Master Greek Tzatziki Sauce Recipe

Before you start grating and whisking, it helps to spend a moment on the ingredients themselves. The list is short, so each piece matters.

Greek Yogurt

A true Greek tzatziki sauce recipe needs thick, strained yogurt. That’s where Greek yogurt comes in. Because it’s been strained to remove much of the whey, Greek yogurt is denser and naturally higher in protein than regular yogurt. Nutrition guides repeatedly point out that this straining concentrates protein, calcium and probiotics into each spoonful.

A few practical notes:

  • Choose plain, unsweetened Greek yogurt. Any sweetness will clash with the garlic and cucumber.
  • Full-fat gives the most luxurious texture, but 2% still works beautifully and feels a bit lighter.
  • If you can’t find Greek yogurt, you can strain regular yogurt in a cheesecloth-lined strainer for a couple of hours in the fridge.

If Greek yogurt is already part of your routine—maybe in breakfasts like high protein overnight oats—tzatziki is simply another way to make the same staple pull double duty.

Cucumber

Cucumber brings that signature freshness and bite. You can use:

  • English (seedless) cucumbers, which have thin skins and fewer seeds
  • Or regular cucumbers, peeled if the skin is thick or waxed

What matters more than the variety is how you treat it. Grating releases water, and unless you squeeze that water out, your Greek tzatziki sauce recipe will start thick and end up runny. Salting and squeezing the cucumber is the small step that turns “good enough” tzatziki into the kind you keep going back to.

Garlic

Fresh garlic is non-negotiable. It’s what stops tzatziki from tasting like plain cucumber yogurt. Mince it very finely, or grate it on a microplane so there are no sharp bits. Raw garlic is strong—especially as it sits in the fridge and infuses the yogurt—so starting with a little less than you think you need is usually wise. You can always add more next time.

Olive Oil

Extra-virgin olive oil adds depth, body and that lovely sheen on top of the finished sauce. It also reminds your palate that you’re in Mediterranean territory. A couple of tablespoons are enough; you want richness, not an oil slick.

Lemon Juice or Vinegar

Acid lifts the flavor. Lemon juice is the most common choice, though wine vinegar or even a mild apple cider vinegar can be used. Add it gradually and taste as you go. You’re looking for bright and tangy, not sour.

Herbs: Dill and Mint

Fresh dill is the classic herb in a Greek tzatziki sauce recipe, although many cooks add mint or swap it in completely. Dill reads as savory and grassy; mint adds a cool, almost sweet edge. Either works. You can even use a mix, especially if you’re serving the sauce with grilled lamb, chicken or eggplant.

Salt and Pepper

Salt is what knits all these pieces together. It seasons the yogurt, pulls moisture from the cucumber and softens the sharp edges of the garlic. Freshly ground black pepper isn’t mandatory, but a small pinch adds a gentle warmth.

Also Read: Béchamel Sauce for Lasagna: Classic, Vegan & Ricotta Sauce Recipe


Master Greek Tzatziki Sauce Recipe (Step by Step)

This is the anchor recipe you can make with your eyes closed once you’ve done it a few times. Every variation later on will start from this bowl.

Ingredients (Makes About 1½ Cups)

  • 1 cup full-fat plain Greek yogurt
  • ½ large cucumber (or 1 small), coarsely grated
  • 2–3 cloves garlic, very finely minced or grated
  • 2 tbsp extra virgin olive oil
  • 1–2 tbsp fresh lemon juice, to taste
  • 2 tbsp finely chopped fresh dill (or 1 tbsp dill + 1 tbsp mint)
  • ½ tsp fine sea salt, plus more to taste
  • A pinch of freshly ground black pepper
  • 1–2 tbsp cold water or reserved cucumber juice, if needed
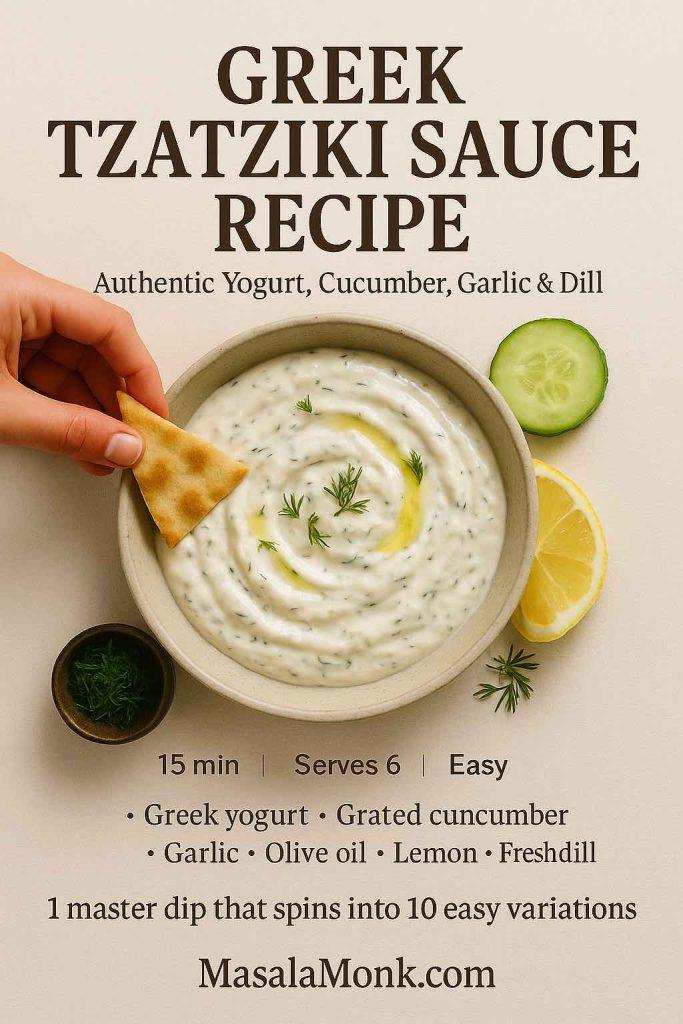
Recipe card showing a bowl of authentic Greek tzatziki sauce made with Greek yogurt, grated cucumber, garlic, olive oil, lemon and dill, with a hand dipping warm pita into the creamy dip on a beige background.
Authentic Greek tzatziki sauce recipe in one glance – thick Greek yogurt, grated cucumber, garlic, lemon, olive oil and fresh dill, ready in 15 minutes and perfect as the master dip for all ten variations.

Step 1: Grate and Salt the Cucumber

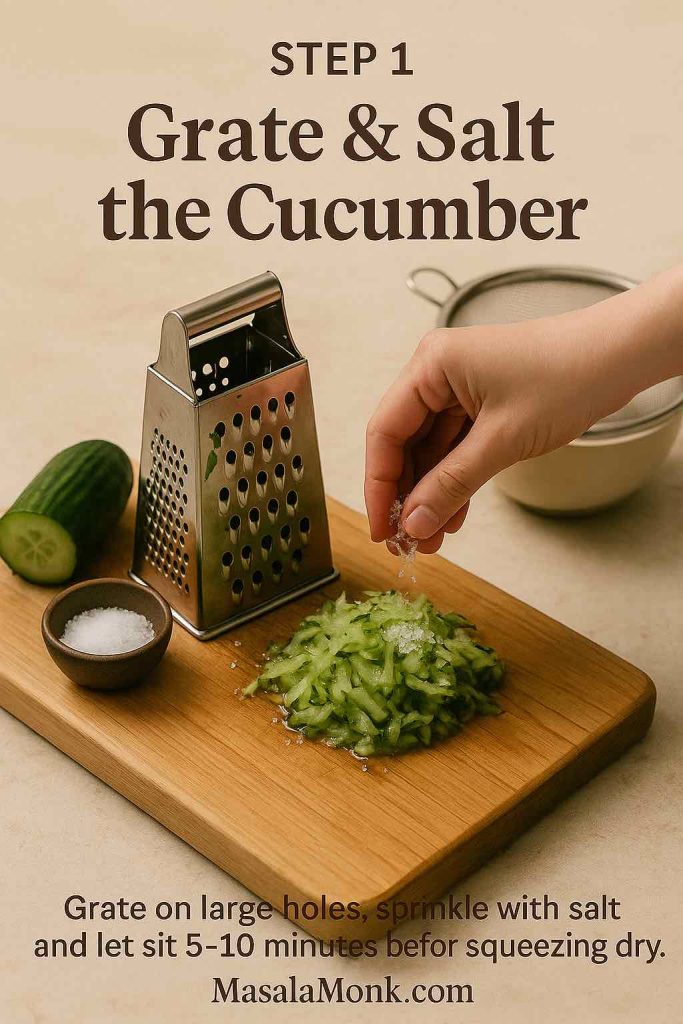
Start by grating the cucumber on the large holes of a box grater. If you’re using a thick-skinned or waxed cucumber, peel it first; otherwise, leave the skin on for extra color and nutrients.

Once it’s grated:

  1. Toss the cucumber with a pinch of salt.
  2. Place it in a fine-mesh strainer over a bowl.
  3. Let it sit for 5–10 minutes, then squeeze it firmly with your hands or a clean towel until it feels quite dry.

It’s tempting to rush this step, but taking an extra minute here pays off later. Think of how well-drained spinach makes a better spinach dip; cucumber behaves the same way.

Step 1 of a Greek tzatziki sauce recipe showing a hand grating cucumber on a box grater and sprinkling salt over a pile of grated cucumber on a board with a fine-mesh strainer ready for draining.
Step 1 – Grate and salt the cucumber: use the large holes of a box grater, sprinkle the shreds with salt and let them sit before squeezing out the excess water so your Greek tzatziki sauce stays thick and creamy instead of watery.

Step 2: Build the Yogurt Base

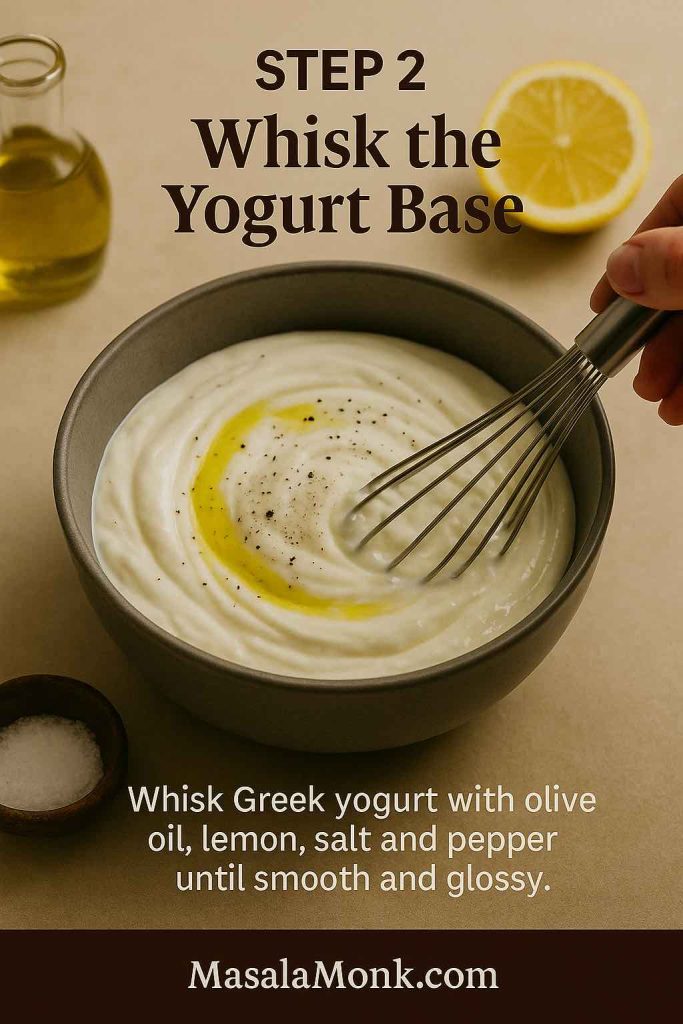
In a medium bowl, whisk together:

  • The Greek yogurt
  • Olive oil
  • 1 tablespoon of lemon juice
  • The ½ teaspoon of salt
  • A pinch of black pepper

Whisk until the mixture is smooth and glossy. The olive oil will loosen the yogurt slightly and give it a silky finish.

Step 2 of a Greek tzatziki sauce recipe showing a hand whisking Greek yogurt with olive oil, lemon juice, salt and pepper in a gray bowl, with a lemon half, olive oil bottle and salt dish in the background.
Step 2 – Whisk the yogurt base: combine Greek yogurt with olive oil, lemon juice, salt and pepper and whisk until the mixture looks smooth, glossy and ready for cucumber, garlic and fresh herbs.

Step 3: Add Garlic, Cucumber and Herbs

Fold in:

  • The squeezed, grated cucumber
  • Minced or grated garlic
  • Chopped dill (and mint, if using)

Stir gently until everything is evenly distributed. At this point, your Greek tzatziki sauce recipe will already smell garlicky and fresh.

Taste a small spoonful and start adjusting:

  • Add more lemon juice for brightness
  • Sprinkle in a little extra salt if the flavors feel muted
  • Stir in another spoonful of dill if you want it more herb-forward

Raw garlic becomes more pronounced as it sits, so what tastes subtle now may taste just right after chilling.

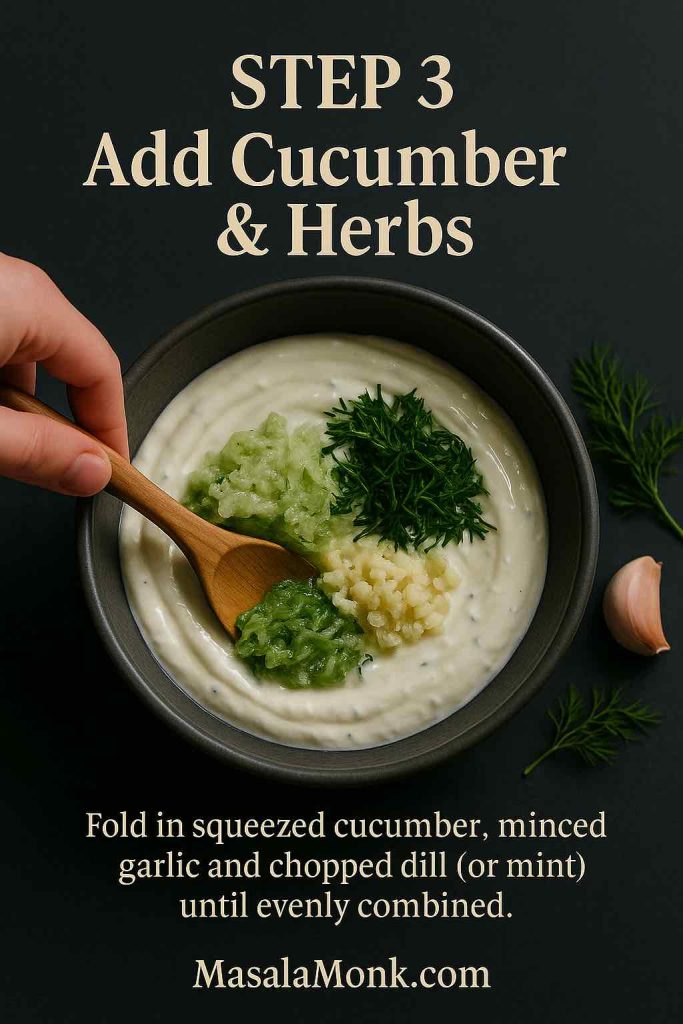
Step 3 of a Greek tzatziki sauce recipe showing a hand using a spatula to fold squeezed grated cucumber, minced garlic and chopped dill into a bowl of smooth Greek yogurt.
Step 3 – Add cucumber and herbs: fold the squeezed grated cucumber, minced garlic and fresh dill (or mint) into the creamy yogurt base until everything is evenly combined and the tzatziki looks speckled with green.

Step 4: Adjust the Thickness

Decide how you plan to use the sauce:

  • For dipping and gyros, keep it thick.
  • For drizzling over salads or bowls, add 1–2 tablespoons of cold water (or a little of the salty cucumber juice you squeezed out earlier) and whisk again until it flows smoothly.

The beauty of this Greek tzatziki sauce recipe is that you can shift the texture without changing the flavor.

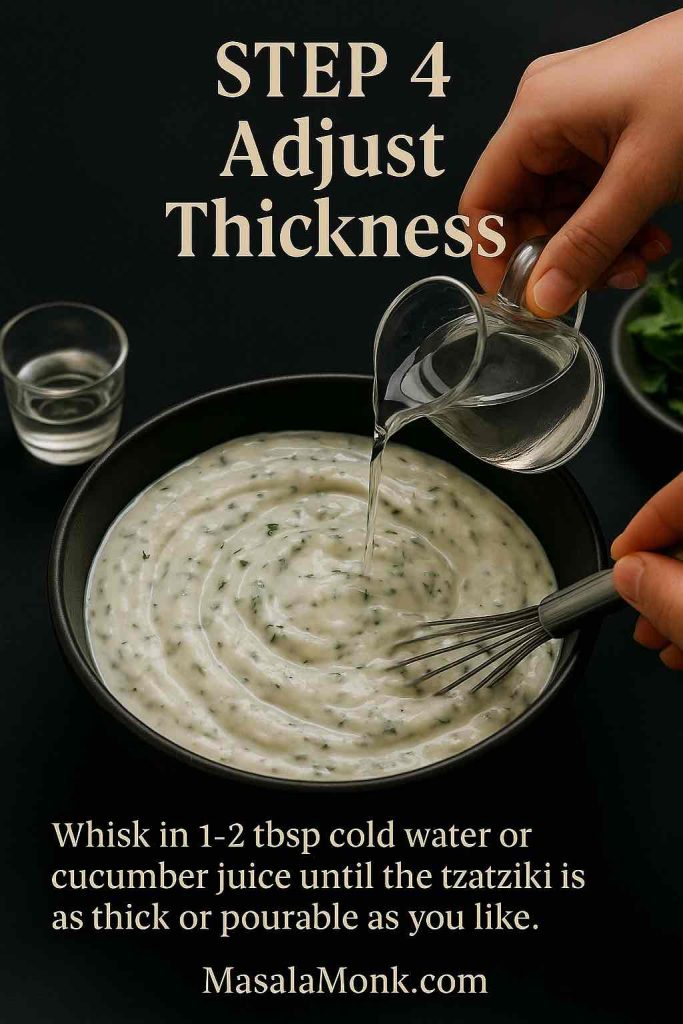
Step 4 of a Greek tzatziki sauce recipe showing a hand pouring a small stream of water or cucumber juice from a jug into a bowl of thick tzatziki while another hand stirs, adjusting the sauce to the desired consistency.
Step 4 – Adjust the thickness: whisk in a spoon or two of cold water or reserved cucumber juice until your Greek tzatziki sauce is as thick for dipping or as pourable for drizzling as you like.

Step 5: Chill

Cover the bowl and refrigerate for at least 30 minutes, and ideally for 1–2 hours. During this time, the garlic softens, the herbs perfume the yogurt and the cucumber flavor moves from individual bits into the whole sauce.

Tzatziki eaten immediately is good; tzatziki that has rested a bit is noticeably better.

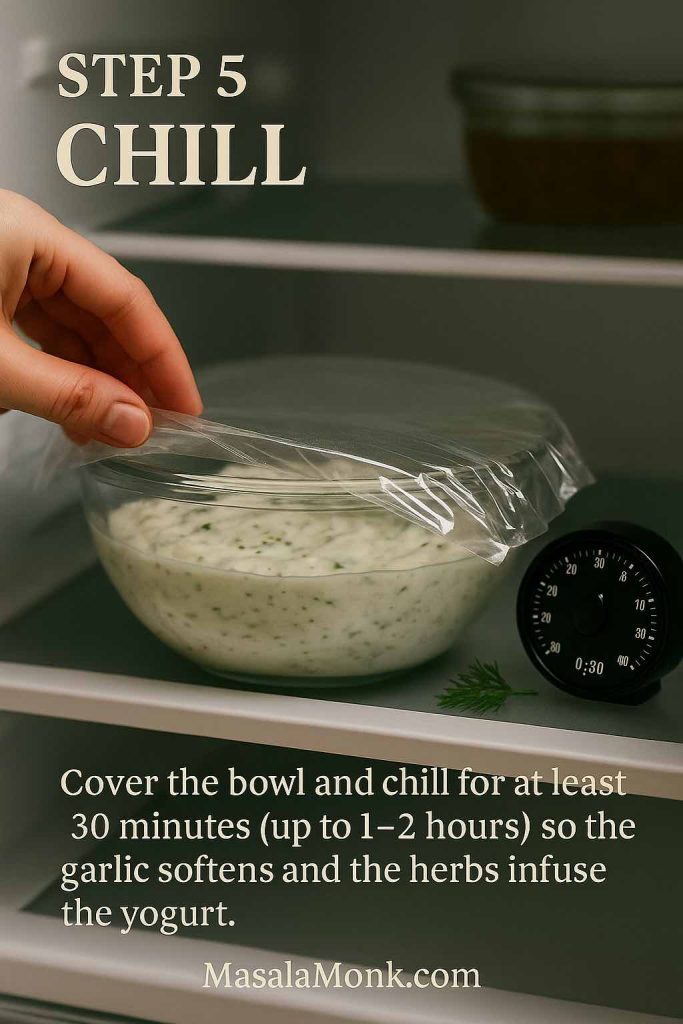
Step 5 of a Greek tzatziki sauce recipe showing a hand covering a glass bowl of tzatziki with plastic wrap on a refrigerator shelf, next to a kitchen timer set to 30 minutes.
Step 5 – Chill: cover the bowl and refrigerate the tzatziki for at least 30 minutes (up to 1–2 hours) so the garlic softens, the herbs perfume the yogurt and the cucumber flavor spreads through the whole sauce.

Step 6: Serve

Just before serving:

  • Spoon the tzatziki into a shallow bowl.
  • Swirl the surface with the back of a spoon.
  • Drizzle a little extra olive oil on top.
  • Scatter a pinch of chopped dill or a few tiny mint leaves over everything.
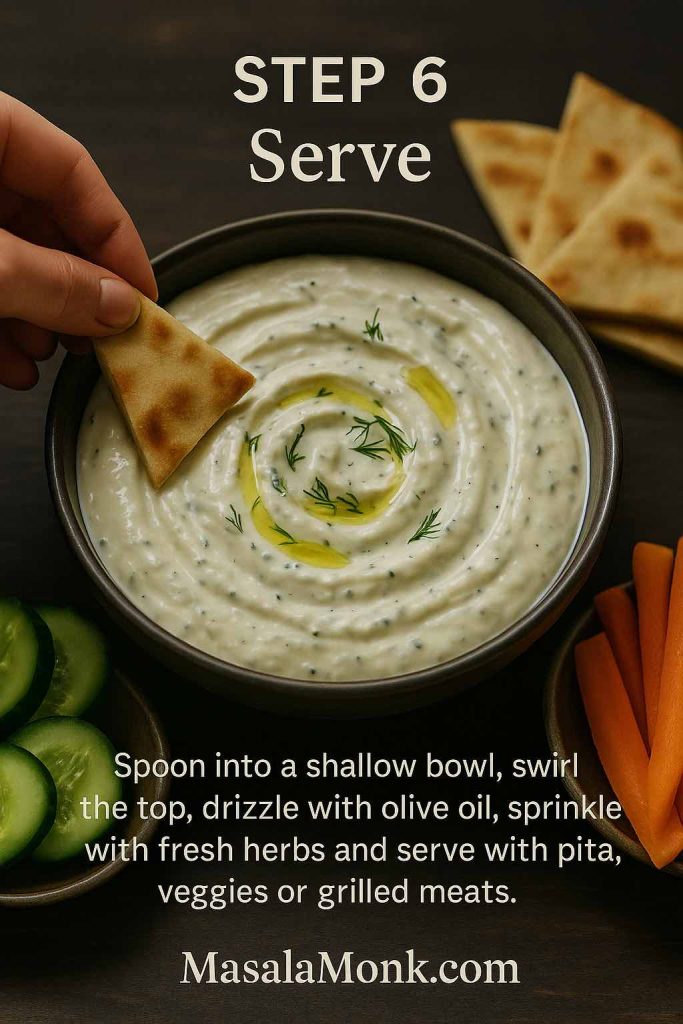
Step 6 of a Greek tzatziki sauce recipe showing a shallow bowl of creamy tzatziki swirled and drizzled with olive oil, garnished with fresh dill, with a hand dipping a pita wedge into the sauce and cucumber slices and carrot sticks arranged around the bowl.
Step 6 – Serve: spoon the chilled tzatziki into a shallow bowl, swirl the top, drizzle with olive oil, scatter fresh dill or mint and bring it to the table with warm pita, crunchy vegetables or grilled meats.

Now it’s ready to set down next to warm pita, grilled meats, roasted vegetables or simply a plate of sliced cucumber and carrots.

Also Read: Tres Leches – Mexican 3 Milk Cake Recipe


Why This Greek Tzatziki Sauce Recipe Fits a Mediterranean Way of Eating

Beyond taste, tzatziki has a few qualities that make it particularly useful if you’re leaning toward more Mediterranean-style meals.

First, Greek yogurt itself is a nutrient-dense ingredient. Because it’s strained, it usually carries more protein and less lactose than regular yogurt, all while keeping a good amount of calcium and live cultures. Many health-focused articles note that this combination supports satiety, bone health and gut health, especially when yogurt is eaten regularly as part of an overall balanced diet.

Second, the rest of the ingredients are simple and whole: cucumber, garlic, olive oil, herbs and lemon. These match up perfectly with the foods emphasized in Mediterranean-style patterns—lots of vegetables, herbs, quality fats and minimal processing. Long-term research has repeatedly associated those patterns with lower risk of heart disease, stroke and type 2 diabetes.

Finally, tzatziki is intense in flavor, so you only need a modest amount to make simple food appealing. A spoonful or two over a plate of grilled vegetables and lentils can be the difference between “virtuous but dull” and “I’d happily eat this again tomorrow.”

If you’re already building meals from other Mediterranean-leaning ideas—such as quinoa-based meal prep bowls or big, colorful salads inspired by a deep dive into daily salad habits—tzatziki slides right into that rhythm.


Ten Greek Tzatziki Sauce Recipes from One Master Bowl

Once you’re comfortable making the master version, small changes create a whole family of variations. You don’t need totally new recipes; you need a handful of smart tweaks.

Below are ten ways to adapt this Greek tzatziki sauce recipe, along with ideas on where each one shines.

1. Everyday Five-Minute Tzatziki

Some nights, the idea of salting, draining and squeezing cucumber is enough to send you toward bottled dressing. For those moments, a streamlined version helps.

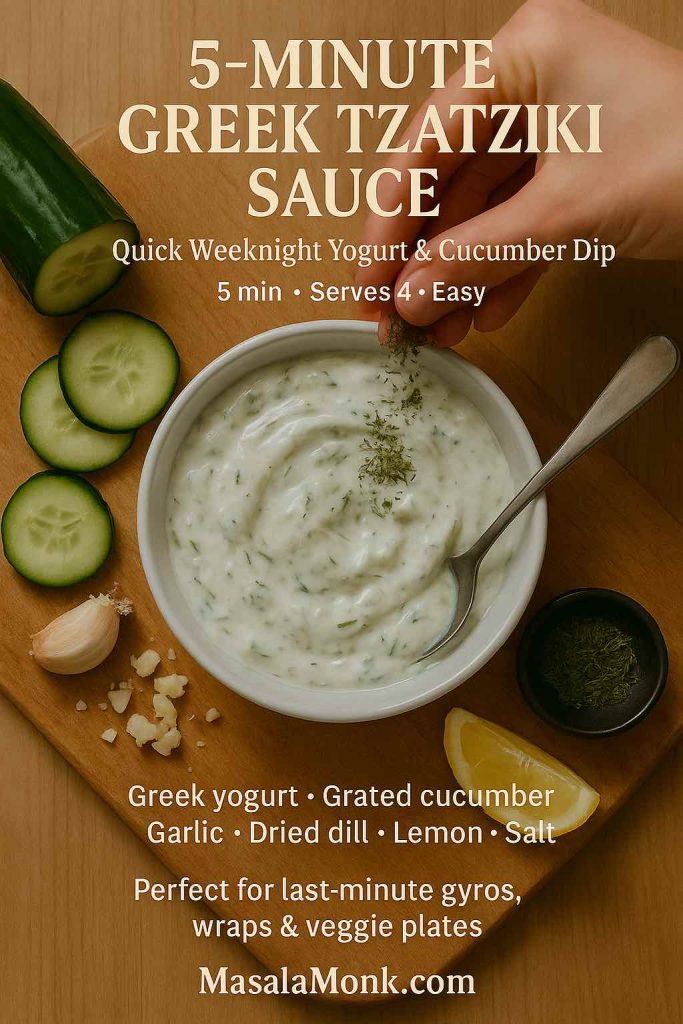
Top-down photo of a bowl of 5-minute Greek tzatziki sauce on a wooden board, with a hand sprinkling dried dill over the creamy yogurt and cucumber dip surrounded by cucumber slices, garlic, lemon and a spoon.
Quick 5-minute Greek tzatziki sauce made with Greek yogurt, grated cucumber, garlic, dried dill and lemon – a weeknight-friendly dip for last-minute gyros, wraps and veggie plates.
  • Grate the cucumber and squeeze it gently in paper towels without salting or resting.
  • Use just 1 clove of garlic plus ½ teaspoon garlic powder for an easier, less intense bite.
  • Swap fresh dill for 1–2 teaspoons dried dill weed if you don’t have fresh herbs on hand.

The flavor won’t be as layered as the full version, and the sauce may loosen a little as it sits, yet it still tastes like a proper Greek tzatziki sauce recipe—cool, garlicky and satisfying. It’s perfect for quick pita sandwiches, simple grilled chicken or as a last-minute dip for vegetable sticks.

Also Read: Simple Bloody Mary Recipe – Classic, Bloody Maria, Virgin & More

2. Recipe of Low-Calorie, High-Protein Tzatziki Greek Sauce

When you want a sauce that feels especially light but still comforting, you can nudge the recipe in that direction without losing its character.

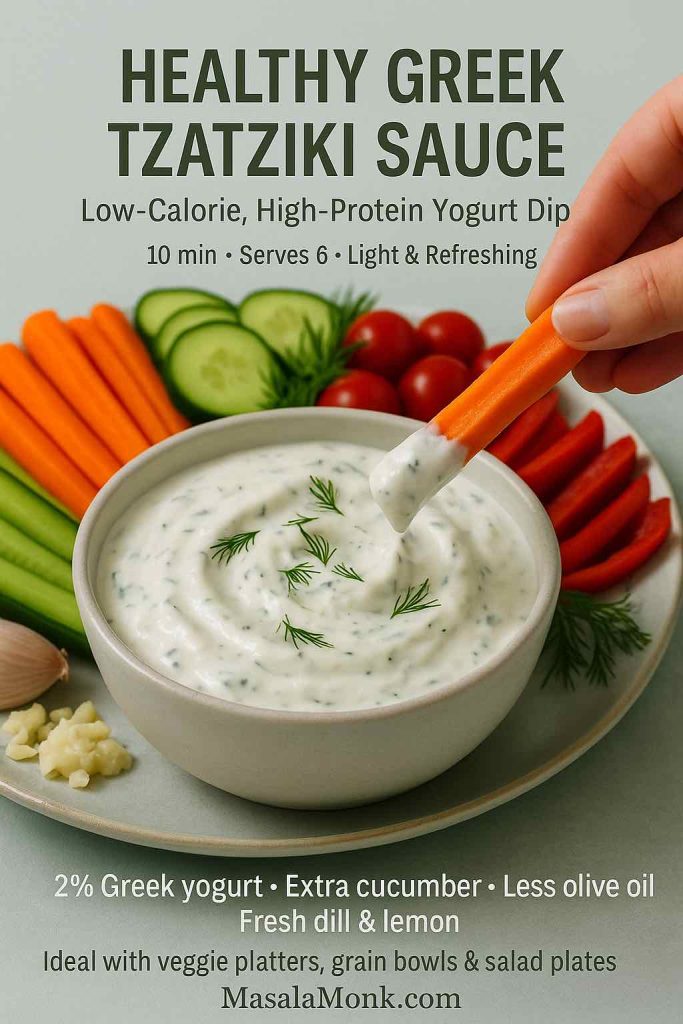
Side view of a bowl of healthy Greek tzatziki sauce made with 2 percent Greek yogurt, extra cucumber and fresh dill, with a hand dipping a carrot stick into the creamy dip, surrounded by cucumber slices, cherry tomatoes and pepper strips on a light plate.
Healthy Greek tzatziki sauce made with 2% Greek yogurt, extra cucumber and less olive oil for a low-calorie, high-protein dip that’s perfect with veggie platters, grain bowls and salad plates.

Try this approach:

  • Use 2% Greek yogurt instead of full-fat.
  • Reduce olive oil to 1 tablespoon.
  • Increase the grated cucumber slightly and add a bit more fresh dill for volume and freshness.

Because Greek yogurt is naturally higher in protein than regular yogurt, this variation still feels substantial. Comparison articles and nutrition breakdowns point out that Greek yogurt often delivers nearly double the protein of traditional yogurt per cup.

This version works beautifully on top of grilled fish, baked chicken, roasted vegetables or as a dressing for grain bowls. It also pairs nicely with lighter mains like a ladle of crock pot lasagna soup or a square of cottage cheese lasagna when you want a mixture of cozy and fresh on the same plate.

3. Dairy-Free / Vegan Recipe for Greek Tzatziki-Style Sauce

For guests who avoid dairy—or for days when you’re simply experimenting with plant-based cooking—you can mimic the feel of tzatziki with a few swaps.

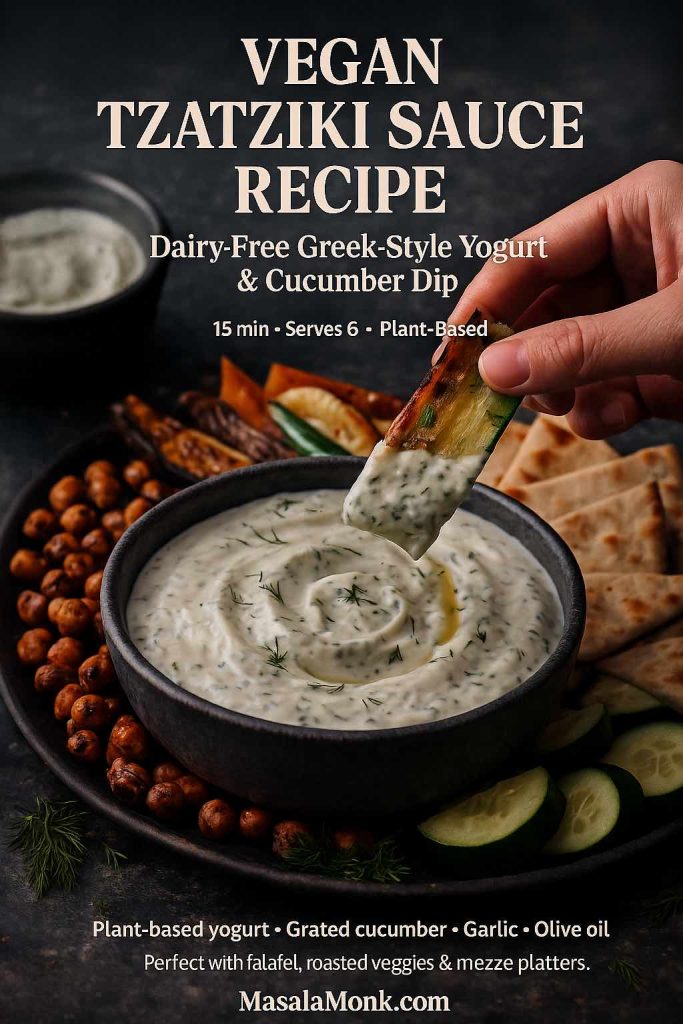
Close-up of a bowl of vegan tzatziki sauce made with plant-based yogurt, grated cucumber, garlic, lemon, dill and olive oil, with a hand dipping a roasted zucchini slice into the creamy dip, surrounded by roasted chickpeas, pita wedges and cucumber on a dark mezze platter.
Vegan tzatziki sauce recipe made with plant-based yogurt, grated cucumber, garlic, lemon and dill – a creamy dairy-free dip that shines on falafel plates, roasted veggie mezze boards and meatless Mediterranean dinners.

Use this pattern:

  • Choose a thick, unsweetened plant-based yogurt made from soy, coconut or almonds.
  • Add 1 extra tablespoon of olive oil to bring back some of the richness you’d get from full-fat dairy.
  • Keep the garlic, lemon and dill generous to ensure a bright, savory flavor.

This dairy-free twist is lovely with roasted vegetables, falafel, lentil patties or Mediterranean-style quinoa bowls similar to those in plant-based meal prep ideas.

You can also thin it down a little and use it as a sauce over roasted chickpeas, baked sweet potato wedges or stuffed peppers.

4. Recipe for Thick Greek Tzatziki Sauce for Gyros

When the sauce needs to stay tucked into bread, it should lean thicker and punchier.

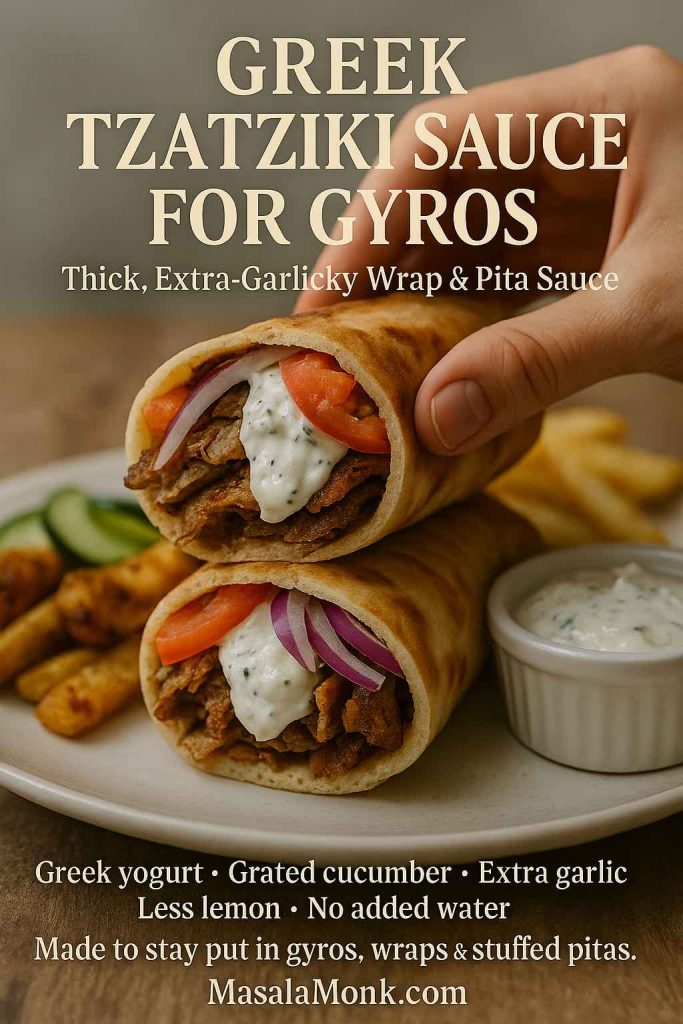
High-resolution photo of a gyro wrap cut in half and stacked, filled with seasoned meat, tomato and red onion, with thick Greek tzatziki sauce visible inside, a hand holding the top half and a small ramekin of extra tzatziki on the side.
Thick, extra-garlicky Greek tzatziki sauce made to stay put inside gyros, wraps and stuffed pitas – rich Greek yogurt, grated cucumber and plenty of garlic with less lemon and no added water for the perfect street-style bite.

Make these adjustments:

  • Squeeze the cucumber extra thoroughly so almost no liquid remains.
  • Skip adding water entirely; let the sauce stay dense.
  • Use the full 3 cloves of garlic and keep lemon to the lower end (around 1 tablespoon) so it doesn’t get runny.

Spread this thick tzatziki down the center of warm pita, add slices of grilled or roasted meat, tuck in tomatoes and onions, then fold everything up. It’s the sauce that ties the sandwich together and keeps it moist, much like the role sauces play in the best chicken sandwich recipes.

You can also use this version as a spread inside flatbread wraps, shawarma-style sandwiches or even on burgers topped with feta and grilled vegetables.

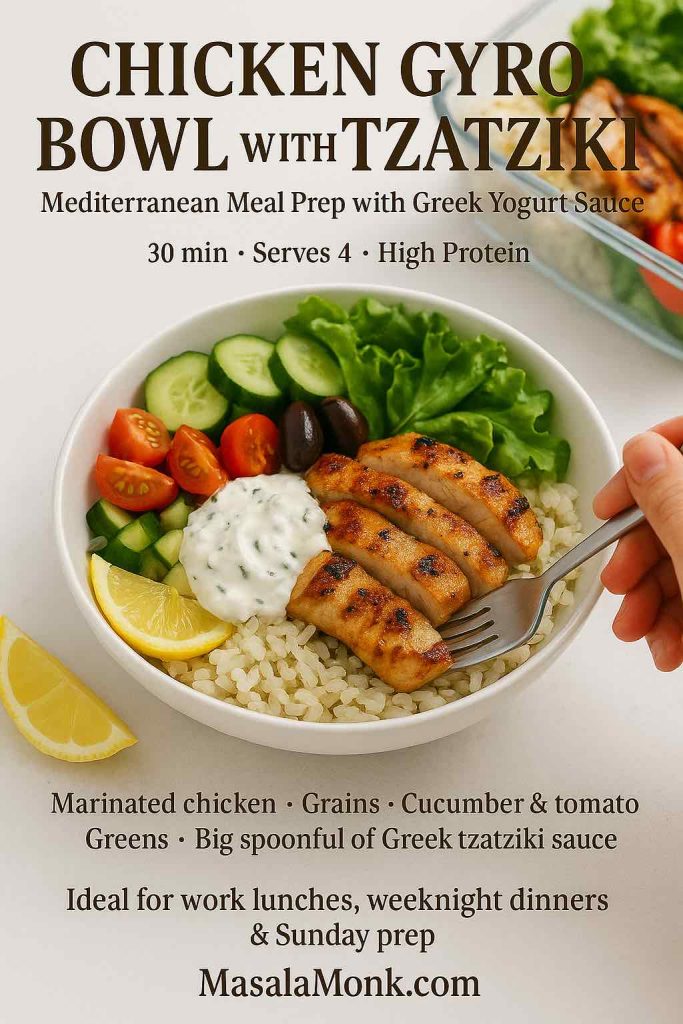
5. Chicken Gyro Bowls with Tzatziki

Instead of wrapping everything in bread, you can turn the same components into a bowl that’s easier to portion and reheat.

High-resolution photo of a chicken gyro bowl with tzatziki, featuring sliced grilled chicken, rice, cucumber, tomatoes, olives, lettuce and a dollop of Greek yogurt sauce in a white bowl, with a hand holding a fork and a meal prep container in the background.
Chicken gyro bowl with tzatziki – marinated grilled chicken, grains, crunchy cucumber and tomato, olives and greens, all tied together with a big spoonful of Greek yogurt sauce for easy Mediterranean meal prep lunches and weeknight dinners.

Here’s one way to do it:

  1. Marinate chicken thighs or breast strips in olive oil, lemon juice, crushed garlic, dried oregano, salt and pepper.
  2. Grill or roast until the edges are charred and the center is juicy.
  3. Build bowls with a base of rice, quinoa or bulgur, then add chopped cucumber, tomato, red onion, lettuce and olives.
  4. Finish with a generous spoonful of the master Greek tzatziki sauce recipe on top.

Between the yogurt sauce and the chicken, you get a protein-rich meal that still feels fresh. This style of bowl sits in the same category as high protein overnight oats—different time of day, same idea of using yogurt to make food more filling without feeling heavy.

These bowls also pack well for lunch: keep the warm elements and the tzatziki separate, then combine them when you’re ready to eat.

6. Greek Tzatziki Salad Dressing

Sometimes salads need more than a vinaigrette to feel satisfying. That’s where a pourable version of tzatziki comes in.

High-resolution photo of tzatziki salad dressing being poured from a glass jug over a colorful Greek salad with lettuce, cucumber, cherry tomatoes, red onion, Kalamata olives and grilled chicken in a beige bowl.
Tzatziki salad dressing – a pourable Greek yogurt version of classic tzatziki that drapes over salads, grain bowls and roasted vegetables with cool, garlicky, herb-fresh flavor.

To turn your sauce into a dressing:

  • Whisk 2–4 tablespoons of cold water into 1 cup of tzatziki until it reaches a smooth, drizzly consistency.
  • Add an extra teaspoon or two of lemon juice.
  • Taste and adjust salt; greens can handle slightly stronger seasoning than raw vegetables served alone.

This dressing is excellent over chopped cucumber–tomato salads, crunchy romaine, simple mixed greens or roasted vegetable platters. It fits neatly with the kind of salads encouraged in a comprehensive look at daily salad habits, where the emphasis is on making vegetables truly enjoyable, not a chore.

You can also drizzle this thinner Greek tzatziki sauce recipe over grain bowls, roasted potatoes or even leftover roasted vegetables to give them new life.

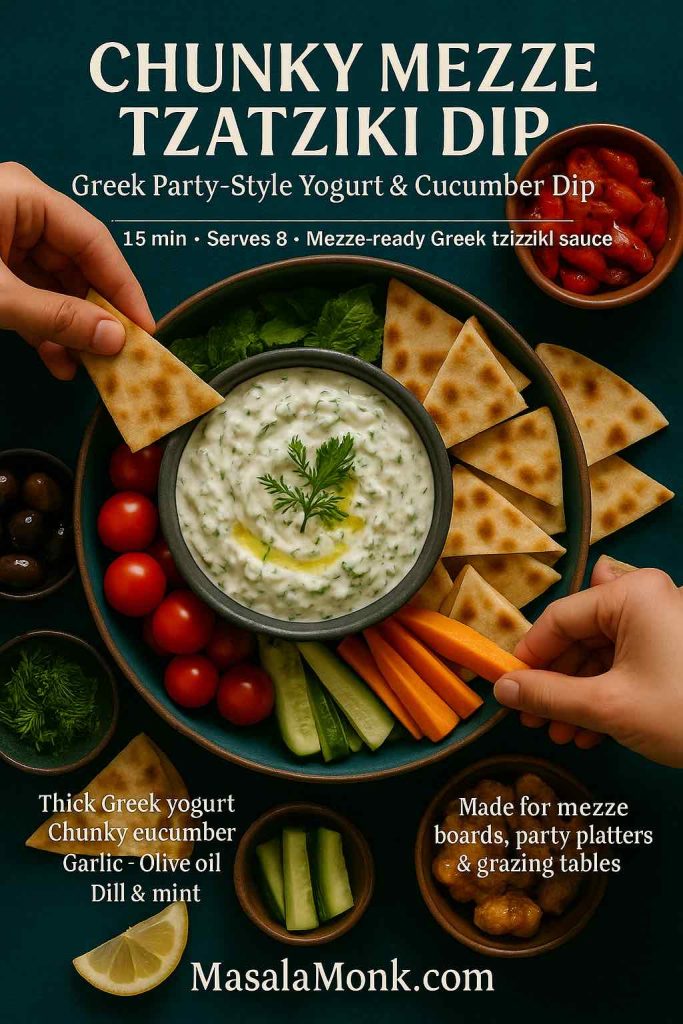
7. Chunky Mezze Tzatziki

When you’re assembling a mezze-style spread for guests, a chunkier, more textural tzatziki feels especially inviting on the table.

Top-down mezze platter with a large shallow bowl of chunky Greek tzatziki dip in the center, surrounded by pita wedges, olives, cherry tomatoes, grilled peppers, cucumber and carrot sticks, with several hands reaching in to scoop from the dip.
Chunky mezze tzatziki dip – thick Greek yogurt, diced cucumber, garlic, olive oil, dill and mint served in a shallow bowl at the center of a colorful mezze platter, made for parties, grazing tables and easy Greek-style entertaining.

To create that version:

  • Prepare the master recipe as usual, keeping it fairly thick.
  • Dice an extra handful of cucumber into tiny cubes and fold them in after chilling.
  • Increase dill and mint slightly for a more herb-packed bite.
  • Finish the surface with olive oil and a dusting of sumac or smoked paprika.

Serve this bowl alongside warm pita, crunchy vegetables and one or two companion dips inspired by spinach dip recipes.

For extra protein and variety, add air fryer hard-boiled eggs to the board. They’re easy to peel and make a satisfying combination with cool tzatziki and warm bread.

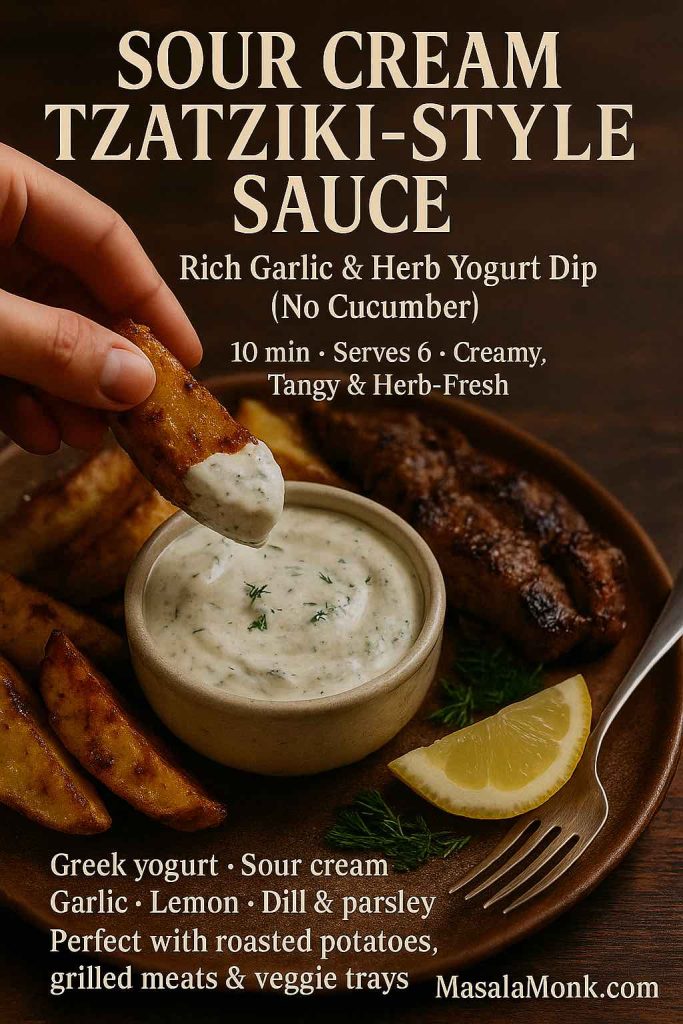
8. Sour-Cream-Enriched Tzatziki (or No-Cucumber Version)

On some days, you might find a tub of sour cream in the fridge and no cucumber in sight. Even then, you can produce something in the spirit of this Greek tzatziki sauce recipe.

Side-angle photo of a bowl of sour cream tzatziki-style sauce made with Greek yogurt, sour cream, garlic, lemon and herbs, with a hand dipping a crispy roasted potato wedge into the creamy white dip on a rustic wooden table next to roasted potatoes and grilled meat.
Sour cream tzatziki-style sauce – a rich, cucumber-free garlic and herb dip made with Greek yogurt and sour cream, perfect alongside roasted potatoes, grilled meats or hearty veggie trays when you want all the tzatziki flavor in a more indulgent, cozy format.

Try this variation:

  • Use ½ cup Greek yogurt and ½ cup sour cream.
  • Skip the cucumber or replace it with a small handful of finely chopped, seeded tomato for freshness.
  • Keep garlic, lemon and herbs generous so the sauce stays bright instead of heavy.

The result is more like a garlicky herb cream, yet it plays a similar role on the plate. Spoon it over roasted potatoes, grilled steak, baked salmon, steamed vegetables or even next to a cozy dish like green bean casserole when you want something cool and tangy on the side.

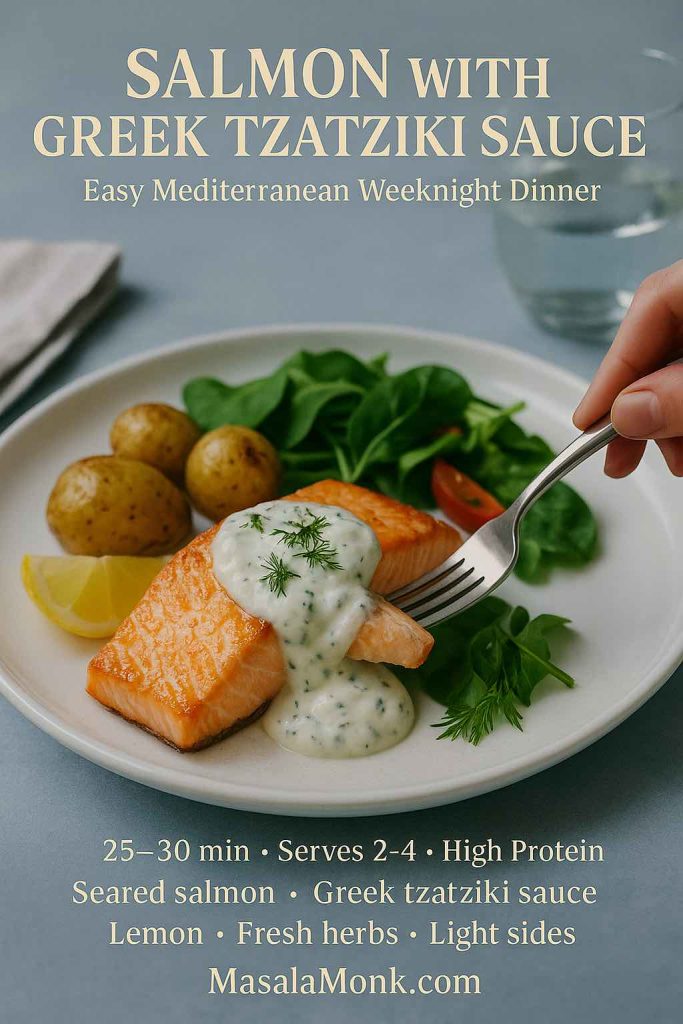
9. Salmon with Greek Tzatziki Sauce Recipe

Fish and yogurt might not sound like an obvious pairing at first, but the combination works beautifully—especially with oily fish like salmon.

Plated salmon with Greek tzatziki sauce, showing a seared salmon fillet on a light plate with a spoonful of creamy yogurt and cucumber sauce, fresh herbs, lemon wedge and a simple green side, with a hand holding a fork ready to take a bite.
Salmon with Greek tzatziki sauce – a simple Mediterranean weeknight dinner of seared salmon, cool garlicky yogurt and cucumber sauce, lemon and light greens that comes together fast but feels restaurant-level on the plate.

A simple way to bring them together:

  1. Rub salmon fillets with olive oil, salt, pepper and a squeeze of lemon.
  2. Roast or pan-sear until just cooked through and beginning to flake.
  3. Serve with a generous spoonful of chilled tzatziki either on top or alongside.
  4. Add a green salad, roasted vegetables or simple potatoes to round out the plate.

This kind of meal—fish, vegetables, olive oil and a small amount of fermented dairy—mirrors classic Mediterranean patterns that many studies highlight as beneficial for long-term heart health.

You can easily swap in cod, haddock or trout; just adjust cooking times and keep the serving of tzatziki the same.

Also Read: Whiskey Sour Recipe: Classic Cocktail, Best Whiskey & Easy Twists

10. Brunch and Breakfast with Tzatziki

Finally, tzatziki doesn’t need to stay confined to lunch and dinner. It also has a comfortable place in brunch spreads and weekend breakfasts, especially for people who enjoy savory options.

High-resolution photo of a Mediterranean brunch board with a central bowl of Greek tzatziki sauce surrounded by roasted potatoes, soft-boiled eggs, pita wedges, grilled vegetables and fresh greens on a wooden table, with a hand reaching in to take a bite.
Mediterranean brunch board built around Greek tzatziki sauce – roasted potatoes, jammy eggs, pita, grilled vegetables and fresh greens for a savory weekend spread that turns one simple yogurt and cucumber dip into a complete breakfast feast.

Consider a few ideas:

  • Put together a savory brunch board with roasted potatoes, grilled vegetables, olives, slices of cheese, air fryer hard-boiled eggs and a big bowl of tzatziki in the center for dipping.
  • Balance a sweet tray of pancakes or French toast sticks with a plate of warm pita, tomatoes, cucumbers and tzatziki so guests can build both sweet and savory bites.
  • Offer both tzatziki and high protein overnight oats so Greek yogurt shows up in two completely different forms at the same meal.

If you enjoy brunch cocktails, a light, bubbly drink such as a French 75 or one of the twists from a mimosa recipe collection pairs nicely without overwhelming the herbs and garlic.


Building Meals Around Tzatziki

Once there’s a bowl of tzatziki in your fridge, the way you think about meals starts to shift. Instead of beginning with a complicated main dish, you can start with the sauce and assemble around it.

Mezze Nights

One of the easiest ways to use a Greek tzatziki sauce recipe is in a mezze-style spread—essentially a table filled with small plates so everyone can pick and choose. For instance, you might set out:

  • Tzatziki and one or two other dips, perhaps a spinach-based dip inspired by spinach dip recipes
  • Warm pita or flatbreads
  • Sliced cucumbers, carrots, radishes and bell peppers
  • A simple tomato and onion salad
  • Olives, pickled peppers and small cubes of cheese
  • A plate of air fryer hard-boiled eggs or grilled chicken pieces for protein

Everyone can build little bites: a piece of bread with tzatziki and tomato, a slice of egg dipped into the sauce, or raw vegetables dragged through a small puddle of yogurt and herbs. It feels relaxed, social and abundant without requiring hours at the stove.

Comfort Main + Fresh Sauce

On cooler evenings, you might crave something heartier—lasagna, rich soups or baked casseroles. Tzatziki can still play a role there, not as the star, but as the fresh sidekick.

Imagine:

  • A bowl of crock pot lasagna soup with a green salad and a small dish of tzatziki nearby so people can add a spoonful to their bowls if they like.
  • A slice of cottage cheese lasagna alongside a cold, crisp cucumber salad dressed with a thinner Greek tzatziki sauce recipe.
  • A holiday-style plate with green bean casserole, roasted potatoes and grilled chicken, brightened with a spoonful of tzatziki instead of another heavy gravy.

This mix of cozy and fresh keeps comfort food from feeling one-note.

Quick Weeknight Plates

On busy nights, tzatziki can turn very simple components into a complete-feeling meal:

  • Roast a tray of chicken pieces and potatoes with olive oil, salt and herbs. Serve everything with a bowl of tzatziki and a quick side salad.
  • Pan-fry or bake fish fillets, add lemon, then spoon tzatziki on top right at the table.
  • Warm pita or flatbreads, stuff them with leftover roasted vegetables or meat, and slather tzatziki inside as the main sauce.

Because the sauce is already waiting in the fridge, these meals feel fast without reading as “thrown together.”

Also Read: Peanut Butter Cookies (Classic Recipe & 3 Variations)


Storing and Making Ahead Greek Tzatziki Sauce Recipe

A fresh Greek tzatziki sauce recipe keeps nicely in the fridge, though it does change subtly over time.

Here are a few practical points:

  • Container: A clean, lidded glass or plastic container keeps the flavors focused and prevents stray fridge smells from sneaking in.
  • Timeframe: For the best texture and flavor, try to eat tzatziki within 3–4 days. After that, the cucumber can soften a bit too much and the garlic may become a little sharper.
  • Separation: If a bit of liquid pools on top, just stir it back in. If it seems a little thin, folding in a spoonful of fresh Greek yogurt right before serving can restore some body.
  • Serving hygiene: If you’re putting tzatziki out for a gathering, spoon a portion into a smaller bowl instead of letting everyone dip directly into the storage container. That way, any double-dipping or stray crumbs don’t affect the whole batch.

For especially busy weeks, one useful trick is to make the base ahead—yogurt, olive oil, garlic, lemon, salt and herbs—then grate and squeeze the cucumber on the day you want to serve. That gives the yogurt time to develop flavor while keeping the cucumber at its freshest and crispest.

Freezing isn’t recommended; the texture of yogurt and cucumber suffers too much after thawing.

Also Read: Homemade Hot Chocolate with Cocoa Powder Recipe


Tzatziki, the greek sauce recipe in a bigger picture

It’s easy to think of tzatziki as “just a sauce.” Yet looked at another way, a reliable Greek tzatziki sauce recipe is a quiet tool for shaping how you cook and eat:

  • It gives raw vegetables a destination besides plain hummus or ranch.
  • It gives leftover grains, beans or roasted vegetables an easy way to feel new again.
  • It provides a creamy element for meals that still lean on vegetables, legumes, whole grains and fish—exactly the kind of pattern associated with the Mediterranean diet and its long list of possible health benefits.

You don’t have to change everything at once. Simply get comfortable making this sauce, keep a bowl in your fridge when you can, and see where it naturally ends up: next to roasted vegetables, on top of salmon, tucked into sandwiches, or drizzled onto salads. Over time, you may notice that your plates look a little more colorful, a bit more vegetable-forward and—perhaps most importantly—much more fun to eat.

FAQs on Greek Tzatziki Sauce Recipe

1. What is a classic Greek tzatziki sauce recipe made of?

A classic Greek tzatziki sauce recipe usually includes thick Greek yogurt, grated and well-squeezed cucumber, fresh garlic, extra virgin olive oil, lemon juice (or a mild vinegar), salt, black pepper and plenty of fresh dill or a mix of dill and mint. Altogether, these ingredients create a cool, tangy and garlicky cucumber yogurt sauce that works as both a dip and a dressing. For the best texture, the yogurt should be strained and the cucumber should be salted and squeezed so the sauce stays thick and creamy instead of watery.


2. How do I make an easy Greek tzatziki sauce recipe for beginners?

For a simple version, start with plain Greek yogurt in a bowl, then stir in finely grated cucumber (pressed dry in a paper towel), minced garlic, a spoon of olive oil, a squeeze of lemon, salt, pepper and dried or fresh dill. Mix everything until smooth and taste to adjust the lemon and salt. Even though the sauce improves after resting in the fridge, it still tastes delicious right away, which makes this easy tzatziki sauce a great option for busy weeknights or last-minute guests.


3. Which yogurt is best for a Greek tzatziki sauce recipe: Greek or regular?

Generally, Greek yogurt is preferred because it is thicker and richer than regular yogurt, so the tzatziki holds its shape and clings nicely to bread, meat and vegetables. Regular yogurt contains more whey, so it tends to be runnier and can make the sauce feel thin. However, if regular yogurt is all you have, you can strain it through a fine cloth or coffee filter for a couple of hours in the fridge; once it thickens, it behaves much more like Greek yogurt in a tzatziki sauce recipe.


4. Can I make a Greek tzatziki sauce recipe without cucumber?

Yes, you can still prepare a tasty garlic yogurt sauce even if you have no cucumber. In that case, simply leave the cucumber out and increase the herbs, garlic and lemon slightly so the flavor stays bright. Alternatively, very finely chopped, seeded tomatoes or a small amount of grated zucchini can bring a bit of freshness and texture. While it won’t be a textbook tzatziki, this no-cucumber version still works wonderfully as a dip for vegetables, a topping for grilled meats or a spread for wraps.


5. Is a Greek tzatziki sauce recipe healthy?

Most of the time, tzatziki is considered a lighter, nutrient-dense sauce. It is built on strained yogurt, which typically provides protein, calcium and live cultures, along with cucumber, olive oil, garlic, herbs and lemon. Compared with many cream-based or mayonnaise-heavy sauces, a Greek tzatziki sauce recipe usually contains less saturated fat and often more protein per spoonful. Naturally, the overall healthiness still depends on what you eat it with and how large the portions are, but as a way to make vegetables and lean proteins more appealing, tzatziki fits very comfortably into a balanced pattern of eating.


6. How can I make a low-calorie or low-fat Greek tzatziki sauce recipe?

To lighten the sauce, try using 2% or low-fat Greek yogurt instead of full-fat, keep the olive oil to a tablespoon or less, and add extra cucumber and herbs for volume. In addition, you can skip any extra oil drizzled on top when serving. The texture remains creamy because Greek yogurt is naturally thick, while the cucumber and dill keep the flavor refreshing. This kind of healthier tzatziki works especially well with grilled chicken, baked fish, grain bowls and big salads where you want a creamy element that doesn’t overshadow the rest of the meal.


7. Can I make a dairy-free or vegan Greek tzatziki sauce recipe?

Absolutely. For a dairy-free or vegan tzatziki, use a thick, unsweetened plant-based yogurt made from soy, coconut, almond or oat instead of Greek yogurt. Then add grated, squeezed cucumber, garlic, herbs, olive oil, lemon, salt and pepper just as you would in a traditional recipe. Because some non-dairy yogurts can be quite mild, you may want a little extra lemon and garlic to keep the flavor bright. This vegan tzatziki is excellent with falafel, roasted vegetables, grain bowls and wraps, and it fills the same role as a classic Greek tzatziki sauce recipe on the plate.


8. What is the difference between tzatziki and gyro sauce?

In many cases, they are essentially the same thing: a thick Greek tzatziki sauce recipe used as the sauce for gyros. However, gyro sauce is often made a little thicker and more garlicky so it stays inside the pita and stands up to heavily seasoned meat and onions. Sometimes, restaurants use a sour-cream-based garlic sauce or a yogurt-mayo mix and still call it “gyro sauce.” If you specifically want the Greek cucumber yogurt sauce, choose a tzatziki recipe built on Greek yogurt, cucumber, garlic, olive oil, lemon and dill, and then simply keep it extra thick for gyros.


9. Can I use sour cream instead of Greek yogurt in a Greek tzatziki sauce recipe?

You can, although the result will be slightly richer and tangier. Sour cream is thicker than regular yogurt but usually a bit looser than Greek yogurt, so the sauce may turn out softer unless you reduce other liquids. One popular option is to use half Greek yogurt and half sour cream to get the best of both: protein and density from the yogurt, plus silkier texture from the sour cream. This hybrid works nicely for baked potatoes, roasted vegetables and grilled meats, particularly when you want a more indulgent twist on standard tzatziki.


10. How long does homemade Greek tzatziki sauce last in the fridge?

Generally, homemade tzatziki keeps well for about 3 to 4 days in a sealed container in the refrigerator. Over time, the cucumber softens and releases a little extra liquid, and the garlic flavor can intensify. If a bit of liquid collects on top, simply stir it back in; if the sauce becomes too thin for your liking, you can fold in a spoonful of fresh Greek yogurt to thicken it again. Once it smells or tastes off, or if the surface looks discolored, it’s best to discard it and make a fresh batch.


11. Can I freeze a Greek tzatziki sauce recipe?

Freezing isn’t recommended. When yogurt and cucumber thaw, the texture often turns grainy and watery, and the fresh, clean flavor that makes tzatziki so appealing is mostly lost. The cucumber can become mushy, and the yogurt may separate. Instead of freezing, it’s better to make smaller batches more often or prepare the yogurt base ahead of time without cucumber, then stir in freshly grated, squeezed cucumber on the day you plan to serve the sauce.


12. How can I turn a Greek tzatziki sauce recipe into a salad dressing?

Turning tzatziki into a salad dressing is straightforward. Start with the sauce in a bowl, then whisk in cold water, milk or a little extra lemon juice a tablespoon at a time until it reaches a pourable consistency. Taste and add a pinch more salt or herbs if the flavor feels diluted. This thinner version works wonderfully over chopped cucumber-tomato salads, mixed greens, roasted vegetable bowls and even grain-based salads. In this way, one Greek tzatziki sauce recipe can cover both dips and dressings, making it an especially versatile staple to keep in your kitchen.