Posted on — Leave a comment

Apple Tart Recipe

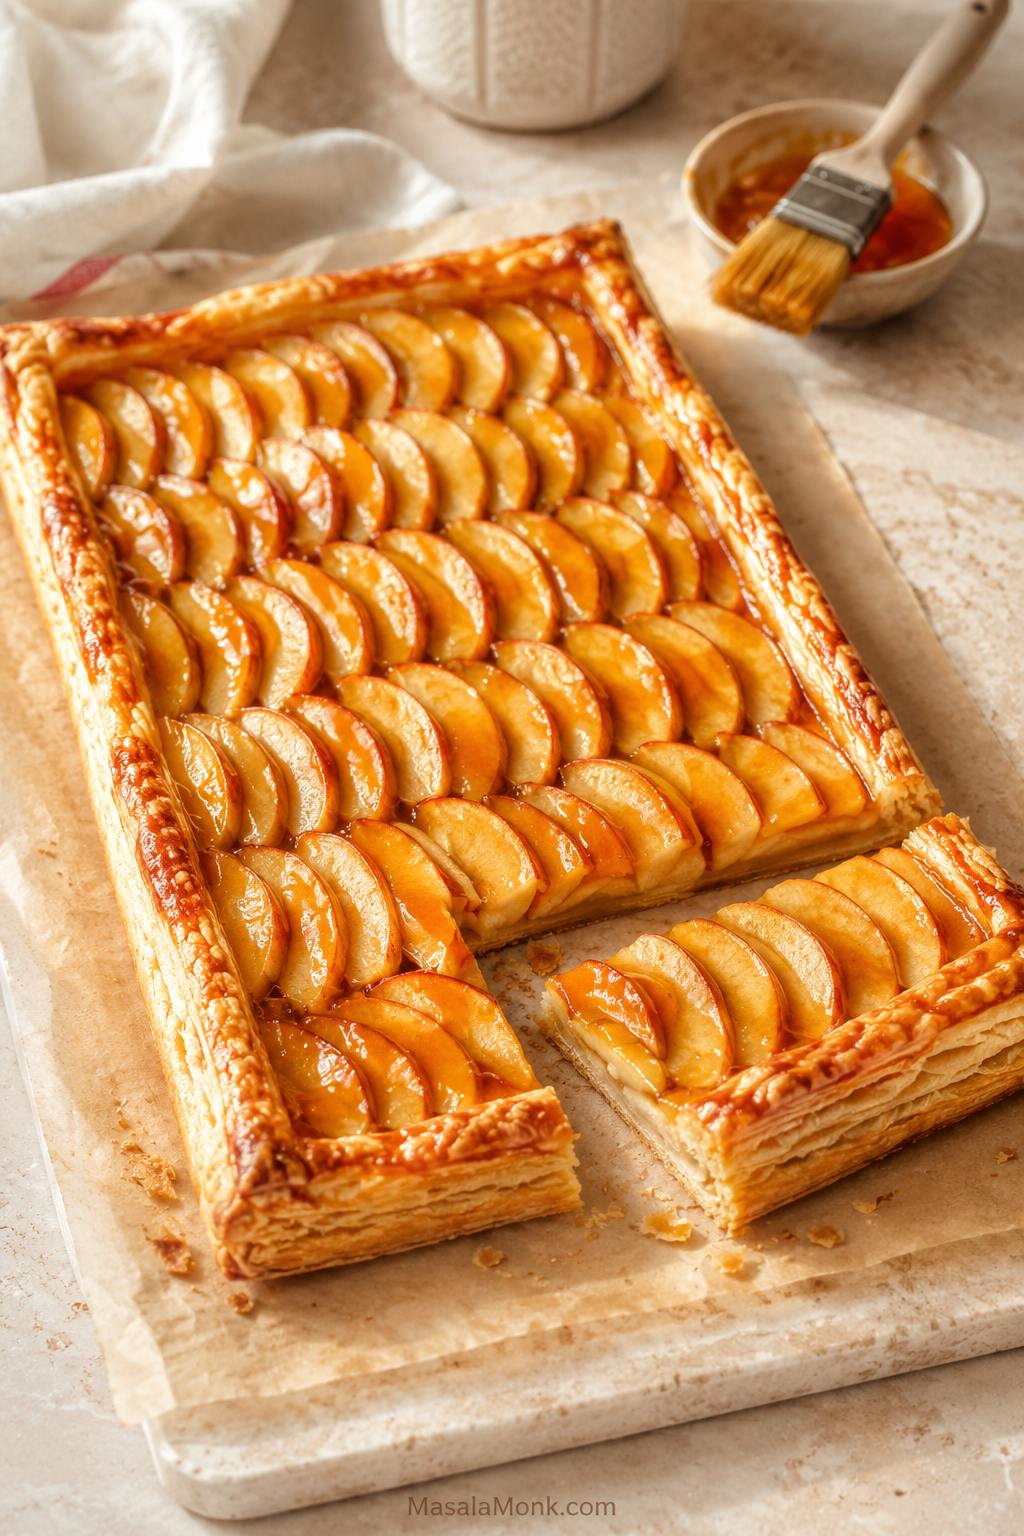
Rectangular apple tart with thin sliced apples, glossy glaze, and a golden puff pastry border on parchment.

This apple tart recipe is for the moment when you want something prettier than a basic apple dessert but easier than a full apple pie. Store-bought puff pastry, thin apple slices, cinnamon sugar, melted butter, and a glossy apricot finish bake into a crisp, bakery-style tart that smells like cinnamon apples and slices cleanly enough to serve with pride.

The method is simple, but the details matter. Keep the pastry cool, slice the apples evenly, and bake the tart until the base feels firm enough to lift with a spatula. The best slices have flaky pastry, soft cinnamon-scented apples, and just enough glaze to catch the light.

Start with the puff pastry version, then use the notes below when you want a round shortcrust tart, a French-style applesauce layer, mini tarts, or a fix for a base that keeps turning soft.

Quick Answer: How to Make Apple Tart

To make an easy apple tart, place cold puff pastry on parchment, score a border around the edge, dock the center with a fork, and arrange thin apple slices in one overlapping layer. Brush the apples with melted butter, sprinkle with cinnamon sugar, then bake at 400°F / 200°C, or 180°C fan, for 30–35 minutes, until the pastry is well browned and the apples are tender. Brush the warm tart with apricot jam or apple jelly for a glossy finish.

When it is right, the edges will puff into a flaky frame, the apples will look glossy and slightly curled at the tips, and the bottom will feel firm instead of bendy. The goal is not a mountain of apples. The goal is a crisp sheet of pastry with enough fruit to taste generous, but not so much that the juices flood the base.

For the full printable-style version, go straight to the recipe card. If your main worry is texture, the crisp base tips explain how to avoid a soggy apple tart.
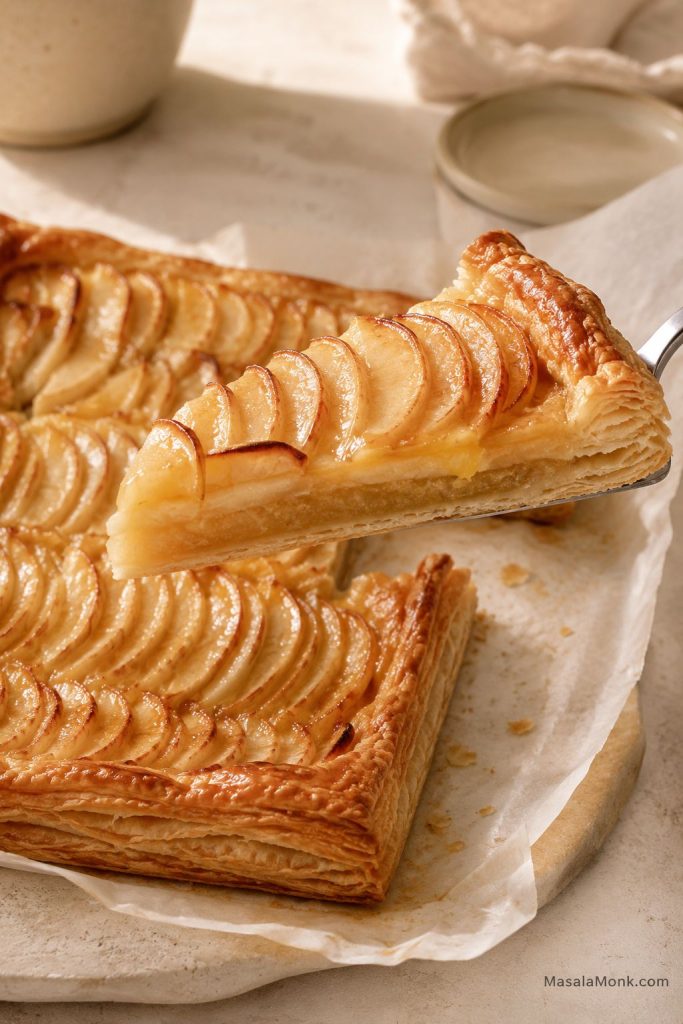
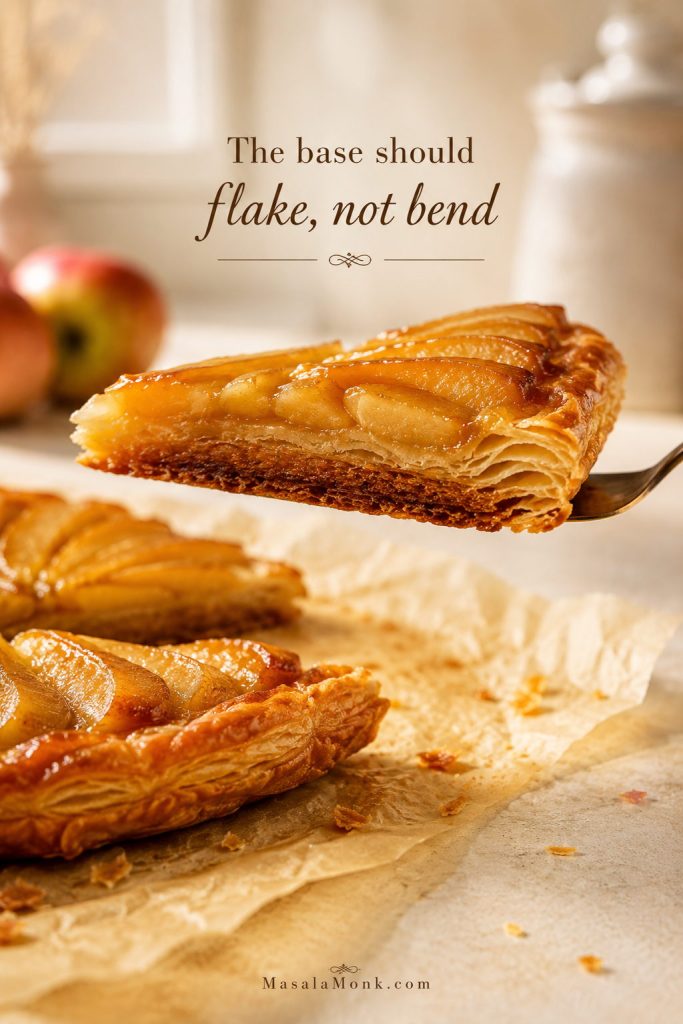
Slice of apple tart lifted from a rectangular puff pastry tart, showing glossy apples and flaky pastry layers.
Once the tart cools slightly, a clean slice should show tender apples on top and a firm pastry base underneath.

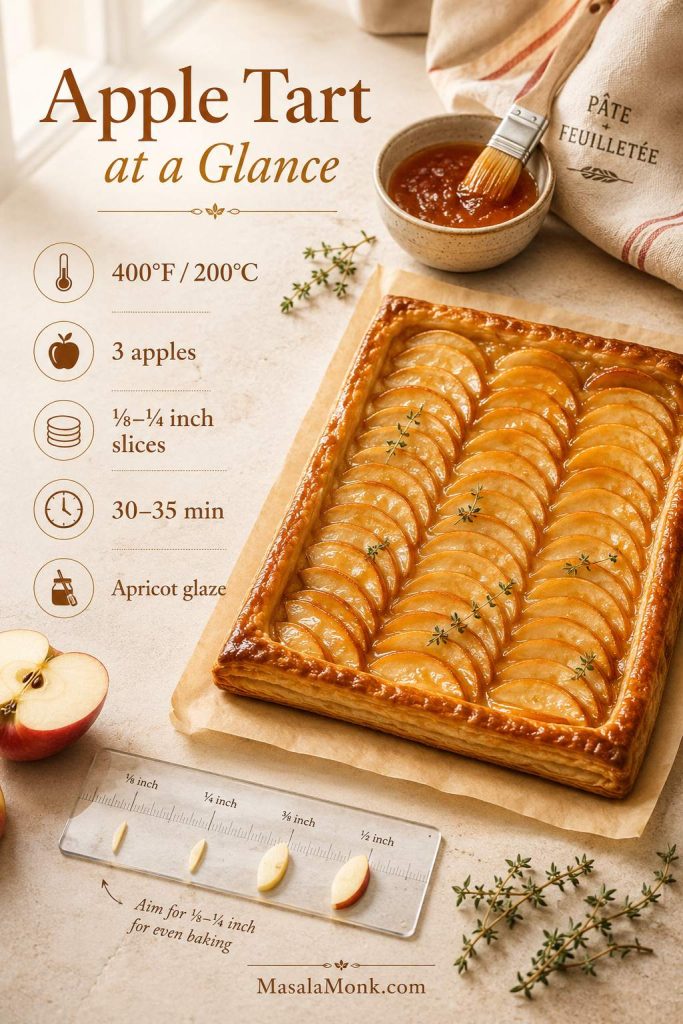
Apple Tart at a Glance

Best pastry for the simple version Store-bought all-butter puff pastry
Apple amount 3 medium apples, about 450–550 g / 1–1¼ lb before peeling and coring
Apple slice thickness ⅛–¼ inch / 3–6 mm
Oven temperature 400°F / 200°C, or 180°C fan
Bake time 30–35 minutes for puff pastry
Best finish Warm apricot jam or apple jelly glaze
Most important texture cue The pastry should be crisp, browned underneath, and firm enough to lift
Apple tart at-a-glance guide showing bake temperature, apple amount, slice thickness, bake time, and apricot glaze.
Use these numbers as guardrails: three apples, thin slices, a hot oven, and apricot glaze keep the tart balanced.

Why This Apple Tart Works

The secret is giving puff pastry the conditions it likes: cold dough, a hot oven, a scored edge, and a thin apple layer that does not weigh down the center. Store-bought puff pastry is the shortcut here; it gives you a flaky, bakery-style apple tart without making dough from scratch.

  • Puff pastry keeps the recipe approachable. You get flaky layers without a homemade dough project.
  • A scored border gives the tart structure. The edge rises around the apples and creates a clean frame.
  • Docking the center keeps it flatter. The middle stays lower while the border puffs.
  • Thin apples bake quickly. Slices around ⅛–¼ inch / 3–6 mm soften before the pastry overbrowns.
  • A hot baking sheet helps the bottom set. This gives the pastry a better chance to crisp before apple juices collect.
  • A light glaze makes it look finished. Apricot jam or apple jelly gives shine without making the tart heavy.

The result is the kind of dessert that feels dressed up without being fussy: crisp enough to lift neatly, tender enough to eat with a fork, and glossy enough to look finished even if your apple rows were not perfect.

This is the tart you make when pie sounds too heavy but sliced apples on buttery pastry still feels special. It looks like it took more effort than it did, which is exactly the charm.

Ingredients You Need

The ingredient list is short, so each piece has to pull its weight: buttery pastry, flavorful apples, a little sugar, a little butter, and a glossy finish at the end.
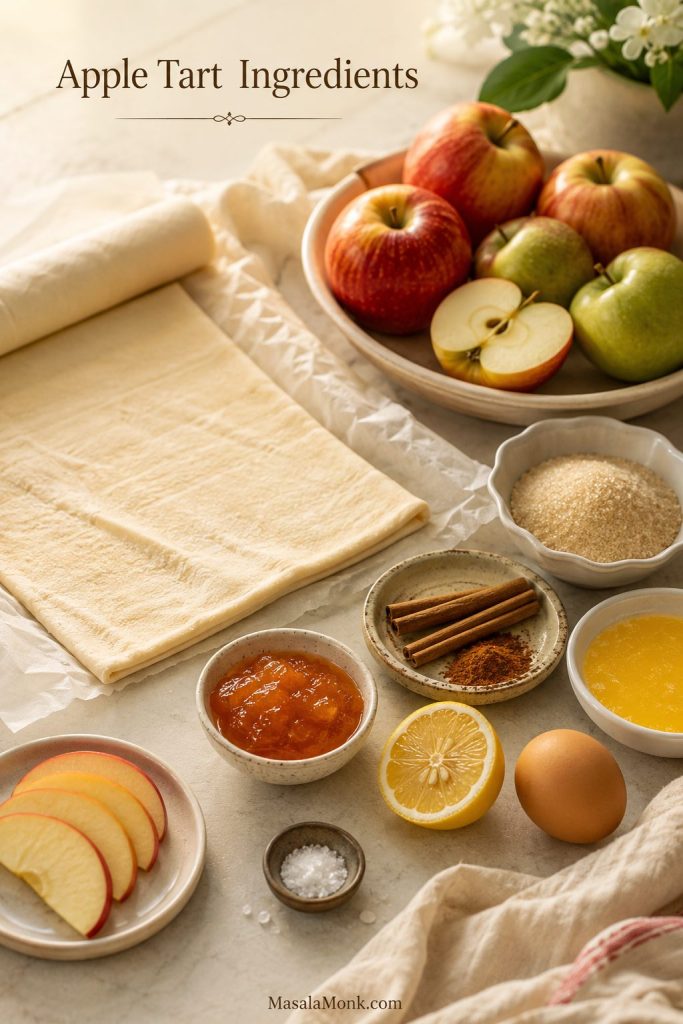
Apple tart ingredients including puff pastry, apples, cinnamon sugar, lemon, butter, apricot jam, egg, and salt.
With a short ingredient list, choose flavorful apples and good puff pastry because there is nowhere for weak ingredients to hide.

If you are still choosing apples, the best apples for apple tart section gives a quick variety guide before you start slicing.

Store-Bought Puff Pastry

Use one sheet of all-butter puff pastry if you can find it. It bakes with better flavor and cleaner flaky layers than pastry made mostly with shortening. Thaw frozen puff pastry in the refrigerator, not on a warm counter, so it unfolds without getting greasy. Soft pastry should go back into the fridge before baking.

Cold pastry matters because firm butter layers create better lift in the oven. King Arthur Baking’s puff pastry guidance explains the same cold-dough, hot-oven principle in more detail.
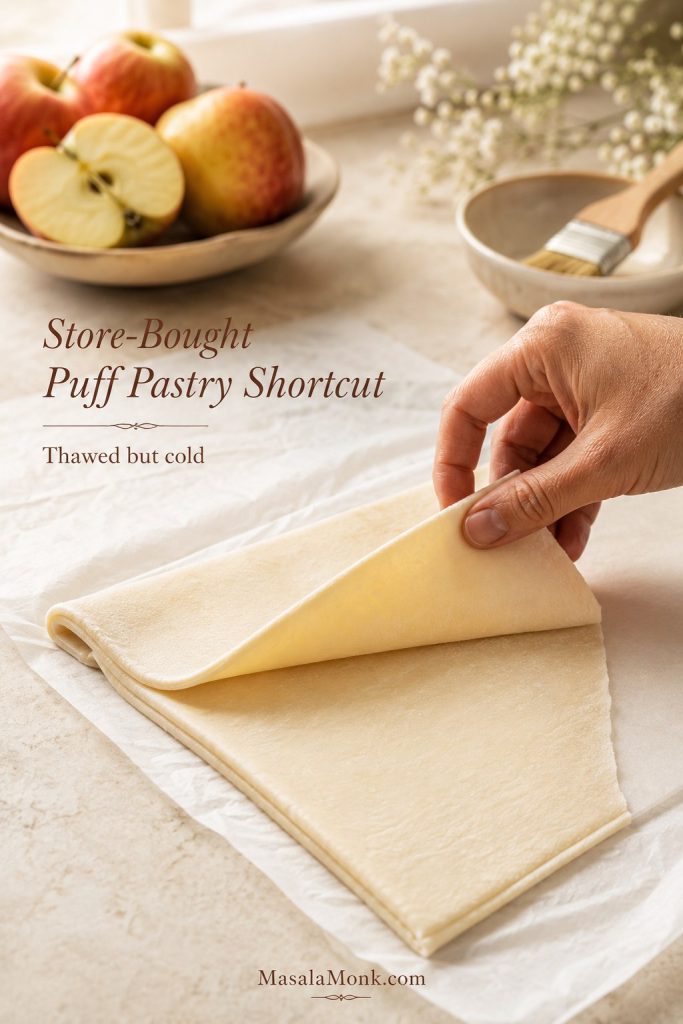
Store-bought puff pastry unfolded on parchment with sliced apples and a pastry brush nearby.
Store-bought puff pastry gives the shortcut, but keeping it cold is what helps the tart rise cleanly in the oven.

Not sure whether puff pastry or shortcrust is better for your tart? See the puff pastry vs shortcrust comparison before you choose.

Apples

You need about 3 medium apples, or 450–550 g / 1–1¼ lb before peeling and coring. That amount covers one rectangular puff pastry tart without weighing down the center. Pink Lady and Honeycrisp give an easy sweet-tart balance, while Granny Smith makes a sharper tart when mixed with a sweeter apple.

Fresh Apples vs Apple Pie Filling

This tart works best with fresh thin apple slices, not thick cooked filling. A saucy apple pie filling recipe is better for pies, crisps, hand pies, and spoonable toppings because it has more moisture and body than this thin pastry base needs.
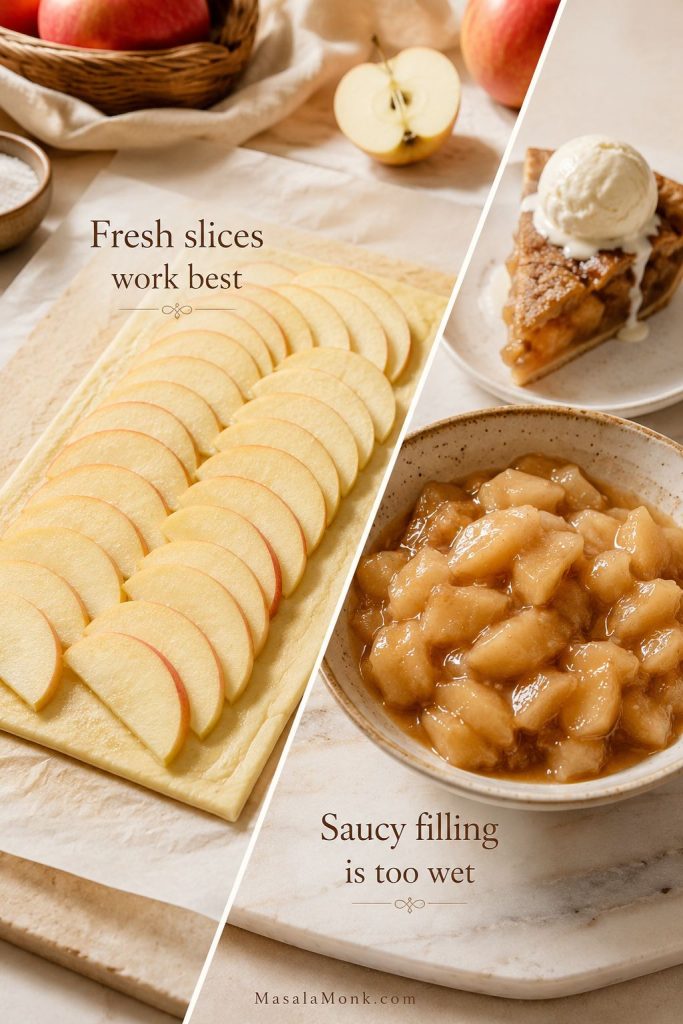
Fresh apple slices on puff pastry compared with saucy apple pie filling for an apple tart.
Fresh apple slices suit a thin puff pastry tart because cooked pie filling brings more sauce than this base can handle.

For a deeper, saucier apple dessert instead, compare this with the apple tart vs pie section.

Sugar

Granulated sugar gives a clean, light sweetness. Light brown sugar adds a warmer caramel note. Use 3 tablespoons for sweet apples or 4 tablespoons for sharper apples.

Butter

A little melted butter helps the apple edges soften, shine, and brown. You do not need much because puff pastry already contains fat.

Lemon Juice

Lemon keeps the apples bright so the tart does not taste flat or overly sweet. It also buys you a little time while you arrange the slices.

Cinnamon and Salt

Cinnamon gives warmth without making the tart taste like heavy apple pie filling. A pinch of salt makes the apples and pastry taste fuller.

Apricot Jam or Apple Jelly

A warm glaze brushed over the baked tart gives it shine. Apricot jam is classic because it looks glossy and does not overpower the apples. Apple jelly works well for a more apple-forward finish.

Egg Wash, Optional

Egg wash helps the pastry border brown and shine. Brush it only on the top of the border, not down the cut or scored sides, so the pastry layers can rise cleanly. The tart still works without egg wash; the edge will simply look a little softer.

Best Apples for Apple Tart

The best apples for apple tart should taste good, slice neatly, and soften without collapsing. Because this tart is thin, the apples do not need to stay as firm as apples in a deep pie. Flavor matters just as much as structure.

For the easiest first tart, use Pink Lady or Honeycrisp. They slice neatly, taste bright, and do not need much adjustment. For a sharper flavor, mix Granny Smith with a sweeter apple so the tart tastes lively without becoming too sour.
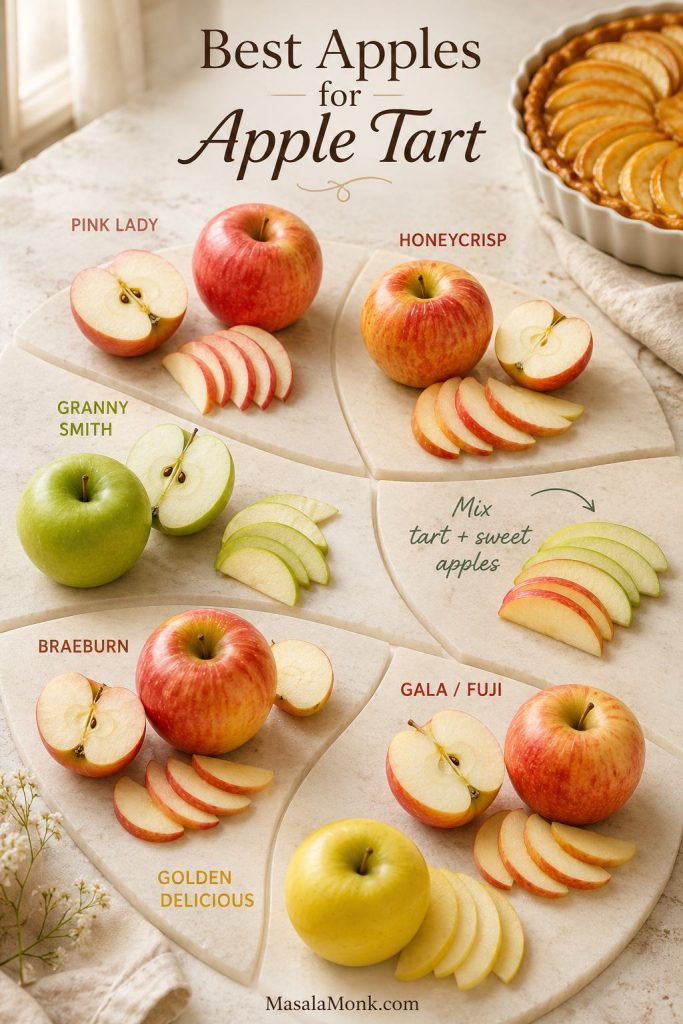
Apple variety guide for apple tart with Pink Lady, Honeycrisp, Granny Smith, Braeburn, Gala, Fuji, and Golden Delicious apples.
Pair a tart apple with a sweeter one when you want bright flavor, gentle sweetness, and slices that still hold together.
Apple Best For Flavor and Texture
Pink Lady Best overall apple tart Sweet-tart, firm, neat slices
Honeycrisp Sweet-tart, familiar flavor Juicy, crisp, and easy to like
Granny Smith Tarter apple tart Firm and sharp; best mixed with a sweeter apple
Braeburn Balanced baking flavor Warm, aromatic, holds shape well
Gala or Fuji Sweeter puff pastry tart Softer and sweeter; good for quick tarts
Golden Delicious Classic French-style tart Soft, mellow, aromatic

A mix of one tart apple and one sweeter apple often gives the best flavor. For example, use Granny Smith with Honeycrisp, Pink Lady, or Fuji. For a deeper baking-apple guide, see best apples for apple pie; the same flavor logic applies, but tart apples should be sliced thinner and arranged more evenly.

Puff Pastry vs Shortcrust for Apple Tart

For this specific recipe, puff pastry is the best first choice. It gives flaky, dramatic edges with very little work, and it keeps the tart feeling light instead of heavy. Shortcrust or pie crust gives a more classic tart-pan texture, but it needs a little more care.
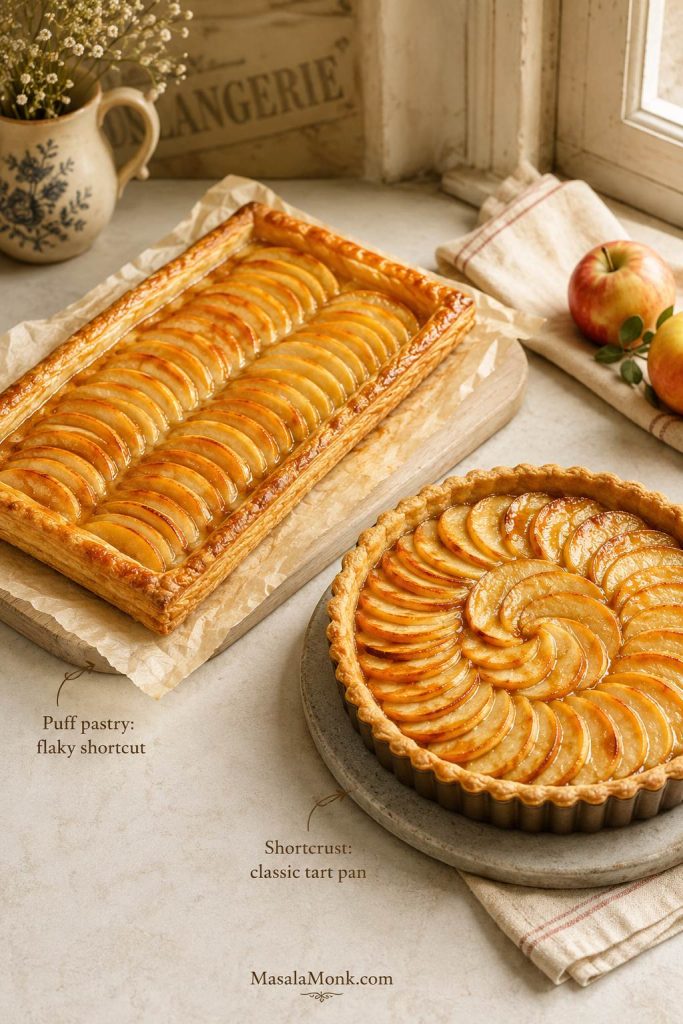
Puff pastry apple tart compared with a shortcrust apple tart in a round fluted tart pan.
Choose puff pastry for a lighter, flakier apple tart, while shortcrust gives a sturdier, more classic tart-pan base.
Pastry Best For Texture Notes
Puff pastry Easy apple tart, French-style sheet tart Flaky, light, crisp edges Great for a quick, flaky tart; keep it cold and bake on a hot tray.
Shortcrust pastry Classic round apple tart Buttery, tender, sturdier Best in a 9–10 inch tart pan.
Pie crust Homemade tart-pan version Flaky but less puffy Works well if rolled thin and chilled.
Store-bought pie crust Shortcut tart-pan version Softer, simpler Chill before baking so it holds shape.

To make the tart with homemade crust, use a buttery pie dough and roll it thin. This apple pie crust recipe is a good base for a shortcrust-style apple tart when you want something more homemade than puff pastry.

How to Make a Shortcrust Apple Tart

For a shortcrust apple tart, line a 9–10 inch tart pan with chilled dough, prick the base with a fork, and chill the lined pan before adding apples. With especially juicy apples or an applesauce layer, partially blind bake the crust until it looks dry and lightly set before adding the fruit.
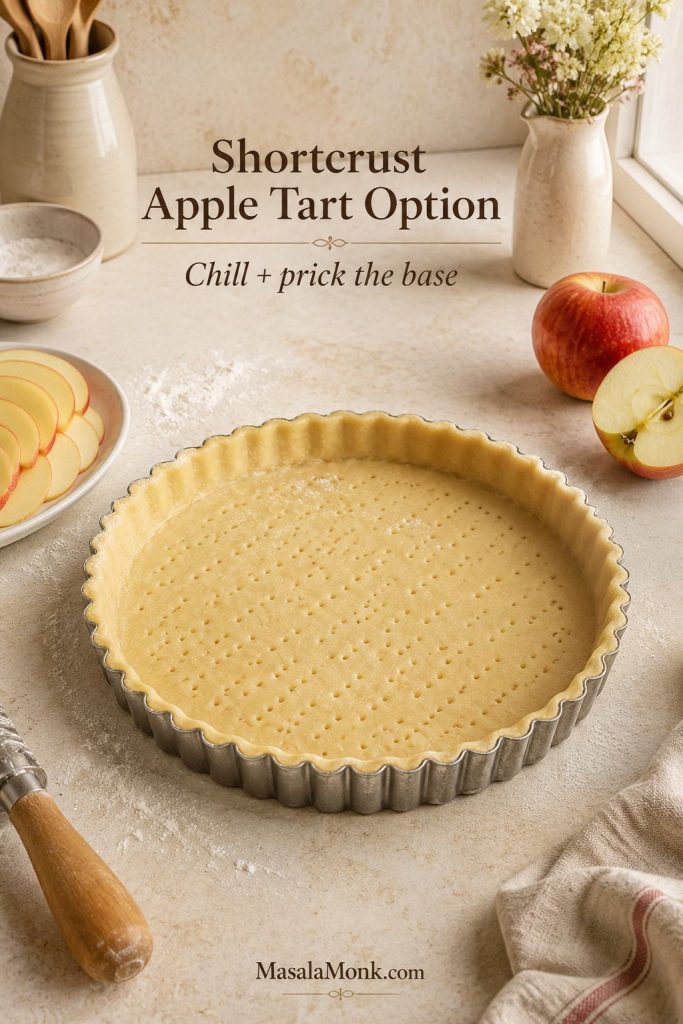
Shortcrust pastry in a fluted tart pan with a fork-pricked base and apple slices nearby.
Before the apples go in, a chilled and pricked shortcrust base gives the tart a better chance to bake evenly.

Shortcrust usually needs longer than puff pastry. Plan on 40–55 minutes, depending on the pan, crust thickness, and apple slice thickness. The tart is ready when the apples are tender and the crust is golden all the way through, not just browned at the rim.

How to Slice Apples for Apple Tart

For a neat apple tart, slice the apples evenly. Aim for ⅛–¼ inch / 3–6 mm. Thinner slices give a polished French-style look, while slices closer to ¼ inch / 6 mm feel more rustic and apple-forward. Whatever thickness you choose, keep the slices similar so they soften at the same pace.
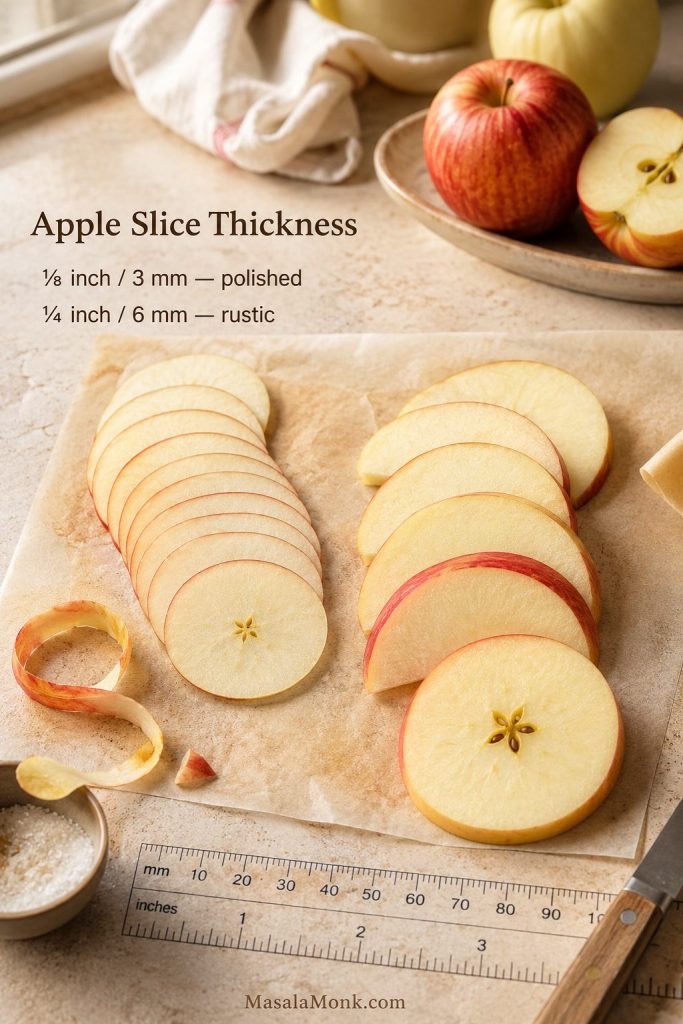
Apple slice thickness guide showing thin and slightly thicker apple slices for an apple tart.
Aim for thinner slices when you want a polished French-style apple tart; go thicker for a softer, more rustic bite.

For easier prep, cut the apples into cheeks first, then slice each piece thinly. You can peel the apples or leave the skin on. Peeled apples give a softer, more classic finish. Unpeeled apples add color and a little bite, especially with Pink Lady, Honeycrisp, or another red-skinned apple. A little browning before baking is harmless, especially once cinnamon and glaze go on.

Need to slice the apples a little ahead of time? Lemon water or lemon juice can slow browning. This guide on how to keep sliced apples from turning brown is useful when you are prepping fruit before baking.

Once the apples are sliced, move to the arranging step for simple rows, shingles, or fans.

How to Make Apple Tart Step by Step

Do not worry about making every slice identical. Even slices help the tart bake evenly, but a slightly rustic pattern still looks lovely once the apples soften and the glaze goes on.

1. Preheat the oven and baking sheet

Heat the oven to 400°F / 200°C, or 180°C fan. Place a rimmed baking sheet on the middle rack while the oven preheats. A hot tray helps the pastry bottom set instead of steaming underneath the apples.
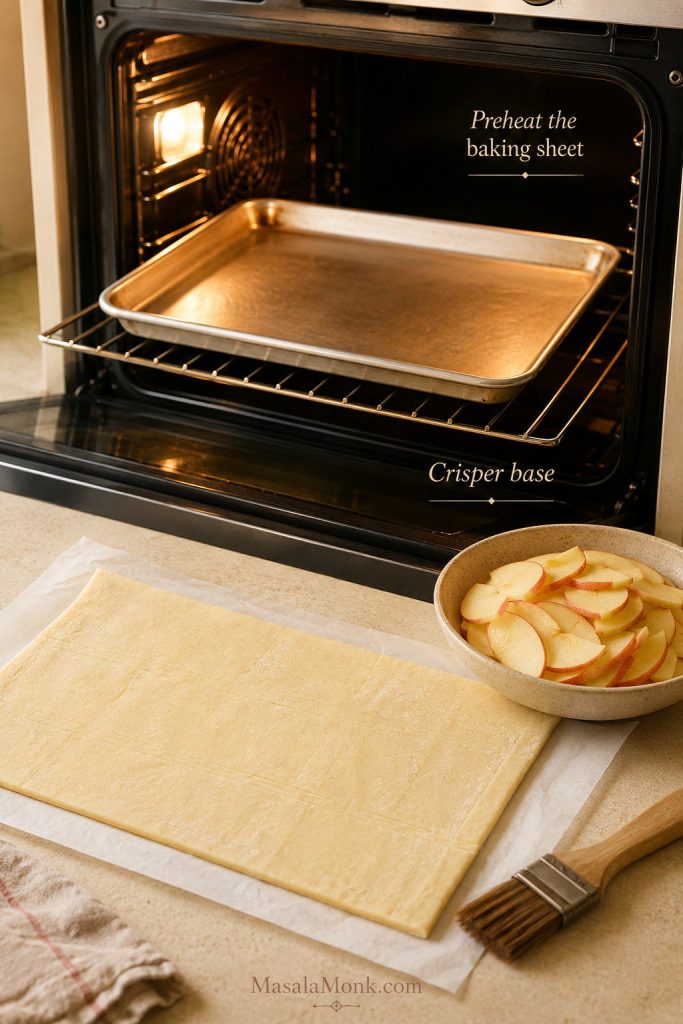
Empty rimmed baking sheet preheating in an oven with puff pastry and sliced apples ready on the counter.
A preheated sheet pan gives puff pastry heat from below, so the base starts setting before the apples release juice.

2. Prepare the puff pastry

Place the cold puff pastry on parchment paper. Roll it lightly to smooth creases or even out the shape. Keep it close to a standard sheet-pan tart size; pastry rolled too thin will not puff as well.

Score a ¾–1 inch / 2–2.5 cm border around the edge with a knife, without cutting all the way through. Dock the center with a fork, leaving the border untouched so it can rise.
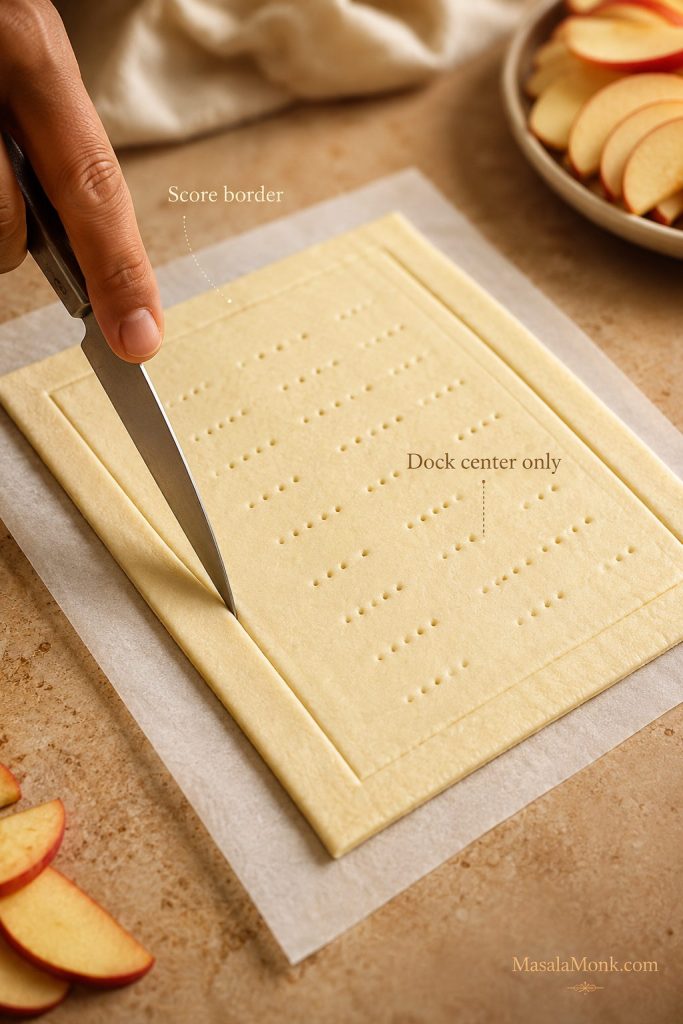
Puff pastry scored around the border and docked in the center with fork marks for apple tart.
Score for lift and dock for control; together, those two small steps shape the raised border and flatter center.

3. Slice and season the apples

Slice the apples thinly and toss them with lemon juice, sugar, cinnamon, and a pinch of salt. When the apples release a lot of juice while they sit, leave the extra liquid behind instead of pouring it onto the pastry.
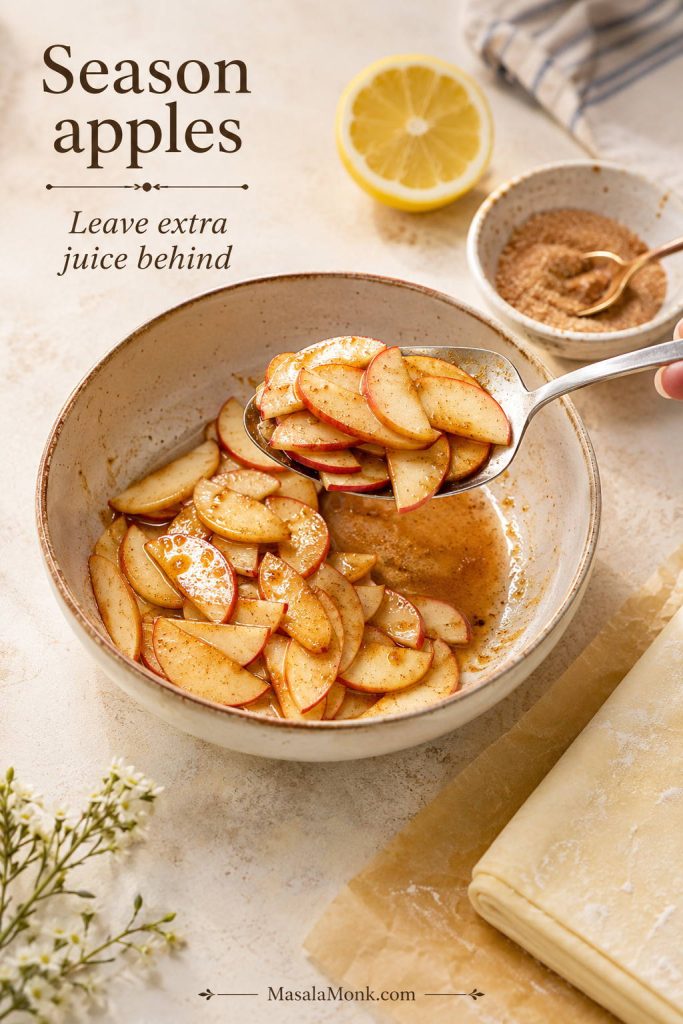
Thin apple slices tossed with cinnamon sugar and lemon juice, with extra liquid left in the bowl.
After seasoning the apples, lift the slices out of the bowl instead of pouring extra cinnamon-lemon juice onto the pastry.

4. Arrange the apples

Arrange the apple slices inside the scored border in overlapping rows, shingles, fans, or a simple diagonal pattern. Keep them in one tidy layer. Brush the apples with melted butter. Brush egg wash on the top border if using, but avoid the cut sides.

Rows, shingles, fans, or a loose spiral all work. The pattern matters less than keeping the apples in an even layer, so do not worry if it looks a little rustic before baking.
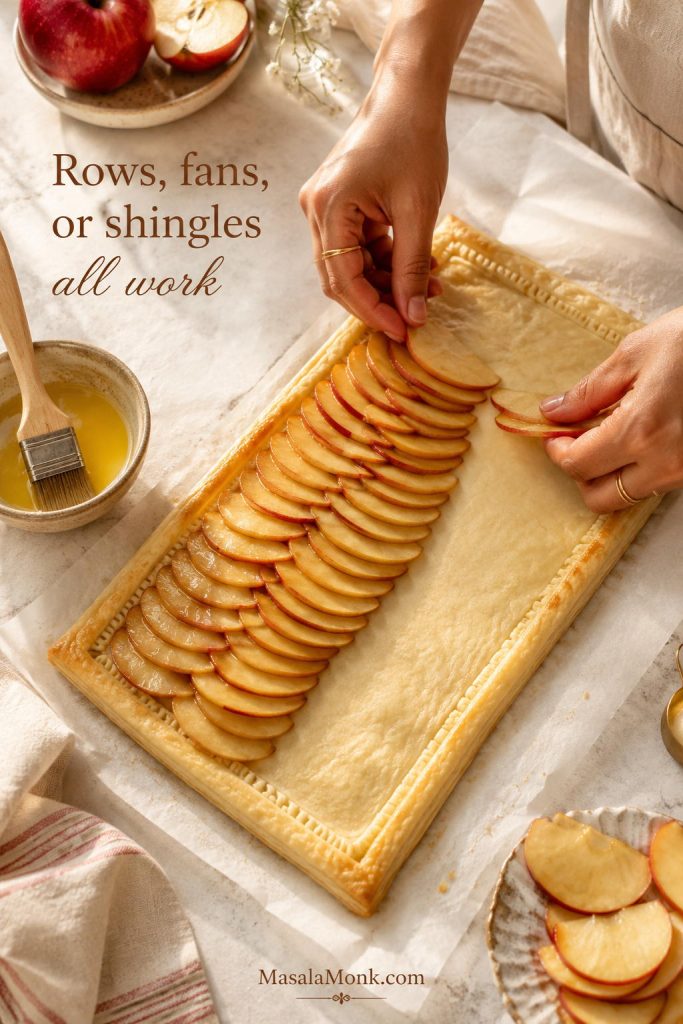
Hands arranging thin apple slices in overlapping rows on puff pastry for apple tart.
A neat apple tart comes from an even layer first; the exact pattern matters less once the apples soften and shine.

5. Chill the assembled tart

Refrigerate the assembled tart for 10–15 minutes while the oven finishes heating. This keeps the butter layers firm and helps the pastry puff more cleanly.
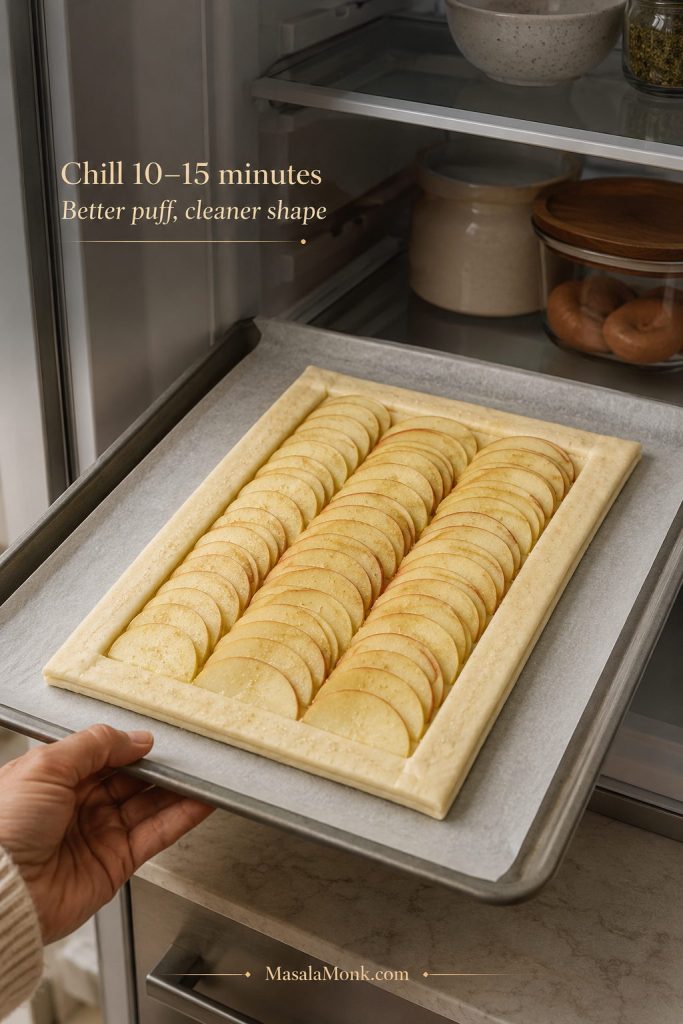
Unbaked apple tart on a baking sheet being chilled in the refrigerator before baking.
That quick fridge rest firms the butter layers, which helps the puff pastry hold its border instead of slumping.

6. Bake until crisp and browned

Carefully slide the parchment with the tart onto the hot baking sheet. Bake for 30–35 minutes, until the edges are puffed, the bottom is browned, and the apples are tender at the edges.

By the last 10 minutes, the kitchen should smell buttery and cinnamon-warm. Do not pull the tart when the border is only lightly golden; puff pastry tastes best when it has real color, and a pale base is the first sign it may soften as it cools.
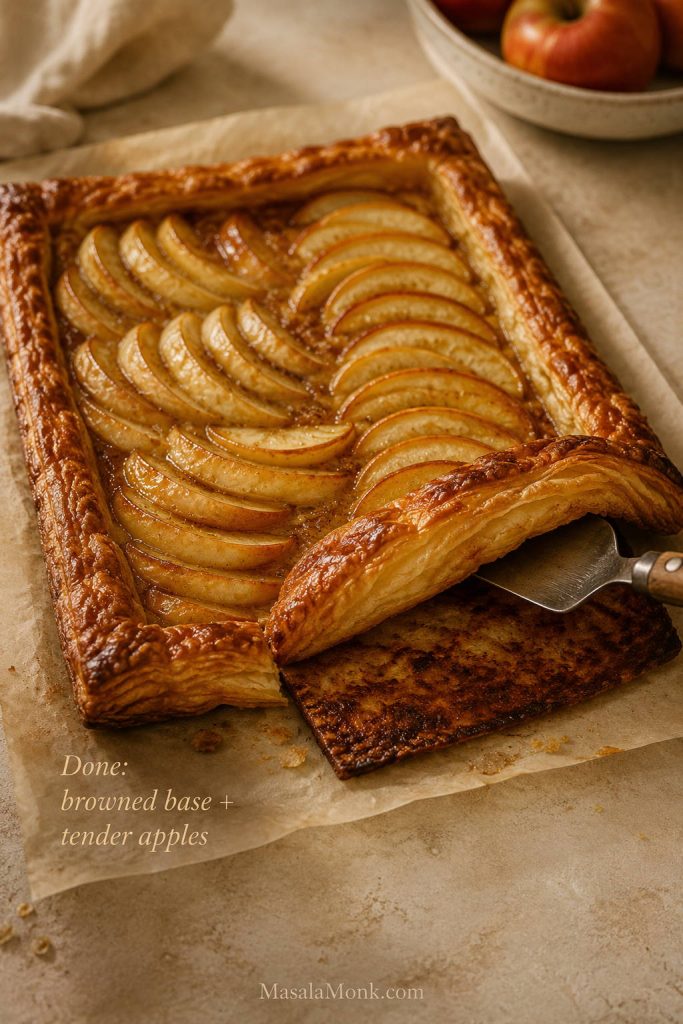
Baked apple tart with browned puff pastry, tender apple slices, and a lifted edge showing the base.
Look underneath before you call it done; a pale base can turn soft even when the apples already look glossy.

For ovens that brown pastry quickly, bake on the middle rack or slightly lower. A lower rack can help the base cook before the top gets too dark. If the pastry is browning unevenly or the center looks soft, check the troubleshooting guide before changing the recipe next time.

7. Glaze and cool

Warm the apricot jam with a teaspoon of water until loose, then brush it mostly over the apples while the tart is still warm. For the smoothest glaze, strain out large fruit pieces before brushing, and avoid soaking the pastry border so the edge stays crisp.
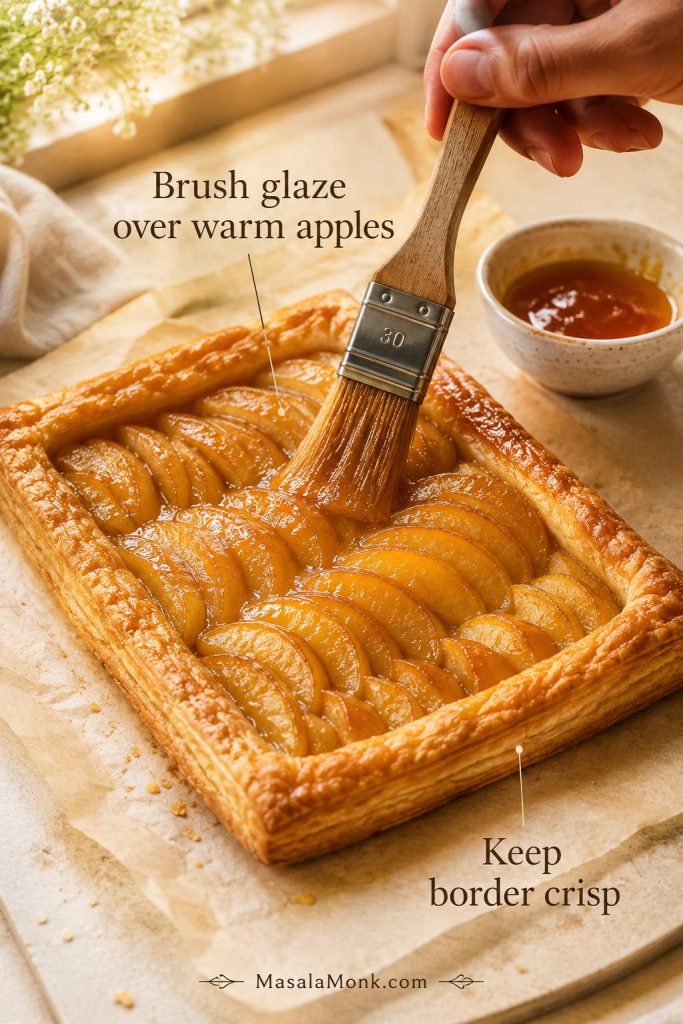
Warm apple tart brushed with apricot glaze while the puff pastry border stays crisp.
Glaze adds shine after baking, but brushing mostly over the apples keeps the puff pastry edge crisp.

Let the tart cool for at least 10–15 minutes before slicing so the pastry can settle. Serve it warm when the apples are soft and fragrant, or at room temperature when you want cleaner slices for a dessert table.

Larger pastry sheet note: Puff pastry sheets vary by brand and country. If your sheet is closer to 300–320 g instead of 240–260 g, use 4 medium apples and add 3–5 minutes to the bake time if the center needs it.

How to Keep Apple Tart from Getting Soggy

A soggy apple tart usually comes from warm pastry, too many apples, excess apple juice, or underbaking. The fix is not one trick; it is a small chain of good habits that keep the pastry cool, the fruit layer controlled, and the base properly baked.
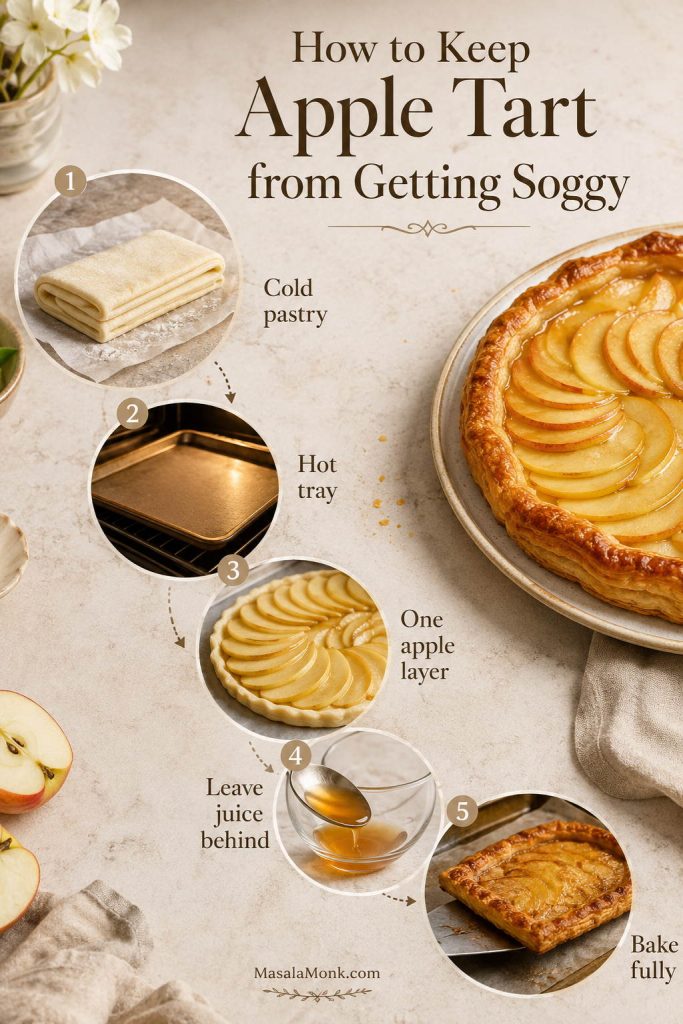
Crisp-base guide for apple tart showing cold pastry, a hot tray, one apple layer, excess juice control, and full baking.
Crispness is built in stages: cool pastry, controlled apple juice, heat from below, and enough time in the oven.

If you are still assembling the tart, the preheated baking sheet step, apple seasoning step, and chilling step are the most important places to prevent sogginess.

Before Baking: Keep the Pastry Cold and the Apples Controlled

  • Keep the pastry cool and firm. Warm puff pastry tends to slump before it rises.
  • Use a hot baking sheet. The heat hits the bottom quickly and helps the base set.
  • Score the border. This encourages the edges to puff around the apples.
  • Dock the center only. The middle stays flatter while the border rises.
  • Use one layer of apples. A heavy pile releases too much juice.
  • Leave excess juice behind. Season the apples, then avoid dumping watery liquid onto the pastry.
  • Add a light barrier when needed. For very juicy apples, sprinkle 1 tablespoon almond flour, fine breadcrumbs, or flour over the pastry center before adding apples.
  • Bake until the bottom is firm. The pastry should flake instead of bend.

After Baking: Diagnose What Went Wrong

If the tart has already gone wrong, use the table below to work out what happened. Most texture problems come back to the same few causes: soft pastry, too much moisture, thick apple slices, or pulling the tart from the oven too early.
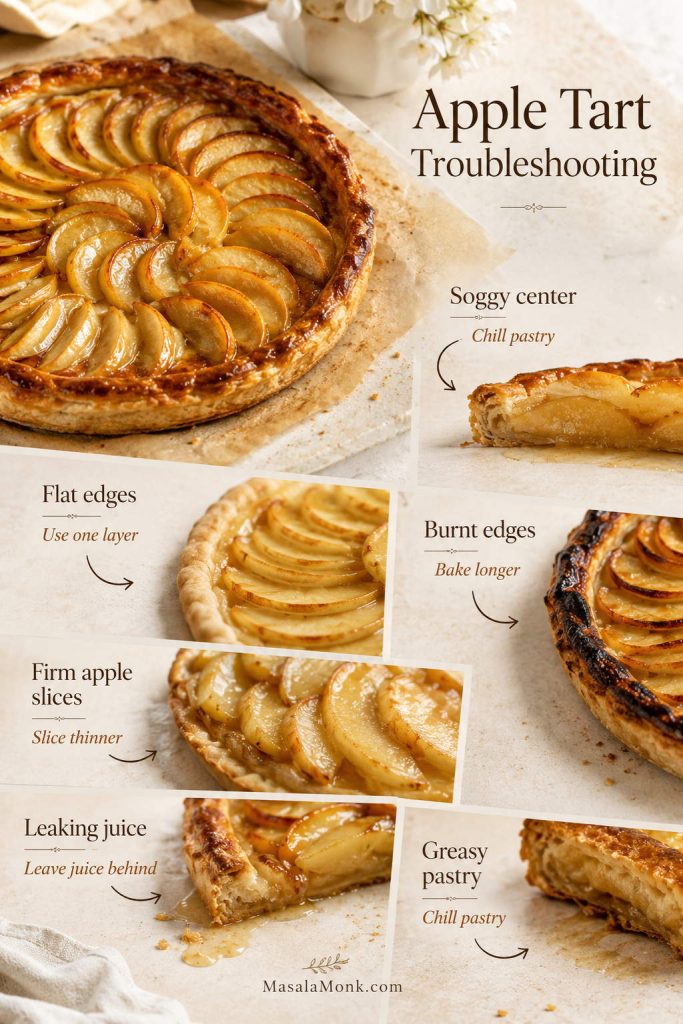
Apple tart troubleshooting guide showing soggy center, flat edges, burnt edges, firm apples, leaking juice, and greasy pastry fixes.
Use the texture problem first, then fix the cause; apple tart issues usually trace back to moisture, heat, or slice thickness.
Problem Likely Cause Fix
Soggy center Too much apple juice or underbaked pastry Leave excess liquid behind and bake until the base is browned.
Flat edges Border was docked, cut too deeply, or pastry got too warm Dock only the center and chill the assembled tart before baking.
Burnt edges Oven too hot, sugar on the border, or tart baked too high in the oven Brush sugar off the border before baking and move the tart lower if needed.
Apples still firm Slices were too thick Slice apples ⅛–¼ inch / 3–6 mm thick.
Juice leaking everywhere Too many apples or too much liquid added to pastry Use one overlapping layer and leave extra apple liquid in the bowl.
Pastry tastes greasy Pastry was warm before baking Chill the tart for 10–15 minutes before it goes into the oven.

Final Texture Cue

Texture cue: The apple tart is done when the edges are puffed, the bottom feels firm when lifted slightly with a spatula, and the apple edges look tender and lightly caramelized.
Apple tart slice lifted sideways to show a browned underside and flaky puff pastry layers.
The underside tells the truth: if the pastry feels firm and layered, the tart will slice and eat better.

Apple Tart vs Pie, Tarte Tatin, and Galette

An apple tart gives you the apple-and-pastry feeling of pie, but in a lighter, neater form. Instead of a deep layer of saucy filling, the apples are sliced thin and baked right on top of the pastry.
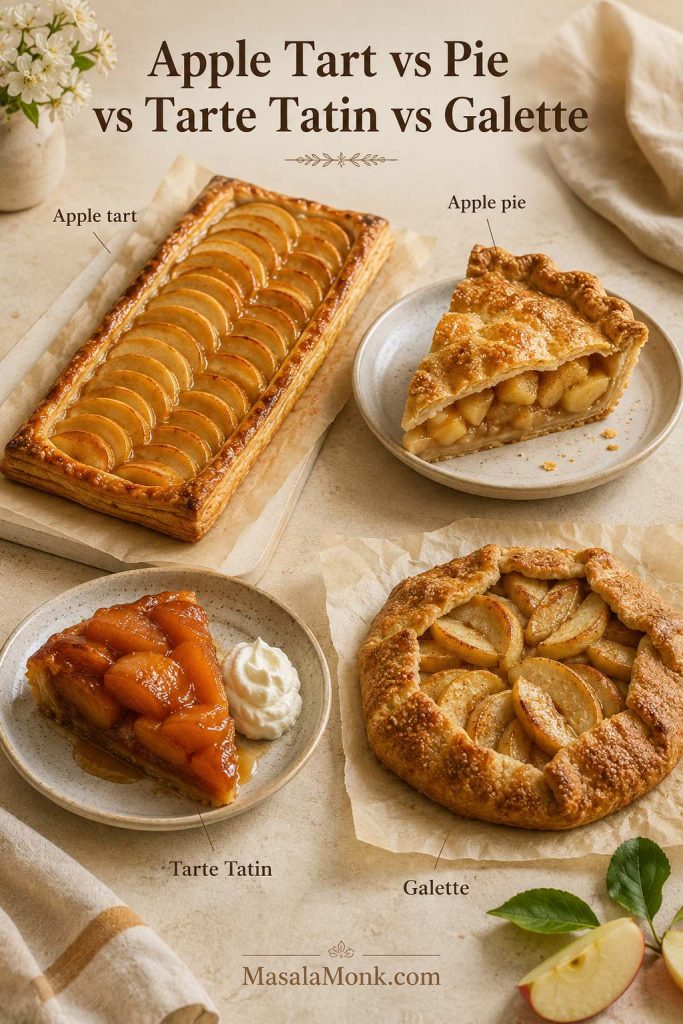
Apple tart, apple pie, Tarte Tatin, and apple galette arranged together as a dessert comparison.
Apple tart is the lighter open-faced dessert, while pie, Tarte Tatin, and galette each bring a different apple texture.
Dessert What It Is Main Difference
Apple tart Open-faced pastry with sliced apples on top Thin, elegant, less filling-heavy
Apple pie Deeper apple filling baked in pie crust Juicier, taller, usually more filling
Tarte Tatin Upside-down caramelized apple tart Apples cook in caramel, then the tart is flipped
Apple galette Free-form rustic apple tart No tart pan or neat border needed

For a deeper, softer dessert with a fuller filling, make a pie instead. This apple pie with apple pie filling is better when you want a shortcut pie with a thicker apple center. For this apple tart recipe, fresh thin apple slices are the better choice because they bake neatly and do not flood the pastry.

French-Style Apple Tart: What Makes It Different?

A French-style apple tart is usually open-faced, neat, and lighter than apple pie. The apples are sliced thin, arranged in rows, shingles, spirals, or fans, and often brushed with apricot glaze after baking. Some versions use puff pastry, while others use shortcrust or a sweet tart dough.

A very thin puff pastry apple tart like this is close to tarte fine aux pommes, the slim French-style apple tart built on pastry, thin apples, and a glossy finish. Deeper tart-pan versions often use shortcrust and sometimes a thin applesauce or compote layer.
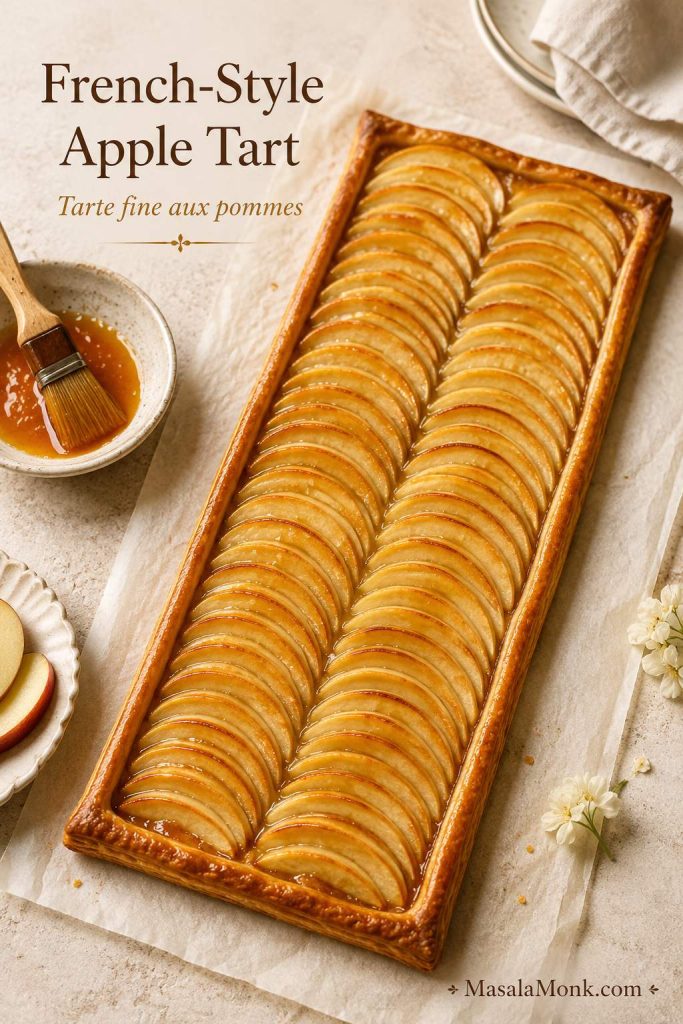
Thin French-style apple tart with overlapping apple slices, glossy glaze, and a slim puff pastry border.
Tarte fine aux pommes keeps the idea elegant: thin apples, slim pastry, glossy finish, and very little heaviness.

The classic look is polished but not complicated. Keep the apple layer even, leave a clear pastry border, and glaze the tart while it is still warm. That gives you the glossy bakery finish without turning the recipe into a pastry-school project.

Apple Tart Variations

Use these variations when you want the same apple-and-pastry idea in a different shape: quicker, richer, more classic, more party-friendly, or better suited to a specific diet.
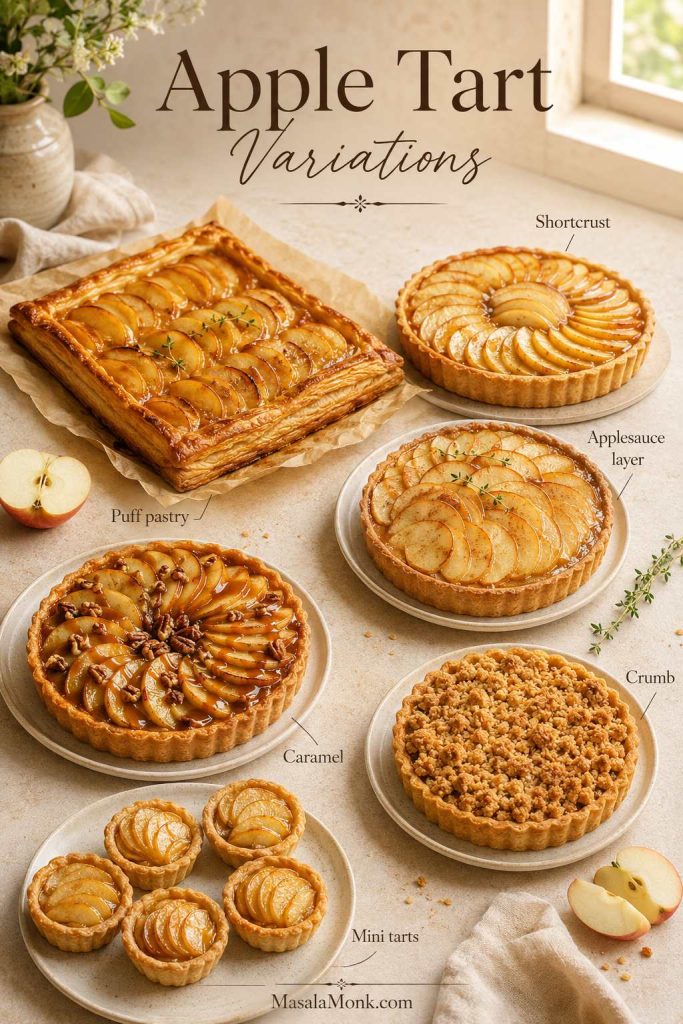
Apple tart variations including puff pastry, shortcrust, applesauce layer, caramel, crumb topping, and mini tarts.
Once the basic apple tart works, you can shift it toward shortcrust, caramel, crumb topping, mini tartlets, or French-style layers.

For the simplest version, stay with the main apple tart recipe. For a more classic tart-pan version, jump back to the shortcrust apple tart notes.

Puff Pastry Apple Tart

Choose this when you want the flakiest apple tart with the least dough work. Store-bought puff pastry does most of the heavy lifting, so this is the best starting point for a weeknight dessert, a last-minute guest dessert, or a simple French-style tart.

Shortcrust Apple Tart

Choose shortcrust when you want a more classic round apple tart in a 9–10 inch tart pan. Chill the lined pan before baking. With juicy apples, a light partial blind bake helps the base set before the fruit goes in.

French-Style Apple Tart with Applesauce

For a more classic French-style apple tart, spread a thin layer of smooth, unsweetened applesauce or apple compote over the pastry before arranging the apple slices. For a puff pastry tart, use only 2–3 tablespoons. A tart-pan shortcrust version can take a slightly thicker layer, but keep it controlled because too much applesauce will soften the base.
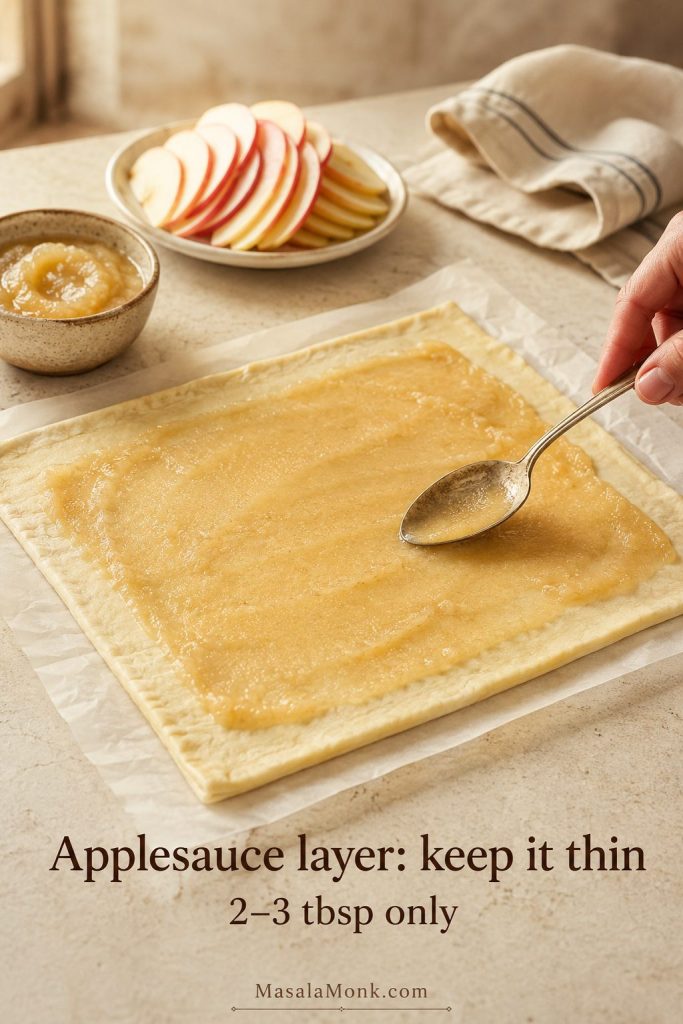
Thin applesauce layer spread over puff pastry before apple slices are added for French-style apple tart.
If you add applesauce, spread it thinly because too much moisture can soften the pastry before it crisps.

Caramel Apple Tart

Drizzle a little caramel sauce over the baked tart just before serving. Avoid adding too much caramel before baking because it can burn around the pastry edges.

Apple Crumb Tart

Add a light crumb topping over the apples before baking if you want a Dutch-style feel. For a fuller crumb-topped apple dessert, this Dutch apple pie recipe is the better route.

Mini Apple Tarts

Mini apple tarts are the party-friendly version. Cut puff pastry into smaller squares or rounds, top each piece with a few apple slices, and start checking around 15–18 minutes because small tarts brown faster than one large sheet tart.
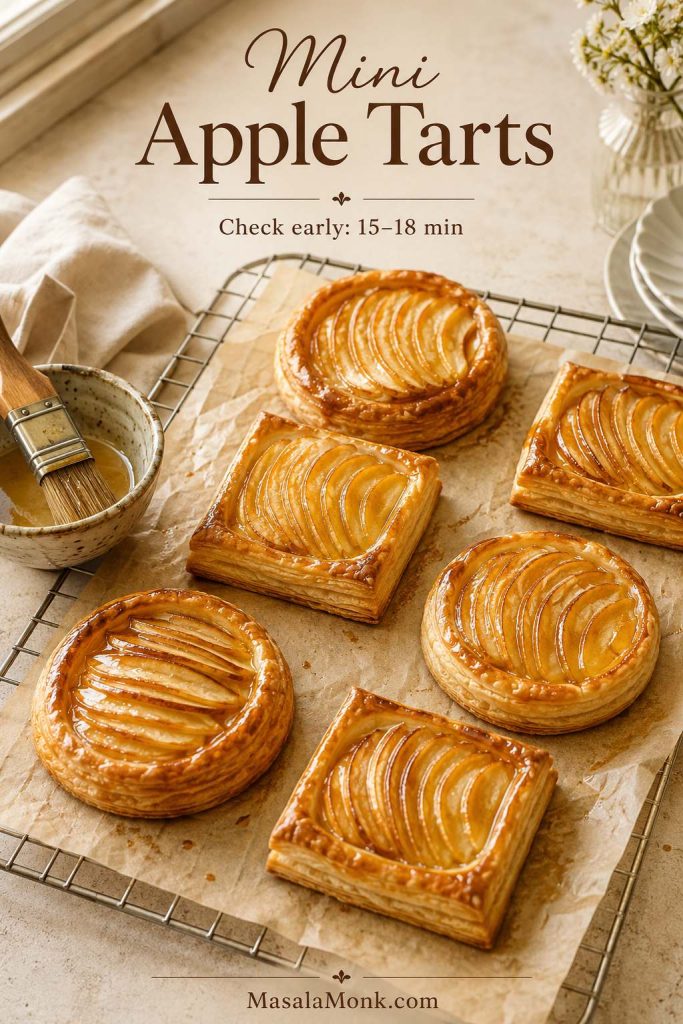
Mini apple tarts with glossy sliced apples on puff pastry, cooling on parchment and a wire rack.
Mini apple tarts brown faster than a full sheet tart, so start checking early once the edges puff and deepen.

Apple Frangipane Tart

For a richer bakery-style tart, add a thin layer of almond frangipane under the apples. Because the almond filling needs time to cook through, it is better treated as its own tart style rather than a quick add-on.

Prepared Apple Filling Dessert

Prepared apple pie filling is better in desserts designed for a softer, saucier texture. An apple cinnamon roll bake with apple pie filling is a much better fit when you want a quick dessert using ready-made filling.

Vegan Apple Tart

For a vegan apple tart, choose vegan puff pastry, brush the border with plant milk, and use vegan butter or a neutral oil on the apples. Most of the method stays the same; just check the jam if you are cooking for strict vegans.

Gluten-Free Apple Tart

Use a tested gluten-free puff pastry or a gluten-free tart crust. Do not assume regular pie dough can be swapped one-for-one with gluten-free flour, because pastry structure changes quickly without gluten.

For apple flavor without pastry at all, make an apple crisp recipe instead. It gives you tender cinnamon apples and a crunchy topping without worrying about tart dough.

Storage, Freezing, and Reheating

How to store apple tart

Apple tart is best the day it is baked, when the pastry is crispest. Store leftovers in an airtight container in the refrigerator for up to 3 days; this also stays in line with the USDA’s general leftovers and food safety guidance.

How to reheat apple tart

Reheat slices in a 325°F / 160°C oven or toaster oven for 8–12 minutes, until the pastry feels crisp again. Avoid microwaving if you care about texture; it softens puff pastry quickly.
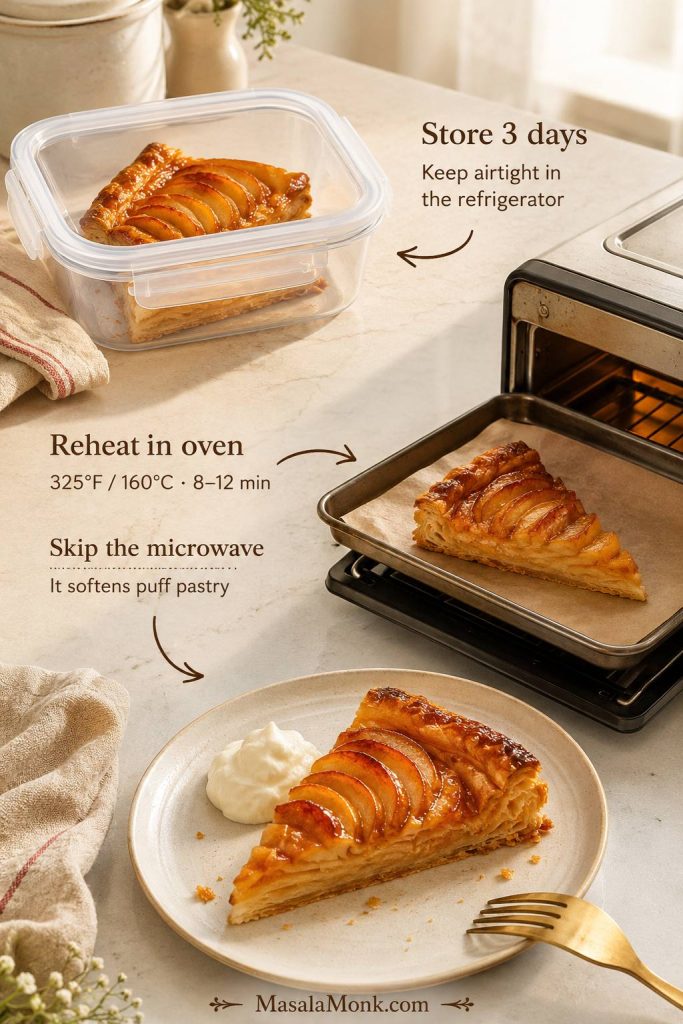
Apple tart storage and reheating guide showing a slice in an airtight container, oven reheating, and a refreshed slice.
Refrigerate leftovers airtight, then use the oven to revive texture because the microwave softens puff pastry quickly.

Can you freeze apple tart?

You can freeze baked apple tart slices, but the pastry will not be quite as crisp after thawing. Reheat from chilled or partially thawed in the oven until warm and crisp at the edges.

Can you make apple tart ahead?

The best make-ahead plan is to prepare the small pieces, then assemble close to baking. Mix the cinnamon sugar ahead, measure the jam or jelly ahead, and keep thawed puff pastry cold in the refrigerator. Slice the apples shortly before assembly for the freshest texture and color, then warm the glaze just before brushing it over the tart.

For guests, bake the tart the same day and let it sit at room temperature before serving. It slices more neatly once it has cooled slightly, but still tastes special with ice cream, cream, coffee, or tea.

For serving ideas, jump to what goes well with apple tart near the FAQs.

Apple Tart Recipe Card
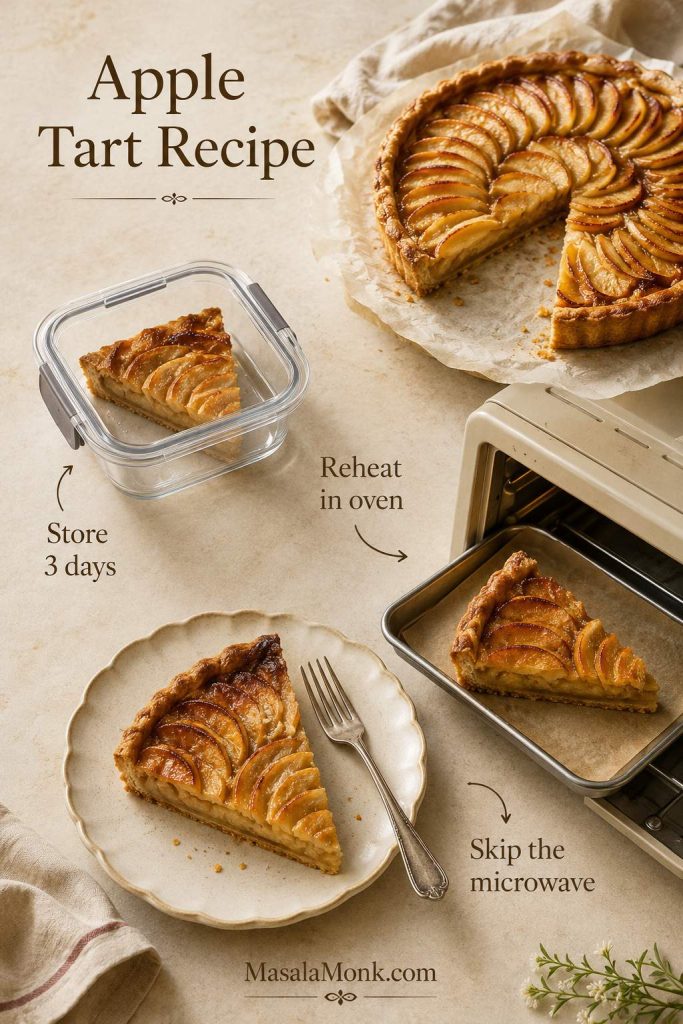
Apple tart recipe card with a tart slice, puff pastry, apples, bake temperature, bake time, and apricot glaze.
The core method stays simple: cold puff pastry, thin apples, a hot oven, full color, and a warm glaze.

Apple Tart Recipe

This easy apple tart recipe bakes thin apple slices over store-bought puff pastry with cinnamon sugar and a glossy apricot glaze. It looks bakery-style, but the method is simple enough for a casual dessert.

Prep Time20 minutes
Chill Time10–15 minutes
Cook Time30–35 minutes
Cooling Time10–15 minutes
Total Time1 hour 10 minutes to 1 hour 25 minutes
Yield6–8 servings

Ingredients

  • 1 sheet all-butter puff pastry, about 8–9 oz / 240–260 g, thawed but cold
  • 3 medium apples, about 450–550 g / 1–1¼ lb before peeling and coring
  • 1 tablespoon lemon juice / 15 ml
  • 3–4 tablespoons granulated sugar or light brown sugar / 38–50 g
  • ½ teaspoon ground cinnamon
  • Pinch of fine salt
  • 2 tablespoons unsalted butter / 28 g, melted
  • 2 tablespoons apricot jam or apple jelly / 35–40 g
  • 1 teaspoon water / 5 ml, for loosening the glaze
  • Optional egg wash: 1 egg beaten with 1 teaspoon water
  • Optional base barrier: 1 tablespoon almond flour, fine breadcrumbs, or all-purpose flour for juicy apples

Instructions

  1. Preheat the oven. Heat the oven to 400°F / 200°C, or 180°C fan. Place a rimmed baking sheet on the middle rack while the oven preheats.
  2. Prepare the pastry. Place the cold puff pastry on parchment paper. Roll lightly if needed to even it out. Score a ¾–1 inch / 2–2.5 cm border around the edge without cutting all the way through. Dock the center with a fork, leaving the border untouched.
  3. Slice the apples. Peel the apples if you like, then slice them ⅛–¼ inch / 3–6 mm thick.
  4. Season the apples. Toss the apple slices with lemon juice, sugar, cinnamon, and salt. Leave extra juice behind if the apples release a lot of liquid.
  5. Arrange the tart. If using the optional base barrier, sprinkle it lightly over the docked center of the pastry. Arrange the apples in overlapping rows or shingles inside the scored border. Brush the apples with melted butter. Brush egg wash only on the top border if using.
  6. Chill. Refrigerate the assembled tart for 10–15 minutes.
  7. Bake. Carefully slide the parchment and tart onto the hot baking sheet. Bake for 30–35 minutes, until the edges are puffed, the bottom is browned, and the apples are tender.
  8. Glaze. Warm the apricot jam with 1 teaspoon water until loose. Brush mostly over the warm apples.
  9. Cool and serve. Let the tart cool for 10–15 minutes before slicing. Serve warm or at room temperature.

Notes

  • For a sharper tart, use Granny Smith or mix Granny Smith with Honeycrisp or Pink Lady.
  • Honeycrisp, Gala, Fuji, and Golden Delicious make a sweeter, softer tart.
  • A larger 300–320 g puff pastry sheet can take 4 medium apples and may need 3–5 extra minutes in the oven.
  • Shortcrust or pie crust works best in a 9–10 inch tart pan and usually needs 40–55 minutes.
  • Do not overload the pastry with apples. One generous overlapping layer is enough.
  • For a French-style applesauce layer, use only 2–3 tablespoons of smooth, unsweetened applesauce on puff pastry so the base does not soften.
  • Leftovers keep in the refrigerator for up to 3 days. Reheat in the oven, not the microwave, for the best texture.

FAQs

Can I use puff pastry for apple tart?

Yes. Puff pastry works especially well for apple tart because it gives a flaky base and raised edge without homemade dough. The key is to bake it from cold and avoid piling on too many apples.

Do the apples need to be cooked first?

No. For this style of apple tart, thin raw apple slices bake directly on the pastry. Pre-cooked apple pie filling is usually too wet and thick for a thin puff pastry tart.

Can apple pie filling be used for apple tart?

Apple pie filling is not the best choice for this tart. It is saucier and heavier, so it can make puff pastry soggy. Use fresh thin apple slices for this recipe and save cooked filling for deeper pies, crisps, hand pies, cinnamon roll bakes, or shortcut desserts.

What temperature is best for apple tart?

For puff pastry apple tart, 400°F / 200°C, or 180°C fan, is reliable. It is hot enough to puff and brown the pastry, but not so aggressive that the apple edges burn before the base cooks.

How thin should apples be for apple tart?

Slice apples about ⅛–¼ inch / 3–6 mm thick. Thin slices soften quickly and create a neater tart. Thicker slices work, but they make the tart more rustic and may need a few extra minutes in the oven.

Should apples be peeled for apple tart?

Peeling is optional. Peeled apples give a softer, more classic tart. Unpeeled apples add color and a little bite, especially with red-skinned apples like Pink Lady or Honeycrisp.

Why is my apple tart soggy?

The most common reasons are warm pastry, too many apples, too much apple juice, or underbaking. Keep the pastry cold, bake on a hot sheet pan, leave excess apple juice behind, and bake until the bottom is crisp.

Does shortcrust pastry work for apple tart?

Shortcrust pastry works well for a classic round apple tart in a tart pan. Chill the lined pan before baking, prick the base, and bake long enough for the crust to turn fully golden.

Can apple tart be made in an air fryer?

Small puff pastry apple tarts can be made in an air fryer, but a full rectangular tart is usually better in the oven. For mini versions, use parchment, leave room for the pastry to puff, and check early because air fryers brown quickly.

What goes well with apple tart?

Warm slices love vanilla ice cream because the cold cream melts into the glossy apples. At room temperature, the tart is lovely with whipped cream, crème fraîche, plain Greek yogurt, coffee, or tea, especially once the pastry has settled and the apple flavor tastes a little deeper.
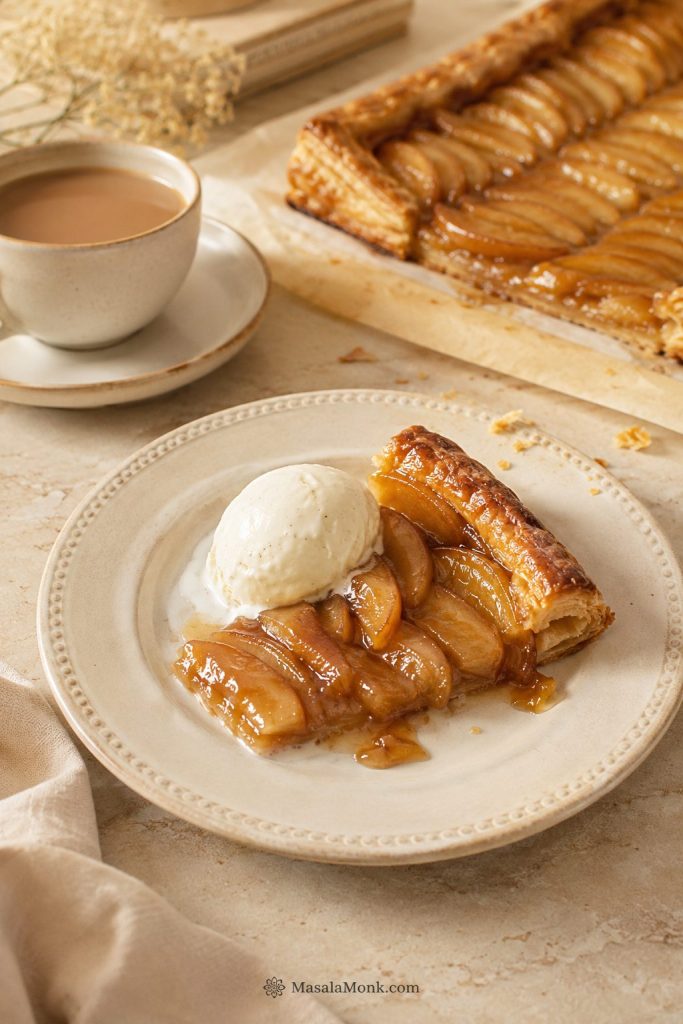
Apple tart slice served with vanilla ice cream, coffee, and the remaining tart in the background.
Serve apple tart warm when you want the ice cream to melt into the glossy apples, or let it cool slightly when clean dessert-table slices matter more.

Back to top

Posted on — Leave a comment

Peanut Butter Rice Crispy Treats

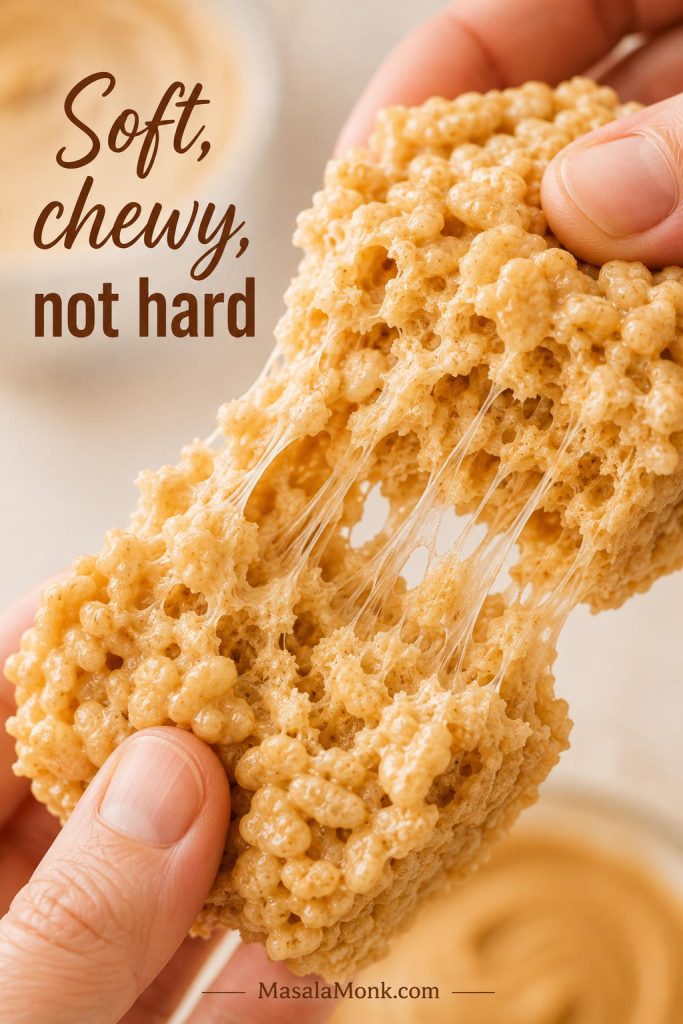
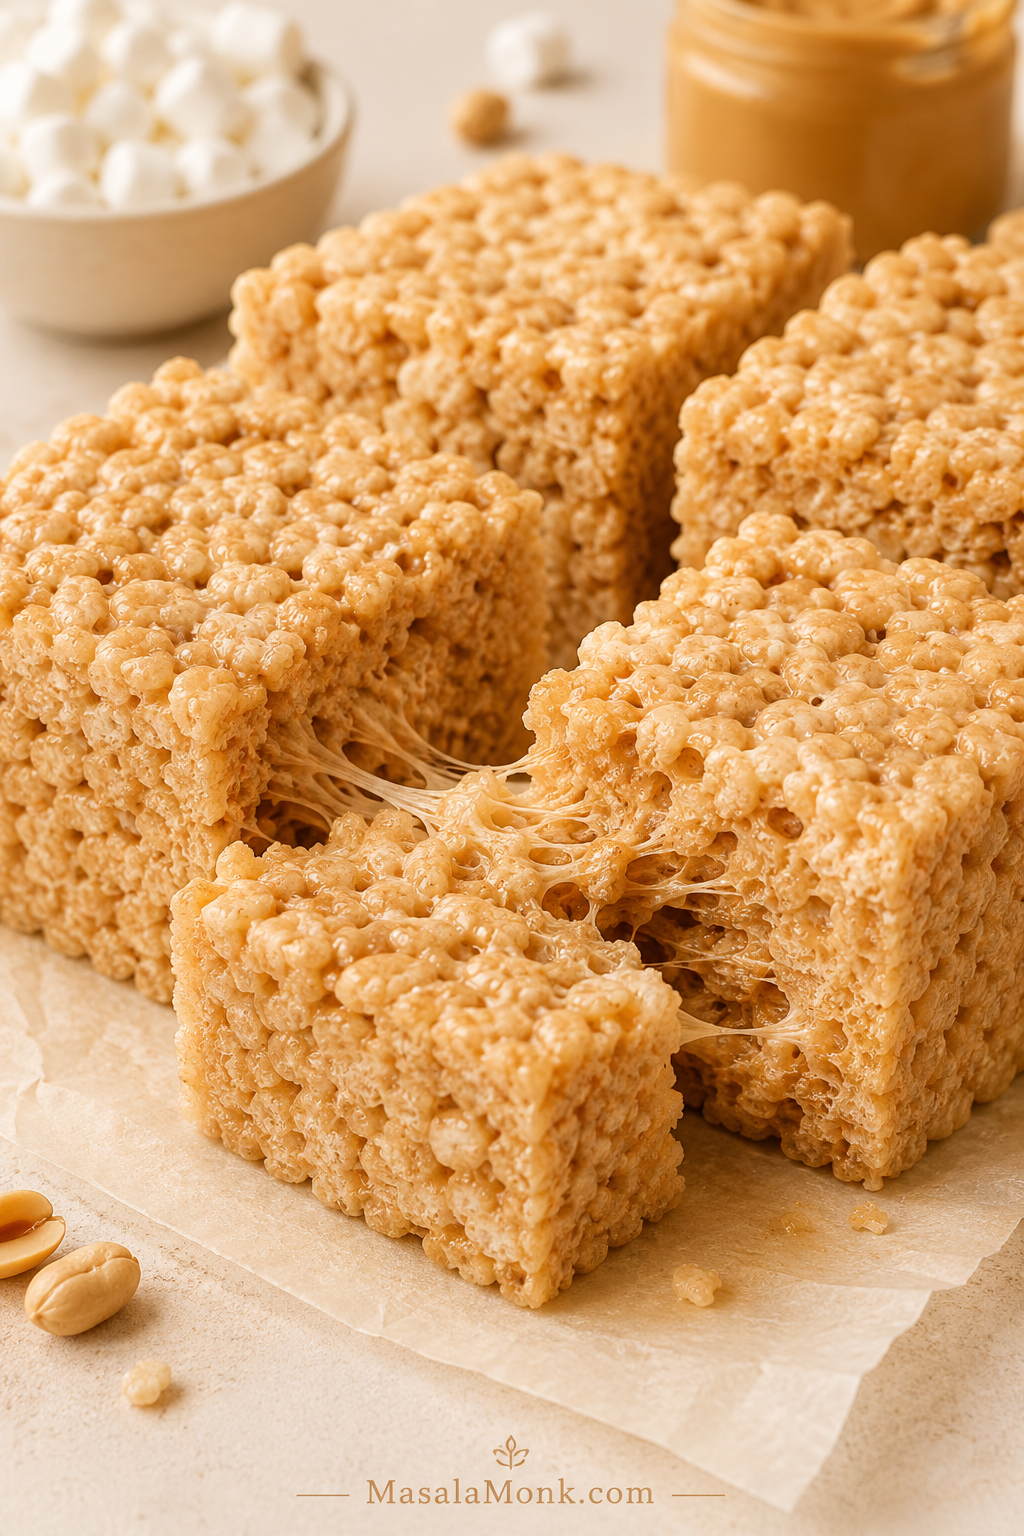
Thick peanut butter rice crispy treats cut into squares, with one piece pulled apart to show marshmallow strands and crisp cereal texture.

These peanut butter rice crispy treats are soft, chewy, salty-sweet no-bake bars with creamy peanut butter melted into the marshmallow mixture and a crisp cereal bite in every square. They taste nostalgic, but the peanut butter makes them richer and more satisfying than the plain version.

The best ones pull apart with soft marshmallow threads, hold their shape when you pick them up, and still have that little crackly bite from the cereal. They should feel homemade and tender, not hard, dry, greasy, or packed down like a brick.

Close-up of a hand pulling apart a soft peanut butter rice crispy treat with marshmallow threads and airy cereal pieces.
If the square bends and pulls instead of snapping, the marshmallows were melted gently and the pan was pressed with a light hand.

This is the kind of pan that disappears in uneven little cuts: one square for a lunchbox, one for the potluck tray, one warm corner piece while the bars are still setting, and then “just one more sliver” later in the afternoon.

You may know these as peanut butter Rice Krispie treats, but Rice Krispies cereal is not the only option. Any fresh crisp rice cereal works as long as the marshmallow mixture stays gentle, glossy, and well balanced.

This version is built around one goal: peanut butter rice crispy treats that stay soft instead of turning stiff. The details are small but important: low heat, fresh marshmallows, the right cereal range, and a light hand when pressing the mixture into the pan.

Quick Answer: How to Make Soft Peanut Butter Rice Crispy Treats

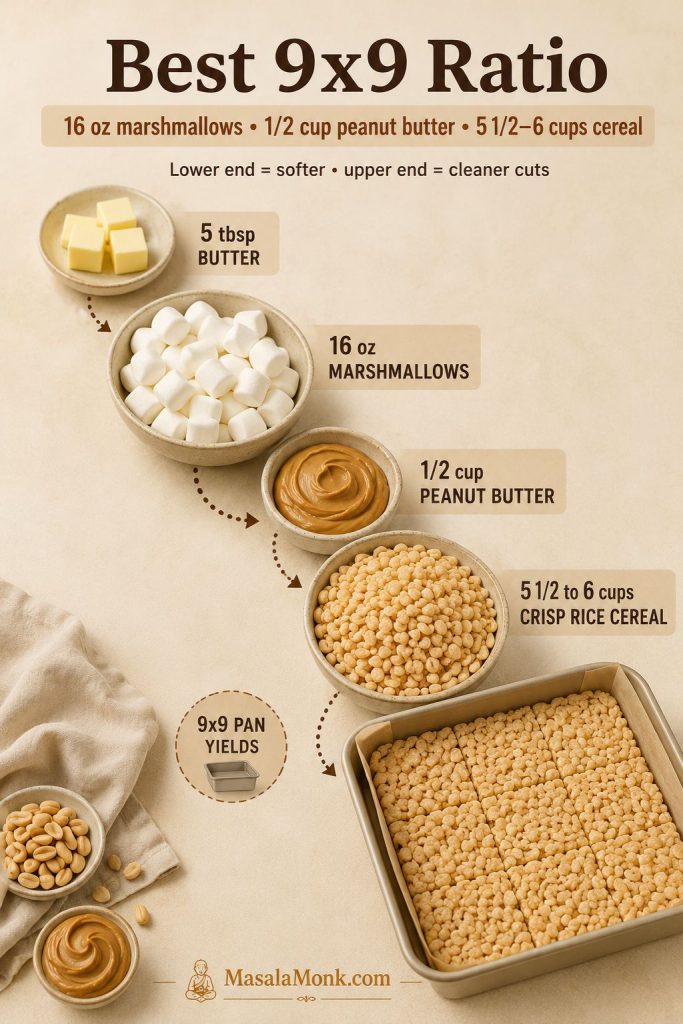
For soft peanut butter rice crispy treats, melt 5 tablespoons butter over low heat, add most of a 16-ounce bag of mini marshmallows, then stir in ½ cup creamy peanut butter, vanilla, and salt. Fold in 5½ to 6 cups crisp rice cereal, press the mixture lightly into a lined 9×9-inch pan, and cool before slicing.

Quick formula board for peanut butter rice crispy treats showing 5 tablespoons butter, 16 ounces marshmallows, 1/2 cup peanut butter, 5 1/2 to 6 cups cereal, vanilla, salt, and a lined 9x9 pan.
This quick formula keeps the base recipe easy to remember, while the cereal range lets you choose a softer or cleaner-cut pan.

For softer, gooier bars, use 5½ cups cereal and fold in reserved mini marshmallows at the end. For cleaner-cut squares, use the full 6 cups cereal and let the pan cool completely. Not sure which texture you want? Use the texture chooser before you start.

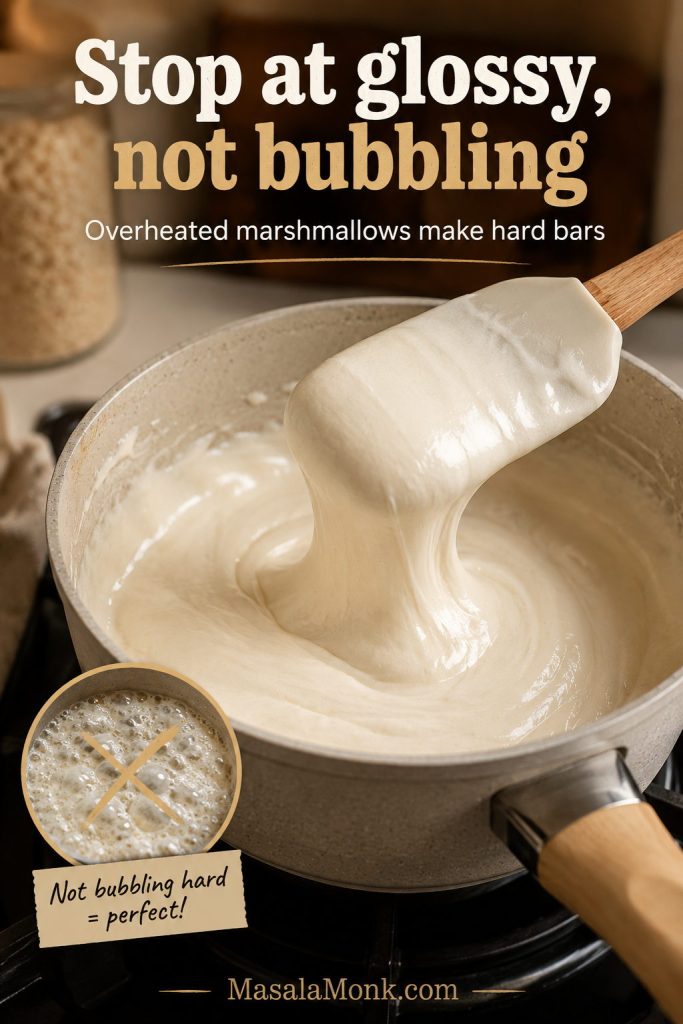
The key is gentle heat and light pressing. Stop when the marshmallow mixture is glossy, not bubbling hard, and nudge the cereal mixture into the pan instead of packing it down. That is what keeps the bars soft instead of brick-like.

The move that keeps them soft: Melt the marshmallows gently, stop before the mixture bubbles hard, and fold reserved mini marshmallows in at the end. That gives you soft pockets instead of one dense, uniform chew. If your last batch turned stiff, check the troubleshooting guide.
Glossy melted marshmallows in a saucepan being lifted with a spatula before the mixture bubbles hard.
Stop at the glossy stage; once the marshmallows bubble hard, the finished treats are more likely to turn stiff.

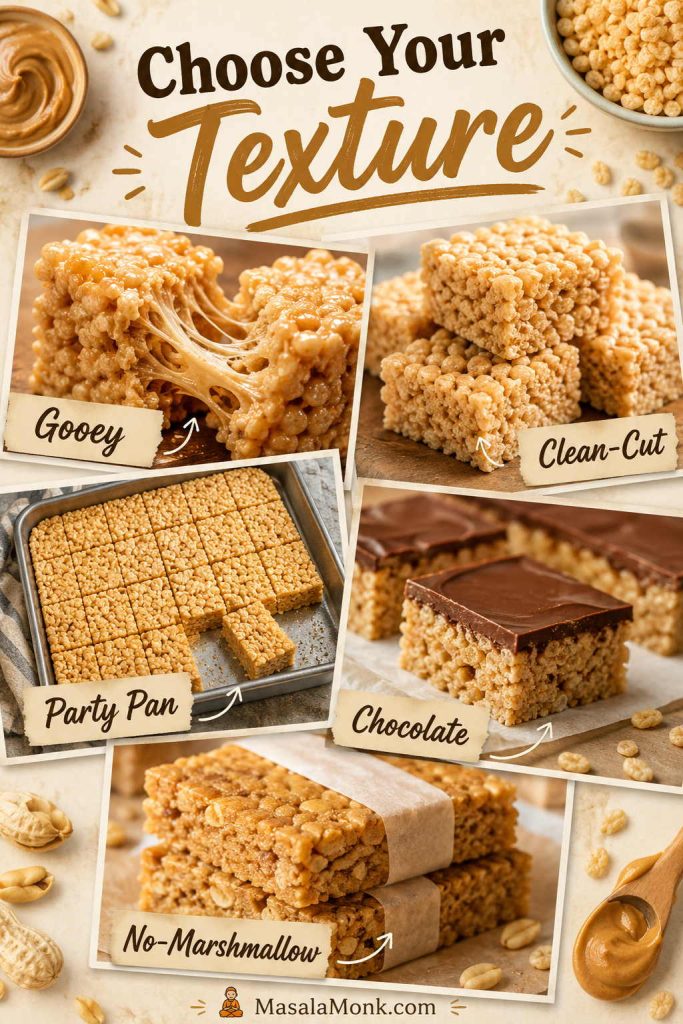
Choose Your Peanut Butter Rice Crispy Treats Texture

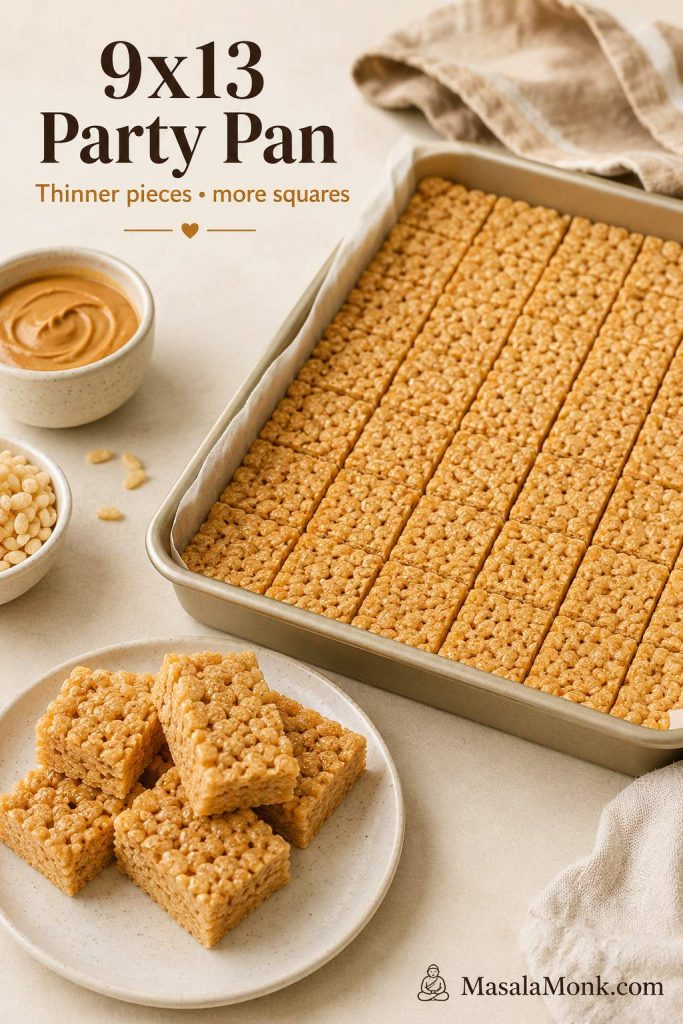
Before you start, decide what kind of treat you want from the pan. The same base recipe can turn soft and gooey for home, cleaner-cut for lunchboxes, chocolate-topped for dessert, party-ready in a 9×13 pan, or firmer and snack-bar-like without marshmallows.

What you want Best move Where to go
Softest, gooey bars Use 5½ cups cereal and fold in reserved mini marshmallows See the Ratio
Cleaner lunchbox squares Use 6 cups cereal and cool completely before cutting See the Ratio
Party tray Use the larger 9×13 pan scale instead of stretching the 9×9 batch Choose a Pan
Dessert-bar version Add the soft chocolate-peanut butter topping after the bars cool Add Chocolate
Firmer snack-bar style Use the peanut butter and honey or maple syrup version without marshmallows Skip Marshmallows
Chooser board with gooey, clean-cut, party pan, chocolate-topped, and no-marshmallow peanut butter rice crispy treat options.
Start by choosing the texture you want; then the cereal amount, pan size, and topping become much easier decisions.

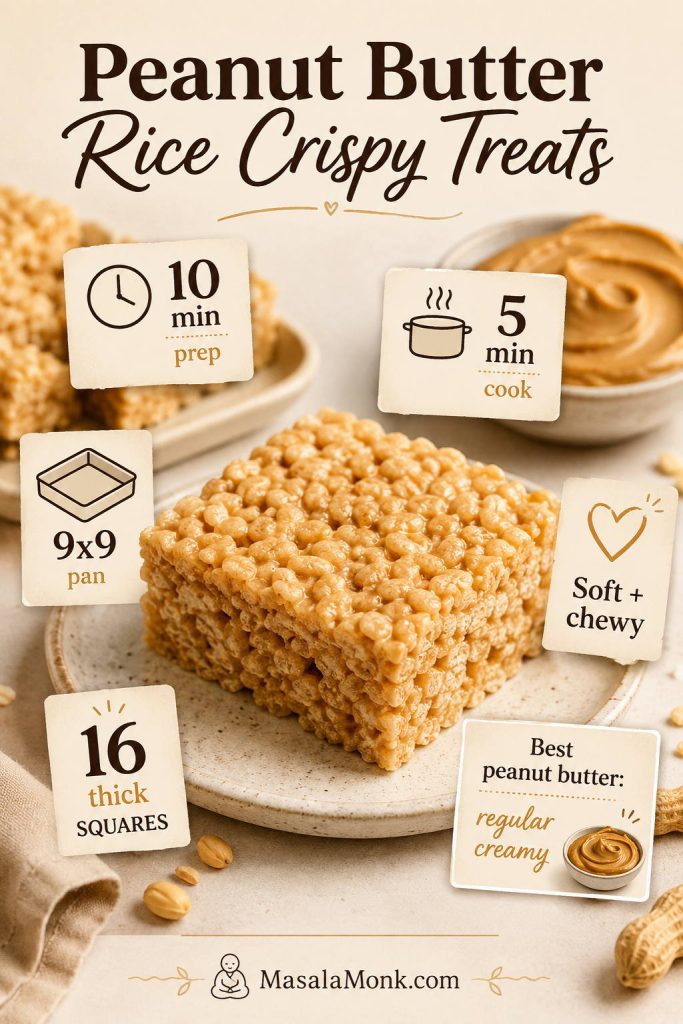
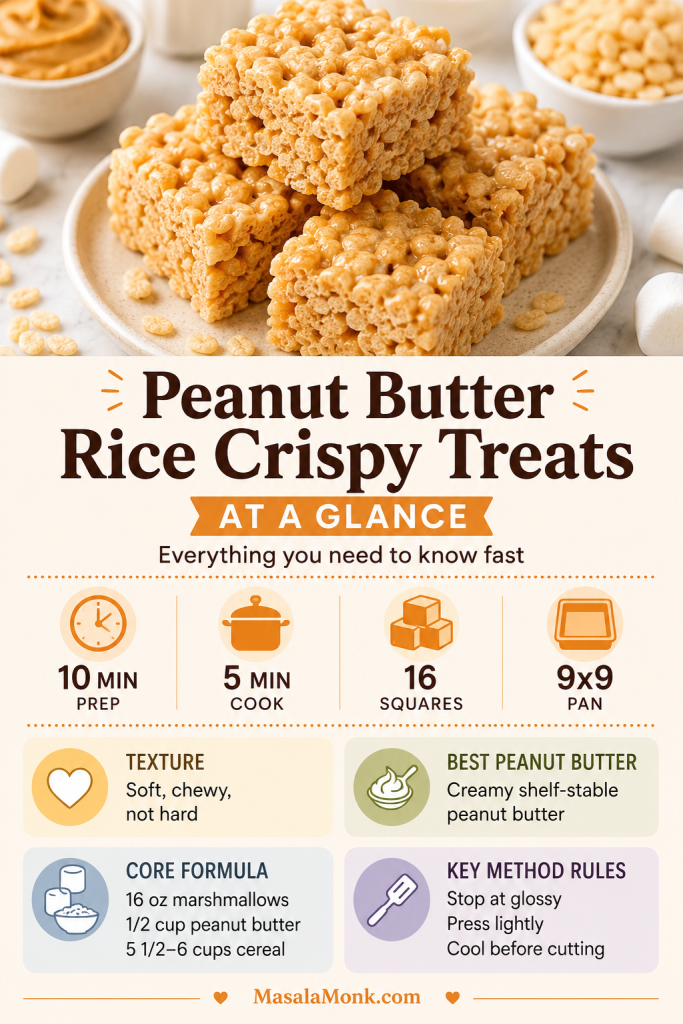
Peanut Butter Rice Crispy Treats at a Glance

Prep time 10 minutes
Cook time 5 minutes
Cooling time 30–45 minutes
Main pan 9×9-inch pan for thick bars
Party pan 9×13-inch pan for thinner squares
Yield 16 thick 9×9 squares, or about 24 thinner 9×13 party pieces
Texture Soft, chewy, lightly gooey, crisp around the cereal
Flavor Sweet-salty, peanut-buttery, marshmallowy
Best for Lunchboxes, bake sales, potlucks, parties, after-school snacks
Best peanut butter Regular creamy peanut butter
At-a-glance guide for peanut butter rice crispy treats showing prep time, cook time, yield, pan size, texture, core formula, and key method tips.
Use this quick at-a-glance guide to check the basic formula, 9×9 pan size, texture goal, and the key method rules before you start making peanut butter rice crispy treats.

Why These Peanut Butter Rice Crispy Treats Work

Peanut butter changes more than the flavor. It adds richness, saltiness, and body, so the bars taste fuller than plain marshmallow cereal treats. The tradeoff is that peanut butter also adds fat, which means the ratio matters: too much can make the bars greasy or heavy, while too little lets the peanut flavor fade into the marshmallow.

The balance is simple: enough marshmallow for pull, enough peanut butter for flavor, and just enough cereal to hold the bars together without making them stiff. You want a square that lifts cleanly from the pan but still bends a little when you bite it.

The peanut butter also keeps the sweetness from tasting one-note. Instead of plain marshmallow sweetness, you get a salty-sweet bar with deeper roasted peanut flavor, soft marshmallow pockets, and a crisp cereal bite.

The method matters too. Melt gently, stir the peanut butter in off the heat, fold without crushing the cereal, and press the mixture just enough to settle it into the pan. Think nudge, not pack.

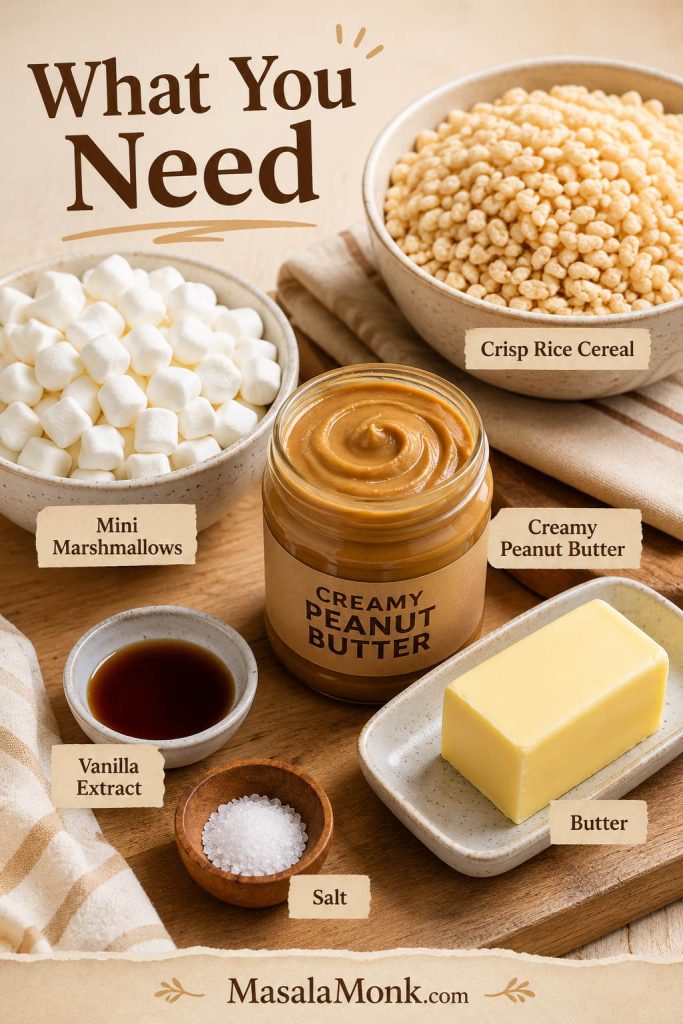
Ingredients for Peanut Butter Cereal Bars

The ingredient list is short, so freshness matters. Soft marshmallows melt smoother, regular creamy peanut butter blends more reliably, and crisp cereal gives the bars that little crackle against the chewy marshmallow base.

Ingredients for peanut butter rice crispy treats, including marshmallows, peanut butter, cereal, butter, vanilla, and salt.
Because there are so few ingredients, stale cereal or dry marshmallows show up quickly in the final texture.

Crisp rice cereal

Any fresh crisp rice cereal will work here. Rice Krispies cereal is the branded classic, and the official peanut butter treats formula also uses butter, marshmallows, peanut butter, and crisp rice cereal; however, this version is built for thicker 9×9 bars with more softness and troubleshooting. See the official Rice Krispies peanut butter treats baseline.

Freshness matters: if the cereal tastes stale from the box, the finished bars will taste flat too, no matter how good the peanut butter mixture is.

Cereal volume can vary by brand and by how you scoop it, so the recipe gives a small range. Stay at the lower end for a softer pan, or use the upper end when you want neater squares.

Mini marshmallows

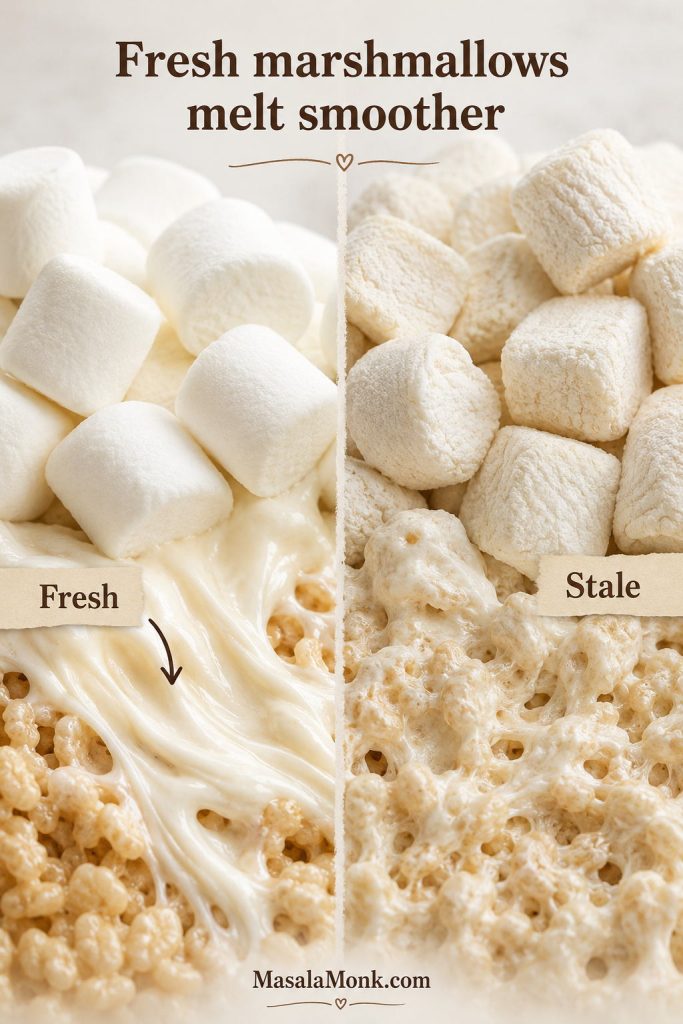
Mini marshmallows melt faster and more evenly than large marshmallows. If they feel dry, firm, or stale in the bag, save them for something else. Fresh marshmallows melt smoother and give you softer, stretchier bars.

Fresh marshmallows compared with stale marshmallows for making rice crispy treats.
Fresh marshmallows should feel soft and springy in the bag; dry ones melt unevenly and can make the bars tighter.

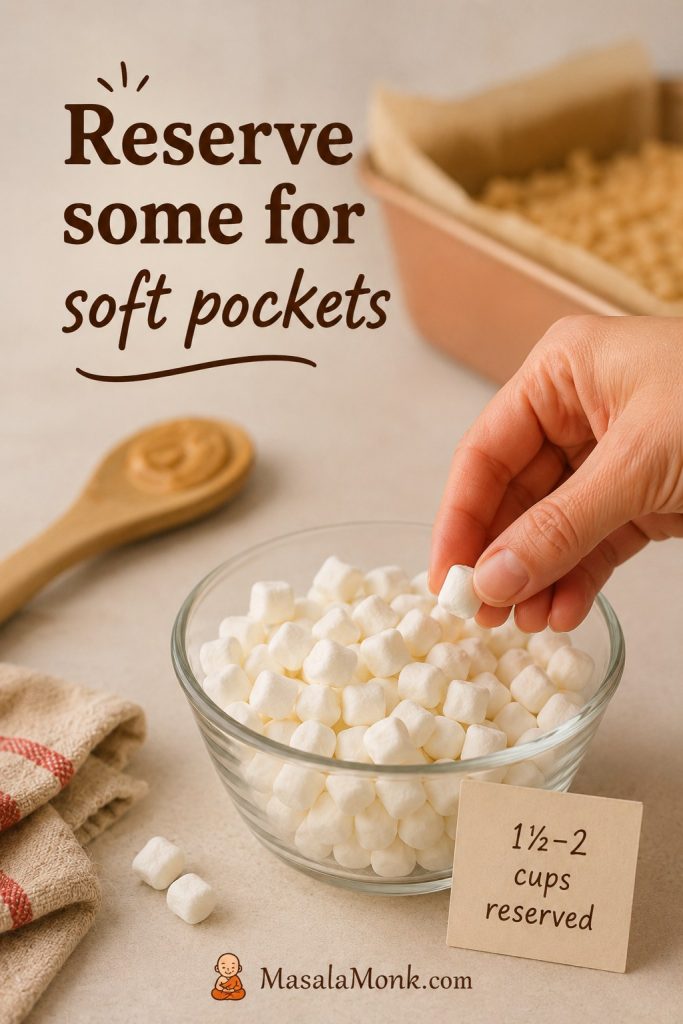
For the softest texture, reserve 1½ to 2 cups of mini marshmallows from the bag and fold them into the warm cereal mixture at the end. They will stay partly intact and create little marshmallow pockets throughout the bars.

Large marshmallows

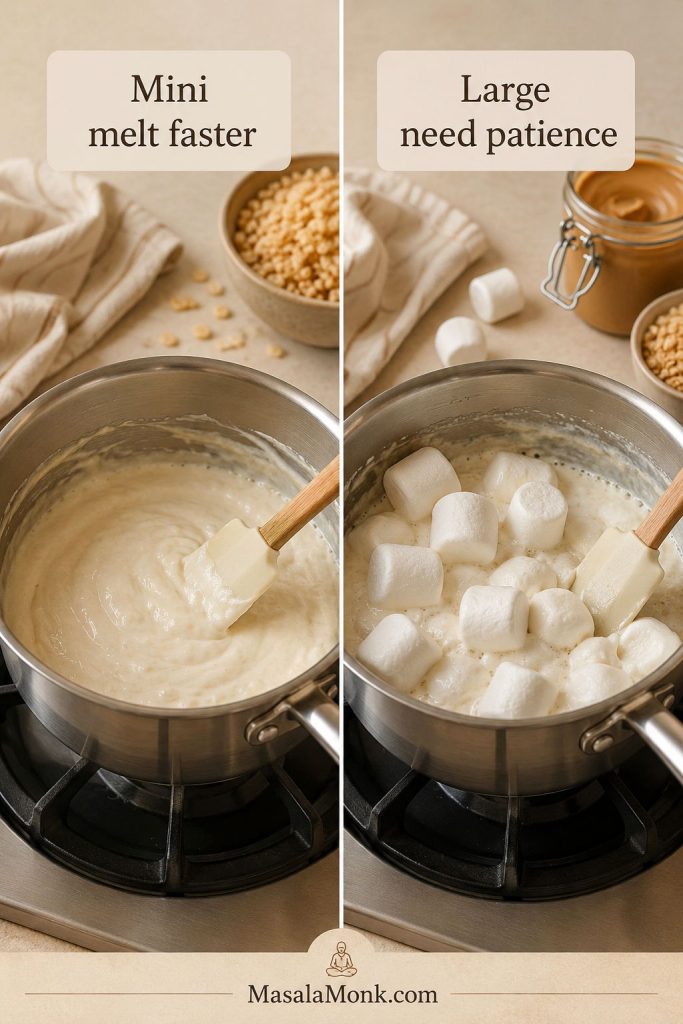
Large marshmallows work, but weight is more reliable than counting pieces. This recipe needs 16 ounces / 454 g marshmallows total. Large marshmallows melt more slowly than minis, so keep the heat low and stir patiently instead of increasing the heat.

Mini marshmallows melting faster than large marshmallows in a side-by-side saucepan comparison.
Mini marshmallows melt faster and more evenly; however, large marshmallows still work if you keep the heat low and stir patiently.

Creamy peanut butter

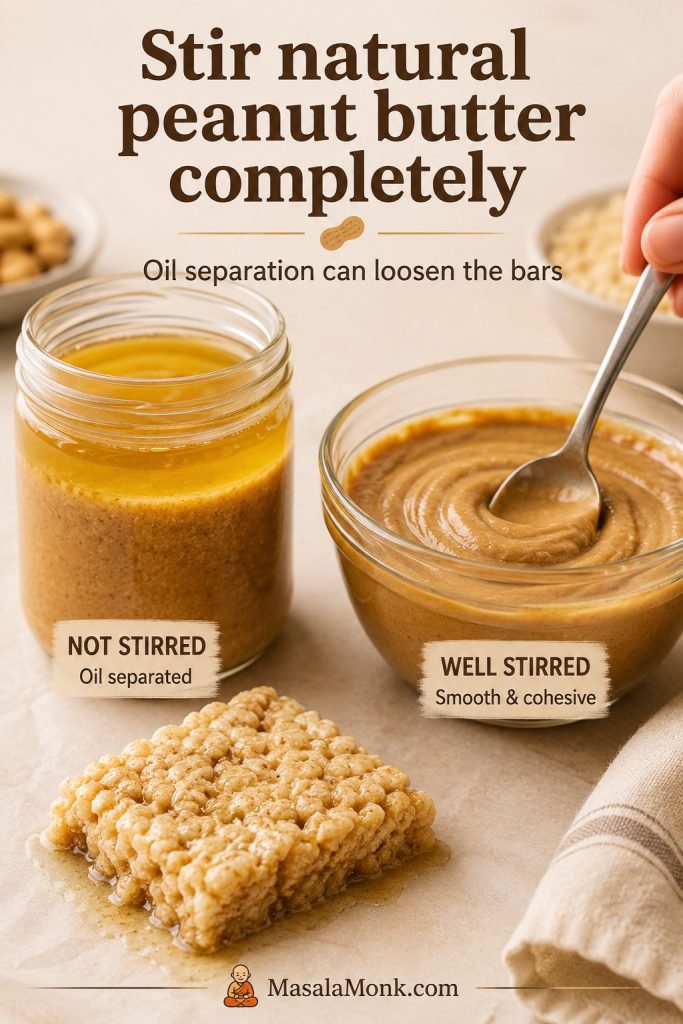
Regular creamy peanut butter is the safest choice because it blends smoothly into the melted marshmallows and gives the bars a consistent texture. Natural peanut butter can work, but it is more likely to separate, which can make the bars oily, loose, or crumbly.

Butter, vanilla, and salt

Butter helps the marshmallows melt smoothly and gives the bars a rounder flavor. Salted butter works well because peanut butter loves salt. If you use unsalted butter, add fine salt to the mixture.

Vanilla is optional in the strictest sense, but it makes the bars taste more finished. It softens the marshmallow sweetness and brings the peanut butter flavor forward.

Gluten-free and dairy-free notes

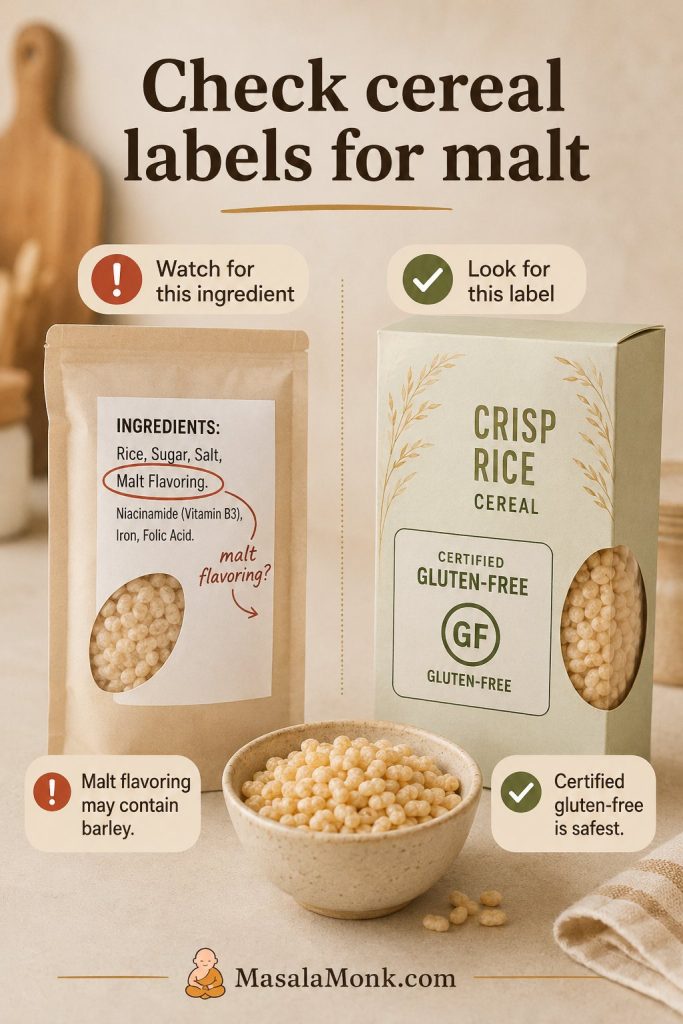
Making these gluten-free mostly comes down to the cereal label. Some crisp rice cereals contain malt flavoring, and malt is often made from barley, so use a certified gluten-free crisp rice cereal if gluten matters in your kitchen. The Celiac Disease Foundation explains why many crispy rice treats are not automatically gluten-free.

Crisp rice cereal label check showing malt flavoring as a warning and certified gluten-free cereal as the safer choice.
Check the cereal label first for gluten-free rice crispy treats because some crisp rice cereals include malt flavoring from barley.

Dairy-free bars need a dairy-free butter substitute and dairy-free chocolate if you are adding the topping. Vegan bars also need vegan marshmallows, or you can use the no-marshmallow peanut butter and maple syrup version below.

Best Peanut Butter to Use

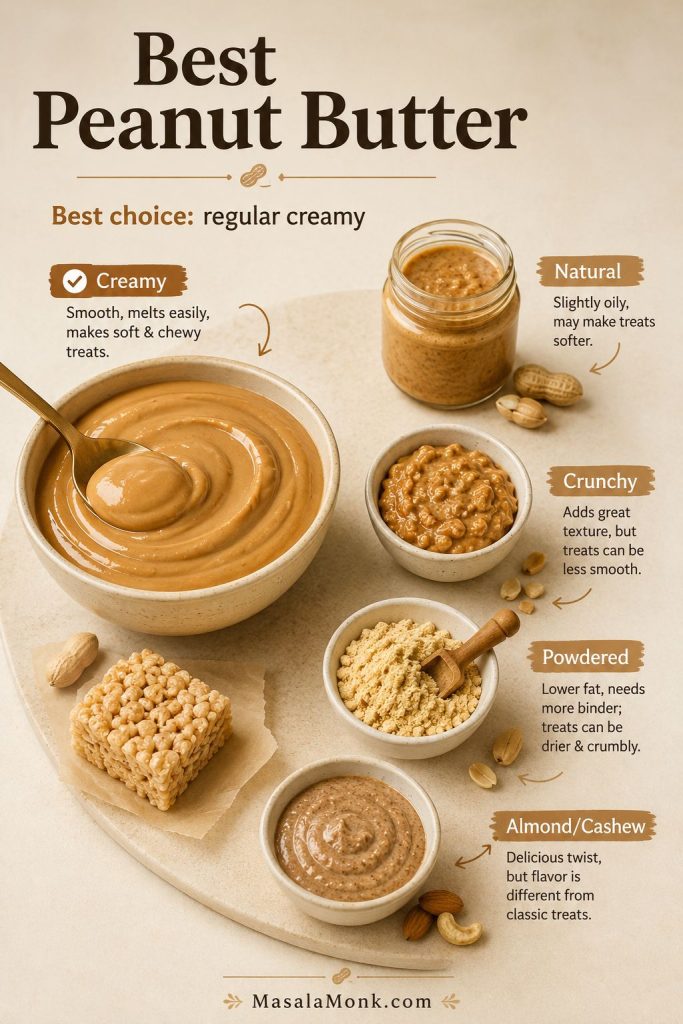
Peanut butter is doing two jobs here: flavor and structure. A smooth, no-stir creamy peanut butter melts into the marshmallow base instead of fighting it, which is why it gives the most reliable bars.

Peanut butter chooser board showing creamy, natural, crunchy, powdered, and almond or cashew butter options.
Choose no-stir creamy peanut butter for the smoothest set; separated natural peanut butter needs extra mixing before it goes in.
Peanut butter type Does it work? What to expect
Regular creamy peanut butter Best choice Melts smoothly into the base and gives the cleanest, softest set
Natural peanut butter Possible, but riskier Can separate and make the bars greasy, loose, or crumbly
Crunchy peanut butter Yes Adds peanut crunch, but the finished bars will not feel as soft and uniform
Powdered peanut butter Not recommended Can make the mixture dry unless the recipe is heavily adjusted
Almond or cashew butter Yes, as a variation Works as a variation, but the flavor and set will be different

If you only have natural peanut butter, stir it extremely well before measuring. If oil is sitting on top of the jar, the bars are more likely to turn greasy. For extra structure, use the full 6 cups of cereal instead of 5½ cups. If your bars already turned oily or loose, jump to the fixes.

Separated natural peanut butter beside fully stirred peanut butter with a loose cereal bar texture cue.
Natural peanut butter can work, but it needs to be stirred completely smooth so the bars do not turn greasy or crumbly.

If peanut butter is the flavor you are here for, these peanut butter cookies are the baked, cookie-style route for the same salty-sweet craving.

For a denser old-school peanut butter candy texture, this peanut butter fudge guide is the better next stop.

Best Ratio for Soft, Chewy Bars

Most hard, dry cereal bars are not really a cereal-brand problem. They happen when the binder gets stretched too far, the marshmallows get too hot, or the warm mixture gets packed down too firmly.

The goal is not just a sweet square. It is a bar that bends slightly when you bite it, tastes deeply peanut-buttery, and still has enough cereal crackle to keep it from feeling heavy.

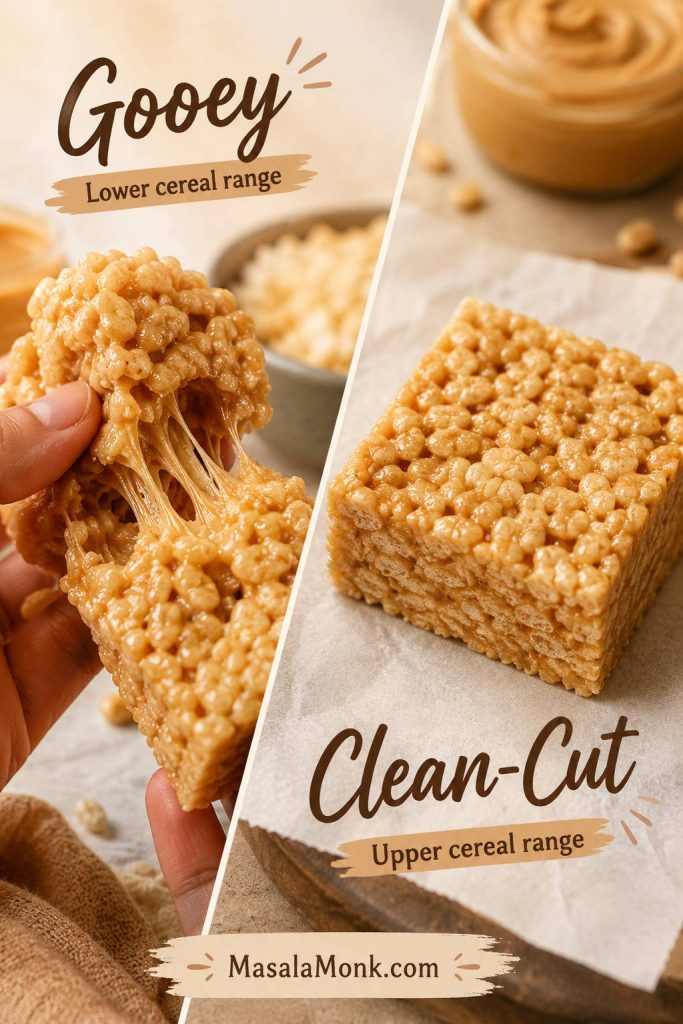
Comparison of a gooey peanut butter rice crispy treat beside a cleaner-cut square on parchment.
A lower cereal amount gives a softer, more marshmallowy bite, while the upper end holds better for lunchboxes and party trays.

This recipe uses a 9×9-inch pan as the main version because it gives thick, soft bars without making them too tall to bite. For thinner party bars, use the 9×13 scale below.

Main 9×9 ratio

Ratio guide showing marshmallows, peanut butter, cereal, butter, and a 9x9 pan for peanut butter rice crispy treats.
The 9×9 ratio balances marshmallow pull, peanut butter flavor, and enough cereal structure for squares that hold together.
Ingredient US amount Metric amount Why it matters
Salted butter 5 tbsp 70 g Helps marshmallows melt smoothly and adds richness
Mini marshmallows 16 oz bag 454 g Creates the soft, chewy binder
Creamy peanut butter ½ cup 125–130 g Adds peanut flavor without making the bars greasy
Crisp rice cereal 5½–6 cups 155–170 g Use less for gooey bars, more for cleaner cuts
Vanilla extract 1 tsp 5 ml Rounds out the flavor
Fine salt, if using unsalted butter ¼ tsp 1–1.5 g Balances the sweetness
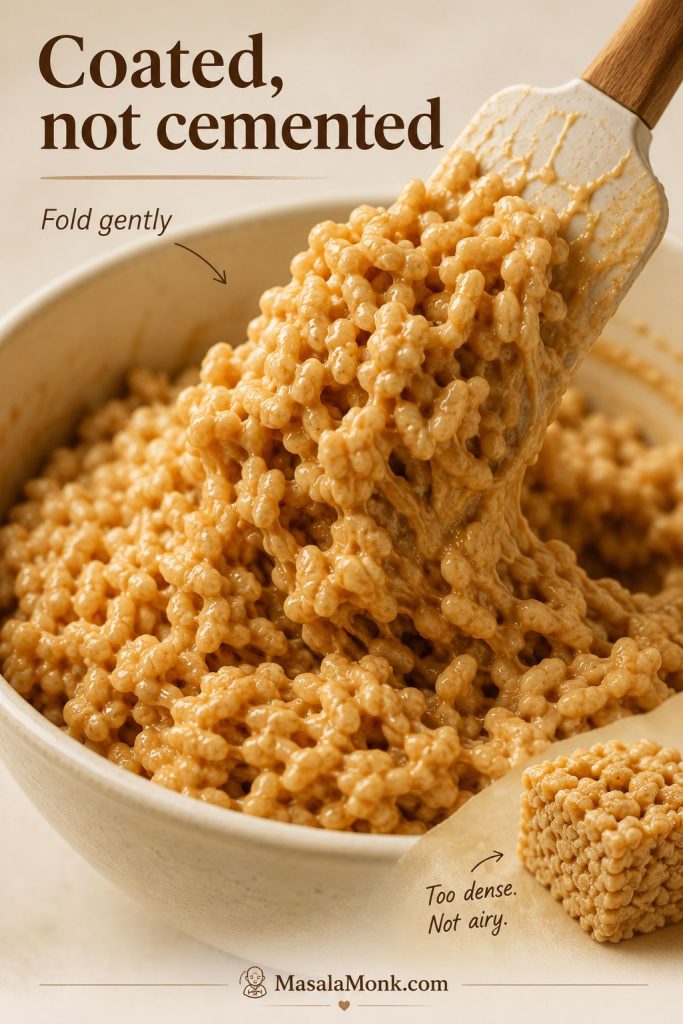
Ratio rule: The cereal should be fully coated but still loose enough to fold. If the mixture looks dry before it reaches the pan, do not fix it by pressing harder; use less cereal next time or melt the marshmallows more gently.
Cereal mixture being folded into marshmallow peanut butter base until coated but still airy.
The cereal should look coated and flexible, not cemented together, before it goes into the pan.

If you only make one version first, make the 9×9 pan with the softer cereal amount. It gives you the most classic pull-apart texture while still cutting cleanly enough for sharing.

Softer, gooier bars

For softer, gooier bars, go with 5½ cups cereal and reserve 1½ to 2 cups of mini marshmallows to fold in at the end. The bars will be a little stickier, but the texture is plush and marshmallowy.

Cleaner-cut squares

For cleaner-cut squares, use the full 6 cups cereal and let the pan cool completely before slicing. This version still tastes chewy, but it holds up better for lunchboxes, parties, and bake sales.

9×13 Party-Pan Scale for Peanut Butter Rice Crispy Treats

For potlucks, bake sales, and larger gatherings, use this 9×13-inch pan scale. It makes about 24 thinner squares, or more if you cut small party pieces. The full printable-style amounts are also included in the recipe card.

Do not simply spread the 9×9 recipe into a 9×13 pan unless you intentionally want very thin bars. The larger pan needs a larger batch.

Ingredient US amount Metric amount
Salted butter ½ cup / 8 tbsp 113 g
Mini marshmallows 20 oz 567 g
Creamy peanut butter 1 cup 250–260 g
Crisp rice cereal 8–8½ cups 225–240 g
Vanilla extract 1½–2 tsp 7.5–10 ml
Fine salt, if using unsalted butter ½ tsp 2–3 g
9x13 pan of peanut butter rice crispy treats cut into thinner party-size squares.
For a crowd, scale the recipe instead of stretching a smaller batch too thin; as a result, the pieces stay balanced and easy to serve.

Equipment You Need

You only need a 9×9-inch pan, parchment paper, a heavy-bottomed pot, and a silicone spatula for the main recipe. A kitchen scale helps with marshmallows and cereal, especially if you are using large marshmallows or a different cereal brand.

For the larger batch, use a 9×13-inch pan. For cleaner cuts, lightly grease your knife before slicing, especially if you added the chocolate topping.

How to Make Peanut Butter Rice Crispy Treats

This is a quick recipe, but it rewards a gentle hand. A few calm minutes over low heat are what keep the bars soft, stretchy, and easy to bite instead of stiff.

Once your ingredients are measured, the process moves quickly. Have the pan ready before you melt the marshmallows so the warm mixture can go straight in while it is still easy to shape.

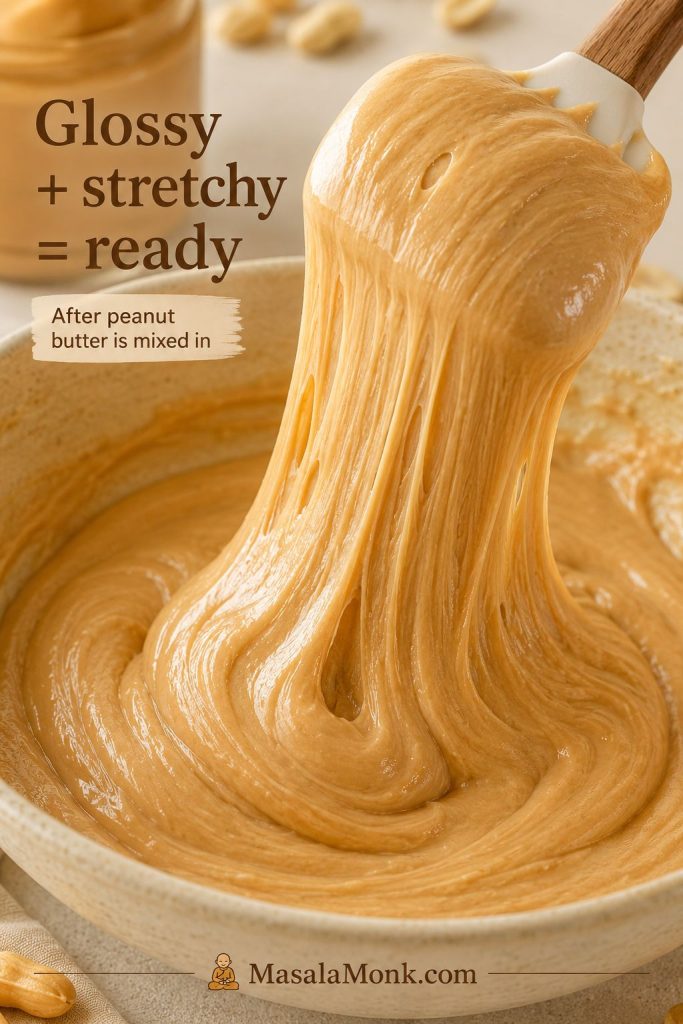
The mixture will look messy at first, then suddenly turn glossy, stretchy, and smooth. That glossy stage is the signal to stop cooking, stir in the peanut butter, and move quickly before the cereal mixture cools and stiffens.

Before you start: Do not boil the marshmallow mixture, do not add extra cereal just because the mixture looks sticky, and do not press the bars firmly into the pan. Those three habits are the most common reasons crispy rice treats turn hard.

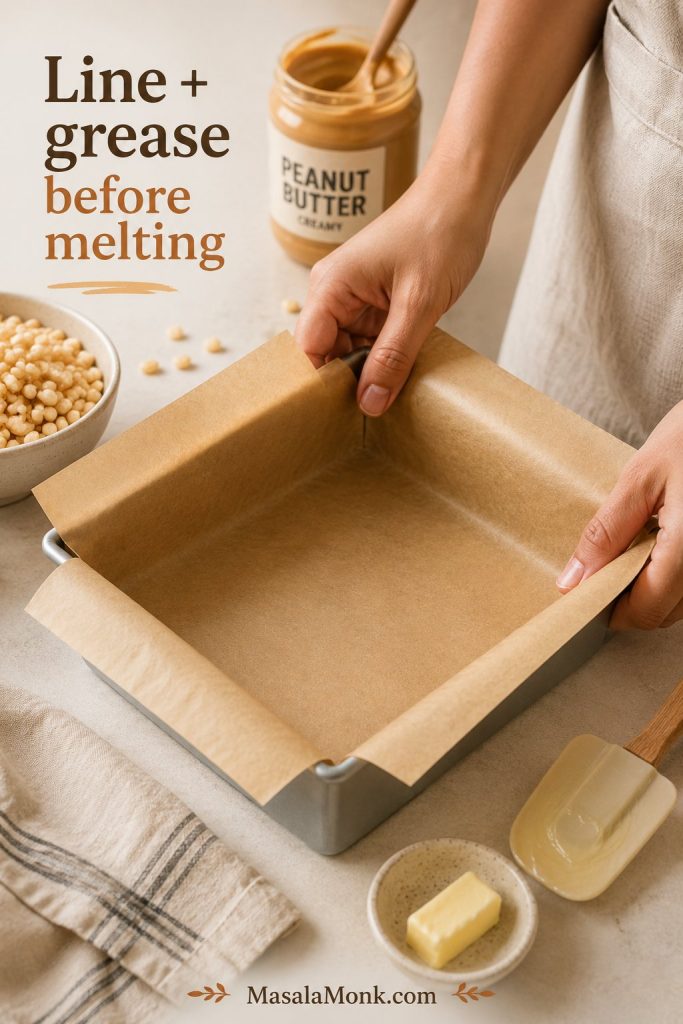
Step 1: Line and grease the pan

Line a 9×9-inch pan with parchment paper, leaving a little overhang so you can lift the bars out later. Then lightly grease the parchment, your spatula, and your hands before the marshmallow mixture starts getting sticky.

Hands lining a 9x9 pan with parchment paper before making peanut butter rice crispy treats.
Line and grease the pan before melting anything so the warm cereal mixture can go straight in while it is still flexible.

Step 2: Reserve mini marshmallows for soft pockets

Set aside 1½ to 2 cups of mini marshmallows from the 16-ounce bag before the pot goes on the heat. Because they are folded in at the end, they soften without disappearing completely.

Mini marshmallows reserved in a bowl for folding into peanut butter rice crispy treats at the end.
Reserving some mini marshmallows creates soft pockets throughout the bars, which makes the texture feel more homemade.

Step 3: Melt the base until glossy

Melt the butter in a large heavy-bottomed pot over low to medium-low heat. Add the remaining marshmallows and stir until they are mostly melted, glossy, and stretchy. A few small lumps are fine, but stop before the mixture bubbles hard.

Remove the pot from the burner, then stir in the peanut butter, vanilla, and salt until the base looks creamy and smooth rather than oily or separated.

Glossy marshmallow peanut butter base stretching from a spatula before cereal is added.
When the base holds a glossy ribbon on the spatula, it is ready for cereal before it starts cooling and tightening.

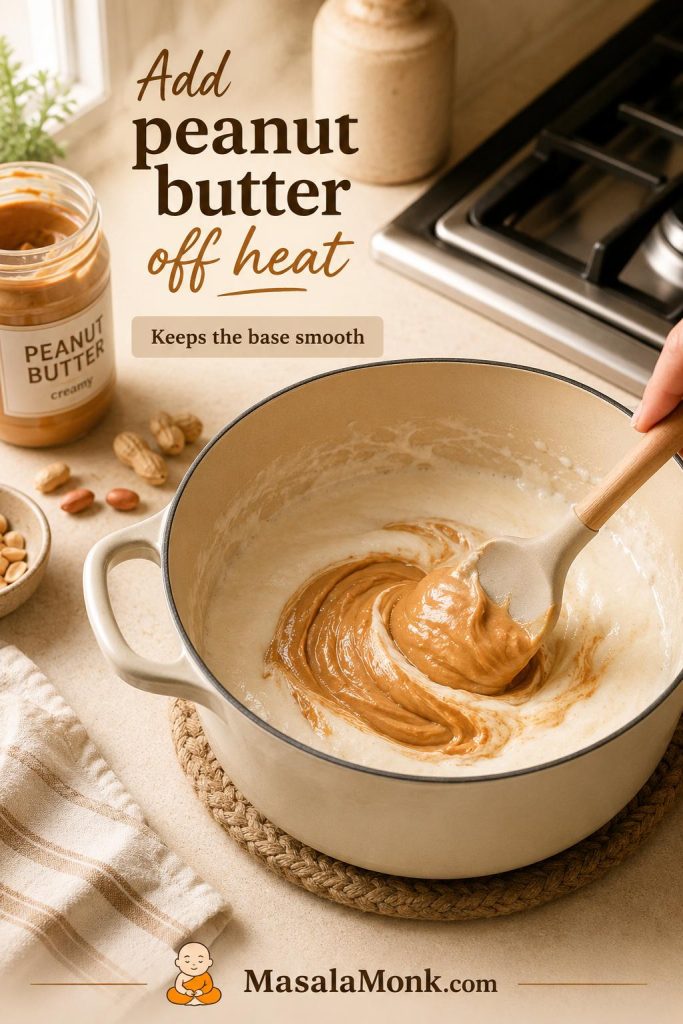
Step 4: Add peanut butter off heat

This off-heat moment is important because peanut butter needs gentle residual warmth, not direct heat. Stir it into the marshmallow base after the pot comes off the burner so the mixture stays smooth.

Creamy peanut butter being stirred into melted marshmallows in a pot moved off the heat.
Add the peanut butter off heat so it melts into the marshmallow base instead of separating or turning oily.

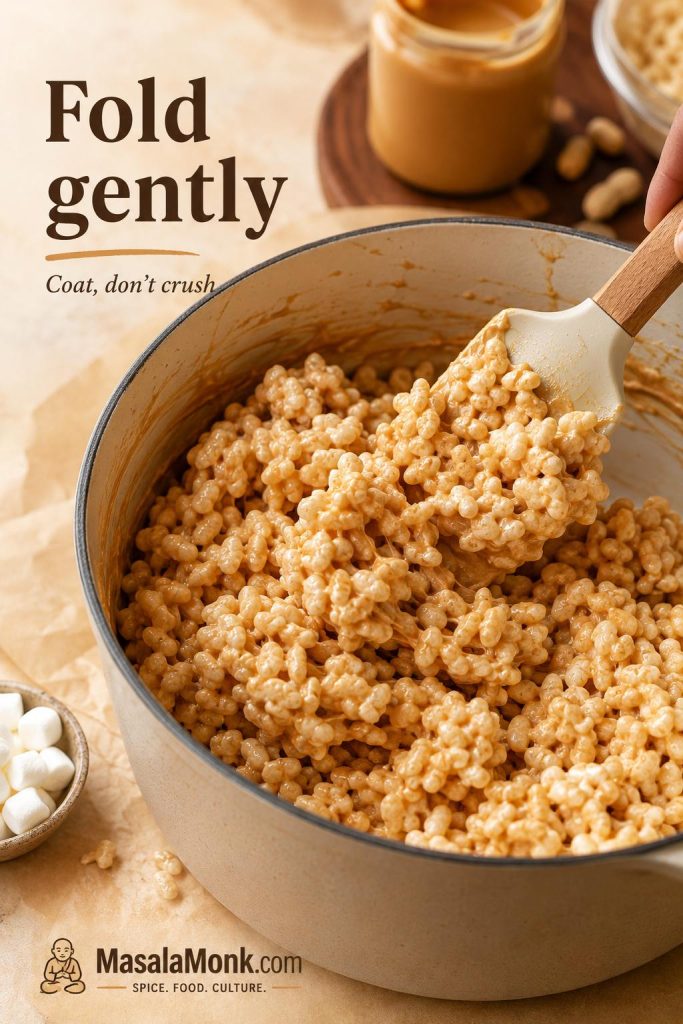
Step 5: Fold the cereal gently

Add the crisp rice cereal and fold with a silicone spatula until the pieces are coated but still airy. Stop once you no longer see dry pockets of cereal, then fold in the reserved mini marshmallows while the mixture is still warm.

Crisp rice cereal being folded gently into a glossy marshmallow peanut butter base with a spatula.
Fold just until coated because overmixing can crush the cereal and make the bars feel heavy.

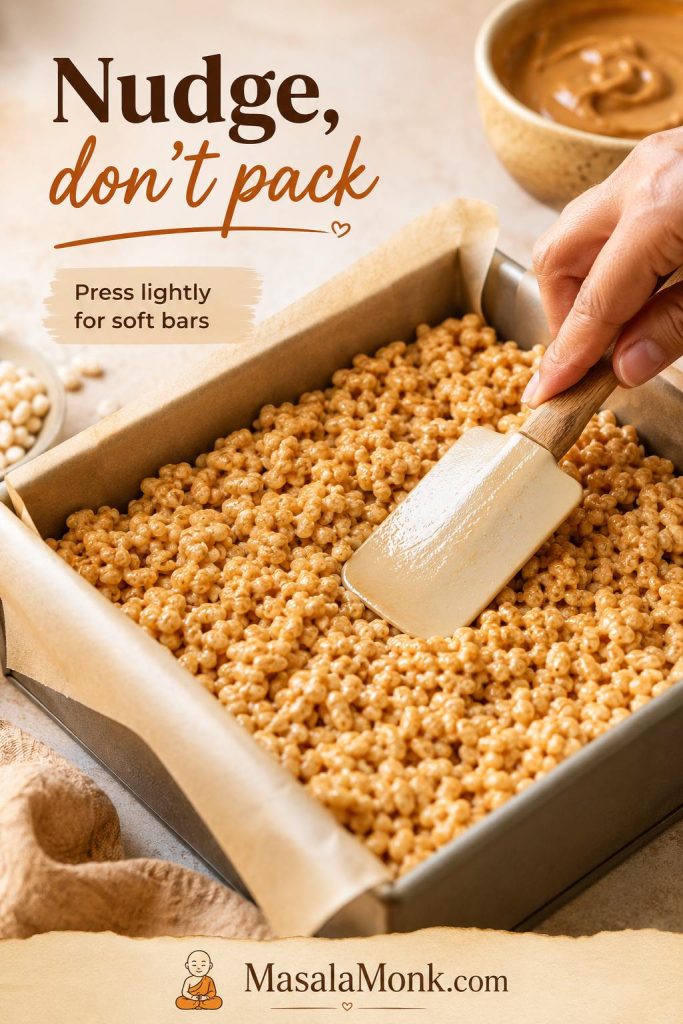
Step 6: Press the mixture lightly

Transfer the mixture to the prepared pan and nudge it into the corners with a greased spatula or lightly buttered hands. Shape it while it is still warm, but do not pack it down or flatten the top hard.

Peanut butter rice crispy treat mixture being pressed lightly into a parchment-lined pan with a spatula.
Use the spatula to guide the mixture into the corners while keeping the top airy instead of flattening it hard.

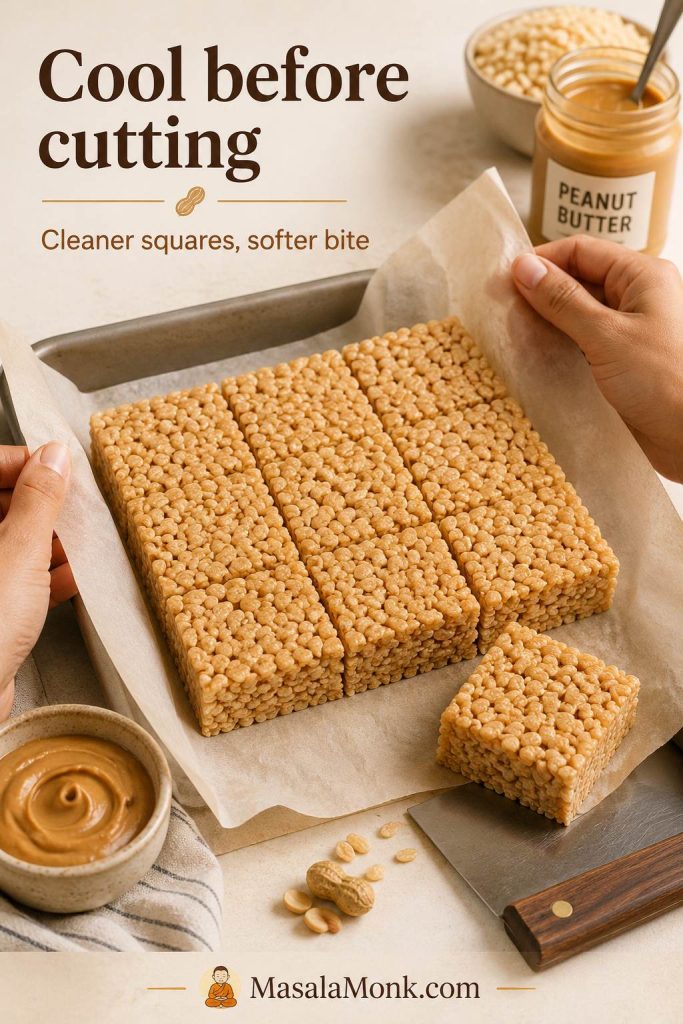
Step 7: Cool before cutting

Let the bars cool at room temperature for 30–45 minutes, or until the top no longer feels warm and the slab lifts cleanly from the pan. Cooling helps the squares hold their shape without losing tenderness.

Peanut butter rice crispy treats lifted from a pan with parchment and cut into clean squares.
Let the slab cool until set so the knife cuts clean edges without smearing the still-soft center.
What good looks like: The melted mixture should be glossy, creamy, and stretchy, not oily or bubbling hard. The cereal should be coated but not crushed. When you press the mixture into the pan, it should mound softly and spring back a little. If it feels stiff before it reaches the pan, the marshmallows were probably overheated. If it sticks to your hands or spatula, lightly grease them instead of pressing harder.
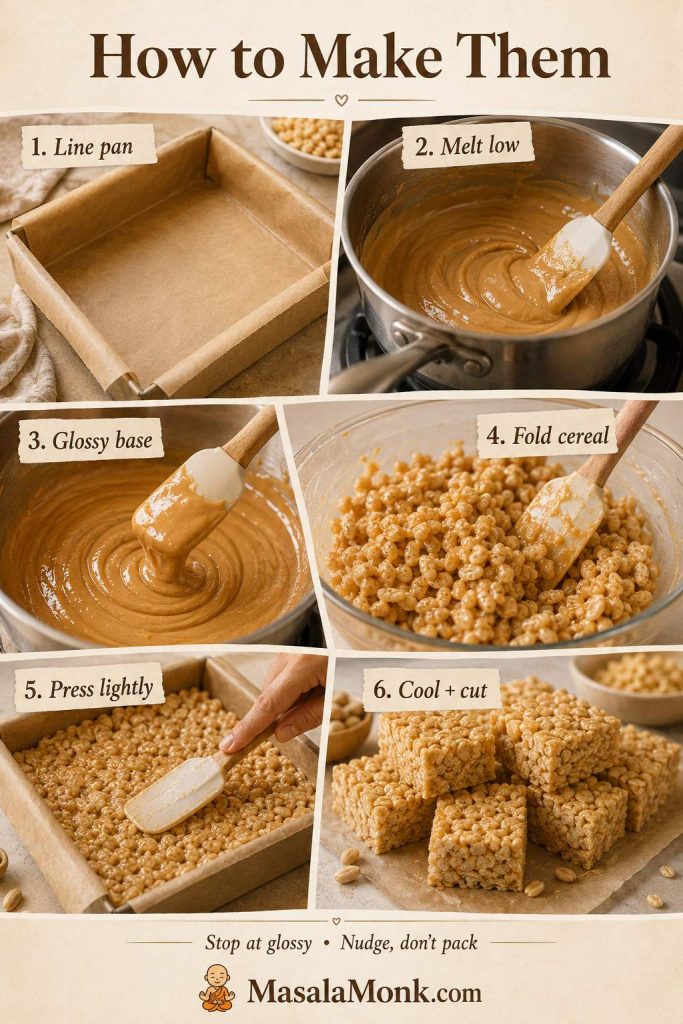
Step-by-step board showing how to line the pan, melt low, make the base, fold cereal, press lightly, and cut.
The method stays easy when you follow the cues in order: melt gently, coat the cereal, press lightly, and cool before slicing.

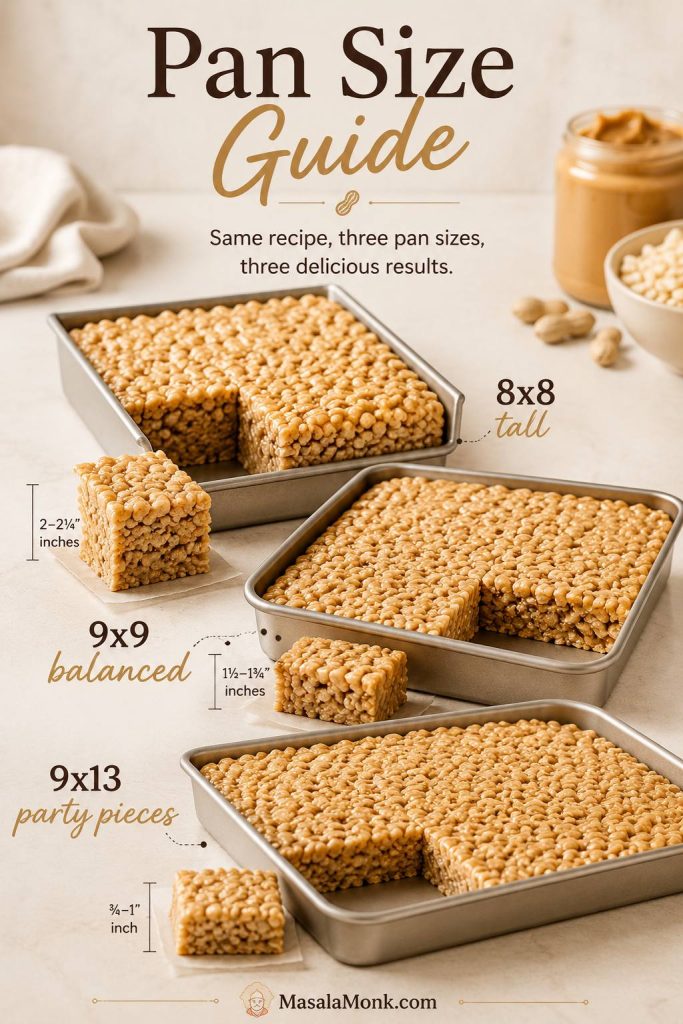
8×8 vs 9×9 vs 9×13 Pan

Pan size changes the whole eating experience. The same mixture can feel tall and gooey in one pan, thinner and firmer in another. Choose the pan based on whether you want thick home-style squares or neat party pieces.

Pan size Best for Result
8×8 inch Very thick dessert bars Tall, gooey, slower to cool, best for small batches
9×9 inch Main recipe Thick but manageable, soft center, clean enough cuts
9×13 inch Parties, lunchboxes, bake sales Thinner bars, more squares, faster cooling
Pan size guide comparing 8x8, 9x9, and 9x13 pans for different rice crispy treat thicknesses.
Pan size changes the eating experience: 8×8 makes taller dessert bars, 9×9 stays balanced, and 9×13 gives thinner party pieces.

If you spread the 9×9 recipe into a 9×13 pan, the bars will be thin, firmer, and less gooey. Use the larger scale if you want a true party pan.

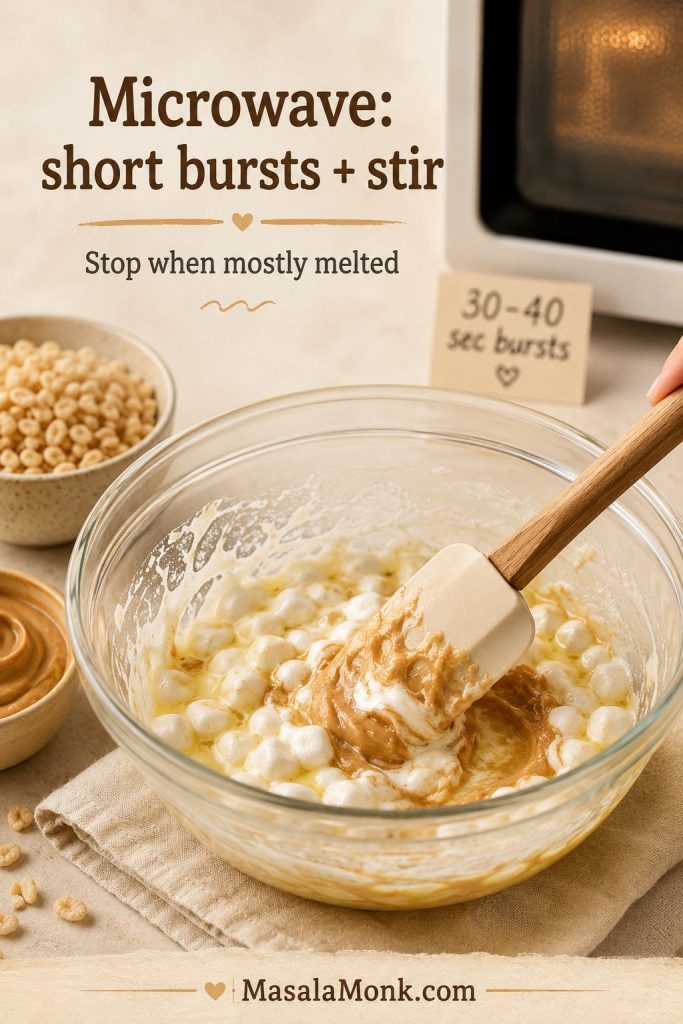
Microwave Method

The microwave is faster, but it needs short bursts and frequent stirring. Marshmallows can go from glossy to stiff quickly, so stop as soon as they are mostly melted.

  1. Use a large microwave-safe bowl with plenty of room for the marshmallows to puff.
  2. Add butter and most of the marshmallows.
  3. Microwave in 30–40 second bursts, stirring after each burst.
  4. Stop when the marshmallows are mostly melted and stir until smooth.
  5. Stir in peanut butter, vanilla, and salt.
  6. Fold in cereal and reserved marshmallows.
  7. Press lightly into a lined pan and cool before slicing.
Microwave-safe bowl of marshmallows and butter being stirred for peanut butter rice crispy treats.
For the microwave method, use short bursts and stir often so the marshmallows melt evenly instead of overheating.

If the marshmallow mixture looks dry, stringy, or stiff after microwaving, it was likely overheated. Start again if you can; adding more peanut butter will not fully fix overheated marshmallows.

The stovetop gives you more control. If you are making these bars for the first time, it is the safer choice.

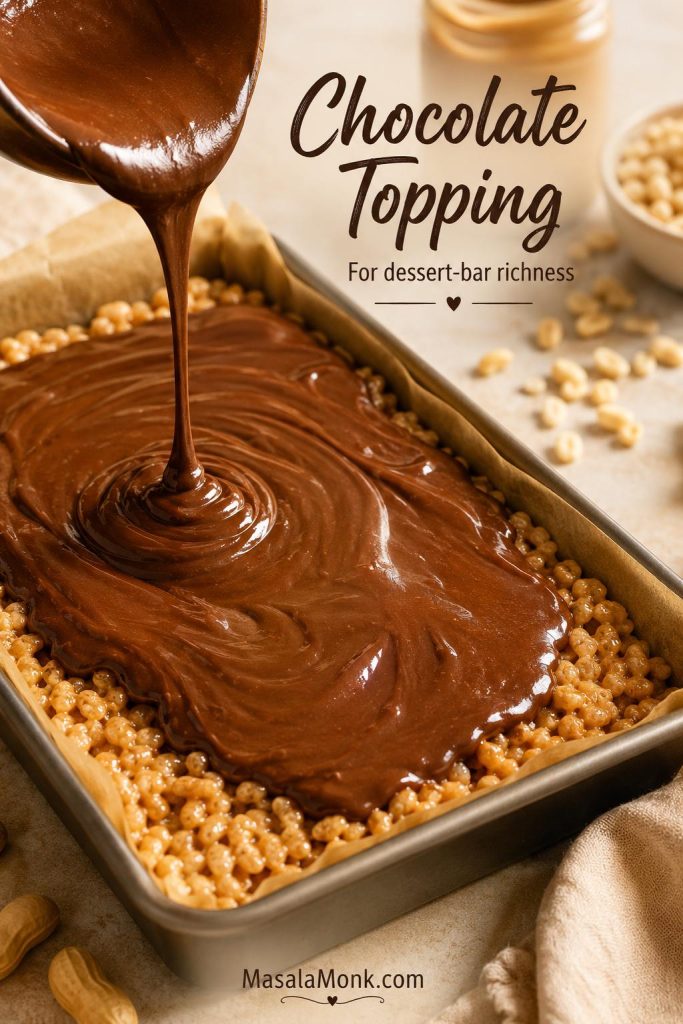
Chocolate Topping

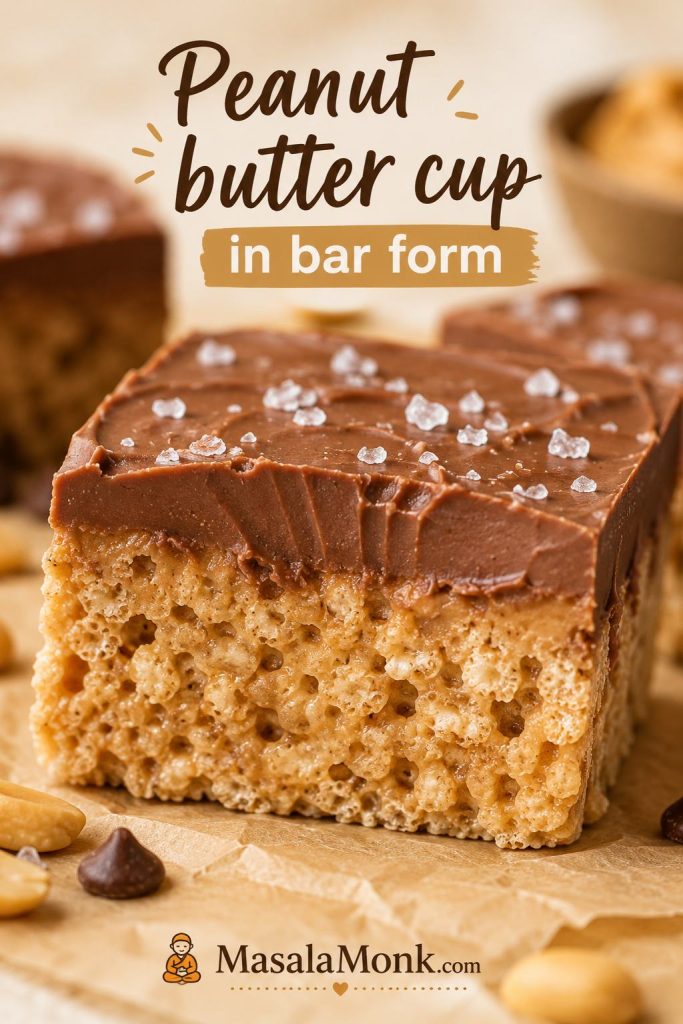
Add the chocolate topping when you want these to feel less like lunchbox squares and more like a peanut butter cup in bar form. The topping sets into a soft chocolate-peanut butter layer while the cereal base stays chewy, crisp, and marshmallowy underneath.

Chocolate peanut butter topping being poured over a pan of peanut butter rice crispy treats.
Add the chocolate topping when you want the bars to move from lunchbox-simple to richer dessert-bar territory.

A drizzle is enough for a lighter snack. However, a full layer turns the pan into something closer to a no-bake chocolate peanut butter bar.

Cross-section of a chocolate-topped peanut butter rice crispy treat with a soft chocolate layer and cereal base.
The chocolate layer should set softly, so every bite feels more like a peanut butter cup than a hard candy shell.

For another rich no-bake chocolate dessert, this avocado chocolate mousse keeps the chocolate flavor deep while staying creamy and spoonable.

Let the bars cool before adding chocolate. If the base is still warm, the topping can sink into the cereal instead of sitting neatly on top. That gives the topping a cleaner surface and helps it set evenly.

Balanced chocolate topping

Ingredient US amount Metric amount
Semi-sweet chocolate chips 1½ cups 255 g
Creamy peanut butter 2 tbsp 30–35 g
Flaky salt Optional Optional

Melt the chocolate chips with the peanut butter until smooth, then spread over the cooled bars. Add flaky salt if you like a sweet-salty finish. Let the chocolate set before slicing.

For a lighter version, use half the chocolate mixture and drizzle it over the top instead of spreading a full layer. For a thicker candy-bar finish, increase the chocolate chips to 2 cups.

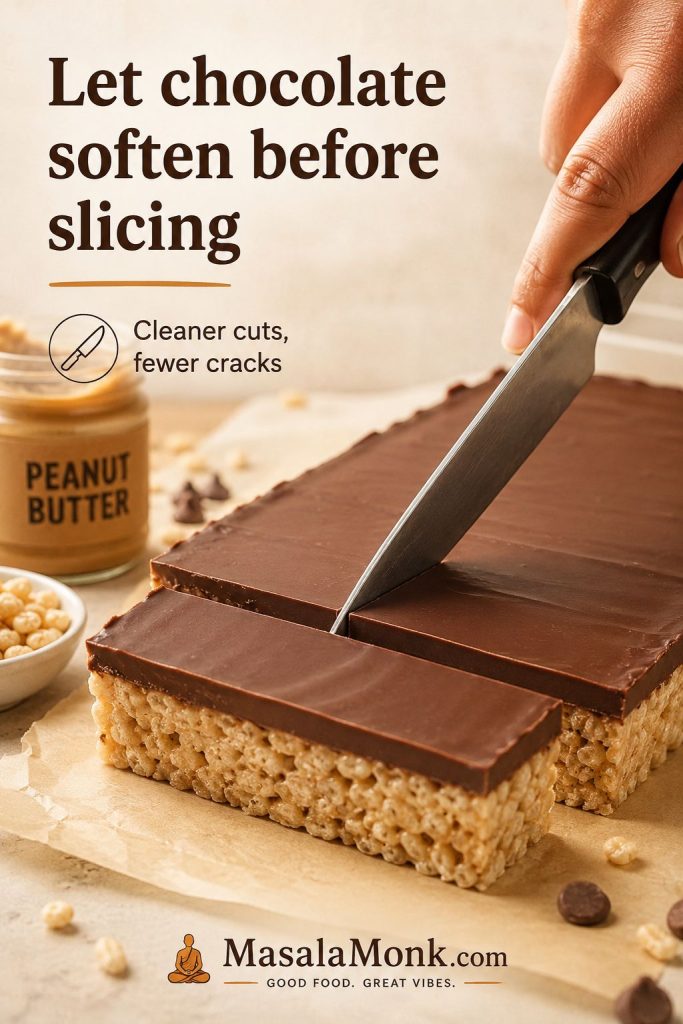
Cutting tip: If the chocolate layer is very cold, it may crack when sliced. Let the pan sit at room temperature for a few minutes, then cut with a sharp knife.
Knife slicing chocolate-topped peanut butter rice crispy treats with a clean cut through the topping.
If the chocolate layer feels too firm, let it sit briefly at room temperature before slicing to prevent cracks.

If you are building a no-bake dessert table, these bars sit naturally beside something creamy and chilled, like this no bake cheesecake recipe.

No-Marshmallow Version

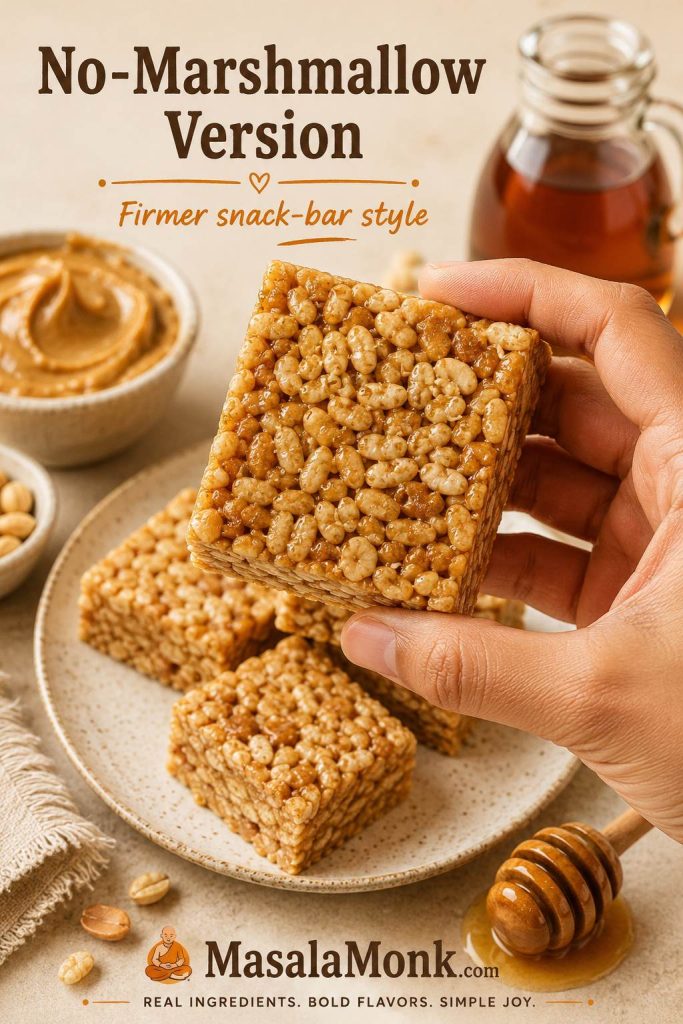
No marshmallows means a different kind of bar. Instead of stretchy, gooey peanut butter rice crispy treats, you get a firmer peanut butter snack bar held together with honey or maple syrup.

No-marshmallow peanut butter rice crispy bars made with peanut butter and honey or maple syrup.
Without marshmallows, these bars set from a peanut butter-syrup binder and taste more like a firmer snack bar.

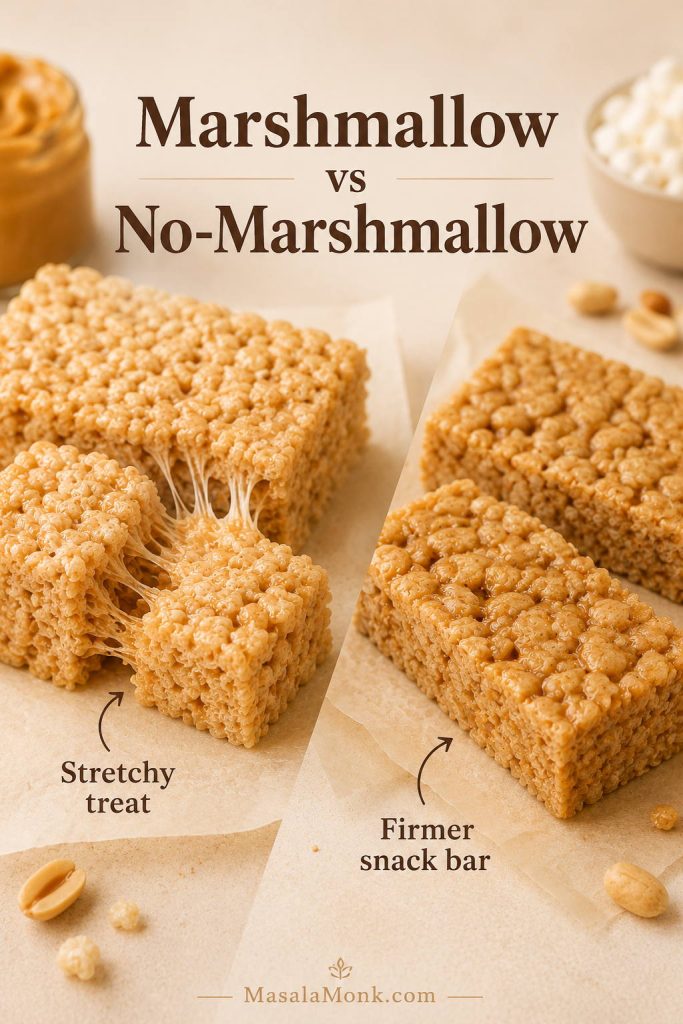
Choose the marshmallow version when you want classic pull-apart cereal treats. Choose this version when you want something firmer, less candy-like, easier to chill, and more lunchbox-snack than dessert-bar.

Marshmallow peanut butter rice crispy treat with stretchy pull beside a firmer no-marshmallow snack bar.
The marshmallow version stretches like a classic cereal treat, while the no-marshmallow version sets firmer from peanut butter and syrup.

If that firmer snack-bar direction is what you want, this homemade granola bars recipe goes deeper into no-bake bar binders, texture, and lunchbox-style snacks.

Ingredient US amount Metric amount
Creamy peanut butter ¾ cup 190 g
Honey or maple syrup 6 tbsp 90 ml
Crisp rice cereal 3 cups 80–85 g
Fine salt Pinch Pinch

Warm the peanut butter and honey or maple syrup together just until smooth, then stir in the salt and cereal. Press the mixture firmly into a lined 8×8-inch pan and chill until set. This version needs firmer pressing and colder setting than the main recipe.

Can I Use Marshmallow Fluff?

Marshmallow fluff or marshmallow creme can work, but it behaves differently from regular marshmallows. It makes the bars softer, stickier, and harder to cut cleanly, so do not replace all 16 ounces of marshmallows with fluff unless you are using a fluff-specific recipe.

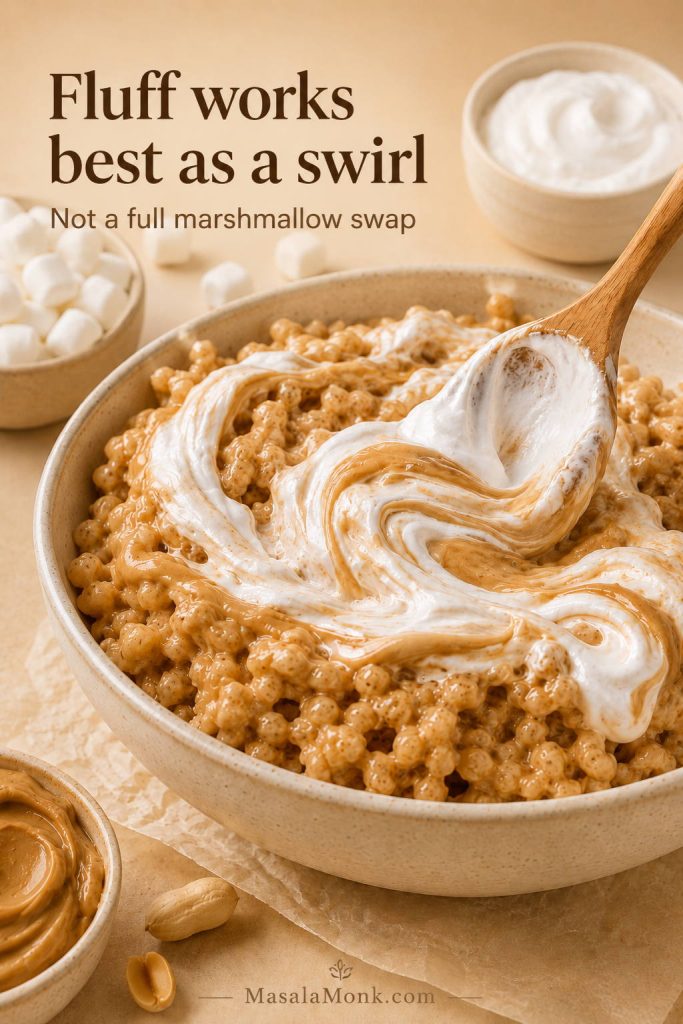
The safer move is to use fluff as a swirl. Fold ⅓ to ½ cup through the warm cereal mixture before pressing it into the pan, or swirl it over the top with a little melted peanut butter.

Marshmallow fluff swirled into peanut butter rice crispy treat mixture with a bowl of fluff nearby.
Marshmallow fluff behaves differently from regular marshmallows, so it works best as a swirl rather than a full swap.

If you are adapting a thinner 9×13 cereal-treat formula, a 7-ounce jar of marshmallow creme is often used as a substitute for a 10-ounce bag of marshmallows. Even then, the finished bars will be softer and stickier than bars made with regular marshmallows.

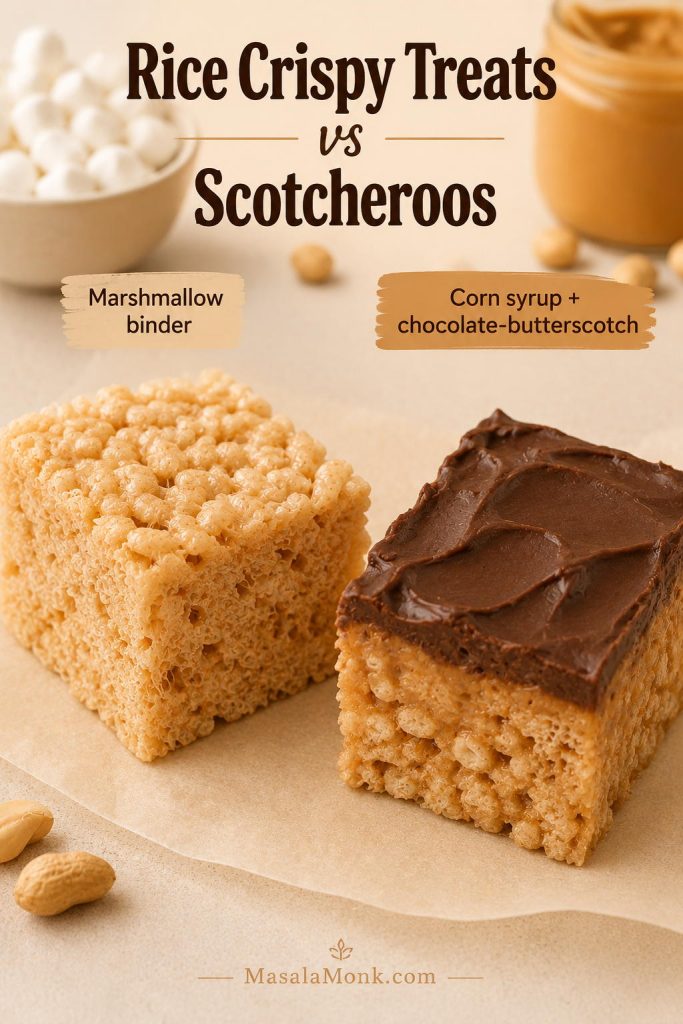
Peanut Butter Rice Crispy Treats vs Scotcheroos

These two bars are related, but the binder is different.

Peanut butter rice crispy treats usually rely on marshmallows, so they are softer, stretchier, and more classic cereal-treat-like. By contrast, Scotcheroos usually use peanut butter with corn syrup and sugar, then get a chocolate-butterscotch topping, so they are denser, sweeter, and more candy-like.

A quick clue: if the bar you remember had a glossy chocolate-butterscotch top and a firmer candy-like bite, you are probably thinking of Scotcheroos. If it was soft, marshmallowy, and stretchy when pulled apart, this is the recipe you want.

Peanut butter rice crispy treat compared with a chocolate-topped Scotcheroo on parchment.
Peanut butter rice crispy treats are usually softer and marshmallow-based, whereas Scotcheroos are denser and more candy-like.

Troubleshooting

Even with a simple recipe, small changes can affect the final texture. If a batch turns hard, dry, greasy, or too sticky, the fix is usually one of four things: heat, ratio, peanut butter type, or how firmly the mixture was pressed into the pan. If your bars turned out well and you just need to keep them fresh, jump to storage.

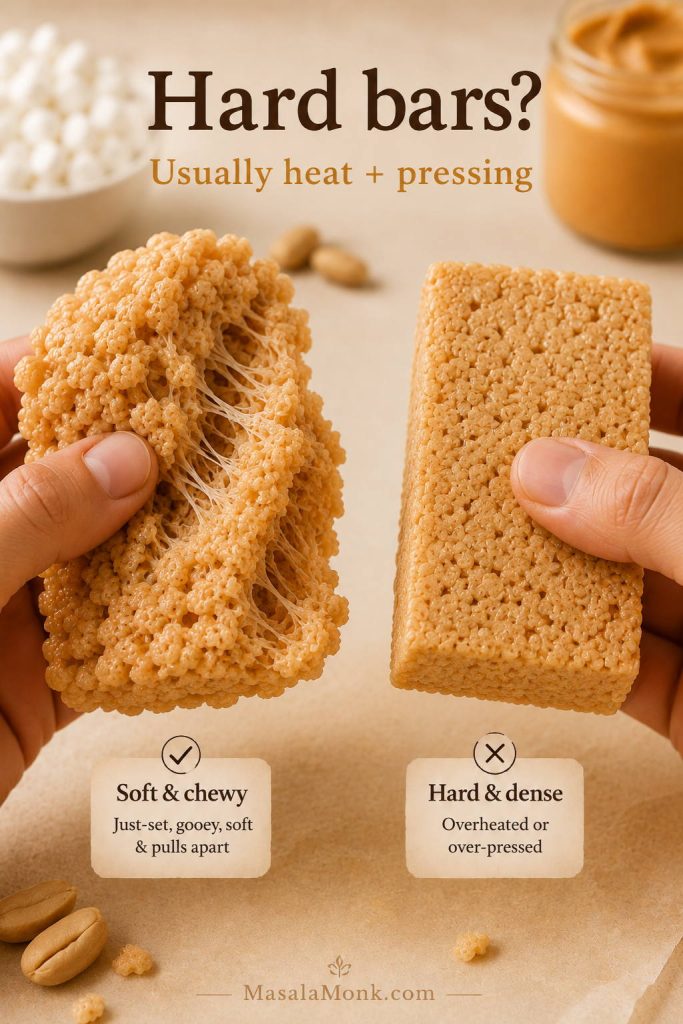
Soft peanut butter rice crispy treat pulling apart beside a compact hard bar with no stretch.
Hard bars usually come from overheated marshmallows, too much pressure, or a ratio that stretches the binder too far.
Problem Likely cause Quick fix next time
Hard bars Overheated marshmallows or packed-down mixture Use low heat, stop at glossy, and press lightly
Dry bars Too much cereal Use less cereal and fold more gently
Greasy bars Separated natural peanut butter Use regular creamy peanut butter
Bars falling apart Not enough binder or cut too early Cool fully before slicing
Sticky bars Too many marshmallows or not cooled Let them set longer
Cracked chocolate Chocolate layer too cold or too thick Let it soften slightly before slicing
Troubleshooting board for peanut butter rice crispy treats with fixes for hard, dry, greasy, sticky, falling apart, and cracked chocolate bars.
Most peanut butter rice crispy treat problems are fixable once you trace them back to heat, cereal amount, peanut butter type, or cooling time.

Why did my bars get hard?

The marshmallow mixture was probably overheated, the marshmallows were stale, too much cereal was added, or the mixture was pressed too firmly into the pan. Next time, use low heat, fresh marshmallows, and a gentler hand. Instead of packing the mixture down, nudge it into the pan just until it reaches the corners.

Why are they dry?

Dry bars usually mean there is too much cereal for the amount of marshmallow mixture. Next time, stay closer to the lower end of the cereal range, or add an extra handful of marshmallows to the melted mixture.

Why are they greasy?

Greasy bars often happen with natural peanut butter that has not been stirred well, or when too much peanut butter or butter is added. Regular creamy peanut butter gives the most reliable result.

Why are they falling apart?

The mixture may not have enough binder, the cereal amount may be too high, or the bars may have been cut before cooling. For the no-marshmallow version, the bars also need chilling time to firm up.

Why are they too sticky?

Sticky bars usually need more cooling time or slightly more cereal. If you folded in extra marshmallows, the bars may also be intentionally gooier. Let them sit longer before slicing.

Why did the chocolate topping crack?

The chocolate may have been too cold or too thick when sliced. Let the bars sit at room temperature for a few minutes before cutting, and use a sharp knife. Adding a little peanut butter to the melted chocolate also keeps the topping softer.

How to Store Them

These bars stay best when they are covered at room temperature: soft enough to bite, but still crisp around the cereal. Open air dries them out faster than time does.

They taste best the day they are made, when the cereal still has its crackle and the marshmallow base is soft. They stay good for about 2 days in an airtight container at room temperature. A third day is usually fine, but the bars will taste less fresh.

If stacking them, place parchment or wax paper between layers so the tops do not stick together. Otherwise, the soft marshmallow surface can cling to the layer above it.

Peanut butter rice crispy treats stored in an airtight container with parchment between the layers.
Store the squares covered at room temperature, with parchment between layers, so they stay easy to lift without drying out.

Avoid refrigerating plain bars because cold air can make them firm and dry. If you add a chocolate topping, you can chill the pan briefly just to set the chocolate, then move the sliced bars back to room temperature storage.

To freeze, place the bars in layers separated by parchment or wax paper inside an airtight freezer-safe container. Freeze for up to 6 weeks. Let them stand at room temperature before serving so the texture softens again. For the full batch formula, return to the recipe card.

Variations

Once the base is soft and reliable, the fun part is choosing what kind of pan you want: lunchbox-simple, candy-bar rich, salty-sweet, extra gooey, or full peanut butter cup.

Keep the base ratio steady, then change the personality of the pan with chocolate, crunch, salt, jam, or a thicker dessert-bar finish.

Five peanut butter rice crispy treat variations with peanut butter cups, chocolate chips, pretzels, jam, and flaky salt.
Once the base recipe is reliable, small add-ins like pretzels, jam, chocolate chips, or flaky salt can change the whole pan.

Chocolate and candy variations

  • Peanut butter cup bars: Fold in chopped peanut butter cups after the cereal is coated, or press them on top before the bars cool.
  • Chocolate chip bars: Sprinkle mini chocolate chips over the warm bars and press gently so they stick.
  • Cookie dough-style bars: Add mini chocolate chips and a little extra vanilla for a cookie-dough feel. If you want the actual spoonable version, make this edible cookie dough recipe instead.
  • Salted chocolate bars: Add the chocolate topping and finish with flaky salt.

Crunchy and salty variations

  • Pretzel bars: Replace ½ cup cereal with lightly crushed pretzels for a salty crunch.
  • Roasted peanut bars: Add ½ cup chopped roasted peanuts for extra texture.
  • Flaky salt finish: Sprinkle a little flaky salt over the top before the bars fully set.

Softer or richer variations

  • Brown butter bars: Brown the butter before adding marshmallows for a deeper, toasted flavor.
  • Extra marshmallow pocket bars: Fold in 2 cups reserved mini marshmallows at the end for a gooier bite.
  • Thicker dessert bars: Use an 8×8 pan and let the bars cool fully before slicing.

Lunchbox and snack-bar variations

  • Lunchbox squares: Use the full 6 cups cereal and cut smaller squares after the bars cool completely.
  • PB&J bars: Swirl a few teaspoons of jam over the top before the bars set, or sandwich a thin jam layer between two thinner layers of the peanut butter cereal mixture. Grape or strawberry keeps the classic lunchbox feel.
  • Protein-style bars: Use the no-marshmallow version as the base and add a small amount of protein powder only if the mixture still feels moist enough. For a no-bake protein dessert that is already built around protein powder, this protein cookie dough recipe is a safer next recipe.
  • Vegan-style bars: Use the no-marshmallow peanut butter and maple syrup version with a vegan crisp rice cereal.

Peanut Butter Rice Crispy Treats Recipe

Peanut Butter Rice Crispy Treats

Soft, chewy peanut butter cereal bars with a glossy marshmallow-peanut butter base, crisp rice cereal, and optional soft marshmallow pockets. Use 5½ cups cereal for gooier bars or 6 cups for cleaner-cut squares.

Prep Time 10 minutes
Cook Time 5 minutes
Cooling Time 30–45 minutes
Yield 16 thick 9×9 bars

Ingredients

  • 5 tbsp (70 g) salted butter, plus more for greasing
  • 16 oz (454 g) mini marshmallows, divided
  • ½ cup (125–130 g) regular creamy peanut butter
  • 1 tsp (5 ml) vanilla extract
  • ¼ tsp fine salt, only if using unsalted butter
  • 5½–6 cups (155–170 g) crisp rice cereal

Optional chocolate topping

  • 1½ cups (255 g) semi-sweet chocolate chips
  • 2 tbsp (30–35 g) creamy peanut butter
  • Flaky salt, optional

Instructions

  1. Line a 9×9-inch pan with parchment paper and lightly grease the parchment.
  2. Reserve 1½ to 2 cups of the mini marshmallows from the 16-ounce bag for folding in at the end.
  3. Melt the butter in a large heavy-bottomed pot over low to medium-low heat.
  4. Add the remaining marshmallows and stir until mostly melted, glossy, and stretchy. Stop before the mixture bubbles hard.
  5. Remove the pot from the heat. Stir in the peanut butter, vanilla, and salt until smooth.
  6. Add the crisp rice cereal and fold gently until evenly coated.
  7. Fold in the reserved mini marshmallows while the mixture is still warm.
  8. Transfer to the prepared pan and press lightly into an even layer. Do not compact firmly.
  9. Cool at room temperature for 30–45 minutes, then lift from the pan and cut into bars.
  10. For chocolate topping, melt chocolate chips with peanut butter, spread over cooled bars, sprinkle with flaky salt if using, and let set before slicing.

9×13 party-pan scale

  • Salted butter: ½ cup / 8 tbsp (113 g)
  • Mini marshmallows: 20 oz (567 g)
  • Creamy peanut butter: 1 cup (250–260 g)
  • Crisp rice cereal: 8–8½ cups (225–240 g)
  • Vanilla extract: 1½–2 tsp (7.5–10 ml)
  • Fine salt, if using unsalted butter: ½ tsp

Notes

  • For the softest bars, stay closer to 5½ cups cereal and press very lightly.
  • For cleaner-cut lunchbox or party squares, use 6 cups cereal and cool fully before slicing.
  • Regular creamy peanut butter gives the most reliable texture.
  • Natural peanut butter must be stirred completely smooth before measuring.
  • Measure marshmallows by weight if using large marshmallows or a different brand.
  • Store covered at room temperature so the bars stay soft and the cereal keeps some crackle.
Recipe card for peanut butter rice crispy treats with time, yield, pan size, core formula, and method rules.
Keep this card nearby for the two texture rules that matter most: glossy heat control and a light hand in the pan.

Once you have the low heat, fresh marshmallows, and light pressing down, this becomes the kind of no-bake recipe you can adjust from memory. Make it gooey for home, cleaner-cut for a party tray, or chocolate-topped when you want the pan to disappear faster.

FAQs

Are these the same as peanut butter Rice Krispie treats?

Yes. Rice Krispies is the branded cereal many people associate with classic crispy cereal bars, while crisp rice cereal is the generic ingredient. This recipe works with Rice Krispies cereal or another fresh crisp rice cereal.

What peanut butter works best?

Regular creamy peanut butter works best because it melts smoothly into the marshmallow base and stays stable. Natural peanut butter can work, but it must be stirred very well and may still make the bars softer or greasier.

Why did my treats get hard?

Hard treats usually come from overheated marshmallows, stale marshmallows, too much cereal, or pressing the mixture too firmly into the pan. Keep the heat low and nudge the mixture into the pan instead of packing it down.

How do I make them extra gooey?

Use 5½ cups cereal, keep the heat low, fold in 1½ to 2 cups reserved mini marshmallows at the end, and press the mixture lightly into the pan.

Can I use large marshmallows?

Yes. Use 16 ounces / 454 g marshmallows total, and give them more time to melt. Large marshmallows melt more slowly than minis, so keep the heat low instead of turning up the burner.

What if I do not have marshmallows?

Use the no-marshmallow version with peanut butter and honey or maple syrup. The texture will be firmer and more snack-bar-like, not stretchy and gooey.

Should I use an 8×8, 9×9, or 9×13 pan?

Use an 8×8 pan for very thick bars, a 9×9 pan for the best balance of thickness and easy cutting, or a 9×13 pan for thinner party squares. The main recipe is written for a 9×9 pan.

Do these need to be refrigerated?

No. They stay softer at room temperature in an airtight container. Refrigeration can make the cereal treats firm, so only chill briefly if you need to set a chocolate topping.

How far ahead can I make them?

They taste best the day they are made, but they keep well for about 2 days in an airtight container. For parties, making them the night before is a good compromise between freshness and convenience.

Can I add chocolate on top?

Yes. Spread melted semi-sweet chocolate chips with a little peanut butter over the cooled bars. Finish with flaky salt if you want a stronger sweet-salty balance.

Are these gluten-free?

They can be, but only if every ingredient is gluten-free. The cereal is the main thing to check because some crisp rice cereals contain malt flavoring. If gluten matters, use certified gluten-free crisp rice cereal.

What is the difference between these and Scotcheroos?

These bars usually use marshmallows as the binder, so they are softer and stretchier. Scotcheroos usually use peanut butter with corn syrup and sugar, then get topped with chocolate and butterscotch, so they are denser and more candy-like.

Back to top

Posted on — 1 Comment

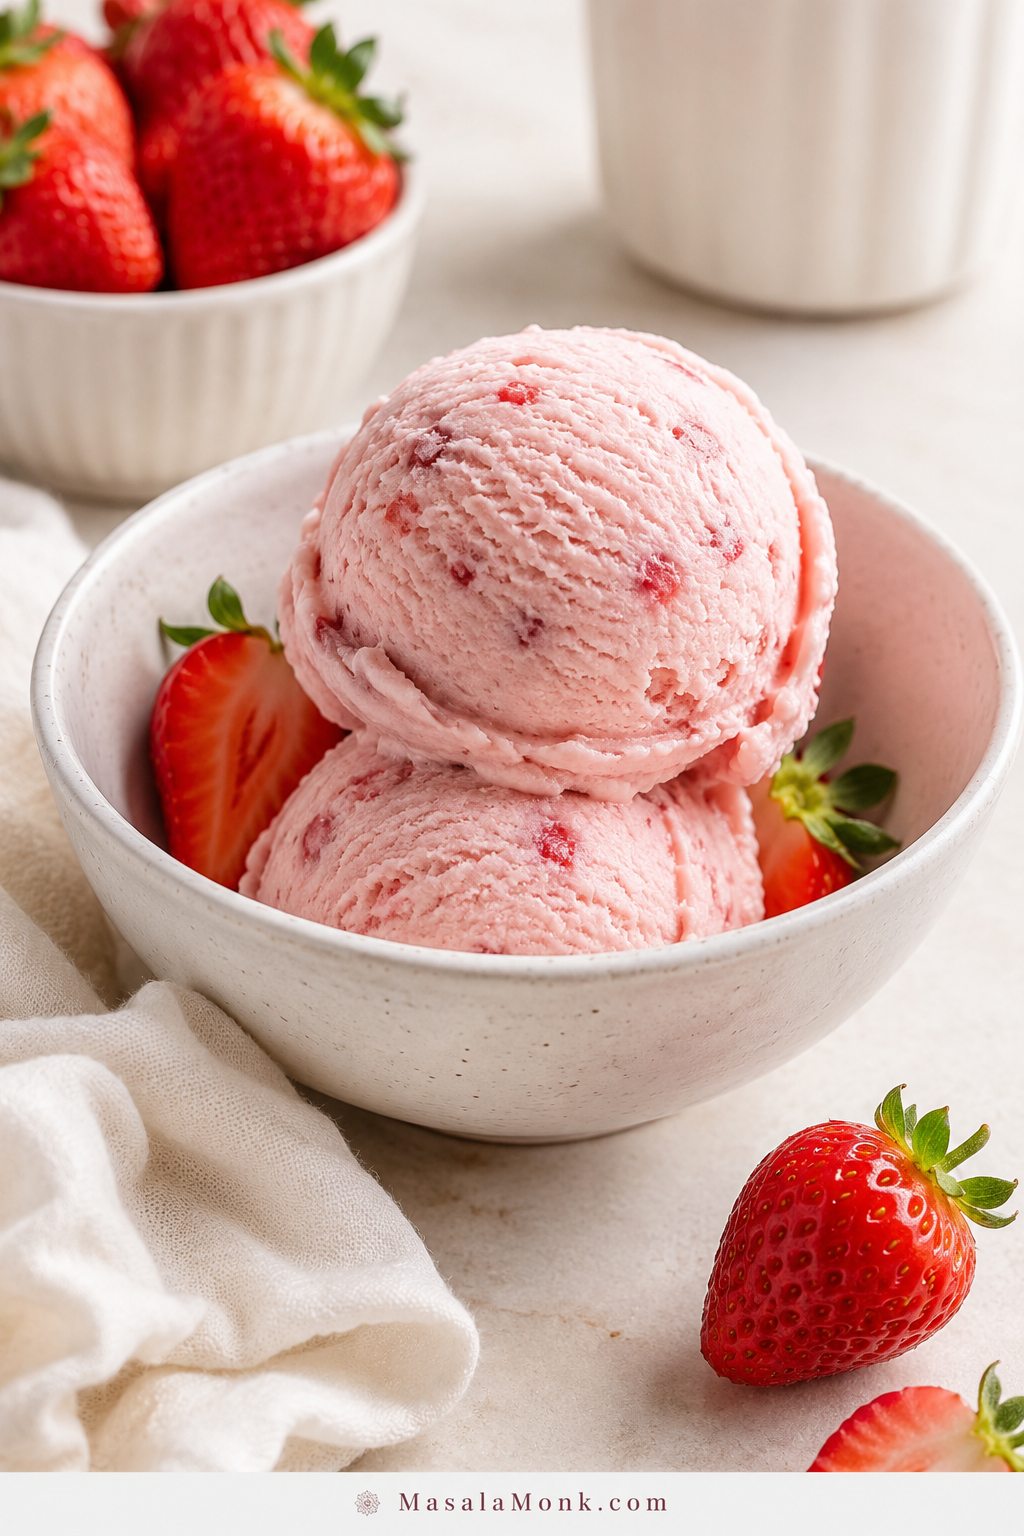
Homemade Strawberry Ice Cream Recipe

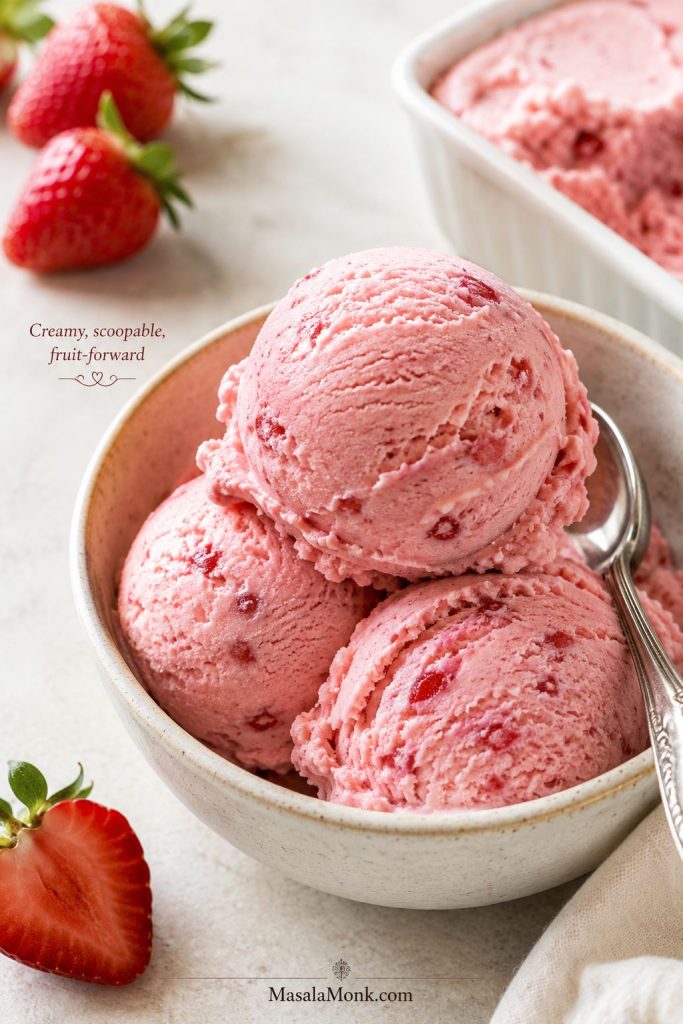
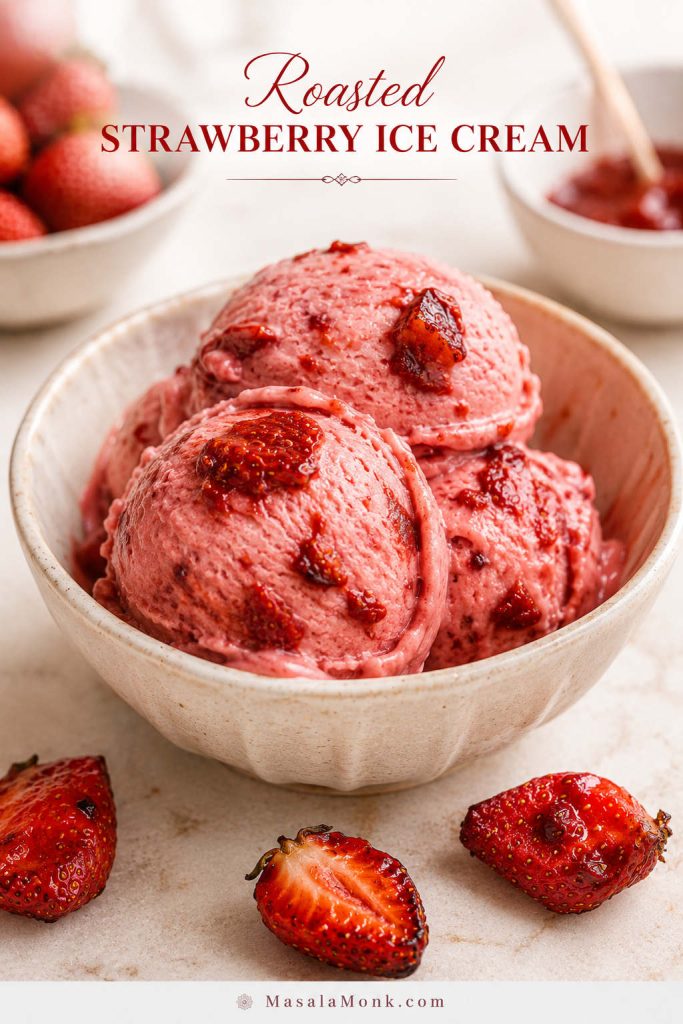
Homemade strawberry ice cream scooped into a pale bowl with fresh strawberries nearby

Strawberry Ice Cream Recipe sounds simple until the freezer gets involved. Sweet berries, cream, sugar, and vanilla should turn into something creamy and bright. Instead, homemade strawberry ice cream can come out icy, pale, too hard to scoop, or strangely bland after one night in the freezer.

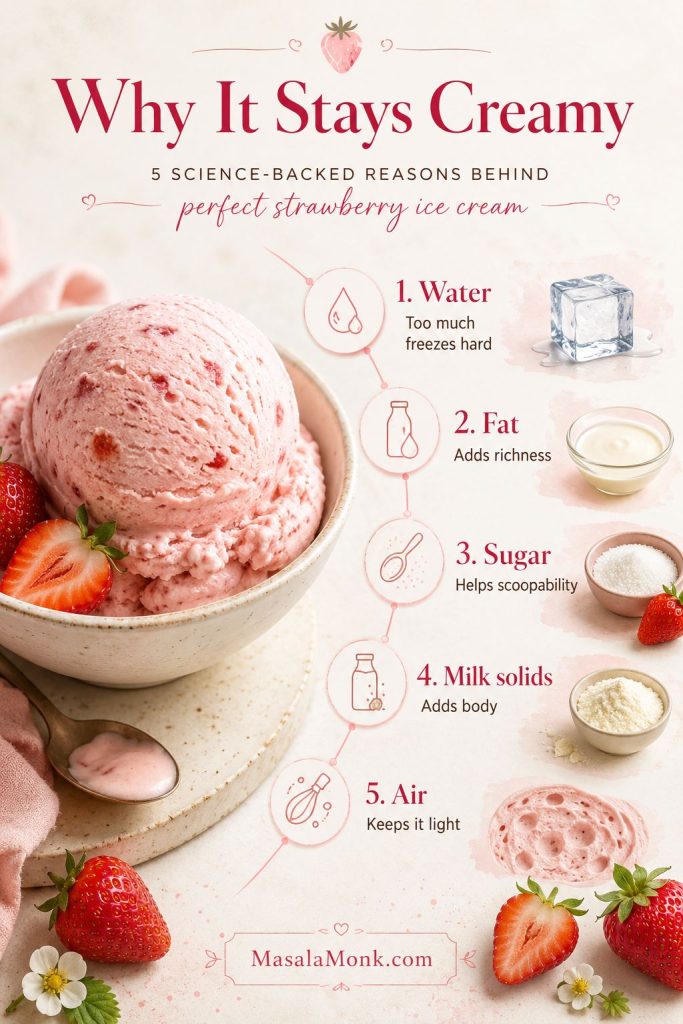
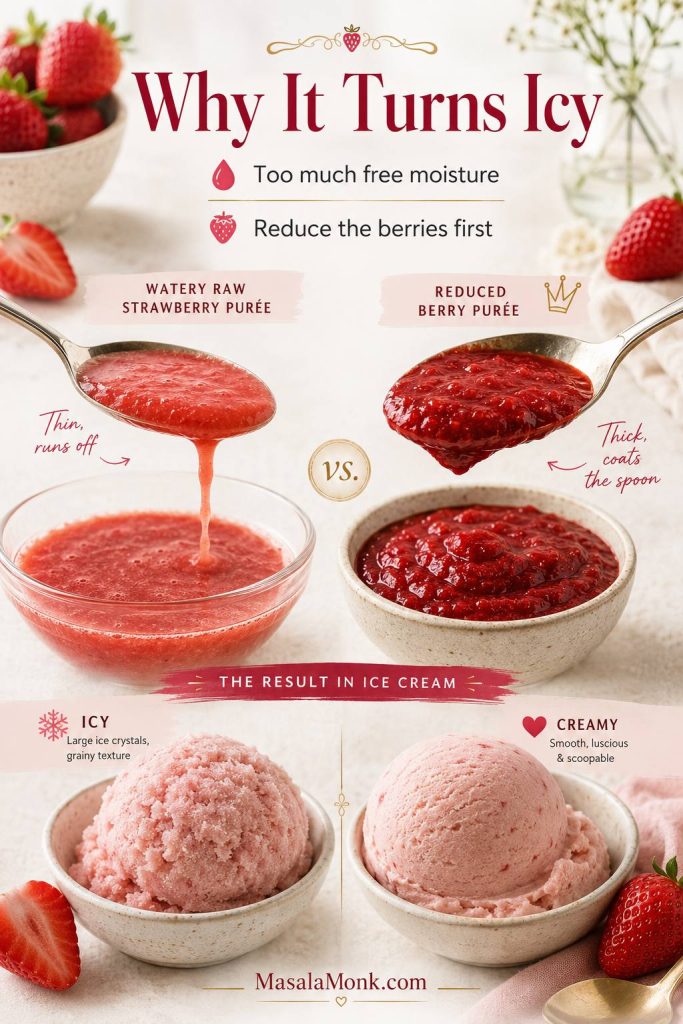
If that has happened to you, it was probably not because you “failed” at ice cream. Strawberry is one of the easiest flavors to make taste good while the mixture is fresh, and one of the easiest to ruin after freezing. The berries bring the flavor, but they also bring water, and water is what turns into frozen crunch.

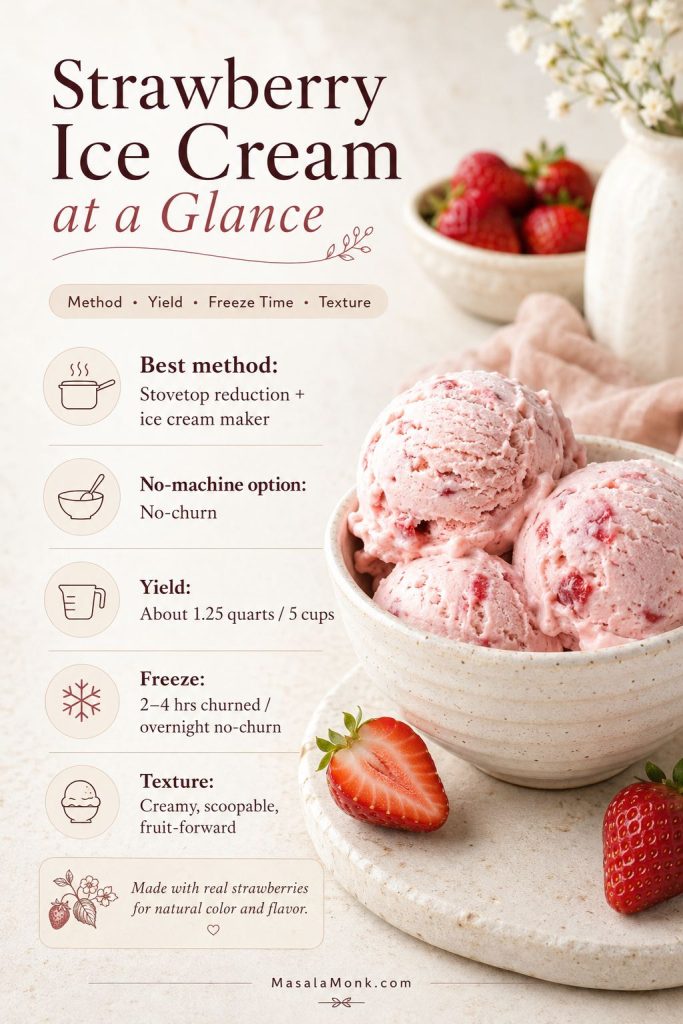
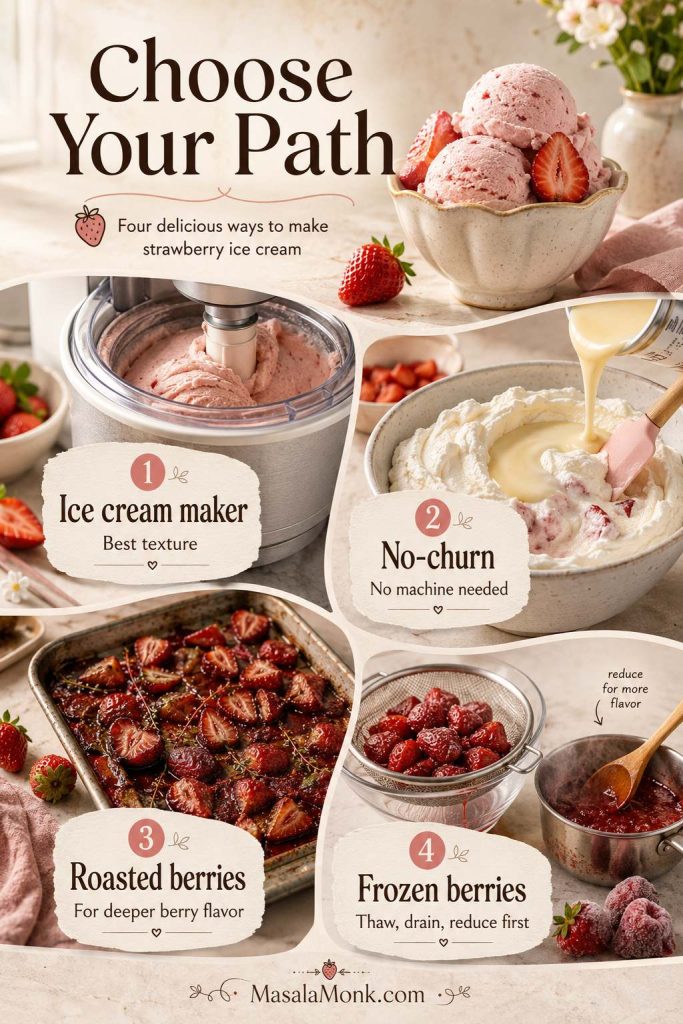
This recipe fixes that by concentrating the strawberries first, so the finished scoop tastes like ripe berries and cream instead of frozen pink milk. You can make it with an ice cream maker for a classic churned texture, or use the no-churn condensed milk method if you do not have a machine.

This is an eggless strawberry ice cream recipe, so the berry flavor stays bright instead of getting buried under a heavy custard.

When it works, the first spoonful should feel creamy from the edge of the scoop, smell like strawberries before you even taste it, and leave you with that clean berries-and-cream flavor instead of a crunchy, icy finish. The color should be soft and natural, not neon, and the flavor should come from cooked-down berries rather than bottled strawberry flavoring.

On this page

Start with the quick answer and method chooser if you are deciding how to make it. Use the second group when you want texture fixes, storage tips, variations, and serving ideas.

Quick Answer: The Best Strawberry Ice Cream Recipe

The best strawberry ice cream recipe starts with ripe strawberries, heavy cream, whole milk or half-and-half, sugar, vanilla, lemon juice, and a small texture helper such as light corn syrup, glucose, or honey. For the creamiest result, cook off some of the berry juice first, until the strawberries become thick, glossy, and jammy rather than loose and watery.

For the best all-around version, use an ice cream maker with a stovetop strawberry reduction. No machine? Use the no-churn version with reduced strawberries, sweetened condensed milk, and whipped cream. In both cases, the strawberry reduction is what keeps the freezer from turning the fruit into a grainy, hard scoop.

The rule is simple: do not blend watery raw strawberries straight into cream and expect smooth ice cream. Make the berries freezer-ready first, chill the mixture well, and freeze it in a shallow airtight container.

Close-up scoops of creamy strawberry ice cream with smooth texture and fresh strawberries
The finished scoop should be smooth, creamy, and fruit-forward, with enough strawberry flavor to stand out after freezing.

Best first batch: Make the stovetop strawberry reduction and churn it in an ice cream maker. Use the no-churn condensed milk method when you want the easiest freezer version without special equipment.

At a Glance

Best method Stovetop strawberry reduction + ice cream maker
No-machine option Reduced strawberries + condensed milk + whipped cream
Yield About 1.25 quarts / 5 cups / 8 servings
Texture Creamy, scoopable, fruit-forward, not icy
Reduction time 15–20 minutes on the stovetop
Churn time Usually 20–30 minutes
Freeze time 2–4 hours after churning, or overnight for no-churn
Best berries Ripe fresh strawberries, or thawed frozen berries that are drained and reduced
At-a-glance strawberry ice cream guide showing method, yield, freeze time, and texture notes
Before starting, check the method, yield, freeze time, and texture goal so the recipe fits your equipment and schedule.

Choose Your Path

If you are standing in the kitchen with strawberries, cream, and a freezer container, this is the fastest way to decide what to do next.

Use this shortcut guide before you start

  • Want the best texture? Use the ice cream maker version with stovetop strawberry reduction.
  • No ice cream maker? Use the no-churn condensed milk version below.
  • Berries smell flat? Roast them for deeper, jammy strawberry flavor.
  • Using frozen strawberries? Thaw, drain, and reduce them before adding dairy.
  • Want eggless strawberry ice cream? You are already in the right place; both versions are eggless.
  • Hate seeds? Blend and strain the reduced purée before mixing the base.

Smell the strawberries before you decide. When they are sweet and floral, the stovetop reduction is enough. If they look red but smell quiet, roast them for deeper flavor. With frozen berries, thaw and drain them before they go anywhere near the cream.

Choose this method Best for What to expect
Stovetop reduction + ice cream maker Best all-around strawberry ice cream Classic churned texture, strong berry flavor, reliable scoop
Roasted strawberries + ice cream maker Deepest fruit flavor Jammy, richer fruit taste; best when berries smell mild
Reduced strawberries + condensed milk + whipped cream No-churn strawberry ice cream Easy, creamy, no machine needed; freeze overnight
Frozen strawberries + reduction Off-season batches Works well if berries are thawed, drained, and cooked first
Raw purée shortcut Fastest possible version Fresh-tasting but more likely to freeze icy

If you are not sure, start with the ice cream maker method and stovetop reduction. It is the most balanced route: not the longest, not the richest, and not the riskiest.

Strawberry ice cream method chooser showing ice cream maker, no-churn, roasted berry, and frozen berry options
Choose the ice cream maker method for the cleanest scoop, the no-churn version for ease, and roasted berries when the fruit needs deeper flavor.

Why This Strawberry Ice Cream Stays Creamy

Creamy ice cream depends on five things working together: water, fat, sugar, milk solids, and air. Strawberries make that balance tricky because they bring flavor and water at the same time. Extra water freezes hard, low fat tastes thin, not enough sugar makes the scoop stiff, and too little air leaves it heavy instead of creamy.

This recipe fixes the balance before the mixture ever reaches the freezer. The strawberries are reduced or roasted, the dairy stays full-fat, the sugar is high enough to soften the freeze, and the base is chilled before churning. In the no-churn version, whipped cream brings the air while condensed milk brings sweetness and body.

The reduction is not a fussy extra step. It is the moment the strawberries stop being watery fruit and become ice-cream flavor.

Strawberry ice cream texture guide showing water, fat, sugar, milk solids, and air as key factors
A smooth scoop starts before churning: cooked-down berries reduce free moisture, while cream, sugar, milk solids, and air support the final texture.

Why Homemade Strawberry Ice Cream Turns Icy

The freezer is where weak strawberry flavor goes to disappear. Fresh berries taste juicy and bright at room temperature, but that same juice becomes the problem once frozen. Too much free moisture in the mixture creates a crunchy, grainy texture instead of a creamy one.

The answer is not to use less fruit. Less fruit gives you pale, timid ice cream. The better fix is to turn loose berries into a thicker purée before they meet the dairy. Simmering or roasting drives off excess moisture while keeping the berry flavor. That gives you a scoop that still tastes like strawberries after a night in the freezer.

Large raw strawberry chunks cause another common disappointment. They look beautiful in the bowl, but they freeze harder than the creamy base around them. Tiny macerated pieces can work; big raw pieces often turn into frozen fruit pebbles. A smooth purée or thick strawberry ripple usually eats better.

If your last batch froze hard, tasted weak, or had icy fruit pieces, the troubleshooting section will help you match the problem to the fix.

Comparison of watery strawberry purée and thick reduced strawberry base for ice cream texture
Strawberry ice cream usually turns icy when too much free berry moisture goes into the freezer, which is why reducing the fruit first matters.

Ingredients You Need

Think of the base as a balance: strawberries for flavor, cream for richness, milk for lightness, sugar for scoopability, and lemon, salt, and vanilla to keep the fruit from tasting flat once frozen.

Ingredients for homemade strawberry ice cream including strawberries, cream, milk, sugar, lemon, vanilla, salt, and milk powder
Simple ingredients do more than add flavor here: the dairy builds body, lemon sharpens the berries, and sugar helps the ice cream scoop cleanly.

Strawberries

Use strawberries that smell sweet before you cut them. Aroma matters more than perfect color. Deep red berries are helpful, but a fragrant berry will give you better ice cream than a glossy berry that tastes watery.

The churned recipe uses 680g / 1 1/2 lb strawberries. After cooking, that fruit should reduce to about 1 1/4 to 1 1/2 cups of thick strawberry purée. The no-churn version uses closer to 900g to 1kg / about 2 lb because condensed milk and whipped cream can support a stronger fruit layer.

Guide comparing fragrant ripe strawberries with glossy watery strawberries for ice cream
For the best strawberry ice cream, aroma matters more than perfect color because fragrant berries usually give stronger flavor after freezing.

Cream and Milk

Heavy cream gives the scoop its plush, rounded texture, while whole milk or half-and-half keeps the bowl from feeling like frozen whipped cream. Low-fat milk makes fruit ice cream more likely to freeze hard and icy, so this is not the recipe where skim milk quietly behaves like cream.

For a richer batch, use heavy cream plus half-and-half. For a lighter but still creamy version, use heavy cream plus whole milk. Either way, keep the dairy full-fat enough to support the fruit.

Sugar, Glucose, Corn Syrup, or Honey

Sugar is doing more than sweetening the bowl. It helps decide whether the finished ice cream scoops cleanly or freezes into something too firm. A base that tastes just right before freezing may taste dull later because cold mutes flavor, so the unfrozen mixture should taste slightly sweeter and more intense than the final scoop you want.

For the smoothest texture, use 3 tablespoons light corn syrup or glucose in the churned version. Honey also works, but it brings its own flavor. The amount is small; it will not make the ice cream syrupy. It simply helps soften the freeze.

If you enjoy the technical side of homemade ice cream, King Arthur Baking’s strawberry ice cream formula is a useful reference for how corn syrup, optional xanthan gum, and careful chilling can support a smoother frozen texture.

Lemon, Vanilla, and Salt

Lemon juice should not announce itself. It is there to make the strawberries taste more awake. Vanilla rounds out the cream, while salt sharpens the fruit and stops the flavor from feeling flat. When berries are decent rather than spectacular, these small ingredients matter even more.

Optional Milk Powder Upgrade

Milk powder is the quiet upgrade here. A spoonful or two adds body without adding more liquid, which is exactly what a fruit-heavy ice cream needs. Use 1 to 2 tablespoons in the churned base, or 1 tablespoon in the no-churn version, for a creamier scoop.

A tiny pinch of xanthan gum can also help advanced batches, but it is optional. Too much can make ice cream feel gummy, so milk powder is the easier first upgrade.

Fresh vs Frozen Strawberries for Strawberry Ice Cream

Fresh ripe strawberries give the best aroma. When they are truly in season, they make the ice cream taste bright before you add anything extra. Still, even fresh berries need concentration because juicy fruit still brings water into the base.

Frozen strawberries can make very good ice cream, but only if you treat them correctly. Thaw them first, drain off excess liquid, and then reduce the fruit on the stovetop. Pouring thawed strawberry water into cream is one of the fastest ways to make icy ice cream.

Strawberry type Best use What to watch
Fresh ripe strawberries Best flavor and aroma Still reduce or roast them for the creamiest texture
Fresh but mild strawberries Good with roasting Need more flavor concentration, lemon, and salt
Frozen strawberries Reliable off-season option Thaw, drain, and reduce before adding to dairy
Raw chopped strawberries Use only in tiny amounts Large pieces freeze hard and icy
Fresh and frozen strawberries compared for homemade strawberry ice cream with thaw, drain, and reduce guidance
Fresh strawberries usually give better aroma; however, frozen strawberries can still work well once they are thawed, drained, and reduced.

If you already use frozen berries in smoothies, the difference here is texture. A smoothie can stay thick because it is blended and served right away. Ice cream has to freeze, sit, and scoop later. MasalaMonk’s strawberry smoothie recipe guide is useful for drink-style berry texture, while this recipe focuses on controlling water for a creamy frozen scoop.

Made it with frozen strawberries? The detail that helps other readers most is whether you thawed, drained, and reduced them first.

Ice Cream Maker Method

Use the ice cream maker when you want that classic churned scoop: smooth, creamy, and light enough to taste like berries instead of heavy frozen cream. The base is eggless, so the strawberry flavor stays clean and bright.

If your machine uses a freezer bowl, freeze the bowl completely before starting. Overnight is safest. A half-frozen bowl gives you slush, not ice cream. The base also needs to be cold before churning, so do not rush the chill time.

Every machine is a little different, so follow your model’s timing and capacity notes. Cuisinart’s official ice cream maker manuals are useful if you need to check whether your bowl needs longer freezing, how much base your model can hold, or when to add mix-ins.

Step-by-step ice cream maker method for strawberry ice cream showing macerating, reducing, blending, chilling, and churning
For the churned method, reduce the berries, chill the base fully, and start with an ice cream maker that is already cold and ready.

Step 1: Macerate the Strawberries

Hull and chop the strawberries. Add them to a saucepan with half the sugar and the lemon juice, then let them sit for about 15 minutes. The sugar pulls juice from the berries and starts building the syrupy layer that will later cook down into stronger strawberry flavor.

Step 2: Reduce the Fruit

Cook the strawberries over medium heat, stirring often, for 15 to 20 minutes. Stop when the mixture looks glossy and thick, and a spatula dragged through the pan briefly leaves a trail. From 680g / 1 1/2 lb strawberries, you want roughly 1 1/4 to 1 1/2 cups of reduced strawberry mixture.

Thick reduced strawberries in a saucepan with a spoon showing jammy texture for ice cream
The strawberry mixture should move from loose and juicy to glossy and spoon-coating before it joins the ice cream base.

This is the moment the recipe starts smelling like dessert. The berries go from juicy and loose to glossy and almost jammy, and that concentrated fruit is what keeps the finished ice cream tasting alive after freezing.

The pan should smell like warm strawberry jam, and the purée should look rich enough to coat the spoon instead of running straight off it.

Three stages of strawberry reduction showing too loose, almost ready, and thick jammy purée
Time helps, but texture matters more; the strawberry reduction is ready when it coats the spoon and no longer runs like juice.

Step 3: Blend and Strain

Cool the reduced strawberries, then blend until smooth. For the silkiest texture, strain the purée through a fine-mesh sieve to remove seeds. Skipping the sieve is fine if you like a more rustic fruit texture, but the smooth version usually feels more polished.

Step 4: Mix and Chill the Base

Whisk the strawberry purée with heavy cream, whole milk or half-and-half, the remaining sugar, light corn syrup or glucose, vanilla, salt, and optional milk powder. Taste the base. It should taste slightly too sweet and very strawberry-forward because freezing will soften the flavor.

If the base tastes bold before it goes into the machine, you are on the right track.

Cover and chill for at least 4 hours. Overnight is even better. A very cold base churns faster, forms smaller ice crystals, and gives a smoother texture.

Chilled pink strawberry ice cream base in a covered glass bowl beside an ice cream maker
Chilling gives the ice cream maker a head start, so the base thickens faster and forms a smoother frozen texture.

Not sure whether it is ready to scoop after freezing? Use the texture guide before serving.

Step 5: Churn Until Thick

Pour the cold base into your ice cream maker and churn according to the machine instructions, usually 20 to 30 minutes. The ice cream should look like thick soft serve when it is ready. Stop there. Churning beyond that point can make the texture grainy, especially in a cream-rich base.

Step 6: Freeze Until Scoopable

Freshly churned strawberry ice cream is soft and spoonable. For clean scoops, transfer it to a shallow freezer-safe container, press parchment or plastic wrap directly onto the surface, cover tightly, and freeze for 2 to 4 hours.

After an overnight freeze, let the container sit at room temperature for 5 to 10 minutes before scooping. You should not need to wait 30 minutes for dessert. If you do, the batch was likely too watery, too low in sugar, or too low in fat.

No-Churn Strawberry Ice Cream Without an Ice Cream Maker

Why No-Churn Needs a Different Structure

No-churn strawberry ice cream can be excellent, but it needs a different kind of structure. Since there is no machine to churn in air, whipped cream has to do that job, while condensed milk brings sweetness, milk solids, and body. The strawberries still need to be reduced first; condensed milk can make the base creamy, but it cannot erase watery fruit.

No-churn strawberry ice cream ingredients showing reduced berries, condensed milk, and whipped cream being folded together
In no-churn strawberry ice cream, each part has a job: thick berries carry the flavor, condensed milk softens the freeze, and whipped cream keeps it light.

If you want to see the same no-churn logic in another fruit dessert, MasalaMonk’s homemade mango ice cream recipe shows how thick fruit purée, whipped cream, and condensed milk work together for a creamy freezer scoop.

The Simple No-Churn Formula

The simplest reliable formula is this: reduce 2 lb strawberries, stir the cooled fruit into 14 oz condensed milk, fold in 2 cups whipped cream, and freeze overnight. That is the no-churn version worth making.

For the no-churn version, 2 lb strawberries usually gives about 3 to 3 1/2 cups purée; reduce it to about 1 1/2 to 1 3/4 cups before cooling. That smaller, thicker amount gives the whipped cream and condensed milk a better chance of freezing creamy instead of icy.

The finished scoop is richer than the churned version, but when the fruit is cooked down properly, it still tastes like strawberries rather than just condensed milk and cream.

When it is ready, the scoop should feel rich and soft-set, with the cooked strawberry flavor cutting through the condensed milk instead of getting buried under it.

If you are making this for guests, make the no-churn version the night before. It needs time to settle into a clean scoop, and rushing it is the fastest way to end up with soft edges and a frozen center.

Roasted Strawberry Method

Roasting gives the deepest strawberry flavor. Toss hulled strawberries with 1 to 2 tablespoons sugar, spread them on a parchment-lined tray, and roast at 160°C / 320°F until the berries collapse and the juices thicken. This usually takes 45 to 60 minutes.

Use this route when your berries are good but not wildly fragrant. The oven concentrates their flavor and gives the ice cream a richer, almost strawberry-jam taste.

Stovetop Strawberry Reduction Method

The saucepan is the practical way to get there on an ordinary day. Chop or blend the berries, simmer them with a little sugar, and stop when the mixture looks thick, glossy, and jammy rather than loose.

This is the better choice when you want homemade strawberry ice cream today without keeping the oven on for an hour. It is also the best way to handle frozen strawberries because it lets you cook off the extra thawed liquid.

Roasted strawberries on a tray compared with stovetop strawberry reduction in a saucepan
Roast strawberries when you want a darker, jammy flavor; use the stovetop when you want a faster, more controlled reduction.

How to Assemble the No-Churn Version

  1. Make the roasted or reduced strawberry purée and cool it completely.
  2. Stir the cooled purée into sweetened condensed milk with vanilla, lemon juice, and salt.
  3. Whip cold heavy cream to medium peaks. It should hold shape but still look smooth.
  4. Fold the whipped cream into the strawberry condensed milk mixture in two or three additions.
  5. Transfer to a shallow freezer-safe container.
  6. Press parchment or plastic wrap onto the surface, cover tightly, and freeze for 8 hours or overnight.

Do not over-whip the cream, and do not beat the folded mixture aggressively. No-churn ice cream depends on trapped air. Knock out too much air and the finished texture becomes dense.

Step-by-step no-churn strawberry ice cream method showing reduced berries, condensed milk, whipped cream, folding, and freezing
For no-churn strawberry ice cream, thick berry reduction, airy whipped cream, and an overnight freeze make the biggest texture difference.

Shortcut that still works: Use the stovetop reduction instead of roasting. It is faster, easier to measure, and still removes enough water to keep the no-churn version creamy.

Recipe Card: Creamy Strawberry Ice Cream

This card gives you two clear paths: the main ice cream maker version first, then a no-churn version for anyone working without a machine. Both start with concentrated strawberries so the finished ice cream tastes bright instead of icy.

YieldAbout 1.25 quarts / 5 cups
Servings8
Prep + cook35–40 minutes
Freeze time2–4 hours after churning; overnight for no-churn

Equipment

  • Ice cream maker
  • Medium saucepan
  • Blender or food processor
  • Fine-mesh sieve, optional
  • Mixing bowl
  • Whisk
  • Freezer-safe shallow container or loaf pan
  • Parchment paper or plastic wrap for the surface

Ingredients: Ice Cream Maker Version

  • 680g / 1 1/2 lb ripe strawberries, hulled and chopped
  • 150g / 3/4 cup granulated sugar, divided
  • 1 tablespoon lemon juice, plus more to taste
  • 360 ml / 1 1/2 cups heavy cream
  • 240 ml / 1 cup whole milk or half-and-half
  • 3 tablespoons light corn syrup or glucose, or honey if preferred
  • 1 teaspoon vanilla extract
  • 1/4 teaspoon fine salt
  • Optional: 1 to 2 tablespoons milk powder for extra body
  • Optional: 1 tablespoon vodka or orange liqueur for a slightly softer adult version

Method: Ice Cream Maker Version

  1. Macerate the berries. Add the chopped strawberries to a saucepan with 75g / about 6 tablespoons of the sugar and the lemon juice. Let sit for 15 minutes.
  2. Reduce the strawberries. Cook over medium heat, stirring often, for 15 to 20 minutes. Stop when the fruit looks glossy and thick, and has reduced to about 1 1/4 to 1 1/2 cups.
  3. Cool and blend. Let the strawberry mixture cool, then blend until smooth. Strain through a fine-mesh sieve if you want a silky texture.
  4. Mix the base. Whisk the strawberry purée with heavy cream, whole milk or half-and-half, remaining sugar, corn syrup or glucose, vanilla, salt, and optional milk powder.
  5. Taste and adjust. The base should taste slightly sweeter and more intense than the final ice cream. Add a little more lemon juice if the strawberries taste flat.
  6. Chill thoroughly. Cover and refrigerate for at least 4 hours, or overnight for the smoothest churn.
  7. Churn. Pour the cold base into a prepared ice cream maker and churn according to the machine instructions, usually 20 to 30 minutes, until thick and soft-serve-like.
  8. Freeze until scoopable. Transfer to a shallow freezer-safe container. Press parchment or plastic wrap directly onto the surface, cover tightly, and freeze for 2 to 4 hours.
  9. Serve. Let the ice cream stand for 5 to 10 minutes after an overnight freeze, then scoop.

Ingredients: No-Churn Version

  • 900g to 1kg / about 2 lb strawberries, hulled
  • 1 to 2 tablespoons sugar
  • 395g to 400g / 13 to 14 oz sweetened condensed milk
  • 480 ml / 2 cups cold heavy whipping cream
  • 1 teaspoon vanilla extract
  • 1 to 2 teaspoons lemon juice
  • Pinch of fine salt
  • Optional: 1 tablespoon milk powder for extra body

Method: No-Churn Version

  1. Concentrate the strawberries. Roast the berries with sugar at 160°C / 320°F for 45 to 60 minutes, or simmer them on the stovetop until reduced by about half. Cool completely.
  2. Blend. Blend the cooled strawberries into a thick purée.
  3. Mix with condensed milk. Stir the strawberry purée into the condensed milk with vanilla, lemon juice, salt, and optional milk powder.
  4. Whip the cream. Beat cold heavy cream to medium peaks.
  5. Fold gently. Fold the whipped cream into the strawberry condensed milk mixture in two or three additions.
  6. Freeze. Transfer to a shallow freezer-safe container, press parchment or plastic wrap against the surface, cover tightly, and freeze for 8 hours or overnight.
  7. Scoop. Rest for 5 to 15 minutes before scooping, depending on your freezer.

Recipe Notes

  • Use ripe strawberries for the best flavor.
  • Frozen strawberries work if thawed, drained, and reduced first.
  • Do not add large raw strawberry chunks unless you like icy fruit pieces.
  • The base should taste slightly too sweet before freezing because cold mutes flavor.
  • Homemade strawberry ice cream is best within the first week.
Homemade strawberry ice cream recipe card with yield, reduced strawberries, dairy, chill time, churn time, and no-churn option
Keep the main formula in mind: reduce the strawberries first, chill the base well, then churn or freeze until the ice cream is scoopable.

Texture Guide: Soft Serve vs Scoopable

Freshly churned strawberry ice cream should look like thick soft serve. It will taste good immediately, but it will not hold round scoops yet. After 2 to 4 hours in the freezer, it becomes firmer and easier to serve in bowls or cones.

No-churn strawberry ice cream needs more time because it is not partially frozen in a machine. Give it 8 hours if possible. Overnight is better. The surface should feel firm, but after a short rest at room temperature, a scoop should move through without a fight.

Stage What it looks like Best use
Just churned Thick, smooth, soft-serve texture Eat right away or freeze for scoops
2–4 hours frozen Firm enough to scoop cleanly Best window for bowls and cones
Overnight frozen Firm but scoopable after a short rest Let stand 5–10 minutes first
Several days later May be firmer Rest longer and use a warm scoop
Strawberry ice cream texture stages showing just churned soft serve, frozen scoopable ice cream, and overnight rested ice cream
Freshly churned ice cream is soft and spoonable; after a few hours in the freezer, it firms into clean, rounded scoops.

A short rest before scooping is normal. A long thaw is not. If strawberry ice cream needs 30 minutes on the counter every time, the mixture likely carried too much water or did not have enough sugar, fat, or milk solids to stay soft enough to serve.

Notice how long your container needed to sit before scooping. Five minutes means the balance was close; 25 minutes usually means the batch carried too much water or not enough sugar.

Troubleshooting: Icy, Hard, or Weak Flavor

Most strawberry ice cream problems show up when you open the freezer, but the mistake usually happened much earlier. If your last batch looked promising when it went into the freezer and came out hard or crunchy the next day, you are not alone. Strawberry ice cream is one of the easiest flavors to make taste good fresh and one of the easiest to ruin after freezing.

Use this quick diagnosis first, then read the details below if you want the full fix.

Troubleshooting guide for strawberry ice cream problems including icy texture, hard scoops, weak flavor, dense no-churn texture, and frozen chunks
When strawberry ice cream turns icy, hard, bland, dense, or chunky, the fix usually starts with moisture control, better balance, or gentler handling.
Problem Most likely cause Fix next batch
Icy texture Too much water from strawberries Reduce or roast the berries before mixing
Rock-hard scoop Not enough sugar, fat, or milk solids Use full-fat dairy and add glucose, corn syrup, or milk powder
Weak strawberry flavor Fruit was not concentrated enough Reduce berries more, then brighten with lemon and salt
Dense no-churn texture Whipped cream lost too much air Whip to medium peaks and fold gently
Frozen fruit pebbles Large raw strawberry chunks Use smooth purée, a ripple, or tiny macerated pieces

Once you know the likely cause, check the storage and scooping tips too, because freezer storage can make a good batch feel harder than it should.

Why Is My Strawberry Ice Cream Icy?

Too much water is the usual reason. Raw purée, thawed frozen berries, low-fat milk, or not enough sugar can all create a crunchy frozen texture. Next time, reduce or roast the strawberries first, use full-fat dairy, and avoid adding watery fruit directly to the cream mixture.

When the Scoop Is Rock Hard

The formula may need more softness. Sugar, glucose, corn syrup, honey, condensed milk, cream, and milk powder all help. Storage matters too. A shallow airtight container with parchment pressed onto the surface protects the texture better than a half-empty tub with air sitting above the ice cream.

Homemade strawberry ice cream comparison showing hard difficult-to-scoop texture versus smooth balanced scoop
Rock-hard homemade ice cream is not just a freezer problem. Water, sugar, fat, milk solids, and storage all affect how easily it scoops.

When the Strawberry Flavor Disappears After Freezing

Cold dulls flavor. If the finished scoop tastes faint, the chilled mixture probably did not taste intense enough before freezing. Reduce the strawberries more next time, add a little lemon juice, use the full amount of salt, and taste before it goes into the fridge.

How to Avoid Frozen Strawberry Pebbles

Large pieces of raw fruit freeze harder than the ice cream around them. Chop them very small, macerate them with sugar first, or skip chunks and use a thick strawberry ripple. A smooth strawberry cream usually gives a better bite than frozen fruit pieces.

Guide showing large frozen strawberry chunks, tiny macerated strawberry pieces, and strawberry ripple in ice cream
Big raw strawberry chunks may look tempting, but they often freeze hard; instead, use tiny macerated pieces or a thick ripple for smoother bites.

Why No-Churn Ice Cream Turns Dense

The whipped cream may have been overmixed, underwhipped, or folded too aggressively. Whip to medium peaks, then fold gently. The mixture should look airy and smooth before freezing, not deflated or stiff.

Grainy Texture After Churning

Graininess can come from over-churning, a warm base, or cream that starts turning buttery. Chill the mixture thoroughly and stop churning once the ice cream reaches thick soft-serve consistency.

When the Ice Cream Tastes Too Sweet

The base needs to taste a little sweeter before freezing, but it should not taste cloying. If the finished ice cream is too sweet, add more lemon juice to the strawberry reduction next time, reduce the sugar slightly, or serve it with fresh berries for contrast.

Strawberry Ice Cream Variations

Once the core scoop is creamy, the variations become much easier. The rule stays the same: bring in flavor, not extra water.

If you have not made the base yet, start with the recipe card first, then come back here once you know whether you are making the churned or no-churn version.

Five strawberry ice cream variations including cheesecake, shortcake, ripple, chocolate chip, and roasted strawberry
Once the base scoop is creamy, variations become simple: add flavor, texture, or richness without bringing extra water into the mix.

Strawberry Cheesecake Ice Cream

This is the richest variation, especially if you want the tang of cheesecake without making a full dessert. Beat 85g / 3 oz softened cream cheese until smooth, then whisk it into the dairy base before chilling. Layer in small graham cracker crumbs as you pack the churned ice cream into the container.

Strawberry cheesecake ice cream scoops with graham crumbs, strawberry pieces, and creamy cheesecake-style swirls
Strawberry cheesecake ice cream is the richest variation, with graham crumbs and a tangy cream cheese note that make each scoop feel like dessert.

Strawberry Shortcake Ice Cream

This is the one to make when you want strawberry ice cream to feel like a summer dessert bowl, not just a scoop. Layer the finished ice cream with small pieces of shortbread, pound cake crumbs, or vanilla cookie crumbs. Add them while transferring the ice cream to the freezer container so they keep some texture.

Strawberry shortcake ice cream scoops with cake crumbs, strawberries, and a pale dessert bowl
Strawberry shortcake ice cream turns a simple berry scoop into a nostalgic summer dessert, especially when the cake pieces stay small and soft.

Strawberry Ripple Ice Cream

Reserve a few tablespoons of thick strawberry reduction and swirl it through the ice cream as you pack it into the container. Do not fully mix it in. Those streaks give you pockets of stronger fruit flavor without watering down the whole base.

Close-up strawberry ripple ice cream with thick red berry swirls through a pale pink base
A thick strawberry ripple gives concentrated berry flavor in each spoonful without loosening the whole ice cream base.

Strawberry Chocolate Chip Ice Cream

Add finely chopped dark chocolate or mini chocolate chips near the end of churning. Small pieces are better than large chunks because frozen chocolate gets very firm.

Roasted Strawberry Ice Cream

Roast the berries instead of simmering them when you want deeper fruit flavor. This is the variation to use when strawberries look good but taste a little quiet; the oven makes them darker, jammy, and more intense.

Roasted strawberry ice cream scoops with jammy roasted strawberry pieces and deep berry sauce
Roasted strawberry ice cream is best when the berries look good but taste quiet, because roasting makes the fruit darker, sweeter, and more intense.

Strawberry Protein Ice Cream Direction

Protein ice cream needs a different formula because protein powder can make frozen desserts chalky or firm. If that is the direction you want, start with MasalaMonk’s protein ice cream recipe and use the strawberry lessons here: concentrate the fruit, keep the mixture smooth, and avoid watery berries.

Tried the cheesecake, shortcake, ripple, or chocolate chip version? Mention which one you made, because mix-ins can change the texture more than people expect.

Storage and Scooping Tips

Homemade strawberry ice cream is at its best in the first few days, when the berry flavor still tastes fresh and the texture has not picked up freezer burn. It can keep longer, but the first week is the sweet spot.

  • Use a shallow airtight freezer-safe container.
  • Press parchment paper or plastic wrap directly onto the surface before adding the lid.
  • Store the container toward the back of the freezer, where the temperature is steadier.
  • Let the ice cream rest for 5 to 10 minutes before scooping after an overnight freeze.
  • Use a warm scoop for cleaner portions.
  • Return the container to the freezer quickly after serving.
Homemade strawberry ice cream in a shallow container with surface wrap and a tight lid for freezer storage
Covering the surface before freezing limits air exposure, which helps protect homemade strawberry ice cream from freezer burn and rough texture.

A wide, shallow container freezes faster and scoops more evenly than a deep narrow tub. Every long thaw and refreeze makes the next scoop a little rougher, so scoop what you need, smooth the surface, cover it again, and freeze it quickly.

Shallow container and deep container compared for storing homemade strawberry ice cream
A shallow container gives the ice cream more surface area, so it firms more evenly and is easier to scoop later.

If the container still needs a long thaw every time, compare your batch with the troubleshooting guide; the issue may be water, sugar, fat, or milk solids rather than storage alone.

When you are ready to serve, let the container rest briefly and warm the scoop under hot water, then dry it before scooping. That small step helps the scoop glide through the ice cream instead of tearing it into rough shards.

Close-up of a warm scoop lifting strawberry ice cream cleanly from a container
Letting the container rest briefly and using a warm scoop helps homemade strawberry ice cream lift cleanly instead of tearing through the texture.

What to Serve with Strawberry Ice Cream

Strawberry ice cream is bright enough to serve on its own, especially when the fruit has been reduced properly. The best pairings either echo the berries or give the scoop contrast: buttery shortbread, lemon cake, brownies, waffles, crumbles, fresh strawberries, or a spoonful of thick strawberry sauce.

A warm fruit dessert works beautifully too. Serve it with MasalaMonk’s peach cobbler with canned peaches, where the cold scoop melts into the buttery topping and warm fruit.

On a summer dessert table, pair it with vanilla cookies, pound cake, crisp wafers, or a fresh berry platter. The contrast works because the ice cream is creamy and cold while the sides bring crunch, warmth, or sharper fruit flavor.

Strawberry ice cream served with shortbread cookies, lemon cake, cobbler, brownies, and fresh strawberries
Strawberry ice cream pairs best with desserts that add crunch, warmth, citrus, chocolate, or buttery contrast without overwhelming the berries.

For a frozen strawberry drink instead of dessert, MasalaMonk’s frozen strawberry daiquiri recipe uses berries in a completely different way: frozen for slushy texture rather than concentrated for a scoopable ice cream base.

FAQs

Fresh or frozen strawberries: which makes better ice cream?

Fresh ripe strawberries usually give the best aroma and flavor. Frozen strawberries can still work well, but they should be thawed, drained, and reduced before being added to the base. Watery thawed berries are one of the main reasons homemade strawberry ice cream turns icy.

What if I do not have an ice cream maker?

Use the no-churn method with reduced strawberries, sweetened condensed milk, and whipped cream. The churned version is cleaner and lighter; the no-churn version is easier and still creamy when the strawberries are concentrated first.

Is this strawberry ice cream recipe eggless?

Yes. This recipe is eggless. Eggs can make ice cream rich, but they are not required for a creamy strawberry scoop. In fact, an eggless base often lets the berry flavor taste brighter and fresher.

Why does homemade strawberry ice cream freeze so hard?

Hard texture usually comes from too much water, too little sugar, too little fat, or not enough milk solids. Strawberry ice cream is especially sensitive because the fruit brings extra water. Reducing the berries first and using full-fat dairy helps the scoop stay softer.

Where condensed milk helps most in no-churn strawberry ice cream

Condensed milk is most useful in no-churn strawberry ice cream. It adds sweetness, body, and milk solids without adding as much water as regular milk. It is less necessary in the ice cream maker version because churning helps build texture.

Roasted vs stovetop strawberries: which gives better flavor?

Roasting gives deeper, more jammy strawberry flavor, especially when the berries smell mild. Simmering on the stovetop is faster and works very well. The important part is concentration: do not add watery raw fruit to the base if you want the creamiest result.

What is the best way to add strawberry pieces without icy chunks?

Keep the pieces tiny and macerate them with sugar first. Large raw strawberry pieces freeze hard. A smooth purée or thick strawberry ripple usually gives a better eating experience than big frozen chunks.

How long does homemade strawberry ice cream last?

It tastes best within the first week. It can keep longer in an airtight container, especially with parchment or plastic wrap pressed against the surface, but homemade ice cream gradually becomes firmer and icier over time.

Final Scoop

A good strawberry ice cream recipe should taste like strawberries first. Not pink milk. Not frozen cream with a hint of berry. The difference comes from one decision: concentrate the fruit before freezing it.

Once the strawberries are thick and flavorful, the rest of the recipe becomes much easier. Chill the base well, use enough cream and sugar to support the texture, churn until soft-serve thick, and freeze it in a shallow covered container. The result is creamy, bright, scoopable strawberry ice cream that still tastes like real fruit when you open the freezer tomorrow.

If you try it, the most useful note to leave is which path you used: churned, no-churn, roasted berries, or stovetop reduction. That helps other readers choose their first batch too.

Posted on — 2 Comments

Coconut Ice Cream Recipe: Coconut Milk, Coconut Cream, Cream of Coconut and No-Churn Options

Three scoops of creamy coconut ice cream in a light ceramic bowl with toasted coconut flakes and a spoon cutting into one scoop.

This coconut ice cream recipe is for the kind of scoop that tastes deeply coconutty, creamy, and smooth—not icy, watery, or rock-hard straight from the freezer. The base uses full-fat coconut milk and coconut cream for a rich dairy-free texture, with just enough sugar to keep it soft enough to scoop.

You can churn it for the smoothest, parlor-style finish, or use the no-churn freeze-and-blend method when you do not have an ice cream maker. There is also a sweeter cream of coconut batch, a condensed milk shortcut, Ninja Creami notes, and tender coconut and Thai-style ideas if you want a more tropical bowl.

The only part of this coconut ice cream recipe that really needs care is choosing the right coconut product. Coconut milk, coconut cream, and cream of coconut sound similar, but they behave very differently once frozen. Get that part right, and you are already most of the way to a creamy scoop.

Quick Answer: The Best Coconut Ice Cream Recipe

The creamiest dairy-free coconut ice cream starts with 1 can full-fat coconut milk plus 1 can unsweetened coconut cream, blended with sugar, vanilla, and salt. Churn it for the smoothest, parlor-style texture, then freeze until firm. If you do not have an ice cream maker, freeze the base in cubes and blend it until creamy. For a richer dairy-style shortcut, use the condensed milk method below.

Best base 1 can full-fat coconut milk + 1 can unsweetened coconut cream
Best method Ice cream maker for the smoothest texture; freeze-and-blend for no-churn
Texture Creamy, coconut-forward, scoopable after resting briefly
Avoid Thin carton coconut milk, lite coconut milk, and using sweetened cream of coconut without reducing sugar

Still deciding? See coconut milk vs coconut cream vs cream of coconut, or skip straight to the recipe card.

Before you choose a method, look at the texture you are aiming for: smooth, dense, creamy coconut ice cream that drags softly on the spoon instead of breaking into icy crystals.

Close-up of a spoon dragging through smooth coconut ice cream, showing soft creamy ridges and a dense but scoopable texture.
A smooth spoon drag is the texture cue to look for; if the scoop looks brittle or crystalline, the base usually needs better fat balance, chilling, or liquid control.

At a Glance

Yield About 1 quart / 900 ml to 1 liter
Prep time 10 minutes
Base chill time At least 4 hours; overnight is better
Churn time 20–30 minutes for most machines
Final freeze 4–6 hours for firm scoops
No-machine option Freeze the blended base in ice cube trays, then blend the frozen cubes
Equipment Blender, ice cream maker, freezer-safe container, spatula, measuring cups or scale

Why This Coconut Ice Cream Recipe Works

This coconut ice cream recipe works because it balances coconut flavor, fat, sugar, and temperature instead of relying on coconut milk alone. Because of that, the goal is a scoop that tastes rich and coconut-forward, but still feels smooth on the spoon—not icy, brittle, greasy, or waxy.

  • Coconut milk keeps the base pourable. It brings clean coconut flavor without making the mixture too heavy.
  • Coconut cream adds body. The extra fat helps the finished scoop feel creamier and less icy.
  • Sugar improves scoopability. It is not only for sweetness; cutting it too far can make homemade coconut ice cream freeze harder.
  • Blending and chilling protect the texture. Blending dissolves the sugar and smooths the coconut fat, while a cold base churns thicker and faster.

The easiest way to remember the main base is simple: coconut milk keeps it fluid, coconut cream gives it body, and sugar helps the finished scoop stay softer.

Coconut milk, coconut cream, sugar, vanilla, and salt arranged as the base ingredients for homemade coconut ice cream.
Coconut milk keeps the base fluid, while coconut cream adds body; together, they create a creamier first batch than either one usually gives alone.

Which Coconut Ice Cream Version Should You Make?

Start here if you are staring at coconut milk, coconut cream, or cream of coconut and wondering whether you bought the right can. You probably can still make a good batch, but the method changes depending on what is in front of you.

If you have ever bought the wrong can for a coconut dessert, this is the section that saves the batch. From there, pick the row that matches your pantry, then follow that route instead of forcing every coconut product into the same recipe.

Visual guide showing coconut ice cream options including churned, no-churn, cream of coconut, Ninja Creami, and tender coconut versions.
Start with what you already have, then choose the method that fits your tools, since coconut milk, cream of coconut, and a Ninja Creami all need slightly different handling.
What you have or want Best route to take What to expect
Full-fat coconut milk + unsweetened coconut cream Best first version Balanced coconut flavor, creamy texture, dairy-free, and less icy than coconut milk alone
Only full-fat canned coconut milk Coconut milk ice cream Lighter coconut flavor, slightly icier texture
Unsweetened coconut cream Coconut cream ice cream Richer, smoother, more indulgent
Sweetened cream of coconut Cream of coconut ice cream Sweeter, stronger coconut flavor, pina-colada-style
No ice cream maker Freeze-and-blend no-churn method Soft-serve texture first, firmer after a short freeze
Heavy cream + condensed milk Condensed milk no-churn shortcut Very creamy and easy, but not dairy-free
Ninja Creami Ninja Creami method Freeze 24 hours, spin, then Re-Spin if crumbly
Tender coconut malai Tender coconut style Fresh coconut texture, Indian-style flavor
Palm sugar or pandan Thai coconut style More fragrant, street-dessert-style coconut flavor
Keto or sugar-free goal See the keto note in variations Needs sweetener-specific testing because texture changes

Picked your path? Jump to the ice cream maker method, no-churn coconut ice cream, cream of coconut ice cream, or Ninja Creami method.

Coconut Milk vs Coconut Cream vs Cream of Coconut

The wrong-can mistake

This is where most coconut ice cream problems start. The names sound almost interchangeable, but the products are not the same. For the main base, reach for full-fat canned coconut milk and unsweetened coconut cream. Save sweetened cream of coconut for the separate cream of coconut batch below.

If you have ever stood in the aisle wondering whether coconut cream and cream of coconut are the same thing, this is the section that prevents the wrong-can mistake.

Do not pour cream of coconut into the main recipe as a straight swap. It is already sweetened, so the batch can turn too sweet and heavy unless you reduce the sugar. Instead, use it in the separate cream-of-coconut version below.

Thick cream of coconut being poured into a bowl with a sugar bowl set aside nearby.
Cream of coconut is already sweetened, so reducing added sugar keeps the finished batch rich and coconut-forward without turning heavy or candy-sweet.

Before you open a can, it helps to see the three products side by side: coconut milk is pourable, coconut cream is thicker, and cream of coconut is sweetened and glossy.

Three coconut products—coconut milk, coconut cream, and cream of coconut—shown in separate bowls beside their containers.
These three coconut products can look similar on the shelf, yet each one changes sweetness, richness, and freezer texture in a different way.

What each can actually does

Coconut product What it is Best use in coconut ice cream Important note
Full-fat canned coconut milk A pourable coconut base with moderate fat Main dairy-free coconut milk ice cream Choose canned full-fat coconut milk, not thin drinking coconut milk
Unsweetened coconut cream Thicker, richer coconut base with more fat Creamier coconut ice cream with better body Best paired with coconut milk so the texture is rich but not waxy
Cream of coconut Sweetened coconut product used in drinks and desserts Sweet, pina-colada-style coconut ice cream Already sweetened, so reduce or skip added sugar
Carton coconut milk Thin drinking-style coconut milk Usually not ideal Often too watery and can freeze icy
Condensed coconut milk Sweetened vegan condensed milk alternative Vegan no-churn or Ninja Creami routes Counts as both sweetener and texture helper
Tender coconut flesh Soft coconut malai from young coconut Tender coconut ice cream style Add it for flavor and texture, not as the only base

Helpful ingredient note: for a deeper ingredient explanation, Epicurious has a useful guide to cream of coconut, including how it differs from coconut cream and coconut milk.

Now that the coconut products are clear, head to the ingredients list, the cream of coconut batch, or the main recipe card.

Ingredients

You do not need a long ingredient list for good coconut ice cream. Instead, what matters most is using full-fat coconut products, dissolving the sugar well, and giving the base enough time to chill before freezing.

In this coconut ice cream recipe, sugar is important not only for sweetness but also for scoopability. When the sweetener is reduced too aggressively, the finished scoop often freezes harder and icier.

Coconut milk, coconut cream, sugar, vanilla, salt, and toasted coconut arranged around a blender jar for coconut ice cream.
The ingredient list is short, yet full-fat coconut products, enough sugar, vanilla, and salt do most of the work in building a smooth homemade scoop.
Ingredient US amount Metric amount Why it matters
Full-fat canned coconut milk 1 can, 13.5–14 oz 400 ml Gives the ice cream its coconut base without making it too heavy
Unsweetened coconut cream 1 can, 13.5–14 oz 400 ml Adds richness and helps prevent an icy texture
Granulated sugar 1/2 cup 100 g Sweetens and improves scoopability
Fine salt 1/8 tsp About 0.7–1 g Makes the coconut flavor taste fuller
Vanilla extract 2 tsp 10 ml Rounds out the coconut flavor
Toasted coconut, optional 1/3–1/2 cup 25–40 g Adds texture and stronger coconut flavor
Coconut extract, optional 1/4 tsp 1 ml Useful if your coconut milk tastes mild

Taste before chilling: the base should taste slightly sweeter than you want the finished ice cream to taste. Cold dulls sweetness, so a base that tastes just right before freezing can taste a little flat once frozen.

Use the measurements below as a quick check before you blend, especially if you are switching between cans, cups, grams, and milliliters.

Measured coconut milk, coconut cream, sugar, vanilla extract, and salt displayed with quantity labels for coconut ice cream.
Accurate measurements keep the coconut ice cream base balanced, especially when you switch between cans, cups, grams, and milliliters.

Start with full-fat canned coconut milk

For the coconut milk-only version, use canned full-fat coconut milk rather than the thin drinking-style cartons. The canned product has more body, while carton coconut milk is usually too watery for a creamy frozen dessert.

Add unsweetened coconut cream for richness

The cream adds body, but balance matters. One can of each gives you richness without the waxy heaviness that can happen when the base is all cream.

A little salt makes the flavor fuller

A tiny amount of salt makes the coconut and vanilla taste more complete. It should not make the ice cream taste salty; it simply keeps the sweetness from tasting flat.

Ice Cream Maker Method

For this coconut ice cream recipe, an ice cream maker is the easiest route to a smooth, parlor-style scoop because it freezes the base while keeping it moving. That movement keeps ice crystals smaller, which matters with coconut bases because they can freeze firmer than dairy ice cream.

Blend and chill the coconut base

  1. Freeze the ice cream maker bowl. If your machine uses a freezer bowl, freeze it for 12–24 hours, or according to the manufacturer’s directions.
  2. Blend the base. Add coconut milk, coconut cream, sugar, salt, and vanilla to a blender. Blend for 1–2 minutes, until smooth and the sugar is fully dissolved.
  3. Chill the base. Refrigerate for at least 4 hours, preferably overnight. A cold base churns thicker and faster.

Blend until the base looks completely smooth, because this step helps dissolve sugar and even out the coconut fat before the mixture chills.

Coconut ice cream base blending in a clear blender jar while ingredients are added.
Blending is not just mixing; it helps dissolve the sugar and smooth the coconut fat so the finished ice cream tastes cleaner and creamier.

After blending, chill the base until it is properly cold; this gives the machine a better chance to thicken the mixture quickly.

Covered bowl of coconut ice cream base chilling in a refrigerator before churning.
A colder base gives the churn a head start, which means the mixture can thicken faster before large ice crystals have time to form.

Churn, freeze, and rest before scooping

  1. Churn. Pour the chilled base into the ice cream maker and churn for 20–30 minutes, or until it looks like thick soft serve.
  2. Add coconut texture. Fold in toasted coconut at the end if you want little chewy-crisp coconut pieces.
  3. Freeze until scoopable. Transfer to a freezer-safe container and freeze for 4–6 hours.
  4. Rest before scooping. Let the ice cream sit at room temperature for 5–15 minutes before scooping, especially if it has been frozen overnight.

During churning, watch the texture rather than the clock alone; the base should look thick and soft-serve-like before you transfer it to the freezer.

Coconut ice cream churning in an ice cream maker until thick and soft like soft serve.
Stop churning when the base looks like thick soft serve; at this point, the machine has done its job and the freezer finishes the texture.

Texture cue: after churning, the coconut ice cream should look like thick soft serve. It will not be fully firm until it has had several hours in the freezer.

Do not panic if the freshly churned batch is still soft; that soft-serve stage is exactly what should happen before the final freezer rest.

Soft churned coconut ice cream lifted with a spatula, showing a thick creamy fold before final freezing.
This soft stage is normal after churning, so do not keep running the machine just because the coconut ice cream is not scoop-firm yet.

No-Churn Coconut Ice Cream Without an Ice Cream Maker

No ice cream maker? This coconut ice cream recipe still gives you two solid routes. The freeze-and-blend method keeps things dairy-free and fresh-tasting; meanwhile, the condensed milk route gives you the easiest rich, creamy no-churn scoop.

For more no-machine dessert methods, this guide to homemade ice cream without a machine is also useful, while the coconut method below gives more specific coconut milk and coconut cream guidance.

Option 1: Dairy-free freeze-and-blend coconut ice cream

Blend the main coconut base, then pour it into ice cube trays. Freeze for at least 6 hours or overnight. Smaller cubes are easier for the blender to turn smooth than one large frozen block.

Frozen cubes of coconut ice cream base being tipped from an ice cube tray into a blender jar.
Freezing the base in cubes gives the blender smaller pieces to work through, which helps the no-churn method turn creamy instead of chunky.

Blend the frozen cubes in a strong blender or food processor until creamy and soft-serve-like, then eat immediately or freeze briefly for firmer scoops.

Frozen coconut base cubes blending into a creamy no-churn coconut ice cream texture.
Once the frozen cubes break down, the mixture turns creamy quickly, so stop blending as soon as it looks smooth and soft.

Option 2: Condensed milk no-churn coconut ice cream

For a richer dairy-style no-churn version, whip 2 cups / 480 ml heavy cream to stiff peaks, then fold in 1 can / 14 oz sweetened condensed milk, 1 can / 400 ml unsweetened coconut cream, 1/8 tsp salt, and 1/2 tsp coconut extract. Freeze in a loaf pan or freezer container for 8 hours or overnight.

Whipped cream, condensed milk, and coconut cream being folded together in a bowl for no-churn coconut ice cream.
The condensed milk version is richer and easier, although it gives a softer, sweeter, more dessert-like scoop than the dairy-free cube-and-blend method.
No-churn method Best for Texture Trade-off
Freeze-and-blend Dairy-free or vegan batches Soft and creamy when freshly blended Needs a strong blender or food processor
Whipped cream + condensed milk Easy no-churn dessert Rich, creamy, softer Not dairy-free unless using vegan alternatives

If you want the most coconut-forward no-machine route, use the freeze-and-blend method rather than the dairy shortcut.

Summary scene showing the no-churn coconut ice cream method from frozen cubes to a creamy blended result.
The freeze-and-blend method is the cleanest dairy-free no-churn route, since it keeps the coconut flavor fresh without depending on whipped cream.

Using the no-churn method? You may also want the troubleshooting guide or the full recipe card.

Coconut Ice Cream Recipe

This coconut ice cream recipe is made with full-fat coconut milk, unsweetened coconut cream, sugar, vanilla, and salt. Churn it in an ice cream maker for the smoothest texture, or use the no-churn freeze-and-blend method if you do not have a machine.

Yield About 1 quart / 900 ml to 1 liter
Prep Time 10 minutes
Chill + Freeze 8–10 hours total
Method Ice cream maker or no-churn

Ingredients

  • 1 can full-fat canned coconut milk, 13.5–14 oz / 400 ml
  • 1 can unsweetened coconut cream, 13.5–14 oz / 400 ml
  • 1/2 cup / 100 g granulated sugar
  • 1/8 teaspoon fine salt
  • 2 teaspoons / 10 ml vanilla extract
  • 1/3–1/2 cup / 25–40 g toasted coconut, optional
  • 1/4 teaspoon coconut extract, optional, for stronger coconut flavor

Ice Cream Maker Method

  1. If using a freezer-bowl ice cream maker, freeze the bowl for 12–24 hours.
  2. Add coconut milk, coconut cream, sugar, salt, and vanilla to a blender.
  3. Blend for 1–2 minutes, until completely smooth and the sugar is dissolved.
  4. Cover and chill the base for at least 4 hours, preferably overnight.
  5. Pour the chilled base into the ice cream maker and churn for 20–30 minutes, or until it reaches thick soft-serve texture.
  6. Fold in toasted coconut, if using.
  7. Transfer to a freezer-safe container and freeze for 4–6 hours, until scoopable.
  8. Rest at room temperature for 5–15 minutes before scooping.

No-Churn Freeze-and-Blend Method

  1. Blend the coconut milk, coconut cream, sugar, salt, and vanilla until smooth.
  2. Pour into ice cube trays and freeze for at least 6 hours or overnight.
  3. Blend the frozen cubes in a strong blender or food processor until creamy.
  4. Serve as soft-serve coconut ice cream, or freeze briefly for firmer scoops.

Notes

  • Use full-fat canned coconut milk, not thin carton coconut milk.
  • A coconut milk-only batch can be made with 2 cans full-fat coconut milk, but the texture will be slightly lighter.
  • A coconut cream-heavy batch still needs some coconut milk so the texture does not turn too heavy or waxy.
  • A cream-of-coconut version should skip the added sugar because cream of coconut is already sweetened.
  • The Ninja Creami method needs a 24-hour freeze in the Creami pint; if the first spin looks crumbly, add 1 tablespoon coconut milk and Re-Spin.
  • For a slightly softer scoop, replace 1–2 tablespoons of the sugar with golden syrup, maple syrup, or agave. Do not remove too much sweetener, or the ice cream may freeze harder.

Use this visual recipe card when you want the core formula without scrolling back through every method note.

Saveable recipe card image showing coconut ice cream ingredients and a finished creamy scoop.
This recipe card gives you the core formula at a glance, which is useful when you want the main coconut ice cream base without scrolling through the full guide.

The full workflow is easier to follow when you keep the order clear: blend, chill, churn, freeze, and rest before scooping.

Step-by-step visual showing the coconut ice cream process from blending and chilling to churning, freezing, and scooping.
The sequence matters: blend until smooth, chill until cold, churn until thick, freeze until firm, then rest briefly before scooping.

Easy 2-Ingredient and 3-Ingredient Shortcuts

When speed matters more than the creamiest possible scoop, these shortcut batches can help. They are useful for quick desserts, but the texture will be different from the full coconut milk and coconut cream base.

Shortcut Ingredients Best for Texture note
2-ingredient cream of coconut ice cream Cream of coconut + heavy cream Fast no-churn dessert Sweet, rich, not dairy-free
3-ingredient coconut milk ice cream Full-fat coconut milk + sugar + vanilla Simple dairy-free coconut ice cream Lighter and icier than the coconut cream base
3-ingredient Ninja Creami coconut ice cream Coconut milk + sweetener + vanilla Creami users Needs a 24-hour freeze and usually benefits from a Re-Spin

Coconut Milk Ice Cream Recipe Notes

If you only have full-fat canned coconut milk, the recipe will still work. Use 2 cans / about 800 ml full-fat coconut milk in place of the coconut milk and coconut cream combination. The flavor will still be good, but the texture may be slightly lighter and a little icier than the batch made with one can of coconut cream.

Comparison of a lighter coconut milk-only ice cream scoop and a richer scoop made with coconut milk plus coconut cream.
A coconut milk-only batch can still be good; however, it usually tastes lighter and freezes a bit firmer than the milk-and-cream version.

For a smoother coconut milk-only batch, chill the cans overnight and use the thick coconut layer from the top if your coconut milk separates. You can also add 1 tablespoon cornstarch or tapioca starch to a cooked base if you want a more custard-like dairy-free texture.

Coconut Cream Ice Cream Recipe Notes

Coconut cream ice cream is richer because the cream has more fat and less water. For the best balance, combine one can of coconut milk with one can of coconut cream. If the base is made only with cream, the result can be very rich but sometimes heavier on the palate.

Comparison between a dense coconut cream-heavy ice cream scoop and a smoother scoop made with a balanced coconut milk and coconut cream base.
More coconut cream does not always mean better texture, because too much richness can feel waxy instead of smooth on the palate.

This is the route to choose when you want a vegan scoop that still feels creamy and indulgent. It also works well with toasted coconut, vanilla bean, dark chocolate pieces, mango puree, or pineapple.

Cream of Coconut Ice Cream

The cream-of-coconut version is its own style because the product is already sweetened. As a result, it gives the finished scoop a stronger, sweeter, almost pina-colada-style flavor. Choose this route when you want a richer dessert-style batch rather than a cleaner coconut milk base.

Important: cream of coconut is not the same as unsweetened coconut cream. If you use cream of coconut, skip the 1/2 cup sugar from the main recipe.

For a cream of coconut batch, blend 1 can / 14–15 oz cream of coconut with 1 cup / 240 ml milk or coconut milk, 1 1/2 cups / 360 ml heavy cream or coconut cream, and a pinch of salt. Churn as directed, or freeze and blend for a softer no-churn result.

Cream of coconut ice cream with cream of coconut and sugar shown nearby to explain how to fix an overly sweet batch.
If a cream-of-coconut batch tastes too sweet, reduce the added sugar next time; that small adjustment usually restores balance without losing coconut flavor.

For a very simple no-churn cream of coconut ice cream, whip 2 cups / 480 ml cold heavy cream to soft peaks, then fold in 1 can / 14–15 oz cream of coconut and a pinch of salt. Freeze for 8 hours or overnight. This shortcut is rich and sweet, so it does not need extra sugar.

Using cream of coconut? Check why coconut ice cream turns too sweet or icy, or compare it again with coconut milk and coconut cream.

Vegan and Dairy-Free Notes

The main coconut milk and coconut cream base is naturally dairy-free and vegan as long as your sugar is vegan-friendly. It does not need eggs, heavy cream, or condensed milk. For the creamiest vegan coconut ice cream, keep the fat level high and avoid thin coconut beverages.

For an even smoother vegan batch, however, one of these optional helpers can improve the texture:

Vegan coconut ice cream texture helpers including starch, syrup, coconut milk powder, and a small optional alcohol cue around a spoonful of ice cream.
Vegan texture helpers can improve the scoop, but they work best as support tools; fat balance, sugar level, and chill time still matter most.
  • 1 tablespoon cornstarch or tapioca starch, cooked briefly into the base for a vegan custard feel.
  • 1–2 tablespoons golden syrup, maple syrup, or agave, replacing part of the sugar for softer scooping.
  • 1–2 tablespoons coconut milk powder, for extra coconut flavor and body.
  • 1 teaspoon vodka or rum, optional, to slightly soften the freeze and add a grown-up note.

Thai-Style and Tender Coconut Notes

Thai coconut ice cream and tender coconut ice cream are related to this recipe, but they have their own flavor logic. Thai-style coconut ice cream often uses coconut milk, coconut cream or coconut water, palm sugar, salt, and sometimes pandan. Tender coconut ice cream usually includes soft tender coconut flesh, also called malai, for a fresh coconut texture.

Thai coconut ice cream variation

For a Thai-inspired batch, replace the granulated sugar with palm sugar, add a pandan leaf while gently warming the base, then remove it before chilling. Serve with roasted peanuts, sticky rice, toasted coconut, jackfruit, or sweet corn if you want a Thai street-dessert style bowl.

Thai-style coconut ice cream in a bowl with roasted peanuts, sticky rice, toasted coconut, and palm sugar.
Thai-style coconut ice cream leans fragrant and textured, so toppings like sticky rice, peanuts, palm sugar, and toasted coconut add contrast as well as flavor.

Tender coconut ice cream variation

For tender coconut ice cream, blend the main coconut base and add chopped tender coconut flesh after churning, or pulse some of the tender coconut into the base before chilling. A small splash of tender coconut water can brighten the flavor, but too much will make the ice cream icier.

Tender coconut flesh being folded into a creamy coconut ice cream base.
Tender coconut flesh adds soft texture and a delicate fresh-coconut note; however, too much coconut water can make the batch icier.

Ninja Creami Coconut Ice Cream

To make coconut ice cream in a Ninja Creami, blend the main base until smooth, pour it into the Creami pint without passing the max fill line, and freeze it level for 24 hours. Process on the Ice Cream or Lite Ice Cream setting depending on your machine and base.

Coconut ice cream in a Ninja Creami-style pint after spinning, with the machine softly visible in the background.
For the Ninja Creami method, a fully frozen pint is essential, since the machine needs a solid base before it can spin the mixture into a creamy texture.

If the mixture looks crumbly after the first spin, add 1 tablespoon coconut milk or coconut cream and use Re-Spin. After that, add toasted coconut, chocolate chips, or chopped fruit with the Mix-In function once the base is creamy.

Freeze the pint level and keep the mixture below the max fill line. If the surface is uneven after freezing, let it sit for a few minutes and level the top before spinning so the blade processes the base evenly.

Creami result What to do
Powdery or crumbly Add 1 tablespoon coconut milk or coconut cream, then Re-Spin.
Too soft Freeze the pint longer and make sure the base was not overfilled or too warm before freezing.
Uneven top Let it sit briefly, level the surface, then process so the blade catches evenly.
Weak coconut flavor Add toasted coconut as a Mix-In or use a small amount of coconut extract next time.

If the Creami pint looks powdery or crumbly after the first spin, use a small splash of coconut milk or coconut cream before you change the whole base.

Ninja Creami coconut ice cream showing a crumbly texture being improved with a tablespoon of liquid before re-spinning.
If a Creami pint comes out crumbly, add about 1 tablespoon of coconut milk or coconut cream and re-spin before changing the whole recipe.

For another fruit-based frozen dessert with blender, no-machine, ice cream maker, and Ninja Creami notes, this mango sorbet recipe is a useful companion.

Flavor Variations

Once the base is balanced, you can take it in several directions without wrecking the texture. Mango makes it sunny and tropical, pineapple pushes it toward a pina-colada-style scoop, chocolate makes it deeper and richer, and toasted coconut gives every bite a stronger coconut finish.

Variation How to make it Best note
Mango coconut ice cream Use thick mango puree, not thin mango juice. If adding a full cup, reduce the coconut milk by 1/4 cup. For a mango-first route, start with this homemade mango ice cream recipe, then use coconut cream or coconut milk as the tropical variation.
Pineapple coconut ice cream Use drained crushed pineapple or thick pineapple puree. Avoid loose pineapple juice unless you want a more icy, sorbet-like result.
Pina colada ice cream Use cream of coconut, pineapple, and optional rum. Reduce added sugar because cream of coconut is sweet.
Chocolate coconut ice cream Use cocoa powder for the easiest version, or cooled melted dark chocolate for a richer texture. Add a pinch more salt to deepen the chocolate flavor.
Mint chocolate coconut ice cream Add peppermint extract and chopped dark chocolate or mini chips to the chilled base. For a classic dairy-style flavor path, see this mint chocolate chip ice cream recipe.
Toasted coconut ice cream Fold toasted coconut into the churned base. Best for stronger coconut flavor and texture.
Old-fashioned coconut custard ice cream Use coconut milk with cream, sugar, egg yolks, vanilla, and salt; cook to a custard before chilling and churning. Richest dairy-style route, but not vegan or egg-free.
Keto coconut ice cream Use coconut cream and a freezer-friendly low-carb sweetener. Needs separate sweetener testing because many keto sweeteners freeze harder.

Keto coconut ice cream note

Keto coconut ice cream needs a freezer-friendly sweetener because many low-carb sweeteners freeze harder than sugar. Allulose usually behaves better than many granular sugar alcohol blends, but the texture still needs separate testing.

Coconut cream, low-carb sweetener, and a small test batch of coconut ice cream arranged to illustrate keto sweetener testing.
Keto coconut ice cream depends heavily on sweetener choice, because replacing sugar affects not only sweetness but also softness and freezer texture.

If you are building a low-carb dessert menu rather than only one frozen recipe, this keto cheesecake recipe is a better tested make-ahead option because frozen keto desserts need more careful sweetener choices.

Want to try one of these flavors? Go back to the main recipe card, or revisit coconut cream ice cream notes if you want a richer base.

Troubleshooting

Start with the likely cause

If your first batch is not perfect, do not toss the recipe. Coconut ice cream is sensitive to fat, sugar, water, and temperature, so small changes can make a big difference in how creamy, scoopable, or icy it turns out.

Most failed batches come down to one of four things: too much water, not enough fat, not enough sugar, or a base that was not cold enough. Rather than changing the whole recipe, find the likely problem below and adjust from there.

Three coconut ice cream textures shown together: icy, smooth and just right, and dense or too heavy.
Most texture problems come down to water, fat, sugar, or temperature, so this guide helps you diagnose the batch before changing the whole recipe.

Fix icy or hard coconut ice cream first

Icy coconut ice cream usually points to too much water, too little fat, thin carton coconut milk, or a base that was not chilled enough before churning.

Thin coconut milk and icy coconut ice cream shown together to explain why a batch can freeze hard and crystalline.
Icy texture usually means the base had too much water or too little fat; therefore, full-fat canned coconut milk works better than thin carton milk.
Problem Likely cause Fix
Icy coconut ice cream Low fat, too much water, carton coconut milk, or warm base Use full-fat canned coconut milk and coconut cream; chill the base at least 4 hours
Too hard to scoop Low sugar, low fat, or long freezer time Rest 5–15 minutes before scooping; slightly increase sugar next time
Grainy texture Sugar not dissolved or coconut fat separated Blend the base for 1–2 minutes; avoid overheating coconut cream
Slushy after churning Ice cream bowl or base was not cold enough Freeze the bowl fully and chill the base overnight if possible
Too sweet Cream of coconut or condensed milk used with extra sugar Use unsweetened coconut cream next time or skip added sugar with cream of coconut
Weak coconut flavor Mild coconut milk or too much vanilla/sugar Add toasted coconut, coconut extract, or more coconut cream
Fatty or waxy mouthfeel Too much coconut cream and not enough coconut milk Use the balanced 1 can coconut milk + 1 can coconut cream formula
Crumbly Ninja Creami result Base froze very hard Add 1 tablespoon coconut milk or cream and Re-Spin

If the batch is hard but not icy, start with resting time before you change the recipe. Coconut-based ice cream often needs a few minutes on the counter.

Firm coconut ice cream resting on the counter with a timer and scoop to show how to soften it before serving.
If the batch freezes too hard, let it rest for a few minutes before scooping; often, that simple pause is enough to improve the texture.

Fix grainy, weak, or waxy batches

If the texture tastes grainy, the base usually needs better blending, better chilling, or gentler handling so the sugar dissolves and the coconut fat stays smooth.

Coconut ice cream base being blended smooth, with spoon samples showing a smoother texture compared with a slightly grainy one.
Graininess usually points to undissolved sugar or separated coconut fat, so thorough blending and proper chilling can make the next batch smoother.

When the texture is fine but the flavor tastes quiet, strengthen the coconut note with toasted coconut, coconut extract, or a slightly richer base.

Coconut ice cream topped with toasted coconut flakes, with coconut extract and vanilla nearby to show ways to strengthen coconut flavor.
If the flavor tastes mild, toasted coconut is the easiest boost; meanwhile, a small amount of coconut extract can add depth without taking over.

If the scoop tastes rich but leaves a heavy coating on the palate, the base may have too much coconut cream and not enough coconut milk.

Comparison of a dense glossy coconut cream-heavy scoop and a smoother balanced coconut ice cream scoop.
A waxy mouthfeel usually means the base leaned too far toward coconut cream, whereas a balanced mix of coconut milk and cream feels cleaner.

Texture note: sugar affects more than sweetness in homemade ice cream. King Arthur Baking has a helpful explainer on how sugar affects scoopability and freezer texture, which is why this recipe does not cut the sweetener too aggressively.

Storage and Scooping

In practice, homemade coconut ice cream is usually at its best when it is treated a little differently from store-bought dairy ice cream. The container, surface protection, and resting time all matter.

Store it in a shallow freezer-safe container with a tight lid. Press parchment paper or plastic wrap directly against the surface before closing the lid if you want to reduce ice crystals. The texture is best in the first 1–2 weeks.

Coconut ice cream spread in a shallow freezer container with plastic wrap or parchment pressed directly onto the surface.
Pressing wrap or parchment directly onto the surface limits air exposure, which helps reduce ice crystals during freezer storage.

Dairy-free coconut ice cream often freezes firmer than dairy ice cream. Let it sit at room temperature for 5–15 minutes before scooping. If it has been frozen for several days, use a warm scoop and drag firmly through the ice cream rather than forcing it straight down.

Coconut ice cream being scooped cleanly after resting at room temperature with a small timer nearby.
After a short rest at room temperature, the scoop moves more cleanly and the texture tastes softer, creamier, and less frozen-solid.

If this is your first homemade coconut ice cream, do not judge the batch straight from the freezer. First, let it rest for a few minutes; then scoop it with a warm spoon and decide whether it needs more sugar, more coconut cream, or a longer chill next time.

Before you start, check which route fits your ingredients or skim the common coconut ice cream problems if you want to avoid icy, hard, or overly sweet results.

FAQs

Need the main recipe again? Jump back to the recipe card or the quick answer.

What coconut milk works best for coconut ice cream?

Full-fat canned coconut milk works best because it has enough fat and body to freeze into a creamier scoop. Skip thin carton coconut milk for this recipe; it is usually too watery and can leave you with a hard, icy texture.

What is the difference between coconut cream and cream of coconut?

Coconut cream is usually unsweetened and thick. Cream of coconut is sweetened and syrupy. Use coconut cream for the main base. Use cream of coconut only for the sweeter cream-of-coconut batch, and reduce or skip added sugar.

Why did my coconut ice cream turn icy?

Coconut ice cream usually turns icy when the base is too watery, too low in fat, too warm before churning, or made with thin carton coconut milk. Full-fat canned coconut milk, coconut cream, and a fully chilled base make the texture smoother.

Can I make coconut ice cream without an ice cream maker?

The best dairy-free no-churn method is to freeze the blended coconut base in ice cube trays, then blend the frozen cubes until creamy. For a richer dairy route, whipped cream plus sweetened condensed milk makes a softer no-churn coconut ice cream.

Do I need eggs for coconut ice cream?

This coconut ice cream recipe does not need eggs because coconut cream gives the base enough richness. Egg yolks can be used for a custard-style coconut ice cream, but they are not necessary for the main dairy-free method.

How long should I chill the coconut ice cream base?

Chill the base for at least 4 hours, though overnight is better. If the base goes into the machine cold, it churns thicker and smoother; if it starts warm, it can stay loose and slushy for too long.

How do I make coconut ice cream easier to scoop?

Sugar, fat, and a fully chilled base all help the finished scoop stay softer. Let the container sit at room temperature for 5–15 minutes before scooping, especially with dairy-free batches, and use a warm scoop instead of forcing it straight from the freezer.

Is this coconut ice cream vegan?

The main base is vegan and dairy-free as long as your sugar is vegan-friendly. It gets richness from coconut milk and coconut cream instead of heavy cream, condensed milk, or eggs.

Why does keto coconut ice cream need a separate approach?

Keto coconut ice cream needs separate sweetener testing because many low-carb sweeteners freeze harder than sugar. Coconut cream gives a strong base, but the sweetener choice matters for texture. Allulose usually behaves better than many granular sugar alcohol blends.

Once you understand the difference between coconut milk, coconut cream, and cream of coconut, homemade coconut ice cream becomes much easier to control. After one batch, this coconut ice cream recipe becomes easy to adjust: start with the churned base for the smoothest scoop, use the freeze-and-blend method if you do not have a machine, and do not worry if the first try needs a small adjustment. A little more fat, sugar, chill time, or resting time can be the difference between icy and creamy.

Posted on — 4 Comments

Strawberry Shortcake Recipe

Classic strawberry shortcake recipe with biscuit-style shortcake, fresh strawberries, and soft whipped cream on a plate

Strawberry shortcake works best when each part of the recipe stays simple: tender biscuit-style shortcakes, ripe strawberries sitting in a little syrup of their own juices, and soft whipped cream. When one part goes too far, the dessert loses its balance. The berries turn watery, the shortcakes go dense, or everything gets soggy before it reaches the table.

This version keeps everything where it should be. The shortcakes are buttery and lightly sweet, the strawberries stay fresh instead of cooked down, and the whipped cream stays soft and light. If you want a classic strawberry shortcake recipe that tastes like the real thing, this is the one to make.

Quick Answer

If you are looking for the classic American strawberry shortcake recipe, biscuit-style shortcakes are the version to make. Classic strawberry shortcake is a biscuit-style dessert made with tender shortcakes, sugared strawberries, and soft whipped cream. The strawberries stay fresh rather than cooked, and the dessert is best assembled just before serving so the shortcakes stay tender instead of soggy.

  • Biscuits or cake? Traditionally, strawberry shortcake is biscuit-style.
  • Do the strawberries get cooked? Not here. They sit with sugar until juicy and glossy.
  • Can you make it ahead? Yes, but keep the parts separate until serving.
  • What should it feel like? Tender shortcake, juicy berries, and soft whipped cream in the same bite.

Is Strawberry Shortcake Made With Biscuits or Cake?

Strawberry shortcake is a classic American dessert made with sweet biscuit-style shortcakes, juicy strawberries, and whipped cream. It is not just strawberries spooned over cake. The classic version starts with a rich, tender shortcake that is closer to a lightly sweet biscuit than to sponge cake or angel food cake. That base matters because it gives the berries and cream something to settle into. You get contrast instead of collapse.

Comparison guide showing biscuit-style strawberry shortcake, pound cake, and angel food cake, with biscuit-style shortcake highlighted as the classic choice.
Classic strawberry shortcake starts with a tender biscuit, while pound cake and angel food cake take the dessert in a richer or lighter direction.

That is why a good strawberry shortcake feels a little rustic in the right way. It should not eat like a frosted celebration cake. It should feel buttery, fresh, and generous, with enough structure to catch the berry juices without turning tough.

If you like bakes with a similarly tender crumb and a cream-and-fruit feel, this easy English scone recipe is another good one to keep around.

Why This Strawberry Shortcake Recipe Works

  • The shortcakes stay tender. Cold butter, buttermilk, and a lightly handled dough keep them delicate instead of heavy.
  • The berries stay bright. A short rest with sugar gives you enough syrup without turning them flat or jammy.
  • The whipped cream stays soft. Soft peaks keep the dessert light instead of thick or overworked.
  • Each part does its job. The shortcakes bring structure, the berries bring juice and sweetness, and the cream ties it together.

This strawberry shortcake recipe stays close to the classic biscuit-style approach. The shortcakes are sturdy enough to hold berries and cream, but still tender enough to split easily with a serrated knife. The berries stay fresh, which keeps the whole dessert tasting brighter and cleaner.

Strawberry Shortcake Ingredients

The ingredient list is short, but the details matter. If you want the most reliable result, weigh the flour, butter, and strawberries instead of estimating by eye.

Ingredient guide for strawberry shortcake showing strawberries, sugar, lemon juice, shortcake ingredients, and whipped cream ingredients grouped into three simple parts.
Breaking the recipe into strawberries, shortcakes, and whipped cream makes strawberry shortcake feel much easier to prep.

Fresh Strawberries for Strawberry Shortcake

  • 680g fresh strawberries (about 1 1/2 pounds), hulled and sliced
  • 50g granulated sugar (1/4 cup)
  • 1 teaspoon lemon juice, optional

Ripe, fragrant berries matter more than perfect looks. If the berries are very sweet, you can use a little less sugar. If they taste flat, keep the full amount and add the lemon juice.

Shortcake Ingredients

  • 240g all-purpose flour (2 cups, spooned and leveled)
  • 50g granulated sugar (1/4 cup)
  • 12g baking powder (1 tablespoon)
  • 1g baking soda (1/4 teaspoon)
  • 3g fine salt (1/2 teaspoon)
  • 85g cold unsalted butter (6 tablespoons), cut into small cubes
  • 160g cold buttermilk (2/3 cup)
  • 15g heavy cream (1 tablespoon), for brushing
  • 12g coarse sugar (1 tablespoon), optional, for the tops

The baking soda supports the buttermilk and helps the tops brown a little better. The butter should stay cold all the way to the oven. If it starts softening while you work, chill the shaped shortcakes for a few minutes before baking.

Whipped Cream Ingredients

  • 240g cold heavy cream (1 cup)
  • 16g powdered sugar (2 tablespoons)
  • 1 teaspoon vanilla extract

Ingredients and Easy Swaps

If you do not have buttermilk, use 160g heavy cream as a fallback. The shortcakes will still be good, but a little richer and a little less tangy. What matters most is keeping both the butter and liquid cold from the start.

If your strawberries taste sweet but a little flat, a small squeeze of lemon juice usually helps more than extra sugar. If they are very tart, let them sit with the full sugar amount and check them again before adding more. For the whipped cream, the colder the cream and bowl are, the easier it is to stop at soft peaks instead of overwhipping.

If you want a deeper biscuit-method reference, King Arthur Baking’s tips for better biscuits is useful on cold butter and gentle handling.

How to Make Strawberry Shortcake

A good strawberry shortcake recipe comes together in three simple parts: prep the strawberries, bake the shortcakes, and whip the cream. The main thing is to keep each part clean and simple so the finished dessert stays balanced.

How to Prep the Strawberries

The berries should end up juicy and glossy, not collapsed. Toss the sliced strawberries with the sugar and lemon juice if using, then let them sit for 30 to 45 minutes at room temperature. Give them a stir once or twice so the sugar dissolves evenly.

Four-stage strawberry shortcake guide showing freshly sliced strawberries, strawberries tossed with sugar, strawberries after 30 to 45 minutes, and berries that have become too watery.
For strawberry shortcake, the berries should look juicy and glossy after resting with sugar, but they should still hold their shape instead of turning loose and watery.

By the end, the berries should have released a light red syrup, but they should still hold their shape. That is the sweet spot. If they are sitting in a lot of liquid, just spoon the syrup on gradually when serving instead of pouring it all on at once.

If the berries still taste dull after 30 minutes, add 1 to 2 more teaspoons of sugar and let them sit another 10 to 15 minutes. And if they are sweet enough but still flat, a small squeeze of lemon juice usually helps more than extra sugar.

How to Make the Shortcake Biscuits

Once the strawberries are resting, the shortcakes come together quickly. The dough should look rough and slightly shaggy, not smooth like bread dough. Handle it lightly and stop as soon as it comes together.

Five-stage strawberry shortcake biscuit guide showing dry ingredients, butter cut into flour, shaggy dough after buttermilk, dough patted and cut, and baked shortcakes.
For tender strawberry shortcake biscuits, keep the dough rough and shaggy, leave visible butter pieces, and stop baking once the tops turn lightly golden.
  1. Heat the oven and mix the dry ingredients. Heat the oven to 425°F / 220°C. Line a baking sheet with parchment paper. In a large bowl, whisk together the flour, sugar, baking powder, baking soda, and salt until evenly combined.
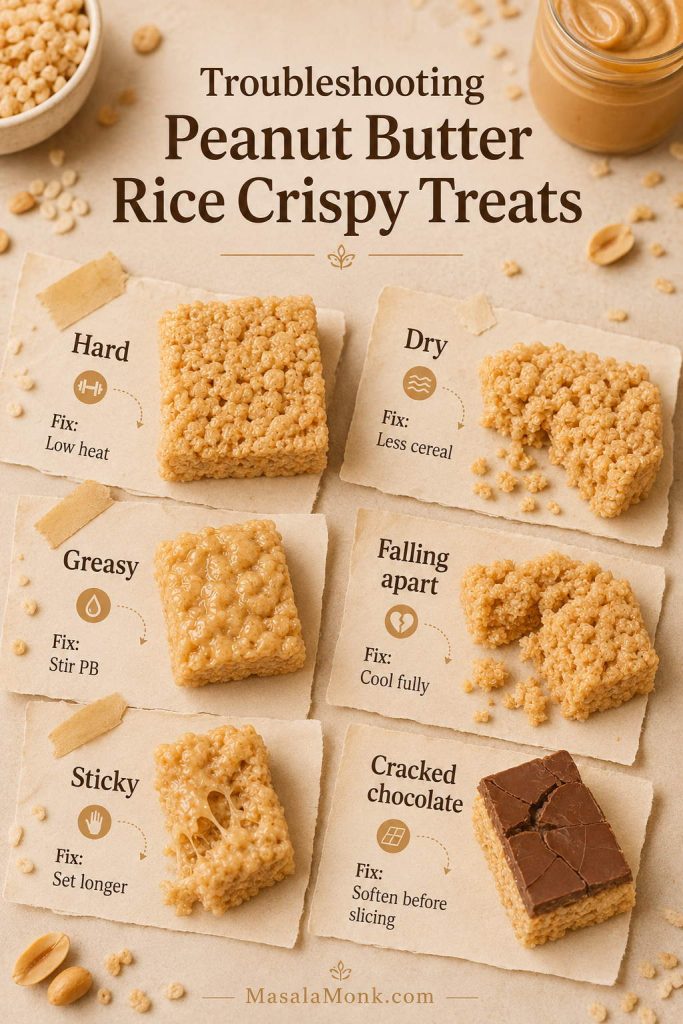
  2. Cut in the butter. Add the cold butter and work it into the flour with a pastry cutter, your fingertips, or two knives until you have a mix of pea-size and slightly flatter pieces. Do not rub it in until the mixture looks sandy. Visible butter pieces help create steam pockets and tenderness as the shortcakes bake.
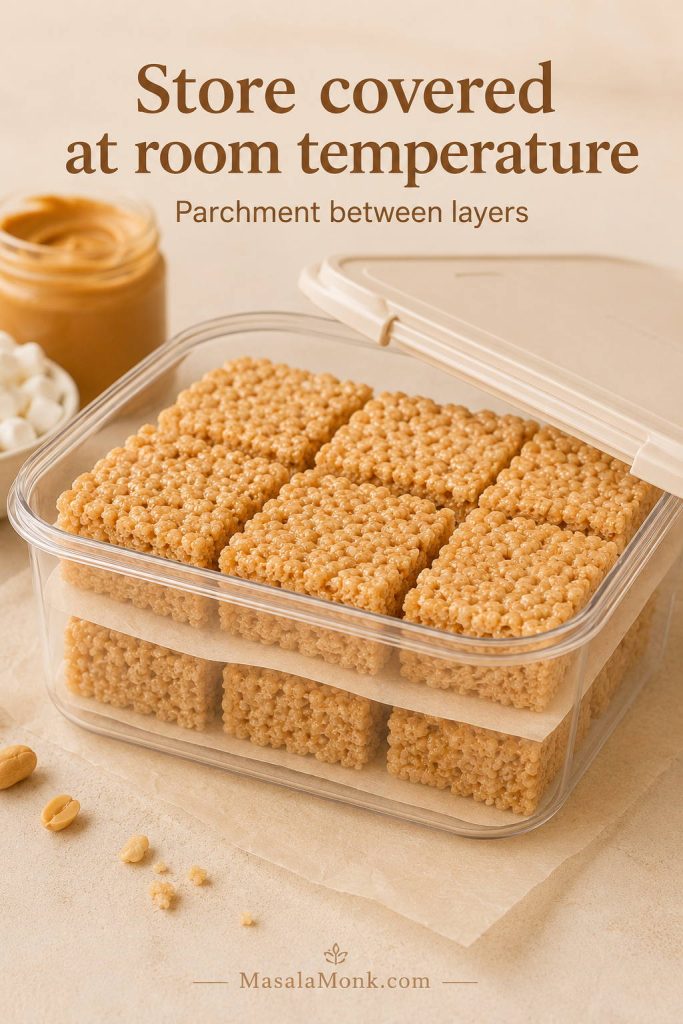
  3. Add the buttermilk. Pour in the cold buttermilk and stir with a fork or spatula just until the dough starts clumping together. It should still look a little messy. If you stir until it looks neat, you have probably gone too far.
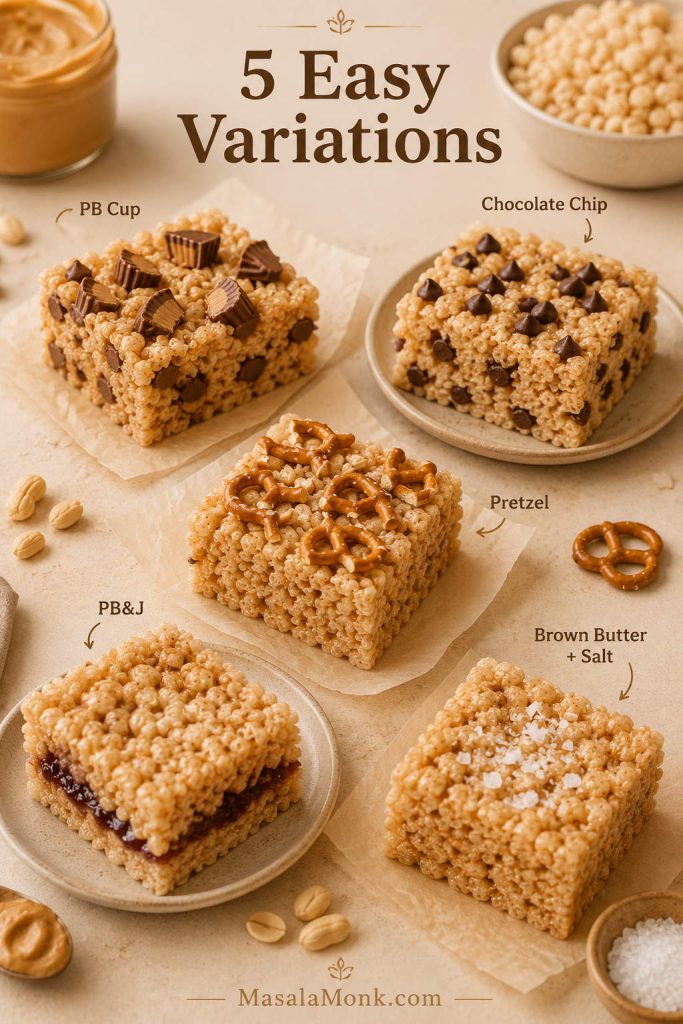
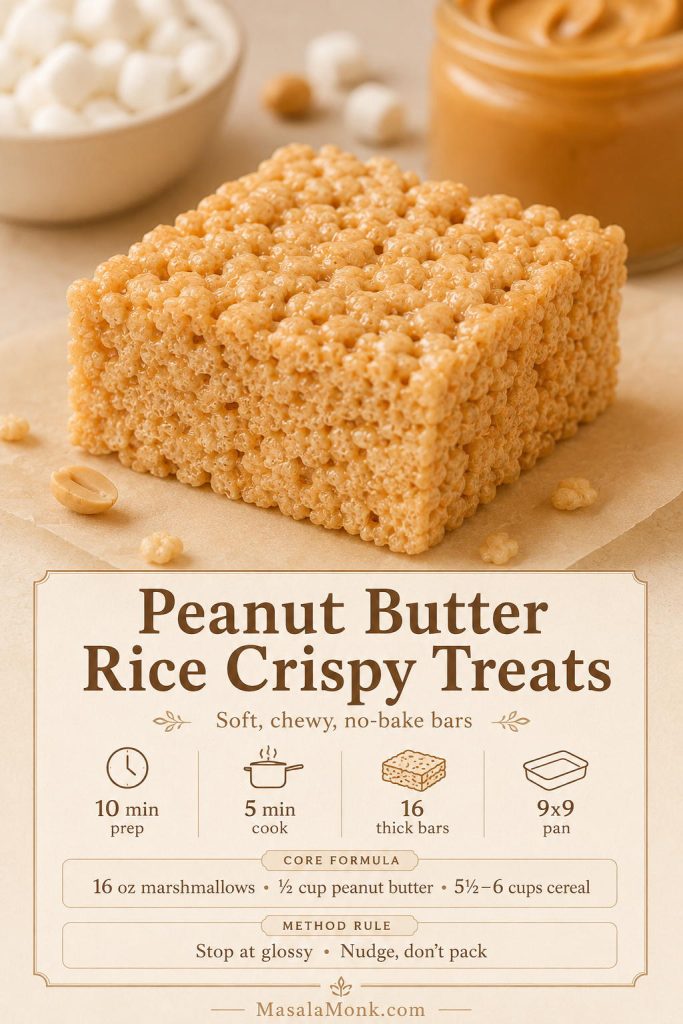
  4. Bring the dough together. Turn the dough onto a lightly floured surface and pat it into a rectangle about 1 inch thick. If it feels sticky, dust lightly with flour, but do not keep adding flour unless you truly need it. The dough should feel soft and cool, not dry or stiff.
  5. Cut the shortcakes. Cut 6 rounds with a sharp 2 1/2- to 3-inch biscuit cutter, pressing straight down rather than twisting. Twisting can seal the edges and limit the rise. If you do not want to reroll scraps, divide the dough into 6 rustic portions instead.
  6. Chill if needed, then bake. Transfer the shortcakes to the prepared baking sheet. If the butter feels soft or the kitchen is warm, chill the tray for 10 minutes before baking. Brush the tops with heavy cream and sprinkle with coarse sugar if using. Bake for 14 to 16 minutes, until the tops are lightly golden and the sides look set.
  7. Cool before splitting. Let the shortcakes cool for 10 to 15 minutes. They should feel warm, not hot, when you split them. Use a serrated knife and a gentle sawing motion so you do not compress the crumb.

How to Make Whipped Cream for Strawberry Shortcake

For the best texture, start with very cold cream and a chilled bowl if you can. Beat the cream, powdered sugar, and vanilla until soft peaks form. When you lift the beaters, the cream should stand up but curl over at the tip.

Three-stage whipped cream guide for strawberry shortcake showing cream that is too loose, ideal soft peaks, and cream that has become too stiff.
For strawberry shortcake, whipped cream should stay soft and spoonable: too loose and it slides, too stiff and it loses the light finish that settles best into the berries.

Stop before the cream turns stiff or grainy. Soft peaks fit strawberry shortcake better because the cream stays spoonable and settles into the berries and biscuit instead of sitting on top like frosting.

How to Assemble Strawberry Shortcake

Split each shortcake with a serrated knife. Spoon some strawberries and a little syrup over the bottom half, add whipped cream, and set the top half over it. Finish with more berries and cream if you like. Serve right away for the best contrast between tender shortcake, juicy fruit, and soft cream.

Five-step strawberry shortcake assembly guide showing a split biscuit shortcake filled with strawberries, whipped cream, and the top biscuit half, then served right away.
Build strawberry shortcake in gentle layers and keep the syrup light so the biscuits stay tender instead of turning soggy.

Assembly is where the dessert either stays balanced or turns soggy. Keep the syrup gradual rather than heavy, and do not build the shortcakes too far ahead.

Strawberry Shortcake Recipe Card

Yield: 6 shortcakes
Prep time: 25 minutes
Berry resting time: 30 to 45 minutes
Bake time: 14 to 16 minutes
Total time: About 1 hour 15 minutes

Classic strawberry shortcake made with a split biscuit-style shortcake, fresh strawberries, and soft whipped cream on a plate.
Right before serving, strawberry shortcake should feel balanced: a tender biscuit, juicy berries, and soft whipped cream that settles into the layers instead of sitting stiffly on top.

Ingredients

  • For the strawberries
    • 680g fresh strawberries (1 1/2 pounds), hulled and sliced
    • 50g granulated sugar (1/4 cup)
    • 1 teaspoon lemon juice, optional
  • For the shortcakes
    • 240g all-purpose flour (2 cups)
    • 50g granulated sugar (1/4 cup)
    • 12g baking powder (1 tablespoon)
    • 1g baking soda (1/4 teaspoon)
    • 3g fine salt (1/2 teaspoon)
    • 85g cold unsalted butter (6 tablespoons), cubed
    • 160g cold buttermilk (2/3 cup)
    • 15g heavy cream (1 tablespoon), for brushing
    • 12g coarse sugar (1 tablespoon), optional
  • For the whipped cream
    • 240g cold heavy cream (1 cup)
    • 16g powdered sugar (2 tablespoons)
    • 1 teaspoon vanilla extract

Method

  1. Toss the strawberries with the sugar and lemon juice if using. Let sit for 30 to 45 minutes, stirring once or twice.
  2. Heat the oven to 425°F / 220°C and line a baking sheet with parchment paper.
  3. Whisk together the flour, sugar, baking powder, baking soda, and salt.
  4. Cut in the cold butter until the mixture has pea-size and slightly flatter pieces.
  5. Add the buttermilk and stir just until a shaggy dough forms.
  6. Pat the dough to about 1 inch thick and cut 6 rounds, or divide into 6 rustic portions.
  7. Transfer to the baking sheet, brush with heavy cream, and sprinkle with coarse sugar if using.
  8. Bake for 14 to 16 minutes, until lightly golden. Cool for 10 to 15 minutes.
  9. Whip the cream, powdered sugar, and vanilla to soft peaks.
  10. Split the shortcakes with a serrated knife, fill with strawberries and whipped cream, and serve immediately.

Recipe Notes

  • The dough should look rough and soft, not smooth.
  • If the butter softens before baking, chill the tray for 10 minutes.
  • Use a serrated knife to split the shortcakes without crushing them.
  • Assemble just before serving for the best texture.

Strawberry Shortcake Storage and Make-Ahead Tips

After the first bake, storage is simple as long as the parts stay separate. You can make most of strawberry shortcake ahead, but the berries, shortcakes, and whipped cream should stay apart until serving. That is what keeps the shortcakes from going soggy.

Make-ahead and storage guide for strawberry shortcake showing chilled strawberries, baked shortcakes stored airtight, whipped cream, frozen shortcakes, and the dessert assembled just before serving.
Prep the parts ahead if you like, but keep the berries, shortcakes, and whipped cream separate until serving so the dessert stays tender instead of soggy.

Make-Ahead Timing

  • Strawberries: Up to 1 day ahead in the refrigerator, though they are best within a few hours.
  • Baked shortcakes: 1 day ahead at room temperature in an airtight container.
  • Unbaked shortcakes: Refrigerate the shaped rounds for up to 1 hour before baking, or freeze them for longer storage.
  • Whipped cream: Best made the same day, though a few hours ahead in the refrigerator is fine.

How to Freeze the Shortcakes

Freeze either the baked, cooled shortcakes or the shaped unbaked rounds. For unbaked shortcakes, freeze them on a tray until firm, then transfer to a freezer bag or airtight container. Do not brush with cream until just before baking. Bake from frozen at 425°F / 220°C, adding a few extra minutes as needed.
How to Serve for the Best Texture

Assemble right before serving. If the shortcakes have been stored overnight, you can warm them lightly in a low oven before splitting if you want to freshen the texture.

If you are serving strawberry shortcake for a group, set out the shortcakes, strawberries, syrup, and whipped cream separately so everyone can build their own. It is easier to serve, and it keeps the shortcakes from going soggy before they reach the table.

If you like fruit desserts that feel simple and comforting, this peach cobbler with canned peaches is another good one to keep in rotation.

Can You Use Pound Cake or Angel Food Cake for Strawberry Shortcake?

If you want a shortcut or a more cake-like dessert, you can. Pound cake makes strawberry shortcake richer and denser, while angel food cake makes it lighter and airier. Both can work, but they give you a different result from the classic biscuit-style version.

If you want a classic strawberry shortcake recipe, stay with the shortcakes in this post. If you want something faster or softer, pound cake or angel food cake can still carry the strawberries and cream well.

Troubleshooting Strawberry Shortcake Recipe

If something feels off, the cause is usually easy to spot. Most strawberry shortcake problems come down to overworked dough, overly juicy berries, or assembling the dessert too early.

Troubleshooting guide for strawberry shortcake showing dense shortcakes, dry shortcakes, watery strawberries, soggy assembled shortcake, and whipped cream that fell flat.
When strawberry shortcake goes off, it is usually a texture problem: overworked biscuits, berries that sat too long, layers assembled too early, or cream whipped past the sweet spot.

My Shortcakes Turned Dense

Cause: The dough was overmixed, overhandled, or the butter got too warm.
Fix: Stir only until the dough comes together, keep the butter cold, and pat the dough gently instead of kneading it.

My Shortcakes Turned Dry

Cause: They baked too long, or the dough had too much flour.
Fix: Pull them when the tops are lightly golden, and weigh the flour or spoon and level it carefully.

My Strawberries Got Too Watery

Cause: They sat too long with sugar, or they were very juicy to begin with.
Fix: Spoon the syrup on gradually and hold some back if needed.

My Strawberry Shortcake Got Soggy

Cause: The dessert was assembled too early.
Fix: Keep the berries, shortcakes, and cream separate until right before serving.

My Whipped Cream Fell Flat

Cause: The cream was not cold enough, or it sat too long after whipping.
Fix: Start with cold cream and beat only to soft peaks. If it loosens slightly, whisk it briefly by hand before serving.

Strawberry Shortcake FAQs

Is strawberry shortcake made with biscuits or cake?

The classic American version is biscuit-style. Cake versions exist, but the traditional first answer is the biscuit-style dessert.

Can I use frozen strawberries?

Fresh strawberries are better for this recipe, but frozen strawberries can work in a pinch. Thaw them first, drain off excess liquid if needed, then toss them gently with sugar. Expect a softer texture and a looser syrup than you would get from fresh berries.

Why is it called shortcake?

In baking, short points to a tender, crumbly texture created by fat worked into the flour. That is why strawberry shortcake is traditionally based on a rich biscuit-like shortcake rather than a fluffy cake layer.

How long should strawberries sit with sugar?

About 30 to 45 minutes is a good starting point. That gives them enough time to release juice while still tasting fresh.

Can I freeze the shortcakes?

Yes. Freeze only the shortcakes, not the fully assembled dessert.

↑ Back to top