Posted on 15 Comments

High Protein Overnight Oats | 5 Recipes (Low Calorie, Vegan, Bulking & More)

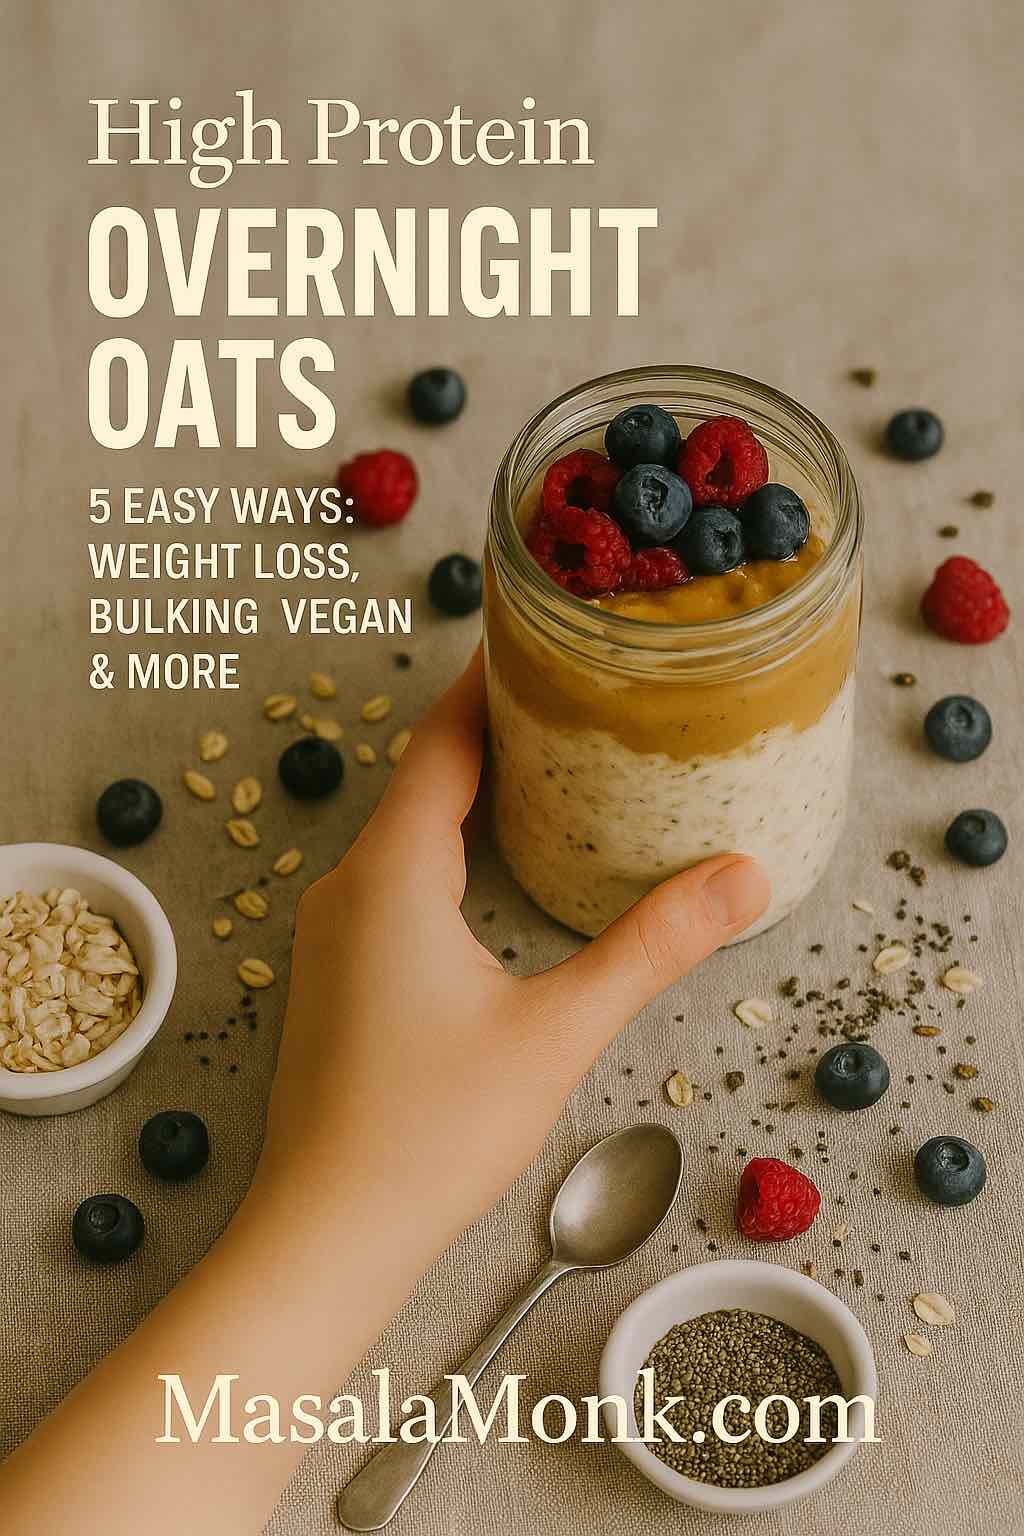
High protein overnight oats in a glass jar with berries and peanut butter, showing 5 easy ways for weight loss, bulking, vegan and more

If you like the idea of breakfast quietly getting ready for you while you sleep, high protein overnight oats are one of the easiest wins you can build into your routine. You stir a few ingredients into a jar at night, tuck it into the fridge, and wake up to something cold, creamy, filling and actually useful for your goals—whether that’s dropping a bit of weight, building muscle, eating more plant-based, or simply avoiding chaos in the morning.

At their core, high protein overnight oats are just oats soaked in liquid with enough protein-rich ingredients added to push the bowl into the 20–30 gram range. Because oats already bring slow-digesting carbohydrates and fibre, you get a steady release of energy instead of a blood-sugar spike and crash. When you add protein and a few smart toppings, you end up with a breakfast that feels like dessert in a jar but behaves like something a dietitian would approve of.

In this guide, you’ll first see a flexible base recipe for high protein overnight oats. After that, we’ll walk through four simple variations: a low-calorie, weight-loss–friendly version, a bulking/bodybuilder version, a vegan and dairy-free version, and finally a no-protein-powder version for days when you want everything to come from regular foods. Along the way, you’ll find links to deeper resources on oats, chia, peanut butter and more so you can tweak things to perfectly fit your macros and taste.


What Makes High Protein Overnight Oats So Powerful?

Before getting into measurements and jars, it’s worth understanding why this basic idea has so much staying power.

Oats are one of those old-school ingredients that have quietly earned their place in modern nutrition. They provide complex carbohydrates, a decent amount of plant protein, and a type of soluble fibre called beta-glucan. That fibre forms a gentle gel in your digestive system, slowing the release of glucose into your bloodstream and helping you feel full for longer. If you want to geek out on the details, the Harvard overview of oats explains how they support heart health, cholesterol and digestion without being complicated to cook.

Because oats are a whole grain, they also bring B-vitamins and minerals along for the ride. The key, though, is not to drown them in sugar. A piece on oatmeal as a smart breakfast choice makes the point that the base is excellent; it’s the flavoured instant sachets and excessive sweeteners that usually cause problems. In overnight oats, you’re in control of every ingredient, which makes it easy to keep things balanced.

Now add protein to that picture. Breakfasts that contain around 20–30 grams of protein are consistently associated with better appetite control and fewer random cravings later in the day. If you’re aiming to manage weight or just avoid mid-morning snack attacks, that’s a big deal. A simple explainer on protein at breakfast and weight loss breaks down why that 20-gram mark is such a useful target. High protein overnight oats are basically a painless way to hit that threshold.

Also Read: 10 High Calorie Protein Shakes & Smoothie Recipes for Healthy Weight Gain

Toppings for Extra Protein

On top of all that, you have chia seeds, nuts and seeds, Greek yogurt, soy products and protein powders—each of which brings its own extra protein, fibre and healthy fats. A quick look at chia seeds and their benefits shows how much fibre and omega-3 fat you get from just a couple of spoonfuls. When you combine all these pieces inside one jar, you get a breakfast that’s easy to prepare, genuinely satisfying, and far more interesting than a plain bowl of porridge.


Choosing Your Oats and Other Building Blocks

Although “oats are oats” is a nice simple idea, the supermarket shelves tell a different story. You’ll see steel-cut, rolled, old-fashioned, quick-cooking and instant oats, plus flavoured packets and granola mixes. The good news is that most plain, unflavoured oat types can work in high protein overnight oats, as long as you adjust the liquid and soaking time.

If you’re a bit confused by the options, MasalaMonk has a detailed guide to oat types and nutrition that walks through steel-cut, rolled, quick and instant oats in simple language. Pair that with their breakdown of oats vs oatmeal and you’ll never stand in the cereal aisle unsure what to buy again.

For overnight oats specifically:

  • Rolled or old-fashioned oats are the sweet spot. They soften nicely overnight and keep some texture.
  • Quick oats will give you a softer, more pudding-like texture and tend to thicken faster.
  • Steel-cut oats need more liquid and time; if you like a bit of chew, they can be great, but you may want to pre-soak or use slightly warm liquid.

If you want to see what happens when oats and chia get together specifically for weight loss and texture, take a look at MasalaMonk’s article on harnessing the power of oats and chia seeds for weight loss. It’s essentially a deep dive into the same idea we’re using here: using fibre and volume to keep hunger in check.

Beyond the oats themselves, you’ll be choosing:

  • Liquid – milk, oat milk, soy milk, almond milk, coconut milk or a mix. If you enjoy DIY projects, the homemade oat milk tutorial at MasalaMonk gives you a one-ingredient version that works beautifully in jars.
  • Protein source – Greek yogurt, skyr, cottage cheese, silken tofu, protein powder (whey or plant-based), or combinations of these.
  • Thickeners and boosters – chia seeds, ground flax, nut butters, seeds.
  • Flavour and sweetness – fruit, cocoa powder, vanilla, cinnamon, cardamom, a small amount of honey, jaggery or dates.

Once you see high protein overnight oats as a formula rather than a single strict recipe, it becomes much easier to customise them.

Also Read: How to Cook Perfect Rice Every Time (Recipe)


The Base High Protein Overnight Oats Recipe

Let’s start with a foundation you can come back to repeatedly. This base high protein overnight oats recipe is designed to land around the 22–28 gram protein mark for most people, depending on your protein powder and yogurt.

Ingredients for One Jar

  • ½ cup (around 40 g) rolled oats
  • ¾ cup (about 180 ml) milk of choice (dairy, soy, or another plant milk)
  • ¼ cup (60 g) thick Greek yogurt or hung curd
  • 1 scoop (20–25 g) protein powder
  • 1 tablespoon chia seeds
  • ½ medium banana, mashed or 1–2 teaspoons honey/jaggery powder
  • A pinch of salt
  • ½ teaspoon vanilla extract or ground cinnamon
  • Optional toppings in the morning: berries, sliced banana, a few chopped nuts, a teaspoon of nut butter, extra seeds

If you’re sensitive to sweetness, err on the side of less banana or sweetener at first. You can always drizzle a bit of honey or maple syrup on top the next day.
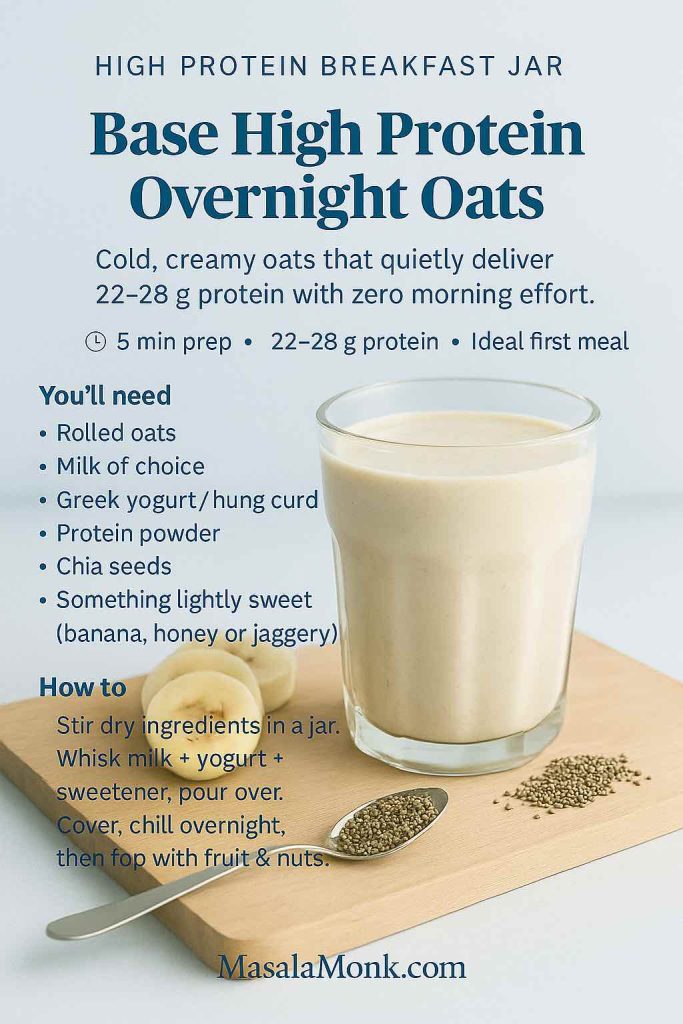
Base High Protein Overnight Oats recipe card showing a glass of creamy overnight oats with banana slices and chia seeds on a wooden board, plus a simple list of ingredients and 3-step method.
Screenshot or pin this base high protein overnight oats formula—oats, milk, Greek yogurt, protein powder and chia—then tweak the toppings to match your calories and macros for the day.

Step-by-Step Method

  1. Combine the dry ingredients.
    Add oats, protein powder, chia seeds, salt and any spices into a jar or container. Stir them together so the powder and seeds are evenly distributed.
  2. Whisk the wet ingredients.
    In a small bowl, whisk milk, yogurt and mashed banana or liquid sweetener. This little step helps your protein powder dissolve more evenly and keeps clumps away.
  3. Bring everything together.
    Pour the wet mixture over the oats mixture. Stir thoroughly, scraping down the sides and bottom of the jar. If it looks very thick, add a splash more milk; if it looks thin, remember that chia and oats will thicken it overnight.
  4. Let the fridge do the work.
    Seal the jar and refrigerate it for at least 4 hours. Overnight (8–12 hours) is ideal. A simple overnight refrigerator oatmeal recipe from Mayo Clinic notes that this kind of mixture can keep for a couple of days if stored properly, which makes prepping multiple jars at once very practical.
  5. Top and adjust in the morning.
    When you’re ready to eat, open the jar and give your high protein overnight oats a quick stir. If it’s too thick, loosen it with a little extra milk or yogurt. Then add toppings: a handful of berries, a spoonful of chopped nuts, some seeds, or a drizzle of peanut butter.

If you enjoy this kind of “prepped once, ready for several days” breakfast, you’ll probably also like MasalaMonk’s healthy oat protein bars. Those bars use oats and protein in a portable, no-sugar way that pairs naturally with this overnight oats approach.

From this base, you can move in four directions depending on your goals and preferences.

Also Read: Homemade Hot Chocolate with Cocoa Powder Recipe


Low Calorie High Protein Overnight Oats for Weight Loss

Sometimes you want your breakfast to be filling and high in protein, but not too heavy on calories. In that case, the idea is to keep protein high while dropping the overall energy density and increasing fibre and water content.

A low calorie high protein overnight oats version is especially useful when:

  • You’re in a fat-loss phase
  • You tend to snack a lot mid-morning
  • You’d rather save more calories for lunch and dinner

How to Lighten the Base Recipe

Starting from the base, you can make a few simple adjustments:

  • Reduce oats to ⅓ cup instead of ½ cup.
  • Use 1 cup unsweetened almond milk, oat milk or skimmed dairy milk instead of ¾ cup regular milk.
  • Keep ¼ cup of low-fat Greek yogurt, or use a slightly smaller portion if you’re very calorie-conscious.
  • Leave the protein powder scoop as-is so protein stays high.
  • Increase chia seeds to 1½ tablespoons; they add fibre and volume for very few additional calories.
  • Swap mashed banana for grated apple and cinnamon or use a zero-calorie sweetener if needed.
  • Focus toppings on fruit and a few seeds rather than heavy nut butters.
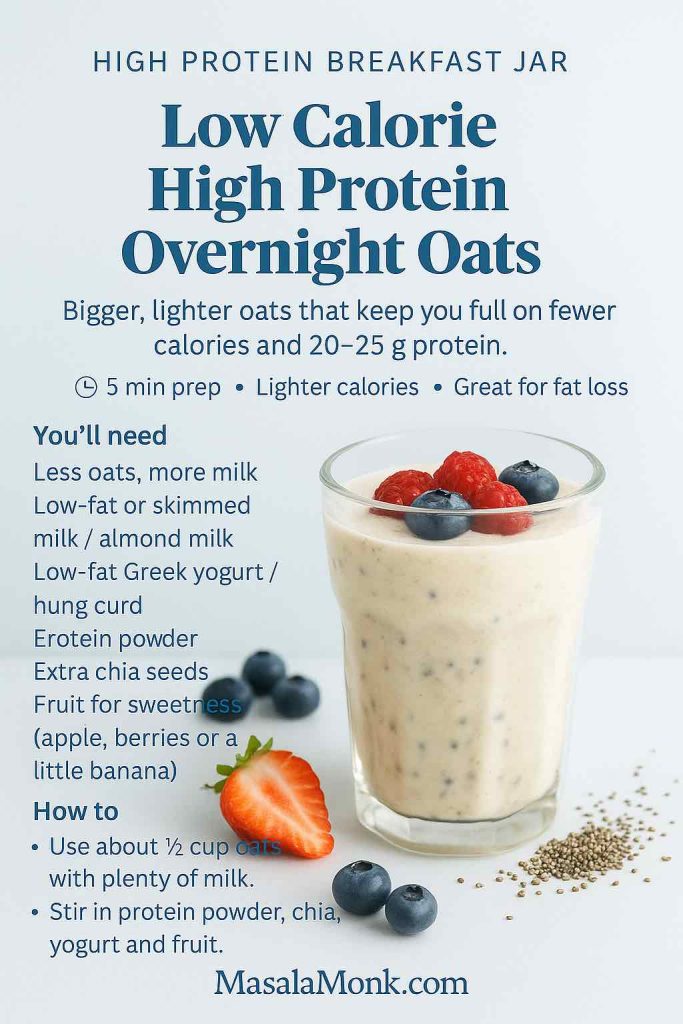
Low Calorie High Protein Overnight Oats recipe card showing a glass jar of creamy overnight oats topped with berries, with a simple list of lighter ingredients and quick method for a weight-loss friendly breakfast.
Save this low calorie high protein overnight oats formula for busy mornings—use less oats, more milk, extra chia and fruit for sweetness to stay full on fewer calories while still hitting 20–25 g of protein.

This gives you a jar of high protein overnight oats that feels generous in size, thanks to extra liquid and chia, but doesn’t eat up your entire calorie budget for the morning. If you like reading about how oats and chia can support fat loss specifically, the MasalaMonk post on oats and chia seeds for weight loss goes into both the science and practical tips.

Importance of Protein

On the protein side, starting your day with a substantial amount can help you feel satisfied for longer and spontaneously eat a little less later on. An accessible explainer on protein at breakfast and weight loss points out that aiming for around 20 grams or more can be particularly helpful for hunger and cravings. With this lighter jar, you remain in that target zone without feeling like you’re dieting.

If you’re building a broader plan around this approach, you might enjoy moving on to other whole-grain, high-protein options during the week, like oat-based snack bars or savoury legumes. The important thing is that this low calorie high protein overnight oats version gives you a stable, predictable base to fall back on during busy mornings.


Bulking and Bodybuilder High Protein Overnight Oats

Of course, not every phase is about eating less. When you’re trying to add muscle mass, train harder or simply maintain weight on an active schedule, you often need more calories in a compact, digestible form. That’s where a bulking version of high protein overnight oats shines.

Instead of nibbling on toast after toast, you can get a serious hit of calories and protein in one bowl or jar, without feeling like you’re stuffing yourself.

Also Read: Peanut Butter Cookies (Classic Recipe & 3 Variations)

Turning the Base Into a Bulking Jar

Using the base high protein overnight oats recipe, make the following changes:

  • Increase oats to ¾ cup for more carbohydrates and volume.
  • Use 1 cup whole milk or even add a splash of cream if you’re really struggling to get enough calories.
  • Keep ¼ cup Greek yogurt, or go up to ⅓ cup if you enjoy the tang.
  • Keep the full scoop of protein powder.
  • Add 1–2 tablespoons peanut butter or almond butter into the mixture.
  • Top with 1–2 tablespoons chopped nuts (almonds, walnuts, peanuts) and a spoon of seeds in the morning.
  • If you tolerate sugar well, a small drizzle of honey or dates syrup can add pleasant sweetness and extra energy.
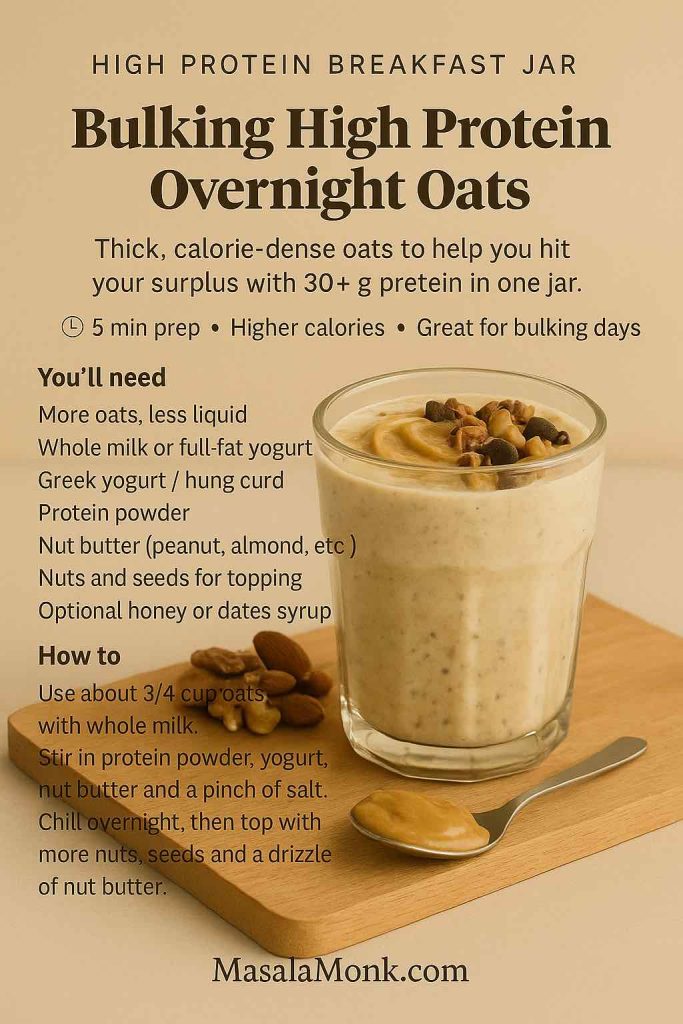
Bulking High Protein Overnight Oats recipe card showing a creamy jar of overnight oats on a wooden board with nuts and chia seeds, plus a short list of higher-calorie ingredients and a simple how-to for mass-gainer breakfast.
Use this bulking high protein overnight oats formula on heavy training days—extra oats, whole milk, Greek yogurt, protein powder and nut butter give you a dense, 30+ gram protein jar that helps you hit your calorie surplus without feeling stuffed.

This kind of bodybuilder high protein overnight oats can easily reach the 500–700 kcal range depending on your exact ingredient choices, while still leaving you feeling comfortable rather than bloated. It’s the sort of breakfast that pairs nicely with heavy training days or long work mornings when lunch is far away.

Why this combination of Oats and Peanut Butter works

The combination of oats and peanut butter, in particular, is a classic for a reason. It brings complex carbohydrates, protein, fibre and healthy fats together in a simple package. MasalaMonk has a full article on oatmeal and peanut butter as a powerful combination that, while written with weight management in mind, also explains why the pairing is so effective for energy and satiety.

For extra protein and crunch, it’s worth looking at which nuts and seeds give you the most per serving. The MasalaMonk guide to protein-packed nuts and seeds breaks down the standouts, making it easier to choose toppings that aren’t just tasty but also macro-friendly for a bulking phase.

Also Read: Béchamel Sauce for Lasagna: Classic, Vegan & Ricotta Sauce Recipe


Vegan and Dairy-Free High Protein Overnight Oats

If you avoid dairy or just prefer a plant-based diet, you might wonder whether high protein overnight oats are still realistic. The good news is that they absolutely are. You simply shift the emphasis towards soy, pea protein and seeds instead of yogurt, cottage cheese or whey.

A vegan high protein overnight oats jar can still hit the same 20–25 gram range while feeling light and fresh.

Building a Plant-Based High Protein Jar

Here’s how you can adapt the base recipe without any dairy:

  • Use ½ cup rolled oats, as usual.
  • Swap dairy milk for 1 cup unsweetened soy milk; it’s one of the highest-protein plant milks.
  • Replace Greek yogurt with ¼ cup soy yogurt or a few spoons of silken tofu blended into the liquid.
  • Choose a plant-based protein powder, such as pea, soy or a rice-pea blend.
  • Keep at least 1 tablespoon chia seeds, and consider adding some ground flax for extra omega-3 fats.
  • Sweeten naturally with mashed banana, blended dates or a small spoonful of maple syrup.
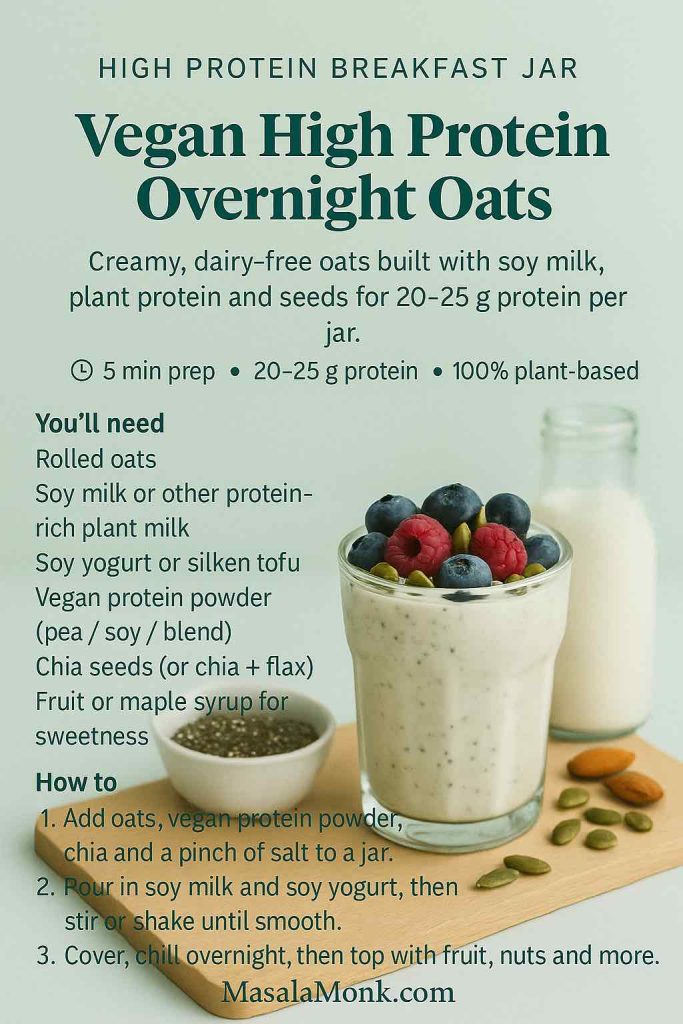
Vegan High Protein Overnight Oats recipe card showing a jar of creamy dairy-free overnight oats with berries and seeds, plus a simple list of plant-based ingredients and a quick how-to for a 20–25 g protein breakfast.
Screenshot this vegan high protein overnight oats formula for dairy-free mornings—rolled oats, soy milk, plant-based protein powder, chia seeds and fruit give you a creamy 20–25 g protein jar without any yogurt or whey.

Chia seeds play an especially important role in vegan high protein overnight oats, because they add both protein and fibre, helping you reach your targets without relying on dairy. For a deeper look at why these tiny seeds are often described as nutritional heavyweights, you can read a concise summary on chia seed nutrition and benefits, which explains their fibre, protein and omega-3 content in a straightforward way.

If you’re looking to generally increase your plant-based protein intake at breakfast, MasalaMonk’s article on high protein plant-based breakfast ideas fits nicely alongside this jar formula. You could rotate between tofu scrambles, chickpea patties and this vegan high protein overnight oats recipe throughout the week to keep things interesting.

Also Read: Cottage Cheese Lasagna Recipe | Chicken, Spinach, & Ricotta


High Protein Overnight Oats Without Protein Powder

Protein powders are convenient, versatile and usually taste good in overnight oats. Even so, you might prefer to get all your protein from “regular” foods, or you may occasionally run out of your favourite tub. In those situations, high protein overnight oats without protein powder are absolutely possible.

The key is to lean heavily on Greek yogurt, curd, cottage cheese or paneer, along with seeds and milk.

A Whole-Food, No-Powder Version

Use this pattern when you’d rather skip the scoop:

  • ½ cup rolled oats
  • ½–¾ cup milk or fortified plant milk
  • ½ cup thick Greek yogurt or hung curd
  • Optional: ¼ cup soft paneer or cottage cheese, crumbled finely
  • 1–2 tablespoons chia seeds or a mix of chia and ground flax
  • A little honey, jaggery or mashed fruit for sweetness
  • Cinnamon, cardamom or vanilla for flavour
  • Fruit and a small handful of chopped nuts on top
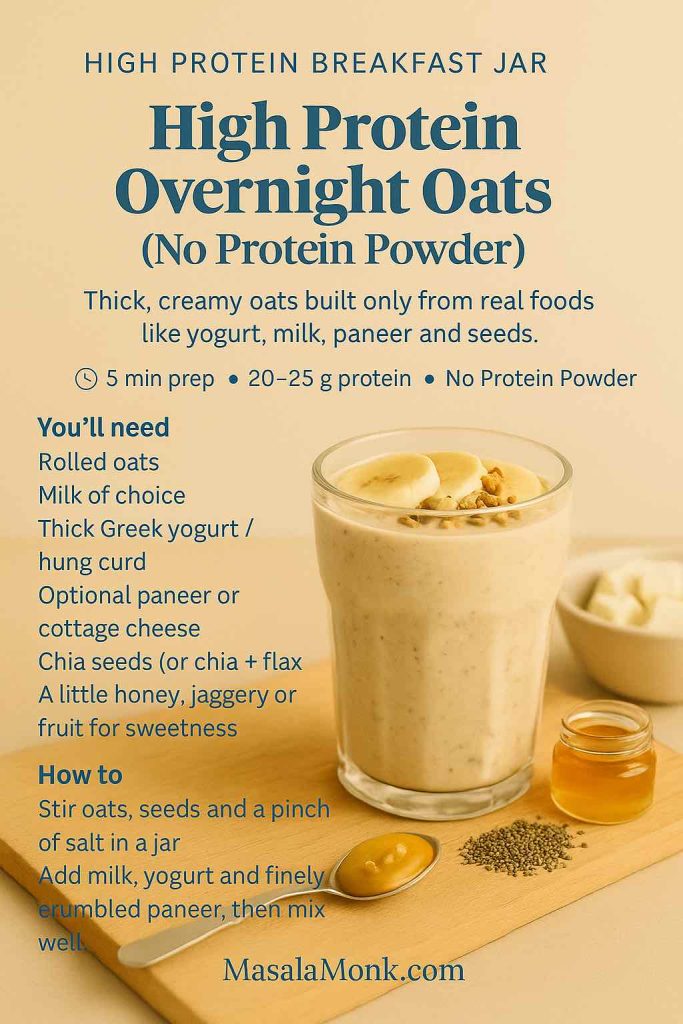
High Protein Overnight Oats without protein powder recipe card showing a creamy jar of oats with seeds and fruit, plus a simple list of whole-food ingredients like yogurt, milk, paneer and chia.
Keep this high protein overnight oats formula handy for days you don’t want to use protein powder—Greek yogurt, milk, a little paneer or cottage cheese and chia seeds give you a 20–25 g protein breakfast built entirely from everyday foods.

Greek yogurt can provide 8–10 grams of protein in just 100 grams, and cottage cheese or paneer adds even more. Between that, the milk and the seeds, you can still reach a meaningful protein intake without relying on any processed powders.

You might see recipes online that add raw egg whites straight into overnight oats to raise the protein. It’s best to be cautious there. If you do experiment, use pasteurised liquid egg whites and heat the mixture gently before serving rather than eating them fully raw from the fridge.

For the bigger picture—how this jar fits into your whole day—it’s worth checking out MasalaMonk’s article on how to eat 100 grams of protein a day. That guide shows you how a strong breakfast like high protein overnight oats can take some pressure off lunch and dinner, especially if you’re trying to hit more ambitious protein targets.

Also Read: French Toast Sticks (Air Fryer + Oven Recipe) — Crispy Outside, Custardy Inside


Flavour Ideas to Keep High Protein Overnight Oats Interesting

Once you understand the structure of high protein overnight oats, you can create an almost endless range of flavours without losing the macro balance. Keeping things exciting is important; even the healthiest recipe will get abandoned if it feels boring after three days.

Here are a few flavour profiles you can use across all four variations:

Chocolate Peanut Butter High Protein Overnight Oats

Stir cocoa powder into the base mixture along with a spoon of peanut butter. In the bulking version, you can be generous with both; in the low-calorie version, go lighter on the peanut butter and rely more on cocoa and a few crushed peanuts for flavour. A little chopped dark chocolate on top makes it feel like dessert.

If you want to understand why oats and peanut butter are such a satisfying combination, the MasalaMonk piece on oatmeal and peanut butter explores how they work together for fullness and nutrition.
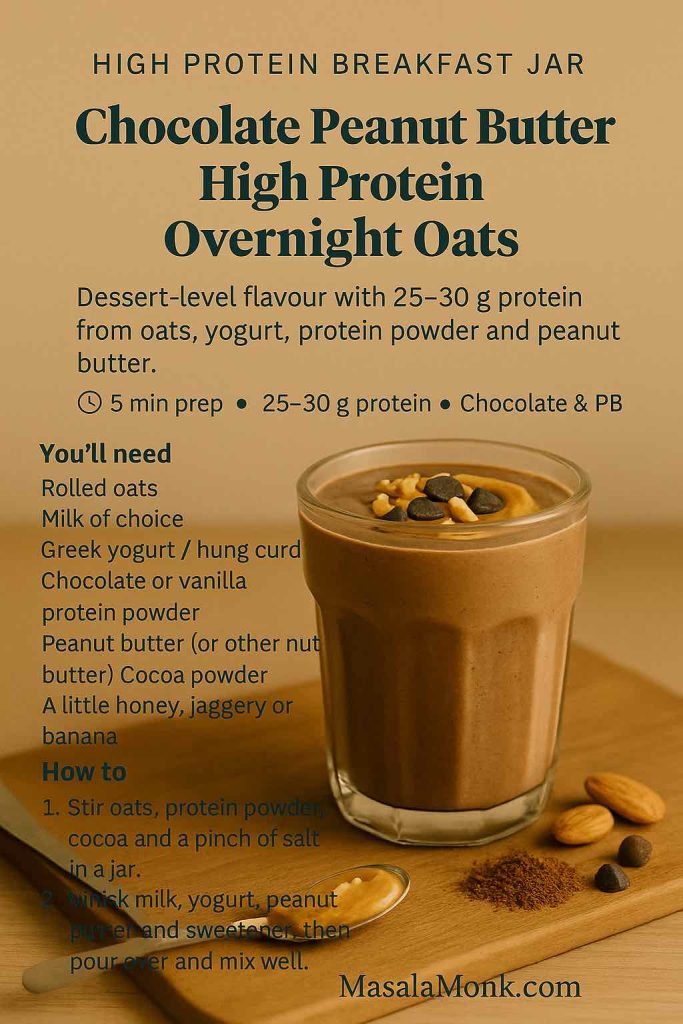
Chocolate Peanut Butter High Protein Overnight Oats recipe card showing a jar of chocolate overnight oats on a wooden board with peanuts, cocoa and peanut butter, plus a simple list of ingredients and a quick how-to.
Turn your basic high protein overnight oats into a chocolate peanut butter jar—just add cocoa, peanut butter and a chocolate or vanilla protein powder for a dessert-style breakfast that still delivers around 25–30 grams of protein.

Apple Cinnamon High Protein Overnight Oats

Grate half an apple into the jar before refrigerating and add a generous pinch of cinnamon. The apple softens overnight, adding natural sweetness and volume. In the morning, you can top with a few raisins and a sprinkle of chopped walnuts to echo classic apple-pie flavours while still keeping the jar balanced.
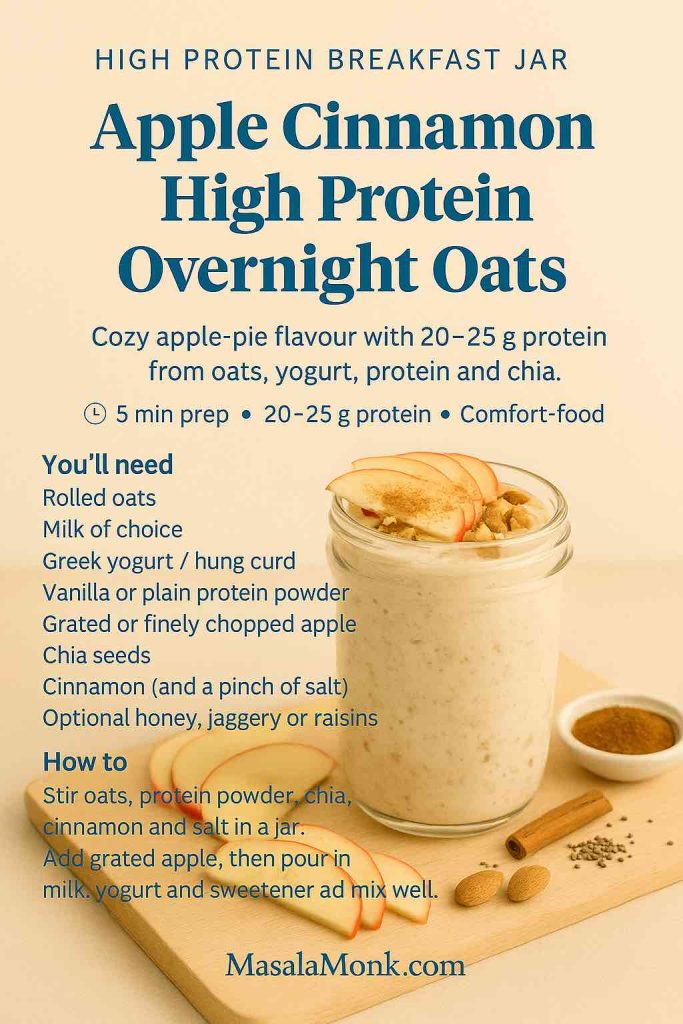
Apple Cinnamon High Protein Overnight Oats recipe card showing a jar of creamy oats with apple slices and cinnamon on a wooden board, plus a simple list of ingredients and a quick how-to.
Save this apple cinnamon high protein overnight oats formula for cozy mornings—grated apple, cinnamon, oats, Greek yogurt, protein powder and chia give you warm apple-pie flavour with 20–25 grams of protein in each jar.

Pumpkin Pie High Protein Overnight Oats

For a seasonal twist, add a few spoons of pumpkin purée, cinnamon, nutmeg and a touch of sweetener. This works especially well with the no-powder or vegan versions, as the pumpkin adds thickness and comfort without much extra fat. A small handful of toasted pumpkin seeds on top brings extra crunch and protein.
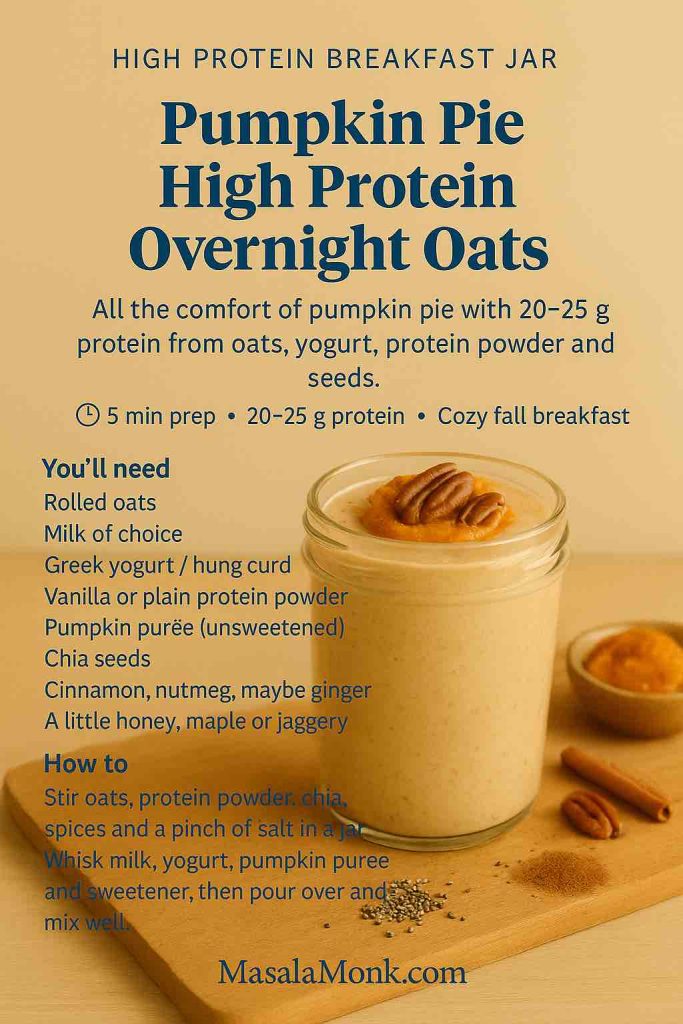
Pumpkin Pie High Protein Overnight Oats recipe card showing a jar of pumpkin-coloured overnight oats topped with nuts and cinnamon on a wooden board, with a simple ingredient list and quick how-to for a cozy high protein breakfast.
Pin this pumpkin pie high protein overnight oats formula for autumn—stir pumpkin purée, cinnamon, nutmeg, oats, Greek yogurt, protein powder and chia together for a dessert-style jar that still delivers around 20–25 grams of protein.

Tiramisu-Inspired High Protein Overnight Oats

Add a shot of strong coffee (or a spoonful of instant coffee dissolved in your milk), along with cocoa and vanilla. In the morning, dust the top with a little more cocoa powder and add a spoon of yogurt for a “cream” effect. This variation leans heavily on the idea that high protein overnight oats can feel like a treat rather than a chore.
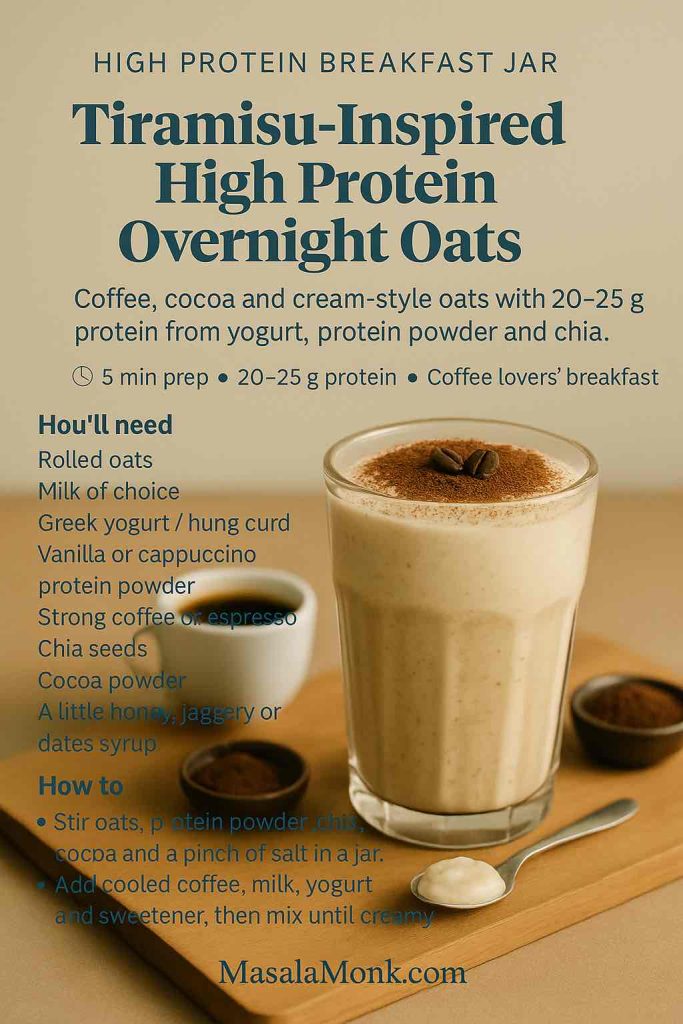
Tiramisu-Inspired High Protein Overnight Oats recipe card showing a jar of coffee-and-cocoa overnight oats with a creamy topping and cocoa dusting, alongside a simple ingredient list and quick how-to for a 20–25 g protein breakfast.
Turn your morning coffee into breakfast with this tiramisu-inspired high protein overnight oats—espresso, cocoa, oats, Greek yogurt, protein powder and chia come together for a dessert-style jar that still delivers around 20–25 grams of protein.

Berry Cheesecake High Protein Overnight Oats

Use a mix of Greek yogurt and cottage cheese in the base, plus a little vanilla and lemon zest. Top with a small handful of mixed berries. This flavour profile sits very naturally inside the no-powder version, because the dairy itself creates that cheesecake-like tang and creaminess.

You can also borrow ideas from other jar-style recipes. For instance, MasalaMonk’s chia pudding with steel-cut oats and mango uses layered textures and fruit in a way that translates beautifully to high protein overnight oats. The formats are similar; only the exact macro balance and ingredients change.
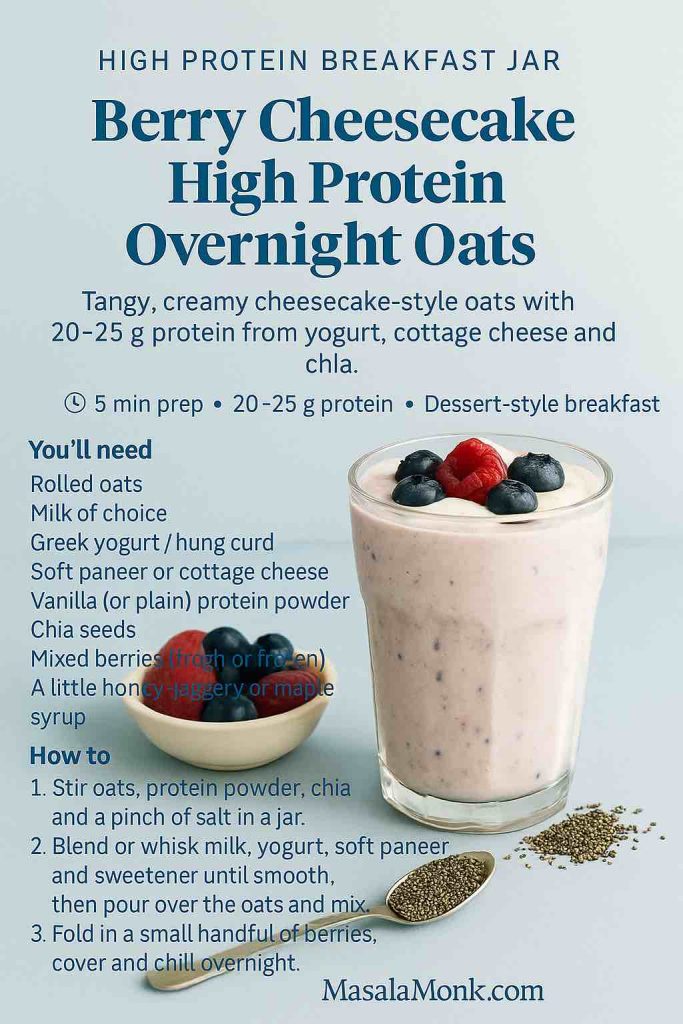
Berry Cheesecake High Protein Overnight Oats recipe card showing a jar of creamy cheesecake-style overnight oats topped with mixed berries, alongside a short ingredient formula and step-by-step method including folding in berries and topping them in the morning.
Screenshot this berry cheesecake high protein overnight oats formula for days you want dessert at breakfast—Greek yogurt, soft paneer or cottage cheese, oats, protein powder and chia make a tangy cheesecake-style base, then you fold in berries and add a fresh berry topping in the morning for 20–25 grams of protein per jar.

Also Read: 10 Best Chicken Sandwich Recipes (BBQ, Parm, Buffalo & More)


Making High Protein Overnight Oats Part of Your Week

A single jar is great, but where high protein overnight oats really shine is in repeatable meal prep. Because the ingredients are simple and inexpensive, you can batch-prepare several jars at once and line them up in the fridge.

A few practical strategies make life easier:

  • Choose one or two base patterns for the week—perhaps the low calorie version on workdays and the bulking version on heavy training days.
  • Prep 3–4 jars of the same base high protein overnight oats, then vary the toppings in the morning with different fruits, nuts and spices so you don’t get bored.
  • Keep a small box of mixed nuts and seeds ready to sprinkle over the top; the guide to protein-rich nuts and seeds can help you stock up on the most efficient options.
  • On days when you’re in the mood for something different, switch to a bar or baked format like the healthy oat protein bars or an oat-based snack, but keep the overall ingredients similar.

Overnight oats also sit comfortably inside a more general pattern of eating that emphasises whole grains, plenty of plants and adequate protein. If you enjoy exploring that style of eating, resources like the Harvard Healthy Eating Plate give a simple visual summary of how to balance your plate (or jar) without obsessing over exact numbers.

Also Read: Vegan French Toast: 6 Easy Recipes (Pan, Air Fryer, GF & High-Protein)


Bringing It All Together

High protein overnight oats are one of those rare habits that manage to be practical, enjoyable and nutritionally solid at the same time. Once you’re comfortable with the base method—mix, soak, top—you can adapt them in countless ways.

You’ve seen:

  • A base recipe that can easily reach 20–30 grams of protein.
  • A low-calorie version that supports weight loss and appetite control while still feeling generous.
  • A bulking and bodybuilder version for days when you need more energy and strength.
  • A vegan and dairy-free version that keeps everything plant-based without sacrificing protein.
  • A no-powder version built entirely from regular foods like yogurt, paneer, milk and seeds.

From there, you can apply as many flavour layers as you like—chocolate peanut butter, apple cinnamon, pumpkin pie, tiramisu and beyond—while still respecting your macro goals. You can keep things simple on busy weekdays and get creative when you have more time, all without changing the underlying habit of prepping your high protein overnight oats the night before.

With a few jars, some rolled oats, a protein source you like and a handful of toppings, you’re only a five-minute stir away from a breakfast that quietly takes care of you every morning.

Also Read: Pumpkin Spice, Your Way: Master Blend, Variations & Real-World Recipes


FAQs

1. How much protein should be in high protein overnight oats?

For most people, high protein overnight oats make sense when each serving delivers at least 20 grams of protein. Plenty of bowls will land between 20–30 grams, depending on how much yogurt, milk and protein powder you use. That kind of overnight oats protein content is usually enough to support better appetite control and muscle repair after training.

To nudge your jar into the high end of that range, simply combine rolled oats with a scoop of protein powder, Greek yogurt and a little milk. Together, those ingredients turn regular oats into genuinely high protein overnight oats instead of just a carb-heavy breakfast.


2. Are high protein overnight oats good for weight loss?

Yes, high protein overnight oats can fit very well into a fat-loss plan, especially when you build low calorie high protein overnight oats on purpose. Protein and fibre help you feel full, which makes it easier to avoid random snacking later in the day. Meanwhile, the slow-digesting carbs from oats give you steady energy rather than a crash.

To keep your bowl helpful for weight loss, emphasise high protein low calorie overnight oats: reduce the amount of oats slightly, choose a lean protein source, increase chia seeds or fruit for volume, and be modest with nut butters and sugary toppings. In that way, you enjoy a big jar, satisfying texture and a proper hit of protein without blowing through your calorie budget.


3. Which oats are best for high protein overnight oats?

Rolled or old-fashioned oats tend to be the best choice for high protein overnight oats because they soften nicely overnight while still keeping some bite. Quick oats also work, particularly if you enjoy a smoother, pudding-like texture, although they can get a bit mushy if you leave the jar for several days.

Steel-cut oats are an option too, yet they usually need more liquid and a longer soak. If you like a chewier texture, you can mix a spoonful of steel-cut oats into rolled oats and adjust the liquid accordingly. In short, any plain oat variety can be used, but rolled oats give the most reliable texture for high protein overnight oats recipes.


4. What is the best protein powder for overnight oats and oatmeal?

There isn’t a single “best protein powder for overnight oats,” because it depends on your taste, digestion and dietary needs. Even so, there are a few reliable patterns. Whey concentrate or isolate dissolves easily and creates creamy whey protein overnight oats with a dessert-like texture. Casein, on the other hand, thickens the mixture a little more and keeps you full for longer.

If you prefer a plant-based option, pea, soy or a rice–pea blend often makes the best protein powder for oats and oatmeal because those powders usually mix smoothly without chalkiness. Flavours such as vanilla, chocolate or cinnamon roll pair especially well with oats. Regardless of which you choose, start with a small scoop and adjust the liquid until your high protein overnight oats feel just right.


5. Can I make high protein overnight oats without protein powder?

Absolutely. High protein overnight oats without protein powder are easy to build if you lean on whole foods. Thick Greek yogurt, hung curd, cottage cheese or paneer, plus milk and seeds, can all add meaningful protein. When you combine these with oats, it’s still simple to reach 20 grams of protein per serving.

To do this, simply increase your yogurt or curd to at least half a cup, keep a generous splash of milk, and include one or two tablespoons of chia or other seeds. That way, you end up with high protein overnight oats that rely entirely on familiar ingredients and still feel indulgent and creamy.


6. Can I use whey protein in overnight oats, or will it get gritty?

You can definitely use whey protein in overnight oats, and it usually blends in very well. To avoid any gritty texture, first whisk the whey with your milk and yogurt before pouring it over the oats. Once everything is smooth, stir in the oats and chia seeds. After chilling, whey protein overnight oats become thick, creamy and easy to eat straight from the jar.

Because whey tends to dissolve quickly, it is particularly good for people who want high protein overnight oats with a simple, milkshake-like flavour. If your scoop is very sweet, you may not need extra sugar, honey or banana at all.


7. Is it possible to make high protein overnight oats low carb?

It’s tricky to make overnight oats truly low carb, since oats themselves are a carbohydrate-rich grain. Nevertheless, you can move toward high protein low carb overnight oats by adjusting the ratios. For example, you can use a slightly smaller portion of oats, then increase protein sources such as Greek yogurt, protein powder and seeds.

In addition, focus on toppings like berries and nuts rather than bananas, dried fruit or large amounts of honey. The result will still contain some carbs from the oats, yet the overall balance shifts toward higher protein, more healthy fats and fewer sugars. As a result, your high protein overnight oats feel steadier on blood sugar while still being enjoyable.


8. Are high protein overnight oats suitable for vegans and people who are dairy-free?

Yes, it’s straightforward to make vegan high protein overnight oats. Instead of dairy milk and yogurt, choose soy milk, almond milk or oat milk and use a plant-based yogurt or silken tofu. Then add a scoop of vegan protein powder made from pea, soy or a blend, and finish with chia seeds, flaxseeds and nuts.

This approach gives you vegan high protein overnight oats that still reach a solid protein target, without any dairy at all. On top of that, you add extra fibre and good fats, which makes the jar satisfying and nutrient-dense even without animal products.


9. How long do high protein overnight oats last in the fridge?

Typically, high protein overnight oats keep well for around three days in the fridge when stored in a sealed container. The texture often improves on day two as the oats and chia seeds absorb more liquid. After that, the mixture can become very thick, and fruit mixed in from the beginning may start to soften too much.

If you want to meal prep several portions, it’s better to prepare the base high protein overnight oats in jars and then add fresh toppings on the day you plan to eat each one. In that manner, you get the convenience of batch-prep while keeping the flavours and textures bright.


10. Can high protein overnight oats really replace a full breakfast?

For most people, a well-balanced serving of high protein overnight oats can absolutely stand in for a complete breakfast. You’re getting complex carbohydrates from oats, a solid chunk of protein, and depending on your toppings, fibre, healthy fats and micronutrients from fruit, nuts and seeds. That combination tends to keep you full and focused for several hours.

To turn the jar into a more substantial meal, you can simply scale the recipe slightly upward or add an extra side such as a small piece of fruit or a handful of nuts. Consequently, high protein overnight oats become a flexible foundation that you can adjust up or down depending on your hunger, training schedule and goals.

Posted on 16 Comments

French Toast Sticks (Air Fryer + Oven Recipe) — Crispy Outside, Custardy Inside

French toast sticks recipe cover with maple syrup poured over a crispy stack; air fryer and oven methods with vegan and gluten-free options.

There are breakfasts you make on autopilot and there are breakfasts that pull everyone to the table. This french toast sticks recipe sits firmly in the second camp: shatteringly crisp edges, a custardy middle that stays tender, and dippable batons that feel festive on a Tuesday and right at home on a holiday brunch board. The method is wonderfully forgiving once you understand three levers—custard ratio, heat management, and evaporation. We’ll walk through air fryer and oven paths, then branch into vegan, gluten-free, and protein-forward variations, plus copycat crunch coats, batch-freezing, and precise reheating. Along the way, when you need a plant-based base that already works, reach for the tried-and-true guide to Vegan French Toast: 6 Easy Recipes; it adapts to sticks beautifully with only a couple of tweaks.

Before we begin, a quick but important food-safety reminder: the center of an egg-based custard should reach about 71°C / 160°F; when you want belt-and-braces certainty, the USDA safe minimum temperature chart explains the number succinctly. With that in mind, let’s get cooking.


Core Ingredients (and Why They Work)

  • Bread (8 thick slices): Brioche, challah, or Texas toast excel because their enriched crumb absorbs custard without collapsing. Standard sandwich bread will do in a pinch if you lightly dry it first.
  • Eggs (3 large): Structure, gloss, and gentle richness.
  • Milk (¾ cup / 180 ml): Whole milk yields plush centers; almond or oat milk keep things dairy-free without losing crispness. If you love making your own nut milk, you can follow this simple primer on how to make almond milk at home for a clean, neutral base.
  • Sugar (1 tbsp): Quickens browning; keep it modest so the crust doesn’t scorch.
  • Vanilla (1 tsp) & Cinnamon (½ tsp): Aroma that plays well with maple, chocolate, or fruit.
  • Salt (pinch): Brightens everything.
  • Butter or neutral oil (1–2 tbsp): A whisper on the basket or pan dramatically boosts crunch.

As a north star for technique and proportions, the explainer at Serious Eats is an evergreen reference; we’ll echo the spirit while tuning for stick geometry and the speed of convection.


Classic French Toast Sticks Recipe — Air Fryer Method

Yield: 4 generous servings (20–24 sticks)
Active time: about 20 minutes

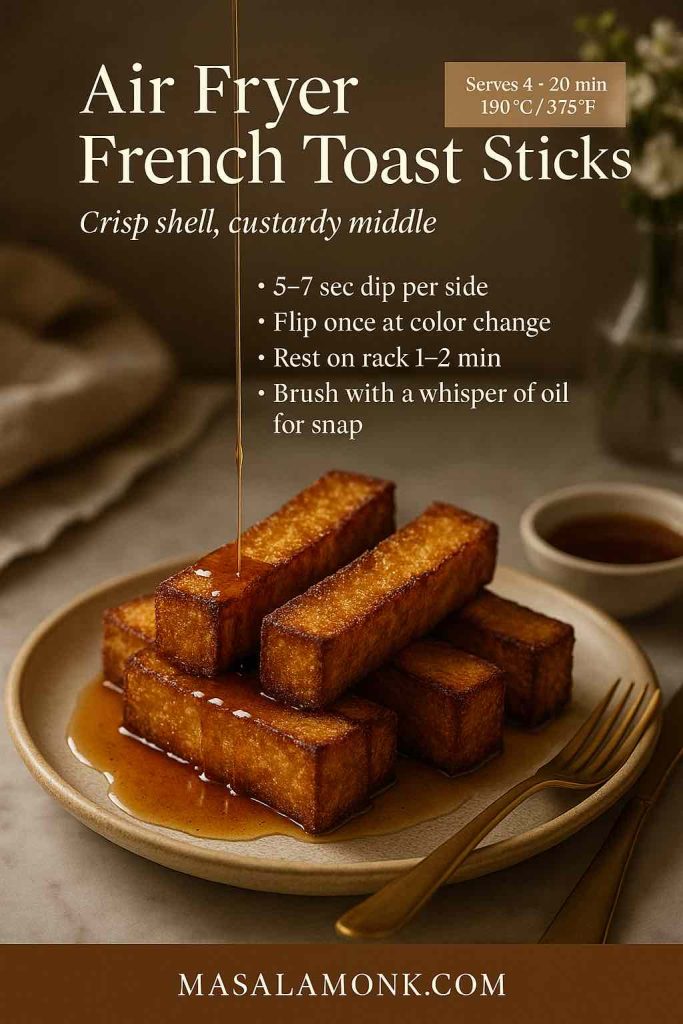
Air Fryer French Toast Sticks stacked on a stoneware plate as maple syrup drips—crisp edges, custardy centers; MasalaMonk recipe card.
Air Fryer French Toast Sticks—shatteringly crisp outside, custardy middle. Dip each stick 5–7 seconds per side, air-fry at 190°C / 375°F for 6–8 minutes, flip once when the color deepens, then rest 1–2 minutes on a rack. Brush a whisper of oil before the flip for extra snap; serve immediately with warm maple.

Step 1: Cut and Dry

Stack each slice and cut into thirds to form batons. Set them on a wire rack for 5–10 minutes while you mix the custard. Alternatively—and especially if the bread is very fresh—give the slices 2–3 minutes in a low oven to drive off a little surface moisture. This brief drying is your first insurance policy against sogginess.

Step 2: Whisk the Custard

In a shallow dish, whisk 3 eggs, ¾ cup (180 ml) milk, 1 tbsp sugar, 1 tsp vanilla, ½ tsp cinnamon, and a pinch of salt until perfectly smooth. The custard should coat the back of a spoon and leave a clean trail when you draw a finger through it.

Step 3: Quick Soak

Dip 6–8 sticks at a time for 5–7 seconds per side. Let excess drip until the coating thins to a glossy film. Because sticks have more edge area, they don’t need a deep soak; brevity yields better texture.

Step 4: Air Fry for Crunch

Preheat to 190°C / 375°F. Lightly brush or spray the basket with butter or oil. Arrange sticks with space between them—hot air needs room to circulate. Air fry 6–8 minutes total, flipping at the halfway point when the color deepens from gold to amber. For a dramatic shell, brush the exposed sides with a trace of oil just before the flip.

Step 5: Rest, Then Serve

Transfer to a wire rack for 1–2 minutes. That brief rest vents steam and sets the crust. Serve immediately with warm maple syrup, or go playful with a small bowl of 3-minute homemade chocolate syrup that turns glossy on contact.


Sheet-Pan French Toast Sticks — Oven Method (Batch-Friendly)

When you’re cooking for a crowd or stocking the freezer, the oven delivers consistency without babysitting.

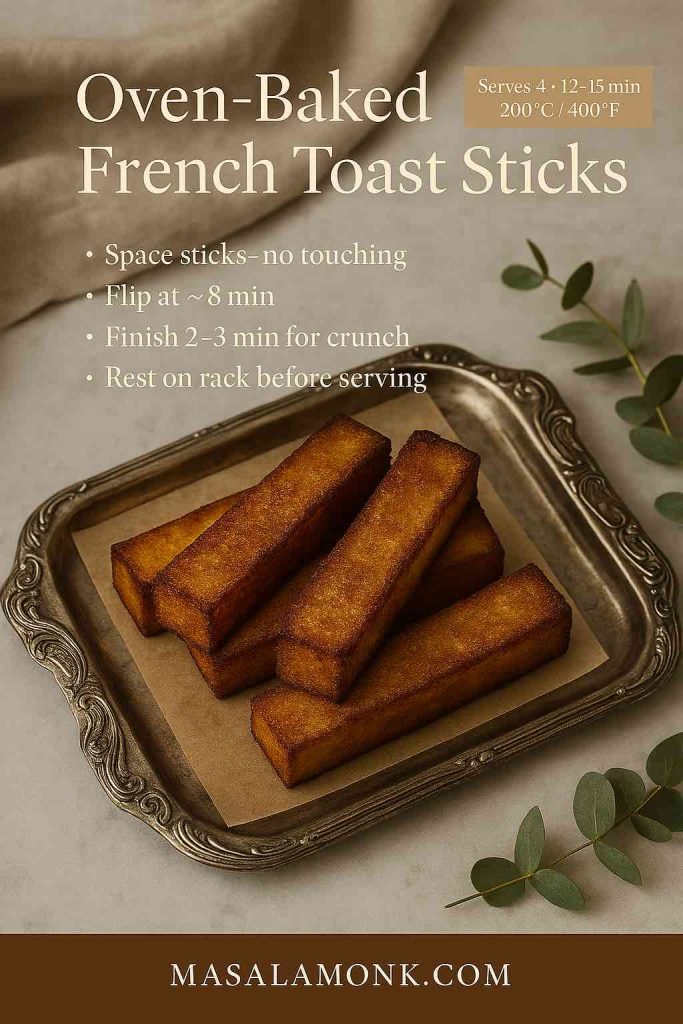
Oven-baked French toast sticks on an antique silver tray with parchment—golden, crisp edges and soft centers; MasalaMonk recipe card.
Oven-Baked French Toast Sticks—perfect for batches. Bake at 200°C / 400°F for 12–15 min on a lined rack, flip at ~8 min, then give 2–3 min extra for crunch. Space the sticks so they don’t touch and rest on a wire rack before serving for crisp bottoms.
  1. Heat oven to 200°C / 400°F. Line a rimmed sheet with parchment or set a rack over the sheet; brush with melted butter.
  2. Dip sticks as above and lay them out so they don’t touch.
  3. Bake 12–15 minutes, flipping around 8 minutes, until deeply golden.
  4. For extra crunch, give them 2–3 minutes more after the flip.
  5. Rest on a rack before plating or freezing.

Although times vary with ovens, color and feel tell the truth: crisp edges, bouncy centers. If the center indents and stays wet, a minute or two more will finish the set.


Stovetop Skillet Variation — When You Want Pan Caramelization

Sometimes you crave the scent of butter browning in a pan. In that case:

Skillet French toast sticks browning in a cast-iron pan with butter—golden, crisp edges and custardy centers; MasalaMonk stovetop recipe card.
Skillet French Toast Sticks—deep caramel notes from the pan. Heat medium with butter + a little neutral oil, cook 2–3 min per side, then brown the third edge. Work in small batches, wipe and refresh fat between rounds, and rest on a wire rack to keep bottoms crisp. Serve immediately with warm maple.
  • Heat a large nonstick or well-seasoned cast-iron skillet over medium.
  • Film the pan with a mix of butter and oil.
  • Cook sticks 2–3 minutes per side, turning to brown the third “edge” as needed.
  • Slide finished sticks onto a rack so the bottoms don’t steam.

This route gives you a slightly deeper caramel note and a touch more flexibility if your air fryer is busy with bacon or potatoes.


Vegan French Toast Sticks — Plant-Forward with Crisp Edges

If you’re cooking for vegans, egg allergies, or you simply like the flavor of plant-based custard, swap in the method from Vegan French Toast: 6 Easy Recipes and adapt it for sticks with two small upgrades:

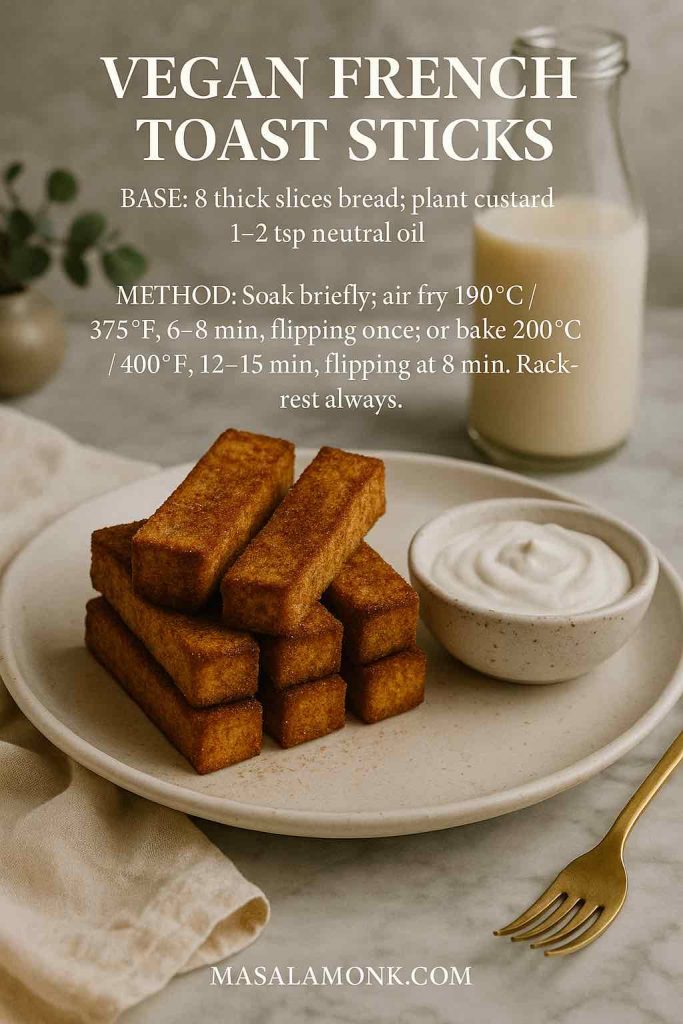
Vegan French toast sticks stacked on a stoneware plate with coconut yogurt and an almond-milk bottle—golden, crisp; MasalaMonk recipe card.
Vegan French Toast Sticks—crisp edges, tender middle without eggs. Enrich the plant custard with 1–2 tsp neutral oil, give each stick a brief soak, then air-fry at 190°C / 375°F for 6–8 min (flip once) or bake at 200°C / 400°F for 12–15 min (flip at 8). Rest on a wire rack to set the crust. Tip: use a tight-crumb loaf and keep the dip quick for best structure.
  • Add 1–2 tsp neutral oil directly to the vegan custard to enhance browning.
  • Keep the soak short (as above) so structure holds.
  • Air fry at 190°C / 375°F for 6–8 minutes total, flipping once, or bake per the oven method and extend a minute if edges look pale.

Because plant custards can set more gently, the rack rest is doubly important; it locks in crunch while the interior finishes.


Gluten-Free French Toast Sticks — Crisp Without Crumble

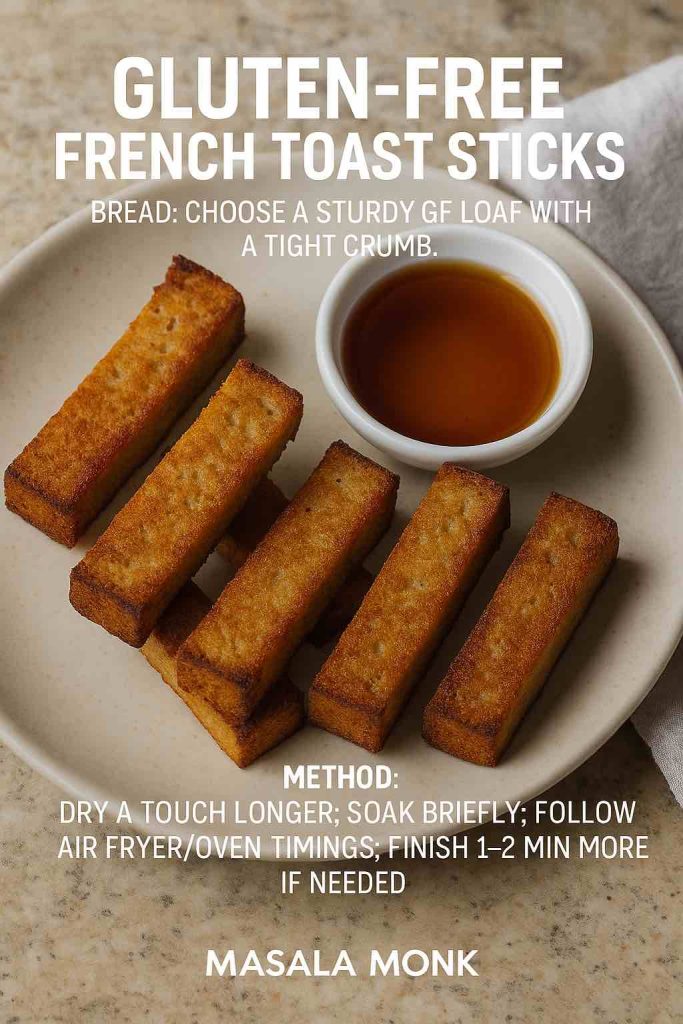
Gluten-free breads vary substantially, so choose a loaf with a close crumb and assertive structure—brioche-style GF loaves or thicker sandwich slices perform best. Dry the sticks slightly longer before dipping, and keep the soak short. Follow either the air fryer or oven timing above; add 1–2 minutes after the flip if the surface looks soft.

Gluten-free French toast sticks on a stoneware plate with a maple-syrup ramekin—golden, crisp edges and tender centers; MasalaMonk recipe card.
Gluten-Free French Toast Sticks—crisp without crumble. Pick a sturdy, tight-crumb GF loaf (brioche-style or thick sandwich). Dry 5–10 min, then brief soak so the sticks hold structure. Cook: Air fryer 190°C / 375°F, 6–8 min (flip once) or oven 200°C / 400°F, 12–15 min (flip at ~8). If the surface looks soft, finish 1–2 min more. Rest on a wire rack for crisp bottoms.

If gluten is new territory for you or your readers, a quick primer like What is Gluten? helps demystify labels. For a naturally GF side that complements sticks, consider a spoon of millet porridge or these ideas in millets as a gluten-free superfood—they round out the plate without competing on sweetness.


Protein French Toast Sticks — Higher Satiety, Same Crunch

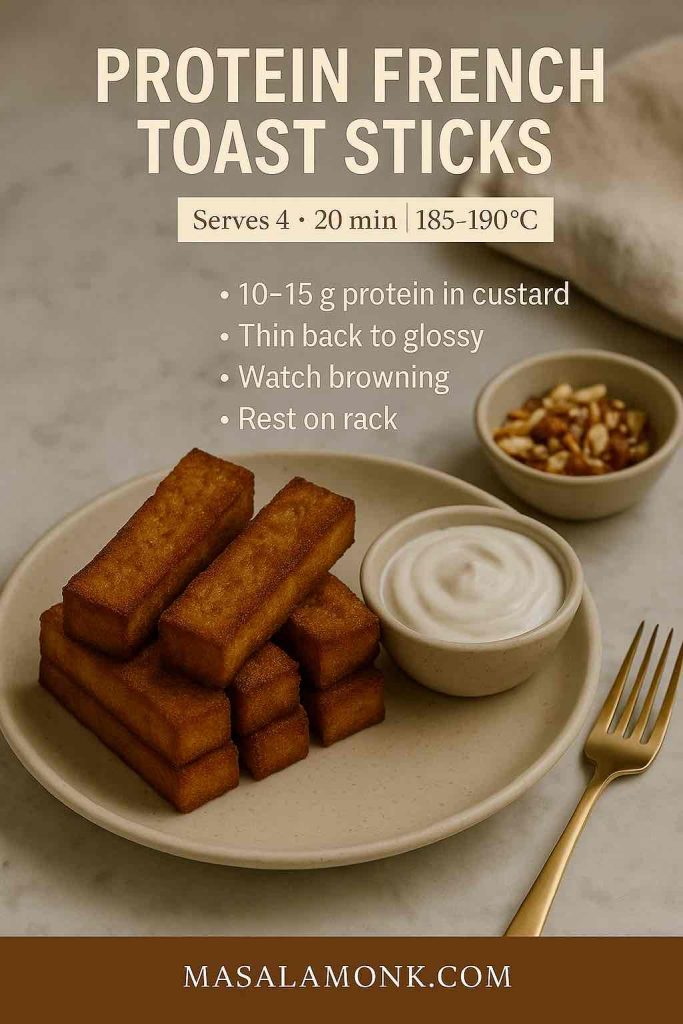
For a more filling breakfast without leaning on syrup, whisk 10–15 g unflavoured whey or plant protein into the custard, then thin with milk until it returns to that glossy, spoon-coating texture. Because added protein browns quickly, watch color closely and lower the air fryer temperature to 185°C / 365°F if necessary. Serve with thick yogurt and chopped nuts, or keep it light and pair a few sticks with keto chia pudding with almond milk so everyone at the table gets what they prefer.

Protein French toast sticks on a stoneware plate with yogurt dip and chopped nuts—golden and crisp; MasalaMonk high-protein recipe card.
Protein French Toast Sticks—more satiety, same crunch. Whisk 10–15 g unflavoured whey or plant protein into the custard, then thin with milk until glossy. Cook 185–190°C / 365–375°F for 6–8 min in the air fryer, flip once, and rest on a rack. Protein speeds browning—watch color and reduce sugar slightly. Serve with thick yogurt and toasted nuts.

Crunch Coats & Copycat Textures — From Churro Sugar to Cornflake Crust

Now and then, you want that fairground crunch or a drive-thru echo at home. Happily, sticks invite embellishment:

  • Cinnamon Sugar “Churro” Finish: Toss just-cooked sticks in a blend of 3 tbsp sugar + 1 tsp cinnamon. Do this while they’re still hot so the sugar clings.
  • Cornflake Crust: After dipping, press each stick into lightly crushed cornflakes. Air fry as usual. The shards add audible crunch without deep-frying.
  • Graham Dust: Blitz plain grahams into coarse crumbs; press on as with cornflakes for a cookie-like halo.
  • Nutty Edge: Roll one long side in finely chopped, lightly toasted almonds or pecans before cooking; it creates a textural contrast without overwhelming the custard.

For inspiration and a sense of what diners expect from a fast-food take, a quick skim of the Sonic Drive-In menu will reveal how they pair sticks and dips. You’ll find that a simple vanilla-maple dip (equal parts maple syrup and thick yogurt, scented with vanilla) outshines most chain versions at home.


Sauces, Dips, and Fruit — Keep the Party on the Plate

Maple syrup is non-negotiable for purists; nevertheless, little jars of toppings make breakfast feel abundant:

  • Warm Chocolate Spoon Sauce: Drizzle a ribbon of 3-minute homemade chocolate syrup over a stack and watch it set into a gloss as the sticks cool.
  • Cinnamon Apples: Spoon over stewed cinnamon apples for a diner-style plate without the cloying sweetness.
  • Yogurt-Maple Dip: Whisk ½ cup thick yogurt with 2 tbsp maple and a pinch of salt.
  • Berry Smash: Crush berries with a touch of sugar and lemon; strain or leave rustic.
  • Orange Zest Sugar: Microplane zest into sugar with a whisper of nutmeg; toss hot sticks lightly for a holiday finish.

Because sauces add sweetness, you can reduce sugar in the custard slightly and lean on caramelization for flavor.


Freezer-Friendly: How to Batch, Store, and Reheat Perfectly

Sticks freeze and reheat better than whole slices thanks to their surface area. Here’s the straightforward route:

  • Cook completely and rest on a rack until room-temp.
  • Freeze in a single layer on a parchment-lined sheet until firm.
  • Bag & label, pressing out air.
  • Reheat from frozen:
    • Air fryer 180°C / 356°F for 3–5 minutes (shake once).
    • Oven 200°C / 400°F for 6–8 minutes on a rack set over a sheet.

If you keep a box of store-bought sticks as a back-pocket option, use these ranges as a starting point and adjust by brand. For context, you can glance at Eggo French Toaster Sticks or Farm Rich French Toast Sticks to see packaging guidance, then dial toward your preferred crispness. Either way, trust color and firmness more than labels.


Ratio Sense — Cook by Feel When Measuring Cups Vanish

Holiday rentals and late-night cravings share one trait: missing measuring cups. Fortunately, this recipe scales by intuition:

  • For 2 slices (6 sticks): 1 large egg + a scant splash of milk (about 60–80 ml).
  • For 4 slices (12 sticks): 2 eggs + ~150 ml milk.
  • For 8 slices (24 sticks): 3 eggs + 180 ml milk (our base).

Aim for a custard that’s thicker than milk and thinner than cream, glossy, and clingy. If it runs like water, add part of another egg; if it clumps, thin with a splash of milk. This single cue—how the custard coats the back of a spoon—unlocks consistency regardless of brand or bread.


Troubleshooting French Toast Sticks Recipe

  • Edges browned, center wet: Shorten the soak next time; for this batch, give the sticks 1–2 extra minutes on a rack in a hot oven to finish.
  • Pale even after time: Preheat longer and add a teaspoon more sugar to the custard; sugar fuels browning.
  • Eggy streaks: Whisk the custard more thoroughly and avoid letting sticks lounge in the liquid.
  • Soft after resting: Always move finished sticks to a wire rack; the air gap prevents steam from softening the bottom.
  • GF bread crumbling: Choose a denser loaf, cut slightly thicker, and keep the dip brisk.
  • Overly sweet: Reduce sugar in the custard and switch to yogurt-maple dip for balance.

For doneness anxiety, an instant-read thermometer ends the guesswork; custard-based dishes earn their melt-in-the-middle texture right around that 71°C / 160°F sweet spot highlighted by the USDA chart.


Flavor Variations That Behave Well in Stick Form

Because the format is stable, you can dress it up or down without losing structure:

  • Orange–Cardamom: Zest one orange into the custard and add a pinch of cardamom; finish with icing sugar.
  • Maple–Brown Butter: Brown 1–2 tbsp butter; brush it on hot sticks and drizzle maple.
  • Coconut: Stir a spoon of coconut cream into the custard; sprinkle toasted coconut to finish.
  • Hazelnut: Thin chocolate-hazelnut spread with warm milk for a pourable gloss.
  • Spiced Sugar: Combine cinnamon, a hint of ginger, and nutmeg; toss lightly while hot.

If you lean into crunchy coats (cornflake or graham), reduce custard sugar slightly to avoid tipping into brittle sweetness.


Scaling Up or Down French Toast Sticks Recipe

  • For one: 1 egg + 60–80 ml milk + 2 slices (6 sticks) → air fryer 6–7 minutes total.
  • For two: 2 eggs + ~150 ml milk + 4 slices (12 sticks) → same heat; cook in two rounds.
  • For a crowd: Double the base and use two sheet pans on convection; rotate pans and flip at the 8-minute mark.

Meanwhile, if you’re running a mixed table—vegan, dairy-free, and classic—cook the vegan batch first, followed by gluten-free if needed, then the standard custard last. Separate racks keep everything crisp and tidy.


A Note on Bread, Moisture, and Timing

Bread is a living variable. Even within the same brand, dryness swings with storage and climate. Consequently, your soak time is the dial you turn most. Fresh, soft brioche? Dry slightly longer and dip quickly. Day-old challah? Dip a hair longer. Very dry loaf? Add a tablespoon of milk and extend the soak by a second or two. Ultimately, color and feel tell you more than the clock: aim for caramel edges and a buoyant middle that springs back when pressed.

If you enjoy tinkering, the classic ratio outlined by pros—roughly one egg per ¼–⅓ cup milk—gives you leeway; the granular reasoning in the Serious Eats overview is a useful mental model as you experiment.


Serving Boards and Balanced Plates

Because sticks are sweet-leaning, anchor the plate with freshness or creaminess. Citrus segments and mint keep things bright; a small bowl of salted yogurt reins in syrup. For a sweet-savory spread, add salty nuts or crisp bacon; for a fully plant-based board, go with fruit, maple, and a side of millet ideas for texture variety. If dessert-for-breakfast is the vibe, a warm ribbon of house chocolate syrup and cinnamon apples earns applause every single time.


Quick Reference Cards (Copy/Paste Friendly)

Air Fryer French Toast Sticks Recipe

  • Ingredients (serves 4): 8 thick slices bread; 3 eggs; ¾ cup (180 ml) milk; 1 tbsp sugar; 1 tsp vanilla; ½ tsp cinnamon; pinch salt; butter/oil.
  • Method: Cut each slice into thirds; dry briefly. Whisk custard smooth. Dip 5–7 s/side. Air fry 190°C / 375°F, 6–8 min, flipping halfway. Rest on a rack. Serve immediately.

Oven-Baked French Toast Sticks Recipe

  • Ingredients: Same as above.
  • Method: Heat oven 200°C / 400°F. Line/rack pan; butter lightly. Dip quickly; arrange with space. Bake 12–15 min, flip at 8 min; add 2–3 min for extra crunch. Rest and serve.

Vegan French Toast Sticks (No Egg, No Dairy)

  • Base: Use plant custard from this vegan guide; add 1–2 tsp neutral oil to the mix.
  • Method: Soak briefly; air fry 190°C / 375°F, 6–8 min (flip once) or bake as above; extend a minute if pale. Rack-rest always.

Gluten-Free French Toast Sticks

  • Bread: Choose a sturdy GF loaf with a tight crumb.
  • Method: Dry a touch longer; soak briefly; follow air fryer/oven timings; finish 1–2 min more if needed.

Make-Ahead & Reheat

  • Freeze fully cooked sticks in a single layer; bag when firm.
  • Reheat from frozen: Air fryer 180°C / 356°F, 3–5 min; Oven 200°C / 400°F, 6–8 min on a rack.

Closing Thoughts

Once you’ve made this french toast sticks recipe a couple of times, you’ll feel the controls in your hands: how quickly to dip, when to flip, and exactly how deep a golden you prefer. From there, variations are easy—vegan when you need it, gluten-free for guests, a protein twist for longer mornings, a churro dust when nostalgia calls. And because the methods scale without drama, you can cook a few sticks for a sleepy kiddo or line up two trays for a party brunch without changing anything but the pan.

When you want the plant-based path that just works, lean on Vegan French Toast: 6 Easy Recipes. If you’re curious about the science of ratios and why small tweaks matter, browse the Serious Eats technique explainer for clarity. And whenever you want precise safety numbers, the USDA chart is the last word. Beyond that, trust your senses: the scent of browning butter, the feel of a springy center, and the sound of a crisp edge snapping are the only cues you really need.

FAQs

1) How long do I air fry french toast sticks, and at what temperature?

For a classic french toast sticks recipe, preheat the air fryer to 190°C / 375°F; cook 6–8 minutes total, flipping halfway. Moreover, if the bread is extra thick, add 1–2 minutes until edges are deeply golden and the center springs back.

2) What’s the best oven time and temperature for french toast sticks?

Bake at 200°C / 400°F for 12–15 minutes, turning at the 8-minute mark. Additionally, for an extra-crisp shell, finish 2–3 minutes more; the interior should feel bouncy rather than wet.

3) What is the ideal egg-to-milk ratio for the custard?

Generally, aim for about 1 large egg per ¼–⅓ cup (60–80 ml) milk. Conversely, if using very stale bread, increase milk slightly so the custard stays silky. This balance keeps the french toast sticks recipe tender without turning soggy.

4) How do I keep french toast sticks crispy instead of soggy?

Firstly, dry the bread briefly before dipping. Secondly, dip quickly (5–7 seconds per side), allowing excess custard to drip off. Furthermore, cook with space between sticks and rest them on a wire rack for a minute before serving.

5) Which bread works best for a french toast sticks recipe?

Brioche, challah, and Texas toast consistently shine thanks to sturdy crumbs and gentle sweetness. Nevertheless, thick-cut sandwich bread succeeds if you dry it slightly beforehand.

6) Can I make french toast sticks without eggs?

Yes. Use a vegan custard base (e.g., plant milk plus thickener and flavorings) and proceed with the same timings. Importantly, add a teaspoon of neutral oil to the batter to encourage browning.

7) How do I make dairy-free french toast sticks?

Simply replace milk with almond, oat, or coconut milk at a 1:1 ratio. Additionally, brush or spray the basket/pan lightly with oil to enhance crisp edges, since non-dairy custards brown a touch slower.

8) What if I have no vanilla or cinnamon?

Omit both and rely on butter browning and maple for aroma. Alternatively, use orange zest, cardamom, or a whisper of nutmeg. Notably, the french toast sticks recipe still tastes great with just salt and sugar.

9) How many eggs per slice (or per batch) should I plan?

As a rule of thumb, 1 egg covers 1–2 slices (3–6 sticks) depending on thickness. Accordingly, for 8 slices (about 24 sticks), 3 eggs plus ¾ cup milk is a dependable starting point.

10) How long should french toast sticks cook on each side in a skillet?

Use medium heat and cook about 2–3 minutes per side. Meanwhile, rotate briefly to brown the “third edge”; transfer to a rack so the bottoms don’t steam.

11) Can I freeze french toast sticks? How do I reheat them later?

Absolutely. Freeze fully cooked sticks in a single layer, then bag. Subsequently, reheat from frozen: air fryer 180°C / 356°F for 3–5 minutes, or oven 200°C / 400°F for 6–8 minutes on a rack.

12) What internal cues tell me the sticks are done?

Look for deep golden edges and a springy center that rebounds with a gentle press. Additionally, the custard should not ooze when cut; if it does, cook 1–2 minutes more.

13) How do I scale this french toast sticks recipe for one person or for a crowd?

For one, use 1 egg + 60–80 ml milk and 2 slices (6 sticks). For a crowd, double or triple the base; use two sheet pans and rotate them, flipping at 8 minutes. Likewise, hold finished sticks on a rack in a warm oven.

14) Can I add protein powder without making the texture chalky?

Yes—whisk in 10–15 g unflavoured whey or plant protein per 1–2 eggs, then thin with milk until the custard coats a spoon. However, because added protein browns faster, reduce heat slightly or watch carefully.

15) What are smart gluten-free adaptations?

Choose a dense GF loaf with a tight crumb, dry the sticks a bit longer, and keep the soak brisk. Moreover, add 1–2 minutes after the flip if the surface looks soft; the extra time sets structure.

16) How do I get a “crunch coat” like churro or cereal-crusted sticks?

Immediately after dipping, press sticks lightly into crushed cornflakes or graham crumbs. Afterward, air fry or bake as usual. Gently dust hot sticks with cinnamon sugar to finish if desired.

17) Can I make the custard richer with cream or half-and-half?

Certainly. Replace up to half the milk with heavy cream or half-and-half. Nevertheless, to prevent a greasy feel, keep cook temperature moderate and avoid over-soaking.

18) What’s the easiest way to avoid eggy streaks in the batter?

Whisk thoroughly until the custard is homogenous and glossy. Additionally, stir between batches, since spices can settle; a smooth custard gives even browning.

19) How do I keep the flavor balanced if I’m using very sweet dips?

Reduce sugar in the custard by a teaspoon and rely on caramelization for depth. Ultimately, the french toast sticks recipe should taste gently sweet on its own, with sauces providing the accent.

20) Can I make french toast sticks ahead for brunch service?

Yes. Cook completely, cool on a rack, and refrigerate up to 4 days. Then, just before serving, re-crisp: air fryer 180°C / 356°F for 3–4 minutes or oven 200°C / 400°F for 5–7 minutes.

21) What pan fat is best—butter or oil?

Butter delivers aroma and browning; a small blend with neutral oil raises the smoke point. Consequently, use butter for flavor and a touch of oil for resilience, especially on the second batch.

22) How do I adapt the french toast sticks recipe for very fresh, soft bread?

Dry the slices lightly in a low oven for 2–3 minutes per side, cool 1 minute, then dip quickly. Conversely, if the loaf is quite dry, increase milk slightly and extend the soak by a second or two.

23) What toppings pair well without overwhelming the texture?

Thick yogurt with a pinch of salt, warm berries, cinnamon apples, peanut-maple, or a restrained chocolate drizzle. Additionally, finish with citrus zest to brighten richer combinations.

24) How do I know I’ve nailed the texture every time?

Color, feel, and sound guide you: amber edges, a gentle spring in the center, and a faint crackle after a brief rack rest. In short, when those cues align, your french toast sticks recipe is spot on.

Posted on 4 Comments

Egg-cellent Seasoning Options for Flavorful Eggs

Egg-cellent Seasoning Secrets

Eggs are the chameleons of the kitchen—simple, nutritious, and endlessly adaptable. But let’s be honest: plain eggs can get boring fast. What transforms basic eggs into crave-worthy bites? Seasoning! In this guide, we’ll explore classic and trending seasonings, global flavors, pro techniques, and real user-tested combos—all to help you level up your egg game, whether you’re a weekday cook or a weekend brunch boss.


Why Seasonings Matter for Eggs

Eggs have a mild flavor and a rich texture, acting as a blank canvas for spices, herbs, and condiments. The right seasoning can:

  • Bring out the eggs’ natural flavor
  • Add texture and color
  • Elevate simple dishes to gourmet experiences
  • Keep breakfasts exciting and varied

Whether you love soft-scrambled, fried, boiled, or baked eggs, the right seasoning makes all the difference.


Classic Seasonings: Simple, Reliable, and Delicious

Let’s start with the basics that never disappoint:

  • Salt & Pepper: The foundation of every great egg dish. Try kosher salt for its clean taste and fresh-cracked black or white pepper.
  • Paprika: Adds color and a mild, smoky warmth. Smoked paprika is especially good on fried or deviled eggs.
  • Garlic Powder & Onion Powder: Give savory depth—perfect for scrambled eggs and omelets.
  • Chili Flakes or Cayenne: For a gentle heat that wakes up your taste buds.

Pro Tip:
For scrambled eggs, add seasonings before cooking for even distribution. For fried or boiled eggs, sprinkle immediately after cooking.


Trending Now: Everything Bagel & More

In 2025, “egg flights”—six eggs, six toppings—are a social media sensation. People are getting creative, topping boiled or fried eggs with everything bagel seasoning, kimchi, hot honey, truffle salt, or even balsamic-mozzarella. Everything bagel seasoning, with its mix of garlic, sesame, onion, and poppy seeds, adds crunch and flavor. Try frying your eggs with a sprinkle of this blend to crisp up the bits!

User Story:
“Soft scramble them with sour cream, sharp cheddar, and everything bagel seasoning. Legit my favorite way to eat eggs.” – Reddit user


Global Flavors: Take Your Tastebuds on a Trip

Why limit yourself to salt and pepper? Eggs are a global staple, and so are their seasonings:

  • Za’atar (Middle Eastern): Thyme, sesame, sumac—delicious on poached or hard-boiled eggs with olive oil.
  • Shichimi Togarashi (Japanese): Chili, sesame, nori, and orange peel—sprinkle over sunny-side eggs for zing.
  • Dukkah (Egyptian): A mix of nuts, seeds, and spices. Try on sliced boiled eggs.
  • Curry Powder or Garam Masala (Indian): Add warmth and depth to scrambles and omelets.
  • Adobo/Sazón (Latin): Garlic, oregano, cumin, and more for a vibrant twist.

Quick Fix:
Toast a slice of bread, top with mashed avocado, a poached egg, and a dusting of za’atar. Thank us later.


Creative Add-Ons & Modern Favorites

If you want to get truly egg-citing, try these:

  • Everything Bagel Seasoning: The reigning champion for fried and boiled eggs.
  • Old Bay: Popular with home cooks, especially for deviled eggs or scrambled with a touch of hot sauce.
  • Kala Namak (Black Salt): Adds a sulfurous, “eggy” flavor—especially loved in vegan tofu scrambles.
  • Cheese and Dairy Mix-ins: Stir in a spoonful of sour cream, cottage cheese, or crème fraîche for creamy scrambled eggs.
  • Fresh Herbs: Chives, parsley, dill, and tarragon bring color and freshness.
  • Kimchi, Salsa, or Hot Sauce: Add a punch to eggs, especially for breakfast tacos or bowls.
  • Umami Boosters: Finish eggs with a sprinkle of bonito flakes, miso, or even truffle oil for extra savoriness.

Pro Techniques from Real Cooks

  • Salt Early: Whisk salt into eggs before cooking for fluffier texture and better moisture. Let the mixture sit for a minute if you can.
  • Watch the Pan: Use moderate heat and enough fat (butter/oil) for creamy, non-rubbery eggs—especially on cast iron.
  • Season as You Go: For fried eggs, season as soon as they hit the pan for best flavor.
  • Don’t Overcrowd: Add delicate herbs at the end to preserve their brightness.

Reddit Wisdom:
“I add seasoning to scrambled eggs before cooking. I add seasoning to fried eggs as soon as I get them in the pan.”


Practical Ideas: Seasoned Eggs, Six Ways

  1. Classic Scramble: Salt, pepper, chives, with a touch of parmesan.
  2. Southwest Kick: Cumin, chili powder, cheddar, and salsa.
  3. Asian-Inspired: Shichimi togarashi, scallions, a dash of soy sauce.
  4. Herby Omelet: Fresh dill, parsley, and a sprinkle of feta.
  5. Creole Deviled Eggs: Replace salt with Tony Chachere’s Creole Seasoning, add a dash of hot sauce.
  6. Egg Flight: Six halves of boiled eggs, each topped with a different seasoning (Old Bay, everything bagel, dukkah, za’atar, harissa, black pepper).

Reader Challenge: Your Egg-Seasoning Adventure

Ready to experiment? Here’s a fun challenge for your next brunch or meal prep:

  1. Pick 3–6 seasonings or blends from this list.
  2. Cook a batch of eggs (scrambled, fried, boiled).
  3. Top each portion with a different seasoning—from classic to wild.
  4. Snap a photo and taste test—share with friends or on social media (tag #EggcellentSeasoning!).
  5. Record your favorites and try them in different dishes (avocado toast, breakfast bowls, salads).

Closing Thoughts

Eggs are a blank canvas for flavor. With the right seasonings—classic, trendy, or global—you can turn the simplest meal into something memorable. Don’t be afraid to experiment and have fun! The world of egg seasonings is vast, and the best discovery might just be your next breakfast.


What’s your favorite egg seasoning or combo? Share your tips and results below!


Sources: Food & Wine, Better Homes & Gardens, Reddit r/Cooking, Simply Recipes, Carolina Ingredients, and more food trend experts from 2025.

10 FAQs for Egg Seasoning Options

1. What’s the best time to add seasoning to eggs?
For scrambled eggs, add salt and spices during whisking before cooking for even flavor and fluffier texture. For fried eggs, season as soon as they hit the pan or immediately after. For boiled eggs, season just before serving or use seasoning blends in fillings for deviled eggs.


2. What are the healthiest seasonings to use on eggs?
Fresh herbs (like parsley, chives, dill), spices (turmeric, paprika, black pepper), and low-sodium blends are healthiest. They add antioxidants and flavor without extra calories or sodium. Avoid overusing salty mixes if watching your intake.


3. What’s the best seasoning for deviled eggs?
Classic choices include paprika, mustard, and chives. Trendy options are everything bagel seasoning, Creole seasoning (like Tony Chachere’s), Old Bay, or smoked paprika. Mix into the yolk filling or sprinkle on top for flavor and color.


4. Can I use the same seasoning for scrambled, fried, and boiled eggs?
Yes, but some seasonings work best in specific dishes. Everything bagel, paprika, or herbs are versatile, while blends with crunchy bits (like dukkah) shine as toppings on boiled or fried eggs rather than scrambled.


5. How do I keep eggs from tasting bland without adding too much salt?
Use herbs, spices, citrus zest (lemon/lime), black pepper, or umami-rich add-ins like nutritional yeast, miso, or a dash of soy sauce. These boost flavor without much sodium.


6. Are there seasoning blends for vegan egg alternatives?
Yes! Kala namak (black salt) gives vegan scrambles an “eggy” flavor. Combine with turmeric, garlic powder, and nutritional yeast for savory depth in tofu or chickpea “eggs.”


7. What global seasonings pair well with eggs?
Try za’atar, shichimi togarashi, curry powder, dukkah, harissa, or adobo. These bring global flair and work in scrambles, omelets, or as a topping for poached and boiled eggs.


8. Can I make my own egg seasoning blend?
Absolutely. Start with a base of kosher salt, pepper, garlic powder, onion powder, and paprika. Add herbs or spice blends to taste. Store in a small jar and shake before use.


9. What’s the secret to fluffy, restaurant-style scrambled eggs?
Salt your eggs when whisking, use a little milk or cream (optional), and cook slowly over medium-low heat, stirring gently. Butter or oil helps prevent sticking and adds richness.


10. What’s a quick way to elevate eggs for guests or brunch?
Create an “egg flight”—top boiled or fried eggs with different seasonings (everything bagel, dukkah, smoked paprika, kimchi, hot honey, etc.). Serve with toast or salad for a colorful, flavorful spread.

Posted on 5 Comments

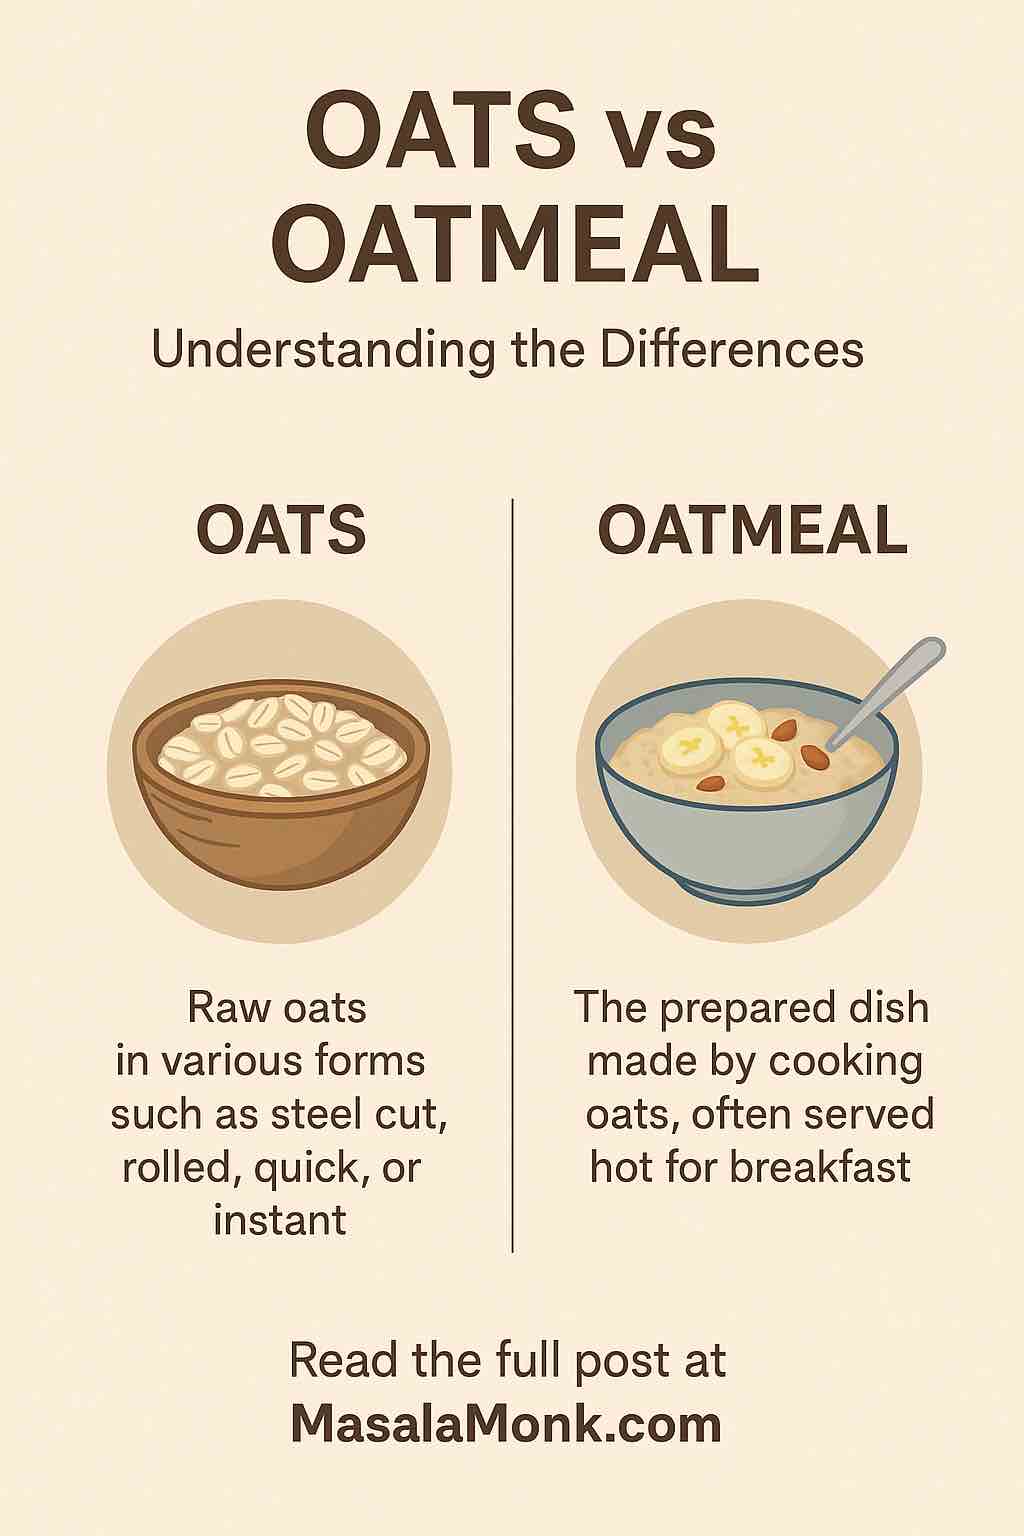
Oats vs Oatmeal: What’s the Difference?

OATS VS OATMEAL

If you’ve ever wandered the cereal aisle, flipped through a healthy cookbook, or browsed breakfast recipes online, you’ve probably seen “oats” and “oatmeal” used in ways that seem interchangeable—or completely different. Sometimes you buy “oats,” sometimes you’re told to “make oatmeal.” So what do these words actually mean, how do they relate, and does it matter for your cooking, health, or grocery list?
Let’s break down the differences and clear up the confusion—once and for all.


Oats: The Starting Point of Everything

Oats are a whole grain, the edible seed of the oat plant (Avena sativa).
Before they ever reach your kitchen, oats go through several stages:

  • Harvested from the field
  • Cleaned and hulled (removing inedible outer layer)
  • Processed into different forms for the market

All oat products start with the oat groat—the unprocessed, whole grain. From here, how they’re cut, steamed, or rolled determines what kind of oat you end up with.
If you’re curious about all the ways oats are processed and what types you’ll find in stores, check out our Ultimate Guide to Oats: Types, Nutrition, and Differences Explained. It covers steel cut, rolled, quick, and instant oats in detail.


What Is Oatmeal? (And Why the Term Changes by Country)

The word oatmeal can mean two things, depending on where you are and who you ask:

  1. In the US, Canada, and India: “Oatmeal” almost always refers to the hot, cooked porridge made from oats (any type).
  2. In the UK, Ireland, and some other countries: “Oatmeal” can also mean finely ground oats used in baking, coatings, and sometimes for porridge.

So, “oatmeal” might mean the dish (cooked oats, usually eaten hot for breakfast) or, in some cases, a specific form of processed oat.

  • When you see a recipe for “oatmeal cookies,” it means cookies made with rolled oats, not ground oats.
  • If you see “oatmeal” on a UK or European ingredient list, check if it means ground oats or cooked porridge.

If you want to know exactly which oat type makes the best oatmeal (dish), see Steel Cut Oats vs Rolled Oats: Nutrition, Taste, Cooking & More, which explains the texture and flavor differences in real-life bowls.


When Do You Use “Oats” and When “Oatmeal”?

  • Oats = The raw ingredient in all its forms: steel cut, rolled, quick, instant, and even whole groats.
    Example: “Add 1 cup of oats to your batter.”
  • Oatmeal = Most often the prepared porridge (the dish) you eat for breakfast.
    Example: “Oatmeal with bananas and almonds is my favorite breakfast.”

But there’s overlap:

  • Some packaging (especially in the UK) uses “oatmeal” to describe ground oats or even instant oats.
  • Some recipes use “oats” when they mean “oatmeal” as the finished dish.

If you ever wonder what type a recipe wants, refer to our Can You Substitute Old-Fashioned Oats for Rolled Oats? for clarity on the most commonly used oats in baking and porridge.


Types of Oats Commonly Used for Oatmeal

You can make oatmeal (the dish) with nearly any type of processed oat.
But the oat type you choose changes everything:

  • Steel cut oats: Chewy, hearty, and nutty; takes longest to cook.
    (See the in-depth taste and nutrition comparison: Steel Cut Oats vs Rolled Oats)
  • Rolled oats (old-fashioned oats): Creamy and classic; ready in 5–10 minutes.
  • Quick oats: Very soft, fast to cook, good for smoother bowls or quick baking.
  • Instant oats: Silky, ready in seconds, often pre-flavored (read the labels!).
    (Want to know how quick oats and instant oats really compare? Are Quick Oats the Same as Instant Oats?)

For most traditional oatmeal (porridge) recipes, rolled oats are the most popular and versatile. If you want a softer or mushier bowl, use quick or instant oats. For a heartier, longer-cooking meal, choose steel cut.


Oats in Baking vs. Oatmeal in Baking

  • If a recipe calls for oats in baking (like granola bars, cookies, or bread), it usually means rolled oats or old-fashioned oats.
  • If it says “oatmeal” as an ingredient (sometimes seen in older British or Irish recipes), it might be referring to ground oats or oat flour.

For modern recipes, the safest bet is to use rolled oats unless the recipe says otherwise.
Wondering if you can swap quick oats, instant oats, or rolled oats in baking? Our post on Are Quick Oats the Same as Instant Oats? covers when substitutions work and when they’ll change your texture.


Nutrition: Oats vs. Oatmeal

Whether you eat oats raw (in muesli or smoothies) or as oatmeal (cooked porridge), you’re getting a nutrient-packed whole grain:

  • Oats: Naturally high in fiber (especially beta-glucan), protein, vitamins, and minerals.
  • Oatmeal: The nutrition of the finished dish depends on your oat type and what you add (milk, water, sweeteners, fruit, nuts, etc.).

All unsweetened oat types—steel cut, rolled, quick, and instant—are naturally healthy. The biggest nutritional difference comes when you buy flavored instant oatmeal, which can be high in sugar and sodium.
Learn how all oat types compare for health and diet in our Ultimate Guide to Oats.


Real-Life Examples and International Variations

  • In the US and Canada: “Oatmeal” always means the hot breakfast bowl (no matter the oat type), and “oats” are the raw ingredient.
  • In the UK/Ireland: “Oatmeal” often means ground oats; “porridge oats” or “rolled oats” are for making breakfast bowls.
  • In India: “Oats” is the more common term for the ingredient, while “oatmeal” is usually the finished dish, often made with rolled or quick oats.

When following recipes from different countries, always double-check which oat type is being used. Our main Guide to Oats: Types, Nutrition, and Differences Explained has a section on UK, US, and Indian terminology, and can help you buy the right ingredient every time.


Frequently Asked Mistakes and Kitchen Tips

  • Don’t confuse old-fashioned oats and rolled oats—they are the same! (Need more? Can You Substitute Old-Fashioned Oats for Rolled Oats?)
  • For classic oatmeal, use rolled oats for the best blend of creaminess and texture.
  • Avoid using instant oats in recipes where you want a chewy texture—they dissolve quickly and can turn bakes to mush.

If you’re not sure about the best oats for porridge, baking, or meal prep, see our popular deep dives:


Conclusion: How to Choose (and Talk About) Oats and Oatmeal

Oats is the umbrella term for the raw grain in all its processed forms: steel cut, rolled, quick, instant, or even whole groats.

Oatmeal is most often the comforting, nourishing bowl of porridge made by cooking oats, though in some countries it can mean ground oats as well.

Understanding these terms (and regional differences) helps you shop smarter, follow recipes more confidently, and get the best results in your kitchen.
And if you want to know how to use each oat for every recipe, or discover which is truly healthiest, don’t miss our full Ultimate Guide to Oats: Types, Nutrition, and Differences Explained.


Ready to take your oats knowledge further?
Explore our most-read posts:

Have a question, or a favorite oat recipe? Drop it in the comments—we’d love to hear from you!


10 FAQs – Oats vs Oatmeal: What’s the Difference?

1. Are oats and oatmeal the same thing?

No. Oats are the raw grain in various forms (steel cut, rolled, quick, instant), while oatmeal usually refers to the hot porridge made by cooking oats.


2. Why do some recipes say “oatmeal” when they mean “oats”?

This is often due to regional differences or old-fashioned language. In the UK and Ireland, “oatmeal” can mean ground oats, while in the US, it often means the cooked dish.


3. What type of oats should I use to make oatmeal?

Rolled oats (old-fashioned oats) are most common for classic oatmeal. Steel cut oats make a chewier porridge, and quick/instant oats create a softer, creamier bowl.


4. Can I use any type of oats to make oatmeal?

Yes, but the texture and cook time will vary. Steel cut oats take longest and are chewiest; rolled oats are classic and creamy; quick/instant oats cook fastest and are softest.


5. Is there a nutrition difference between oats and oatmeal?

The nutrition is similar. The difference comes from what you add to your oatmeal (milk, water, sugar, fruit, etc.) or if you use pre-flavored instant oats.


6. Is oatmeal always hot, or can it be cold?

Oatmeal is traditionally hot, but overnight oats are a popular cold version made with rolled oats soaked in milk or yogurt.


7. What is “oatmeal” in UK recipes?

In the UK, “oatmeal” often refers to ground oats, not the cooked porridge. Always check the recipe context.


8. Is it possible to use oatmeal (the dish) in baking?

No. Most baking recipes use dry oats (usually rolled oats), not cooked oatmeal.


9. Can I substitute oats for oatmeal in recipes?

Only if the recipe is clear about which form it means. If it says “oatmeal” but lists it with dry ingredients, it probably means ground oats or rolled oats.


10. Which is healthier: oats or oatmeal?

Both are healthy. Oats are the base ingredient; oatmeal is simply cooked oats. Just watch what you add for flavor or sweetness.

Posted on Leave a comment

How to Choose the Best Foods to Break a Fast for Optimal Fat Loss and Sustained Energy

Break a Fast for Optimal Fat Loss and Sustained Energy

Intermittent fasting has swept the health and fitness world in recent years—and for good reason. Study after study demonstrates that time-restricted eating and fasting can help with fat loss, metabolic health, cognitive function, and even longevity. But here’s a question that stumps even seasoned fasters:

“What’s the BEST way to break my fast for maximum fat loss and all-day energy?”

If you’ve ever agonized over this—or if you’ve ever felt weirdly sleepy, bloated, or ravenous after a meal that was supposed to leave you energized—you’re not alone. The truth is, how you break your fast matters just as much as when you fast. The latest research shows that your first meal after fasting can “set the tone” for your metabolism, fat burning, and energy for the rest of the day.

In this detailed guide, we’ll dive deep into the science and practice of breaking a fast for optimal fat loss and sustained energy. You’ll learn what actually happens in your body during a fast, which foods and combinations are best, common mistakes to avoid, and get real-life meal examples you can try today.


Section 1: The Science of Fasting—Why Breaking the Fast Matters

When you fast—whether it’s a simple overnight fast, intermittent fasting (like 16:8 or 18:6), or even an extended fast—your body undergoes major metabolic shifts:

  • Glycogen stores are depleted, and your body begins to mobilize fat for fuel.
  • Insulin levels drop, making your body more insulin-sensitive (a good thing for fat loss).
  • Autophagy (cellular cleaning) ramps up, especially after 16–24 hours.

But when you break your fast, your body becomes like a sponge—primed to absorb nutrients, restore glycogen, and recalibrate your metabolism for the hours ahead. The type of food you eat first can either:

  • Sustain fat burning and stable energy, or
  • Trigger a sharp blood sugar spike, leading to fatigue, hunger, and fat storage.

Why the First Meal is Critical

Research in 2025 confirms that:

  • The composition of your first meal after fasting determines your insulin and glucose response for hours.
  • Early time-restricted eating (eating more calories earlier in the day) leads to greater fat loss and metabolic benefits compared to late-night eating .
  • Protein and fat, consumed first, can dampen blood sugar spikes and keep you in a “fat-burning” mode longer .

Section 2: The Biggest Mistakes People Make When Breaking a Fast

Before we get practical, let’s bust a few myths and mistakes:

Mistake 1: Eating High-Sugar Foods or Juices First

Your gut and metabolism are sensitive after fasting. Starting with sweet foods, refined carbs, or fruit juices causes rapid glucose absorption, which spikes insulin and halts fat burning.

Mistake 2: Overeating or Bingeing

Many people feel ravenous after fasting and overdo it. Research shows this can cause bloating, GI distress, and a crash in energy as your body struggles to process a large meal all at once.

Mistake 3: Breaking Fast with “Fast” Foods

Ultra-processed foods (bars, pastries, “breakfast cereals”, etc.) are tempting but often loaded with sugar, unhealthy fats, and additives that sabotage metabolic health.

Mistake 4: Ignoring Protein and Healthy Fats

Meals that are too carb-heavy (even healthy carbs) can leave you hungry again soon. Protein and fats are key for satiety and energy.


Section 3: Research-Backed Principles for Breaking a Fast

Let’s translate the latest science into practical, simple rules:

1. Start with Protein

  • Protein triggers a lower insulin response than carbs, supports muscle maintenance, and signals satiety to your brain.
  • 2024–2025 studies show that 25–35g of high-quality protein in your first meal after fasting can help maintain lean mass while promoting fat loss.

2. Add Healthy Fats

  • Healthy fats (avocado, nuts, olive oil, fatty fish, seeds) help slow the absorption of nutrients and keep blood sugar stable.
  • They also provide longer-lasting energy, especially when you’re still using fat for fuel.

3. Include Fiber-Rich, Low-Glycemic Carbs

  • Fiber slows digestion and helps avoid sharp glucose spikes.
  • Low-GI carbs—like berries, leafy greens, legumes—support gut health and provide steady energy.

4. Sequence Meals Properly

  • After longer fasts (20+ hours), start gently: bone broth, a few nuts, or a small protein portion.
  • Wait 15–30 minutes, then eat a full, balanced meal.

5. Hydrate and Replenish Electrolytes

  • Water, herbal tea, or a pinch of sea salt can help offset any dehydration from fasting.
  • Especially important after 16+ hour fasts.

Section 4: What the Latest Research (2024–2025) Says

Let’s dig into new findings:

A. Intermittent Fasting Works—But Meal Timing is Key

A 2025 Annals of Internal Medicine study found that people practicing 4:3 fasting (three “fasting” days a week) lost more weight and improved their blood pressure, cholesterol, and glucose than those simply cutting daily calories . Interestingly, adherence (how well people stuck to the plan) was higher in the fasting group.

B. Early Eating Windows Enhance Fat Loss

Multiple studies (Spain, Iran, UK) confirm that eating most of your calories before 3–4 PM boosts fat loss, insulin sensitivity, and even mood .

C. Protein & Fat for Stable Energy

Research published in Nutrients (June 2025) demonstrates that starting your eating window with protein and fat (instead of just carbs) reduces the risk of reactive hypoglycemia (blood sugar crashes) and increases satiety throughout the day.

D. Fasted Exercise = More Fat Burn

A May 2025 clinical trial shows that people who work out in a fasted state (especially morning) burn more fat and have better triglyceride responses post-meal.


Section 5: Practical Steps—How to Break a Fast for Fat Loss & Energy

Let’s pull it all together. Here’s a step-by-step process you can follow, whether you’re fasting for 14 hours or doing occasional 24-hour fasts.

Step 1: Hydrate

  • Drink 8–16 oz (250–500 ml) of water upon waking and before your first meal.
  • Add a pinch of Himalayan salt or electrolyte powder if you’ve been fasting longer than 16 hours.

Step 2: Ease In (For Long Fasts)

  • If you fasted 20+ hours, start with something gentle:
    • A cup of bone broth
    • A few almonds or walnuts
    • 1 boiled egg

Step 3: Build Your Main Meal

  • Protein (25–35g):
    • 3–4 eggs
    • Greek yogurt or cottage cheese (unsweetened)
    • Chicken, turkey, fish, or tofu
  • Healthy Fat (15–25g):
    • 1/2 avocado
    • 1–2 tbsp olive oil
    • A small handful of nuts
  • Fiber/Low-GI Carbs (10–20g):
    • 1 cup berries
    • 2 cups spinach, kale, broccoli, or other non-starchy vegetables
    • 1/2 cup legumes (chickpeas, black beans) if tolerated

Optional: Add fermented foods (sauerkraut, kimchi, kefir) for gut health.

Step 4: Eat Slowly, Chew Well

Your digestive system is “waking up” after a break—give it time to signal fullness.

Step 5: Monitor Your Energy and Hunger

  • You should feel satisfied but not stuffed.
  • Energy should remain steady for 3–5 hours after eating.

Section 6: Sample Meal Ideas to Break Your Fast

Example 1: The “Power Plate”

  • 3 eggs scrambled with spinach and tomatoes (protein + fiber)
  • 1/2 avocado (healthy fat)
  • Small bowl of berries (low-GI carbs)
  • Sprinkle of pumpkin seeds (extra minerals and crunch)

Example 2: Savory Yogurt Bowl

  • 1 cup Greek yogurt (unsweetened, high protein)
  • 1 tbsp chia seeds + 1 tbsp walnuts (fiber & fat)
  • 1/2 cup mixed berries
  • Dash of cinnamon and a sprinkle of salt

Example 3: Simple Lunch-Style Break-Fast

  • 4 oz grilled chicken breast
  • 1–2 cups mixed salad greens + cherry tomatoes, cucumber, bell pepper
  • 2 tbsp olive oil vinaigrette
  • Small handful of almonds

Example 4: Vegan/Plant-Based

  • 1 cup cooked lentils with sautéed kale and red onion
  • Drizzle of tahini
  • Side of fresh orange slices or berries

Section 7: Foods to Avoid When Breaking a Fast

  • Sugary foods and drinks: Fruit juice, sweetened yogurt, pastries, candy.
  • Refined grains: White bread, white rice, most breakfast cereals.
  • Ultra-processed snacks: Chips, bars, crackers made with refined flour and oils.
  • Large fatty meals: (especially if fasting >24 hours) Too much fat can cause GI upset; add fats gradually.
  • Alcohol: Rapidly absorbed after fasting, impairs metabolism.

Section 8: What About Coffee, Supplements, and Other Diets?

Can I break my fast with coffee?

  • Black coffee is fine during a fast and won’t break it. To break your fast, pair coffee with a protein-rich meal or add a splash of unsweetened milk/cream.

Should I take supplements when breaking a fast?

  • Magnesium, potassium, and sodium are helpful if you fast >16 hours.
  • Multivitamins can be taken with your meal for best absorption.

What if I’m keto, paleo, or plant-based?

  • The same principles apply! Focus on protein, healthy fats, and fiber.
  • For keto: Stick to leafy greens and low-carb veggies; avoid grains/legumes.
  • For plant-based: Choose tofu, tempeh, lentils, beans as protein; add nuts and seeds for fat.

Section 9: Myth-Busting—Breaking a Fast

Myth: “Any calorie breaks my fast.”
Fact: Most metabolic benefits of fasting (fat burning, autophagy) aren’t reversed by a few calories—especially from protein or fat. However, carbs (especially sugar) rapidly end the fasted state.

Myth: “Fasting means skipping breakfast.”
Fact: Breakfast just means “breaking the fast”—the time of day is less important than the quality and timing of your first meal.

Myth: “Fruit juice is a healthy way to break a fast.”
Fact: Juice is mostly sugar with little fiber; it spikes blood sugar and halts fat burning.


Section 10: The Takeaway—A Simple Action Plan

To break your fast for optimal fat loss and sustained energy:

  1. Hydrate first.
  2. Prioritize protein (25–35g in your first meal).
  3. Add healthy fats for satiety and slow energy.
  4. Choose low-GI, fiber-rich carbs (berries, greens, legumes).
  5. Eat most calories earlier in the day—avoid late-night meals.
  6. Move your body—try a fasted morning walk or workout.
  7. Monitor your body—adjust portions and macros to your energy and hunger.

Section 11: Your Next Steps—A Week of Break-Fast Meals

To make it easy, here’s a simple 7-day “break-fast” meal plan you can rotate:

DayMeal Example
Monday3 eggs + spinach, tomato, olive oil + ½ avocado + berries
TuesdayGreek yogurt + chia + walnuts + berries + sprinkle of hemp seeds
WednesdayTofu scramble + kale + bell pepper + salsa + ½ avocado
ThursdayChicken breast + arugula salad + olive oil + pumpkin seeds
FridayCottage cheese + sliced cucumber + olive oil + cherry tomatoes
SaturdayLentil stew + broccoli + tahini drizzle
Sunday2 boiled eggs + small apple + almond butter

Adjust portion sizes for your goals and preferences.


Conclusion

Fasting can be a powerful tool for fat loss, health, and focus—but only if you break your fast wisely. New science shows the first foods you eat matter: protein, healthy fats, and fiber-rich carbs help you sustain energy, avoid hunger, and keep burning fat all day long.

Start slow, choose real foods, and listen to your body. The results? More energy, better moods, and—if that’s your goal—sustained, healthy fat loss.

Ready to try it? Let me know your favorite “break-fast” meal or questions in the comments!

If you enjoyed this post, share it with your friends—or try one of the meals above and tag us with your results!

10 Frequently Asked Questions (FAQs)

1. What should I absolutely avoid when breaking a fast?
Avoid sugary foods (like juice, pastries), refined grains (white bread, most cereals), and ultra-processed snacks. These spike your blood sugar, trigger hunger, and halt fat burning.

2. Is it okay to break a fast with fruit?
Whole fruit is better than fruit juice, but keep portions small and combine with protein/fat to blunt blood sugar spikes. Berries or half an apple with nuts or Greek yogurt work well.

3. Can I drink coffee or tea while fasting or to break my fast?
Black coffee and unsweetened tea are fine during fasting. To break your fast, enjoy them with your meal, but avoid adding sugar or high-calorie creamers.

4. How much protein should I aim for in my first meal after fasting?
Aim for 25–35 grams of high-quality protein (about 3–4 eggs, 1 cup Greek yogurt, or a palm-sized portion of meat/fish).

5. Should I eat carbs in my first meal after fasting?
Include low-glycemic, fiber-rich carbs like berries, legumes, or vegetables. Avoid high-sugar or starchy carbs when breaking your fast.

6. Can I break a fast with a workout shake or bar?
Most commercial shakes and bars are high in sugar and low in nutrients. If using, choose one with no added sugars, moderate protein, and healthy fats.

7. What’s the best time of day to break my fast?
Early morning to midday (e.g., 7–10 AM) aligns best with your body’s circadian rhythms and supports optimal fat loss and energy.

8. What if I feel weak or dizzy after breaking a fast?
This may be due to dehydration or rapid blood sugar changes. Hydrate before eating, eat slowly, and ensure you include some healthy fats and protein.

9. How can I break a fast if I follow a vegan or plant-based diet?
Opt for tofu, tempeh, lentils, beans, nuts, and seeds for protein and fat. Pair with leafy greens or non-starchy vegetables.

10. Will breaking my fast with fat (like bulletproof coffee) keep me in fat-burning mode?
Adding only fat (e.g., butter/MCT oil in coffee) provides energy but doesn’t offer protein or fiber. For best results, combine fats with protein and fiber for satiety and metabolic health.