This egg muffins recipe is for the mornings when you want breakfast handled before the day gets loud. The muffins are soft, savory, protein-rich, and easy to reheat, with tender centers, lightly cheesy edges, and enough filling to feel like a real breakfast instead of plain baked eggs.
If your past egg muffins turned watery, rubbery, stuck to the pan, or collapsed into dense, disappointing little pucks, this version fixes the usual problems. The ratio is simple, the fillings are controlled, and the bake is gentle enough for meal prep.
If your last batch failed, jump straight to watery egg muffin fixes, rubbery texture fixes, or sticking and pan-release tips.
This recipe for breakfast egg muffins uses a reliable base formula: 10 eggs, a little dairy, controlled fillings, a 350°F oven, and a 3/4-full muffin cup. The main batch uses cheddar, bell pepper, cooked spinach, and your choice of cooked bacon, sausage, ham, or mushrooms. From there, you can change the fillings without changing the ratio.
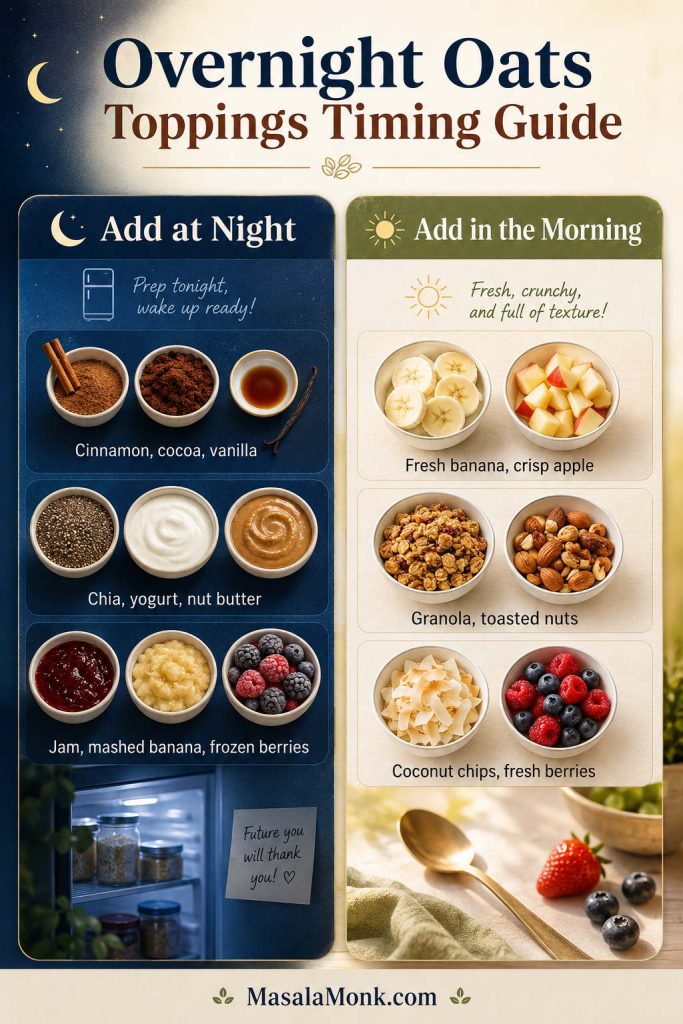
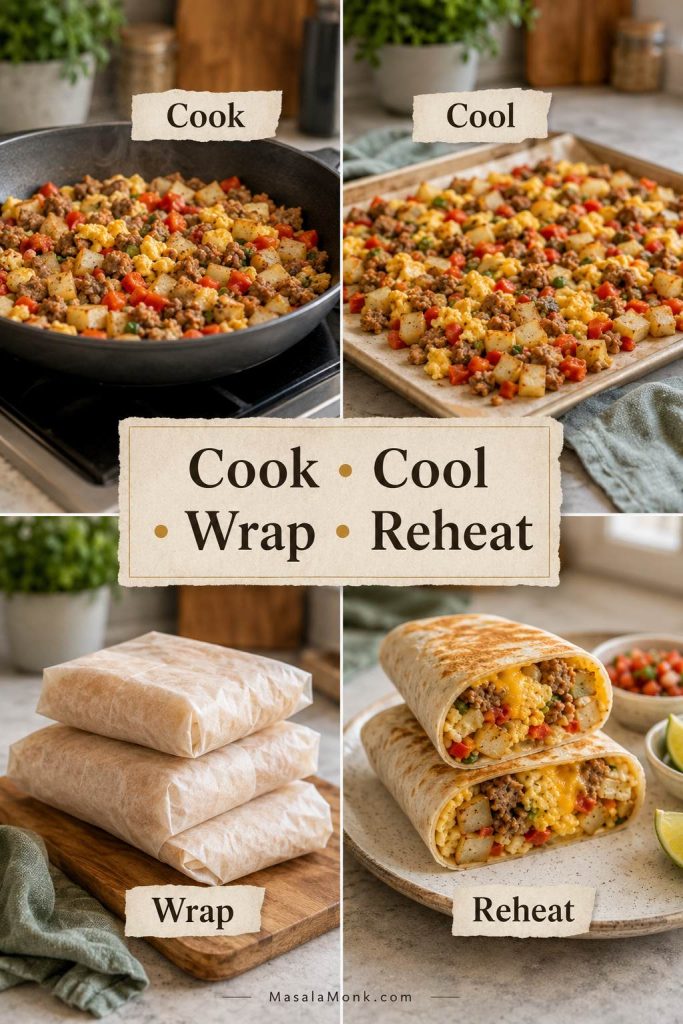
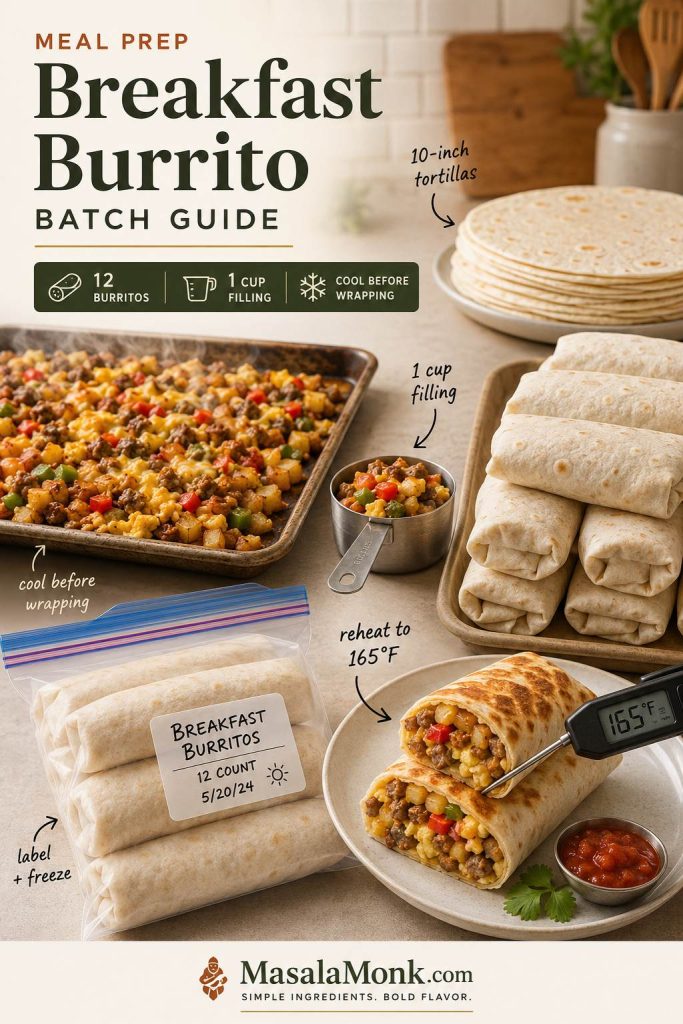
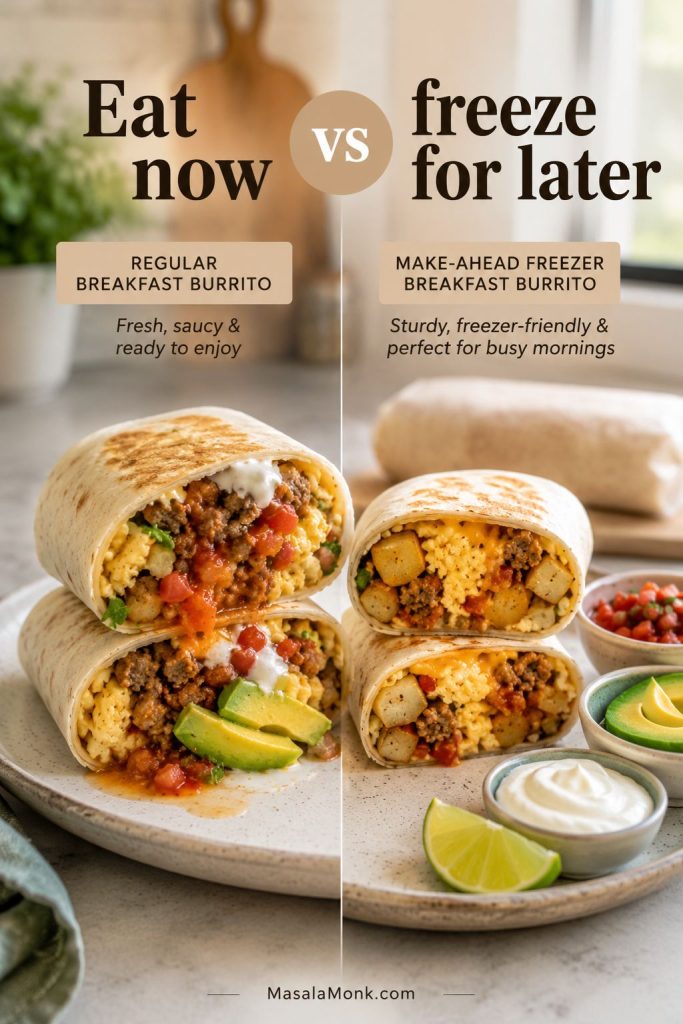
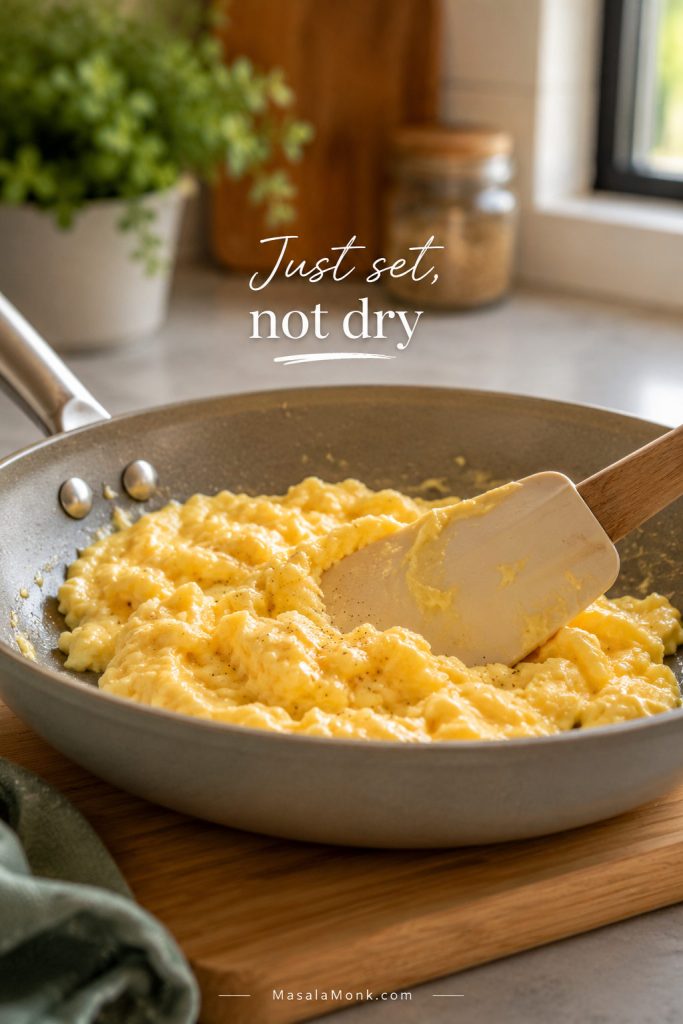
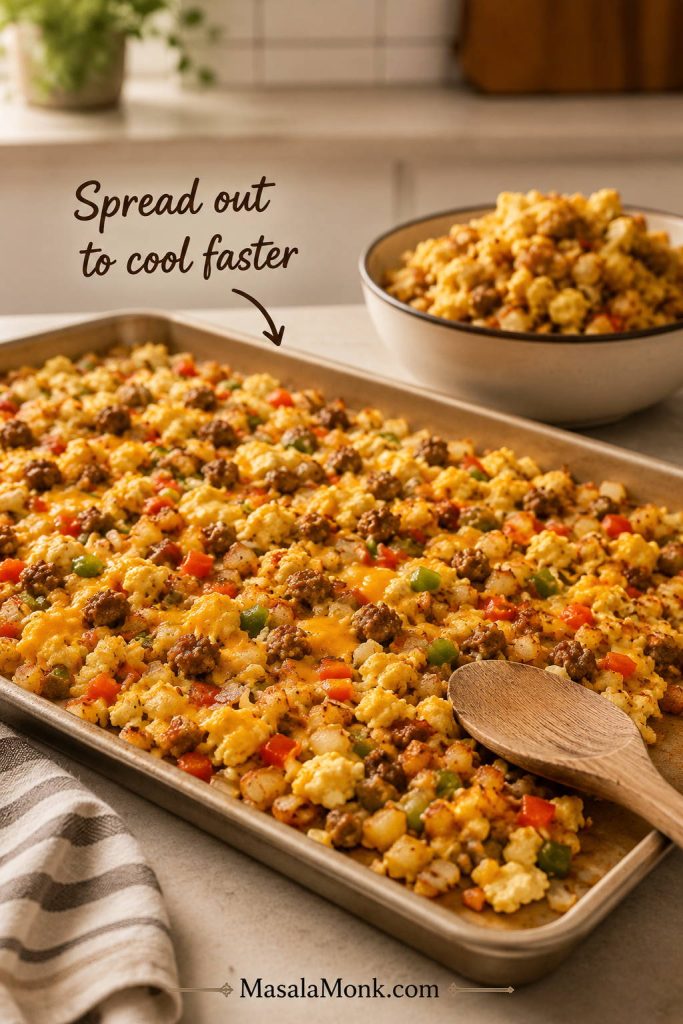
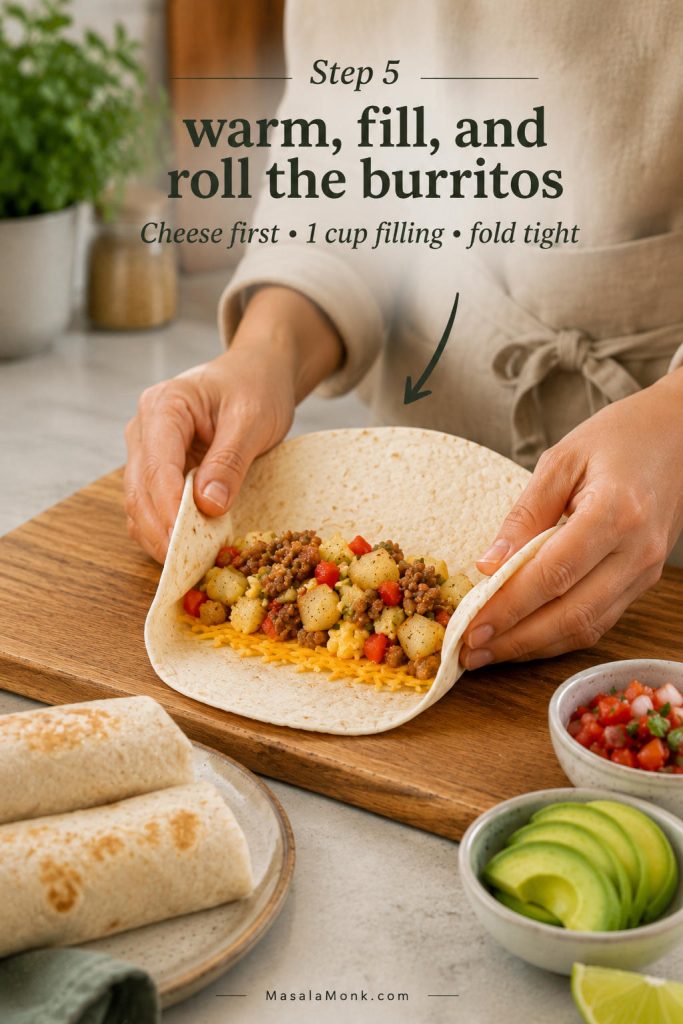
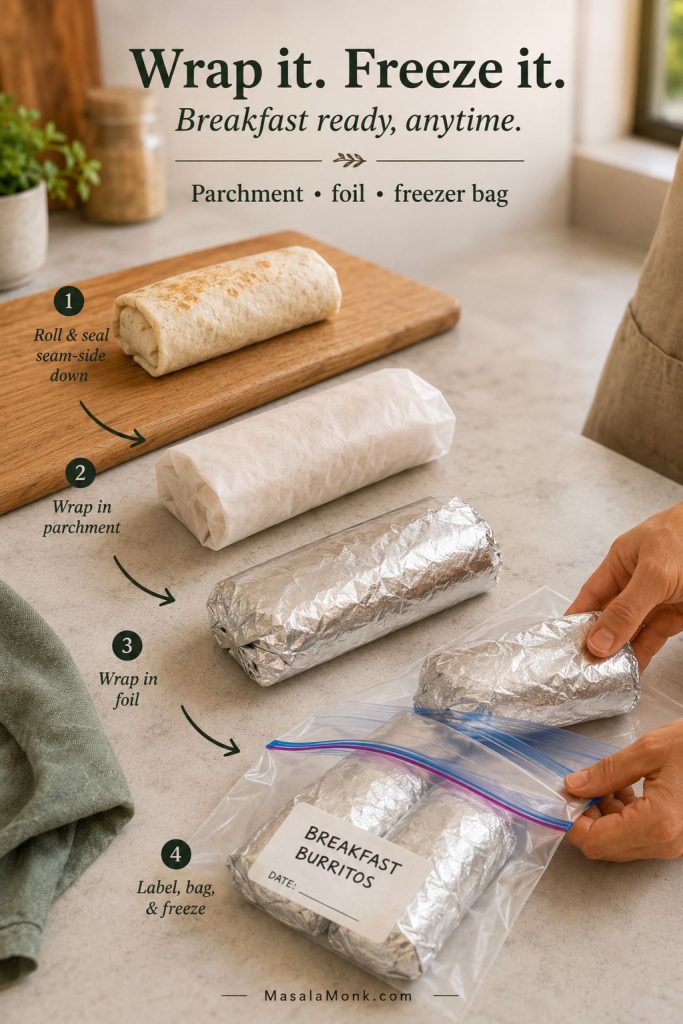
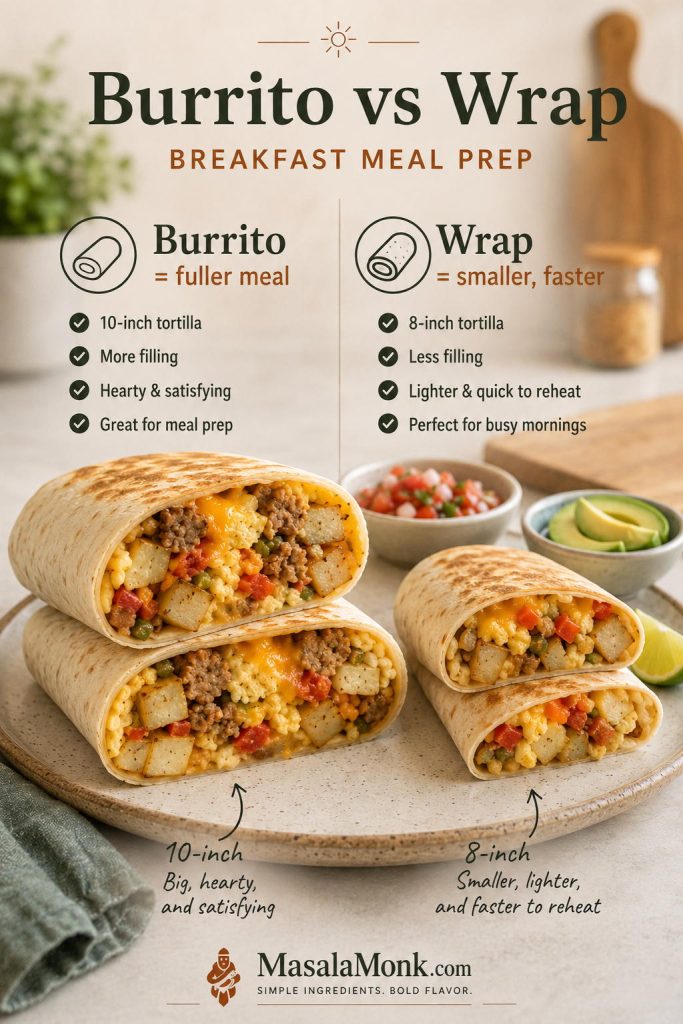
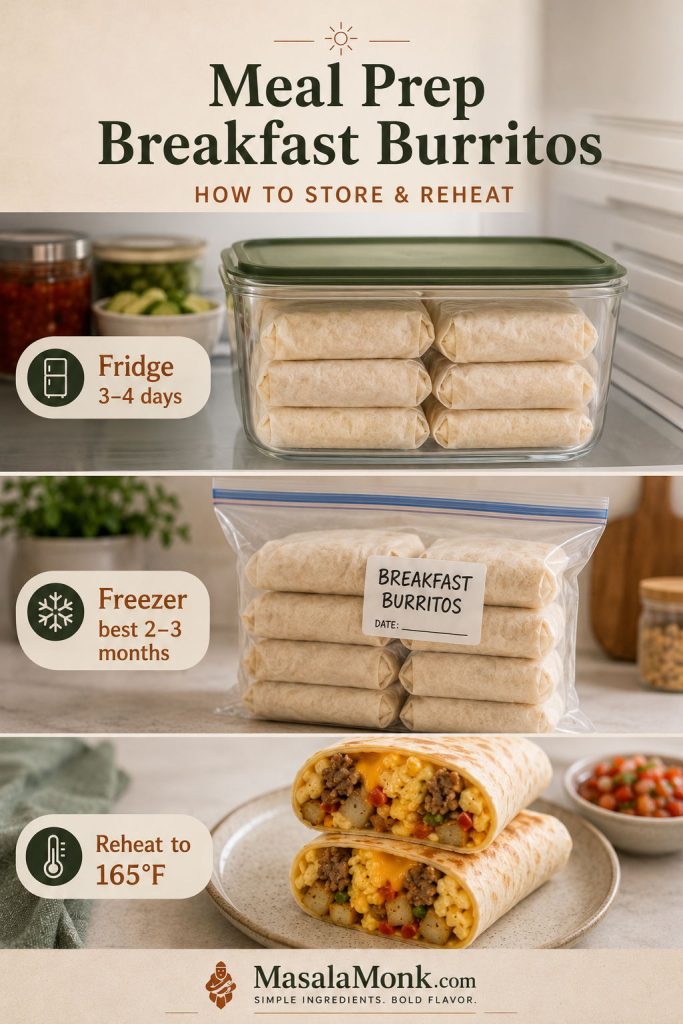
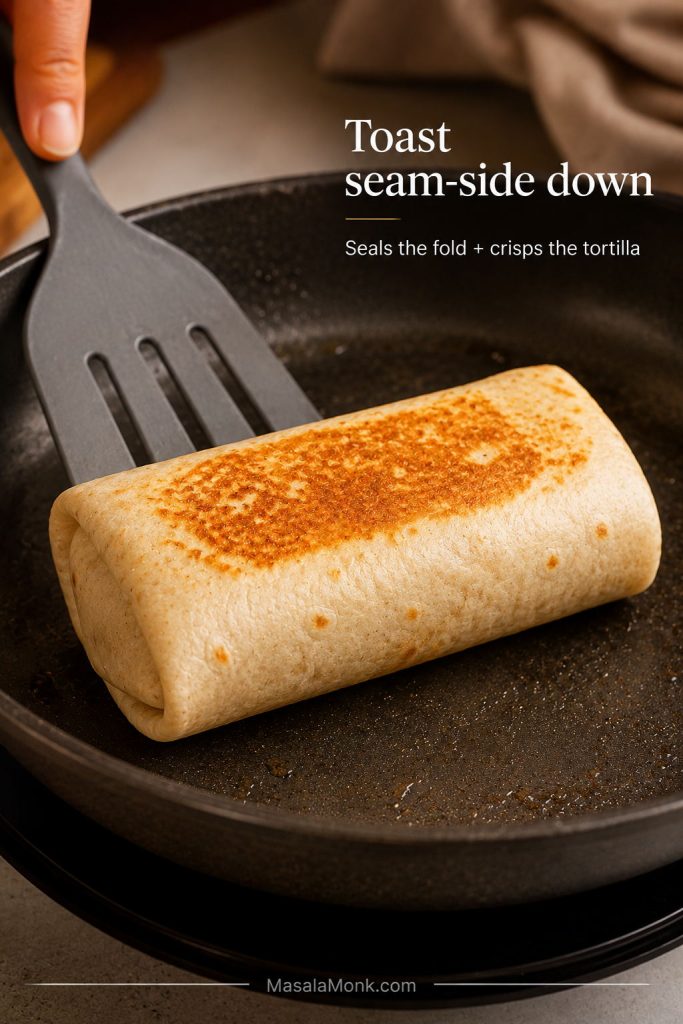
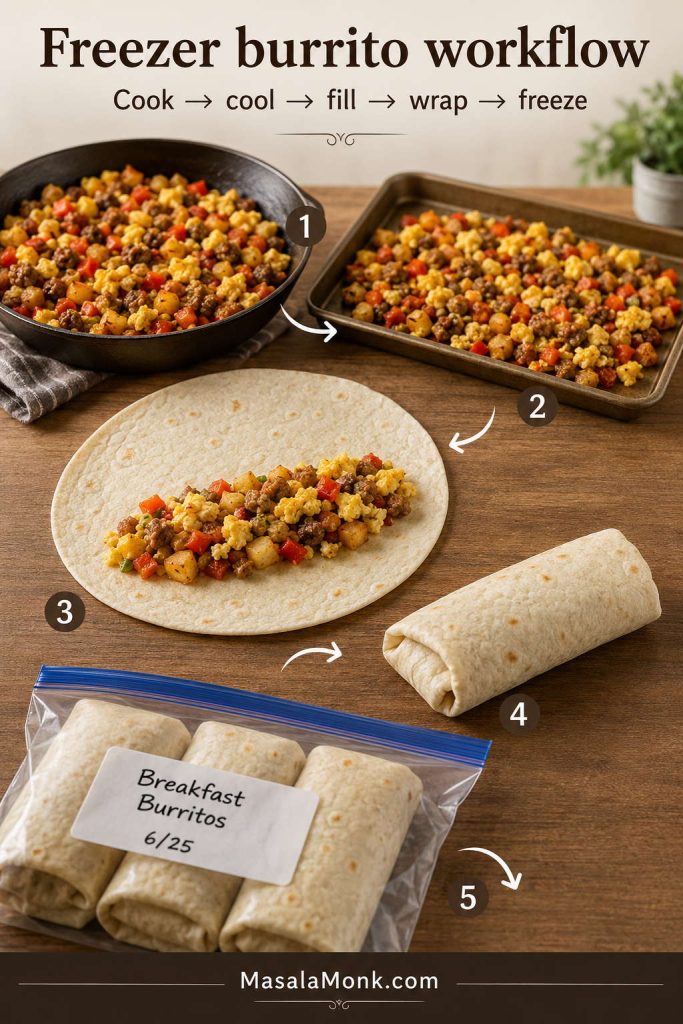
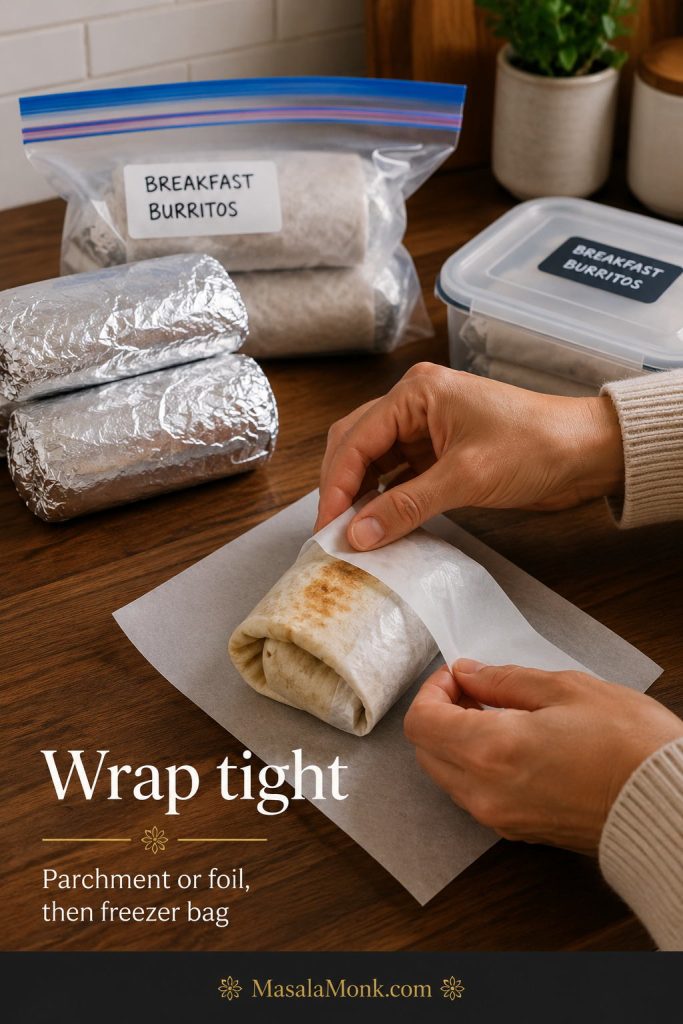
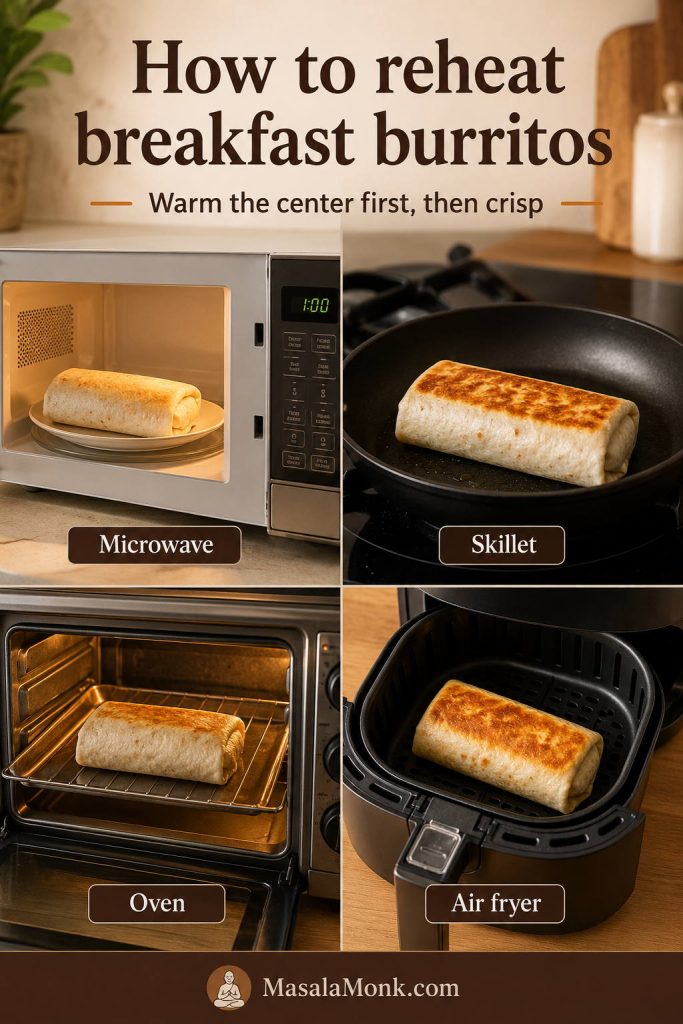
Because they are naturally high in protein, these muffin tin eggs are especially useful when you want a savory breakfast before the morning rush. For another freezer-friendly breakfast that feels more filling, keep these in rotation with meal prep breakfast burritos.
What You’ll Find in This Guide
Make the Egg Muffins
Quick Answer: The Best Egg Muffin Cups Recipe
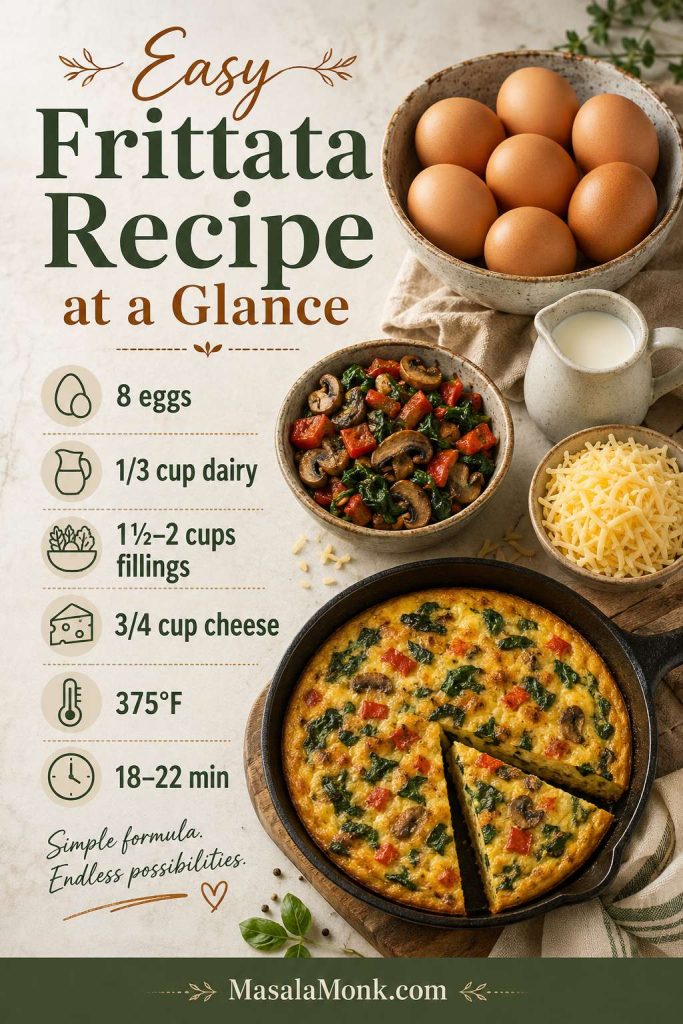
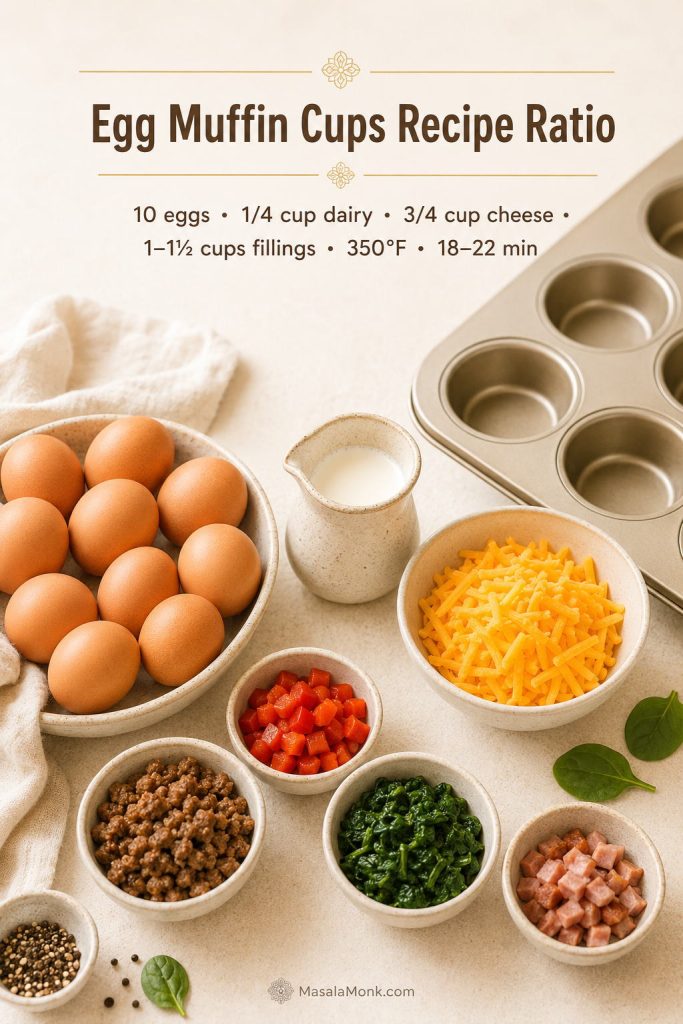
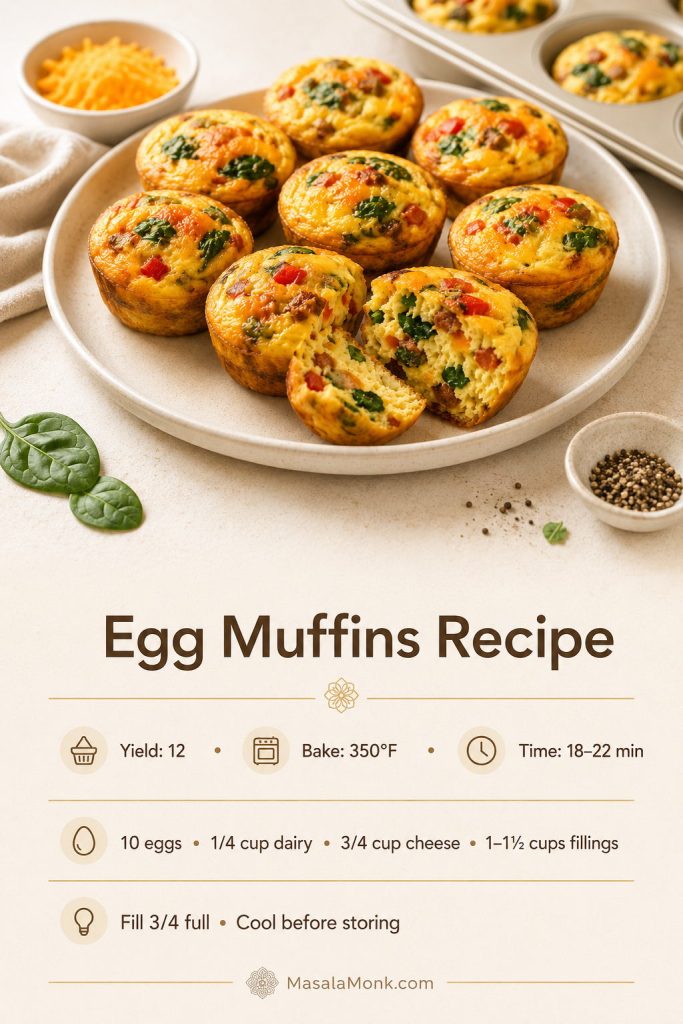
The best egg muffin cups recipe starts with 10 large eggs, 1/4 cup milk or cream, 3/4 cup cheese, and 1 to 1 1/2 cups cooked or well-drained fillings. Bake them in a greased muffin tin or silicone muffin pan at 350°F / 175°C for 18–22 minutes, until the centers are set and no longer wet or jiggly.
| Detail | Start here |
|---|---|
| Yield | 12 egg muffins |
| Oven temperature | 350°F / 175°C |
| Bake time | 18–22 minutes |
| Eggs | 10 large eggs, about 500 g without shells |
| Dairy | 1/4 cup / 60 ml milk, half-and-half, cream, or blended cottage cheese |
| Cheese | 3/4 cup / 85 g shredded cheese |
| Add-ins | 1 to 1 1/2 cups / about 140–225 g cooked or drained vegetables, meat, or both |
| Fill level | About 3/4 full |
| Doneness cue | Set centers, lightly puffed tops, no wet jiggle |
Once you have the base formula, you can jump to the full ratio guide, the step-by-step method, or the meal prep storage tips.
The First Batch to Make
For the first batch, use cheddar, bell pepper, cooked spinach, and cooked bacon, sausage, ham, or mushrooms. It gives you color, savory flavor, protein, and a steady texture without pushing the filling too far.

As a result, the finished egg muffins are savory, cheesy, and tender, with little pockets of vegetables and protein in every bite. They puff in the oven, settle slightly as they cool, and stay sturdy enough for meal prep without tasting dry when reheated gently.
Egg Muffins Recipe Card
These savory egg muffins bake up tender, cheesy, and sturdy enough for meal prep, with bell pepper, spinach, and your choice of cooked bacon, sausage, ham, or mushrooms in every bite. They are easy to customize, simple to reheat, and designed to stay soft instead of turning watery or rubbery.
Ingredients
- 10 large eggs, about 500 g without shells
- 1/4 cup / 60 ml milk, half-and-half, cream, or blended cottage cheese
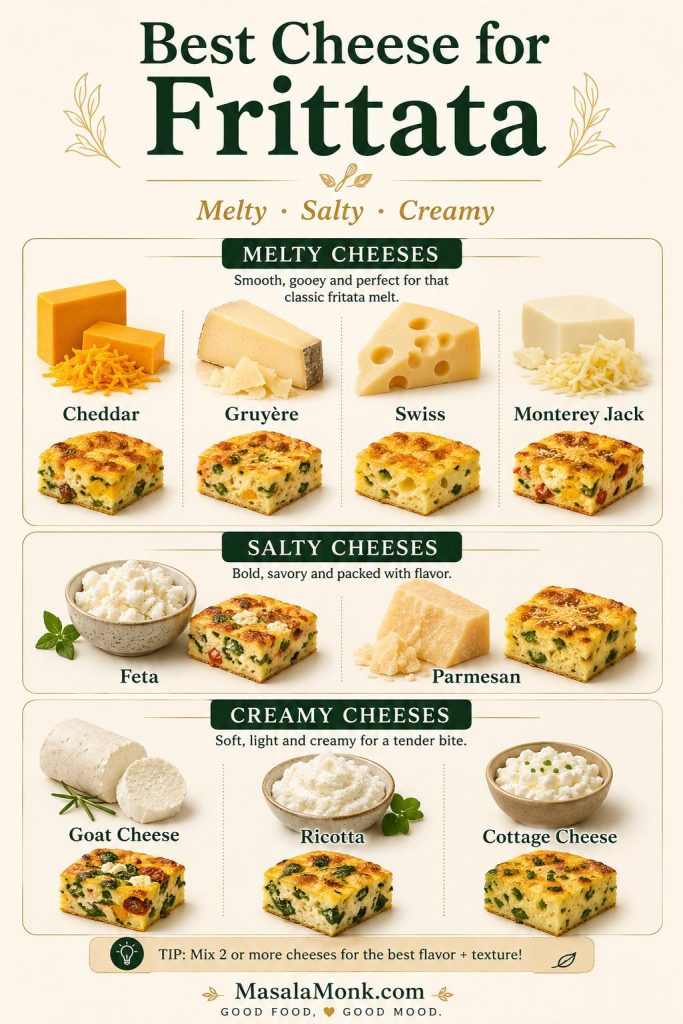
- 3/4 cup / 85 g shredded cheddar, Monterey Jack, mozzarella, Swiss, pepper jack, feta, or mixed cheese
- 1/2 cup / 70–80 g finely diced bell pepper, raw for a little crunch or sautéed 2–3 minutes for softer, less watery muffins
- 1/2 cup / 70–80 g cooked spinach, squeezed dry and chopped
- 1/2 cup / 60–75 g cooked and drained bacon, sausage, ham, turkey sausage, chicken sausage, mushrooms, or extra vegetables
- 3/4 teaspoon fine salt
- 1/4 teaspoon black pepper
- 1/4 teaspoon garlic powder, optional
- 1/4 teaspoon onion powder, optional
- Cooking spray, butter, or oil for greasing
Instructions
- Preheat the oven to 350°F / 175°C. Grease a 12-cup muffin pan generously, or use lightly greased silicone liners.
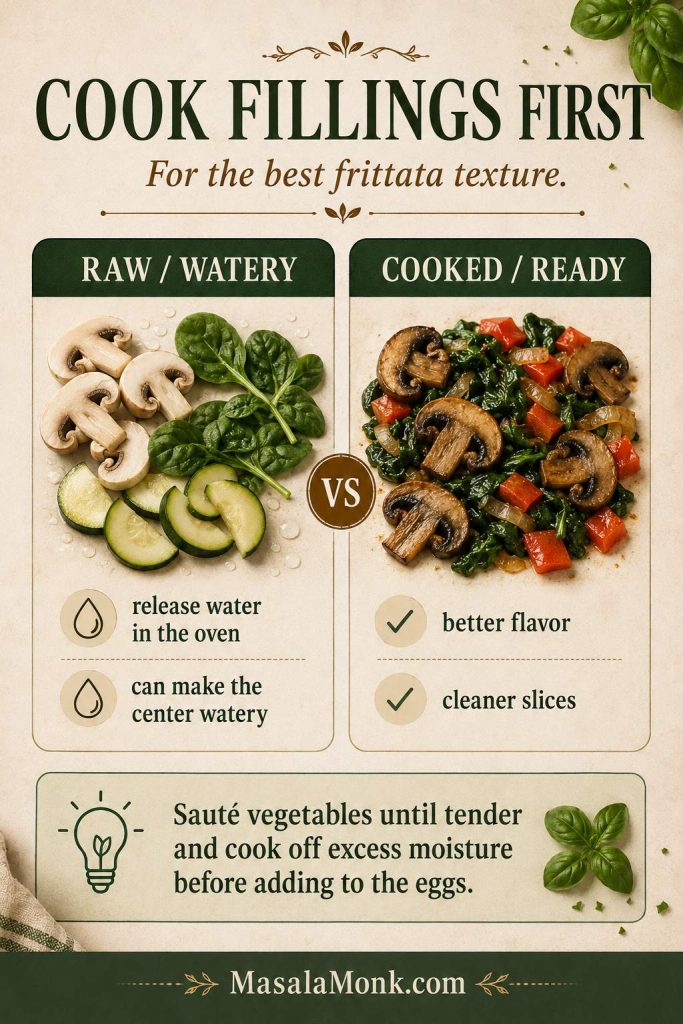
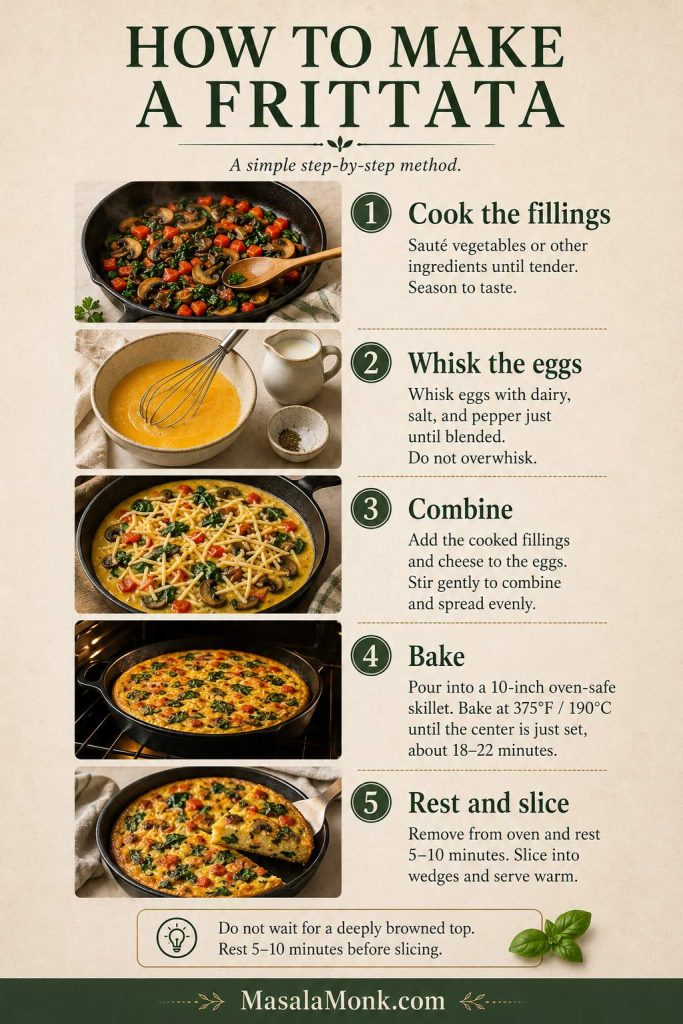
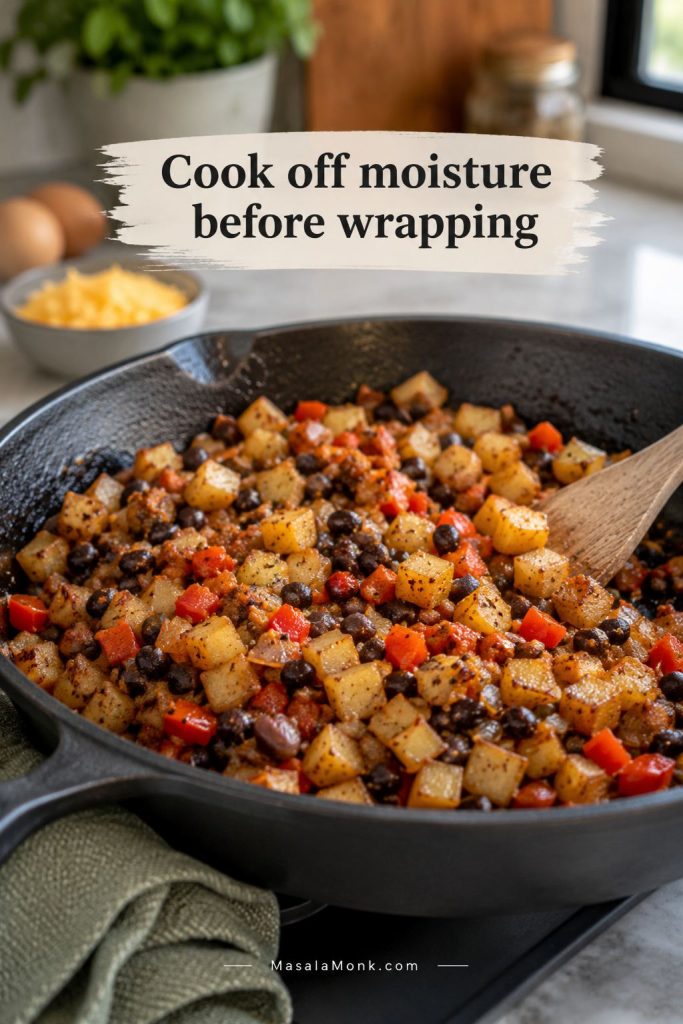
- Cook and drain any watery or greasy fillings. Mushrooms, onions, spinach, zucchini, bacon, sausage, turkey sausage, chicken sausage, and similar fillings should be cooked before adding.
- In a large bowl, whisk the eggs, dairy, salt, pepper, garlic powder, and onion powder until just combined.
- Divide the cooked fillings and cheese evenly among the muffin cups.
- Pour the egg mixture over the fillings, filling each cup about 3/4 full.
- Bake for 18–22 minutes, until the centers are set and the tops are lightly puffed.
- Cool in the pan for 5–10 minutes, then remove carefully.
- Serve warm, or cool completely before storing for meal prep.
Recipe Notes
- Use silicone if you want the easiest release.
- Do not overfill the cups; egg muffins puff while baking.
- Cook and drain watery vegetables before baking.
- If starting with fresh spinach, use about 2 packed cups, cook it down, then squeeze dry before measuring 1/2 cup cooked spinach.
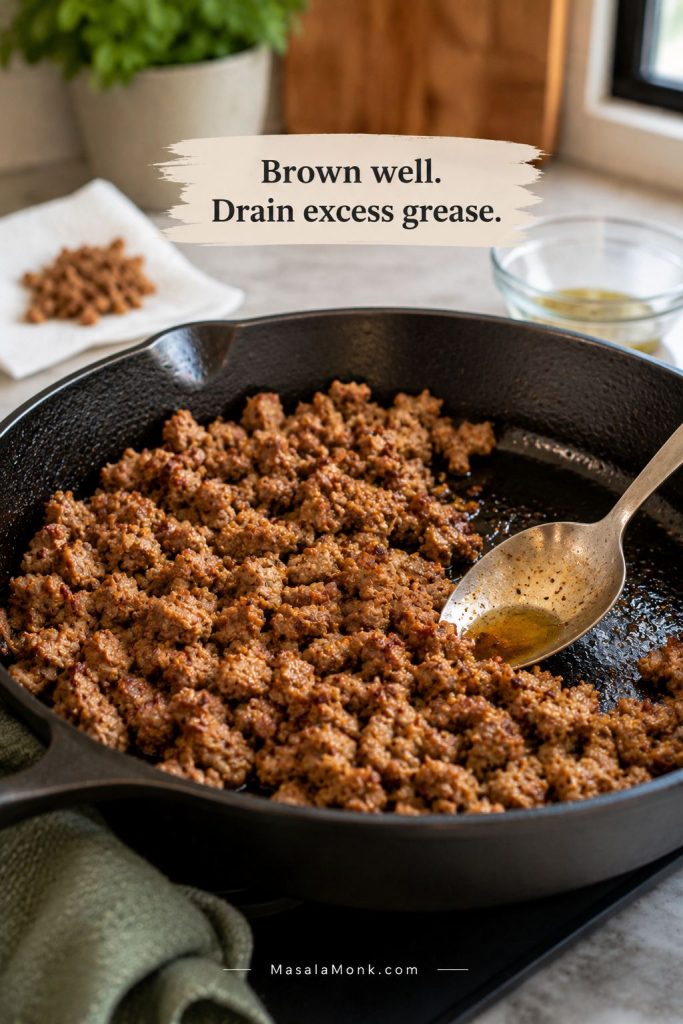
- Cook and drain meat before adding it to the egg mixture.
- Reheat gently to avoid rubbery eggs.
- For a softer, higher-protein version, blend cottage cheese into the egg base.
- For a vegetarian batch, replace bacon, sausage, or ham with sautéed mushrooms, broccoli, peppers, or extra spinach.
What Are Egg Muffins?
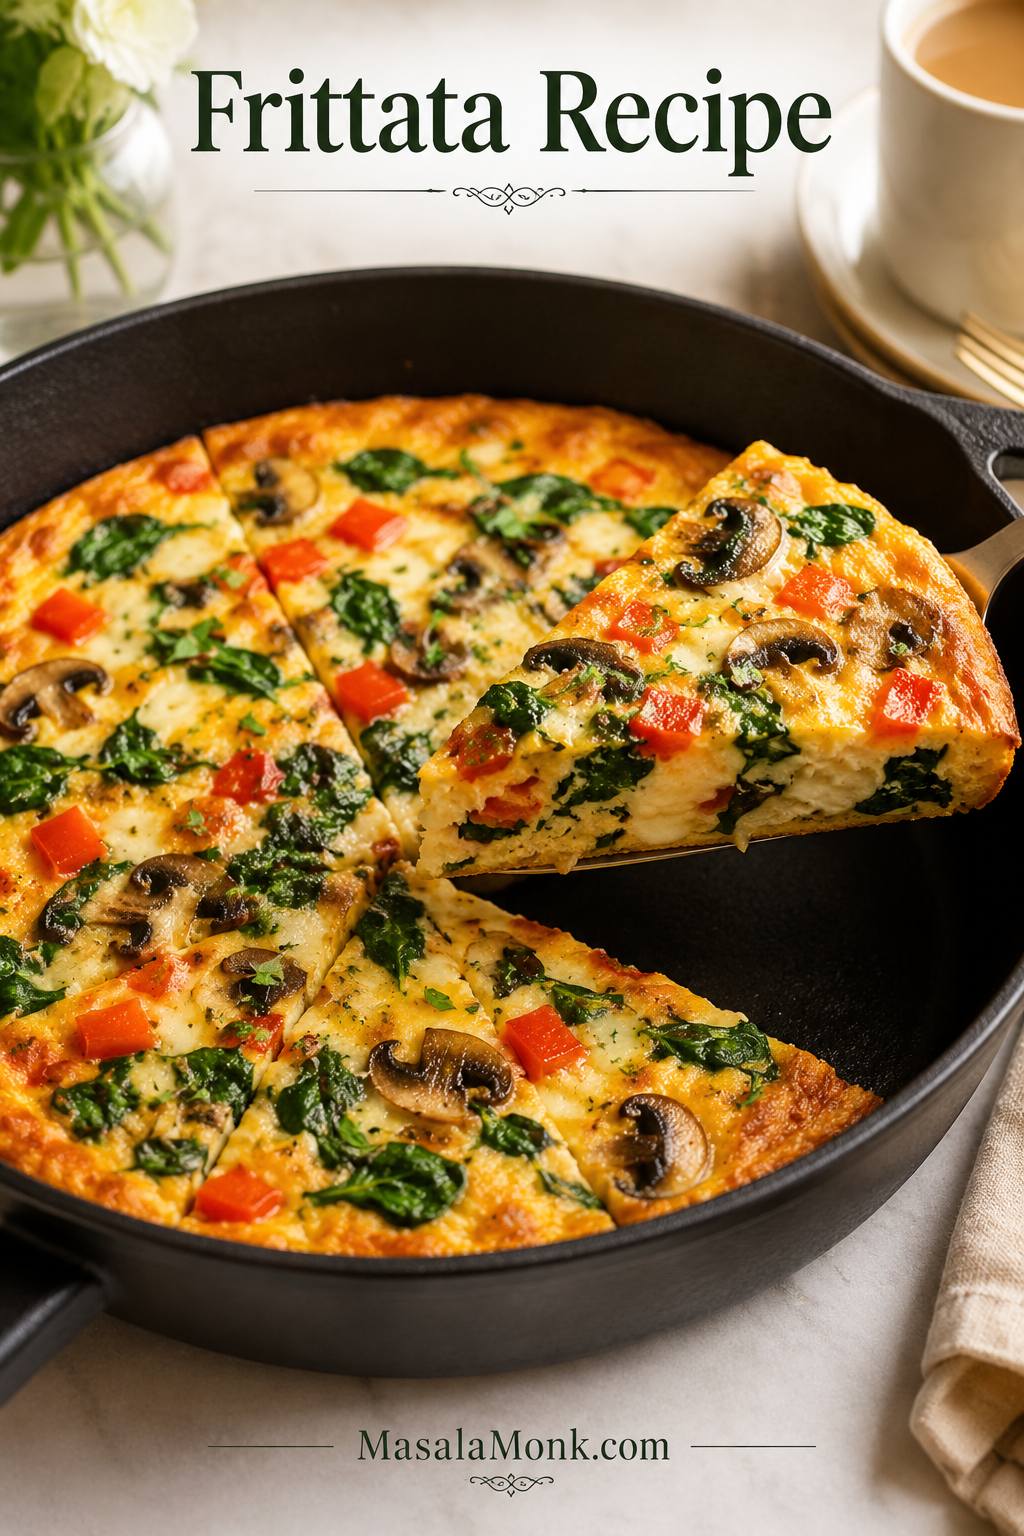
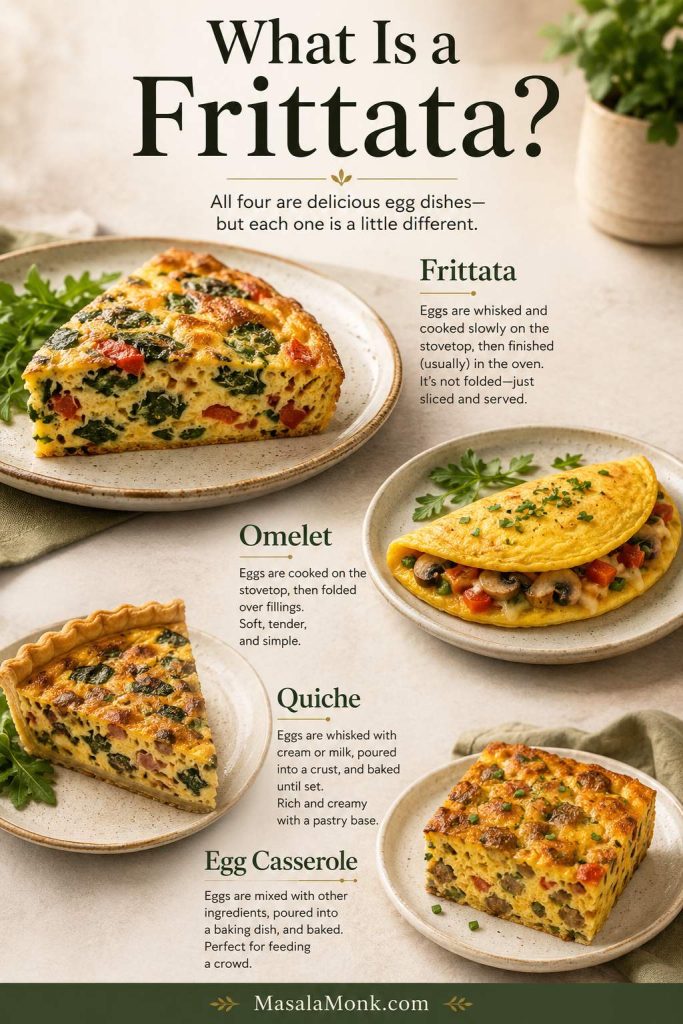
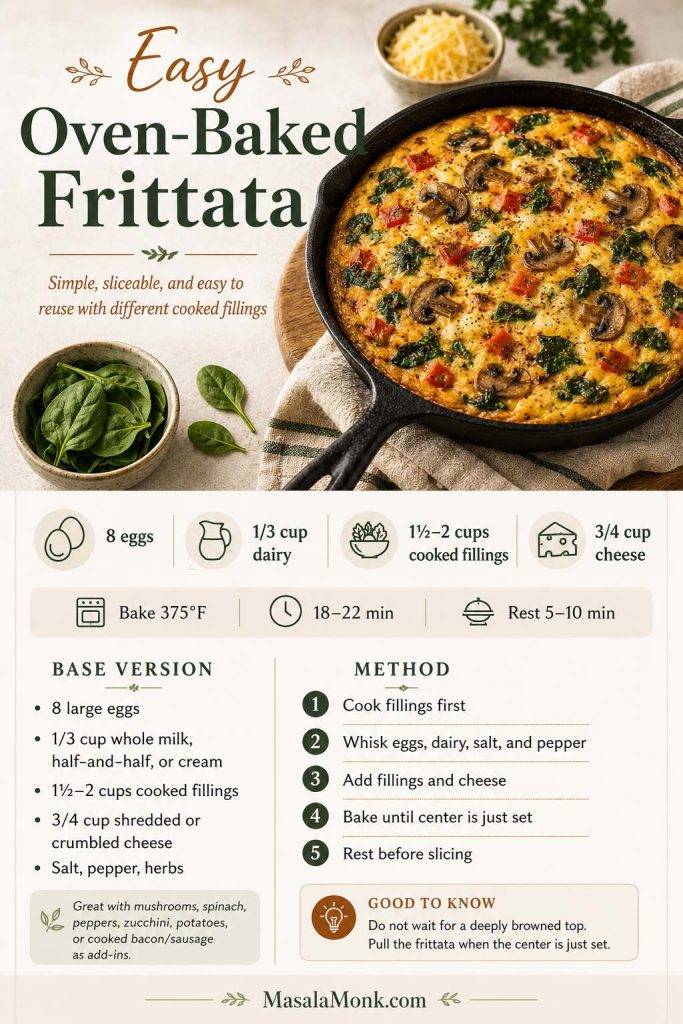
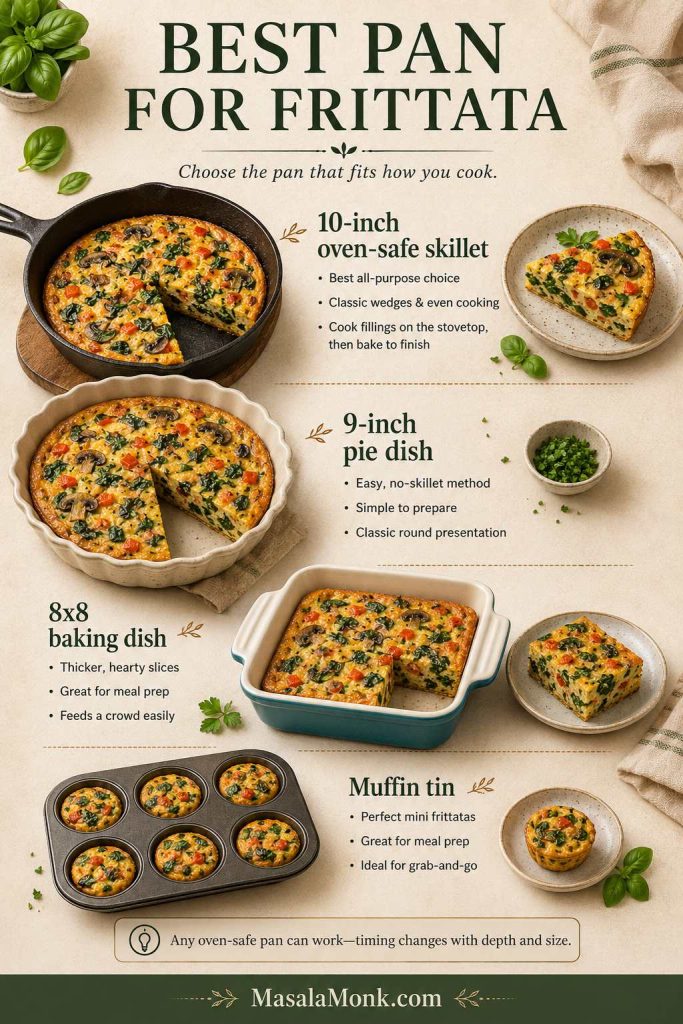
At their simplest, egg muffins are small baked egg cups made in a muffin pan. They are not sweet muffins, and they do not have a bread-like crumb. Instead, they are closer to mini frittatas: eggs are whisked with a little dairy, cheese, seasoning, and fillings, then baked until set.
Because these are muffins made with egg rather than flour, the recipe depends more on oven timing, moisture control, and the right pan than on traditional muffin mixing technique.
That muffin-tin shape is what makes them useful. Each cup becomes a single portion, so you can eat one or two for breakfast, pack them in a lunchbox, or store a batch in the fridge for busy mornings.
For more easy ways to build meals around eggs, this guide to egg dishes with 2 eggs gives you extra breakfast and brunch ideas beyond muffin tin eggs.
Are Egg Muffins the Same as Egg Cups?
Usually, yes. Many people use the names egg muffins, egg muffin cups, and egg cups for the same basic idea. The difference is that some egg cup recipes use a “cup” or shell made from bacon, hash browns, tortillas, or bread.
This version uses the classic whisked-egg muffin tin method. Later in the post, you will also find notes for bacon egg muffins, hash brown egg cups, cottage cheese egg muffins, and other variations.
Are Egg Muffins Mini Frittatas?
Yes, that is the easiest way to understand their texture. Egg muffins are basically small frittatas baked in a muffin tin. They should be set and tender, not wet in the middle and not dry like overcooked scrambled eggs.
What Texture Should Egg Muffins Have?
Good egg muffins should be set and tender, not wet in the middle and not dry or squeaky around the edges. They are usually firmer than café-style egg bites, but they should still reheat without turning tough.
Why This Recipe Works
What makes this recipe reliable is the balance between the egg base, fillings, cheese, dairy, and bake time. In other words, the goal is not just to make egg muffins that look good when they come out of the oven. The goal is to make breakfast egg muffins that still taste good after chilling and reheating.
The real win is that these egg muffins are not just good straight from the oven. They are built to survive the fridge, the microwave, and a busy weekday morning without turning wet, bland, or rubbery.
- 10 eggs make fuller muffins. An 8-egg batch can work, but 10 eggs gives a steadier all-purpose texture for 12 muffin cups.
- A little dairy keeps the eggs tender. Milk, half-and-half, cream, or blended cottage cheese helps soften the texture.
- The add-ins are controlled. Too many vegetables or meats can make egg muffins watery, crumbly, or hard to remove.
- Watery fillings are cooked or drained first. Spinach, mushrooms, onions, zucchini, and tomatoes need extra attention.
- 350°F / 175°C is gentle enough for meal prep. A slightly lower oven temperature helps avoid rubbery edges.
- The pan matters. Silicone or a very well-greased pan makes removal much easier.
- A short cooling time helps. Resting the muffins for 5–10 minutes helps them finish setting and release more cleanly.
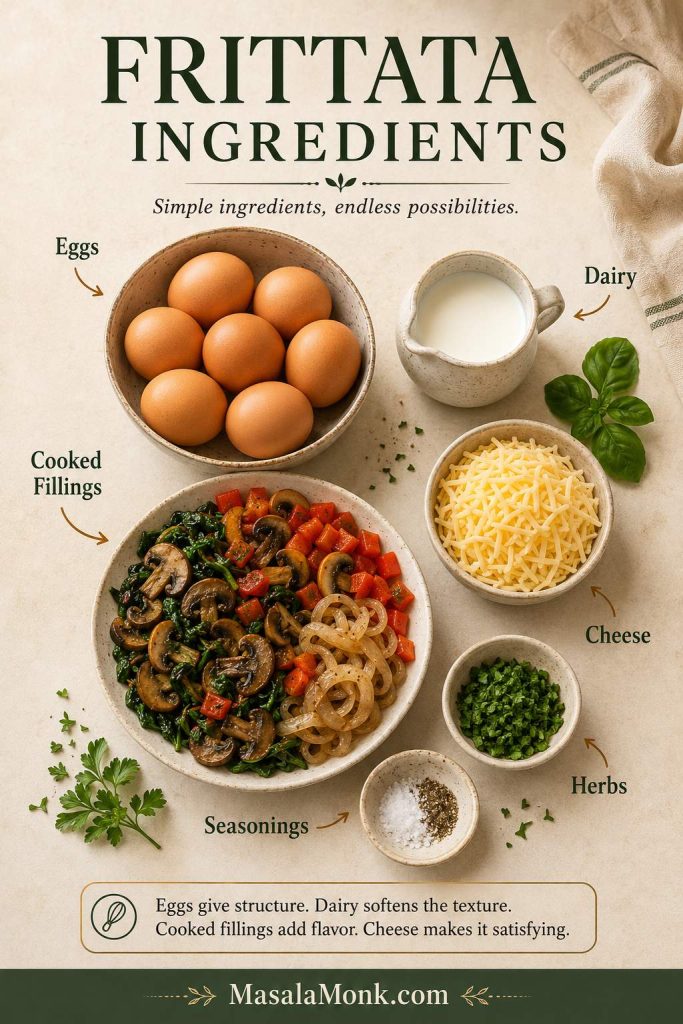
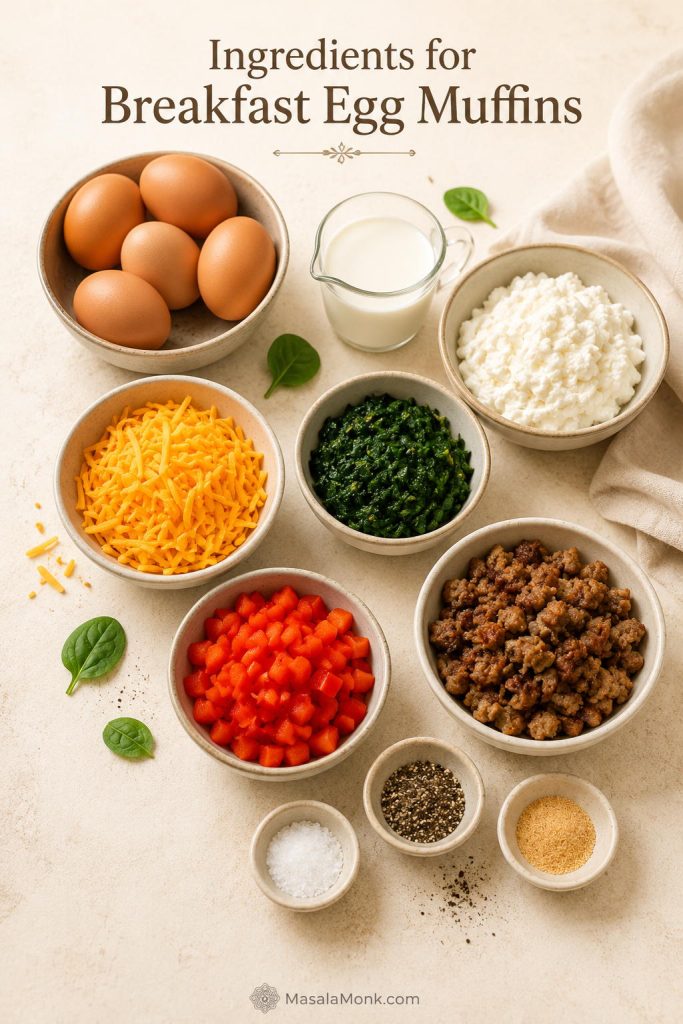
Ingredients for Breakfast Egg Muffins
The ingredients are simple, but they should taste like more than “eggs in a muffin tin.” Cheddar brings savory richness, bell pepper adds small sweet pops, spinach keeps the batch colorful, and bacon, sausage, ham, or mushrooms make each cup feel like a real breakfast. The key is keeping those add-ins flavorful without letting them make the muffins watery.
Already know your fillings? Skip ahead to how to prep vegetables and protein, or check the watery egg muffin fixes if your batches often release liquid after baking.
Eggs
Use 10 large eggs, about 500 g without shells, for the main batch. This amount fills a standard 12-cup muffin pan nicely when combined with dairy, cheese, and fillings.
- 8 eggs make lighter, more filling-heavy muffins.
- 10 eggs give the most reliable all-purpose balance.
- 12 eggs make firmer, more egg-forward muffins.
If you are making egg white muffins, use extra seasoning and some cheese or cottage cheese for softness. Egg whites can turn rubbery faster than whole eggs, especially if they are overbaked.
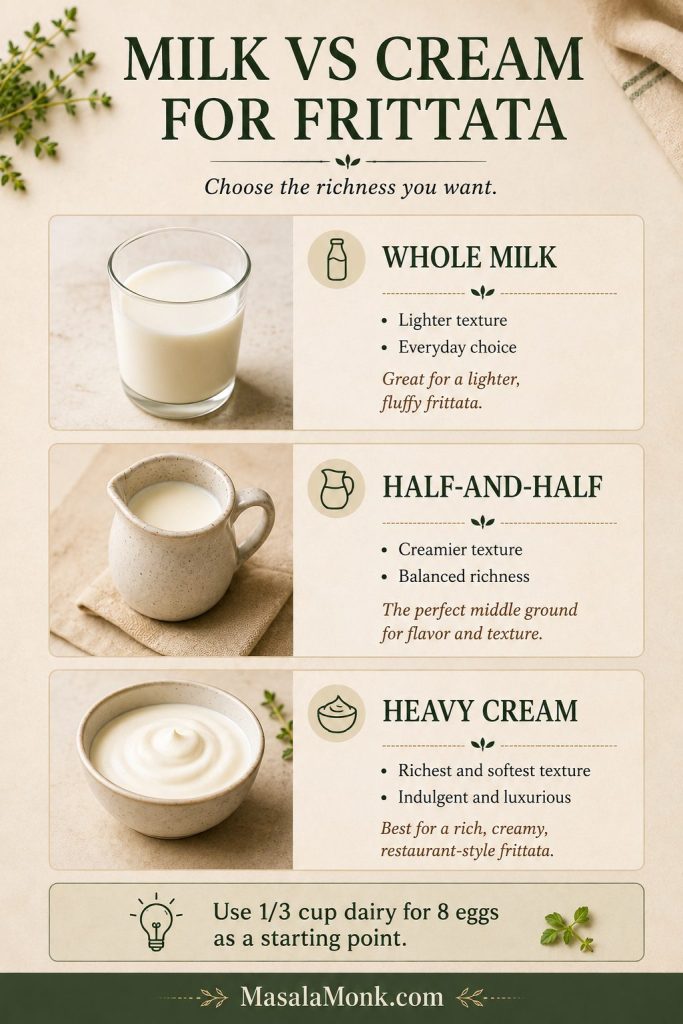
Milk, Cream, Half-and-Half, or Cottage Cheese
Use 1/4 cup / 60 ml milk, cream, half-and-half, or blended cottage cheese for a standard batch. Milk gives a lighter texture, half-and-half makes the muffins a little softer, and cream gives a richer low-carb version.
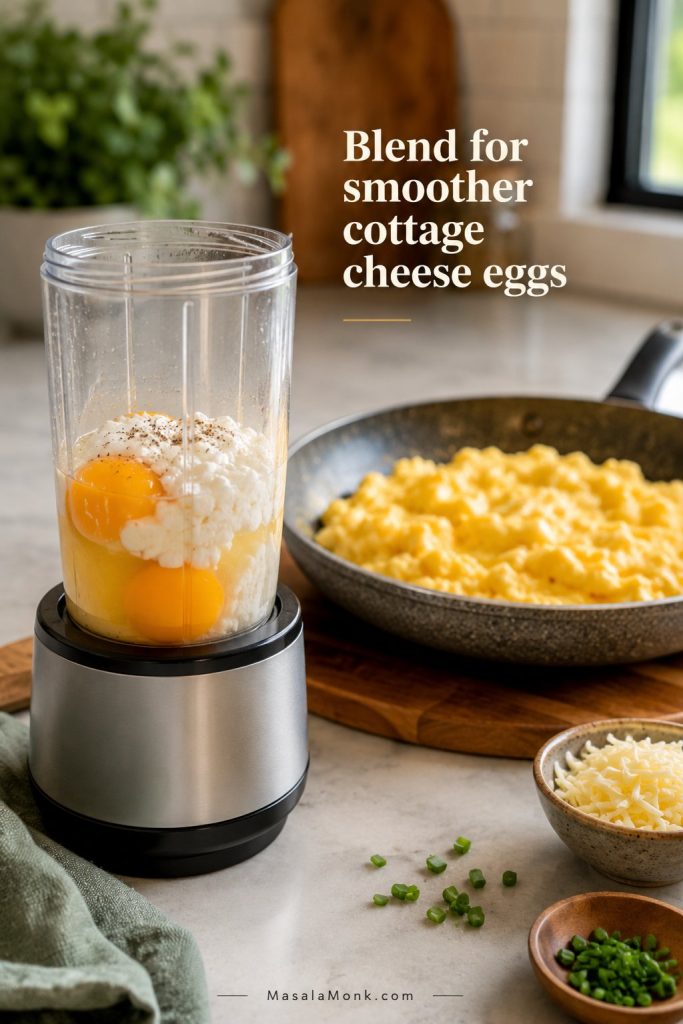
Use 1/4 cup blended cottage cheese as a simple dairy swap in the standard recipe. However, use 3/4–1 cup blended cottage cheese only when you want a softer, higher-protein egg-bite-style version. If you want the cottage cheese to disappear into the egg base, blend it first until smooth.
For the softest, higher-protein version, cottage cheese works best when it is blended into the egg base instead of stirred in as curds.

Dairy-Free Egg Muffins
For dairy-free egg muffins, use unsweetened dairy-free milk and skip the cheese, or use a dairy-free shredded cheese you already like. The muffins may be a little firmer without dairy or cheese, so avoid overbaking and add flavorful vegetables, herbs, salsa, or cooked sausage for balance.
This is still an egg-based breakfast. For high-protein breakfasts without eggs, these plant-based breakfast ideas are a better fit than trying to force this recipe into an egg-free version.
Cheese
Use 3/4 cup / 85 g shredded cheese for balanced egg muffins. Cheddar, Monterey Jack, mozzarella, Swiss, pepper jack, and feta all work.
- 3/4 cup is balanced.
- 1 cup is cheesier but still reasonable.
- 1 1/2 cups is better reserved for richer bacon or sausage egg muffins.
Too much cheese can make the edges stick and the bottoms feel greasy, so start with 3/4 cup and increase only if you want a richer batch.
For a lighter batch, use more vegetables, lean meat, milk instead of cream, and a little less cheese. If you skip cheese completely, add extra herbs, seasoning, or salsa so the muffins still taste savory and balanced.
Vegetables and Protein Add-Ins
For the best texture, use 1 to 1 1/2 cups total cooked or well-drained add-ins, which is about 140–225 g depending on the ingredients. That could be vegetables, meat, or a mix of both.
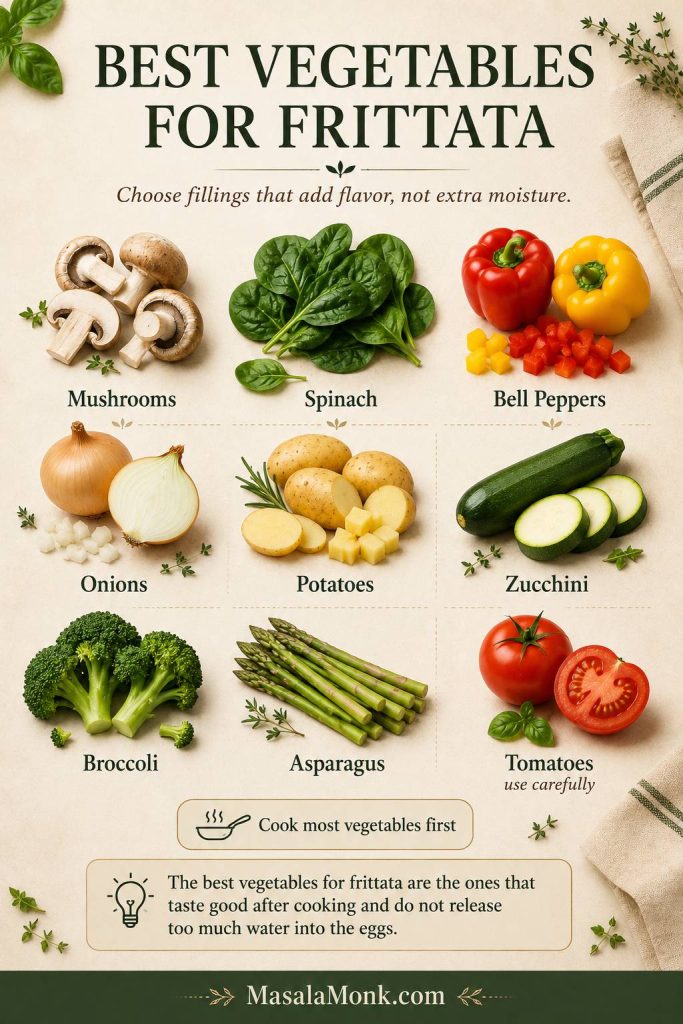
Good options include bell pepper, spinach, mushrooms, onions, broccoli, tomatoes, bacon, sausage, ham, turkey sausage, chicken sausage, feta, cheddar, and herbs. Cook bacon, sausage, mushrooms, onions, spinach, zucchini, and other watery or greasy fillings before adding them to the muffin tin.

Seasoning
Egg muffins need enough seasoning because eggs and vegetables can taste flat once chilled. Start with:
- 3/4 teaspoon fine salt
- 1/4 teaspoon black pepper
- 1/4 teaspoon garlic powder, optional
- 1/4 teaspoon onion powder, optional
You can also add smoked paprika, chili flakes, chopped herbs, curry powder, taco seasoning, or everything bagel seasoning depending on the flavor you want.
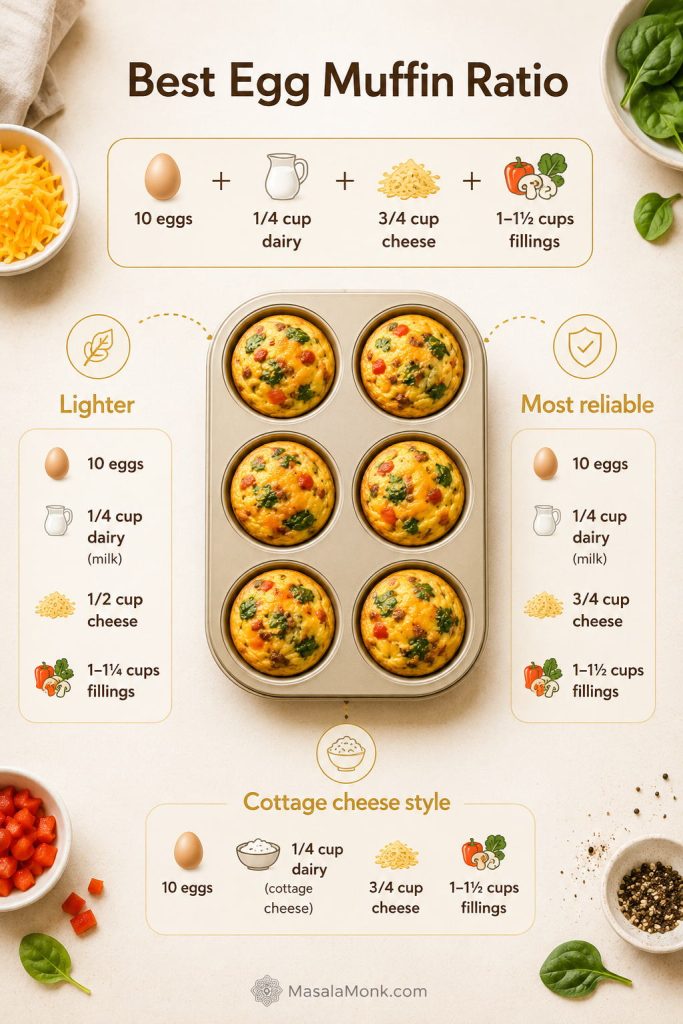
The Best Egg Muffin Ratio
Think of this as the formula that keeps the batch predictable. Once the egg base, cheese, and fillings stay in balance, you can change the flavor without gambling on the texture.
| Batch style | Eggs | Dairy | Cheese | Add-ins | Works well for |
|---|---|---|---|---|---|
| Lighter | 8 eggs | 1/4 cup / 60 ml | 1/2–3/4 cup | 1 cup | Veggie-heavy muffins |
| Most reliable | 10 eggs | 1/4 cup / 60 ml | 3/4 cup / 85 g | 1–1 1/2 cups | Classic breakfast egg muffins |
| Extra egg-forward | 12 eggs | 1/4–1/3 cup | 3/4–1 cup | 1 cup | Protein-heavy or low-carb muffins |
| Cottage cheese style | 8–10 eggs | 3/4–1 cup blended cottage cheese | Optional | 1 cup | Softer, higher-protein egg muffins |
If you are scaling the batch, go to how to scale the recipe. If your muffins overflow or stick around the edges, check how full to fill the cups before baking.
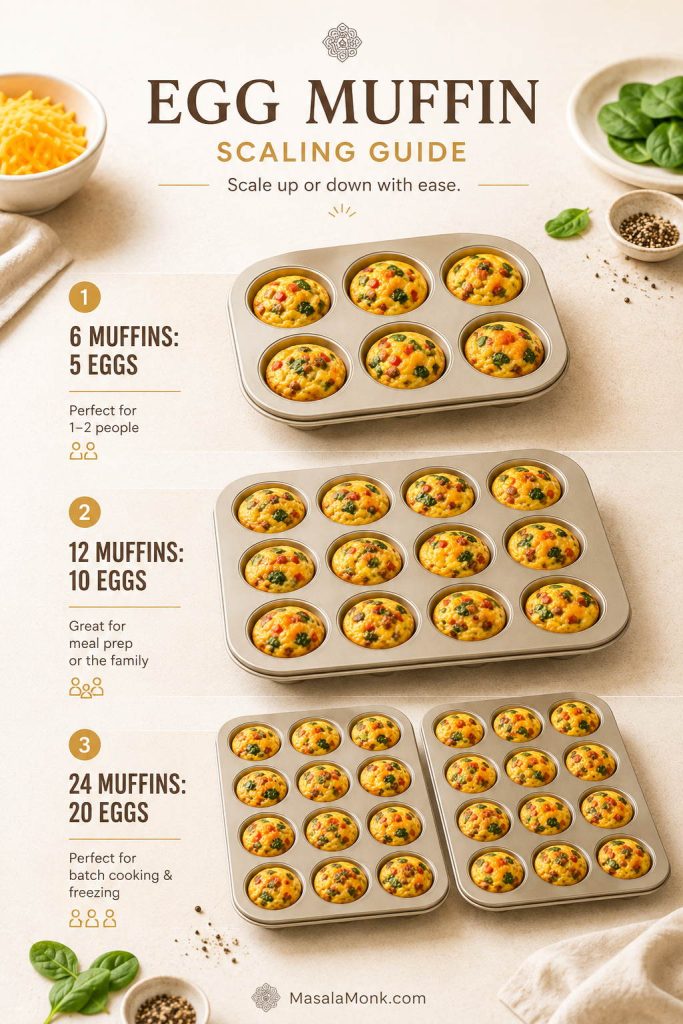
How to Scale the Recipe
You can scale the same ratio up or down without changing the method.
| Batch size | Eggs | Dairy | Cheese | Add-ins |
|---|---|---|---|---|
| 6 egg muffins | 5 large eggs | 2 tablespoons / 30 ml | 6 tablespoons / about 40 g | 1/2–3/4 cup |
| 12 egg muffins | 10 large eggs | 1/4 cup / 60 ml | 3/4 cup / 85 g | 1–1 1/2 cups |
| 24 egg muffins | 20 large eggs | 1/2 cup / 120 ml | 1 1/2 cups / 170 g | 2–3 cups |
How Full Should You Fill the Muffin Cups?
Fill each muffin cup about 3/4 full. If the cups are too low, the muffins look flat. If they are too full, the egg mixture can overflow, bake onto the edges, and stick to the pan.
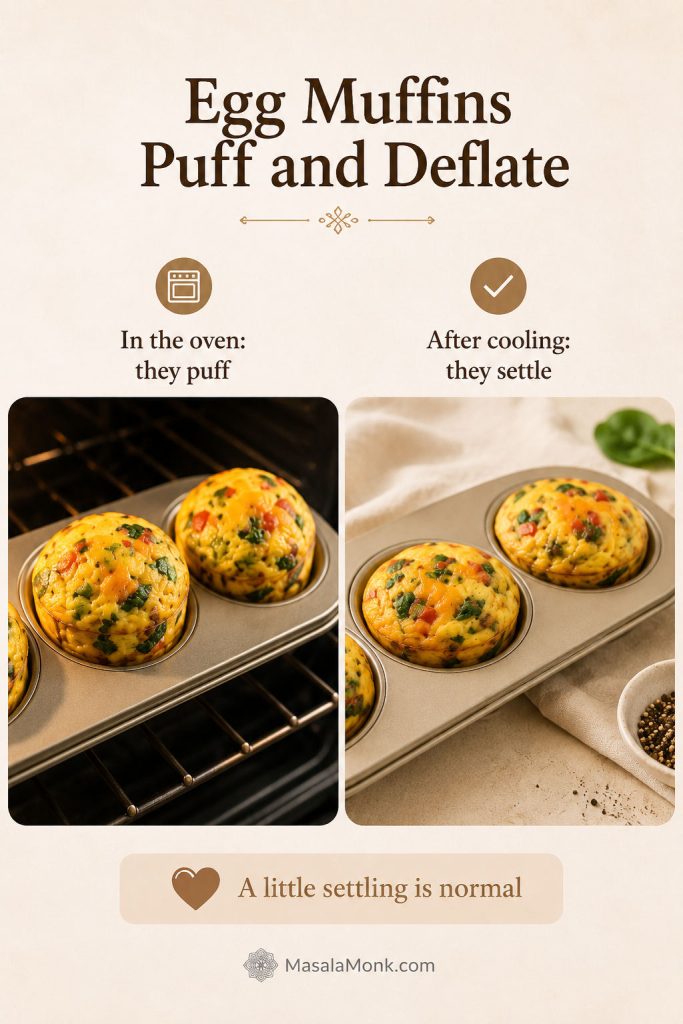
As they bake, egg muffins puff and then settle slightly as they cool. That small deflation is normal and does not mean the recipe failed.

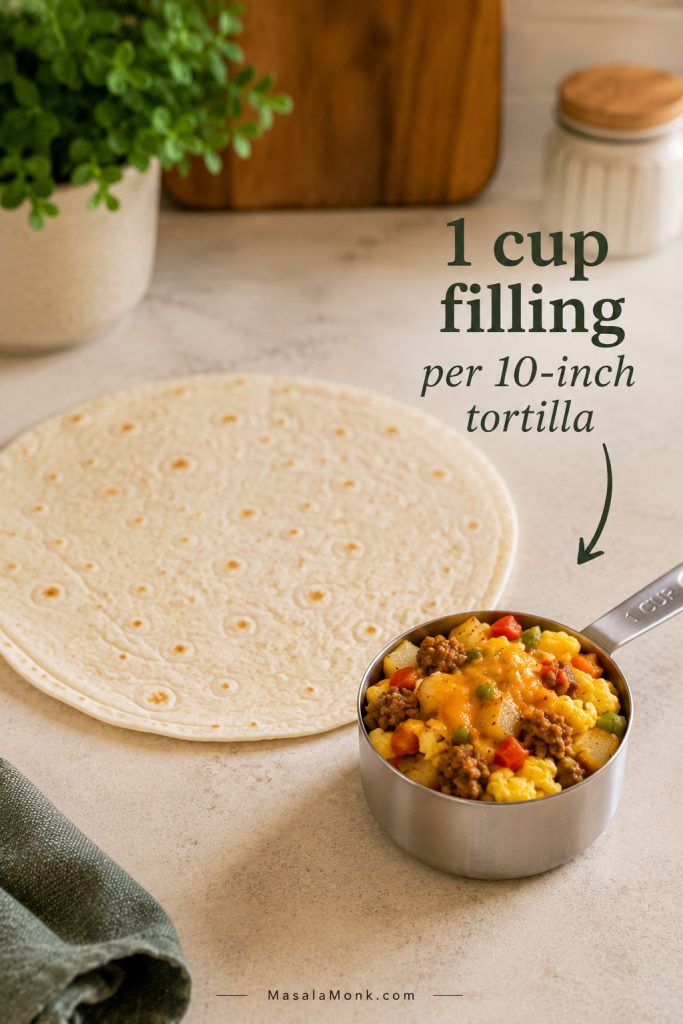
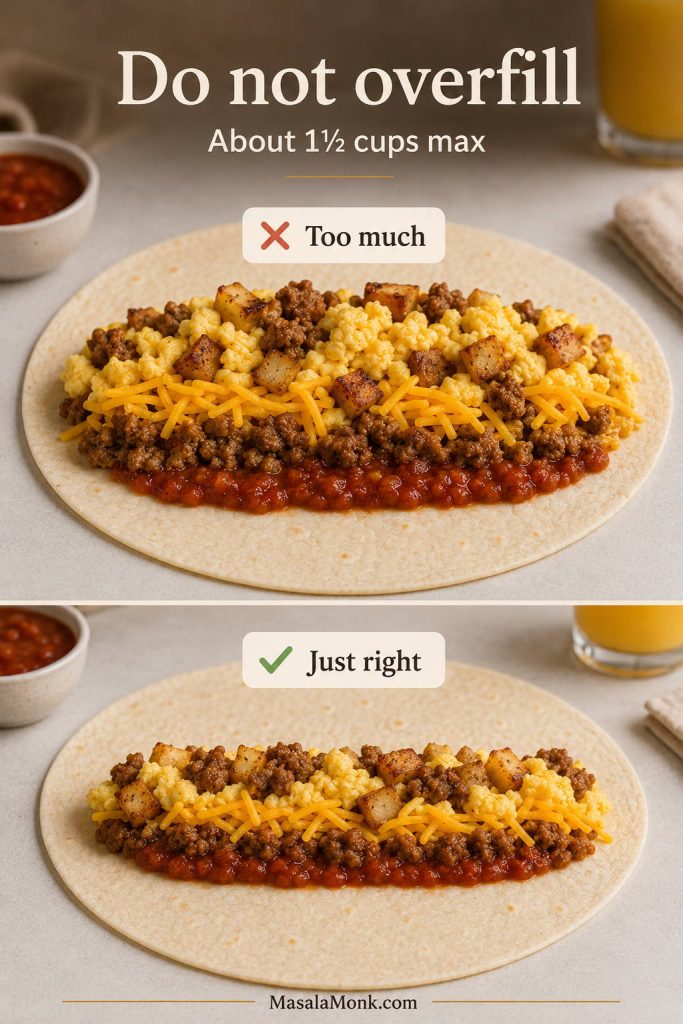
How Much Filling Is Too Much?
For 12 egg muffins, 1 cup of add-ins is the safest amount, while 1 1/2 cups gives a more loaded breakfast muffin. You can push toward 2 cups, but only if the vegetables are cooked and drained very well. More than that usually makes the muffins watery, crumbly, or difficult to remove.
Equipment You Need
You do not need much equipment for egg muffins, but the pan matters more than it does for regular muffins. Eggs and cheese cling easily, so silicone or a very well-greased metal tin will save you cleanup later.
- 12-cup muffin pan
- Silicone muffin pan or silicone liners
- Large mixing bowl
- Whisk
- Measuring cup with pour spout
- Skillet for cooking vegetables or protein
- Cooling rack
- Airtight container for storage
- Freezer-safe bag or container if freezing
If sticking is your biggest issue, skip to the full pan-release section before choosing liners or a muffin tin.
Best Pan for Egg Muffins: Silicone vs Metal vs Paper Liners
If egg muffins have ever welded themselves to your muffin tin, the pan is probably the reason. A good pan or liner can save you from broken muffins and a long cleanup.
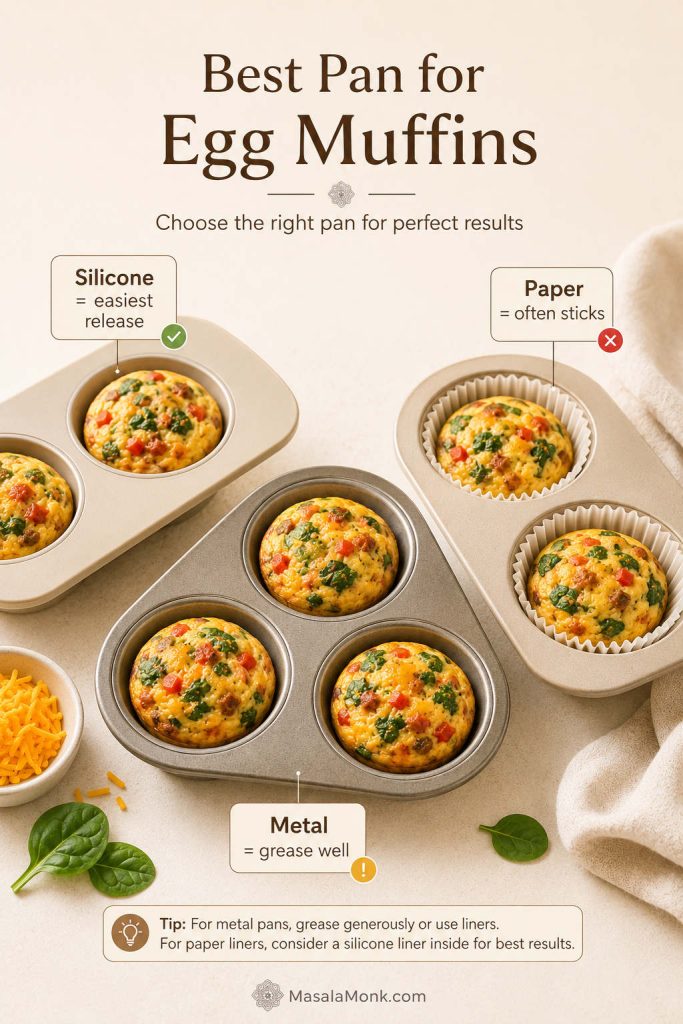
| Pan or liner | Works well for | Pros | Watch out |
|---|---|---|---|
| Silicone muffin pan | Regular meal prep | Easiest release, less sticking, good for weekly batches | Place it on a baking sheet for stability |
| Silicone liners in metal pan | Easy cleanup | Good shape, reusable, easier release | Lightly grease them for extra safety |
| Nonstick metal muffin tin | Defined edges | Common, sturdy, easy to move | Must be greased generously |
| Paper liners | Not ideal | Easy serving in theory | Eggs often stick badly unless liners are sprayed |
| Parchment liners | Occasional batches | Easier release than plain paper | Can wrinkle the muffin edges |
How to Make Egg Muffins
This muffin tin eggs recipe gives you evenly filled cups with a tender texture and fewer sticking problems. The two biggest keys are cooking watery fillings first and not overbaking the eggs.
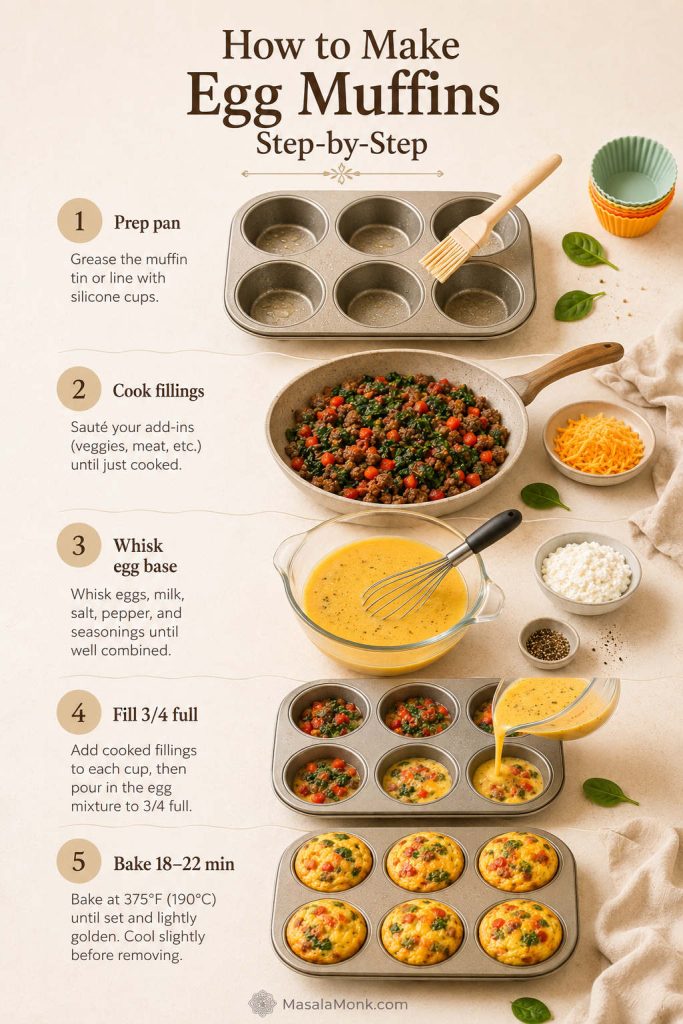
Step 1: Prep the Pan and Preheat the Oven
Preheat the oven to 350°F / 175°C. Grease a 12-cup muffin pan very well with cooking spray, butter, or oil. If you are using a silicone muffin pan, place it on a sturdy baking sheet before filling so it is easier to move in and out of the oven.
Step 2: Cook and Drain Watery Fillings
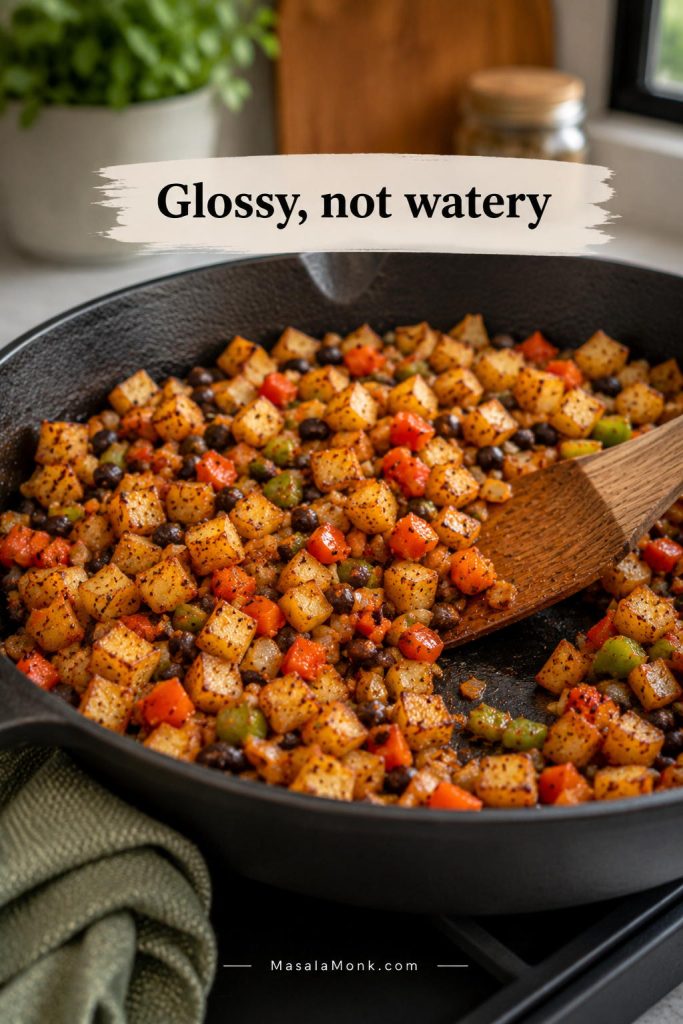
Cook mushrooms, onions, spinach, zucchini, bacon, sausage, or any filling that releases water or fat. If the pan still looks wet after cooking mushrooms or onions, keep going for another minute or two. If using cooked spinach, squeeze it dry before adding it to the muffin cups.
This step keeps the final egg muffins from becoming watery after baking or after a night in the fridge.
Step 3: Whisk the Egg Base
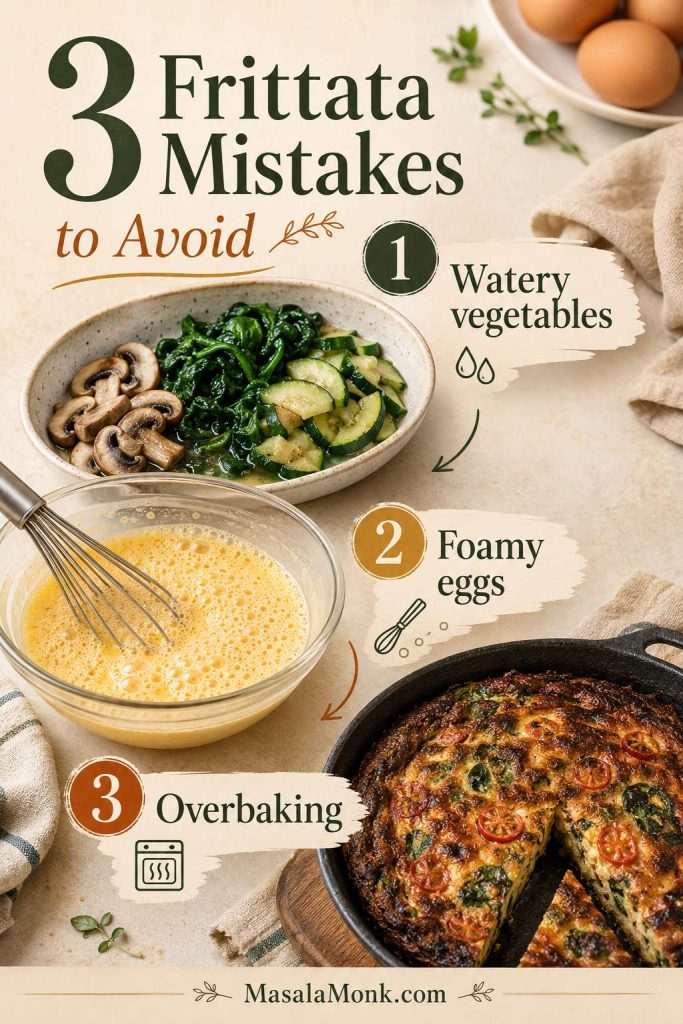
In a large bowl, whisk the eggs, dairy, salt, pepper, garlic powder, and onion powder until combined. Do not beat the eggs until foamy. Too much trapped air can make the muffins puff dramatically and then sink more as they cool.
Step 4: Divide Fillings and Cheese
Add the cooked fillings and cheese directly to the muffin cups first. This gives you better portion control than mixing everything into the bowl, where heavier fillings can sink to the bottom.
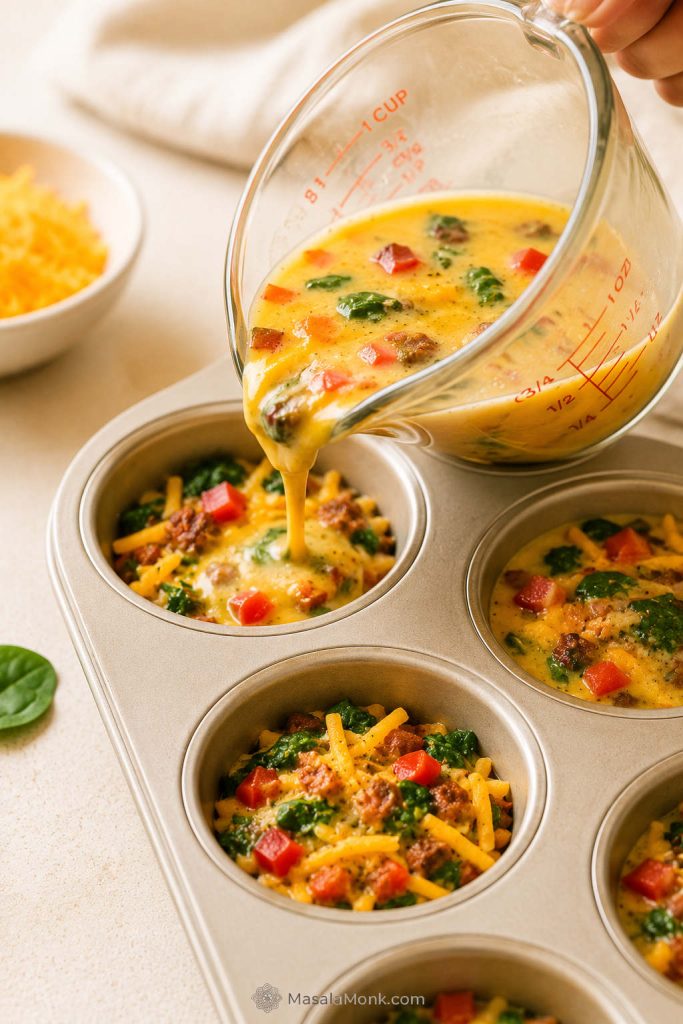
Step 5: Fill 3/4 Full
Pour the egg mixture over the fillings until each cup is about 3/4 full. A measuring cup with a pour spout makes this cleaner and helps you fill each cup evenly.
Step 6: Bake Until Just Set
Bake for 18–22 minutes, or until the centers are set and the tops are lightly puffed. Start checking around 18 minutes, especially if your muffin cups are not very full or if your oven runs hot.
Step 7: Cool Before Removing
Let the egg muffins cool in the pan for 5–10 minutes. This short rest helps them firm up and release more cleanly. If you are using a metal pan, gently run a thin knife around the edges before lifting them out.
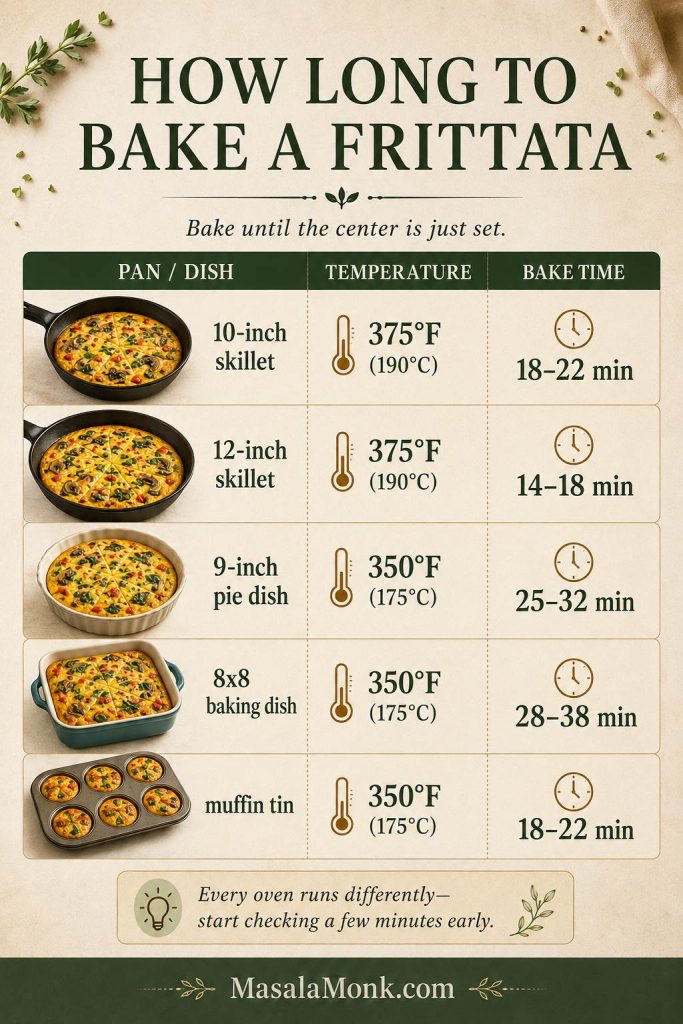
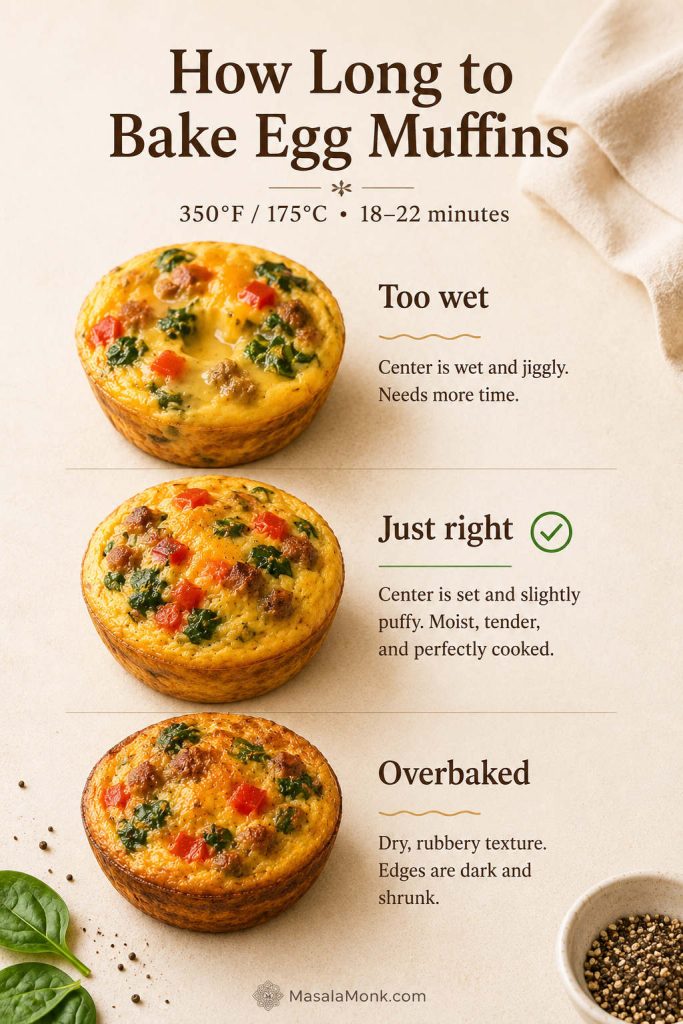
How Long to Bake Egg Muffins
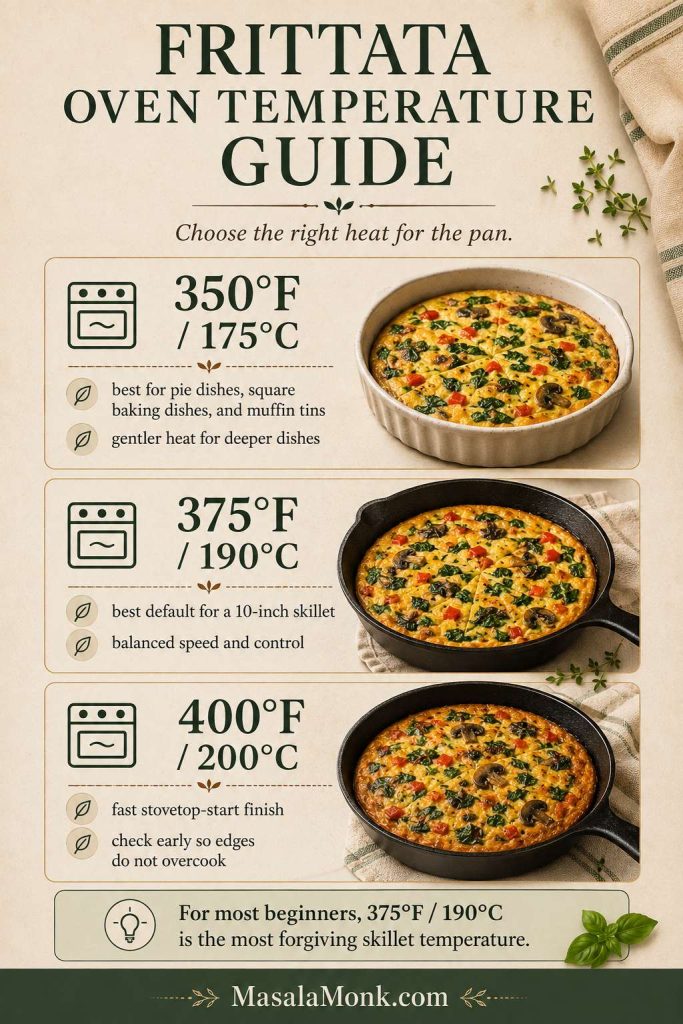
The best oven temperature for classic egg muffins is 350°F / 175°C. It is gentle enough to keep the texture soft, but still hot enough to set the centers in about 20 minutes.
| Oven temp | Approx. time | Texture | Works well for |
|---|---|---|---|
| 350°F / 175°C | 18–22 minutes | Softer, less rubbery | Default meal prep egg muffins |
| 375°F / 190°C | 15–20 minutes | Faster, slightly firmer | Smaller muffins or quick bake |
| 325°F / 160°C | 22–28 minutes | Gentler, softer | Cottage cheese or egg-bite-style versions |
| 400°F / 200°C | Not ideal for classic egg muffins | Firmer edges | Hash brown cups or bacon-shell cups |
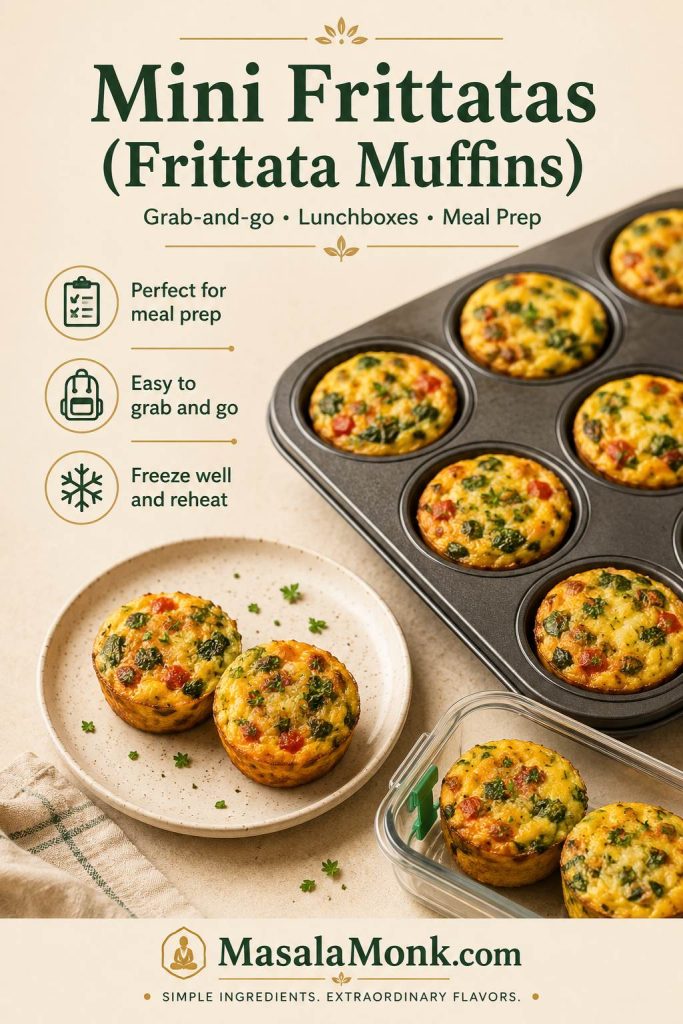
How Long to Bake Mini Egg Muffins
Mini egg muffins bake faster than standard muffin tin eggs. Start checking a mini muffin pan around 12–15 minutes at 350°F / 175°C. The exact time depends on the size of the cups, how full they are, and how many fillings you add.
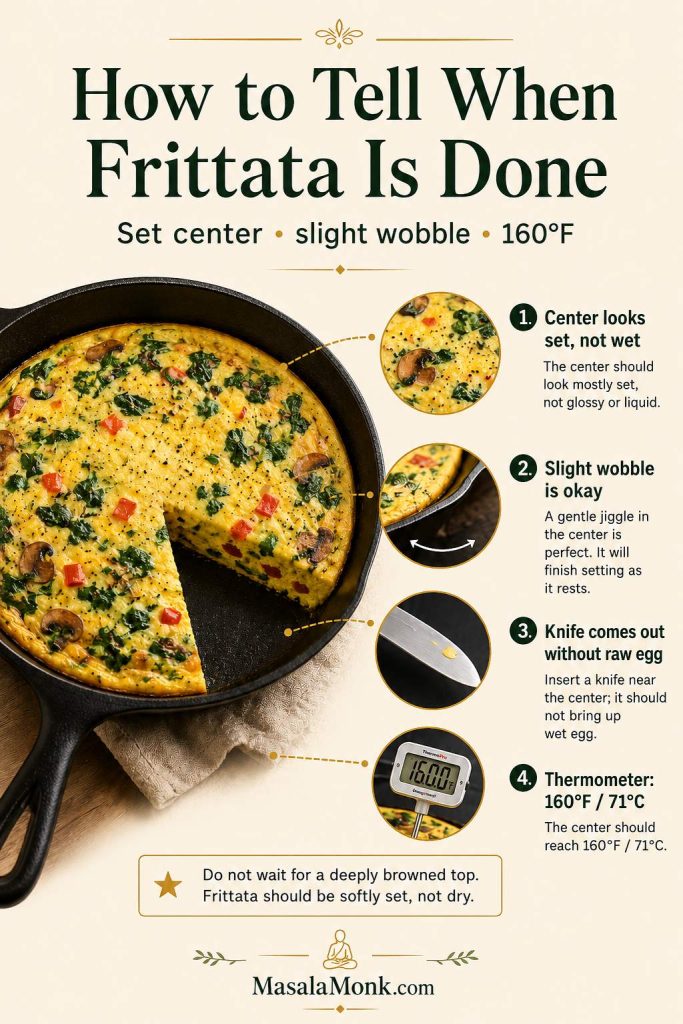
How to Tell Egg Muffins Are Done
You will know they are done when the centers are set, the tops are lightly puffed, and there is no wet jiggle in the middle. If you use an instant-read thermometer, aim for 160°F / 71°C; egg dishes such as frittata and quiche are listed at that temperature on the FoodSafety.gov safe minimum temperature chart.
Why Egg Muffins Puff and Then Deflate
Egg muffins rise because steam and air expand in the oven. After they cool, they settle. Some deflation is normal. The goal is not to keep them tall forever; instead, the goal is to keep them tender, set, and not watery.
How to Stop Egg Muffins from Sticking to the Pan
If your first batch has ever stuck to the pan, you are not doing anything unusual. Baked eggs cling more than regular muffin batter, especially when cheese melts onto the edges. The fix is mostly about pan choice, grease, and giving the muffins a short cooling time before you remove them.
Best Pan and Liner Tips
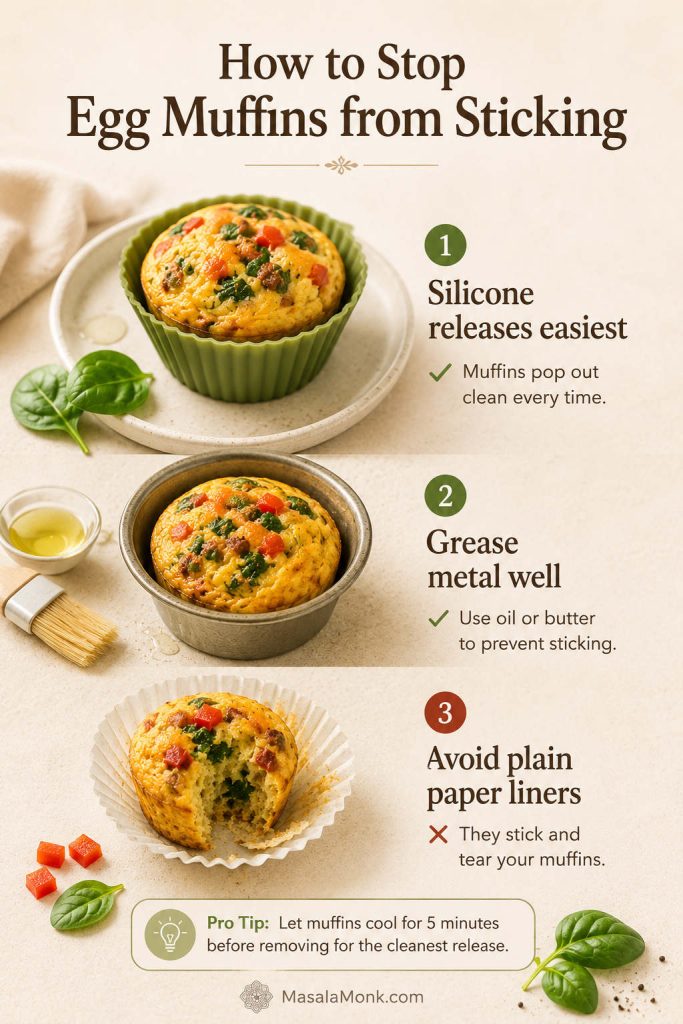
- Use silicone if you make egg muffins often. A silicone muffin pan or silicone liners give the cleanest release.
- Grease metal pans generously. Coat the bottom, sides, and upper rim of each cup because puffed egg and melted cheese can stick near the top.
- Avoid plain paper liners. They often hold onto baked eggs unless they are sprayed first.
- Let the muffins cool for 5–10 minutes. That short rest helps the eggs finish setting and makes removal easier.
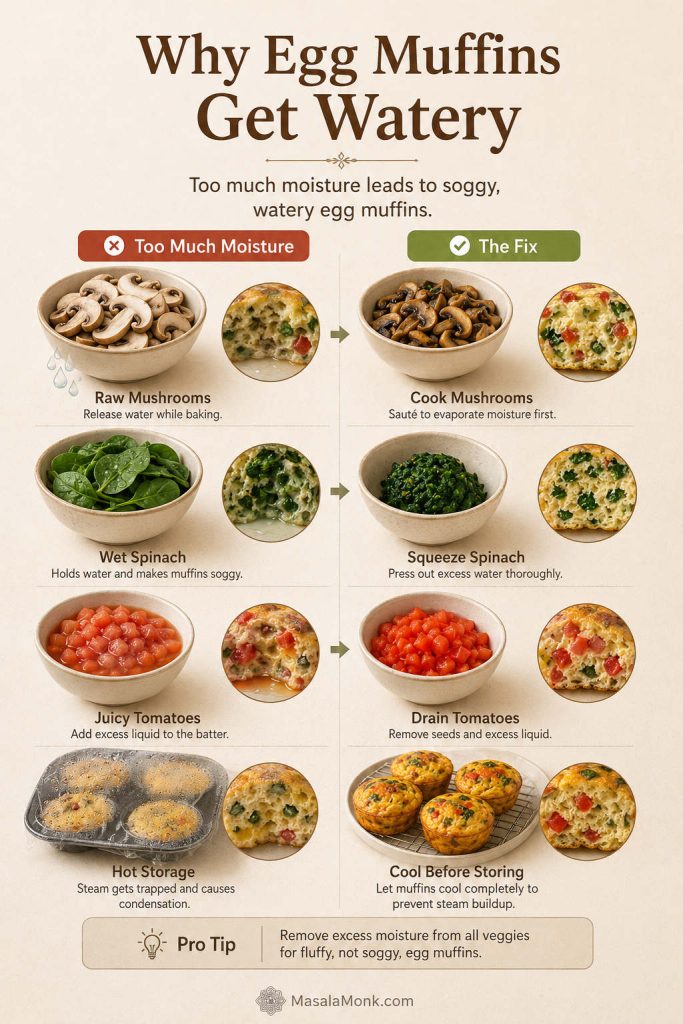
How to Keep Egg Muffins from Getting Watery
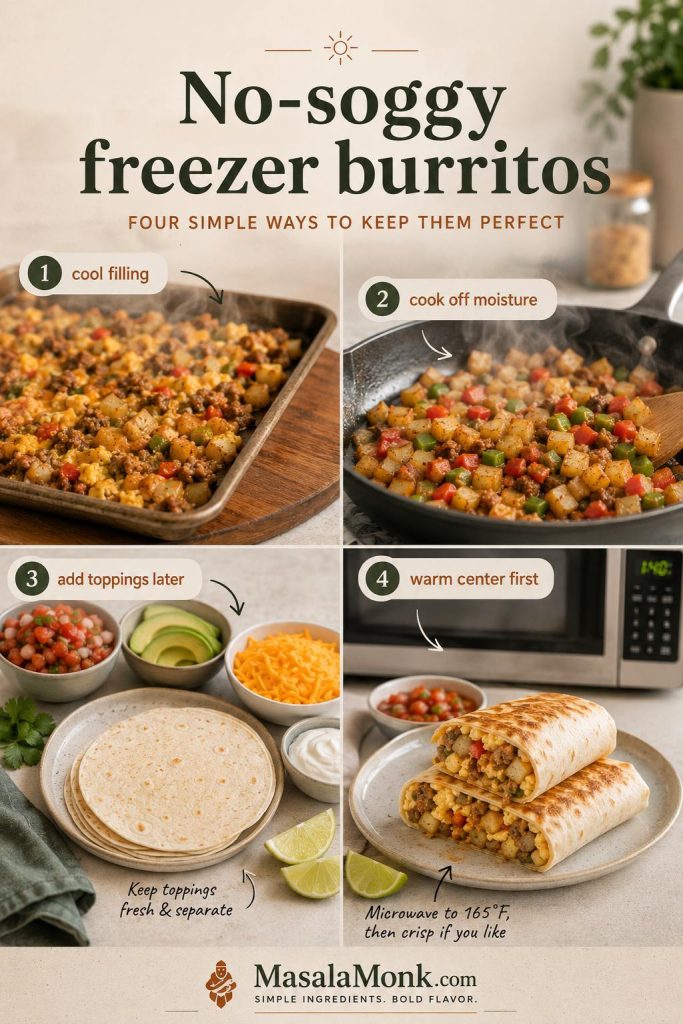
Watery egg muffins usually come from watery fillings, too many add-ins, or storing the muffins while they are still warm. Fortunately, the fix is simple: control moisture before the egg mixture goes into the pan.
| Add-in | Problem | Prep first |
|---|---|---|
| Spinach | Releases water | Cook and squeeze dry |
| Mushrooms | Release lots of moisture | Sauté until the pan looks dry |
| Onion | Can water out and taste sharp | Sauté first |
| Bell pepper | Mild moisture | Dice small; sauté briefly if using a lot |
| Tomato | Can make muffins soggy | Use drained diced tomato or skip very juicy tomato |
| Zucchini | Very watery | Salt and squeeze, or sauté first |
| Broccoli | Can be bulky | Chop small and pre-cook |
| Bacon or sausage | Grease can pool | Cook and drain before adding |
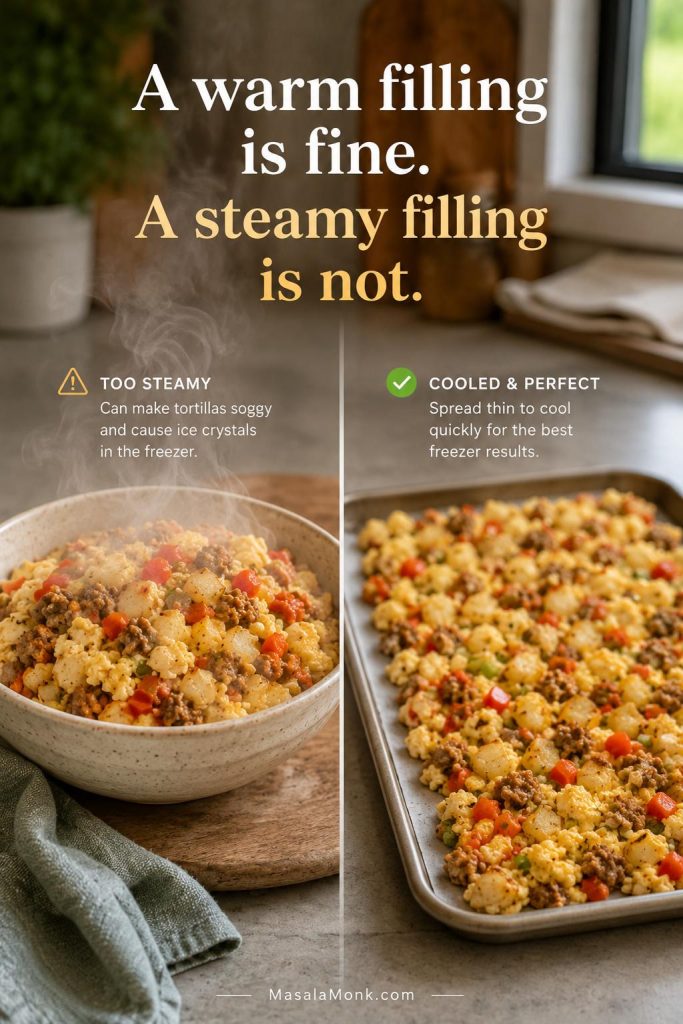
Cool Before Storing
Do not put hot egg muffins straight into an airtight container. Steam gets trapped, turns into condensation, and makes the muffins wet. Let them cool completely first.
Blot Before Reheating If Needed
Vegetable-heavy egg muffins can release a little liquid after chilling. If that happens, blot the bottom lightly with a paper towel before reheating. This is especially helpful with spinach, mushrooms, tomatoes, and zucchini.
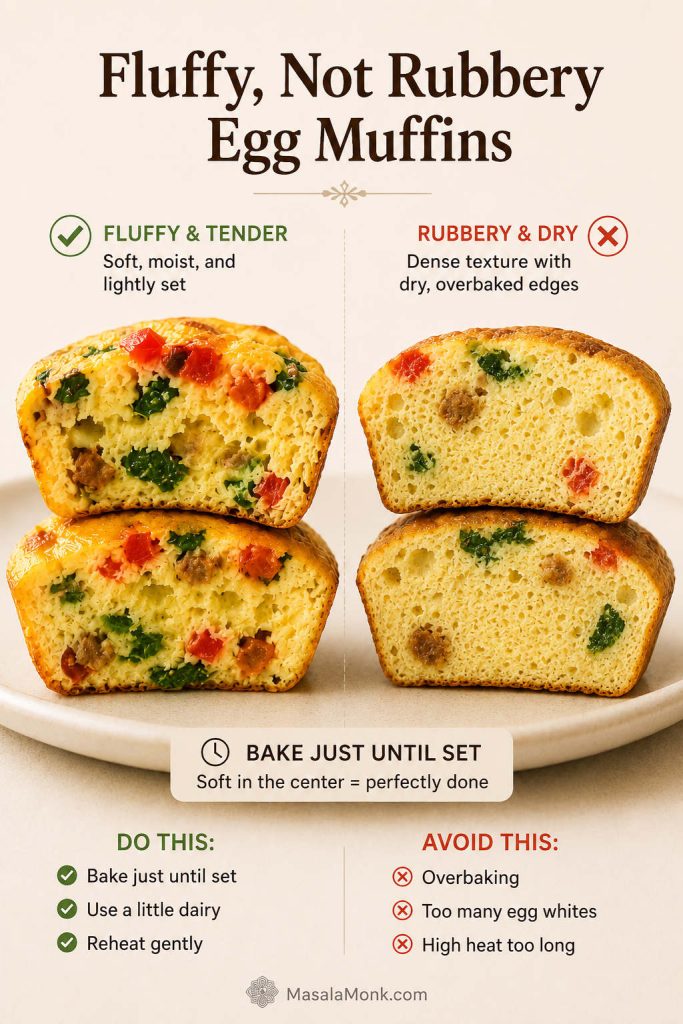
How to Make Egg Muffins Fluffy, Not Rubbery
Rubbery egg muffins usually mean the eggs were pushed a little too far, either in the oven or during reheating. You want the centers fully set, but not dry, squeaky, or spongey.
Five Ways to Keep Egg Muffins Tender
- Start checking at 18 minutes. Pull the muffins when the centers are just set and the tops are lightly puffed.
- Use a little dairy. Milk, half-and-half, cream, or blended cottage cheese softens the egg texture.
- Do not rely only on egg whites. Egg white muffins can turn rubbery faster, so add cheese, cottage cheese, or a few whole eggs if you want a softer bite.
- Whisk until combined, not foamy. Too much trapped air can make the muffins puff dramatically and then collapse more as they cool.
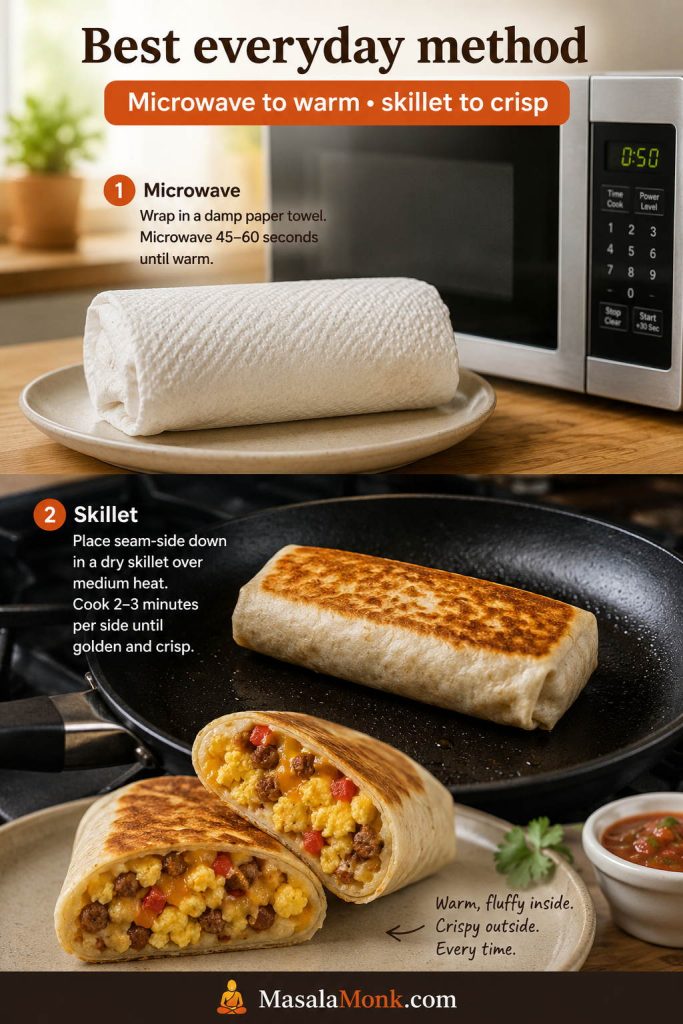
- Reheat gently. Use short microwave bursts or medium power, and cover the muffins with a damp paper towel so the edges do not dry out.
Egg Muffins Recipe: Storage, Freezing, and Reheating
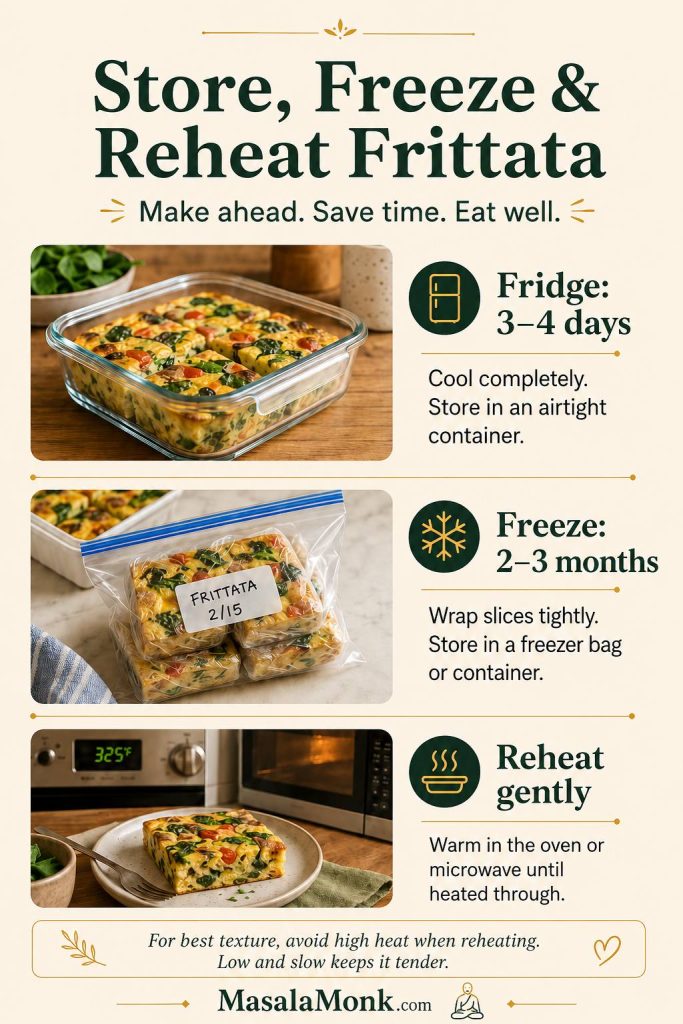
The real test of egg muffins is not just how they taste warm from the oven. It is whether you still want to eat them on Wednesday morning. Cool them completely before packing, and reheat them gently for the best texture.
| Method | How long / how to do it | Texture tip |
|---|---|---|
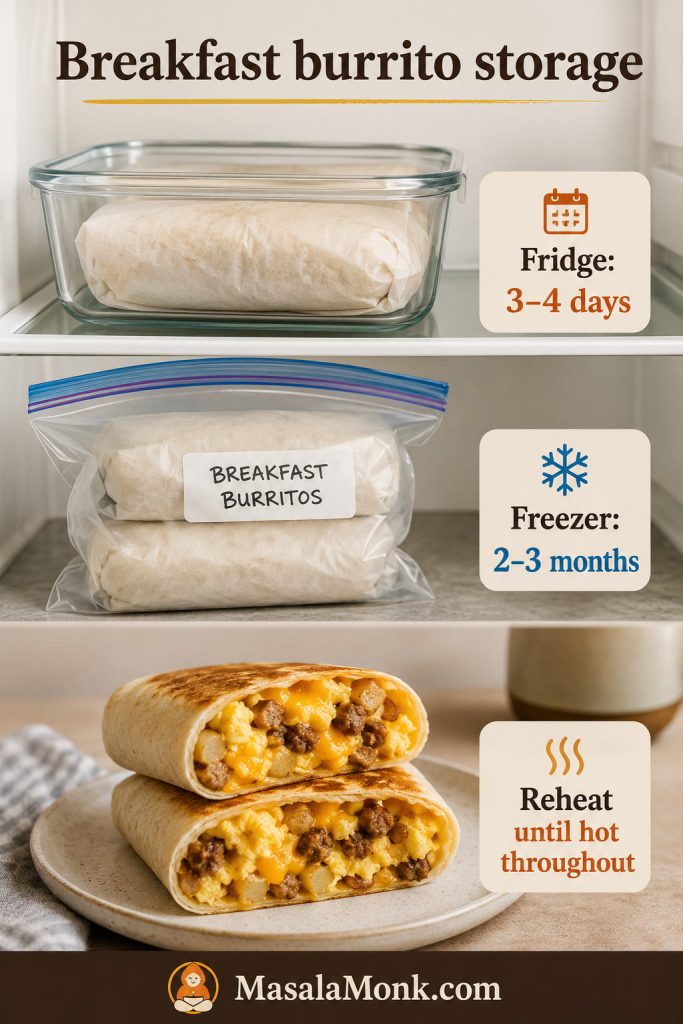
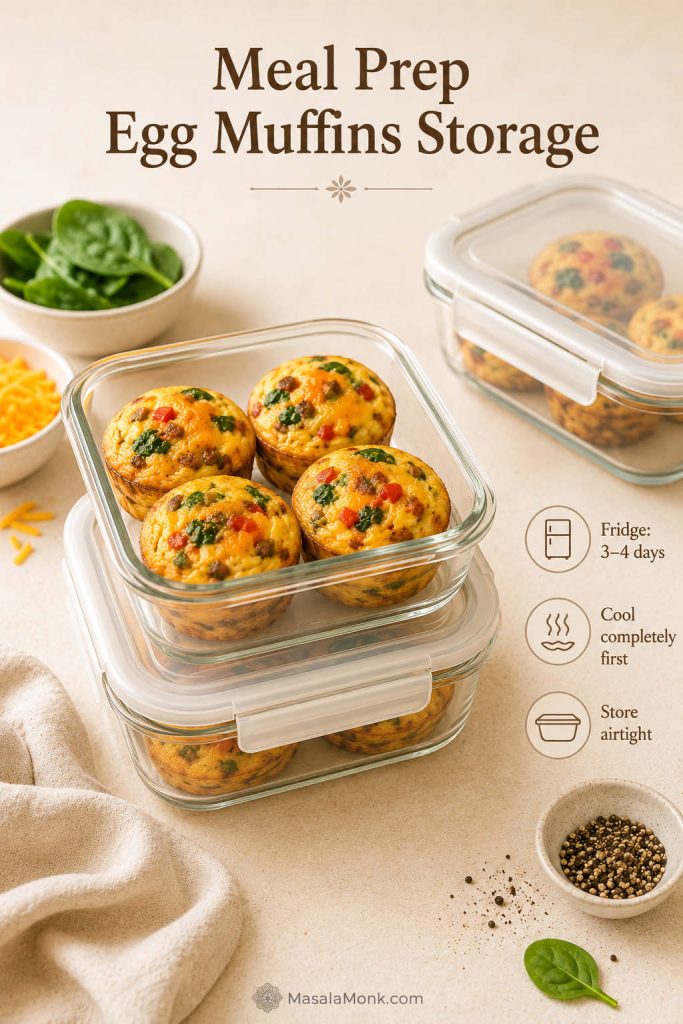
| Refrigerate | Store airtight for 3–4 days | Cool completely before closing the container |
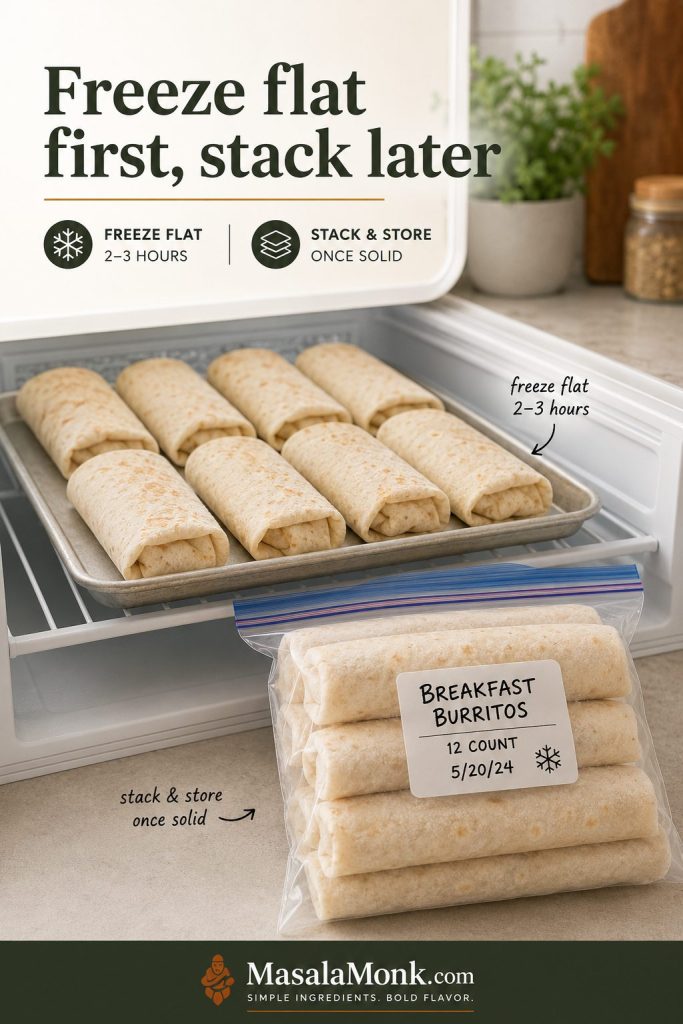
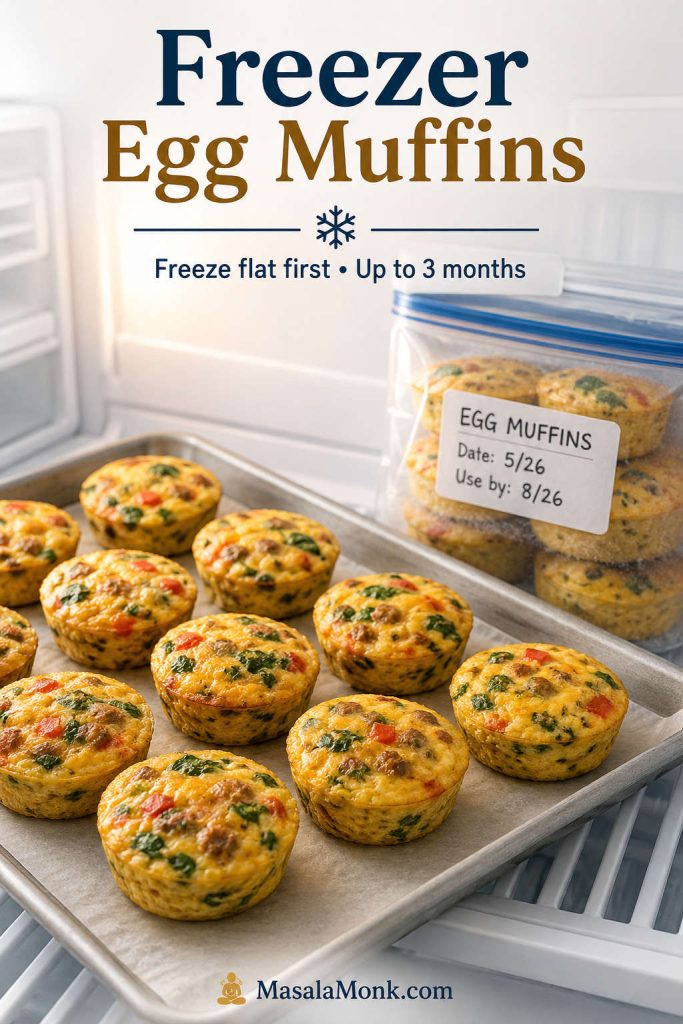
| Freeze | Freeze airtight for up to 3 months for best texture | Freeze flat first, then transfer to a bag or container |
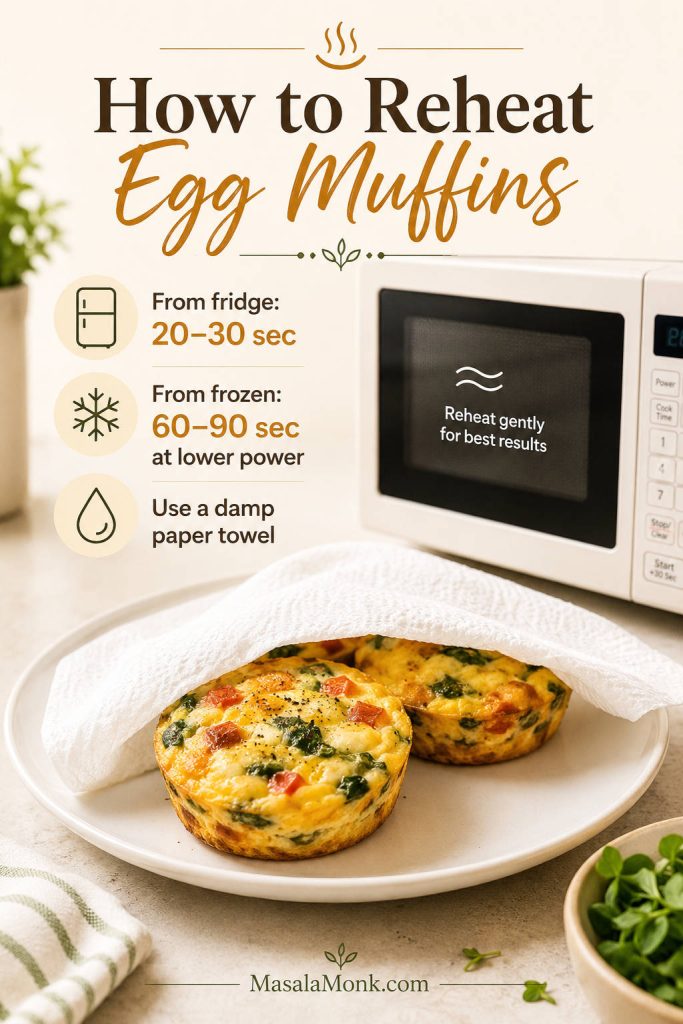
| Reheat from fridge | Microwave 20–30 seconds | Cover with a damp paper towel |
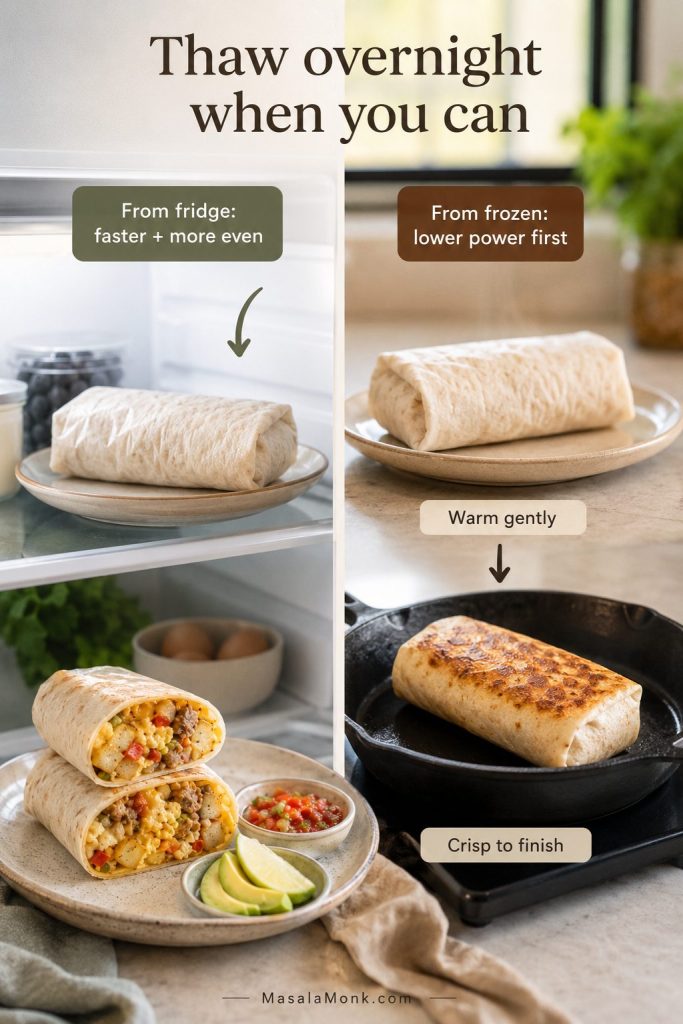
| Reheat from frozen | Microwave 60–90 seconds at 50–70% power | Thaw overnight first if possible |
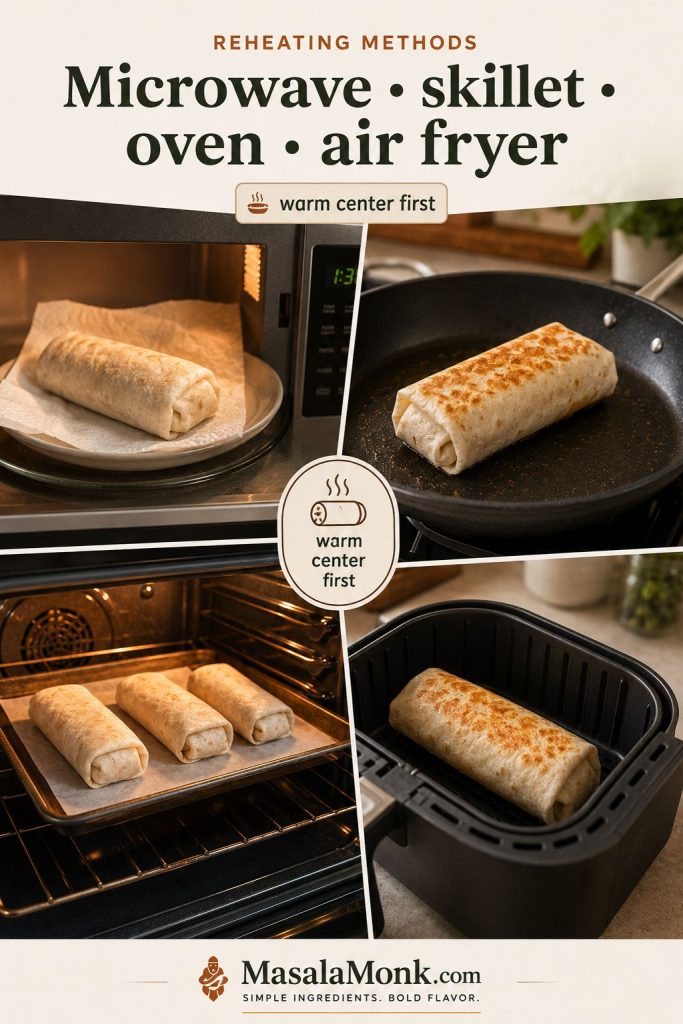
| Oven reheat | 300–350°F for 5–10 minutes | Good for reheating several at once |
| Air fryer reheat | 325–350°F for 2–4 minutes | Use a gentle setting to avoid drying the edges |
For make-ahead planning, jump to freezing egg muffins or reheating without a rubbery texture.
How Long Do Egg Muffins Last in the Fridge?
Store cooked egg muffins in an airtight container in the refrigerator for 3–4 days. The USDA/FSIS refrigeration guidance lists cooked egg dishes with a refrigerator storage time of 3–4 days, which is the safest guideline to follow for meal prep.
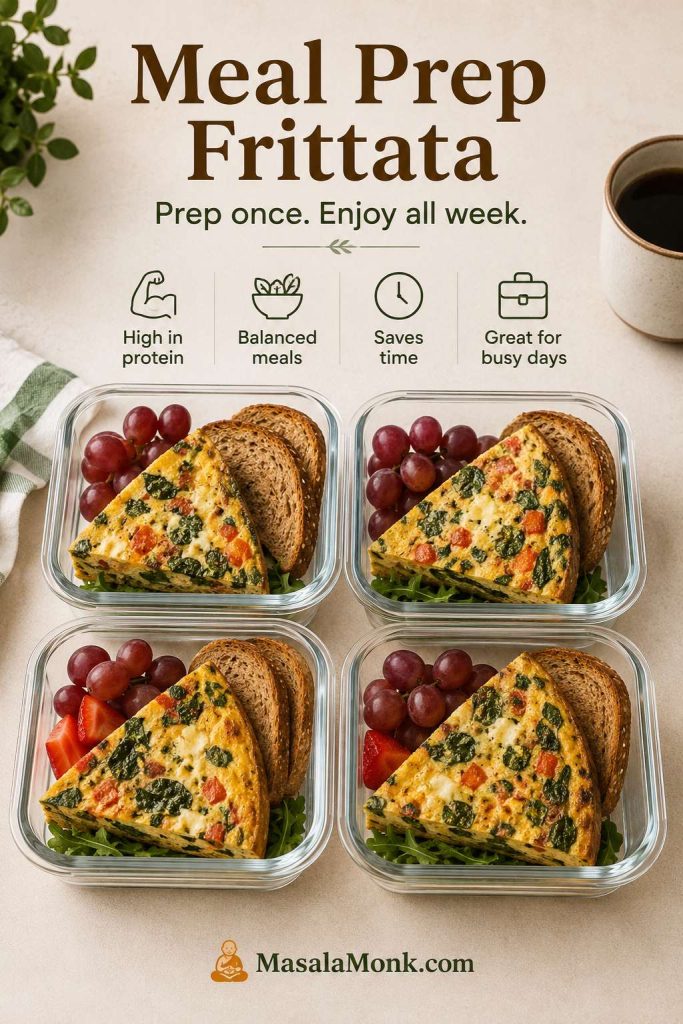
A Simple Weekly Meal Prep Plan
For an easy workweek plan, bake 12 egg muffins on Sunday. Keep 6–8 in the fridge for the next 3–4 days, then freeze the rest. After that, reheat two at a time with a damp paper towel so they warm gently instead of turning rubbery.
If you like prepping eggs for the week, air fryer hard-boiled eggs are another easy option for salads, snack boxes, and quick breakfasts.
Can You Freeze Egg Muffins?
Yes. Cool them completely, then freeze in a single layer until firm. After that, transfer them to a freezer-safe bag or container. Use within about 3 months for the best texture.
How to Reheat Egg Muffins from the Fridge
Microwave one egg muffin for 20–30 seconds, covered with a damp paper towel. Add more time only if needed. If your microwave runs hot, use medium power instead of full power.
How to Reheat Egg Muffins from Frozen
For the best texture, thaw overnight in the refrigerator. To reheat straight from frozen, microwave at 50–70% power for 60–90 seconds, checking in short bursts.
When reheating leftovers, heat them until hot all the way through. Use short bursts so the centers warm without drying out the edges.
Can You Eat Egg Muffins Cold?
You can eat them cold if they have been stored safely, but the texture is better when they are gently warmed. A short reheat brings back the softer texture and makes the cheese taste better.
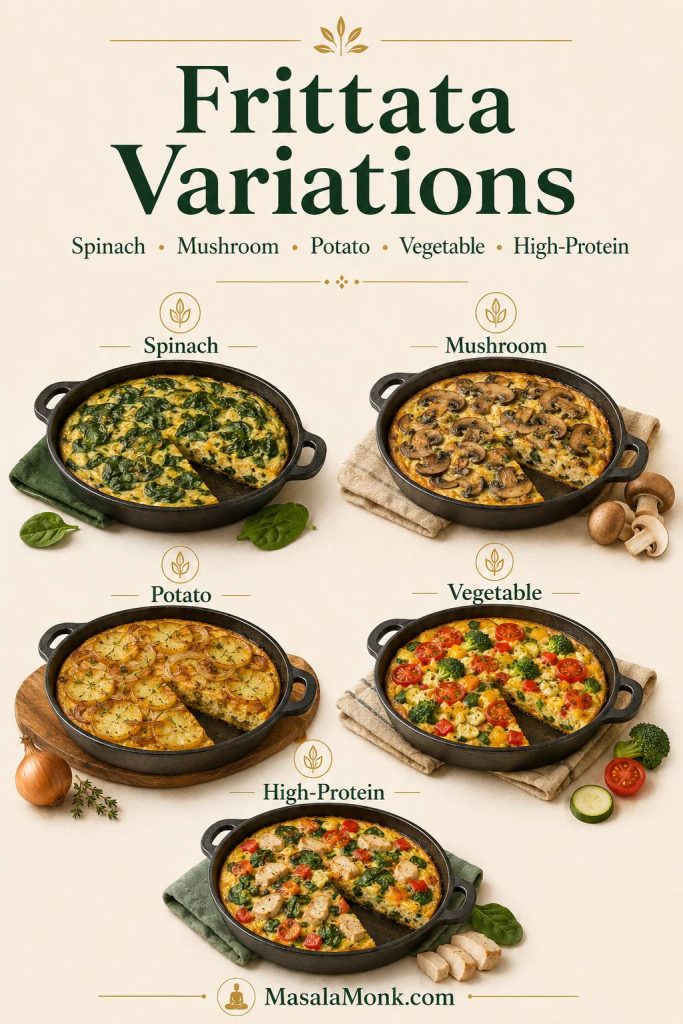
Egg Muffin Variations
This is where the recipe becomes your own. Keep the same base ratio, then choose the filling style that fits your morning: hearty, lighter, kid-friendly, low-carb, or brunch-ready.
Need a specific version? Jump to the classic cheddar batch, hash brown egg cups, or the egg muffins vs egg bites comparison.

Choose Your Filling Style
| If your morning needs… | Choose… | Key adjustment |
|---|---|---|
| Grab-and-go protein | Bacon, sausage, or cottage cheese muffins | Use cooked meat and keep the bake gentle |
| A lighter breakfast | Peppers, spinach, mushrooms, and less cheese | Cook watery vegetables first |
| A kid-friendly batch | Ham and cheddar | Keep seasonings mild |
| A brunch plate | Spinach feta or mushroom Swiss | Serve warm with salad or toast |
| Low-carb meal prep | Eggs, cream, cheese, bacon, and spinach | Skip potatoes and starchy add-ins |
How to Customize Without Ruining the Texture
If this is your first time making the recipe, start with the easy classic cheddar version. It gives you the best read on the base texture before you experiment with cottage cheese, egg whites, hash browns, or heavier vegetable mixes.
After that, adjust one thing at a time: the cheese, the protein, or the vegetables. That way, you can tell what changed the texture and what changed the flavor.
Specific Egg Muffin Filling Ideas
If you already know the style you want, the table below gives you more specific filling combinations while keeping the same basic egg-to-filling ratio.
| Variation | Add-ins | Special note |
|---|---|---|
| Bacon egg muffins | Cooked bacon, cheddar, green onion | Drain bacon well before adding |
| Sausage egg muffins | Cooked sausage, cheddar, peppers | Drain fat before adding |
| Ham and cheese egg muffins | Diced ham, cheddar or Swiss | Good for kids and meal prep |
| Spinach feta egg muffins | Spinach, feta, herbs | Squeeze spinach dry |
| Cottage cheese egg muffins | Blended cottage cheese, eggs, spinach | Softer, higher-protein texture |
| Egg white muffins | Egg whites, vegetables, cheese | Season well and do not overbake |
| Keto egg muffins | Eggs, cream, cheese, bacon or sausage | Skip starchy add-ins |
| Hash brown egg cups | Hash brown shell, egg filling | Different method; bake the shell first |
| Vegetarian egg muffins | Peppers, spinach, mushrooms, cheese | Cook watery vegetables first |
| Spicy egg muffins | Jalapeño, pepper jack, onion | Remove seeds for milder heat |
Easy Classic Cheddar Version
Use cheddar, bell pepper, spinach, and cooked bacon, ham, or sausage. Cheddar melts into the edges, bell pepper gives small sweet pops, and the cooked meat makes the muffins feel breakfasty and satisfying. If you are using bacon, this is a good place to prep extra from your air fryer bacon batch.

Higher-Protein Cottage Cheese Version
Use blended cottage cheese in the egg base and add turkey sausage, chicken sausage, or extra egg whites. Cottage cheese makes the texture softer and more café-style, but the bake should stay gentle so the eggs do not turn spongey. On days when you want a bowl instead of baked eggs, protein oatmeal gives you another high-protein breakfast option.
Low-Carb or Keto Version
Use eggs, cream, cheese, bacon or sausage, spinach, and mushrooms. Skip potatoes, hash browns, and sweet vegetables if you want a stricter low-carb version.
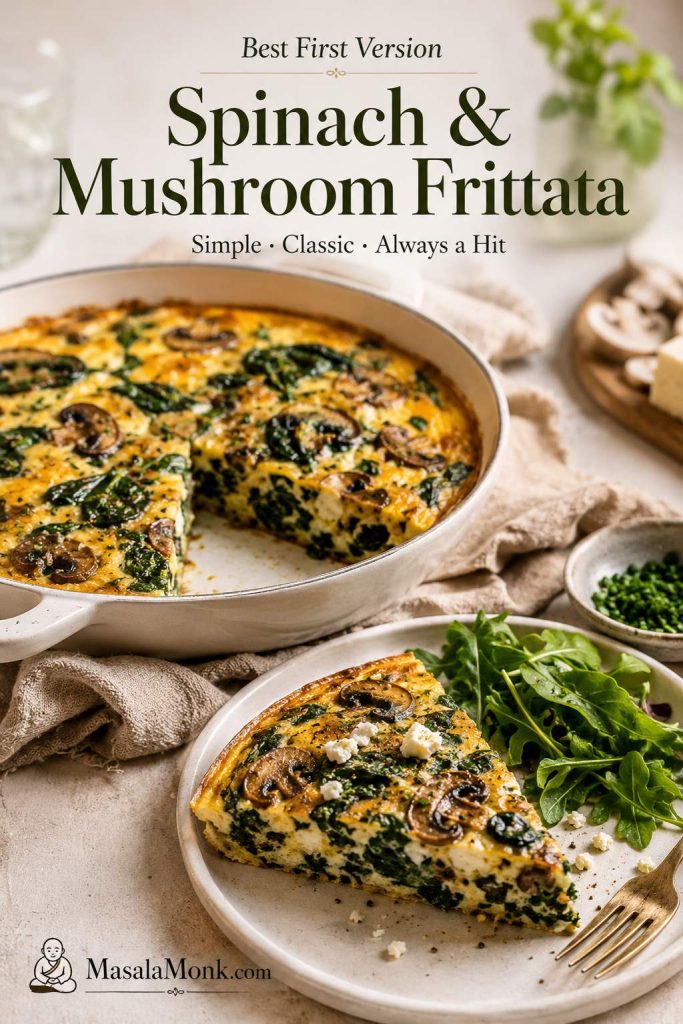
Vegetarian Spinach and Mushroom Version
Use spinach, bell peppers, mushrooms, onions, feta, cheddar, or herbs. Mushrooms bring savory depth, feta adds brightness, and spinach keeps the batch colorful. Cook the mushrooms and onions first so the muffins do not turn watery.
Hash Brown Egg Cups Version
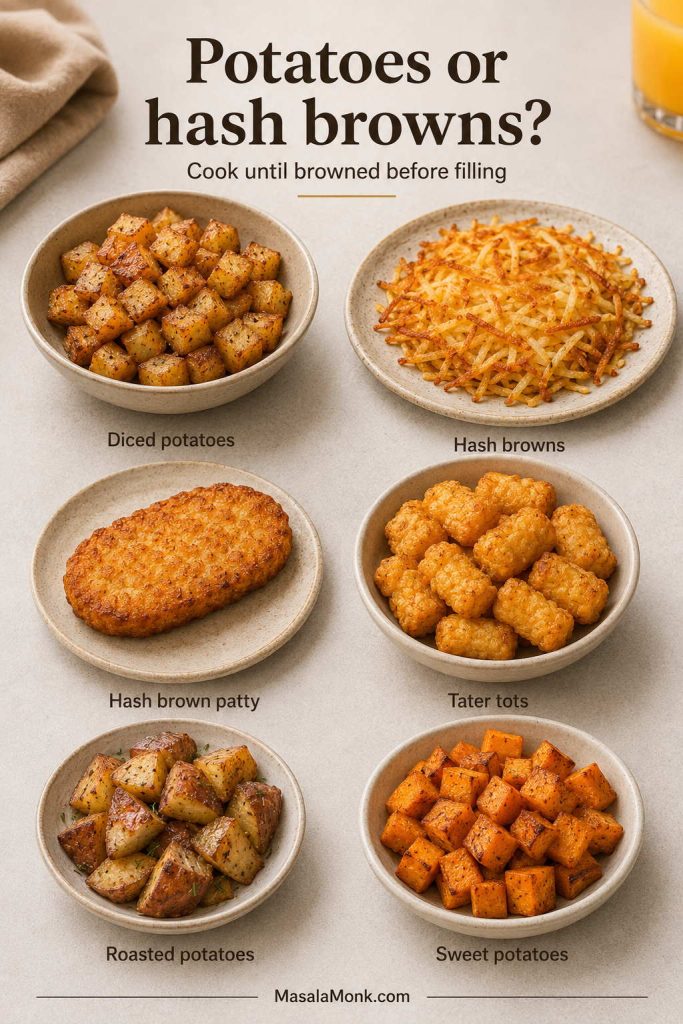
Hash brown egg cups need a different method. Press seasoned hash browns into the muffin cups first, bake them until they begin to crisp, then add the egg filling and bake again. This gives you a potato shell instead of a classic egg muffin base. If you are starting with frozen shredded potatoes or patties, the timing notes in this air fryer hash browns guide can help you understand how moisture and crisp edges behave before you turn them into cups.

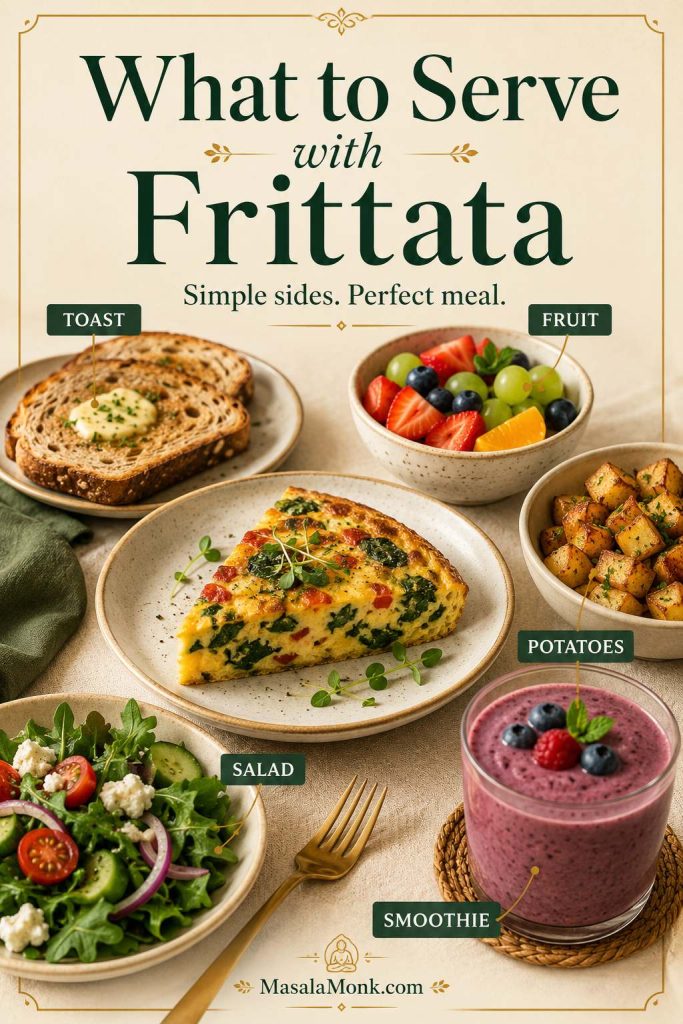
What to Serve with Egg Muffins
Two breakfast egg muffins can be a full light breakfast on their own. Because egg muffins are soft and savory, they taste best with contrast: fruit for freshness, avocado for creaminess, salsa for brightness, toast for crunch, or roasted potatoes when you want the plate to feel more like brunch.
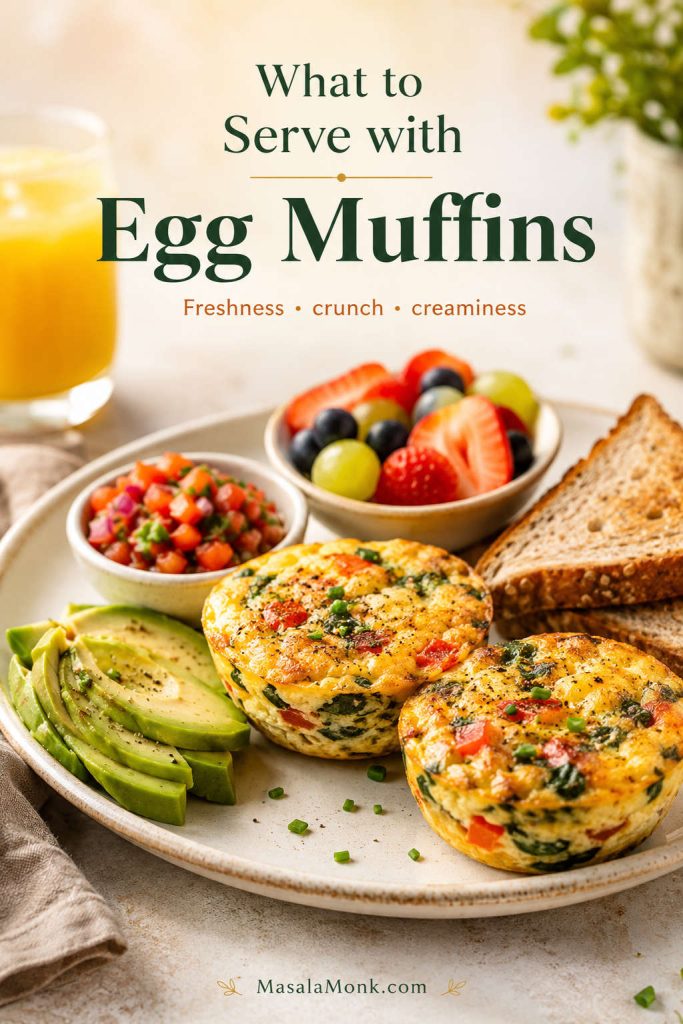
For a heartier plate, add an English muffin, hash browns, or a small breakfast sandwich. For sandwich-style ideas, this list of breakfast sandwich recipes can help you build a more filling morning meal.
Egg Muffins vs Egg Bites vs Mini Frittatas
These names are closely related, but the texture and method can be different. Knowing the difference helps you choose the right recipe style for your breakfast meal prep.
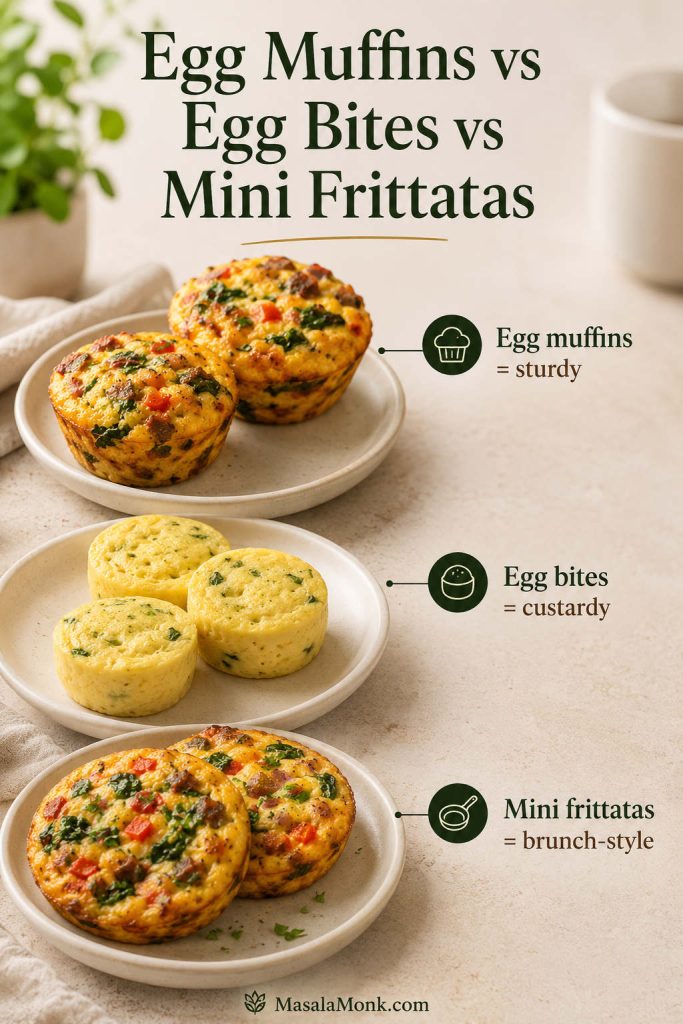
Egg Muffins
Egg muffins are firm enough to pick up and meal prep easily. They are usually whisked, not blended, and baked in a muffin tin. This is the best version when you want a simple, sturdy, make-ahead breakfast.
As a baked egg cups recipe, this version is firmer and easier to store than custardy egg bites, which makes it better for grab-and-go breakfasts.
Egg Bites
Egg bites are softer and more custardy. They often use blended cottage cheese and a gentler baking method. If you want a Starbucks-style texture, make a cottage cheese egg bite version rather than a classic egg muffin.
For a softer egg-bite texture, blend the eggs with cottage cheese and bake more gently, around 325°F / 160°C. A water bath is not needed for classic egg muffins, but it can help egg bites cook more evenly and stay custardy. For that method, set a metal muffin tin or silicone-lined muffin tin inside a larger baking dish, pour hot water into the outer dish until it comes partway up the sides of the muffin tin, and move everything carefully so no water splashes into the eggs.
Mini Frittatas
Mini frittatas are very similar to egg muffins, but the name often appears in brunch-style recipes. They may be served fresh rather than packed for meal prep.
Which One Should You Make?
- Easy meal prep: make classic egg muffins.
- Softer café-style texture: make cottage cheese egg bites.
- Brunch-style serving: call them mini frittatas and serve them warm.
- Crispy base: make hash brown egg cups instead.
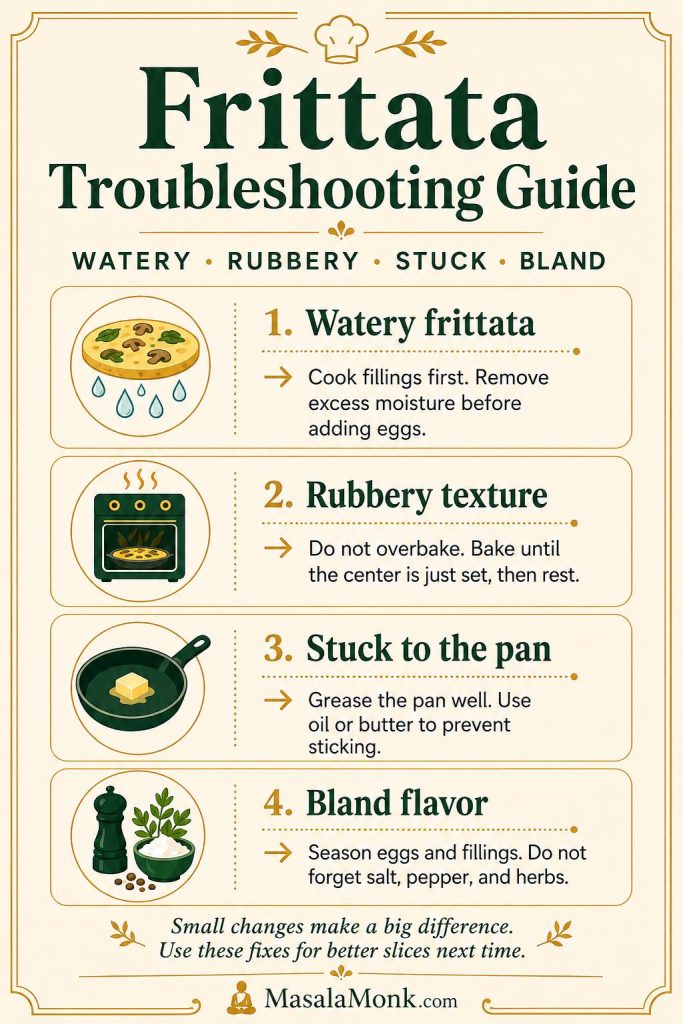
Troubleshooting Egg Muffins
If a batch turns out watery, rubbery, stuck, or bland, it usually comes down to one small step rather than the whole recipe failing. Use this table before your next batch, and the fix should be clear.
Not sure what went wrong? The most common fixes are also covered in the dedicated sections for watery egg muffins, rubbery texture, and sticking to the pan.
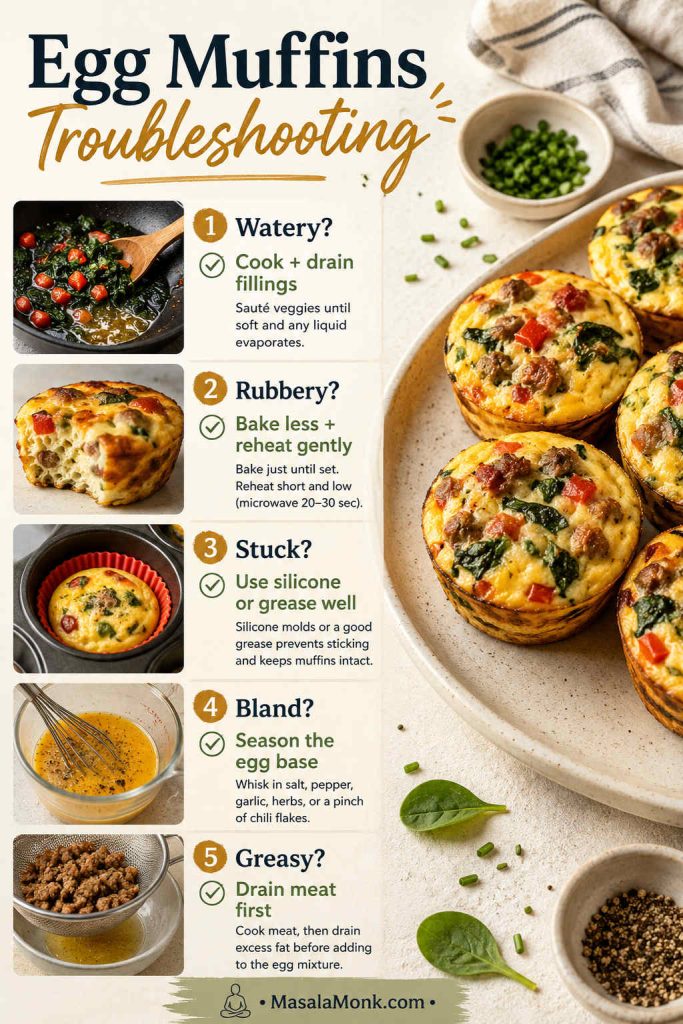
| Problem | Likely cause | Fix next time |
|---|---|---|
| Watery egg muffins | Raw watery vegetables, too many add-ins, or storing while warm | Cook and drain vegetables; cool completely before storing |
| Rubbery texture | Overbaked or reheated too aggressively | Bake just until set and reheat gently |
| Stuck to pan | Not enough grease, plain paper liners, or metal pan | Use silicone or grease generously |
| Collapsed muffins | Normal cooling, overmixed eggs, or watery filling | Whisk gently and control moisture |
| Bland flavor | Not enough salt, cheese, herbs, or savory fillings | Season the egg base and use flavorful add-ins |
| Dry muffins | Too long in the oven or too little dairy | Reduce bake time and add milk, cream, or cottage cheese |
| Undercooked center | Cups overfilled or oven runs cool | Fill 3/4 full and bake a few minutes longer |
| Greasy bottoms | Bacon or sausage not drained | Cook and drain protein before adding |
| Spongey texture | Overcooked eggs or too many egg whites | Use whole eggs, dairy, and a gentler bake |
FAQs About Egg Muffins
How many eggs do I need for 12 egg muffins?
Use 10 large eggs for the best all-purpose batch. That gives you enough egg mixture to fill a standard 12-cup muffin pan while still leaving room for cheese, vegetables, and protein.
What temperature is best for egg muffins?
350°F / 175°C is the best default temperature. It is hot enough to set the centers in about 20 minutes, but gentle enough to keep the edges from turning tough.
How long do egg muffins take to bake?
Most egg muffins take 18–22 minutes at 350°F / 175°C. Start checking around 18 minutes, especially if your cups are lightly filled or your oven runs hot.
How long do mini egg muffins take?
Mini egg muffins usually take about 12–15 minutes at 350°F / 175°C. Since mini muffin pans vary, check early and pull them when the centers are just set.
Why are my egg muffins watery?
Watery egg muffins usually come from raw watery vegetables, too many fillings, or storing the muffins before they cool. Cook and drain ingredients like spinach, mushrooms, onions, tomatoes, and zucchini before baking.
Why did my egg muffins turn rubbery?
Rubbery egg muffins usually mean the eggs were overbaked or reheated too aggressively. Pull them when the centers are just set, then reheat in short bursts with a damp paper towel.
What is the best pan for egg muffins?
A silicone muffin pan or silicone liners are the easiest options because baked eggs release more cleanly from silicone. A metal nonstick muffin tin also works, but it needs generous greasing.
Are egg muffins healthy?
They can be. Egg muffins are naturally high in protein, and you can make them lighter with vegetables, lean meat, cottage cheese, egg whites, or less cheese. The final nutrition depends on the fillings you choose.
Are egg muffins keto?
Yes, they can be keto if you use eggs, cream, cheese, bacon or sausage, and low-carb vegetables such as spinach, mushrooms, peppers, or zucchini. Skip potatoes, hash browns, and sweet starchy add-ins.
Do egg muffins freeze well?
They freeze well enough for meal prep, especially if you cool them completely and reheat them gently. The texture is usually best after an overnight thaw, but even from frozen, short microwave bursts work better than one long blast.
What is the difference between egg muffins and egg bites?
Egg muffins are usually firmer and more like mini frittatas. Egg bites are softer, smoother, and often blended with cottage cheese or cooked more gently for a custardy texture.
Frozen vegetables in egg muffins: what works best?
Thaw and drain frozen vegetables before adding them. Frozen spinach, broccoli, peppers, and mixed vegetables can all work, but they need a quick squeeze or blot first so they do not leak into the egg base.
Raw meat in egg muffins: why cook it first?
Cook sausage, bacon, chicken sausage, turkey sausage, or any other meat before adding it to the muffin cups. The eggs cook quickly, so raw meat will not cook evenly inside the cups; cooked and drained meat gives you safer, cleaner, less greasy muffins.
Final Tips for Better Egg Muffins
Once you know the basic ratio, this egg muffins recipe becomes easy to repeat. Keep the oven gentle, control moisture, fill the cups only 3/4 full, and reheat gently. After one or two batches, you will know which fillings taste best for your mornings and which ones reheat the cleanest.

That is how you get tender centers, savory fillings, lightly cheesy edges, and breakfast egg muffin cups that are easy to store, easy to customize, and actually worth eating all week.