There’s something quietly magical about crock pot pork chops and sauerkraut on a slow day. The kitchen smells warm and familiar, the tang settles into something rounder, and dinner feels like it’s been gently cooking in the background of your life—because it has. Even so, if you’ve ever lifted the lid and found pork chops that look perfect but chew dry, you already know the catch: pork chops aren’t one of those “leave it forever and it only gets better” cuts.
That’s exactly why this version is built around two things that actually matter: the chop you choose and when you stop cooking. Once you get those right, everything else becomes straightforward—whether you keep it classic, lean into apples and onions, or go simple and old fashioned with nothing more than onion, pepper, and kraut.
At the same time, you’ll learn how to steer the sauerkraut so it lands where you want it—bright and tangy, mellow and savory, or somewhere comfortably in between—without masking it under sugar. Plus, because pork and sauerkraut is often a meal people come back to for comfort or a New Year’s Day table, you’ll have options that scale beautifully without turning your slow cooker into a pot of boiled pork.
For doneness, we’ll stick to a clear, widely accepted standard: cook the pork to 145°F (63°C) and let it rest briefly, as outlined in the USDA safe temperature chart and echoed in the safe minimum internal temperature guidance at FoodSafety.gov. In other words, we’ll cook with confidence—then stop at exactly the right time.
Why pork chops and sauerkraut in a crock pot sometimes disappoint
A slow cooker is brilliant at turning tougher cuts into tenderness, because collagen has time to soften and melt. However, many pork chops—especially lean loin chops—don’t contain much collagen to begin with. So instead of improving endlessly, they can slide from tender to firm to dry if they sit too long.
On top of that, sauerkraut is a tricky companion. It’s salty, acidic, and wet. Those are not bad things—far from it—but they do change how pork behaves, and they can make the difference between “juicy and savory” and “tight and stringy.”
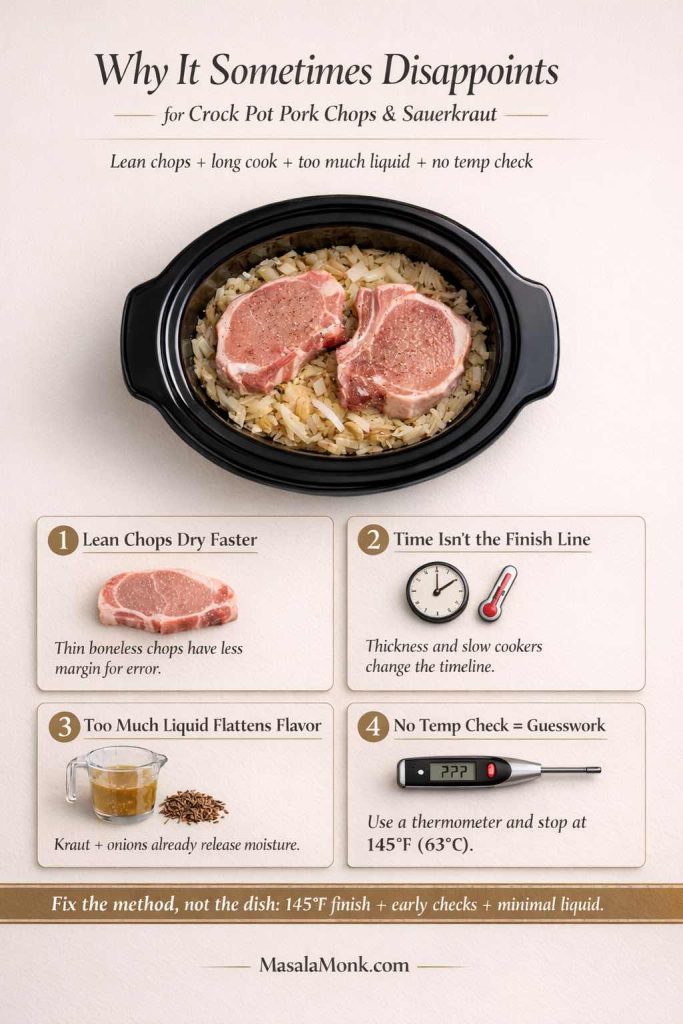
That’s why this method avoids the common trap of treating every chop the same. Rather than setting a long timer and hoping for the best, you’ll start checking earlier based on thickness, then pull at temperature. You’ll also manage the sauerkraut so it supports the pork instead of overwhelming it.
If you like this temperature-first approach, you’ll recognize the same logic used in our oven method for pork—especially the emphasis on stopping at the right moment rather than cooking “until it’s definitely done.” It’s the same idea you’ll see in pork tenderloin in oven, where the goal is juicy meat that slices cleanly without drying out.
Also Read: Keto Mocktails: 10 Low Carb, Sugar Free Recipes
Choosing the best pork chops for crock pot pork chops and sauerkraut
Before you open a jar of kraut, choose your chops. It sounds basic, yet it’s the difference between a meal that feels effortless and a meal you swear you’ll never make again.

Bone-in vs boneless for crock pot pork chops and sauerkraut
Bone-in chops are often thicker and slightly more forgiving. They also tend to stay juicier in slow-cooker cooking because they’re less likely to be ultra-lean.
Boneless chops, especially boneless loin chops, can still work beautifully—provided you treat them gently and don’t let them run long. If you’re aiming for a reliable, no-drama dinner, bone-in gives you a little extra cushion. Even so, boneless can be fantastic when you want faster cooking or a cleaner slice.
Thickness matters more than almost everything else
If you take one idea from this entire post, let it be this: thickness changes the timeline.
- Thin chops (½–¾ inch): cook quickly and can overcook quickly.
- Standard chops (about 1 inch): the easiest middle ground.
- Thick chops (1¼–2 inches): the best insurance policy for tenderness.
If you’re using thin chops, you can still win—yet you’ll want to start checking earlier and keep the heat gentle. Meanwhile, thick chops buy you time and keep the odds in your favor.
The “kraut-friendly” chop profile
Pork and sauerkraut is happiest when the pork has at least a little fat or marbling to balance the tang. So, if you have choices:
- pick chops that are not paper-thin
- avoid the leanest “extra trimmed” versions when possible
- lean toward bone-in or thicker cuts
Also Read: Slow Cooker Pork Tenderloin (Crock Pot Recipe) — 3 Easy Ways
Which pork chops stay juiciest with sauerkraut (a quick buyer’s guide)
If you’ve ever had pork chops that came out oddly firm even though they were “done,” the cut is often the reason. Sauerkraut is tangy and salty, so it pairs best with chops that have a little natural richness.
If you can choose, look for chops that fall into one of these categories:
- Shoulder or sirloin chops: these are usually a bit fattier and more forgiving, which makes them a great match for crock pot pork chops and sauerkraut. They’re the kind of chop that can handle slow heat without turning dry as easily.
- Rib chops or center-cut bone-in chops: these are often thicker and stay tender well, especially when you pull at temperature.
- Boneless loin chops: these are lean and can still be delicious, yet they need a shorter cook and earlier checking to avoid that dry, tight bite.
If all you have are lean boneless chops, don’t worry—just treat them gently. Keep the liquid minimal, cook on LOW, and consider the apple-and-onion variation so the dish feels balanced even with a leaner cut.
Also Read: Chicken Pesto Pasta (Easy Base Recipe + Creamy, One-Pot, Baked & More)
Ingredients for pork chops and sauerkraut crock pot style
This dish can be as spare as you want or as layered as you want. Still, the best version is always the one that tastes balanced. The ingredient list below keeps the classic soul while giving you a few optional add-ons that make it feel special without feeling sweet.
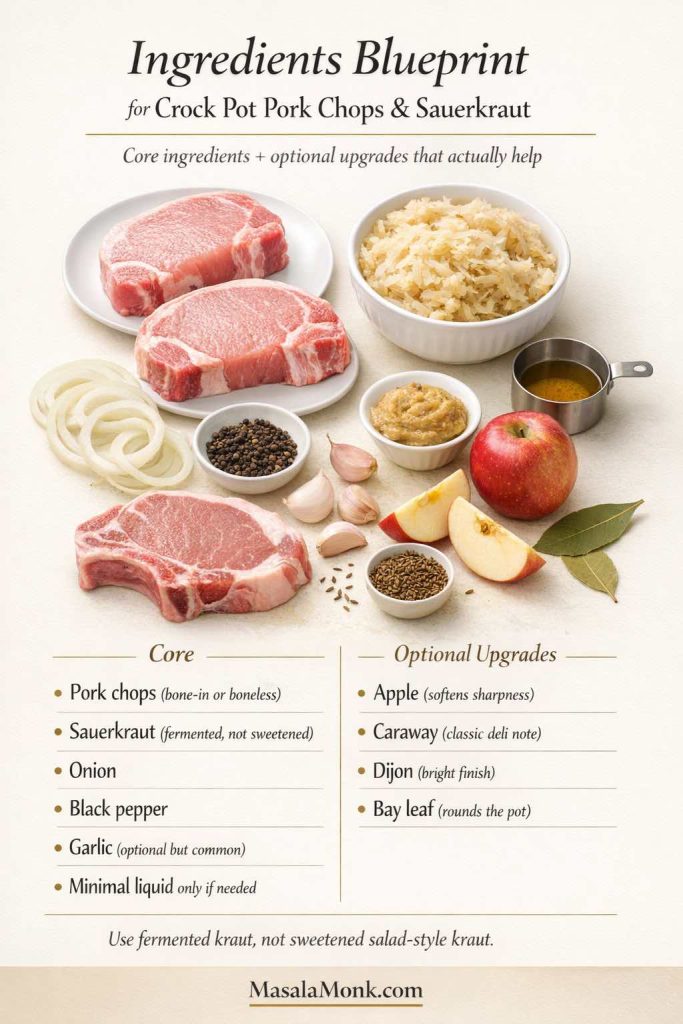
Core ingredients
- Pork chops (bone-in or boneless; thicker is better)
- Sauerkraut (fermented kraut, not sweetened salad-style)
- Onion, sliced (one medium onion is enough)
- Black pepper
- Garlic (optional, but lovely)
- Caraway seeds (optional, classic, and surprisingly impactful)
Optional, highly recommended additions
- One apple, sliced (for pork and sauerkraut with apples)
- A small splash of apple juice or broth (only if needed; we’ll keep this measured)
- Dijon mustard (for a bright finish)
- A bay leaf (subtle, but it rounds the pot)
If you’re curious about what makes sauerkraut taste the way it does—salt levels, brine, and that sharp-tang backbone—this fermentation resource is genuinely useful: NCHFP’s sauerkraut guide. You don’t need to make homemade kraut for dinner tonight, but understanding the brine helps you adjust flavor with intention.
Also Read: Pork Tenderloin in Oven (Juicy, Easy, 350°F or 400°F) Recipe
Sauerkraut in crockpot: the “tangy vs mild” dial
Different jars and bags of sauerkraut can taste wildly different. Some are bright and briny; others are mellow and soft; a few are downright salty. Rather than guessing, you can steer it.

If you want it bold and tangy
Use sauerkraut with some of its brine. Keep seasoning simple. Then lean on onion and pepper to round it out.
If you want it mild and mellow
Rinse the sauerkraut quickly in a colander, then squeeze it gently. It’ll still taste like kraut—just less sharp. After that, add onion, and consider adding apple for an easy, natural balance.
If your sauerkraut is salty
Rinse and squeeze, then skip adding any extra salt. In fact, pepper and aromatics will often be enough.
If your sauerkraut tastes sharp in a way you don’t love
Add onion and apple. They soften the edges without turning dinner into something sugary. A tiny bit of sweetness is fine; a heavy hand isn’t necessary.
Because many people also cook sauerkraut in a slow cooker as a standalone side, you’ll sometimes see phrases like “sauerkraut in slow cooker” or “sauerkraut in crockpot.” In this dish, though, the sauerkraut isn’t just a side—it becomes the flavor bed that seasons the pork and carries the juices.
Also Read: How to Make a Flax Egg (Recipe & Ratio for Vegan Baking)
Step-by-step: crock pot pork chops & sauerkraut
The method is simple, yet it’s worth doing in a specific order. That way, the bottom of the slow cooker becomes a flavor base and the pork stays tender.

Step 1: Build the base
Scatter sliced onions across the bottom of your slow cooker. Then add the sauerkraut on top of the onions. This matters more than it seems because onions release moisture and sweetness, which helps the kraut mellow out as it cooks.
If you’re using apple, tuck slices through the kraut so they soften gently and perfume the pot. If you place apples directly on top, they can over-soften and feel like a separate layer. When they’re nestled in, they disappear in the best way—like you can taste the balance, but you don’t feel like you’re eating fruit for dinner.

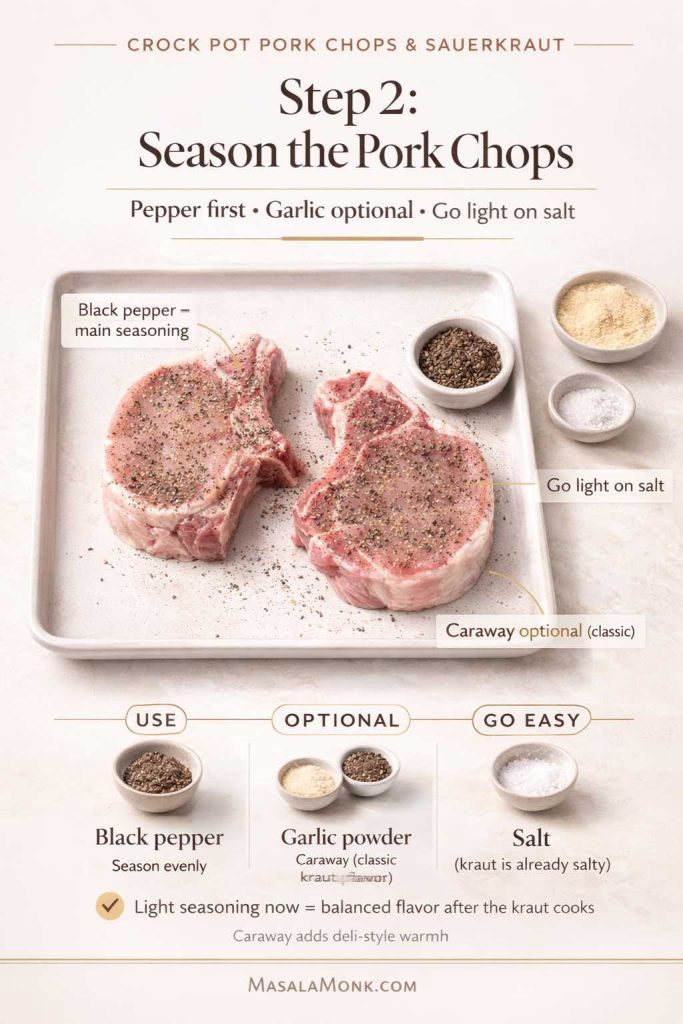
Step 2: Season the pork chops
Season pork chops with black pepper. Add garlic powder if you like. Caraway is optional; if you love the deli-style character of sauerkraut dishes, you’ll appreciate it.
Go light on salt. In most cases, the sauerkraut brings enough salinity on its own.
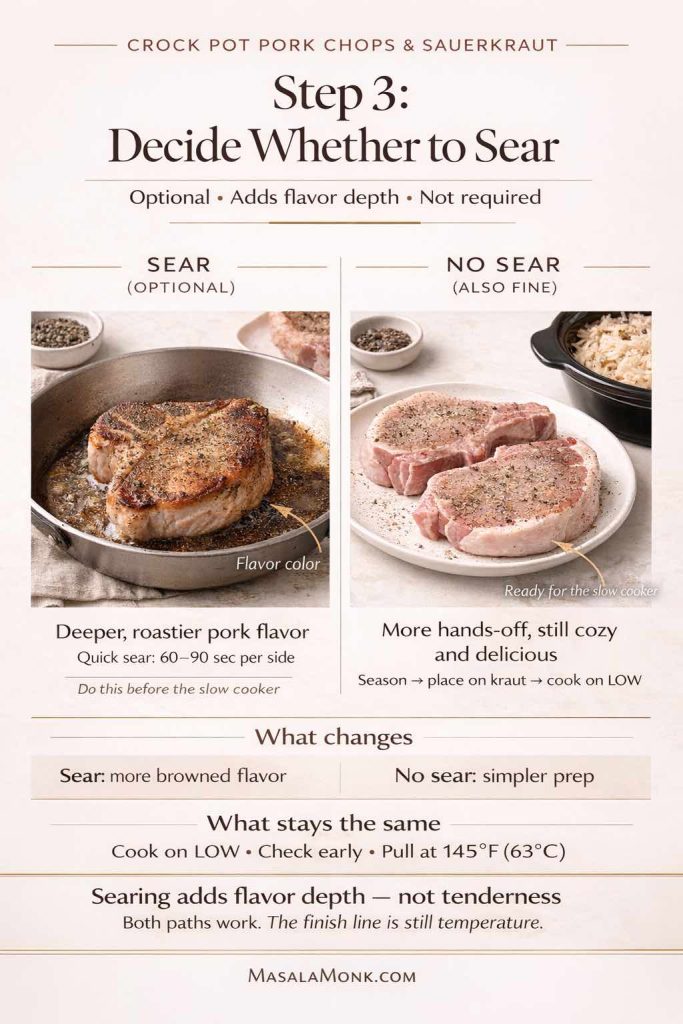
Step 3: Decide whether to sear
Searing is not required. Still, it adds depth and a richer pork flavor. If you have time, sear the chops quickly in a hot skillet for 60–90 seconds per side.
If you don’t have time, skip it. The dish will still be comforting and delicious. Nevertheless, searing can be the difference between “soft-cooked” and “deeper, roastier flavor.” Both are good; pick what suits your day.
Step 4: Place the chops on top
Lay the pork chops on top of the sauerkraut mixture. Keeping them above the densest part of the kraut helps them cook more evenly and keeps the pork from sitting too deep in liquid.
At this point, you’ll see some recipes that add lots of water or broth. Instead, we’ll use a measured approach.

Step 5: Use the liquid rule
Here’s the clean rule: add only what you need.
- If the sauerkraut looks juicy and you have onions underneath, you may not need any additional liquid.
- If the kraut looks dry, add ¼ cup broth or apple juice.
- If you’re worried your slow cooker runs hot or you’ve seen scorching before, you can go up to ½ cup—yet try not to exceed that unless you truly need to.
More liquid isn’t automatically better. Too much can flatten the flavor and leave you with watery kraut.

Step 6: Cook low and stop at the right time
Cover the slow cooker and cook on LOW. While timing varies by slow cooker, chop thickness and whether they’re bone-in, you can use these checkpoints as your guide.
- Thin chops (½–¾ inch): start checking around 2 hours on LOW
- About 1 inch: start checking around 2½–3 hours on LOW
- Thick chops (1¼–2 inches): start checking around 3–4 hours on LOW
When the thickest part hits 145°F (63°C), pull them and rest briefly. The safe temperature guidance is supported in the embedded resources: USDA safe temperature chart and FoodSafety.gov’s safe minimum internal temperature chart.
From here, let the chops rest a few minutes before serving. That short pause helps the juices settle so the pork feels tender and moist.

How to check doneness so you don’t overcook the pork chops in crock pot
When you’re cooking pork chops with kraut, the simplest way to keep them tender is to check the thickest part of the chop—not near the bone and not poking straight through into the hot crock.
Angle the thermometer into the center from the side, aiming for the thickest spot. Once it reads 145°F (63°C, then a brief rest), you’re done. If the chop is bone-in, keep the tip slightly away from the bone, because the bone can give a misleading reading.

Also, try to start checking a little earlier than you think you need to. It’s easy to cook longer; it’s impossible to “uncook” a chop that’s gone a little too far.
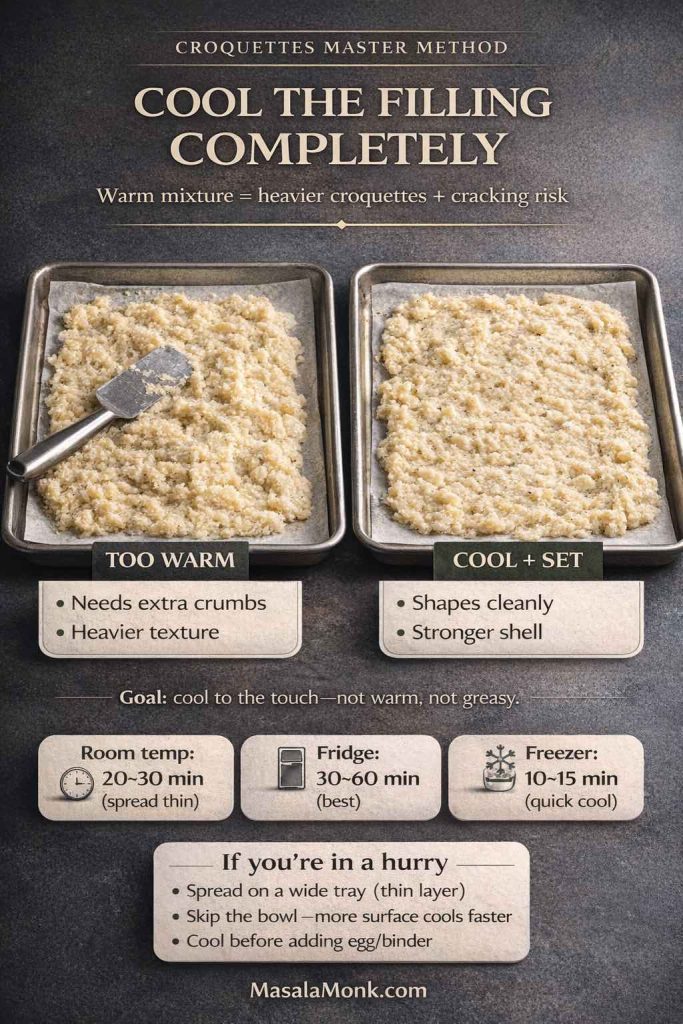
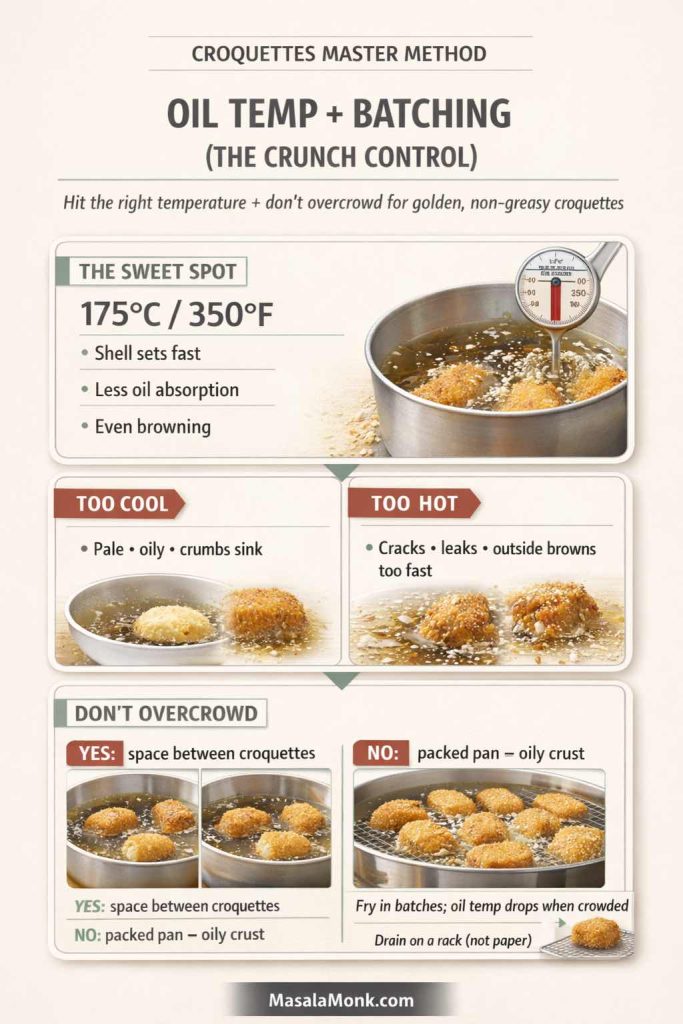
Also Read: Croquettes Recipe: One Master Method + 10 Popular Variations
Pork chop sauerkraut crock pot timing: what actually changes the result
You’ll see wildly different cook times for pork chops and sauerkraut in a slow cooker. Some versions run 6–8 hours and swear it’s “tender.” Others keep it shorter and insist longer is a mistake. The truth sits in the middle because different chops behave differently.

Why thin pork chops don’t want a long cook in crock pot
Lean, thin chops can cook through quickly. If they keep going, they tighten, then dry out. So, for thin chops, shorter is almost always safer.
Why thick pork chops can handle more time in crock pot
Thicker chops have more thermal buffer. They don’t spike in temperature as quickly, and they’re often slightly fattier. That buys you time and makes them more forgiving.
Why bone-in chops feel different
Bone-in chops usually cook more gently and stay juicier. They can still dry out if ignored all day, yet they’re more forgiving than thin boneless chops.
Why LOW is the safer setting here
HIGH can push the outside of pork chops past the ideal point before the center is ready, especially in small slow cookers. LOW gives you a gentler climb and a more consistent result. Even if you’re in a rush, LOW plus earlier checking tends to produce a better bite than blasting it and hoping.
Also Read: Ravioli Recipe Reinvented: 5 Indian-Inspired Twists on the Italian Classic
Why some recipes say 3 hours and others say 8 hours (and both can be “right”)
It’s confusing when one version of pork chop and sauerkraut slow cooker dinner says to cook for three hours, while another insists on eight. The difference usually isn’t the sauerkraut—it’s the chop and the slow cooker itself.

First, pork chops vary wildly in thickness and leanness. A thin boneless loin chop can be cooked through quickly, then spend the rest of the time drying out. Meanwhile, a thicker bone-in chop might still feel tender after a longer cook because it warms more slowly and has a little more fat to cushion the texture.
Second, slow cookers don’t run at the same heat. Some “LOW” settings run surprisingly hot, especially smaller units that fill up quickly. On the other hand, a large slow cooker that’s only half full can heat more slowly and take longer to reach the same internal temperature.
Finally, some recipes are written around a different goal. Long cook times often assume you’re cooking a fattier cut until it’s very soft, then serving it as a fall-apart comfort dish. Pork chops don’t always benefit from that approach, so if you want juicy chops that still feel like chops, you’re better off checking early and stopping at the right internal temperature instead of riding the clock.
Also Read: Fish and Chips Reimagined: 5 Indian Twists (Recipe + Method)
Crock pot pork chops and kraut: three variations that still taste classic
One of the joys of pork and sauerkraut is how easily it adapts. With only a few small changes, you can make it feel like a different dinner—yet it will still be the same comforting dish at heart.

1) Old fashioned pork and sauerkraut, classic style
This is the version you make when you want that traditional taste without extra sweetness.
- Onion
- Sauerkraut (rinsed or not, depending on your dial)
- Caraway seeds (optional but classic)
- Black pepper
If you want to amplify the aroma, add a bay leaf. It doesn’t scream “bay leaf,” but it smooths everything out.
2) Crock Pot Pork Chops & sauerkraut with apples (balanced, not sugary)
This variation is subtle and cozy, not dessert-like.
Add one sliced apple and keep everything else the same. If your sauerkraut is extremely sharp, you can add a teaspoon of brown sugar, but keep it restrained. The apple already does the job.
This apple-forward style also pairs beautifully with mashed potatoes or a potato salad side.
3) Mustard finish (bright and savory crock pot pork chops)
For a tangy-savory finish, stir a spoon of Dijon mustard into a small amount of hot cooking liquid, then spoon it over the chops at serving.
This works particularly well when you’ve rinsed the kraut to keep it mild. The mustard adds lift without making the dish heavy.
If you like sauces that bring freshness to rich food, an herb-forward option like chimichurri can also be a fun contrast, especially if you’re serving the pork chops with starchy sides that appreciate a bright accent.
Also Read: Sourdough Recipe: 10 Easy Bread Bakes (Loaves, Rolls & Bagels)
Crock pot pork chops & sauerkraut: serving ideas that make it feel like a full meal
Pork chops with kraut can be satisfying on its own, yet it shines even more when you pair it with the right side. Because the main dish is tangy and savory, sides that absorb juices or offer clean contrast work best.

Classic comfort with Crock pot pork chops: mashed potatoes
If you want that “Sunday dinner” feeling, mashed potatoes are the obvious choice. They soak up the juices and soften the acidity.
A creamy mash option like perfect mashed potatoes turns the plate into something you’ll want to eat slowly.
Bright and traditional: potato salad with Crock pot pork chops
German-style potato salad and sauerkraut are old friends. It’s a natural pairing, especially if you want something that feels traditional but not heavy.
A collection like potato salad recipes gives you room to choose—creamy, vinegar-based, herby—depending on whether your kraut is tangy or mild.
Crispy leftover upgrade: croquettes
If you end up with leftover mash, don’t just reheat it and call it a day. Turn it into something crunchy and satisfying. Croquettes are especially good next to leftover pork and kraut because you get creamy inside, crisp outside, and tangy-salty alongside.
Build a weeknight rotation
If this dinner hits the spot and you want more slow cooker ideas that feel similarly low effort, keep the momentum going with crock pot chicken breast recipes. Different protein, same “dinner cooks itself” energy.
Also Read: Sweetened Condensed Milk Fudge: 10 Easy Recipes
Simple pork and sauerkraut recipe: quick fixes when something feels off
Even a great crock pot pork chops and sauerkraut setup can vary slightly depending on the slow cooker and the chops. So if dinner isn’t landing perfectly, these quick adjustments usually solve it.
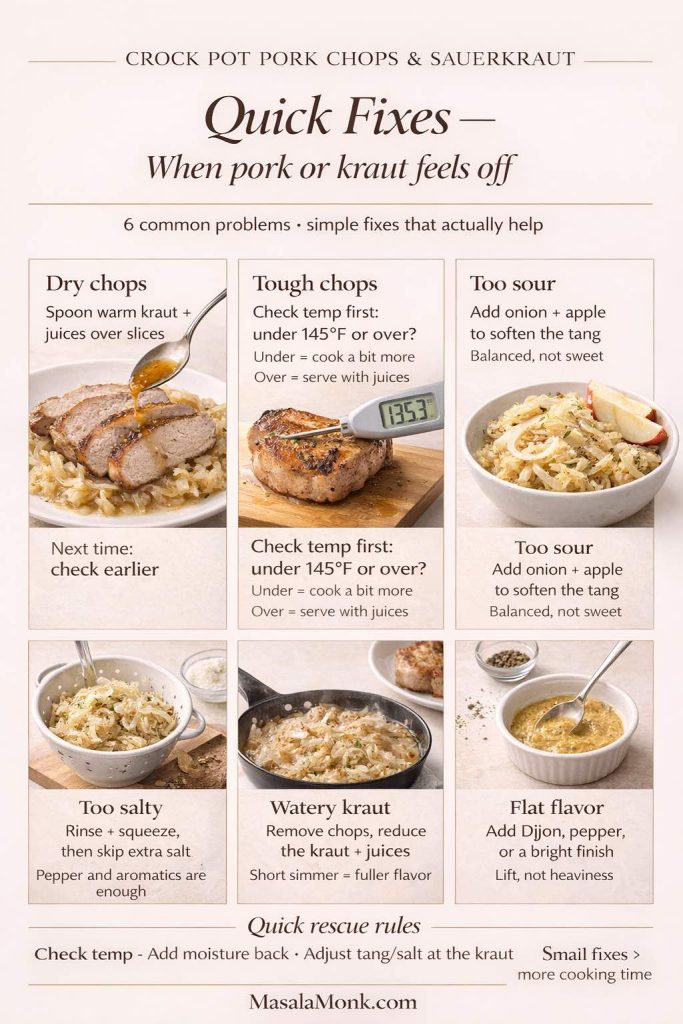
If the pork chops are dry
Dry almost always means they went too long or the chops were too lean for the cook time. Next time, start checking earlier and pull at temperature. For tonight, slice the chops and spoon more of the warm kraut and juices over them, then serve with something that absorbs moisture—mashed potatoes are perfect for that.
If the pork chops cooked in crock pot are tough
“Tough” can mean two different things, so take a quick temperature reading:
- If they’re under 145°F, they simply need more time—keep cooking in short bursts and re-check.
- If they’re already past it and still feel tough, they’re likely lean chops that tightened from cooking too long. In that case, serve with extra juices, and plan a shorter cook next time.
If the sauerkraut is too sour
Next time, rinse the kraut quickly and squeeze it. For now, add apple slices (even late), let them warm through, and lean on onion and pepper to round it out.
If the sauerkraut is too salty
Rinse the kraut next time and skip added salt altogether. For tonight, add extra onion (or a few apple slices) to soften the salty edge.
If the sauerkraut is watery
Remove the chops, then reduce the kraut and liquid briefly until it tastes concentrated again. Even a short simmer makes the flavor feel fuller and less diluted.
If the flavor tastes flat
A spoon of mustard stirred into a little hot cooking liquid, extra black pepper, or a bright finish like an herb sauce can wake everything up without changing the dish into something else.
Also Read: Chicken Adobo — Step-by-Step Recipe — Classic Filipino Adobong Manok
Crock pot pork loin & sauerkraut vs pork chops (a quick comparison)
Once you get comfortable with pork chops and sauerkraut in a slow cooker, it’s natural to wonder how this changes with other cuts—especially pork roast, pork loin, or tenderloin.

- Pork loin and tenderloin are leaner and more sensitive to overcooking, much like chops. The “stop at the right temp” approach matters even more.
- Pork shoulder or pork butt has more collagen and fat, so it behaves differently. It can handle longer cooking and becomes shreddable.
If you want to explore pork in other formats, the same “cook to temp” idea plays out in a different way in pork tenderloin in oven. Meanwhile, if you want a slow cooker pork method that’s built for tenderness and easy slicing, slow cooker pork tenderloin gives you a parallel approach that’s designed to stay juicy rather than stringy.
Also Read: How to make No-Bake Banana Pudding: No Oven Required Recipe
Pork and sauerkraut meal: making it feel special without making it complicated
Sometimes you want this dish to feel like more than a Tuesday dinner. Fortunately, the same ingredients can feel elevated with a few small touches.

Add a “flavor bed” moment
Instead of just onion and kraut, add:
- onion
- a few smashed garlic cloves
- a pinch of caraway
- optional apple slices
It still looks simple, but it tastes layered.
Finish Crock Pot Pork Chops with something fresh
A bright finish helps tangy foods feel vibrant rather than heavy. Even a spoon of mustard stirred into juices counts. Alternatively, a fresh herb sauce can be fun—something like chimichurri adds a clean, lively note when you want contrast.
Serve it in a way that feels intentional
Instead of just scooping everything into a bowl, plate it:
- a bed of mashed potatoes
- a mound of sauerkraut and onions
- chops on top
- a final spoon of reduced juices
It looks like you cared, even though the slow cooker did most of the work.
Sauerkraut and pork chops in oven vs crock pot (when to choose which)
Slow cooker pork chops & sauerkraut is comfort-forward and forgiving when you manage time. The oven version tends to give more browning and a roasted character. If you crave caramelized edges, the oven is often the better fit. If you want hands-off cooking and mellowed kraut, the crock pot wins.
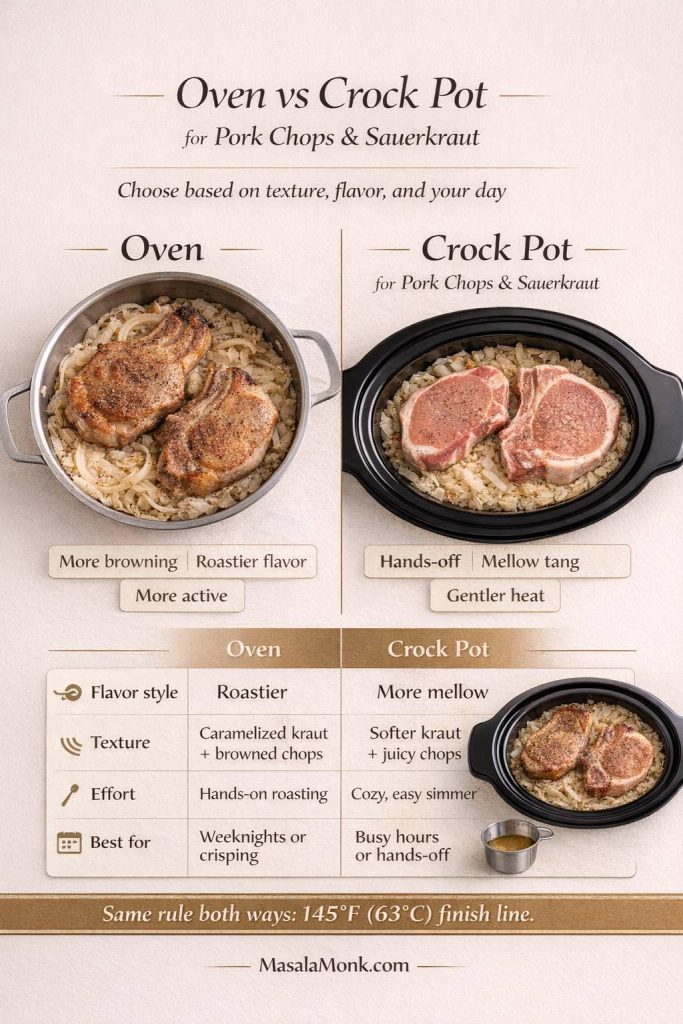
Still, the same doneness principle holds. Whether you cook pork in the oven or slow cooker, stopping at the right internal temperature is what protects the meat from drying out. That’s also why the safety guidance is helpful: FoodSafety.gov’s safe minimum internal temperature chart and the USDA safe temperature chart give you a clear, consistent endpoint.
Also Read: Crock Pot Chicken Breast Recipes: 10 Easy Slow Cooker Dinners (Juicy Every Time)
Recipe recap: crock pot pork chops and kraut, the reliable way
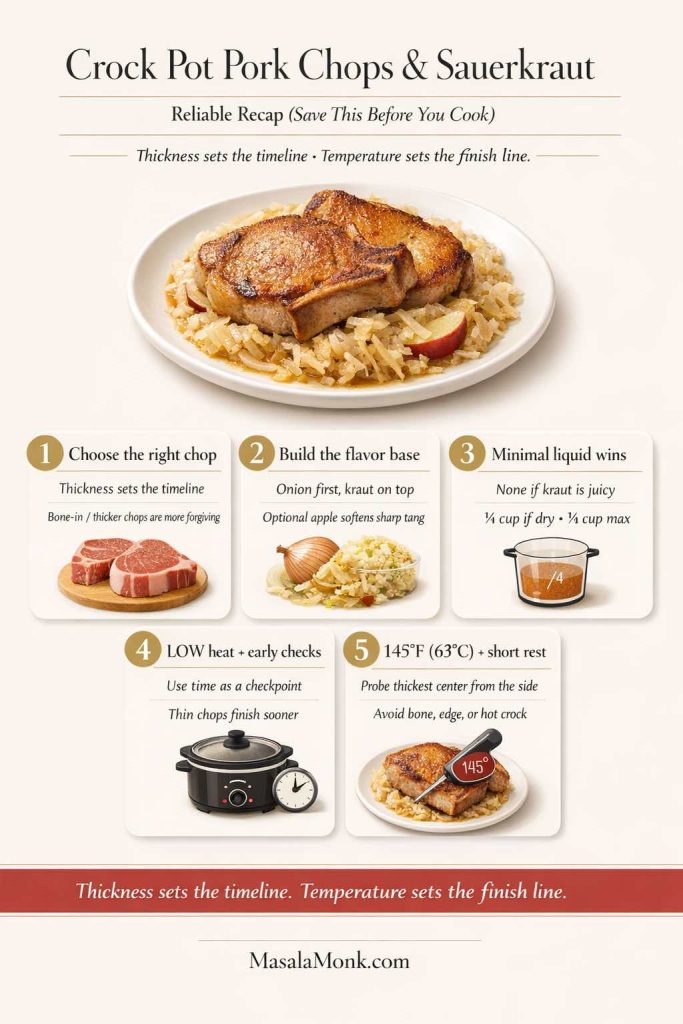
To make this feel simple again, here’s the flow you can keep in your head:
- Onion on the bottom
- Sauerkraut on top (rinsed or not, depending on how tangy you want it)
- Optional apple slices tucked in
- Pork chops on top
- Minimal liquid (none, ¼ cup, or ½ cup max)
- Cook on LOW, start checking early based on thickness
- Pull at 145°F, rest a few minutes, serve with the juices

That’s it. Everything else is seasoning and personality.
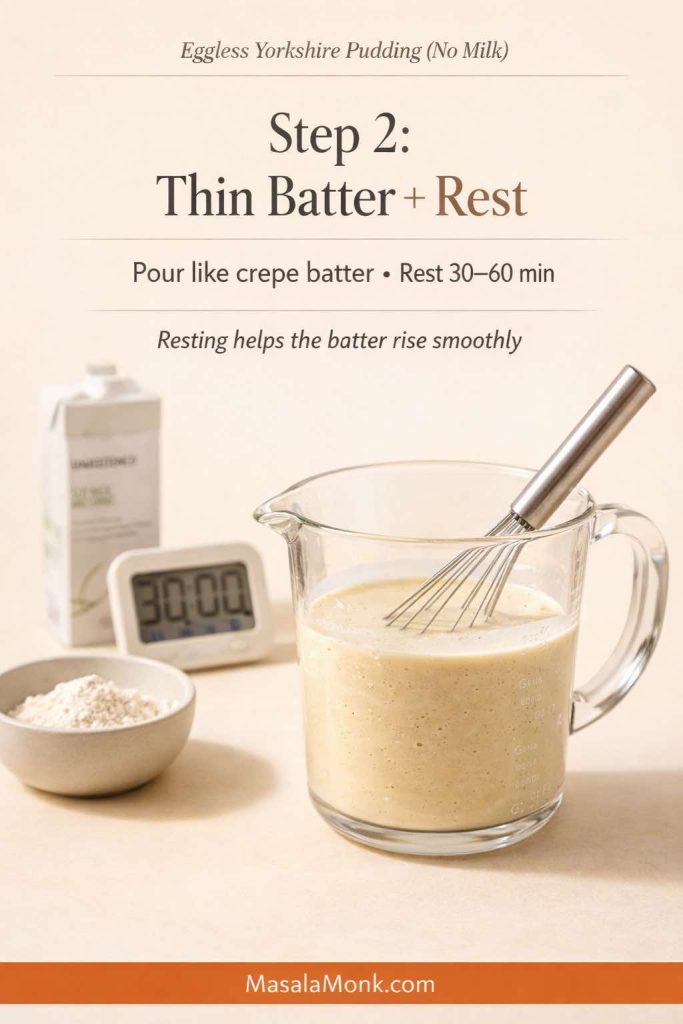
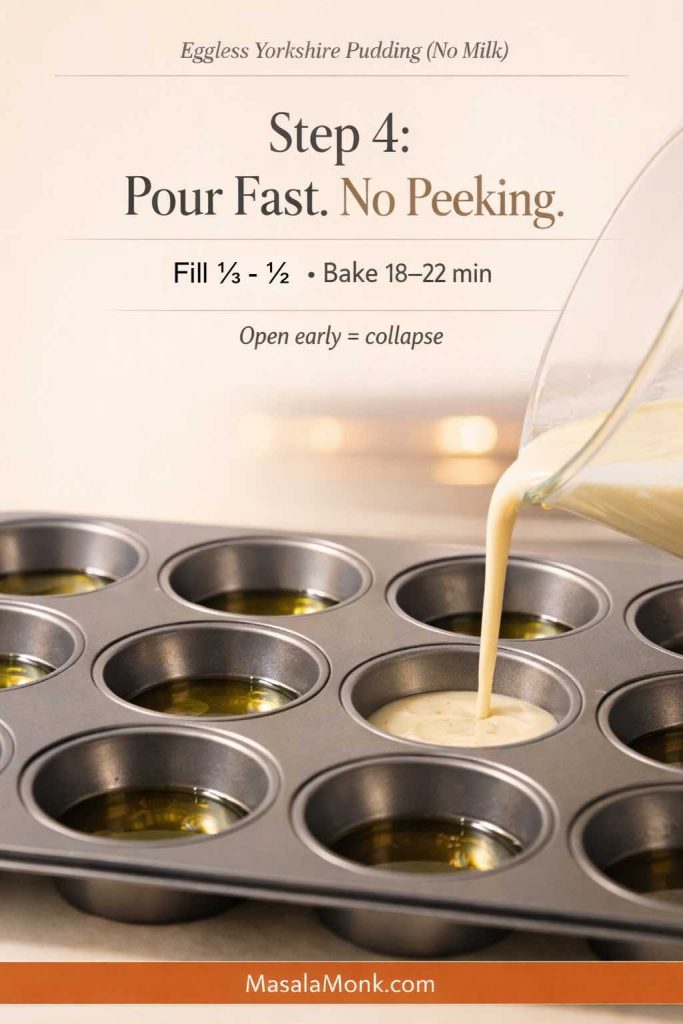
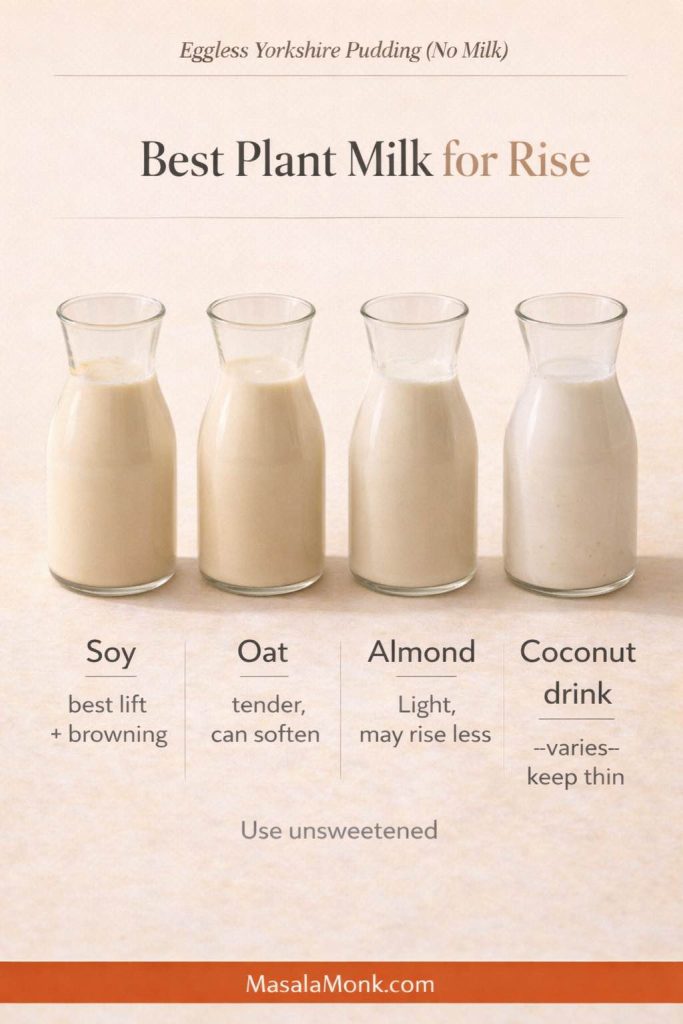
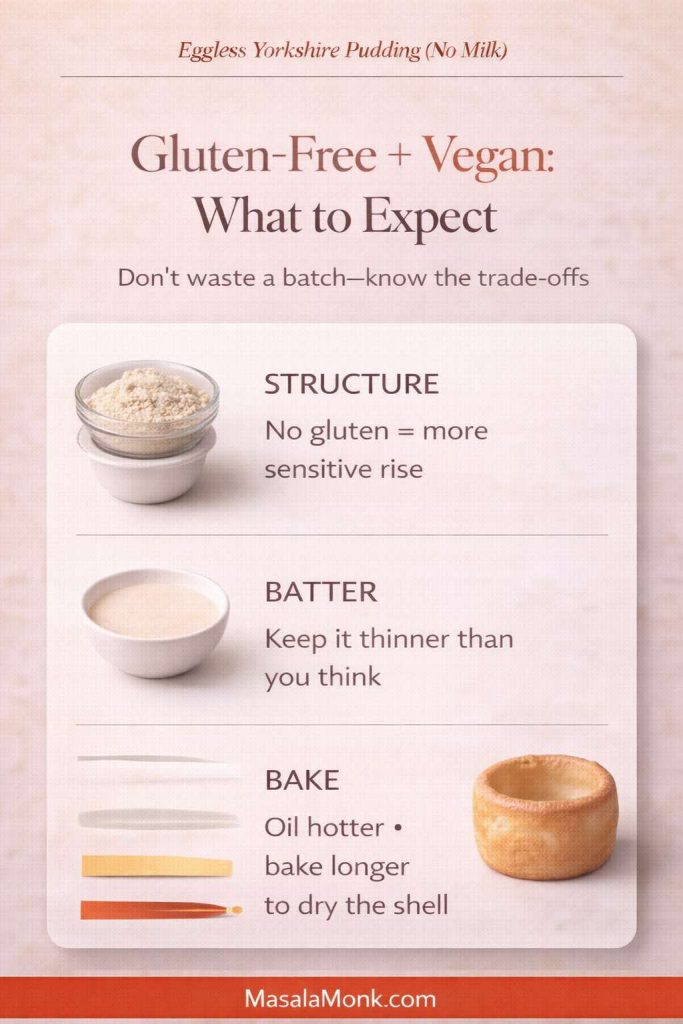
Also Read: Eggless Yorkshire Pudding (No Milk) Recipe
Storing and reheating crock pot pork chops & sauerkraut
Pork chops can reheat beautifully if you keep it gentle. Since sauerkraut holds moisture, storing the chops with the kraut actually helps.
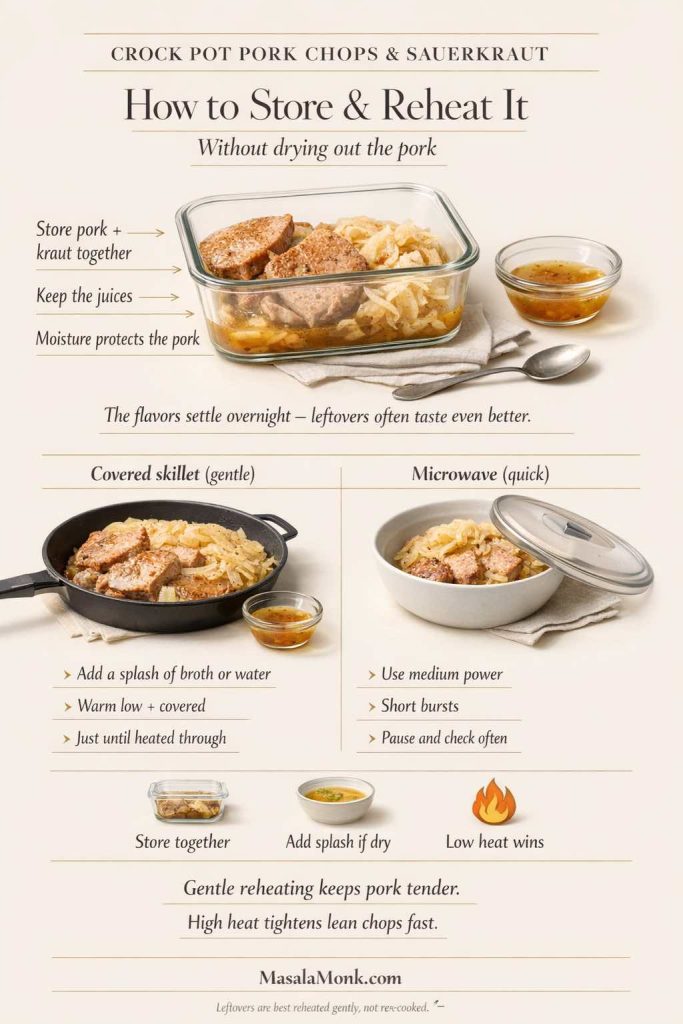
- Cool leftovers, then store pork and kraut together in an airtight container.
- Reheat slowly: a covered skillet with a splash of water or broth works well.
- If microwaving, use medium power and shorter bursts so the pork warms without tightening.
The next day, this dish often tastes even better because the flavors settle.
If you’re building a comfort-food rotation, keep a few slow cooker staples in your back pocket too. On a different day, something like whole chicken in crock pot gives you the same ease with a different flavor payoff, and it fits naturally into the same kind of weeknight schedule.
Also Read: Garlic & Paprika Cabbage Rolls (Keto-Friendly Recipes) – 5 Bold Savory Twists
A gentle New Year’s nod (without turning this into a holiday-only dinner)
Pork and sauerkraut has a well-known New Year’s Day tradition in many households, and it’s easy to see why: it’s hearty, it serves a crowd, and it tastes like something you’d make on purpose. Even if you’re not cooking it for a New Year’s pork recipe moment, the same idea still applies—this is a meal that feels lucky because it’s reliable.

If you want to lean into that tradition, you can make it “holiday-ready” by scaling up, choosing thicker chops, and adding apples and onions for extra depth. Then serve it with mashed potatoes or potato salad and let the table do the rest.
Also Read: 10 Low Carb Chia Pudding Recipes for Weight Loss (Keto, High-Protein, Dairy-Free)
Final thoughts
Crock pot pork chops and sauerkraut doesn’t need to be a gamble. Once you treat chop thickness as the timeline and temperature as the finish line, the dish becomes what it was always meant to be: comforting, hands-off, and surprisingly satisfying.
Start simple, learn your sauerkraut dial, and keep your liquid minimal. Then, as you get comfortable, play with apples, mustard, or caraway until the flavor lands exactly where you want it. After all, the best version is the one you’ll actually want to make again.
And if you’re in the mood to keep building your slow cooker rotation, you’ll find plenty of weeknight-friendly ideas in crock pot chicken breast recipes, plus pork technique continuity through slow cooker pork tenderloin and pork tenderloin in oven.
Also Read: How to Cook Tortellini (Fresh, Frozen, Dried) + Easy Dinner Ideas
FAQs
1) Can I make crock pot pork chops and sauerkraut without searing the chops first?
Yes. Searing adds deeper flavor and a nicer “roasty” note, yet it isn’t required for tender results. If you skip it, focus on good seasoning, smart layering, and stopping the cook once the chops hit the right internal temperature.
2) What are the best pork chops for pork chop and sauerkraut slow cooker recipes?
Thicker chops usually win. Bone-in chops tend to stay juicier, while very lean boneless loin chops can dry out if they run too long. If you’re choosing at the store, look for chops that are at least about an inch thick for more forgiveness.
3) How long do pork chops and sauerkraut in a slow cooker usually take?
It depends on thickness, whether they’re bone-in, and how hot your slow cooker runs. In general, thinner chops finish sooner, while thicker chops take longer. Rather than relying on a single fixed time, start checking earlier than you think you need to and pull when the chops are done.
4) Can I cook pork chops and sauerkraut on HIGH instead of LOW?
You can, although LOW is more reliable for tender pork chops with kraut. HIGH can push the outside of lean chops too far before the center settles, which increases the chance of dryness. If you must use HIGH, check sooner and don’t let the chops coast once they’re done.
5) Should sauerkraut go on the bottom or the top in crock pot pork chops and sauerkraut?
Typically, sauerkraut works best on the bottom with onions underneath, then pork chops on top. This setup lets the kraut mellow as it cooks while the chops heat more evenly, instead of sitting submerged in liquid.
6) Do I drain sauerkraut for a sauerkraut crock pot recipe, or use the brine?
Either works—choose based on flavor. Using some brine makes the dish tangier. Draining keeps it more moderate. If your kraut is very salty or sharp, rinsing and squeezing it lightly can make the final pork and sauerkraut meal taste smoother.
7) How do I make crock pot pork and kraut taste less sour?
First, rinse the sauerkraut quickly and squeeze it. Next, add onions, and consider apples for natural balance. Finally, keep extra liquid to a minimum so the flavor stays concentrated rather than harsh and watery.
8) Can I make pork and sauerkraut with apples in the slow cooker?
Absolutely. Apples are one of the easiest ways to soften the tang without turning the dish sweet. Slice a crisp apple and tuck it into the kraut layer so it cooks gently and blends into the overall flavor.
9) What’s the difference between pork roast and sauerkraut in slow cooker and pork chops with sauerkraut?
A pork roast (like shoulder or butt) can handle longer cooking and can become shreddable, while pork chops are leaner and can dry out if they cook too long. So, pork roast and sauerkraut in a slow cooker is more forgiving, whereas pork chop and sauerkraut slow cooker recipes benefit from earlier checking and a shorter window.
10) Can I make crock pot pork loin and sauerkraut the same way as chops?
The layering is similar, but pork loin behaves more like chops than like shoulder—it’s lean and can dry out if it runs too long. Therefore, it’s best to treat pork loin and sauerkraut in slow cooker cooking with the same “check early and stop on time” approach.
11) Can I use pork tenderloin and sauerkraut in slow cooker recipes?
Yes, although tenderloin is very lean, so it needs an even shorter cook than most chops or loin. For pork tenderloin and sauerkraut in slow cooker cooking, plan to start checking early and avoid extended cooking times.
12) Is “pork and kraut” the same thing as pork and sauerkraut?
Yes. “Kraut” is simply shorthand for sauerkraut, so crock pot pork and kraut, pork & kraut, and pork and sauerkraut recipes often describe the same classic dish.
13) Why are my pork chops tough in a pork chop sauerkraut slow cooker dinner?
Toughness usually comes from one of two things: they’re not finished yet, or they cooked too long while being very lean. A quick temperature check helps you decide which problem you’re dealing with, and from there you can adjust with short additional cooking or serve with extra juices.
14) Why did my pork chops turn dry in crock pot pork chops and sauerkraut?
Dry chops typically mean they cooked past the ideal point, especially if they were thin or very lean. Next time, choose thicker chops, cook on LOW, and begin checking sooner so you can pull them as soon as they’re done.
15) How do I stop pork chops from tasting boiled when making pork & sauerkraut in crock pot?
The easiest fix is controlling liquid. Sauerkraut and onions already contribute moisture, so you rarely need much added broth. Keeping extra liquid minimal helps the flavor stay rich and prevents that boiled, diluted taste.
16) Can I cook pork and sauerkraut in crock pot overnight?
You can, but pork chops aren’t the best cut for very long holds. Overnight cooking works better with a pork roast (shoulder/butt) than with chops. If you want overnight timing, consider switching to a roast-focused recipe for pork roast and sauerkraut slow cooker cooking.
17) What are the best side dishes for pork and sauerkraut?
Potatoes are the classic partner—mashed, roasted, or boiled—because they absorb the tangy juices. In addition, cabbage-friendly sides like simple salads, rye bread, or dumplings pair well depending on how hearty you want the pork and sauerkraut meal to feel.
18) Can I make baked pork chop and sauerkraut instead of slow cooker?
Yes. If you prefer more browning and a roastier flavor, baked pork chop and sauerkraut in the oven can be a great alternative. That said, the slow cooker version is ideal when you want hands-off cooking and a softer, mellowed kraut.
19) Can I use ribs and sauerkraut instead of chops?
You can. Ribs tend to be fattier and can handle longer cooking times, so they often stay tender even if the cook runs longer. If you enjoy this flavor profile, recipes for ribs and sauerkraut are a natural next step.
20) How do I store and reheat pork chops with kraut without drying them out?
Cool leftovers, store chops with the sauerkraut, and reheat gently. A covered pan with a small splash of water works well, and medium microwave power prevents the pork from tightening. As a result, leftovers stay tender instead of turning dry and stringy.