Croquettes have a way of making an ordinary day feel a little more celebratory. The outside turns crisp and golden, the inside stays soft and savory, and suddenly a handful of simple ingredients becomes something you’d happily serve to guests. Even so, a lot of people hesitate to try a croquettes recipe because they’ve had the frustrating version: croquettes that crack in the oil, croquettes that taste bland inside, croquettes that go oily, or croquettes that collapse the moment you flip them.
Fortunately, once you learn one reliable croquettes recipe method, everything clicks. After that, you can make easy croquettes on a weeknight, bake them when you want healthy croquettes, or go all-in with Spanish croquetas that are creamy enough to feel like a tapas bar at home. You can also work through the classics—potato croquettes, ham croquettes, chicken croquettes, tuna croquettes, salmon croquettes (canned or fresh salmon croquette), cod croquettes, vegetarian croquettes, vegan croquettes—without learning a new technique every time.
This post is exactly that: a single, detailed, step-by-step guide that covers croquette fish styles, croquette veggie options, and the “perfect croquettes” approach—plus the oven baked croquettes route when you want crunch with less fuss.
And because croquettes are at their best when they’re part of a spread, you’ll also get natural pairings: cooling chutneys, fiery chutneys, and a few drink and dessert ideas to finish the meal without feeling heavy.
Croquettes Recipe: The Four Rules That Make Them Work Every Time
Before you pick a variant, it helps to understand what croquettes really are. Whether you call it a croquette, a croqueta recipe, a kroket (you’ll see “chicken kroket” and “dutch croquettes” used in different places), or even a Japanese potato croquette style, the structure is the same:
- A flavorful filling
- A binder that holds it together
- A coating that creates crunch
- A chill step that turns “hope” into “confidence”
If you keep those four rules steady, you can change almost everything else.
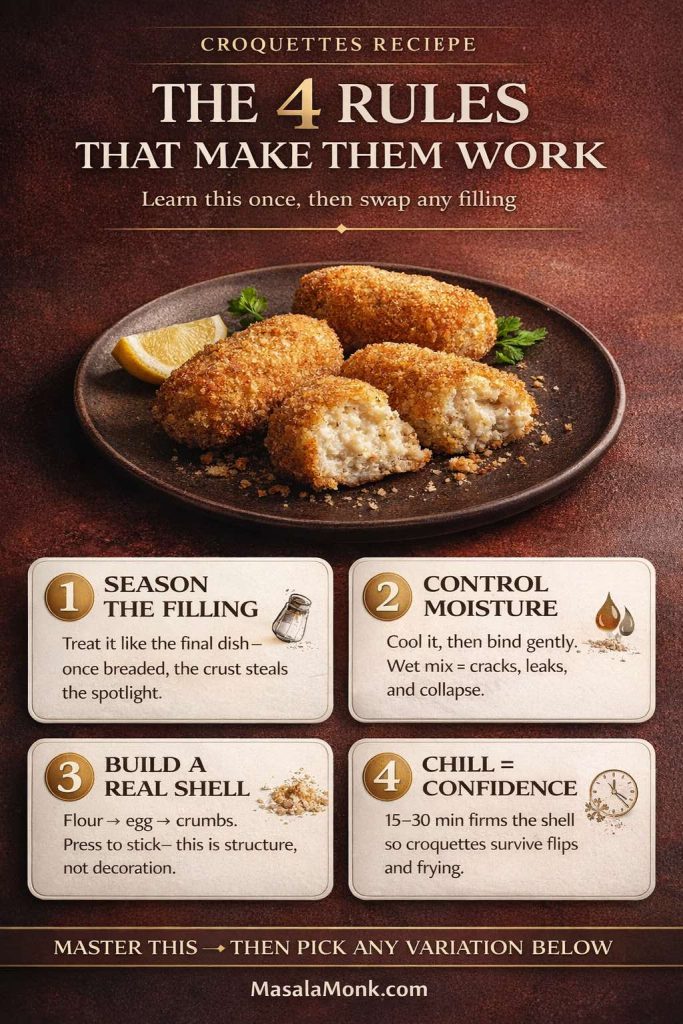
Rule 1: Season the filling like it’s the final dish.
Once croquettes are breaded, the outside becomes the star. That means the inside must be seasoned enough to hold its own.
Rule 2: Control moisture, don’t fight it.
Wet fillings are the number one reason croquettes fall apart. Instead of adding more egg (which can make them softer), you remove or offset moisture: cool the mixture, add just enough dry binder, and chill properly.
Rule 3: The coating is a shell, not decoration.
Flour → egg → crumbs isn’t tradition for tradition’s sake. It builds a sturdy exterior so the inside can stay creamy.
Rule 4: Chilling is non-negotiable for perfect croquettes.
Chilling firms fat and starches, reduces steam pressure, and makes shaping easier. It’s the difference between croquettes that survive the pan and croquettes that become snack-flavored chaos.
Keep these rules in mind, and suddenly “how do you make croquettes” becomes a calm question rather than a stressful one.
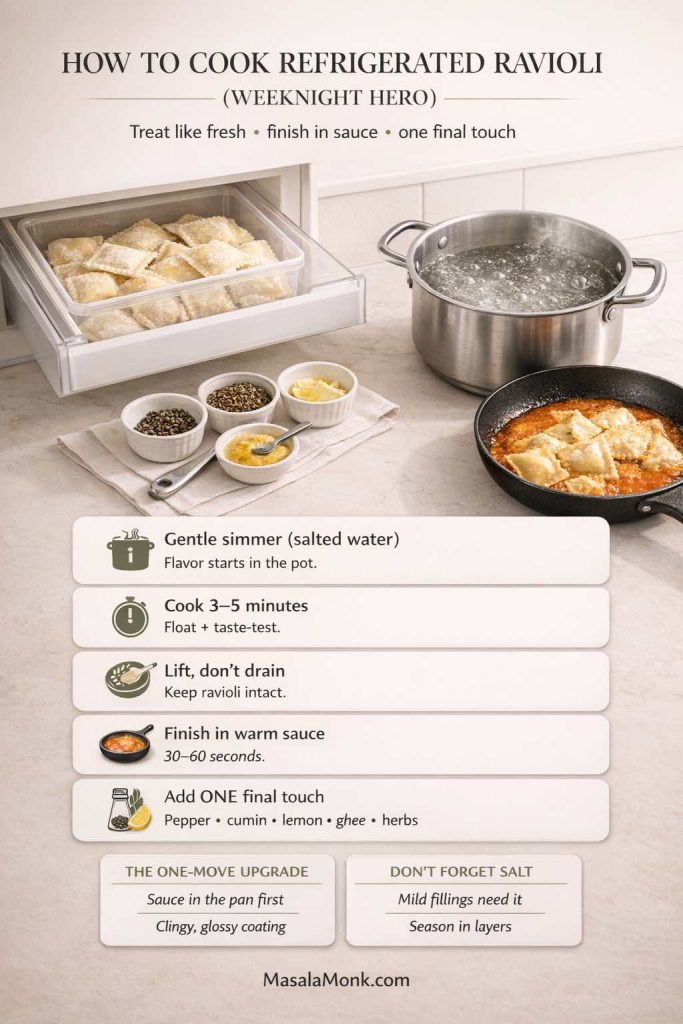
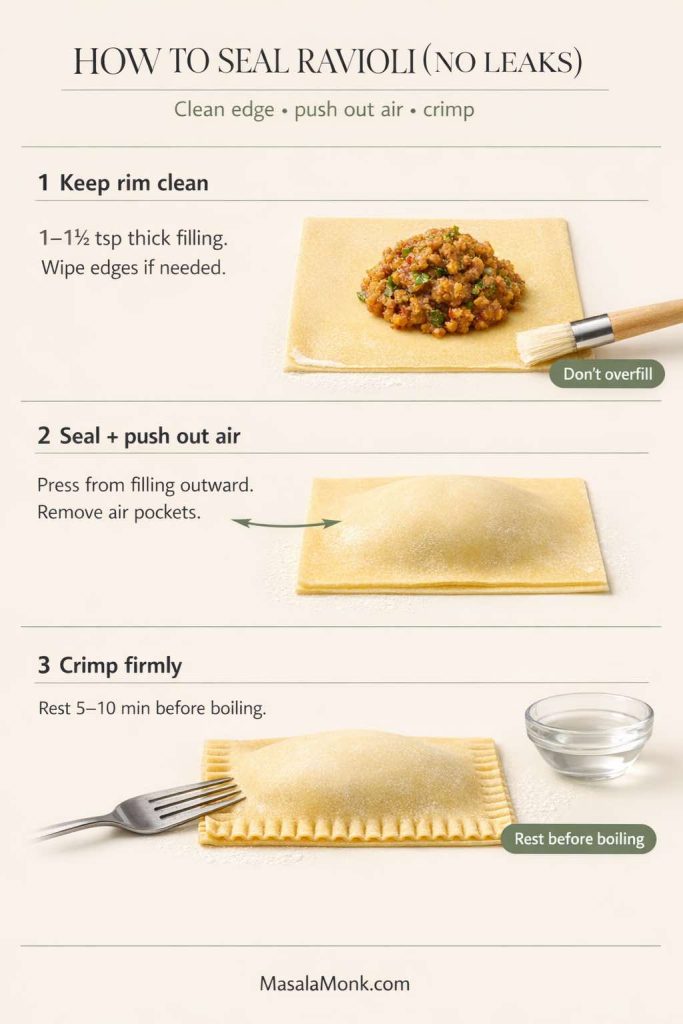
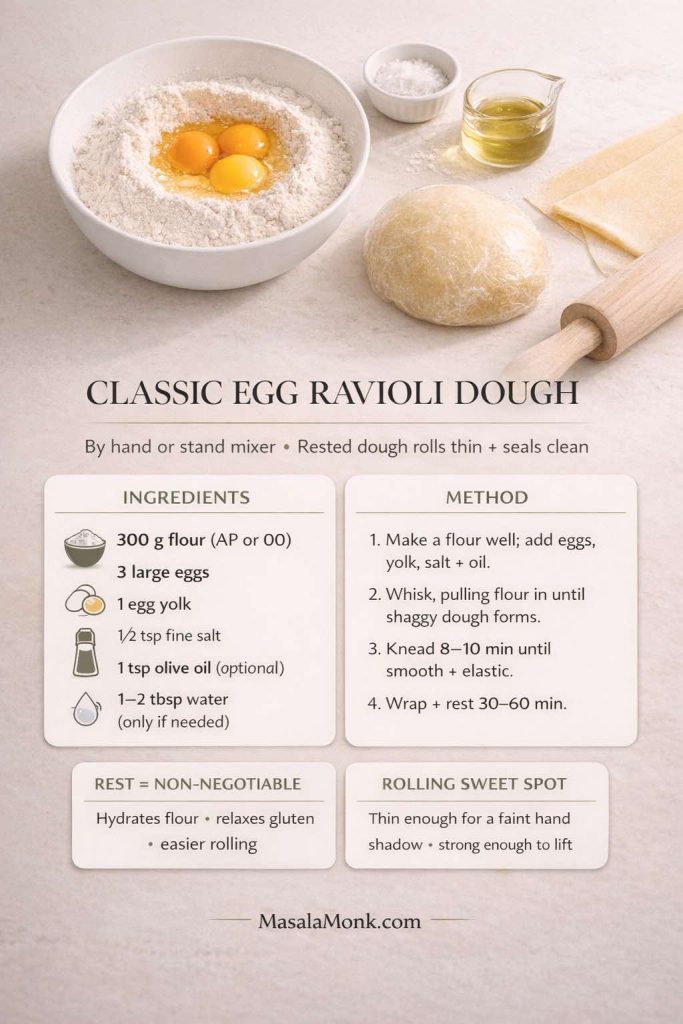
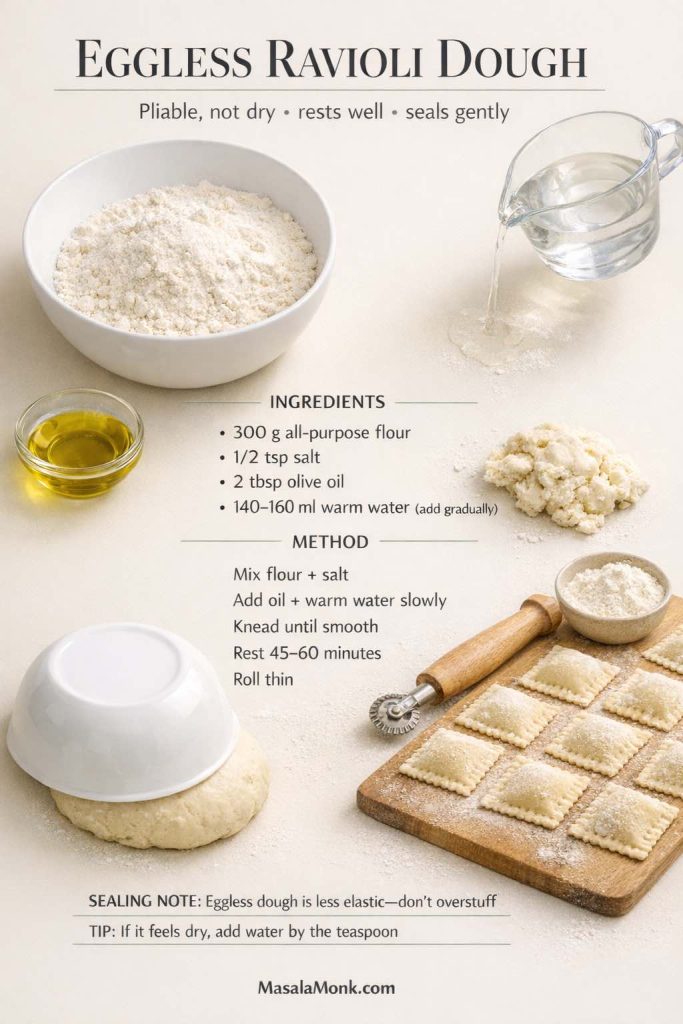
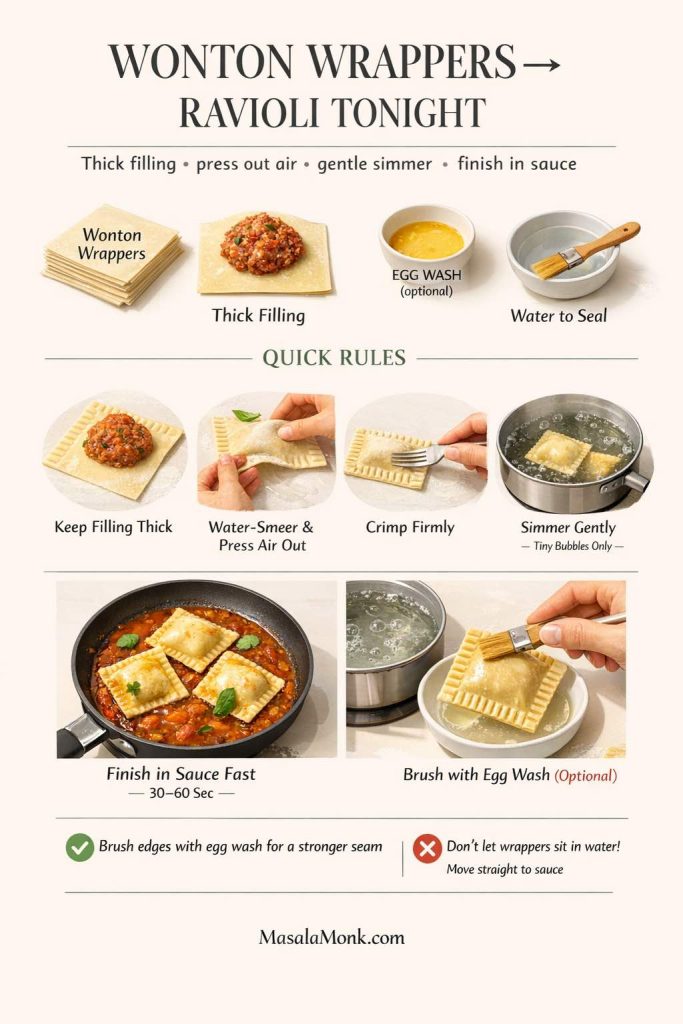
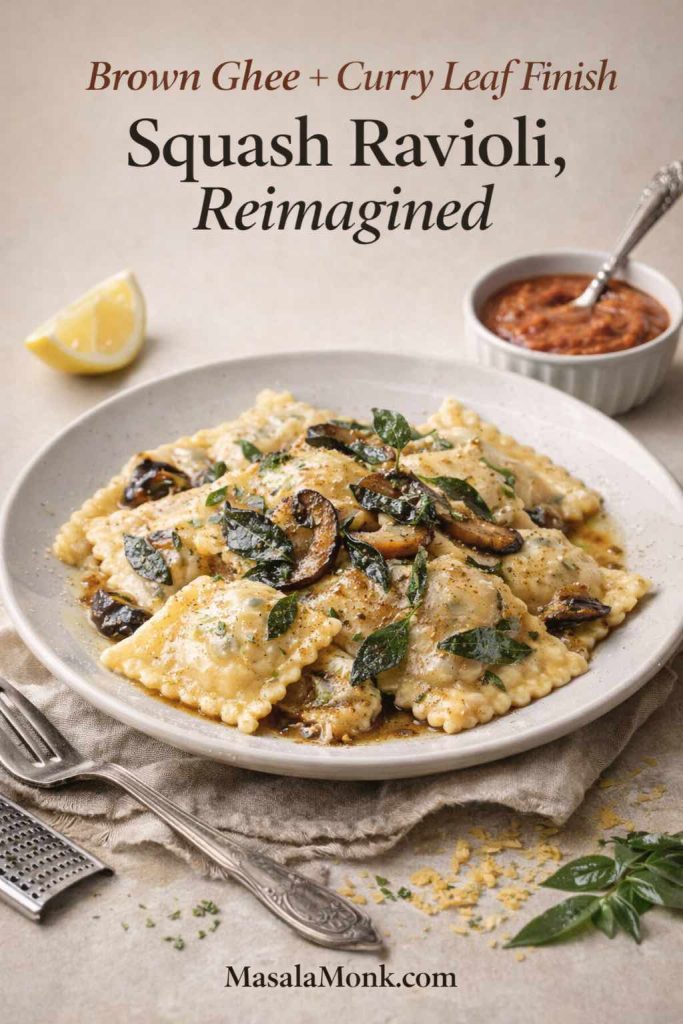
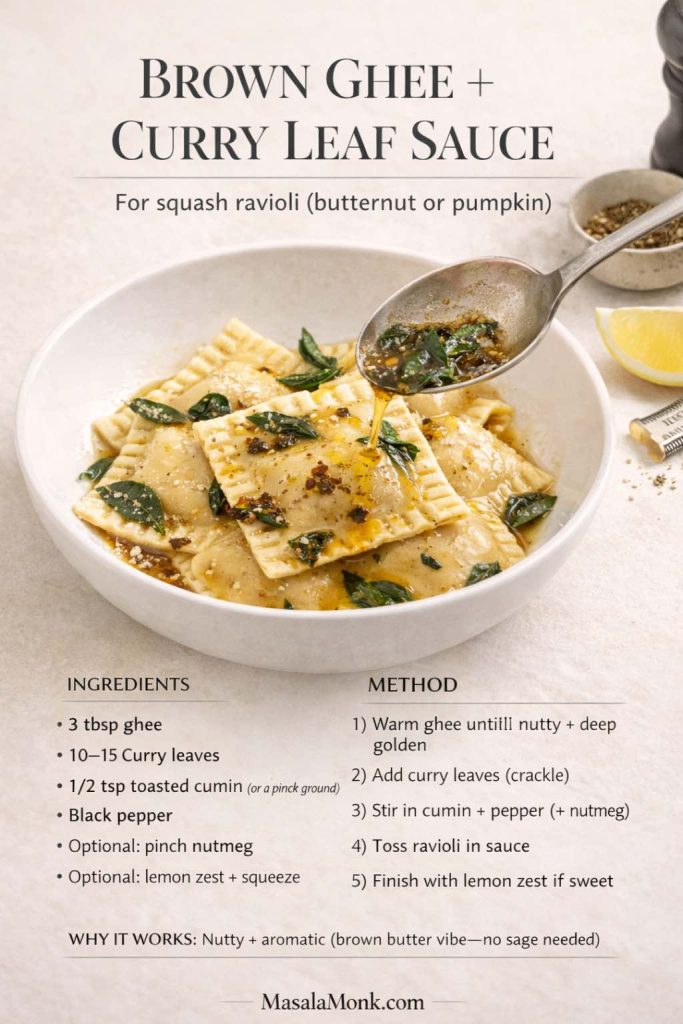
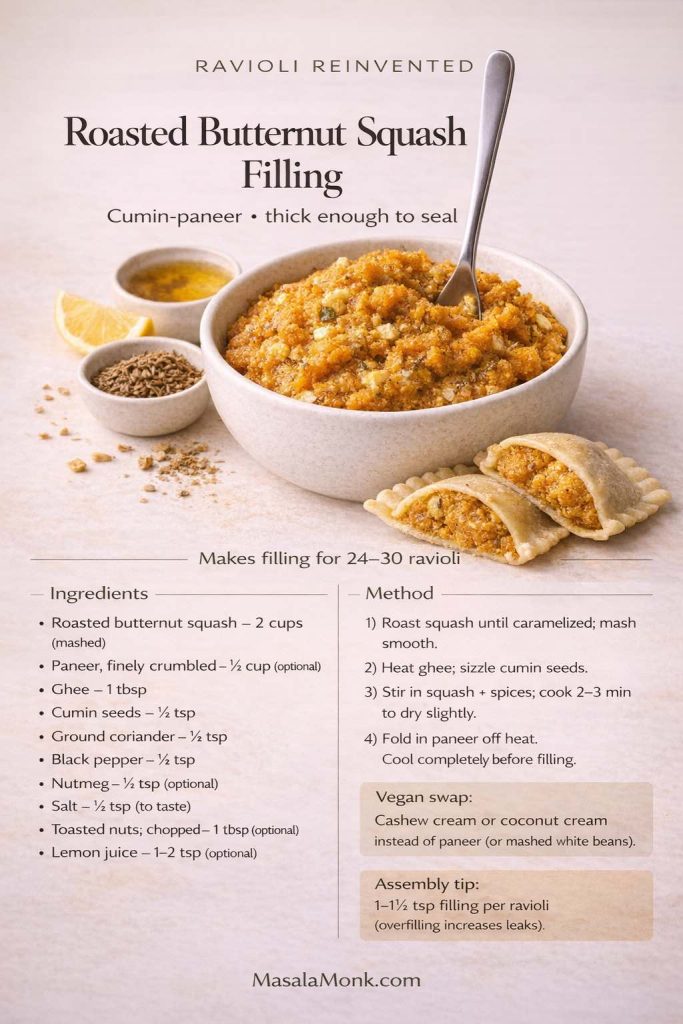
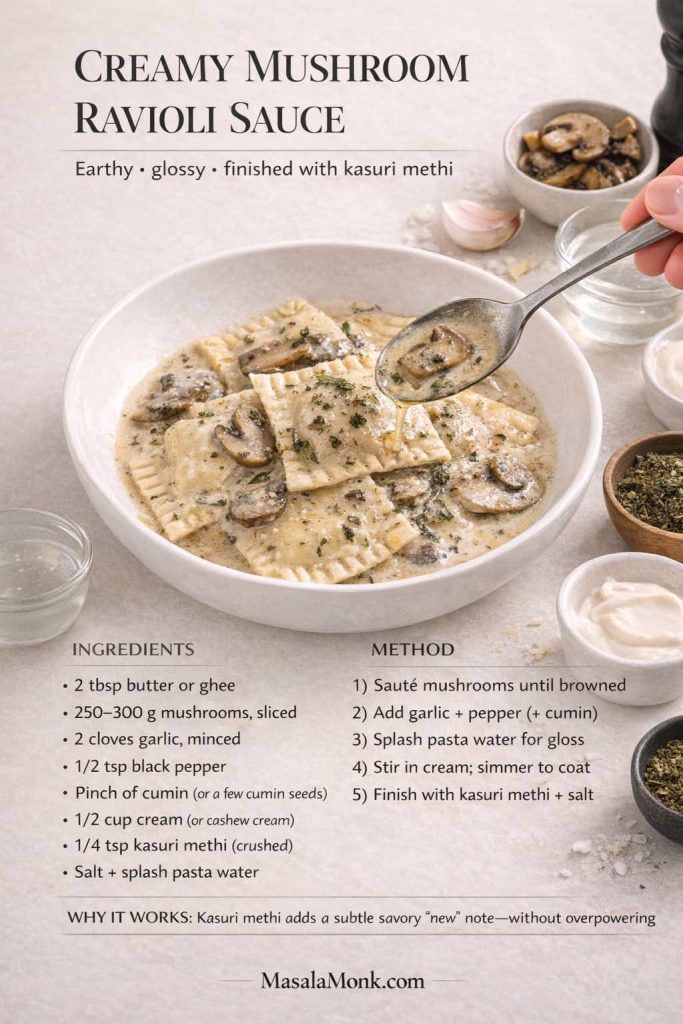
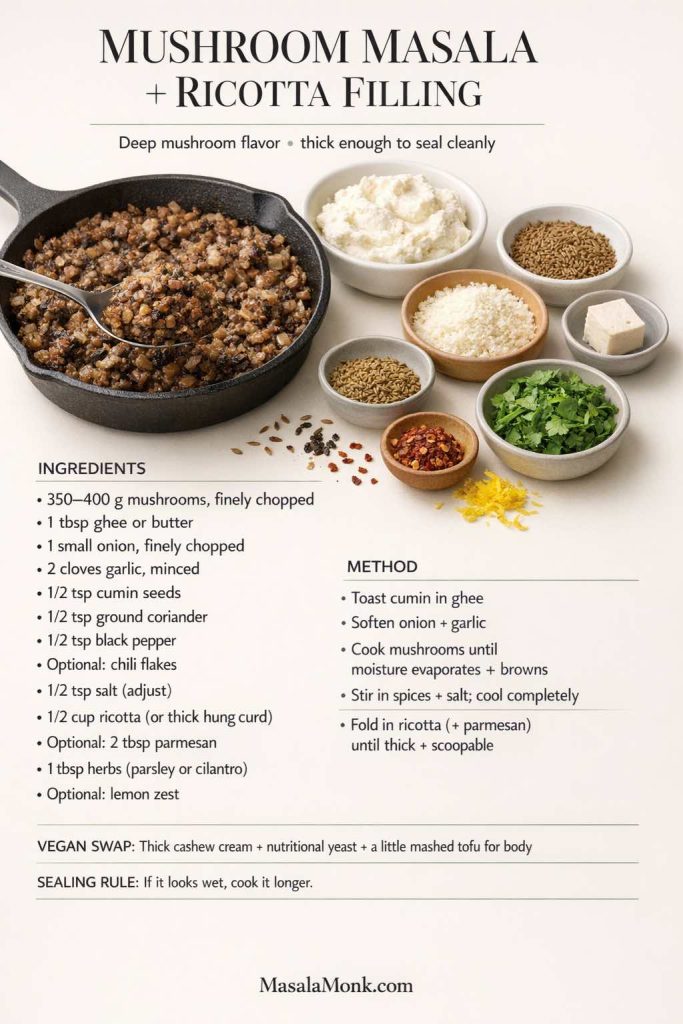
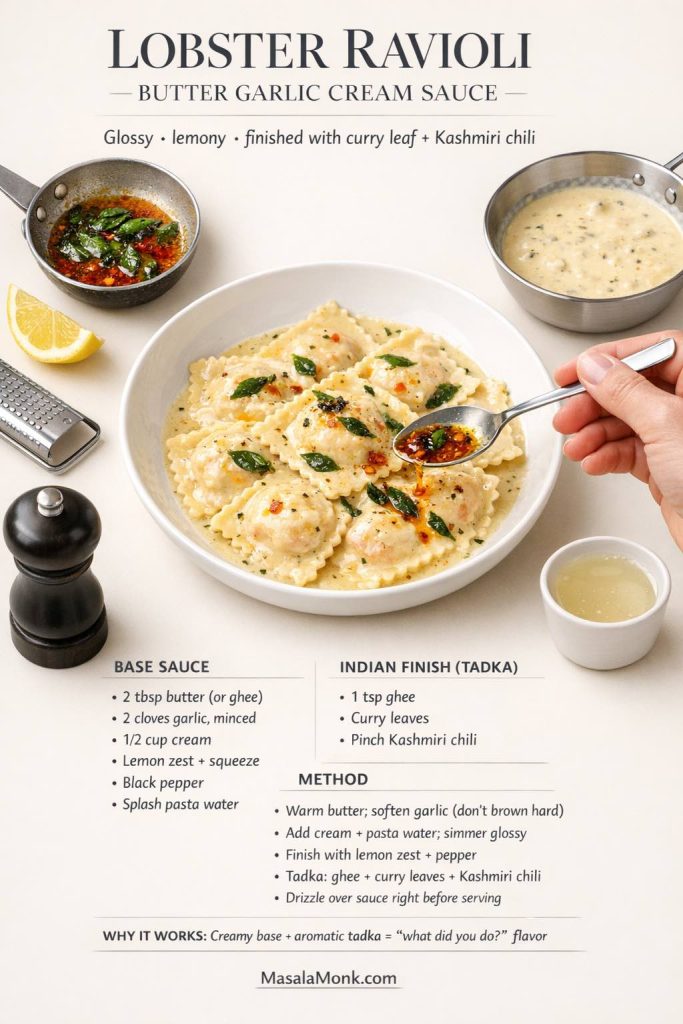
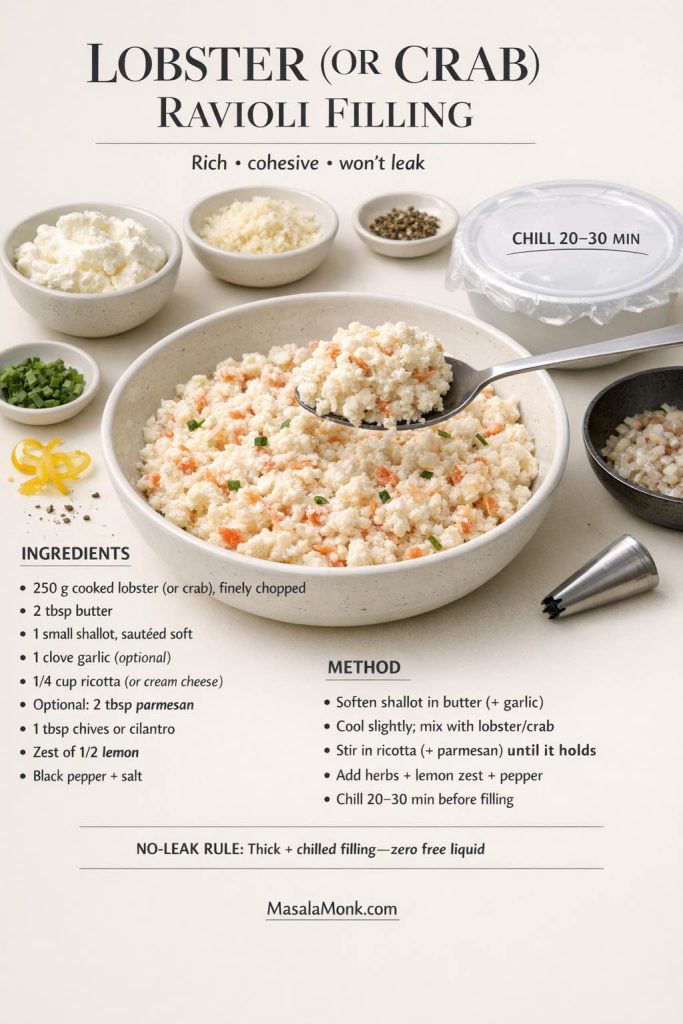
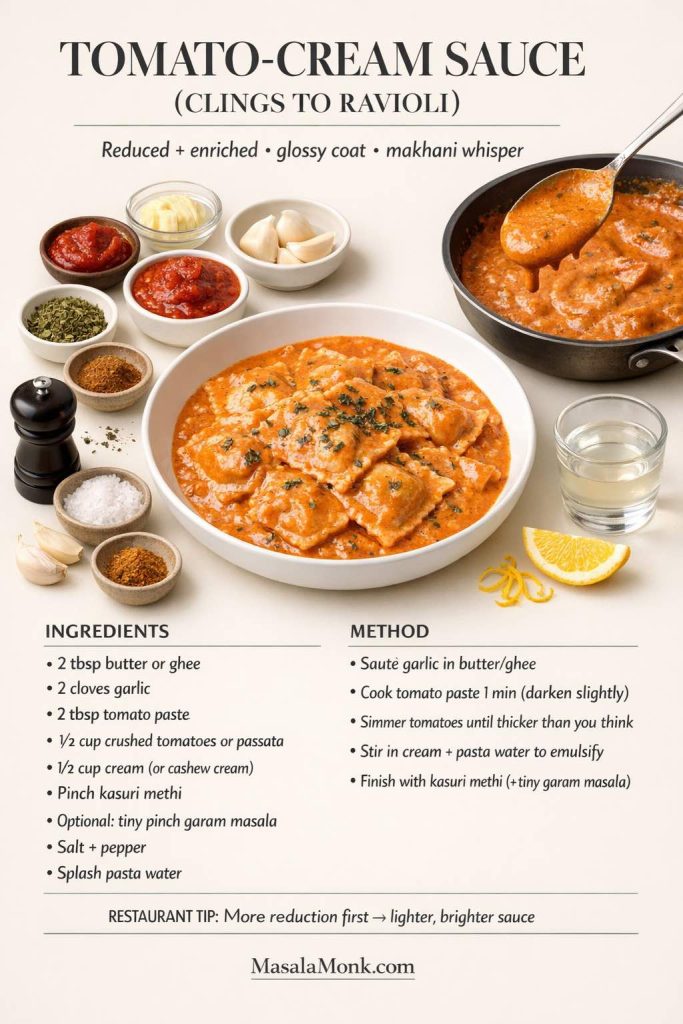
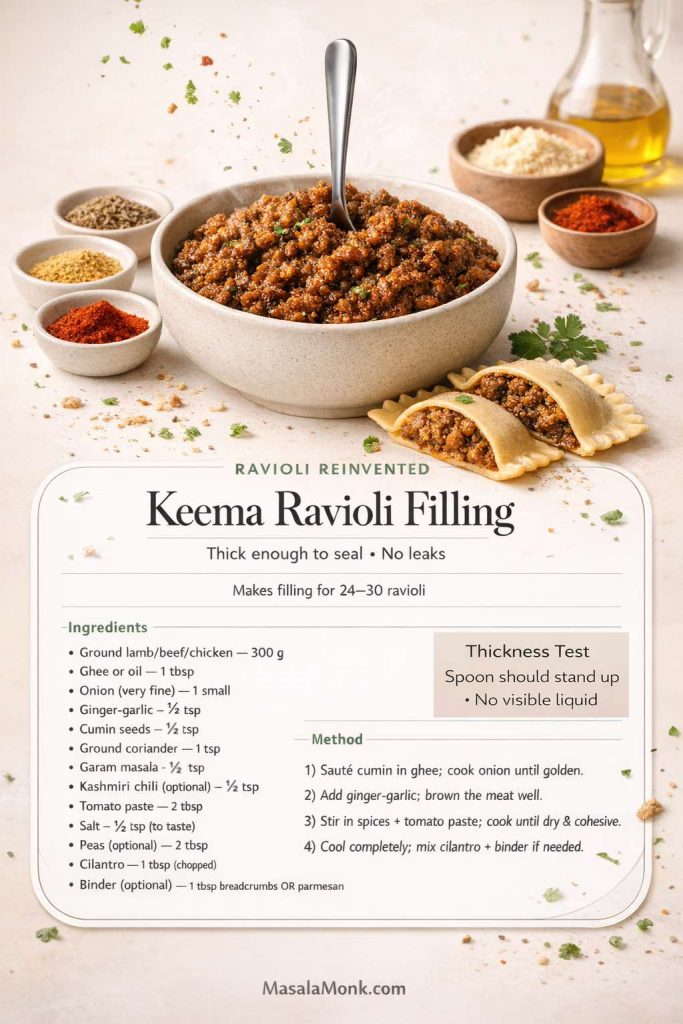
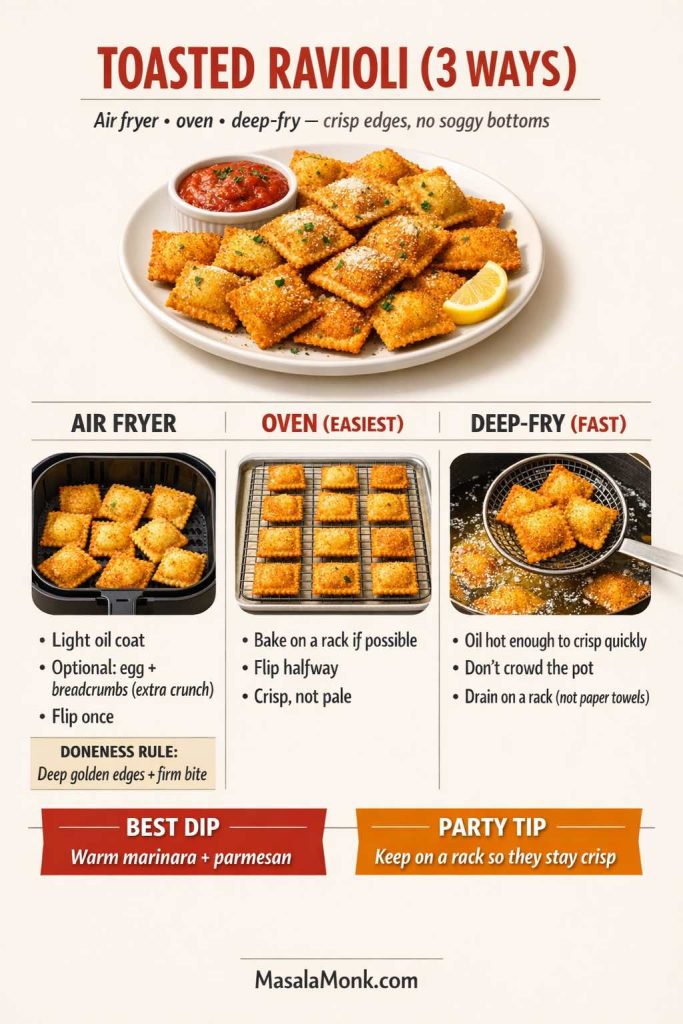
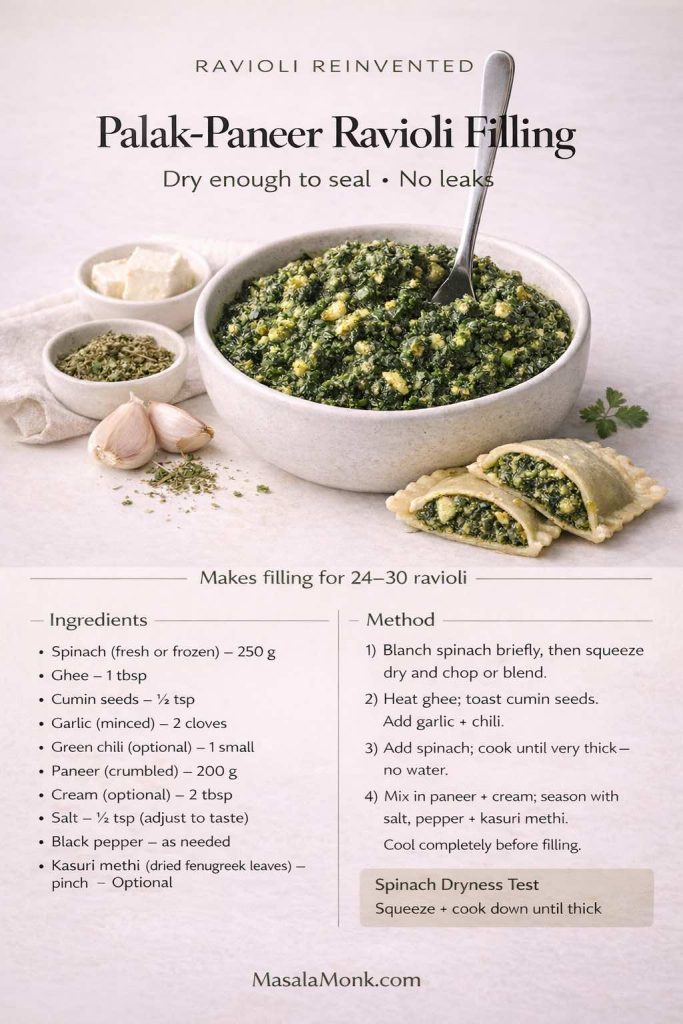
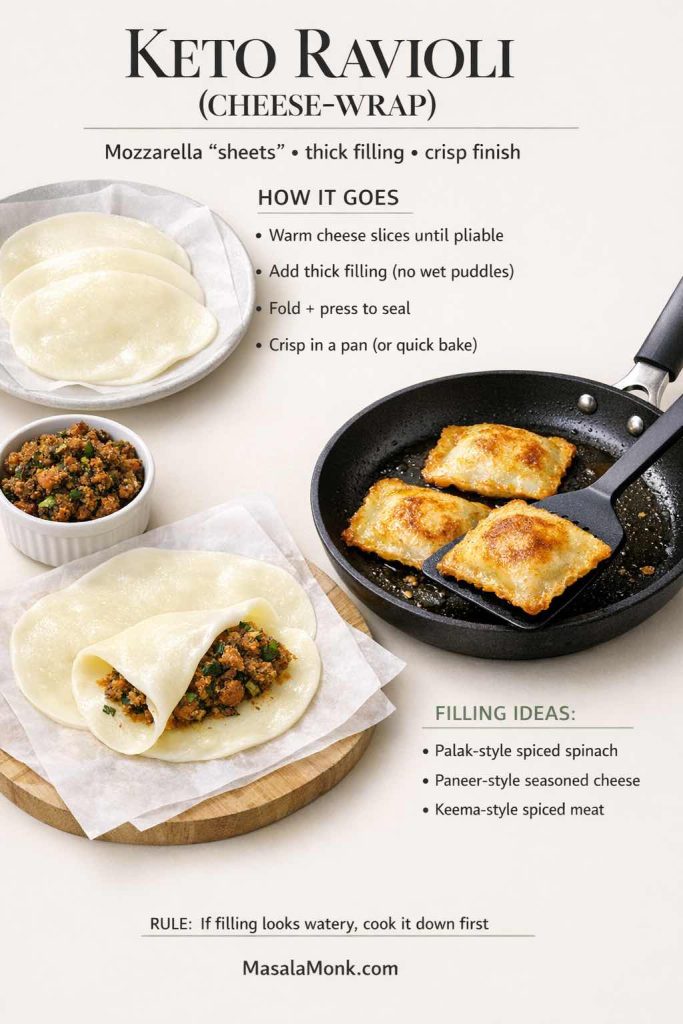
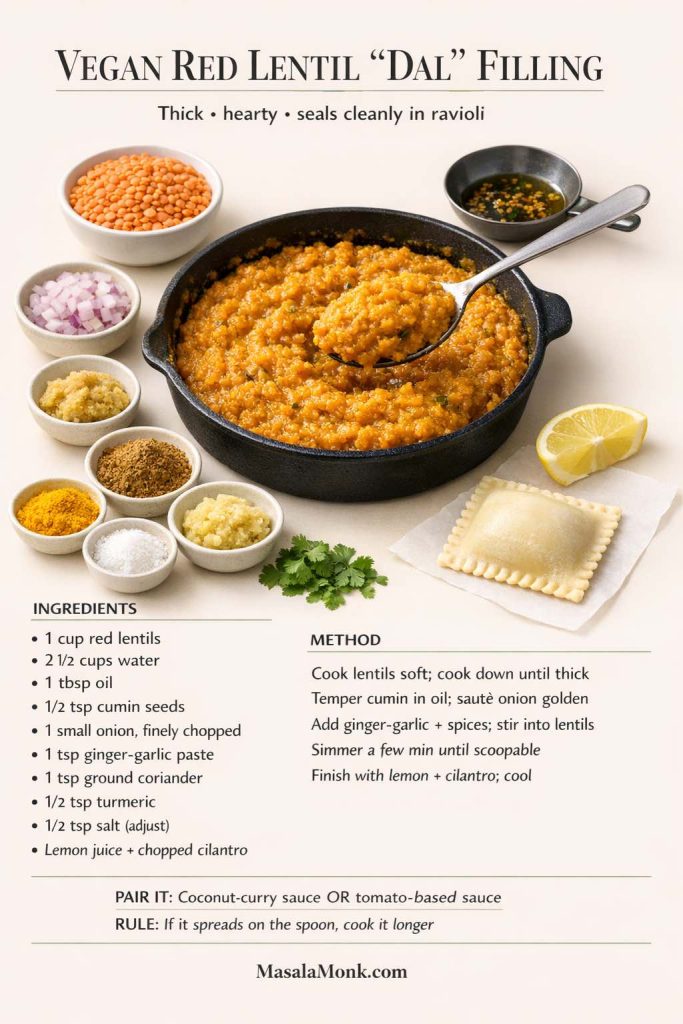
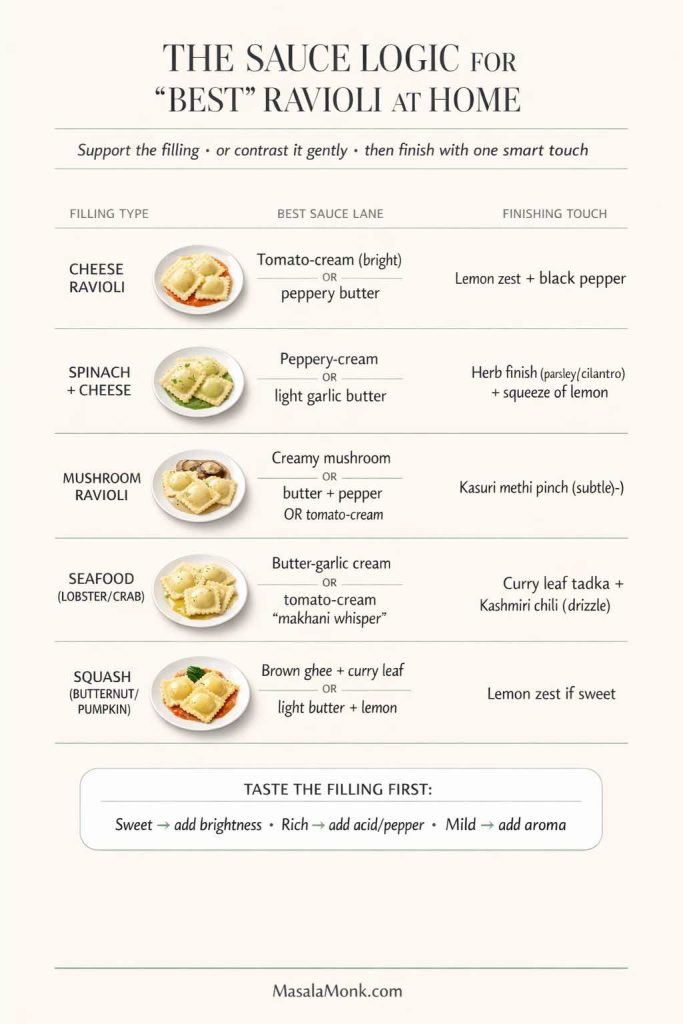
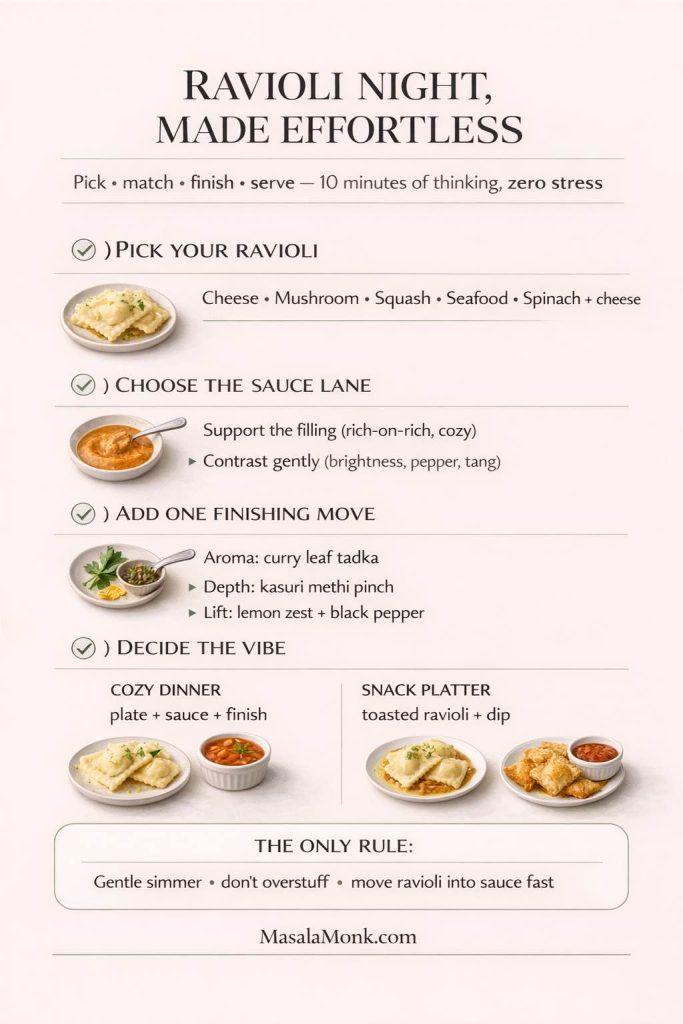
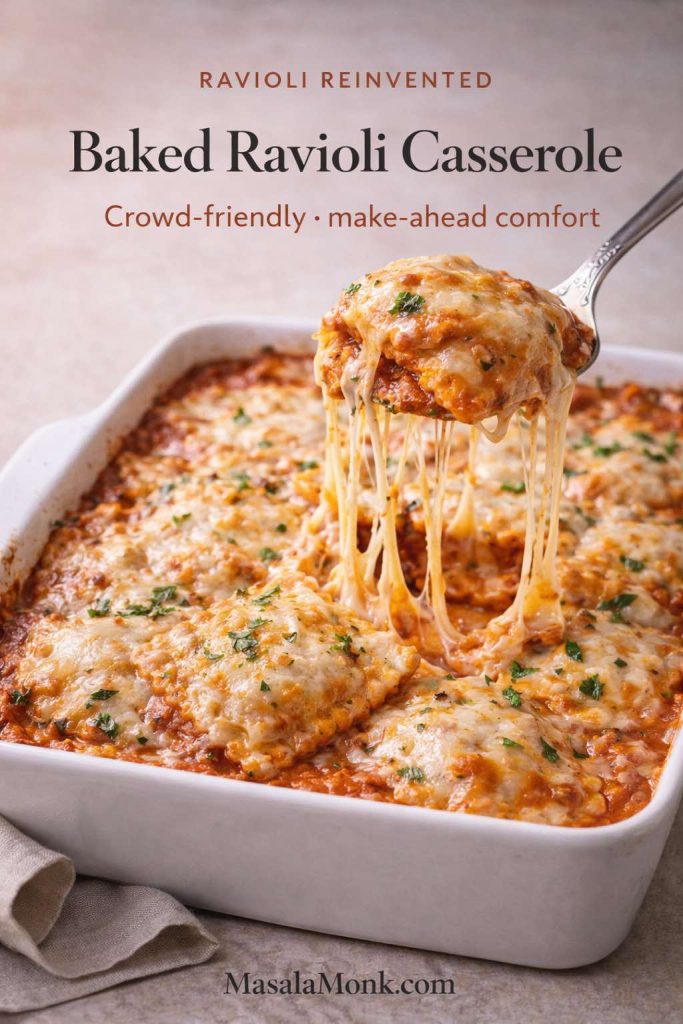
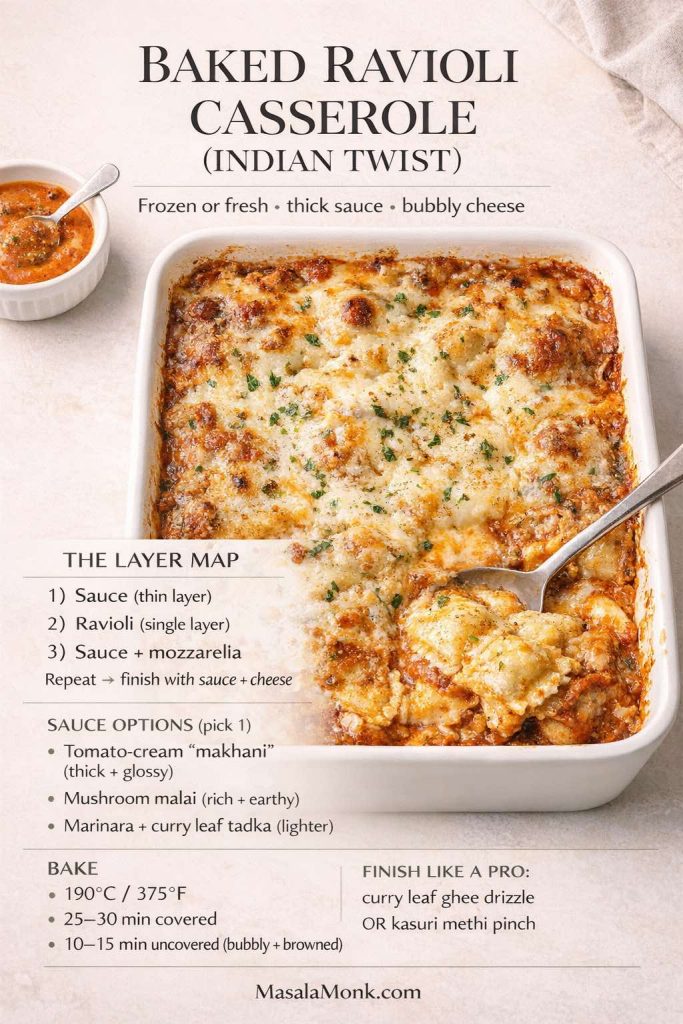
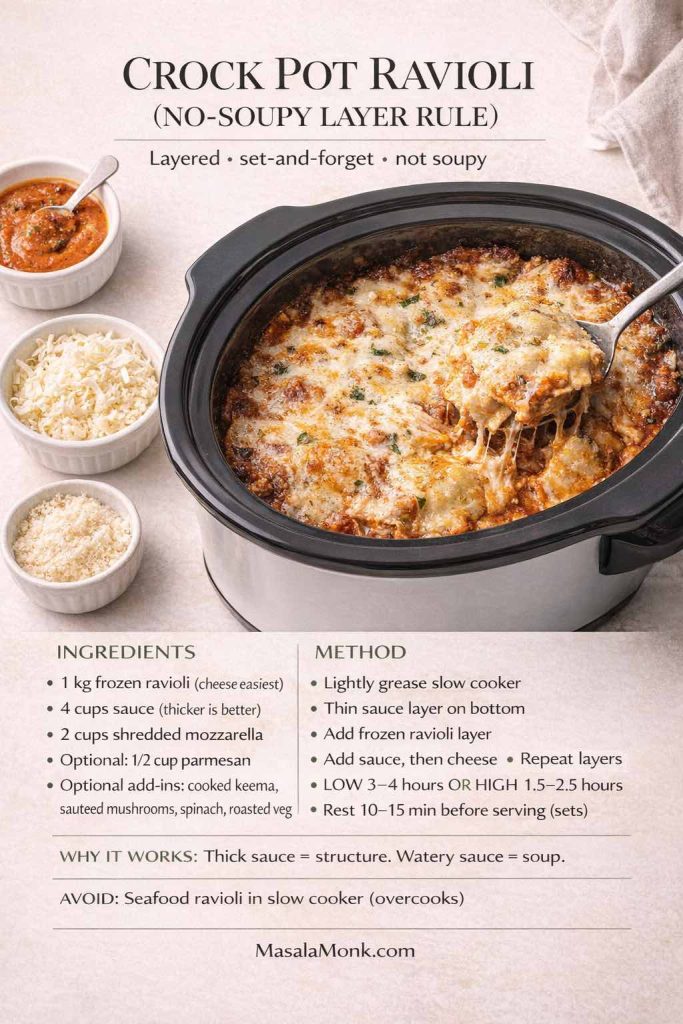
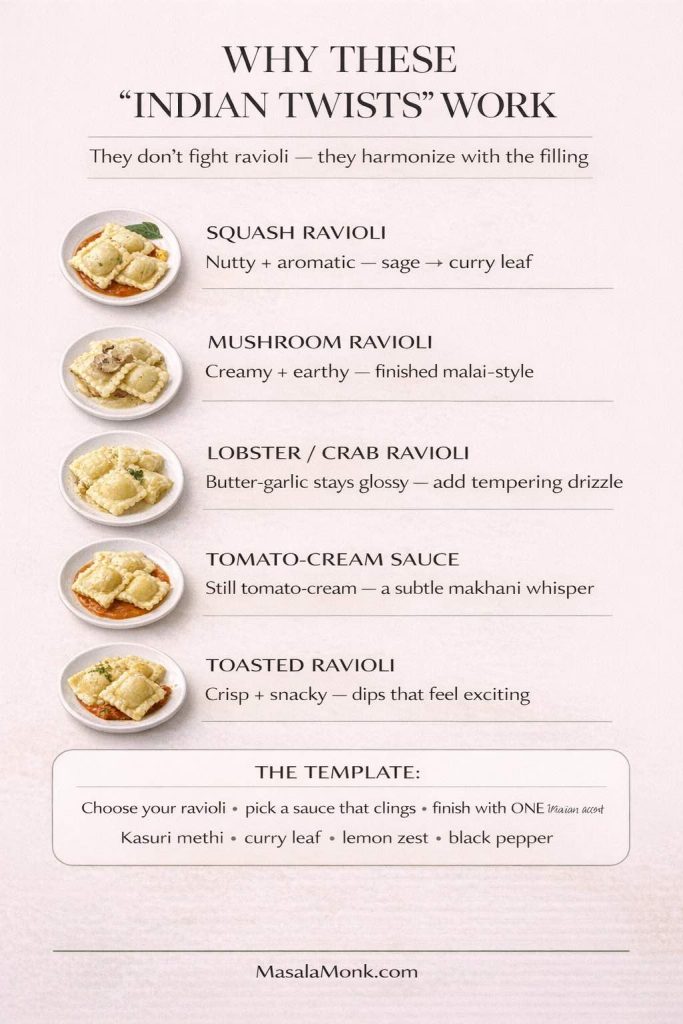
Also Read: Ravioli Recipe Reinvented: 5 Indian-Inspired Twists on the Italian Classic
How to Make Croquettes: The Master Step-by-Step (Works for Every Variant)
This is the core croquettes recipe method you’ll use for everything in the post—potato, fish, chicken, turkey, vegetarian, vegan, Spanish croquetas, and more.
What you’ll need
- 3 shallow bowls (for breading)
- A tray (for chilling shaped croquettes)
- A rack (for draining fried croquettes or baking with airflow)
- Optional but helpful: a food thermometer for meat and fish variants
Base quantities (Recipe makes 10–12 croquettes)
Think of these as the “croquettes template.” Your filling changes, the structure stays.
For the croquette mixture
- 2 packed cups prepared filling (pick a variant below)
- 1 large egg (binder)
Vegan binder method is included later - 2–6 tablespoons breadcrumbs or flour, only as needed (moisture control)
- Salt and pepper (plus any spices/herbs your filling wants)
For the coating
- ½ cup flour
- 2 eggs, beaten with a pinch of salt
- 1½ cups breadcrumbs or panko (panko gives the crispest bite)
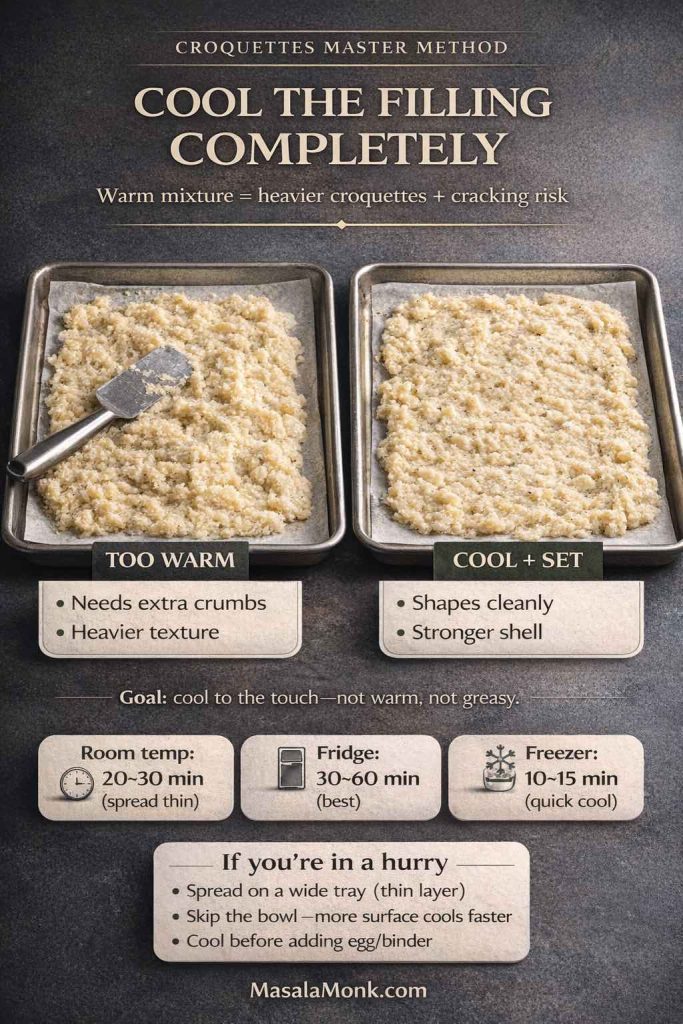
Step 1: Prepare the filling, then cool it completely
Make your filling according to the variant recipe you’re using. When it’s done, spread it out on a plate or tray and let it cool. If you rush and mix while it’s warm, you’ll need more breadcrumbs, the texture will be heavier, and shaping will feel like wrestling mashed clouds.
Step 2: Bind the mixture
Add your egg and mix thoroughly. Then test the texture:
- If it holds together when you press a small handful, you’re good.
- If it feels loose or wet, add breadcrumbs 1 tablespoon at a time until it firms up.
This step is where people often over-correct. Slow down. You’re aiming for a mixture that is cohesive, not dry.

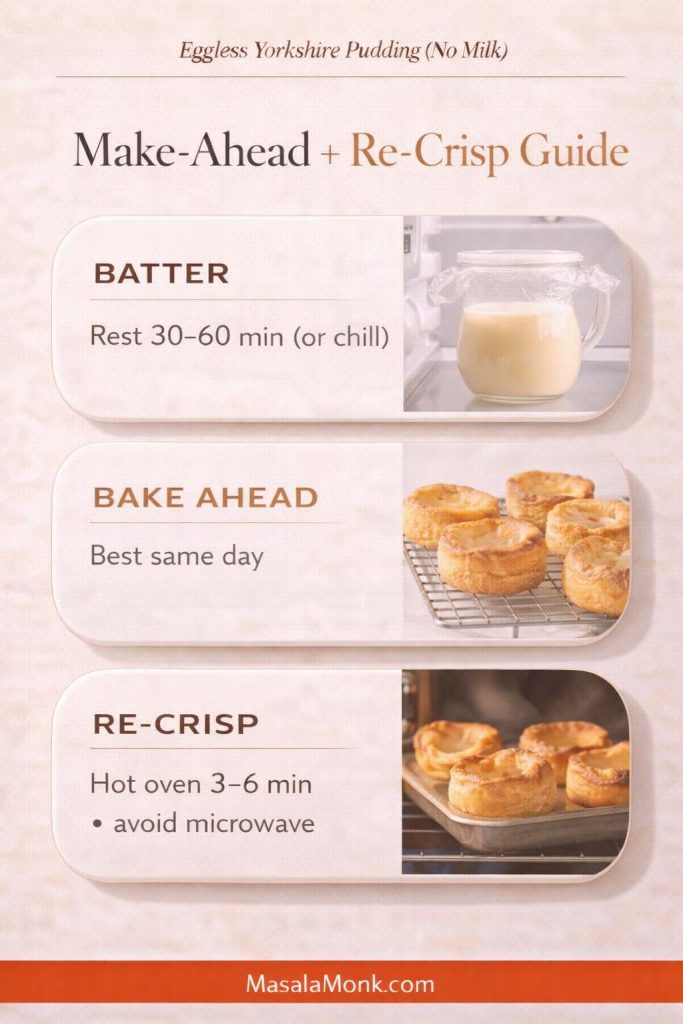
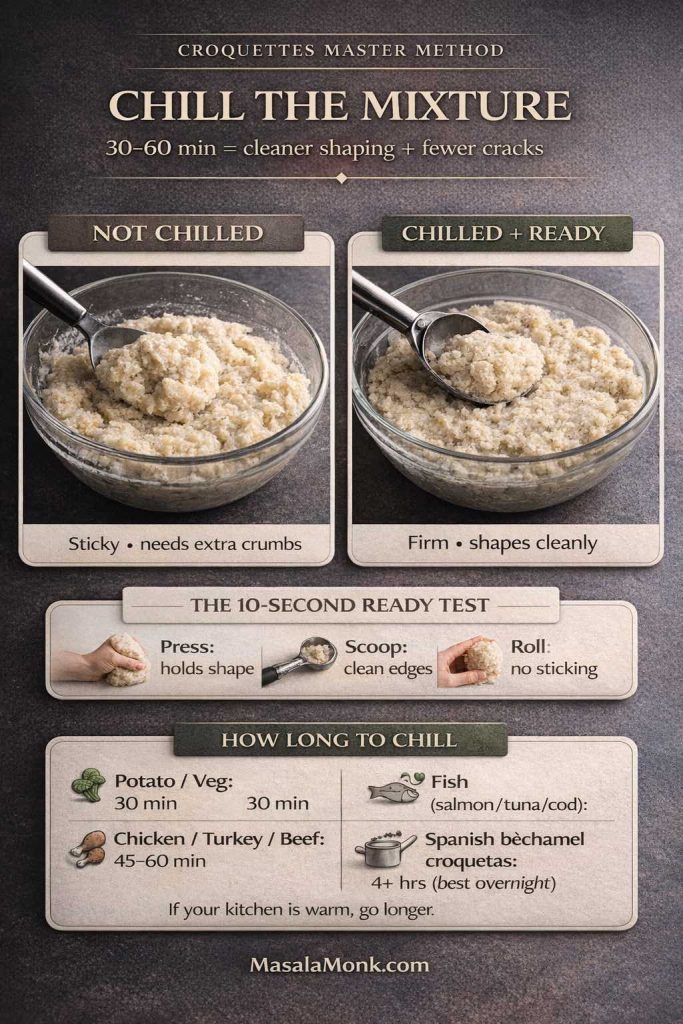
Step 3: Chill the mixture (30–60 minutes)
This single step makes shaping easier and prevents cracking. In addition, it helps the mixture set so it survives turning.
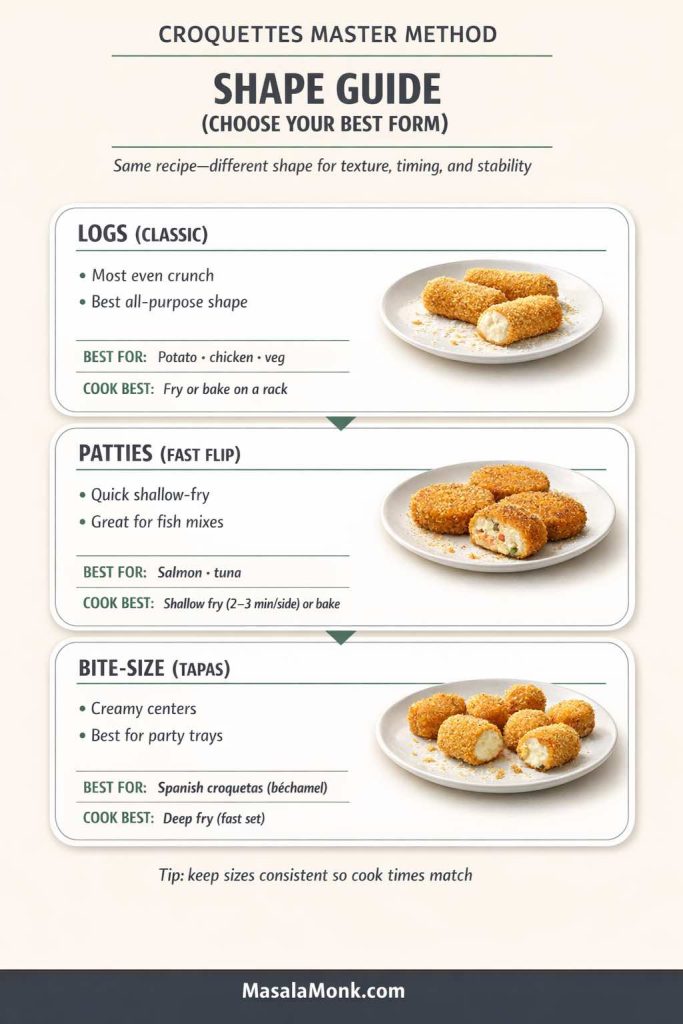
Step 4: Shape your croquettes
You can shape croquettes as:
- Logs (classic croquette shape)
- Thick patties (great for salmon croquettes, tuna croquettes, and easy croquettes you want to flip quickly)
- Small cylinders (perfect for Spanish croquetas, which are often bite-sized)
As you shape, keep the sizes consistent so cook times match.
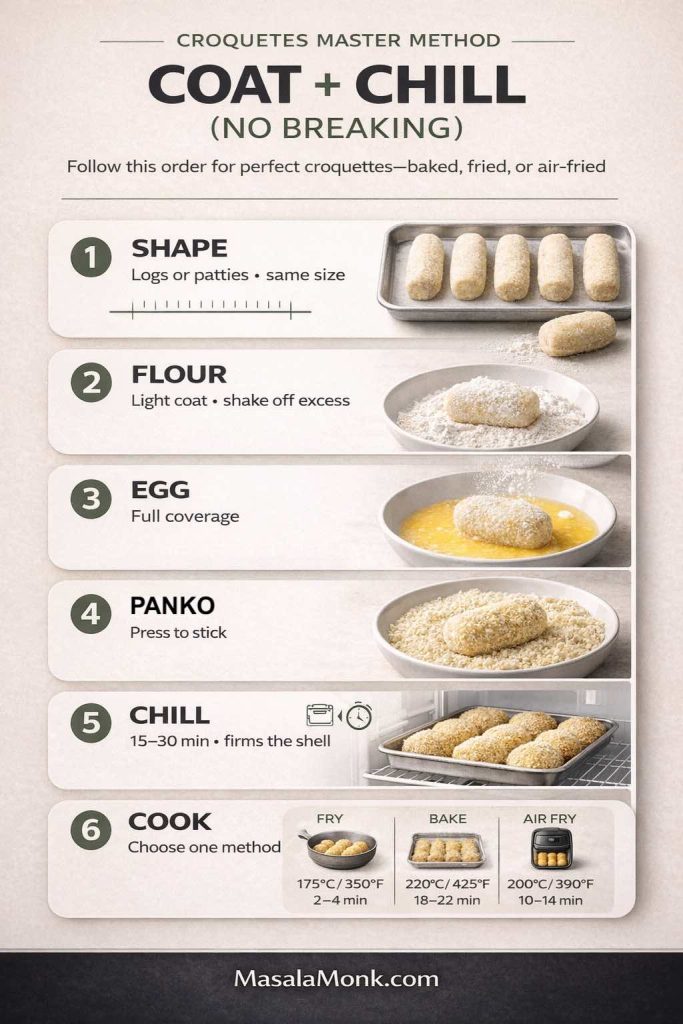
Step 5: Bread the croquettes (flour → egg → crumbs)
Set up a breading station:
- Flour bowl
- Egg bowl
- Breadcrumb bowl
Coat each croquette in flour first, shaking off excess. Then dip in egg. Finally, press into breadcrumbs so the crumbs actually stick rather than merely dust the surface.

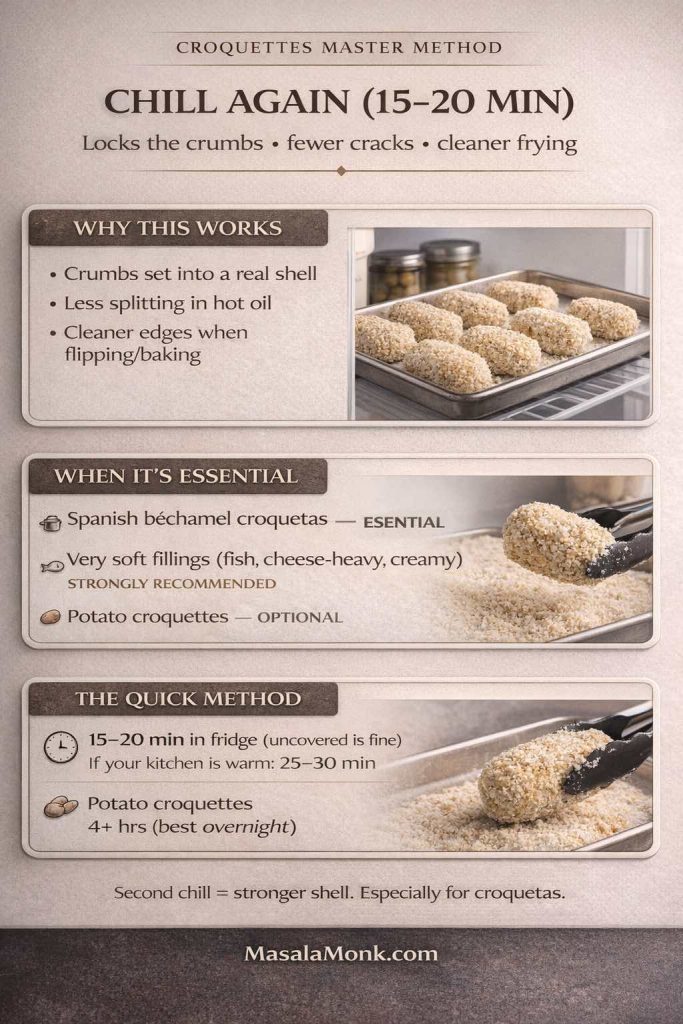
Step 6: Chill again (15–20 minutes)
This second chill is optional for potato croquettes, yet extremely helpful for béchamel-based Spanish croquetas and any very soft filling. It firms the exterior and helps the coating adhere.
Step 7: Cook using your method of choice (fry, shallow fry, bake, or air fry)
You’ve got options. None of them are “wrong,” so choose based on your time and your mood.

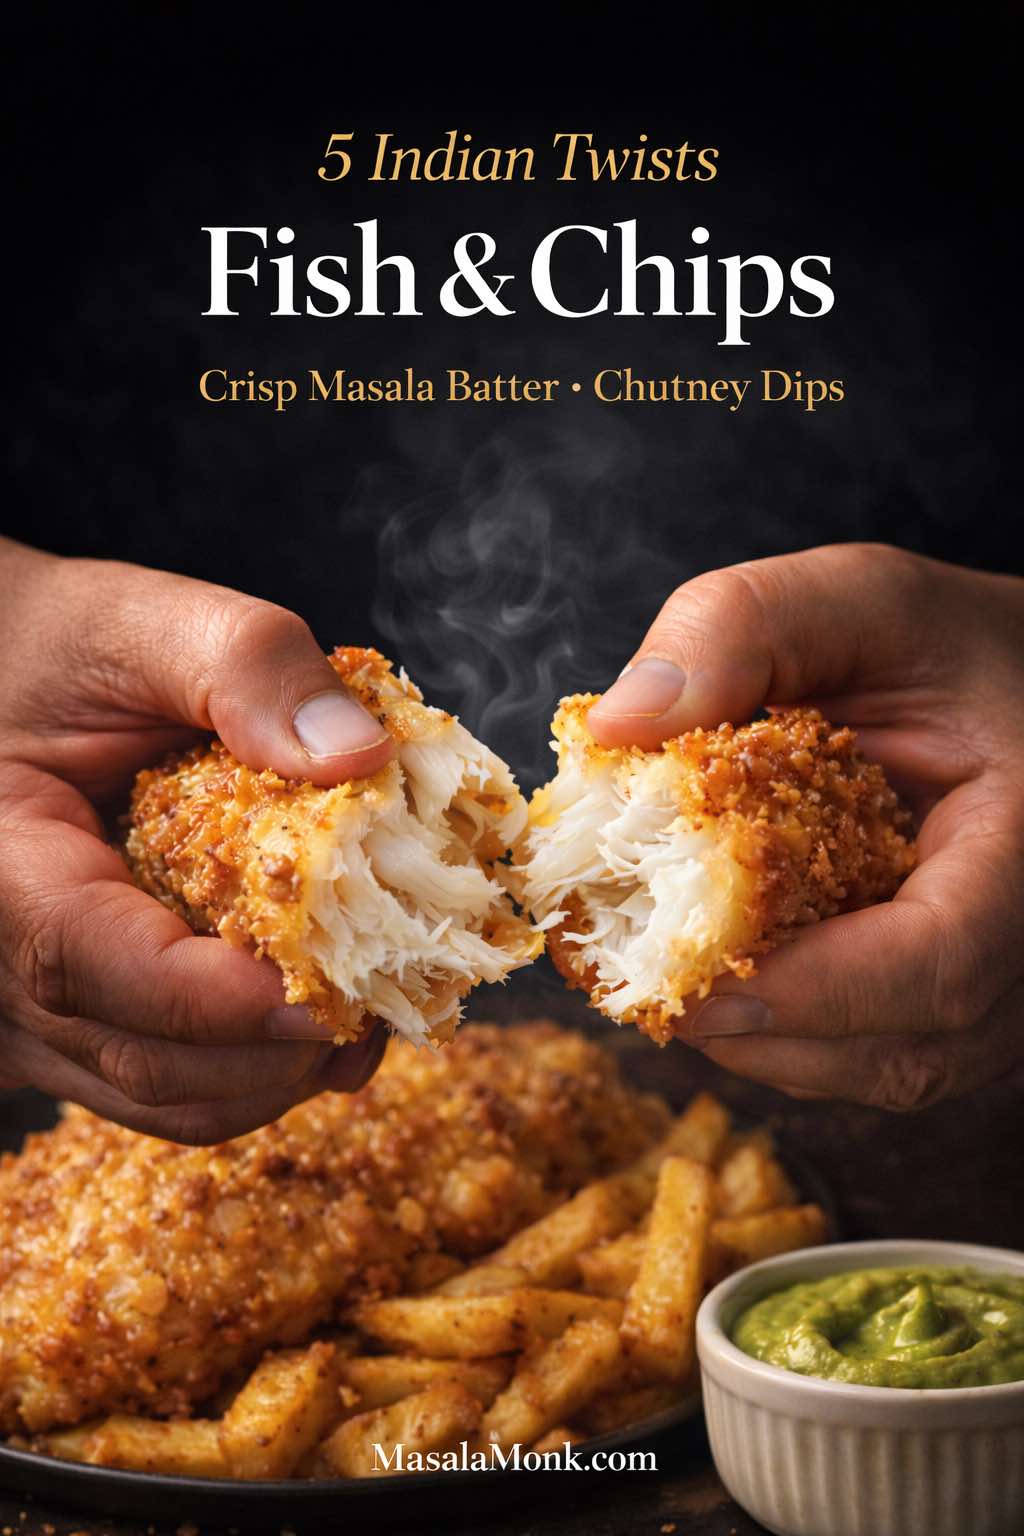
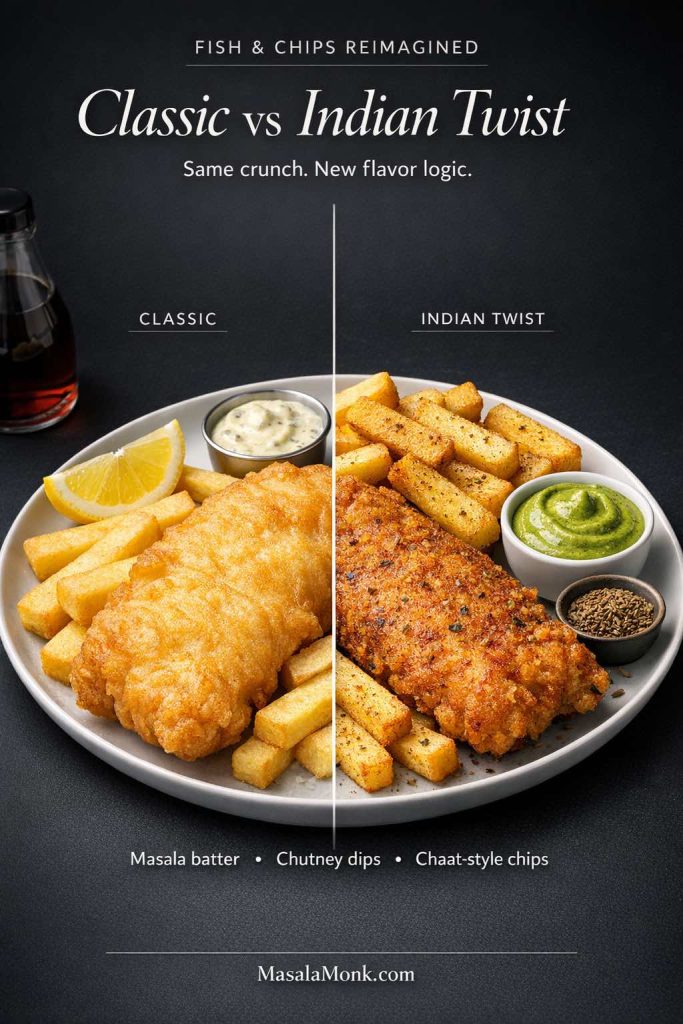
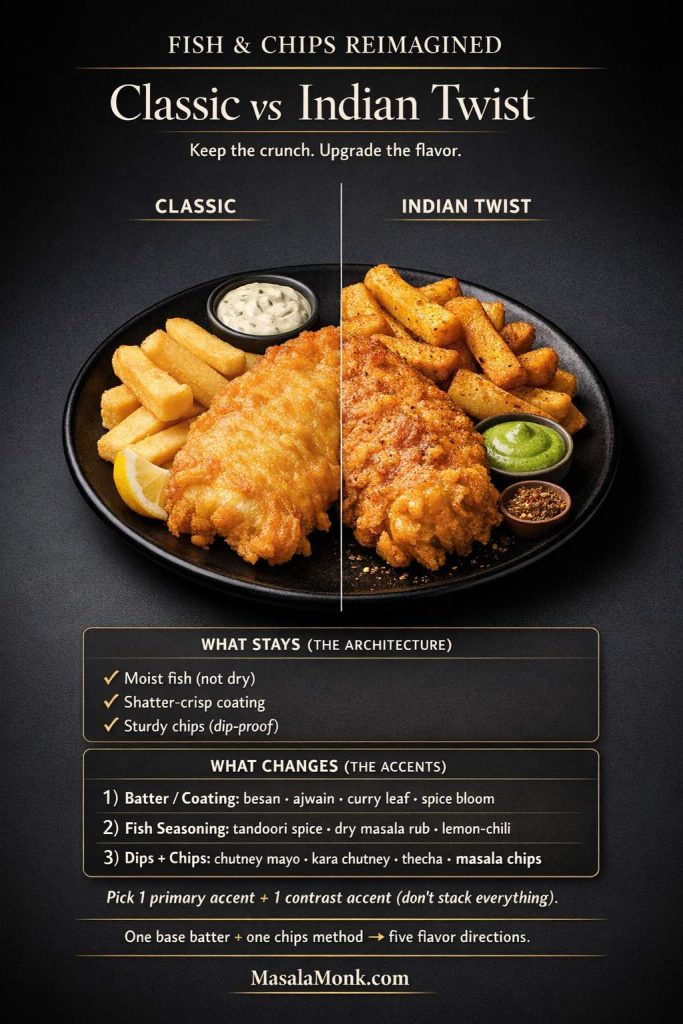
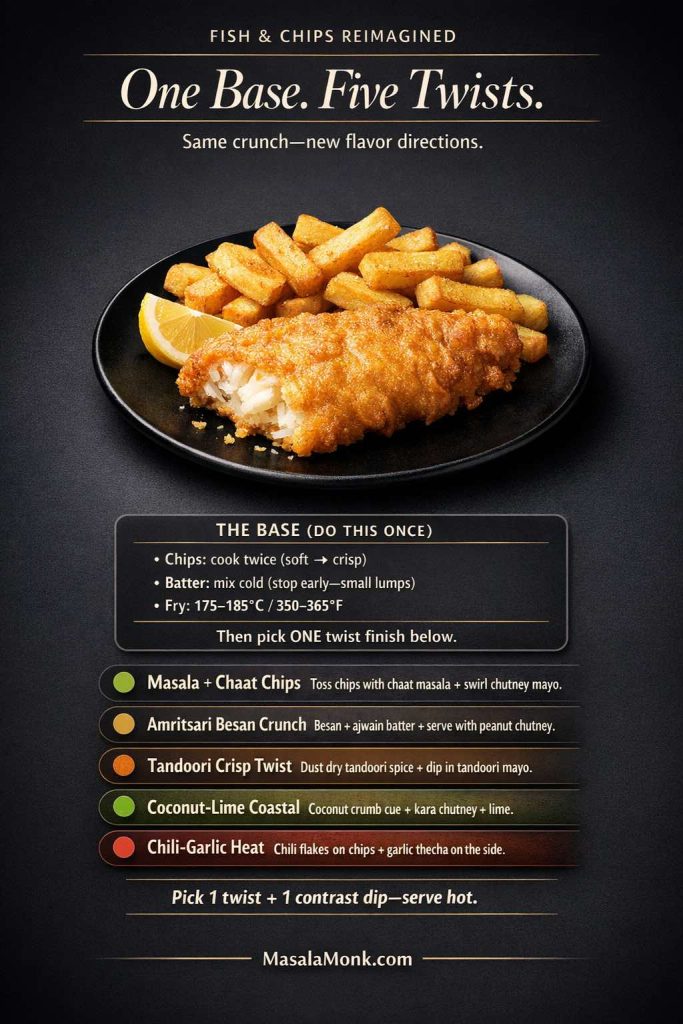
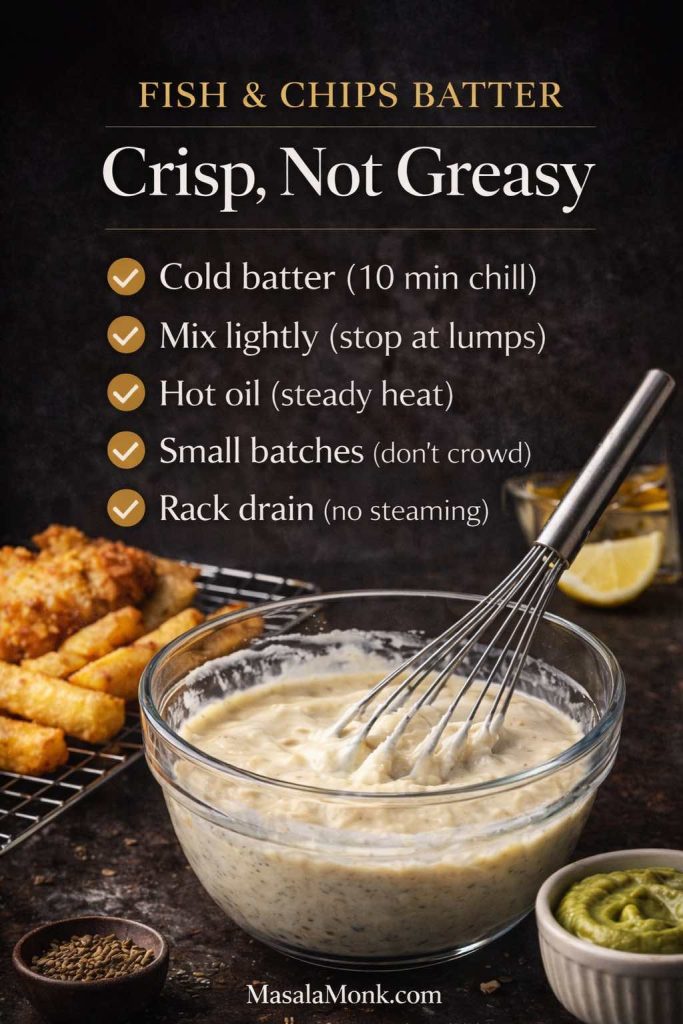
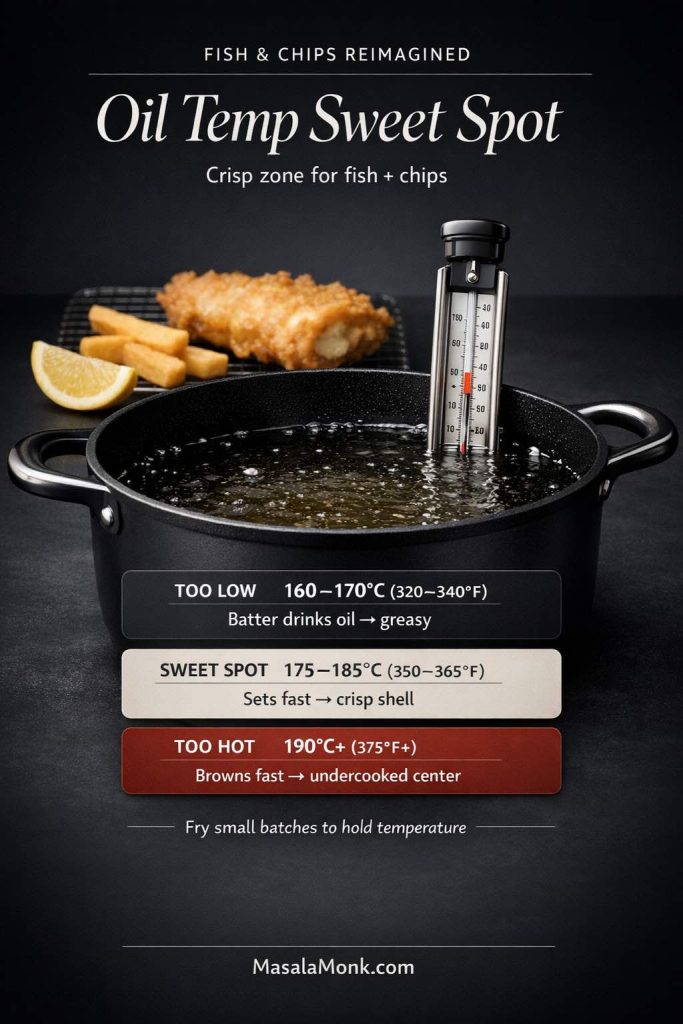
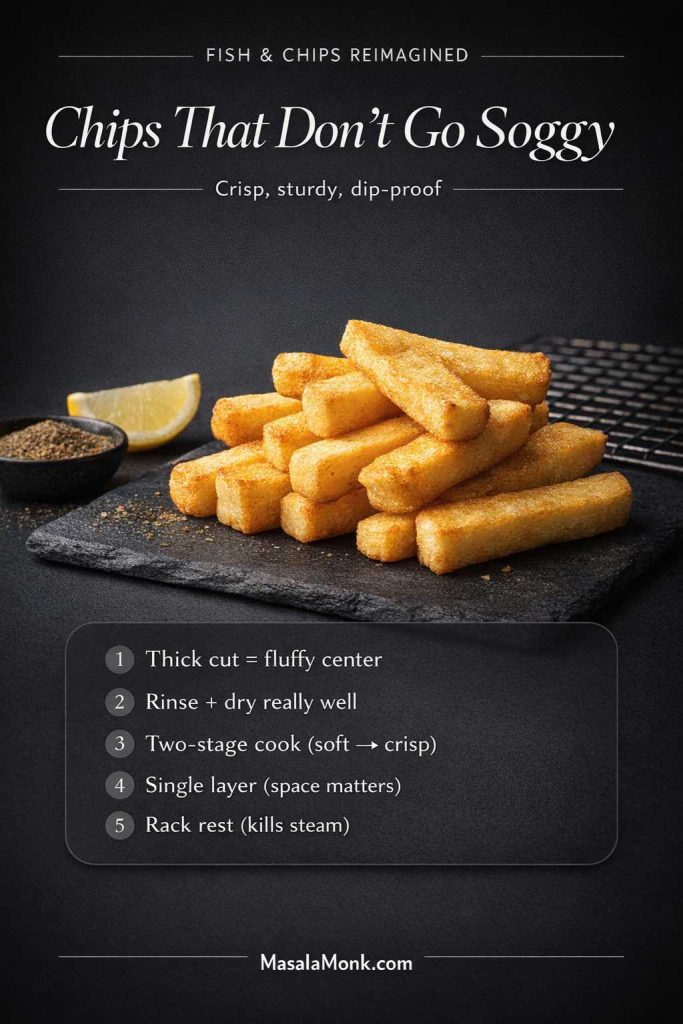
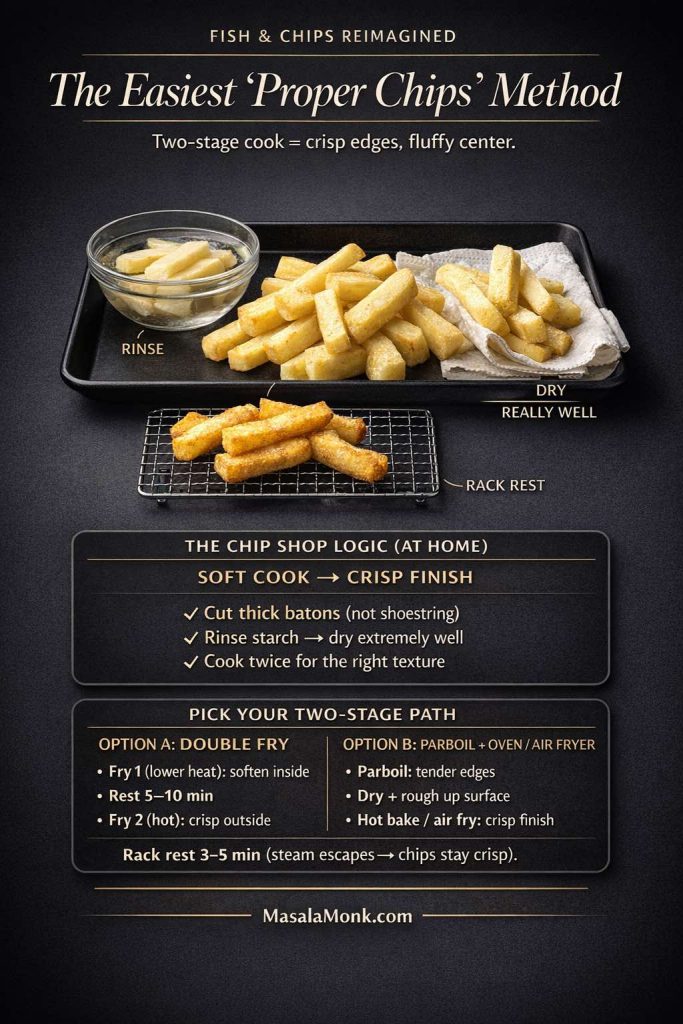
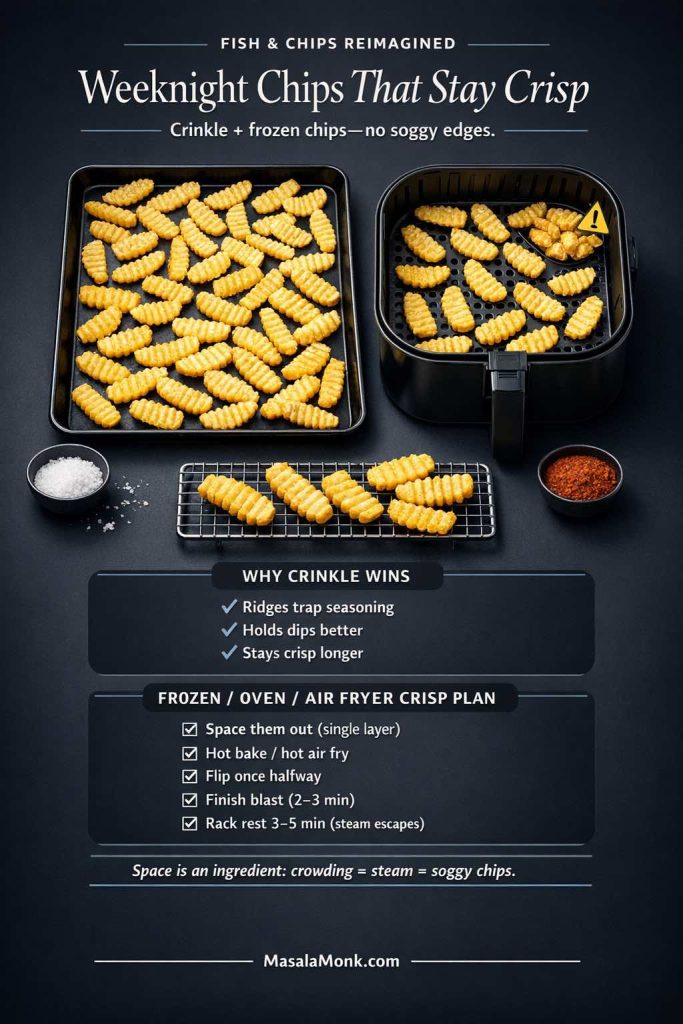
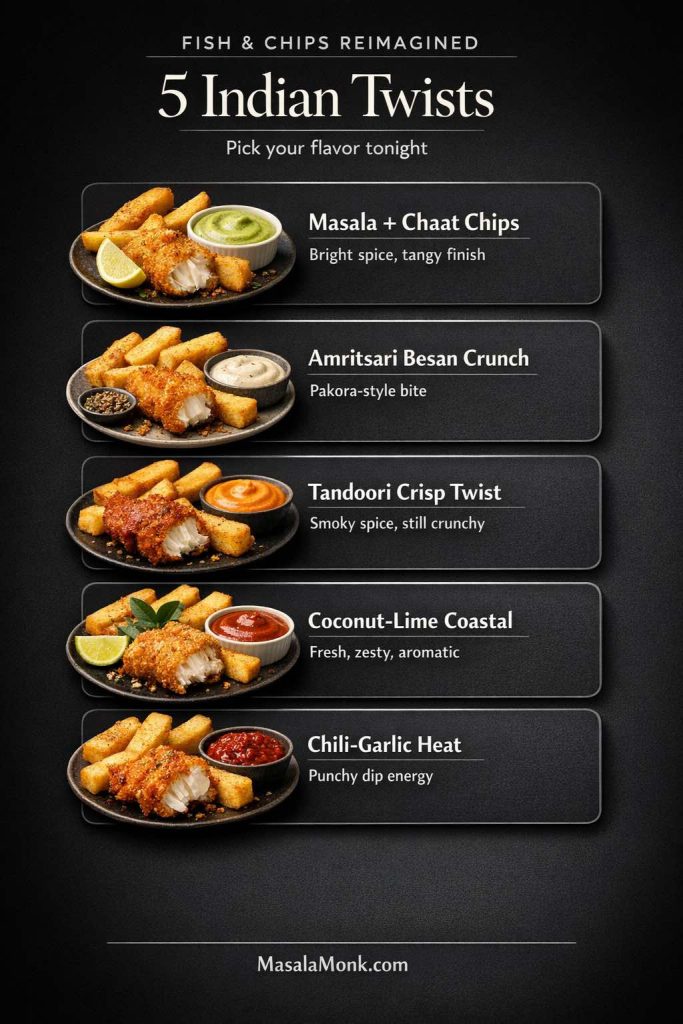
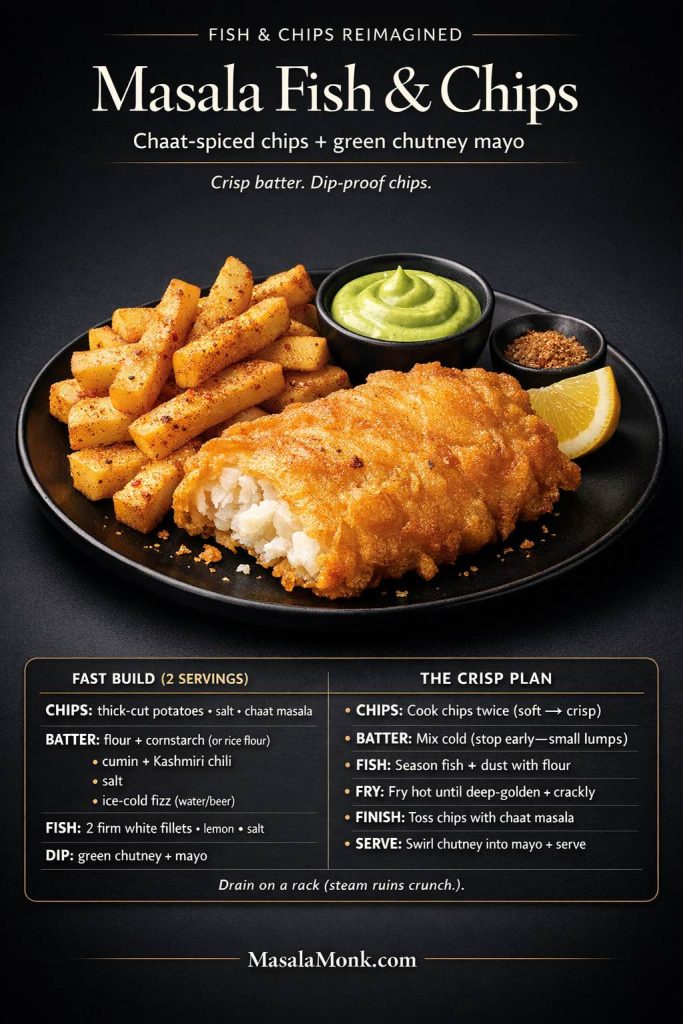
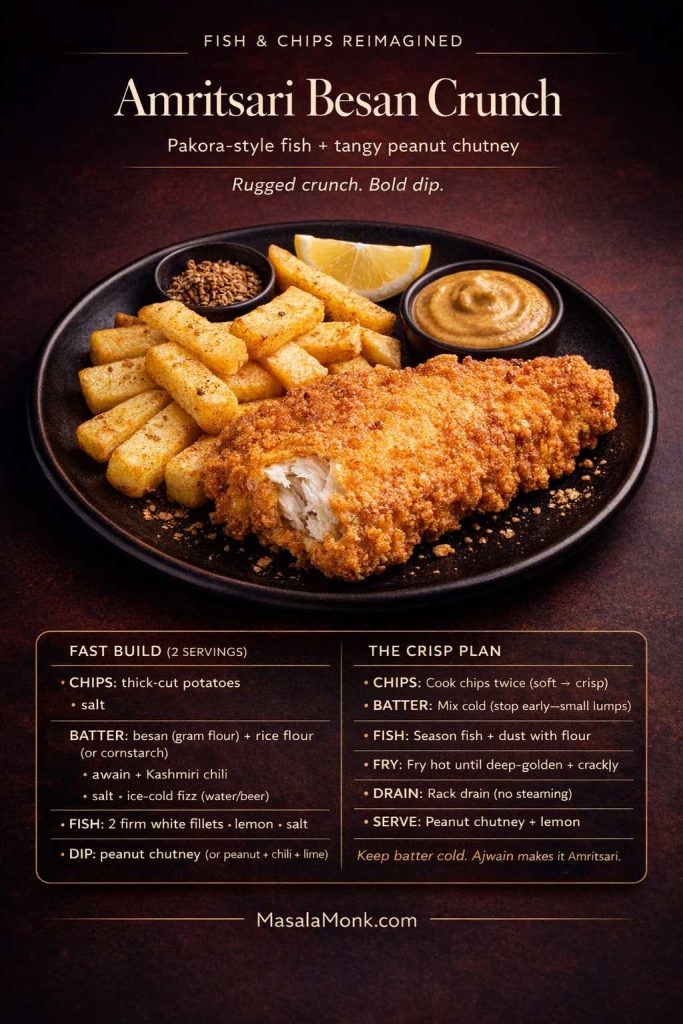
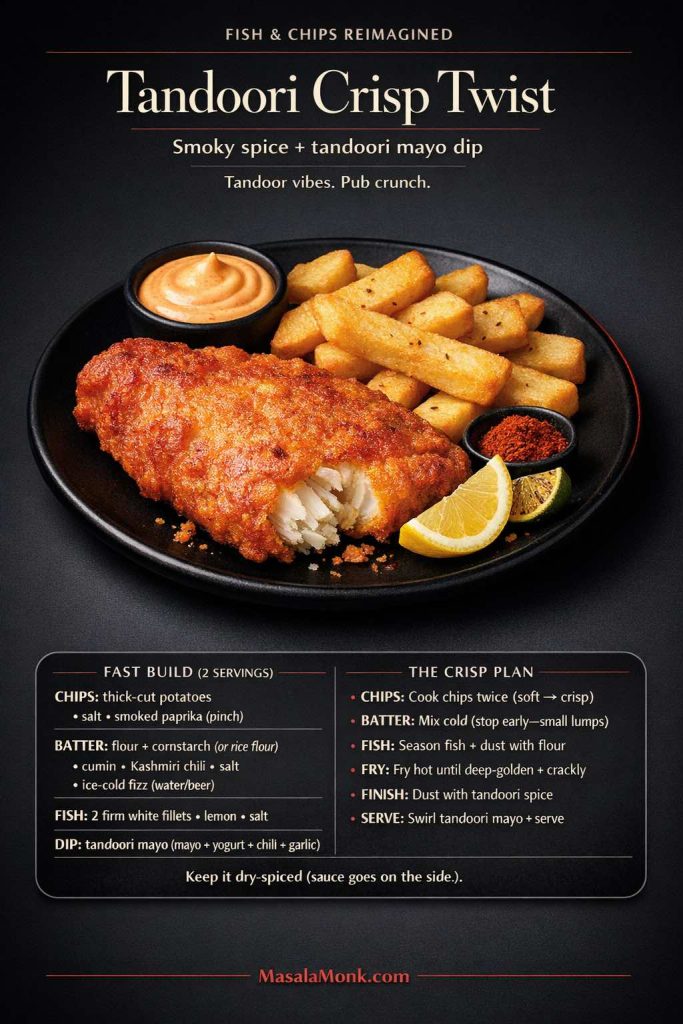
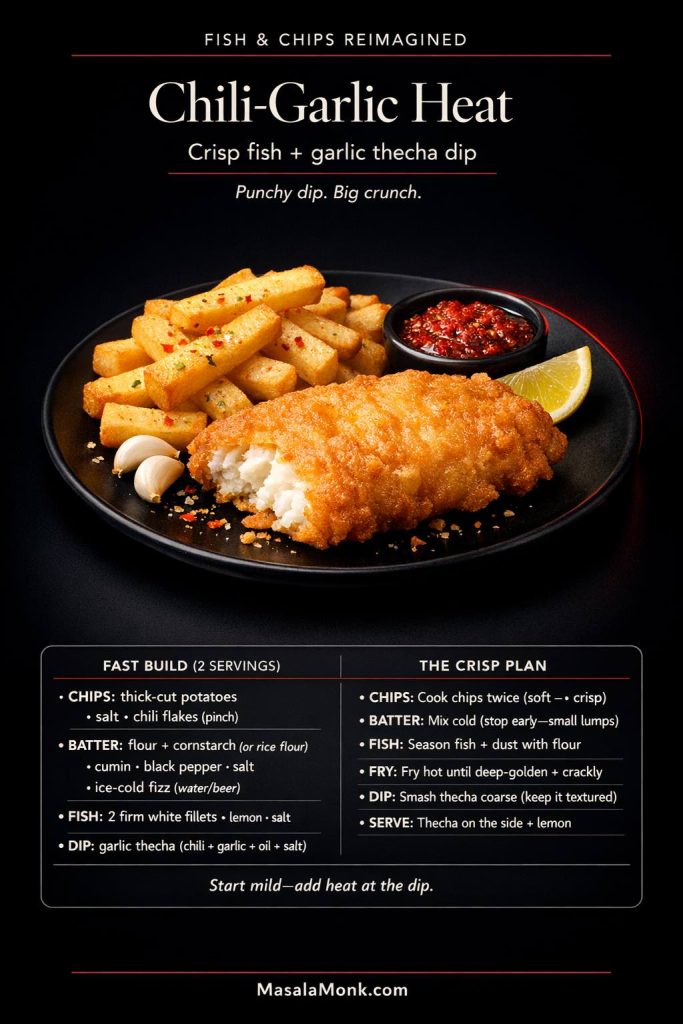
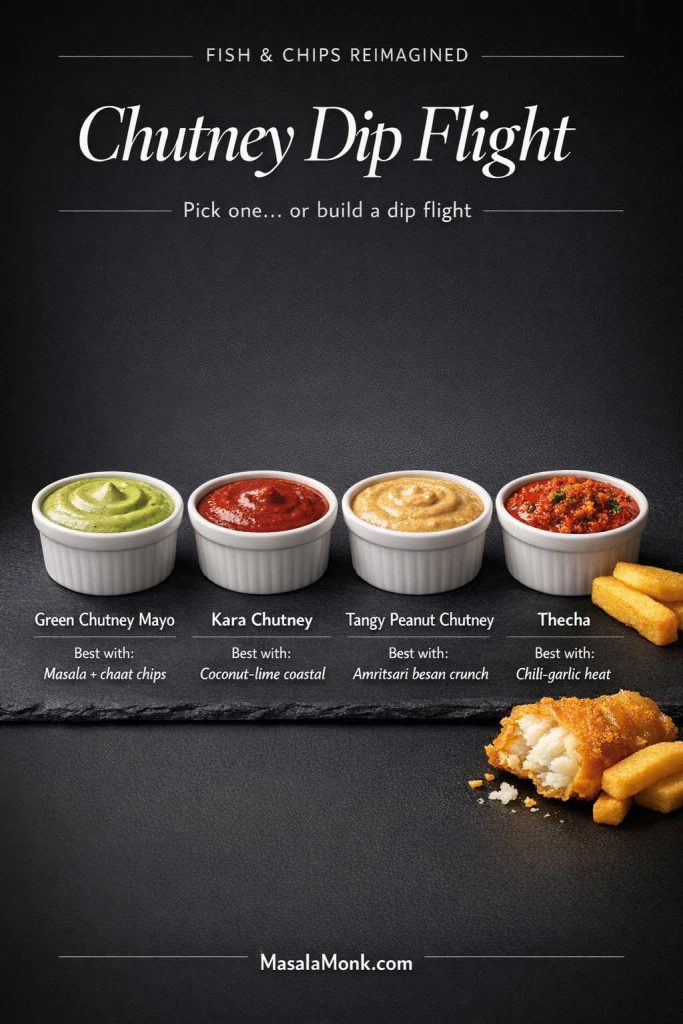
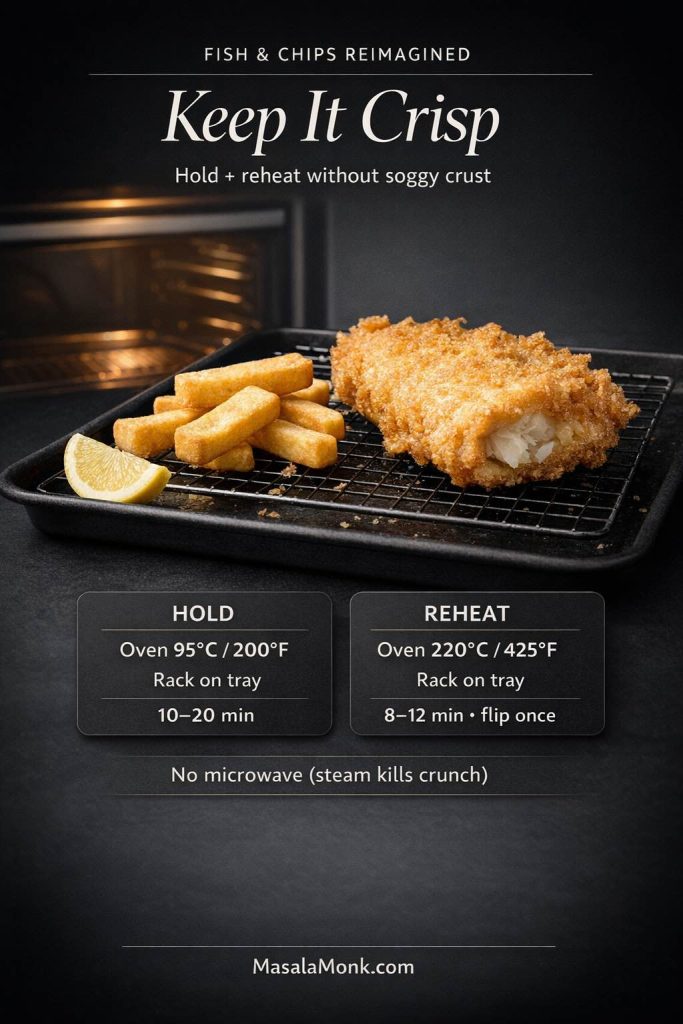
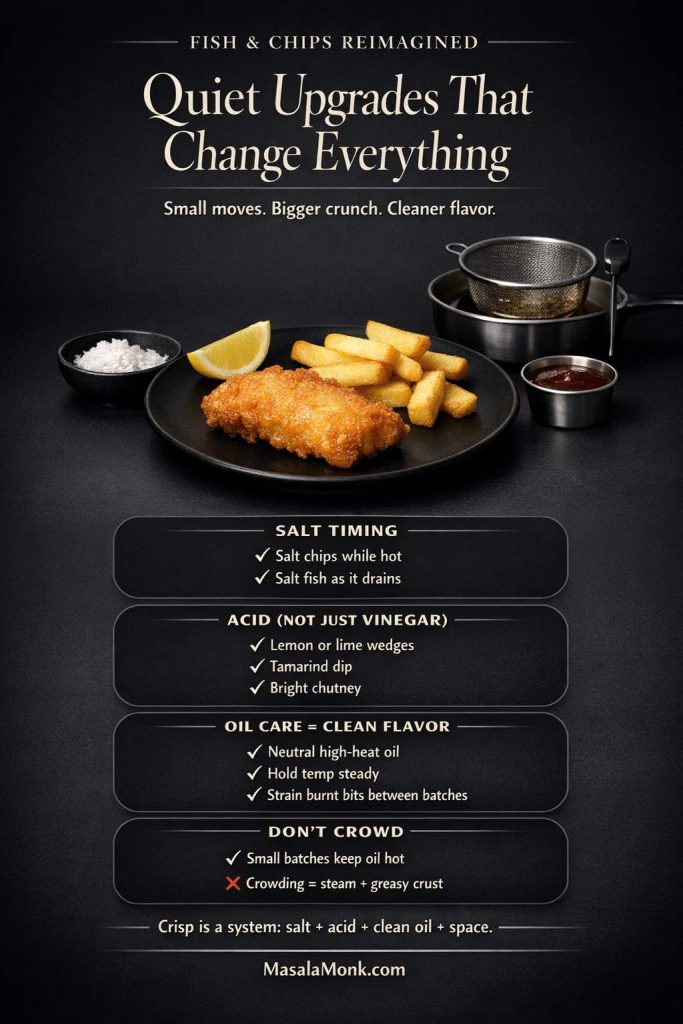
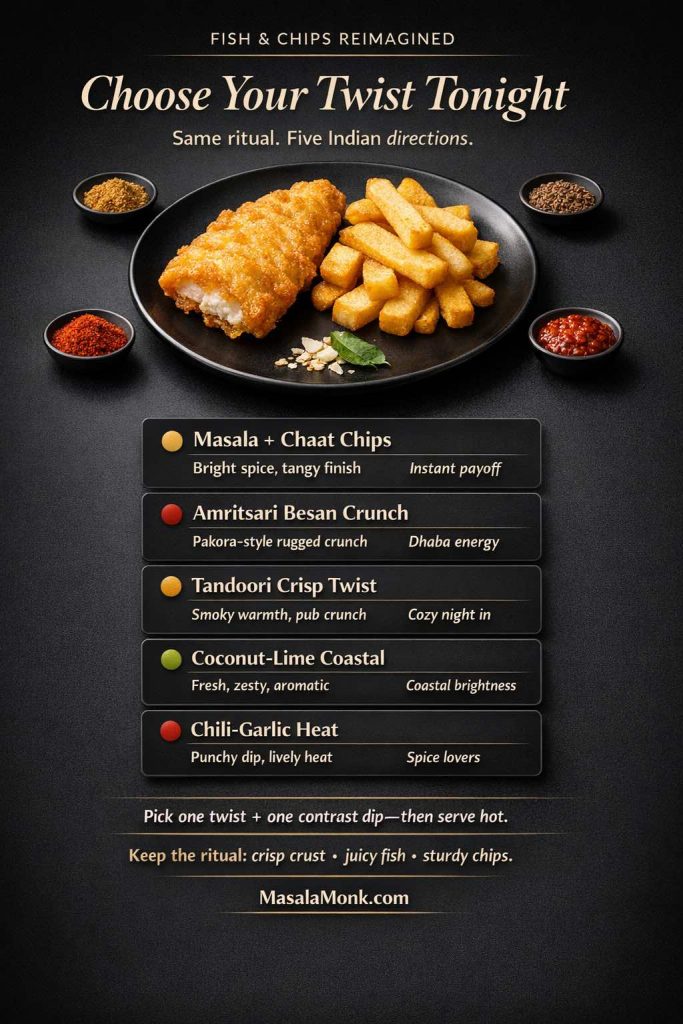
Also Read: Fish and Chips Reimagined: 5 Indian Twists (Recipe + Method)
Croquettes Cooking Methods (Fried, Shallow-Fried, Oven Baked, Air Fryer)
Deep-fried croquettes recipe (crispiest and fastest)
- Heat oil to 175°C / 350°F
- Fry in batches, 2–4 minutes, until deep golden
- Drain on a rack so they stay crisp
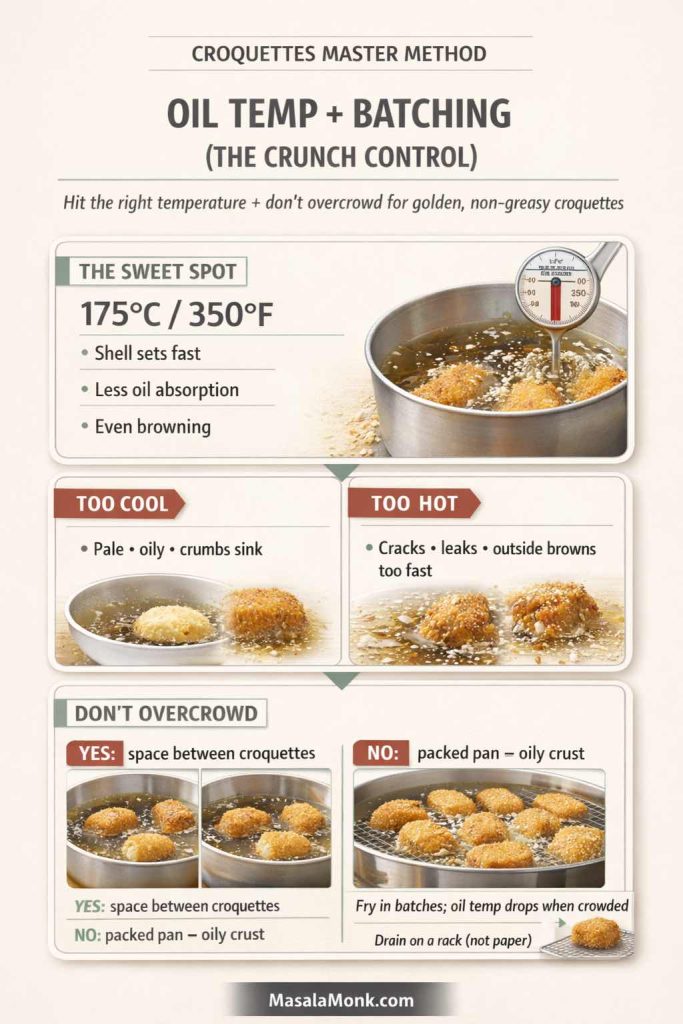
Because the shell sets quickly, deep frying is surprisingly forgiving—provided the oil is hot enough and you don’t overcrowd the pot.
Shallow-fried croquettes (easier, still crisp)
- Add about 1 cm of oil to a skillet
- Medium heat
- Fry 2–3 minutes per side
Shallow frying is excellent for salmon croquette patties and old fashioned tuna croquettes where you want more surface browning.
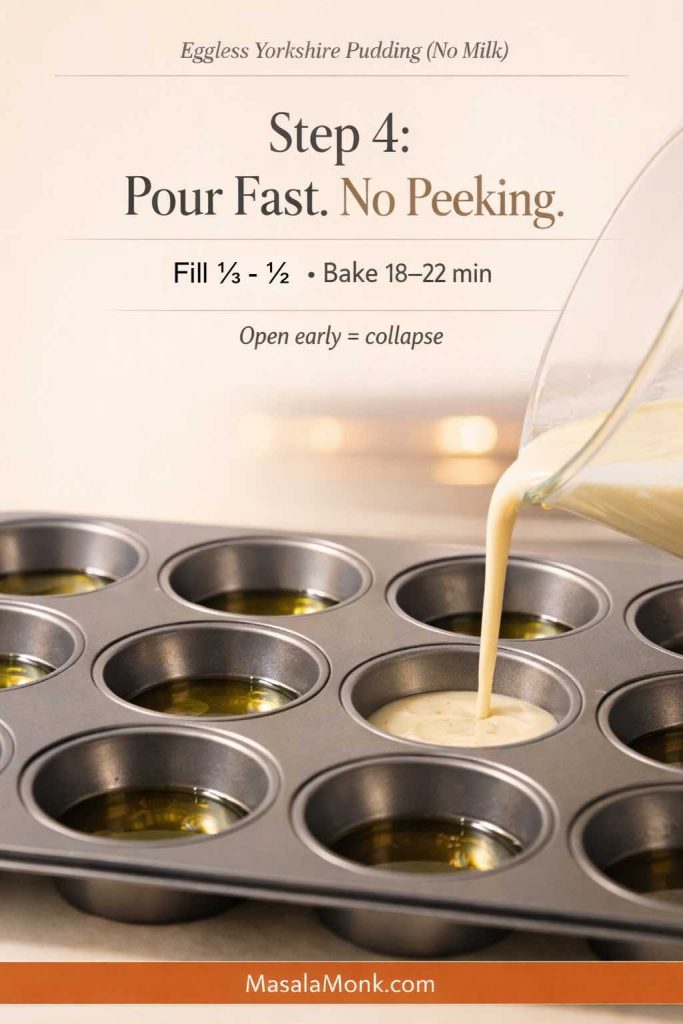
Croquettes oven baked (the best “healthy croquettes” recipe)
If you want croquettes oven baked without losing that crunch, do this:
- Preheat oven to 220°C / 425°F
- Place croquettes on a rack over a tray
- Lightly spray or brush with oil
- Bake 18–22 minutes, flipping once
Baked croquettes won’t taste “fried,” but they can be crisp and satisfying when you use panko and high heat.
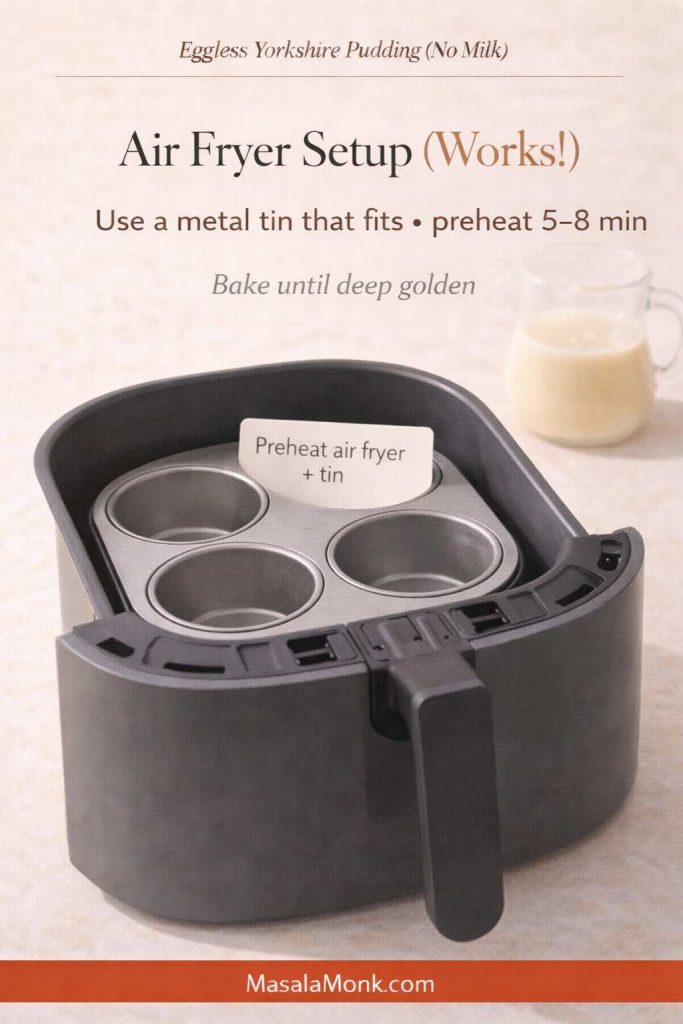
Air fryer croquettes (fast, crisp, low mess recipe)
- Preheat if your air fryer benefits from it
- Cook at 200°C / 390°F
- Spray lightly with oil
- Air fry 10–14 minutes, flipping once
Air frying is fantastic for frozen croquettes you’ve made ahead, because it re-crisps without drying out the center too harshly.
Also Read: Dirty Martini Recipe (Classic, Extra Dirty, No Vermouth, Spicy, Blue Cheese, Tequila + Batched)
Croquettes and Sauces: The Secret to Keeping Every Batch Exciting
Croquettes are rich by design. Therefore, they love sauces that bring contrast: bright, spicy, tangy, or herbaceous.
For an Indian-inspired spread, you can rotate between:
- South Indian Coconut Chutney for cool, nutty freshness
- Kara Chutney when you want a sharper, spicy edge
- Thecha (green chilli–garlic chutney) when you want bold heat
- Spicy Peanut Chutney (no onion, no garlic) when you want creamy tang without dairy
- Vada Pav Dry Chutney when you want a sprinkle-style punch that clings to the crust
Meanwhile, if you’re turning croquettes into cocktail snacks, the pairing is almost too natural: salty croquettes with a briny drink, or crispy croquettes with a citrusy drink. A crisp Dirty Martini fits especially well with Spanish croquetas and ham and cheese croquettes, while a bright Lemon Drop Martini works beautifully when you want freshness to cut richness. If you prefer something lighter and longer, Vodka with Lemon is an easy match.
Now that the method is clear, let’s cook through the variants properly.
Also Read: Keto Hot Chocolate Recipe (Sugar-Free Hot Cocoa) + Best Homemade Mix
Potato Croquettes (Classic, Leftover Mash Friendly, and Japanese Potato Croquette Recipe)
Potato croquettes are the easiest place to start because potatoes naturally bind. That’s why “mashed potato croquette” and “how to make potato croquettes with leftover mashed potatoes” are such popular queries—this version welcomes leftovers.

Easy potato croquettes recipe (makes 10–12)
Ingredients
- 2 cups cold mashed potatoes
- 1 egg
- ½ teaspoon salt
- ½ teaspoon black pepper
- 2 tablespoons chopped parsley or chives (optional)
- ½ cup grated cheese (optional, great for cheese croquettes vibes)
- 2–4 tablespoons breadcrumbs if needed (only if your mash is loose)
Step-by-step
- Mix the mashed potatoes with salt, pepper, and herbs.
- Stir in cheese if you want a richer center.
- Add the egg and mix until cohesive.
- If it feels too soft to shape, add breadcrumbs gradually.
- Chill 30–60 minutes.
- Shape into logs or patties.
- Bread and cook using your preferred method.
If you like checking a classic baseline, BBC Good Food’s potato croquettes are a handy reference for the traditional approach.
Recipe for leftover mashed potato croquettes: making them sturdier
Leftover mash varies a lot. Some is buttery, some is stiff, some has milk or cream. Consequently, the fix also varies:
- If your mash is loose: add 1–2 tablespoons breadcrumbs and chill longer
- If your mash is stiff: add 1 tablespoon milk, mix gently, then chill
- If your mash is chunky: mash a bit more so shaping is smoother
Japanese potato croquette direction (korokke vibe recipe)
If you want Japanese potato croquette style, keep the potato base, then fold in one of these:
- sautéed onions and carrots
- a little cooked minced meat (beef croquettes style)
- a pinch of nutmeg plus a tiny splash of soy for depth
Shape into patties, bread with panko, then shallow fry or bake hot for a crisp shell.
Also Read: 10 Low Carb Chia Pudding Recipes for Weight Loss (Keto, High-Protein, Dairy-Free)
Spanish Croquetas (Ham, Jamón, and Ham and Cheese Croquettes recipe)
Spanish croquetas are the ones people describe as “perfect croquetas” because the interior is creamy in a way potato croquettes simply aren’t. Instead of mash, you build a very thick béchamel that sets in the fridge, then you bread and fry.
This is the point where “how do you make ham croquettes” becomes a real cooking question, because béchamel croquetas reward patience. Luckily, the steps are straightforward.
Jamón croquetas recipe (classic Spanish croquetas)
Makes: about 15–20 small croquetas
Ingredients
- 3 tablespoons butter
- ⅓ cup flour
- 2 cups milk, warmed
- 1 cup finely chopped ham or jamón (tiny dice)
- ¼ teaspoon nutmeg
- black pepper (generous)
- salt only if needed
Step-by-step
- Melt butter in a pan over medium heat.
- Whisk in flour and cook 1–2 minutes so it loses its raw taste.
- Slowly pour in warm milk while whisking constantly.
- Keep stirring until it thickens dramatically; you want it thick enough that it pulls away from the pan.
- Stir in ham, nutmeg, and pepper. Taste before adding salt.
- Spread the mixture into a shallow tray so it cools quickly.
- Cool at room temp, then refrigerate at least 4 hours (overnight is better).
- Scoop and shape quickly, then bread carefully.
- Chill the breaded croquetas 15–20 minutes, then fry at 175°C / 350°F until golden.
For external references that echo this traditional Spanish food croquettes method, you can use:
- BBC Good Food’s ham & cheese croquetas for timings and chilling flow
- The Spruce Eats croquetas de jamón for a beginner-friendly walk-through
- Spanish Sabores’ croquetas de jamón serrano for a Spain-forward perspective
Ham and cheese croquettes (extra creamy recipe)
If you want ham and cheese croquettes (also written as ham and cheese croquetas), do the same base, then stir in:
- ¾ cup shredded cheese (manchego is classic; cheddar is excellent)
Chill overnight, bread, then fry. Because cheese browns quickly, keep the oil steady and don’t overcook.
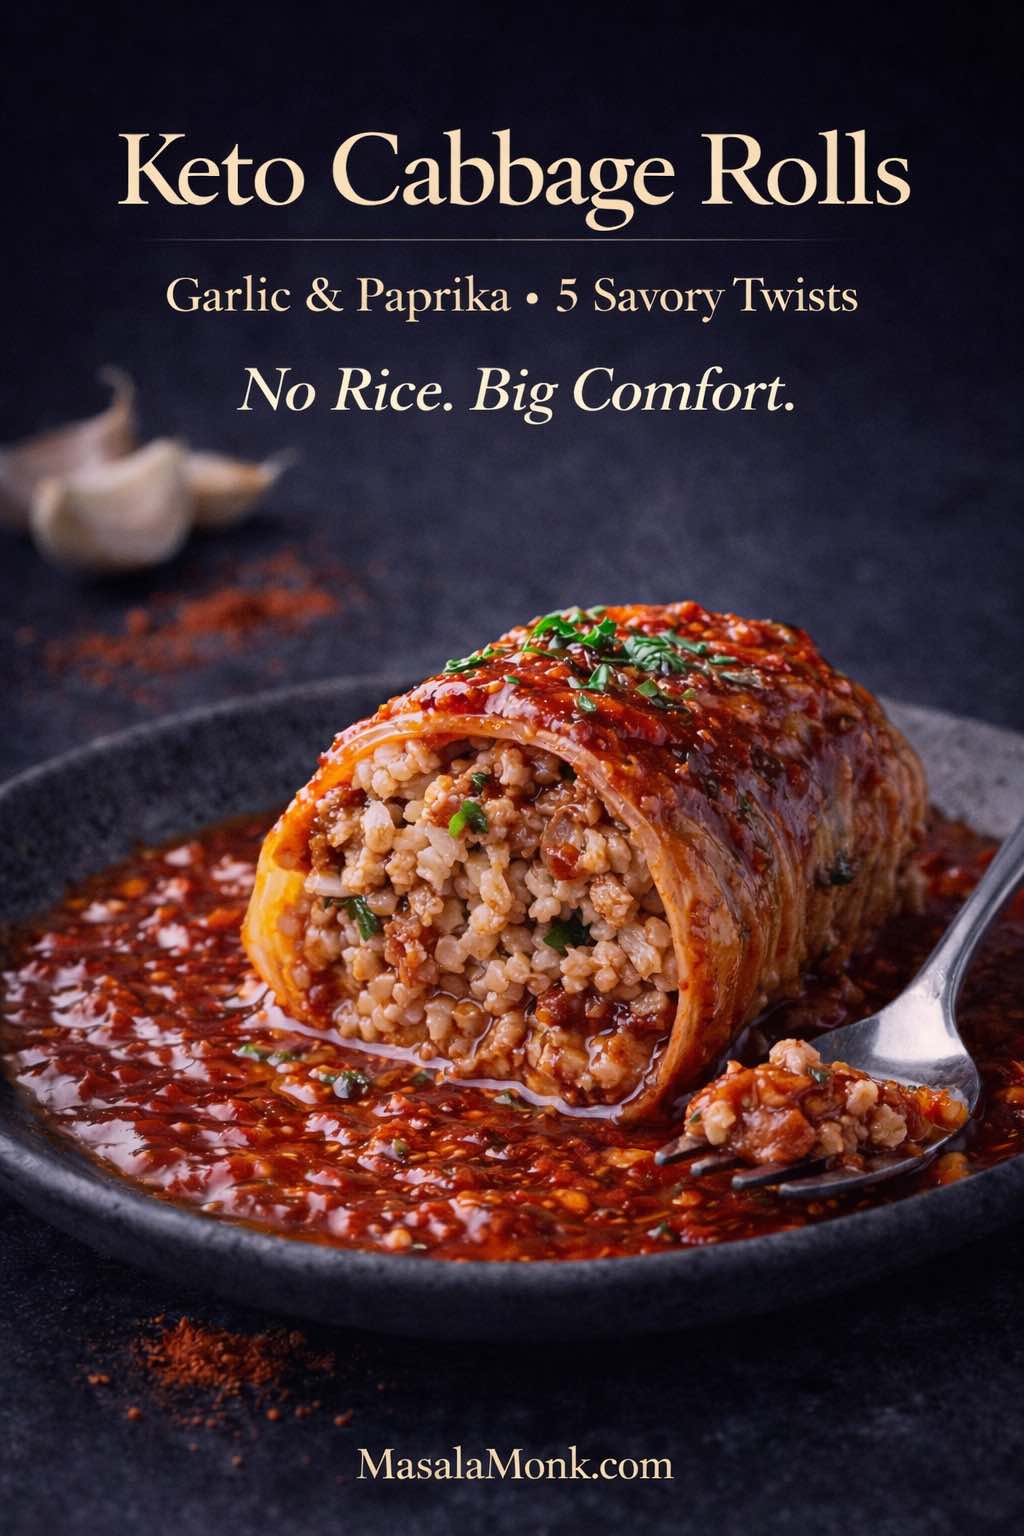
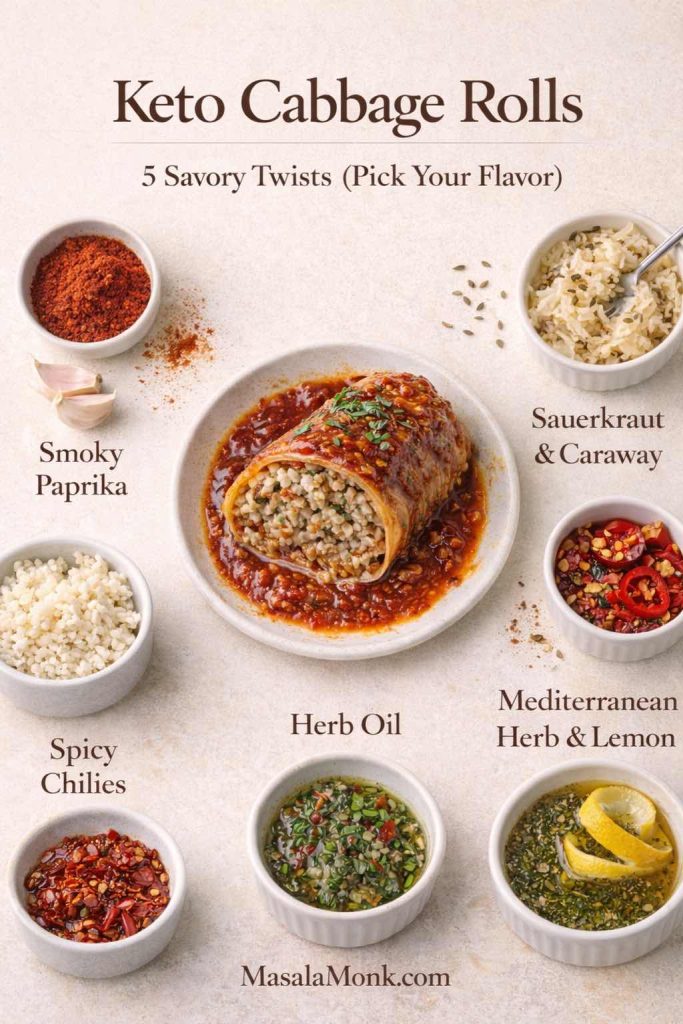
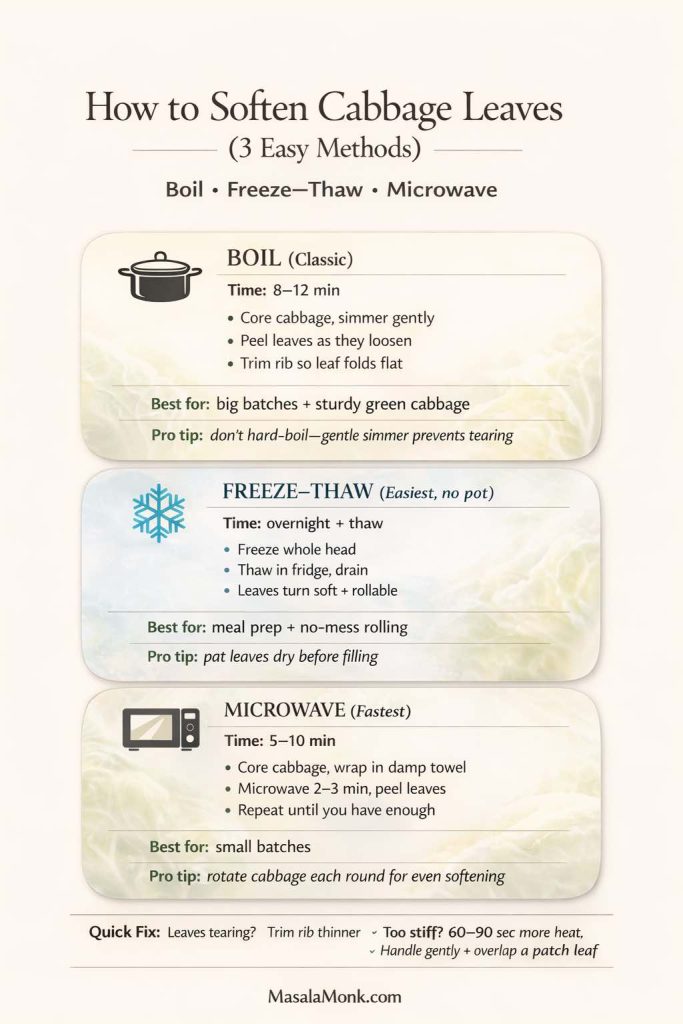
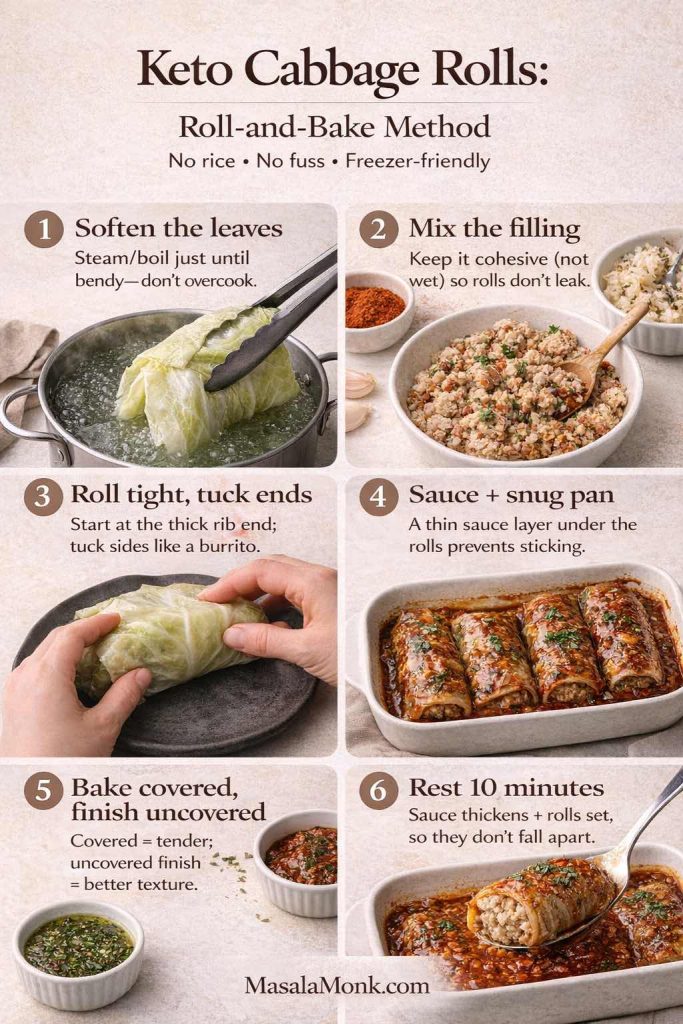
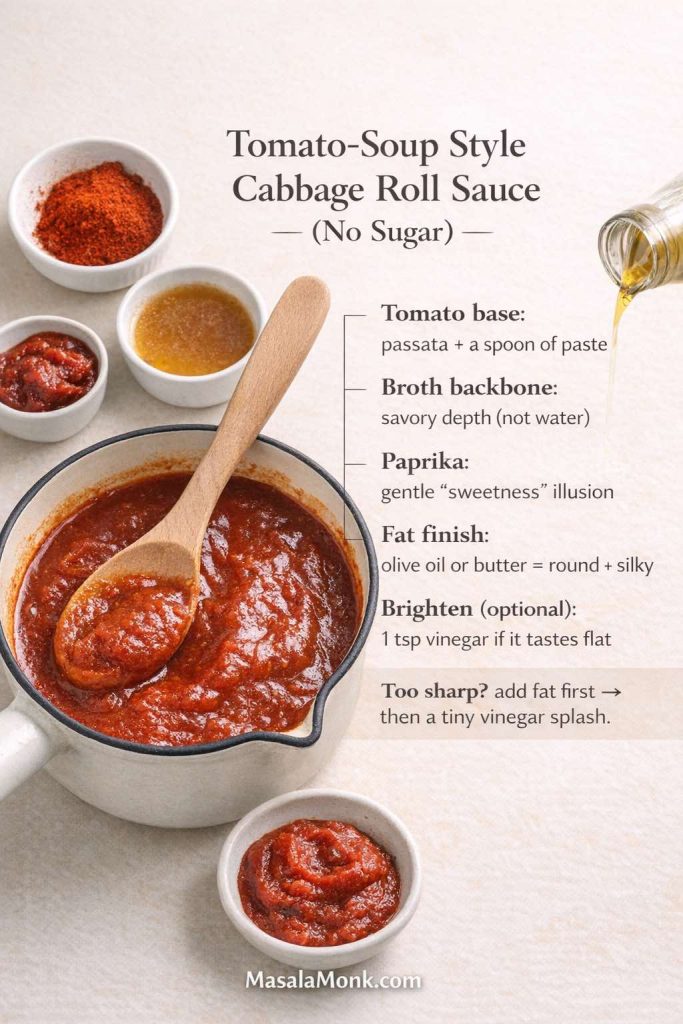
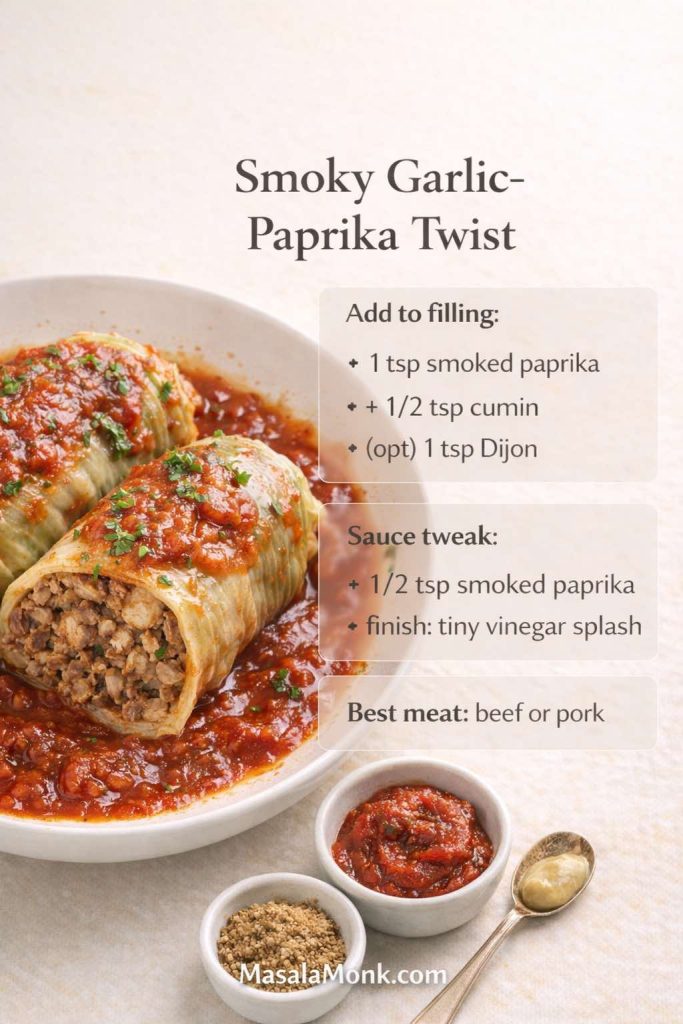
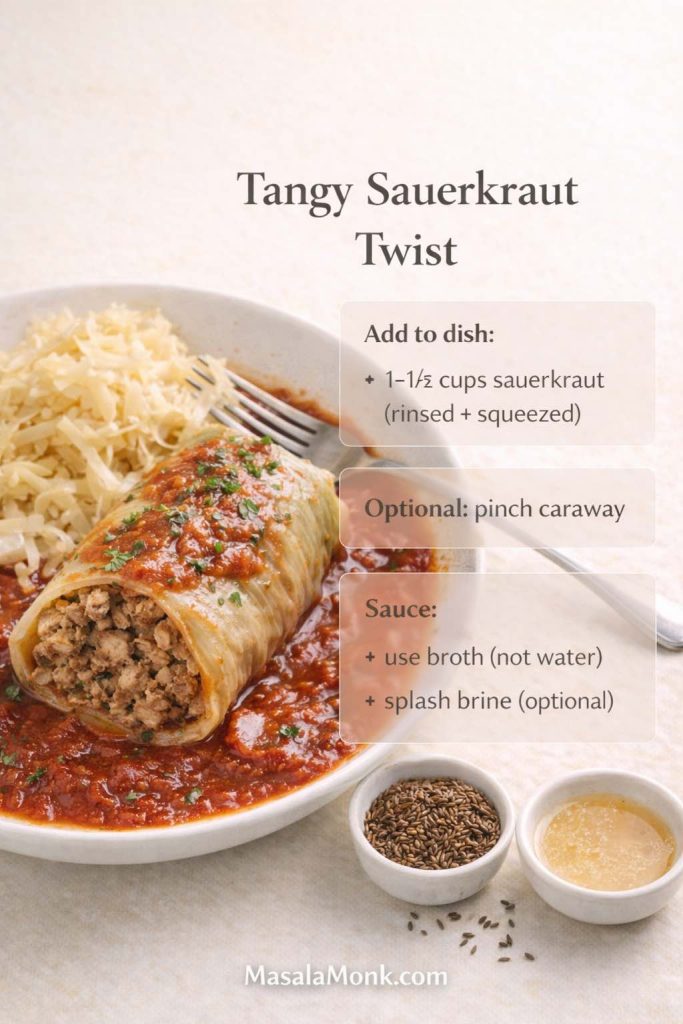
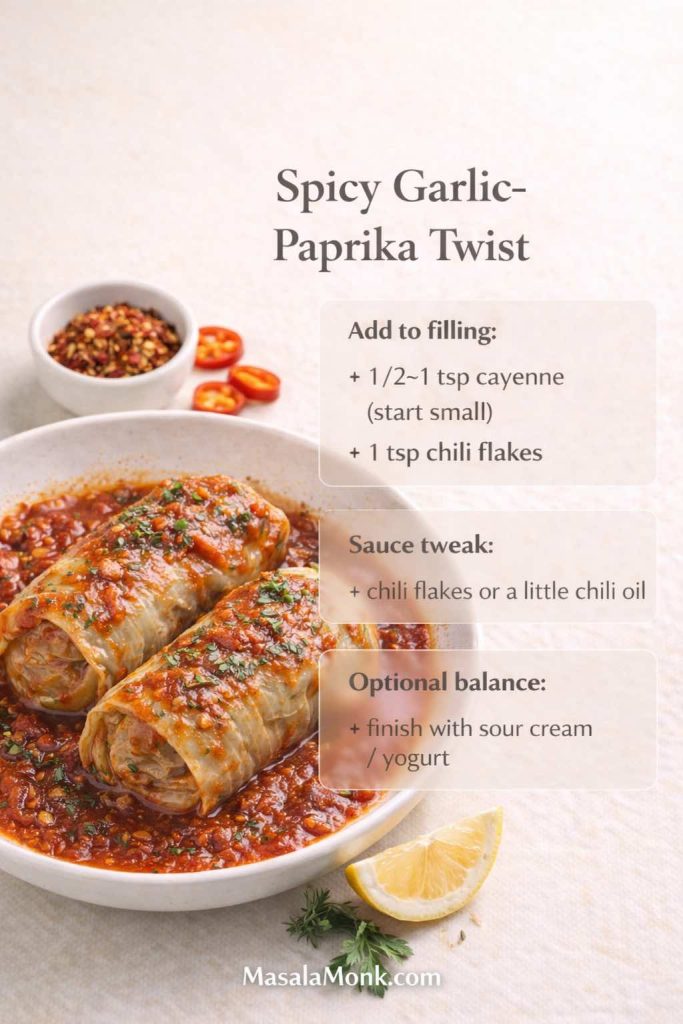
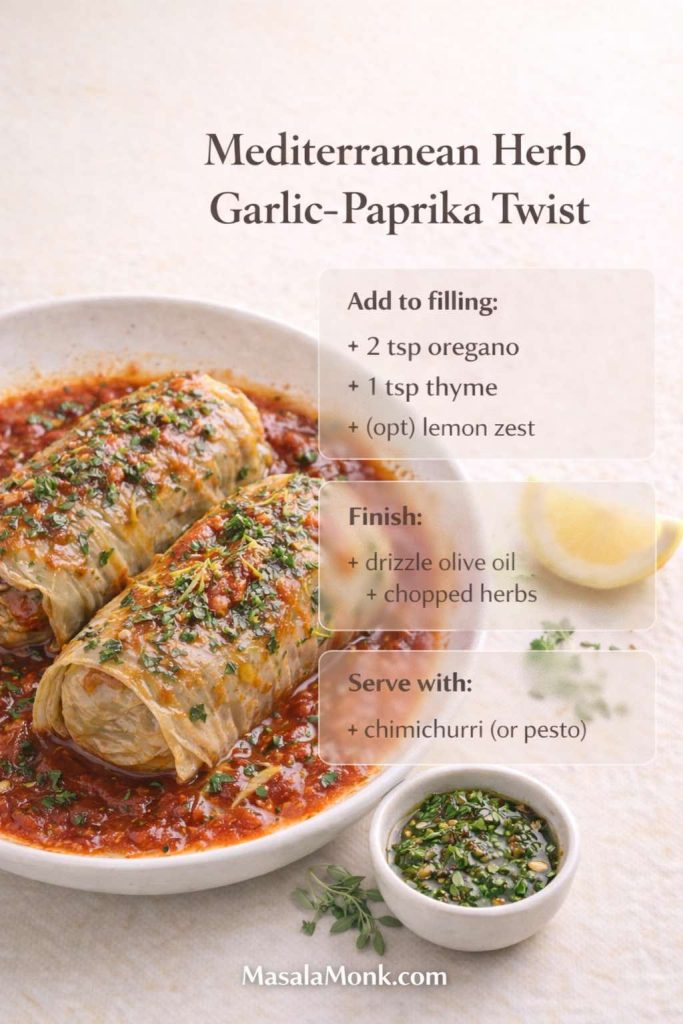
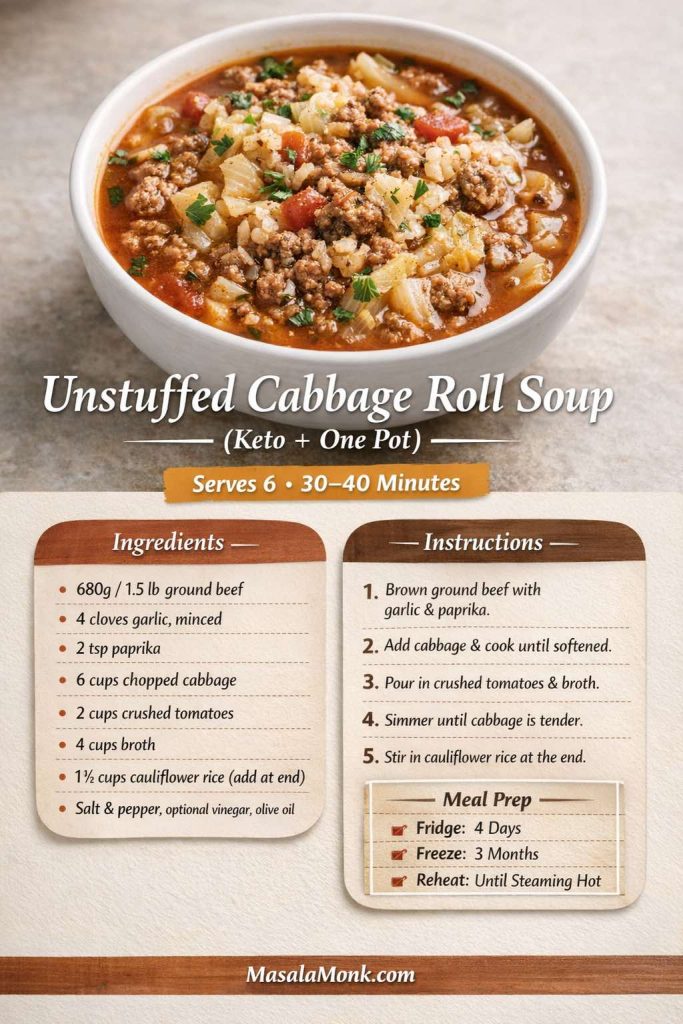
Also Read: Garlic & Paprika Cabbage Rolls (Keto-Friendly Recipes) – 5 Bold Savory Twists
Salmon Croquettes (Canned, Fresh, Southern Style, and Baked Salmon Croquette Recipe)
Salmon croquettes are popular because they hit the sweet spot: inexpensive enough for regular meals, yet special enough for guests. They also adapt well to baking, so “baked salmon croquette recipe” and “easy salmon croquette” versions fit nicely alongside fried.
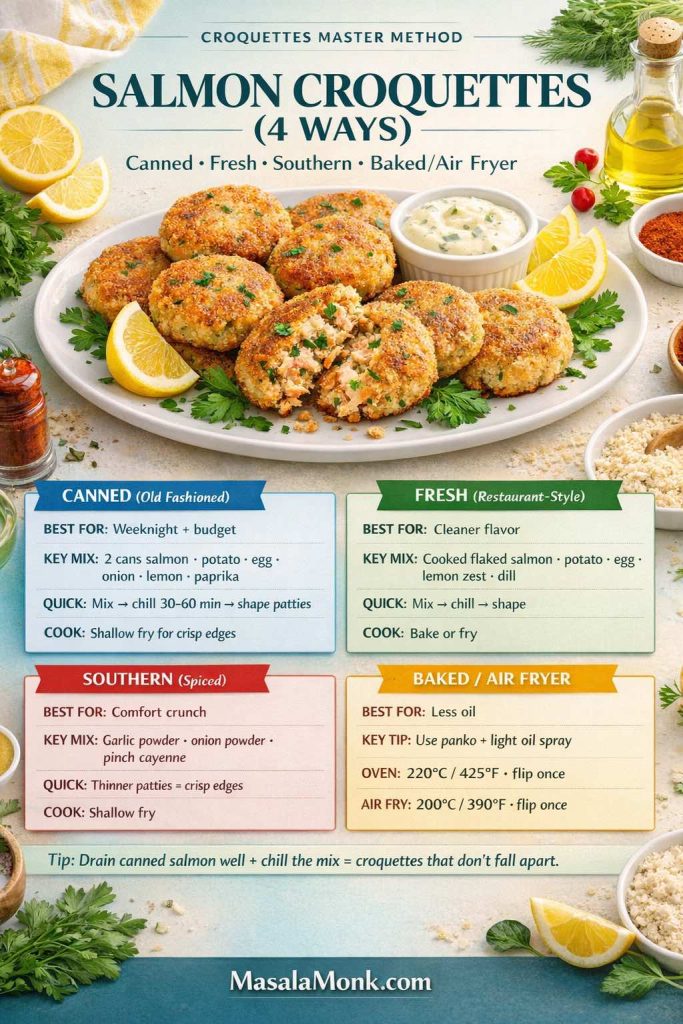
Canned salmon croquettes recipe (old fashioned, reliable)
Makes: 10–12 patties
Ingredients
- 2 cans salmon, drained well
- 1½ cups mashed potatoes (best structure)
- 1 egg
- ¼ cup finely minced onion (or scallions)
- 1 tablespoon lemon juice
- 1 teaspoon paprika (or Old Bay)
- black pepper
- salt to taste
- 2 tablespoons parsley
Step-by-step
- Flake salmon into a bowl.
- Add mashed potatoes, onion, lemon juice, and seasoning.
- Stir in the egg until cohesive.
- Chill 30–60 minutes.
- Shape into patties.
- Bread, then shallow fry, deep fry, bake, or air fry.
If you want the crispest shell with minimal mess, shallow frying is a wonderful middle ground.
Fresh salmon croquette (more “restaurant” recipe)
Ingredients
- 2 cups cooked flaked salmon, cooled
- 1½ cups mashed potatoes
- 1 egg
- zest of ½ lemon + 1 tablespoon lemon juice
- 2 tablespoons dill or parsley
- salt and pepper
Step-by-step
- Mix salmon, potato, herbs, lemon.
- Add egg; chill.
- Shape, bread, then cook.
Southern salmon croquettes (southern fried salmon croquettes recipe feel)
For southern-style salmon croquettes, keep the canned salmon base, then add:
- ½ teaspoon garlic powder
- ½ teaspoon onion powder
- pinch of cayenne
Shape thinner patties and shallow fry for crisp edges. This style leans into that “recipe salmon croquettes soul food” comfort.
Salmon croquettes oven baked
To do salmon croquettes oven baked:
- Use panko for the coating
- Spray lightly with oil
- Bake hot at 220°C / 425°F
- Flip once for even browning
This is a great route when you want healthy croquettes that still feel satisfying.
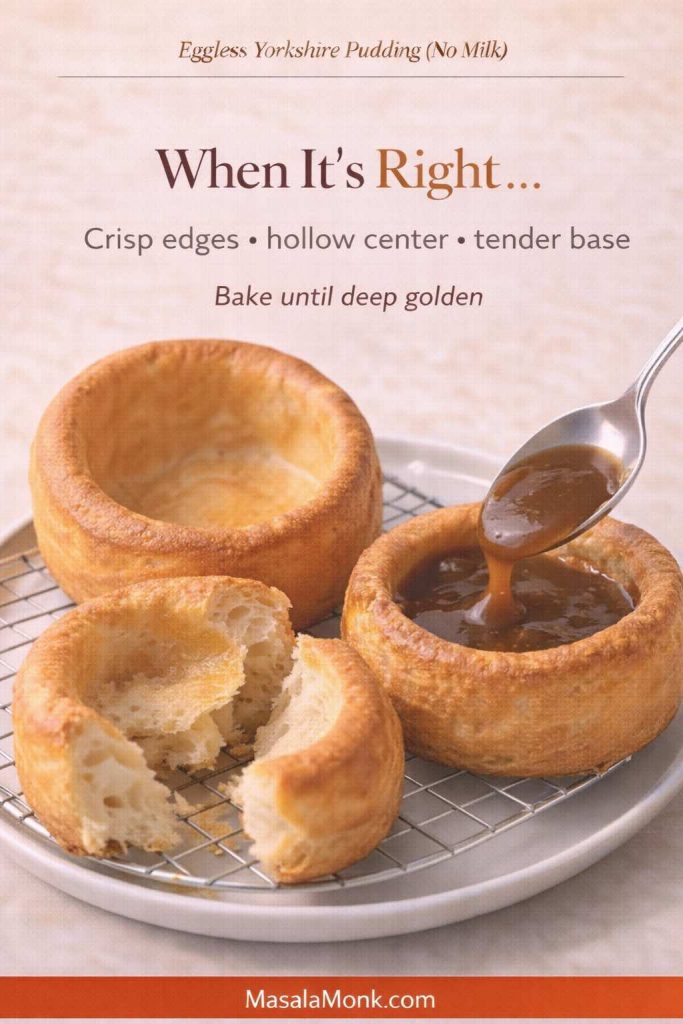
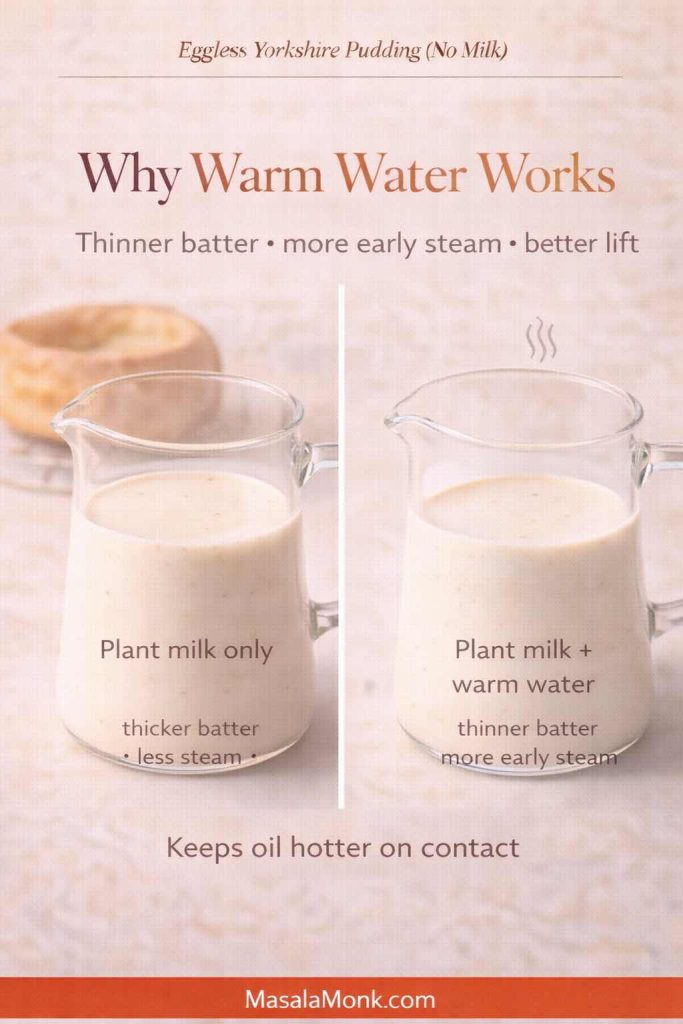
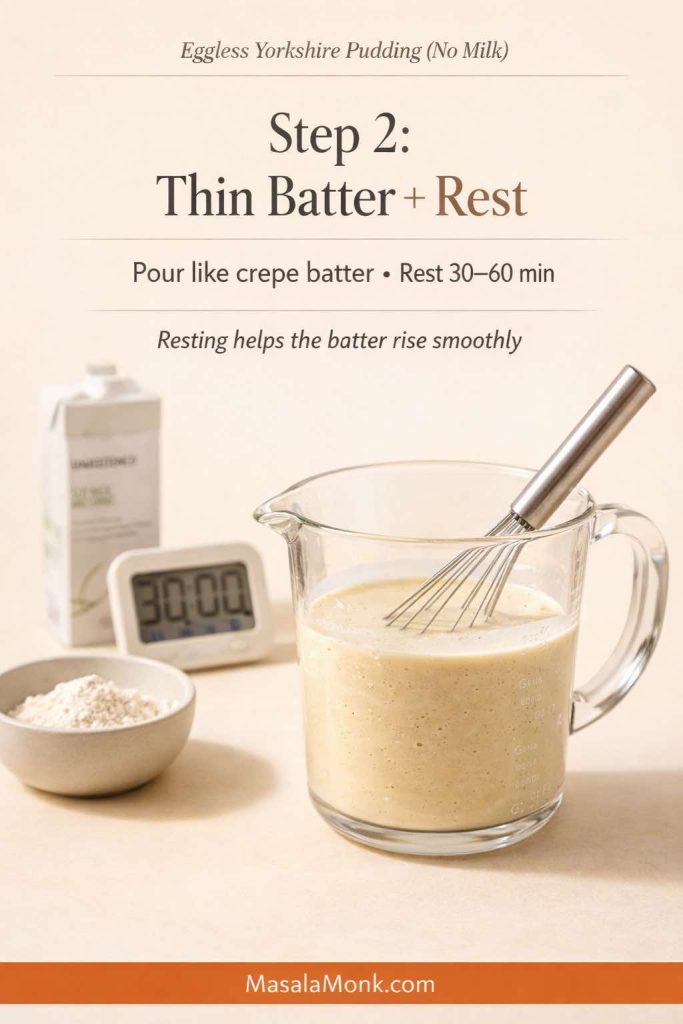
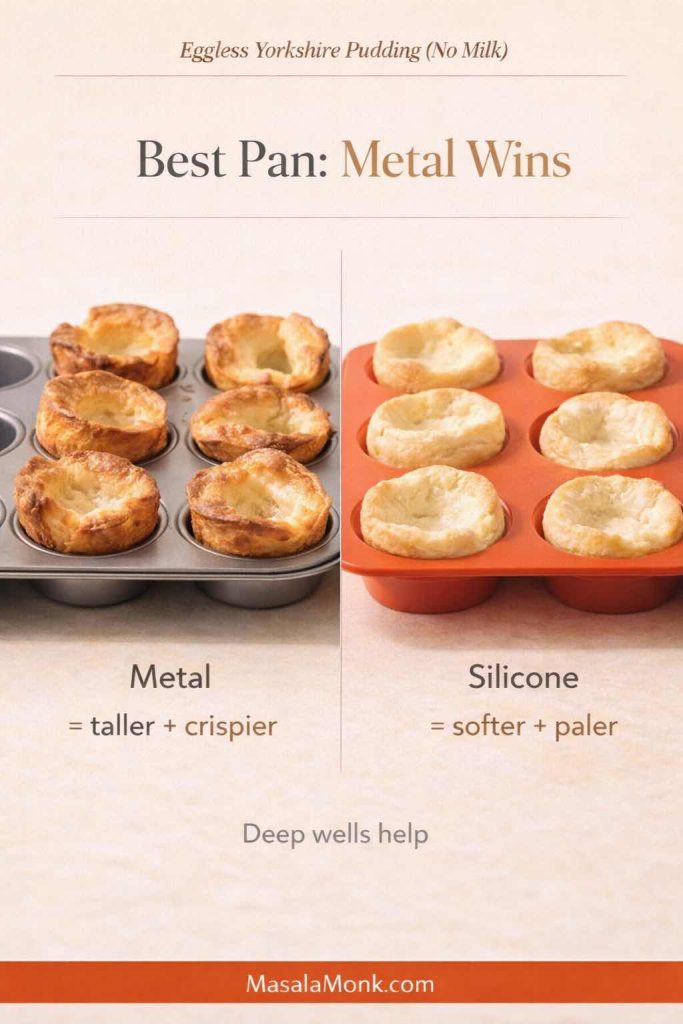
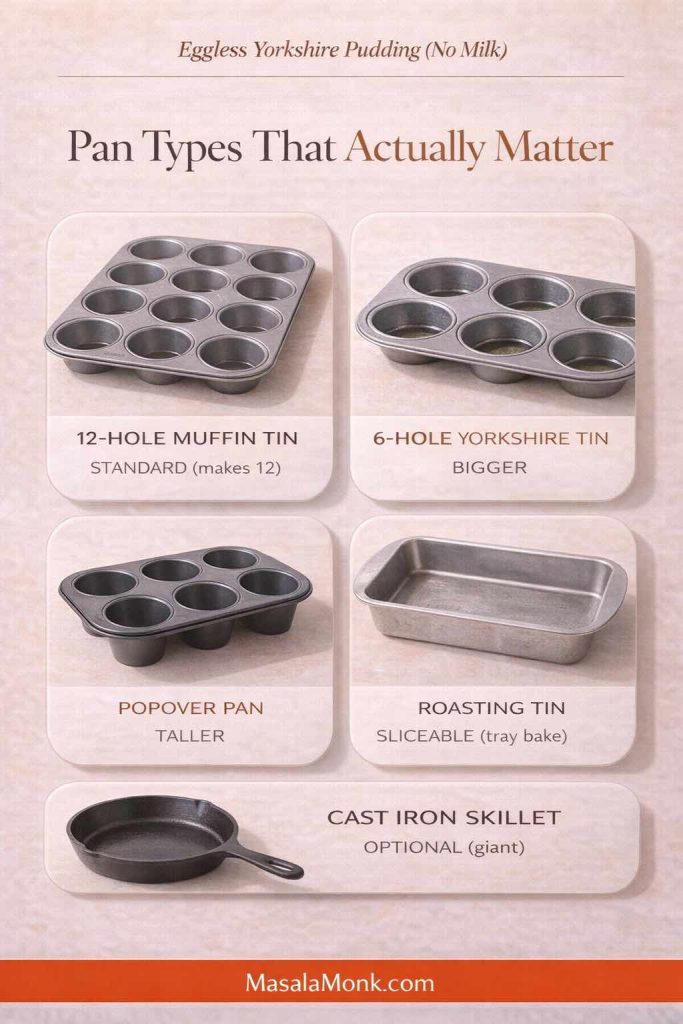
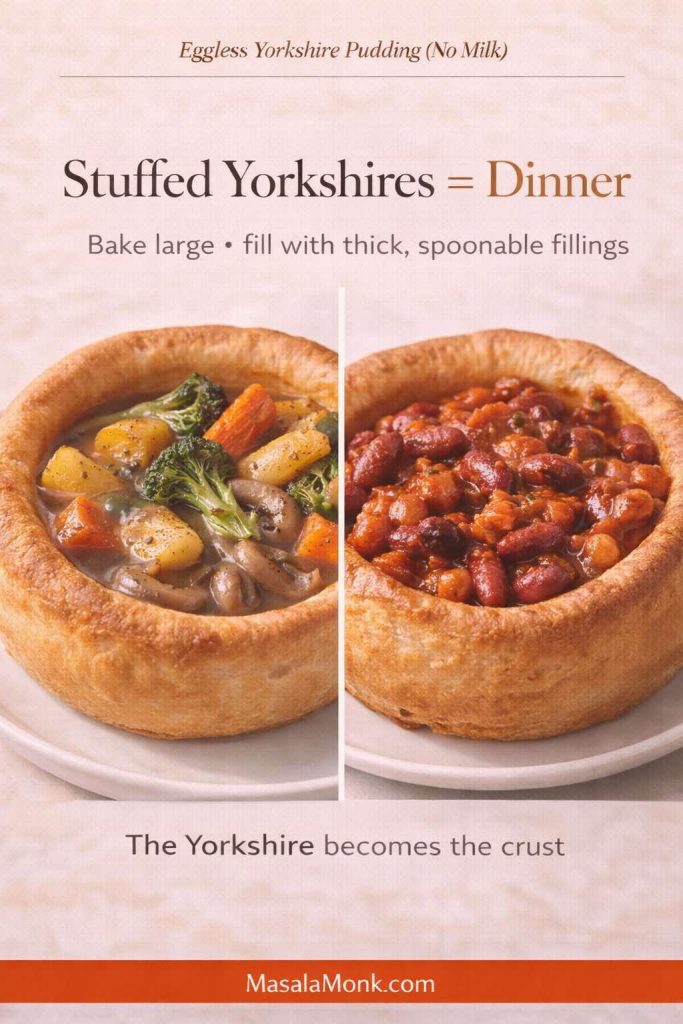
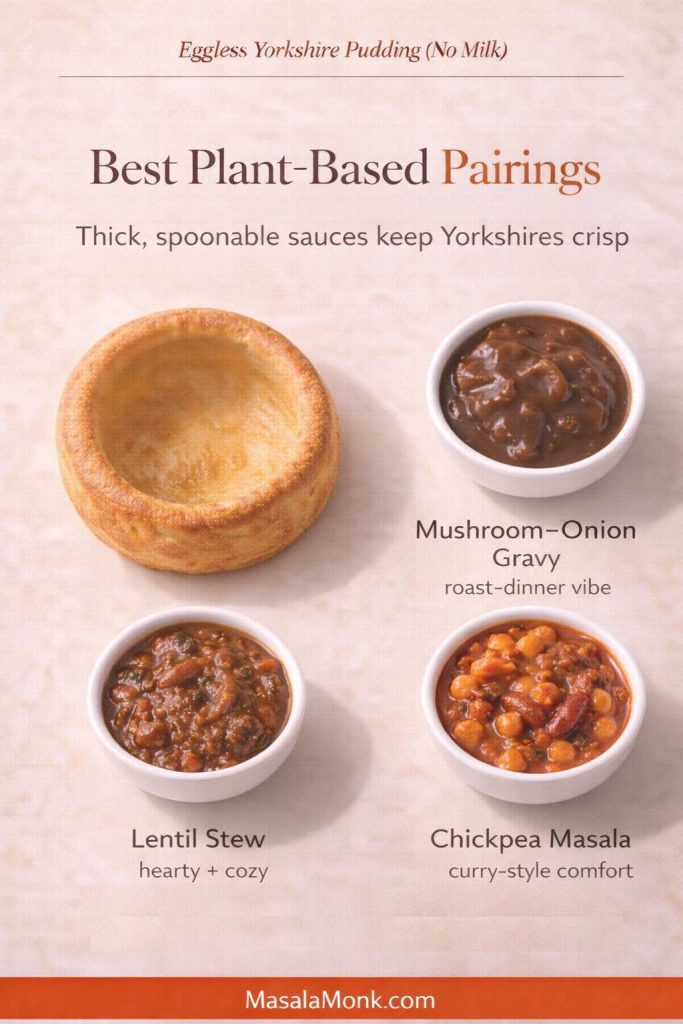
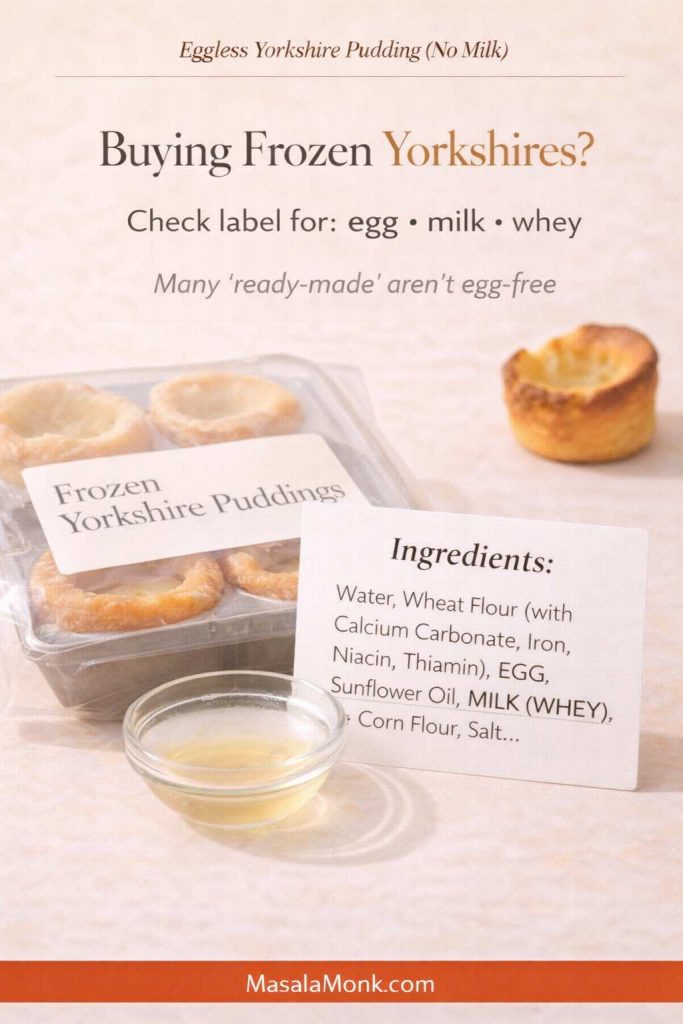
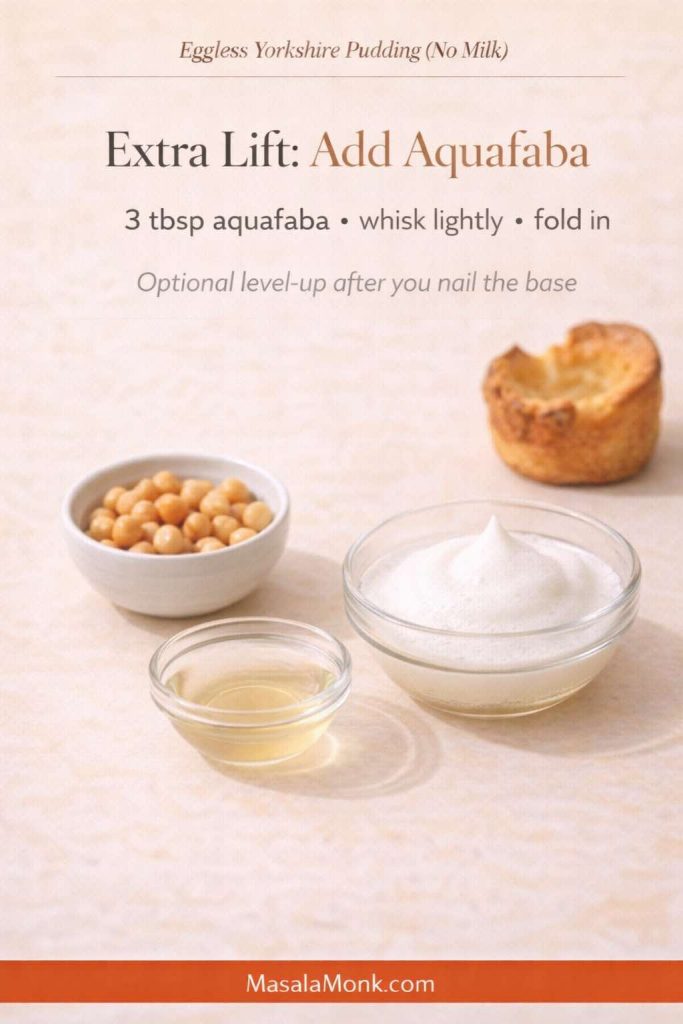
Also Read: Eggless Yorkshire Pudding (No Milk) Recipe
Tuna Croquettes (Easy, Budget-Friendly, and Sturdy)
Tuna croquettes are simple, but they demand one thing: dry tuna. If you drain it aggressively, the rest is easy.
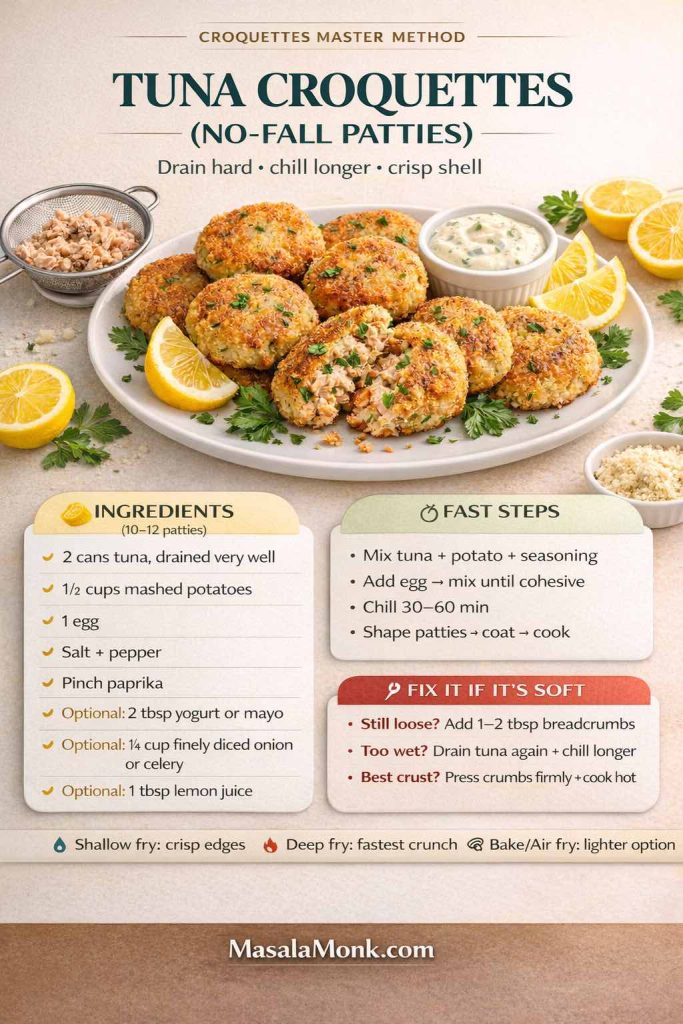
Easy tuna croquette recipe (makes 10–12)
Ingredients
- 2 cans tuna, drained very well
- 1½ cups mashed potatoes
- 1 egg
- 2 tablespoons yogurt or mayo (optional)
- 1 tablespoon lemon juice
- ¼ cup finely diced onion or celery (optional)
- salt and pepper
- pinch paprika
Step-by-step
- Mix tuna with mashed potatoes and seasoning.
- Add egg and mix until cohesive.
- Chill, shape, bread, cook.
If you’re asking “how do you make tuna croquettes” without them falling apart, the answer is nearly always the same: drain more, chill more, and don’t rush the breading.
Also Read: Crock Pot Chicken Breast Recipes: 10 Easy Slow Cooker Dinners (Juicy Every Time)
Chicken Croquettes and Turkey Croquettes (Best Use of Leftovers)
Chicken croquettes are a brilliant leftover solution because shredded chicken gives texture and protein while the binder creates creaminess. Turkey croquettes follow the same pattern, and they’re especially useful after a roast dinner.
Chicken croquettes recipe (makes 10–12)
Ingredients
- 2 cups cooked shredded chicken
- 1 to 1½ cups mashed potatoes (start with 1 cup)
- 1 egg
- ¼ cup sautéed onion (or finely minced onion)
- salt and pepper
- optional: thyme or mixed herbs
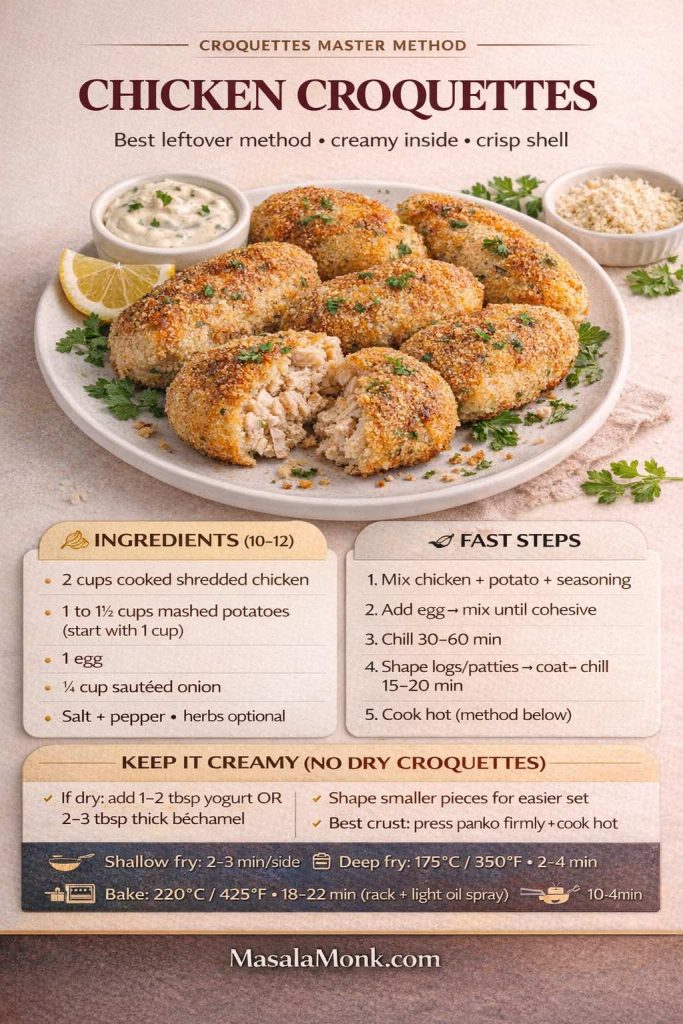
Step-by-step
- Mix chicken with potatoes, onion, and seasonings.
- Add egg and mix well.
- If it feels loose, add breadcrumbs 1 tablespoon at a time.
- Chill, shape, bread, then fry or bake.
For a restaurant-style croquetas de pollo approach, Food & Wine’s chicken croquettes is a solid external reference.
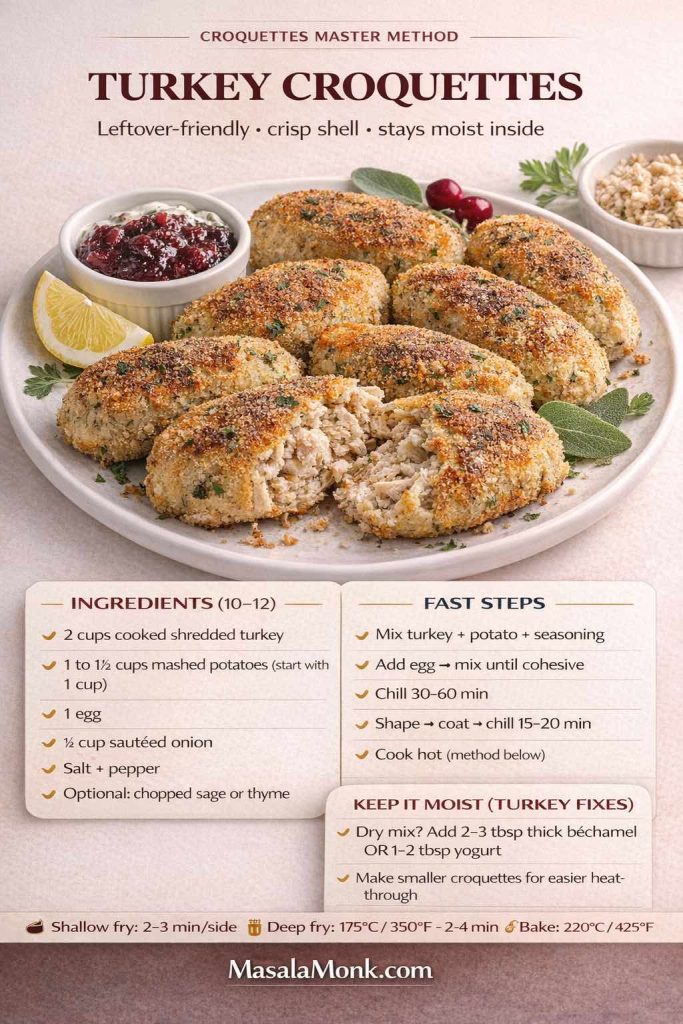
Turkey croquettes (leftover-friendly recipe)
Use the chicken method, then lean into turkey flavors:
- add chopped sage
- add black pepper generously
- optionally tuck a tiny cranberry center inside each croquette for a sweet-savory surprise
Because turkey can be drier than chicken, the potato ratio often helps: aim for the higher end (closer to 1½ cups potato).
Cod Croquettes Recipe and Croquette Fish Variants (Moisture Control Wins)
Cod croquettes are delicate, light, and surprisingly elegant. However, cod holds water, which is why “croquettes cod” attempts sometimes go wrong.
Cod fish croquettes (Recipe for 10–12 pieces)
Ingredients
- 2 cups cooked flaked cod, cooled and patted dry
- 1½ cups mashed potatoes
- 1 egg
- 1 tablespoon lemon juice
- 2 tablespoons parsley
- salt and pepper
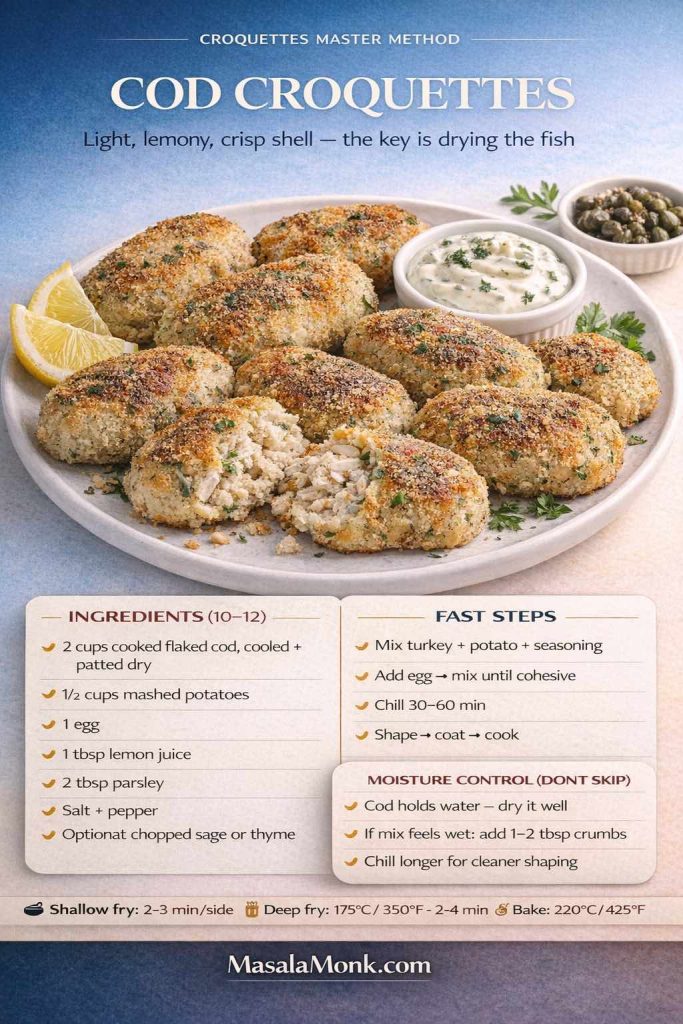
Step-by-step
- Pat cod dry after it cools.
- Mix cod with potatoes, lemon, herbs, seasoning.
- Add egg; chill.
- Shape, bread, then cook.
If you’re cooking fresh and frozen seafood, the FDA’s guidance is a helpful safety reference, especially for handling and storage: Selecting and Serving Fresh and Frozen Seafood Safely.
Also Read: Sourdough Starter Recipe: Make, Feed, Store & Fix Your Starter (Beginner Guide)
Vegetarian Croquettes (Croquette Veggie, Veg Croquettes Recipe)
Vegetarian croquettes work best when vegetables are flavorful and dry. In other words, cook out moisture before you ever add potato.
Veg croquettes recipe (makes 10–12)
Ingredients
- 2 cups mixed vegetables (peas, corn, carrots), sautéed until moisture evaporates
- 1½ cups mashed potatoes
- 1 egg
- ½ teaspoon cumin or paprika
- salt and pepper

Step-by-step
- Sauté vegetables until they’re tender and relatively dry.
- Cool, then mix with potatoes and spices.
- Add egg; chill.
- Shape, bread, cook.
These are especially good with South Indian Coconut Chutney because the creamy chutney doubles down on comfort without overpowering the filling.
Also Read: How to make No-Bake Banana Pudding: No Oven Required Recipe
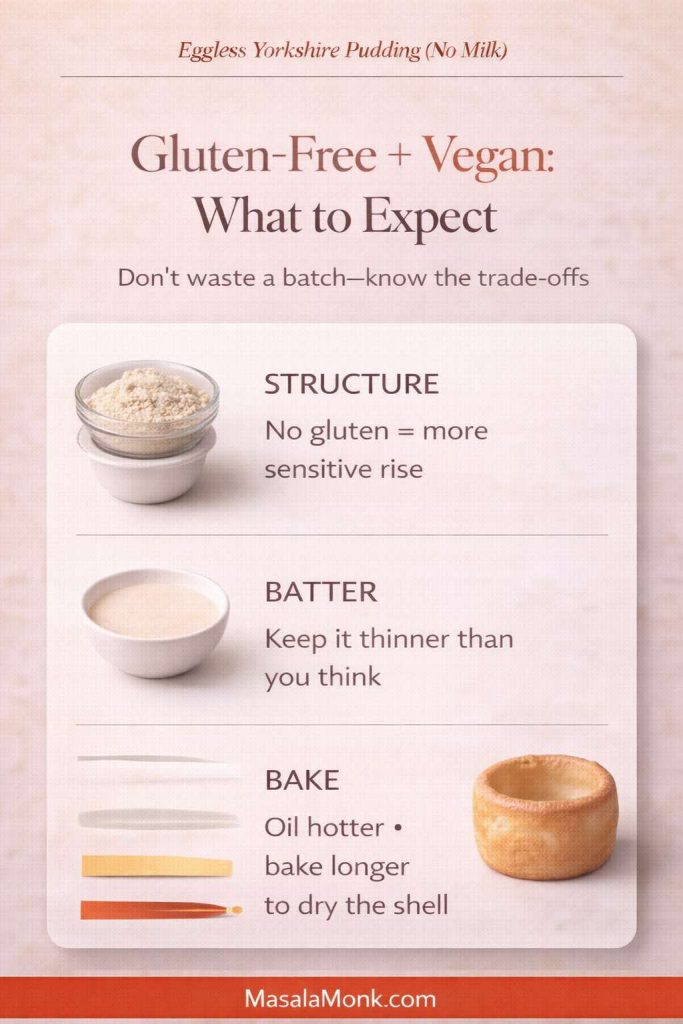
Vegan Croquettes (Croquettes Vegan, Eggless Binding and Coating)
These croquettes can be just as crisp, yet the vegan version needs a binder that sets and a coating that sticks without eggs.

Vegan binder options
- Flax “egg”: 1 tablespoon ground flax + 3 tablespoons water (rest 5 minutes)
- Chickpea flour: 2–3 tablespoons stirred into the mixture for structure
Eggless breading method
- Bowl 1: flour
- Bowl 2: slurry (3 tablespoons flour + 6 tablespoons water)
- Bowl 3: breadcrumbs or panko
Vegan croquettes recipe (makes 10–12)
Ingredients
- 2 cups mashed potatoes (or half mashed chickpeas + half potato)
- flax egg or chickpea flour binder
- salt, pepper, paprika/garlic powder
- breadcrumbs as needed
Step-by-step
- Mix the base, add binder, then adjust with breadcrumbs if the mixture is soft.
- Chill longer than usual—45–60 minutes helps.
- Shape, bread with slurry method, then bake or air fry for the best texture.
For dipping, vegan croquettes pair beautifully with Spicy Peanut Chutney (no onion, no garlic) because it brings richness without dairy.
Also Read: Chicken Adobo — Step-by-Step Recipe — Classic Filipino Adobong Manok
Beef Croquettes and Lamb Croquettes (When You Want Something Heartier)
Even though potato and fish croquettes get most of the attention, beef croquettes and lamb croquette versions are excellent when you want deeper savoriness.

Beef croquettes (quick recipe)
- Use cooked minced beef, cooled
- Add sautéed onions and a pinch of spice (paprika, cumin, or black pepper)
- Bind with mashed potato and egg
- Chill, bread, cook
Lamb croquette (cozy, bold recipe)
- Use cooked minced lamb or finely chopped leftover roast lamb
- Season with black pepper, cumin, and a small pinch of cinnamon
- Bind with potato (or a thicker béchamel if you want a tapas vibe)
- Serve with a sweet-tangy chutney like Indian Spiced Plum Chutney for contrast
These richer croquettes also pair nicely with a bright drink. Even a simple citrus-forward Vodka with Lemon can lighten the overall feel.
Also Read: Sourdough Recipe: 10 Easy Bread Bakes (Loaves, Rolls & Bagels)
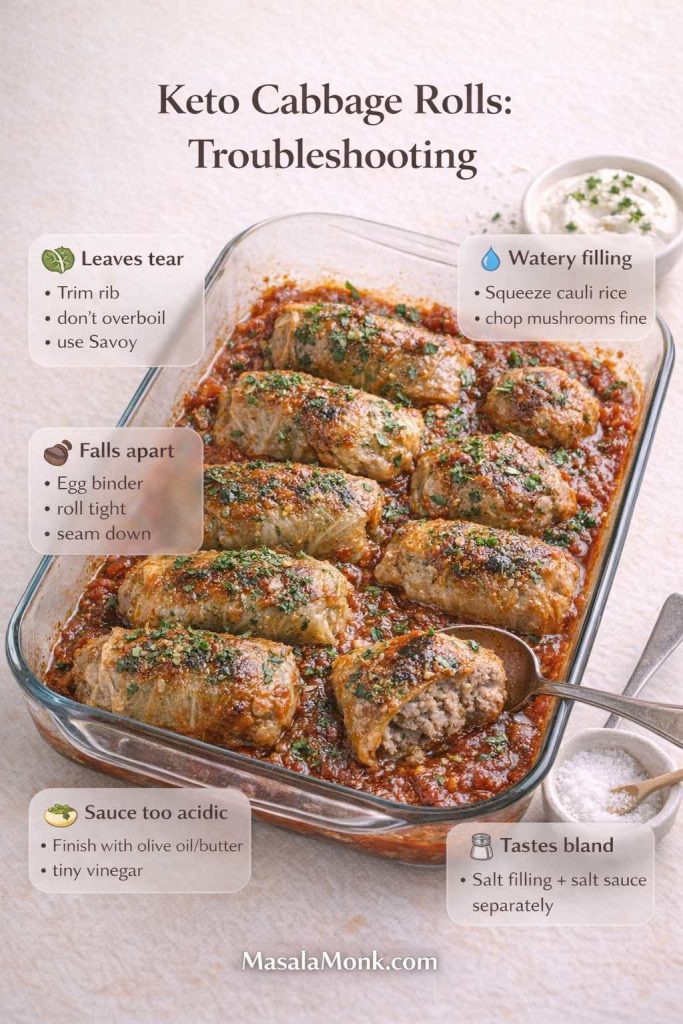
Making Croquettes That Don’t Fall Apart (Without Overcomplicating It)
It’s tempting to treat croquettes like a mysterious technique. In reality, croquettes fail for a few predictable reasons. Once you can spot them, you can fix them quickly.
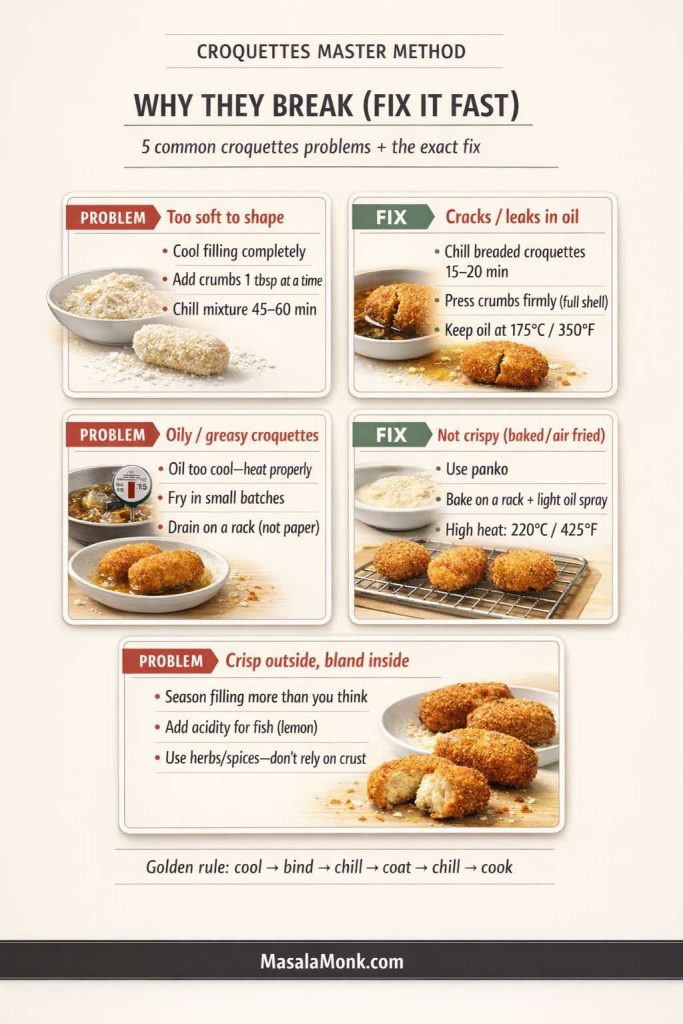
If your croquettes are too soft to shape
- Cool the mixture fully
- Add 1–2 tablespoons breadcrumbs
- Chill 45–60 minutes
- Shape smaller pieces (large croquettes are harder to stabilize)
Croquettes crack or leak while frying
- Your oil may be too hot
- Your croquettes may not be chilled enough
- The mixture might be too wet
- The coating may be too thin (press crumbs in firmly)
And if croquettes are crisp outside but bland inside
Season more than you think. Croquettes are not a stew. The crust dilutes the perceived seasoning, so the filling needs confidence: salt, pepper, acidity (lemon in fish croquettes), and aromatics.
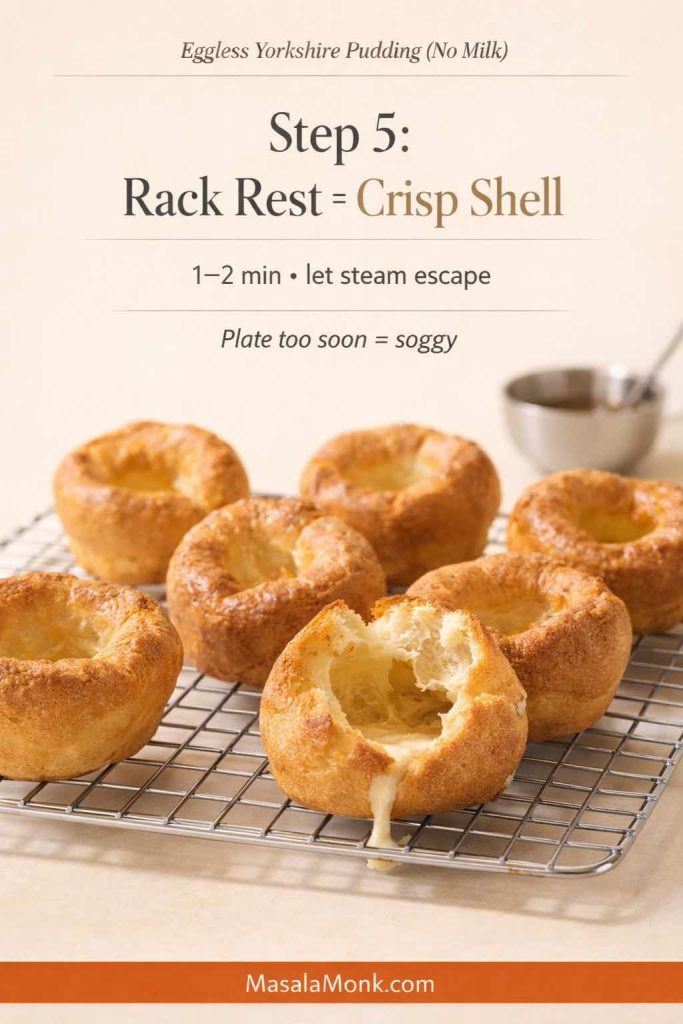
If croquettes oven baked are not crisp
- Use panko
- Bake at high heat
- Oil-spray the crumbs
- Place on a rack so air circulates
- Leave space between croquettes
Baked croquettes can be genuinely crunchy. They just need structure and heat rather than hope.
Also Read: Peanut Butter Fudge: Recipes & Guide (8 Methods + Easy Variations)
Food Safety for Croquettes (Simple, Practical, Calm)
Croquettes often start with cooked ingredients—leftover chicken, canned salmon, cooked mashed potatoes—then get chilled and cooked again. That’s normal. Still, it’s worth cooking to safe internal temperatures and reheating leftovers properly.
For authoritative temperature guidance, you can reference:
If you’re dealing with fish croquettes and you want handling guidance for fresh and frozen seafood, the FDA resource is helpful: Selecting and Serving Fresh and Frozen Seafood Safely.
Also Read: Cold Brew Espresso Martini: How to Make It (Step-by-Step Recipe)
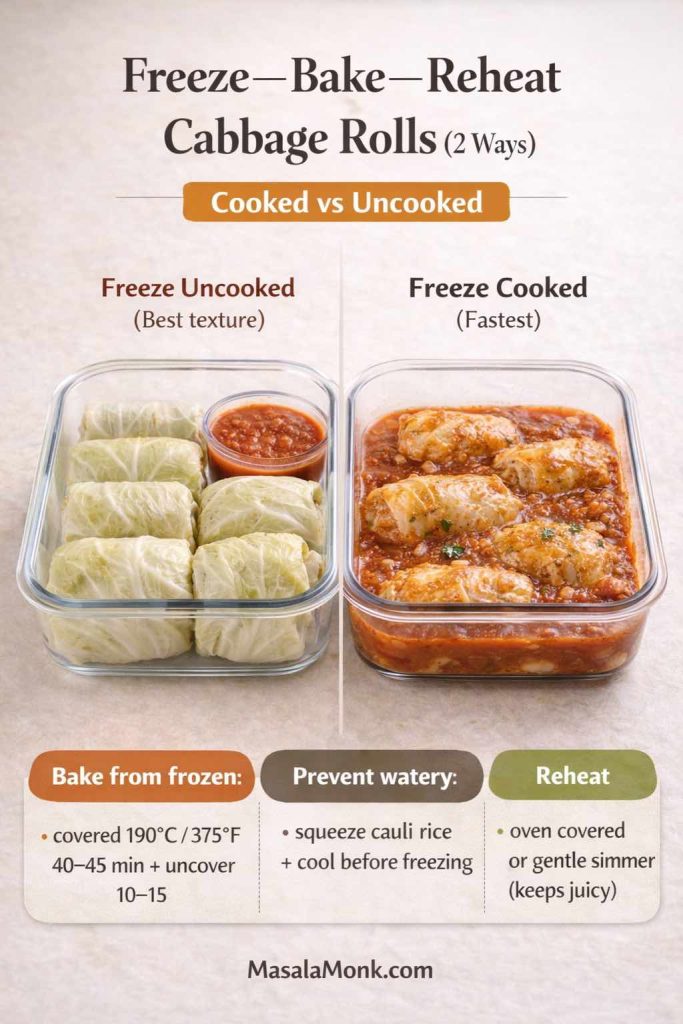
Make-Ahead, Freezing, and “Frozen Croquettes” Without Store-Bought Anything
Even though “frozen croquettes” and “croquetas frozen” often show up as shopping intent, freezing homemade croquettes is one of the smartest ways to keep this recipe in your regular rotation. In fact, croquettes are almost designed for batch cooking.
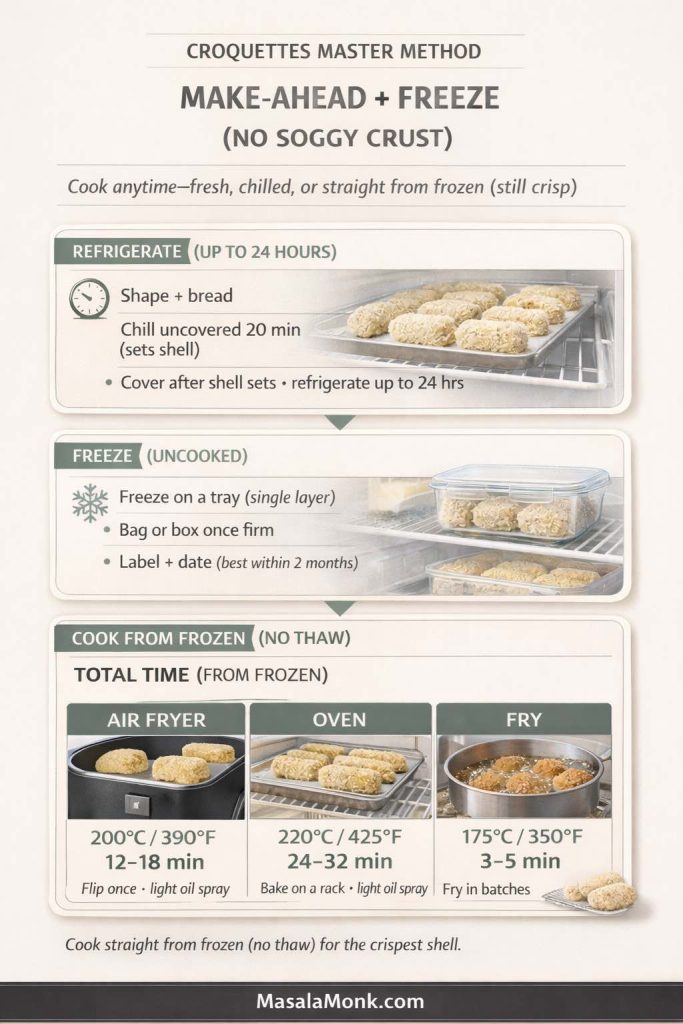
Make-ahead (best texture)
- Prepare filling
- Shape croquettes
- Bread them
- Refrigerate up to 24 hours before cooking
This keeps the coating intact and gives you that “ready whenever” flexibility.
Freeze croquettes (uncooked, breaded)
- Place breaded croquettes on a tray in a single layer
- Freeze until firm
- Transfer to a freezer bag or container
Cook from frozen
- Air fryer: add 2–4 minutes
- Oven: add 6–10 minutes
- Frying: lower into oil carefully, fry slightly longer at steady temperature
Frozen homemade croquettes are also a lifesaver when you want easy croquettes for guests without spending the whole evening at the stove.
Also Read: 19 Essential Kitchen Tools That Make Cooking Easier
Serving Croquettes Like a Complete Meal (Not Just a Snack)
Croquettes can be appetizers, lunch, or dinner. The difference is what you serve around them.

For a snack platter
- A cooling chutney + a spicy chutney
- Lemon wedges for fish croquettes
- Something crunchy on the side (salad, pickles, sliced cucumbers)
Try a duo like South Indian Coconut Chutney and Thecha—one soothing, one loud. Alternatively, Kara Chutney adds a sharp, spicy note that makes potato croquettes feel brighter.
For a cocktail night
Croquettes were practically made for a salty sip. A briny Dirty Martini pairs especially well with ham croquettes, jamon croquettes, and ham and cheese croquettes because the flavors reinforce each other instead of competing. On the other hand, if you want the opposite effect—freshness that cuts richness—a citrusy Lemon Drop Martini is a fun counterpoint. And when you want something lighter, Vodka with Lemon keeps the whole spread breezy.
For a simple dinner
- Croquettes + salad
- Croquettes + sautéed greens
- Fish croquettes + a quick cucumber-onion salad with lemon
Croquettes don’t need much. They just need contrast.
Also Read: 10 Vegan Chocolate Cake Recipes (Easy, Moist, & Dairy-Free)
A Sweet Finish That Doesn’t Feel Heavy
After croquettes, most people want dessert that’s clean and easy rather than overly rich. That’s why a fruit-forward finish works so well.
If you’re keeping it simple, Quick Mango Pudding (10 minutes) is an easy win. If you’re building a full menu, you can also browse these mango dessert recipes and pick something that matches your mood.
Putting It All Together: Choose Your Croquettes Recipe, Then Follow the Same Flow
At this point, you’ve got everything you need:
- a single croquettes recipe method
- detailed recipes for the most common variants
- a baked option for healthy croquettes
- make-ahead and freezing guidance
- sauces, drinks, and dessert pairings that turn croquettes into a full experience
So the only question left is what you’re making first.
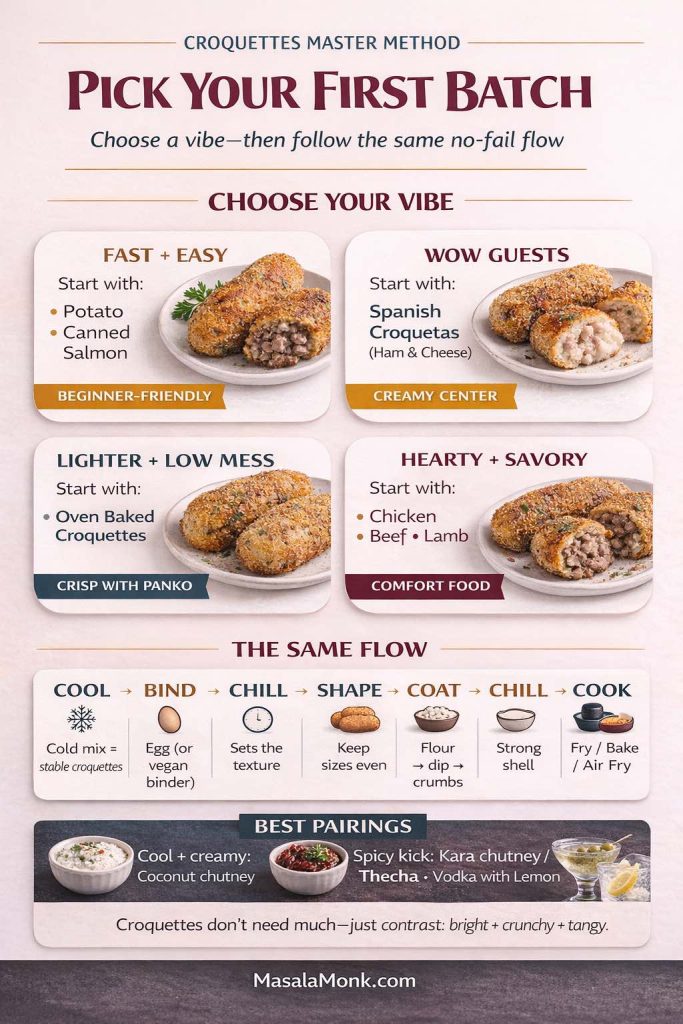
For a fast, no-drama batch, potato croquettes or canned salmon croquettes are the easiest place to begin. Planning to wow guests? Spanish croquetas—especially ham and cheese croquettes—feel instantly special alongside coconut chutney and a dirty martini. On busy nights when you’d rather skip splatter and cleanup, croquettes oven baked with a punchy kara chutney keep things crisp, flavorful, and wonderfully low-effort.
Whichever path you pick, the method stays the same—and that’s the real upgrade.
Also Read: Hot Chocolate Coffee: 3 Easy Recipes (Cocoa, Mix, or Espresso)
FAQs about Croquettes Recipe
1) What are croquettes, exactly?
Croquettes are crispy, breaded bites with a soft, savory center—usually made from mashed potato, béchamel, flaked fish, or shredded meat. In other words, a croquette is less about one “fixed” ingredient and more about the method: a seasoned filling, a binder, and a crunchy coating.
2) How do you make croquettes so they don’t fall apart?
Start by cooling the filling completely, then add just enough binder to make it hold its shape. After that, chill the shaped croquettes before cooking. Finally, keep the oil at a steady temperature (or bake hot on a rack) so the shell sets quickly instead of soaking.
3) How to make a croquette with the classic flour–egg–breadcrumbs coating?
First, roll each croquette in flour and shake off the excess. Next, dip in beaten egg. Then press firmly into breadcrumbs (panko if you want extra crunch). Afterward, chill briefly so the coating adheres, and cook.
4) What’s the easiest croquettes recipe for beginners?
Potato croquettes are the simplest starting point because mashed potatoes naturally bind and shape easily. Alternatively, canned salmon croquettes are very forgiving when you combine drained salmon with mashed potatoes and a single egg.
5) Can I make croquettes oven baked instead of fried?
Yes—croquettes oven baked can be crisp when you use panko, bake at a high temperature, and lightly oil the surface. Even so, spacing matters; if croquettes touch, steam builds and the coating softens.
6) Are baked croquettes actually “healthy croquettes”?
Compared with deep-frying, baking uses less oil, so it’s often a lighter option. However, “healthy” still depends on the filling and portion size—especially for ham and cheese croquettes or béchamel-based Spanish croquetas.
7) How do I make potato croquettes with leftover mashed potatoes?
Use cold mashed potatoes, mix in an egg, then adjust with a little breadcrumb only if needed. After that, chill the mixture, shape, bread, and cook. If your mash is very buttery or loose, chilling longer makes a big difference.
8) What’s the difference between potato croquettes and mashed potato croquette patties?
Potato croquettes are often shaped as logs, while mashed potato croquette patties are flattened and typically pan-fried. Because patties have more surface area, they brown quickly and feel extra crisp around the edges.
9) What are Spanish croquetas and how are they different from regular croquettes?
Spanish croquetas usually use a thick béchamel base instead of mashed potato. As a result, the center is creamier and softer. That said, they need more chilling time so they’re firm enough to bread and fry cleanly.
10) How do you make ham croquettes the Spanish way?
Make a very thick béchamel, stir in finely chopped ham or jamón, then chill until solid. Next, shape quickly, bread thoroughly, and fry at a steady temperature until golden. In practice, patience during chilling is what separates perfect croquetas from messy ones.
11) How to make ham and cheese croquettes without the filling leaking out?
Let the béchamel cool completely, then chill overnight if possible. Also, dice ham finely and use grated cheese that melts smoothly. Finally, keep the croquettes small and the coating firm so the shell seals before the cheese gets too runny.
12) Can I make cheese croquettes without ham?
Absolutely. Swap ham for grated cheese, sautéed mushrooms, spinach, or finely chopped herbs. Even so, avoid watery fillings; otherwise, the mixture turns loose and needs more binder.
13) What’s the best salmon croquette recipe: canned salmon or fresh salmon croquette?
Canned salmon croquettes are quicker and more consistent, especially for weeknights. Meanwhile, a fresh salmon croquette tastes cleaner and more “restaurant-like,” particularly when you add lemon zest and herbs.
14) How do I make old fashioned salmon croquettes?
Use drained canned salmon, mashed potatoes (or a small amount of breadcrumbs), egg, onion, and seasoning. Then shape into patties and shallow-fry until deeply golden. Traditionally, this style is simple, crisp, and comfort-forward.
15) How to make southern salmon croquettes (southern fried salmon croquettes recipe style)?
Season more boldly—think garlic powder, onion powder, and a pinch of cayenne—then shape thinner patties for extra crunch. After that, shallow-fry until the edges brown well. As a result, you get that classic southern-style crispness without a deep fryer.
16) Can I use fresh salmon for salmon croquettes southern style?
Yes—cook and flake the salmon first, then cool it completely before mixing. Still, add mashed potatoes for stability; fresh salmon can be softer than canned once it’s flaked.
17) How do you make tuna croquettes that aren’t mushy?
Drain tuna extremely well, then bind it with mashed potatoes and egg. Additionally, chill the mixture before shaping. If needed, add a small amount of breadcrumbs, but don’t overdo it or the croquettes turn dry.
18) How do you make chicken croquettes so they stay creamy inside?
Use shredded chicken plus a creamy binder like mashed potato (or a thick béchamel-style base). Then chill before shaping so the mixture firms up. Finally, cook until the crust is deeply golden, which helps seal in moisture.
19) How do you make turkey croquettes from leftovers?
Combine shredded turkey with mashed potatoes, seasoning, and an egg. Next, chill, shape, bread, and cook. For extra flavor, add herbs like sage or a little minced onion, and keep the croquettes slightly smaller so they heat through evenly.
20) What’s the best method for cod croquettes or cod fish croquette?
Pat the cooked cod dry after it cools, then mix with mashed potatoes, egg, lemon, and herbs. Afterward, chill thoroughly. Because cod holds moisture, that drying step is the quiet key to croquettes cod that hold together.
21) Can I make croquettes vegetarian without them crumbling?
Yes—use a sturdy base like mashed potatoes and cook vegetables until most moisture evaporates. Then add egg and chill before shaping. Consequently, vegetarian croquettes stay cohesive and fry or bake neatly.
22) How do I make croquettes vegan without eggs?
Use a binder such as a flax “egg” (ground flax + water) or chickpea flour. For breading, replace the egg dip with a simple flour-and-water slurry. Then chill longer before cooking to help everything set.
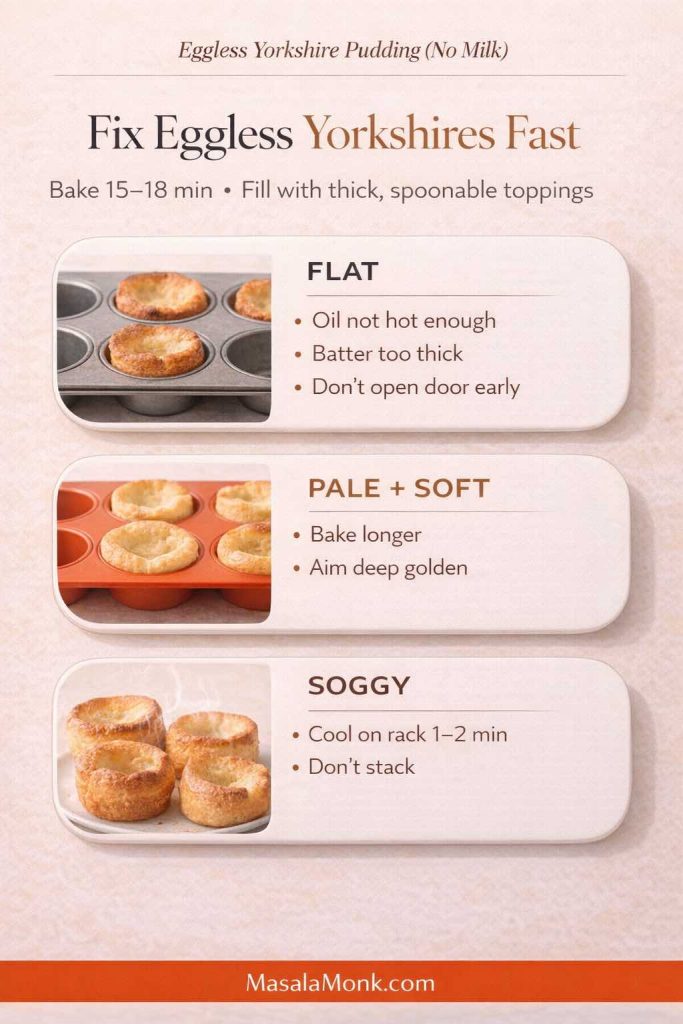
23) Why are my croquettes not crispy?
Usually, the oil wasn’t hot enough, the pan was overcrowded, or the coating was too thin. For oven baked croquettes, the most common issue is low heat or skipping oil on the crumbs. In contrast, using panko and baking on a rack improves crispness dramatically.
24) Why do croquettes crack while frying?
Cracking often happens when the mixture is too wet or not chilled, or when oil is too hot and the outside sets before the inside stabilizes. Therefore, chilling and steady oil temperature solve most cracking problems.
25) Can I freeze croquettes?
Yes—freeze breaded croquettes on a tray, then transfer to a container once firm. Later, bake, air-fry, or fry from frozen with a slightly longer cook time. This is especially handy for easy croquettes on busy days.
26) How do I reheat croquettes so they stay crisp?
Reheat in an oven or air fryer rather than the microwave. That way, the exterior re-crisps while the center warms through. If you must microwave, finish in a hot pan or oven for a quick crisping boost.
27) What can I serve with croquettes?
Pair croquettes with bright, tangy sides or sauces—something that cuts richness. Also, salads, pickles, citrus wedges, and herby dips all work well. Meanwhile, for party food, croquettes fit beautifully on snack platters alongside other small bites.
28) What’s the single biggest tip for perfect croquettes?
Chill twice: chill the mixture before shaping, and chill the breaded croquettes before cooking. Ultimately, that one habit makes croquettes easier to handle, cleaner to cook, and far more consistent.