This salmon croquettes recipe gives you crisp, golden patties with a tender, flaky center using canned salmon, egg, cornmeal, flour, onion, bell pepper, lemon, and simple pantry seasoning. The main version is pan-fried and Southern-style, with baked salmon croquettes, air fryer salmon croquettes, and a fresh salmon option included below.
Most importantly, this recipe is built to work on the first try, even if salmon croquettes or salmon patties have fallen apart on you before. You will learn how to drain and bind the salmon, how thick to shape the patties, when to use cornmeal versus panko or crackers, what sauce to serve with them, and how to fix common problems like patties falling apart, turning mushy, or tasting dry.
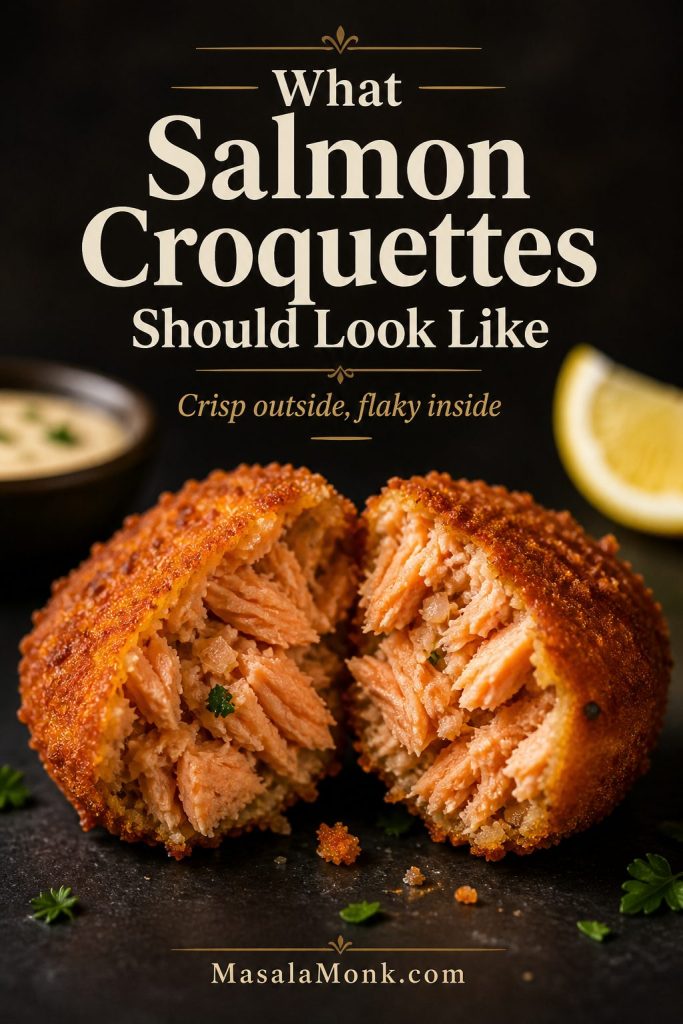
What Salmon Croquettes Should Look Like
In This Guide
Make the Croquettes
Quick Answer: How to Make Salmon Croquettes
This salmon croquettes recipe starts with well-drained canned salmon, egg, mayonnaise, cornmeal, flour, onion, bell pepper, Worcestershire sauce, lemon juice, and seasonings. Shape the mixture into ¼-cup patties, then pan-fry them in hot oil for 3–4 minutes per side until crisp and golden.
Quick Visual Guide to Salmon Croquettes

At a Glance
| Detail | Best answer |
|---|---|
| Yield | 8 medium croquettes |
| Main salmon | Canned pink salmon for the classic version |
| Best binder | Egg, mayo, cornmeal, and flour |
| Best method | Pan-fried in a cast iron skillet or heavy skillet |
| Oil temperature | About 350°F / 175°C |
| Cook time | 3–4 minutes per side |
| Total time | 25–45 minutes, depending on whether you chill the patties |
| Patty size | ¼ cup mixture each, about ½–⅔ inch thick |
| Best sauces | Tartar sauce, lemon dill mayo, remoulade, green chutney mayo, tzatziki, or mango mustard |
| Make-ahead tip | Chill shaped patties 10–20 minutes if the mixture feels soft |
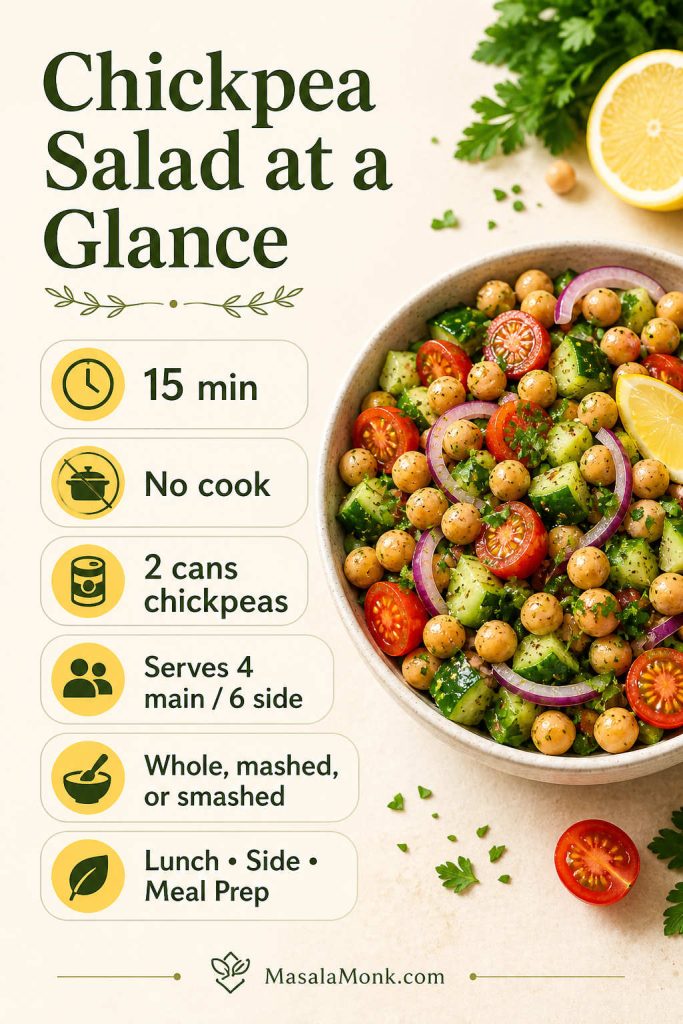
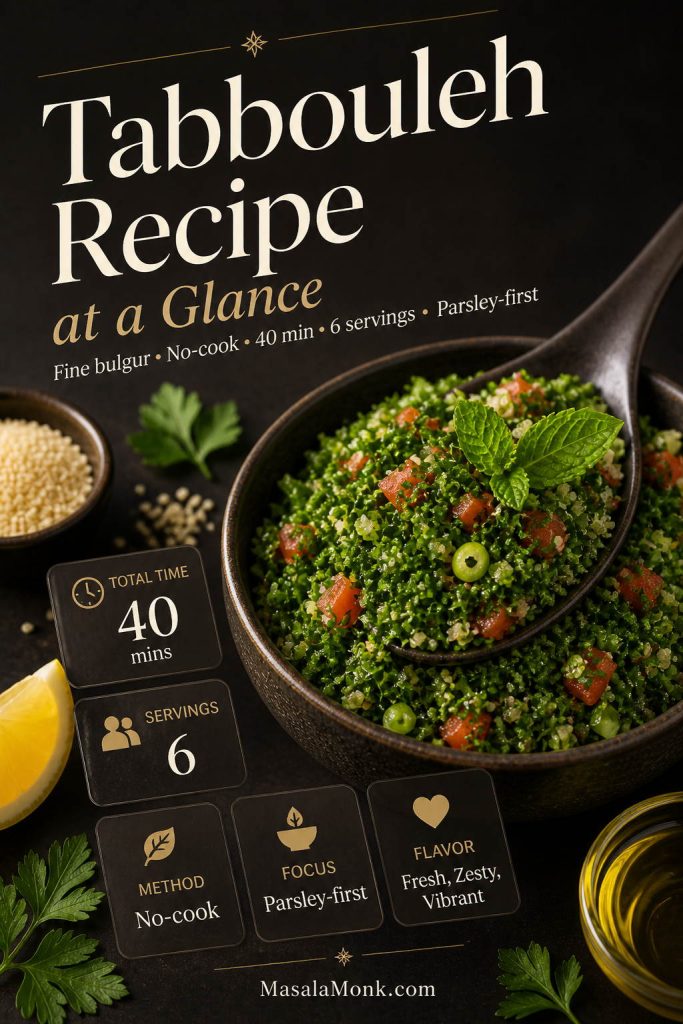
Salmon Croquettes at a Glance

Ready to cook? Jump to the recipe card or see the step-by-step method.
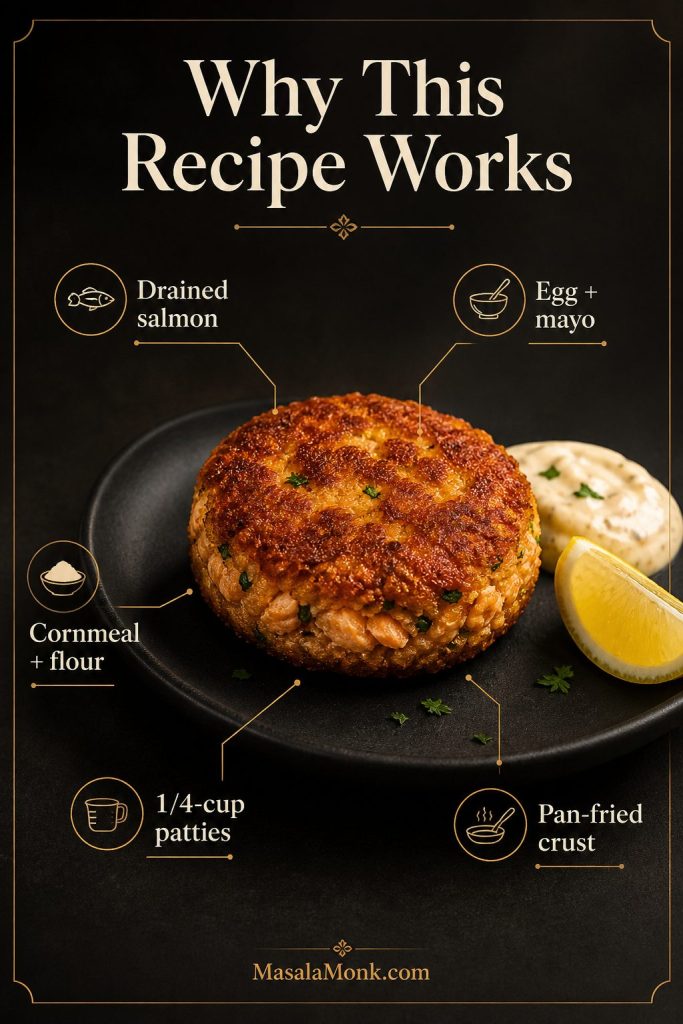
Why This Salmon Croquettes Recipe Works
- Draining the salmon first prevents mushy patties. Too much liquid is one of the biggest reasons croquettes fall apart.
- Egg, mayo, cornmeal, and flour give balanced structure. The egg binds, the mayo keeps the center tender, the cornmeal adds crispness, and the flour helps the mixture hold together.
- ¼-cup patties cook evenly. This size gives you crisp edges without drying out the center.
- Pan-frying gives the best crust. Baked and air fryer versions work, but the skillet method gives the most classic Southern-style texture.
- The troubleshooting guide fixes common failures. If the mixture is wet, bland, dry, greasy, or falling apart, there is a direct fix below.
Why This Recipe Works Visually
What Are Salmon Croquettes?
Salmon croquettes are crisp, shaped patties made from flaked salmon, egg, dry binder, aromatics, and seasoning. In many Southern-style versions, they are made with canned salmon, cornmeal or flour, onion, bell pepper, egg, and a hot skillet. They are inexpensive, fast, and deeply satisfying when the outside is crisp and the inside stays tender.
The basic logic is the same as a good croquettes master method: control moisture, bind the filling, shape it evenly, and cook until the outside sets before you flip.
Salmon Croquettes vs Salmon Patties vs Salmon Cakes
These names overlap, and many people use them interchangeably. Still, there are a few useful differences.
| Term | Usually means | How to think about it |
|---|---|---|
| Salmon croquettes | Often Southern-style, made with canned salmon, binder, and a crisp fried crust. | This is the main recipe here. |
| Salmon patties | A broader term for flatter salmon cakes or patties, usually made with canned or leftover cooked salmon. | Same family, slightly less specific. |
| Salmon cakes | Often a little more restaurant-style, sometimes made with fresh salmon, panko, herbs, Dijon, or mayo. | Use the fresh salmon variation below if you want this style. |

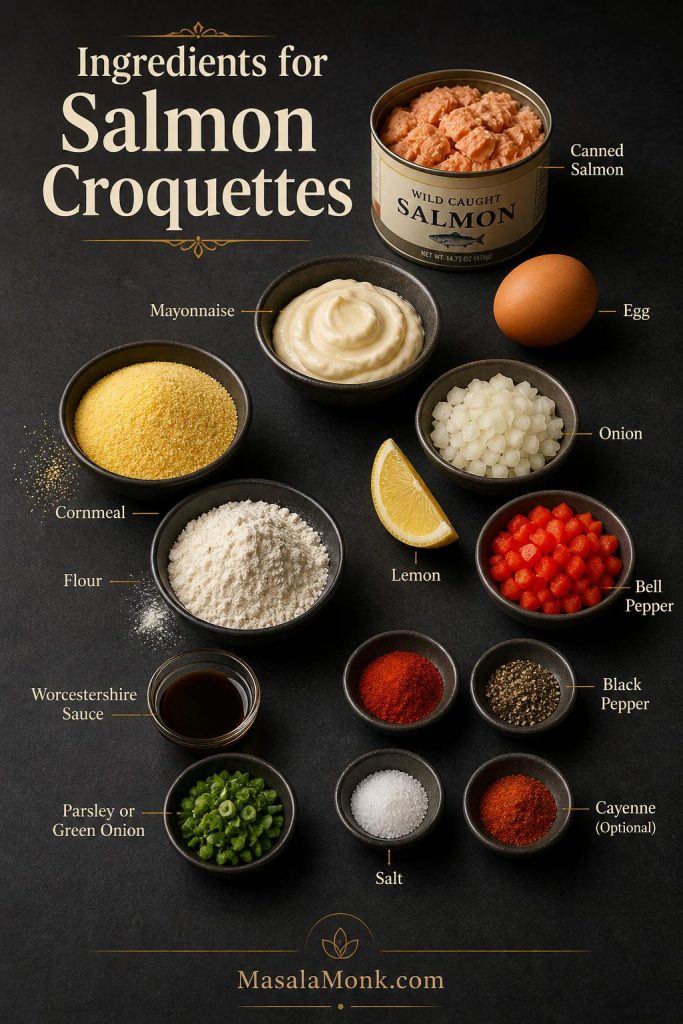
Ingredients for Salmon Croquettes
A good salmon croquettes recipe is simple, but balance still matters. Too much wet binder makes the mixture mushy; meanwhile, too much flour or cornmeal can make the patties dry. This version uses canned salmon, egg, mayo, cornmeal, and flour so the croquettes hold together while the center stays flaky.
Visual Guide to Salmon Croquettes Ingredients
Salmon
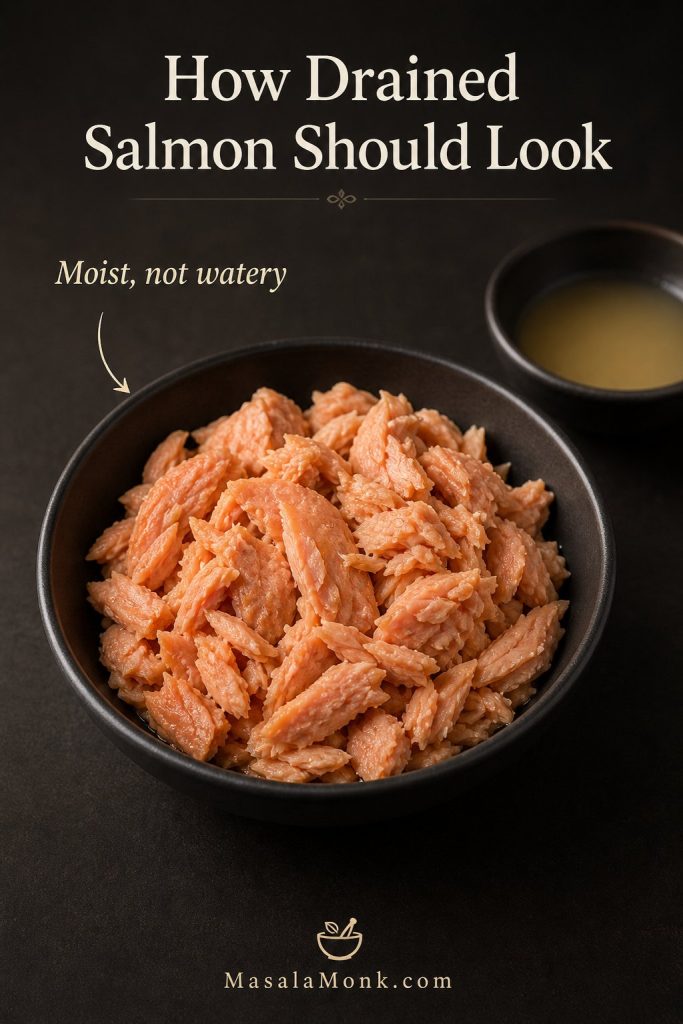
For classic salmon croquettes, use one standard can of pink salmon, usually 14.75–15 ounces / 418–425 grams. Drain off excess liquid, but do not squeeze the salmon completely dry. It should be moist enough to flake, not watery. You can remove the larger bones and skin if you prefer, although many canned salmon recipes leave the small soft bones in because they mash easily and add calcium.
Fresh cooked salmon also works. Use about 1 pound / 454 grams raw salmon, cook it first, cool it slightly, then flake it into the mixture. Leftover cooked salmon is even easier because it is already cooked and ready to flake.
How Drained Salmon Should Look
Egg, Mayo, Cornmeal, and Flour
The egg gives structure. Mayo adds moisture and helps keep the center from drying out. Cornmeal adds a crisp, old-fashioned Southern texture. Flour helps the mixture bind without making the croquettes too crumbly.
Mayo also gives you an easy sauce base. If you like homemade condiments, use homemade mayo to make lemon dill mayo, garlic mayo, spicy mayo, tartar sauce, or a quick remoulade-style dip for serving.
Onion, Bell Pepper, Herbs, and Seasoning
Finely diced onion and bell pepper give the croquettes sweetness and texture. Green onion or parsley adds freshness. Worcestershire sauce gives a savory backbone, lemon juice brightens the salmon, and paprika, garlic powder, black pepper, and a little cayenne or hot sauce round out the flavor.
For a seafood-style flavor, add ½ teaspoon Old Bay-style seafood seasoning, Cajun seasoning, or Creole seasoning and reduce the added salt if the blend is already salty.
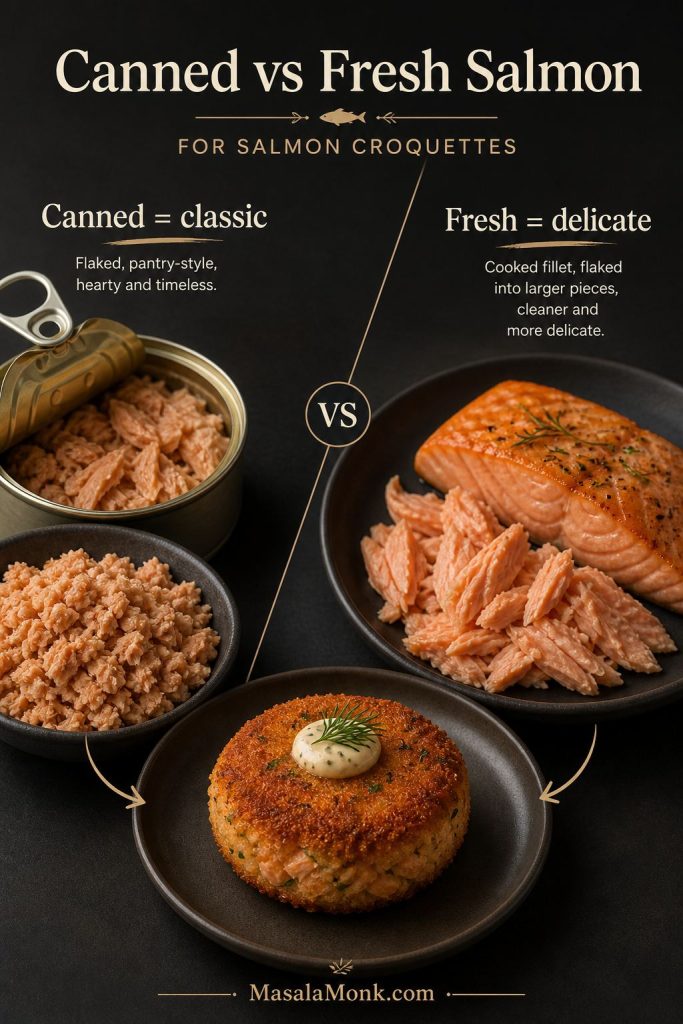
Canned Salmon vs Fresh Salmon for Croquettes
Canned salmon is the best first choice for classic salmon croquettes because it is already cooked, affordable, easy to flake, and traditional in many old-fashioned and Southern-style recipes. Fresh salmon, meanwhile, gives a cleaner flavor and a softer, more delicate texture, but it needs to be cooked before you mix the croquettes.
Canned vs Fresh Salmon at a Glance
Canned Salmon Croquettes
For classic croquettes, canned salmon is the easiest and most traditional choice. Drain it very well, flake it gently, and use one 14.75–15 ounce / 418–425 gram can for about 8 croquettes. In this recipe, canned pink salmon gives a milder, budget-friendly patty, while canned red salmon tastes richer. Remove large pieces of skin or bone if you prefer a smoother texture.
How Much One Can of Salmon Makes

Once your salmon is drained and flaked, jump to the step-by-step method.
| Salmon type | Best for | How to use it |
|---|---|---|
| Canned pink salmon | Classic salmon croquettes, Southern salmon croquettes, quick dinners | Drain off excess liquid, flake with a fork, and remove large bones or skin if desired. The salmon should be moist, not watery. |
| Canned red salmon | A richer canned salmon version | Use the same amount as pink salmon, but reduce added salt if the can tastes salty. |
| Fresh salmon | Fresh salmon croquettes or salmon cakes | Cook first, cool slightly, then flake into the binder. |
| Leftover cooked salmon | Fastest fresh-style version | Flake gently and reduce salt if the salmon was already seasoned. |
If you have extra cooked salmon after dinner, use some for croquettes and turn the rest into a salmon bowl with rice, cucumber, sauce, avocado, herbs, and crunchy toppings.
How to Make Fresh Salmon Croquettes
To use fresh salmon, start with about 1 pound / 454 grams of salmon fillet. Cook it until just done, cool it slightly, then flake it into large pieces before mixing. For food safety, fresh fish should reach 145°F / 63°C, or the flesh should be opaque and separate easily with a fork, according to FoodSafety.gov.
When buying fresh salmon, the FDA’s seafood safety guidance recommends choosing fish that smells fresh and mild, not fishy, sour, or ammonia-like. Fresh fillets should look firm, not dried or discolored around the edges.
How to Use Fresh Salmon Instead

How to Make Salmon Croquettes Step by Step
This method keeps the salmon flaky and the croquettes sturdy, which is the main thing a good recipe needs to get right. Drain well, mix the wet binder first, fold gently, shape evenly, and avoid flipping until the first side has formed a crust.
Step 1: Drain and Flake the Salmon
Drain the canned salmon thoroughly. Press out extra liquid if needed, then flake it with a fork. Do not mash it into a paste. A little texture gives the croquettes a better center.

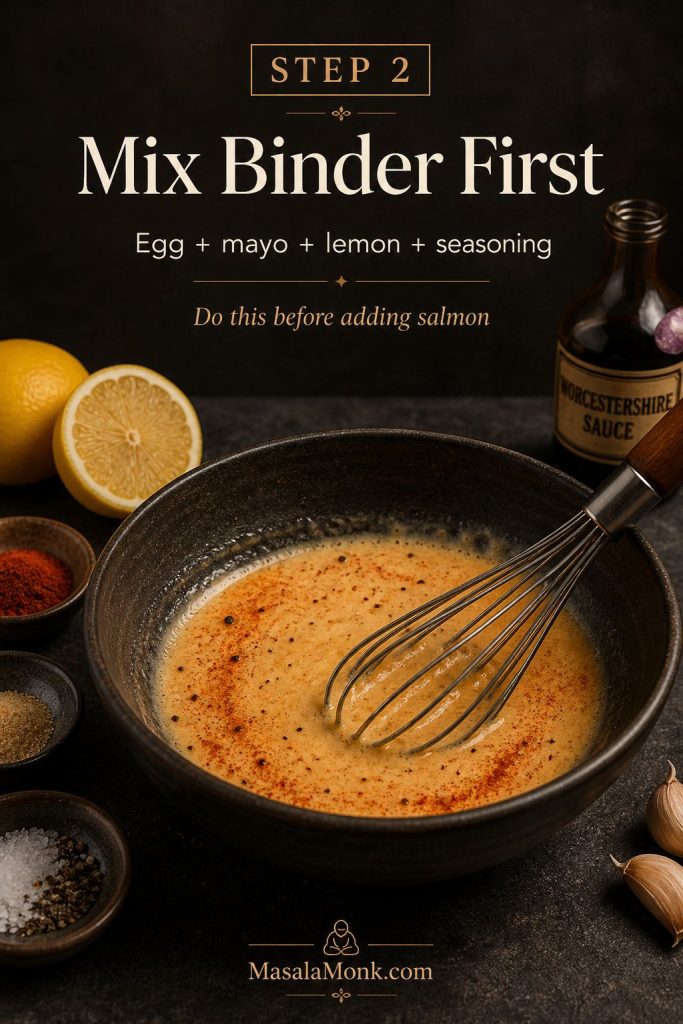
Step 2: Mix the Wet Binder First
In a large bowl, whisk the egg, mayonnaise, Worcestershire sauce, lemon juice, garlic powder, paprika, black pepper, salt, and cayenne or hot sauce if using. Mixing the wet ingredients first helps the seasoning spread evenly.
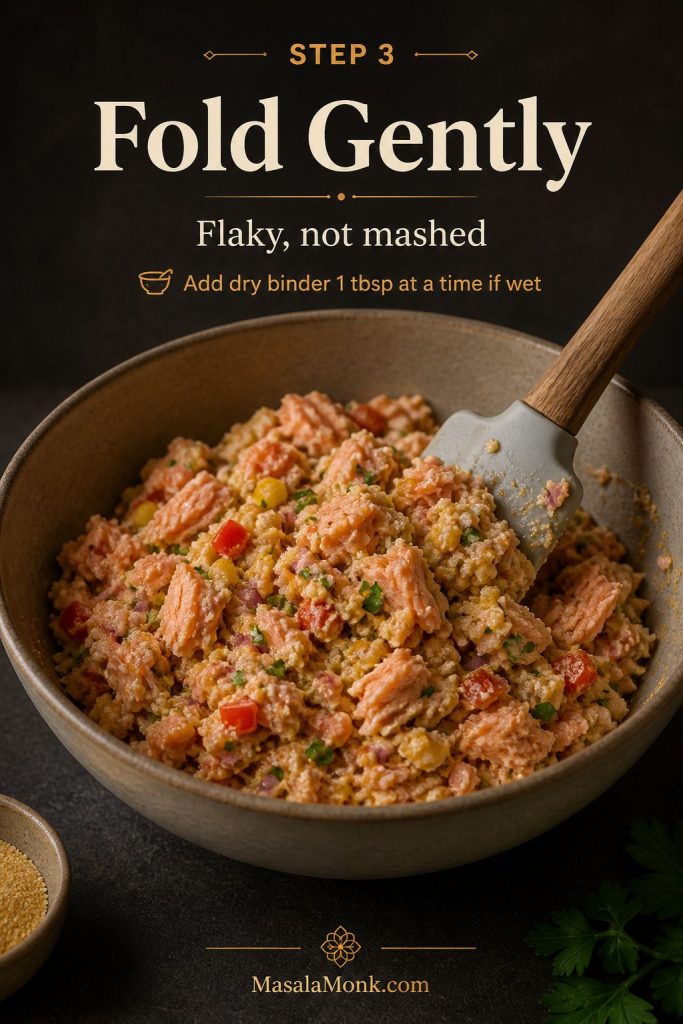
Step 3: Fold in Salmon, Vegetables, Cornmeal, and Flour
Add the flaked salmon, onion, bell pepper, green onion or parsley, cornmeal, and flour. Fold gently until the mixture holds together when pressed. If it feels very wet, add another tablespoon of cornmeal, flour, panko, or crushed crackers.
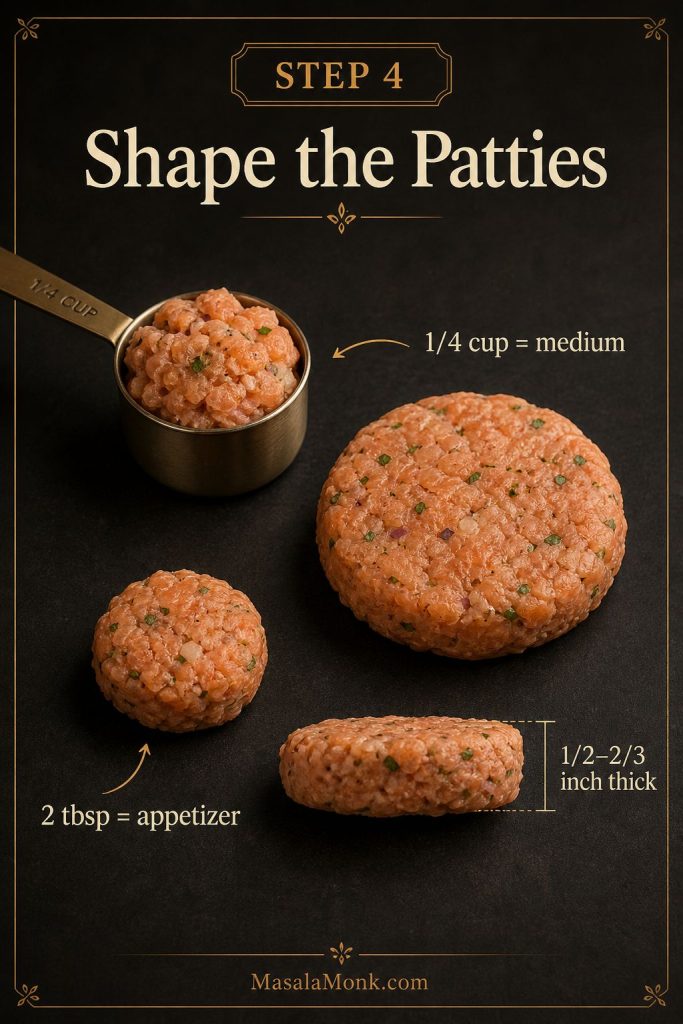
Step 4: Shape Into ¼-Cup Patties
Scoop about ¼ cup of mixture for each croquette. Shape into patties about ½–⅔ inch thick. Do not pack them too tightly; press just enough so they hold together.
Step 5: Chill if the Mixture Feels Soft
If the croquettes feel delicate, chill them for 10–20 minutes. Chilling firms the binder and makes them easier to flip. This is especially useful if your salmon was very moist or if you used fresh salmon.

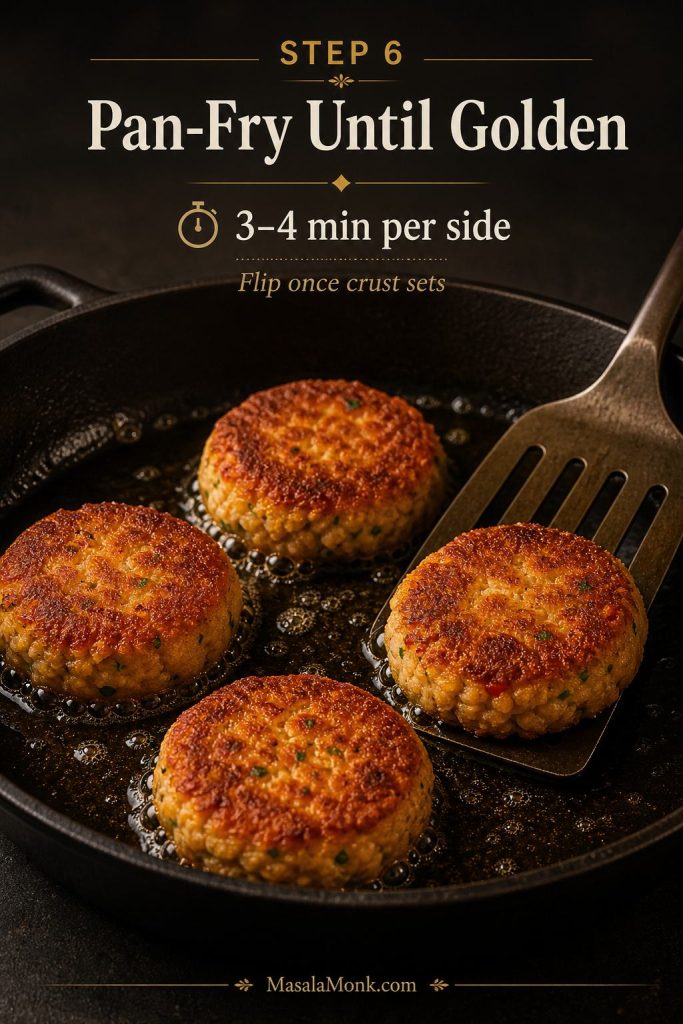
Step 6: Pan-Fry Until Crisp
Heat neutral oil in a cast iron skillet or heavy-bottom skillet until it reaches about 350°F / 175°C, or until a small crumb sizzles steadily when dropped in. Fry the croquettes for 3–4 minutes per side, flipping once, until deeply golden and crisp. Drain on a wire rack or paper-towel-lined plate.
Pan-Fried Salmon Croquettes
Pan-frying is the best default method because it gives salmon croquettes the crispest crust and the most classic texture. Use a 10-inch cast iron skillet or heavy-bottom skillet, and fry in batches so the oil temperature does not drop too much.
Because the salmon is already cooked when you use canned salmon, the real goal is to set the croquettes, crisp the crust, and heat the center without drying them out.
You do not need to deep-fry them. A shallow layer of oil is enough. For 8 croquettes, start with about ¼ cup / 60 ml oil and add a little more if the pan looks dry. For a more old-fashioned Southern fry, use closer to ½ cup / 120 ml.
Use a neutral frying oil such as canola, vegetable, avocado, or peanut oil. The oil should shimmer, and a small crumb should sizzle steadily when dropped in. Croquettes that brown too fast need slightly lower heat. Croquettes that absorb oil and taste greasy usually need hotter oil or fewer patties in the pan.
Best Oil Temperature for Salmon Croquettes
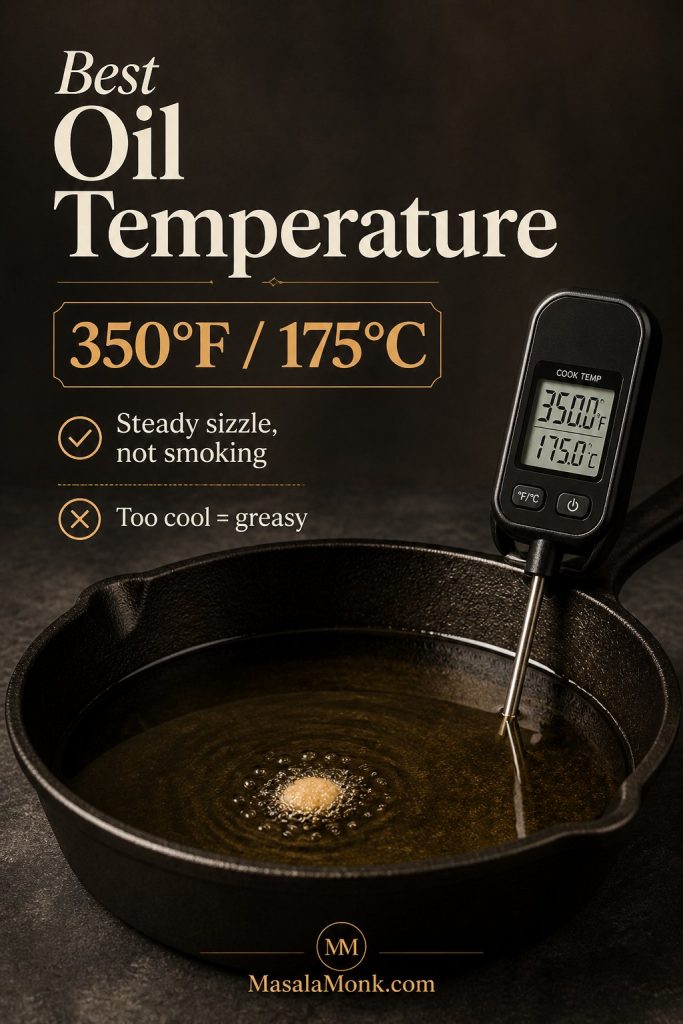
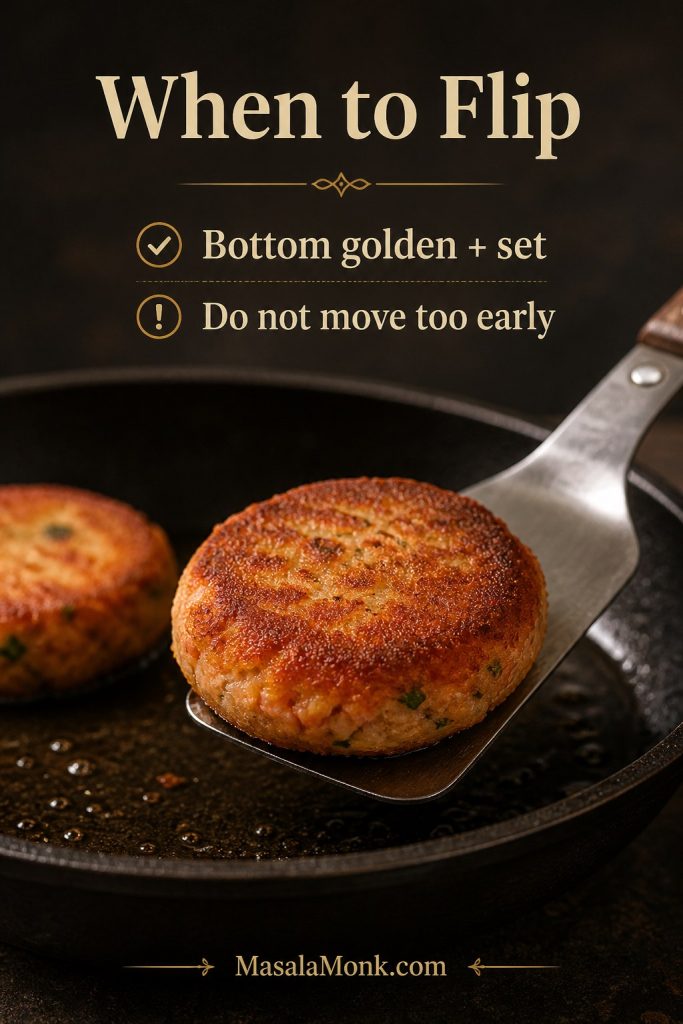
The croquettes are done when the outside is deeply golden, the center feels hot, and the patties feel set when lifted with a spatula.
When to Flip Salmon Croquettes
Southern Salmon Croquettes
Southern salmon croquettes usually start with canned pink salmon, onion, bell pepper, egg, cornmeal, flour, and a hot skillet. The texture is crisp-edged and old-fashioned, with a savory salmon center and a little sweetness from the vegetables.
For a stronger Southern-style version, keep the cornmeal and flour combination in the recipe card, add a pinch of cayenne or a few dashes of hot sauce, and serve the croquettes with remoulade, lemon dill mayo, green chutney mayo, or hot sauce.
Extra cornmeal on the outside creates a rougher, crunchier crust. For a softer patty, skip the extra coating and let the flour do more of the binding.
Southern Salmon Croquettes Texture Cue

Cornmeal vs Flour vs Crackers vs Panko
The binder changes the texture of salmon croquettes more than most people realize. Cornmeal gives a classic Southern texture. Flour makes the mixture more cohesive. Panko makes the croquettes lighter and crispier. Crushed crackers give an old-fashioned pantry flavor.
| Binder or coating | Best for | Texture |
|---|---|---|
| Cornmeal | Southern salmon croquettes | Crisp, grainy, old-fashioned crust |
| Flour | Softer salmon patties | Tender, cohesive, less crunchy |
| Panko | Modern crispy salmon cakes | Light, airy crunch |
| Crushed saltines | Pantry-style salmon patties | Savory, tender-crisp, nostalgic |
| Regular breadcrumbs | Classic salmon cakes | Even structure and mild crust |
| Almond flour | Low-carb or gluten-free variation | Softer and less crisp, but useful for dietary swaps |
Best Binder for Salmon Croquettes
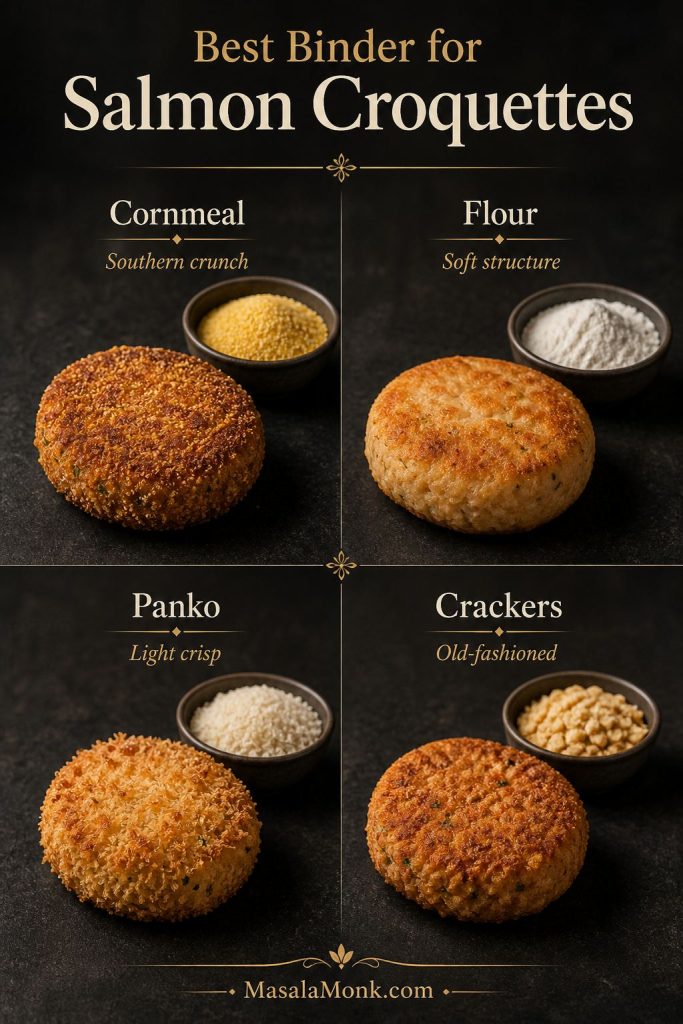
For the best first batch, use cornmeal plus flour. If you want a lighter, crispier version, replace some or all of the cornmeal with panko. For old-fashioned salmon patties, crushed saltines work beautifully instead of panko or breadcrumbs.
If your mixture feels too wet or too loose, jump to the troubleshooting guide.
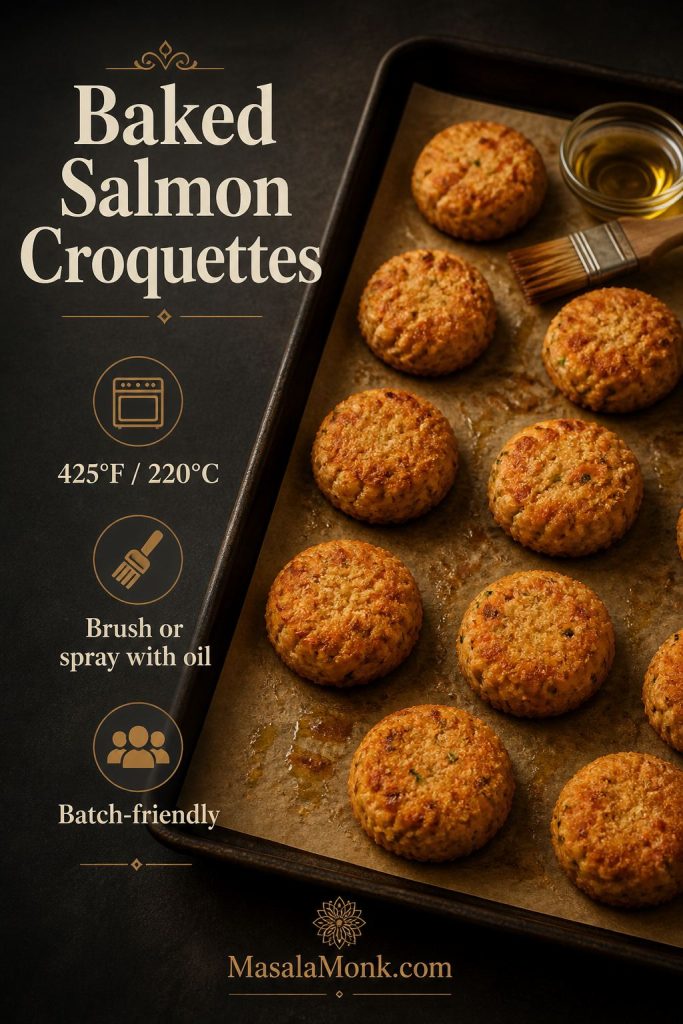
Baked Salmon Croquettes
Baked salmon croquettes are useful when you want less oil or need to cook a whole batch at once. Although they will not be quite as deeply crisp as pan-fried croquettes, a hot, well-oiled sheet pan helps them brown.
To bake them, heat the oven to 425°F / 220°C. Place the shaped croquettes on a well-oiled sheet pan, brush or spray the tops lightly with oil, and bake for 15 minutes. Flip carefully, then bake for another 5–7 minutes, until golden and firm.
Baked Salmon Croquettes Texture Cue
Want a crisp, lower-oil option without using the oven? See the air fryer method.
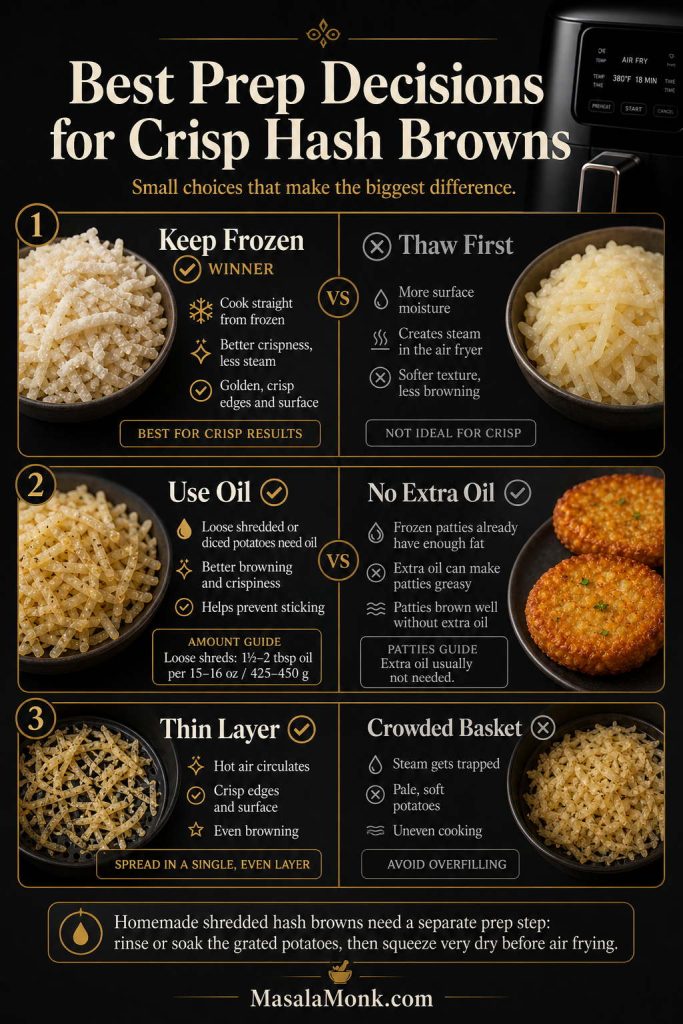
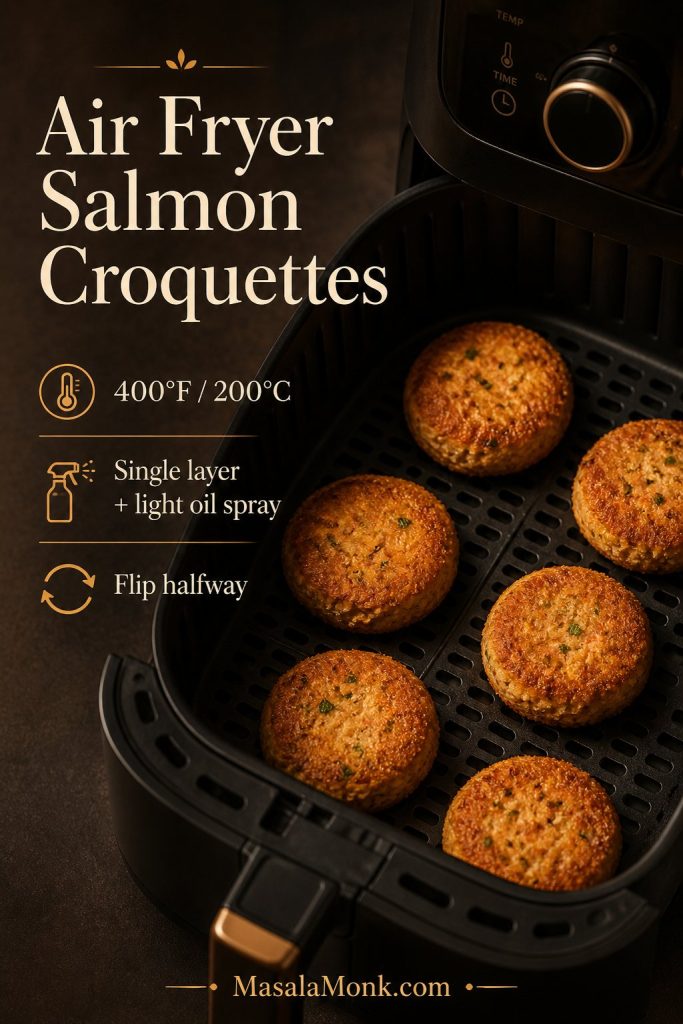
Air Fryer Salmon Croquettes
Air fryer salmon croquettes are a good middle ground between pan-fried and baked. They use less oil than skillet frying; however, they can still develop a crisp surface if you spray them lightly and avoid overcrowding the basket.
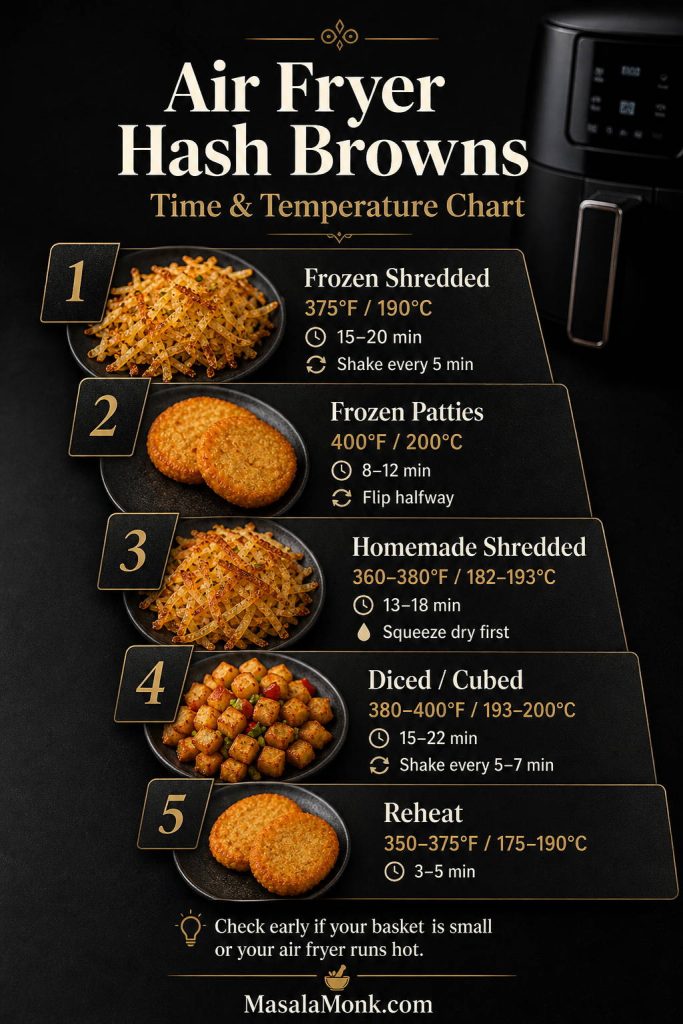
Preheat the air fryer to 400°F / 200°C. Spray the basket or use perforated parchment. Add the croquettes in a single layer, spray the tops lightly with oil, and air fry for 8–10 minutes. Flip, spray again if needed, and cook for another 3–5 minutes, depending on thickness.
Air Fryer Salmon Croquettes Texture Cue
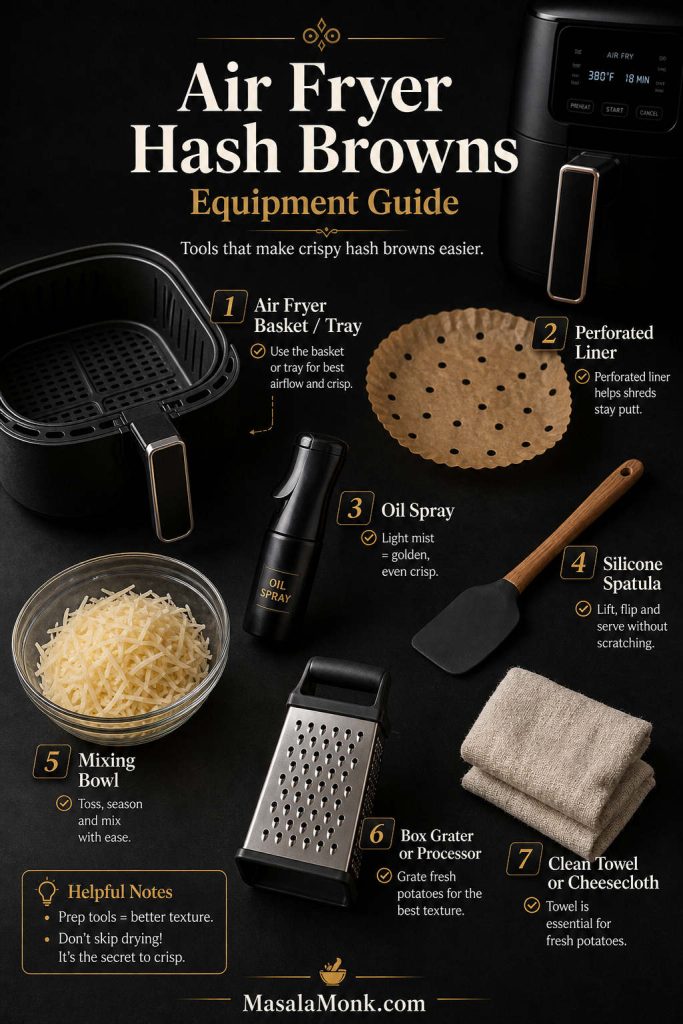
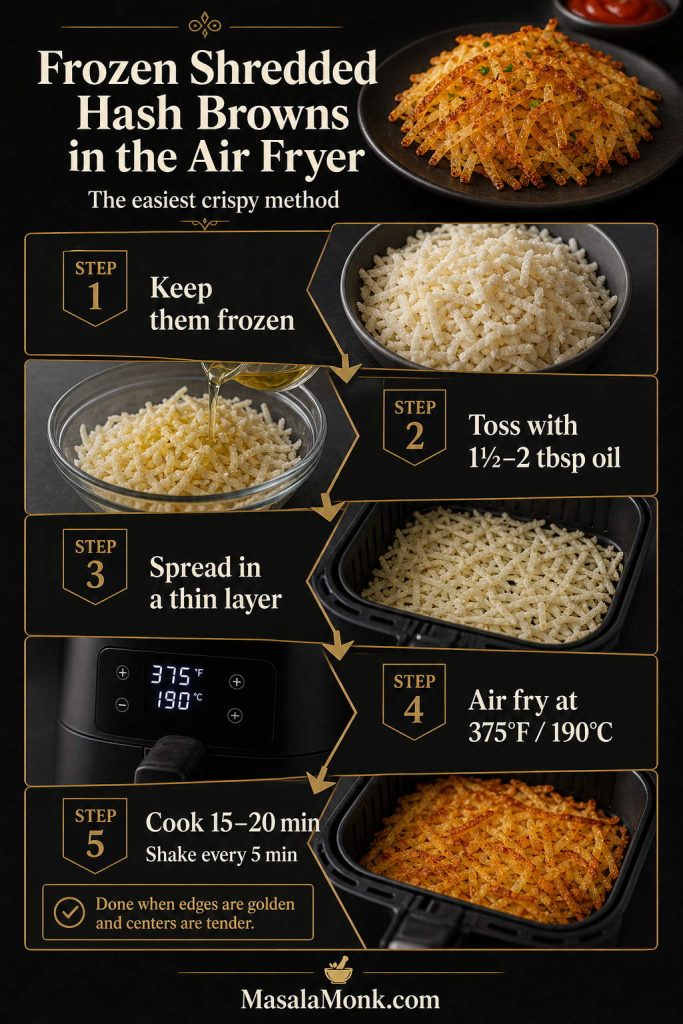
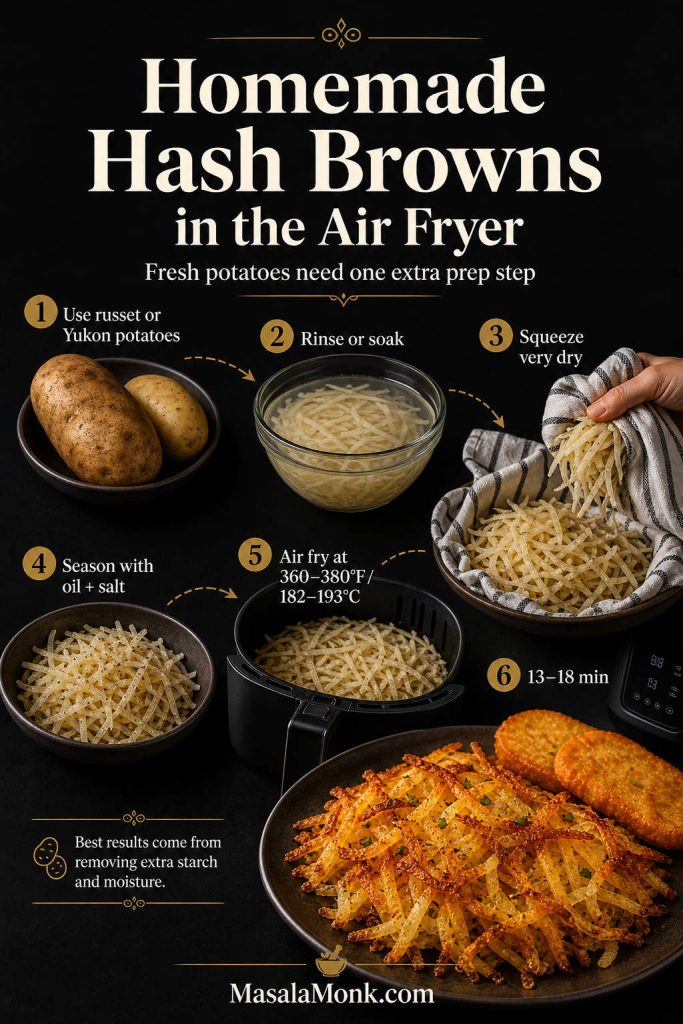
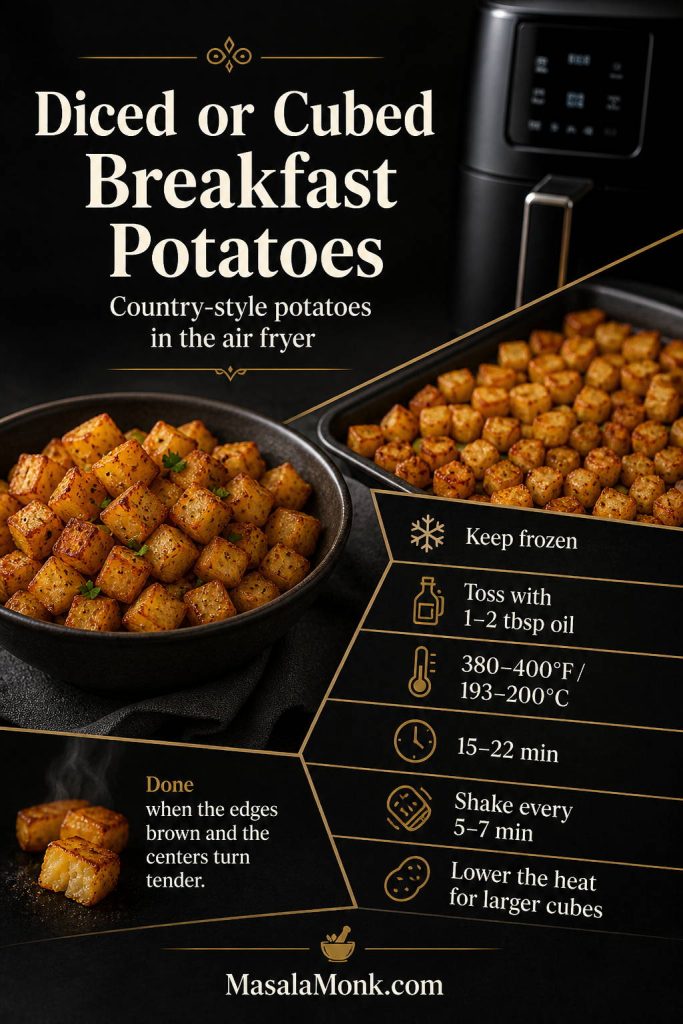
If you are building a full air fryer meal, serve the croquettes with something crisp and simple like air fryer hash browns or a cold salad on the side.
Pan-Fried vs Baked vs Air Fryer Salmon Croquettes

Potato Salmon Croquettes
Potato salmon croquettes are softer and more like fish cakes. To make them, mix the drained salmon with about 1 cup mashed potatoes, one egg, onion, herbs, lemon, and seasoning. Reduce the cornmeal and flour because the potatoes already add body.
Chill potato salmon croquettes before cooking. They are more delicate than the canned salmon version, so a short rest in the fridge helps them hold their shape.
Potato Salmon Croquettes Texture Cue

Best Sauce for Salmon Croquettes
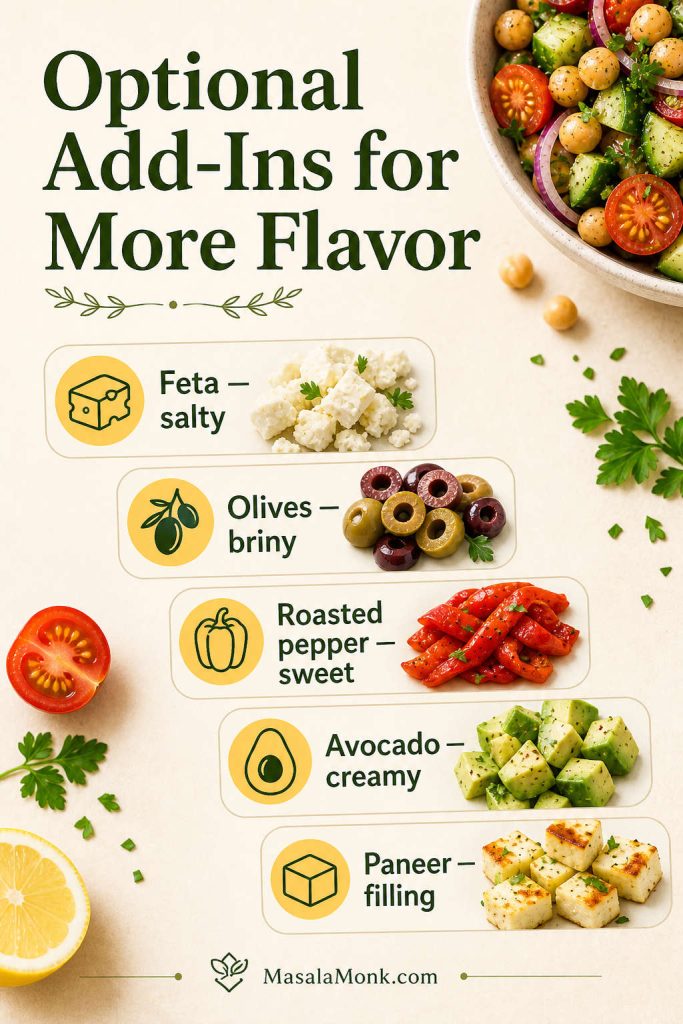
Salmon croquettes need a sauce with acid, creaminess, herbs, or heat. Tartar sauce is the familiar classic, lemon dill mayo is the easiest homemade option, remoulade gives a more Southern seafood-style finish, and brighter sauces like green chutney mayo, tzatziki, mango mustard, or mango habanero can change the whole plate.
Best Sauces for Salmon Croquettes

Quick Tartar Sauce Shortcut
- ½ cup mayonnaise
- 1–2 tablespoons chopped pickles or relish
- 1 teaspoon lemon juice
- 1 teaspoon Dijon mustard, optional
- Black pepper, to taste
Stir everything together and chill until serving. This is the easiest classic dip for salmon patties, salmon cakes, and crisp croquettes.
Quick Lemon Dill Sauce
- ½ cup mayonnaise or Greek yogurt
- 1 tablespoon lemon juice
- 1 teaspoon Dijon mustard
- 1 tablespoon chopped dill or parsley
- 1 small grated garlic clove
- Salt and black pepper, to taste
Mix everything together and chill until ready to serve. If the sauce tastes flat, add more lemon. If it tastes too sharp, add a spoonful more mayo or yogurt.
Quick Remoulade-Style Sauce
- ½ cup mayonnaise
- 1 teaspoon Dijon mustard
- 1 tablespoon lemon juice or pickle juice
- 1 teaspoon hot sauce
- ½ teaspoon paprika
- 1 tablespoon chopped pickles, relish, or capers, optional
- Black pepper, to taste
Mix everything together and chill for 10–15 minutes if you have time. This sauce is especially good with Southern salmon croquettes, cornmeal-crusted croquettes, and fried salmon patties.
For an Indian-style twist, stir green chutney into mayo or yogurt. The coriander, mint, chilli, ginger, cumin, and citrus make a sharp, fresh dip that cuts through the fried crust.
For baked or air fryer croquettes, a cool tzatziki sauce works beautifully. The cucumber and yogurt keep the plate lighter, especially if the croquettes are spicy or served as lunch.
For a sweet, tangy, fish-friendly sauce, try mango mustard sauce instead of plain mustard. For more heat, finish the plate with mango habanero sauce, especially with slaw, rice, or a bowl-style meal.
Building a full plate? See what to serve with salmon croquettes.
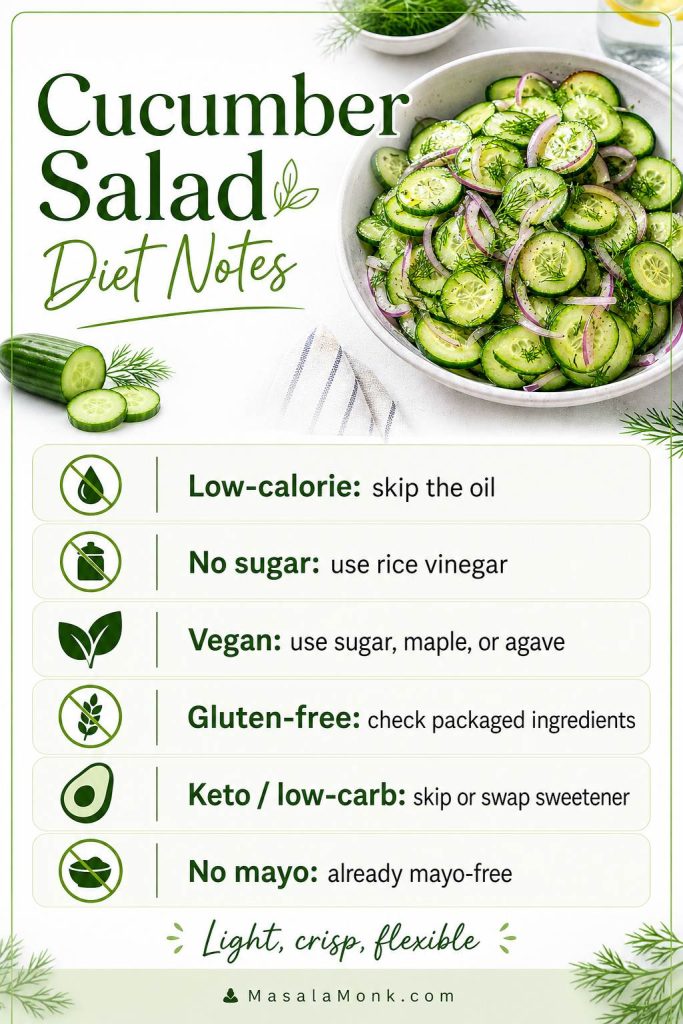
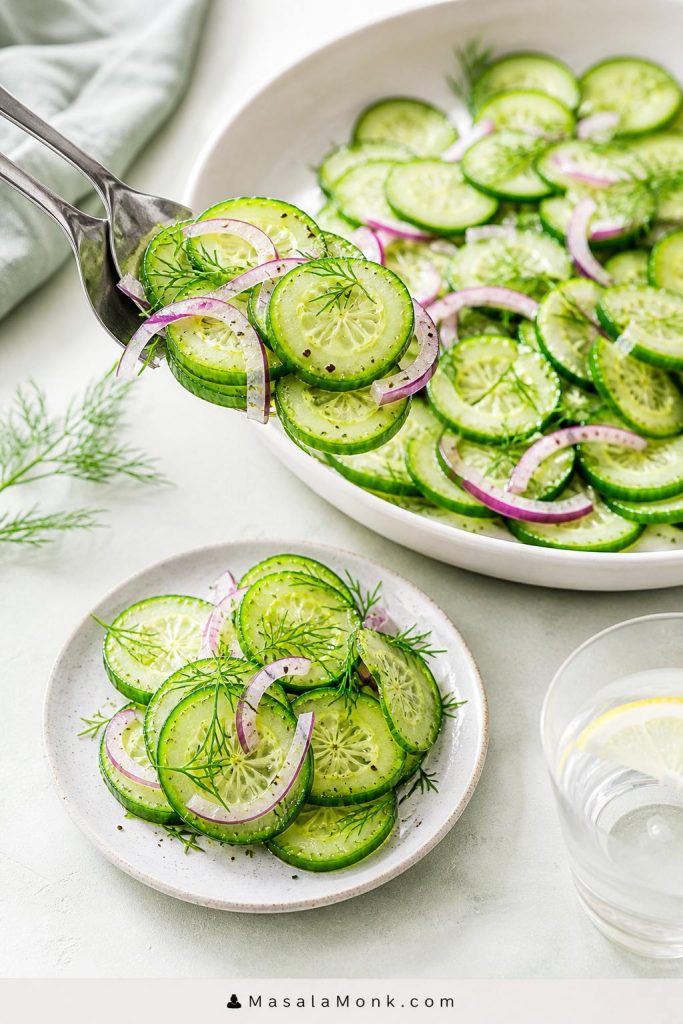
What to Serve with Salmon Croquettes
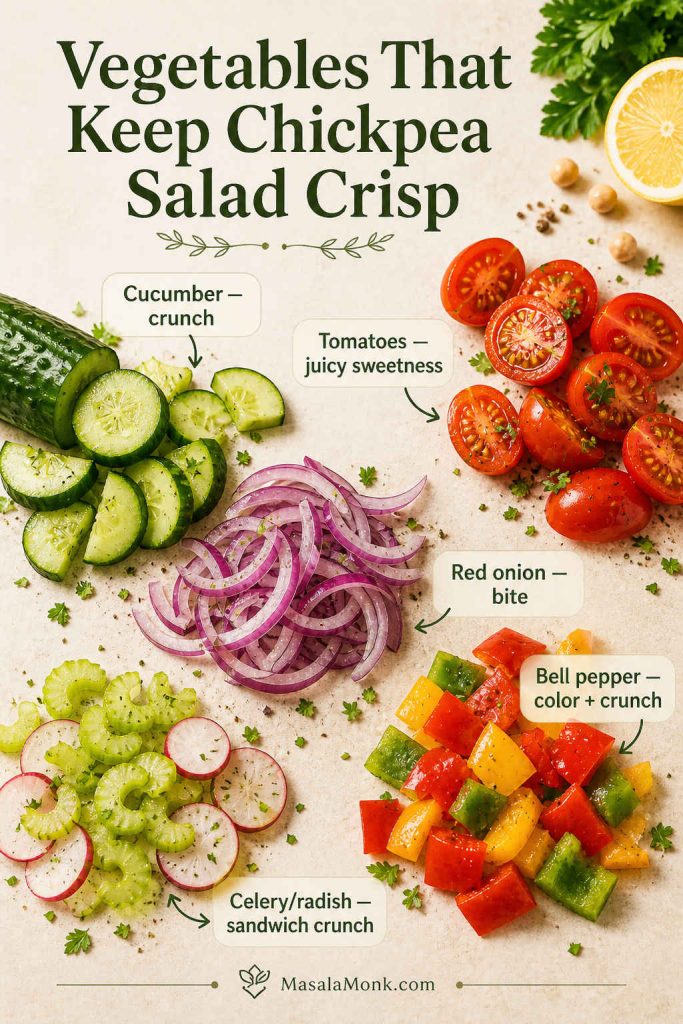
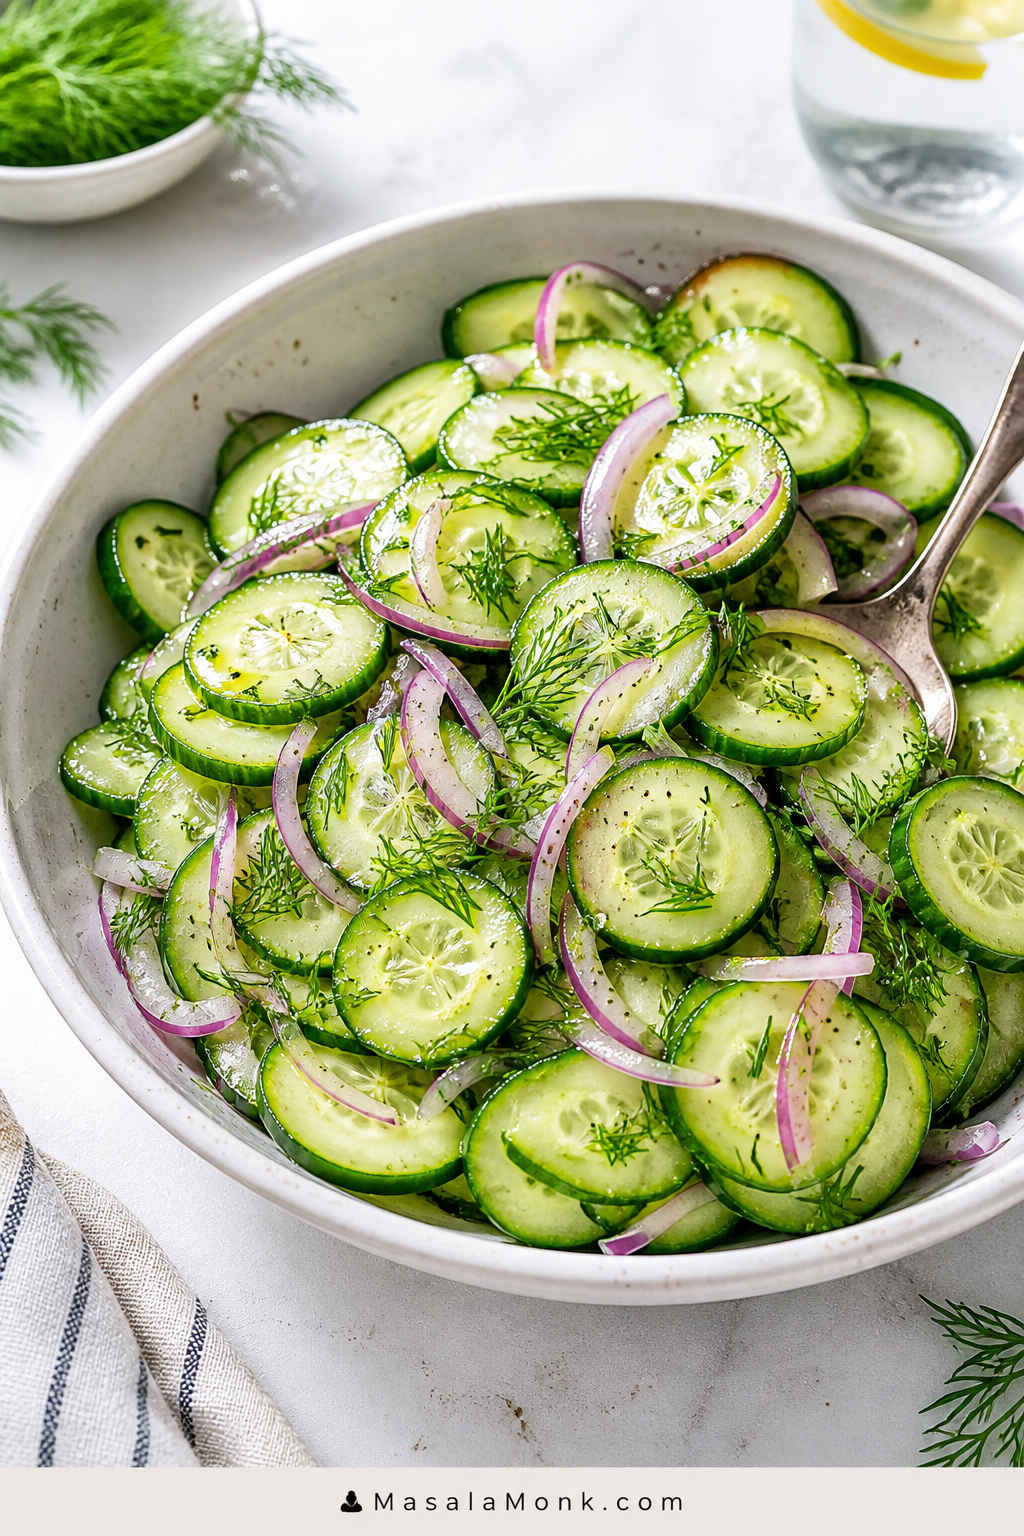
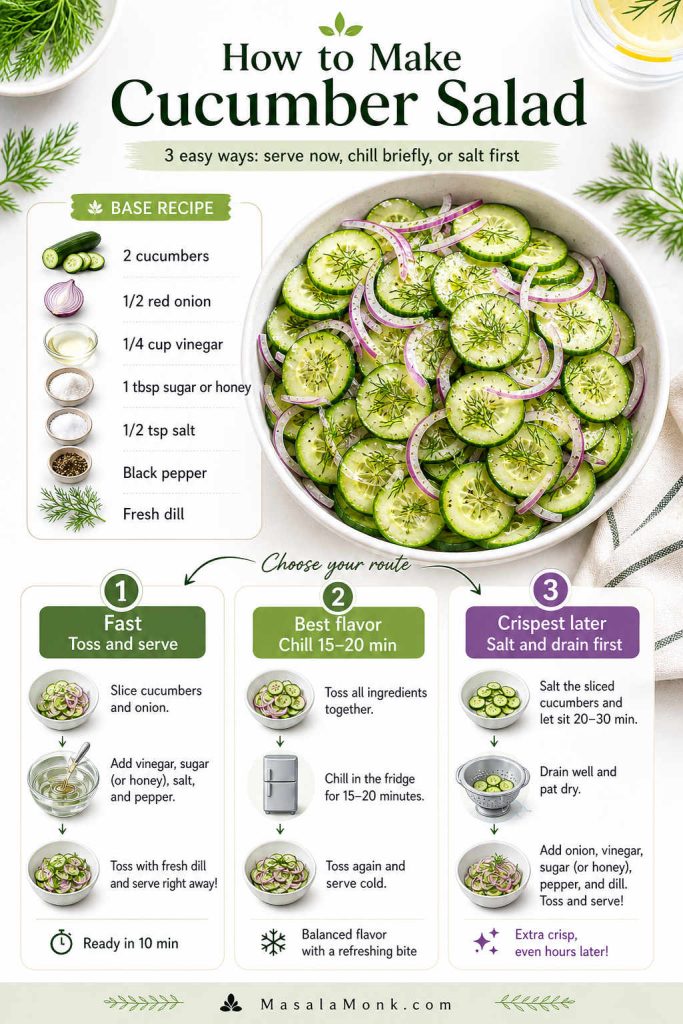
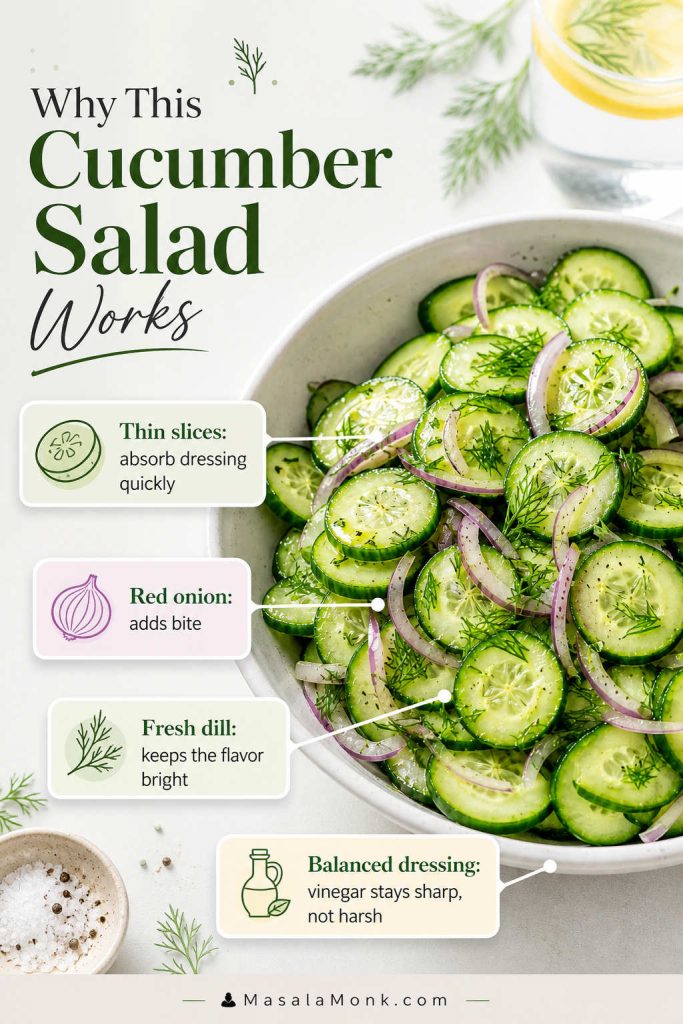
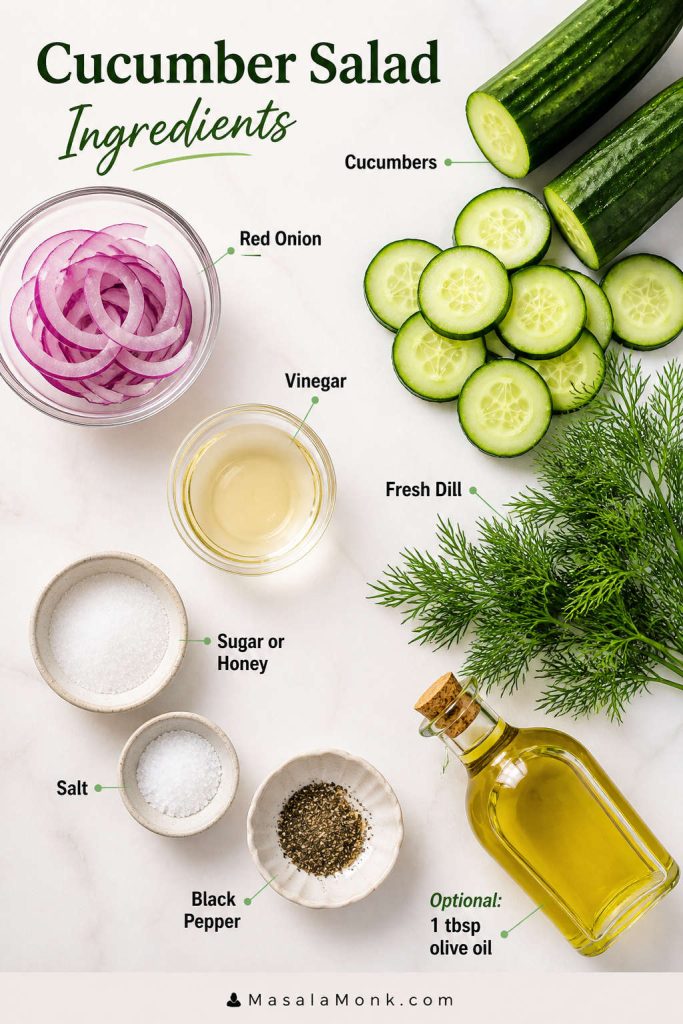
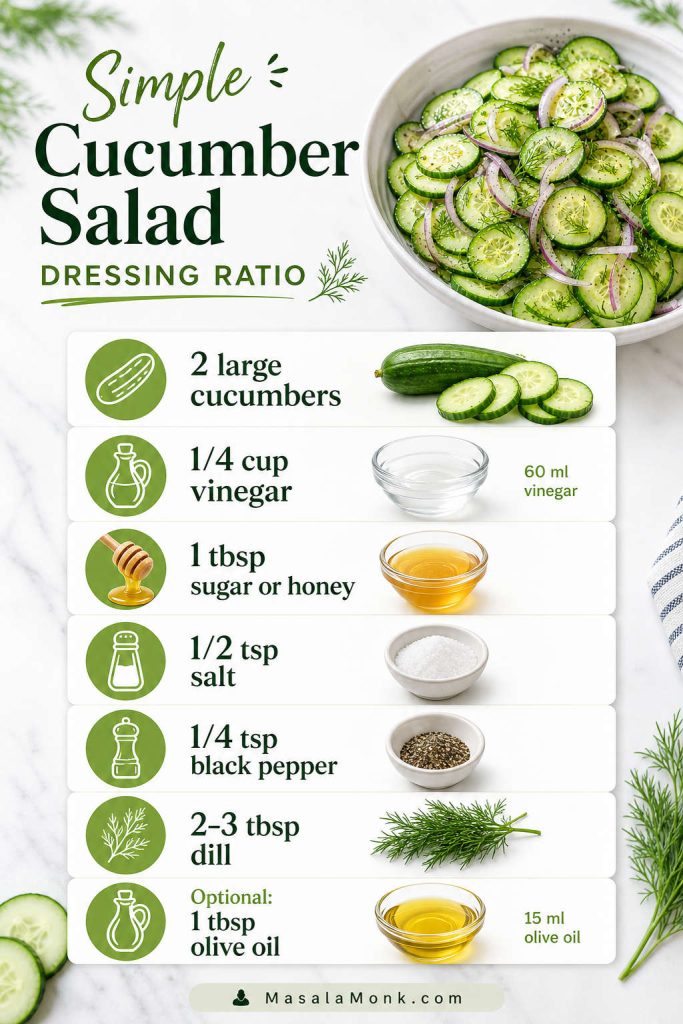
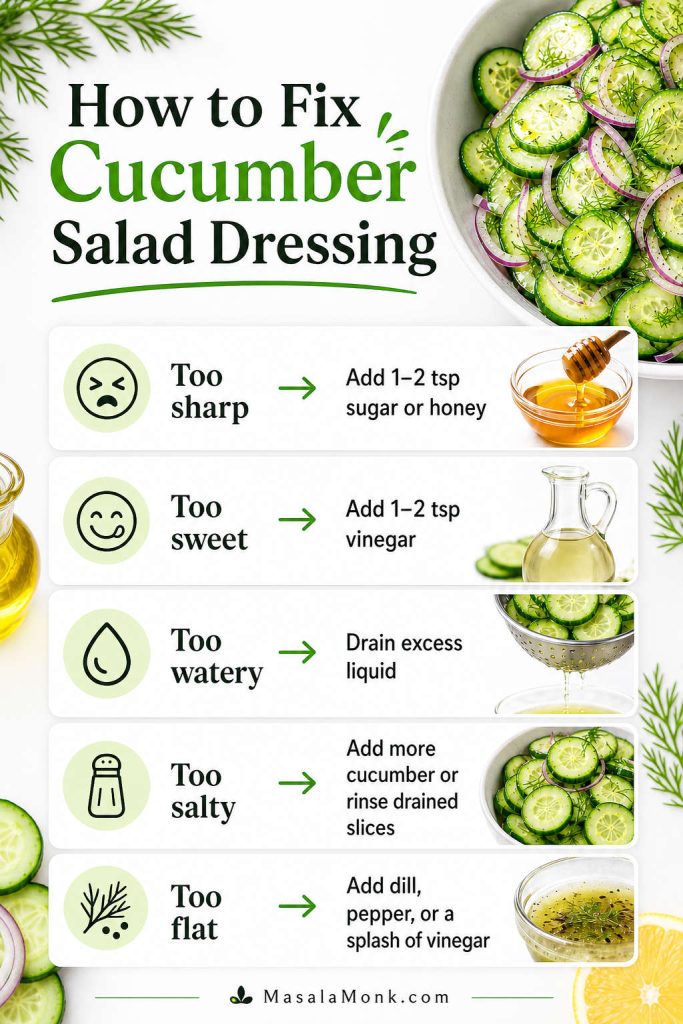
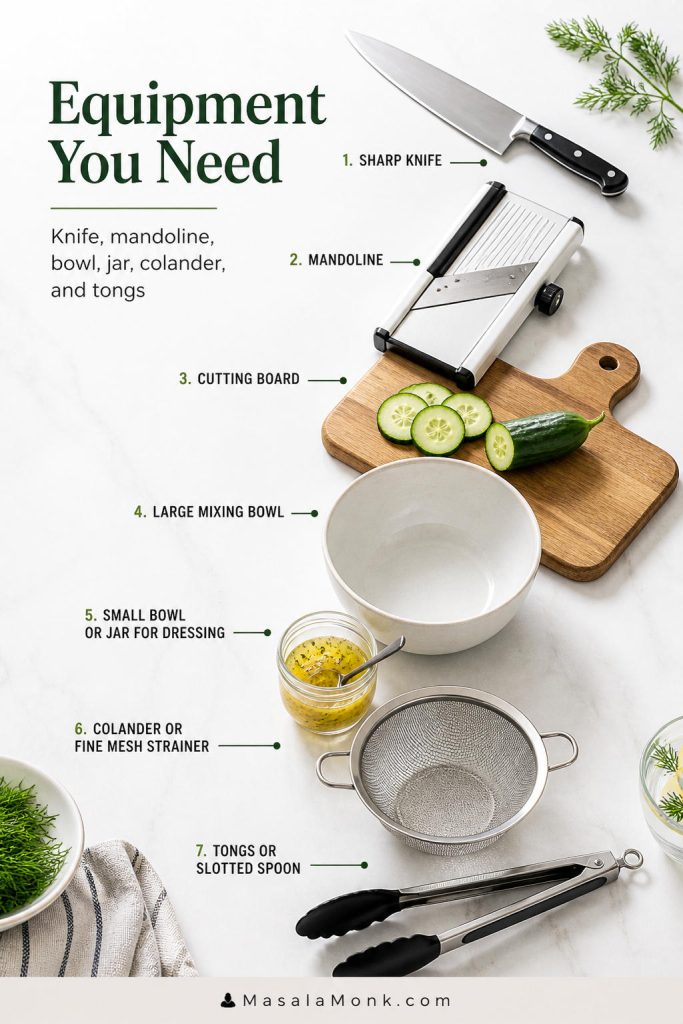
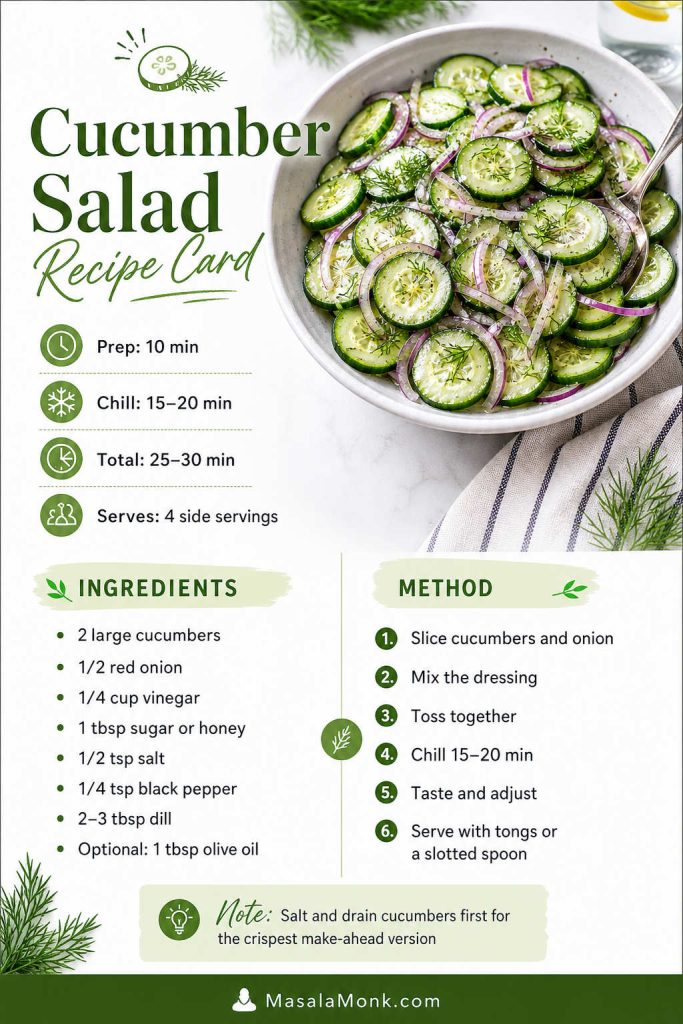
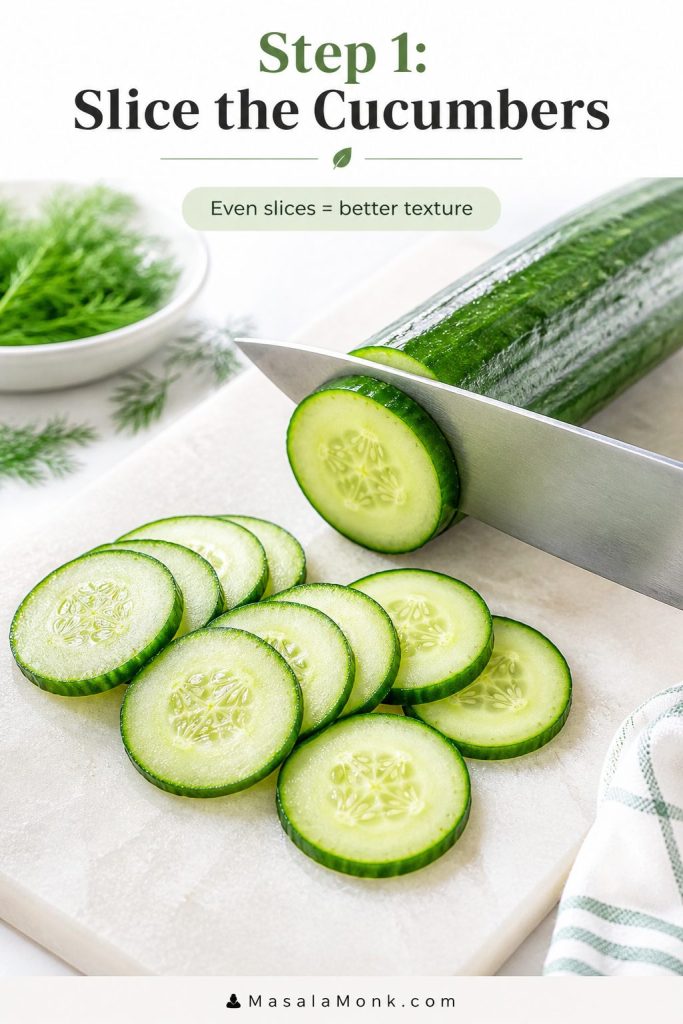
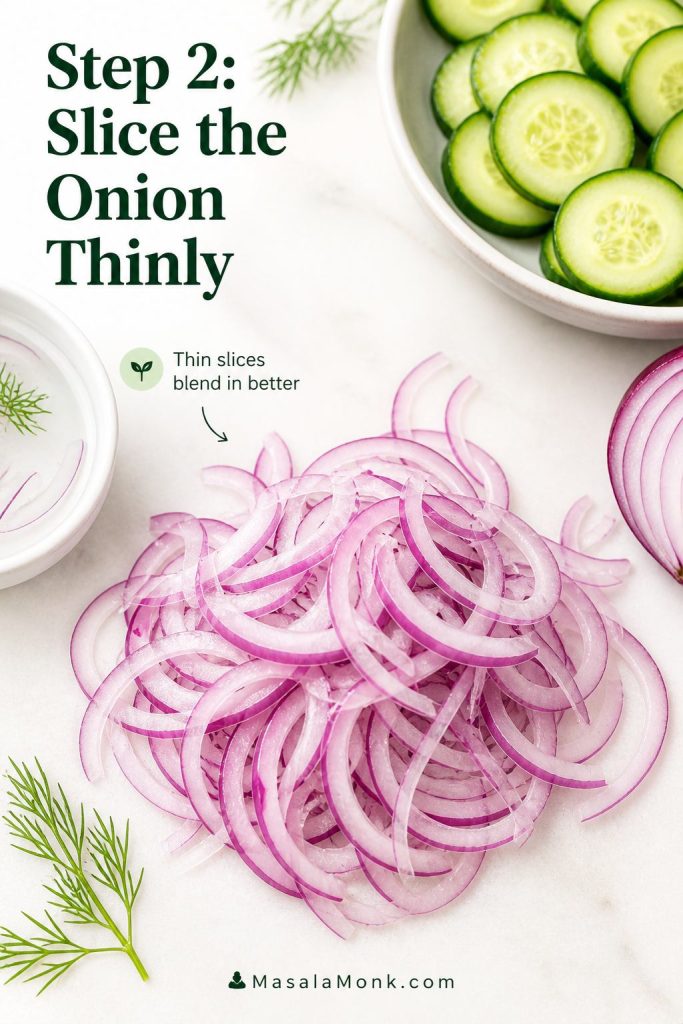
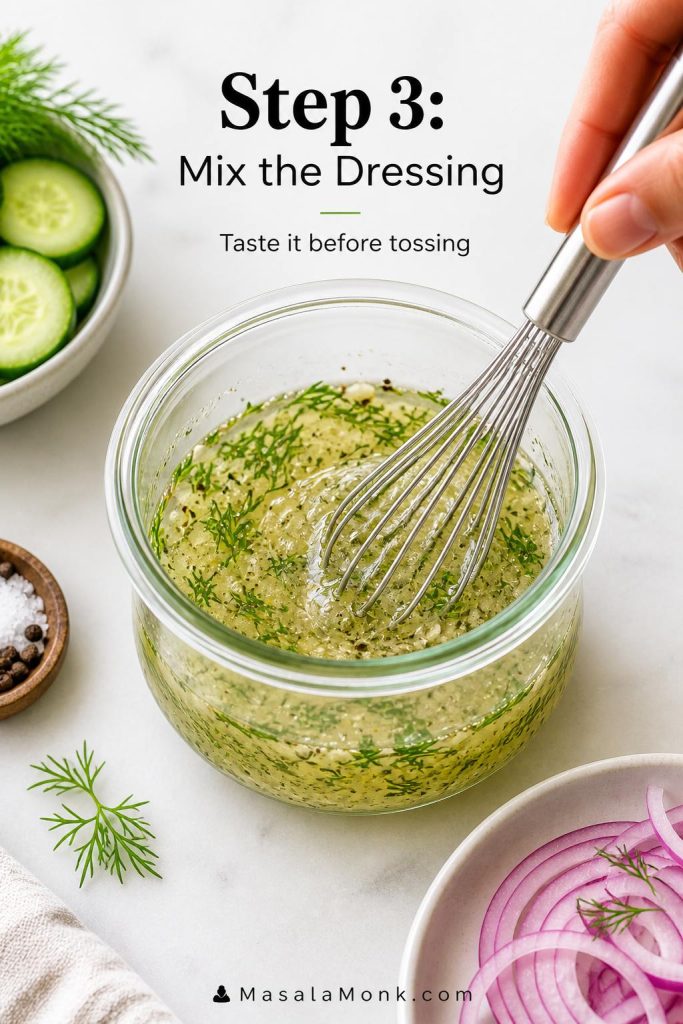
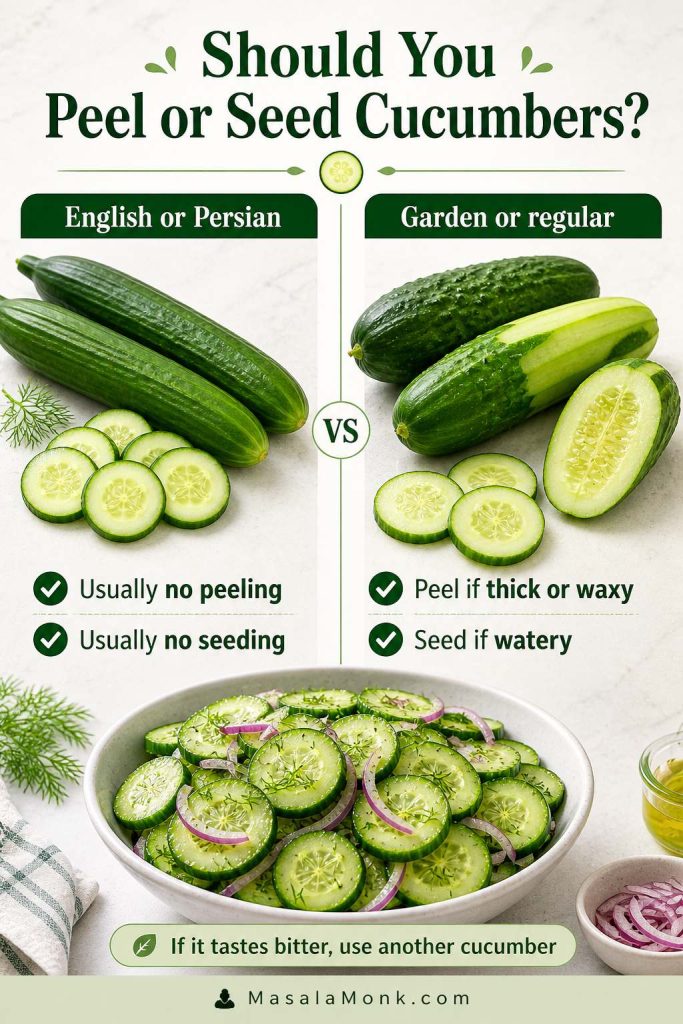
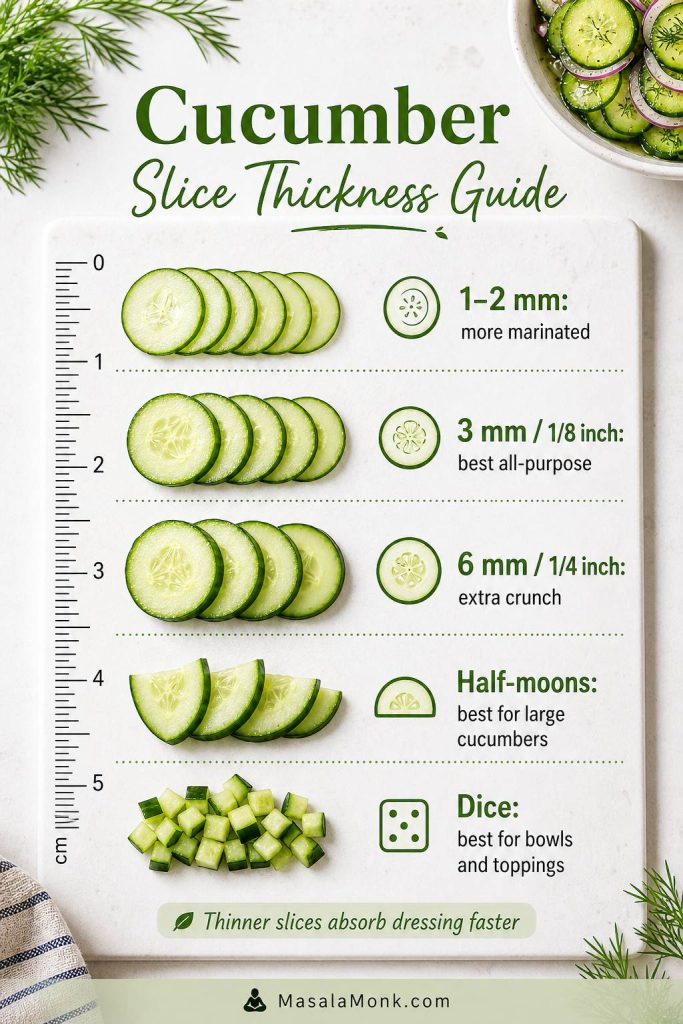
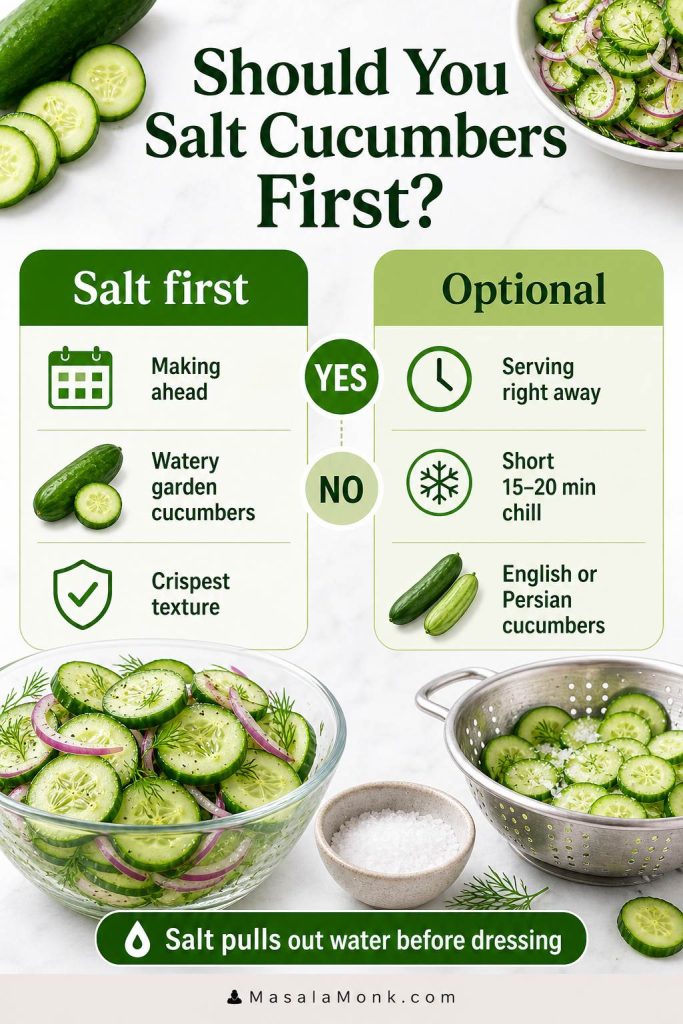
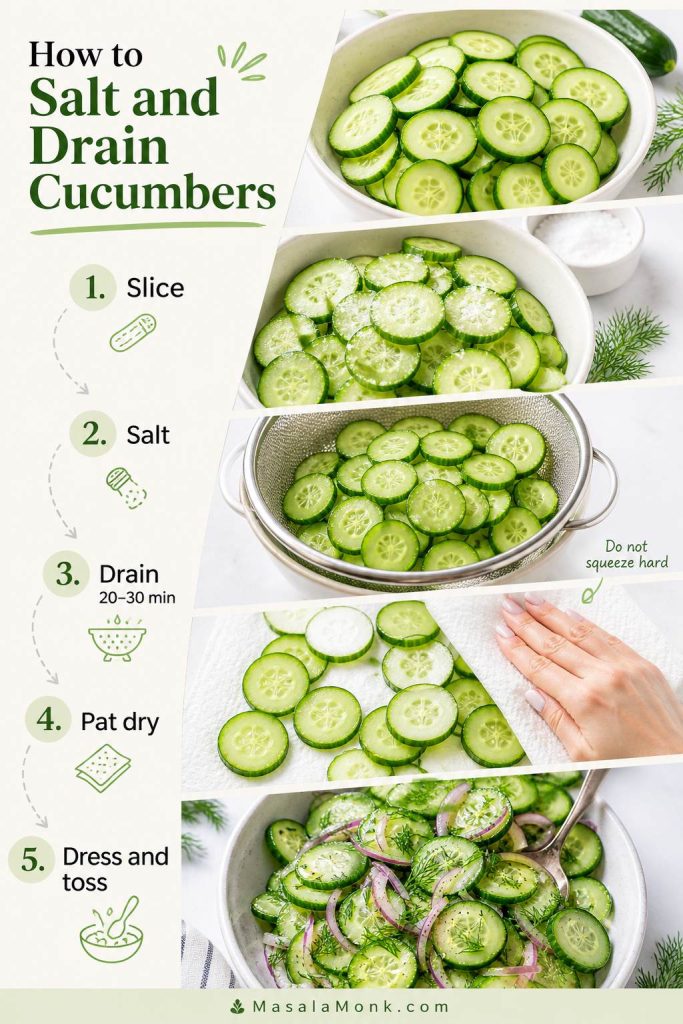
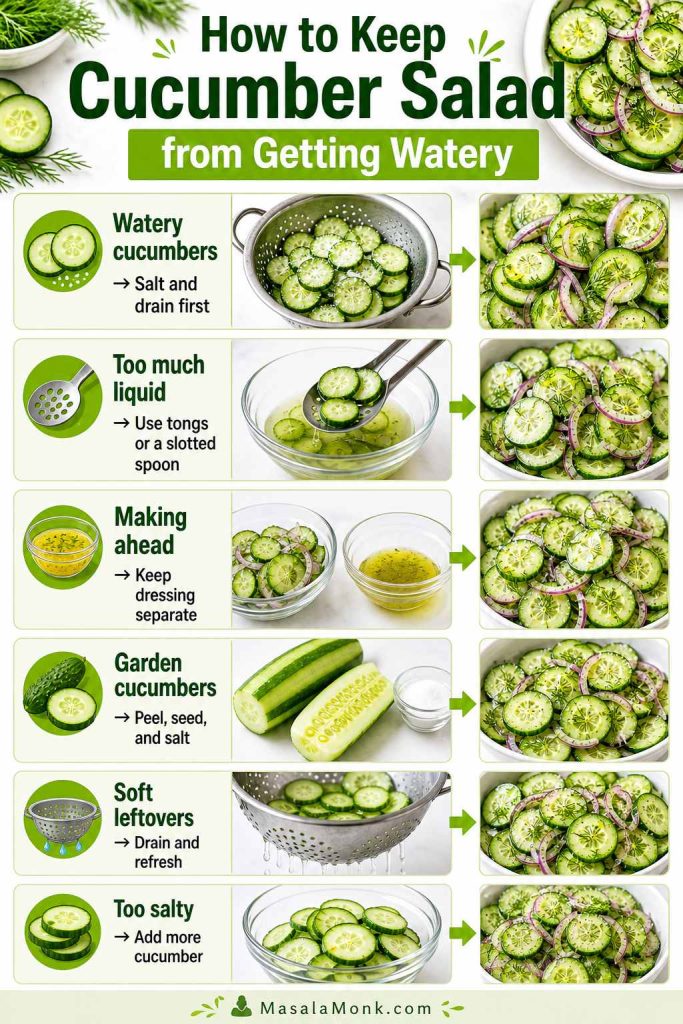
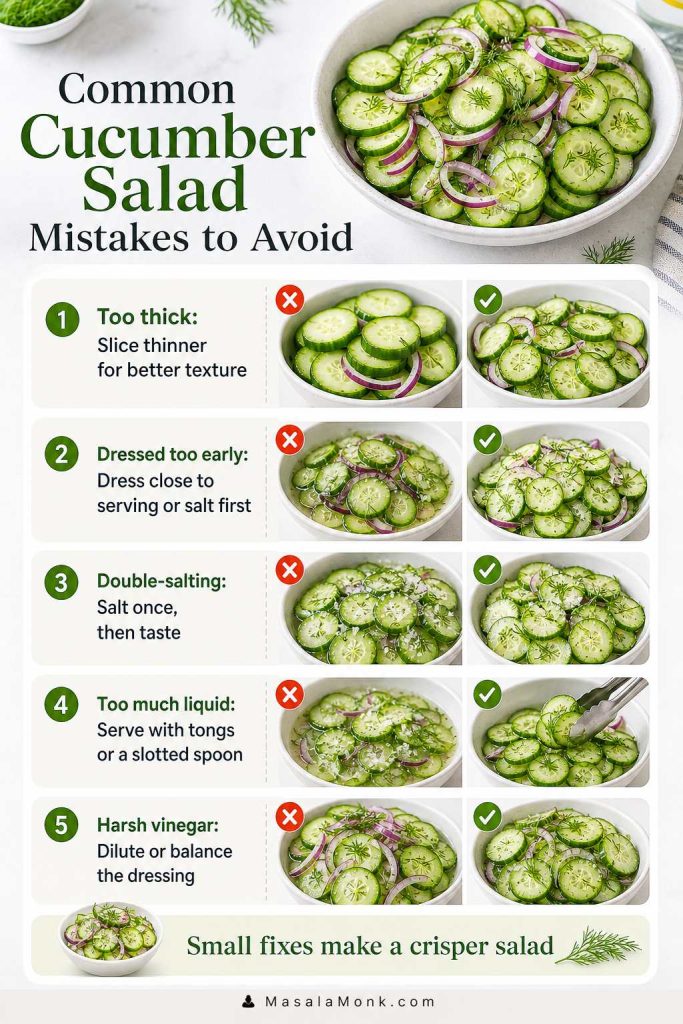
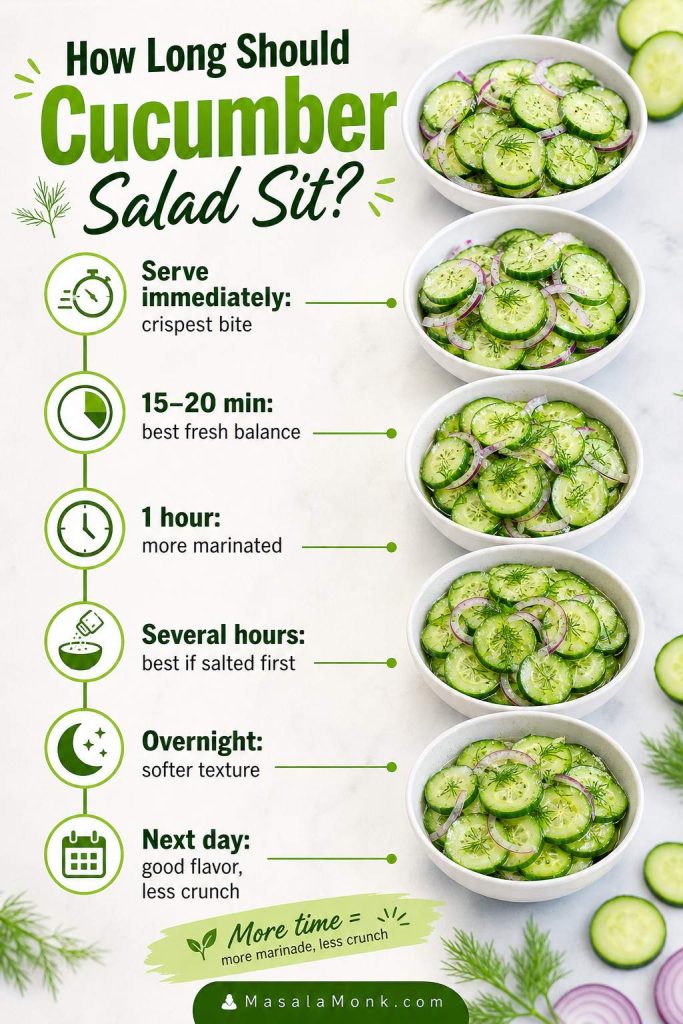
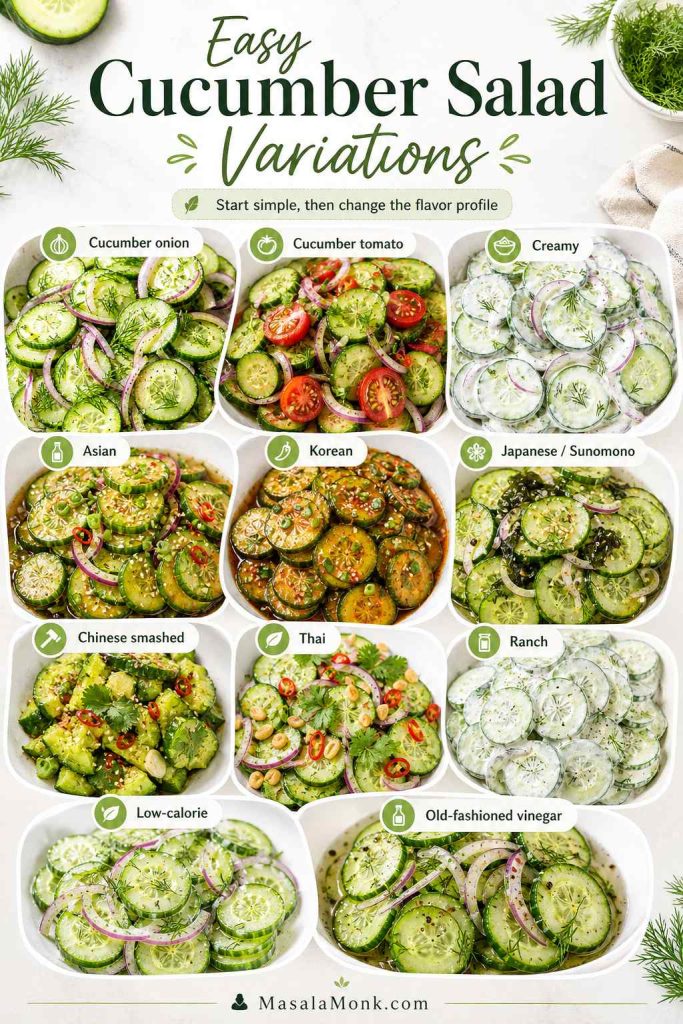
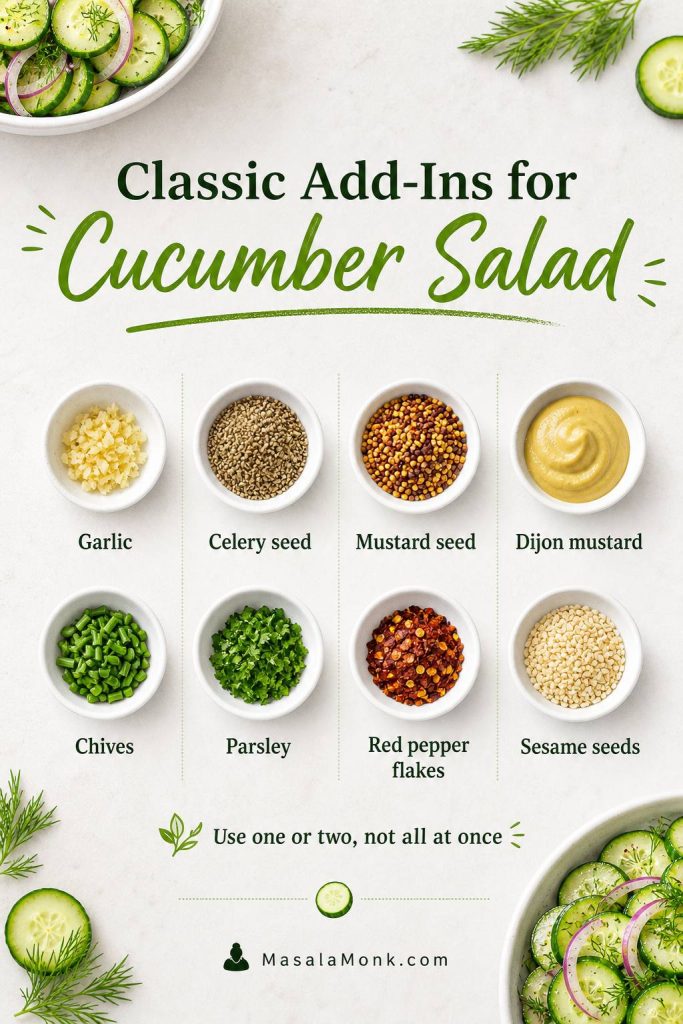
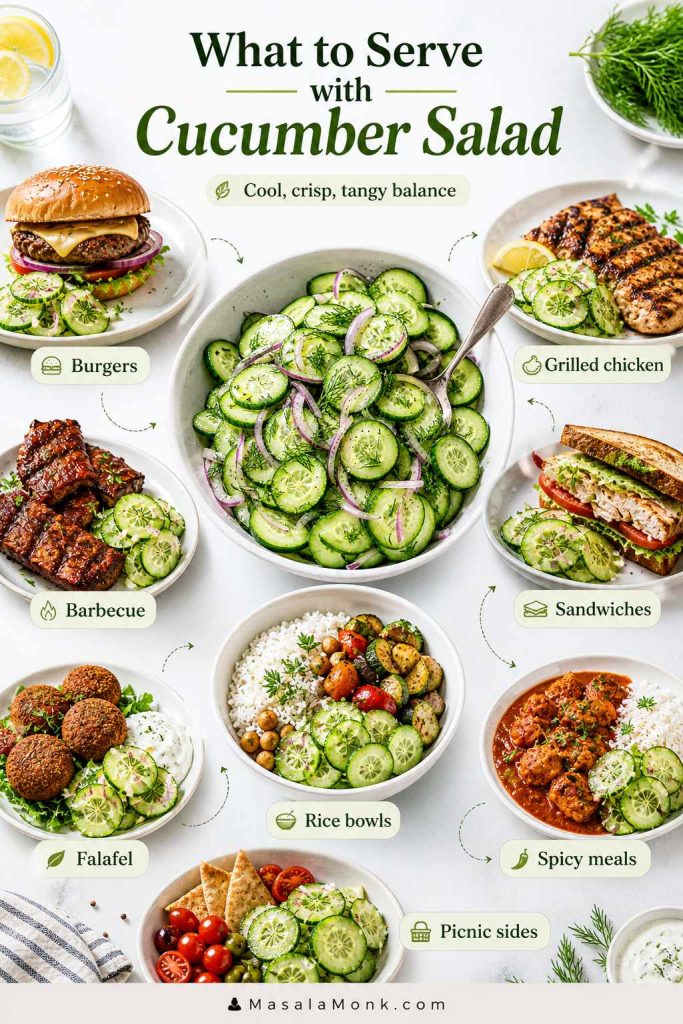
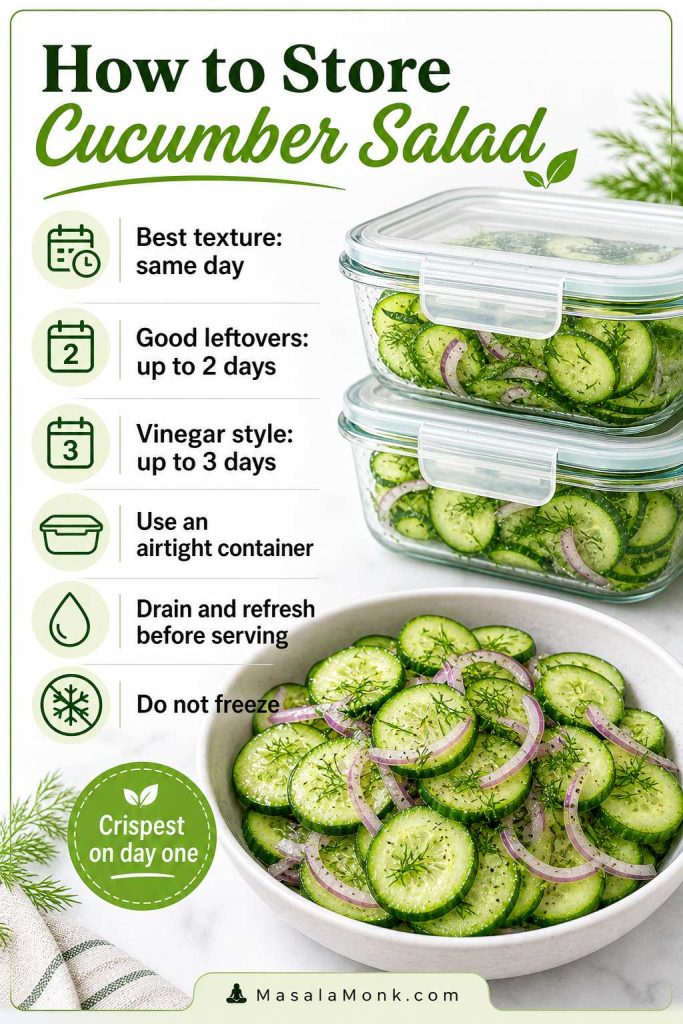
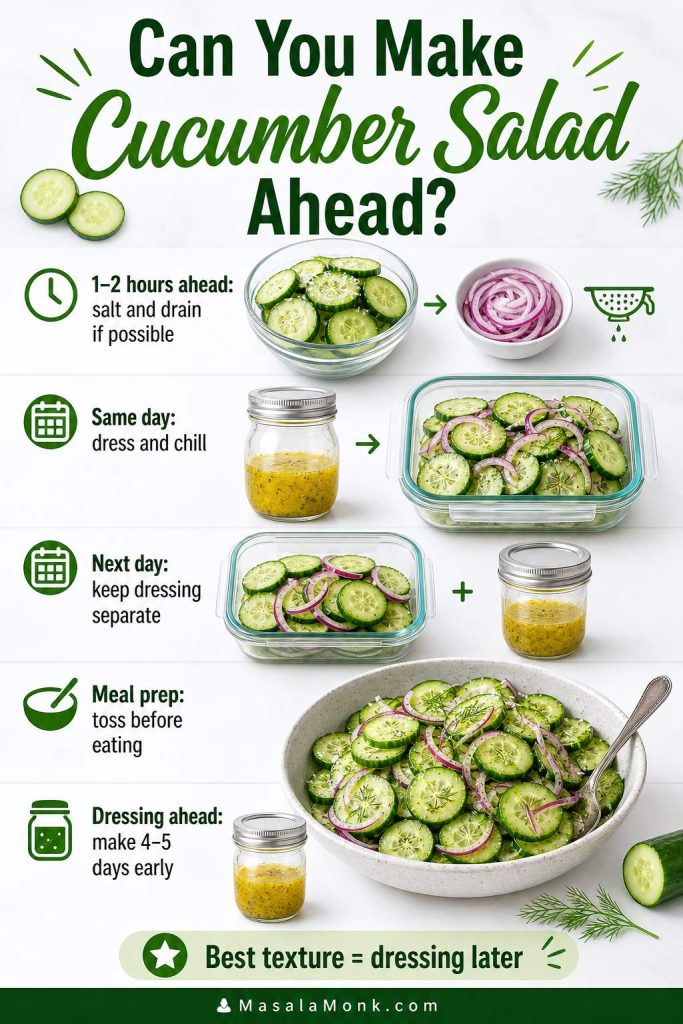
A cold, crisp cucumber salad is one of the easiest sides for salmon croquettes. The vinegar, dill, onion, and crunch balance the fried crust without making the meal heavy.
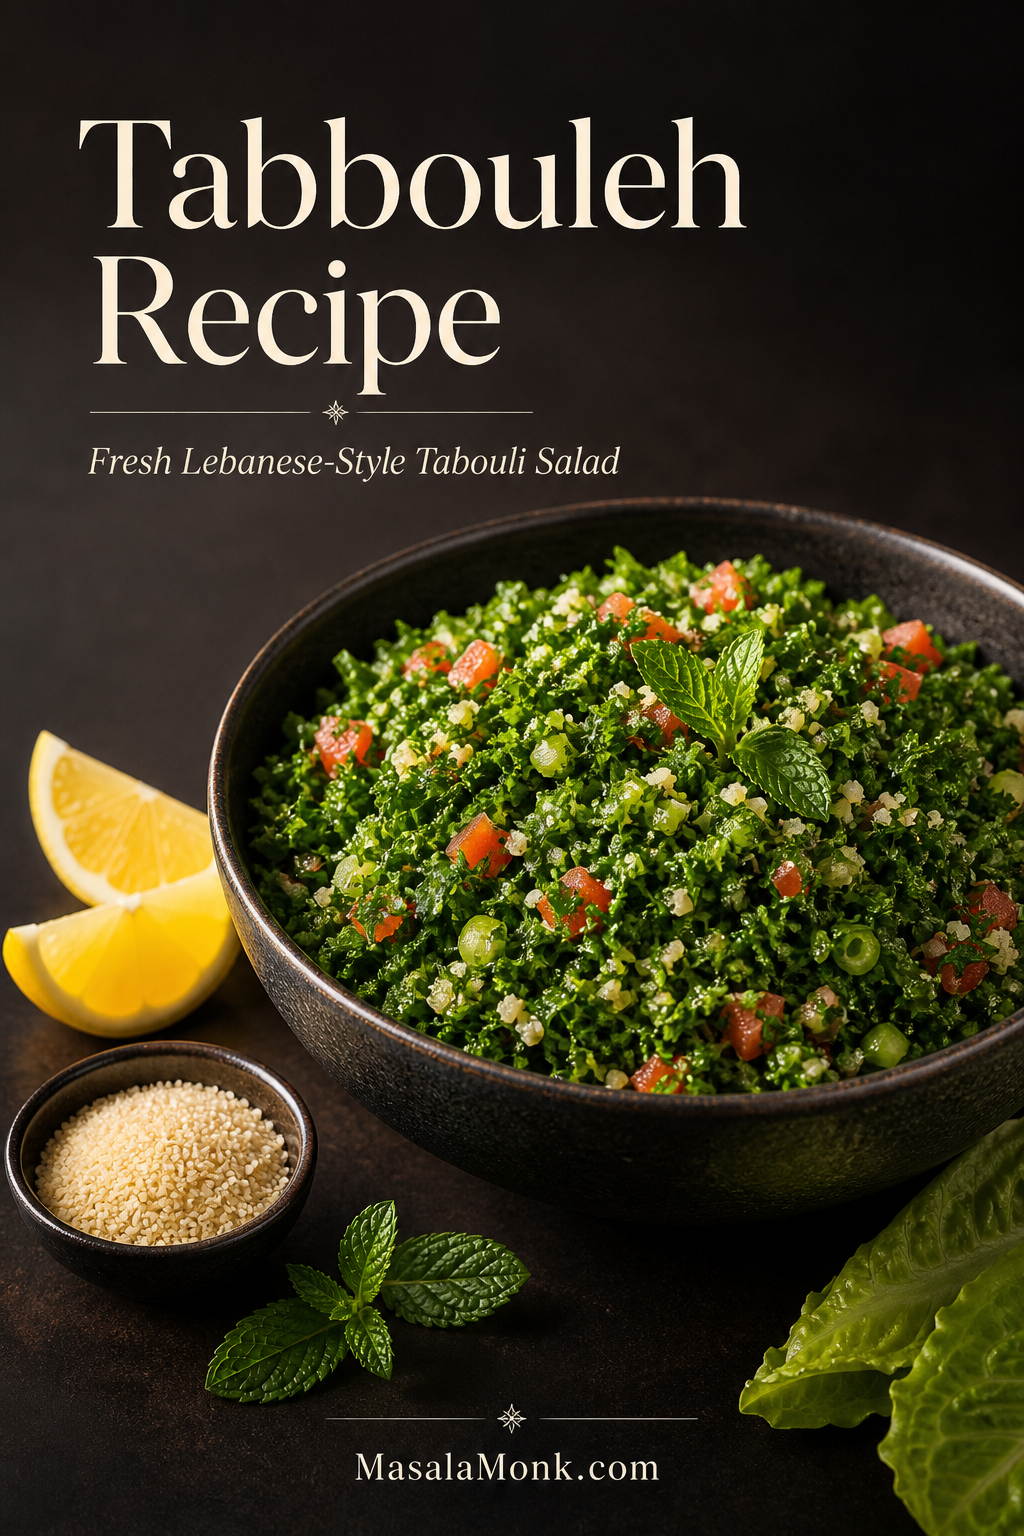
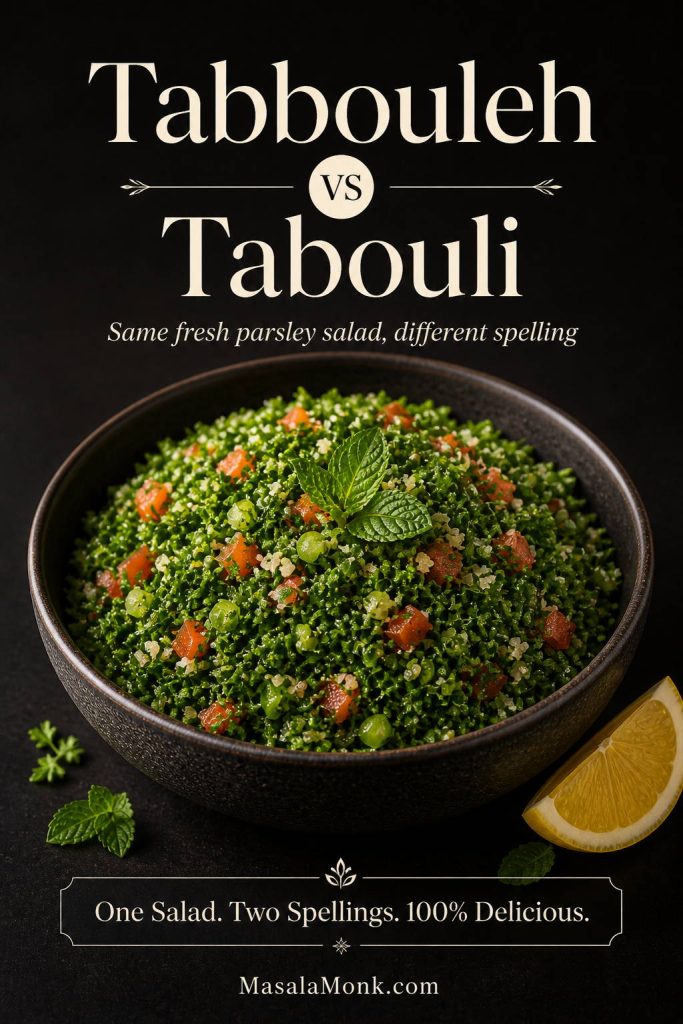
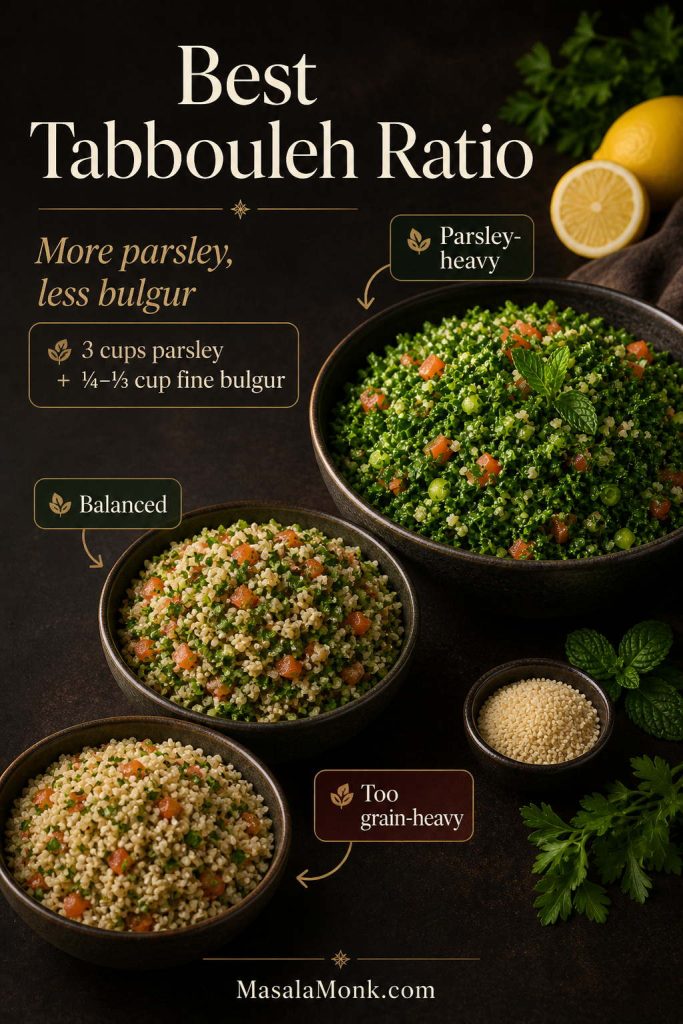
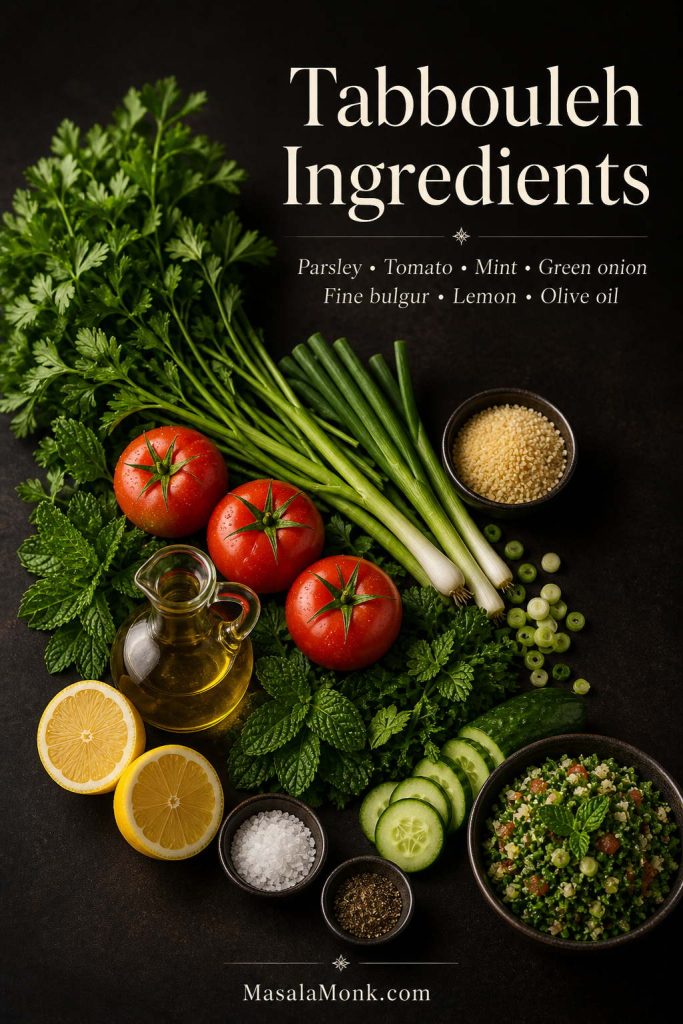
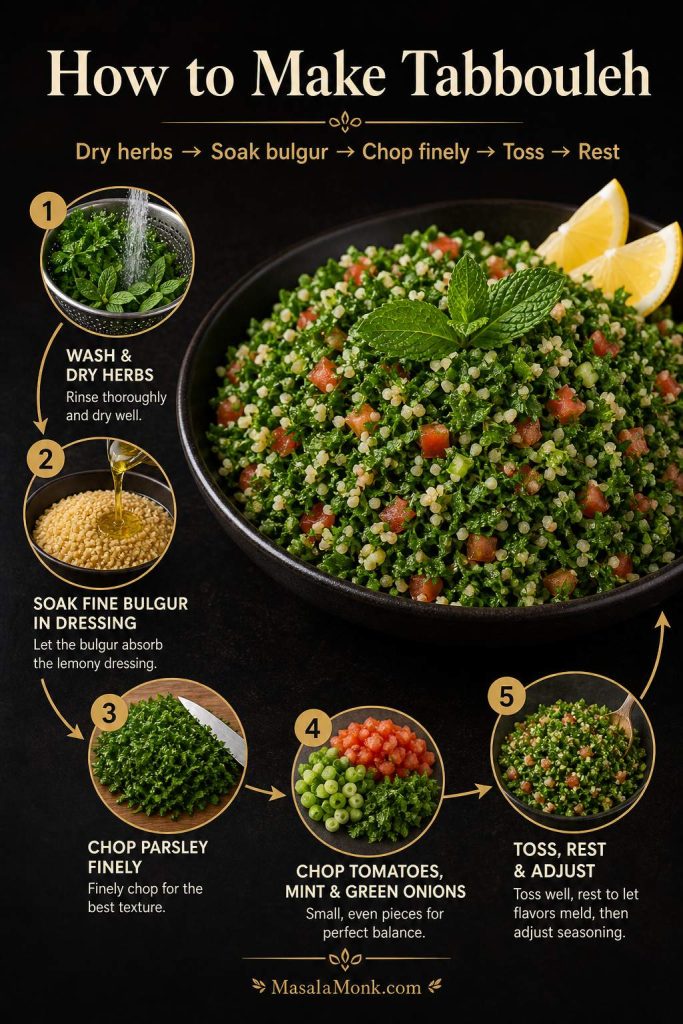
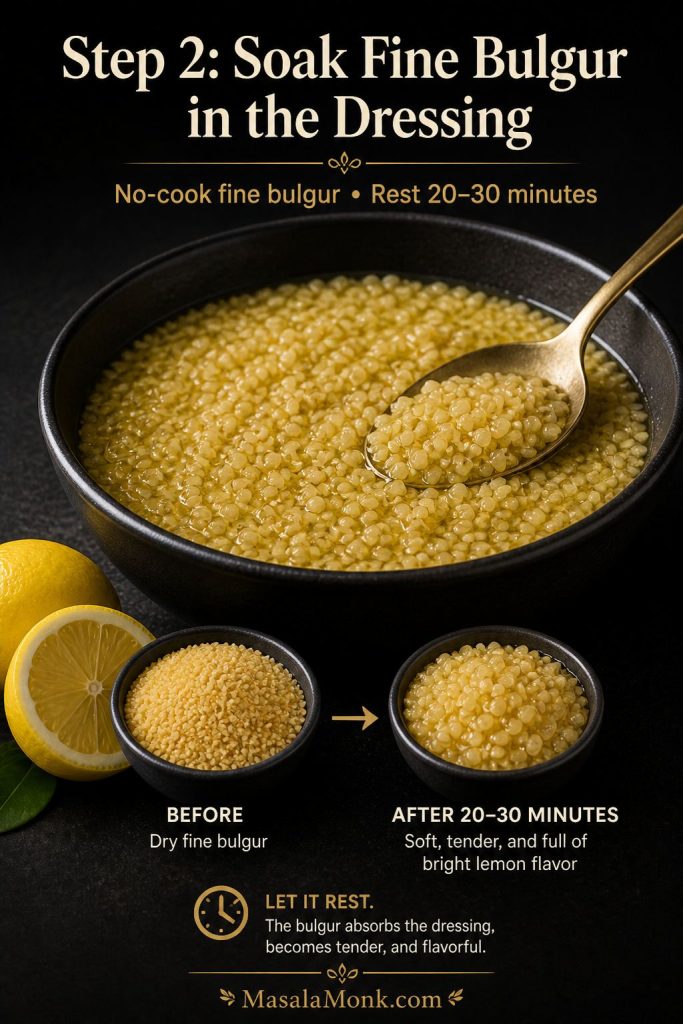
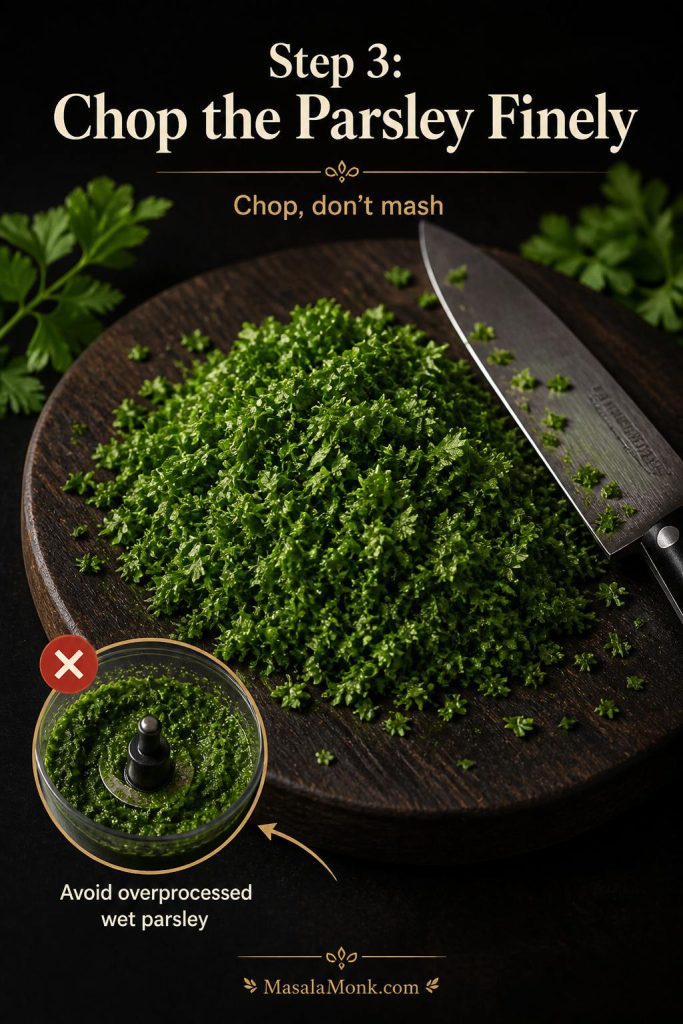
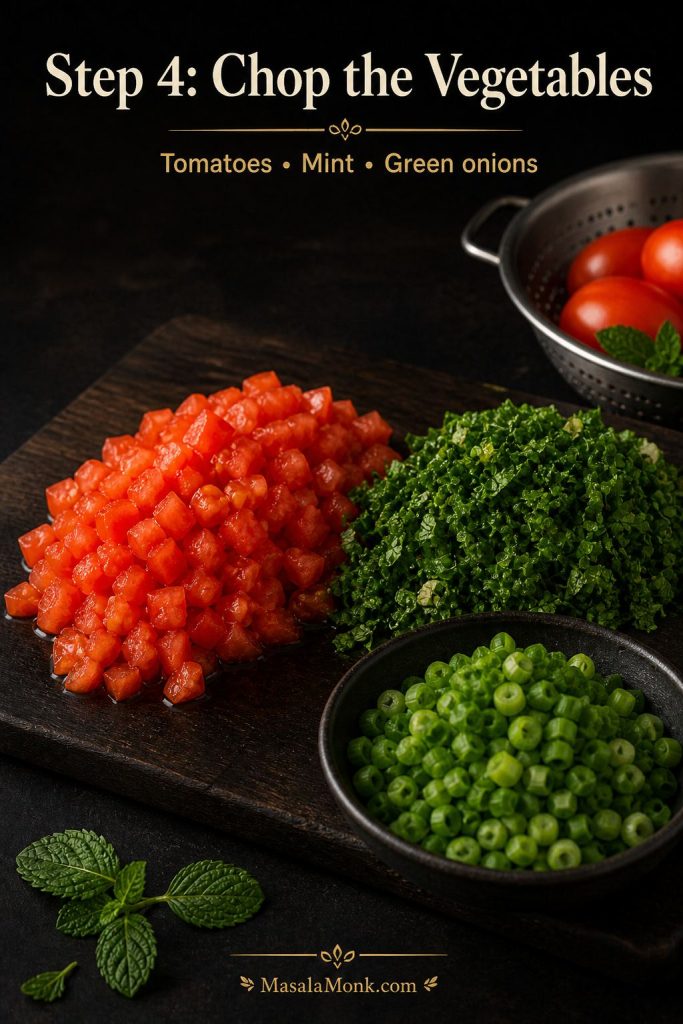
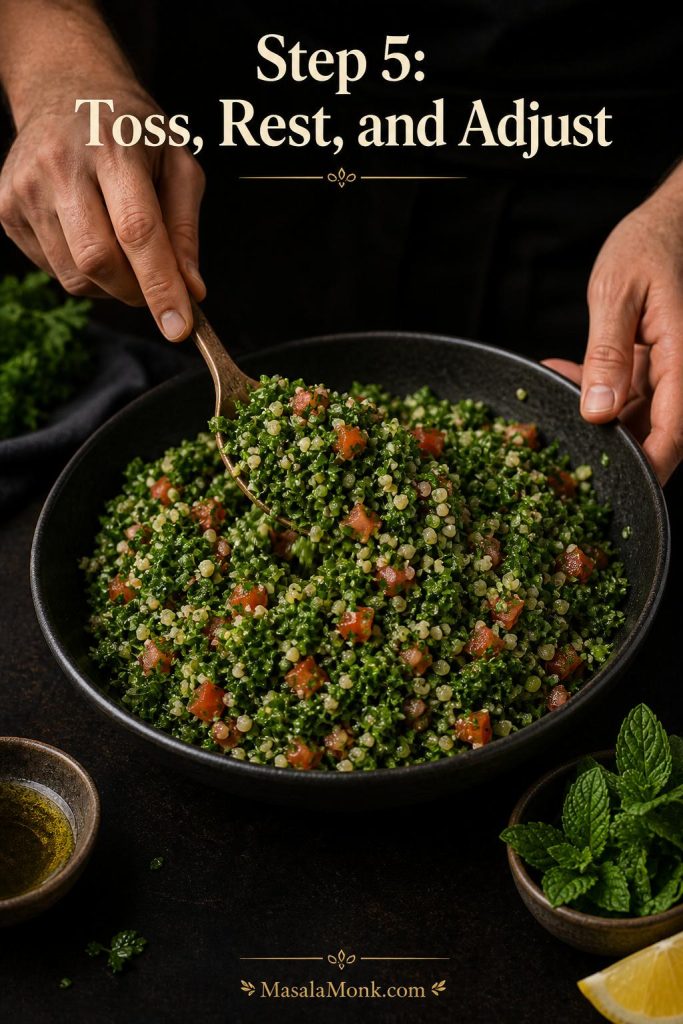
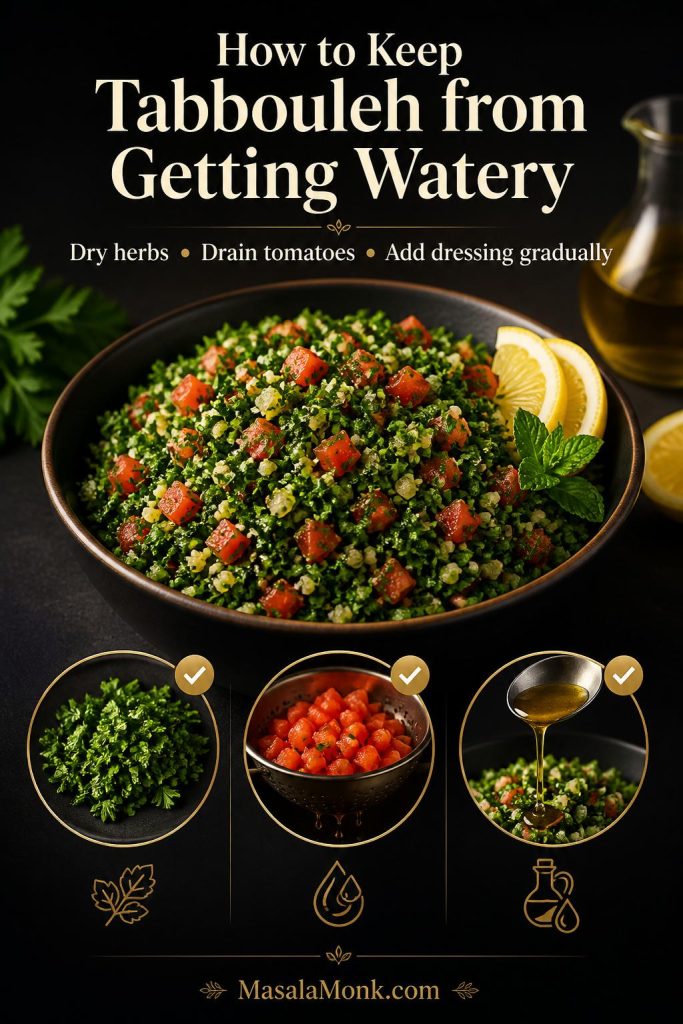
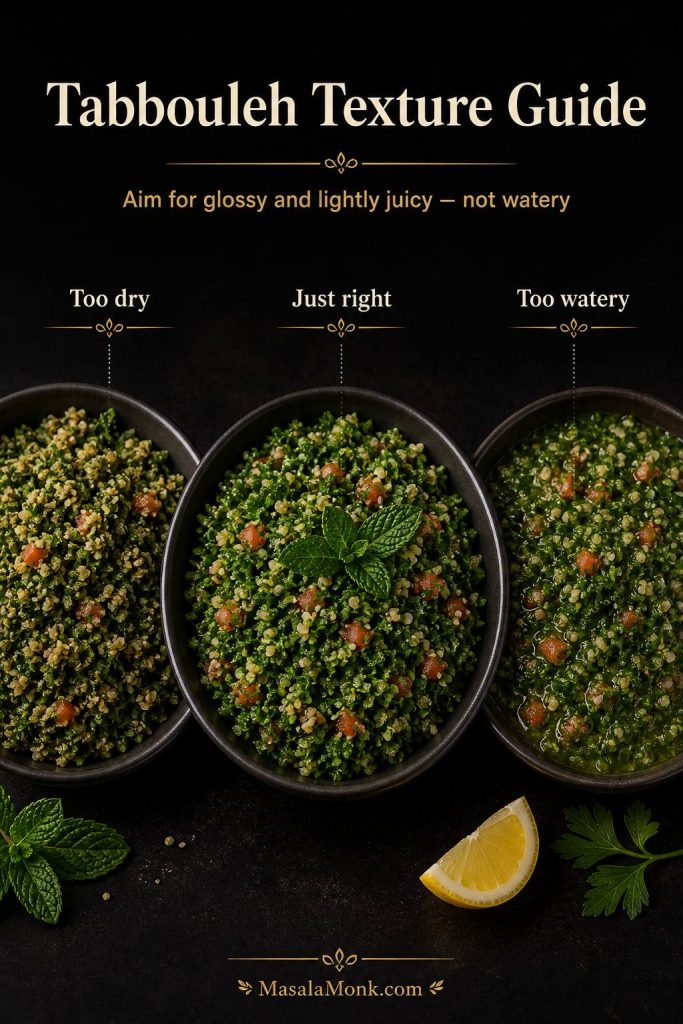
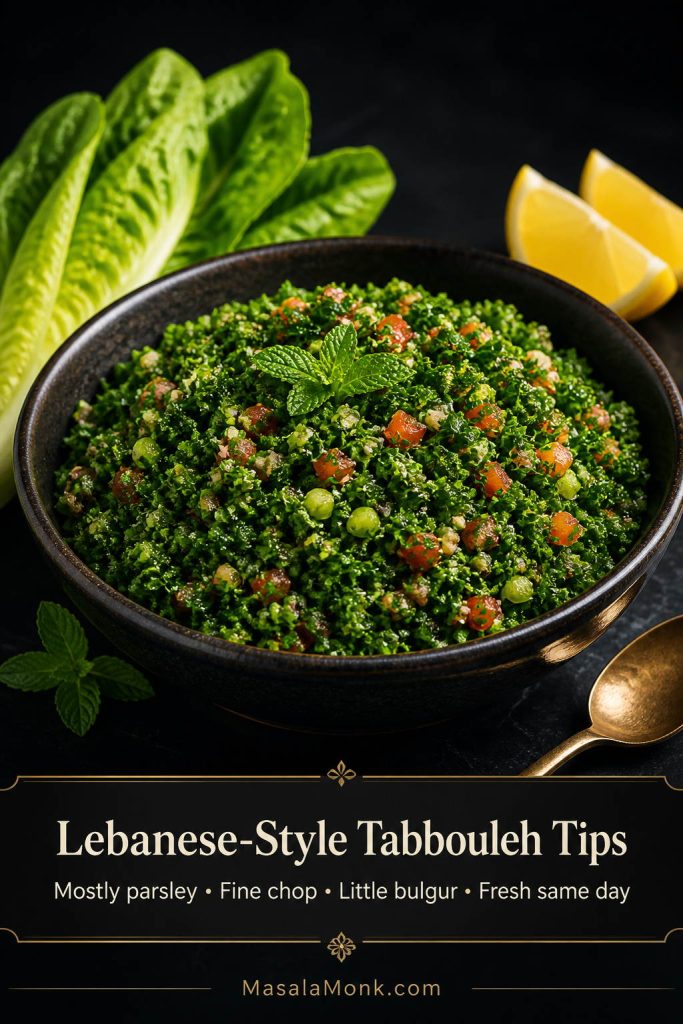
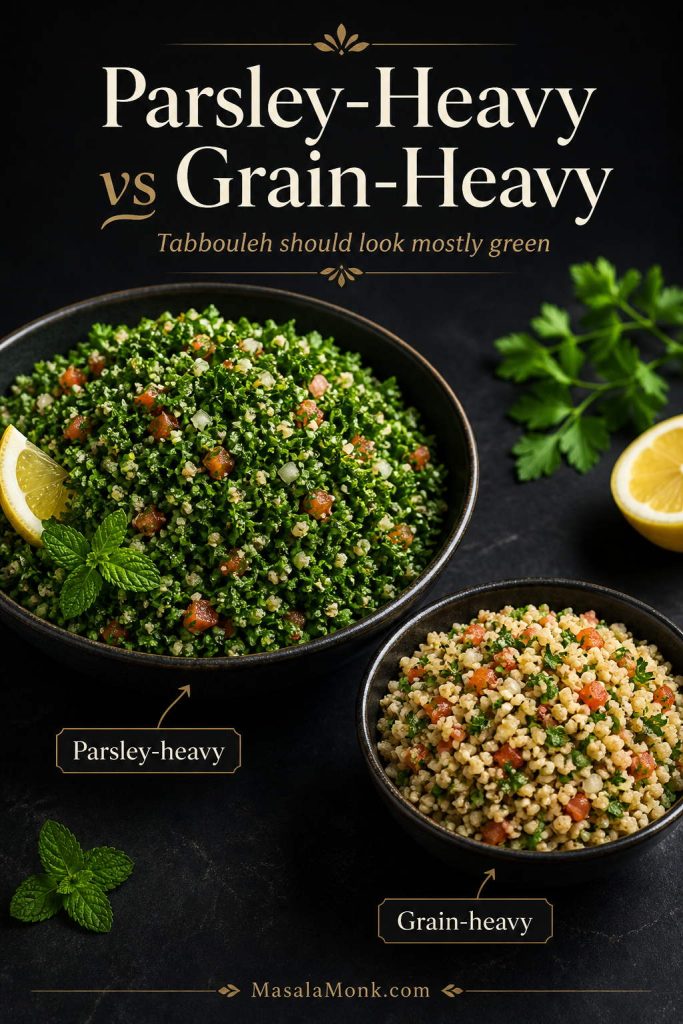
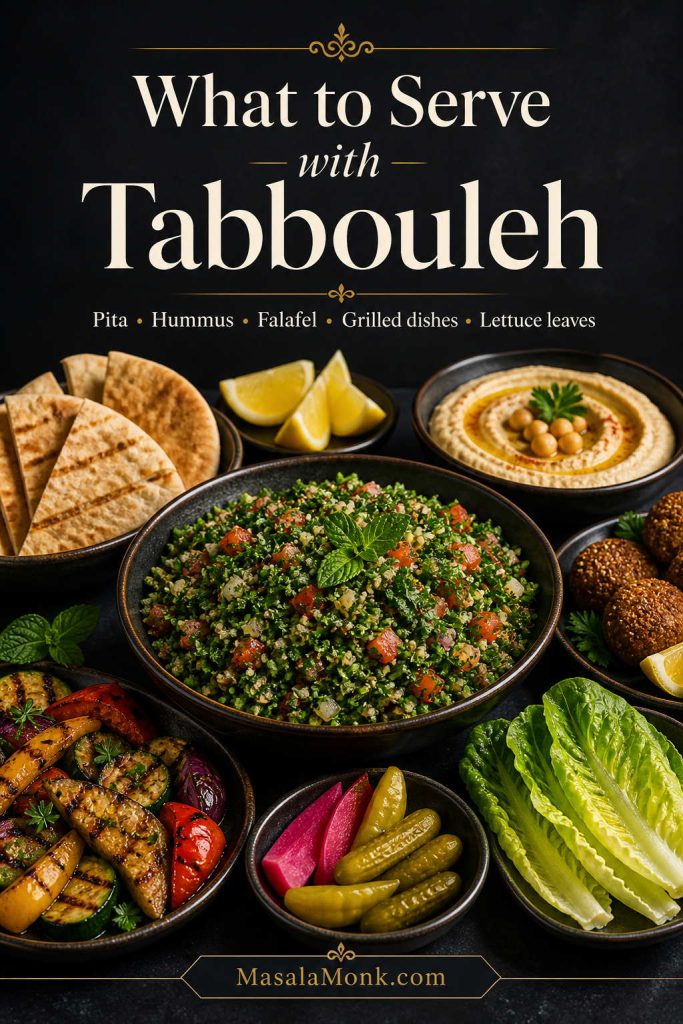
Tabbouleh is a brighter herb-heavy side because parsley, mint, lemon, tomato, and bulgur bring freshness to the plate.
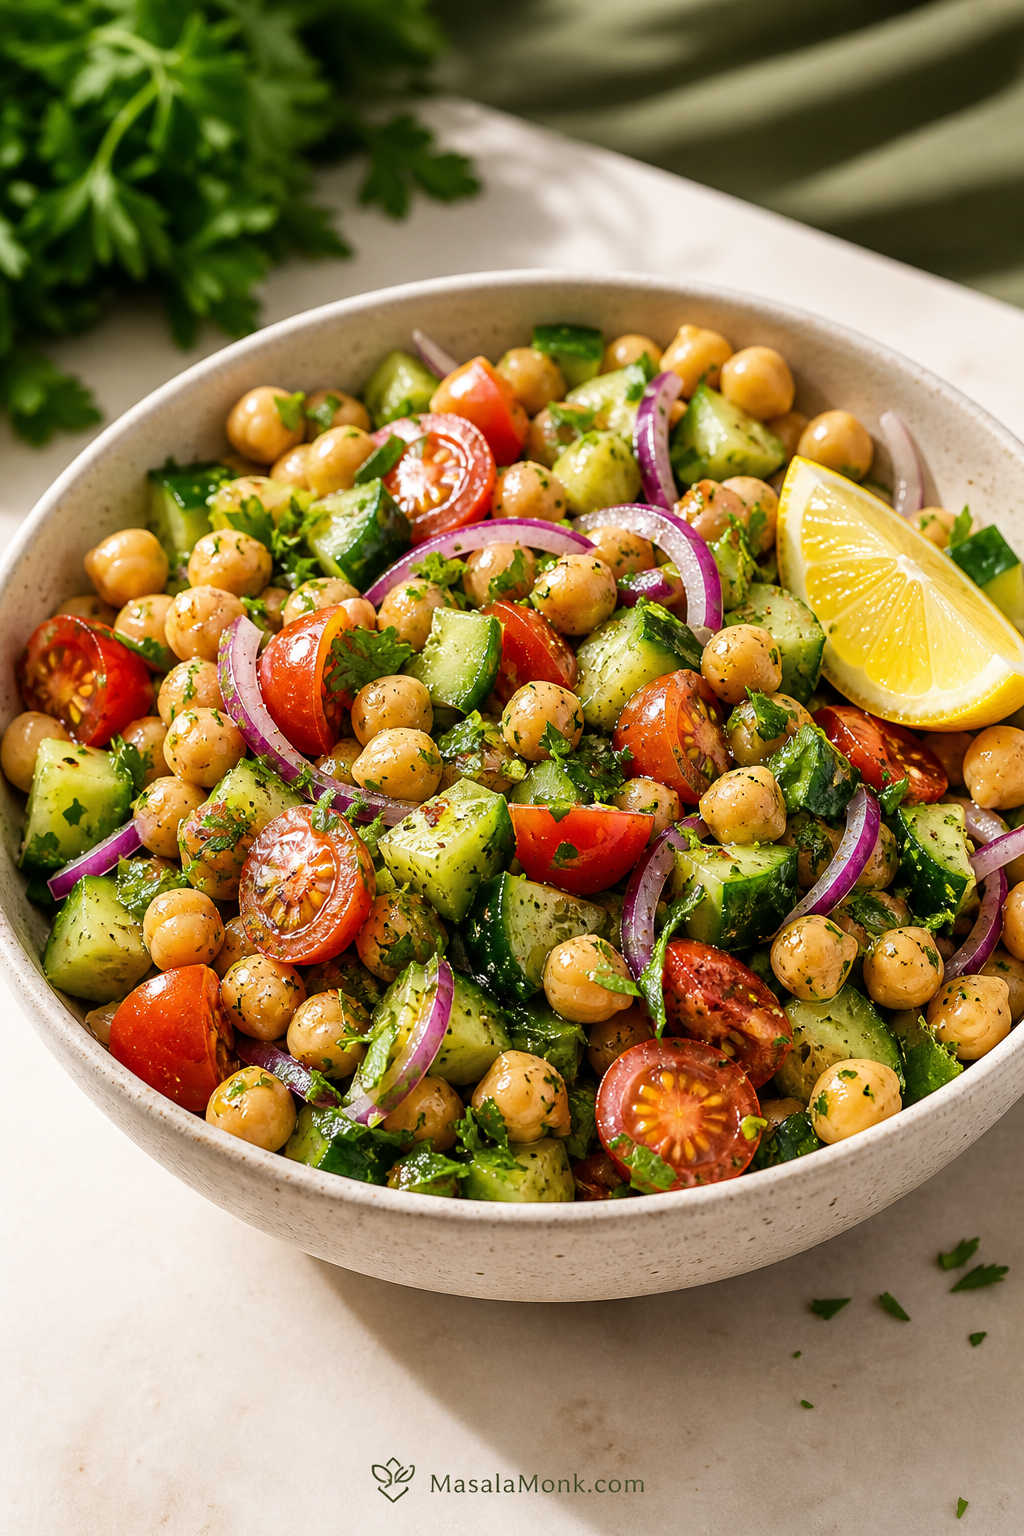
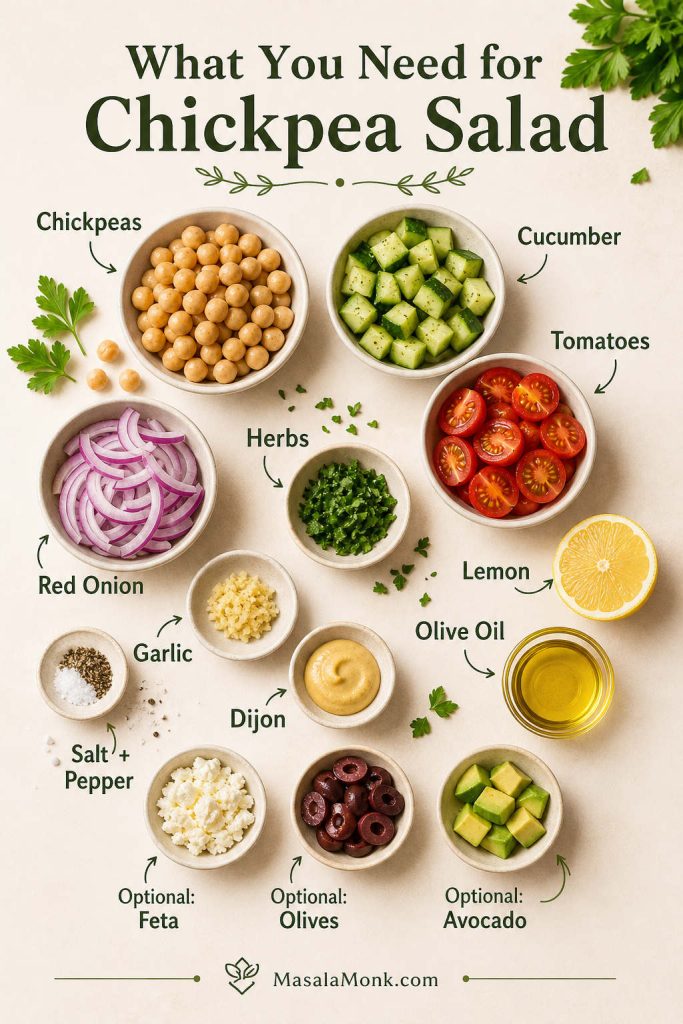
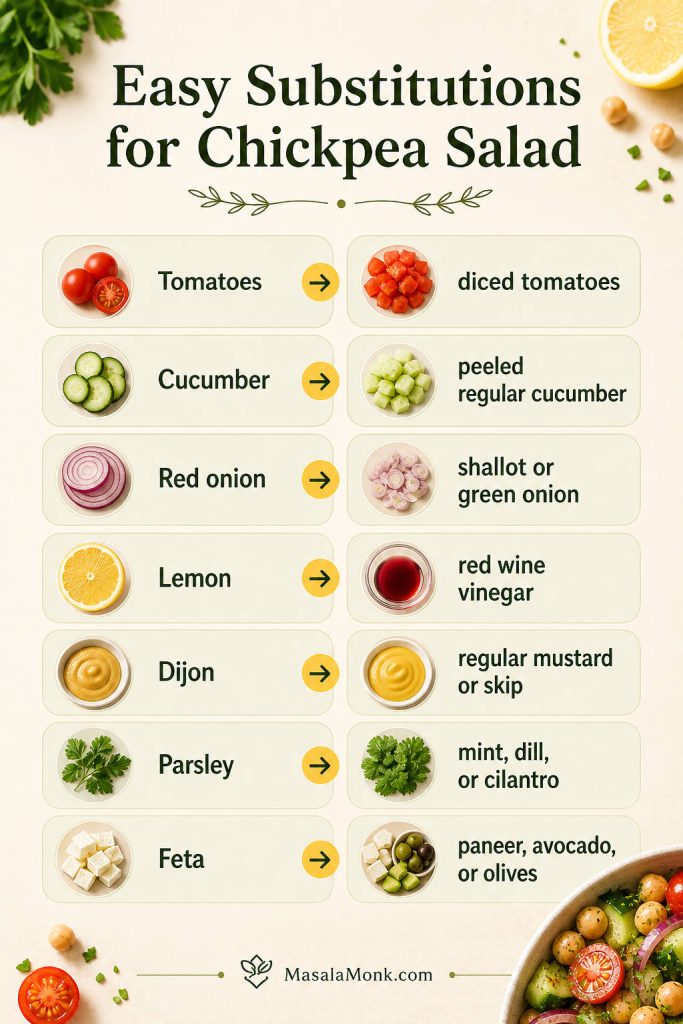
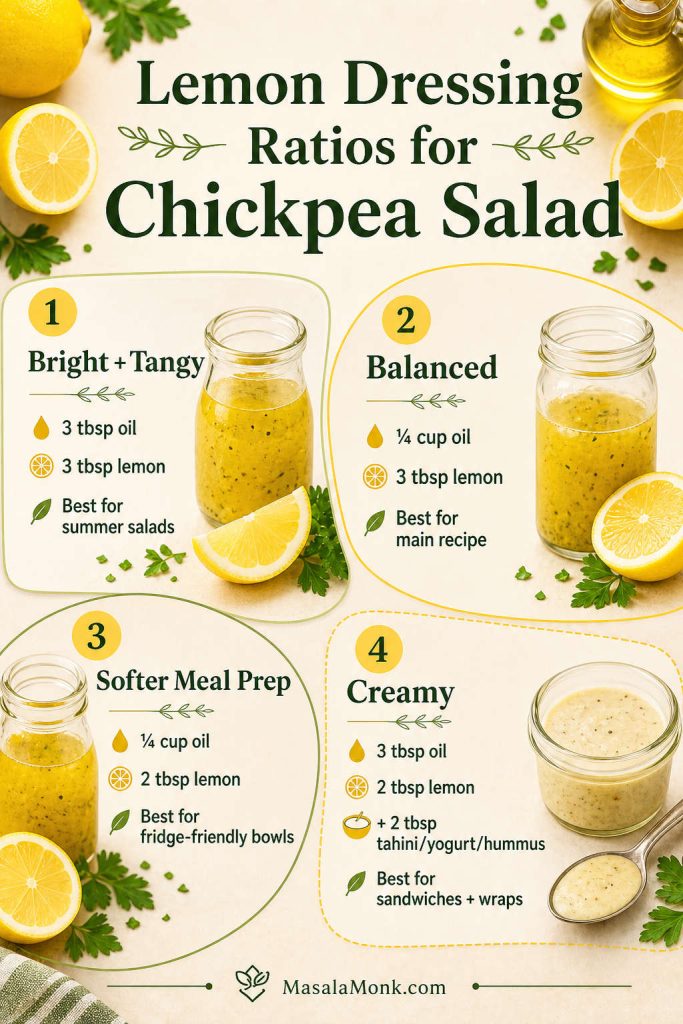
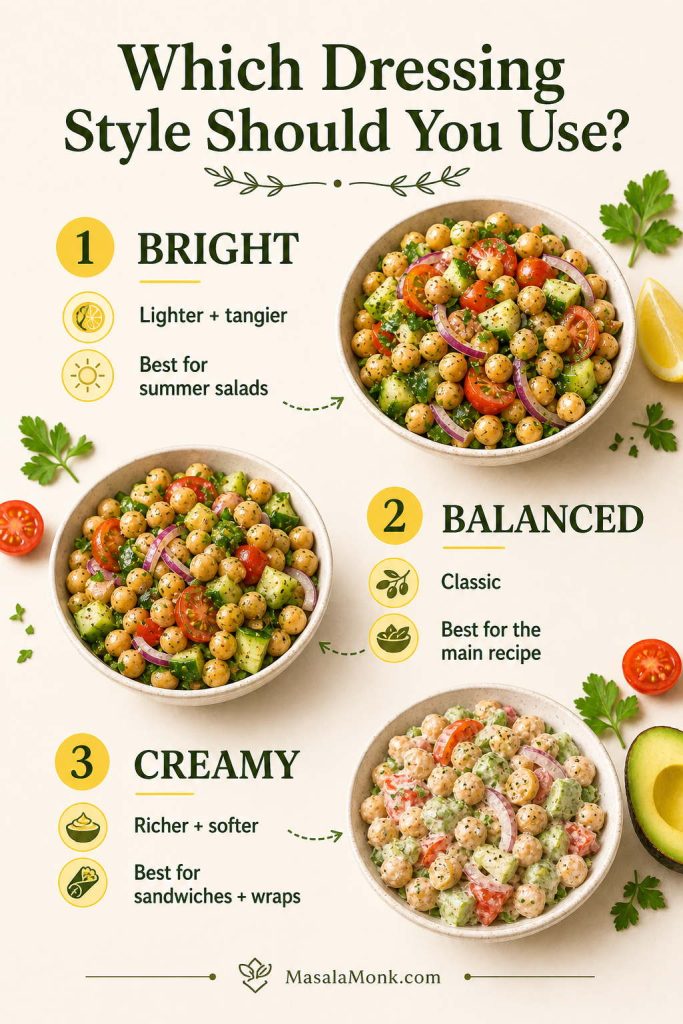
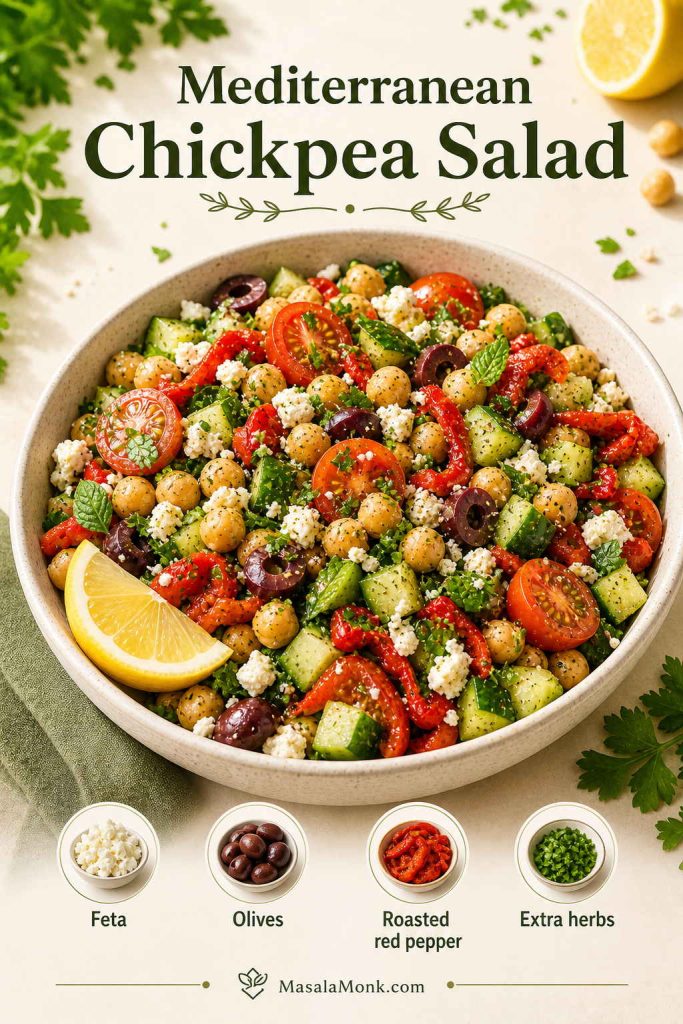
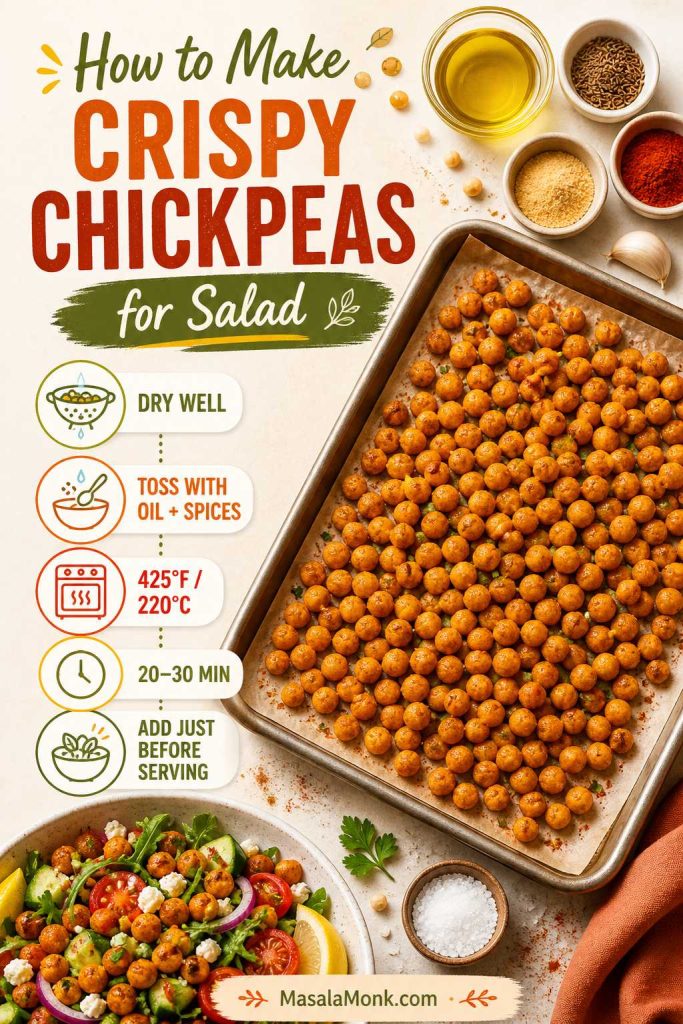
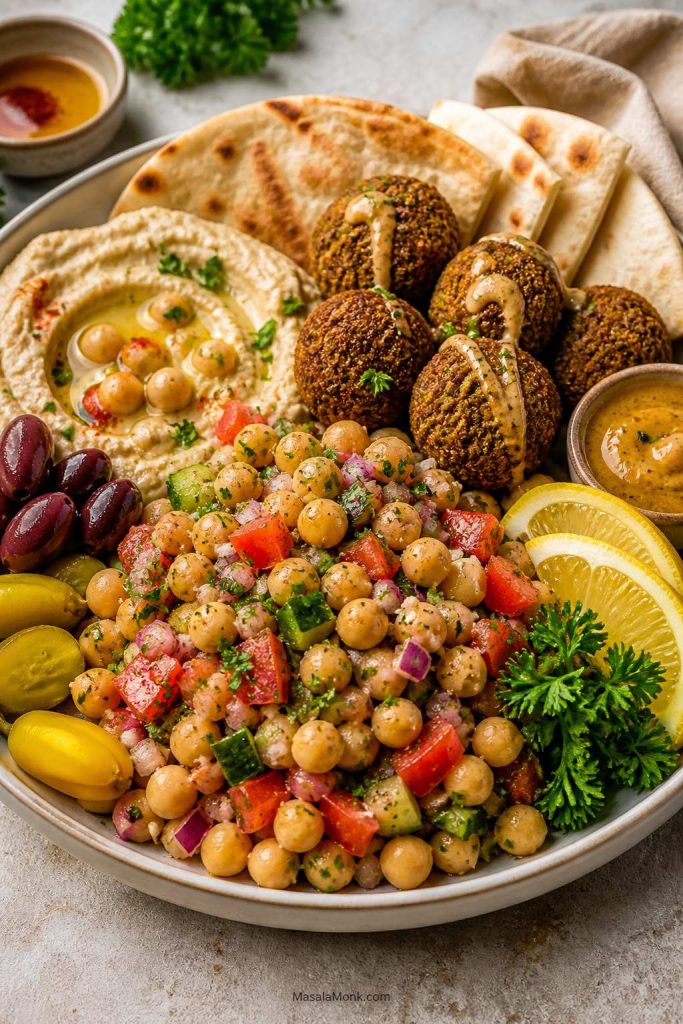
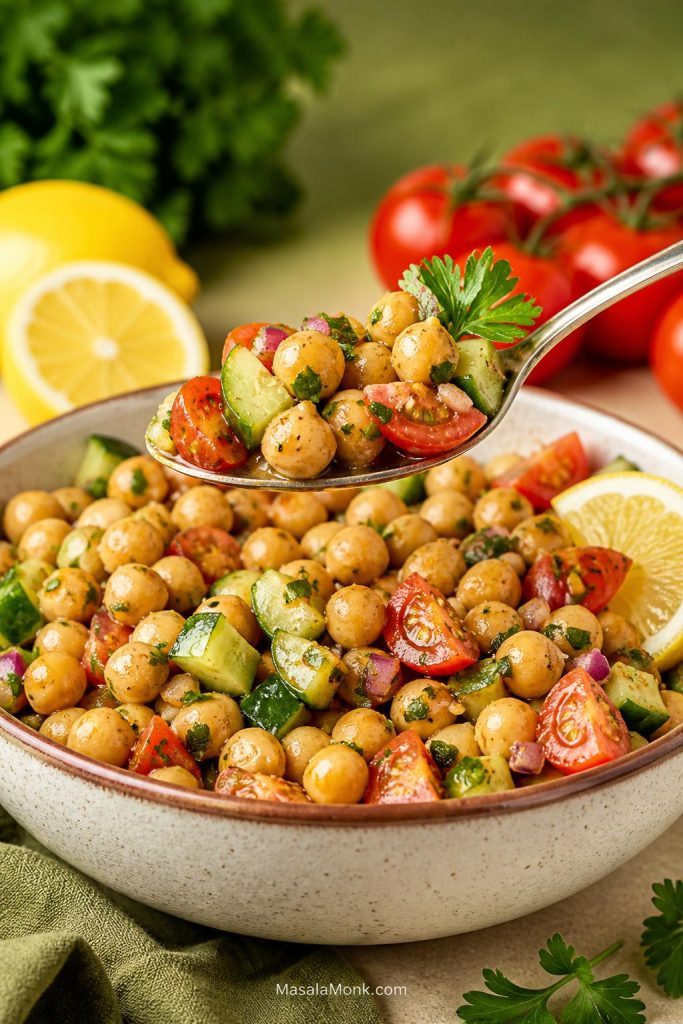
For a more filling lunch, add chickpea salad on the side or tuck the croquettes into bowls with greens, cucumber, herbs, and sauce.
A classic comfort-food plate works well with potato salad, fries, roasted potatoes, green beans, coleslaw, or a simple green salad.
During warmer months, serve the croquettes with mango salsa, lime, and shredded cabbage for a fresher, taco-inspired plate.
Visual Side Dish Guide

Healthy, Gluten-Free, Low-Carb, and Egg-Free Variations
For a lighter or dietary-specific version, keep the same basic method and adjust the binder, cooking method, or sauce.
| Variation | How to adjust it |
|---|---|
| Lighter salmon croquettes | Bake or air fry instead of pan-frying, and serve with a yogurt-based sauce like tzatziki. |
| Gluten-free salmon croquettes | Use certified gluten-free cornmeal plus gluten-free flour, gluten-free crackers, gluten-free breadcrumbs, or almond flour. Expect almond flour to make a softer croquette. |
| Low-carb salmon croquettes | Use almond flour in place of flour and skip crackers or breadcrumbs. Expect a softer texture than the cornmeal version. |
| Egg-free salmon croquettes | Use 2–3 tablespoons mashed potato or a flax egg as the binder, then chill the patties well before cooking. |
| Dairy-free salmon croquettes | The base recipe is already dairy-free if your mayo is dairy-free. |
Healthy Salmon Croquettes Variations

In these gluten-free, low-carb, or egg-free versions, treat the croquette mixture more gently and chill it before cooking. These swaps usually need a short rest because they are softer than the classic canned salmon and cornmeal version.
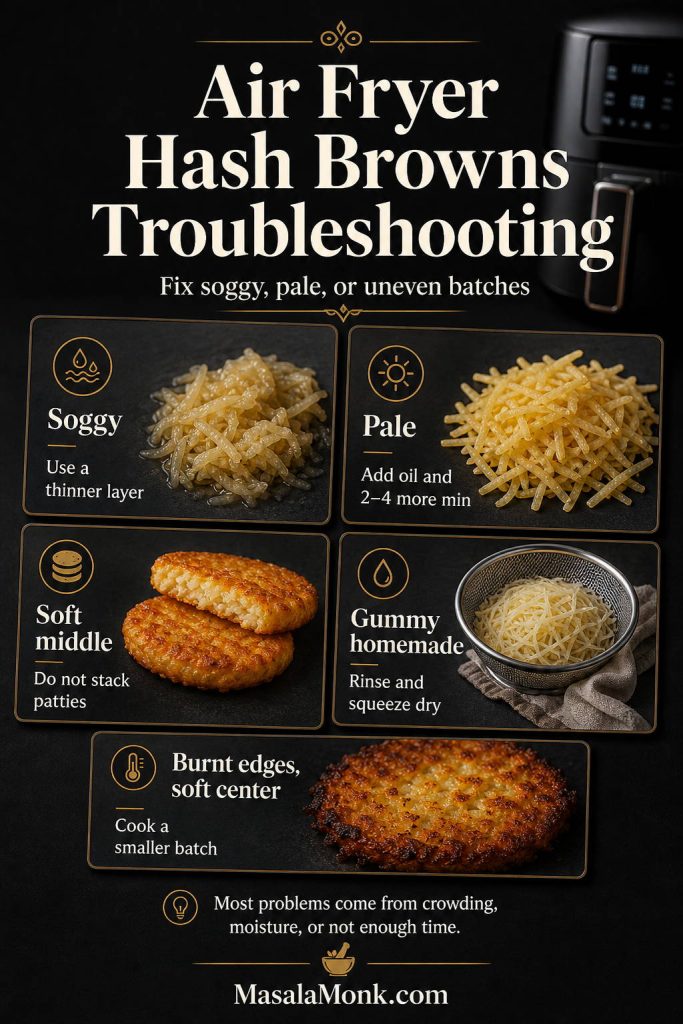
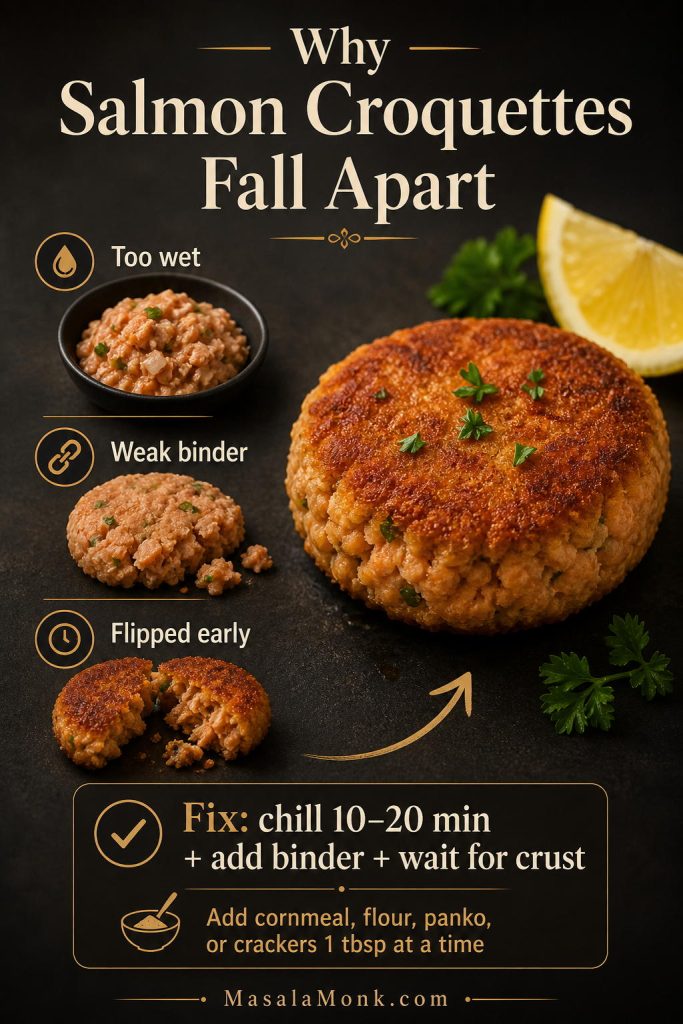
Why Do Salmon Croquettes Fall Apart?
Croquettes usually fall apart when the salmon mixture is too wet, the binder is too weak, the patties were not chilled, or they were flipped before the crust had time to set. Fortunately, the fix is simple: drain the salmon better, add dry binder one tablespoon at a time, chill the shaped patties, and flip only after the bottom is golden.
Salmon Croquettes Mixture Texture Guide
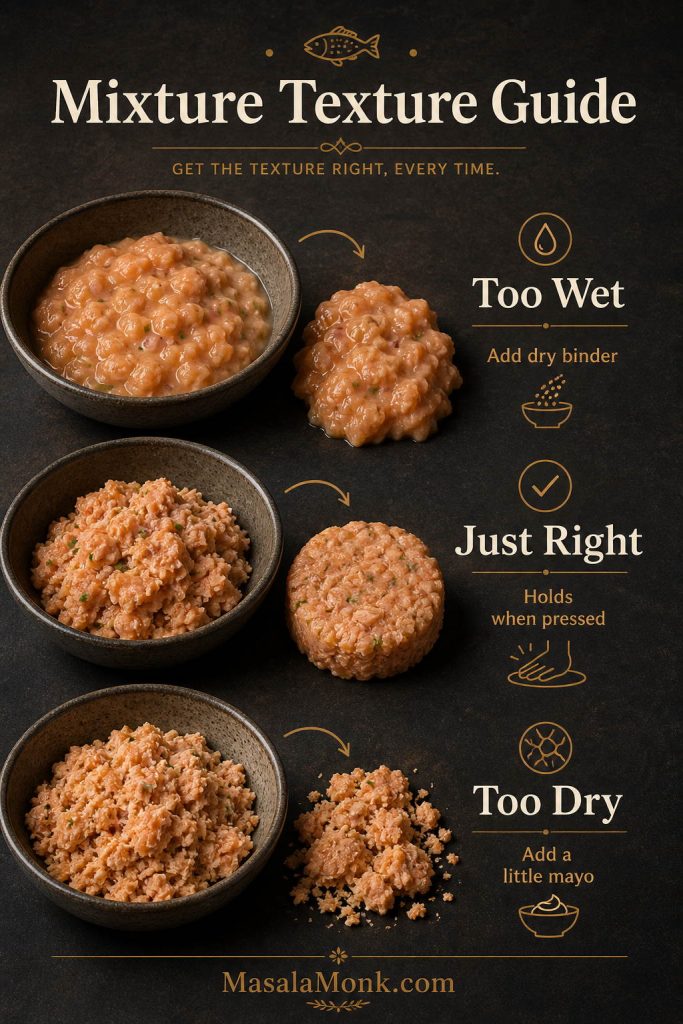
| Problem | Why it happens | Fix |
|---|---|---|
| Croquettes fall apart | Too wet, weak binder, or flipped too early. | Add 1–2 tablespoons dry binder, chill 10–20 minutes, and flip only after a crust forms. |
| Mixture is too wet | Salmon was not drained well or there is too much mayo. | Add cornmeal, flour, panko, or crushed crackers 1 tablespoon at a time. |
| Croquettes are dry | Too much flour or cornmeal, or they cooked too long. | Add a little mayo to the mixture next time and serve with sauce. |
| Croquettes are mushy | Too much wet binder or salmon mashed too finely. | Drain salmon well, leave some flakes, and reduce mayo slightly. |
| They stick to the pan | Oil was not hot enough or they were moved too soon. | Heat oil until shimmering and let the bottom set before flipping. |
| They taste greasy | Oil was too cool or the pan was crowded. | Fry hotter, cook in batches, and drain on a wire rack. |
| They taste bland | Not enough salt, acid, or savory seasoning. | Add lemon, Worcestershire, herbs, black pepper, cayenne, hot sauce, or a small amount of Old Bay-style seasoning. |
Why Salmon Croquettes Fall Apart
Ready to try again? Return to the recipe card.
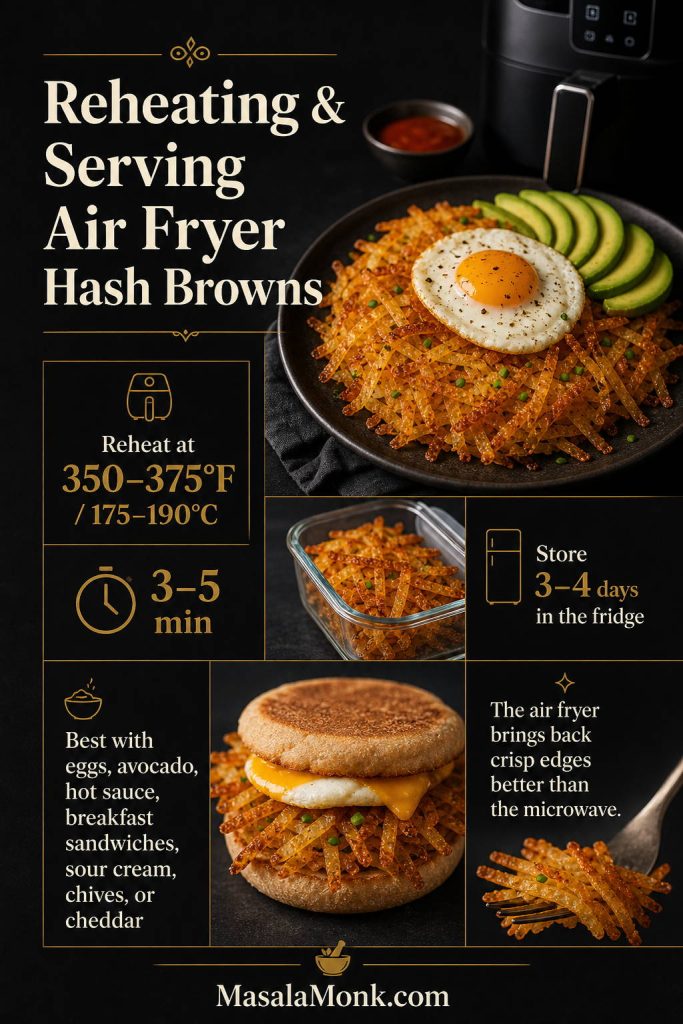
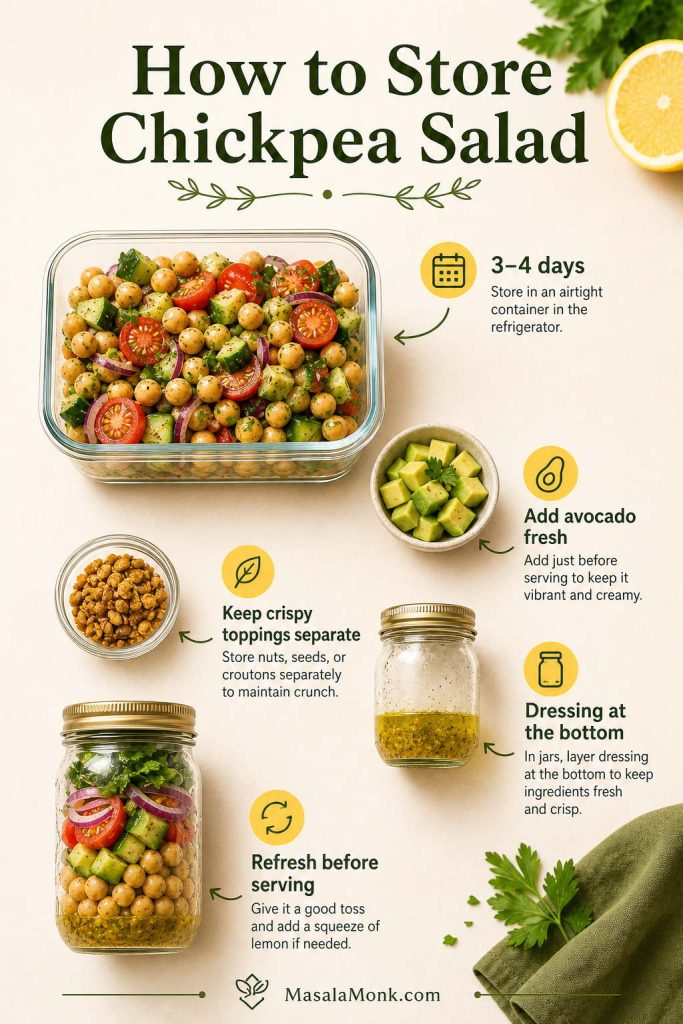
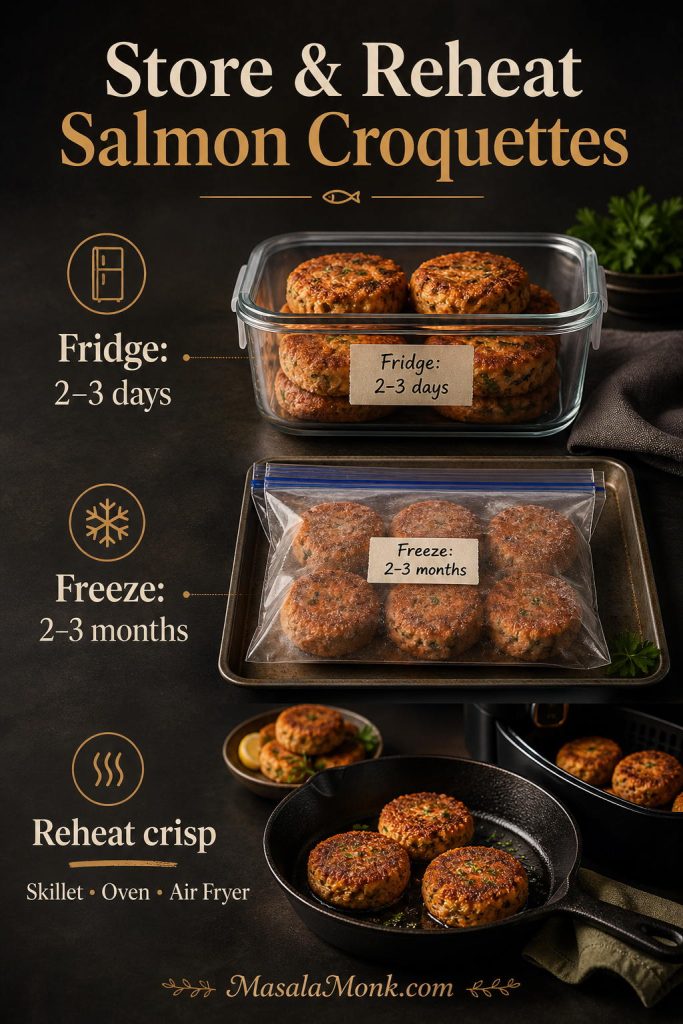
Storage, Freezing, and Reheating
Salmon croquettes are best right after frying, but leftovers reheat well if you use a skillet, oven, or air fryer. Avoid microwaving if you want to keep the crust crisp.
| Storage method | Time | Best reheating method |
|---|---|---|
| Fridge | 2–3 days | Skillet, oven, or air fryer |
| Make ahead | Up to 1 day | Shape the croquettes, cover, and refrigerate. Fry straight from the fridge, adding an extra minute if needed. |
| Freeze uncooked | Up to 2–3 months | Freeze on a tray first, then transfer to a bag. Thaw before cooking. |
| Freeze cooked | Up to 2–3 months | Cool fully, freeze in a single layer, then reheat from thawed. |
| Skillet reheat | 2–3 minutes per side | Best for restoring the crust |
| Air fryer reheat | 375°F / 190°C for 4–7 minutes | Fast and crisp |
| Oven reheat | 350°F / 175°C for 10–15 minutes | Best for larger batches |
How to Store and Reheat Salmon Croquettes
Saveable Salmon Croquettes Recipe Card
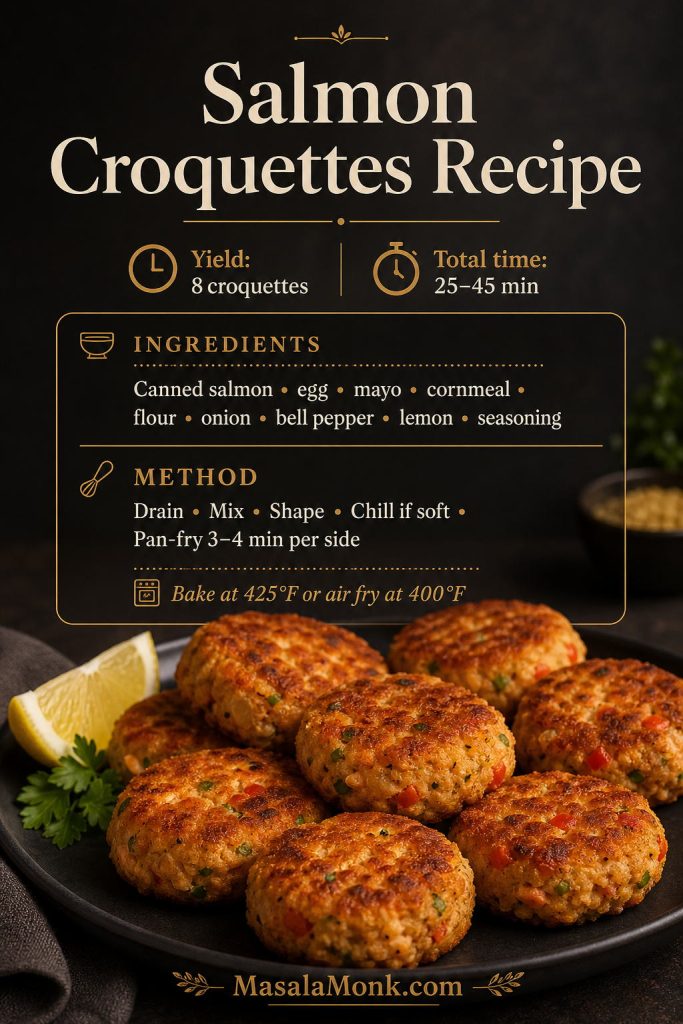
Crispy Salmon Croquettes Recipe
These salmon croquettes are crisp outside, tender inside, and made with canned salmon, egg, mayo, cornmeal, flour, onion, bell pepper, lemon, Worcestershire, and pantry seasoning. Pan-fry them for the classic version, or use the baked and air fryer notes below.
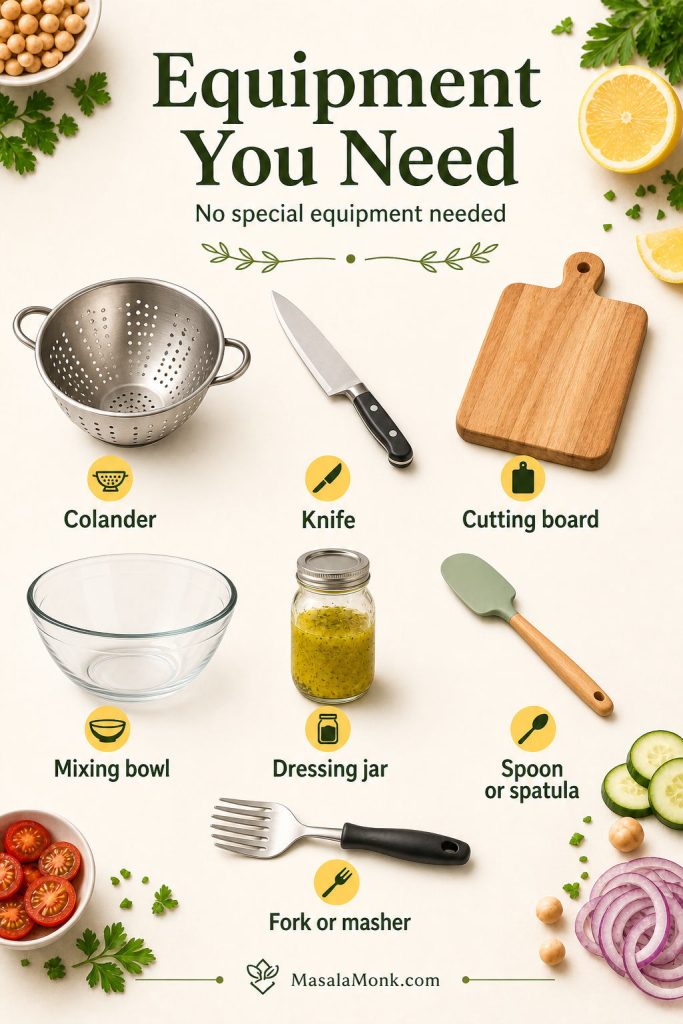
Equipment
- Large mixing bowl
- Fork for flaking salmon
- ¼-cup measuring cup or scoop
- 10-inch cast iron skillet or heavy-bottom skillet
- Thin spatula or fish spatula
- Wire rack or paper-towel-lined plate
- Optional instant-read thermometer for oil
Ingredients
- 1 can canned pink salmon, 14.75–15 oz / 418–425 g, drained well
- 1 large egg
- ¼ cup / 60 g mayonnaise
- ½ cup / about 75 g fine yellow cornmeal
- ¼ cup / about 30 g all-purpose flour
- ¼ cup / about 40 g finely diced onion
- ¼ cup / about 35 g finely diced bell pepper
- 2 tablespoons chopped green onion or parsley
- 1 tablespoon / 15 ml Worcestershire sauce
- 1 tablespoon / 15 ml fresh lemon juice
- ½ teaspoon garlic powder
- ½ teaspoon paprika or smoked paprika
- ¼ teaspoon black pepper
- ¼–½ teaspoon salt, to taste
- Pinch of cayenne or a few dashes hot sauce, optional
- Optional: ½ teaspoon Old Bay-style seafood seasoning, Cajun seasoning, or Creole seasoning; reduce salt if using a salty blend
- ¼–½ cup / 60–120 ml neutral oil, such as canola, vegetable, avocado, or peanut oil, for frying
Instructions
- Drain and flake the salmon. Drain the canned salmon well, but do not squeeze it completely dry. Flake it with a fork, leaving some texture.
- Mix the wet binder. In a large bowl, whisk the egg, mayonnaise, Worcestershire sauce, lemon juice, garlic powder, paprika, black pepper, salt, and cayenne or hot sauce.
- Add the salmon and dry binder. Fold in the salmon, onion, bell pepper, green onion or parsley, cornmeal, and flour. Mix gently until the mixture holds together when pressed.
- Adjust texture if needed. If the mixture feels too wet, add cornmeal, flour, panko, or crushed crackers 1 tablespoon at a time.
- Shape. Scoop about ¼ cup mixture per croquette and shape into patties about ½–⅔ inch thick. You should get about 8 croquettes.
- Chill if needed. If the patties feel soft, chill them for 10–20 minutes.
- Heat the oil. Add oil to a cast iron skillet or heavy-bottom skillet and heat to about 350°F / 175°C.
- Fry. Cook the croquettes for 3–4 minutes per side, flipping once, until golden, crisp, hot in the center, and set enough to lift with a spatula.
- Drain and serve. Transfer to a wire rack or paper-towel-lined plate. Serve hot with lemon wedges, tartar sauce, lemon dill sauce, remoulade, green chutney mayo, tzatziki, mango mustard, or hot sauce.
Baked Version
Heat oven to 425°F / 220°C. Place croquettes on a well-oiled sheet pan, brush or spray the tops with oil, and bake for 15 minutes. Flip and bake 5–7 minutes more.
Air Fryer Version
Air fry at 400°F / 200°C for 8–10 minutes. Flip, spray lightly with oil, and cook 3–5 minutes more, until crisp and heated through.
Fresh Salmon Version
Use 1 lb / 454 g cooked fresh salmon. Cool slightly, flake, and use in place of canned salmon. Taste before shaping because fresh salmon may need a little extra salt or seasoning.
Notes
- For a lighter crispy version, replace some or all of the cornmeal with panko.
- For old-fashioned salmon patties, use crushed saltines instead of panko or breadcrumbs.
- For gluten-free salmon croquettes, use certified gluten-free cornmeal plus gluten-free flour, gluten-free crackers, gluten-free breadcrumbs, or almond flour.
- For spicier croquettes, add cayenne, hot sauce, Cajun-style seasoning, or extra black pepper.
- You can shape the croquettes up to 1 day ahead, cover, and refrigerate. Fry them straight from the fridge, adding an extra minute if needed.
- Serve with lemon wedges and one creamy sauce, such as tartar sauce, lemon dill mayo, or remoulade.
If this salmon croquettes recipe helped you get crisp patties that actually hold together, save it for the next time you have canned salmon in the pantry. You can also come back to the binder guide, sauce ideas, and troubleshooting table whenever you want to adjust the recipe with panko, crackers, fresh salmon, or the air fryer.
Serving Salmon Croquettes

FAQs About Salmon Croquettes
Are salmon croquettes the same as salmon patties?
They are very similar, and many people use the names interchangeably. Salmon croquettes are often associated with a crisp, Southern-style version made with canned salmon, cornmeal or flour, egg, onion, and skillet frying. Salmon patties is a broader term and can refer to thinner or simpler salmon cakes.
Are salmon croquettes the same as salmon cakes?
They are in the same family, but salmon cakes often sound a little more restaurant-style and may use fresh salmon, panko, herbs, Dijon, or mayo. Croquettes usually feel more old-fashioned, pantry-friendly, and crisp-edged.
Can I use canned salmon?
Yes. Canned salmon is the easiest and most traditional choice for classic salmon croquettes. Drain it well and flake it before mixing.
Do I remove the bones and skin from canned salmon?
You can remove the larger bones and skin if you prefer a smoother texture. The small soft bones are edible and mash easily, but it is fine to take them out if you do not like them.
Is this recipe better with canned salmon or fresh salmon?
For classic croquettes, canned salmon is easier because it is already cooked, budget-friendly, and easy to bind. Fresh salmon also works, but you need to cook it first, cool it slightly, and flake it before mixing the patties.
Can I use fresh salmon?
Yes. Cook fresh salmon first, cool it slightly, then flake it and use it in place of canned salmon. Fresh salmon croquettes usually taste cleaner and more delicate than canned salmon croquettes.
What keeps salmon croquettes from falling apart?
Good drainage, enough binder, even shaping, and patient frying. Use egg plus a dry binder, chill the patties if they feel soft, and do not flip until the first side has formed a crust.
Do you use cornmeal or flour for salmon croquettes?
Use both for the best classic texture. Cornmeal gives crispness and an old-fashioned Southern feel, while flour helps bind the mixture. You can also use panko, breadcrumbs, or crushed crackers.
Can I use crackers instead of breadcrumbs?
Yes. Crushed saltines are a classic pantry binder for salmon patties and croquettes. They give a savory, tender-crisp texture.
Can salmon croquettes be baked?
Yes. Bake them at 425°F / 220°C on a well-oiled sheet pan for 15 minutes, flip, then bake 5–7 minutes more. Brush or spray the tops with oil for better browning.
Can salmon croquettes be cooked in the air fryer?
Yes. Air fry at 400°F / 200°C for 8–10 minutes, flip, then cook 3–5 minutes more. Spray lightly with oil for a crisp surface.
How long do you cook salmon croquettes?
Pan-fried salmon croquettes usually take 3–4 minutes per side. Baked salmon croquettes take about 20–22 minutes total at 425°F / 220°C. Air fryer salmon croquettes usually take 11–15 minutes total at 400°F / 200°C, depending on thickness.
What sauce goes with salmon croquettes?
Tartar sauce, lemon dill mayo, remoulade, green chutney mayo, tzatziki, mango mustard, mango habanero sauce, hot sauce, or a simple garlic mayo all work well.
What sides go with salmon croquettes?
Cucumber salad, tabbouleh, chickpea salad, potato salad, coleslaw, roasted potatoes, rice, green beans, and mango salsa all pair well with salmon croquettes.
Can you freeze salmon croquettes?
Yes. Freeze shaped uncooked croquettes on a tray, then transfer to a freezer bag. You can also freeze cooked croquettes after they cool fully. For best texture, thaw before reheating or frying.
How do you reheat salmon croquettes?
Reheat them in a skillet for 2–3 minutes per side, in an air fryer at 375°F / 190°C for 4–7 minutes, or in the oven at 350°F / 175°C for 10–15 minutes. The microwave works, but it softens the crust.
Are salmon croquettes healthy?
They can be part of a balanced meal, especially if you serve them with salad, vegetables, or a yogurt-based sauce. Pan-fried croquettes use more oil, while baked or air fryer salmon croquettes are lighter.