Posted on 1 Comment

Chickpea Salad Recipe

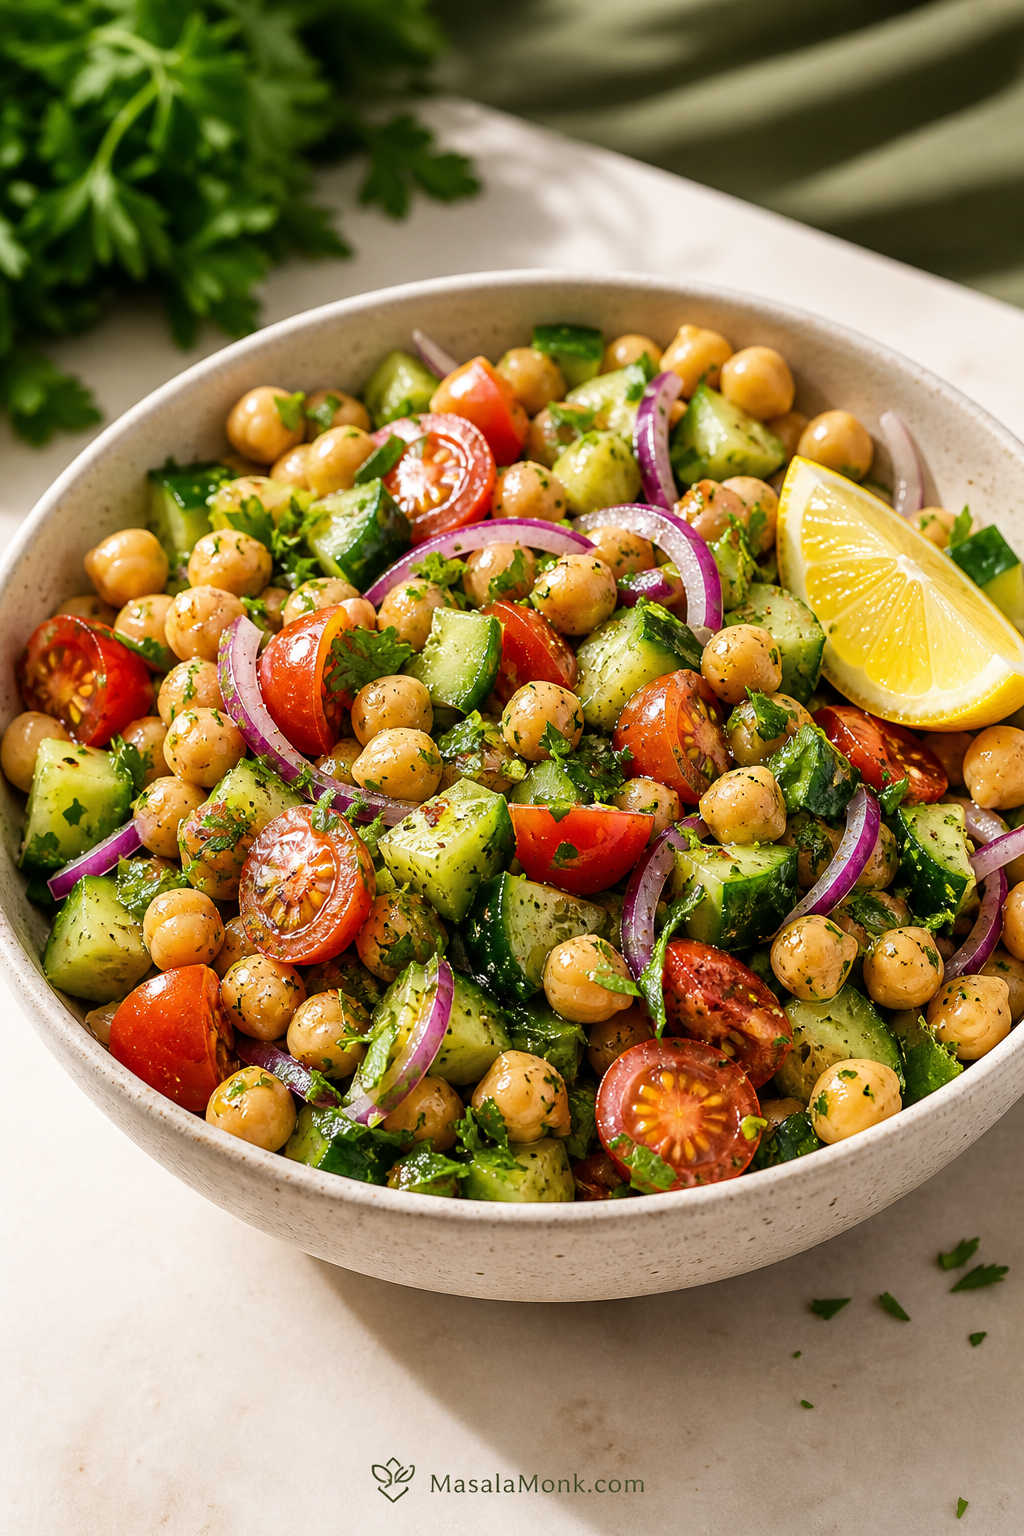
Bowl of chickpea salad with cucumber, cherry tomatoes, red onion, parsley, and lemon dressing on a light surface.

This chickpea salad recipe turns canned chickpeas into a fresh no-cook salad with cucumber, tomatoes, red onion, herbs, and lemon dressing in about 15 minutes. It is bright enough for a side dish, filling enough for lunch, and sturdy enough for meal prep.

Keep the chickpeas whole for a crisp salad bowl, lightly mash them for wraps or pita pockets, or smash them more deeply for a creamy chickpea salad sandwich. The same recipe can lean Mediterranean with feta and olives, vegan with avocado or tahini, or Indian-style with cilantro, cumin, chili, and lemon.

Chickpeas and garbanzo beans are the same ingredient, so this also works as a garbanzo bean salad recipe. The key is simple: drain the chickpeas well, season them boldly, and use enough lemon, salt, herbs, and crunch so the salad tastes fresh instead of flat.

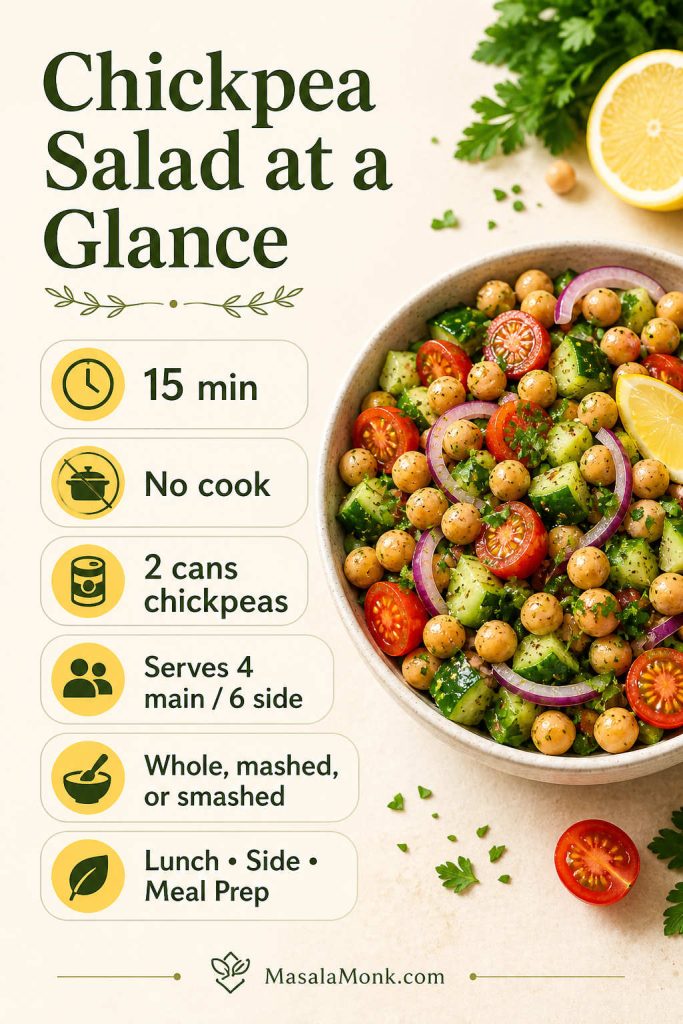
At a glance: This recipe takes about 15 minutes, uses 2 cans of chickpeas, serves 4 as a main or 6 as a side, and needs no cooking. Keep it whole for a salad bowl, lightly mash it for wraps, or smash it for sandwiches.
Why this version is easy to use: The base salad stays simple, but you also get dressing ratios, substitution options, storage cues, and texture choices. As a result, the same chickpeas can become a bowl, wrap, pita filling, sandwich, or meal-prep lunch without starting over.

Quick Answer: 15-Minute Chickpea Salad

Canned chickpeas make this a fresh salad with cucumber, tomatoes, herbs, and lemon dressing in about 15 minutes. Make the dressing first, drain and rinse the chickpeas, chop the vegetables, toss everything together, and let the bowl sit for 10 minutes if you have time.

The salad can be served cold or at room temperature. For a side salad or lunch bowl, leave the chickpeas whole. However, if you are making wraps or pita pockets, lightly mash some of them so the filling holds together. When you want a thicker sandwich filling, smash most of the chickpeas instead.
First time making it? Start with chickpeas, cucumber, tomatoes, red onion, parsley, lemon, olive oil, garlic, salt, and pepper. Once the base tastes good, add feta, olives, avocado, paneer, or extra spices.
Infographic showing chickpea salad facts including 15 minutes, no-cook method, two cans of chickpeas, serving size, and texture options.
Before you start, note the useful basics: this chickpea salad takes about 15 minutes, needs no cooking, and works as a bowl, wrap, sandwich filling, or meal-prep lunch.

Ingredients for Chickpea Salad

You only need a few ingredients, so each one should add something useful. The chickpeas make the salad filling, cucumber and tomatoes keep it fresh, herbs lift the flavor, and lemon dressing pulls this recipe together.
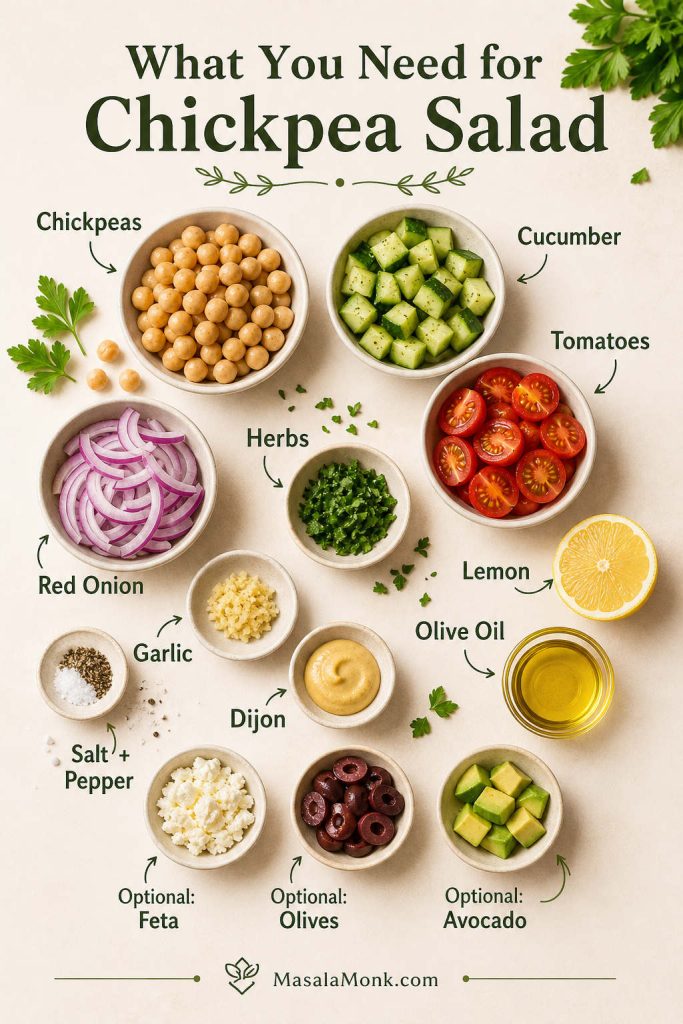
Labeled ingredient board for chickpea salad with chickpeas, cucumber, tomatoes, red onion, herbs, lemon, olive oil, garlic, Dijon mustard, and optional add-ins.
A good chickpea salad needs contrast, so chickpeas make it filling, cucumber adds crunch, tomatoes bring juiciness, herbs lift the flavor, and lemon dressing keeps everything bright.

Chickpeas or Garbanzo Beans?

Chickpeas and garbanzo beans are the same ingredient, so this recipe works no matter which name is on the can or how the salad is labeled. Use two cans of chickpeas or garbanzo beans, drain and rinse them well, and treat them the same way in the bowl.

Why Canned Chickpeas Work in This Salad Recipe

Canned chickpeas are already cooked, which makes this recipe quick enough for a weekday salad or lunch bowl. Use two 15-ounce / 425 g cans, or two 400 g cans, drained and rinsed. Once drained, that usually gives you about 480–500 g chickpeas total, or about 3 cups cooked chickpeas.

Rinsing matters because it removes excess canning liquid and gives the salad a cleaner flavor. After rinsing, let the chickpeas drain well. If they still look wet, pat them lightly with a clean towel so the dressing does not get diluted.

Using Cooked Chickpeas Instead of Canned

If you cook chickpeas from dry, use about 3 cups / 480–500 g cooked chickpeas. They should be tender enough to eat cold in the salad, but not so soft that they collapse when tossed.

Cooked-from-dry chickpeas can taste nuttier than canned ones. However, canned chickpeas are still the easiest choice when you want a fast salad.
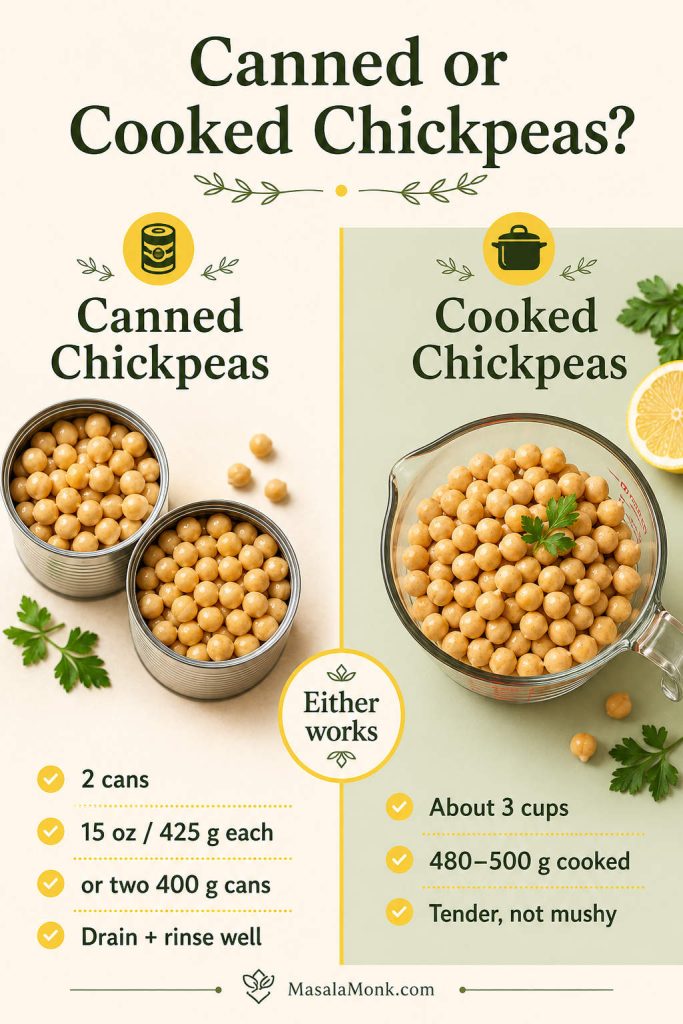
Comparison image showing canned chickpeas on one side and cooked chickpeas on the other for use in chickpea salad.
Canned chickpeas are the easiest choice when you want a fast chickpea salad recipe; however, cooked chickpeas work just as well if they are tender, well-drained, and not too soft.

Fresh Vegetables That Keep the Salad Crisp

For this recipe, chickpeas give the salad body, so the vegetables should bring crunch, juice, and freshness. Cucumber adds crispness, cherry or grape tomatoes bring sweetness, red onion gives bite, and bell pepper adds color if you want extra crunch.
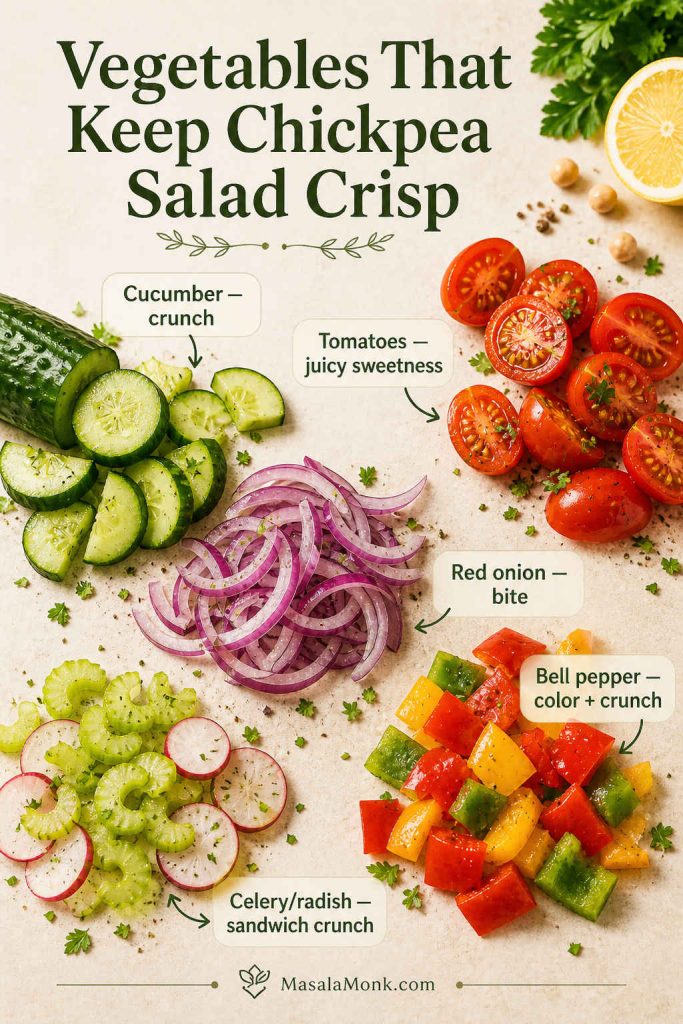
Vegetable guide for chickpea salad featuring cucumber, cherry tomatoes, red onion, bell pepper, and celery with short usage notes.
For the freshest texture, choose vegetables that add contrast: cucumber brings crunch, tomatoes add juiciness, red onion adds bite, and bell pepper adds extra color as well as crispness.

If you like fresh no-cook sides, this pairs well with MasalaMonk’s cucumber salad recipe. That one leans lighter and tangier, while this chickpea version is more filling.

Herbs That Make Chickpea Salad Taste Fresher

Parsley is the most classic choice, but mint, dill, and cilantro all work. For a Mediterranean-style salad, pair parsley with mint. For a cooler, brighter bowl, add dill. If you want the recipe to lean closer to Indian chana salad, go with cilantro, cumin, and chili.

Be generous with the herbs. Chickpeas are dense, so a small sprinkle can disappear in the bowl.
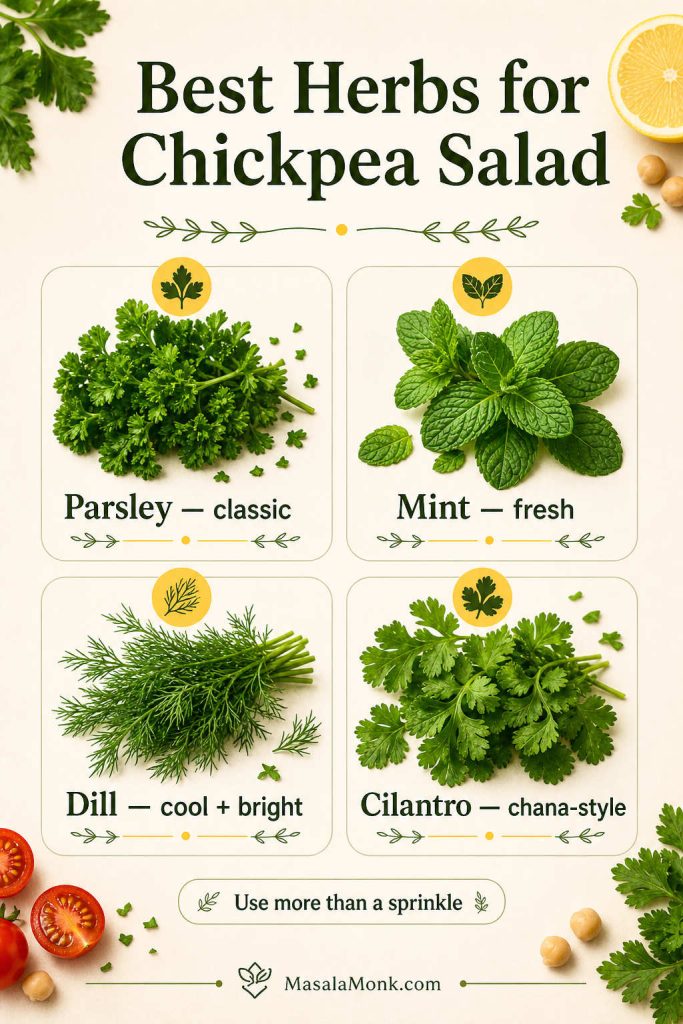
Herb comparison board for chickpea salad showing parsley, mint, dill, and cilantro with flavor notes.
Herbs can shift the whole direction of a chickpea salad, so parsley keeps it classic, mint makes it brighter, dill makes it cooler, and cilantro pushes it toward a chana-style version.

Optional Add-Ins for This Recipe

Olives, feta, roasted red pepper, avocado, and paneer all work, but they change the salad in different ways. Olives and feta make it more Mediterranean. Avocado makes it creamy. Paneer adds a firmer vegetarian protein option. Roasted red pepper brings sweetness and color.

If you are making this recipe ahead, add avocado just before serving. It tastes great with chickpeas, but it browns and softens quickly once mixed into the salad.
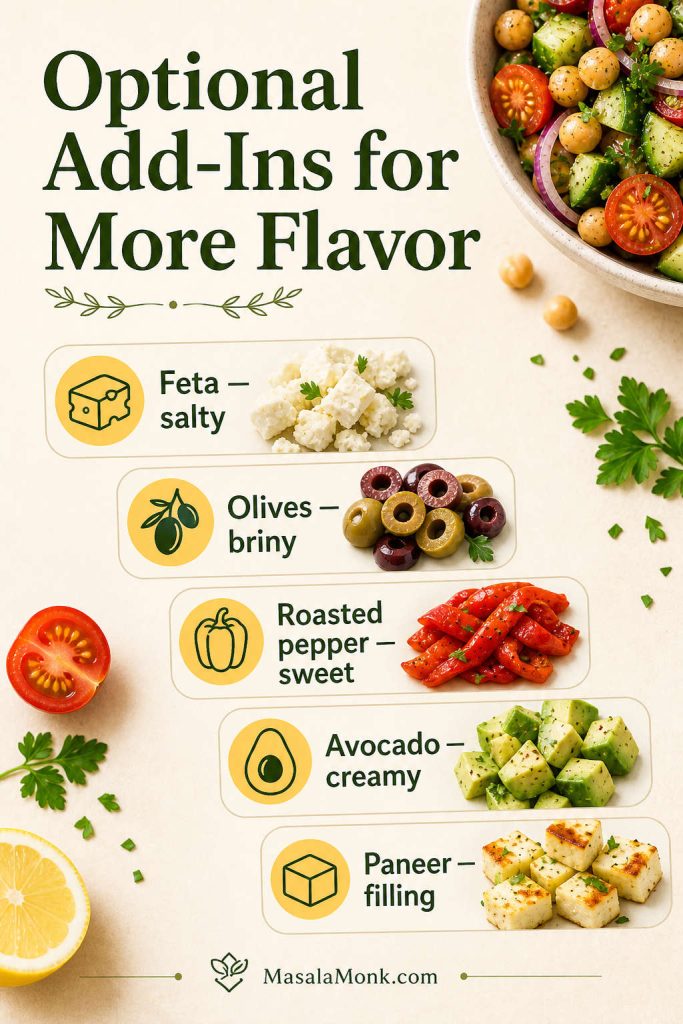
Guide to optional add-ins for chickpea salad including feta, olives, avocado, paneer, and roasted red pepper.
Once the base tastes balanced, add-ins can change the whole mood: feta and olives make it more Mediterranean, avocado makes it creamier, and paneer makes it more filling.

Easy Substitutions

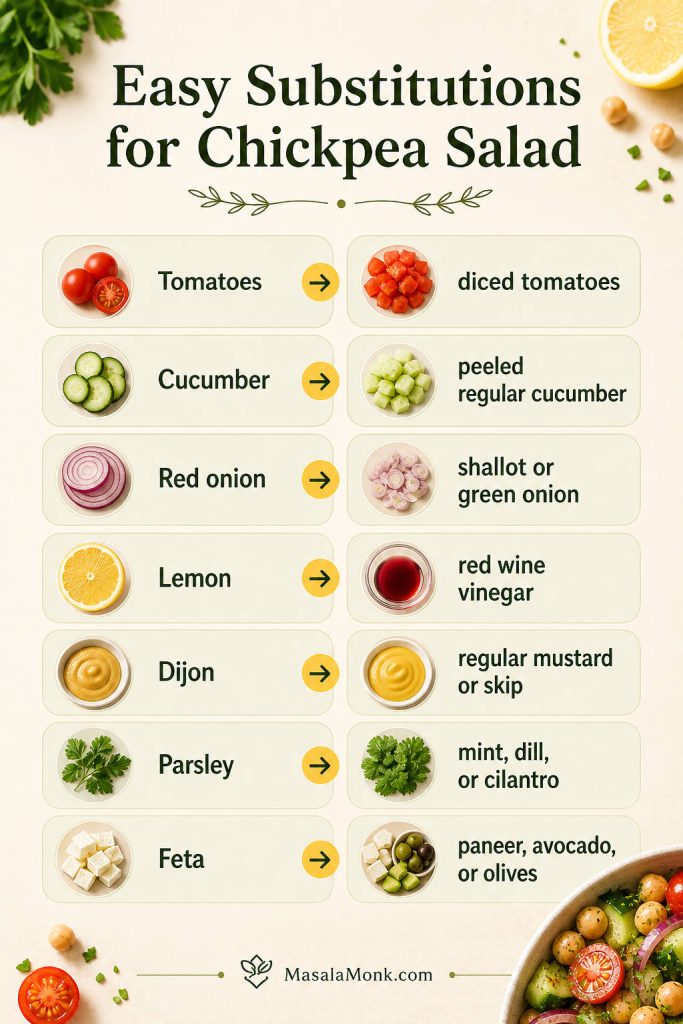
This salad is flexible, so you do not need every optional ingredient. As long as you keep the chickpeas, something crisp, something juicy, enough herbs, and a bright dressing, the recipe still works. Then you can adjust with what you have.

If you do not have… Use this instead
Cherry tomatoes Diced regular tomatoes, drained if they are very juicy
English or Persian cucumber Regular cucumber, peeled if the skin is tough and seeded if watery
Red onion Shallots, green onion, or white onion soaked in cold water for 10 minutes
Fresh lemon Red wine vinegar or apple cider vinegar, added to taste
Dijon mustard A small spoon of regular mustard, or skip it and whisk the dressing well
Parsley Mint, dill, cilantro, or a mix of fresh herbs
Feta Paneer, avocado, olives, toasted seeds, or simply leave it out
Substitutions guide for chickpea salad showing ingredient swaps for tomatoes, cucumber, onion, lemon, mustard, herbs, and feta.
Missing one ingredient should not stop the recipe, because a good chickpea salad still works when you keep the same balance of chickpeas, crunch, herbs, acidity, and seasoning.

The Lemon Dressing That Makes the Salad Work

The dressing should taste bright, salty, and slightly sharp before it touches the chickpeas. Once everything is tossed together, the chickpeas, cucumber, and tomatoes soften that intensity, so the dressing needs enough lemon, garlic, mustard, and salt to season the whole salad.
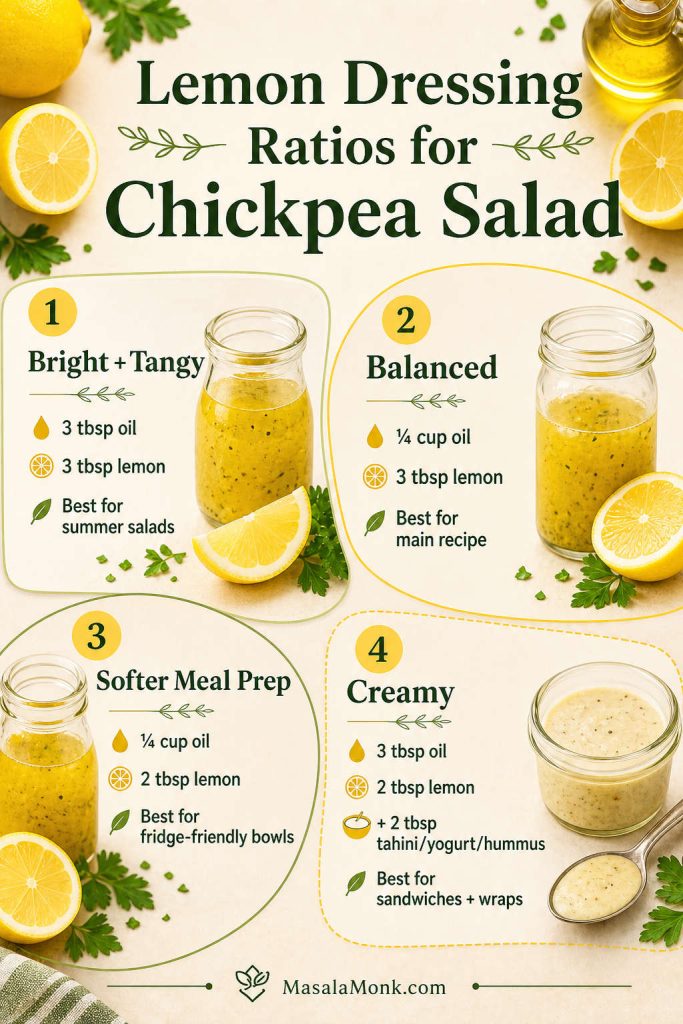
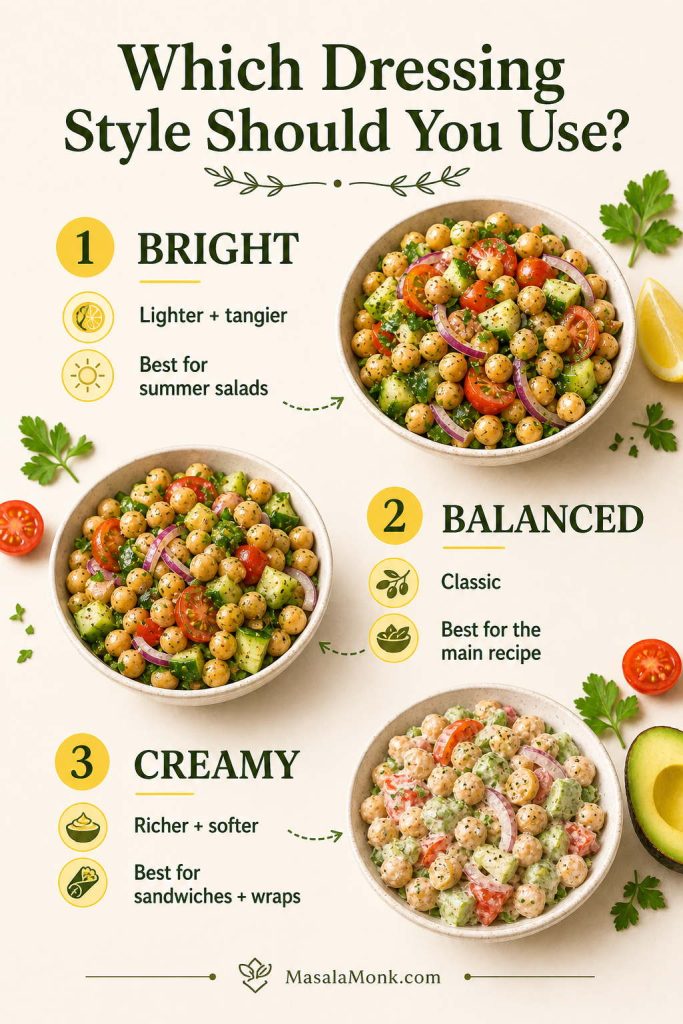
Dressing ratio guide for chickpea salad showing bright, balanced, softer, and creamy lemon dressing options.
A small change in oil, lemon, or creamy binder can shift the whole bowl, so this dressing guide helps you choose the best chickpea salad texture for bowls, meal prep, wraps, or sandwiches.

Balanced Lemon Dressing

For the main recipe, use ¼ cup / 60 ml olive oil and 3 tablespoons / 45 ml fresh lemon juice. Add Dijon mustard, garlic, salt, black pepper, and either cumin or oregano. This gives the salad a balanced flavor without making it oily or sour.

A Brighter Lemon Dressing

If your chickpeas taste a little flat or your vegetables are very juicy, use equal parts olive oil and lemon juice. This sharper version works well for summer salads, cucumber-heavy bowls, and versions served with pita or grilled foods.

Creamy Dressing for Chickpeas and Sandwiches

When the recipe is going toward wraps or sandwiches, add 2 tablespoons of tahini, Greek yogurt, hummus, vegan mayo, or mashed avocado. A creamy dressing helps the chickpeas hold together instead of rolling out of the bread.

Indian-Style Lemon Dressing

For a chana salad variation, use lemon juice, olive oil, roasted cumin powder, black pepper, chopped cilantro, chili flakes or green chili, and salt. A tiny pinch of chaat masala can work if you want a sharper snack-style flavor, but keep it light so it does not overpower the chickpeas.

Bright, Balanced, and Creamy Dressing Guide

Dressing style Olive oil Lemon or vinegar Best for
Bright and tangy 3 tbsp / 45 ml 3 tbsp / 45 ml Summer salad, cucumber-heavy versions
Balanced ¼ cup / 60 ml 3 tbsp / 45 ml Main recipe
Softer meal-prep ¼ cup / 60 ml 2 tbsp / 30 ml Fridge-friendly version
Creamy 3 tbsp / 45 ml 2 tbsp / 30 ml plus 2 tbsp tahini, yogurt, hummus, or vegan mayo Sandwiches, wraps, and bowls
Comparison board showing bright, balanced, and creamy dressing styles for chickpea salad with short notes about each style.
Choose a brighter dressing when you want a sharper summer salad, a balanced dressing for the classic version, and a creamy dressing when the chickpea salad is headed for wraps or sandwiches.

Equipment You Need

You do not need special equipment for this salad. A colander, cutting board, sharp knife, large mixing bowl, small bowl or jar for the dressing, and a spoon or spatula are enough. For the sandwich version, keep a fork or potato masher nearby so you can lightly smash the chickpeas.
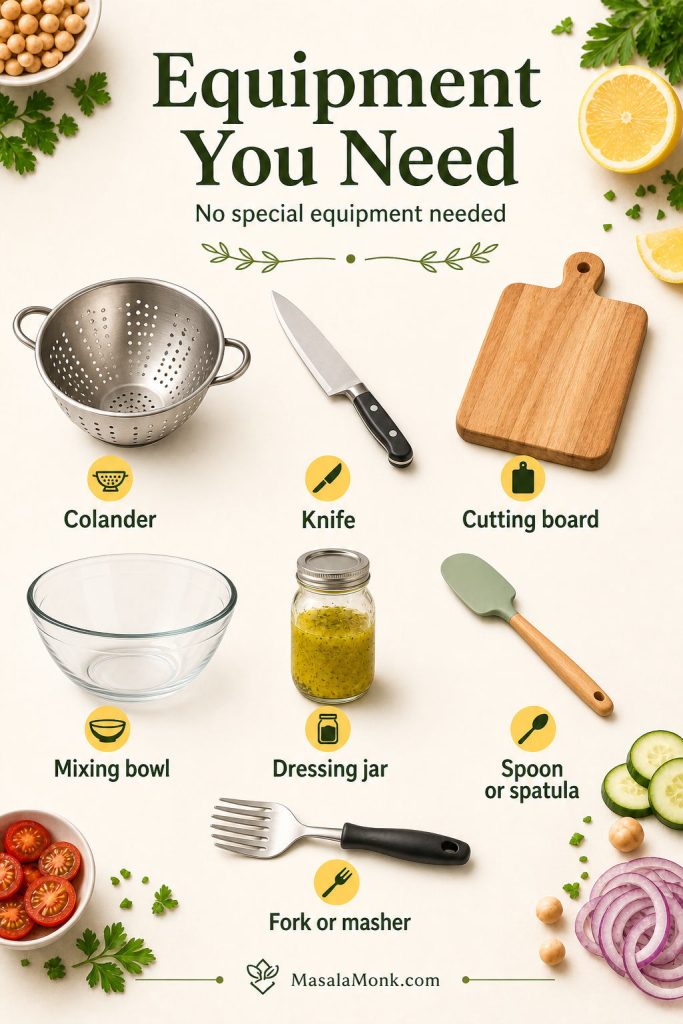
Equipment board for chickpea salad showing a colander, knife, cutting board, mixing bowl, dressing jar, spoon or spatula, and fork or masher.
This chickpea salad recipe stays practical because it only needs a few everyday tools, so you can make it easily without special equipment or unnecessary cleanup.

How to Make Chickpea Salad

Because this is a no-cook recipe, making the salad is mostly about dressing the chickpeas well, chopping the vegetables, tossing gently, and tasting at the end.

  1. Make the dressing first. Whisk olive oil, lemon juice, Dijon, garlic, salt, pepper, and cumin or oregano in a large bowl. You can also shake it in a jar.
  2. Drain, rinse, and dry the chickpeas. Let them sit in a colander for a minute, then pat them lightly with a clean towel if they still look wet. Drier chickpeas hold the lemon dressing better and keep the salad from turning watery.
  3. Chop the vegetables. Dice the cucumber, halve the tomatoes, and finely chop the onion or shallot.
  4. Add everything to the bowl. Add chickpeas, vegetables, herbs, and sturdy add-ins to the dressing.
  5. Toss gently. Coat everything without crushing the chickpeas.
  6. Rest briefly. Let the salad sit for 10 minutes if you have time.
  7. Check the bowl. The chickpeas should look lightly glossy, not oily, and the salad should taste bright before it tastes salty.
  8. Taste and adjust. Add more lemon, salt, pepper, herbs, or olive oil as needed.
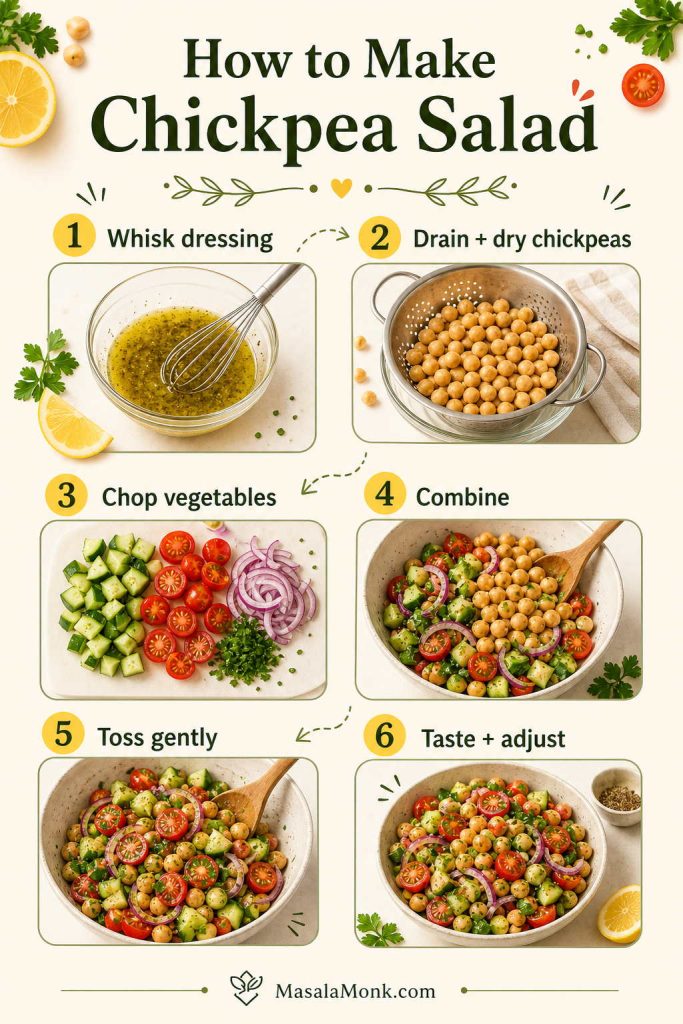
Step-by-step board showing how to make chickpea salad by whisking dressing, drying chickpeas, chopping vegetables, combining, tossing, and adjusting seasoning.
The method matters more than it first seems: whisk the dressing first, dry the chickpeas well, toss gently, and then taste again so the salad stays bright instead of bland or watery.
Avoid bland chickpeas: rinse them well, season the dressing boldly, and let the salad rest for 10 minutes before judging the flavor.
Avoid a watery salad: drain the chickpeas well, dry them if needed, do not over-salt cucumber and tomatoes too early, and add avocado only when you are close to serving.

Dry the Chickpeas Before Making Salad
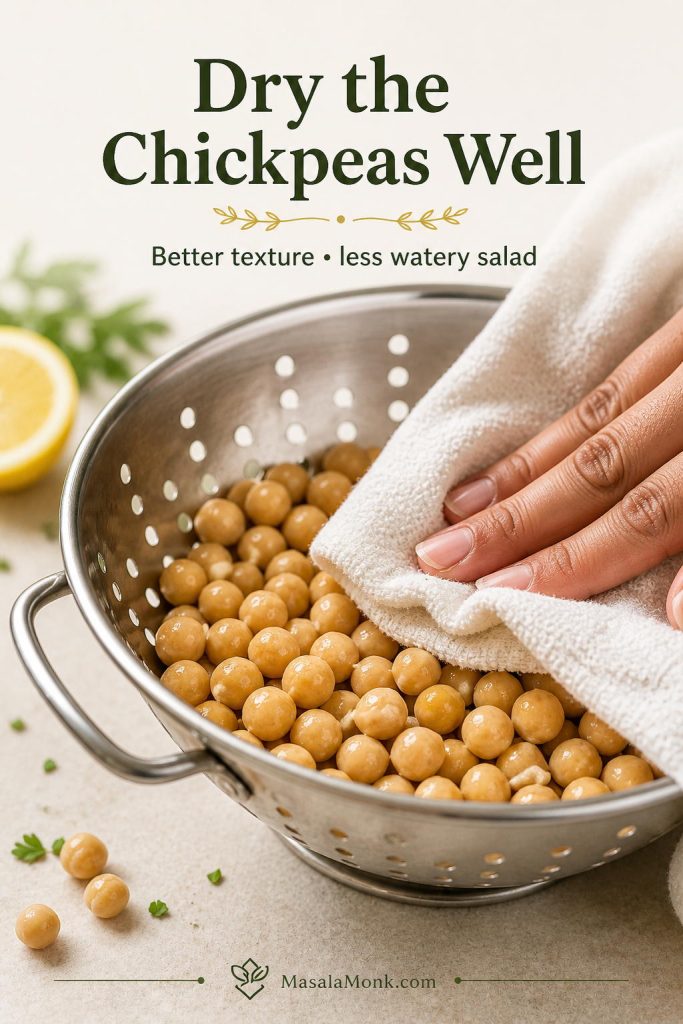
Close-up of rinsed chickpeas being patted dry with a clean towel before making chickpea salad.
Drying the chickpeas is one of the easiest upgrades because it helps the dressing cling better and, in turn, keeps the chickpea salad from turning loose or watered down.

Recipe Card

Chickpea Salad Recipe

A 15-minute no-cook salad made with chickpeas, cucumber, tomatoes, herbs, and lemon dressing. Serve it whole as a fresh salad bowl, lightly mashed in wraps or pita, or smashed into a creamy chickpea salad sandwich filling.

Prep Time15 minutes
Cook Time0 minutes
Total Time15 minutes
Servings4 main or 6 side servings

Optional rest time: 10 minutes
Course: Salad, Lunch, Side Dish
Cuisine: Mediterranean-inspired
Diet: Vegetarian; vegan if feta or paneer is omitted

Ingredients

Salad

  • 2 cans chickpeas, 15 oz / 425 g each, or two 400 g cans, drained and rinsed
  • Or use about 3 cups / 480–500 g cooked chickpeas
  • 1 large English cucumber or 3 Persian cucumbers, diced
  • 2 cups cherry or grape tomatoes, halved
  • 1 small red onion or 2 shallots, finely chopped
  • ½ cup olives, sliced, optional
  • ½ cup roasted red pepper, chopped, optional
  • ¾–1 cup chopped fresh herbs: parsley, mint, dill, cilantro, or a mix
  • ½ cup feta or paneer cubes, optional
  • 1 avocado, diced, optional and best added just before serving

Lemon Dressing

  • ¼ cup / 60 ml extra-virgin olive oil
  • 3 tbsp / 45 ml fresh lemon juice
  • 1 tsp Dijon mustard
  • 1 garlic clove, grated or minced
  • ½ tsp fine salt, plus more to taste
  • ½ tsp black pepper
  • ½ tsp ground cumin or dried oregano
  • ½–1 tsp sumac or lemon zest, optional
  • Pinch chili flakes or Aleppo pepper, optional

Instructions

  1. Whisk olive oil, lemon juice, Dijon mustard, garlic, salt, pepper, cumin or oregano, and sumac or lemon zest if using in a large bowl.
  2. Drain and rinse the chickpeas well. Let them sit in a colander for a minute, then pat dry if needed so the salad does not turn watery.
  3. Add chickpeas, cucumber, tomatoes, onion, olives, roasted red pepper, and herbs to the dressing. Toss gently.
  4. Add feta, paneer, or avocado only if serving soon.
  5. Let the salad rest for 10 minutes if possible.
  6. Taste and adjust with more lemon, salt, pepper, herbs, or olive oil.
  7. Serve cold or at room temperature as a salad, side dish, wrap filling, pita filling, or sandwich base.

Notes

  • For the cleanest flavor, rinse canned chickpeas well and let them drain before mixing.
  • If the chickpeas still look wet after draining, pat them lightly with a clean towel before mixing.
  • For a vegan version, skip feta and paneer. Use olives, avocado, roasted pepper, tahini, or extra herbs for richness.
  • For sandwiches, mash 60–70% of the chickpeas and add 2–4 tablespoons of a creamy binder.
  • For meal prep, add avocado, crispy chickpeas, and delicate herbs right before serving.
  • If using dried chickpeas, cook them until tender and use about 3 cups / 480–500 g cooked chickpeas.
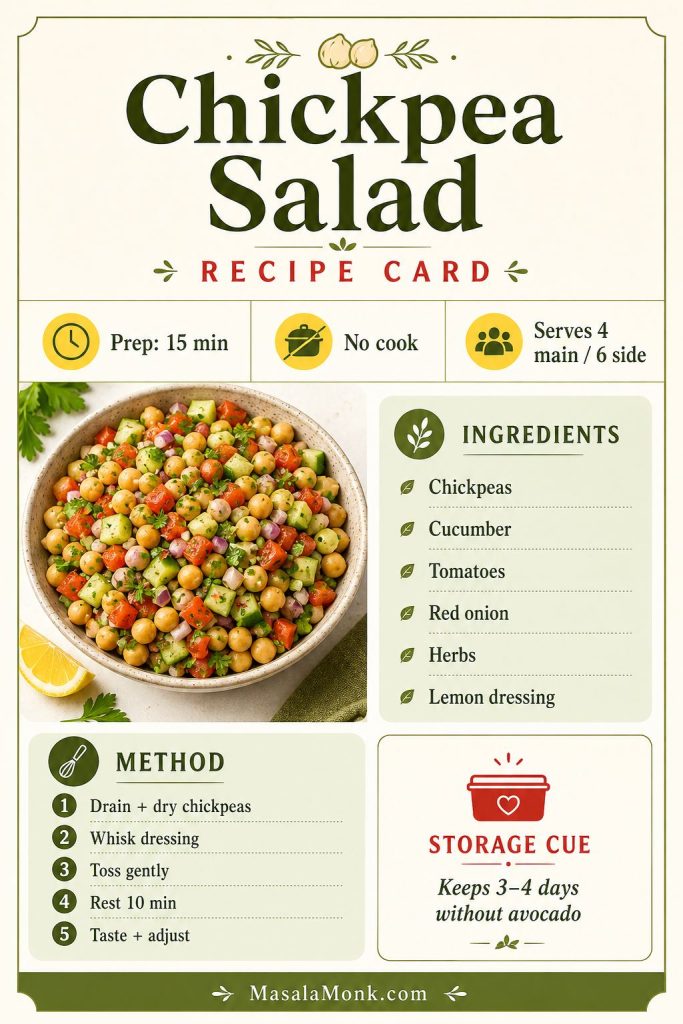
Recipe card graphic for chickpea salad with prep time, servings, core ingredients, method steps, and storage note.
Keep this recipe card handy when you need the short version: drain and dry the chickpeas, whisk the lemon dressing, toss gently, rest briefly, and adjust before serving.

Why This Recipe Works

The salad works because chickpeas make it filling without any cooking, while cucumber, tomatoes, onion, herbs, and lemon keep it fresh. The dressing is bright enough to season the chickpeas properly, and the same base can stay whole for bowls, lightly mashed for wraps, or smashed for sandwiches.

Whole, Lightly Mashed, or Smashed Chickpeas?

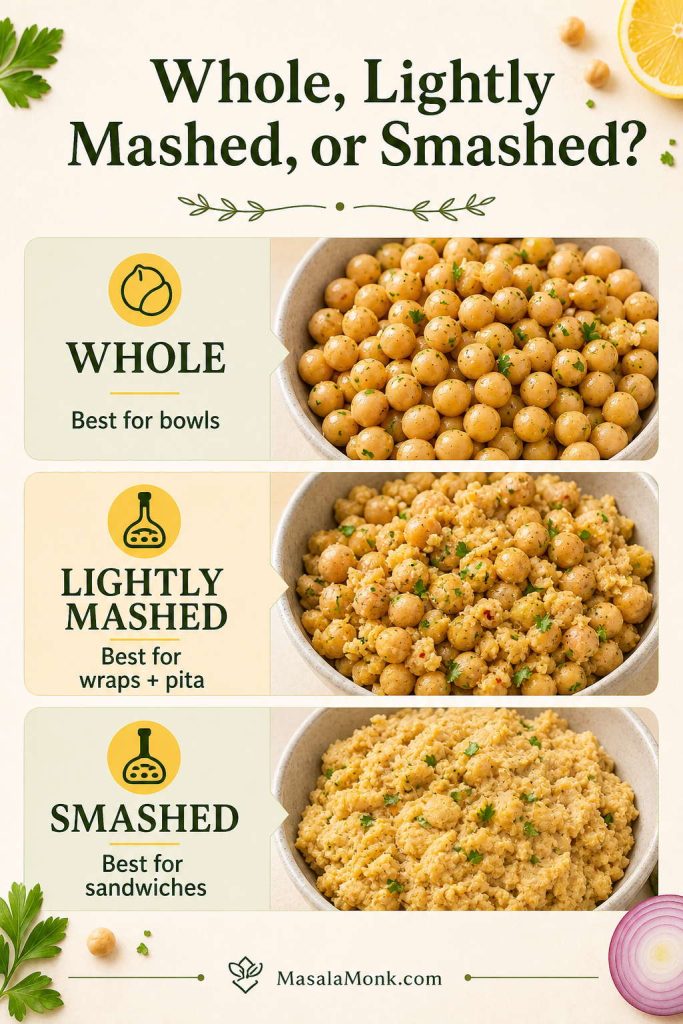
A small change in texture changes how you can use the salad. Whole chickpeas make the best fresh bowl. Lightly mashed chickpeas help the salad sit better in wraps or pita. Smashed chickpeas turn the same ingredients into a sandwich filling that holds together instead of rolling out of the bread.

Texture What to do Best use
Whole chickpeas Toss gently and do not mash Fresh salad bowls and side salads
Lightly mashed Press ¼–⅓ of the chickpeas Wraps, pita pockets, and lunch bowls
Smashed Mash 60–70% of the chickpeas Chickpea salad sandwiches
Creamy Mash deeply and add mayo, yogurt, tahini, hummus, or avocado Vegan tuna-style chickpea salad
Texture comparison board showing whole chickpeas, lightly mashed chickpeas, and smashed chickpeas with suggested uses.
Texture changes how the recipe works, so whole chickpeas suit salad bowls, lightly mashed chickpeas hold better in wraps, and smashed chickpeas make the most reliable sandwich filling.
Need the base recipe? Jump to recipe card · Main method · Recipe guide

Mediterranean-Style Chickpea Salad

To make this recipe more Mediterranean, add olives, feta, roasted red pepper, parsley, mint, oregano, and extra lemon. Keep the cucumber, tomato, and red onion because they give the salad the fresh chopped texture that works so well with chickpeas.

This version is especially good with pita, hummus, grilled vegetables, rice bowls, roasted chicken, fish, or a simple soup. If you like herb-heavy Mediterranean salads, it also sits well next to MasalaMonk’s tabbouleh recipe, especially when serving pita, hummus, grilled vegetables, or mezze-style plates.
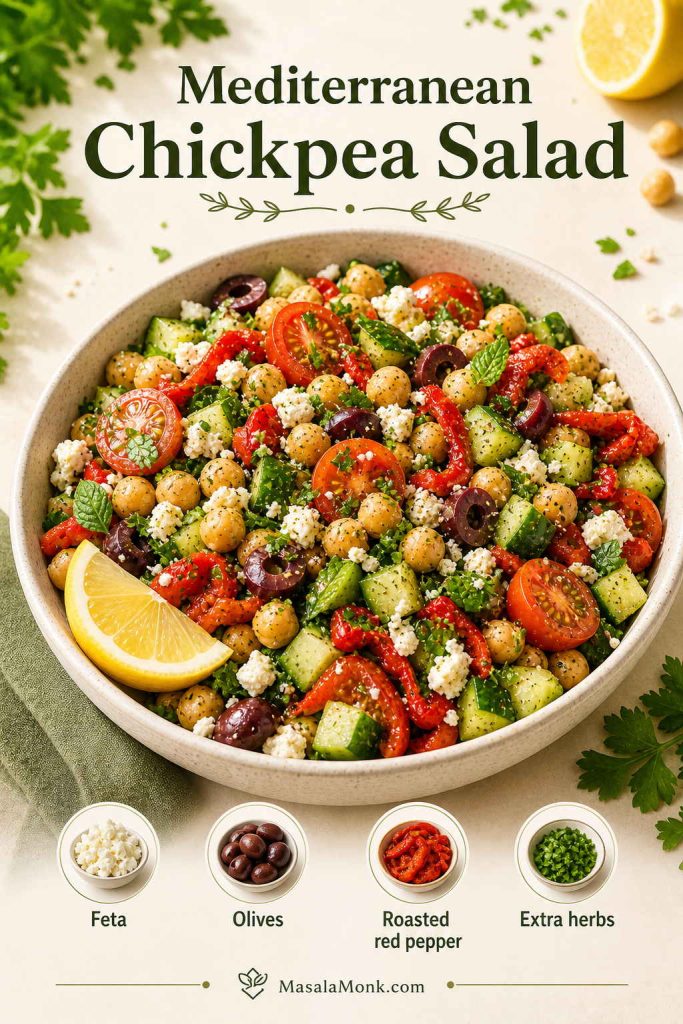
Mediterranean chickpea salad with feta, olives, roasted red pepper, cucumber, tomatoes, herbs, and lemon.
For a Mediterranean chickpea salad, feta, olives, roasted red pepper, and extra herbs deepen the flavor while still keeping the recipe fresh, colorful, and easy to serve.

Turn This Recipe Into a Chickpea Salad Sandwich

For a sandwich, mash most of the chickpeas and add a creamy binder. Greek yogurt, vegan mayo, tahini, hummus, mashed avocado, or a mix of mayo and yogurt all work. Then add something crunchy, such as celery, cucumber, onion, radish, or pickles.

Toasted bread, pita, wraps, and lettuce cups all work. If you are packing lunch, store the filling separately and assemble the sandwich later so the bread stays firm. This is also a useful plant-based alternative when you want a creamy, tangy sandwich filling. For a non-vegetarian comparison, see MasalaMonk’s chicken salad sandwich recipe.

Sandwich formula: 2 cups chickpea salad + 2–4 tbsp creamy binder + ¼ cup crunchy vegetables + lemon, mustard, herbs, salt, and pepper to taste.

If you want a cooler, yogurt-based sauce for wraps or pita, MasalaMonk’s Greek tzatziki sauce recipe is a natural fit with cucumber, herbs, chickpeas, and toasted bread.
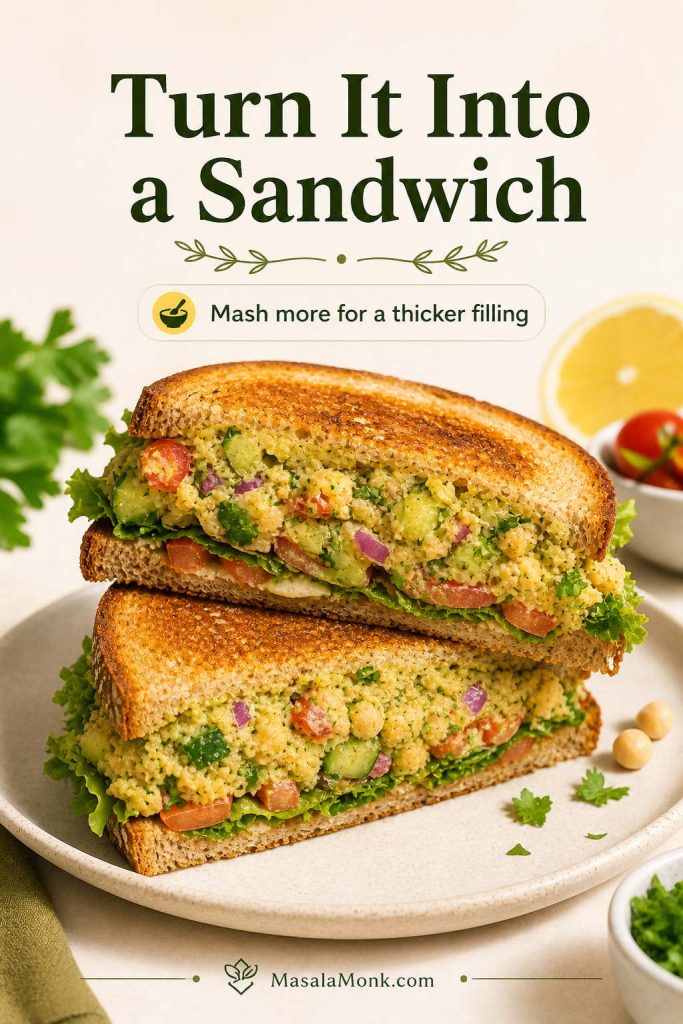
Toasted chickpea salad sandwich cut in half, showing a thick filling of mashed chickpeas, vegetables, and herbs.
Turning chickpea salad into a sandwich works best when you mash more of the chickpeas, because the filling becomes thicker, creamier, and much easier to hold together.
Need the base recipe? Jump to recipe card · Main method · Recipe guide

Chickpea Tuna Salad and Vegan Tuna-Style Version

This base can move in two directions. To make a real chickpea tuna salad, add drained tuna, celery, lemon, herbs, and a little Greek yogurt or mayo. If you want a vegan tuna-style version, skip the tuna, mash the chickpeas more deeply, and add celery, lemon, pickles or capers, herbs, and a creamy binder such as vegan mayo, tahini, hummus, or avocado.

A more sea-like vegan flavor can come from finely crushed nori or a tiny pinch of kelp flakes. Keep it optional; the mashed chickpea version still works as a creamy salad filling without any sea flavor.
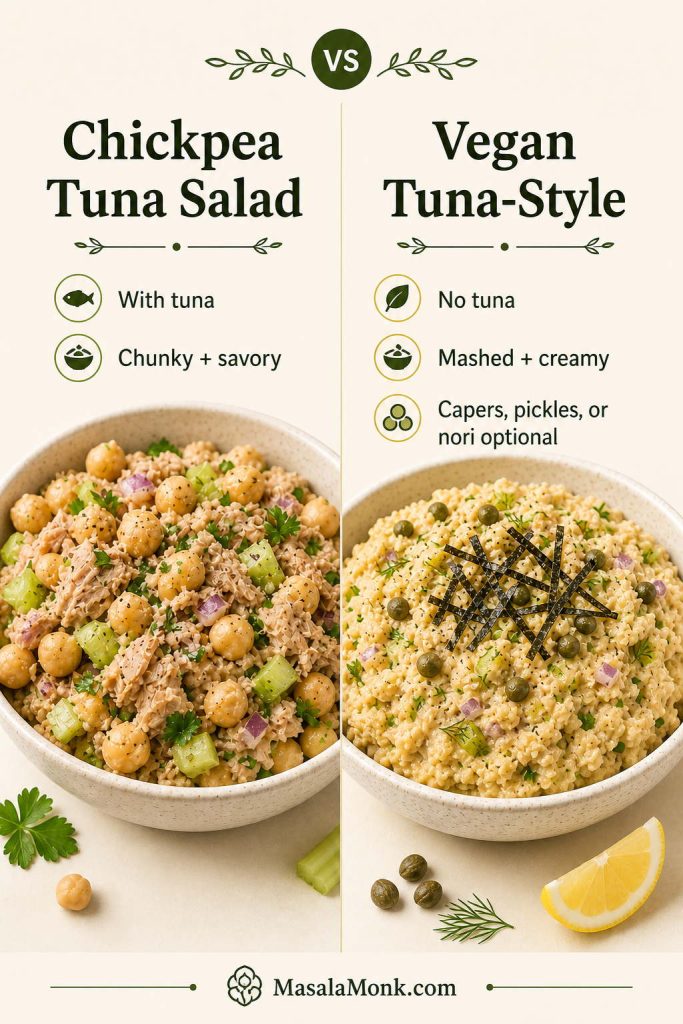
Comparison board showing chickpea tuna salad on one side and vegan tuna-style chickpea salad on the other.
For a chickpea tuna salad, add real tuna for a chunkier, savory version; for a vegan tuna-style salad, mash the chickpeas more and use capers, pickles, or nori for extra depth.
Need the base recipe? Jump to recipe card · Main method · Recipe guide

Meal Prep and Storage for This Salad

Chickpea salad is good for meal prep because chickpeas hold their shape better than leafy greens, so the salad stays useful for lunches over several days. However, a few ingredients are better added fresh. For example, avocado browns, crispy chickpeas soften, and delicate herbs taste brighter when added closer to serving.
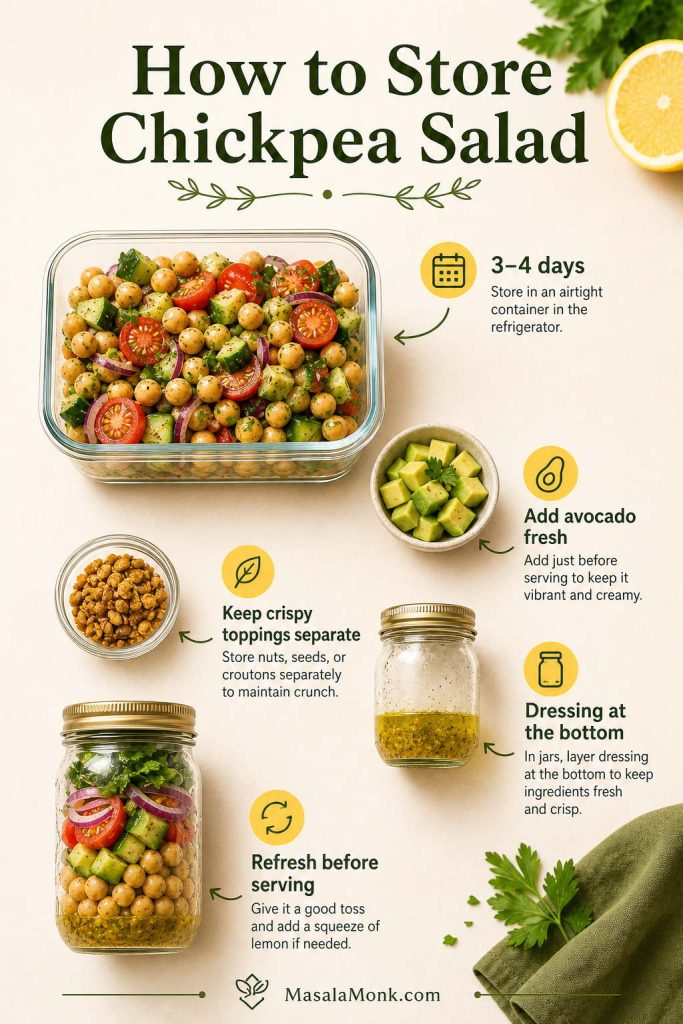
Storage guide for chickpea salad with airtight containers, meal-prep jars, dressing jar, and notes about keeping avocado and crunchy toppings separate.
Chickpea salad is meal-prep friendly; however, it stores best when avocado, crispy toppings, and delicate herbs are added later instead of being mixed in too early.
Need the base recipe? Jump to recipe card · Main method · Recipe guide

For the best make-ahead version, store the base salad without avocado and add delicate toppings just before serving. If you are making lunch jars, put the dressing at the bottom, then chickpeas and firmer vegetables, then herbs or greens near the top.

If you are making the salad more than a few hours ahead, keep some of the herbs fresh for serving and go lighter on the salt at first. Salt draws water from cucumber and tomatoes, so a final pinch right before serving keeps the salad fresher.

How to Store This Recipe Without Making the Salad Watery

Drain and dry the chickpeas well, avoid over-salting watery vegetables too early, and keep avocado or crispy toppings separate. If the salad sits overnight, refresh it with a little lemon juice, olive oil, and fresh herbs before serving.
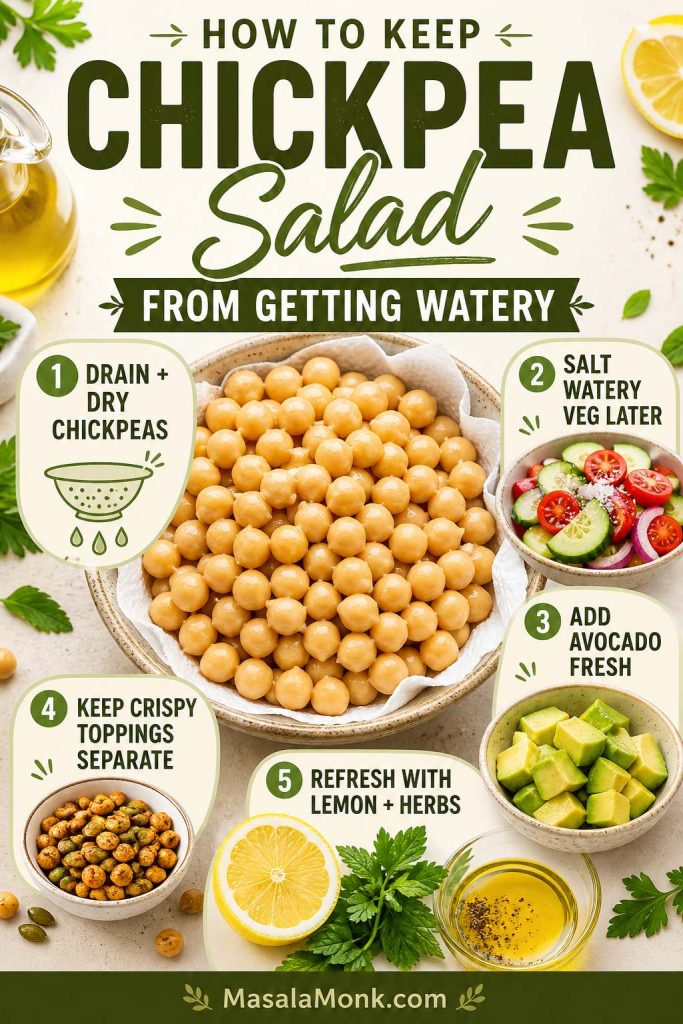
Infographic showing tips to keep chickpea salad from getting watery, including drying chickpeas, salting vegetables later, and adding avocado fresh.
If your chickpea salad turns watery, the fix usually starts earlier: dry the chickpeas well, salt juicy vegetables later, and add avocado or crunchy toppings closer to serving time.
Version Fridge life Best method
Plain chickpea salad, no avocado 3–4 days Store in an airtight container
With avocado Same day best Add avocado fresh just before serving
With feta or paneer 2–3 days best Add fresh if you want the cleanest texture
Dressing mixed in 2–3 days best texture Stir before serving and refresh with lemon or herbs
Dressing only 7–10 days Keep in a sealed jar in the fridge
Sandwich filling 3–4 days Store filling separately from bread
Crispy chickpeas Same day best Keep separate and add just before eating
Meal-prep jars 4–5 days Dressing bottom, chickpeas and vegetables middle, herbs top

Recipe Variations with Chickpeas

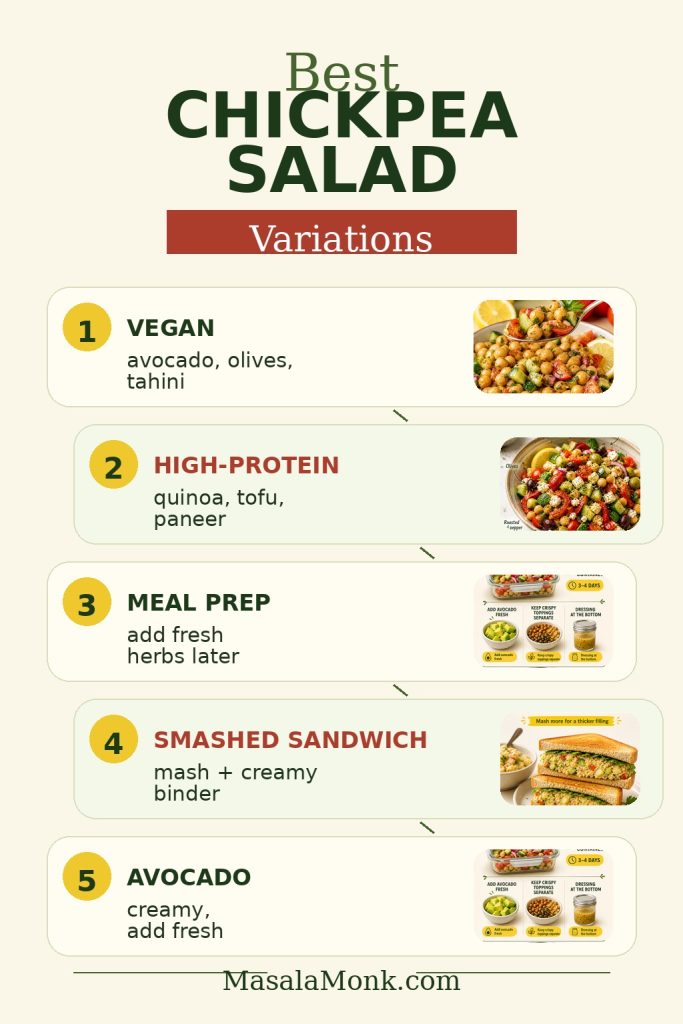
Once the base recipe is balanced, the same chickpeas can move in several salad directions. Keep lemon, salt, and herbs as the anchor, then change the add-ins based on how you want to serve it.

Lunch, Meal Prep, and Sandwich Versions

If you want… Make this version What to add
A dairy-free lunch Vegan chickpea salad Avocado, olives, roasted red pepper, extra herbs, toasted seeds, or tahini dressing
A more filling meal High-protein salad with chickpeas Quinoa, tofu, paneer, boiled eggs, Greek yogurt dressing, feta, grilled chicken, or extra chickpeas
A lunchbox or picnic salad Meal-prep chickpea salad Keep avocado and crispy toppings separate, use a slightly softer dressing, and add fresh herbs before serving
A sandwich filling Smashed chickpea salad Mash most of the chickpeas and add yogurt, tahini, hummus, vegan mayo, or avocado
A creamier bowl or wrap Avocado chickpea salad Diced avocado added just before serving, or a little mashed avocado in the dressing
Variation guide for chickpea salad showing vegan, high-protein, meal-prep, smashed sandwich, and avocado versions.
The same base recipe can become a vegan lunch, higher-protein bowl, meal-prep container, smashed sandwich filling, or avocado chickpea salad with only a few targeted changes.
Need the base recipe? Jump to recipe card · Main method · All variations

For more ways to build filling vegetarian bowls around legumes, grains, and seeds, see MasalaMonk’s guide to plant-based protein sources for high-protein meal prep.

Fresh, Crunchy, and Bigger-Flavor Versions

If you want… Make this version What to add
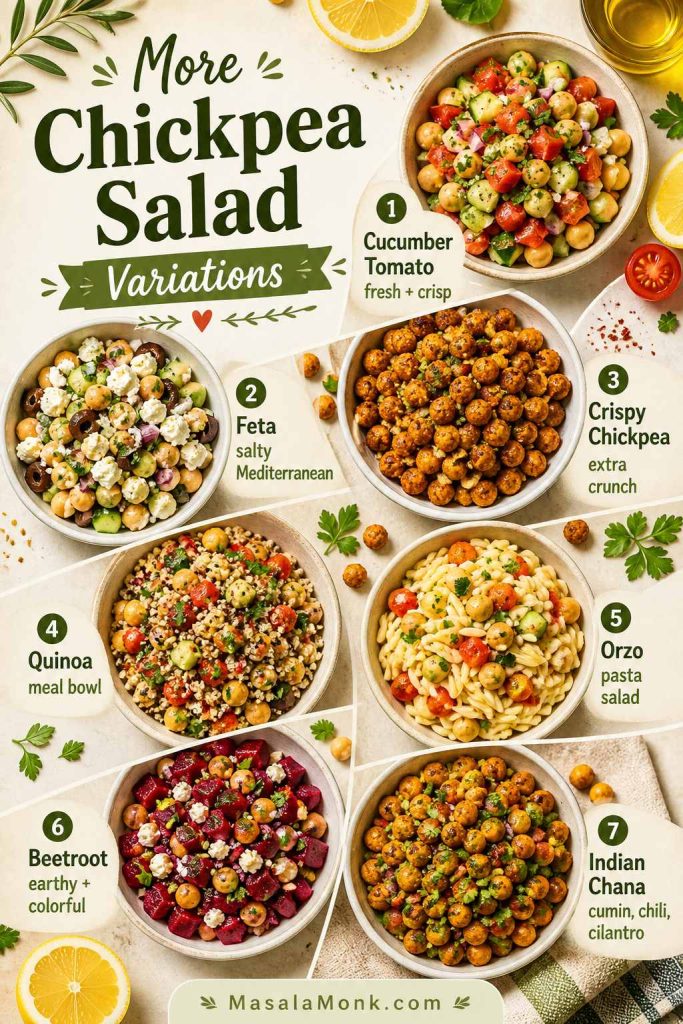
A clean summer side Cucumber tomato chickpea salad Extra cucumber, tomatoes, red onion, parsley, lemon, olive oil, salt, and pepper
A saltier Mediterranean side Feta chickpea salad Feta, olives, oregano, and lemon zest; taste before adding extra salt
A crunchy topping Crispy chickpea salad Add roasted or air-fried chickpeas right before serving so they stay crisp
A meal-prep grain bowl Quinoa chickpea salad Cooked and cooled quinoa plus extra dressing because grains absorb liquid
A pasta salad direction Orzo chickpea salad Cooked and cooled orzo, cucumber, tomato, herbs, feta, and extra lemon dressing
An earthy, colorful bowl Beetroot chickpea salad Cooked and cooled beetroot, feta or paneer, cumin, herbs, lemon, and red onion
An Indian-style side Indian chana salad Use kabuli chana for the closest chickpea salad texture, or kala chana for a firmer, earthier Indian-style version with cilantro, lemon, cumin, chili, onion, cucumber, and tomato
Second variation guide for chickpea salad showing cucumber tomato, feta, crispy chickpea, quinoa, orzo, beetroot, and Indian chana versions.
For more variety, the chickpea salad can turn crisp with cucumber and tomato, salty with feta, hearty with quinoa or orzo, earthy with beetroot, or spicier as Indian chana salad.
Need the base recipe? Jump to recipe card · Main method · All variations

Crispy Chickpeas for Salad

For crispy chickpeas, dry the drained chickpeas very well, toss them with a little oil, salt, cumin, paprika, or garlic powder, and roast at 425°F / 220°C for about 20–30 minutes, shaking the pan once or twice. Add them to the salad right before serving so they stay crisp.
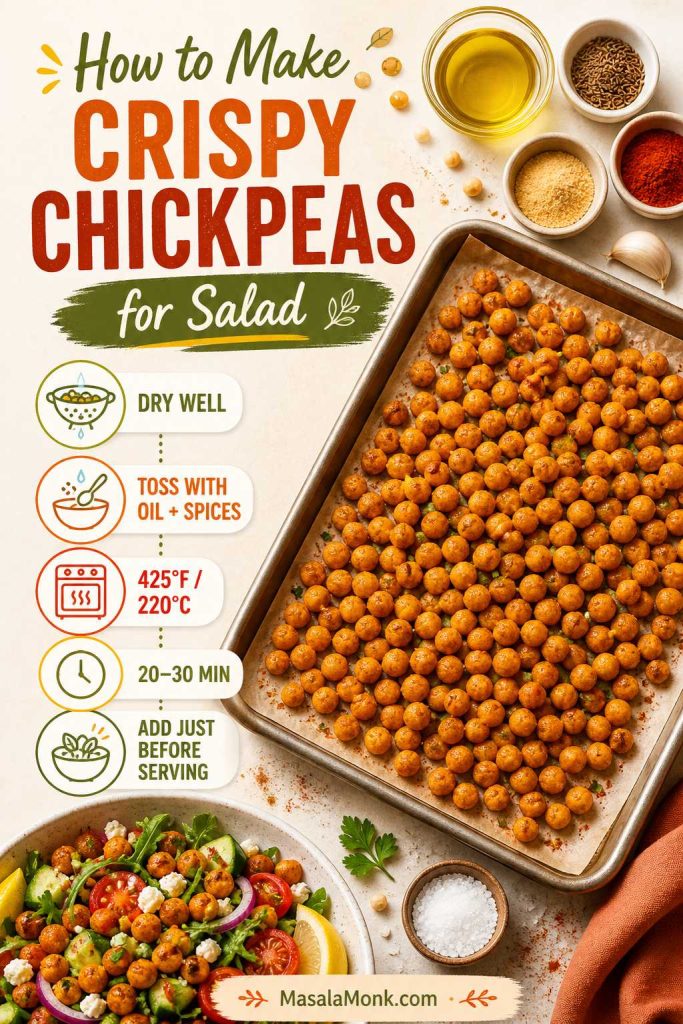
Roasted crispy chickpeas on a sheet pan with seasonings and notes about oven temperature, roasting time, and serving.
Crispy chickpeas add the most texture when they are roasted until dry and added right before serving, so they stay crunchy instead of softening in the salad.

Troubleshooting This Salad

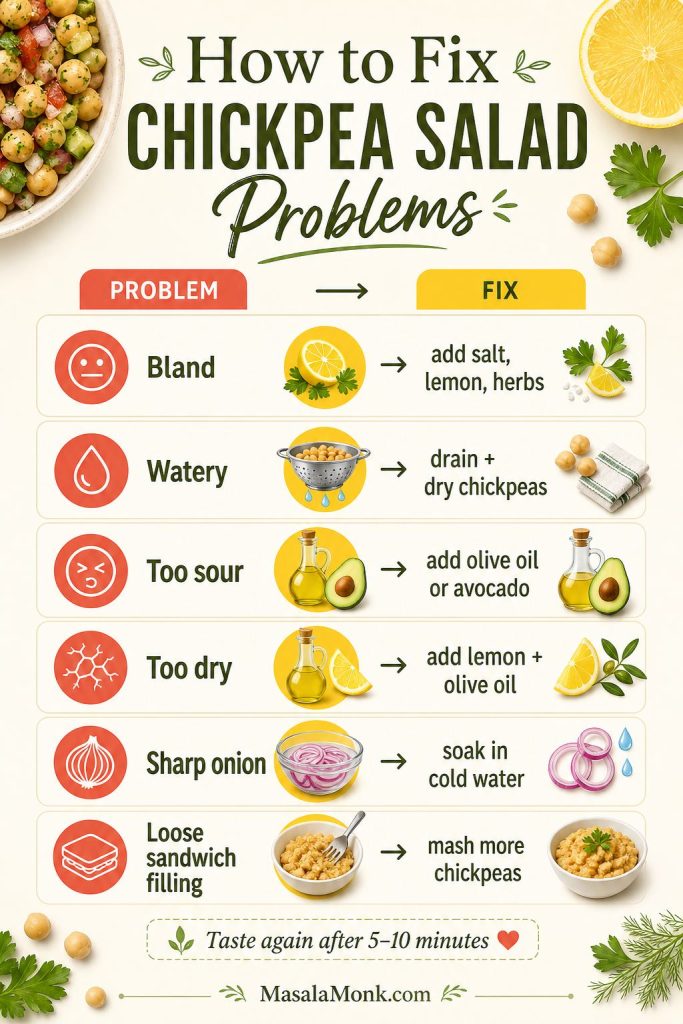
Because this recipe is not cooked, most chickpea salad problems can be fixed before serving. If the chickpeas taste bland, watery, sour, or dry, adjust the dressing first. Then give the salad a few minutes to settle before judging it again.

Problem Likely cause Fix
Salad tastes bland Not enough salt, acid, or herbs Add salt first, then lemon, then more herbs
Salad is watery Chickpeas or vegetables were too wet Drain and dry chickpeas well, and add tomatoes closer to serving
Chickpeas taste canned They were not rinsed well or not seasoned enough Rinse thoroughly and let them sit in dressing for 10 minutes
Onion is too sharp Raw onion is too strong Soak chopped onion in cold water for 10 minutes, then drain
Salad is too sour Too much lemon or vinegar Add olive oil, chickpeas, avocado, or feta to soften it
Salad is too dry Chickpeas absorbed the dressing Add a splash of olive oil and lemon juice before serving
Avocado browned It was added too early Add avocado fresh, or toss it with lemon before mixing
Sandwich filling is too loose Too much dressing or not enough mashing Mash more chickpeas and add a thicker binder
Crispy chickpeas went soft They sat in the wet salad Keep them separate and add just before eating
Troubleshooting guide for chickpea salad showing common problems such as bland, watery, too sour, too dry, sharp onion, and loose sandwich filling with quick fixes.
Before starting over, fix the bowl: bland salad usually needs salt, lemon, and herbs; watery salad needs better draining; and loose sandwich filling needs more mashed chickpeas.

What to Serve with Chickpea Salad

Serve chickpea salad with pita, hummus, grilled vegetables, rice, quinoa, soup, roasted potatoes, grilled chicken, fish, or paneer. It also works inside wraps, lettuce cups, toasted sandwiches, or meal-prep bowls. To make a fuller chickpea-based mezze plate, add MasalaMonk’s falafel recipe on the side.

A lighter plate can be as simple as cucumber salad, tomato soup, or a green salad. For a sharper Middle Eastern-style plate, serve it with pita and a spoon of MasalaMonk’s amba sauce recipe for a tangy mango-chili contrast.
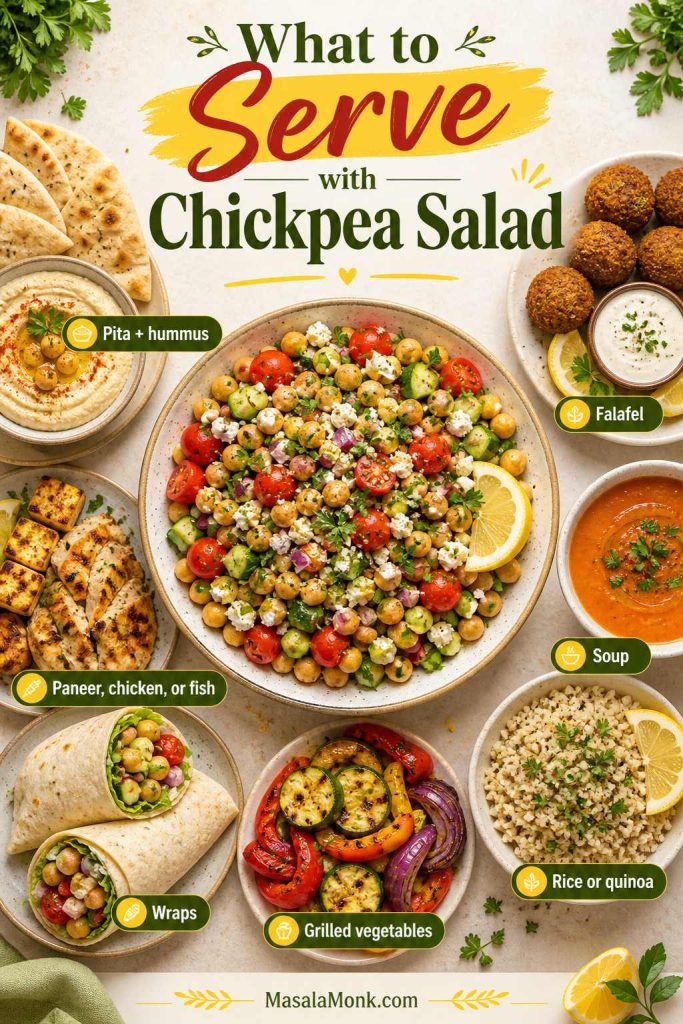
Serving ideas board for chickpea salad with pita, hummus, falafel, soup, rice or quinoa, wraps, grilled vegetables, and paneer, chicken, or fish.
Chickpea salad becomes a fuller meal more easily when you pair it with pita, hummus, soup, falafel, grains, or grilled vegetables, rather than serving it as a plain side alone.

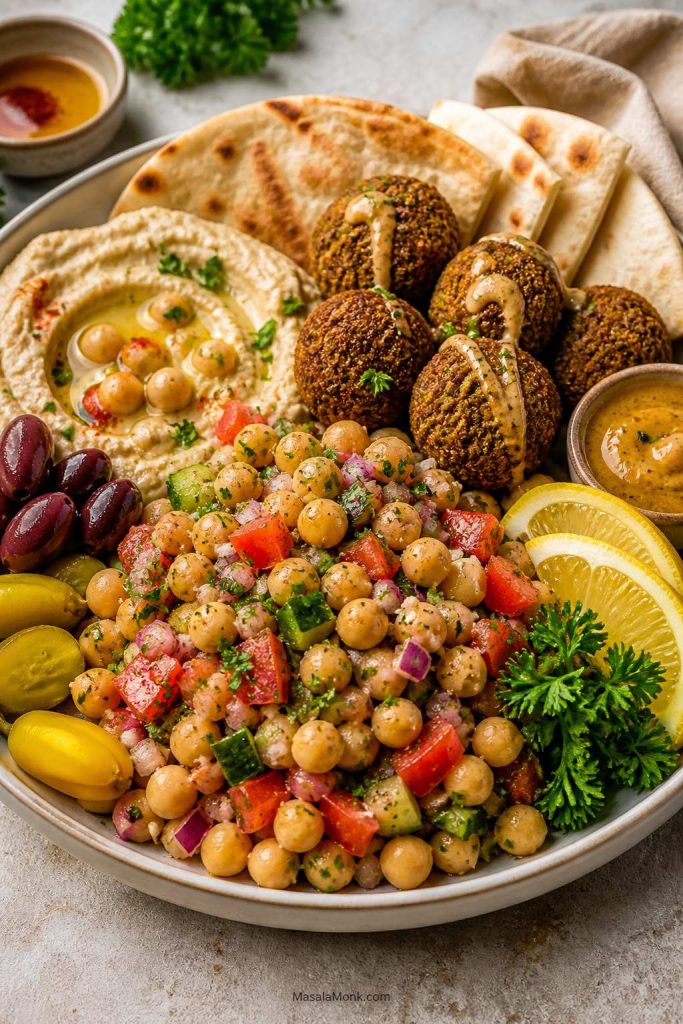
Chickpea Salad Mezze Plate

Chickpea salad served as part of a mezze plate with pita, hummus, falafel, olives, tomatoes, and lemon.
Serving chickpea salad as part of a mezze plate adds variety and makes the recipe more useful for lunch or dinner, especially when paired with hummus, pita, and falafel.

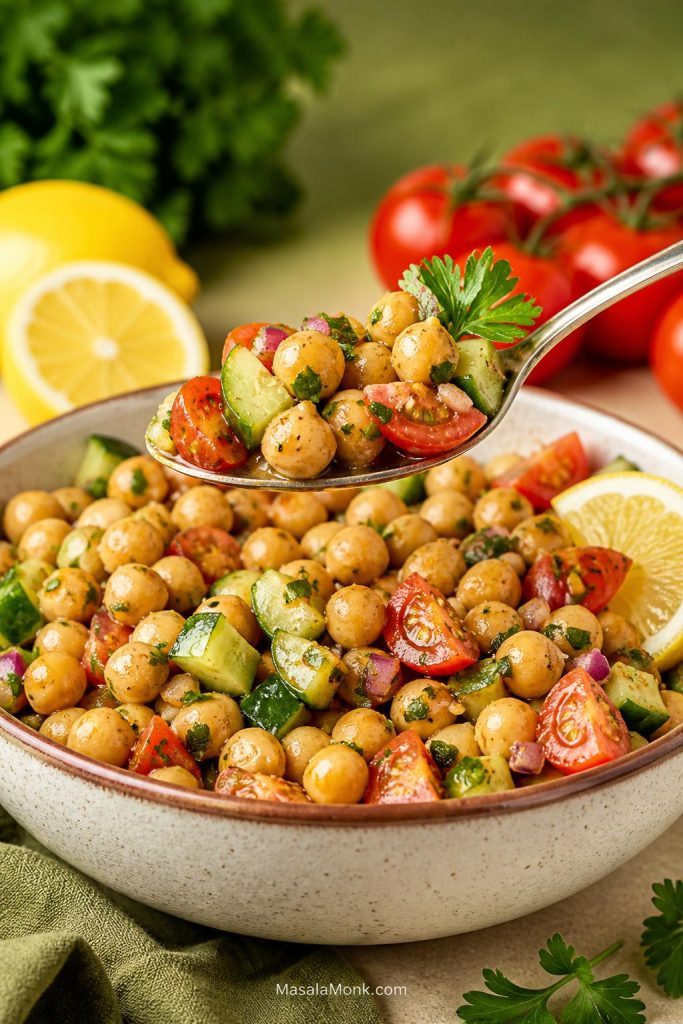
Final Serving Texture

Close-up serving image of chickpea salad in a bowl with cucumber, tomatoes, herbs, and a spoon lifting a portion.
A final serving image highlights the texture that makes this recipe work so well: chickpeas stay distinct, vegetables stay crisp, and the dressing coats the salad without drowning it.
Ready to make it? Jump to recipe card · Main method · Recipe guide

FAQs About This Recipe

Are chickpeas and garbanzo beans the same?

Chickpeas and garbanzo beans are the same ingredient. “Chickpea” is more common in many recipe titles, while “garbanzo bean” often appears on cans and packaging. Use either one for this salad.

What kind of chickpeas work best for this salad?

Canned chickpeas are the easiest choice because they are already cooked and ready to use. Drain and rinse them well, then let them sit in a colander for a minute so extra water does not dilute the dressing.

Do canned chickpeas need to be cooked first?

No cooking is needed. Canned chickpeas are already cooked, so this recipe only needs draining, rinsing, chopping, dressing, and tossing.

How long does this chickpea salad recipe last in the fridge?

This chickpea salad recipe keeps well for about 3–4 days without avocado. Store it in an airtight container, then add avocado, crispy chickpeas, or delicate herbs closer to serving for the best texture.

How do you keep chickpea salad from getting watery?

Drain and dry the chickpeas well, use tomatoes that are not overly watery, and go lighter on salt if you are making the salad ahead. Salt pulls moisture from cucumber and tomatoes, so a final pinch before serving keeps the salad fresher.

Is this chickpea salad vegan?

The base salad is vegan when you skip feta, paneer, yogurt, and any dairy-based creamy add-ins. For richness, use olives, avocado, tahini, hummus, vegan mayo, roasted red pepper, toasted seeds, or extra herbs.

Is chickpea salad healthy?

Chickpea salad can be a nourishing meal or side because chickpeas provide plant-based protein and fiber, while the vegetables and herbs add freshness. Keep the dressing balanced and use richer add-ins like feta, paneer, avocado, or creamy binders according to how filling you want the salad to be. For more general chickpea nutrition background, see the Harvard Nutrition Source guide to chickpeas.

What can I use instead of lemon juice?

Red wine vinegar or apple cider vinegar can replace lemon juice. However, start with a little less than the recipe calls for, then taste and add more only if the salad needs extra brightness.

How do I make chickpea salad without mayo?

The base salad uses lemon and olive oil dressing, so it does not need mayo. For a creamy no-mayo version, use tahini, hummus, Greek yogurt, or mashed avocado.

How do I turn this into chickpea salad sandwiches?

Mash 60–70% of the chickpeas, add 2–4 tablespoons of a creamy binder, and keep the filling thick. Toasted bread, pita, wraps, and lettuce cups all work, but the filling should be stored separately from bread until serving.

What goes well with chickpea salad?

Pita, hummus, grilled vegetables, soup, rice, quinoa, roasted potatoes, paneer, grilled chicken, fish, and simple green salads all pair well with chickpea salad. It also works inside wraps, lettuce cups, and meal-prep bowls.

How can I make the salad higher in protein?

Add quinoa, paneer, tofu, boiled eggs, Greek yogurt dressing, feta, grilled chicken, or extra chickpeas. For a vegan version, use tofu, quinoa, hummus, tahini, seeds, or another legume.

Should you freeze chickpea salad?

Freezing is not worth it for this recipe. Cucumber, tomatoes, herbs, and dressing lose their fresh texture after thawing. If you want to prep ahead, freeze cooked chickpeas separately and make the salad fresh.
Posted on 1 Comment

Tabbouleh Recipe: Fresh Lebanese Tabouli Salad with Bulgur

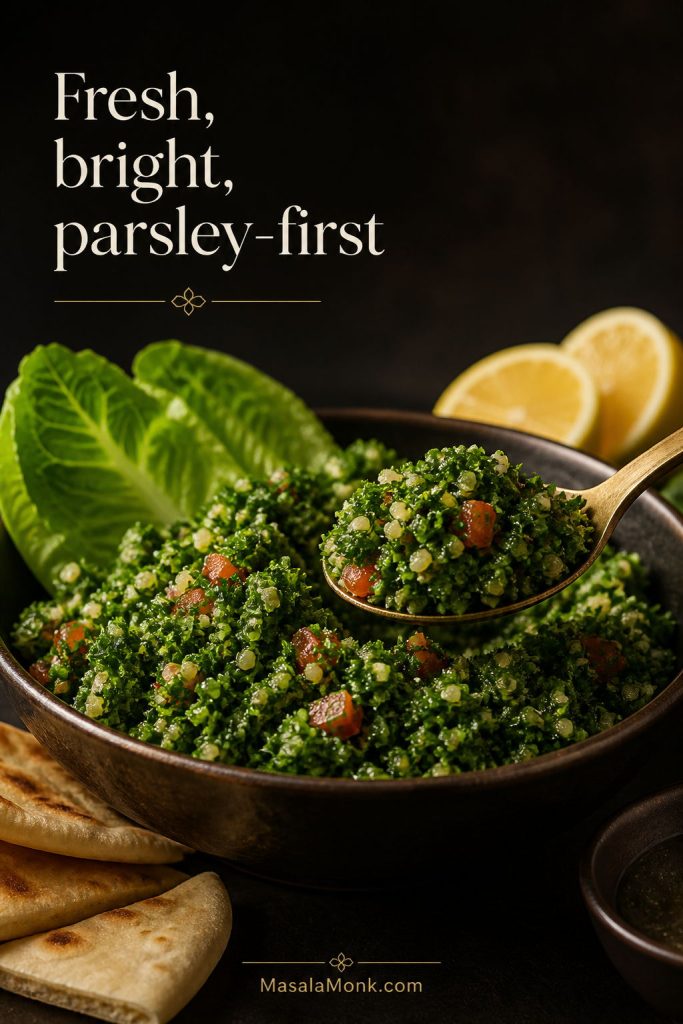
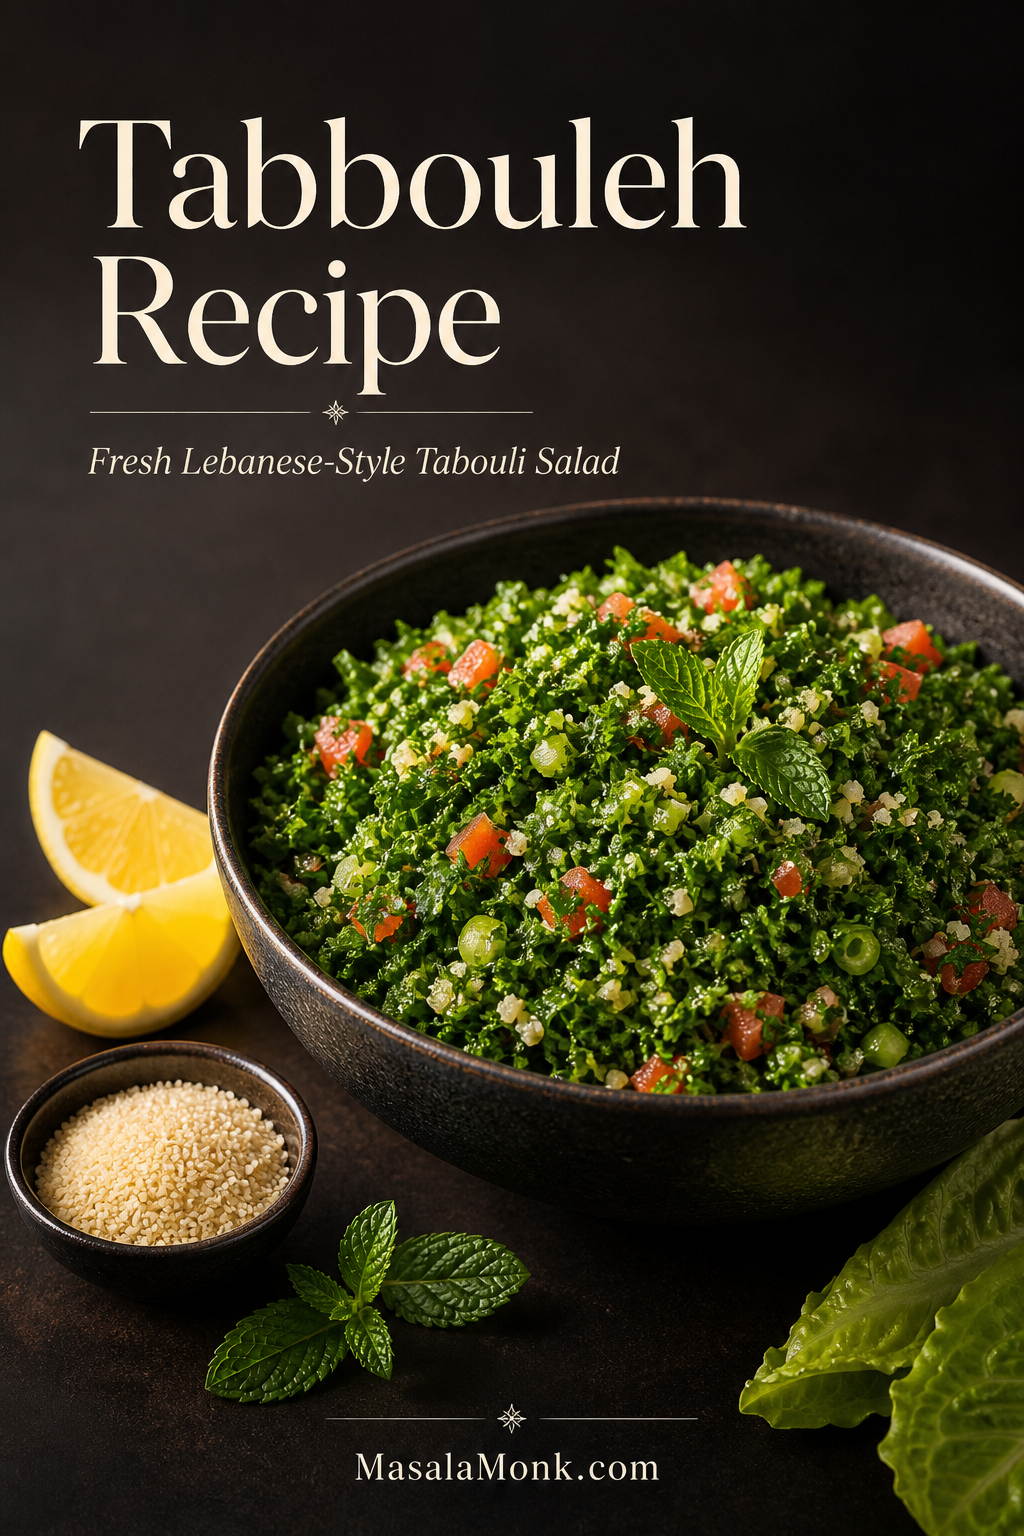
A dark bowl of parsley-heavy tabbouleh with tomato pieces, mint, lemon wedges, romaine leaves, and a small amount of fine bulgur.

This tabbouleh recipe is fresh, lemony, parsley-heavy, and built around the detail that matters most: tabbouleh should taste like a chopped herb salad, not a bowl of bulgur with a few herbs mixed in.

Also spelled tabouli, this Lebanese-style salad is made with finely chopped parsley, tomato, mint, green onion, fine bulgur, lemon juice, olive oil, salt, and pepper. Although the bulgur adds texture, parsley is the star.

To keep the recipe no-cook, the method below soaks fine bulgur directly in the lemon-olive oil dressing while you chop the herbs. As a result, the bulgur gets more flavor, the salad stays bright, and you avoid the watery, grain-heavy tabbouleh that often happens at home.

Table of Contents

Use this guide to make fresh tabbouleh, choose the right bulgur, keep it from turning watery, and adapt it for quinoa, cauliflower, or couscous versions.

Quick Answer: What Is Tabbouleh?

Tabbouleh is a fresh Middle Eastern parsley salad made with finely chopped parsley, tomato, mint, green onion, fine bulgur wheat, lemon juice, olive oil, salt, and pepper. In a good tabbouleh recipe, the herbs should lead and the bulgur should support.

Classic tabbouleh is usually served as part of a mezze spread with pita, hummus, falafel, grilled meats, or lettuce leaves. It is naturally vegan and dairy-free, though it is not gluten-free because bulgur is made from wheat.

Quick ratio: For a parsley-first tabbouleh, use about 3 packed cups finely chopped parsley with only 1/3 cup fine bulgur. That keeps the salad fresh and herb-heavy instead of turning it into a grain salad.

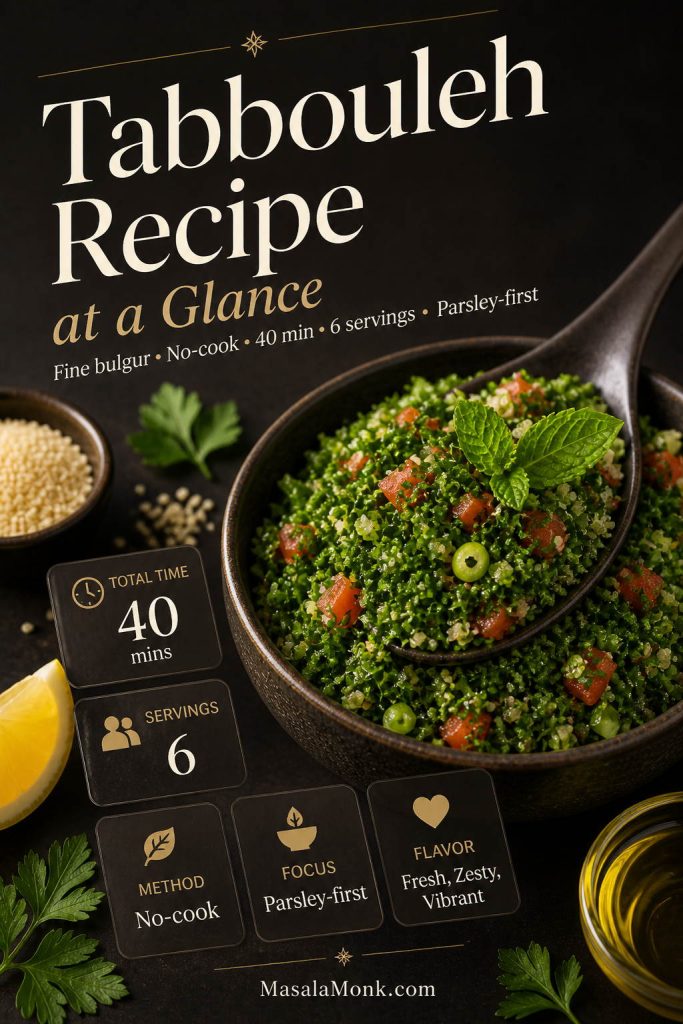
Tabbouleh Recipe at a Glance

This tabbouleh recipe is built for a fresh, parsley-heavy texture with fine bulgur, bright lemon dressing, and no cooking required when you use the right grain.

Best bulgur Fine #1 bulgur wheat
Cook time 0 minutes for fine bulgur
Total time About 40 minutes
Yield 6 servings, about 5–6 cups
Flavor Fresh, lemony, herb-heavy, lightly juicy
Best texture Finely chopped herbs, tender bulgur, no puddle of dressing
Make-ahead Best same day; leftovers keep 2–3 days
A tabbouleh recipe overview graphic with a finished salad, parsley, lemon, fine bulgur, and text showing no-cook method, 40 minutes, 6 servings, and parsley-first.
This tabbouleh recipe uses fine bulgur, needs no cooking, and takes about 40 minutes. The main texture goal is simple: plenty of parsley with just enough bulgur to support it.

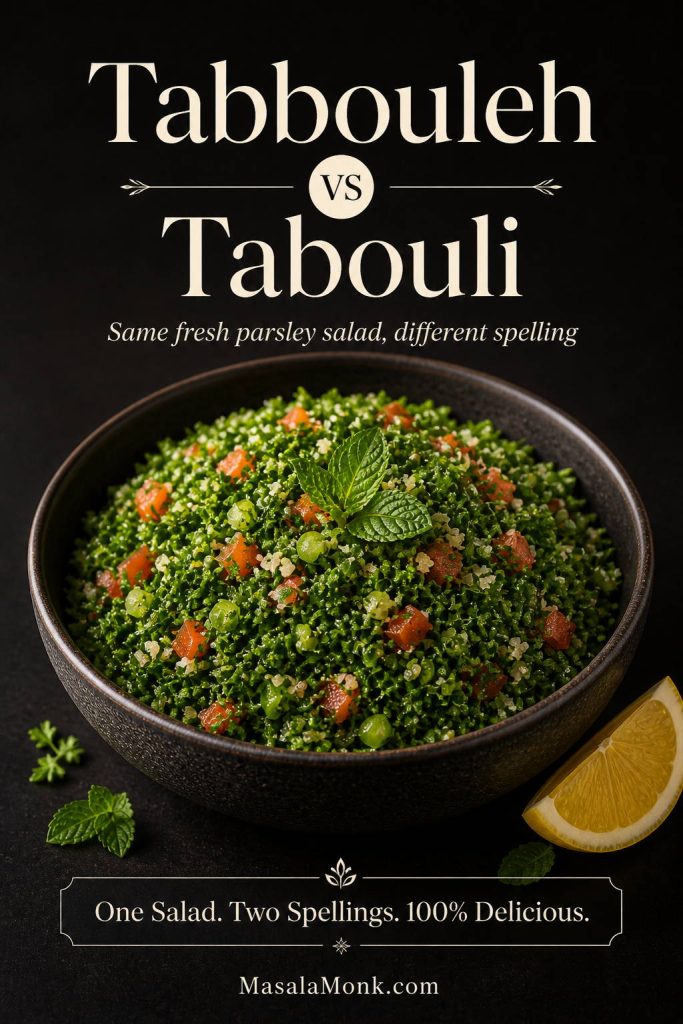
Tabbouleh vs Tabouli: Same Salad, Different Spelling

Tabbouleh and tabouli usually refer to the same salad. The spelling changes because the Arabic word is transliterated into English in different ways.

You may see it written as tabbouleh, tabouli, tabouleh, tabouli salad, or tabbouleh salad. The spellings vary by region, family tradition, and how the Arabic word is transliterated into English.

Here, the salad follows a Lebanese-style direction: finely chopped parsley, tomato, mint, green onion, fine bulgur, lemon juice, and olive oil.

A spelling comparison graphic showing one bowl of tabbouleh labeled with both “Tabbouleh” and “Tabouli.”
Tabbouleh and tabouli usually mean the same salad. The spelling changes, but the base stays familiar: parsley, tomato, mint, fine bulgur, lemon juice, and olive oil.

Why This Tabbouleh Recipe Works

Homemade tabbouleh usually goes wrong in a few predictable ways: too much bulgur, wet herbs, bland dressing, hard grains, or a watery bowl after 20 minutes. To avoid those problems, this version uses a parsley-first ratio, fine bulgur, careful draining, and a simple dressing that seasons the grain as it softens.

  • It is parsley-first. The salad tastes fresh and green, not heavy or grainy.
  • Fine bulgur keeps it no-cook. Fine #1 bulgur softens in lemon juice and olive oil while you chop the herbs.
  • The tomatoes are drained if needed. That keeps the salad juicy without turning soupy.
  • The dressing is simple. Lemon juice, olive oil, salt, and pepper are enough when the herbs are fresh.
  • The amounts are precise. Cups, grams, and milliliters are included so the parsley-to-bulgur balance stays right.

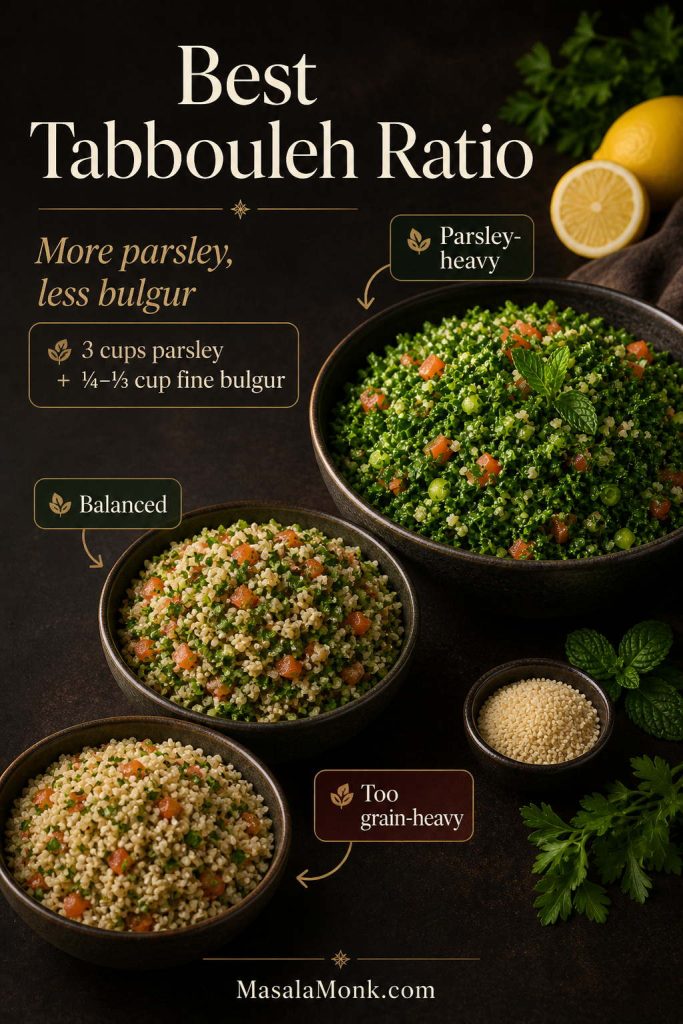
Best Parsley-to-Bulgur Ratio for Tabbouleh

The easiest way to keep tabbouleh fresh is to use a lot of parsley and only a small amount of bulgur. The bulgur should soften the bite and absorb flavor, but it should not make the salad heavy.

Style Parsley Bulgur Result
Parsley-heavy Lebanese-style 3 packed cups 1/4 to 1/3 cup fine bulgur Fresh, green, herb-led tabbouleh
Balanced everyday style 3 packed cups 1/2 cup fine bulgur Still fresh, but slightly more filling
Grain-heavy style 2–3 cups 3/4 cup or more More like bulgur salad than classic tabbouleh
A ratio comparison graphic with three tabbouleh bowls showing parsley-heavy, balanced, and grain-heavy versions.
For a Lebanese-style tabbouleh ratio, start with about 3 packed cups of chopped parsley and only ¼ to ⅓ cup fine bulgur. More bulgur makes the salad heavier and less herb-led.

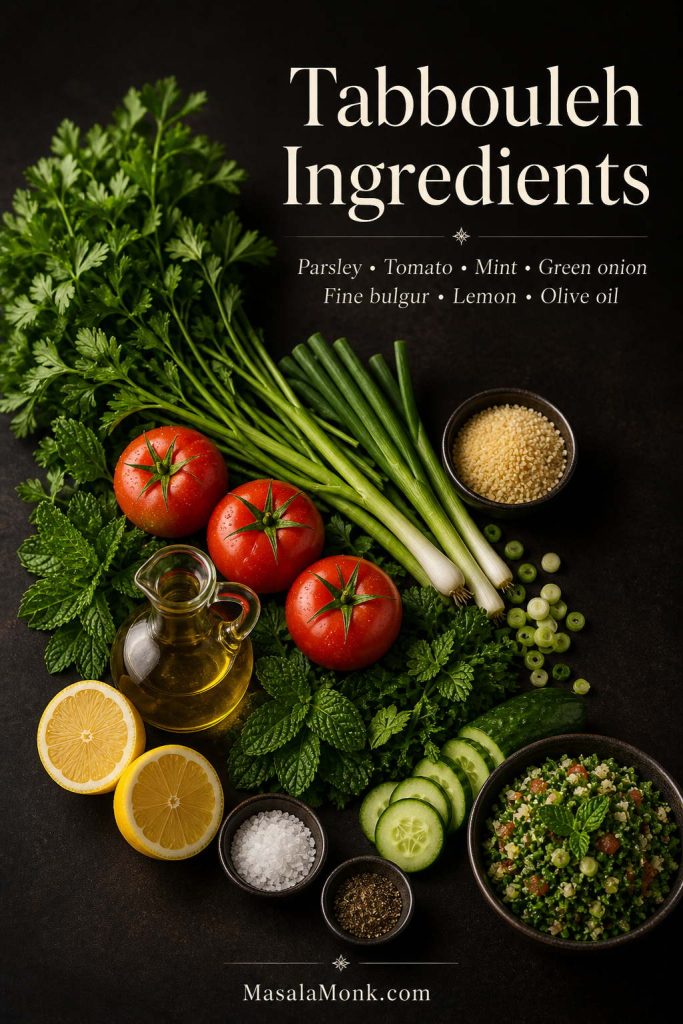
Tabbouleh Ingredients

For tabbouleh, this recipe keeps the ingredient list simple but pays close attention to texture: dry herbs, firm tomatoes, fine bulgur, fresh lemon, and enough olive oil to round everything out.

A dark ingredient board with parsley, mint, tomatoes, green onions, fine bulgur, lemon, olive oil, salt, pepper, and optional cucumber for tabbouleh.
The best tabbouleh ingredients are simple, but prep matters. Dry the herbs, use firm tomatoes, choose fine bulgur, and rely on fresh lemon juice rather than bottled citrus.

Parsley

Because parsley is the main ingredient, its texture matters. You can use curly parsley or flat-leaf parsley, but the leaves need to be very dry before chopping. Wet parsley is one of the main reasons tabbouleh becomes watery.

Chop the parsley finely with a sharp knife. A food processor can bruise the herbs and turn them wet or pasty if you overdo it.

Tomatoes

Use firm Roma tomatoes or another firm, meaty tomato. Chop them small, then drain off extra liquid if they are very juicy. You want tomato freshness, not a pool of tomato water at the bottom of the bowl.

Mint

Fresh mint gives tabbouleh its cooling lift. Do not use dried mint as a full replacement here; it will not give the same fresh, bright finish.

Green Onions or Scallions

Green onions add mild onion flavor without overpowering the herbs. Slice them finely so they disappear into the salad rather than standing out in large pieces.

Fine Bulgur

Fine #1 bulgur is best for Lebanese-style tabbouleh. It softens quickly and blends into the herbs without making the salad feel heavy.

Lemon Juice and Olive Oil

Fresh lemon juice gives tabbouleh its sharp, clean brightness. Extra-virgin olive oil rounds out the dressing and helps soften the bulgur. Bottled lemon juice is not ideal because the salad depends on a fresh citrus flavor.

Cucumber, Optional

Cucumber is optional. It adds crunch and freshness, especially in modern tabouli salad versions, but the salad still works beautifully without it. If you use cucumber, dice it small and drain it if it is watery.

If cucumber is the part you love most, you may also like this crisp cucumber salad recipe with vinegar, dill, and onion.

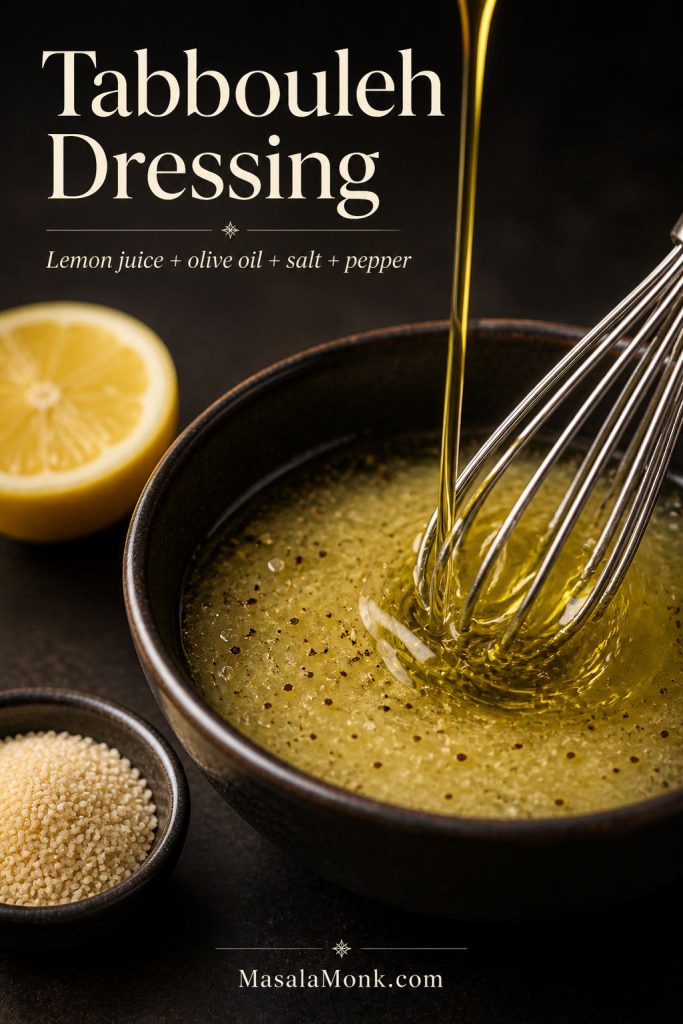
Tabbouleh Dressing

In this tabbouleh recipe, the dressing is simple: fresh lemon juice, extra-virgin olive oil, salt, and black pepper. It should lightly coat the herbs, season the tomatoes, and soften the fine bulgur without drowning the salad.

Lemon juice and olive oil being whisked into a tabbouleh dressing with salt, pepper, lemon halves, and fine bulgur nearby.
Tabbouleh dressing is not a thick vinaigrette. Lemon juice, olive oil, salt, and pepper should lightly coat the herbs and help fine bulgur soften without drowning the salad.

Here, the fine bulgur sits in the lemon-olive oil dressing while you chop the parsley, mint, tomatoes, and green onions. That gives the bulgur better flavor than soaking it in plain water.

Once the salad rests, taste before adding anything else. A pinch of salt usually fixes flat flavor, extra lemon brings brightness, and a small drizzle of olive oil softens a sharp edge.

Best Bulgur for Tabbouleh

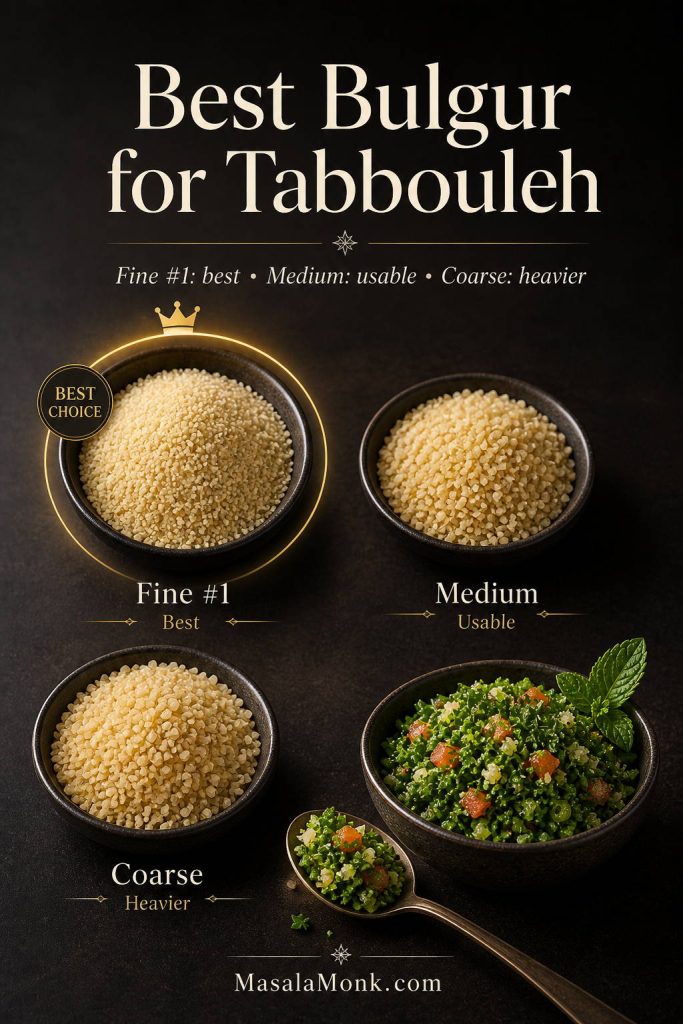
The best bulgur for tabbouleh is fine #1 bulgur. It is small enough to soften without boiling and delicate enough to stay in the background. That matters because tabbouleh should taste like a fresh herb salad, not a bulgur bowl.

Bulgur is wheat that has already been parboiled, dried, cracked, and sorted by size. That is why fine bulgur can soften quickly in dressing instead of needing a full boil. For more background, see the Whole Grains Council guide to bulgur and freekeh.

If your bulgur is medium or coarse, you can still use it, but the texture will be different and it usually needs hot water before mixing.

Bulgur or Swap Best For How to Prepare It
Extra-fine / #1 bulgur Best choice for Lebanese-style tabbouleh Soak in the lemon-olive oil dressing for 20–30 minutes. No cooking needed.
Fine bulgur Good everyday choice Soak until tender. Drain if you use water.
Medium bulgur Usable, but less delicate Soak in hot water, drain well, and cool before mixing.
Coarse bulgur More of a grain-salad texture Cook or hot-soak until tender, then cool completely. Use less than you would in a grain salad.
Cracked wheat Depends on grind and processing Usually needs longer soaking or cooking. Check texture before adding.
Quinoa Gluten-free tabbouleh variation Cook, cool completely, then mix with the herbs and dressing.
Cauliflower rice Grain-free variation Use raw or lightly salted and drained. Keep the pieces small and dry.
Couscous Quick variation, not classic tabbouleh Steam or soak, fluff, cool completely, then mix.
A bulgur comparison graphic showing fine, medium, and coarse bulgur, with fine bulgur marked as the best choice for tabbouleh.
Fine #1 bulgur is best for tabbouleh because it softens quickly and stays delicate. Medium or coarse bulgur can work, but it usually needs hot soaking and gives a heavier texture.
Do not overuse bulgur. If you add too much, the salad shifts from tabbouleh into a bulgur salad. For this recipe, 1/3 cup fine bulgur is enough for 6 servings.

What If You Only Have Medium or Coarse Bulgur?

If you only have medium or coarse bulgur, you can still make tabbouleh, but the texture will be less delicate. Put the medium or coarse bulgur in a bowl, cover it with hot water, and let it sit until tender. Drain it very well, press out excess moisture, and cool it completely before adding it to the herbs.

Use a smaller amount than you would in a grain salad. The goal is still a parsley-forward tabbouleh, not a heavy bulgur salad.

How to Buy Bulgur for Tabbouleh

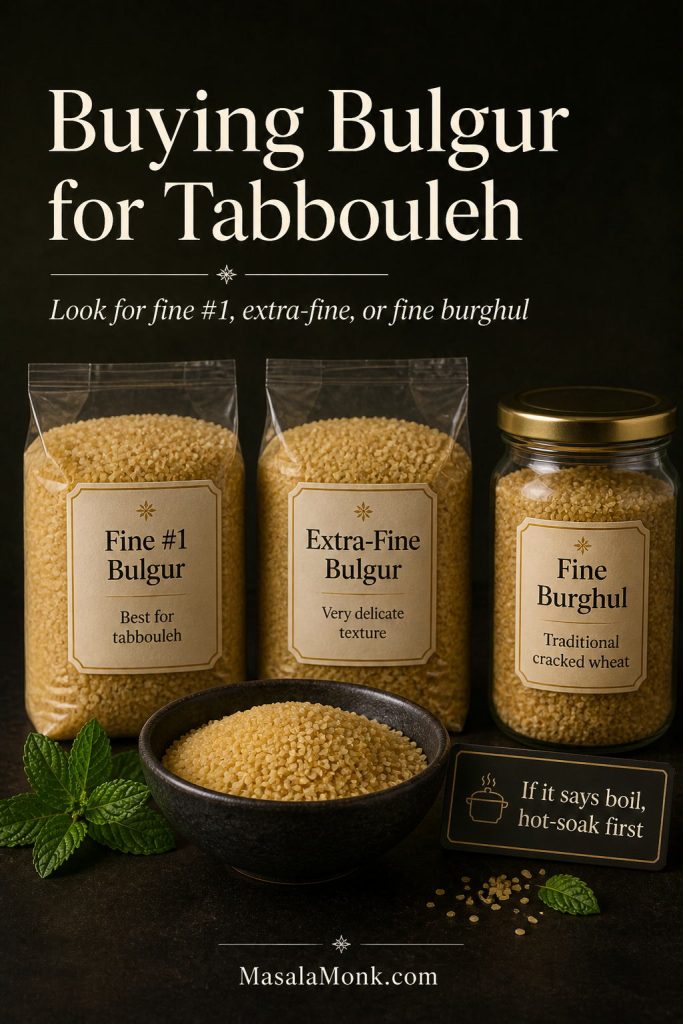
When shopping, look for fine #1 bulgur, extra-fine bulgur, or fine burghul. It is often easier to find in Middle Eastern grocery stores, international aisles, or natural-food stores than in the regular grain aisle. If the package says it must be boiled, treat it like medium or coarse bulgur and cool it before mixing.

A shopping guide graphic with bags or jars labeled fine #1 bulgur, extra-fine bulgur, and fine burghul for tabbouleh.
When buying bulgur for tabbouleh, look for fine #1, extra-fine bulgur, or fine burghul. If the package says it must be boiled, treat it like a coarser grain.

Equipment You’ll Need

You do not need special equipment, but a few basic tools make a big difference in the final texture.

  • Sharp chef’s knife: for finely chopping parsley without bruising it.
  • Large cutting board: tabbouleh uses a lot of herbs, so space helps.
  • Salad spinner or clean towels: for drying parsley and mint thoroughly.
  • Large mixing bowl: gives you room to toss without crushing the herbs.
  • Small bowl or measuring jug: for the lemon-olive oil dressing.
  • Fine-mesh strainer or colander: useful for draining tomatoes, cucumber, or soaked bulgur.

How to Make Tabbouleh

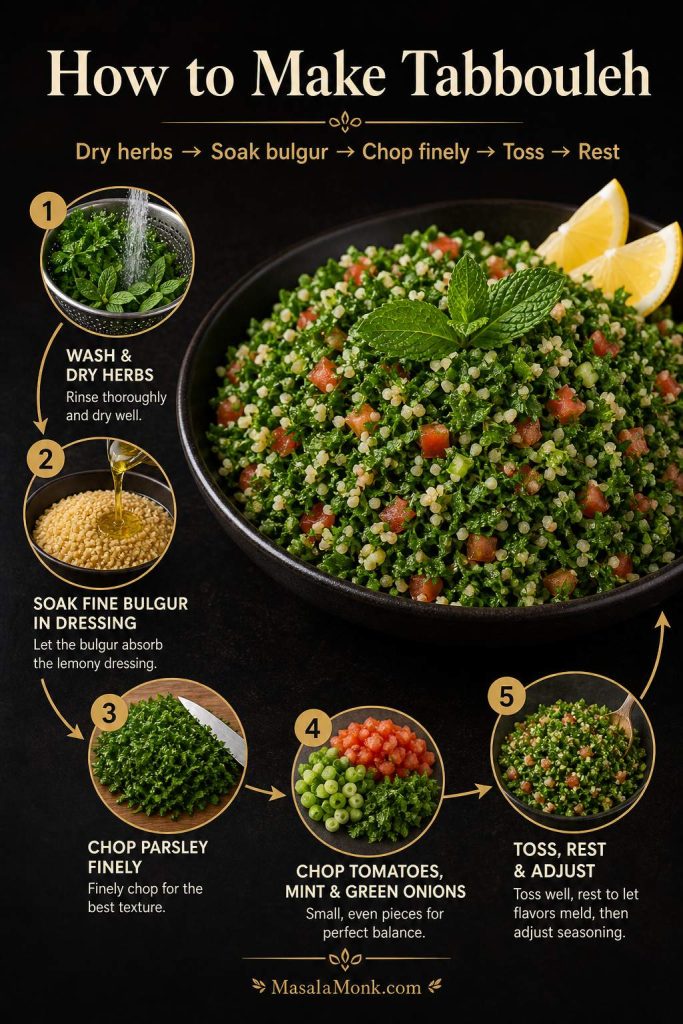
Good tabbouleh is mostly about prep. Although the ingredients are simple, the herbs need to be dry, the chopping needs to be fine, and the bulgur needs enough time to soften.

A step-by-step tabbouleh method graphic showing washing herbs, soaking bulgur, chopping parsley, chopping vegetables, and tossing the salad.
The tabbouleh method is mostly about order: dry the herbs first, soak fine bulgur in dressing, chop everything small, toss gently, then rest before the final seasoning check.

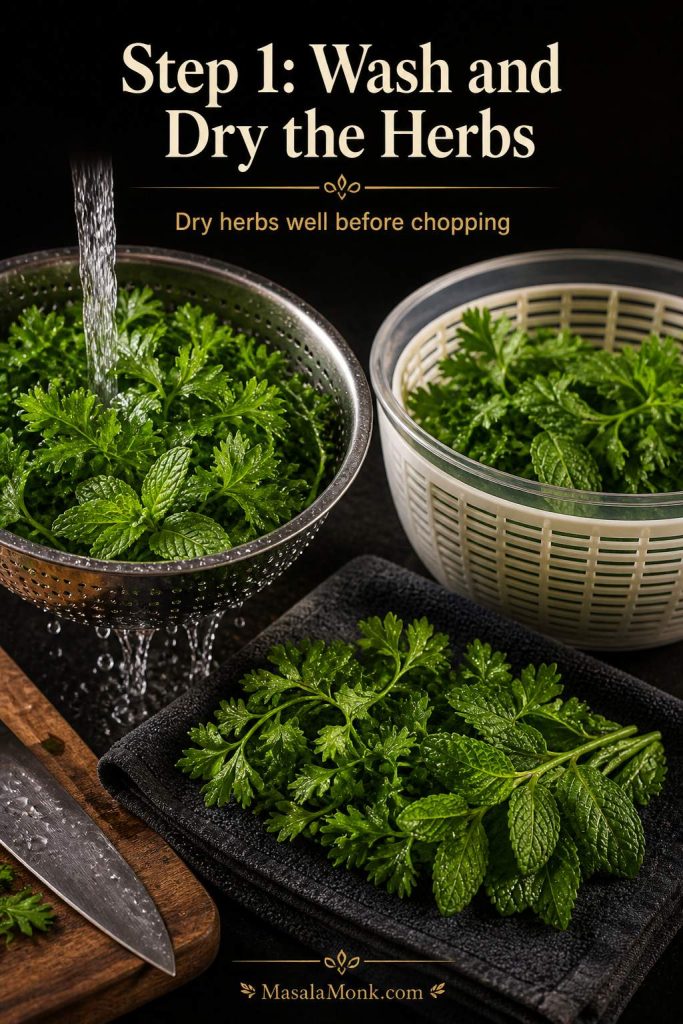
Step 1: Wash and Dry the Herbs

Wash the parsley and mint, then dry them very well. A salad spinner is helpful, but you can also spread the herbs on clean towels and pat them dry.

This step matters because wet herbs dilute the dressing and make the salad watery faster.

Fresh parsley and mint being washed, drained, and dried on a towel and in a salad spinner before making tabbouleh.
Dry parsley and mint thoroughly before chopping. Even a little extra water on the herbs can dilute the lemon-olive oil dressing and make tabbouleh turn watery.

Step 2: Soak the Fine Bulgur in the Dressing

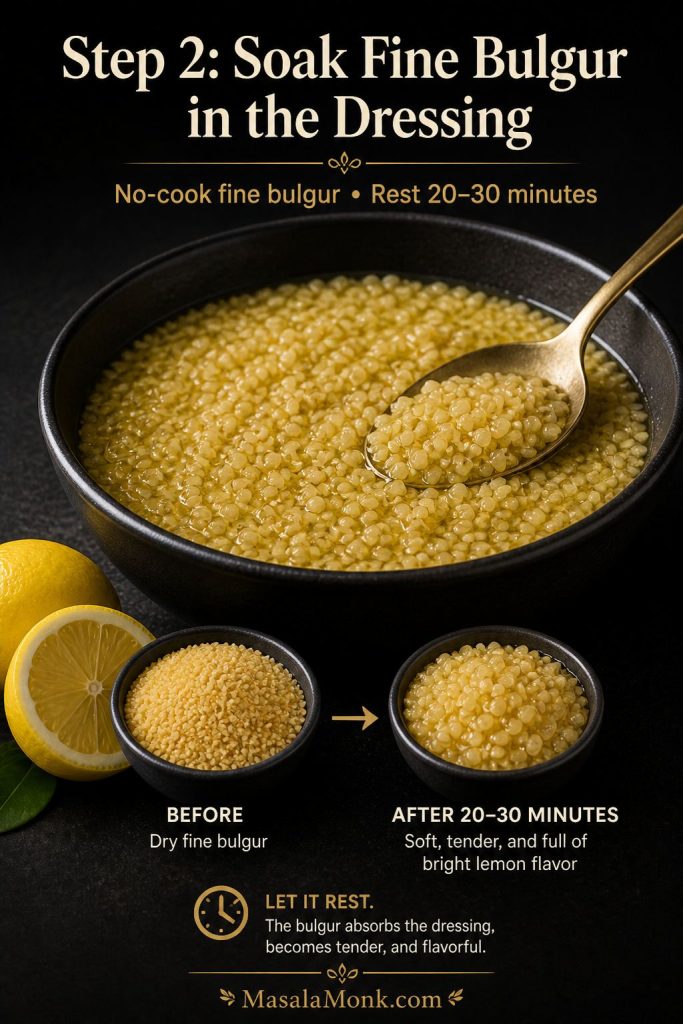
In a large mixing bowl, whisk together the lemon juice, 1/4 cup olive oil, salt, and pepper. Stir in the fine bulgur and let it sit for 20–30 minutes while you chop the herbs and vegetables.

The bulgur should soften but not become mushy. If it still tastes hard after resting, add 1 tablespoon of warm water or lemon juice, stir, and wait another 10 minutes.

Fine bulgur soaking in lemon and olive oil dressing in a dark bowl, with lemon and olive oil nearby.
Fine bulgur does not need boiling for this tabbouleh recipe. Let it sit in the lemon-olive oil dressing for 20–30 minutes so it becomes tender and better seasoned.

Step 3: Chop the Parsley Finely

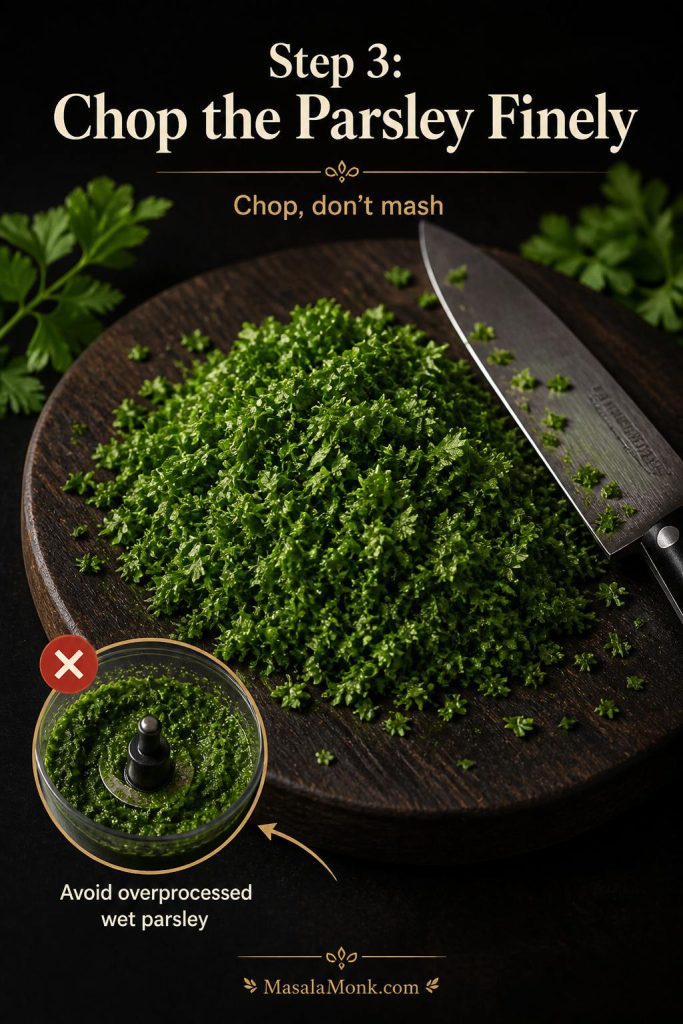
Gather the dry parsley into small bunches and chop it finely with a sharp knife. You want small, even pieces, not large leaves and not a wet green paste.

Tender stems are fine if they are chopped very small. Thick stems should be removed.

A parsley chopping guide showing finely chopped parsley on a cutting board and an inset warning against overprocessed wet parsley.
Hand-chopped parsley gives tabbouleh a lighter texture. A food processor can work only if pulsed carefully, but overprocessing turns the herbs wet, dark, and pasty.

Step 4: Chop the Tomatoes, Mint, and Green Onions

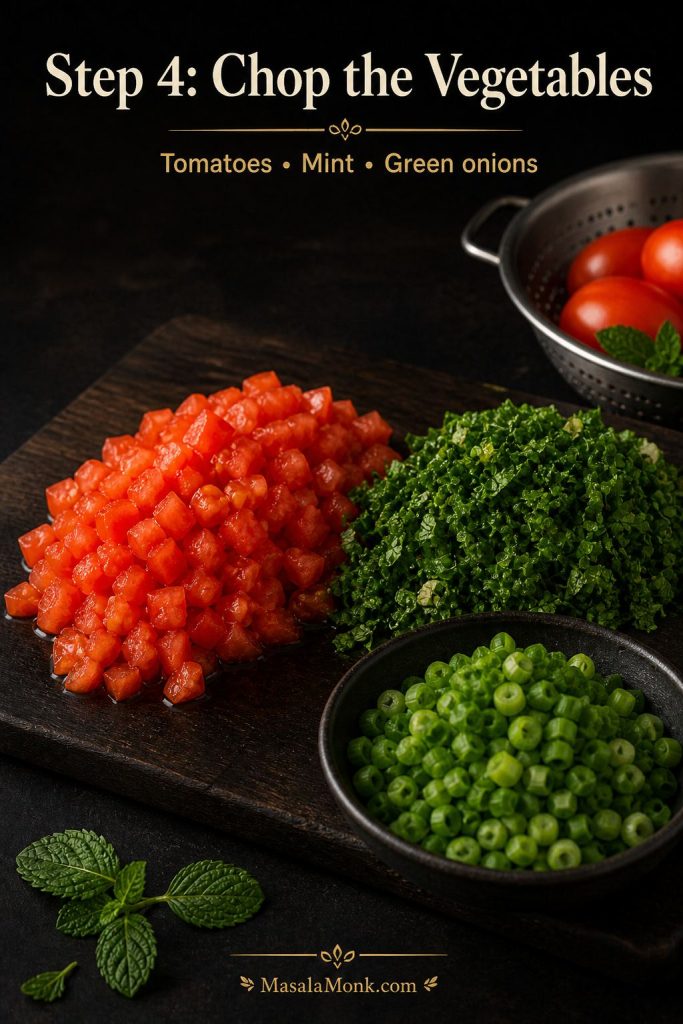
Finely chop the tomatoes, mint, and green onions. If the tomatoes release a lot of juice, drain them briefly before adding them to the bowl. If using cucumber, dice it small and drain it too.

Finely chopped tomatoes, mint, and green onions arranged on a dark cutting board for tabbouleh.
Chop tomatoes, mint, and green onions small enough to blend into every bite. If the tomatoes are juicy, drain them before mixing so the salad stays fresh instead of soupy.

Step 5: Toss, Rest, and Adjust

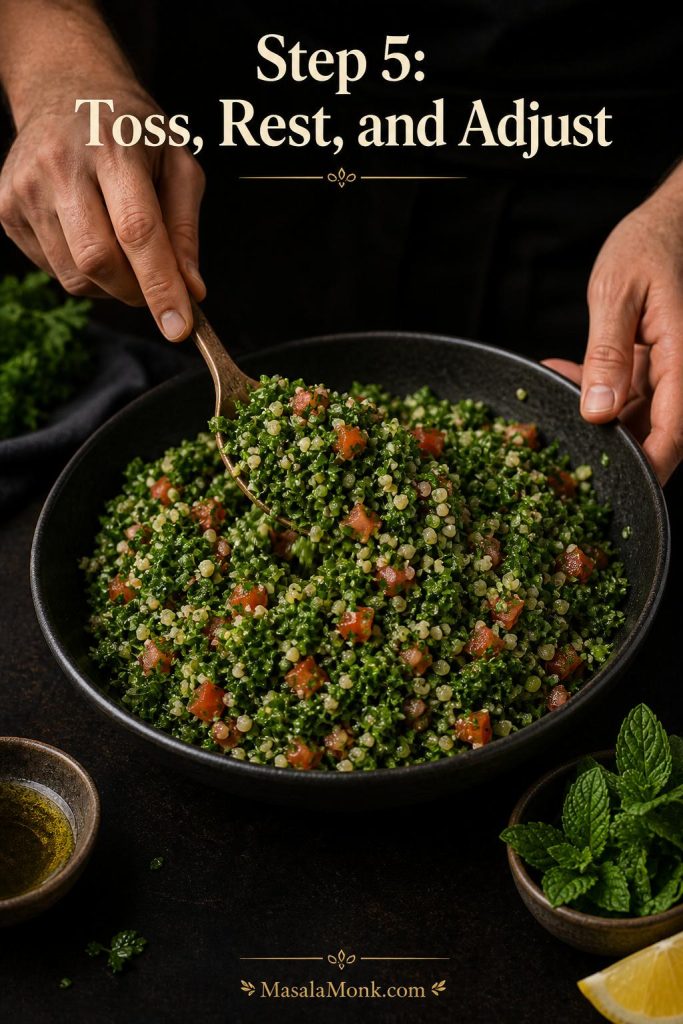
Add the parsley, mint, tomatoes, green onions, and optional cucumber to the soaked bulgur. Toss gently until everything is evenly coated, but do not crush the herbs.

Let the tabbouleh rest for 10 minutes, then taste and adjust. Start with salt if the flavor feels flat, brighten it with lemon if needed, or round it out with a little olive oil if the salad tastes too sharp. Add the remaining olive oil only if the salad needs a softer finish.

Hands gently tossing parsley-heavy tabbouleh with a spoon in a dark bowl.
Once the herbs, tomatoes, and softened bulgur are combined, toss gently and let the salad rest for about 10 minutes. After that, adjust salt, lemon, or olive oil.

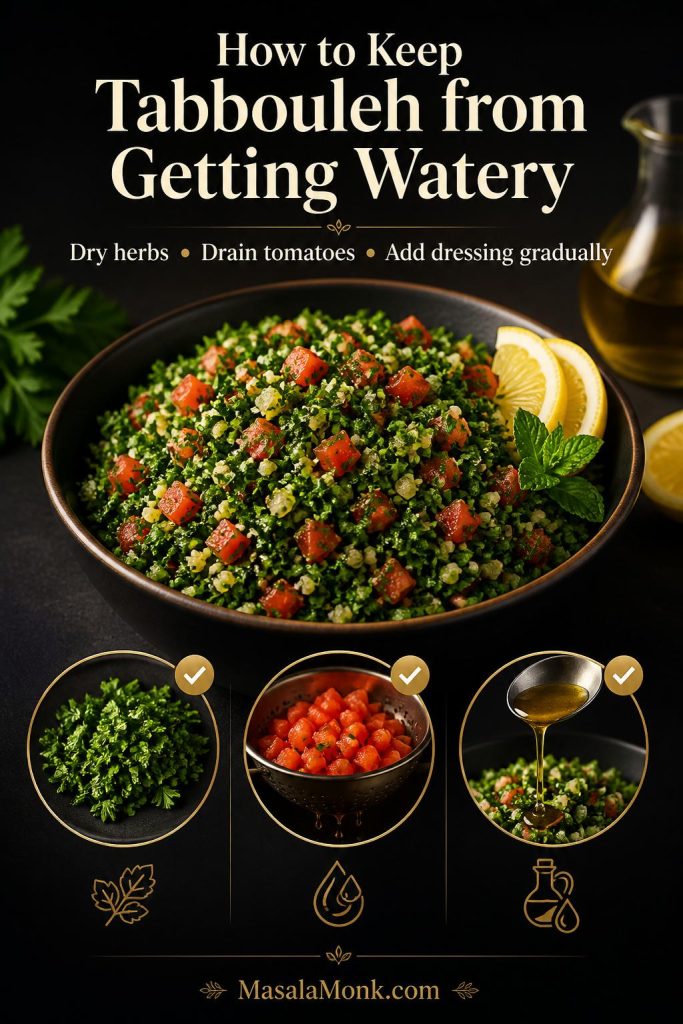
How to Keep Tabbouleh from Getting Watery

Watery tabbouleh usually comes from wet herbs, juicy tomatoes, too much dressing, or bulgur that has not been drained properly. The best fix is to control moisture before everything goes into the bowl.

Drain Juicy Tomatoes and Cucumber First

If your tomatoes or cucumber are very juicy, sprinkle them with a small pinch of salt and let them sit in a strainer for 10 minutes while you chop the herbs. After 10 minutes, drain the liquid before mixing. This keeps the salad fresh and juicy without creating a puddle at the bottom of the bowl.

A watery tabbouleh prevention graphic showing dry herbs, drained tomatoes, gradual dressing, and a finished bowl of tabbouleh.
Watery tabbouleh usually comes from wet herbs, juicy tomatoes, or too much dressing. Fix it before mixing by drying the herbs, draining the tomatoes, and adding dressing gradually.

Quick Fixes for Watery Tabbouleh

Problem Likely Cause Best Fix
Tabbouleh is watery Wet parsley, juicy tomatoes, or too much dressing Dry herbs thoroughly, drain tomatoes, and add dressing gradually.
Bulgur is hard Bulgur is too coarse or under-soaked Add 1–2 tablespoons warm water or lemon juice and rest 10–15 minutes.
Bulgur is soggy Too much soaking liquid Drain or blot if possible, then add more parsley, mint, or tomato.
Salad tastes flat Not enough salt or lemon Add salt first, then lemon juice in small amounts.
Salad tastes too sharp Too much lemon juice Add a little olive oil and extra tomato to round it out.
Parsley tastes harsh Pieces are too large or salad has not rested Chop finer next time and let the salad rest 10–20 minutes before serving.
Herbs look mushy Food processor overuse or wet herbs Chop by hand and dry herbs well before cutting.

What the Finished Tabbouleh Should Look Like

For the best texture, serve tabbouleh the same day it is made. Although it keeps well for a couple of days, the herbs soften as they sit.

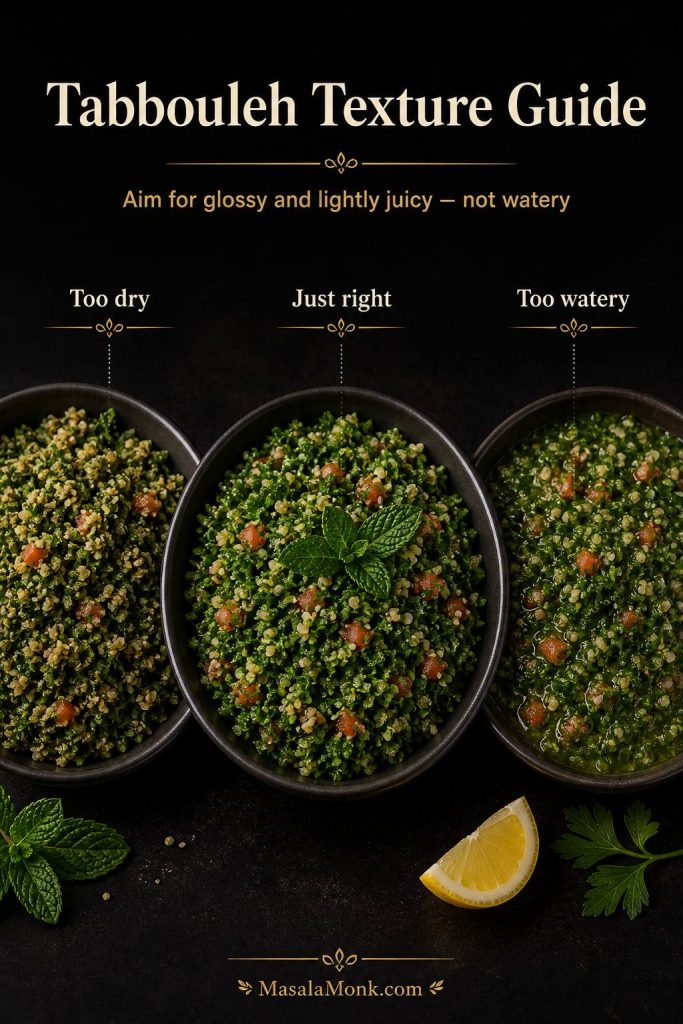
Best texture target: The finished tabbouleh should be finely chopped, glossy, lemony, and lightly juicy, but there should not be a puddle of dressing at the bottom of the bowl.

Do not worry if the herbs darken slightly after dressing. Proper tabbouleh should look moist and glossy, not dry and fluffy. The warning sign is excess liquid pooling underneath, not a lightly dressed herb texture.

A tabbouleh texture guide comparing too dry, just right, and too watery versions of the salad.
Finished tabbouleh should be glossy and lightly juicy, not dry and not puddled. If liquid collects at the bottom, lift the salad out with a slotted spoon and drain juicier vegetables next time.

Authentic Lebanese-Style Tabbouleh Tips

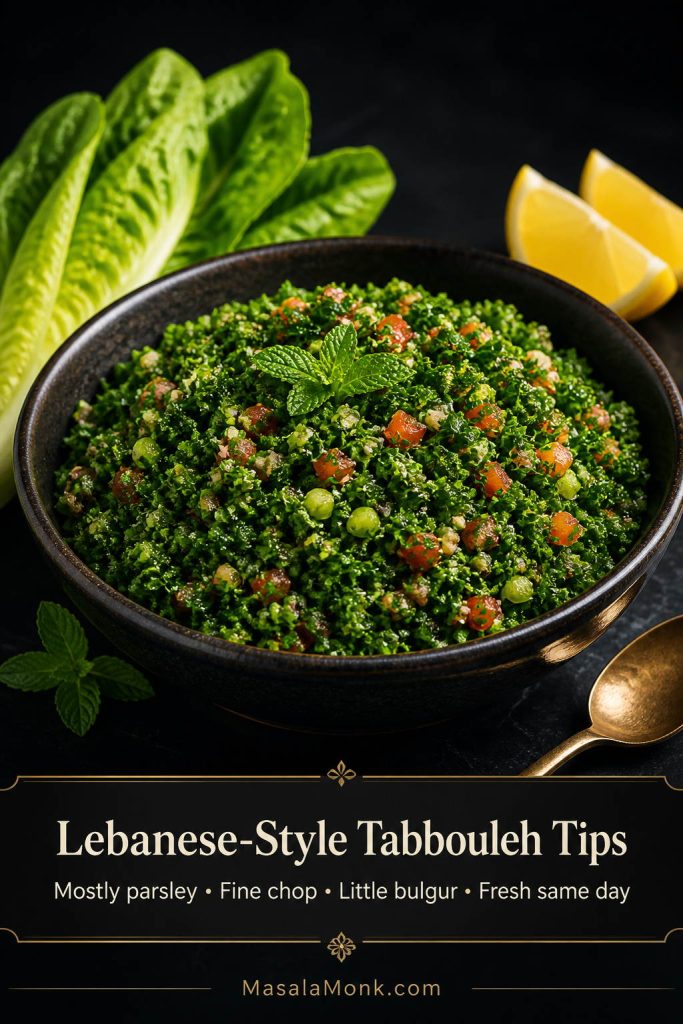
Lebanese-style tabbouleh is usually much more herb-heavy than many restaurant or grocery-store versions. Parsley should be the main ingredient, while the bulgur should add texture in the background rather than making the salad feel like a grain bowl.

A Lebanese-style tabbouleh tips graphic showing a mostly green parsley-heavy bowl with lemon wedges and romaine leaves.
Lebanese-style tabbouleh is usually much more herb-led than many store-bought versions. Use fine bulgur sparingly so the salad stays light, fresh, and finely chopped.
  • Use more parsley than bulgur. A small amount of fine bulgur is enough to give texture without taking over.
  • Chop everything finely. The parsley, tomatoes, mint, and green onions should feel evenly mixed in every bite.
  • Use fine bulgur if possible. Fine #1 bulgur gives the most delicate texture and does not need boiling.
  • Keep cucumber optional. Cucumber is common in many modern tabouli salad versions, but the salad still works beautifully without it.
  • Serve it fresh. Tabbouleh can be stored, but the brightest flavor and best herb texture are usually the same day.
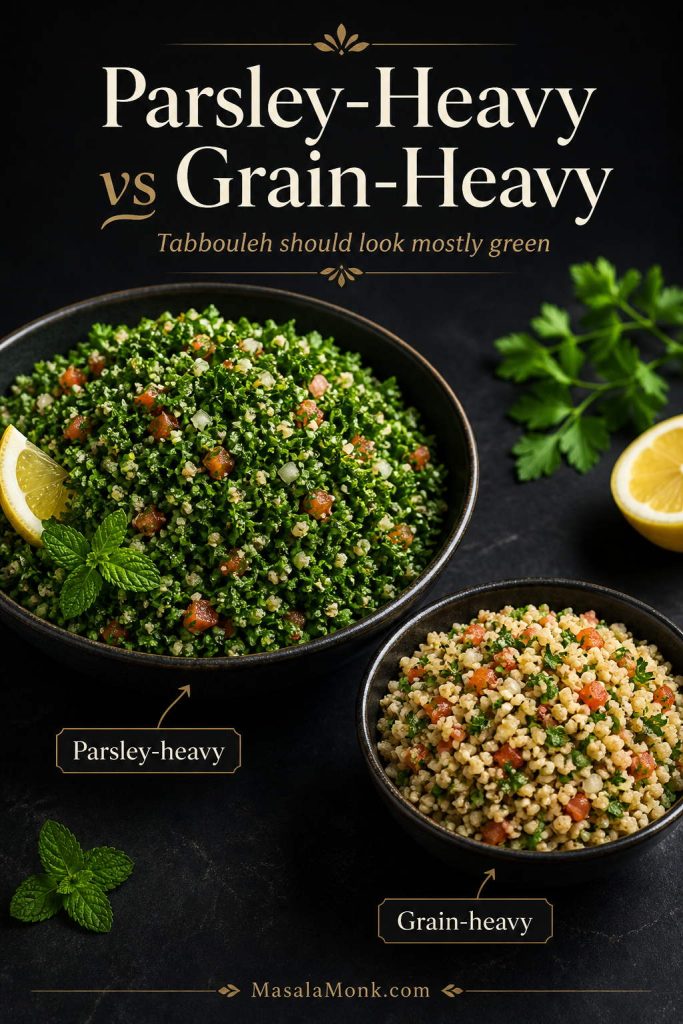
Texture cue: If the bowl looks mostly green with small flecks of tomato, mint, onion, and bulgur, you are close to a Lebanese-style tabbouleh texture. If it looks mostly grain-based, there is probably too much bulgur.
A comparison graphic with a green parsley-heavy tabbouleh bowl beside a beige grain-heavy bulgur salad bowl.
A parsley-heavy tabbouleh bowl looks green, fresh, and finely chopped. When the bowl looks beige or grain-led, the recipe has moved closer to bulgur salad.

Tabbouleh Recipe Card

Tabbouleh Recipe: Fresh Lebanese Tabouli Salad with Bulgur

This fresh tabbouleh recipe is parsley-first, lemony, and no-cook. Fine bulgur softens in the lemon-olive oil dressing while you chop the herbs, keeping the salad bright instead of watery.

Prep Time40 minutes
Cook Time0 minutes
Total Time40 minutes
Yield6 servings, about 5–6 cups

Ingredients

  • 1/3 cup fine #1 bulgur wheat, about 50g
  • 1/4 cup fresh lemon juice, 60ml
  • 1/4 to 1/3 cup extra-virgin olive oil, 60–80ml
  • 3/4 teaspoon fine salt, plus more to taste
  • 1/4 teaspoon black pepper
  • 3 packed cups finely chopped parsley, about 90–120g chopped leaves and tender stems
  • 2–3 firm Roma tomatoes, finely chopped and drained, about 250–300g
  • 3–4 green onions or scallions, finely chopped, about 45–60g
  • 1/4 to 1/3 cup finely chopped fresh mint, about 10–15g
  • 1 cup finely diced English cucumber, about 120–150g, optional
  • Romaine lettuce leaves, optional, for serving

Instructions

  1. Wash and dry the herbs. Wash the parsley and mint, then dry very well in a salad spinner or with clean kitchen towels.
  2. Soak the bulgur. In a large bowl, whisk lemon juice, 1/4 cup olive oil, salt, and pepper. Stir in the fine bulgur and let it sit for 20–30 minutes while you chop the herbs and vegetables.
  3. Chop the parsley. Finely chop the parsley by hand. Remove thick stems, but tender stems are fine if chopped small.
  4. Prepare the vegetables. Finely chop the tomatoes, green onions, mint, and optional cucumber. Drain tomatoes and cucumber if they release a lot of liquid.
  5. Mix the tabbouleh. Add the parsley, tomatoes, green onions, mint, and cucumber to the soaked bulgur. Toss gently until evenly combined.
  6. Rest and adjust. Let the salad rest for 10 minutes. Taste and adjust with more salt, lemon juice, or olive oil as needed. Use the remaining olive oil only if the salad needs a softer finish.
  7. Serve. Serve chilled or at room temperature, with romaine leaves, pita, hummus, falafel, or grilled dishes.

Notes

  • Fine #1 bulgur gives the best no-cook texture for tabbouleh.
  • If using medium or coarse bulgur, soak it separately in hot water, drain very well, and cool completely before mixing.
  • Dry the parsley thoroughly before chopping. Wet herbs make watery tabbouleh.
  • Drain juicy tomatoes and cucumber before adding them to the bowl.
  • For a stricter parsley-heavy version, skip the cucumber.
  • For gluten-free tabbouleh, use cooked and cooled quinoa or finely riced cauliflower instead of bulgur.
  • Best texture is the same day, but leftovers keep 2–3 days in the fridge.
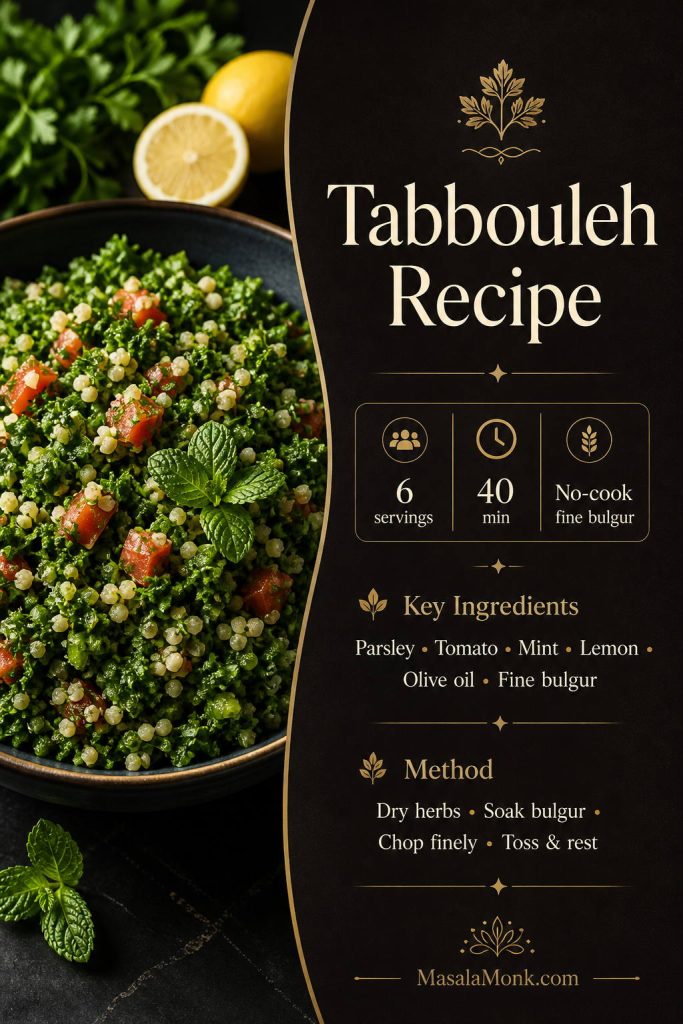
A visual tabbouleh recipe card with a finished salad, 6 servings, 40 minutes, no-cook fine bulgur, key ingredients, and method steps.
This tabbouleh recipe card keeps the essentials together: 6 servings, about 40 minutes, no-cook fine bulgur, fresh herbs, lemon dressing, and a short rest before serving.

Make-Ahead and Storage

Although tabbouleh can be made ahead, it is best when the herbs still taste fresh and lively. If you want to prepare it early, wash and dry the herbs first, then chop and mix closer to serving.

For the freshest texture, keep the chopped herbs, drained tomatoes, and soaked bulgur separate until close to serving, then toss and adjust the seasoning. This is especially helpful if you are making tabbouleh for guests.

  • Best same day: Tabbouleh has the brightest texture and flavor within a few hours of mixing.
  • Best for guests: Mix the salad within 30–60 minutes of serving for the freshest herb texture.
  • Best for leftovers: Store dressed tabbouleh in an airtight container for 2–3 days, knowing the herbs will soften over time.
  • Make-ahead tip: Wash and dry parsley up to 1 day ahead. Keep it wrapped in towels in the fridge.
  • Do not freeze: The tomatoes and herbs turn limp and watery after thawing.
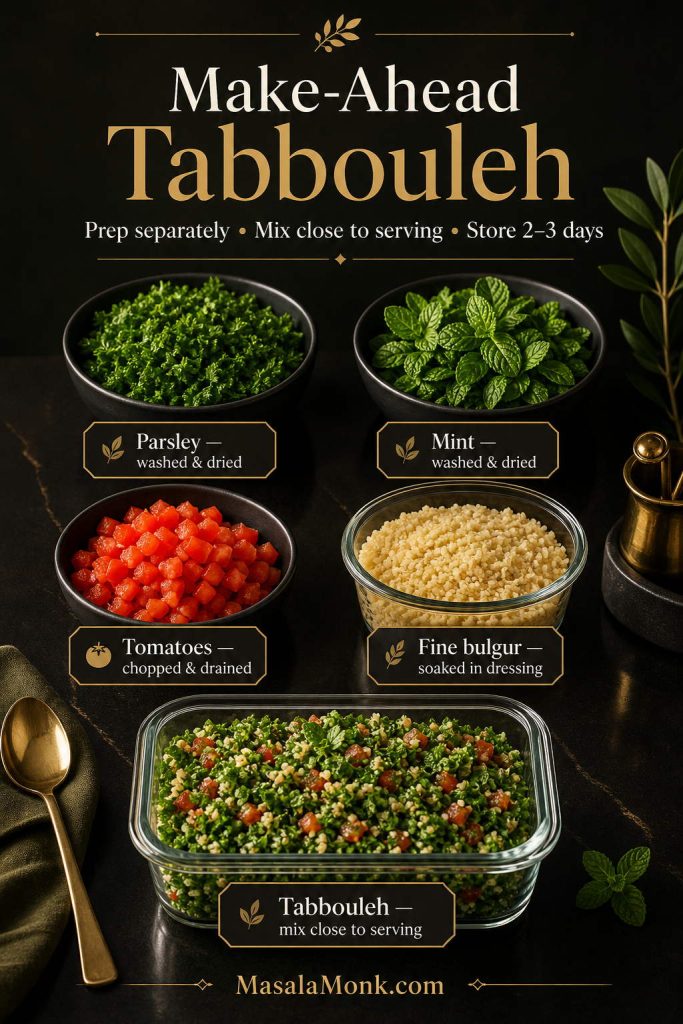
A make-ahead tabbouleh guide showing dried parsley, dried mint, drained tomatoes, fine bulgur soaked in dressing, and finished tabbouleh in a container.
For make-ahead tabbouleh, prep the herbs, tomatoes, and fine bulgur separately. Then mix close to serving and store leftovers in the fridge for 2–3 days.

If the salad tastes dull after sitting, refresh it with a small squeeze of lemon juice, a pinch of salt, and a drizzle of olive oil before serving. This brings back brightness without needing a full new batch of dressing.

What to Serve with Tabbouleh

Tabbouleh works as a salad, side dish, or part of a mezze spread. Its bright lemon and herb flavor makes it especially good beside richer dishes.

  • Hummus and warm pita
  • Falafel
  • Grilled chicken, kebabs, or kofta
  • Lentil soup
  • Stuffed pita wraps
  • Roasted eggplant or grilled vegetables
  • Romaine lettuce leaves for scooping
  • Rice bowls or grain bowls
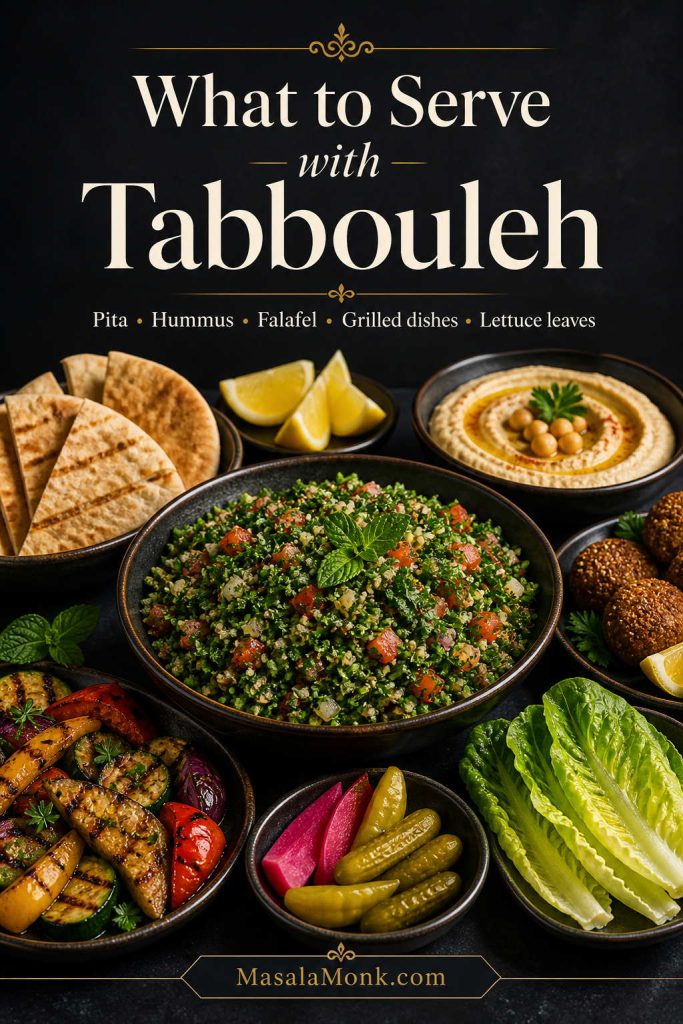
A mezze spread with tabbouleh, pita, hummus, falafel, pickles, grilled vegetables, lemon, and lettuce leaves.
Tabbouleh works well with mezze because its lemony herbs cut through richer foods. Serve it with pita, hummus, falafel, grilled dishes, pickles, or crisp lettuce leaves.

For a full mezze-style meal, serve tabbouleh with warm pita, hummus, pickles, and homemade falafel. If you are building a falafel, shawarma, or pita spread, a spoon of amba sauce adds a sharp, tangy contrast beside the fresh herbs.

For grilled chicken, wraps, or pita plates, tabbouleh also works well with a cooling tzatziki sauce. You can also spoon it into pita pockets with hummus, cucumber, and crisp vegetables, similar to this hummus veggie sandwich.

For a lighter plate, serve tabbouleh with hummus, raw vegetables, olives, and pita. For a fuller dinner, pair it with grilled chicken or lamb and a creamy yogurt sauce.

Tabbouleh Variations

Once you understand the base recipe for tabbouleh, the variations are easy. For example, you can swap bulgur for quinoa, cauliflower rice, or couscous while keeping the herbs generous, the pieces small, and the lemon-olive oil balance bright.

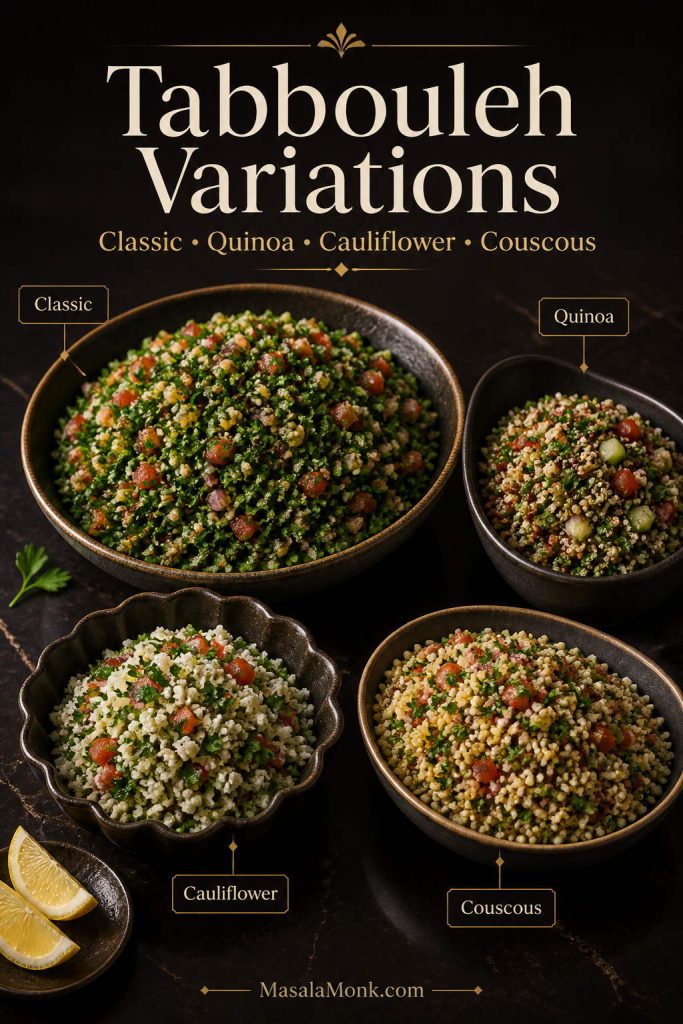
A tabbouleh variations graphic showing classic bulgur, quinoa, cauliflower, and couscous versions in separate bowls.
Once the parsley-heavy base is clear, tabbouleh variations are easy. Use quinoa for gluten-free tabbouleh, cauliflower rice for grain-free tabbouleh, or couscous for a quick variation.

Quinoa Tabbouleh

Use cooked and fully cooled quinoa instead of bulgur. Quinoa tabbouleh is the best gluten-free version because quinoa has a small grain size and absorbs lemon dressing well. Keep the parsley generous so it still tastes like tabbouleh, not just quinoa salad.

If you are using quinoa for meal prep, this quinoa and chickpea salad idea shows how well quinoa works with cucumber, tomatoes, red onion, and lemon-tahini dressing.

Cauliflower Tabbouleh

Use finely riced cauliflower instead of bulgur for a grain-free version. Raw cauliflower rice works well if it is chopped small and not watery. For a softer texture, salt it lightly, let it sit for a few minutes, then squeeze out extra moisture before mixing.

Couscous Tabbouleh

Couscous tabbouleh is a quick variation, but it is not the traditional version. Cook or soak the couscous, fluff it, cool it completely, then mix with the herbs, tomato, lemon, and olive oil.

No-Bulgur Tabbouleh

You can skip the bulgur for a lighter herb salad. The texture will be less traditional, but it works if you want a very fresh salad with parsley, tomato, mint, lemon, and olive oil.

Extra-Lemony Tabbouleh

If you like a sharper salad, add another tablespoon of lemon juice after the salad rests. Add it gradually because too much lemon can overpower the herbs.

Tabbouleh FAQs

Is tabbouleh the same as tabouli?

Yes. Tabbouleh and tabouli usually mean the same parsley, tomato, mint, bulgur, lemon, and olive oil salad. The difference is mostly spelling.

What is tabbouleh made of?

Tabbouleh is made with parsley, tomatoes, mint, green onions, fine bulgur, lemon juice, olive oil, salt, and pepper. Some versions also include cucumber.

What kind of bulgur is best for tabbouleh?

Fine #1 bulgur is best for tabbouleh because it softens quickly and does not overpower the parsley. Medium or coarse bulgur can work, but it usually needs hot water and gives the salad a heavier texture.

Do you cook bulgur for tabbouleh?

You do not need to cook fine bulgur for tabbouleh. In this recipe, it softens in the lemon-olive oil dressing while you chop the herbs and vegetables. Medium or coarse bulgur should be hot-soaked or cooked, then cooled before mixing.

Can I make tabbouleh without bulgur?

Yes. You can leave out the bulgur for a lighter parsley salad, but the texture will be less traditional. If you want a gluten-free version with a similar small-grain feel, cooked and cooled quinoa is the best swap.

Is tabbouleh gluten-free?

Classic tabbouleh is not gluten-free because bulgur is made from wheat. For a gluten-free version, use cooked quinoa or cauliflower rice instead of bulgur.

Is tabbouleh vegan?

Yes. Traditional tabbouleh ingredients are plant-based, so the salad is naturally vegan and dairy-free.

Is tabbouleh healthy?

Tabbouleh is a fresh, herb- and vegetable-heavy salad made with parsley, tomatoes, mint, lemon juice, olive oil, and a small amount of bulgur. It can fit well into a balanced Mediterranean-style meal with vegetables, legumes, whole grains, and olive oil. For broader context, Harvard’s Nutrition Source has a useful overview of the Mediterranean diet pattern.

Why is my tabbouleh watery?

Tabbouleh becomes watery when the parsley is wet, the tomatoes are too juicy, the cucumber is not drained, or too much dressing is added. Dry the herbs well, drain juicy vegetables, and let the salad rest before adjusting the final seasoning.

Should tabbouleh be served cold?

Tabbouleh can be served chilled or at room temperature. It tastes best after a short rest, but it should not sit out for too long because the herbs soften and the tomatoes release more liquid.

How long should tabbouleh rest before serving?

Let tabbouleh rest for about 10–30 minutes after mixing. That gives the bulgur time to finish softening and lets the lemon, olive oil, herbs, and tomatoes settle into a brighter flavor.

Can I make tabbouleh ahead of time?

Yes, but it tastes freshest the same day. You can wash and dry the herbs ahead of time, then chop and mix the salad closer to serving. Leftovers keep 2–3 days in the fridge.

Can I freeze tabbouleh?

No. Tabbouleh does not freeze well because the herbs and tomatoes become limp and watery after thawing.

Can I use quinoa instead of bulgur?

Yes. Use cooked and cooled quinoa instead of bulgur for a gluten-free quinoa tabbouleh. Keep the herbs generous so the salad still tastes fresh and parsley-forward.

Can I use couscous instead of bulgur?

Yes, but couscous tabbouleh is a quick variation rather than the classic version. Cook or soak the couscous, cool it completely, then mix with the herbs, tomatoes, lemon, and olive oil.

Can I use cauliflower rice instead of bulgur?

Yes. Finely riced cauliflower makes a grain-free tabbouleh variation. Use it raw for crunch or salt and drain it lightly for a softer texture.

Should I use curly parsley or flat-leaf parsley?

Both can work. Curly parsley gives a fluffy, traditional-looking texture, while flat-leaf parsley has a stronger flavor and is easier to chop. Whichever you use, dry it very well before chopping.

Can I chop parsley in a food processor?

You can, but hand-chopping gives better texture. If using a food processor, pulse carefully and stop before the parsley becomes wet or pasty.

A close serving image of fresh parsley-first tabbouleh with a spoon, pita wedges, lemon, and romaine leaves.
Before serving, taste the rested tabbouleh one last time. Salt fixes flat flavor, lemon adds brightness, and a small drizzle of olive oil softens sharp edges.

Tabbouleh Recipe Tips to Remember

For the best tabbouleh, keep the salad parsley-first, use fine bulgur, dry the herbs thoroughly, drain juicy tomatoes, and taste after the salad rests. Those small details make the difference between a fresh, bright herb salad and a watery, grain-heavy bowl.