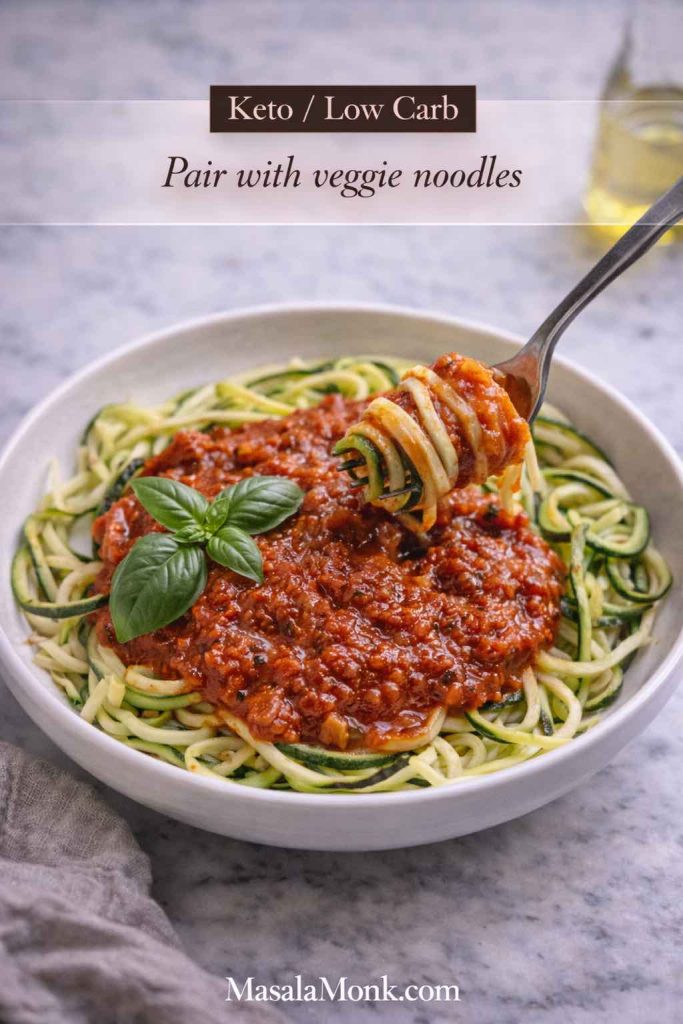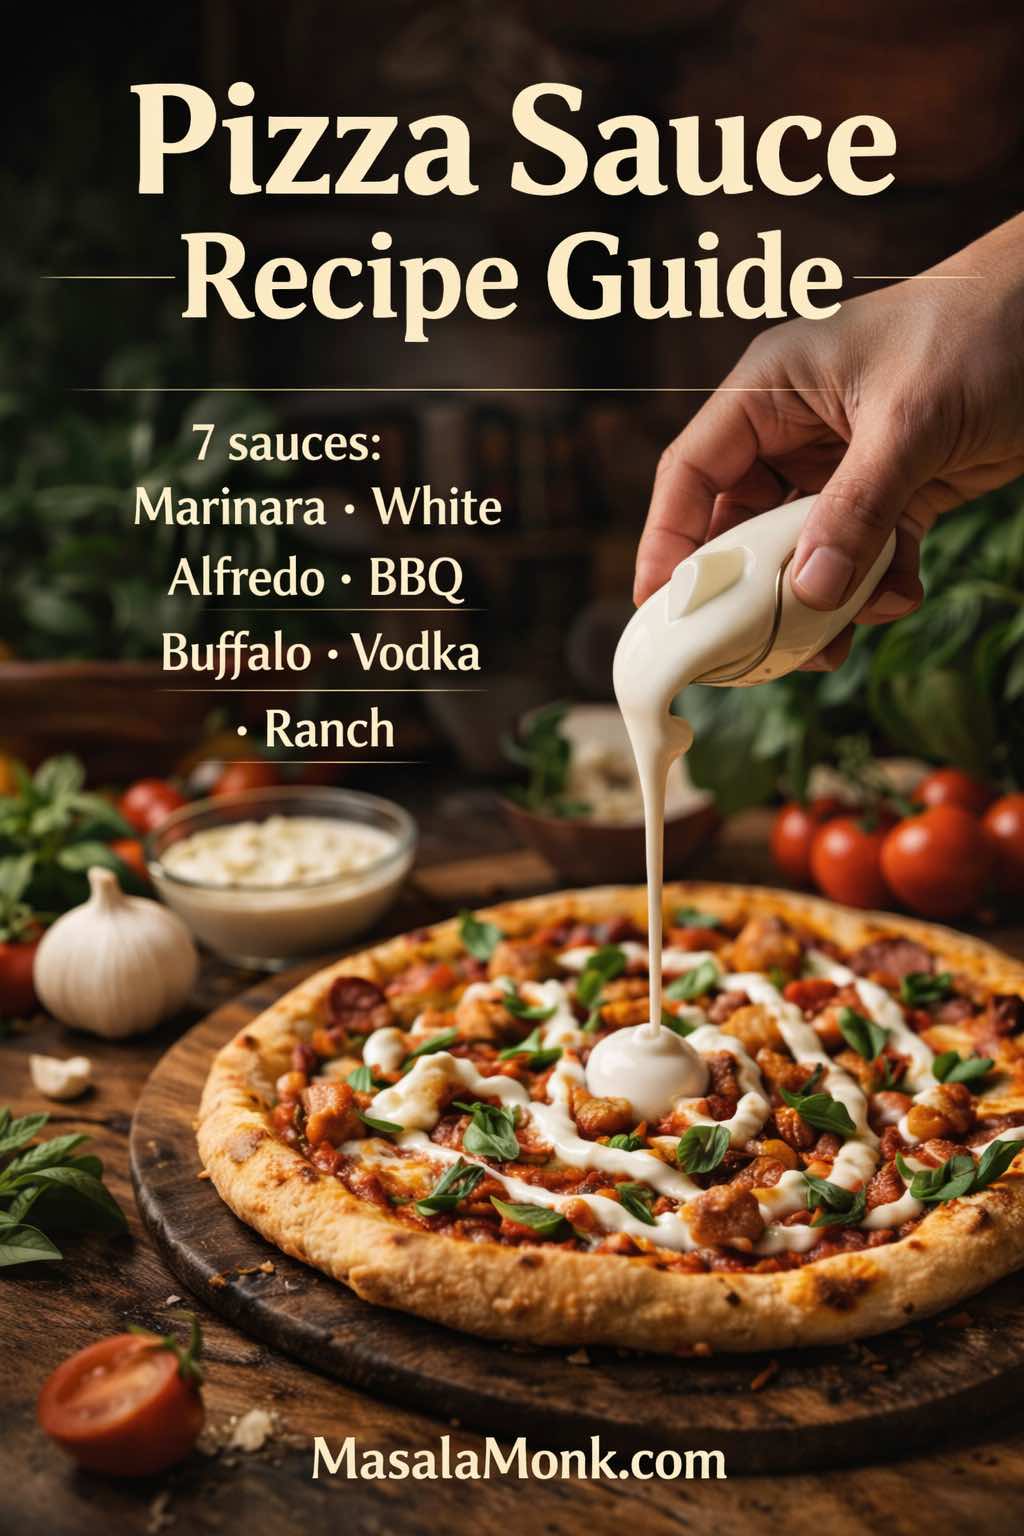
If you’ve ever looked up a pizza sauce recipe and somehow ended up with a dozen tabs open, you already know what’s going on: pizza night isn’t one craving, it’s several. One person wants marinara pizza that tastes bright and classic. Someone else is hoping for a white base pizza with a creamy, garlicky bite. Meanwhile, another person is basically chanting “buffalo sauce on pizza” and refusing to negotiate unless pizza ranch dressing is on the table.
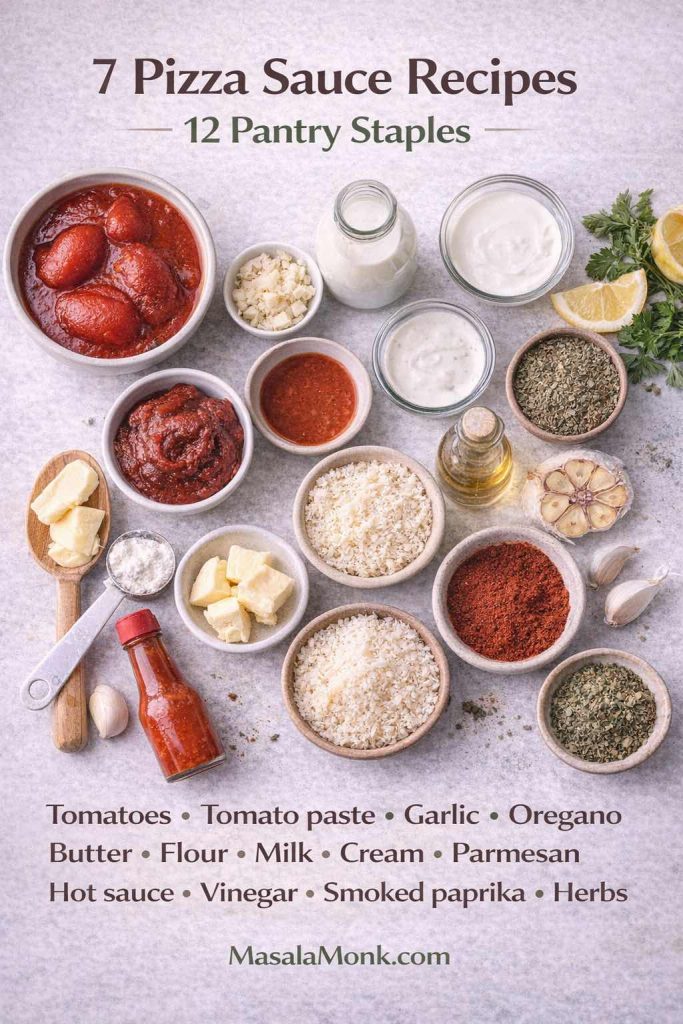
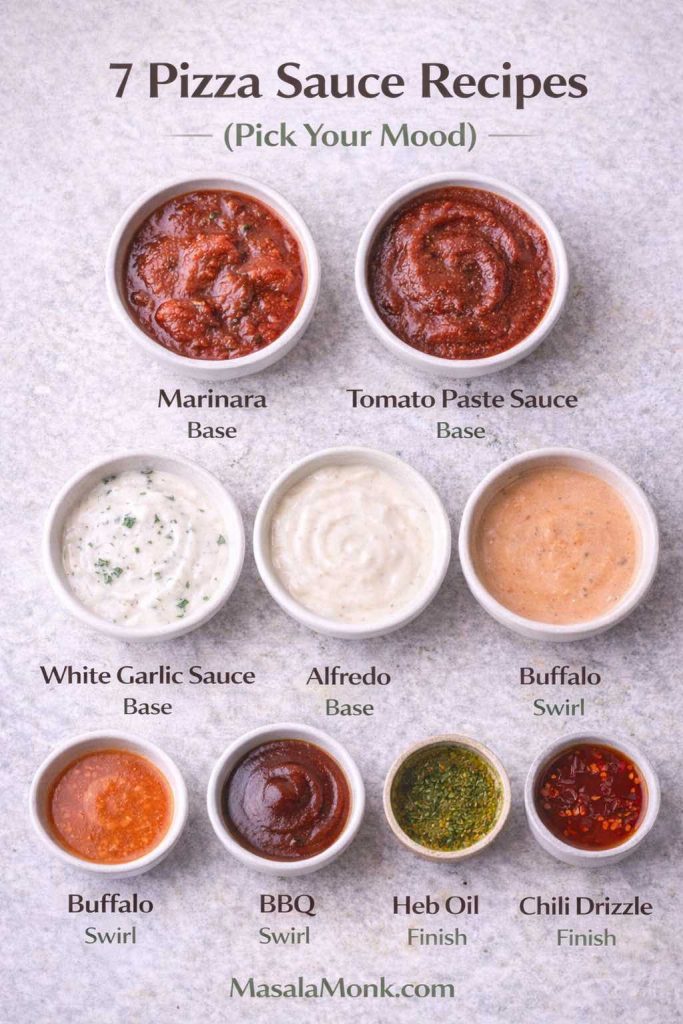
So, rather than forcing everyone into a single sauce choice, this post gives you a practical lineup of seven sauces that cover the major moods—red, white, rich, spicy, smoky, creamy-tomato, and tangy-cool. Each pizza sauce recipe is written to work in a hot oven (so your crust stays crisp), and each one includes the small decisions that make a big difference: whether it should be a base, a swirl, or a finish, plus the toppings that actually make sense with it.
If you like a lighter foundation for your pizza nights, you can also borrow ideas from MasalaMonk’s Satvic pizza approach. On the other hand, if you want full comfort-mode slices, you’re still in the right place—because these sauces are built to taste bold even under cheese.
The pizza sauce recipe basics: thickness, layering, timing
A sauce can taste perfect in a spoon and still fail on pizza. However, that usually isn’t because the recipe is “bad.” More often, it’s because pizza cooking is unforgiving: high heat, dry air, and dough that turns steamy if the sauce is too loose.
So before you pick your favorite pizza sauce recipe below, keep these three rules in mind. They’ll protect your crust, sharpen your flavor, and make the whole night feel smoother.
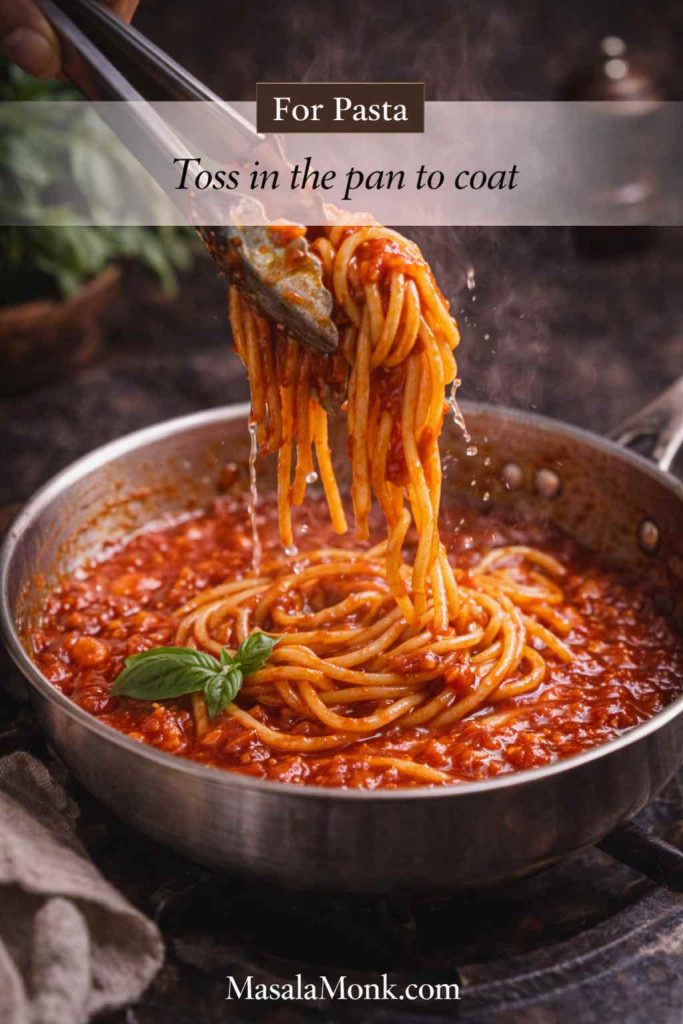
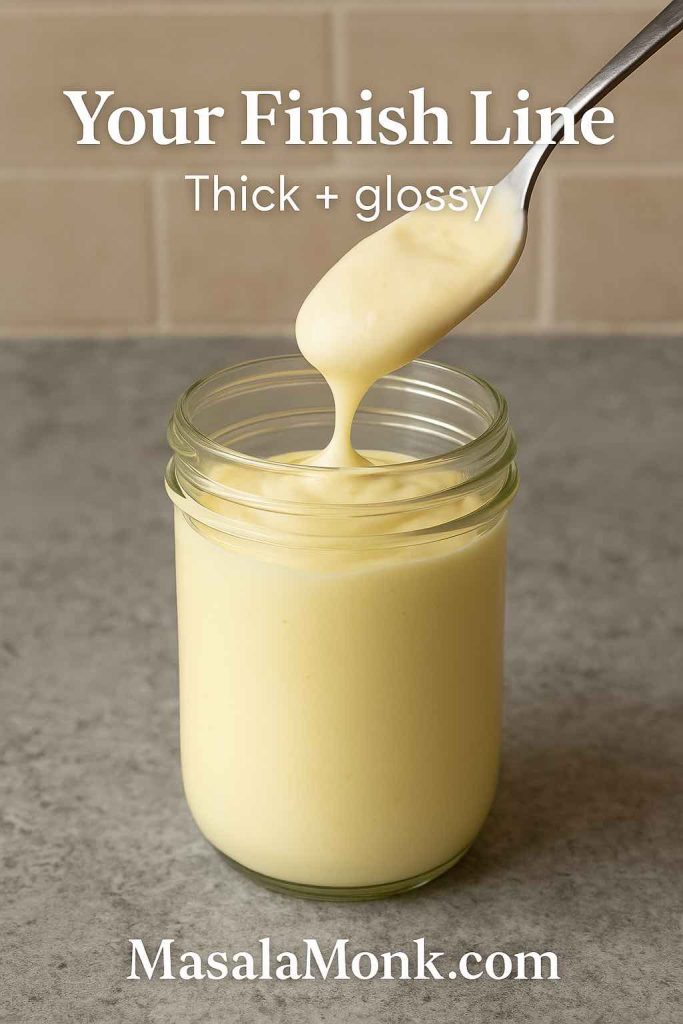
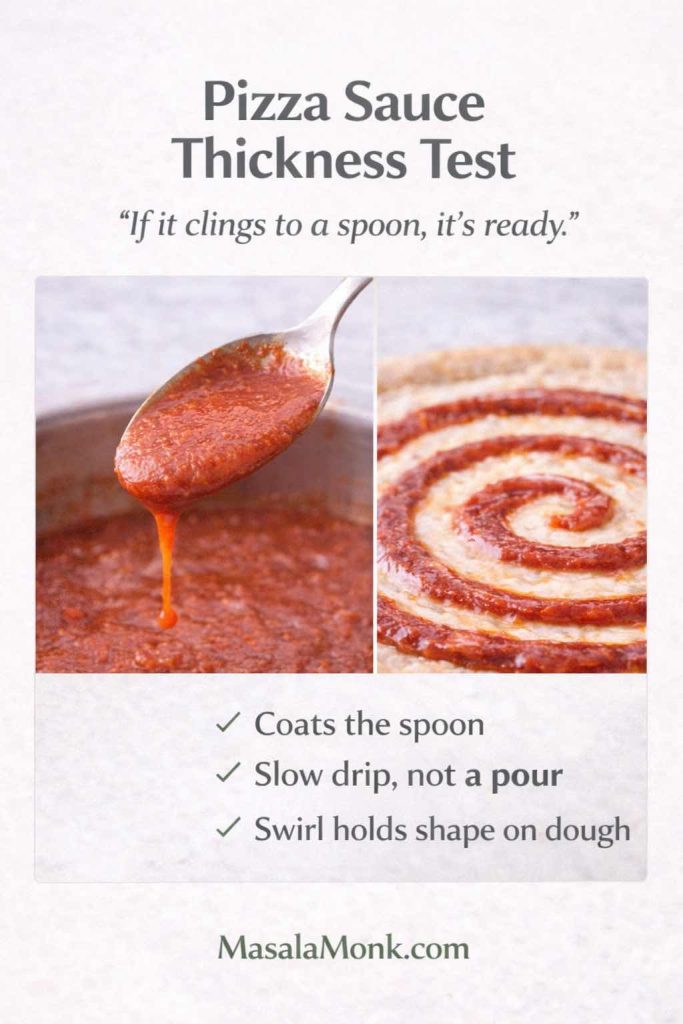
1) Make it thicker than a pasta sauce
Pasta sauces can be a little loose because pasta carries them. In contrast, pizza sauce sits on top of dough and has to behave under heat. Therefore, if your sauce pours like soup, reduce it longer. When the sauce coats a spoon and slowly slides off, you’re in the right range.
If you’re starting from fresh tomatoes, MasalaMonk’s guide on tomato sauce from fresh tomatoes is useful, especially for learning how reduction changes texture.
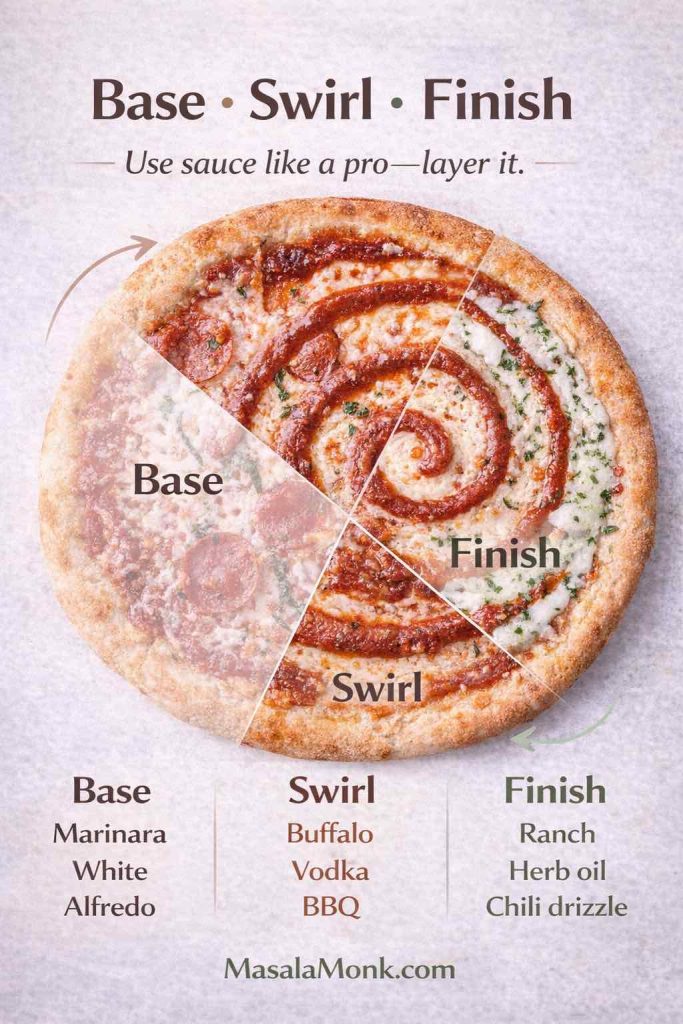
2) Decide: base, swirl, or finisher
This is where pizza starts tasting like you planned it.
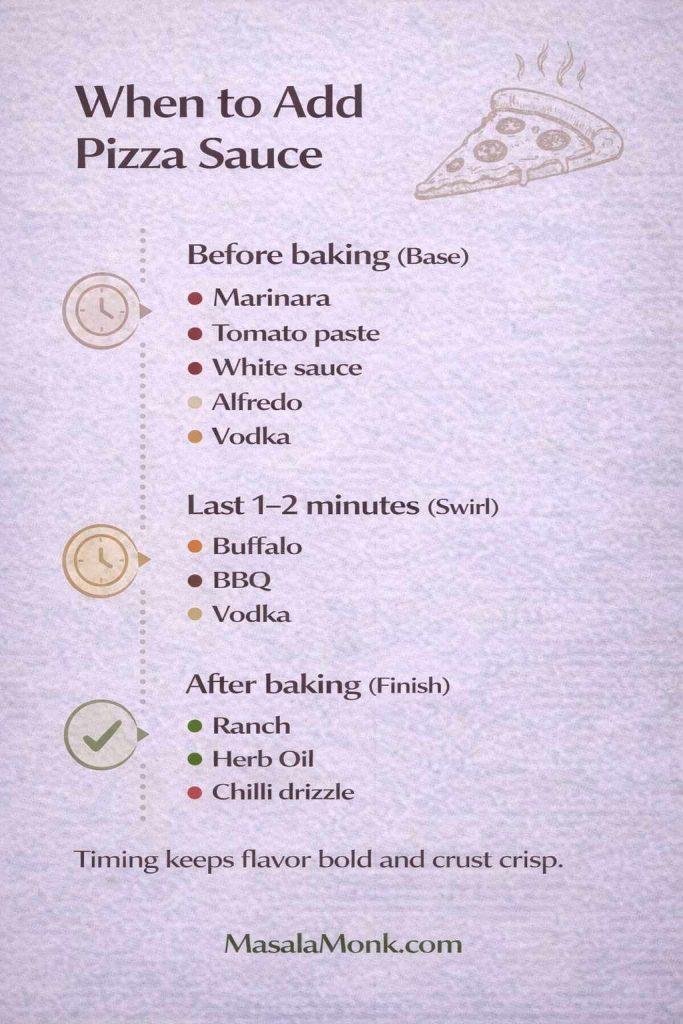
- Base sauce goes under cheese (marinara, white pizza sauce, Alfredo sauce, barbecue pizza sauce, pizza vodka sauce).
- Swirl sauce goes lightly on top (buffalo sauce on pizza works best like this; vodka and BBQ can, too).
- Finisher goes on after baking (pizza ranch dressing is the classic example).
Because of that simple choice, you stop oversaucing by default, and your crust stops turning soggy.
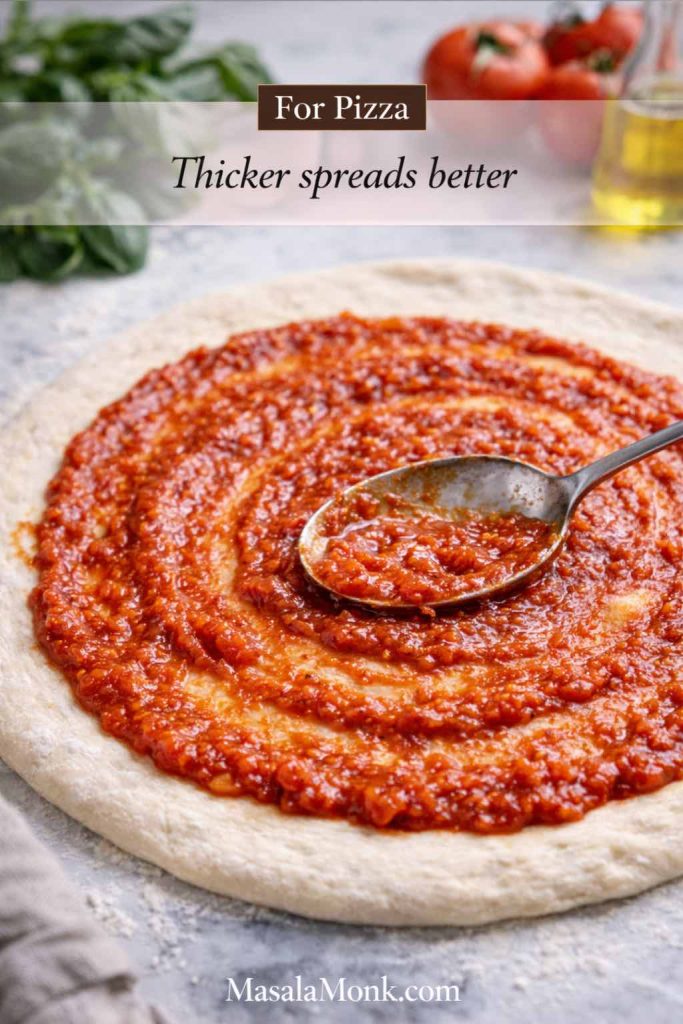
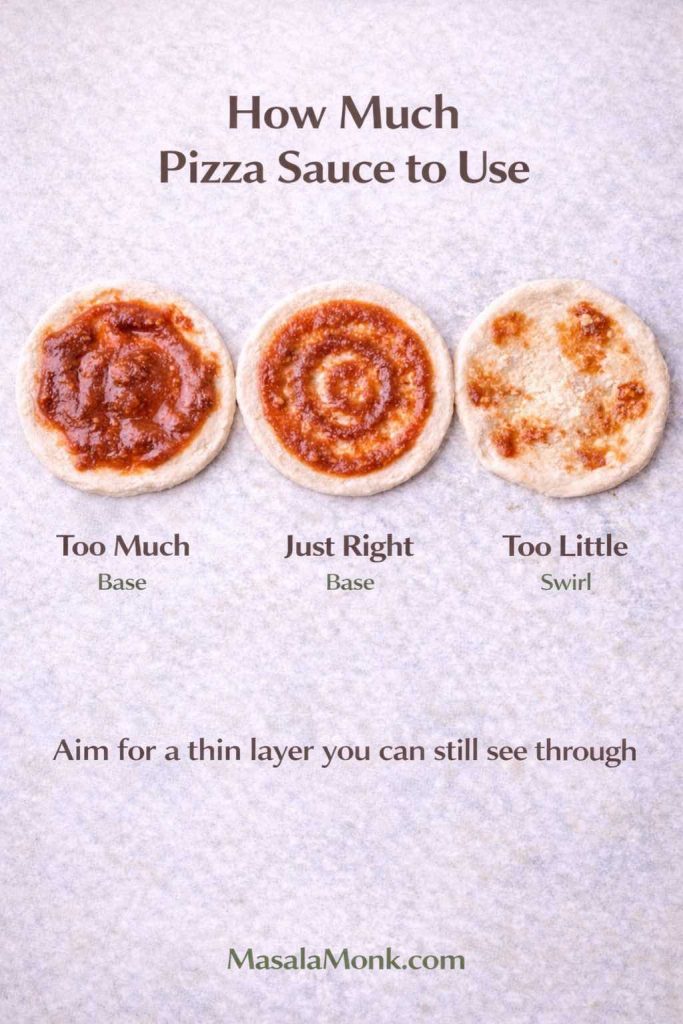
3) Use less than your instincts suggest
Most home pizzas go wrong in the middle because there’s too much moisture. Instead of spreading a thick layer edge-to-edge, start modestly, then add extra flavor as a swirl or drizzle later. As a result, your pizza slices hold together and taste cleaner.
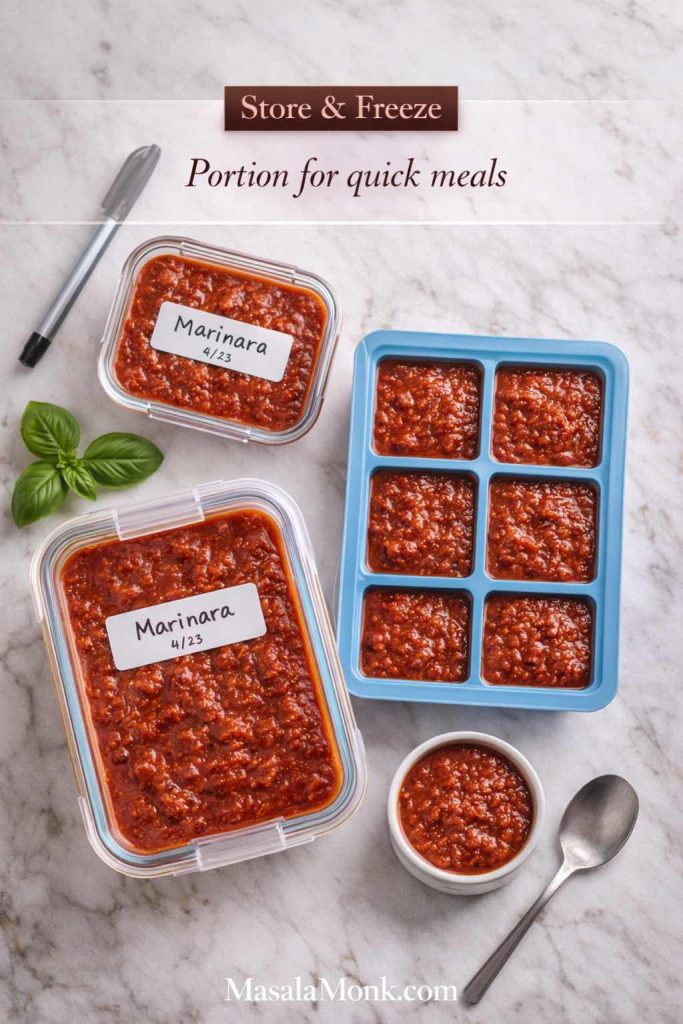
A quick safety note on leftovers
If you’re making sauce ahead, you’ll want to store it safely. For reliable refrigerator and freezer guidance, the USDA’s Leftovers and Food Safety page and FoodSafety.gov’s Cold Food Storage Chart are good references.
And if you want a dependable dough to carry all of these sauces, King Arthur Baking’s Pizza Crust Recipe is straightforward and reliable.
Now, with that framework set, let’s get into the seven sauces—starting with the red classic.
Also Read: Negroni Recipe: Classic Cocktail & Its Variation Drinks
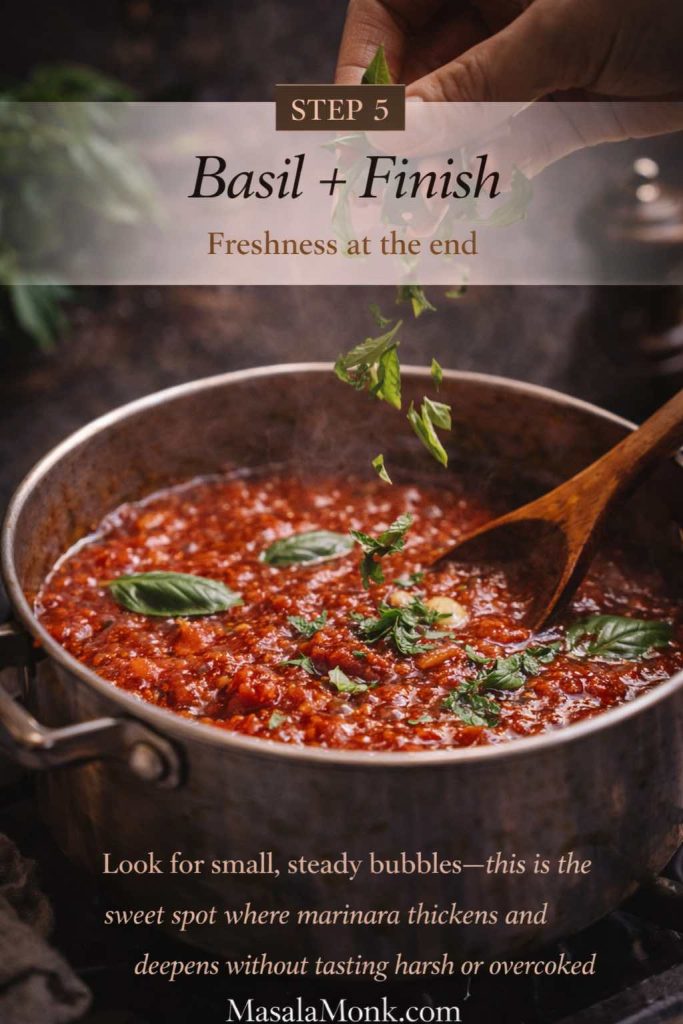
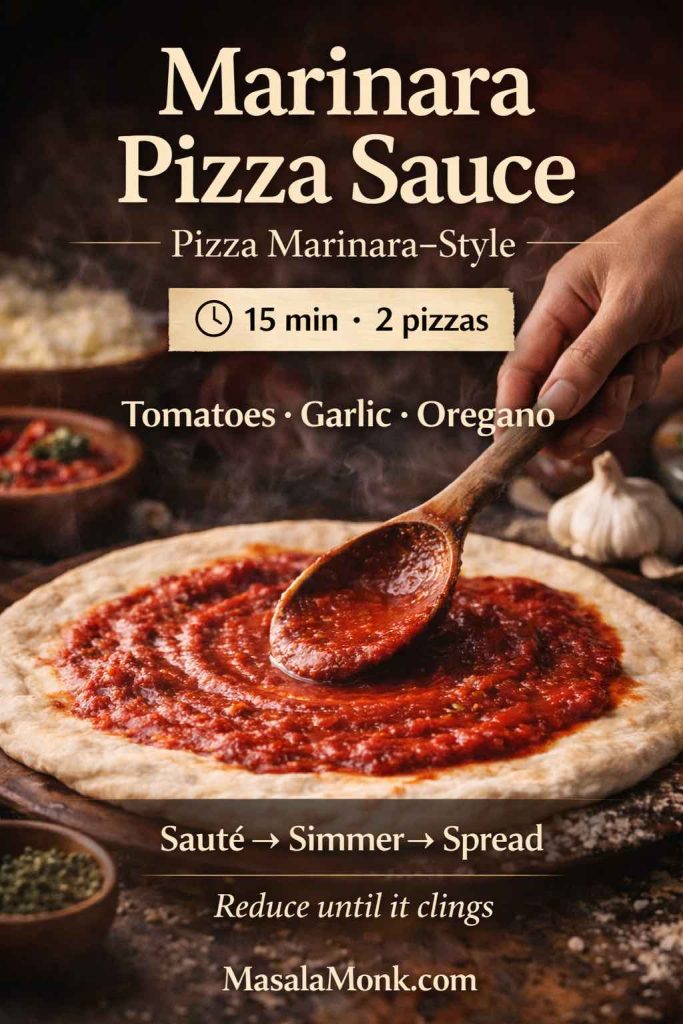
1) Marinara sauce recipe for pizza (marinara pizza / pizza marinara)
When people say “marinara pizza,” they usually mean a tomato base that tastes bright, garlicky, and clean—not heavy, not sweet, and not overloaded with spices. In other words, this is the pizza red sauce lane in its simplest form.
If you want a deeper companion version, MasalaMonk’s dedicated marinara sauce recipe is worth bookmarking. Additionally, Serious Eats has a solid technique reference for a classic marinara-style sauce: Serious Eats marinara.
This pizza sauce recipe, however, is tuned specifically for pizza: thick enough to cling, balanced enough to taste vivid under cheese.
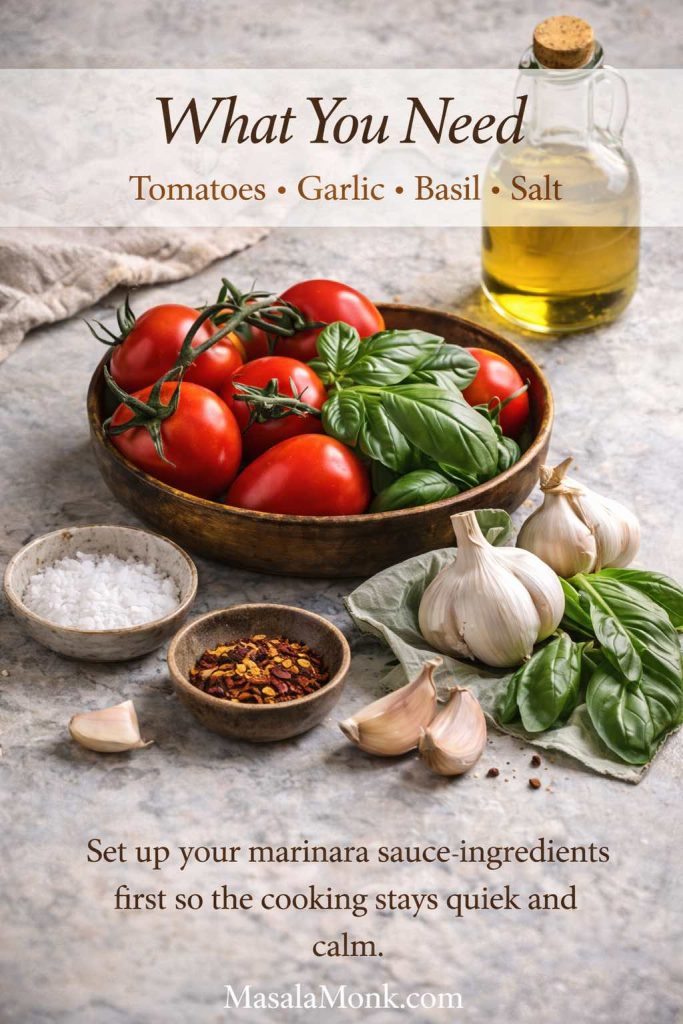
Ingredients for marinara pizza sauce recipe
- 1 tbsp olive oil
- 1 medium onion, finely chopped (optional, but helpful for body)
- 4–6 garlic cloves, finely chopped or grated
- 1 can (400g) crushed tomatoes (or blended whole peeled tomatoes)
- 1 tsp salt (start here; adjust later)
- ½ tsp dried oregano
- ½ tsp dried basil (or fresh basil at the end)
- Pinch chilli flakes (optional)
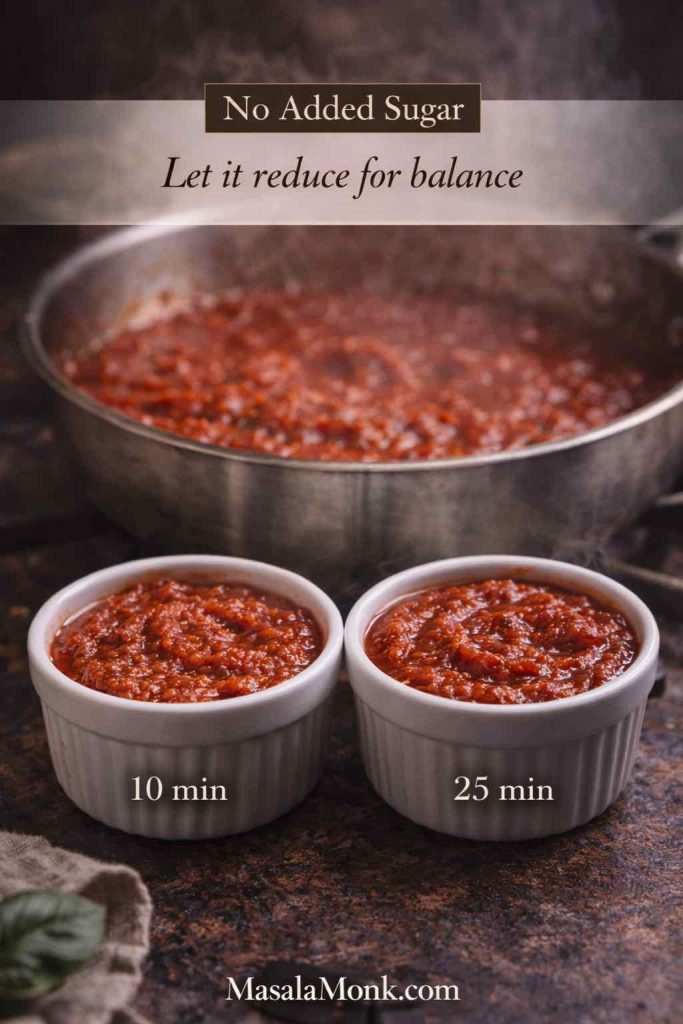
- ½ tsp sugar (optional, only if your tomatoes are sharp)
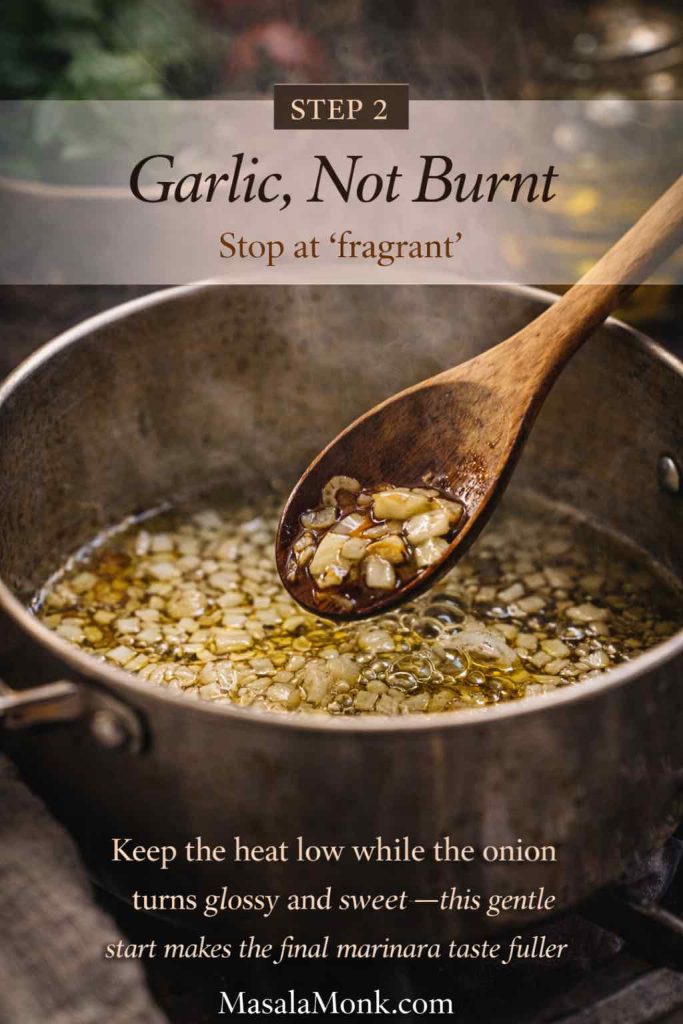
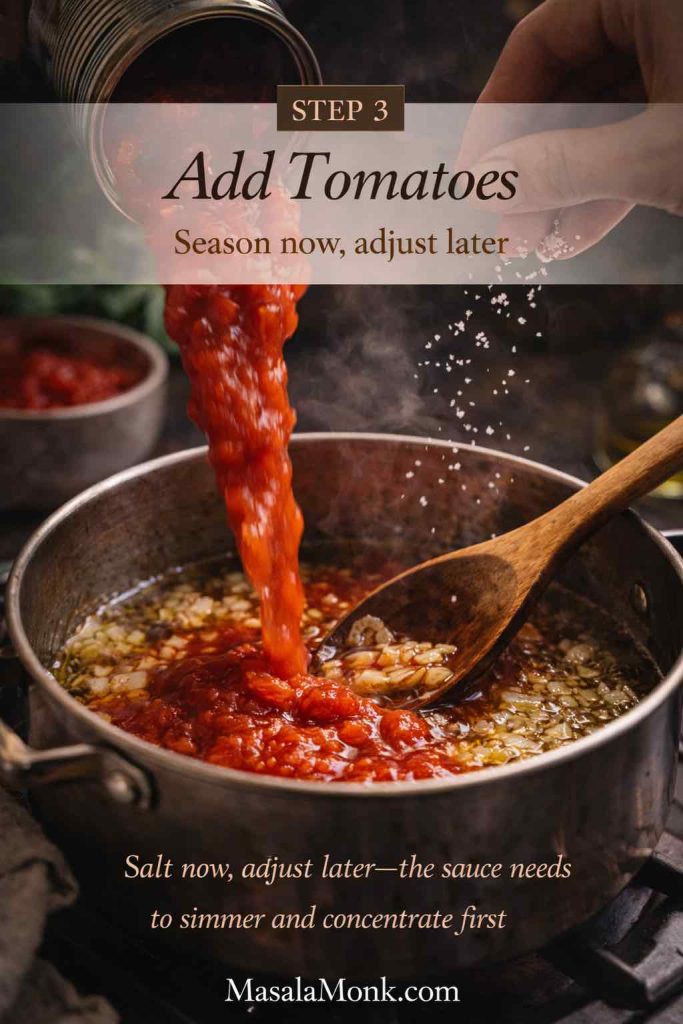
Method
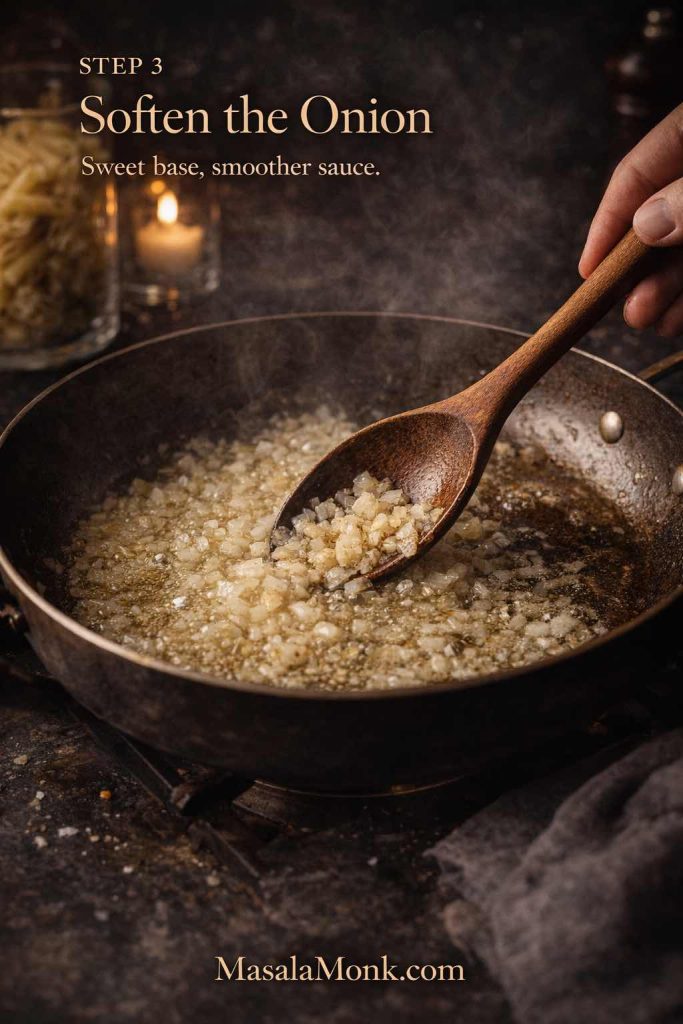
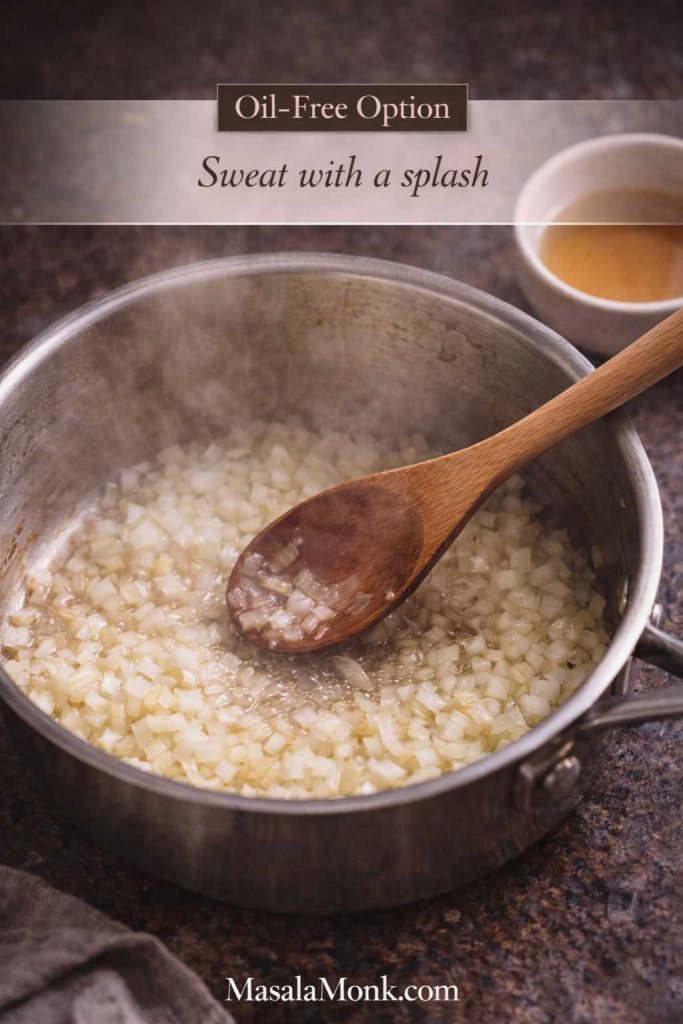
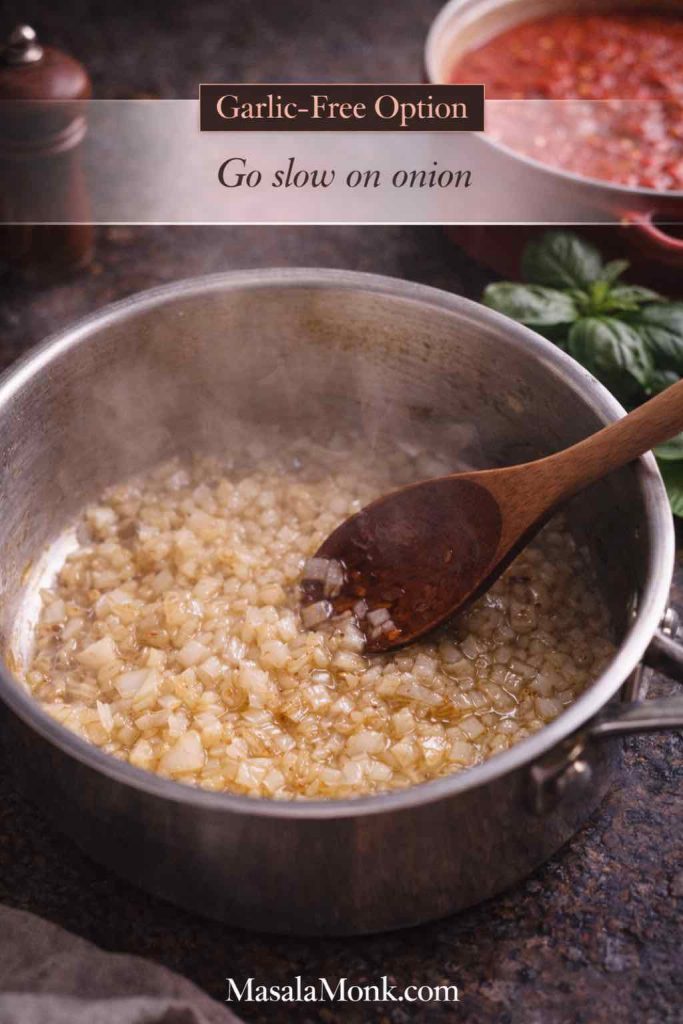
- Warm olive oil over medium heat. If using onion, add it first with a pinch of salt. Then cook until soft and glossy, about 6–8 minutes.
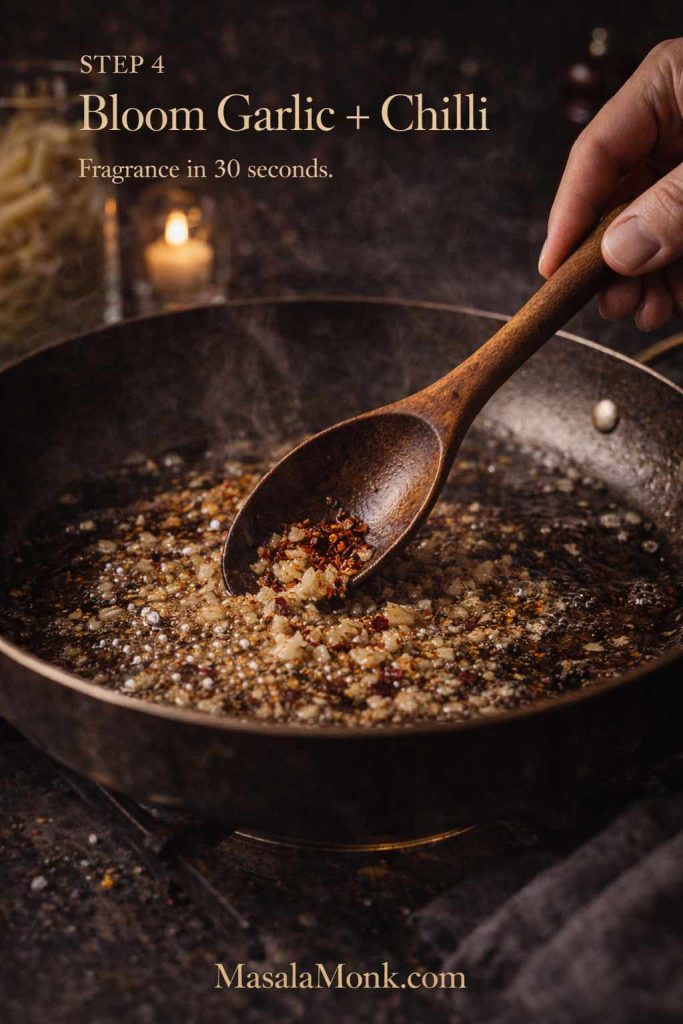
- Add garlic and stir for 30–45 seconds. You want fragrance, not browning.
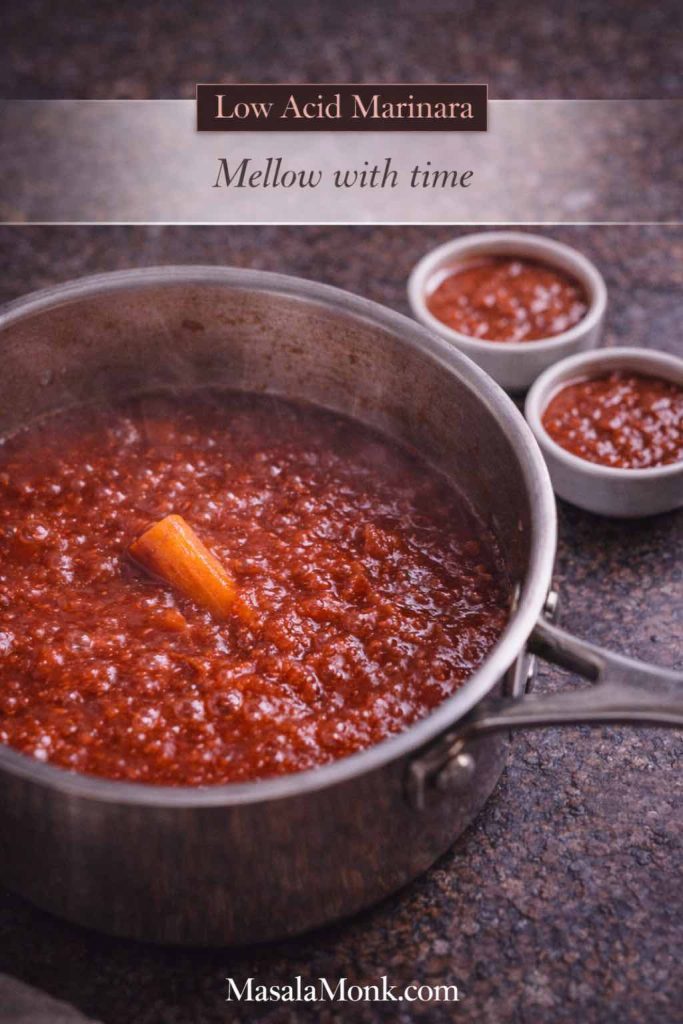
- Add tomatoes, salt, oregano, basil, and chilli flakes if you like.
- Bring to a gentle simmer and cook uncovered until thickened, usually 12–18 minutes.
- Taste and adjust. If it feels sharp, add a pinch of sugar; if it tastes flat, add salt gradually.
If you like comparing different classic approaches, Ooni’s Classic Pizza Sauce is another good reference point.
How to use it for pizza marinara
Spread a thin layer, then add mozzarella and minimal toppings. After baking, finish with fresh basil if you have it. That last touch makes pizza marinara feel brighter immediately.
Toppings that work especially well
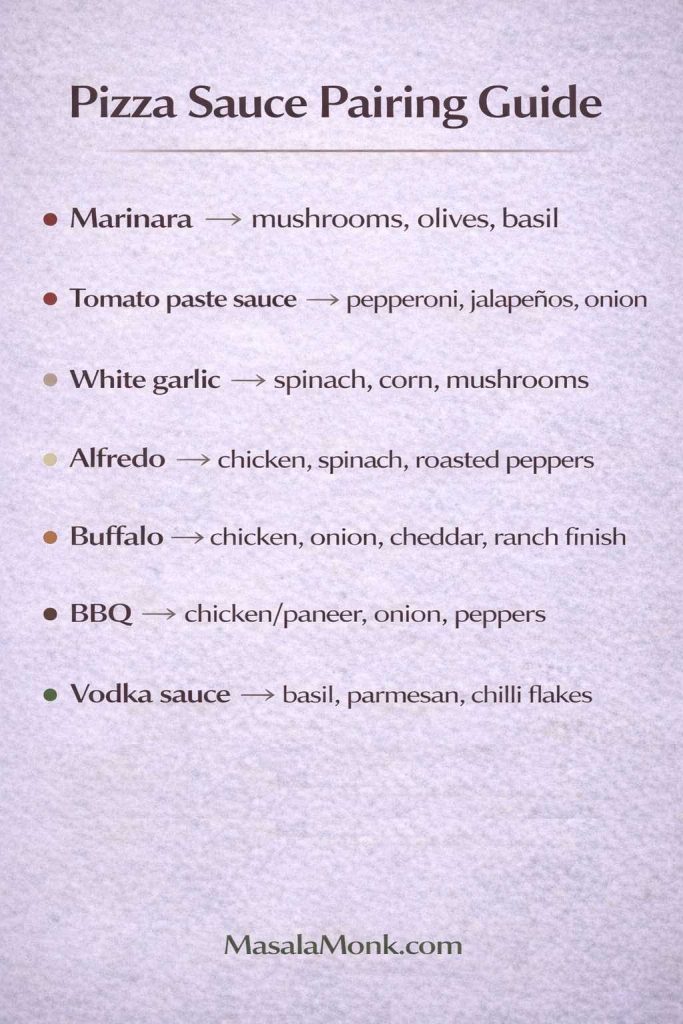
Because marinara sauce for pizza is bright, it pairs beautifully with:
- mushrooms, olives, roasted bell peppers
- onions, jalapeños, sweet corn
- chicken, paneer, or tofu
Make-ahead and storage
Marinara thickens further as it cools, which is ideal for pizza sauce. So, you can cook it earlier in the day, chill it, and spread it easily at night.
Quick fixes
- If it’s watery, simmer longer or whisk in a spoon of tomato paste.
- If it’s too acidic, add a pinch of sugar or cook onions longer next time.
- If it tastes dull, add salt in small increments, then reassess.
This is one of the most useful “base” answers to the general pizza sauce query, and it’s the simplest pizza sauce recipe to master first.
Also Read: Classic Deviled Eggs (Easy) + 8 Flavorful Variations
2) Pizza sauce from tomato paste (fast pantry pizza sauce recipe)
Sometimes you don’t want to open a can of tomatoes. Sometimes you don’t want to simmer anything. You just want pizza—fast. That’s exactly where pizza sauce from tomato paste shines.
Because tomato paste is concentrated, this sauce tastes bold even with lots of cheese. Additionally, it starts thick, which means it’s naturally pizza-friendly. So, as a weeknight shortcut, this pizza sauce recipe is hard to beat.
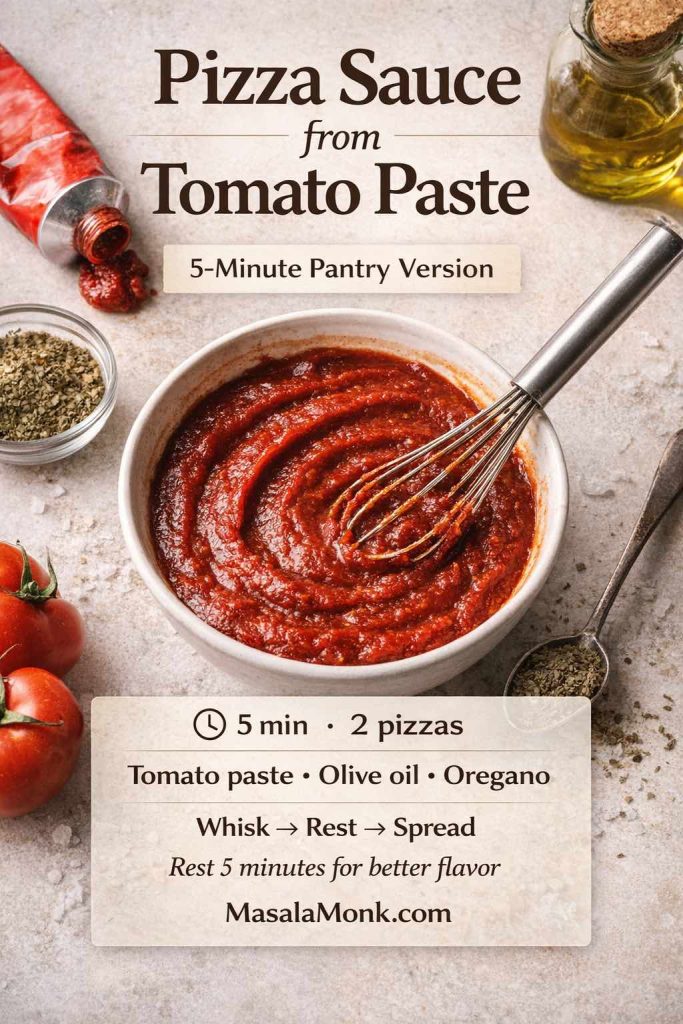
Ingredients
- 6 tbsp tomato paste
- 6–10 tbsp warm water (adjust for thickness)
- 1–2 tbsp olive oil
- 1 tsp dried oregano
- ½ tsp garlic powder (or 1 small grated garlic clove)
- ¾ tsp salt (adjust later)
- Pinch black pepper
- Pinch chilli flakes (optional)
- Optional: a squeeze of lemon or a tiny pinch of sugar (choose one only if needed)
Method
- Whisk tomato paste and warm water until smooth.
- Stir in olive oil, oregano, garlic, salt, pepper, and chilli flakes if using.
- Let it sit 5 minutes so the herbs hydrate and the flavor rounds out.
Two easy upgrades (if you have time)
- Warm it in a small pan with a drizzle of olive oil for 2–3 minutes; it will taste richer.
- Add a spoon of finely grated onion; it softens the sharp edge quickly.
How to use it
Spread a thin layer as your base. Then add cheese and toppings. Because it’s concentrated, you don’t need much.
Best toppings for this style
This sauce loves bold flavors:
- spicy toppings (jalapeños, chilli flakes, hot chicken)
- smoky toppings (roasted peppers, tandoori-style pieces)
- mixed cheeses (mozzarella plus something sharper)
When you want variety without extra work, pairing this with a white sauce pizza in the same night is a great move.
Also Read: Baked Jalapeño Poppers (Oven) — Time, Temp & Bacon Tips
3) White pizza sauce recipe (white sauce in pizza / white garlic pizza sauce / white base pizza)
White sauce in pizza isn’t just “cream on bread.” A proper white pizza sauce has structure, seasoning, and enough thickness to hold up under cheese.
The classic foundation is béchamel: butter, flour, milk. From there, turning it into white garlic pizza sauce is easy. If you want a clear baseline, MasalaMonk’s béchamel guide is helpful. Likewise, Serious Eats has a detailed method: béchamel / white sauce technique.
This pizza sauce recipe focuses on a white base that tastes garlicky and cozy, not bland.
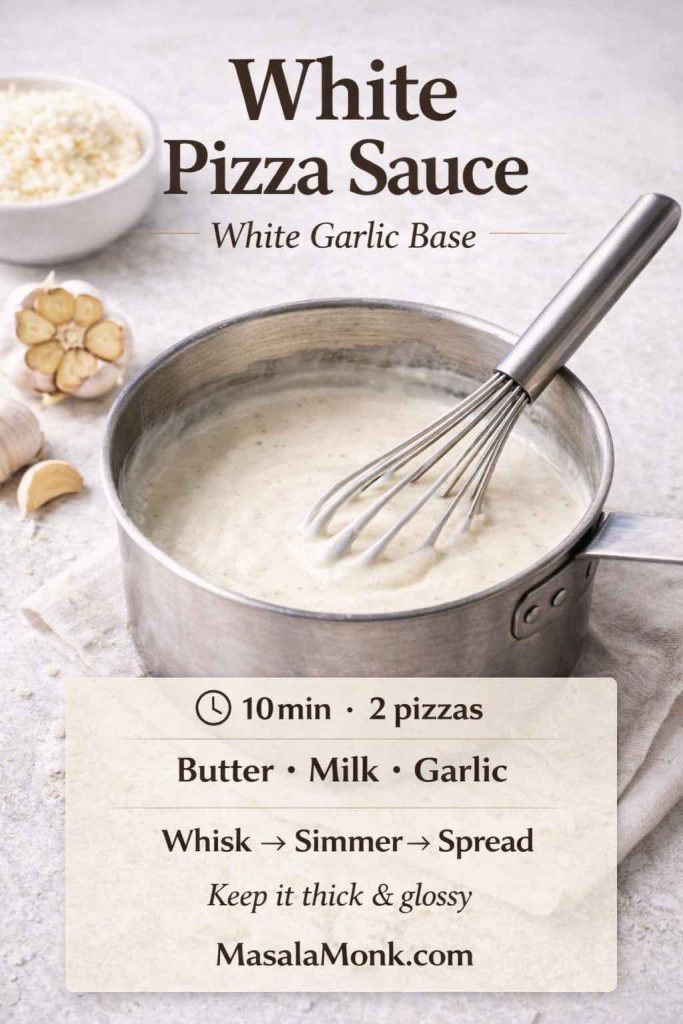
Ingredients for White pizza sauce recipe
- 2 tbsp butter
- 2 tbsp all-purpose flour
- 1½ cups milk (warm if possible)
- 3–5 garlic cloves, grated (depending on preference)
- ½ tsp salt (start light)
- ¼–½ tsp black pepper
- Pinch nutmeg (optional, but excellent)
- Optional: 2–3 tbsp grated cheese (parmesan, mozzarella, or both)
Method
- Melt butter over medium heat.
- Add flour and whisk constantly for 1–2 minutes, until it smells lightly nutty.
- Add milk gradually while whisking. At first it may clump; nevertheless, keep whisking and it will smooth out.
- Simmer gently until thick, usually 3–6 minutes.
- Add garlic, salt, pepper, and nutmeg if using.
- If adding cheese, stir it in off heat to keep the sauce smooth.
How to use it on a white base pizza
Spread a thin layer—less than you’d use for marinara. Then build toppings that add contrast.
Toppings that make white pizza sauce recipe shine
- mushrooms + caramelized onions
- spinach + corn
- roasted bell peppers + olives
- chicken, paneer, or tofu
If you want plant-forward topping inspiration that fits a white base pizza, MasalaMonk’s tofu Italian meal prep ideas includes concepts that adapt nicely.
Make-ahead notes
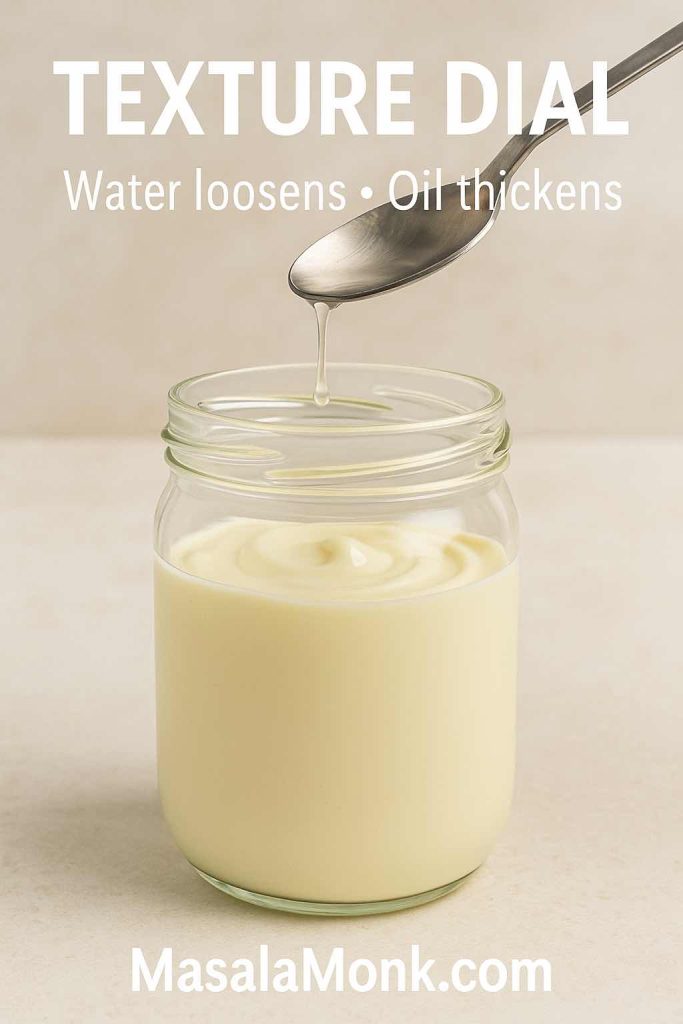
White sauce thickens a lot in the fridge. So, when reheating, warm gently and loosen with a spoon of milk. Avoid aggressive boiling; otherwise, it can split.
Quick fixes
- Too thick? Add warm milk, a tablespoon at a time.
- Too bland? Add salt gradually, then recheck.
- Too heavy? Use less sauce and finish with something bright (like a squeeze of lemon after baking).
This is the pizza sauce recipe that usually convinces people that white sauce belongs on pizza.
Also Read: Peanut Butter Cookies (Classic Recipe & 3 Variations)
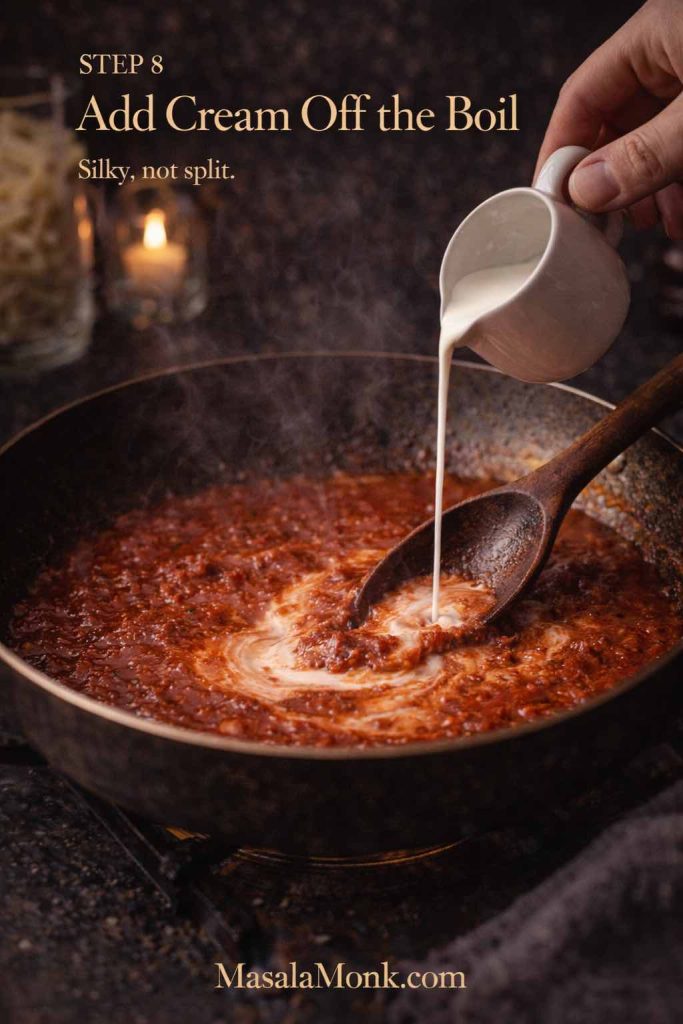
4) Alfredo sauce pizza: pizza sauce recipe for a creamy base
Alfredo sauce pizza is its own craving. It’s richer than white sauce, more buttery, and more cheese-forward. At the same time, Alfredo can separate if overheated or handled roughly. Therefore, the trick is gentle heat and careful mixing.
For Alfredo variations and styles, MasalaMonk has two useful reads: Classic vs Authentic Alfredo and Alfredo Pasta Reinvented: Indian-inspired twists.
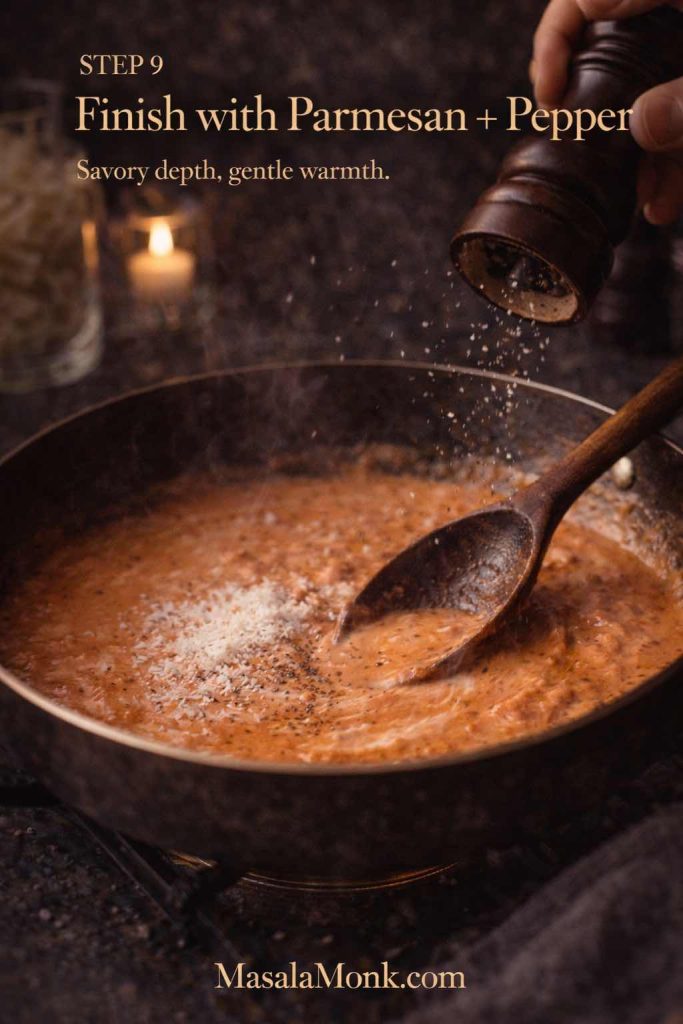
This pizza sauce recipe gives you a pizza-friendly Alfredo: smooth, rich, and spreadable.
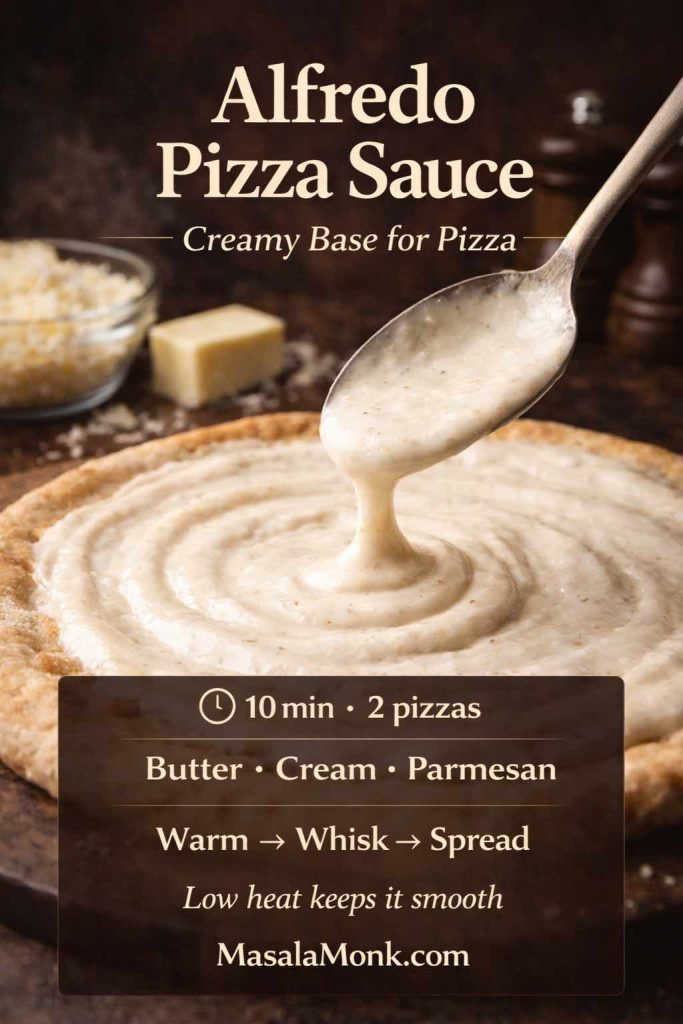
Ingredients for Alfredo pizza sauce recipe
- 3 tbsp butter
- 1 cup cream (or half-and-half for lighter)
- ¾ cup finely grated parmesan (or parmesan + a little mozzarella)
- Black pepper to taste
- Optional: 1 small garlic clove, grated
- Salt only after tasting
Method
- Melt butter on low heat.
- Add garlic if using and stir briefly.
- Warm the cream gently—avoid a hard boil.
- Lower heat further, then whisk in cheese gradually until smooth.
- Add pepper, taste, and add salt only if needed.
How to use Alfredo sauce on pizza
Spread lightly as a base. Then, instead of piling on more rich items, add toppings that bring contrast: greens, roasted vegetables, or something spicy.
Best toppings for Alfredo sauce pizza
- spinach + mushroom
- chicken + corn
- paneer tikka-style topping (great Indo-Italian vibe)
Make-ahead notes
Alfredo is best fresh. Still, if you store it, reheat gently with a splash of cream or milk. Stir continuously, and keep the heat low.
Quick fixes
- Grainy texture usually means the heat was too high. Next time, lower heat and add cheese slowly.
- Oily separation often comes from overheating or too much sauce on the pizza. Use a thinner layer.
This is a pizza sauce recipe that feels restaurant-like without requiring restaurant equipment.
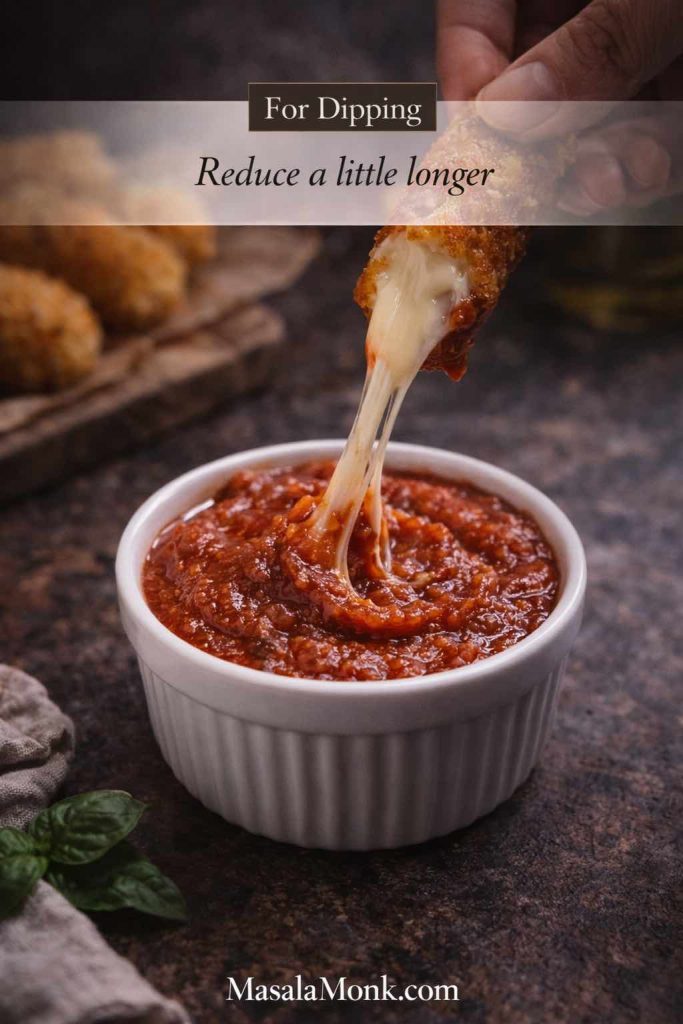
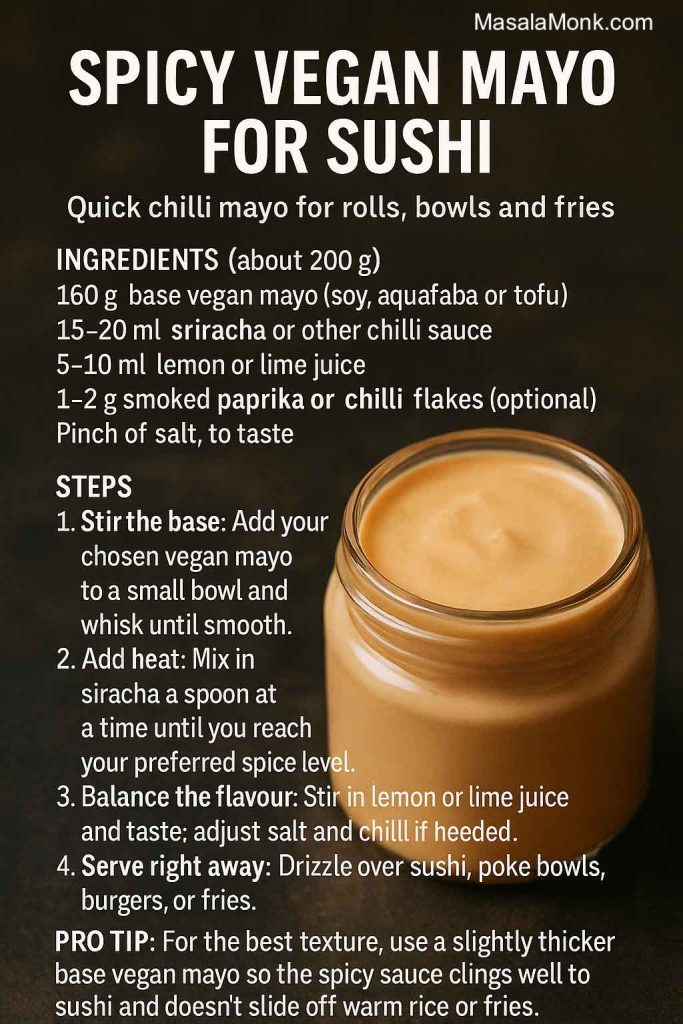
5) Buffalo sauce on pizza: pizza sauce recipe used as a swirl
Buffalo sauce on pizza can be incredible. However, if you spread it thick like marinara, you’ll usually end up with a damp center and harsh acidity. So, the smartest approach is to treat buffalo as a swirl or finisher.
If you want to explore hot sauce ideas beyond buffalo, MasalaMonk’s pepper sauce guide is a great rabbit hole. For classic buffalo sauce logic (hot sauce + butter), Serious Eats’ wing technique is a useful reference: buffalo wings technique.
This pizza sauce recipe is intentionally simple so it tastes like true buffalo.
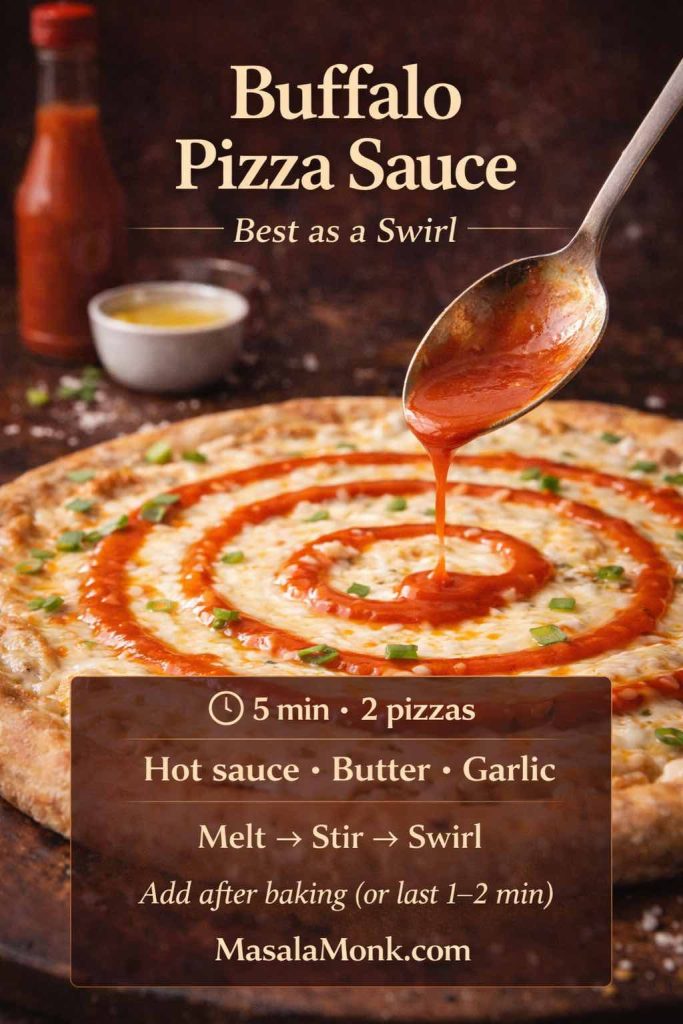
Ingredients
- ⅓ cup hot sauce
- 3 tbsp butter
- ½ tsp garlic powder (optional)
- Optional: tiny drizzle of honey (only if you want a sweet edge)
Method
- Melt butter over low heat.
- Stir in hot sauce.
- Add garlic powder if using.
- Taste and adjust.
Two ways to use buffalo sauce on pizza
Swirl method (recommended):
Bake the pizza with a base sauce underneath (marinara, white sauce, or Alfredo). Then, right at the end, swirl buffalo sauce over the top. As a result, the flavor stays bold and the crust stays crisp.
Reduced base method:
If you want pizza with buffalo sauce as the base, simmer it for 2–3 minutes to thicken slightly, then spread very thinly.
Toppings that match pizza with buffalo sauce
- shredded chicken (or crispy chicken)
- onions, jalapeños
- mozzarella + cheddar blend
- ranch drizzle after baking
If you want the whole table to lean into the buffalo theme, MasalaMonk’s buffalo chicken dip is a natural side.
Also, because buffalo pairs beautifully with wings, MasalaMonk’s air fryer chicken wings can turn pizza night into a full-on party spread.
This is one of the most high-impact sauces in the lineup, and it’s a pizza sauce recipe that rewards restraint.
Also Read: Potato Salad Recipe: Classic, Russian, German, Vegan & More
6) BBQ pizza sauce recipe (bbq pizza sauce / barbecue pizza sauce / barbeque pizza)
Barbeque pizza is a crowd-pleaser, yet it needs balance. Many BBQ sauces are sweet, and sweetness can flatten under cheese. Therefore, the best bbq pizza sauce is smoky, thick, and slightly sharp so it stays interesting.
If you want a classic external baseline for simmer-and-thicken, BBC Good Food’s barbecue sauce recipe is a solid reference.
This pizza sauce recipe is tuned specifically for pizza: thicker and more “clingy” than a dipping BBQ sauce.
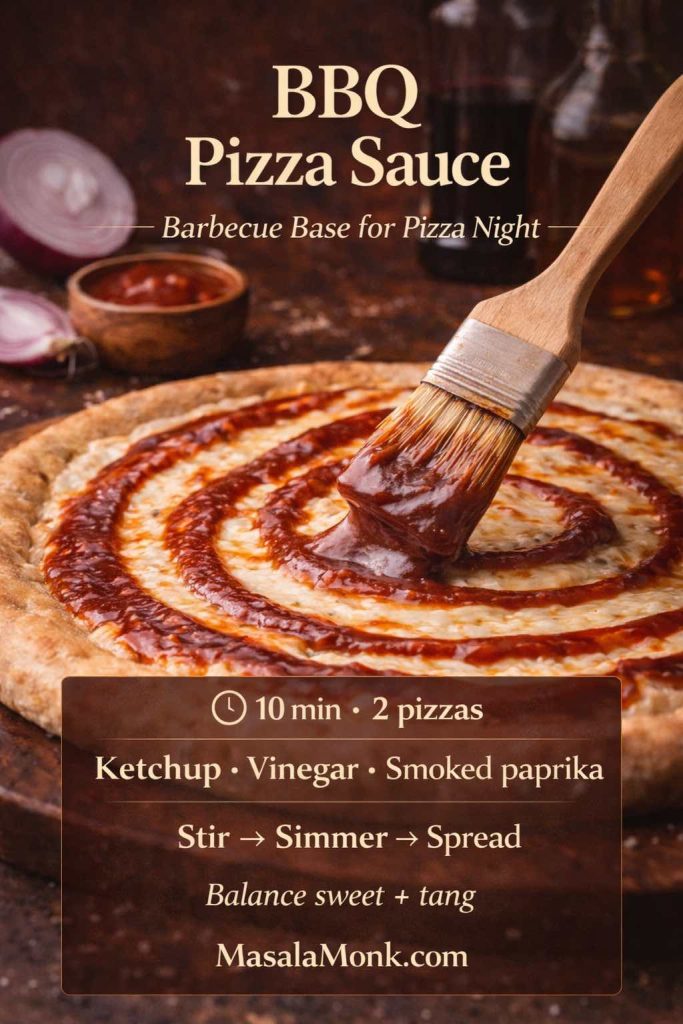
Ingredients for BBQ pizza sauce recipe
- ¾ cup ketchup (or passata + extra sweetener)
- 2 tbsp vinegar
- 2 tbsp brown sugar or jaggery (adjust to taste)
- 1 tbsp soy sauce
- 1 tsp smoked paprika (or paprika + pinch cumin)
- 1 garlic clove, grated
- Optional: chilli flakes or hot sauce
Method
- Combine everything in a small pan.
- Simmer 8–12 minutes until glossy and thicker.
- Cool slightly; it thickens more as it rests.
How to use barbecue pizza sauce
Use a thin layer as a base. Then add toppings that cut sweetness: onions, jalapeños, pickled elements, or even a squeeze of lime after baking.
Best toppings for barbeque pizza
- chicken, paneer, or tofu
- onions (fresh or caramelized)
- bell peppers
- mozzarella + a sharper cheese
If you want a vegetable topping prep that works well here, MasalaMonk’s mushroom and zucchini stir fry can be adapted into a drier topping (cook off moisture, then scatter).
This pizza sauce recipe is also great for “mixed crowd” nights because you can keep it mild and still flavorful.
Also Read: Homemade Hot Chocolate with Cocoa Powder Recipe
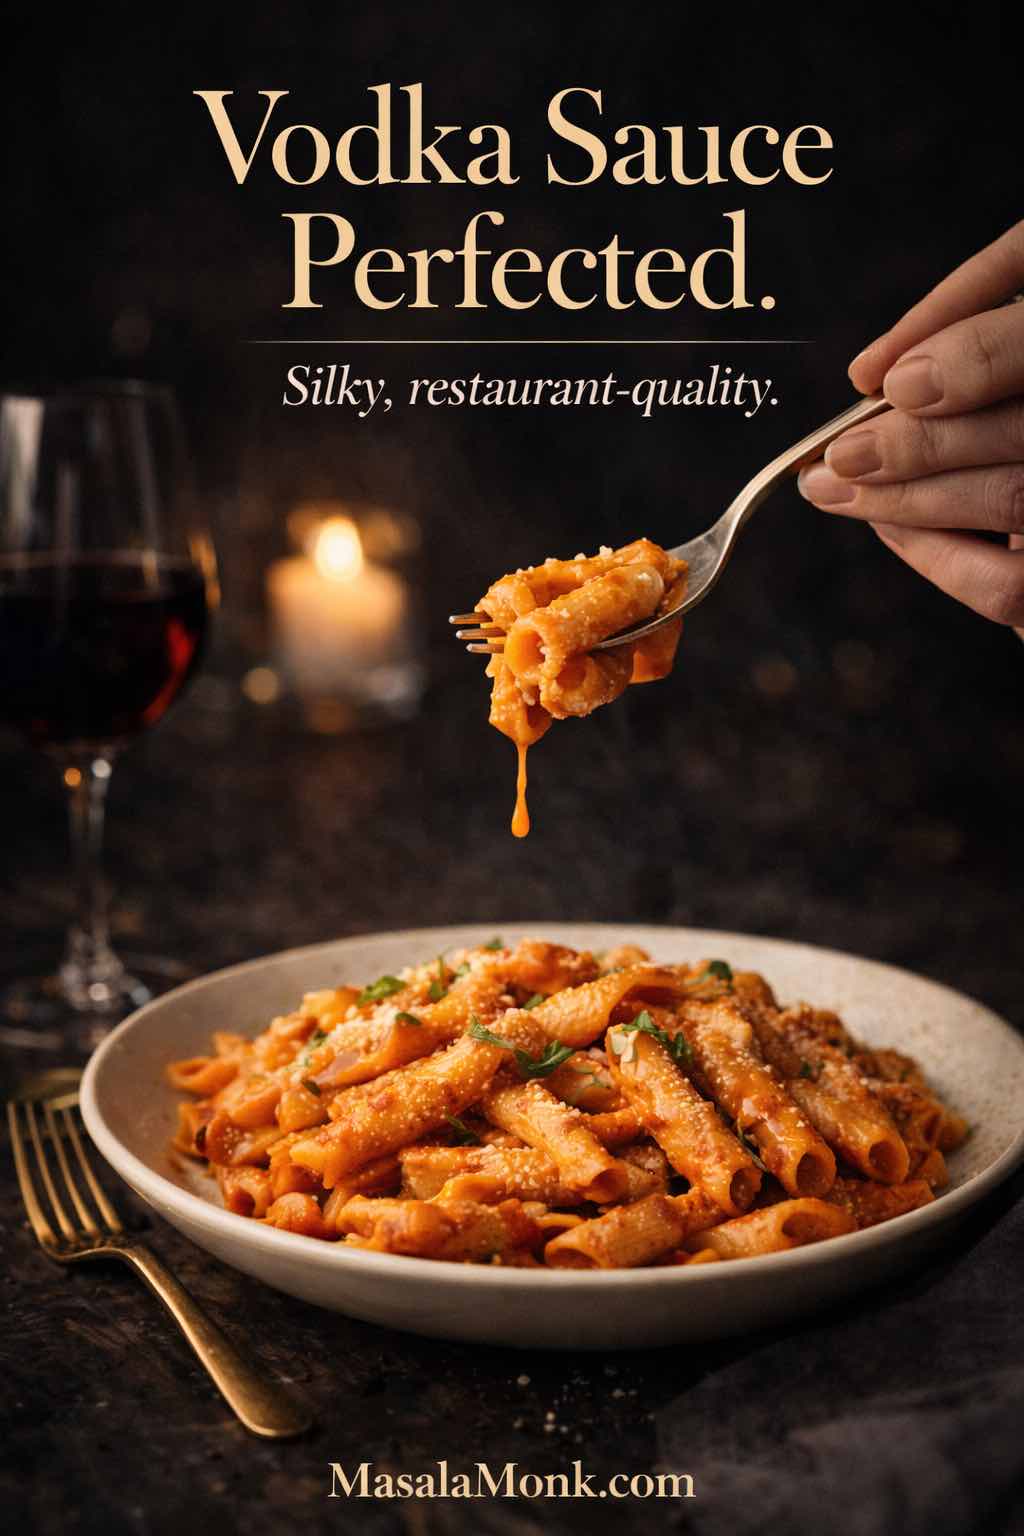
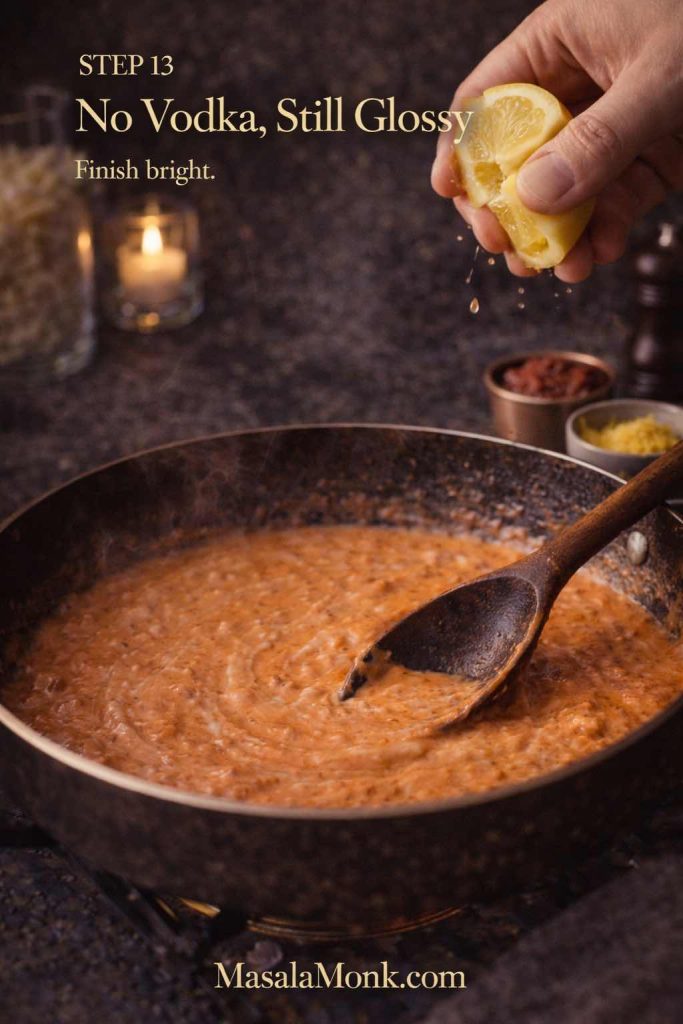
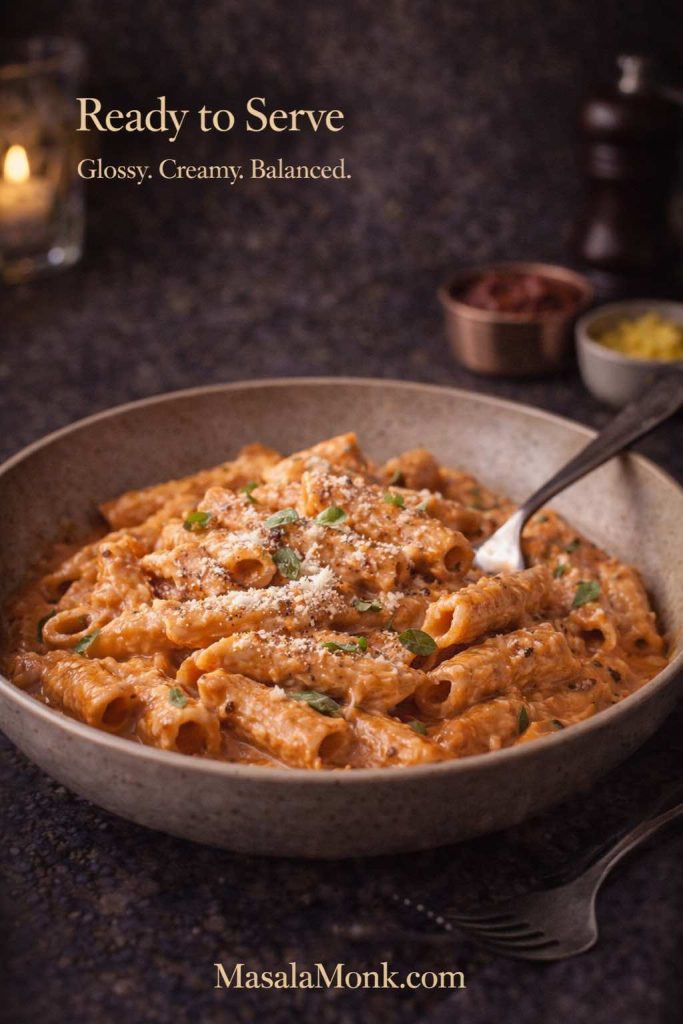
7) Pizza vodka sauce recipe (pizza vodka sauce / vodka pizza / pizza with vodka sauce)
Pizza vodka sauce sits between marinara and Alfredo: it has tomato depth, but it’s also creamy and a little luxe. That’s why vodka pizza has become such a thing—it tastes like a “restaurant slice” even when made at home.
For technique reference, Serious Eats has a widely referenced vodka sauce method. And if you like the story behind its popularity, Bon Appétit’s piece on why vodka sauce is everywhere is a fun read.
This pizza sauce recipe is written so the sauce stays smooth and thick enough for pizza.
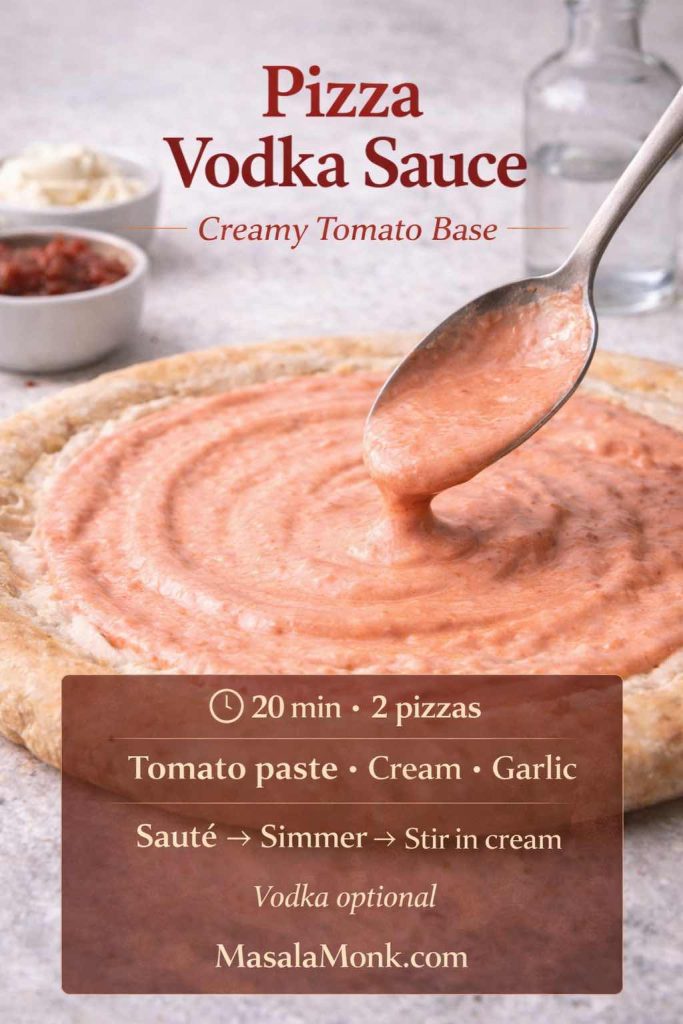
Ingredients for Pizza vodka sauce recipe
- 1 tbsp butter
- 1 tbsp olive oil
- 1 small onion, finely chopped
- 2–3 garlic cloves, sliced
- 3–4 tbsp tomato paste
- ¼ cup vodka (optional)
- ¾ cup crushed tomatoes (or blended peeled tomatoes)
- ½–¾ cup cream
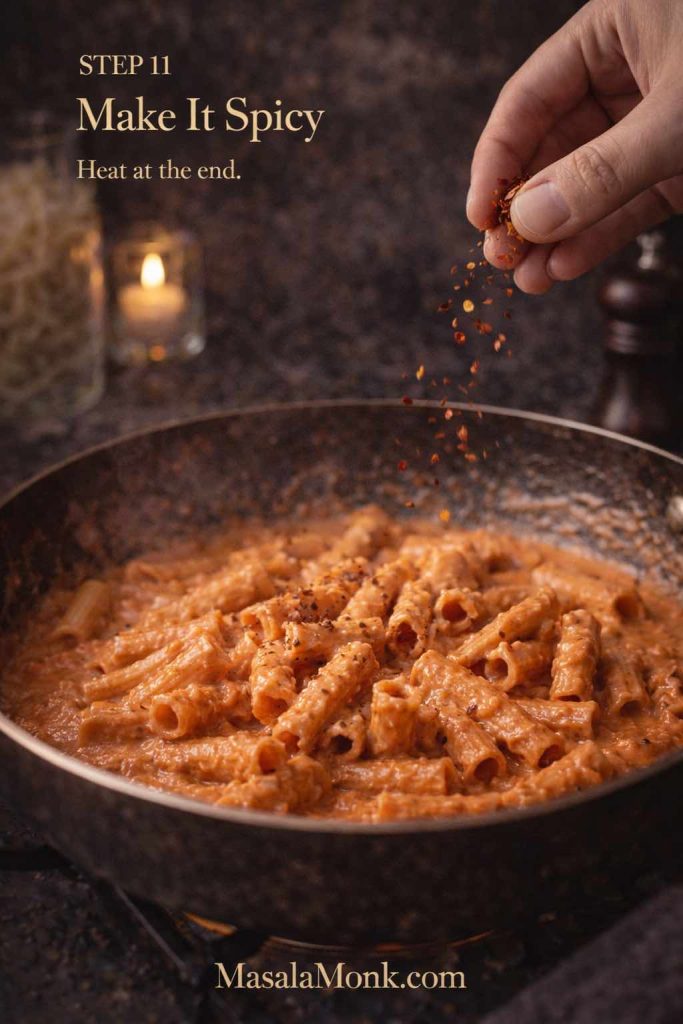
- Chilli flakes
- Salt to taste
Method
- Warm butter and oil. Add onion with a pinch of salt and cook until soft.
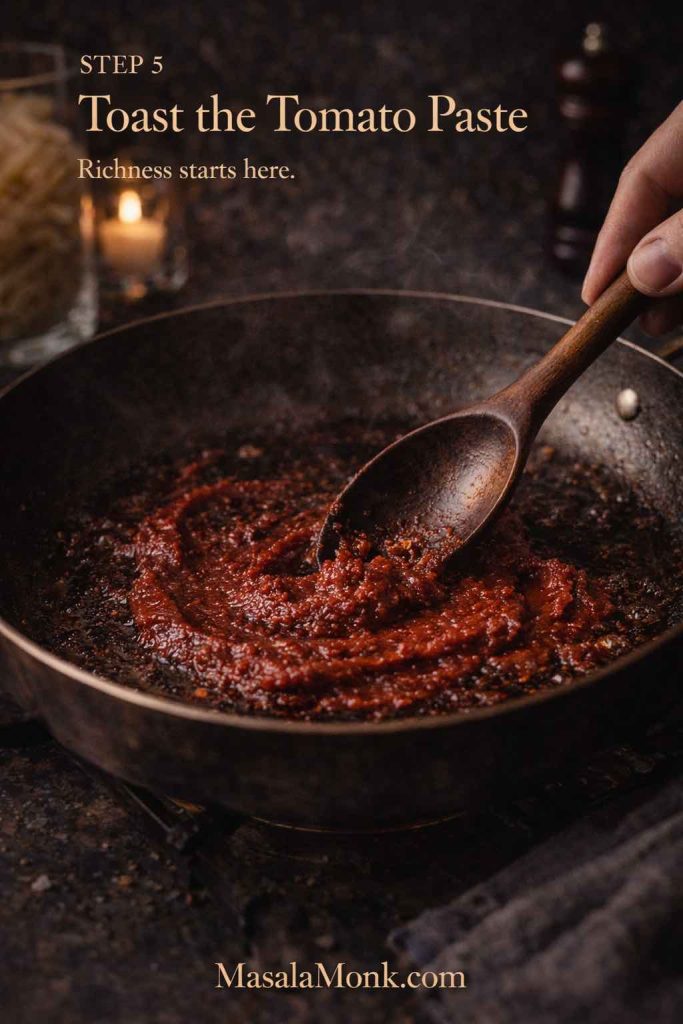
- Add garlic briefly, then stir in tomato paste.
- Cook tomato paste 1–2 minutes until it darkens slightly; this step builds depth quickly.
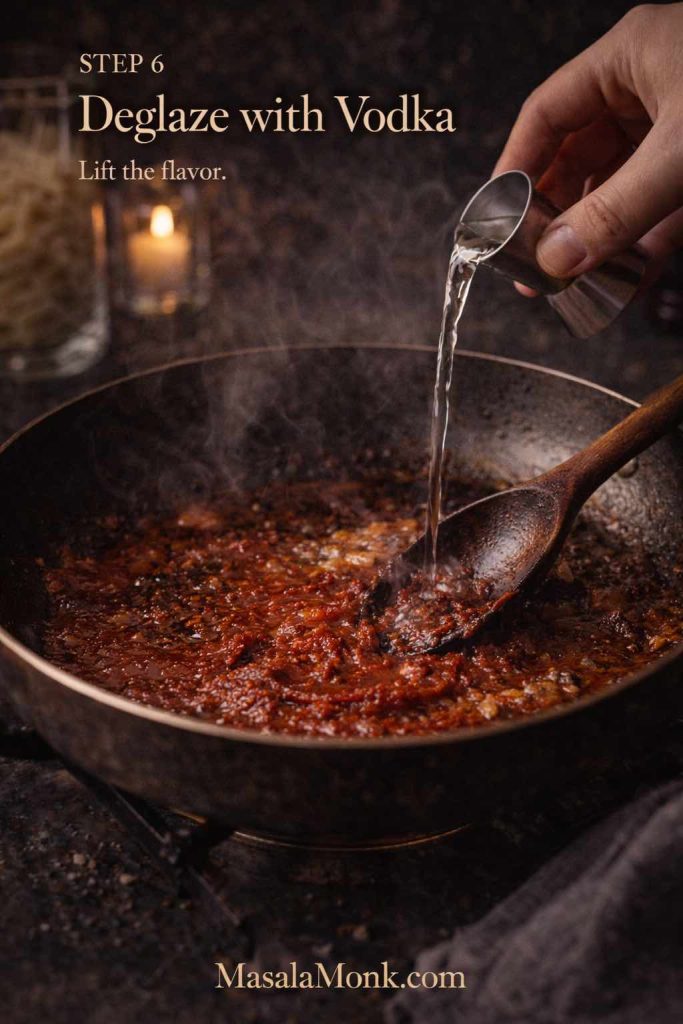
- Add vodka if using and simmer briefly.
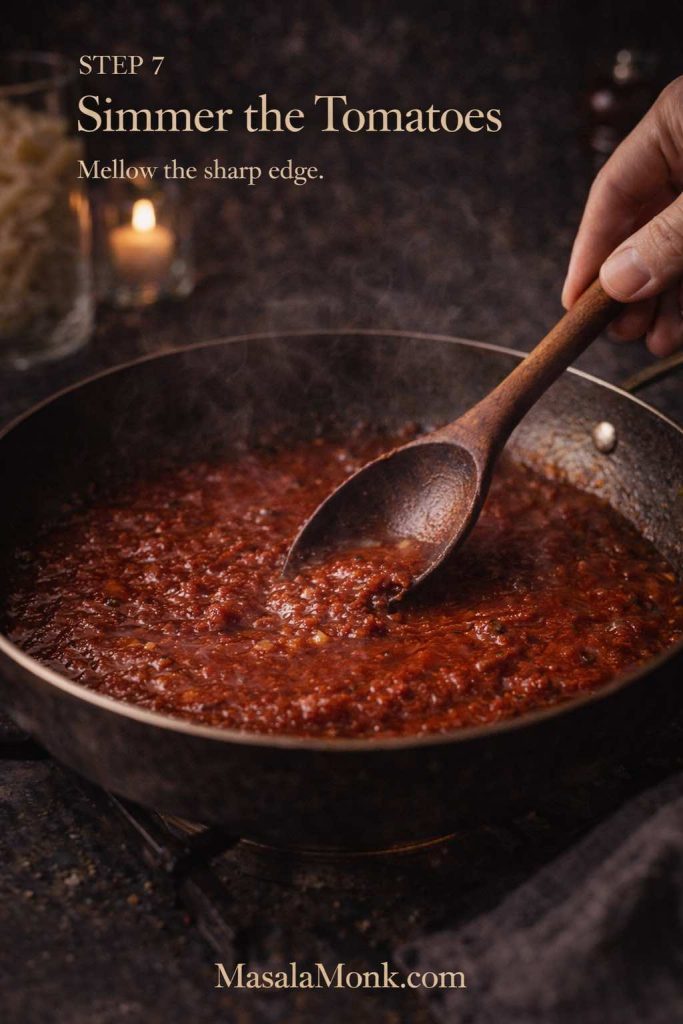
- Add tomatoes and simmer 5–8 minutes.
- Stir in cream, add chilli flakes, and season with salt.
No-alcohol option
If you don’t want vodka, skip it and add a splash of water or stock instead. You’ll still have a creamy tomato sauce that behaves well on pizza. In other words, you can still do “vodka pizza vibes” without the vodka.
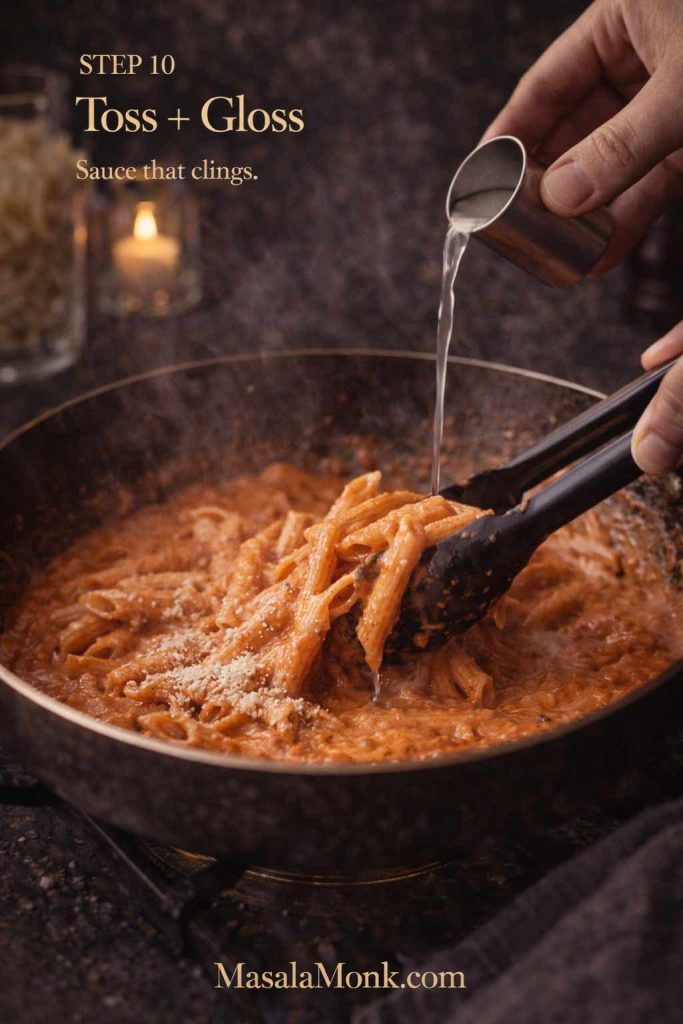
How to use pizza vodka sauce
You can use it as a base, or you can swirl it over mozzarella on top of a marinara base. Either way, keep the layer modest because cream sauces loosen under heat.
Toppings that match vodka pizza
- mozzarella + parmesan
- basil
- chilli flakes
- roasted peppers
- spicy chicken or paneer
This is the pizza sauce recipe for nights when you want something different from classic pizza sauce, but still want tomato at the center.
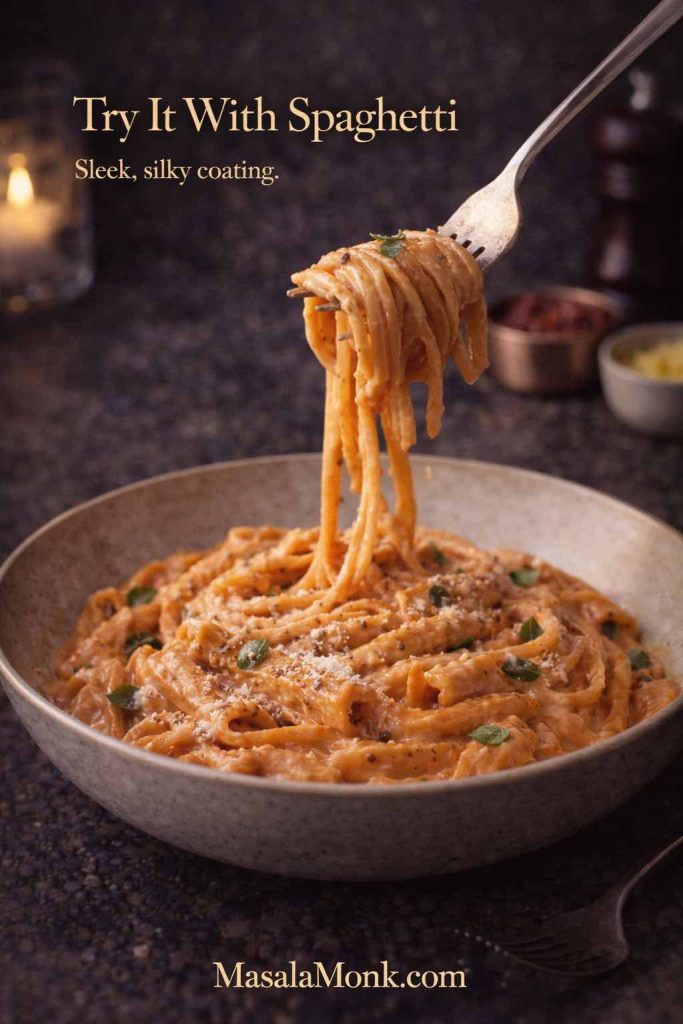
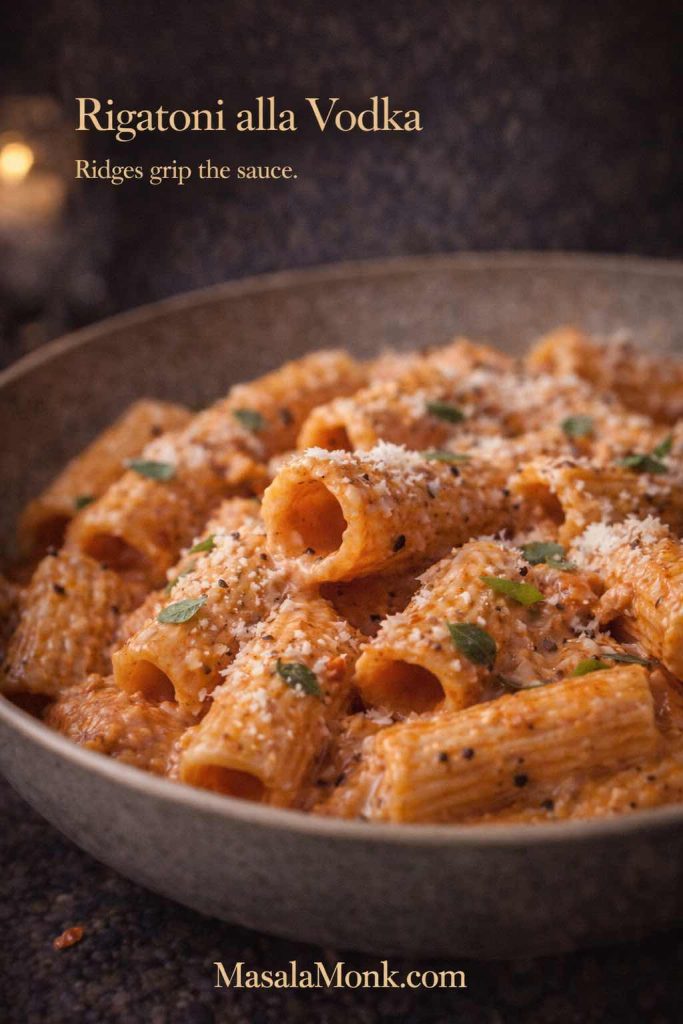
Also Read: Vodka Pasta (Penne alla Vodka) + Spicy Rigatoni, Chicken, and Gigi Recipes
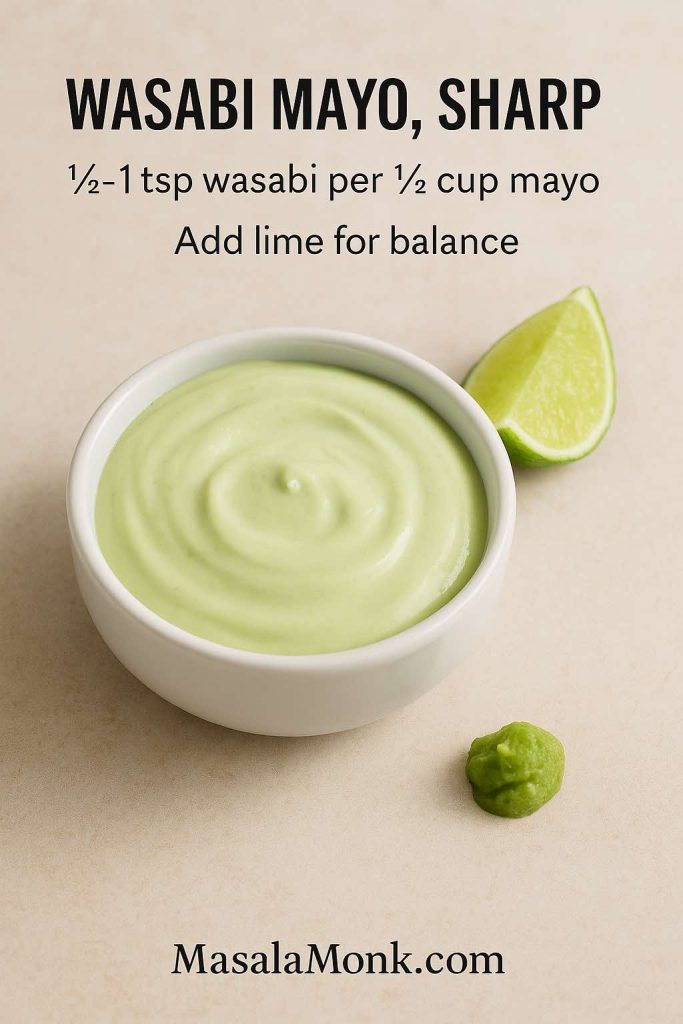
Ranch as the finishing move (pizza ranch dressing / pizza and ranch dressing)
Pizza and ranch dressing is a real thing for a reason: ranch is cooling, tangy, and creamy, which makes spicy pizza feel balanced. That said, ranch is almost always best as a finisher or dip—not baked into the base.
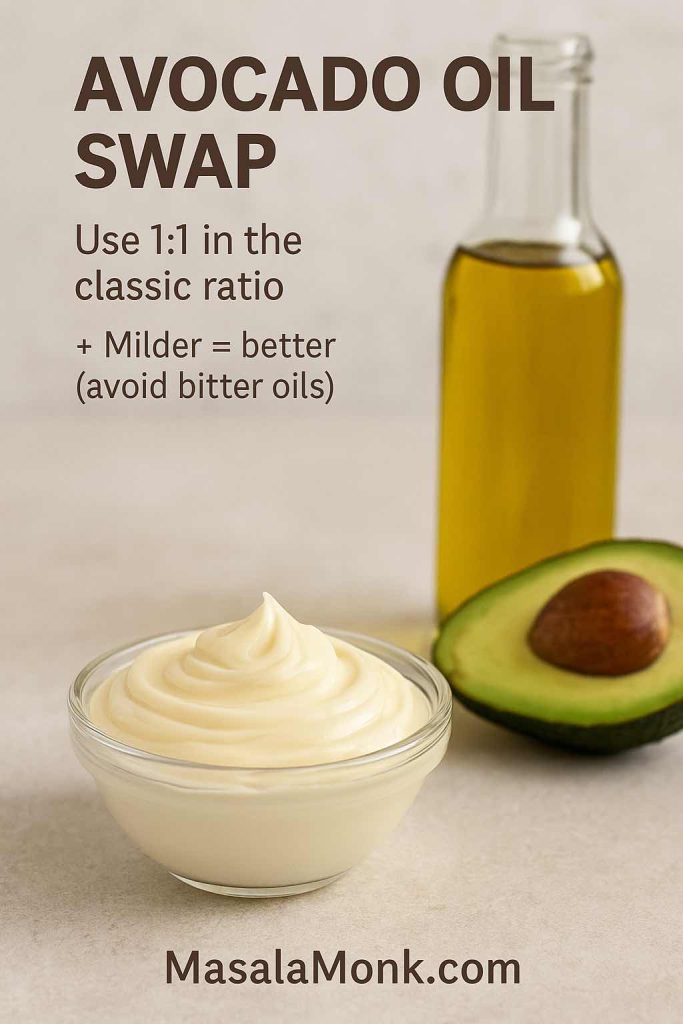
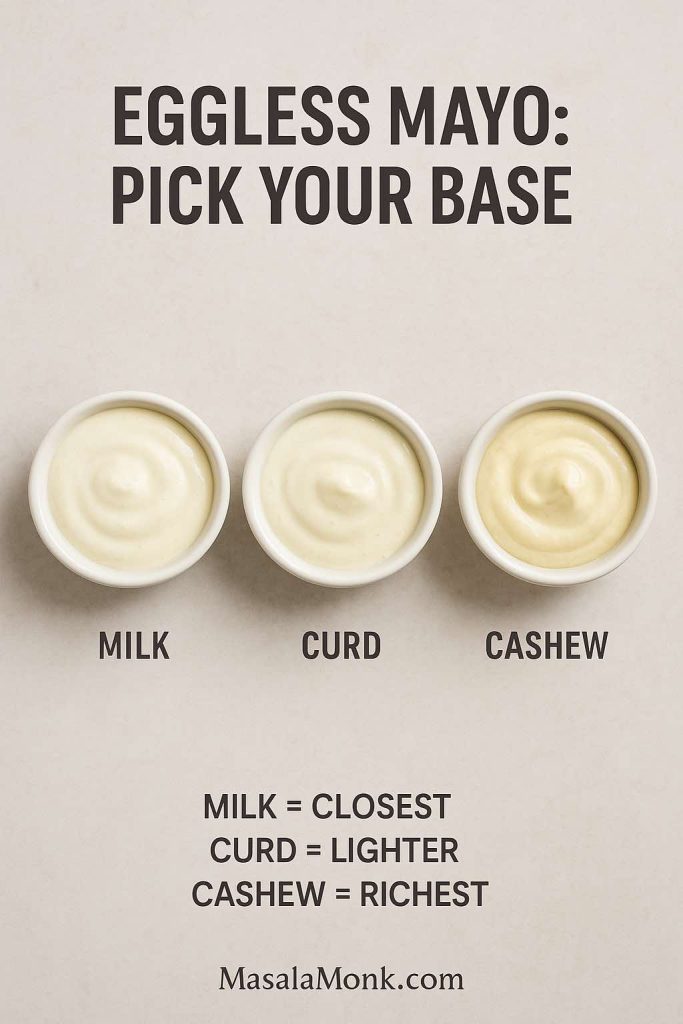
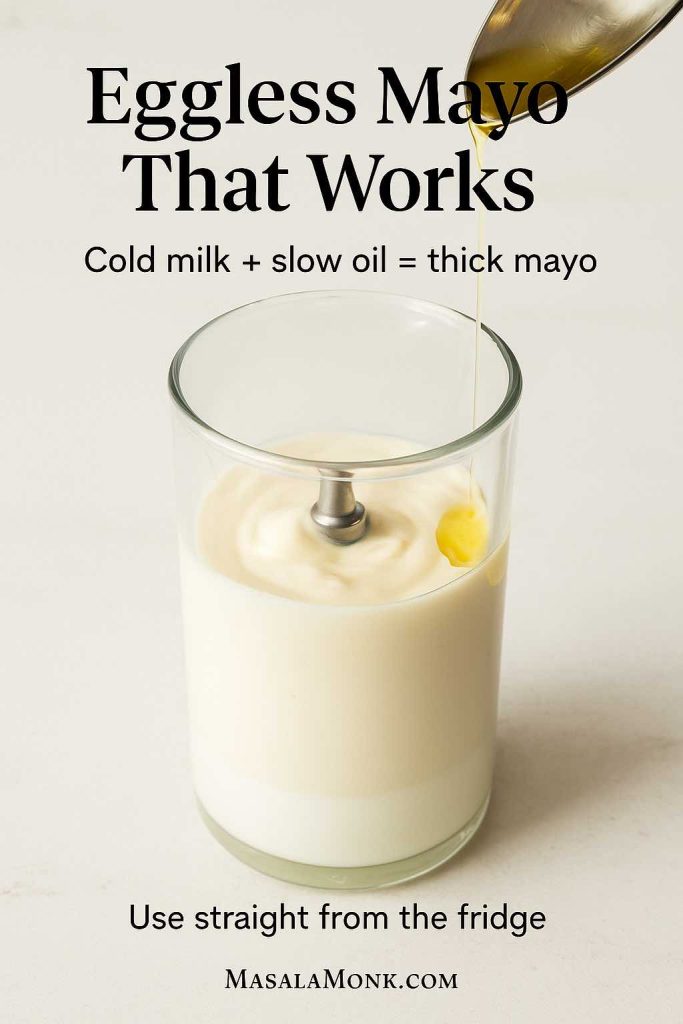
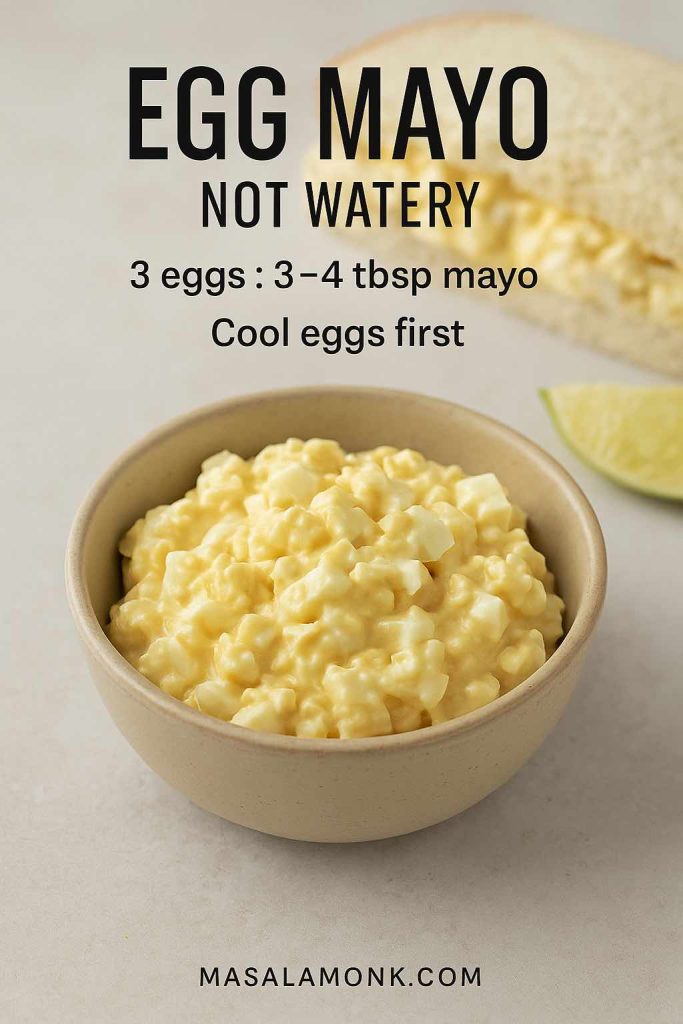
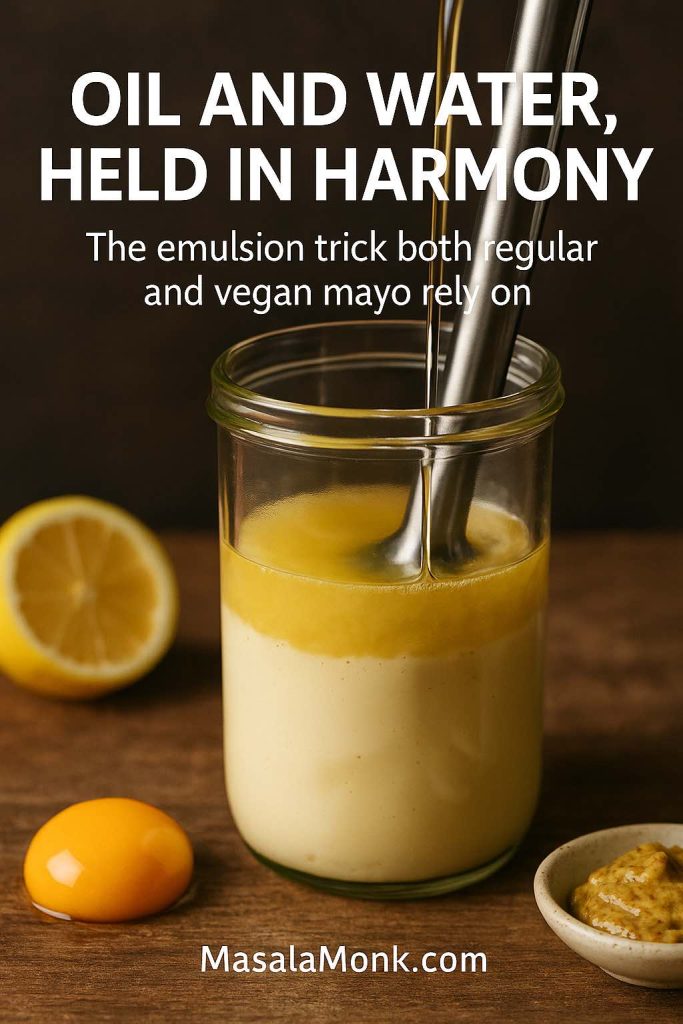
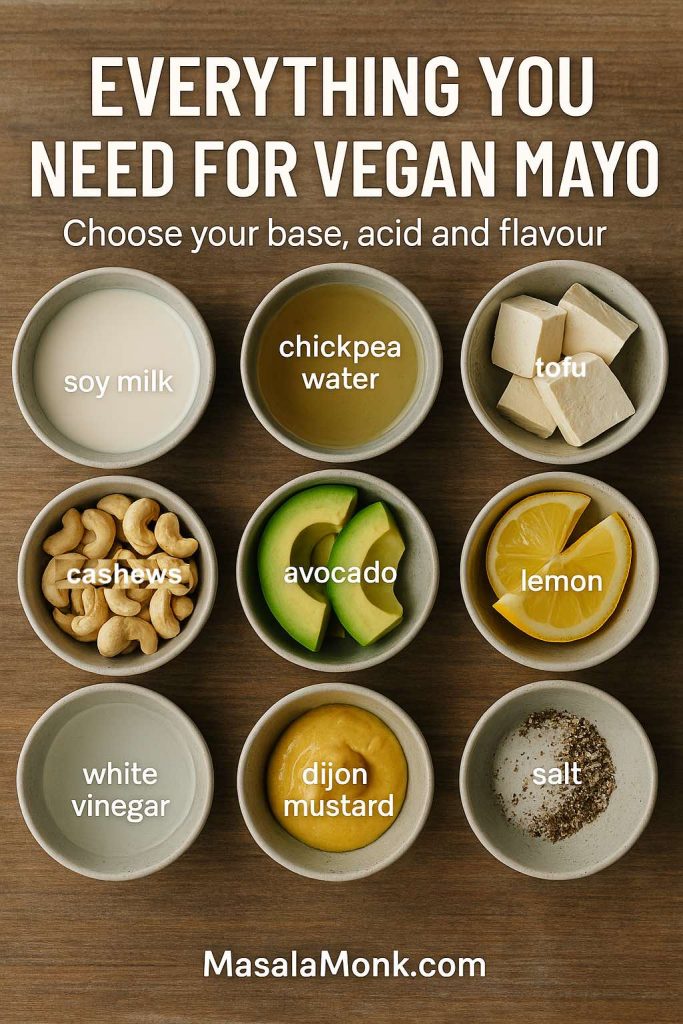
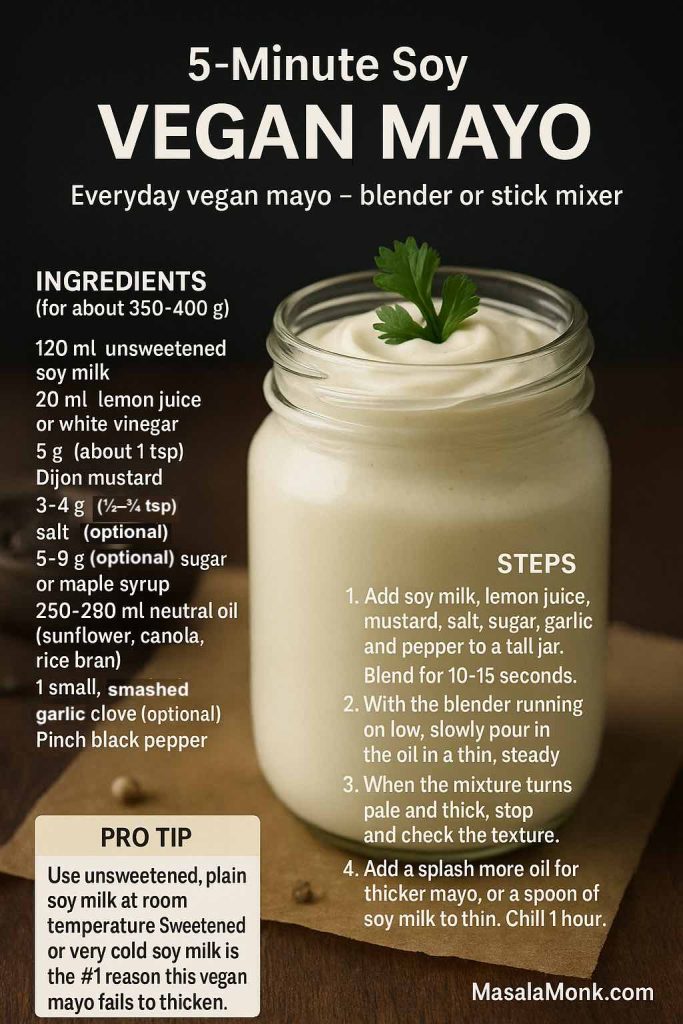
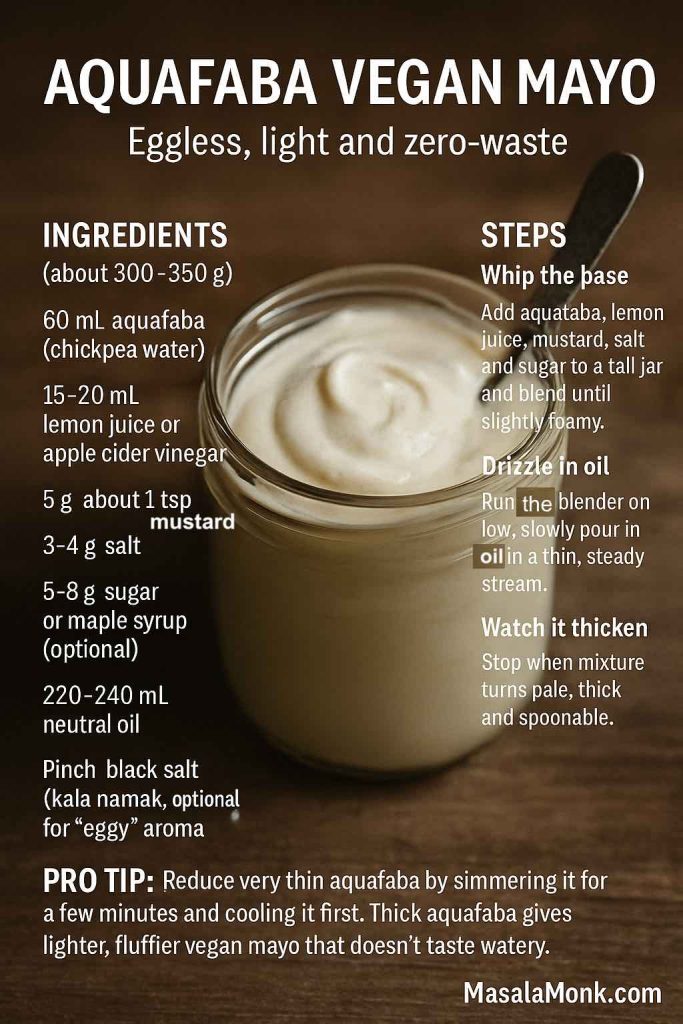
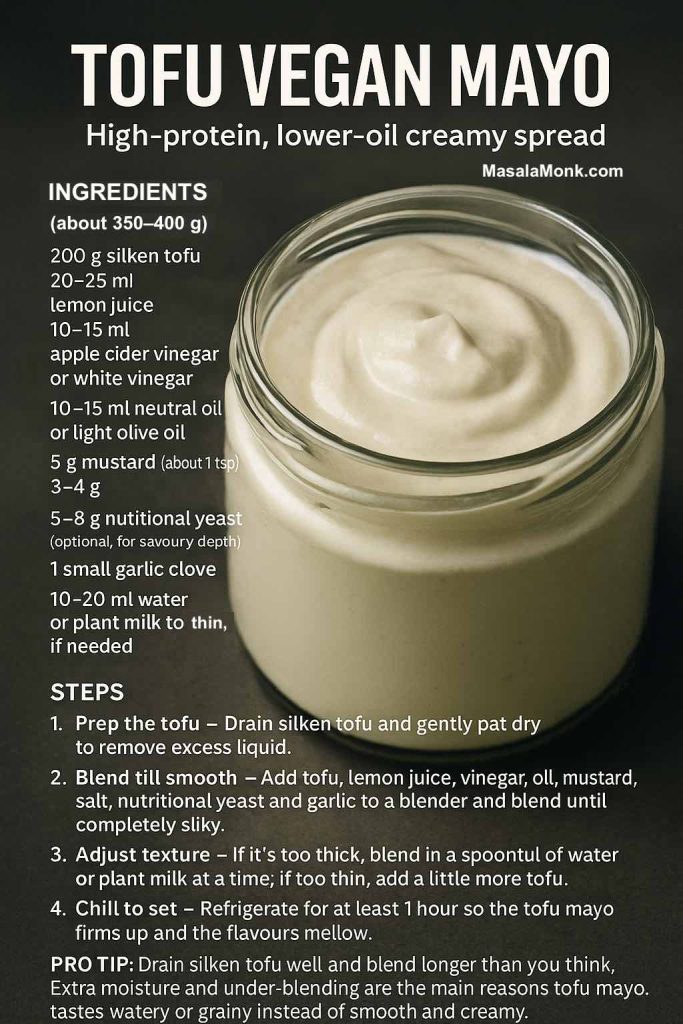
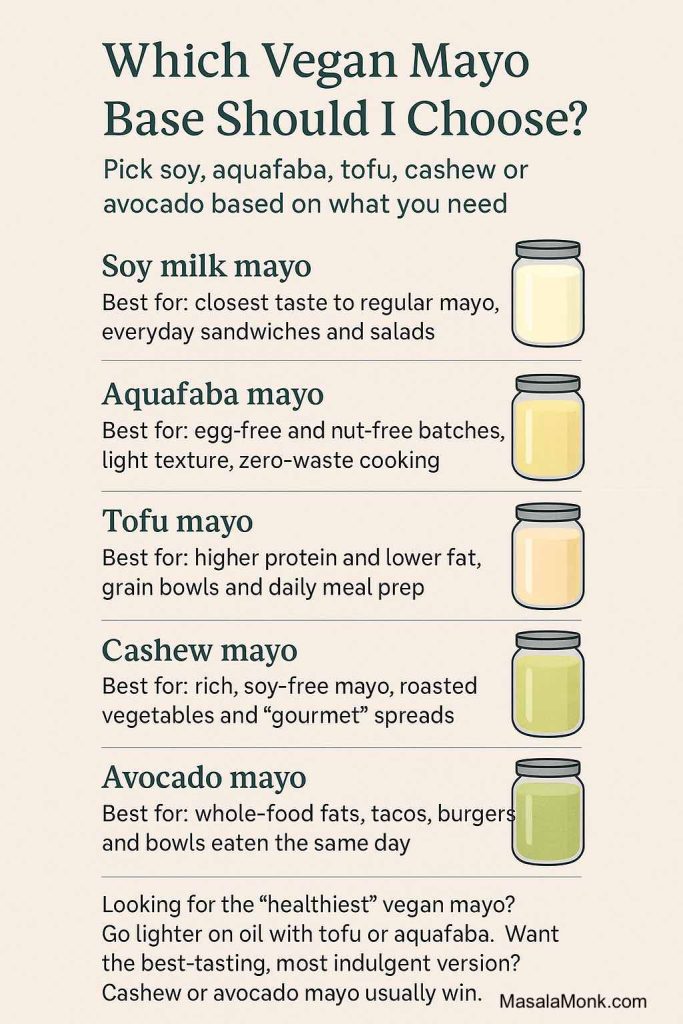
For an external reference, Serious Eats has a strong homemade ranch dressing recipe. For an egg-free foundation, MasalaMonk’s eggless mayonnaise recipe is a great starting point.
This pizza sauce recipe (in the “finisher” category) is quick, flexible, and easy to adjust.
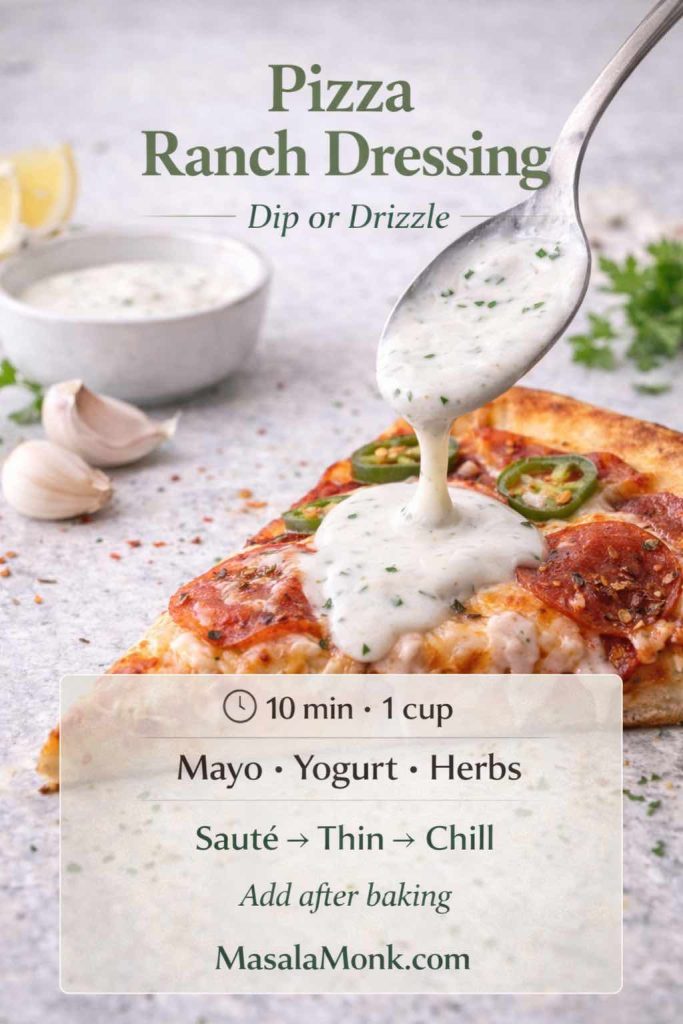
Ingredients
- ⅓ cup mayonnaise
- ⅓ cup sour cream or thick yogurt
- 2–4 tbsp buttermilk (or milk + lemon)
- 1 tsp lemon juice
- 1 garlic clove, grated
- dried dill/parsley (or fresh)
- salt and pepper
Method
- Whisk mayo and sour cream/yogurt until smooth.
- Thin gradually with buttermilk until it’s dip- or drizzle-consistency.
- Add lemon, garlic, herbs, salt, and pepper.
- Chill briefly if you can; the flavor improves as it rests.
How to serve pizza ranch dressing
Drizzle after baking, not before. Or serve it as a dip for crusts. In both cases, you get that cooling contrast that makes buffalo sauce on pizza taste even better.
Also Read: One-Pot Chicken Bacon Ranch Pasta (Easy & Creamy Recipe)
A simple way to plan pizza night so it never feels repetitive
Once you have these sauces, you don’t need to reinvent pizza night every time. Instead, you can rotate styles based on mood. As a result, even the same dough and cheese can feel completely different from week to week.
Here’s a rhythm that works surprisingly well:
Build “pairs” instead of picking one pizza sauce recipe forever
If you’re making two smaller pizzas, do one red and one white. For example:
- marinara pizza on one
- white pizza sauce on the other
Or, for bolder nights:
- bbq pizza sauce on one
- pizza vodka sauce on the other
Because the flavor profiles are different, the table feels satisfied without anyone feeling like they “lost the vote.”
Use contrast like a secret ingredient
- If the sauce is bright (marinara), you can go heavier on cheese or earthy toppings.
- If the sauce is rich (Alfredo), add something sharp or spicy.
- If the sauce is sweet (barbecue pizza sauce), bring acidity or heat.
In practice, this keeps every slice from tasting one-note.
Add sides that match the mood
If you’re leaning into marinara pizza, a side like MasalaMonk’s homemade garlic bread loaf makes the meal feel complete.
Meanwhile, if you’re doing buffalo or BBQ, wings can tie the whole spread together, and MasalaMonk’s air fryer chicken wings are an easy way to get that crispy side without fuss.
Make-ahead strategy: cook once, eat twice (or three times)
If you want this lineup to feel effortless, treat it like prep. Even one extra batch can make pizza night smoother later.
Tomato sauces (marinara and tomato paste sauce)
These store and reheat well. Additionally, they often taste better the next day. So, you can make marinara once, use it for pizza marinara tonight, and then use leftovers for another marinara pizza or a quick pasta later.
White sauce and Alfredo
These are more delicate. Still, they can be stored for a couple of days if cooled quickly and reheated gently. When reheating, add a splash of milk or cream and keep the heat low. Otherwise, they can split.
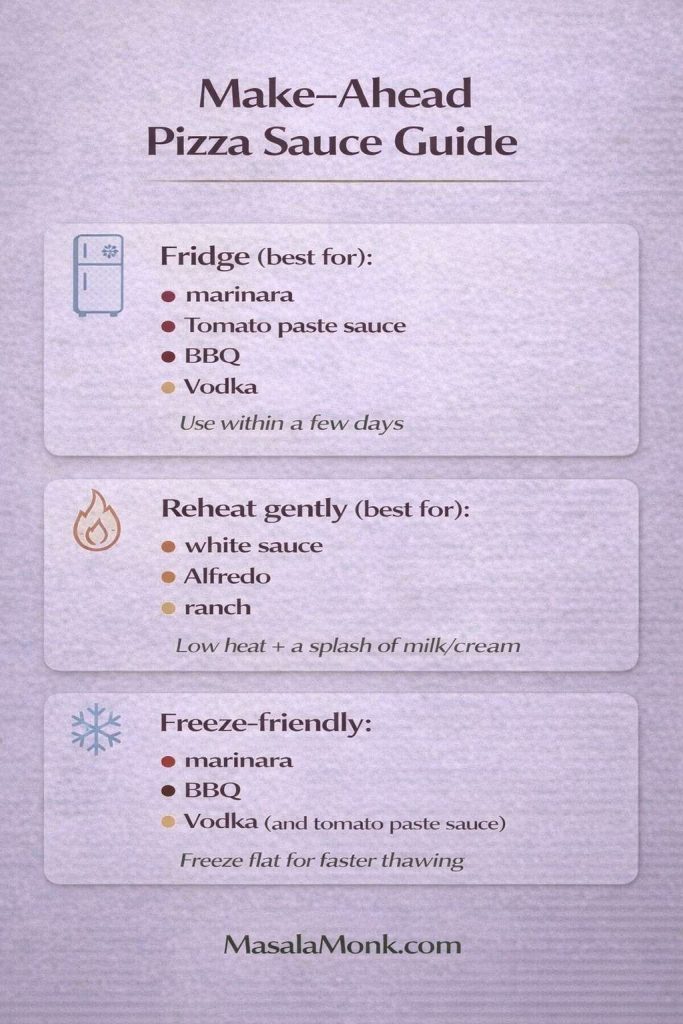
Buffalo and BBQ
Both are easy to store, and both are flexible. In fact, buffalo often tastes best warmed gently and applied as a swirl at the end. Likewise, BBQ sauce thickens as it cools, which actually makes it more pizza-ready the next day.
Vodka sauce
Vodka sauce stores well, although it can thicken in the fridge. Therefore, warm it gently and loosen with a spoon of water or cream until spreadable again.
And if you ever want to add a green sauce into the rotation later, pesto is the natural next step. MasalaMonk’s pesto variations fit the same structure without changing your overall process.
Bringing it back to the point: a lineup you’ll actually use
Pizza night doesn’t need to be complicated. It just needs a small set of reliable sauces that match different cravings. That’s why this post is built as a rotation rather than a single “one true sauce.”
To recap the seven core styles covered here:
- marinara sauce for pizza for classic pizza marinara nights
- pizza sauce from tomato paste for speed and intensity
- white pizza sauce for white base pizza comfort
- Alfredo sauce pizza for rich, buttery slices
- buffalo sauce on pizza for spicy tang and party vibes
- bbq pizza sauce / barbecue pizza sauce for smoky-sweet crowd-pleasers
- pizza vodka sauce for creamy tomato “restaurant slice” energy
- plus pizza ranch dressing as the cooling finisher that makes spicy slices sing
If you save only one idea from this post, make it this: each pizza sauce recipe works best when it’s used in the right role—base, swirl, or finish—and when it’s thick enough to respect the crust.
And once that clicks, pizza night stops being stressful. Instead, it becomes the easiest kind of creative: pick a sauce, pick a couple toppings that make sense, and let the oven do the rest.
FAQs
1) What is the best pizza sauce recipe for beginners?
If you’re starting out, a basic marinara-style pizza sauce recipe is usually the easiest because it’s forgiving, fast, and doesn’t rely on tricky temperature control. Additionally, it tastes familiar under cheese, so you can focus on getting the texture right rather than chasing complex flavors.
2) What’s the difference between pizza sauce and marinara pizza sauce?
Although they’re close, marinara pizza sauce is often a little brighter and simpler, while a classic pizza sauce recipe is typically thicker and more seasoned to stand up to heavy toppings. In practice, the main difference is consistency: pizza sauce tends to be reduced more so it doesn’t waterlog the crust.
3) How do I make pizza sauce from tomato paste?
To make pizza sauce from tomato paste, whisk tomato paste with warm water until it turns smooth and spreadable, then stir in olive oil, oregano, garlic, salt, and pepper. Afterward, let it rest a few minutes so the dried herbs bloom; as a result, the flavor tastes more “cooked” even before it hits the oven.
4) Why does my pizza sauce make the center soggy?
Usually it happens because the sauce is too thin or there’s simply too much of it. Instead, aim for a thicker pizza sauce recipe and spread a lighter layer; then, if you want extra punch, add a small swirl on top near the end rather than soaking the dough from the start.
5) What is white sauce in pizza, exactly?
White sauce in pizza is a creamy base—often built from a butter-and-flour thickener plus milk—then seasoned with garlic, pepper, and sometimes cheese. Consequently, a white pizza sauce recipe behaves more like a structured cream sauce than plain cream, which is why it bakes well without turning runny.
6) Is white pizza sauce the same as Alfredo sauce?
Not necessarily. White pizza sauce is usually a lighter, béchamel-style base, whereas an Alfredo sauce pizza base is richer and more cheese-forward. Put differently, both are creamy, yet Alfredo tends to taste buttery and intense, while white sauce feels smoother and more neutral.
7) How do I keep an Alfredo sauce pizza from turning greasy?
First, keep the heat gentle when making the sauce so it stays cohesive. Then, use a thinner layer on the dough, because Alfredo loosens under oven heat. Finally, pair it with toppings that add contrast—greens, roasted vegetables, or a little spice—so the slice doesn’t feel heavy.
8) Can I use buffalo sauce on pizza as the base?
Yes, but it’s often better as a swirl. Since buffalo sauce is thinner and more acidic, spreading it as a full base can make the crust damp. Alternatively, bake with a different base sauce and add buffalo sauce on pizza as a finishing swirl so the flavor stays bright.
9) What toppings go best on pizza with buffalo sauce?
Generally, chicken, onions, jalapeños, and a mozzarella-cheddar mix work well because they balance heat and tang. Moreover, a cooling drizzle makes the whole bite feel complete, which is why pizza and ranch dressing is such a common pairing for buffalo-style slices.
10) What’s the difference between bbq pizza sauce and regular barbecue sauce?
BBQ pizza sauce is usually thicker and slightly more balanced for baking, because regular barbecue sauce can be too sweet or too loose under cheese. Therefore, a barbecue pizza sauce recipe often includes extra simmering (to thicken) and enough tang to keep the flavor lively.
11) What does “barbeque pizza” usually mean in recipes?
Typically, barbeque pizza refers to a pizza built around a smoky-sweet sauce base, often topped with onions and a savory protein like chicken or paneer. In addition, it frequently benefits from something sharp—pickled onions or jalapeños—so the sweetness doesn’t dominate.
12) What is pizza vodka sauce, and why is vodka pizza popular?
Pizza vodka sauce is a creamy tomato sauce that often starts with tomato paste cooked for depth, then finished with cream for a plush texture. Meanwhile, vodka pizza became popular because that sauce tastes “restaurant-like” at home: rich, slightly spicy, and still tomato-forward.
13) Do I need vodka to make a pizza vodka sauce recipe?
No. You can still make a great pizza vodka sauce recipe by skipping the vodka and using a small splash of water or stock instead. Even without it, the tomato paste plus cream combination delivers the same creamy tomato character most people want.
14) What’s the best way to use pizza ranch dressing?
Most of the time, pizza ranch dressing works best as a dip or a post-bake drizzle. That way, it stays cool and tangy, which contrasts nicely with hot, spicy slices. Conversely, baking ranch into the pizza can mute its flavor and make it feel heavier.
15) How much sauce should I use on one pizza?
As a rule of thumb, use just enough to lightly coat the dough—more like a thin spread than a thick layer. Then, if you want stronger sauce flavor, add a small extra swirl near the end. This approach keeps the center crisp while still delivering sauce in every bite.
16) Can one post really cover multiple pizza sauce recipes without confusing readers?
Yes, provided each section is clearly separated by sauce type and purpose. For instance, marinara pizza sauce recipe content serves a classic red base intent, while white pizza sauce recipe sections handle creamy base intent, and buffalo or ranch sections cover finishing/drizzle intent. As long as each sauce solves a distinct craving, the structure stays easy to follow.
17) Which pizza sauce recipe is best for a party crowd?
If you’re cooking for a mixed crowd, bbq pizza sauce and marinara-style sauces are usually safest because they’re familiar and broadly liked. Then, for guests who want bolder flavors, offer buffalo sauce on pizza as a swirl and keep ranch available as an optional dip.
18) How do I thicken a sauce quickly if it’s already made?
If it’s a tomato sauce, simmer it uncovered for a few minutes until it reduces. If it’s a creamy sauce, warm it gently and let it simmer briefly so water evaporates without splitting. In either case, aim for a texture that clings—because a thicker pizza sauce recipe is almost always easier to bake successfully.