Posted on — Leave a comment

Chicken Parmesan Recipe: Crispy, Juicy & Easy

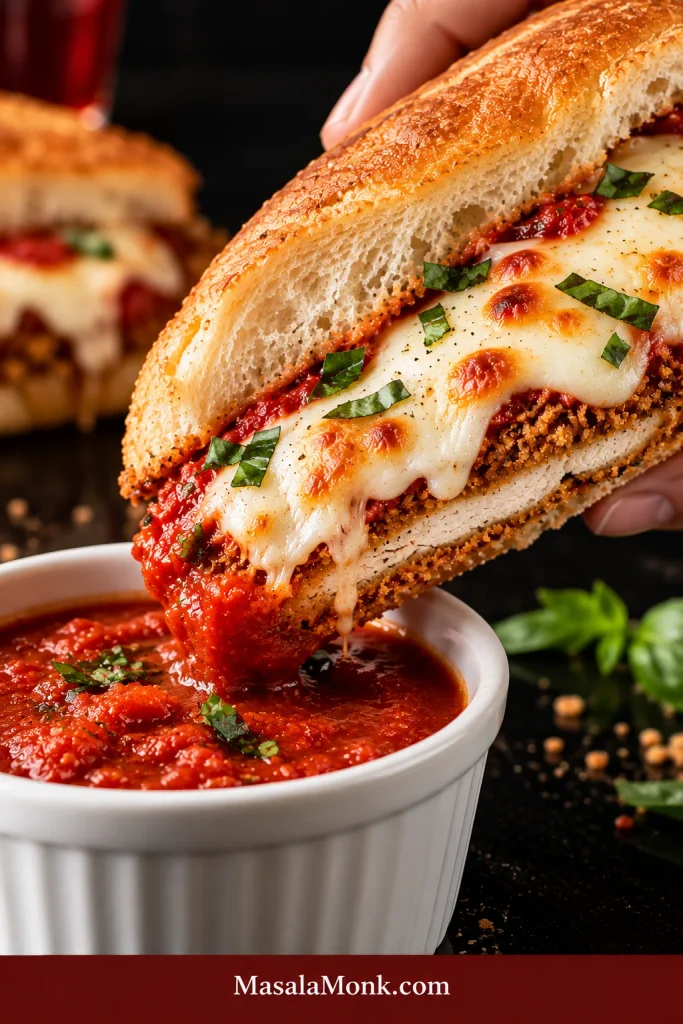
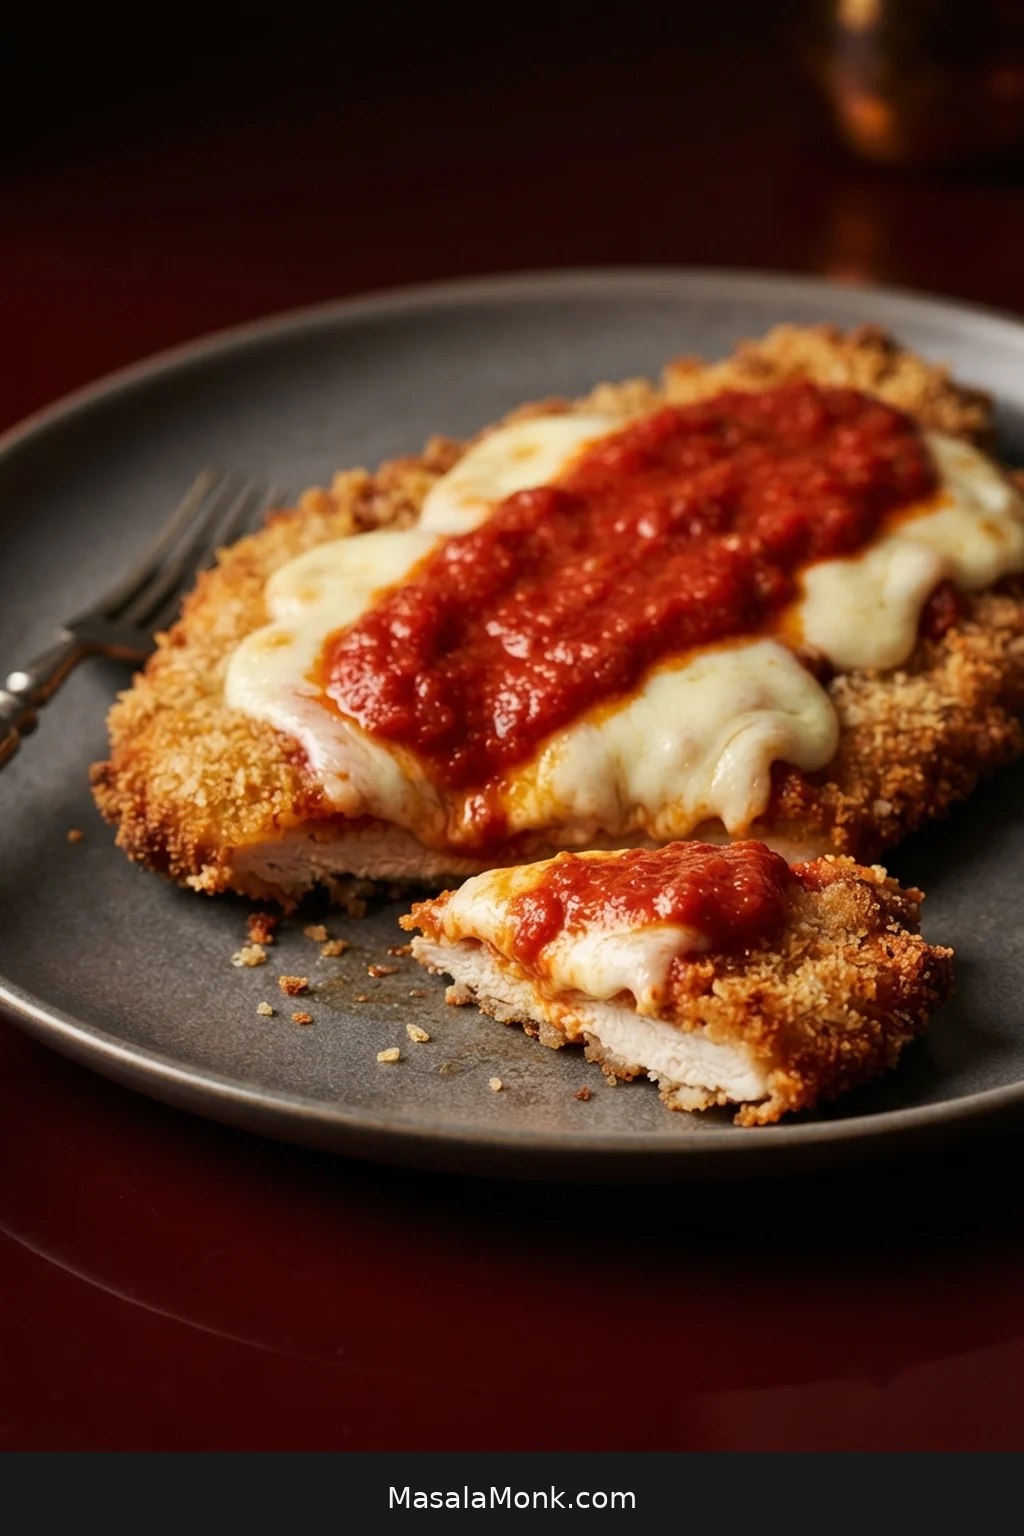
Golden Chicken Parmesan cutlet topped with melted mozzarella and thick marinara, with a sliced edge showing moist cooked chicken and crisp breadcrumb coating.

Cut into good Chicken Parmesan and you should hit a crisp golden edge before the juicy chicken, melted mozzarella, and hot marinara underneath. The breading beneath the sauce will soften a little—that is part of the pleasure—but the whole cutlet should not arrive as one uniformly soft layer.

That contrast is surprisingly easy to lose. A cutlet can leave the skillet beautifully crisp, then steam on a plate, sit under too much sauce, or spend another long stretch in the oven. Start with chicken that is too thick and the opposite happens: the breading darkens while the center is still catching up.

The order matters more than any trick ingredient. Most failures happen at the handoffs—breading to oil, skillet to rack, cheese to sauce—so this method pays particular attention to those moments. Build a crisp, fully cooked cutlet first; the mozzarella and marinara are a quick finish, not a second long cooking phase.

Protect the Crust From Pan to Plate

  • Cutlet: thin and even, about ⅓ inch / 8 mm.
  • Coating: light dredges, crumbs pressed on, then a 10-minute rest.
  • Fry: keep the oil around 350–365°F / 175–185°C and rack the cooked chicken immediately.
  • Finish: melt the cheese quickly, then spoon on the marinara.
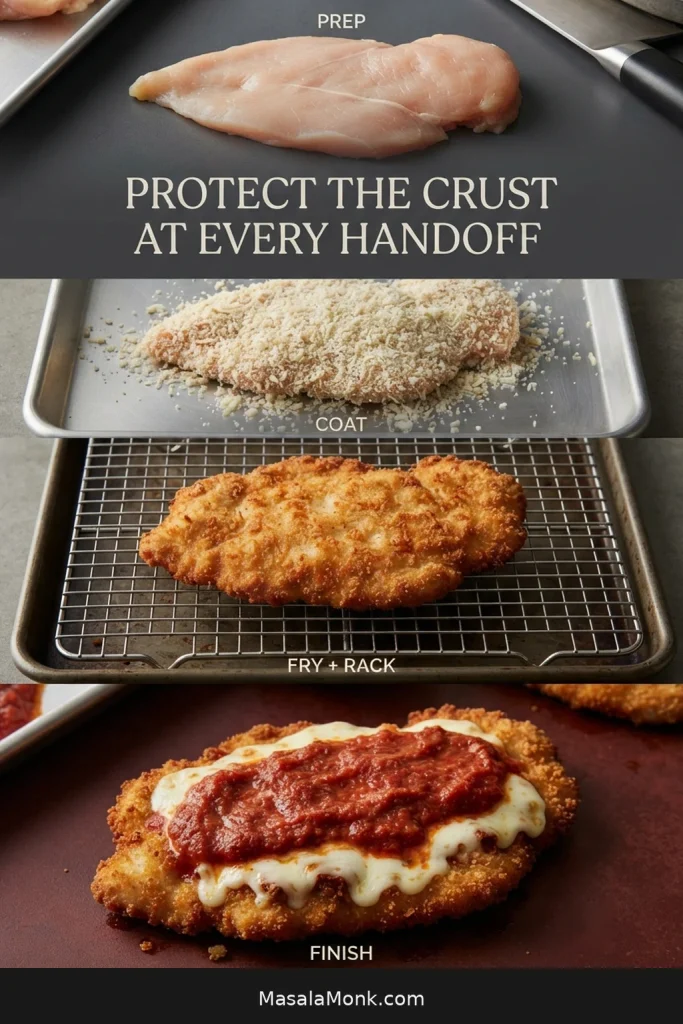
Four-stage Chicken Parmesan process showing a raw cutlet, breaded chicken, a fried cutlet resting on a wire rack, and the finished cutlet with mozzarella and marinara.
Each handoff either introduces moisture or gives it somewhere to escape. That is why crisp Chicken Parm depends as much on what happens between breading, frying and finishing as it does on the individual steps themselves.

Crispy Chicken Parmesan Recipe

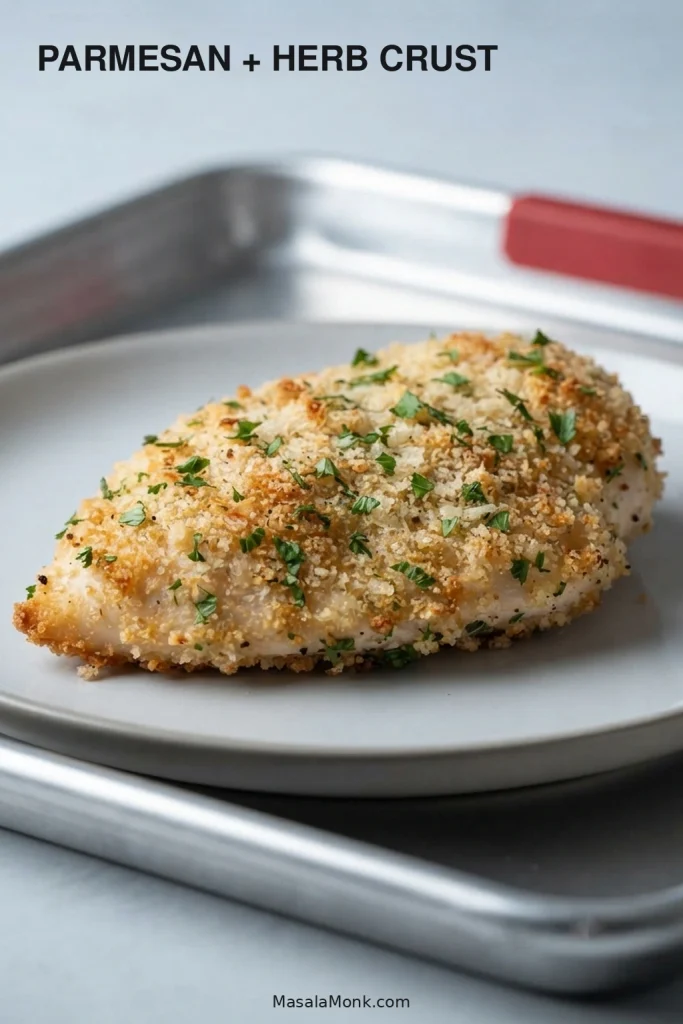
Thin Parmesan-breaded chicken cutlets, shallow-fried until golden and cooked through, topped with low-moisture mozzarella, then finished with hot marinara after the cheese melts.

Prep: about 20 minutes   Breading rest: 10 minutes, mostly overlapping   Cook & finish: about 15–25 minutes   Total: about 40–50 minutes   Yield: 4 servings

Use the breading rest to heat the oil, warm the marinara, and prepare the cheese. Cook time changes mainly with how many cutlets fit comfortably in your skillet at once.

Equipment

  • Heavy 12-inch / 30-cm skillet
  • Sharp chef’s knife
  • Meat mallet or rolling pin
  • 3 shallow dishes
  • Large plate or tray for raw breaded chicken
  • Wire rack set over a rimmed sheet pan for cooked chicken
  • Clean broiler-safe sheet pan or tray if your rack is not broiler-safe
  • Thin spatula or fish turner suitable for your skillet
  • Instant-read thermometer

Ingredients

Chicken

  • 1½ lb / 680 g boneless, skinless chicken breasts, usually 2 large breasts
  • 1 teaspoon / about 6 g fine sea salt
  • ½ teaspoon freshly ground black pepper

Parmesan Breadcrumb Coating

  • ½ cup / 60 g all-purpose flour
  • 2 large eggs
  • 1 tablespoon / 15 ml water
  • 1 cup / about 60 g panko breadcrumbs
  • ½ cup / about 55 g fine dry breadcrumbs, plain or Italian-style
  • ½ cup / about 45 g finely grated Parmesan
  • 1 teaspoon garlic powder
  • ½ teaspoon dried Italian seasoning, optional if your breadcrumbs are not already strongly seasoned

For Frying & Finishing

  • Neutral high-heat oil such as canola, vegetable, or avocado oil, enough for a shallow layer about ⅛ inch / 3 mm deep; usually around ¾–1 cup / 180–240 ml depending on the skillet
  • 6 oz / 170 g whole-milk low-moisture mozzarella, preferably freshly shredded
  • ¼ cup / about 22 g finely grated Parmesan
  • 1½ cups / 360 ml thick marinara, warmed and divided; use about ½–¾ cup / 120–180 ml on the chicken and keep the rest for serving
  • Fresh basil or flat-leaf parsley, optional
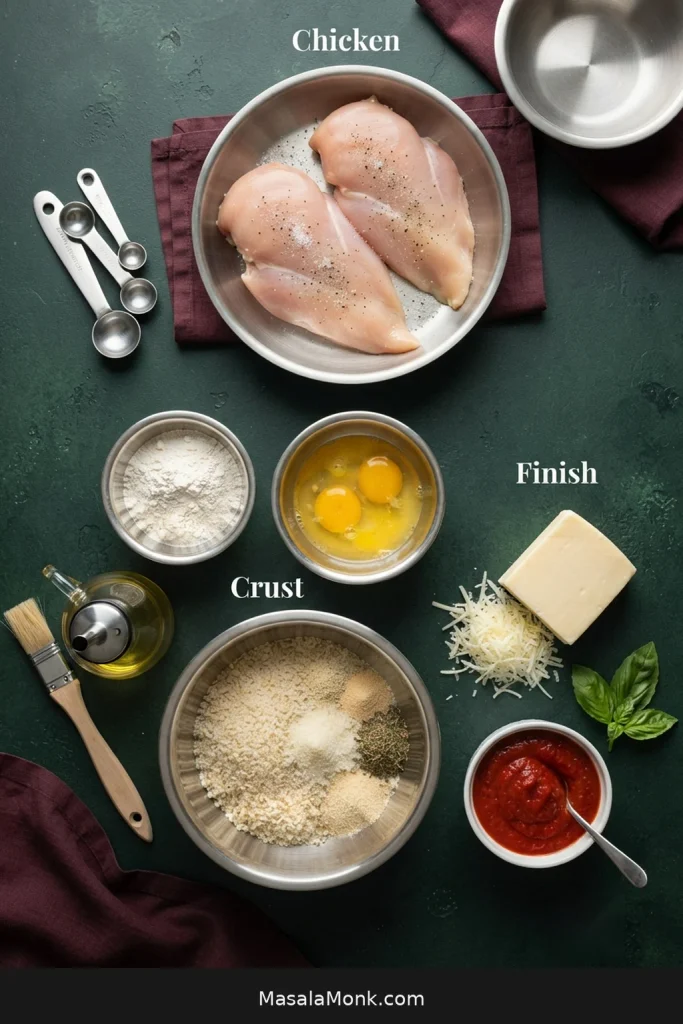
Chicken Parmesan ingredients grouped into chicken, breadcrumb coating, and finishing ingredients including flour, eggs, breadcrumbs, Parmesan, mozzarella, oil, marinara, and basil.
Think of the ingredients in three jobs: chicken provides structure, the dredges build adhesion and crunch, and mozzarella plus marinara create the rich, moist finish.

Before You Start

  • Chicken breasts are the easiest default. Large breasts split neatly into broad cutlets. Store-bought raw chicken cutlets save time; just even out any thick spots. If they are already close to ⅓ inch / 8 mm, pat them dry, season with the salt and pepper, and start at Step 2.
  • Slice before pounding. Halve thick breasts horizontally first, then flatten only the thicker areas. The pieces do not have to look like factory copies.
  • Low-moisture mozzarella is the easiest cheese to manage. Freshly shredded cheese melts more smoothly; pre-shredded saves time and still gets dinner done.
  • Jarred marinara is a smart weeknight choice. Use one you already enjoy, as long as it is thick enough to stay where you spoon it.
  • Keep raw and cooked surfaces separate. Rest breaded raw chicken on the plate or tray; reserve the rack for chicken coming out of the skillet.

Instructions

1. Slice and even out the chicken

Place each breast flat on a cutting board. With a sharp knife held parallel to the board, slice horizontally through the center to make 4 thinner cutlets.
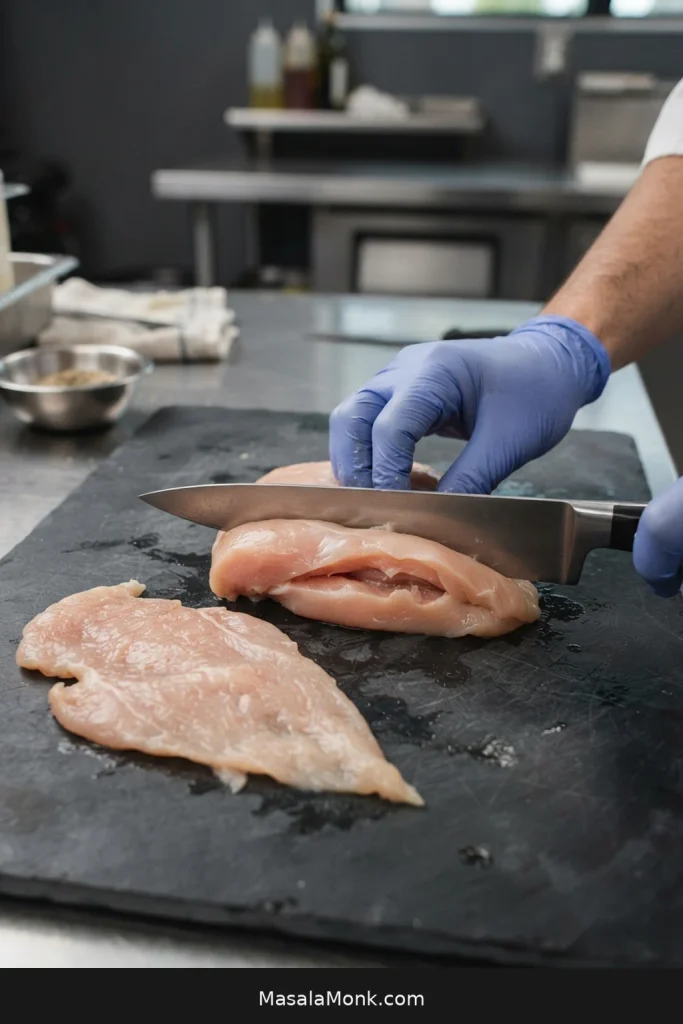
Chef’s knife cutting horizontally through a boneless chicken breast to create a broad, thin cutlet.
Horizontal slicing does the major shaping before the mallet comes out. As a result, pounding becomes a small correction for uneven thickness instead of a battle to flatten one bulky chicken breast.

Put the cutlets between sheets of parchment or inside a sturdy reusable bag. Gently pound the thicker areas until the pieces are evenly thin, close to ⅓ inch / 8 mm through the center. You are removing bulky spots, not trying to make every cutlet identical.
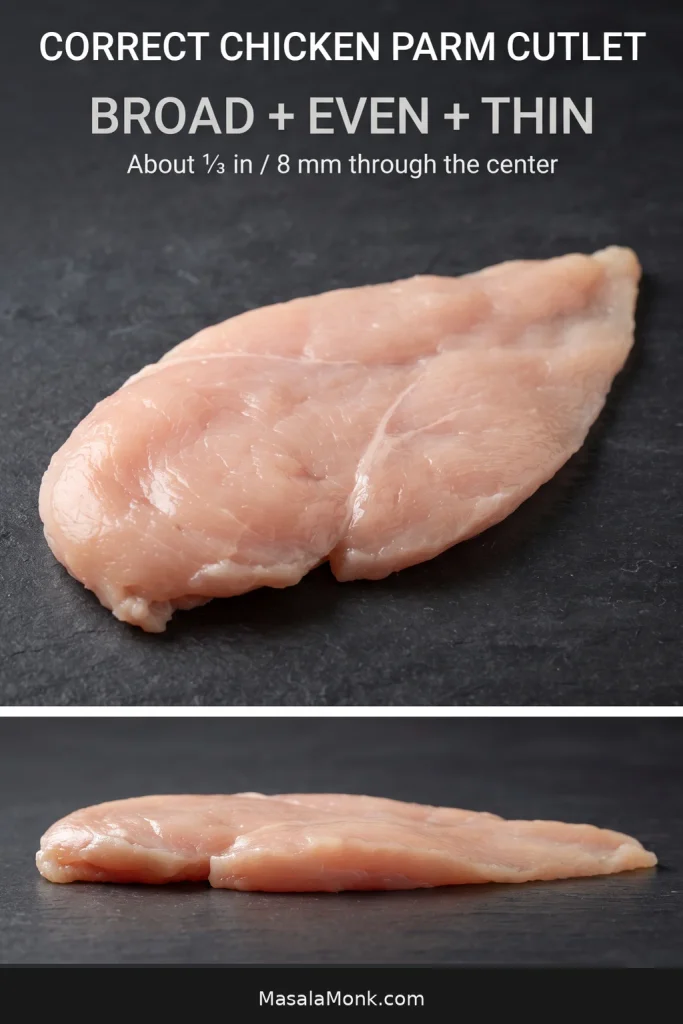
Raw chicken cutlet shown from above and from the side with guidance for a broad, even, thin cutlet about one-third inch or 8 millimeters through the center.
Judge the cutlet from the side as well as from above. Its outline can stay naturally irregular; what matters more is removing bulky high spots so the center cooks at roughly the same pace from edge to edge.

Pat the chicken dry, then season both sides with salt and black pepper. Small beads of moisture may collect while you prepare the breading; blot them gently before dredging.

2. Build the breading station

Put the flour in the first shallow dish. Beat the eggs with 1 tablespoon / 15 ml water in the second dish until smooth.

In the third dish, mix the panko, fine breadcrumbs, ½ cup / 45 g Parmesan, and garlic powder. If you are using Italian-style breadcrumbs, taste the dry mixture before adding the optional Italian seasoning; some brands are already strongly seasoned.

Crush especially large panko flakes lightly between your fingers as you mix.

3. Bread the cutlets

Coat one cutlet lightly in flour and shake off anything loose. Dip it into the egg, then hold it above the dish for a moment so the excess can drip away.
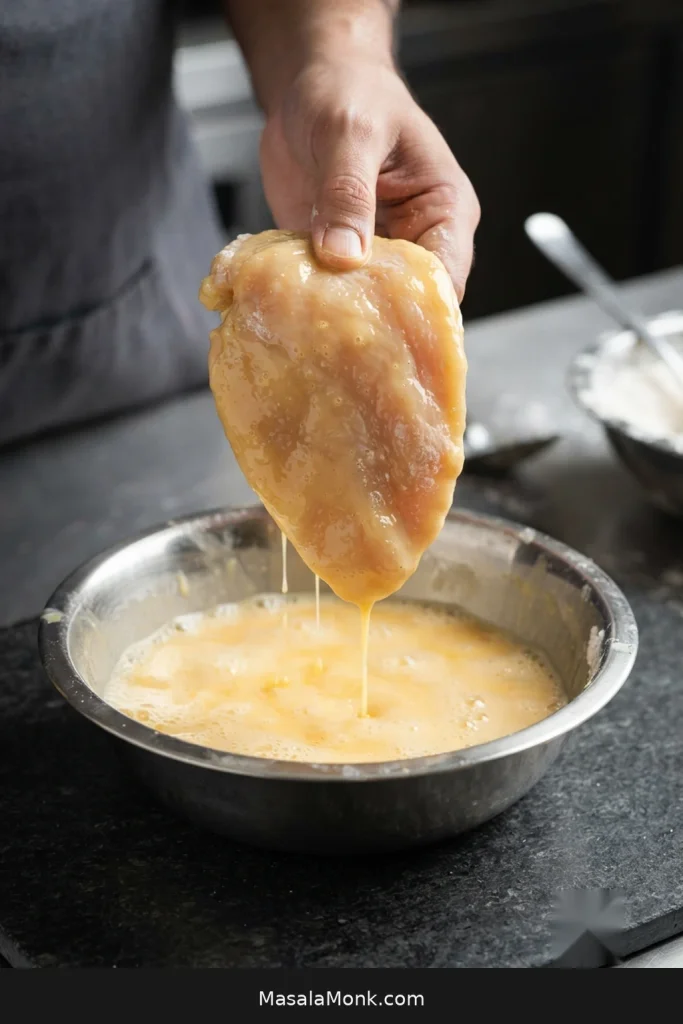
Thin raw chicken cutlet lifted from beaten egg with a light coating and several narrow drips falling back into a stainless bowl.
After the egg dip, aim for a thin sheen, not a hanging coat. Excess egg leaves a slippery layer beneath the crumbs.

Press the chicken firmly into the breadcrumb mixture on both sides and around the edges. A good coating looks craggy but complete, with no wet bald patches or thick armor of crumbs. If it still looks glossy with egg, let more drip away before pressing on the breading.
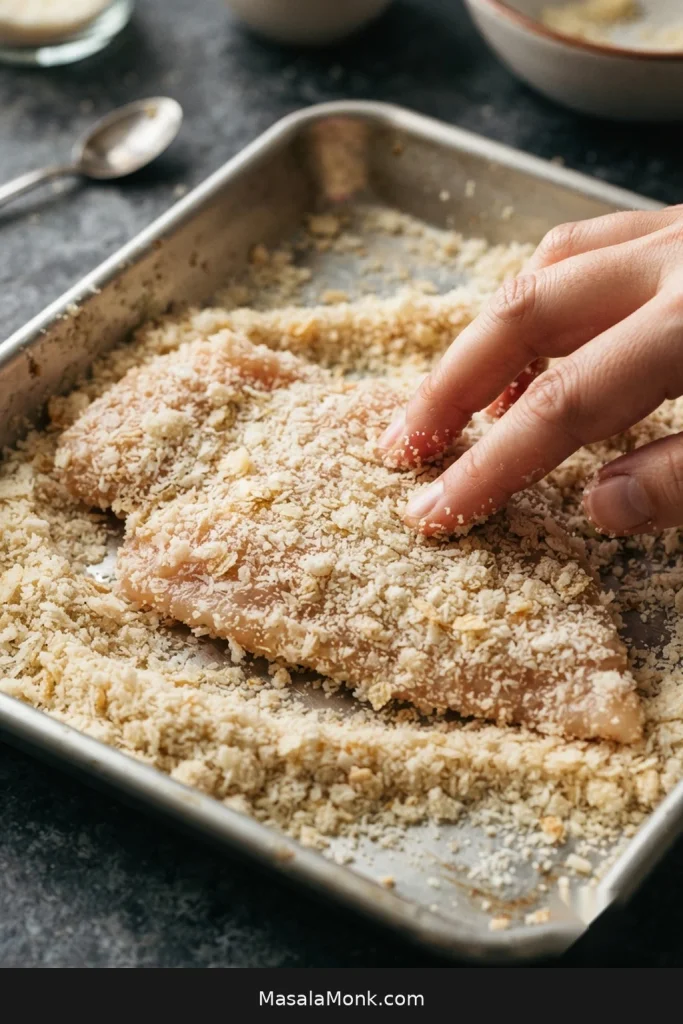
Fingers pressing a mixture of panko and fine breadcrumbs onto a thin raw chicken cutlet in a breading tray.
Check the edges as carefully as the center. A well-breaded cutlet should show a continuous fine-crumb base with panko texture on top, without glossy egg or bare chicken peeking through around the perimeter.

Set the breaded raw cutlet on the clean plate or tray—not on the rack reserved for cooked chicken. Repeat with the remaining pieces, then let them rest for about 10 minutes. That short rest gives the coating time to settle onto the chicken before frying.

Meanwhile, warm the marinara, prepare the finishing cheese, and heat the oil. Position an oven rack about 6 inches / 15 cm from the broiler so the finishing setup is ready later. Discard any flour, egg, or breadcrumb mixture that has touched raw chicken.

4. Heat the oil

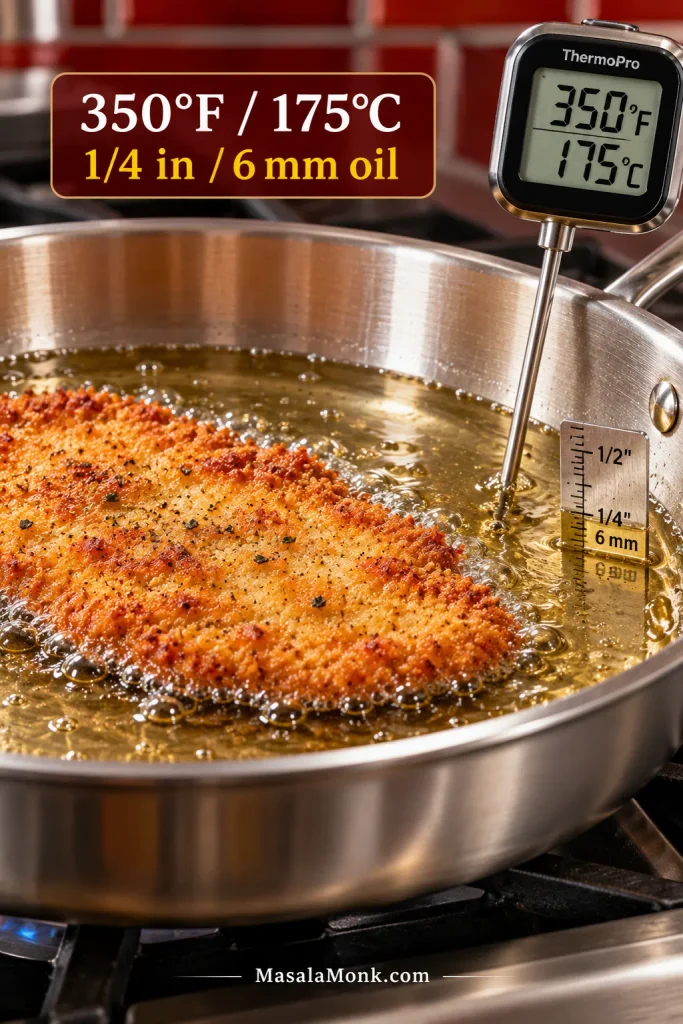
Keep the frying oil around 350–365°F / 175–185°C while the chicken cooks. Add enough oil for a shallow layer about ⅛ inch / 3 mm deep, then heat it to about 365°F / 185°C before the first cutlet goes in.

Skillets vary in shape, so use the oil depth—not a fixed volume—as your guide.

As a rough check without a thermometer, drop in a pinch of breadcrumbs. They should sizzle immediately and steadily without turning dark within a few seconds.

5. Fry without crowding the skillet

Add 1 or 2 cutlets at a time—only as many as fit with clear space around them. Fry the first side for about 2–3 minutes, until the coating is deeply golden and feels set.

Read the First Side Before You Flip

Try not to keep lifting the chicken to check underneath. A crust that is ready to turn usually releases more easily. If the cutlet still grips the pan, it generally needs another 20–30 seconds. Give it that time; pulling harder can take the crust with it.
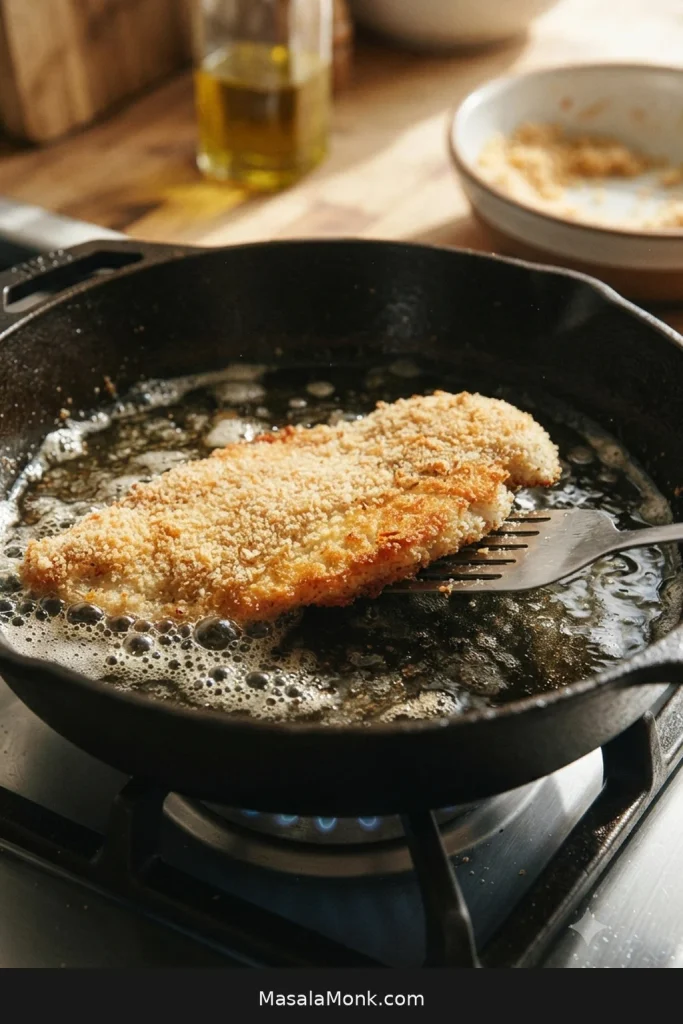
Breaded chicken cutlet shallow-frying in a skillet while a thin spatula tests one golden edge for release.
A crust ready to turn should begin releasing at the edge. If it still grips the pan, give it a little longer.

Flip once and cook the second side for about 1½–2½ minutes, adjusting the heat if the coating is darkening too quickly.

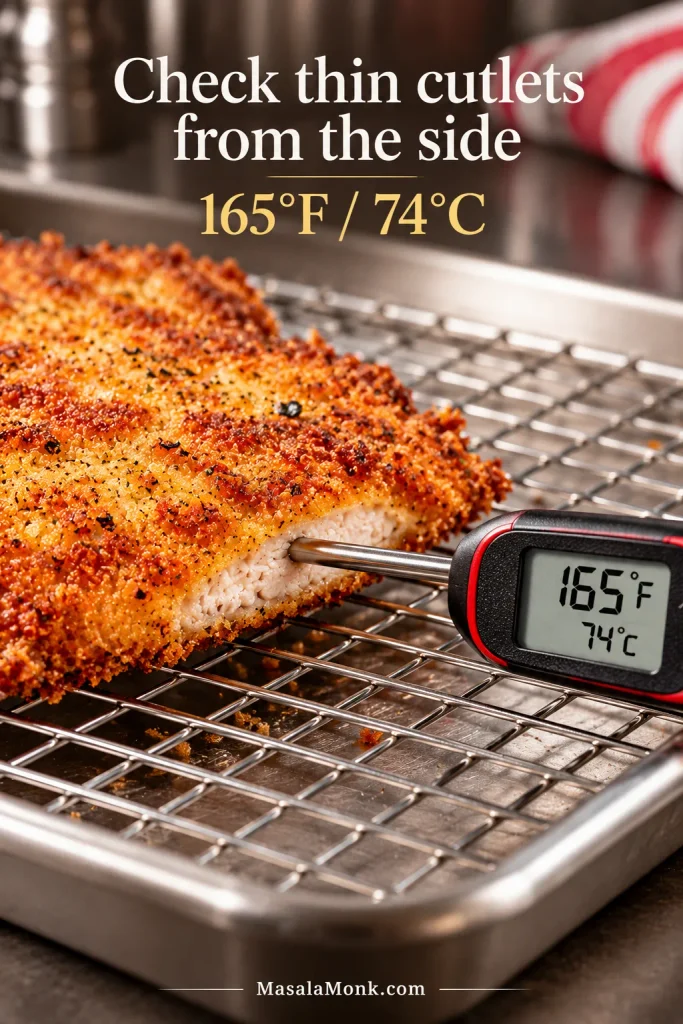
Cook the chicken to 165°F / 74°C in the thickest part. On a thin cutlet, slide the thermometer horizontally in from the side so the tip reaches the center without passing straight through.

Rack the Chicken and Reset the Oil

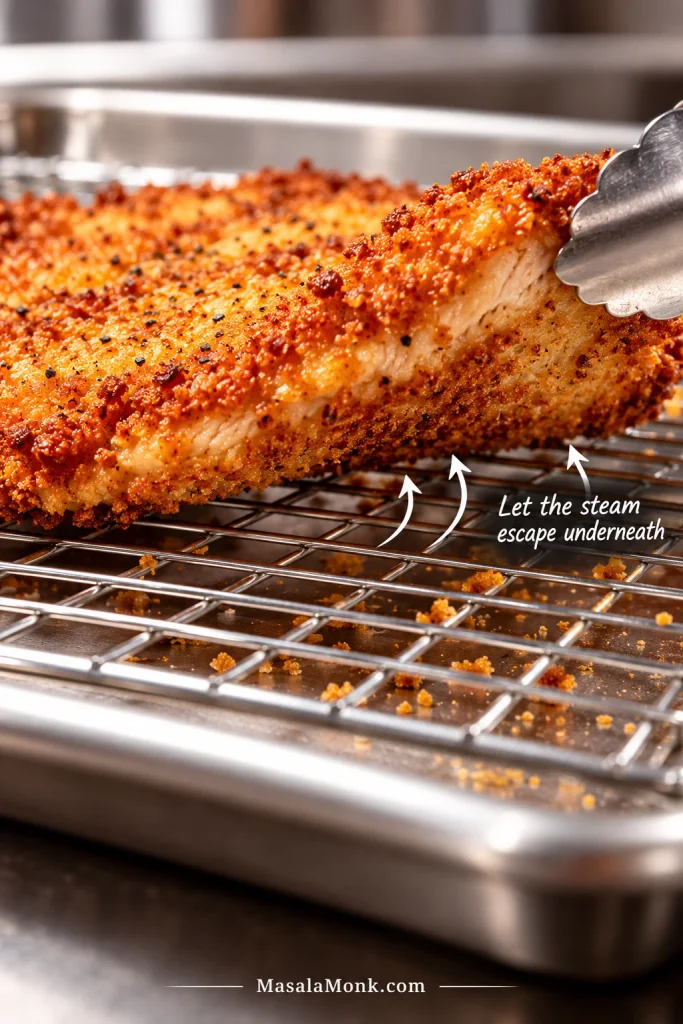
Transfer each cooked cutlet directly to the clean wire rack in one uncovered layer. Repeat with the remaining chicken, letting the oil recover between batches and skimming out obviously dark crumbs as needed.
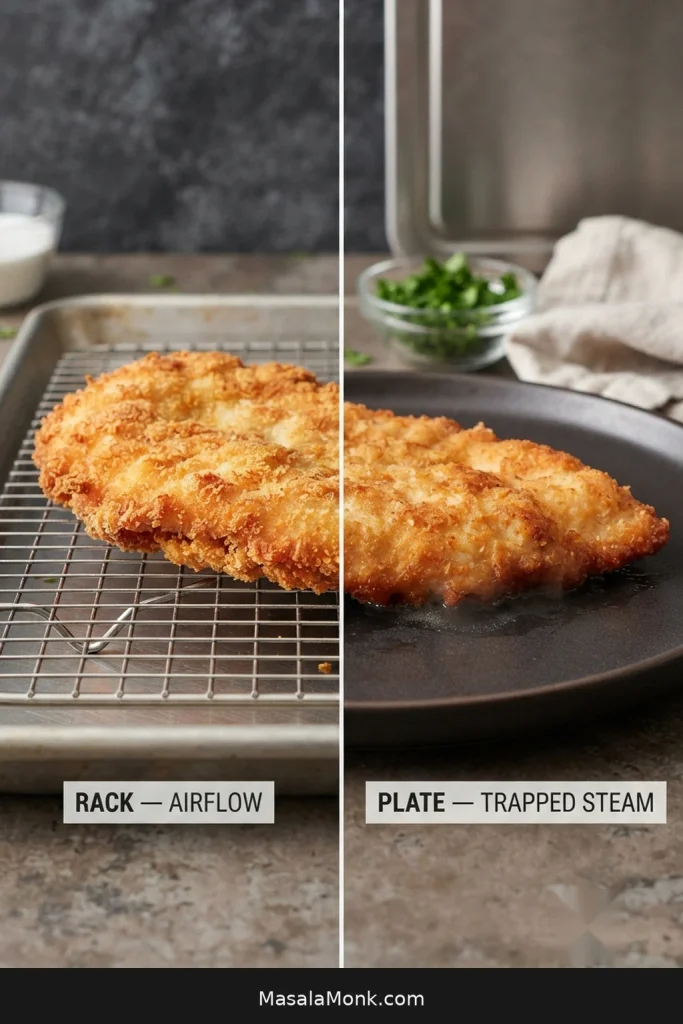
Fried chicken cutlets compared on a wire rack labeled Airflow and a flat plate labeled Trapped Steam.
The rack is doing more than draining oil. Its open gap lets heat and moisture escape; on a plate, the hot underside sits directly in the steam it is producing.

Use the first batch to read the pan. A first cutlet that comes out darker than you wanted has not ruined dinner—lower the heat before the next one goes in. Pale, oily breading means the oil needs time to recover. Scoop out loose dark crumbs while you wait.

6. Heat the broiler and melt the cheese quickly

As the final batch fries, turn on the broiler so it is fully hot when the chicken reaches the rack. Keep the warm marinara and finishing cheese close by; this handoff should move quickly.

If your wire rack and sheet pan are broiler-safe, leave the cooked cutlets on the rack. Otherwise, move them to a clean broiler-safe tray. Divide the mozzarella over the centers, leaving a border of golden breading visible. Sprinkle with the remaining Parmesan.

Broil for about 1–2 minutes, watching continuously. The cheese is ready when the individual shreds have relaxed into one bubbling layer. Follow the cheese rather than the clock; this is a melt, not another cooking stage for the chicken.

7. Add the marinara and serve

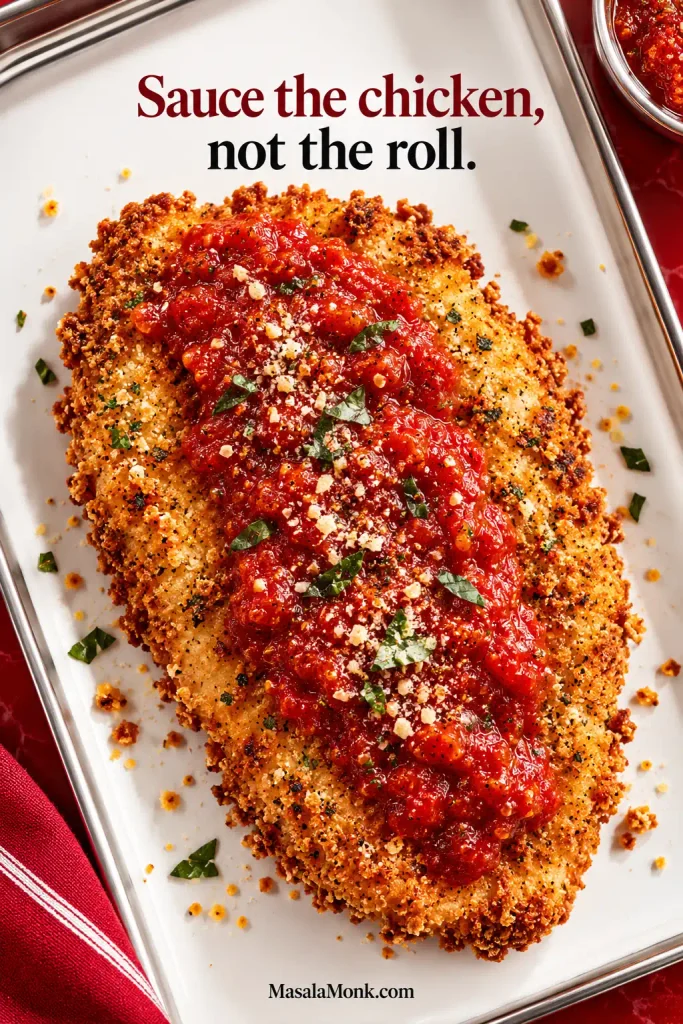
Spoon about 2–3 tablespoons / 30–45 ml of hot marinara mostly over the melted cheese on each cutlet. You should still see a clean band of golden crust around the bubbling cheese and red sauce.
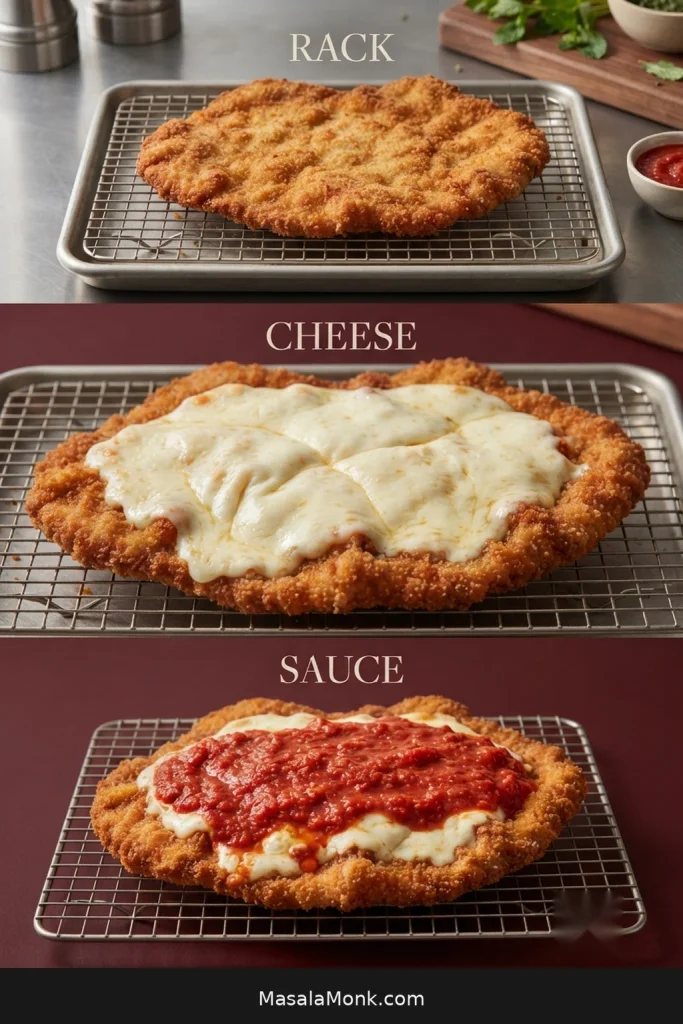
Three-stage Chicken Parmesan sequence showing a fried cutlet on a rack, melted mozzarella added to the center, and marinara added over the cheese.
Notice the shrinking wet zone across the sequence: the crisp cutlet stays exposed, mozzarella occupies mainly the center, and marinara lands over the cheese. That footprint matters more than simply using “less sauce.”

Finish with basil or parsley if you like and serve straight away. Put the remaining marinara on the table or use it for pasta so anyone who wants more sauce can add it without soaking every cutlet in advance.

Recipe Notes

  • Thickness controls the timing. Very thin cutlets finish faster; thick spots give the crumbs more time to darken.
  • If the marinara is watery, reduce it first. A sauce thick enough for Chicken Parm stays mostly where the spoon puts it instead of leaving a red moat around the cutlet.
  • Prefer a softer, saucier version? Add more marinara before the cheese. The crust will soften faster, but that may be exactly the texture you want.

What the Finished Chicken Parmesan Should Look Like
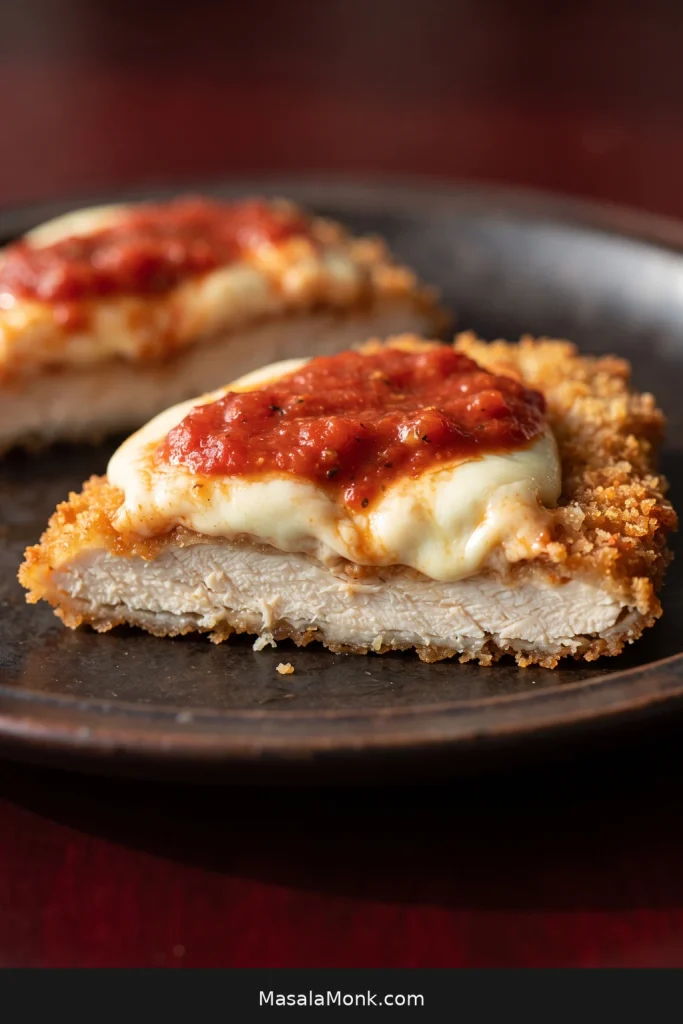
Close cross-section of thin Chicken Parmesan showing golden breadcrumb crust, moist cooked chicken, melted mozzarella, and thick red marinara.
Use the cut edge to inspect the architecture. The chicken should remain the main layer, the breadcrumb crust should stay thin and attached, and there should be no obvious hollow pocket where the coating has separated from the meat.

About this recipe: This is a research-led synthesis of established Chicken Parmesan methods and recurring home-cook problems with breading, frying, cheese, sauce, and reheating; it was not developed in a MasalaMonk test kitchen.

The Details That Make Chicken Parmesan Work

The crust depends on a few things working together: the coating has to stay attached, the oil has to stay hot enough, and moisture has to stay controlled once the chicken leaves the skillet. Below, we unpack the places where those pieces most often go wrong—and what to change when they do.

Why Chicken Parmesan Breading Falls Off

There are two common versions of this problem, and they do not fail in quite the same way.

The coating comes off in the pan

Bare patches during frying or flipping often start with moisture on the chicken. Flour grabs much more cleanly onto a dry surface than one that is slick with moisture.

A heavy flour layer can turn pasty; too much egg leaves a slippery layer beneath the crumbs. Shake off the flour, let the egg drip, and press the crumb mixture onto what remains.

Then give the first side time to become a crust. A cutlet that still feels stuck usually needs a few more seconds. If a small patch does come loose, keep cooking—one imperfect spot does not ruin the cutlet.

The crust pulls away when you slice the chicken

Breading that stays intact in the pan but lifts away like a shell when sliced usually points to trapped moisture or an overly thick coating.

Thin chicken shortens that steamy cooking window. Light dredges leave less wet material beneath the crumbs, and the short rest gives the layers time to settle together before they hit the pan.

Cover the chicken completely, but do not build a thick shell.
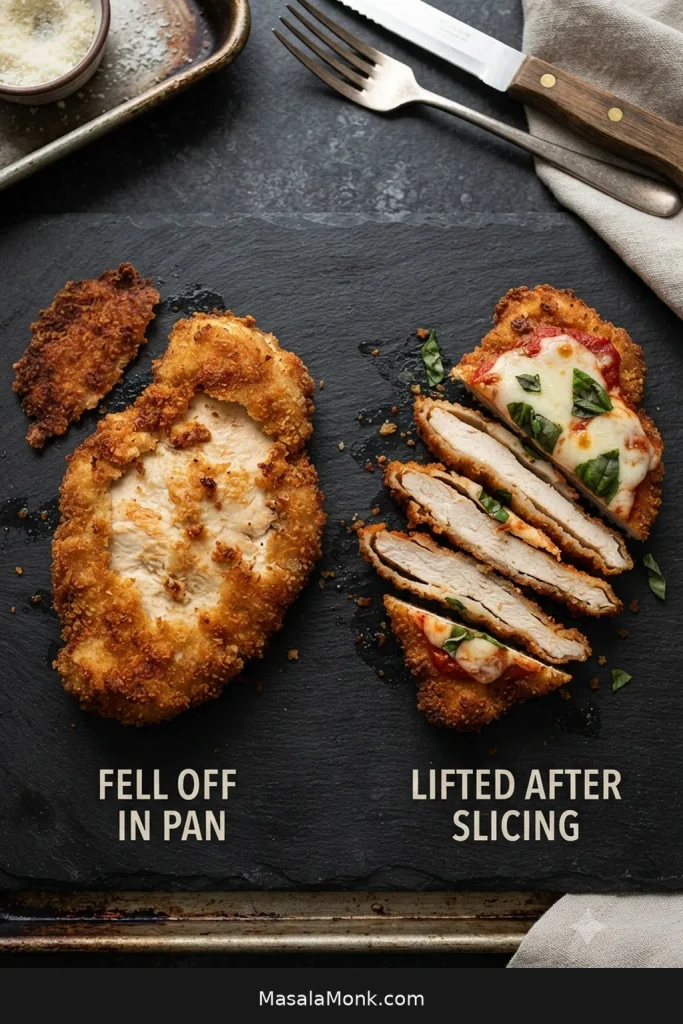
Comparison showing breading missing from part of a cooked chicken cutlet and an intact breading shell lifting away from sliced chicken.
These failures look similar only at first glance. Bare patches mean the coating has actually left the chicken; an intact crust lifting as a sheet means the layers stayed together but lost their bond to the meat.

Panko, Breadcrumbs & Parmesan

Fine crumbs fill the gaps; panko creates rougher, airier edges. Together they give the chicken full coverage without making the crust feel dense.

Only have one kind? All-panko gives a rougher, more open crust; all-fine breadcrumbs make a tighter, more uniform one.
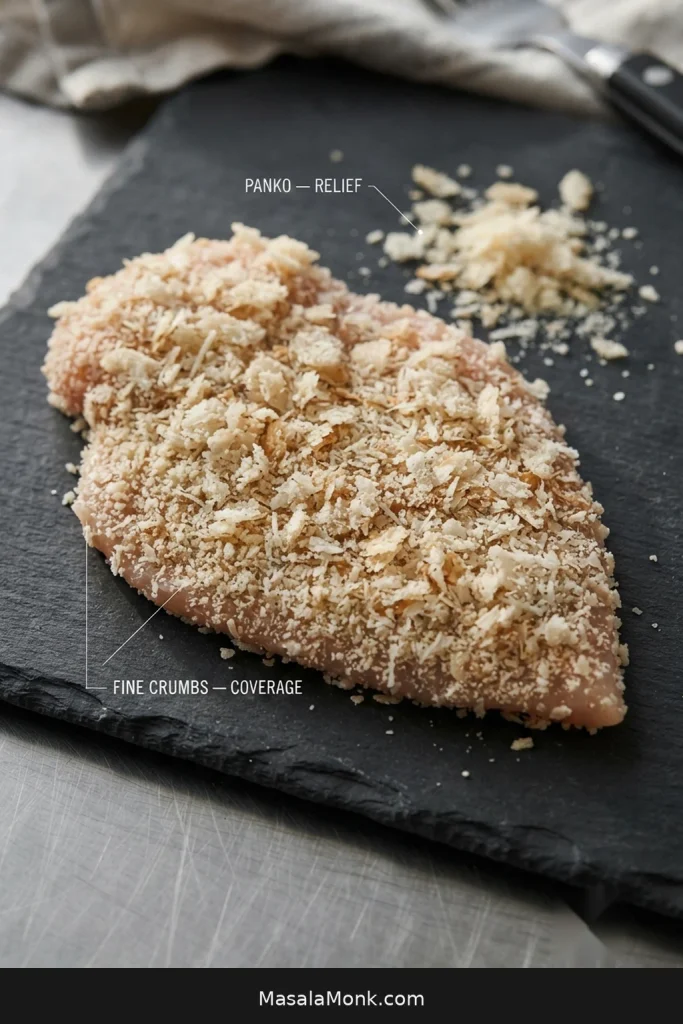
Raw breaded chicken cutlet beside coarse panko flakes and fine breadcrumbs, showing both crumb sizes in the coating.
Look for both textures: fine crumbs fill the gaps while panko creates rougher, airier ridges.

Why Parmesan belongs in the breading

Finely grated Parmesan seasons the coating itself and adds nutty, savory flavor wherever the crumbs brown. It also colors quickly, so the breading still needs plenty of crumb for structure and a little more forgiveness in the skillet.

If you are choosing between supermarket Parmesan, Parmigiano Reggiano, and similar hard cheeses, our guide to Parmesan cheese and its varieties explains the differences in more detail.

What the Frying Oil Is Doing

Keep the oil around 350–365°F / 175–185°C while frying.

Cool oil leaves the crumbs shiny and heavy. At the right temperature, the finished crust looks dry and deeply golden, without an oily sheen. Crowding the skillet can drag the temperature down quickly because each cold cutlet absorbs heat from the oil.

Oil that runs too hot sends the coating toward dark brown while the center is still cooking. A first cutlet several shades darker than you wanted is useful information: turn the burner down before batch two.
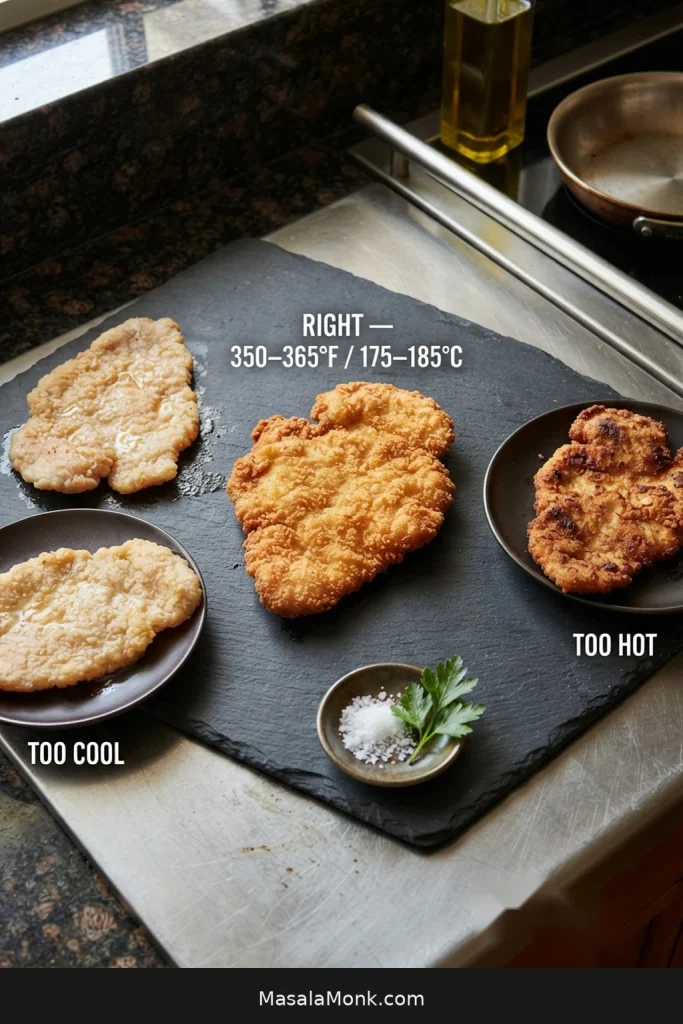
Breaded chicken cutlets showing pale, golden, and dark crust states with the preferred frying range labeled 350–365°F / 175–185°C.
Do not read frying oil by color alone. The useful Chicken Parmesan crust looks dry and crisp as well as golden; pale or unusually shiny breading can signal that the oil lost too much heat when the chicken went in.

Later batches have another complication. Loose breadcrumb and Parmesan fragments keep frying after the chicken comes out, gradually changing the oil. Skim the obviously dark pieces and let the temperature recover before adding more chicken.
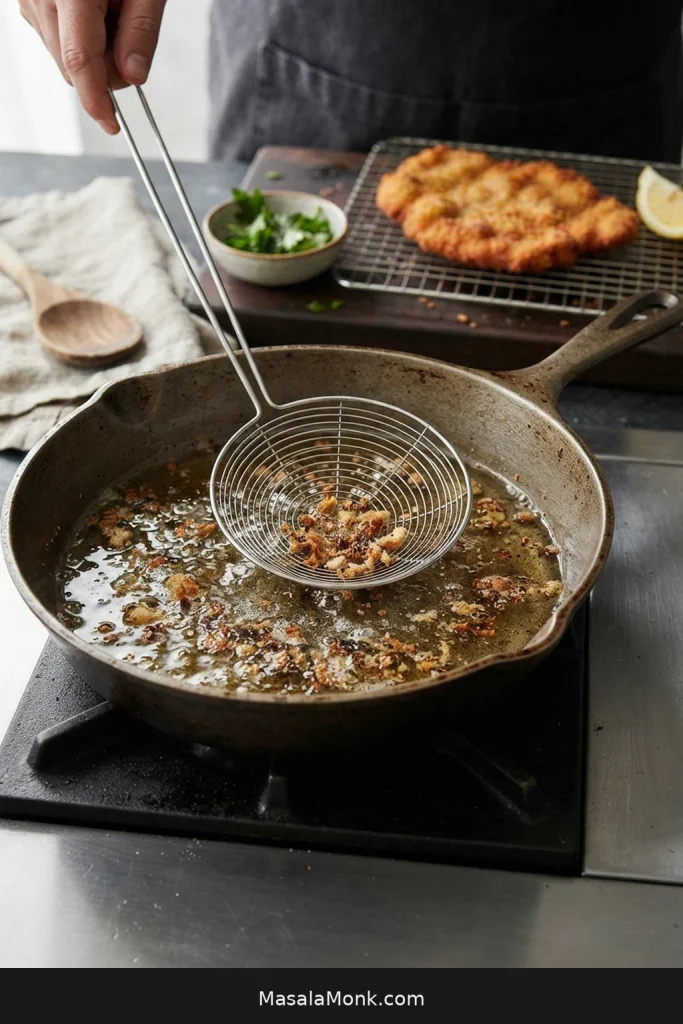
Metal skimmer removing dark breadcrumb and Parmesan fragments from shallow frying oil, with a golden fried cutlet resting on a rack behind.
If later cutlets develop dark specks even though the thermometer looks right, inspect the oil itself. Burnt breadcrumb and Parmesan fragments can make batch three behave differently from batch one without any change to the burner.

When Is Chicken Parmesan Done?

A deeply golden crust tells you the breading is ready; it does not tell you whether the center of the chicken is done. Check the thickest cutlet in the batch instead of assuming pieces that look alike will finish at exactly the same moment.

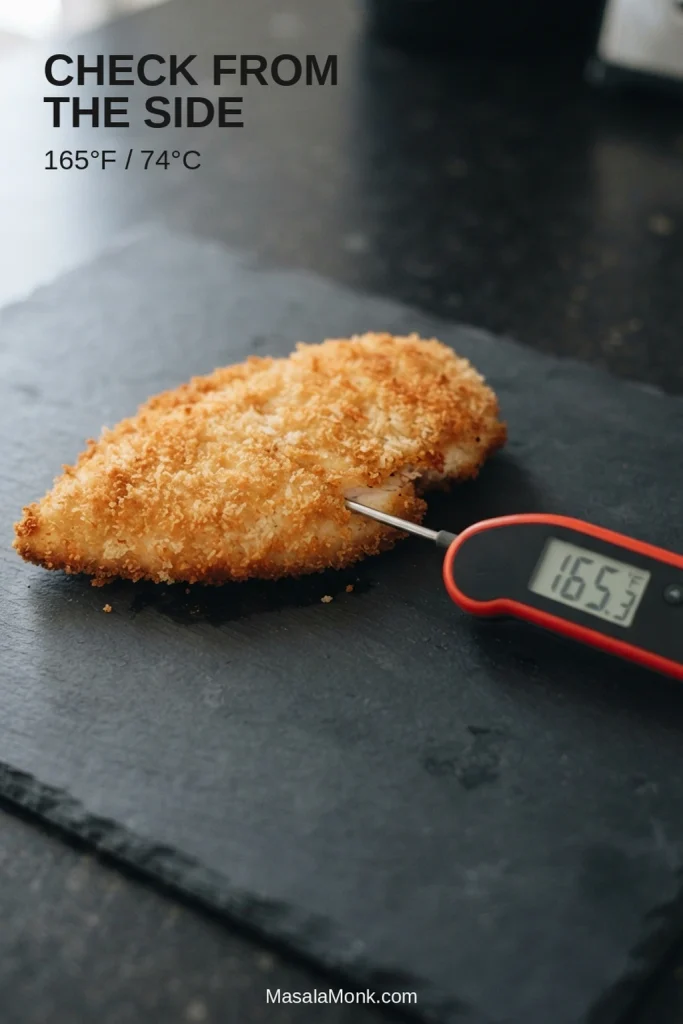
The thickest part should reach 165°F / 74°C, the USDA safe minimum temperature for poultry. On a thin cutlet, slide the thermometer horizontally in from the side so the tip reaches the center without passing straight through.
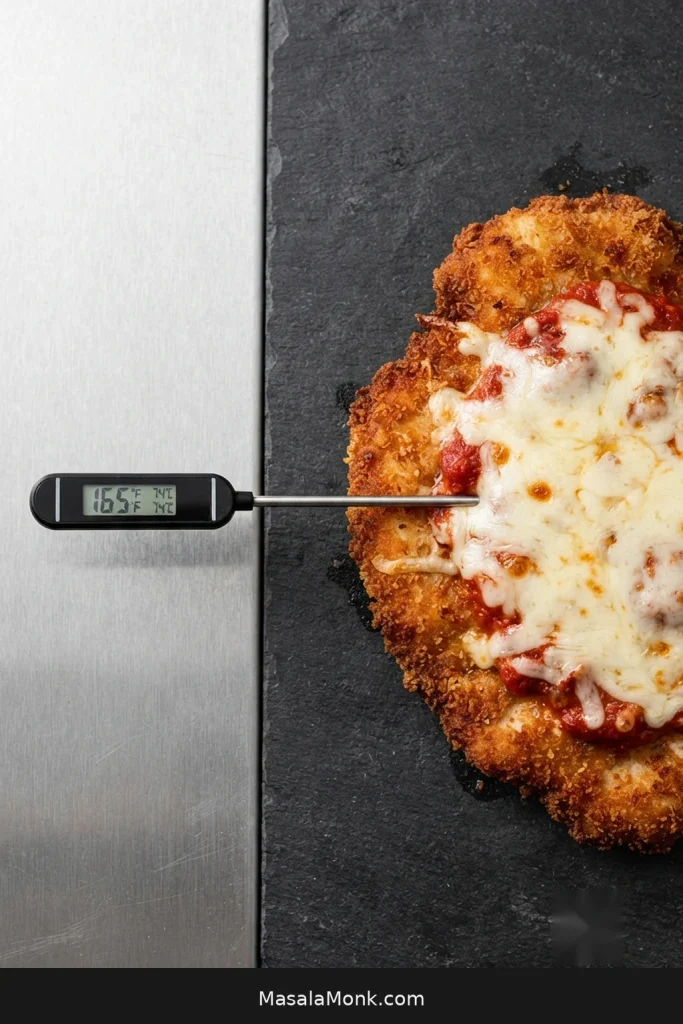
Instant-read thermometer inserted horizontally through the side of a fried chicken cutlet and displaying 165°F / 74°C.
Insert the thermometer from the side so more of the probe stays inside the thin cutlet and reaches the center.

One piece may be ready while another needs another 30–60 seconds. Move the finished cutlet to the rack and leave the slower one in the skillet. The chicken is already safely cooked before the broiler; that final burst of heat should be just long enough to melt the cheese.

Sauce Last, Not Sauce-Free

Once the chicken is golden and cooked, the next few minutes decide how much of that crust survives. For the crispest Chicken Parmesan, melt the cheese first and spoon thick marinara mainly over the center just before serving.

Some Chicken Parmesan is assembled in a sauced baking dish and baked until everything melds together. That produces a softer style, and plenty of people prefer it.

Use a Thick Marinara

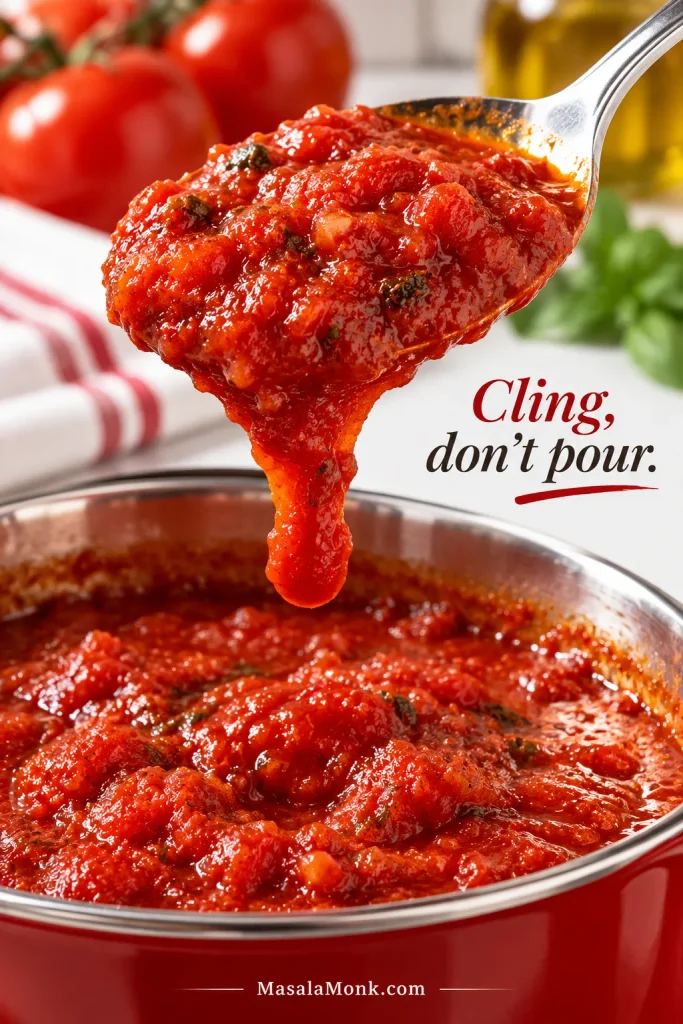
Thin marinara runs straight under the chicken and leaves a red moat around it. A thicker sauce stays mostly where the spoon puts it.
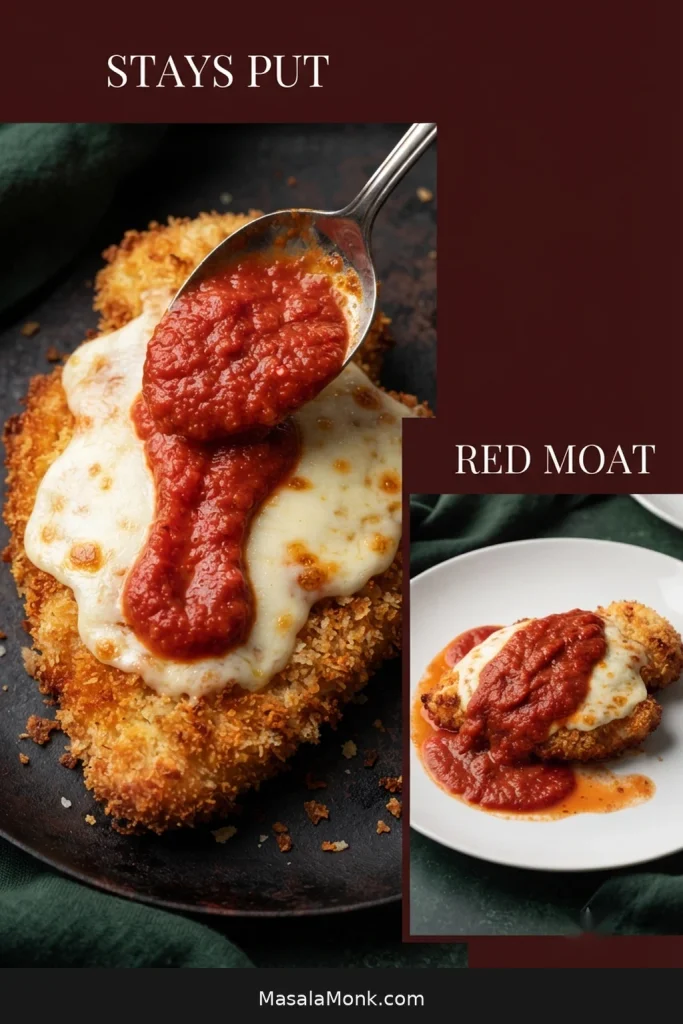
Comparison of thick marinara staying on top of melted cheese and thinner tomato sauce spreading beneath a Chicken Parmesan cutlet.
Watch what happens immediately after the spoon leaves. Marinara suited to Chicken Parm should hold some height before slowly settling; sauce that instantly runs outward is also more likely to find its way beneath the crust.

Jarred sauce keeps the weeknight version easy. For homemade, our Marinara Sauce Recipe gives you a bright tomato base; let it reduce enough to fall from the spoon in a thick ribbon for Chicken Parm.

Keep extra sauce hot at the table or use it on pasta. Anyone who wants a saucier plate can add more without every cutlet being soaked in advance.

More sauce gives you a softer, more unified Chicken Parm; keeping it mostly toward the center preserves more of the fried edge.
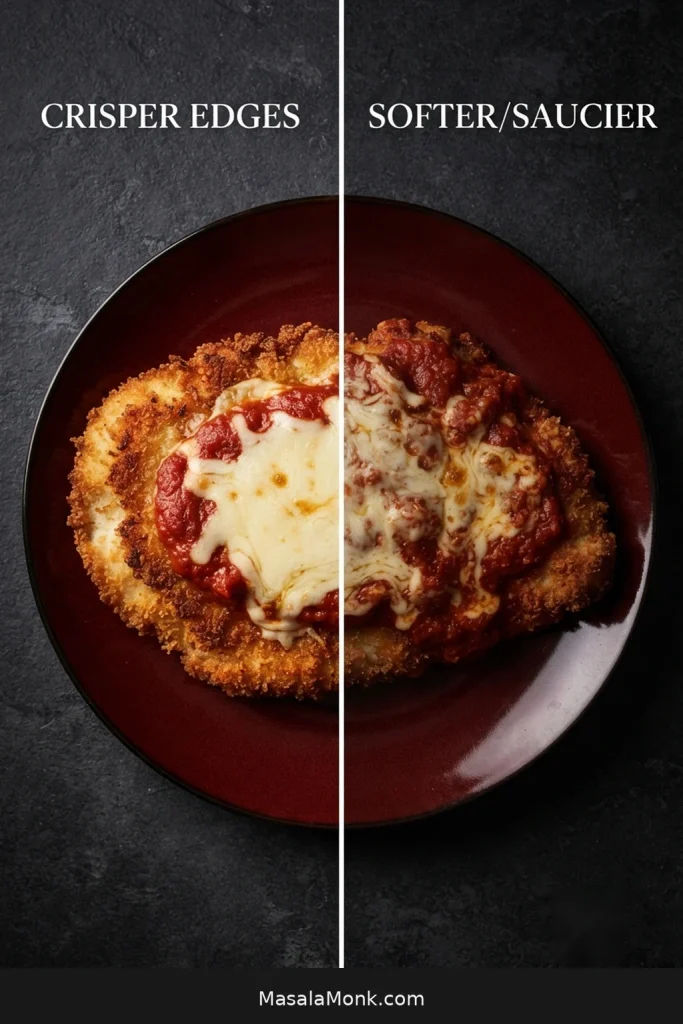
Two Chicken Parmesan cutlets, one with generous marinara coverage and one with a wider exposed golden breadcrumb edge.
Treat sauce coverage as a texture dial, not a right-or-wrong choice. More coverage moves Chicken Parm toward soft and melded; a smaller center patch leaves more fried crumb available for contrast.

Low-Moisture Mozzarella Is the Easiest Choice

Whole-milk low-moisture mozzarella is the easiest default: it melts readily and brings less free water to the crust than fresh mozzarella. Freshly shredded cheese generally melts more smoothly; pre-shredded saves time.

Fresh mozzarella is a workable alternative if you drain and blot it thoroughly, but expect a softer, wetter finish. Provolone can replace part of the mozzarella when you want a sharper flavor.
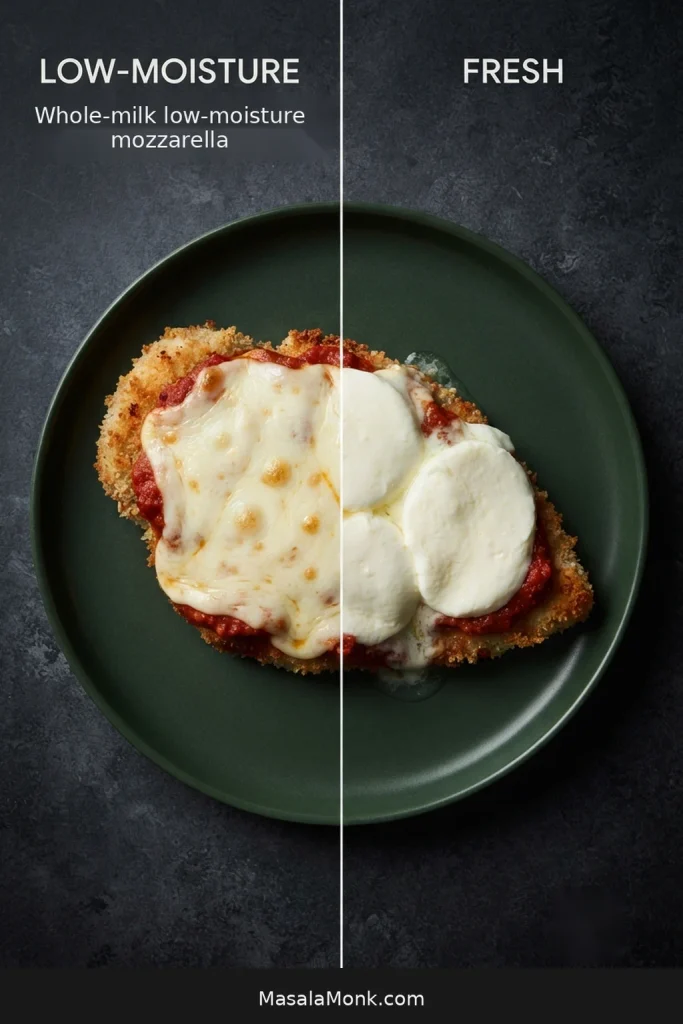
Comparison of low-moisture mozzarella melting evenly on Chicken Parmesan and fresh mozzarella producing a softer, wetter melt.
The giveaway is often at the cheese’s edge. Low-moisture mozzarella melts with relatively little free liquid, while wetter cheese can develop a visible moisture halo before that liquid ever reaches the breading below.

Crispy Baked Chicken Parmesan

Want Chicken Parm without standing over a skillet? The baked version works best when the panko gets browned before it ever touches the chicken; otherwise the meat can finish before the crust develops enough color.

Jumped straight here? Use these quantities for the baked version:

Chicken

  • 1½ lb / 680 g boneless, skinless chicken breasts or thin chicken cutlets
  • 1 teaspoon / about 6 g fine sea salt
  • ½ teaspoon black pepper

Breading

  • ½ cup / 60 g all-purpose flour
  • 2 large eggs + 1 tablespoon / 15 ml water
  • 1 cup / about 60 g panko breadcrumbs
  • ½ cup / about 55 g fine dry breadcrumbs
  • ½ cup / about 45 g finely grated Parmesan
  • 1 teaspoon garlic powder
  • ½ teaspoon dried Italian seasoning, optional
  • 2 tablespoons / 30 ml olive oil

Finish

  • 6 oz / 170 g low-moisture mozzarella
  • ¼ cup / about 22 g finely grated Parmesan
  • 1½ cups / 360 ml thick marinara, warmed
  • Fresh basil or parsley, optional

1. Brown the panko first

Heat the oven to 425°F / 218°C. Toss the panko with 2 tablespoons / 30 ml olive oil on a rimmed sheet pan and spread it into an even layer. Bake for about 8–10 minutes, stirring halfway, until the panko is golden.
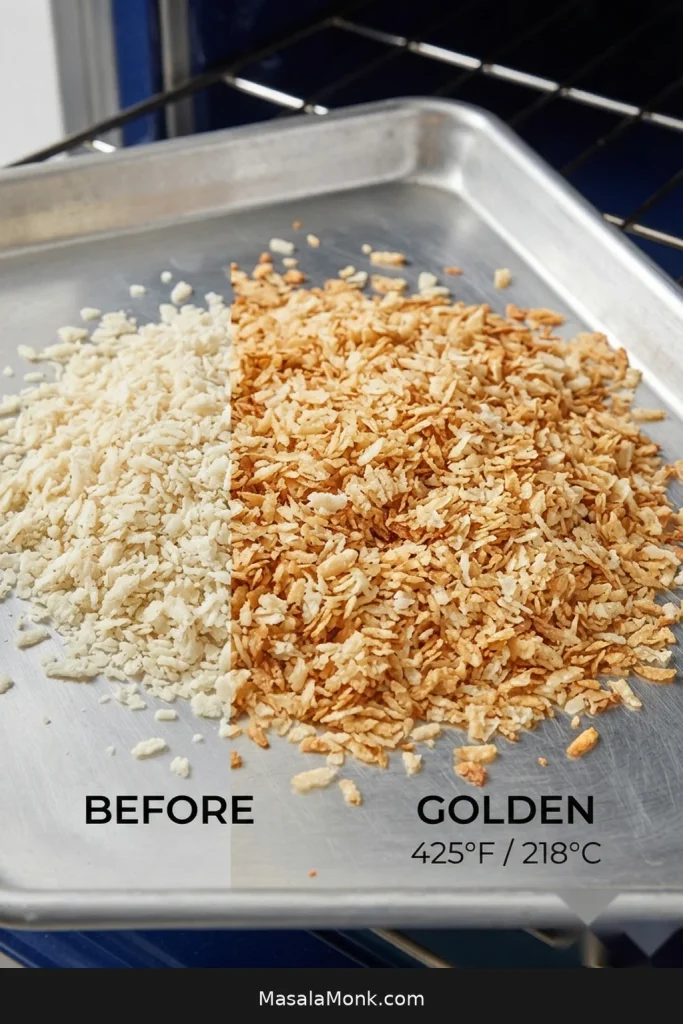
Panko breadcrumbs shown pale before baking and evenly golden after browning, with 425°F / 218°C indicated.
Stop the panko at an even gold, not deep brown; it still has another hot oven stage ahead.

Let it cool briefly, then combine it with the fine breadcrumbs, ½ cup / 45 g Parmesan, garlic powder, and Italian seasoning. Raise the oven temperature to 450°F / 232°C while you bread the chicken.

2. Prepare and bread the chicken

Slice thick chicken breasts horizontally into 4 cutlets, then gently even out bulky spots to about ⅓ inch / 8 mm. Pat the chicken dry and season with the salt and black pepper. If you started with thin store-bought cutlets, simply even out any noticeably thick spots before drying and seasoning.

Coat each cutlet lightly in flour, dip in the beaten egg mixture and let the excess drip away, then press firmly into the browned panko mixture. Rest the breaded chicken for 10 minutes.

3. Bake at 450°F Until 165°F, About 10–14 Minutes

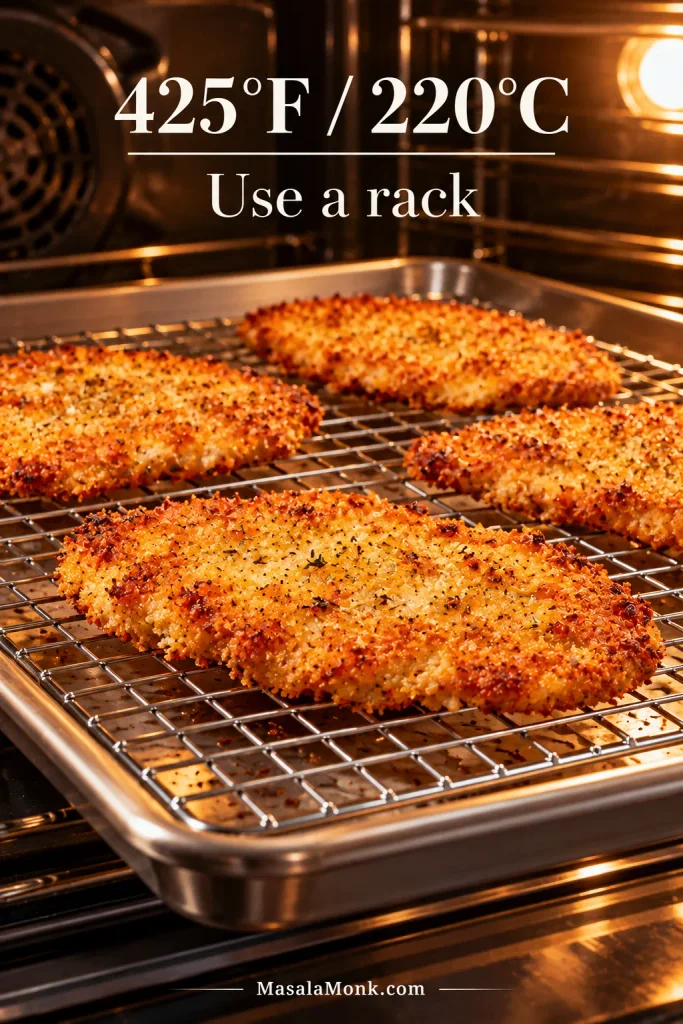
Set an oven-safe wire rack over a clean rimmed sheet pan and grease the rack lightly. Arrange the cutlets with space between them.
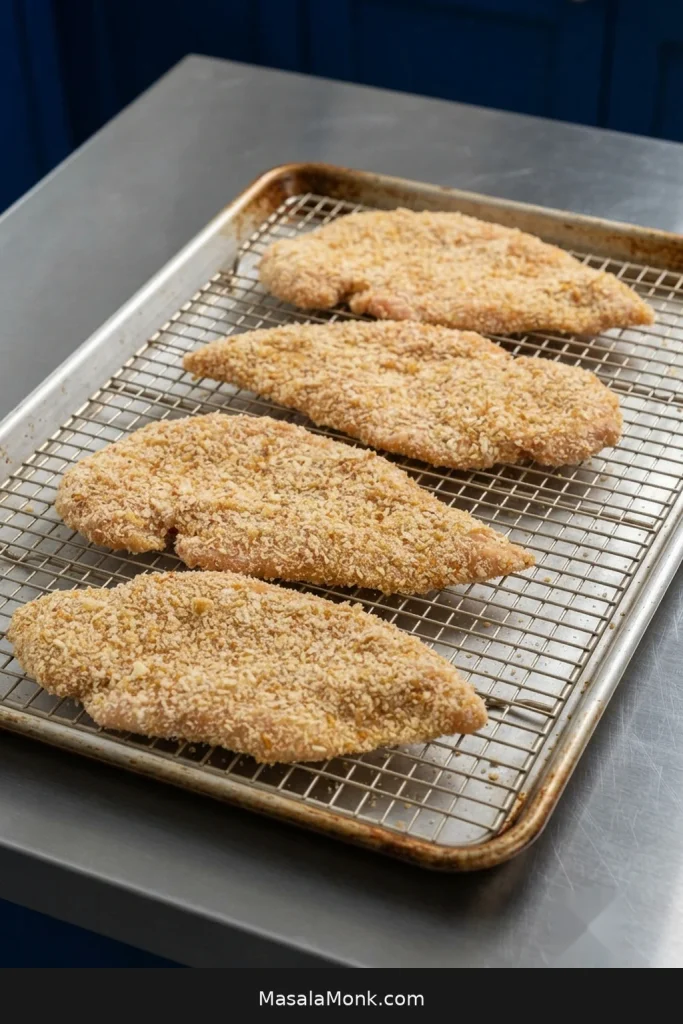
Four breaded chicken cutlets spaced apart on a wire rack set over a rimmed baking sheet.
Leave visible space around every cutlet. Touching edges lose airflow and tend to stay softer.

Begin checking around 10 minutes. Thin cutlets will commonly need roughly 10–14 minutes. The timer gets you close; pull the chicken when the thickest part reaches 165°F / 74°C.

4. Melt the cheese and add the sauce

Switch the oven to broil. The chicken should sit roughly 6 inches / 15 cm below the broiler element; if your baking position is lower, carefully move the sheet pan to a higher oven rack. If the wire rack and sheet pan are broiler-safe, leave the chicken in place. Otherwise, move the cutlets to a clean broiler-safe tray.

Add the mozzarella and finishing Parmesan, then broil only until the cheese melts into a bubbling layer. Spoon hot marinara over the center and serve.
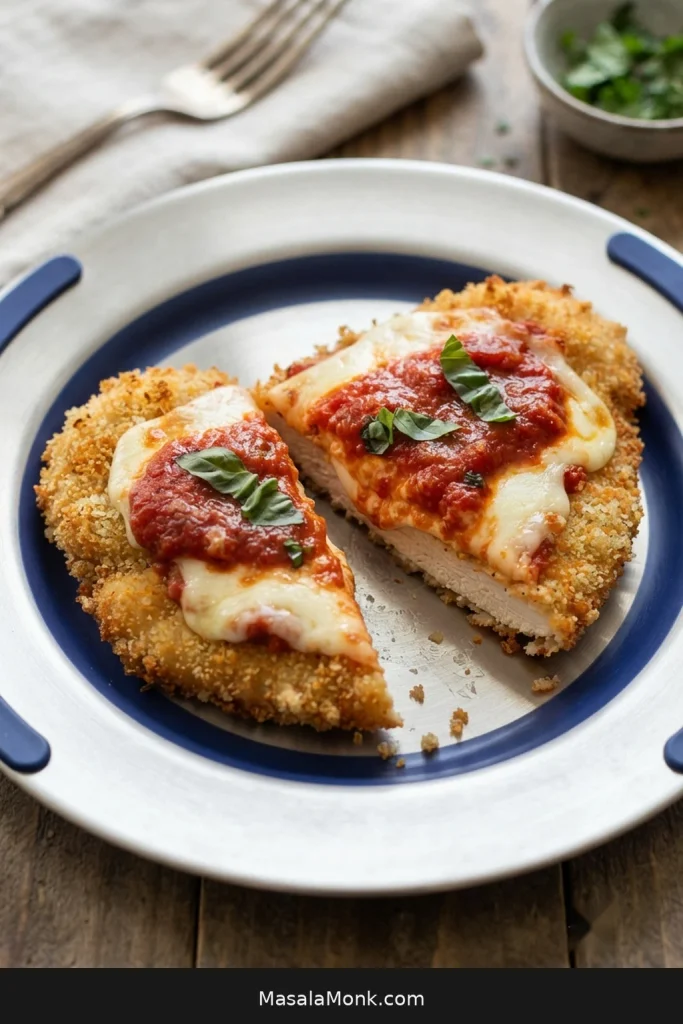
Sliced baked Chicken Parmesan showing golden breading, thin cooked chicken, melted mozzarella, marinara, and an exposed crisp edge.
On baked Chicken Parmesan, inspect the exposed edge rather than judging only the top. A dry-looking, firmly attached crumb border tells you more about the crust than chasing one uniformly dark shade across the whole cutlet.

Fried vs Baked Chicken Parmesan

MethodFriedBaked
CrustDeepest, most even crunchLighter, still crisp when the panko is pre-browned
OilShallow layer in skillet2 tbsp / 30 ml on the panko
Hands-on cookingCook in batchesMostly oven time
Best forClassic fried textureLess stovetop frying and cleanup
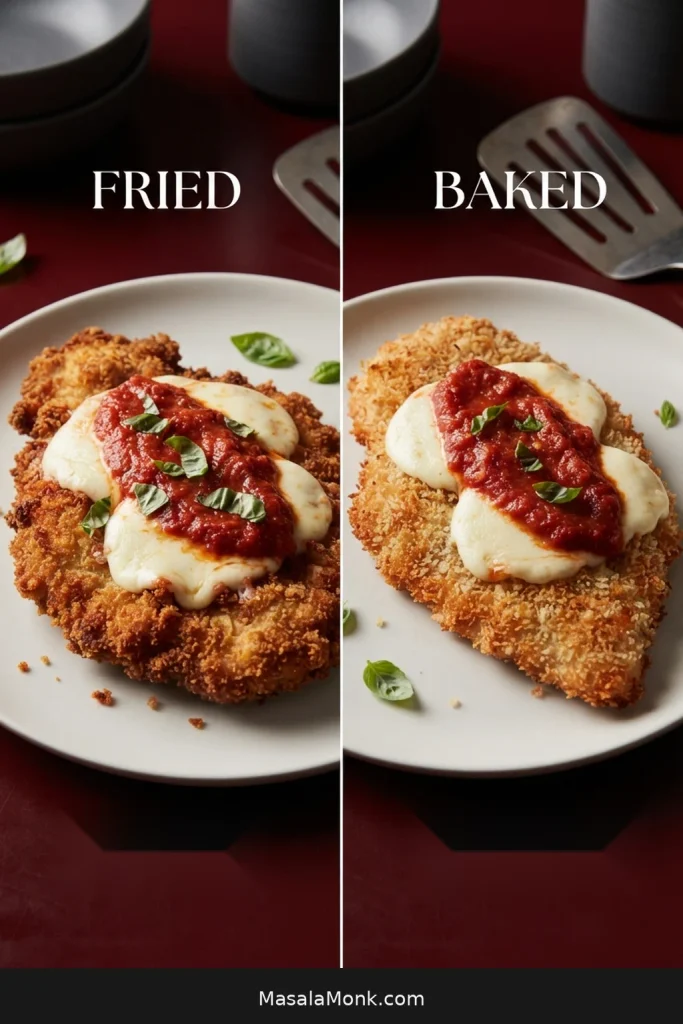
Fried and baked Chicken Parmesan shown side by side, with a darker rougher fried crust and a lighter more even baked crust.
Fried crust is darker and rougher; baked crust can still be crisp while staying lighter and more even.

For an air-fryer route, our Air Fryer Fried Chicken Breast covers thin breaded cutlets, spacing, oil mist, flipping, and doneness in detail. Once the chicken is crisp, use the cheese-and-marinara finish from this recipe.

Chicken Parmesan Troubleshooting

If one of those handoffs went wrong, match what you saw to the part of the process that caused it. Most problems need one adjustment, not a complete restart.
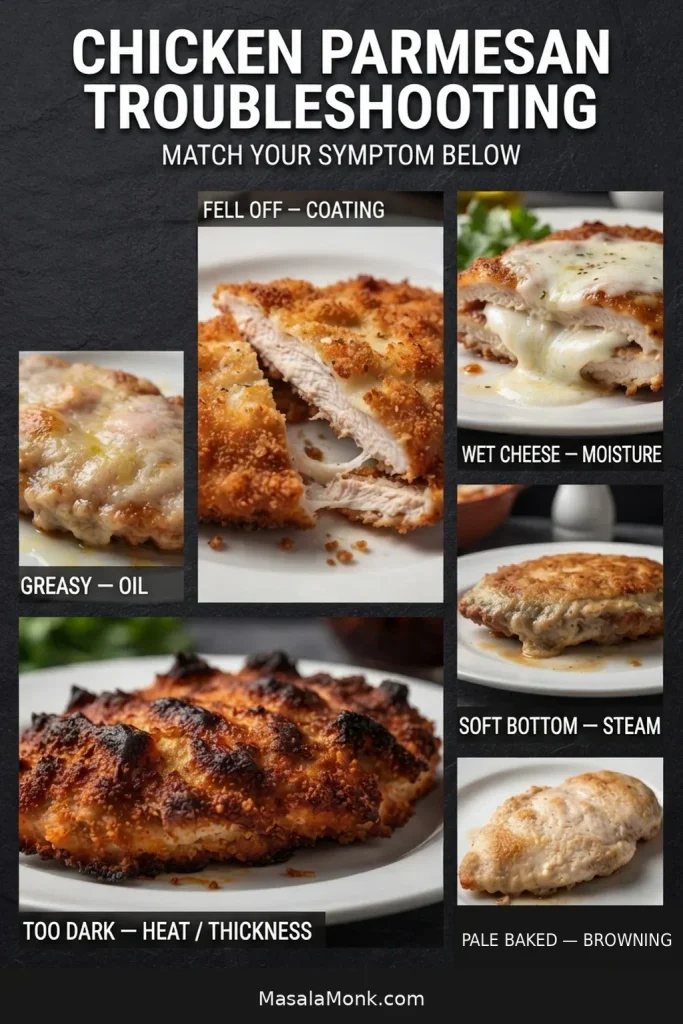
Chicken Parmesan troubleshooting graphic showing breading falling off, greasy crust, dark crust, a soft bottom, wet cheese, and pale baked breading.
Troubleshoot by category before changing the recipe: missing or lifted breading points toward adhesion, unusual color points toward heat, while greasy, wet or soft surfaces usually point toward moisture, airflow or oil recovery.

Crust, Oil & Doneness Problems

What You SawLikely CauseWhat to Change
Breading fell off in the panWet chicken, heavy flour/egg layers, no setting time, or turning too earlyPat dry, shake off excess flour, drain the egg, press crumbs on, rest 10 minutes, and let the first side set
Crust separated like a shell when slicedTrapped moisture or an overly thick coatingKeep the dredges light, use thin even cutlets, and avoid unnecessarily long cooking
Coating looked greasyOil was too cool or the skillet was crowdedLet the oil recover and fry only as many cutlets as fit with clear space around them
Crumbs were dark before chicken was doneChicken was too thick or the oil was too hotEven out bulky spots and reduce the heat before the next batch
Chicken was dryCutlets were very thin, fried too long, or spent too long under the broilerUse the thermometer, keep the broiler finish brief, and stop as soon as the cheese melts

Moisture, Cheese & Baked Problems

What You SawLikely CauseWhat to Change
Bottom turned soft before sauceHot chicken sat on a plate, was stacked, or was coveredMove cooked cutlets straight to a wire rack in one uncovered layer
Chicken went soggy after assemblyToo much sauce contact or too much waiting timeUse thick marinara near serving time and keep some fried edge exposed
Later batches had black specks or bitternessLoose breadcrumb and Parmesan debris burned in the oilSkim out dark crumbs and let the oil recover between batches
Mozzarella released waterHigh-moisture cheeseUse low-moisture mozzarella or drain and dry fresh mozzarella thoroughly
Cheese slid off in one sheetA slick sauce layer sat beneath heavily melted cheeseMelt the cheese directly on the cutlet and spoon marinara over it afterward
Baked coating stayed pale or softPanko was not pre-browned, oven heat was too low, or steam collected underneathBrown the panko first, bake hot, space the chicken, and use a rack

Make Ahead Without Making It Soggy

If dinner has to happen in stages, Chicken Parm handles that well as long as the sauce and cheese stay out of the way until the final finish.
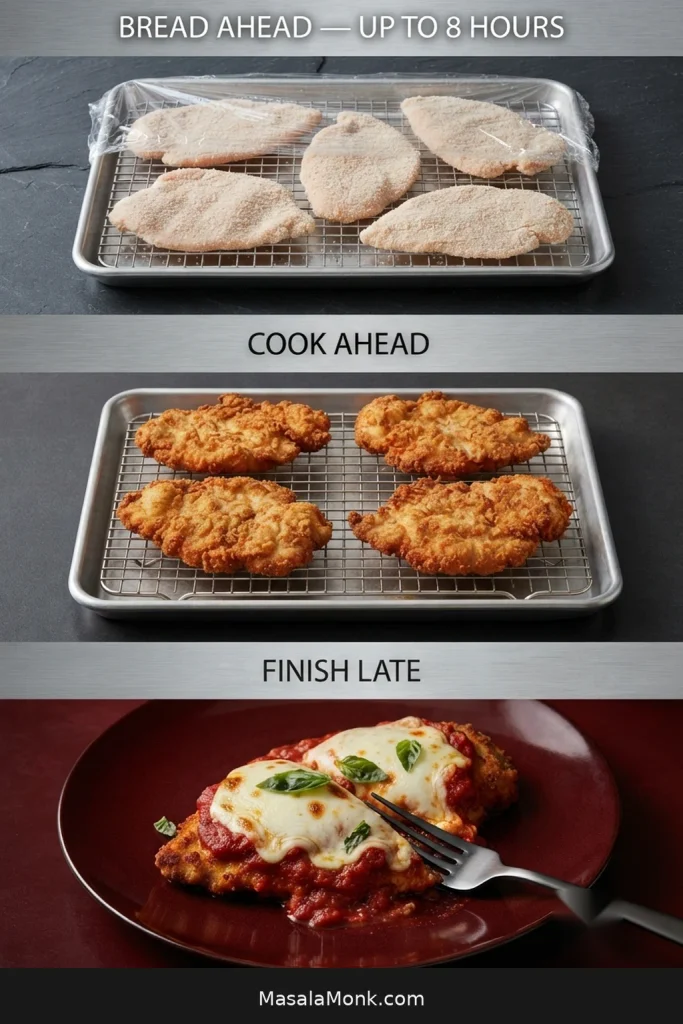
Three-stage make-ahead guide showing breaded raw chicken, cooked unsauced cutlets, and Chicken Parmesan finished later with cheese and marinara.
For make-ahead Chicken Parmesan, stop at the latest dry stage your schedule allows. Breaded raw cutlets and cooked unsauced cutlets both preserve more options than fully assembling the dish long before dinner.

Bread ahead: Bread the cutlets up to about 8 hours ahead, cover and refrigerate them in one layer, then fry close to serving time.

Cook ahead: Cook the chicken fully, leave it unsauced, and refrigerate it promptly. Reheat with dry heat, add the cheese, broil briefly, and finish with hot marinara.

Do not partially cook poultry, chill it, and plan to finish cooking it later.

Shortcut Chicken Parm With Frozen Breaded Chicken

If the package says the breaded chicken is fully cooked, cook it according to the package directions until hot and crisp, then add mozzarella and Parmesan, melt the cheese, and spoon on hot marinara. Some frozen breaded chicken products are raw or only partly cooked despite looking browned, so follow the label carefully.

Store, Freeze & Reheat

Fridge: refrigerate leftovers promptly and use them within 3–4 days.

Freeze: cool the cooked cutlets and freeze them without sauce. Wrap well, separate layers with parchment if needed, and use within about 4 months for best quality. Add the cheese and marinara after reheating.

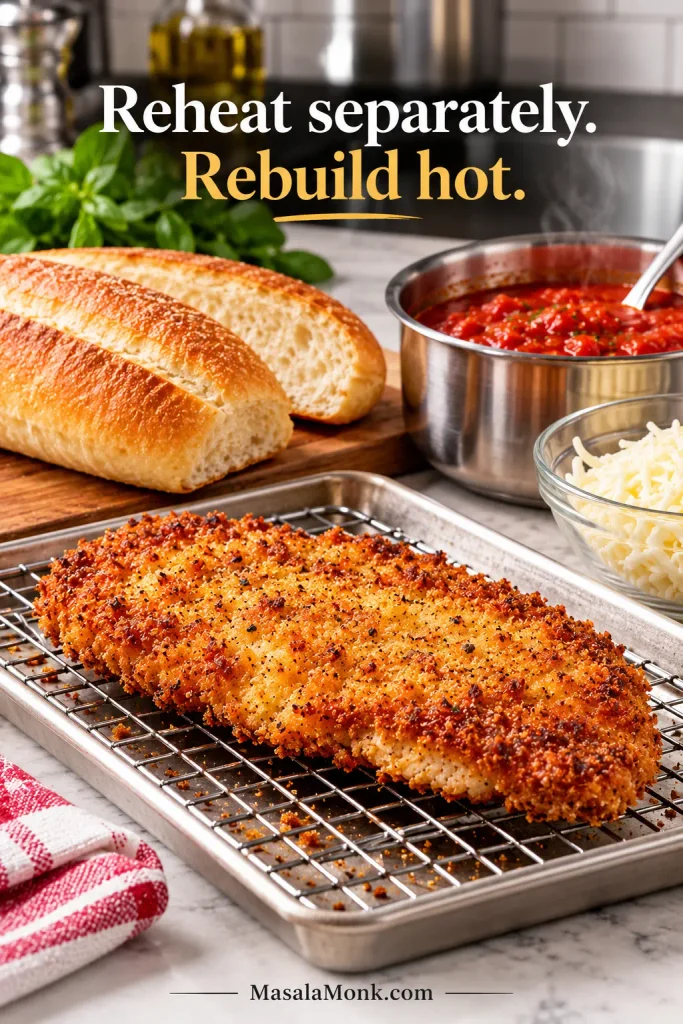
Reheat: an oven, toaster oven, or air fryer gives the coating the best chance of crisping again. Heat cooked leftovers to 165°F / 74°C in the center. The microwave is faster, but expect a softer crust.
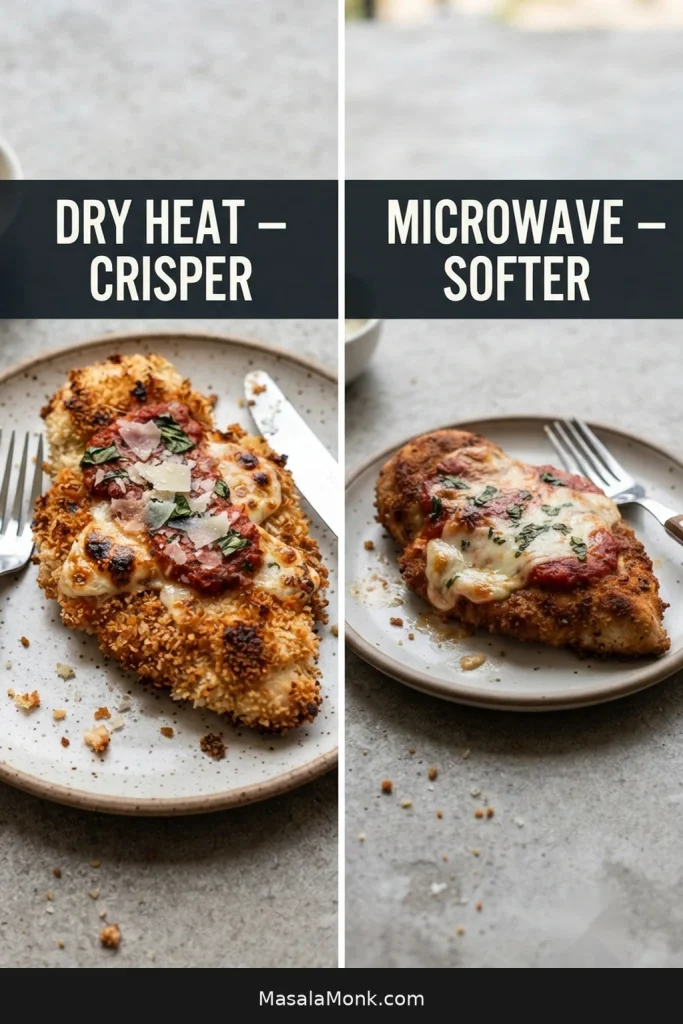
Leftover Chicken Parmesan reheated with dry heat showing a rougher crisp surface beside a microwave-reheated piece with softer breading.
“Hot again” and “crisp again” are different goals. Dry heat gives surface moisture somewhere to escape as leftovers warm; microwave reheating can reach the right internal temperature just as effectively while leaving the breadcrumb coating softer.

What to Serve with Chicken Parmesan

For the classic plate, serve Chicken Parmesan with spaghetti, linguine, or another simple pasta and put the extra marinara on the pasta instead of beneath the chicken. A fresher counterpoint comes from Green Beans Almondine, with lemon and toasted-almond crunch against the rich cutlet.

Homemade garlic bread takes the meal firmly into red-sauce comfort-food territory. If what you really want is Chicken Parm in a roll, the Chicken Parmesan Sandwich handles the bread, sauce placement, and broiler timing as its own recipe.

Chicken Parmesan FAQs

Is Chicken Parmesan the same as chicken parmigiana?

In everyday American usage, Chicken Parmesan, chicken parm, and chicken parmigiana generally refer to the same Italian-American dish: breaded chicken cutlets with tomato sauce and cheese. Recipes differ in how heavily the chicken is sauced, which cheeses are used, and whether the cutlets are fried or baked.

Can I make Chicken Parmesan gluten-free?

Yes. Replace the all-purpose flour with a dependable gluten-free all-purpose blend and use gluten-free panko or breadcrumbs. Keep the same light dredges, pressed coating, and short rest before cooking.

The Final Forkful
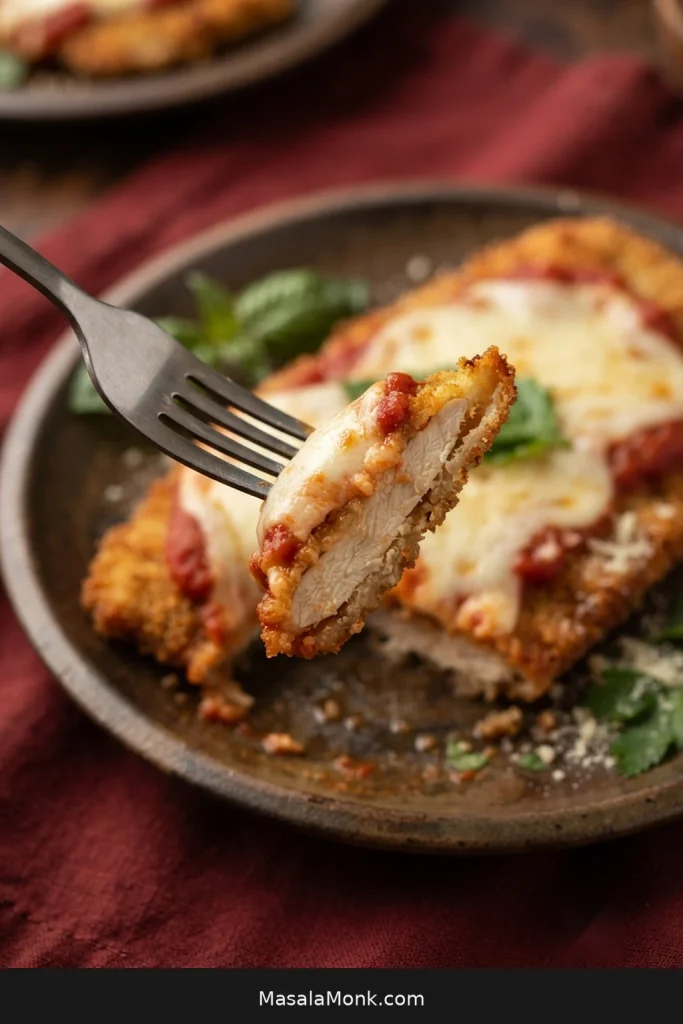
Fork lifting a bite of Chicken Parmesan with thin cooked chicken, attached golden crust, melted mozzarella, marinara, and a crisp exposed edge.
After slicing, the breadcrumb crust should still cling to the chicken instead of slipping away beneath the cheese and sauce.

Serve it while the mozzarella is still bubbling and the marinara is hot. The best forkful catches juicy chicken, tomato, and melted cheese with one golden edge still exposed.
Posted on — Leave a comment

Korean Fried Chicken Recipe: Extra Crispy, Juicy & Easy

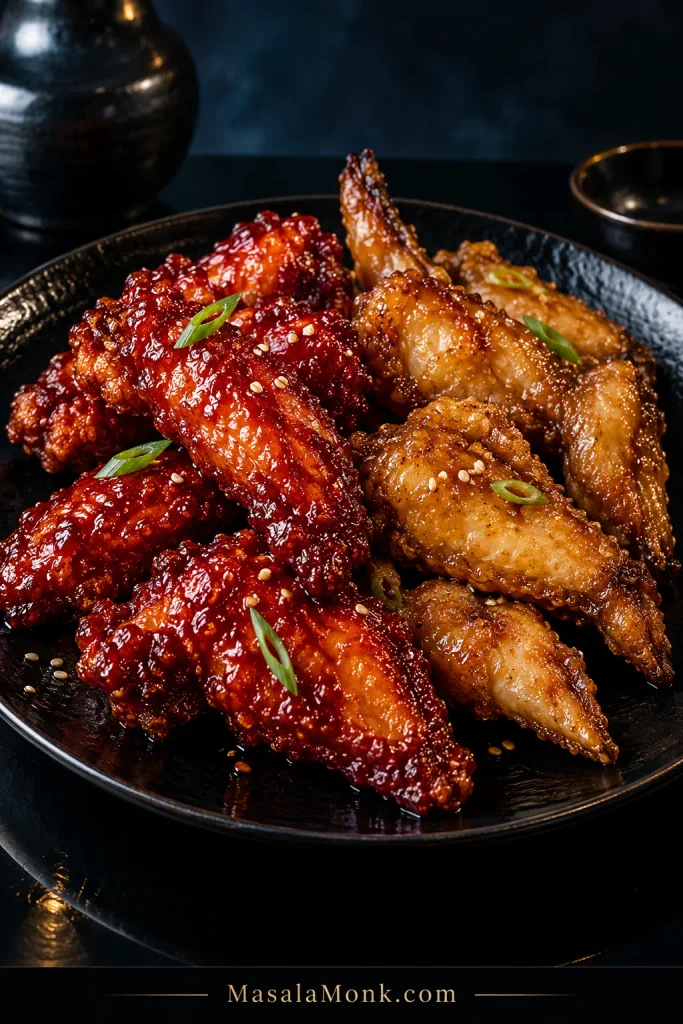
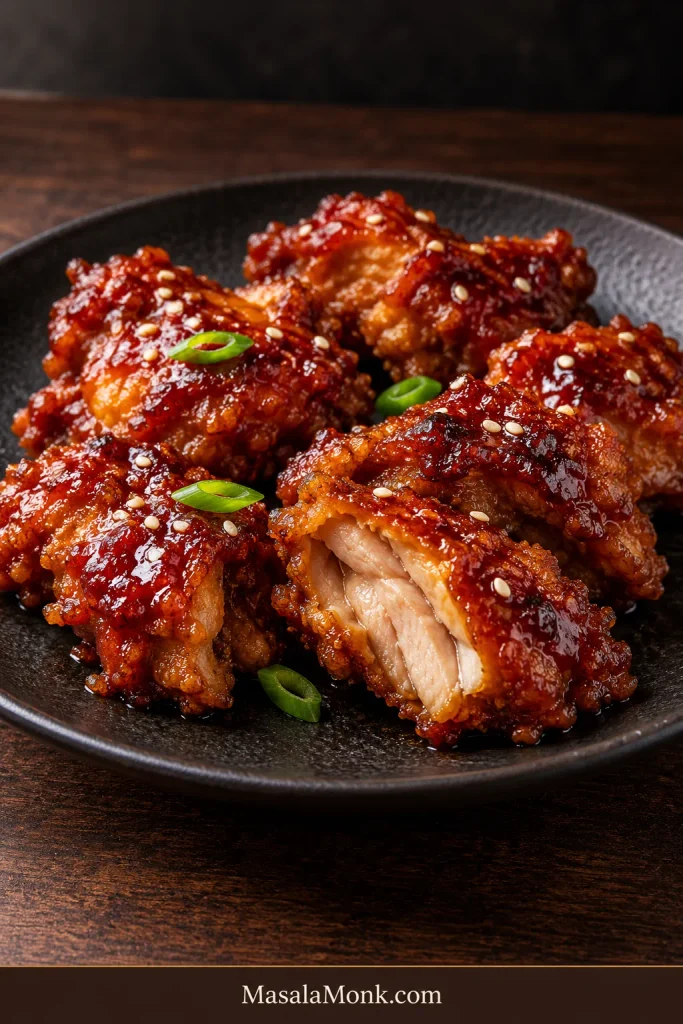
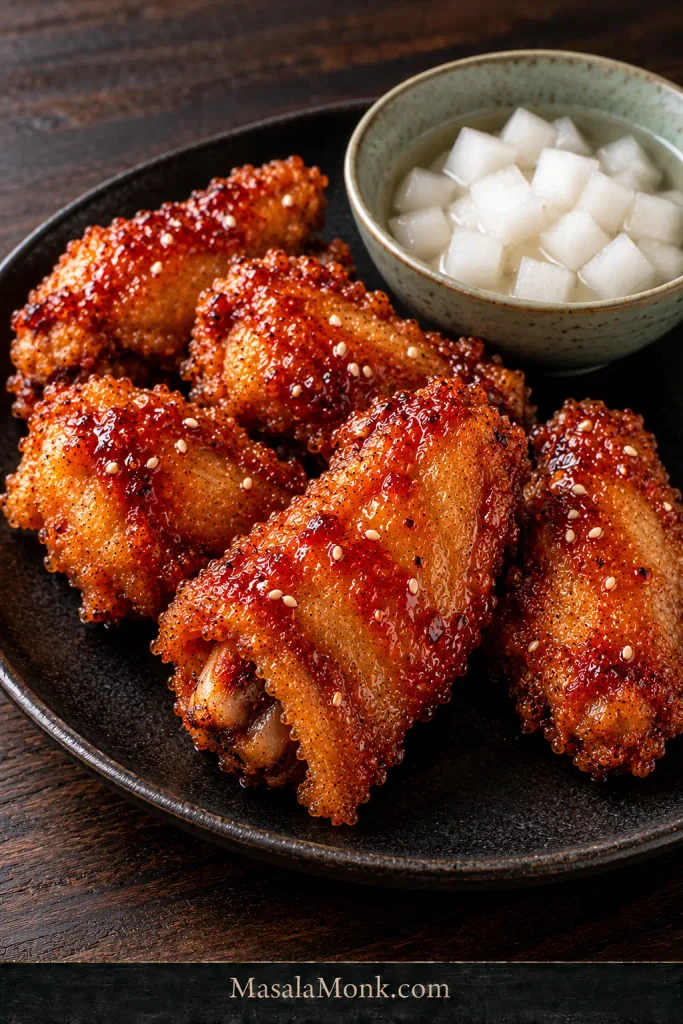
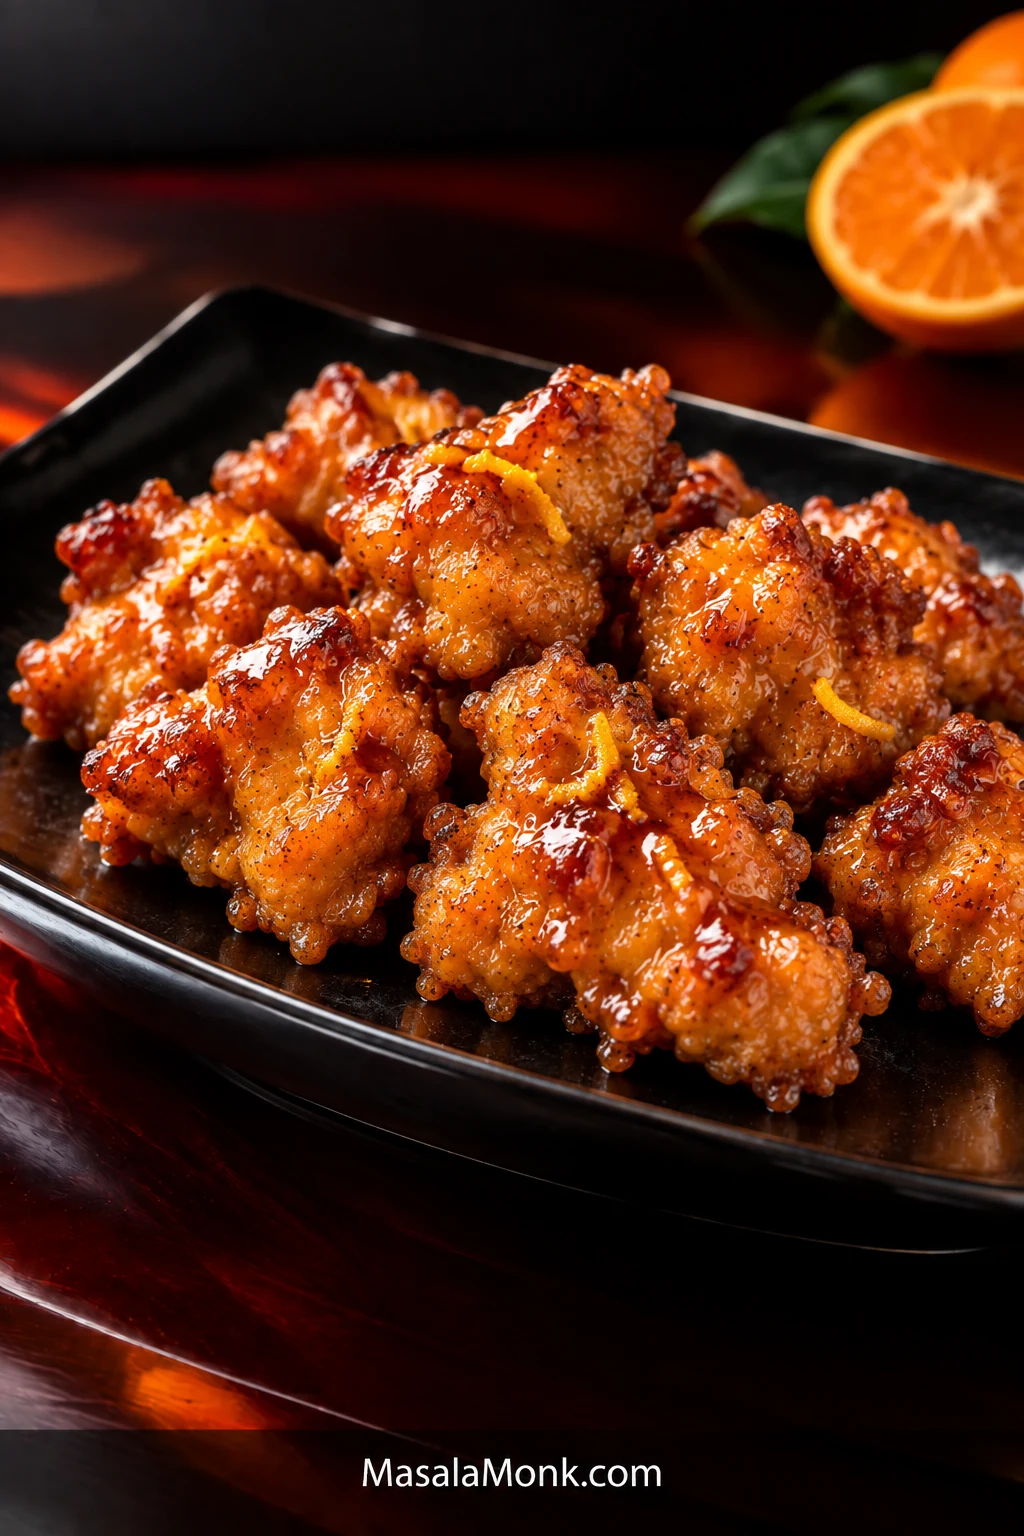
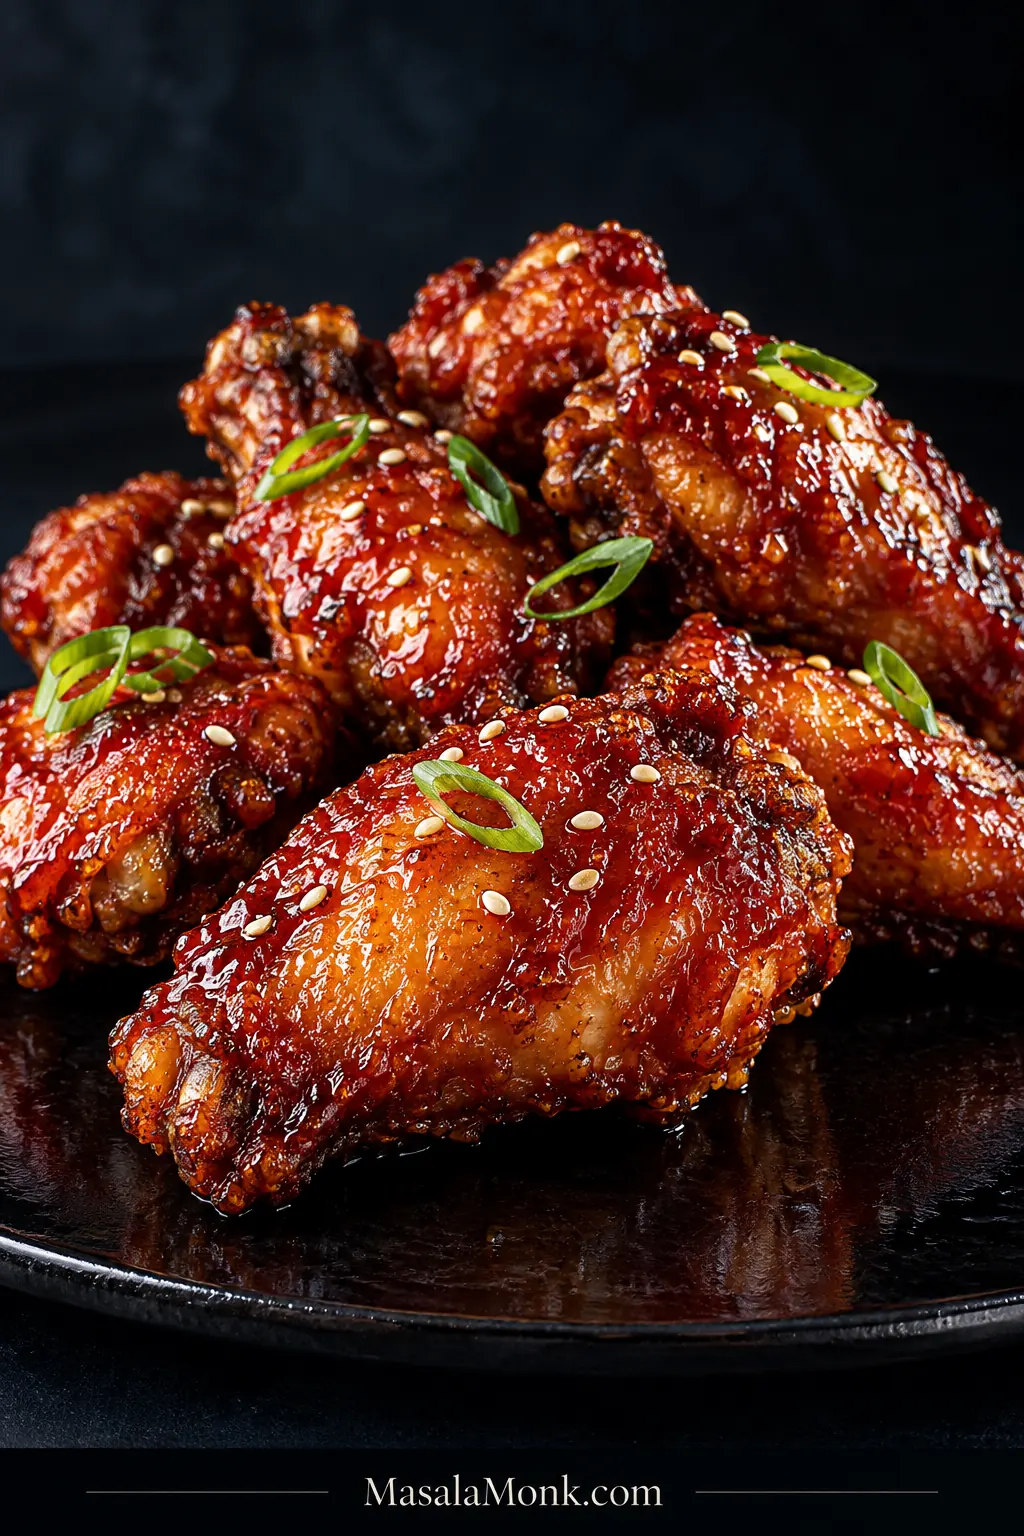
Korean fried chicken flats and drumettes with golden crisp edges, deep red gochujang glaze, sesame seeds and scallions on a dark plate.

The best Korean fried chicken has a crust that looks almost too thin to deliver the crunch it does. Bite through it and the shell cracks first, then gives way to juicy, seasoned chicken underneath. A light glaze adds flavor without burying that texture.

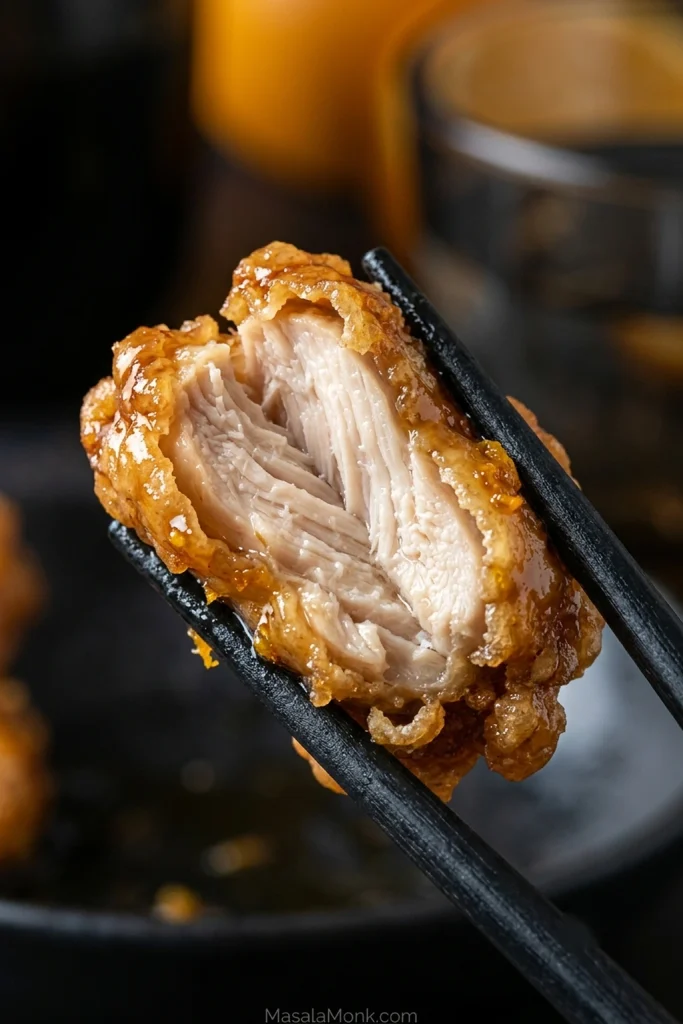
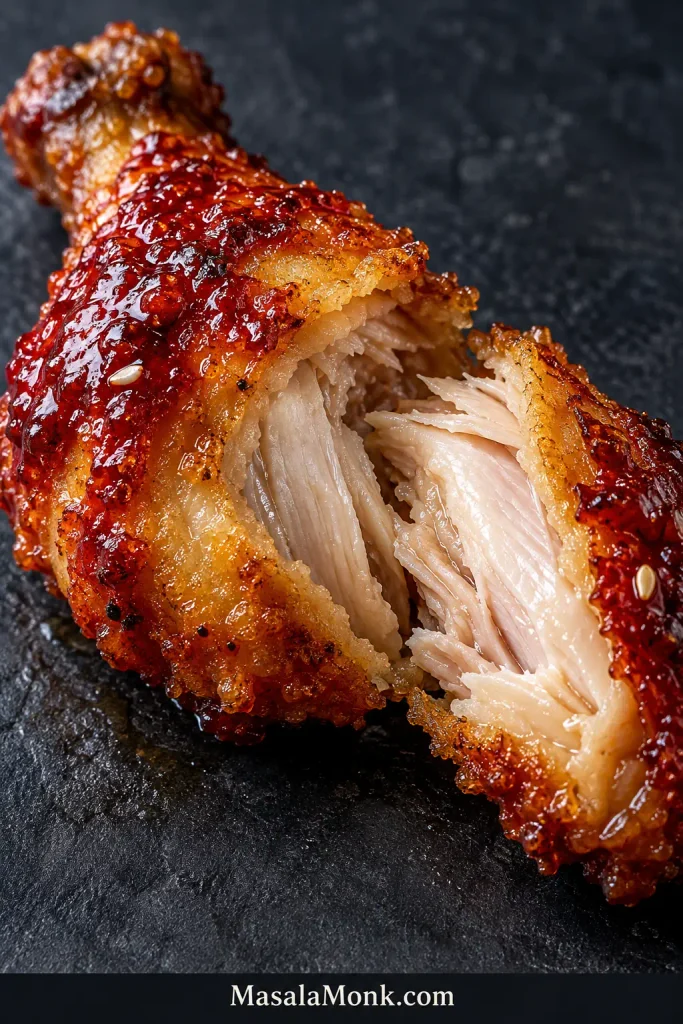
Glazed Korean fried chicken wing broken open to reveal moist cooked chicken beneath a thin golden crust.
Use the broken edge as a crust check: the crisp shell should form only a narrow rim around the juicy chicken. A thick breaded band means too much coating went on before frying.

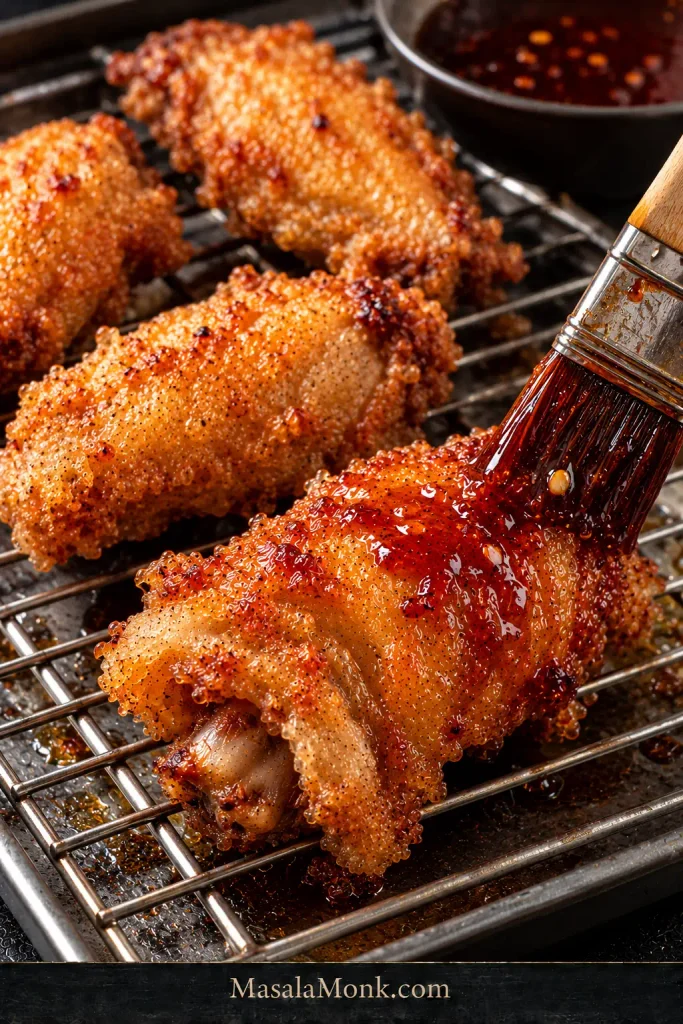
Wet chicken loosens the coating. Heavy batter turns hard. Too many wings cool the oil. Then, just when the crust is finally crisp, an overly wet glaze can soften it again.

This Korean fried chicken method uses split wings and a thin flour-and-potato-starch coating, followed by a gentler first fry, a short rest, and a hotter second fry. Once the crust is finished, choose sweet-spicy gochujang, savory soy-garlic, or divide the batch and make both.

Research note: This recipe is a research-led synthesis of established Korean fried chicken techniques, recurring troubleshooting guidance, and food-safety recommendations; it is not presented as an in-house test-kitchen trial.

At a Glance: Four Things to Get Right Before the Oil

  • Surface: remove loose liquid before coating. The chicken can be slightly moist, but it should not drip.
  • Batter: think thin veil, not a jacket. Most of it should run back into the bowl when you lift a wing.
  • Oil: 330°F / 165°C is where the first fry starts. Watch what happens after cold chicken goes in.
  • Sauce: make it before frying. It should coat a spoon and still move easily under a brush.

The first fry should look unfinished. If the wings are already deeply golden and ready to serve, you have left very little room for the hotter second fry.

Korean Fried Chicken Recipe

Thin, extra-crispy Korean fried chicken wings with a two-stage fry and your choice of sweet-spicy gochujang or soy-garlic glaze.

Prep
20 minutes

Seasoning Rest
30 minutes minimum

Fry/Cook
About 40–55 minutes

Total
About 1 hr 30 min–1 hr 45 min with the minimum seasoning rest

Yield
About 18–24 wing pieces

Serves
4 light portions; 2–3 larger mains

Equipment

  • 5–6 quart heavy pot or Dutch oven, deep enough to leave plenty of space above the oil
  • Clip-on deep-fry/candy thermometer, or another thermometer rated for continuous oil-temperature monitoring
  • Instant-read thermometer for checking the chicken
  • Wire rack set over a sheet pan
  • Spider/skimmer or sturdy tongs
  • 1 small saucepan, or 2 if making both glazes at once
  • Pastry brush, optional but useful for a light, even glaze

Ingredients

Chicken

  • 2 lb / 32 oz / 900 g split chicken wings, flats and drumettes
  • 1 tsp / about 5 g fine sea salt
  • 1 tsp / about 2 g finely grated fresh ginger
  • ½ tsp / about 1 g black pepper

Light Starch Dusting and Thin Batter

  • Up to 2 tbsp potato starch, for a very light dusting; you may use less
  • ½ cup / 60 g all-purpose flour
  • ⅓ cup / about 50 g potato starch
  • ¾ tsp / about 3 g baking powder
  • ½ tsp / about 3 g fine sea salt
  • ¾ cup / 180 ml cold water, plus up to 1–2 tbsp / 15–30 ml more if needed

For Frying

  • Neutral high-heat frying oil, enough to reach about 2 inches / 5 cm deep in your pot

Canola, vegetable, peanut, rice bran, and grapeseed oil all work well.

For half-and-half: make both glazes as written. If you want one flavor on all the wings, double that glaze.

Sweet-Spicy Gochujang Glaze — Half Batch

  • 2 tbsp / about 35 g gochujang
  • 2 tbsp / about 30 g ketchup
  • 1½ tbsp / about 30 g rice syrup, or 1 tbsp / about 21 g honey
  • 1 tbsp / 15 ml regular or all-purpose soy sauce, not dark soy sauce
  • 1 tbsp / 15 ml rice vinegar
  • 1 tbsp / 15 ml water
  • 2 tsp / about 6 g minced garlic
  • ½ tsp / 2.5 ml toasted sesame oil, stirred in off heat

Soy-Garlic Glaze — Half Batch

  • 1½ tbsp / 22 ml regular or all-purpose soy sauce, not dark soy sauce
  • 2 tbsp / 30 ml water
  • 1 tbsp / about 20 g rice syrup, or 2 tsp / about 14 g honey
  • 2 tsp / about 8 g brown sugar
  • 2 tsp / 10 ml rice vinegar
  • 2 tsp / about 6 g minced garlic
  • ½ tsp / about 1 g finely grated fresh ginger
  • ½ tsp / 2.5 ml toasted sesame oil, stirred in off heat

Optional for serving: toasted sesame seeds and thinly sliced scallions.

Instructions

Prep, Glaze and Coat the Wings

  1. Season the wings. Toss with the salt, ginger, and black pepper. Refrigerate for at least 30 minutes; 2 hours is better, and overnight is fine. Before coating, blot away loose liquid.
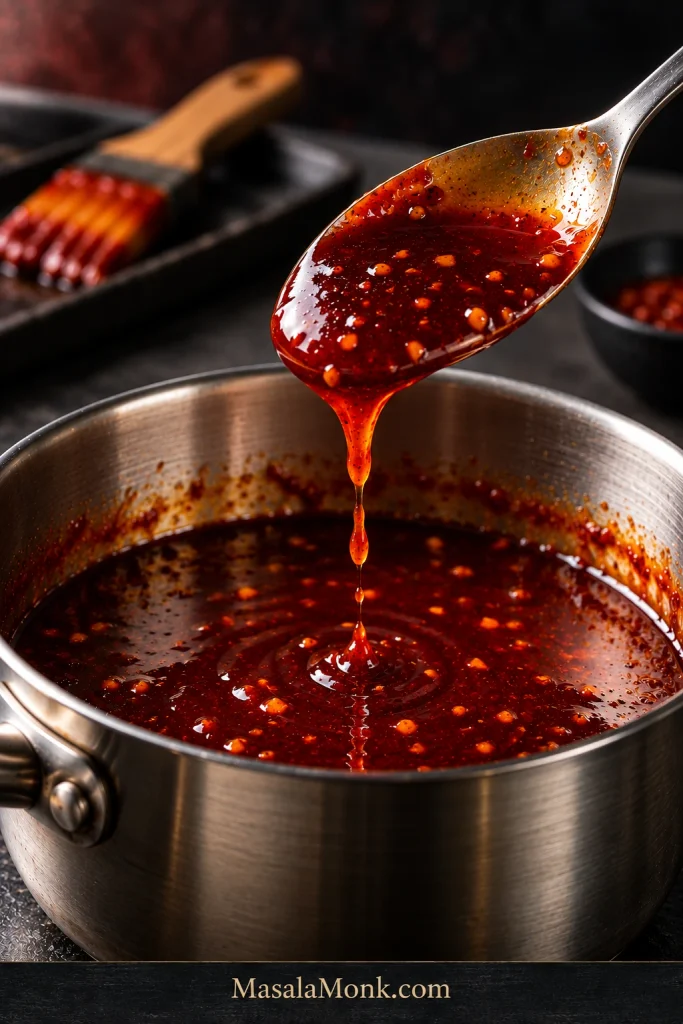
  2. Make the glaze or glazes. Combine everything for the glaze you are making except the toasted sesame oil. Simmer gently, stirring often: gochujang for about 2–4 minutes; soy-garlic for 3–5 minutes. Remove when a spoon comes out coated but the sauce still pours, then stir in the sesame oil. For half-and-half, prepare each glaze separately.
  3. Heat the oil. Pour enough oil into a deep heavy pot to reach about 2 inches / 5 cm. Leave generous empty space above the oil. Heat to 330°F / 165°C and set a wire rack over a sheet pan beside the stove.
  4. Dust the chicken lightly. Add only enough potato starch to remove the surface slickness; you may not need all 2 tablespoons. Toss gently and shake off loose excess. Aim for a thin matte haze, not a white dredge.
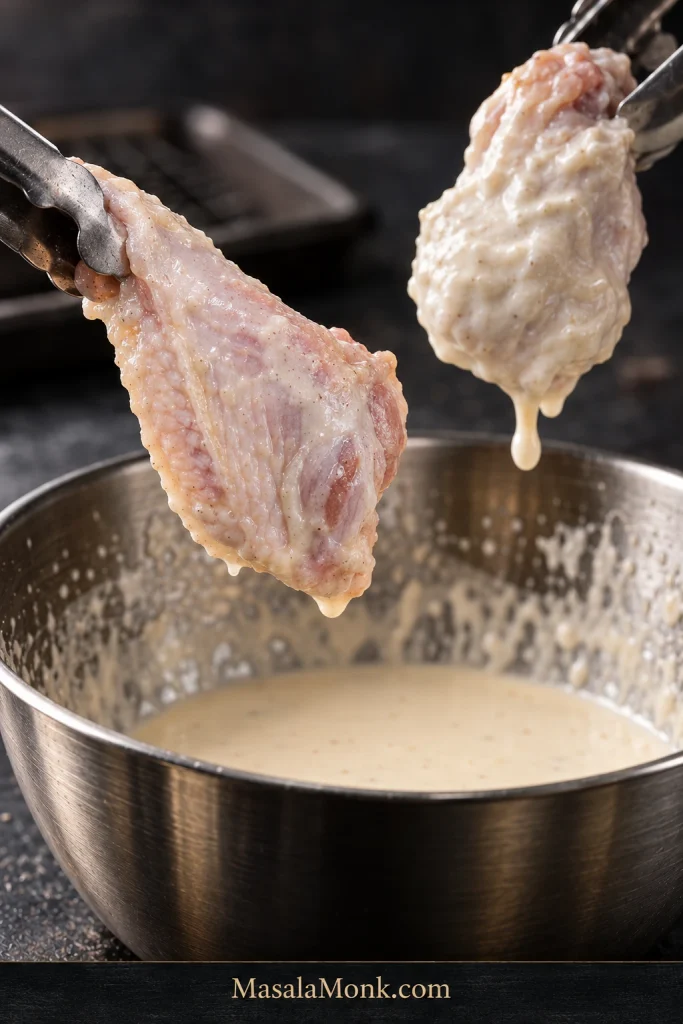
  5. Mix the batter. Whisk the flour, ⅓ cup / 50 g potato starch, baking powder, and salt, then add ¾ cup / 180 ml cold water. Lift one wing: most batter should stream back, leaving a thin film. If it hangs heavily, add cold water 1 tablespoon / 15 ml at a time, up to 2 tablespoons / 30 ml. Re-whisk before each batch because the starch settles.

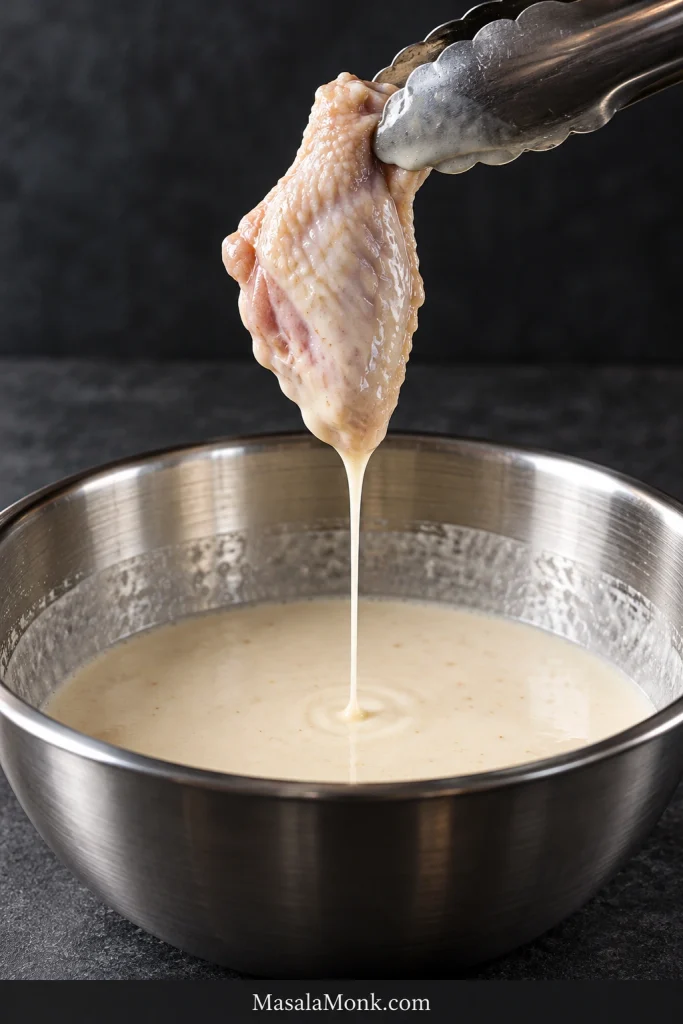
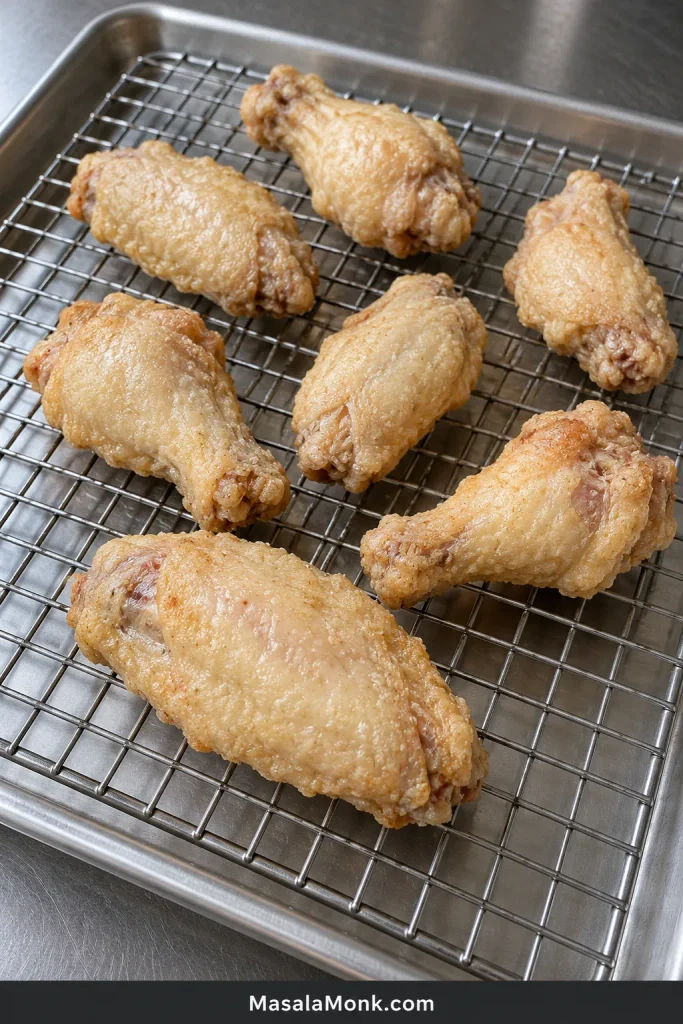
Before frying, check one wing: the batter should drain freely and leave the natural ridges and joints visible beneath a thin film.

Raw chicken wing above a metal bowl with a thin pale batter film and excess batter dripping back into the bowl.
Besides draining freely, the batter should preserve the wing’s natural ridges and joints underneath. If those contours start disappearing beneath an opaque layer, thin the batter before frying.

First Fry and Rest

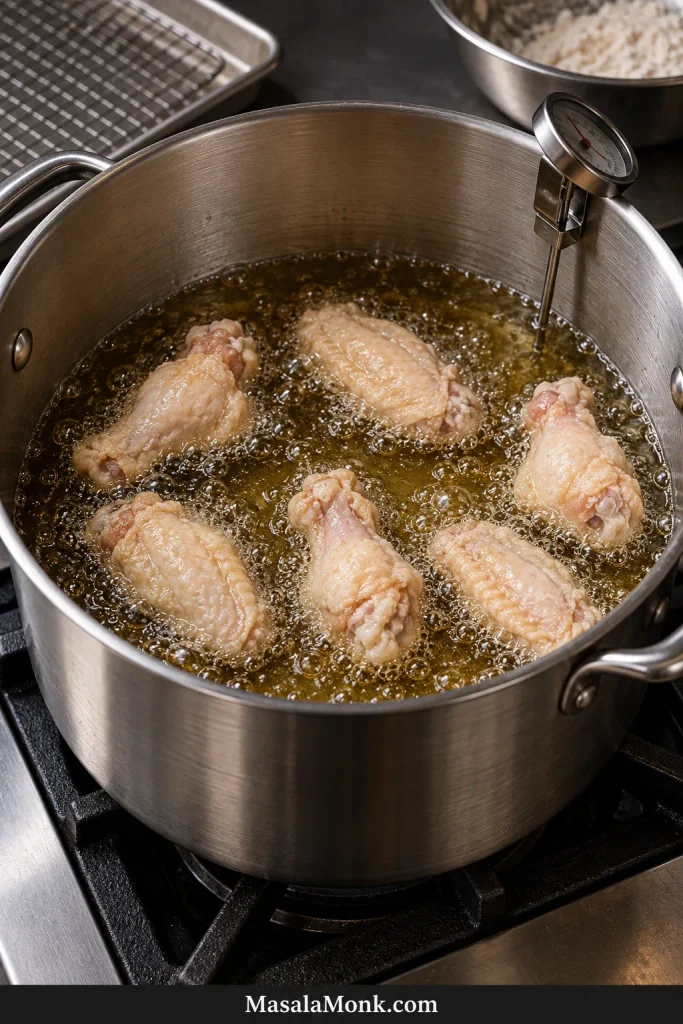
  1. First fry. Dip the wings and let excess batter drain for a couple of seconds. Carefully lower about 6–8 pieces at a time into a typical 5–6 quart pot; use fewer if the wings are large or the oil struggles to recover. Once the chicken is in, keep the oil around 315–330°F / 157–165°C and fry for about 6–7 minutes. The wings may look almost disappointingly pale. That is exactly what you want: the coating should be set and dry, but the real color and crunch come later. Transfer the wings to the rack, skim out loose crumbs, and let the oil recover before the next batch.
  2. Rest, then raise the heat. Let each first-fried batch rest on the rack for at least 5 minutes. With several batches, the earliest wings will naturally rest longer while the remaining batches finish. Keep this as one continuous cooking session: the wings are not ready to eat after fry one, and should not be refrigerated or saved to finish later. Once the first-fry batches are done, bring the oil to 375°F / 190°C.

Second Fry, Sauce and Serve

  1. Second fry and check doneness. Fry again in small batches for about 3–5 minutes, starting to check at 3 minutes. Once the wings are in, aim to keep the oil around 365–375°F / 185–190°C. They should feel different now: firmer and drier under the tongs, with a brittle crust instead of the softer coating from fry one. Look for deeper gold and bubbling that has noticeably calmed. This is the payoff from the second fry: a dry, brittle crust sturdy enough for a light glaze, with juicy chicken underneath. Check one of the largest pieces in each batch, especially a thick drumette, with an instant-read thermometer inserted into the thickest meaty part without touching bone. Poultry should reach at least 165°F / 74°C.

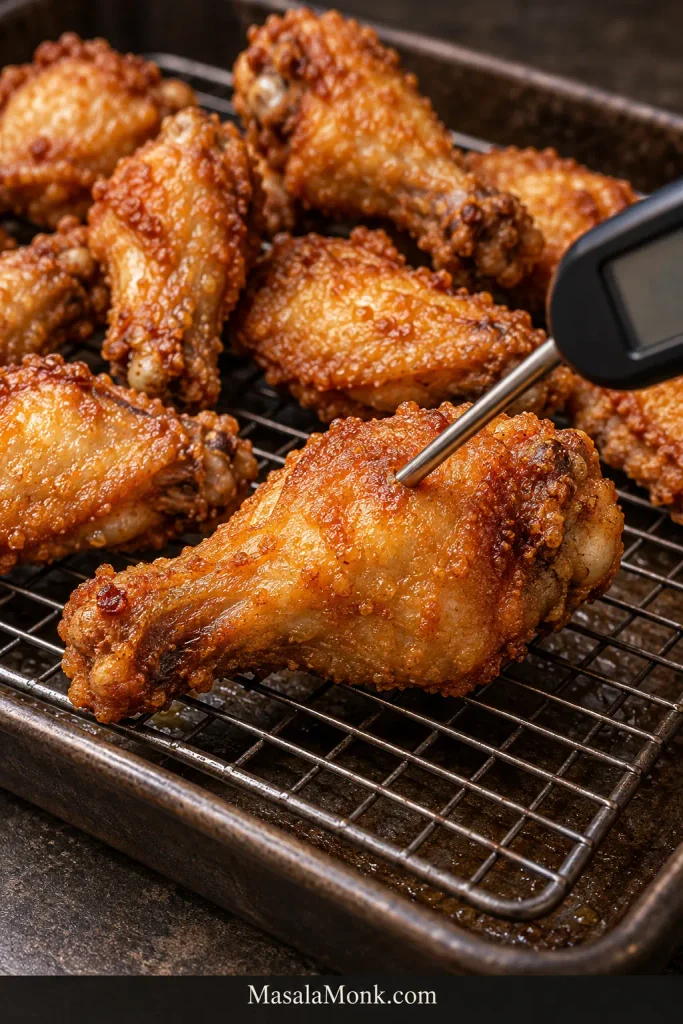
At this point, two checks should agree: the crust should look dry and tight, while the thermometer confirms the thickest drumette is safely cooked.

Golden second-fried chicken wings with an instant-read thermometer inserted into the thick meaty part of one wing.
After the second fry, raised areas should deepen to gold while the shell looks tighter and drier overall. Then probe the thickest meaty section from the side so the thermometer avoids bone.
  1. Finish with sauce. Rest the wings for a minute or two. Warm the glaze gently if needed. Brush on a thin layer for the best balance of sauce and exposed crust, toss quickly for fuller coverage, or leave the wings plain and dip them at the table. After brushing, you should still be able to see the fried texture beneath the glaze.
  2. Serve right away. For half-and-half chicken, glaze one half with gochujang and the other with soy-garlic. Finish with sesame seeds or scallions if you like.

Recipe Notes

  • Wing size: these frying times are for split flats and drumettes. Large drumsticks, whole wings, and other bone-in cuts need different timing.
  • Potato starch: it gives the crust the brittle character we want here. Cornstarch works if that is what you have.
  • Sticking: if battered wings tend to stick to the bottom of the pot, use tongs to hold each one partly submerged for a second before releasing it.
  • Leftovers: leave any wings you expect to save unsauced whenever possible.

How the Method Works

The Crust: Thin, Crisp and Built to Take Sauce

Korean fried chicken does not have one universal coating. You will find starch-only versions, frying mixes, thin batters, and heavier dredges. Here, the goal is a close-fitting crust with a brittle bite and very little bread-like bulk.

For this version, flour gives the coating structure while potato starch gives it the brittle crackle. Potato starch on its own produces a thinner, glassier crust.

CoatingWhat You Get
Flour + potato starchThin, structured and brittle-crisp. This is the main method in the recipe.
Potato starch onlyA thinner, glassier crackle with almost no bread-like character.
CornstarchStill light and crisp, but generally a little less brittle and glassy than potato starch.
Korean frying mixA convenient seasoned frying blend that often combines flour and starch with leavening. Formulas vary, so follow the package’s liquid guidance.

Flour and starch absorb water a little differently from one brand to another, so watch the batter rather than worshipping the measuring cup. The lift test in the recipe matters more than forcing every batch to take exactly the same last spoonful of water.

Why the Seasoning Stays Relatively Dry

Salt, ginger, and black pepper season the meat without leaving much extra liquid on the surface. Rice wine and other liquid marinades can be delicious, but here they leave more surface moisture just when the thin coating needs a clean grip.

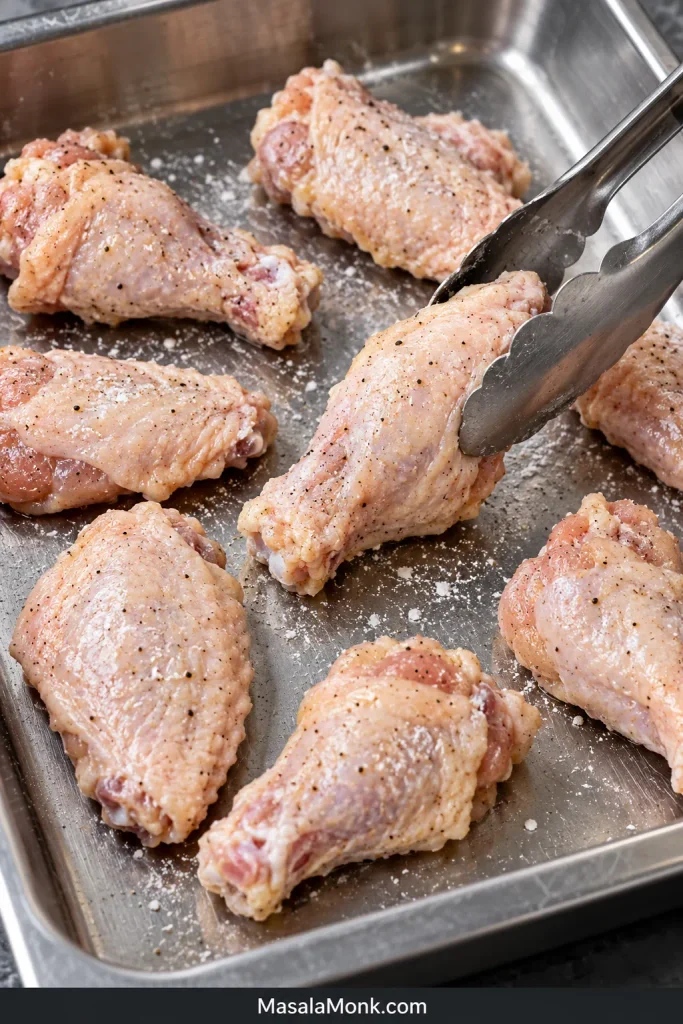
Raw split chicken wings with a very light potato-starch dusting in a stainless-steel tray, with most skin still visible.
Surface shine is the easiest cue here. Once the slick chicken skin turns softly matte, stop adding potato starch; obvious white patches mean the dusting is becoming a dredge.

Why Korean Fried Chicken Is Fried Twice

The first fry starts the cooking and sets the coating; the rack rest lets steam escape; the hotter second fry dries the crust and builds the final brittle texture.

Pale blond first-fried chicken wings resting unsauced on a wire rack over a stainless-steel tray.
Ignore browning and inspect the coating instead: after the first fry it should look matte and dry-set, with no wet batter patches. Pale color alone is not a problem.

Watch the temperature after the wings go in, not just before. Six pieces may be fine in one pot and too many in another. If the oil stays below the target range instead of beginning to climb back, reduce the next batch.

Six battered chicken wing pieces frying with space between them in a deep pot beside a clip-on oil thermometer.
Notice the channels of bubbling oil between the wings. That breathing room helps the oil recover after loading; crowding drops the temperature further and slows its recovery.

Choose Your Glaze: Gochujang or Soy-Garlic

Sweet-Spicy Gochujang

This sweet-spicy Korean fried chicken style is often called yangnyeom chicken; yangnyeom means seasoned. Gochujang gives the red glaze fermented heat and depth. Ketchup softens the sharper edges, soy adds salt and savoriness, and rice vinegar keeps the finish from feeling overly sweet.

Rice syrup adds shine and body with a relatively neutral flavor. Honey is stronger and sweeter, which is why the recipe uses less of it. Taste once the glaze has reduced; brands of gochujang vary enough that the final adjustment is better made in the saucepan than on paper.

Metal spoon coated with glossy deep red gochujang glaze dripping into a stainless-steel saucepan.
Watch the landing point as the gochujang glaze falls from the spoon. Properly reduced sauce flows back into the pan with a small ripple; a mound that holds its shape has gone too far.

Soy-Garlic

Soy-garlic is the less chile-forward option: salty-sweet, deeply garlicky, and light enough that more of the fried crust comes through.

If you do not have gochujang, make this version rather than replacing gochujang 1:1 with ordinary hot sauce. Pull the glaze from the heat while it still pours; it thickens further as it cools.

Half-and-Half Korean Fried Chicken

Each glaze covers roughly 1 lb / 450 g of wings. Split the chicken after the second fry and finish each half differently, or double one glaze for the full batch. Half-and-half is especially useful when some people want the gochujang heat and others would rather stay with soy-garlic.

Korean fried chicken with deep ruby gochujang glaze beside wings coated in lighter amber soy-garlic glaze.
The two glazes should separate visually before you taste them: gochujang stays ruby-red, while soy-garlic remains translucent amber. If the soy glaze turns nearly black, it is too dark or reduced too far.

Sauce Is Where Crisp Chicken Goes Soft

The second fry dries the Korean fried chicken crust. Sauce starts softening it almost immediately, so application matters.

FinishWhat Happens
BrushYou get plenty of flavor while leaving some crisp crust exposed.
Quick tossCoverage is fuller, but the crust softens sooner.
DipThe wings stay at their crispest until the moment you eat them.

Whatever you choose, reduce the glaze until it clings and apply it as close to serving as you can.

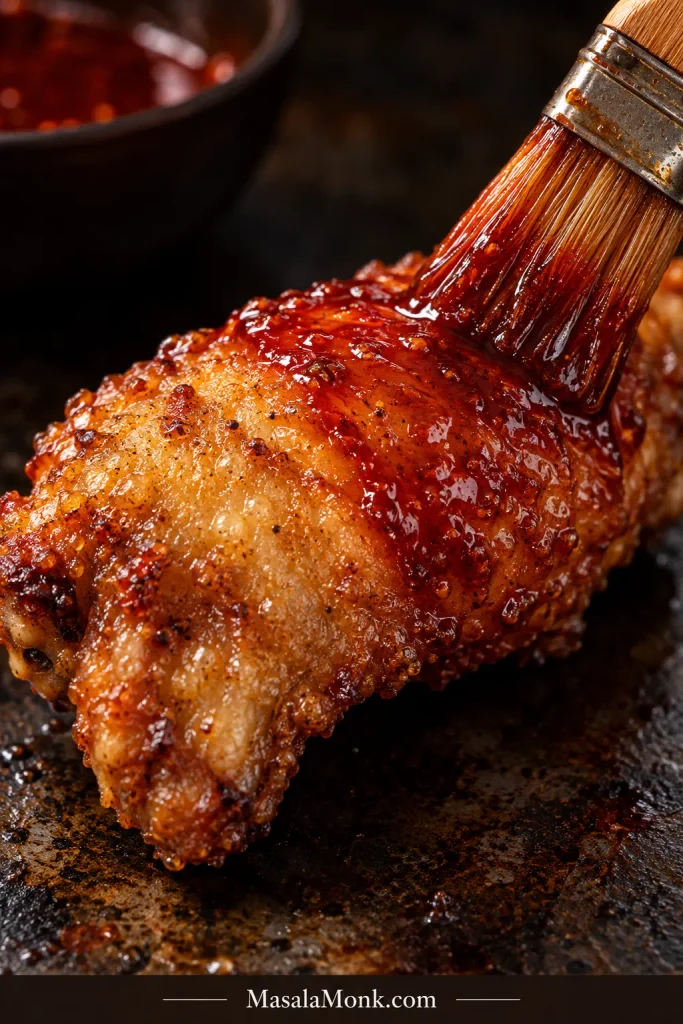
Pastry brush spreading deep red gochujang glaze over part of a freshly fried golden chicken wing.
A well-brushed wing shows two textures at once: glossy gochujang in lower creases and dry golden high points above it. That contrast is the visual sign of restrained glazing.

When the Crunch Goes Wrong

For Korean fried chicken, this troubleshooting check is easiest before frying: batter thickness is much easier to correct while you can still compare the coating against the wing’s natural shape.

Two raw chicken wings above a batter bowl, one thinly coated and the other covered in thicker opaque batter.
Compare the silhouettes rather than just the color. Correct Korean fried chicken batter follows the wing’s joints and skin folds; a heavy coating rounds those contours and makes the piece visibly bulkier.
What You SeeLikely Cause + Fix
Batter slides away before fryingThe surface is too wet. Blot away loose liquid first, then use only a light starch dusting before battering.
Coating falls off laterThe coating may have been too heavy, not firmly set, or knocked loose during tossing. Drain excess batter well, let the first fry set the coating, and brush rather than toss a fragile batch.
Pale, greasy crustThe oil stayed too cool. Fry fewer pieces and let the oil recover fully.
Thick or hard crustThe batter was too heavy or the wings fried too long. Thin the batter and drain each piece well.
Crisp plain, soft after glazingThe sauce is too thin, too heavy, or went on too early. Reduce it further and use less.
Sauce will not clingIt needs a little more reduction.
Glaze turns sticky or glueyIt reduced too far. Loosen it carefully with a little warm water.

Ways to Adapt the Method

Boneless Korean Fried Chicken

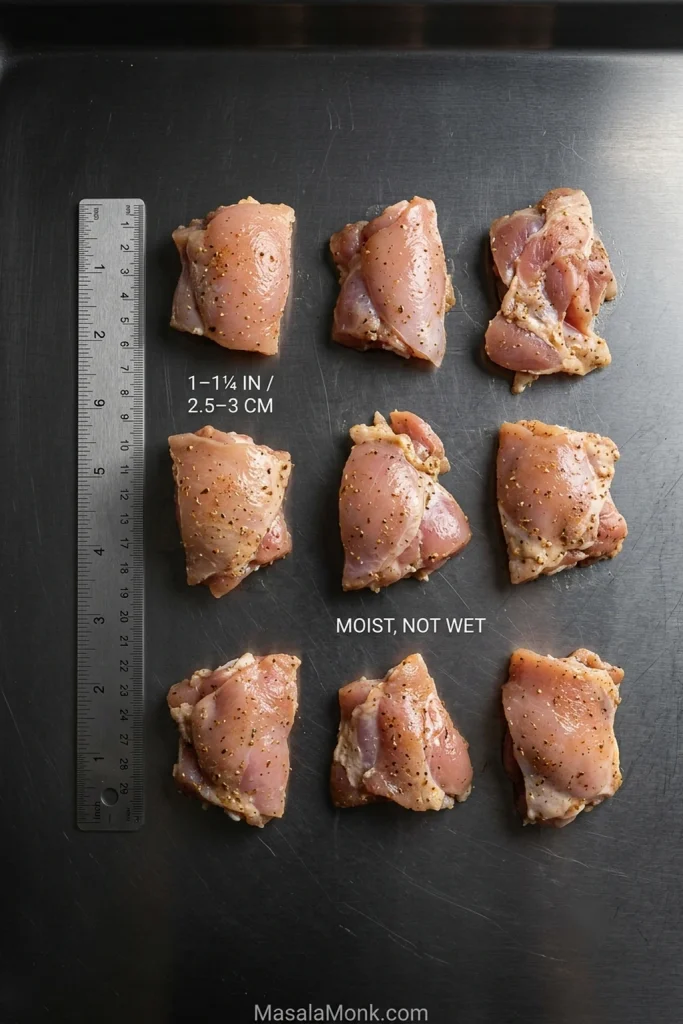
Chicken thighs are the best choice for boneless pieces because they stay juicy through two fries. Cut them into chunks about 1½ inches / 4 cm across and use the same seasoning, starch dusting, batter, and sauces.

Glazed boneless Korean fried chicken made from irregular thigh chunks, with one piece opened to show moist cooked meat.
The opened piece is the useful checkpoint: juicy thigh should dominate the cross-section, with only a thin fried shell around it. If crust starts outweighing meat, the pieces are too small or too heavily coated.

Start checking the first fry around 4–5 minutes and the second around 2–3 minutes. The exact time depends on piece size, so use the thermometer as well as the clock. Breast meat can work, but it gives you less margin before drying out.

Another crisp boneless option is our Sesame Chicken, which uses smaller pieces and a different sweet-savory glaze.

Potato-Starch-Only Crust

For a thinner, harder crackle, skip both the starch dusting and wet batter. A 2 lb / 900 g batch of wings needs about ½ cup / 75–80 g potato starch.

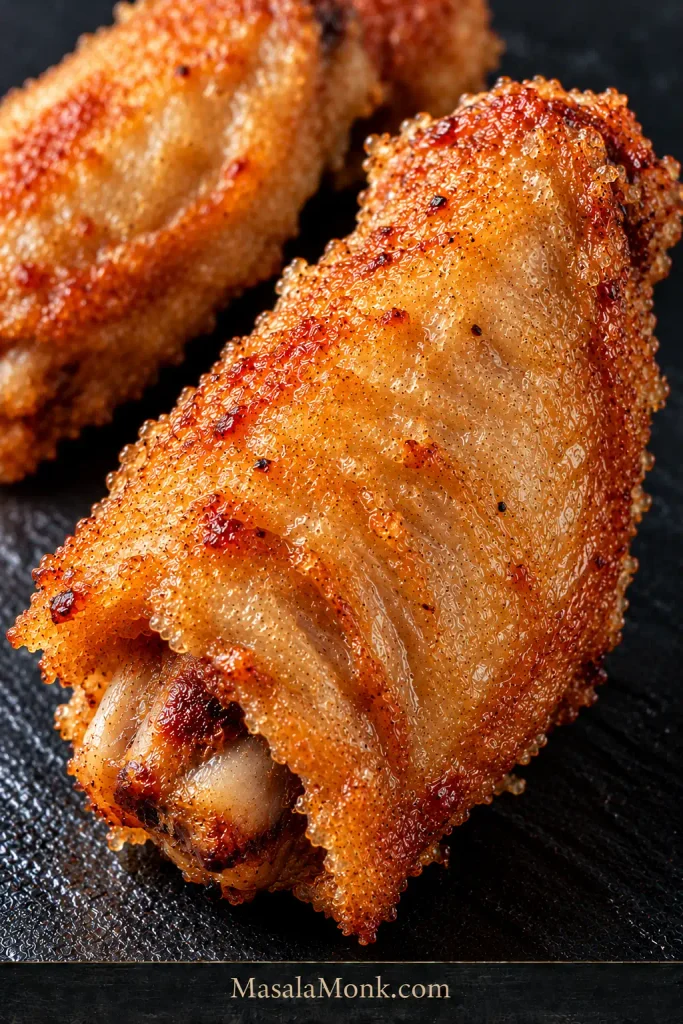
Close-up of an unsauced golden chicken wing with a thin potato-starch crust and fine glassy microblisters.
Potato-starch-only crust catches the light in tiny hard, glassy points while staying close to the skin. Broad floury ridges or a puffy outline would signal a different coating style.
  • Season and blot the wings as directed.
  • Coat them directly in the potato starch, pressing lightly so the surface is covered.
  • Shake off all loose excess before frying.
  • Use the same two-stage frying method and temperature targets as the main recipe, checking the crust and internal temperature rather than relying on time alone.

The result is a more glassy, less bread-like Korean fried chicken crust than the main batter. If the whole dish needs to be gluten-free, check the gochujang and soy sauce labels too and use certified gluten-free versions where needed.

Can You Make Korean Fried Chicken in an Air Fryer?

An air fryer can make crisp Korean-style wings, but the wet batter above is designed for oil. For an air fryer, the potato-starch-only route is easier: coat the wings, mist the surface well with oil, leave space around them, and glaze only after they are crisp.

If deep frying is off the table, our Air Fryer Chicken Wings guide has the full timing and spacing.

For a Party: Prep Ahead, Fry Close to Serving

For Korean fried chicken at a party, do the quiet prep earlier. Leave the battering, frying, and glazing for close to the time everyone is ready to eat.

Earlier in the Day

  • Season the wings and keep them refrigerated.
  • Make the glazes up to a day ahead and refrigerate them.
  • Measure the dry batter ingredients, leaving the water until frying time.

If Cucumber Salad is going alongside the wings, slice the vegetables earlier but dress them closer to serving so they keep their snap.

Close to Serving

  • Mix the batter and heat the oil.
  • First-fry the batches, then move through the hotter second fry as one continuous cooking session.
  • Warm the glaze and finish the wings only when you are ready to serve them.

Storing and Reheating Korean Fried Chicken

Refrigerate cooked chicken within about 2 hours — or within 1 hour if the surrounding temperature is above 90°F / 32°C — and use it within 3–4 days.

Reheat unsauced wings in an oven or air fryer until the thickest pieces reach 165°F / 74°C and the exterior is crisp again, then add warm glaze. Already-sauced wings will improve with dry heat, but they will not return completely to their just-fried texture.

Reheated golden chicken wings on a wire rack while a pastry brush applies red glaze to one foreground wing.
The useful detail is the air gap under the wings: a rack lets dry heat reach the underside, avoiding the soft contact patch that forms when hot chicken sits flat against a tray.

If the exterior needs more help in the oven, our Crispy Baked Chicken Wings guide shows how a rack and dry oven heat can bring back more of the crust.

The easiest leftover rule: sauce only what you are eating now.

What to Serve With It

Cold, crisp chicken-mu—Korean pickled radish—cuts through Korean fried chicken with sharp acidity and crunch. Steamed rice keeps the plate simple; Fried Rice turns the wings into a fuller meal.

Glazed Korean fried chicken on a dark plate beside a celadon bowl of white pickled radish cubes in clear brine.
Chicken-mu should look clean and refreshing beside the wings: small white radish cubes in clear brine, not a heavy or creamy pickle. That contrast keeps the serving plate from feeling too rich.

For another cool side, our Coleslaw brings crunch and a little creaminess against the hot chicken.

Then eat the chicken while the timing is still on your side: second fry finished, glaze just brushed on, shell still audibly crisp.

Posted on — Leave a comment

Air Fryer Fried Chicken Breast Recipe: Crispy, Juicy & Easy

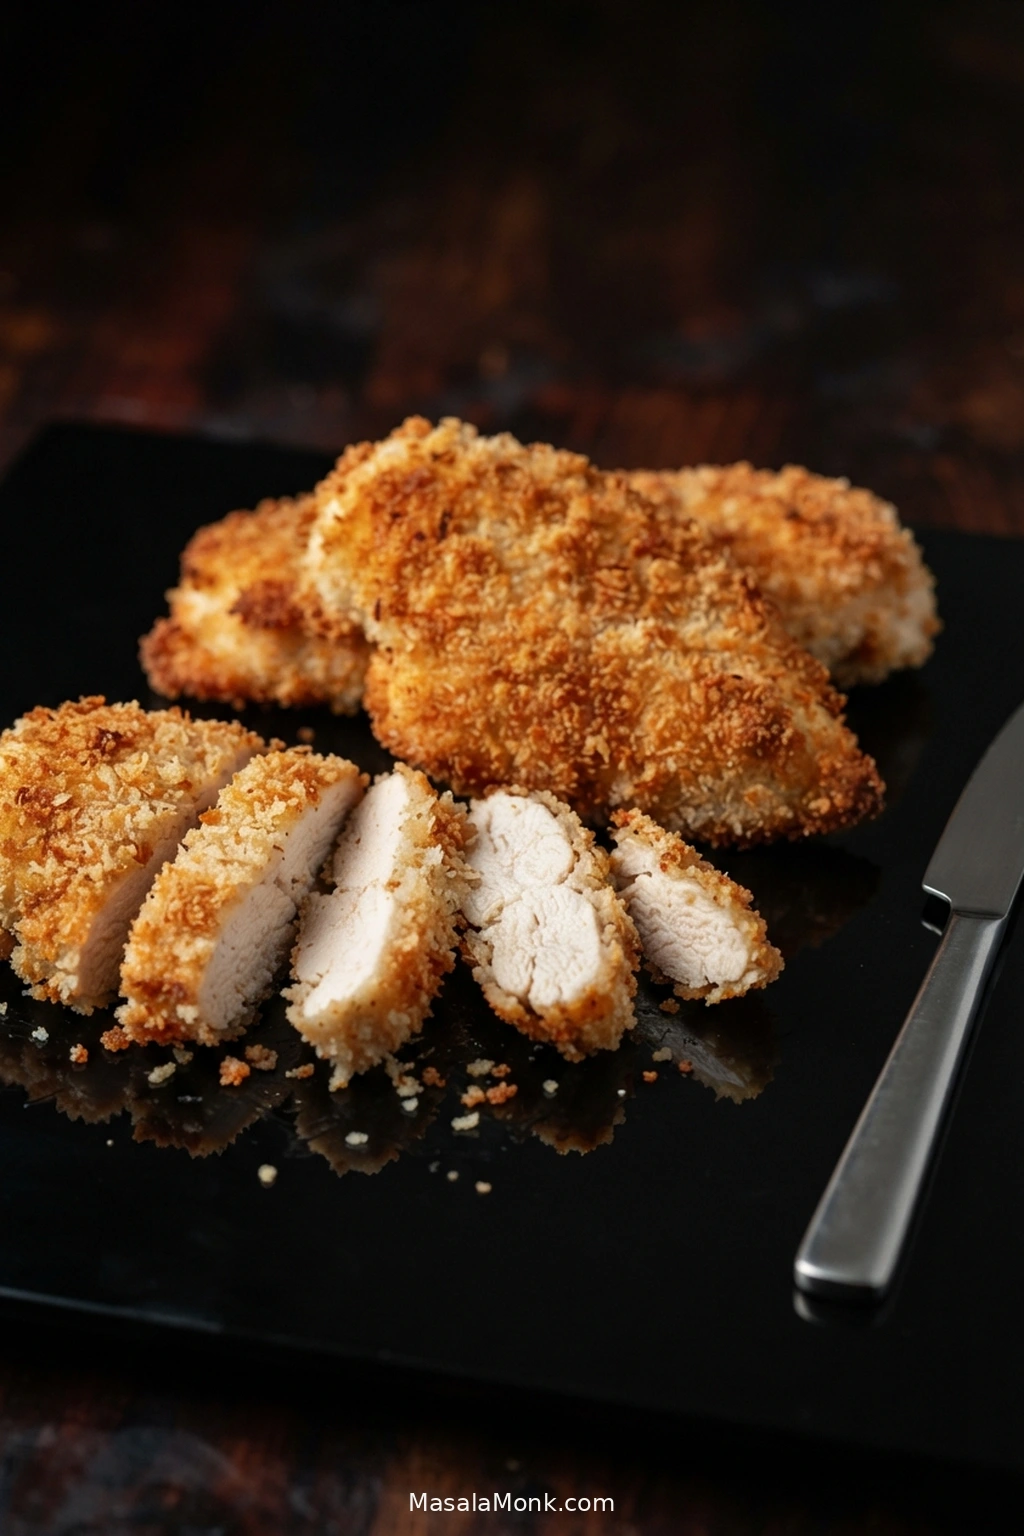
Three golden breaded chicken breast cutlets on a dark surface, with the front cutlet sliced to reveal moist white chicken inside.

This air fryer fried chicken breast recipe gives you crisp, golden breading around juicy chicken without a pan of frying oil. The crust needs enough time to brown and crunch before lean chicken breast has a chance to dry out.

Splitting the breasts into thinner cutlets makes that much easier. A thin mayonnaise-Dijon layer holds the breading in place without the usual flour-and-egg dredging station. Fine breadcrumbs fill the gaps, while panko leaves rougher edges for extra crunch. The coating is light enough that mayonnaise should not dominate; Dijon mainly leaves a little tang behind.

For 1/2-inch / 12–13 mm cutlets, allow 10–12 minutes per batch at 390°F / 200°C. Begin checking the thickest part around 9 minutes and remove each piece when it reaches 165°F / 74°C. Use the clock to know when to start checking and the thermometer to decide when the chicken comes out.

This is the breaded, fried-style version. For chicken breast without breading, use the air fryer chicken breast recipe instead.

Air Fryer Fried Chicken Breast Recipe

Thin chicken breast cutlets with a seasoned breadcrumb-panko crust, air fried until crisp outside and juicy in the center.

Prep
15 minutes

Breading Rest
10 minutes

Cook
10–12 minutes per batch

Total
About 40–55 minutes

Yield
4 cutlets

Equipment

  • Air fryer
  • Sharp chef’s knife
  • Small bowl
  • Shallow bowl or plate for breading
  • Tongs
  • Instant-read thermometer
  • Meat mallet or rolling pin, optional
  • Wire rack, optional

Ingredients

  • 2 large boneless, skinless chicken breasts, about 18–20 oz / 510–565 g total
  • 3/4 teaspoon fine sea salt, about 4 g, divided
  • 1/2 teaspoon black pepper, about 1 g, divided
  • 2 tablespoons mayonnaise, about 30 g
  • 1 tablespoon Dijon mustard, about 15 g
  • 1/2 cup plain fine dry breadcrumbs, about 50 g
  • 1/2 cup plain panko breadcrumbs, about 30 g
  • 1 teaspoon paprika, about 2 g
  • 1 teaspoon garlic powder, about 3 g
  • 1/2 teaspoon onion powder, about 1 g
  • 1/4 teaspoon cayenne pepper, optional
  • 2 teaspoons olive or avocado oil, 10 mL
  • Cooking spray or additional oil for misting, as needed

Instructions

Prepare and Bread the Chicken

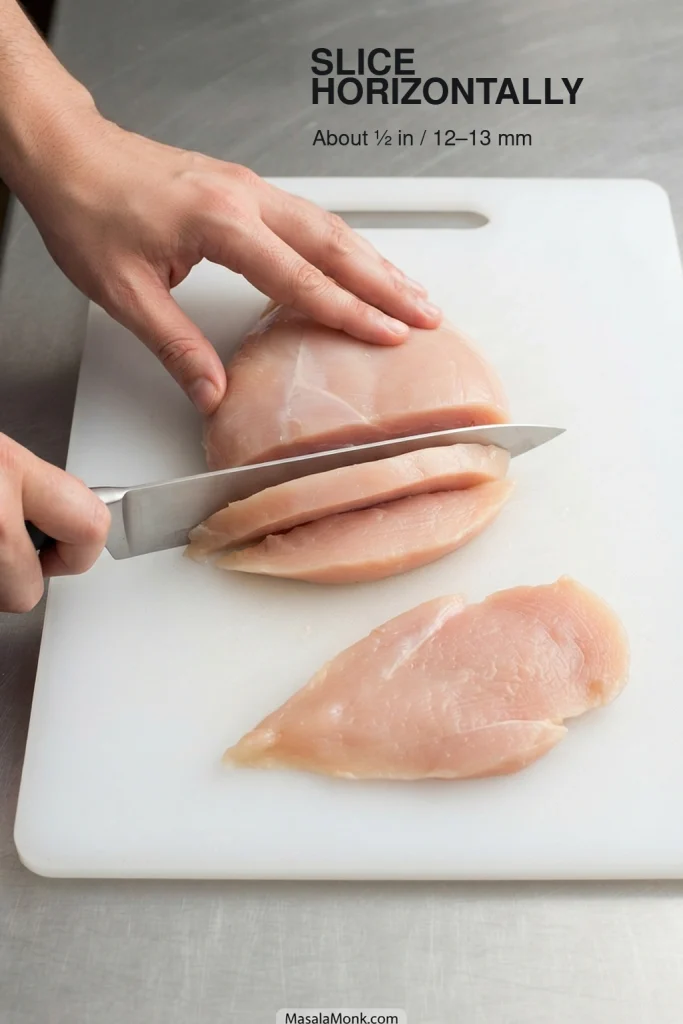
  1. Slice the chicken. Cut each breast horizontally into 2 cutlets. Aim for pieces about 1/2 inch / 12–13 mm thick. They do not need to match perfectly. If one cutlet has a noticeably thicker center, gently pound just that area until the piece is closer to an even thickness.
  2. Dry and season. Pat every surface of the chicken thoroughly dry. Season both sides with 1/2 teaspoon salt and 1/4 teaspoon black pepper.
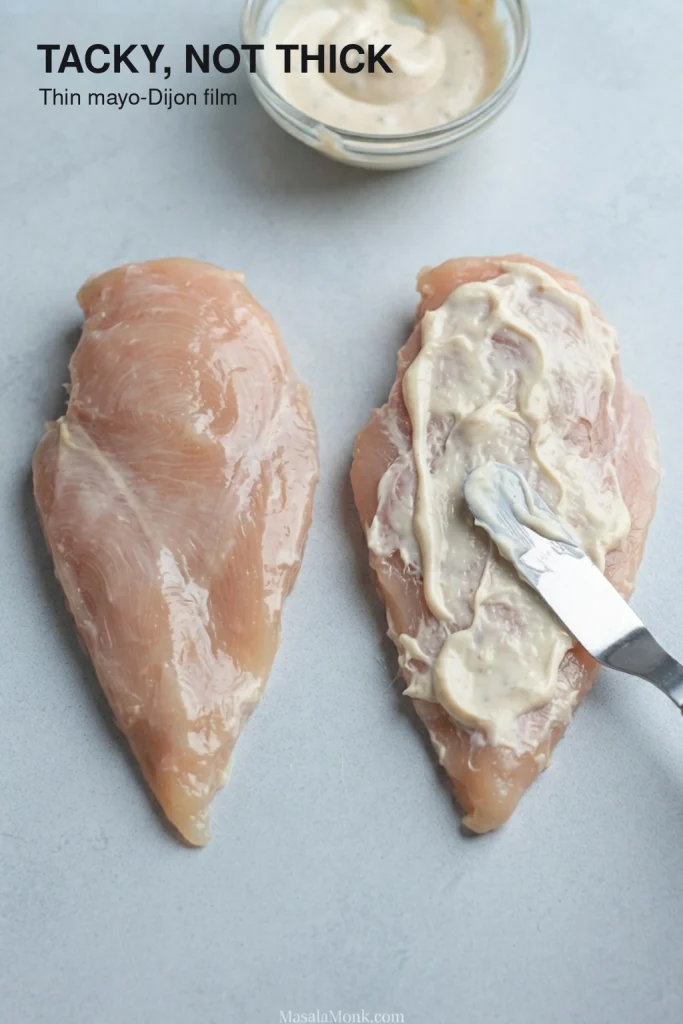
  3. Mix the binder. Stir together the mayonnaise and Dijon mustard. Spread a thin film over every side of the chicken. You need enough to make the surface tacky, not a thick wet coating.
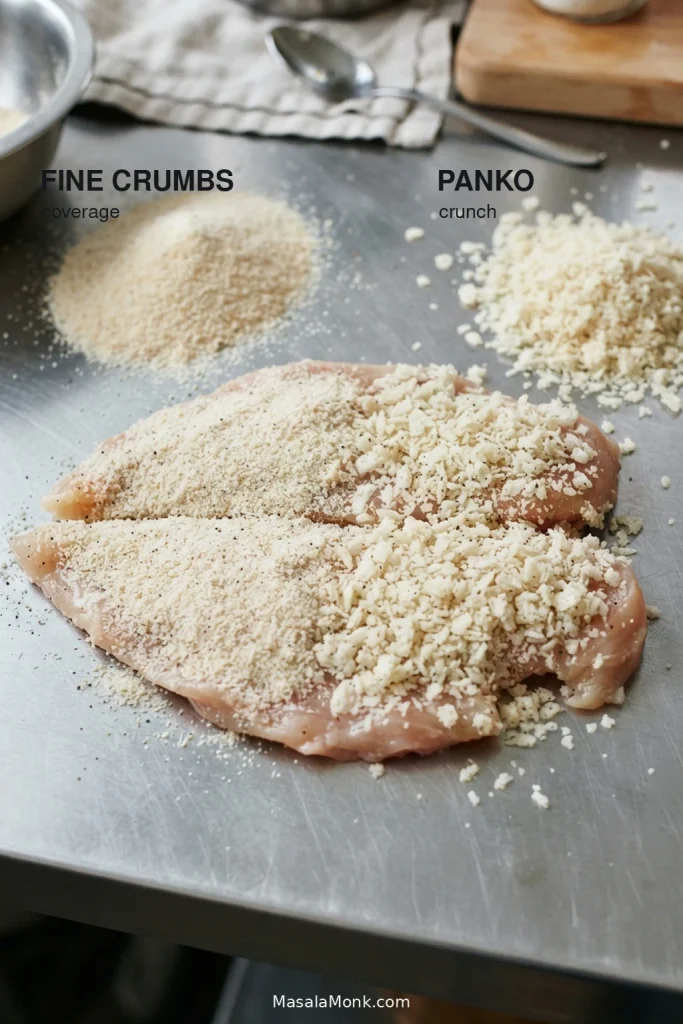
  4. Make the breading. Combine the fine breadcrumbs, panko, paprika, garlic powder, onion powder, optional cayenne, remaining 1/4 teaspoon salt and remaining 1/4 teaspoon black pepper. Drizzle in the 2 teaspoons / 10 mL oil and toss until the crumbs are lightly coated but still loose.
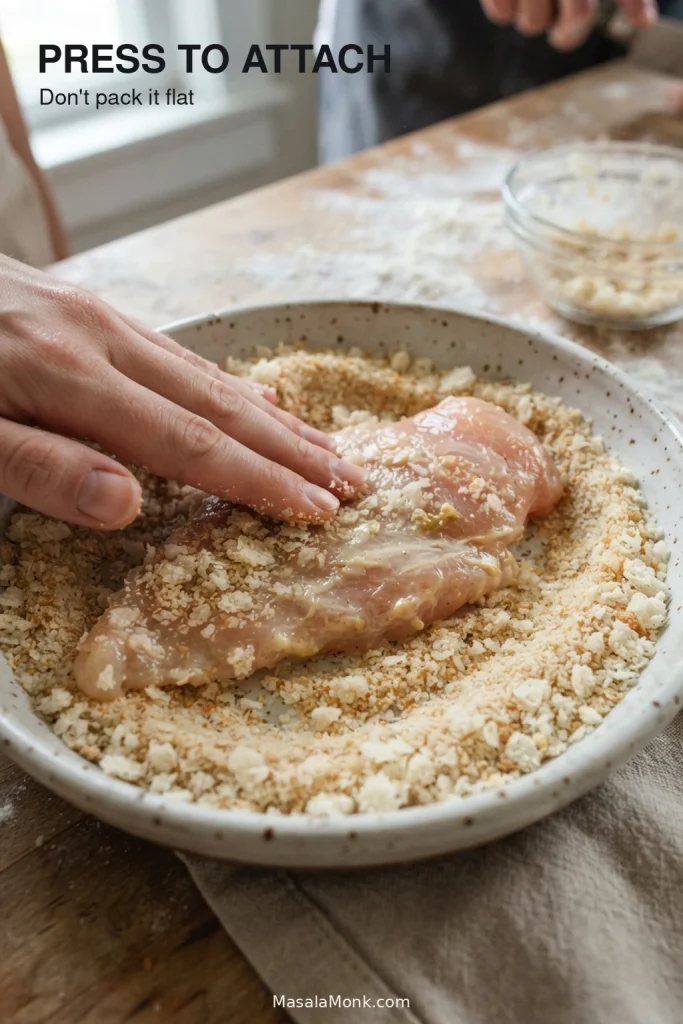
  5. Bread the cutlets. Press each piece into the crumbs just enough for the breading to cling to both sides and the edges. Leave the panko rough instead of packing it flat.

Air Fry the Chicken

  1. Let the breading settle and preheat. Rest the cutlets for 10 minutes. While they sit, preheat the air fryer to 390°F / 200°C for 3 minutes, or use the machine’s preheat cycle.
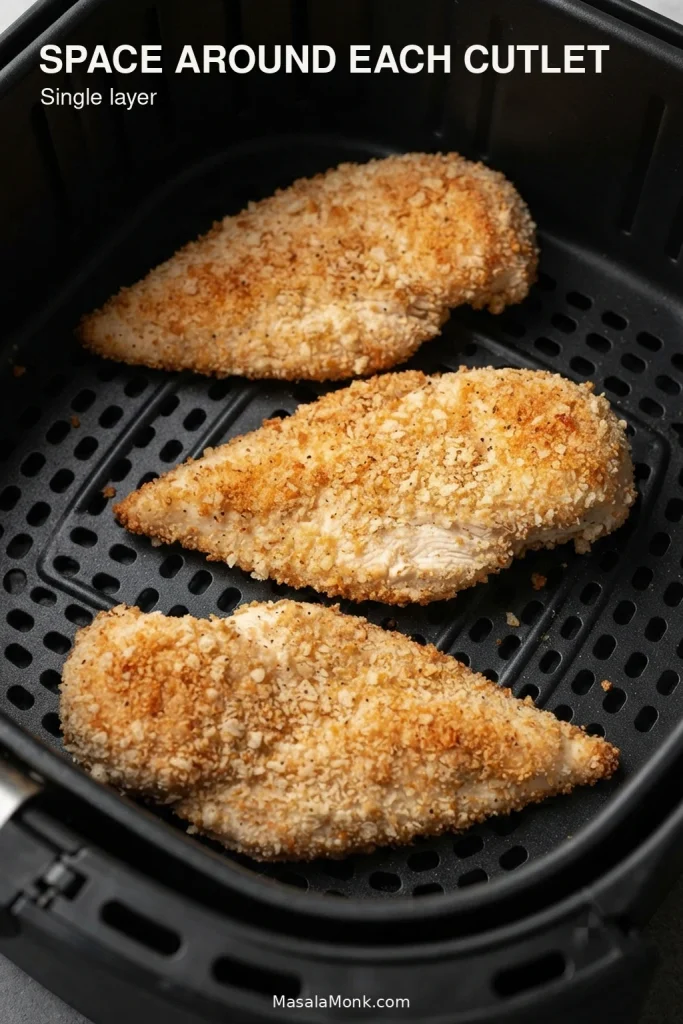
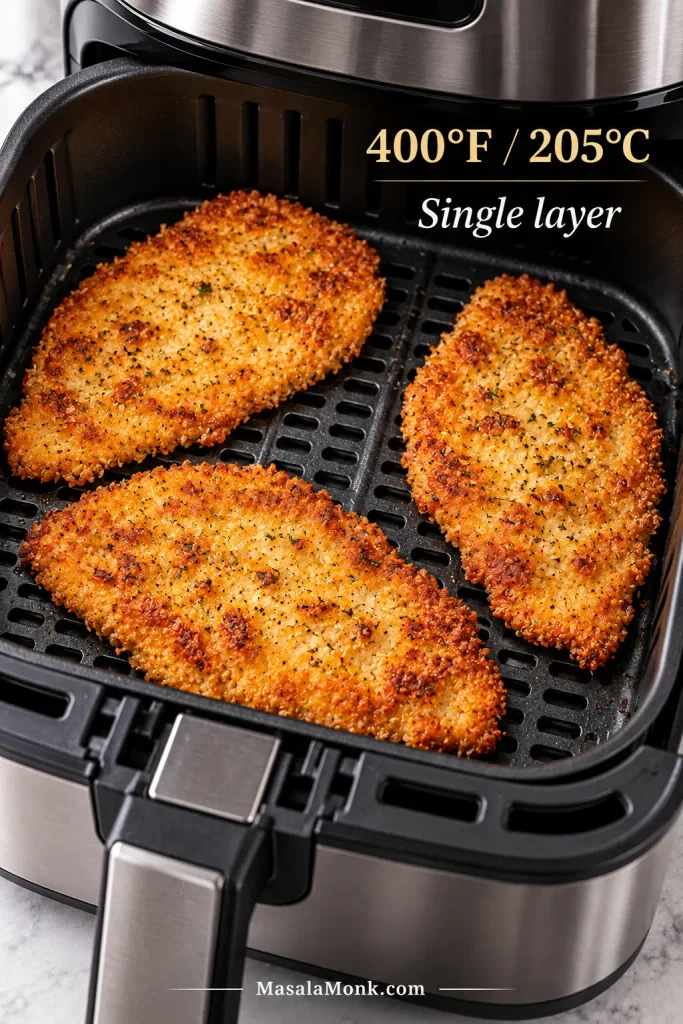
  2. Load the basket. Lightly oil the basket if your model tends to stick. Arrange the cutlets in one layer with space around them. If four pieces feel crowded, cook in two batches.
  3. Cook the first side. Mist any obviously dry breading very lightly with oil. Air fry for 5 minutes. A few pale crumbs are normal at this stage; what matters is that the surface looks set rather than wet or pasty.
  4. Flip and finish. Slide the tongs under one edge. When the crust lifts cleanly, turn the chicken carefully. If it still feels fragile, give it another minute. Once flipped, mist any pale, dry-looking patches and continue cooking. Begin checking the center when the batch reaches about 9 minutes total.
  5. Remove each piece when it is ready. Most 1/2-inch cutlets finish in 10–12 minutes total. Remove each piece as soon as its thickest center reaches 165°F / 74°C. If the smaller cutlet gets there first, take it out and let the others catch up.

Rest Before Serving

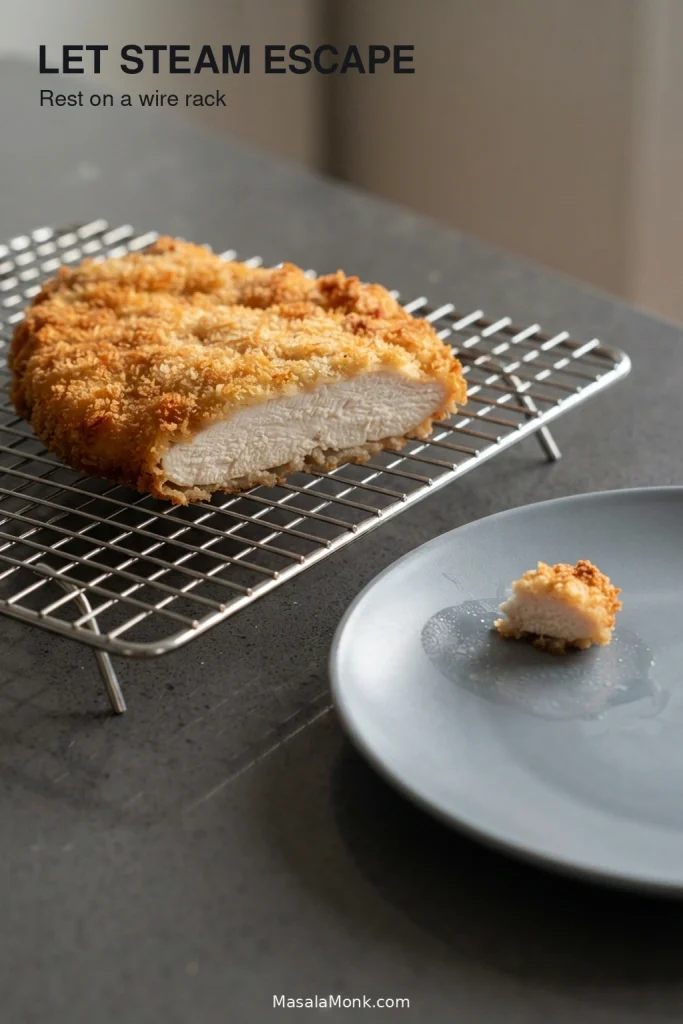
  1. Rest briefly. Move the cooked chicken to a clean wire rack for 3–5 minutes. No rack? Set the pieces separately on a clean plate and serve promptly. Avoid stacking or tightly covering the hot cutlets so trapped steam does not soften the crust.

Recipe Notes

  • Cooking in batches? Start checking every batch around 9 minutes, but let the crust and thermometer tell you when each piece is ready.
  • Keep raw and cooked chicken separate. Discard leftover binder or breading that has touched raw chicken, and move cooked cutlets to a clean plate or rack rather than the surface that held them raw.
  • Using seasoned breadcrumbs? Taste them first and reduce the added salt if necessary.

How to Keep the Crust Crisp and the Chicken Juicy

Thin cutlets, a light, tacky coating and just enough oil do most of the work. From there, watch the crust and check the center.

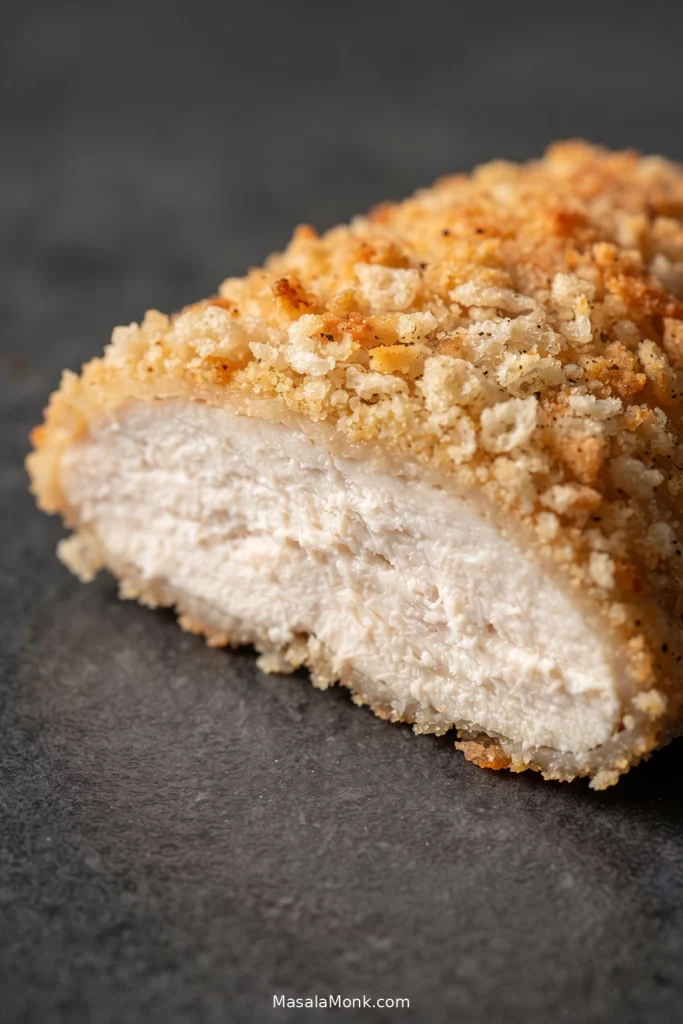
Macro view of sliced chicken breast showing moist white meat surrounded by a thin golden breadcrumb-and-panko crust.
The meat should dominate this cross-section. A thin breadcrumb-panko shell gives you crunch at the edge; however, if the coating starts to rival the chicken in thickness, the breading has become heavier than this air fryer chicken breast needs.

Why We Split the Chicken Breast Into Cutlets

A thick supermarket chicken breast can still be underdone in the center when the crust is already as brown as you want it. Splitting it horizontally to about 1/2 inch gives the meat and breading a much better chance of finishing together. The pieces do not need to be identical; start checking the smaller one first.

Working with very large breasts? Slice them horizontally first. If the center of a cutlet is still noticeably thicker, gently pound just that area rather than flattening the whole piece.

Raw boneless chicken breast being sliced horizontally into a broad, thin cutlet.
Follow the natural horizontal plane of the chicken breast rather than trying to create a perfectly rectangular cutlet. A tapered edge is fine; what matters is removing the thick central hump that would otherwise finish later than the rest.

Next, see how the binder, crumbs and oil build the crisp crust →

How to Build a Crisp Air-Fryer Crust

A deep fryer surrounds breading with hot fat. An air fryer does not, so the coating needs a little more help with adhesion and browning. The three things that matter most are a thin tacky binder, the right crumb texture and enough oil where the crust needs it.

Keep the Mayo-Dijon Layer Thin

Mayonnaise and Dijon leave a tacky film that helps the crumbs stay attached as the cutlet cooks. Spread only enough to coat the surface.

If the cutlet looks heavily frosted with mayonnaise, scrape some off. A thick wet layer can soften the crumbs before they have a chance to crisp.

Raw chicken breast cutlets coated with a thin pale mayo-Dijon layer, with excess coating being scraped from one piece.
The raw chicken should still be visible through the mayo-Dijon. Moreover, carry that thin tacky film around the edges—not just across the flat faces—because bare sides give the breadcrumb coating nowhere to grip.

No mayonnaise? Beat 1 large egg with about 1 teaspoon Dijon mustard. Let the excess drip away before pressing the chicken into the crumbs.

Fine Breadcrumbs Cover; Panko Brings the Crunch

Fine breadcrumbs settle into the gaps for more even coverage, while panko leaves larger golden flakes that give the crust its bigger crunch. Season the crumbs as well as the chicken so the crust has flavor of its own.

Breaded raw chicken breast beside fine dry breadcrumbs and larger irregular panko breadcrumbs.
A properly breaded cutlet should look intentionally uneven: fine breadcrumbs form the continuous base while individual panko pieces remain raised above it. If the surface becomes smooth and compact, the airy panko structure has been pressed away.

Press to Attach, Not to Flatten

Once the chicken has an even layer, stop pressing. The crumbs should cling, but the panko should still look rough rather than flattened into a smooth shell.

Hands gently pressing a thin chicken breast cutlet into a mixture of fine breadcrumbs and panko.
Press once firmly enough to attach the crumbs, then turn the cutlet so the narrow edges get coated too. After that, stop handling it; repeated pressure packs the panko flatter and leaves fewer exposed edges to brown.

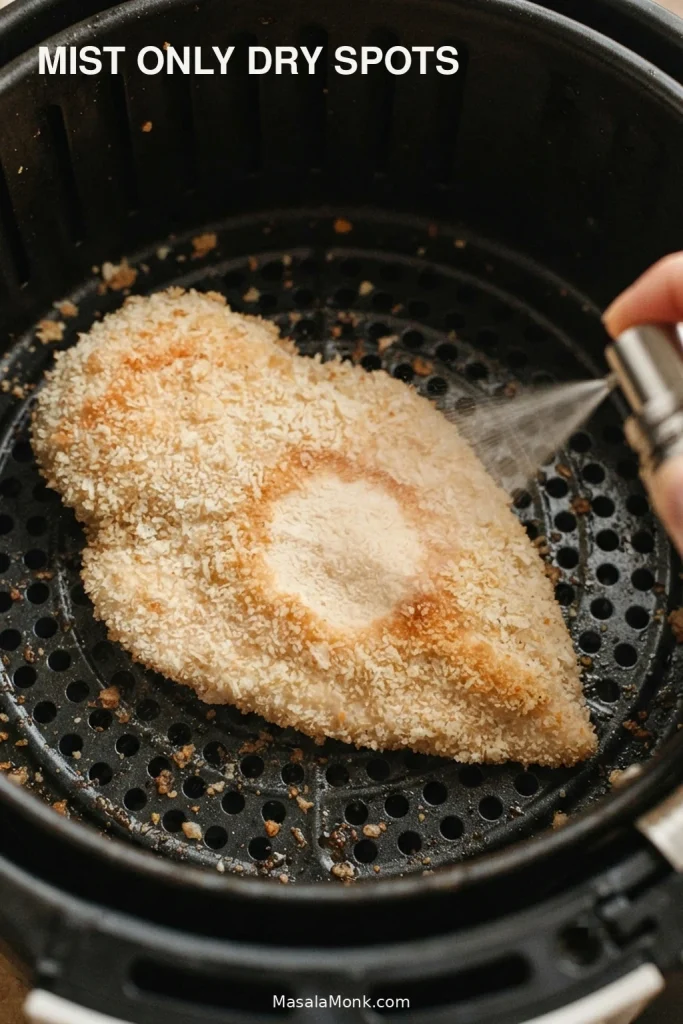
Oil the Crumbs, Then Mist Only Dry Spots

A small amount of oil tossed through the crumbs helps them start browning from the beginning. After the flip, look before you spray. If most of the crust is already golden, mist only the pale, dry patches.

Fine oil mist aimed at a pale, dry patch of breading on a chicken breast cutlet inside an air fryer.
Pale does not automatically mean dry. Instead, mist the patch that still looks dusty and matte; crumbs that already have a slight sheen usually need more time, not another coat of oil.

Next, see what the breading should look like as it cooks →

Read the Breading as It Cooks

You do not need every crumb to turn exactly the same shade of brown. Watch for the breading to move from tacky, to set, to dry and golden.

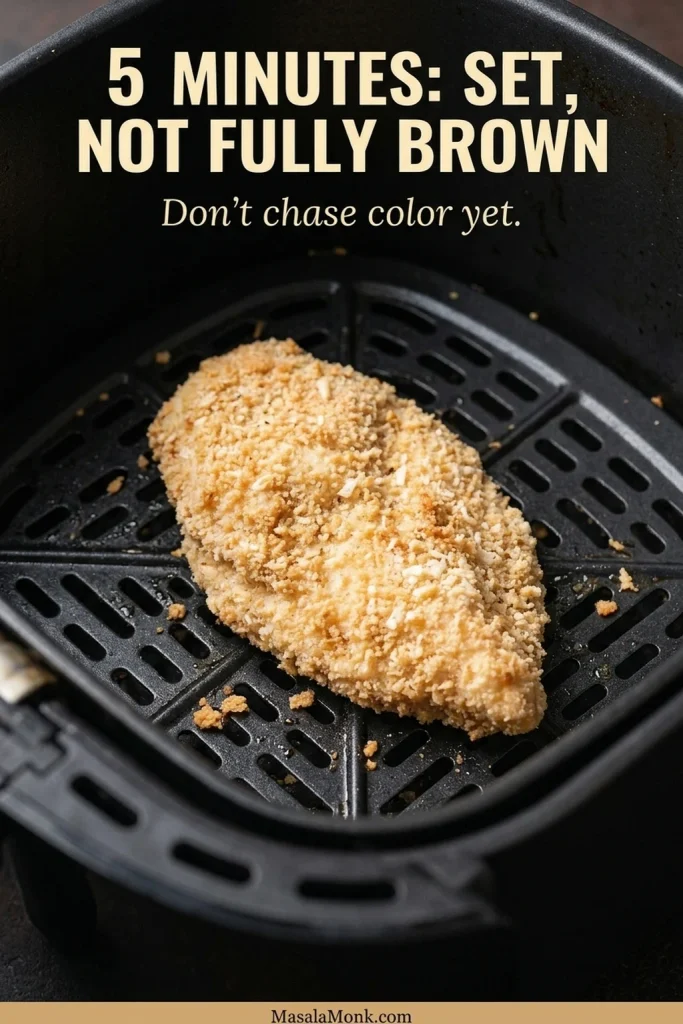
At Five Minutes, Look for a Set Surface

The first side does not need to be deeply browned yet. What matters at this point is that the coating has stopped looking wet or pasty and has formed a stable surface that can survive the flip.

Partially cooked breaded chicken breast in an air fryer with set pale crumbs and scattered early golden browning.
Patchy browning is normal at five minutes. What should worry you is a glossy or smearable patch: leave that area undisturbed until the crumbs look dry enough to hold their shape when the cutlet moves.
Stage What you should see What to do
Before cooking An even layer that looks attached, with no wet sludge or thick piles of loose crumbs Cover any bare spots, then leave the breaded chicken alone for 10 minutes
Ready to flip The first side looks dry and set, and the developing crust lifts without smearing Turn gently and mist only pale, dry-looking areas
Ready to check The raised crumbs look dry and browned rather than damp or dusty Check the thickest center with a thermometer and remove the cutlet when it reaches 165°F / 74°C

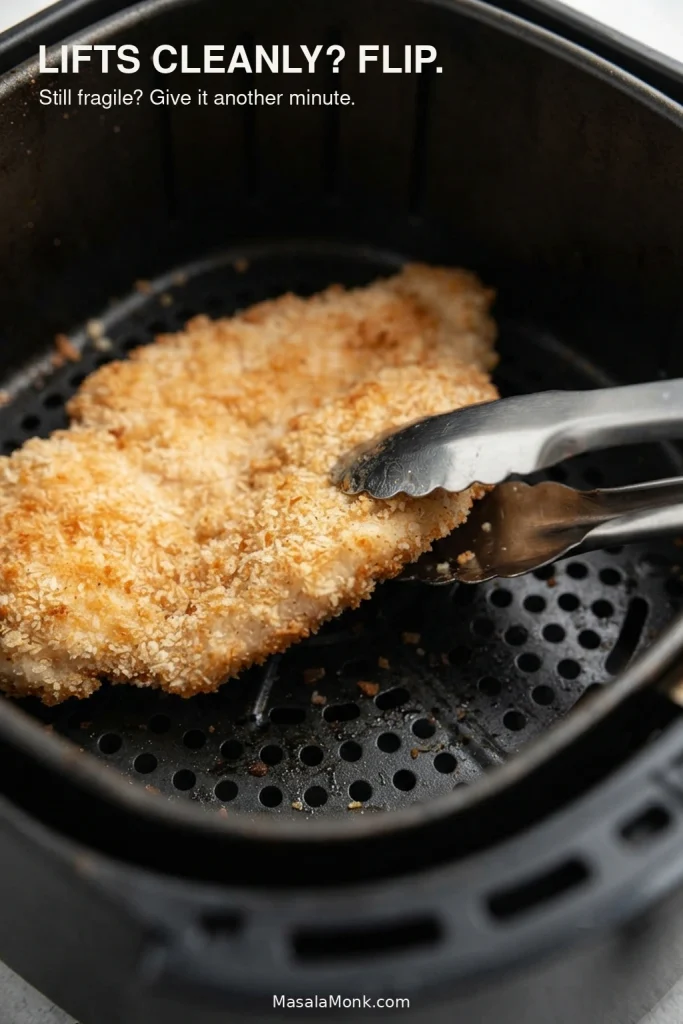
Let the Crust Tell You When to Flip

When the first side looks set, slide the tongs underneath one edge. A crust that releases cleanly is ready to turn; if it still clings or smears, give it another minute before trying again.

Stainless-steel tongs lifting one edge of a breaded chicken breast to check whether the crust releases from the air fryer basket.
Slide the tongs underneath rather than pinching the crust from above. If the edge still resists, waiting another minute usually preserves more breading than forcing the cutlet free on schedule.

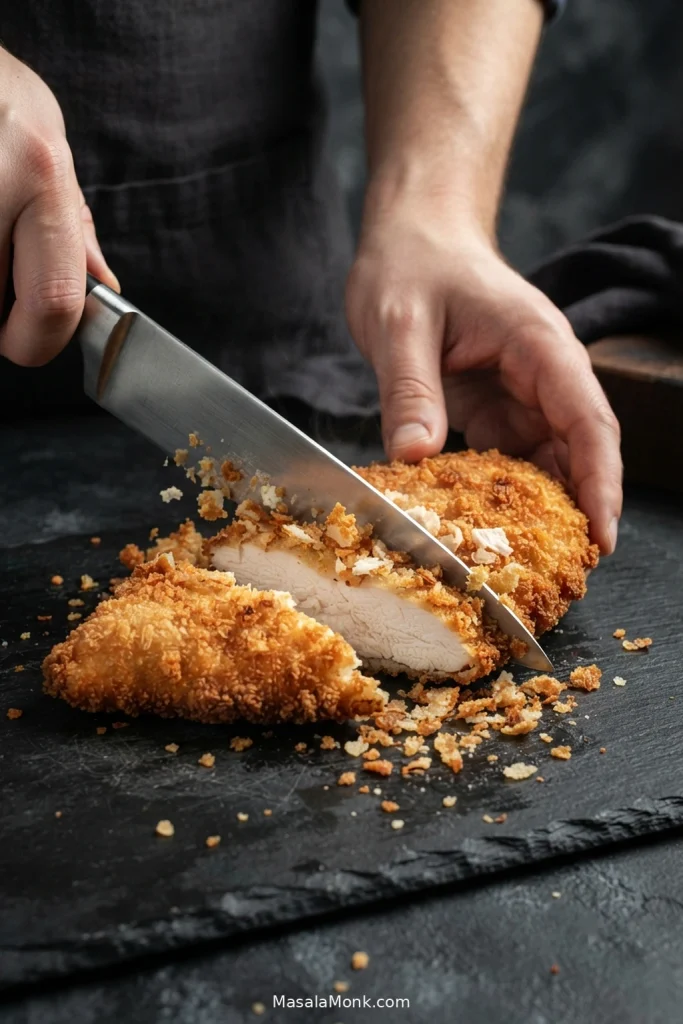
What a Crisp Finished Crust Looks Like

By the end, the raised crumbs should look dry and deeply golden in places while the coating stays bonded when the chicken is cut. Color can tell you the crust is ready to check; the thermometer still gets the final say on the meat underneath.

Knife cutting through golden breaded chicken breast as a few crisp crumbs break away and moist white meat is exposed.
A crisp crust should fracture locally, not detach in one sheet. Ideally, the knife releases a few crunchy crumbs at the cut while the surrounding breading stays bonded to the juicy chicken breast underneath.

Air Fryer Fried Chicken Breast Time and Temperature

For 1/2-inch breaded chicken breast cutlets, air fry at 390°F / 200°C for 10–12 minutes per batch, flipping once. Begin checking around 9 minutes. Thinner pieces can finish sooner, so start checking them earlier rather than relying on the full window.

Check a thin cutlet from the side. Insert an instant-read thermometer horizontally into the thickest part so the probe reaches the center. Remove each piece when it reaches 165°F / 74°C. The USDA safe-temperature guidance lists 165°F for poultry.

Digital instant-read thermometer inserted horizontally through the side of a thin breaded chicken breast cutlet.
For thin chicken cutlets, guide the probe through the thickest meat so its sensing area sits in the center—not mostly in crust and not against the basket. Then remove each piece individually when it reaches 165°F / 74°C.

Crust not behaving as expected? Go to troubleshooting →

Troubleshooting Air Fryer Fried Chicken

If the Breading Keeps Falling Off

Breading sliding away from the chicken can come from a wet surface, too much binder or crumbs that never had time to settle. Pat the chicken very dry, keep the mayo-Dijon layer thin and give the breading its 10-minute rest.

Crust tearing as you lift it? Give that side another minute. Once it has properly set, it should release much more cleanly.

If it sticks badly to the basket, lightly oil the basket before loading it. For particularly grabby baskets, perforated parchment can help if your air-fryer manufacturer allows it. Add the liner only with food on top to hold it down, and keep it clear of the heating element and airflow openings.

If the Crust Stays Pale or Soft

Dry, pale patches: mist only those areas lightly with oil. Large dusty-looking spots need a little surface fat to brown.

Give the Cutlets Room for Airflow

A soft underside points to trapped steam. Leave space around the cutlets and keep airflow open underneath; overlapping pieces and solid liners work against you here.

Three breaded chicken breast cutlets arranged separately with visible gaps in a perforated black air fryer basket.
Use the basket itself as your spacing guide: you should still see perforations between the breaded chicken cutlets. If touching pieces hide most of the basket floor, split the batch so steam has somewhere to escape and the edges can crisp.

Keep the Crust Crisp After Cooking

Crisp in the basket but soft on the plate? Hot chicken is still giving off steam. Rest the pieces separately and add wet sauces only when you are ready to eat. A little honey mustard dressing on the side gives you tangy sweetness without soaking the whole cutlet.

Golden breaded chicken breast resting above the surface on a wire rack, with a smaller piece resting directly on a plate nearby.
Using a wire rack is especially helpful when one cutlet finishes before the others. While the remaining chicken cooks, airflow underneath the first piece prevents trapped steam—and keeping the cutlets unstacked stops them steaming one another.

If the Outside and Center Are Not Ready Together

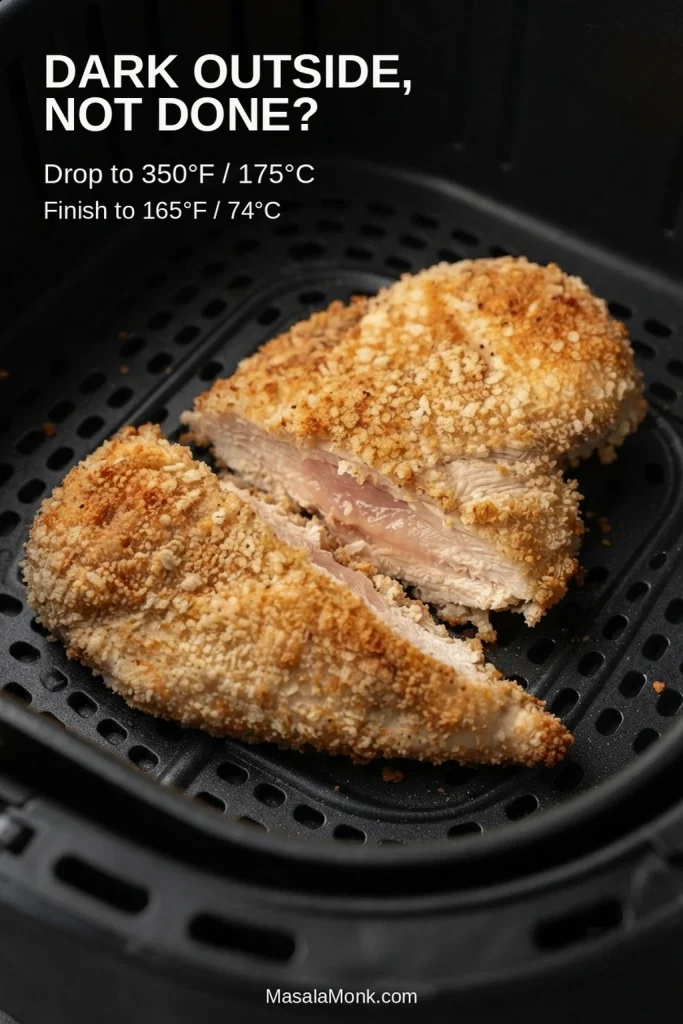
Dark crust with an underdone center: lower the air fryer to 350°F / 175°C and continue cooking, checking the center frequently, until the chicken reaches 165°F / 74°C. Next time, bring the cutlets closer to the 1/2-inch target before breading.

Breaded chicken breast with a deeply browned crust and an underdone-looking center, shown as a troubleshooting example.
Lower heat fixes the current problem; thickness fixes the next one. Continue gently until the chicken reaches 165°F / 74°C, then make the next batch closer to an even 1/2-inch so the center and crust finish on a similar timetable.

When the chicken is nearly done but the crust still looks pale, mist any dry areas and raise the fryer to 400°F / 205°C for 1 minute at a time. Check the center between bursts. You are giving the crust a last push, not starting another full cooking cycle.

If the chicken comes out dry, it likely stayed in the fryer too long. Start checking the next batch sooner, and take finished pieces out individually instead of making the smallest one wait for the largest.

Easy Ways to Change the Crust

Add a Little Flour

Replace 1/4 cup / about 25 g of the fine breadcrumbs with 1/4 cup / about 30 g all-purpose flour. Mix the flour thoroughly through the remaining breadcrumbs and panko so isolated floury patches are less likely to stay pale.

Make It Spicier

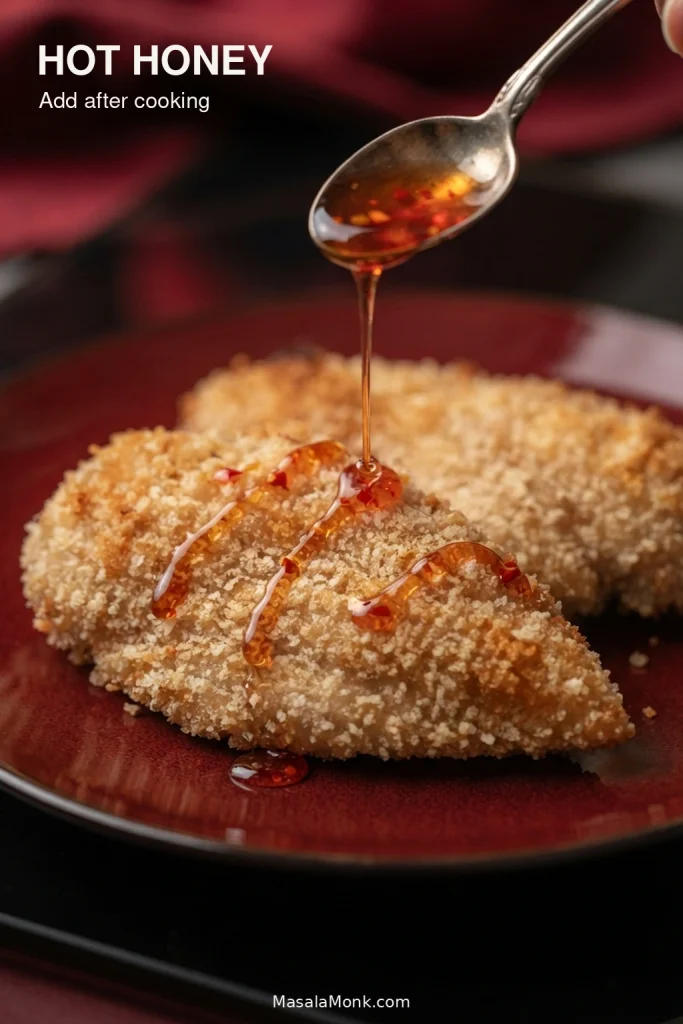
Increase the cayenne to 1/2 teaspoon and add 1/2 teaspoon chili powder to the crumbs. For sweet heat, drizzle hot honey sauce over the chicken just before serving so the crust keeps as much crunch as possible.

Golden breaded chicken breast with narrow ribbons of amber-red hot honey and small chile flecks.
Drizzle hot honey in narrow ribbons rather than glazing the whole cutlet. That way, some bites become sticky and sweet-spicy while other sections of the panko crust stay deliberately dry and crisp.

Add Parmesan

Mix in 1/4 cup / about 20 g finely grated Parmesan and 1/2 teaspoon dried oregano or Italian seasoning. Parmesan brings its own salt, so reduce the salt in the crumb mixture if your cheese or breadcrumbs are already well seasoned.

Golden breaded chicken breast with Parmesan incorporated into the crust and a light scattering of green herb flecks.
Finely grated Parmesan disappears through the breadcrumb mixture more evenly than coarse shreds. As a result, it can toast into the crust without burying the panko; because the cheese also adds salt, season the crumbs accordingly.

Storage and Reheating

Refrigerate cooked chicken within 2 hours, or within 1 hour if the temperature is above 90°F / 32°C. Keep it covered in the refrigerator and use it within 3–4 days, in line with USDA leftovers guidance.

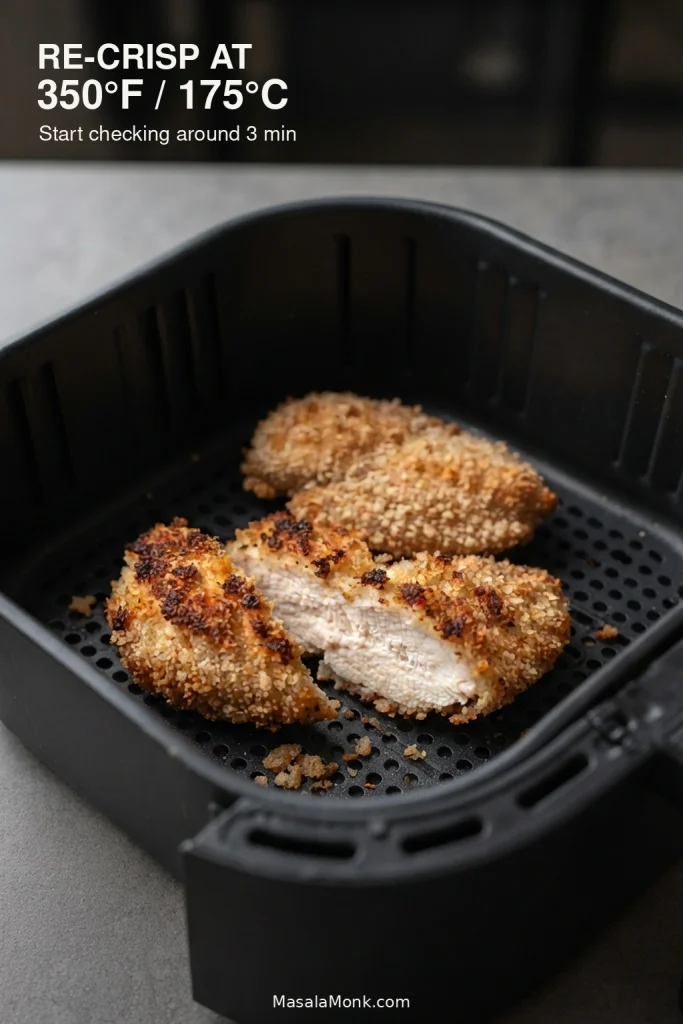
To re-crisp the coating, reheat the cutlets in the air fryer at 350°F / 175°C. Start checking around 3 minutes; a thicker or very cold piece may need closer to 5. Reheat leftovers to 165°F / 74°C.

Previously cooked breaded chicken breast reheating in an air fryer, with a sliced piece showing cooked white meat.
Stop reheating once two things happen together: the center is hot and the breading feels dry and crisp again. Additional air fryer time may deepen the color, but lean chicken breast will keep losing moisture after the crust has recovered.

The microwave is quicker, but the trapped steam softens the breading. Use it when speed matters more than crunch.

What to Serve With Air Fryer Fried Chicken Breast

Serve the cutlets while the crust is still at its best. Cut into one and you should have a crisp shell around moist, steaming chicken rather than a dark crust hiding a dry center.

Build a Comfort-Food Dinner

For a comfort-food dinner, creamy mashed potatoes make a soft, buttery contrast to the crunchy chicken; green beans or broccoli work nicely alongside.

Crispy breaded chicken breast served with creamy mashed potatoes and green beans on a dinner plate.
Keep creamy sides beside the crispy chicken rather than over it. Meanwhile, mashed potatoes provide a soft, buttery contrast and green vegetables freshen the plate without covering the breadcrumb crust you worked to preserve.

If you want something cold and crisp alongside, creamy coleslaw brings crunchy cabbage and enough tang to cut through the savory breading.

Turn It Into a Crispy Chicken Sandwich

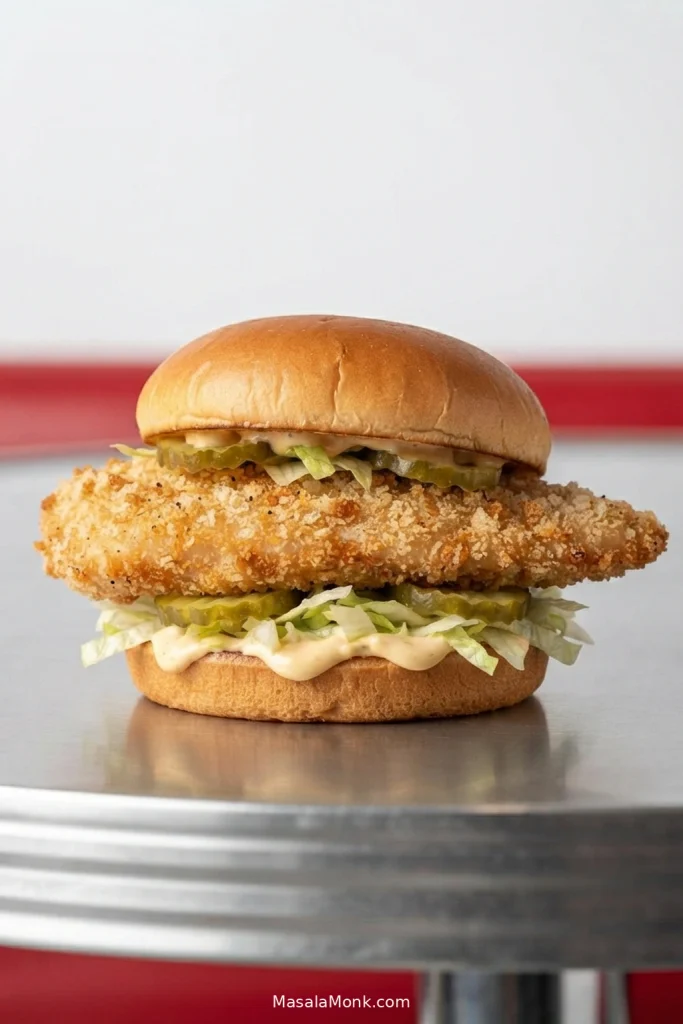
The cutlets are sturdy enough for sandwiches too. Add pickles, lettuce or slaw and a thick sauce just before serving so the crust stays crisp. If that sounds like dinner, the chicken sandwich recipes have more ideas for fillings, sauces and toppings.

Crispy breaded chicken breast sandwich on a soft bun with lettuce, pickle slices and a small amount of creamy sauce.
Build the crispy chicken sandwich close to serving time and let a little cutlet overhang the bun so exposed edges stay crunchy. Then concentrate sauce and pickles instead of wetting every inch of the breading.

Recipe development note: This recipe is research-derived from established air-fryer breaded-chicken methods, common reader troubleshooting patterns and food-safety guidance. MasalaMonk has not independently kitchen-tested this exact formula.

Posted on — Leave a comment

Chicken Parmesan Sandwich Recipe: Crispy, Cheesy & Easy

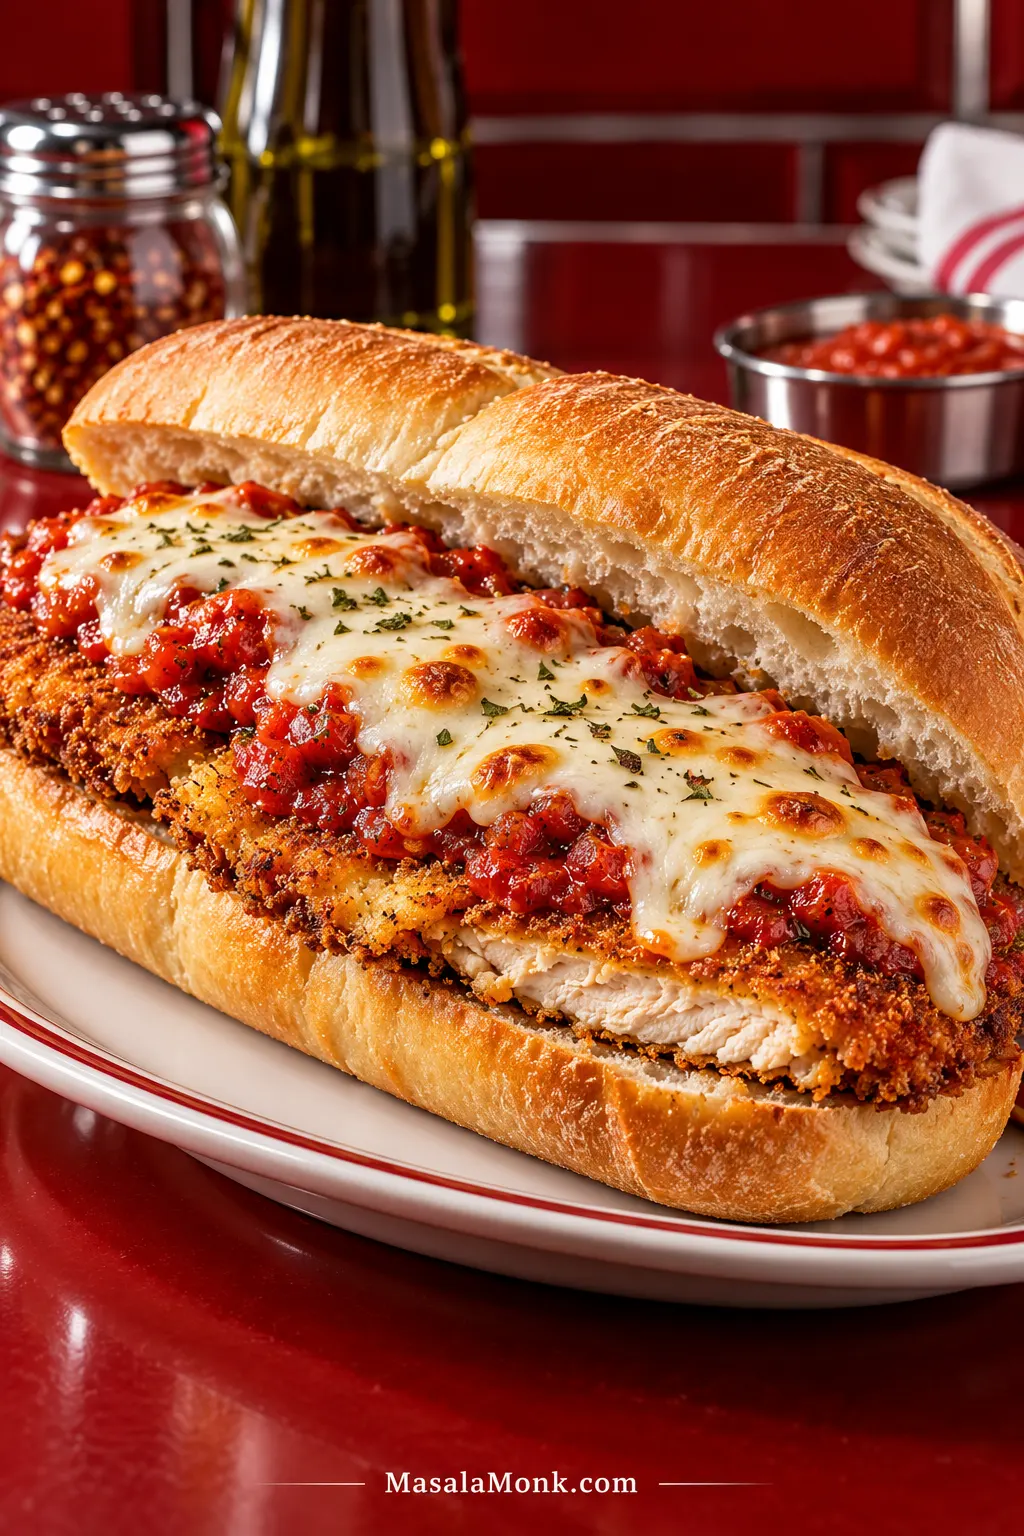
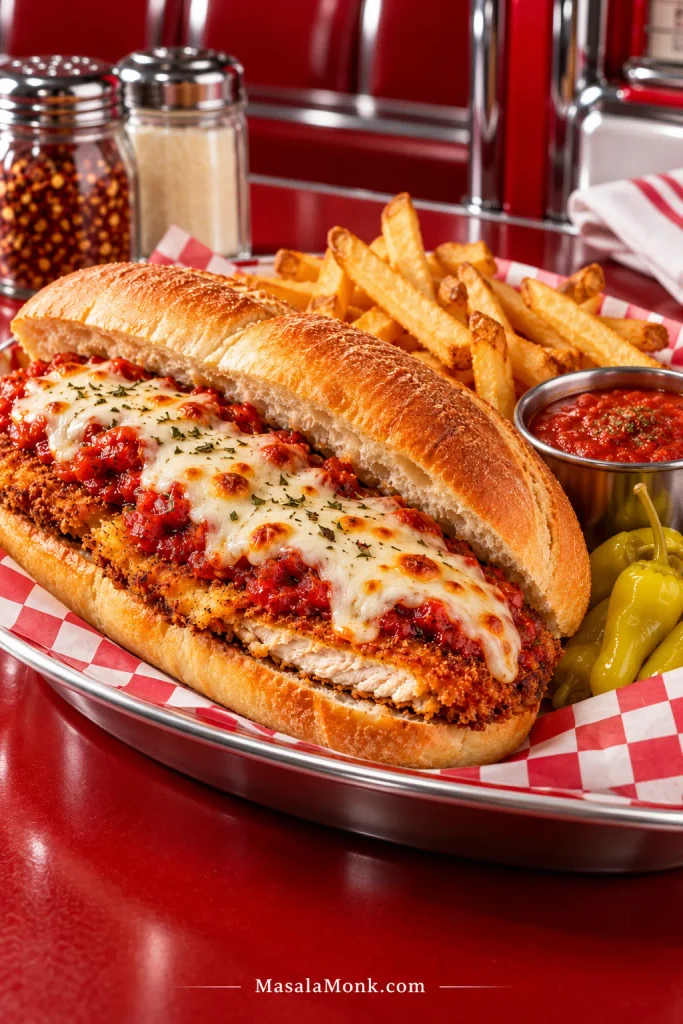
Chicken Parmesan sandwich on a hoagie roll with a thin crispy breaded chicken cutlet, marinara and melted mozzarella.

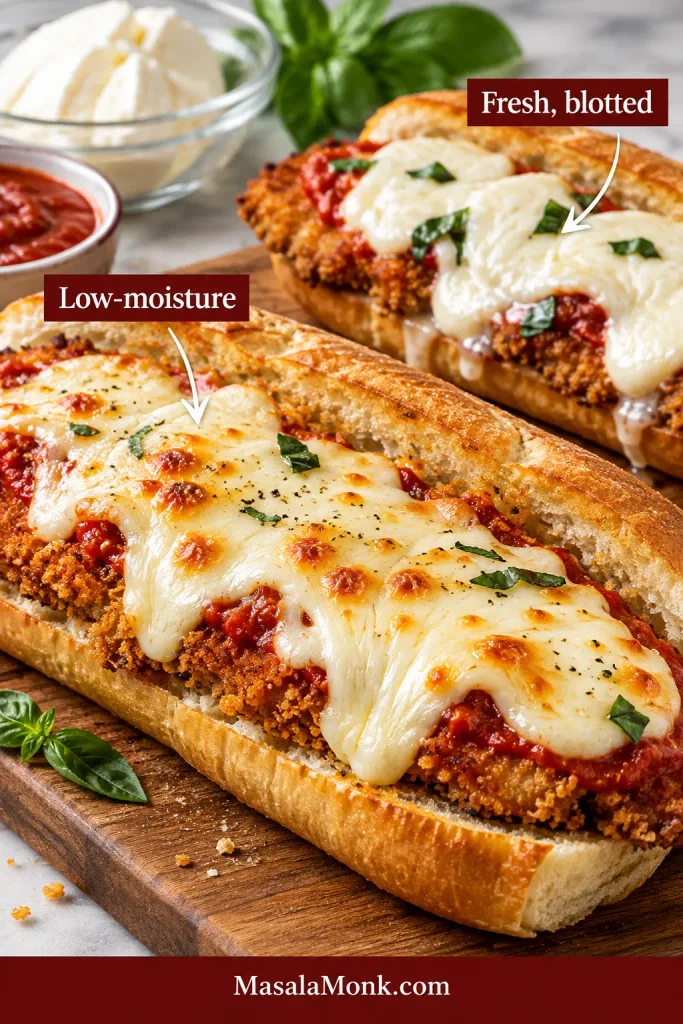
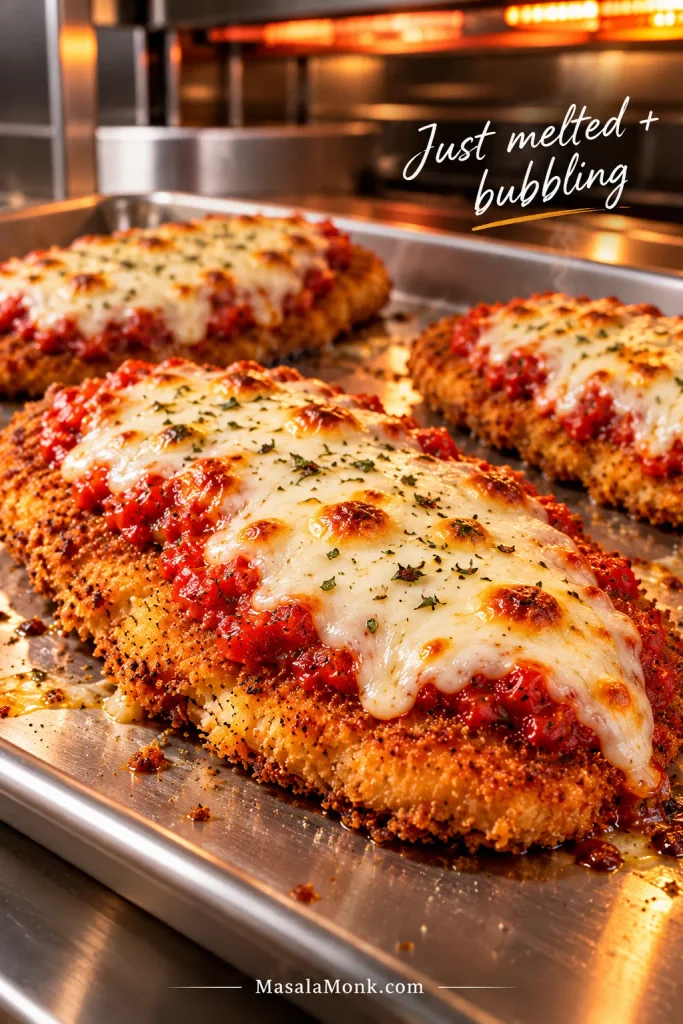
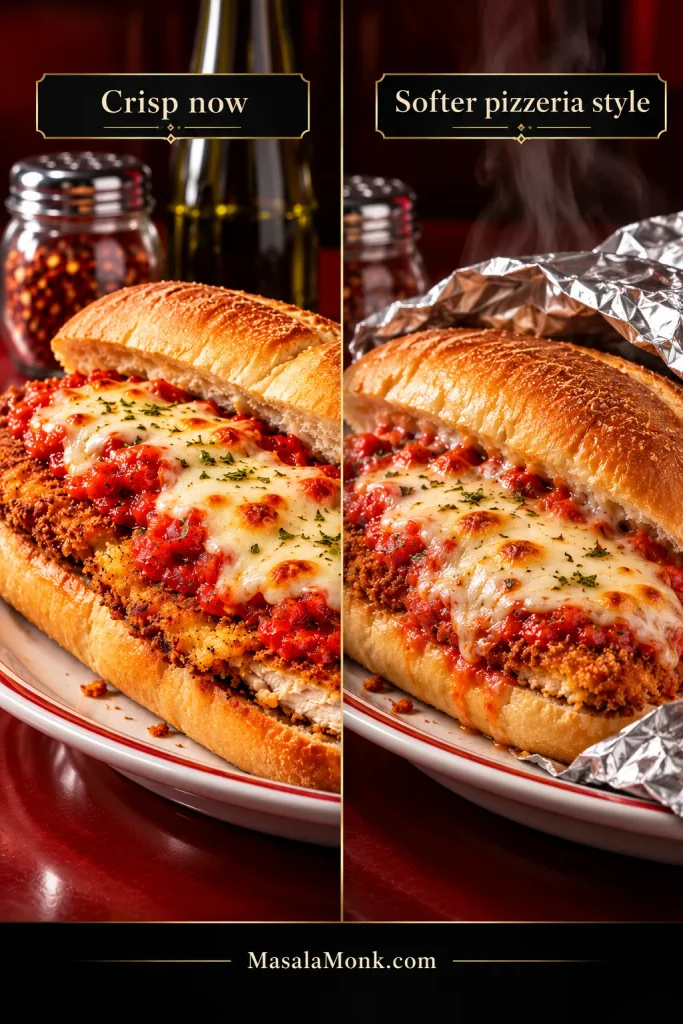
Hot tomato sauce and melted mozzarella through the middle, fried chicken still crisp around the edges, and a toasted roll soft enough to give when you pick it up—that is the bite worth chasing.

The trouble is that a chicken Parm sandwich can turn soft surprisingly fast. Thin sauce soaks the breading. Melted cheese traps steam. An overly hard roll pushes the filling out on the first bite. This chicken Parmesan sandwich recipe deals with those problems before they happen.

Done well, it should be generous and a little unruly: juicy chicken, molten cheese, bright tomato sauce and enough fried edge to keep the whole sandwich from eating like one soft layer. You’ll want two hands.

Before you start:

  • Chicken: aim for ¼ to ⅜ inch / 6 to 10 mm thick and roughly sized to the roll.
  • Sauce: use marinara that clings to a spoon and falls slowly rather than pouring like soup.
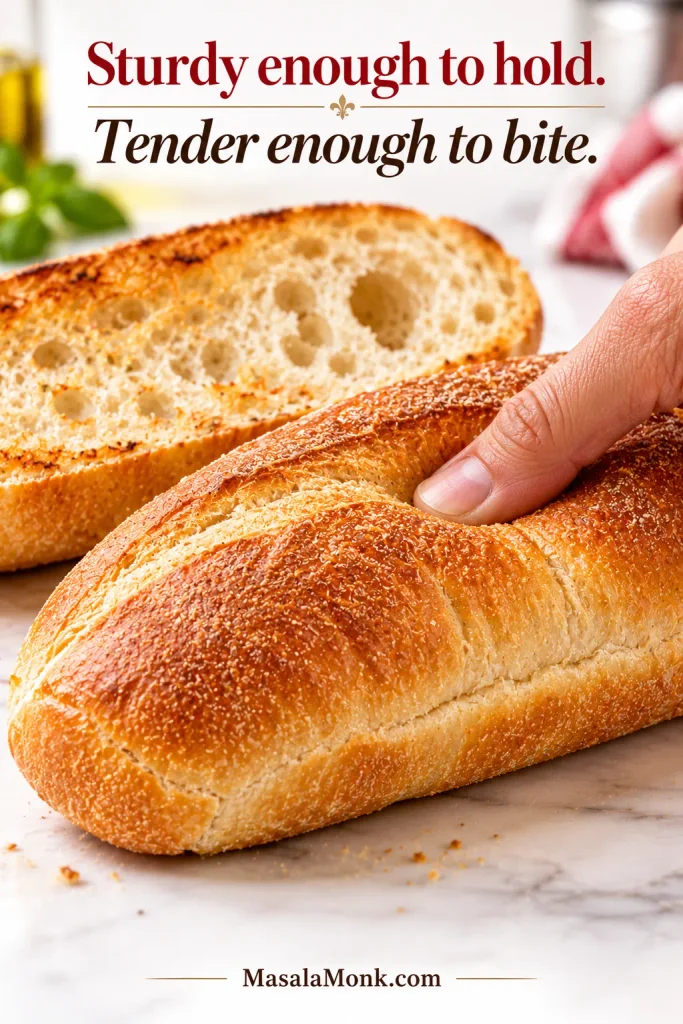
  • Roll: choose bread sturdy enough for the filling but still tender enough to bite through easily.

Crispy Chicken Parmesan Sandwich Recipe

Parmesan-panko chicken, marinara and bubbling mozzarella on garlic-Parmesan-toasted rolls, with extra warm sauce alongside for dipping.

Prep
25 minutes

Cook
25 minutes

Total
50 minutes

Yield
4 large sandwiches

Equipment

  • Heavy 10- to 12-inch / 25- to 30-cm skillet
  • Meat mallet or rolling pin
  • 3 shallow bowls or dishes
  • Large plate or tray for the raw breaded chicken
  • 2 rimmed sheet pans: one fitted with a clean oven-safe wire rack, one for topping and broiling
  • Tongs
  • Instant-read thermometer

Ingredients

Chicken and Parmesan-panko coating

  • 1¼ lb / 570 g boneless, skinless chicken breasts, usually 2 large breasts
  • 1 tsp fine sea salt / about 6 g
  • ½ tsp freshly ground black pepper
  • ½ cup all-purpose flour / 60 g
  • 2 large eggs
  • 1 tbsp water / 15 ml
  • 1¼ cups panko breadcrumbs / about 75 g
  • ½ cup finely grated Parmesan / about 45 g
  • 1 tsp Italian seasoning
  • About 1½ to 2 cups / 360 to 480 ml neutral high-heat oil, such as canola, vegetable, grapeseed or refined avocado oil, or enough to reach about ¼ inch / 6 mm deep in the skillet

Sandwiches

  • 4 sturdy 6- to 8-inch / 15- to 20-cm Italian or hoagie rolls, split lengthwise but left hinged on one side if possible
  • 3 tbsp unsalted butter / 42 g, softened
  • ½ tsp garlic powder
  • ¼ cup finely grated Parmesan / about 22 g, divided
  • 1½ cups marinara / 360 ml, warmed and divided; a good jarred sauce is absolutely fine, or use homemade marinara sauce
  • 8 oz / 225 g low-moisture whole-milk mozzarella, about 2 cups shredded
  • Fresh basil, optional

Prepare the Chicken

  1. Slice, pound and season. Cut the chicken breasts horizontally to make four cutlets. Working between parchment or plastic wrap, gently pound them to an even ¼ to ⅜ inch / 6 to 10 mm. Pat thoroughly dry, then season both sides with the salt and black pepper. One ugly edge does not matter. Uneven thickness does.
  2. Set up the breading. Put the flour in the first shallow dish. Beat the eggs with the water in the second. Combine the panko, ½ cup / 45 g Parmesan and Italian seasoning in the third.
  3. Bread and rest. Dust each cutlet lightly with flour and shake off the excess. Dip into the egg and let the extra drip away. Press the panko mixture firmly onto both sides. Set the breaded chicken in a single layer on a large plate or tray and rest for 5 to 15 minutes. Use that time to get the marinara, cheese and rolls ready.

Fry Until Golden

  1. Heat the oil. Pour enough oil into the skillet to reach about ¼ inch / 6 mm deep. A 10-inch pan will use less than a wide 12-inch pan, so let the depth—not the cup measurement—be the final guide. Heat to about 350°F / 175°C.
  2. Fry in batches. Add the cutlets without crowding the pan. Leave the first side alone until the coating has set and releases easily, then turn. Cook for roughly 2½ to 4 minutes per side, with ¼-inch / 6-mm cutlets often finishing toward the early end. Let the oil recover between batches. Check the thickest part, then move each cutlet to the clean wire rack as soon as it reaches 165°F / 74°C.

Once the final raw cutlet is in the skillet, wash or swap any tongs that touched uncooked chicken before using them on the finished cutlets.

Checking a thin cutlet: insert the thermometer horizontally through the side so the tip reaches the center rather than passing straight through the meat.

Toast and Top

  1. Check the marinara and heat the broiler. The sauce should cling to a spoon and fall slowly. Give a loose marinara a few minutes of uncovered simmering. If your oven setup allows, position the rack about 5 to 6 inches / 13 to 15 cm below the broiler element. Have the chicken, rolls and cheese ready before anything goes underneath.
  2. Toast the rolls. Mix the softened butter with the garlic powder and 2 tablespoons of the sandwich Parmesan, then spread it over the cut faces. Broil cut-side up, watching continuously, for about 1 to 2 minutes, until lightly golden. The toasted surface should feel dry and lightly crisp while the middle of the roll still gives when pressed. Transfer the toasted rolls to a plate.
  3. Sauce and cheese the chicken. Set the fried cutlets on that same broiler-safe sheet pan. Spoon 2 to 3 tablespoons / 30 to 45 ml marinara mostly through the center of each cutlet, leaving some fried edges exposed. Do not spread marinara across the rolls in this crispy version—the chicken carries the sauce. Divide the mozzarella over the top, about 2 oz / 55 to 60 g per sandwich, and finish with the remaining Parmesan.
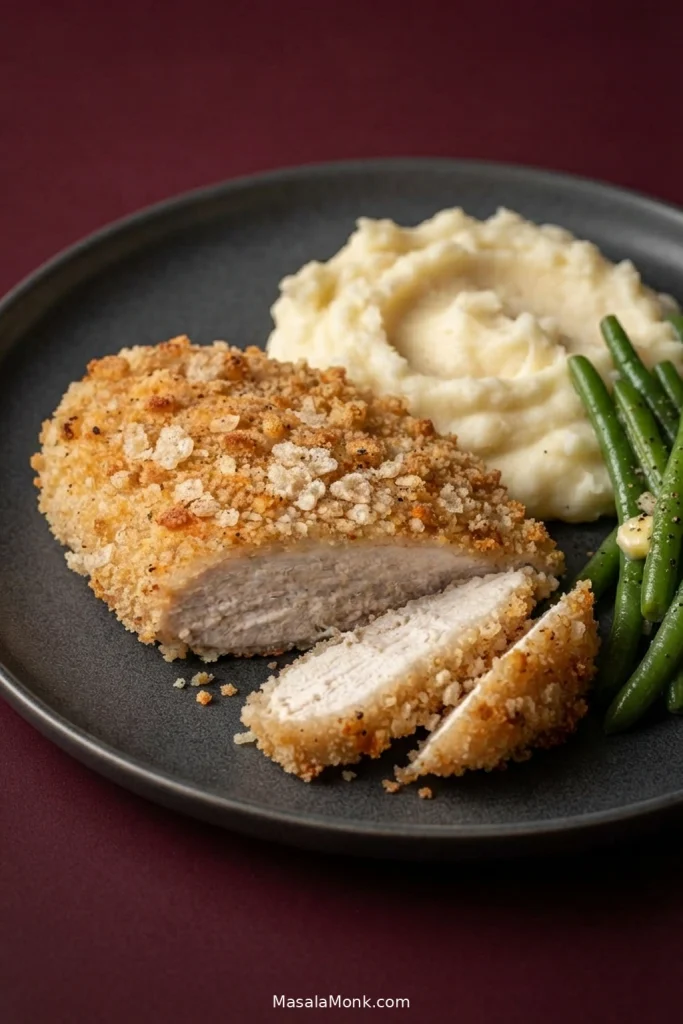
Melt and Build

  1. Melt the cheese. Put the topped chicken under the fully heated broiler and watch continuously. Depending on your broiler, this can take anywhere from about 30 seconds to 2 minutes. Pull the tray as soon as the mozzarella has slumped over the chicken, is bubbling and has a few golden spots. The chicken is already cooked, so there is no benefit in leaving it there longer.
  2. Build and serve. Move each cutlet straight into a toasted roll. Add basil if using, close the hinged roll gently and serve while hot. Keep the remaining marinara at the table for dipping or spooning onto individual bites, adding more as you eat instead of letting extra sauce sit in the bread.

Recipe Notes

  • Use the clock as a guide. Let the crust color tell you when to turn; let internal temperature tell you when the chicken is done.
  • Regular breadcrumbs work. The coating will be finer and less craggy. If the crumbs are already well seasoned, reduce or skip the added Italian seasoning.
  • Skip the foil wrap if crispness is the goal. Wrapping a finished chicken Parm sub gives you a softer, more melded pizzeria-style sandwich. That’s a valid style, but it is not the one we’re building here.
  • Serve it with: hot homemade French fries for the full sandwich-shop treatment, or a sharply dressed green salad or a few pickled peppers when you want something fresher.
Chicken Parmesan sandwich served with golden fries, a ramekin of marinara and pickled peppers on a diner-style tray.
Extra marinara stays on the side, while pickled peppers cut through the fried chicken and melted cheese.

The sandwich works when each layer keeps a distinct job: crisp chicken, controlled marinara, melted mozzarella and bread that stays tender without collapsing.

Exploded Chicken Parmesan sandwich with a hoagie roll, thin crispy chicken cutlet, marinara and melted mozzarella shown as separate layers.
Sauce and cheese stay concentrated through the middle, leaving fried edges exposed for contrast.

Size the Cutlet to the Sandwich

Before breading, lay a pounded cutlet over the open roll for a second. If most of the bread is covered, you’re done. There is no prize for making it perfectly rectangular.

Aim for ¼ to ⅜ inch / 6 to 10 mm. Much thicker and the coating can get dark while the center catches up. Go paper-thin and you start losing the chicken underneath all that crust.

Breaded chicken cutlet fitted to an open hoagie roll with a side measurement showing ¼ to ⅜ inch, or 6 to 10 millimeters, thickness.
Flatten the high spots, not the whole cutlet; even thickness matters more than perfect shape.

Oversized pieces can simply be divided. That usually eats better than reaching for a huge roll just because one chicken breast happened to be enormous.
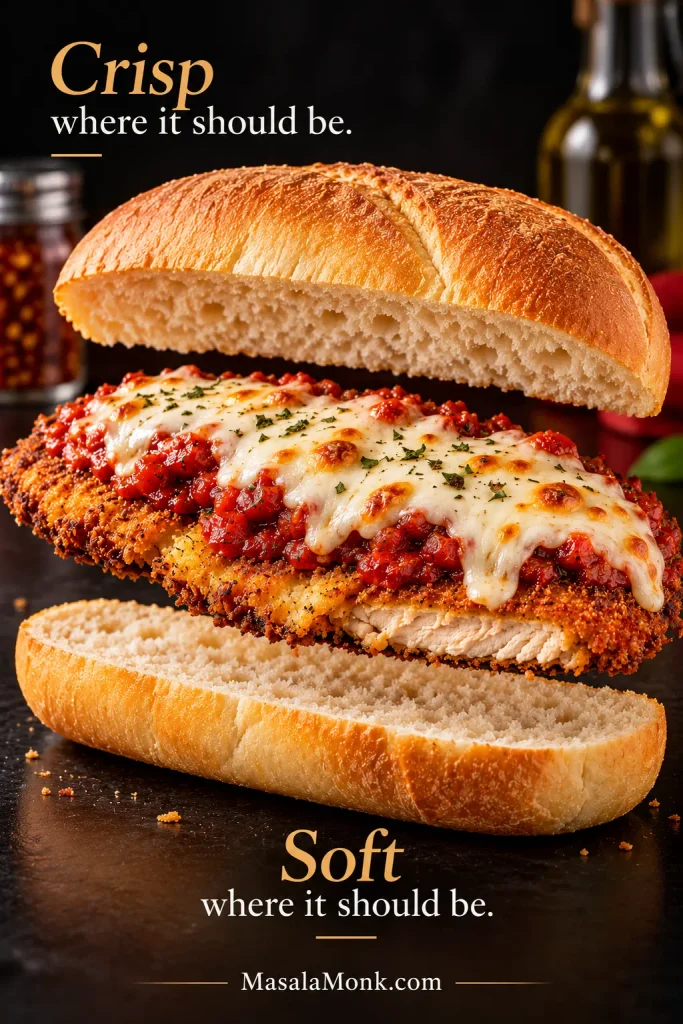
Breading the Chicken

Most breading failures begin before the oil. Wet chicken gives the flour a poor surface to cling to. Too much flour turns pasty. Heavy egg drips create slippery patches. Loosely scattered crumbs come away just as easily as they went on.

Dry the meat well, use a light flour coat, let excess egg drip back into the bowl and press the panko onto both sides. If you’ve made our chicken katsu curry, the flour → egg → panko sequence will be familiar: each layer has a job, and piling on more of any one layer does not make the coating sturdier.

Hand pressing coarse Parmesan-panko crumbs onto a thin chicken cutlet beside a bowl of beaten egg.
Glossy wet patches and heavy crumb clumps are the places most likely to detach in the oil.

Once the crumbs are attached, leave them alone. Re-dipping a half-breaded cutlet usually creates a heavier, less tidy shell rather than fixing it. The short rest gives the coating a little time to grip the chicken more firmly; by the time the oil is hot and the rest of the sandwich is ready, it has had enough time.

Why 350°F Works

For shallow-fried chicken Parm cutlets, keep the oil around 350°F / 175°C. At that temperature the breading starts setting as soon as the chicken hits the pan. Cooler oil gives the crumbs more time to absorb fat; excessively hot oil can darken the Parmesan before the chicken is ready.

Thin breaded chicken cutlet shallow-frying in a skillet with oil marked at ¼ inch or 6 millimeters and a thermometer showing 350°F or 175°C.
Let the oil return toward 350°F / 175°C between batches; cooler oil gives the next crust more time to absorb fat.

No oil thermometer? Look for steady, lively bubbling around the cutlet rather than smoke or violent splattering. Use the instant-read thermometer for the chicken itself, since the color of the crust cannot tell you the temperature at the center.

Instant-read thermometer inserted horizontally through the side of a thin fried chicken cutlet on a wire rack, displaying 165°F and 74°C.
If the probe breaks through the opposite side, pull it back until the sensing area sits fully inside the meat.

Prefer not to shallow-fry? Jump to the Air Fryer or Oven methods →

Sauce, Cheese and Rolls

Keeping the sandwich crisp mostly comes down to where the moisture sits and how long it stays there.

Marinara That Stays Put

Homemade and jarred marinara both work; consistency matters more than pedigree.

Spoon lifting thick chunky marinara that clings before falling slowly back into a saucepan.
If the sauce runs straight off the spoon, reduce it before topping the chicken.

Keep most of the sauce through the middle of the cutlet and leave a few fried edges uncovered. If it spreads across the sheet pan before the cheese even goes on, give it another few minutes in the saucepan. A little crushed red pepper or Calabrian chile can bring heat if you want it, but the basic sandwich does not need a more complicated sauce.
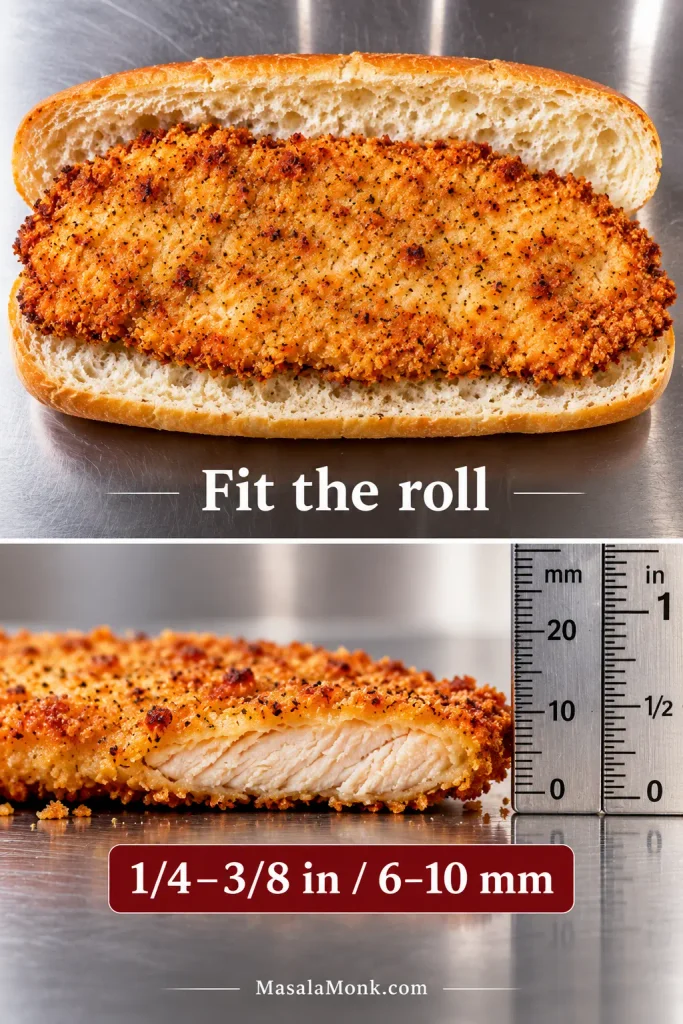
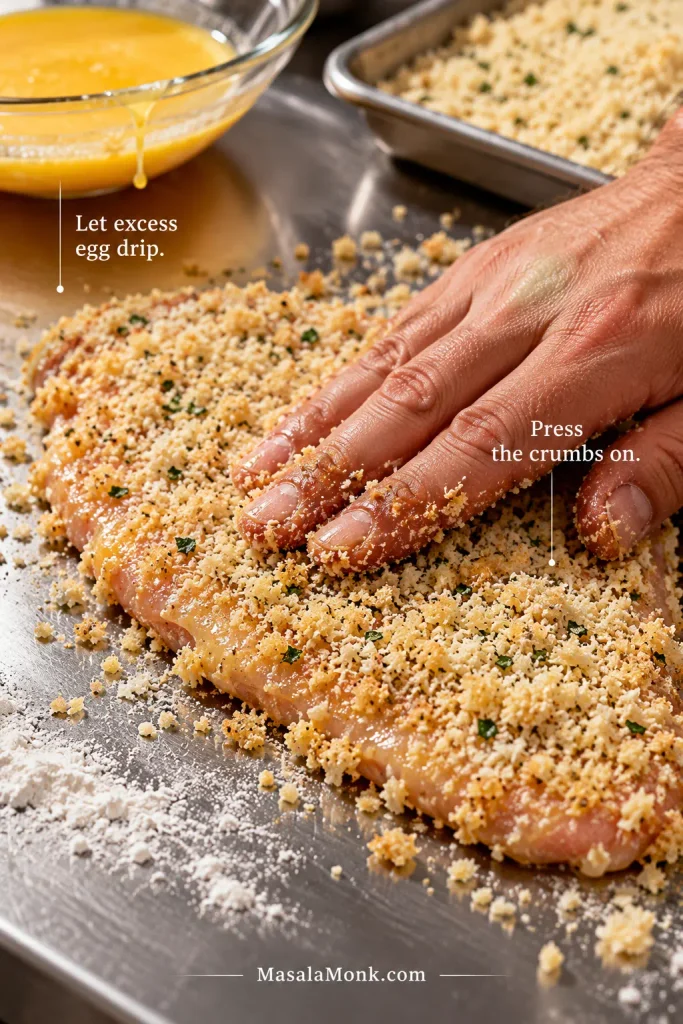
Crispy breaded chicken cutlet with thick marinara spooned through the center while the fried edges remain uncovered.
Keep the middle saucy and the perimeter exposed—that visible fried edge is your reserve of crunch.

Mozzarella Without the Extra Water

Low-moisture whole-milk mozzarella is the easiest default for a chicken Parm sandwich because it melts smoothly without releasing as much water as fresh mozzarella. It gives you the stretch and richness you want while being easier on the breading underneath.

Two Chicken Parmesan sandwiches comparing evenly melted low-moisture mozzarella with softer pieces of blotted fresh mozzarella.
Fresh mozzarella can work, but smaller well-blotted pieces create fewer wet pockets over the crust.

Low-moisture mozzarella also earns its keep in homemade mozzarella sticks, where excess water causes trouble inside the coating. Fresh mozzarella can still work here; blot it well first. Provolone can replace some of the mozzarella when you want a sharper, more old-school sub-shop flavor.

Breaded chicken cutlets on a sheet pan topped with marinara and bubbling melted mozzarella with a few golden spots.
Once the mozzarella bubbles and slumps over the cutlet, pull it; extra broiler time only works against the chicken.

A Roll That Holds the Filling

The best bread for a chicken Parmesan sandwich is a sturdy but tender Italian or hoagie roll, about 6 to 8 inches / 15 to 20 cm long. Leave a hinge along one side if the roll allows it; that little bit of structure helps keep the hot filling from escaping out the back.

Italian hoagie roll with an airy crumb and toasted cut surface being gently pressed with a finger to show its softness.
A good hoagie roll should compress under your fingers without cracking or collapsing.

Ciabatta is another good choice when the center is tender. A very hard baguette is less forgiving. If the top half of the roll fights you every time you bite, the filling usually loses.

Toast only the cut faces with garlic-Parmesan butter. The surface touching the chicken gets a little protection while the rest of the bread stays soft.

Ready to cook? Back to the recipe ↑

Fix My Chicken Parm Sandwich

If the first cutlet loses a few crumbs, don’t start over. Look at what happened and correct the next one.

Before treating softness as a problem, decide what happened after assembly. If the sandwich was wrapped, some softening is expected; if it stayed unwrapped and still went limp, moisture or trapped steam is the more useful thing to troubleshoot.

Two Chicken Parmesan sandwiches compared side by side, one crisp and unwrapped and the other partially wrapped in foil with a softer texture.
Serve immediately for sharper fried edges; a brief foil rest intentionally trades some crunch for the softer, melded bite of a pizzeria-style chicken Parm sub.

Troubleshoot the Crust, Chicken and Sandwich

Problem What to check
Breading falls off Dry the chicken well, keep the flour coat light, let excess egg drip away and press the crumbs on. Give the first side time to set before turning.
Crust gets dark too fast The cutlet may be too thick or the oil too hot. Keep the chicken thin and even and the oil around 350°F.
Crust is pale and greasy The oil has probably cooled down. Fry fewer pieces at once and let it recover before adding another cutlet.
The underside softens after frying Hot chicken sitting flat traps steam underneath. Move cooked cutlets to a clean wire rack and leave them uncovered.
The chicken is dry Use thin, even cutlets and pull each one as soon as it reaches 165°F / 74°C. Keep the later cheese melt brief.
The cheese won’t melt quickly Use shredded low-moisture mozzarella and make sure the broiler is fully heated before the tray goes underneath. Thick slices take longer and keep the chicken under heat unnecessarily.
The roll turns soggy Check the sauce first. Watery marinara, untoasted bread, sauce spread directly on the roll or a sandwich built too early will soften it quickly.
The filling slides out The bread may be too hard, the cutlet may be the wrong size for the roll, or there may simply be too much loose sauce inside. A hinged roll helps too.

Keep the Fried Crust Crisp After Frying

Tongs lifting a crispy breaded chicken cutlet from a wire rack, revealing open space beneath the crust.
A bare rack beats a flat plate or paper towel when crispness matters because steam can escape below the cutlet.

Back to the recipe ↑ · Air Fryer or Oven →

Air Fryer or Oven

You can cook the breaded cutlets without shallow frying. The air fryer is quicker but usually means batches; the oven gives you more room, and a wire rack helps the underside stay crisp.

Air Fryer

Lightly spray or brush both sides of the breading with oil. Arrange the cutlets in a single layer at 400°F / 205°C, working in batches if necessary, and flip halfway through.

Three breaded chicken cutlets spaced apart in a single layer inside an air fryer basket at 400°F or 205°C.
Spacing is part of the method: overlapping cutlets shield each other from the circulating hot air.

Begin checking around 7 minutes. Cutlets near ¼ inch / 6 mm may finish around 7 to 9 minutes; pieces closer to ⅜ inch / 10 mm can take longer. Cook each one until the thickest part reaches 165°F / 74°C.

Once the chicken is cooked, add the marinara and mozzarella and return it briefly to the air fryer, or use the broiler, just until the cheese melts.

Oven

Heat the oven to 425°F / 220°C. Set the breaded cutlets on an oiled oven-safe wire rack over a sheet pan and mist or brush the tops with oil. Bake until the raised panko ridges are deeply golden and the chicken reaches 165°F / 74°C, turning once if needed for even browning.

Thin breaded chicken cutlets baking on a wire rack over a rimmed sheet pan inside an oven at 425°F or 220°C.
Check the underside before flipping. Good rack airflow may brown both sides evenly enough that no turn is needed.

Cutlets close to ¼ inch / 6 mm may be ready around 10 to 12 minutes; pieces nearer ⅜ inch / 10 mm often need roughly 12 to 15 minutes. Let 165°F / 74°C in the thickest part make the final call. Add the marinara and mozzarella only after the chicken is cooked, then broil just until the cheese melts. The rack keeps hot air moving underneath instead of letting the bottom breading steam against the pan.

Shortcut night: use fully cooked frozen breaded chicken cutlets and heat them according to the package directions until crisp and hot through, then join the recipe at the sauce-and-cheese step. If the frozen product is raw or labeled not ready to eat, follow its package cooking directions and cook it to 165°F / 74°C before topping. Toast the rolls fresh.

Make Ahead and Reheat

You can prep almost everything ahead; just leave the sandwiches unassembled until you’re ready to eat. Slice and pound the chicken, grate the cheese, mix the garlic butter and have the marinara ready. Breaded cutlets can also be refrigerated, covered, for several hours before cooking.

Keep leftover chicken, sauce and bread separate whenever you can. Refrigerated cooked chicken is best used within 3 to 4 days.

Reheat the Chicken Without Giving Up the Crust

Whichever method you use, reheat leftover chicken to 165°F / 74°C in the center.

  • Air fryer: reheat at 350°F / 175°C in a single layer and check after about 4 minutes. Give it longer if needed until the crust is hot and crisp again.
  • Oven: reheat on an oven-safe wire rack at 375°F / 190°C. Allow roughly 8 minutes before checking, then continue only as long as needed for the edges to crisp again.
Reheated crispy chicken cutlet on a wire rack with a separate toasted hoagie roll, warm marinara and shredded mozzarella nearby.
Recrisp the coating as the chicken reheats, then rebuild promptly once the center reaches 165°F / 74°C.

Warm the marinara separately and give the cut faces of the roll another quick toast, then rebuild the sandwich. Keep extra sauce alongside for dipping instead of spooning it over the whole sandwich. A microwave gets lunch hot faster, but the breading and bread will be softer.

Hand holding a Chicken Parmesan sandwich with a thin crispy chicken cutlet, melted mozzarella and marinara while one edge is dipped into tomato sauce.
Dip only the bite you’re about to eat so the rest of the sandwich keeps its crisp structure.

Pick the sandwich up while the cheese is still loose and the roll is warm. It should give slightly under your fingers, with a little tomato sauce peeking through the mozzarella and a few strips of fried crust still visible around the edges.

The chicken stays juicy. The roll bends instead of cracking or collapsing. That’s enough. Eat it while it’s hot.

Posted on — Leave a comment

Orange Chicken Recipe: Crispy Homemade Chicken with Easy Orange Sauce

Glossy orange chicken piled on a black rectangular plate, topped with thin orange-peel strips, with a halved orange behind the plate.

Orange chicken has a built-in problem: the sauce needs to reach every crisp ridge, but the moment that wet glaze touches the crust, the crust starts to soften.

When it lands properly, though, the first bite still has a crisp edge under the glaze, the chicken stays juicy inside, and the orange arrives before the sweetness does. That bright citrus smell matters just as much as the sticky finish.

This is Chinese-American takeout-style orange chicken, but it isn’t built as a restaurant copycat. The goal is fresh orange, a manageable shallow fry and just enough glossy sauce to coat the crust.

Coat
Tacky chicken, pressed starch, shaggy surface.

Fry
Hot oil, roomy batches, rack between batches.

Glaze
Thicken first, coat lightly, toss 15–20 seconds.

Crispy Homemade Orange Chicken Recipe

Crisp first. Glaze last. Keep the fried chicken and finished orange sauce apart until serving.

Yield
4 generous servings

Prep
About 25 minutes

Cook
About 25 minutes

Total
About 50 minutes

Equipment: 12-inch / 30 cm heavy skillet, wok or similar wide pan; wire rack set over a tray; fine grater or zester; instant-read thermometer if available; heatproof container for used oil if reusing the frying pan.

Chicken

  • 1½ lb / 680 g boneless skinless chicken thighs
  • 1 tbsp / 15 ml regular or light soy sauce, not dark or sweet soy
  • 1 tbsp / 15 ml Shaoxing wine or dry sherry
  • ¼ tsp ground white pepper

Crisp Coating

  • ¾ cup plus 2 tbsp cornstarch / about 105 g total, divided
  • Neutral high-heat frying oil, enough for about ¼ inch / 5–6 mm depth in the pan

Fresh Orange Sauce

  • About 3 medium oranges, or enough to yield ¾ cup / 180 ml fresh orange juice
  • 2 tbsp / 30 ml water
  • ⅓ cup / about 65 g granulated sugar
  • 2 tbsp / 30 ml regular or light soy sauce
  • 2 tbsp / 30 ml unseasoned rice vinegar
  • ¼–½ tsp red pepper flakes, or omit for mild
  • 2 tsp neutral oil, if using a clean pan for the sauce
  • 3 garlic cloves / about 9 g, finely minced
  • 2 tsp / about 4–5 g finely grated fresh ginger
  • 2 tsp packed / about 4–5 g finely grated orange zest, colored skin only
  • ½ tsp / 2.5 ml toasted sesame oil, optional

Cornstarch Slurry

  • 1½ tbsp / about 12 g cornstarch
  • 2 tbsp / 30 ml cold water

Optional Finish

  • Thinly sliced scallions
  • Sesame seeds

1. Season the chicken

Cut the thighs into fairly even 1 to 1¼-inch / 2.5–3 cm pieces. Toss with 1 tablespoon soy sauce, the Shaoxing wine and white pepper. Leave for 15 minutes while you prepare the sauce ingredients.

You’re looking for moist chicken with no puddle at the bottom of the bowl. Drain off any obvious excess before coating.

2. Mix the sauce and slurry

Zest the oranges before juicing them. Then squeeze enough juice to measure ¾ cup / 180 ml.

Whisk the orange juice with the water, sugar, 2 tablespoons soy sauce, rice vinegar and red pepper flakes. Keep the measured zest and optional sesame oil aside.

In a second bowl, stir the cornstarch into the cold water. Mix the sauce now, but wait until the chicken is fried before cooking and thickening it.

Before you start frying, have the sauce mixture, slurry, zest, wire rack and serving plate ready. Once the chicken is done, the rest moves quickly.

3. Coat the chicken

Add 2 tablespoons cornstarch directly to the seasoned chicken and toss until the surface feels lightly tacky.

Put the remaining ¾ cup / about 90 g cornstarch in a wide bowl or shallow dish. Press each piece firmly into the starch, then shake away whatever does not stick.

A good coating looks rough, dry and a little shaggy. Fry it once the oil is ready.

4. Shallow-fry in batches

Pour about ¼ inch / 5–6 mm neutral oil into a 12-inch / 30 cm heavy skillet, wok or similar wide pan. Heat to roughly 350–360°F / about 175–180°C.

Lower each piece into the oil away from you and leave visible space between the pieces. A high-sided pan helps contain splatter; a splatter screen is useful if you have one. Listen for a steady, lively sizzle. A suddenly quiet pan means it is time to stop adding chicken and let the oil recover.

Let the first side cook undisturbed until the crust has set before turning. If it still feels soft or wants to cling to the pan, give it a few more seconds. Fry in 2–3 batches; each batch will usually need about 3½–5 minutes total, until crisp and cooked through.

Check one of the larger pieces: poultry should reach 165°F / 74°C in the center. Move each batch to a wire rack rather than piling it into a bowl.

Finish all the frying before you cook the sauce. The chicken can wait on the rack for those few minutes.

The crust should now feel dry, set and crisp under the tongs instead of dusty or soft. At this point, it should already be crisp enough to make you want to steal a piece. That’s a good sign.

For extra crunch: Once every piece has completed the first fry, raise the oil to about 375°F / 190°C and fry the chicken again for 45–90 seconds. Stop once the crust looks drier and feels more brittle. Allow about 5 extra minutes for this optional step.

5. Cook the orange sauce

Using a clean pan? Heat 2 teaspoons neutral oil over medium. Reusing the frying pan? Carefully transfer the excess frying oil to a heatproof container, leaving about 2 teaspoons in the pan, and remove any loose dark starch bits. Never pour frying oil down the sink.

Add the garlic and ginger and cook for 20–30 seconds, until fragrant. A little color is fine; burnt garlic is not.

Stir the orange-juice mixture, pour it in and bring it to a lively simmer for 1–2 minutes. Taste it now. Orange should lead, sweetness should sit behind it, and enough acidity and soy should remain to keep the sauce from tasting like candy.

Stir the slurry again and start with about two-thirds. Let it bubble for a few seconds and look at the sauce before adding more. Still thin? Add a little more. You may not need the rest.

The glaze should coat the back of a spoon or spatula in a thin shiny film. Drag the spatula through the pan as a second check: the trail should stay visible for about one second before closing.

Turn off the heat and stir in the orange zest. Almost immediately, the sauce should smell fresher and unmistakably more orange. Add the optional sesame oil if you want a faint toasted note.

If the glaze tightens before you’re ready to toss the chicken, loosen it over low heat with 1 tablespoon water. Nothing is ruined.

6. Glaze and serve

If there is visibly more sauce in the pan than you need for a thin coating, spoon a little out now and save it for rice. The chicken needs a lacquer, not a bath.

Add the fried chicken and toss for only 15–20 seconds, just until glossy. Plate immediately and finish with scallions and sesame seeds, if using.

Recipe Notes

  • Chicken breast: works, but it dries faster than thigh, so start checking it earlier.
  • Soy sauce: use regular/light soy rather than dark or sweet soy, which can overpower the citrus and darken the glaze.

Cooking now? You can stop here. The rest of the guide is for the moments when the coating falls off, the oil cools down, or the sauce somehow still does not taste orange enough.

The finished bite is the test for everything above: a thin crisp shell should still give way to juicy chicken underneath, even after the glaze has reached the crust.

Close-up of a glazed piece of orange chicken held in black chopsticks and cut open to reveal juicy chicken inside a thin golden crust.
The best bite keeps both textures in play: crisp coating around the edges and juicy chicken at the center, with neither one overwhelming the other.

Before the Oil: Make the Coating Stay Put

Your coating can start failing before the chicken ever reaches the oil. Too much surface liquid weakens the starch layer and gives it less to hold onto.

Keep the pieces around 1 to 1¼ inches / 2.5–3 cm. That gives you plenty of crisp surface without shrinking the chicken into tiny nuggets that dry out too quickly.

Raw seasoned chicken thigh pieces arranged beside a ruler, with a size guide of 1–1¼ inches / 2.5–3 cm and a note that the surface should be moist, not wet.
Uniform pieces are easier to fry well than a mix of large and small ones; similar sizing helps the centers finish together while the outside turns crisp.

Season first, but don’t soak the surface

The short soy, Shaoxing and white-pepper rest gives the meat some flavor of its own. Liquid collecting at the bottom of the bowl is your cue to drain it before the starch goes on.

Why cornstarch?

A pressed-on starch coating fries into a thin, crisp crust. The first small addition of cornstarch makes the seasoned chicken tacky; the remaining starch then has something to hold onto.

A heavier flour-and-starch dredge, like our hot honey chicken tenders use, creates a much craggier crust. For this shallow-fry method, keep the starch shell lighter.

Look before you fry. The starch should sit in little rough patches that stay put when you lift a piece. Shake away any powder that showers off. Once the coating looks shaggy rather than snowy, you’re there. Those rough ridges are exactly where the glaze will catch later.

Side-by-side chicken pieces comparing a rough, attached cornstarch coating labeled “shaggy — ready” with a heavily powdered coating labeled “snowy — shake off.”
More loose cornstarch does not mean more crunch. What matters is the starch that actually clings, because attached rough patches become the crust instead of falling away in the oil.

In the Oil: Control the Heat

How do you keep orange chicken crispy? Fry in small batches, let the crust set before turning, drain the chicken on a rack, and finish the sauce before the final toss.

A wide high-sided skillet gives you room for batches and some protection from splatter. A wok or Dutch oven works too.

The sound gives you an early warning before a thermometer does. When the steady sizzle fades sharply, check the oil; once it drops much below about 325°F / 165°C, pause before adding more chicken and let the heat recover.

Chicken frying vigorously in a skillet beside an oil thermometer, with a comparison showing a lively frying pan and a quieter pan that needs time to recover.
A fading sizzle is also a batch-size warning: give the pan room and time to regain heat before adding more chicken.

Move each batch straight to a wire rack. Hot chicken keeps giving off steam, and a bowl traps that moisture against the crust.

When is a second fry worth it?

For orange chicken that is going straight from pan to plate, one good fry is usually enough. Use the optional second fry for maximum crunch or when the fried chicken needs to sit longer than the few minutes it takes to finish the sauce.

The second fry drives off a little more surface moisture, leaving the coating harder, drier and noticeably more brittle.

Two groups of fried chicken compared side by side, with one labeled “one fry — serve now” and the crisper second group labeled “second fry — extra crunch.”
The second fry earns its keep when the chicken must wait—the drier crust buys you a little more resistance to steam and sauce.

Check the Crust Before You Move On

Break open one larger piece if you want a final pre-sauce check. The coating should be thin and crisp, while the chicken inside stays juicy. Once that contrast is there, the slow part is behind you. Now build the sauce.

Build an Orange Sauce, Not an Orange-Juice Sauce

More juice does not always make a sauce taste more orange. Once the sauce is already loose enough, another splash can dilute it faster than it improves the aroma.

Orange juice brings sweetness, acidity and the base citrus flavor. Fresh zest supplies the concentrated aromatic oils that make the finished glaze smell unmistakably orange.

A glass of fresh orange juice beside a halved orange being grated, with loose orange zest and labels identifying juice as the sauce base and zest as the aroma.
If the sauce already has enough sweetness and liquid but still smells muted, add zest before reaching for more juice—the missing piece may be aroma, not orange volume.

Taste before you thicken

Balance the sauce while it is still fluid. Once it is thickened, adding water, vinegar or soy also changes its texture, so settle the sweet-sour-savory balance first. If something still tastes off, fix the flavor before thickening.

Fix the Flavor Before the Chicken Goes In

Small corrections are enough.

If the sauce tastes…Try this
Too sweetAdd unseasoned rice vinegar, 1 tsp at a time, then taste again.
Too sharpAdd 1 tsp sugar, dissolve it, then taste again.
Too saltyAdd warm water, 1 tbsp at a time, then taste again. Thicken only after the balance is right.
Flat or one-noteTry ½ tsp soy plus ½ tsp rice vinegar, then taste again.
Sweet but not orange enoughFinish thickening first. Once the heat is off, add extra zest ¼ tsp at a time until the aroma lifts.

Once the balance tastes right, check the glaze thickness before the chicken goes in.

How Thick Should Orange Chicken Sauce Be?

Thickness matters most once the sauce reaches the crust.

Too thin: it runs straight off the crust and gathers underneath, carrying more water into the coating.

Right: it still moves easily in the pan but leaves a translucent, glossy layer across the rough surface of the chicken.

Too thick: it begins sitting on the chicken in sticky blobs instead of flowing over the ridges, and the glaze can turn gummy as it cools.

Three-way comparison of orange chicken coated with sauce labeled too thin, too thick and right, with an inset showing a short trail through properly thickened sauce.
Judge the glaze by how it moves: too thin brings extra moisture to the crust, while too thick sits heavily on it. The sweet spot is glossy, fluid and clingy.

The exact amount of slurry can vary because pan width, simmer intensity and reduction time change how much liquid cooks off. Start with most of it, then let the texture in the pan decide whether the rest is needed.

Once the glaze is where you want it, turn off the heat and stir in the orange zest. The aroma should brighten almost immediately. Add the optional sesame oil now if you want a faint toasted note.

Fresh orange zest falling into a pan of glossy orange sauce, with a grater and a small bowl of zest beside the pan.
Late zest is less about making the sauce more sour and more about restoring the fresh orange aroma lost during simmering.

Glaze ready? Go to the final toss.

The 15–20 Second Window

By now the chicken is crisp and the sauce is finished. Nothing needs more cooking.

Add only enough glaze to coat the chicken thinly and toss for about 15–20 seconds. Then get it onto the plate.

A spoon lifting glossy orange chicken from a wok during the final sauce toss, with “15–20 seconds” displayed above the pan.
The final toss is for coverage, not cooking. Once the glossy sauce has reached the rough surfaces, get the chicken out of the pan before the crust absorbs more moisture.

A wet glaze will eventually soften any starch crust, so those first few minutes are the reward: crisp edges beneath a thin sticky coating, juicy chicken inside, and fresh orange aroma still sitting above the sweetness.

Two portions of glazed orange chicken compared on a dark plate, with crisp pieces labeled “just tossed” and softer-looking pieces labeled “after sitting.”
Crispness starts changing as soon as sauce meets starch. The freshly tossed batch has the strongest contrast between sticky glaze and brittle edges.

Need the quantities or numbered method again? Back to the recipe card.

Orange Chicken Troubleshooting

If a batch goes sideways, don’t change everything at once. Think back to the first moment it looked wrong. That usually tells you what to fix.

Chicken and Coating Problems

ProblemLikely causeWhat to do
Coating looks wet and pastyToo much surface liquidDrain obvious liquid before coating. If the starch is already pasty, press on more dry starch until the surface looks rough rather than wet.
Loose starch keeps falling offCoating is not firmly attachedPress it on, then shake away the excess.
Coating falls off in the oilMoisture, weak adhesion or turning too earlyLet the crust set before turning, handle the pieces gently, and revisit the coating cues if the starch never attached well.
Chicken is pale or greasyOil stayed too coolReduce the batch size and let the oil recover before adding more chicken; see the frying-oil cues.
Outside darkens too fastOil too hot or pieces too largeLower the heat slightly and keep the pieces close to the recipe size.

Sauce, Glaze and Serving Problems

ProblemLikely causeWhat to do
Sauce stays wateryNot enough simmering or slurryBring it back to a simmer and add a little more freshly stirred slurry, using the sauce-thickness cues as your target.
Sauce turns gummyToo much starch or too much reductionWhisk in warm water, 1 tbsp at a time, until it flows again; compare it with the correct glaze consistency.
Sauce tastes bitterToo much white pith or scorched aromaticsMild pith bitterness may soften with a little water and sugar. If the garlic or ginger is genuinely burnt and acrid, remake the sauce.
Chicken loses its crispness too quicklyToo much sauce, sauce too thin or toss too longUse less glaze, finish thickening it first and keep the final toss brief.
Chicken is dry insideIt cooked too longCheck the larger pieces earlier and stop once they reach 165°F / 74°C. Breast has less margin than thigh.

Once you’ve fixed the problem, return to the recipe card and pick up from the step you need.

Swaps That Work Here

Chicken and coating

Chicken breast can replace thigh; start checking it earlier. Potato starch is also a good coating alternative if you already have it, with a slightly more brittle finished crust.

Sauce ingredients

Dry sherry is the easiest substitute for Shaoxing wine; if you have neither, leave it out. Unsweetened bottled orange juice can work, although fresh zest still matters. Orange marmalade brings sugar, peel and pectin together, so it needs its own balanced sauce rather than a straight swap for fresh juice. For more heat, add extra red pepper flakes or a little chile paste.

Air Fryer and Unbreaded Options

For an unbreaded version, brown seasoned bite-size chicken in a lightly oiled skillet and finish it with the orange sauce. Our hibachi chicken recipe goes deeper into pan-browning chicken without a coating.

For an air-fryer adaptation, use the same cornstarch-coated chicken and coat the surface thoroughly but lightly with oil so dry starch does not remain chalky. Arrange the pieces in a single layer and air fry at 400°F / 205°C, turning halfway.

Start checking around 10 minutes; exact timing varies with the air fryer and piece size. Cook until the edges look crisp and the largest pieces reach 165°F / 74°C. Finish the sauce separately and toss only at the end. Expect the crust to be lighter and a little less evenly craggy than the shallow-fried version.

Cornstarch-coated chicken in an open air-fryer basket beside a plate of shallow-fried chicken, with labels identifying the two cooking methods.
With air-fried orange chicken, watch for chalky white starch rather than chasing the darker color of shallow frying; exposed dry patches need a light coating of oil.

What to Serve with Orange Chicken

Because the chicken is sticky, sweet and rich, plain rice and something green are usually all it needs.

Glazed orange chicken served with white rice and green vegetables on a plate set on a wooden dining table.
Plain rice gives stray glaze somewhere to go, while broccoli or another green vegetable brings freshness against the sweet, rich orange chicken.
  • Steamed jasmine rice: simple and excellent for catching the little bit of glaze left on the plate. Our guide to cooking jasmine and other white rice has stovetop ratios and texture cues if rice is the part you tend to second-guess.
  • Broccoli, bok choy or stir-fried greens: something fresh and slightly bitter works well against the sweet citrus glaze.
  • Fried rice: good when you want a fuller takeout-style meal; keep its seasoning relatively restrained so the orange chicken remains the main event.

If you want the same contrast of crisp chicken and glossy sauce with a toasted-sesame profile, our sesame chicken takes it in that direction.

Store, Freeze and Reheat Orange Chicken

If you expect leftovers, leave the portion you will not serve immediately unsauced and keep the chicken and sauce separate. That gives the crust a much better chance of coming back later.

Glass container filled with unsauced fried chicken beside a separate jar of orange sauce, with a plated serving of orange chicken in the background.
Set aside tomorrow’s portion before glazing the whole batch. An unsauced crust responds far better to dry reheating than chicken that has already spent hours absorbing sauce.

For make-ahead cooking, mix the sauce ingredients in advance but keep the zest and slurry separate. Cut the chicken ahead if needed, then coat it close to frying time.

Refrigerate leftovers promptly, within 2 hours of cooking. Store them in shallow covered containers and use refrigerated leftovers within 3–4 days.

For longer storage, keep the chicken and sauce in separate shallow containers and chill them promptly. For best quality, freeze for up to 3 months. Reheat the chicken until hot and crisp again, warm the sauce separately, and toss only when you’re ready to eat.

An oven or air fryer gives the crust the best chance to dry out again. A skillet works for smaller portions. The microwave is fastest, and sometimes that’s what works tonight—just expect a softer coating. Reheat leftovers thoroughly to 165°F / 74°C.

Back to the recipe card · Back to top

When it is time to eat, the finished plate should still look like fried chicken underneath the sauce: glossy enough to catch the light, but textured enough that the crust has not disappeared.

Black chopsticks holding a glossy piece of orange chicken above a plate containing white rice, orange chicken and green vegetables.
A thin sheen is enough. If the fried ridges are still visible beneath the glaze, the sauce is coating the chicken rather than burying it.

The sauce should taste unmistakably orange, cling in a thin glossy layer and leave very little liquid behind in the pan. Once the chicken is crisp and the glaze is there, don’t linger. Toss, plate and eat.