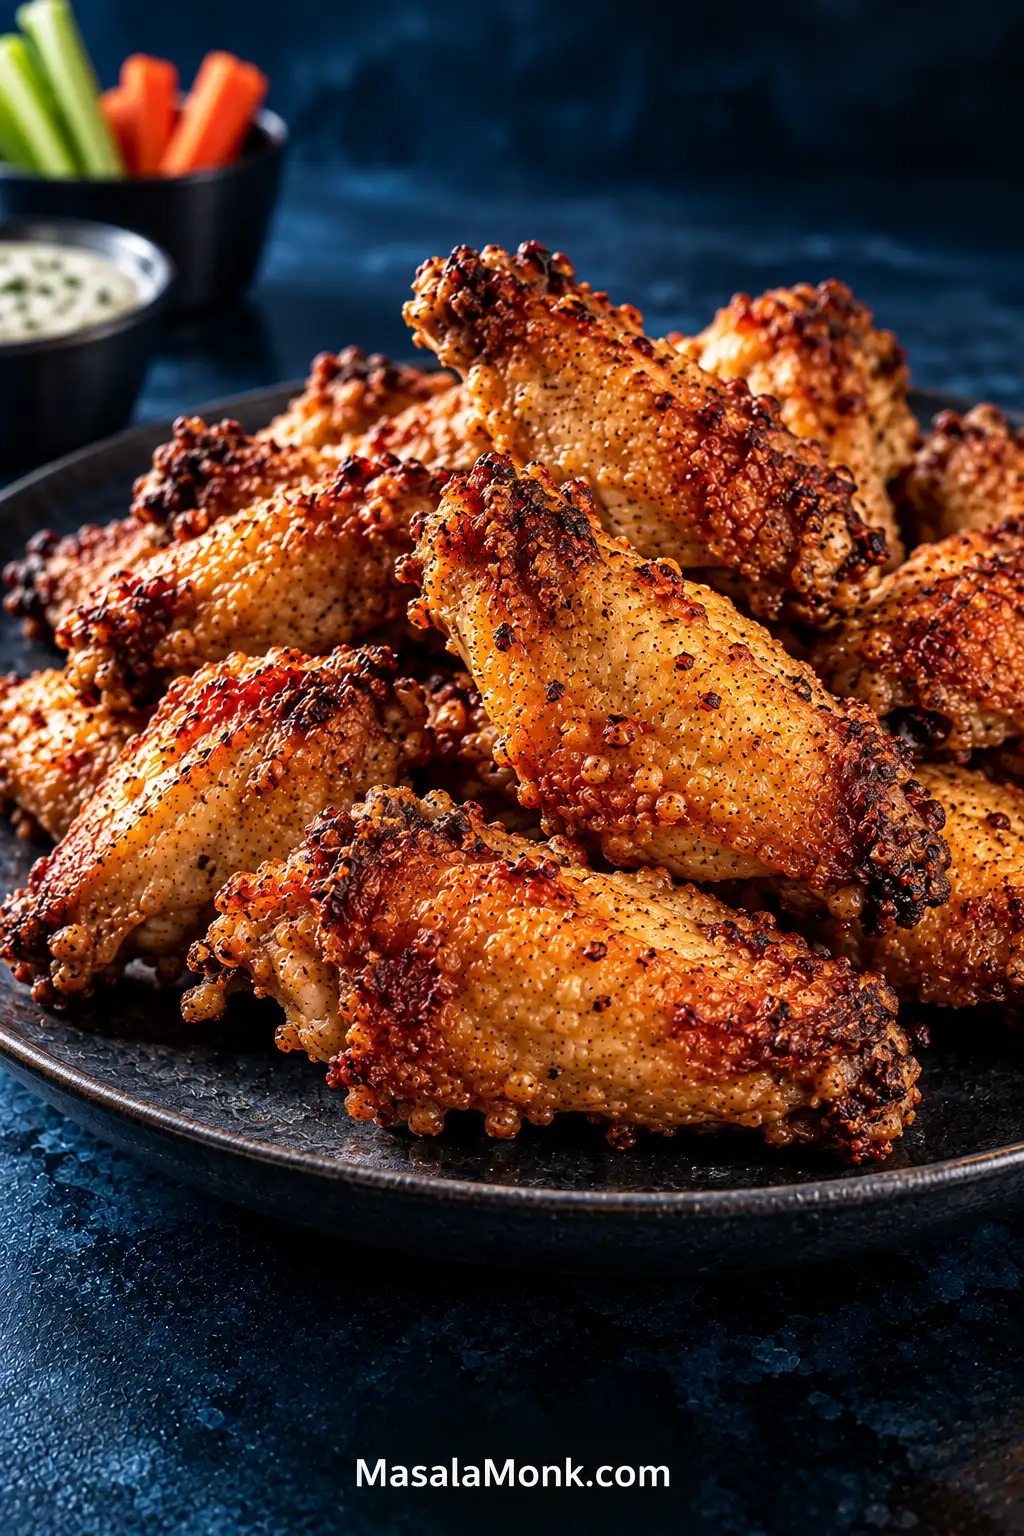
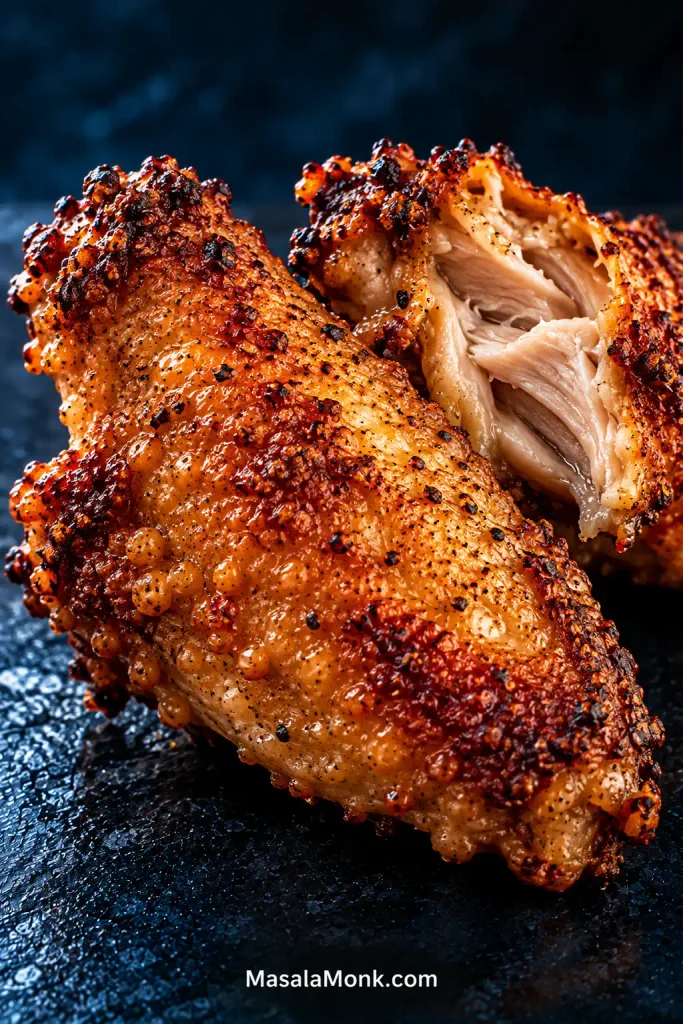
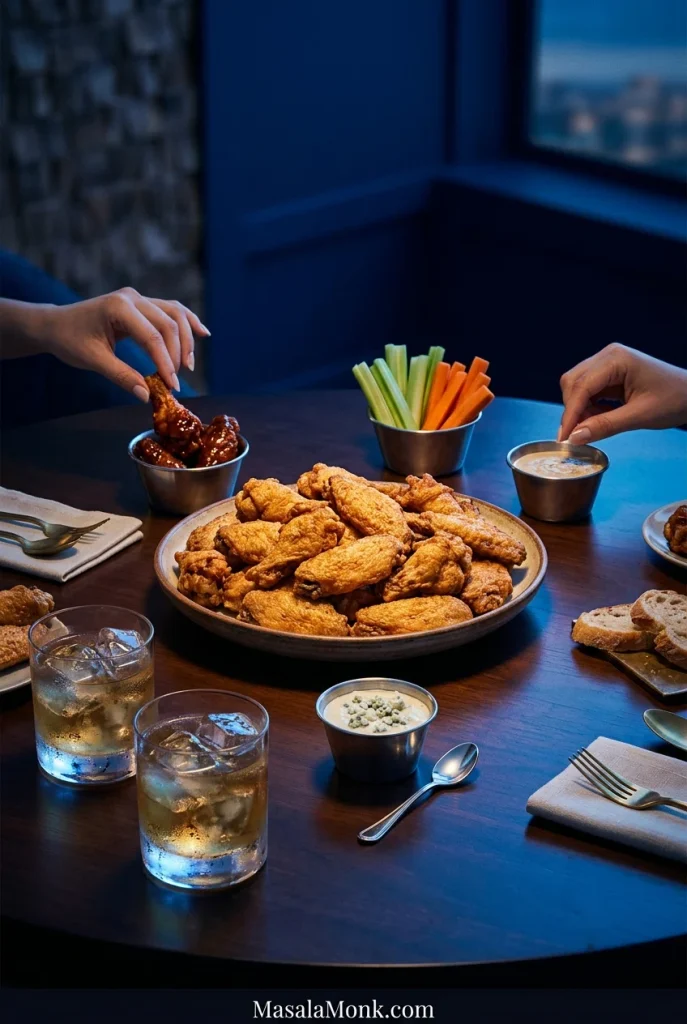
Good baked wings should crackle when you bite through the skin, then give way to juicy meat underneath. Look for tiny blisters, crisp edges and deeply golden skin. The frustrating part is that chicken can be perfectly cooked while the skin is still pale, soft or greasy underneath.
This crispy baked chicken wings recipe uses a hot 425°F / 220°C oven and a light baking-powder coating to get there without deep-frying or breading.
Dry the wings, dust lightly, give them room, bake hot and sauce them at the end.
The Quick Answer: Crispy Oven Wings Without Frying
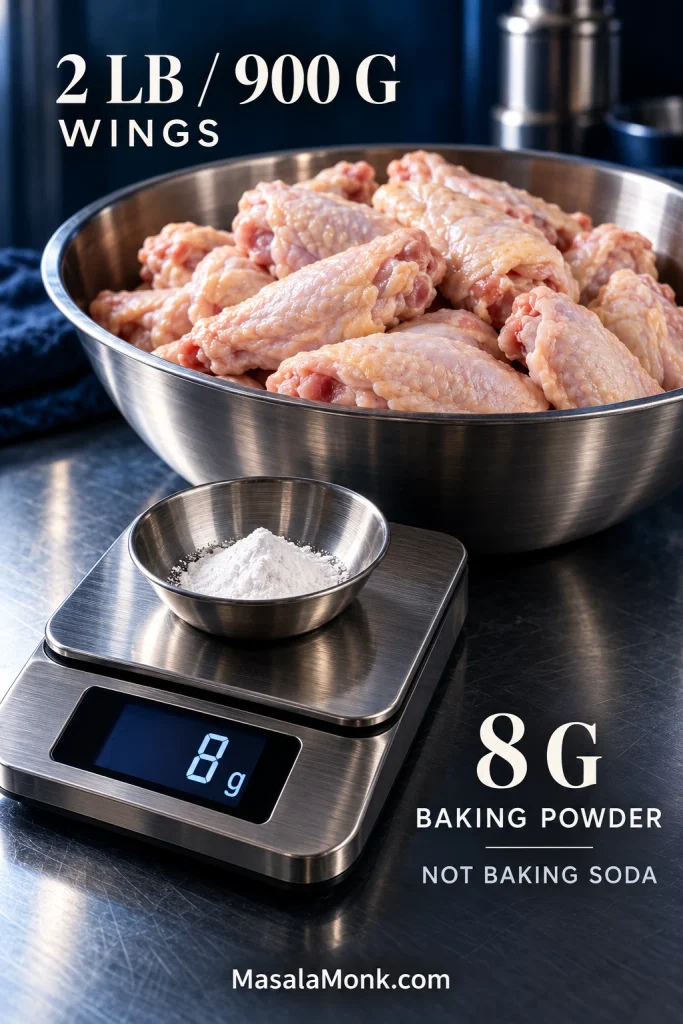
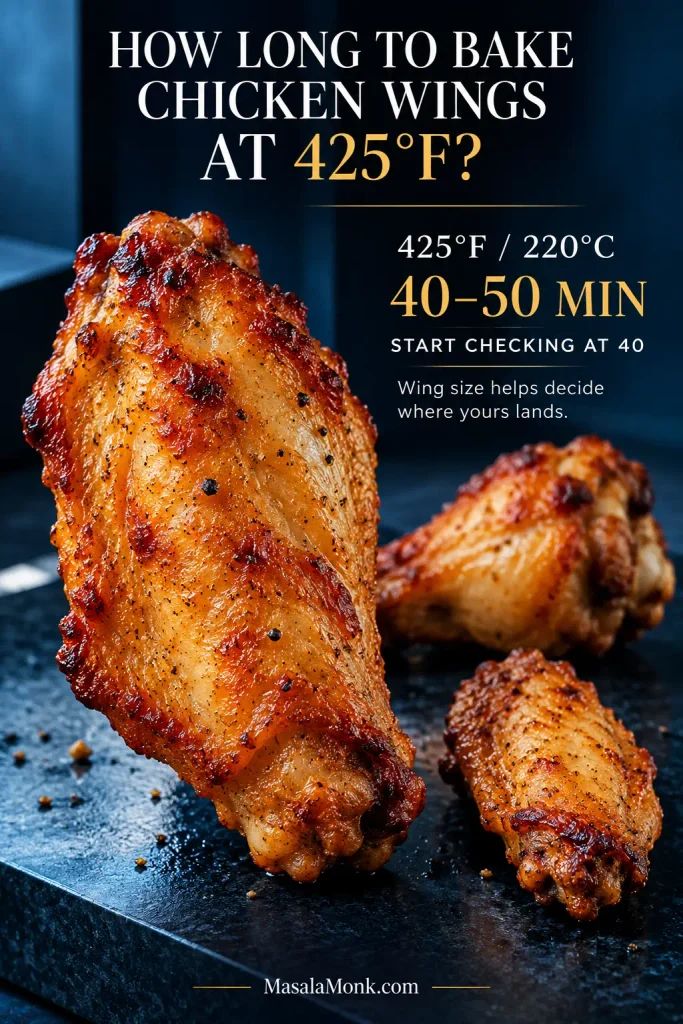
Bake 2 lb / 900 g thawed split chicken wings at 425°F / 220°C for 40–50 minutes. Pat them very dry, toss with 8 g / about 2 tsp baking powder and the seasoning, arrange them on a rack with space between the pieces, and turn them after 25 minutes.
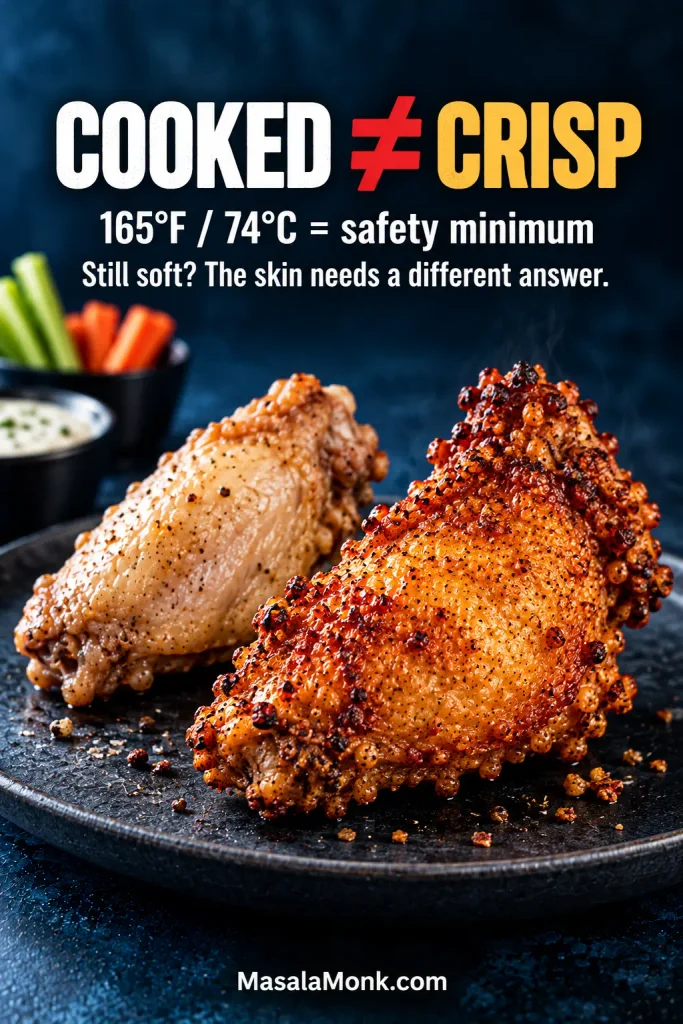
Start checking at 40 minutes. The wings are ready when the skin is deeply golden and blistered and the thickest pieces have reached at least 165°F / 74°C.
Crisp skin can form before the meat loses its moisture. Break one open and you should see juicy, fully cooked chicken beneath skin that has enough structure to crackle at the edge.
Crispy Baked Chicken Wings Recipe
Thin, blistered chicken skin with a crackly bite and juicy meat underneath. No breading, no fryer.
Yield About 18–24 split wing pieces, depending on size
Serves About 4 as an appetizer
Prep 15 minutes
Cook 40–50 minutes
Total 55–65 minutes
Equipment
Rimmed half-sheet pan, about 13 × 18 in / 33 × 46 cm
Oven-safe wire rack that fits inside the pan
Large mixing bowl
Tongs
Instant-read thermometer
Kitchen scale, especially useful for the baking powder and salt
Ingredients
2 lb / 32 oz / about 900 g chicken wings, fully thawed and split into flats and drumettes
8 g / about 2 tsp baking powder, preferably aluminum-free — not baking soda
6 g fine sea salt, about 1 tsp
3 g garlic powder, about 1 tsp
1 g freshly ground black pepper, about ½ tsp
1 tsp / 5 ml neutral oil, or a light cooking spray, for the rack
Optional dry seasoning or wet sauce, added after baking
Using a salty sauce? Reduce the fine sea salt to about 4–5 g / ¾ tsp.
Method
Prep and Dry the Wings
Heat the oven. Set a rack in the middle of the oven and preheat to 425°F / 220°C. Put the wire rack inside the rimmed pan. Line underneath with foil for easier cleanup, then lightly grease the rack.
Dry the wings. Blot the thawed chicken thoroughly with paper towels, including around the joints. The skin should feel dry or lightly tacky, with no wet shine. Skip rinsing; USDA advises against washing raw chicken because splashing can spread bacteria around the kitchen.
Season and Arrange
Mix the seasoning. Stir the baking powder, salt, garlic powder and black pepper together first so the small amount of baking powder distributes evenly.
Eight grams is surprisingly little beside 2 lb / 900 g of wings, which is exactly why measuring helps. Mix that small amount thoroughly through the dry seasonings first; otherwise, a few pieces can receive far more coating than the rest.
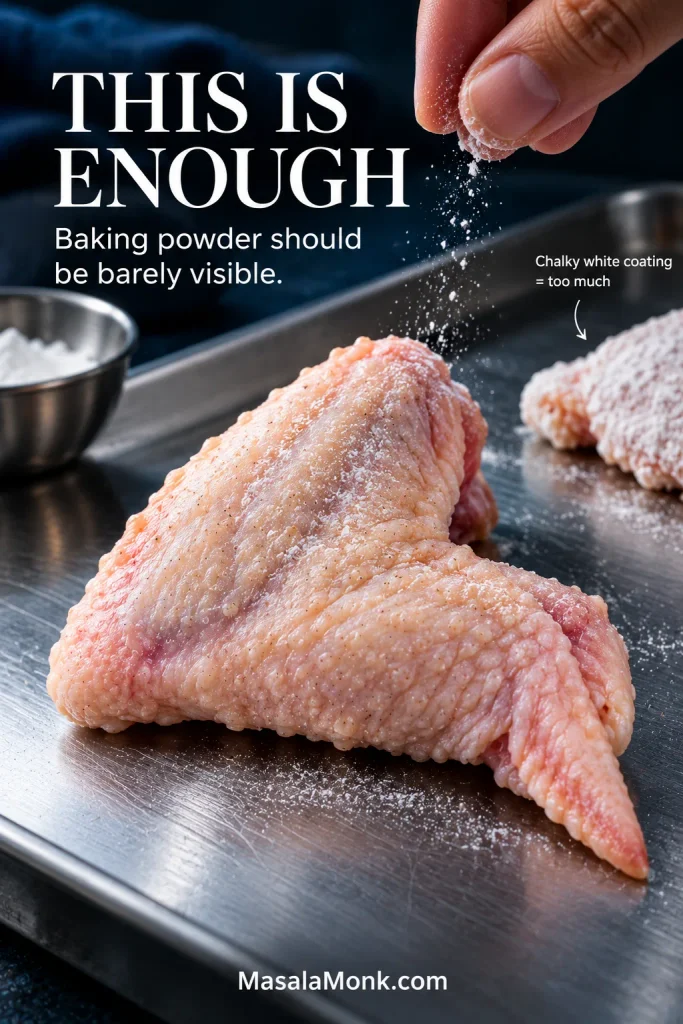
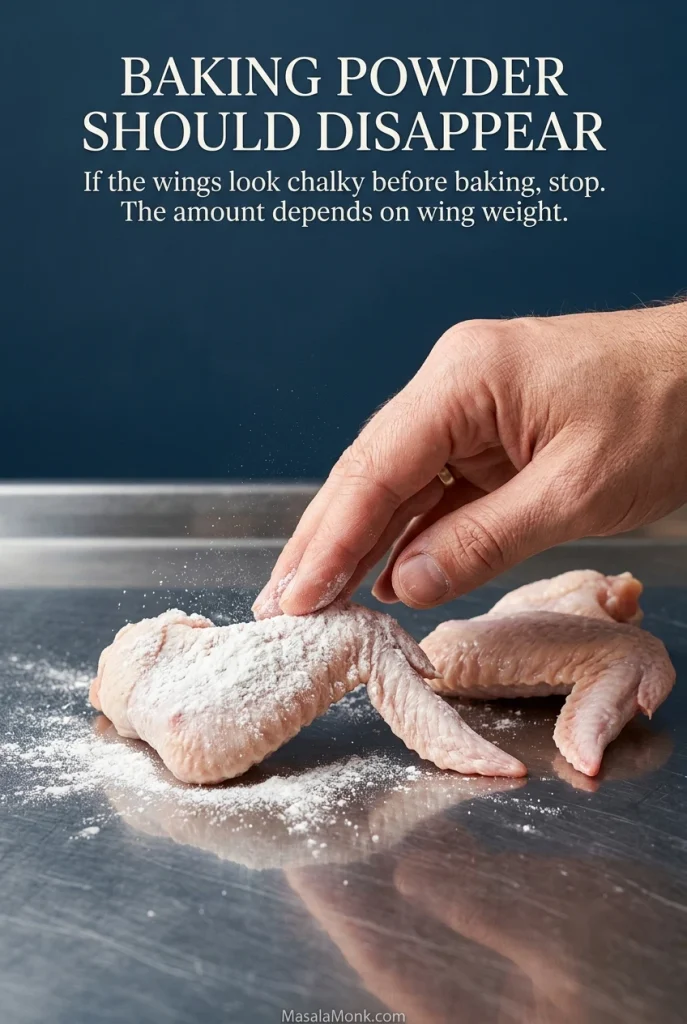
Dust the wings lightly. Scatter the mixture over the chicken and toss well. The coating should look almost too light. That’s what you want. You should still clearly see the skin underneath.
Check the folds and joints after tossing, because excess baking powder can hide there even when the broad skin looks lightly seasoned. The coating is right when the chicken still looks mostly like bare skin rather than something dredged in white powder.
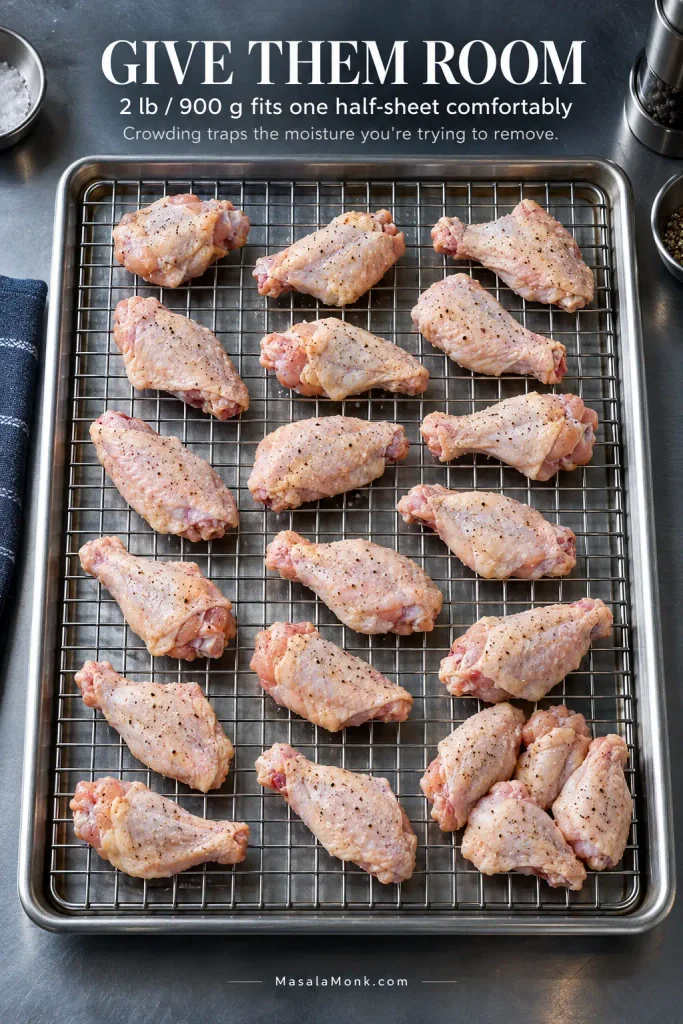
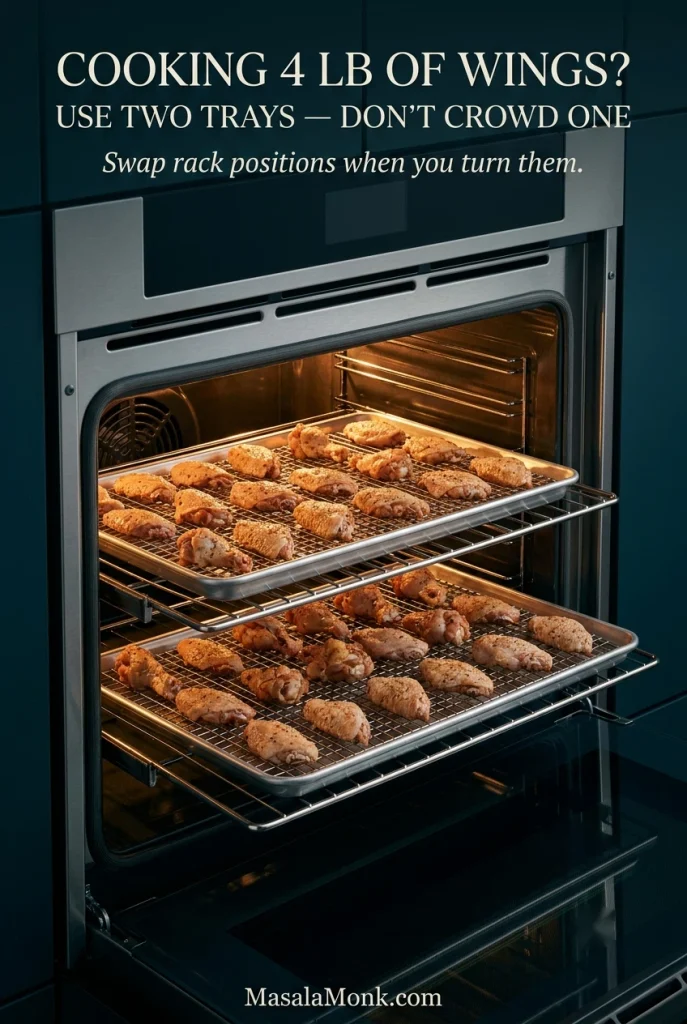
Give them room. Arrange the wings in one layer with a little space between each piece. Two pounds is a comfortable one-tray batch. Four pounds belongs on two trays.
The empty space between pieces is doing real work: hot air can reach more skin while moisture escapes instead of collecting where wings touch. Consequently, squeezing a few extra pieces onto the tray can make the same 425°F oven produce noticeably softer patches.
Bake, Turn and Check
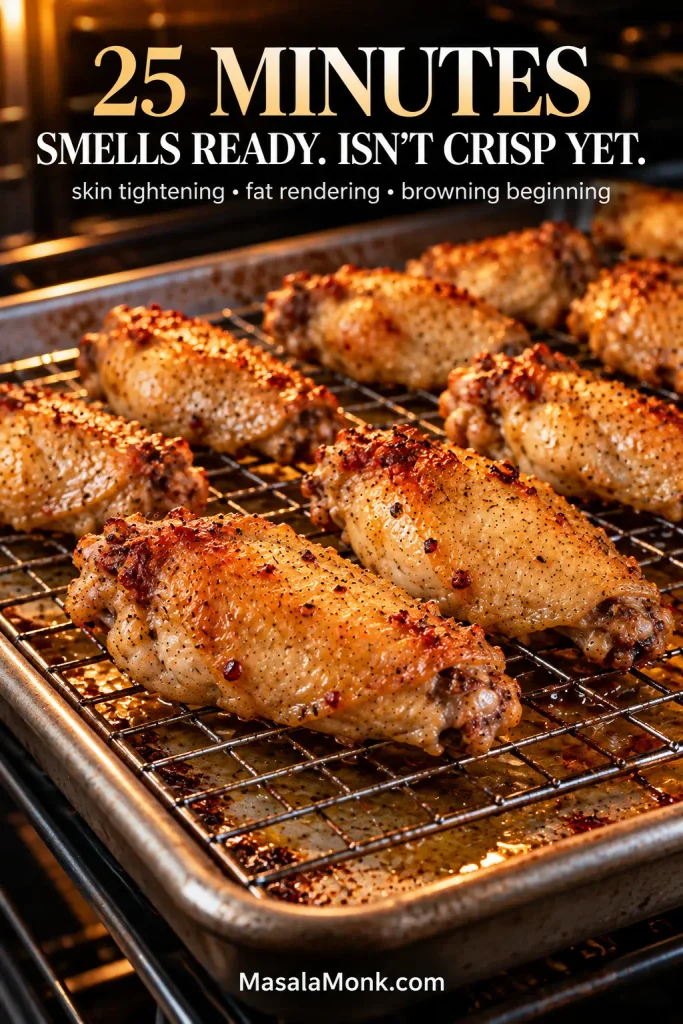
Bake for 25 minutes. The wings will tighten and shrink a little while fat collects underneath. They may smell fantastic already, but they are not ready yet.
At this stage, one side can already look browned while the less-exposed skin remains softer and paler. That unevenness is useful feedback—the wings are ready to be turned, not ready to leave the oven.
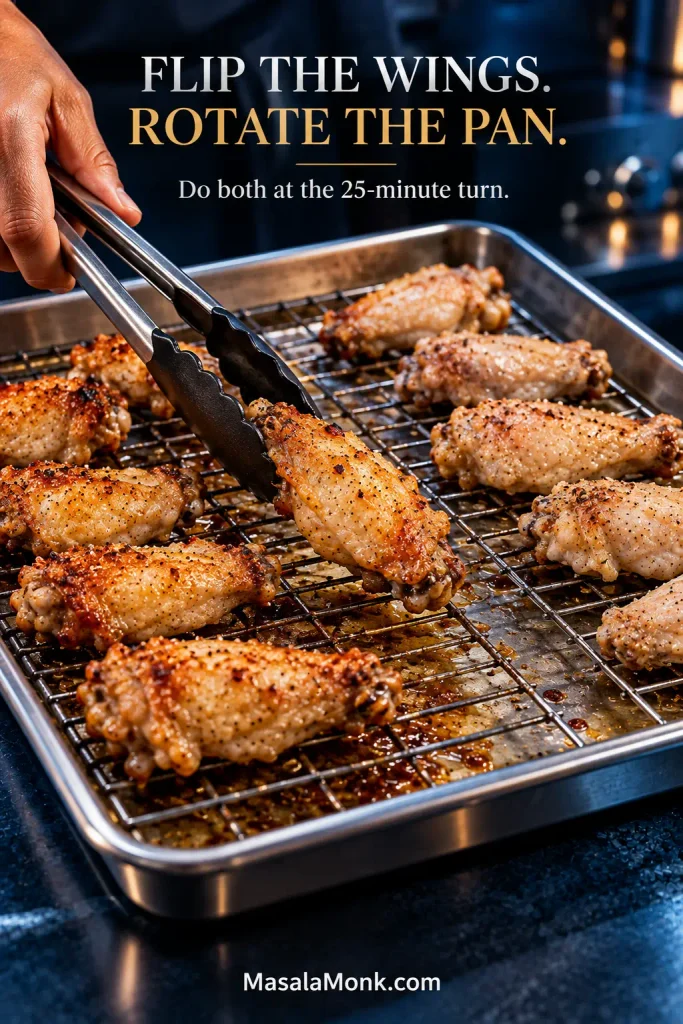
Turn and rotate. Flip the wings with tongs and rotate the pan front to back. Bake for another 15 minutes.
Flipping changes which skin surface faces the hotter, drier air; rotating changes which pieces sit in the oven’s hot spots. Doing both corrects two different causes of uneven browning instead of simply giving the whole tray more time.
Start checking at 40 minutes. Most average party wings finish in 40–50 minutes. Take out smaller pieces as they become crisp and let larger drumettes continue.
Check the thickest pieces. Insert an instant-read thermometer into the meatiest section without touching bone. Chicken must reach at least 165°F / 74°C. If the temperature is there but the skin still looks soft or pale, give it a little longer.
Finish and serve. Eat the wings dry, add a final seasoning, or toss a serving-size batch with sauce immediately before it goes to the table.
Convection / Fan Oven
Use 400°F / 205°C convection and begin checking about 5–10 minutes earlier. Fan strength varies between ovens, so watch the skin and check the thickest pieces with a thermometer.
No Wire Rack?
Bake directly on a lightly greased rimmed sheet pan. Leave room between the pieces, turn them during cooking and drain excess fat if it starts pooling. The underside may not crisp quite as evenly.
Baking Two Trays?
Use two pans rather than crowding one. When you turn the wings, swap the pans from top to bottom and rotate each pan front to back. Start checking at the usual time, but expect the batches to finish a little differently because two loaded pans change the oven’s airflow.
Want to Prep Ahead?
For this 425°F method, spread the plain thawed wings on a rack in the refrigerator, uncovered, for several hours or overnight. Add the baking powder and seasoning shortly before baking. An overnight seasoned dry-brine is a different technique.
Once the tray is in the oven, the useful skill is knowing what those wings should look like as they cook.
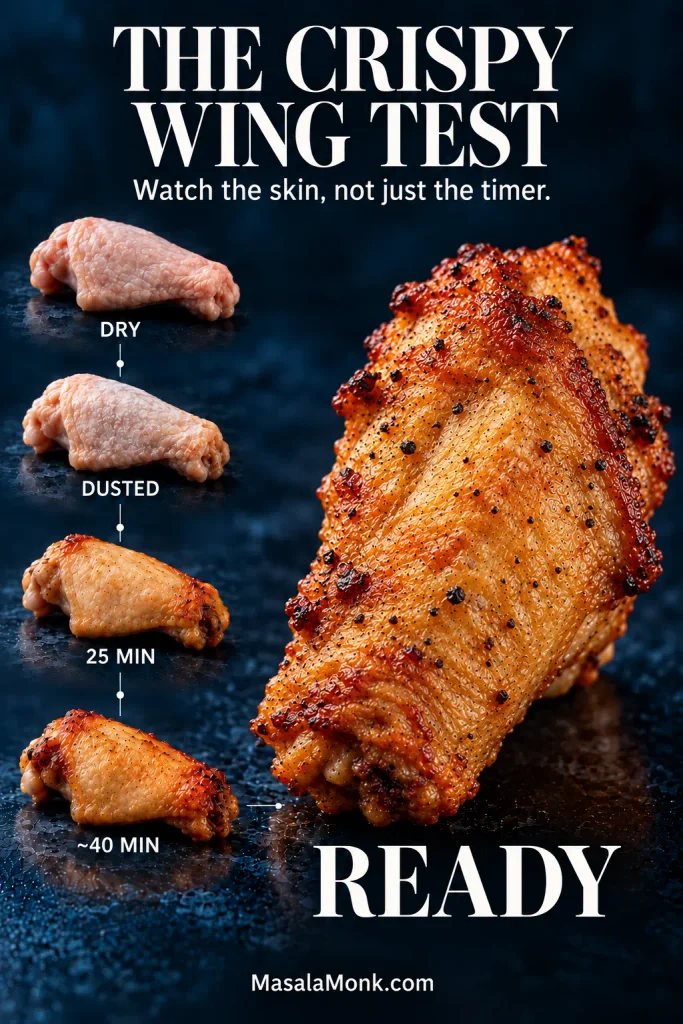
The Crispy Wing Test: How to Tell When Wings Are Done
Don’t wait for the timer to give you permission. Watch the wings.
Stage
What you should notice
Before seasoning
Dry or lightly tacky skin with no glossy wet spots.
After seasoning
A faint haze of seasoning. You can still clearly see the chicken skin.
After 25 minutes
The wings have tightened and shrunk a little. Fat is collecting below and early browning is appearing.
Around 40 minutes
The surface looks taut, golden areas deepen, tiny blisters catch the light and the edges lose their wet look.
Ready
Deeply golden, blistered, crisp-looking skin with the thickest pieces safely cooked through.
Do not judge readiness by color alone: seasoning and oven hot spots can darken one wing before another. Instead, look for a surface that has lost its wet sheen, tightened around the meat and developed small irregular blisters along the exposed edges.
If one small flat looks perfect at 43 minutes, take it out and let the larger drumettes keep cooking.
Plan on 40–50 minutes at 425°F / 220°C for average-size split chicken wings. Start watching closely at 40 minutes. Large pieces may need longer.
Wing size and oven performance can shift these ranges, so use them as checkpoints rather than promises.
Use the first small piece that turns properly crisp as feedback about how your oven is behaving that day. Then check the remaining flats and larger drumettes individually; a mixed tray rarely reaches its best texture at one identical minute.
Oven temperature
General checking range
Trade-off
400°F / 205°C
About 45–55 min
More gradual browning and a longer cook.
425°F / 220°C
About 40–50 min
The method used here.
450°F / 230°C
About 30–40 min
Faster browning with less margin before the skin gets too dark.
Two ovens set to 425°F can finish the same wings at different times. Treat 40 minutes as the first checkpoint, not the finish line.
When should you pull the wings?
165°F / 74°C answers the safety question. The skin answers the texture question. Once a wing has reached the safe minimum, let the skin and texture—not the thermometer alone—tell you whether it needs more time.
A thermometer can tell you the center has reached a safe temperature, but it cannot measure whether enough surface moisture has escaped. If a safely cooked wing is still pale and pliable, the remaining issue is exterior texture—not whether the chicken is done inside.
Why do some baked-wing recipes take much longer?
Some wing methods start low and finish hot. The extra time gives the skin longer to dry and the fat underneath longer to cook out before the final crisping stage. Here, the oven stays at 425°F / 220°C throughout.
Time isn’t the only variable. The coating matters too.
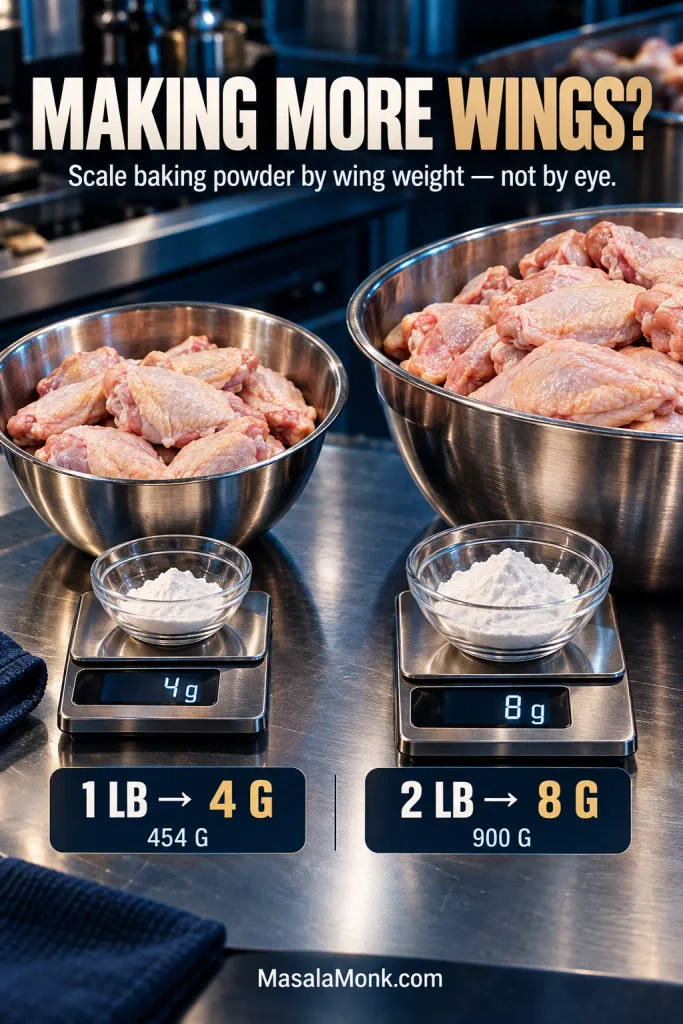
For this method, use about 4 g baking powder per 1 lb / 454 g wings—8 g for a 2 lb / 900 g batch. Once tossed, the coating should be barely visible; if the wings look chalky, you’ve used more than the skin needs.
The relationship is easier to scale than the appearance of the coating: use about 4 g of baking powder per pound of wings. That also gives you a sensible number for odd-sized batches—for example, roughly 10 g for 2½ lb—without guessing from how dusty the skin looks.
Wing weight
Baking powder
1 lb / 454 g
4 g / about 1 tsp
2 lb / about 900 g
8 g / about 2 tsp
3 lb / about 1.36 kg
12 g / about 3 tsp
4 lb / about 1.8 kg
16 g / about 4 tsp
You should not taste the baking powder. If the wings taste bitter, metallic or chalky, first make sure you used baking powder—not baking soda, then check the amount against the weight of the chicken. Baking soda is much more alkaline and is not a one-for-one substitute.
What about cornstarch or flour?
Cornstarch gives the surface a drier, more coated crunch; flour moves the wings toward a lightly breaded, oven-fried crust. You can also skip a coating entirely if that is the texture you prefer.
If you want crisp wings without baking powder, our air fryer chicken wings use concentrated airflow instead.
Wingettes, Drumettes and Whole Wings
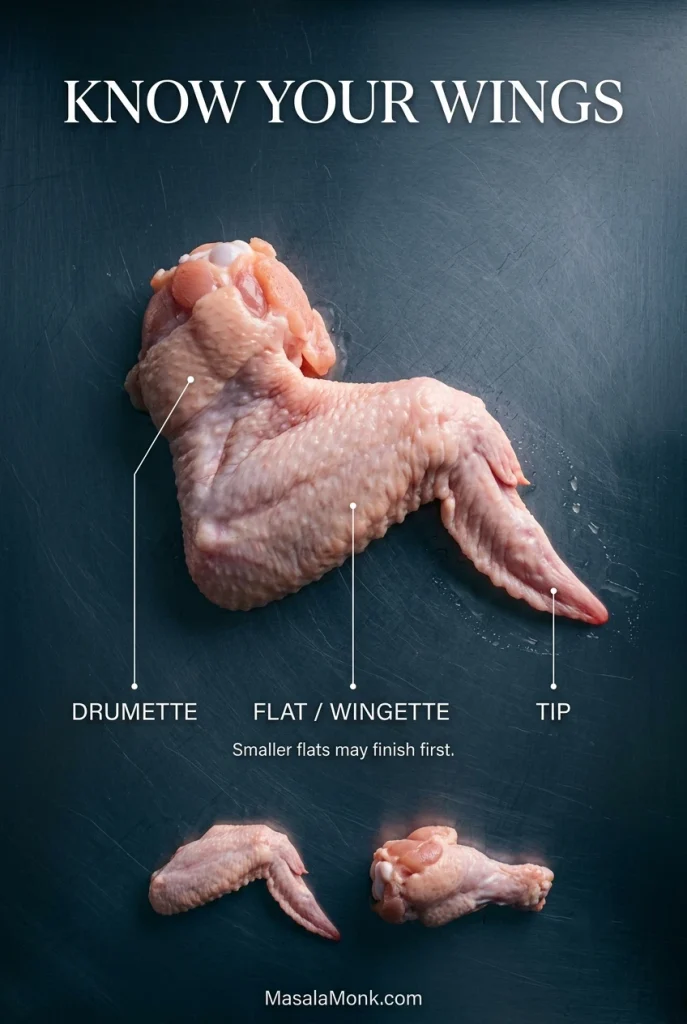
Most packages sold as party wings contain separated flats—also called wingettes—and drumettes. Whole wings keep those sections and the tip attached; separate them through the flexible joints rather than trying to cut through bone. Flats are usually smaller, so some may be ready before the biggest drumettes.
A mixed tray contains pieces with very different thicknesses. Check the thinnest flats first and treat the largest drumettes as individual pieces; otherwise, an already-crisp flat can dry out while you wait for the thickest piece to catch up.
Starting with frozen wings?
Use thawed wings for this method. Frozen chicken releases extra water as it heats and is harder to dry before baking. For a frozen-first route, see our frozen chicken wings in the air fryer.
Sauce the Wings When You’re Ready to Eat
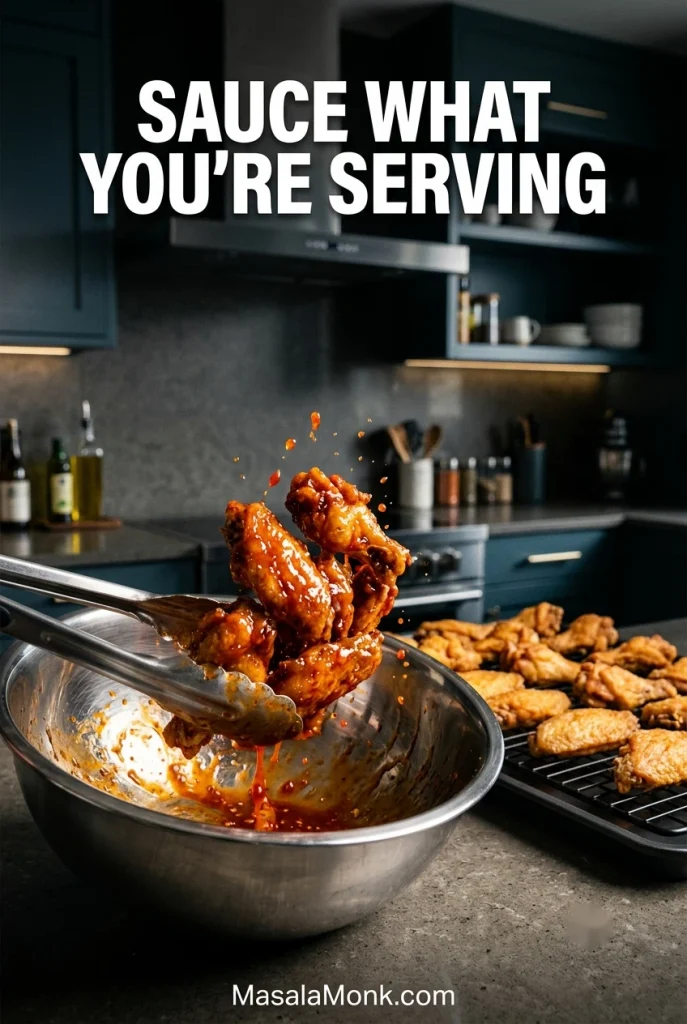
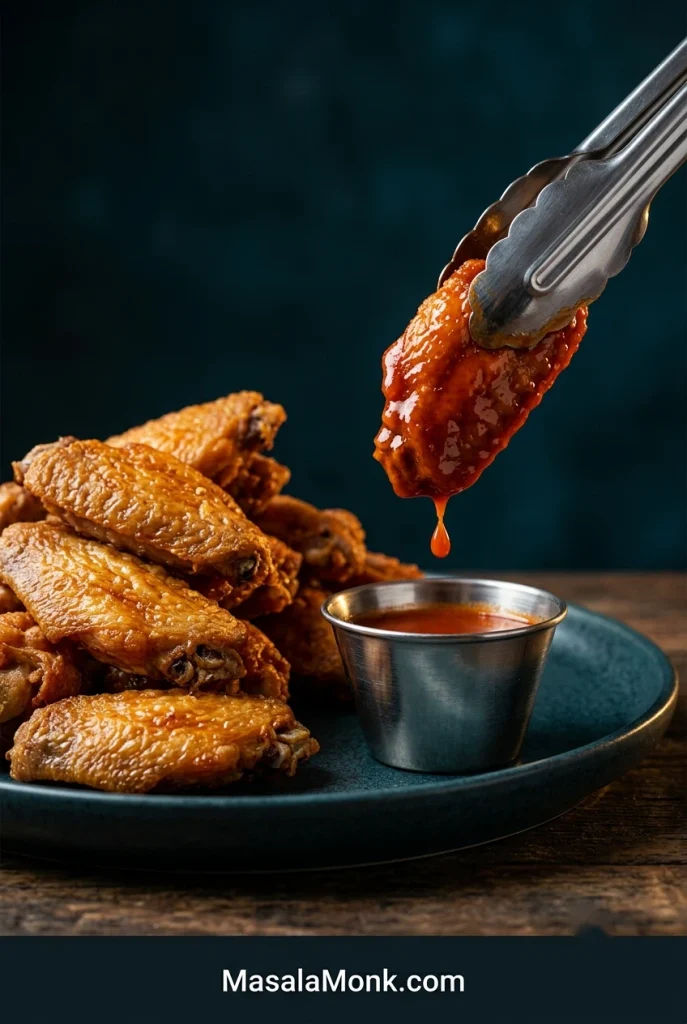
Crispness is something you spend when you add sauce. Spend it as late as possible. Wet sauce starts softening the skin on contact, so toss only the amount you’re about to serve.
One dry batch can become several flavors without sacrificing all of its crunch at once. Divide hot wings into smaller bowls as needed, then sauce each portion separately while the remaining baked wings stay untouched.
For a sweet-hot finish, try hot honey sauce. Briefly broiling sauced wings gives the glaze a more baked-on finish, while saucing after baking preserves more of the exposed skin’s crunch.
For a dry citrus-pepper direction instead, our lemon pepper chicken wings build that flavor directly into the wings.
Why Baked Wings Fail—and How to Fix Them
When a tray goes wrong, the skin usually tells you why.
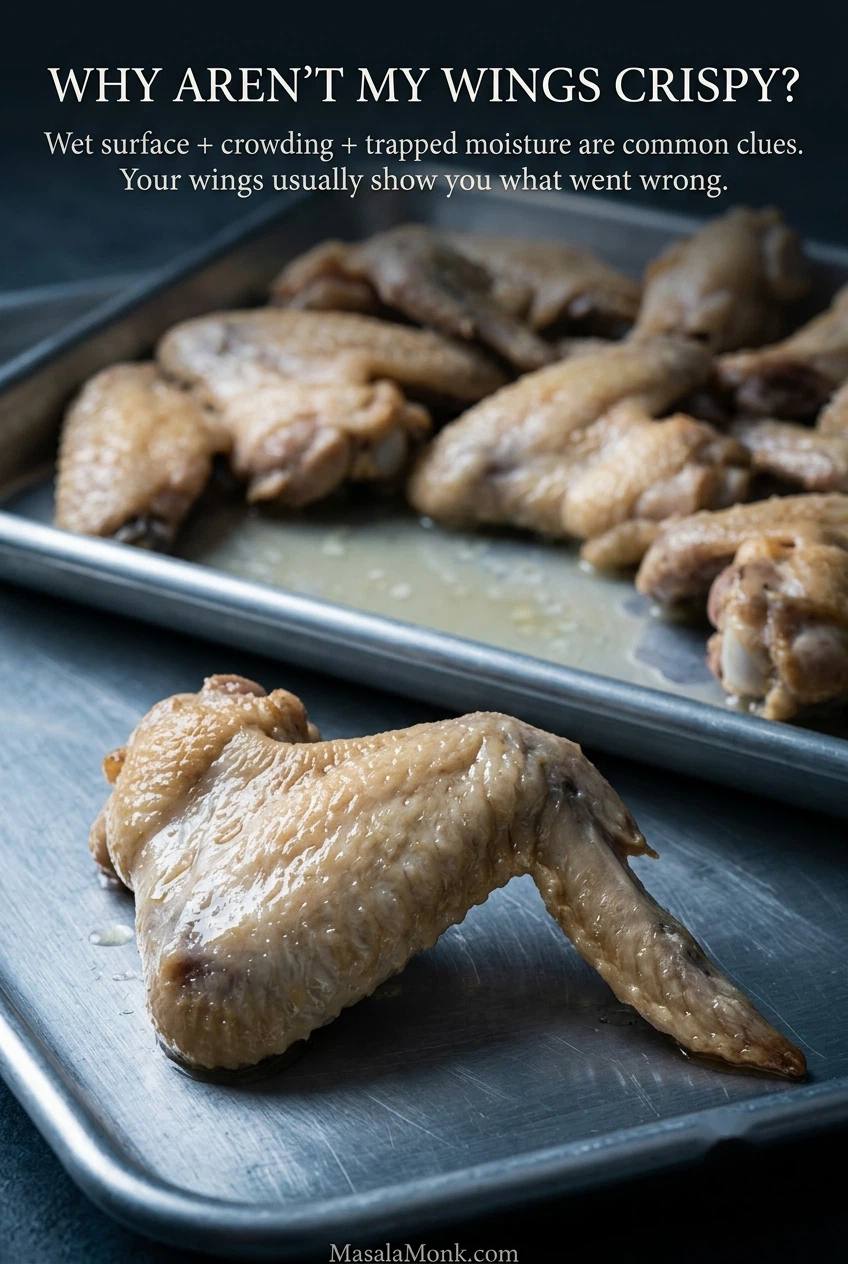
Before adding another 10 or 15 minutes, look underneath and between the wings. If cooked pieces are touching while liquid pools below them, moisture and airflow are the more useful problems to fix than simply extending the bake.
Match the Symptom to the Cause
Problem
Likely cause
Next batch
Soft or soggy skin
Wet surface, crowding or too little airflow.
Dry the wings thoroughly and leave more room between pieces.
Greasy, soft underside
The wings sat in too much fat.
Use a rack, or drain excess fat when baking directly on the pan.
Bitter or metallic taste
Baking soda, too much baking powder or an unpleasant-tasting powder.
Confirm the product, weigh it accurately and keep the coating light.
White patches
Too much coating or uneven distribution.
Mix the dry ingredients first and toss until only a faint haze remains.
Leathery skin
Low or uneven heat, poor fat rendering, or overcooking after the surface dried.
Check oven heat and airflow before simply extending the bake.
Dry meat
The wings stayed in the oven while the exterior struggled to crisp.
Fix moisture and airflow rather than relying on extra cooking time.
Outside darkens too quickly
Very hot oven, strong convection or unusually small pieces.
Check earlier and lower the heat slightly if needed.
Uneven doneness
Different wing sizes or oven hot spots.
Rotate the pan and remove smaller pieces as they become ready.
Smoking oven
Fat is burning, overflowing or hitting old oven grease.
Use a properly rimmed pan and keep the drippings contained.
Wings stick to the rack
The rack was not lightly greased or the skin was moved too soon.
Grease the rack lightly and let the surface set before turning.
Crisp until sauced
Wet sauce softened the skin.
Toss smaller batches immediately before serving.
If the Coating Looks Chalky
White patches or a chalky taste are a reason to inspect the coating before changing the oven temperature or extending the bake.
Look closely at joints and skin folds, where concentrated powder can remain hidden after a quick toss. Mixing the dry seasonings together first and redistributing any white patches gives the coating a better chance of staying thin and even.
When More Oven Time Won’t Help
If the chicken is safely cooked but the skin is disappointing, don’t automatically add another 15 minutes. More oven time cannot fix every crisping problem.
One tray is easy. Feeding a crowd is where wings get interesting. Tray two is still cooking, somebody wants sauce, somebody else wants them dry, and the first batch is losing its crispness on the counter.
Two trays solve the crowding problem, but they also change the oven’s airflow. Even after you swap rack positions, check both pans independently because the upper and lower batches may still reach crispness at slightly different times.
Prep the wings ahead, bake them in batches and keep them unsauced until people are ready to eat. A cold side such as creamy coleslaw can be made earlier, leaving the oven to the chicken.
For a crowd, open racks and sheet pans protect crispness better than covered containers that trap steam. Meanwhile, keeping sauces separate lets one batch become several flavors without committing every wing before guests are ready to eat.
Holding a cooked batch
If one batch needs to stay hot while the next tray finishes, spread the unsauced wings on racks or sheet pans in a low oven around 200–225°F / 95–110°C. Keep the food itself at or above 140°F / 60°C while hot-holding. A covered container or slow cooker traps steam and quickly softens the skin.
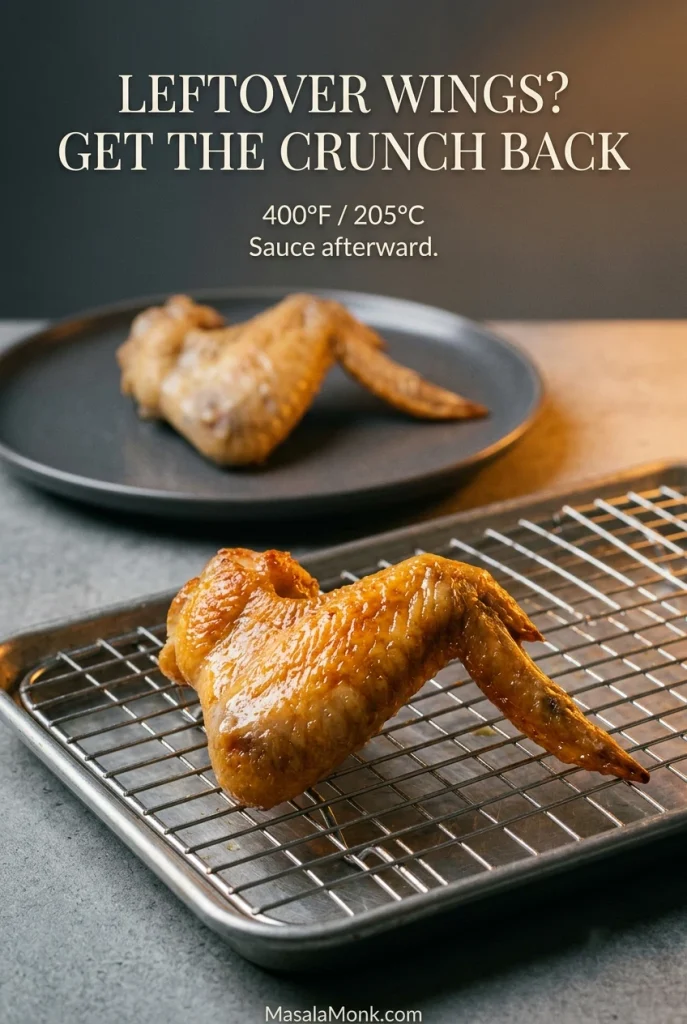
Reheating leftover wings
Spread refrigerated wings in one layer and reheat at about 400°F / 205°C for 5–10 minutes, until the skin is crisp again and the thickest pieces reach 165°F / 74°C. Add sauce afterward.
An air fryer works especially well for a small leftover batch. A microwave warms the meat quickly, but the skin loses most of its crunch.
The microwave can warm leftover chicken quickly, but it does little for softened skin. When crispness matters, dry oven heat is the better tool because it can drive moisture from the exterior again instead of merely heating the meat.
Storage
Refrigerate cooked wings promptly and use them within 3–4 days.
Celery and carrot sticks bring fresh crunch beside hot wings, while ranch or blue cheese gives you the classic cool contrast.
For a fuller meal, macaroni and cheese gives you something soft and creamy beside the crisp chicken.
One plain tray can also become several flavors: divide the hot wings between bowls, toss each portion separately and leave some dry.
A plain tray stays flexible right to the table: one portion can take hot honey, another a dry seasoning, and some wings can remain completely unsauced. That variety comes without softening the entire batch at once.
By the second tray, you shouldn’t need to stare at the timer. You’ll know the signs: taut skin, deepening color, little blisters and edges that have finally lost their softness.
Sauce the wings you’re ready to serve, leave the rest crisp and dry, and get them onto the table while they’re hot.
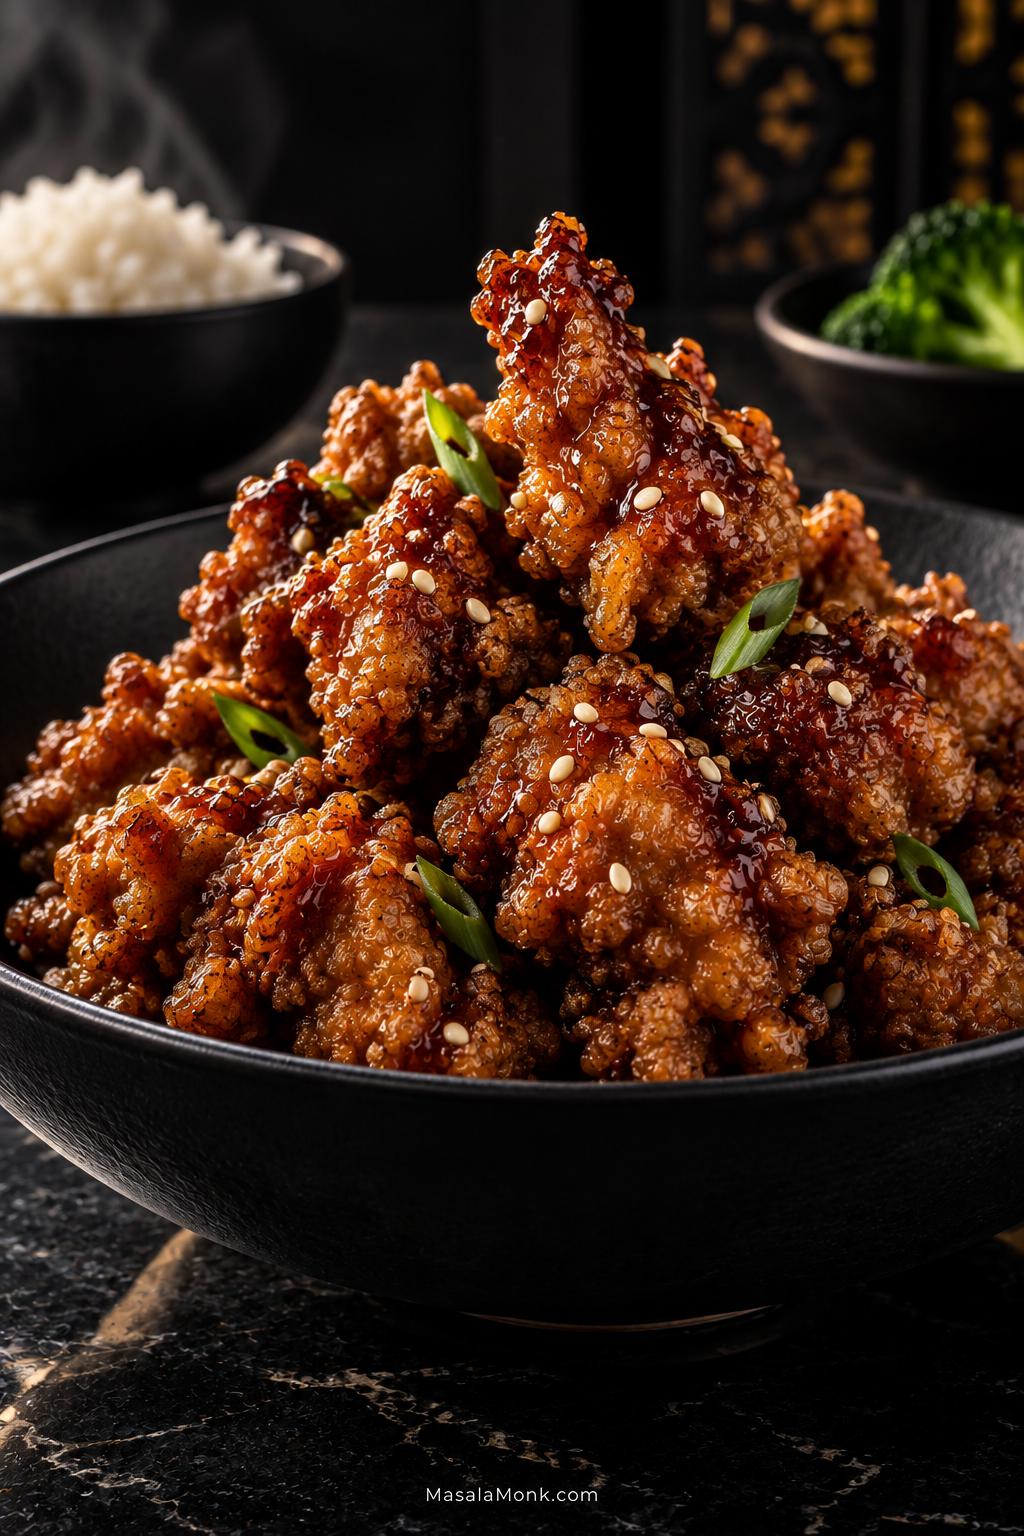
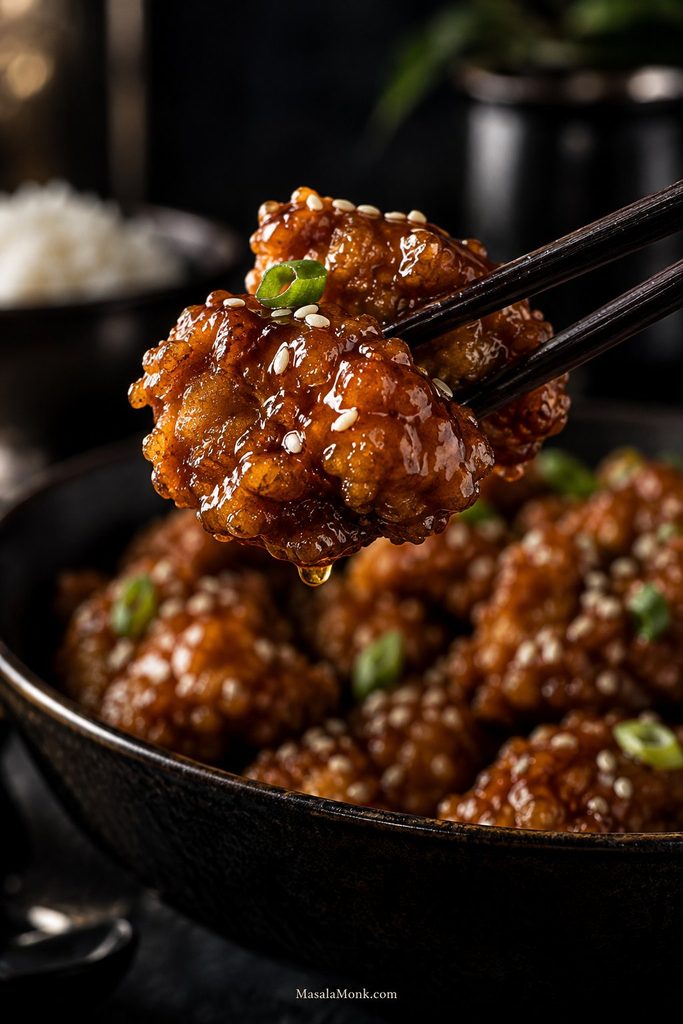
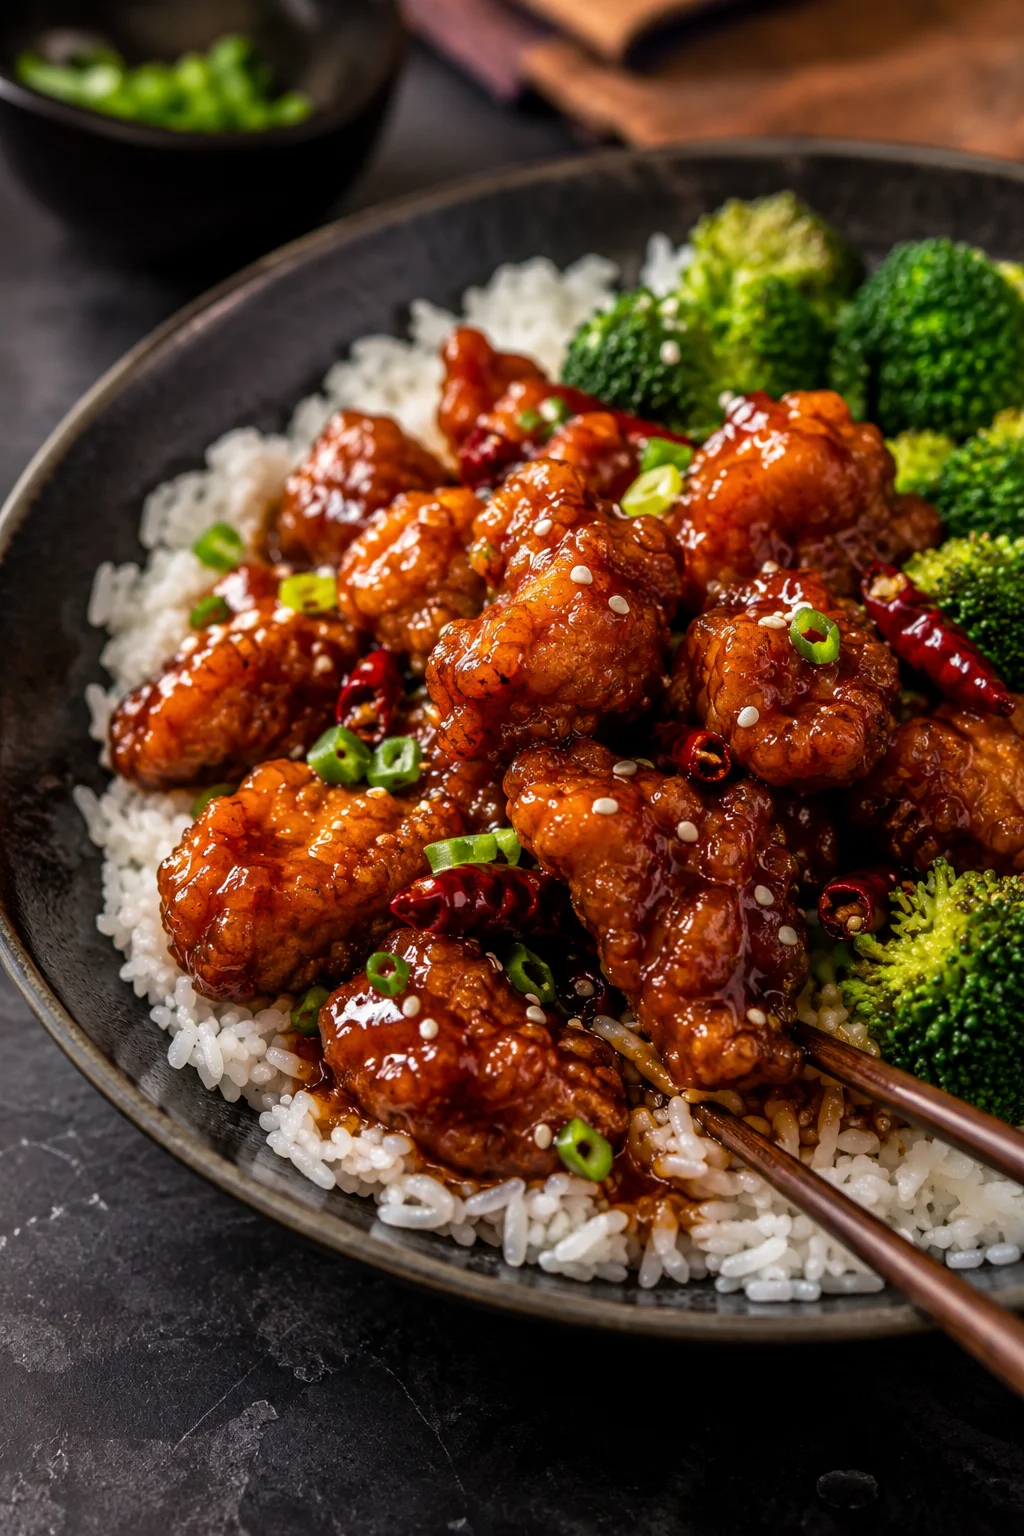
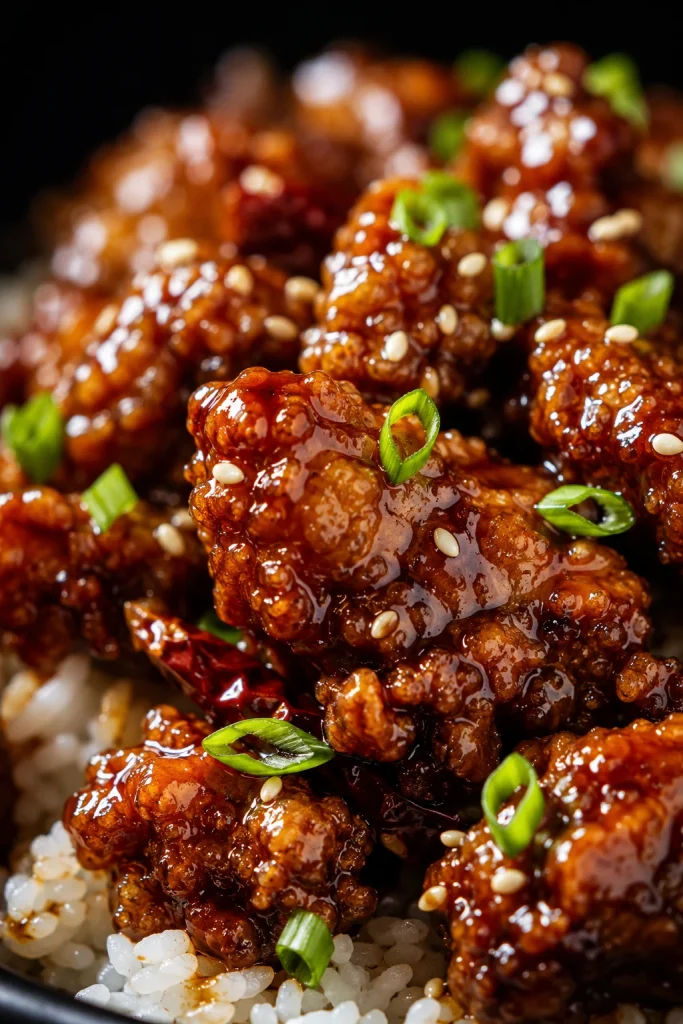
A good sesame chicken recipe has one awkward problem to solve: the chicken should still have crisp edges after it meets the sticky sauce. Get the timing right and the glaze catches on the fried surface instead of pooling underneath it. The chicken stays juicy inside, toasted sesame smells nutty and warm, and every bite keeps some contrast between crisp crust and glossy sauce.
This is the takeout-style version—the kind with real texture under the sauce, not simply diced chicken simmered in a sweet skillet glaze. Thighs give you the widest margin for juicy meat, although breast works too. You do not need restaurant equipment or a roaring wok burner. Steady oil temperature and a finished glaze waiting for the chicken matter much more.
The second fry earns its place because home cooking gives you one advantage takeout cannot: the chicken can go from hot oil to glaze to plate almost immediately.
This sesame chicken recipe makes Chinese-American fried chicken coated in a sweet-savory sesame glaze. For the crispest version, fry once at 350°F / 175°C, rest on a wire rack while the sauce thickens, then fry again at 375°F / 190°C. Toss only after the glaze is ready and serve straight away. The largest pieces should reach at least 165°F / 74°C.
Sesame Chicken Recipe
Allow about 50–60 minutes, depending on your pot, burner and batch size. Much of the work overlaps. Think of it as three phases: fry the chicken, finish the sauce during the rest, then crisp and glaze just before serving.
Chicken 24 oz / 680 g
Cut 1–1¼ in / 2.5–3.2 cm
First Fry 350°F / 175°C
Second Fry 375°F / 190°C
Serves 4 generously; up to 6 with sides
Prep About 25 minutes
Cook About 25–35 minutes
Total About 50–60 minutes
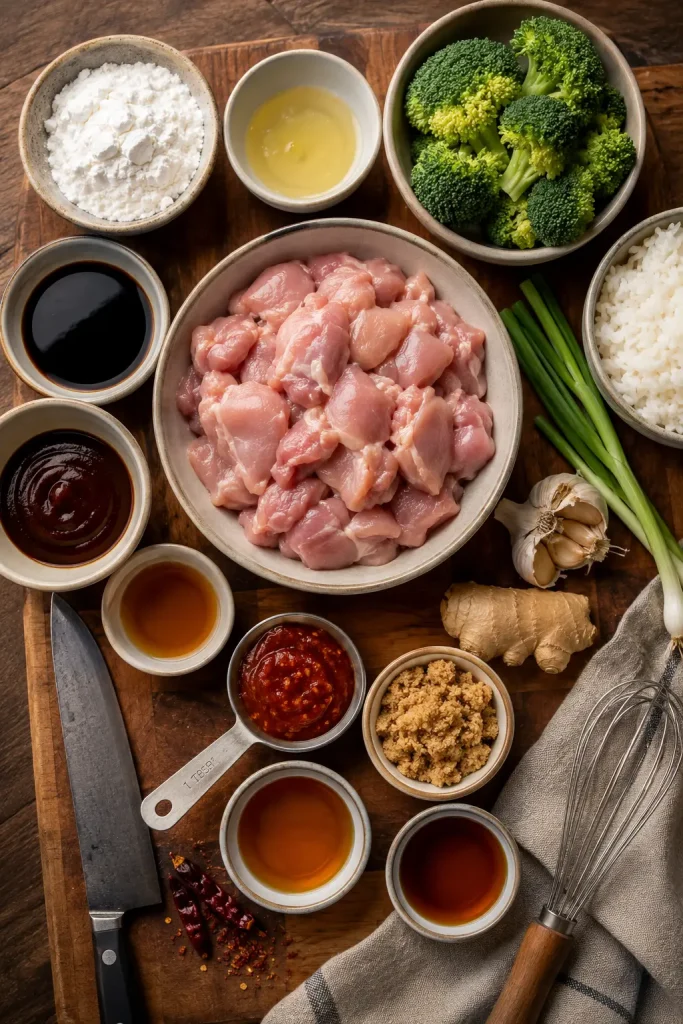
For the Chicken
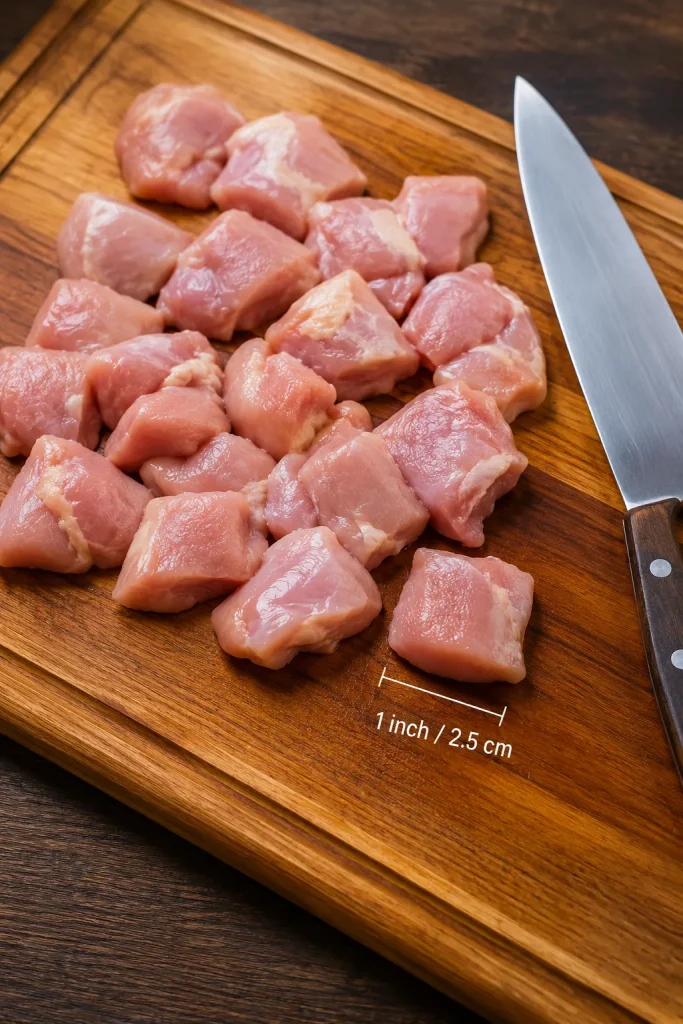
24 oz / 680 g boneless skinless chicken thighs, cut into roughly 1–1¼ in / 2.5–3.2 cm pieces
1 tablespoon / 15 ml reduced-sodium soy sauce
1 tablespoon / 15 ml Shaoxing wine or dry sherry
1 large egg white, about 1 oz / 30 g
1 teaspoon / about 2 g finely grated fresh ginger
1 teaspoon / 5 ml toasted sesame oil
¼ teaspoon white pepper
Chicken breast: Use the same weight and cut it to the same size. It has less margin for overcooking, so watch the center temperature closely.
No Shaoxing wine? Dry sherry is the closest easy substitute. For an alcohol-free version, use 1 tablespoon / 15 ml unsalted or low-sodium chicken stock or water. Rice vinegar supplies acidity, so it is not a Shaoxing substitute.
For the Crisp Coating
¾ cup / about 90 g cornstarch
½ cup / about 60 g all-purpose flour
1½ teaspoons / about 6 g baking powder
½ teaspoon fine salt
¼ teaspoon white pepper
For Frying
Neutral high-heat oil such as canola or vegetable oil, enough to reach about 2 in / 5 cm deep in your pot; peanut oil is another option
For the Sticky Sesame Sauce
3 tablespoons / 45 ml reduced-sodium soy sauce
3 tablespoons / about 63 g honey
1 tablespoon / about 13 g packed brown sugar
2 tablespoons / 30 ml unseasoned rice vinegar
2 tablespoons / about 30 g ketchup
1 tablespoon / 15 ml oyster sauce, or vegetarian mushroom stir-fry sauce
2 tablespoons / 30 ml water
2 teaspoons / about 4 g finely grated fresh ginger
2 teaspoons / about 6 g finely minced garlic
1 teaspoon / 5 ml neutral oil
1 teaspoon / 5 ml toasted sesame oil
¼ teaspoon MSG, optional
¼ teaspoon crushed red pepper flakes, optional
Soy sauce varies: Chinese light soy works, but some brands are saltier than reduced-sodium all-purpose soy. Start with 2 tablespoons / 30 ml in the sauce if yours is especially assertive and add more after tasting. Dark soy should not replace the full amount one-for-one.
No oyster sauce? Use 1 tablespoon / 15 ml vegetarian mushroom stir-fry sauce. Brands differ in saltiness, so taste before adding extra soy.
For the Cornstarch Slurry
2 teaspoons / about 5 g cornstarch
1 tablespoon / 15 ml cool water
To Finish
2 tablespoons / about 18 g toasted sesame seeds
2 scallions, thinly sliced, optional
Raw sesame seeds need only a few minutes in a dry skillet over medium-low heat. Stir often and remove them when they smell nutty and turn lightly golden.
Allergen note: With conventional oyster sauce, the recipe contains sesame, soy, wheat, egg and shellfish. Peanut oil adds a peanut-allergy consideration if you use it. A vegetarian mushroom stir-fry sauce removes the oyster, but check individual labels whenever you are cooking for a food allergy.
Equipment
Frying: deep heavy-bottomed pot or wok, deep-fry thermometer, spider or skimmer, and a wire rack set over a sheet pan
Doneness: instant-read food thermometer
Sauce: wide skillet or wok
Before the oil gets hot: mix the soy sauce, honey, brown sugar, rice vinegar, ketchup, oyster or mushroom sauce, water and optional MSG. Keep the cornstarch slurry separate. Put the rack, skimmer and thermometers within reach, and have the sesame seeds, scallions and serving dishes ready. If you’re serving rice, start it before heating the frying oil.
Instructions
Use these as batch markers, not a color target. The first fry can stay pale; later batches darkening faster are a sign your oil is running hotter.
Season, Coat and First Fry
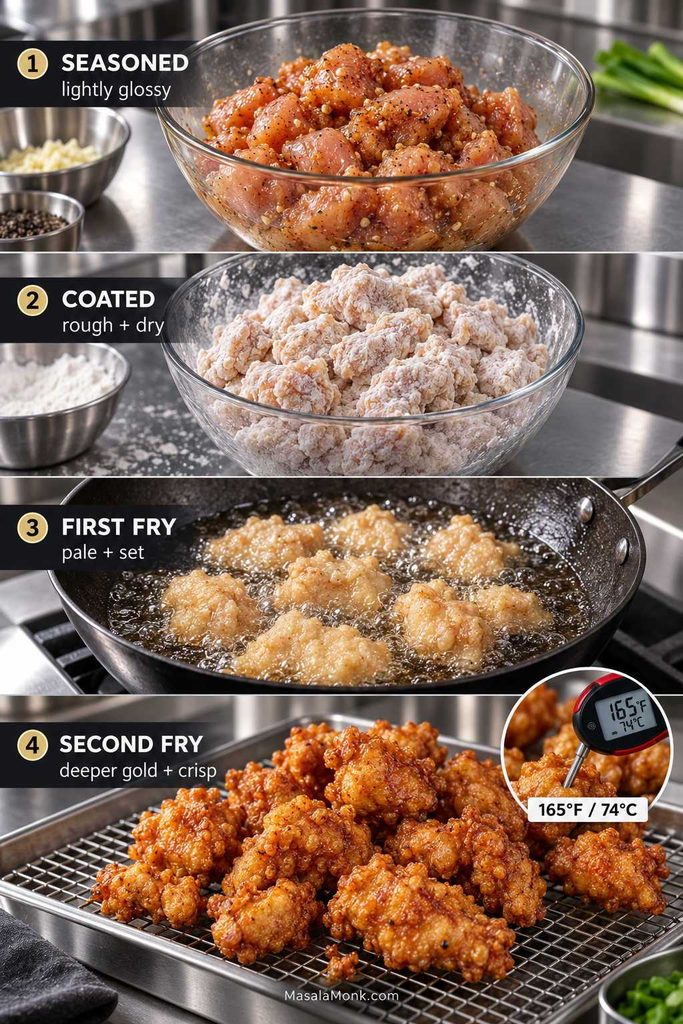
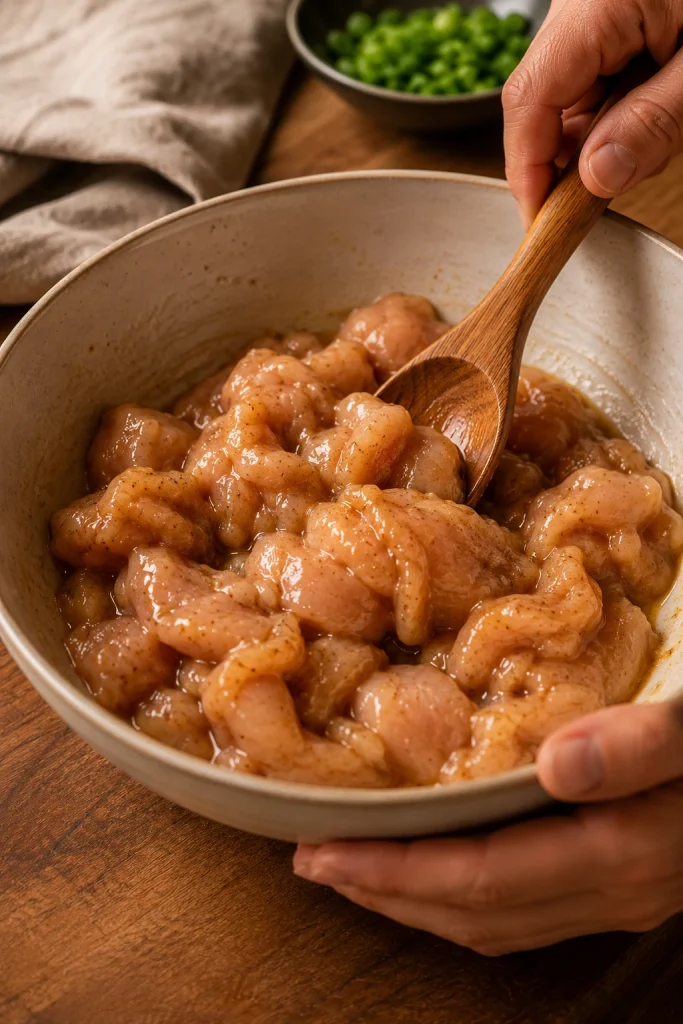
Season the chicken. Mix the chicken with soy sauce, Shaoxing wine, egg white, toasted sesame oil, ginger and white pepper. The pieces should look lightly glossy, with very little loose liquid underneath. Rest for 10–15 minutes while you mix the coating and finish the remaining prep.
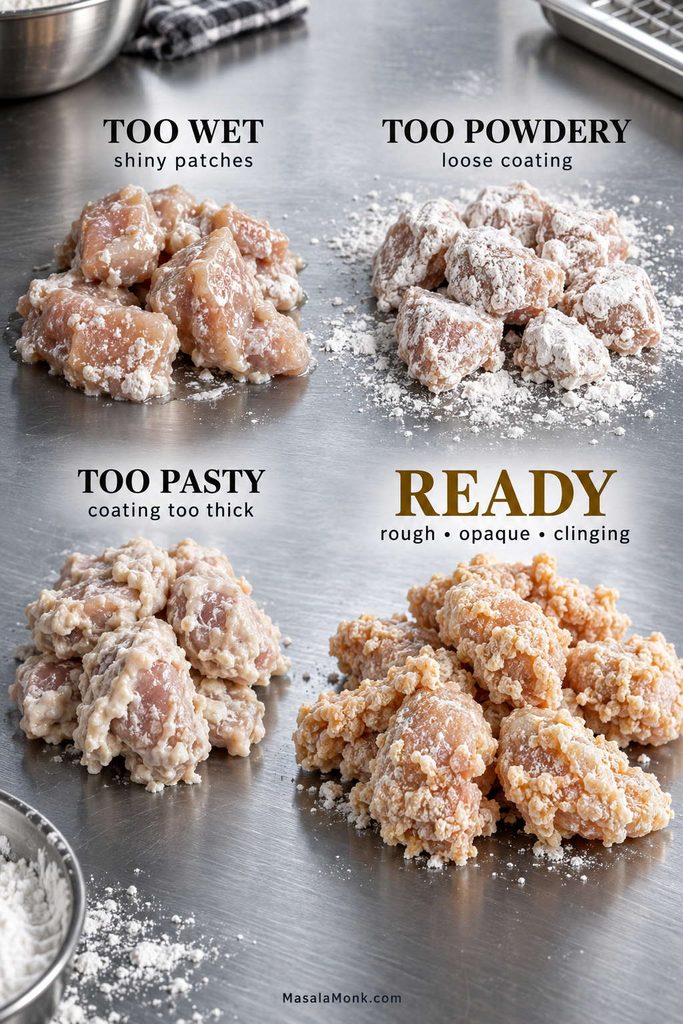
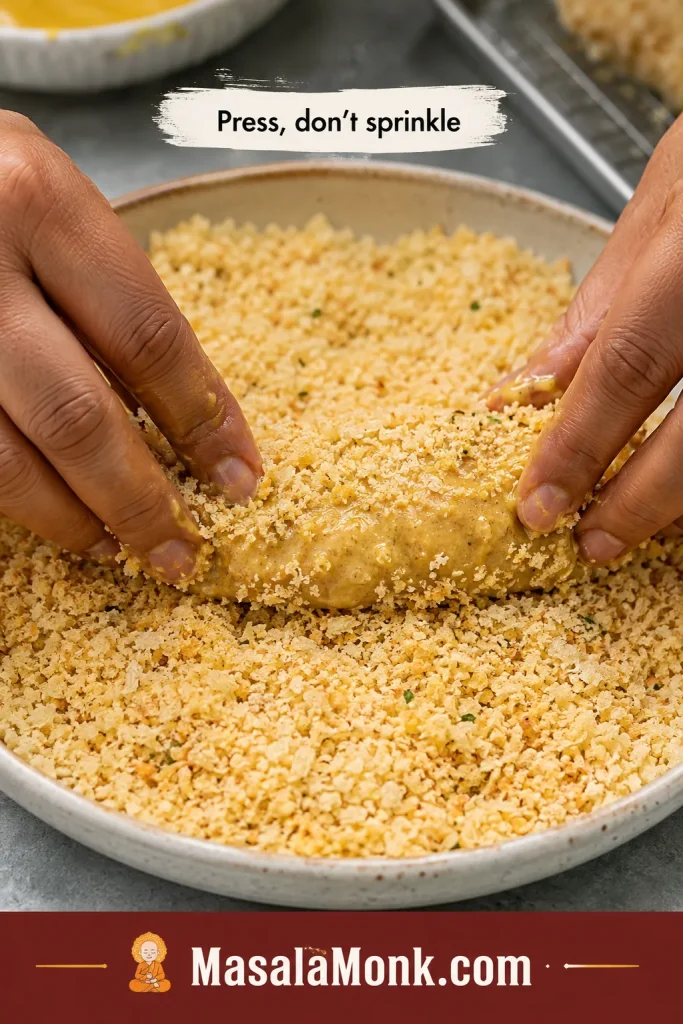
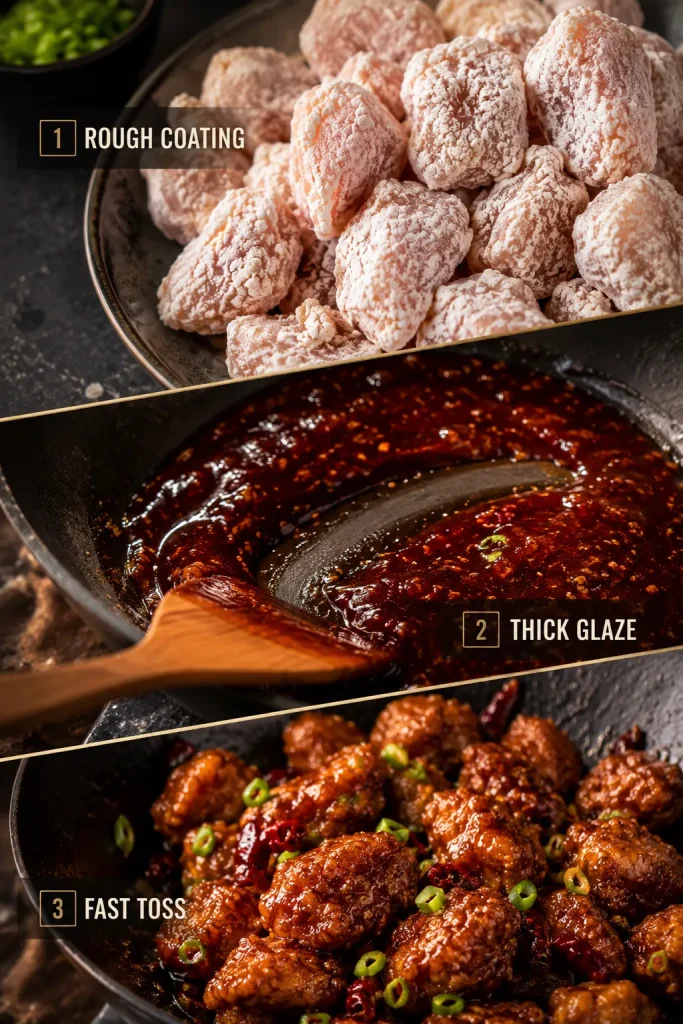
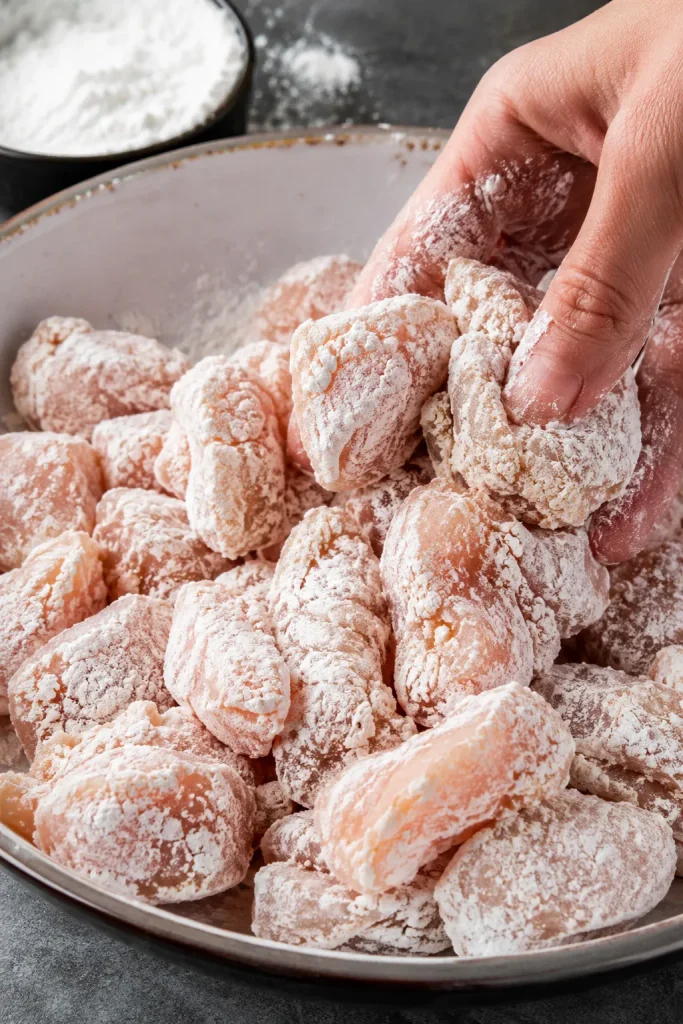
Coat the chicken. Whisk the cornstarch, flour, baking powder, salt and white pepper in a wide bowl. Let obvious excess seasoning drip from each handful of chicken, then toss through the dredge. Press and turn until the wet surface disappears under a rough, irregular coating. A few uneven edges are exactly what you want. Rest for about 5–8 minutes while the oil heats. Discard any dredge left in the bowl after it has contacted raw chicken.
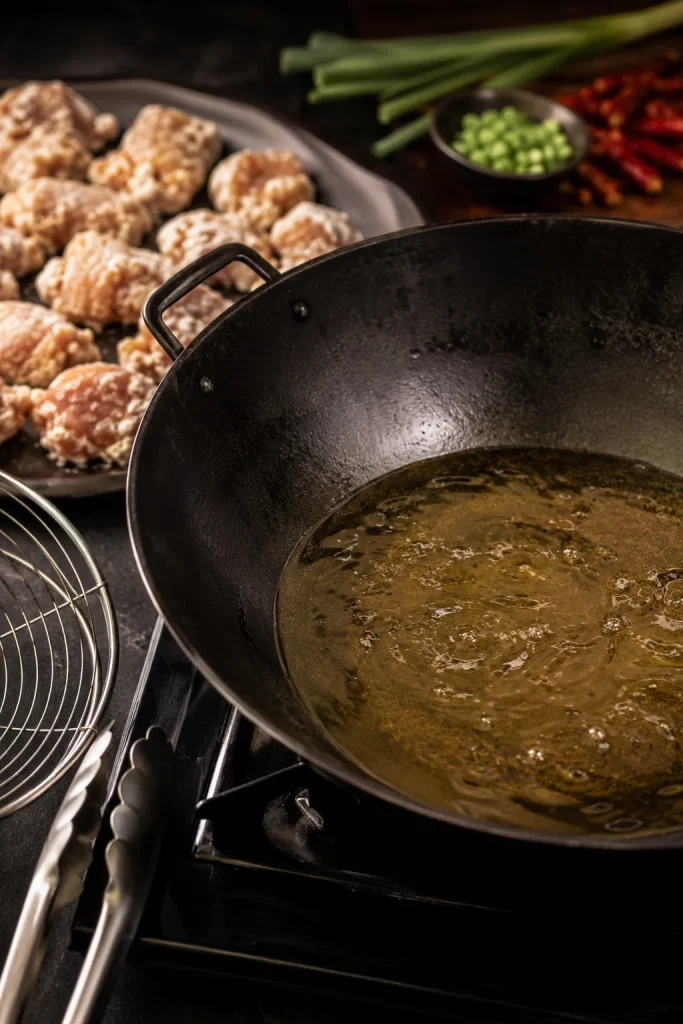
Heat the oil. Add enough neutral oil to reach about 2 in / 5 cm deep in a deep pot with plenty of empty space above it. Heat to 350°F / 175°C. Keep water away from hot oil, never overfill the pot and never leave it unattended.
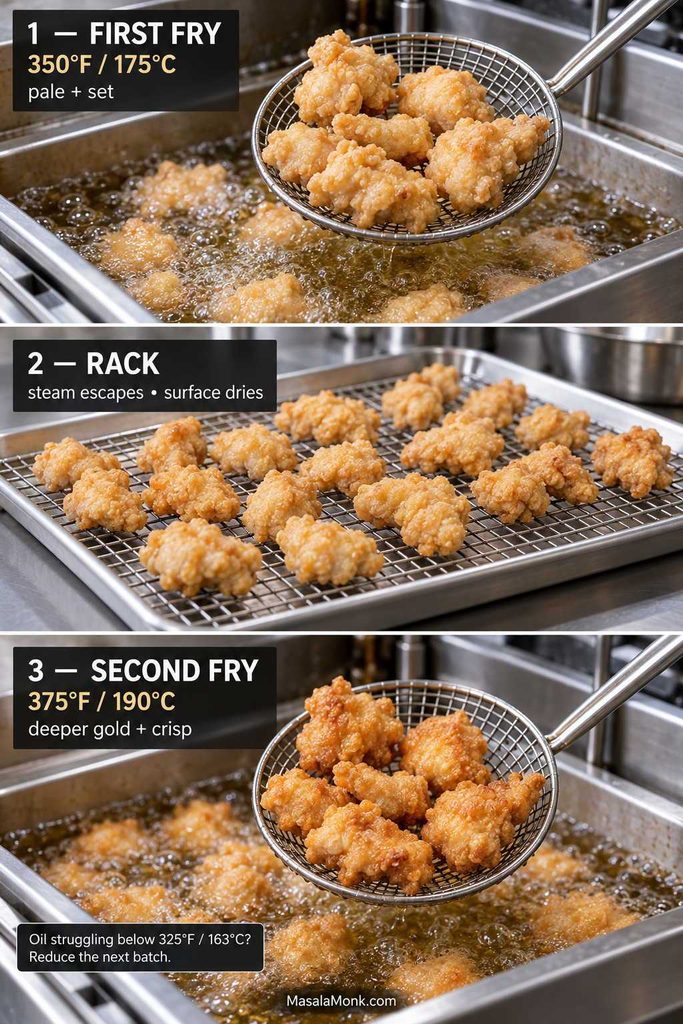
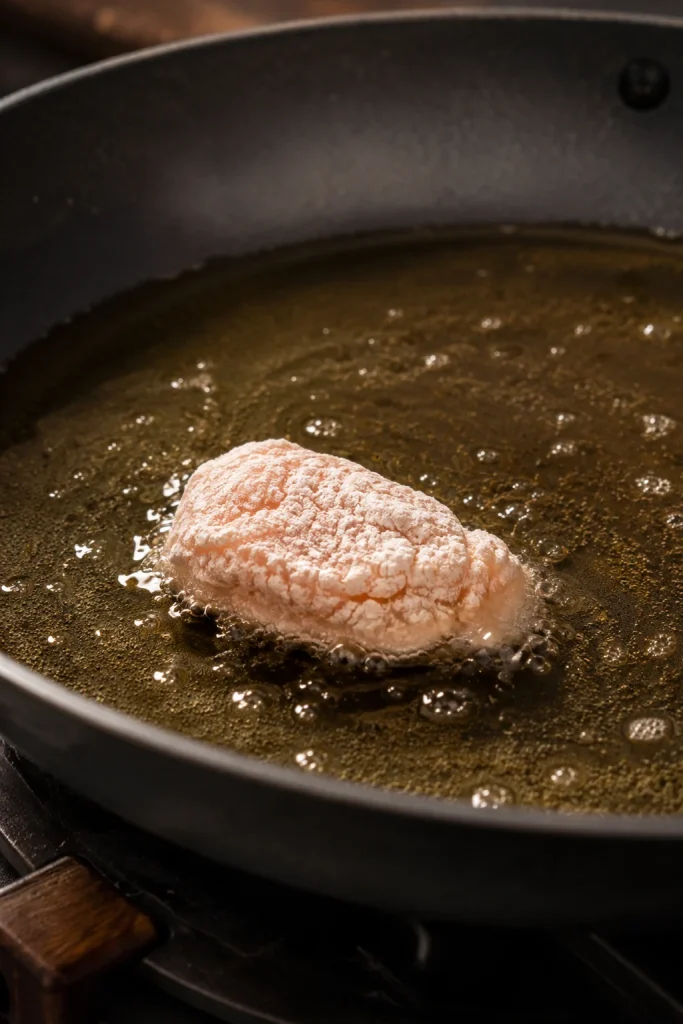
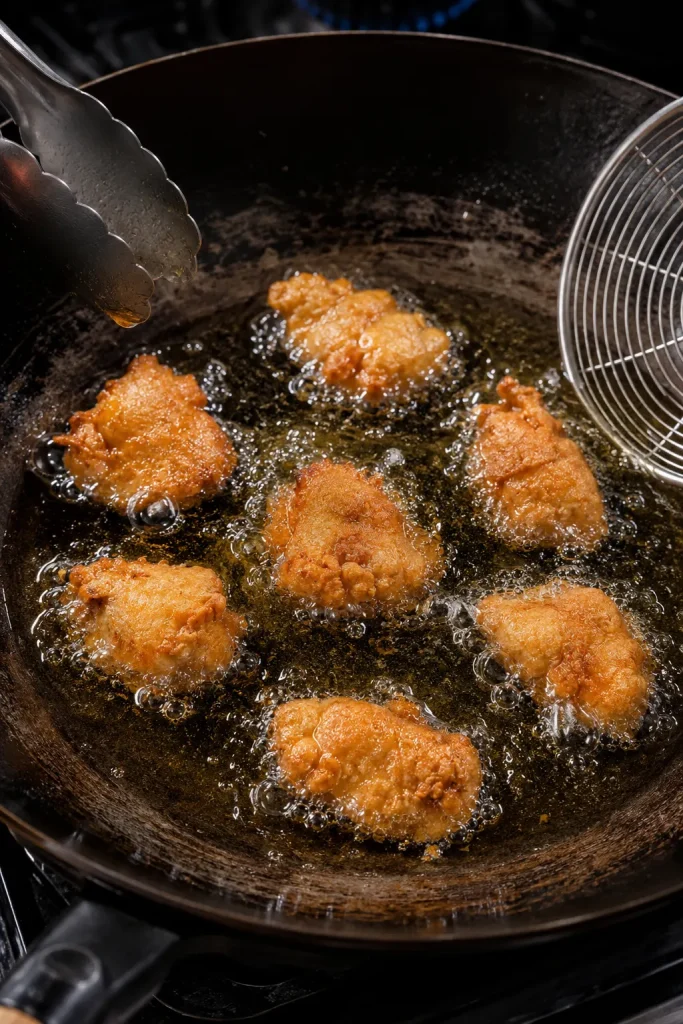
Fry the first round. Lower in enough chicken to form a loose layer. Give the coating a moment to set before moving the pieces much. Fry for about 2½–3½ minutes. The surface should change from soft and chalky-looking to firm and pale golden. Pale is fine; deeper color comes later. If the oil stays much below 325°F / 163°C, make the next batch smaller. Transfer to the rack and let the oil recover.
Make the Glaze
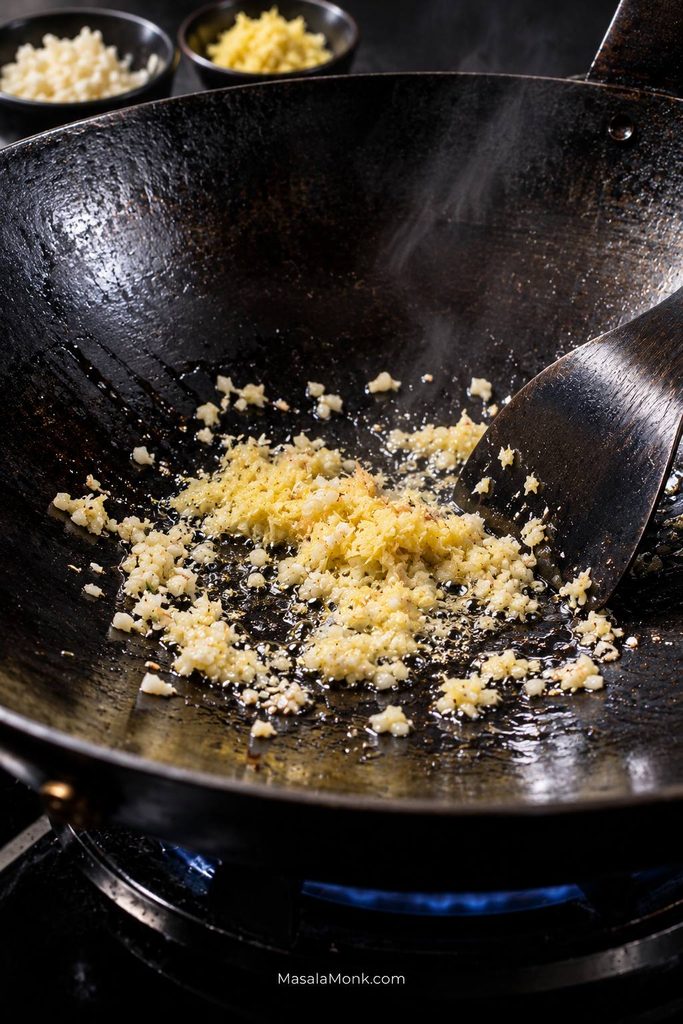
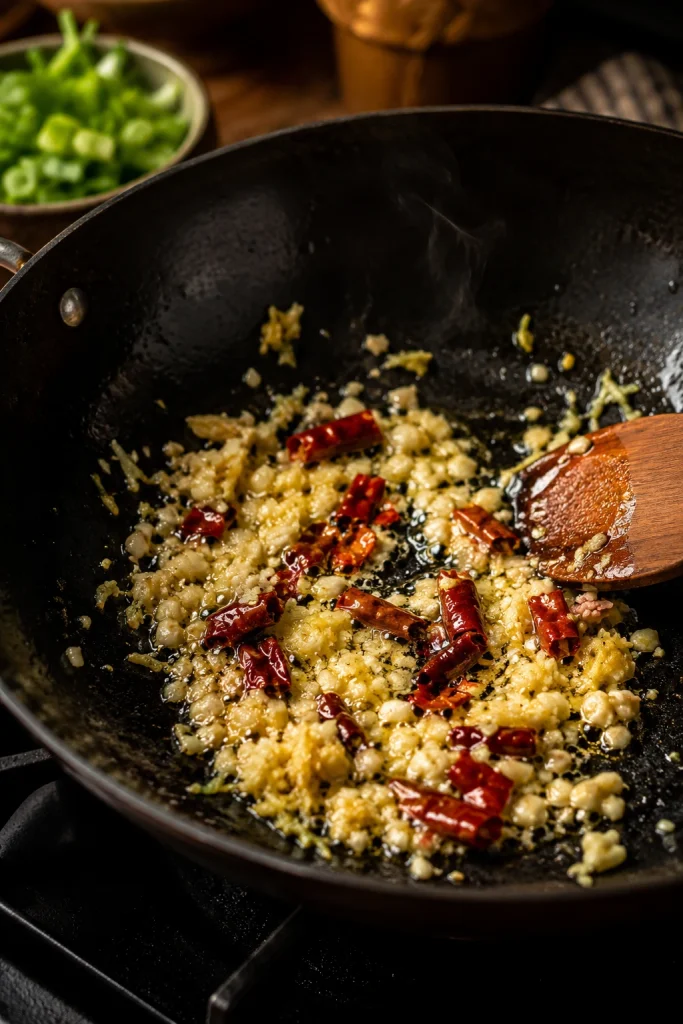
Cook the sauce while the chicken rests. Heat 1 teaspoon neutral oil in a wide skillet or wok over medium heat. Add the garlic, ginger and optional chile flakes. After 15–30 seconds they should smell fragrant but not browned. Pour in the prepared sauce mixture and bring it to a lively simmer. This is still the sauce mixture; once it thickens enough to ribbon from a spoon and cling to the chicken, think of it as the glaze.
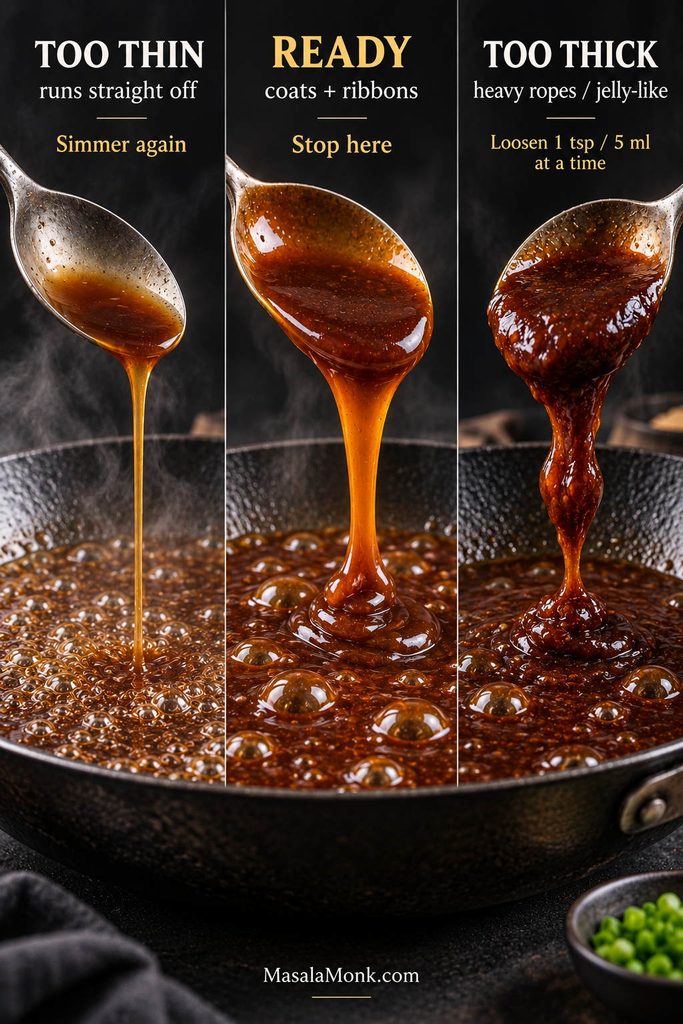
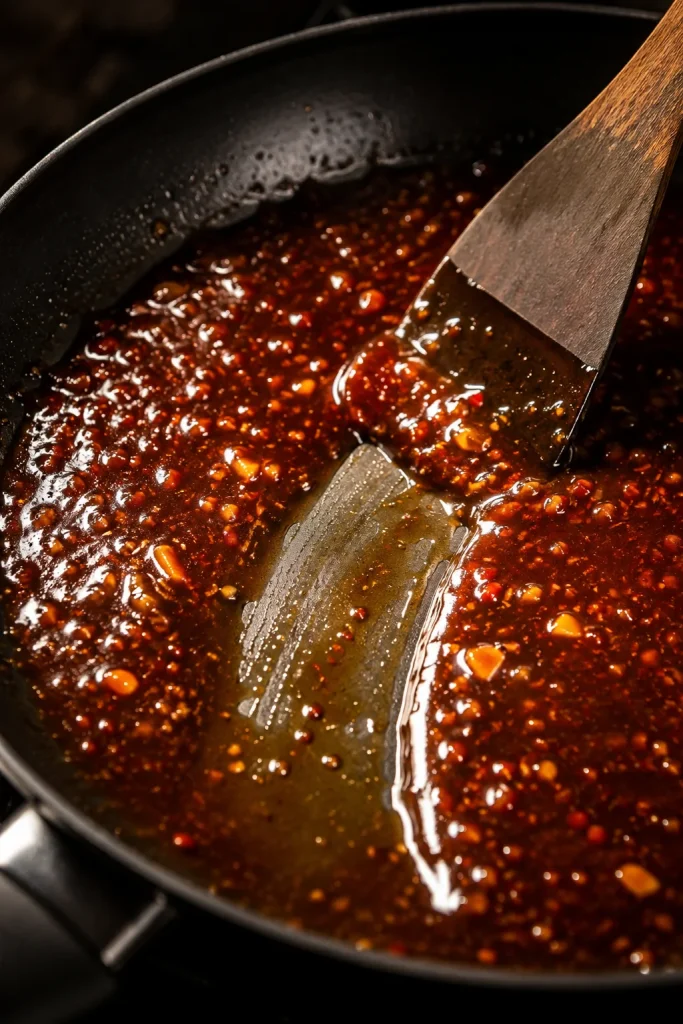
Thicken the glaze. Stir the slurry again and add about two-thirds. Let it bubble briefly. The bubbles become slower and shinier as it thickens. When the glaze coats the back of a spoon and falls into the pan in a ribbon, turn off the heat and stir in the toasted sesame oil. If it looks right before all the slurry is used, stop there.
Second Fry, Glaze and Serve
Fry a second time. Raise the oil to 375°F / 190°C. Starting with the chicken that came out first, fry in batches for another 45–75 seconds. The crust should tighten, deepen slightly and look drier. Check one of the largest pieces by inserting an instant-read thermometer through the side so the tip reaches the center. If it is under 165°F / 74°C: return those pieces briefly and check again. If the crust is already deeply browned: let the oil settle closer to 350°F / 175°C before finishing them.
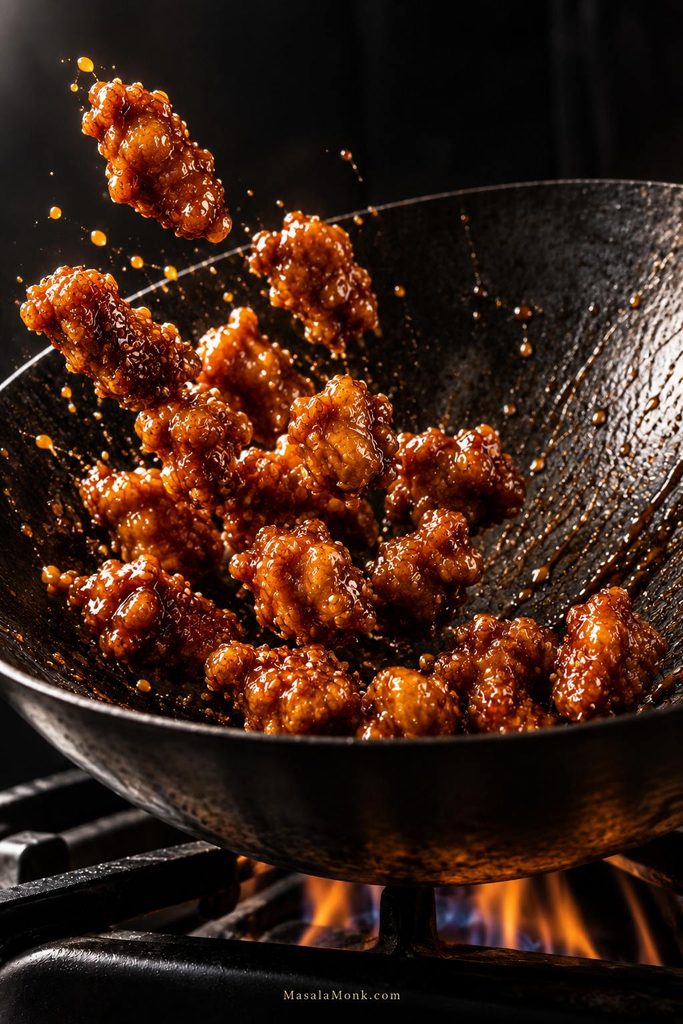
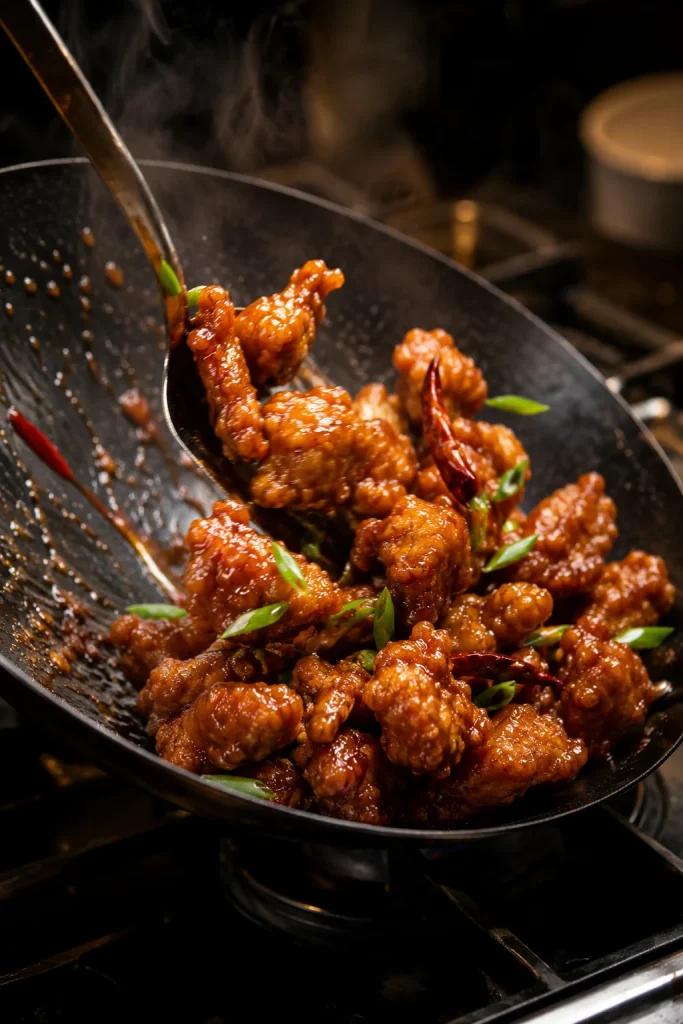
Glaze. Warm the glaze briefly over low heat if it has tightened, then switch off the heat. Add the chicken and turn the pieces only long enough for the fried surface to shine with a thin coating.
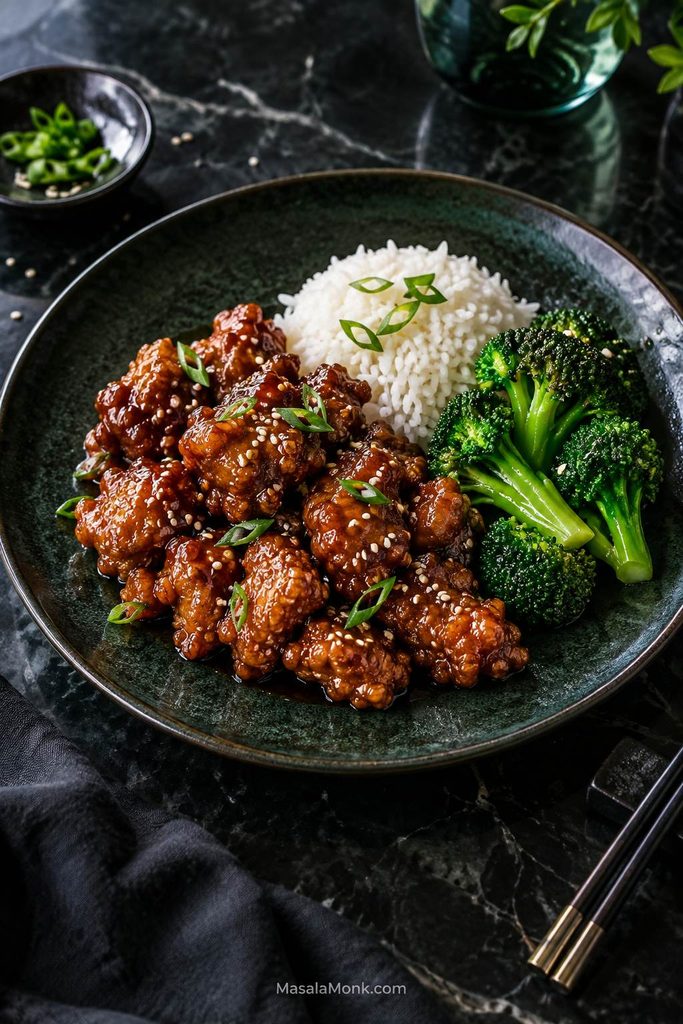
Serve. Add the toasted sesame seeds and scallions and move the chicken straight to the table.
Crispness is a chain. The coating has to grip the chicken, the first fry has to set it, the rack has to let steam escape, and the finished glaze has to cling without soaking the crust.
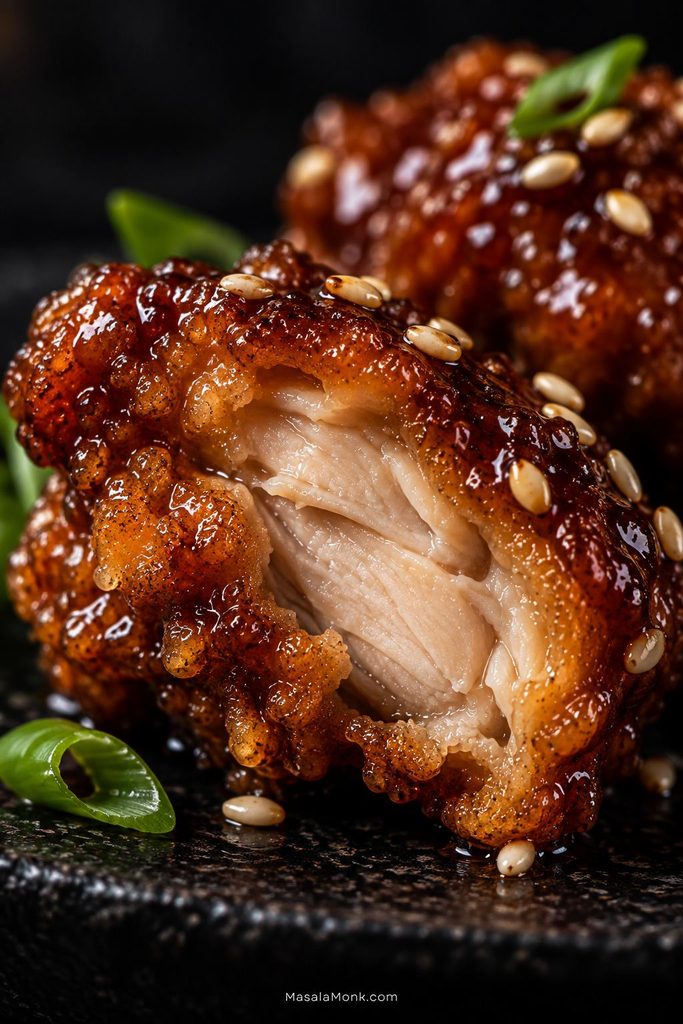
Use the cross-section to judge coating thickness. The crisp shell should be much thinner than the chicken inside; if crust and meat look nearly equal, too much wet mixture or dredge probably built up before frying.
Chicken Choice and Cut Size
If you have no strong preference, use thighs. They stay juicy across a wider cooking window and make batch frying more forgiving. Breast gives a leaner, firmer bite and works well too.
Aim for pieces around 1–1¼ inches / 2.5–3.2 cm. They do not need to be identical; they just need to be close enough in size that the smallest pieces are not drying out while the largest are still cooking.
Build a Coating That Holds
The seasoned chicken should feel tacky and lightly slick, with very little liquid pooled underneath. The egg white gives the dry coating something to grip. Carry a puddle of marinade into the dredge and the flour and starch can turn into heavy patches of paste.
Cornstarch brings brittle crunch, flour gives the crust structure, and baking powder makes the surface lighter and more irregular. Smooth is not the goal. You should still feel like you are eating chicken first, not a thick shell of breading.
Potato starch works too. Swap 90 g for the 90 g cornstarch, then add a little more only where wet patches remain.
Before frying, look for an opaque, rough surface with small irregular bits of coating clinging to the chicken. Wet shiny patches need another turn through the dredge. Loose white powder needs pressing in. Thick paste is too much.
Craggy is useful only when those crags are firmly attached. Loose flour breaks away in hot oil, while attached rough edges create more crisp surface for the glaze to catch later.
For this flour-and-starch coating, a short 5–8 minute rest lets the damp spots settle. Pure starch coatings behave differently.
First Fry, Rest, Then Fry Again
The first batch tells you what your pot, burner and quantity of oil can actually handle. Watch how quickly the temperature recovers after the chicken goes in; that is more useful than an arbitrary piece count.
Oil Depth and Batch Size
About 2 inches / 5 cm of oil gives the chicken heat around several sides at once and keeps damp coating from sitting against the metal for too long.
If the thermometer recovers quickly and the pieces separate easily, the batch size is working. If loose coating crumbs begin to darken, skim them out before the next batch.
Let the Crust Set
Fresh dredge is fragile when it first hits the oil. Leave the chicken mostly alone until the exterior firms up. Then a skimmer can move the pieces without scraping away the crust.
Two pieces touching is not a disaster. Ease them apart once the coating has set.
Rest, Then Finish With a Second Fry
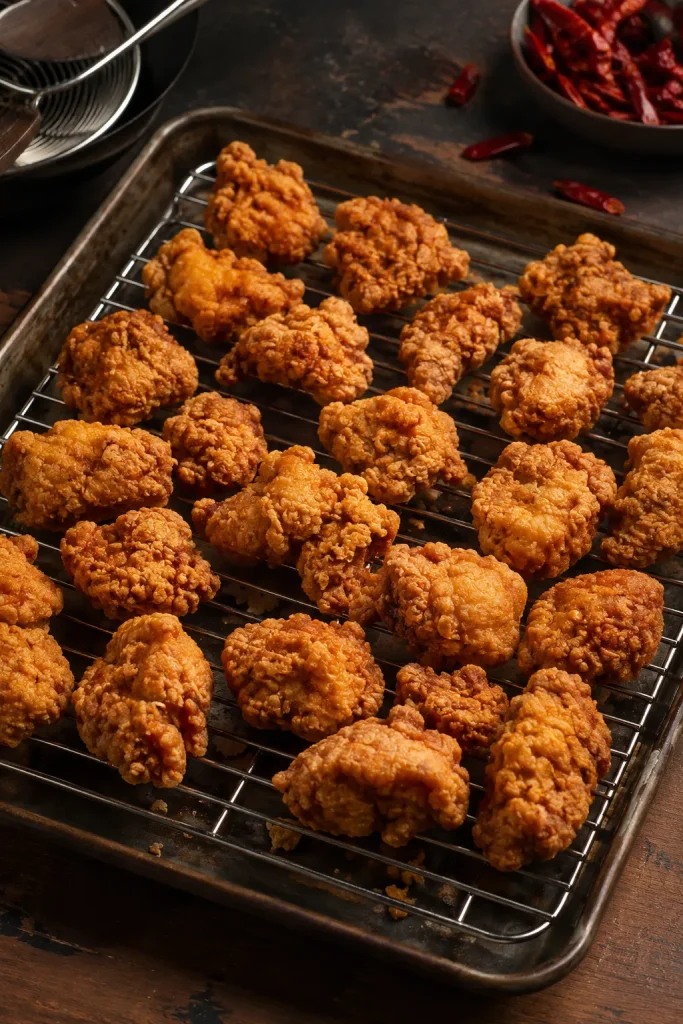
Spread the first-fried pieces across a rack in one layer so steam can escape underneath. By the end of the rest, the surface should feel dry, not steamy.
The second fry is the finish, not a rescue. The hotter oil tightens and dries a crust that has already set. This is when the chicken starts looking like the dish you came for: deeper gold, drier edges and a coating that feels crisp against the skimmer.
If the first fry left a batch pale and oily, correct the oil temperature and batch size before continuing. A longer second fry will not rebuild a crust that never formed properly.
A wire rack works better than paper towels between fries because air can move underneath the chicken. Trapped steam has an easier escape route, so the second fry starts with a drier crust.
Sesame chicken sauce is a sweet-savory glaze made with soy sauce, honey, brown sugar, rice vinegar, ketchup, oyster or mushroom stir-fry sauce, garlic, ginger and toasted sesame oil. Before thickening, it is the sauce mixture. Once it ribbons from the spoon and clings instead of running off, it has become the glaze you need for fried chicken.
Honey gives the glaze rounded sweetness and shine, while brown sugar adds a slightly darker caramel note. Rice vinegar keeps the sweetness in check. Ketchup adds body, tang and the reddish-brown color familiar in Chinese-American sesame chicken sauces.
When the garlic and ginger hit the warm oil, the pan finally starts smelling like sesame chicken instead of a bowl of measured ingredients. Toasted sesame oil goes in after thickening so its aroma stays brighter.
Have the mixed sesame chicken sauce beside the stove before the aromatics hit the wok. This fragrant stage lasts only seconds.
Know When the Glaze Is Thick Enough
What It Does
What It Means
Next Move
Runs straight off the spoon
Too thin
Simmer another 20–30 seconds and check again. Add more slurry only if needed.
Coats the spoon and falls in a ribbon
Ready
Stop thickening.
Falls in heavy ropes or looks jelly-like
Too thick
Loosen with water 1 teaspoon / 5 ml at a time.
Stir the slurry just before pouring because cornstarch settles quickly. Start with about two-thirds. The bubbles become slower and shinier as the glaze thickens.
It will tighten further as it cools. Stop while it still moves easily from the spoon. If you go a little too far, a teaspoon or two of water usually brings it back.
Let each slurry addition heat through before adding more. Cornstarch thickens with heat, so rushing the next spoonful can take a loose sesame chicken glaze past ribboning and into a gummy texture.
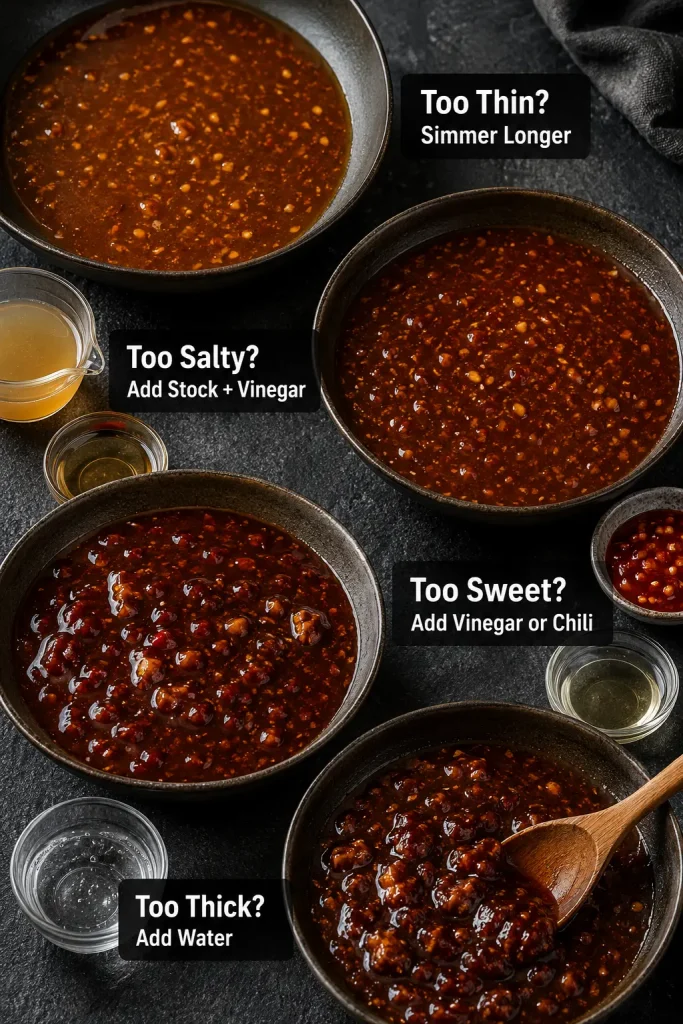
Fix the Glaze Before Adding the Chicken
Slightly too sweet: add unseasoned rice vinegar 1 teaspoon / 5 ml at a time.
Clearly too sweet: start with 1 tablespoon / 15 ml water, 1 teaspoon / 5 ml soy sauce and 1 teaspoon / 5 ml rice vinegar. Simmer briefly and taste again.
Too salty: add water 1 teaspoon / 5 ml at a time. If the glaze becomes too thin, add 1 teaspoon of the prepared slurry, simmer briefly and reassess before adding more.
Too sour: add honey 1 teaspoon / about 7 g at a time.
Needs thinning: add water 1 teaspoon / 5 ml at a time.
Still too thin: simmer another 20–30 seconds first. If it still runs straight off the spoon, add prepared slurry 1 teaspoon at a time.
Sesame flavor feels quiet: add more toasted seeds first, then a small splash of toasted sesame oil if needed.
Want It Sweeter or Need Extra Glaze?
For sweeter honey sesame chicken, add another tablespoon / about 21 g honey. For a deliberately less-sweet batch, omit the brown sugar first. If you want to pull it back further, reduce the honey by 1 teaspoon / about 7 g at a time.
If you want more sauce, make more—but reserve it separately. Scale the sauce and slurry to 1½ times the listed amounts, thicken it, then move roughly one-third to a bowl. Extra glaze belongs with the rice or broccoli, not poured over the finished crust.
For a looser sauce that works across chicken, tofu, vegetables and noodles, see our stir fry sauce recipe. The glaze here is intentionally more concentrated because it has a different job: coating fried chicken quickly.
How to Sauce Sesame Chicken: The Toss Is the Timer
Have the glaze completely finished before the chicken goes in. Warm it only if it has become stiff, switch off the heat, then turn the chicken through the pan just long enough to coat it.
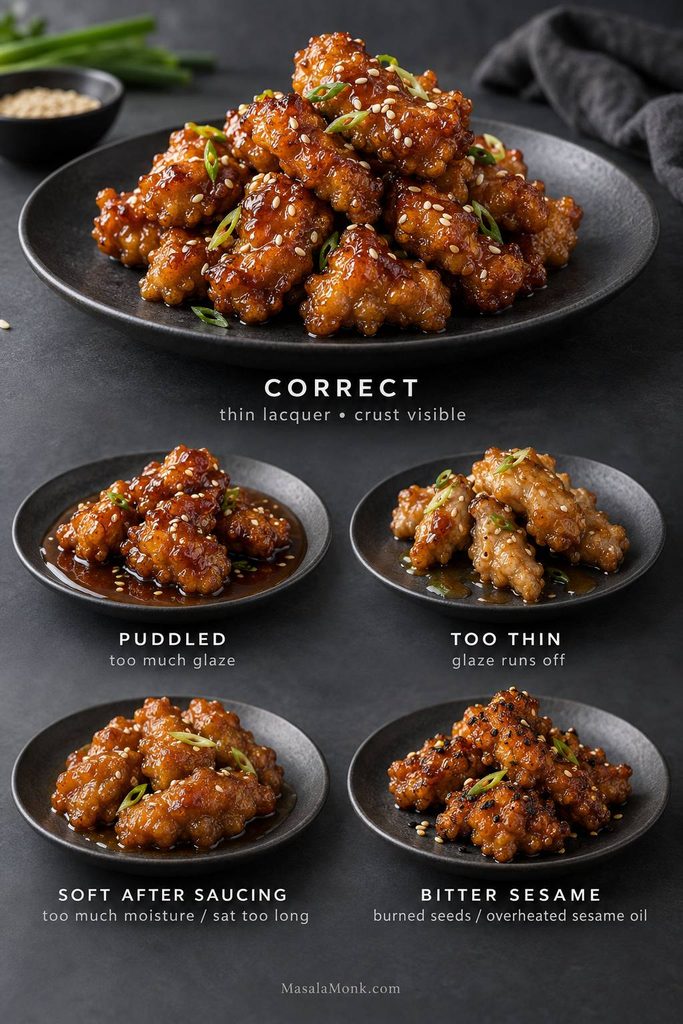
You should still be able to see the crust underneath the shine. A few streaks of glaze at the bottom of the pan are normal. A puddle means the chicken has more sauce than it needs.
Turn off the heat and coat quickly. A thin film needs fewer turns, which gives the fried edges less time to absorb moisture.
This is where the extra effort pays off. The chicken can go from its second fry to glaze to plate in under a minute, before a takeout box has the chance to steam the crust.
Sauced fried chicken will eventually soften. What you want is crunch when it reaches the table and through those first bites—not a promise that glazed chicken somehow stays crackly forever.
What to Serve With Sesame Chicken
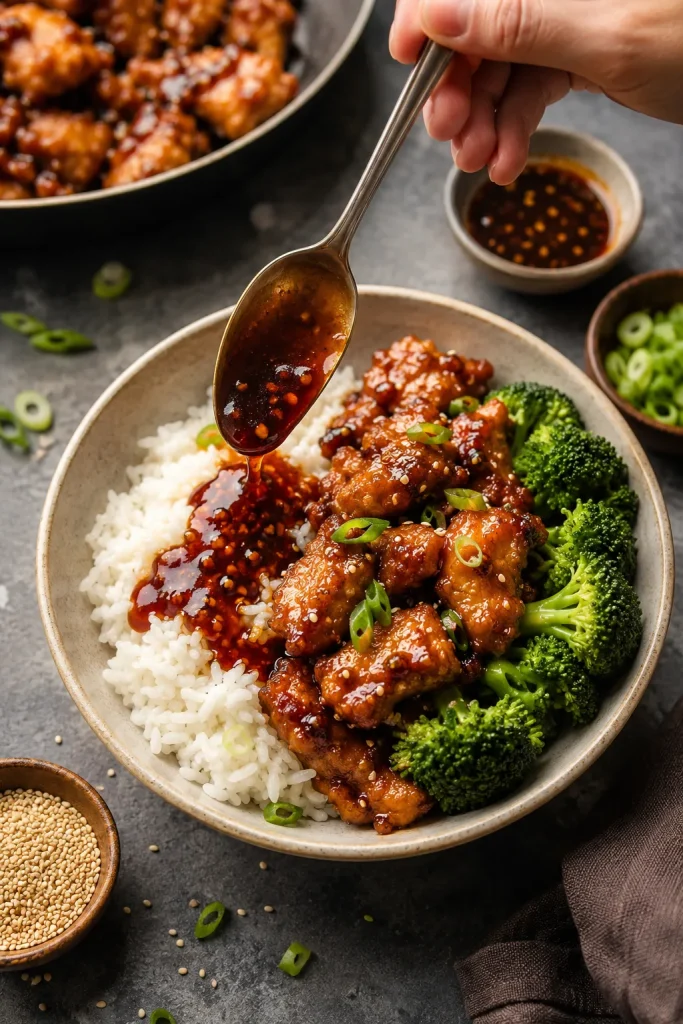
Pile the chicken beside hot steamed rice and something green while the glaze is still shining and the crust still has some snap. Broccoli is an easy choice: the rice catches extra sauce, while the broccoli keeps the plate from becoming too sweet.
Keep the green vegetable simply seasoned. Hot rice catches extra glaze, while a clean green side keeps the next sesame chicken bite from feeling too sweet.
If you’re making plain rice, our guide to cooking rice covers jasmine, long-grain, basmati and other methods.
For a fuller takeout-style dinner, Chicken Fried Rice gives you a seasoned rice option. If you would rather serve noodles, Chicken Chow Mein fits the same kind of meal. Bok choy, green beans or a cold cucumber salad work well too.
Find the moment when it changed. Chicken that was already soft before the glaze arrived points toward the coating or fryer. Chicken that stayed crisp until glazing points toward glaze thickness, amount or timing.
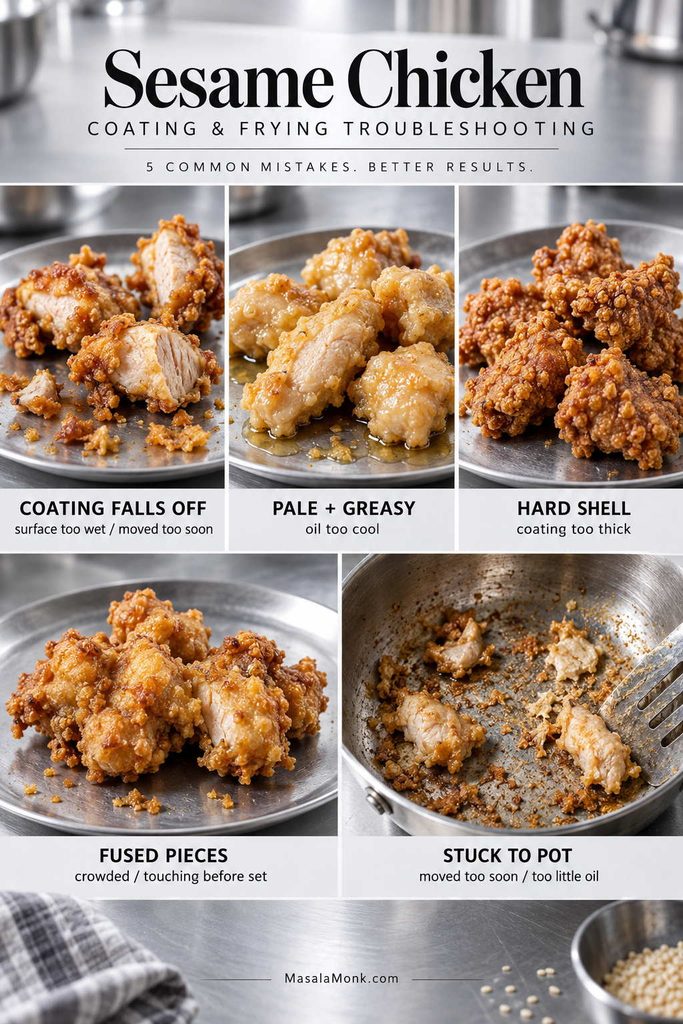
Coating and Frying Problems
Problem
Likely Cause
What to Change
Coating falls off in the oil
Too much surface liquid, weak contact with the dredge or rough handling at the start
Drain obvious excess seasoning, press on the coating and give the crust time to set.
Crust slides off when bitten
The coating is too thick or poorly bonded
Use a thinner layer and carry less loose marinade into the dredge.
Pieces fuse together
The fryer is crowded, or pieces were lowered against one another before the crust set
Leave more room between pieces. If two touch, wait until the coating firms before easing them apart.
Crust is hard
Too much dry coating
Keep the layer irregular but relatively thin and knock away heavy excess.
Chicken is pale and greasy
The oil stayed too cool
Let it recover fully and reduce the next batch size.
Chicken darkens too quickly
The oil is too hot or the pieces are unusually small
Check the thermometer and lower the heat before continuing.
Coating sticks to the pot
Too little oil or the crust stayed against the metal before setting
Use roughly 2 in / 5 cm of oil and wait until the coating firms before moving the pieces.
Second fry does not make it crisp
The first fry left the crust greasy, wet or damaged
Correct the first-fry conditions; do not simply extend the hotter fry.
For a failed batch, keep one piece unsauced. Comparing it with a glazed piece quickly tells you whether the texture problem began in the fryer or appeared during finishing.
Glaze and Finishing Problems
Problem
Likely Cause
What to Change
Chicken was crisp until glazed
The glaze was too thin, too abundant or left around the chicken too long
Finish the glaze first and use only enough to coat the surface.
Chicken softens after several minutes
Moisture from the glaze is working into the crust, especially if the chicken is heavily sauced or covered
Serve promptly and keep extra glaze separate.
Glaze flavor or texture is off
The balance or thickness needs adjustment
Fix it before adding chicken using the recovery guide above.
Sesame flavor tastes bitter
Burned seeds or overheated toasted sesame oil
Toast seeds gently and add sesame oil after thickening.
When the glaze looks uncertain, test one piece before adding the whole batch. Visible crust means continue; pooling, running or heavy ropes mean fix the glaze first.
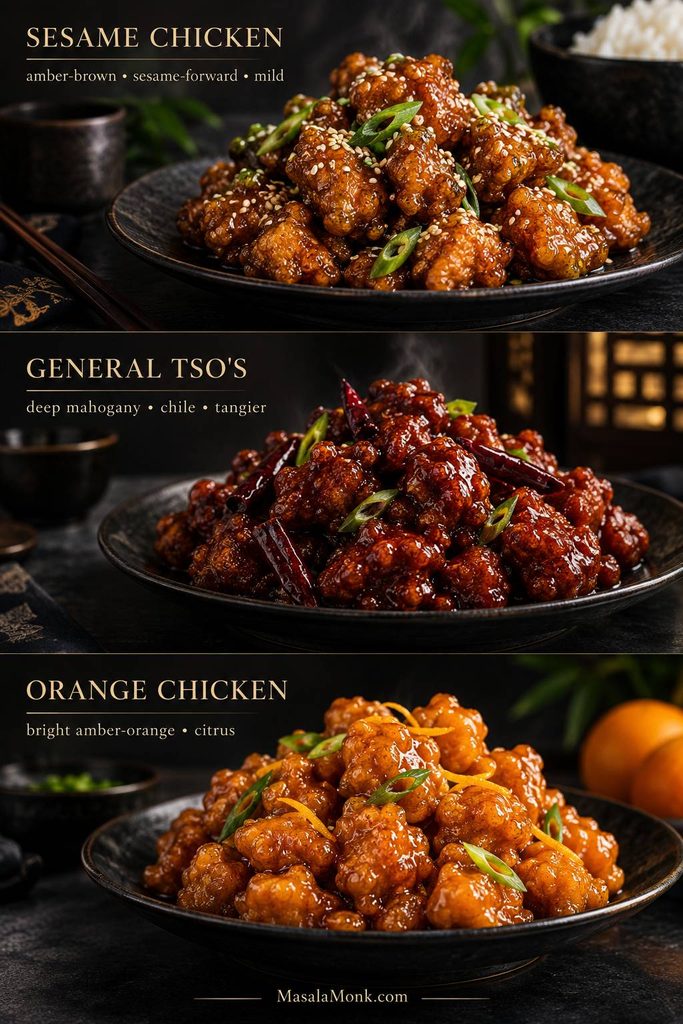
Sesame Chicken vs General Tso’s Chicken vs Orange Chicken
The main difference is the glaze. Sesame chicken is usually mild and sesame-forward. General Tso’s chicken is generally darker, tangier and more chile-forward, while orange chicken is defined by citrus.
Restaurant versions vary, but sesame chicken should taste meaningfully of toasted sesame—not like a generic sweet sauce with seeds scattered over it. For a chicken stir-fry built around dried chiles, peanuts and a tangier sauce, see our Kung Pao Chicken.
Look past color: toasted sesame, chile and citrus are the flavors that distinguish sesame chicken, General Tso’s chicken and orange chicken.
Make Ahead, Store and Reheat
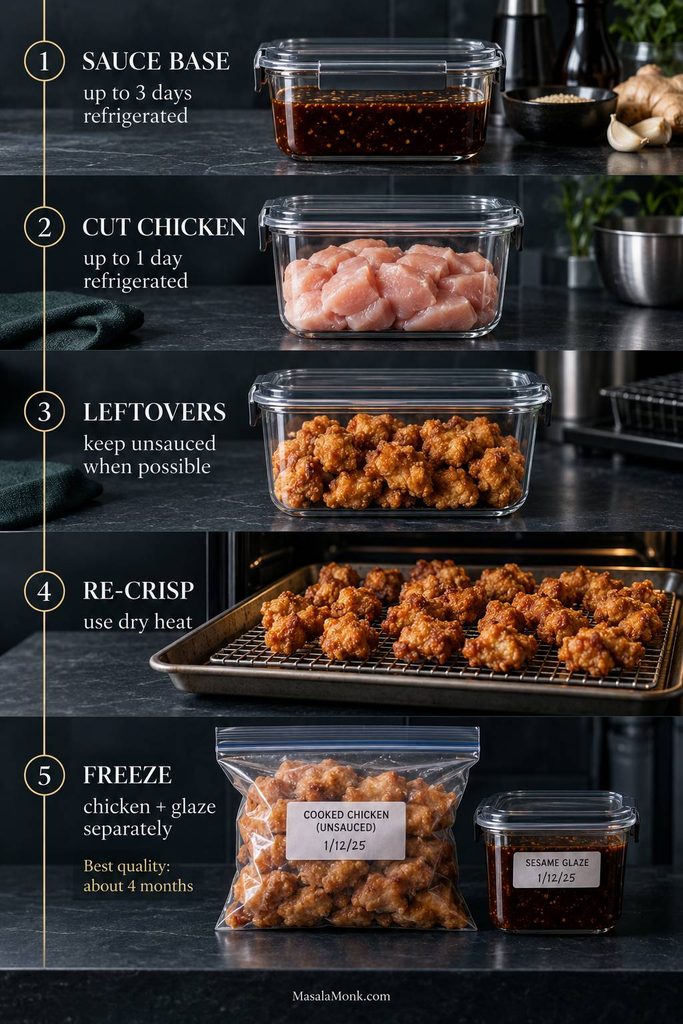
If you know you will save some chicken, keep that portion unsauced. Fried coating has a much better chance of crisping again when it has not spent the night absorbing glaze.
What You Can Prepare Ahead
Sauce base: mix the soy sauce, honey, brown sugar, rice vinegar, ketchup, oyster or mushroom sauce, water and optional MSG up to 3 days ahead. Refrigerate in a covered container.
Chicken: cut it up to 1 day ahead, keep it covered and refrigerated at 40°F / 4°C or below, and do not add the egg-white seasoning until you are closer to cooking.
Dry dredge: combine the cornstarch, flour, baking powder, salt and white pepper several days ahead and keep it airtight and dry.
Slurry: mix it close to cooking. Cornstarch settles quickly, so stir again immediately before using.
Cooked Chicken for Another Day
Do not deliberately partly cook chicken, chill it and finish it later. Cook it fully to 165°F / 74°C, cool promptly and store safely.
Re-crisp fully cooked unsauced pieces in a hot oven, air fryer or briefly in hot oil before adding warm glaze. The result will not be identical to a fresh batch, but keeping chicken and glaze separate gives you the best chance.
Leftovers and Freezing
Refrigerate leftovers within about 2 hours and use refrigerated cooked chicken within about 3–4 days. Reheat thoroughly to 165°F / 74°C.
Unsauced chicken responds best to dry heat from an oven or air fryer. Already-glazed chicken is easier to warm in a skillet or wok; add a teaspoon or two of water if the glaze has tightened too much. The microwave is fastest and gives you the softest crust.
To freeze: cool fully cooked unsauced chicken, freeze the pieces in a single layer until firm, then transfer them to an airtight freezer container or bag. Freeze the glaze separately. USDA lists about 4 months as the best-quality freezer window for cooked or fried chicken, although the crust will still be at its best when freshly cooked. See the USDA chicken storage guidance.
Let frying oil cool completely before straining it for reuse or transferring it for disposal. Never pour cooking oil down the sink.
For better leftovers, separate is better: dry chicken re-crisps more easily, while the glaze can be warmed and added just before eating.
A Chinese-American sesame chicken recipe usually combines bite-size chicken, a crisp fried coating and a sweet-savory sesame glaze made with soy sauce, honey or sugar, vinegar, garlic, ginger and sesame.
2. Is sesame chicken spicy?
Usually it is mild. The optional ¼ teaspoon crushed red pepper gives this sauce a little background warmth. Leave it out for a mild batch or increase it gradually for more heat.
3. Can I use chicken breast instead of thighs?
Yes. Keep the pieces the same size and use 165°F / 74°C at the center as your doneness check. Breast has less margin for overcooking than thigh.
4. Is sesame chicken gluten-free?
Not as written. The flour, conventional soy sauce, many oyster or mushroom sauces, some Shaoxing wines and some packaged baking powders can contain gluten or require label checking. Use certified gluten-free tamari, certified gluten-free sauces and baking powder, plus dry sherry or stock unless your Shaoxing wine is confirmed gluten-free.
For the coating, a pure cornstarch or potato-starch version can provide a gluten-free route, but it behaves differently from the flour-and-starch dredge above. Coat the chicken close to frying and expect a more brittle crust.
5. Can I make sesame chicken without honey?
You can replace the 3 tablespoons / about 63 g honey with 4 tablespoons / about 50 g packed brown sugar plus 1 tablespoon / 15 ml water as a starting point. Honey adds body as well as sweetness, so judge the finished glaze by taste and the spoon-coating cue.
6. Can I use potato starch instead of cornstarch?
Potato starch works well in the same amount: start with 90 g in place of the 90 g cornstarch. Add a little more only if wet patches remain on the chicken.
7. Can I make sesame chicken in an air fryer or oven?
An air fryer or oven can work, but not by moving this exact deep-fry dredge unchanged into dry circulating heat and expecting the same crust. Those methods work better with coatings designed for them. If you mainly want sesame chicken flavor without breading or a pot of oil, our Sesame Ground Chicken is the easier skillet route.
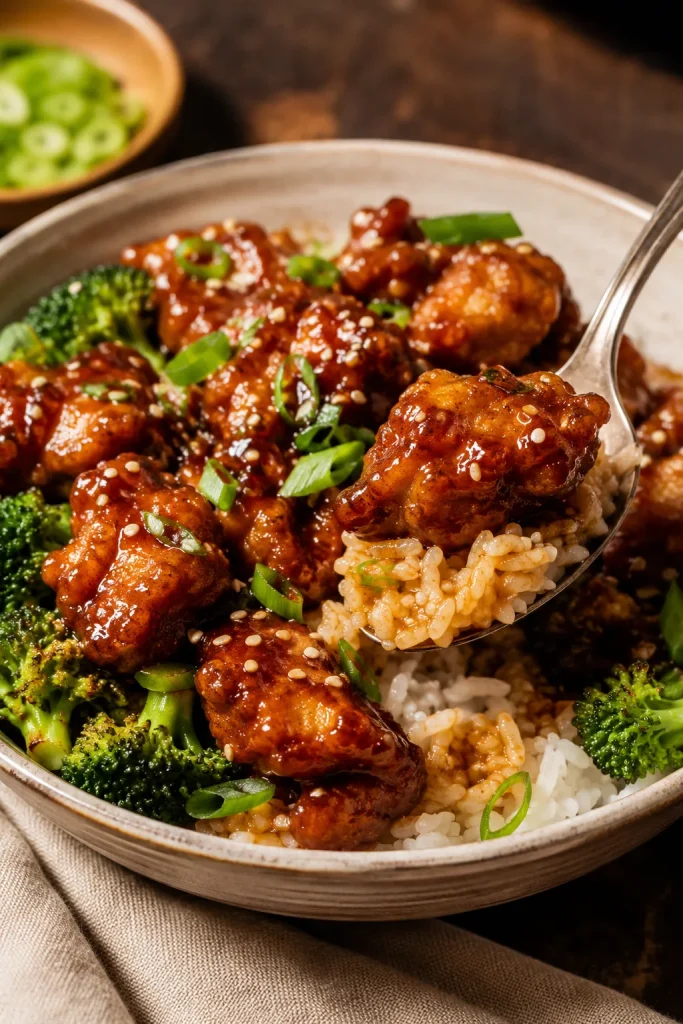
When the chicken is freshly glazed and the crust still has some snap, get it to the table.
Thin glossy glaze, craggy fried edges, and enough crunch left for the first bites.
Extra sauce can wait for the rice. The chicken shouldn’t.
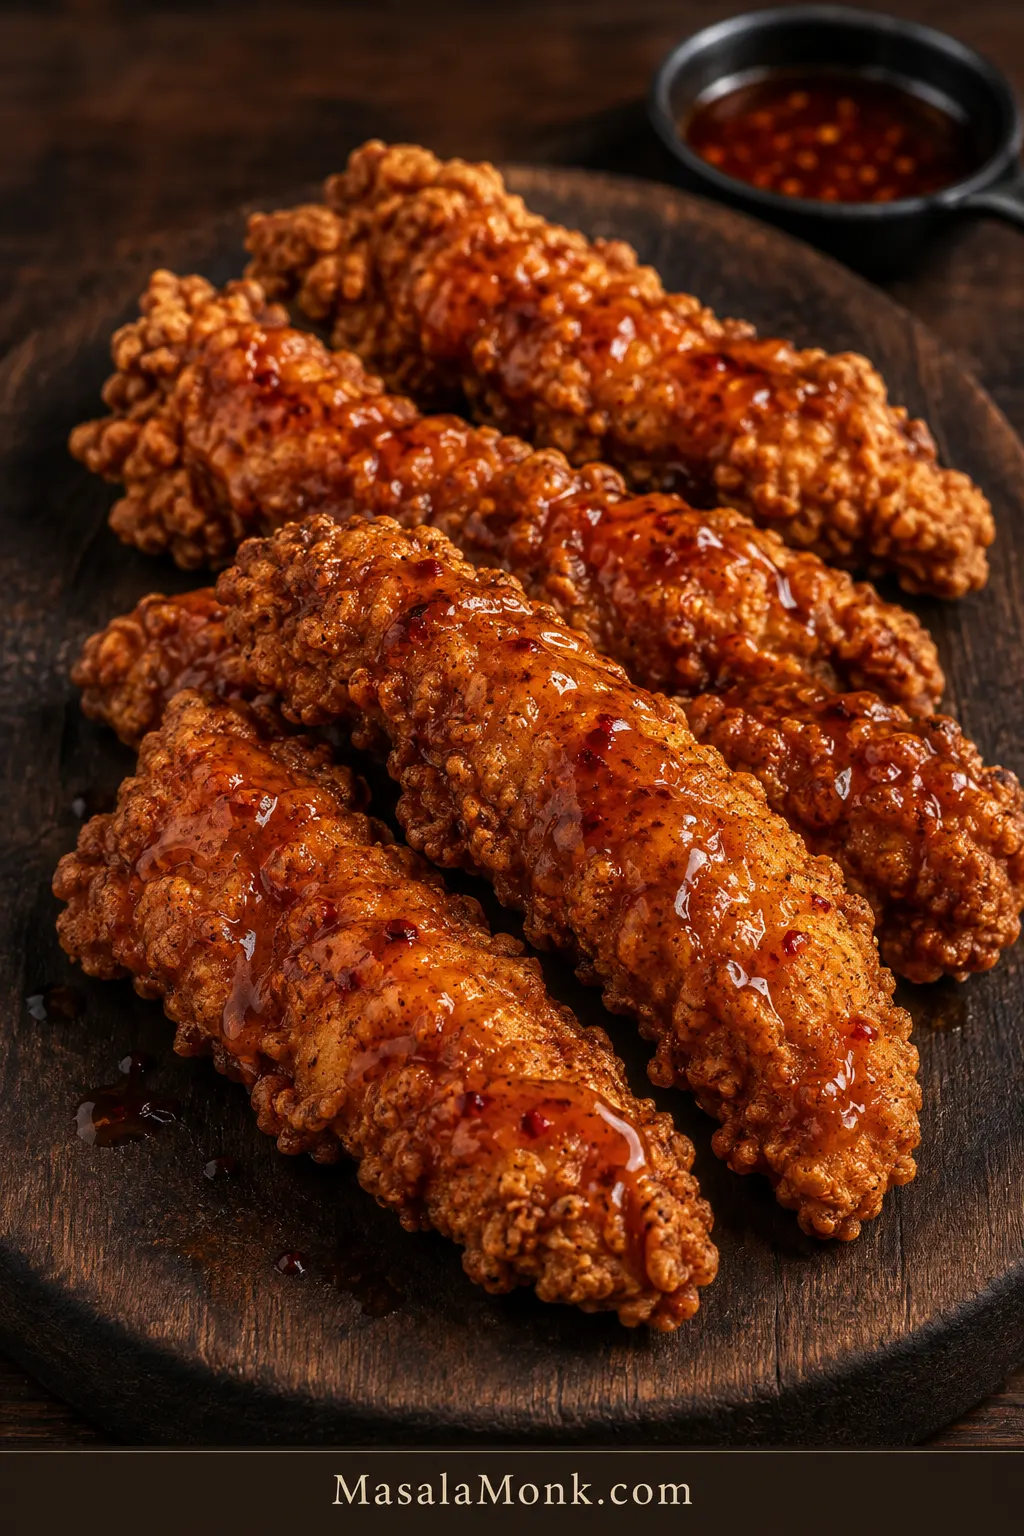
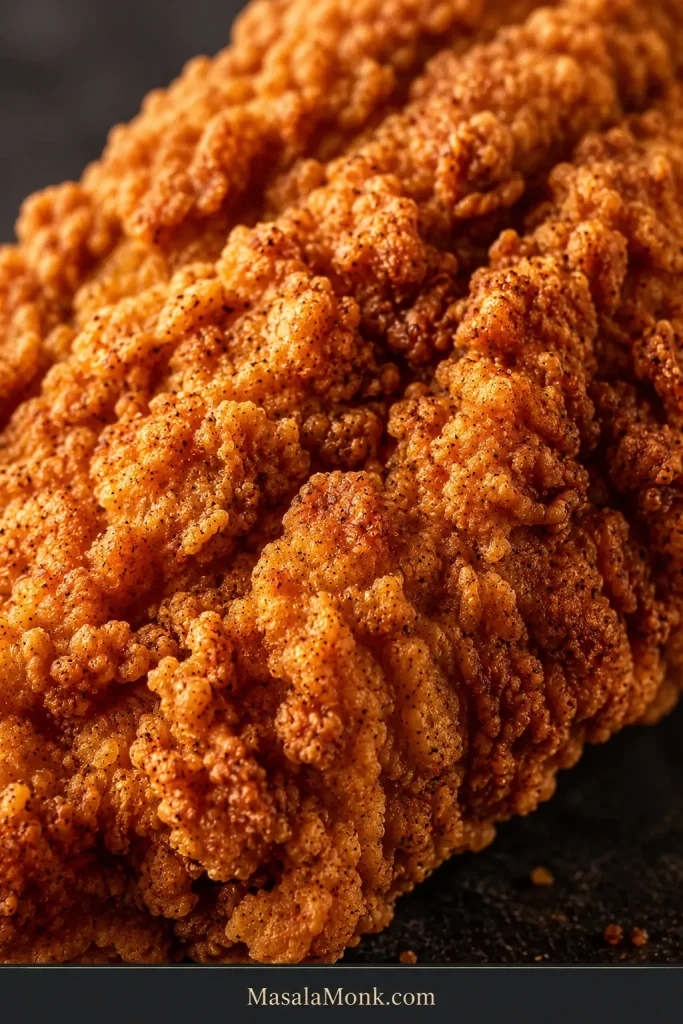
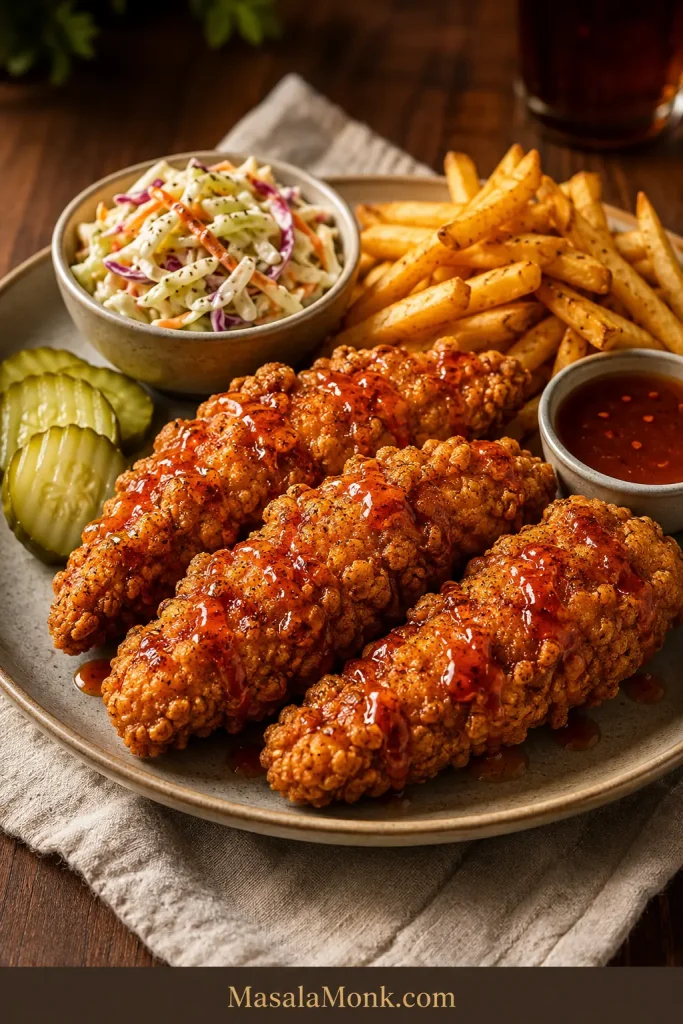
The best hot honey chicken tenders crackle when you bite through the coating, then give way to juicy chicken, sticky honey and a little heat that arrives just after the sweetness. Those rough golden ridges matter—they give the honey somewhere to catch without covering every bit of crunch.
Homemade tenders usually go wrong in a few predictable places. The breading slips off, too much chicken cools the oil, a thick piece stays underdone while the outside darkens, or the hot honey goes on so heavily that a beautiful crust turns soft almost immediately.
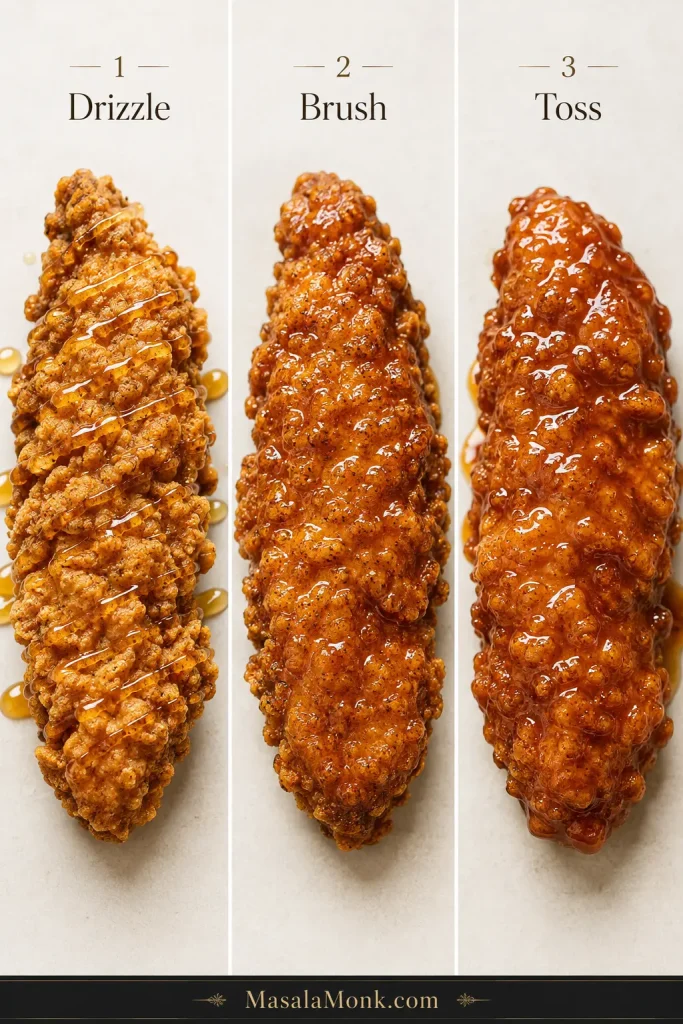
This version keeps those trouble spots under control without turning fried chicken into a project. The chicken is seasoned before breading, the coating gets rough little flour flakes for extra crunch, and only a few similarly sized pieces go into the oil at a time. Once the tenders hit the rack, you can drizzle, brush or toss them depending on how much crunch you want to keep.
Quick Answer: How to Make Crispy Hot Honey Chicken Tenders
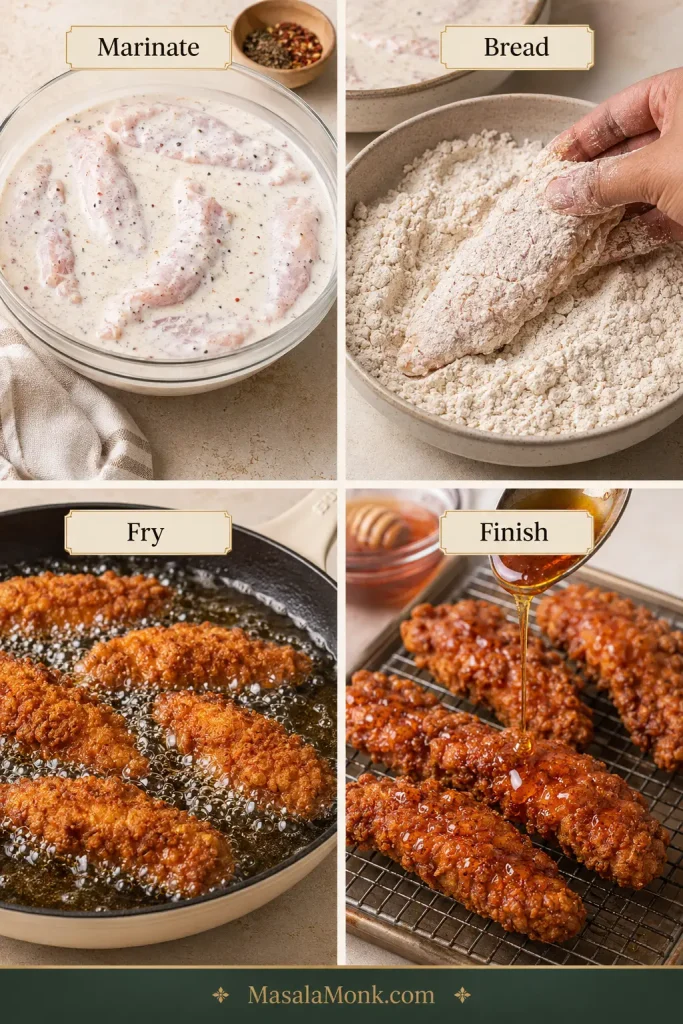
Marinate: Season 1½ lb (680 g) chicken tenders in buttermilk for at least 30 minutes; 2–4 hours gives the seasoning more time to work.
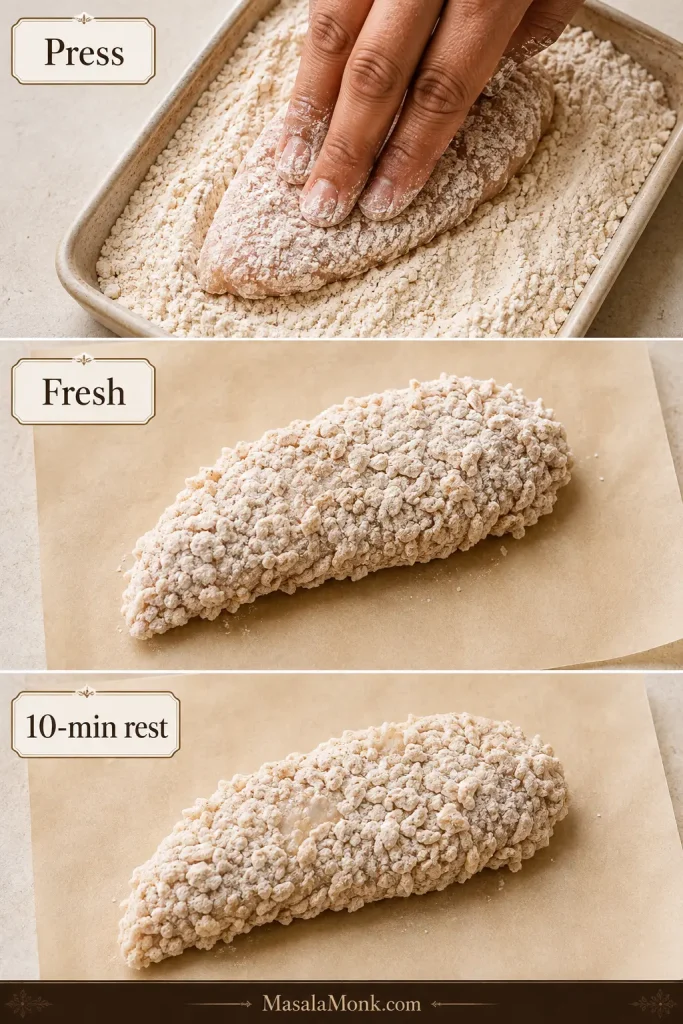
Bread: Press the chicken into a flour-cornstarch dredge with small damp flour flakes, then rest the breaded tenders for 10 minutes.
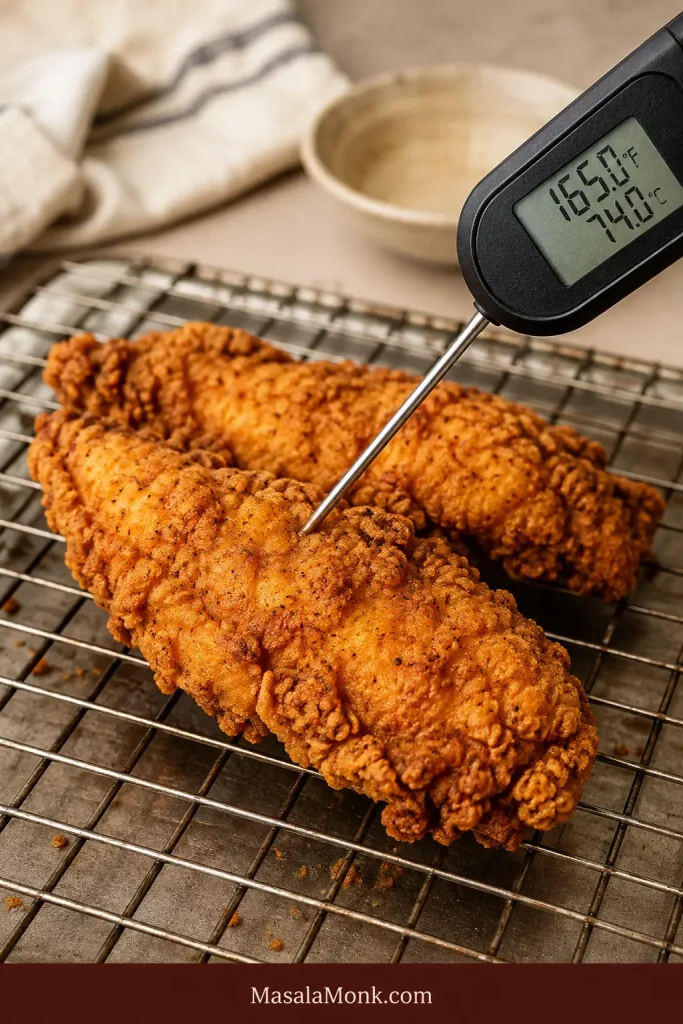
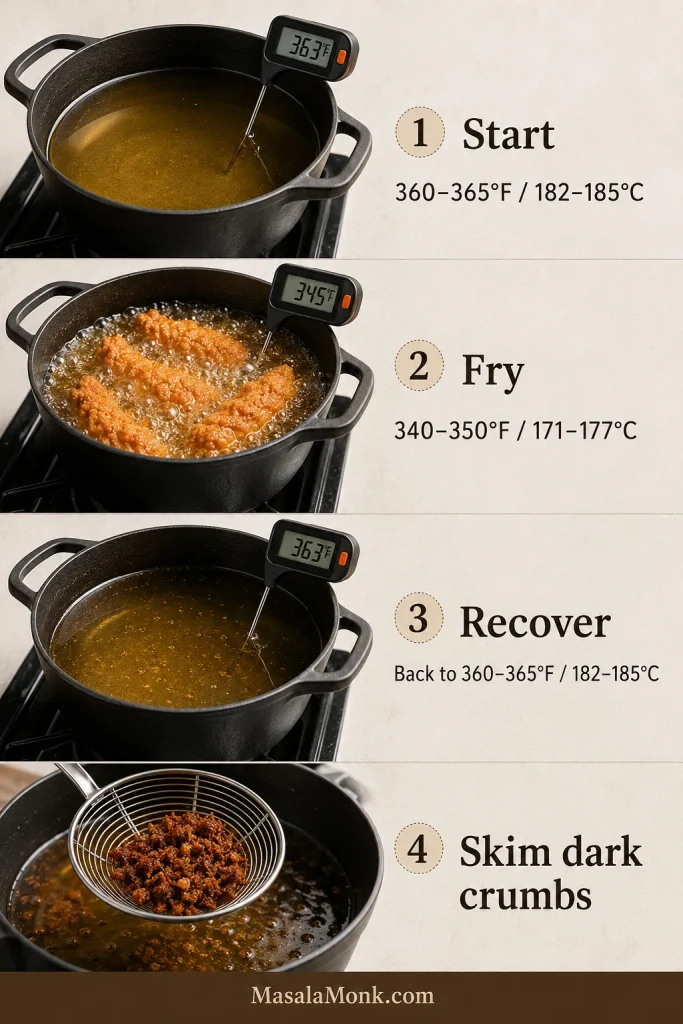
Fry: Start the oil at 360–365°F (182–185°C), keep it around 340–350°F (171–177°C) while the chicken cooks, and cook the thickest piece to 165°F (74°C).
Finish: Rest the fried chicken on a wire rack for 2–3 minutes, then add warm hot honey.
Build the crunch before frying, protect it afterward, and add the hot honey last.
Choose Your Hot Honey Finish
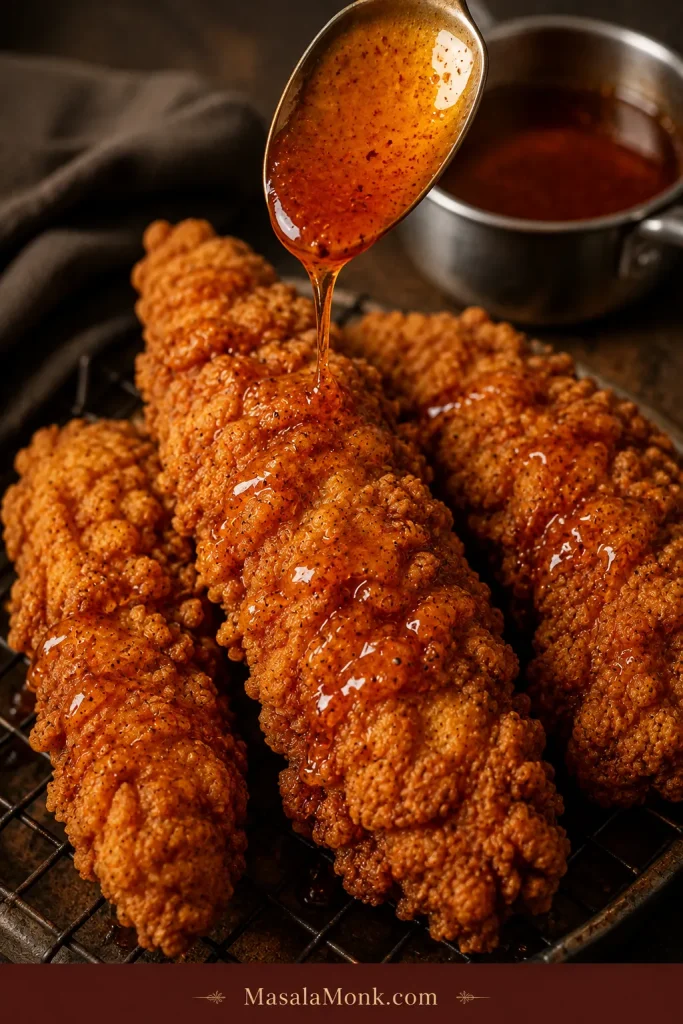
How you add the hot honey changes the bite. A drizzle leaves plenty of golden ridges exposed; a full toss fills almost every crevice with sauce.
You want
Finish
What to expect
Maximum crunch
Drizzle
Sweet heat with plenty of crisp breading still exposed. Recommended.
More even sauce
Brush
Broader coverage while much of the coating stays crisp.
Sticky glazed chicken
Toss
Maximum sauce coverage; eat it right away.
The main recipe uses the drizzle method.
Hot Honey Chicken Tenders Recipe
Craggy, deeply golden chicken tenders with juicy centers and warm hot honey that catches in the ridges instead of soaking the whole crust.
Yield: 10–12 tenders
Serves: about 4
Hands-on time: about 50 minutes
Marinate: 30 minutes minimum; 2–4 hours preferred
Total time: about 1 hour 20 minutes with the 30-minute marinade
Doubling: double the ingredients, but keep the same small frying batches
Equipment
5–6-quart heavy Dutch oven or similarly deep pot
Deep-fry thermometer or other clip-on oil thermometer
Instant-read thermometer for the chicken
Wire rack set over a rimmed tray
You will also need a parchment-lined tray or large plate for the raw breaded chicken, shallow bowls, a small saucepan and tongs or a spider/skimmer. Keep a clean utensil ready for transferring the cooked chicken.
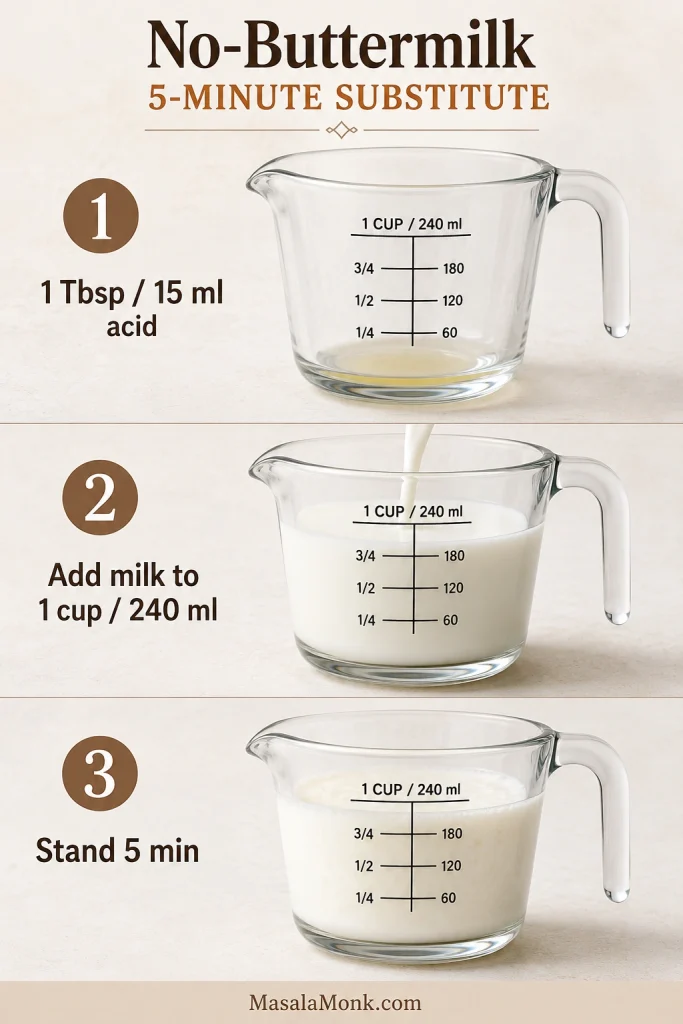
No buttermilk? Put 1 tablespoon (15 ml) lemon juice or white vinegar in a measuring cup, then add enough whole milk to reach 1 cup (240 ml). Stir and let it stand for 5 minutes.
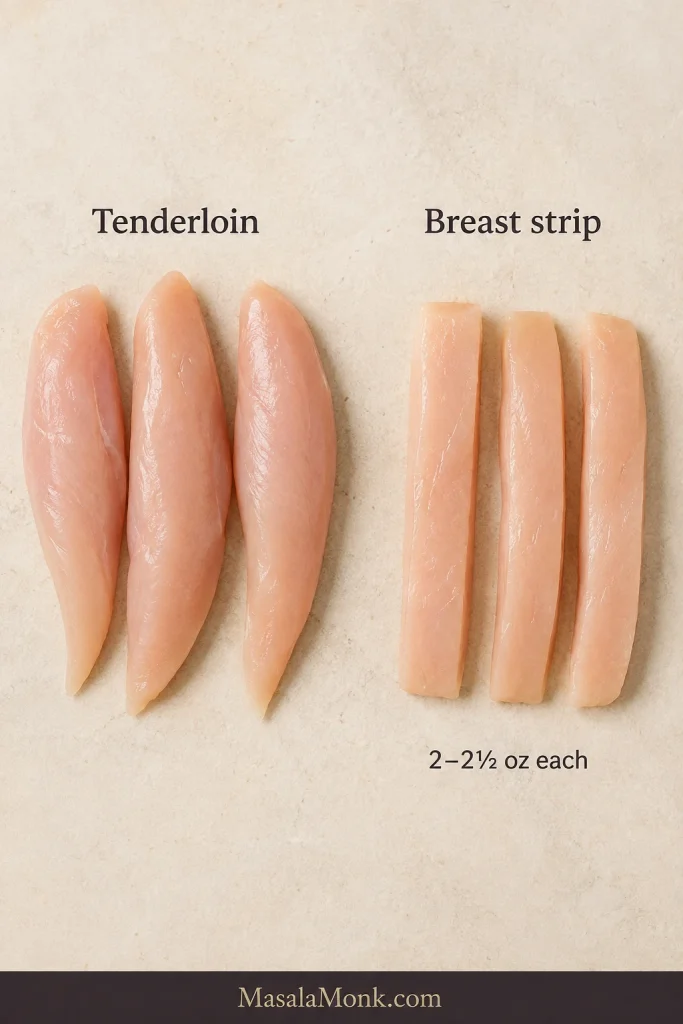
Using chicken breast? Cut it into strips ¾–1 inch (2–2.5 cm) wide and ½–¾ inch (1.25–2 cm) thick. Aim for 2–2½ oz (55–70 g) per strip.
For the Crispy Coating
1½ cups (180 g) all-purpose flour
½ cup (60–65 g) cornstarch
1½ teaspoons baking powder
8 g fine sea salt, about 1⅓ teaspoons
1 teaspoon garlic powder
1 teaspoon onion powder
1 teaspoon sweet paprika
1 teaspoon freshly ground black pepper
¼ teaspoon cayenne pepper, optional
3 tablespoons (45 ml) seasoned buttermilk mixture, removed before the raw chicken is added
If you use kosher salt, follow the gram weights rather than the teaspoon estimates because crystal size varies by brand.
For the Medium Hot Honey
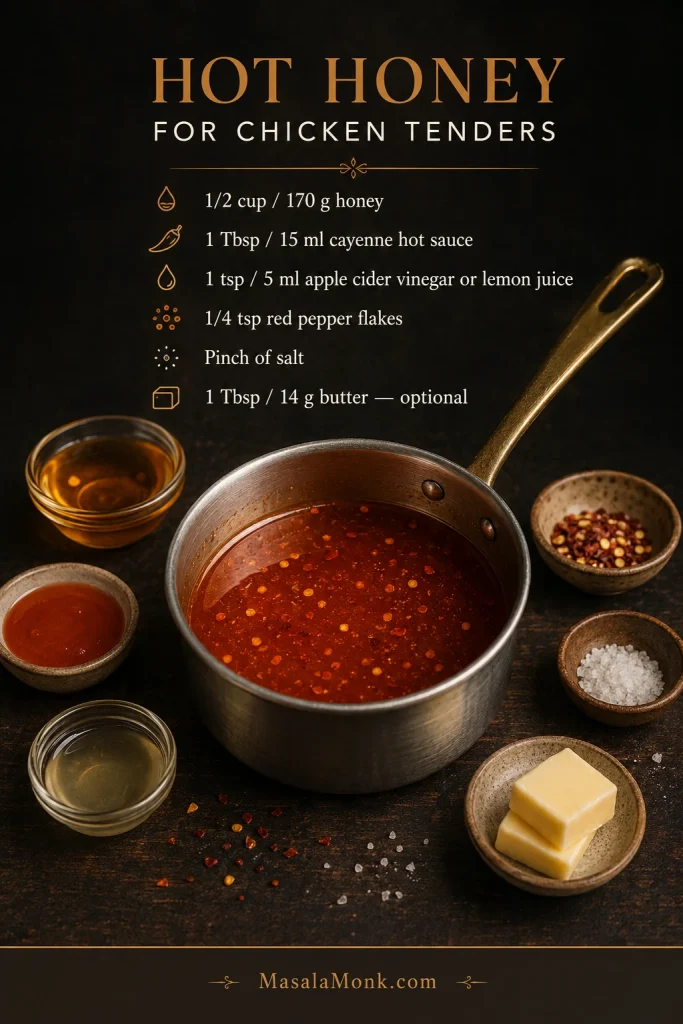
½ cup (170 g) honey
1 tablespoon (15 ml) cayenne-style hot sauce
1 teaspoon (5 ml) apple cider vinegar or fresh lemon juice
¼ teaspoon crushed red pepper flakes
Small pinch fine salt
1 tablespoon (14 g) unsalted butter, optional
Use a thin, vinegar-forward cayenne hot sauce here. Thick sriracha, chili crisp and highly concentrated pepper sauces behave differently and are not tablespoon-for-tablespoon substitutes.
1½–2 quarts (1.4–1.9 L) neutral frying oil, or enough to reach 1¼–1½ inches (3–4 cm) deep in your pot while leaving plenty of empty space above the oil
Peanut, canola, sunflower or standard vegetable oil all work well. Let the depth in your pot determine the exact amount. Fresh oil—or clean, well-filtered oil that still smells neutral—gives the cleanest flavor.
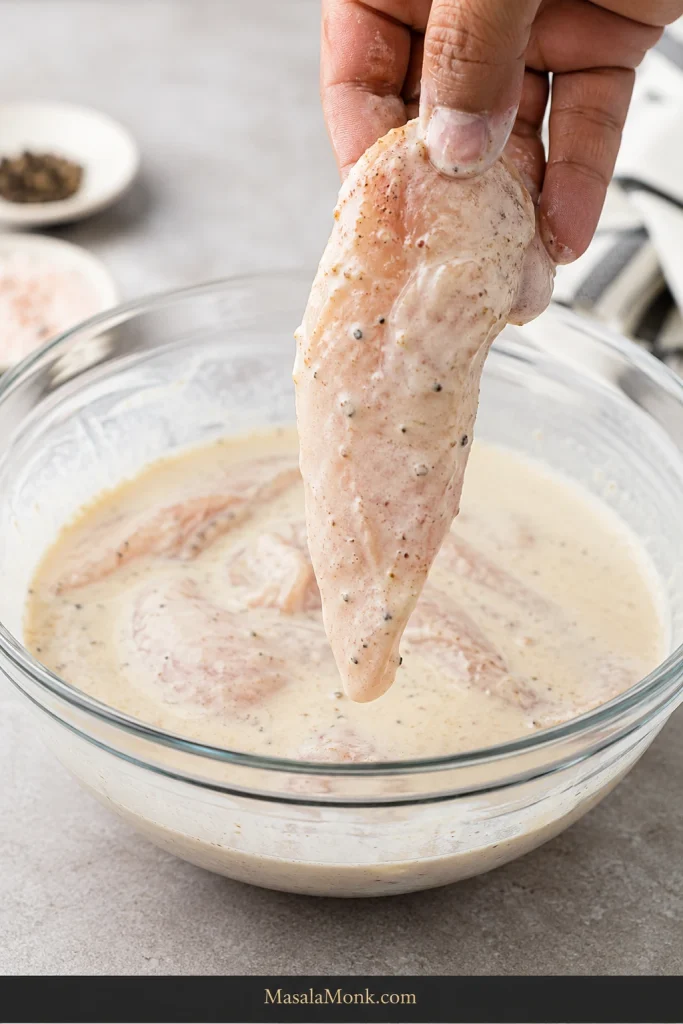
Season and marinate the chicken. Whisk together the buttermilk, hot sauce, salt, garlic powder and black pepper. Before raw chicken enters the bowl, spoon 3 tablespoons (45 ml) into a separate clean bowl for the dredge. Add the chicken, turn to coat, cover and refrigerate for at least 30 minutes. Two to four hours is ideal; these thin pieces gain little from a much longer soak.
While the chicken marinates, make the hot honey. Combine the honey, hot sauce, vinegar or lemon juice, red pepper flakes and salt in a small saucepan. Warm over low heat for 1–2 minutes, just until loose and fragrant. Do not boil. Stir in the butter if using, taste and set aside. Rewarm briefly before serving if the sauce thickens.
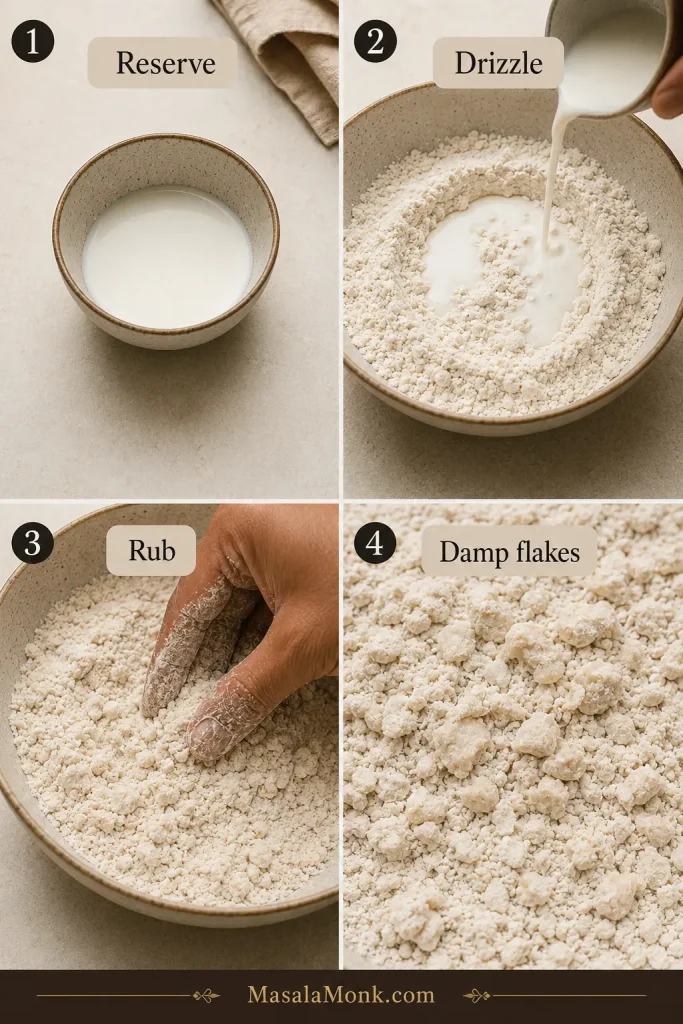
Mix the dredge while the chicken finishes marinating. Whisk together the flour, cornstarch, baking powder, salt, garlic powder, onion powder, paprika, black pepper and cayenne. Drizzle the clean reserved buttermilk over the flour mixture and rub lightly with your fingertips until small damp flakes and pebbly pieces form. Break apart anything that resembles wet dough.
Bread the chicken. Lift one tender from the marinade and let the excess drip back into the bowl. Do not pat it dry. The surface should stay tacky without dripping in streams. Press the chicken firmly into the dredge on every side, picking up some of the rough flour flakes, then place it on the parchment-lined tray. Repeat with the remaining pieces. Discard the remaining raw-chicken marinade and any dredge that touched raw chicken.
Fry the Chicken
Rest the breading and start heating the oil. Begin heating the oil to 360–365°F (182–185°C). Let the breaded chicken rest for at least 10 minutes while the oil comes up to temperature. The coating should look shaggy and slightly hydrated in patches. If the oil needs another few minutes, the chicken can simply stay on the tray.
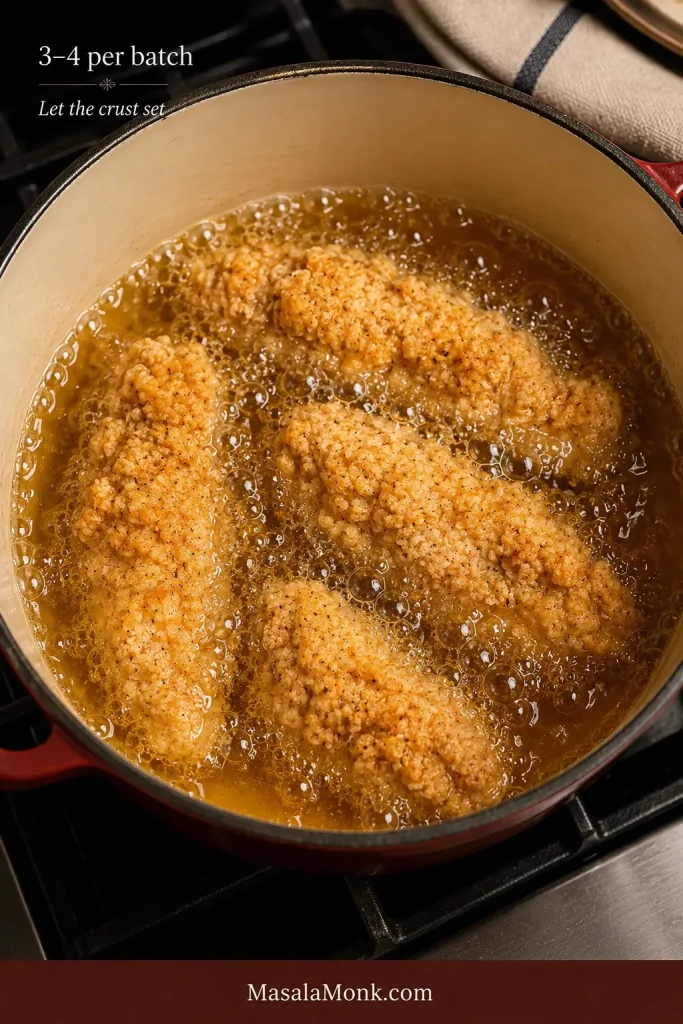
Fry the first batch and let the coating set. Lower 3–4 tenders gently into the oil, leaving visible space between them. Do not keep nudging or turning them as soon as they land; give the crust time to set. Aim to keep the oil around 340–350°F (171–177°C).
Cook until deep gold and 165°F. Pieces in the 2–2½ oz (55–70 g) range usually need 5–7 minutes total. Turn once when needed. The bubbling should stay energetic while the ridges move gradually from pale to deep gold. Start checking the largest piece near the early end of the range; poultry should reach 165°F (74°C) in the thickest part.
Once a batch comes out deep gold, crisp at the edges and 165°F (74°C) in the center, you have your pot figured out. The remaining batches are mostly repetition.
Rack, Reset and Finish
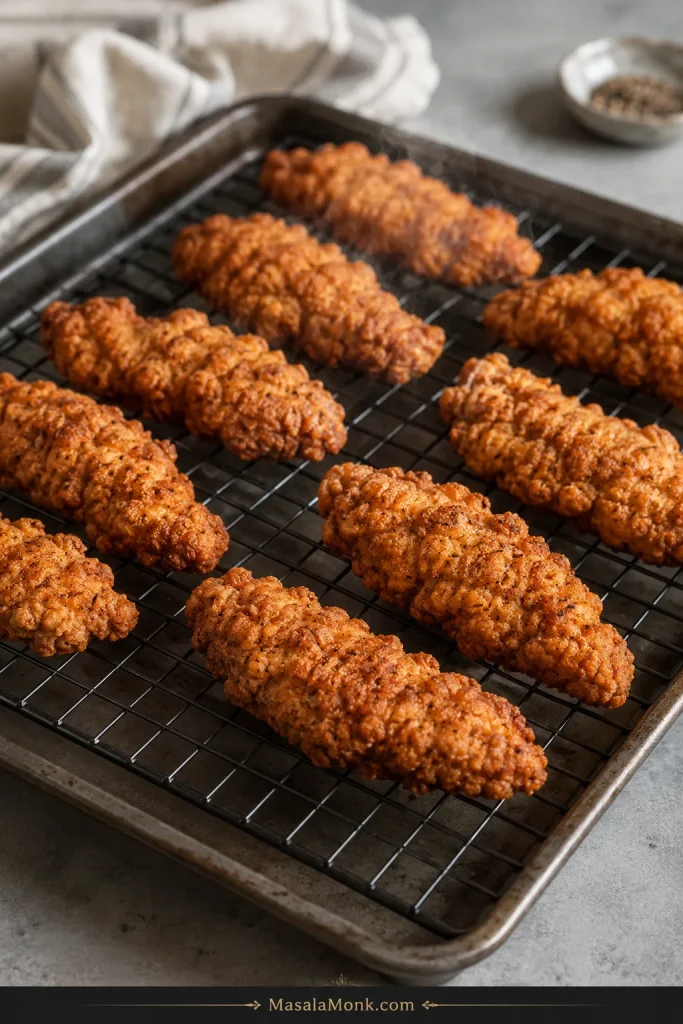
Move the cooked chicken to the rack. Transfer the tenders with clean tongs or a clean spider/skimmer and keep them in one layer so steam can escape underneath.
Reset the oil between batches. Let it return to the starting range before adding more chicken. If recovery is slow, make the next batch smaller. Skim out loose breading once it turns dark so burnt crumbs do not make later batches bitter.
Add the hot honey last. Give each fried batch 2–3 minutes on the rack, until the strongest steam has eased. Rewarm the sauce if needed, then drizzle it over only the tenders you expect to eat right away. The honey should fall in glossy ribbons and catch on the rough ridges. Keep the rest of the sauce at the table.
Give the steam somewhere to go: the rack keeps the bottom from softening while the crust settles before the hot honey goes on.
For the first serving, drizzle a few tenders and listen for that first crunch before deciding whether the rest need more honey.
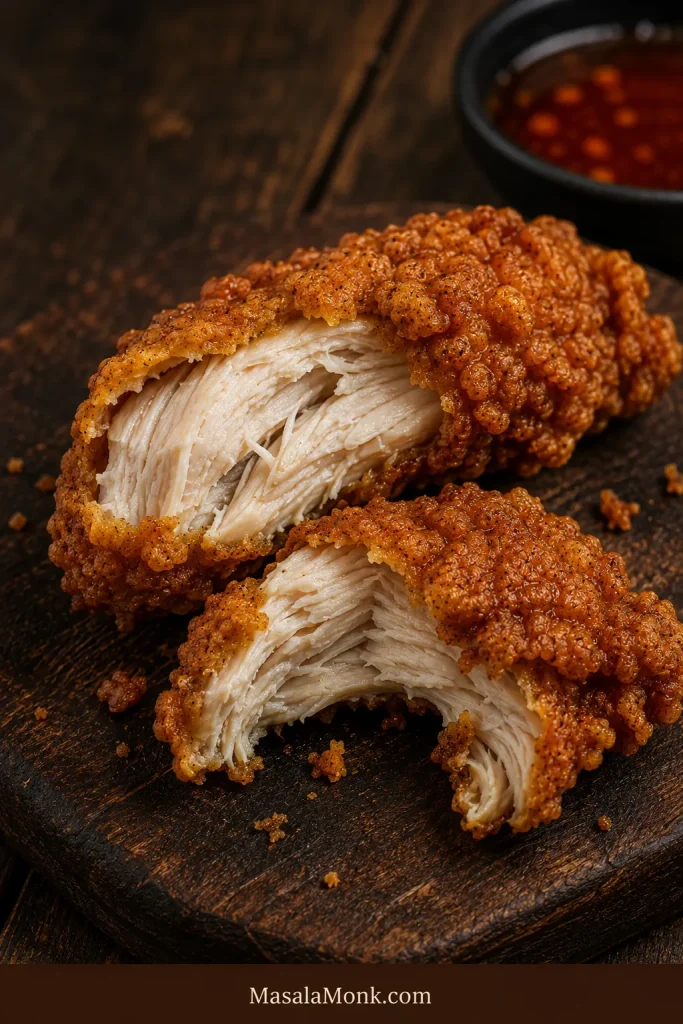
Break one open while it is still hot: the center should be moist white chicken beneath a closely attached craggy crust, not a thick hollow shell.
Tenderloins are already close to the shape you want. Split or gently flatten any unusually thick ones so they finish alongside the rest.
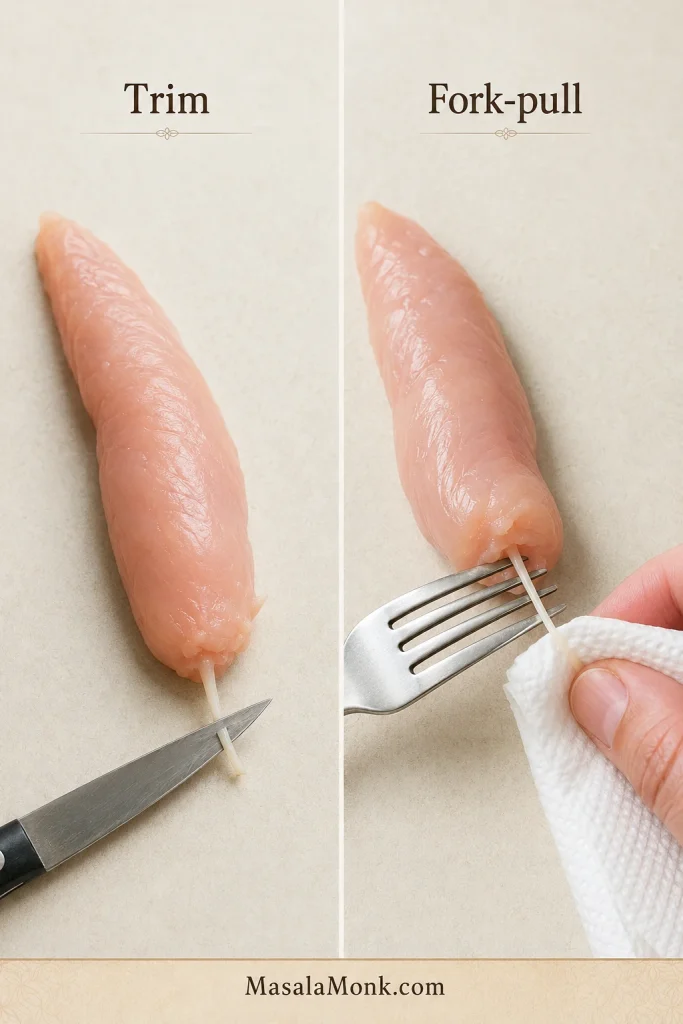
The firm white tendon is harmless. Trim the exposed portion, or grip it with paper towel and gently pull it through the tines of a fork if you prefer to remove more. Stop if the tender begins tearing.
Chicken breast is an easy substitute. Cut it to the size given in the recipe rather than making long, thick strips. Similar-size pieces are what keep the frying time predictable.
If you would rather cook the breasts whole, our baked chicken breast recipe goes deeper into thickness, timing and keeping lean chicken juicy.
Chicken fingers, strips and tenders are often used loosely for the finished dish. Here, size matters more than the label on the package.
The Ingredients That Actually Change the Result
Buttermilk
Buttermilk carries seasoning, adds mild tang and leaves a naturally tacky surface for the flour. The milk-and-acid substitute in the recipe is thinner than cultured buttermilk, but it still gives the coating something to grip.
If the recipe leaves most of a carton behind, save it for flaky Southern buttermilk biscuits. Fried chicken and warm biscuits rarely need much persuasion to share a plate.
Flour, Cornstarch and Baking Powder
Flour gives the coating enough structure to cling to the chicken, while cornstarch keeps the fried edges lighter and crisper. A little baking powder helps keep the surface rough instead of dense and smooth. When the clean reserved buttermilk is rubbed lightly through this mixture, the small damp flakes become the craggy pieces you want the chicken to pick up.
What you are building toward: a fried crust with thin ridges, folds and blisters rather than one thick, smooth shell. Those irregular edges create more crisp surface without burying the chicken in breading.
Seasoning the Chicken and the Coating
Seasoning in the marinade reaches the meat itself; seasoning in the dredge flavors the crust. Once the honey goes on, that distinction matters. Sweet, spicy sauce should finish good fried chicken rather than cover a bland center.
Sweet paprika brings color and mild pepper flavor. Cayenne in the dredge is optional, especially when several people at the table have different ideas about what “hot” means.
How to Keep Breading on Chicken Tenders
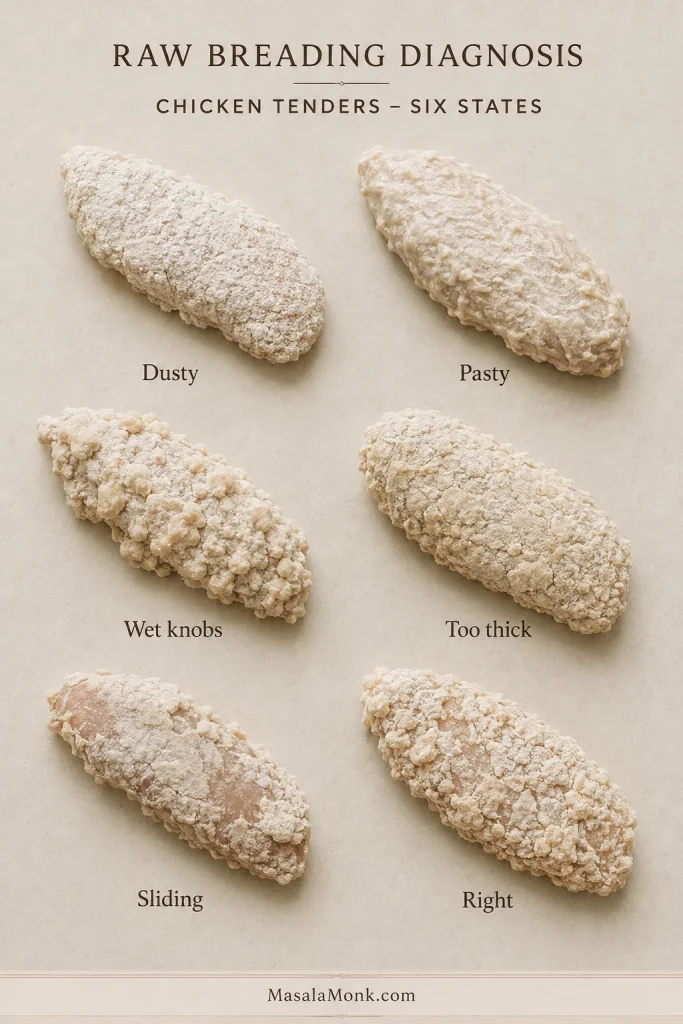
Before frying, the coating can tell you a lot. Good breading looks rough and patchy, with some flour hydrated against the chicken and little shaggy ridges still standing up.
Still dusty almost everywhere after resting? A few floury spots are fine. On the next tender, let slightly less marinade drip away before dredging; do not try to wet an already breaded piece.
Smooth and pasty? Too much marinade followed the chicken into the flour. Let the next piece drip a little longer.
Huge wet knobs? Break the damp flour clumps smaller so they fry into crisp ridges rather than hard chunks.
A thick shell forming around the meat? The coating is too heavy. One well-pressed dredge is enough for this recipe.
Coating slides when you lift the tender? Press it on more firmly and give the breading its full resting time.
Rough, patchy and a little untidy? Good. Leave it alone.
Keeping one hand for wet chicken and the other for dry dredge also prevents the breading process from turning into a bowl full of floury fingerprints.
After the breading rests: the coating should still look rough and shaggy, with only a few slightly hydrated patches. It should not turn uniformly shiny, smooth or wet.
How to Control the Oil Temperature Between Batches
A thermometer makes home frying much less mysterious. The useful number is not only where the oil starts; it is what happens after cold chicken enters the pot.
Stage
Target
What you want to see
Before chicken enters
360–365°F (182–185°C)
Enough stored heat for the initial temperature drop
While frying
340–350°F (171–177°C)
Steady bubbling and gradual golden browning
Before the next batch
Back near 360–365°F (182–185°C)
Oil recovered before more cold chicken enters
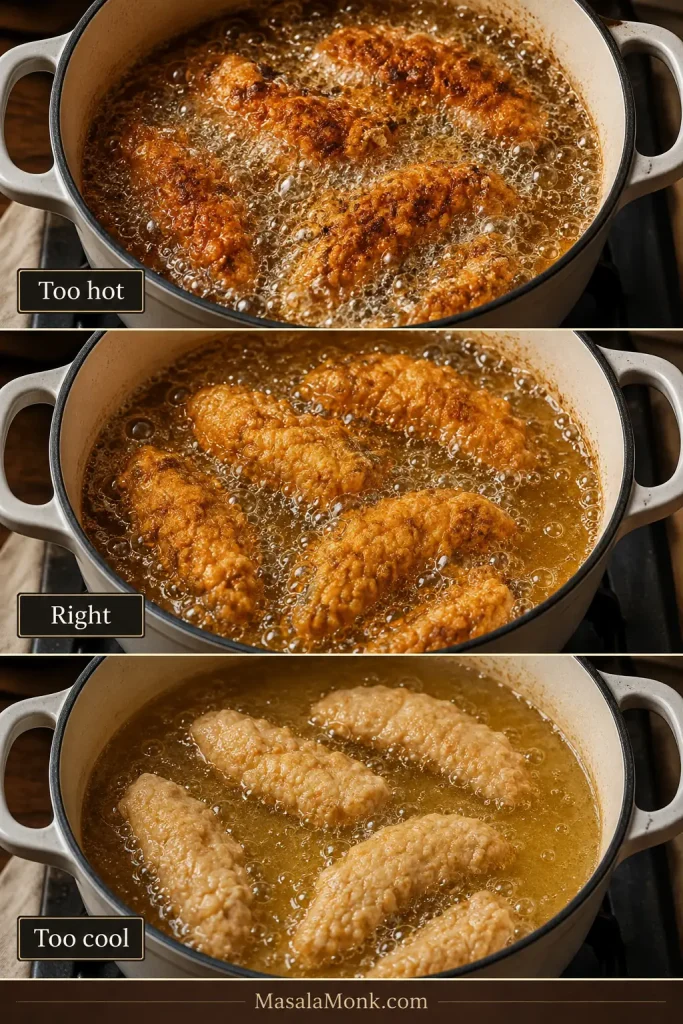
Little flour peaks that darken almost immediately mean the oil is running too hot. Pale chicken sitting in weak bubbles points the other way. Small crumbs in the pot are normal, but remove them once they turn dark.
Use the first batch to learn your pot. Once the bubbling and browning settle into the right rhythm, the remaining batches become much easier to repeat.
A deep cast-iron skillet is another good option. A Dutch oven gives you higher sides and a little more protection from splatter. An electric fryer is fine too; resist filling the basket just because there is room.
Use the bubbling as a batch-size check: leave visible oil between the tenders, and if active bubbling weakens sharply after loading the pot, make the next batch smaller rather than squeezing in another piece.
Keep the whole frying cycle in view: start near 360–365°F (182–185°C), let the oil work around 340–350°F (171–177°C), then give it time to recover before the next batch.
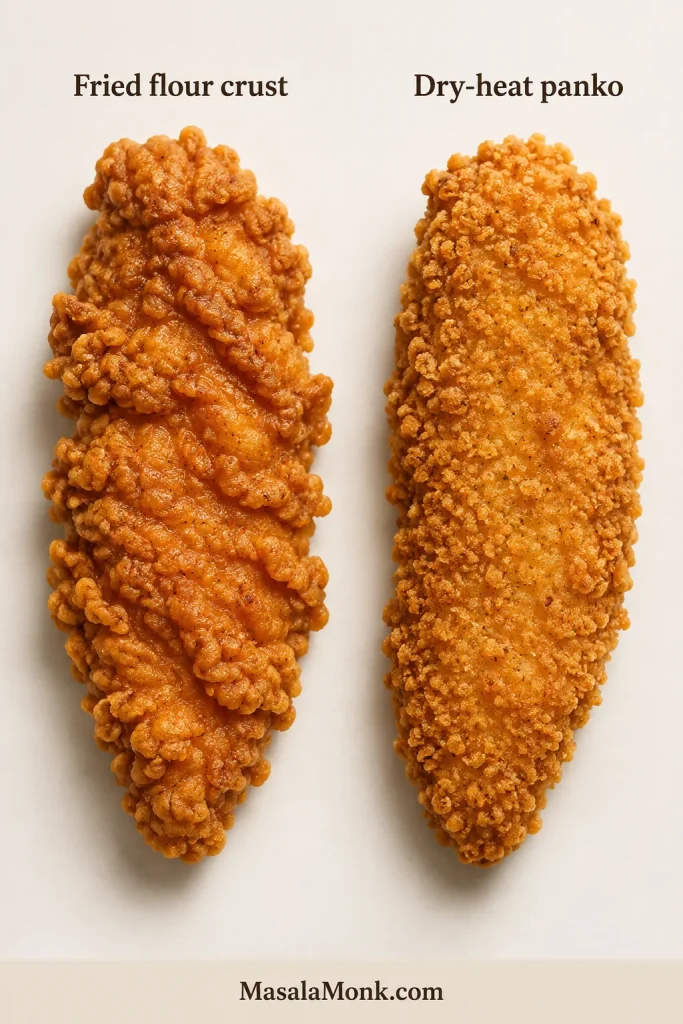
The flour coating used for frying relies on hot oil to set those craggy edges. Dry heat does better with panko. Use the air fryer when you want to avoid a pot of oil; the oven is easier when you need more tenders at once.
For the cooking times below, use 10–12 similarly sized tenderloins or chicken breast strips around 2–2½ oz (55–70 g) each. Very thick pieces will need longer.
Marinate for at least 30 minutes; 2–4 hours is ideal. Unlike the fried version, you do not need to reserve any marinade for the coating.
If you are cooking with dry heat anyway, our honey mustard chicken tenders use a similar panko approach with a tangier finish.
Panko Coating
½ cup (60 g) all-purpose flour
2 large eggs
1½ cups (95 g) panko breadcrumbs
1 tablespoon (15 ml) neutral oil
Oil spray or a little extra neutral oil for the basket, rack and any dry crumb patches
6 g fine sea salt, about 1 teaspoon
1 teaspoon garlic powder
1 teaspoon onion powder
1 teaspoon sweet paprika
½ teaspoon freshly ground black pepper
⅛ teaspoon cayenne, optional
Mix the dry seasonings together. Stir roughly one-third into the flour and the rest into the panko, then work the tablespoon of oil through the crumbs.
Air Fryer
Let excess marinade drip from the chicken.
Coat lightly in seasoned flour, dip in beaten egg, then press firmly into the panko.
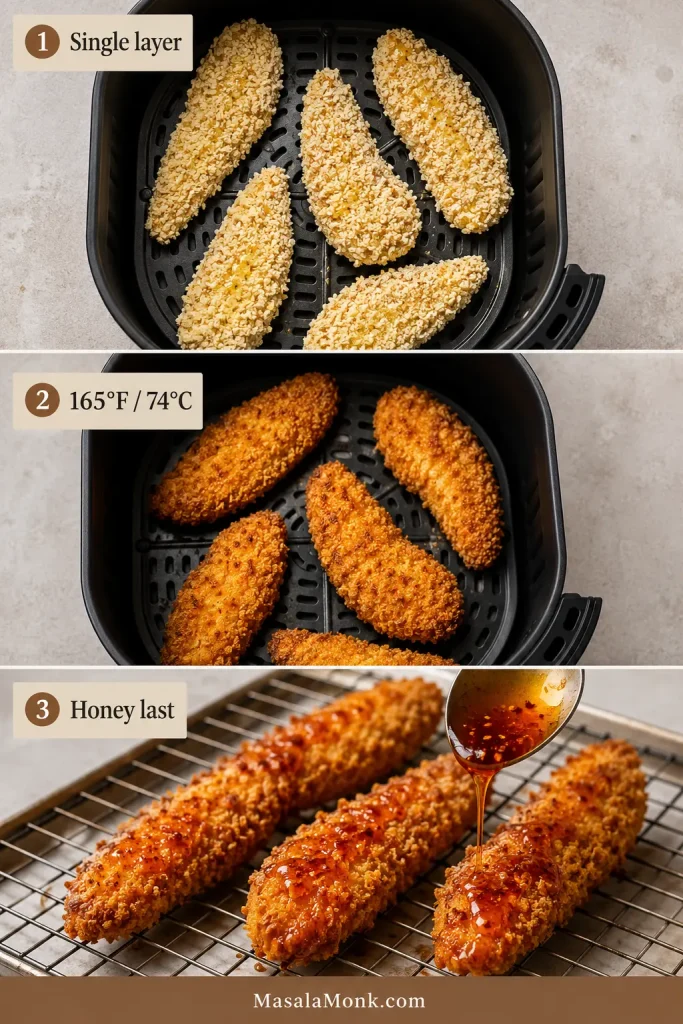
Preheat the air fryer to 400°F (205°C) if your model benefits from preheating.
Lightly oil the basket and arrange the tenders in one layer with space around them. Mist any visibly dry crumb patches.
Air fry for 8–11 minutes, turning halfway, until golden and 165°F (74°C) in the thickest piece.
Transfer the tenders to a wire rack and rest for 2–3 minutes, until the initial steam has eased. Drizzle with warm hot honey just before serving.
Later batches may finish a little sooner once the air fryer is thoroughly hot.
Oven
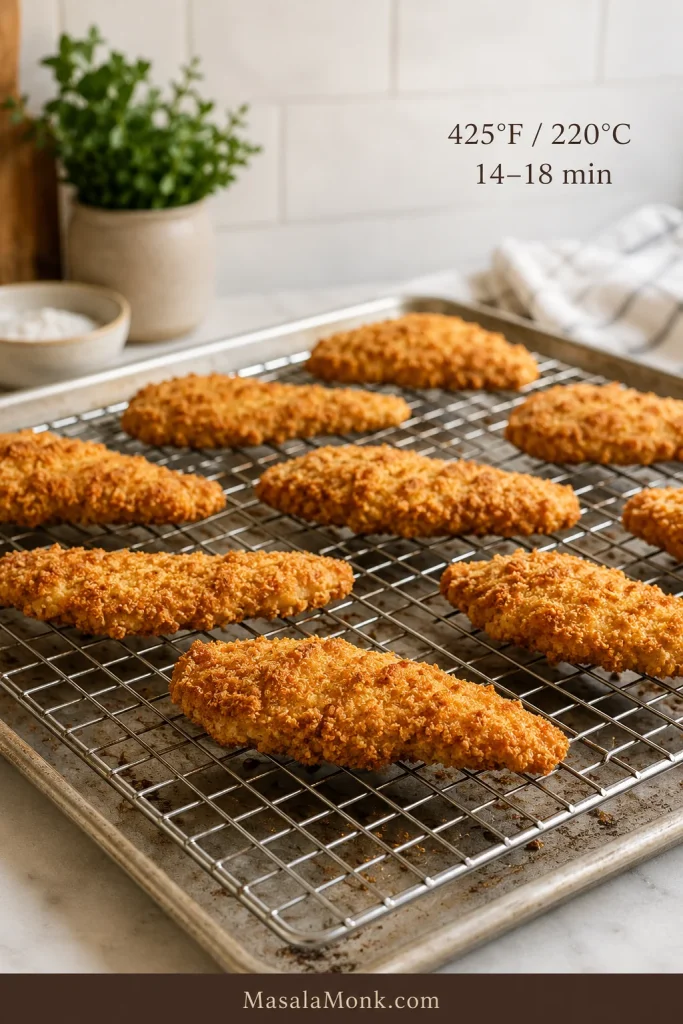
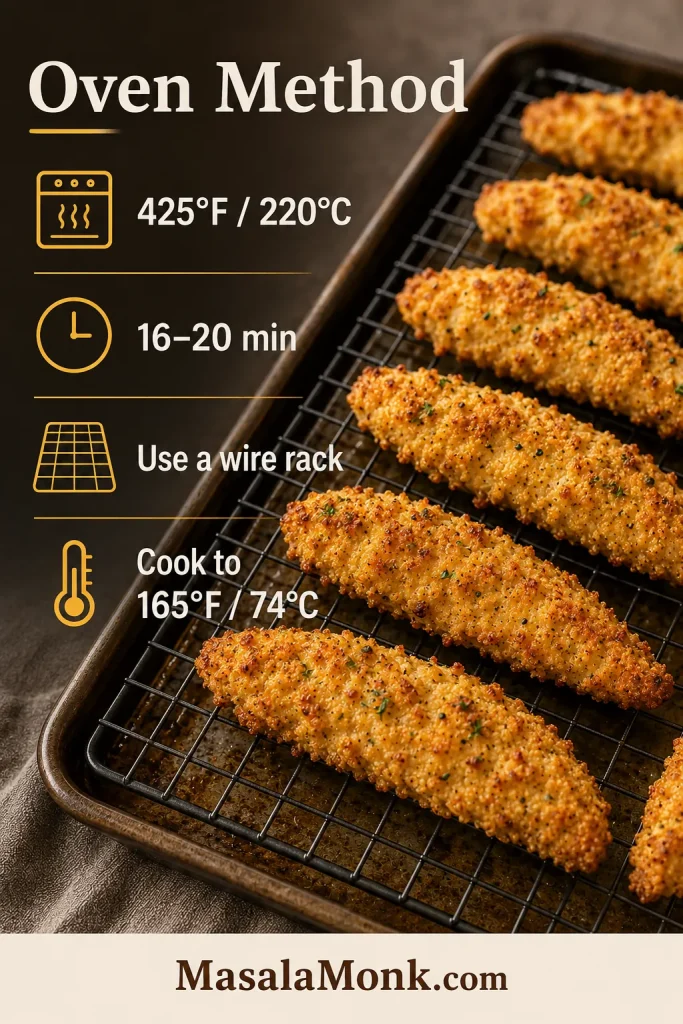
Heat the oven to 425°F (220°C).
Set a lightly greased wire rack over a rimmed baking sheet.
Bread the chicken with the panko mixture and arrange the pieces in one layer. Mist any dry-looking crumb patches.
Bake for 14–18 minutes, depending on thickness, until golden and 165°F (74°C) inside.
Leave the tenders on the rack for 2–3 minutes, until the initial steam has eased, then drizzle with warm hot honey.
Adjust the Hot Honey: Mild, Medium or Hot
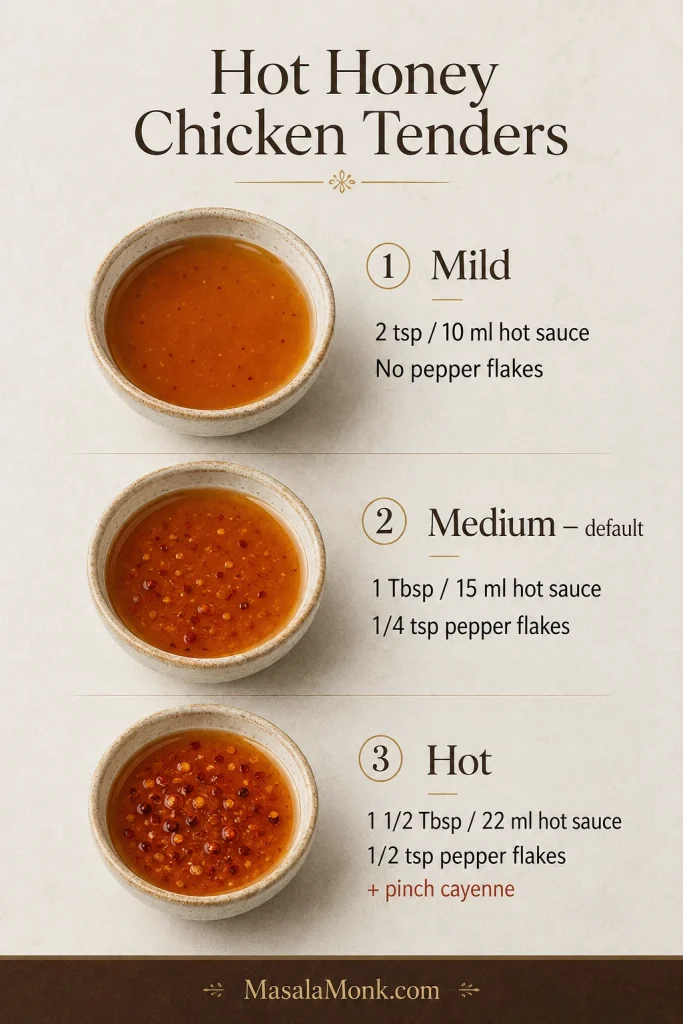
The recipe is medium as written. Keep the ½ cup (170 g) honey, teaspoon of acid and pinch of salt the same, then choose the heat level below.
Heat level
Use this
Mild
2 teaspoons (10 ml) cayenne hot sauce; no pepper flakes
Medium — default
1 tablespoon (15 ml) cayenne hot sauce + ¼ teaspoon red pepper flakes
Hot
1½ tablespoons (22 ml) cayenne hot sauce + ½ teaspoon red pepper flakes + a small optional pinch of cayenne
Taste the sauce warm before adding more heat; hot sauces and pepper flakes vary quite a bit.
One batch can easily cover two heat preferences. Divide the warm honey between two bowls and increase the chili in only one; there is no need to make the fried chicken itself aggressively spicy.
Butter is optional. One tablespoon (14 g) makes the glaze richer and slightly softens the heat; keep the sauce over low heat so it stays smooth.
How Much Hot Honey Do You Need?
Drizzle: start with ¼ cup (60 ml)
Brush: use roughly ⅓ cup (80 ml)
Toss: use most or all of the basic sauce batch
Make 1½ batches when you want heavily glazed chicken and extra sauce at the table. The sauce should be warm enough to fall in ribbons, but not thin or watery.
Already have bottled hot honey? Start with ½ cup (120 ml). A few drops of vinegar or lemon juice can sharpen it if the sweetness feels flat.
If a batch goes wrong, do not change five things at once. Start with what you can see; the crust, color and oil usually point toward the problem.
Breading and Frying Problems
What you see
What it means and what to change
Breading falls off
Too much marinade, weak pressing or too little resting time. Let excess drip, press firmly and give the coating time to settle.
Breading is thick and hard
The wet flour pieces are too large or the dredge is too heavy. Use smaller flakes and one substantial coating.
Chicken is pale and greasy
The oil spent too much of the batch too cool. Fry fewer pieces and let it recover before reloading.
Outside is dark, center underdone
The oil is too hot or the chicken is too thick. Lower the heat and make the pieces more even.
Chicken is dry
It cooked too long. Start checking the largest piece sooner.
Bottom turns soft
Steam is trapped underneath. Move cooked tenders to a wire rack in one layer.
Later batches taste bitter
Loose breading has burned in the oil. Skim out dark crumbs between batches.
A pot that starts at 360°F but spends most of the batch near 300°F is still frying too cool. What the thermometer does after the chicken enters matters more than the starting number alone.
Hot Honey and Crispness Problems
What you see
What it means and what to change
Sauce softens the crust quickly
The chicken was sauced too soon or too heavily. Give it a brief rack rest and start with a drizzle.
Hot honey is too sweet or too hot
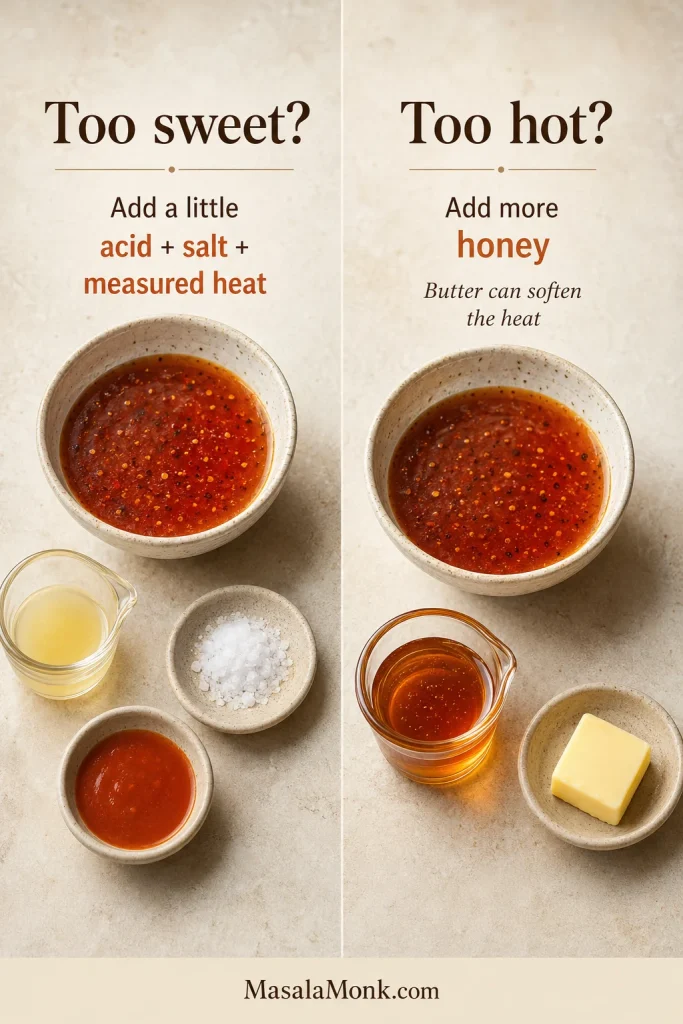
Too sweet: add a little acid, salt and measured heat. Too hot: stir in more honey; butter can soften the heat too.
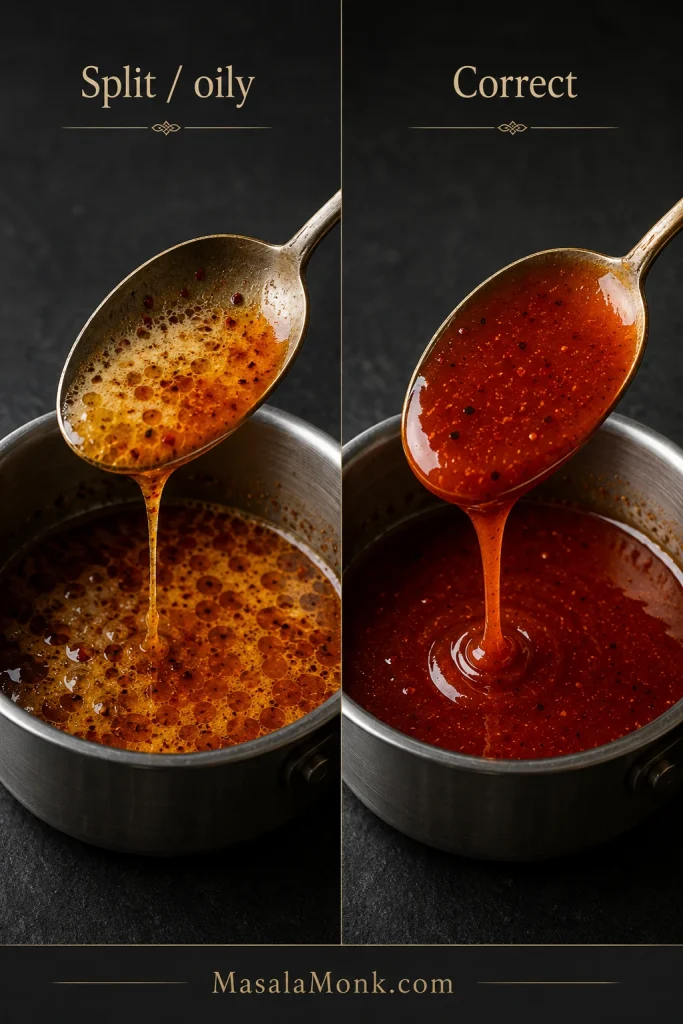
Hot honey looks oily or split
Butter-containing sauce may have overheated. Take it off the heat, whisk gently and rewarm only over low heat.
Sauce runs off
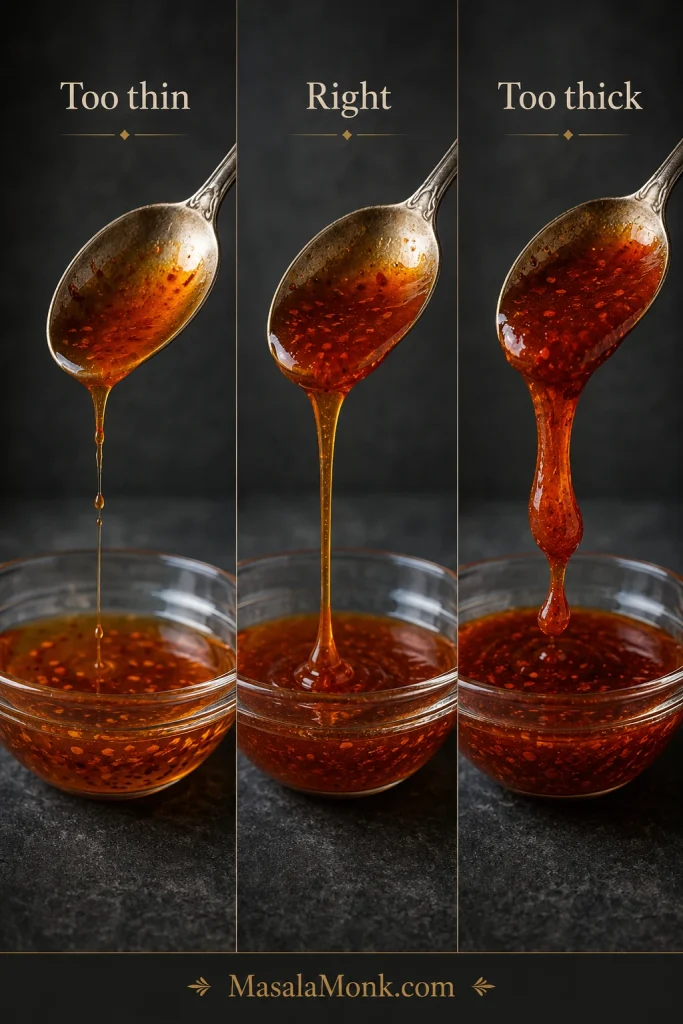
It is too hot or thin. Let it cool until it falls from the spoon in ribbons.
If buttered hot honey turns oily or streaky: take it off the heat, whisk gently and rewarm only over low heat. The finished sauce should look smooth and cohesive rather than separated.
Correct one thing at a time while the sauce is warm: use a little acid, salt and measured heat when it is too sweet; add more honey when it is too hot. If someone at the table simply wants a gentler creamy option, our easy yum yum sauce gives them another path without changing the whole batch.
Make Ahead, Store and Reheat
Hot honey: Make it up to 1 week ahead, refrigerate it in a covered container and warm it gently before serving. Low heat is especially important when butter is included.
Chicken: Marinate 2–4 hours ahead when convenient. Bread it close to frying; the short 10-minute rest helps the coating settle, while a long breaded hold works against that rough, crisp texture.
If coleslaw is part of dinner, this is a good moment to make it too. Our creamy coleslaw recipe can chill while the chicken marinates.
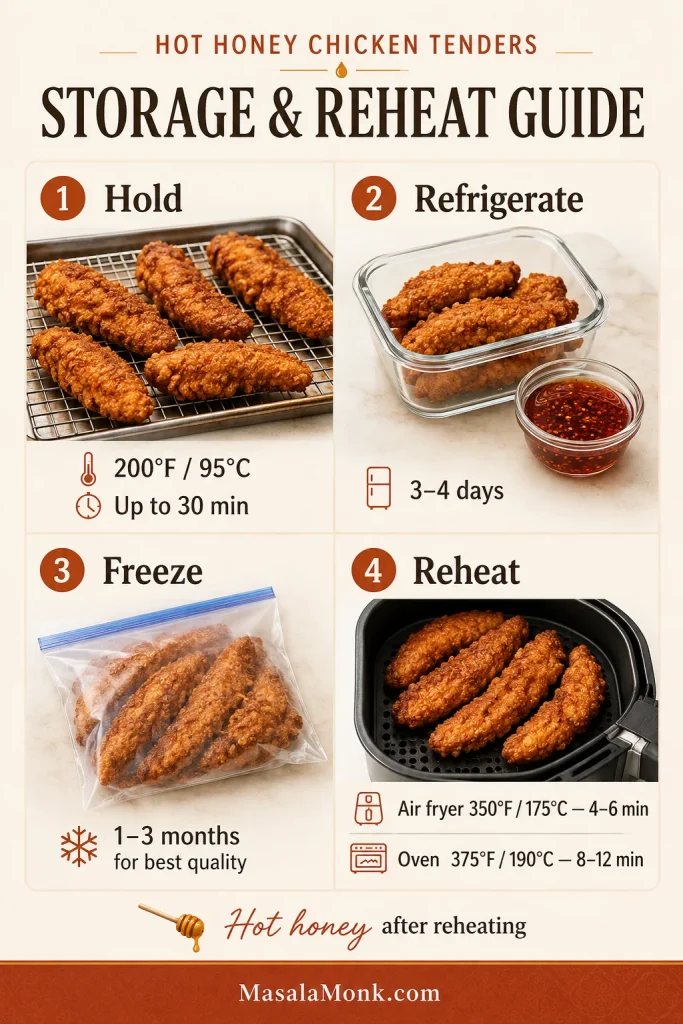
Holding fresh batches: Keep the tenders unsauced on their rack in a 200°F (95°C) oven for up to 30 minutes while you finish frying. A short hold works, but straight from frying is still best.
Leftovers: Refrigerate cooked chicken for 3–4 days, with extra hot honey stored separately whenever possible.
Freezing: Freeze cooked tenders unsauced. For best quality, use them within roughly 1–3 months, then re-crisp before adding fresh hot honey.
Air fryer: 350°F (175°C) for 4–6 minutes
Oven: 375°F (190°C) on a rack for 8–12 minutes
Microwave: quickest, but the coating will be softer
Whichever method you choose, reheat the center of the chicken to 165°F (74°C), then add fresh hot honey.
What to Serve With Hot Honey Chicken Tenders
You do not need an elaborate plate. Something cold and crunchy, creamy, tart or pickled is usually enough to balance rich fried chicken and sticky sweet heat.
Sandwich night: Add slaw, pickles and a little hot honey to a toasted bun. Our chicken sandwich recipes have more ideas for building around crisp chicken.
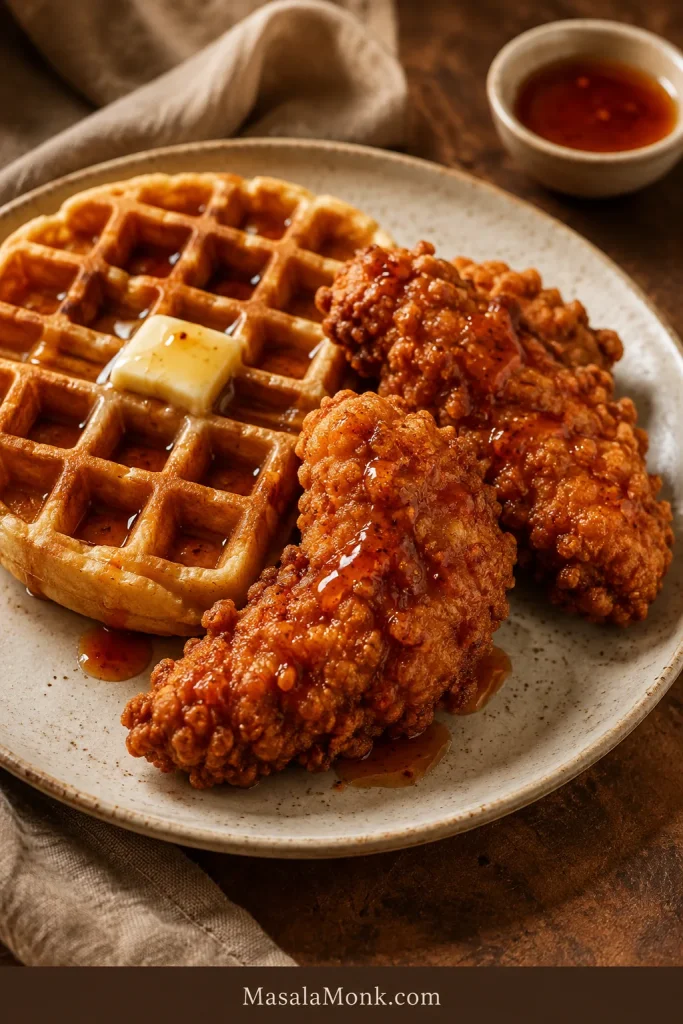
Sweet-savory: Pile the tenders onto waffles and drizzle the honey over both while leaving plenty of fried ridges exposed.
The best plate of these still lets you see rough dark-gold ridges beneath thin glossy streaks of honey. The first bite should give you crunch and juicy chicken, then sweetness, then the chili catching up a moment later.
If you make them, tell us whether you used tenderloins or breast strips, how you cooked them, and whether you drizzled, brushed or tossed the hot honey. Your notes may help the next person standing over a batch of chicken wondering whether theirs looks right.
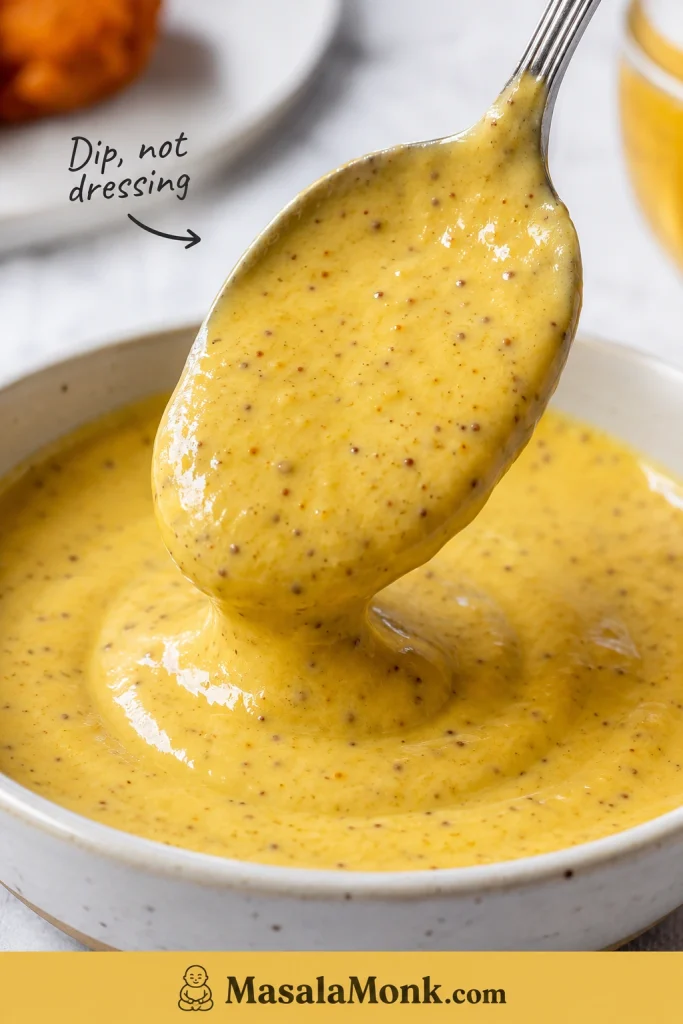
These honey mustard chicken tenders are for the night you want crispy chicken strips, a creamy sweet-tangy dip, and zero deep-frying drama. The chicken stays juicy, the panko turns golden, and every piece is made for dragging through honey mustard sauce.
They are the kind of tenders people pick from the tray before dinner is even on the table: crisp edges, juicy centers, and just enough honey mustard to keep everyone reaching for one more.
Here, the goal is simple: no pale panko, no soggy bottoms, no dry chicken, and no wasted dipping sauce because it touched raw chicken. Everything runs on one simple system: creamy honey mustard as the binder, panko as the crunch, clean dip reserved first, then an oven or air fryer finish.
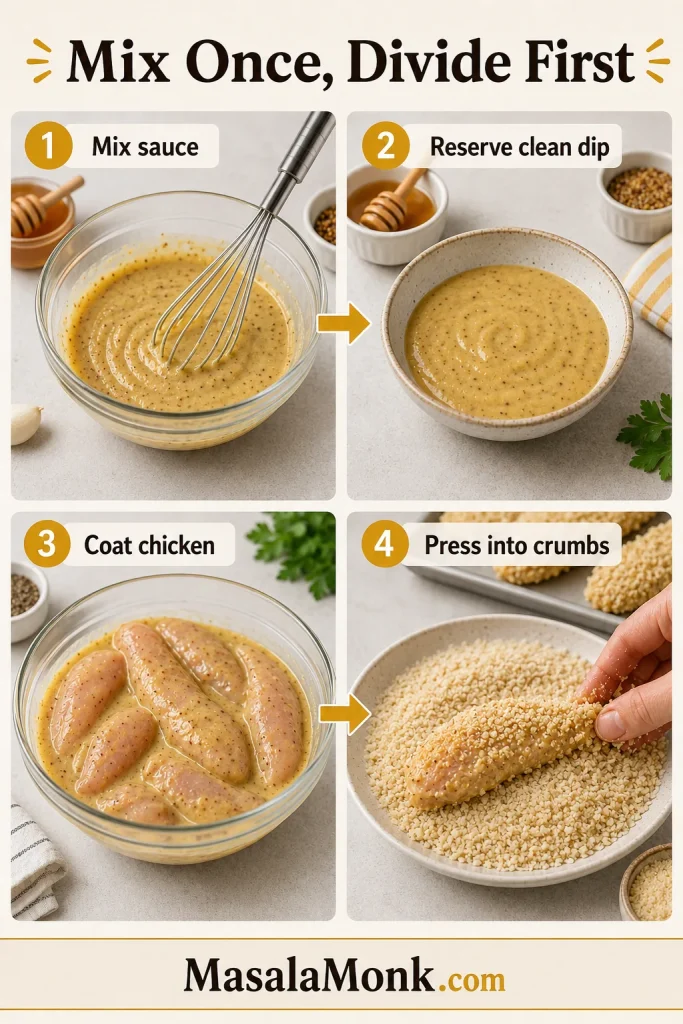
Remember the signature rule: mix once, divide first — one clean bowl for dipping, one bowl for coating raw chicken. For the best all-around tray, use chicken strips about 3/4 inch thick, press them into panko, and bake at 425°F / 220°C until golden and cooked through. It is the kind of dinner that feels fun without asking you to set up a frying station or babysit a pan of oil.
Quick Answer: How to Make Honey Mustard Chicken Tenders
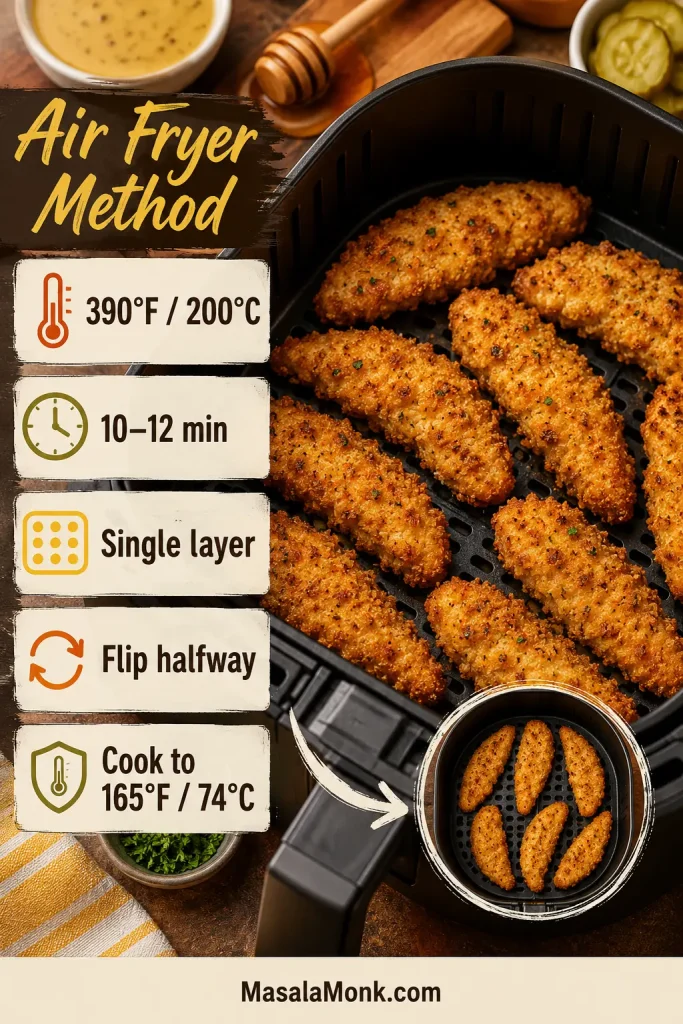
To make crispy honey mustard chicken tenders, pat chicken tenderloins or chicken breast strips dry, coat them in a creamy mustard-honey mixture, reserve clean sauce before raw chicken touches the rest, press the coated chicken into panko breadcrumbs, then bake at 425°F / 220°C for 16–20 minutes or air fry at 390°F / 200°C for 10–12 minutes.
The chicken is done when the thickest piece reaches 165°F / 74°C. For the best texture, keep the strips evenly sized, spray the crumb layer lightly with oil, leave space between pieces, and dip at the table instead of pouring sauce over the crust too early.
Main method: Oven baked Alternate method: Air fryer Servings: 4 Yield: About 10–12 chicken tenders
Prep Time
15 minutes
Optional Rest
15–30 minutes
Cook Time
16–20 minutes oven / 10–12 minutes air fryer
Total Time
35–45 minutes, plus optional 15–30 minute rest
Chicken Doneness
165°F / 74°C internal temperature
Ingredients
For the Chicken and Coating
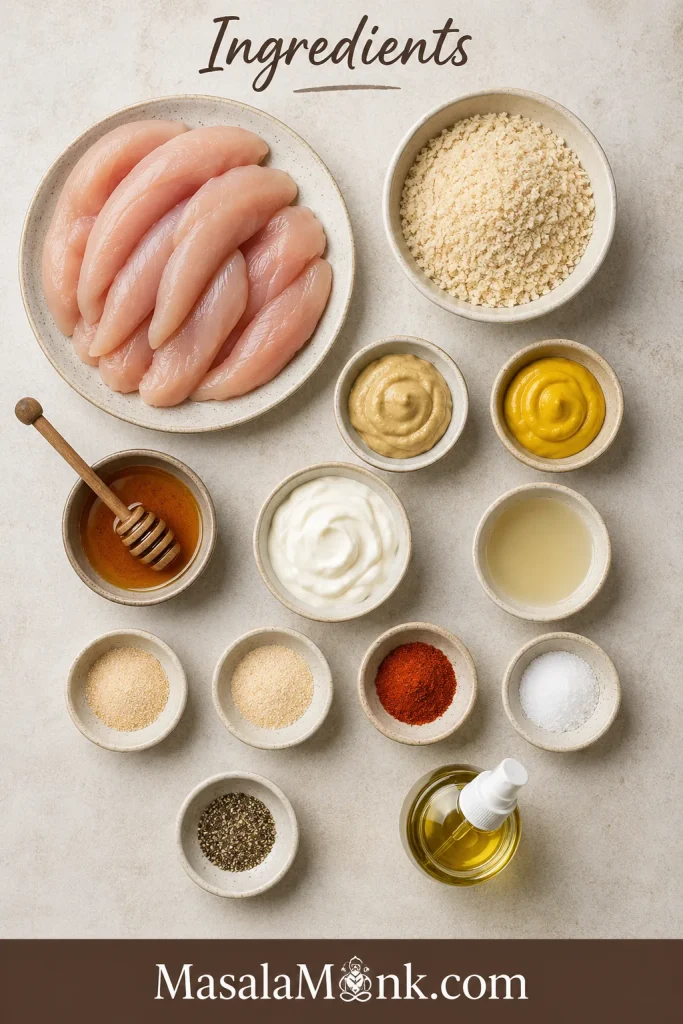
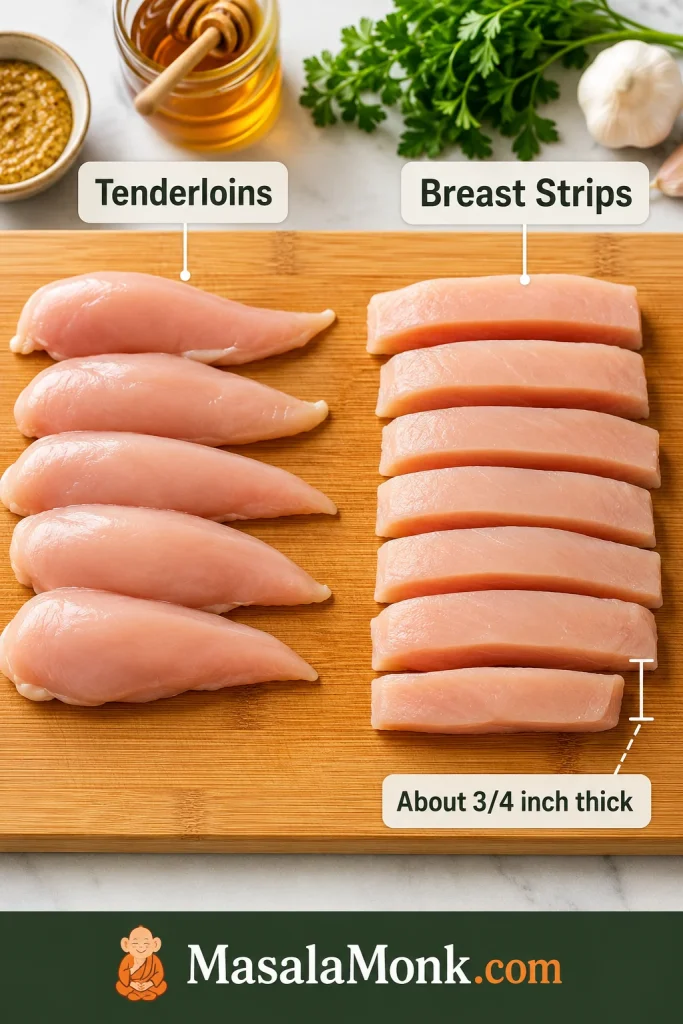
1 1/2 lb / 680 g / 24 oz chicken tenderloins, or boneless chicken breast sliced into strips about 3/4 inch thick
1 1/2 cups / 75–90 g panko breadcrumbs
Fine salt, 1 teaspoon / 5–6 g, divided
Black pepper, 1/2 teaspoon
Garlic powder, 1 teaspoon
Onion powder, 1/2 teaspoon
Smoked paprika or sweet paprika, 1 teaspoon
Oil spray, or 1 tablespoon / 15 ml olive oil for drizzling
For the Honey Mustard Coating and Dipping Sauce
1/4 cup / 60 ml / about 60 g Dijon mustard, yellow mustard, or a mix of both
3 tablespoons honey / 45 ml / about 60 g
3 tablespoons mayonnaise or Greek yogurt / 45 ml / about 45 g
1 tablespoon / 15 ml lemon juice or apple cider vinegar
1/4 teaspoon garlic powder
Pinch of salt and black pepper, to taste
Sauce note: This amount gives enough sauce to coat the chicken and reserve a small dipping bowl. For sauce-heavy serving, make a second half-batch of honey mustard or reserve more before raw chicken touches it.
Instructions
Prepare the Sauce
In a bowl, mix the mustard, honey, mayonnaise or Greek yogurt, lemon juice or vinegar, garlic powder, salt and pepper.
Taste and adjust. Make it sweeter with more honey, sharper with extra Dijon, or brighter with a little more lemon juice.
Mix once, divide first: reserve about one-third to one-half of the sauce in a clean bowl for dipping. Keep this portion away from raw chicken.
Coat the Chicken
Pat the chicken tenders dry with paper towels. The surface should look dry, not shiny-wet.
Season the chicken lightly with some of the salt, pepper, garlic powder, onion powder and paprika.
Add the chicken to the remaining honey mustard mixture and turn until each piece is coated.
Let the chicken sit for 15–30 minutes if you have time. Avoid a long acidic marinade for very thin strips because the surface can soften and the coating may not grip as well.
Place the panko breadcrumbs in a shallow bowl. Season with the remaining salt and spices.
Press each honey mustard-coated chicken tender firmly into the panko, turning to coat all sides.
Bake the Chicken Tenders
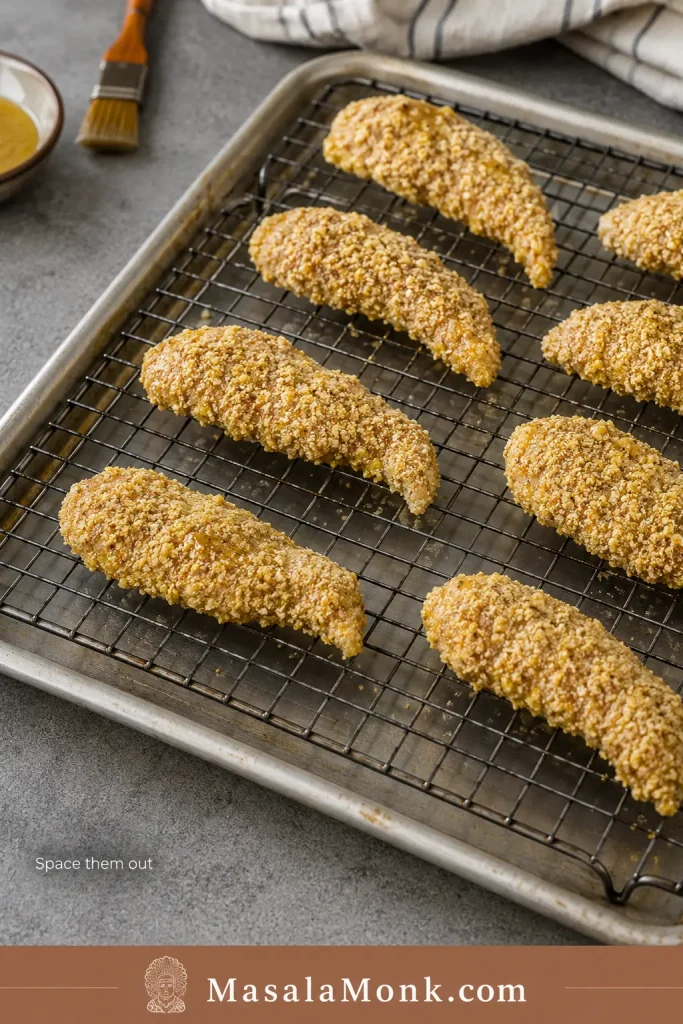
Preheat the oven to 425°F / 220°C. Line a baking sheet with parchment paper. For crispier bottoms, place a wire rack over the baking sheet.
Arrange the coated tenders in a single layer with space between them.
Spray the tops lightly with oil, or drizzle with a small amount of olive oil.
Bake for 16–20 minutes, flipping once if needed, until the edges are golden and the chicken is cooked through.
Check the thickest tender for doneness.
Rest for 3–5 minutes on a rack or plate, then serve with the reserved clean honey mustard dipping sauce.
Air Fryer Method
Preheat the air fryer to 390°F / 200°C.
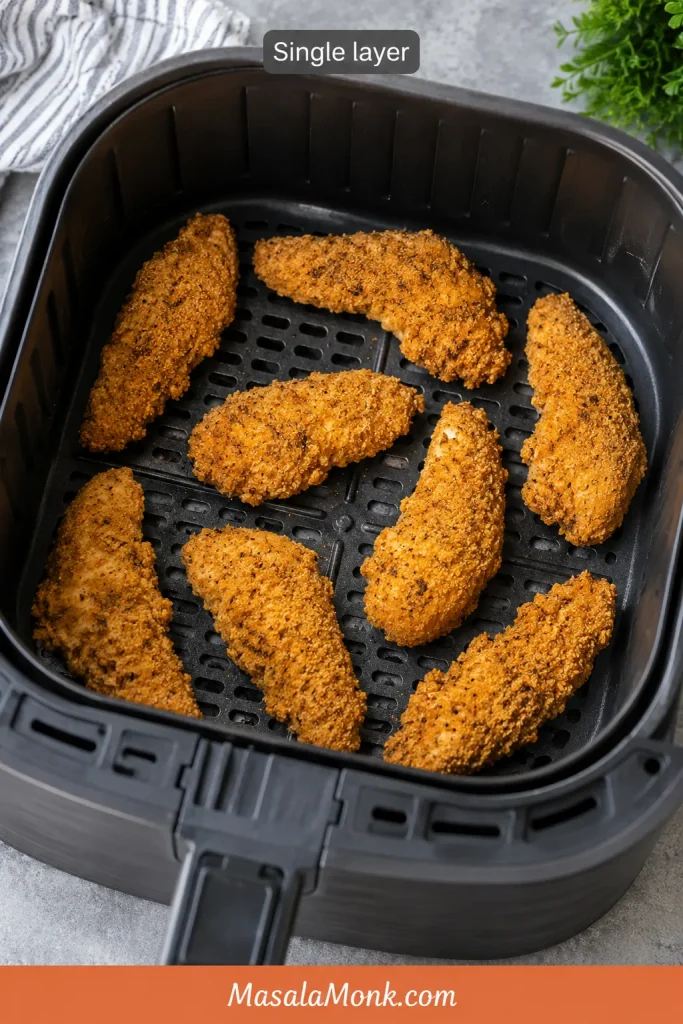
Arrange the chicken tenders in a single layer. Do not overcrowd the basket.
Spray lightly with oil.
Air fry for 10–12 minutes, flipping halfway, until crisp and cooked through. Check around 9–10 minutes the first time because air fryers brown at different speeds.
Cook in batches if needed. Two lighter batches will beat one crowded batch every time.
Recipe Notes
No egg is needed here because the honey mustard mixture acts as the binder.
Very thin strips cook quickly, so start checking early.
Thicker tenders may need the full 20 minutes, or a gentler 400°F / 200°C bake for a few extra minutes.
For the crunchiest crust, use a wire rack and oil spray.
To get a familiar fast-food-style honey mustard, use more yellow mustard and mayonnaise.
Prefer a sharper Dijon-style sauce? Use more Dijon and a little extra lemon juice.
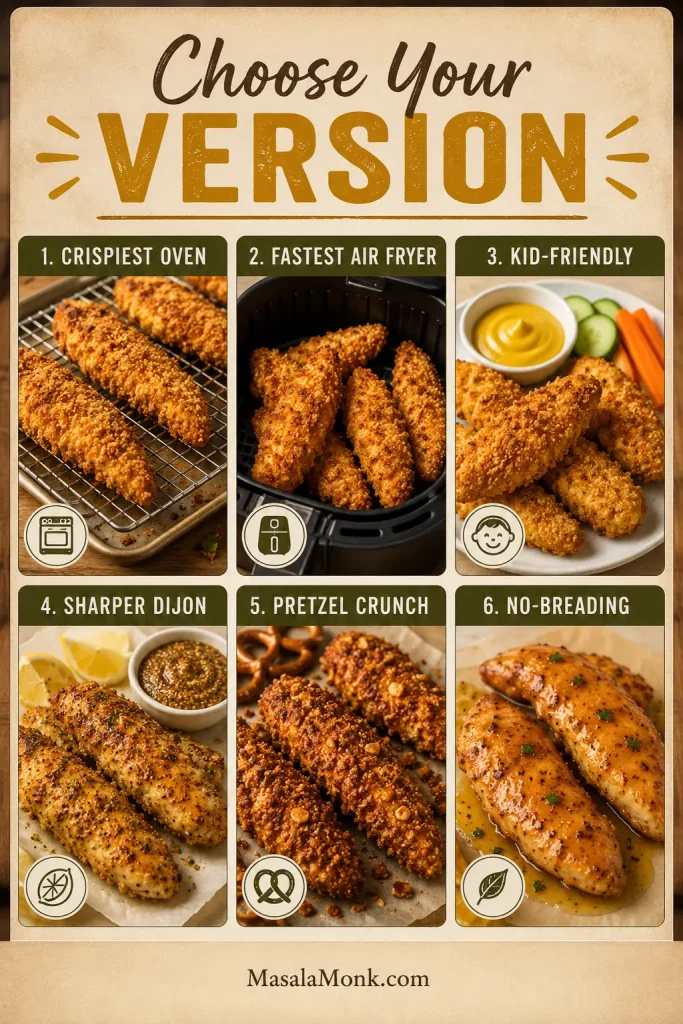
Choose Your Version
Already know what kind of tray you want? Use this table to steer the recipe. The base method stays the same; the small changes below make the tenders crunchier, faster, milder, sharper, party-style, or gluten-free.
Choose the version that fits your night: oven-baked for maximum crunch, air fryer for speed, Dijon for a sharper bite, pretzel crumbs for texture, or no-breading for a lighter option.
Want This Result?
Do This
Crispiest oven tenders
Use panko, toast it first if you can, spray with oil, and bake on a wire rack.
Fastest version
Use the air fryer at 390°F / 200°C in a single layer.
Kid-friendly flavor
Use yellow mustard, mayonnaise, and a little extra honey.
Sharper Dijon version
Use more Dijon, Greek yogurt, and extra lemon juice.
Party-style crunch
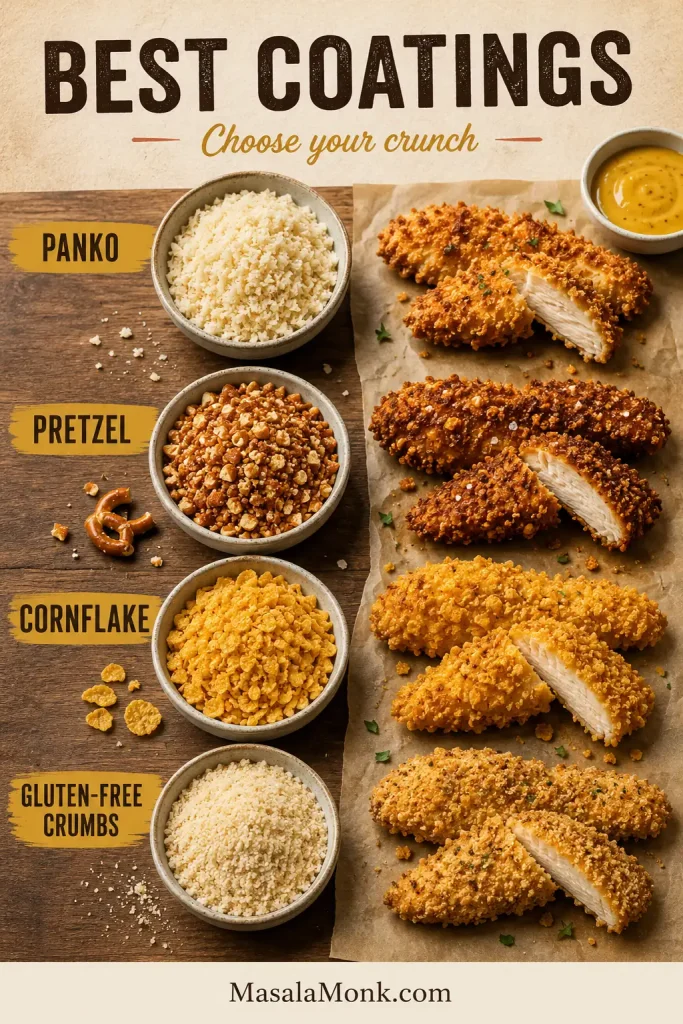
Replace panko with crushed pretzels and reduce added salt.
Gluten-free version
Use gluten-free panko or crushed gluten-free rice cereal.
No-breading version
Skip the panko and bake lightly coated honey mustard tenderloins.
Time and Temperature Guide
Chicken tenders cook quickly, so timing matters. Use the table below as a guide, then check the thickest piece before serving.
Method
Temperature
Time
Best For
Oven, standard tenders
425°F / 220°C
16–20 minutes
Full batch, golden crumb crust
Oven, thick tenders
400°F / 200°C
20–25 minutes
Larger chicken strips
Air fryer
390°F / 200°C
10–12 minutes
Fast crisping, smaller batches
Reheat
375–390°F / 190–200°C
5–8 minutes, or until hot and crisp
Leftovers
Chicken should reach 165°F / 74°C in the thickest part. The tenders should also look golden at the edges and feel firm when lifted with tongs, but the thermometer is the safest check.
Once the timing is clear, the next thing is texture. These tenders work because the coating is built to cling, brown, and stay crisp long enough to dip.
Why This Recipe Works
The best honey mustard chicken tenders are not just sweet chicken in breadcrumbs. They need a coating that stays put, a crust that browns before the chicken dries out, and a dipping sauce that does not soften the crunch too early.
The magic is not complicated, but it does depend on a few small choices that keep baked tenders from tasting like soft breaded chicken.
Dry chicken helps the coating grip. You want the mustard-honey layer to cling, not slide around.
Honey mustard replaces egg. It gives the crumbs something to hold onto and adds flavor at the same time.
Panko gives the oven-fried bite. It is lighter and flakier than regular breadcrumbs.
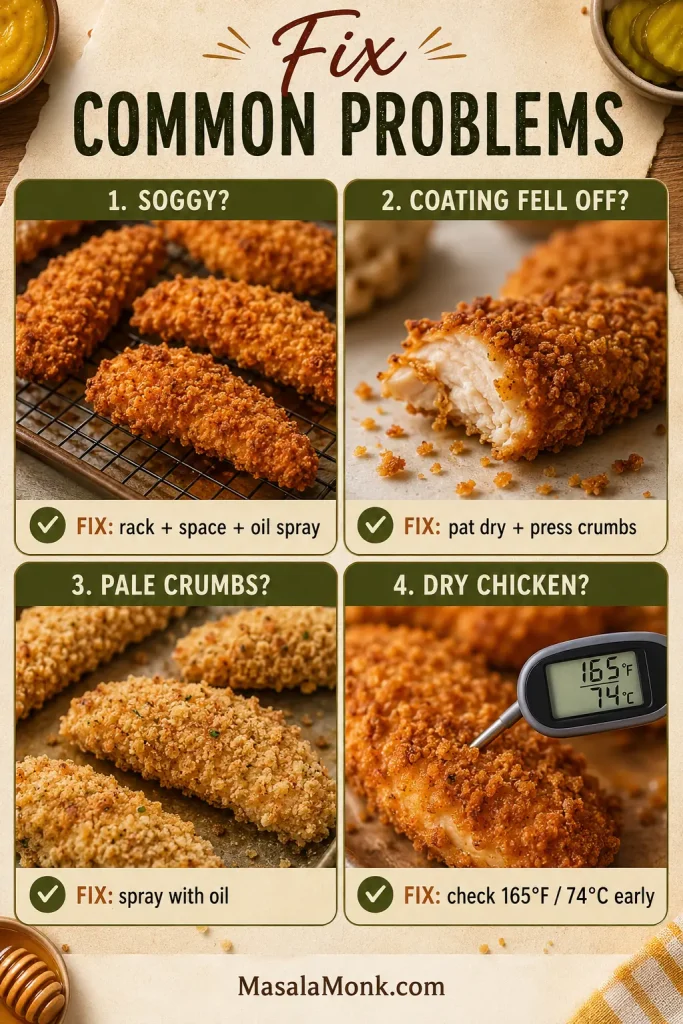
Oil spray brings the color. Dry crumbs stay pale; a little oil helps them turn golden.
Space and a rack fight steam. Give the tenders a little breathing room so they brown instead of softening together.
Reserved sauce stays clean. Moving the dip to a separate bowl before coating the chicken keeps serving simple and safe.
When those pieces work together, you get the comfort of chicken fingers, the brightness of honey mustard, and a crisp bite that still tastes juicy underneath.
The best part is the contrast: the craggy panko shell, the tender strip of chicken inside, and that cool-sweet honey mustard dip catching in all the little crispy edges.
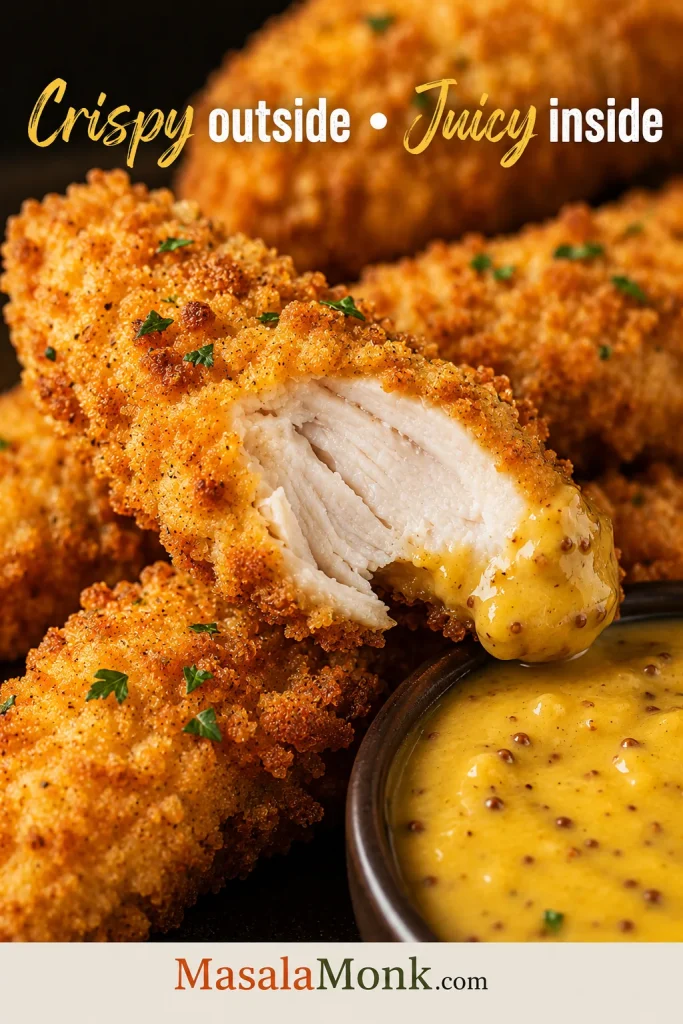
Crispy Outside, Juicy Inside
This is the texture target to keep in mind before you start coating: crisp crumbs on the outside, tender chicken in the middle, and sauce served on the side so the crust stays lively.
Aim for contrast in every bite: a crunchy panko shell outside and moist white chicken inside. Pull the tenders once they are cooked through so the center stays juicy.
Ingredients You Need
Most of the flavor comes from the ingredients. Simple tools and small technique choices handle the texture.
Set out the chicken, panko, sauce ingredients, seasonings, and oil spray before you start. It keeps the coating step smooth and makes it easier to reserve a clean dipping bowl.
Chicken Tenderloins or Chicken Breast
Chicken tenderloins are easiest because they are already shaped like strips. Boneless chicken breast works too; just slice it lengthwise into even pieces about 3/4 inch thick at the widest part. Very thin strips cook before the crumbs brown, while very thick strips need more time and can darken the honey before the center is done.
Even thickness matters more than perfect shape. Keep chicken tenderloins or breast strips close to 3/4 inch thick so the coating can brown before the center dries out.
If you are starting with full chicken breasts and want more detail on keeping them juicy, this baked chicken breast recipe goes deeper into timing, thickness, and avoiding dry chicken.
Mustard
Dijon brings bite; yellow mustard brings nostalgia. Use Dijon for a sharper sauce, yellow mustard for a milder dipping-sauce flavor, or a mix of both for the best middle ground.
Honey
Honey gives the sauce its classic sweetness, but this is not a sticky glaze recipe. The honey mustard flavors the chicken while the panko does the crisping, so the tenders stay crunchy instead of turning syrupy.
Mayonnaise or Greek Yogurt
Mayonnaise makes the sauce creamy and familiar. Greek yogurt gives you a lighter, tangier version. Both help the mustard-honey coating cling to the chicken and hold the crumbs in place.
If you like making creamy sauces from scratch, this homemade mayonnaise guide gives you a richer base for dips.
Panko Breadcrumbs
Panko is what keeps baked tenders from feeling like soft breaded chicken. The flakes are light and uneven, so they create a craggy shell that feels much closer to fried chicken fingers.
This recipe skips the classic flour-and-egg dredge to keep the coating simple. The mustard-honey layer works as the glue. For a firmer, more restaurant-style crust, lightly dust the chicken with flour before dipping it into the sauce, then press it into the panko.
Seasonings
Garlic powder, onion powder, paprika, salt and pepper are enough. They make the coating savory without hiding the honey mustard flavor.
Equipment That Helps
You can make these with a baking sheet and a bowl, but a few simple tools make the difference between “good enough” tenders and crisp, golden ones.
Rimmed baking sheet: Keeps crumbs and oil contained.
Parchment paper: Helps prevent sticking and makes cleanup easier.
Wire rack: Gives the bottoms a better chance to crisp.
Shallow bowl: Makes pressing the panko onto the chicken easier.
Oil spray: Helps the crumbs turn golden without deep frying.
Air fryer: Optional, but excellent for smaller batches.
Instant-read thermometer: Helpful for avoiding dry or undercooked chicken.
Honey Mustard Sauce: Dip, Binder or Marinade?
Honey mustard does three jobs here: it helps the crumbs stick, flavors the chicken, and gives you that creamy dipping bowl at the end. The only rule is that the dip must be reserved before raw chicken touches the rest.
Sauce safety rule: mix once, divide first. Make one batch of honey mustard, then immediately move the dipping portion to a clean bowl before raw chicken touches the rest.
Mix Once, Divide First
This visible split is what keeps dinner simple: one bowl becomes the clean dip, while the rest of the sauce seasons and coats the raw chicken before breading.
Mix once, then divide before raw chicken touches the sauce. This keeps one bowl safe and clean for dipping while the remaining honey mustard becomes the flavorful coating binder.
The sauce has three jobs. First, it helps the crumb layer stick. At the table, it gives the cooked tenders that creamy sweet-tangy finish. If the chicken rests for 15–30 minutes before breading, the same sauce also works as a short flavor boost.
Honey Mustard Sauce Spoon Test
Before the chicken goes in, lift a spoon through the sauce and check the texture. It should coat the spoon in a creamy layer, not run off immediately.
Look for a spoon-coating texture: thick enough to cling, creamy enough to dip. If the honey mustard looks runny, thicken it slightly before coating the chicken.
For a loose sauce, whisk in another spoonful of mayo or Greek yogurt before breading. A thicker sauce grips the chicken better and protects the panko from turning wet.
Very thin strips do not need an overnight marinade, especially if your sauce is tangy with lemon juice or vinegar. Too much time in an acidic sauce can soften the surface and make the coating less secure.
Simple Honey Mustard Dipping Sauce Ratio
1/4 cup / 60 ml mayonnaise or Greek yogurt
2 tablespoons / 30 ml Dijon or yellow mustard
2 tablespoons honey / 30 ml / about 40 g
1–2 teaspoons lemon juice or apple cider vinegar
Pinch of garlic powder
Salt and pepper to taste
Make it sweeter with more honey, sharper with extra Dijon, or more familiar and restaurant-style with yellow mustard and mayo. Greek yogurt plus a little extra lemon juice gives you the lighter, tangier version.
If you enjoy this sweet-tangy lane, mango mustard sauce is a fun next dip for fries, wraps and sandwiches.
Once the recipe card is open, these are the small visual cues that make the tray come out right: dry surface, spoon-coating sauce, firmly pressed crumbs, enough space, and golden edges.
1. Dry and Season the Chicken
The chicken should look dry before the sauce goes on. You want the mustard-honey coating to cling, not slide around.
2. Mix, Taste and Divide the Sauce
The sauce should taste sweet first, tangy next, and creamy enough to dip. Once it tastes right, reserve the clean dipping portion before you coat the raw chicken.
3. Coat Lightly, Not Heavily
You want a thin layer of honey mustard clinging to the chicken, not a heavy blanket of sauce. Too much sauce can make the crumbs wet and slow down browning.
4. Press the Panko
Press the crumbs onto the chicken instead of sprinkling them over the top. The coating should look attached before it goes into the oven or air fryer.
After coating the chicken, press it firmly into the panko instead of sprinkling crumbs over the top. This helps the breadcrumb crust grip better during baking or air frying.
5. Space, Spray and Cook
Leave gaps between the tenders and give the crumb layer a light spray of oil. This is the step that makes the tray look like dinner instead of pale baked chicken: the crumbs need both heat and a little fat to turn golden.
Oven Method
Use the oven when you want the whole tray ready together, with enough tenders for dinner plates and a few “just one more” pieces.
Temperature: 425°F / 220°C
Time: 16–20 minutes
Best setup: parchment-lined baking sheet or a wire rack over a baking sheet
Texture goal: golden crumbs, juicy chicken, crisp edges
For the oven method, high heat and rack spacing do most of the work. The rack helps the panko crisp underneath while the quick bake keeps the chicken tender.
Why Use a Wire Rack?
A wire rack helps hot air reach the bottom of the tenders, which keeps them from steaming against the pan. When baking directly on parchment, flip the tenders once for better bottom color. With a rack, flipping is optional.
A wire rack gives baked chicken tenders an instant crispness boost. Because heat can move underneath the pieces, the bottoms stay drier and the panko browns more evenly.
Thick tenders can bake at 400°F / 200°C for about 20–25 minutes. Thin strips may be ready closer to 14–16 minutes, so start checking early.
Use the air fryer when speed matters more than cooking the whole batch at once. It crisps the crumb layer quickly, but only if the basket has enough space.
Air Fryer Single Layer Setup
Before starting the timer, check the basket. The pieces should sit in one layer with visible gaps, even if that means cooking two smaller batches.
In the air fryer, crowding turns crisping into steaming. Therefore, leave small gaps between the tenders so the hot air can brown the panko coating properly.
Temperature: 390°F / 200°C
Time: 10–12 minutes
Flip: halfway through
Oil: light spray on both sides
Best rule: cook in batches if the basket is small
Air Fryer Time and Temperature Guide
Use this quick visual check when you want the air fryer version: moderate-high heat, a halfway flip, and enough space for the crumbs to crisp.
Give every tender room in the air fryer basket. Meanwhile, flipping halfway helps both sides get direct heat so the coating crisps instead of softening.
Different air fryers brown at different speeds, so check around 9–10 minutes the first time. Keep the first batch warm on a rack in a low oven while the rest cook, and avoid stacking hot tenders in a bowl because steam will soften the crust.
The same air-flow rule shows up in crispy recipes like air fryer chicken wings: dry surfaces, space between pieces, and late saucing protect the crunch.
Once the basic method is in place, these upgrades take baked chicken tenders from good to properly crisp. They are especially helpful if your baked tenders usually come out pale or soft.
Toast the panko first. This is the best color upgrade. Toasting gives baked tenders a golden head start before the chicken has a chance to overcook.
Use a wire rack. It lets heat move around the tenders instead of trapping steam underneath.
Spray both sides lightly. A little oil helps the crumbs brown and gives the crust a more oven-fried texture.
Rest cooked tenders on a rack. If you have a rack, use it even after baking. It keeps the bottoms from softening while everyone is getting plates ready.
Avoid stacking. Hot tenders piled together will soften quickly.
Dip, do not drown. Let the crust stay in charge until the moment you eat.
Best Coatings for Honey Mustard Chicken Tenders
Panko is the easiest default, but honey mustard chicken tenders are flexible. Use this quick guide to choose the coating that fits the meal.
Each coating changes the crunch. Panko stays light and flaky, pretzel crumbs add salty depth, cornflakes create a bigger golden crust, and gluten-free crumbs keep the recipe flexible.
Coating
Best For
Notes
Panko breadcrumbs
Classic crispy baked tenders
Best default choice
Crushed pretzels
Salty, crunchy party-style tenders
Use less added salt
Crushed cornflakes
Extra crisp kid-friendly tenders
Crush finely but not into powder
Regular breadcrumbs
Softer chicken strips
Works, but less crisp than panko
Gluten-free panko
Gluten-free version
Check labels on mustard and seasonings too
Crushed rice cereal
Emergency gluten-free crunch
Best with a little extra seasoning
If you use pretzels or cornflakes, crush them into small uneven crumbs. A little texture is good, but a fine powder will not give the same crunch.
Variations
Once the basic tray works, this recipe is easy to bend toward the people eating it — sweeter for kids, sharper for Dijon lovers, spicier for game day, crunchier with pretzels, or lighter without mayo.
Spicy Hot Honey Mustard Chicken Tenders
This is the game-day version: still sweet and creamy, but with enough heat to keep people dipping. Add a pinch of cayenne, chili powder or hot sauce to the honey mustard mixture. You can also finish the cooked tenders with a tiny drizzle of hot honey, but add it at the table so the coating stays crisp.
For a fruitier heat, borrow the sweet-spicy direction from this mango habanero sauce and add only a small amount to the honey mustard dip.
Pretzel-Crusted Honey Mustard Tenders
Replace the panko with crushed pretzels for a salty snack-style crust that feels made for a party tray. Reduce the salt in the crumb mixture because pretzels are already salty.
Buttermilk Honey Mustard Chicken Tenders
For a more tender, classic chicken-finger texture, soak the chicken in buttermilk for 30 minutes before coating. Pat off the excess before adding the honey mustard mixture so the panko does not slide off.
No-Mayo Honey Mustard Sauce
Use Greek yogurt when you want the dip tangier and lighter without losing the creamy coating. Add a little extra honey if you want it sweeter. For an egg-free creamy base, eggless mayonnaise also works well.
Kid-Friendly Yellow Mustard Version
Use yellow mustard instead of Dijon, skip the cayenne or spicy seasonings, and keep the sauce a little sweeter. This version tastes closer to familiar fast-food honey mustard.
Gluten-Free Honey Mustard Chicken Tenders
Use gluten-free panko or crushed gluten-free rice cereal. Also check the mustard, mayonnaise and seasonings to make sure they fit your needs.
No-Breading Honey Mustard Tenderloins
This version is not trying to be crispy. It is for the night you want juicy honey mustard tenderloins over rice, salad, or roasted vegetables. Skip the panko, coat the chicken lightly in honey mustard, and bake on parchment until cooked through, starting to check around 14–16 minutes depending on thickness.
Green Chutney Mayo Dip
For an Indian-style dipping sauce, stir a spoonful of green chutney into mayo or Greek yogurt. It gives the tenders a fresh coriander-mint bite without changing the main recipe.
Shallow-fried note: If you want a more classic chicken-finger texture, shallow fry the coated tenders in a thin layer of neutral oil until golden and cooked through. Keep the heat moderate so the honey in the coating does not brown too fast.
What to Serve with Honey Mustard Chicken Tenders
Once the tray is done, the only real question is whether this is a cozy dinner, a game-day snack, or a wrap-and-leftovers situation. Keep the dip close and build the meal around something crisp, creamy, tangy or fresh.
These tenders can move from snack to full meal with the right sides. Try them with fries and slaw, tuck them into wraps, or slice them over salad with extra honey mustard.
Weeknight dinner: roasted broccoli, green beans, mashed potatoes, or macaroni and cheese.
Game-day tray: buffalo chicken dip, potato wedges, celery sticks, and a pile of napkins.
Lunchbox or salad bowl: cucumber salad, green salad, crunchy vegetables, and sliced cold tenders.
Wrap or sandwich night: lettuce, pickles, soft buns or tortillas, and enough sauce to swipe through every bite.
Leftover tenders are great sliced over salad, tucked into wraps, or layered into sandwiches with lettuce, pickles and extra honey mustard. For more lunch ideas, these chicken sandwich recipes are a useful next stop.
Storage, Freezing and Reheating
The main rule for leftovers is simple: keep the sauce separate and bring the crunch back with dry heat.
Storing Leftovers
Store cooked chicken tenders in an airtight container in the fridge for 3–4 days. Keep the honey mustard sauce in a separate container so the coating does not soften. That 3–4 day window matches the FoodSafety.gov cold storage chart for cooked meat and poultry leftovers.
Reheating
For the best texture, reheat the tenders in an oven or air fryer at 375–390°F / 190–200°C for about 5–8 minutes, or until hot and crisp. The microwave works if you are in a hurry, but it will soften the coating.
Freezing
For easiest freezing, freeze cooked tenders. Raw breaded tenders can also be frozen if the chicken was handled cold and clean, but cooked leftovers are simpler and safer for most home kitchens. Freeze in a single layer first, then move to a freezer-safe bag or container.
Do not freeze the dipping sauce with the chicken. Make fresh sauce or store it separately in the fridge.
Troubleshooting
Most honey mustard chicken tender problems come down to moisture, crowding, or too much sauce. If baked tenders have ever come out pale, soft, or half-naked on the pan, this is the section that saves the next batch.
For soggy coating, fix the airflow first with a rack, spacing, and oil spray. When crumbs fall off, start earlier by patting the chicken dry and pressing the panko firmly.
Why Are My Chicken Tenders Soggy?
Likely causes: crowding, too much sauce, not enough oil on the crumbs, or stacking hot tenders after cooking.
Fix: leave space between pieces, use a rack if possible, spray lightly with oil, rest cooked tenders without stacking, and dip at the table instead of saucing early.
Why Did My Coating Fall Off?
Likely causes: wet chicken, thin sauce, loose crumbs, or not enough pressing.
Fix: pat the chicken dry, use a creamy coating that clings, and press each tender into the panko until the crumbs look attached.
Why Is My Panko Pale?
Likely causes: dry breadcrumbs, low browning, or not enough time for color before the chicken is done.
Fix: spray or drizzle the panko lightly with oil. For deeper color, toast the panko before coating the chicken.
Why Did the Honey Burn?
Likely causes: a sauce layer that is too heavy, very small chicken pieces, or cooking too long.
Fix: use a thin coating, rely on panko for crunch, and start checking thin strips early.
Why Is the Chicken Dry?
Likely causes: thin strips, uneven sizes, or cooking past the safe internal temperature.
Fix: cut even pieces, start checking early, and use a thermometer in the thickest tender.
Why Is the Sauce Too Sweet or Too Sharp?
Likely causes: too much honey for your taste, too much Dijon, or not enough creamy base.
Fix: add mustard or lemon juice if it is too sweet. Add honey, mayo, or Greek yogurt if it is too sharp. Honey mustard should taste sweet first, tangy next, and creamy enough to dip.
Are Chicken Tenders and Chicken Strips the Same Thing?
They are often used the same way in recipes. Tenderloins are the small natural strips attached to the chicken breast. Strips are usually sliced from boneless chicken breast. Both work as long as the pieces are similar in size.
Can I Use Chicken Breast Instead of Tenderloins?
Yes. Slice boneless chicken breast into even strips about 3/4 inch thick at the widest part. Try not to make them too thin, because thin strips can dry out before the coating gets crisp.
Do I Need Flour or Egg for These Chicken Tenders?
No. The honey mustard mixture works as the binder in this recipe. For a firmer restaurant-style crust, lightly dust the chicken with flour before adding the sauce and panko.
Can I Make Honey Mustard Chicken Tenders in the Air Fryer?
Yes. Air fry at 390°F / 200°C for 10–12 minutes, flipping halfway, until the chicken is crisp and cooked through. Cook in batches so the basket is not crowded.
How Do I Keep Baked Chicken Tenders Crispy?
Use panko breadcrumbs, spray or drizzle the coating lightly with oil, leave space between the tenders, and bake at high heat. A wire rack helps too. Keep the sauce on the side until serving.
Can I Make These Gluten-Free?
Yes. Use gluten-free panko or crushed gluten-free rice cereal. Check your mustard, mayonnaise, and seasonings as well if gluten-free cooking is important for your household.
Can I Make the Sauce Without Mayo?
Yes. Use Greek yogurt for a tangier, lighter sauce. Add a little extra honey if you want it sweeter, or use eggless mayonnaise if you want a mayo-style sauce without egg.
Can I Use the Same Honey Mustard as Marinade and Dip?
Only if you divide it first. Reserve the dipping portion in a clean bowl before raw chicken touches the rest. The sauce used on raw chicken should not be served as a dip unless it is cooked safely.
How Do I Reheat or Freeze Honey Mustard Chicken Tenders?
Reheat cooked tenders in an oven or air fryer at 375–390°F / 190–200°C for 5–8 minutes, or until hot and crisp. For freezing, cooked tenders are the easiest option. Freeze in a single layer first, then store in a freezer-safe bag or container.
Final Bite
The win here is simple: no frying pot, no soggy tray, no dry chicken, and no wasted dipping sauce because it touched raw chicken.
Just golden panko, juicy strips, and a clean bowl of sweet-tangy honey mustard that somehow disappears faster than expected. Keep the sauce creamy, the crumbs well-pressed, and the dip on the side until the moment everyone starts reaching.
This General Tso chicken recipe is for the takeout craving: crisp pieces of chicken, a glossy sweet-spicy sauce, garlic and ginger in the pan, and rice waiting underneath to catch every sticky spoonful.
The secret is timing, not a complicated sauce. Takeout chicken often softens because it sits in glaze on the way home. Here, the sauce meets the chicken at the last second, so the first few bites still have crunch.
The whole recipe comes down to three cues: rough coating, thick glaze, fast toss. Remember that rhythm and you get crunchy edges, juicy centers, and sauce that clings instead of turning the pan soggy.
This version takes about 40 minutes from start to finish and uses a shallow-fry method, so you do not need a deep fryer. Better than takeout here does not mean fancier; it means the chicken is sauced at the last second, the glaze is balanced to your taste, and the first bite still feels fresh from the pan.
The best homemade General Tso chicken is made by cutting boneless chicken into small pieces, coating it with cornstarch, shallow frying it until crisp, then tossing it briefly in a thick sweet-spicy sauce made with soy sauce, rice vinegar, hoisin, sugar, garlic, ginger, chili, sesame oil, stock or water, and cornstarch.
For the juiciest General Tso’s chicken, use boneless skinless chicken thighs. For the crispiest result without a deep fryer, fry the chicken in batches in about 2 cm / 3/4 inch of hot oil, thicken the sauce separately, and toss the fried pieces only at the end.
This recipe also helps with the two things that usually go wrong at home: soggy chicken and sauce that tastes too sweet, too salty, too thin, or too flat.
A close look at the finished chicken helps you know what the sauce should do: cling lightly to the ridges without hiding the crisp coating.
Sticky sauce, visible ridges, and rice underneath — this is the texture target.
The 3-Cue Method
If you remember only one thing before cooking, remember this: rough coating, thick glaze, fast toss. These three checks protect the texture more than any complicated sauce trick.
Cue
What to Look For
Why It Matters
Rough coating
Patchy, dry-looking chicken pieces, not smooth paste
Rough edges crisp better in hot oil
Thick glaze
Sauce that coats a spoon and leaves a short trail
Thin sauce soaks into the crust
Fast toss
About 30 seconds in the pan
The chicken gets coated without turning soft
Once the sauce is mixed, the chicken is coated, and the rice is already steaming, the cooking feels much calmer. From there, it is hot oil, a quick glaze, scallions on top, and the sticky takeout-style bowl you were hoping for.
The Three Cues in One Look
Use this visual as a quick check before cooking: the coating should look rough, the sauce should look thick, and the toss should happen fast.
Rough coating, thick glaze, fast toss — these three checks protect the crisp edges.
General Tso Chicken at a Glance
Flavor
Sweet first, then savory, tangy, and gently spicy
Texture
Crisp chicken edges with a sticky glaze
Best chicken
Boneless skinless thighs for juicy takeout-style pieces
Leaner option
Chicken breast, cut evenly and cooked carefully
Main method
Shallow fry, thicken sauce, toss briefly
Oil depth
About 2 cm / 3/4 inch
Oil amount
About 1 1/2 cups in a 10-inch skillet; closer to 2 cups in a wider pan
Oil temperature
375–390°F / 190–200°C
Chicken safe temperature
165°F / 74°C inside
Best served with
Rice and broccoli
What Is General Tso Chicken?
General Tso chicken, often written as General Tso’s chicken, is a Chinese-American takeout dish made with crispy pieces of chicken tossed in a sweet, tangy, savory, lightly spicy sauce. It usually tastes sweet first, then savory and tangy, with a gentle chili warmth at the end. The goal is contrast: crisp edges, juicy chicken, and a shiny sauce that clings to each piece instead of pooling at the bottom of the pan.
Before You Start
This recipe moves quickly once the oil is hot, so a little prep makes everything easier. Start the rice first; this guide to cooking rice is useful when you want fluffy grains ready before the chicken hits the sauce.
Frying feels less stressful when you treat the first piece as a test. Use a heavy pan, keep the oil shallow, and fry one small coated piece before the first full batch. When it sizzles steadily and turns golden without burning, the oil is ready.
Crispy General Tso Chicken Without Deep Frying
Summary: Crispy shallow-fried chicken tossed in a glossy sweet, tangy, lightly spicy General Tso sauce. This homemade version gives you takeout-style flavor without a deep fryer.
Prep Time
20 minutes
Cook Time
20 minutes
Total Time
40 minutes
Servings
4 servings
Method
Shallow fry, thicken sauce, toss briefly
Skill Level
Moderate, but very manageable with prep
Equipment
Large heavy skillet, wok, or Dutch oven
Mixing bowls
Whisk
Tongs or a spider strainer
Wire rack or paper towel-lined plate
Instant-read thermometer or oil thermometer, helpful but optional
Knife and cutting board
Ingredients
For the Chicken
600g / 1.3 lb boneless skinless chicken thighs, cut into 1-inch / 2.5 cm pieces
1 large egg white, or 2 tablespoons beaten egg, for better coating grip
1 tablespoon soy sauce
1 tablespoon Shaoxing wine, dry sherry, chicken stock, or water
1/4 teaspoon salt, plus more only if needed
1/4 teaspoon white pepper or black pepper
1/2 cup / about 65g cornstarch, plus 1–2 tablespoons more if needed
Neutral oil for shallow frying, usually 1 1/2 to 2 cups depending on pan width
For the General Tso Sauce
1/2 cup / 120ml chicken stock or water
3 tablespoons low-sodium soy sauce
2 tablespoons hoisin sauce
2 tablespoons unseasoned rice vinegar
2–3 tablespoons brown sugar or honey, depending on how sweet you like it
1 tablespoon chili garlic sauce or sambal, or 1/2–1 teaspoon red pepper flakes
2 teaspoons sesame oil
1 tablespoon cornstarch
For the Aromatics and Serving
2–3 garlic cloves, minced
1 teaspoon fresh ginger, grated
3–5 dried red chilies, optional
Cooked jasmine rice, white rice, brown rice, or fried rice
Steamed or stir-fried broccoli
Sliced scallions
Sesame seeds
Instructions
Prep the Chicken
1. Cut the chicken. Cut the chicken into even 1-inch / 2.5 cm pieces. Similar size matters more than perfect cubes.
2. Season the chicken. In a bowl, combine the chicken with egg white or beaten egg, soy sauce, Shaoxing wine or another listed liquid, salt, and pepper. Stir until the pieces are lightly coated.
3. Add the cornstarch. Sprinkle in the cornstarch and toss until the chicken pieces have a thin, rough, mostly dry-looking coating. Uneven is good here because those rough patches turn into crisp edges in the oil. If the chicken looks wet or sticky, add another tablespoon or two of cornstarch. Shake off heavy loose clumps before frying.
4. Mix the sauce. In a separate bowl, whisk together the stock or water, soy sauce, hoisin sauce, rice vinegar, brown sugar or honey, chili garlic sauce, sesame oil, and cornstarch.
Fry and Drain
5. Heat the oil. Add about 2 cm / 3/4 inch neutral oil to a heavy skillet, wok, or Dutch oven. In a 10-inch skillet, start with about 1 1/2 cups oil. In a wider pan, you may need closer to 2 cups to reach the same shallow depth. Heat to 375–390°F / 190–200°C. Without a thermometer, look for shimmering oil and listen for an immediate steady sizzle when a small test piece goes in.
6. Fry in batches. Add the chicken in a single layer with space between pieces. Fry for 3–5 minutes total, turning as needed, until golden, crisp, and cooked through. The chicken should reach 165°F / 74°C inside.
7. Drain the chicken. Transfer the fried chicken to a wire rack or a paper towel-lined plate. A wire rack is best because it lets steam escape instead of collecting under the coating. Repeat with the remaining chicken.
Make the Sauce and Toss
8. Cook the aromatics. Carefully pour off most of the oil, leaving about 1 tablespoon in the pan. Add the garlic, ginger, and dried chilies. Stir for 20–30 seconds, just until the garlic and ginger smell sharp, warm, and a little toasty. Stop before the garlic browns; burnt garlic can make the whole sauce taste harsh.
9. Thicken the sauce. Whisk the sauce once more, then pour it into the pan. Simmer for 1–2 minutes, stirring often, until the sauce turns shiny, darkens slightly, and moves like a glaze instead of a thin liquid. When you drag a spatula through the sauce, it should briefly leave a trail before flowing back together.
10. Toss quickly. Add the fried chicken back to the pan and toss for about 30 seconds, just until the glaze catches on the rough edges in a thin, shiny layer, with a few crisp ridges still showing. Get it out of the pan before the coating sits too long in the sauce.
11. Serve immediately. Finish with scallions and sesame seeds. Serve hot with rice and broccoli while the sauce is shiny and the edges still have some crunch.
Recipe Notes
Chicken thighs are the most forgiving choice because they stay juicy. Chicken breast works too, but avoid overcooking it.
Egg white gives the cleanest coating. If using whole beaten egg, use only 2 tablespoons at first and add extra cornstarch as needed.
Before frying, aim for rough, mostly dry chicken pieces. Before tossing, look for a glossy sauce that coats the spoon. If either one looks wet or thin, fix it before moving on.
The sauce must thicken before the chicken returns. This one step protects the coating more than anything else.
If the first batch browns before the chicken cooks through, the oil is too hot for the size of the pieces. Lower the heat slightly and give the next batch a little more time.
For a milder sauce, reduce the chili garlic sauce or skip the dried chilies.
For a sweeter restaurant-style sauce, use the full 3 tablespoons brown sugar or honey.
If using regular soy sauce instead of low-sodium soy sauce, reduce the added salt and taste the sauce before coating the chicken.
This is the kind of recipe where the first batch teaches you the pan. By the second batch, the sizzle, color, and sauce thickness start to make sense.
The coating will not look perfectly smooth, and that is a good thing. Rough, patchy bits are what crisp in the oil, and the sauce needs to be thick before the chicken returns so those edges stay noticeable in the first few bites.
Why This Recipe Works
This dish looks simple, but the texture depends on timing. Cool oil makes the coating greasy. Thin sauce softens the crust. Too much time in the pan after saucing turns crunchy edges into soft ones.
Small chicken pieces cook quickly. One-inch pieces brown fast and stay juicy inside.
Egg white and cornstarch build the right coating. Egg white helps the coating grip, while cornstarch fries up lighter and crisper than heavy breading.
Shallow frying gives better texture than a dry skillet. You get crunchy edges without needing a full deep fryer.
A thick glaze protects the crust. Sauce thickness matters more than sauce complexity because thin liquid soaks into fried coating.
A fast toss keeps the texture alive. The chicken needs enough time to catch the glaze, not enough time to stew in it.
The flavor is adjustable. You can make the sauce sweeter, spicier, tangier, or less salty before it ever touches the chicken.
Ingredients You’ll Need
You do not need a long list of specialty ingredients here. What matters is balance: enough sweetness to feel like takeout, enough vinegar to keep it bright, enough chili to warm the bowl, and enough garlic and ginger to make the sauce smell alive as soon as it hits the pan.
The sauce can taste a little bold before it hits the chicken because the rice, broccoli, and crisp coating will soften the edges.
Set Up Before the Pan Gets Hot
General Tso chicken moves quickly once the pan is hot, so this setup keeps the frying, sauce, and serving steps from colliding.
A full setup keeps the frying, sauce, and final toss from feeling rushed.
Chicken and Coating
Chicken thighs are the easiest choice for juicy pieces because they handle hot oil well. Chicken breast works for a leaner version, but cut it evenly and pull it from the pan as soon as it is cooked through.
Egg white helps the cornstarch cling without making the coating heavy. Cornstarch is the ingredient to watch: too little and the pieces will not crisp well; too much loose powder can fall off in the oil. Aim for rough, dry-looking patches that cling to the chicken.
Sauce Ingredients
Low-sodium soy sauce gives you better control because the sauce reduces quickly. Hoisin adds body and that darker, rounder takeout sweetness. Rice vinegar keeps the sauce bright, while brown sugar or honey gives the sticky finish.
Chili garlic sauce gives spice plus flavor, sambal tastes sharper and more chili-forward, and red pepper flakes are the easiest pantry fix. Sesame oil goes in the sauce for aroma, and cornstarch turns everything glossy and spoon-coating.
When the balance is right, the sauce tastes bold on its own but even better once it catches the crisp chicken and drips into the rice.
Aromatics and Garnish
Fresh garlic and ginger wake up the sauce fast. Because the glaze only cooks for a minute or two, those fresh aromatics matter more here than they would in a long-simmered dish. Scallions, sesame seeds, and broccoli make the final bowl feel fresh instead of heavy.
Easy Ingredient Substitutions
Ingredient
Best Substitute
What Changes
Shaoxing wine
Dry sherry, chicken stock, or water
Less restaurant-style aroma, but still works
Rice vinegar
Apple cider vinegar, using slightly less
Sharper flavor
Hoisin sauce
Extra soy sauce, sugar or honey, and a splash of stock
Less body, still sweet-savory
Chili garlic sauce
Sambal or red pepper flakes
Heat changes slightly
Low-sodium soy sauce
Regular soy sauce, with less added salt
Sauce can get salty faster
Chicken thighs
Chicken breast
Leaner, less forgiving
Chicken Thighs vs Chicken Breast
Chicken thighs are juicier, more forgiving, and closer to the takeout texture most people expect. Chicken breast is leaner, but it dries out faster, so cut it evenly and pull it from the pan as soon as it reaches 165°F / 74°C.
There is more than one way to coat the chicken. The best choice depends on whether the night calls for fast, extra crunchy, or somewhere in the middle.
Coating Method
Best For
Result
Cornstarch only
Fastest weeknight version
Light crisp edges, easiest method
Egg white + cornstarch
Best balance for shallow frying
Better coating grip and stronger crispness
Flour + cornstarch + baking powder
Restaurant-style crunch
Thicker, crispier coating; best with double frying
How Each Coating Looks After Frying
Use the coating comparison as a texture decision guide before you choose the fastest, balanced, or crunchiest version.
For coating style, cornstarch-only stays light, egg white plus cornstarch gives balance, and flour plus cornstarch adds a thicker crunch.
For this recipe, the egg-white-and-cornstarch method gives the best balance. It is still simple, but the coating grips better than cornstarch alone. For a very fast version, skip the egg white and use only cornstarch. For a restaurant-style version, add a little flour and baking powder and fry the chicken twice.
Extra crispy option: For a thicker, crunchier coating, replace part of the cornstarch with flour and add a pinch of baking powder. Fry once until cooked and lightly golden, rest the chicken on a rack, then fry again briefly until crisp. This gives a stronger restaurant-style crust, but it adds more oil, time, and cleanup.
General Tso Sauce: Sweet, Sticky, Spicy, and Tangy
This is where the dish becomes yours. The sauce should be sweet enough to feel like takeout, tangy enough to stay balanced, salty enough to season the chicken, and spicy enough to give warmth without overwhelming the bowl.
General Tso sauce formula: salty soy sauce, sweet brown sugar or honey, rounded hoisin, bright rice vinegar, chili warmth, fresh garlic and ginger, and enough cornstarch to turn it glossy and thick.
Garlic, Ginger, and Chilies
The sauce starts with a quick aromatic sizzle. Keep it brief so the garlic and ginger taste warm and sharp, not browned or bitter.
Once the chicken is fried, let garlic, ginger, and chilies sizzle briefly so the General Tso sauce starts with bold aroma.
How Thick Should the Sauce Be?
Look for a sauce that coats a spoon and leaves a short trail when you drag a spatula through the pan. It thickens quickly once it starts bubbling, so stay close. If it is watery when the chicken goes in, the coating will soften quickly.
When the Sauce Is Thick Enough
This is the visual cue to look for before the fried chicken goes back into the pan.
The sauce trail is your sign to stop reducing; at this thickness, the glaze coats the chicken instead of soaking the crust.
If the sauce tightens before the chicken is ready, loosen it with a splash of water or stock, warm it until glossy again, then toss. When the sauce is right, it looks like something you want to drag a spoon through before the chicken even goes in.
Can You Make General Tso Sauce Ahead?
Yes. You can mix and cook the sauce 3–4 days ahead, then refrigerate it in an airtight container. Reheat it gently in a pan with a splash of water or stock until it turns glossy again. For the best texture, fry the chicken fresh and toss it with the warmed sauce right before serving.
Other Ways to Use General Tso Sauce
Use it with crispy tofu, shrimp, cauliflower, stir-fried vegetables, frozen chicken bites, or rice bowls. The rule stays the same: cook the sauce until shiny, then toss it with the main ingredient at the end.
General Tso Sauce Troubleshooting
Sauce Problem
How to Fix It
Too thick
Add water or stock 1 tablespoon at a time until it loosens.
Too thin
Simmer a little longer, or add a small cornstarch slurry.
Too salty
Add water or stock, then balance with a little sugar and vinegar.
Too sweet
Add rice vinegar or chili garlic sauce.
Too spicy
Add a little hoisin, sugar, or water.
Tastes flat
Add a little more ginger, garlic, vinegar, or sesame oil.
How to Fix the Sauce Before Tossing
Fix the sauce while it is still by itself. Once the chicken returns, every extra minute in the pan softens the crust.
Balance the sauce while it is still alone in the pan, before it can soften the chicken.
The sauce does not need to be perfect in the bowl before it hits the pan. It just needs to be balanced enough that, once it turns glossy, you want it on rice.
When in doubt, come back to the rhythm: rough coating, thick glaze, fast toss.
How It Should Look at Each Step
Once the exact steps are in front of you, these visual cues keep you from second-guessing the pan when the oil is hot and the recipe starts moving quickly.
Chicken Cut Size
The pieces do not need to be perfect cubes, but they should be close in size so they brown outside and cook through inside.
First, aim for roughly 1-inch chicken pieces; that size helps the inside cook through while the outside turns golden.
What the Marinade Should Look Like
Before the cornstarch goes in, the chicken should be lightly coated, not sitting in a puddle of marinade.
Next, the egg white and soy mixture lightly glosses the chicken, giving the cornstarch something to grab onto.
Rough Cornstarch Coating
Smooth paste is not the goal here. A patchy, dry-looking coating gives the sauce more crisp edges to grab later.
After the cornstarch goes in, patchy and dry is what you want; those uneven spots become the crispest edges.
Set Up the Shallow Fry
Use enough oil to crisp the coating, but not so much that the recipe turns into a full deep-fry project.
Meanwhile, a shallow layer of oil gives you crisp General Tso chicken without the mess of a deep fryer.
How to Know the Oil Is Ready
Test one piece before committing to a full batch. Steady bubbles mean the oil is ready; silence or smoke means you need to adjust.
Once one test piece bubbles steadily, the oil is ready; quiet oil turns coating greasy, while smoking oil browns too fast.
Frying in Batches
Space is part of the method. If the pieces touch everywhere, they steam before they crisp.
Fry in batches so the pieces stay separate, the oil stays hot, and the coating has room to crisp instead of steam.
Why a Wire Rack Helps
A rack keeps the crust away from trapped steam while the rest of the recipe comes together.
Then, move the fried chicken to a wire rack; airflow underneath protects the crust while you finish the sauce.
When to Stop Tossing
Look for coated chicken, not submerged chicken. As soon as the glaze catches on the rough edges, get it out of the pan.
Finally, toss quickly until the sauce catches on the rough edges; look for glazed chicken, not simmered chicken.
If homemade saucy chicken usually turns soft on you, this is the part to remember. You are not chasing dry, shattering crunch here. You want that first little crackle before the sauce turns soft and sticky.
Why General Tso Chicken Gets Soggy
Most texture problems come from one of four places: crowded oil, thin sauce, trapped steam, or too much time in the glaze.
If the chicken softens quickly, check the usual suspects: crowding, thin sauce, trapped steam, or too much time in the glaze.
The Big 3 Crispy Rules
Rule
Why It Matters
Fry in batches
Crowding makes the coating steam instead of crisp.
Thicken the sauce first
Thin sauce soaks into the crust.
Toss for about 30 seconds
Long simmering softens the fried coating.
The supporting details matter too: pat the chicken dry if it looks wet, use enough cornstarch for a dry-looking coating, shake off heavy loose powder, drain the fried pieces on a rack, and serve as soon as the sauce goes on. Also avoid covering freshly fried or freshly sauced chicken; trapped steam is one of the fastest ways to soften the coating.
Quick Crispness Troubleshooting
Problem
Likely Cause
Fix Next Time
Chicken feels greasy
Oil was too cool
Heat oil until chicken sizzles immediately
Coating fell off
Chicken was too wet or stirred too much
Use more cornstarch and turn gently
Chicken softened fast
Sauce was thin or chicken sat too long
Thicken sauce first and toss right before serving
Chicken browned but inside was undercooked
Pieces were too large or oil too hot
Cut smaller pieces and control heat
Chicken is dry
Overcooked or breast pieces were too small
Use thighs or cook breast just to 165°F / 74°C
If the chicken softened almost immediately, the sauce was probably too thin or the pieces sat in it too long. If they never got crisp in the first place, the oil was probably too cool or the pan was crowded.
Even when leftovers soften, the first serving should give you that little edge of crunch that makes the whole bowl feel worth the extra pan.
Make It Sweeter, Spicier, Tangier, or Less Salty
Taste before you toss. Once the chicken is in, you have less room to adjust the sauce without softening the coating.
Cooking for kids or spice-sensitive eaters? Start with less chili in the sauce and add chili oil, flakes, or sambal at the table.
Craving…
Adjustment
Sweeter sauce
Add 1–2 teaspoons brown sugar or honey.
Extra heat
Add chili garlic sauce, sambal, red pepper flakes, or dried chilies.
Tangier sauce
Add another splash of rice vinegar.
Lower salt
Use low-sodium soy sauce and add a little water or stock.
Bigger garlic flavor
Add one extra clove of garlic.
Restaurant-style depth
Add a little extra hoisin and sesame oil.
Less sweetness
Use 2 tablespoons sugar instead of 3 and add a little more vinegar.
Savory balance
Add a splash more soy sauce or a spoon of stock, then rebalance with vinegar.
Make small changes and taste again. A good sauce does not taste like only sugar, only soy sauce, or only chili. It lands somewhere in the middle: sticky, bright, savory, and warm.
Lighter Version
To make the bowl a little lighter, use chicken breast, reduce the sugar to 2 tablespoons, choose low-sodium soy sauce, and use the air fryer or baked method. You will lose some takeout crunch, but you still get the sweet-spicy sauce, rice-bowl comfort, and a dinner that feels fun.
Choose Your Version
There are a few honest ways to make this dish, and they do not all promise the same texture. Pick the one that matches your night.
Craving This?
Use This Method
What to Expect
Best balance of crisp and easy
Egg white + cornstarch shallow fry
Juicy chicken, crisp edges, no deep fryer
Fastest weeknight version
Cornstarch-only skillet method
Lighter coating, fewer steps
Restaurant-style crunch
Flour + cornstarch + baking powder, then double fry
Crispier crust, more oil and cleanup
Lower oil
Air fryer
Useful, but not as glossy-crisp as fried
Hands-off dinner
Slow cooker
Saucy and tender, not crispy
No-fry family meal
Baked or sheet-pan style
Easier cleanup, softer coating
If crispness matters most, use the main shallow-fry recipe. If convenience matters more, jump to the other cooking methods.
The recipe card above is the version to make first. Once you understand the texture you want, you can adjust the method without guessing.
Air Fryer, Baked, Slow Cooker, and Deep-Fry Notes
The shallow-fry version is the main recipe because it gives the best mix of crispness, control, and realistic home cleanup. Choose the method that matches your night, not the one that sounds most impressive.
In short: shallow fry for the best overall texture, air fry for lower oil, bake for easier cleanup, slow cook for saucy comfort, and deep fry for the crunchiest restaurant-style result. If your main goal is less oil or less hands-on cooking, a softer coating is not a failure; it is just a different dinner — saucier, easier, and still good over rice.
Which Cooking Method Fits Your Night?
This comparison keeps the method choice honest: crispness, oil level, cleanup, and sauciness all change depending on how you cook the chicken.
Choose the method by texture and time: shallow fry is crispest, air fryer is lighter, baked is simpler, and slow cooker is saucier.
Air Fryer General Tso Chicken
Air fryer General Tso chicken works best when the chicken is cooked separately and the sauce is made on the stove. Air fry coated chicken pieces at about 400°F / 200°C for 10–15 minutes, turning or shaking halfway through, then toss with hot sauce right before serving. Leave space between the pieces so the coating can dry and crisp instead of steaming.
If your air fryer chicken often turns out pale, uneven, or soft, this guide to common air fryer mistakes explains why spacing, flipping, and dry surfaces matter.
Baked General Tso Chicken
Baked General Tso chicken is easier and less messy, but it will be softer than fried. For better texture, bake the coated chicken on a rack or a well-oiled sheet pan, then sauce it after baking.
Slow Cooker General Tso Chicken
Slow cooker General Tso chicken is cozy and saucy. It is the version for spooning over rice, not the one for crisp edges. Brown the chicken first for better flavor, then cook it with the sauce and serve it hot.
Deep-Fried Restaurant-Style General Tso Chicken
The crispiest route is a deeper pot of oil and a double fry. Fry once until cooked and lightly golden, rest the chicken on a rack, then fry again briefly at a slightly hotter temperature before tossing with sauce.
Shortcut General Tso Chicken
For a shortcut dinner, use frozen crispy chicken bites or popcorn chicken and make only the sauce from scratch. Heat the chicken until crisp, simmer the sauce separately, then toss right before serving.
What to Serve With General Tso Chicken
General Tso chicken is rich and saucy, so it works best with simple sides that catch the sauce or balance the sweetness. Plain rice is the easiest base, but for a fuller takeout-style plate, shrimp fried rice works beautifully beside the sticky chicken.
Steamed jasmine rice or white rice
Brown rice
Fried rice
Steamed broccoli
Stir-fried green beans
Bok choy
Noodles
Cucumber salad
Cabbage slaw
Cauliflower rice for a lighter bowl
If serving broccoli, steam or blanch it for 3–4 minutes while the chicken drains, then serve it on the side or toss it into the pan only at the very end. Broccoli cuts through the sticky sauce and makes the plate feel complete without adding much extra work.
For the best bowl, add rice first, then broccoli, then the hot chicken. Spoon any extra sauce from the pan over the rice, not over the chicken, so the top pieces keep more texture. The best bowl is not neat; it is rice catching sauce, broccoli cutting the sweetness, and a few crisp edges still fighting through the glaze.
How to Build the Bowl
The rice can take the extra sauce. The top pieces should stay more exposed so the coating keeps a little texture.
For serving, spoon extra sauce onto the rice side so the top pieces keep more texture while the rice gets saucy.
The Final Bowl
The finished bowl should look saucy and generous, but the chicken should still show some crisp edges after tossing.
The best bowl has saucy rice, bright broccoli, and chicken pieces with crisp edges still showing.
For a starter, add something crisp and snacky like these crispy veg spring rolls. A small bowl of peanut sauce gives the table a creamy, salty-sweet contrast.
Storage and Reheating
General Tso chicken is best fresh. The coating starts to soften once it is tossed in sauce, so the first serving will always have the best texture. Leftovers are still good over rice, just more saucy and soft than crackly.
Refrigerator: Store leftovers in an airtight container for 3–4 days.
Rice: Store rice separately if possible so it does not absorb all the sauce.
Microwave: Fastest option, but it softens the coating.
Air fryer: Reheat at about 350°F / 175°C for 6–8 minutes.
Skillet: Reheat over medium heat until hot, adding a splash of water if the sauce is too thick.
Freezer: You can freeze it, but the coating will not stay crisp after thawing.
Can You Make It Ahead?
The parts can be prepped ahead, but save the frying and tossing for the last minute. Mix the sauce, cut the chicken, and chop the aromatics earlier in the day, then cook when you are ready to eat.
General Tso Chicken vs Sesame Chicken, Orange Chicken, and Kung Pao
These takeout dishes can look similar, but the flavor profiles are different.
Dish
Main Flavor
Texture
Heat Level
General Tso chicken
Sweet, tangy, savory
Crispy chicken in sticky glaze
Mild to medium
Sesame chicken
Sweeter, sesame-forward
Crispy or saucy
Mild
Orange chicken
Sweet citrus
Crispy chicken in orange glaze
Usually mild
Kung pao chicken
Savory, spicy, nutty
Stir-fried, not usually battered
Medium
Choose General Tso for sticky, sweet heat. Choose sesame chicken for a sweeter and milder sauce, orange chicken for citrus, and kung pao chicken for a less-sweet stir-fry with peanuts and chiles.
Is General Tso Chicken Authentic?
General Tso chicken is best known today as a Chinese-American restaurant dish. It has roots connected to Hunan-style cooking and the dish associated with Chef Peng Chang-kuei, but the version most people know from American takeout menus became sweeter, saucier, and more heavily coated over time. For a short background read, Smithsonian has a helpful piece on the history of General Tso’s chicken.
This is a takeout-style version, written for the flavor most people expect from the dish: crisp chicken, a sweet-spicy glaze, a little tang, and rice underneath. It is not trying to replace a traditional Chinese home recipe.
Once you understand the coating, sauce thickness, and toss timing, most General Tso problems become easy to fix.
FAQ
Is General Tso chicken spicy?
General Tso chicken is usually mildly spicy, not extremely hot. The heat comes from chili garlic sauce, dried red chilies, sambal, or red pepper flakes. For a family-friendly version, use less chili sauce and skip the dried chilies. For more heat, add extra chili near the end and taste as you go.
What is General Tso sauce made of?
General Tso sauce is made with soy sauce, rice vinegar, sugar or honey, hoisin, chili, garlic, ginger, sesame oil, stock or water, and cornstarch. It should taste sweet, savory, tangy, lightly spicy, and thick enough to coat the chicken.
Can I make General Tso chicken without hoisin sauce?
Yes. The sauce will be a little less rounded and glossy, but it will still work. Use an extra teaspoon of soy sauce, a little more sugar or honey, and a small splash of water or stock. If you have oyster sauce, add 1 teaspoon for body. Taste before tossing the chicken.
Why is my General Tso sauce not sticky?
General Tso sauce is usually not sticky because it is too thin, has not simmered long enough, or does not have enough cornstarch. Simmer it until glossy and spoon-coating. If it still looks watery, add a small cornstarch slurry and cook for another minute.
What oil is best for frying General Tso chicken?
Use a neutral high-heat oil such as canola, vegetable, peanut, sunflower, or rice bran oil. Avoid olive oil for this shallow-fry method because the oil needs to get hot enough for the coating to crisp quickly.
Can I use frozen chicken?
Yes, but thaw it completely first and pat it very dry before coating. Do not coat or fry frozen chicken pieces; the extra moisture can make the coating fall off, splatter in the oil, and turn the chicken soggy. For safest cooking, check the thickest piece and cook the chicken to 165°F / 74°C.
Why did my chicken get soggy?
Chicken gets soggy when the sauce is too thin, the pan is crowded, or the fried pieces sit in sauce too long. Fry in batches, drain well, thicken the sauce first, and toss right before serving.
Can I use chicken breast instead of thighs?
Yes, chicken breast works, but it is leaner and dries out faster than thighs. Cut it into even 1-inch pieces and avoid overcooking it. Chicken thighs are more forgiving and usually give a juicier, more takeout-style result.
Is General Tso the same as General Tao, General Cho, or General Gau chicken?
General Tao chicken, General Cho chicken, General Gau chicken, General Tsao chicken, and chicken tso are often used for very similar sweet-spicy crispy chicken dishes. The spelling changes by restaurant and region, but most people are looking for the same takeout-style idea.
Can I make it without deep frying?
Yes, shallow frying gives the closest texture without using a deep fryer. Air fryer and oven versions also work, but the coating will be lighter and less like classic takeout. For the crispiest result, shallow frying or deep frying works best.
How do I make it gluten-free?
Use gluten-free tamari instead of soy sauce and choose a gluten-free hoisin sauce. Cornstarch is usually gluten-free, but always check the label if needed. Serve with rice and vegetables instead of noodles unless the noodles are certified gluten-free.
Can General Tso chicken be made ahead of time?
The parts can be prepped ahead, but save the frying and tossing for the last minute. Mix the sauce, cut the chicken, and chop the aromatics earlier in the day, then cook when you are ready to eat.
What is the difference between General Tso chicken and sesame chicken?
General Tso chicken is usually tangier and spicier, while sesame chicken is sweeter, milder, and more sesame-forward. Both are often made with crispy chicken and sticky sauce, but General Tso has more heat and a sharper sweet-tangy balance.
Can I use bottled General Tso sauce?
Yes, bottled General Tso sauce works when dinner needs to be fast. Heat it separately and toss the chicken only at the end so the coating does not sit in sauce too long. Homemade still gives you better control over sweetness, salt, heat, and thickness.
Make it once as written, then adjust the sauce the way your table likes it. A little more vinegar, a little more chili, a little less sugar — that is when this stops feeling like a copied takeout order and starts feeling like yours. Next time, you will know exactly what to change.