
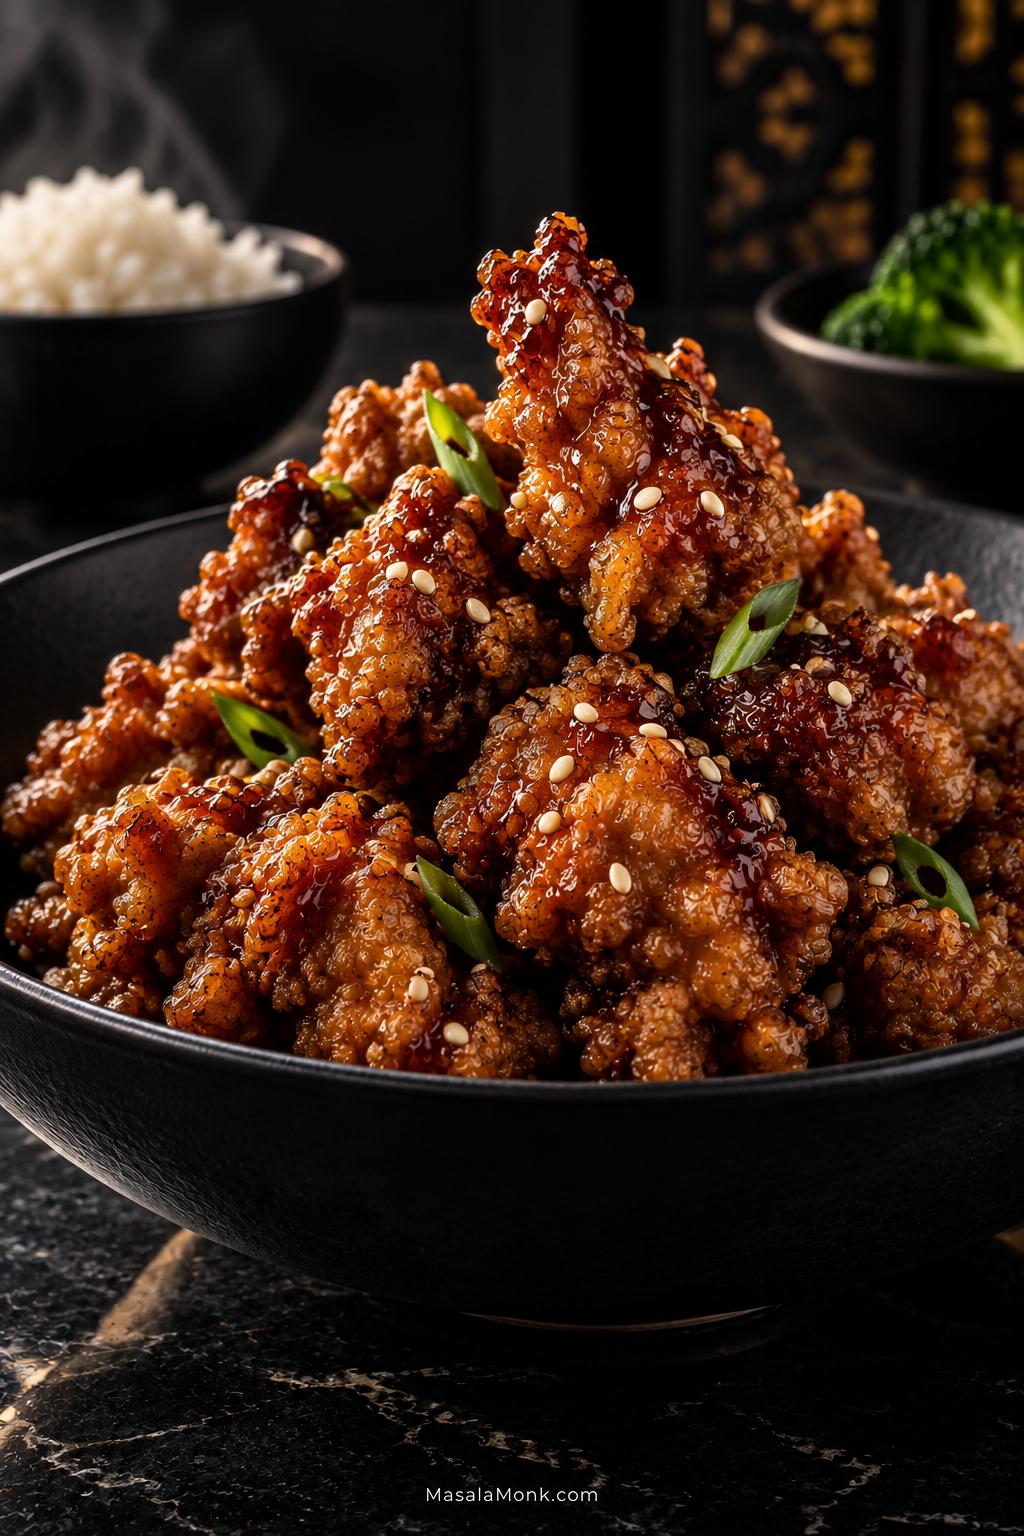
A good sesame chicken recipe has one awkward problem to solve: the chicken should still have crisp edges after it meets the sticky sauce. Get the timing right and the glaze catches on the fried surface instead of pooling underneath it. The chicken stays juicy inside, toasted sesame smells nutty and warm, and every bite keeps some contrast between crisp crust and glossy sauce.
This is the takeout-style version—the kind with real texture under the sauce, not simply diced chicken simmered in a sweet skillet glaze. Thighs give you the widest margin for juicy meat, although breast works too. You do not need restaurant equipment or a roaring wok burner. Steady oil temperature and a finished glaze waiting for the chicken matter much more.
The second fry earns its place because home cooking gives you one advantage takeout cannot: the chicken can go from hot oil to glaze to plate almost immediately.
This sesame chicken recipe makes Chinese-American fried chicken coated in a sweet-savory sesame glaze. For the crispest version, fry once at 350°F / 175°C, rest on a wire rack while the sauce thickens, then fry again at 375°F / 190°C. Toss only after the glaze is ready and serve straight away. The largest pieces should reach at least 165°F / 74°C.
Sesame Chicken Recipe
Allow about 50–60 minutes, depending on your pot, burner and batch size. Much of the work overlaps. Think of it as three phases: fry the chicken, finish the sauce during the rest, then crisp and glaze just before serving.
For the Chicken
- 24 oz / 680 g boneless skinless chicken thighs, cut into roughly 1–1¼ in / 2.5–3.2 cm pieces
- 1 tablespoon / 15 ml reduced-sodium soy sauce
- 1 tablespoon / 15 ml Shaoxing wine or dry sherry
- 1 large egg white, about 1 oz / 30 g
- 1 teaspoon / about 2 g finely grated fresh ginger
- 1 teaspoon / 5 ml toasted sesame oil
- ¼ teaspoon white pepper
Chicken breast: Use the same weight and cut it to the same size. It has less margin for overcooking, so watch the center temperature closely.
No Shaoxing wine? Dry sherry is the closest easy substitute. For an alcohol-free version, use 1 tablespoon / 15 ml unsalted or low-sodium chicken stock or water. Rice vinegar supplies acidity, so it is not a Shaoxing substitute.
For the Crisp Coating
- ¾ cup / about 90 g cornstarch
- ½ cup / about 60 g all-purpose flour
- 1½ teaspoons / about 6 g baking powder
- ½ teaspoon fine salt
- ¼ teaspoon white pepper
For Frying
- Neutral high-heat oil such as canola or vegetable oil, enough to reach about 2 in / 5 cm deep in your pot; peanut oil is another option
For the Sticky Sesame Sauce
- 3 tablespoons / 45 ml reduced-sodium soy sauce
- 3 tablespoons / about 63 g honey
- 1 tablespoon / about 13 g packed brown sugar
- 2 tablespoons / 30 ml unseasoned rice vinegar
- 2 tablespoons / about 30 g ketchup
- 1 tablespoon / 15 ml oyster sauce, or vegetarian mushroom stir-fry sauce
- 2 tablespoons / 30 ml water
- 2 teaspoons / about 4 g finely grated fresh ginger
- 2 teaspoons / about 6 g finely minced garlic
- 1 teaspoon / 5 ml neutral oil
- 1 teaspoon / 5 ml toasted sesame oil
- ¼ teaspoon MSG, optional
- ¼ teaspoon crushed red pepper flakes, optional
Soy sauce varies: Chinese light soy works, but some brands are saltier than reduced-sodium all-purpose soy. Start with 2 tablespoons / 30 ml in the sauce if yours is especially assertive and add more after tasting. Dark soy should not replace the full amount one-for-one.
No oyster sauce? Use 1 tablespoon / 15 ml vegetarian mushroom stir-fry sauce. Brands differ in saltiness, so taste before adding extra soy.
For the Cornstarch Slurry
- 2 teaspoons / about 5 g cornstarch
- 1 tablespoon / 15 ml cool water
To Finish
- 2 tablespoons / about 18 g toasted sesame seeds
- 2 scallions, thinly sliced, optional
Raw sesame seeds need only a few minutes in a dry skillet over medium-low heat. Stir often and remove them when they smell nutty and turn lightly golden.
Allergen note: With conventional oyster sauce, the recipe contains sesame, soy, wheat, egg and shellfish. Peanut oil adds a peanut-allergy consideration if you use it. A vegetarian mushroom stir-fry sauce removes the oyster, but check individual labels whenever you are cooking for a food allergy.
Equipment
- Frying: deep heavy-bottomed pot or wok, deep-fry thermometer, spider or skimmer, and a wire rack set over a sheet pan
- Doneness: instant-read food thermometer
- Sauce: wide skillet or wok
Before the oil gets hot: mix the soy sauce, honey, brown sugar, rice vinegar, ketchup, oyster or mushroom sauce, water and optional MSG. Keep the cornstarch slurry separate. Put the rack, skimmer and thermometers within reach, and have the sesame seeds, scallions and serving dishes ready. If you’re serving rice, start it before heating the frying oil.
Instructions
Season, Coat and First Fry
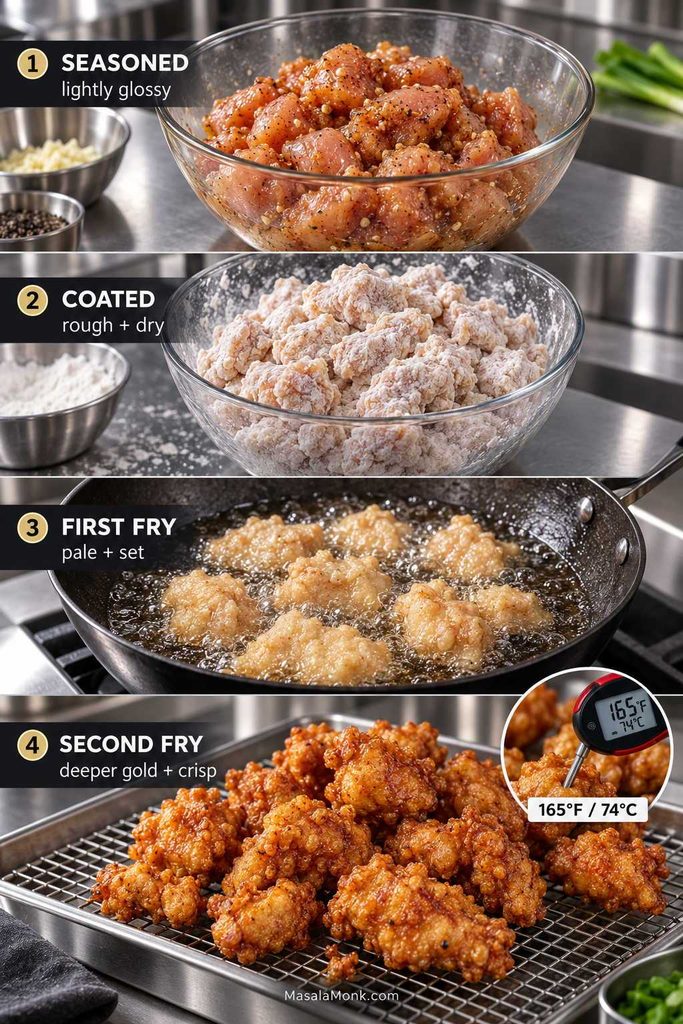
- Season the chicken. Mix the chicken with soy sauce, Shaoxing wine, egg white, toasted sesame oil, ginger and white pepper. The pieces should look lightly glossy, with very little loose liquid underneath. Rest for 10–15 minutes while you mix the coating and finish the remaining prep.
- Coat the chicken. Whisk the cornstarch, flour, baking powder, salt and white pepper in a wide bowl. Let obvious excess seasoning drip from each handful of chicken, then toss through the dredge. Press and turn until the wet surface disappears under a rough, irregular coating. A few uneven edges are exactly what you want. Rest for about 5–8 minutes while the oil heats. Discard any dredge left in the bowl after it has contacted raw chicken.
- Heat the oil. Add enough neutral oil to reach about 2 in / 5 cm deep in a deep pot with plenty of empty space above it. Heat to 350°F / 175°C. Keep water away from hot oil, never overfill the pot and never leave it unattended.
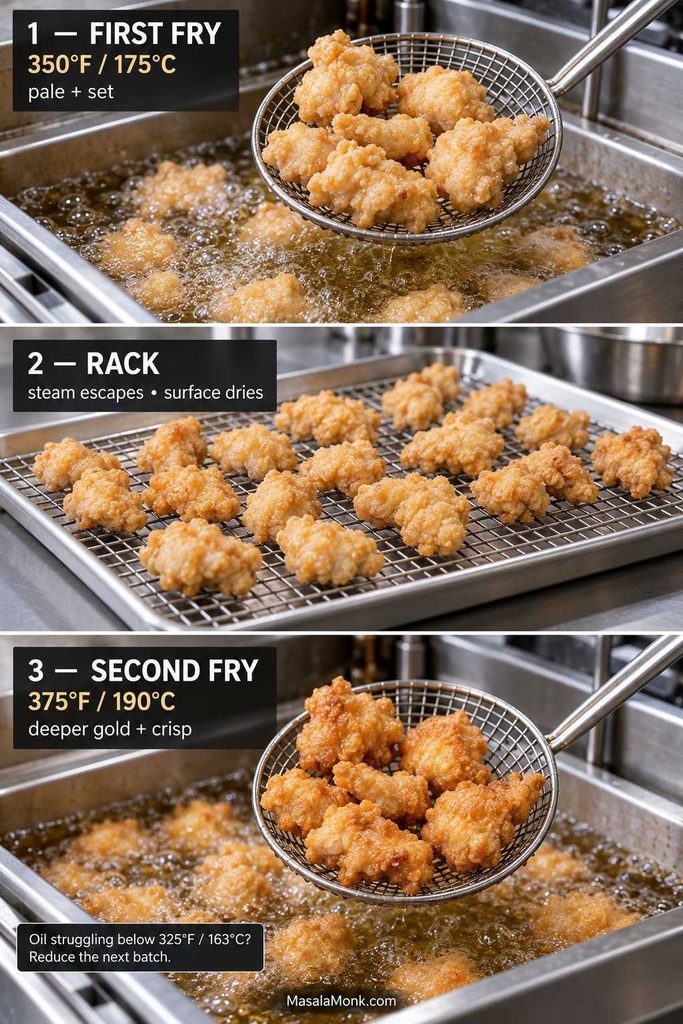
- Fry the first round. Lower in enough chicken to form a loose layer. Give the coating a moment to set before moving the pieces much. Fry for about 2½–3½ minutes. The surface should change from soft and chalky-looking to firm and pale golden. Pale is fine; deeper color comes later. If the oil stays much below 325°F / 163°C, make the next batch smaller. Transfer to the rack and let the oil recover.
Make the Glaze
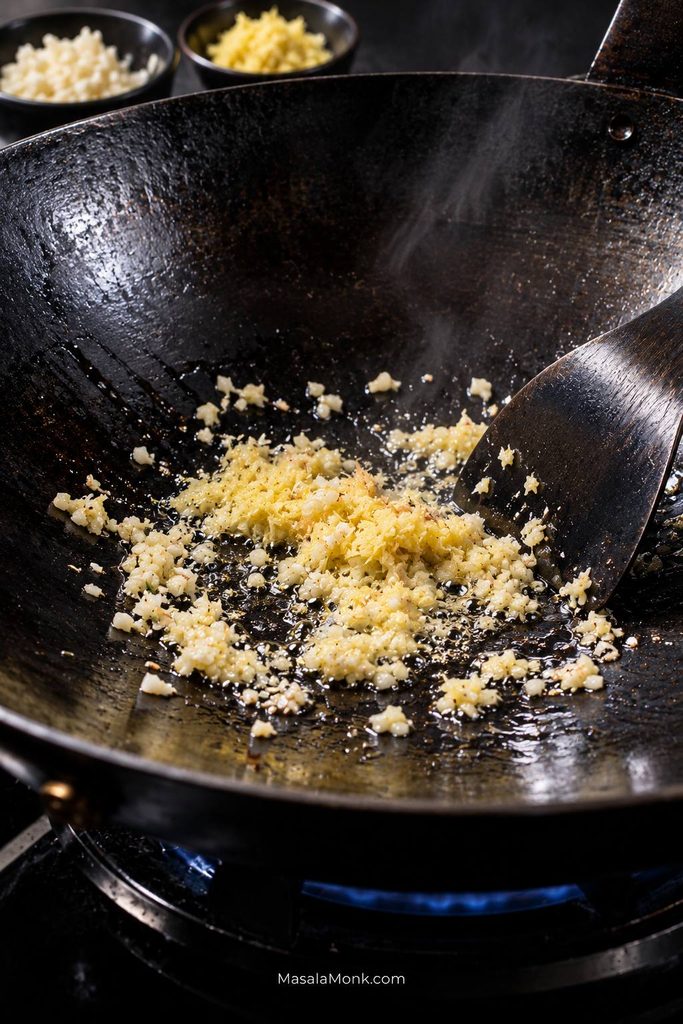
- Cook the sauce while the chicken rests. Heat 1 teaspoon neutral oil in a wide skillet or wok over medium heat. Add the garlic, ginger and optional chile flakes. After 15–30 seconds they should smell fragrant but not browned. Pour in the prepared sauce mixture and bring it to a lively simmer. This is still the sauce mixture; once it thickens enough to ribbon from a spoon and cling to the chicken, think of it as the glaze.
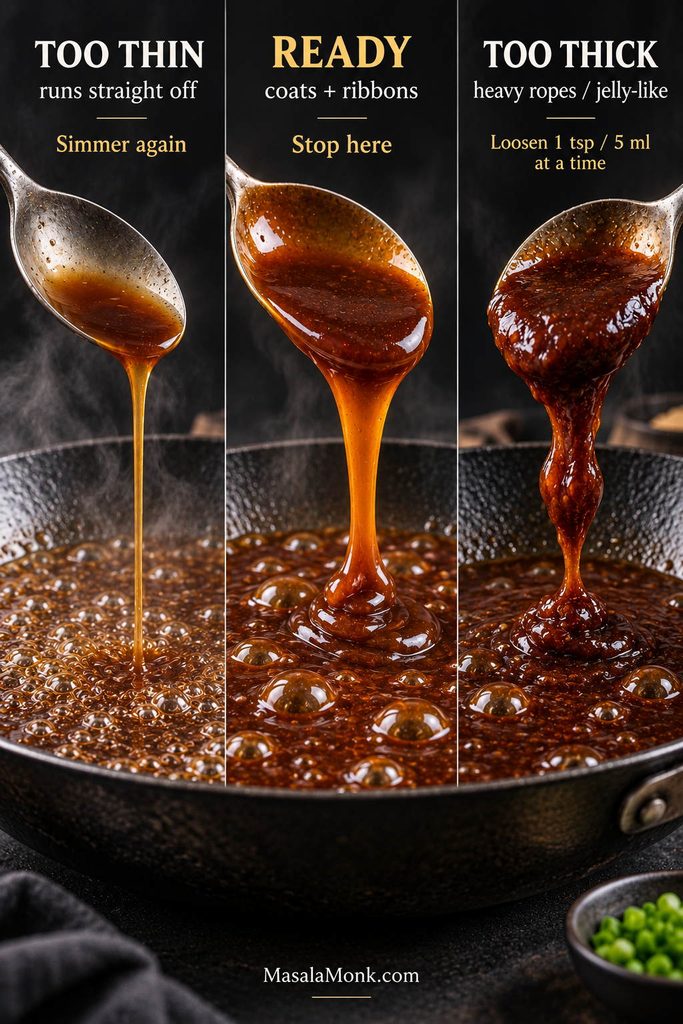
- Thicken the glaze. Stir the slurry again and add about two-thirds. Let it bubble briefly. The bubbles become slower and shinier as it thickens. When the glaze coats the back of a spoon and falls into the pan in a ribbon, turn off the heat and stir in the toasted sesame oil. If it looks right before all the slurry is used, stop there.
Second Fry, Glaze and Serve
- Fry a second time. Raise the oil to 375°F / 190°C. Starting with the chicken that came out first, fry in batches for another 45–75 seconds. The crust should tighten, deepen slightly and look drier. Check one of the largest pieces by inserting an instant-read thermometer through the side so the tip reaches the center.
If it is under 165°F / 74°C: return those pieces briefly and check again.
If the crust is already deeply browned: let the oil settle closer to 350°F / 175°C before finishing them. - Glaze. Warm the glaze briefly over low heat if it has tightened, then switch off the heat. Add the chicken and turn the pieces only long enough for the fried surface to shine with a thin coating.
- Serve. Add the toasted sesame seeds and scallions and move the chicken straight to the table.
Chicken temperature: Time is only a guide. Poultry should reach 165°F / 74°C. See the safe minimum internal temperature chart for official guidance.
How to Keep Sesame Chicken Crispy
Crispness is a chain. The coating has to grip the chicken, the first fry has to set it, the rack has to let steam escape, and the finished glaze has to cling without soaking the crust.
Chicken Choice and Cut Size
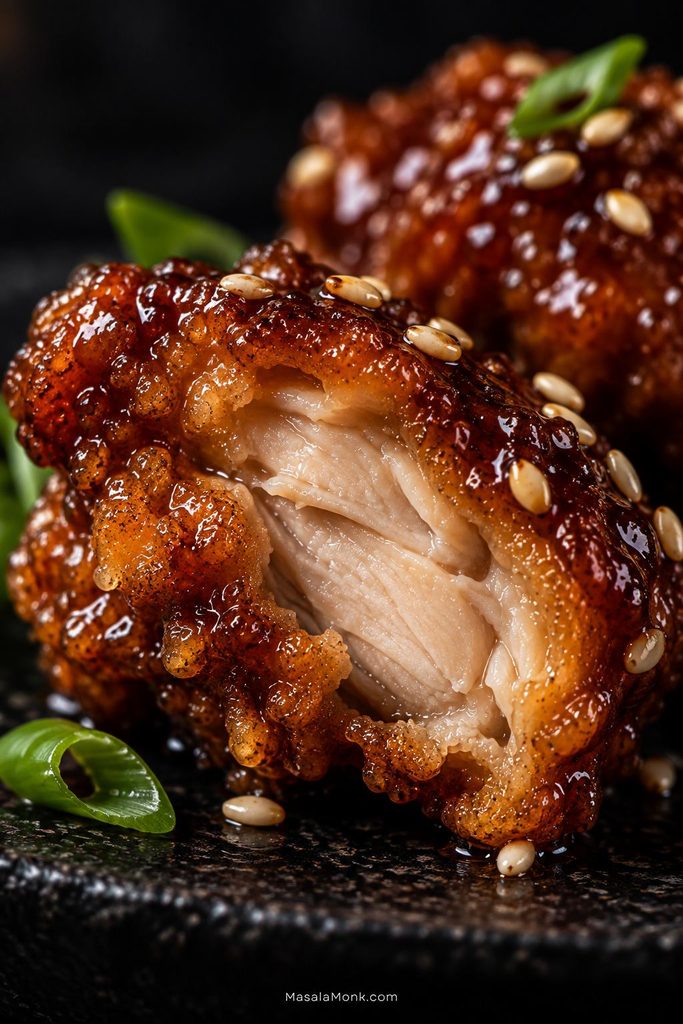
If you have no strong preference, use thighs. They stay juicy across a wider cooking window and make batch frying more forgiving. Breast gives a leaner, firmer bite and works well too.
Aim for pieces around 1–1¼ inches / 2.5–3.2 cm. They do not need to be identical; they just need to be close enough in size that the smallest pieces are not drying out while the largest are still cooking.
Build a Coating That Holds
The seasoned chicken should feel tacky and lightly slick, with very little liquid pooled underneath. The egg white gives the dry coating something to grip. Carry a puddle of marinade into the dredge and the flour and starch can turn into heavy patches of paste.
Cornstarch brings brittle crunch, flour gives the crust structure, and baking powder makes the surface lighter and more irregular. Smooth is not the goal. You should still feel like you are eating chicken first, not a thick shell of breading.
Potato starch works too. Swap 90 g for the 90 g cornstarch, then add a little more only where wet patches remain.
Before frying, look for an opaque, rough surface with small irregular bits of coating clinging to the chicken. Wet shiny patches need another turn through the dredge. Loose white powder needs pressing in. Thick paste is too much.
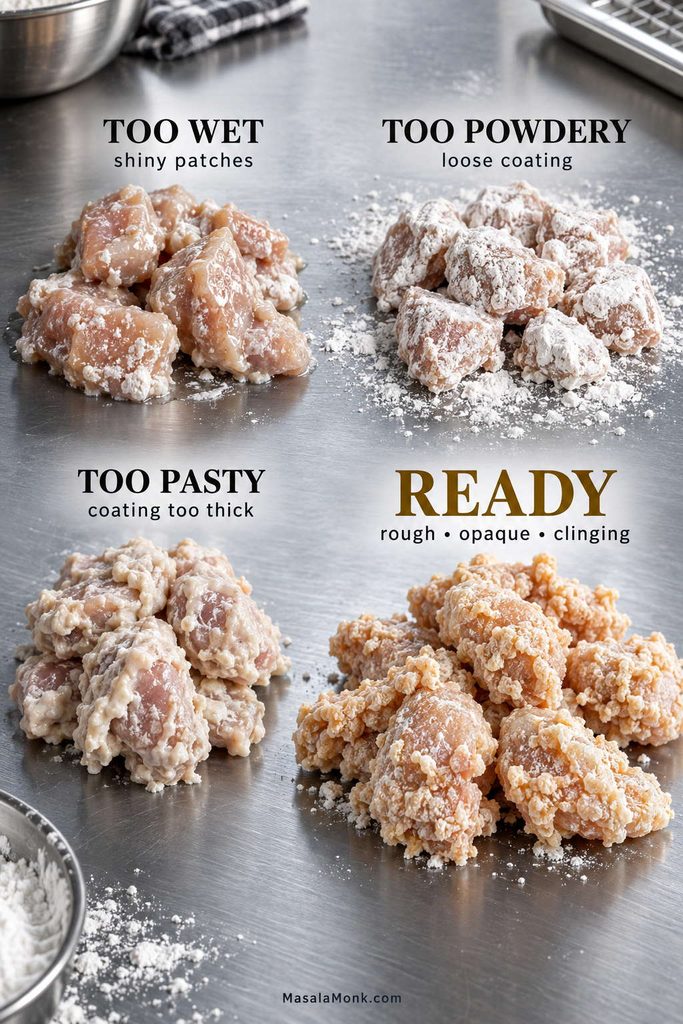
For this flour-and-starch coating, a short 5–8 minute rest lets the damp spots settle. Pure starch coatings behave differently.
First Fry, Rest, Then Fry Again
The first batch tells you what your pot, burner and quantity of oil can actually handle. Watch how quickly the temperature recovers after the chicken goes in; that is more useful than an arbitrary piece count.
Oil Depth and Batch Size
About 2 inches / 5 cm of oil gives the chicken heat around several sides at once and keeps damp coating from sitting against the metal for too long.
If the thermometer recovers quickly and the pieces separate easily, the batch size is working. If loose coating crumbs begin to darken, skim them out before the next batch.
Let the Crust Set
Fresh dredge is fragile when it first hits the oil. Leave the chicken mostly alone until the exterior firms up. Then a skimmer can move the pieces without scraping away the crust.
Two pieces touching is not a disaster. Ease them apart once the coating has set.
Rest, Then Finish With a Second Fry
Spread the first-fried pieces across a rack in one layer so steam can escape underneath. By the end of the rest, the surface should feel dry, not steamy.
The second fry is the finish, not a rescue. The hotter oil tightens and dries a crust that has already set. This is when the chicken starts looking like the dish you came for: deeper gold, drier edges and a coating that feels crisp against the skimmer.
If the first fry left a batch pale and oily, correct the oil temperature and batch size before continuing. A longer second fry will not rebuild a crust that never formed properly.
Sesame Chicken Sauce: From Sauce to Glaze
Sesame chicken sauce is a sweet-savory glaze made with soy sauce, honey, brown sugar, rice vinegar, ketchup, oyster or mushroom stir-fry sauce, garlic, ginger and toasted sesame oil. Before thickening, it is the sauce mixture. Once it ribbons from the spoon and clings instead of running off, it has become the glaze you need for fried chicken.
Honey gives the glaze rounded sweetness and shine, while brown sugar adds a slightly darker caramel note. Rice vinegar keeps the sweetness in check. Ketchup adds body, tang and the reddish-brown color familiar in Chinese-American sesame chicken sauces.
When the garlic and ginger hit the warm oil, the pan finally starts smelling like sesame chicken instead of a bowl of measured ingredients. Toasted sesame oil goes in after thickening so its aroma stays brighter.
Know When the Glaze Is Thick Enough
| What It Does | What It Means | Next Move |
|---|---|---|
| Runs straight off the spoon | Too thin | Simmer another 20–30 seconds and check again. Add more slurry only if needed. |
| Coats the spoon and falls in a ribbon | Ready | Stop thickening. |
| Falls in heavy ropes or looks jelly-like | Too thick | Loosen with water 1 teaspoon / 5 ml at a time. |
Stir the slurry just before pouring because cornstarch settles quickly. Start with about two-thirds. The bubbles become slower and shinier as the glaze thickens.
It will tighten further as it cools. Stop while it still moves easily from the spoon. If you go a little too far, a teaspoon or two of water usually brings it back.
Fix the Glaze Before Adding the Chicken
- Slightly too sweet: add unseasoned rice vinegar 1 teaspoon / 5 ml at a time.
- Clearly too sweet: start with 1 tablespoon / 15 ml water, 1 teaspoon / 5 ml soy sauce and 1 teaspoon / 5 ml rice vinegar. Simmer briefly and taste again.
- Too salty: add water 1 teaspoon / 5 ml at a time. If the glaze becomes too thin, add 1 teaspoon of the prepared slurry, simmer briefly and reassess before adding more.
- Too sour: add honey 1 teaspoon / about 7 g at a time.
- Needs thinning: add water 1 teaspoon / 5 ml at a time.
- Still too thin: simmer another 20–30 seconds first. If it still runs straight off the spoon, add prepared slurry 1 teaspoon at a time.
- Sesame flavor feels quiet: add more toasted seeds first, then a small splash of toasted sesame oil if needed.
Want It Sweeter or Need Extra Glaze?
For sweeter honey sesame chicken, add another tablespoon / about 21 g honey. For a deliberately less-sweet batch, omit the brown sugar first. If you want to pull it back further, reduce the honey by 1 teaspoon / about 7 g at a time.
If you want more sauce, make more—but reserve it separately. Scale the sauce and slurry to 1½ times the listed amounts, thicken it, then move roughly one-third to a bowl. Extra glaze belongs with the rice or broccoli, not poured over the finished crust.
For a looser sauce that works across chicken, tofu, vegetables and noodles, see our stir fry sauce recipe. The glaze here is intentionally more concentrated because it has a different job: coating fried chicken quickly.
How to Sauce Sesame Chicken: The Toss Is the Timer
Have the glaze completely finished before the chicken goes in. Warm it only if it has become stiff, switch off the heat, then turn the chicken through the pan just long enough to coat it.
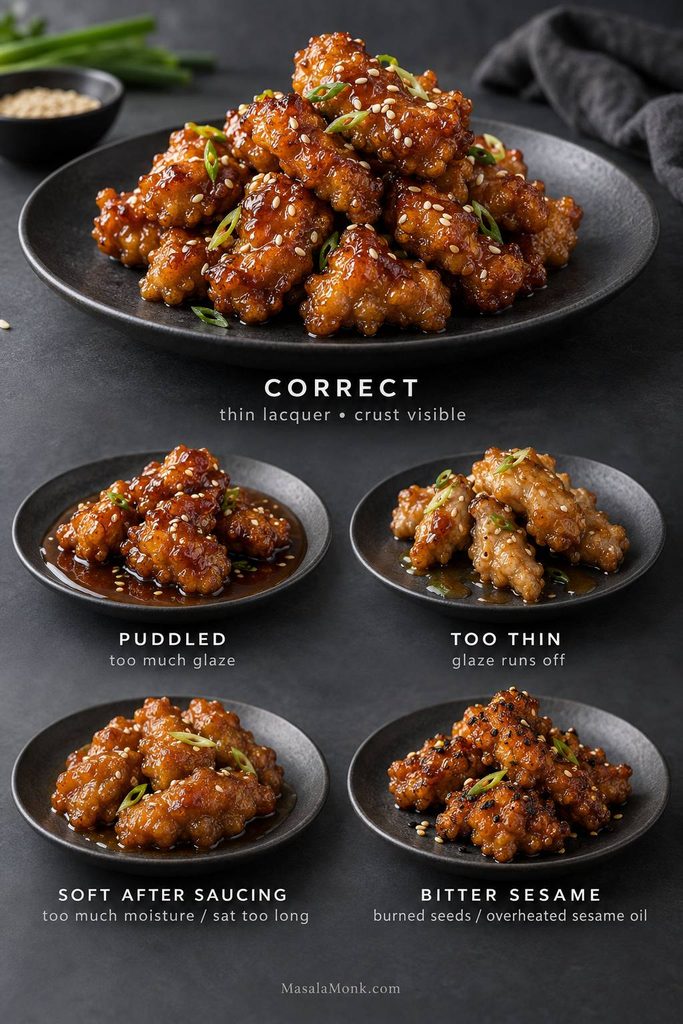
You should still be able to see the crust underneath the shine. A few streaks of glaze at the bottom of the pan are normal. A puddle means the chicken has more sauce than it needs.
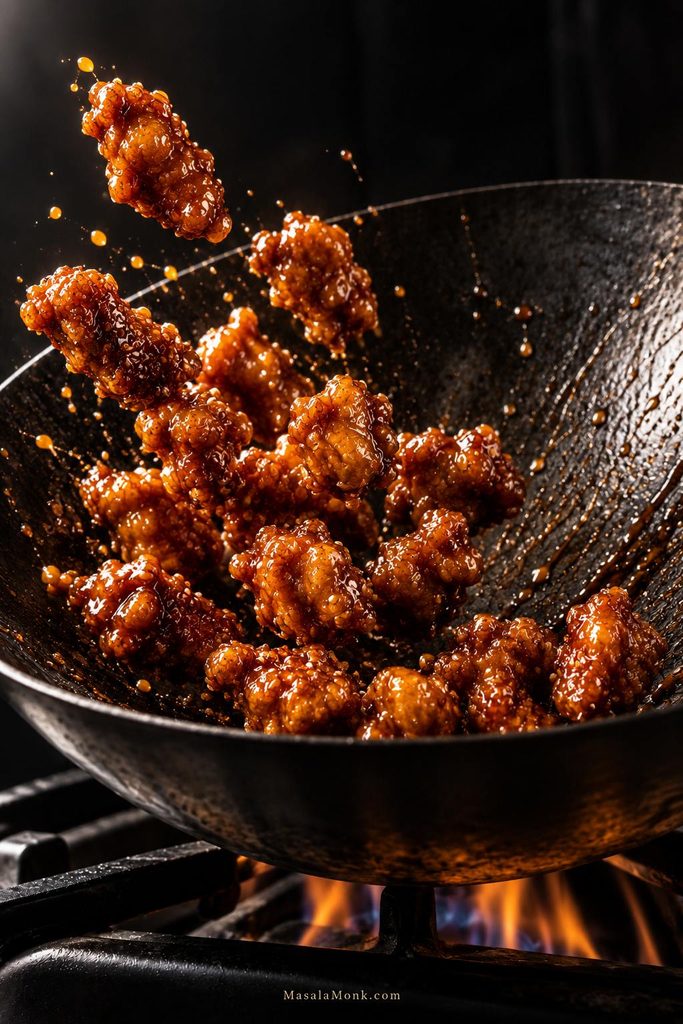
This is where the extra effort pays off. The chicken can go from its second fry to glaze to plate in under a minute, before a takeout box has the chance to steam the crust.
Sauced fried chicken will eventually soften. What you want is crunch when it reaches the table and through those first bites—not a promise that glazed chicken somehow stays crackly forever.
What to Serve With Sesame Chicken
Pile the chicken beside hot steamed rice and something green while the glaze is still shining and the crust still has some snap. Broccoli is an easy choice: the rice catches extra sauce, while the broccoli keeps the plate from becoming too sweet.
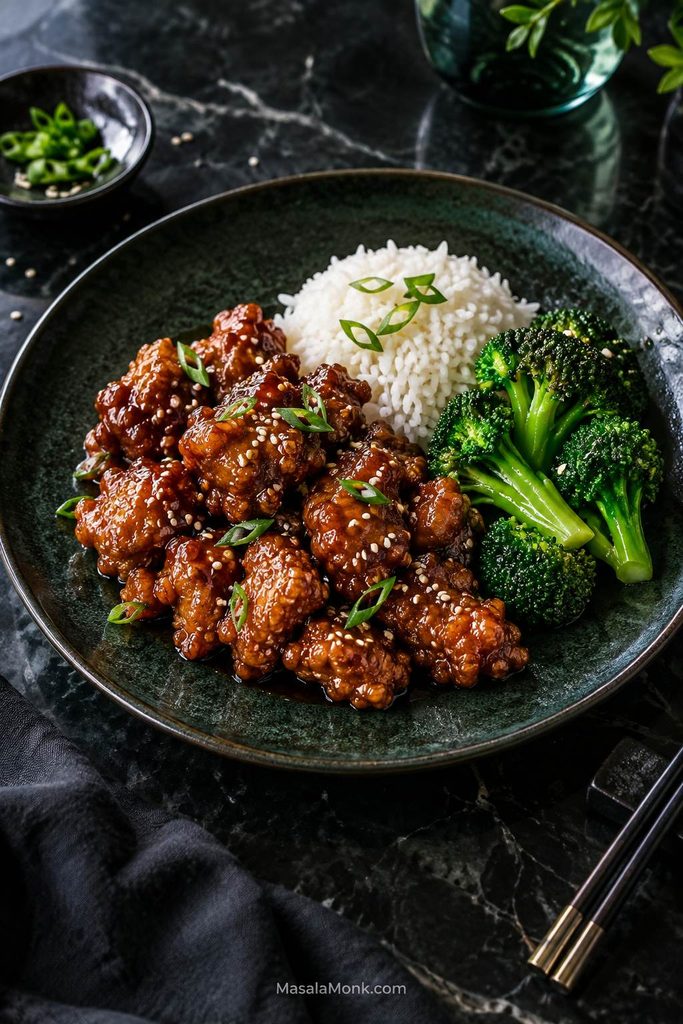
If you’re making plain rice, our guide to cooking rice covers jasmine, long-grain, basmati and other methods.
For a fuller takeout-style dinner, Chicken Fried Rice gives you a seasoned rice option. If you would rather serve noodles, Chicken Chow Mein fits the same kind of meal. Bok choy, green beans or a cold cucumber salad work well too.
Sesame Chicken Troubleshooting
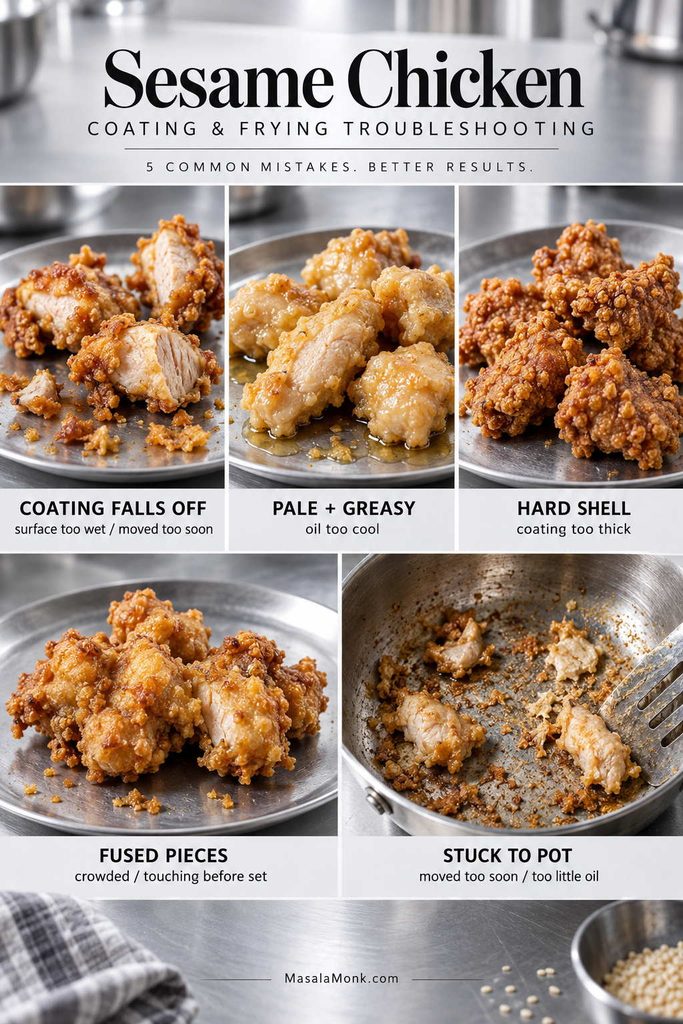
Find the moment when it changed. Chicken that was already soft before the glaze arrived points toward the coating or fryer. Chicken that stayed crisp until glazing points toward glaze thickness, amount or timing.
Coating and Frying Problems
| Problem | Likely Cause | What to Change |
|---|---|---|
| Coating falls off in the oil | Too much surface liquid, weak contact with the dredge or rough handling at the start | Drain obvious excess seasoning, press on the coating and give the crust time to set. |
| Crust slides off when bitten | The coating is too thick or poorly bonded | Use a thinner layer and carry less loose marinade into the dredge. |
| Pieces fuse together | The fryer is crowded, or pieces were lowered against one another before the crust set | Leave more room between pieces. If two touch, wait until the coating firms before easing them apart. |
| Crust is hard | Too much dry coating | Keep the layer irregular but relatively thin and knock away heavy excess. |
| Chicken is pale and greasy | The oil stayed too cool | Let it recover fully and reduce the next batch size. |
| Chicken darkens too quickly | The oil is too hot or the pieces are unusually small | Check the thermometer and lower the heat before continuing. |
| Coating sticks to the pot | Too little oil or the crust stayed against the metal before setting | Use roughly 2 in / 5 cm of oil and wait until the coating firms before moving the pieces. |
| Second fry does not make it crisp | The first fry left the crust greasy, wet or damaged | Correct the first-fry conditions; do not simply extend the hotter fry. |
Glaze and Finishing Problems
| Problem | Likely Cause | What to Change |
|---|---|---|
| Chicken was crisp until glazed | The glaze was too thin, too abundant or left around the chicken too long | Finish the glaze first and use only enough to coat the surface. |
| Chicken softens after several minutes | Moisture from the glaze is working into the crust, especially if the chicken is heavily sauced or covered | Serve promptly and keep extra glaze separate. |
| Glaze flavor or texture is off | The balance or thickness needs adjustment | Fix it before adding chicken using the recovery guide above. |
| Sesame flavor tastes bitter | Burned seeds or overheated toasted sesame oil | Toast seeds gently and add sesame oil after thickening. |
↑ Recipe · ↑ Sauce guide · Storage → · ↑ Top
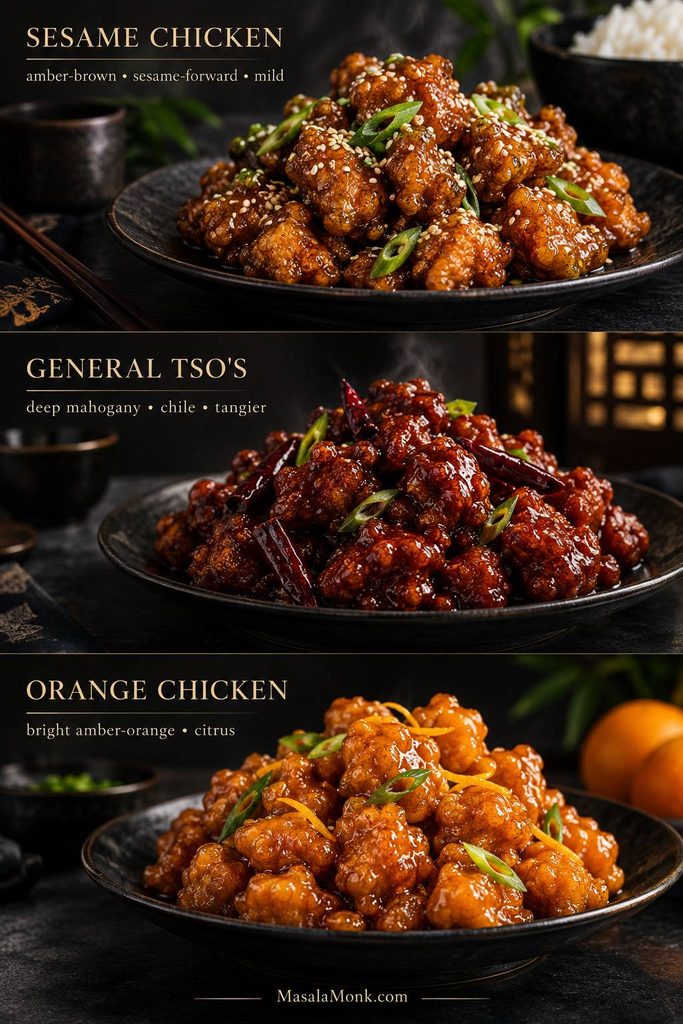
Sesame Chicken vs General Tso’s Chicken vs Orange Chicken
The main difference is the glaze. Sesame chicken is usually mild and sesame-forward. General Tso’s chicken is generally darker, tangier and more chile-forward, while orange chicken is defined by citrus.
Restaurant versions vary, but sesame chicken should taste meaningfully of toasted sesame—not like a generic sweet sauce with seeds scattered over it. For a chicken stir-fry built around dried chiles, peanuts and a tangier sauce, see our Kung Pao Chicken.
Make Ahead, Store and Reheat
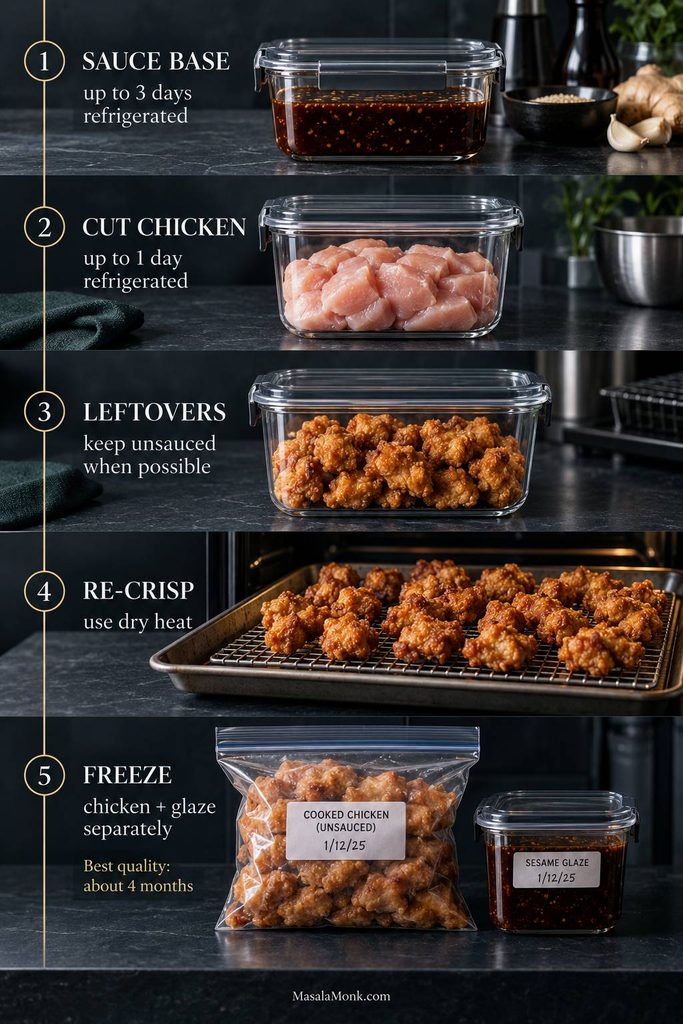
If you know you will save some chicken, keep that portion unsauced. Fried coating has a much better chance of crisping again when it has not spent the night absorbing glaze.
What You Can Prepare Ahead
- Sauce base: mix the soy sauce, honey, brown sugar, rice vinegar, ketchup, oyster or mushroom sauce, water and optional MSG up to 3 days ahead. Refrigerate in a covered container.
- Chicken: cut it up to 1 day ahead, keep it covered and refrigerated at 40°F / 4°C or below, and do not add the egg-white seasoning until you are closer to cooking.
- Dry dredge: combine the cornstarch, flour, baking powder, salt and white pepper several days ahead and keep it airtight and dry.
- Slurry: mix it close to cooking. Cornstarch settles quickly, so stir again immediately before using.
Cooked Chicken for Another Day
Do not deliberately partly cook chicken, chill it and finish it later. Cook it fully to 165°F / 74°C, cool promptly and store safely.
Re-crisp fully cooked unsauced pieces in a hot oven, air fryer or briefly in hot oil before adding warm glaze. The result will not be identical to a fresh batch, but keeping chicken and glaze separate gives you the best chance.
Leftovers and Freezing
Refrigerate leftovers within about 2 hours and use refrigerated cooked chicken within about 3–4 days. Reheat thoroughly to 165°F / 74°C.
Unsauced chicken responds best to dry heat from an oven or air fryer. Already-glazed chicken is easier to warm in a skillet or wok; add a teaspoon or two of water if the glaze has tightened too much. The microwave is fastest and gives you the softest crust.
To freeze: cool fully cooked unsauced chicken, freeze the pieces in a single layer until firm, then transfer them to an airtight freezer container or bag. Freeze the glaze separately. USDA lists about 4 months as the best-quality freezer window for cooked or fried chicken, although the crust will still be at its best when freshly cooked. See the USDA chicken storage guidance.
Let frying oil cool completely before straining it for reuse or transferring it for disposal. Never pour cooking oil down the sink.
Sesame Chicken Questions
1. What is sesame chicken made of?
A Chinese-American sesame chicken recipe usually combines bite-size chicken, a crisp fried coating and a sweet-savory sesame glaze made with soy sauce, honey or sugar, vinegar, garlic, ginger and sesame.
2. Is sesame chicken spicy?
Usually it is mild. The optional ¼ teaspoon crushed red pepper gives this sauce a little background warmth. Leave it out for a mild batch or increase it gradually for more heat.
3. Can I use chicken breast instead of thighs?
Yes. Keep the pieces the same size and use 165°F / 74°C at the center as your doneness check. Breast has less margin for overcooking than thigh.
4. Is sesame chicken gluten-free?
Not as written. The flour, conventional soy sauce, many oyster or mushroom sauces, some Shaoxing wines and some packaged baking powders can contain gluten or require label checking. Use certified gluten-free tamari, certified gluten-free sauces and baking powder, plus dry sherry or stock unless your Shaoxing wine is confirmed gluten-free.
For the coating, a pure cornstarch or potato-starch version can provide a gluten-free route, but it behaves differently from the flour-and-starch dredge above. Coat the chicken close to frying and expect a more brittle crust.
5. Can I make sesame chicken without honey?
You can replace the 3 tablespoons / about 63 g honey with 4 tablespoons / about 50 g packed brown sugar plus 1 tablespoon / 15 ml water as a starting point. Honey adds body as well as sweetness, so judge the finished glaze by taste and the spoon-coating cue.
6. Can I use potato starch instead of cornstarch?
Potato starch works well in the same amount: start with 90 g in place of the 90 g cornstarch. Add a little more only if wet patches remain on the chicken.
7. Can I make sesame chicken in an air fryer or oven?
An air fryer or oven can work, but not by moving this exact deep-fry dredge unchanged into dry circulating heat and expecting the same crust. Those methods work better with coatings designed for them. If you mainly want sesame chicken flavor without breading or a pot of oil, our Sesame Ground Chicken is the easier skillet route.
When the chicken is freshly glazed and the crust still has some snap, get it to the table.
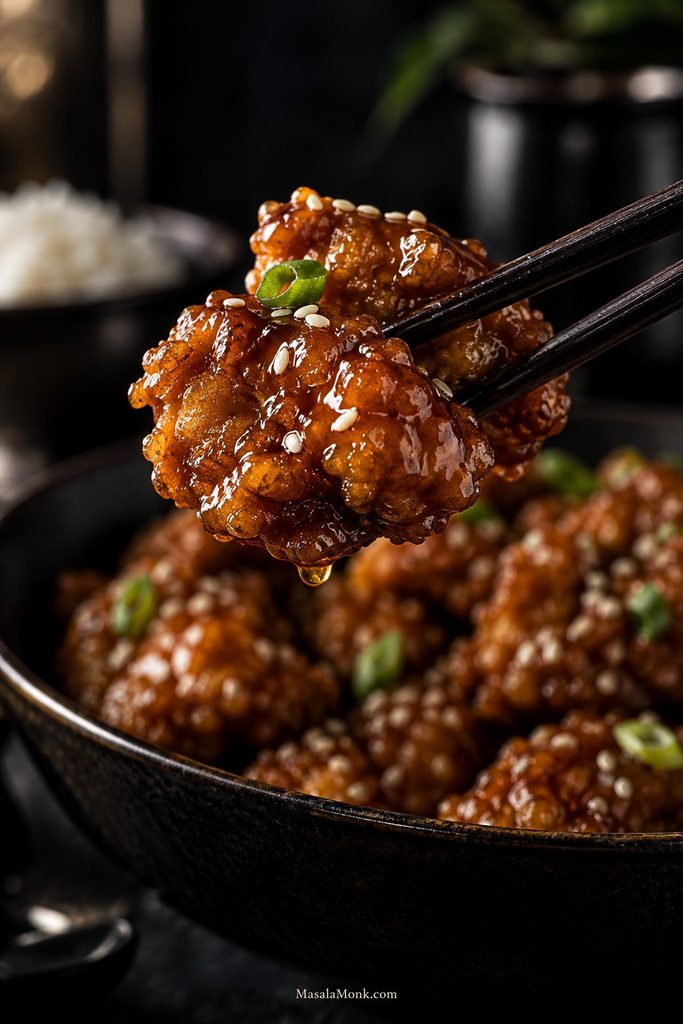
Extra sauce can wait for the rice. The chicken shouldn’t.








