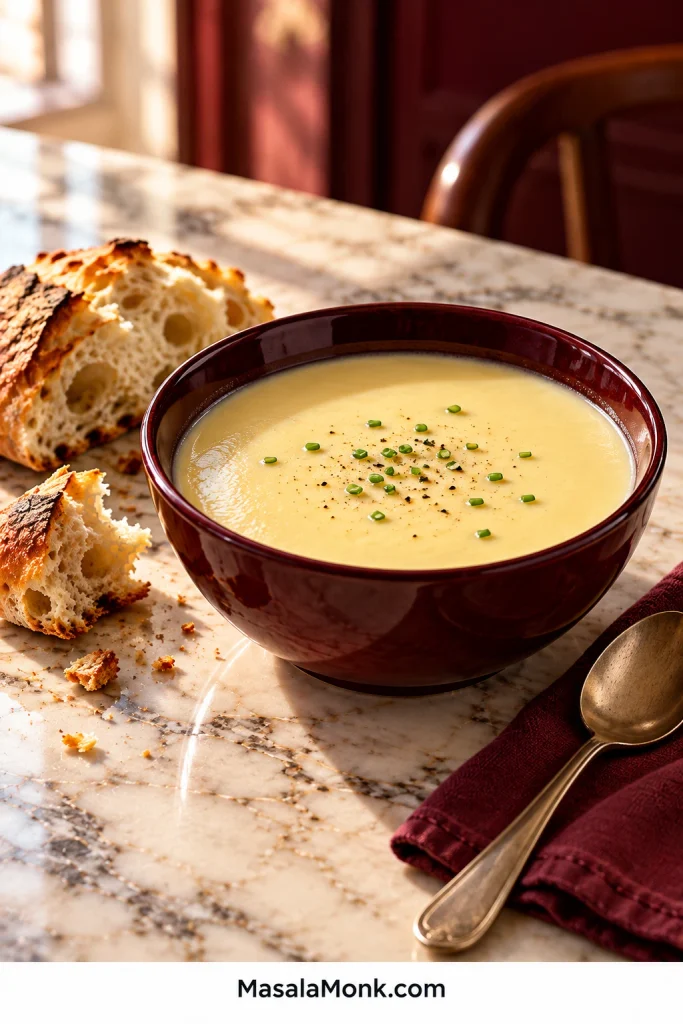
Southern cornbread dressing has a lightly golden top and a soft, moist center that gives easily to a serving spoon and holds together on the way to the plate.
It is also one of those dishes people may cook only once or twice a year, often for a table full of people who already know exactly how they think dressing should taste. That can make the bowl just before baking feel unusually important: Is it wet enough? Too wet? Did I add too much sage?
This one keeps things straightforward—savory homemade cornbread, a little plain bread, tender onion and celery, butter, broth, sage and eggs. Southern families disagree about plenty of the details; here, cornbread leads the flavor and the finished center stays soft, savory and spoonable.
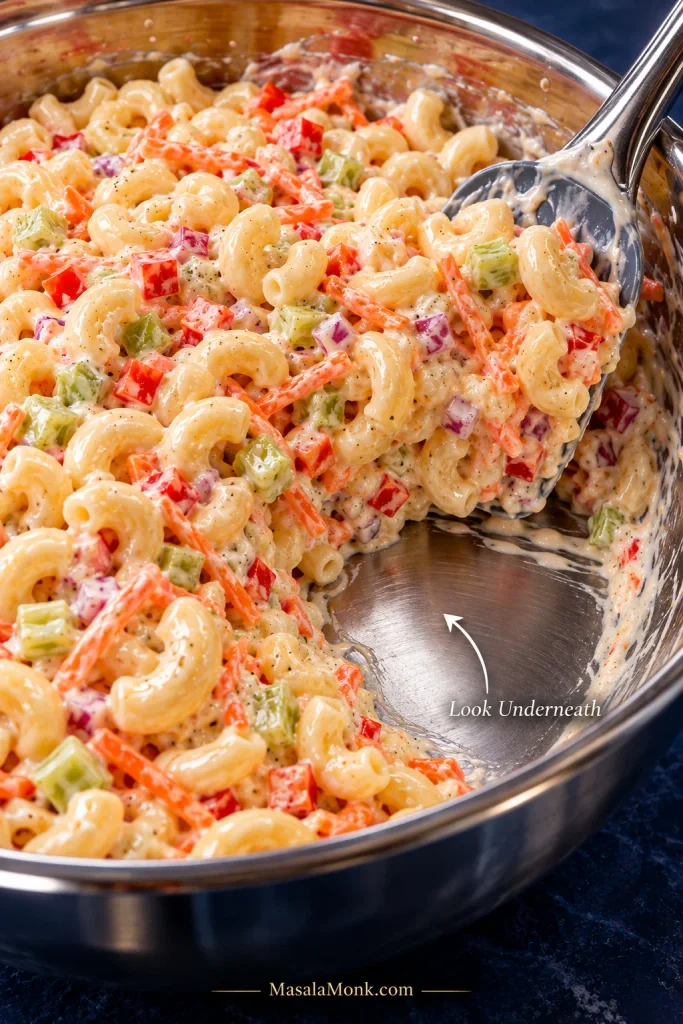
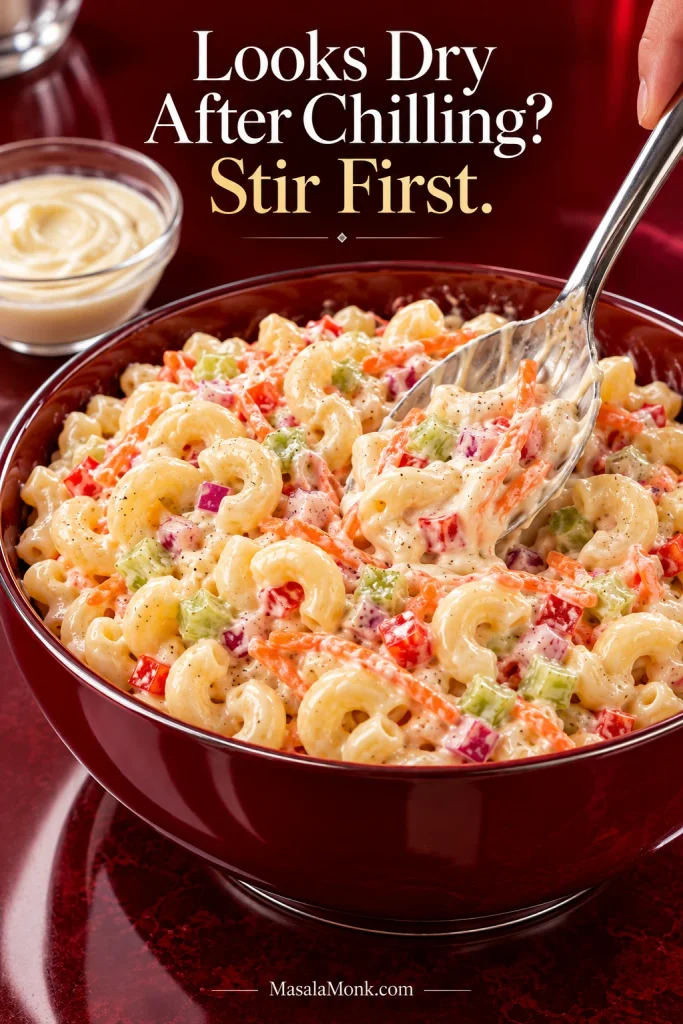
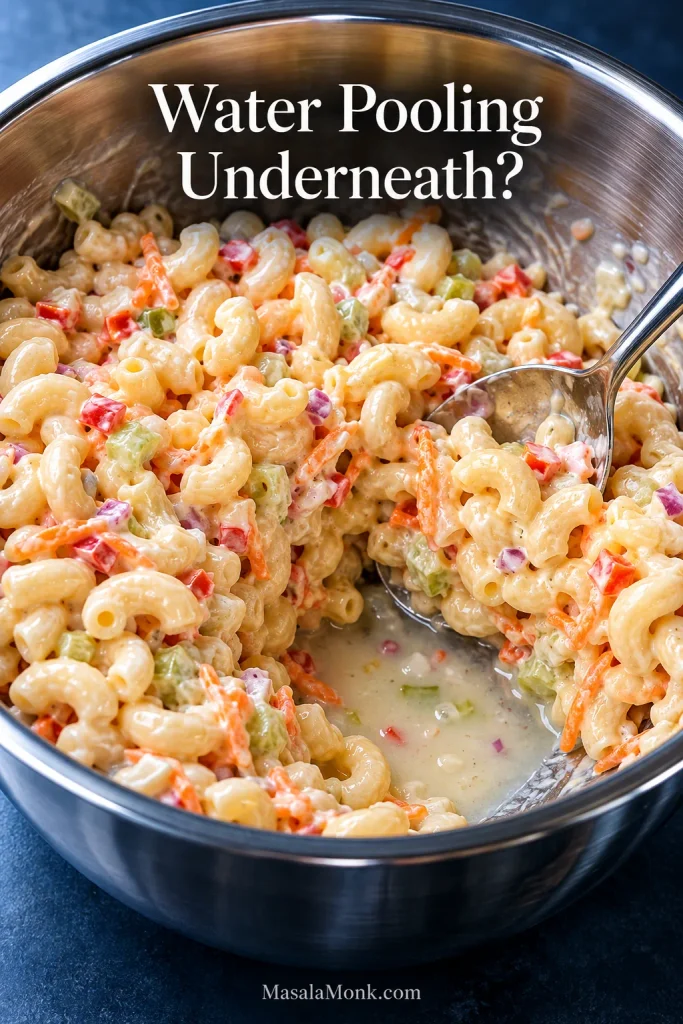
Cornbread dressing should look very moist before baking, with the broth soaked through the bread instead of pooling separately underneath it.
For the cornbread used in this recipe, start with 4 cups / 950 mL warm broth, fold gently and leave the bowl alone for 5 minutes. Dry crumbs or a stiff mound mean it needs more. When a spoonful slowly settles and the broth is absorbed throughout the bread, stop adding liquid. A persistent puddle beneath saturated crumbs means the bowl has gone too wet.
Taste and season before adding the raw eggs. Bake in a 9×13-inch / 23×33 cm dish at 375°F / 190°C until lightly golden, set through the middle and at least 165°F / 74°C.
Pan: 9×13 in / 23×33 cm • Serves: 10–12 • Texture: soft, moist and spoonable
After the five-minute rest, the middle bowl can move on to seasoning and eggs; the dry and pooled-liquid versions still need correction.
Southern Cornbread Dressing Recipe
Old-fashioned Southern cornbread dressing with tender onion and celery, sage and a soft, moist center with recognizable pieces of cornbread.
Active prep: about 25 minutes with prepared cornbread • Bake: 45–55 minutes • Rest: 10–15 minutes • Total with prepared cornbread: about 1 hour 20 minutes–1 hour 35 minutes
Starting with freshly baked cornbread? Allow extra time for it to cool and dry before the active prep begins.
Equipment
9×13-inch / 23×33 cm baking dish
Large mixing bowl
Large skillet
Baking sheet if drying the breads the same day
Aluminum foil
Instant-read thermometer
Ingredients
Cornbread leads; the smaller amount of white bread supports the soft center without turning this into ordinary bread stuffing.
Bread
1 full 10-inch / 25 cm skillet savory Southern cornbread, completely cooled and slightly dried
4 oz / 115 g plain white sandwich bread, about 4–5 standard slices, dried and torn
For the closest match to the method below, use the savory version of MasalaMonk’s Southern Cornbread Recipe. Other homemade and boxed cornbreads can differ in size, sweetness and absorption, so the broth may need to be handled a little differently.
Butter, Onion and Celery
8 tablespoons / 4 oz / 113 g unsalted butter, plus more for the baking dish
About 1½ cups / 7 oz / 200 g yellow onion, finely diced
About 1½ cups / 6.3 oz / 180 g celery, finely diced
Seasoning
2 teaspoons rubbed sage
1 teaspoon poultry seasoning
1 teaspoon freshly ground black pepper
Fine salt, to taste after the first broth soak; broth and cornbread can vary considerably in saltiness
Broth and Eggs
Starting broth: 4 cups / 950 mL low-sodium chicken or turkey broth, warmed
Reserve broth: up to 1 cup / 240 mL, warmed
3 large eggs
Good homemade turkey broth can replace the chicken broth. Strained juices or drippings from a fully cooked turkey can replace part of it too; use concentrated or salty drippings sparingly.
Think of the last cup of broth as insurance, not a target. Very dry bread may want most of it. Fresher bread may need little or none.
Instructions
1. Dry and Crumble the Breads
If possible, bake the cornbread a day ahead and cool it completely. Breaking it into large pieces gives some of the fresh-baked moisture a chance to escape.
For same-day dressing, spread the cooled cornbread pieces on a baking sheet and dry them at 250°F / 120°C, turning occasionally and beginning to check around 20 minutes. Add the torn white bread too, watching the thinner pieces because they may dry sooner.
The surface feels dry and the pieces break easily when they are ready. The middle no longer feels steamy or cake-soft. There is no need to turn the bread into hard croutons.
Slightly dried cornbread gives you more control over broth without becoming hard or crouton-like.
Crumble the cornbread into a large bowl. Most pieces can be small, with a scattering of irregular ½–1 inch / 1–2.5 cm pieces. Uneven crumbs are fine.
Small crumbs absorb and bind; a few larger pieces keep the finished dressing recognizably cornbread.
Raise the oven to 375°F / 190°C when the bread is ready. If you dried it ahead, simply preheat the oven before assembly.
2. Cook the Onion, Celery and Seasonings
Melt the butter in a large skillet over medium heat. Add the onion and celery and cook for 8–10 minutes, stirring occasionally, until tender and translucent. A little color around the edges is welcome.
Add the rubbed sage, poultry seasoning and black pepper for the final 30–60 seconds. When the herbs hit the warm butter, the skillet should smell unmistakably like dressing. Scrape the vegetables and all of that seasoned butter over the bread.
Tender vegetables will not need to cook inside wet bread, while the brief herb bloom seasons the butter.
3. Add the First Broth
Using the linked cornbread or another similarly sized homemade batch, pour 4 cups / 950 mL warm broth around the bowl and fold gently from the bottom.
Using a noticeably smaller or very different batch of cornbread? Start with less broth and work upward instead of automatically pouring in all 4 cups.
As the broth spreads through the bowl, the crumbs become glossy and heavy with moisture while their cornbread texture remains visible. Fold only enough to distribute the liquid.
4. Leave It Alone for 5 Minutes
This is the point where dressing often looks wrong even when it isn’t. Give the bread time to drink before changing anything.
After 5 minutes, fold once or twice. Pale dry crumbs or a spoonful that sits in a stiff mound mean the bowl wants more broth. Add the reserve ¼ cup / 60 mL at a time.
Five minutes changes the picture: give the bread time to absorb the first broth before deciding whether it needs more.
Stop when the bread is moist all the way through and a spoonful slowly settles back into the bowl. Saturated crumbs with a persistent pool of broth underneath have gone too far.
Trust what the bread is doing more than the amount left in the measuring cup.
5. Taste, Season, Then Add the Eggs
Taste the dressing before the raw eggs go in. Add salt as needed, then taste for pepper or another small pinch of rubbed sage.
After hydration, salt and sage register more clearly—making this the best moment for the final seasoning adjustment.
Go carefully with the sage. Adding another pinch is easy; softening an overwhelmingly herbal pan is not.
Whisk the 3 eggs, pour them over the dressing and fold gently until evenly distributed. Stop tasting once the raw eggs are in.
6. Fill the Baking Dish
Butter a 9×13-inch / 23×33 cm baking dish. Spoon in the dressing and spread it evenly without packing it down.
Making a double batch? Use two 9×13 pans. Keeping the layer close to the original depth helps both pans cook evenly.
Two pans keep a double batch close to the original depth, so the bake behaves more like the single recipe.
7. Bake Covered, Then Uncovered
Cover loosely with foil and bake at 375°F / 190°C for 25 minutes. Remove the foil and bake another 20–30 minutes, beginning to look in on it around 20 minutes.
Covered first protects the center; uncovering later shifts the oven’s job toward browning the surface.
The top turns lightly golden, with deeper toasted patches near some of the edges. Nudge the dish and the middle moves together gently instead of rippling or sloshing like loose batter. The center needs to reach at least 165°F / 74°C.
Take it out while the center still looks moist. The 10–15 minute rest will give it a little more structure.
8. Rest Before Serving
Leave the pan alone for 10–15 minutes. A serving spoon uncovers a moist interior beneath the lightly toasted surface, tender enough to yield and firm enough to reach the plate.
The 10–15 minute rest lets the moist center settle without baking away its tenderness.
Serve warm, while the top still has a little toastiness and the center is soft, savory and fragrant with sage and butter.
There isn’t one Southern dressing rulebook. One family may love a pan so soft it is almost spoon-pudding tender. Another may expect neat squares. Biscuits, white bread, chicken and condensed soup all appear in different family versions.
Two recipes can both be Southern cornbread dressing and land at very different points on this spectrum. Choose the texture you want before changing broth or bake time.
For a lot of cooks, the real reference point isn’t another written recipe at all. It is the pan they remember from Thanksgiving—the one somebody made largely by feel, adding broth until “it looked right.” The cues here are meant to make that judgment easier to recognize and repeat.
Here, cornbread leads the flavor. Onion and celery soften in butter first, sage stays clearly present, and raw eggs help the moist center set. Chicken, sausage and condensed soup can make excellent dressings too; they change the salt, fat and moisture enough to deserve their own balance.
Dressing vs Stuffing
The words overlap heavily in everyday use. A practical distinction is that dressing is commonly baked in its own casserole dish, while stuffing traditionally cooks inside poultry. This recipe is baked separately.
Which Cornbread Is Best for Dressing?
Slightly dried or day-old savory cornbread is easiest to work with because it has room to take on broth. Fresh cornbread works too; give it some time in the low oven first.
Good dressing bread feels dry at the surface and crumbles easily. It does not need to be brittle. Starting with a very moist, cake-soft pan simply makes the broth harder to control.
The middle state gives you the most room to build moisture gradually without starting with cake-soft bread.
Why Add a Little White Bread?
The 4 oz / 115 g white bread is a small supporting part of the bowl. Cornbread supplies the flavor; the plain bread gives the tender center a little extra help holding together.
Some Southern dressings use biscuits for a similar reason. Plain sandwich bread stays deliberately quiet here.
Prefer all cornbread? Replace the white bread with 4 oz / 115 g additional dried cornbread. Let the first broth soak in before reaching for more, since an all-cornbread bowl may absorb differently.
Can I Use Jiffy or Another Corn Muffin Mix?
Yes, but expect a sweeter flavor and different absorption. Boxed mixes and other homemade recipes can also produce a smaller or larger amount of cornbread.
When the amount differs noticeably from the linked recipe, add the broth gradually. A smaller batch may need considerably less than 4 cups, while a larger or drier batch may take more.
Batch size changes absorption capacity. A smaller boxed or homemade cornbread batch should not automatically receive the full broth amount.
How Much Sage—and What Do the Eggs Do?
Start with 2 teaspoons rubbed sage plus 1 teaspoon poultry seasoning. After the broth has soaked into the bread, taste and make any final adjustment before the eggs go in.
Rubbed Sage vs Ground Sage
Ground sage is much finer and packs more tightly into a measuring spoon than fluffy rubbed sage. A teaspoon-for-teaspoon swap can therefore taste considerably stronger.
Using ground sage? Begin cautiously. Poultry seasoning often contains sage as well, so check the label if you want a milder sage flavor or need to avoid it altogether.
Ground sage packs more densely than rubbed sage, so start conservatively and adjust after the broth soaks in.
Do You Put Eggs in Cornbread Dressing?
Raw eggs help the very moist dressing set as it bakes. Chopped hard-boiled eggs are a separate family-style addition.
Think structure versus texture: raw eggs help the dressing set; chopped boiled eggs change the bites you encounter.
Using eggs—or not using them—is a family and regional choice, not a test of whether dressing is “really Southern.” Plenty of long-standing versions exist on both sides.
If the dressing you grew up with had chopped boiled eggs, keep them if that’s the version you love. They bring their own flavor and texture; they do not replace the raw eggs used here for structure.
Leaving the raw eggs out entirely changes how this formula sets, so an intentionally eggless dressing is better balanced from the start as its own version.
How Wet Should Cornbread Dressing Be Before Baking?
Very moist and slowly settling is the goal. The bread is moist all the way through, from top to bottom. There are no dry pockets and no free liquid underneath.
This soft Southern dressing looks considerably wetter than cubed bread stuffing. Draw a serving spoon through the bowl and the path gradually relaxes instead of staying sharply open.
The groove should be temporary. Correctly moistened dressing slowly relaxes toward the spoon trail; a stiff trench points dry, while liquid collecting in it points too wet.
State
What It Looks Like
What to Do
Too dry
Dry crumbs remain and the mixture sits stiffly
Add warm broth ¼ cup / 60 mL at a time
Just right
The bread is moist through, crumb texture remains, and a spoonful slowly settles
Stop adding broth
Too wet
The crumbs are saturated but broth still gathers separately after resting
Fold in additional dried bread before adding the eggs
Freshly added broth can look alarmingly loose for a few minutes. Let it soak in. What matters is whether free liquid remains after the bread has had a chance to absorb it.
Soft Is the Goal; Paste Is Not
Soft dressing can be extremely tender and still show recognizable pieces of cornbread. Gummy dressing has lost that crumb and feels more like paste.
Very fresh bread, crumbs worked too fine, excess broth and aggressive mixing can all push the bowl in that direction. Extra oven time can remove moisture; it cannot rebuild crumb texture that has already broken down.
A standard 9×13-inch / 23×33 cm dish gives the dressing a comfortable depth for an even bake. Go deeper and the center needs more time; use a shallower dish and the surface browns and dries faster.
Look, Move, Measure
Look: the surface is lightly golden, with deeper toasted patches near some of the edges.
Move: the center shifts together gently when the dish is nudged; loose batter would ripple or slosh.
Measure: the middle reaches at least 165°F / 74°C.
No single doneness cue is enough: browning can get ahead of the center, movement shows the set, and 165°F / 74°C confirms temperature.
Once the top looks right, the middle moves together and the thermometer says 165°F / 74°C, it is done. Don’t leave it in waiting for a firm center; the rest will take care of the final bit of setting.
For a moist dressing like this, gravy is an extra pleasure rather than the only thing keeping the serving from tasting dry.
Cornbread Dressing Troubleshooting
Your best rescue window is before the eggs. Broth, dry bread, salt and herbs are much easier to adjust then. Once the pan is baking, time and foil are your main tools.
Before Baking
Dry and stiff: Let the existing broth soak in first. If dry crumbs remain, add warm broth ¼ cup / 60 mL at a time.
Broth pooling underneath: Saturated bread plus persistent free liquid means the bowl is too wet. Fold in additional dried bread before adding the eggs.
Bland: Add salt, then reassess the pepper and herbs.
Too much sage: Dilute with unseasoned dried bread and enough broth to restore the soft, moist texture.
Crunchy onion or celery: Return the vegetables to the skillet and cook until tender before continuing.
During or After Baking
Center still wet or loose: Keep baking. If the top is already well browned, cover the dish loosely with foil. A deeper casserole may simply need longer through the middle.
If the top browns first, loose foil protects it while the softer center finishes cooking.
Gummy or pasty: More baking may remove moisture, but it cannot fully restore crumb texture after the bread has been overworked or oversaturated.
Too firm or cakey: The bowl was probably too dry, or the pan stayed in the oven too long. Gravy helps at the table; next time leave the mixture wetter or pull it sooner.
The crumb often reveals what went wrong: gummy dressing has lost its bread structure, while firm or cakey dressing usually points to a drier mixture or longer bake.
Falls apart: Give it the full 10–15 minute rest first. If it remains very crumbly, the mixture was likely too dry or the center needed more time.
A missing vegetable does not mean Thanksgiving is cancelled.
No celery or onion: Either can simply be left out. Omitting both gives you a plainer dressing, but the recipe still works.
No chicken broth: Turkey broth is the closest substitute. Vegetable broth works too, though it gives the dressing a different savory background.
All-cornbread dressing: Replace the 4 oz / 115 g white bread with the same amount of dried cornbread. Let the bread absorb the broth before adding more; an all-cornbread mixture may not need exactly the same amount.
How Much Cornbread Dressing Do You Need?
One 9×13 pan gives about 10–12 side servings. For a crowd, use more pans rather than building one unusually deep casserole.
Scale sideways rather than deeper: keeping similar pan depth preserves the recipe’s familiar center-to-edge bake.
People
Amount
Pan Setup
5–6
½ batch
8×8 in / 20×20 cm or similar; begin checking earlier
10–12
1 batch
One 9×13 pan
20–24
2 batches
Two 9×13 pans
About 50
About 5 batches
Five 9×13 pans when several other substantial sides are being served
For very generous servings or planned leftovers at a 50-person meal, make six pans.
Mix one or two batches at a time instead of wrestling with one giant bowl. It is easier to see how the bread is taking up the broth and easier to season evenly.
If you’re trying to match a particular family style before a big holiday, a half batch also gives you an easy way to dial in the moisture and seasoning for the version you remember.
Make-Ahead Southern Cornbread Dressing for Thanksgiving
Yes. Bake and dry the breads and cook the onion and celery ahead, then bring everything together close to baking.
Don’t fully assemble the dressing with broth and raw eggs the night before. Keep the dried breads separate from the refrigerated ingredients, then combine them on bake day.
Make-ahead dressing works best when prep does not lock in the final moisture level. Keep the liquid separate so absorption can be judged on bake day.
If you’re responsible for the dressing this year, getting the bread and vegetables out of the way ahead of time takes a lot of pressure off Thanksgiving morning.
When
What to Do
1–2 days ahead
Bake the cornbread, cool it completely and begin drying it
Day before
Finish drying both breads. Once completely cool, keep them covered and dry. Cook the onion and celery and refrigerate them. Keep broth and eggs refrigerated separately.
Bake day
Combine bread, vegetables and broth; adjust the moisture and seasoning; add the eggs; bake
Serving time
Let the finished dressing rest 10–15 minutes before serving
This also follows USDA stuffing food-safety guidance, which recommends preparing wet and dry ingredients ahead separately and combining them close to cooking.
If oven space is the bigger Thanksgiving problem, MasalaMonk’s Sweet Potato Casserole is another side that can be largely prepared ahead.
Keeping Dressing Warm Without Drying It Out
Holding it hot for a delayed meal? Keep the dressing at 140°F / 60°C or warmer. Otherwise, refrigerate it within 2 hours.
For a short delay, leave the pan covered so the surface holds onto more of its moisture. That also gives you a little breathing room to finish something best served fresh, such as soft dinner rolls.
Storage, Freezing and Reheating
Refrigerate: Transfer leftovers to reasonably shallow containers and refrigerate within 2 hours. Use refrigerated dressing within 3–4 days.
Freeze: Freeze cooked dressing in practical meal-size or family-size portions. For best quality, use it within about 2–3 months.
Reheat: Cover the dressing so it holds onto steam. A dry-looking portion can take a small splash of broth before reheating. Heat the center to 165°F / 74°C, uncovering near the end if you want a little texture back on top.
The most important moment arrives before the oven door closes.
The bread is thoroughly moist. You can still see pieces of cornbread. The onion and celery are tender, and the sage smells warm and savory in the butter.
Then the oven takes over. The edges toast, the middle sets softly, and the bowl that looked almost suspiciously wet becomes dressing that gives easily under the spoon.
That is what the measurements and checkpoints are really for: turning “add broth until it looks right” into something you can recognize for yourself.
The payoff: a generous serving holds together on the way to the plate, then gives easily under the fork.
Once you can look at the bowl and know it is ready, Southern cornbread dressing stops feeling like a once-a-year gamble.
Good chicken fried rice should feel loose in the pan: hot separate grains, browned chicken, tender pieces of egg and vegetables in almost every scoop.
When it goes wrong, you can usually see it happening. The lively sizzle fades, cold ingredients pile in faster than the pan can recover, and rice that was supposed to fry starts quietly steaming instead.
This version is built for the kind of dinner that comes together from yesterday’s rice, one piece of chicken and whatever vegetables are in the freezer. Rice cooked today works too once the steam has escaped, and a wide skillet is perfectly useful if you do not own a wok.
The method is easiest to remember in four words:
Fry in stages, sauce late.
That gives each stage enough heat to fry properly before the next ingredient goes in.
For four main-course servings, use about 650 g cooked rice, or roughly 4 loosely filled cups, 12 oz / 340 g chicken, 3 eggs and 1 cup mixed vegetables.
Give raw chicken a brief soy-and-cornstarch velvet. Soft-scramble the eggs and remove them, brown the chicken separately, cook the vegetables, then fry the rice until hot and loose. Add the sauce only after the rice is ready, then return the chicken and egg.
You are looking for separate grains with occasional lightly toasted patches, juicy chicken and tender egg—not wet rice coated in soy sauce.
Chicken Fried Rice Recipe
Recipe at a Glance
Prep: about 15 minutes Cook: about 12–15 minutes Total: about 30 minutes, with cooked rice ready Yield: 4 main-course servings or about 6 side servings
Starting with uncooked rice adds its cooking and cooling time.
Equipment
12-inch / 30 cm stainless-steel, cast-iron or carbon-steel skillet, or approximately 14-inch / 35 cm wok
2 plates or shallow bowls — one for the egg and one for the chicken
small bowl for the sauce
spatula or wok spatula
knife and cutting board
A large nonstick skillet can work too. Use the highest heat appropriate for your particular pan rather than assuming the burner always needs to be at maximum.
If your pan is much smaller than 12 inches / 30 cm, cook in smaller batches. Fried rice needs room more than it needs specialized equipment.
Ingredients
For the Chicken
12 oz / 340 g boneless skinless chicken thighs, or chicken breast
2 teaspoons / 10 ml regular/all-purpose soy sauce or Chinese light soy sauce, not dark soy
2 teaspoons / about 5 g cornstarch
1 teaspoon / 5 ml neutral high-heat oil
Base Fried Rice Sauce
2 tablespoons / 30 ml regular/all-purpose soy sauce or Chinese light soy sauce, not dark soy
1 tablespoon / 15 ml oyster sauce
¼ teaspoon sugar
⅛ teaspoon ground white pepper
1 teaspoon / 5 ml toasted sesame oil
That is the complete base sauce. None of the extras below is required.
If they are already in your cupboard, you can also add:
1 teaspoon / 5 ml dark soy sauce for deeper colour
¼ teaspoon MSG, or a small pinch of chicken bouillon powder, for extra savouriness
2 teaspoons / 10 ml Shaoxing wine at the finish
For the Rice, Egg and Vegetables
about 650 g cold cooked jasmine or long-grain white rice, roughly 4 loosely filled cups
3 large eggs
2 tablespoons + 2 teaspoons / about 40 ml neutral high-heat oil, such as canola, peanut, rice-bran, avocado or vegetable oil, divided
½ medium onion, finely diced
1 cup / about 140 g frozen peas and carrots, no need to thaw
3 garlic cloves, finely chopped
4 scallions, sliced, with white/light-green and dark-green parts separated
Keep another teaspoon or two of oil nearby in case a stainless-steel or carbon-steel pan becomes genuinely dry.
Before You Heat the Pan
Break the cold rice apart with your fingers or a fork.
For chicken thighs, cut the meat into pieces roughly ½ inch / 1–1.5 cm across. For chicken breast, slice across the grain into bite-size pieces roughly ¼ inch / 6 mm thick.
Mix the chicken with the soy sauce, cornstarch and 1 teaspoon oil. Leave it for 10–15 minutes while you prepare everything else.
Mix the fried-rice sauce and beat the eggs.
Before the stove goes on, have the rice separated, sauce mixed, eggs beaten and vegetables ready beside the pan.
Once cooking starts, things move quickly.
Set the ingredients out in cooking order: early aromatics, sauce and finishing scallions each get their own moment in the pan.
1. Soft-Scramble the Eggs
Heat the skillet or wok over medium-high heat and add 1 teaspoon / 5 ml oil.
Pour in the eggs and stir gently until soft curds form, about 30–60 seconds.
Transfer them to a clean plate while they are still slightly glossy. They will warm again at the end, so there is no benefit in cooking them firm now.
The egg is ready when no liquid pools but the curds still look satiny.
2. Sear the Chicken
Increase the heat to high or medium-high, depending on your stove and pan, and add 1 tablespoon / 15 ml oil.
When the chicken sizzles immediately on contact, spread it into a single layer. Let the first side develop some colour, then stir-fry until the chicken has browned edges and is almost cooked through, usually 2–4 minutes depending on the cut.
Transfer the chicken to its own clean plate or bowl.
You want browned edges while the centre is still juicy; the chicken will finish cooking when it returns to the pan.
Visible pan between the chicken pieces is the crowding check; released moisture needs somewhere to escape.
3. Cook the Onion and Vegetables
Add 1 teaspoon / 5 ml oil.
Cook the onion for about 1 minute, then add the peas and carrots straight from the freezer.
No thawing is needed. Cook for another 1–3 minutes, until the vegetables are hot and the bottom of the pan is dry again.
Do not worry about whether this takes exactly two minutes or three. Wait until the visible water has disappeared.
Steam above the pan is normal. Liquid pooling on the metal means the vegetables need more time.
4. Add the Garlic and Scallion Whites
Add the garlic and the white/light-green parts of the scallions.
Toss for 20–30 seconds, just until the garlic smells fragrant.
5. Fry the Rice
Add the remaining 1 tablespoon / 15 ml oil, followed by the rice.
Break apart any lingering clumps as you toss and cook for 3–5 minutes, until the rice is hot throughout and moving freely.
If using a skillet, spread portions across the hot surface and leave them alone for 30–60 seconds before turning. A few grains should begin picking up pale-golden edges where they meet the pan.
With a hot wok and capable burner, work more briskly and keep the rice moving.
Drag the spatula through the rice: a brief trail followed by loose, tumbling grains means it is ready for sauce.
6. Add the Sauce
Stir the sauce once more and pour it over the rice.
Toss immediately and cook for 1–2 minutes, until the seasoning is evenly distributed and there is no wet sauce sitting underneath the grains.
Taste a spoonful.
The rice should taste savoury and aromatic while still tasting like rice—not wet, over-sauced or primarily of soy sauce.
When the balance is right, you get savoury depth through the grains, little toasted edges from the pan and just enough sweetness to round everything out without making the rice taste sweet.
If it needs more saltiness, add a small splash of regular soy. If the flavour is right and you simply want deeper colour, use the optional dark soy instead.
7. Return the Chicken and Egg
Return the chicken first, followed by the egg.
Break the egg into tender bite-size pieces as you toss and cook for another 30–60 seconds, until everything is piping hot.
Jasmine is my first choice for chicken fried rice, but basmati and regular long-grain white rice work well too. The best choice is a rice that cooks into distinct grains rather than a sticky mass.
Rice
What the Fried Rice Is Like
Best For
Jasmine rice
aromatic, tender, nicely separate
my first choice
Basmati rice
longer, drier, very distinct grains
excellent everyday alternative
Regular long-grain white rice
neutral and dependable
use what you already have
If you’re buying rice specifically for this recipe, jasmine is the easiest default. If basmati or another long-grain rice is already in the fridge, use it rather than cooking another batch just to change varieties.
Basmati tends to stay a little drier and more distinct; jasmine gives a slightly softer, more tender bite.
Making this with shrimp instead? The same broad rice method carries over to Shrimp Fried Rice, but the shrimp needs only a brief turn in the pan.
Does Fried Rice Need Day-Old Rice?
Cold leftover rice is easiest because it is already cool and relatively dry. Properly cooled same-day rice works too.
What matters is how the grains behave when they reach the pan: they should separate cleanly rather than arriving hot, wet and soft.
Even good day-old rice can turn soggy if wet vegetables, too much sauce or an overcrowded pan add more moisture than the heat can drive away.
How to Make Fried Rice With Fresh Rice
Freshly cooked rice works once the visible steam is gone and the grains loosen cleanly instead of smearing together. Spread it over a tray to cool quickly before frying.
Sometimes the craving for fried rice arrives well after the point when yesterday’s rice was supposedly meant to exist.
A wide tray speeds same-day cooling by giving steam far more surface area to escape.
If you are starting from dry rice, this guide to cooking rice covers jasmine, basmati and regular long-grain methods in more detail.
Around 1½ cups dry rice is a useful starting point for this recipe, depending on the variety and cooking method. Measure the cooked amount before frying rather than relying too heavily on a raw-to-cooked conversion.
Same-Day Rice Method
Cook the rice a little firmer if your usual method produces particularly soft grains.
Fluff the rice gently.
Spread it over a large tray or baking sheet.
Leave it uncovered so steam can escape.
Cool until the rice is no longer visibly steaming.
Pick up a small handful. The grains should loosen from one another instead of smearing into a soft mass.
Refrigerate briefly if you have time.
The rice is ready when the grains loosen cleanly in your hand. Cooling time will vary with the type of rice, room temperature and how thinly it is spread.
Lift a little rice and let gravity test it; ready grains separate with almost no persuasion.
Slightly warm rice is fine once the grains feel dry and separate. Rice still giving off clouds of steam needs longer.
Plain precooked microwave rice is also handy when making and cooling another pot feels like one task too many. Choose an unflavoured packet and break the rice apart before frying.
Do not leave cooked rice sitting out for hours. Refrigerate it within 2 hours, or within 1 hour when the temperature is above 90°F / 32°C, preferably spread or portioned so it cools quickly.
If you ended up with more plain rice than the fried rice needs, save the extra for another meal. Rice pudding made with cooked rice works with jasmine, basmati or ordinary white rice.
The chicken does not need a long marinade. Ten to fifteen minutes with soy sauce, cornstarch and a little oil is enough while you chop the vegetables and mix the sauce.
I prefer boneless skinless thighs here. They brown readily, stay juicy and give you more margin if the rice takes an extra minute.
Chicken breast works well too; slice it thinner and keep a closer eye on the cooking time.
Breast benefits from thinner slices, thigh can stay chunkier, and the velvet should cling thinly with no spare marinade pooling.
Why Take the Chicken Out?
If small pieces of chicken remain in the pan through the vegetables, cold rice and final seasoning, they can dry out before the rice is ready.
Brown the meat, let it wait on its own plate, then give it its final minute when everything comes back together.
The extra plate is less glamorous than a restaurant burner, but it solves a much more useful kitchen problem.
A small amount of baking soda is sometimes used for especially tender restaurant-style chicken. I would not bother with it here. The cornstarch is enough.
Using Leftover or Rotisserie Chicken
Use about 8–9 oz / 225–250 g cooked chicken, diced or shredded.
Skip the velvet and searing steps. Add the cooked chicken near the end and toss only until it is hot.
Dice or shred cold cooked chicken small enough to reheat quickly without holding up the finished rice.
A container of leftover roast chicken and yesterday’s rice is about as close as this dinner gets to assembling itself.
Wok or Skillet?
You do not need a wok to make good fried rice.
A 12-inch / 30 cm skillet gives the rice plenty of contact with the hot surface and is often the easiest option on most home burners.
Over strong heat, a wok rewards quick movement. By contrast, a skillet rewards brief periods of undisturbed contact so portions of rice can toast against the broad base.
Whichever pan you use, avoid piling the ingredients deeply. Divide the recipe into smaller batches if necessary.
A skillet that never develops toasted patches may be moving too often; food lingering in one hot spot of a wok may need to move sooner.
That smoky restaurant aroma is often called wok hei. A skillet on a domestic stove will not reproduce all of it, and it does not need to. Loose grains, juicy chicken and balanced seasoning already make very good fried rice.
Read the Pan: Sizzle, Steam, Grains
The clock helps. The pan tells you more.
When fried-rice cues disagree, deal with the limiting one first. If a cold addition kills the sizzle, let the pan recover before adding sauce.
Sizzle: Chicken should make itself heard when it lands. If a large addition of cold food makes the pan suddenly quiet, wait. The returning sizzle tells you the heat is catching up.
Steam: A lively haze of steam is normal. A puddle underneath the food needs to disappear before the next major ingredient goes in.
Grains: Before the sauce enters, the rice should move easily rather than dragging around in cold clumps. Taste one if you are unsure; it should be hot through the centre.
Aroma: Garlic should smell fragrant rather than sharp or burnt. Scallion greens, sesame oil and optional Shaoxing arrive late because their aroma is part of the finish.
That last half-minute should smell noticeably better than the pan did five minutes earlier.
For this batch, soy sauce, oyster sauce, white pepper and toasted sesame oil make the base seasoning. Shaoxing wine and MSG are optional, not requirements.
Fried rice can be salty enough and still taste strangely flat.
Usually, the answer is not another large pour of soy sauce. What is missing is often aroma or savoury depth, not more salt.
Adjusting Salt, Colour and Aroma
Ingredient
What It Contributes
Soy sauce
salt and savouriness
Oyster sauce
deeper sweet-savoury umami
White pepper
background warmth
Shaoxing wine
aromatic depth
Toasted sesame oil
finishing aroma
MSG or bouillon
optional extra savouriness
Tiny amount of sugar
rounds the seasoning
Judge seasoning by taste, not shade: darker fried rice is not automatically saltier, more savoury or more aromatic.
When those layers are balanced, the grains taste savoury without feeling heavy, white pepper adds a gentle warmth, and sesame and scallion arrive at the finish instead of disappearing beneath the soy.
Soy sauces vary considerably in saltiness, so the recipe starts with a measured amount and leaves the final adjustment until the end. If the rice tastes right but looks pale, a little dark soy can deepen the colour without another large pour of regular soy.
For a genuinely saucy chicken-and-vegetable stir-fry, the balance is different; this stir fry sauce is designed to coat meat and vegetables, while fried rice deliberately keeps liquid restrained.
If I were adding just one of the extras here, I would make it Shaoxing wine. The small perimeter drizzle flashes against the hot metal and noticeably changes the aroma at the finish.
MSG adds savoury depth without more liquid. Bouillon can do something similar, but brands vary enough in saltiness that a small pinch is the better starting point.
If your protein is already heavily seasoned, reduce the sauce rather than seasoning on autopilot. Spam is an obvious example; Spam Fried Rice needs a lighter hand with salty sauces.
Which Vegetables Work in Chicken Fried Rice?
Have corn instead of peas? Half a bell pepper that needs using? A handful of mushrooms?
That is exactly the kind of flexibility fried rice is good at.
Use roughly 1 cup / about 140 g mixed vegetables and adjust the timing to suit them. Carrot, mushrooms, broccoli stems and bell pepper can go in earlier; cabbage, bean sprouts and tender greens need much less time.
Cut size matters too: smaller pieces heat and shed moisture faster, so timing follows texture and size as much as the vegetable itself.
The frozen peas and carrots in the base recipe go straight from freezer to pan. Let them become hot and give any released water time to disappear before adding the rice.
Why Cook the Egg Separately?
There are excellent fried-rice techniques where egg and rice cook together, but for this recipe, I prefer taking the egg out.
You can stop at tender, slightly glossy curds and return them after the rice has had all the pan time it needs.
Soft egg against firmer, lightly toasted grains is a much nicer contrast than scrambled egg that has spent the entire recipe cooking.
Chicken Fried Rice Troubleshooting
Sometimes you reach troubleshooting advice after dinner has already started going wrong.
Here is what may help the pan in front of you—and what is worth changing next time.
If several things go wrong at once, restore heat and control moisture first, then deal with texture, and season last. Extra sauce cannot rescue a cold, wet pan.
Moisture & Clumping Problems
Wet, Steamy Rice
Why: The pan cooled, became crowded or took on too much liquid.
Soggy rice moves in heavy connected clumps; properly fried grains tumble away from the spatula and settle back separately.
Save it now: Stop adding ingredients or sauce. Spread the rice over as much hot surface as possible. If the pan is badly crowded, remove half and finish the rice in two rounds.
Next time: Use a smaller batch and let released vegetable water cook away before the rice goes in.
Sticky Grains
Why: The rice entered too moist, or wet egg coated the grains before they had a chance to fry.
Save it now: Keep the rice moving over good heat and add no more liquid.
Next time: Cool fresh rice more thoroughly and cook the egg separately.
Water After the Vegetables
Why: Frozen or high-moisture vegetables released water.
Save it now: Keep cooking until the bottom of the pan is dry.
Next time: Wait for that dry-pan cue before adding the rice.
Hard Rice Clumps
Why: Refrigerator-cold rice has compacted into stubborn lumps.
Target the clump, not the whole skillet. The teaspoon-water trick is for hard refrigerator-compressed rice, not otherwise loose grains.
Save it now: Sprinkle 1–2 teaspoons water at a time onto the hard clumps, loosen them, then cook until that moisture has disappeared.
Next time: Break apart the rice before heating the pan.
Grease & Browning Problems
Greasy Rice
Why: Too much oil is sitting on the grains, often because the pan cooled and the rice stopped frying cleanly.
Save it now: Stop adding oil or sauce, spread the rice out and let the pan recover its heat.
Next time: Start with a little less oil if your pan is naturally slick.
No Toasted Edges
Why: The rice has been moved constantly in a skillet.
Save it now: Leave portions against the hot surface for 30–60 seconds before turning.
Next time: Keep the batch shallow enough that plenty of rice can actually touch the hot skillet.
Chicken, Egg & Seasoning Problems
Pale, Watery Chicken
Why: The chicken crowded or cooled the pan.
Save it now: If liquid has collected, remove the chicken temporarily and let the pan become hot again before continuing.
Next time: Spread the chicken into one layer and cook in batches if necessary.
Dry Chicken
Why: It stayed in the pan throughout the whole fried-rice cook.
Save it now: Egg and the finished seasoning may make the bite feel less dry, but overcooked chicken cannot truly be made juicy again.
Next time: Brown it, remove it and return it near the end.
Rubbery Egg
Why: The egg was fully cooked during its first turn and then cooked again.
Save it now: Break it into smaller pieces so it disperses through the rice.
Next time: Remove the egg while the curds are still tender and slightly glossy.
Dark but Bland Rice
Why: Colour arrived before balanced seasoning.
Save it now: Taste for salt, white pepper and savoury depth rather than pouring in more dark soy.
Next time: Season for flavour first; use dark soy mainly when the rice already tastes right and needs more colour.
Too Salty
Why: Strong sauces, salty protein or simply too much seasoning.
Add plain cooked rice gradually, tossing and tasting between additions so you restore balance without overshooting into blandness.
Save it now: Fold in some unseasoned cooked rice or another cooked egg if you have either available.
Next time: Reduce the sauce, especially when the protein is already well seasoned.
Ingredient Substitutions
No egg? Leave it out; the rest of the method stays the same.
No sesame oil? The rice cooks exactly the same way, although you lose some of the toasted sesame aroma at the finish.
No Oyster Sauce?
A vegetarian mushroom oyster-style sauce is the closest easy substitute and is particularly useful when avoiding shellfish.
If you have no oyster-style sauce at all, leave it out and taste the finished rice before deciding whether it needs a little more soy. The flavour will be lighter, but dinner will still be good.
No Shaoxing Wine?
Dry sherry is my first substitute. Cooking sake is also fine.
Mirin is sweeter, so leave out the sugar if necessary. For an alcohol-free version, simply omit the wine rather than replacing it with a large splash of stock.
No Soy Sauce?
Coconut aminos can be used, but they tend to be sweeter and less salty, so adjust by taste.
If gluten rather than soy is the concern, a suitable gluten-free tamari is usually the more direct substitute for regular soy sauce. Check the labels on oyster sauce, bouillon and other bottled seasonings too, since replacing the soy sauce alone does not automatically make every version gluten-free.
If you are avoiding soy entirely, remember that tamari is generally soy-based and some oyster-style sauces and bouillons also contain soy.
How to Double the Recipe
The ingredient list can double. The pan usually cannot.
Prepare twice as much chicken, rice, egg, vegetables and sauce if you need eight main servings, then divide everything into two batches for cooking.
Each batch gets enough hot surface to fry properly, and because the stovetop portion is quick, a second round is easier than fighting one overloaded pan.
If the rice starts building upward instead of spreading outward, hot pan surface—not ingredient quantity—has become the bottleneck.
What to Serve With Chicken Fried Rice
Chicken fried rice is substantial enough to be dinner on its own.
Something crisp and cool works particularly well beside the hot savoury rice. This cucumber salad brings acidity and crunch without creating another major cooking project.
Steamed or stir-fried greens, broccoli, dumplings or a light broth also fit easily.
Keep chilli crisp, chilli oil or sliced fresh chilli at the table if different people want different levels of heat.
Storage, Freezing and Reheating
Chicken fried rice reheats well, so leftovers are worth keeping.
Reheating problems need opposite fixes: very firm refrigerated grains may benefit from a tiny amount of water, whereas already-soft rice needs heat and evaporation—not another splash of moisture.
Cool them promptly and transfer them to shallow covered containers. Refrigerate within 2 hours, or within 1 hour above 90°F / 32°C. Properly refrigerated leftovers are generally best used within 3–4 days.
Freezing
Yes, chicken fried rice can be frozen.
Cool it promptly, divide it into meal-size portions and seal well. For best quality, use frozen leftovers within about 3–4 months.
You can thaw a portion overnight in the refrigerator, but you do not have to: frozen leftovers can be reheated from frozen, although they will take longer.
Reheating in the Microwave
Sprinkle over a little water if the rice seems dry and cover loosely.
Heat until steaming hot throughout, stirring once or twice so the chicken and rice warm evenly. Leftovers should reach 165°F / 74°C when reheated.
Reheating in a Skillet
Heat a small amount of oil over medium-high heat.
Add the fried rice and toss until hot. Very firm refrigerated grains can be loosened with 1–2 teaspoons water; let that moisture cook away before serving.
There is a point near the end when the pan stops looking like a collection of leftovers.
The grains move freely. The chicken has browned edges. Soft pieces of egg sit between the rice instead of disappearing into it. Then the scallion greens hit the heat and the whole kitchen suddenly smells like dinner.
Spoon it out while it is hot.
And if you make it, tell us what you used—jasmine, basmati or another rice, and wok or skillet. Those details are especially useful for the next person standing at the stove wondering whether what they have will work.
The best scalloped potatoes slump softly under the serving spoon. The slices are tender all the way through but still visible as layers, mellow onion and garlic run through the creamy sauce, and the browned edges give you the richest bites in the pan.
Scalloped potatoes aren’t difficult, but they can be frustrating when they go wrong because most problems reveal themselves late. After more than an hour in the oven, nobody wants to discover a firm layer hiding beneath a beautifully browned top—or thin sauce pooling underneath the first serving.
This version is made from scratch with Russet potatoes and a buttery whole-milk white sauce seasoned with softened onion, garlic, black pepper and an optional whisper of nutmeg. You don’t need canned soup, heavy cream or cheese to make it rich and satisfying.
How to Make Creamy Scalloped Potatoes Without a Watery Sauce
Slice 3 lb (1.36 kg) Russet potatoes about ⅛ inch (3 mm) thick. Layer them with a lightly thickened whole-milk white sauce in a shallow 9 × 13-inch (23 × 33-cm) baking dish.
Bake at 375°F (190°C) for 45 minutes covered, then uncover and bake another 25 minutes. Start checking at the 70-minute mark. A thin knife should pass all the way through without catching on a firm layer. Most pans finish in the 75–90 minute range.
Rest the potatoes for 20 minutes before serving. And don’t worry if some slices remain visible above the sauce before baking. Scalloped potatoes do not need to swim.
Make it now
Scalloped Potatoes Recipe
These easy scalloped potatoes pair thin Russet slices with a savory onion-and-garlic white sauce that stays creamy without relying on heavy cream or cheese.
Recipe at a Glance
Yield: 8 side-dish servings
Prep: 25 minutes
First check: 70-minute mark
Typical bake: 75–90 minutes
Rest: 20 minutes
Total: 2 hours to 2 hours 15 minutes
Oven: 375°F (190°C)
Dish: shallow 9 × 13 inches (23 × 33 cm), about 2 inches (5 cm) deep
Equipment
Shallow 9 × 13-inch (23 × 33-cm) baking dish
Medium saucepan
Whisk
Mandoline with hand guard or sharp chef’s knife
Aluminum foil
A similarly sized shallow dish works too. A deeper dish stacks the potatoes into a thicker layer, so heat takes longer to reach and soften the slices in the middle.
Pan dimensions can vary a little; what matters is the height of the potato stack. A noticeably deeper layer takes longer for heat to soften through the center.
Planning to finish the top under the broiler? Use a baking dish rated for broiler heat.
Ingredients
Most of the salt seasons the sauce; the rest reaches the potato layers directly.
3 lb (1.36 kg) Russet potatoes, weighed before peeling
3½ tablespoons (50 g) unsalted butter, plus more for the dish
1 medium yellow onion, about 5 oz (140 g), finely diced
2 medium garlic cloves, about 6 g, finely minced
¼ cup (30 g) all-purpose flour
2½ cups (590 ml) whole milk
2 teaspoons fine sea salt (about 11 g), divided
¾ teaspoon freshly ground black pepper
⅛ teaspoon ground nutmeg, optional
Chopped chives, parsley or a few thyme leaves, optional for serving
Instructions
Prep the Sauce and Potatoes
Heat the oven and prepare the dish. Set a rack in the center, heat the oven to 375°F (190°C), and lightly butter the baking dish.
Soften the onion and garlic. Melt the butter in a medium saucepan over medium heat. Cook the onion for 5–7 minutes, stirring occasionally, until soft and translucent. Add the garlic and cook for another 30 seconds, just until fragrant.
Make the white sauce. Stir in the flour and cook for 1 minute, until no dry flour remains. Gradually whisk in the milk in several additions, followed by 1½ teaspoons (about 8 g) salt, the pepper and optional nutmeg. Cook over medium to medium-low heat, whisking regularly, until the sauce lightly coats the back of a spoon but still pours easily. Once all the milk is incorporated, this usually takes 4–6 minutes. Remove from the heat.
Scrub, peel and slice the potatoes. Cut the Russets into even rounds about ⅛ inch (3 mm) thick. Keep the starch on the cut surfaces; don’t rinse or soak the slices. Separate any rounds that cling together.
Aim for about ⅛ inch (3 mm) throughout so the slices reach tenderness together.
Check the sauce. It may thicken while you’re slicing the potatoes. Warm it gently and whisk until it pours easily again, adding a small splash of milk only when needed.
The target is a light coating that still pours easily—looser than gravy, but with enough body to stay with the potato layers.
Layer and Bake
Layer the potatoes. Spread one-third across the dish, overlapping loosely and avoiding dense stacks. Sprinkle with one-third of the remaining ½ teaspoon (about 3 g) salt, then spoon over one-third of the sauce. Repeat twice, finishing with sauce across the top.
Cover and bake for 45 minutes. Seal the dish tightly with foil. The trapped steam gives the stacked slices time to soften before the exposed top gets too dark.
Uncover and bake another 25 minutes. Rotate the dish now if your oven browns unevenly. You should see steady bubbling around the edges and smell mellow onion, garlic and butter. The top can still be fairly pale, and some potato may still feel firm. This is usually the point when the pan starts looking like dinner.
Start checking at the 70-minute mark. Push a thin knife all the way through the potatoes. Clear resistance means they need more time, so continue uncovered in 5–10 minute stretches. Most pans finish between 75 and 90 minutes. Another 10 minutes is not a problem; give the final firm layer time to cook.
If the knife catches in the middle, keep baking; when it glides through the stacked slices, the potatoes are ready.
Finish and Serve
Take the pan out when the potatoes are tender all the way through. The knife should move through the stacked slices with very little resistance.
Brown the top only if it needs it. Once the potatoes are cooked through, a long extra bake can dry them out. A brief broil gives the top deeper browned flavor. Use a broiler-safe pan and watch closely.
Rest for 20 minutes. The hard bubbling will calm and the sauce will settle around the potato layers. Finish with chives, parsley or thyme if you want a little freshness against the creamy sauce.
Narrow seams of sauce between the slices are enough; the potatoes do not need to sit in a pool.
If you’re cooking right now, you can stop here. Once the potatoes are tender and the pan has had its 20-minute rest, dinner is ready. Everything below is optional help for choosing ingredients, fixing problems, planning ahead and serving the dish.
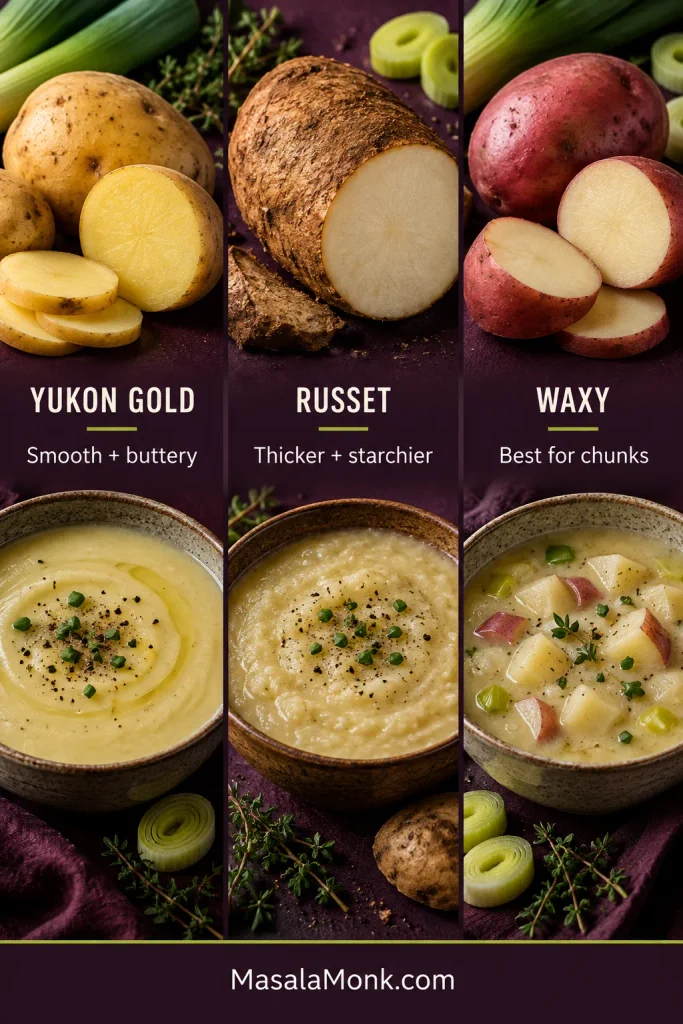
Both work. Russets give you especially tender, creamy layers; Yukon Golds stay a little firmer and more defined.
Potato
Finished texture
What happens to the sauce
Best when you want
Russet
Very tender and yielding
Releases more starch
Maximum creaminess
Yukon Gold
Firmer, tidier slices
Releases less starch
Buttery flavor with more distinct layers
Russets relax more; Yukon Golds keep cleaner layers. Use the same weight and slice thickness for either.
How to Prep Russets or Yukon Golds
Russets suit this version because some of their starch moves into the sauce as they cook, helping it cling between the slices. Their thicker skins can stand out in such thin layers, so peeling is worth the few extra minutes.
Yukon Golds are a good swap when you prefer the potatoes to keep their shape more clearly. Use the same weight and slice thickness. Their thinner skins are less noticeable, so leaving them on becomes mostly a matter of preference.
The same texture difference shows up in mashed potatoes: Russets lean lighter and fluffier, while Yukon Golds make a naturally buttery, creamier mash.
Whichever potato you choose, keep the starch clinging to the freshly cut slices. Make the sauce first, cut the potatoes afterward, and assemble the dish right away.
Keep the natural surface starch; it helps the lightly thickened milk sauce cling as the potatoes bake.
Milk, Cream and the White Sauce
Cook the onion until it is soft and translucent, not browned. At that point its flavor is sweet and mellow; garlic and black pepper round out the sauce, while optional nutmeg should stay quietly in the background.
Soft and translucent is enough; browning would push the sauce toward a deeper onion flavor.
The sauce is essentially a simple béchamel-style white sauce: butter and flour give the milk some body before it goes into the oven, then potato starch thickens it further as the layers bake.
Cook until no dry flour remains, but stop before the roux takes on brown color.
Dairy Choices for Scalloped Potatoes
Whole milk gives the best balance here—rich enough to feel creamy without overwhelming the potatoes.
Half-and-half makes a richer version. Heavy cream can replace roughly one-third to one-half of the milk when you want something more luxurious. 2% milk gives you a lighter sauce. Skim milk produces a leaner result and isn’t the best choice when creaminess is the goal.
Whole milk is the baseline; richer dairy changes richness, not the sauce endpoint.
What the Sauce Should Look Like
The sauce should tell you when it is ready. Almost milk-thin? Give it another minute. Thick enough to sit heavily on the spoon? Loosen it before layering. The sweet spot is a light coating on the spoon that still flows easily.
Scalloped Potatoes vs Au Gratin
The names overlap in modern recipes, but traditionally scalloped potatoes are built around sliced potatoes and a creamy sauce. In potatoes au gratin, cheese usually plays a defining role.
Scalloped potatoes let the creamy sauce lead; au gratin usually makes cheese a defining feature.
Cheese is optional here. Add up to 4 oz (115 g) finely grated sharp cheddar or Gruyère if you want it, either over the top when the foil comes off or stirred into the warm sauce away from direct heat.
If the scalloped potatoes you grew up with started with a can of cream-of-mushroom soup, that’s another very familiar branch of the dish. Condensed soup replaces the homemade white sauce; it isn’t something to pour on top of the recipe as written because it already brings its own starch, salt and flavor.
The same homemade-sauce-versus-canned-soup choice comes up in our green bean casserole.
What the Potatoes Should Look Like at Three Stages
Use the clock as a checkpoint, then let the pan confirm what happens next. The visual changes matter most as the casserole moves from covered to uncovered to rested.
Use the clock as a checkpoint; center tenderness still decides when the casserole is done.
Before baking
The sauce should flow easily between the slices, and the potato depth should stay reasonably even. Perfect rows are optional; loose overlap matters much more.
Loose overlap leaves pathways for sauce and heat; tight stacks make uneven cooking more likely.
Some upper slices can stay visible before baking. The sauce should reach through the layers without leaving the potatoes sitting in a pool of liquid.
Some potato can stay visible before baking. Extra milk for reassurance can leave too much liquid after the casserole cooks.
When the foil comes off
Look for steady bubbling around the perimeter and a surface that may still be fairly pale. The upper slices will have begun to yield, while the potatoes lower in the pan can still need more time. The butter, onion and garlic should be noticeably fragrant by now.
After uncovering, evaporation concentrates the sauce while exposed potato surfaces finally get a chance to brown.
When they’re done
At the finish, the potatoes are tender all the way through and the edges have picked up some color. The sauce bubbles with more body than it had earlier in the bake. After resting, it clings around the slices instead of running across the plate.
Color is secondary: a tender casserole may still have pale patches between deeper browned edges.
Why They Turn Watery
Watery scalloped potatoes rarely come down to one mistake. Potato quantity, surface starch, sauce consistency, pan depth, the covered and uncovered stages, and the final rest all affect what reaches the plate.
Most watery pans trace back to one of these six decisions.
How to Prevent Watery Scalloped Potatoes
Use the full potato quantity. The 2½ cups (590 ml) milk are balanced around 3 lb (1.36 kg) potatoes.
Keep the surface starch. Rinsing the slices removes starch that otherwise helps the sauce gain body.
Give the milk a head start. Lightly thickening it before assembly means the potatoes aren’t beginning their bake in plain liquid.
Keep the potato layer reasonably shallow. A thicker vertical stack needs more time for heat to work through it evenly.
Let the covered stage work first. The potatoes need moisture while they soften. Once the foil comes off, evaporation can concentrate the sauce and the exposed edges can begin to brown.
Rest before deciding the sauce is too thin. It is naturally at its loosest while everything is still bubbling hard.
Loose isn’t automatically watery. A pan straight from the oven can look looser than it will 20 minutes later. Give it the rest first. Only then decide whether there is genuinely too much thin liquid.
Judge the sauce after the full 20-minute rest. Thin liquid that still separates then is different from the normal looseness of a bubbling-hot pan.
Troubleshooting
Start with what you can see and feel. Most problems have a straightforward next move, and some apparent problems need nothing more than patience.
What you see
What to do
Loose sauce straight from the oven
Rest for 20 minutes before judging it
Thin liquid still pooling after the rest
When the potatoes are fully tender, return the pan uncovered for 5–10 minutes, then let it settle again
Whole middle still firm
Cover again if the top is already dark and continue baking in 5–10 minute stretches
Only random slices stay firm
Keep this batch cooking; next time watch for thicker rounds or slices stuck together
White sauce has flour lumps before layering
Whisk firmly while warm and press obvious lumps against the side of the saucepan; add milk more gradually next time
Sauce is too thick before layering
Warm gently and whisk until pourable, adding a small splash of milk only as needed
Potatoes are tender but the top is pale
Use a brief broiler finish in a broiler-safe dish
Finished potatoes seem dry
Stop the regular bake as soon as the potatoes are cooked through; use brief high heat for extra browning
The sauce still looks watery after resting
Visible thin liquid after the 20-minute rest is different from the normal looseness of a piping-hot pan. When the potatoes are already tender, return the dish to the oven uncovered for another 5–10 minutes. Watch closely: once the excess liquid is gone, creamy can turn dry surprisingly quickly.
The potatoes are cooking unevenly
A firm layer through the whole middle simply needs more time. Cover the dish again when the top is already sufficiently browned and keep baking until the potatoes are cooked through.
One broad firm zone usually needs more cooking time; scattered firm pieces point back to uneven thickness or slices stuck together.
Random firm slices point to something different: thickness or stacking. A few thicker rounds, or several slices pressed tightly together, can lag behind everything around them.
Two slices stuck together cook like one thick slice, so separate little stacks before layering.
The white sauce looks too thick or lumpy
Deal with this before layering. Sauce that has simply thickened while waiting usually needs gentle heat and whisking, perhaps with a small splash of milk. Flour lumps are easier to correct while the sauce is still in the saucepan: whisk firmly and press stubborn lumps against the side until they break down.
Once the potatoes are cooked through and the rested sauce clings around the slices, stop fixing things. They’re ready to eat.
A slight bend on the spoon signals tender layers that still hold together.
350°F (175°C): the potatoes will cook more slowly. Begin checking around the 80-minute mark and continue until no firm layer remains.
375°F (190°C): use the main method. This temperature gives a comfortable balance between steady cooking and controlled browning.
400°F (205°C): the exposed top will color faster, so don’t let browning convince you the potatoes underneath are finished. Keep the covered-first method.
During the uncovered stage, check the potatoes themselves. Once the top has enough color, loosely cover it again if the layers underneath still need more time.
Once the center is tender, use a brief broil for color instead of prolonging the bake.
425°F (220°C): save this temperature for the finish. Once the potatoes are nearly or completely cooked, a short burst of higher heat can deepen the color. A full bake at 425°F risks dark edges long before the stacked slices are ready.
Higher heat browns sooner. Whatever temperature you use, let tenderness through the center—not surface color—decide when the potatoes are done.
Make-Ahead Options
The white sauce can be made up to 2 days ahead, cooled, covered and refrigerated. Rewarm it gently until pourable before assembling the potatoes. That removes a useful chunk of work without leaving raw slices sitting around overnight.
You can also assemble the whole dish several hours in advance, cover it tightly and refrigerate. A cold pan will take longer to bake, and the delay varies with the baking dish and how thoroughly chilled everything is.
Don’t simply tack a fixed 10 minutes onto the recipe. Keep the dish covered while the potatoes warm and begin to soften, then use their texture to decide when they’re ready for the final uncovered stage.
For this method, skip the overnight water soak. Soaking prevents sliced potatoes from browning, but it also washes away some of the surface starch we’re deliberately keeping to help the sauce.
For a busy holiday, the fully baked day-ahead route is the most predictable; shorter lead times leave more of the cooking for serving day.
For a holiday, bake it the day before
On a holiday, predictability is worth more than doing everything at the last minute. If the ham is warming, vegetables are waiting and somebody needs the oven for rolls, scalloped potatoes are a terrible thing to discover still have a hard center.
Fully baking them a day ahead removes that gamble. It is especially useful beside a honey glazed ham, which has its own warming and glazing schedule.
Bake the potatoes normally and let them rest.
Cool briefly, then cover and refrigerate the pan within 2 hours.
Reheat covered at 350°F (175°C) until the center reaches 165°F (74°C).
Uncover near the end when the surface needs refreshing.
Bake until fully tender the day before. Serving day becomes reheating and refreshing the surface, not another round of checking for doneness.
Another way to ease holiday oven traffic is to move the main elsewhere: a slow cooker whole chicken leaves the oven almost entirely to the potatoes.
Changing the quantity is straightforward. Keeping roughly the same depth in the baking dish matters more than keeping exactly the same footprint.
Scale sideways, not deeper. Two shallow pans cook more predictably than one giant dish piled twice as high.
Double the pan area, not the stack height. Two shallow pans also give you more browned edges.
Pan Sizes and Serving Amounts
Batch
Side servings
Potatoes
Dish
Timing
Half
4
1½ lb (680 g)
8 × 8-inch (20 × 20-cm) shallow dish
Start checking a little before the standard batch; similar depth means the total cooking time may remain fairly close
Standard
8
3 lb (1.36 kg)
9 × 13-inch (23 × 33-cm) dish
First check at 70 minutes
Double
16
6 lb (2.72 kg)
Two 9 × 13-inch dishes
Allow extra time when both pans share the oven
Large crowd
Multiply standard batches
As needed
Several shallow pans
Judge each pan separately
The standard recipe uses roughly 6 oz (170 g) raw potato per side serving. That’s comfortable when several other dishes are on the table; make more when the potatoes are likely to be one of the stars.
Preserve casserole depth when scaling; a double batch belongs in two shallow 9 × 13-inch pans.
For two people, halve the recipe and use an 8 × 8-inch (20 × 20-cm) shallow dish. You’ll get about four side portions, so there should be enough for dinner and leftovers.
For a family roast-style meal, the standard pan fits naturally beside a slow cooker brisket with onion gravy. The slow cooker handles the beef while the potatoes get the oven.
For a Holiday Crowd
For Thanksgiving, Christmas or Easter, use two ordinary 9 × 13-inch pans instead of crowding 6 lb (2.72 kg) potatoes into one deep dish. Rotate them when your oven has obvious hot spots. You may need a little extra time—and you get twice as many browned corner pieces, which is hardly a downside.
Edges lose moisture fastest, concentrating the sauce and creating especially browned, flavorful bites.
What to Serve With Scalloped Potatoes
Scalloped potatoes already bring richness, tenderness and plenty of creaminess. The rest of the plate benefits from browned meat or fish, something green, and enough freshness or acidity to keep everything lively.
Pair the rich potatoes with a browned main and something green for contrast.
With pork: the browned edges and sticky sweet-savory glaze on honey garlic pork chops are especially good against a spoonful of creamy potatoes. Add broccoli, green beans or a sharp salad and dinner is done.
On a holiday table: ham, turkey and roast beef all work beautifully. For something brighter alongside them, roasted carrots bring caramelized edges, color and just enough sweetness to wake up a rich plate.
With fish:honey garlic salmon has enough browned, garlicky glaze to stand beside the potatoes without needing another heavy side.
Storage, Reheating and Freezing
Cover and refrigerate leftovers within 2 hours. The USDA leftovers guidance recommends using refrigerated leftovers within 3–4 days and reheating them to 165°F (74°C). Use that temperature as the target whichever reheating method you choose.
Refrigeration preserves texture better. Freeze for longer storage when needed, knowing the potatoes and dairy sauce may return a little less smoothly after thawing.
One serving: cover loosely and microwave in short intervals until the middle reaches 165°F (74°C). A teaspoon or two of milk around the serving can loosen sauce that has tightened in the refrigerator.
Several servings: cover and reheat at 350°F (175°C). Start checking after about 20 minutes and continue until the potatoes reach 165°F (74°C) in the middle.
A whole pan from the refrigerator: cover and reheat at 350°F (175°C). Begin checking after about 30 minutes and continue until the center reaches 165°F (74°C). Uncover for the final 5–10 minutes when the top needs refreshing.
Gentle reheating relaxes chilled layers; a little milk can loosen sauce that has tightened in the refrigerator.
Can you freeze scalloped potatoes?
You can, although refrigeration preserves the texture better. Potatoes can become slightly mealier after freezing and thawing, and the dairy sauce may not return quite as smoothly.
If you do freeze them, once the potatoes are chilled, portion them into airtight containers and freeze for up to 2 months for best quality. Thaw overnight in the refrigerator and reheat gently. A small splash of milk can help when the sauce has tightened.
A good pan of scalloped potatoes doesn’t need to stand rigidly on the plate. Spoon into it and you should find tender layers, browned edges, mellow onion and garlic, and enough creamy sauce clinging between the slices to make the corner pieces especially hard to resist.
After resting, the sauce should travel with the potato layers instead of running across the plate.
Give the potatoes that last bit of resting time, then bring the pan to the table while the edges are still warm and browned. That’s when scalloped potatoes are at their best.
The final tadka announces dinner before the bowl reaches the table. Cumin crackles, garlic turns gold, and hot ghee carries the smell of red chilli across the kitchen. Underneath that dramatic finish, the dal has a quieter job: it should fall creamy from the spoon, with no watery separation, no gluey heaviness and no firm lentils interrupting each mouthful.
This Dal Tadka recipe gives you the familiar restaurant-style Punjabi yellow dal, along with the choices that shape it. Start with toor dal for the classic version, blend in a little yellow moong for a softer finish, and cook it in a pressure cooker, Instant Pot or heavy saucepan. The finished dal is creamy without feeling heavy, warmly spiced through the pot and bright with fresh cumin and garlic at the surface.
You will judge the lentils by how easily a grain crushes, the consistency by how the dal falls from the ladle and the tadka by the colour of the garlic—not by timing alone.
The disappointing bowl often contains all the right ingredients. Usually, one stage was rushed: the lentils came off the heat while still grainy, the tomato base remained raw, the consistency was never corrected, or the garlic crossed from golden to bitter while nobody was looking.
The MasalaMonk rule: the lentils decide when the dal is cooked; the final simmer decides its texture; the fresh tadka decides how memorable it tastes.
Quick Answer: How to Make Restaurant-Style Dal Tadka
Cook the dal: pressure-cook 1 cup toor dal (200 g) with 2¾ cups water (660 ml), turmeric and part of the salt.
In a stovetop cooker, cook for 8 minutes at pressure. In an Instant Pot, use 7 minutes for soaked dal or 8 minutes for unsoaked dal, followed by a full natural pressure release. Every grain should crush without resistance.
Build the body: whisk the lentils partly smooth, combine them with an onion-tomato masala cooked until glossy, then simmer with kasuri methi and enough hot water to reach a creamy, pourable consistency.
Finish at the table: bloom cumin in ghee, add evenly sliced garlic, then add dried chilli as the garlic begins colouring and hing for the final few seconds. Stop the garlic at pale-to-medium gold, remove the pan from the heat, add Kashmiri chilli powder and pour the tadka immediately.
Dal Tadka is also written as Dal Tarka or Tarka Dal. Tadka, tarka and chaunk all describe spices and aromatics bloomed in hot fat. This Punjabi version begins with toor/arhar dal.
Pick your finish
Choose your Dal Tadka style
One pot can feel light and comforting, creamy and restaurant-style, or bold and smoky. Decide before building the masala and tadka, because each style changes how far you cook the tomatoes, how thick you leave the dal and how much fat you use.
Style
What it tastes like
How to finish it
Everyday home-style
Light, familiar and weeknight-friendly
Keep the dal a little loose; use about 1 tablespoon fat in the base and 1 tablespoon in the final tadka; cook the tomato only until softened; skip cream and smoke; finish with lemon
Restaurant-style
Creamy, rounded and aromatic with a glossy red tadka
Whisk the dal partly smooth, cook the tomato base thoroughly, use kasuri methi and make the full garlic-ghee tadka
Dhaba-style
Bolder, thicker, garlicky and slightly smoky
Use the full tadka, add extra sliced garlic, keep the dal slightly thicker and use the optional short dhungar
Choose a lighter home-style, creamy restaurant-style or bolder dhaba-style finish.
These are three finishes for the same base dal, adjusted through consistency, tomato reduction, garlic, fat and optional smoke.
Make it now
Restaurant-Style Dal Tadka Recipe
Soft toor dal is stirred into a glossy onion-tomato masala, loosened to a creamy pour, then finished with a fresh garlic-cumin tadka.
Yield4 main-dish or 5 side servings (about 40–50 g dry dal per person)
PrepAbout 15–20 minutes
Active cookingAbout 20–30 minutes
Pressure cycleAbout 30–45 minutes, including heating and natural release
Total elapsedAbout 55–70 minutes, plus optional soaking
Saucepan totalAbout 80–110 minutes, plus soaking
Dietary note: Vegetarian; vegan with oil and no butter or cream; gluten-free when the hing is labelled gluten-free.
These windows overlap: chop while the cooker heats, then build the masala as the pressure releases. The total reflects the real clock rather than adding every line together.
Equipment
3–4 litre stovetop pressure cooker, 6-quart Instant Pot or a heavy 3–4 litre saucepan
Medium frying pan or kadai for the onion-tomato masala
Small, preferably deep tadka pan with a long handle; otherwise use your smallest heavy saucepan or frying pan
Whisk, wooden spoon or dal ghutni
Heatproof serving bowl and ladle
Optional: natural charcoal, tongs and a small steel bowl for dhungar
Ingredients
For cooking the dal
1 cup toor/arhar dal (200 g / 7 oz), or ¾ cup toor plus ¼ cup yellow moong
2¾ cups water (660 ml) for pressure cooking
½ teaspoon turmeric
1¼ teaspoons fine salt (about 7–8 g), divided, plus more after tasting
½–1 cup hot water (120–240 ml), as needed after cooking
For the onion-tomato masala
1½ tablespoons ghee or neutral oil (22 ml)
1 teaspoon cumin seeds
1 medium onion, finely chopped (about 140 g / 5 oz)
10–12 g finely grated ginger (about 1 packed tablespoon)
4 garlic cloves, finely chopped or crushed (about 12 g)
1–2 green chillies; slit for gentler heat or finely chop to spread the heat through the dal
2 medium tomatoes, finely chopped or crushed (about 250 g / 9 oz)
1 teaspoon ground coriander
½ teaspoon Kashmiri chilli powder; use mild paprika only if Kashmiri chilli is unavailable
¼ teaspoon garam masala
1 teaspoon kasuri methi, crushed between your palms
For the final tadka and balance
1½ tablespoons ghee (22 ml), or oil for a vegan version
1 teaspoon cumin seeds
5 medium garlic cloves, thinly and evenly sliced, about 2 mm thick (about 15 g)
1–2 dried red chillies, broken in half
Up to a scant ⅛ teaspoon hing/asafoetida, optional; use less when yours is strong or pure, and check compounded hing for wheat when cooking gluten-free
½ teaspoon Kashmiri chilli powder
2–3 tablespoons chopped coriander leaves/cilantro
Lemon juice: 1–2 teaspoons, if the finished dal needs brightness
Optional for a richer or smoky finish
Butter or cream: 1 tablespoon
Dhungar: 1 piece natural lump charcoal, about 1 inch/2.5 cm, plus ½ teaspoon ghee
How the ingredients work together
Think of the ingredients in three layers: lentils create body, the masala supplies depth, and the final tadka carries aroma.
Use the waiting time: chop the onion, tomato, ginger and garlic while the cooker builds pressure. Cook the masala while the pressure releases. Measure the finishing-tadka ingredients before the garlic enters hot ghee; that last stage moves too quickly for cupboard hunting.
Instructions
1. Rinse and optionally soak the dal
Put the dal in a bowl and rinse it three or four times, rubbing it gently between your fingers, until the water changes from very cloudy to lightly hazy. Drain well.
Soaking for 20–30 minutes is optional for a pressure cooker or Instant Pot, but it helps older lentils cook more evenly. If using an ordinary saucepan, soak toor dal for 1–2 hours; older lentils benefit from the longer end.
Lightly hazy water is enough; the goal is to remove obvious surface residue, not rinse until the water becomes perfectly transparent.
2. Cook until the lentils completely soften
Add the drained dal, 2¾ cups water, turmeric and ½ teaspoon salt to your cooker.
Choose your cooking method
Stovetop pressure cooker: bring to full pressure over medium-high heat. Lower to medium and cook for 8 minutes; use 10 minutes for older, unsoaked lentils. Turn off the heat and let the pressure fall naturally. Cooker designs and burners vary, so use elapsed pressure time and the grain test rather than whistle count.
Instant Pot: cook on High Pressure for 7 minutes when soaked or 8 minutes when unsoaked. Allow the pressure to release naturally until the float valve drops; do not force an immediate release for this starchy, expanding food.
Saucepan: begin with 4 cups water instead of 2¾ cups. Bring to a boil, skim excessive foam, then simmer partly covered for 45–75 minutes after soaking. Stir occasionally and keep a kettle of hot water nearby; older lentils may need longer.
Softness matters more than looseness here: water can be adjusted later, but firm lentil centres must be cooked out now.
Pressure-cooker safety: follow the manual for your model. In an Instant Pot, keep lentils, water and other ingredients below the ½ fill line used for expanding or starchy foods; overfilling can obstruct the steam-release path. Never cover or obstruct the valve while pressure is releasing. For model-specific details, check the Instant Pot safety guidance (opens in a new tab).
Lift out one grain, let it cool for a few seconds, then press it between your fingers—or crush it against the side of the pot with a spoon. It should collapse easily with no firm or chalky centre. If it still feels grainy, add a splash of hot water and cook it longer. Once the grain yields without resistance, the hardest part is done.
This single-grain test outranks the timer because older or drier lentils may need longer even when every measured quantity stays unchanged.
3. Whisk to a creamy texture
Whisk or mash the cooked dal for 20–30 seconds, breaking down most of the grains while leaving a little natural texture.
The cooker may open to dal far thicker than you expected. That is normal. Hold back the extra water for now; the masala adds moisture, and the final flow is easier to judge once everything is together.
Whisking changes structure, not doneness: it makes softened grains cohesive, but it cannot rescue lentils that remain firm inside.
4. Build the onion-tomato masala
Heat 1½ tablespoons ghee or oil in a medium pan over medium heat. Add the cumin. It should sizzle promptly and smell nutty within 15–20 seconds. If it sits silently, the fat is not hot enough.
Add the onion with ⅛ teaspoon of the measured salt. Cook for 6–8 minutes, stirring regularly, until soft and golden at the edges and free of its raw sharpness.
Edge colour is the safest stopping cue because it removes raw onion sharpness without introducing the heaviness of deep browning.
Add the ginger, chopped garlic and green chilli. Cook for 60–90 seconds, until fragrant and the garlic begins turning pale gold.
Reduce the tomatoes until glossy
Add the tomatoes. Cook over medium heat for 7–10 minutes, stirring and pressing them against the pan, until they collapse into the onion, lose their raw smell and form a cohesive, glossy masala. Small beads of fat may appear around the edges.
The masala should smell rounder and sweeter now. This is the patient part: extra butter later cannot replace tomatoes that still taste raw.
Judge readiness by movement as well as colour: once done, tomato and onion move together instead of releasing watery liquid separately.
Lower the heat. Add ground coriander and the first ½ teaspoon Kashmiri chilli powder. Stir for 20–30 seconds. If the pan looks dry, add one tablespoon water rather than letting the spices scorch.
5. Combine, season and set the consistency
Pour the cooked dal into the masala pan, or scrape the masala into the cooker if that gives you more room. Stir until the colour and texture are even.
A brief simmer after combining lets the masala season the lentils evenly instead of remaining concentrated in isolated pockets.
Add ½ cup hot water, the garam masala, crushed kasuri methi and ½ teaspoon of the measured salt. Reserve the final ⅛ teaspoon until after tasting. Bring the dal to a gentle simmer and cook uncovered for 4–6 minutes, stirring once or twice.
Set the final consistency
Judge the texture while the dal is hot. It should pour from a ladle in one creamy stream, then settle back into the pan. This flow carries the tadka through the dal instead of swallowing it.
Watch the ribbon’s leading edge: it should fall as one creamy stream rather than break into lumps or leak clear liquid.
If the dal drops in a mound, add hot water in ¼-cup/60 ml increments. If clear liquid runs ahead of the lentils, whisk briefly and simmer uncovered until the mixture comes together. Stop while it is a little looser than you want at the table; it will thicken as it rests.
Taste the dal before making the tadka: check the salt, tomato sharpness and body. Add the reserved ⅛ teaspoon salt if needed. If the tomato still tastes raw or sharp, simmer for another 2–3 minutes.
Stir in the optional butter or cream, then turn off the heat. Hold the lemon until after the tadka so you can judge the complete spoonful and keep dairy smooth. After the fresh tempering goes in, avoid prolonged simmering; it will flatten the aroma.
6. Make the garlic tadka
The order follows heat tolerance: cumin needs the longest contact, garlic needs controlled browning, and chilli powder needs residual heat only.
Put the serving bowl close to the stove and measure every tadka ingredient before heating the ghee. Once the garlic starts colouring, there is no useful pause button.
Heat 1½ tablespoons ghee in a small, deep pan over medium heat until fully melted and shimmering, but not smoking. Add the cumin seeds and let them sizzle actively for about 10–20 seconds.
Control the garlic colour
Add the evenly sliced garlic and reduce the heat to medium-low. Cook, swirling or stirring, until the edges begin to turn pale gold. Add the dried red chillies, then add the hing for the final 5–10 seconds. Pull the pan when the garlic is pale to medium gold; it will continue darkening in the hot ghee.
Garlic continues darkening after the pan leaves the flame, so stop one shade earlier than the colour wanted on the finished dal.
Bloom, pour and divide the tadka
With the pan off the heat, add ½ teaspoon Kashmiri chilli powder and swirl immediately. The ghee should turn red without the chilli powder blackening.
Residual heat is enough to colour the ghee; returning the pan to the flame adds no benefit and can scorch the chilli powder.
Pour about three-quarters of the sizzling tadka over the dal while the ghee is still hot and aromatic.
The brief crackle confirms the tadka is still hot enough to release aroma, although the surface should remain mostly creamy rather than oily.
Stir once so most of the tempering travels through the pot, then spoon the remainder over the surface and finish with chopped coriander.
7. Let the tadka settle, then serve
Let the tadka sit for a moment, then taste a spoonful that catches both dal and tempering.
If the dal tightened while the tadka was cooking, gently stir in warm water one tablespoon at a time. Once the texture is right, add lemon ½ teaspoon at a time, up to 2 teaspoons, if the spoonful still needs lift.
Serve while the garlic is still fragrant and the red ghee remains visible. Dal continues thickening on the way to the table, so finish it slightly looser than the texture you want at serving. When rice is part of the meal, MasalaMonk’s guide to cooking rice covers basmati, stovetop, cooker and Instant Pot methods.
Use the exposed yellow dal as a proportion check: if tempering hides most of the surface, the finish is heavier than necessary.
Crush. Ribbon. Gold. Crush one lentil: it should collapse. Lift one ladle: the dal should fall in a broad creamy ribbon. Look at the garlic: it should be golden. When all three agree, carry the dal to the table.
These checks isolate three failure points—lentil doneness, final consistency and tempering control—so a beautiful surface cannot hide an undercooked base.
Make Dal Tadka work in your kitchen
The main recipe gets dinner on the table. The sections below help when your lentils are older, your cooker behaves differently or you prefer the dal lighter, thicker or smokier.
For a Punjabi-style Dal Tadka, toor dal is the most dependable starting point. It may also be labelled arhar dal, tur dal, tuvar dal or split pigeon peas. These names refer to the same lentil.
Some restaurants mix in yellow moong, masoor or a little chana dal. That does not make one version authentic and another wrong. It changes what the spoon feels like: moong softens the body, masoor breaks down quickly, and chana leaves a faint nutty texture.
Choose by spoon feel, not colour alone: toor stays classic, moong softens, masoor smooths and chana leaves more visible texture.
How common dal blends change the texture
Dal choice
Result
What changes
100% toor/arhar dal
Classic, creamy and clean-tasting
Best default for this recipe
¾ toor + ¼ yellow moong
Softer, lighter and slightly creamier
Cooks at a similar pace and is the easiest blend to use
¾ toor + ¼ masoor
Very soft and cohesive because masoor breaks down earlier
Begin with the all-toor timing; let the toor grains decide doneness and expect to adjust the water
Toor with a little chana dal
Nutty with more visible texture
Soak first; chana dal decides the minimum cooking time
100% yellow moong
Light, mild and quick-cooking
Produces a different everyday dal and deserves its own method
Whole green moong
Earthy, hearty and textured
Needs soaking and a longer cook; do not use as a direct swap here
How common lentil choices change the texture and cooking behaviour of Dal Tadka.
Blend ratios change the dal’s body before butter or cream is added, making lentil choice the recipe’s first texture decision.
For the clearest starting point, use 200 g toor dal. For a softer blend, use 150 g toor plus 50 g yellow moong. Begin checking at the same time, then let the softened grain decide whether it needs longer.
Ingredients that shape the flavour
Garlic works twice. Chopped garlic melts into the masala, while evenly sliced garlic gives the fresh tempering its recognisable aroma and golden pieces.
Keep kasuri methi and garam masala in the background. One teaspoon kasuri methi gives the dal its warm restaurant-style aroma, while ¼ teaspoon garam masala deepens the base without taking over. If your blend smells flat, MasalaMonk’s homemade garam masala recipe explains how the whole-spice balance is built.
No kasuri methi? Skip it instead of replacing it with fresh fenugreek. The cumin-garlic tempering will still give the dal a satisfying finish.
Handle Kashmiri chilli and hing gently. Take the tadka pan off the flame before adding the chilli powder so it blooms red without scorching. Hing needs just the final few seconds in the hot fat, and strong or pure hing needs far less than a mild compounded product. For gluten-free Dal Tadka, check the label because some compounded asafoetida contains wheat flour.
Regional note: this Punjabi version is led by cumin and garlic. Mustard seeds and curry leaves are central to many other regional dals, especially in South Indian cooking, but this recipe does not need them.
Pressure cooker, Instant Pot or saucepan?
A stovetop pressure cooker is fastest, an Instant Pot asks for the least attention, and a saucepan lets you watch the lentils soften. Choose the method that fits how you like to cook; the grain test stays the same.
Method
Soaking
Starting water
First timing window
Ready when
Stovetop pressure cooker
Optional 20–30 min
2¾ cups / 660 ml
8 min at pressure; 10 for older unsoaked dal; natural release
A grain collapses immediately with no chalky centre
Instant Pot
Optional 20–30 min
2¾ cups / 660 ml
7 min soaked or 8 min unsoaked; full natural release
The dal whisks creamy with almost no resistance
Heavy saucepan
1–2 hr for toor
Begin with 4 cups / 950 ml
45–75 min gentle simmer; older dal may need longer
No firm grains remain and the liquid no longer looks separate
Starting points for toor dal in a stovetop pressure cooker, Instant Pot or heavy saucepan.
Pressure time and saucepan simmer time measure different things; compare these methods by attention and final softness rather than numbers alone.
Cooker size, heat and lentil age vary; the softened grain gives the final answer.
Restaurant-style Dal Tadka tastes layered because each stage keeps its own job. Tender lentils create the creamy body. The reduced onion-tomato masala carries sweetness and savoury depth through every spoonful. The garlic-cumin tadka goes in at the end, while its aroma is still vivid. That is where the richness comes from—not oil floating on top.
Keep the final tadka out of a prolonged simmer: cooked masala tolerates time, but fresh garlic-cumin aroma quickly becomes quieter.
How thick should Dal Tadka be?
The ideal texture depends on how you are serving it, but restaurant-style Dal Tadka should be creamy and pourable: cohesive on the spoon, then willing to flow back into the pot.
What you see
What it means
What to do
Dal sits in a mound and barely moves
Too thick
Add hot water ¼ cup/60 ml at a time
Dal falls in a broad ribbon and settles slowly
Creamy restaurant-style flow
Stop adjusting; it will thicken slightly as it rests
Clear liquid runs ahead of lentil solids
Too thin or not yet cohesive
Whisk briefly and simmer uncovered
Dal feels creamy but turns stiff after 10 minutes
Normal cooling and starch thickening
Keep it slightly loose before serving
Use the ladle flow—not thickness in the pot alone—to judge the final consistency.
Use the comparison below to identify the problem before adjusting. Change one thing at a time, then give the dal a moment to settle before judging again. For a sturdy flatbread such as MasalaMonk’s jowar-bajra roti, stop a little thicker; for rice, leave it looser. If dinner runs five minutes late, restore the flow just before serving.
The same bowl can be too thick or merely separated, so watch how it falls before deciding whether to add water or simmer.
Dal Tadka troubleshooting
Most disappointing pots are recoverable. Before reaching for more spice, ask which stage needs another minute. Grainy dal needs cooking, separated dal needs whisking and reduction, and a weak finish usually needs balance or a fresh tempering.
Four visible failures point to different causes; diagnose the texture or colour first instead of automatically adding more spice, water or fat.
Fix texture and consistency problems
Problem
Likely cause
Most useful fix
Watery or separated dal
Undercooked lentils, too much adjustment water or too little whisking
Confirm the grains are soft, whisk briefly and simmer uncovered; do not add flour or starch
Grainy dal
Old lentils, hard water or insufficient pressure time
Add ¼–½ cup hot water and pressure-cook 2–3 minutes more, or simmer covered until the grains collapse; if this repeats across batches, try filtered water
Dal became stiff while waiting
Normal starch thickening as it cools
Fold in warm water a tablespoon at a time; recheck salt only after the texture is right
Correct the physical texture before changing the seasoning.
Fix flavour and tempering problems
Problem
Likely cause
Most useful fix
Flat flavour
Too little salt or acidity, raw masala, or a tadka made too early
Check salt first, then add lemon by the teaspoon; cook raw tomato longer or make a small fresh tadka
Bitter tadka
Garlic or chilli powder burned
Discard and remake the small tadka; stop garlic at pale-to-medium gold and add chilli powder off heat
Too much oil on top
The tadka was too large for the amount of dal
Spoon off excess and loosen the dal if needed; use the lighter home-style quantity next time
Tomato tastes sharp or raw
The masala was combined too soon
Simmer before adding the final tadka until the raw smell disappears and the base looks cohesive
Garlic softened or disappeared
Uneven slices or all the tadka was stirred through early
Slice evenly, fry just before serving and reserve part of the tadka for the surface
Match the flavour problem to the stage that created it.
When the garlic and red ghee disappear into the pot, the problem is usually distribution rather than quantity. Stir most of the tadka through for flavour in every serving, but reserve a smaller portion for the surface so the freshest aroma and crispest garlic remain noticeable.
Dividing the tadka solves two jobs at once: flavour throughout the pot and a fresher aromatic layer at the surface.
When the texture is right but the flavour is flat
When the texture is right but the flavour remains dull, taste in this order: salt, acidity, tomato reduction and tadka freshness. If the garlic is dark brown, the chilli smells scorched or the fat tastes bitter, remake the tempering. Two fresh minutes are better than letting burnt garlic follow every spoonful.
For bolder dhaba-style dal, change four things instead of doubling every spice.
Keep the dal slightly thicker, but still loose enough to settle naturally.
Add two extra sliced garlic cloves to the final tadka.
Taste first; if the kasuri methi is too quiet, add up to another ½ teaspoon during the final simmer.
Use a brief charcoal dhungar for smoke.
How to smoke the dal without making it bitter
The same brief charcoal method appears in MasalaMonk’s butter chicken recipe, but Dal Tadka needs a lighter exposure.
Working beneath strong ventilation, heat the 1-inch/2.5 cm piece of natural lump charcoal—not a self-lighting briquette—over a flame until it glows red in places and develops a light grey surface. Handle it only with tongs.
Put a small steel bowl in the centre of the finished dal and place the hot charcoal inside it without letting the charcoal touch the food. Drizzle ½ teaspoon ghee over the charcoal and immediately cover the pot.
Treat one minute as the first checkpoint, not a minimum target; smoke is easy to add, whereas oversmoked dal cannot be corrected.
Start with 60 seconds. Uncover, remove the bowl and taste. Smoke is easy to add and impossible to remove. Repeat for one more minute if you deliberately want a stronger smoke.
Leave the used charcoal in a heatproof metal container until it is completely cold before disposal.
Once the lentils are tender and the tadka is fresh, the recipe is easy to adapt. Change one thing at a time so the garlic, tomato and spices still taste as though they belong together.
Vegan Dal Tadka
Use sunflower, rice bran, canola or another neutral oil for the masala and tadka, then skip butter and cream. Mustard oil gives the dal a sharper, more mustard-led flavour; choose it when that is the direction you want.
No-onion, no-garlic Dal Tadka
Skip the onion and garlic. Use ginger, cumin, tomato and kasuri methi, then finish with lemon. Use up to the full scant ⅛ teaspoon hing for a mild compounded product; use considerably less when it is strong or pure. A South Indian no-onion version may use mustard seeds, curry leaves and a different spice balance.
Lasooni or extra-garlic Dal Tadka
Add two or three extra garlic cloves to the final tadka and reserve the crispest slices for the top. For a gentler garlic flavour, use two cloves in the masala and four in the tadka. Fried garlic creates the recognisable lasooni aroma more clearly than simply adding more crushed garlic to the base.
Milder family version
Use one green chilli or omit it, choose mild Kashmiri chilli for colour and leave the dried chilli whole so it perfumes the ghee without releasing as much heat. Adults can add chilli at the table.
Fresh, lighter home-style version
Use 1 tablespoon oil in the masala and 1 tablespoon ghee or oil in the tadka. Cook the tomatoes for 3–5 minutes, until softened but still bright; skip cream and smoke, then finish with lemon and coriander. A crisp cucumber salad makes a natural cool contrast.
Dal Tadka vs Dal Fry: what is the difference?
Restaurants and home kitchens often use the names loosely, but the usual distinction is about technique.
Feature
Dal Tadka
Dal Fry
Defining move
A fresh tempering is poured over or stirred into the finished dal
Cooked dal is simmered in a fried onion-tomato masala
Appearance
Often has visible ghee, garlic and chilli on top
Usually looks more uniformly mixed
Flavour emphasis
Fresh cumin, garlic and chilli aroma
Deeper cooked masala flavour
Can a recipe use both?
Yes
Yes
A final fresh tempering is the clearest practical cue for Dal Tadka.
Because one recipe can use both techniques, identify the difference by where the masala and fresh tempering do their work.
This recipe uses both a cooked masala base and a final tempering, a common restaurant-style approach. The fresh cumin, garlic and chilli on top make the dish unmistakably Dal Tadka.
What to serve with Dal Tadka
Dal Tadka can anchor a quiet weekday dinner or sit within a larger North Indian spread. For the simplest meal, rice, dal, curd and pickle are enough. With rotis, keep the dal slightly thicker and add a dry vegetable or cooling raita alongside.
Rice benefits from dal that flows between the grains, while roti needs enough body to stay on a torn piece without becoming paste-like.
With rice: basmati rice, jeera rice or plain steamed rice
With bread: roti, phulka, naan, tandoori roti or paratha
For contrast: cucumber raita, plain curd, sliced onion, lemon and pickle; MasalaMonk’s palak raita makes a more substantial cooling side
For a fuller meal: a dry vegetable, papad and a fresh salad
Leave the dal looser for rice and slightly thicker for roti. That small adjustment changes how naturally it sits with the rest of the meal.
Build contrast with one cooling side and one sharp side: raita softens the chilli, while pickle or lemon keeps the creamy dal lively.
Make ahead, store and reheat
Dal is generous to tomorrow’s dinner, but its texture and aroma need different treatment: cool the base promptly, then restore the flow and make a fresh tadka when you reheat it.
Best make-ahead method
Cook the dal and onion-tomato base in advance, but hold back the serving-time tempering. Reheat the portion you need, restore the consistency, then check the salt and make a fresh tadka before serving. For Indian meal prep, store the base in portions and finish each one as it goes to the table.
Refrigerator
Transfer the dal to shallow covered containers and refrigerate at 40°F/4°C or below within two hours—or within one hour when the room is above 90°F/32°C. Use it within 3–4 days. These limits follow the USDA leftovers guidance (opens in a new tab). The dal will become substantially thicker as it chills.
Freezer
Freeze the cooked dal and masala base without the final tadka in meal-sized portions. For best texture and flavour, use within about 2–3 months. Thaw in the refrigerator—or reheat from frozen slowly in a saucepan—then add a new tadka before serving.
How to reheat without ruining the texture
Put the dal in a saucepan with a splash of water. Reheat gently, stirring as it loosens, until steaming hot throughout—165°F/74°C if you check with a thermometer. Add a little more as needed until the dal is creamy and pourable again. Restore the consistency first, then taste for salt and acidity because dilution changes both.
Restore the consistency before correcting salt or lemon because added water changes both; make the fresh tadka only after the texture is right.
Yes. Soak the toor dal for 1–2 hours, begin with about 4 cups/950 ml water and simmer it in a heavy saucepan until every grain crushes easily. Expect roughly 45–75 minutes after soaking, and longer for particularly old lentils.
Can I use red lentils instead of toor dal?
You can make a good tarka dal with red lentils, but it will not behave exactly like this Punjabi toor-dal recipe. Red lentils cook faster, break down more completely and usually need less time.
Can I use packaged Dal Tadka masala?
Packaged Dal Tadka masala can work. Add it conservatively to the cooked onion-tomato base, and check whether the blend already contains salt, chilli, dried mango or kasuri methi before adding the recipe’s full seasoning. A packet can simplify the base; freshly bloomed cumin, garlic and chilli still give the finished dal its clearest aroma, so keep the fresh garlic tadka.
Can I make Dal Tadka without tomato?
Tomato is optional. Cook the onion until properly golden, then build the base with ginger, garlic and spices. The dal will be less red and slightly less sweet. Begin with ⅛ teaspoon amchur or 1 teaspoon lemon juice after tasting, then add more if needed.
Can I double the recipe?
Doubling works, provided the cooker remains within the manufacturer’s limit for expanding foods. In an Instant Pot, the combined lentils, water and other ingredients must stay below the ½ line. Ingredient quantities can double, but pressure time usually does not. Scale salt and chilli conservatively at first, then adjust after combining. A large batch is often better with two smaller tadkas than one overcrowded pan.
Cook the lentils ahead. Prepare the masala while the cooker releases. Adjust the consistency and hold the pot on low heat while the rest of dinner comes together.
But make the last tadka when the rice is fluffed, the rotis are coming off the tawa and everyone is almost ready to eat.
That brief rush of cumin, golden garlic and red chilli is not decoration. It is what turns a pot of lentils into the bowl people lean toward before it has even stopped sizzling.
A stir-fry can look perfect in the pan and still taste disappointing if the sauce is off. Use too little, and dinner feels dry. Pour too much, and the vegetables turn watery. Go too salty, and you lose the freshness. Let it get too sweet, and everything starts tasting bottled.
The short version: mix one jar, add it near the end, and use about 1 cup for a family-size stir-fry so dinner turns glossy, not watery.
This homemade stir fry sauce is built around a simple MasalaMonk rule: salt, loosen, brighten, round, aroma, cling. Soy sauce gives the savory base, water or broth keeps it balanced, vinegar brightens it, honey or brown sugar rounds it, garlic-ginger-sesame bring aroma, and cornstarch helps it cling to the food instead of pooling at the bottom of the pan.
It takes about five minutes to mix and works with chicken, beef, tofu, shrimp, vegetables, noodles, rice bowls, and those tired weeknight dinners where the fridge has a few vegetables, a protein, and no clear plan.
This is the sauce to keep in your back pocket: flexible enough for whatever is in the pan, reliable enough to make a random skillet taste like a real dinner, and easy enough to adjust lighter, deeper, sweeter, spicier, lower-sodium, vegan, keto-friendly, gluten-free, or soy-free.
A basic stir fry sauce is made with soy sauce, water or broth, rice vinegar, honey or brown sugar, toasted sesame oil, garlic, ginger, and cornstarch. Whisk everything together, add it near the end of cooking, and let it bubble for 30 to 60 seconds until it turns glossy and coats the food.
For most stir-fries, use about ¾ to 1 cup sauce for 1 lb / 450 g protein plus vegetables. Use less for fried rice, more for noodles, and slightly less if your vegetables release a lot of water.
If you have ever poured sauce into a stir-fry and watched it turn thin, salty, or soupy, the problem was probably not you. It was usually timing, pan moisture, or too much sauce for the amount of food in the pan.
Before the sauce ever hits the pan, check the texture. It should be thin enough to pour, but balanced enough to turn shiny and cling once heated.
Use the spoon as a quick texture check: the sauce should pour easily, but still leave a shiny coating behind. That is the texture that helps it cling in the pan.
Recipe at a Glance
Prep time: 5 minutes
Cook time: No cooking until added to the pan
Yield: About 1 cup / 250 ml
Servings: 1 family-size stir-fry / about 4 portions
Best for: Chicken, beef, tofu, vegetables, noodles, rice bowls
Flavor: Savory, lightly sweet, garlicky, gingery
Make-ahead: 5–7 days in the fridge
Main cue: Add near the end; stop when shiny and coating
Easy Homemade Stir-Fry Sauce
This is the all-purpose version to start with. It is balanced enough for chicken, beef, tofu, vegetables, noodles, and rice bowls, but simple enough to mix before the pan is even hot.
All-Purpose Stir Fry Sauce
Prep: 5 minutes
Cook: no-cook sauce; 1–3 minutes in pan
Yield: about 1 cup / 250 ml
Serves: 1 family-size stir-fry / about 4 portions
Equipment
No special equipment is needed. A small bowl or jar, a whisk or fork, measuring spoons, and a hot wok or large skillet are enough.
It is not meant for deep-frying or as a thick dip straight from the jar. This sauce shines when it hits hot food in the pan and has a minute to thicken.
Ingredients
½ cup / 120 ml water or low-sodium broth
⅓ cup / 80 ml low-sodium soy sauce
1 tablespoon / 15 ml rice vinegar
1 tablespoon honey or brown sugar, about 20 g honey or 12–13 g sugar
2 teaspoons / 10 ml toasted sesame oil
2 garlic cloves, grated or very finely minced
2 teaspoons fresh ginger, grated
1 tablespoon cornstarch / cornflour (the white thickening starch), about 8 g
¼ to ½ teaspoon red pepper flakes, chili garlic sauce, or sriracha, optional
Instructions
Add the water or broth, soy sauce, rice vinegar, honey or brown sugar, sesame oil, garlic, ginger, cornstarch, and chili if using to a bowl or jar.
Whisk well, or close the jar and shake until the cornstarch is fully dissolved.
Use immediately, or refrigerate in an airtight jar.
Shake or whisk again before using because the cornstarch settles as the sauce sits.
Add near the end of stir-frying, after the protein and vegetables are mostly cooked.
Let it bubble for 30 to 60 seconds, tossing until it turns shiny and coats the food.
Recipe Notes
Use low-sodium soy sauce for the best balance. Regular soy sauce can become too salty once reduced.
Use broth instead of water when you want a deeper sauce for chicken or beef.
For a brighter sauce, add 1 extra teaspoon rice vinegar at the end.
For a saucier rice bowl, add 2 to 4 tablespoons extra water or broth when the sauce hits the pan.
Do not pour it into a pan full of watery vegetables. Cook off extra moisture first.
If using this as a marinade, leave out the cornstarch. Cornstarch is for thickening in the hot pan; in a marinade, it can settle, clump, or make the surface pasty.
Yes, you can double the recipe. Double all ingredients, store in a larger jar, and shake well before each use.
It is also a good meal-prep sauce. Keep a jar in the fridge, and you are halfway to a stir-fry before the pan is even hot.
Why a jar of sauce makes stir-fry easier
A mixed sauce jar turns stir-fry into assembly cooking. With the flavor base ready, you can focus on heat, sequence, and not overcrowding the pan.
Because the sauce is mixed before cooking, weeknight stir-fries move faster. Keep it in a jar, then shake before using so the cornstarch blends back into the sauce.
Stir fry sauce ingredients before you mix
Keep the ingredients measured before cooking starts. Stir-fries move quickly, so the sauce should be ready before the wok or skillet gets hot.
The ingredient list is short, but each part matters: soy sauce brings salt, vinegar brightens, sweetener rounds, aromatics wake it up, and cornstarch helps it finish properly.
Mix the sauce before the pan gets hot
Whisk or shake until the cornstarch disappears into the liquid. That prevents last-minute measuring and gives the thickener time to disperse evenly.
Mix the sauce before the pan gets hot. Then, once the protein and vegetables are ready, you can add it quickly instead of overcooking dinner while you measure.
The first time this sauce really clicks is when you stop treating it like a separate recipe and start treating it like a dinner shortcut. A jar in the fridge means chicken, tofu, broccoli, mushrooms, noodles, or leftover rice can turn into something that feels planned — as long as you use the right amount.
Timing cue: Mix the sauce before the pan gets hot. The protein should be cooked, the vegetables should be crisp-tender, and the pan should be hot but not swimming in liquid before the sauce goes in.
The MasalaMonk Stir-Fry Sauce Rule
A good stir-fry sauce is not just soy sauce plus thickener. It needs balance. Once you understand what each part is doing, you can adjust the sauce without guessing.
The six-part sauce rule
Use this as the control panel for the recipe. If dinner tastes off, fix the missing role instead of adding random ingredients.
This is the control system for the whole recipe: salt, loosen, brighten, round, aroma, and cling. Once you understand those six jobs, you can fix the sauce without guessing.
Balance Part
Ingredient
Job in the Sauce
Salt
Soy sauce, tamari, coconut aminos
Creates the savory base.
Loosen
Water or broth
Keeps the sauce from becoming too salty or heavy.
Brighten
Rice vinegar, lime juice
Cuts through richness and keeps the flavor awake.
Round
Honey, brown sugar, maple syrup
Softens salt, acid, and heat.
Aroma
Garlic, ginger, toasted sesame oil
Makes the sauce smell fresh instead of flat.
Cling
Cornstarch, arrowroot, xanthan gum
Helps the sauce coat the food instead of pooling.
That is the real trick. The recipe gives you the base, but this rule tells you how to fix it. Too salty? Loosen. Too flat? Brighten. Too sharp? Round. Too thin? Help it cling. Too bottled? Add aroma.
Using the rule to fix dinner? If the sauce tastes too salty, too flat, too thin, or too sweet, jump to the troubleshooting table.
How Much Stir Fry Sauce to Use
This is the part most recipes skip, and it is also the part that saves dinner. The same sauce can taste perfect or overwhelming depending on how much food is in the pan.
If your stir-fries usually taste either dry or soupy, use the table first, then check the image cue that matches what you are cooking.
What You Are Cooking
How Much Sauce to Use
What to Watch
1 lb / 450 g chicken + vegetables
¾ to 1 cup
Use the full cup if serving over rice and you want extra sauce.
1 lb / 450 g beef + vegetables
⅔ to 1 cup
Beef can handle a deeper, slightly stronger sauce.
14 oz / 400 g tofu + vegetables
About ⅔ cup
Use a slightly thicker sauce so it clings to crisp tofu.
4 cups vegetables only
About ½ cup
Use less if the vegetables release water.
6 cups vegetables + 1 lb protein
About 1 cup
This is the classic family-size stir-fry amount.
200 g fresh noodles or 100 g dried noodles + add-ins
⅔ to 1 cup
Noodles absorb sauce quickly; add water or broth if needed.
Fried rice-style stir fry
3 to 5 tablespoons
Too much sauce makes rice wet and soft.
Very saucy takeout-style stir fry
1 cup plus 2 to 4 tablespoons water or broth
Best when serving over plain rice.
How much sauce to use for chicken stir-fry
For chicken and vegetables, start with ¾ cup if the pan is modest and go up to 1 cup when you want extra sauce for plain rice.
Chicken and vegetables usually need ¾ to 1 cup sauce for a family-size pan. Use the higher end when serving over plain rice, where a little extra sauce is useful.
How much sauce to use for tofu stir-fry
Tofu works better with restraint. Too much sauce softens the crisp edges before they can hold flavor.
Tofu needs enough sauce to cling to its crisp edges, but not so much that the pan floods. About ⅔ cup is a good starting point for tofu and vegetables.
How much sauce to use for vegetables
Vegetables release moisture as they cook, so a smaller amount of sauce often looks light at first but finishes better after bubbling.
Vegetable-only stir-fries need restraint because the vegetables release water as they cook. Start with about ½ cup, then add more only after the sauce thickens.
How much sauce to use for noodles
Noodles absorb sauce quickly. Keep water or broth nearby so you can loosen the pan without adding more salt or sweetness.
Noodles absorb sauce as they sit, so keep the finish flexible. Start with ⅔ to 1 cup sauce, then loosen with a splash of water if the noodles tighten up.
How much sauce to use for fried rice
Fried rice needs seasoning, not a full stir-fry sauce pour. Start with a few tablespoons, toss, taste, and stop before the grains clump.
Fried rice is seasoned, not sauced. Use only 3 to 5 tablespoons so the grains stay separate instead of turning wet and clumpy.
Amount rule: Start lower if your pan is crowded, your vegetables are watery, or your noodles are already soft. You can always add more sauce after it thickens; you cannot easily remove extra once the pan turns soupy.
When to Add the Sauce
Add it near the end of cooking, not at the beginning. The sauce is there to coat and finish the food, not to boil the vegetables or stew the protein.
The stir-fry order before sauce goes in
The pan should be hot, the protein mostly cooked, and excess vegetable moisture reduced before the sauce goes in.
Heat the wok or large skillet first. A hot pan helps food sear instead of steam.
Cook the protein. Chicken, beef, shrimp, pork, or tofu need direct heat before sauce.
Remove the protein if needed. This prevents overcooking while vegetables finish.
Cook firm vegetables first. Broccoli and carrots need more time than bok choy leaves or peppers.
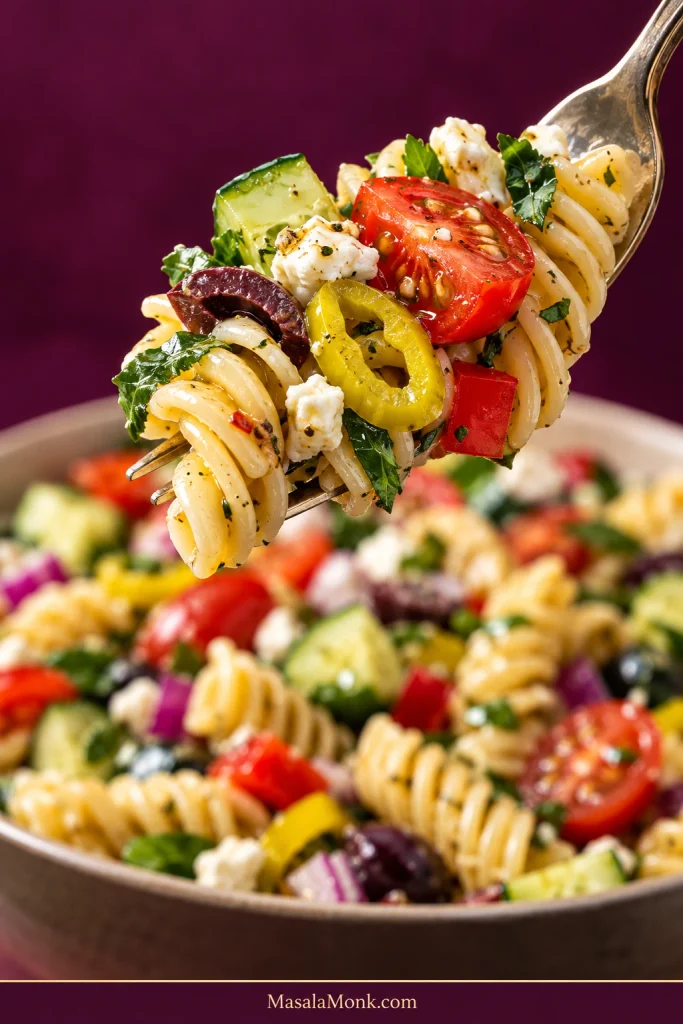
Cook off extra moisture. A watery pan dilutes the sauce.
Return the protein and shake the sauce. Cornstarch settles, so mix it again.
Add the sauce and toss for 30 to 60 seconds. Stop when it thickens and finishes the pan.
Add the sauce near the end, not at the beginning. The food should already be mostly cooked, so the sauce only needs a short bubble to thicken and coat.
Cloudy to glossy: what the sauce should do in the pan
In the pan, the sauce often starts cloudy because the cornstarch is just beginning to hydrate. Once it bubbles around the edges, it should turn clearer, darker, and shinier.
At first, cornstarch sauce can look cloudy in the pan. Give it 30 to 60 seconds of bubbling, and it should turn clearer, shinier, and more clingy.
Stop when the sauce turns glossy
The stop point is short and visual: the sauce tightens, the food looks coated, and the vegetables still look bright. Keep cooking after that and the flavor can turn too salty.
This is the stop point: the sauce has tightened, the food looks coated, and the vegetables still look bright. Keep cooking much longer and the sauce can turn too salty.
Glossy, not soupy: the final texture cue
The goal is glossy, not soupy — coated, not drowned. If sauce sits under the food instead of clinging to it, the pan probably has too much liquid.
The difference is liquid control. Too much stir-fry sauce drowns the pan; just enough coats the food and keeps the vegetables crisp-looking.
Good stir-frying is mostly prep, heat, and sequence. Serious Eats explains those stir-frying basics in depth, but for this sauce the main thing is simple: mix it first and add it near the end.
If you need rice underneath your stir-fry, MasalaMonk’s how to cook rice guide is useful when you want fluffy rice that can hold sauce without turning mushy.
Why This Recipe Works
Why each ingredient has a job
This recipe works because each ingredient solves a specific sauce problem. Use the roles below when you need to adjust taste, thickness, or balance.
When a sauce tastes off, fix the role that is missing. Add broth to loosen, vinegar to brighten, honey or sugar to round, garlic and ginger for aroma, or cornstarch for cling.
This sauce is simple, but it is not random. Soy sauce brings salt and savory depth, while water or broth keeps it from becoming too intense. Rice vinegar adds brightness, and honey or brown sugar rounds the sharp edges so the sauce tastes balanced instead of harsh.
Garlic and ginger give the sauce its classic stir-fry aroma. Toasted sesame oil adds a warm nutty finish. Cornstarch is what changes the sauce from thin liquid into a shiny coating in the hot pan.
The goal is not a heavy glaze. The goal is a thin mixture that thickens in the hot pan, grabs onto the food, and leaves everything tasting seasoned but still fresh.
When it is right, you should smell the garlic and ginger first, see the sauce turn from cloudy to shiny, and still taste the freshness of the vegetables underneath. The sauce should make the food feel finished, not hidden.
Ingredients and Substitutions
Think of this section as permission to adjust. The sauce does not fall apart if you swap broth for water, honey for maple syrup, or tamari for soy sauce. You just need to keep the balance: salt, loosen, brighten, round, aroma, and cling.
Low-sodium soy sauce is the best default. Regular soy sauce can work, but it becomes stronger as it reduces. If you only have regular soy sauce, use ¼ cup instead of ⅓ cup, then add 1 to 2 extra tablespoons water or broth.
For gluten-free sauce, use certified gluten-free tamari, certified gluten-free soy sauce, or coconut aminos. For a soy-free style version, coconut aminos are usually the easiest starting point, but they are sweeter and less salty than soy sauce, so reduce the sweetener and taste at the end.
Water or Broth
Water keeps the flavor clean and light. Broth gives more depth. Chicken broth works well with chicken, beef broth gives beef stir-fries a deeper base, and vegetable broth keeps tofu or vegetable stir-fries flexible. Low-sodium broth is best because the soy sauce already brings salt.
Honey or Brown Sugar
A little sweetness balances the saltiness of soy sauce and the sharpness of vinegar. Honey gives a smooth feel. Brown sugar gives deeper flavor. Maple syrup works well for a vegan version.
For the base sauce, keep the sweetener modest. This is a balanced weeknight sauce, not a sticky glaze. If you want something sweeter, use the honey soy variation below.
Rice Vinegar
Rice vinegar keeps the sauce bright. Apple cider vinegar can work in a pinch. Lime juice also works, especially for a Thai-inspired version, but it changes the flavor and makes the sauce sharper.
Garlic and Ginger
Fresh garlic and ginger make the sauce taste more alive. Grating them helps them disappear into the mixture and spread evenly through the pan.
Fresh garlic and ginger do more than add flavor; they make the sauce smell freshly cooked instead of bottled. Grating them helps that aroma spread quickly through the stir-fry.
If you need to use powders, replace 2 garlic cloves with about ½ teaspoon garlic powder, and replace 2 teaspoons fresh ginger with about ½ to ¾ teaspoon ground ginger. The sauce will still work, but fresh gives better aroma.
Toasted Sesame Oil
Use toasted sesame oil for flavor, not as the main cooking oil. Two teaspoons are enough to make the sauce taste warm and nutty without overpowering the garlic and ginger.
Cornstarch / Cornflour
Cornstarch thickens the sauce and gives it that takeout-style finish. It must be mixed into cold or room-temperature liquid before heating. If dry cornstarch hits hot liquid directly, it can clump.
Cornstarch works best when it is whisked into cool liquid first. That small step prevents clumps and helps the sauce turn smooth when it bubbles.
It also settles when the sauce sits, so always shake or whisk before adding it to the pan.
Can you make it without cornstarch? Yes, but it will be thinner. You can simmer it slightly longer, use arrowroot for some gluten-free or grain-free versions, or use a tiny amount of xanthan gum for keto sauce. Cornstarch is still the easiest everyday thickener.
How to Use This Sauce for Different Stir-Fries
Once the base is mixed, the rest is about matching the sauce to the food. Chicken wants balance. Beef can take depth. Tofu needs cling. Vegetables need restraint. Noodles need room to move.
For Chicken
Chicken is mild, so the sauce should stay balanced rather than too salty or too sweet. The base recipe works as written, especially if you use broth instead of water.
For 1 lb / 450 g chicken plus vegetables, ¾ to 1 cup is usually right. Go closer to the full cup if you are serving it over rice and want a little extra sauce to catch underneath.
The main danger with chicken is not the sauce; it is overcooking the chicken while waiting for the sauce to thicken. Keep the final simmer short.
Good vegetables for chicken include broccoli, bell peppers, carrots, snap peas, green beans, mushrooms, cabbage, bok choy, zucchini, and onions.
This is the chicken use-case: tender pieces, crisp vegetables, and enough sauce to catch on the rice without turning the bowl soupy.
For Beef
Beef likes a darker, more savory sauce. Start by swapping water for broth. Oyster sauce gives the quickest savory boost, Shaoxing wine or dry sherry adds restaurant-style depth, white pepper brings quiet warmth, and a small splash of dark soy sauce gives color if you have it.
You do not need every add-in at once. Even one or two — broth, oyster sauce, or white pepper — can make the sauce taste deeper.
For 1 lb / 450 g beef plus vegetables, ⅔ to 1 cup works well. Beef can carry a stronger sauce, especially with broccoli, mushrooms, green beans, or rice underneath.
Slice beef thinly across the grain and cook it quickly over high heat. Add the sauce only after the beef and vegetables are mostly cooked, then toss just long enough for everything to thicken and coat.
For beef, lean deeper and more savory. A darker brown sauce works well with mushrooms, broccoli, peppers, and thin slices of tender beef.
For Tofu
Tofu needs the sauce to cling, not slide off. If the tofu is not browned first, it can taste bland even when the sauce itself tastes good.
A 14 oz / 400 g block of tofu plus vegetables usually needs about ⅔ cup. More than that can flood the pan before the tofu has a chance to hold the flavor.
Press firm or extra-firm tofu, cut it into cubes or slabs, and pat it dry before it hits the pan. A dry surface browns better, and browned tofu holds sauce better.
Brown the tofu first so the sauce has something to hold onto. Crisp edges make tofu taste more seasoned and keep the sauce from sliding off.
For a lower-carb tofu dinner idea, MasalaMonk’s tofu and broccoli stir-fry with cauliflower rice is a natural fit, especially when you want a high-protein meal without noodles or regular rice.
For a vegan tofu stir-fry, use vegetable broth and maple syrup or sugar instead of honey. If you want deeper savory flavor, add mushroom powder or a little dried-shiitake soaking liquid.
For Vegetables
Vegetables are sneaky. They look dry when they first hit the pan, then suddenly release enough water to thin the whole sauce. That is why vegetable stir-fries need less sauce and a hotter pan.
Four cups of vegetables usually need only about ½ cup sauce. That may look modest, but vegetables release their own moisture as they cook.
Mushrooms and zucchini are the biggest water releasers here. Give them space, use higher heat, and wait until their moisture cooks off before adding the sauce.
Cook firm vegetables first: broccoli, carrots, cauliflower, green beans, cabbage stems. Add softer vegetables later: bell peppers, mushrooms, zucchini, bok choy leaves, snap peas, and scallions.
A vegetable stir-fry should still look fresh after saucing. Keep the coating light so the broccoli, peppers, carrots, mushrooms, and snap peas stay colorful.
For Noodles and Rice
Noodles drink sauce quickly, so they need a looser finish. For noodles, use ⅔ to 1 cup sauce for about 200 g fresh noodles or 100 g dried noodles, plus your protein and vegetables. Start lower if the noodles are already soft or oily; add a splash of water or broth if they drink up the sauce too quickly.
If cooked noodles are clumped before they go into the pan, loosen them first with a splash of water or oil. Sauce cannot coat noodles evenly if they enter the pan as one sticky block.
Noodle stir-fry is ready when the strands separate and shine instead of clumping together. If the pan feels tight, add a splash of water and toss briefly.
For fried rice-style cooking, use much less. Start with 3 to 5 tablespoons. Too much liquid makes rice wet and heavy. Cold cooked rice works better than freshly cooked hot rice because it is drier and separates more easily in the pan.
If you like saucy rice-bowl dinners, use the full cup in the stir-fry and serve it over plain rice. For fried rice, season gradually.
For a takeout-style egg dish with a glossy sauce, MasalaMonk’s egg foo young recipe is a useful companion because it also leans on a savory sauce that thickens and coats.
You do not need every variation today. Make the base sauce first. Come back to this section when you want it sweeter, spicier, darker, lower-sodium, vegan, gluten-free, keto-friendly, or soy-free.
Choose the sauce direction that fits dinner
Use the base recipe as your starting point, then nudge it sweeter, hotter, darker, or looser depending on what is in the pan.
Once the base sauce works, choose the direction that fits dinner: honey soy for shine, spicy for heat, or dark takeout-style for a deeper brown sauce.
If You Want
Change This
Best For
Balanced everyday sauce
Use the base recipe as written.
Chicken, tofu, vegetables, rice bowls
Sweeter honey soy
Increase honey to 2 tablespoons.
Chicken, shrimp, tofu, noodles
Darker takeout-style sauce
Use broth, oyster sauce, Shaoxing wine, and white pepper.
Beef, broccoli, mushrooms, cabbage
Spicy sauce
Add chili garlic sauce, sriracha, chili crisp, or fresh chilies.
Chicken, shrimp, tofu, noodles
Noodle-friendly sauce
Keep it looser with extra water or broth.
Fresh noodles, dried noodles, rice noodles
Soy-free style
Use coconut aminos and reduce the sweetener.
Tofu, vegetables, chicken, rice bowls
Pick the version closest to tonight’s dinner, then adjust from there. Chicken and noodles may want sweeter or looser; beef may want darker; vegetables usually want restraint.
If you find a version that works especially well — extra ginger, chili crisp, coconut aminos, mushroom broth, less sweetener, or something completely your own — leave it in the comments so another reader can borrow the idea.
3 Ingredient Stir Fry Sauce
A 3 ingredient version is useful when you need something fast and do not have the full list of ingredients. Mix soy sauce, honey or brown sugar, and a cornstarch slurry. It works in a pinch, but the full sauce tastes more balanced because it includes acid, aromatics, sesame oil, and a proper loosened base.
Chinese Takeout-Style Brown Sauce Variation
For a deeper, darker, more takeout-style sauce, start by swapping water for broth. Oyster sauce brings the quickest savory boost, Shaoxing wine or dry sherry adds restaurant-style depth, white pepper brings quiet warmth, and a small splash of dark soy sauce gives color if you have it. Reduce the honey or brown sugar slightly so the sauce stays savory.
Vegetarian cooks can use mushroom sauce instead of oyster sauce. For a vegan version, skip oyster sauce and use mushroom powder, shiitake soaking liquid, or a vegan mushroom stir-fry sauce.
Honey Soy Stir Fry Sauce
The honey soy version is sweeter and shinier: increase the honey to 2 tablespoons. It works especially well with chicken, shrimp, salmon, tofu, broccoli, carrots, bell peppers, and noodles. If it tastes too sweet, balance it with rice vinegar, lime juice, chili flakes, or a little more soy sauce.
Spicy Stir Fry Sauce
To make it spicy, add red pepper flakes, chili garlic sauce, sriracha, gochujang, chili crisp, or fresh chopped chilies to the base recipe. Start small. Spicy sauce tastes better when it still has balance: salt, sweetness, acid, garlic, ginger, and heat.
Thai-Inspired Quick Stir-Fry Sauce
This is not a replacement for a specific Thai dish sauce. It is a quick direction for weeknight stir-fries when you want the flavor to lean brighter, sharper, and more chili-forward. Replace some rice vinegar with lime juice, add a little fish sauce if you are not vegetarian, reduce the soy sauce slightly, and keep the garlic and chili strong.
If you want a full Thai basil stir-fry, MasalaMonk’s Pad Kra Pao recipe goes deeper into that sharper, basil-heavy sauce style.
Teriyaki-Style Stir Fry Sauce
For a teriyaki-style version, make the sauce sweeter and shinier. Increase the sweetener, use a little more ginger, and let it reduce until it looks lightly glazed. Use this when you want a sweeter rice-bowl style dinner rather than a lighter vegetable stir-fry. For a dedicated sweeter glaze, see MasalaMonk’s teriyaki sauce recipe.
Diet and Substitution Variations
These versions are not here to make the sauce feel restricted. They are here so the same jar can still work when someone at the table needs less sodium, no gluten, no soy, no animal products, or no sugar.
Use this section like a shortcut: lower-sodium if salt is the problem, gluten-free if wheat is the problem, soy-free if soy itself is the problem, and keto if sugar or starch is the problem.
Easy stir fry sauce swaps that are not interchangeable
The labels matter here. Gluten-free, soy-free, vegan, and lower-sodium changes solve different problems, so choose the swap that matches the actual need.
Substitution labels matter. Tamari can help with gluten-free stir fry sauce, but it is usually soy-based; coconut aminos are the better soy-free starting point.
Lower-Sodium Version
A lower-sodium version needs more than just low-sodium soy sauce. Low-sodium soy sauce still contains sodium, and the sauce can become saltier as it reduces. Reduce the soy sauce first, increase water or unsalted broth, and build flavor with garlic, ginger, vinegar, chili, scallions, mushrooms, and sesame aroma.
Do not add salt until the stir-fry is finished and tasted. If you are cooking for a strict sodium limit, use label numbers rather than taste alone.
Keto / Sugar-Free Version
For a keto or sugar-free version, skip the honey or brown sugar and use a keto-friendly sweetener only if needed. Cornstarch is not ideal for strict keto. Use up to ⅛ teaspoon xanthan gum for 1 cup sauce, starting with a smaller pinch if your brand thickens aggressively.
Xanthan gum does not behave like cornstarch: cornstarch thickens as it cooks, while xanthan gum thickens as it hydrates. Whisk well, wait a minute, and add more only if you really need it. A sauce can go from glossy to gummy quickly.
Vegan Version
To make it vegan, use vegetable broth and maple syrup or sugar instead of honey. Avoid oyster sauce, fish sauce, chicken broth, chicken bouillon, and non-vegan bottled sauces. For deeper savory flavor, add mushroom powder, finely minced mushrooms, or a little dried-shiitake soaking liquid.
If you are building more plant-forward meals around tofu, tempeh, edamame, lentils, or beans, MasalaMonk’s plant-based protein sources guide can help you choose what to pair with the sauce.
Gluten-Free Version
Regular soy sauce often contains wheat, so it is not always gluten-free. Use certified gluten-free tamari, certified gluten-free soy sauce, or coconut aminos. Also check the labels on broth, oyster sauce, hoisin sauce, chili garlic sauce, and bottled sauces because gluten can appear in places you may not expect.
No Soy Sauce vs Soy-Free vs Gluten-Free
These terms sound similar, but they are not interchangeable. That matters when you are cooking for allergies, gluten-free needs, or someone who is avoiding soy completely. For a broader look at tamari, coconut aminos, and liquid aminos, EatingWell’s guide to soy sauce substitutes is a helpful reference.
Phrase
What It Actually Means
What to Watch
Without soy sauce
The recipe does not use soy sauce.
It may still contain soy from hoisin, oyster-style sauces, or other condiments.
Soy-free
No soy ingredients at all.
Check every label carefully.
Gluten-free
No wheat/gluten ingredients.
Tamari may be gluten-free but still contains soy.
Coconut aminos
A common soy-free and gluten-free substitute for soy sauce.
Usually sweeter and less salty, so reduce sweetener.
Liquid aminos
A savory soy-sauce-like seasoning.
Many versions are soy-based and can still be high in sodium; check the label.
Without Soy Sauce
A sauce without soy sauce is not always the same as a soy-free sauce. Some recipes skip soy sauce but use hoisin sauce, oyster sauce, or other bottled condiments that may still contain soy. That may be fine if you only want to avoid soy sauce specifically, but it is not appropriate for someone who needs a truly soy-free version.
Coconut aminos are the easiest starting point for a soy-sauce-style substitute. From there, garlic, ginger, vinegar, chili, and a little mushroom depth help bring back the savory edge that soy sauce usually provides.
Truly Soy-Free Version
For a truly soy-free version, check every ingredient label carefully. Do not use soy sauce, tamari, hoisin sauce, or oyster-style sauces unless they are clearly labeled soy-free. Use coconut aminos as the main savory base, then add garlic, ginger, rice vinegar, sesame oil if tolerated, chili, and mushroom flavor for depth.
Store-bought sauce is convenient, but it often leans too sweet, too salty, or too thick. Homemade sauce lets you adjust the balance in the moment: more vinegar for brightness, more broth for looseness, more garlic or ginger for freshness, and a little sweetener only when the sauce tastes harsh.
If you are using bottled sauce, start with ⅓ to ½ cup for a small two-serving stir-fry, or ½ to ¾ cup for a larger pan. Bottled sauces are often saltier and sweeter than homemade, so add less first and stretch with water or broth if needed.
Too salty? Dilute with water or broth and add more vegetables.
Too sweet? Add rice vinegar, lime juice, chili, or a little soy sauce.
Too thick? Loosen with water or broth.
Too flat? Add fresh garlic, ginger, scallions, chili, or toasted sesame oil.
Tastes bottled? Add fresh aromatics and a splash of acid.
Use bottled sauce near the end of cooking, just like homemade. If it is already thick and sweet, do not simmer it for too long or it can become sticky and overpowering.
How to Fix Sauce Problems
A stir-fry can go sideways fast, but most sauce problems are fixable while the pan is still hot. Usually the pan needs one small correction, not a restart.
Most sauce problems start earlier: check the amount guide and the timing cue if your stir-fries often turn watery, salty, or too thick.
Quick fixes for common stir-fry sauce problems
Problem
Why It Happened
Fix
Sauce is too salty
Too much regular soy sauce, salty broth, or bottled sauce.
Add water or broth, vinegar or lime, more vegetables, or a little sweetener.
Sauce is too thin
Not enough cornstarch, not simmered long enough, or pan is watery.
Simmer 30–60 seconds more or add a small slurry.
Sauce is too thick
Too much cornstarch or sauce reduced too much.
Add water or broth 1 tablespoon at a time.
Sauce tastes flat
Not enough acid, garlic, ginger, or heat.
Add vinegar, lime, garlic, ginger, chili, or sesame oil.
Sauce is too sweet
Too much honey, sugar, or bottled sauce.
Add vinegar, chili, soy sauce, or broth.
Sauce clumps
Cornstarch was added directly to hot liquid.
Mix cornstarch with cold liquid first.
Stir-fry turns watery
Vegetables released moisture into the pan.
Cook off liquid before adding sauce.
Sauce burns
Sugary sauce cooked too long over high heat.
Add sauce at the end, lower the heat slightly if needed, and stop once glossy.
Noodles absorb everything
Noodles are thirsty or sauce is too thick.
Add water or broth and toss briefly.
Tofu tastes bland
Tofu was not crisped or sauce was too thin.
Crisp tofu first and use a slightly thicker sauce.
Sauce tastes bottled
It is sweet, salty, and thick but missing freshness.
Add fresh garlic, ginger, vinegar or lime, scallions, chili, or sesame oil.
Why your stir-fry turns watery
The most common mistake is adding sauce to a crowded, watery pan. Cook the vegetables until extra moisture reduces, then add the sauce and let it bubble briefly.
If the pan turns watery, pause before adding more sauce. Cook off vegetable moisture first, especially with mushrooms, zucchini, or a crowded skillet.
Small fixes before you restart dinner
Small save: If the pan tastes almost right but not quite, add a splash of water if it is too strong, a little vinegar if it feels flat, or a pinch of sugar if it tastes harsh. Tiny changes fix most stir-fry sauce problems.
How to Store It
Store the sauce in an airtight jar in the refrigerator for 5 to 7 days. Shake or whisk before using because the cornstarch settles at the bottom.
You can also freeze it for up to 3 months. Thaw in the refrigerator, then whisk or shake well before adding it to the pan. If freezing, use a freezer-safe container and leave a little room for expansion.
Do not worry if it looks cloudy or separated when cold. Cornstarch can settle and make the sauce look uneven. Once heated and stirred, it should smooth out again.
If the sauce has already been cooked into a stir-fry, store leftovers in an airtight container. For best texture, store noodles or rice separately from saucy stir-fry when possible.
What to Serve With It
It fits easy dinners like chicken and broccoli, beef and green beans, tofu and bok choy, shrimp and vegetables, cabbage and mushrooms, or zucchini and peppers.
Serve those over steamed jasmine rice, brown rice, cauliflower rice, stir-fried noodles, lettuce wraps, or fried rice. For choosing between rice, quinoa, cauliflower rice, or lighter base options, MasalaMonk’s quinoa vs rice guide is helpful, especially if you are balancing fullness, carbs, and texture.
If you want a cool, crisp side beside a salty-sweet stir-fry, MasalaMonk’s cucumber salad is a simple contrast: fresh, tangy, and fast enough to make while the sauce is resting in the jar.
If you want a rice-based takeout-style meal with a different flavor direction, MasalaMonk’s Spam fried rice recipe shows how little sauce fried rice actually needs compared with a saucy stir-fry.
At its best, the sauce leaves you with crisp vegetables, tender protein, and just enough savory-sweet shine for the rice or noodles to catch.
Frequently Asked Questions
What is stir fry sauce made of?
It is usually made with soy sauce, water or broth, rice vinegar, a little sweetener, garlic, ginger, sesame oil, and cornstarch. Together, they make a sauce that is savory, lightly sweet, aromatic, and able to thicken in the pan.
How much sauce should I use for a stir-fry?
Use about ¾ to 1 cup for 1 lb / 450 g protein plus vegetables. Use about ½ cup for vegetables only, ⅔ to 1 cup for noodles, and only 3 to 5 tablespoons for fried rice.
When should I add sauce to a stir-fry?
Add it near the end of cooking, after the protein and vegetables are mostly cooked. Let it bubble for 30 to 60 seconds until it turns glossy and coats the food.
Can I make this without soy sauce?
Yes. Coconut aminos are the easiest soy-sauce-style substitute. They are usually sweeter and less salty than soy sauce, so reduce the sweetener and adjust the flavor at the end. Be careful with hoisin, oyster sauce, and bottled sauces because they may still contain soy even if they are not soy sauce.
Is this sauce gluten-free?
Only if you use the right soy sauce substitute. Regular soy sauce often contains wheat, so choose certified gluten-free tamari, certified gluten-free soy sauce, or coconut aminos, and check all bottled add-ins.
How do I make a lower-sodium version?
Use low-sodium soy sauce or a lower-sodium alternative, water or unsalted broth, and extra garlic, ginger, vinegar, chili, scallions, or mushroom flavor. Avoid high-sodium bottled sauces unless the label works for your needs.
How do I make a keto version?
Skip honey or sugar and use a keto sweetener only if needed. Replace cornstarch with up to ⅛ teaspoon xanthan gum for 1 cup sauce, starting with a small pinch. Soy sauce, tamari, or coconut aminos can all work depending on your carb and sodium needs.
Can I use this for noodles?
Yes. Use ⅔ to 1 cup for a noodle stir-fry, and keep a little water or broth nearby. Noodles absorb sauce quickly, so you may need a splash to loosen everything in the pan.
Can I use this as a marinade?
Yes, but leave out the cornstarch if using it as a marinade. Cornstarch is for thickening in the pan, not for soaking raw protein. Add the cornstarch later when you are ready to cook.
Why is my sauce too salty?
The most common reason is regular soy sauce, salty broth, or too much bottled sauce. Dilute with water or broth, add more vegetables, brighten with vinegar or lime, or balance with a small amount of sweetener.
Why did it not thicken?
It may not have simmered long enough, the pan may have too much vegetable liquid, or there may not be enough cornstarch. Let it bubble briefly, or add a small slurry made from cornstarch and cold water.
How long does homemade stir fry sauce last?
It lasts 5 to 7 days in an airtight jar in the refrigerator. Shake or whisk before using because the cornstarch settles.
Final Notes
Do not let the length of the guide make the sauce feel complicated. The base recipe is simple; the extra notes are just here to help you adjust it without guessing.
Once you know the rule — salt, loosen, brighten, round, aroma, cling — stir-fry sauce stops feeling like a fixed recipe and starts feeling like something you can control.
Keep a jar ready, and a random mix of protein, vegetables, and rice or noodles starts to feel like dinner instead of leftovers. If you make it your own — sweeter, spicier, soy-free, or extra garlicky — share what worked so others can borrow the idea too.