Posted on — Leave a comment

Chicken Noodle Soup Recipe: Easy, Homemade & Full of Flavor

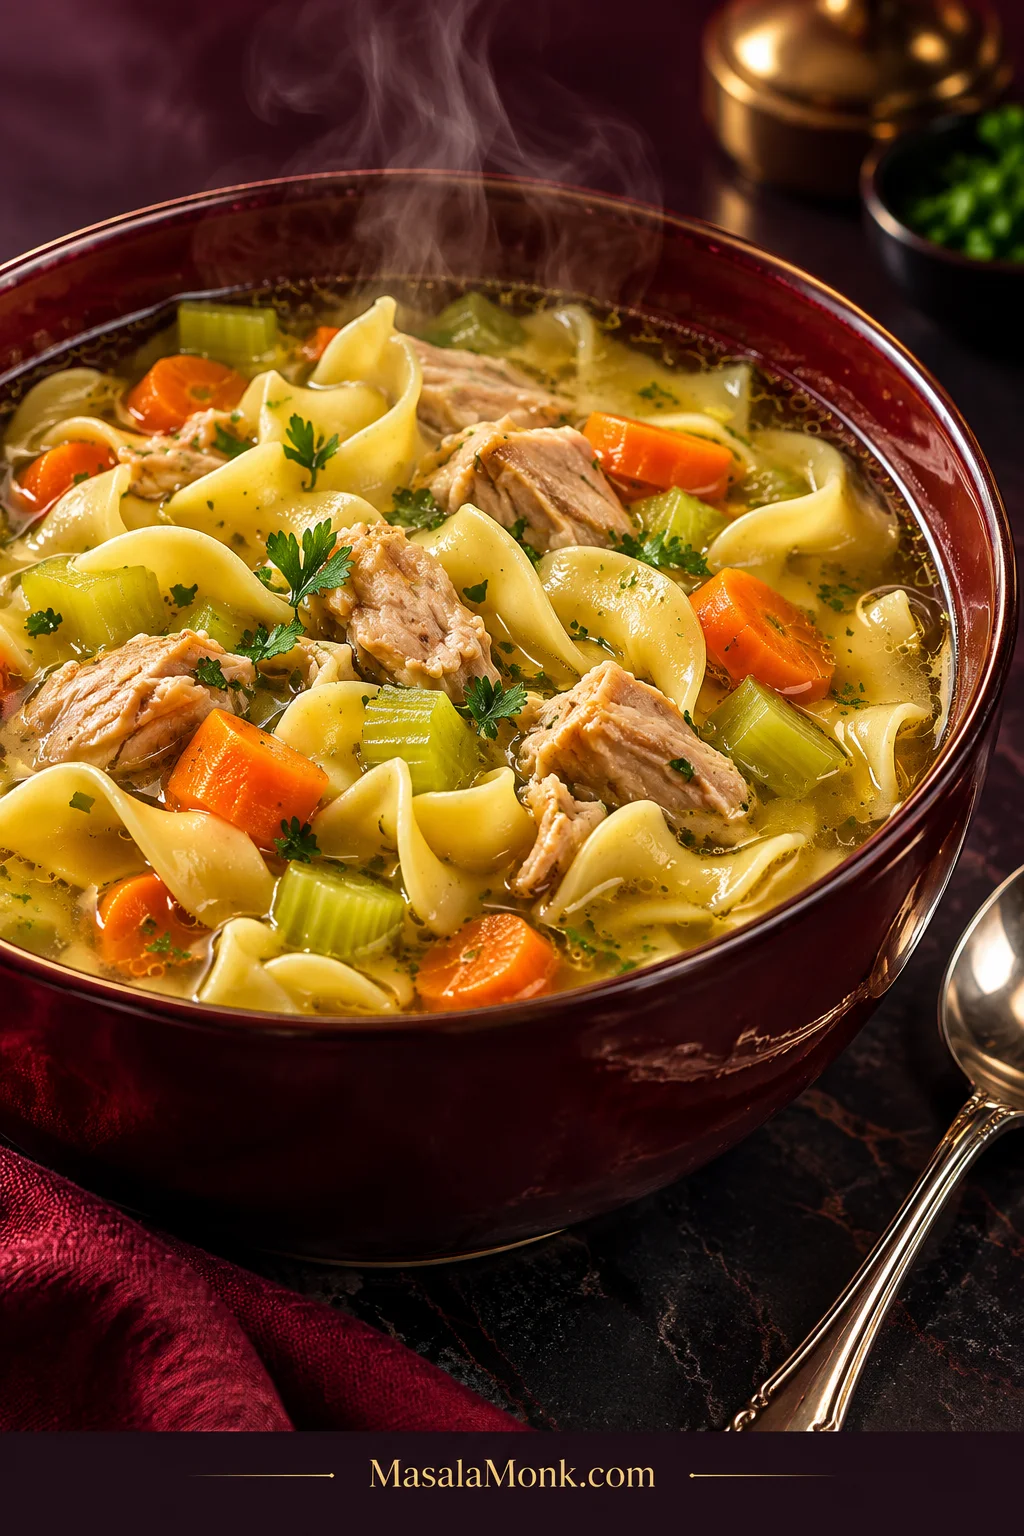
Steaming golden chicken noodle soup with wide egg noodles, irregular chicken pieces, carrot, celery and parsley in a deep burgundy serving bowl.

A good chicken noodle soup still looks like soup. There is plenty of golden, savory broth around the noodles, the chicken is tender rather than stringy, and the carrots and celery are soft enough to eat but hold their shape.

It is the kind of dinner that makes sense when the weather turns, the day has run long, or somebody at the table simply wants something warm and familiar.

This easy homemade chicken noodle soup recipe gets there without asking you to simmer a whole chicken all afternoon. Boneless chicken thighs get a light browning first, then onion, carrot and celery pick up the savory fond left behind. Low-sodium chicken broth goes in next, and the thighs finish gently in the pot until tender.

Chicken noodle soup is simple food, but the broth, chicken and noodles do not finish at the same time. Get the broth tasting right before the noodles go in. Take the chicken out when it is ready instead of making it wait for the pasta. Saving most of the pot for tomorrow? Keep those noodles separate.

Chicken Noodle Soup Recipe

A homemade chicken noodle soup with plenty of savory broth, tender chicken thighs, classic vegetables and wide egg noodles. Light browning gives store-bought chicken broth more depth without turning dinner into an all-day stock project.

Prep Time
20 minutes

Cook Time
About 50 minutes

Total Time
About 1 hour 10 minutes

Yield
6 generous servings

Thigh Texture Target
About 175–180°F / 79–82°C

Pot Size
6–7 qt / 5.7–6.6 L

Equipment

  • 6–7 quart / 5.7–6.6 L Dutch oven or heavy soup pot
  • Instant-read thermometer
  • Tongs and a wooden spoon
  • Chef’s knife and cutting board
  • Optional second saucepan if cooking the noodles separately

Ingredients

  • 1½ lb / 680 g boneless, skinless chicken thighs, trimmed and patted dry
  • ¾ teaspoon fine sea salt, plus more as needed
  • ½ teaspoon freshly ground black pepper, plus more to taste
  • 1 tablespoon / 15 ml neutral cooking oil
  • 1 tablespoon / 14 g unsalted butter
  • 1 medium yellow onion, about 6 oz / 170 g, cut into roughly ½-inch / 1.3 cm pieces, about 1¼–1½ cups
  • 3 medium carrots, about 8 oz / 225 g, sliced about ½ inch / 1.3 cm thick, about 1½ cups
  • 3 celery ribs, about 6 oz / 170 g, cut into ½-inch / 1.3 cm pieces, about 1½ cups
  • 4 garlic cloves, about 12 g, minced
  • 8 cups / 1.9 L low-sodium chicken broth or stock, plus up to 1–2 cups / 240–480 ml extra if needed
  • 1–2 teaspoons chicken base or bouillon paste, optional
  • 2 bay leaves
  • 4 fresh thyme sprigs, or ½ teaspoon dried thyme
  • 6 oz / 170 g wide egg noodles, roughly 3 cups dry depending on the brand and shape
  • ¼ cup / about 15 g fresh parsley, chopped
  • 1 tablespoon finely chopped fresh dill, optional
  • 1–2 teaspoons / 5–10 ml fresh lemon juice, optional

Instructions

Brown the Chicken and Start the Vegetables

  1. Season the chicken. Pat the thighs dry. Season with ¾ teaspoon salt and ½ teaspoon black pepper.
  2. Give the chicken some color. Heat the oil over medium-high heat. Add the thighs in a single layer, working in two batches if necessary rather than crowding the pot. Cook for about 3–4 minutes on the first side and 2–3 minutes on the second, until lightly golden in patches. They should not be cooked through yet. Transfer them to a plate.

The brown residue left behind is the fond; keep it in the pot because it adds depth to the broth.

Boneless chicken thighs browning in a red Dutch oven, with golden patches, some still-uncooked areas and browned fond developing underneath. Text reads “Lightly Golden — Not Cooked Through.”
Crowding chicken thighs traps steam, which weakens browning and leaves less flavorful fond behind. Give the pieces room to make direct contact with the hot pot.
  1. Start the vegetables. Reduce the heat to medium. Spoon off excess chicken fat if there is much more than about a tablespoon in the pot. Add the butter, onion, carrots and celery. Cook for about 4–5 minutes, stirring occasionally. The onion should turn translucent, the celery should just begin to soften, and the carrots should remain quite firm. Add the garlic and cook for about 30 seconds, just until you can smell it clearly. Don’t wait for the garlic to brown.
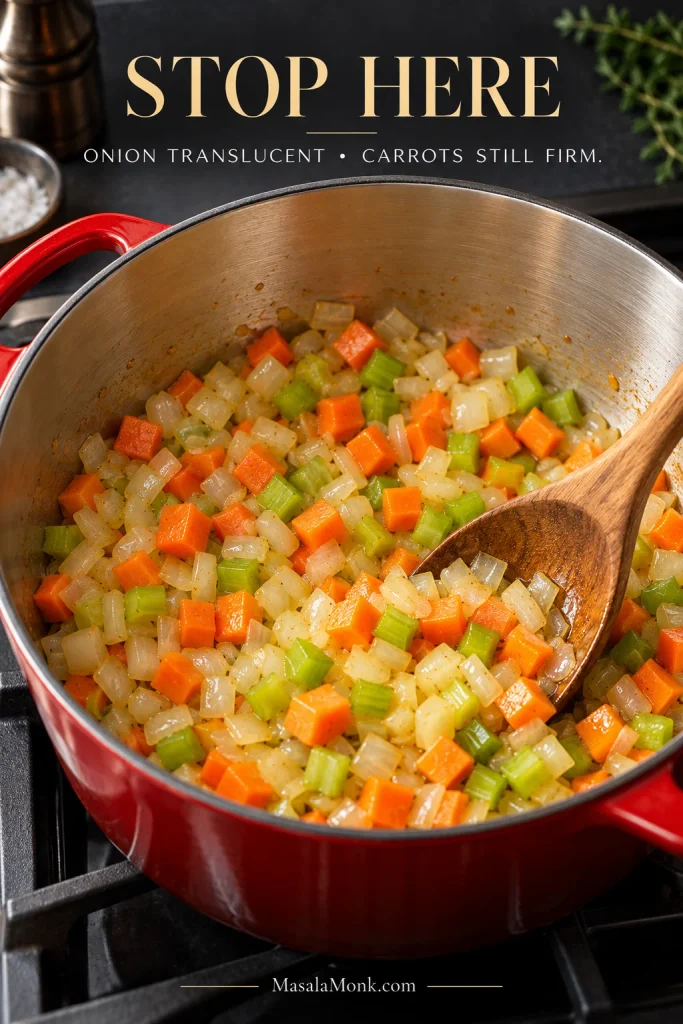
Diced onion, carrot and celery cooking in a red Dutch oven with a wooden spoon; the onion is translucent while the carrot and celery pieces remain firm. Text reads “Stop Here — Onion Translucent • Carrots Still Firm.”
Cut size matters as much as cooking time here. Keeping the carrots and celery around ½ inch helps them soften at a similar pace; much smaller pieces can lose their shape before the soup is finished.

Build the Broth and Cook the Chicken

  1. Add the broth. Pour in the 8 cups / 1.9 L chicken broth and scrape the bottom of the pot with a wooden spoon to loosen the browned bits. Add the bay leaves and thyme. Bring the broth just to a boil.

Aim for deep golden-brown fond rather than black scorch. Scrape the browned layer into the broth, but leave genuinely burnt patches behind so bitterness does not spread through the pot.
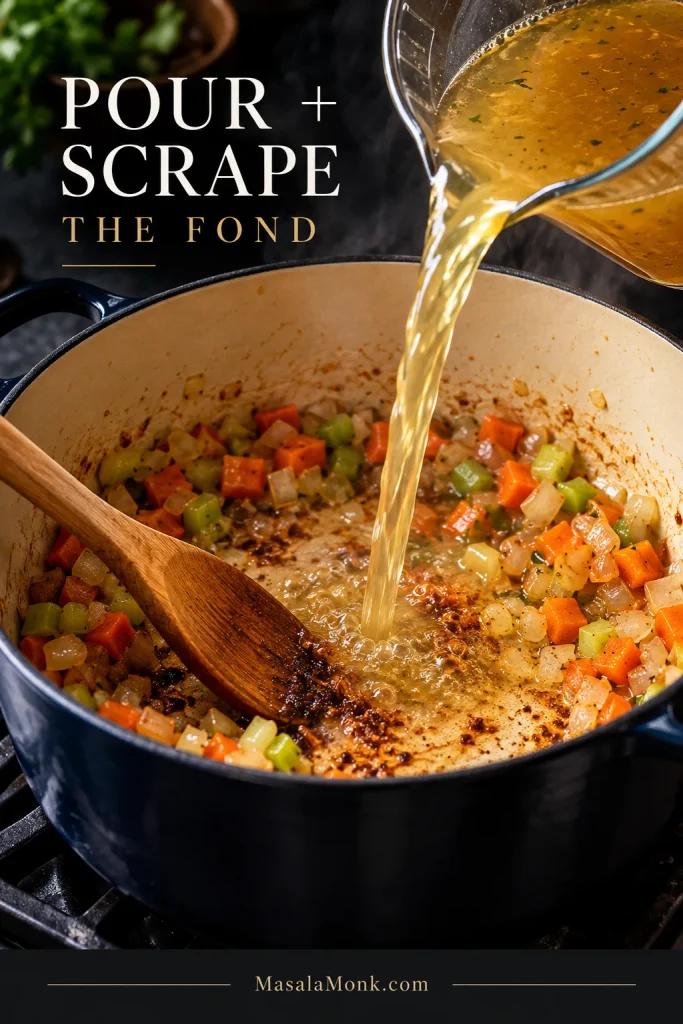
Golden chicken broth being poured into a pot while a wooden spoon scrapes browned fond from the bottom among cooked onion, carrot and celery. Text reads “Pour + Scrape the Fond.”
Move the spoon across the full base of the pot, including the edges where browned bits collect. The released fond carries the flavor into the broth.
  1. Finish the thighs gently. Return the chicken and any juices from the plate. Adjust the heat until the broth settles into a gentle simmer with small, lazy bubbles. Begin checking after about 8 minutes. The safe minimum for poultry is 165°F / 74°C, but thighs become more tender as they cook beyond that point. For this soup, aim for about 175–180°F / 79–82°C. Larger pieces may need around 10–14 minutes. Remove the thighs when they pull apart easily but still form juicy pieces rather than dry threads. Rest for about 5 minutes, then shred or cut into bite-size pieces.

Check the thermometer in the thickest folded part of the thigh, not a thin edge. If the pieces vary noticeably in size, verify more than one before removing them from the broth.
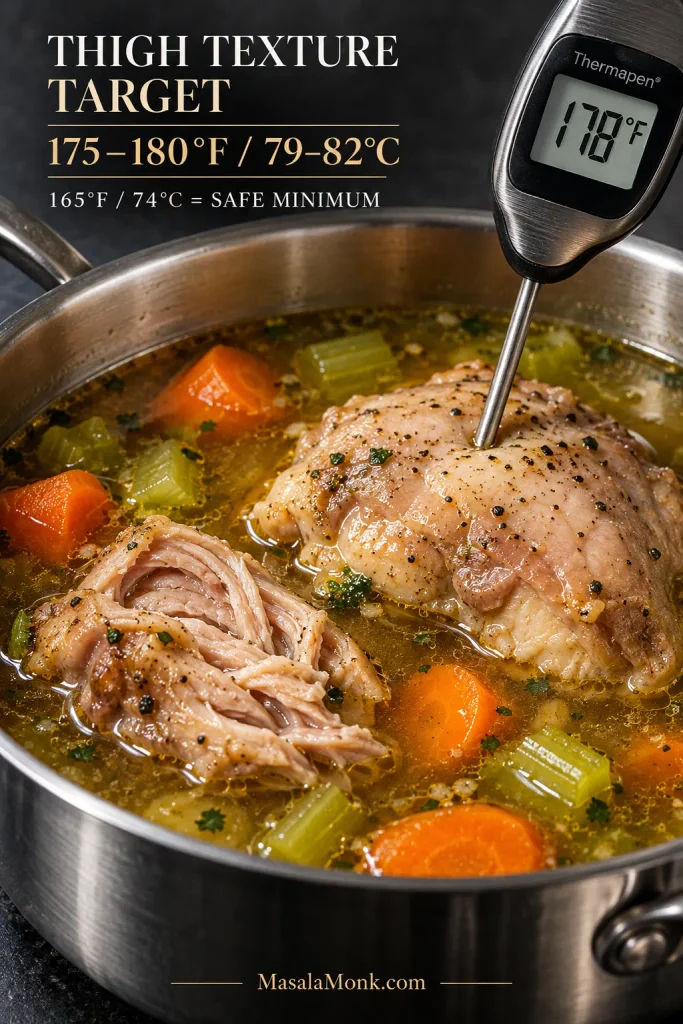
Instant-read thermometer showing 178°F in a boneless chicken thigh simmering in golden broth with carrot and celery, with another thigh piece pulled apart to show moist cooked meat. Text identifies 175–180°F / 79–82°C as the thigh texture target and 165°F / 74°C as the safe minimum.
Larger thighs may need several minutes longer than smaller ones. Check the largest piece and verify any noticeably different pieces before removing them all.
  1. Taste the broth now. It should taste clearly of chicken before any noodles go in. Chicken flavor that is present but muted usually needs salt; add about ¼ teaspoon at a time. Weak broth with room for more salt can take 1 teaspoon chicken base. Let it dissolve and taste before deciding whether it needs the second teaspoon.

Cook the Noodles and Finish the Soup

  1. Choose your noodle method. Eating most of the soup tonight? Cook the noodles directly in the broth. Planning several leftover servings? Cook them separately in lightly salted water and add them to each bowl.
  2. Cook the noodles just shy of fully soft. For the one-pot version, add the 6 oz / 170 g egg noodles to the gently simmering broth. Begin checking about 1 minute before the package time; many wide egg noodles take around 6–8 minutes. Stop when they are tender but offer the faintest resistance in the center. For the separate version, cook them in their own saucepan to the same point, then drain.
  3. Return the chicken. Add the shredded chicken for the final 2–3 minutes, just long enough to heat it through. Remove the bay leaves and thyme stems, then stir in the parsley and optional dill.
  4. Take one final taste. A well-seasoned soup that tastes flat may only need 1 teaspoon / 5 ml lemon juice. Stir it in and taste before adding more. A noodle-heavy pot can be loosened with some of the extra low-sodium broth. The finished soup should look brothy, with plenty of liquid visible around the chicken, vegetables and noodles. Serve hot.

Overhead view of finished chicken noodle soup in a burgundy Dutch oven, with wide egg noodles, chicken, carrot and celery surrounded by clearly visible golden broth. Text reads “Still Looks Like Soup — Plenty of Broth Should Still Be Visible.”
Egg noodles continue absorbing liquid from residual heat after the burner is off. If serving is delayed, a little hot low-sodium broth can restore the balance just before ladling.

How to Make Boxed Broth Taste Homemade

Browning the chicken gives boxed broth its first real layer of homemade flavor. The golden bits left on the bottom of the pot dissolve into the soup when the broth goes in, carrying savory chicken flavor into the broth.

You do not need to make stock from a whole chicken. A flavorful carton of low-sodium broth is a practical starting point, and the lower salt level leaves room to adjust the pot after the chicken and vegetables have flavored it.

Why Does My Chicken Noodle Soup Taste Bland?

If chicken noodle soup tastes bland, first work out whether it needs more salt, stronger chicken flavor, more body or a brighter finish. More salt is not always the answer.

Steaming bowl of chicken noodle soup with wide egg noodles, chicken, carrots and celery, surrounded by the prompts “Salt?”, “Chicken Depth?”, “Body?” and “Brightness?”. Headline reads “Bland Soup? More Salt Isn’t Always the Answer.”
Salt can make existing flavor more noticeable, but it cannot create chicken depth or give thin broth more body. Taste the broth hot, change one variable, then taste again before reaching for another correction.
What you noticeWhat usually helps
The chicken flavor is there, but everything seems mutedAdd salt about ¼ teaspoon at a time, stir well and taste again.
It barely tastes of chicken and the broth can take more saltStir in 1 teaspoon chicken base, let it dissolve, then taste before adding more.
It is already salty enough but the chicken flavor is weakAdd some stronger unsalted or low-sodium chicken stock if you have it. Reducing the broth or adding salty bouillon can make the salt problem worse.
The broth tastes balanced but feels wateryTry the optional gelatin fix below for more body.
It tastes savory and well seasoned but flatStir in 1 teaspoon fresh lemon juice, then taste before adding more.

Broth with balanced flavor but a watery mouthfeel can take one optional fix: bloom about 2 teaspoons unflavored powdered gelatin in 2 tablespoons cold water or cool broth until hydrated, then stir it into the hot soup until dissolved. It adds some of the silky body of a long-simmered stock without making the soup thick or gravy-like.

Which Chicken Is Best for Chicken Noodle Soup?

Boneless skinless chicken thighs are the best choice for this easy version because they have more flavor and tolerate the gentle simmer well. Whatever chicken you use, don’t make finished chicken wait in the broth for the noodles.

  • Chicken thighs: use the recipe as written. Taking them beyond the 165°F / 74°C safety minimum gives their connective tissue more time to soften; around 175–180°F / 79–82°C works well for tender pieces that still hold together.
  • Chicken breasts: breasts have less margin than thighs. Begin checking sooner and remove them once the thickest part reaches the safe minimum of 165°F / 74°C. Leaving cooked breast meat in the simmer while the noodles finish is an easy way to make it dry and stringy.
  • Rotisserie chicken: yesterday’s rotisserie chicken works well here. Use about 3 cups / 425–450 g shredded cooked chicken, skip the browning step, and add the meat only during the final few minutes.
  • Leftover roast chicken: treat it like rotisserie chicken. It only needs enough time in the pot to heat through.
  • Bone-in chicken: it can give the broth more depth but needs extra time and handling. Chicken Tinola is a good example of a soup built deliberately around bone-in chicken.

Using a rotisserie carcass? Simmer the picked carcass in the boxed broth for 15–20 minutes before making the soup. Strain the enriched broth into a bowl or large measuring jug, discard the bones and cartilage, then use that broth when you continue with the recipe. This keeps small bone fragments out of the vegetables later.

The Noodle Decision: Tonight or Tomorrow?

What Noodles Are Best for Chicken Noodle Soup?

Wide egg noodles fit this version particularly well. They have the familiar soft but substantial bite people expect from a classic bowl, and they sit comfortably beside chunks of chicken and vegetables without needing a huge amount of pasta.

Six ounces / 170 g may not look like much while the noodles are dry. Once cooked, it is plenty for this pot. A full 12-ounce bag is a different story: by the next day, a surprising amount of your broth may be inside the noodles.

Side-by-side comparison of 6 oz / 170 g and 12 oz / 340 g of wide egg noodles on kitchen scales, with soup below showing the smaller quantity more brothy and the larger quantity much more noodle-heavy.
Wide egg noodles vary dramatically in width, curl and cup volume, which makes weight more reliable than eyeballing the package. Six ounces / 170 g gives this 8-cup broth base a repeatable noodle-to-broth balance.

Should You Cook Egg Noodles in the Broth?

When you’re eating the soup right away, cooking the noodles directly in the broth keeps things simple and lets them pick up some of the soup’s flavor. Once the pot needs to survive until tomorrow, separation becomes much more useful.

Split scene showing wide egg noodles cooking directly in steaming chicken soup on one side and chicken-vegetable broth with cooked noodles stored separately in glass containers on the other. Text reads “Tonight? In the Broth” and “Tomorrow? Keep Them Separate.”
The real variable is holding time. The longer cooked noodles remain in hot broth, the softer they become and the more liquid they absorb; therefore, tomorrow’s servings benefit far more from separation than tonight’s dinner.
If you are…Do this
Eating most of the soup tonightCook the noodles directly in the broth.
Planning several leftover servingsCook the noodles separately and add them by the bowl.
Taking a pot to a friend or family memberPack broth and noodles separately so the soup tastes freshly made when they warm it.
Freezing the soupLeave the noodles out and cook fresh ones later.

Small pasta such as ditalini also works well. Homemade or frozen egg noodles are often thicker and chewier, so use the package or recipe timing rather than assuming they will cook in the same 6–8 minutes as dried wide egg noodles.

If You’re Missing an Ingredient

This soup can absorb a few substitutions without falling apart. You do not need an emergency grocery run because one celery rib is missing.

  • No celery: leave it out. You’ll lose some of the familiar chicken-soup aroma, but the recipe works.
  • No carrots: omit them. The finished broth will have less sweetness.
  • No onion: you can make the soup without it, although you’ll miss some of the sweetness and savory aroma underneath the broth.
  • Frozen vegetables: add them during the last few minutes and simmer only until hot and tender. They’re already partly softened, so adding them alongside the fresh carrots and celery can leave them mushy by the time the soup is done.
  • No fresh thyme: use ½ teaspoon dried thyme.
  • No dill: skip it. Parsley is enough.
  • Dairy-free: replace the butter with another tablespoon of olive or neutral oil.

What makes the bowl taste like classic chicken noodle soup is the chicken, flavorful broth, onion-carrot-celery base and noodles. It does not need a cupboard full of “secret” seasonings.

Mushy Noodles, Dry Chicken & Other Fixes

Some mistakes can be fixed in this pot; others are really notes for next time. The useful thing is knowing which is which.

What happened?What helps now / next time
Noodles are mushyYou cannot make them firm again. Stop cooking and serve the soup now. Next time begin checking sooner and stop while the centers retain the faintest bite.
There is barely any broth left tomorrowAdd low-sodium broth while reheating. Next time store the noodles separately when you know most of the soup will be saved.
Chicken is dry or stringyGet it out of the hot broth rather than letting it simmer longer. Next time remove the chicken when it reaches the right endpoint for the cut you’re using.
Vegetables are mushyTheir firmness cannot be restored. Stop simmering now; next time shorten the initial sauté or cut the vegetables slightly larger.
Soup looks greasySpoon off obvious excess fat. A few shimmering droplets are fine; a heavy oil slick is not needed.
Garlic or herbs dominate the bowlDilute genuinely overpowering flavor with a little unsalted or low-sodium broth. Then leave the seasonings alone and let the chicken broth do the work.

Most pots do not need five different corrections. Change one thing, try another spoonful, and stop when the soup tastes good.

A slightly cloudy broth is not a failed broth. Chicken proteins, fat, noodle starch and vigorous simmering can all affect clarity. When the broth tastes balanced, a little cloudiness is not something you need to fix.

How to Keep Leftovers Brothy

Enough left for tomorrow? You’re in good shape. If you cooked the noodles separately, cool and refrigerate them in their own covered container and store the chicken, vegetables and broth in another. Combine only the amount you’re reheating.

Two clear glass containers on a cool gray surface, one holding golden chicken soup with chicken, carrots and celery and the other holding cooked wide egg noodles. Text reads “Keep Tomorrow’s Soup Brothy — Noodles Separate.”
Separate storage also lets you rebuild each bowl instead of reheating the entire batch. Add as many noodles as that serving needs, loosen the broth if necessary, and the remaining components avoid another unnecessary heat cycle.

Making the soup ahead on purpose? Cool and refrigerate the cooked broth and vegetables, and keep the shredded chicken separately. When you’re ready to eat, warm the soup base gently just until hot. Cook fresh noodles in a separate saucepan, return the chicken only long enough to heat through, then add the noodles to each bowl. That keeps the vegetables from going through another full simmer and lets the noodles arrive at the table freshly cooked.

How Long Does Chicken Noodle Soup Last in the Fridge?

Chicken noodle soup keeps for 3–4 days in the refrigerator when it is cooled and stored safely. Divide leftovers into shallow covered containers and refrigerate them within 2 hours.

Noodles stored in the soup will continue taking up liquid overnight. Add low-sodium chicken broth while reheating until the bowl is as brothy as you want it again.

Don’t be surprised if the chilled broth turns a little jiggly. That’s often natural gelatin, along with some chilled fat. It melts back into the soup as it heats.

Can You Freeze Chicken Noodle Soup?

Yes. Freeze the chicken, vegetables and broth without noodles whenever possible. Portion the cooled soup into freezer-safe containers with a little room for expansion. For best quality, use it within about 3 months.
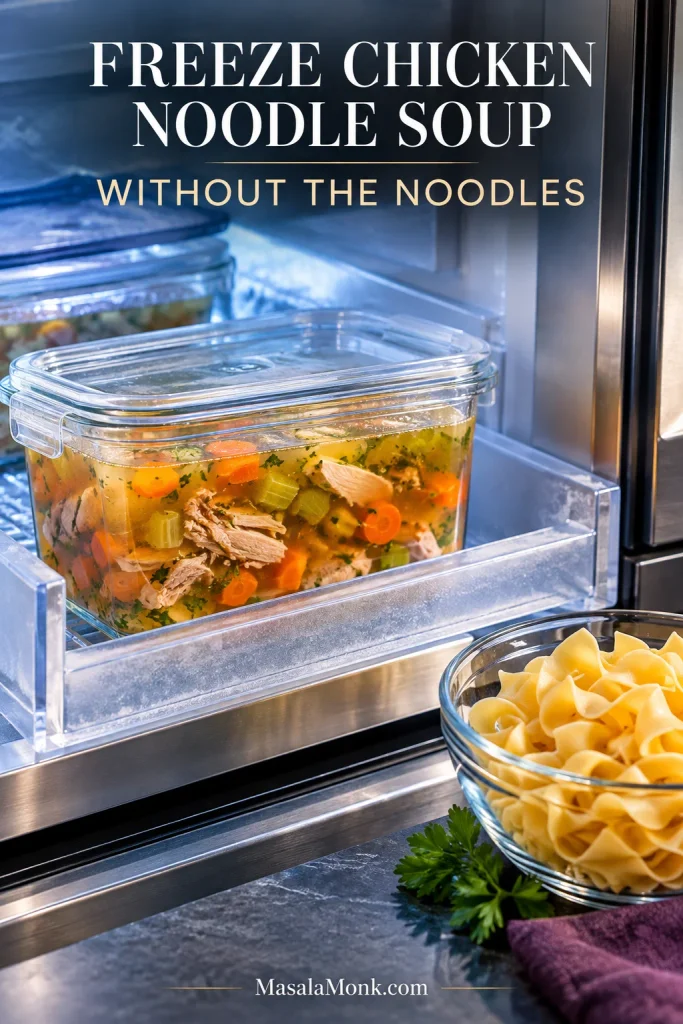
Open freezer drawer containing a sealed glass container of golden chicken soup base with chicken, carrot and celery but no noodles; a bowl of wide egg noodles sits outside the freezer. Text reads “Freeze Chicken Noodle Soup Without the Noodles.”
Cooked egg noodles become softer and more fragile through freezing, thawing and reheating. Instead, freeze the chicken-and-vegetable soup base on its own and add freshly cooked noodles when the soup returns to the stove.

Thaw the soup overnight in the refrigerator when convenient, or warm it gently from frozen on the stovetop. Cook fresh egg noodles while the soup reheats.

How to Reheat Chicken Noodle Soup

Bring the soup to a brief boil on the stovetop and make sure it reaches at least 165°F / 74°C throughout.
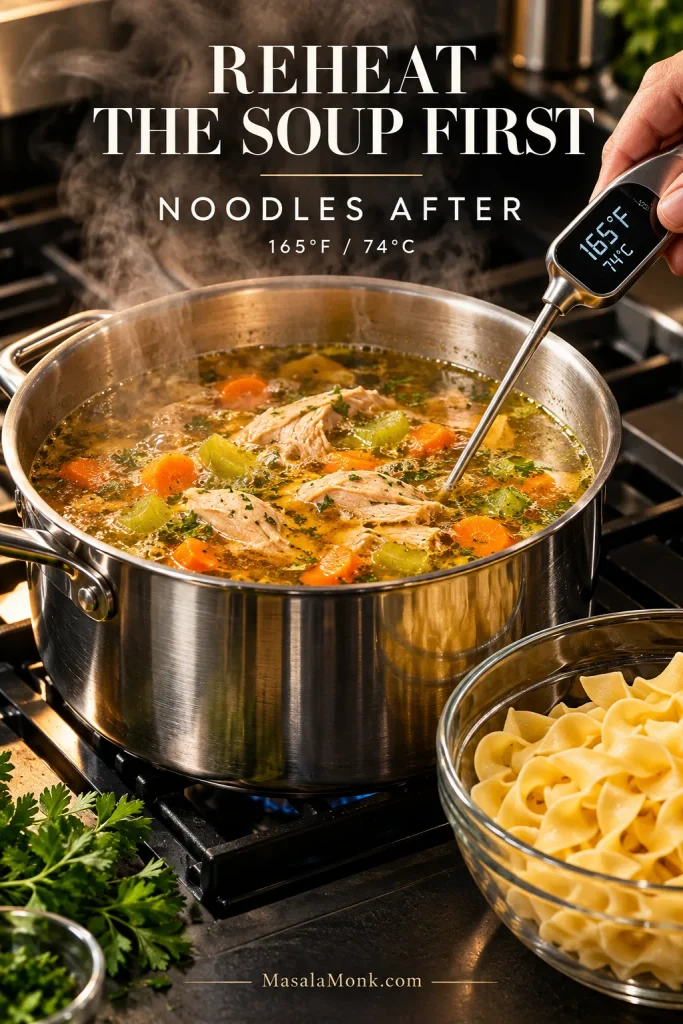
Steaming stainless-steel pot of golden chicken soup base with chicken, carrots and celery on a stovetop, an instant-read thermometer showing 165°F and a bowl of wide egg noodles waiting beside the pot. Text reads “Reheat the Soup First — Noodles After.”
Reheat only the portion you plan to serve when practical. Keeping the rest chilled avoids repeatedly heating the whole batch and lets each bowl take only the noodles it needs.

If the soup has thickened overnight, loosen it with a little low-sodium broth. Add separately stored noodles after the soup is fully reheated and warm them through briefly; if the noodles are already in the soup, keep the boil short to limit further softening.

What to Serve with Chicken Noodle Soup

If you’d like something alongside, warm Irish Soda Bread is an easy partner and doesn’t need yeast or proofing.
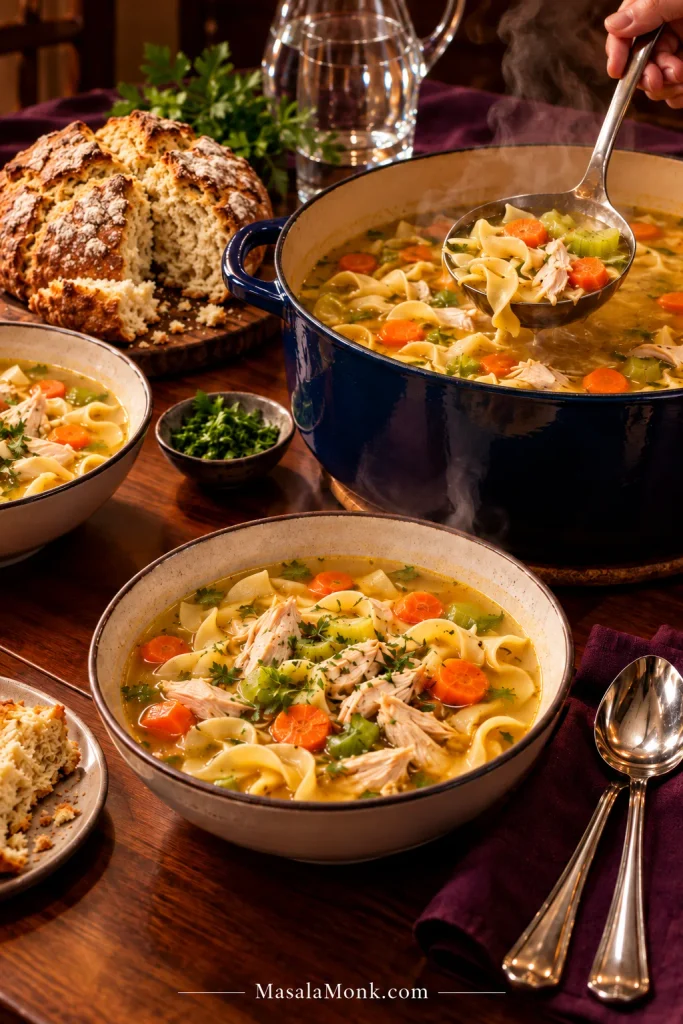
Warm dinner table with a steaming blue Dutch oven and bowls of chicken noodle soup, a ladle serving the soup, polished silverware and a round, craggy Irish soda bread with its dense interior visible.
Irish soda bread suits homemade chicken noodle soup especially well because its close, sturdy crumb absorbs savory broth without immediately falling apart, giving the meal extra texture without competing with the soup.

Ladle the soup while the broth is steaming, scatter over a little parsley or dill, and put the pot on the table. When the chicken is tender and the noodles are still just right, it really does not need much else.
Posted on — Leave a comment

Potato Soup Recipe: Easy, Creamy & Perfectly Thick

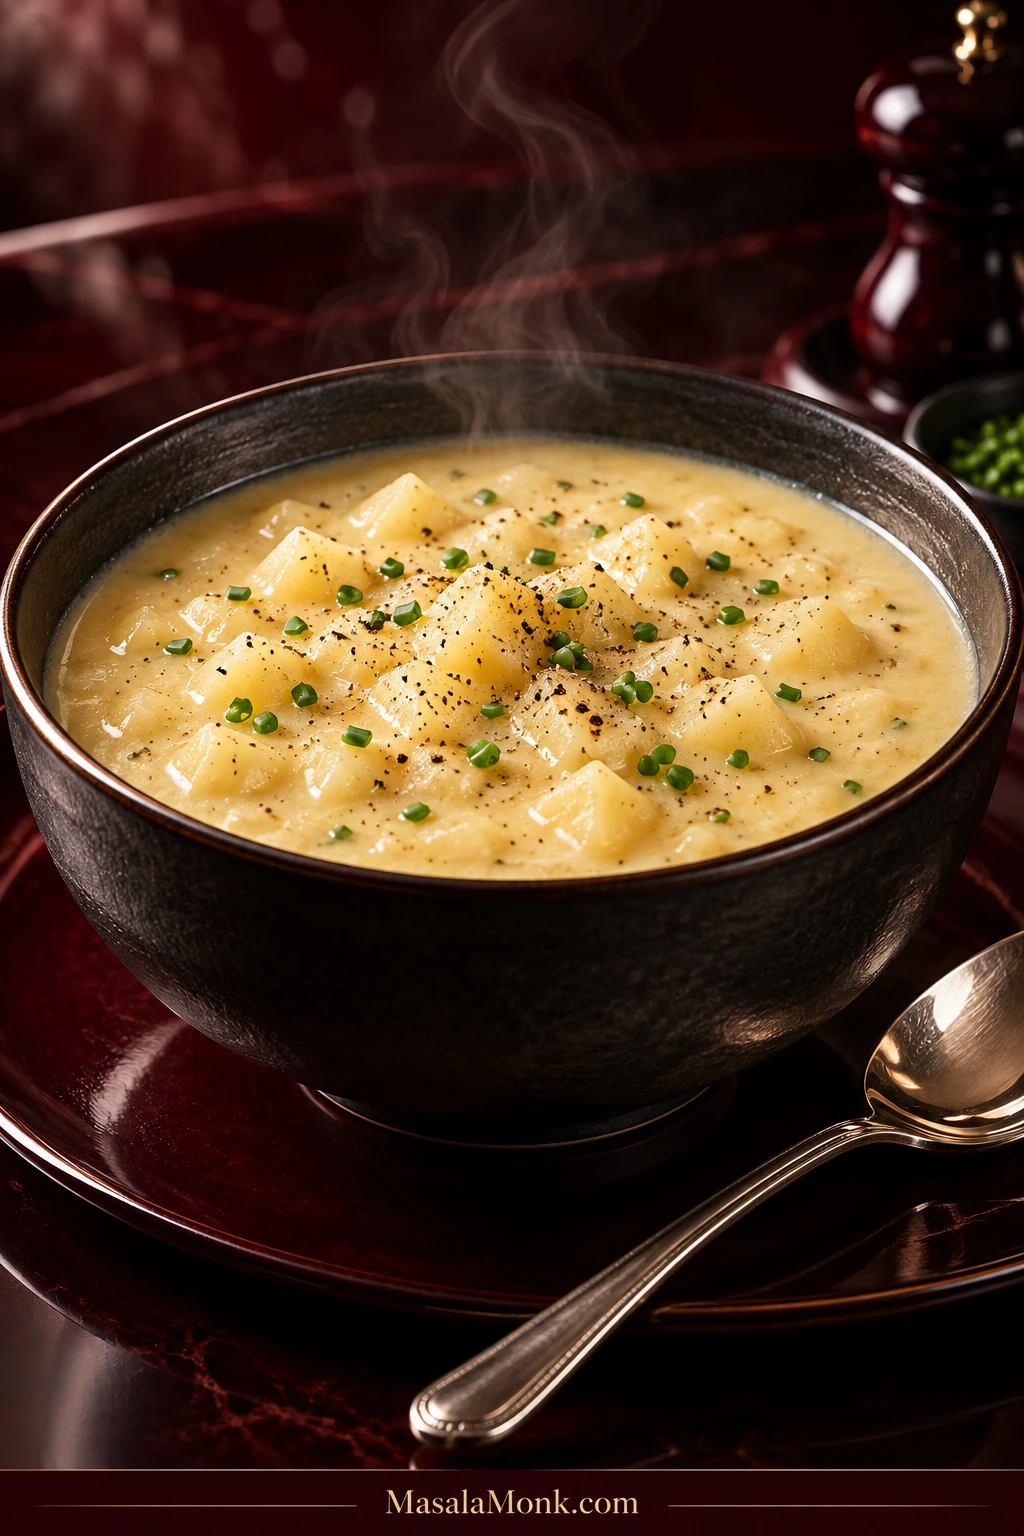
Dark bowl of creamy potato soup with softened potato chunks, chopped chives, black pepper and rising steam on a deep red surface.

Potato soup can go wrong in both directions. One pot stays brothy no matter how much cream goes in; another looks perfect on the stove and turns almost spoon-standing dense by dinner. Then there is the batch that gets blended too enthusiastically and becomes sticky instead of creamy.

This potato soup recipe is made from scratch on the stovetop, with creamy broth, soft potato chunks and enough body to coat a spoon without turning into mashed potatoes in a bowl. It cooks in one pot, needs no blender or heavy cream, and takes about 20 minutes of hands-on prep before the simmering does most of the work. This is the version for when you want potato soup to taste like potatoes.

The rule to remember is simple: tender first, mash lightly, milk late, judge after the rest.

Potato Soup Recipe

Tender Russet chunks sit in a smooth broth with softened onion, thyme and black pepper underneath. A small roux and light hand-mashing give the soup enough body to coat a spoon without needing heavy cream.

Prep20 minutes
Cook35–40 minutes
Rest5 minutes
TotalAbout 60–65 minutes
YieldAbout 9–10 cups / 2.1–2.4 L
Serves6 mains or 8 smaller bowls
MethodStovetop
Pot5½–6 qt / 5–5.7 L

Equipment

  • 5½–6 quart / 5–5.7 L Dutch oven or heavy-bottomed pot
  • Whisk
  • Potato masher
  • Kitchen scale and/or measuring cups and spoons

Ingredients

  • 2½ lb / 1.13 kg Russet potatoes, peeled and cut into ½-inch / 1.25-cm cubes
  • 3 Tbsp / 42 g unsalted butter
  • 1 medium yellow onion / 150–170 g, finely diced
  • 2 celery ribs / about 100 g, finely diced
  • 3 garlic cloves / about 10 g, minced
  • 3 Tbsp / 24 g all-purpose flour
  • 4 cups / 960 ml low-sodium chicken broth, divided—use 3½ cups / 840 ml for cooking and keep ½ cup / 120 ml aside for final adjustment
  • 2 cups / 480 ml whole milk
  • 1 tsp dried thyme
  • ½ tsp freshly ground black pepper, plus more to finish
  • 1 tsp fine sea salt / about 5–6 g, divided, plus more to taste
  • ½–1½ tsp / 2.5–7.5 ml lemon juice, optional; white wine vinegar or apple cider vinegar can be used instead
  • Chopped chives or scallions, optional, for serving

Instructions

Build the Soup

  1. Prepare the potatoes. Peel the Russets and cut them into roughly ½-inch / 1.25-cm cubes. Cut them roughly the same size so they become tender together; the cubes don’t need to be perfect.
  2. Soften the onion and celery. Melt the butter over medium heat. Add the onion, celery and ¼ teaspoon salt. Cook for 5–6 minutes, stirring occasionally, until soft and the pot smells sweet and savory rather than raw. Add the garlic and thyme and cook for about 30 seconds, just until fragrant.
  3. Build a smooth light roux. Sprinkle in the flour and stir constantly for 1–2 minutes. From the 3½ cups / 840 ml cooking broth, add about ½ cup / 120 ml first and whisk until smooth. Gradually stir in the remaining 3 cups / 720 ml.
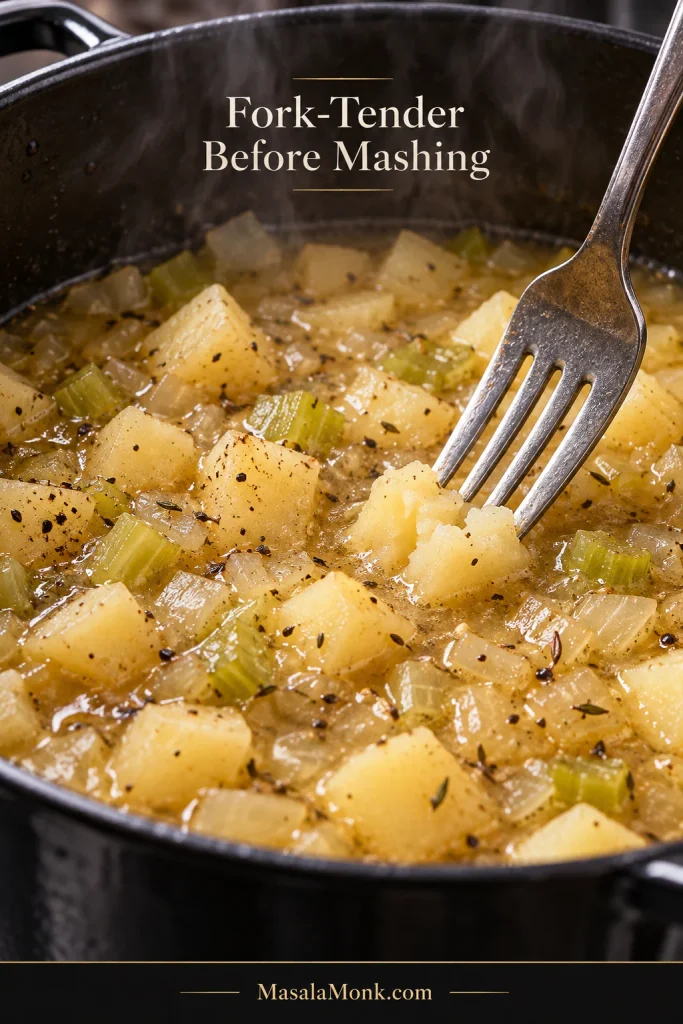
  4. Cook the potatoes until truly tender. Add the potatoes, black pepper and ½ teaspoon salt. Bring just to a boil, then lower the heat to a gentle simmer with small, lazy bubbles. Simmer gently, stirring from the bottom once or twice as the potatoes cook. Begin checking around 18 minutes and keep cooking as needed. The potatoes are ready when a fork slips through easily and a cube collapses with light pressure against the side of the pot. Let them become fully tender before deciding how much to mash.
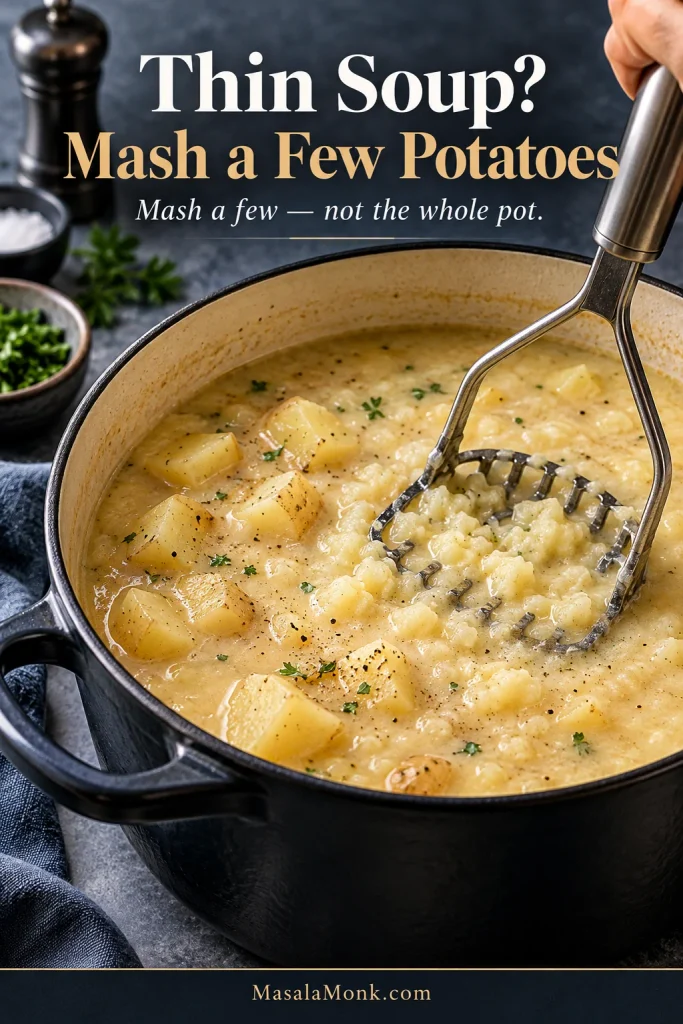
  5. Mash lightly. Take the pot off the heat. Start with about 6 firm presses of a potato masher, moving around the pot instead of repeatedly working one area. Stir. The broth should begin looking creamy while plenty of potato chunks remain. You can always mash more; you can’t put the chunks back.

Finish the Soup

  1. Add the milk. Stir in the whole milk and return the pot to low heat. Cook gently for about 5 minutes. Do not let it boil hard. Stir frequently and scrape across the bottom because the thickening soup can catch quickly.
  2. Wait. Take the pot off the heat and leave it alone for 5 full minutes. Do not add more flour, potato flakes or extra mashed potato yet.
  3. Check the consistency.
    Looks right? If the soup coats the spoon but still flows easily, move on to seasoning.
    Too dense? Add reserved broth starting with ¼ cup / 60 ml.
    Too loose? Mash a few more potato pieces. If needed, simmer gently, uncovered, for another 3–5 minutes.
    Still loose? Stir in 1 Tbsp / about 8 g plain instant potato flakes, wait 2–3 minutes, then check again before adding more.
  4. Season and serve. Add the remaining ¼ teaspoon salt if needed, then more only as your broth and potatoes require. Finish with black pepper to taste. If the soup is properly seasoned but still feels heavy or muted, take it off the heat and stir in ½ tsp / 2.5 ml lemon juice. Taste before adding more. White wine vinegar or apple cider vinegar can stand in for the lemon if needed.

Recipe Notes

  • No potato masher? Press a few fully tender potato pieces against the side of the pot with a sturdy wooden spoon or silicone spatula.
  • Do not aggressively blend Russets. Overworking cooked potato starch can turn the texture sticky or pasty. For a smoother bowl, briefly use an immersion blender in one small area of the pot, then stop well before the entire soup becomes smooth.
  • You do not have to peel every potato. Peeling gives the smoothest, palest soup. For a more rustic bowl, scrub the potatoes well and leave some or all of the skin on.

If the broth coats the spoon and the potatoes are soft but still visible, you’re done. Taste a hot spoonful with plenty of black pepper before changing anything else. If your pot looks thinner, thicker or stranger than expected, identify the problem before adjusting the texture.
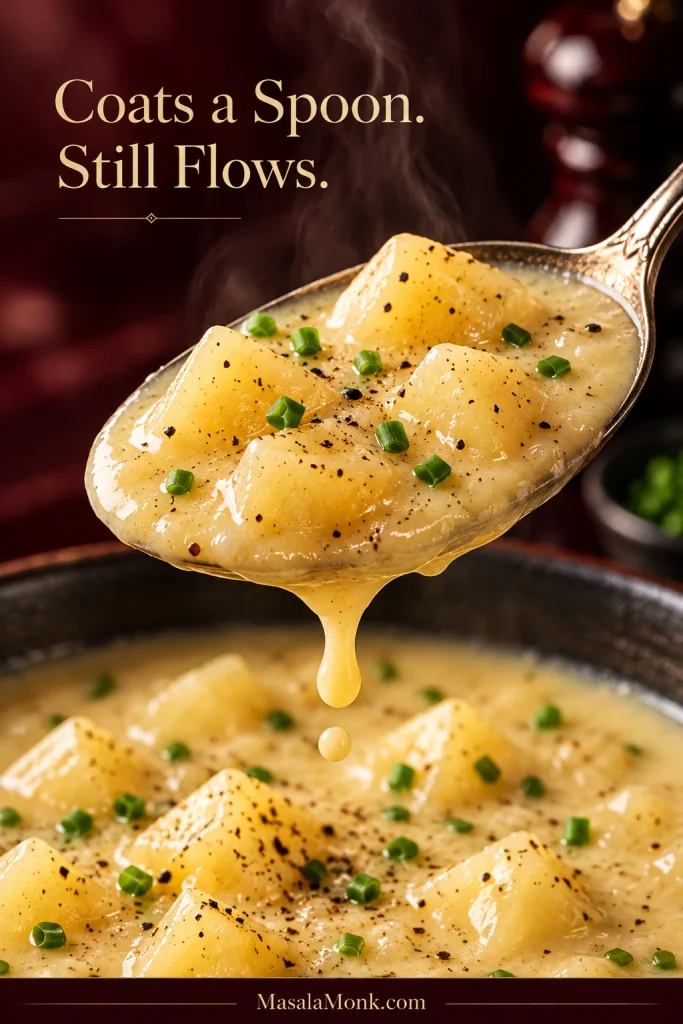
Close-up spoon lifting creamy potato soup with soft potato pieces and a rounded drop of broth falling back toward the bowl.
On the spoon, release matters more than thickness alone. The broth should gather, fall in a rounded drop and settle back into the bowl; if it pulls into strings or leaves a stubborn ridge instead, you are looking at a different texture problem.

Get the Texture You Want

Why Potato Soup Gets Thicker as It Sits

Potato soup gets thicker as it sits because potato starch and cooked flour continue holding onto liquid as the soup cools. Russets release starch while they simmer, and breaking a few of the cooked potatoes apart sends even more into the broth.

Heavy cream makes a soup richer; the potatoes and roux are what give this one its body. Overworking the potatoes can push that body too far and leave the soup dense or sticky.

That same handling matters in our mashed potatoes recipe: gentle mashing keeps Russets fluffy, while aggressive working pushes them toward paste.

This is also where tenderness matters more than the clock. Fully tender potatoes mash cleanly into the broth; partly firm pieces break unevenly and can leave hard centers behind.

Fork pressing through the center of a tender potato cube in broth with softened onion, celery and seasoning.
Test the center of a potato cube, not a frayed edge. Because the outside softens first, an edge can look done while the middle is still firm; the fork should pass through the center with almost no resistance before you mash.

That starch behavior is why the potato itself matters so much here.

Russet, Yukon Gold or Red Potatoes?

For this thick, creamy style, Russet potatoes are the best choice because their high starch content naturally gives the soup more body. They soften into the base instead of staying sharply defined.

PotatoEffect on the brothPotato pieces
RussetMost natural body; thickestSoft, fluffy and more likely to break down
Yukon GoldCreamy but somewhat looserButtery and better defined
Red potatoLightest of the threeFirmest and best at holding shape
Half Russet + half YukonCreamy with moderate starchMore defined chunks than all-Russet
Russet, Russet-Yukon mix, Yukon Gold and red potatoes arranged along a comparison from more broth body to more defined potato chunks.
Use the comparison to change your technique, not just your shopping list. An all-Russet pot usually needs less mashing for body; with Yukon Gold or red potatoes, stop once the pieces are tender rather than overworking them just to imitate Russet thickness.

If firm potato pieces are the priority, the same distinction matters in our potato salad guide, where holding shape matters much more than releasing starch.

Is Your Potato Soup Actually Too Thin?

Before adding anything, give the soup its full 5-minute rest. A pot that looks loose immediately after the milk goes in can tighten considerably once it is off the heat.

Too loose

The liquid runs straight off the spoon, and the potato pieces sit in an obviously thin base even after the final cook and rest.

Just right

The broth coats the back of a spoon but still drips slowly. A ladleful settles into the bowl on its own, with tender potato pieces still visible. Ideally, each spoonful feels creamy first, then gives you a soft piece of potato.

Too far

A spoon leaves a rigid channel behind, or the soup sits in a mound instead of settling. Too much potato may have been mashed, too much liquid may have evaporated, or the starch simply tightened more than expected.

Three potato soup consistencies labeled Too Loose, Just Right and Too Far, progressing from runny broth to an overly dense mound.
To judge potato soup consistency fairly, stir once and scoop from the center of the pot. A spoonful crowded with potato pieces can look thicker than the broth really is, so tilt the spoon and watch how the liquid itself moves before deciding what needs changing.

How to Thicken Potato Soup Without Making It Gluey

  1. Mash a few more cooked potato pieces.
  2. Simmer uncovered for 3–5 minutes over gentle heat, stirring from the bottom.
  3. Give it another short rest.
  4. If it still needs help, stir in 1 Tbsp / about 8 g plain instant potato flakes.
  5. Wait 2–3 minutes before deciding whether it needs another spoonful.
Potato masher pressing into one area of creamy soup while many tender potato chunks remain intact.
If the rested soup is still too loose, mash only a few additional potato pieces at a time, then stir that released starch through the broth before deciding whether to mash more. This is a correction step, not a reason to rework the whole pot.

For the standard recipe, use the potato already in the pot before reaching for another starch. A cornstarch slurry makes more sense when you’re deliberately making a flourless batch.

If it is too dense

Add reserved broth ¼ cup / 60 ml at a time, stirring completely before adding more. Once the reserve is gone, use warm milk or additional broth in the same small increments if needed.

Small measuring jug pouring reserved broth into a pot of thick potato soup with visible soft potato chunks.
Reserved broth works best as a control knob rather than a reset button. Add a little, then stir from the bottom of the pot until the texture is even before judging again; otherwise, the surface can look loose while denser soup remains underneath.

Thick is not the same as gluey. If yours is simply too thick but still creamy, a splash of broth will bring it back. Gluey potato soup feels sticky, elastic or stringy after the potatoes have been worked too aggressively. Serious Eats explains the potato-starch changes behind that texture.

Side-by-side comparison of smooth, thick potato soup and sticky, pasty overworked soup with an elastic texture.
Watch what happens after you try to loosen the soup. A merely thick batch relaxes as liquid is incorporated; an overworked batch can stay tacky or elastic, which points to damaged starch rather than simple over-thickening.

When Potato Soup Goes Wrong

First, think about when the problem appeared—that usually tells you where to look.

Before the milk goes in

The potatoes are still hard. Keep simmering until they crush easily. Cube size, potato variety and simmer strength all change the timing.

The base is already very dense. Don’t mash yet. Add a splash of reserved broth if necessary and finish cooking the potatoes before making another adjustment.

The flour formed lumps. Whisk firmly while the mixture is still fairly loose. Next time, make the first ½ cup / 120 ml broth completely smooth with the flour-coated vegetables before adding the rest.
After the milk goes in

The dairy looks grainy or separated. Most often, the pot became too hot. Pull it off the burner and whisk gently. Return it only to low heat if it needs more cooking. Gentle whisking can smooth it somewhat, but badly split dairy won’t always return to a perfectly smooth texture.

The bottom smells scorched. Move the unburned soup into a clean pot immediately. Leave the burnt layer behind rather than scraping it into the rest of the batch.

It tastes bland. Check the salt first and correct it gradually, then add freshly ground black pepper. If the soup is properly seasoned but still feels heavy or muted, stir in ½ tsp / 2.5 ml lemon juice off the heat. Taste before adding more.

It became sticky or elastic after blending. You’ve probably overworked the potato starch. A little broth can make the soup easier to eat, but the original texture may not return completely. Next time, use a potato masher instead of blending the whole pot.

Once the potatoes and texture are where you want them, there is some room to adapt the dairy and a few other ingredients.

Creamy Potato Soup Without Heavy Cream

You don’t need heavy cream here. Russets and the small roux provide the body; whole milk adds enough richness without making the bowl heavy.

Finished creamy potato soup with visual cues for Russet starch, a small roux, light mashing and whole milk added late.
Once the Russets, small roux and light mash have built the structure, dairy is mostly a richness decision. A milk substitution changes flavor and richness; it should not be used to rescue a thin pot, which is a texture problem instead.

The swaps below are for the nights when your fridge—or your diet—requires a change.

If you haveWhat to do
2% milkReplace whole milk 1:1. The finished soup will taste slightly lighter.
Evaporated milkReplace the milk 1:1 for a richer, slightly more concentrated dairy flavor. Use unsweetened evaporated milk, not sweetened condensed milk.
Half-and-halfReplace up to half the milk if you want a richer bowl.
Heavy creamReplace up to 1 cup / 240 ml of the milk with heavy cream for a richer soup.
Unsweetened oat milkChoose plain and unflavored. An extra-creamy style will come closest to whole milk, though the flavor will still be slightly different.

Vegan, Gluten-Free and Flourless Options

To make vegan potato soup, use vegetable broth, plant-based butter and the plain unsweetened oat milk described above.

For gluten-free potato soup, a cup-for-cup / 1:1 gluten-free flour blend can replace the all-purpose flour; start with 24 g. Blends vary, so the finished consistency may need a small adjustment.

For a flourless version, skip the roux. Once the potatoes are fully tender, mash a little more of them into the soup. If the rested pot still needs body, whisk 1 Tbsp / about 8 g cornstarch with 2 Tbsp / 30 ml cold milk, stir it in and heat gently until the soup thickens. Our white bean soup uses another flourless route, blending cannellini beans into the base.

Making Potato Soup With What You Have

Fresh Russets are the easiest route, but don’t abandon dinner because what you have is frozen, shredded or already mashed.

Frozen diced potatoes. Add them directly unless the package says otherwise. Different brands use different potatoes and cube sizes. Once they’re in the pot, tenderness matters more than the original timer.

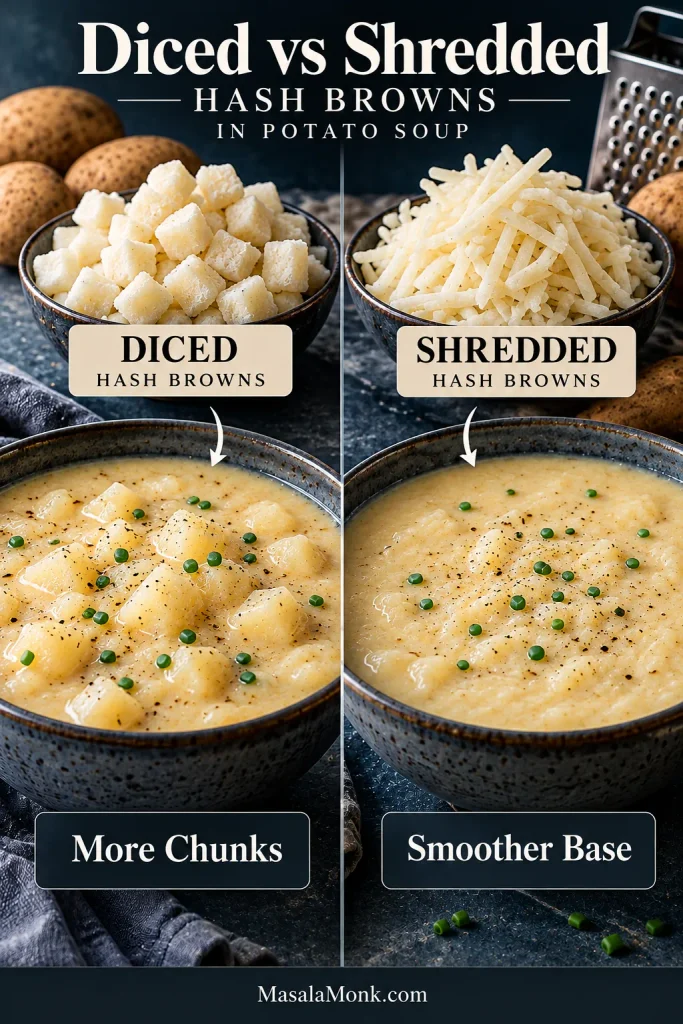
Frozen hash browns. If they are what gets dinner into the pot tonight, use them. Diced hash browns are better when you want recognizable potato pieces; shredded ones disappear much more readily and create a smoother base. Choose plain, unseasoned hash browns when possible so extra salt, onion powder or added fat does not unexpectedly change the soup.

Diced frozen hash browns beside chunkier potato soup and shredded hash browns beside smoother soup, labeled More Chunks and Smoother Base.
Shredded hash browns expose more cut potato surface than diced pieces, so they can soften into the broth and release starch sooner. Because brands and cuts vary, start checking the texture earlier instead of carrying fresh ½-inch potato-cube timing over unchanged.

Leftover mashed potatoes. Stir them in near the end, starting with about ½ cup at a time. Leftover mash may already contain butter, milk, cheese, garlic or plenty of salt, so taste before seasoning again.

Plain instant potato flakes. They are useful as an emergency thickener because they add potato solids without introducing another floury flavor. Use plain flakes rather than seasoned instant mash; follow the measured rescue method if the pot still needs help.

What to Serve With Potato Soup

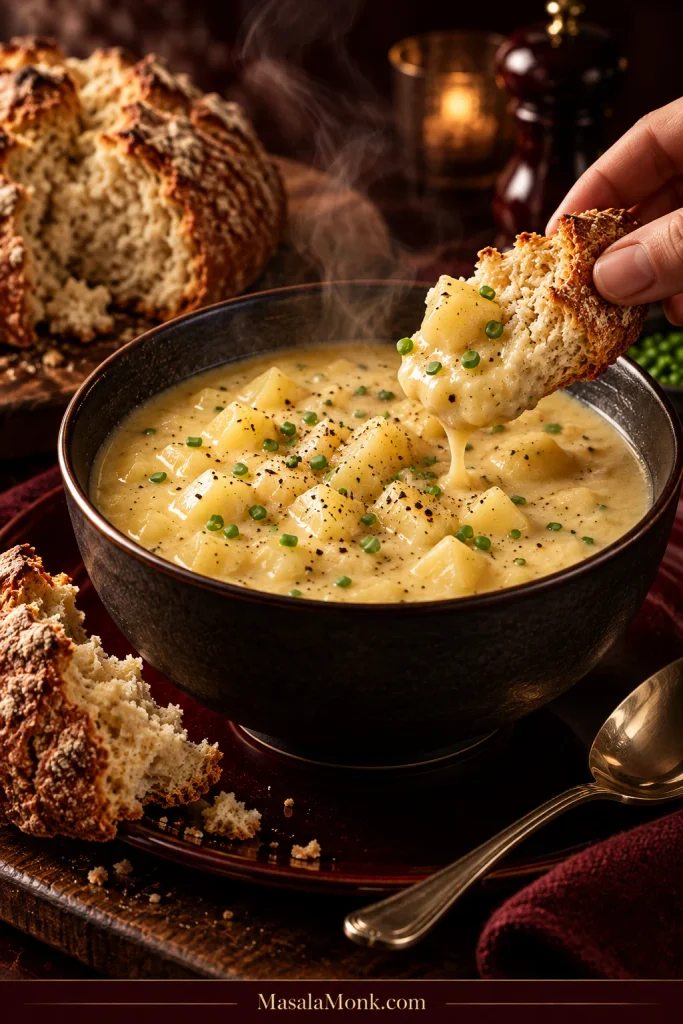
Potato soup is especially good with something crisp, fresh or crusty alongside it. Irish soda bread gives you something sturdy for the broth, a simple green salad brings freshness, and grilled cheese turns the bowl into a fuller meal.

Hand dipping a torn piece of crusty soda bread into a steaming bowl of creamy potato soup.
Crusty bread works especially well here because it gives the creamy soup some chew and contrast without turning the bowl into a heavier loaded-potato meal.

Taste the soup before reaching for toppings; it should already feel complete. The finished bowl should taste of potato first, with softened onion, thyme and black pepper underneath it. Chopped chives or scallions bring a fresh finish without covering that up.

Bacon, cheddar and sour cream are all good additions at the table when you want something more loaded. If those flavors are really the point of dinner, our twice-baked potato casserole takes that combination much further.

Storing, Reheating and Freezing Potato Soup

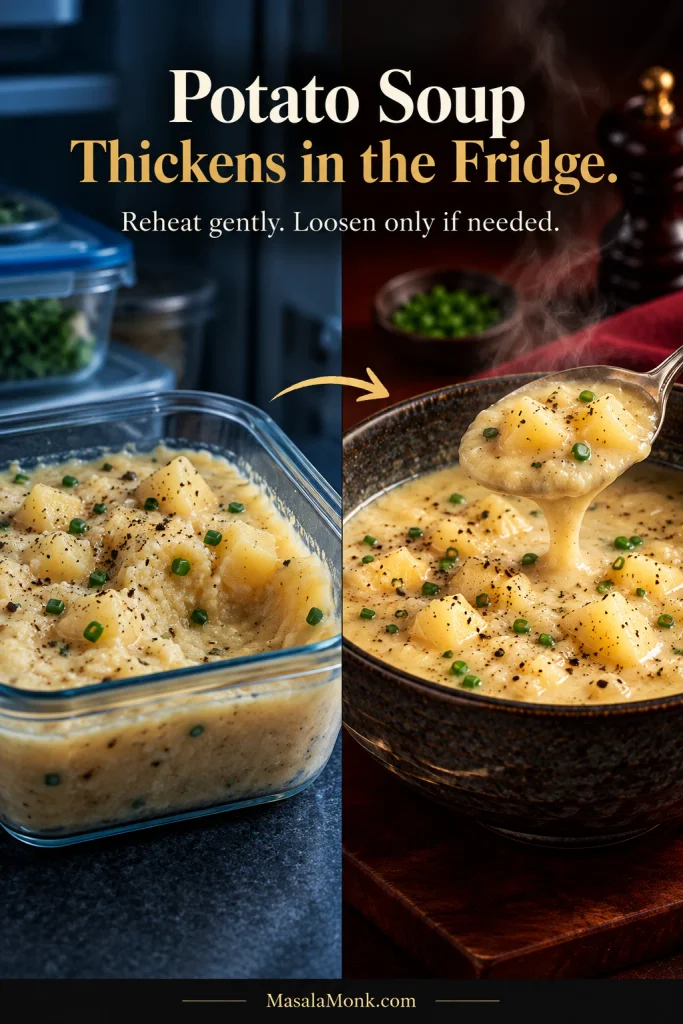
Potato soup will be noticeably thicker straight from the refrigerator. Reheat it gently before deciding how much liquid it needs; warming and stirring alone will loosen it.

Cold thick potato soup in a storage container beside reheated soup flowing from a spoon, showing the same soup before and after warming.
Stir from the bottom as leftover potato soup warms and judge the consistency only once the center is hot. Cold pockets can remain much denser than the edges, so adding broth or milk too early can leave the fully reheated soup thinner than you intended.

Refrigerating potato soup safely

Refrigerate leftovers in shallow containers within 2 hours of cooking, or within 1 hour in temperatures above 90°F / 32°C.

Keep them at 40°F / 4°C or colder and use within 3–4 days. These timings follow USDA guidance for safely handling cooked leftovers.

Reheating

Start over medium-low heat and stir frequently, scraping the bottom. If the cold soup is too stiff to stir comfortably, add just 1–2 Tbsp / 15–30 ml broth or milk to get it moving. Once the soup is hot and evenly mixed, add more liquid only as needed, 2–4 Tbsp / 30–60 ml at a time.

Reheat the soup thoroughly. Leftovers should reach at least 165°F / 74°C throughout; if you bring the soup to a boil, keep it brief rather than letting the milk-based soup boil hard. If the consistency still feels off once the soup is hot, use the same texture check as the fresh pot before making another adjustment.

Freezing

You can freeze potato soup, but expect some change. Russet pieces may become grainier or more crumbly after thawing, and the milk-based broth can look slightly separated.

For best quality, use frozen potato soup within about 2–3 months. Thaw it in the refrigerator, then reheat thoroughly while stirring. If the potato pieces have become crumbly, mash some of them back into the soup instead of trying to make them firm again.

Ladle the soup while the broth still moves easily around the soft potato pieces. Finish with chives and plenty of black pepper. Put something crisp or crusty alongside it, and serve while the potatoes are still unmistakably the main event.

Posted on — Leave a comment

Avgolemono Soup Recipe: Silky Greek Lemon Chicken Soup

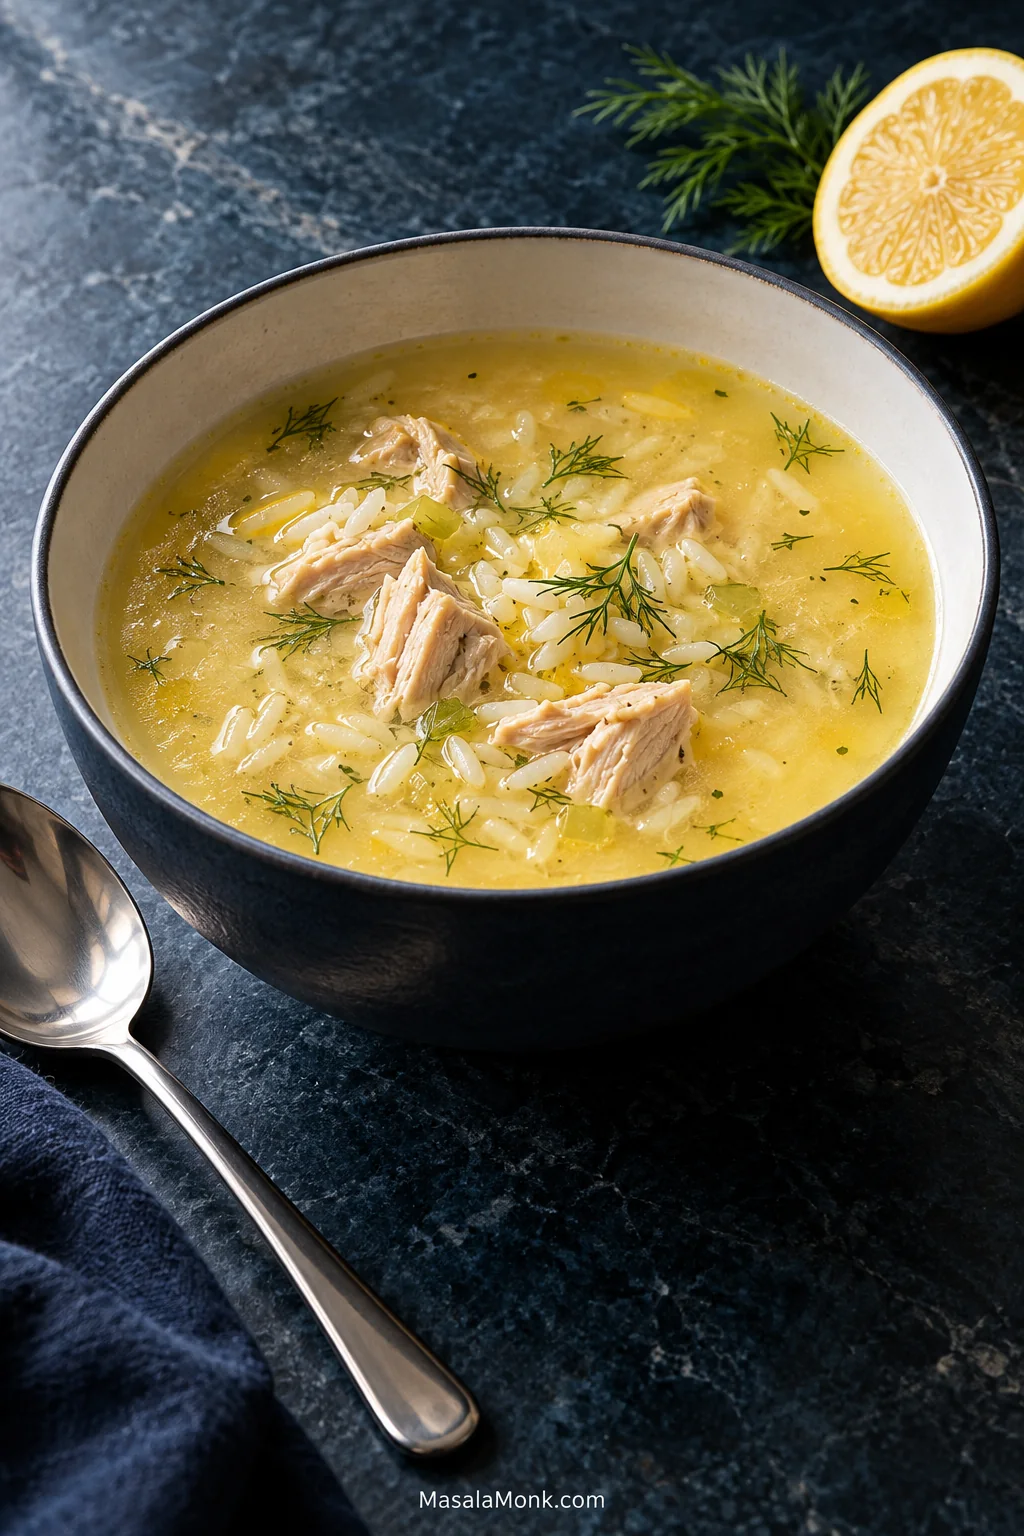
Bowl of pale lemon-gold Avgolemono soup with tender chicken, medium-grain rice, finely diced vegetables and a small amount of fresh dill, with visible broth between the solids.

Avgolemono should be silky enough to lightly coat a spoon, bright with fresh lemon, and brothy enough that tender rice and chicken still move freely through the soup. Eggs—not cream—give the broth its creamy body, while lemon keeps it fresh rather than heavy. Underneath the unfamiliar name and egg-lemon technique is something reassuringly simple: warm chicken broth, tender chicken and soft rice.

The main risks are simple too: eggs that get too hot and rice that takes over the broth. Overheated eggs can tighten into white ribbons. Rice that looks perfectly reasonable while the pot is bubbling can keep drinking broth long after the heat is off.

The method below keeps both in check. First comes the chicken, followed by the medium-grain rice. Active simmering stops before the egg-lemon mixture goes back into the pot, leaving you with a Greek lemon chicken soup that stays bright, brothy and smooth without cream.

This Avgolemono soup recipe uses medium-grain rice, with an exact orzo option below. Lemon goes in stages too. Most of the cooking is ordinary soup-making; tempering is the one part that asks for your full attention, and the cues below make it much easier than it sounds.

Four Moments Decide the Soup

SIMMER

Cook the chicken, then the rice, while the broth can still simmer.

Look for: tender rice with plenty of free broth.

STOP

Turn the burner off before the egg-lemon mixture returns.

Look for: active bubbling has stopped.

TEMPER

Whisk measured hot broth gradually into eggs and lemon.

Look for: a warm, smooth mixture with no white strands.

REST

Give the finished soup 10–15 minutes before changing anything.

Look for: broth that lightly coats a spoon but still pours freely.

Avgolemono Soup Recipe

Greek lemon chicken soup with tender chicken, medium-grain rice and a fresh egg-lemon finish. The modest amount of rice leaves plenty of broth, while measured tempering gives the eggs time to warm gradually and disappear into it.

Prep: 15 minutes

Cook: about 40 minutes

Rest: 10–15 minutes

Total: about 1 hour 5–10 minutes

Servings: 6

Equipment

  • 5–6 quart / about 5–6 L Dutch oven or heavy soup pot with lid
  • Medium heatproof mixing bowl
  • Whisk
  • Instant-read thermometer

A ladle or heatproof measuring cup makes tempering easier. For rinsing the rice, a fine-mesh sieve is useful; a fine grater helps if you are adding zest.

Ingredients

IngredientAmount
Extra-virgin olive oil1 tablespoon / 15 ml
Yellow onion, finely diced1 medium, about 150 g / 5.3 oz
Carrot, finely diced1 medium, about 100 g / 3.5 oz
Celery, finely diced1 large stalk, about 60 g / 2 oz
Low-sodium chicken broth or stock8 cups / 1.9 L, plus extra if needed
Boneless skinless chicken thighs1¼ lb / about 570 g
Medium-grain white rice½ cup / about 95 g / 3.4 oz
Large eggs3
Fresh lemon juice¼ cup / 60 ml, plus 1–2 tablespoons / 15–30 ml to taste; about 2–3 medium lemons total
Finely grated lemon zest, optional1 teaspoon
Fresh dill, finely chopped2 tablespoons / about 3 g
Fine salt½ teaspoon / about 3 g to start, plus more to taste
Freshly ground black pepper½ teaspoon, plus more to taste

Before you start: take the eggs from the refrigerator while you prep the vegetables. Rinse the rice in a fine-mesh sieve under cool running water until the runoff is much less cloudy, then drain well. This removes much of the loose surface starch and helps prevent the broth from becoming overly thick. If your broth is already salty, start with less than the listed ½ teaspoon salt.

Instructions

Cook the Broth, Chicken & Rice

  1. Soften the vegetables. Heat the olive oil in the soup pot over medium heat. Add the onion, carrot, celery and ½ teaspoon salt. Cook for about 5 minutes, stirring occasionally, until the onion is translucent and the vegetables begin to soften. Keep them pale rather than browning them deeply.
  1. Add the broth and chicken. Pour in the chicken broth and bring it to a low simmer. Add the thighs, partially cover the pot and adjust the heat so small steady bubbles rise through the broth.
  1. Cook until safe and tender. Simmer until the thickest thigh reaches at least 165°F / 74°C and the meat is tender, usually about 12–16 minutes depending on thickness. Transfer the chicken to a plate. If the broth has reduced noticeably, top it up with some hot broth before the rice goes in.
  1. Cook the rice uncovered. Stir in the rinsed rice and keep the broth at a low simmer until the rice is tender, usually about 14–18 minutes.
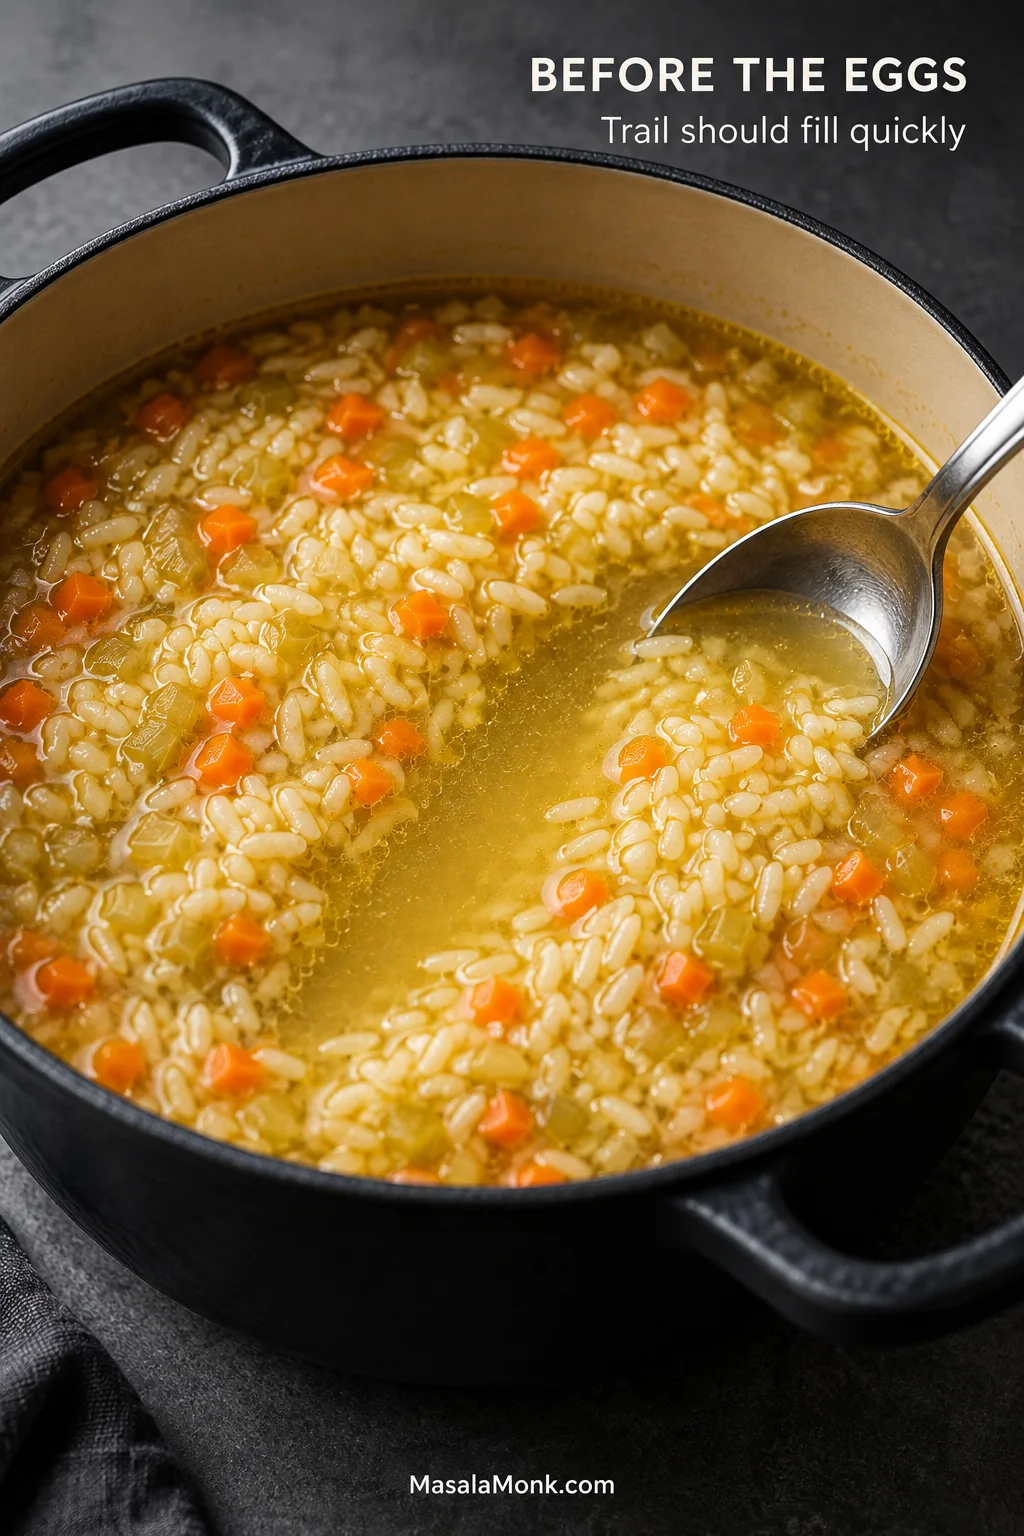
  1. Read the pot. There should be plenty of liquid around the rice. Drag a spoon through the pot; broth should flow back into the trail almost immediately. If that is what you see, you are exactly where you want to be. A pot that already looks thick needs some hot broth now rather than later.
Spoon drawn through golden chicken-and-rice broth before the egg-lemon finish, leaving a temporary trail with liquid flowing back around the rice and vegetables.
Pot width, simmer strength and evaporation can all change the timing. That is why reading the liquid around the rice is more dependable than cooking by minutes alone: the broth should still move freely before the eggs enter the picture.
  1. Prepare the chicken. While the rice cooks, shred or chop the thighs into pieces that fit easily on a soup spoon.

Temper the Egg-Lemon Mixture

  1. Whisk the eggs and lemon. In a medium heatproof bowl, whisk the eggs until completely blended and lightly frothy. Whisk in ¼ cup / 60 ml freshly squeezed lemon juice and the zest, if using.
  1. Turn the burner off. Once the rice is tender, switch off the heat. Wait 1–2 minutes, until active bubbling has stopped.
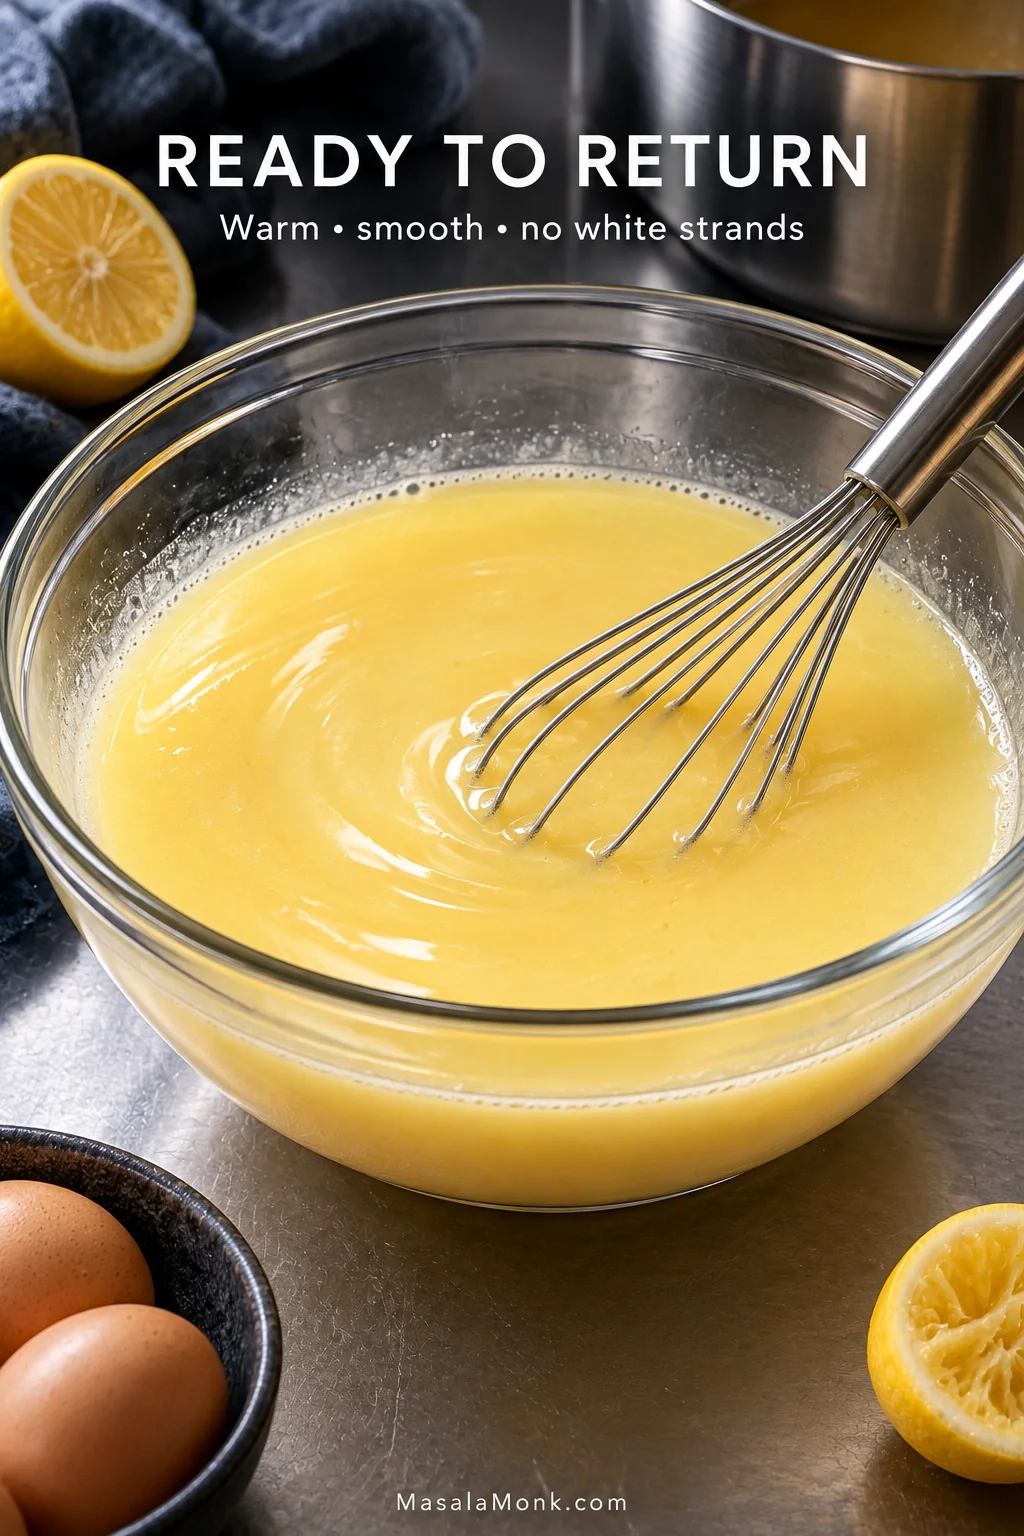
  1. Temper gradually. Measure 2 cups / 475 ml hot broth from the pot. While whisking continuously, slowly stream in the first ½ cup / 120 ml. Once the egg mixture feels warm, add the remaining broth in roughly ½-cup / 120 ml additions, whisking throughout. Lift the whisk at the end: the mixture should run back smoothly, without cooked white strands clinging to it. Once it is warm and smooth, the hardest part is over.
Hot chicken broth being poured in a thin stream into eggs and lemon while the mixture is whisked continuously in a heatproof bowl.
The first stream handles the biggest temperature jump. At that point the hot broth and cool eggs are furthest apart; once the mixture has warmed, the later additions are much less likely to shock the eggs.

Return, Rest & Finish the Soup

  1. Return it to the pot. Slowly pour the tempered mixture into the soup while stirring, then add the chicken. The broth turns pale and fuller.

    Temperature check: if the soup is already 160°F / 71°C or above, the fresh soup needs no more heat. If it is cooler, warm it over low heat while stirring until it reaches 160°F / 71°C. Do not bring freshly finished Avgolemono back to a simmer.
  1. Leave it alone for 10–15 minutes. A soup that looks slightly loose at this point is normal. The texture will settle as it rests. Don’t chase thickness before that happens.
  1. Finish the soup. Check the salt first, then add more fresh lemon juice 1 tablespoon / 15 ml at a time until it tastes as bright as you want it. Stir in the dill and black pepper. Tilt a ladle over the pot: the broth should pour back in a smooth stream rather than drop in heavy clumps. Add warm broth ¼ cup / 60 ml at a time if it needs loosening.

Useful Substitutions

  • Chicken breast: use the same weight and remove it promptly once the thickest part reaches 165°F / 74°C.
  • Rotisserie chicken: use about 3 cups / 400–450 g shredded plain or lightly seasoned chicken. If it is refrigerator-cold, warm it in the broth before turning off the heat and tempering the eggs.
  • Orzo: replace the rice with 4 oz / 115 g dry orzo and cook until just tender, usually about 7–10 minutes depending on the brand.
  • Cooked rice: warm about 1½ cups in the broth before turning off the heat and tempering, or warm it separately and ladle the finished Avgolemono over it.
  • Parsley: flat-leaf parsley can replace the dill.
  • Richer egg finish: use 2 whole eggs + 2 yolks instead of 3 whole eggs.

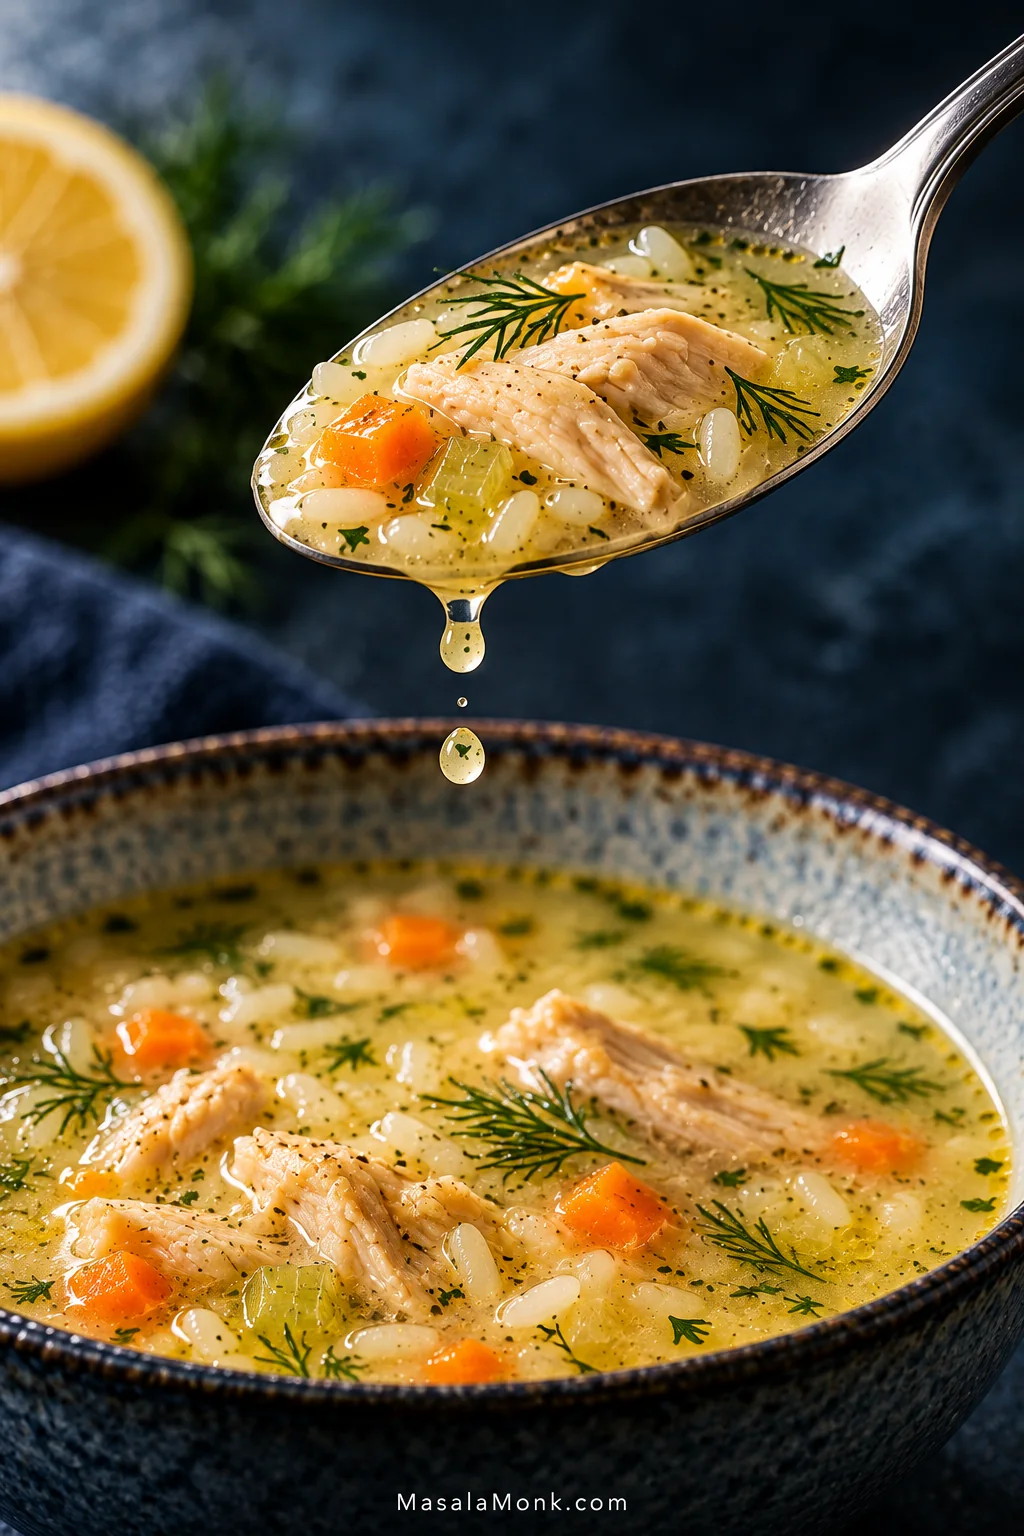
Texture check: finished Avgolemono should cling lightly to the spoon while still falling back into the bowl as broth.

Close-up of a spoon holding Avgolemono with chicken and rice as a few separate drops of pale broth fall back toward the bowl.
The broth should cling lightly, then fall cleanly from the spoon. A continuous rope-like stream or sauce-like ribbon usually means starch or reduction has pushed the soup beyond the light, brothy texture intended here.

What Makes Avgolemono Avgolemono?

Avgolemono (roughly ahv-go-LEM-uh-no) literally means “egg-lemon.” It is a Greek preparation made with eggs, lemon and hot broth, and it is used to give soups and other dishes body, brightness and a smooth finish.

Here, it transforms chicken-and-rice soup into the pale, silky soup most English-speaking cooks know by the same name. You will also see it described as Greek lemon chicken soup or Greek egg-lemon soup. In Greek-American diners, it may also appear as chicken lemon rice soup.

A lemon chicken soup with rice or orzo is not automatically Avgolemono; the egg-lemon finish is what changes it. Some cooks use rice, others orzo. Whole eggs are common, while extra yolks make the mixture richer. The soup can finish light and brothy or considerably thicker.

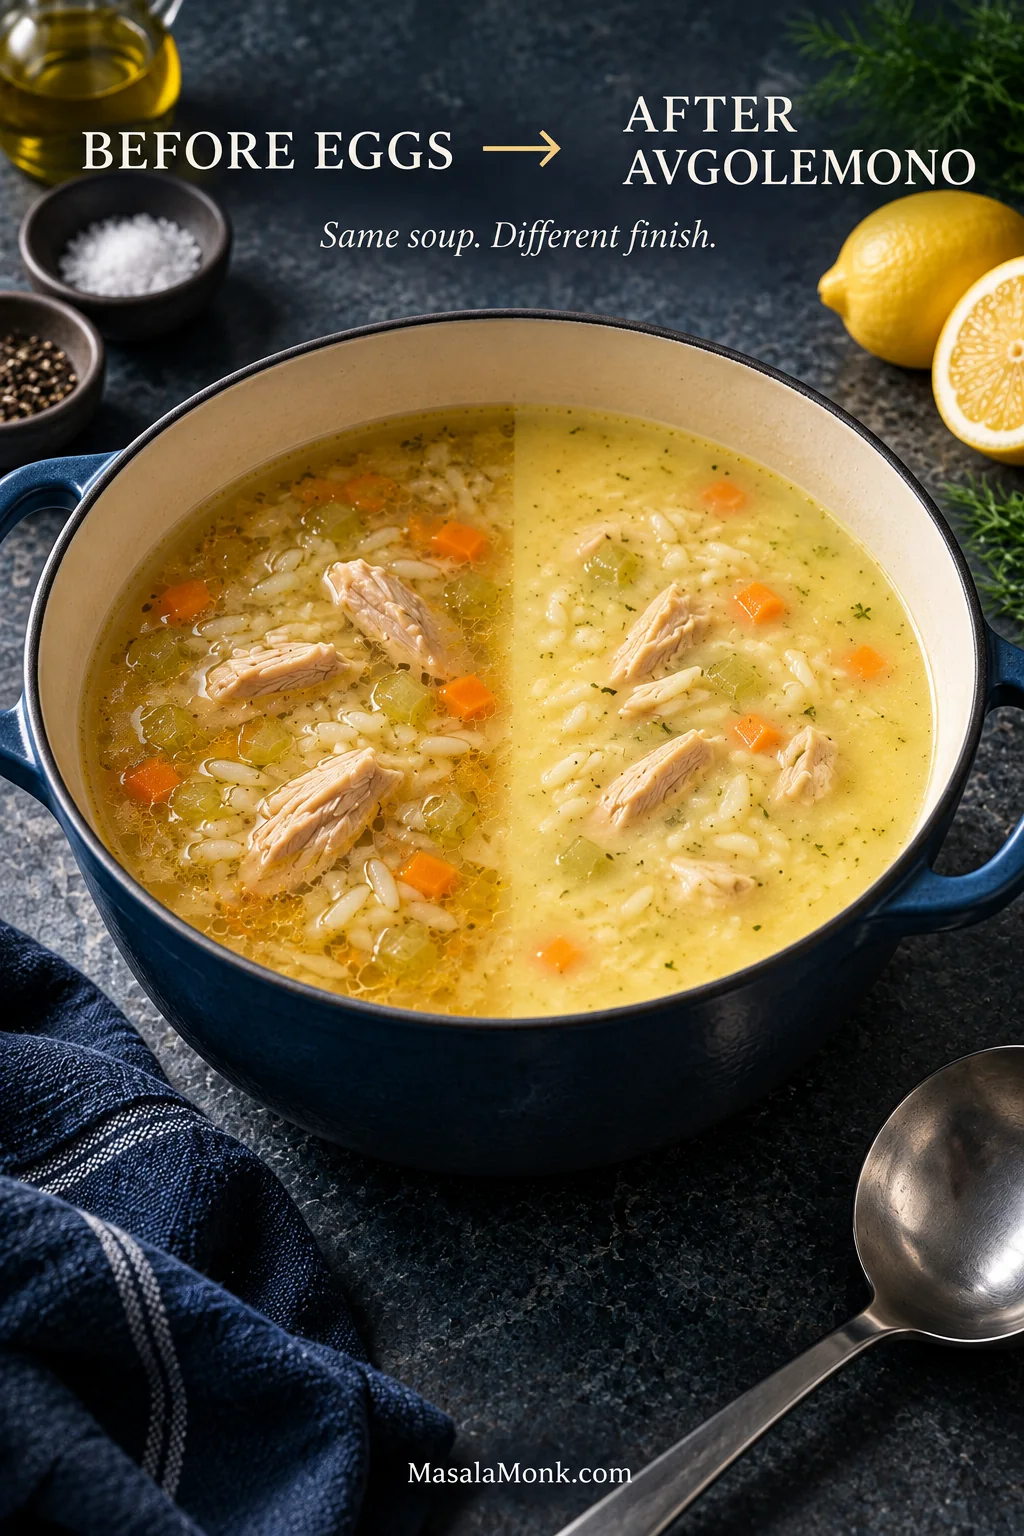
The same chicken-and-rice soup shown before and after the egg-lemon finish, changing from clear golden broth to an evenly pale and more opaque Avgolemono broth.
Look for an even change throughout the liquid. After the tempered eggs return, the broth should become uniformly paler and more satin-like; isolated white wisps are different and point to egg beginning to set separately.

Rice or Orzo: Choose the Texture You Want

Both rice and orzo work in Avgolemono. Rice usually gives you a softer, more integrated soup; orzo has a more distinct pasta bite. Either one will continue taking up broth during storage, which is worth remembering when you are cooking ahead.

If you want…Choose…What changes
A fuller, more integrated lemon-rice soupMedium-grain white riceSofter grains and a little more body in the broth
A lighter soup with clearer individual grainsLong-grain white riceMore separation between rice and broth
A defined pasta biteOrzoA more pasta-forward texture while fresh
Several days of leftoversCook either starch separatelyThe stored broth stays much looser
A thick Greek-American diner styleA little more starch or a longer restMore body and a stronger lemon-rice character
Two bowls of Avgolemono side by side, one made with white rice and one with orzo pasta, showing the visibly different shape and texture of the two starches.
Rice and orzo are not best swapped blindly by volume. They pack differently, so use the measured amount for each in the recipe; then choose between them for the eating texture you prefer rather than trying to make one behave like the other.

Start with ½ cup / about 95 g medium-grain rice for 8 cups / 1.9 L broth. That gives the soup substance without making it starch-heavy; the eggs provide most of the body.

Arborio works too, but it releases plenty of starch and thickens the broth quickly. Use the same restrained amount and give the soup time to settle before deciding it needs more body.

If Tomorrow Matters, Keep the Rice Separate

When most of the soup will be eaten at dinner, cook the rice right in the broth. It takes on chicken flavor, and some of its starch becomes part of the soup.

For leftovers over the next couple of days, keep the rice or orzo separate from the start. Spoon some into each serving and add hot Avgolemono over it. The how to cook rice guide has the basic ratios and timings if you are cooking a separate batch.

Cooked white rice being spooned from a separate bowl into a serving of Avgolemono, illustrating keeping the rice apart until serving leftovers.
Separate storage also protects the broth from extra starch. Reheat the soup according to the safety guidance below, warm the rice separately, then combine them in the serving bowl so the grains spend less time soaking in the broth.

Planning for leftovers? See make-ahead, storage and reheating.

Chicken Thighs, Breast or Rotisserie?

Chicken thighs are the main choice here because they are forgiving and bring some richness to the broth. 165°F / 74°C is the safe minimum for poultry, but thighs may become more tender with additional time at a low simmer if the meat still feels firm.

Chicken breast behaves differently: remove it promptly at 165°F / 74°C to keep it from drying out. The baked chicken breast guide goes deeper into thickness and temperature.

Rotisserie chicken is the fastest option. Use a plain or lightly seasoned bird, remove heavily flavored skin, and warm refrigerated meat in the broth before the tempering step. Smoke, barbecue seasoning or a strong herb crust can pull the soup away from its clean chicken-and-lemon flavor.

The Egg-Lemon Handoff

To keep Avgolemono from curdling, take the soup off active heat, warm the egg-lemon mixture gradually with hot broth while whisking, then return it to the pot without letting the freshly finished soup simmer or boil.

Tempering narrows the temperature jump. The eggs warm in stages, so they disperse into the broth instead of tightening into visible strands.

Why 2 Cups of Broth?

Ladles vary enormously. A measured 2 cups / 475 ml hot broth gives you enough liquid to warm the eggs gradually and makes the method repeatable from one kitchen to another.

Watch the mixture: before tempering, the eggs and lemon look yellow and lightly frothy. By the end they are warmer, thinner and completely smooth. White threads mean some egg has already started to coagulate.

Smooth pale-yellow tempered mixture of eggs, lemon and hot broth in a clear bowl, with a whisk resting in the fluid mixture and no cooked egg strands visible.
Another clue is how quickly the whisk marks disappear. A properly tempered egg-lemon mixture remains loose enough to level itself almost immediately instead of holding ridges like custard or sauce.

Those threads are exactly what you want in egg drop soup, where the eggs are encouraged to form ribbons. Avgolemono is aiming for a smooth broth instead.

Three whole eggs keep this version simple; extra yolks make the soup richer and more yellow, while some traditional methods whip the whites separately for a lighter, foamier finish. For more richness without changing the basic technique, use 2 whole eggs and 2 yolks.

Temperature note: chicken needs to reach at least 165°F / 74°C in its thickest part. Egg-containing dishes should reach 160°F / 71°C. If the soup drops below that temperature during tempering, warm it over low heat while stirring until it reaches 160°F / 71°C rather than restarting a simmer. The FDA egg-safety guidance also explains when pasteurized eggs are useful.

Already seeing white strands or graininess? See Avgolemono troubleshooting.

Bright Is Not the Same as Sour

One Avgolemono can taste gently lemony while another makes lemon the first thing you notice. Starting with a moderate amount leaves room to adjust after the soup has rested.

Begin with ¼ cup / 60 ml freshly squeezed lemon juice, then taste again after the rest and add more a tablespoon at a time. Fresh juice has a brighter citrus aroma than bottled lemon juice.

Juice and Zest Do Different Jobs

Lemon juice adds acidity. Lemon zest adds aroma. A soup can already taste tart and still seem strangely short on lemon character. More juice may only sharpen it; some fresh yellow zest can make the citrus smell brighter without adding the same amount of acid.

Hand lightly grating the yellow zest of a fresh lemon over Avgolemono, with fresh lemon juice nearby.
Grate zest directly over the bowl when you can. The fine yellow shreds release aromatic oils that are easy to leave behind on a board or plate; juice, meanwhile, is the better tool when the soup needs more acidity.

Keep the grater on the thin yellow skin and away from the bitter white pith underneath. The same distinction is useful in our lemon pepper chicken, where zest carries much of the citrus aroma and juice supplies the sharper finish.

Still tasting flat? Check the salt before squeezing another lemon. Weak or under-seasoned broth does not become richer just because it becomes more acidic.

Read the Soup Now, in 15 Minutes, and Tomorrow

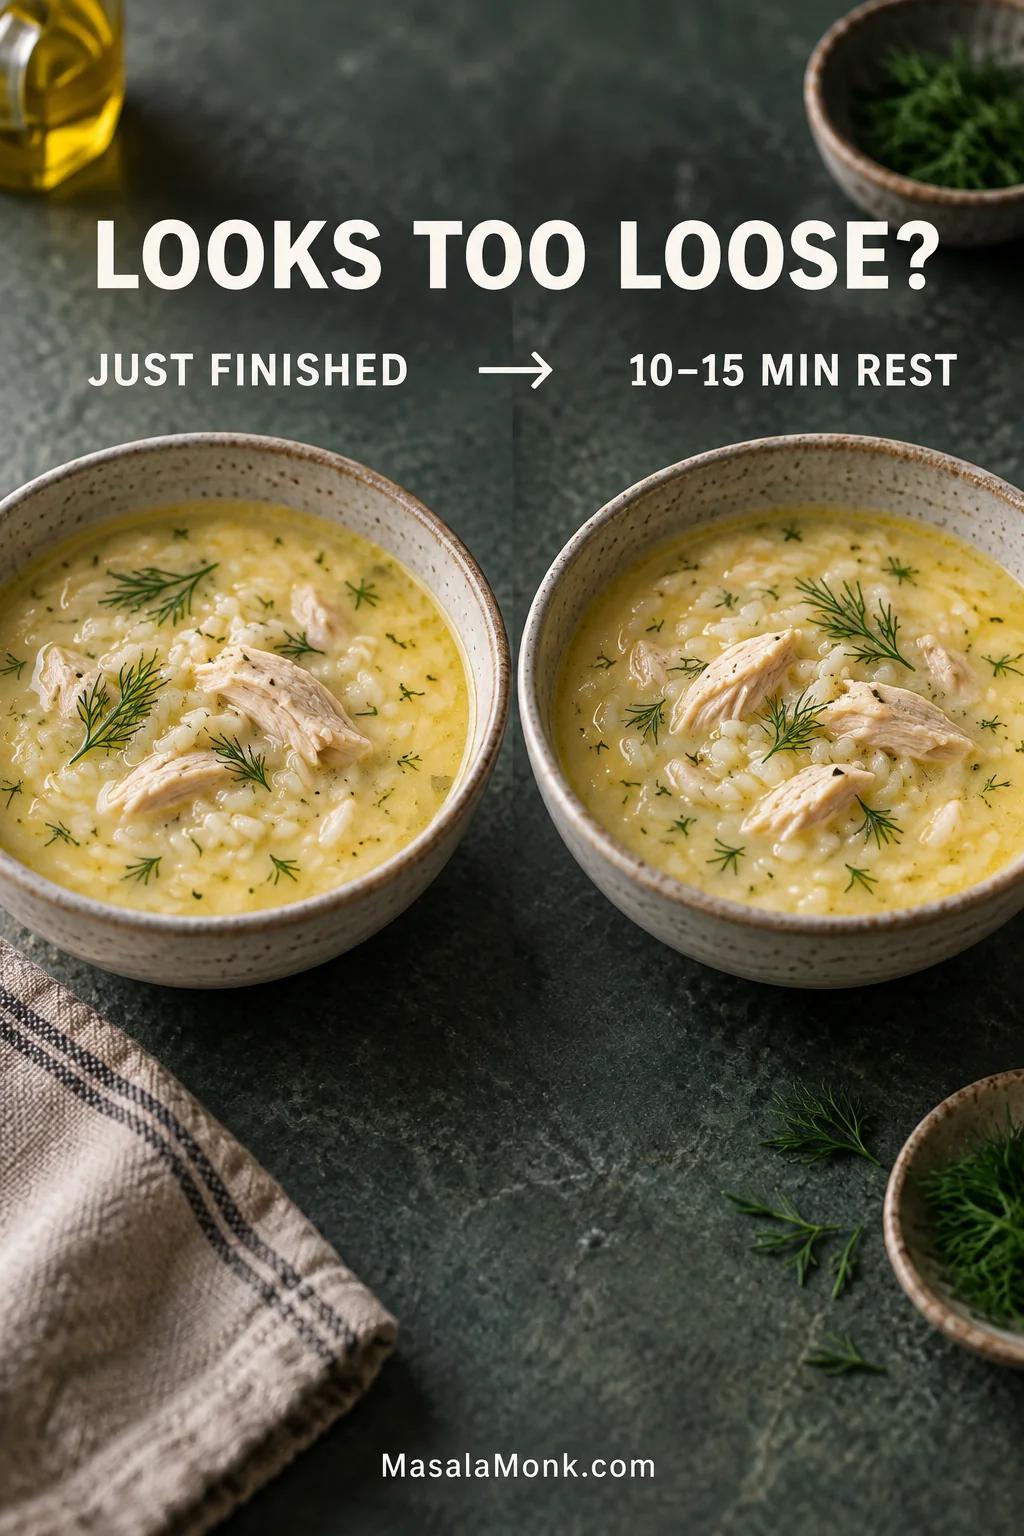
Fresh Avgolemono changes after the burner goes off. A soup that looks slightly loose right after tempering can settle into exactly the right texture after ten minutes, so the first spoonful from the pot can be misleading.

WhenWhat you are likely to seeWhat to do
Just finishedSlightly looser than the final textureLeave it alone for 10–15 minutes
After the restFuller broth with liquid around the riceAdjust salt, lemon and broth now
An hour laterMore noticeable thickeningAdd some broth if needed
TomorrowUsually much thickerExpect a thicker soup; follow the reheating guidance below
Two matched bowls of Avgolemono showing a looser freshly finished soup and a somewhat fuller texture after resting for 10 to 15 minutes.
When you are unsure, err slightly loose before the rest. Broth can always be adjusted afterward, whereas thickening the soup further too early can overshoot the texture you wanted once the rice continues absorbing liquid.

How Thick Should Avgolemono Be?

There is no single fixed answer. Some Greek versions stay light and broth-forward; others are much more substantial. Greek-American lemon rice soup from Detroit-area Coney Island diners can be thicker still, with rice playing a much larger role.

This recipe aims for broth that lightly coats a spoon but still moves freely around the chicken and rice. If you prefer the thicker diner style, let it stand longer before thinning it or use more rice next time.

When Avgolemono Goes Wrong

Think back to the moment the soup changed. A pot that became thick before the eggs arrived needs broth; white strands appearing during tempering point to too much heat. That timing usually tells you where the problem started.

Problems Before the Egg-Lemon Finish

Smooth finished Avgolemono beside a small sample containing irregular white cooked egg strands, demonstrating the visual difference between an even broth and curdled egg.
Do not mistake normal pale opacity for curdling. The warning signs are irregular opaque flecks, white strands or a broken-looking surface interrupting an otherwise smooth broth—not simply the lighter color created by the egg-lemon finish.
What you seeWhat probably happenedWhat to do
Hardly any broth around the riceThe pot reduced too much or there is too much rice for the remaining brothAdd hot broth before tempering
Firm thigh meat before temperingIf it has already reached 165°F / 74°C, it may be safely cooked but not fully tender yetReturn the chicken to the simmering broth and cook until tender
The pot is still bubbling hardIt has not cooled enough for the egg mixtureWait until active bubbling stops
White threads appear while temperingThe eggs heated too quicklyPause, whisk and add the remaining broth more slowly; a heavily scrambled mixture is better remade
The mixture turns grainySome egg has coagulatedStop applying heat; severe curdling cannot truly be reversed

Problems After the Soup Is Finished

ProblemTry this
Too thinLet it rest before changing anything
Too thickAdd warm broth ¼ cup / 60 ml at a time
Too sourDilute with broth, then recheck the salt
Tart but not very aromaticAdd some fresh yellow zest rather than more juice
Bitter lemon flavorWhite pith or cooked peel is the likely culprit; dilution may soften it
Bland except for lemonFix the broth and salt before adding more acid
Almost porridge the next dayFor future batches, keep the rice separate when leftovers matter
Grainy after reheatingThe egg emulsion has tightened; reheated Avgolemono may not return to its freshly made texture
Warm golden chicken broth being poured into overly thick Avgolemono while a spoon stirs the soup to loosen its consistency.
Fix texture before correcting seasoning. Warm chicken broth loosens an over-thick Avgolemono without thinning the broth’s flavor as much as water; every addition also softens the salt and lemon, so taste again only after the consistency is right.

A few tiny egg flecks are mostly cosmetic and can be strained out if they bother you. Once the whole broth is visibly grainy or full of cooked egg ribbons, blending may hide the appearance, but it cannot uncook the eggs.

Serving Later Today, Tomorrow, or From the Freezer

Making Avgolemono Ahead

If you are serving within about an hour, let the finished soup rest and make the final lemon and broth adjustments just before eating. For a longer gap, refrigerate it promptly rather than leaving a chicken-and-egg soup at room temperature. According to the USDA leftovers guidance, perishable food should be refrigerated within 2 hours, or within 1 hour when the surrounding temperature is above 90°F / 32°C.

For the best texture when you already know the soup is for later, stop earlier: chill the chicken-and-broth base before adding the rice or orzo and egg-lemon mixture, then finish the soup closer to serving. Shallow containers help a large batch cool more quickly.

Glass container holding golden chicken broth with chicken and finely diced vegetables, while dry rice, eggs and fresh lemons remain separate for finishing the soup later.
The chicken-broth base is the most reliable part to make ahead. It freezes and reheats more predictably than cooked rice or orzo and the finished egg-lemon emulsion, whose textures change more noticeably during storage.

Storing & Reheating Avgolemono

How Long Does Avgolemono Keep?

Properly refrigerated leftovers are generally best used within about 3–4 days. Rice or orzo will continue softening during storage, so a finished batch will not look exactly as it did on the first night.

How to Reheat Avgolemono Safely

The USDA leftovers guidance says reheated leftovers should reach 165°F / 74°C and soups should be brought to a rolling boil.

That treatment is hard on Avgolemono’s egg-lemon texture, so a reheated batch may be less smooth than the first pot. Food safety takes priority. If second-day texture matters, the base-only make-ahead method above is the better choice.

Can You Freeze Avgolemono?

You can freeze finished Avgolemono, but the thawed soup may be grainier and the rice or orzo softer. The more reliable approach is the same one used for make-ahead cooking: freeze the chicken-and-broth base before the starch and egg-lemon finish.

Thaw the base safely, heat it, cook the rice or orzo, then make the Avgolemono fresh.

The Finished Bowl

This Avgolemono doesn’t rely on cream or a large amount of rice for its body. The broth should pour rather than sit, the chicken should be tender, and the lemon should smell fresh before the acidity becomes the first thing you notice.

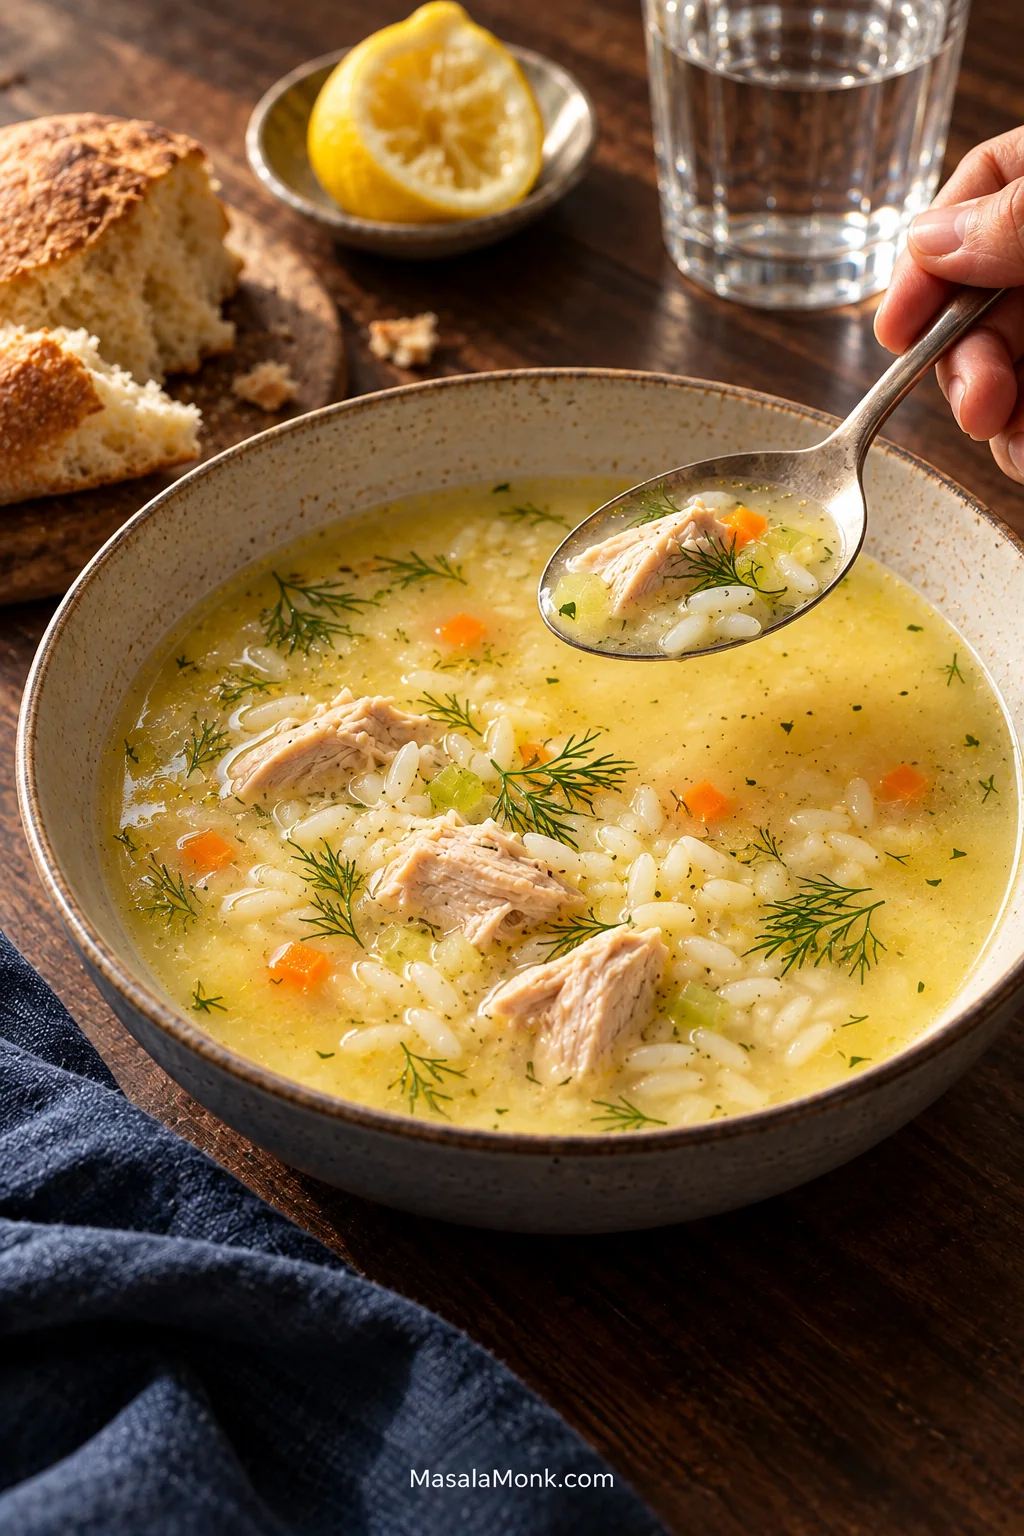
Hand lifting a spoonful of Avgolemono with chicken and rice from a bowl at the table, with rustic bread, lemon and a drink arranged nearby.
For a simple meal, serve Avgolemono with warm pita or crusty bread and a crisp salad. Keep the sides restrained so they complement the lemony chicken broth rather than competing with it.

Once the rhythm makes sense, the technique fades into the background. What is left in the bowl is tender chicken, soft rice, fresh lemon and a broth that somehow feels creamy without being heavy.

Simmer → Stop → Temper → Rest.

Posted on — Leave a comment

White Bean Soup Recipe: Creamy, Hearty & Easy in 30 Minutes

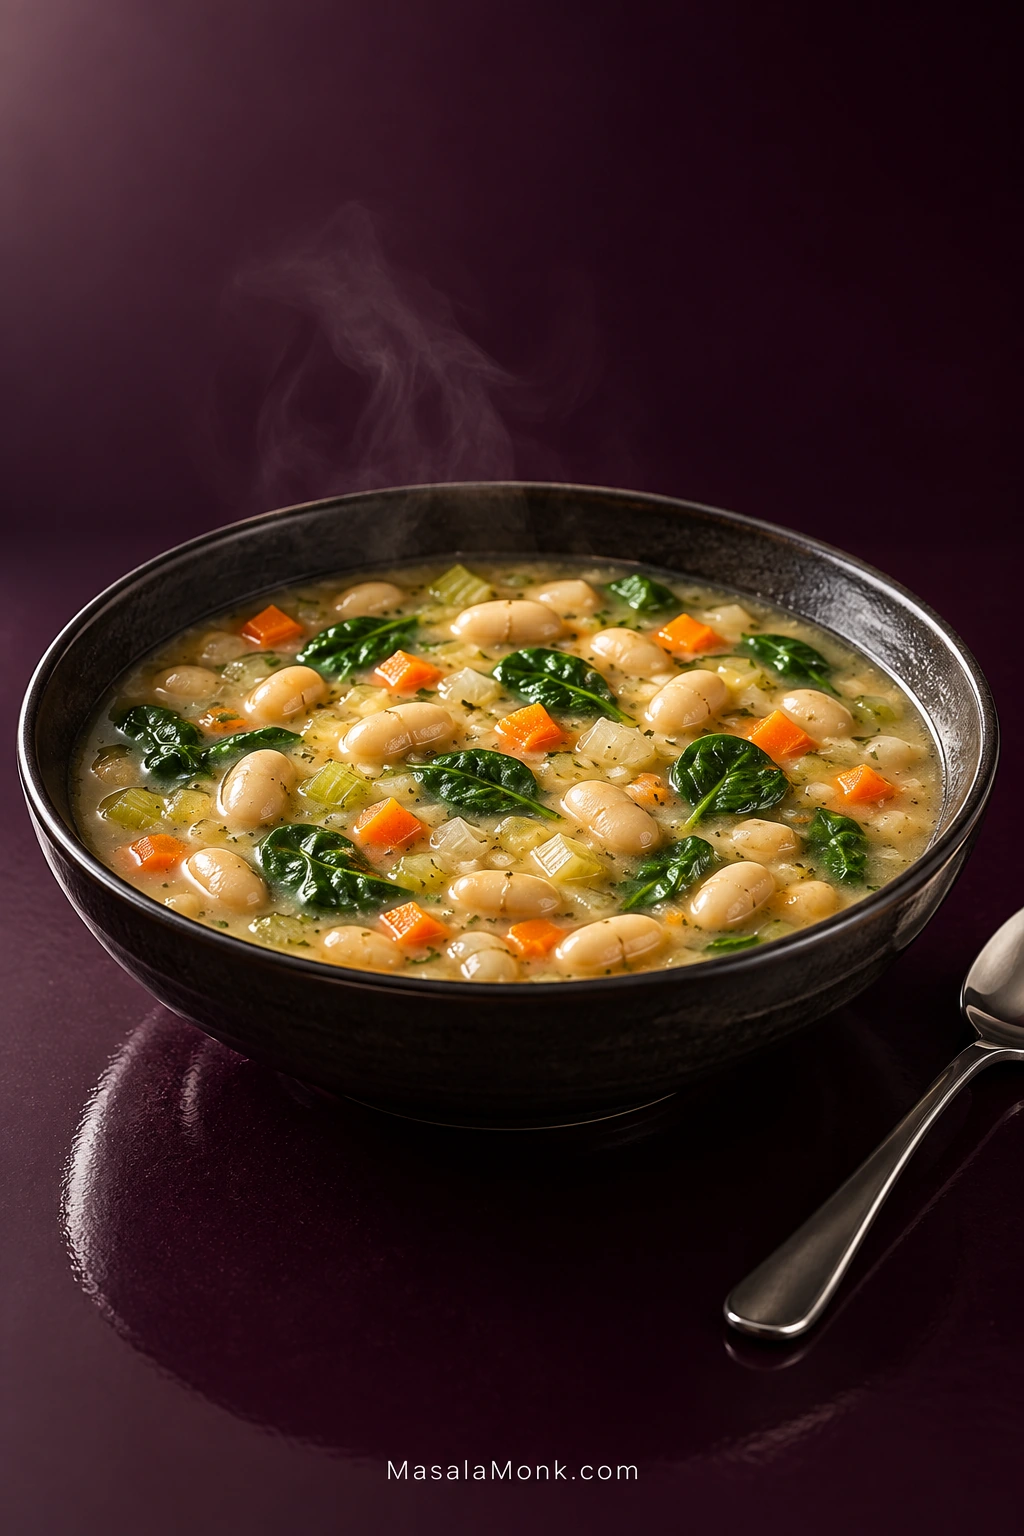
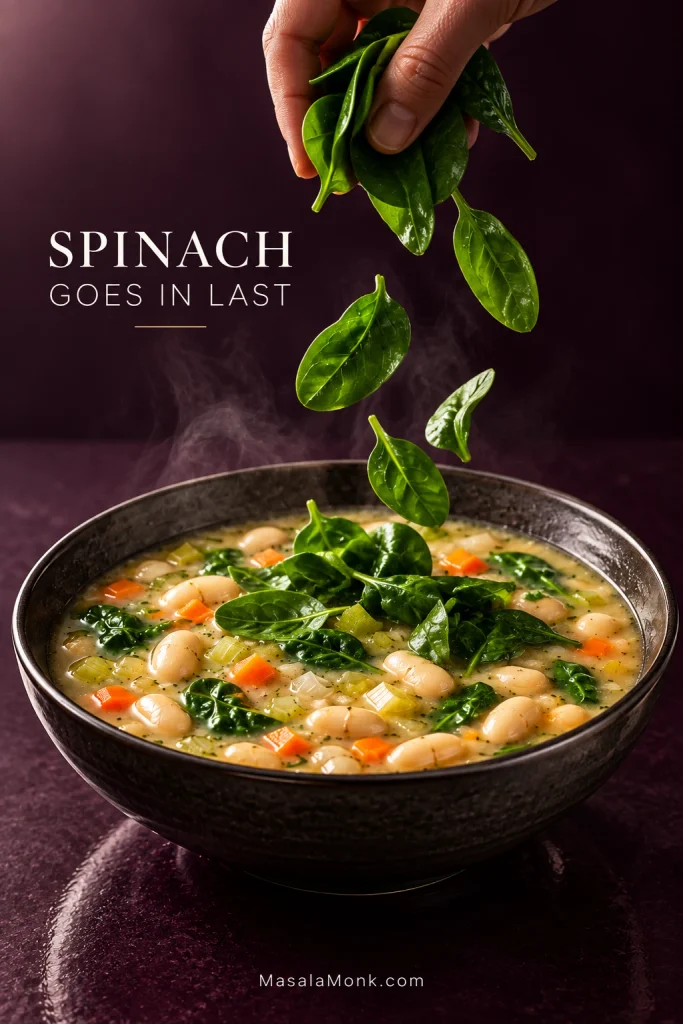
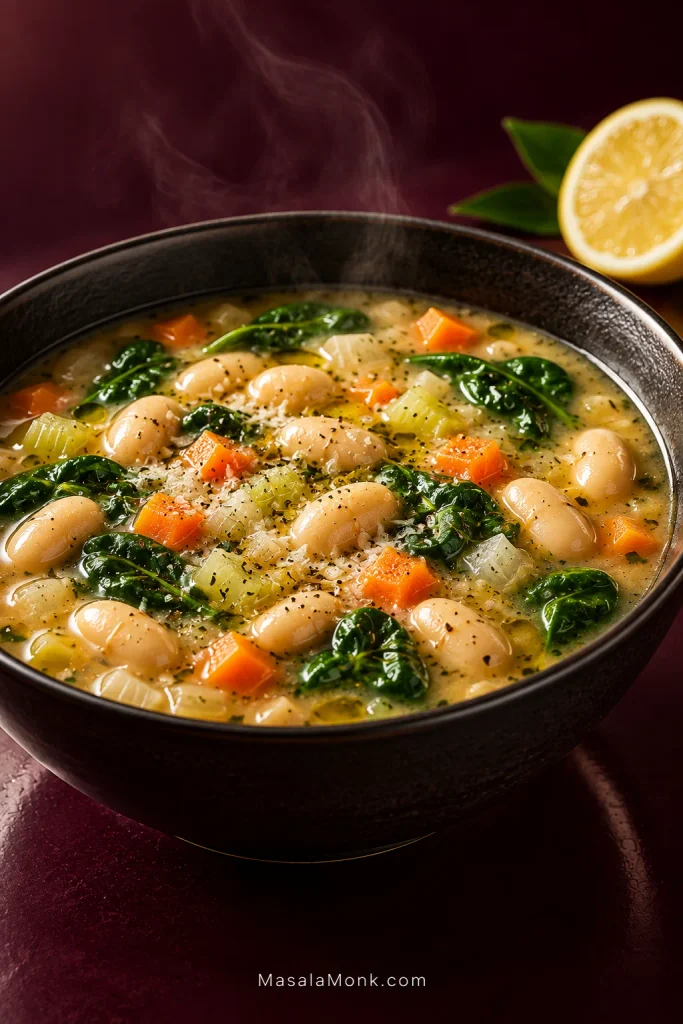
Dark bowl filled with creamy white bean soup, whole cannellini beans, diced carrots and celery, and wilted spinach.

A few cans of white beans, an onion, a carrot and some broth do not look like much of a dinner. Half an hour later, they can be a pot of creamy broth full of whole cannellini beans, tender vegetables and wilted spinach, with enough garlic, herbs and lemon to keep every spoonful lively.

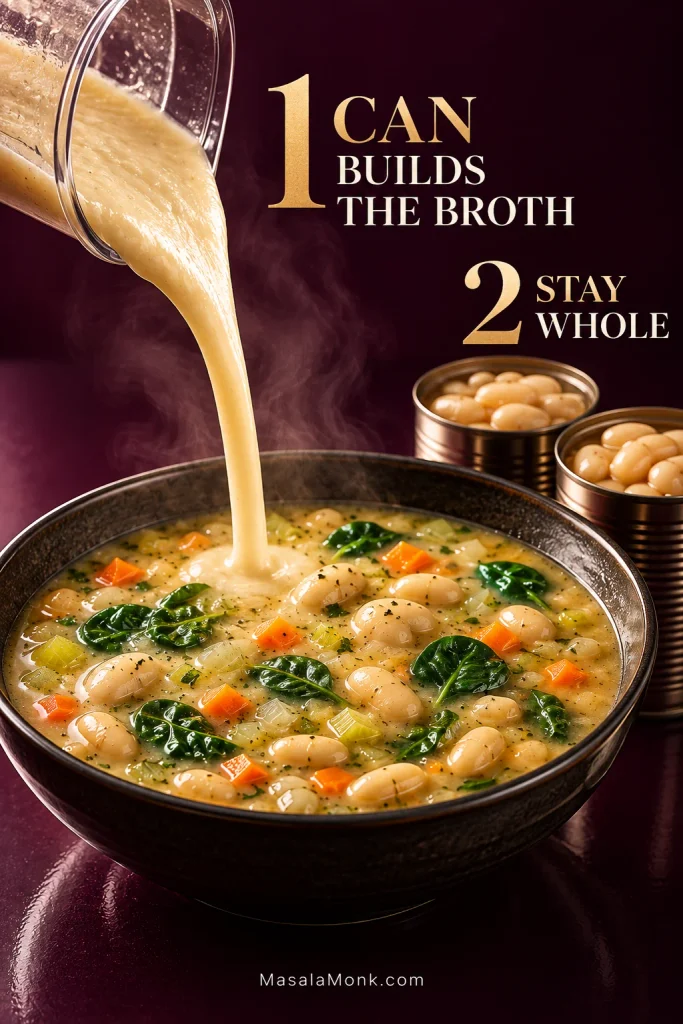
The broth gets its body from the beans themselves, not from flour or heavy cream. One can is blended until smooth and the other two stay whole, so the bowl still feels hearty rather than puréed.

White Bean Soup Recipe

Cannellini beans, tender vegetables and spinach in a bean-thickened broth with garlic, rosemary, thyme and fresh lemon.

Pot
5–6 qt / 4.7–5.7 L

Prep
10 min

Cook
20 min

Total
30 min

Yield
4 generous / 6 lighter servings

Equipment

  • 5- to 6-quart / 4.7- to 5.7-liter Dutch oven or soup pot
  • Countertop blender or immersion blender with a tall blending jug; see notes for a no-blender option

Ingredients

  • 2 tablespoons / 30 ml olive oil
  • 1 medium yellow onion, about 170 g peeled, diced
  • 2 medium carrots, about 150 g trimmed, diced
  • 2 celery ribs, about 100 g trimmed, diced
  • 4 garlic cloves / about 14 g, finely chopped or minced
  • 1 teaspoon dried thyme
  • ½ teaspoon dried rosemary, lightly crushed between your fingers
  • ¼ teaspoon red pepper flakes, or less for a very mild soup
  • 3 × 15 oz / 425 g cans cannellini beans, drained and rinsed
  • 4 cups / 950 ml low-sodium vegetable or chicken broth, plus more if needed
  • 3 packed cups / about 90–100 g baby spinach
  • 1½ tablespoons / about 22 ml fresh lemon juice, plus another 1–2 teaspoons if needed
  • ¼ teaspoon fine sea salt to start, plus more to taste
  • ¼ teaspoon freshly ground black pepper, plus more to taste

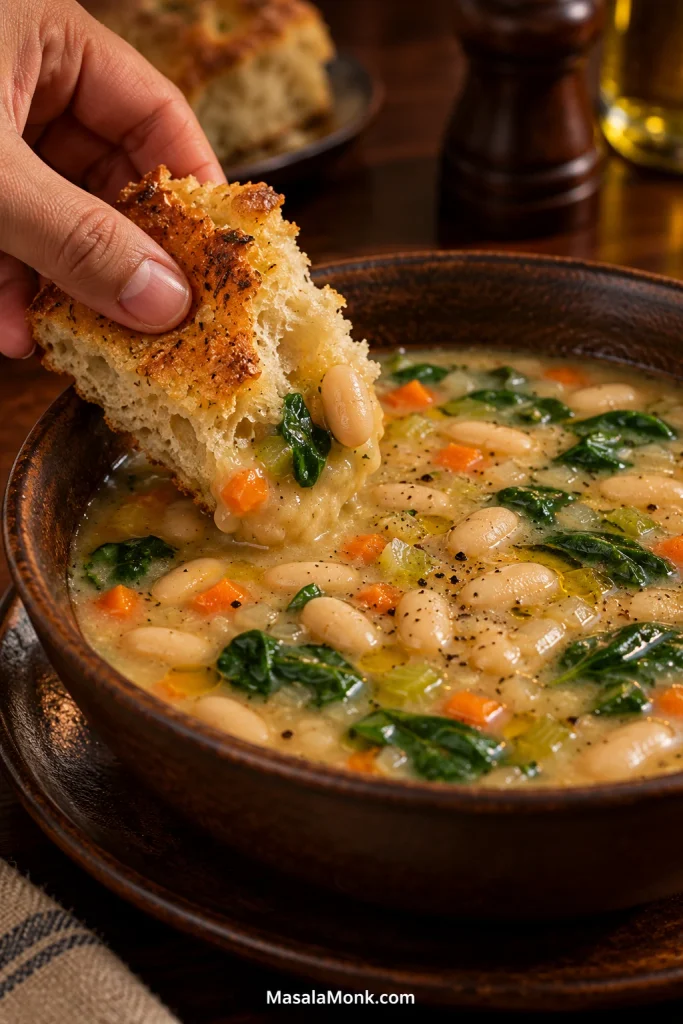
For serving, if you like: grated Parmesan, chopped parsley, extra-virgin olive oil, black pepper, red pepper flakes and crusty bread.

Method

Build the Base

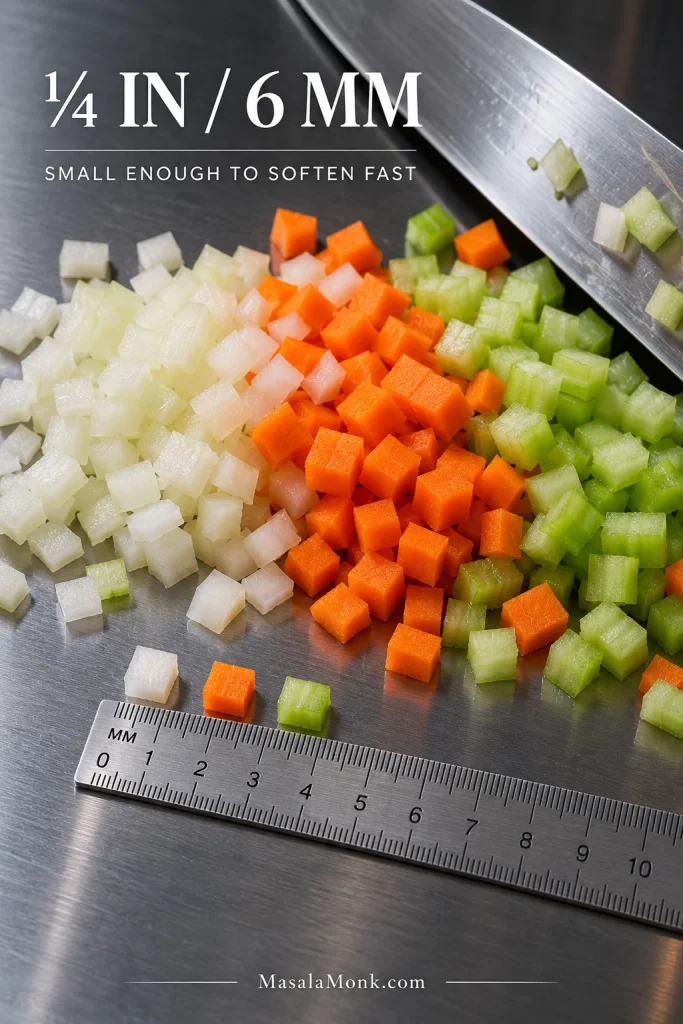
  1. Start the vegetables. Heat the olive oil over medium heat. Add the onion, carrots, celery and the measured ¼ teaspoon salt. Keep the vegetables around ¼ inch / 6 mm so they soften within the short cook. Cook for about 6–7 minutes, stirring occasionally, until the onion is translucent and the vegetables are beginning to soften.
Small diced pieces of onion, carrot and celery beside a ruler showing a size of about one-quarter inch or 6 millimeters.
Uniformity matters more than perfect knife work. Keep the onion, carrot and celery close to ¼ inch / 6 mm so one oversized piece does not stay firm after the rest has softened.
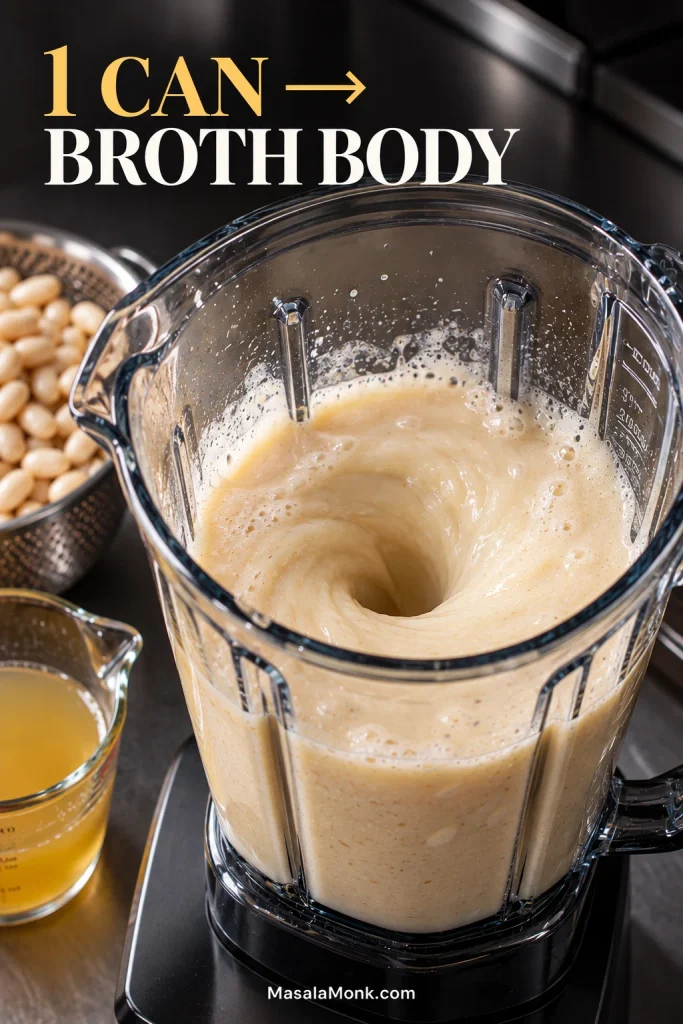
  1. Blend one can of beans while the vegetables cook. Put one drained and rinsed can of cannellini beans in a countertop blender or tall blending jug with 1 cup / 240 ml of the unheated broth. Blend until smooth and glossy, with no obvious pieces of bean skin.
Clear blender jar swirling cannellini beans and broth into a smooth, pale, pourable bean mixture.
Watch the texture in the blender: the bean mixture should be smooth enough to pour, not thick enough to sit like paste. That fluid base is what later gives the broth body.
  1. Add the aromatics. Stir in the garlic, thyme, rosemary and red pepper flakes. Cook for 30–60 seconds, until the garlic loses its raw edge and the herbs smell noticeably stronger. Do not let the garlic brown.

Simmer and Finish

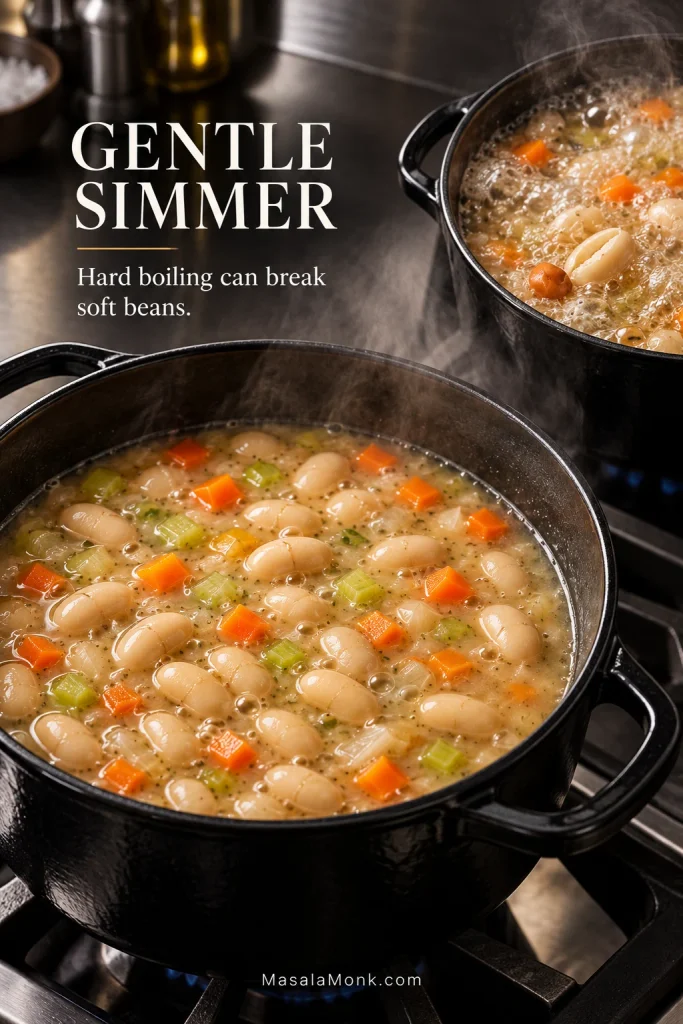
  1. Add the beans and broth. Stir in the two remaining cans of whole beans, the bean purée and the remaining 3 cups / about 710 ml broth. Bring the pot just to a boil, then lower the heat to a gentle simmer. Cook uncovered for about 8–10 minutes, until the vegetables are tender and the broth has lightly thickened.
White bean soup at a gentle simmer in the foreground with a more vigorously boiling example shown behind it.
The surface should stay mostly calm with small bubbles rising through it. When the whole pot churns, very tender canned beans are more likely to split and lose their skins.
  1. Wilt the spinach. Add the spinach. It will look like a lot at first, then collapse quickly. Cook for 1–2 minutes, until wilted but still green.
Fresh baby spinach being dropped into a pot of creamy white bean soup with whole beans and diced vegetables.
Once the leaves lose their volume, there is little benefit in cooking them much longer. Extra time mostly dulls their color and softens their texture.
  1. Finish off the heat. Stir in 1½ tablespoons / about 22 ml lemon juice and the black pepper. Taste before adding more salt. Already salty enough but still dull? Add another teaspoon of lemon first. Loosen with a little extra broth if needed.
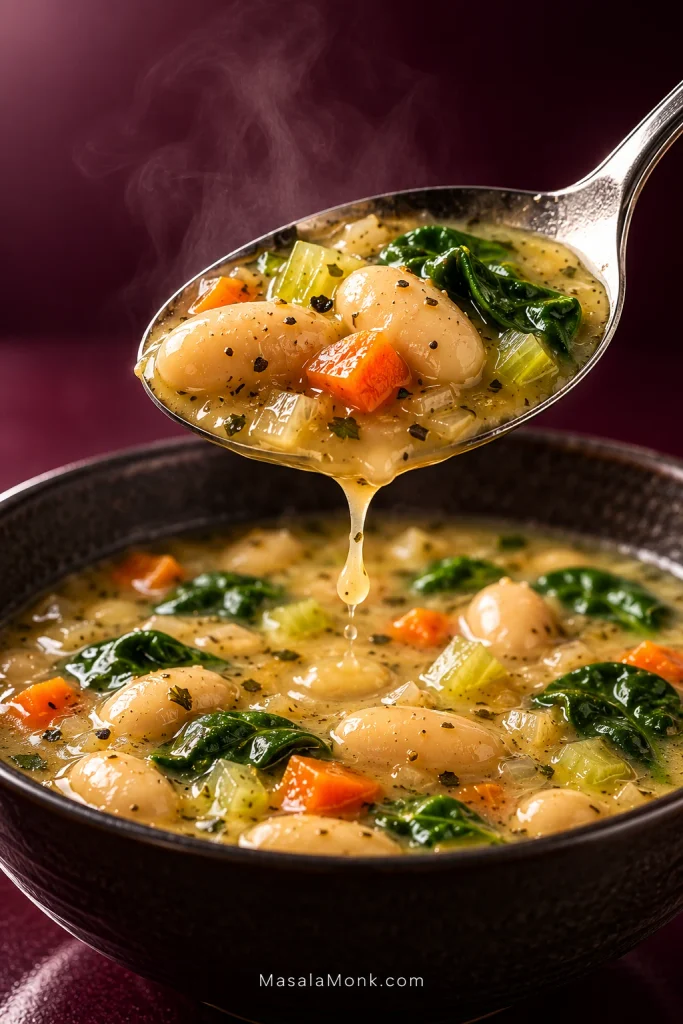
Close-up spoon holding cannellini beans, spinach and diced vegetables coated in creamy white bean soup broth.
A balanced spoonful carries broth, beans, vegetables and greens together. If the solids sink away from watery broth—or barely move through something gravy-thick—the texture still needs adjusting.

Recipe Notes

  • No blender: Mash one drained can very thoroughly, then loosen it with a little broth before adding it to the pot.
  • Very soft canned beans: Beans already cracking or shedding skins in the colander need a shorter simmer and gentler stirring from here.
  • Vegan: Use vegetable broth and leave off the Parmesan. A drizzle of extra-virgin olive oil at serving adds richness.
Macro view of rinsed cannellini beans, including intact beans and one very soft bean splitting with a loose skin.
The colander can tell you a lot before cooking starts. Beans that are already cracking or slipping out of their skins need gentler stirring than a firmer batch.

Something not tasting or behaving right? Jump to flavor fixes or texture fixes.

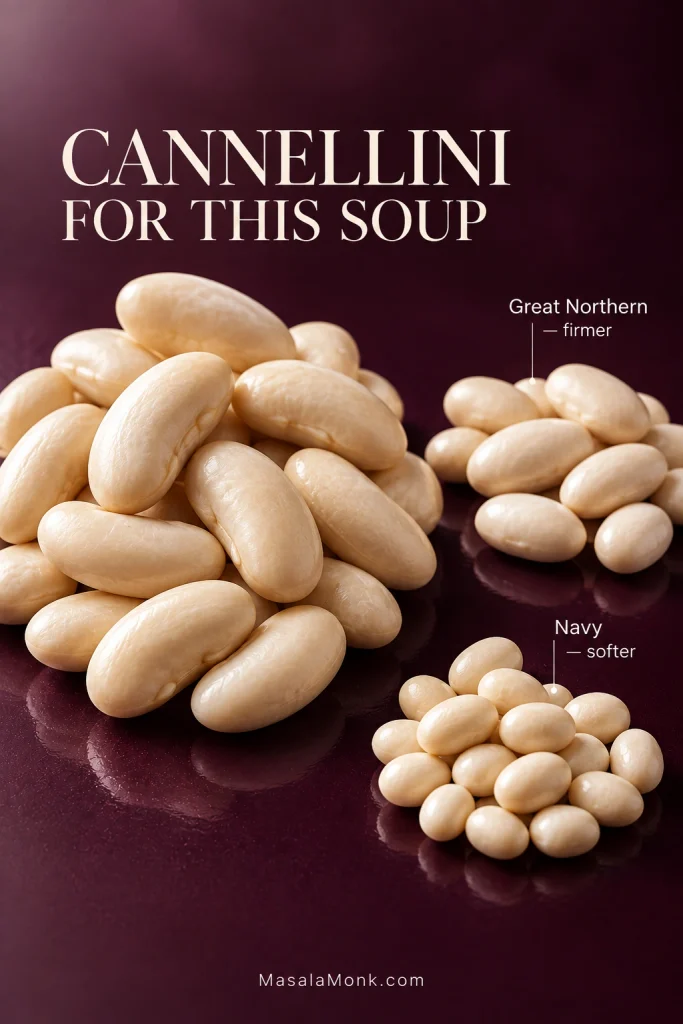
Cannellini, Great Northern or Navy?

Cannellini: large and creamy, with enough structure to stay mostly whole. They give this soup a fuller broth without disappearing into it.

Great Northern: smaller, slightly firmer and very mild. Use them as a direct swap.

Navy: smaller and softer. They tend to break down sooner, so the finished soup may feel thicker.

Comparison of large elongated cannellini beans, medium Great Northern beans and smaller navy beans.
Size changes what you notice in the bowl. Cannellini stay prominent, Great Northern beans sit in the middle, while smaller navy beans disappear into the broth more easily as they soften.

Should You Drain and Rinse Canned Beans?

For this recipe, yes. Canned bean liquid contains starch and can be useful, but its saltiness, thickness and flavor vary quite a bit by brand.

Rinsing gives you more control and can wash away a noticeable canned or metallic taste from some packing liquids. The blended beans already provide the starch we need here.

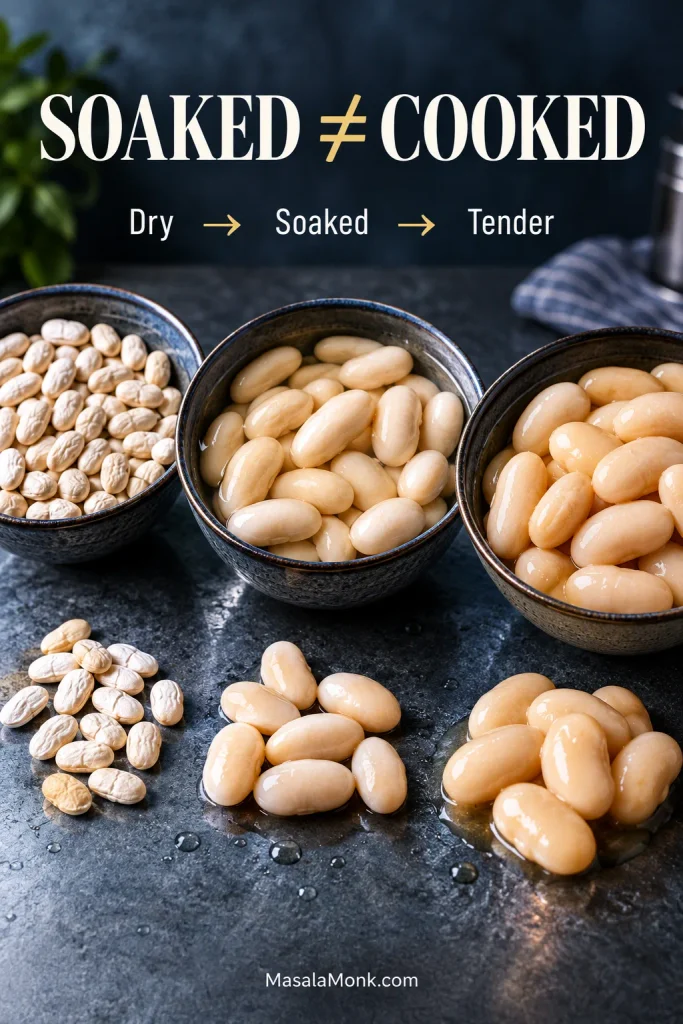
Using Dried White Beans? Cook Them First

Cook them all the way before using them in this recipe. Soaking hydrates cannellini, Great Northern or navy beans, but it does not make them tender enough to go straight into this quick soup.

Once cooked, use enough beans to replace the three drained cans called for in the recipe. Because dried-bean yield varies with the bean and cooking method, match the finished cooked amount rather than relying on an untested dry-bean conversion.

Wait until the beans are soft before adding strongly acidic ingredients. Colorado State University Extension gives the same guidance for cooking pulses. The lemon here already goes in at the end.

White beans shown dry, swollen after soaking and fully plump after cooking, with the words “Soaked ≠ Cooked.”
Plump does not mean tender. Dried white beans can look ready after soaking while still being far from the soft texture needed for soup.

Creamy Without Cream

Creamy describes the broth; the whole soup should not be smooth. You still want whole beans and pieces of carrot, celery and spinach in every bowl.

With three cans of beans and 4 cups / 950 ml broth, the soup stays substantial without becoming dense. One can builds the broth while the other two keep the bowl full of whole beans.

White bean soup showing smooth blended beans forming the broth while whole cannellini beans remain visible, with text explaining that one can builds the broth and two stay whole.
Separating the beans by job gives you more control later. The blended portion can build body while the whole beans preserve texture, so thickening the broth does not mean sacrificing every intact bean.

Drag a spoon through a ladleful. The broth should cling lightly to the beans and vegetables, then flow straight back into the gap. Bean brands vary, so use that result instead of chasing one exact look.

Spoon drawn through creamy white bean soup, leaving a temporary channel as the broth begins moving back into place.
Pay attention to how the trail closes. A gap that stays open suggests the soup is too dense; one that vanishes immediately points to a looser broth.
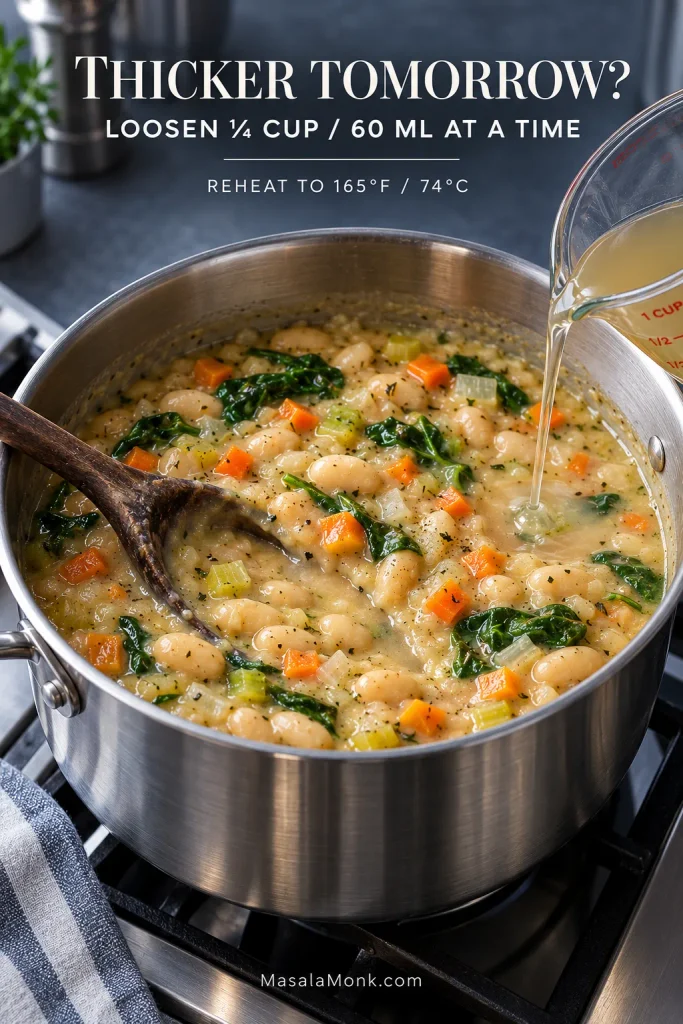
  • Too brothy: mash or blend another ½–1 cup of beans.
  • Still too thin: simmer uncovered for another 2–4 minutes.
  • Too thick: add broth in ¼-cup / 60 ml increments.

Stop a little earlier than you think. The beans keep thickening the broth as it sits.

Texture still not right? Jump to the troubleshooting table →

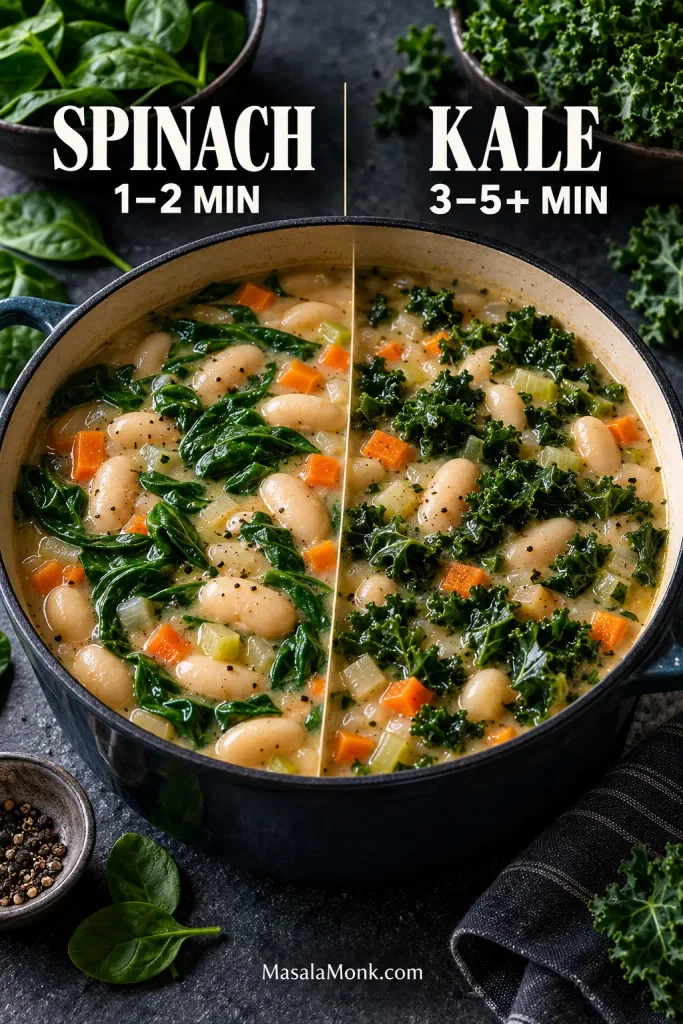
Spinach or Kale? The Timing Changes

Spinach is the quicker option and stays fairly quiet in the finished bowl. Add 3 packed cups / about 90–100 g only after the beans have simmered and the broth is where you want it.

Kale has more chew and a stronger flavor. Use roughly 2½–3 loosely packed cups / 70–90 g stemmed, chopped kale. Tender leaves may be ready in 3–5 minutes; mature kale often needs longer.

White bean soup comparing soft wilted spinach with more structured cooked kale in the same creamy bean broth.
The choice changes the eating experience as much as the timing. Spinach almost melts into the broth, while kale stays more noticeable and gives each spoonful extra chew.

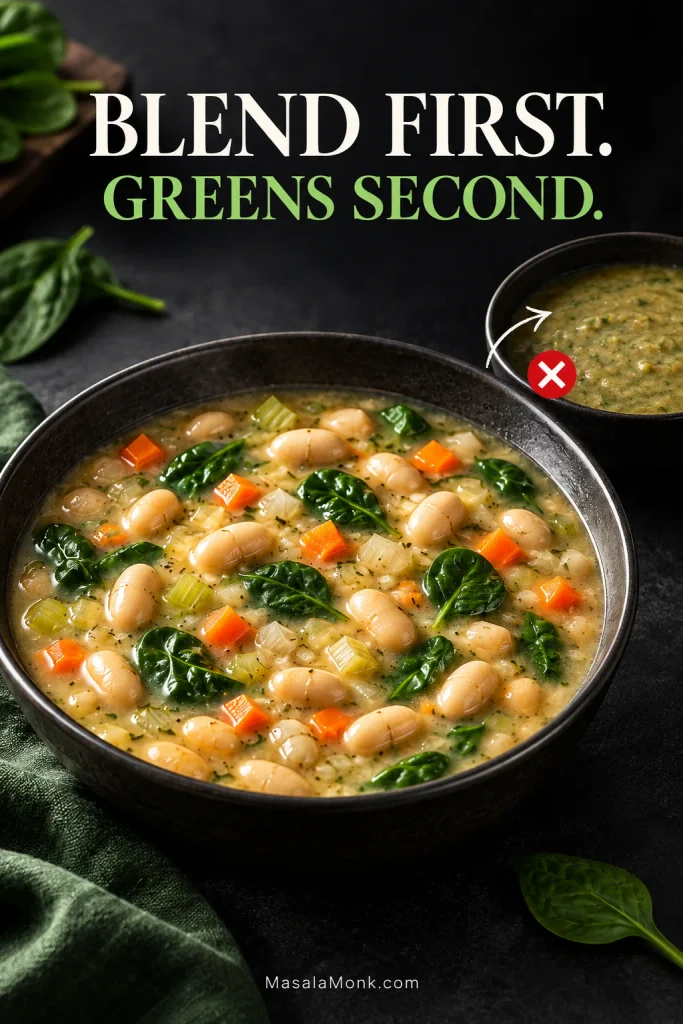
Blend first, greens second. Once the leaves are in, leave the blender alone. Otherwise the pale broth turns muddy and the greens disappear into the purée.

Creamy white bean soup with distinct spinach beside a smaller muddy green over-blended version, labeled “Blend first. Greens second.”
Once leafy greens are blended into the base, their clean color and leaf definition are gone for good. Finish the blending while the pot is still just beans and broth.

Frozen spinach works too; thaw it and squeeze out excess water first. For a brothier bowl with beans, vegetables, greens and small pasta, the minestrone soup recipe goes in that direction.

Cooking now? Back to the method ↑

Before You Add More Salt

Salty does not necessarily mean flavorful. Taste once before reaching for anything. Is it actually under-salted, or simply dull? Those are different problems.

Lemon being squeezed over creamy white bean soup, with droplets falling toward whole beans and spinach.
Salt and acidity do different jobs. If the white bean soup already tastes seasoned, fresh lemon can sharpen the beans, vegetables and herbs without pushing the salt level higher.
What it tastes likeTry this next
Clearly under-saltedAdd a small pinch of salt, stir, then taste again.
Salty enough but flatAdd another teaspoon of lemon juice.
Bright but still one-dimensionalTry black pepper, red pepper flakes, parsley or Parmesan at the table.
Slightly too sweetAdd lemon first, then reassess pepper and salt.
Actually too saltyDilute with unsalted broth or water, then taste again.

Low-sodium broth leaves more room for those final changes because canned beans and packaged broth both vary.

When the Texture Is Off

ProblemLikely causeFix now
PastyToo much purée or too much evaporationAdd broth ¼ cup / 60 ml at a time.
Crunchy carrotsPieces were too large or the initial sauté was rushedKeep simmering before adding greens. Next time keep the dice near ¼ inch / 6 mm.
Beans falling apartThe pot boiled too hard or the beans were very soft to begin withLower the heat and stir gently.
Lots of loose skinsSoft beans, vigorous cooking or the bean brand itselfKeep the simmer mild. Repeated loose skins are also a good reason to try another brand.
Mushy spinachIt went in too earlyNext time add it only for the final 1–2 minutes.

Why It Gets Thicker Overnight

The beans keep absorbing liquid as they sit, so tomorrow’s bowl will usually be thicker than tonight’s. Expect to add a splash of broth or water when reheating.

Thick leftover white bean soup in a stainless saucepan while liquid is poured in from a measuring cup for reheating.
Make the final consistency judgment after the leftovers are hot. Chilled bean soup can look deceptively dense, and adding too much liquid too early may leave the reheated bowl thinner than you wanted.

Refrigerator: Divide larger amounts into smaller, shallow containers and refrigerate within 2 hours. FoodSafety.gov lists soups and stews at 3–4 days in the refrigerator.

Freezer: Freeze cooled portions in suitable containers, leaving a little room for expansion. For best quality, use within about 2–3 months. The spinach will be softer after thawing.

Reheating: Warm gently, adding broth or water in ¼-cup / 60 ml increments until the broth pours easily again. Reheat leftovers to 165°F / 74°C.

Taste again before serving. Added liquid can soften the seasoning, and some of the fresh lemon character fades in storage. Another small squeeze may be all the bowl needs.

Finished bowl of creamy cannellini bean soup with spinach, carrots, celery, black pepper and a light sheen of olive oil.
Once the broth is balanced, the soup needs very little at the table. Parmesan adds salt, olive oil adds richness and black pepper adds warmth, so finish the bowl according to what it still needs.

What to Serve With It

This is filling enough to be dinner on its own, though bread is hard to argue with. Homemade focaccia gives you a soft middle and crisp olive-oil edges; a homemade garlic bread loaf is the more garlicky option. Either one is good for dragging through the last of the broth.

Hand dipping torn focaccia into creamy white bean soup, with broth and a cannellini bean clinging to the bread.
An airy focaccia crumb traps broth and small pieces of beans and vegetables especially well. Dip as you eat rather than leaving it submerged, and the bread keeps more of its structure.

A simple green salad works too. Parmesan, parsley, black pepper or a drizzle of extra-virgin olive oil are all good at the table. When the pot is right, though, it does not need much: tender vegetables, whole beans, broth that clings lightly, and just enough lemon to pull you into another spoonful. Add bread and dinner is done.

Partly eaten bowl of white bean soup with a spoon resting inside and torn bread on a warm wooden table.
A little broth, a few beans and torn bread left at the end of dinner—sometimes that says more about the soup than another perfectly styled bowl ever could.

Back to top ↑

Posted on — Leave a comment

Beef Barley Soup Recipe: Hearty, Tender Beef and Pearl Barley Soup

Steaming black bowl of beef barley soup with browned beef chunks, pearl barley, diced carrots, celery and parsley in deep brown broth.

A good beef barley soup recipe should give you tender pieces of beef, plump pearl barley with a little chew, carrots and celery that keep their shape, and enough deeply savory broth for the bowl to remain unmistakably soup. The best spoonful catches a little of everything, with dark broth settling back around the beef and grain instead of disappearing into them.

The tricky part is that those ingredients do not finish on the same schedule. This version browns the chuck in batches, gives the beef a head start, then brings in the barley and vegetables according to how long they actually need. The flavors stay classic—beef, barley, onion, carrots, celery and herbs—but the timing is more deliberate, which helps prevent rubbery beef, overdone vegetables and a pot that quietly turns into barley stew.

Quick Answer: Give the Beef a Head Start

Brown the chuck and simmer until it has clearly begun softening. Add the pearl barley, then add the carrots and celery when the barley has about 20-25 minutes left to cook. Use 3/4 cup (about 160 g) barley for a substantial soup that remains brothy, and adjust the final consistency with reserved broth.

Dutch oven filled with beef barley soup as a ladle lifts beef, pearl barley, carrots and celery with brown broth visible around the ingredients.
A hearty bowl can still be brothy: look for liquid moving freely between the beef, barley and vegetables.

Before the Pot Goes On

  • Beef: boneless chuck roast, cut into 3/4-inch (2 cm) pieces.
  • Barley: regular pearl barley, sometimes sold as medium pearled barley; not quick-cooking barley.
  • Pot: 5 1/2- to 6-quart (about 5.2-5.7 L) Dutch oven or heavy soup pot.

Make the Soup: Tender Beef Barley Soup

Yield6 generous servings
PrepAbout 25 minutes
CookAbout 1 1/2-2 hours, depending on the beef and barley
TotalAbout 2-2 1/2 hours
Final textureTender beef, plump barley, intact vegetables and a full-bodied broth that still flows

Ingredients

  • 2 lb (900 g) boneless beef chuck roast, trimmed of thick hard exterior fat and cut into 3/4-inch (2 cm) pieces
  • 1 1/4 teaspoons fine sea salt, divided, plus more to taste; this is a starting point for low-sodium broth
  • 1 teaspoon freshly ground black pepper, divided
  • 2 tablespoons (30 ml) neutral cooking oil, plus a little more if needed between batches
  • 1 large yellow onion, about 8-9 oz (225-255 g), chopped
  • 4 garlic cloves, minced
  • 1 tablespoon (about 16 g) tomato paste
  • 1/2 cup (120 ml) dry red wine, such as Cabernet Sauvignon, Merlot or Pinot Noir, optional; if omitted, use an additional 1/2 cup (120 ml) beef broth in addition to the 7 cups below
  • 7 cups (1.65 L) low-sodium beef broth
  • 1-2 cups (240-480 ml) additional low-sodium beef broth, kept in reserve
  • 1 tablespoon (15 ml) Worcestershire sauce
  • 1 teaspoon dried thyme or 4 fresh thyme sprigs
  • 1 bay leaf
  • 3 medium carrots, about 8-9 oz (225-255 g), cut into 1/2-inch (1.25 cm) pieces
  • 3 celery ribs, about 5 oz (140 g), cut into 1/2-inch (1.25 cm) pieces
  • 3/4 cup (about 160 g) regular pearl barley, rinsed and drained if directed on the package
  • 1/4 cup chopped flat-leaf parsley
  • Up to 1 teaspoon (5 ml) red wine vinegar or apple cider vinegar, optional, for final adjustment

Brown the Beef

  1. Dry and season the beef. Pat the chuck very dry. Season with about 3/4 teaspoon of the salt and 1/2 teaspoon of the black pepper.
  2. Brown in batches. Heat 1 tablespoon oil over medium-high heat. Add enough beef for one uncrowded layer. Leave it undisturbed until the underside develops a dark brown crust and releases reasonably cleanly, then turn and brown additional sides. Transfer to a bowl and repeat with the remaining beef, adding the remaining oil as needed.

The beef does not need to cook through here. Look for dark brown patches on the meat and a brown film on the bottom of the pot. Pale, wet-looking beef needs more space. By the end of this step, the pot should smell roasted and beefy rather than steamed.

Instructional graphic showing well-spaced beef cubes browning in a dark pot beside an inset of crowded, pale beef releasing moisture. Text reads “Brown it — don’t steam it.”
Pale, wet-looking beef needs more room before it can brown properly.

Build the Broth

  1. Cook the onion. Reduce the heat to medium. Add the onion and cook for 5-6 minutes, until softened and lightly golden, scraping loose browned bits from the pot.
  2. Build the savory base. Stir in the garlic and tomato paste and cook for about 1 minute, until fragrant and the paste has darkened slightly. If using wine, add it now, scrape the bottom of the pot well, and let it bubble for 2-3 minutes. Without wine, add 1/2 cup (120 ml) extra beef broth here; this is in addition to the 7 cups used in the next step.
  3. Start the beef simmer. Return the beef and accumulated juices to the pot. Add 7 cups broth, Worcestershire, thyme, bay leaf, the remaining black pepper and the remaining 1/2 teaspoon salt. Bring just to the edge of a boil, then reduce to a gentle simmer. Partially cover and cook for about 40-45 minutes.

Before You Add the Barley, Check One Piece of Beef

Test one beef cube after about 40-45 minutes. A fork should enter more easily than it did at the start, but the meat does not need to be fully tender yet. If the beef seems stubborn at this point, that is not unusual. Give it another 10-15 minutes, check again, and repeat as needed. Do not add the barley merely because another 15 minutes passed. Wait until the chuck has clearly begun to soften.

Do not rush the chuck.

Fork testing a cube of simmered beef above a spoon and pot of broth. The graphic says the beef should begin softening before pearl barley is added.
The chuck only needs to begin softening here; full tenderness comes later.

Add the Barley, Then the Vegetables

  1. Add the barley. Stir in the pearl barley. The dry amount may look small. Do not add more by eye.
  2. Add the vegetables when the barley has about 20-25 minutes left to cook. Check the cooking time on your barley. For a 30-35 minute pearl barley, that usually means adding the carrots and celery about 8-10 minutes after the barley goes in. A slower barley simply gets a longer head start.
Two-stage cooking graphic showing pearl barley added to beef broth first and chopped carrots and celery added later, when the barley has about 20–25 minutes left.
This 20-25 minute window assumes roughly 1/2-inch carrot and celery pieces; larger cuts need more time.
  1. Cook until the barley is ready. Keep the soup partially uncovered and stir across the bottom every 8-10 minutes so settled grain does not catch. Bite one grain as you approach its expected cooking time. It is ready when the center is tender with a little pleasant resistance left.

Finish the Soup

  1. Check the beef. Bite into a piece. It should give easily, without a rubbery center. If it needs only a few more minutes, leave the whole pot at the gentlest simmer. When the barley is already ready but the beef remains substantially tough, lift out the beef and finish it gently in a little hot broth before returning it to the pot.
  2. Set the consistency. Remove the bay leaf and fresh thyme stems. Add hot reserved broth 1/4-1/2 cup (60-120 ml) at a time until liquid moves freely around the beef, vegetables and grain. Drag a ladle through the pot: the broth should close back in behind it instead of leaving a trench. If the soup is too thin, simmer uncovered for a few minutes.
Overhead pot of beef barley soup with a ladle raised above the surface, showing flowing brown broth between beef, barley and vegetables.
Set the soup’s flow before the final seasoning adjustment; added broth can change how salty the pot tastes.
  1. Season and rest. Taste before adding more salt. Adjust salt and black pepper and stir in the parsley. If the broth is properly salted but tastes rich and dull, add 1/2 teaspoon vinegar, taste, and add more only if needed, up to 1 teaspoon total. Rest for about 5 minutes before serving.

Recipe Notes

  • Use regular pearl barley. Different brands can cook at noticeably different speeds, so use the grain’s texture as the final judge.
  • Keep broth in reserve. The exact amount needed depends on the barley, simmer and how long the soup stands.
  • For multi-day leftovers, cook the barley separately. The make-ahead method below keeps the soup brothier for longer.

A finished spoonful is one last check on the whole pot: beef, barley and vegetables should all feel present, with broth still visible around them.

Close-up spoonful of beef barley soup containing a beef chunk, pearl barley, carrot and celery above a dark bowl of broth.

If you are cooking now, the recipe above is all you need. The guide below is for choosing beef and barley, adjusting the final texture, rescuing a pot that behaves differently from the ideal one, or adapting it for another kind of beef.

What Beef Makes the Best Beef Barley Soup?

Boneless chuck roast is the best all-around choice because its marbling and connective tissue soften during a long, gentle simmer. Buying a whole roast also lets you cut pieces to a consistent size, which helps them reach tenderness more evenly.

Aim for pieces around 3/4 inch (2 cm). Smaller cubes can lose their presence in the finished bowl; much larger ones may still be firm when the barley is ready. Trim thick hard exterior fat and obvious silverskin, but leave the useful internal marbling.

Food guide showing a raw chuck roast, evenly cut beef cubes and a finished bowl of beef barley soup, with text explaining why chuck is preferred for a long simmer.
Even 3/4-inch chuck cubes are more likely to soften on the same schedule.
BeefHow it behaves here
Chuck roastPreferred. Rich, predictable and suited to a long gentle simmer.
Packaged stew meatConvenient, but less predictable than cutting a chuck roast yourself.
Boneless short ribRich and tender, but more expensive and often fattier.
Beef shankExcellent beef flavor, but usually needs a longer cooking window.
Ground beefA different, faster soup with browned beef crumbles instead of tender chuck pieces.
Cooked roast or brisketAdd near the end so already-tender beef does not dry out.
Cooked steak or prime ribWarm only briefly at the end, especially if you want to preserve a pink center.

Stew meat works too, but a package can contain several cuts. One cube may turn tender while the next still fights the fork, so check the meat itself instead of expecting every piece to finish together.

Pearl Barley: How Much to Use and When to Add It

Use regular pearl barley for this recipe. It needs no overnight soaking, but cooking time varies considerably with the grain and degree of pearling. Some pearl barley may be tender around the half-hour mark, while other medium pearled barley needs considerably longer. Check the package once, then let texture make the final decision. The Whole Grains Council’s barley guide explains the differences between hulled, pearl and quick barley.

  • Regular pearl barley: the recipe default; add it after the beef has clearly begun softening.
  • Quick-cooking barley: add it near the end and follow its shorter cooking time.
  • Hulled barley: cook it separately according to its package directions, then add it near the end. Its longer cook makes it awkward to synchronize with this soup’s beef and vegetables.

Pearl barley contains gluten, so this soup is not gluten-free.

How Much Barley Changes the Whole Pot

Dry pearl barleyWhat the soup becomes
1/2 cup (about 105 g)Brothier, with beef and vegetables dominating each spoonful.
3/4 cup (about 160 g)The balance used here: plenty of barley, with broth still moving freely around it.
1 cup (about 210-215 g)Much more grain-heavy and likely to become stew-like after resting.
Three bowls compare beef barley soup made with one-half cup, three-quarters cup and one cup of dry pearl barley, with three-quarters cup marked as the preferred balance.
Three-quarters cup gives the best balance here; a full cup makes the soup noticeably denser after resting.

Three-quarters of a cup looks stingy when the barley is dry. It will not look stingy half an hour later. Leave it alone and let it expand before deciding the pot needs more grain.

How Thick Should Beef Barley Soup Be?

Beef barley soup should be hearty enough to satisfy, with broth moving freely between the solids. Tilt a full ladle and you should see liquid run around the beef, vegetables and barley rather than clinging like gravy.

  • Too thick now: add hot broth 1/4-1/2 cup (60-120 ml) at a time and stir before deciding whether it needs more.
  • Too thin now: simmer uncovered for a few minutes before changing the seasoning.
  • Much thicker tomorrow: nothing went wrong. Loosen the soup with broth or water while reheating.

Troubleshooting

The Beef Is Still Tough

Tough does not mean ruined. Keep the soup at a gentle simmer and check another piece in 10-15 minutes. Repeat until the fork enters reasonably easily. A hard boil is not the fix; give the chuck time.

The Barley Is Ready but the Beef Is Still Tough

If the beef needs only a few more minutes, leave the whole pot at the gentlest simmer. Substantially tough beef needs its own finish: lift out the pieces, put them in a small saucepan with enough hot soup broth to come partway up the meat, simmer gently until tender, then return everything to the pot. The grain and vegetables can stop cooking while the chuck catches up.

Split instructional graphic showing beef cubes lifted from beef barley soup and transferred to a small saucepan of broth to finish cooking separately.
Separate the jobs: let the barley stop cooking while the beef gets the extra time it needs.

The barley swallowed all the broth.

Add hot broth 1/4-1/2 cup (60-120 ml) at a time until the soup looks properly brothy again, then taste for salt.

The vegetables are falling apart.

There is no way to restore their shape once they are soft. Next time, add them when the barley has 20-25 minutes left to cook.

The broth tastes flat.

Check salt first. Properly salted but lacking savory depth? Add 1/2 teaspoon Worcestershire, taste, then add more only if needed. If the broth tastes rich and heavy, try 1/2 teaspoon red wine vinegar or apple cider vinegar instead. The vinegar should brighten the broth without announcing itself.

Smaller problemLikely fix
Barley is still hardKeep simmering gently and add broth if needed. Give the grain the time it needs.
Barley is mushyIt cooked too long or quick barley was used. Loosen the soup with broth; the grain’s bite cannot be restored.
Soup is greasySkim surface fat. Next time trim thick hard exterior fat and avoid unnecessary extra oil.
Soup is too saltyDilute with unsalted broth or water, then taste again.
Barley is stickingLower the heat and scrape across the bottom regularly after the grain goes in.
Broth looks cloudy or foamyThis is usually harmless coagulated protein from the beef. Skim it if you prefer a clearer-looking broth.

Variations That Need Different Timing

Beef Mushroom Barley Soup

For noticeable mushroom flavor without overwhelming the beef, use about 8 oz (225 g) sliced cremini or button mushrooms. Brown the beef first and remove it. If the pot looks dry, add 1-2 teaspoons oil, then cook the mushrooms until their released moisture has evaporated and real browning begins. Remove the mushrooms and cook the onion as written.

Continue with the broth and beef as written, then return the mushrooms for the final 10-15 minutes. Want mushrooms to play a bigger role? Increase them to 12-16 oz (340-450 g).

Bowl of beef mushroom barley soup with browned beef pieces, sliced mushrooms, pearl barley, carrots, celery and parsley in brown broth.

Using Leftover Roast Beef or Brisket

Use about 1 1/2 lb (680 g) chopped or cubed cooked roast beef or brisket. Build the broth without the long chuck-tenderizing phase, then cook the barley as directed.

Add the carrots and celery when the grain has about 20-25 minutes left. Stir in the cooked roast or brisket for only the final 5 minutes or so, just long enough to heat through.

Using Leftover Steak or Prime Rib

Already-pink steak or prime rib needs much less heat. Slice or cube it and add it only at the very end, just long enough to warm through. To protect a medium-rare center, put the meat directly into individual bowls and ladle the steaming soup over it.

Slices of pink cooked steak in a bowl as hot beef barley soup with pearl barley and vegetables is ladled over the meat.

Ground Beef Barley Soup

Use about 1 1/2 lb (680 g) ground beef for a faster soup with browned beef crumbles instead of tender chuck pieces. Brown the meat thoroughly, drain excess fat if needed, and transfer it to a bowl. Cook the onion, garlic and tomato paste as written, then return the beef when you add the broth.

Add the barley, followed by the carrots and celery when the grain has about 20-25 minutes left to cook. There is no long tenderizing phase.

Easy Swaps

SwapAdjustment
No wineReplace the 1/2 cup (120 ml) wine with the same amount of beef broth.
No tomato pasteOmit it if you want beef barley soup without tomato. The broth will be lighter in color and slightly less concentrated.
Quick-cooking barleyAdd it near the end and follow its shorter cooking time.
Hulled barleyCook separately according to package directions, then stir it into the soup near the end.

Make-Ahead Beef Barley Soup

For several days of leftovers, cook and store the barley separately. For a pot you expect to finish within a day or so, cooking the grain directly in the soup is the better default because it takes on beef flavor and gives the broth natural body.

How to Cook the Barley Separately

  1. Bring 3 cups (710 ml) water or low-sodium broth to a boil.
  2. Add the recipe’s 3/4 cup (about 160 g) pearl barley and a small pinch of salt.
  3. Reduce to a steady simmer and cook until the grain is tender through the center with a little chew. Start checking around the time listed on the package rather than forcing one universal minute mark.
  4. Drain well, cool promptly and refrigerate separately from the soup.
  5. Add barley to individual bowls as the soup reheats.
Container of beef and vegetable soup beside a separate bowl of cooked pearl barley, with a finished serving of beef barley soup in front.
Separate storage sacrifices a little shared beef flavor, but gives you far more control over leftover brothiness.

When the barley is staying out of the soup pot, continue simmering the beef until it is nearly tender—a fork goes in fairly easily, but there is still a little resistance. Add the carrots and celery at that point and cook for another 20-25 minutes, until the vegetables are tender and the beef is ready. Spoon barley into each bowl and ladle the hot soup over it.

If you like your beef barley soup especially brothy, portioning the barley bowl by bowl also lets each person control how grain-heavy their serving becomes. Our Minestrone Soup keeps its starch separate for the same practical reason: leftovers stay brothier.

Storage and Reheating

The flavors often settle and deepen overnight, while the soup itself becomes thicker. Add broth or water during reheating until it returns to the consistency you like.

Refrigerating. Divide the soup into shallow covered containers and refrigerate promptly. Use refrigerated leftovers within 3-4 days. If the barley was cooked separately, keep it in its own container and combine portions only as you reheat them. This follows USDA food-safety guidance on rapid cooling and leftover storage.

Freezing. Freeze chilled portions in airtight freezer-safe containers for best quality within about 2-3 months. Barley can be frozen in the soup, although keeping it separate gives you more control over the broth when freezing a batch for later.

Reheating. For about 2 cups of cold soup, start with 1/4 cup (60 ml) beef broth or water and add more as needed. Reheat leftovers to 165°F (74°C), stirring so the soup heats evenly.

Whenever you serve it, ladle the soup into warm bowls and scatter over a little parsley.

Green bowl of beef barley soup with beef, pearl barley, carrots, celery and parsley on a dining table beside bread and a spoon.

Bring it to the table while the broth is steaming and the beef is tender enough to meet the spoon without a fight. Crusty bread or soft dinner rolls are welcome alongside, but this is already dinner in the bowl.