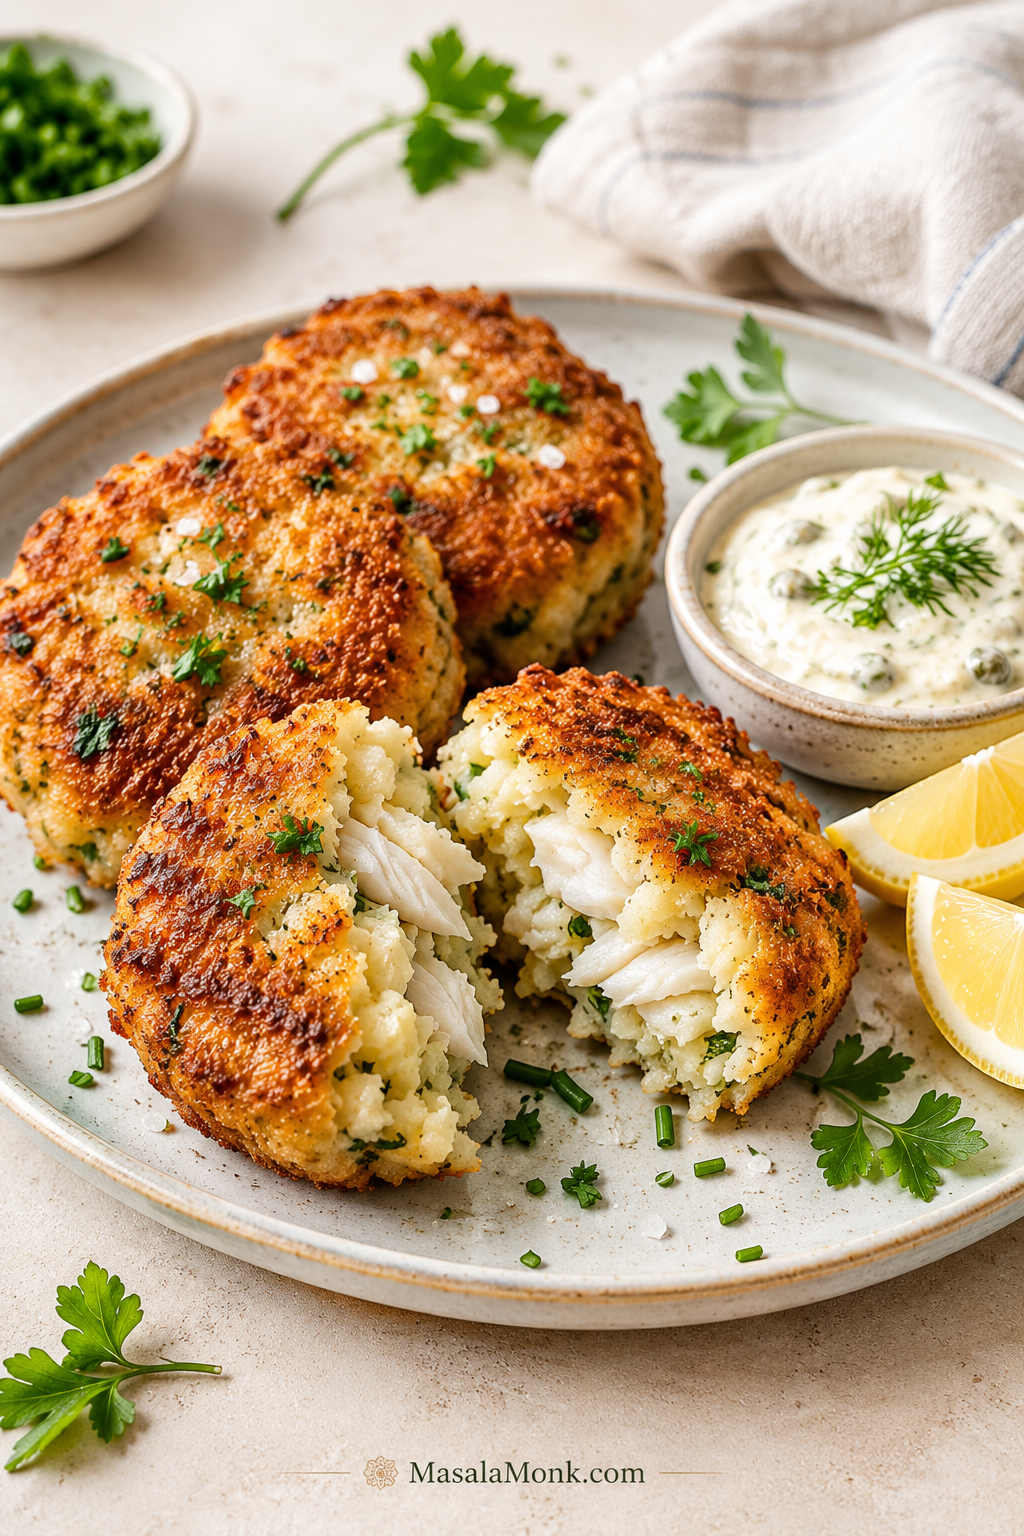
Good fish cakes should give you three things at once: a crisp golden crust, soft but not mushy potato, and real flakes of fish inside. This fish cakes recipe starts with cod because it is easy to find, gentle in flavor, and perfect with lemon, herbs, mustard, and breadcrumbs. However, the same method also works with haddock, pollock, hake, tilapia, leftover cooked white fish, or carefully thawed frozen fish.
These little cakes are the kind of dinner that can feel old-fashioned in the best possible way: a little potato, a little fish, a hot pan, and suddenly the meal feels generous. Still, the texture matters. Too much potato and they taste flat. Too much wet fish and they collapse. This recipe keeps the middle soft and flaky while giving you the crisp edge everyone reaches for first.
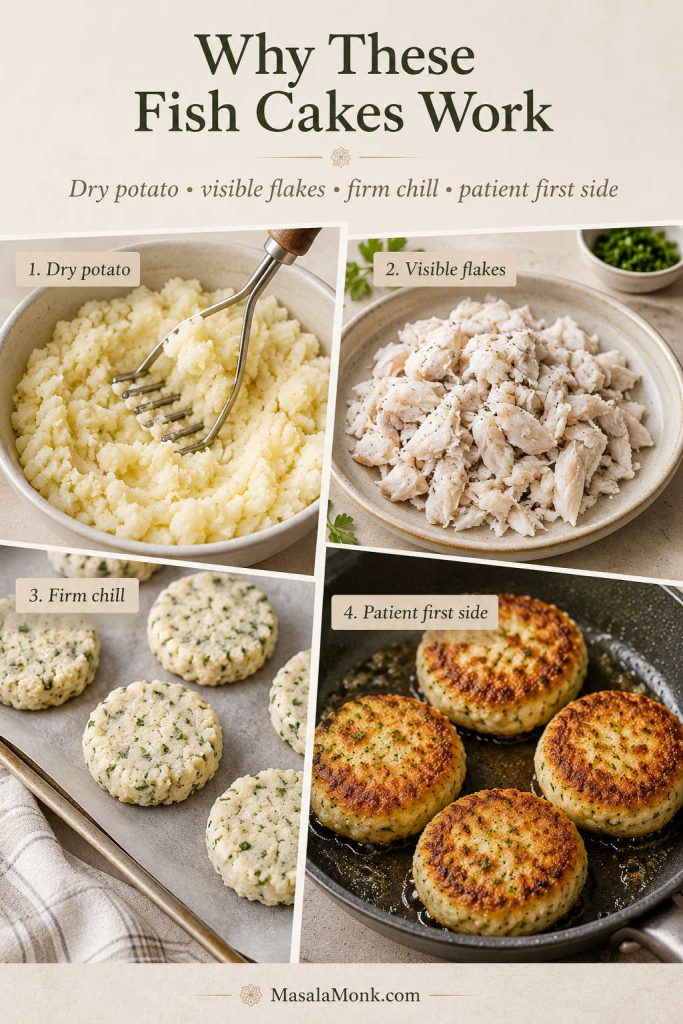
The method is simple once you know what matters: dry potato, visible fish flakes, a firm chill, and a crust that sets before you flip. Even if the mixture feels a little soft at first, it is usually easy to save with a spoonful of breadcrumbs and a short rest in the fridge.
What Good Fish Cakes Should Look Like
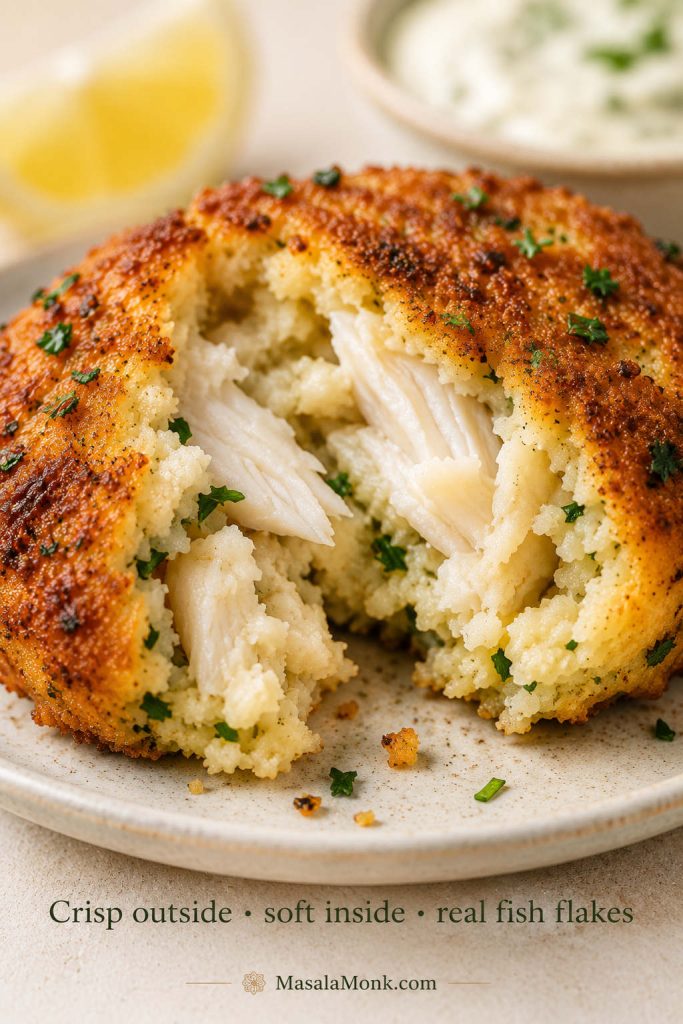
Before you start cooking, it helps to know the texture you are aiming for: crisp outside, soft inside, and fish that stays visible instead of disappearing into the potato.
In This Guide
Make the Fish Cakes
Cook, Freeze & Fix
Quick Answer: How to Make Crispy Fish Cakes
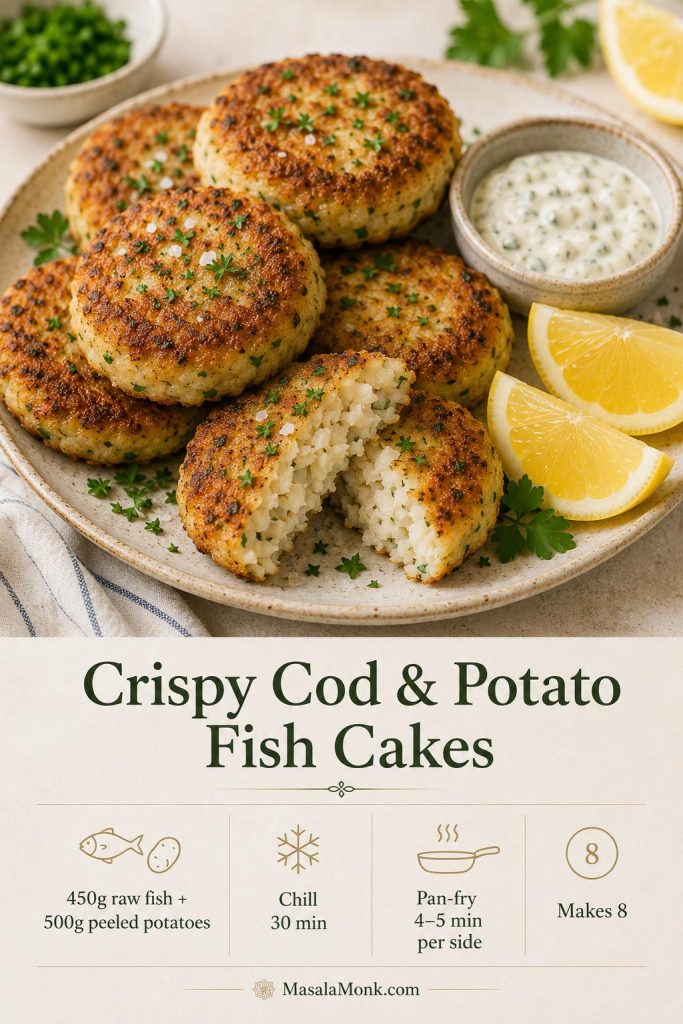
To make crispy fish cakes, cook cod or another firm white fish until it flakes, then mix it gently with dry mashed potato, egg, lemon, herbs, mustard, and seasoning. Shape the filling into patties, chill for at least 30 minutes, coat with flour, beaten egg, and breadcrumbs, then pan-fry until golden on both sides.

For 8 medium cakes, use about 450g / 1 lb raw fish and 500g / 1.1 lb peeled potatoes. That ratio gives enough potato to bind the patties without hiding the fish. When you break one open, you should see soft potato, clear flakes of fish, and a crunchy golden edge rather than a smooth, heavy paste.
If your mixture already feels too wet, too soft, or likely to break, use the fixing section before shaping the whole batch.
These are especially good when you want something comforting without making a heavy meal. A few crisp cakes, a sharp salad, lemon wedges, and a cold creamy sauce can feel like a proper dinner without needing much else.
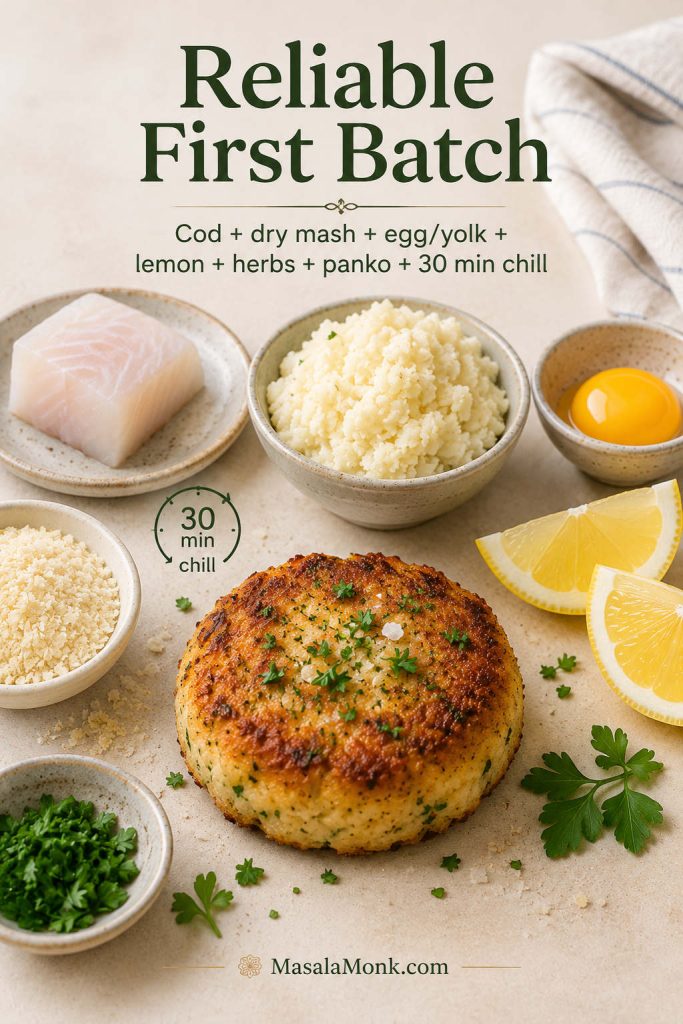
Reliable first batch
Use cod or haddock, dry mashed potato, one egg or yolk, lemon zest, parsley, panko, and a 30-minute chill. Pan-fry over medium heat and let the first side fully set before flipping. If this is your first time, use the pan-fried method before trying the baked or air fryer versions.
At a Glance
| Main fish | Cod, haddock, pollock, hake, or firm white fish |
|---|---|
| Best potatoes | Starchy potatoes such as Russet, Maris Piper, King Edward, or Yukon Gold |
| Yield | 8 medium fish cakes |
| Serves | 4 |
| Fish-to-potato ratio | About 450g raw fish to 500g peeled potatoes |
| Chill time | 30 minutes |
| Pan-fry time | 4–5 minutes per side |
| Optional oven finish | 200°C / 400°F for 8–10 minutes |
| Air fryer | 190–200°C / 375–400°F for 10–14 minutes |
| Fish doneness | 145°F / 63°C, or opaque and flaking easily |
| Good sauces | Tartar sauce, lemon dill mayo, garlic mayo, green chutney mayo, sweet chili sauce |
Why This Fish Cakes Recipe Works
The real secret is not a complicated ingredient. It is moisture control. Dry potato gives the cakes structure, gently flaked fish keeps the middle light, and a short chill gives each patty enough firmness to survive the pan.
That is why a fish cake that looks simple on the plate can feel so satisfying: the crust, filling, and flakes all do different jobs. The coating gives crunch, the potato keeps everything tender, and the fish stays present instead of disappearing into the mash.
Flour helps the egg cling, egg helps the crumbs stick, and breadcrumbs give you that crisp outside. Panko makes the lightest crunch, while fresh breadcrumbs give a softer, more old-fashioned fishcake crust.
Just as importantly, the filling is folded instead of mashed into a paste. That small choice keeps the inside tender and textured, so every bite has a little potato, a little fish, and a clean lemony finish.
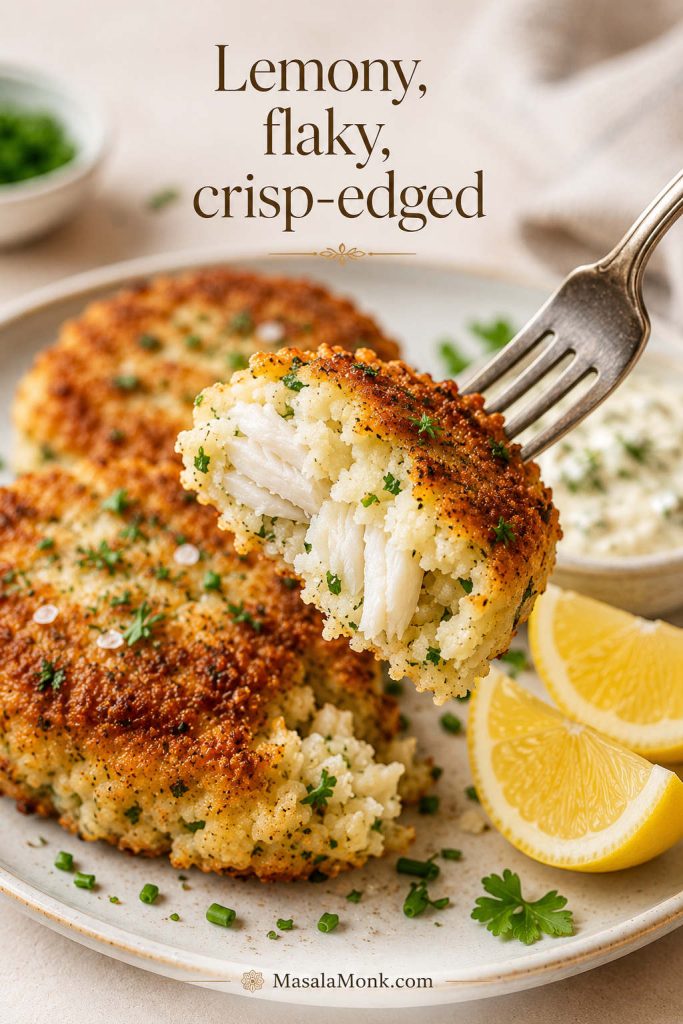
What They Should Taste Like
The finished fish cakes should taste clean, lemony, and savory, not heavy or fishy. The crust should give a quiet crunch when you cut in, while the middle stays warm and soft with visible flakes of fish and little pockets of potato. Add a squeeze of lemon and a spoonful of tartar sauce, dill mayo, or green chutney mayo, and the whole plate should feel bright rather than rich.
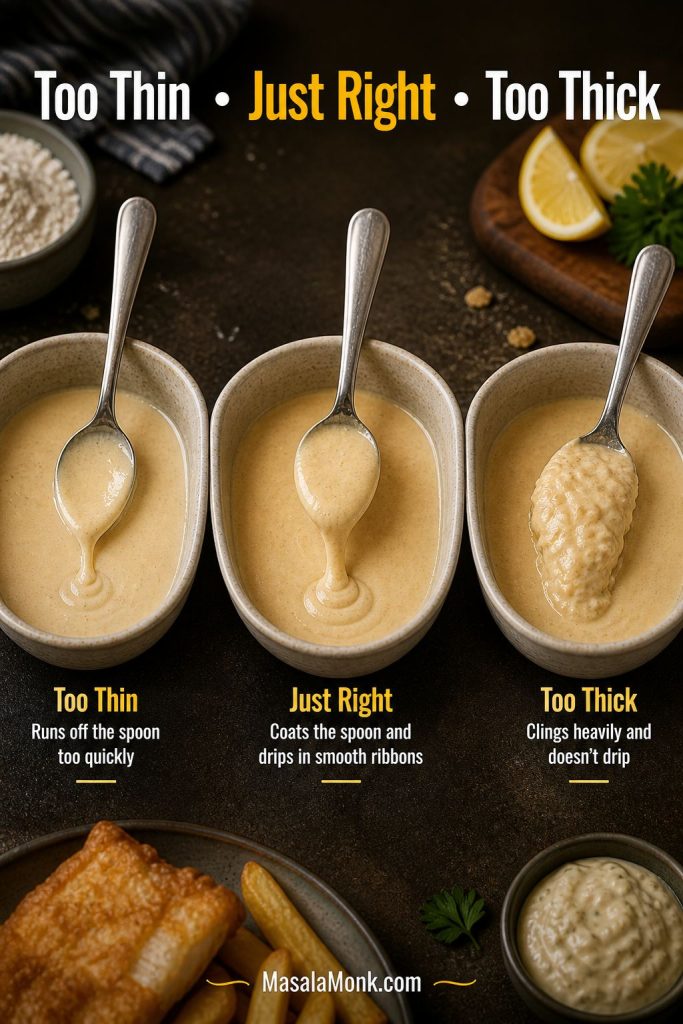
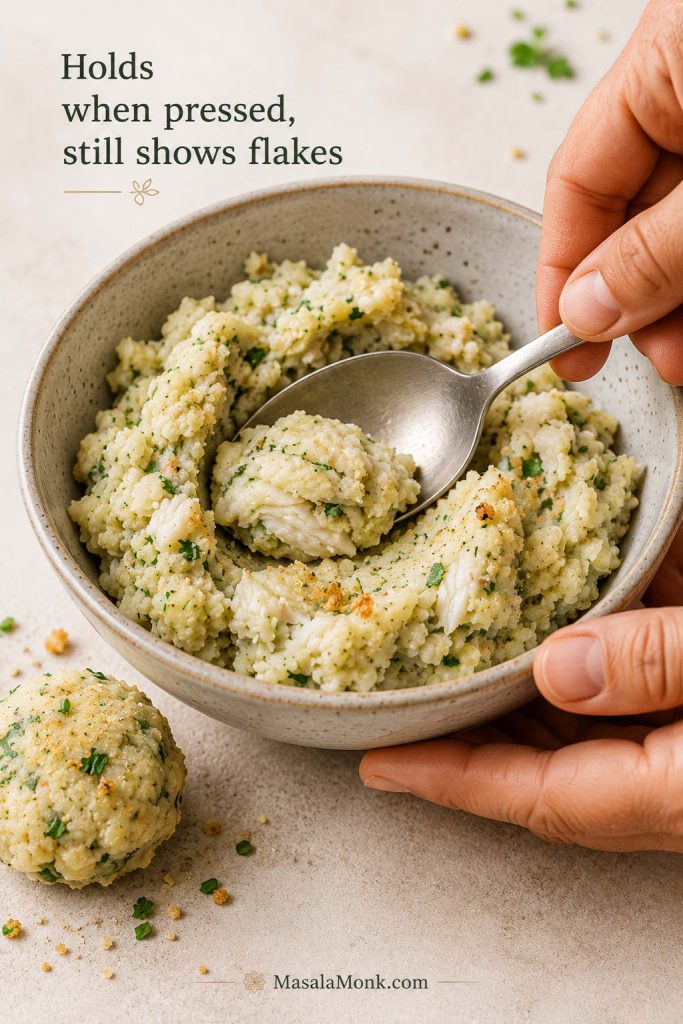
Texture checkpoint
Before chilling, the mixture should hold together when pressed but still show flakes of fish. If it looks smooth like paste, it has been overmixed. If it slumps on the tray, it needs breadcrumbs.
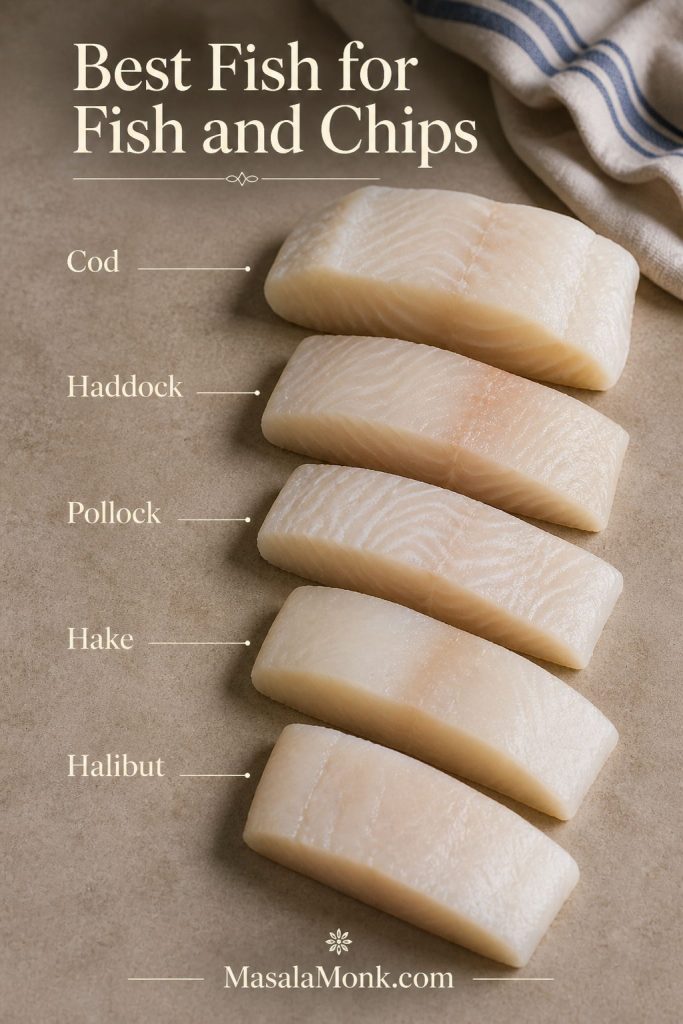
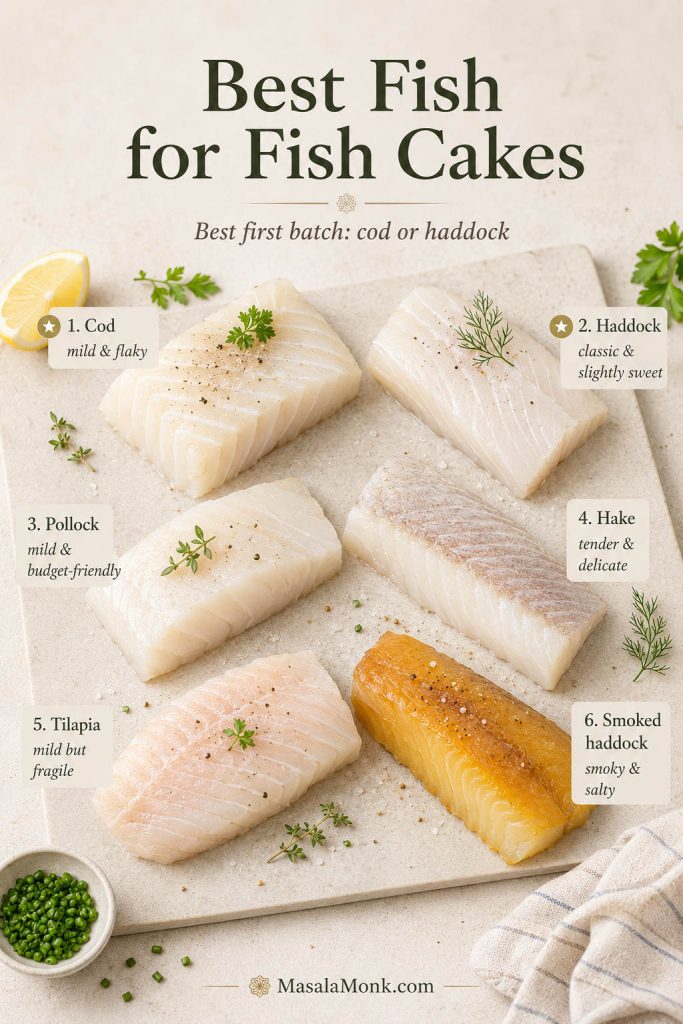
Best Fish for Fish Cakes
For most home cooks, cod is the easiest place to start. It flakes cleanly, tastes gentle rather than strong, and pairs naturally with potato, lemon, herbs, mustard, and breadcrumbs. Haddock is just as classic and slightly sweeter. Pollock and hake are good budget-friendly white fish options, while tilapia works if you handle it gently and avoid overcooking.
If you are standing at the fish counter, do not overthink it. Choose a mild white fish that looks fresh, smells clean, and flakes easily when cooked. Cod and haddock are the safest choices, but pollock, hake, and other firm white fish can make excellent cakes too.
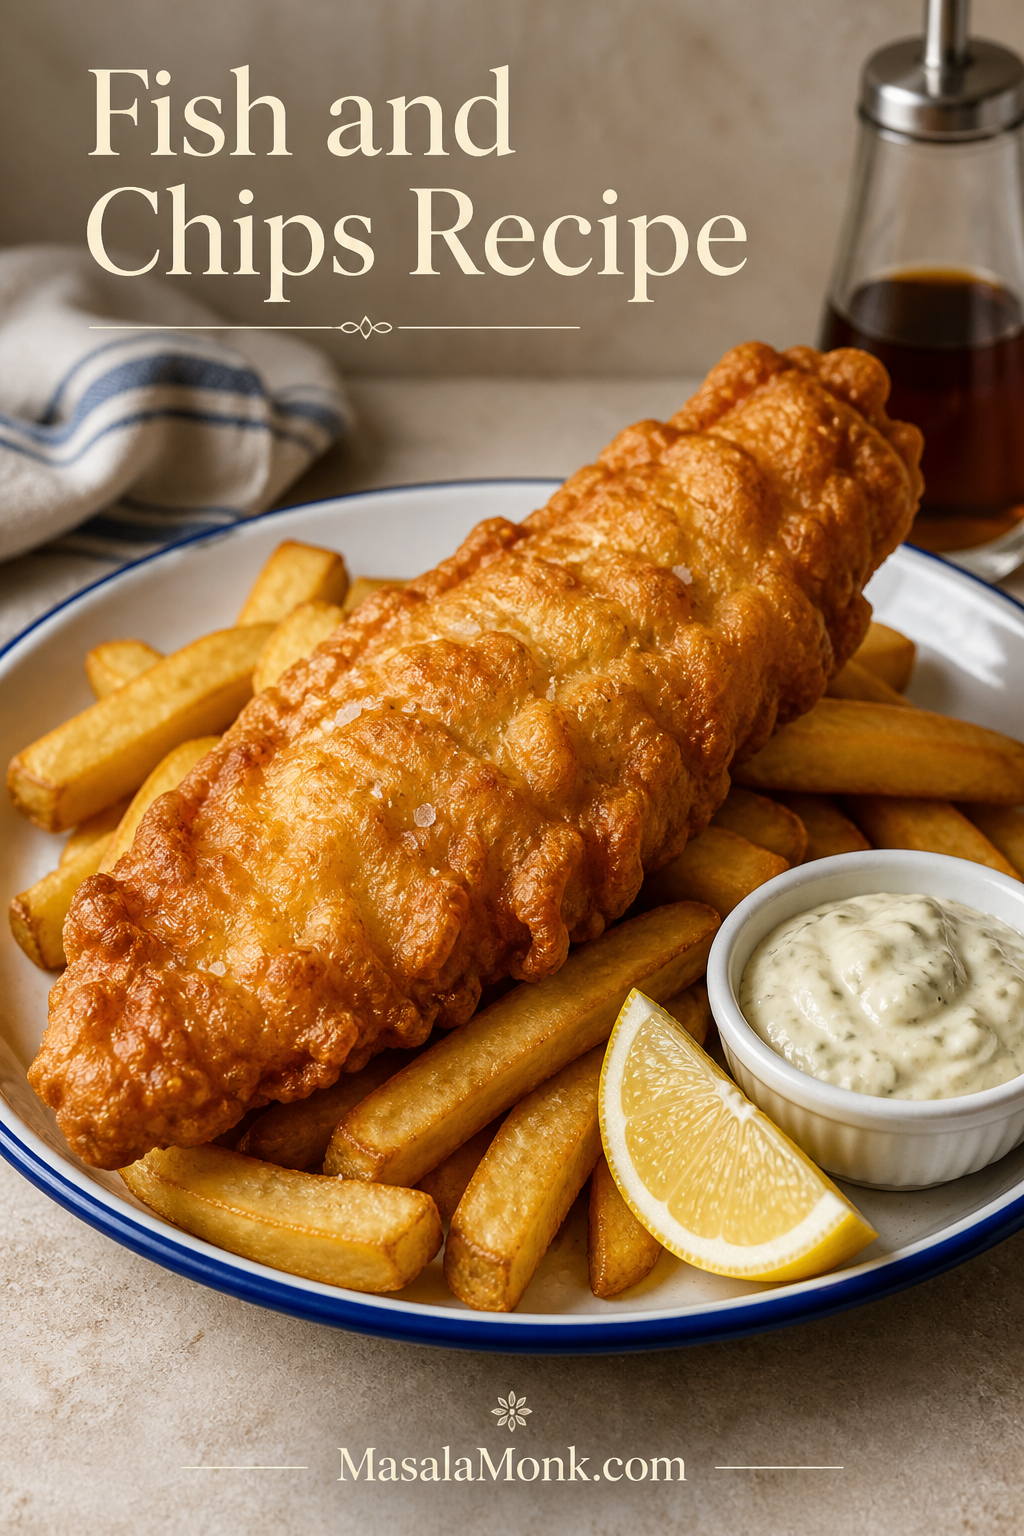
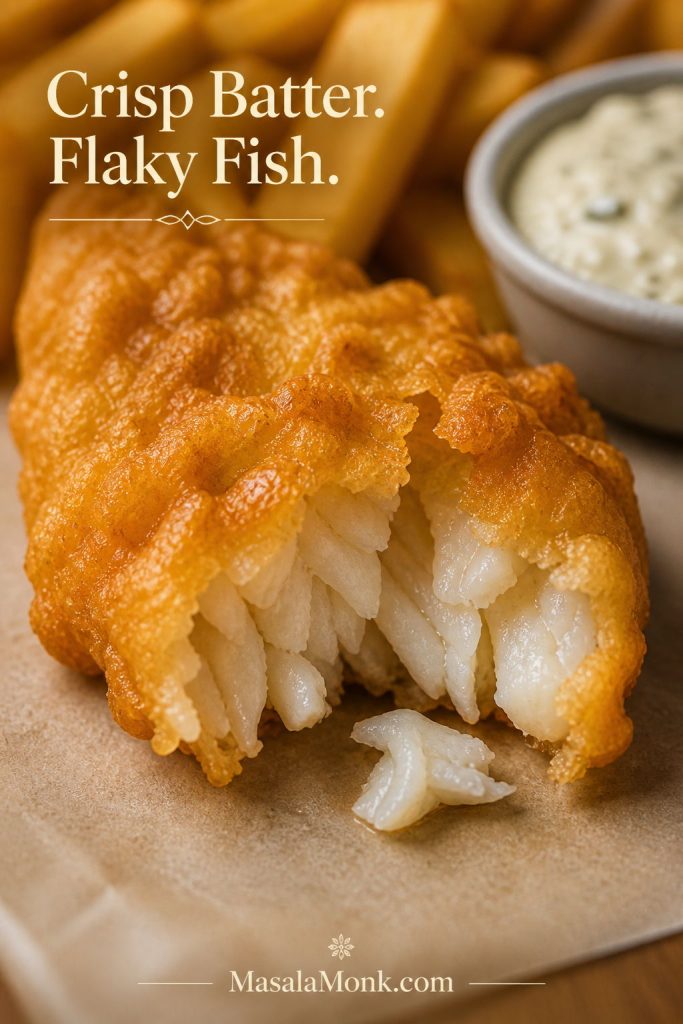
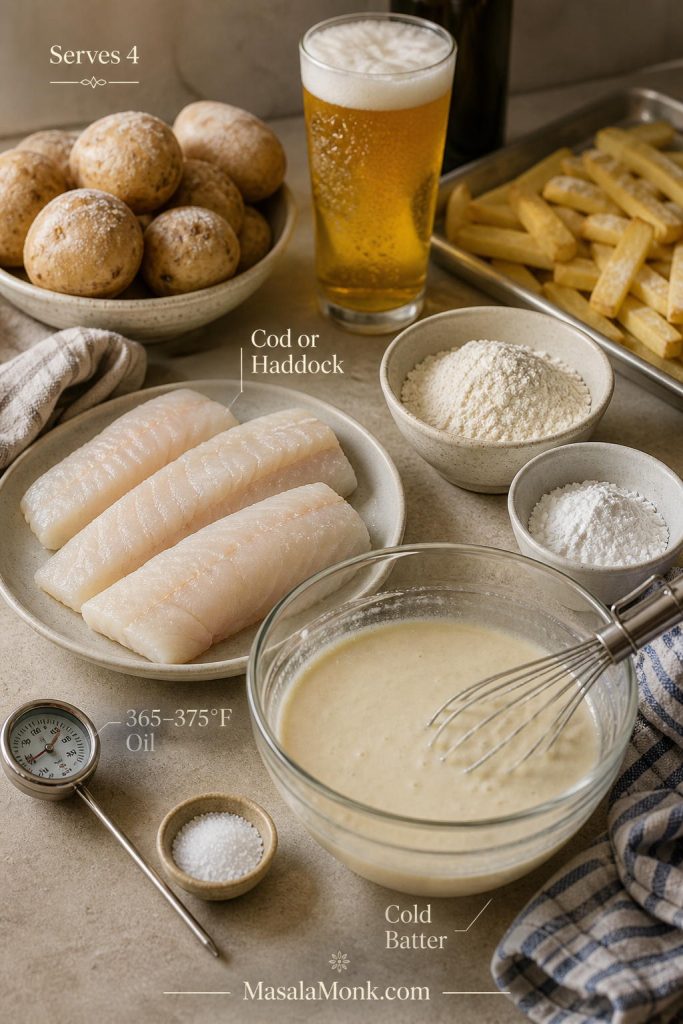
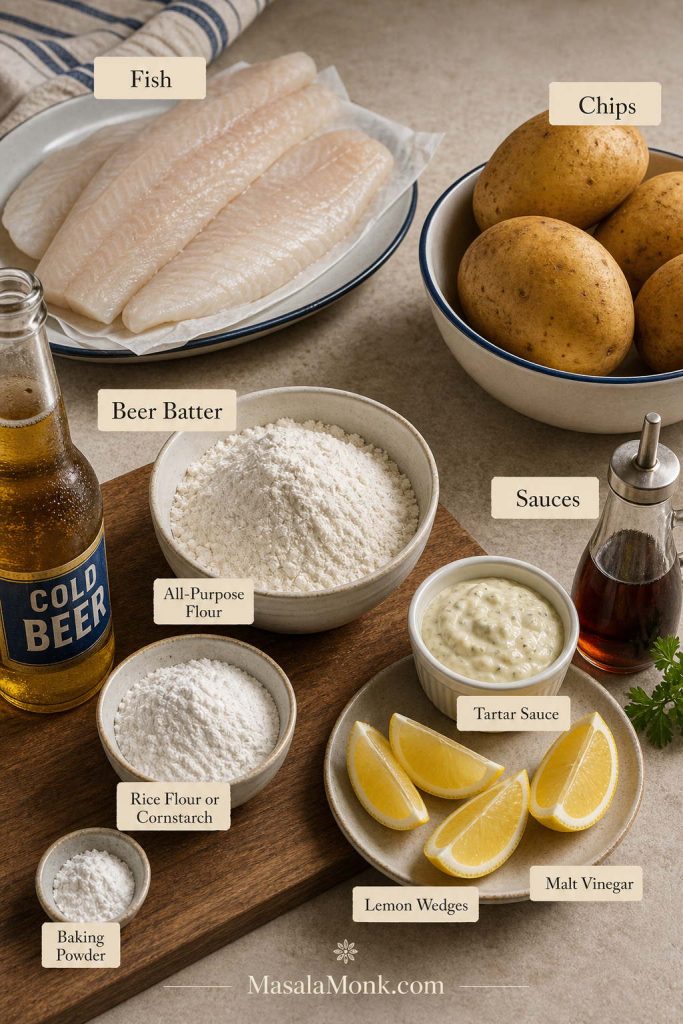
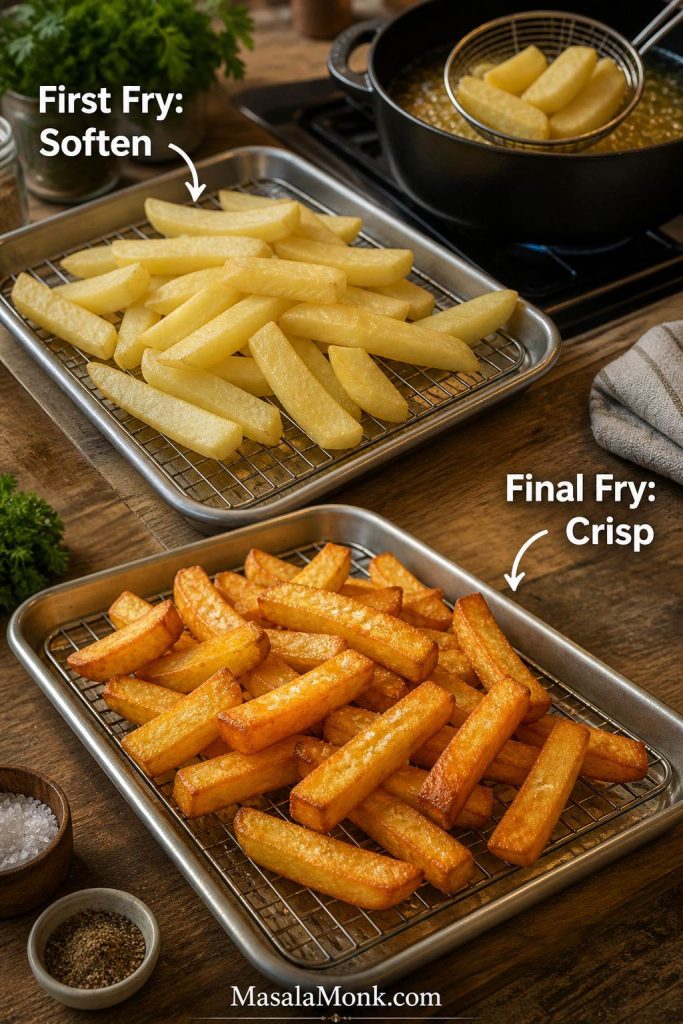
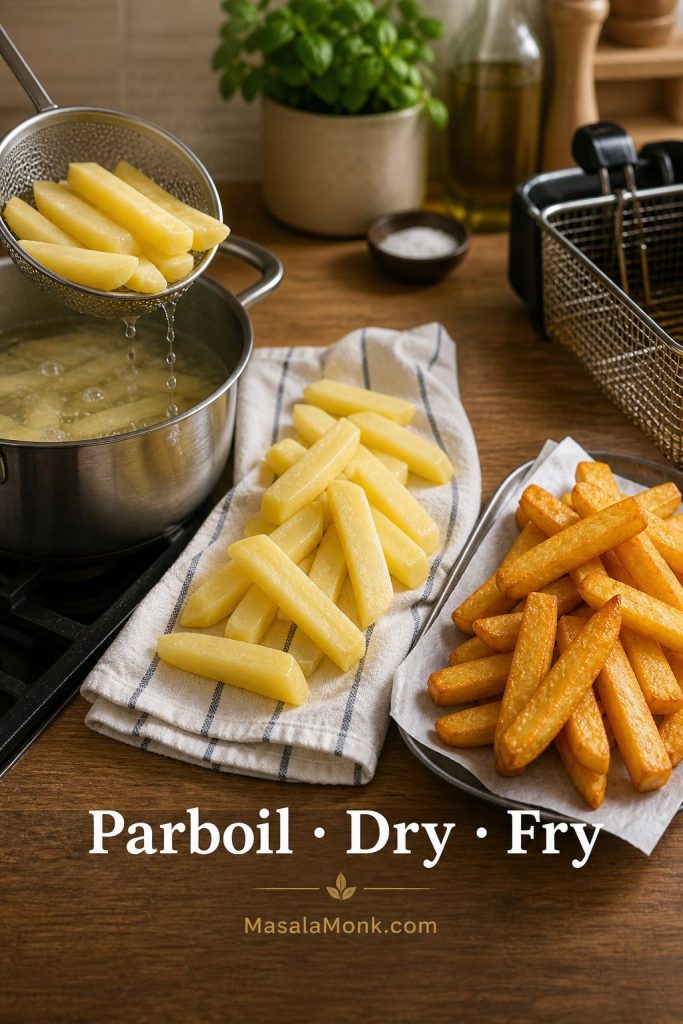
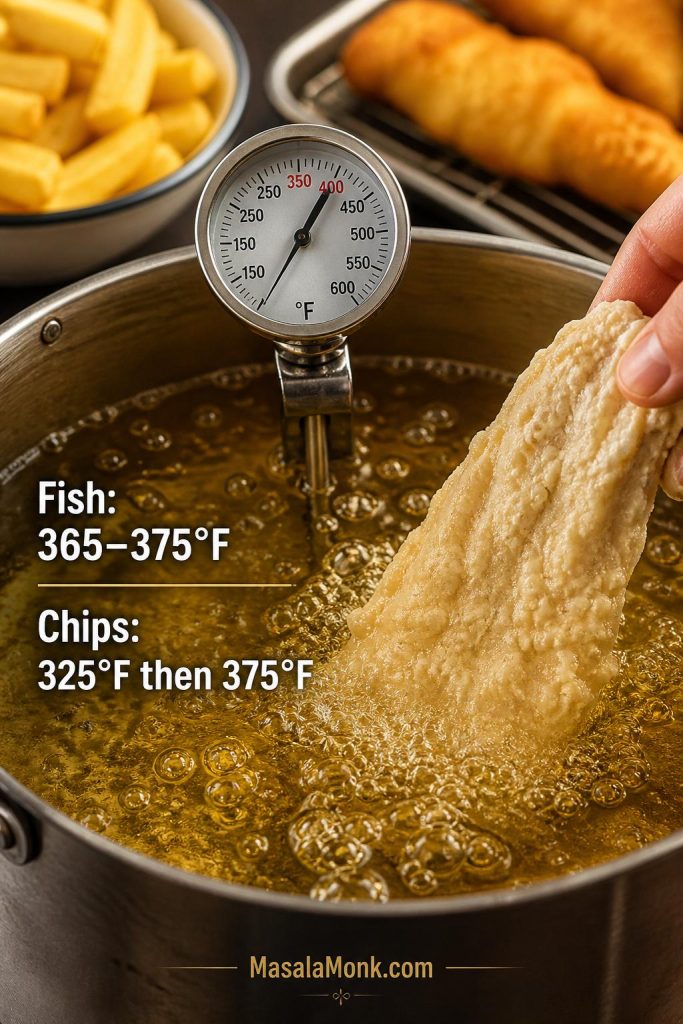
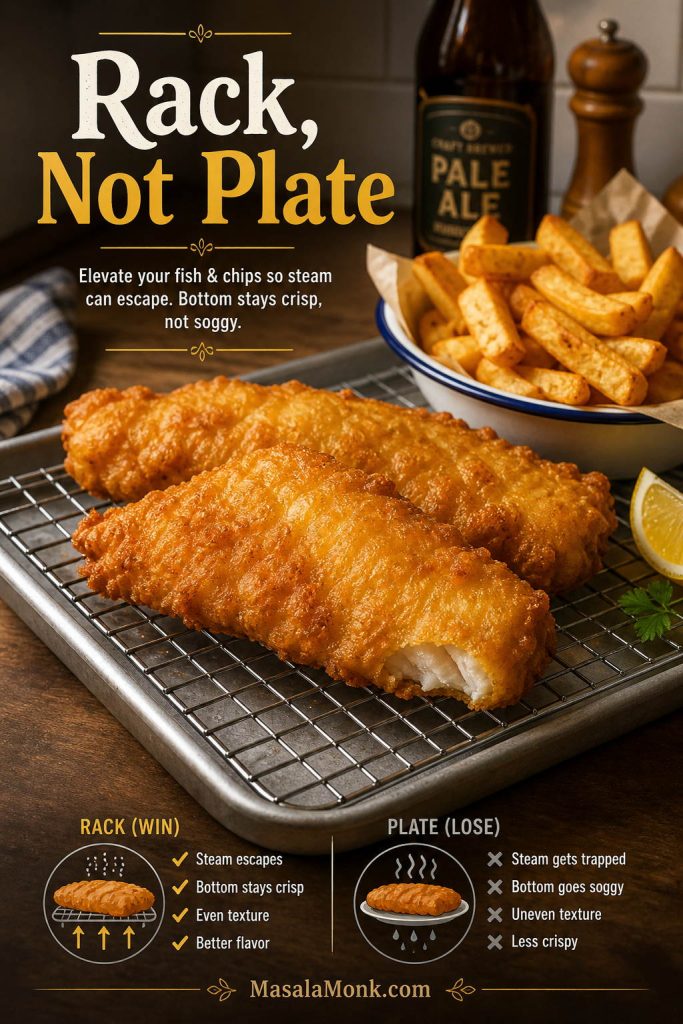
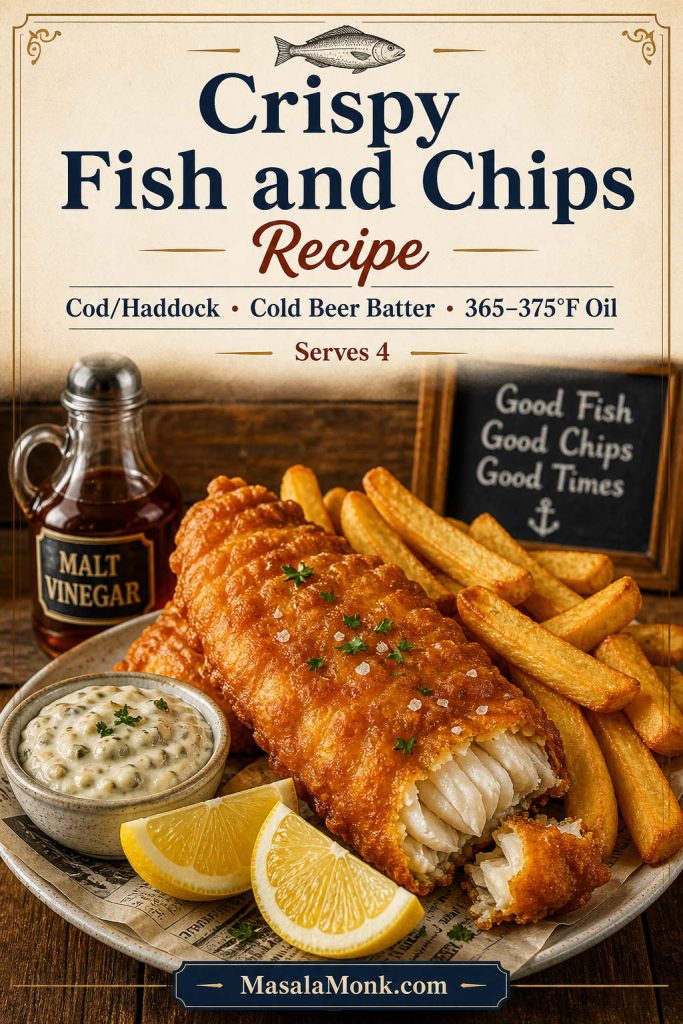
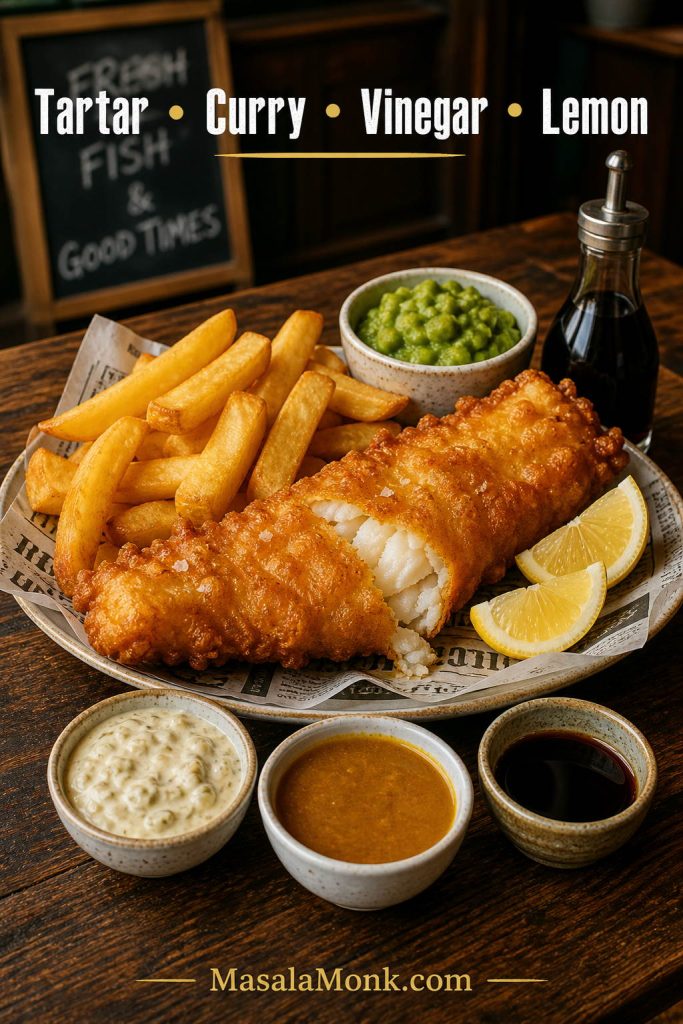
If you would rather turn cod or haddock into a battered fillet dinner instead of patties, start with this fish and chips recipe.
Fish choice shortcut
First batch: cod or haddock. Budget batch: pollock or hake. Stronger flavor: half smoked haddock, half plain white fish. Leftover option: cooked cod, haddock, salmon, or trout, folded in large flakes.
Why Cod Works So Well for Fish Cakes
Cod is especially good in fish cakes because it stays clean-tasting even after poaching, folding, chilling, and frying. It gives you real flakes inside the cake without making the filling taste heavy or oily.
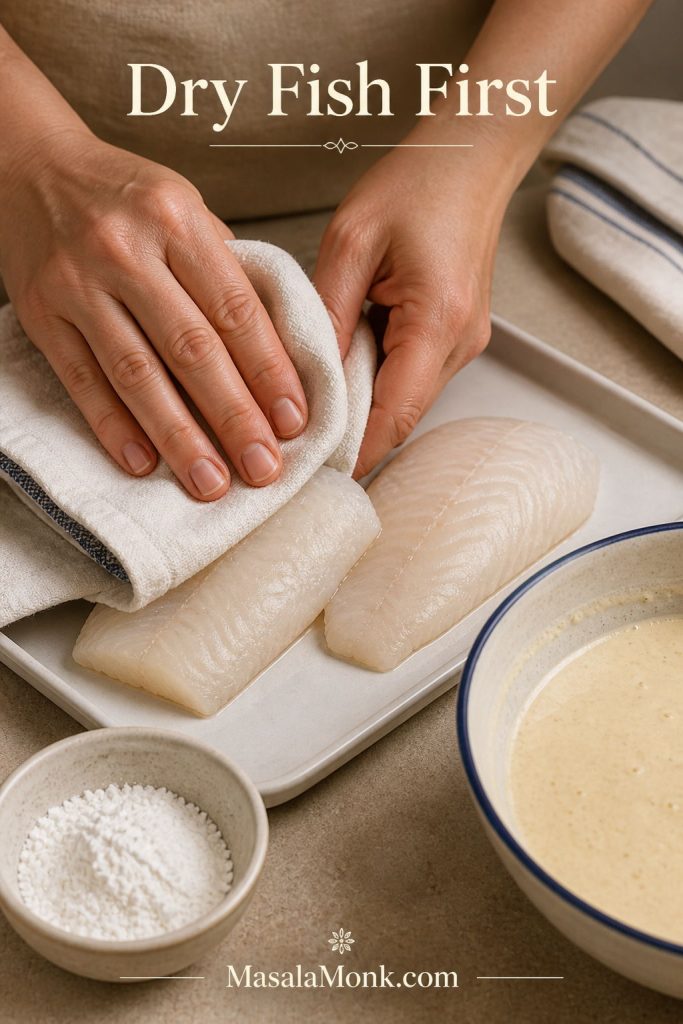
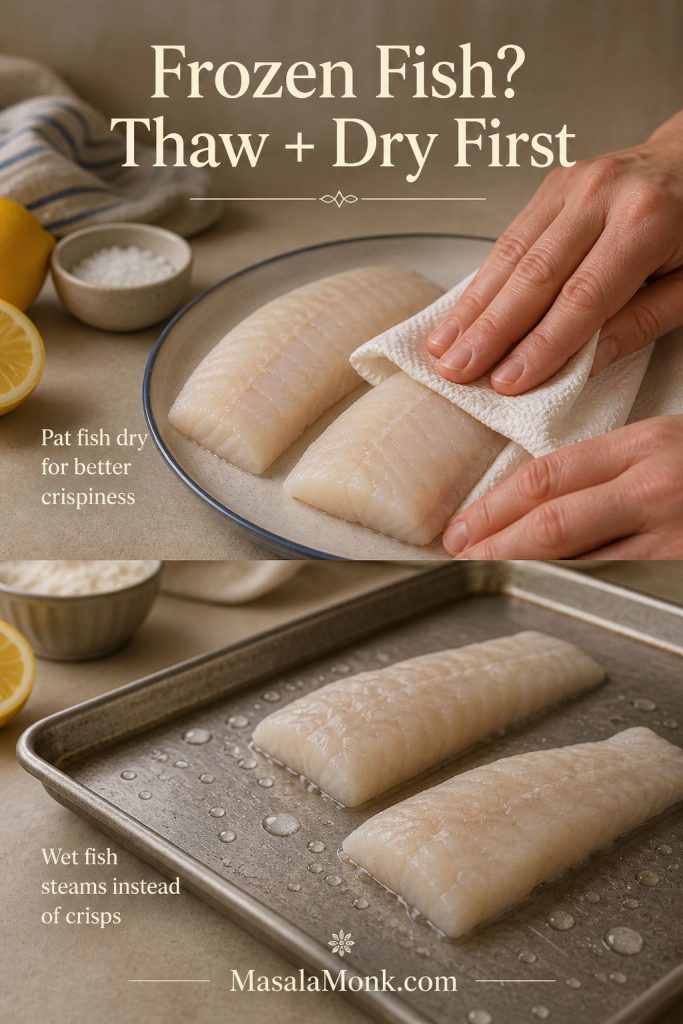
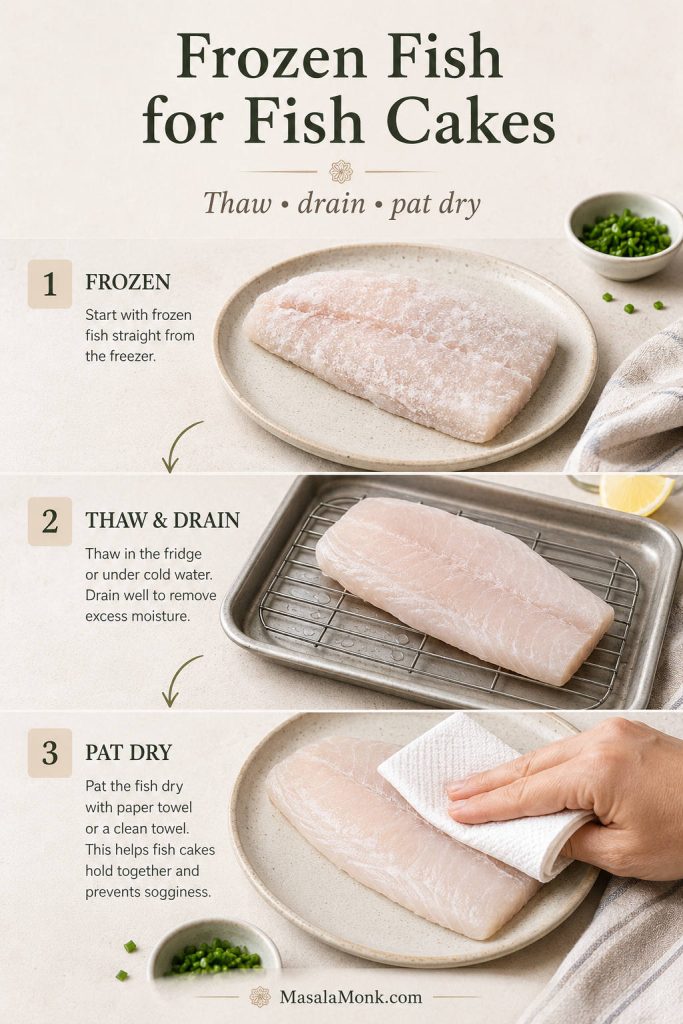
If using frozen cod, thaw it fully, drain away any liquid, and pat it dry before cooking. Wet fish is one of the quickest ways to make the filling soft, loose, or difficult to brown. For full make-ahead storage and cooking guidance, use the frozen fish cakes guide later in the post.
| Fish | How it behaves | Best use |
|---|---|---|
| Cod | Clean-tasting and flaky | A clean, reliable choice for classic cod fish cakes. |
| Haddock | Firm, classic, slightly sweeter | Excellent for traditional fish and potato cakes. |
| Pollock | Mild and budget-friendly | Good when you want an affordable white fish. |
| Hake | Soft and delicate | Works well if folded gently. |
| Tilapia | Mild but more fragile | Useful when cod or haddock is not available. |
| Smoked haddock | Bold and salty | Use partly with plain white fish or potato for a stronger flavor. |
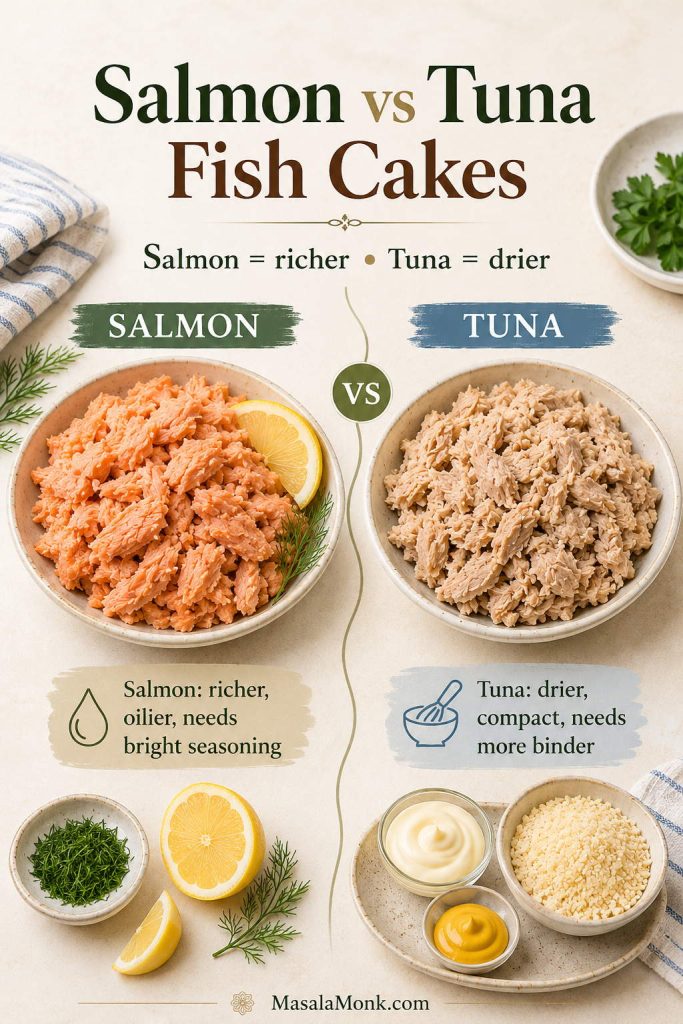
| Salmon | Richer and oilier | Use a richer binder and brighter seasoning; canned salmon works especially well in croquettes. |
| Tuna | Drier and more compact when canned | Use mayo, mustard, egg, and breadcrumbs to keep canned tuna from tasting dry. |
| Mackerel | Strong and oily | Balance it with lemon, herbs, mustard, and a crisp coating. |
Frozen Fish
Frozen fish works for this recipe, but it must be thawed and dried well. Thaw it in the refrigerator, drain off any liquid, then pat the fish dry before cooking. If frozen fish goes into the filling wet, the patties are more likely to break, taste watery, or refuse to brown.
For freezing shaped cakes, reheating leftovers, and choosing whether to thaw first or cook from frozen, use the full freezing guide below.
Leftover Cooked Fish
Leftover cooked cod, haddock, pollock, salmon, trout, or other flaky fish can work well. Keep the flakes fairly large and fold them in gently near the end. If the fish is already seasoned, taste the mixture before adding more salt.

If you are also starting with leftover mashed potato, use the leftover mash section for the better ratio before you shape the patties.
Using Salmon or Tuna
Both salmon and tuna can make good patties, but they behave differently from poached white fish. Because salmon is richer and canned tuna is drier and more compact, both usually need slightly different seasoning and binding. For a salmon-specific recipe, especially with canned salmon and Southern-style patties, use the salmon croquettes recipe.
Fish and Potato Cakes: The Ratio That Keeps Them Crisp
The best fish and potato cakes use enough potato to bind the filling, but not so much that the fish disappears. A reliable working ratio is:
Reliable starting ratio
450g / 1 lb raw cod or white fish + 500g / 1.1 lb peeled starchy potatoes
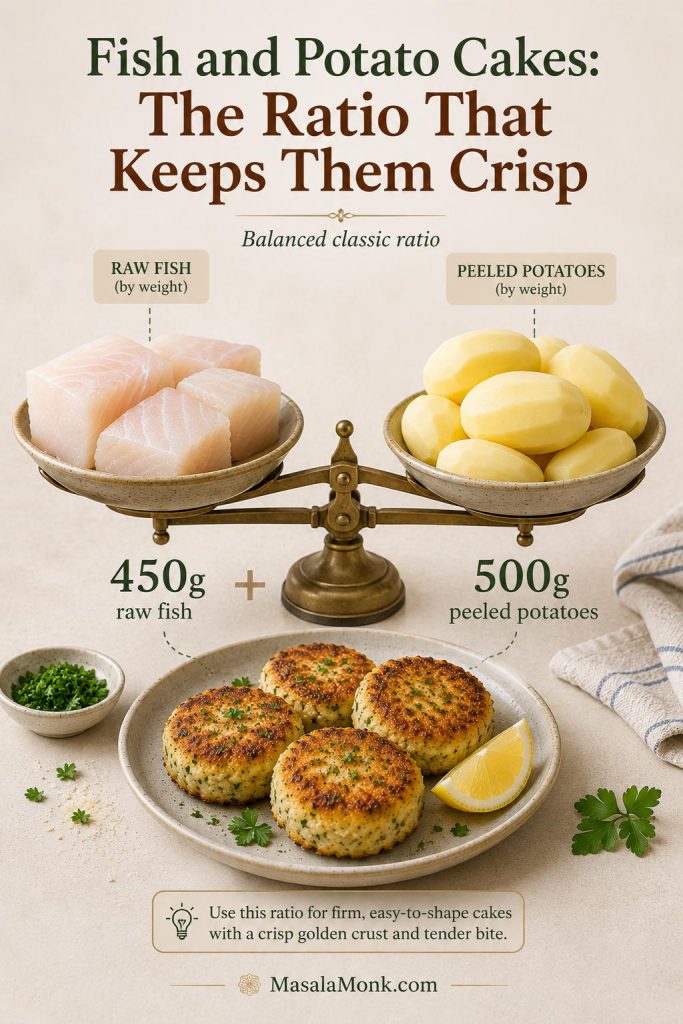
Think of the potato as the frame, not the main event. It should hold the fish together, soften the bite, and help the crust brown. It should not bury the fish so completely that the cakes taste like leftover mash with a little seafood mixed in.
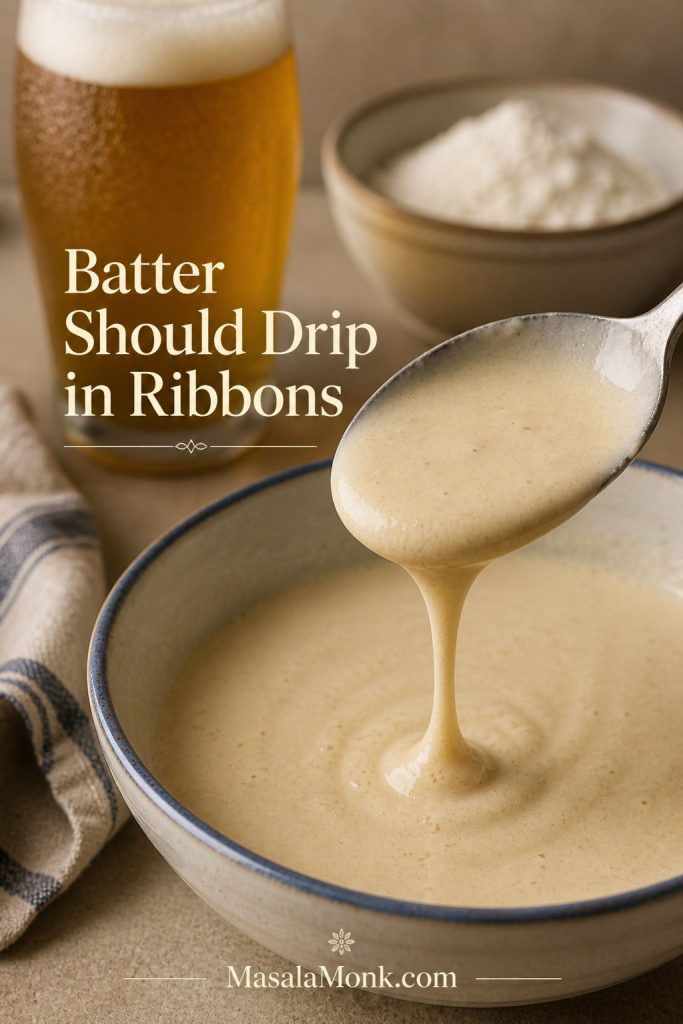
You are not chasing a perfect formula so much as a filling that presses together without turning into paste. A wet filling usually needs breadcrumbs, added one tablespoon at a time, followed by a short chill. A dry, crumbly base needs a little more binder, such as egg yolk, Dijon, mayo, or a tiny splash of poaching liquid.
Adjust the Ratio by Texture
The table below is not meant to make the recipe fussy. It simply shows why some batches feel flaky and delicate while others feel soft, sturdy, and more potato-forward.
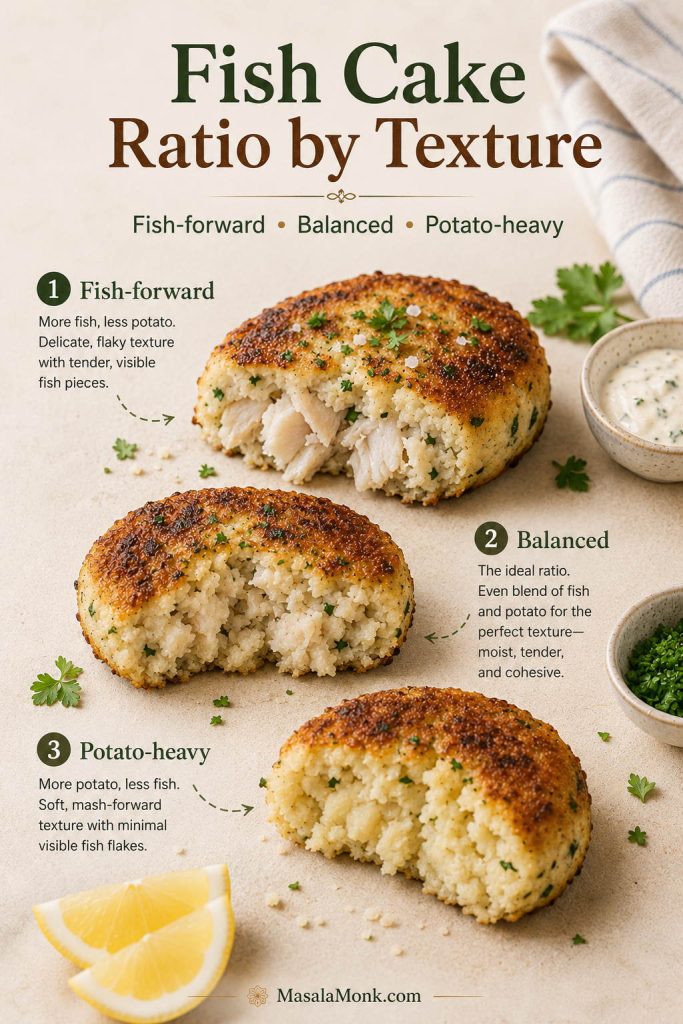
These weights follow the same basis as the main recipe: raw fish weight and peeled potato weight.
| Style | Raw fish | Peeled potatoes | Result |
|---|---|---|---|
| Fish-forward | 500g | 400g | Flakier, more delicate, and a little harder to handle. |
| Balanced classic | 450g | 500g | The most reliable first batch. |
| Potato-heavy | 350g | 600g | Softer, cheaper, and less fish-forward. |
Check the Mixture Before Shaping
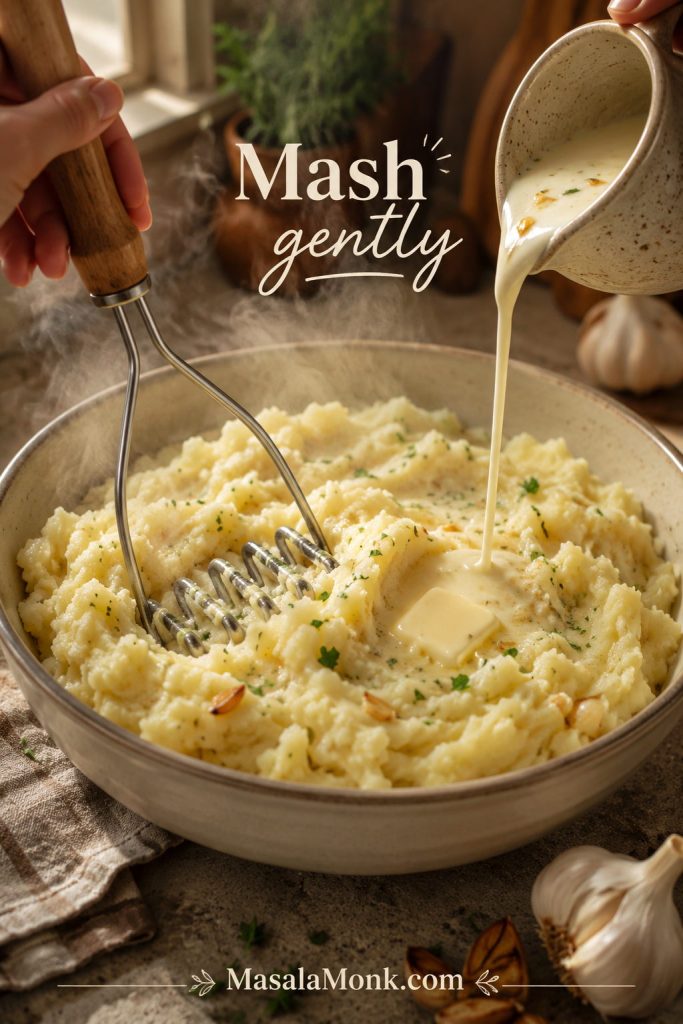
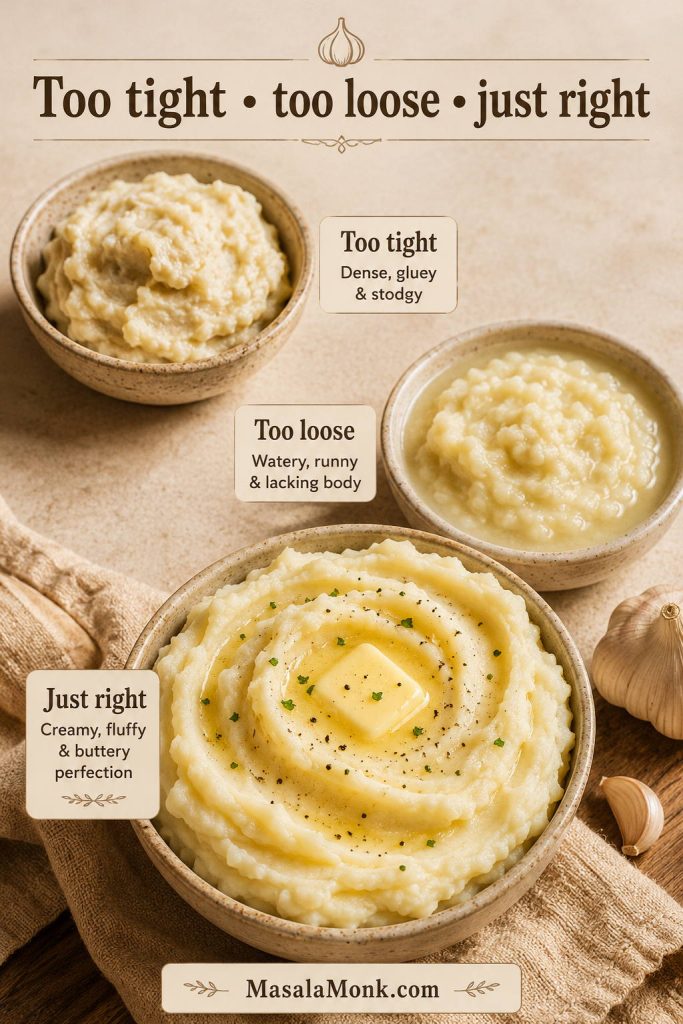
The goal is not smooth mashed potato. The most satisfying cakes have a mixture of soft potato, a few small potato lumps, and visible flakes of fish. If you mash the potato until gluey or crush the fish into paste, the inside becomes heavy instead of light and flaky.
Avoid loose, creamy mashed potatoes for this recipe. Mash made with lots of milk, cream, or butter can make the filling soft. If you are using leftover mashed potato, start with a drier mash and add breadcrumbs until the patties keep their shape.
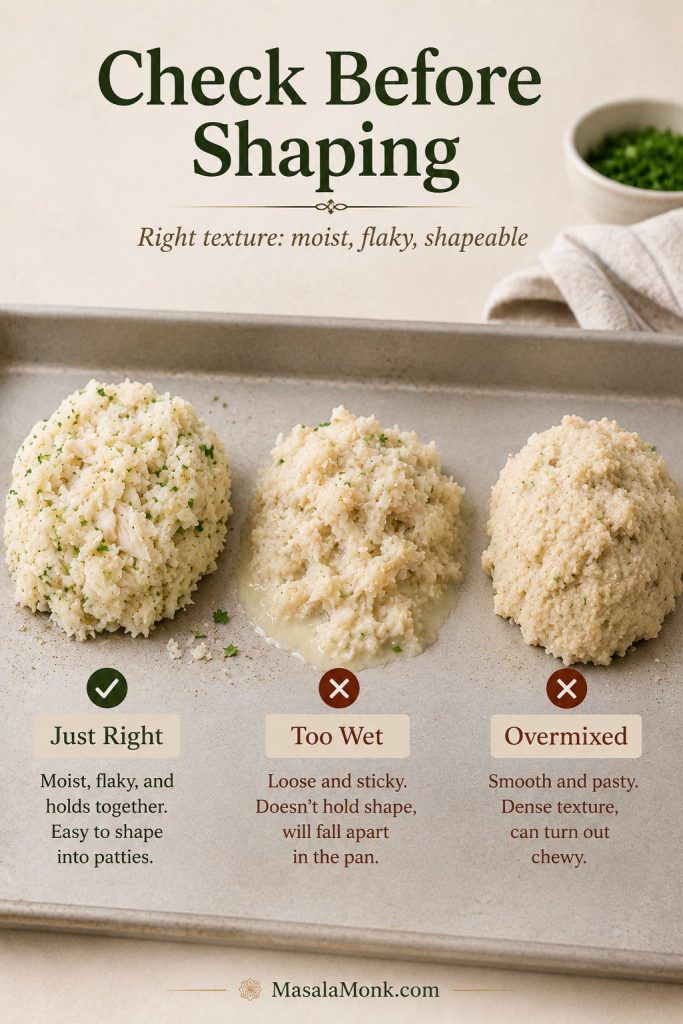
If the mixture already looks wet, slumpy, or crumbly, the troubleshooting table gives faster fixes before you start coating.
| Mixture texture | What it means | What to do |
|---|---|---|
| Holds shape but feels moist | Right where you want it | Chill, coat, and cook. |
| Slumps on the tray | Too wet | Add breadcrumbs 1 tablespoon at a time. |
| Crumbles when pressed | Too dry | Add egg yolk, Dijon, mayo, or a tiny splash of poaching liquid. |
| Looks smooth and pasty | Overmixed | Stop mixing. If available, fold in a few extra fish flakes. |
| Sticky and gluey | Potato was overworked or too wet | Add breadcrumbs and chill longer; avoid heavy stirring next time. |
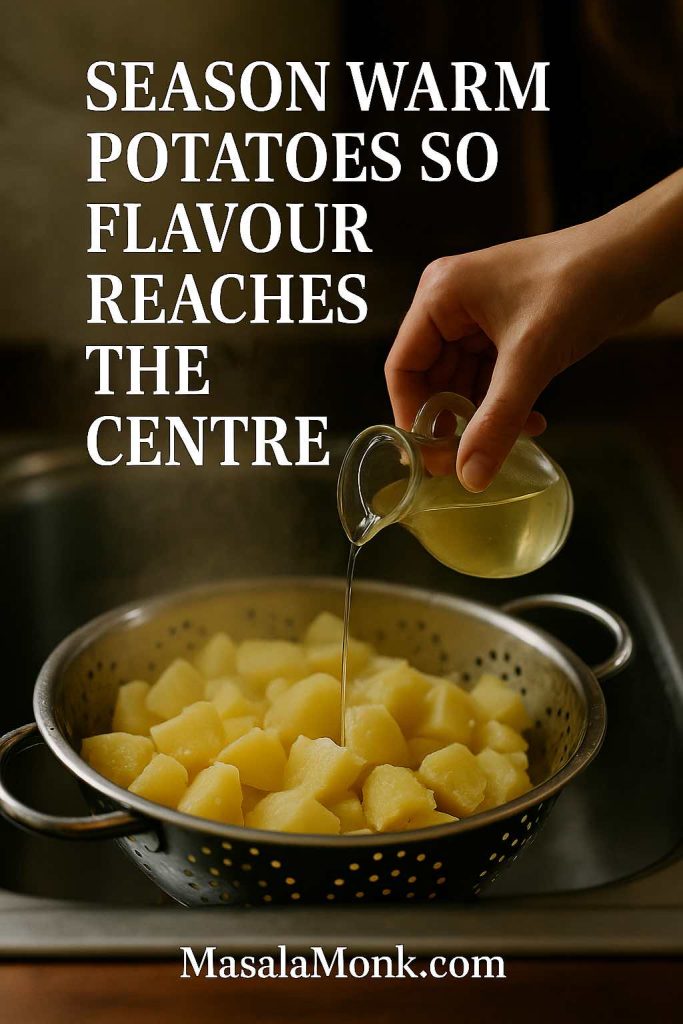
Ingredients for Cod and Potato Fish Cakes
The ingredient list is short, so the small choices matter: dry potato instead of creamy mash, enough lemon to wake up the fish, and a coating that protects the soft center while it fries.
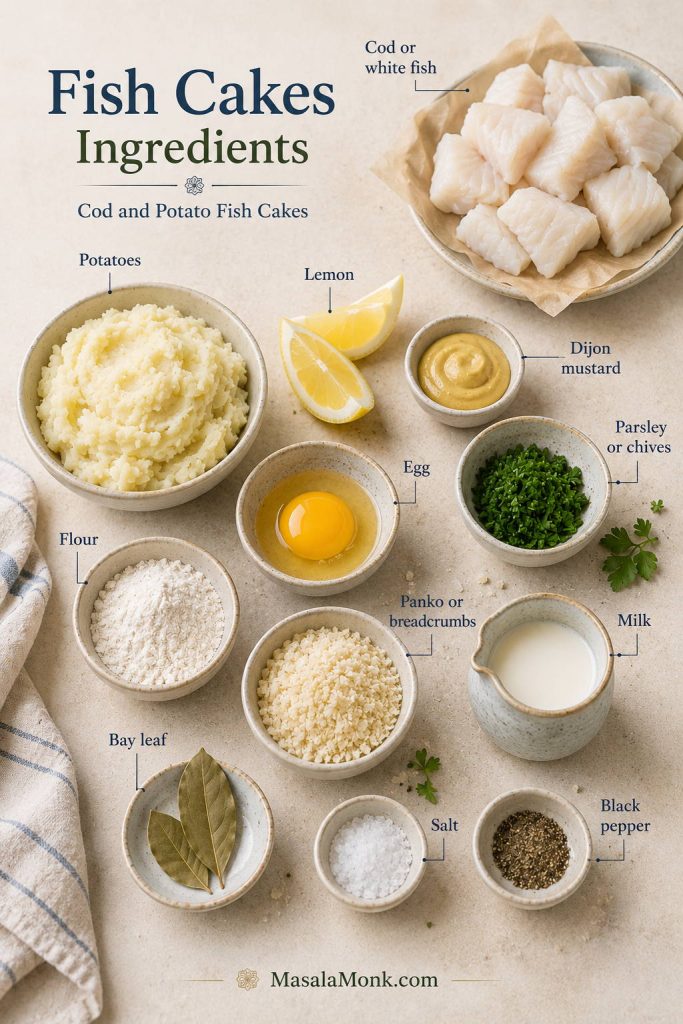
Fish
Use cod, haddock, pollock, hake, or another firm white fish. Cod is the easiest starting point because it flakes cleanly and has a gentle flavor that works with lemon, herbs, mustard, and breadcrumbs.
Fresh fish works well, but good frozen white fish is also a smart choice because it will be cooked, flaked, and folded into potato rather than served as a whole fillet. If sustainability labels matter where you shop, the Marine Stewardship Council haddock guide is a useful reference for certified haddock and related white fish choices.
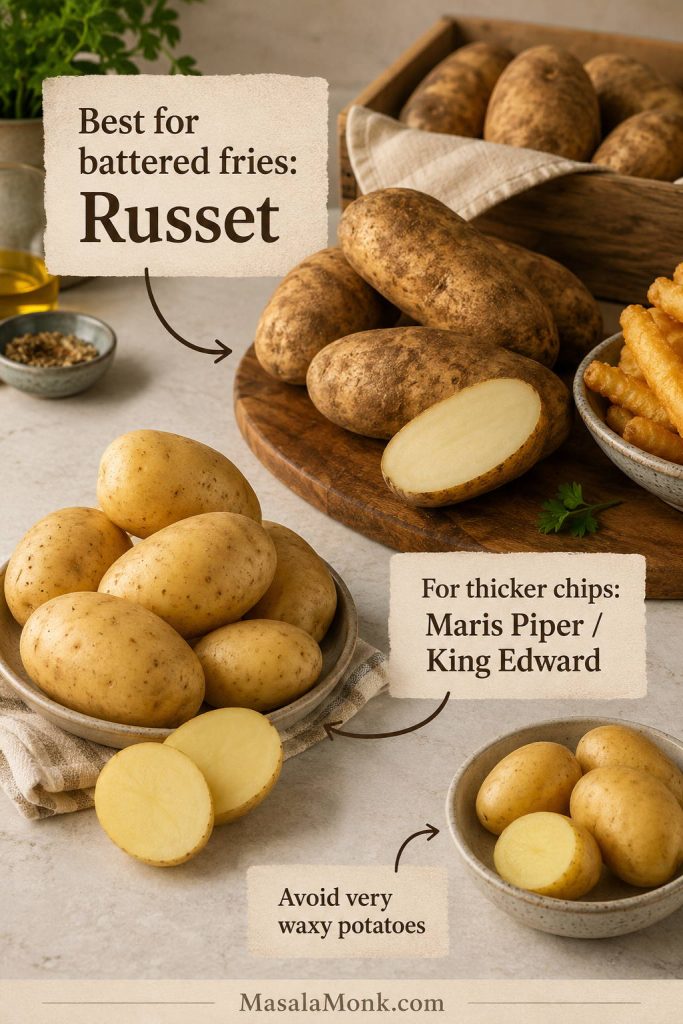
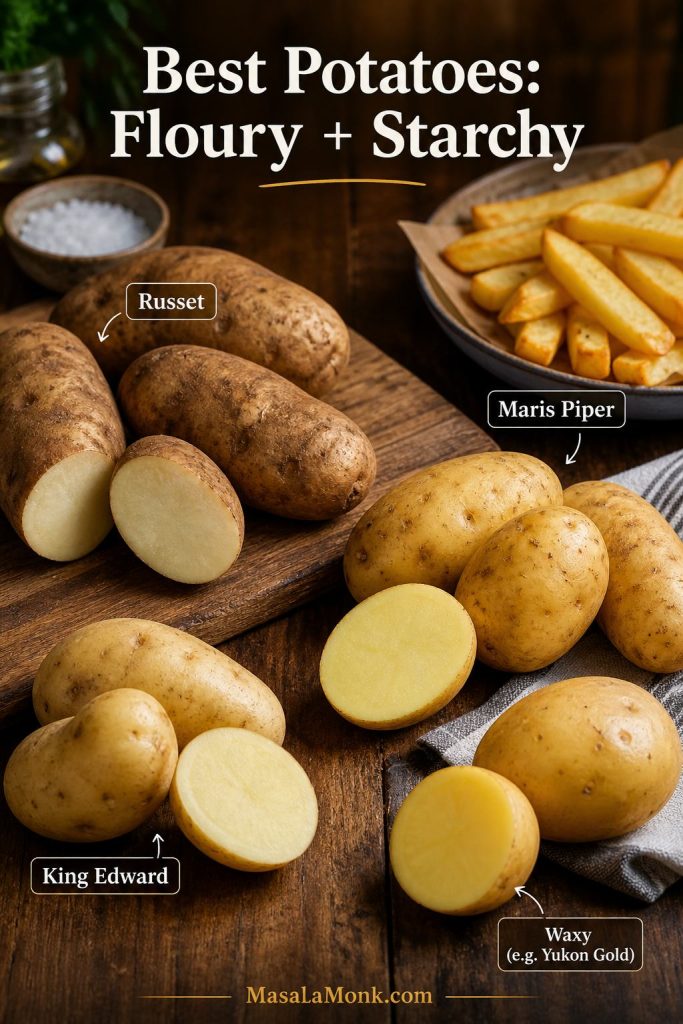
Potatoes
Starchy potatoes are your friend here. Russet, Maris Piper, King Edward, or Yukon Gold mash into a dry, fluffy base that holds together well. Waxy potatoes can work, but they make the filling denser and a little stickier.

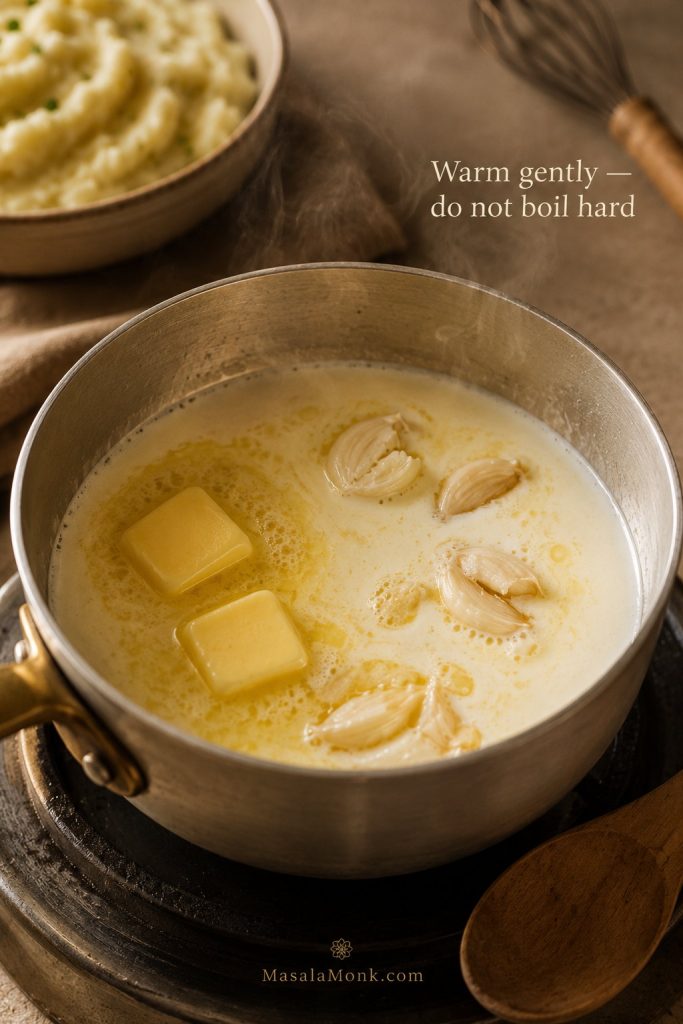
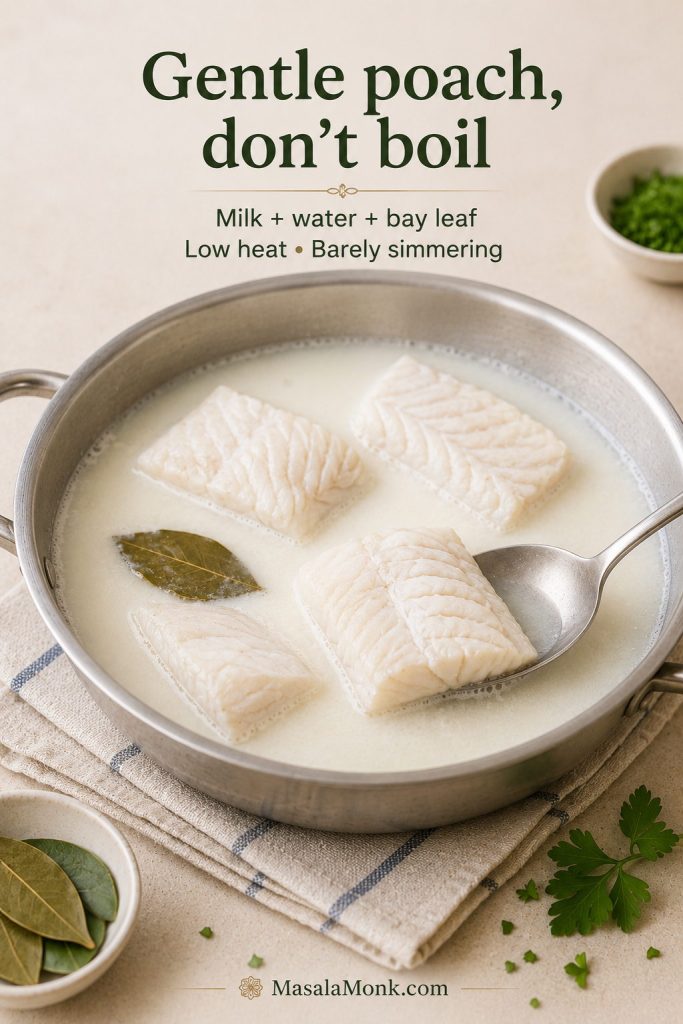
Milk, Water, and Bay Leaf
A simple poaching liquid of milk, water, and bay leaf keeps the fish gentle and lightly seasoned. You can use all water if needed, but milk gives the cod a softer, rounder flavor.
Egg
Use one small egg or one egg yolk in the filling. A whole egg gives more binding, while a yolk gives richness with slightly less wetness. If your mixture is already soft, use a yolk instead of a full egg.
Lemon, Mustard, and Herbs
Lemon zest, lemon juice, Dijon mustard, parsley, and chives or spring onion keep the filling bright. Fish cakes need more seasoning than plain fish because the potato and breadcrumb coating soften the flavor.
Breadcrumb Coating
For the crispest finish, use a flour, egg, and breadcrumb coating. Panko gives a lighter crunch. Fresh breadcrumbs give a more traditional homemade fishcake crust. If you like crispy coatings, you may also enjoy the separate fish batter recipe for fried fish.
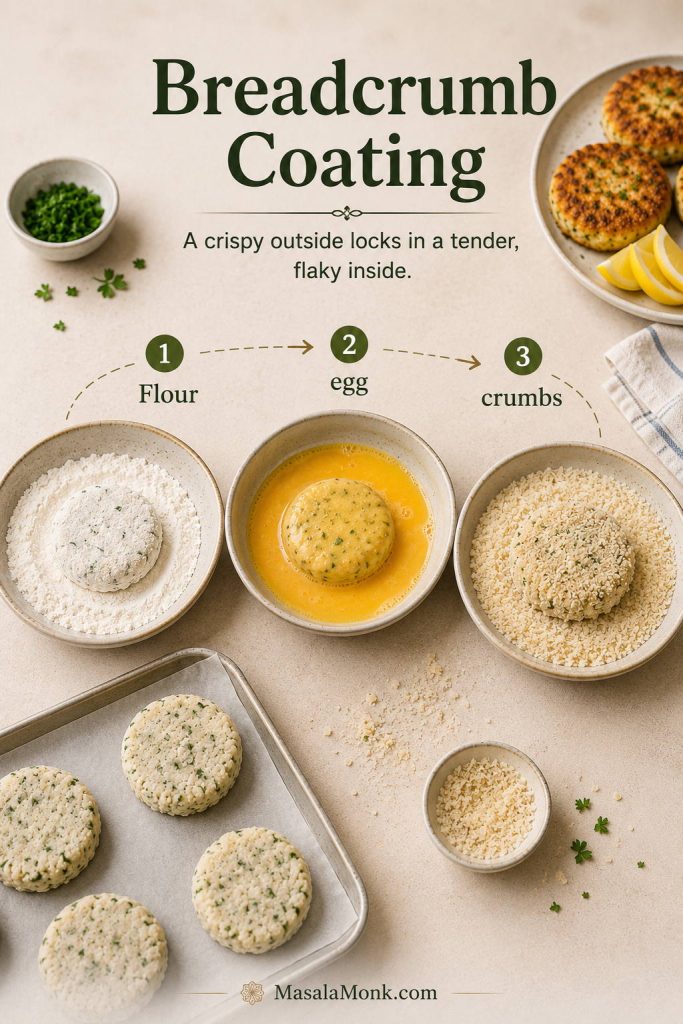
For the exact flour–egg–crumb sequence in the method, use the step-by-step coating section below.
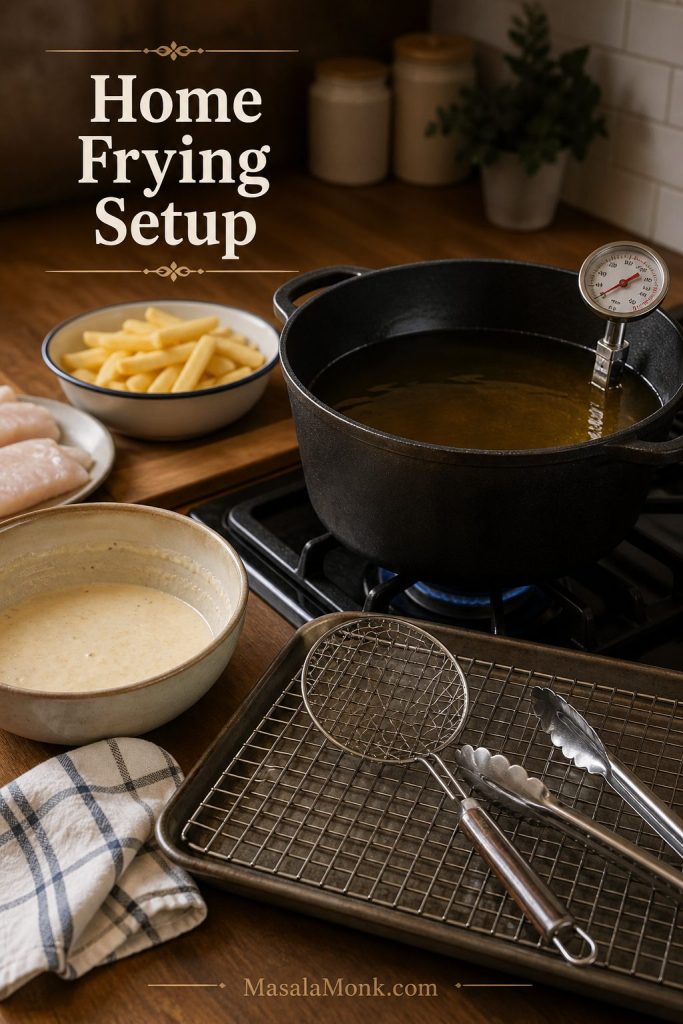
Tools That Make Fish Cakes Easier
You do not need special equipment, but the right basic tools make the patties easier to handle. A wide skillet gives them room to brown, shallow bowls keep coating neat, and a fish spatula makes flipping less stressful.
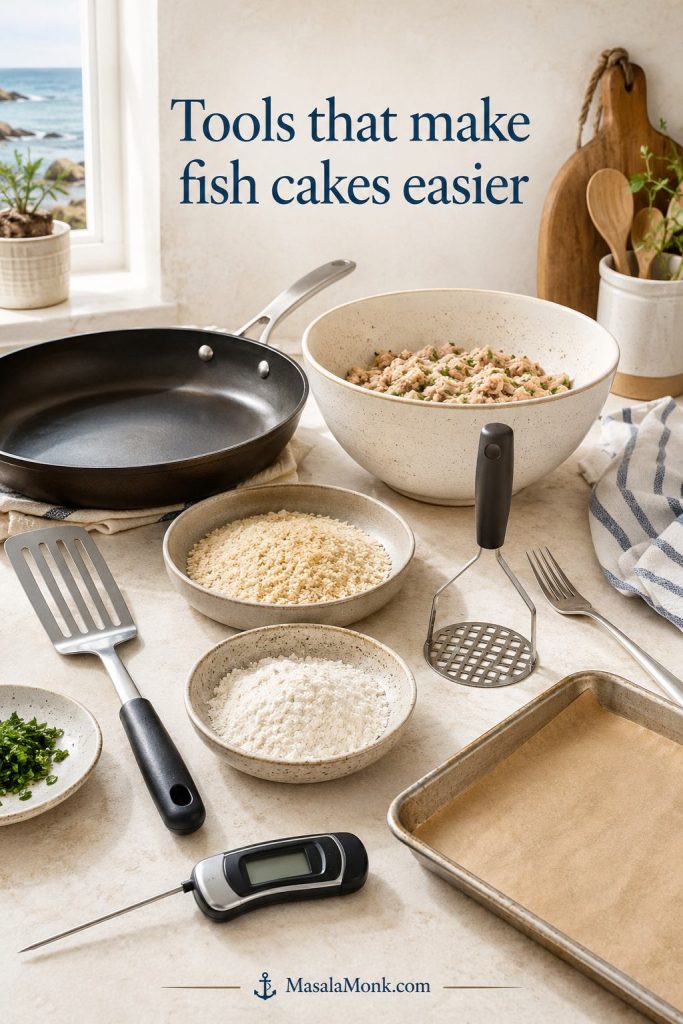
- Saucepan: for boiling the potatoes.
- Shallow pan or skillet: for gently poaching the fish.
- Colander: for draining the potatoes well.
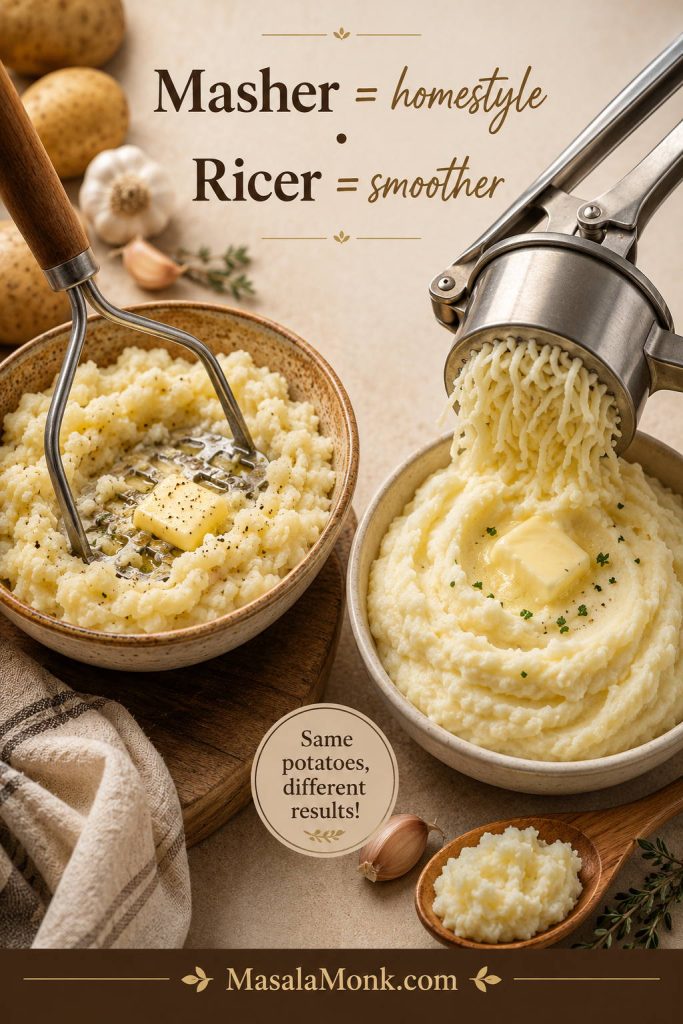
- Fork or potato masher: for rough mashing.
- Mixing bowl: for folding the filling.
- Tray or large plate: for chilling shaped cakes.
- Three shallow bowls: for flour, egg, and breadcrumbs.
- Large skillet: for pan-frying.
- Fish spatula: for easier flipping.
- Instant-read thermometer: optional, but useful for checking fish and reheated leftovers.
How to Make Fish Cakes Step by Step
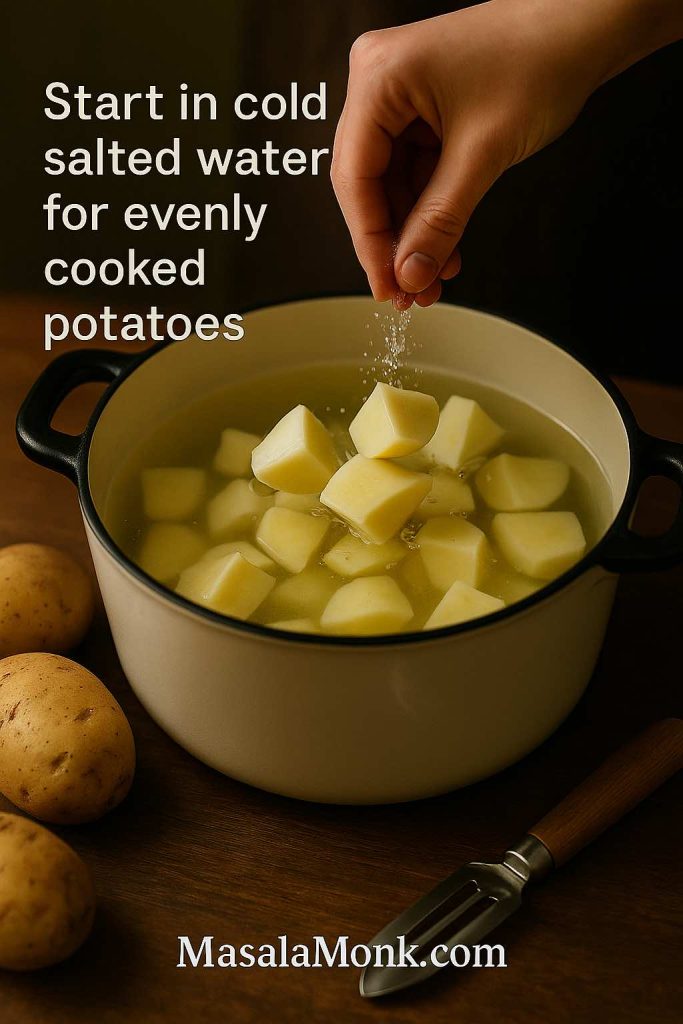
Step 1: Cook the Potatoes
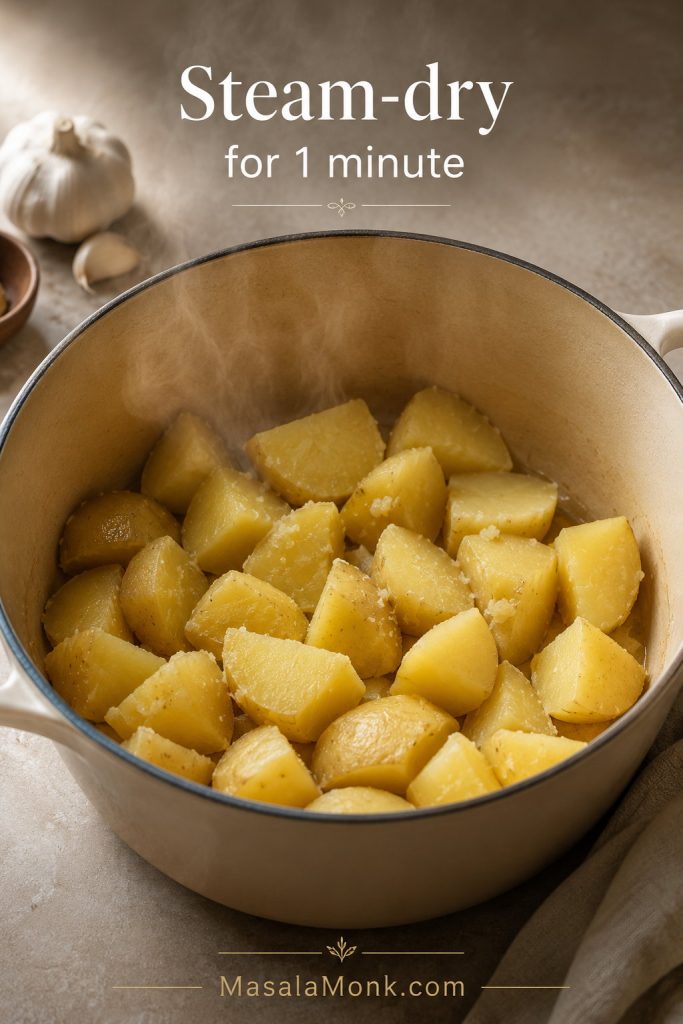
Peel and cut the potatoes into even chunks. Simmer in salted water for 10–15 minutes, or until tender enough to crush with a fork. Drain well, then return the potatoes to the hot pan for 1–2 minutes so excess steam escapes. Mash roughly. Do not add milk, cream, or butter.
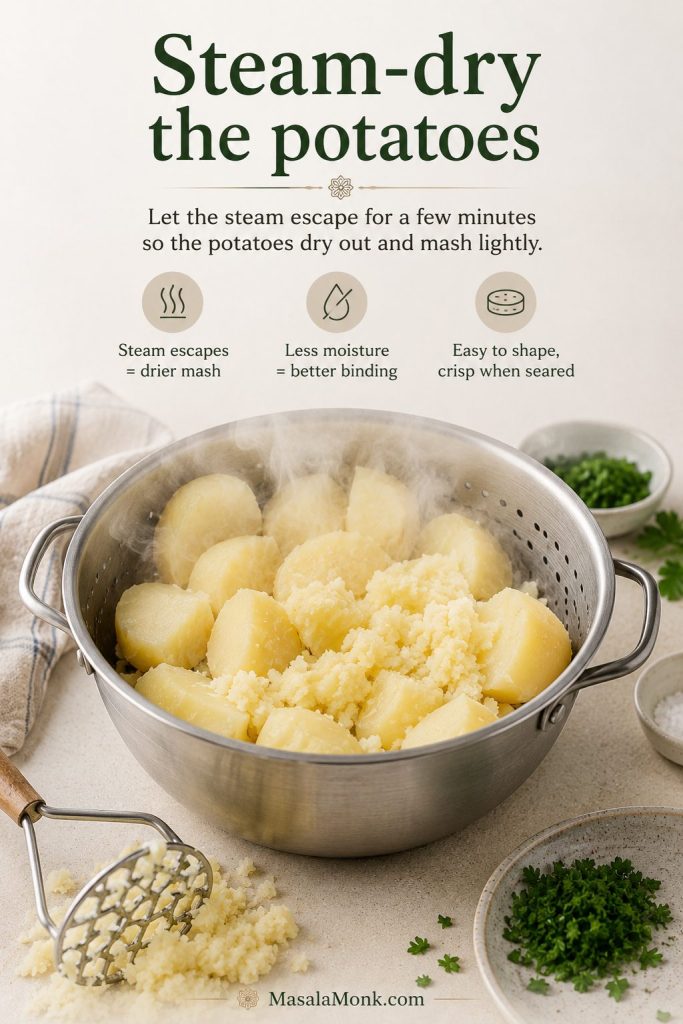
The potatoes are ready when they crush easily and look dry rather than glossy after steaming off. A rough mash is better than a perfectly smooth one because a little texture helps the cakes feel light.
Step 2: Poach the Fish
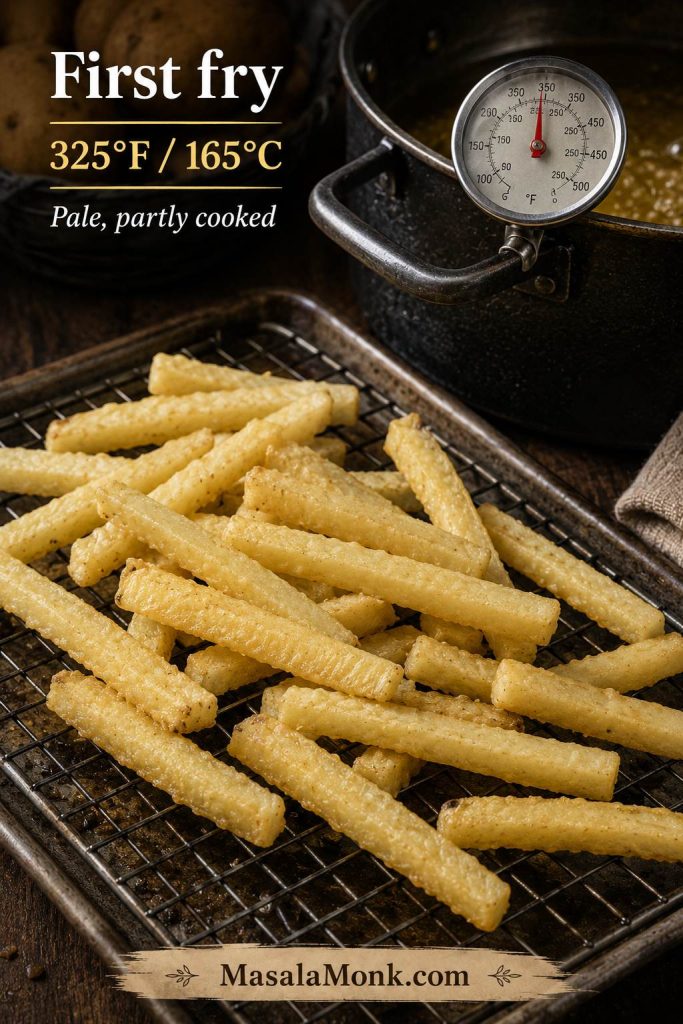
Place the cod or white fish in a shallow pan with milk, water, bay leaf, and a little black pepper. Bring just to a gentle simmer, then cook for about 4–6 minutes, depending on thickness. Turn off the heat, cover, and let the fish stand for 5 minutes. It should reach 145°F / 63°C, or be opaque and flake easily with a fork.
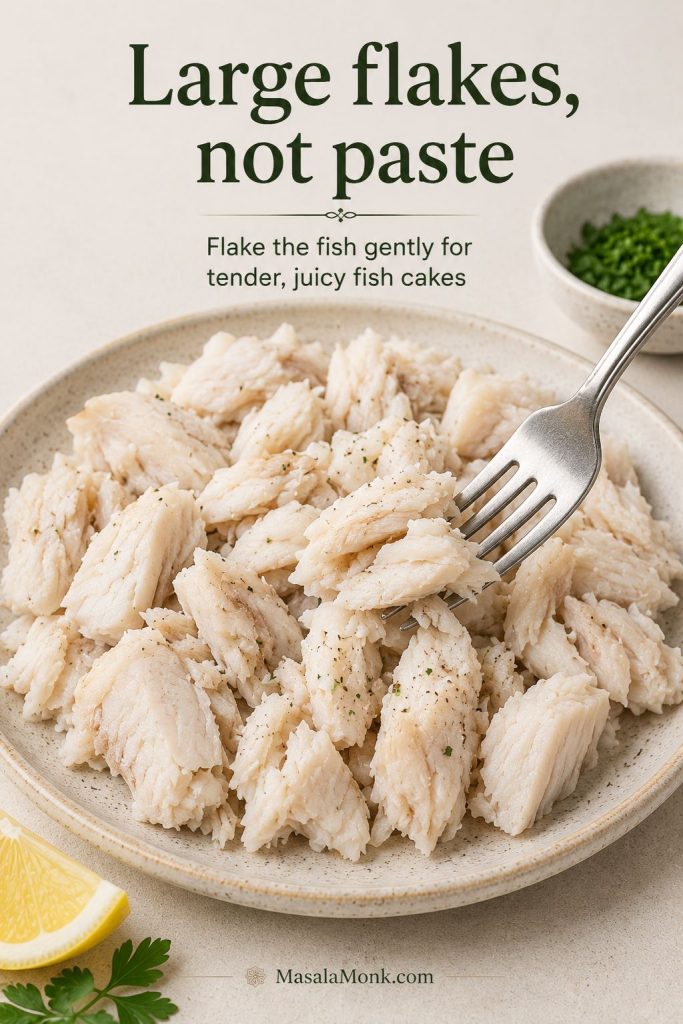
Step 3: Cool and Flake
Lift the fish out of the poaching liquid and let it cool slightly. Flake it into large pieces, removing any skin or bones. Do not mash the fish into the potato. Visible flakes are what make the cakes feel like fish cakes instead of plain potato patties.
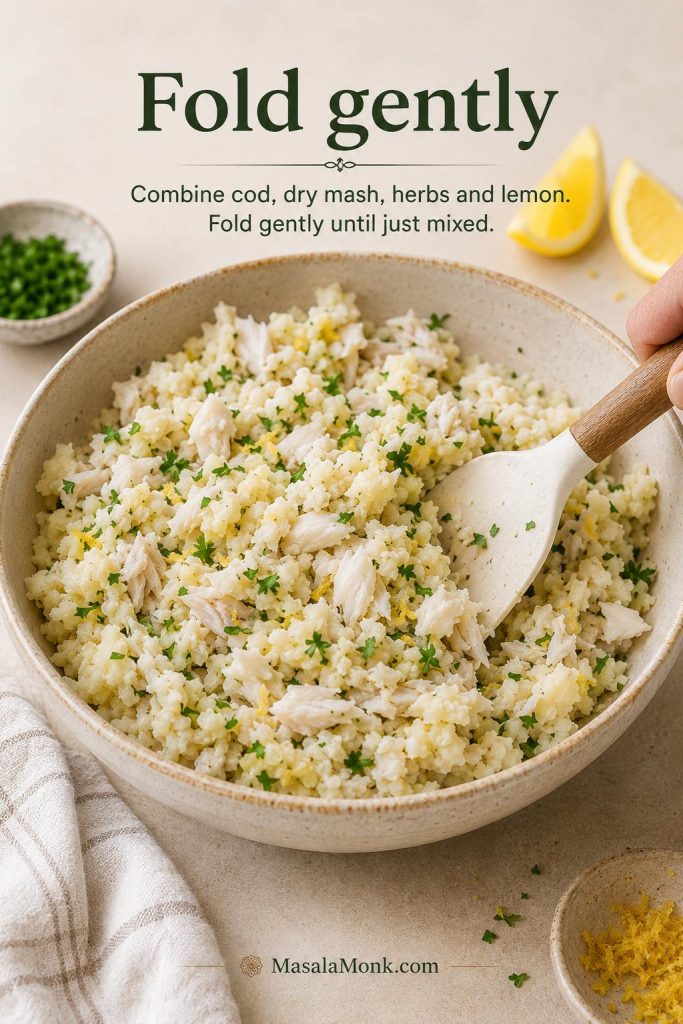
Step 4: Mix the Filling
In a large bowl, combine the mashed potato, lemon zest, lemon juice, Dijon mustard, parsley, chives or spring onion, salt, pepper, and egg or egg yolk. Fold in the fish gently. The mixture may feel softer than burger patties, and that is okay. Once chilled and coated, it firms up enough to handle.
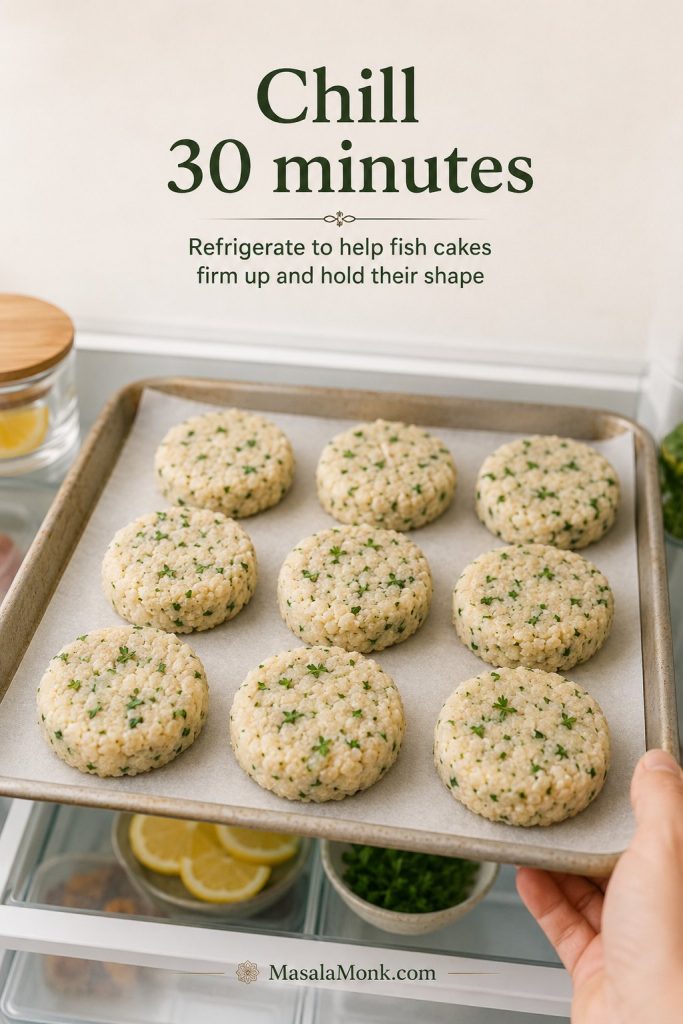
Step 5: Shape and Chill
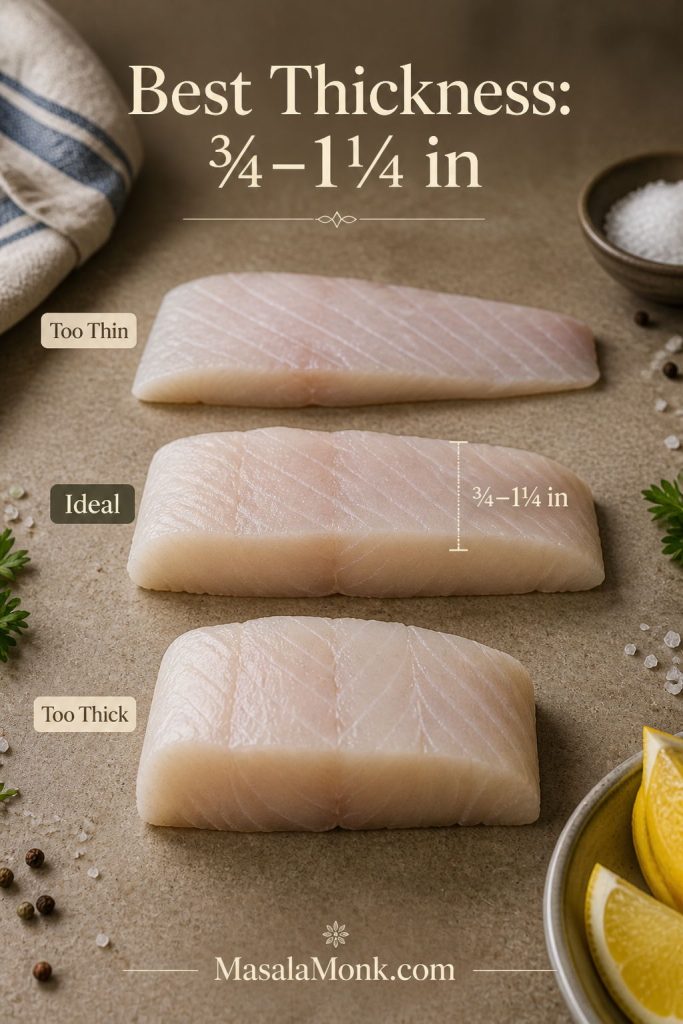
Divide the filling into 8 cakes, about 75–90g each. Shape each one about 2cm / ¾ inch thick. Place on a tray and chill for at least 30 minutes. Chilling firms the patties and makes them easier to coat and fry. If you want to make the batch ahead instead of frying right away, use the make-ahead timeline.
Do not worry if the shaped cakes look a little rustic. Neat edges are nice, but a chilled, well-coated patty matters more than a perfect circle.
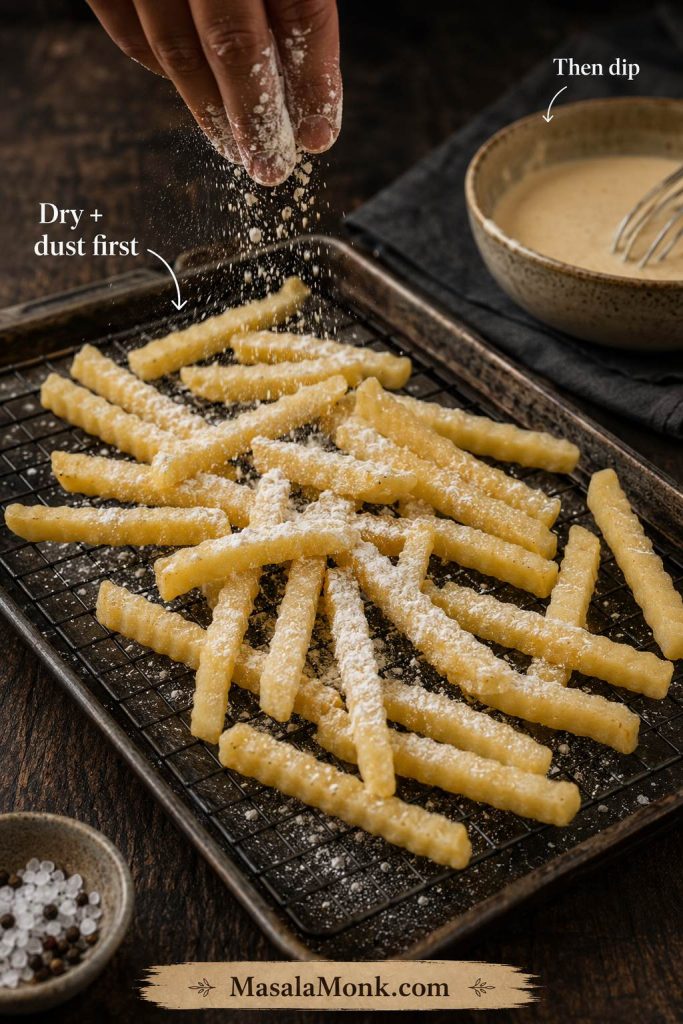
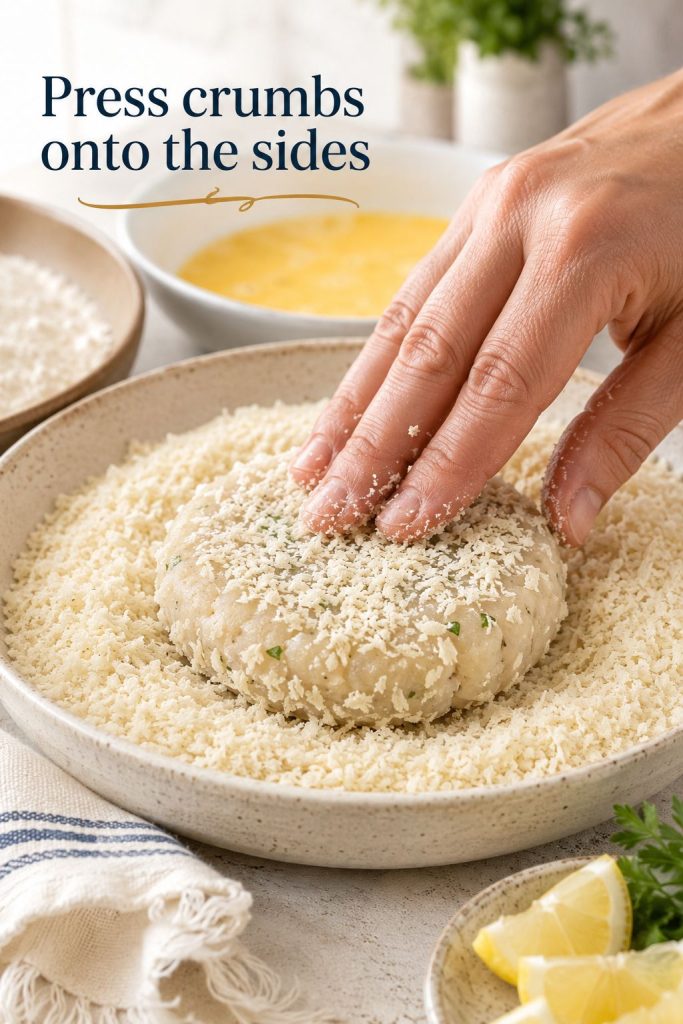
Step 6: Coat
Set up three shallow bowls: flour, beaten egg, and breadcrumbs. Coat each round lightly in flour, dip in egg, then press into breadcrumbs. Make sure the sides are coated too.
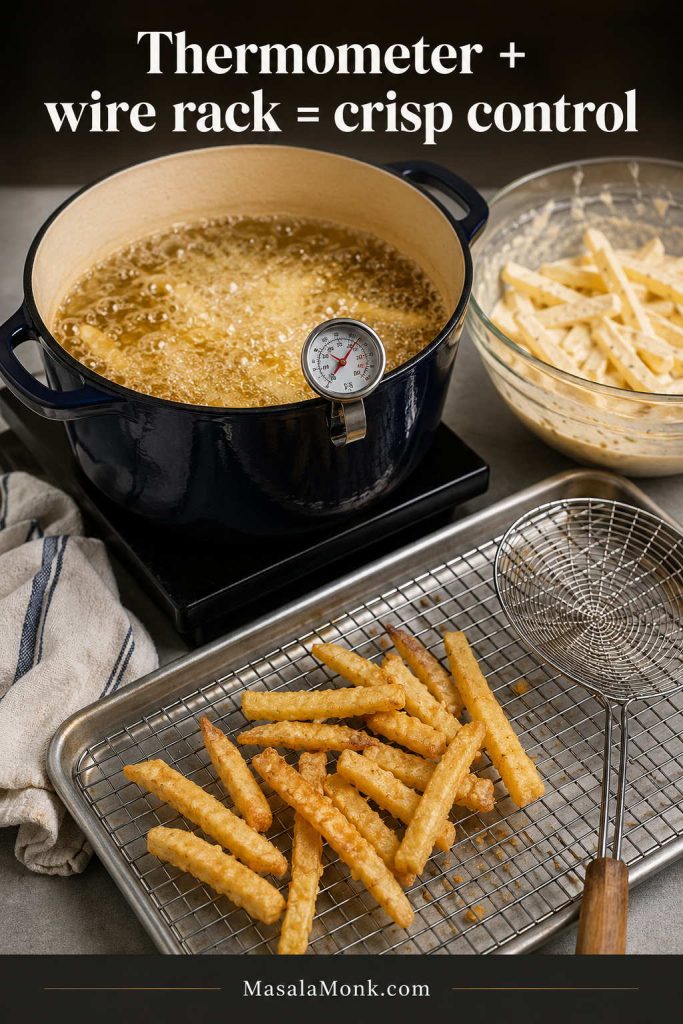
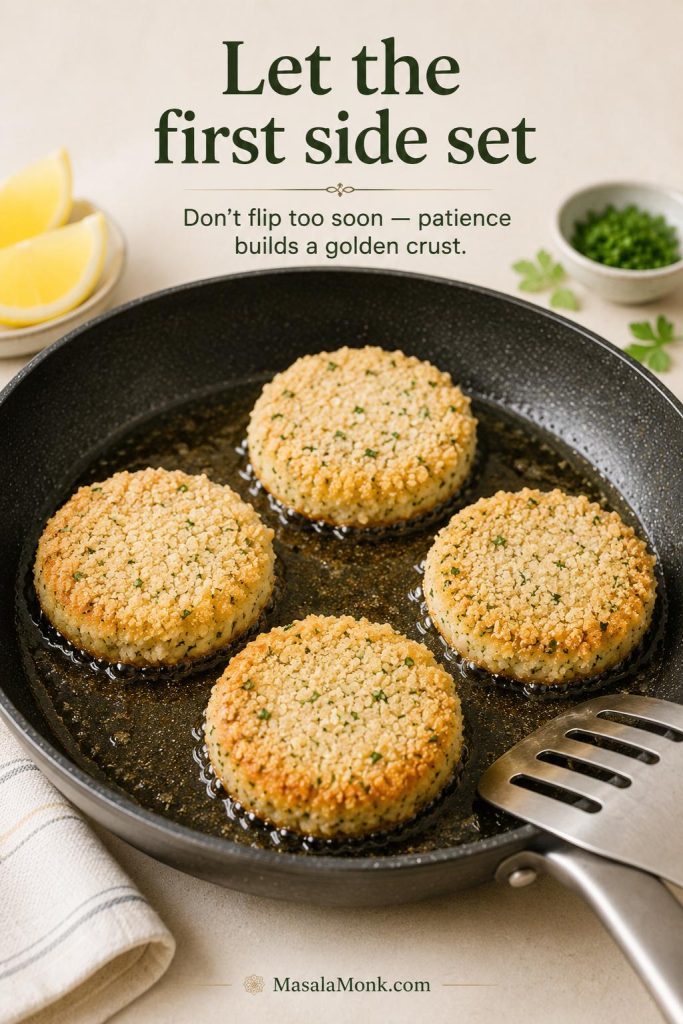
Step 7: Fry
Heat oil in a large skillet over medium heat. Fry the cakes for 4–5 minutes per side, or until golden, crisp, and hot through. The first side is the patience side. Let it build a crust before you move it.
For more detail on skillet heat, crust timing, and the oven finish, see the pan-fried fish cakes section.
Fish Cakes Recipe: Crispy Cod and Potato Fish Cakes
This fish cakes recipe makes crispy cod and potato patties with dry mashed potato, lemon, herbs, egg, and a golden breadcrumb coating. Pan-fry them for the crispiest crust, or use the baked and air fryer notes below.
Ingredients
Fish and Potatoes
- 450g / 1 lb raw cod, haddock, pollock, hake, or firm white fish
- 500g / 1.1 lb peeled starchy potatoes, cut into chunks
- 150ml / ⅔ cup milk
- 150ml / ⅔ cup water
- 1 bay leaf
- ¾ teaspoon fine salt, divided, plus more for potato water
- ¼–½ teaspoon black pepper
Binder, Lemon, and Herbs
- 1 small egg or 1 egg yolk
- 1 teaspoon lemon zest
- 1–2 teaspoons lemon juice
- 1 teaspoon Dijon mustard
- 2 tablespoons chopped parsley
- 2 tablespoons chopped chives or spring onion
Coating and Frying
- 50–60g / ½ cup flour
- 1 large egg, beaten
- 85–100g / 1½–2 cups panko or fresh breadcrumbs
- 3–4 tablespoons neutral oil, or enough for a thin shallow-fry layer
- Lemon wedges, for serving
- Tartar sauce, lemon dill mayo, or green chutney mayo, for serving
Instructions
Cook and Mix
- Cook the potatoes. Put the potato chunks in a saucepan, cover with cold water, add salt, and simmer for 10–15 minutes until tender. Drain well, then return to the hot pan for 1–2 minutes to steam dry. Mash roughly and let cool slightly.
- Poach the fish. Place the fish in a shallow pan with the milk, water, bay leaf, and a little black pepper. Bring just to a gentle simmer. Cook for 4–6 minutes, depending on thickness, then turn off the heat, cover, and rest for 5 minutes. The fish should reach 145°F / 63°C, or be opaque and flake easily with a fork.
- Flake the fish. Lift the fish from the poaching liquid, cool slightly, then flake into large pieces. Remove any skin or bones.
- Mix the filling. In a bowl, combine the mashed potato, egg or yolk, lemon zest, lemon juice, Dijon mustard, parsley, chives or spring onion, remaining salt, and pepper. Fold in the fish gently, keeping visible flakes.
- Adjust texture. A wet mixture needs breadcrumbs, added 1 tablespoon at a time. For a dry or crumbly mixture, add 1 teaspoon of reserved poaching liquid, mayonnaise, or Dijon.
Shape, Coat, and Fry
- Shape. Divide into 8 cakes, about 75–90g each and about 2cm / ¾ inch thick. Place on a tray.
- Chill. Refrigerate for at least 30 minutes. This helps the patties keep their shape.
- Coat. Put flour, beaten egg, and breadcrumbs in three shallow bowls. Coat each cake in flour, dip in egg, then press into breadcrumbs.
- Pan-fry. Heat oil in a skillet over medium heat. Fry for 4–5 minutes per side until golden and crisp. Flip gently and only once if possible.
- Finish if needed. When the crust is ready before the center is hot, place the batch in a 200°C / 400°F oven for 8–10 minutes.
- Serve. Serve hot with lemon wedges, tartar sauce, lemon dill mayo, garlic mayo, green chutney mayo, or sweet chili sauce.
Recipe Notes
- For the driest potato texture, bake the potatoes instead of boiling them, then scoop and mash the flesh.
- If using frozen fish, thaw fully and pat dry before cooking.
- If using leftover mashed potato, avoid very creamy mash or add breadcrumbs to firm it up. See the leftover mashed potato section for the better ratio.
- Panko gives the lightest crunch. Fresh breadcrumbs give a softer, classic crust.
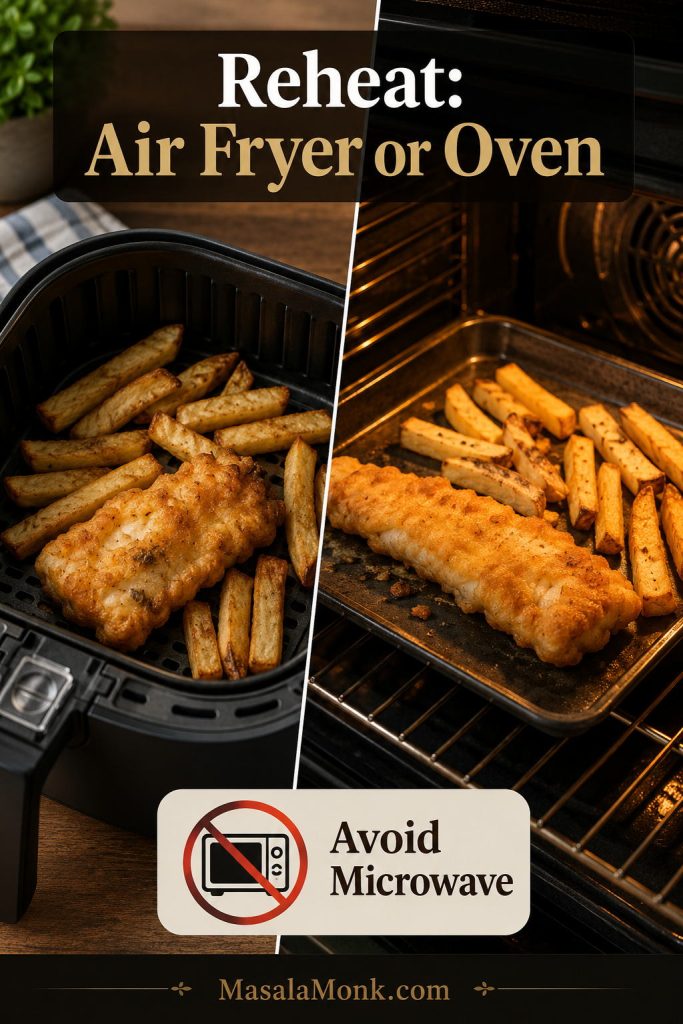
Pan-Fried Fish Cakes: How to Get a Golden Crust
For your first batch, pan-frying is the best teacher because you can see how the crust sets. Baking is calmer for a full tray, and the air fryer is useful when you want less oil and easier cleanup, but the skillet gives you the clearest feedback. If you already know you want a hands-off batch, use the baked method; if you want less oil, use the air fryer method.
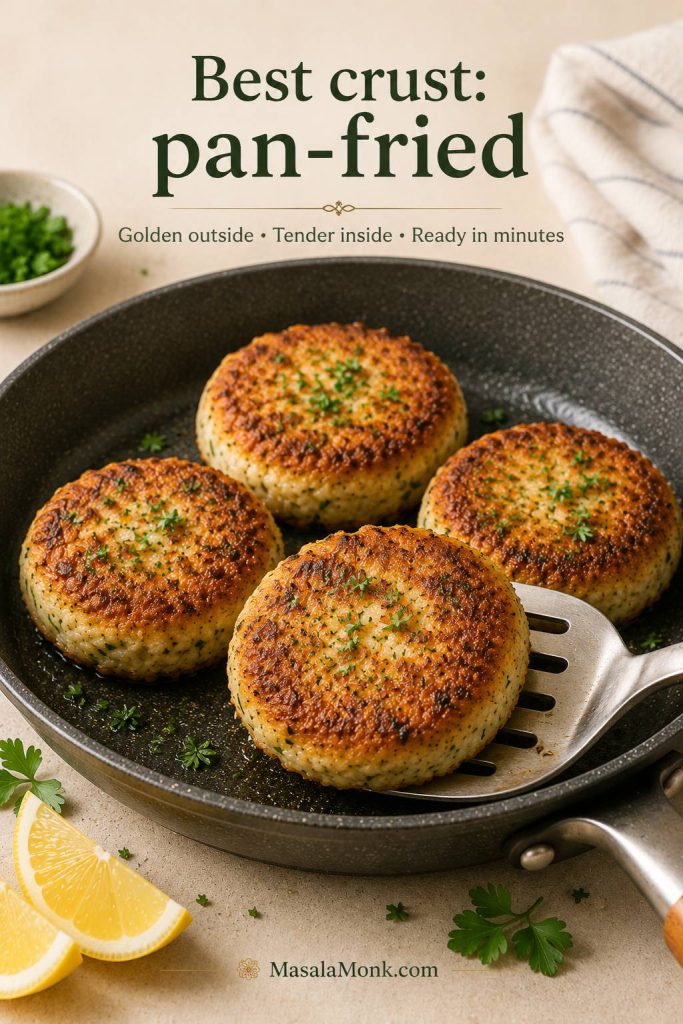
Use a nonstick skillet, cast iron skillet, or heavy-bottom frying pan. Add enough neutral oil to coat the base generously, usually 3–4 tablespoons. For a deeper crust, use a shallow 1cm / 0.4 inch layer of oil.
You are looking for a steady sizzle, not aggressive frying. If the pan hisses hard or the crumbs darken within a minute, lower the heat. Fish cakes brown best when the crust has time to set before the inside overheats.
Add the patties in a single layer, leave space between them, and cook for 4–5 minutes on the first side before turning gently. The crust should sound gently crisp when you tap it with the spatula, not soft or oily.
When the crust is ready before the center is hot, the oven can finish the job without burning the crumbs. Transfer the batch to a 200°C / 400°F oven for 8–10 minutes, especially if the cakes are thick, very cold from the fridge, or made ahead.
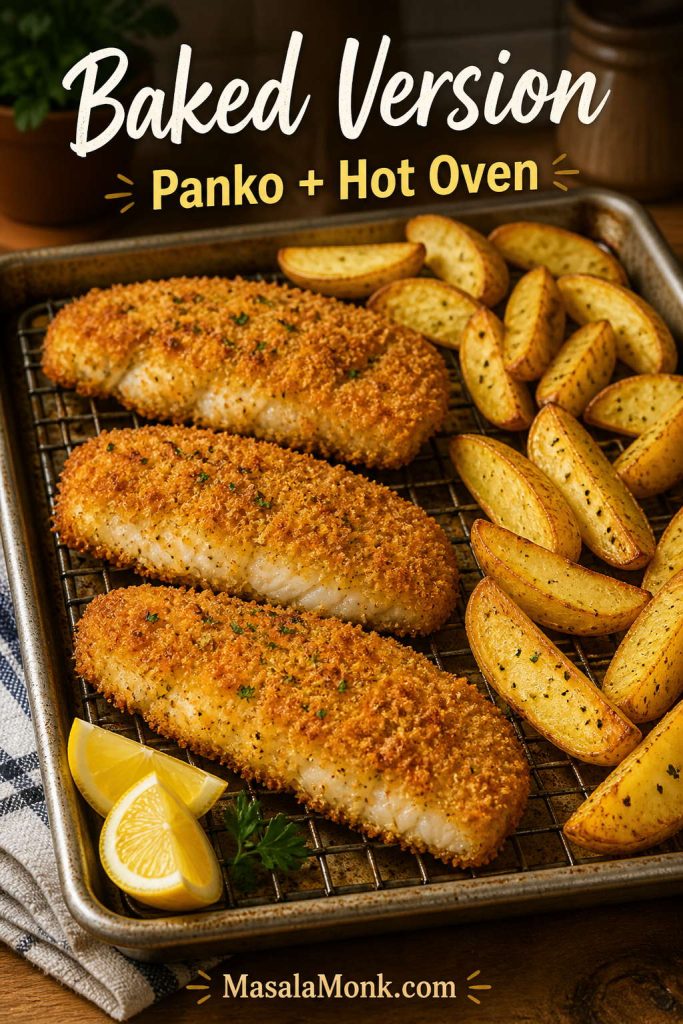
Baked Fish Cakes
When you want the whole batch done at once, baking is the calmest route. The crust will not be quite as crackly as pan-fried, but a hot tray, a little oil, and a halfway flip still give you a golden finish. For a crisper but less hands-off result, use the pan-fried method instead.
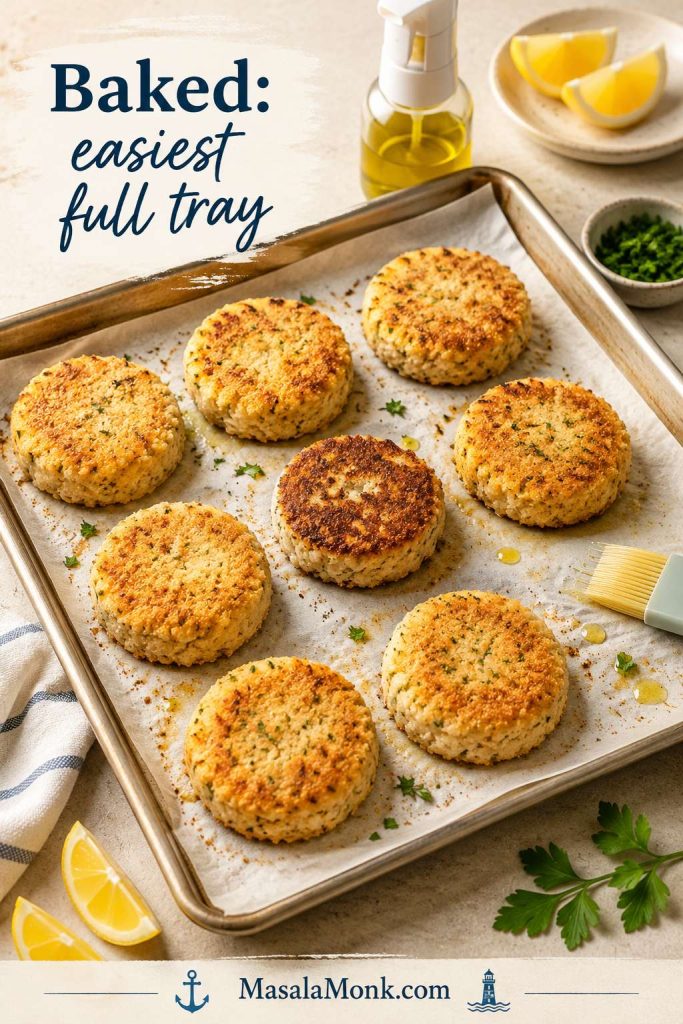
This is the method to choose when you care more about an easy full tray than the loudest crunch.
- Heat the oven to 200°C / 400°F.
- Place breaded fish cakes on a parchment-lined or lightly oiled baking sheet.
- Brush or spray both sides with oil.
- Bake for 18–22 minutes, flipping halfway.
- For extra browning, broil or grill for 1–2 minutes at the end.
If the cakes are very thick, use a thermometer to check that the center is hot. Fish cooked from raw should reach 145°F / 63°C, or be opaque and flake easily with a fork. Leftovers should be reheated to 165°F / 74°C.
Air Fryer Fish Cakes
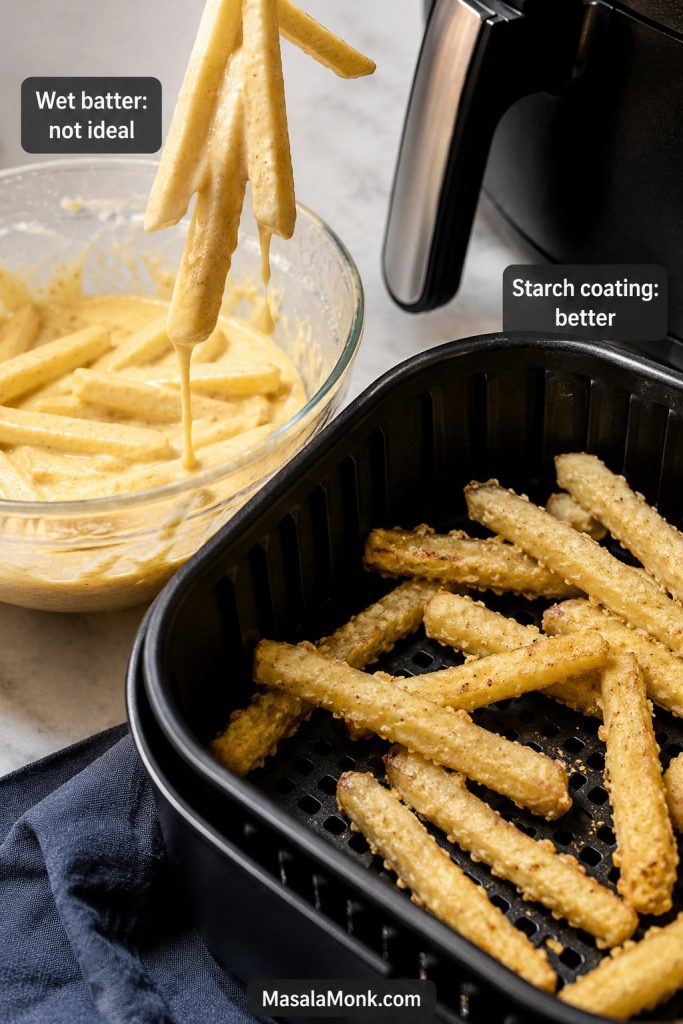
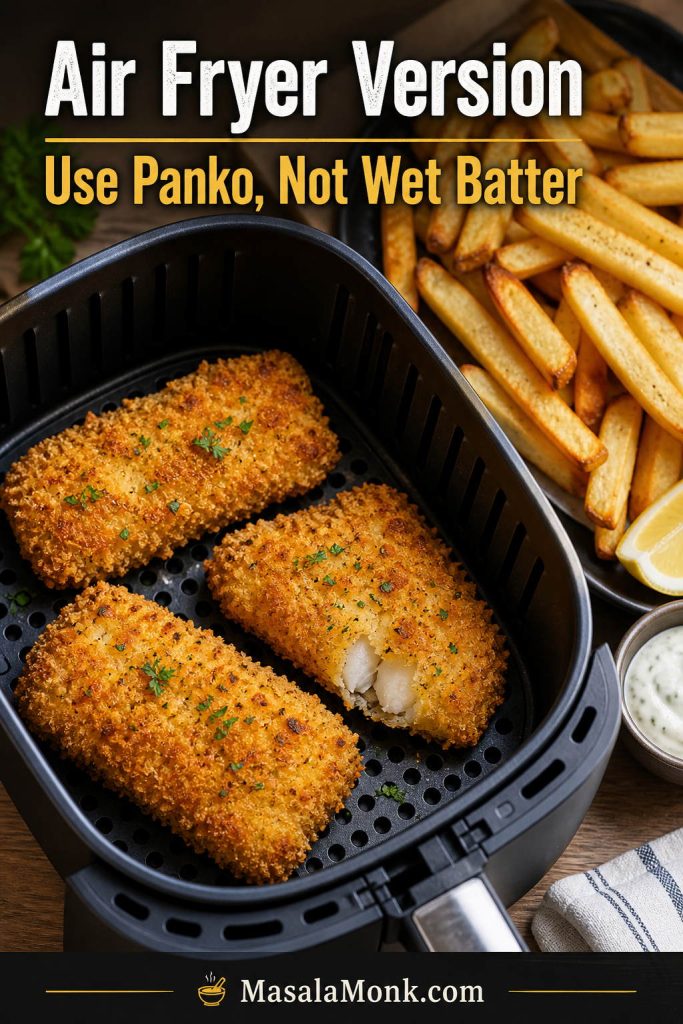
The air fryer is best when you want a neater, lighter version and do not want to babysit a skillet. The trade-off is texture: good crunch, but not the same shallow-fried crust.

Think of the air fryer as a crisping tool, not a deep fryer. A little oil on the crumbs still matters.
For the best homemade air fryer fish cakes, chill them first, spray both sides with oil, and keep them in a single layer. Crowding traps steam and softens the crumb.
| Type | Air fryer temperature | Time | Notes |
|---|---|---|---|
| Homemade chilled fish cakes | 190–200°C / 375–400°F | 10–14 minutes | Spray with oil and flip halfway. |
| Homemade frozen fish cakes | 180–190°C / 360–375°F | 14–18 minutes | Thicker cakes need longer; check the center. |
| Store-bought frozen fish cakes | 180°C / 360°F | 8–11 minutes | Cook in a single layer and flip or shake halfway. |
| Reheating cooked leftovers | 190°C / 375°F | 4–6 minutes | Best for restoring crispness. Reheat leftovers to 165°F / 74°C. |
Air fryer models vary, so treat the times as a range. Smaller, flatter cakes brown faster. Larger or very cold patties may need a few extra minutes. The coating should look golden and crisp, and the center should be hot all the way through. If you are cooking a freezer batch, use the cook-from-frozen section for thaw-first versus frozen guidance.
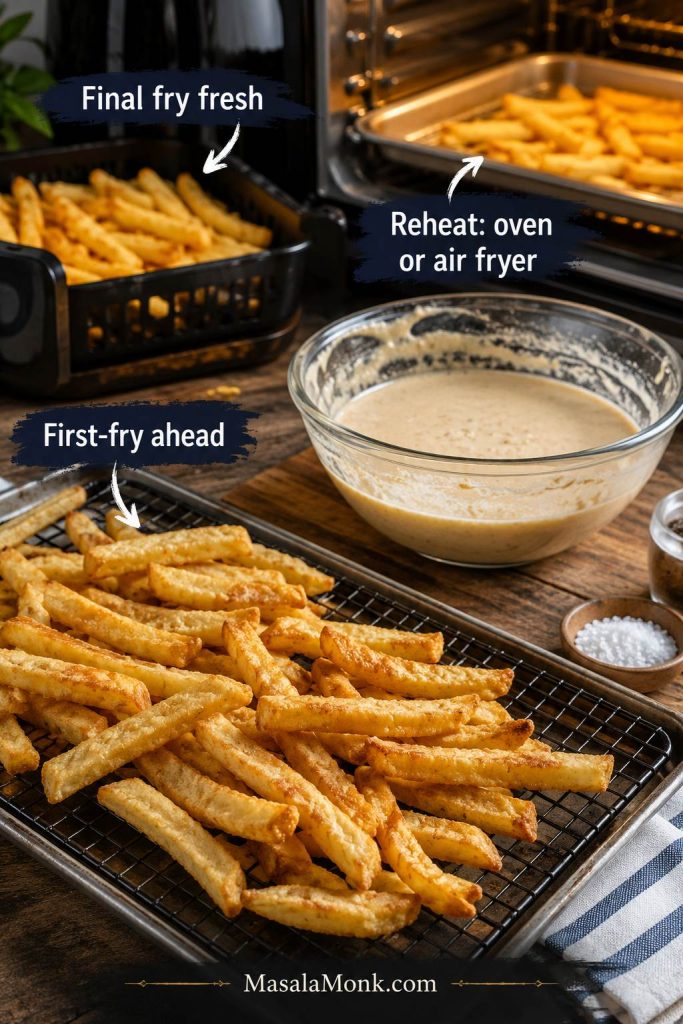
Frozen Fish Cakes: How to Freeze, Cook, and Reheat
This is a recipe worth doubling. Once the cakes are shaped and coated, they freeze neatly and can become a quick dinner later with very little effort. Future-you will thank you for freezing them flat first; it keeps the coating neat and makes weeknight cooking much easier.
Fish cakes reward a little planning because chilling is not wasted time here. It is what makes the patties easier to coat, freeze, and fry without drama.
Make-Ahead Timeline

| Plan | What to do |
|---|---|
| Cook tonight | Shape, chill 30 minutes, coat, and fry. |
| Prep 1 day ahead | Shape and refrigerate covered; coat before frying. |
| Freeze for later | Shape, coat, freeze on a tray, then bag. |
| Cleanest crust from frozen | Thaw overnight, then pan-fry. |
| Fastest frozen dinner | Air fry or bake from frozen, checking the center. |
If the batch feels too soft before freezing, fix the mixture first so the patties do not break later.
How to Freeze Them
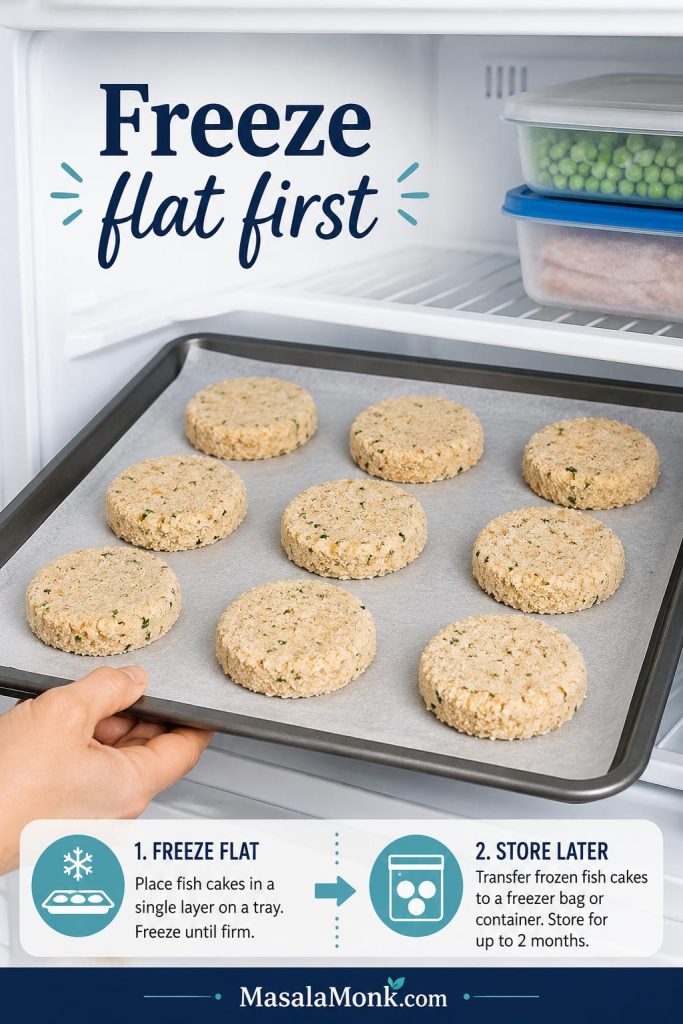
- Shape the fish cakes.
- Chill for 30 minutes.
- Coat with flour, egg, and breadcrumbs.
- Place on a tray and freeze until firm.
- Transfer to a freezer-safe container or bag.
- Label with the date and use within 2–3 months for best texture.
Should You Freeze Fish Cakes Before or After Cooking?
For this potato fish cakes recipe, the best texture usually comes from freezing the cakes after shaping and coating, but before frying. Freeze them on a tray until firm, then store with parchment between layers. Thaw overnight before pan-frying for the crispiest crust.
If your fish was previously frozen and you are worried about refreezing, cook the patties first, cool them quickly, then freeze the cooked cakes. Reheat from frozen in the oven or air fryer until hot through.
Cook From Frozen or Thaw First?
For the cleanest crust, thaw fish cakes overnight in the fridge, then pan-fry, bake, or air-fry. If cooking from frozen, use a gentler temperature and allow more time so the outside does not brown before the center heats through.
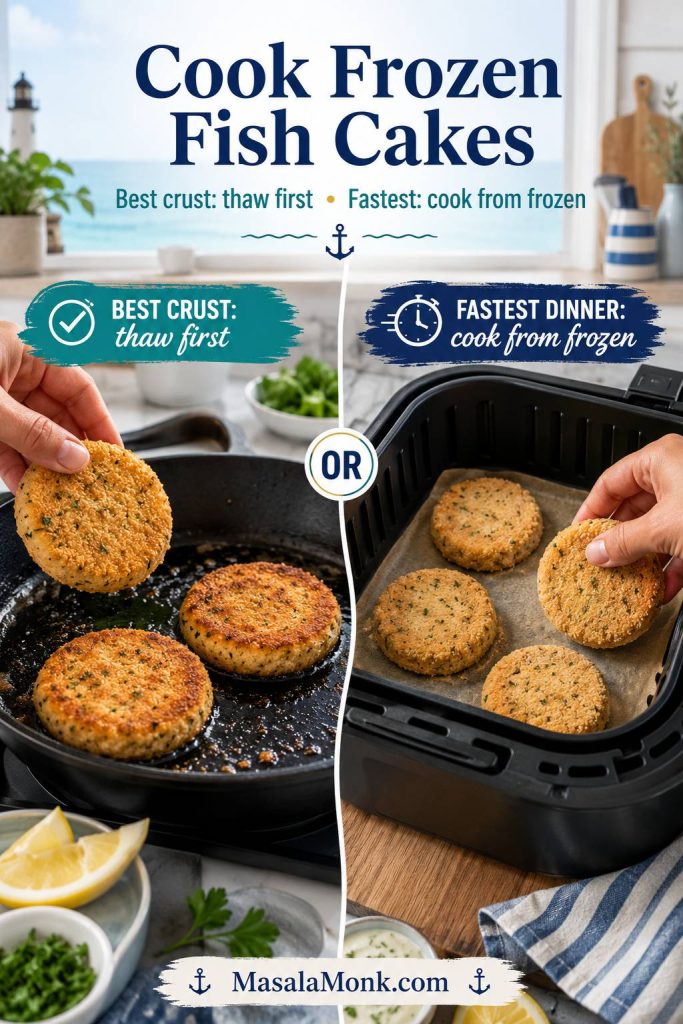
| Method | Temperature | Time from frozen |
|---|---|---|
| Oven | 200°C / 400°F | 25–30 minutes, flipping once |
| Air fryer | 180–190°C / 360–375°F | 14–18 minutes |
| Skillet + oven finish | Medium skillet, then 200°C / 400°F oven | Brown first, then bake 10–15 minutes |
Leftover Mashed Potato Fish Cakes
Leftover mashed potato can be a gift here, as long as it is not too loose. Cold, dry mash gives the fish something sturdy to hold on to, which means the cakes are easier to shape and less likely to fall apart.

Use about 2 cups cold mashed potato with 300–350g cooked flaked fish for a balanced leftover batch. If you have closer to 450g / 1 lb cooked fish, add another ½–1 cup mash or extra breadcrumbs until the mixture holds its shape.
Leftover mash rule
If the mashed potato tastes creamy enough to eat as a side dish, it may be too soft for fish cakes. Add breadcrumbs, chill longer, and shape smaller cakes.
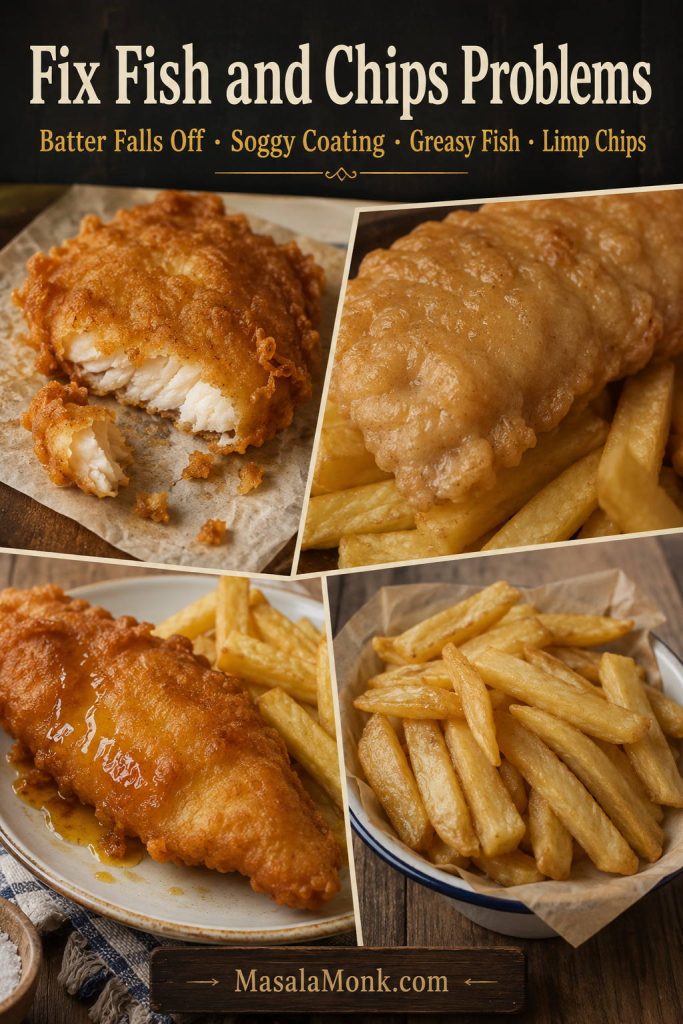
Why Fish Cakes Fall Apart
Diagnose the Problem First
Fish cakes usually fall apart because the mixture is too wet, the patties were not chilled, the binder is weak, or the crust was moved before it had time to set. If the first cake breaks, do not panic. Most broken fish cakes are a moisture, binder, or timing problem, and the moment they break tells you what to fix.
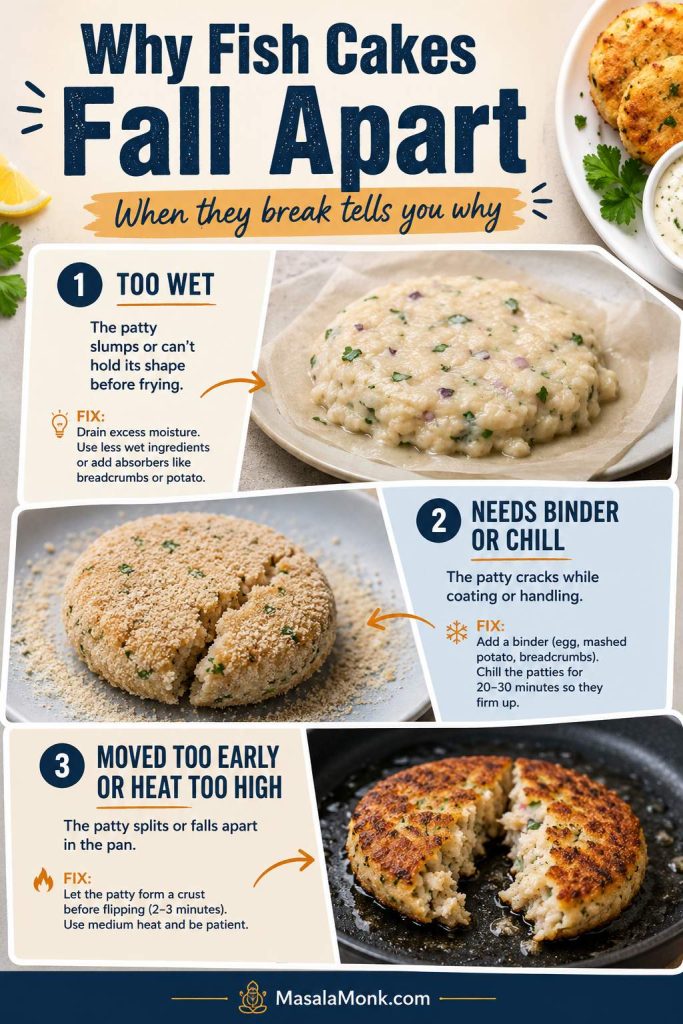
Look at when they break. Slumping before frying points to too much moisture. Cracking during coating usually means the patties need more binder or more time in the fridge. Splitting in the pan usually means the crust was moved too early or the heat was too aggressive.
For extra insurance, fry one small test cake before shaping the whole batch. Cracks mean the rest needs a spoonful of breadcrumbs and more chilling. A flat-tasting test cake means you should adjust the salt, lemon, mustard, or herbs before coating the remaining patties.
Quick Fixes for Common Problems
| Problem | Likely cause | Fix |
|---|---|---|
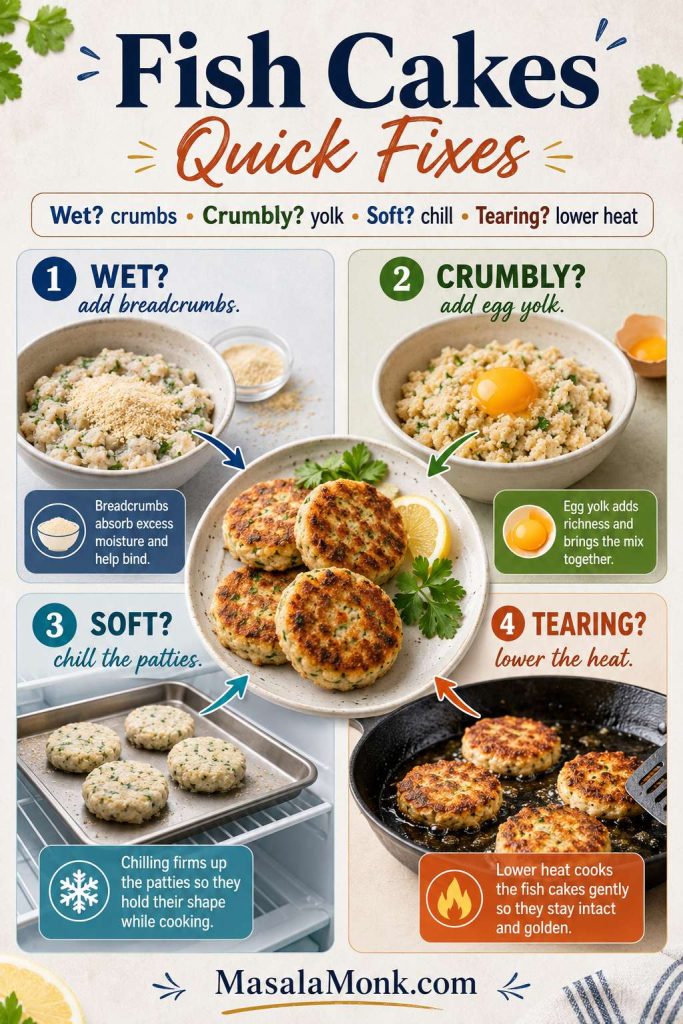
| Fish cakes fall apart | Mixture too wet, not chilled, or weak binder | Add breadcrumbs, chill 30–60 minutes, and use egg or egg yolk. |
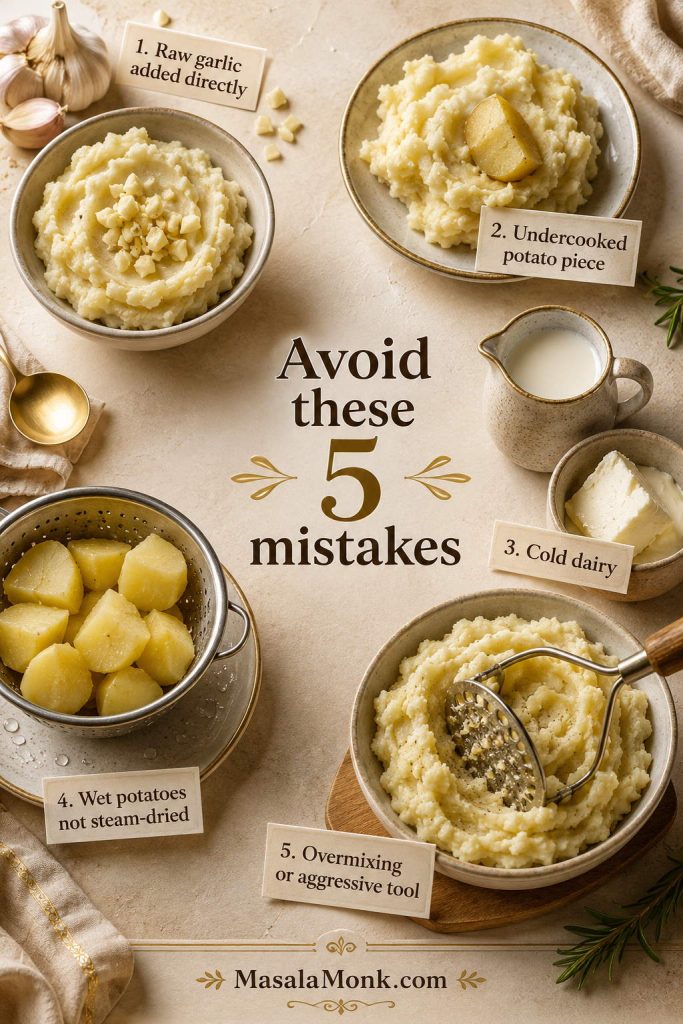
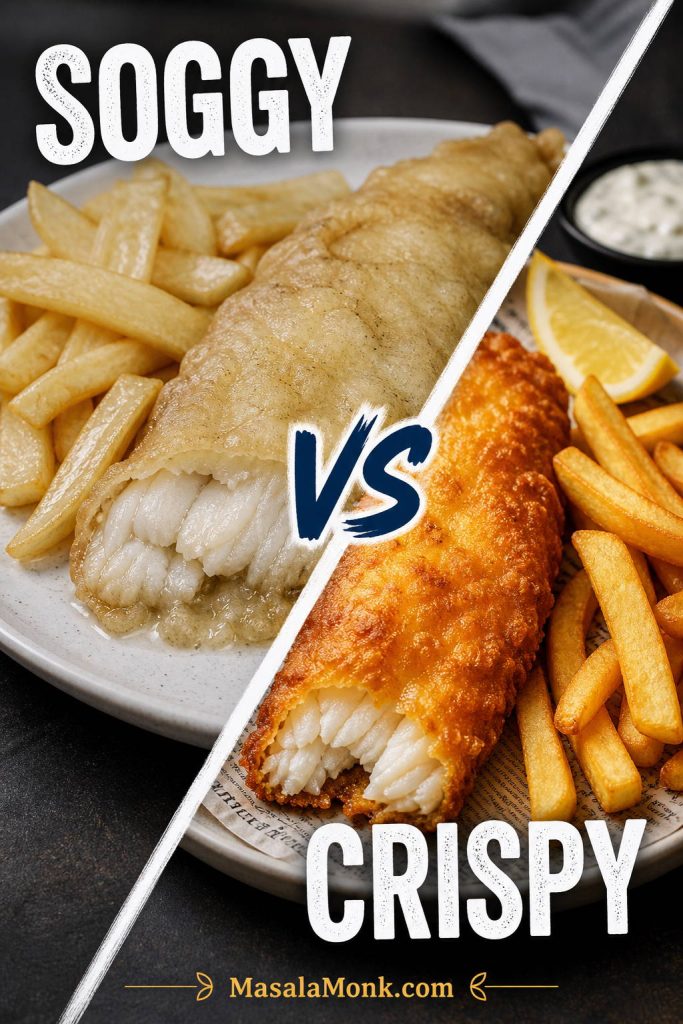
| Cakes are mushy | Wet mashed potato or overmixed filling | Steam-dry potatoes, avoid creamy mash, and fold fish gently. |
| Cakes taste bland | Potato diluted the seasoning | Add more salt, lemon zest, herbs, mustard, or a sharper sauce. |
| Outside browns too fast | Heat too high | Lower heat and finish thick cakes in the oven. |
| Cakes absorb oil | Oil too cool or pan overcrowded | Use medium heat, wait for a steady sizzle, and fry in batches. |
| Coating falls off | Surface too wet or coating not pressed in | Dust lightly with flour first, dip in egg, then press breadcrumbs firmly. |
| Center is cold | Cakes too thick or too cold from fridge/freezer | Finish in a 200°C / 400°F oven for 8–10 minutes. |
How to Keep Fish Cakes from Falling Apart
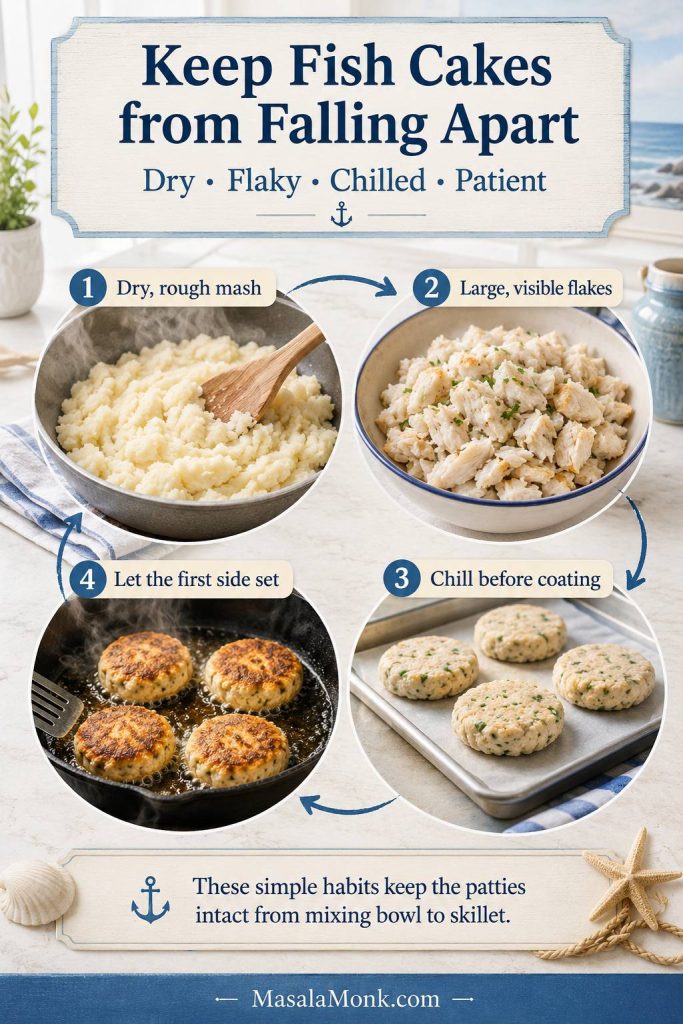
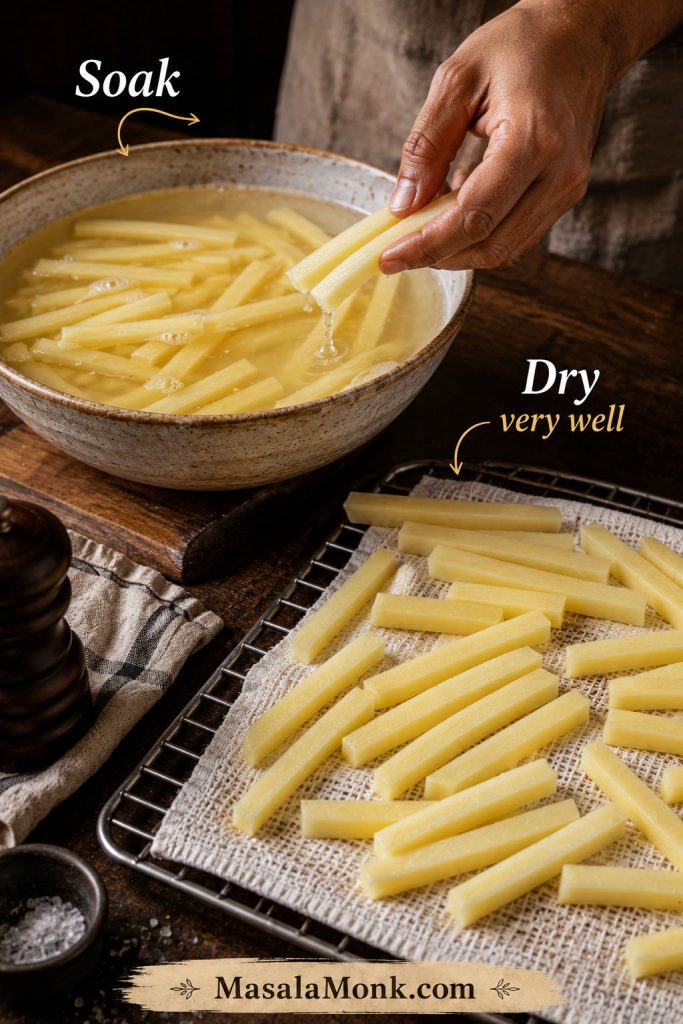
- Use dry mashed potato, not loose creamy mash.
- Drain and pat fish dry before mixing.
- Keep fish flakes visible instead of mashing everything smooth.
- Use egg or egg yolk as a binder.
- Chill shaped cakes for at least 30 minutes.
- Make cakes about 2cm / ¾ inch thick, not huge and heavy.
- Flip only after the first side is golden and set.
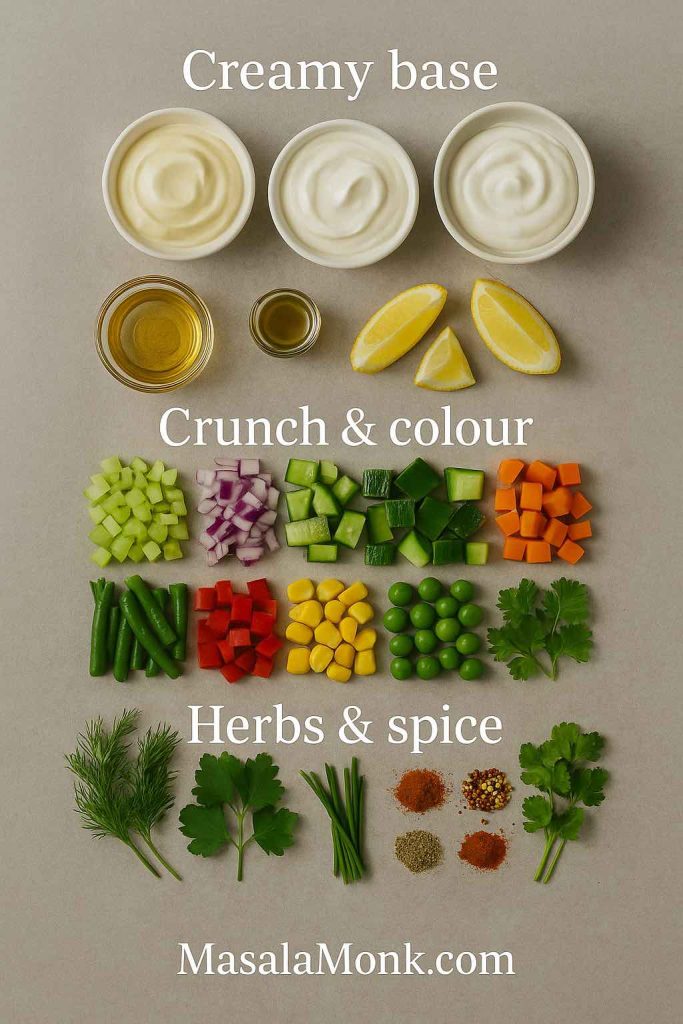
Sauces for Fish Cakes
A good sauce makes fish cakes feel complete. You want something bright, creamy, tangy, or a little spicy to cut through the fried crust and wake up the potato.

For tartar sauce, garlic mayo, or lemon dill mayo, the sauce tastes best when the base is rich but balanced. If you want to make the creamy base yourself, use this homemade mayonnaise recipe before adding pickles, herbs, lemon, capers, or mustard.
For the first batch, keep it simple: tartar sauce and lemon. Once you know you like the texture, try green chutney mayo for a sharper finish or mango mustard sauce when you want something brighter and more playful.
Sauce Ideas by Flavor
| Sauce | Use it with |
|---|---|
| Tartar sauce | Classic cod fish cakes, chips, peas, salad |
| Lemon dill mayo | Cod, haddock, and lighter fish cakes |
| Garlic mayo | Crispy pan-fried fish cakes and fries |
| Green chutney mayo | Indian-spiced or herb-heavy fish cakes |
| Sweet chili sauce | Thai-inspired or spicy fish cake variations |
| Caper yogurt sauce | Lighter plates with salad or roasted vegetables |
| Sriracha mayo | Spicy fish patties, sandwiches, sliders |
Need a full plate idea? The serving section below pairs these sauces with sides.
What to Serve with Fish Cakes
Fish cakes can be a light meal, a dinner plate, or part of a bigger seafood spread. Because they are crisp and savory, they pair best with something fresh, sharp, creamy, or crunchy. A simple green salad is enough, but coleslaw, cucumber salad, or fries can make the plate feel more complete.
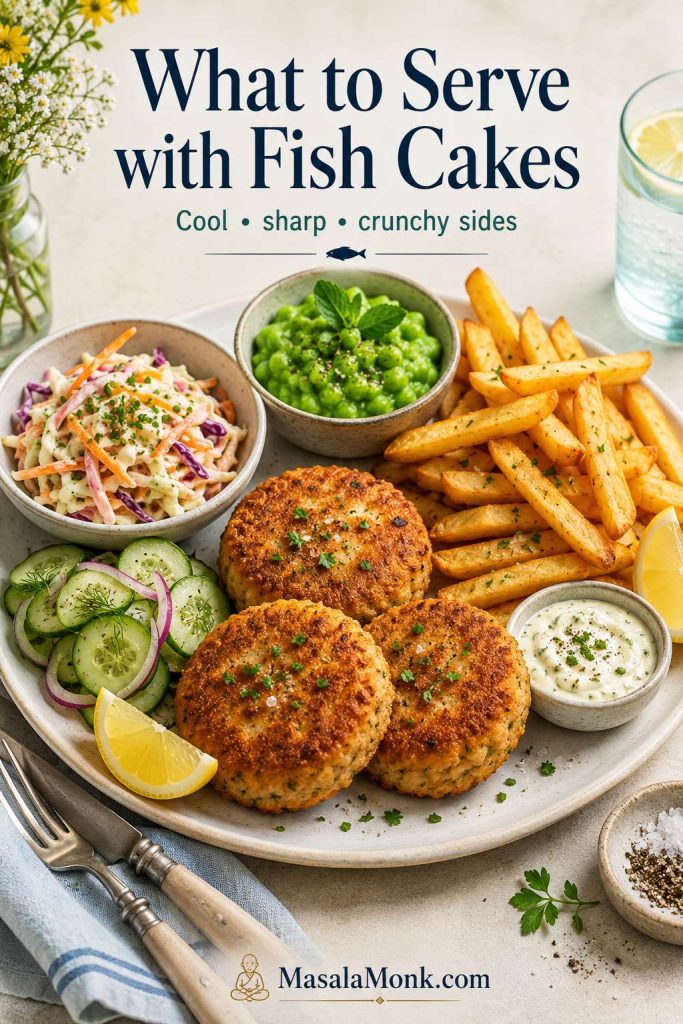
The best plate has contrast: hot crisp cakes, something cool or sharp, and enough sauce or lemon to keep each bite bright.
Easy Sides and Pairings
- Green salad: Best for a lighter dinner.
- Coleslaw: Crunchy, creamy, and great with tartar sauce.
- Cucumber salad: Cool, crisp, and bright enough to cut through the fried crust.
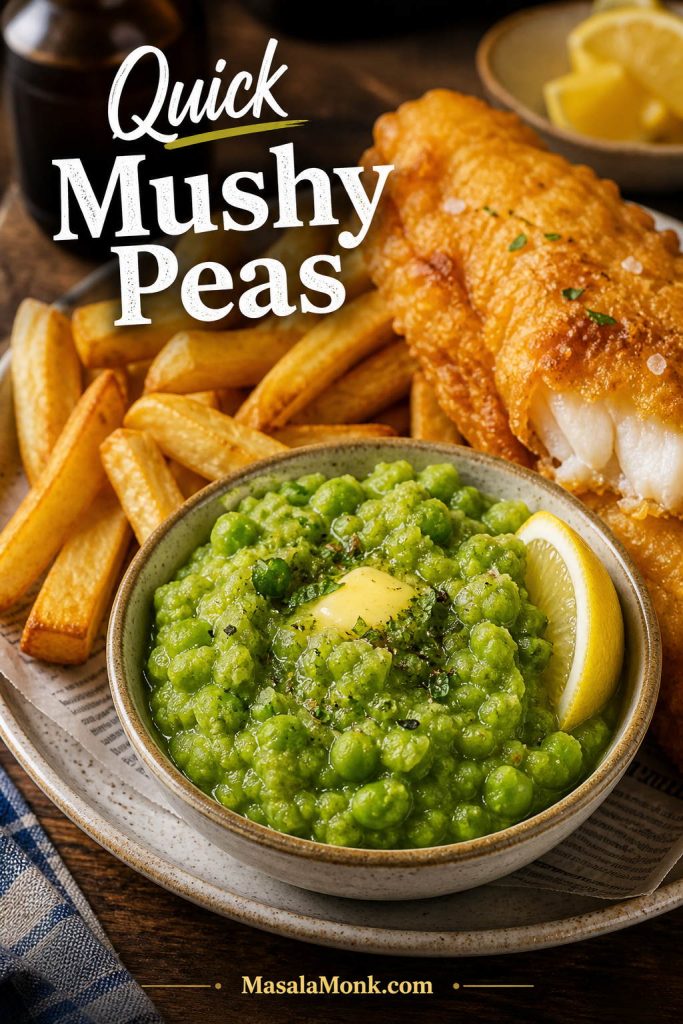
- Peas or mushy peas: Classic with cod and potato fish cakes.
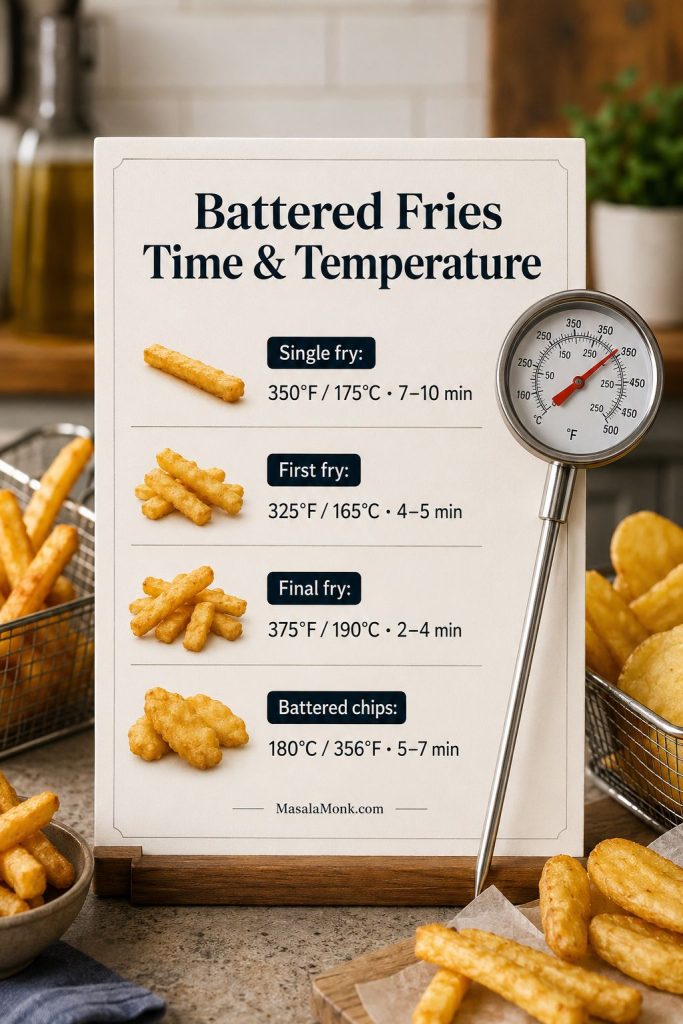
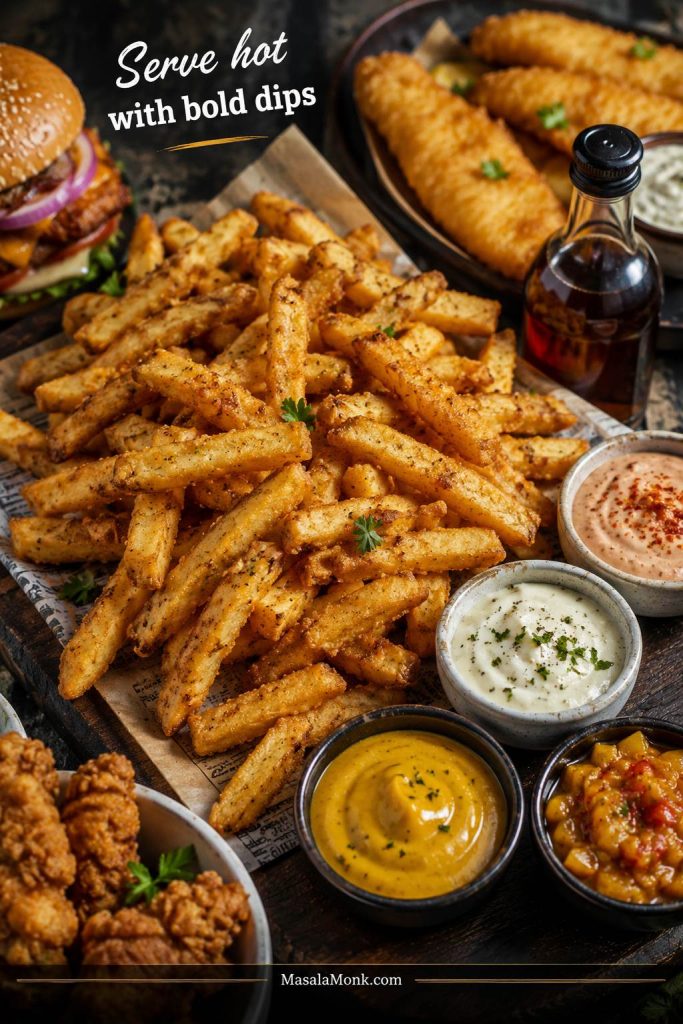
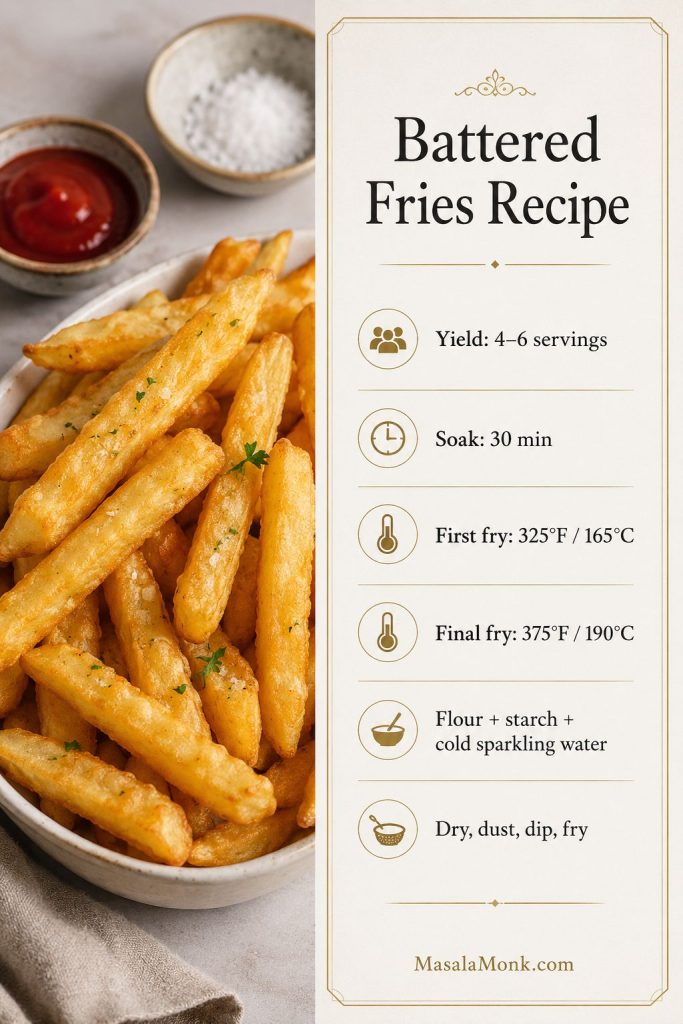
- Battered fries or chips: Makes the plate feel closer to fish and chips, especially with tartar sauce and lemon.
- Roasted vegetables: Good for a simple dinner plate.
- Rice: Useful if you are serving the fish cakes with chutney, curry-style sauce, or sweet chili sauce.
- Soup: Pair one or two smaller fish cakes with tomato soup, vegetable soup, or chowder.
If you want a spiced version instead, the variations section has Indian-spiced and Thai-style directions.
Fish Cakes vs Fish Patties vs Croquettes
The names overlap because all three are built around the same idea: a soft filling shaped into something you can fry or bake. In everyday cooking, fish cakes usually include fish and potato, while fish patties often rely more on breadcrumbs, egg, mayo, or soaked bread instead of mash.
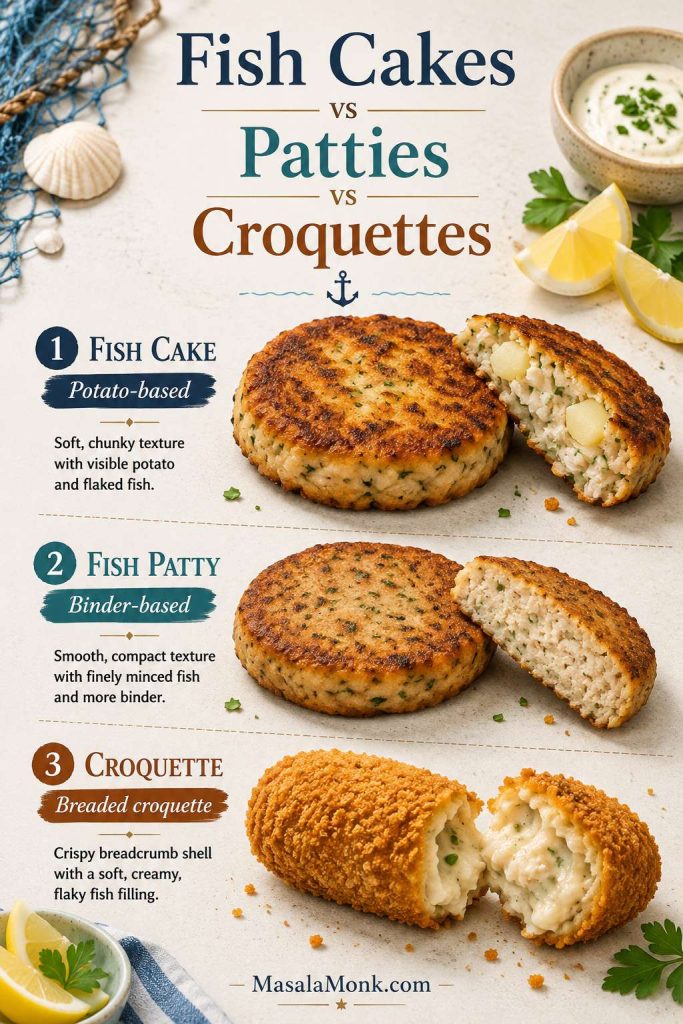
Croquettes are usually breaded and fried with a softer filling, so fish cakes can feel like a simpler, flatter cousin of croquettes. If you like the breaded-and-fried style, you may also enjoy this broader croquettes recipe guide.
Variations When You Want a Different Fish or Flavor
Once the basic texture is right, the fish and seasoning can change. Keep the same rules — dry base, visible flakes, enough binder, and a proper chill — then adjust the flavor around the fish you are using.
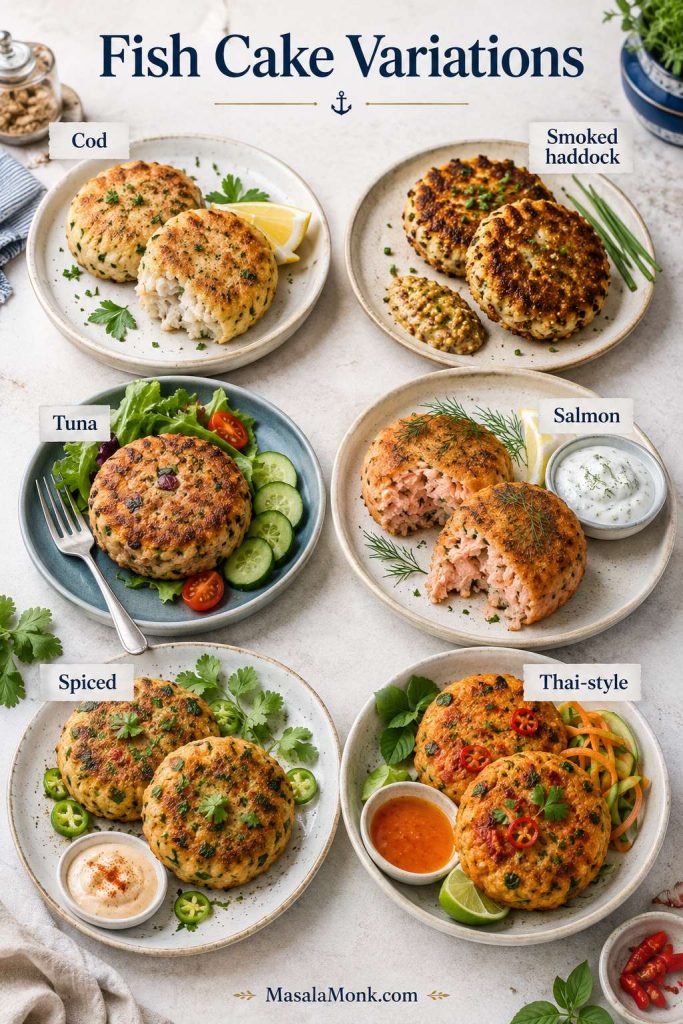
Cod Fish Cakes
Use cod as written in the main recipe for a clean, gentle, familiar version. It is the safest starting point if you want fish cakes that taste bright, flaky, and not too strong.
Smoked Haddock Fish Cakes
Replace half the cod with smoked haddock for a stronger flavor. Taste before adding salt because smoked fish is already seasoned.
Salt Cod Fish Cakes
Salt cod fish cakes are a separate regional style. Soak the salt cod properly first, then mix with potato, herbs, and binder. Do not use salt cod without soaking or the cakes will be far too salty.
Mackerel Fish Cakes
Mackerel gives a stronger, oilier fish cake. Use more lemon, herbs, mustard, or a sharp sauce to balance the richness.
Tuna Fish Cakes
Canned tuna can work, but tuna patties usually need a slightly different formula because canned tuna is drier and more compact than poached cod. Add mayo, mustard, egg, and breadcrumbs for structure.
Salmon Fish Cakes
Salmon patties and croquettes are close cousins of fish cakes, but they have their own binder, texture, and seasoning logic. Canned salmon usually needs a richer binder and a brighter seasoning profile than poached white fish.
Thai Fish Cakes
Thai fish cakes are a different style. They usually use fish paste or finely processed fish, red curry paste, fish sauce, makrut lime leaves, and green beans. The texture is springier and bouncier than potato fish cakes, so they deserve their own recipe rather than being treated as a small variation here.
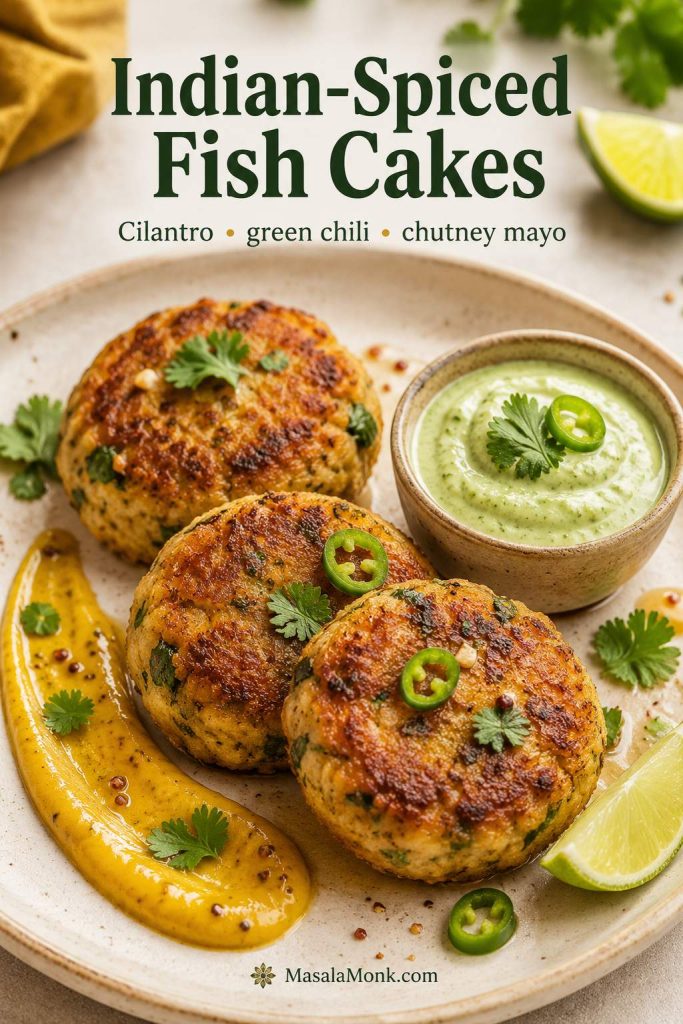
Indian-Spiced Fish Cakes
For an Indian-style version, add a little ginger, green chili, cilantro, cumin, or garam masala to the mixture. Keep the spices modest so the fish still comes through. Serve with green chutney mayo or a spoonable mango mustard sauce for a tangy, sweet, mustard-forward finish. For more pairing ideas, go back to the sauces section.
Fish Tacos Instead of Fish Cakes
If you have thin fillets and want a fresher, tortilla-style dinner instead of potato fish cakes, make this fish tacos recipe with slaw, sauce, and quick-cooked fish.
Fish Cakes Without Potato
You can make fish cakes without potato, but the texture changes. Instead of mashed potato, use breadcrumbs, soaked bread, egg, mayo, or another binder. The cakes will be more like fish patties than classic potato fish cakes.
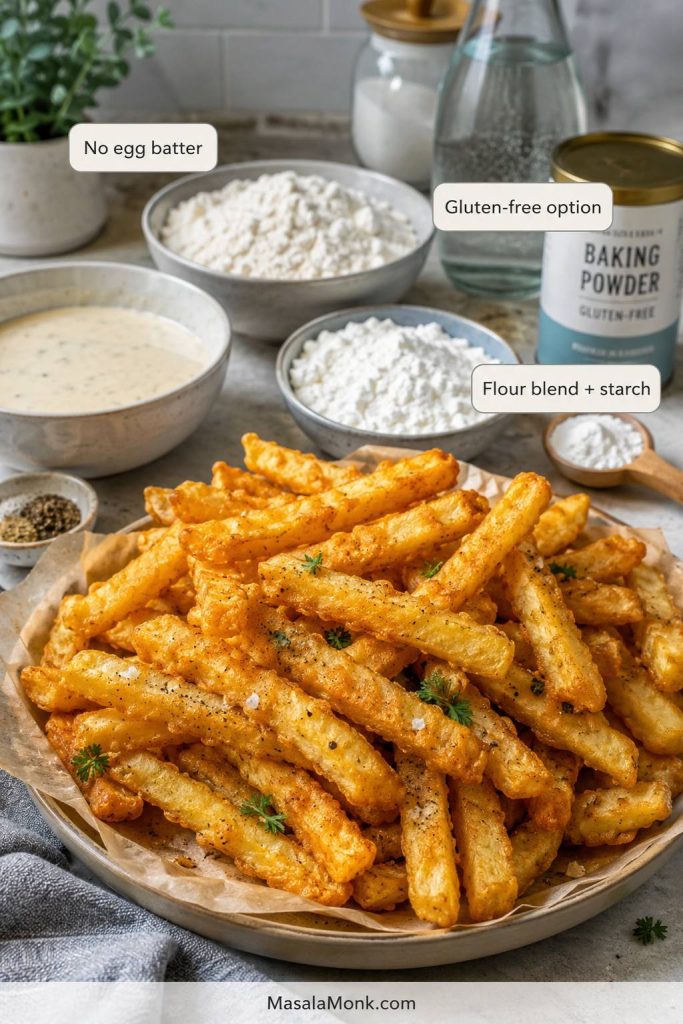
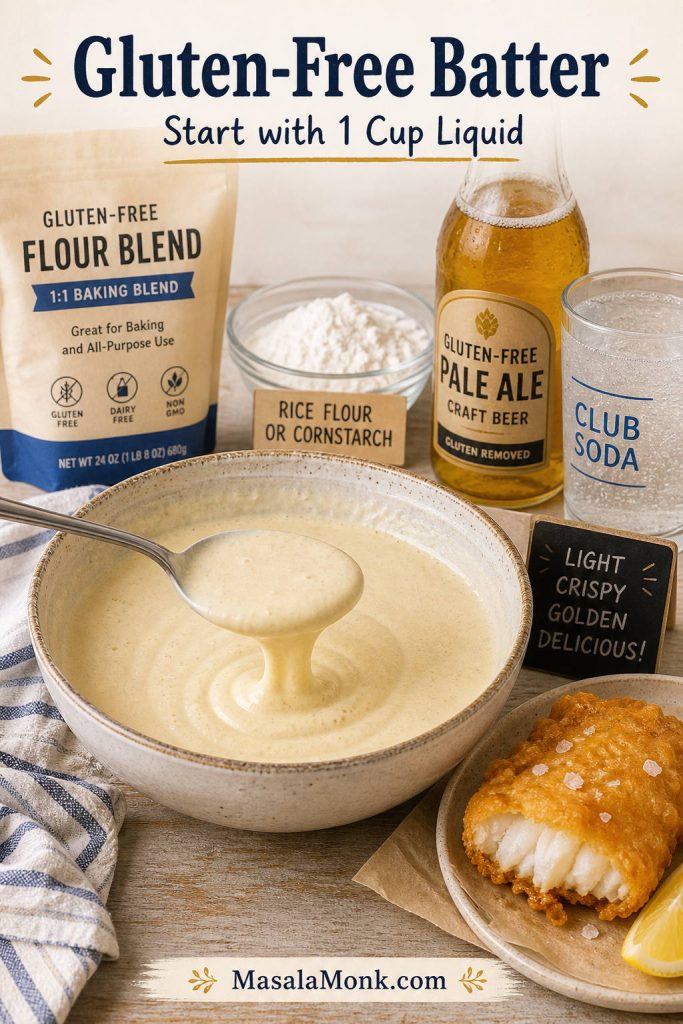
Gluten-Free, Dairy-Free, and Egg-Free Adjustments
These swaps work best when you keep the same texture goal: a filling that presses together, chills firm, and can be flipped without falling apart.
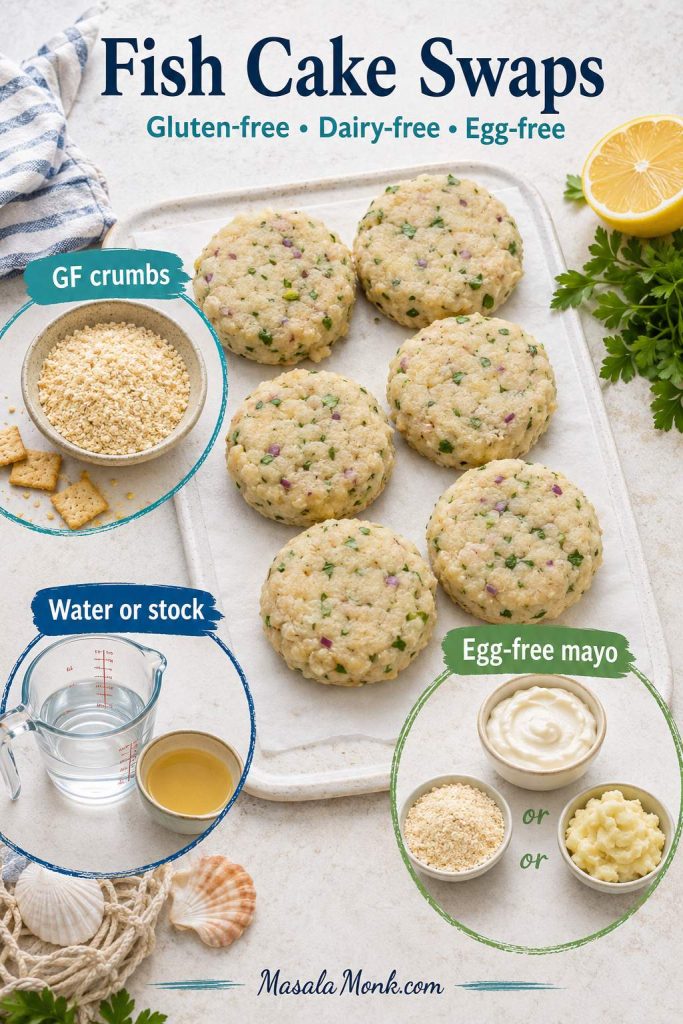
- Gluten-free: Use gluten-free flour and gluten-free breadcrumbs or crushed gluten-free crackers.
- Dairy-free: Poach the fish in water or light stock instead of milk. Use unsweetened dairy-free milk only if its flavor is neutral.
- Egg-free: Use egg-free mayo, extra breadcrumbs, or a little extra mashed potato to help bind. Chill the cakes longer and flip gently because they will be more delicate.
- No panko: Use fresh breadcrumbs, dry breadcrumbs, crushed crackers, or a light cornmeal coating.
How to Store and Reheat Without Losing the Crust
The main goal with leftovers is to bring back the crust without drying out the middle. The microwave is fastest, but the oven, skillet, or air fryer will give you a much better second-day fish cake. If you are freezing uncooked cakes instead of leftovers, use the freezing guide above.
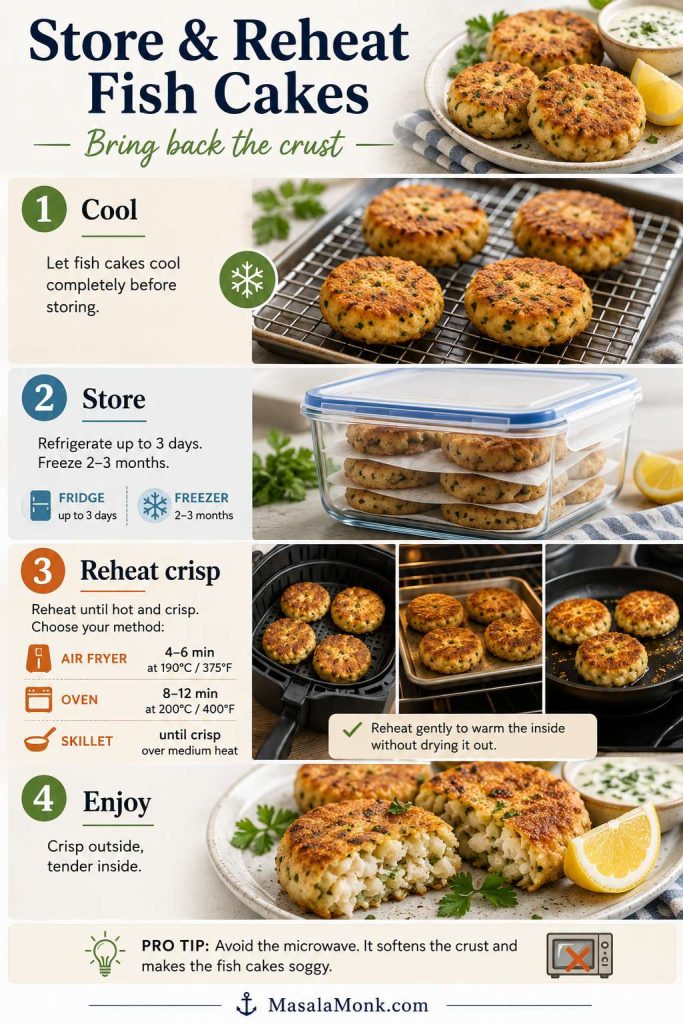
Refrigerator
Store cooked fish cakes in an airtight container in the refrigerator for up to 3 days. Let them cool before covering so trapped steam does not soften the crust too much.
Freezer
Freeze uncooked breaded fish cakes on a tray until firm, then transfer to a freezer bag or container. Use within 2–3 months for best texture.
How to Reheat Fish Cakes
- Air fryer: 190°C / 375°F for 4–6 minutes.
- Oven: 190–200°C / 375–400°F for 8–12 minutes.
- Skillet: Medium heat with a thin film of oil until crisp and hot.
- Microwave: Fast, but it softens the crust.
Reheated well, the outside should crisp back up while the center stays soft and flaky. Fish cooked from raw should reach 145°F / 63°C, or be opaque and flake easily with a fork. Leftovers should be reheated to 165°F / 74°C. You can check the official FoodSafety.gov internal temperature chart for current guidance.
Once you understand the texture cues, fish cakes become much less fussy. Keep the potato dry, leave the fish in flakes, chill before coating, and let the first side set in the pan. Those four habits matter more than the exact fish you choose.
FAQs
Best fish for a first batch
Cod is the easiest first choice because it flakes cleanly, tastes mild, and holds together well with potato. Haddock, pollock, hake, and tilapia also work. Smoked haddock gives a stronger flavor, while salmon and tuna need slightly different seasoning and binding.
Frozen fish: what matters most?
Thaw it fully, drain it well, and pat it dry before cooking. Frozen fish releases extra moisture, so drying it properly helps the cakes hold together and brown better.
Leftover fish works, but keep the flakes large
Leftover cooked fish is useful as long as it is not too wet. Fold it into the potato mixture near the end so the pieces stay visible instead of disappearing into the mash.
Leftover mashed potato: when it helps and when it hurts
Cold, dry mashed potato is helpful. Very creamy mash can make the mixture loose, especially if it contains lots of milk, cream, or butter. Add breadcrumbs until the mixture holds its shape.
Why the cakes break
Most broken fish cakes are not a disaster; they are a moisture or timing problem. Add breadcrumbs if the mixture is wet, chill longer if the patties feel soft, and wait until the first side is set before turning.
Egg, yolk, or no egg?
A whole egg gives more binding, while a yolk adds richness with slightly less wetness. Egg-free cakes can work with egg-free mayo, extra breadcrumbs, or a little more mashed potato, but they are more delicate.
Baking instead of frying
Bake breaded fish cakes at 200°C / 400°F for 18–22 minutes, flipping halfway. Brush or spray both sides with oil so the crumbs brown instead of drying out.
Air fryer timing for homemade cakes
Air fry chilled homemade fish cakes at 190–200°C / 375–400°F for 10–14 minutes, flipping halfway. Spray the coating lightly with oil and keep the cakes in a single layer.
Freezing before or after cooking?
For the cleanest crust, freeze shaped and breaded fish cakes before frying. If the fish was previously frozen and you prefer not to refreeze it uncooked, cook the cakes first, cool them quickly, then freeze.
Fish cakes, patties, and croquettes — the difference
The terms overlap. Classic versions usually include fish and potato, fish patties may use breadcrumbs, egg, mayo, or other binders instead of potato, and croquettes are usually breaded and fried with a softer filling.