Posted on — Leave a comment

Pasta Salad Recipe: Easy, Zesty & Perfect for Summer Cookouts

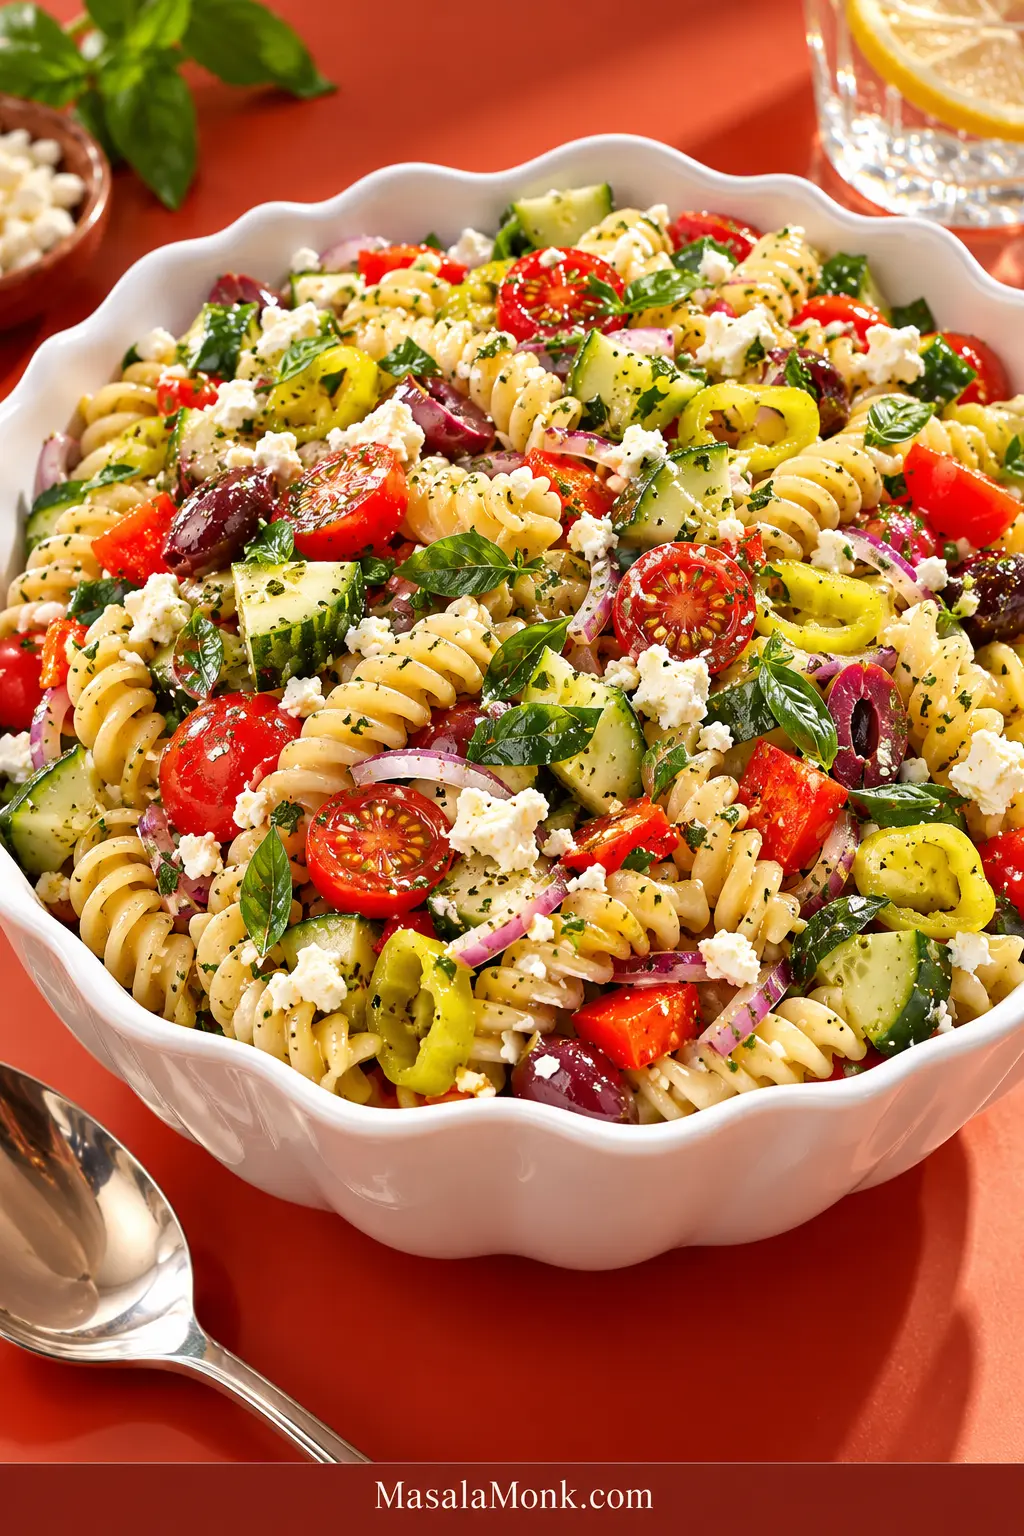
Rotini pasta salad in a white bowl with cucumber, halved cherry tomatoes, bell pepper, red onion, pepperoncini, Kalamata olives, crumbled feta and fresh herbs coated in vinaigrette.

A good pasta salad should still taste lively after an hour in the fridge. You want cool spirals of pasta coated in vinaigrette, cucumber that still snaps, juicy tomato, salty feta and the sharp little bite of pepperoncini in the same forkful.

This easy pasta salad recipe combines rotini or fusilli with cucumber, bell pepper, tomatoes, feta, pepperoncini and fresh herbs in a bright Italian-style vinaigrette. It travels well, can be made ahead and works for cookouts, picnics and potlucks.

Pasta salad can turn dry even when you started with plenty of dressing. The noodles keep absorbing it as they sit, flavors taste duller when the salad is refrigerator-cold, and wet pasta quietly waters the dressing down. So most of the vinaigrette goes in first, while a smaller portion waits for serving. For the creamy deli-style version instead, head to the classic macaroni salad recipe.

Pasta Salad Recipe

Short pasta tossed with cucumber, tomatoes, bell pepper, feta, pepperoncini and herbs in a tangy homemade vinaigrette. Part of the dressing is held back until serving so the salad still tastes properly dressed after chilling.

You only need about 35 minutes of hands-on time; the rest is chilling and resting.

Prep
25 minutes

Cook
10–12 minutes

Chill + Stand Before Serving
1 hour + 15–20 minutes

Total
About 2 hours

Yield
About 13–14 cups

Serves
13–14 generous 1-cup servings or 17–18 side servings

Make Ahead
Best up to 1 day ahead

Equipment

  • 6–8 quart / 5.5–7.5 liter pot
  • Colander, large enough to drain 1 lb / 454 g pasta comfortably
  • Large mixing bowl, about 6 quarts / 5.5 liters
  • Small bowl and whisk, or a lidded jar, for the dressing

Pasta Salad Ingredients

For the salad

  • 16 oz / 454 g rotini or fusilli
  • 15–18 g fine sea salt, about 1 tablespoon, for the pasta water
  • 1 medium English cucumber, cut into roughly 1/2-inch / 1–1.5 cm pieces — about 10 oz / 285 g
  • 10 oz / 285 g cherry or grape tomatoes, halved; if exceptionally juicy, let the cut sides drain for a few minutes
  • 1 medium red, yellow or orange bell pepper, cut into roughly 1/2-inch / 1–1.5 cm pieces — about 5 oz / 140 g
  • 1/3 cup / 55 g finely chopped red onion
  • 1/2 cup / 70 g sliced pepperoncini, drained
  • 1/2 cup / 70 g pitted Kalamata olives, halved, optional
  • 6 oz / 170 g feta, crumbled
  • 1/4 cup / 15 g chopped flat-leaf parsley
  • 1/3 cup / 10 g fresh basil leaves; keep whole until serving, then tear or thinly slice

For the Italian-style vinaigrette

  • 2/3 cup / 160 ml extra-virgin olive oil
  • 1/3 cup / 80 ml red wine vinegar
  • 1 tablespoon / 15 ml fresh lemon juice
  • 1 tablespoon / 15 ml pepperoncini brine
  • 1 tablespoon / 15 g Dijon mustard
  • 1 garlic clove, finely grated or minced — about 4 g
  • 1 teaspoon / 1 g dried oregano
  • 1/2 teaspoon / 3 g fine sea salt, plus more to taste
  • 1/2 teaspoon / 1 g freshly ground black pepper
  • 1/2–1 teaspoon / 3–7 g honey, optional

Shortcut: bottled zesty Italian dressing works here when pasta salad is only one of several dishes you’re making. Use about 1 1/4 cups / 300 ml total: roughly 1 cup / 240 ml for the first toss and 1/4 cup / 60 ml saved for serving.

How to Make Pasta Salad

Three details matter most: cook the pasta tender enough for chilling, drain it until cool rather than wet, and save vinaigrette for the final toss.
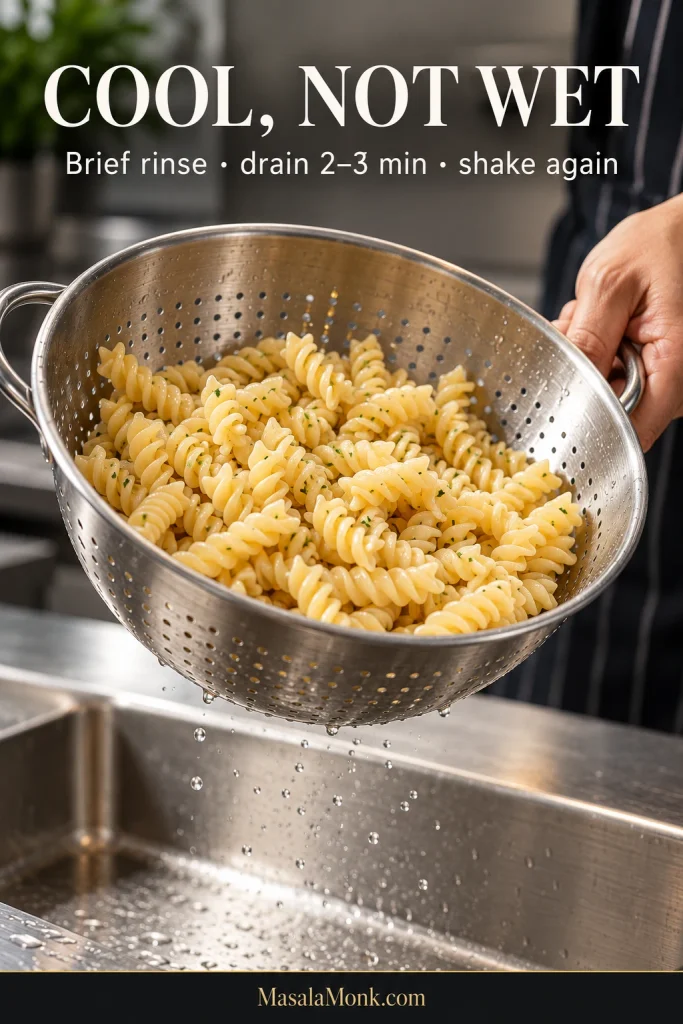
Cooked rotini draining in a stainless steel colander over a sink with a few remaining water droplets. Text reads “Cool, Not Wet” and “Brief rinse · drain 2–3 min · shake again.”
Steady dripping means the pasta still needs time. After the final shake, only occasional drops should remain.
  1. Mix the dressing. Whisk or shake the olive oil, vinegar, lemon, pepperoncini brine, Dijon, garlic, oregano, salt and pepper. Taste; it should have a clear acidic edge. Add honey only if harsh. Reserve 1/4 cup / 60 ml and refrigerate.
  2. Cook the pasta. Bring 4 quarts / 3.8 liters water to a boil and add the 15–18 g fine sea salt. Cook until tender throughout but still holding its shape, usually near the upper end of the package range. Bite one before draining; it should have no hard or chalky center.
  3. Rinse, then really drain it. Run the pasta briefly under cool running water until it stops steaming. Shake well, drain for 2–3 minutes, then shake again. This reduces clumping; the pasta should feel cool, not wet.
  4. Assemble. Combine the pasta with cucumber, tomatoes, bell pepper, onion, pepperoncini, olives if using, feta and parsley. Keep the vegetables close to the pasta in size so several textures fit on one fork. Hold the basil for the end.
  5. Dress and chill. Add the remaining vinaigrette and toss well. Cover and refrigerate for about 1 hour.
  6. Finish before serving. Take the salad and reserved vinaigrette out 15–20 minutes before eating. Shake the dressing, toss the salad, then add vinaigrette gradually until lightly coated. Fold in the basil and taste. Add salt, lemon or pepperoncini brine only if needed.

Recipe Notes

  • Make ahead: Make the salad several hours or up to 1 day before serving.
  • Milder cheese: replace the feta with 6 oz / 170 g small mozzarella pearls.
  • Raw onion too sharp? Soak it in cold water for 10 minutes, then drain thoroughly.
  • Storage: refrigerate promptly and use within about 3 days for the best texture.

Read the Salad After It Chills

Before you toss it, look at the surface and the bottom of the bowl. Then give the salad a good toss and taste it before deciding whether anything needs changing.
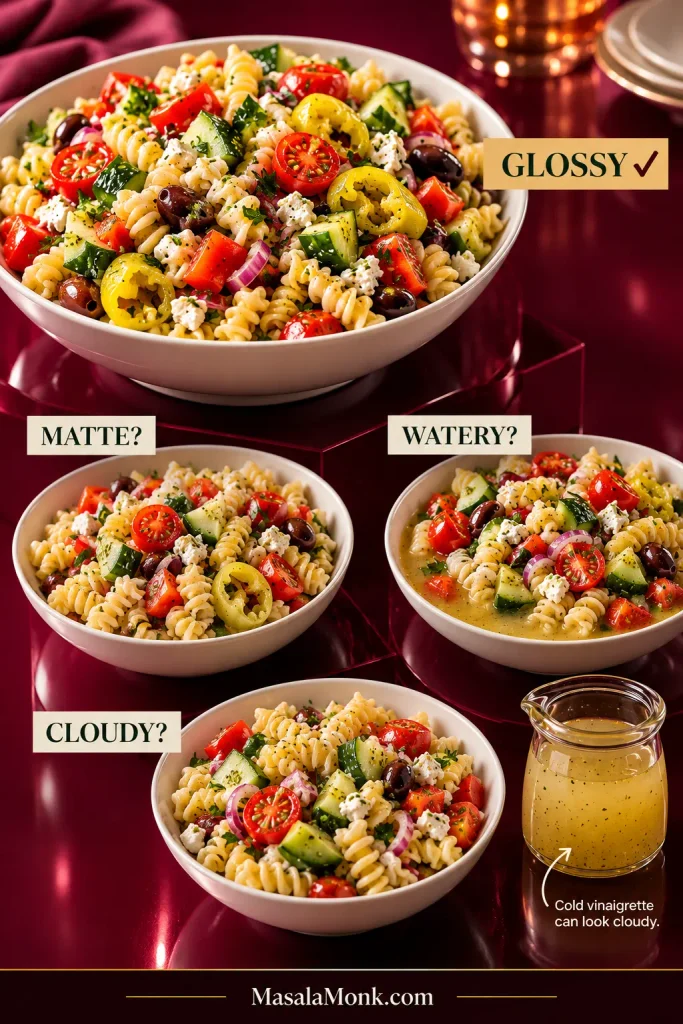
Pasta salad comparison with one large glossy bowl and smaller bowls labeled matte, watery and cloudy, plus a jar showing chilled vinaigrette with a slightly cloudy appearance.
Check the bowl before stirring because chilling leaves useful evidence in place. Once tossed, pooled moisture, absorbed dressing and cold-clouded vinaigrette become harder to distinguish.
What you see What it suggests
Glossy pasta, no puddle underneath The dressing level is probably fine.
Matte-looking pasta The noodles have absorbed a fair amount of vinaigrette.
Thin or watery liquid collecting underneath The pasta may have gone in too wet, or the vegetables have released water.
Dressing looks cloudy or slightly thick Olive oil can cloud or firm when cold. It loosens again as the salad warms slightly.

If the bowl still looks or tastes wrong after that first toss, go to the dry, watery or bland pasta salad fixes.

Build the Bowl

A pound of pasta needs enough going on around it: crisp vegetables, something juicy, something salty or briny, fresh herbs and enough dressing to season the whole bowl. Here, cucumber and bell pepper bring the crunch, tomatoes the juice, feta the salty richness and pepperoncini the sharp, briny bite.
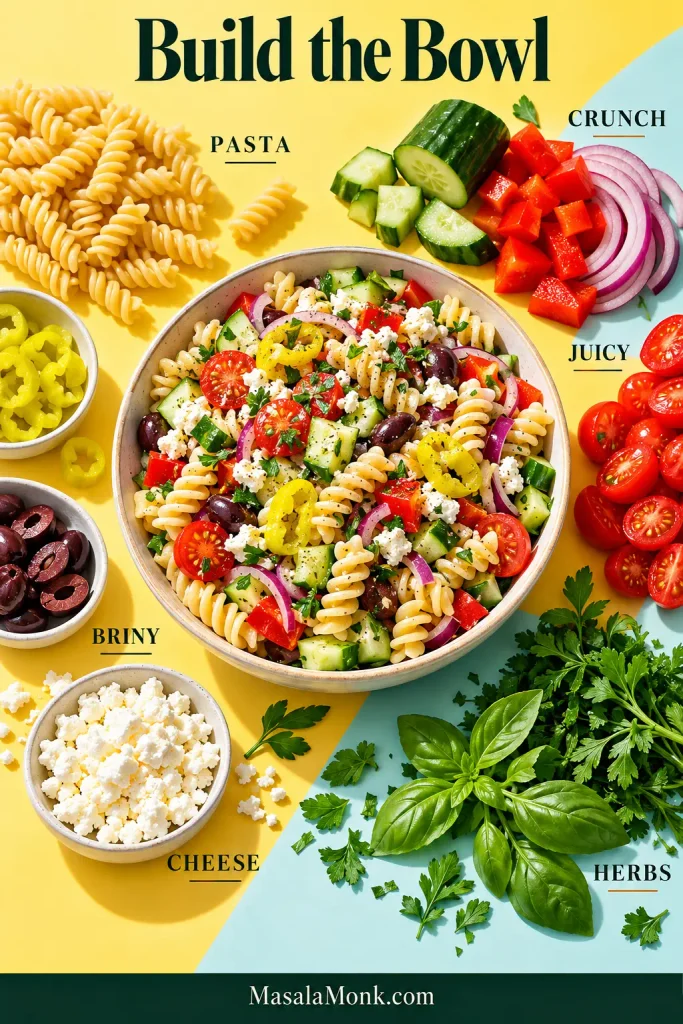
Finished pasta salad surrounded by ingredient groups labeled pasta, crunch, juicy, briny, cheese and herbs.
Think in roles, not a fixed shopping list: swap crunch for crunch, brine for brine and one cheese for another.

Best Pasta for Pasta Salad

The best pasta for pasta salad is a short, sturdy shape with ridges, curls or pockets. Rotini, fusilli, cavatappi, penne rigate and small shells all fit that brief.
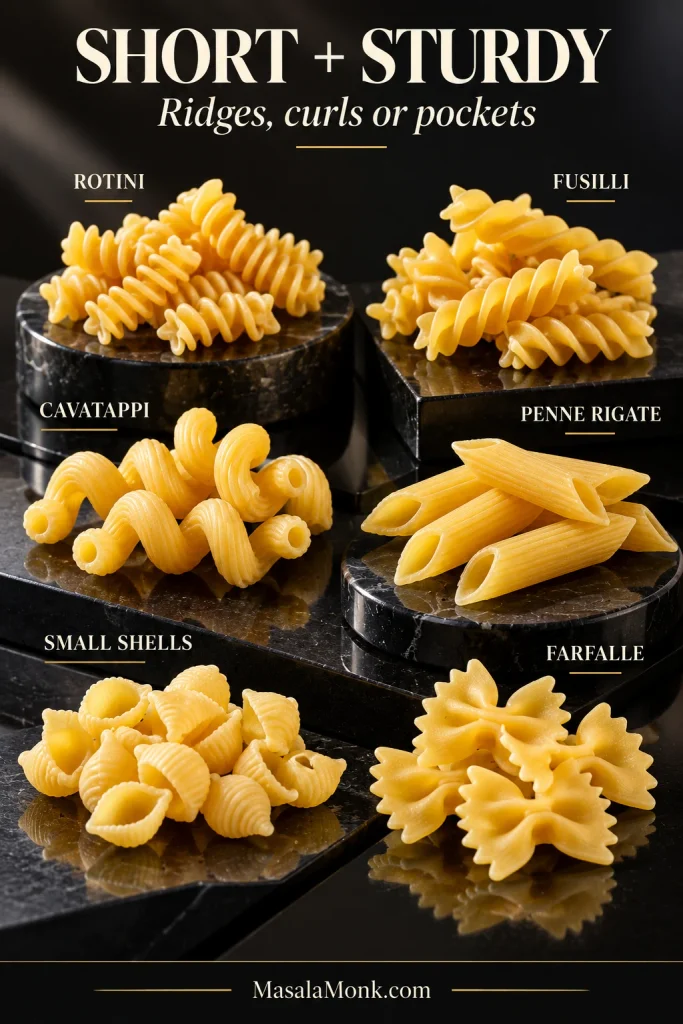
Dry rotini, fusilli, cavatappi, penne rigate, small shells and farfalle displayed separately on dark platforms beneath the words “Short + Sturdy” and “Ridges, curls or pockets.”
When choosing the best pasta for pasta salad, consider bite size as well as dressing retention: short pieces that share a fork easily with chopped vegetables are simpler to toss and serve cold.
Pasta Good to know
Rotini or fusilli Best all-round choice; the spirals hold dressing and small ingredients well.
Cavatappi Ridged, curved and hollow, so vinaigrette clings inside and out.
Penne rigate Sturdy and easy to scoop; choose ridged rather than smooth penne.
Small shells The cups catch herbs, feta and chopped vegetables.
Farfalle Works well, but check the thick center before draining; it can lag behind the thinner edges.

Skip delicate fresh pasta here. It’s lovely hot, but rinsing, chilling and transporting it do it no favors; sturdy dried pasta holds up better.

Tri-color rotini is fine. Check the box size, though. Many contain 12 oz / 340 g rather than 16 oz / 454 g, so don’t automatically use the full amount of vegetables and dressing.

Using gluten-free pasta? Choose a sturdy short shape and follow that brand’s timing closely. Some gluten-free pastas firm up or dry out noticeably after refrigeration, so serve the salad the same day when possible and keep a little extra vinaigrette for pasta that looks dry.

Chosen your pasta? Jump to the pasta salad recipe and start cooking.

Crunch, Brine and Cheese

English cucumber stays pleasantly crisp and has fewer large seeds than a standard cucumber. Cherry or grape tomatoes release less liquid into the bowl than finely chopped large tomatoes. For a lighter side built around that cucumber-and-vinegar combination, the cucumber salad with dill and onion takes it in a different direction.
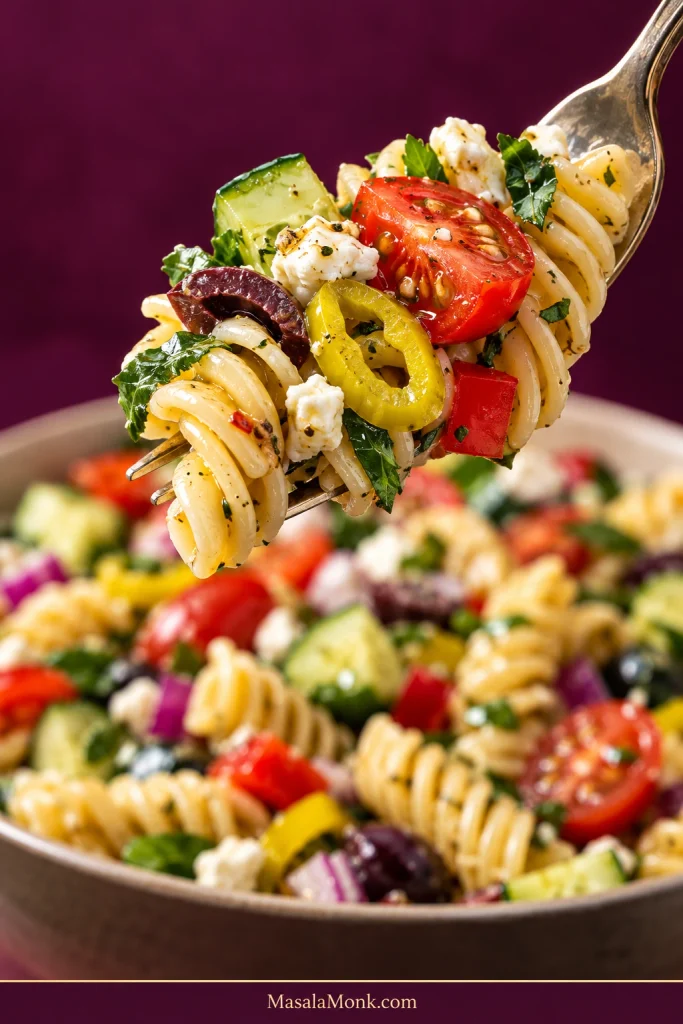
Close-up of a fork lifting rotini pasta salad with cucumber, cherry tomato, crumbled feta, pepperoncini and herbs, with the salad bowl softly blurred behind.
Use the forkful as a cut-size test: cucumber and bell pepper should sit beside the rotini rather than dominate it, so pasta, vegetables, feta and pepperoncini can travel together.

Red onion gives the salad some bite; soak it in cold water for 10 minutes if yours is particularly sharp. Pepperoncini brings acidity and briny snap, while feta gives each forkful something salty and creamy. Mozzarella pearls give you a milder, less salty version.

Easy Add-Ins

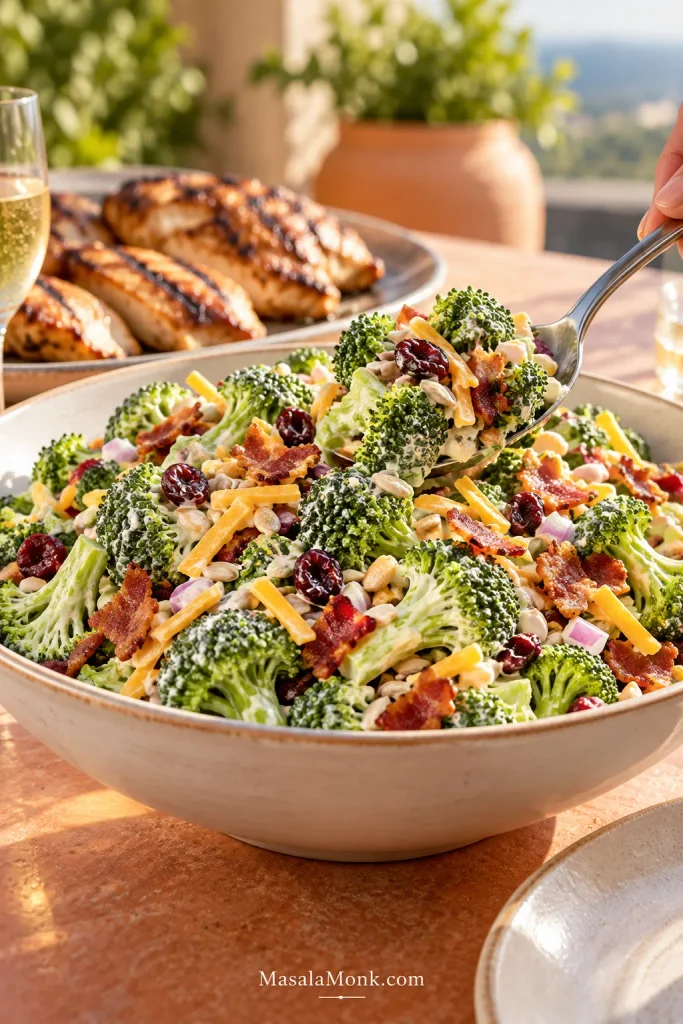
Chickpeas, cooked chicken, salami and tuna can turn this into a heartier lunch. Roasted red pepper, corn, celery, capers and artichoke hearts all fit too. Small broccoli florets work nicely as well; for a broccoli-first side, the broccoli salad recipe keeps them crisp under a creamy, tangy dressing. Add a generous amount of chicken or chickpeas and you’ll probably need a little more vinaigrette too.

Pasta Salad Dressing That Still Tastes Good Cold

A pound of pasta can swallow mild dressing. Here, red wine vinegar, lemon and pepperoncini brine give the vinaigrette enough edge to stay noticeable after the pasta absorbs some of it, while Dijon, garlic and oregano keep it from tasting like oil and vinegar alone.

Taste it before pouring it over the pasta. It should have a definite tang. Once it has coated all those noodles and spent an hour in the fridge, that edge will soften considerably.

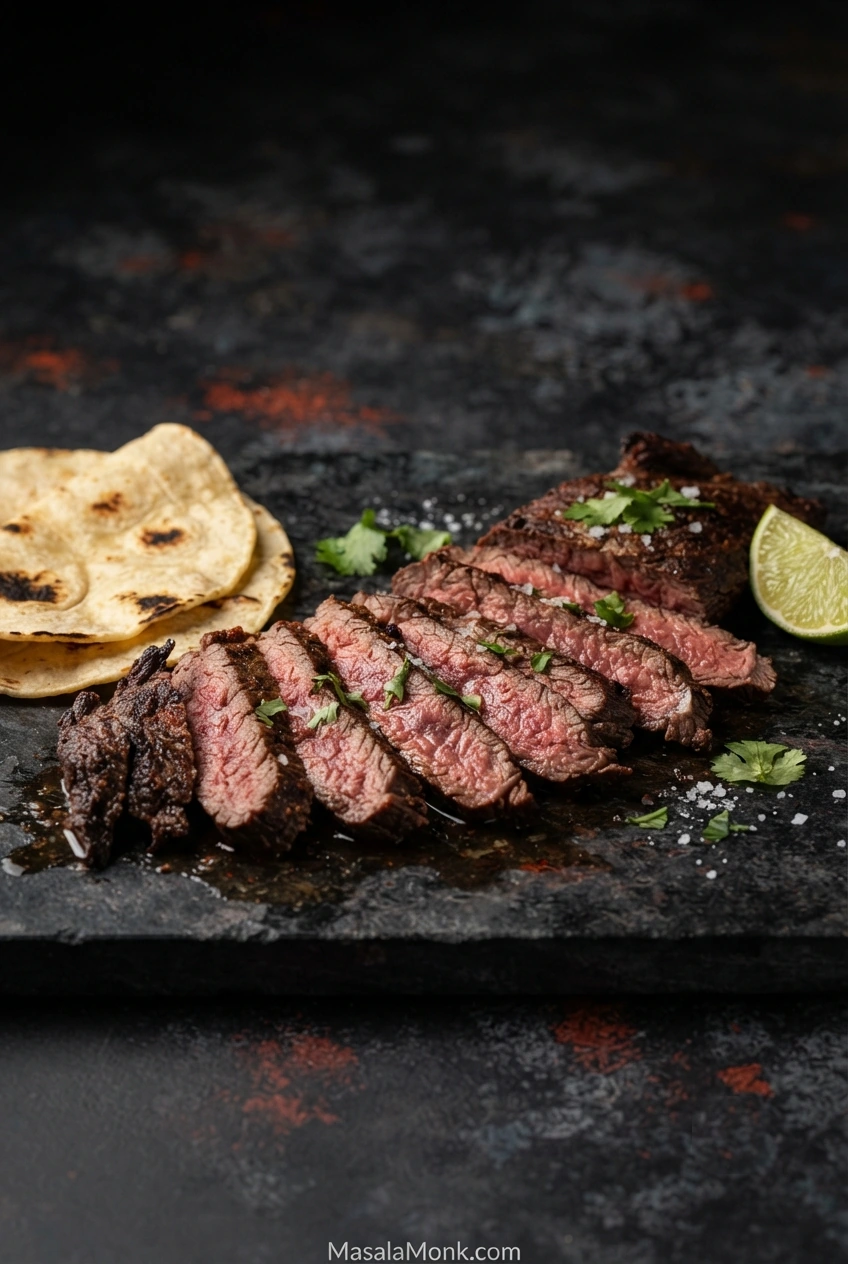
At the table, the salad is best cool rather than straight-from-the-fridge cold. The pasta should be tender, the cucumber should still snap, and there should be enough vinaigrette to coat everything without a pool at the bottom. Next to something deeply browned and smoky, such as carne asada, the cool, tangy salad gives the plate a welcome contrast.

The pasta absorbs some of the first pour, so save 1/4 cup / 60 ml for the final toss. If the salad already looks well coated but tastes dull, try salt, lemon or pepperoncini brine before adding more oil.
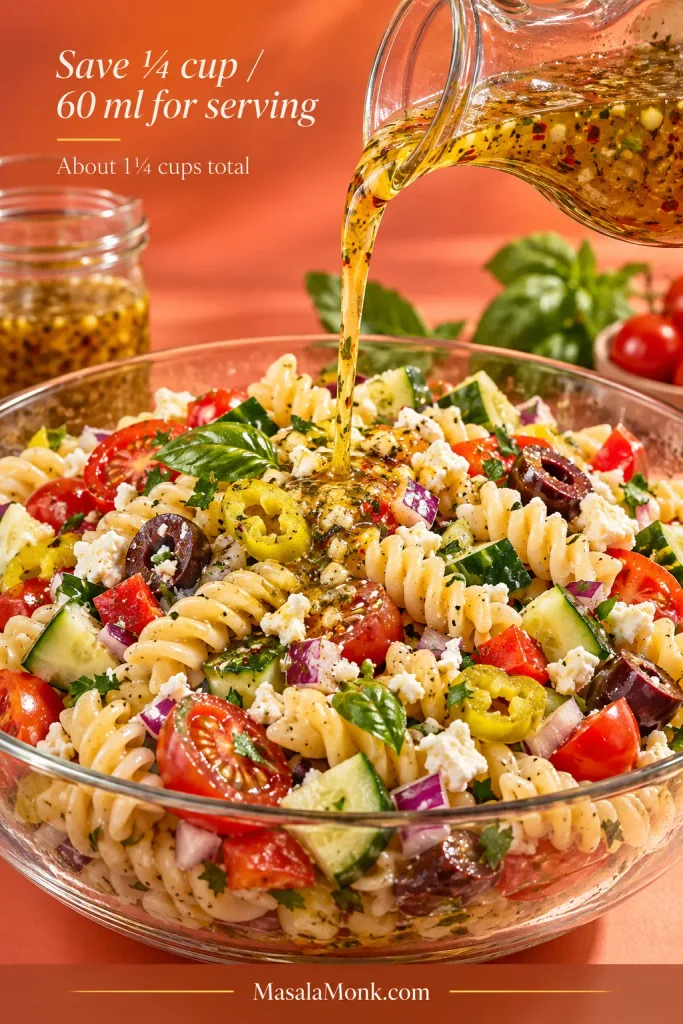
Golden herb vinaigrette being poured over rotini pasta salad with cucumber, tomatoes, pepperoncini, feta and herbs. Text says to save 1/4 cup, or 60 milliliters, for serving.
Because vinaigrette separates as it sits, shake the reserved portion again before serving so the oil and acid go back onto the salad together.

Using Bottled Italian Dressing

Bottled zesty Italian dressing is completely fair game when this is one dish among several. Brands vary in sweetness, salt and acidity, so taste the salad before pouring in all of the reserved portion.

Make Pasta Salad Ahead

The point of making pasta salad ahead is that serving it should be easy. A fully assembled batch is best made no more than a day in advance; when you’re starting earlier than that, prep ingredients rather than the finished salad.
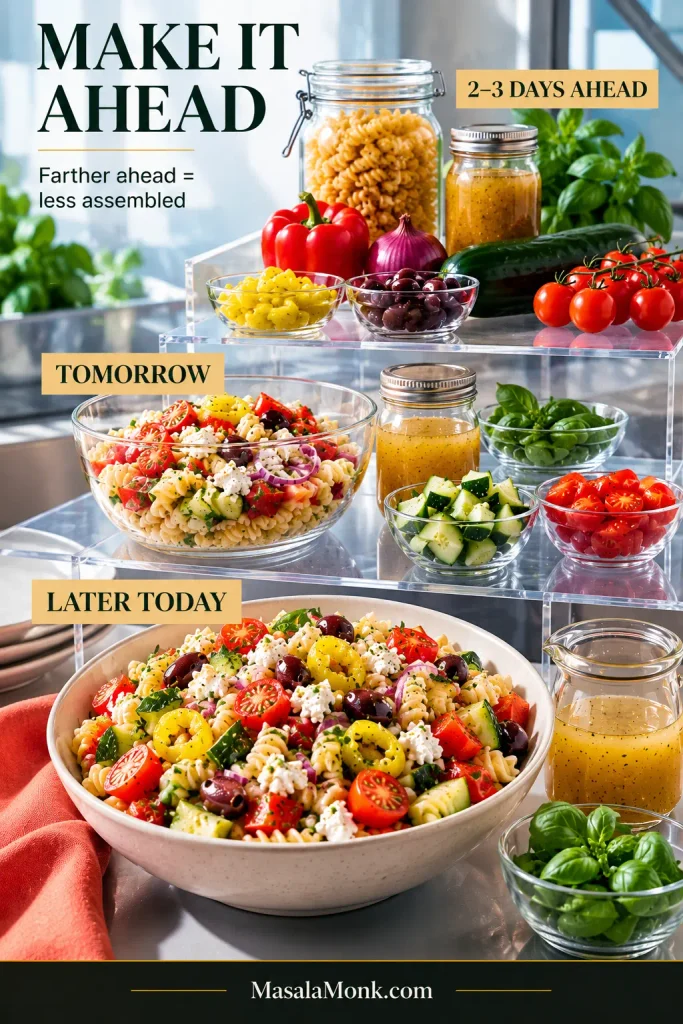
Tiered make-ahead pasta salad setup labeled Later Today, Tomorrow and 2–3 Days Ahead, progressing from finished salad to partly assembled salad and then dry pasta, vinaigrette and separate fresh ingredients.
The farther ahead you work, the less assembled the salad should be. Hold back the wettest and most delicate ingredients first.

Later Today

Follow the recipe through the first dressing and chill. Keep the reserved vinaigrette and whole basil leaves cold, then finish the salad just before serving. That keeps last-minute work to a minimum.

Tomorrow

Make the salad through the first toss and refrigerate the reserved vinaigrette and whole, dry basil separately. If maximum crunch matters, leave the cucumber and tomatoes out of that first assembly and refrigerate them separately too. Add them the next day before the final toss, then add only as much reserved dressing as the salad needs. Tear or slice the basil and fold it in at the end.

Prepping 2–3 Days Ahead

Make the vinaigrette and prep the ingredients that hold well, such as onion, pepperoncini, olives and bell pepper. Keep the pasta uncooked, and leave the cucumber, tomatoes and basil whole until closer to serving. Cook the pasta and assemble the main salad no more than a day ahead.

Feeding more than the standard batch? Use the pasta salad crowd amounts before you scale the recipe.

Fix a Dry, Watery or Bland Bowl

Something tastes off? Start by tossing the salad. Dressing settles, vegetables release liquid, and the forkful you grabbed from the top may not represent what’s underneath.
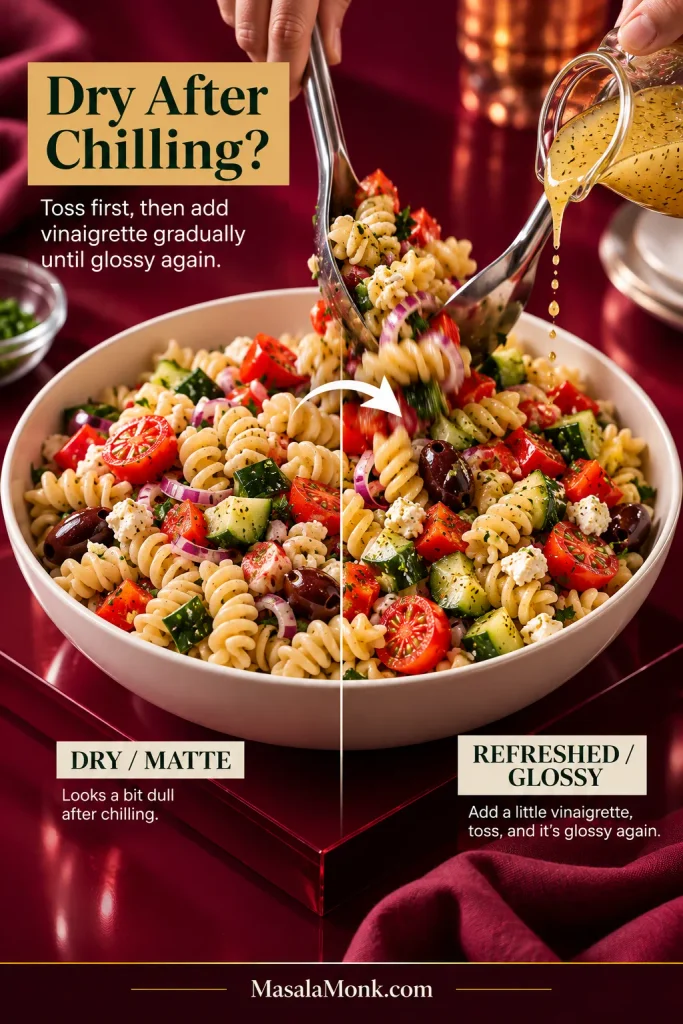
Split view of the same pasta salad looking matte after chilling on one side and glossier after tossing and adding a small amount of vinaigrette on the other.
Dry and bland are different problems. Matte pasta may need more coating; glossy pasta that tastes flat usually needs salt or acid instead.
Problem Likely cause What to do
Dry The pasta absorbed dressing. Add reserved or fresh vinaigrette gradually.
Bland The seasoning is too weak for the cold pasta. Try salt plus a little vinegar, lemon or pepperoncini brine.
Watery The pasta went in wet, or the vegetables released liquid. Drain obvious excess, toss and reseason.
Greasy Too much oil for the acid and salt. Add a small splash of vinegar or lemon and a pinch of salt.
Too sharp The vinegar is particularly aggressive. Add a little olive oil. A tiny touch of honey can soften the edge.
Hard after chilling The pasta started too firm or is still very cold. Give it a little time out of the fridge. Cook it slightly more tender next time.
Mushy The pasta was overcooked. There isn’t a real fix; shorten the cooking time next batch.
Sticky or clumpy Too much surface starch or poor cooling. Toss gently with dressing. Next time, use the brief rinse.

Pasta Salad for a Crowd

For a normal side dish, plan on about 3/4 cup of pasta salad per person. Go down to 1/2 cup when the table is packed with other sides, or up to 1 cup for a generous serving.
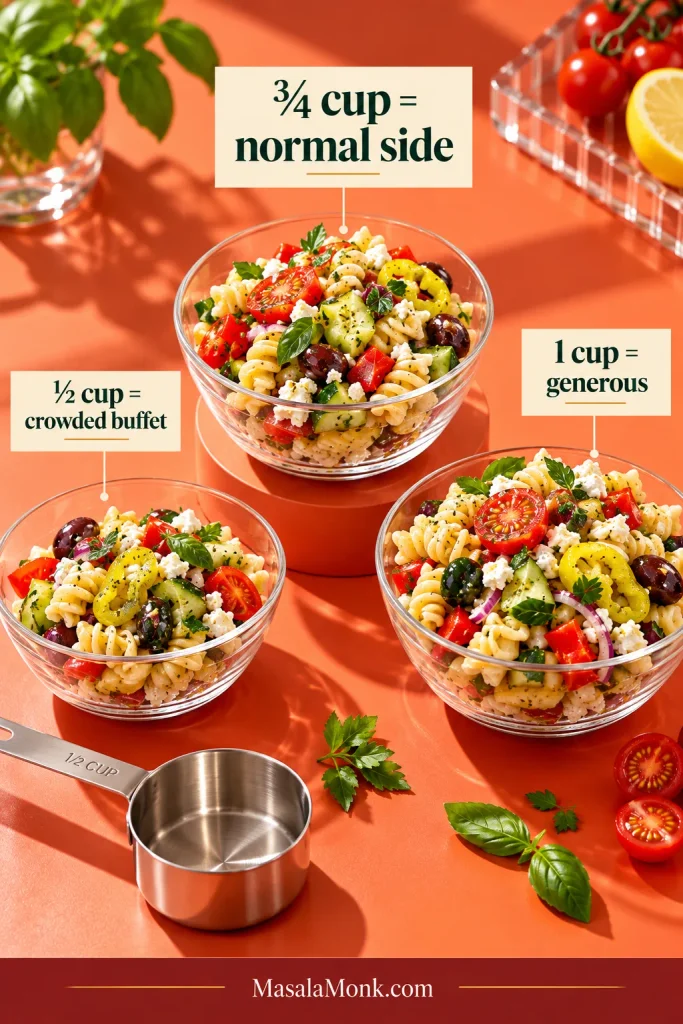
Three clear bowls showing one-half cup, three-quarters cup and one cup of pasta salad, with the three-quarter-cup portion emphasized as the normal side serving.
Plan from finished volume rather than dry pasta weight. Vegetables, feta and dressing add substantially to the amount in the bowl.

One batch of this recipe lands around 13–14 cups, with a little variation from pasta shape and vegetable size. On a crowded plate with burgers, beans, corn and another side or two, most people aren’t taking a full cup. The pasta salad should give you something cool, tangy and crunchy beside the hot food, not take over the plate.

Guests At about 3/4 cup each Practical plan
12–18 About 1 batch One standard recipe
25 About 1 1/2 batches Make 2 batches if you want an easy buffer
30 About 2 batches Prepare as two normal batches
50 About 3 batches Keep part chilled and refill the serving bowl
100 About 6 batches Cook and mix in manageable batches

Serving this outdoors? Jump to how long pasta salad can sit out before the food goes on the table.

Cooking for a Big Group

Don’t try to make six batches in one giant pot. Work in normal-size batches instead. They’re easier to season, easier to chill and far easier to move around a busy kitchen.
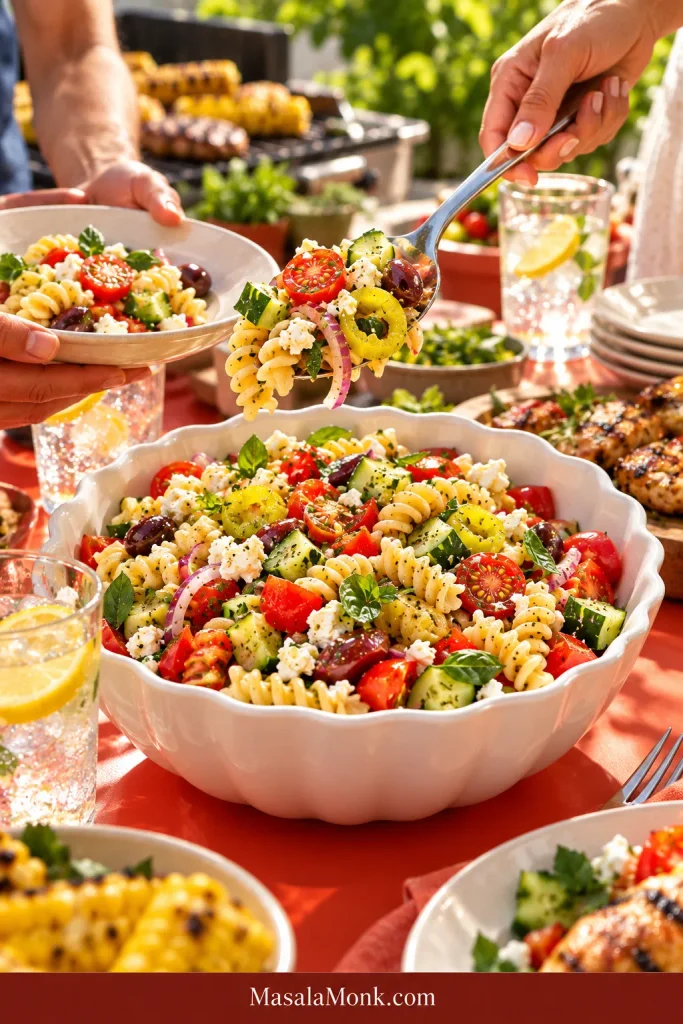
Hands serving rotini pasta salad from a large white bowl at a sunny outdoor cookout with grilled corn, chicken, plates and chilled drinks around the table.
Each time you refill the serving bowl, give the chilled reserve a quick toss so the vegetables, feta and vinaigrette are redistributed.

How Long Can Pasta Salad Sit Out?

Skipping mayonnaise doesn’t make pasta salad shelf-stable. Cooked pasta, cheese and cut vegetables are still perishable.

The USDA recommends keeping cold perishable food at 40°F / about 4°C or colder. Don’t leave it unrefrigerated for more than 2 hours, or more than 1 hour when the temperature is above 90°F / 32°C.
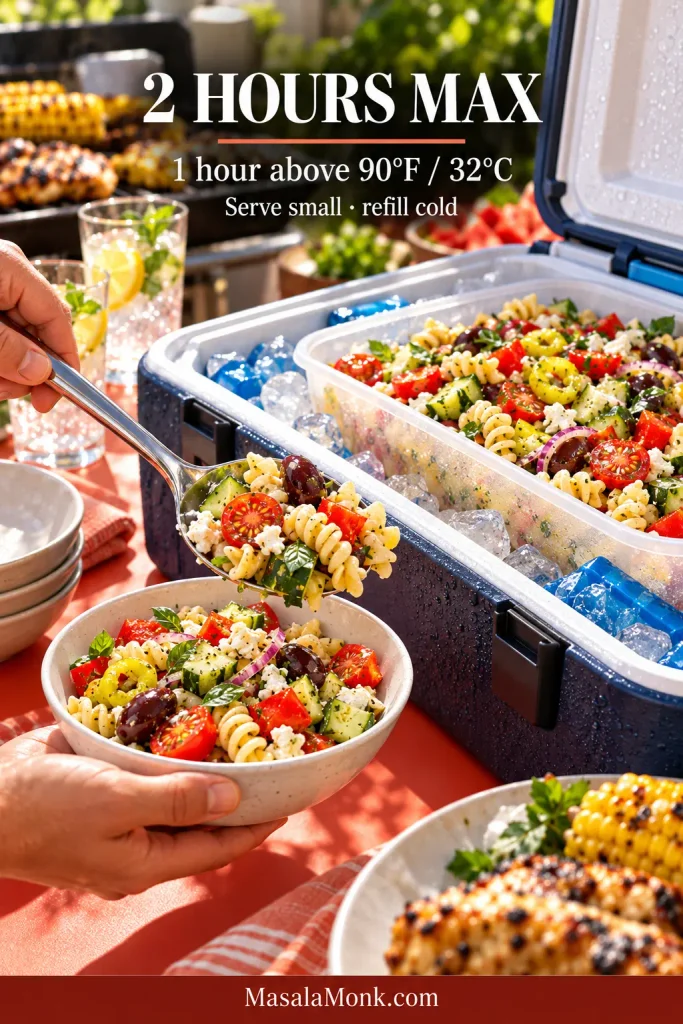
A hand refilling a small bowl of pasta salad from a larger container kept on ice inside an open cooler at an outdoor cookout. Text states “2 Hours Max,” “1 hour above 90°F / 32°C” and “Serve small · refill cold.”
A smaller serving bowl keeps most of the pasta salad cold longer. Refill it from the chilled reserve as guests eat.

Use a well-chilled cooler with ice or frozen gel packs for transport. At a long buffet, put out a smaller bowl and refill it from the cooler instead of leaving the entire batch in the heat.

Storage and Leftovers

Refrigerate leftovers promptly in a covered container and use them within about 3 days for the best texture, while the cucumber still has some snap and the pasta hasn’t absorbed every last bit of dressing.
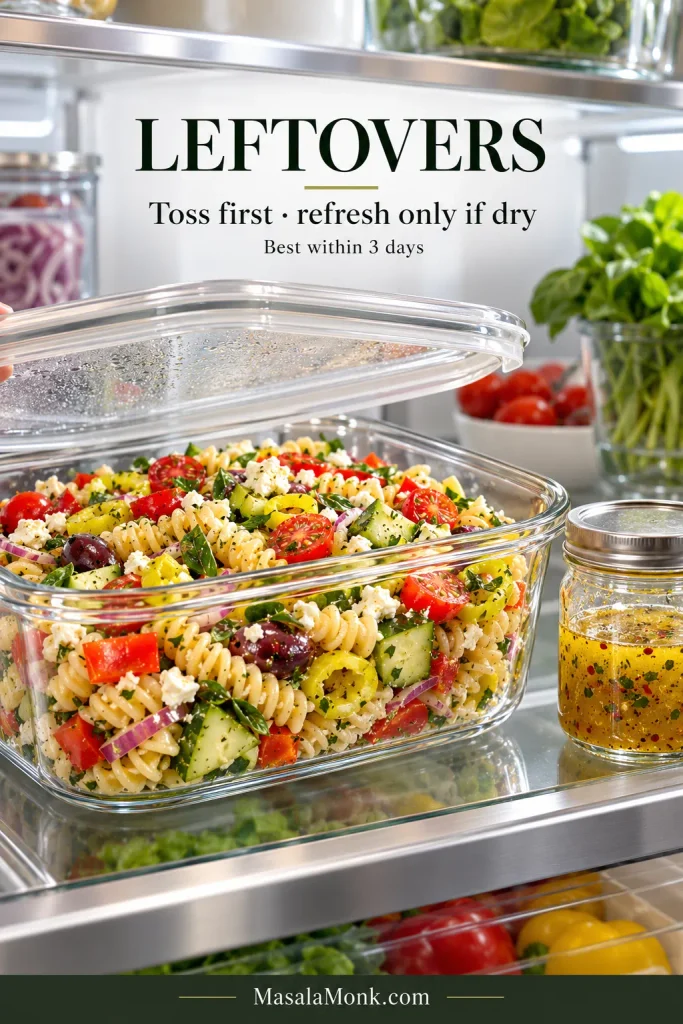
Covered glass container of leftover rotini pasta salad on a refrigerator shelf beside a small jar of vinaigrette. Text reads “Leftovers,” “Toss first · refresh only if dry” and “Best within 3 days.”
Keep any extra vinaigrette separate from the covered salad so you can refresh only what the pasta actually needs the next day.

Toss leftovers before eating. If the pasta looks dry, add a spoonful of fresh vinaigrette; if it already looks moist, taste it before adding anything else.

Freezing isn’t worthwhile. The pasta loses its pleasant texture, and cucumber and tomatoes soften and release water after thawing.
Posted on — Leave a comment

Slow Cooker Corned Beef Recipe: Tender Crock Pot Corned Beef & Cabbage

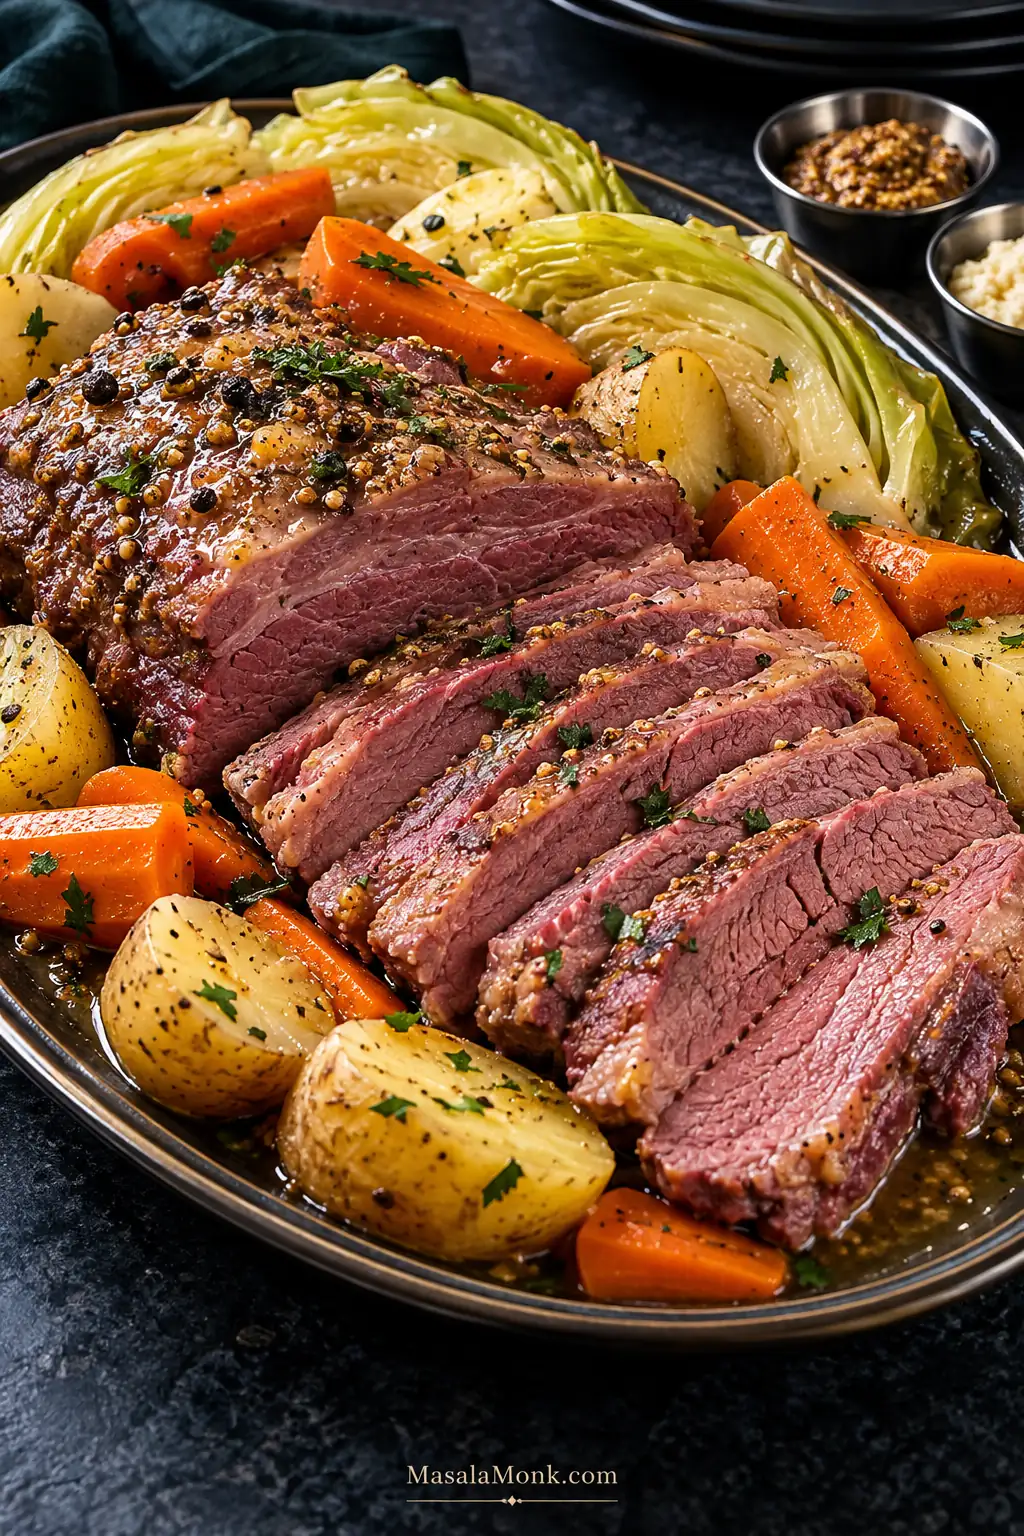
Sliced rosy corned beef brisket served with tender cabbage wedges, carrots and golden potatoes on a dark platter.

A corned beef brisket may need most of the day to become tender. Cabbage absolutely does not. Potatoes and carrots sit somewhere between the two. Put the whole dinner into the Crock Pot at breakfast and it is easy to end up choosing between beef that still pushes back against the knife and vegetables that have already given up.

This slow cooker corned beef recipe gives each part of dinner the time it actually needs. The brisket starts first, potatoes and carrots join later, and cabbage goes in last.

Jump to Recipe

Done well, it lands on the table as rosy slices of corned beef, potatoes carrying the spiced cooking juices, sweet carrots and cabbage tender enough to cut easily with a fork.

For many cooks, this is a once-a-year dinner. You do not need to remember last year’s timing, and staging the vegetables does not turn it into a fussy project: add the potatoes and carrots once, add the cabbage once, then check each part as it finishes.

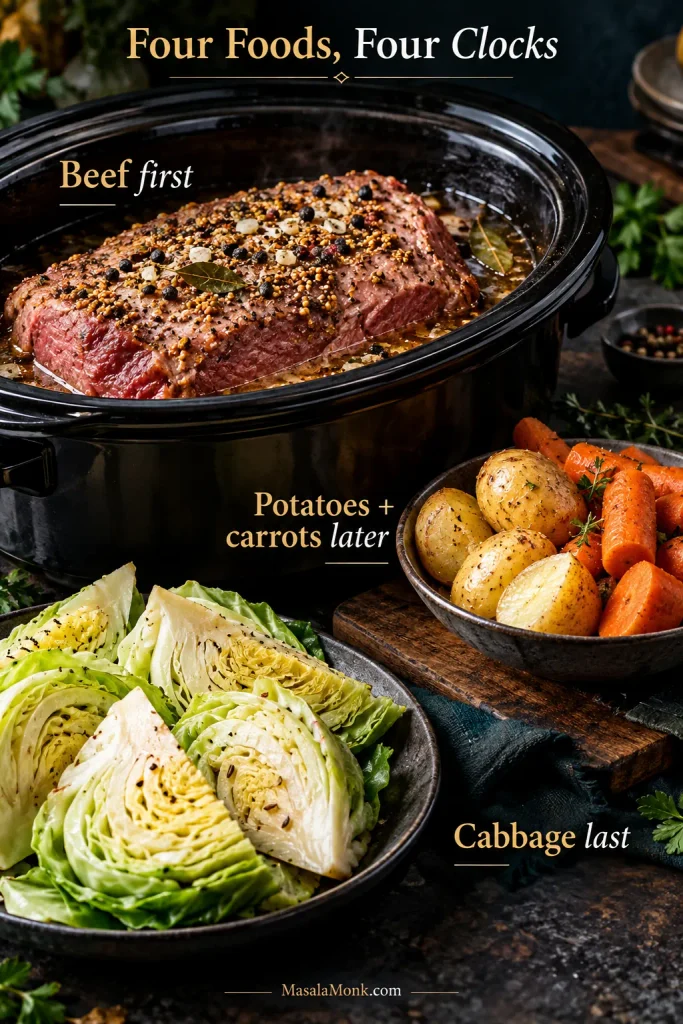
Four Foods, Four Clocks

Slow cooker corned beef with potatoes, carrots and cabbage arranged to show that the foods finish on different schedules.
A corned beef and cabbage dinner does not need one finish line. If one component is ready first, remove it; otherwise, keeping finished food in the Crock Pot simply trades good texture for unnecessary extra cooking.
FoodLOW timing & doneness
Corned beefStart checking around 7½ hours. Ready when a thin probe enters the thickest part with very little resistance.
PotatoesAdd at 5½ hours. Ready when a knife enters easily while the pieces still hold their shape.
CarrotsAdd with the potatoes at 5½ hours. Tender through the center without collapsing at the edges.
CabbageAdd around 7½ hours; usually needs another 1–1½ hours. Judge the thick center rib and cook it to the tenderness you prefer.

Slow Cooker Corned Beef and Cabbage Recipe

This recipe is built around a 3–4 lb / 1.4–1.8 kg uncooked corned beef brisket—the refrigerated kind sold in curing brine—fully thawed, in a 6-quart / 5.7-liter slow cooker. Staging the vegetables keeps them from spending the brisket’s entire long cook in the pot.

Yield
About 6 servings

Prep
20 minutes

Cook window
LOW: 8½–10 hr
HIGH: 6¼–7½ hr

Total
LOW: about 9–10¾ hr
HIGH: about 7–8¼ hr

Total time includes prep and the 15–20 minute rest. Six servings assumes the vegetables are part of the meal; for more meat-heavy plates, expect closer to 4–5 generous portions.

Ingredients

  • 1 fully thawed, uncooked commercially cured corned beef brisket, 3–4 lb / 1.4–1.8 kg, flat cut preferred for neat slices
  • 1 medium yellow onion, about 8 oz / 225 g, cut into thick wedges
  • 4 garlic cloves, lightly crushed
  • 1 included corned beef seasoning packet, or 1 tbsp / 15 ml pickling spice
  • About 3 cups / 710 ml water, adjusted as needed so the liquid reaches roughly one-third to halfway up the brisket
  • 1½ lb / 680 g baby Yukon Gold or red potatoes, very small ones left whole; cut larger potatoes into pieces about 1½–2 inches / 4–5 cm across
  • About 1 lb / 450 g carrots, cut into sturdy 2-inch / 5-cm pieces
  • 1 small green cabbage, about 1¼–1½ lb / 570–680 g, trimmed and cut through the core into 6 wedges, leaving enough core attached to hold each wedge together

For Serving & Finishing

  • Dijon or grainy mustard
  • Prepared horseradish or horseradish cream, optional
  • Optional vegetable finish: 2 tbsp / 28 g unsalted butter, 2 tbsp / about 8 g finely chopped parsley and ¼ tsp / about 0.5 g freshly ground black pepper

Do not add salt at the beginning. Corned beef varies quite a bit in saltiness from brand to brand, so taste the vegetables and cooking liquid near the end before adding any.

Equipment

  • 6-quart / 5.7-liter slow cooker
  • Instant-read thermometer or thin probe
  • Sharp slicing knife
  • Small tea infuser or cheesecloth, optional for containing the whole spices

1. Start the Brisket

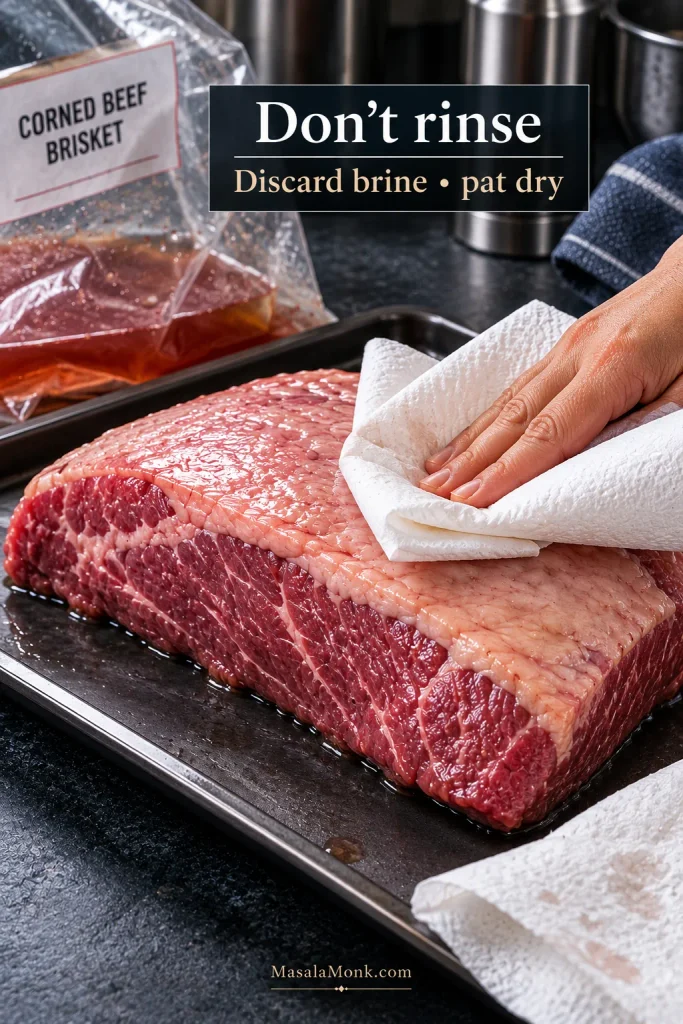
Set the package in a rimmed dish, open it carefully and discard the packing brine. Transfer the brisket to paper towels and pat the surface dry. Do not rinse it under running water. For the safety and salt-control reasoning, see why we do not rinse corned beef.

If the brisket has an unusually thick slab of hard fat, trim some of the excess while leaving a modest layer over the meat. A thin fat cap is useful; a very thick one will not completely disappear in the slow cooker.

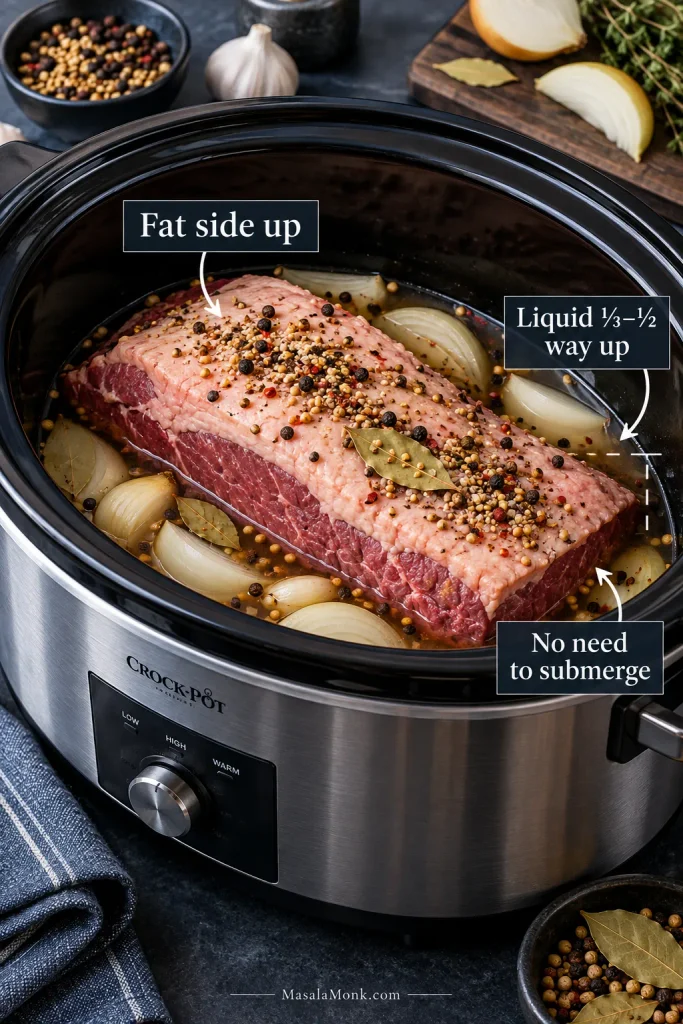
Scatter the onion and garlic over the bottom of the slow cooker, then set the fully thawed brisket on top fat-side up.

Sprinkle over the included seasoning packet. Missing seasoning packet? Use about 1 tablespoon / 15 ml pickling spice. A tea infuser or loose cheesecloth bundle keeps peppercorns and seeds out of the finished vegetables without losing their flavor.

Pour about 3 cups / 710 ml water around the brisket rather than directly over the spices. Use the liquid level as the guide: aim for roughly one-third to halfway up the meat, adjusting the amount if your cooker puts it well above or below that range. For alternatives, jump to the water, broth and beer guide.

Uncooked corned beef brisket fat-side up in a slow cooker with liquid reaching roughly one-third to halfway up the meat.
Choose the cooking liquid for flavor and salt control, not tenderness. If you plan to spoon the juices over the finished corned beef, plain water or low-sodium broth leaves the most room to adjust seasoning at the end.

Cover and cook on LOW for 5½ hours. Keep the lid closed so the cooker does not have to repeatedly rebuild lost heat and steam.

2. Add the Potatoes and Carrots

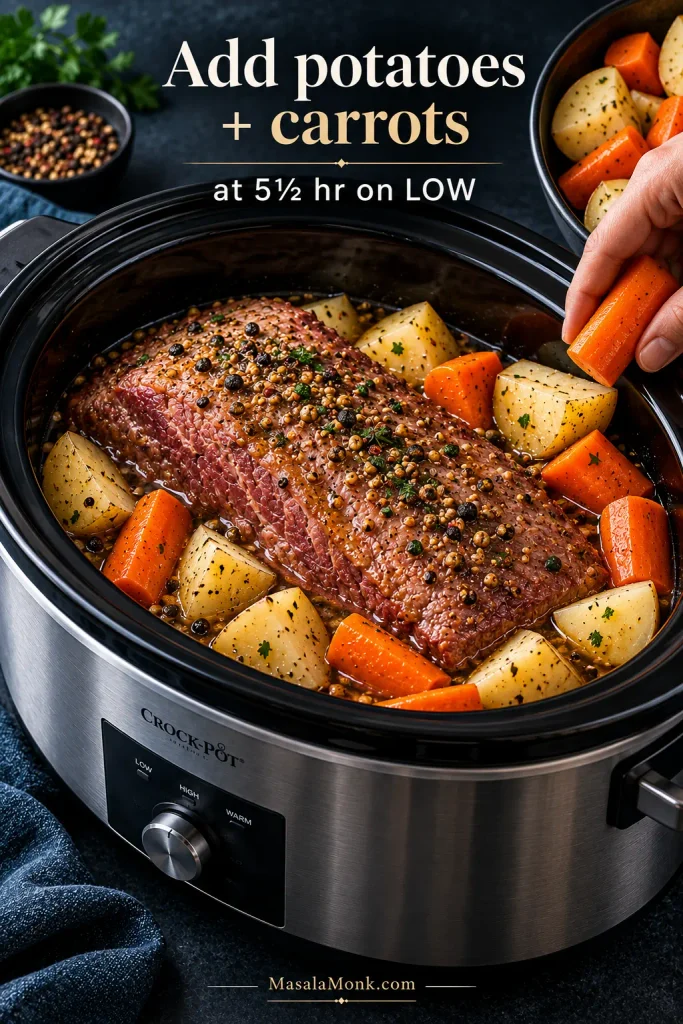
Add the potatoes and carrots after the beef has cooked for 5½ hours on LOW. Arrange them around the brisket, pushing the denser pieces into the hot liquid where practical. Replace the lid quickly and continue cooking for another 2 hours.

The large pieces are deliberate. Small potato cubes and thin carrot slices can be fully cooked while the brisket is still working its way toward tenderness.

Large potato and carrot pieces being added around a partially cooked whole corned beef brisket in a slow cooker.
Waxy potatoes such as Yukon Gold or red potatoes hold together better through the final hours of a slow cooker corned beef dinner. Meanwhile, placing the densest pieces down near the hot liquid helps them soften more evenly.

3. Check the Beef, Then Add the Cabbage

At about 7½ hours total, make an early check. Slide a thin thermometer probe or skewer into the thickest part of the brisket. If the resistance is hard to judge, use the full tenderness guide.

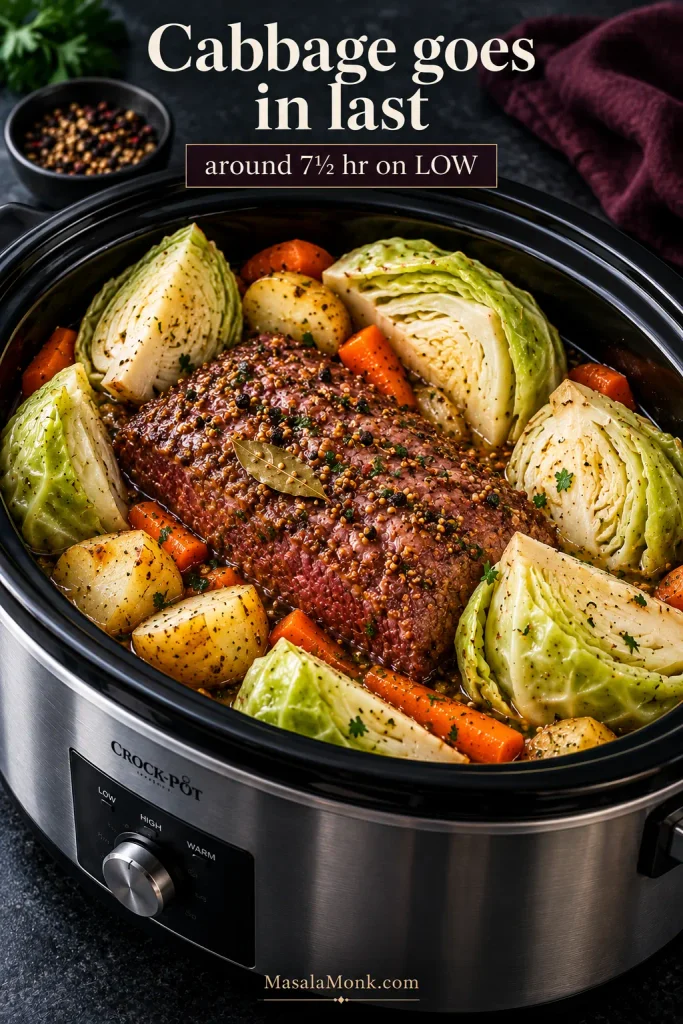
If the brisket still offers clear resistance, arrange the cabbage wedges over and around the beef, replace the lid and continue on LOW for about 1–1½ hours.

If the brisket is already very easy to pierce, remove it before adding the cabbage. Arrange the cabbage in the cooker and let the vegetables finish without the beef.

Green cabbage wedges with their cores attached being added late to a slow cooker containing corned beef, potatoes and carrots.
Do not judge cabbage by its outer leaves alone. Instead, test the thick center rib; keeping each wedge attached through the core lets the leaves soften while the wedge still holds together on the plate.

Because newly added cabbage will usually need longer than a normal 15–20 minute rest, transfer an early-finished brisket with a little cooking liquid to a covered oven-safe dish. Keep it hot in the lowest practical oven setting, ideally around 170°F / 75°C, while keeping the meat at 140°F / 60°C or above. Begin its final 15–20 minute rest shortly before you plan to slice.

4. Check the Whole Dinner

From about 8½ hours total, start checking each part of the meal.

  • Corned beef: the probe should slide into the thickest part with very little resistance.
  • Potatoes: a knife should enter easily while the pieces still hold their shape.
  • Carrots: the center should be tender without the edges collapsing.
  • Cabbage: judge the thick center rib rather than the delicate outer leaf.

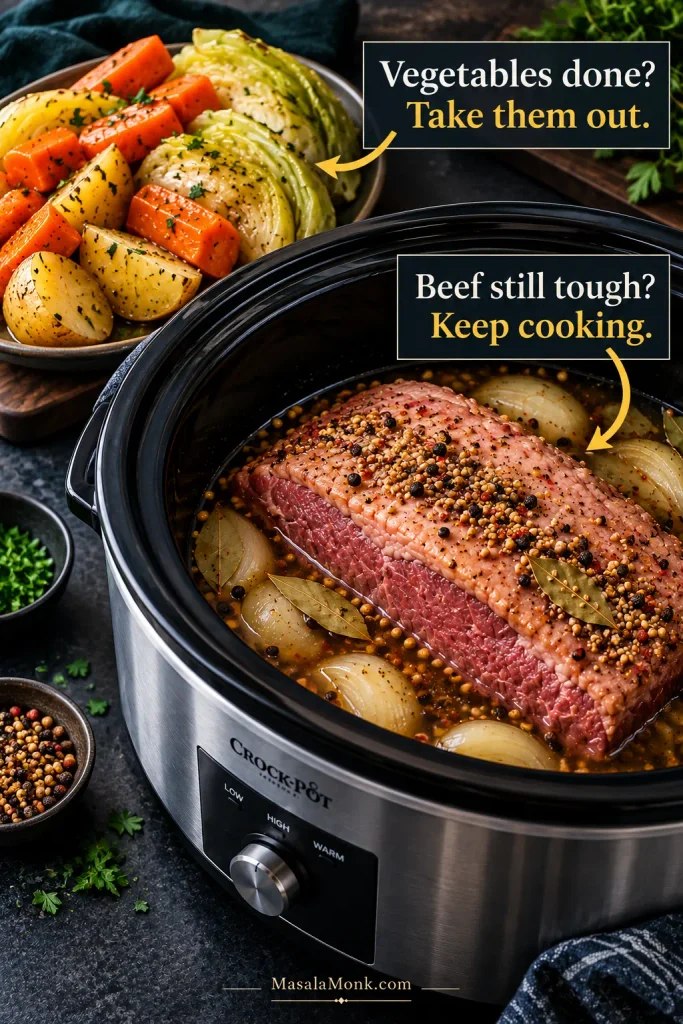
Remove anything that is ready. The brisket can keep cooking without the vegetables, and the vegetables can finish without the brisket. If the beef becomes ready now and the vegetables need only another 15–20 minutes, let the brisket rest normally. For a longer gap, use the covered holding method from Step 3. Still tough? Leave the beef in its cooking liquid and check again in about 30 minutes.

If the meal has split into different finish times, go straight to the troubleshooting guide.

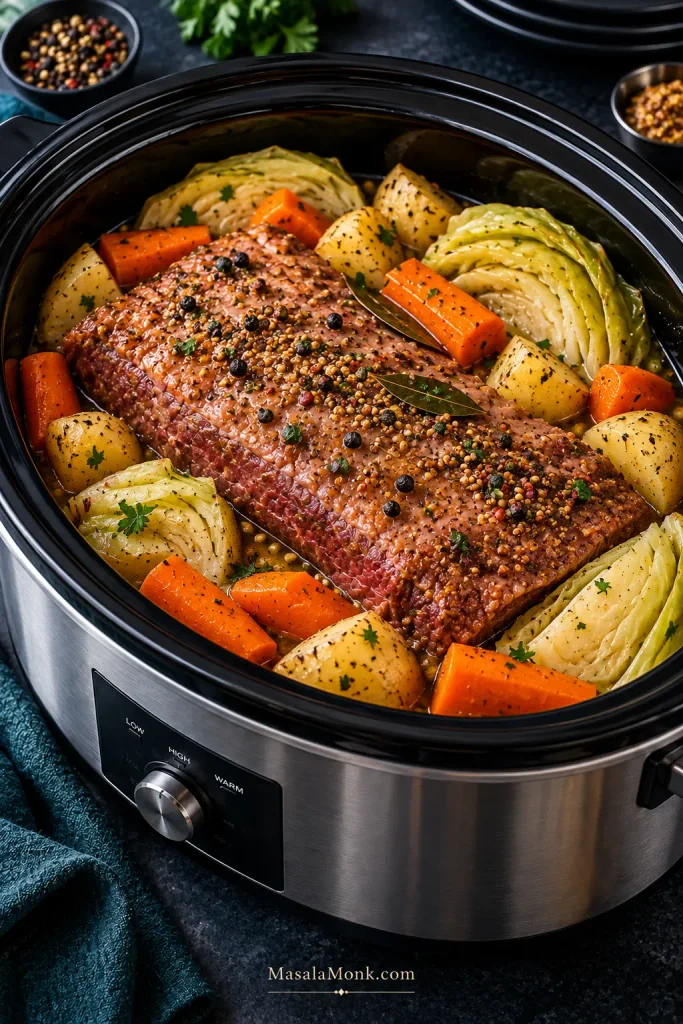
Whole cooked corned beef brisket in a slow cooker surrounded by intact cabbage wedges, carrots and potatoes.
Before adding salt to the finished corned beef and cabbage, taste the vegetables and cooking liquid. Because cured briskets vary in saltiness, the potatoes, carrots and cabbage may already be seasoned more than you expect.

5. Rest and Slice Across the Grain

Transfer the brisket to a cutting board and rest it for 15–20 minutes.

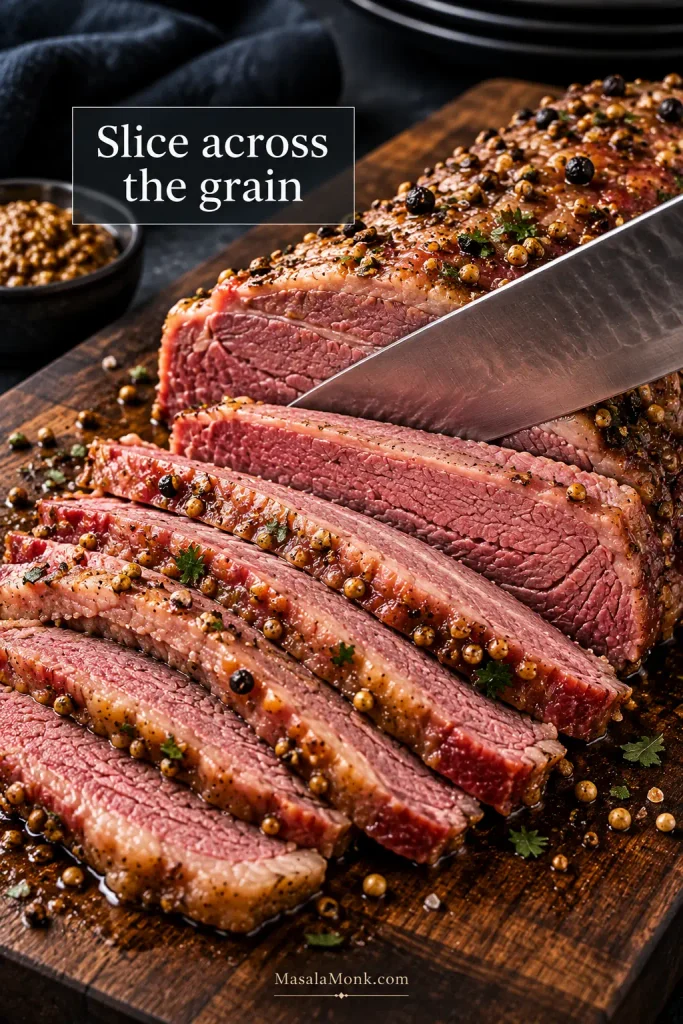
Look for the long lines of muscle fiber running through the meat. Turn the brisket so your knife crosses those lines, then cut slices about ¼–⅜ inch / 6–10 mm thick.

Point cuts can have grain running in more than one direction. When that happens, divide the cooked brisket into obvious sections first and rotate each section before slicing across its grain.

A knife slicing moist cooked corned beef brisket across the visible direction of the muscle fibers.
Use a long, sharp knife and smooth strokes rather than sawing. Clean slices should hold together without pulling into long strings; if they do, rotate the brisket and check the grain direction again.
6. Taste and Serve

Taste the vegetables before adding salt. If using the butter finish, toss the hot potatoes, carrots and cabbage with the butter, parsley and black pepper. Strain a little cooking liquid for the table, then serve the sliced beef with the vegetables, mustard and horseradish.

Cooking on HIGH

LOW is the more forgiving schedule for this recipe because it gives you a wider window to judge brisket tenderness while staggering the vegetables. HIGH works when dinner needs to happen sooner, but smaller or thinner briskets deserve an earlier check.

  1. Prepare the brisket, onion, garlic, spices and liquid exactly as above.
  2. Cook the beef on HIGH for 4 hours.
  3. Add the potatoes and carrots.
  4. At about 5 hours total, check a brisket around 3 lb / 1.4 kg or one that is relatively thin. If it is already tender, remove it and keep it hot using the holding method in Step 3 while the vegetables continue cooking.

  5. At about 5½ hours total, check a thicker brisket closer to 4 lb / 1.8 kg. Add the cabbage now and remove the beef for holding if it is ready.
  6. Cook the cabbage on HIGH for about 45–60 minutes. At roughly 6¼–6½ hours total, check the whole dinner. Remove finished components and continue anything that still needs time.

Recipe Notes

  • Fat side & searing: Place the brisket fat-side up for this method. There is no need to sear it before slow cooking.
  • Frozen brisket: Thaw it completely in the refrigerator before slow cooking. The timing in this recipe assumes a fully thawed brisket.
  • Prep ahead: Cut the carrots, cabbage and onion the night before and refrigerate them. Small potatoes can stay whole. If larger potatoes are cut ahead, keep them submerged in cold water in the refrigerator, then drain before cooking.
  • Softer vegetables: Add the potatoes and carrots earlier if you deliberately prefer a very soft boiled-dinner texture.
  • Leaving vegetables out: Cabbage, potatoes and carrots are optional. Omitting them does not change how the brisket cooks.
  • Cooking for a crowd: Two briskets and twice the vegetables can crowd a 6-quart cooker badly enough to change the timing. Use a larger cooker, divide the meal between two slow cookers, or cook some of the vegetables separately.

Choosing Corned Beef for the Slow Cooker

Flat Cut or Point Cut?

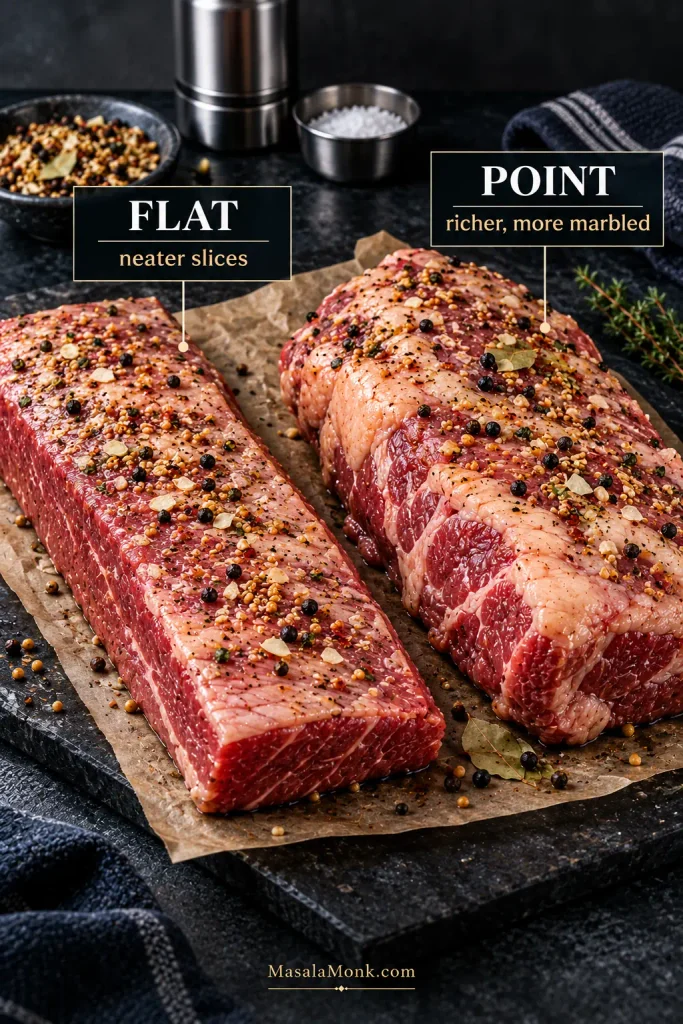
Choose a flat cut for neater slices and a point cut for more marbling and richness. A flat is usually more uniform in thickness and easier to carve cleanly across the grain, while a point is generally more irregular and often fattier.

The actual brisket matters more than the cut name: a well-marbled flat can be a better choice than an unusually lean point.

Raw cured brisket flat cut beside a thicker, fattier point cut, showing differences in shape, thickness and marbling.
When comparing packages, look past the cut name and inspect the actual brisket through the wrap. Thickness, fat seams and overall shape can vary noticeably even between two flats or two points.

How Much Corned Beef to Buy

A 3–4 lb / 1.4–1.8 kg brisket is a practical size for about six people when the vegetables are part of the meal. For planned Reuben or hash leftovers, buy toward the 4-lb end.

Should You Rinse Corned Beef?

No—do not rinse corned beef under running water. Discard the packing brine and pat the brisket dry. USDA guidance on washing raw meat warns that rinsing can spread contaminated droplets around the sink and nearby surfaces; cooking is what makes the meat safe.

Raw cured corned beef brisket being patted dry with paper towels after the packing brine has been discarded.
Pat until the surface is damp rather than dripping. That gives the seasoning packet or pickling spices a better chance to stay on the brisket instead of immediately running into the cooking liquid.

If saltiness is the concern, control it through the cooking liquid and final seasoning rather than rinsing the raw brisket under the faucet. Salt at the end, not on faith: corned beef is already cured, so starting with water and no added salt gives you room to taste and adjust once the meal is nearly finished.

How Much Liquid? Water, Broth, Beer or Guinness?

The brisket does not need to be submerged. For this recipe, water is the best default because the beef is already cured and seasoned. Start around 3 cups / 710 ml and use the level in the cooker as your final guide: roughly one-third to halfway up the brisket is enough.

Low-sodium beef broth can replace some or all of the water 1:1 when you want a more savory cooking liquid. Regular broth can push an already-cured brisket and its vegetables toward excessive saltiness, so taste before adding any extra salt.

For a beer version, replace about 12 fl oz / 355 ml of the water with beer and keep the final liquid level in the same range. Lager or brown ale brings mild malt sweetness; Guinness or another stout gives the pot a darker roasted edge and can make its bitterness more noticeable in long-cooked vegetables.

Beer changes the flavor, not the basic tenderizing process. For a dish where stout is meant to lead rather than sit in the background, a Guinness beef stew is built around it from the start.

How to Tell When Corned Beef Is Tender

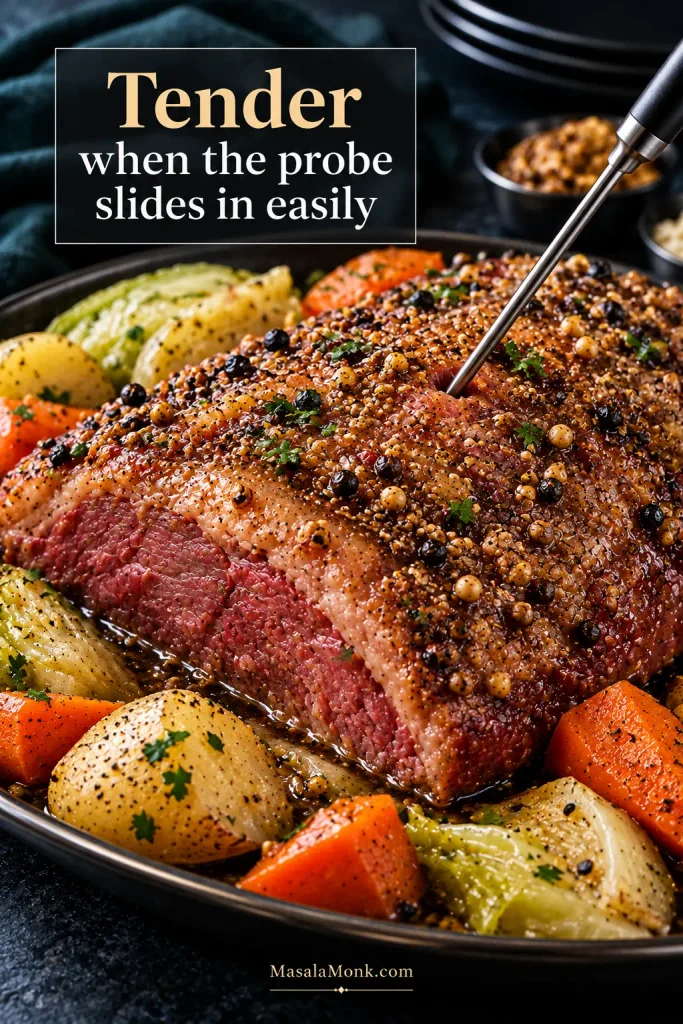
Read the brisket, not just the timer. Corned beef is ready for neat slices when a thin probe enters the thickest part with very little resistance while the meat still holds together.

Safe Temperature vs Tender Temperature

USDA lists 145°F / 63°C followed by at least a 3-minute rest as the food-safety minimum, but brisket usually needs considerably more cooking before it becomes tender. See the USDA’s corned beef guidance for the safety standard.

For clean, sliceable tenderness, ThermoWorks’ corned beef temperature guidance places corned beef around 190–195°F / 88–91°C. Around 200–205°F / 93–96°C, the meat moves toward a much softer texture. Even so, a brisket can pass 190°F and still feel tight, so let probe resistance make the final call.

A thin probe inserted into the thickest part of a whole cooked corned beef brisket to test tenderness before slicing.
A brisket can be fully food-safe and still feel tough. Check the thickest area—not just a soft edge—and, if the brisket varies in thickness, probe more than one spot before deciding the corned beef is tender enough to remove.
  • Still firm when pierced: keep cooking.
  • Probe slides in easily but the meat still holds together: ideal for neat slices.
  • Almost no resistance and the fibers readily separate: very soft, fall-apart territory.

For neat slices, the knife should pass through without sawing, while each slice still holds together when you lift it.

Corned beef can also go too far. A lean flat may become dry and stringy, while a fattier piece can soften past the clean-slicing stage and begin to fall apart.

Do not judge corned beef by color. Properly cooked corned beef can remain distinctly pink because of the curing process.

Thickness, shape, marbling and the way your slow cooker heats explain why two briskets of the same weight can finish at different times. Times get you into the right window; texture tells you when dinner is actually ready.

Back to Recipe

When to Start Checking Corned Beef by Weight

These times tell you when to begin checking tenderness. They are deliberately earlier than a guaranteed finish time.

Brisket sizeBegin checking
3 lb / 1.4 kgLOW: about 7½ hr · HIGH: about 5 hr
4 lb / 1.8 kgLOW: about 8 hr · HIGH: about 5½ hr

The vegetable schedule in the main recipe is tuned to a 3–4 lb / 1.4–1.8 kg brisket. For substantially smaller or larger briskets, begin checking earlier or later and let probe tenderness—not a rigid minutes-per-pound formula—decide when the beef is ready.

The 7½-hour check in the LOW method is an early look before the cabbage goes in. A thicker 4-lb brisket may not enter its more meaningful tenderness window until closer to 8 hours.

A short, thick point and a long, thin flat can weigh exactly the same, which is why the probe ultimately tells you more than a rigid minutes-per-pound rule.

When to Add the Potatoes, Carrots and Cabbage

Slow cookers are excellent at giving tough beef hours to soften. The vegetables finish much sooner.

FoodMain recipe timing
Potatoes + carrotsLOW: add at 5½ hr · HIGH: add at 4 hr
CabbageLOW: add around 7½ hr, then cook 1–1½ hr · HIGH: add around 5½ hr, then cook 45–60 min

Potatoes and Carrots

The schedule above gives the potatoes and carrots roughly two to three hours to soften instead of forcing them through the brisket’s entire long cook. Use waxy potatoes such as Yukon Gold or red potatoes and keep them roughly 1½–2 inches / 4–5 cm across. Carrot pieces should be similarly substantial at about 2 inches / 5 cm.

Add them a little earlier when you deliberately want very soft, deeply braised vegetables; add them later when you prefer more structure.

For browned edges and a firmer center, oven roasted carrots are a good alternative when caramelization matters more than keeping everything in one pot.

Cabbage

Cabbage gets only the final stretch. The leaves soften first, so test the thick center rib—the last part of the wedge to lose its crunch.

Keep the cabbage in sturdy wedges rather than shredding it. Add it later when you want more bite, or give it longer for very soft cabbage. You can also cook the wedges separately in some strained cooking liquid when you want maximum control over their texture.

If Dinner Isn’t Finishing Together

Look at what is tender and what is still firm. That usually tells you more than the clock does.

Beef Problems

What you seeWhat to do
Beef tough + vegetables tenderTake the vegetables out and cover them; they are done. Leave the brisket in its cooking liquid and give it more time. That’s fixable—you have not ruined dinner.
Beef hot but rubberyIt may already be safely cooked but still needs more tenderizing time. Keep cooking until it becomes much easier to pierce.
Beef tough + vegetables hardConfirm that the cooker is on LOW or HIGH and that the lid has stayed closed; if so, give the meal more time. If raw beef accidentally sat on WARM from the start and you cannot verify that it heated promptly, discard it. WARM is a holding setting for already-cooked food.
Beef tender + vegetables still firmRemove the beef with a little cooking liquid. If the vegetables need only 15–20 minutes, let the meat rest; for a longer gap, keep the covered beef at 140°F / 60°C or above while the vegetables finish.
Beef dry or stringyRest it, slice thinly across the grain and spoon a little hot cooking liquid over the meat. An unusually lean cut, overcooking or slicing with the grain can all contribute.
Beef falls apart under the knifeIt has moved beyond the neat-slicing stage. Serve it as soft chunks or shredded beef and begin checking earlier next time.
Cooked potatoes, carrots and cabbage set aside while a cooked but still-firm corned beef brisket continues cooking in the slow cooker.
Removing finished vegetables is not a failure; it protects their texture while the brisket catches up. Cover them, then rewarm briefly with a little hot cooking liquid just before serving if needed.

Vegetable Problems

What you seeWhat to do
Potatoes turning to mushRemove them now. Next time use larger waxy potatoes, cut them less aggressively or add them later.
Potatoes still hardMove them into the hot liquid and keep cooking until a knife enters easily. Very large pieces or a cooler-running slow cooker may need longer.
Cabbage gray and collapsingIt stayed in too long. Add the wedges later next time or cook them separately in some of the corned-beef liquid.
Cabbage still crunchyGive it more time. Judge the thick center rib, especially on large wedges.
No room left for cabbageRemove finished potatoes or carrots, or cook the cabbage separately. Packing everything tightly under the lid is not worth sacrificing texture.

Salt & Flavor Problems

What you seeWhat to do
Everything tastes too saltyDo not reduce the cooking liquid further. Serve with unsalted sides where possible and dilute any liquid you plan to spoon over the plate.
Beef tastes right but vegetables are blandToss the hot vegetables with the optional butter, parsley and black pepper, then taste before adding salt.

Can Tough Corned Beef Be Rescued?

Yes, when it is genuinely firm rather than already dry. Put it back into hot cooking liquid, cover and continue cooking gently until the probe becomes much easier to insert.

If the slow cooker is heating but the beef remains stubbornly firm, transfer it with some cooking liquid to a covered oven-safe dish and continue at about 325°F / 165°C until probe-tender. Finished vegetables can stay out.

Back to Recipe Back to Top

Optional Broiler Finish

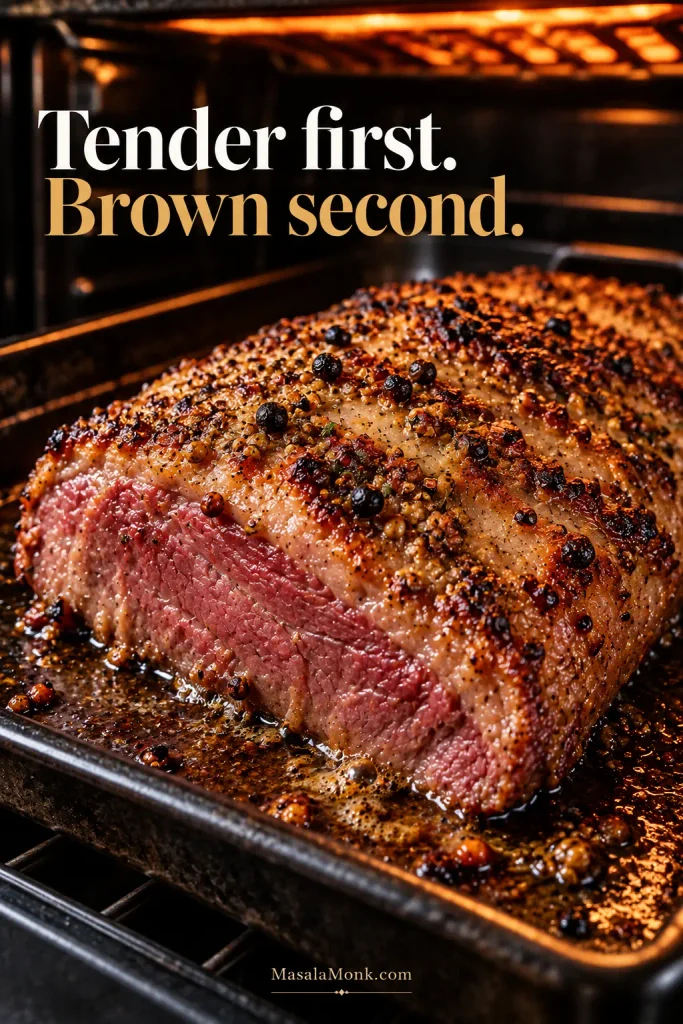
Once the brisket is tender, you can stop there. For darker edges, transfer it to a foil-lined broiler-safe pan and brush the fat side lightly with Dijon or grainy mustard.

Broil only until the surface bubbles and browns, usually about 2–4 minutes. Start watching closely after the first minute; mustard can darken quickly under a strong broiler.

Tender whole corned beef brisket under a broiler with a mustard and spice coating beginning to bubble and brown.
Let excess surface liquid drain before brushing on the mustard so the top browns instead of steaming. Pull the brisket when the coating bubbles and the high points bronze, before the mustard turns black.

What to Serve with Corned Beef and Cabbage

Arrange the rested slices with the potatoes, carrots and cabbage, then spoon a little strained cooking liquid over the beef—enough to keep the slices glossy and moist without flooding the plate.

For a St. Patrick’s Day dinner, put Dijon or grainy mustard and horseradish on the table and let everyone add their own. A creamy horseradish sauce works especially well because its cool, sharp bite cuts through the salty, rich beef.

Skipped the potatoes in the slow cooker? Creamy mashed potatoes make a good alternative underneath the sliced beef, especially with a little of the strained juices spooned around them. Warm dinner rolls or Irish soda bread are also good for catching the juices left on the plate.

Storage and Leftovers

Storing and Reheating Cooked Corned Beef

Cooked corned beef keeps for 3–4 days in the refrigerator or about 2–3 months in the freezer for best quality. Refrigerate it within 2 hours.

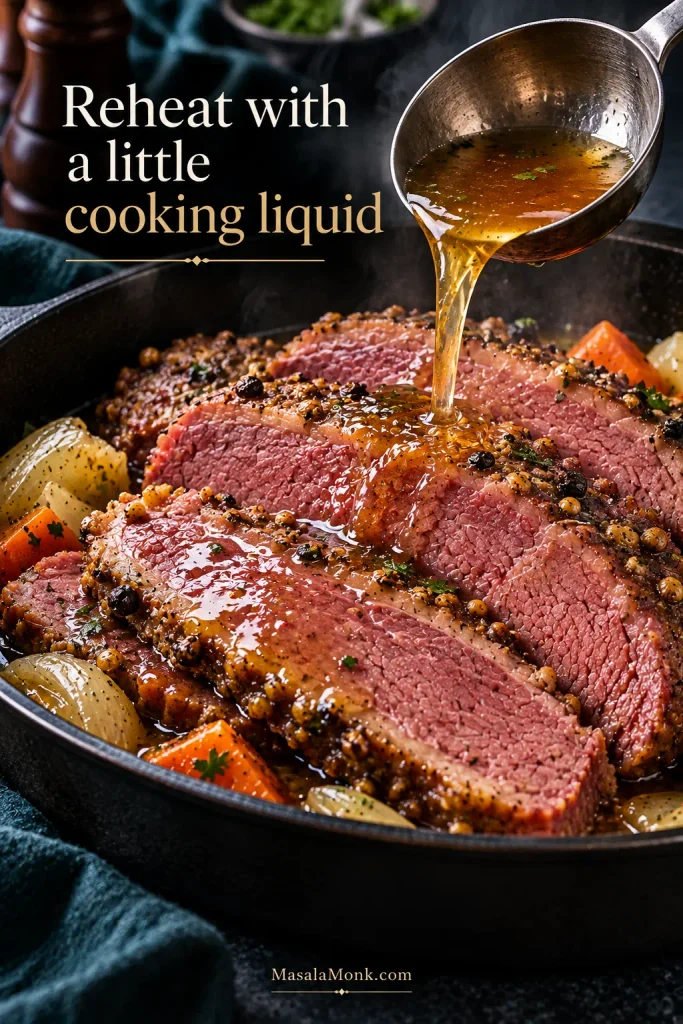
Instead of leaving the brisket whole or slicing all of it thin, divide leftovers into a few smaller, manageable sections and place them in shallow containers with a little strained cooking liquid. Reheat leftovers to 165°F / 74°C; a splash of the cooking liquid helps keep the meat from drying out.

Amber cooking liquid being ladled over sliced leftover corned beef as the meat reheats in a dark pan.
Reheat only the leftover corned beef you plan to serve, adding a small amount of strained cooking liquid as it warms. That keeps the slices glossy without repeatedly heating—and gradually drying out—the entire batch of leftovers.

Save Some for a Reuben

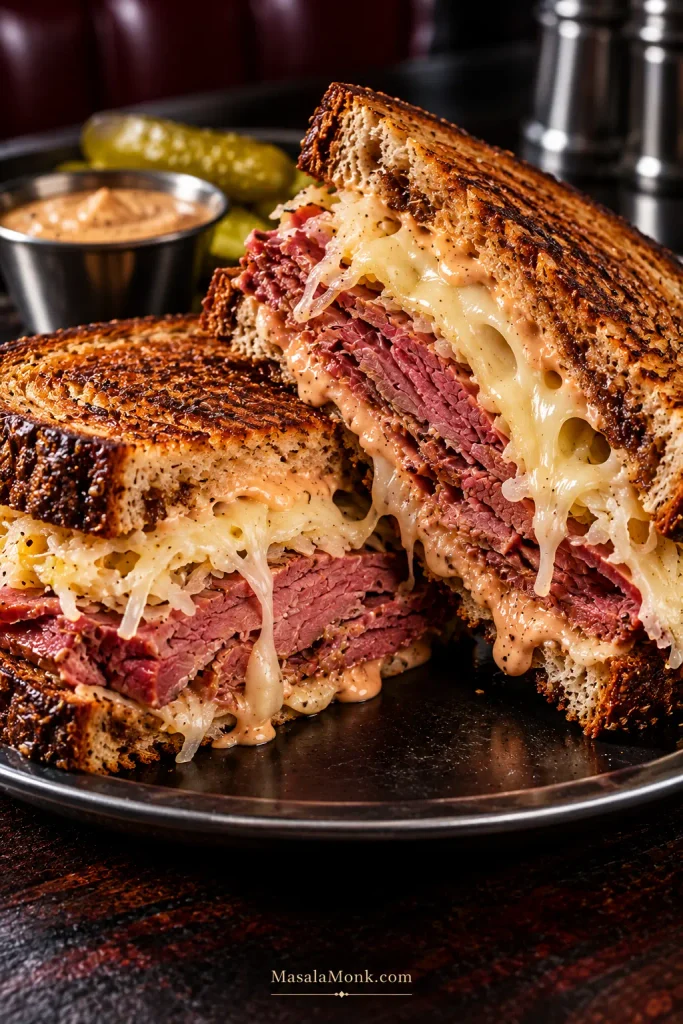
For a crispy Reuben sandwich, keep one of the larger leftover pieces intact. Reheat it gently, then slice it across the grain before adding rye, Swiss, sauerkraut and dressing.

Cut Reuben sandwich filled with sliced corned beef, melted Swiss cheese, sauerkraut and dressing between crisp rye bread.
For a crisper Reuben sandwich, drain the sauerkraut well before assembly. Excess brine can soften the rye before the cheese melts and the outside has time to toast.

Corned Beef Hash

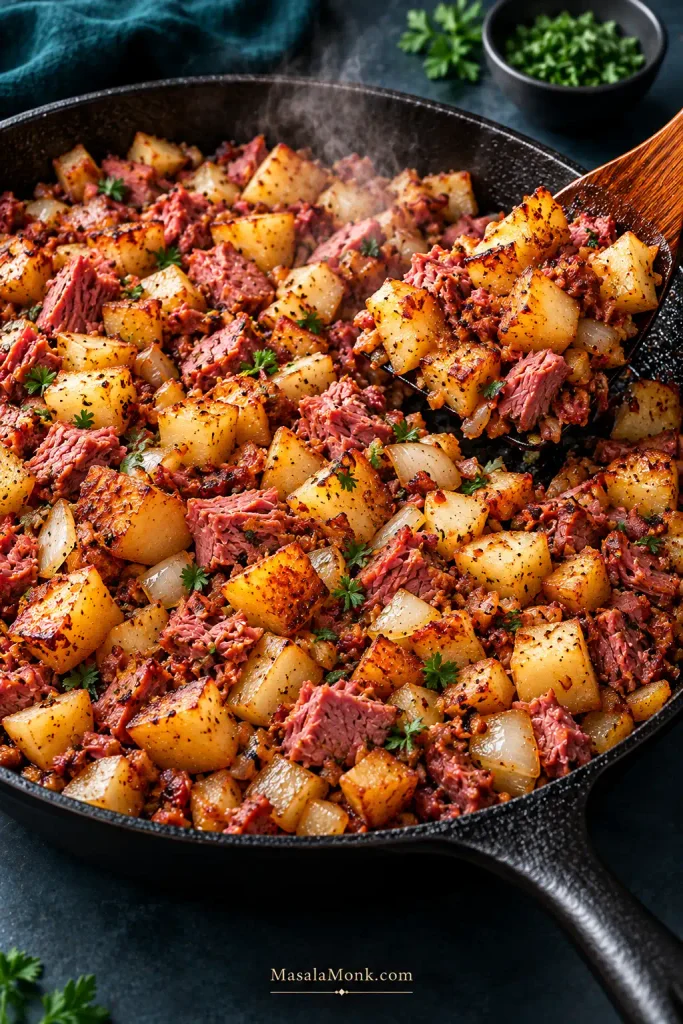
Another easy destination for leftovers is corned beef hash: chop the meat with cooked potatoes and onion, then crisp the mixture in a skillet until the edges brown.

Crisp corned beef hash with browned potatoes, onions and chopped rosy corned beef being turned in a cast-iron skillet.
Corned beef hash needs uninterrupted contact with a hot skillet to develop a crust. Spread the potatoes, onion and chopped beef out, let one side brown, then turn sections rather than constantly stirring everything around the pan.

The brisket does not need to know when the cabbage is ready, and the cabbage does not need to wait for the brisket. Once you stop asking the whole Crock Pot to finish at the same moment, this corned beef-and-cabbage dinner becomes much easier to get right.

Back to Recipe Back to Top

Posted on — Leave a comment

Macaroni Salad Recipe: Creamy, Classic & Easy for Cookouts

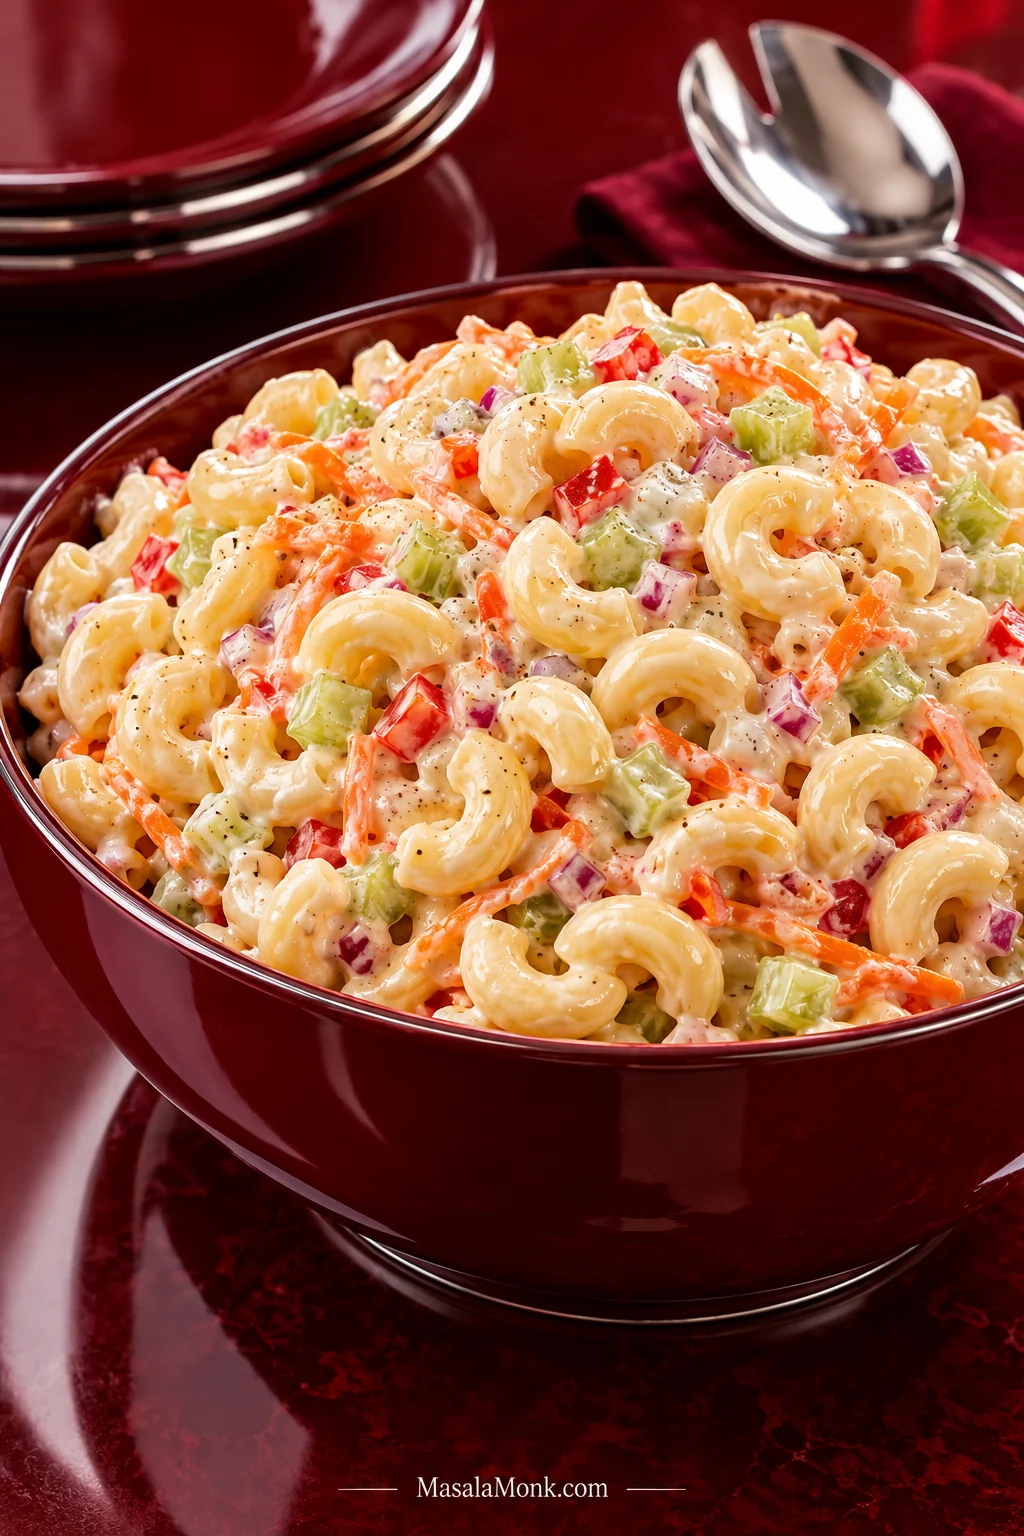
Large burgundy bowl filled with creamy elbow macaroni salad containing finely diced celery, red bell pepper, red onion, and shredded carrot on a glossy red surface.

Macaroni salad has a maddening little habit: it can look perfect in the mixing bowl and feel dry by the time the cookout starts. Get it right, though, and you have tender little elbows, celery and pepper with a bit of snap, sweet pickle, and a cool dressing that tastes creamy without turning heavy.

Make the salad for the bowl you’re actually going to eat. The macaroni will feel firmer once thoroughly chilled, and it will take up some of the dressing while it sits.

Save some of the dressing. Mix the rest into the fresh salad, let everything get properly cold, then use the reserved portion only if the chilled bowl needs it.

Macaroni Salad Recipe

Creamy macaroni salad with tender elbow pasta, finely chopped vegetables, sweet pickle, and a tangy mayonnaise dressing—the classic deli-style balance that works especially well beside cookout food.

Yield
About 8 side servings

Prep
20 minutes

Cook
About 8–10 minutes, depending on pasta

Chill
At least 2 hours

Total
About 2 hours 30 minutes, including chilling

Ingredients

Macaroni

  • 8 oz (225 g) elbow macaroni
  • Water, for boiling
  • Kosher salt, for the cooking water

Vegetables

  • 1 cup (about 100 g) finely diced celery
  • ½ cup (about 60 g) carrot, shredded on the large holes of a box grater
  • ½ cup (about 75 g) finely diced red bell pepper
  • ¼ cup (about 40 g) finely diced red onion
  • 2 hard-boiled eggs, finely chopped, optional

Dressing

  • 1 cup (240 ml) mayonnaise
  • 2 tablespoons (30 ml) white vinegar
  • 2 tablespoons (30 g) sweet pickle relish
  • 1 tablespoon (12 g) granulated sugar
  • 1 teaspoon (5 ml) yellow mustard
  • ½ teaspoon fine salt
  • ¼ teaspoon black pepper

Equipment

  • Large pot
  • Colander
  • Large mixing bowl
  • Box grater

Instructions

  1. Cook the macaroni. Bring a roomy pot of water to a rolling boil and salt it. Add the macaroni and start checking before the package’s full cooking time. Cook until there is no chalky center and the elbows still hold their shape.
  2. Cool and drain. Drain the macaroni and rinse it briefly under cold water. Toss the colander well and let the excess water drain away.
  3. Prep the vegetables. Finely dice the celery, bell pepper, and red onion, and shred the carrot on the large holes of a box grater. If the onion is especially sharp, soak it in cold water for 10–15 minutes, then drain and dry it well.
  4. Make the dressing. Whisk the mayonnaise, white vinegar, sweet relish, sugar, yellow mustard, salt, and pepper until smooth. Reserve ⅓ cup (80 ml) of the finished dressing, cover it, and refrigerate it.
  5. Mix. Combine the cooled macaroni, vegetables, and eggs if using. Fold in the remaining dressing until everything is evenly dressed.
  6. Chill. Check the seasoning, cover, and refrigerate for at least 2 hours.
  7. Finish it chilled. Stir the salad and taste it cold. If it looks dry, fold in the reserved dressing a spoonful at a time; if it is still creamy, leave the reserve unused. Make the final seasoning adjustment now.

Recipe Notes

  • Judge the macaroni by texture rather than the clock; different brands cook at different rates.
  • Drain the pasta and washed vegetables well so excess water does not thin the dressing.

What You’re Looking For in the Finished Salad

A good forkful has tender macaroni wrapped in cool, creamy dressing, with little interruptions of celery and pepper crunch. The elbows stay intact, but there isn’t a firm center waiting in the middle.

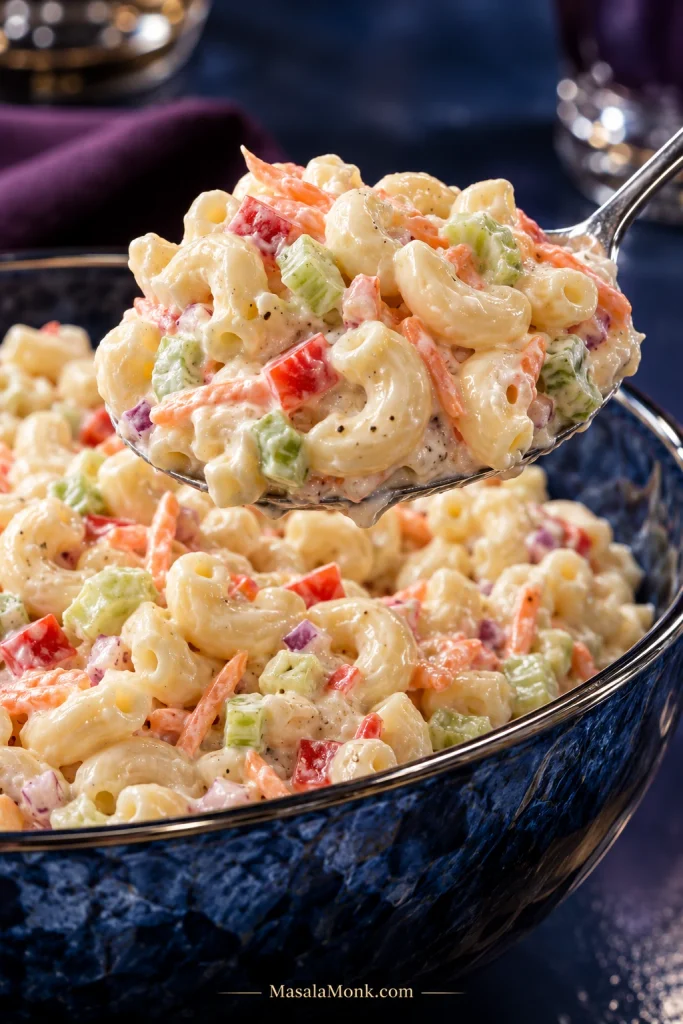
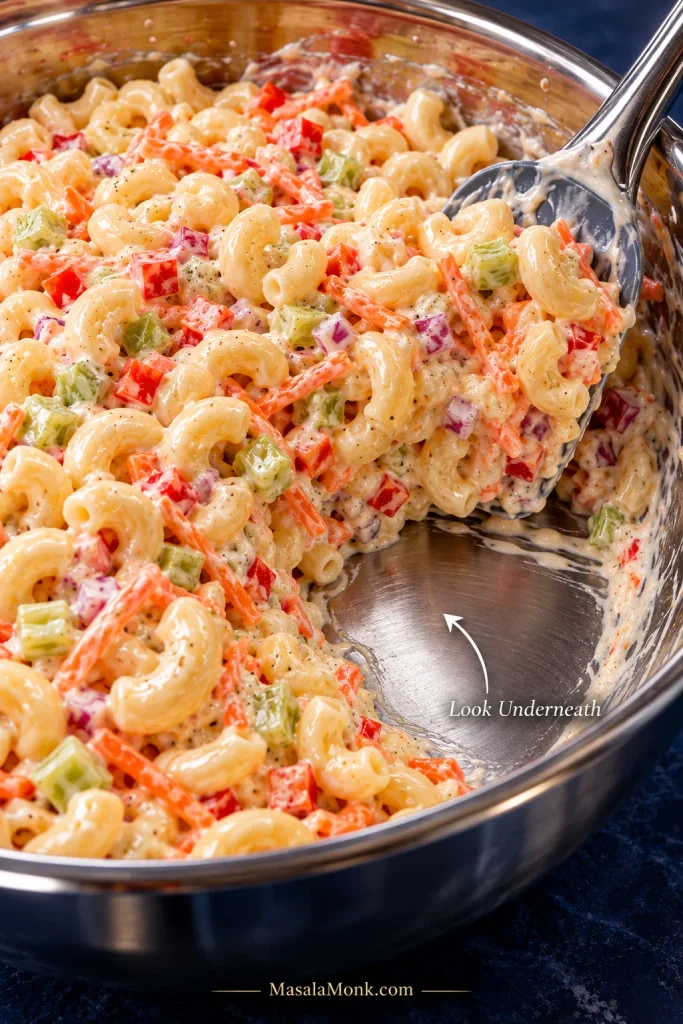
Metal serving spoon lifting creamy elbow macaroni salad with finely diced celery, red bell pepper, red onion, and shredded carrot.
Use the serving spoon as a creaminess check: the dressing should travel with distinct elbows in a glossy coat, with no watery trail left behind.

The vegetables belong in the bite rather than taking it over. Carrot and onion are small enough to spread through the bowl, so you get their sweetness and bite without suddenly meeting a mouthful of either one.

The dressing comes through creamy first, then pickle and tang, with enough sweetness to round the sharper notes. It should make you want another bite, not reach for a glass of water.

Need the exact quantities? Back to the Recipe Card →

Why These Ingredients Work Together

The vegetables aren’t here to turn this into a vegetable-heavy pasta salad. They’re used in small amounts to break up all that soft, creamy macaroni: celery and bell pepper bring the crunch, carrot adds mild sweetness, and onion gives the bowl a little bite.

Sweet relish pulls several jobs together at once—pickle flavor, sweetness, and little bits of texture. White vinegar cuts through the mayonnaise, while yellow mustard keeps the dressing in familiar deli territory.

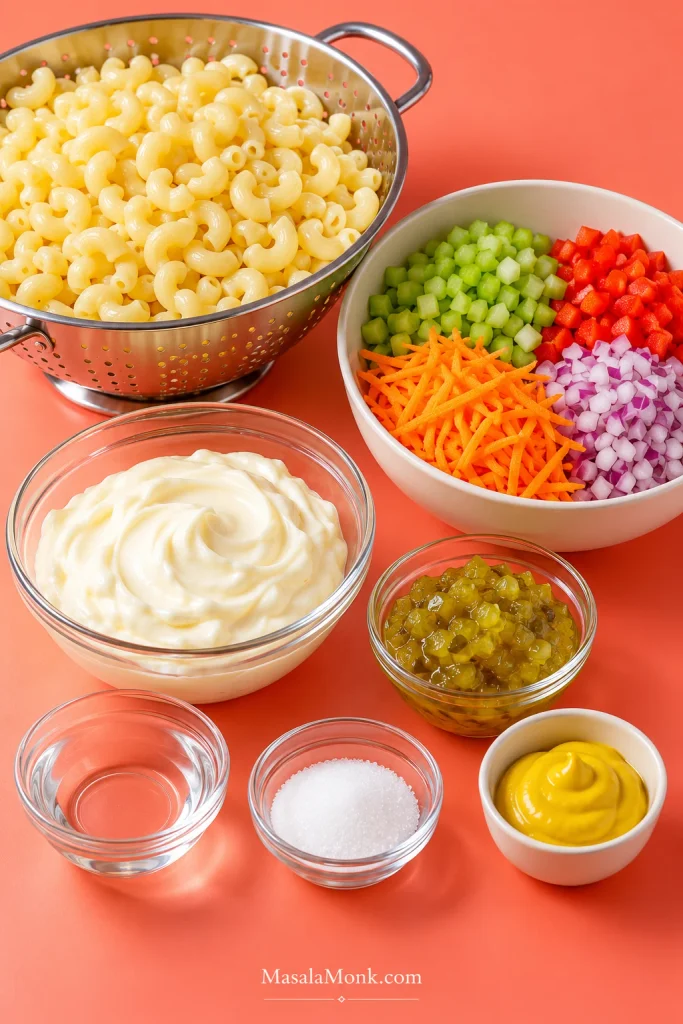
Elbow macaroni, celery, red bell pepper, red onion, shredded carrot, mayonnaise, mustard, relish, vinegar, sugar, and seasonings arranged on a coral surface.
The ingredient spread shows the hierarchy of classic macaroni salad: pasta and mayonnaise build the base, while smaller amounts of vegetables, relish, mustard, and vinegar change the texture and balance rather than the volume.

What Pasta Works Best for Macaroni Salad?

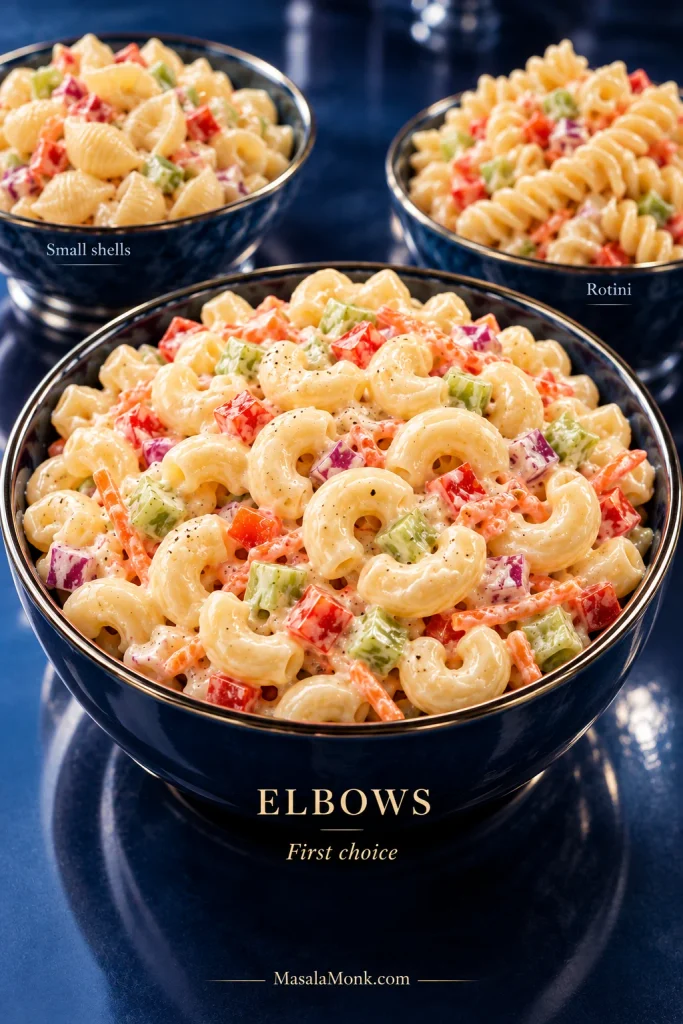
Elbow macaroni is the clear first choice here. Its small curved shape catches the dressing while leaving room for bits of celery, pepper, and pickle in the same bite.

Small shells are a good second choice. Rotini and other ridged shapes can work, but they hold dressing differently, so don’t assume they will need exactly the same amount after chilling.

Three bowls of creamy pasta salad showing elbow macaroni in front with shell pasta and rotini in bowls behind.
Elbows carry dressing around their curves; shells and rotini trap more in pockets and grooves. If you switch shapes, judge the cold salad before assuming it needs the same amount of dressing.

Gluten-free pasta can work too, although some shapes change texture more noticeably after refrigeration. Follow the package directions closely and judge it by how it eats once cooled.

Easy Substitutions

Keep the basic balance intact when you make a swap. Changing the pickle, mustard, or vinegar shifts the character of the dressing more than changing one of the vegetables.

ChangeWhat happens
Swap red onion for green onionThe onion flavor becomes milder.
Replace relish with finely chopped sweet pickleYou keep the sweet-pickle profile with a little more texture.
Try dill pickle instead of sweet relishThe salad becomes sharper and more savory, moving away from the lightly sweet deli-style balance.
Omit the celeryYou lose some of the classic crunch; add a little extra bell pepper if you want to replace some of it.
Replace part of the mayonnaise with sour creamThe dressing becomes tangier and slightly less rich.
Use Dijon instead of yellow mustardThe mustard flavor becomes sharper and a little less classically deli-style.
Use apple cider vinegar instead of white vinegarThe acidity becomes slightly softer and fruitier.
Leave out the hard-boiled eggsThe salad is a little less rich, while the pickle and vegetables come through more clearly.

For an egg-free version, omit the hard-boiled eggs and use eggless mayonnaise in place of regular mayonnaise. If you’re cooking for an allergy, check the labels on the mayonnaise, mustard, relish, and other packaged ingredients individually.

How to Make Macaroni Salad

1. Cook the macaroni for the cold bite

Bring a roomy pot of water to a rolling boil and salt it. Add the macaroni and start checking before the package time is up.

Stop when the elbows are completely tender through the center but still holding their shape. Macaroni feels firmer once thoroughly chilled, so a hard or chalky center now will be even more noticeable later.

2. Cool it and lose the surface water

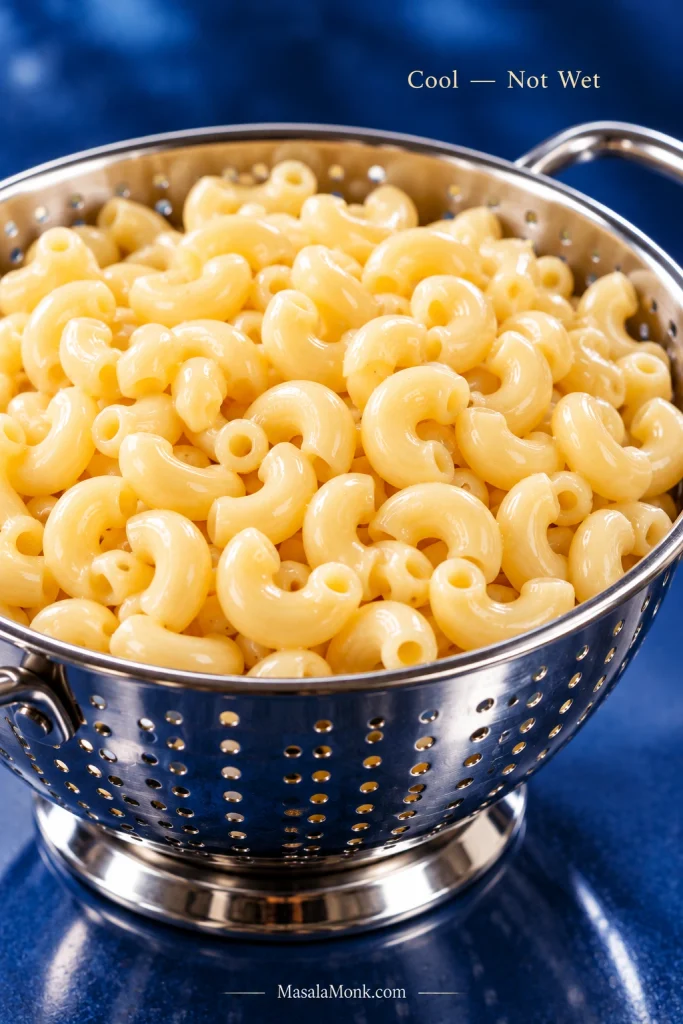
Drain the macaroni and rinse it briefly under cold water. Toss the colander well, then let the excess water drain away before the pasta goes into the mixing bowl.

You aren’t trying to dry the macaroni. You just don’t want enough water clinging to it to send the creamy dressing sliding toward the bottom of the bowl.

Cooked elbow macaroni draining in a polished stainless steel colander against a deep blue background.
Water can hide inside the elbows as well as cling to the outside. Give the colander a few firm tosses before dressing the pasta.

Should you rinse macaroni for macaroni salad? For this recipe, yes. Cooling the pasta quickly slows further softening; just drain it thoroughly before dressing. Some macaroni salads dress the pasta warm instead, but this one is built around cooling it first.

3. Keep the vegetables small and dry

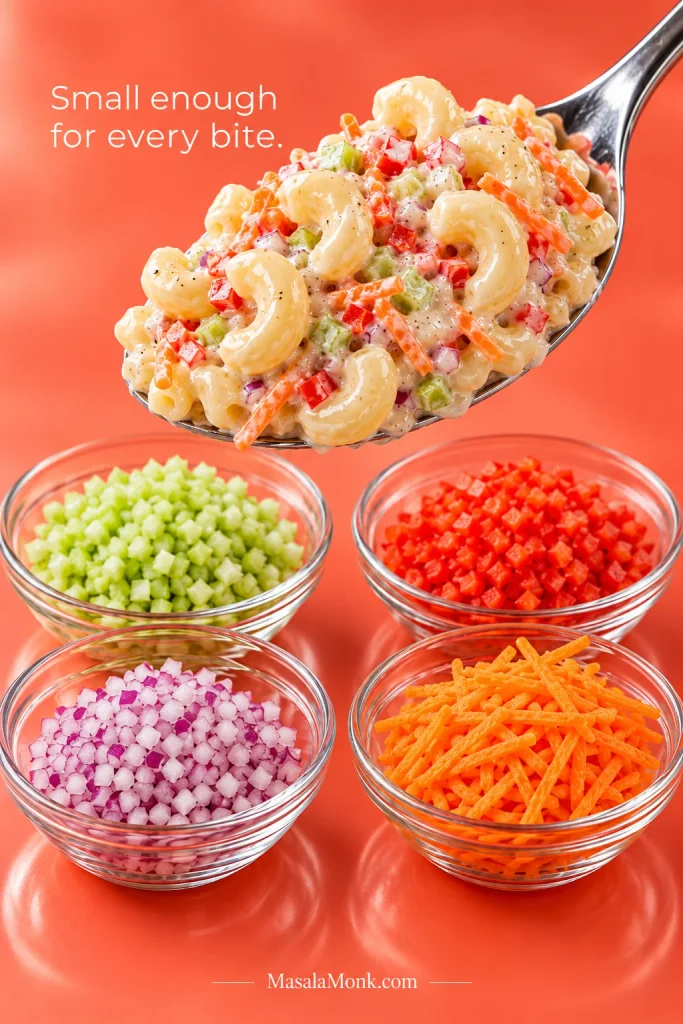
Finely dice the celery, bell pepper, and red onion, and shred the carrot on the large holes of a box grater. Pat away obvious water left from washing.

A celery piece should not be so large that it takes over the entire forkful. Smaller pieces spread that crunch through the salad instead.

Spoonful of creamy elbow macaroni salad above bowls of finely diced celery, red bell pepper, red onion, and shredded carrot.
The cuts have different jobs: celery, pepper, and onion stay finely diced for small bursts of crunch, while shredded carrot spreads sweetness and color through more bites.

If the onion is particularly sharp, give it 10–15 minutes in cold water, then drain and dry it well.

4. Whisk the dressing and save some

Whisk the mayonnaise, white vinegar, sweet relish, sugar, yellow mustard, salt, and black pepper until smooth.

The dressing should taste a little stronger on its own than you want the finished salad to taste. The macaroni and vegetables soften the sweetness, salt, and acidity once everything is together.

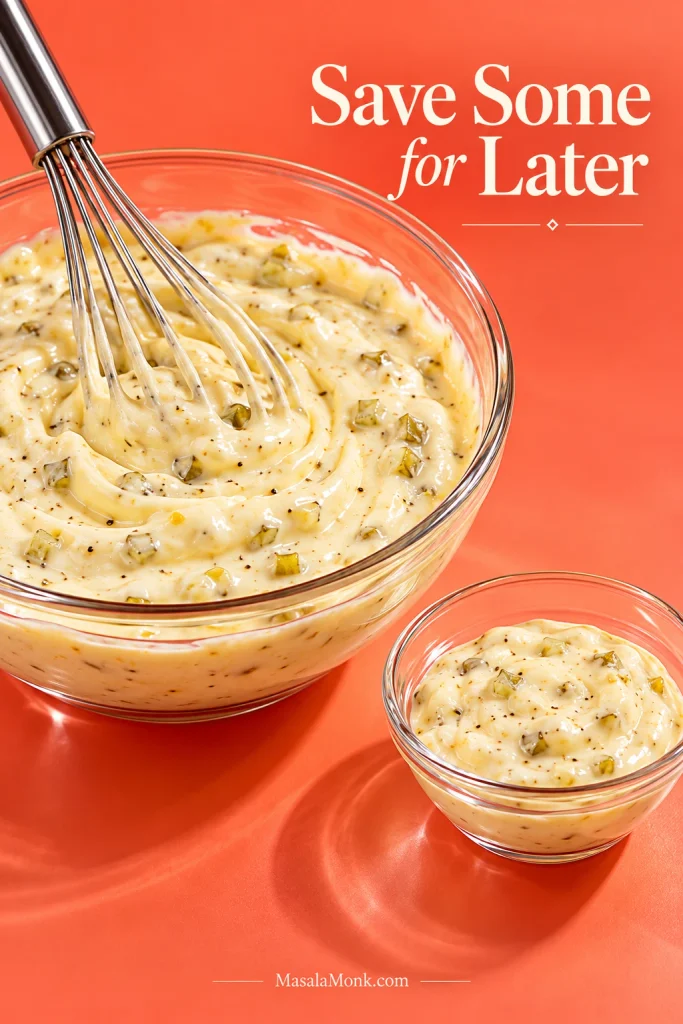
Measure out ⅓ cup (80 ml) of the finished dressing, cover it, and refrigerate it. Fold the rest into the salad.

Large glass bowl of creamy relish and mustard dressing beside a smaller glass bowl holding a reserved portion.
Reserved dressing is insurance, not a required second pour. Holding some back keeps the fresh salad from starting too wet and leaves room to respond to its cold texture later.

5. Fold the salad together

Combine the cooled macaroni, vegetables, and eggs if using in a large bowl, then fold in the dressing.

Look at the bottom of the bowl. The dressing belongs on the elbows, not in a loose puddle underneath them. If you see pooling, give everything another thorough fold before adding anything else.

Stainless steel bowl of macaroni salad with a metal spoon pushing the salad aside to expose the bowl bottom without a watery puddle.
A creamy film on the bowl is normal. However, liquid that moves independently when the salad is shifted means moisture is collecting underneath instead of clinging to the macaroni.

Seeing a watery layer? Jump to the water-pooling fix →

6. Check the seasoning, then chill

Check the seasoning before the bowl goes into the refrigerator. It should taste well seasoned, with enough acidity to keep the mayonnaise from feeling heavy. Make only a small correction now; the flavor and texture will read differently after chilling.

Cover and refrigerate for at least 2 hours.

7. Finish it chilled

Once the salad is thoroughly chilled, stir it and take a forkful. This is the bite that matters. Make any final texture and seasoning adjustment now.

How to Keep Macaroni Salad Creamy After Chilling

To keep macaroni salad creamy after chilling, reserve some of the dressing, stir the chilled salad first, and add the reserved portion only if the pasta looks dry. Macaroni continues taking up moisture as it sits in the refrigerator, so the bowl can look different several hours later than it did when freshly mixed.

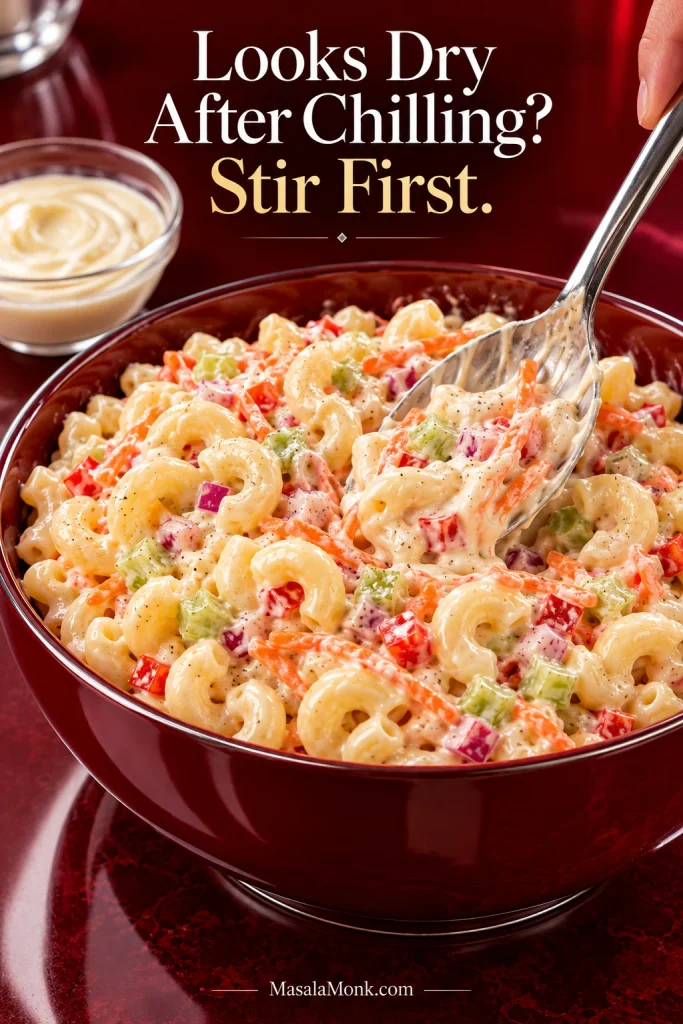
Creamy macaroni salad being stirred with a metal spoon, with a small container of reserved dressing nearby.
Stirring redistributes the cold dressing before you decide whether the bowl actually needs more.
After chillingWhat to do
Still creamyLeave it alone. There is no reason to use the reserved dressing just because it is there.
Looks a little dryStir first, then fold in a little reserved dressing if needed.
Noticeably drier the next dayAdd reserved dressing gradually until the elbows look creamy again.

Making it ahead? Jump to Make-Ahead Macaroni Salad →

The Deli-Style Bite

Tender elbows, finely chopped vegetables, sweet pickle, yellow mustard, and a creamy dressing with a clear tang put this salad squarely in familiar deli territory. The sugar rounds out the vinegar and pickle rather than taking over the bowl.

Most importantly, don’t bury the pasta under extras. The appeal is the way soft macaroni, little bits of crunch, and that sweet-and-sharp dressing land together.

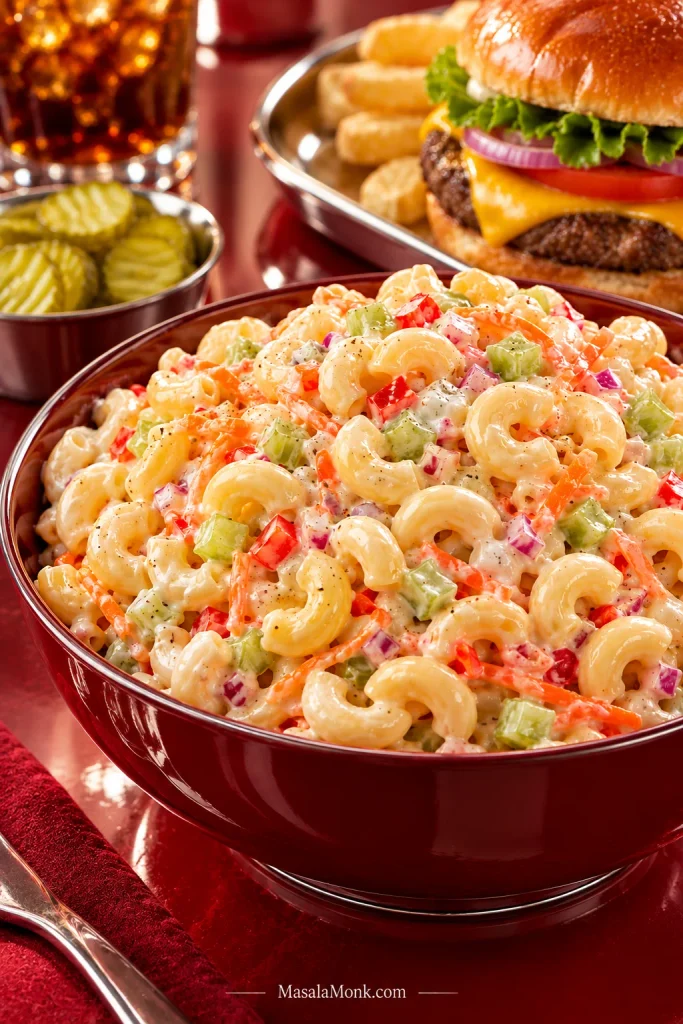
Burgundy bowl of creamy macaroni salad in front of a cheeseburger, sliced pickles, buns, and an iced drink.
Deli-style macaroni salad works especially well beside hot, salty, or charred food. Its cold creaminess softens the plate, while pickle and vinegar keep the contrast bright.

Macaroni Salad Troubleshooting

Start with the symptom before changing the dressing. Dry elbows, free liquid, dull seasoning, mushy pasta, and overpowering onion need different corrections.

Water pooling underneath is a moisture problem

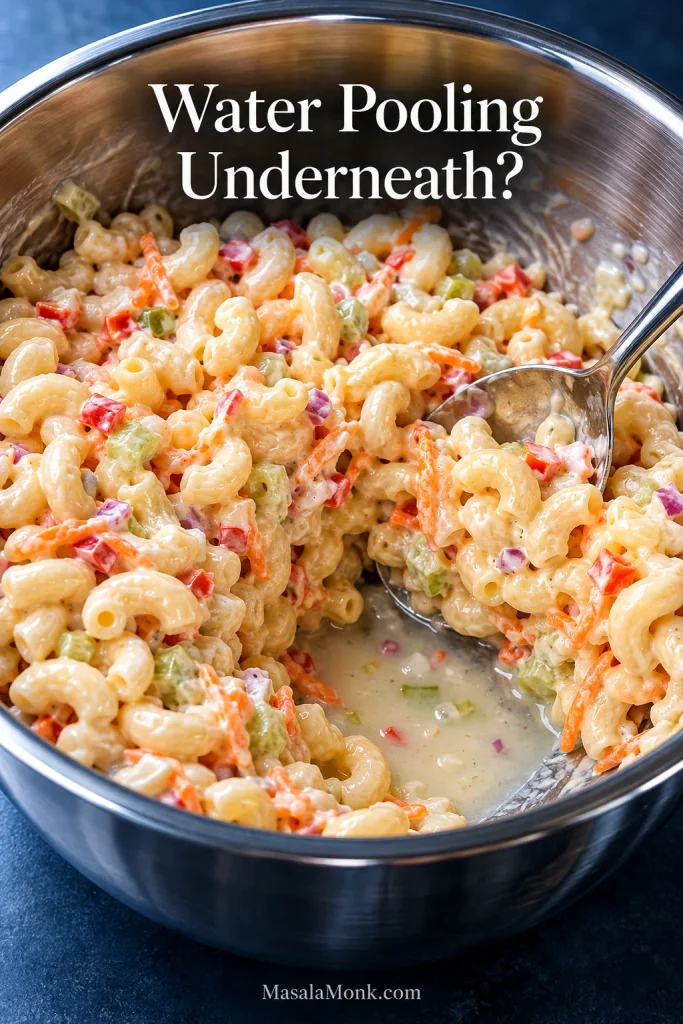
If liquid moves separately at the bottom of the bowl, treat it as excess moisture rather than ordinary dressing absorption. Fold the salad thoroughly first; if a watery layer still remains, spoon off a little before you adjust the seasoning.

Macaroni salad in a stainless steel bowl pushed aside with a spoon to reveal a thin pool of pale watery liquid underneath.
This is the failure state: liquid is moving separately from the creamy coating.

Other common macaroni salad problems

ProblemLikely causeFix
Still dry after the reserved dressing is goneThe pasta has taken up more moisture than expected.Mix a spoonful of mayonnaise with a small amount of the same vinegar used in the dressing, then fold it in gradually.
Dry immediately after mixingThere isn’t enough dressing on the pasta.Use a little of the reserved dressing now rather than waiting until after chilling.
Creamy but dull after chillingThe seasoning isn’t coming through strongly enough.Start with a small pinch of salt, stir, and check again.
Too sharp or vinegaryThe acid is dominating the dressing.Fold in a little mayonnaise to soften it.
Too sweetThe sugar and relish are dominating.Start with ½ teaspoon of the same vinegar used in the dressing and a small pinch of salt; stir before adding more.
Mushy macaroniThe pasta cooked too far or stayed hot too long.Next time, stop once it is tender through the center but still holding its shape, then cool it promptly.
Onion takes overThe pieces are too large or the onion is particularly strong.Dice it more finely or mellow it briefly in cold water.

Need the base recipe? Back to the Recipe Card →

Make-Ahead Macaroni Salad

You can make this macaroni salad one day ahead. Make the salad, cover the reserved dressing separately, and refrigerate both. Give yourself five minutes before serving the next day for a stir and any final adjustment.

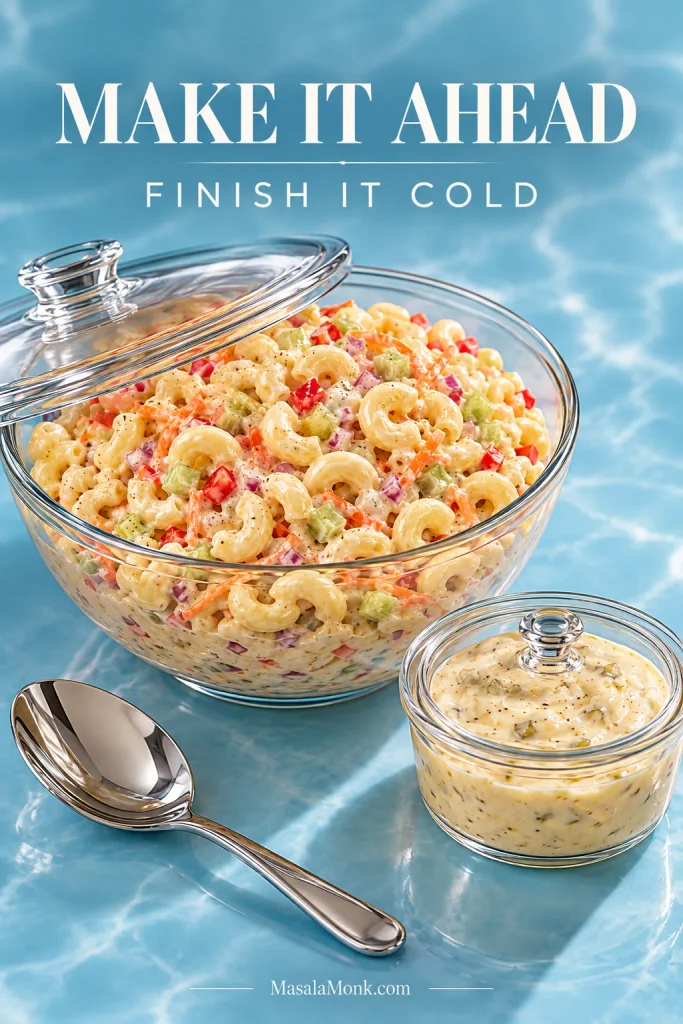
Partly covered glass bowl of macaroni salad beside a small covered container of reserved dressing and a polished serving spoon on a blue surface.
The advantage of make-ahead macaroni salad is delaying the final texture decision. Keep the reserve separate, chill the bowl fully, and let the cold pasta tell you whether anything needs changing.

If you’re planning several sides in advance, this classic potato salad can be made ahead too.

That’s the useful part of making macaroni salad ahead: the chopping, cooking, mixing, and washing up are already behind you while everyone else is setting the table.

How Much Macaroni Salad Do You Need for a Crowd?

Approx. side servingsStarting point
4½ batch
81 batch
162 batches
243 batches

Those are side portions, not a promise about how much every person will eat. A cookout with several salads and sides can stretch a batch further than a meal where macaroni salad is one of only two accompaniments.

Bring It to the Cookout

Macaroni salad is at home beside grilled meat, burgers, sandwiches, or anything smoky and charred. The cold, creamy salad gives the plate somewhere softer to land.

Before the bowl goes out, give it one last stir. The elbows should separate easily, with dressing clinging to them rather than water collecting underneath.

Keep it cold. The FDA’s guidance for eating outdoors recommends keeping cold perishable foods at 40°F (4°C) or below. Do not leave macaroni salad at room temperature for more than 2 hours, or more than 1 hour when temperatures are above 90°F (32°C).

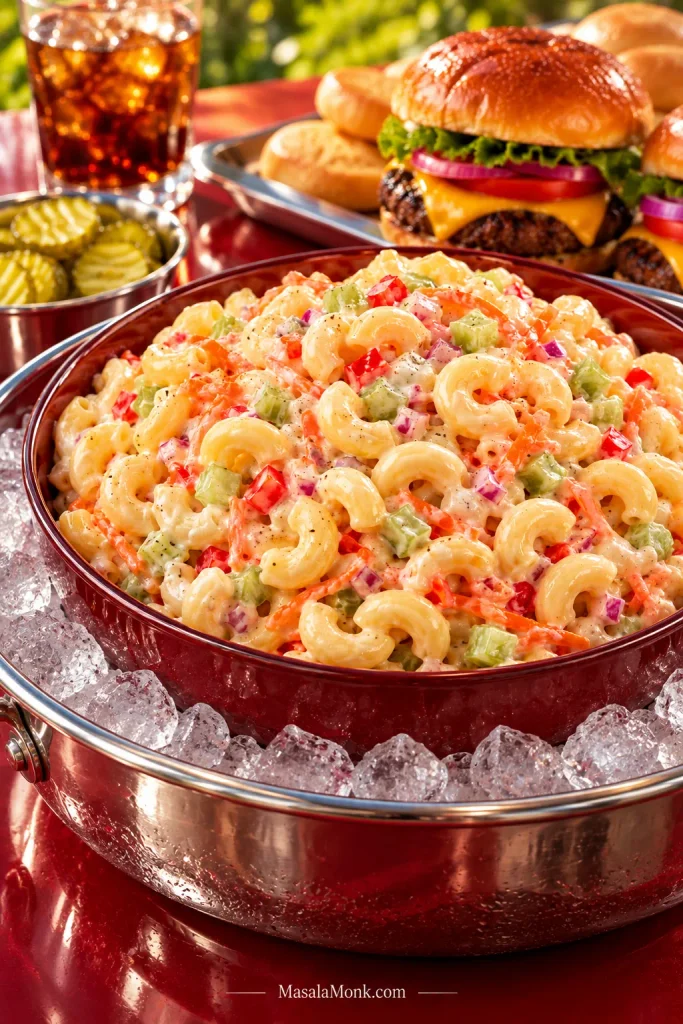
Burgundy bowl of creamy macaroni salad nested inside a larger metal bowl filled with ice, with burgers, pickles, buns, and an iced drink behind it.
At a cookout, keep the ice around the serving bowl rather than inside the food. Nesting the bowl securely over ice keeps meltwater out while the macaroni salad stays cold and easy to serve.

Storage

Macaroni salad keeps for about 3–4 days in the refrigerator. Store leftovers covered and chilled. For general leftover-safety guidance, see the USDA recommendations for refrigerated leftovers.

The salad is at its best earlier in that window, while the vegetables still have some snap and the pasta hasn’t absorbed too much of the dressing.

Freezing the finished salad isn’t worth it. The mayonnaise dressing can separate after thawing, while the pasta and vegetables lose the textures that make the salad good in the first place.

Posted on — Leave a comment

Broccoli Salad Recipe: Crunchy, Creamy & Easy

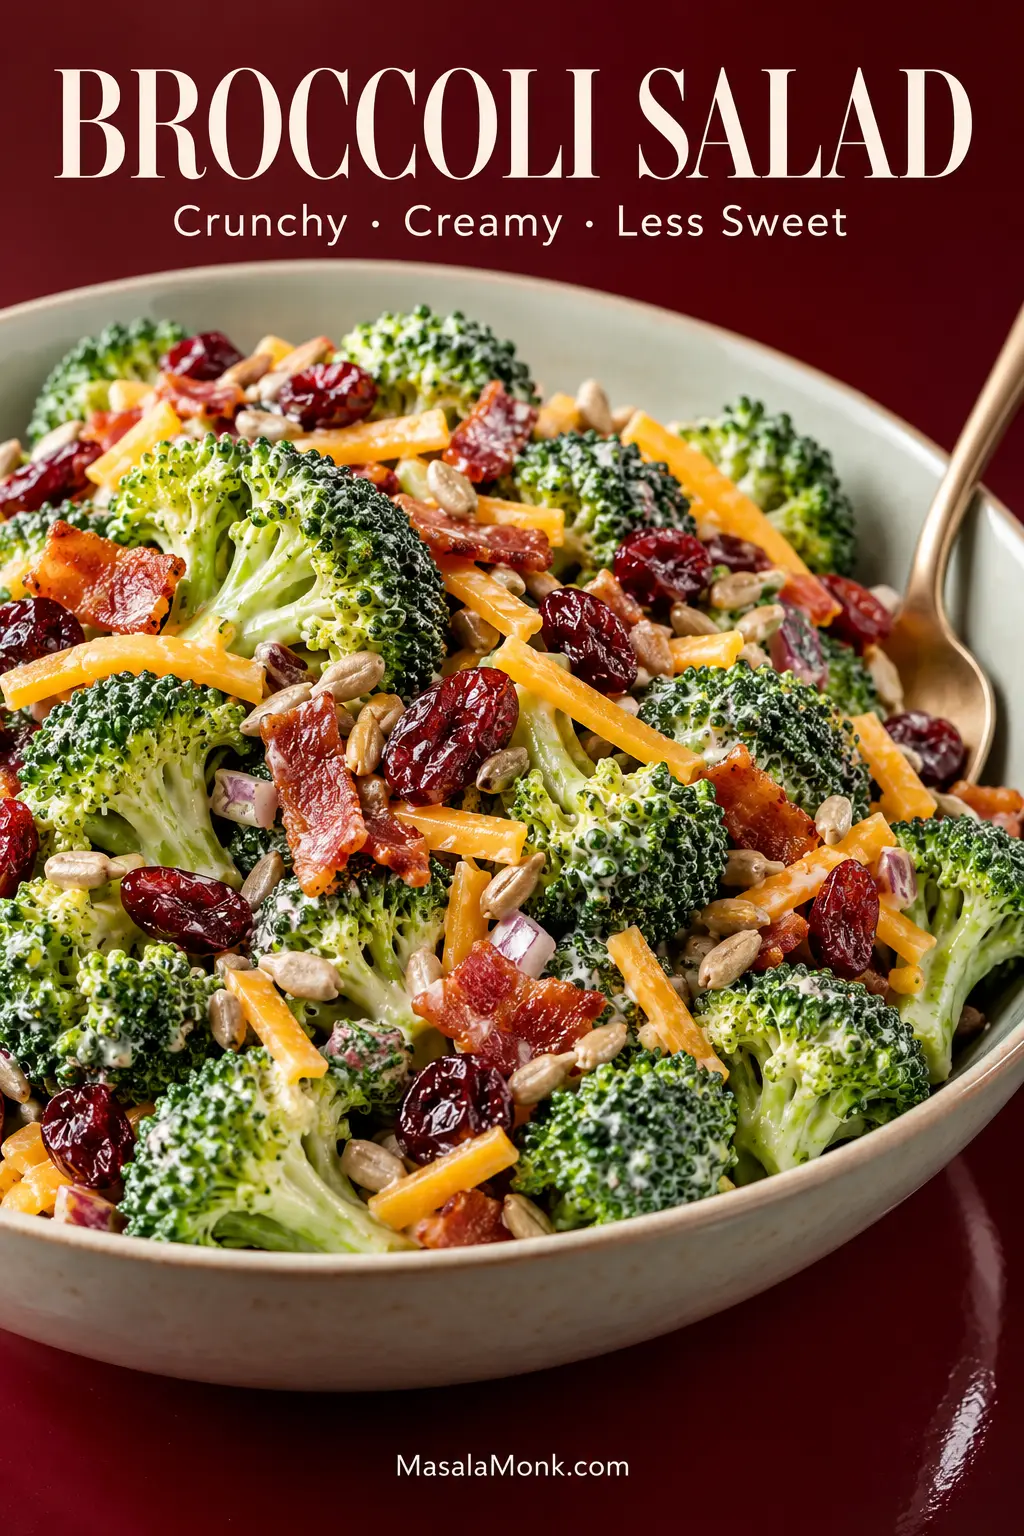
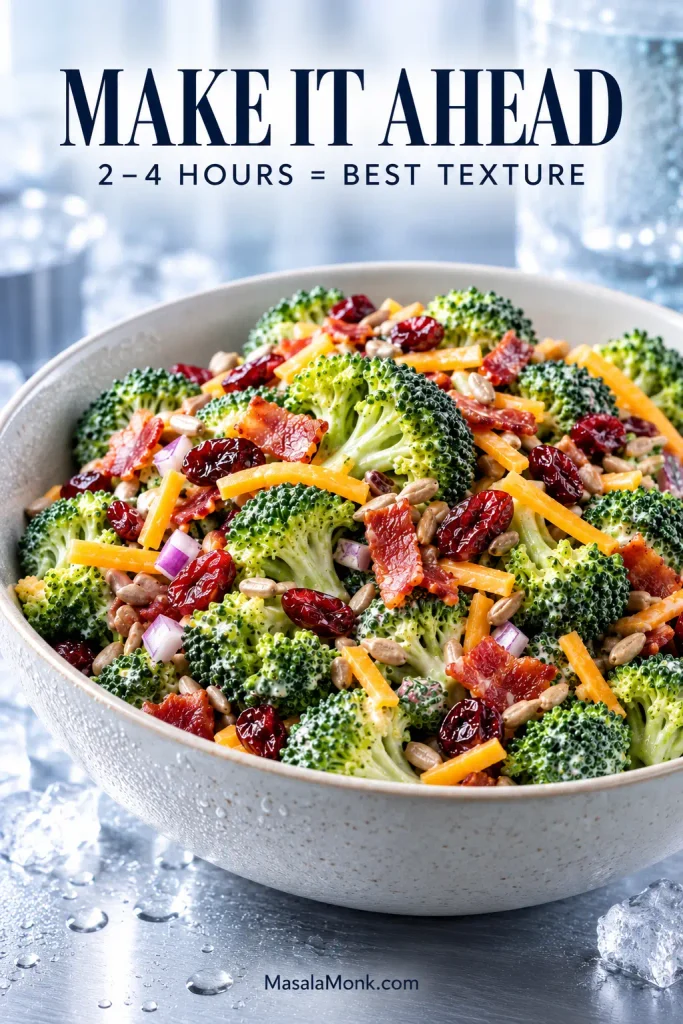
Creamy broccoli salad in a shallow bowl with green broccoli florets, crisp bacon, cheddar, dried cranberries, sunflower seeds and red onion on a deep burgundy background.

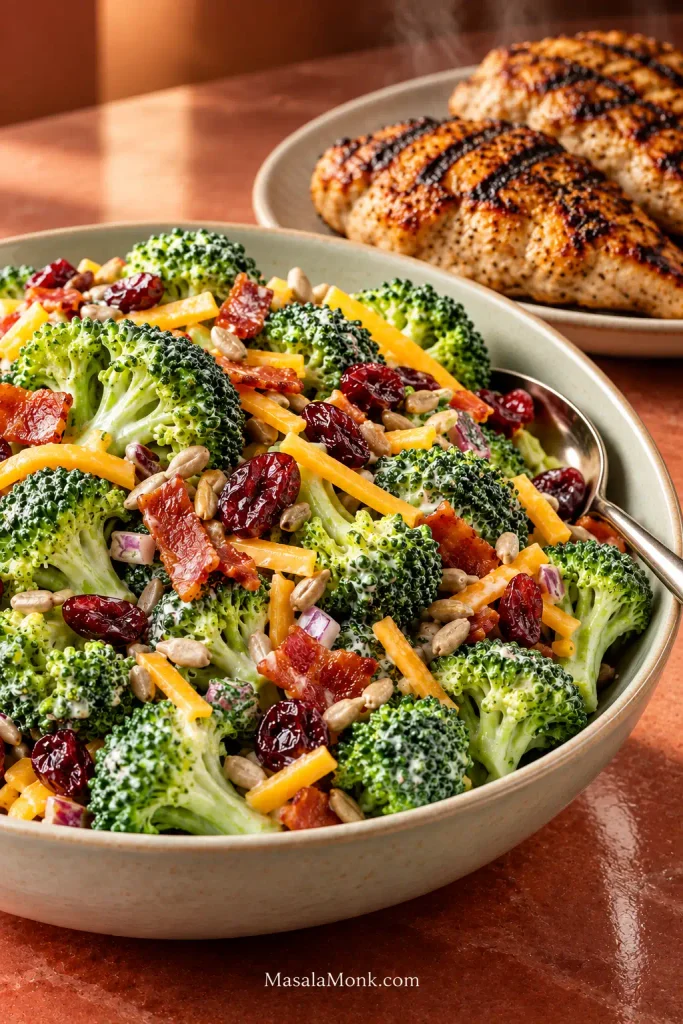
The best forkful of broccoli salad gives you cold broccoli with some snap, creamy dressing caught between the florets, smoky bacon, sharp cheddar, a little sweet-tart cranberry, and something salty and crisp at the end.

This broccoli salad recipe keeps that familiar cookout combination but pulls back the sweetness and lets the broccoli stay in charge. The dressing is creamy and tangy, with just enough honey to round out the cider vinegar rather than turn the salad sweet.

It’s especially good straight from the refrigerator beside something hot from the grill. Raw broccoli gives you the firmest bite, while a quick blanch makes it more tender. Both work; choose the texture you actually enjoy eating.

Dry the broccoli. Don’t drown it. Save some crunch for the finish.

What Makes This Broccoli Salad Work

The broccoli should still taste like broccoli. Bacon and cheddar bring plenty of richness, so the dressing needs enough vinegar and Dijon to keep the salad from feeling heavy. The cranberries give you occasional sweet-tart bites instead of making the whole salad sugary.

Bacon does two different jobs depending on when it goes in. Mixed through the salad, it gives the dressing and broccoli a smoky, savory edge. The portion added at the end stays crisp enough to notice. The sunflower seeds bring another kind of contrast without competing with the broccoli.

A good forkful shouldn’t simply taste creamy. You might get cool broccoli first, then a bit of cheddar or bacon, a cranberry, and finally the salty crackle of a sunflower seed. Enough dressing makes those ingredients belong together; too much makes every bite taste and feel the same.

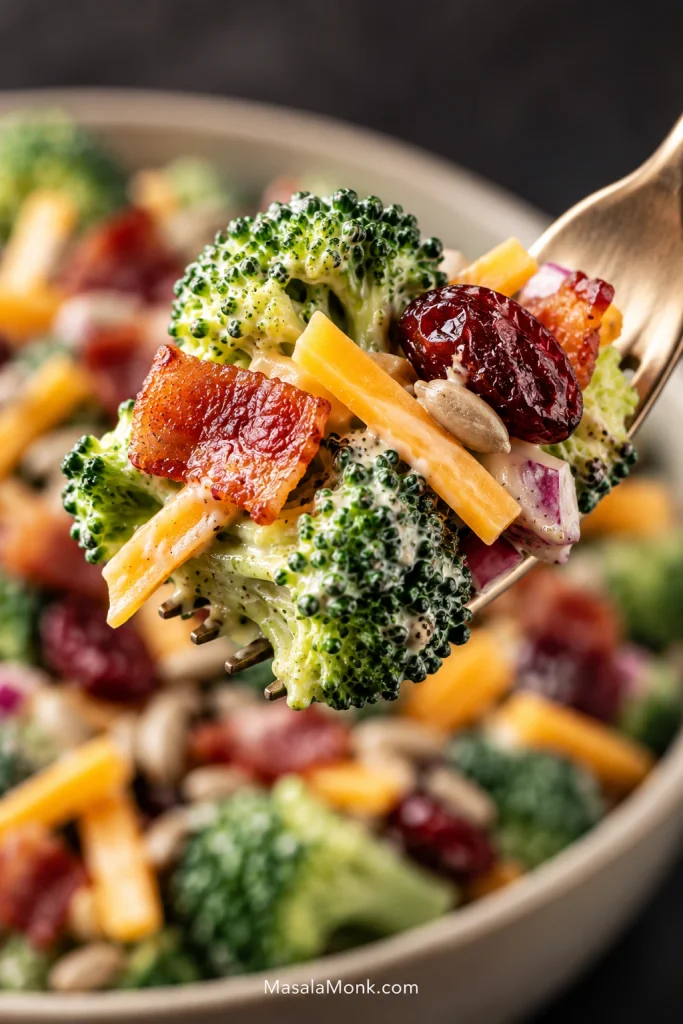
Close-up forkful of broccoli salad with a creamy broccoli floret, bacon, cheddar, dried cranberry, sunflower seed and red onion above the serving bowl.
The best forkful combines crown and stem. Its branching crown catches dressing and smaller toppings, while a short piece of stem adds a cleaner snap; together, they give the bite more contrast than either oversized florets or finely chopped broccoli.

Ingredients

The recipe card below has the exact amounts. Before you get there, these are the ingredient choices that make the biggest difference to the finished salad.

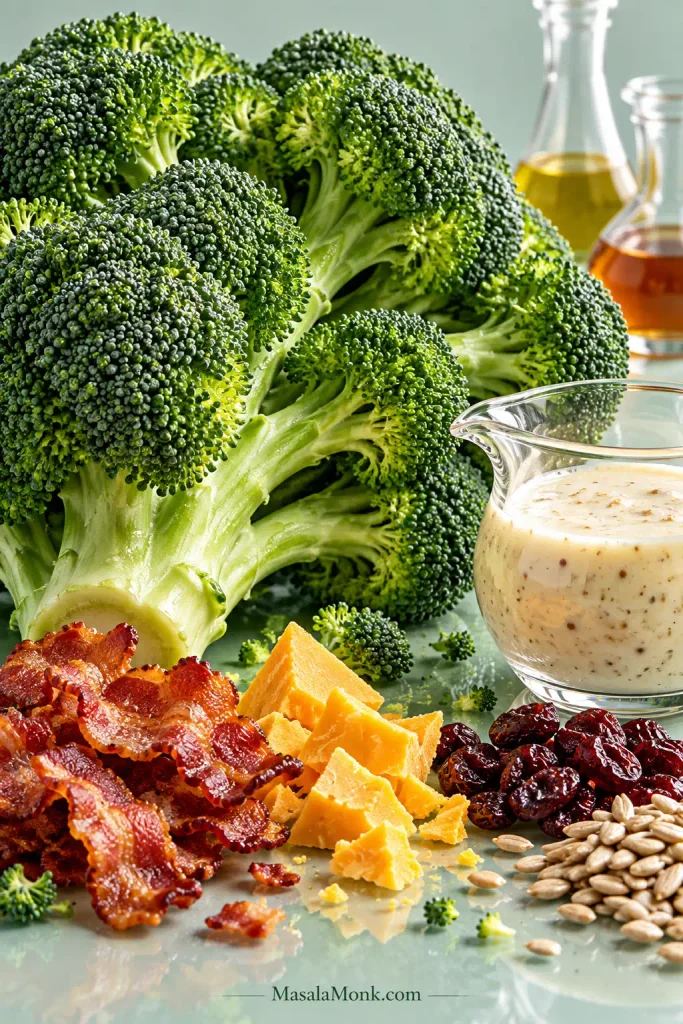
Fresh broccoli arranged with crisp bacon, sharp cheddar, dried cranberries, sunflower seeds and creamy broccoli salad dressing on a pale green surface.
The best mix-ins are sized to travel with the broccoli rather than fall away from it. Finely chopped onion spreads its sharpness through the bowl, while small pieces of cheddar, cranberries and sunflower seeds stay noticeable without competing with the florets.
  • Broccoli: Choose firm broccoli with tightly packed florets. You’ll need about 450 g / 1 lb usable florets. Smaller pieces are easier to eat raw and give the dressing more surface to cling to.
  • Bacon: Cook it until genuinely crisp. If you’re making only a few strips, MasalaMonk’s air fryer bacon guide is an easy way to get them crisp before cooling and chopping. Some goes into the salad for smoky flavor; some stays out until serving so the crispness is still noticeable.
  • Sharp cheddar: Use a cheese with enough flavor to stand up to the dressing. Small cubes give distinct bites; coarse shreds distribute the cheese more evenly.
  • Dried cranberries: They provide the sweet-tart note, but the amount is restrained because this version is meant to stay broccoli-forward rather than sugary.
  • Unsalted sunflower seeds: Unsalted seeds let you control the final seasoning. Toast them if you want a nuttier flavor.
  • Mayonnaise + Greek yogurt: Mayonnaise gives the dressing body, while plain unsweetened Greek yogurt keeps it lighter and tangier. Use a mayonnaise you already like; MasalaMonk’s homemade mayonnaise guide works if you prefer making your own.
  • Apple cider vinegar + honey + Dijon: These control the balance: enough acidity to keep the dressing lively, restrained sweetness to round it out, and Dijon for extra bite.

Raw or Blanched Broccoli?

Raw broccoli gives this salad its firmest, freshest texture, so that’s the default here. If raw broccoli is the part that usually puts you off, blanch it—but barely.

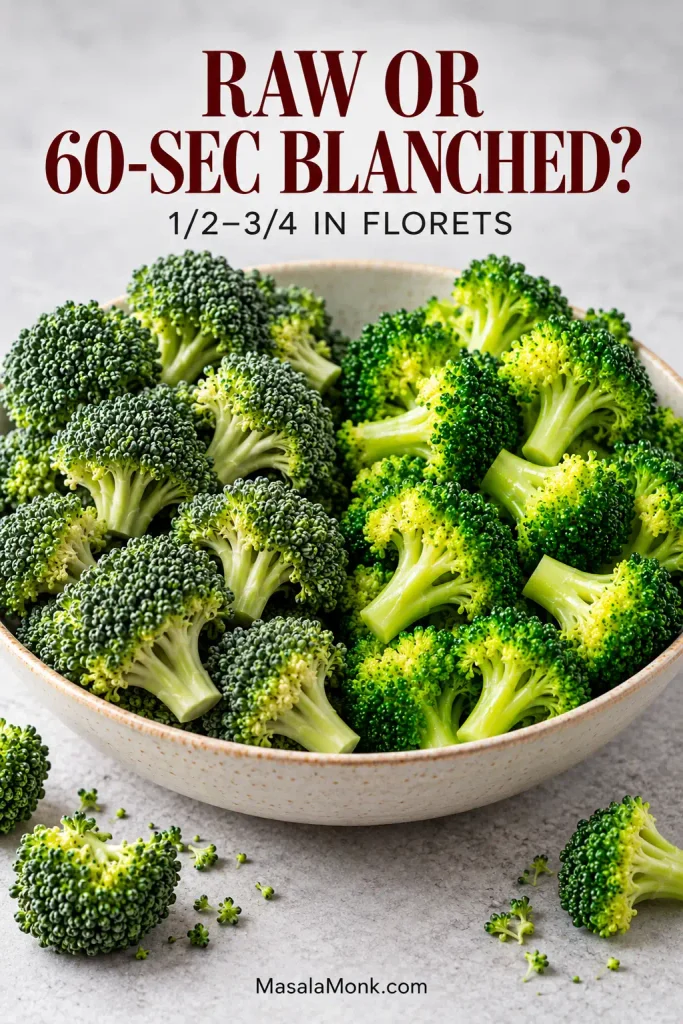
Raw dark-green broccoli florets beside brighter briefly blanched florets, with pieces shown at roughly half- to three-quarter-inch size.
Raw vs blanched broccoli is really a choice about resistance. Raw florets stay firmer from crown to stem, whereas a brief blanch softens the exterior first while the center keeps some snap; therefore, even a short cook changes the way the salad chews without making the broccoli soft.

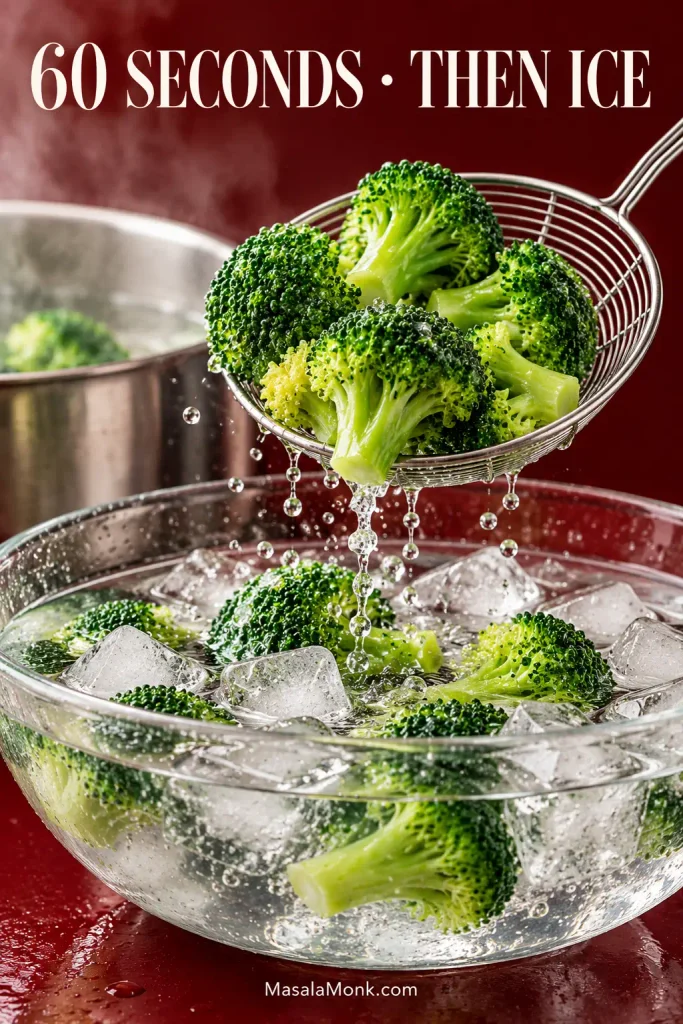
About 60 seconds in boiling water takes away some of the raw edge without cooking the broccoli through. Transfer the florets immediately to ice water; once they’re cold, drain and dry them very well.

Bright green broccoli florets being transferred with a wire skimmer into a clear bowl filled with ice water.
The ice bath does more than protect broccoli’s bright color. More importantly, it removes residual heat that would otherwise keep softening the florets after they leave the pot, giving you much tighter control over the final texture.
MethodWhat you’ll notice
RawFirmest texture and freshest broccoli flavor
60-second blanchMore tender and less raw-tasting, while still holding its shape

Pick up a piece after blanching. It should bend a little more easily than raw broccoli but still resist your bite. If it’s soft all the way through, it cooked too long.

Fresh broccoli is strongly preferred here. Frozen broccoli tends to be softer and wetter after thawing, so it won’t give this salad the same crisp structure.

Broccoli Salad Recipe

Cold broccoli coated—not buried—in a tangy creamy dressing, with crisp bacon, sharp cheddar, sweet-tart cranberries, red onion and sunflower seeds in every scoop.

Yield
8 side servings

Prep
20–25 minutes

Cook
About 10 minutes

Chill
1 hour minimum
2–4 hours ideal

Total
About 1½ hours

Equipment

  • Large mixing bowl
  • Small bowl and whisk
  • Chef’s knife and cutting board
  • Skillet for the bacon
  • Salad spinner or clean kitchen towels

Ingredients

Salad

  • 450 g / 1 lb broccoli florets, about 5–6 cups chopped
  • 70 g / ½ cup finely chopped red onion
  • 100 g / 3½ oz raw bacon, cooked until crisp; reserve about one-quarter of the cooked bacon for finishing
  • 85 g / 3 oz sharp cheddar cheese, cut into small cubes or coarsely shredded
  • 50 g / ⅓ cup dried cranberries
  • 35 g / ¼ cup unsalted hulled sunflower seeds, toasted if you like; reserve about 1 tbsp for finishing

Dressing

  • 120 g / ½ cup mayonnaise
  • 80 g / ⅓ cup plain unsweetened Greek yogurt
  • 30 ml / 2 tbsp apple cider vinegar
  • 20 g / 1 tbsp honey
  • 10 g / 2 tsp Dijon mustard
  • ½ tsp fine salt, then more if needed after chilling
  • ¼ tsp freshly ground black pepper

Method

Prep the Broccoli & Bacon

  1. Prepare the broccoli. Wash the broccoli, then cut the florets into pieces about ½ to ¾ inch across. Peel any tough outer stem and dice the tender center into smaller pieces. For the blanched version, cook the florets in boiling salted water for about 60 seconds, transfer immediately to ice water, then drain thoroughly once cold.
  2. Dry it well. After washing—or after draining the blanched broccoli—use a salad spinner or clean towels to remove the surface water.
  3. Soften the onion, if needed. If your red onion is especially sharp, soak the chopped onion in cold water for 10 minutes. Drain and dry it well.
  4. Cook the bacon. Cook over medium heat until browned and crisp, about 8–12 minutes depending on thickness. Drain, cool and chop. Reserve about one-quarter for serving.
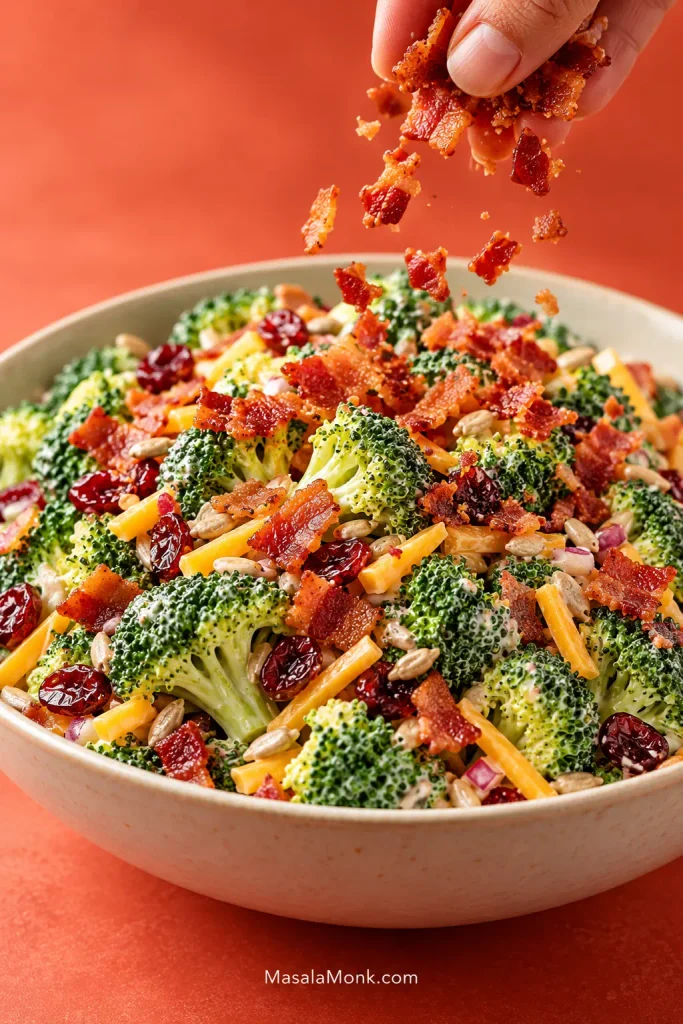
Hand sprinkling crisp bacon pieces over broccoli salad with cheddar, dried cranberries, sunflower seeds and creamy dressing.
Let the bacon drain and cool before it meets the salad. That keeps residual heat and surface fat out of the dressing, while the portion held back for serving stays noticeably crisper.

Mix, Dress & Chill

  1. Make the dressing. Whisk the mayonnaise, Greek yogurt, apple cider vinegar, honey, Dijon mustard, salt and black pepper until smooth. Taste it. It should be creamy and distinctly tangy, with enough sweetness to soften the vinegar without hiding it.
  2. Build the salad. Put the broccoli, onion, most of the bacon, cheddar, cranberries and most of the sunflower seeds in a large bowl.
  3. Dress gradually. Start with about three-quarters of the dressing and toss thoroughly. Add more only until the florets are evenly coated. If you don’t need all of it, cover and refrigerate the extra separately.
  4. Chill. Cover and refrigerate for at least 1 hour. For a good balance of flavor and texture, aim for 2–4 hours.
  5. Finish and taste it cold. Toss once more, add the reserved bacon and sunflower seeds, then taste. Chilling can mute seasoning, so add another pinch of salt or 1 teaspoon apple cider vinegar if needed.

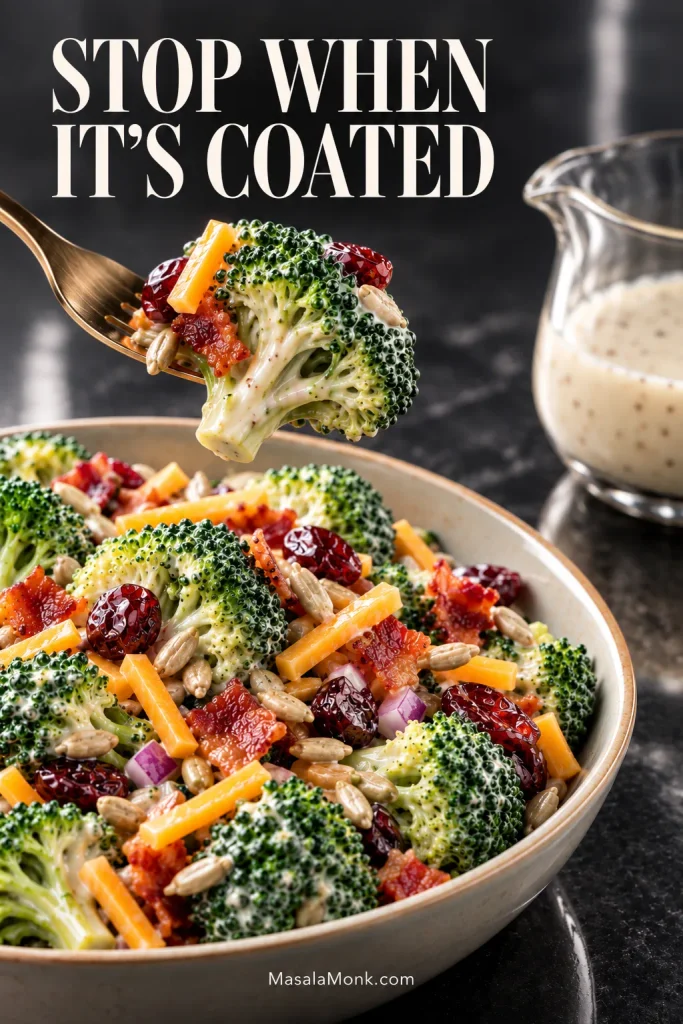
Check one floret before you stop. The dressing should cling instead of running straight back into the bowl, and the broccoli should still give you a clean bite.

Fork lifting a lightly coated broccoli floret above the salad with extra creamy dressing visible in a small glass pitcher nearby.
Before adding more broccoli salad dressing, toss from the bottom upward and inspect a floret from the middle of the bowl. Dressing settles unevenly at first, so a thorough toss can show that the broccoli is already coated well enough even when some dressing remains.

Storage

Cover and refrigerate leftovers for up to 3–4 days. The salad is at its best earlier, before the broccoli and toppings soften further.

Why Broccoli Salad Gets Watery

Broccoli salad usually gets watery because moisture is trapped in the florets or because more dressing was added than the broccoli can hold. A little moisture as the salad rests is normal; a puddle underneath it isn’t.

Bowl of broccoli salad with thin creamy liquid pooling around broccoli, bacon, cheddar, dried cranberries and sunflower seeds.
After tossing, tilt the bowl slightly and watch the low edge. Proper dressing should stay mostly on the broccoli; if thin liquid quickly runs into a puddle, stop adding dressing and check the florets for trapped water.

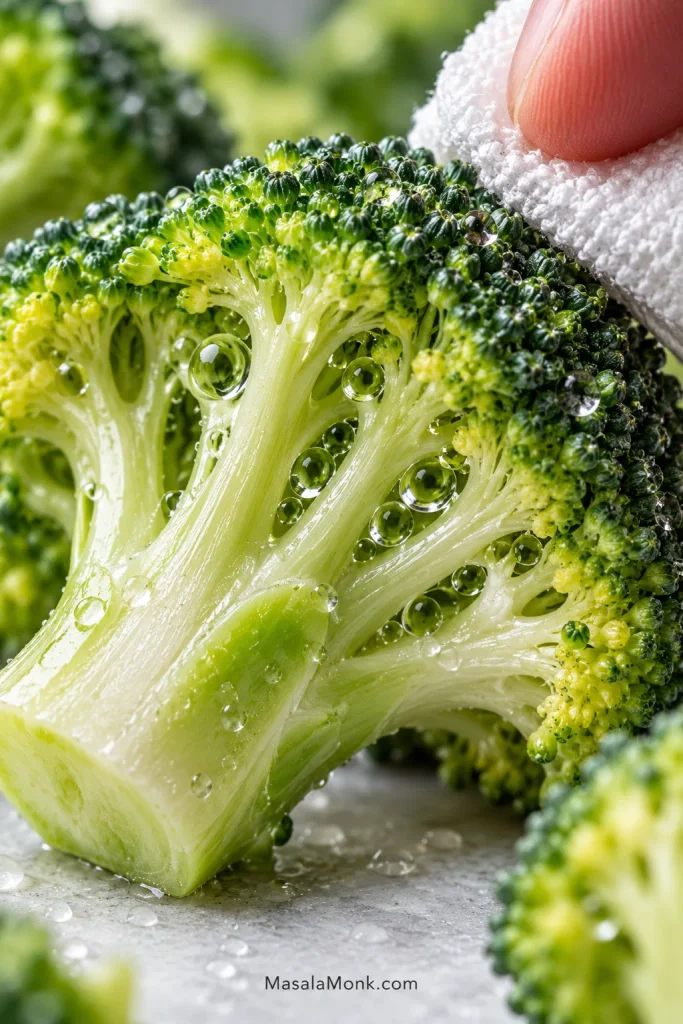
If there’s a puddle, check the broccoli first. Water caught between the tiny branches of the florets thins the creamy coating as the salad sits and eventually works its way to the bottom of the bowl.

Extreme close-up of water droplets caught between the branching stems and buds of a broccoli floret as a towel touches the surface.
After washing or blanching, turn larger florets crown-side down on a clean towel for a moment. Water hides where the smaller branches meet, so changing the angle helps moisture escape from places that can remain wet even when the outside already feels dry.

Overdressing can create a similar result. Floret size and surface area vary from batch to batch, so don’t treat an empty dressing bowl as the goal. Stop when the broccoli is evenly coated.

Time changes things too. Broccoli becomes more yielding as it sits, while bacon and sunflower seeds soften once coated. That’s useful up to a point: the raw edge mellows and the ingredients start tasting like one salad. Adding the reserved toppings at the end restores some contrast where you’ll actually notice it.

How to Balance the Dressing

Taste the dressing before it reaches the broccoli. It should seem brighter and slightly sharper on its own than you want the finished salad to taste; the broccoli, cheddar, bacon and cranberries soften that edge once everything is together.

If it tastes too sweet, whisk in apple cider vinegar 1 teaspoon at a time, tasting between additions. For a dressing that feels rich but dull rather than sweet, try another teaspoon of vinegar or a little more Dijon.

Made it too sharp? Whisk in 1 tablespoon mayonnaise and taste again. Mayo softens the acidity more neutrally than extra Greek yogurt. If the dressing still needs a touch more sweetness, add honey in ½-teaspoon increments.

The broccoli decides how much dressing it needs. Toss thoroughly and stop when the florets are coated rather than automatically using every spoonful.

For a lighter version, replace up to half of the mayonnaise with additional plain unsweetened Greek yogurt. Because that makes the base tangier, start with 1 tablespoon of the vinegar. Then add more 1 teaspoon at a time until it tastes bright but still creamy.

Make-Ahead Timing

Yes, you can make broccoli salad the night before, although this version has its best texture after about 2–4 hours in the refrigerator. Overnight, the salad remains good but becomes softer as the broccoli and toppings spend more time in the dressing.

Chilled broccoli salad with bacon, cheddar, dried cranberries and sunflower seeds on a cool metal surface with condensation nearby.
For make-ahead broccoli salad, separate the elements that benefit from resting from those that do not. Keep the reserved bacon refrigerated separately and the extra sunflower seeds dry until serving; that way, the dressed salad develops flavor without giving up all of its finishing crunch.

During that rest, the onion loses some of its raw edge and the dressing coats the broccoli more evenly without giving the florets enough time to soften much.

TimingWhat changes
1 hourGood minimum chill time; the ingredients are beginning to come together
2–4 hoursMore integrated flavor while the broccoli remains firm
OvernightMore blended flavor, with softer broccoli and toppings

At a cookout, that timing is convenient too: make the salad before you deal with the grill or the rest of dinner.

Overnight is a compromise, not a disaster. Keep it properly refrigerated, give it a good toss before serving, and expect a slightly softer salad.

Substitutions & Easy Variations

  • Cranberries → raisins: choose raisins if you want a sweeter, softer dried-fruit note; cranberries keep more tartness.
  • Sunflower seeds → pepitas or chopped nuts: pepitas stay closer to the small, scattered crunch of sunflower seeds; chopped pecans or almonds make the nutty flavor and texture more noticeable.
  • Honey → maple syrup: the sweetness remains similar, with a slightly different flavor.
  • Red onion → shallot: a good choice when you want the onion presence to be gentler.
  • Cheddar → another sharp or semi-sharp cheese: choose one with enough character to stand up to the dressing.
  • Bacon → omit: the salad still works, although it will be less smoky and savory.

Crisp apple or halved seedless grapes can give the salad a fresher, juicier kind of sweetness. Dry the fruit well and don’t add so much that its juice begins loosening the dressing.

Want it more savory? Reduce the honey and leave out the cranberries. Bacon, cheddar, Dijon, black pepper and cider vinegar will come further forward.

You can also replace part of the broccoli with small cauliflower florets. Keep the pieces similar in size so the two vegetables are easy to pick up in the same forkful.

Tips & Troubleshooting

If something seems off, start with what you can actually see, taste or feel.

What you noticeWhat to do
There’s a puddle at the bottom.Toss well and don’t add more dressing. Prevent it by drying the vegetables thoroughly and dressing gradually.
The broccoli is tiring to chew.Give it longer to rest. For a softer bite, cut smaller florets or use the brief blanch.
The broccoli went soft.It won’t become crisp again. Add fresh bacon or sunflower seeds for contrast; blanch for less time next time.
The onion takes over.Add more broccoli if available, or soften the effect with a spoonful of mayonnaise. Next time, use less onion or soak it first.
The bacon or seeds softened.Add a fresh handful at serving. Keeping some out of the dressed salad avoids the problem.
It tastes flat after chilling.Taste it straight from the refrigerator, then add a small pinch of salt or 1 teaspoon vinegar. Toss and taste again before adding more.

Make one adjustment at a time. It’s much easier to taste what one teaspoon of vinegar changed than to rescue a bowl after changing the salt, sweetness and acidity all at once.

How to Store Broccoli Salad

For the best texture, eat the salad the day you make it or the next day. Keep leftovers covered in the refrigerator at 40°F / about 4°C or below and use them within 3–4 days.

The USDA advises refrigerating perishable leftovers promptly, keeping them at 40°F or below, and generally using refrigerated leftovers within 3–4 days. Its leftover food-safety guidance also recommends discarding food left unrefrigerated for more than 2 hours, or more than 1 hour when the temperature is above 90°F / 32°C.

At a cookout or buffet, keep the bowl cold over ice if it needs to stay out longer rather than stretching those time limits.

Freezing isn’t recommended. The creamy dressing can separate after thawing, and the broccoli tends to soften.

Give refrigerated leftovers a good toss before serving. If you kept extra dressing separately, add only what the salad needs.

What to Serve with Broccoli Salad

This salad makes the most sense beside something hot, smoky or rich—the cold, tangy bowl is a welcome contrast. Serve it with burgers, grilled chicken, pulled pork, barbecue or sandwiches. MasalaMonk’s air fryer burgers make an easy pairing.

Creamy broccoli salad in the foreground with browned grilled chicken behind it on a warm terracotta table.
Broccoli salad with grilled chicken works because temperature becomes part of the contrast: warm browned chicken beside cold, tangy, crisp broccoli. Serve the salad straight from the refrigerator and plate it last so that contrast survives all the way to the first bite.

For a bigger cookout spread, add creamy coleslaw when you want a softer shredded side alongside the broccoli. For another crisp, creamy side with bacon, try a wedge salad.

Large bowl of broccoli salad being served with a spoon at a sunlit outdoor table, with grilled chicken and a drinking glass softly blurred in the background.
Give the bowl one quick toss before it reaches the table so the cheddar, cranberries, bacon and sunflower seeds redistribute instead of collecting at the bottom. Finish with the reserved crunchy toppings, then keep the salad cold until serving.

Make sure every scoop gets some of the crisp bacon and sunflower-seed finish. That’s the bite worth aiming for.

Posted on — Leave a comment

Carne Asada Recipe: Juicy, Tender Mexican Grilled Steak

Thin slices of grilled carne asada with deeply charred edges and a juicy interior, with warm tortillas and lime nearby.

The best carne asada has dark, almost singed edges, hot beef juices on the cutting board, and enough citrus, garlic and chile to brighten the steak without covering up its beefiness. Slice it thinly across the grain and it should fold into a warm tortilla without turning dinner into a tug-of-war.

Carne asada literally means grilled meat, and the cuts, seasoning and accompaniments vary across Mexico and Mexican-American cooking. This carne asada recipe takes the citrus-marinated route, followed by fierce heat for a deeply browned exterior and juicy beef inside.

Outside skirt steak and flap meat are especially good here. Flank steak works too, and it is often easier to find. The marinade supplies the citrus, garlic and chile; tenderness depends just as much on the beef you buy, the heat of the grill and the way you slice it at the end.

Carne asada at a glance:
Best beef: outside skirt first, flap/bavette close behind; flank is the easiest supermarket substitute.
Marinate: 2–4 hours for this citrus marinade.
Heat: about 450–500°F / 230–260°C or hotter for direct grilling.
Cook: watch thickness, browning and temperature instead of trusting one timer.
Rest: 3–5 minutes for very thin beef; 5–10 minutes for thicker skirt, flap or flank.
Slice: thinly across the grain; chop afterward for tacos.

Carne Asada Recipe

Citrus-marinated skirt or flap steak grilled over intense heat until deeply browned, then rested and sliced thinly.

Yield
4–6 main servings or about 8 smaller taco servings
Prep
15 minutes
Marinate
2–4 hours
Cook
About 2–12 minutes for most cuts; thick flank may take longer
Rest
3–10 minutes
Total
About 2½–5 hours with the recommended marinating time

Equipment

  • Gas or charcoal grill
  • Large zip-top bag or shallow non-reactive container
  • Long grill tongs
  • Instant-read thermometer for meat thick enough to probe reliably
  • Sharp chef’s or slicing knife
  • Cutting board
  • Paper towels

Ingredients

  • 2 lb / 907 g outside skirt steak or flap/bavette; flank steak also works
  • ½ cup / 120 ml fresh orange juice
  • 3 tbsp / 45 ml fresh lime juice
  • ¼ cup / 60 ml olive oil or neutral oil
  • 4 garlic cloves / about 16 g, finely grated or minced
  • ½ cup loosely packed chopped cilantro / about 8 g
  • 1 medium jalapeño / about 15–20 g, finely chopped; remove seeds and ribs for less heat
  • 1 tsp / about 1 g Mexican oregano; regular oregano works if needed
  • 1 tsp / about 2 g ground cumin
  • 1 tsp / about 2 g pure ancho chile powder, not a blended chili seasoning mix
  • 6 g kosher salt, preferably weighed; about 2⅛ tsp Diamond Crystal or 1¼ tsp Morton kosher salt
  • ¾ tsp / about 1.5 g freshly ground black pepper
  • Neutral high-heat oil, as needed for the grill grates
  • Fresh lime wedges, for serving

Instructions

  1. Prepare the beef. Trim away obvious thick silver skin or tough membrane. Cut very long skirt or flap steak into 2–3 sections so each piece can lie flat on the grill. Notice which direction the muscle fibers run now; they are easier to see before cooking.
  2. Mix the marinade. Whisk together the orange juice, lime juice, oil, garlic, cilantro, jalapeño, oregano, cumin, ancho chile, salt and black pepper. It should smell bright, citrusy and strongly garlicky.
  3. Marinate. Add the beef and turn until well coated. Refrigerate for 2–4 hours. Even 30 minutes gives the surface noticeable citrus, garlic and chile flavor when dinner is close. With this acidic formula, keep the total marinating time within about 8 hours.
  4. Heat the grill. Prepare a direct grilling zone at about 450–500°F / 230–260°C or hotter. Clean the hot grates well and, if your grill tends to stick, lightly oil them with a little neutral high-heat oil.
  5. Drain and blot. Remove the steak from the marinade and discard the used liquid. Blot the beef well with paper towels. Brush away heavy clumps of garlic or herbs that could scorch before the meat develops a crust.
  6. Grill. Very thin ranchera or flap may need only 1–2 minutes per side. Regular skirt or flap often takes 2–4 minutes per side. Thicker flank may need 4–6 minutes per side or longer. Look for deep brown patches and darkening edges, then start watching closely. A few blackened tips are welcome; a uniformly black steak has gone too far.
  7. Check doneness. Use an instant-read thermometer when the steak is thick enough to probe reliably, cooking to your preferred doneness while keeping the food-safety guidance below in mind. With thinner skirt or flap, insert the probe horizontally from the side toward the center. Paper-thin carnicería cuts cook so quickly that browning, timing and close attention matter especially.
  8. Rest. Give very thin steak about 3–5 minutes. Rest thicker skirt, flap or flank for 5–10 minutes.
  9. Slice across the grain. Turn the steak so your knife crosses the visible muscle fibers. Slice thinly. For tacos or burritos, chop those slices into pieces about ½ inch / 1.25 cm across.
  10. Taste and serve. Taste a freshly cut piece and add a small pinch of salt if needed. Finish with fresh lime and serve immediately.
How much beef per person: 2 lb / 907 g serves about 4–6 people when the steak is the center of the meal, or roughly 8 smaller taco servings with sides. That usually works out to about 2–3 tacos per person, depending on tortilla size and toppings.
Food-safety note: For intact whole beef steaks, USDA guidance is 145°F / 63°C followed by at least a 3-minute rest. Follow the package cooking instructions if your beef is labeled mechanically, blade or needle tenderized.
Cooking indoors: Well-drained, blotted steak can be cooked in a thoroughly preheated cast-iron skillet or under a hot broiler. Work in batches when using a skillet and ventilate the kitchen well.

Match the Cooking Time to Your Steak

Whether the package says ranchera or the cut is skirt, flap or flank, thickness sets the pace. Thin carne asada needs fierce heat and very little time; thicker flank simply needs longer to develop the same strong browning. Find the row closest to the steak you actually bought.

Raw outside skirt steak, flap or bavette, and flank steak arranged together to show their different shapes, grain and thickness.
Outside skirt, flap and flank all work for carne asada, yet their different thicknesses change how quickly heat reaches the center. That is why two steaks on the same grill can need very different cooking times.
If you bought…Start checking here
Very thin ranchera/flapAbout 1–2 minutes per side over fierce heat.
Regular skirt or flapAbout 2–4 minutes per side.
Thicker flank steakAbout 4–6 minutes per side; use a thermometer once the meat is thick enough to probe reliably.

Best Meat for Carne Asada: Skirt, Flap and Flank

Outside skirt is the first choice here, flap/bavette is an excellent alternative, and flank is the easiest widely available supermarket substitute. All three can make terrific carne asada.

Outside skirt steak is deeply beefy, relatively thin and full of loose muscle fibers that brown quickly and become tender when cut across the grain.

Flap meat, or bavette, has a similarly coarse grain and plenty of beef flavor. It is particularly good when the steak will be chopped for tacos.

Flank is not a consolation prize. It is leaner and usually thicker than skirt or flap, so give it the extra time its thickness requires.

Inside skirt works too, although it can be firmer than outside skirt. Careful trimming and thin slicing help. Where classic skirt has become expensive or difficult to find, thin chuck or diezmillo also works well for taco-style carne asada when a butcher slices it appropriately thin.

Ranchera and Arrachera at the Meat Counter

At many Mexican markets, arrachera means skirt steak, while ranchera may be flap or another thin grilling cut. The names can change from one butcher shop to another.

Ask what cut you are buying, then ask how thick it has been sliced. After that, stop worrying about the label and cook the steak you actually brought home.

Package says mechanically, blade or needle tenderized? Follow its cooking instructions rather than treating it exactly like an intact steak.

Carne Asada Marinade: Citrus, Garlic and Chile

This carne asada marinade combines orange and lime juice with garlic, cilantro, jalapeño, oregano, ancho chile, cumin, oil and salt. Orange rounds out the sharper lime, while garlic, jalapeño, oregano and ancho do most of the aromatic work. Cumin stays in the background, oil helps the mixture cling to the beef, and salt seasons it.

Raw steak coated in a light citrus marinade, with orange, lime, garlic, jalapeño, cilantro and ground spices nearby.
This carne asada marinade is designed to brighten the beef rather than bury it. Orange rounds out lime’s sharper acidity, while garlic, jalapeño, cilantro and ground spices build depth that the grill later turns darker and smokier.

When it is mixed, the marinade should smell fresh, citrusy and strongly garlicky. Once the steak reaches the grill, browned beef and smoke should move to the front.

How Long to Marinate Carne Asada

Two to four hours is the sweet spot. Even 30 minutes gives the surface noticeable flavor when you are rushed, and 4–8 hours is workable, especially with thicker beef. For this citrus-heavy marinade, skip the overnight soak and keep it within about 8 hours. Longer exposure gives the citrus more time to change the surface texture without necessarily making the steak taste better.

Carne asada can be much simpler than the version here. In parts of northern Mexico, excellent beef, salt and live fire can be the whole idea. Pati Jinich’s Sonora-style carne asada is a useful example; this recipe deliberately takes the citrus-marinated route instead.

How to Make Carne Asada on the Grill

Now get the grill hot.

Build a direct grilling zone around 450–500°F / 230–260°C or above. For thin skirt or flap, hotter than feels polite is usually better: you want color on the outside before the middle has time to overcook.

Scrub the hot grates clean. If your grill has a history of sticking, lightly oil them with a little neutral high-heat oil before the steak goes down.

Dry the Steak Before It Hits the Grill

Remove the steak from the marinade, discard the liquid and blot the beef well. Dry the surface well. A wet steak can steam and turn gray while you wait for char that never arrives.

Carne asada steak cooking over high heat, with a wetter pale surface beside a darker browned surface.
A marinated steak does not need to be dry inside; only the outside needs to be free of excess liquid before it hits the heat. Once that surface moisture is reduced, more of the grill’s energy can go toward browning and crust formation.

The steak should answer with a hard sizzle almost immediately when it hits the grate. A weak hiss usually means the surface is still too wet or the grill needs more heat.

What you seeWhat it means
Dull, wet or gray surfaceThe steak needs a drier surface, more heat, or more time undisturbed against the grill.
Deep brown or mahogany patchesThe crust is developing; start watching the thinner areas closely.
Blackened thin tips and edgesUsually fine on skirt steak as long as the rest of the piece is browning rather than burning.
Black from edge to edgeThe char has gone too far; pull the steak before bitterness takes over.

Give the Steak Time to Brown

Lay the beef over the hottest part of the grill that is not engulfed in flare-ups and leave the first side alone long enough to develop color. Constant lifting and turning makes a good crust harder to build.

Close-up of grilled carne asada with a deeply browned mahogany crust, irregular charred areas and darker thin edges.
Good carne asada char is concentrated rather than uniform. Look for a dry, deeply browned crust with a few darker edges; the goal is smoky contrast around juicy beef, not a steak blackened from end to end.

Uneven char is normal on skirt steak. Thin ends darken before the thicker center, so do not keep the whole piece over the fire just to make every inch the same color.

Charcoal naturally adds smoke and live-fire flavor. A standard gas grill gives you plenty of heat and char, though without quite the same smoke profile. Mesquite pushes that smoky character further, while a very hot plancha or griddle produces its own taco-shop style of browned beef.

If the steak is properly seasoned but still tastes flat, stronger browning or a little smoke may be what it is missing.

Carne Asada Temperature: Medium-Rare vs. USDA Guidance

For culinary doneness, medium-rare steak is commonly finished around 130–135°F / 54–57°C. Thicker steak may rise a few degrees as it rests; paper-thin carne asada has much less carryover.

That is different from the official food-safety recommendation. The USDA recommends 145°F / 63°C for intact whole beef steaks followed by at least a 3-minute rest.

On thicker steak, insert an instant-read thermometer horizontally through the side toward the center. Paper-thin cuts may be too shallow for a reliable probe reading, which makes browning, timing and close attention more important.

Instant-read thermometer entering horizontally through the side of a thick grilled steak toward its center.
The probe needs to reach the middle of the steak, not simply touch its surface. With thicker flank or flap, entering through the side gives the sensor a straighter path into the center, making the reading more representative of the meat inside.

Cooking Carne Asada Indoors

No outdoor grill? You can still make excellent carne asada indoors. Cast iron gives you a hard sear; the broiler keeps the cooking off the stovetop.

Cast Iron

Cut long skirt or flap steak into pieces that can lie completely flat. Blot them especially well, then heat a heavy cast-iron skillet over high heat until very hot. Add just enough high-heat oil to lightly coat the cooking surface.

Carne asada steak searing flat in a hot cast-iron skillet with space around the meat.
A heavy cast-iron skillet holds a lot of heat, which is exactly what carne asada needs for a hard crust indoors. Keep the pieces flat and spaced apart; otherwise, released moisture cools the cooking surface and encourages steaming instead of searing.

Start checking the first side after about 2–3 minutes. Turn when it has developed a strong brown crust, then watch the second side closely; thin pieces can finish quickly, while thicker flap or flank needs longer. Use the thermometer and temperature guidance above whenever the steak is thick enough to probe reliably.

Cook in batches so every piece gets direct contact with the pan, and let the empty skillet regain its heat before starting the next batch. A properly hot skillet will create smoke, so turn on the exhaust hood and open the windows before cooking.

Broiler

Arrange the well-drained steak on a foil-lined broiler-safe sheet pan and place it roughly 4–6 inches / 10–15 cm from a fully heated broiler.

Carne asada on a foil-lined tray positioned beneath the upper heating element of an oven broiler.
A broiler puts intense heat directly above the steak, so thin carne asada can brown surprisingly fast without a grill. Broilers vary widely, however, which is why the color of the crust is a better stopping signal than blindly following one fixed cooking time.

Start checking regular skirt after about 6 minutes total; many pieces finish in roughly 6–10 minutes, turning once as the first side browns. Paper-thin ranchera can be ready much sooner, while thicker flank needs more time. Broilers vary considerably, so let browning and doneness decide when the steak comes out.

Slice Across the Grain Before You Chop

While the steak rests, warm a stack of soft homemade corn tortillas and keep them covered for serving.

Look closely at the rested steak before reaching for the knife. The long muscle fibers should be visible running in one direction.

Turn the beef so the knife crosses those fibers and make thin slices. A slight diagonal cut gives you wider pieces while keeping the fibers short.

Cooked skirt steak being sliced across its grain, with thin slices and smaller chopped pieces on the cutting board.
Once the steak is sliced across the grain, those thin pieces are easier to eat and portion into tacos. A quick chop then creates small, loose pieces that distribute through the tortilla instead of forming one dense mouthful.

Slicing direction matters more than it seems: juicy skirt steak can still feel frustratingly chewy when it is sliced with the grain.

For Tacos, Slice First and Chop Second

Serving the steak on a platter? Stop at thin slices. When it is headed for tacos or burritos, chop those slices into pieces around ½ inch / 1.25 cm across.

This is the payoff: thin, juicy slices, dark at the edges, with the long fibers shortened enough to bite cleanly. A hot tortilla, chopped steak, onion, salsa and lime are often all it needs.

Why Is My Carne Asada Tough? Don’t Blame the Marinade First

A flavorful steak can still be tough. The cause might be the cut, leftover membrane, overcooking, long muscle fibers or simply pieces that are too large for an easy taco bite.

What happenedWhat to check next time
Gray with little crustBlot the steak more thoroughly, increase the heat and avoid crowding the cooking surface.
Dry and leatheryThe meat likely cooked too long, especially if thin steak was given thick-steak timing.
Juicy but chewyCheck the grain direction, slice thickness, tough membrane and the actual cut.
Hard to bite through in a tacoSlice across the grain first, then chop the slices smaller.
Burnt garlic or herbsBrush away heavy marinade solids before the steak reaches fierce heat.
Soft or mealy outsideShorten the time in the acidic marinade.
Too saltyCheck the salt measurement and marinating time. Weigh the kosher salt if possible because brands differ substantially by volume.
Some pieces tender, others toughUneven thickness can put different pieces at different levels of doneness.
Well seasoned but missing taqueria characterLook at the heat, browning and smoke before changing the marinade.

A marinade can change flavor and surface texture; it cannot shorten long muscle fibers. Your knife does that when you slice across the grain.

Make Ahead, Freeze and Use the Leftovers

Make Ahead

The marinade can be mixed up to 1 day ahead and refrigerated separately. Combine the beef and marinade 2–4 hours before cooking. Carne asada is best soon after grilling, so prep early rather than cooking the steak hours ahead.

Freezing

For best texture, freeze the raw beef and marinade separately. FoodSafety.gov lists 4–12 months at 0°F / −18°C for the best quality of frozen fresh beef steaks, although carne asada is better used toward the earlier end of that range for texture. Thaw the beef in the refrigerator, then marinate normally for 2–4 hours.

Leftovers

Refrigerate cooked carne asada promptly in a covered container and use it within 3–4 days. Reheat only what you need, ideally in a hot skillet, until it reaches 165°F / 74°C. If you freeze the cooked steak, FoodSafety.gov lists 2–6 months for cooked-meat quality, although thin cooked steak is at its best much sooner.

Leftover carne asada is excellent in a crisp skillet quesadilla; the folding and browning method in our chicken quesadilla recipe works just as well once you swap in the chopped steak.

A smaller handful can become carne asada fries: warm the beef quickly, then scatter it over crisp homemade French fries with cheese, salsa and avocado.

What to Serve with Carne Asada

Bring the sliced beef straight to the table and let everyone build their own. Carne asada does not improve by waiting under a pile of elaborate toppings.

Hand holding a warm corn tortilla filled with chopped carne asada, with tortillas, lime and taco toppings arranged on the table behind it.
A good carne asada taco leaves room for the steak to remain distinct. Warm corn tortillas carry the beef, while lime, onion and salsa add brightness and contrast. A lighter hand with the toppings lets the char and seasoning stay noticeable.

Lime, guacamole, pico de gallo, charred green onions and blistered chiles all make sense around smoky beef. You do not need all of them on the same plate.

For tacos, keep the pile loose. A modest spoonful of chopped beef, onion, salsa and lime gives you a cleaner bite than packing the tortilla so full that the filling falls out before the first mouthful.

Choose the salsa to suit the rest of the meal: roasted salsa verde brings tart tomatillo and chile, while fresh mango salsa gives the smoky steak a sweeter, juicier contrast.

For a fuller plate, add creamy refried beans and fluffy Mexican rice.

Get it into warm tortillas and eat it while those charred edges are still hot.