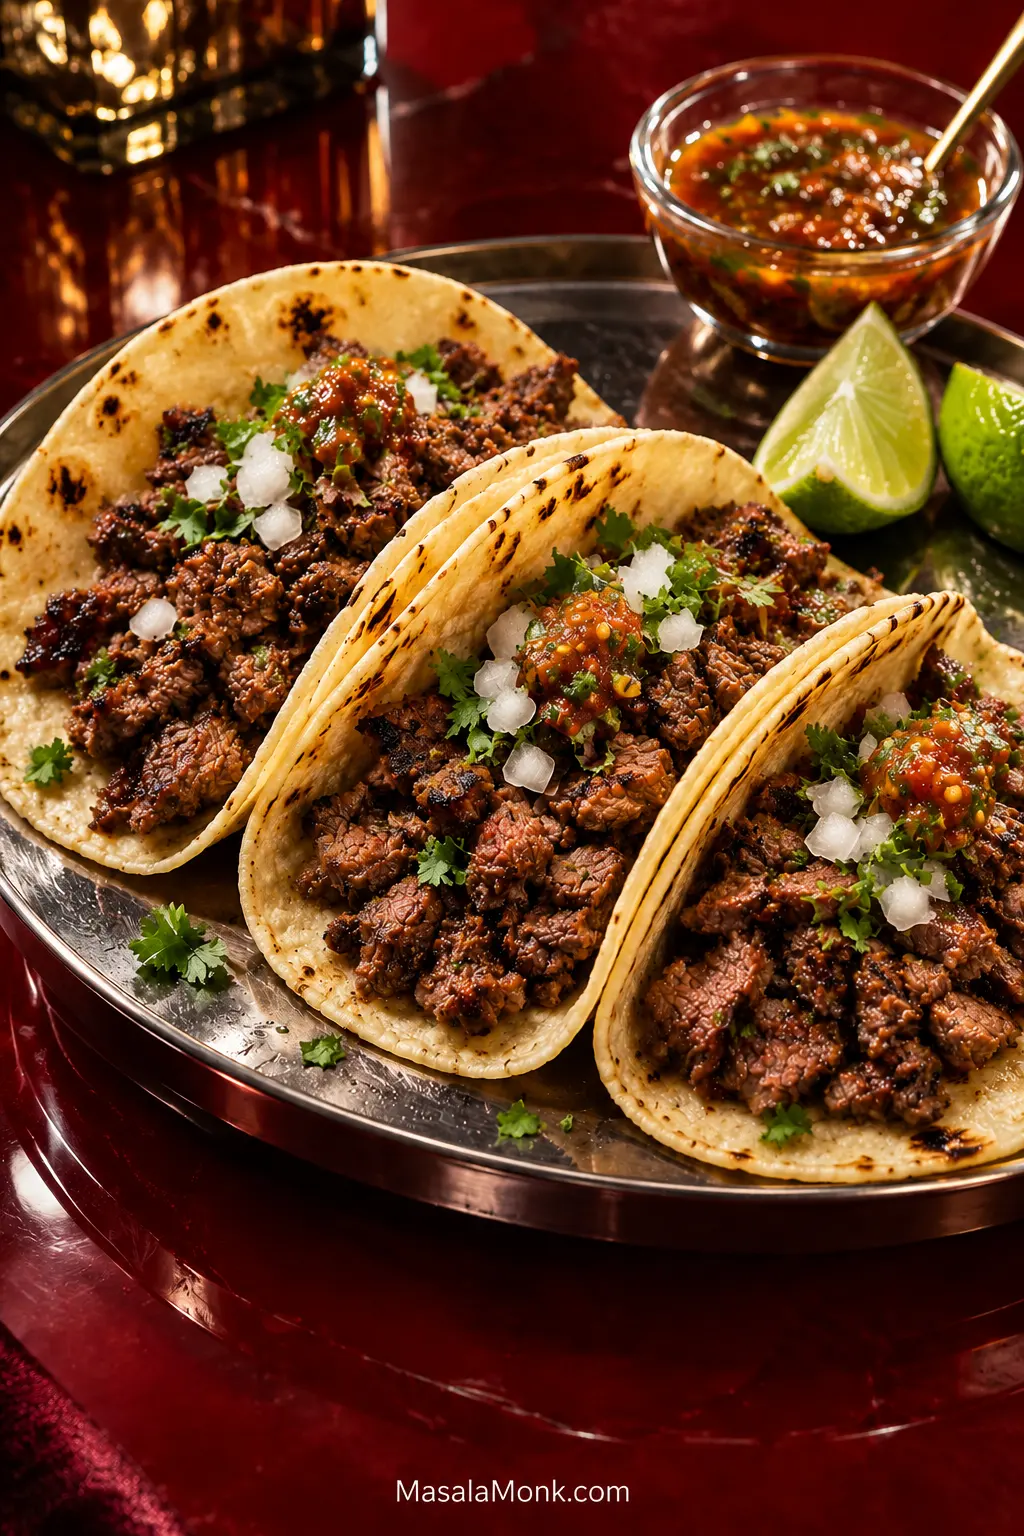
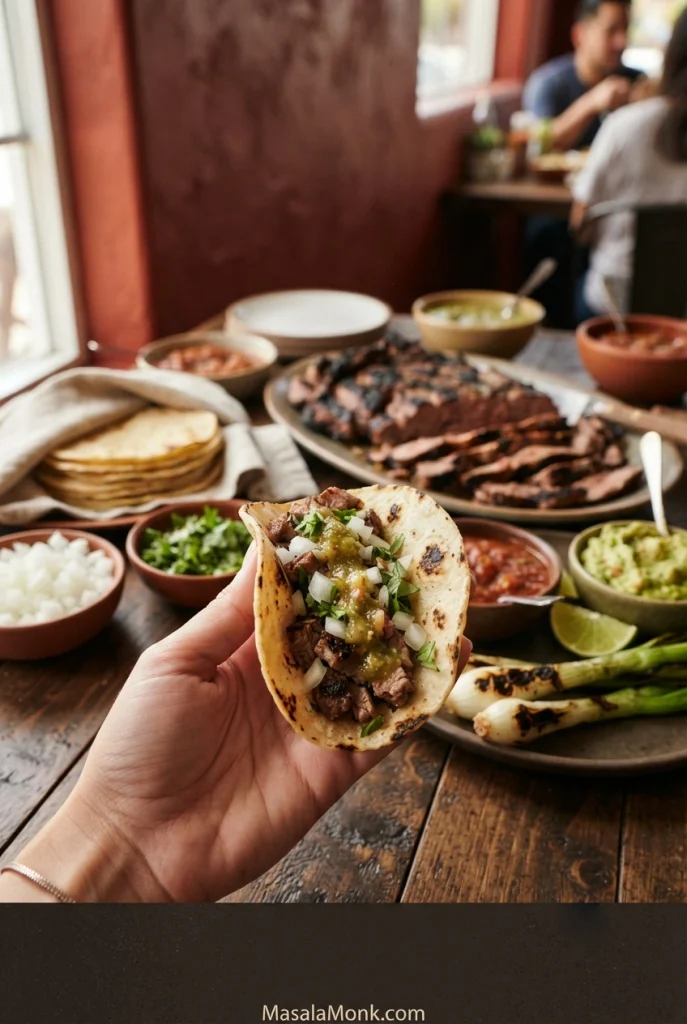
Carne asada tacos should bite cleanly. You want dark char around the edges, juicy beef inside, and pieces short enough that steak and tortilla separate together instead of dragging half the filling out with your first bite.
This version follows the citrus-marinated, corn-tortilla route. Carne asada changes from region to region, and the guide below also covers the flour-tortilla style common in northern Mexico.
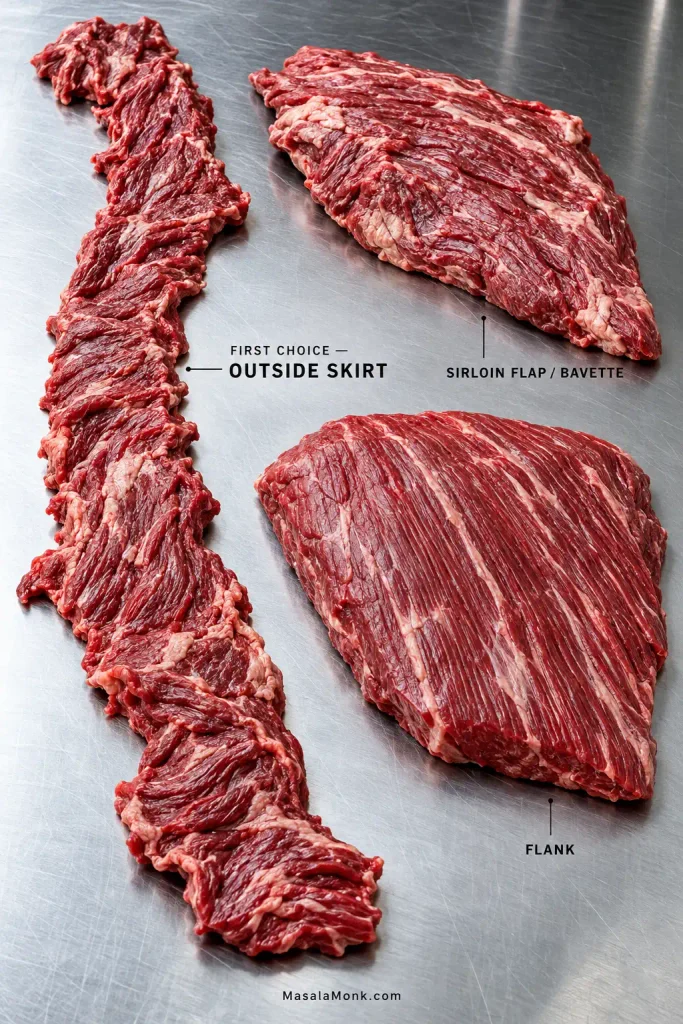
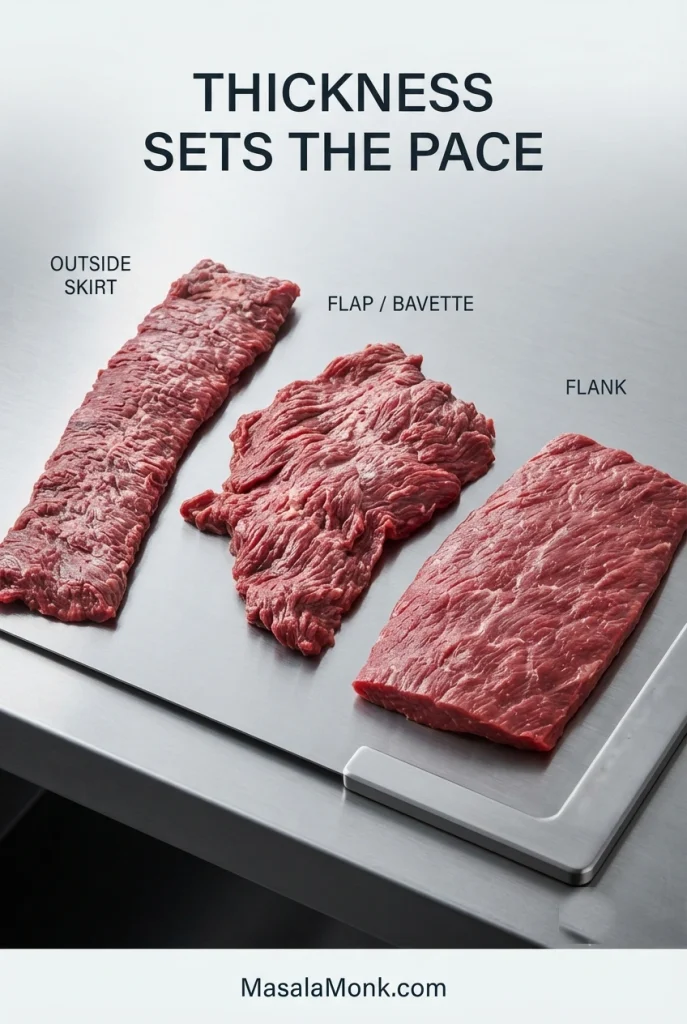
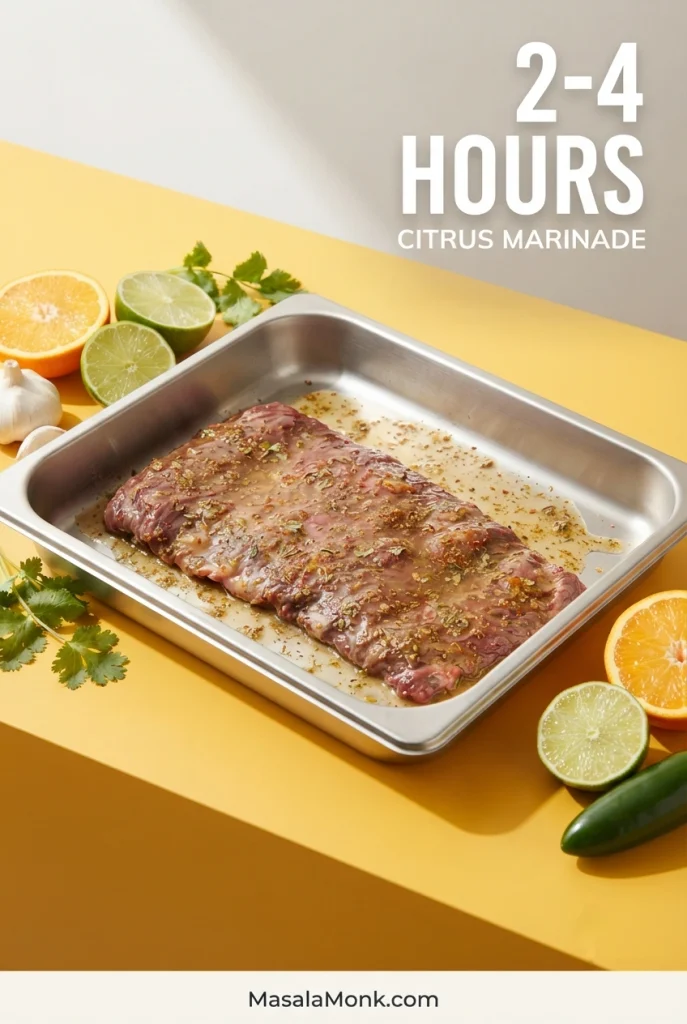
Outside skirt steak is the first choice for this version, with sirloin flap (often sold as bavette) close behind and flank steak as the easiest supermarket fallback. The beef spends 2–4 hours in an orange-lime marinade, then gets dried well and cooked over fierce heat in larger pieces.
Before the steak comes off the heat, have the toppings ready and the tortilla pan or comal hot. Once the beef is chopped, the tacos should come together quickly.
Carne Asada Tacos Recipe
Marinate the steak, cook it over high heat, slice it thinly across the grain, then chop it into roughly ½-inch pieces for hot corn tortillas with onion, cilantro, salsa and lime.
Prep 20 minutes
Marinate 2–4 hours
Cook & Assemble 25–40 minutes
Total About 2¾–5 hours
Yield About 16 small tacos
Serves 4 as a main, or up to 6 with sides
Most of that time is hands-off marinating.
Equipment
Gas or charcoal grill, or a heavy cast-iron skillet or griddle
Large zip-top bag or shallow non-reactive container
Instant-read thermometer for pieces thick enough to probe reliably
Sharp knife and large cutting board
Dry skillet or comal plus a clean towel or tortilla warmer
Ingredients
For the Steak and Marinade
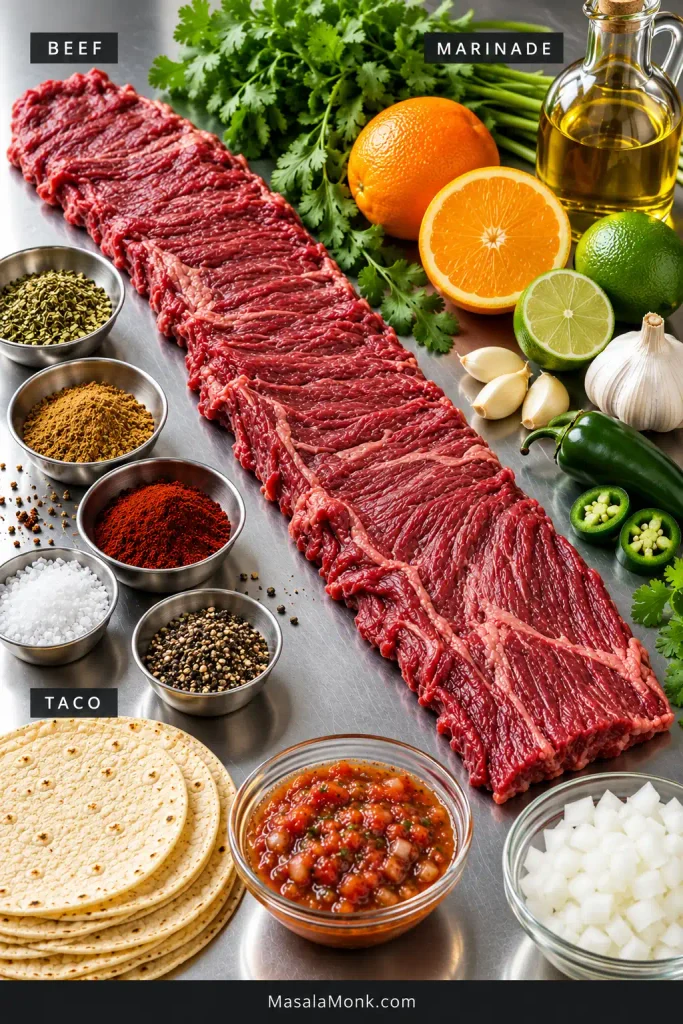
2 lb / 907 g outside skirt steak or sirloin flap (bavette); flank steak also works
½ cup / 120 ml fresh orange juice
3 tbsp / 45 ml fresh lime juice
¼ cup / 60 ml olive oil or neutral oil
4 garlic cloves / about 16 g, finely grated or minced
½ cup loosely packed chopped cilantro / about 8 g
1 medium jalapeño / about 15–20 g, finely chopped; remove seeds and ribs for less heat
1 tsp / about 1 g dried Mexican oregano; regular dried oregano works if needed
1 tsp / about 2 g ground cumin
1 tsp / about 2 g pure ancho chile powder, not a blended chili seasoning mix
6 g kosher salt, preferably weighed; about 2⅛ tsp Diamond Crystal or 1¼ tsp Morton kosher salt, plus more to finish if needed
¾ tsp / about 1.5 g freshly ground black pepper
Neutral high-heat oil for the skillet, griddle or grill grates, if needed
For the Tacos
16 small corn tortillas, about 5–5½ inches / 13–14 cm across; have 32 if you prefer doubled tortillas
1 medium white onion / about 150 g, finely diced
¾ cup loosely packed chopped cilantro / about 12 g
About 1 cup / 240 ml salsa, for spooning lightly over the tacos
4 limes, cut into wedges
Optional: sliced radishes, avocado or guacamole, grilled onions or chiles, cotija or queso fresco
Cilantro appears in both the marinade and the finished tacos. Portion the two amounts before raw steak enters the prep area. That way, the garnish stays fresh and ready for assembly.
Instructions
1. Check the Grain and Portion the Steak
Trim away obvious thick silver skin or tough membrane. If a long piece of skirt or flap will not sit flat on the grill or skillet, cut it into two or three manageable sections.
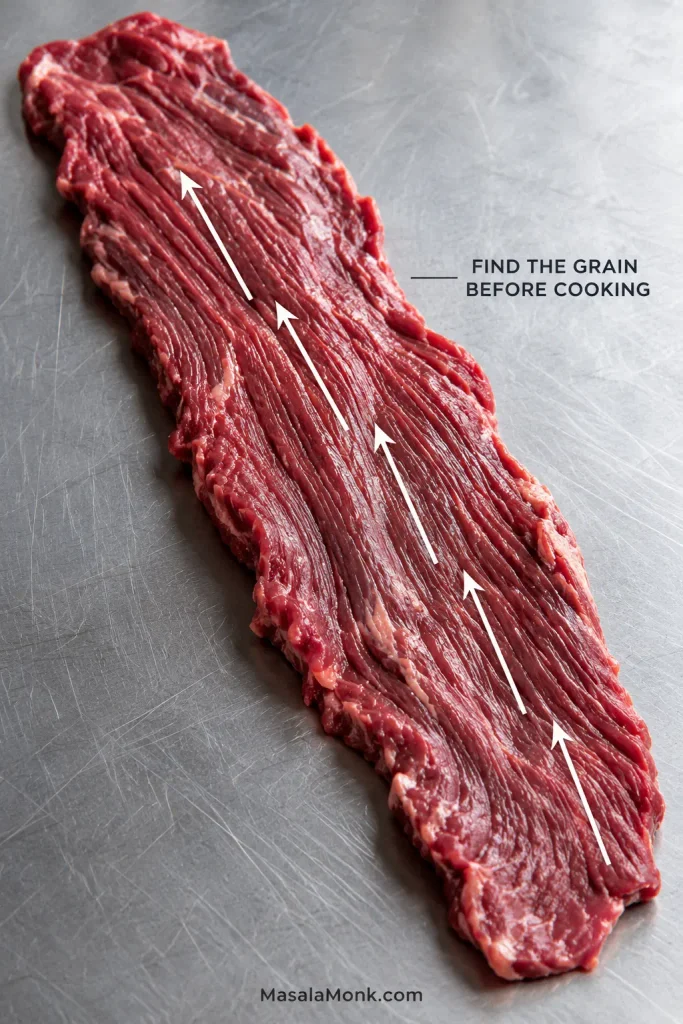
Take a second to see which direction the muscle fibers run. You will cut across them later, and they are much easier to spot now than beneath a dark seared crust.
Before marinating, note where the fibers meet a tapered end or cut edge. Those landmarks make the grain easier to relocate after browning darkens the surface.
2. Mix and Marinate
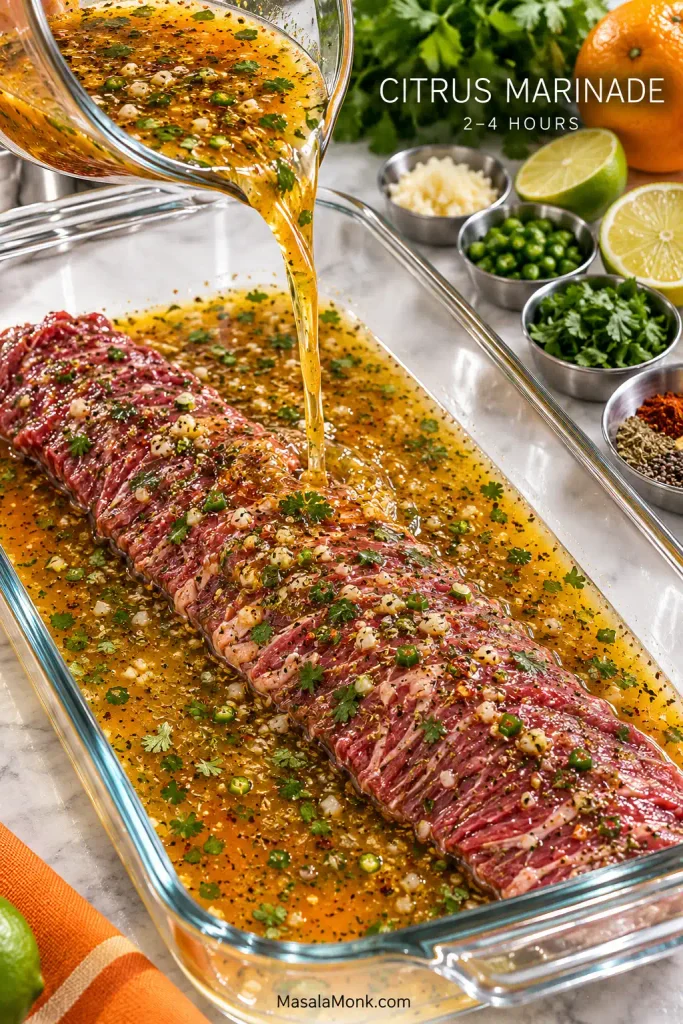
Marinate for 2–4 hours; don’t leave the steak in this citrus-heavy marinade longer than about 8 hours. Whisk together the orange juice, lime juice, oil, garlic, cilantro, jalapeño, oregano, cumin, ancho chile, salt and black pepper. Add the beef and turn it until the marinade reaches both sides and any folds.
Even 30 minutes adds useful surface flavor when time is short. Dinner running late? Once the steak has had enough time in the marinade, take it out, blot it dry, cover it and refrigerate it until you’re ready to cook.
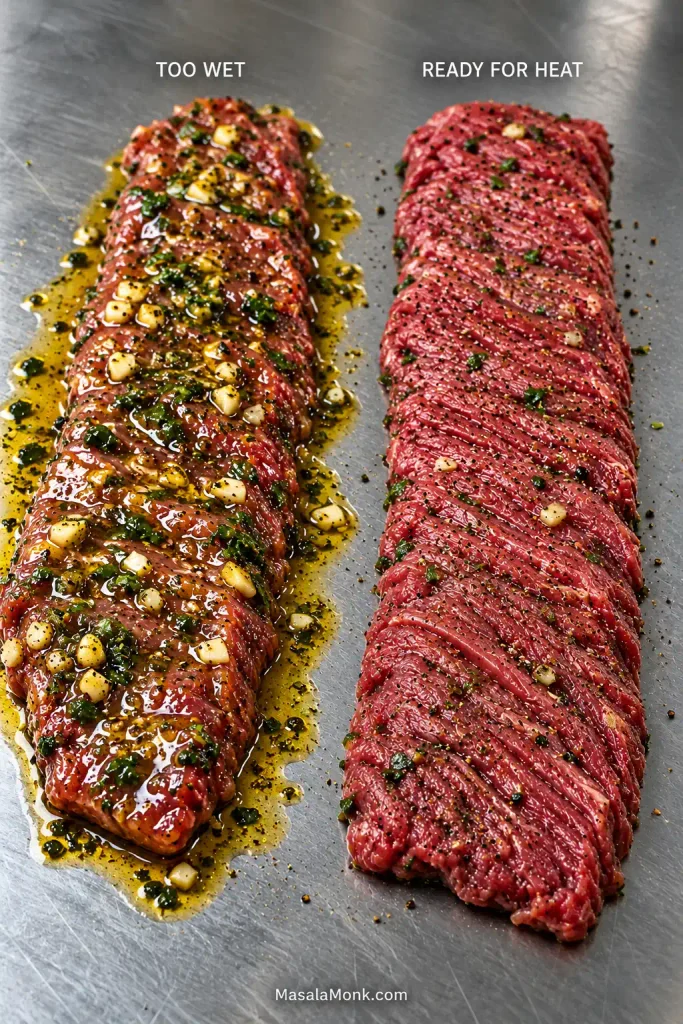
Carne asada marinade should look like a loose citrus-oil coating, not a thick sauce. If the skirt steak’s grain is still visible, the mixture is coating the meat rather than burying it.
3. Drain and Dry the Beef
Lift the steak from the marinade and discard the used liquid. Blot the meat thoroughly with paper towels, including folds and thin ends. Brush away thick wet clumps of garlic or herbs so they don’t scorch before the beef browns.
The surface should look matte and feel mostly dry before it hits the heat.
Mostly matte is the target, not bone-dry. Blot until beads of marinade disappear, while the raw skirt steak still looks supple and freshly cut.
4. Get the Grill or Pan Hot
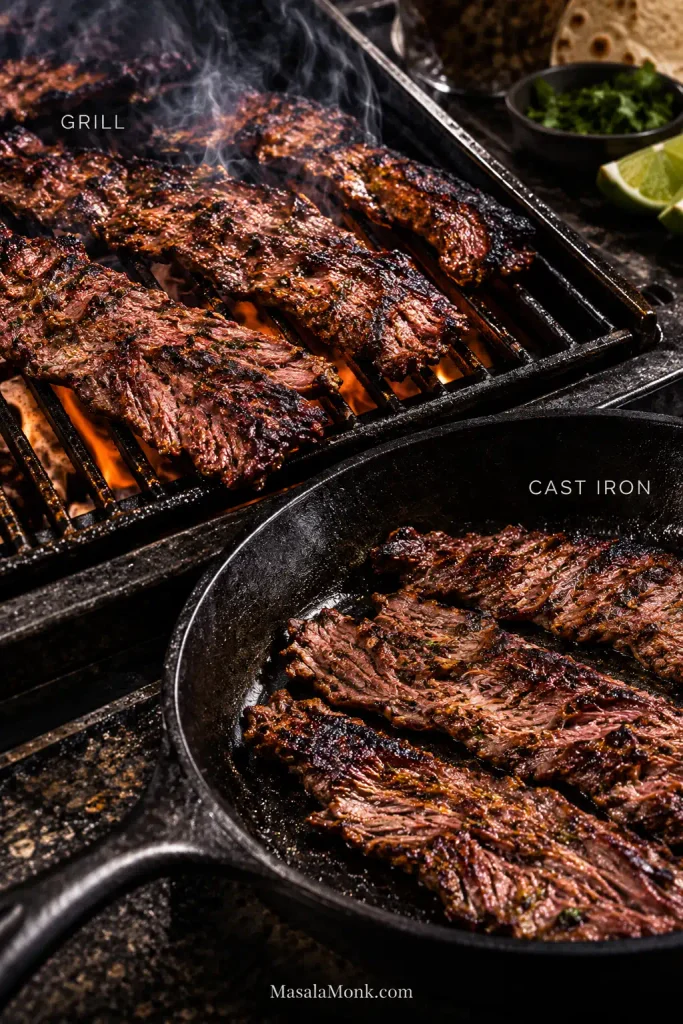
Get the grill very hot and build a strong direct-heat zone. If your grill gives you a temperature reading, roughly 450–500°F / 230–260°C or higher puts you in the right territory. Clean the grates and oil them lightly if they tend to stick.
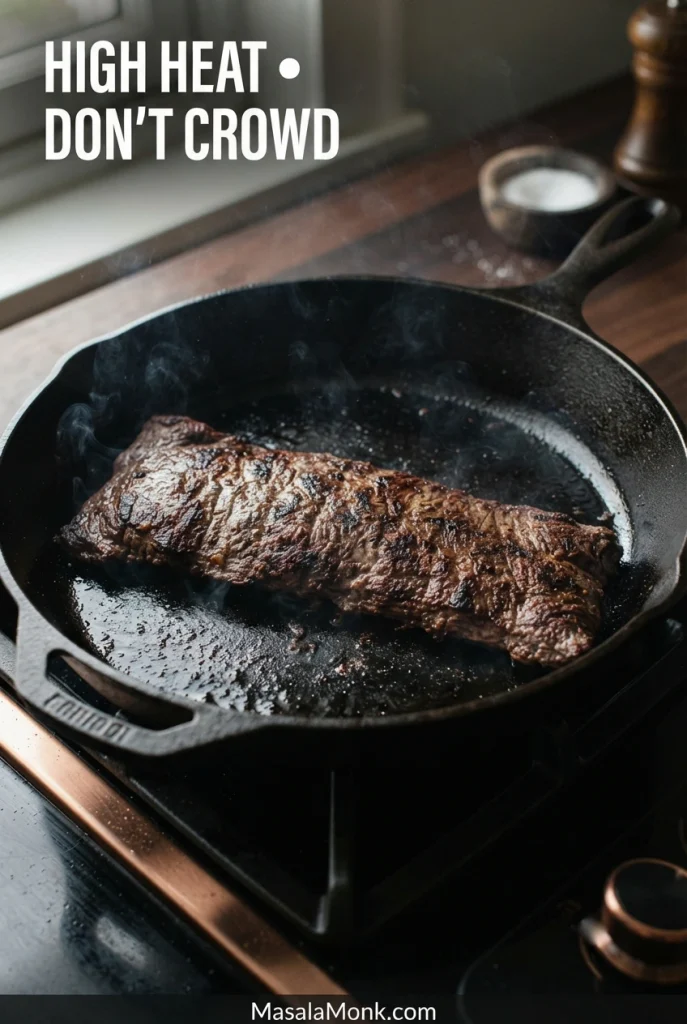
Indoors, preheat a heavy cast-iron skillet or griddle thoroughly over high heat. Add only a thin film of high-heat oil if the surface needs it. Use your exhaust hood and open a window if needed; hard-seared carne asada can make plenty of smoke.
On a grill, drips can escape; in cast iron, they stay beside the beef. That makes spacing and pan recovery especially important indoors, even when both methods start equally hot.
5. Cook by Cut and Thickness
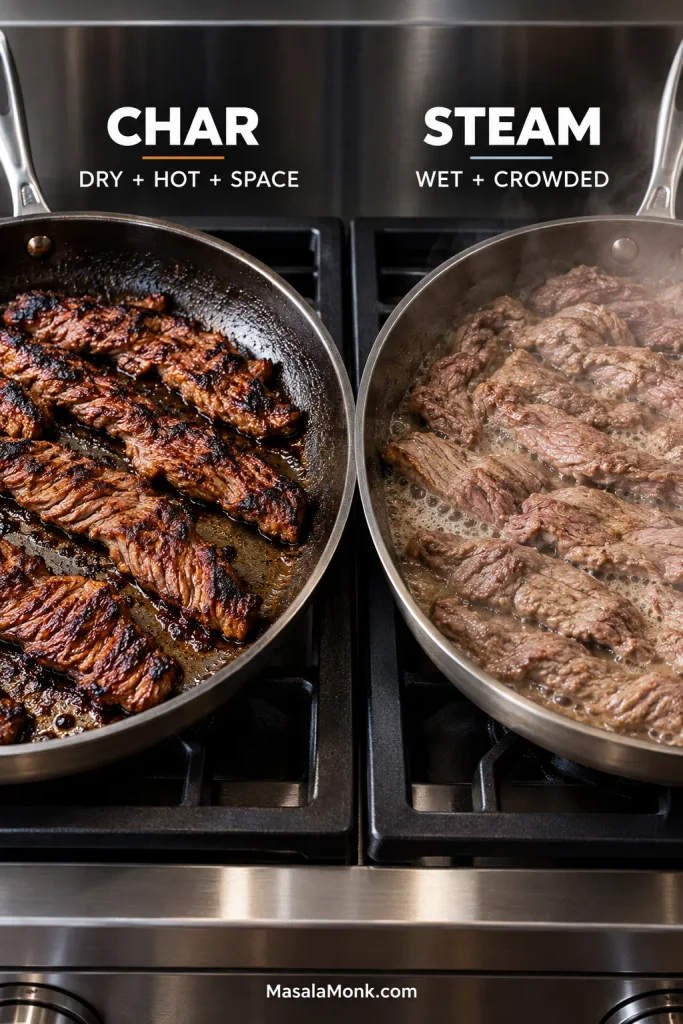
On a grill, lay the steak over direct heat. In a skillet or on a griddle, leave room around each piece and work in batches when necessary. You want a sharp sizzle when the meat lands, not a quiet puddle forming around it.
Use these as starting checkpoints:
Very thin ranchera-style beef or thin flap: start checking at about 1–2 minutes per side.
Regular skirt or flap: start checking at about 2–4 minutes per side.
Thicker flank steak: start checking at about 4–6 minutes per side; a thick piece may need longer.
Cook until the outside has deep brown patches and a few dark edges and the steak has reached the doneness you want. When the meat is thick enough to probe reliably, an instant-read thermometer is more useful than trying to force every steak onto the same timetable.
Uneven thickness is normal. Pull a thin end when it’s ready and let the thicker part keep cooking. Cook to the piece in front of you, not to the clock.
Food-safety note: USDA guidance for intact whole beef steaks is a minimum internal temperature of 145°F / 62.8°C followed by at least a 3-minute rest. See the USDA safe-temperature guidance.
6. Rest Briefly
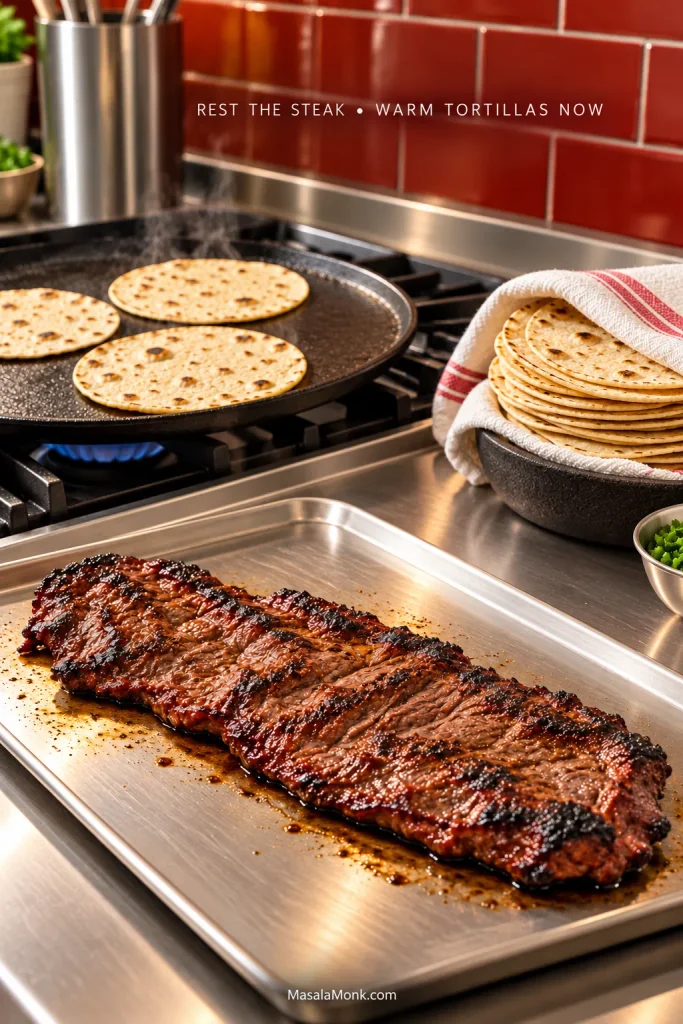
Move the steak to a cutting board. Give thin skirt or flap about 3–5 minutes; thicker pieces can rest for 5–10 minutes.
7. Warm and Hold the Tortillas
Have the tortilla pan or comal hot before the steak comes off. While the steak rests, warm several tortillas at once if your cooking surface allows. With a small skillet, start the first batches shortly before the steak finishes so you aren’t still warming tortillas after the meat comes off the heat.
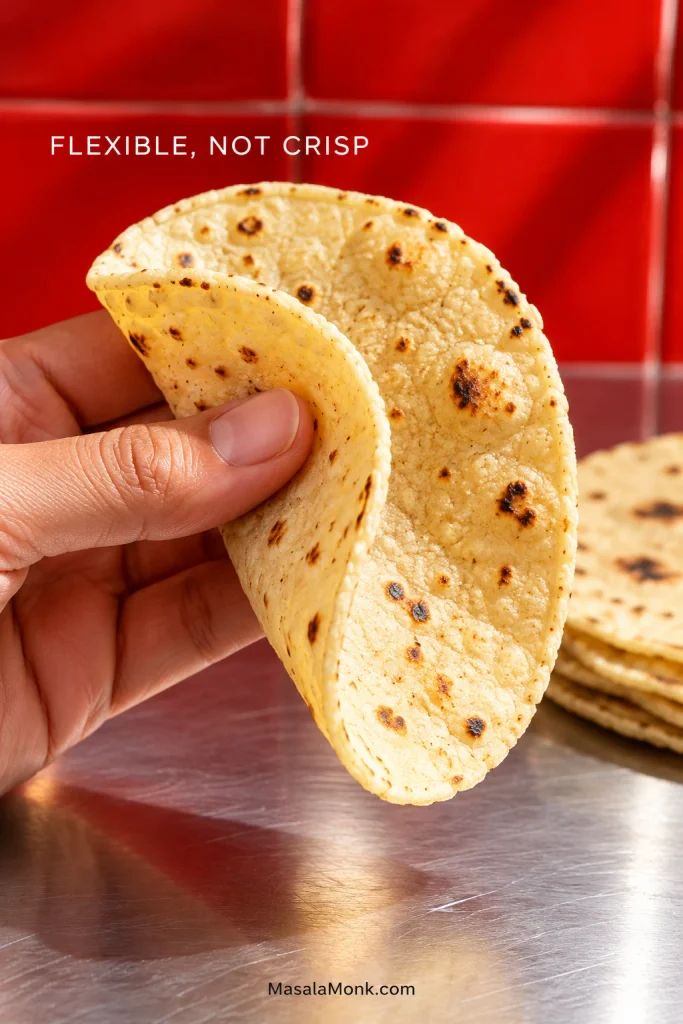
Heat the tortillas until hot through, flexible and lightly spotted, usually about 15–30 seconds per side, then keep every batch covered. Let the first tortilla tell you how much time the rest need.
Cover each warmed tortilla as it comes off the comal. The trapped steam helps the early tortillas stay pliable. Meanwhile, the steak can rest and the last batch can heat.
8. Slice Across the Grain, Then Chop
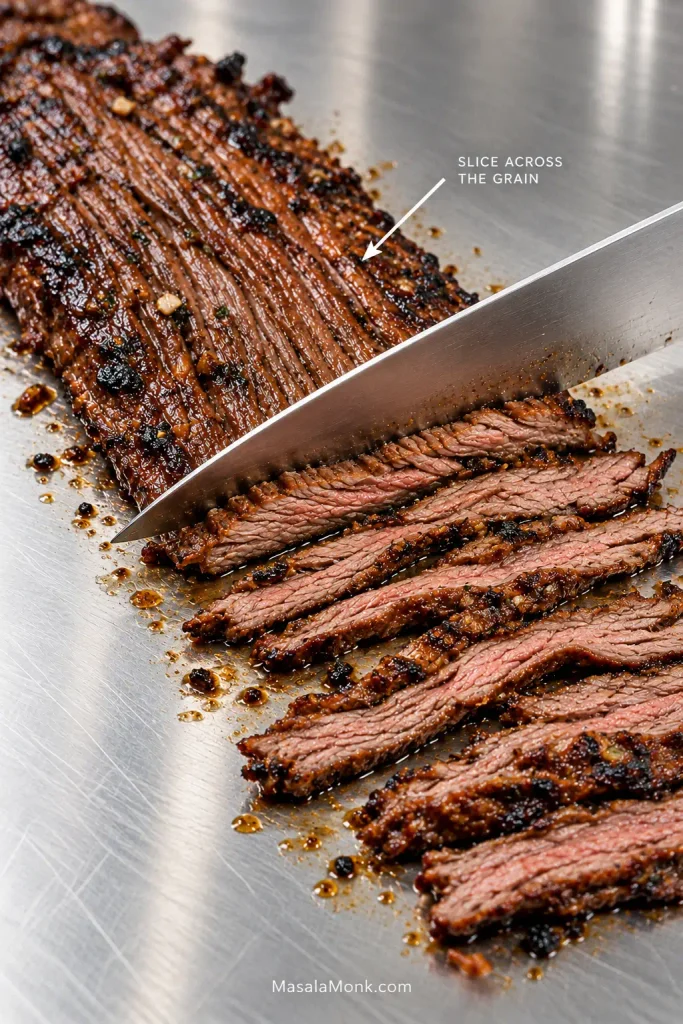
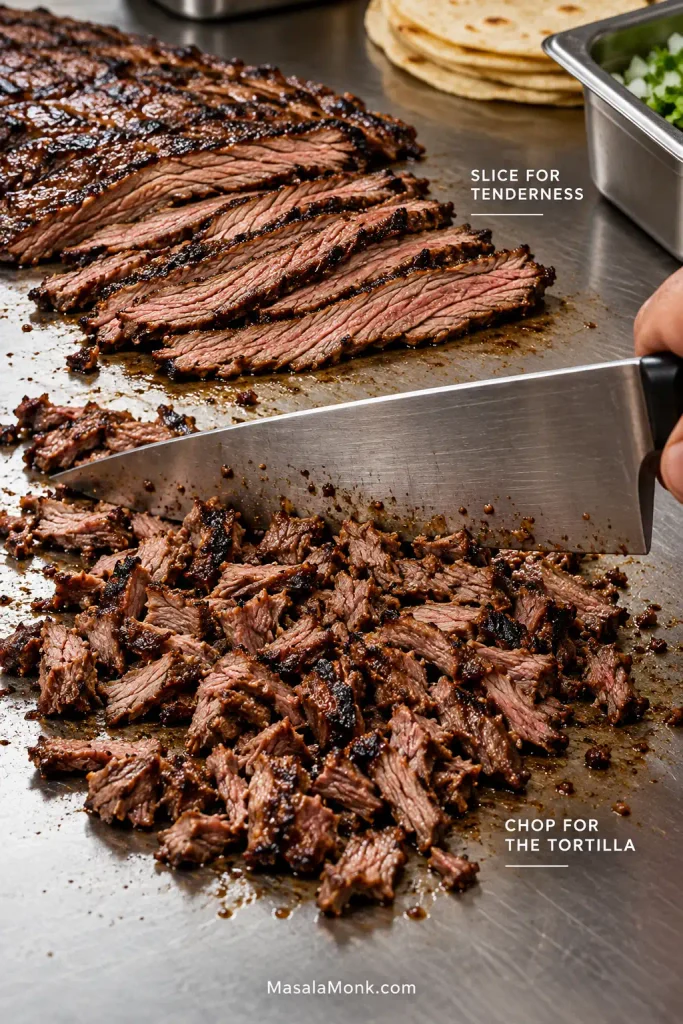
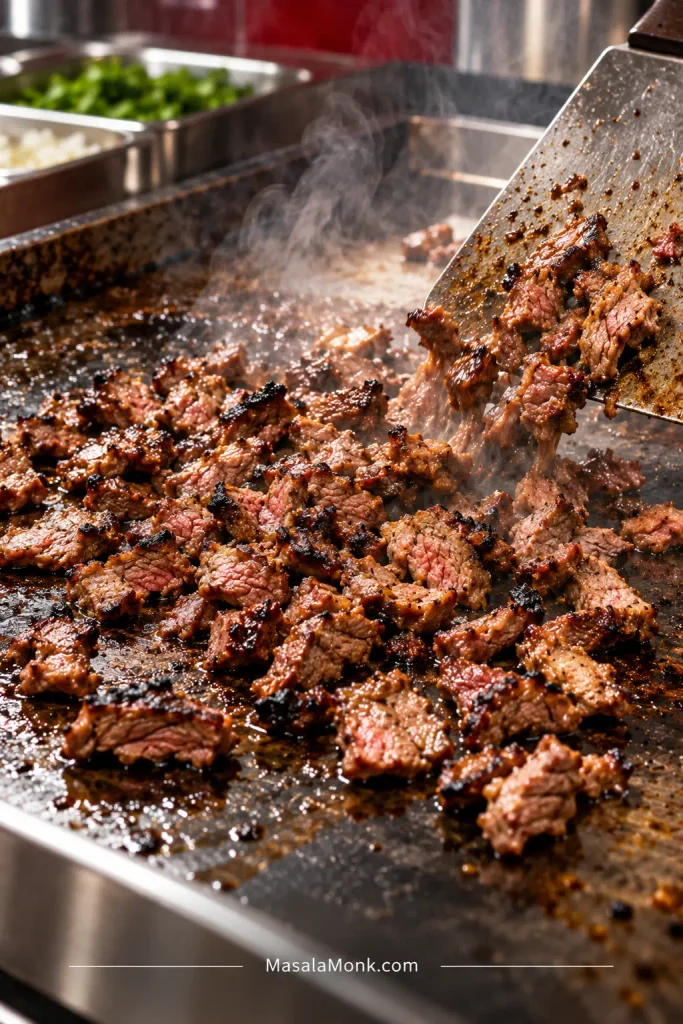
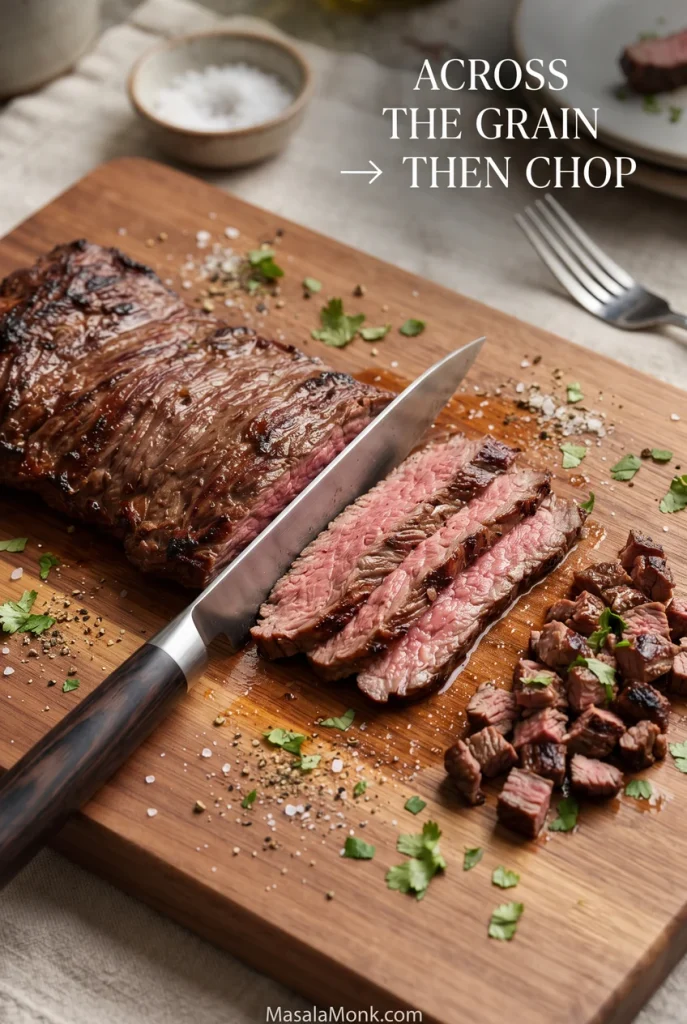
Slice the steak thinly across the grain first, then chop those slices into roughly ½-inch / 1.25-cm taco-size pieces. Keep the pieces visibly chunky, with browned edges.
Taste one hot piece. If the beef tastes good on its own, leave it alone. A small pinch of salt at this stage can wake up steak that tastes flat.
Skirt steak rarely runs perfectly straight from end to end. Reorient each section when the fibers turn so “across the grain” stays true all the way through the cut.
9. Build the Tacos
Two pounds of steak comfortably fills about 16 small tacos. Cover the center generously without packing the tortilla so full that it cannot fold.
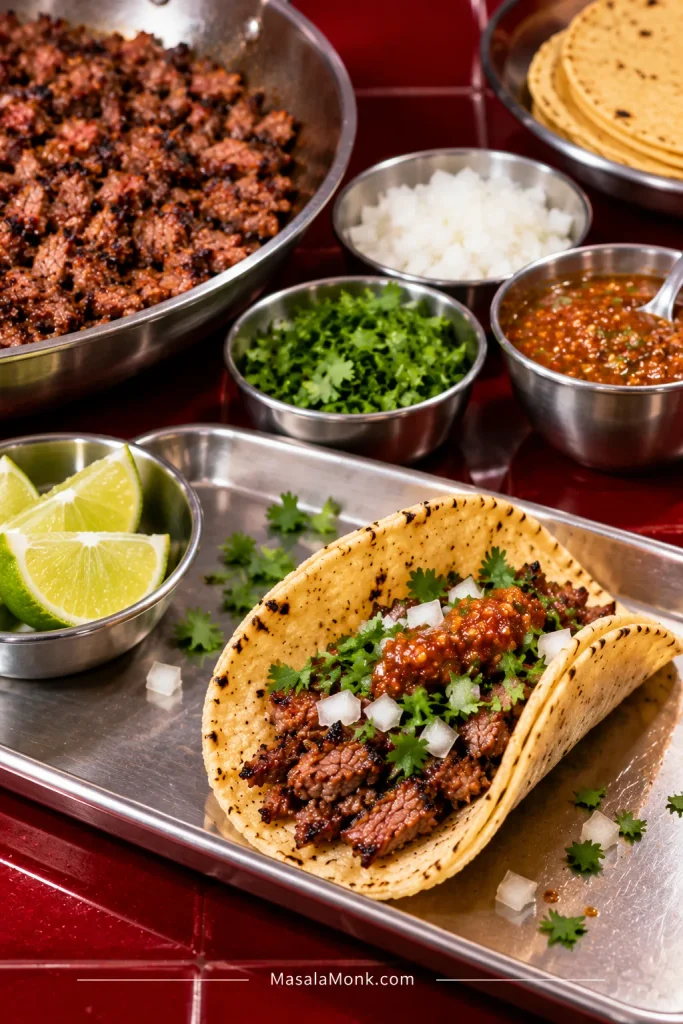
Add finely diced white onion, cilantro, a modest spoonful of salsa and fresh lime. A roasted Salsa Verde is especially good with the smoky edges of the beef.
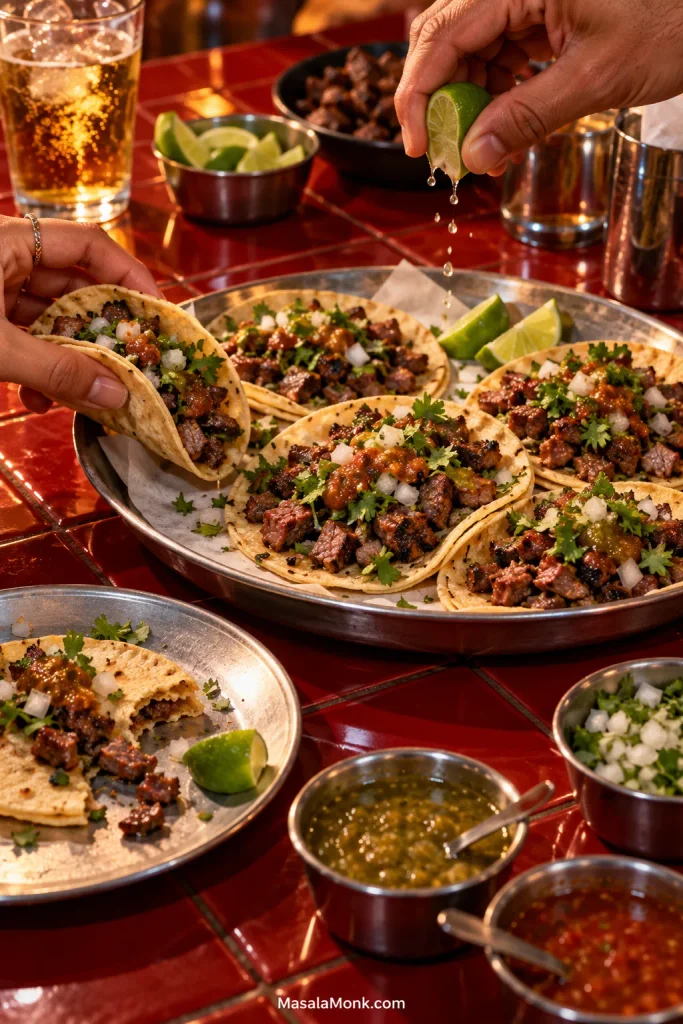
The taco should fold easily, hold together through the first bite and taste of beef before anything else. Put the toppings on the table and let everyone finish their tacos while the meat is still hot.
Recipe note: This research-derived recipe brings together established carne asada methods and has not been independently kitchen-tested by MasalaMonk.
Outside skirt has the deep beef flavor, loose grain and broad surface area that work especially well for carne asada tacos. It browns quickly and stays recognizable after the final chop.
If the package only says skirt steak, ask whether it is outside or inside skirt. Inside skirt can still work, but it tends to be firmer.
Sirloin flap, often sold as bavette, has beefy flavor and a coarse grain that handles high heat well; thickness can vary considerably from one end to the other.
Flank steak is the easy supermarket fallback: leaner, generally thicker and best sliced thinly after cooking.
For carne asada tacos, even thickness can matter as much as the cut name. A more uniform piece of skirt or flap is easier to sear, so thin ends are less likely to overcook while the thickest section catches up.
At a Mexican market you may see names such as ranchera or arrachera. Those labels vary by butcher, so ask what cut you’re buying and how thinly it has been sliced.
If the package says needle- or blade-tenderized, follow the cooking instructions on the label rather than the intact-steak guidance here.
For more cut-by-cut detail, the Carne Asada Recipe goes deeper into skirt, flap and flank and how each behaves over high heat; if your steak is already chosen, jump to the cook-by-cut checkpoints.
Getting a Good Char
The citrus and chile should sit behind the flavor of browned beef, not cover it. When the steak comes off the heat, char should be the first thing you smell and taste.
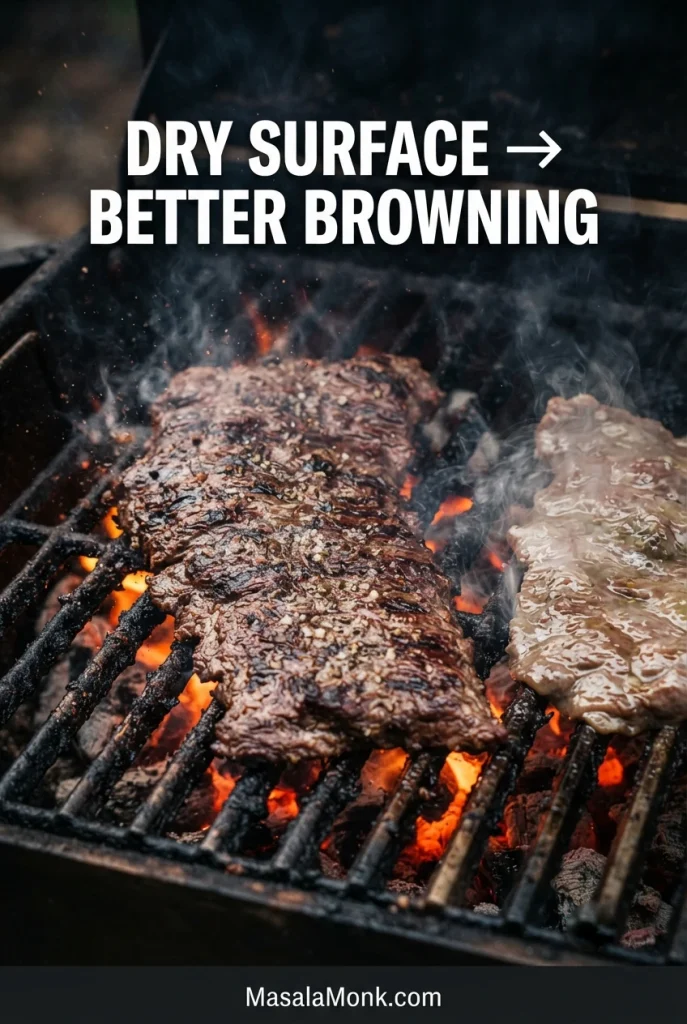
Moisture works against that browning. A wet piece of skirt steak can spend much of its short cooking time shedding water, and even a screaming-hot cast-iron pan cools when you cover it with cold beef. Blot the meat well, leave room between pieces and let the pan recover if a later batch starts releasing juice instead of sizzling.
If a batch starts bubbling instead of sizzling, stop adding meat. Let that batch finish, transfer it out, then let the empty pan get fiercely hot again before the next steak goes in.
Don’t chase char at the expense of how the steak eats, either. With skirt steak, very rare is not automatically more tender. Its coarse fibers can often eat better around medium than they do with a very rare center, especially once the meat is chopped for tacos.
The Moment Steak Becomes Taco Meat
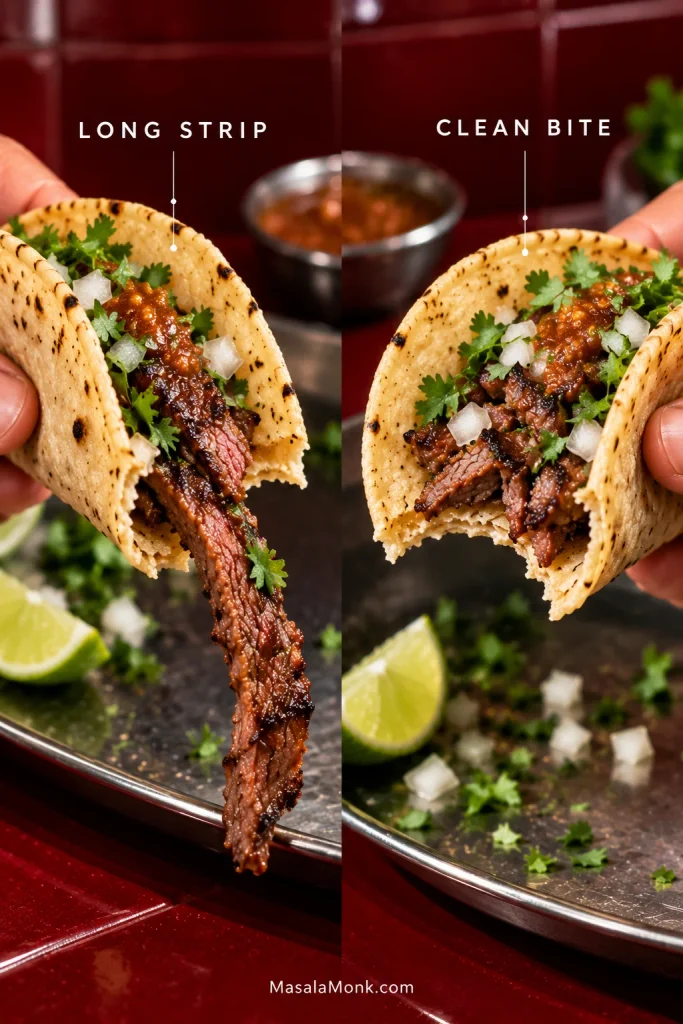
A beautifully cooked steak can still be awkward inside a taco. Long slices that look generous on a plate can follow your teeth straight out of a small tortilla.
First, Slice Across the Grain
Find the long muscle fibers and cut perpendicular to them. With skirt and flank, this makes a noticeable difference because the grain is so pronounced.
Then Chop for the Tortilla
Slice across the grain for tenderness; chop those slices into roughly ½-inch pieces so they fit and bite cleanly inside a small tortilla.
Keep the pieces large enough to stay juicy and recognizable, but short enough that several sit comfortably in one taco. You should still see dark edges around moist pieces of beef.
After slicing for tenderness, stack only a few strips at a time for the second cut. That keeps the final carne asada taco meat irregular and short without crushing it into mince.
The clean-bite test: bite through the center of a finished taco. A clean bite means the beef separates with the tortilla. If a long strip follows your teeth out, the steak may be tender enough for a plate but it was not cut properly for this job.
When the first taco fails the bite test, fix the meat—not the finished taco. Return the unassembled carne asada to the board and shorten the pieces before you build the rest.
Optional: Crisp the Chopped Edges
If you want a little more crust, give the chopped carne asada 30–60 seconds on a ripping-hot griddle or skillet after it has rested and been cut. Stop as soon as a few freshly cut surfaces brown.
Let the chopped carne asada sit against hot steel for a moment before tossing. Browning needs contact; constant stirring gives the cut faces heat without enough time to crust.
How to Warm the Tortillas
For these small tacos, the tortilla should stay soft enough to fold comfortably around the filling. The goal is flexibility, not crispness: if it cracks at the fold, it needs more heat; if the edges start stiffening, it has gone too far.
Test the first corn tortilla while it is hot. If it cracks before it is hot through, give the next one a little more heat; if the edges are already dry and stiff, shorten the heating time.
The Corn Tortilla Recipe yields about 16 soft 5–5½-inch tortillas if you want to make them from scratch.
One Tortilla or Two?
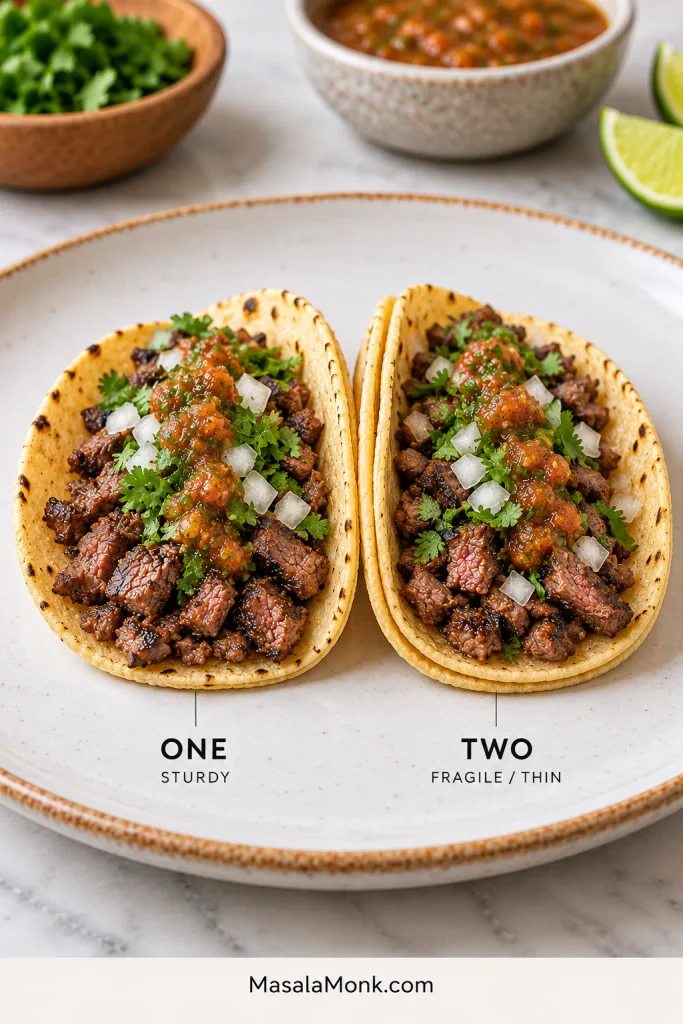
A single tortilla is enough when it is fresh, flexible and sturdy. Add a second for particularly thin or fragile tortillas, especially with a juicy salsa.
Warm first, then decide. Build one test taco. If the base sags or tears under the beef and salsa, double the remaining tortillas. Otherwise, keep the lighter single-tortilla build.
What About Flour Tortillas?
Flour tortillas have a particularly strong place in northern Mexico, especially Sonora, where carne asada tacos can also be larger and more heavily filled than the little corn-tortilla tacos we’re making here.
Start simply: hot tortilla, hot chopped carne asada, white onion, cilantro, salsa and lime. Taste that taco before reaching for anything else.
Keep chopped carne asada along the center line and add salsa last. That leaves a drier outer edge to grip and fold, which makes a small corn tortilla easier to eat cleanly.
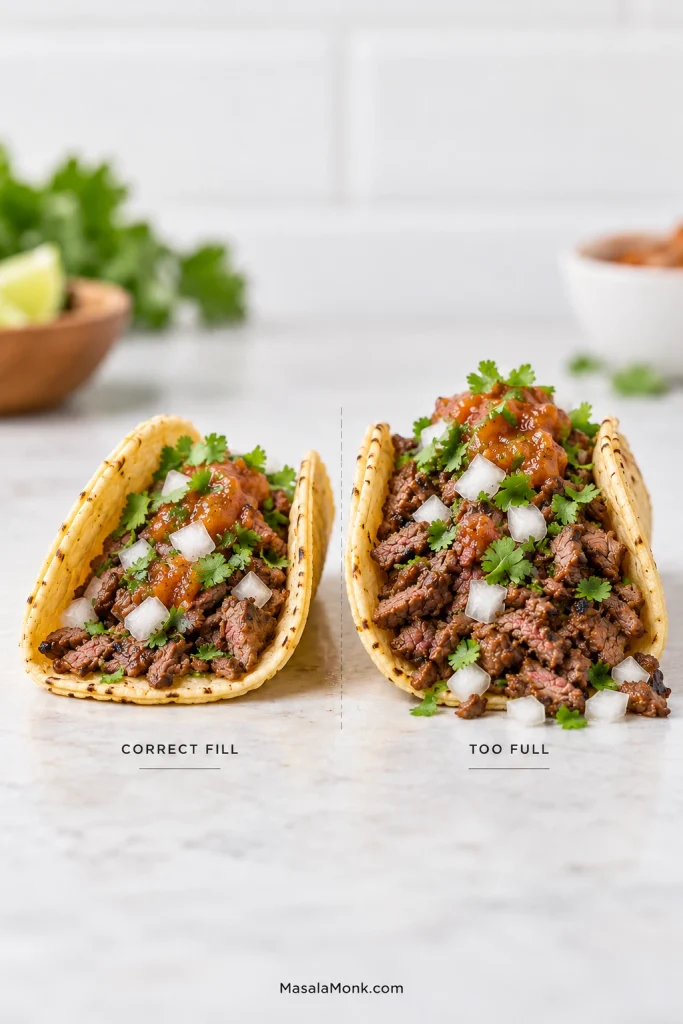
Don’t Overfill It
Before you pick it up, the tortilla should still be able to fold comfortably around the filling without bulging open. If it can’t, take a little out; the taco will eat better.
Use the tortilla edge as the stop line. Filling below it can fold inward; meat piled above it has nowhere to go except out.
If dinner needs more heft, add it alongside rather than overloading the tortilla; creamy Refried Beans work well here.
Carne Asada Taco Toppings
Salsa should brighten the beef without running through the tortilla before you take the first bite. A roasted salsa verde gives you tart tomatillo and chile; a fresh Pico de Gallo keeps things cooler, chunkier and tomato-forward.
Radishes add crispness. Grilled onion or jalapeño keeps the smoky direction going. Cotija or queso fresco makes the taco richer, while Guacamole is easy to serve on the side so everyone can add their own.
Gray beef, chewy beef and a broken tortilla may happen at the same dinner, but they come from different problems. Fix the symptom you actually have.
What you notice
Likely cause
Try this
Pale or gray beef
Wet surface or weak heat.
Dry the steak more thoroughly and get the cooking surface hotter.
Liquid collecting around the meat
Too much marinade came with the steak, or the pan is crowded.
Blot the meat well and cook smaller batches.
Tough, stringy beef
Cut, doneness or grain direction may be working against you.
Check which steak you bought, how far it cooked and which way you sliced it.
Long pieces pull out with each bite
The final chop is too large.
Slice across the grain first, then chop those slices into shorter pieces.
Beef tastes boiled
The meat simmered in pooled liquid.
Use a dry surface, higher heat and more room in the pan.
Corn tortillas crack
They are cold, dry, stale or underheated.
Heat them until flexible and keep the stack covered. If they stay brittle, switch to fresher tortillas or double them.
Tortillas tear underneath
Thin tortilla, too much filling or too much wet salsa.
Use less filling, spoon salsa lightly or double fragile tortillas.
The taco is awkward to bite
Pieces are too large, the taco is too full, or both.
Cut the beef smaller and leave room for the tortilla to fold.
The taco tastes flat
It may need salt, better char, salsa acidity or lime.
Fix those fundamentals before adding more toppings.
Marinated but Still Tough?
More time in citrus is rarely the first answer. Check the cut and doneness first, then the grain direction and whether the final pieces are too long for the tortilla.
Flank especially needs careful cross-grain slicing, while skirt can feel much tougher when cut with the fibers. Long pieces can make otherwise tender steak awkward inside a tortilla. Once the cut, doneness and slicing all look right, then revisit the marinade timing. Citrus can change the surface; it cannot undo overcooking or with-grain slicing.
Finish the fresh toppings and salsa while the steak marinates, then keep them chilled. Near serving time, only the hot jobs should be left.
If you’re feeding a bigger table, make Mexican Rice while the steak marinates. It can be ready and resting before the grill gets busy.
Have the tortilla pan ready as the steak finishes. Warm and hold the tortillas during the rest, then slice and chop the beef and build the tacos immediately. That’s the easiest way to get hot meat into a flexible tortilla without making everyone wait.
Leftovers and Reheating
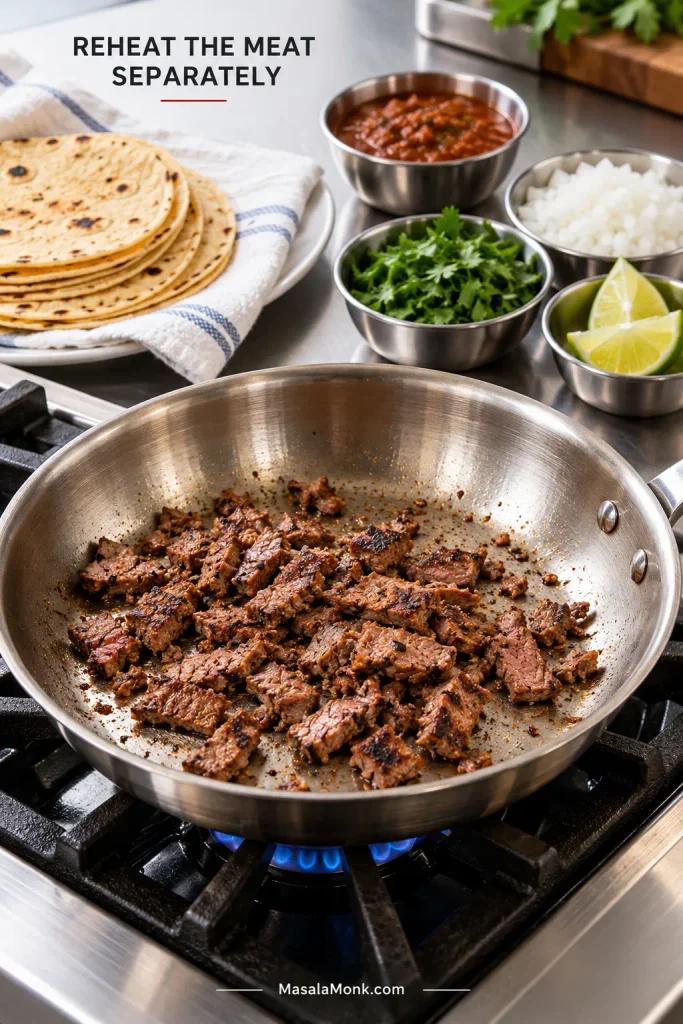
Store cooked carne asada separately from the tortillas, salsa and fresh toppings. Reheat only what you need in a hot skillet, then build the tacos with freshly warmed tortillas.
Spread the carne asada in a loose single layer and reheat until it reaches 165°F / 74°C, then stop. Small chopped pieces lose moisture quickly, so extra pan time hurts more than it helps.
Refrigerate cooked leftovers promptly and use them within about 3–4 days. When reheating leftovers for food safety, bring them to 165°F / 74°C.
If only a little steak remains, chop it small and warm it briefly for a steak-and-egg Breakfast Burrito the next morning.
Eat Them Hot
The steak can be excellent and still make a mediocre taco. Everything clicks when the beef is still hot, the tortilla folds around it without cracking, and onion, salsa and a squeeze of lime sharpen the char instead of burying it. Eat that taco while everything is still doing its best work.
Squeeze lime over the tacos at the table rather than well in advance. The fresh acidity brightens the char and gives the juice less time to soak into the warm corn tortilla.
The best carne asada has dark, almost singed edges, hot beef juices on the cutting board, and enough citrus, garlic and chile to brighten the steak without covering up its beefiness. Slice it thinly across the grain and it should fold into a warm tortilla without turning dinner into a tug-of-war.
Carne asada literally means grilled meat, and the cuts, seasoning and accompaniments vary across Mexico and Mexican-American cooking. This carne asada recipe takes the citrus-marinated route, followed by fierce heat for a deeply browned exterior and juicy beef inside.
Outside skirt steak and flap meat are especially good here. Flank steak works too, and it is often easier to find. The marinade supplies the citrus, garlic and chile; tenderness depends just as much on the beef you buy, the heat of the grill and the way you slice it at the end.
Carne asada at a glance: Best beef: outside skirt first, flap/bavette close behind; flank is the easiest supermarket substitute. Marinate: 2–4 hours for this citrus marinade. Heat: about 450–500°F / 230–260°C or hotter for direct grilling. Cook: watch thickness, browning and temperature instead of trusting one timer. Rest: 3–5 minutes for very thin beef; 5–10 minutes for thicker skirt, flap or flank. Slice: thinly across the grain; chop afterward for tacos.
Carne Asada Recipe
Citrus-marinated skirt or flap steak grilled over intense heat until deeply browned, then rested and sliced thinly.
Yield 4–6 main servings or about 8 smaller taco servings
Prep 15 minutes
Marinate 2–4 hours
Cook About 2–12 minutes for most cuts; thick flank may take longer
Rest 3–10 minutes
Total About 2½–5 hours with the recommended marinating time
Equipment
Gas or charcoal grill
Large zip-top bag or shallow non-reactive container
Long grill tongs
Instant-read thermometer for meat thick enough to probe reliably
Sharp chef’s or slicing knife
Cutting board
Paper towels
Ingredients
2 lb / 907 g outside skirt steak or flap/bavette; flank steak also works
½ cup / 120 ml fresh orange juice
3 tbsp / 45 ml fresh lime juice
¼ cup / 60 ml olive oil or neutral oil
4 garlic cloves / about 16 g, finely grated or minced
½ cup loosely packed chopped cilantro / about 8 g
1 medium jalapeño / about 15–20 g, finely chopped; remove seeds and ribs for less heat
1 tsp / about 1 g Mexican oregano; regular oregano works if needed
1 tsp / about 2 g ground cumin
1 tsp / about 2 g pure ancho chile powder, not a blended chili seasoning mix
6 g kosher salt, preferably weighed; about 2⅛ tsp Diamond Crystal or 1¼ tsp Morton kosher salt
¾ tsp / about 1.5 g freshly ground black pepper
Neutral high-heat oil, as needed for the grill grates
Fresh lime wedges, for serving
Instructions
Prepare the beef. Trim away obvious thick silver skin or tough membrane. Cut very long skirt or flap steak into 2–3 sections so each piece can lie flat on the grill. Notice which direction the muscle fibers run now; they are easier to see before cooking.
Mix the marinade. Whisk together the orange juice, lime juice, oil, garlic, cilantro, jalapeño, oregano, cumin, ancho chile, salt and black pepper. It should smell bright, citrusy and strongly garlicky.
Marinate. Add the beef and turn until well coated. Refrigerate for 2–4 hours. Even 30 minutes gives the surface noticeable citrus, garlic and chile flavor when dinner is close. With this acidic formula, keep the total marinating time within about 8 hours.
Heat the grill. Prepare a direct grilling zone at about 450–500°F / 230–260°C or hotter. Clean the hot grates well and, if your grill tends to stick, lightly oil them with a little neutral high-heat oil.
Drain and blot. Remove the steak from the marinade and discard the used liquid. Blot the beef well with paper towels. Brush away heavy clumps of garlic or herbs that could scorch before the meat develops a crust.
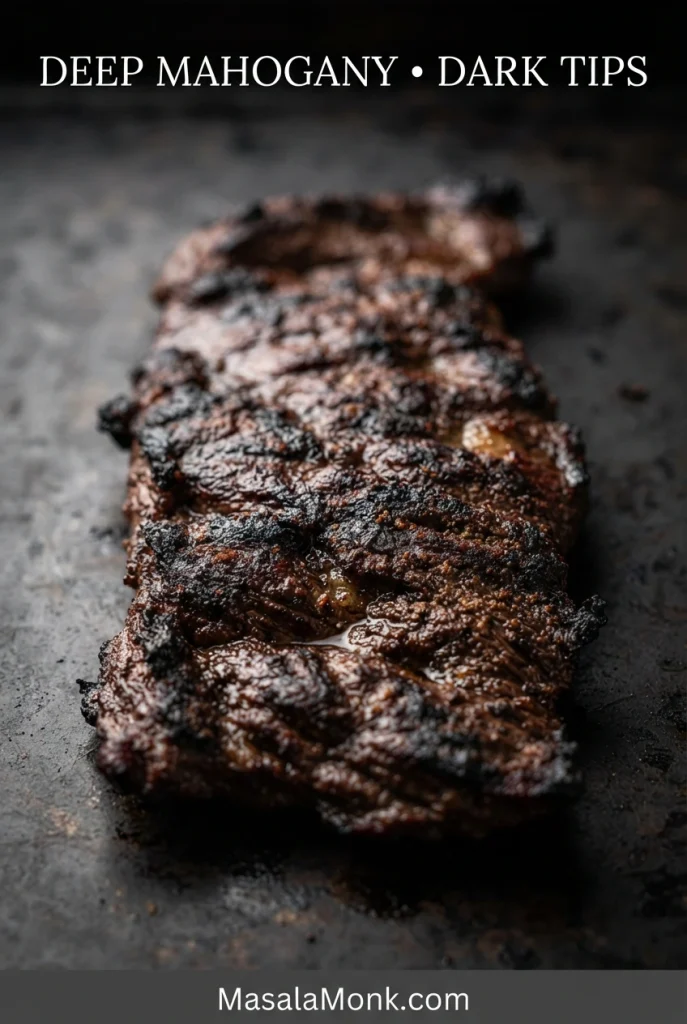
Grill. Very thin ranchera or flap may need only 1–2 minutes per side. Regular skirt or flap often takes 2–4 minutes per side. Thicker flank may need 4–6 minutes per side or longer. Look for deep brown patches and darkening edges, then start watching closely. A few blackened tips are welcome; a uniformly black steak has gone too far.
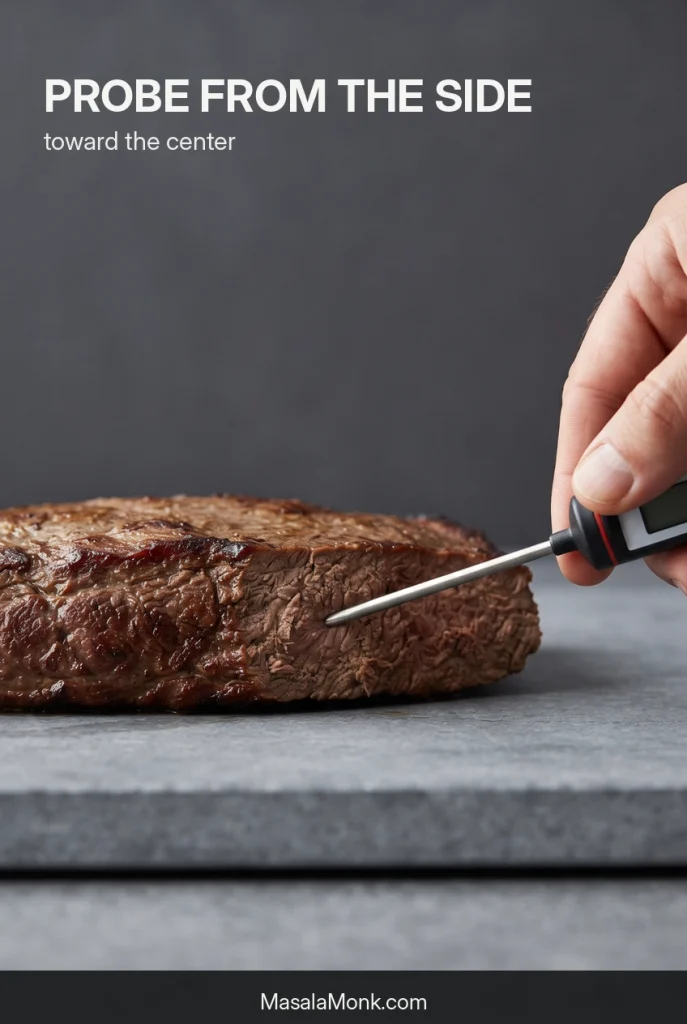
Check doneness. Use an instant-read thermometer when the steak is thick enough to probe reliably, cooking to your preferred doneness while keeping the food-safety guidance below in mind. With thinner skirt or flap, insert the probe horizontally from the side toward the center. Paper-thin carnicería cuts cook so quickly that browning, timing and close attention matter especially.
Rest. Give very thin steak about 3–5 minutes. Rest thicker skirt, flap or flank for 5–10 minutes.
Slice across the grain. Turn the steak so your knife crosses the visible muscle fibers. Slice thinly. For tacos or burritos, chop those slices into pieces about ½ inch / 1.25 cm across.
Taste and serve. Taste a freshly cut piece and add a small pinch of salt if needed. Finish with fresh lime and serve immediately.
How much beef per person: 2 lb / 907 g serves about 4–6 people when the steak is the center of the meal, or roughly 8 smaller taco servings with sides. That usually works out to about 2–3 tacos per person, depending on tortilla size and toppings.
Food-safety note: For intact whole beef steaks, USDA guidance is 145°F / 63°C followed by at least a 3-minute rest. Follow the package cooking instructions if your beef is labeled mechanically, blade or needle tenderized.
Cooking indoors: Well-drained, blotted steak can be cooked in a thoroughly preheated cast-iron skillet or under a hot broiler. Work in batches when using a skillet and ventilate the kitchen well.
Whether the package says ranchera or the cut is skirt, flap or flank, thickness sets the pace. Thin carne asada needs fierce heat and very little time; thicker flank simply needs longer to develop the same strong browning. Find the row closest to the steak you actually bought.
Outside skirt, flap and flank all work for carne asada, yet their different thicknesses change how quickly heat reaches the center. That is why two steaks on the same grill can need very different cooking times.
If you bought…
Start checking here
Very thin ranchera/flap
About 1–2 minutes per side over fierce heat.
Regular skirt or flap
About 2–4 minutes per side.
Thicker flank steak
About 4–6 minutes per side; use a thermometer once the meat is thick enough to probe reliably.
Best Meat for Carne Asada: Skirt, Flap and Flank
Outside skirt is the first choice here, flap/bavette is an excellent alternative, and flank is the easiest widely available supermarket substitute. All three can make terrific carne asada.
Outside skirt steak is deeply beefy, relatively thin and full of loose muscle fibers that brown quickly and become tender when cut across the grain.
Flap meat, or bavette, has a similarly coarse grain and plenty of beef flavor. It is particularly good when the steak will be chopped for tacos.
Flank is not a consolation prize. It is leaner and usually thicker than skirt or flap, so give it the extra time its thickness requires.
Inside skirt works too, although it can be firmer than outside skirt. Careful trimming and thin slicing help. Where classic skirt has become expensive or difficult to find, thin chuck or diezmillo also works well for taco-style carne asada when a butcher slices it appropriately thin.
Ranchera and Arrachera at the Meat Counter
At many Mexican markets, arrachera means skirt steak, while ranchera may be flap or another thin grilling cut. The names can change from one butcher shop to another.
Ask what cut you are buying, then ask how thick it has been sliced. After that, stop worrying about the label and cook the steak you actually brought home.
Package says mechanically, blade or needle tenderized? Follow its cooking instructions rather than treating it exactly like an intact steak.
Carne Asada Marinade: Citrus, Garlic and Chile
This carne asada marinade combines orange and lime juice with garlic, cilantro, jalapeño, oregano, ancho chile, cumin, oil and salt. Orange rounds out the sharper lime, while garlic, jalapeño, oregano and ancho do most of the aromatic work. Cumin stays in the background, oil helps the mixture cling to the beef, and salt seasons it.
This carne asada marinade is designed to brighten the beef rather than bury it. Orange rounds out lime’s sharper acidity, while garlic, jalapeño, cilantro and ground spices build depth that the grill later turns darker and smokier.
When it is mixed, the marinade should smell fresh, citrusy and strongly garlicky. Once the steak reaches the grill, browned beef and smoke should move to the front.
How Long to Marinate Carne Asada
Two to four hours is the sweet spot. Even 30 minutes gives the surface noticeable flavor when you are rushed, and 4–8 hours is workable, especially with thicker beef. For this citrus-heavy marinade, skip the overnight soak and keep it within about 8 hours. Longer exposure gives the citrus more time to change the surface texture without necessarily making the steak taste better.
Carne asada can be much simpler than the version here. In parts of northern Mexico, excellent beef, salt and live fire can be the whole idea. Pati Jinich’s Sonora-style carne asada is a useful example; this recipe deliberately takes the citrus-marinated route instead.
How to Make Carne Asada on the Grill
Now get the grill hot.
Build a direct grilling zone around 450–500°F / 230–260°C or above. For thin skirt or flap, hotter than feels polite is usually better: you want color on the outside before the middle has time to overcook.
Scrub the hot grates clean. If your grill has a history of sticking, lightly oil them with a little neutral high-heat oil before the steak goes down.
Dry the Steak Before It Hits the Grill
Remove the steak from the marinade, discard the liquid and blot the beef well. Dry the surface well. A wet steak can steam and turn gray while you wait for char that never arrives.
A marinated steak does not need to be dry inside; only the outside needs to be free of excess liquid before it hits the heat. Once that surface moisture is reduced, more of the grill’s energy can go toward browning and crust formation.
The steak should answer with a hard sizzle almost immediately when it hits the grate. A weak hiss usually means the surface is still too wet or the grill needs more heat.
What you see
What it means
Dull, wet or gray surface
The steak needs a drier surface, more heat, or more time undisturbed against the grill.
Deep brown or mahogany patches
The crust is developing; start watching the thinner areas closely.
Blackened thin tips and edges
Usually fine on skirt steak as long as the rest of the piece is browning rather than burning.
Black from edge to edge
The char has gone too far; pull the steak before bitterness takes over.
Give the Steak Time to Brown
Lay the beef over the hottest part of the grill that is not engulfed in flare-ups and leave the first side alone long enough to develop color. Constant lifting and turning makes a good crust harder to build.
Good carne asada char is concentrated rather than uniform. Look for a dry, deeply browned crust with a few darker edges; the goal is smoky contrast around juicy beef, not a steak blackened from end to end.
Uneven char is normal on skirt steak. Thin ends darken before the thicker center, so do not keep the whole piece over the fire just to make every inch the same color.
Charcoal naturally adds smoke and live-fire flavor. A standard gas grill gives you plenty of heat and char, though without quite the same smoke profile. Mesquite pushes that smoky character further, while a very hot plancha or griddle produces its own taco-shop style of browned beef.
If the steak is properly seasoned but still tastes flat, stronger browning or a little smoke may be what it is missing.
Carne Asada Temperature: Medium-Rare vs. USDA Guidance
For culinary doneness, medium-rare steak is commonly finished around 130–135°F / 54–57°C. Thicker steak may rise a few degrees as it rests; paper-thin carne asada has much less carryover.
On thicker steak, insert an instant-read thermometer horizontally through the side toward the center. Paper-thin cuts may be too shallow for a reliable probe reading, which makes browning, timing and close attention more important.
The probe needs to reach the middle of the steak, not simply touch its surface. With thicker flank or flap, entering through the side gives the sensor a straighter path into the center, making the reading more representative of the meat inside.
No outdoor grill? You can still make excellent carne asada indoors. Cast iron gives you a hard sear; the broiler keeps the cooking off the stovetop.
Cast Iron
Cut long skirt or flap steak into pieces that can lie completely flat. Blot them especially well, then heat a heavy cast-iron skillet over high heat until very hot. Add just enough high-heat oil to lightly coat the cooking surface.
A heavy cast-iron skillet holds a lot of heat, which is exactly what carne asada needs for a hard crust indoors. Keep the pieces flat and spaced apart; otherwise, released moisture cools the cooking surface and encourages steaming instead of searing.
Start checking the first side after about 2–3 minutes. Turn when it has developed a strong brown crust, then watch the second side closely; thin pieces can finish quickly, while thicker flap or flank needs longer. Use the thermometer and temperature guidance above whenever the steak is thick enough to probe reliably.
Cook in batches so every piece gets direct contact with the pan, and let the empty skillet regain its heat before starting the next batch. A properly hot skillet will create smoke, so turn on the exhaust hood and open the windows before cooking.
Broiler
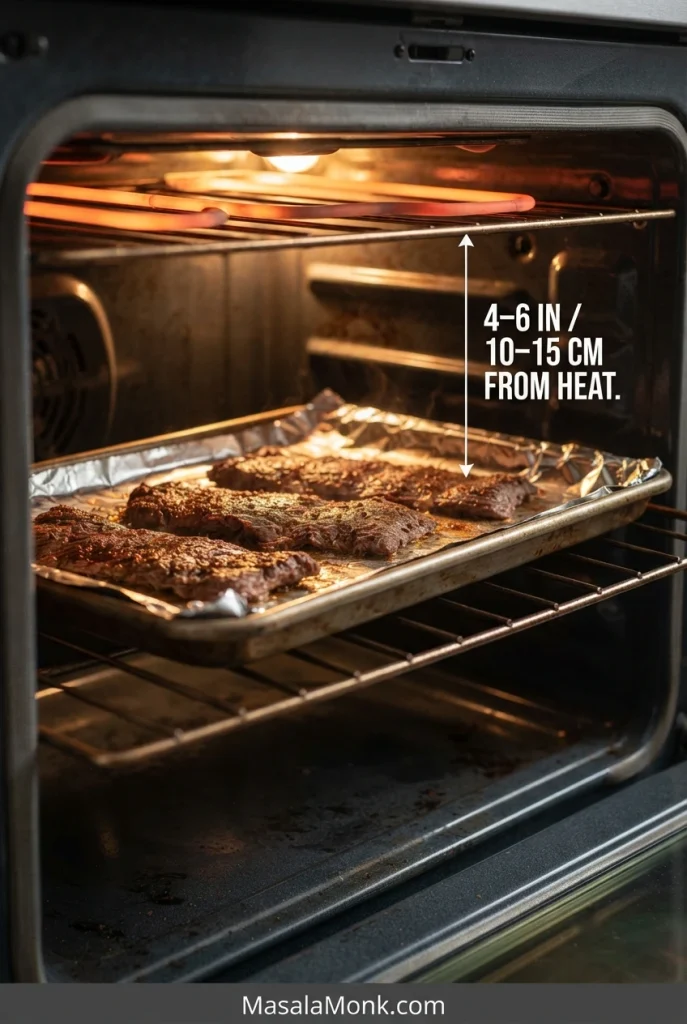
Arrange the well-drained steak on a foil-lined broiler-safe sheet pan and place it roughly 4–6 inches / 10–15 cm from a fully heated broiler.
A broiler puts intense heat directly above the steak, so thin carne asada can brown surprisingly fast without a grill. Broilers vary widely, however, which is why the color of the crust is a better stopping signal than blindly following one fixed cooking time.
Start checking regular skirt after about 6 minutes total; many pieces finish in roughly 6–10 minutes, turning once as the first side browns. Paper-thin ranchera can be ready much sooner, while thicker flank needs more time. Broilers vary considerably, so let browning and doneness decide when the steak comes out.
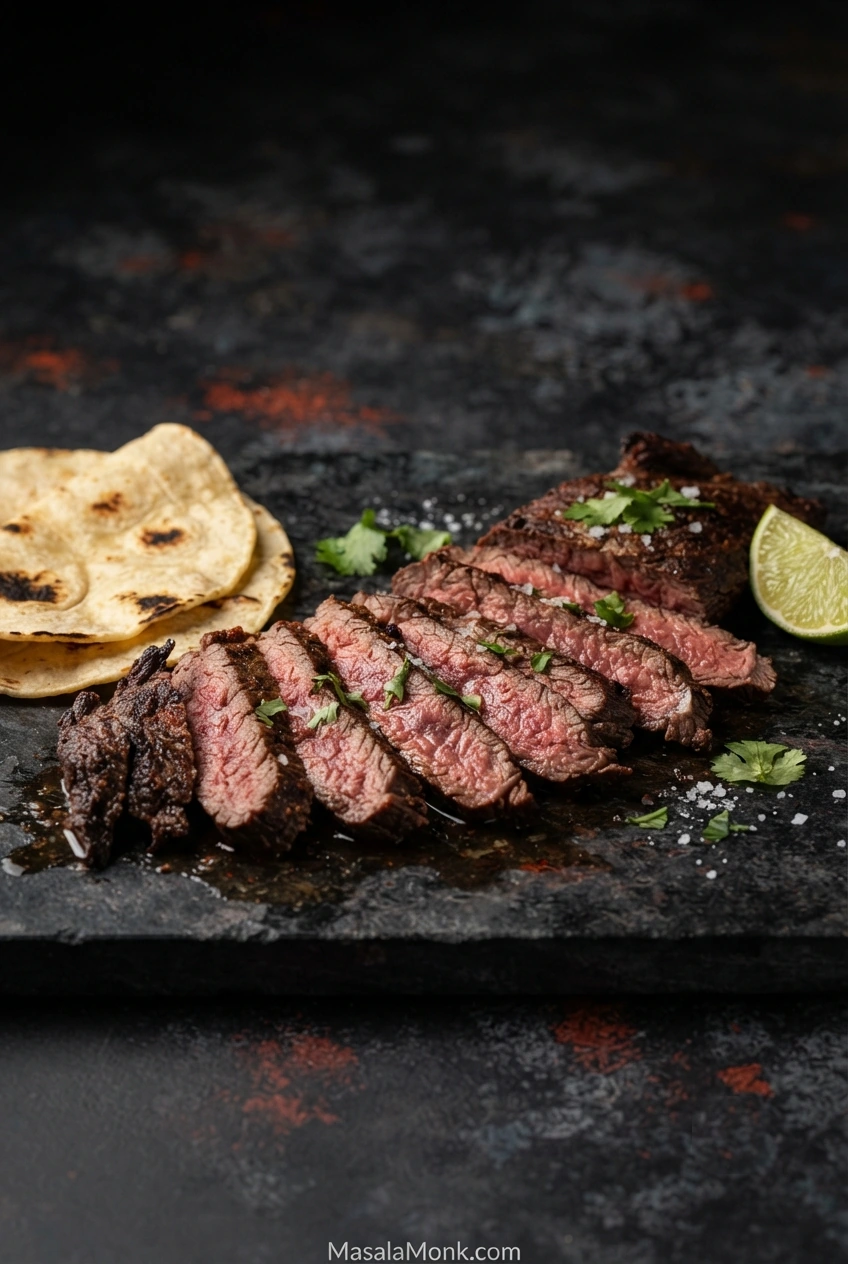
Look closely at the rested steak before reaching for the knife. The long muscle fibers should be visible running in one direction.
Turn the beef so the knife crosses those fibers and make thin slices. A slight diagonal cut gives you wider pieces while keeping the fibers short.
Once the steak is sliced across the grain, those thin pieces are easier to eat and portion into tacos. A quick chop then creates small, loose pieces that distribute through the tortilla instead of forming one dense mouthful.
Slicing direction matters more than it seems: juicy skirt steak can still feel frustratingly chewy when it is sliced with the grain.
For Tacos, Slice First and Chop Second
Serving the steak on a platter? Stop at thin slices. When it is headed for tacos or burritos, chop those slices into pieces around ½ inch / 1.25 cm across.
This is the payoff: thin, juicy slices, dark at the edges, with the long fibers shortened enough to bite cleanly. A hot tortilla, chopped steak, onion, salsa and lime are often all it needs.
Why Is My Carne Asada Tough? Don’t Blame the Marinade First
A flavorful steak can still be tough. The cause might be the cut, leftover membrane, overcooking, long muscle fibers or simply pieces that are too large for an easy taco bite.
What happened
What to check next time
Gray with little crust
Blot the steak more thoroughly, increase the heat and avoid crowding the cooking surface.
Dry and leathery
The meat likely cooked too long, especially if thin steak was given thick-steak timing.
Juicy but chewy
Check the grain direction, slice thickness, tough membrane and the actual cut.
Brush away heavy marinade solids before the steak reaches fierce heat.
Soft or mealy outside
Shorten the time in the acidic marinade.
Too salty
Check the salt measurement and marinating time. Weigh the kosher salt if possible because brands differ substantially by volume.
Some pieces tender, others tough
Uneven thickness can put different pieces at different levels of doneness.
Well seasoned but missing taqueria character
Look at the heat, browning and smoke before changing the marinade.
A marinade can change flavor and surface texture; it cannot shorten long muscle fibers. Your knife does that when you slice across the grain.
Make Ahead, Freeze and Use the Leftovers
Make Ahead
The marinade can be mixed up to 1 day ahead and refrigerated separately. Combine the beef and marinade 2–4 hours before cooking. Carne asada is best soon after grilling, so prep early rather than cooking the steak hours ahead.
Refrigerate cooked carne asada promptly in a covered container and use it within 3–4 days. Reheat only what you need, ideally in a hot skillet, until it reaches 165°F / 74°C. If you freeze the cooked steak, FoodSafety.gov lists 2–6 months for cooked-meat quality, although thin cooked steak is at its best much sooner.
Leftover carne asada is excellent in a crisp skillet quesadilla; the folding and browning method in our chicken quesadilla recipe works just as well once you swap in the chopped steak.
A smaller handful can become carne asada fries: warm the beef quickly, then scatter it over crisp homemade French fries with cheese, salsa and avocado.
What to Serve with Carne Asada
Bring the sliced beef straight to the table and let everyone build their own. Carne asada does not improve by waiting under a pile of elaborate toppings.
A good carne asada taco leaves room for the steak to remain distinct. Warm corn tortillas carry the beef, while lime, onion and salsa add brightness and contrast. A lighter hand with the toppings lets the char and seasoning stay noticeable.
Lime, guacamole, pico de gallo, charred green onions and blistered chiles all make sense around smoky beef. You do not need all of them on the same plate.
For tacos, keep the pile loose. A modest spoonful of chopped beef, onion, salsa and lime gives you a cleaner bite than packing the tortilla so full that the filling falls out before the first mouthful.
Choose the salsa to suit the rest of the meal: roasted salsa verde brings tart tomatillo and chile, while fresh mango salsa gives the smoky steak a sweeter, juicier contrast.
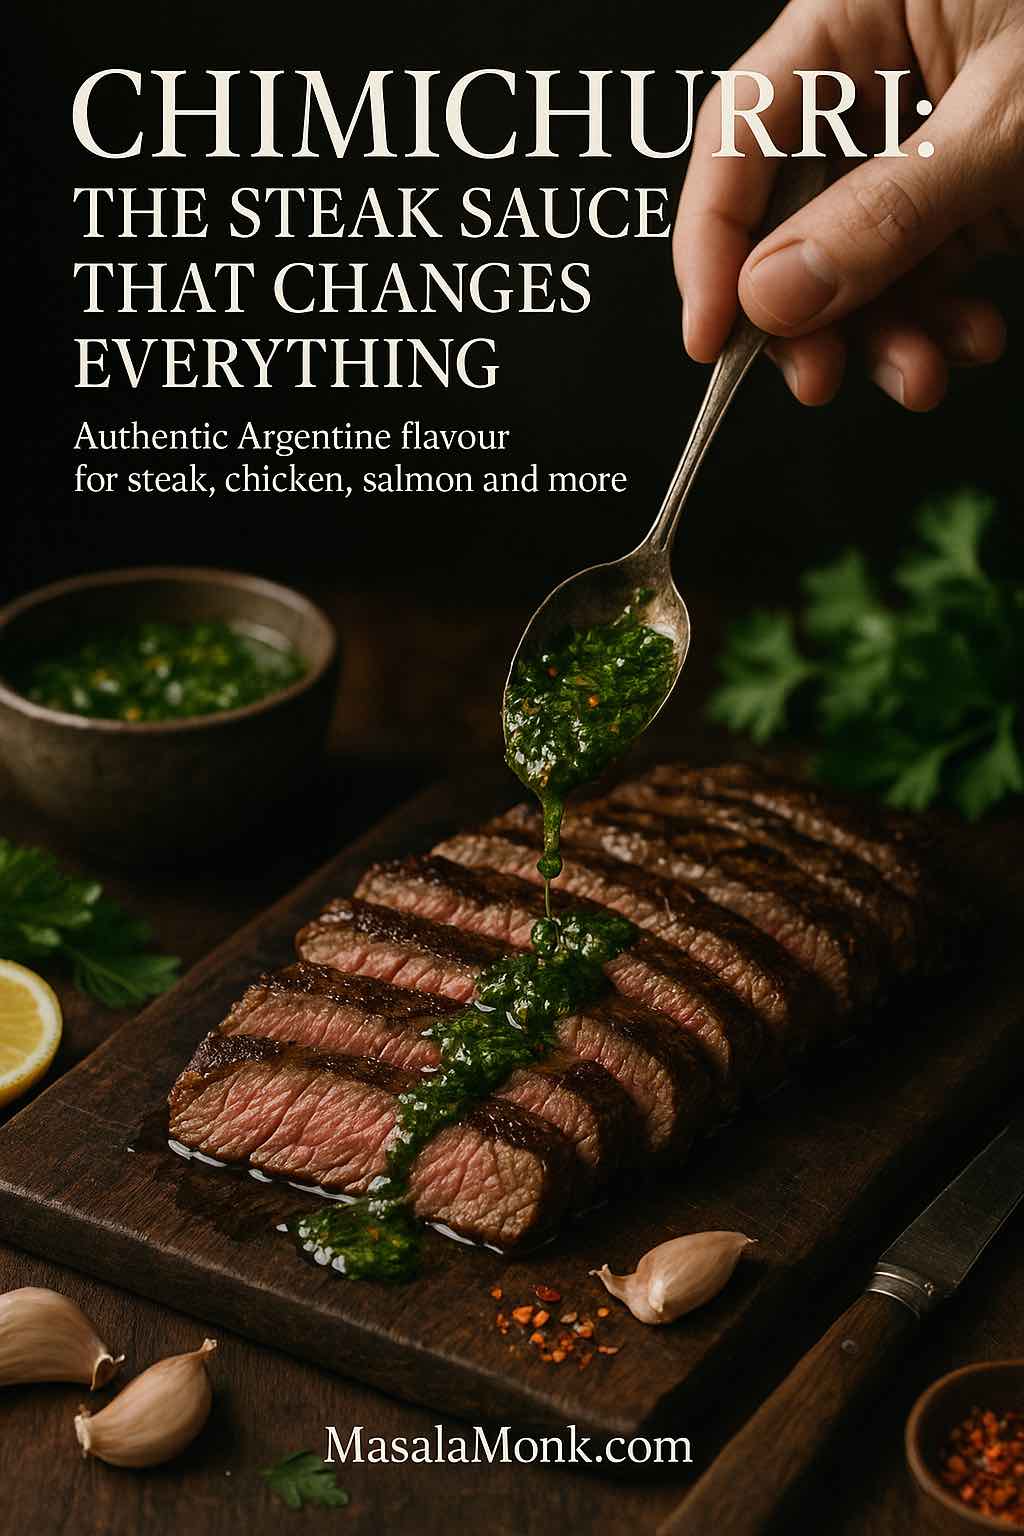
Some sauces quietly change the way you cook. Chimichurri is one of those quiet revolutions: a small bowl of vivid green herbs, garlic and oil that suddenly makes steak, chicken, vegetables, burgers, salmon, even rice taste brighter and more alive. If you’ve ever wondered what chimichurri is, how to make an authentic Argentinian version at home, or how to turn one simple chimichurri recipe into a marinade, dry rub, salad dressing, dip, or even a compound butter, you’re in exactly the right place. We’ll walk through a classic chimichurri sauce recipe, look at red chimichurri and spicy versions, explore cilantro and basil twists, then step into all the ways to use chimichurri for steak, chicken, salmon and beyond.
Along the way, you’ll see how this humble Argentine sauce for steak connects to a whole world of dips and dressings—like basil pesto with 10 variations or Greek tzatziki sauce ideas—so you can build a complete “sauce toolbox” in your kitchen.
What Is Chimichurri?
Chimichurri is a loose, uncooked herb sauce from Argentina and Uruguay, traditionally spooned over grilled meats at outdoor barbecues, or asados. According to its entry on Wikipedia, it’s typically made with parsley, garlic, oregano, vinegar, oil and chili, and it comes in both green (chimichurri verde) and red (chimichurri rojo) versions. It’s part sauce, part marinade, part all-purpose condiment.
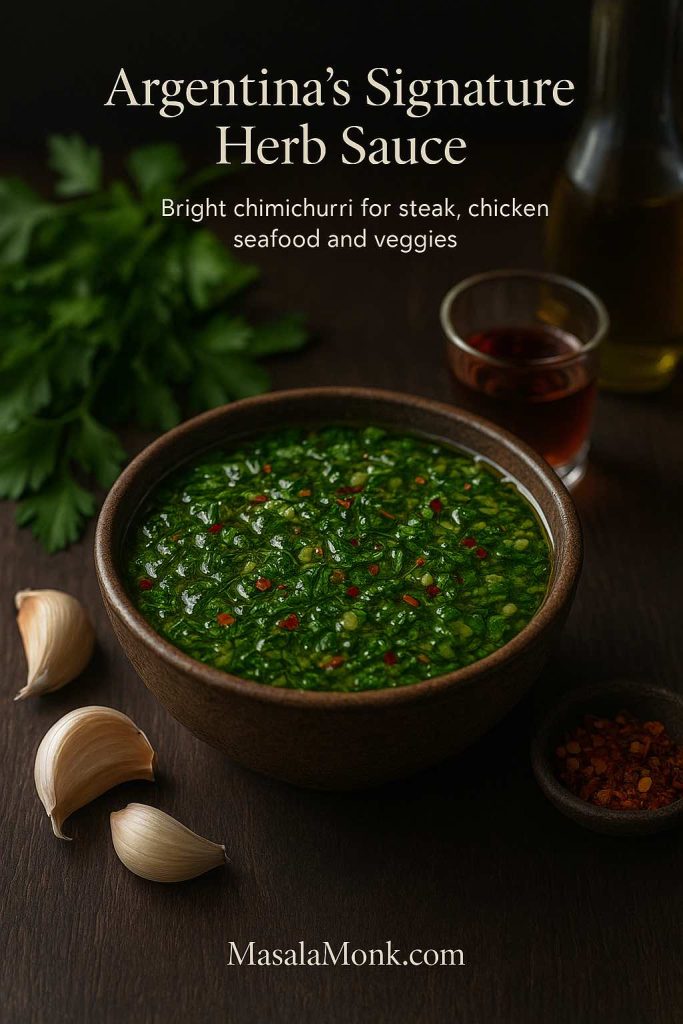
Chopped parsley, garlic, chili, vinegar and olive oil suspended in one loose, glossy chimichurri—this is the Argentinian herb sauce that turns grilled meat, seafood and vegetables from plain to unforgettable.
Unlike creamy, cooked sauces, chimichurri is raw and punchy. It behaves like a cross between a salsa and a vinaigrette: fresh herbs and garlic suspended in a tangy pool of red wine vinegar and olive oil. That’s why it works as:
A bright chimichurri steak sauce, poured generously over sliced beef
A quick chimichurri marinade for steak, chicken, prawns or tofu
A zippy chimichurri dressing for salads or grain bowls
A lively chimichurri dip with bread, fries or roasted vegetables
In some menus and cookbooks you’ll see it called “chimi sauce” or “chimi recipe,” and occasionally people mis-hear it as “jimmy churri sauce.” No matter how you spell it, the idea is the same: finely chopped herbs, bold garlic, enough acidity to wake everything up and enough oil to soften all that intensity.
Chimichurri Recipe Main Ingredients and Flavour Profile
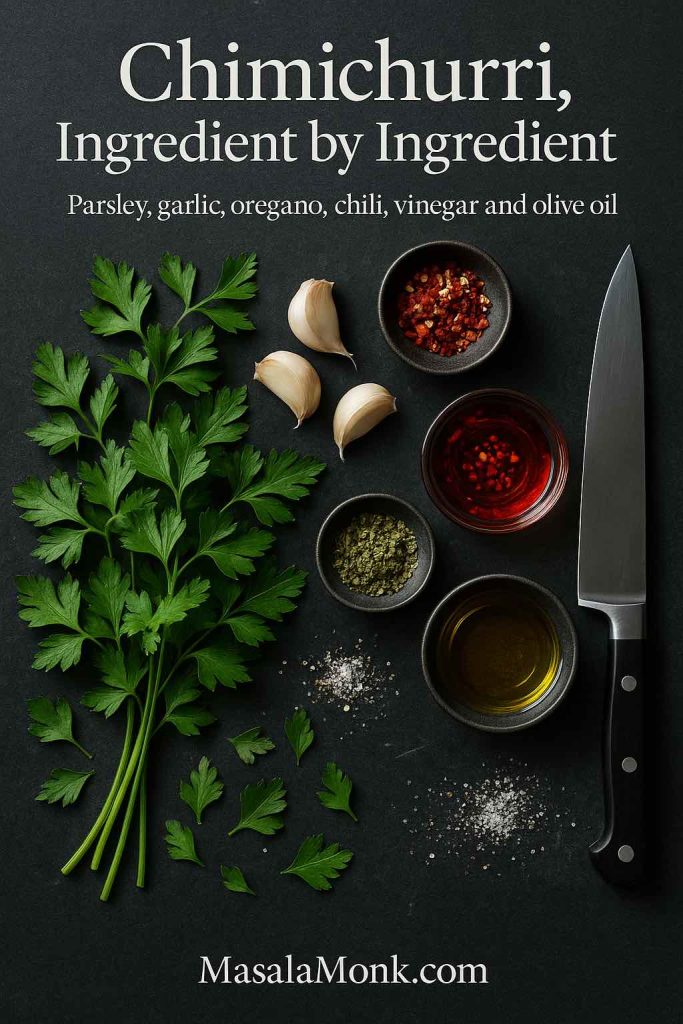
Before you learn how to make chimichurri step by step, it helps to understand its flavour structure. Most chimichurri ingredients lists share a common backbone:
Fresh flat-leaf parsley – the core herb in traditional chimichurri
Garlic – usually raw and finely minced, for deep savoury heat
Oregano – often dried, sometimes fresh, for that warm earthiness
Red pepper flakes or fresh chili – the level that turns it into a spicy chimichurri sauce
Red wine vinegar – the most common acid in a classic Argentinian chimichurri sauce recipe
Olive oil – a good, flavourful oil to carry everything
Salt and black pepper – to round out and balance all the sharp edges
This is the whole story in one frame: flat-leaf parsley for freshness, garlic for heat, oregano for warmth, chili for a kick, red wine vinegar for tang and olive oil to pull everything together into classic chimichurri sauce.
Many families add tiny tweaks: a spoonful of finely chopped onion or shallot, a splash of lemon juice, or a bay leaf left to infuse the sauce, like in some Argentine home-style recipes. However, the heart of a classic chimichurri recipe remains the same.
Chimichurri sits in its own niche: all about herbs, vinegar, garlic and chili—not creamy, not cheesy, not tomato-based. It’s an Argentinian herb sauce designed to cut through the richness of grilled meat and wake up the whole plate.
Let’s start with a simple, authentic-style green chimichurri sauce you can use on almost anything. This is the base that all the other variations grow from.
Serves: 6–8 as a condiment Time: 10–15 minutes, plus resting
Ingredients for Classic Chimichurri Sauce Recipe
1 cup very finely chopped flat-leaf parsley (tender stems and leaves)
Optional: 1–2 tablespoons finely minced red onion or shallot
Optional: 1–2 tablespoons fresh lemon juice
Step-by-Step Method for Chimichurri Sauce Recipe
1. Chop the herbs by hand
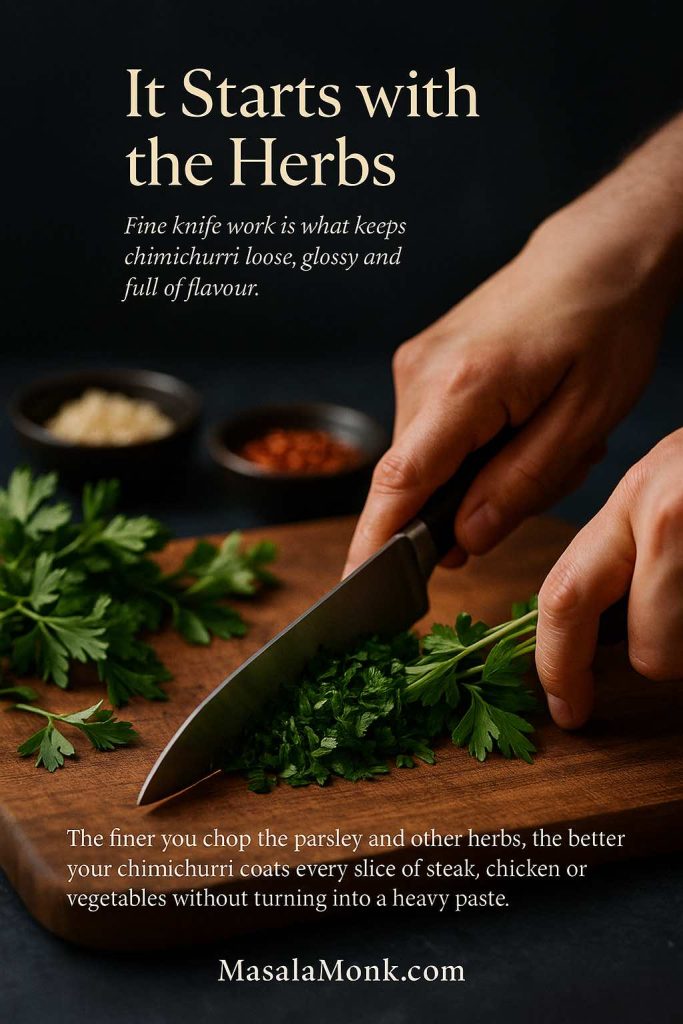
Begin by giving the parsley and oregano a really fine chop. Lay the leaves in a loose pile, then run a sharp knife through them again and again until the pieces are tiny but still distinct. You want to see little flecks of green, not a wet paste. This is what keeps chimichurri loose, textured and almost salad-like rather than thick and gluey.
Fine, even parsley pieces help chimichurri cling lightly to steak, chicken and vegetables, instead of clumping in big leafy chunks or turning into a paste in the blender.
Instead of reaching for a blender or food processor, take a minute to enjoy the knife work. Machines tend to bruise the herbs, releasing too much moisture and turning the sauce into something closer to pesto. Hand-chopping protects the flavour, keeps the colour bright and gives that classic Argentine-style chimichurri look we want over steak, chicken and vegetables.
2. Build the herb base
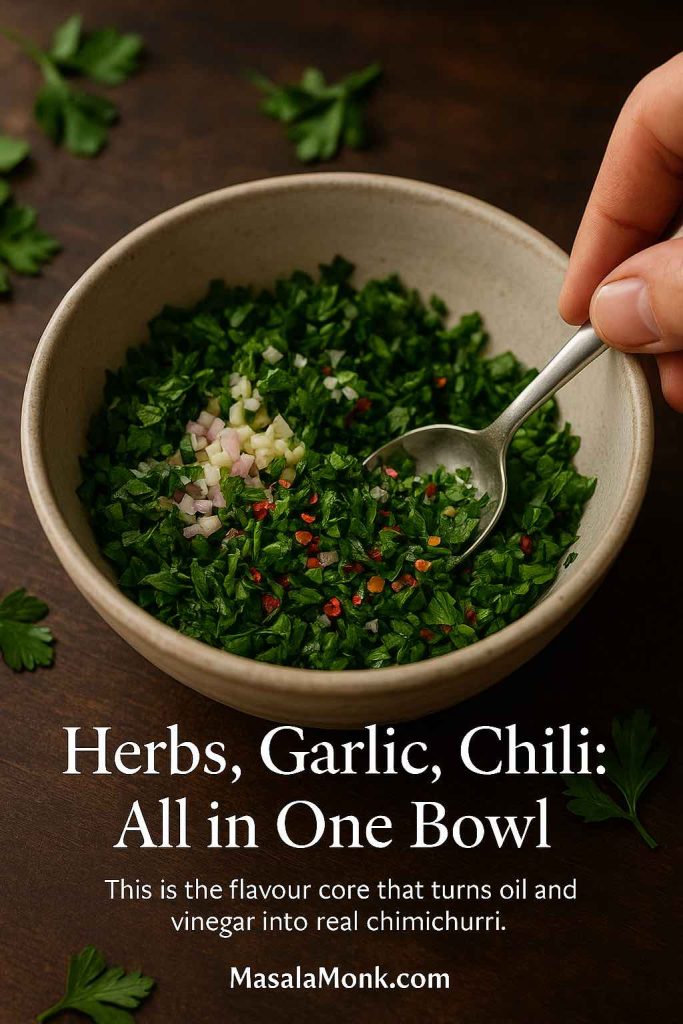
Once the herbs are finely chopped, slide them into a medium bowl. Add the minced garlic, red pepper flakes and the tiny dice of onion or shallot if you’re using it. Sprinkle over the salt and black pepper, then gently stir everything together. You’re building the flavour foundation here, so take a moment to make sure the aromatics are evenly distributed.
When parsley, garlic, shallots and chili come together in one bowl, you’ve built the flavour core—later the vinegar and olive oil simply carry this mix over every slice of steak, chicken, seafood or vegetables.
As the herbs, garlic and chili sit together, they start to release their oils and juices. This early mixing step helps the chimichurri taste integrated later, instead of like oil with bits floating in it. You should already catch the smell of parsley, garlic and spice lifting out of the bowl.
3. Add vinegar, then oil
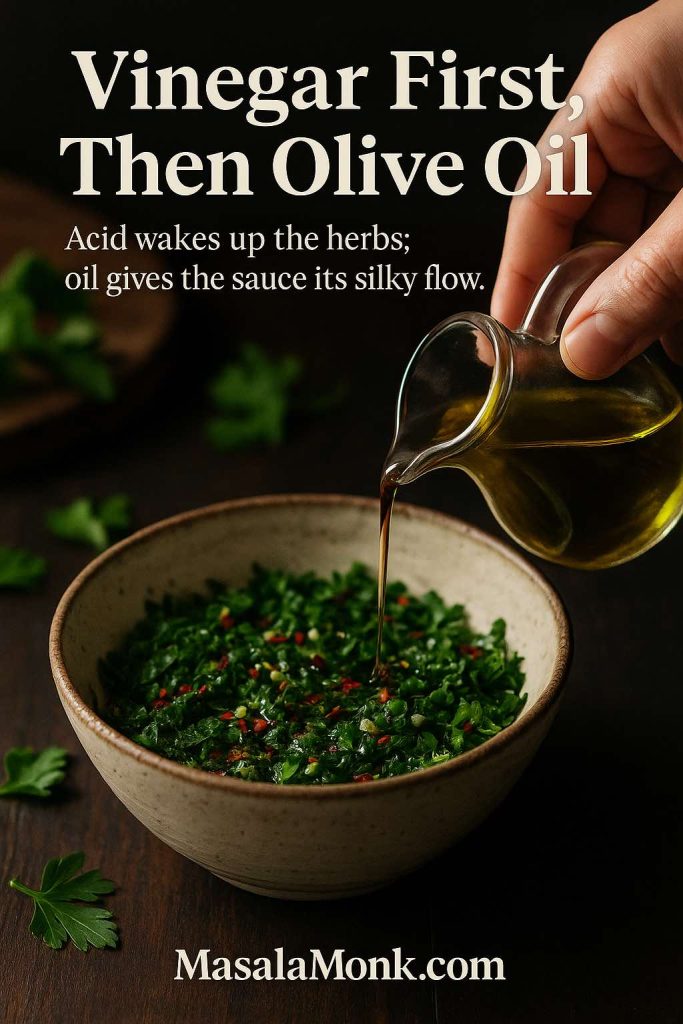
Now it’s time to give the mixture its bite. Pour in the red wine vinegar and any lemon juice first. Stir well and let the herbs soak up that acidity for a minute; this brief pause softens the raw edge of the garlic and starts to “cook” the herbs in the best possible way.
Let the vinegar hit the herbs first so it can soften the garlic and wake up the parsley, then follow with olive oil to turn everything into a loose, silky chimichurri that runs beautifully over steak, chicken or vegetables.
Only after the vinegar has had a chance to mingle do you begin adding the olive oil. Start with about ½ cup, stirring as you pour, then gradually add more until the chimichurri looks loose, glossy and spoonable—somewhere between a chunky salsa and a vinaigrette. The herbs should be well coated but not drowning in oil. This balance is what lets the sauce cling to steak or chicken while still running slightly across the plate.
4. Taste and adjust
Before you call it done, taste a small spoonful. Ask yourself how it feels on your tongue. If the flavour is sharp or slightly aggressive, a little extra olive oil will round it out. When the sauce tastes flat or dull, reach for a pinch more salt or another drizzle of vinegar to bring it back to life.
A quick taste at this stage tells you whether your chimichurri needs a pinch more salt, an extra splash of vinegar or just a little more chili to match the steak, chicken or vegetables you’re about to serve it with.
On the other hand, if the chimichurri seems too gentle, you can easily wake it up. Add a few more red pepper flakes, a touch of fresh chili or a bit more garlic until the heat and fragrance match what you like on your steak or chicken. This is where you turn a basic chimichurri into your best chimichurri recipe—tiny adjustments until the herbs, acidity, heat and richness all feel in harmony.
5. Let it rest
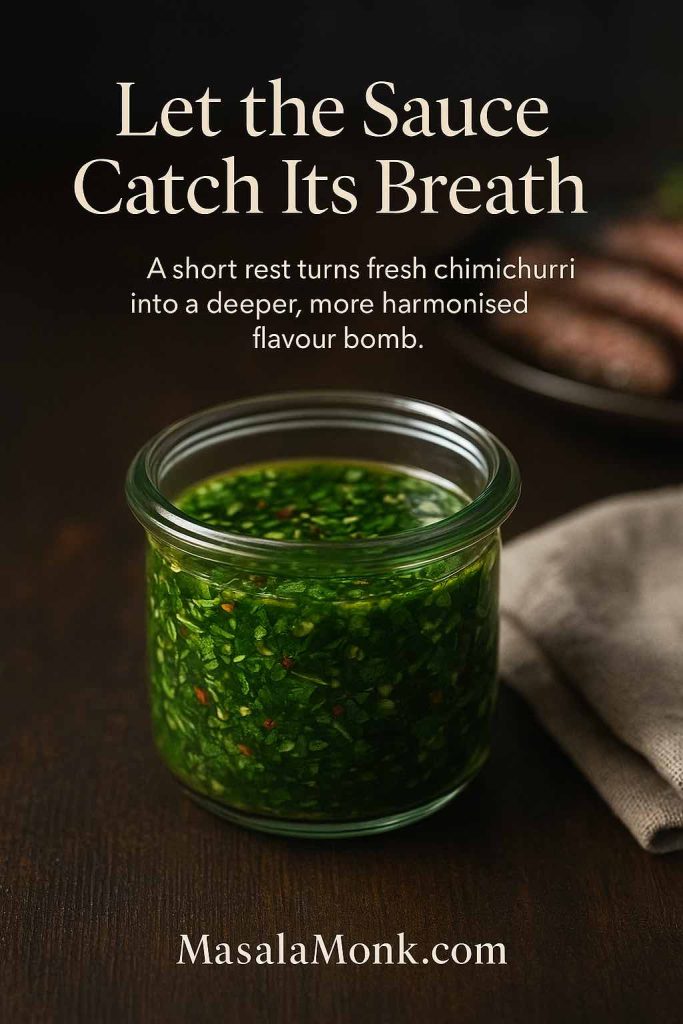
Finally, give the sauce a little time to settle. Leave your homemade chimichurri at room temperature for 20–30 minutes before serving. During this rest, the herbs hydrate in the oil and vinegar, the garlic softens, and the individual flavours relax into one another.
After you mix it, let chimichurri rest in a jar for a little while—the parsley softens, the garlic mellows and the whole sauce tastes deeper when it finally hits steak, chicken, seafood or vegetables.
If you’re planning ahead, you can refrigerate the chimichurri for several hours or even overnight. Just remember to bring it back to room temperature and stir well before using it. That way, when you spoon it over a freshly grilled steak, fold it into chicken and rice, or drizzle it on roasted vegetables, you get the fullest, most rounded flavour in every bite.
That’s it. You’ve just made a simple, easy chimichurri recipe you can rely on. It’s the answer to all the “how to make chimichurri,” “how do you make chimichurri,” and “how is chimichurri made” questions in one small bowl.
Authentic, Traditional and Regional Chimichurri Styles
Once you know the basic technique, you’ll see a whole family of chimichurri recipes out in the wild: authentic versions from Argentina and Uruguay, spicy riffs from Brazil, and herb-loaded sauces inspired by Mexican or Cuban cuisine.
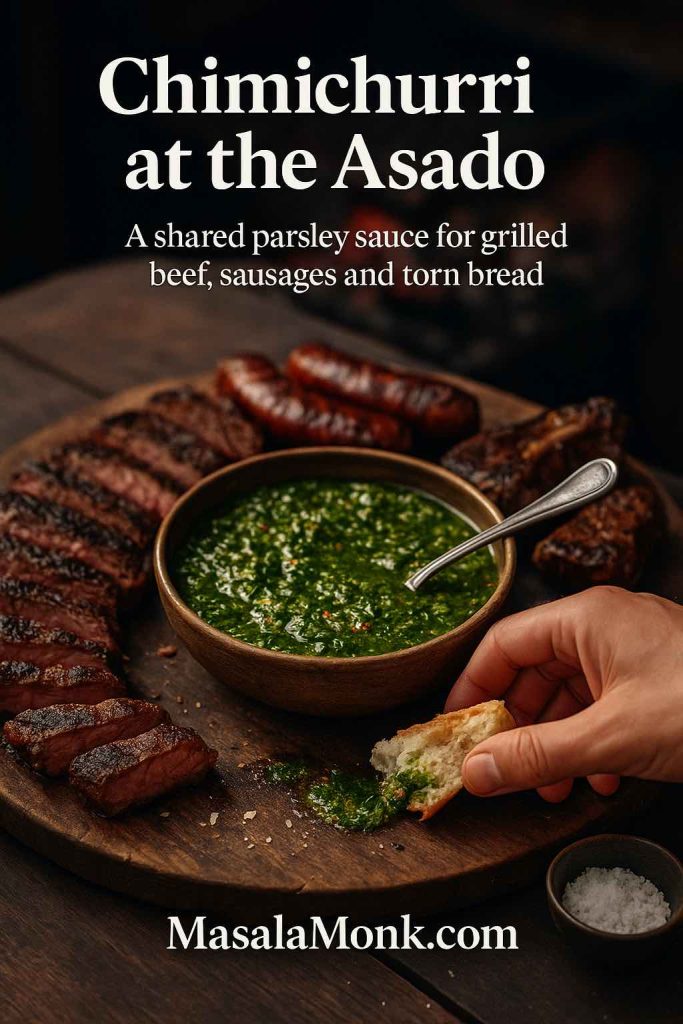
At an Argentinian asado, chimichurri is the bowl everyone reaches for—passed around the table to soak grilled beef, sausages and even torn bread in sharp parsley, garlic and vinegar rather than sitting as a garnish on just one steak.
Authentic Argentinian Chimichurri Recipe
When people talk about an “authentic chimichurri recipe” or “traditional chimichurri sauce,” they usually mean one thing: heavy on parsley, simple on extras, and totally uncooked.
Recipes like this one from Cafe Delites and Hernan Dieguez’s Argentine chimichurri stick close to that idea—parsley, garlic, oregano, vinegar, chili and oil, sometimes with a bay leaf for perfume. The result is sharp, herbaceous and perfectly suited to grilled beef, sausages and skewers.
These classic versions answer the craving for:
Authentic chimichurri sauce
Chimichurri original recipe
Traditional chimichurri sauce recipe
Argentine chimichurri recipe or argentinian chimichurri sauce recipe
If you’re chasing that straight-from-the-parrilla feeling, make the basic recipe above, keep parsley as the star, and resist adding too many extras.
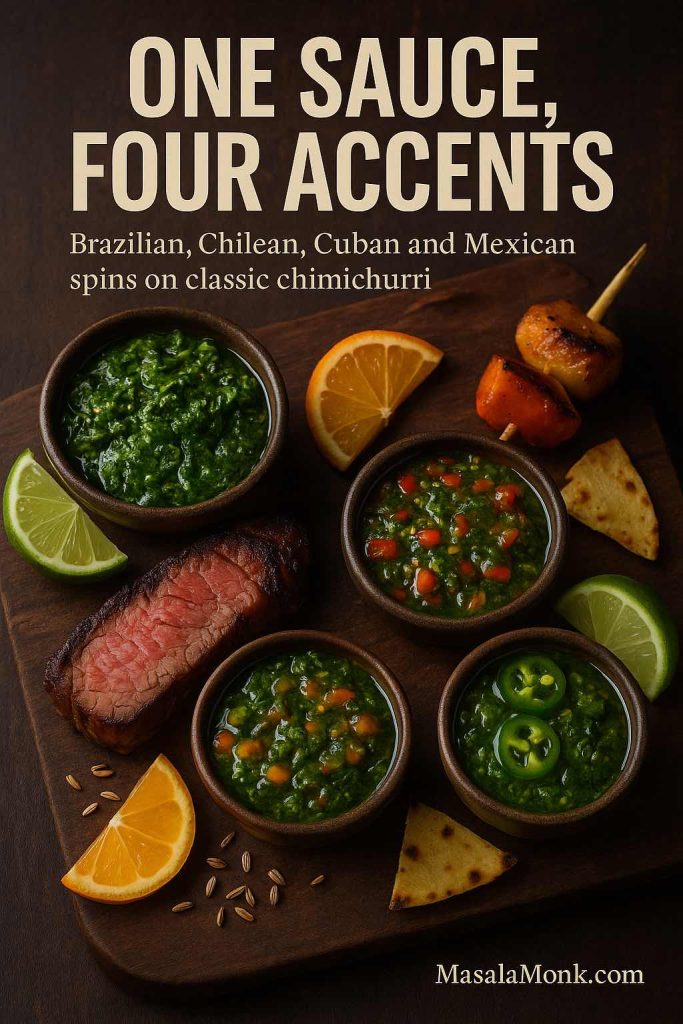
One basic chimichurri idea becomes four accents here: extra-cilantro Brazilian style with grilled beef, red pepper–flecked Chilean chimichurri, citrus-and-cumin Cuban sauce and a jalapeño-and-lime Mexican twist—all built on the same herb, garlic, vinegar and olive oil backbone.
Brazilian, Chilean, Cuban and Mexican Chimichurri Recipe Twists
As chimichurri travelled, it picked up new accents:
Brazilian chimichurri sauce sometimes includes more cilantro and can accompany picanha and other Brazilian steak cuts.
Chilean chimichurri may lean into red bell pepper and milder chilies.
Cuban-style chimichurri occasionally brings in citrus and a touch of cumin.
Mexican chimichurri sauce or “chimichurri mexicano” might introduce jalapeño, serrano or lime juice, nudging the flavour closer to salsa while keeping the herb-and-vinegar backbone.
None of these are less “real”; they’re just a different answer to the same question: how to make a herby, garlicky chimichurri sauce suit local taste and local grills.
Cilantro, Basil and Avocado Chimichurri Recipe Variations
Once you’re comfortable with parsley and oregano, it’s natural to start asking “Can you make chimichurri with cilantro?” or “What about basil chimichurri?”
The short answer is yes. Quite happily.
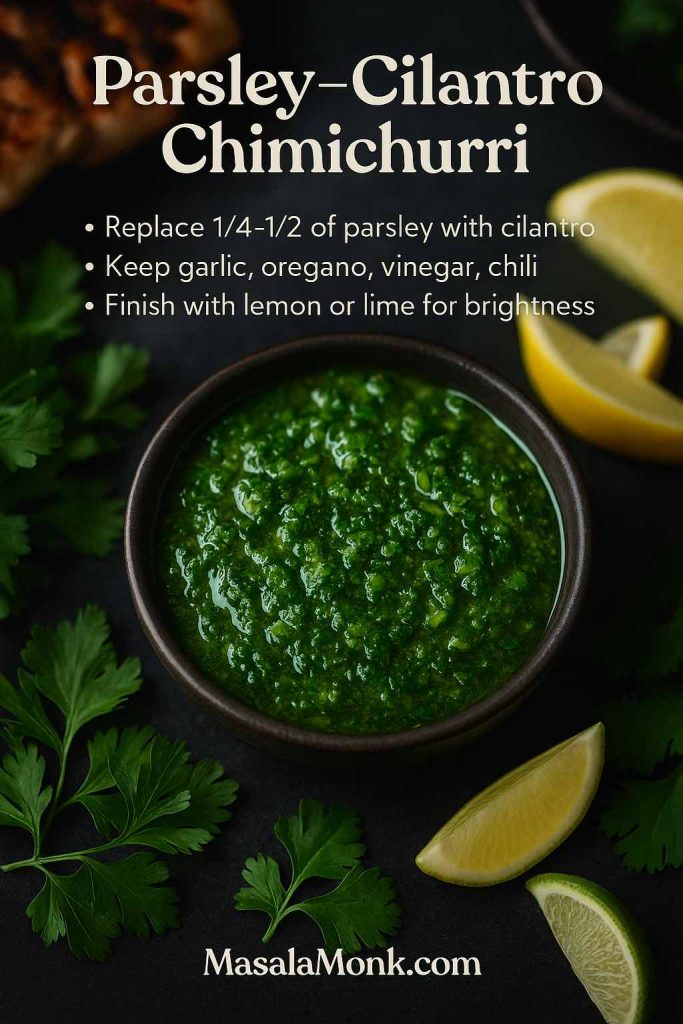
Parsley–cilantro chimichurri is an easy upgrade on the classic: simply replace part of the parsley with cilantro, keep the garlic, oregano, vinegar and chili the same and finish with lemon or lime juice. The result leans gently toward Mexican flavours and is unbeatable on grilled chicken, fish tacos, shrimp skewers and roasted vegetables.
Parsley–Cilantro Chimichurri Recipe
Cilantro chimichurri is probably the most popular variation right now. To make a well-balanced cilantro chimichurri:
Replace ¼ to ½ of the parsley with cilantro leaves.
Keep the oregano, garlic, vinegar and chili the same.
Add a little extra lemon or lime juice for brightness if the flavour feels heavy.
This version is wonderful on grilled chicken, fish tacos, shrimp skewers and roasted vegetables. It edges closer to Mexican flavours while staying clearly a chimichurri, not a salsa.
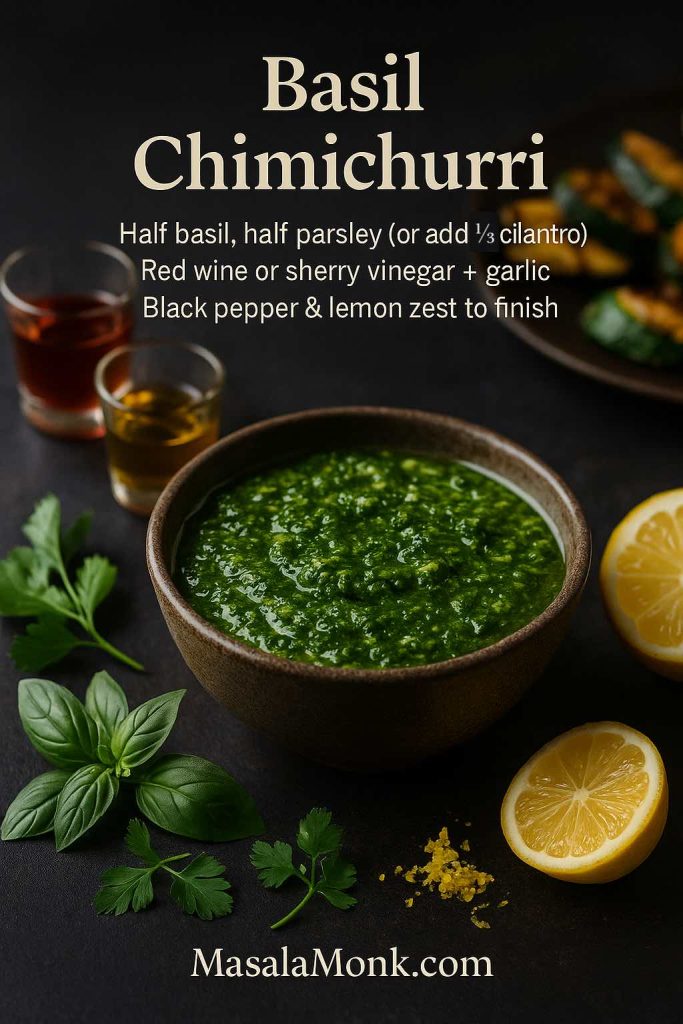
Basil chimichurri softens the classic sauce into something a little more Italian—use plenty of basil with parsley, whisk in red wine or sherry vinegar, garlic and olive oil, then finish with black pepper and lemon zest before spooning it over roasted vegetables, grilled zucchini or simple chicken breasts.
Basil Chimichurri Recipe and Herb Mixes
Basil brings a soft, sweet edge and moves the sauce closer to an Italian profile. For a basil chimichurri:
Use half basil, half parsley, or a third basil, a third parsley, a third cilantro.
Stick with red wine vinegar, or try sherry vinegar for a rounder note.
Add a touch of black pepper and maybe a small grating of lemon zest.
Basil chimichurri is especially good on roasted vegetables, grilled zucchini, simple chicken breasts and even as a spread inside sandwiches. If you love this kind of herb creativity, you’ll probably also enjoy exploring pesto recipes with 10 easy variations, which cover nut-free, spicy and vegan twists on basil-based sauces.
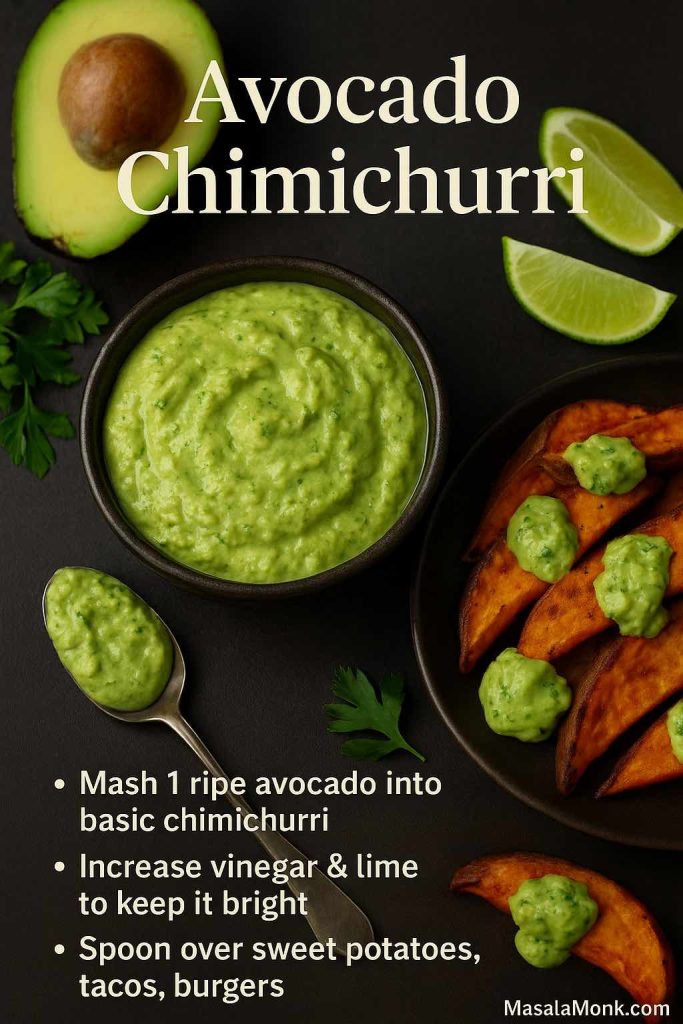
Avocado Chimichurri Sauce Recipe
If you’re craving something creamier—but still dairy-free—avocado chimichurri is a clever hybrid. You essentially make a quick chimichurri recipe in a bowl, then mash in a ripe avocado until the texture sits between a spoonable sauce and a chunky dip.
Avocado chimichurri starts as a regular chimichurri, then gets a ripe avocado mashed in until it turns thick and scoopable—add extra vinegar and lime to keep it bright, then spoon it over sweet potatoes, tacos, burgers or grain bowls for a creamy but still dairy-free sauce.
It’s brilliant with:
Grilled prawns and fish
Roasted sweet potatoes
Chip bowls, tacos and burritos
As a spread on burgers and sandwiches
Because avocado dulls acidity slightly, you may want to add more vinegar and lime juice to keep the flavour bright.
Red Chimichurri, Green Chimichurri and Spicy Versions
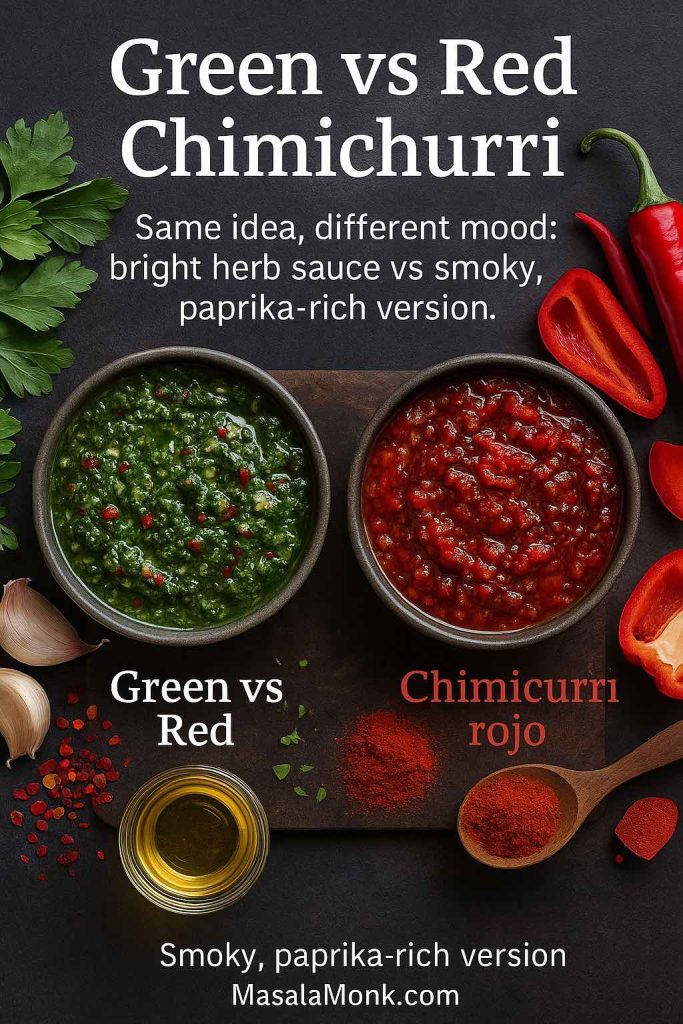
Most people first meet a green chimichurri sauce. However, red chimichurri sauce has a strong tradition too and deserves its own moment.
Both sauces start from the same idea—herbs, garlic, vinegar and oil—but chimichurri verde stays bright and parsley-heavy, while chimichurri rojo adds paprika, extra chili and red pepper for a smokier, deeper flavour on grilled meat and vegetables.
Green Chimichurri (Chimichurri Verde)
The classic green version—chimichurri verde—is what you’ve already seen: parsley-led, olive-oil rich, with red pepper flakes scattered through. It’s the default when you see recipes for:
chimichurri skirt steak
chimichurri flank steak
chimichurri beef steak
Argentinian steak with chimichurri
The green colour signals freshness, herbal intensity and that unmistakable “asado” aroma.
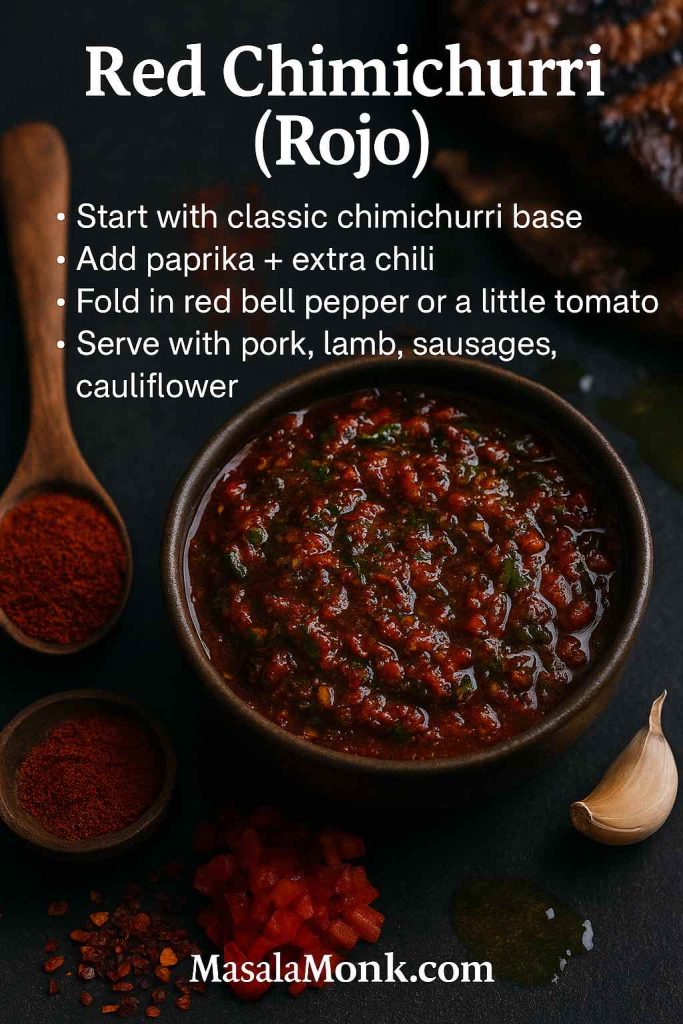
Red chimichurri, or chimichurri rojo, starts with the same herb-and-garlic base as the green version, then leans into paprika, extra chili and a little red bell pepper or tomato. The result is a smokier, richer sauce that’s ideal for pork, lamb, sausages and even roasted cauliflower steaks when you want something bolder than classic chimichurri verde.
Red Chimichurri (Chimichurri Rojo)
Red chimichurri starts from the same base but adds ingredients like:
Sweet or hot paprika
Extra chili flakes or chopped fresh chilies
Finely diced red bell pepper
Sometimes a spoonful of tomato paste or sun-dried tomatoes
The result is a red chimichurri sauce for steak that feels richer, smokier and often spicier. This is the version to reach for when you want red chimichurri sauce recipe or a more fiery chimichurri hot sauce to drizzle or dip.
Red chimichurri loves grilled pork, lamb chops, spicy sausages and roasted cauliflower steaks just as much as it loves beef.
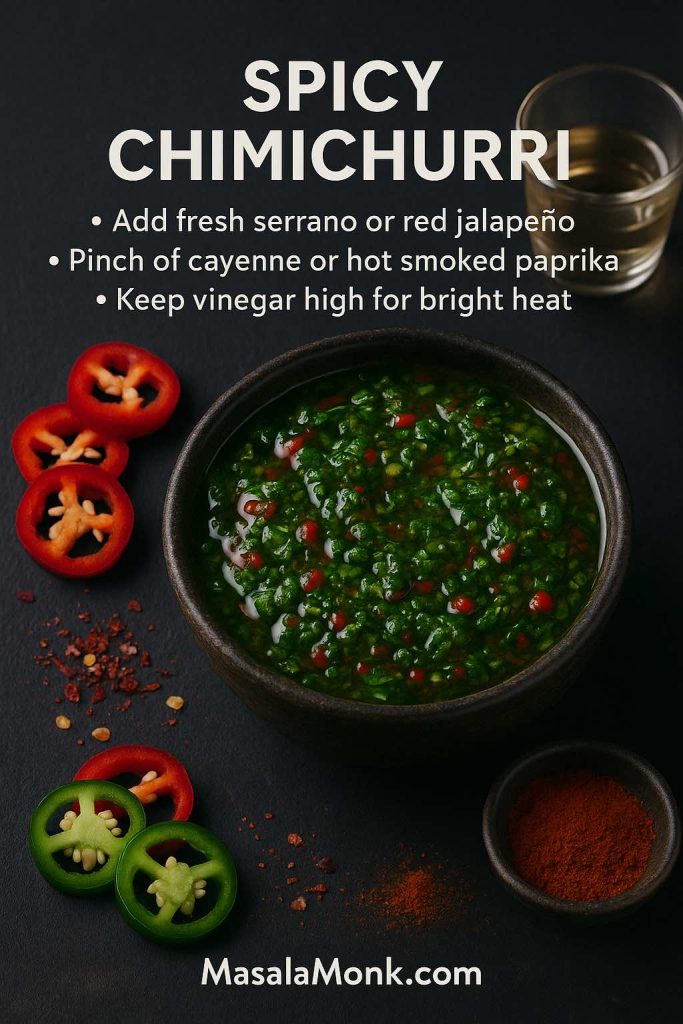
This is the dial-it-up version of chimichurri: fresh serrano or red jalapeño stirred into the herbs, a pinch of cayenne or hot smoked paprika and enough vinegar to keep all that heat feeling bright instead of heavy.
Turning Up the Heat: Spicy Chimichurri Sauce Recipe
If you want a chimichurri sauce spicy enough to make your lips tingle but still balanced, there are a few easy moves:
Swap part of the red pepper flakes for finely chopped fresh chili (serrano, red jalapeño or bird’s eye).
Add a pinch of cayenne or hot smoked paprika.
Keep the vinegar level high so it stays bright, not muddy.
At that point you’re on the border between chimichurri and a light hot sauce, and that’s a very comfortable place to be.
Chimichurri for Steak: Flank, Skirt, Ribeye, Bavette and Churrasco
Now for the main event: chimichurri and steak. This is where most people fall in love with the sauce in the first place.
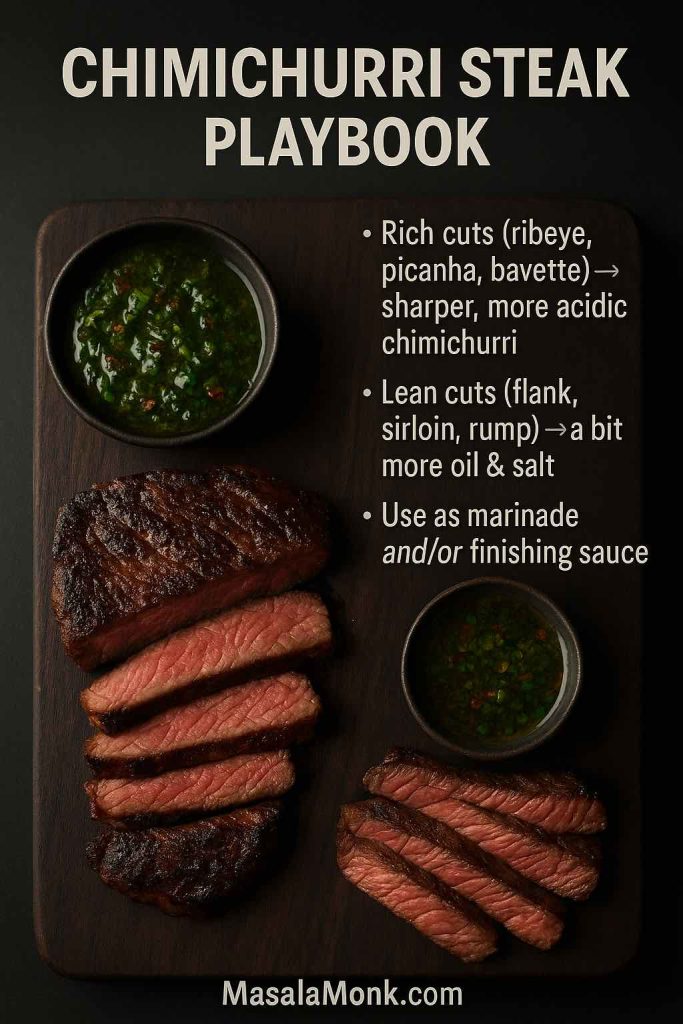
This quick playbook shows how chimichurri behaves with different steaks: richer cuts like ribeye, picanha and bavette shine with a sharper, more acidic sauce, while leaner steaks such as flank, sirloin or rump benefit from a touch more oil and salt, whether you use chimichurri as a marinade, a finishing sauce or both.
General Rules for Chimichurri Steak
Before we dive into specific cuts, a few guiding ideas:
Richer steaks (ribeye, picanha, bavette) can handle a sharper, more acidic chimichurri.
Leaner steaks (sirloin, rump, some flank) sometimes like a touch more oil and salt.
You can use chimichurri as a steak marinade, a steak sauce, or both.
If you’d like exact internal temperatures, the USDA and FoodSafety.gov charts recommend cooking whole beef steaks and roasts to at least 145°C / 63°C with a short rest for safety, even though many steak lovers prefer rarer doneness. You can aim for the safe zone while still serving juicy meat by using chimichurri generously over the top.
Flank Steak Recipe and Chimichurri
Flank steak has a strong, beefy flavour and a visible grain. It loves marinade, high heat and a sharp knife.
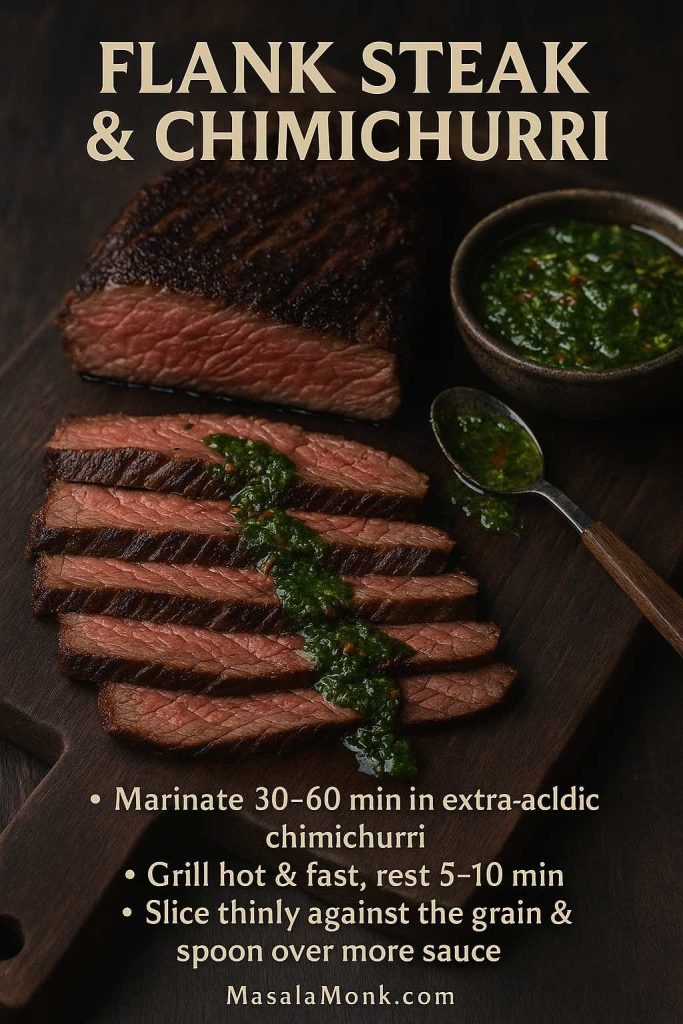
Marinate flank steak for 30–60 minutes in an extra-acidic chimichurri, grill it hot and fast, let it rest, then slice thinly against the grain and spoon more sauce over the top—suddenly a relatively affordable cut turns into a steak-night centrepiece.
For flank steak and chimichurri:
Marinate the steak for 30–60 minutes in a slightly more acidic chimichurri marinade for steak (add extra vinegar, salt and a splash of water).
Pat it dry and grill or pan-sear on high heat until it hits your preferred temperature.
Rest for at least 5–10 minutes.
Slice thinly against the grain and spoon chimichurri sauce flank steak generously over the slices.
This approach turns a relatively affordable cut into something that feels like a special occasion.
Skirt Steak Recipe and Chimichurri
Skirt steak, or entraña, is another classic partner. It’s thinner than flank and cooks extremely quickly, making it perfect for weeknight chimichurri dinners.
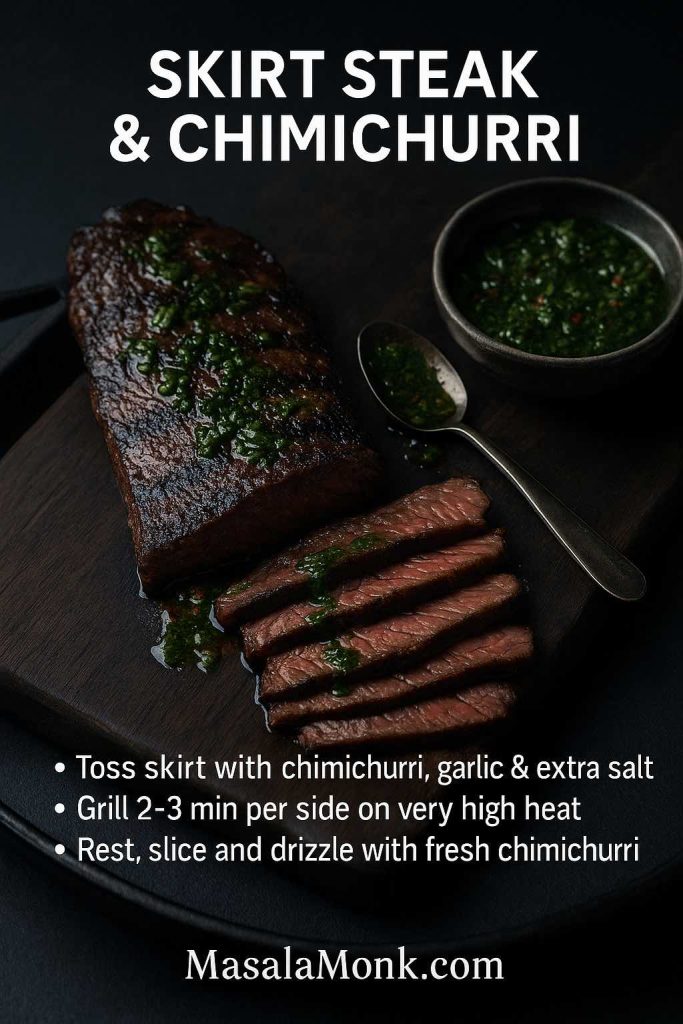
For weeknights, skirt steak and chimichurri are hard to beat: toss the steak with chimichurri, garlic and a little extra salt, grill it 2–3 minutes per side on very high heat, then rest, slice and finish with a fresh spoonful of sauce for maximum flavour with minimal time.
Try this chimichurri sauce for skirt steak routine:
Toss skirt steak with a few spoonfuls of chimichurri, garlic and extra salt for a quick chimichurri marinade.
Grill on a very hot pan or barbecue, about 2–3 minutes per side.
Let it rest, then slice and drizzle with fresh chimichurri.
Because skirt is quite rich, this combo often feels like the best chimichurri steak you’ve had without much effort at all.
Ribeye, Bavette and Other Cuts
For thick, marbled cuts like ribeye or bavette, you might skip the marinade and simply use chimichurri as a finishing sauce. Salt the steak ahead, cook it as you like, then bathe it in chimichurri sauce for steak at the table.
The same basic idea works for:
Chimichurri ribeye
Bavette chimichurri
Churrasco chimichurri (thin steaks cooked hot and fast)
Mixed grills where several cuts share a platter and a big bowl of chimichurri in the middle
If you’d like to go all in on steak technique—two-zone grilling, resting, slicing—resources like the Serious Eats guides to grilled steak are very handy, and chimichurri slots right into those methods as the finishing touch.
Choripán, Burgers and Sandwiches
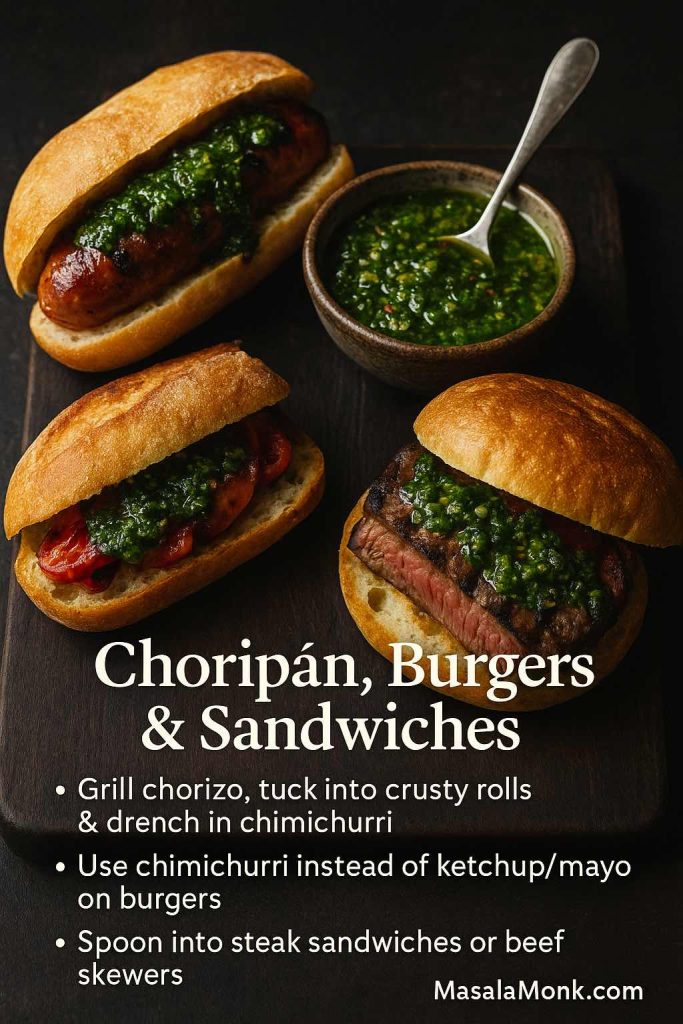
Chimichurri doesn’t stop at whole steaks. It is also the heart of the beloved choripán recipe: grilled chorizo sausage tucked into crusty bread, drenched in chimichurri. A quick version is simple:
Grill sausages until browned and cooked through.
Split crusty rolls, toast lightly, spoon in chimichurri.
Add sausage, then more chimichurri on top.
Chimichurri turns simple sandwiches into parrilla food: drizzle it over grilled chorizo in choripán, swap it for ketchup and mayo on burgers, or spoon it into steak sandwiches with roasted peppers for a fast way to make everyday grill-night feel more Argentinian.
Similarly, you can use it to create:
Chimichurri burger toppings instead of ketchup and mayo
Steak sandwiches with herby chimichurri and roasted peppers
Beef skewers—essentially churrasco bites—served with chimichurri as a dipping sauce
A little bowl of sauce suddenly turns grill night into something much more Argentinian.
Chicken Chimichurri, Baked Dishes and Chicken-and-Rice Bowls
Although beef gets most of the attention, chicken and chimichurri are an extremely useful pairing for everyday cooking. The acidity brightens mild meat, while the herbs make simple meal prep feel more exciting.
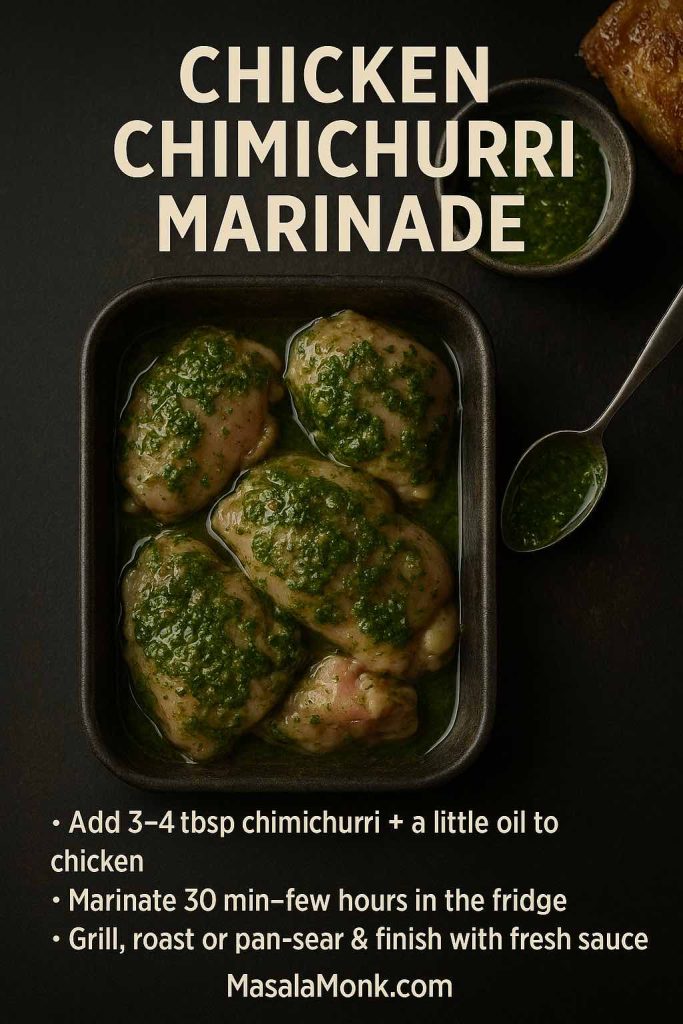
For an easy chicken chimichurri marinade, coat thighs or breasts in a few spoonfuls of sauce with a little extra oil, let them sit for at least 30 minutes, then grill, roast or pan-sear and finish with a fresh spoonful of chimichurri at the table.
Chicken Chimichurri Marinade Recipe
For a straightforward chicken chimichurri sauce recipe:
Place chicken thighs or breasts in a bowl or zip bag.
Add 3–4 tablespoons of chimichurri plus a drizzle of extra oil.
Marinate 30 minutes (or up to a few hours in the fridge).
Grill, roast or pan-sear until fully cooked.
Serve with more fresh chicken chimichurri sauce spooned over the top.
You can also bake a chicken chimichurri tray bake: scatter potatoes, onions and bell peppers in a roasting dish, nestle in the marinated chicken, and roast until everything is tender and golden. The excess chimichurri and chicken juices effectively become a built-in pan sauce.
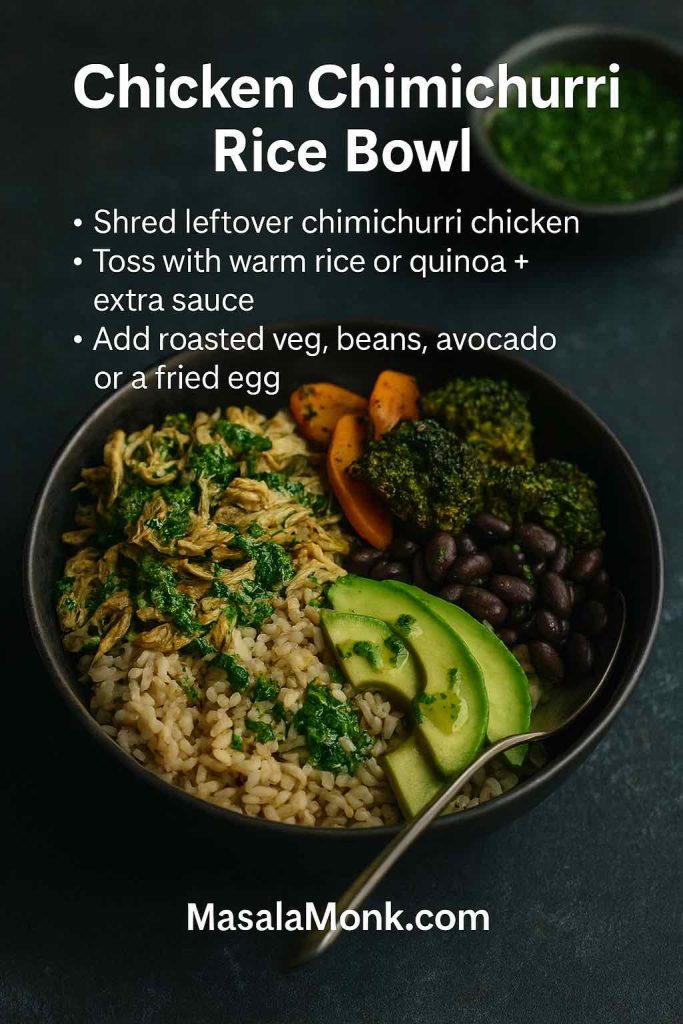
Turn leftover chimichurri chicken into a full meal by shredding it over warm rice or quinoa, adding roasted vegetables, beans and creamy avocado, then finishing the bowl with another bright drizzle of sauce.
Recipe for Chicken Chimichurri and Rice
Leftover chimichurri chicken becomes the base of a great chicken and chimichurri rice bowl:
Shred cooked chicken.
Toss with a spoonful of chimichurri and some cooked rice or quinoa.
Add roasted vegetables, beans, avocado or a fried egg.
It’s a quick route to a flavourful lunch, especially when you already have chimichurri sitting in the fridge.
For sandwich nights, use chimichurri instead of mayo in grilled chicken sandwiches and wraps, weaving it into spreads alongside ideas from MasalaMonk’s chicken sandwich recipes for an entire roster of combinations.
Chimichurri and Salmon, Seafood, Vegetables and Plant-Based Proteins
Chimichurri is not just about beef and poultry. Its balance of herbs and acid makes it naturally comfortable with seafood, vegetables and vegetarian proteins.
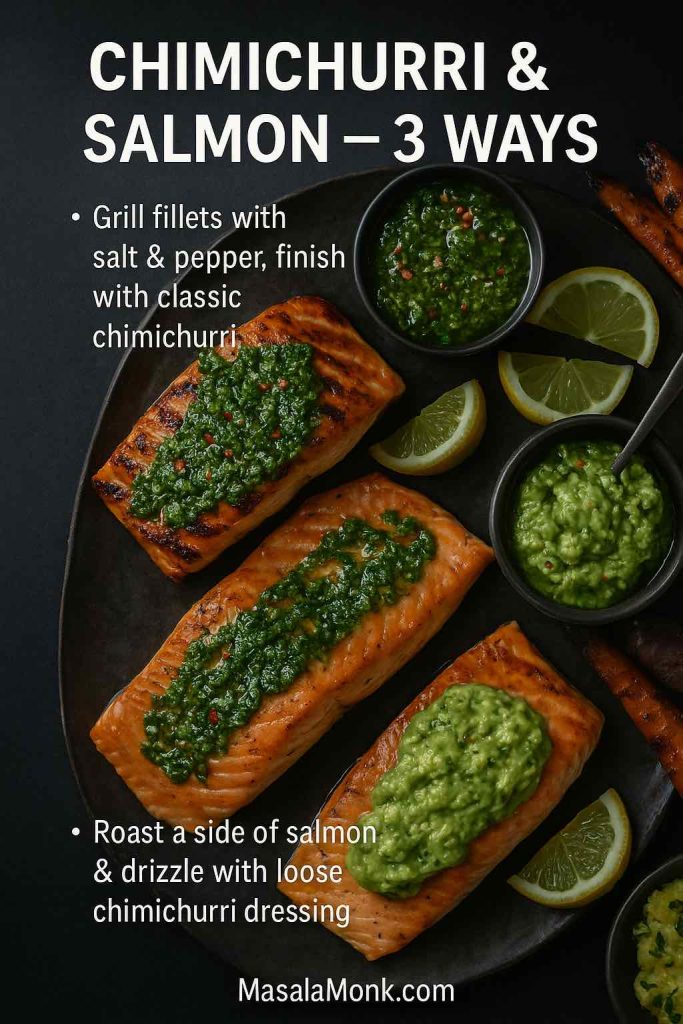
Salmon is a natural partner for chimichurri—grill fillets and finish them with classic sauce, roast a side of salmon and drizzle a looser chimichurri dressing down the middle, or go richer with a creamy avocado chimichurri on top of each portion.
Chimichurri and Salmon
For chimichurri and salmon, you have a few approaches:
Grill or pan-sear salmon fillets with only salt and pepper, then spoon cilantro-heavy chimichurri over the top.
Roast a side of salmon and drizzle a looser chimichurri dressing over the whole platter.
Use avocado chimichurri as a creamy topping, especially if you like richer sauces.
The mild sweetness of salmon plays beautifully with the tang of vinegar, garlic and herbs.
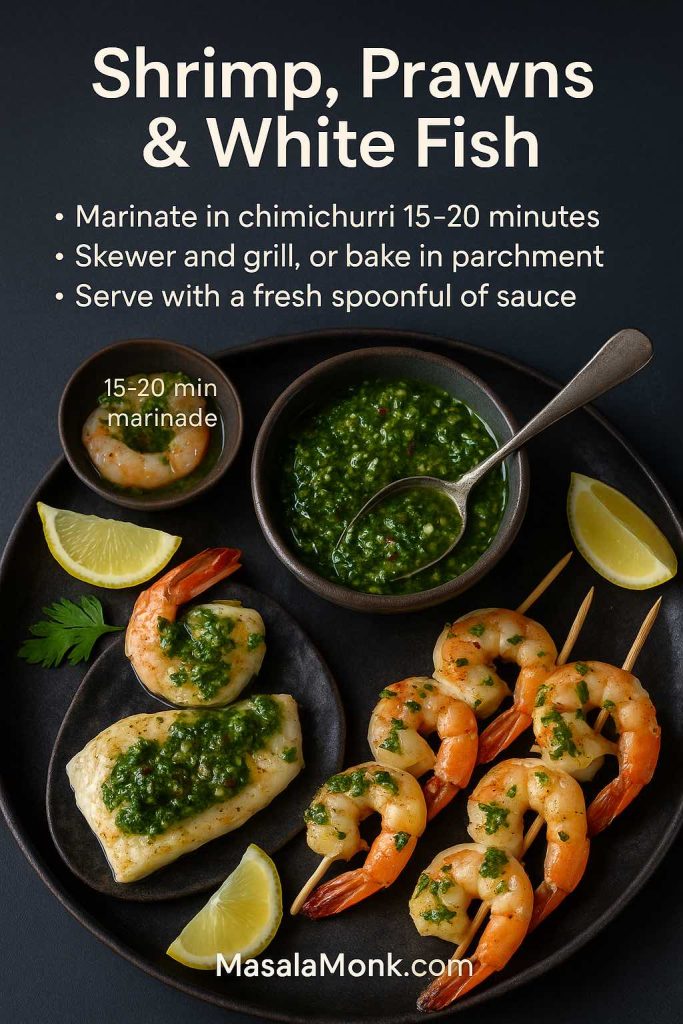
For shrimp, prawns and firm white fish, a short chimichurri bath is enough—marinate for 15–20 minutes, grill or bake, then finish with a fresh spoonful of sauce so the seafood stays bright and delicate instead of heavy.
Shrimp, Prawns and White Fish
Chimichurri also works well as a marinade and finishing sauce for prawns, shrimp and firm white fish:
Toss prawns in a chimichurri marinade for 15–20 minutes.
Skewer and grill, then serve with more chimichurri.
Or bake fish portions in parchment with a spoonful of chimichurri on top.
Because seafood is delicate, you may prefer a slightly less garlicky version for these dishes.
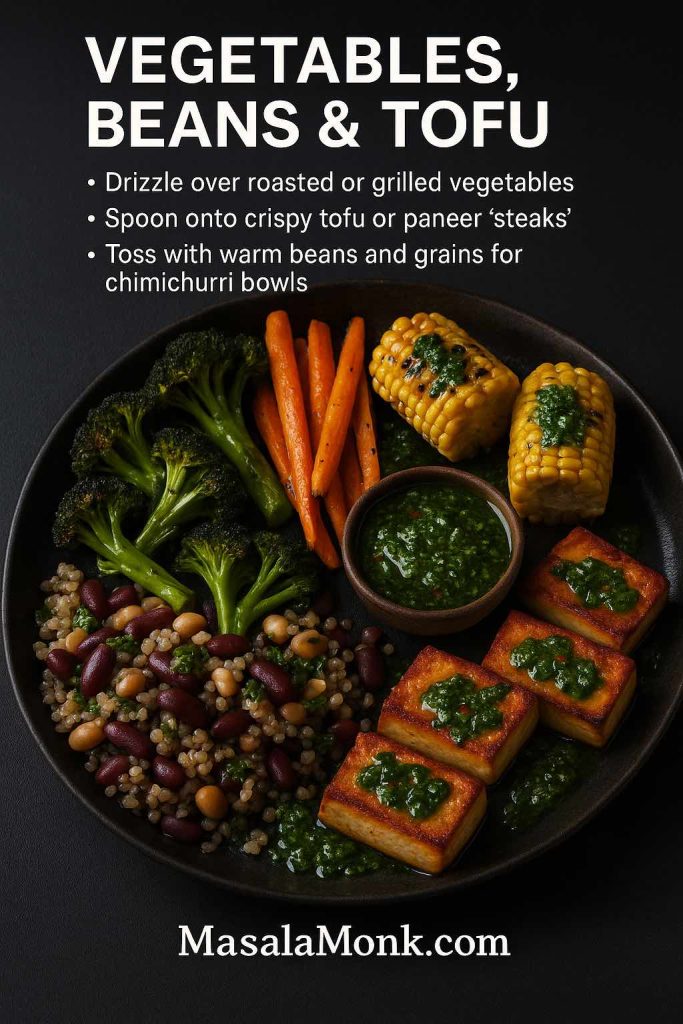
Vegetables, Beans and Tofu
On the plant side, chimichurri brings grilled and roasted vegetables to life: think charred broccoli, roasted carrots, grilled portobello mushrooms, corn on the cob, sweet potato wedges and crispy roast potatoes.
Chimichurri isn’t just for steak—drizzle it over roasted broccoli and carrots, spoon it onto crispy tofu or paneer ‘steaks’ and toss it through warm beans and grains to build bright, plant-forward bowls that taste like they’ve been finished at the grill.
You can also:
Drizzle chimichurri over crispy tofu or paneer “steaks.”
Stir it into warm beans and vegetables with cooked grains to make chimichurri rice bowls.
Use it as a dressing for a bean and grain salad, similar in spirit to classic potato or pasta salads.
If you lean heavily into plant-based cooking, it’s worth browsing MasalaMonk’s various veggie-forward ideas—like their high-protein meal prep concepts or grain-based recipes—and simply adding chimichurri as the finishing touch.
Chimichurri Marinade, Rub, Seasoning and Dry Mix Recipe
So far we’ve looked at chimichurri as a fresh sauce. However, it can also become a chimichurri seasoning or chimichurri dry rub that lives in your spice cupboard.
Recipe for Chimichurri Marinade
To convert your sauce into a marinade:
Increase the vinegar slightly.
Add more salt.
Thin with a tablespoon or two of water.
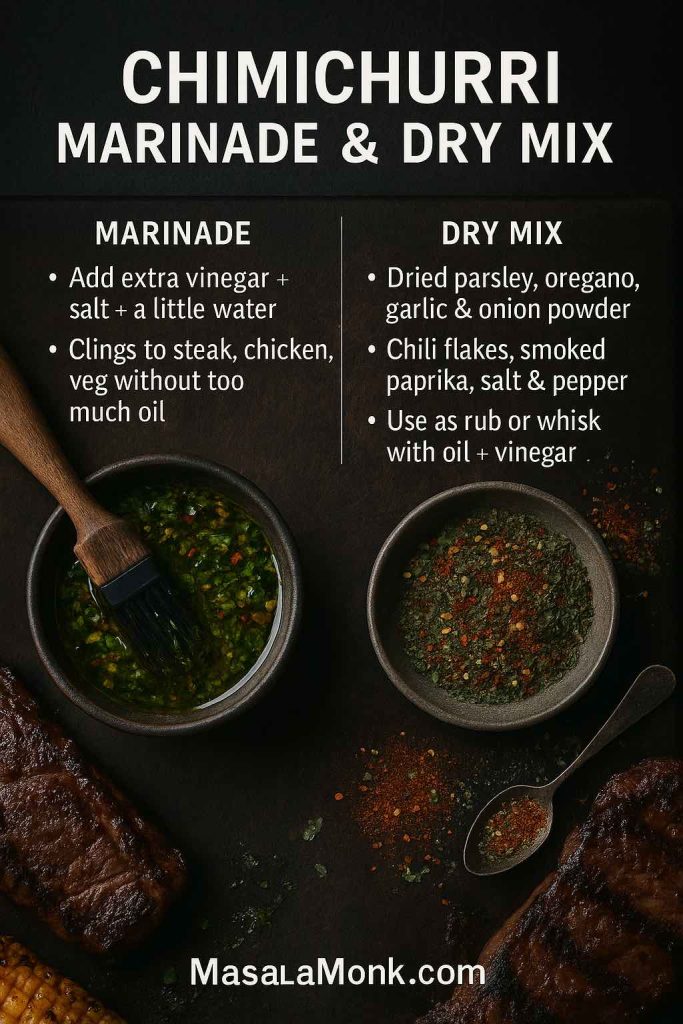
This looser mixture clings to meat or vegetables, tenderising gently and adding flavour without being too oily. It works especially well as a beef chimichurri marinade or as a marinade for chicken thighs and drumsticks.
Use chimichurri two ways: loosen the sauce with extra vinegar, salt and a splash of water to make a marinade that clings to steak, chicken and veg without too much oil, or keep a dry chimichurri mix of herbs, chili flakes and smoked paprika in your spice jar to rub on meat or whisk with oil and vinegar for instant chimi sauce.
Dry Chimichurri Mix Recipe
A dry chimichurri mix lets you capture the essence of the sauce using dried herbs and spices. You might combine:
Dried parsley
Dried oregano
Garlic powder
Onion powder
Red pepper flakes
Smoked paprika
Dried basil or thyme (optional)
Salt and pepper
Sprinkle this chimichurri spice mix as a rub on steak, chicken, pork chops or tofu, or whisk it with vinegar and olive oil for a quick, pantry-friendly chimi sauce.
This is also an excellent answer when you want chimichurri flavour but don’t have fresh herbs on hand.
Chimichurri Butter, Mayo, Cream Sauce and Salad Dressing
Once you’ve made a batch of chimichurri, it becomes a building block for many other condiments.
Chimichurri Butter Recipe
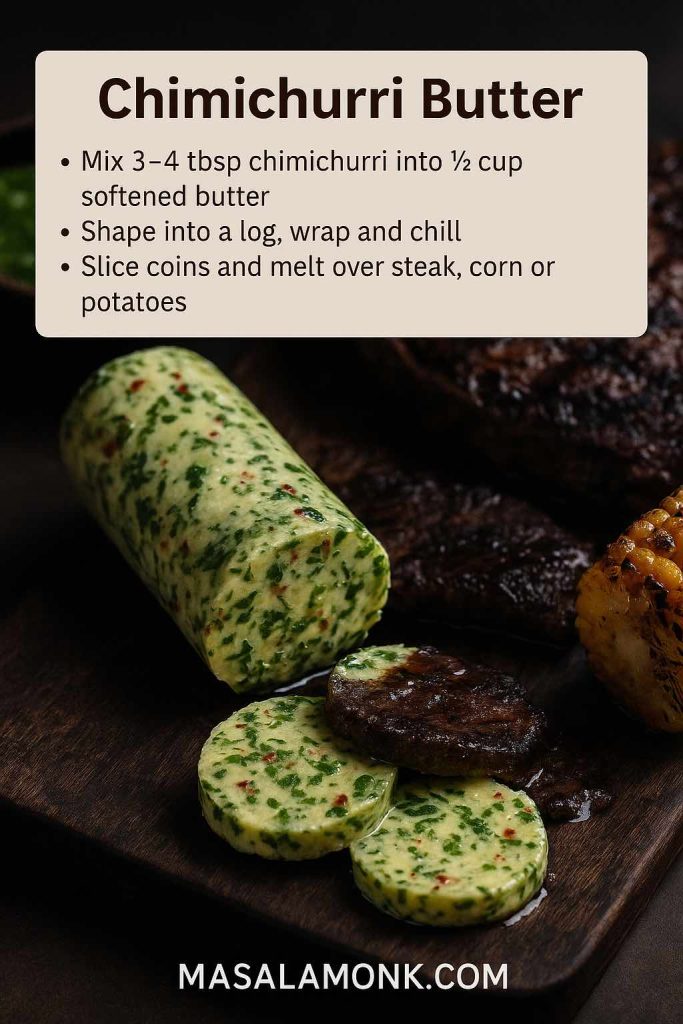
For steak nights, grilled corn or baked potatoes, chimichurri butter is a small luxury:
Stir 3–4 tablespoons of thick chimichurri into ½ cup softened butter.
Shape into a log, wrap and chill.
Cut slices and place them on hot steak or vegetables so they melt into a gorgeous herby pool.
This compound butter keeps well in the freezer and turns even plain steamed vegetables into something special.
Stir a few spoonfuls of chimichurri into softened butter, chill it in a log and slice coins to melt over hot steak, grilled corn or baked potatoes—one batch of chimichurri butter turns simple mains and sides into restaurant-level plates.
Chimichurri Mayo and Dipping Sauces Recipe
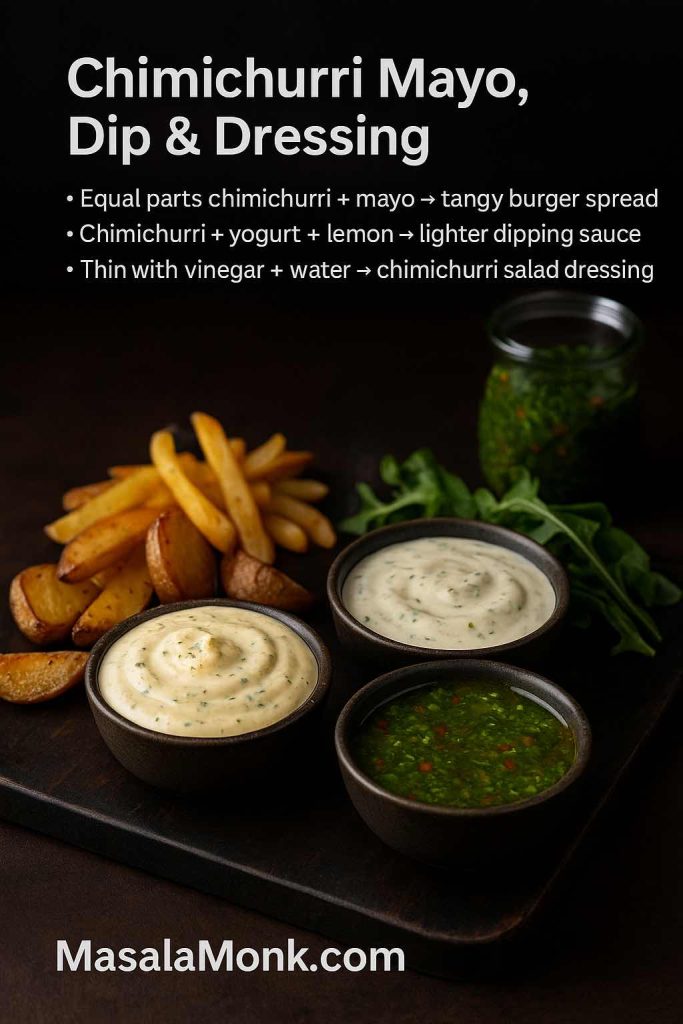
If you like dipping fries or roasted potatoes into sauce, you can whisk chimichurri into mayonnaise or Greek yogurt:
Equal parts chimichurri and mayo make a rich, tangy spread.
Chimichurri plus yogurt and a squeeze of lemon creates a lighter dipping sauce or salad dressing.
These are terrific alongside crispy potatoes or as alternative burger sauces. For more dip inspiration, you can explore MasalaMonk’s spinach dip recipes and adapt those serving ideas to chimichurri too.
One batch of chimichurri turns into three new sauces: whisk it with mayo for a tangy burger spread, fold it into yogurt with lemon for a lighter dipping sauce and thin it with vinegar and water for a bright salad dressing over greens, grain bowls and grilled vegetables.
Chimichurri Salad Dressing Recipe
To transform chimichurri into a salad dressing, simply:
Thin with extra vinegar and a splash of water.
Add a pinch of sugar or honey if you like a slightly softer edge.
Taste to balance salt and acid.
This chimichurri dressing is gorgeous over grilled vegetable salads, steak salads, grain bowls and hearty greens.
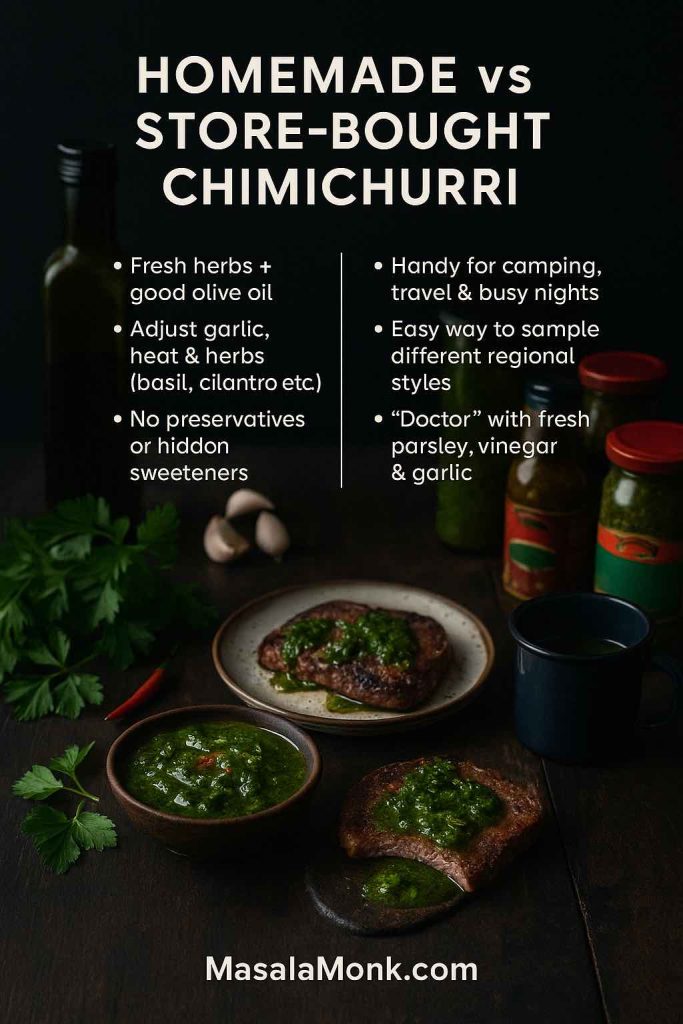
Every now and again, people look for best premade chimichurri sauce that can be store bought, ready-made jars and bottles can be handy, but once you understand how to make homemade chimichurri sauce, you gain a lot of control.
Homemade chimichurri:
Lets you choose fresh herbs and a good olive oil.
Allows you to boost garlic, reduce heat or play with herbs like basil and cilantro.
Avoids preservatives, stabilisers and hidden sweeteners.
Fresh chimichurri made with good olive oil and fragrant herbs lets you control the garlic, chili and sweetness, while bottled chimichurri earns its place for travel, camping and last-minute dinners—especially if you “doctor” it with extra parsley, vinegar and garlic.
Premade chimichurri sauce and chimichurri in a bottle, on the other hand, can be:
Useful for camping, travel or last-minute cooking.
A quick way to explore different regional takes if you see interesting labels.
If you do buy a jar, you can always “doctor” it: add fresh parsley, more vinegar, extra garlic or chili to bring it closer to your taste. Over time, though, most people find that making a quick chimichurri recipe at home is faster than driving out specifically to buy chimichurri sauce.
Chimichurri is one of those condiments that almost improves after a day, which makes it ideal for meal prep.
Short term: keep it in a covered jar in the fridge for up to 3–4 days. The flavours deepen and mellow.
Medium term: top the jar with a thin layer of olive oil to slow oxidation and keep the herbs greener.
Freezing: for longer storage, spoon chimichurri into ice cube trays and freeze. Pop out cubes into a freezer bag and use them later as a quick marinade base or cooking sauce.
Before serving refrigerated or thawed chimichurri, stir it well and let it come to room temperature. You can also refresh it with a little extra parsley, vinegar and oil if it tastes tired.
Is Chimichurri Healthy?
From a nutrition angle, chimichurri looks pretty friendly. It’s essentially:
Fresh herbs (especially parsley and sometimes cilantro and basil)
Garlic and sometimes onion
Olive oil
Vinegar and lemon juice
Chili and spices
The bulk of the calories come from olive oil; roughly speaking, a tablespoon might sit in the 45–60 calorie range, mostly from fat. That means a modest spoonful can add big flavour for relatively few calories, especially compared to creamy, cheese-heavy or sugar-sweetened sauces.
To make a healthy chimichurri recipe:
Keep the oil to the lower end of the range and lean more on herbs and vinegar.
Use it to dress lean proteins—chicken, seafood, tofu, legumes—instead of only marbled steaks.
Pair it with fibre-rich sides: salads, roasted vegetables, beans, whole grains and sweet potatoes.
If you’re building a broader “healthy comfort” menu, you might also like to balance rich dinners with more gently indulgent drinks and treats—like MasalaMonk’s healthy pumpkin spice latte or a small mug of homemade hot chocolate made with real cocoa.
What to Serve with Chimichurri Steak and Chicken
A plate of chimichurri steak or chicken doesn’t need complicated sides, but thoughtful ones make the whole meal sing.
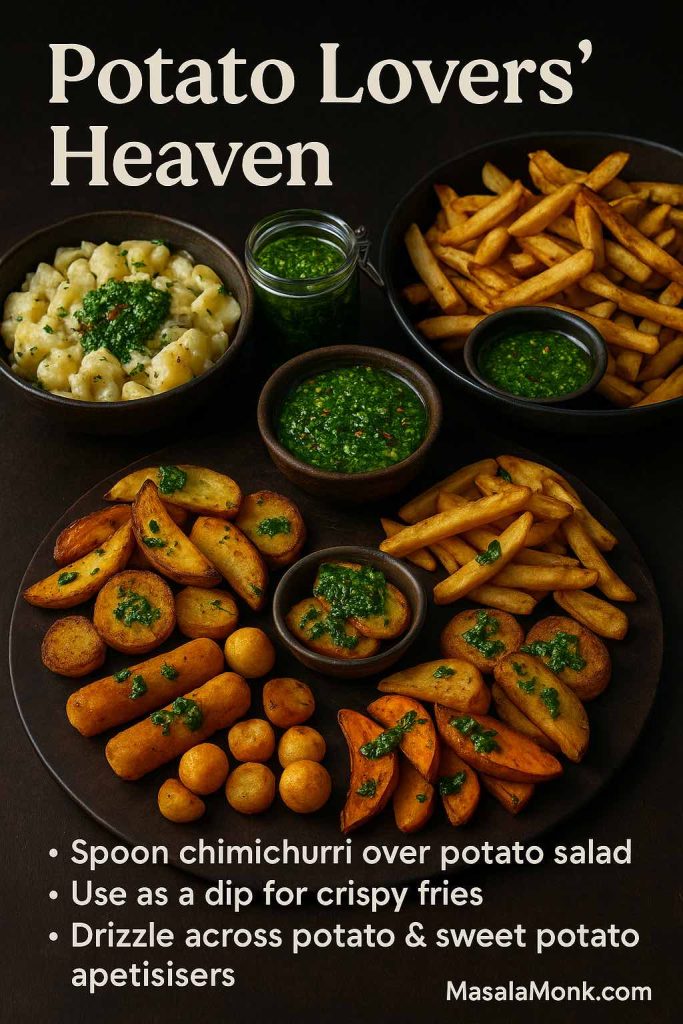
Potato salad, crispy fries and mixed potato appetisers all get a serious upgrade from chimichurri—spoon it over creamy salad, serve it as a dip for hot fries or drizzle it across roasted potato and sweet potato bites so every side on the table gets some garlicky, herb-bright heat.
Potato Lovers’ Heaven
Herby chimichurri sauce and potatoes are natural partners. You could:
Make a big bowl of potato salad—classic, German, Russian or vegan—and let guests spoon chimichurri over their portions for extra zing.
Because chimichurri is both garlicky and acidic, it cuts through the richness of fried or roasted potatoes effortlessly.
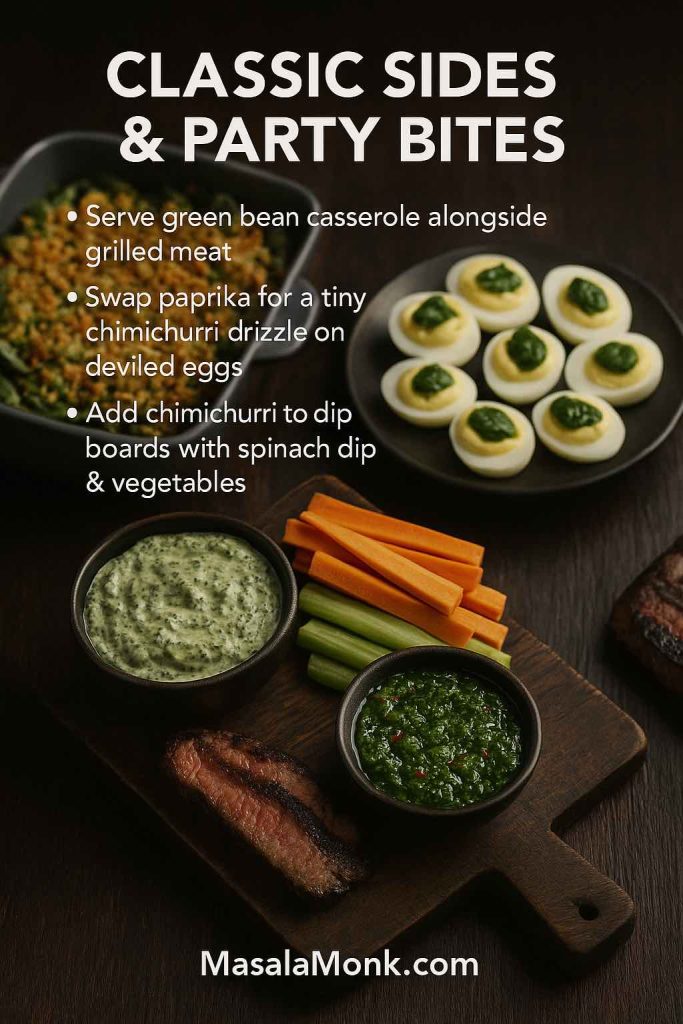
Turn chimichurri steak or chicken into a full spread with cosy sides: a bubbling green bean casserole, deviled eggs finished with a tiny chimichurri drizzle and a dip board where spinach dip, fresh vegetables and a bowl of chimi all share the same platter.
Classic Sides and Party Bites
Beyond potatoes, there are plenty of other dishes that sit happily beside a platter of chimichurri steak:
A pan of green bean casserole (MasalaMonk’s green bean casserole recipes offer classic and updated versions) next to grilled meat feels festive.
A tray of classic deviled eggs can be dusted with a tiny drizzle of chimichurri instead of paprika for a twist.
For dipping boards, consider pairing chimichurri with spinach dip variations and fresh vegetables.
Finally, for nights when you’re turning chimichurri steak into a full occasion, you can round things out with a dessert or a late-night drink. An espresso martini recipe variation makes a lively after-dinner cocktail, while a simple hot chocolate or lemon-water routine will suit quieter evenings.
Chimichurri vs Other Sauces You Might Love
Once you’ve mastered one good chimichurri recipe, it’s natural to compare it to other favourites in your kitchen. Each sauce has its own personality:
Chimichurri is raw, herby, sharp and slightly spicy, made for grilled meat and vegetables.
Pesto is rich, cheesy and nutty; it loves pasta, sandwiches and roasted vegetables. You can learn more variations in MasalaMonk’s pesto guide.
Tzatziki is cool and creamy, based on yogurt, cucumber and garlic, perfect for wraps and mezze; MasalaMonk’s Greek tzatziki sauce recipes dive into that world.
Béchamel is a gentle white sauce, the base for lasagna and gratins; it’s explored in MasalaMonk’s béchamel sauce for lasagna.
Learning chimichurri alongside these other “master sauces” gives you a lot of flexibility: one night you serve flank steak with chimichurri, another you layer a vegetable lasagna with béchamel, and on another you pile grilled meat, tzatziki and salad into flatbreads. All of them start from simple, repeatable techniques.
By now you’ve seen chimichurri from several angles:
As a classic Argentine sauce for steak, originally designed for asados and grilled meats.
As a versatile chimichurri sauce recipe that can dress flank steak, skirt steak, ribeye, chicken, salmon, vegetables, burgers and choripán.
As a base for variations like cilantro chimichurri, basil chimichurri, avocado chimichurri, red chimichurri sauce and spicy chimichurri hot sauce.
As a building block for chimichurri butter, chimichurri marinade, chimichurri dry rub, chimichurri salad dressing and more.
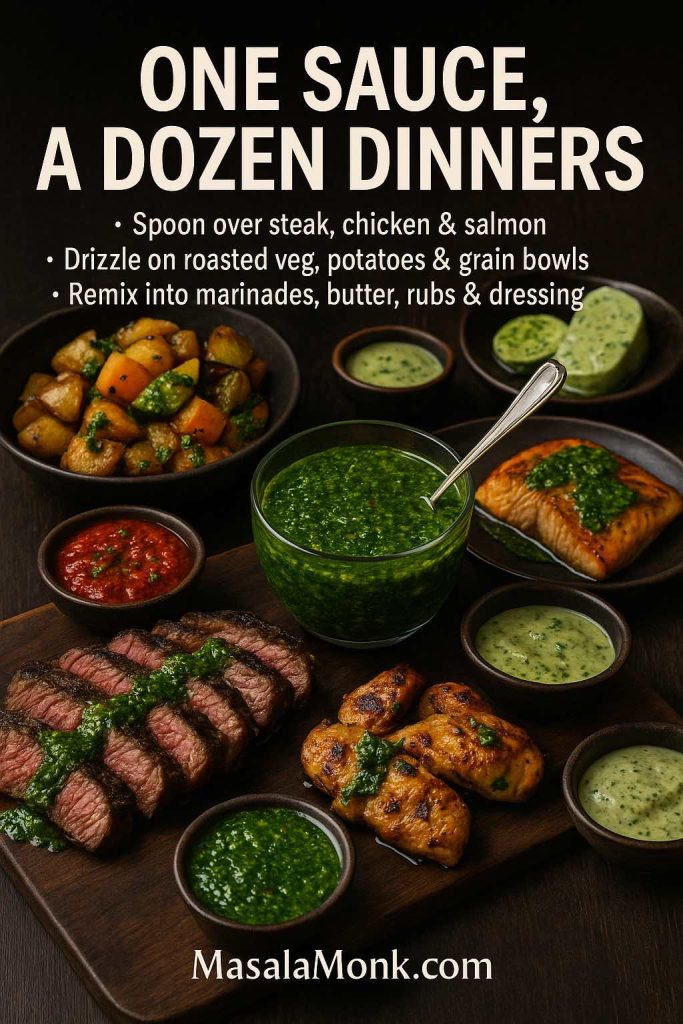
This final feast table pulls everything together: one bowl of chimichurri becomes the finishing touch for steak, chicken and salmon, a drizzle for roasted potatoes and vegetables, and the base for red, creamy and marinade-style variations—proof that a single sauce can carry a dozen different dinners.
You’ve also seen how easily your homemade chimichurri can sit next to potato salads, green bean casseroles, French fries, deviled eggs, dips and drinks to make complete meals that feel thoughtful without being complicated.
Most importantly, you now know exactly how to make chimichurri, how to adjust it to your taste, and how to keep it in your fridge as a ready-to-go flavour bomb. The next time you’re staring at a plain steak, a tray of vegetables or a pack of chicken thighs, you’ll have a simple answer: chop some herbs, add garlic, vinegar, chili and oil, and let chimichurri do the heavy lifting.
FAQs
1. What is chimichurri sauce?
To begin with, chimichurri is an uncooked herb sauce from Argentina and Uruguay made primarily with parsley, garlic, vinegar, olive oil, oregano and chili. It’s traditionally served with grilled beef at asados, which is why so many people think of it first as an Argentinian steak sauce. However, modern cooks now use chimichurri sauce as a condiment, marinade, dressing and dip for everything from steak and chicken to salmon, vegetables, burgers and rice bowls.
2. What ingredients are used to make chimichurri?
Next, let’s talk about the chimichurri ingredients list. A classic, traditional chimichurri recipe includes:
Fresh flat-leaf parsley
Garlic
Dried or fresh oregano
Red pepper flakes or fresh chili
Red wine vinegar
Olive oil
Salt and black pepper
Optionally, many home cooks also add a little finely chopped onion or shallot, lemon juice, bay leaf or a hint of other herbs. These variations still fit the idea of an authentic chimichurri sauce as long as parsley, garlic, oil and vinegar remain the main ingredients.
3. How do you make chimichurri?
Moving on, the basic method for how to make chimichurri is very straightforward:
Finely chop parsley (and any other fresh herbs) with a sharp knife.
Mince garlic into a paste and combine it with the herbs, oregano, chili, salt and pepper.
Stir in red wine vinegar and optional lemon juice.
Add olive oil until you get a loose, spoonable sauce.
Taste and adjust salt, acid and heat.
Let your chimichurri rest at room temperature so the flavours meld.
That’s the answer behind “how do you make chimichurri” lots of chopping, no cooking and a little patience.
4. How do you make the best chimichurri recipe for steak?
After you’ve mastered the basics, the best chimichurri recipe for steak is mainly about balance. For rich cuts like ribeye, picanha, skirt steak or flank steak, it helps to:
Use plenty of parsley and garlic.
Increase vinegar slightly so the chimichurri cuts through fat.
Add enough salt so the sauce tastes vivid on its own.
Adjust chili for a gentle burn if you want a spicy chimichurri sauce.
For a classic chimichurri for steak recipe, many people follow a roughly 3:1 ratio of oil to vinegar and keep the sauce quite loose. That style works brilliantly as a finishing sauce for flank steak and chimichurri, skirt steak and chimichurri, chimichurri ribeye and other grilled beef steaks.
5. Can I use chimichurri as a marinade, rub or dry seasoning?
In many cases, yes. A basic chimichurri recipe turns into a chimichurri marinade when you simply increase vinegar and salt, then thin the sauce with a splash of water. This version clings to steak, chicken, prawns or tofu for 30–60 minutes before grilling. Furthermore, you can mix dried parsley, dried oregano, garlic powder, onion powder, chili flakes, smoked paprika, salt and pepper to create a dry chimichurri mix or chimichurri seasoning that works as a rub. That dry chimichurri rub can then be sprinkled on meat, seafood or vegetables before cooking, giving you chimichurri flavour even when fresh herbs aren’t available.
6. Is chimichurri healthy?
From a nutrition perspective, chimichurri can be a healthy addition to your meals when you use it mindfully. It’s mostly made from fresh herbs, garlic, olive oil, vinegar and chili. Consequently, you get beneficial fats from the olive oil and plenty of phytonutrients from the parsley and other herbs. Because most of the calories come from oil, a tablespoon of chimichurri sauce will usually sit around 45–60 calories. If you want a healthier chimichurri recipe, simply use more herbs and vinegar relative to oil, and drizzle it over grilled vegetables, lean steak, chicken, seafood, beans or tofu instead of heavy cream-based sauces.
7. What is the difference between authentic chimichurri and modern versions?
In practice, an authentic Argentinian chimichurri sauce recipe usually keeps things very simple: parsley, garlic, oregano, vinegar, olive oil, chili, salt and pepper. That’s the kind of traditional chimichurri recipe you’ll see served with grilled beef at asados. By contrast, modern chimichurri recipes may introduce cilantro, basil, carrot tops, lemon juice, lime juice, smoked paprika, onion, bay leaves or even avocado. These still count as chimichurri as long as the basic idea—herbs, garlic, oil and vinegar—stays intact.
8. Can you make chimichurri with cilantro?
Absolutely. Once you feel comfortable with classic parsley chimichurri, a cilantro chimichurri recipe is a natural variation. Typically, you:
Swap one-quarter to one-half of the parsley for cilantro.
Keep the oregano, garlic, vinegar and chili the same.
Possibly add a little lime juice or extra lemon juice for brightness.
As a result, you get chimichurri cilantro, chimichurri cilantro parsley or chimichurri with parsley and cilantro—different names for the same parsley–cilantro blend. This kind of chimichurri sauce recipe with cilantro goes especially well with chicken, salmon, prawns, fish tacos and grilled vegetables.
9. What is red chimichurri sauce?
Red chimichurri, or chimichurri rojo, is a cousin of the green version. Instead of only parsley and green herbs, red chimichurri sauce often includes:
Sweet or hot paprika
Extra chili flakes or fresh red chili
Sometimes finely chopped red bell pepper
Occasionally tomato paste or sun-dried tomato
Beyond that, the structure stays the same: herbs, garlic, vinegar, oil and salt. Therefore, “chimichurri red” or “red chimichurri sauce recipe” typically point to a smokier, slightly richer sauce. Red chimichurri is particularly good as a sauce for steak, pork chops, sausages and grilled vegetables.
10. How should I use chimichurri besides steak?
Once you have a jar of chimichurri in the fridge, it becomes a multi-use condiment. Moreover, you can:
Spoon chimichurri over grilled chicken, baked chicken or roast chicken pieces.
Drizzle cilantro-heavy chimichurri over salmon or other fish fillets.
Toss roasted vegetables and potatoes in chimichurri dressing.
Use it on burgers as a chimi sauce instead of ketchup and mayo.
Stir a spoonful into cooked rice or quinoa to make chimichurri rice bowls.
Serve chimichurri as a dip alongside fries, sweet potato wedges or crusty bread.
So when you’re wondering “how to use chimichurri” or “how to use chimichurri sauce,” the answer is simple: treat it anywhere you’d enjoy a bold herb sauce, vinaigrette or salsa.
11. How long does homemade chimichurri last and how do you store it?
For best flavour, homemade chimichurri is usually stored in an airtight jar in the refrigerator. Under normal circumstances, it keeps well for about 3–4 days. Over time, the herbs soften and the garlic mellows, which can be very pleasant. To extend its life a little, you can:
Cover the surface with a thin layer of olive oil.
Always use a clean spoon to avoid contamination.
If you’d like to store chimichurri longer, you can freeze it in small portions (for instance, in an ice cube tray). Later on, thaw a cube or two to use as a quick marinade, chimichurri sauce for steak or a base for dressings. Before serving, let it come back to room temperature and stir well.
12. Can I freeze chimichurri?
Yes, chimichurri freezes surprisingly well. Instead of discarding leftovers, you can spoon the sauce into an ice cube tray or small containers and freeze. Subsequently, each cube becomes a ready-made flavour bomb: add one to a pan sauce, melt one over grilled steak, or whisk one into extra vinegar and oil for a fast chimichurri dressing. The texture of the herbs softens slightly after freezing, yet the flavour remains intense, making frozen chimichurri ideal for marinades, skillet sauces and stews.
13. Why does my chimichurri taste bitter, too oily or too acidic?
Occasionally, a chimichurri sauce recipe can feel out of balance. If it tastes bitter, one reason might be over-processed herbs: blending parsley and oil aggressively can release bitter compounds. Another cause can be very sharp, low-quality olive oil. To fix this, chop herbs by hand when possible and consider using a milder oil or a mix of oils.
When chimichurri tastes too oily, add more vinegar, lemon juice and chopped herbs until it feels fresher and lighter. On the other hand, if your chimichurri is too acidic, stir in more olive oil, a pinch of sugar or honey and a little extra salt. In short, you can repair most “bad” chimichurri by adjusting those three dials: oil, acid and salt.
14. What is the difference between chimichurri, pesto and salsa verde?
Although they’re all green sauces, they serve different purposes. Chimichurri is a raw Argentinian herb sauce with parsley, garlic, vinegar, chili and oil, designed as a condiment and marinade for grilled meats. Pesto is a thick Italian sauce made with basil, pine nuts, Parmesan, garlic and olive oil; it’s usually tossed with pasta or spread on sandwiches. Salsa verde can refer to different sauces, but Italian salsa verde includes parsley, capers, anchovies and vinegar, while Mexican salsa verde is based on tomatillos and chilies. Consequently, when you’re searching for chimichurri sauce recipe, pesto recipe or salsa verde, you’re really choosing between three distinct personalities, even though they share herbs and garlic.
15. Is “chimi sauce,” “chimi recipe” or “jimmy churri sauce” the same as chimichurri?
Every so often, you might see people write “chimi sauce,” “chimi recipe” or even “jimmy churri sauce.” Generally, these are just informal or misspelled ways of referring to chimichurri. In some contexts, especially around Dominican street food, “chimi” can mean a specific style of burger, yet the sauce on those burgers is often inspired by chimichurri flavours. Therefore, if someone mentions chimi sauce for steak or asks how to make jimmy churri sauce, they usually want a standard chimichurri sauce recipe—parsley, garlic, vinegar, chili and olive oil—no matter how they spell it.