Posted on 2 Comments

Apple Cinnamon Roll Bake with Apple Pie Filling

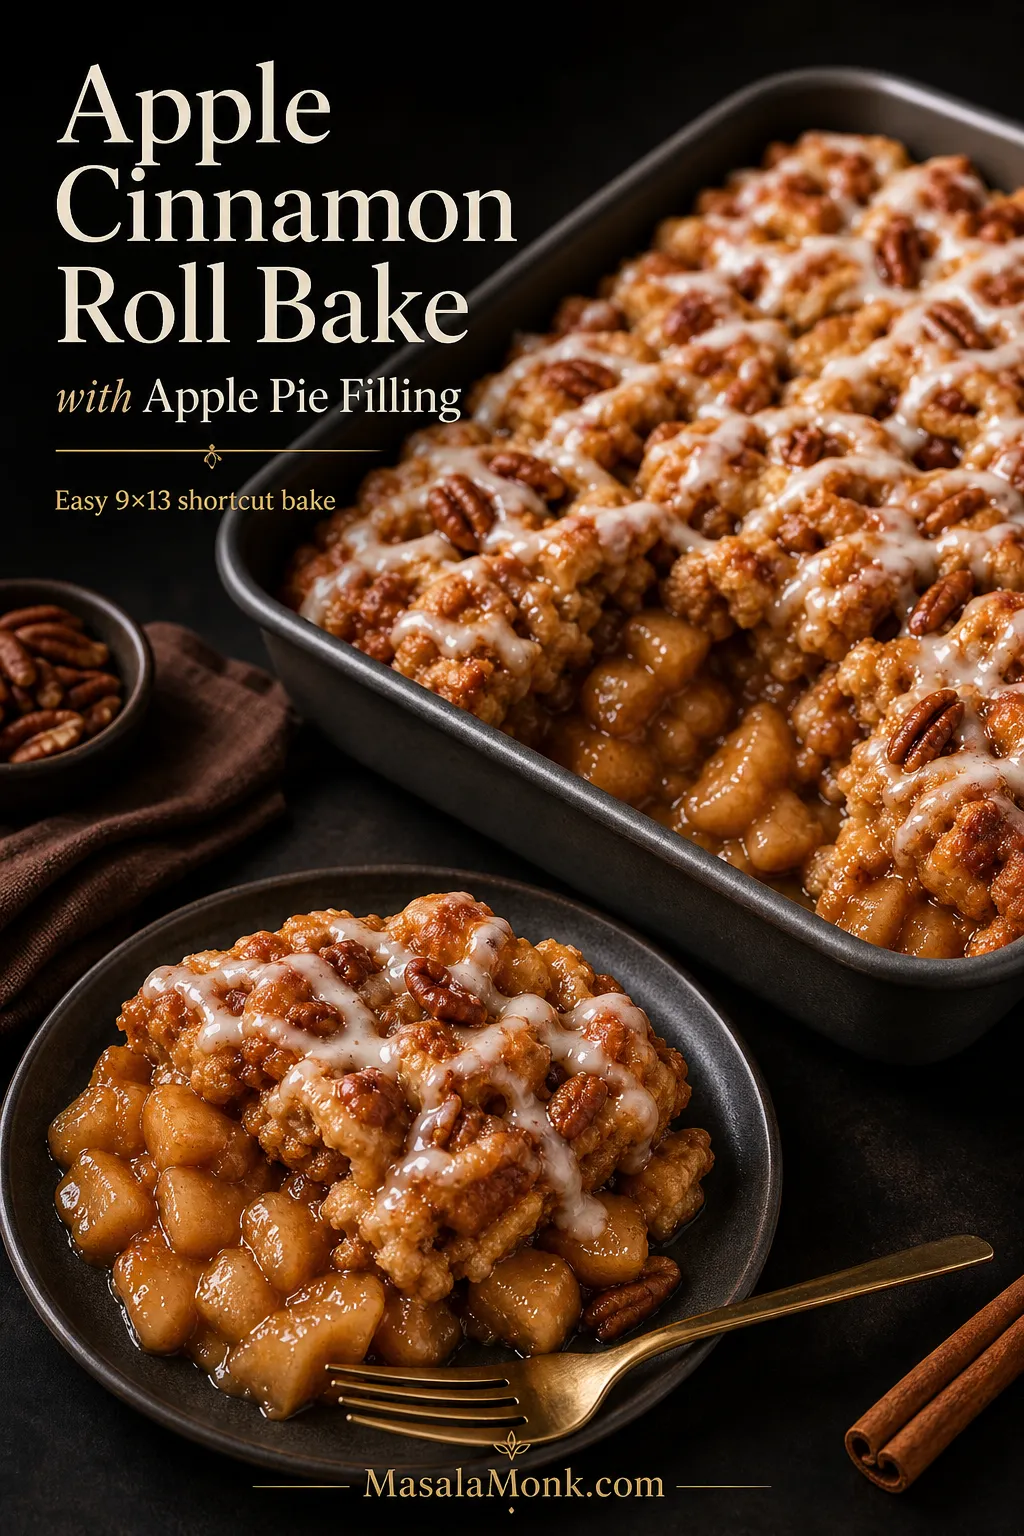
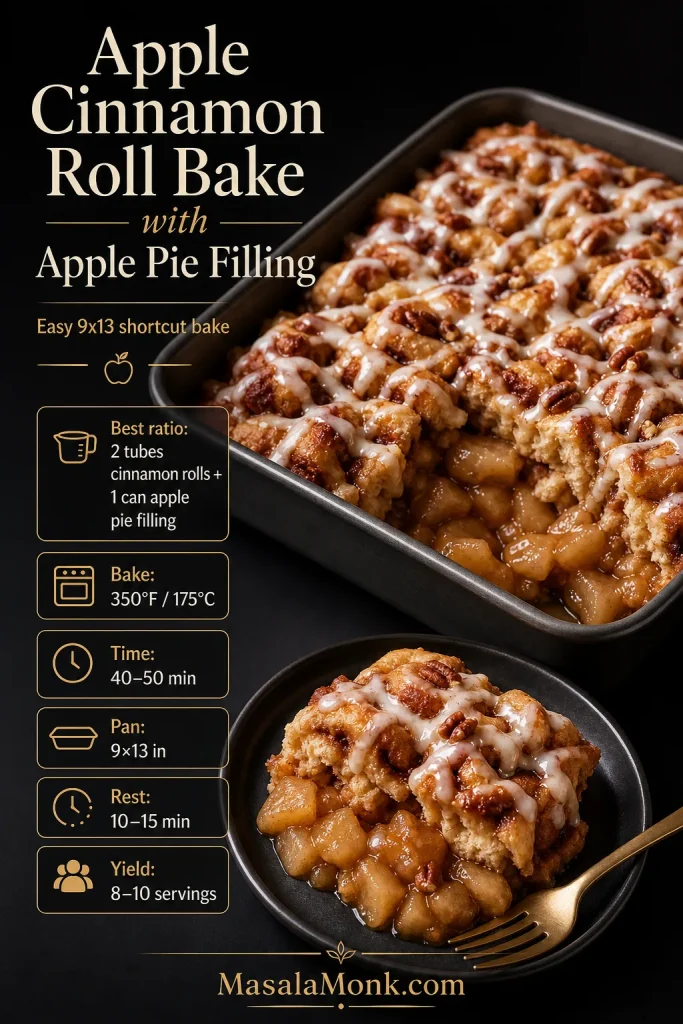
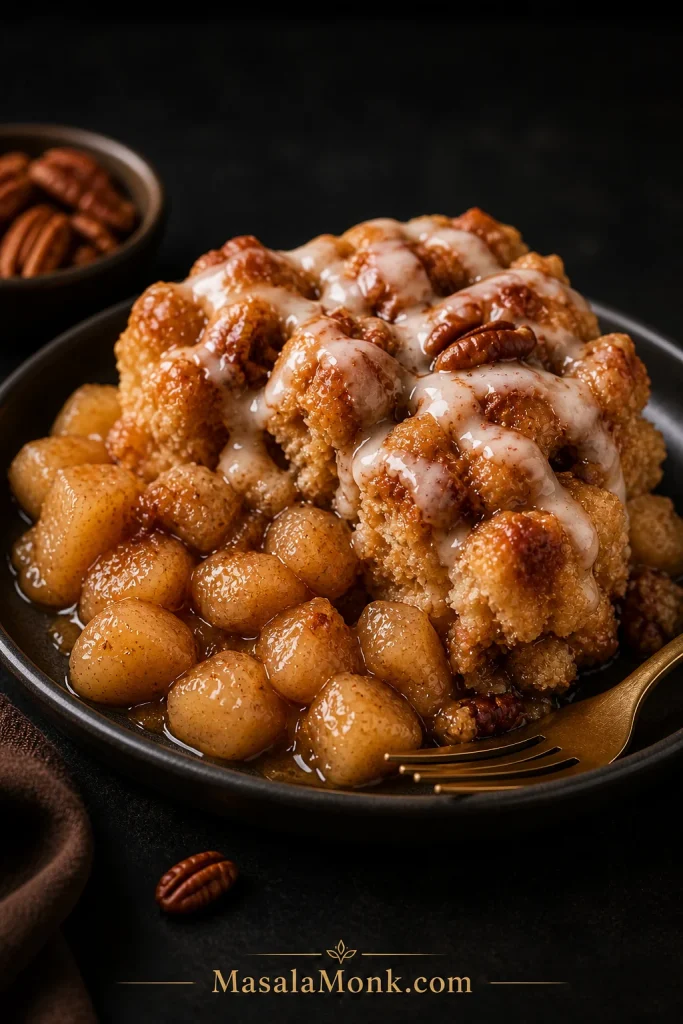
Apple cinnamon roll bake with apple pie filling in a dark 9x13 pan, topped with icing, pecans, and glossy apple pieces.

Apple cinnamon roll bake with apple pie filling is the shortcut dessert you make when you want warm apple pie flavor without rolling pie crust, peeling apples, or making cinnamon roll dough from scratch.

At its simplest, this can be a 2-ingredient apple cinnamon roll bake made with refrigerated cinnamon rolls and apple pie filling. This version keeps that easy shortcut, then adds a few small upgrades — butter, brown sugar, cinnamon, optional cream, and better ratio guidance — so the pan tastes more finished and bakes more evenly.

If you are looking for apple cinnamon rolls with apple pie filling, this is the easy bake-style version: soft cinnamon roll pieces, warm apple filling, sticky icing, and clear fixes for the common problem of wet or doughy centers.

Quick Answer: Apple Cinnamon Roll Bake with Apple Pie Filling

Cut refrigerated cinnamon rolls into pieces, toss them with melted butter, cinnamon, brown sugar, and apple pie filling, then bake everything in a greased 9×13 inch pan at 350°F / 175°C until the center is puffed and cooked through. For the most reliable texture, use 2 tubes of cinnamon rolls with 1 can of apple pie filling. Use 1½ to 2 cans only if you want a very gooey, apple-heavy bake and are comfortable baking it a little longer.

This is not a from-scratch cinnamon roll recipe. It is the easy refrigerated cinnamon roll bake, and the best way to make it taste more homemade is to upgrade the filling first. Diced homemade apple pie filling gives better texture without turning the recipe into a full dough project.

Best default ratio: 2 large tubes refrigerated cinnamon rolls, about 35 oz / 990 g total, plus 1 can apple pie filling, 21 oz / 595 g. This gives you a soft, gooey bake without overloading the pan.

Quick guide for apple cinnamon roll bake with apple pie filling showing a 9x13 pan, 350°F bake temperature, 40 to 50 minute time, and 2 tubes to 1 can ratio.
For the safest first version, use this starting formula: 2 tubes of cinnamon rolls, 1 can of apple pie filling, a 9×13 pan, and enough bake time for the middle to set before icing.

Need exact amounts? Jump to the recipe. Still choosing filling amount? Check the ratio guide.

Apple Cinnamon Roll Bake at a Glance

Best pan9×13 inch / 23×33 cm baking dish for a full batch
Oven temperature350°F / 175°C
Best cinnamon rollsRefrigerated cinnamon rolls, cut into quarters; jumbo rolls can be cut into 6 pieces
Best filling ratio2 tubes cinnamon rolls + 1 can apple pie filling
Homemade filling replacementUse 2 to 2½ cups homemade apple pie filling to replace one 20–21 oz can
Bake timeUsually 40–50 minutes for a 9×13 pan
Center cueThe middle should be puffed, set, and no longer wet or raw
Rest time10–15 minutes before adding icing
Yield8–10 servings

Why This Apple Cinnamon Roll Bake Works

This recipe works because it treats the filling ratio as the main decision, not an afterthought. Apple pie filling is sweet, saucy, and heavy, so using too much can keep the cinnamon roll pieces from baking evenly in the center. Starting with 1 can of filling for 2 tubes of cinnamon rolls gives you enough apple flavor without turning the middle wet.

Cutting the rolls into smaller pieces also matters. Smaller pieces bake through faster, hold the apple filling better, and give you more soft edges for the icing to settle into. A wide 9×13 pan helps the dough spread instead of steaming in a deep pile.

The result is still gooey, cozy, and generous, but the center cooks through properly.

Before mixing the pan, compare the best filling ratios and choose the right version for your pan.

Ingredients You Need

This recipe starts with the easy version: refrigerated cinnamon rolls and apple pie filling. The small upgrades — butter, brown sugar, cinnamon, salt, and optional cream — make it taste more like a finished bake and less like two packaged ingredients stirred together.

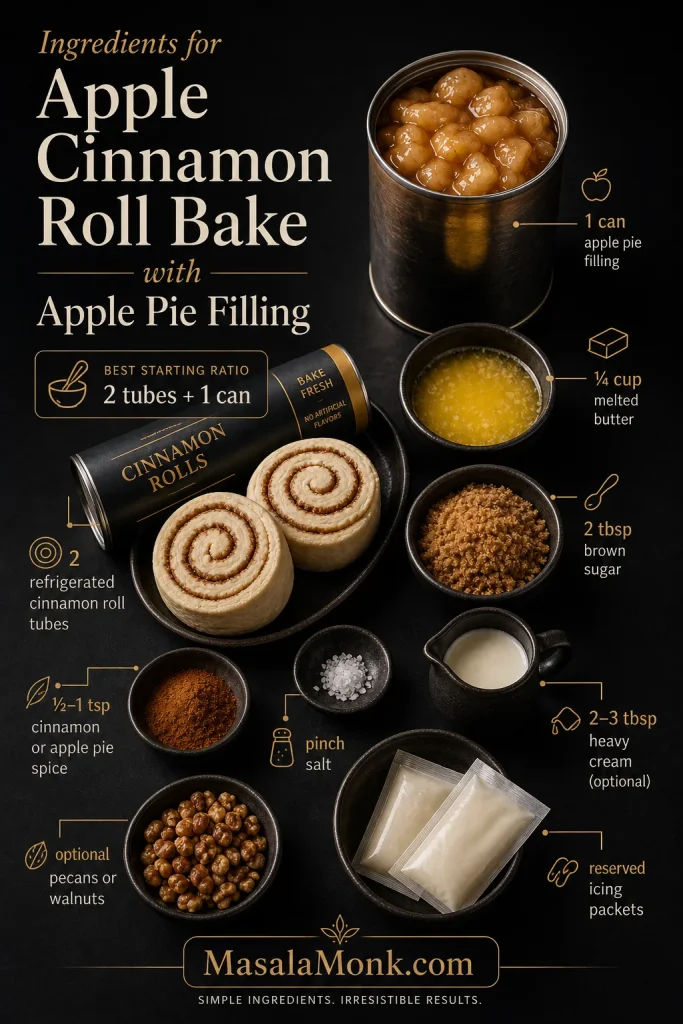
Ingredients for apple cinnamon roll bake including cinnamon roll tubes, apple pie filling, butter, brown sugar, cinnamon, salt, cream, pecans, and icing.
The shortcut comes from refrigerated cinnamon rolls and apple pie filling, but the small upgrades matter. Butter adds richness, brown sugar deepens the flavor, cinnamon reinforces the apple-pie taste, and a pinch of salt keeps the bake from tasting flat.

Using smaller tubes or extra filling? Check the filling ratio before mixing the pan.

Refrigerated Cinnamon Rolls

Use 2 tubes of refrigerated cinnamon rolls for a full 9×13 pan. Large tubes are often about 17.5 oz / 496 g each, giving you about 35 oz / 990 g total dough. If your tubes are smaller, use the ratio guide below instead of guessing.

Use any brand of refrigerated cinnamon rolls you like. The important part is the total dough weight, not the brand name. If your tubes are smaller than the large 17.5 oz / 496 g size, reduce the filling slightly or use the small-batch guide.

Reserve the icing packets. Drizzle the icing after the bake has rested, not before it goes into the oven.

Apple Pie Filling

Use 1 can of apple pie filling, usually 21 oz / 595 g, for the most reliable full-pan bake. If the apple slices are large, chop them into smaller pieces before mixing. Smaller apple pieces distribute better and reduce wet pockets in the center.

You do not need to drain the apple pie filling. If the can looks extremely saucy, spoon off a little excess gel, but do not strain it dry. The sauce is part of what makes the bake soft and gooey.

You can also use homemade apple pie filling. For this recipe, diced apple pie filling works better than long slices because it spreads evenly between the cinnamon roll pieces.

Butter, Brown Sugar and Cinnamon

Melted butter coats the dough pieces and helps the edges bake up richer. Brown sugar adds a light caramel note, while cinnamon or apple pie spice reinforces the apple-pie flavor.

  • Melted butter: ¼ cup / 4 tablespoons / 57 g
  • Light brown sugar: 2 tablespoons / about 25 g
  • Cinnamon or apple pie spice: ½ to 1 teaspoon
  • Fine salt: a small pinch, optional but useful

Heavy Cream, Optional

Heavy cream can make the bake softer and more gooey, but too much can slow down the center. For this recipe, use only 2–3 tablespoons / 30–45 ml if you want the cream upgrade.

Icing or Cream Cheese Glaze

The easiest option is the icing that comes with the cinnamon rolls. For a thicker finish, make the quick cream cheese glaze in the recipe card. Add icing while the bake is warm, not piping hot, so it melts slightly without disappearing completely.

Pecans or Walnuts, Optional

Chopped pecans or walnuts add crunch and make the bake feel more holiday-ready. Use about ½ cup / 55–60 g, and sprinkle some inside the bake or over the top before baking.

Best Ratio of Cinnamon Rolls to Apple Pie Filling

This is where many apple cinnamon roll bakes go wrong. One version may call for two cans of apple pie filling, while another uses one can for the same amount of dough. Both can work, but they do not give the same result.

For the most reliable center, use 1 can of apple pie filling with 2 large tubes of cinnamon rolls. If you want a wetter, cobbler-style bake, increase the filling and bake longer.

If you want visible apple pieces in every bite, chop the filling smaller before adding a second full can. Smaller pieces distribute better without flooding the center.

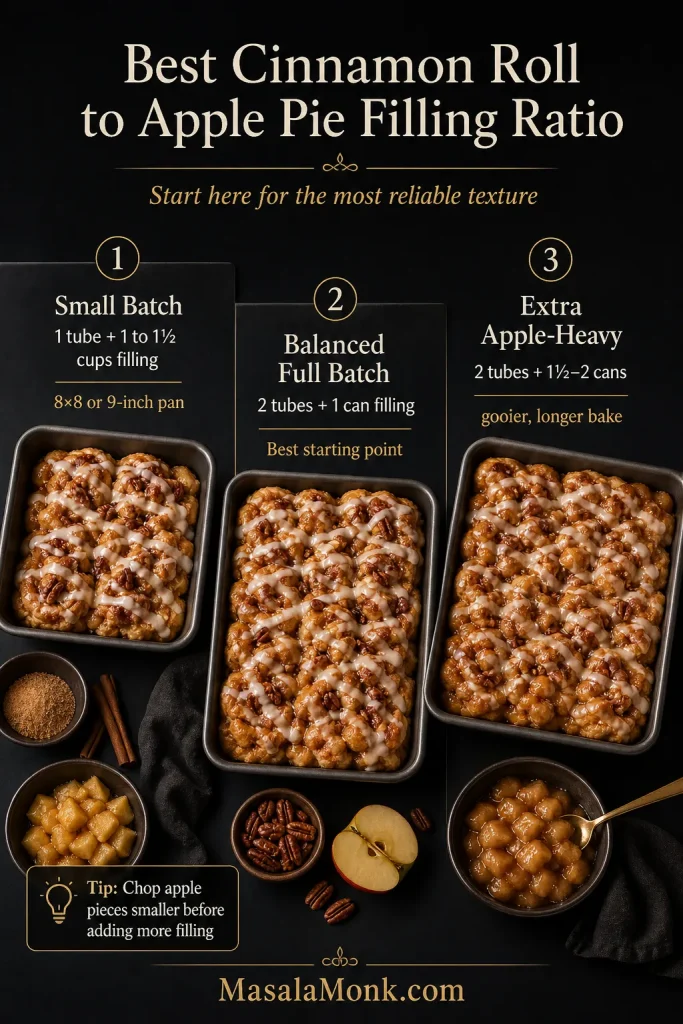
Ratio guide comparing small batch, balanced full batch, and extra apple-heavy apple cinnamon roll bake with apple pie filling.
The filling ratio changes the whole texture of the bake. One can gives a safer, more evenly baked center, while extra filling creates a gooier dessert-style pan that usually needs more time in the oven.
VersionCinnamon rollsApple pie fillingPanBake time
Small batch1 tube / 12–17.5 oz / 340–500 g1 to 1½ cups8×8 inch or 9-inch round22–30 minutes
Balanced full batch2 large tubes / about 35 oz / 990 g total1 can / 21 oz / 595 g9×13 inch / 23×33 cm40–50 minutes
Extra apple-heavy2 large tubes / about 35 oz / 990 g total1½ to 2 cans / 31–42 oz / 880–1190 g9×13 inch / 23×33 cm45–55 minutes
Homemade filling version2 large tubes2 to 2½ cups homemade filling per can replacement9×13 inch / 23×33 cm40–50 minutes

One Can vs Two Cans of Apple Pie Filling

If you are making this apple cinnamon roll bake for the first time, one can of apple pie filling is the safer starting point. Two cans can taste extra gooey, but the added sauce makes the center slower to bake and easier to undercook.

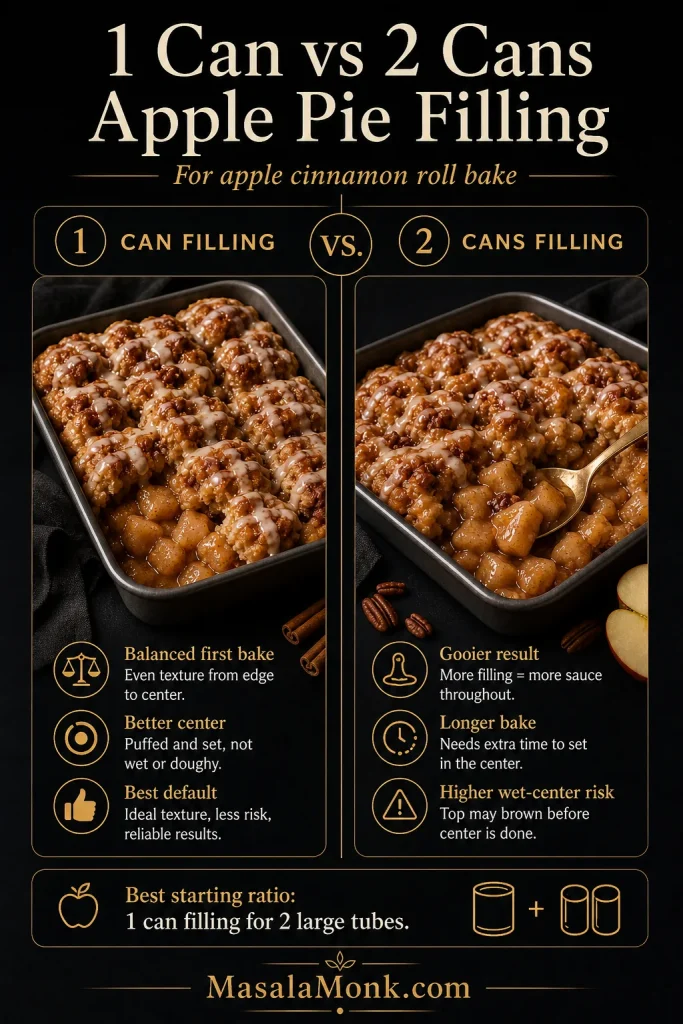
One can versus two cans of apple pie filling comparison for apple cinnamon roll bake, showing balanced and extra-gooey versions.
One can is the best default for a balanced apple cinnamon roll bake. Two cans can be deliciously gooey, but the center needs more attention because extra sauce slows down the bake.

Want the simplest shortcut? See the 2-ingredient version. Ready to bake? Jump to the method.

Small-roll note: If your cinnamon roll tubes are smaller than 17.5 oz / 496 g each, do not automatically use a full can of filling for every tube. Smaller tubes need less filling, or the pan can turn wet before the dough cooks through.

Can You Make This with Just 2 Ingredients?

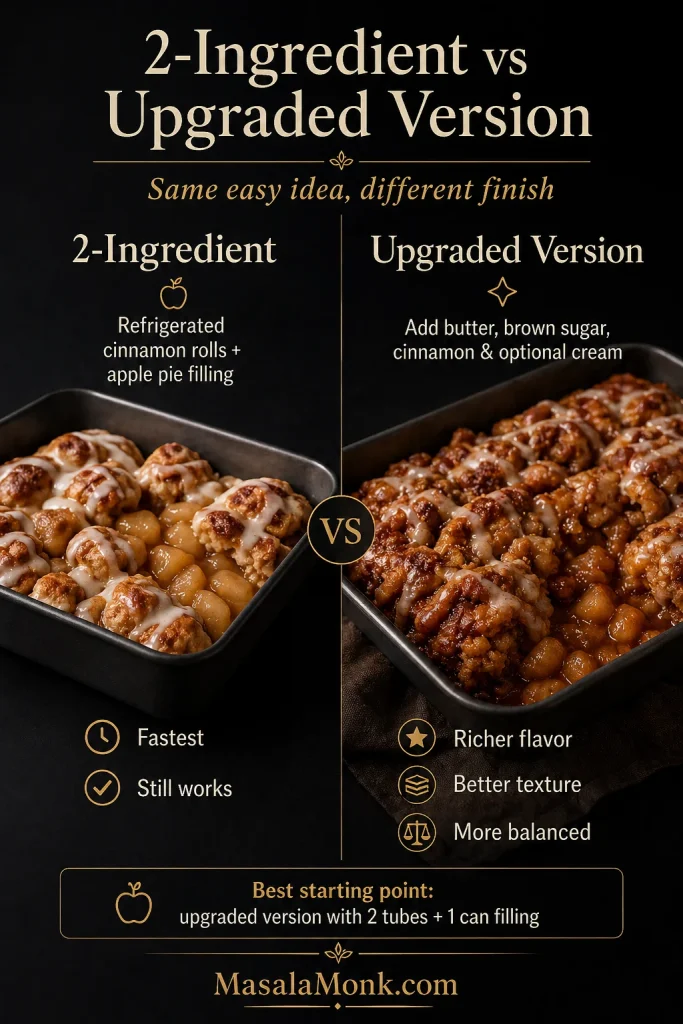
Yes. You can make a 2-ingredient apple cinnamon roll bake with only refrigerated cinnamon rolls and apple pie filling. Cut the rolls, fold them with the filling, bake until the center is cooked through, then drizzle with the icing. The butter, brown sugar, cinnamon, and salt in this recipe are small upgrades that make the bake taste more finished, but they are not required.

Comparison of 2-ingredient apple cinnamon roll bake and upgraded version with butter, brown sugar, cinnamon, and optional cream.
The 2-ingredient version works when you need the fastest shortcut. However, the upgraded version adds better flavor balance and a softer, more bakery-style finish without turning this into a from-scratch cinnamon roll recipe.

Which Version Should You Make?

The best version depends on what you want from the pan. If this is your first time making it, start with the balanced 9×13 bake. Once you know how your oven, pan, and cinnamon rolls behave, you can make it more apple-heavy or richer with cream.

Choose this versionUse it whenWhat to expect
Balanced 9×13 bakeYou want the safest first trySoft rolls, clear apple flavor, less risk of a doughy center
Extra apple-heavy bakeYou want a gooier dessert-style casseroleMore filling, more sauce, longer bake time
Small batchYou are using 1 tube of cinnamon rollsBetter for an 8×8 pan or 9-inch round pan
Homemade filling versionYou want better apple texture and less canned sweetnessBest flavor, especially with diced apple pie filling

Canned vs Homemade Apple Pie Filling

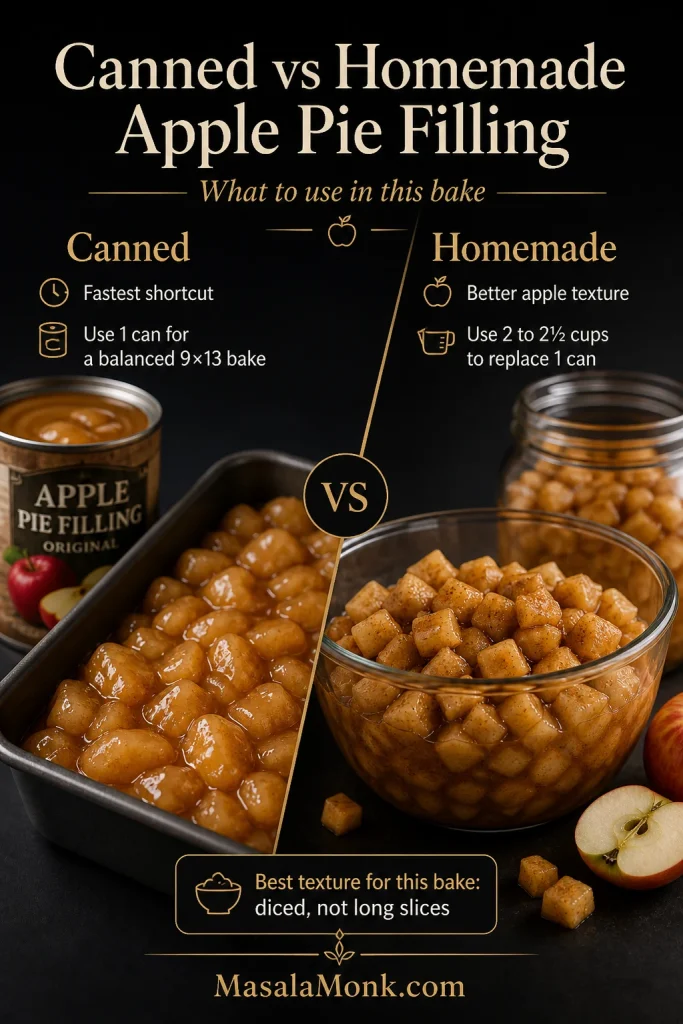
Canned apple pie filling is the fastest option, and it works well for this recipe. Homemade filling gives you better control over sweetness, apple texture, and spice. The best homemade version for this bake is diced or chopped, not long slices.

Canned and homemade apple pie filling comparison for apple cinnamon roll bake, showing canned filling and diced homemade filling in bowls.
Canned apple pie filling is the fastest option, but homemade diced filling gives better control over sweetness and texture. For this bake, small apple pieces distribute more evenly than long slices.
FillingBest forHow much to use
Canned apple pie fillingFastest shortcut bake1 can / 21 oz / 595 g for a balanced 9×13 bake
Homemade diced apple pie fillingBetter texture and less canned sweetness2 to 2½ cups to replace one can
Extra saucy fillingGooey casserole-style bakeUse carefully; too much sauce can delay the center
Fresh raw applesNot the best direct swapCook them first or use a proper apple pie filling method

If you want to make the filling from scratch, use this apple pie filling recipe and dice the apples for this bake. Use about 2 to 2½ cups homemade filling for every 20–21 oz can you are replacing.

Long Slices vs Diced Apple Pie Filling

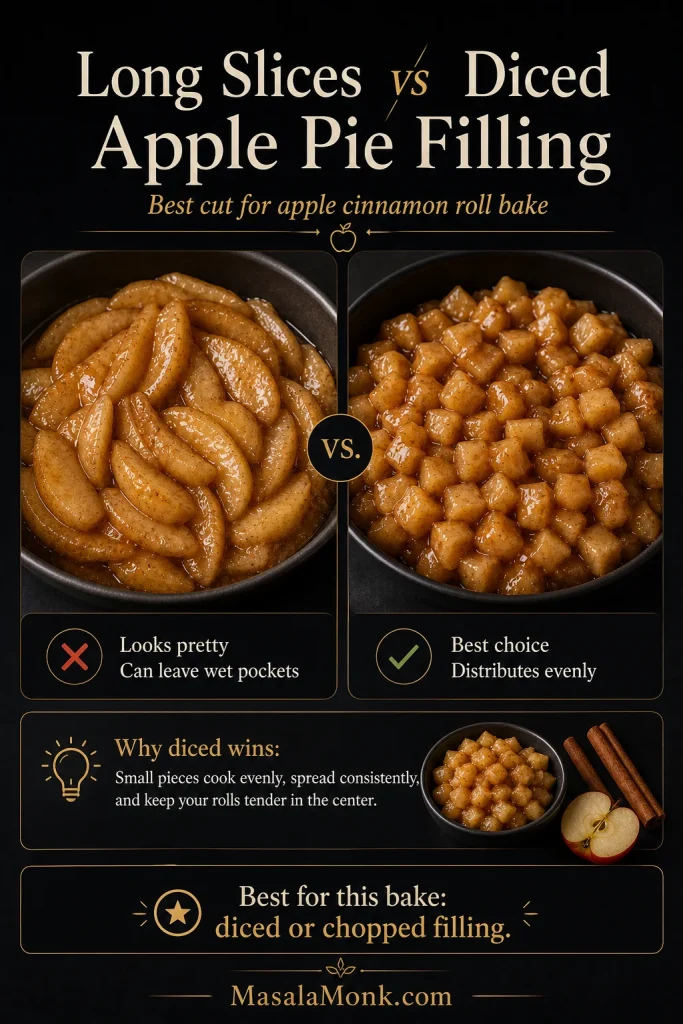
For this bake, diced or chopped apple pie filling works better than long slices. Smaller pieces spread between the cinnamon roll pieces more evenly, which gives you apple flavor throughout the pan without creating wet pockets.

Comparison of long apple slices and diced apple pie filling for apple cinnamon roll bake, showing diced filling as the better choice for even distribution.
Long apple slices can look beautiful, but they may leave wet pockets between the dough pieces. Diced or chopped apple pie filling spreads more evenly, which helps the center bake through cleanly.

Filling ready? Go to the step-by-step method. Worried about the center? Check the doughy-center fixes.

How to Make Apple Cinnamon Roll Bake with Apple Pie Filling

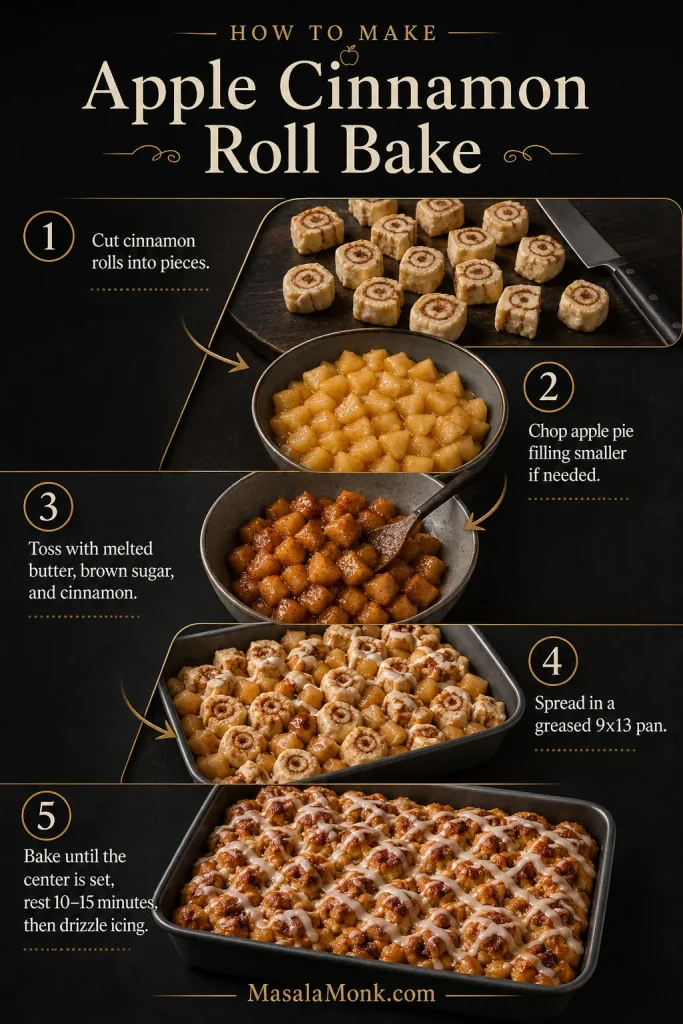
The goal is simple: keep the dough pieces small, spread the filling evenly, and give the center enough time to bake through. The apple filling should sit around and between the cinnamon roll pieces rather than forming one thick layer over the top.

Step-by-step apple cinnamon roll bake method showing cut cinnamon rolls, chopped apple filling, seasoned dough, unbaked 9x13 pan, and iced baked rolls.
Cutting the rolls smaller and chopping the apple filling before baking helps every bite cook more evenly. As a result, you get soft cinnamon roll pieces with apple flavor throughout instead of wet pockets in the middle.
  1. Preheat the oven. Heat oven to 350°F / 175°C. Grease a 9×13 inch / 23×33 cm baking dish.
  2. Reserve the icing. Open the cinnamon roll tubes and set the icing aside for later.
  3. Cut the cinnamon rolls. Cut regular rolls into quarters. If using jumbo rolls, cut each roll into 6 pieces.
  4. Chop the apple filling. If the apple slices are large, chop them into roughly ½-inch / 1.25 cm pieces.
  5. Season the dough. In a large bowl, toss the cinnamon roll pieces with melted butter, brown sugar, cinnamon or apple pie spice, and a small pinch of salt.
  6. Add the apple pie filling. Fold in the filling gently so the dough pieces are coated but not crushed.
  7. Spread in the pan. Transfer the mixture to the baking dish and spread it in one even layer.
  8. Add cream, if using. Drizzle 2–3 tablespoons / 30–45 ml heavy cream over the top. Keep it light so the center still bakes through cleanly.
  9. Bake. Bake for 40–50 minutes, checking the center around 35–40 minutes. Tent loosely with foil if the top browns before the middle is done.
  10. Rest and ice. Let the bake rest for 10–15 minutes, then drizzle with the reserved icing or cream cheese glaze.

Center still looks soft? Use the doughy-center checklist. Different pan size? Check pan sizes.

Common Mistakes to Avoid

  • Using too much filling the first time. Two cans can work, but 1 can is the better starting point for a full 9×13 bake.
  • Leaving the cinnamon rolls too large. Big pieces brown on the outside before the middle cooks through.
  • Using a deep pan for a full batch. A deep dish traps steam and slows the center.
  • Adding icing too early. If the pan is piping hot, the icing melts away instead of sitting on top.
  • Judging only by the edges. The edges cook first. Always check the center before pulling the pan from the oven.

How to Keep Apple Cinnamon Rolls from Staying Doughy

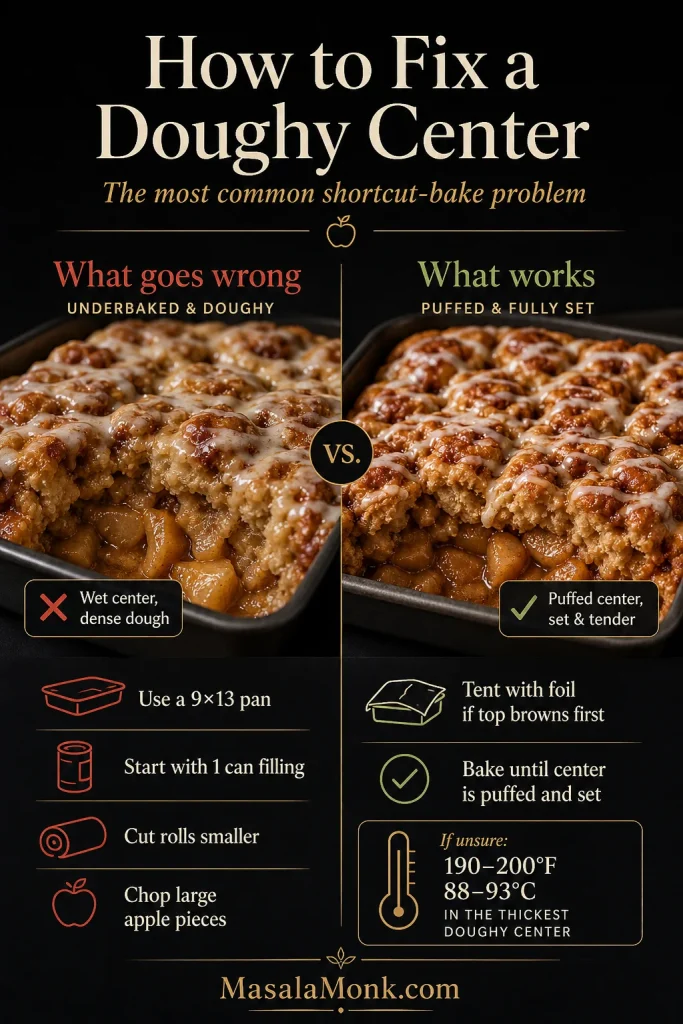
A doughy center is the most common problem with this kind of shortcut bake. It usually happens because the dough pieces are too large, the pan is too deep, or there is too much wet filling sitting over the middle.

Troubleshooting guide for fixing a doughy center in apple cinnamon roll bake, comparing a wet underbaked center with a puffed and set center.
A doughy center usually means the pan was too deep, the filling was too heavy, or the roll pieces were too large. If the top browns first, tent it with foil and keep baking until the middle is set.
  • Use a wide pan. A 9×13 pan is safer for a full batch than a deep round dish.
  • Cut the rolls small enough. Quarter regular rolls; cut jumbo rolls into 6 pieces.
  • Start with 1 can of filling. Two cans can work, but the bake becomes wetter and needs more time.
  • Chop large apple slices. Big apple pieces create wet pockets around the dough.
  • Spread everything evenly. Avoid leaving a mound of filling in the center.
  • Tent with foil if needed. If the top is browning but the center is not done, cover loosely and keep baking.
  • Check the middle, not just the edges. The center should be puffed and no longer raw or collapsed.
  • Use a thermometer if unsure. The thickest doughy part should be about 190–200°F / 88–93°C, a helpful doneness range for soft baked dough.
  • Rest before icing. Resting helps the filling settle and keeps the icing from disappearing into the hottest parts of the pan.

Glass and ceramic pans: These may need a little longer than metal pans. If the edges look done but the middle is still soft, tent with foil and continue baking in 5-minute intervals.

For other texture issues, see the taste and texture fixes. For pan-specific help, check the pan guide.

How to Fix the Taste and Texture

If the first pan is not exactly how you like it, the fix is usually simple. Adjust the filling, pan, or bake time rather than changing the whole recipe.

Texture Guide: Too Wet, Just Right or Too Dry

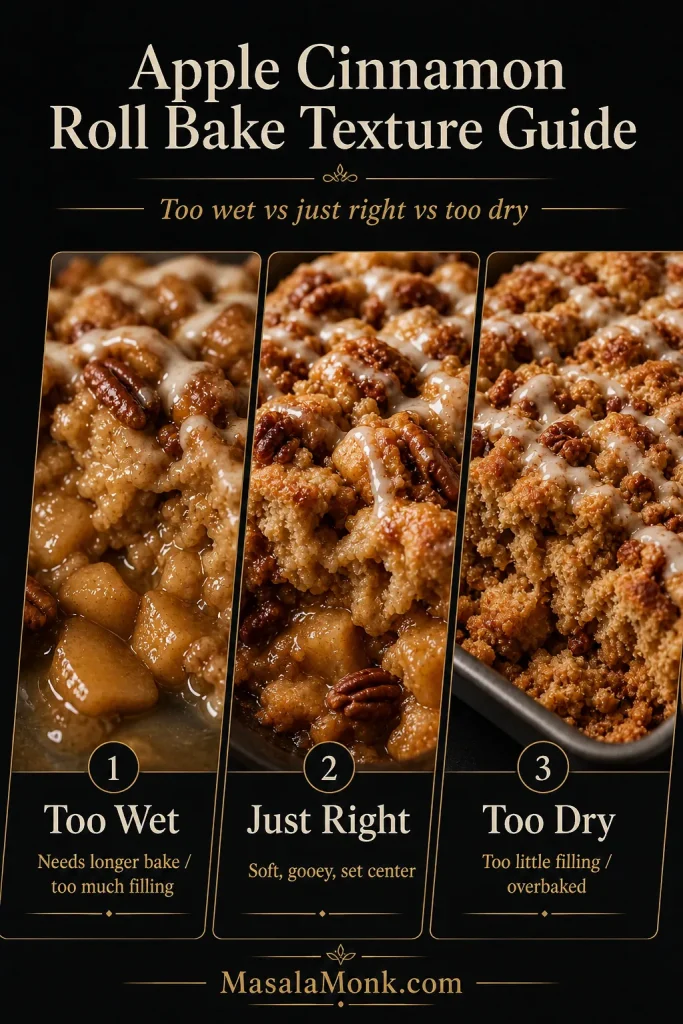
The texture should be soft and gooey, but the center should still look set. Use the visual cues below to decide whether the bake needs more time, less filling next time, or a little more moisture.

Texture guide for apple cinnamon roll bake showing too wet, just right, and too dry examples with apple filling and icing.
The ideal texture is soft, gooey, and set in the center. If the bake looks loose or sunken, give it more time; if it looks dry and crumbly, use a little more filling or check it earlier next time.
ProblemWhy it happenedFix it next time
Center is doughyToo much filling, large dough pieces, or deep panUse a 9×13 pan, cut rolls smaller, start with 1 can filling
Top is too brownTop cooked before the center finishedTent loosely with foil and keep baking
Bake is too wetToo much apple filling or heavy creamUse less filling or skip cream next time
Rolls feel dryToo little filling or baked too longUse the balanced ratio and check earlier
Too sweetSweet filling plus icing plus caramel or extra sugarSkip caramel, reduce brown sugar, or use homemade filling
Not enough apple flavorFilling pieces were too sparse or too largeChop the apples smaller and spread them evenly

Pan Sizes and Bake Times for Apple Cinnamon Roll Bake

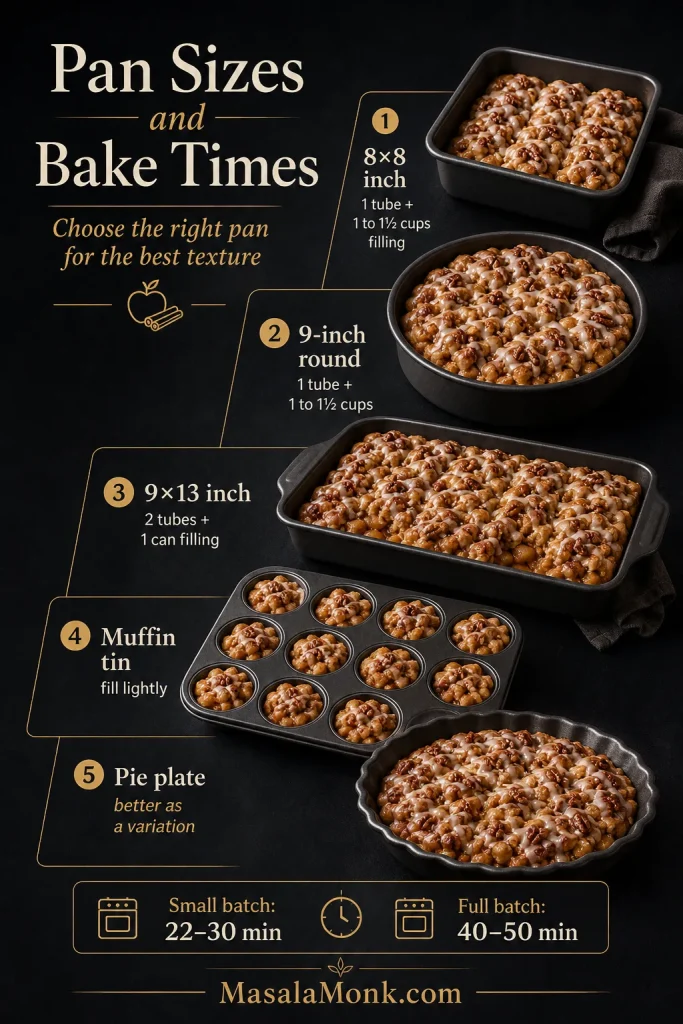
The pan changes everything. A full batch needs room to spread. A smaller batch can work beautifully in an 8×8 pan, but a full 2-tube recipe crowded into a deep dish is more likely to stay doughy.

Pan size guide for apple cinnamon roll bake showing 8x8 pan, 9-inch round pan, 9x13 pan, muffin tin, and pie plate options.
A full batch spreads and bakes best in a 9×13 pan, while one tube works better in an 8×8 pan or 9-inch round dish. In other words, matching the pan to the batch size is one of the easiest ways to avoid a doughy center.
PanBest forSuggested amountBake cue
8×8 inch / 20×20 cmSmall batch1 tube rolls + 1 to 1½ cups fillingCenter puffed and no raw dough
9-inch / 23 cm roundSmall pull-apart style bake1 tube rolls + 1 to 1½ cups fillingKeep the dough in an even layer
9×13 inch / 23×33 cmFull batch2 tubes rolls + 1 can fillingBest all-around option
12-cup muffin tinApple cinnamon roll cupsFlatten rolls into cups and fill lightlyDo not overfill
9-inch pie plateCinnamon roll apple pie variationPressed cinnamon roll crust + fillingBetter as a separate pie-style version

Small-Batch Apple Cinnamon Roll Bake

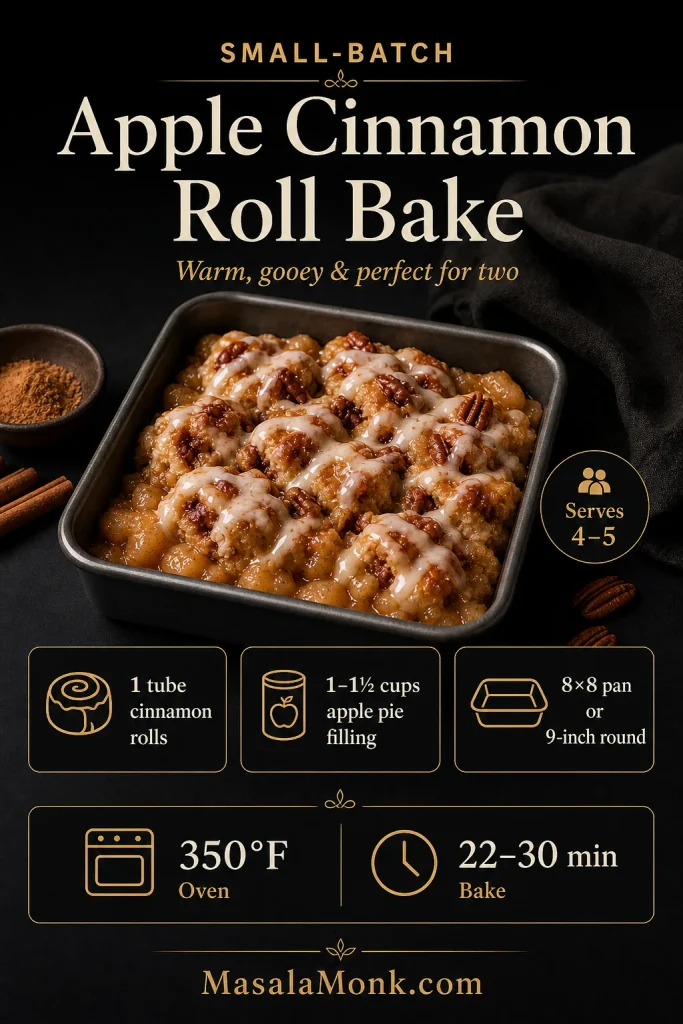
A small batch is best when you only have one tube of cinnamon rolls or do not want a full 9×13 pan. Use an 8×8 pan or 9-inch round dish so the dough sits in an even layer and bakes through cleanly.

Small-batch apple cinnamon roll bake in an 8x8 pan with 1 tube cinnamon rolls, 1 to 1.5 cups apple pie filling, and 22 to 30 minute bake time.
A small-batch apple cinnamon roll bake is the better choice when you only have one tube of cinnamon rolls or do not want a full 9×13 pan. Because the layer is smaller, it also bakes faster and is easier to monitor.

Making the full version instead? Return to the ratio guide. Need exact amounts? Jump to the recipe card.

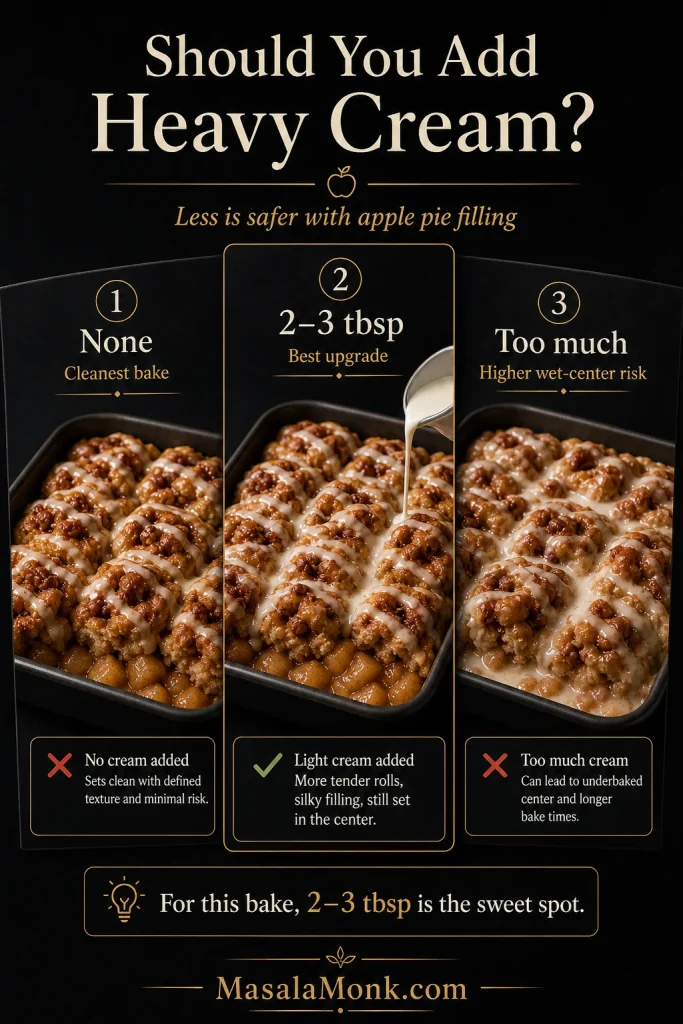
Should You Add Heavy Cream?

Heavy cream is optional. It can make cinnamon rolls softer and richer, but it also adds moisture. For this apple filling version, a small amount is enough.

Heavy cream guide for apple cinnamon roll bake comparing no cream, 2 to 3 tablespoons of cream, and too much cream.
Heavy cream can make the rolls more tender, but apple pie filling already adds moisture. Therefore, 2–3 tablespoons is the safest upgrade if you want a softer bake without risking a wet center.
Heavy cream amountResultBest use
NoneCleanest, most reliable bakeBest default if you worry about a doughy center
2–3 tbsp / 30–45 mlSofter, slightly gooierBest controlled cream option
⅓ cup / 80 mlRicher and wetterWorks, but watch the center carefully
½ cup / 120 ml or moreVery gooey, casserole-likeHigher risk of a wet center with apple filling

If you use extra apple pie filling, skip the heavy cream the first time. The filling already brings moisture and sauce.

Not sure about texture yet? Compare the texture fixes. Ready to bake? Go to the recipe card.

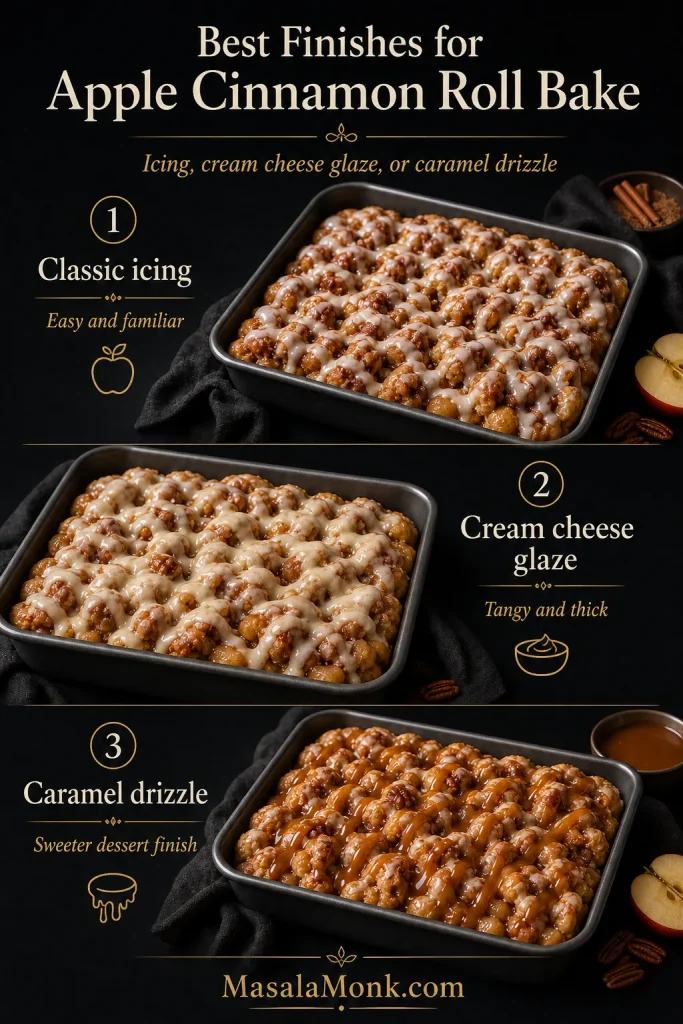
Icing, Cream Cheese Glaze and Caramel Drizzle

The icing packet that comes with refrigerated cinnamon rolls is the easiest finish. Let the bake rest first, then drizzle the icing over the top while the rolls are still warm.

Three finish options for apple cinnamon roll bake: classic icing, cream cheese glaze, and caramel drizzle.
Choose the finish based on how sweet and rich you want the bake to feel. Classic icing is the simplest, cream cheese glaze adds tang, and caramel drizzle pushes the pan further toward dessert.

For a thicker glaze, stir together:

  • 2 oz / 55 g softened cream cheese
  • 1 tablespoon / 14 g softened butter
  • ½ cup / 60 g powdered sugar
  • 1–2 tablespoons / 15–30 ml milk
  • ½ teaspoon vanilla extract
  • Small pinch of salt

Caramel drizzle also works well, especially if you are making a fall dessert or holiday brunch bake. Use it lightly so the pan does not become too sweet.

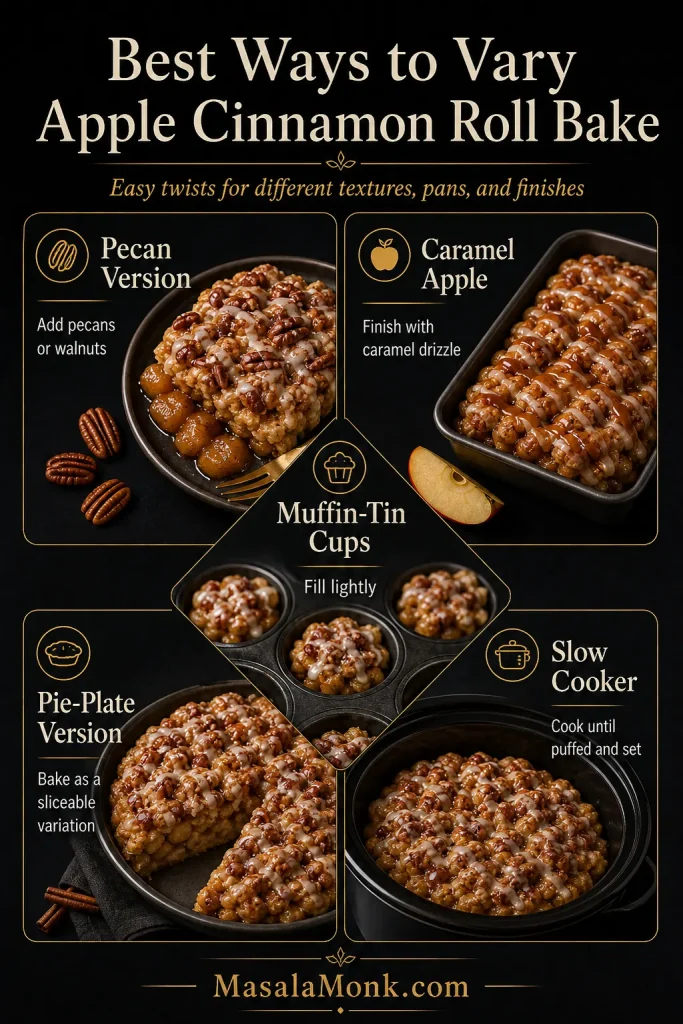
Variations

Once the basic method is clear, you can change the finish, pan, or serving style without changing the whole recipe. These variations are useful when you want more crunch, more caramel flavor, or a portioned version for guests.

Variation guide for apple cinnamon roll bake showing pecan, caramel apple, muffin-tin cups, pie-plate version, and slow cooker options.
Once the basic apple cinnamon roll bake works for you, choose a variation based on how you want to serve it. Muffin cups are better for portions, pecans add crunch, caramel makes it more dessert-like, and a pie plate gives a more sliceable bake.

Apple Cinnamon Roll Casserole with Pie Filling

Use the same 9×13 method, but make it extra gooey with 1½ cans of apple pie filling and a slightly longer bake. Tent with foil if the top browns too quickly.

Caramel Apple Cinnamon Rolls

Drizzle caramel sauce over the rested bake after icing. Add chopped pecans for a caramel-apple-pie flavor.

Apple Pie Cinnamon Roll Bake with Pecans

Fold ½ cup chopped pecans or walnuts into the mixture before baking, or scatter them over the top for crunch.

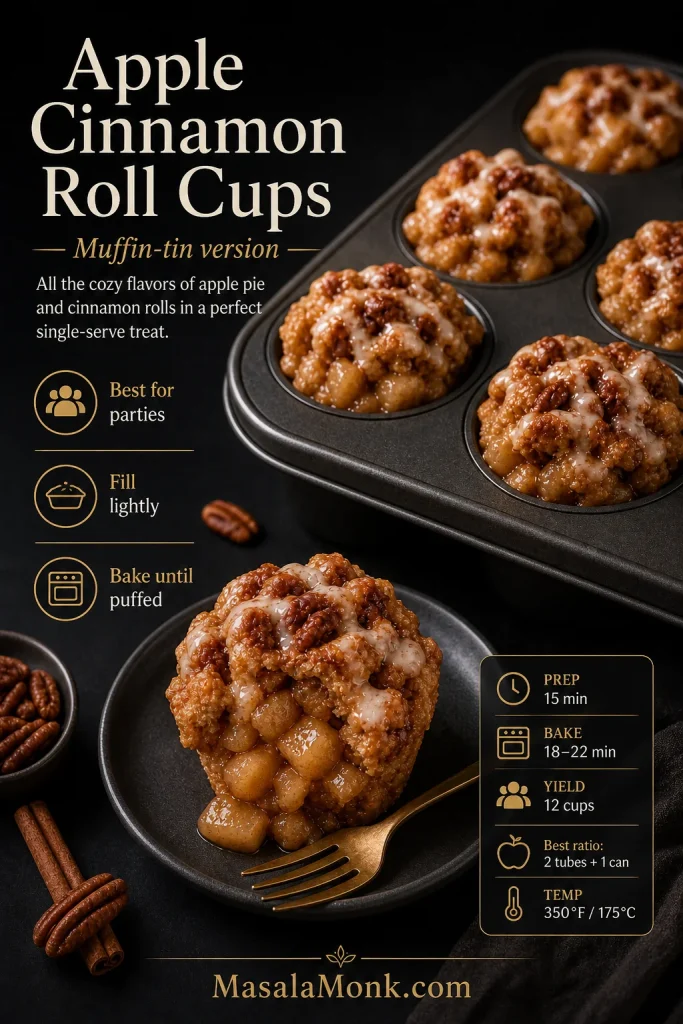
Cinnamon Roll Apple Pie Cups

For a portioned version, flatten individual cinnamon rolls into a greased muffin tin, add a spoonful of chopped apple pie filling, and bake until puffed and golden. Keep the filling light so the cups rise properly instead of bubbling over.

Apple cinnamon roll cups made in a muffin tin with apple pie filling, icing drizzle, pecans, and a plated single-serving cup.
Muffin-tin cinnamon roll cups are a good variation for parties or portioned desserts. Even so, fill them lightly because apple pie filling expands and bubbles as the dough bakes.

Prefer the main 9×13 version? Use the recipe card. Looking for serving ideas? See how to serve it.

Cinnamon Roll Apple Pie Crust

For a pie-style variation, flattened cinnamon rolls can be pressed into a pie plate and filled with apple pie filling. If you want a classic pie instead, use this apple pie crust recipe.

Apple Cinnamon Roll Monkey Bread

Use smaller pieces of cinnamon roll dough, toss with butter and cinnamon sugar, and layer with chopped apple pie filling in a Bundt pan. This is a separate bake style and usually needs careful timing so the center cooks.

Crock Pot Apple Cinnamon Roll Bake

A slow cooker version can work, but the top will not brown the same way. Use less filling, line or grease the cooker well, and cook until the dough is fully set in the center.

How to Serve This Apple Cinnamon Roll Bake

Serve this warm while the icing is still soft. It works as a sweet brunch bake, a holiday breakfast, or an easy apple dessert with very little prep.

Close-up serving of apple cinnamon roll bake with glossy apple filling, icing drizzle, pecans, and a fork on a dark plate.
Let the bake rest briefly before serving so the filling thickens slightly and the scoops hold together better. Then serve it warm, when the icing is still soft and the apple filling tastes richest.
  • For breakfast or brunch, serve it with coffee, tea, fresh fruit, or something salty like eggs or breakfast potatoes.
  • For dessert, add vanilla ice cream, whipped cream, or a light caramel drizzle. Keep the topping light if your bake is already extra apple-heavy or very sweet.
  • For a holiday table, sprinkle chopped pecans over the top and serve it straight from the baking dish.

Make Ahead, Storage, Freezing and Reheating

Because this bake is soft and saucy, the best make-ahead approach is to keep the icing separate and reheat gently. That way, the rolls stay tender instead of drying out or turning overly sticky.

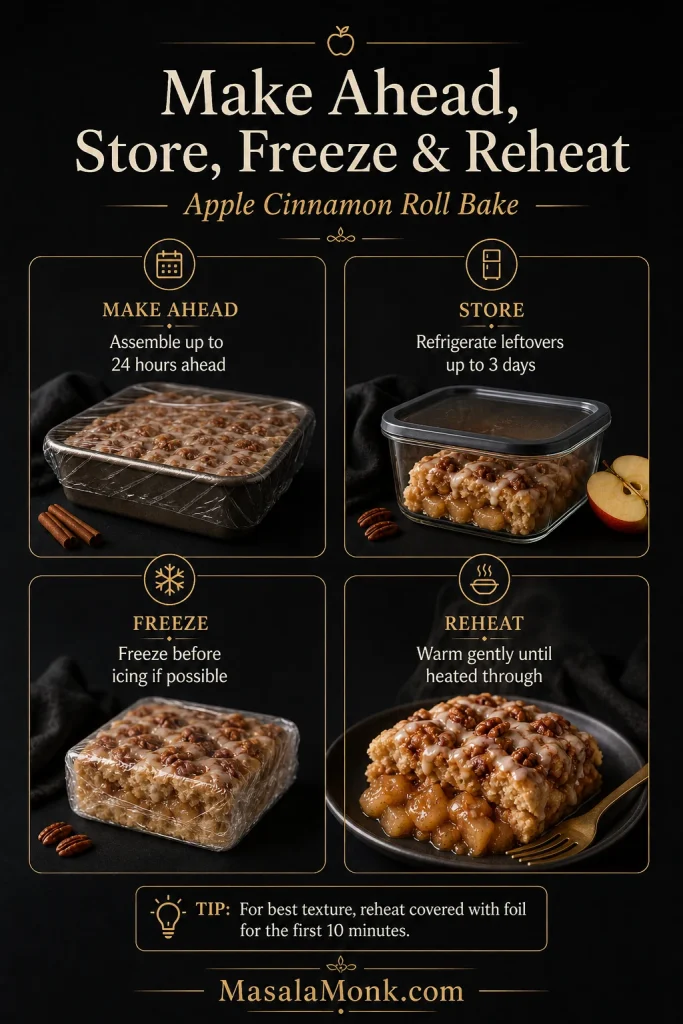
Make ahead, storage, freezing, and reheating guide for apple cinnamon roll bake with covered pan, storage container, wrapped portion, and warm serving.
For make-ahead baking, assemble the pan up to 24 hours ahead and keep the icing separate. Later, reheat leftovers gently so the rolls warm through without drying out.

Can You Make It Ahead?

Yes. Assemble the bake up to 24 hours ahead, cover tightly, and refrigerate. For the most even bake, let the pan sit at room temperature for 20–30 minutes while the oven preheats. If baking straight from the fridge, add a few extra minutes.

When Should You Add the Icing?

Add icing after baking, not before. If you are making the bake ahead, keep the icing separate until the pan is baked and rested.

How Long Do Leftovers Keep?

Store leftovers covered in the refrigerator for up to 3 days. This fits within the USDA’s 3-to-4-day leftover storage guidance. The rolls will soften as they sit because of the apple filling, but they reheat well.

How Do You Reheat It?

Reheat individual portions in short microwave bursts until warm. For a larger portion, cover loosely with foil and warm in a low oven until heated through.

Can You Freeze Apple Cinnamon Roll Bake?

You can freeze it, but the texture is best fresh. If freezing, freeze before icing. Thaw overnight in the refrigerator, reheat gently, and add icing after warming.

Making it now? Return to the recipe card. Need quick answers? Jump to FAQs.

Apple Cinnamon Roll Bake with Apple Pie Filling Recipe

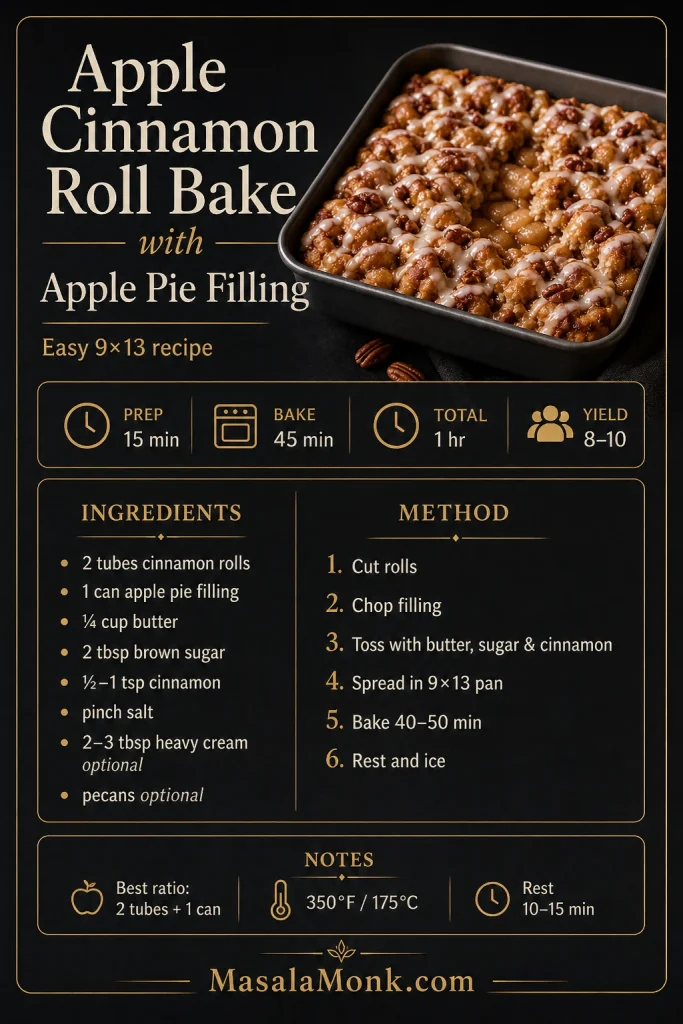
Saveable recipe card for apple cinnamon roll bake with apple pie filling listing prep time, bake time, yield, ingredients, and basic method.
Use this saveable recipe card when you want the full bake in one glance. It keeps the key numbers together, so you do not have to scroll back for the filling ratio, oven temperature, or bake time.

Prep Time
15 minutes

Cook Time
45 minutes

Total Time
1 hour

Yield
8–10 servings

Description: Easy apple cinnamon roll bake made in a 9×13 pan with refrigerated cinnamon rolls, apple pie filling, optional heavy cream, and icing drizzle. The recipe uses a reliable filling ratio so the rolls stay soft and gooey without leaving the center raw.

Equipment

  • 9×13 inch / 23×33 cm baking dish
  • Large mixing bowl
  • Knife or kitchen shears
  • Spatula or large spoon
  • Foil for tenting, if needed
  • Optional instant-read thermometer

Ingredients

  • 2 tubes refrigerated cinnamon rolls, about 17.5 oz / 496 g each, about 35 oz / 990 g total, icing reserved
  • 1 can apple pie filling, 21 oz / 595 g, chopped if slices are large
  • ¼ cup / 4 tablespoons / 57 g unsalted butter, melted
  • 2 tablespoons / about 25 g light brown sugar
  • ½ to 1 teaspoon ground cinnamon or apple pie spice
  • Small pinch fine salt, optional
  • 2–3 tablespoons / 30–45 ml heavy cream, optional
  • ½ cup / 55–60 g chopped pecans or walnuts, optional

Homemade filling option: Replace one 20–21 oz can with 2 to 2½ cups homemade diced apple pie filling.

Optional Cream Cheese Glaze

  • 2 oz / 55 g cream cheese, softened
  • 1 tablespoon / 14 g butter, softened
  • ½ cup / 60 g powdered sugar
  • 1–2 tablespoons / 15–30 ml milk
  • ½ teaspoon vanilla extract
  • Small pinch salt

Instructions

  1. Preheat oven to 350°F / 175°C. Grease a 9×13 inch / 23×33 cm baking dish.
  2. Open the cinnamon roll tubes and reserve the icing for later.
  3. Cut regular cinnamon rolls into quarters. If using jumbo rolls, cut each roll into 6 pieces.
  4. Chop large apple slices in the apple pie filling into smaller pieces, about ½ inch / 1.25 cm.
  5. In a large bowl, toss cinnamon roll pieces with melted butter, brown sugar, cinnamon or apple pie spice, and salt.
  6. Fold in the apple pie filling gently until the dough pieces are evenly coated.
  7. Spread the mixture in one even layer in the prepared baking dish.
  8. Drizzle 2–3 tablespoons heavy cream over the top, if using. Sprinkle with nuts, if using.
  9. Bake for 40–50 minutes, checking the center around 35–40 minutes. Tent loosely with foil if the top browns before the center is done.
  10. The bake is ready when the center is puffed, set, and no longer wet or raw. If using a thermometer, the thickest doughy center should be about 190–200°F / 88–93°C.
  11. Let the pan rest for 10–15 minutes.
  12. Drizzle with reserved icing or cream cheese glaze. Serve warm.

Notes

  • For the most reliable texture, start with 1 can of apple pie filling for 2 large tubes of cinnamon rolls.
  • For an extra apple-heavy bake, use 1½ to 2 cans filling and bake longer.
  • Glass and ceramic pans may need extra time compared with metal pans.
  • If the top browns too quickly, tent with foil and continue baking until the center is done.
  • Add icing after the bake rests, not immediately out of the oven.

FAQs

Can I use homemade apple pie filling?

Yes. Use 2 to 2½ cups homemade apple pie filling to replace one 20–21 oz can. Diced filling works best because it spreads evenly between the cinnamon roll pieces.

Should I use one can or two cans of apple pie filling?

Use one can for the most reliable 9×13 bake. Use 1½ to 2 cans if you want a very gooey, apple-heavy version, but expect a longer bake time and check the center carefully.

Can I make this with only cinnamon rolls and apple pie filling?

Yes. You can make a 2-ingredient version with only refrigerated cinnamon rolls and apple pie filling. The butter, brown sugar, cinnamon, and salt are optional upgrades that make the bake taste richer and more balanced, but the shortcut version still works without them.

Why are my cinnamon rolls doughy in the middle?

The most common reasons are too much filling, dough pieces that are too large, a pan that is too deep, or not enough bake time. Use a wide 9×13 pan, cut the rolls smaller, spread the filling evenly, and bake until the center is puffed and set.

Can I make this with one tube of cinnamon rolls?

Yes. Use an 8×8 inch pan or 9-inch round pan with 1 tube of cinnamon rolls and about 1 to 1½ cups apple pie filling. Bake until the center is cooked through, usually 22–30 minutes depending on the dough size and pan.

Can I use jumbo cinnamon rolls?

Yes. Cut jumbo rolls into 6 pieces instead of quarters so the center cooks more evenly. Jumbo rolls often need a longer bake time.

Do I need heavy cream?

No. Heavy cream is optional. Use 2–3 tablespoons if you want a softer, richer bake. Skip it if you are using extra apple pie filling or if you are worried about a wet center.

Can I make apple cinnamon rolls with apple pie filling overnight?

Yes. Assemble the pan, cover it tightly, and refrigerate for up to 24 hours. Let it sit at room temperature for 20–30 minutes while the oven heats, or bake straight from chilled with a little extra time.

Can I make this in a muffin tin?

Yes. Flatten individual cinnamon rolls into greased muffin cups, spoon in chopped apple pie filling, and bake until puffed and cooked through. Keep the filling light so the cups do not overflow.

Can I use fresh apples instead of apple pie filling?

Fresh raw apples are not the best direct swap because they release moisture and may not soften enough before the dough bakes. For better results, cook the apples into a quick apple pie filling first.

Can I freeze apple cinnamon roll bake?

Yes, but the texture is best fresh. Freeze before icing if possible. Thaw overnight in the refrigerator, reheat gently, and add icing after warming.

Back to top

Posted on 5 Comments

Apple Pie Crust Recipe: Flaky Homemade Pie Dough for Apple Pie

A flaky apple pie crust starts with cold butter, gentle handling, and enough baking time. Once it is deeply golden, the crust can hold the apple filling without turning soft or heavy.

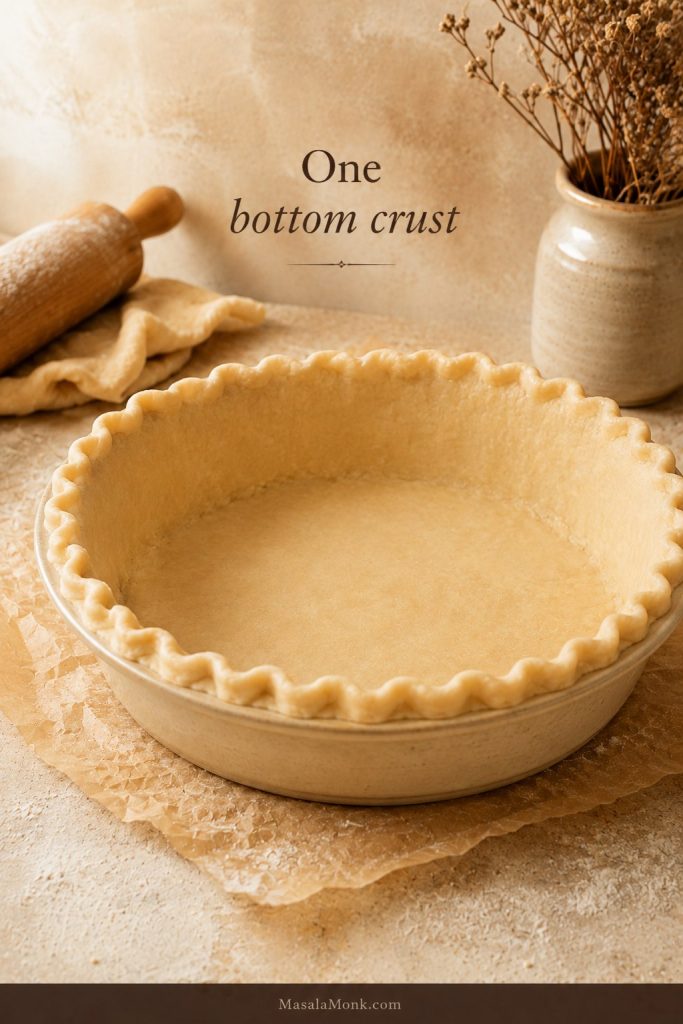
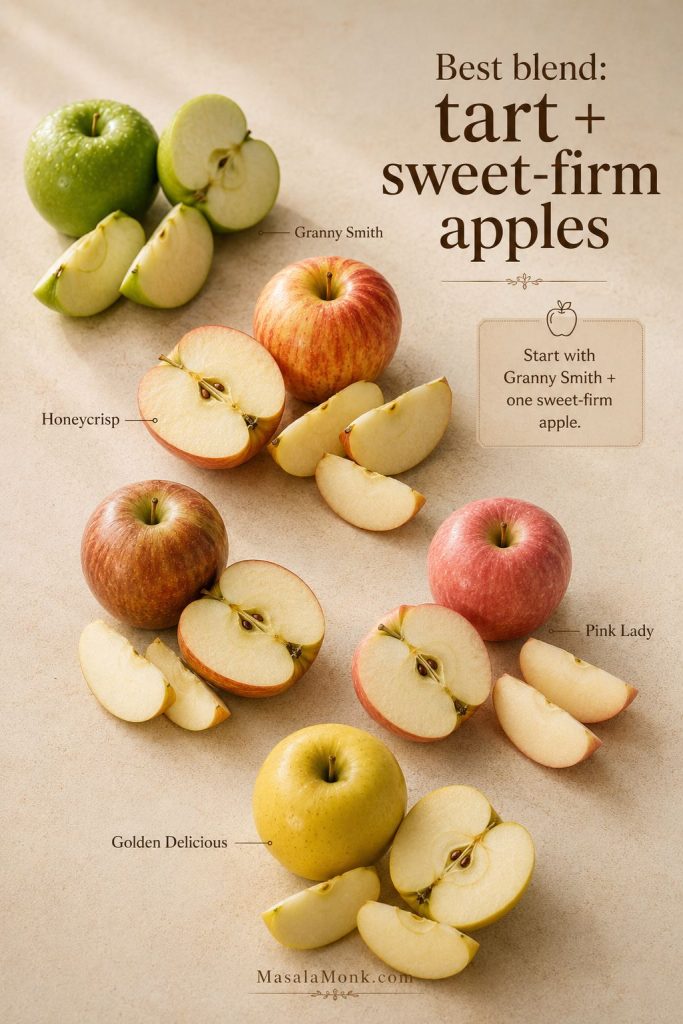
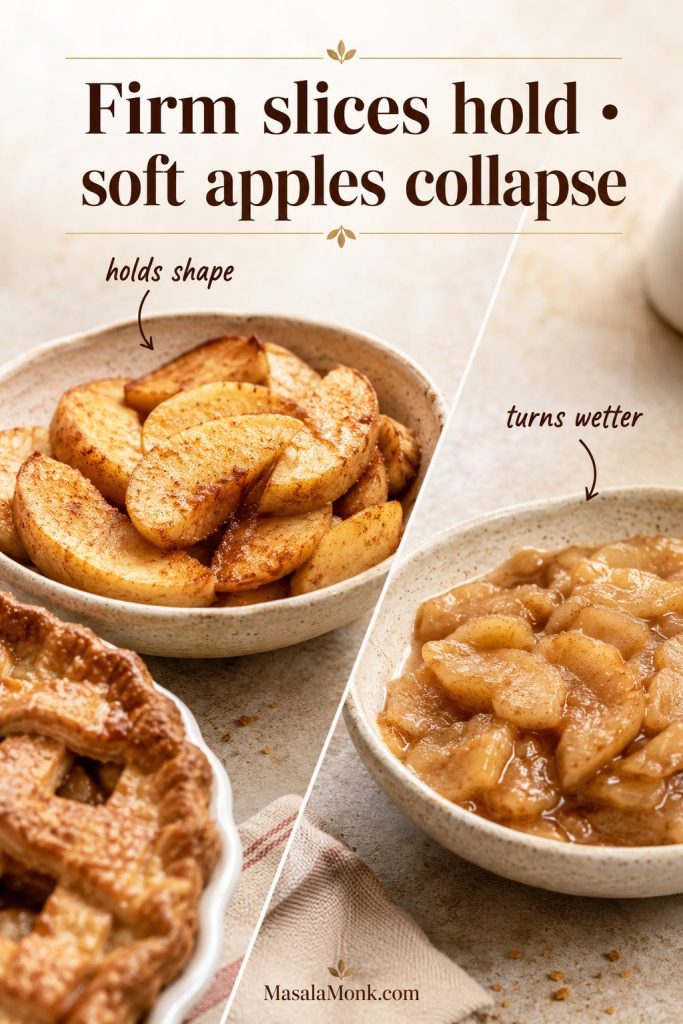
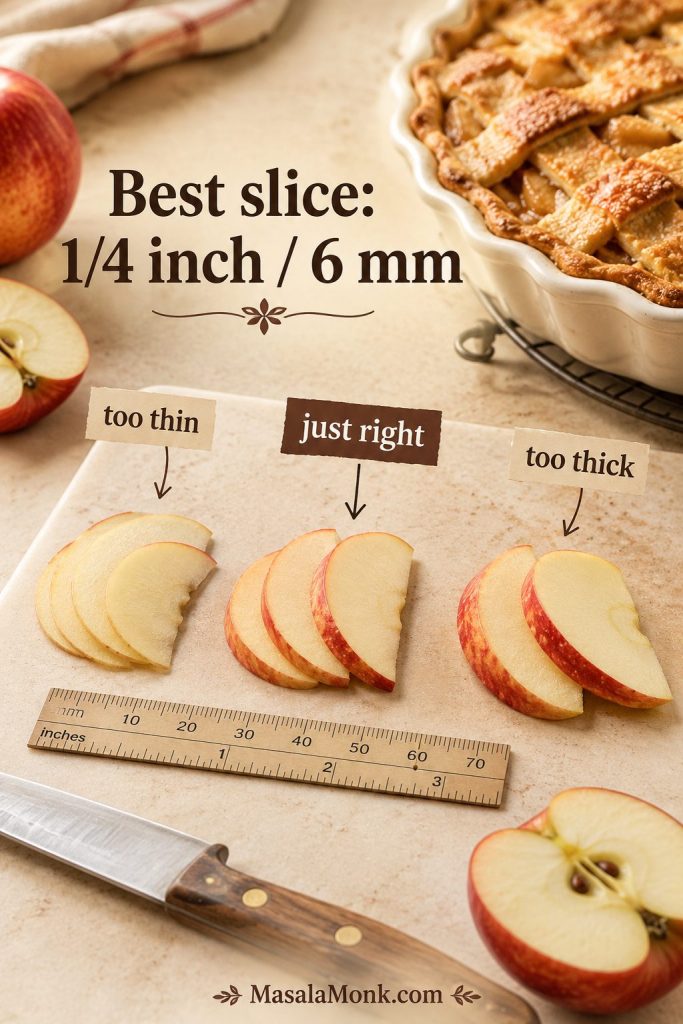
A good apple pie crust recipe should give you dough that is buttery, flaky, and strong enough to hold a juicy apple filling without turning tough or soggy. The crust is often the part that makes people nervous: butter softens, dough cracks, bottoms turn pale, and filling leaks where it should not. However, once the dough is cold enough and hydrated just enough, the whole process becomes much calmer.

This homemade pie dough is made for a classic 9-inch / 23-cm apple pie. It gives you enough for a bottom crust and a top crust, so you can make a full double-crust pie, a lattice pie, or a single-crust pie if you want to save the second disk for later. Because apple filling is heavier and juicier than many dessert fillings, the dough needs to be tender without being weak.

The method is simple, but the details matter. Keep the butter cold, add the water slowly, chill the dough before rolling, and avoid stretching it into the pie plate. Then, when you are ready to fill it, use a thick and cooled filling like this homemade apple pie filling recipe so the bottom crust has a better chance of baking up crisp and flaky.

The goal here is not a fancy pastry-school crust. It is a reliable apple pie crust that rolls without falling apart, seals cleanly around the filling, and bakes up flaky enough for a holiday pie. If the dough cracks a little or needs a patch, that is fine. Pie crust is more forgiving than it looks once you keep the butter cold and stop trying to make the dough perfectly smooth.

Quick Answer: The Best Crust for Apple Pie

The best crust for apple pie is a flaky, buttery pie dough that can hold fruit filling without collapsing, cracking apart, or turning soggy on the bottom. For a classic 9-inch / 23-cm apple pie, make a double batch of dough: one round for the bottom crust and one for the top crust or lattice.

This apple pie crust recipe uses all-purpose flour, cold butter, salt, a little sugar, and ice water. The butter gives the crust its rich flavor and flaky layers. Meanwhile, the chill time helps the dough relax, roll more cleanly, and shrink less once it hits the oven.

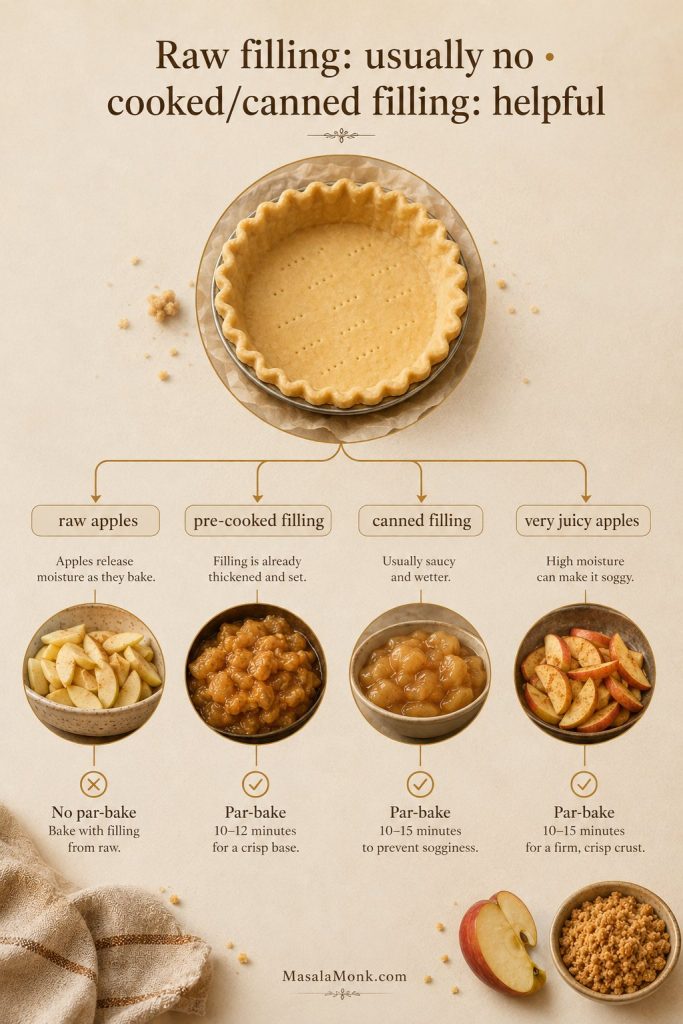
For a traditional double-crust apple pie, you usually do not need to prebake the bottom crust. Instead, use a filling that is thick rather than watery, let it cool before adding it to the pastry, vent the top crust, and bake until the crust is deeply golden. If you are making a single-crust apple pie with crumb topping, partial prebaking can sometimes help the bottom stay crisp.

A crust choice is not just decoration. It changes how the pie bakes, how steam escapes, and how sturdy the slices feel later. A double-crust pie, a crumb-topped pie, a graham cracker crust pie, and a puff pastry apple dessert all need slightly different handling, so it helps to choose the direction before you start rolling dough.

Apple Pie Crust at a Glance

Yield: this recipe makes enough crust for one 9-inch / 23-cm apple pie or two single-crust pies
Best for: classic apple pie, lattice pie, and crumb-topped single-crust pie
Dough chill time: at least 1 hour
Rest before rolling: 5 to 10 minutes if the dough is very firm
Assembled pie chill: 15 to 20 minutes if the dough has softened
Full pie bake time: about 55 to 65 minutes, plus 2 to 3 hours cooling
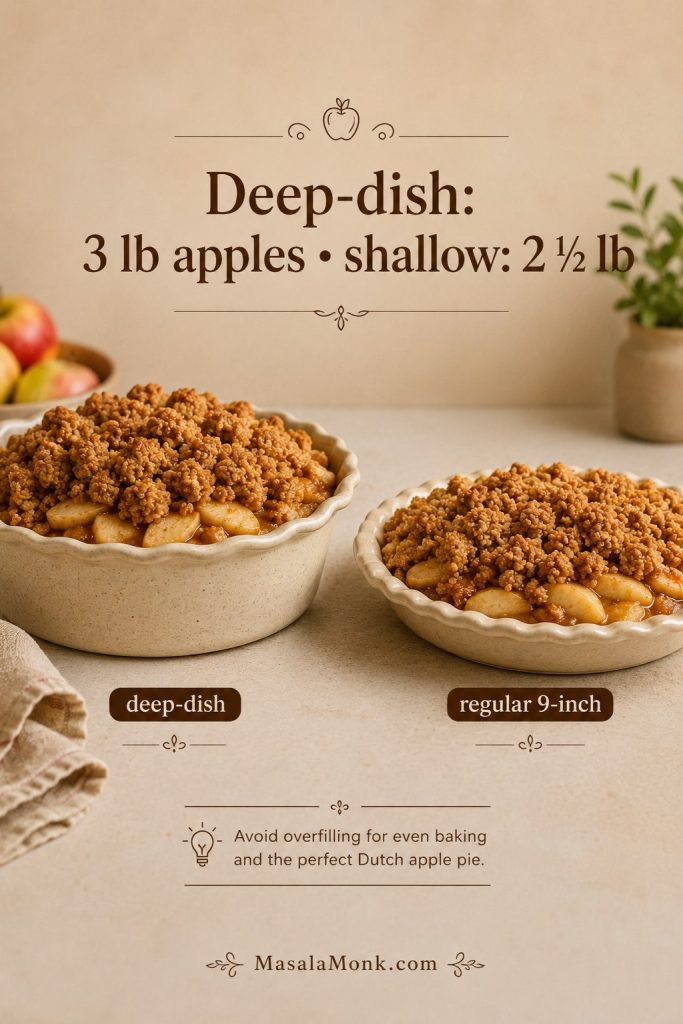
Filling amount: 5 to 6 cups / about 1.1 to 1.4 kg / 2.5 to 3 lb cooled apple pie filling
Prebake? Usually no for double-crust apple pie; sometimes yes for single-crust crumb pies
At-a-glance apple pie crust recipe board showing yield, chill time, bake time, filling amount, and best uses.
Before you start, check the timing and yield. This apple pie crust recipe makes one double crust, needs at least 1 hour of chilling, and works best with thick cooled apple filling.

Apple Pie Crust Help

Use these sections to make flaky pie dough, choose the right crust style, and fix the most common apple pie crust problems.

Why This Apple Pie Dough Works

Apple pie is harder on crust than it looks. The filling is juicy, the bake time is long, and the bottom pastry has to hold up while the apples soften and bubble. Because of that, a crust that works for a cream pie or a tiny tart may not always behave the same way under a heavy apple filling.

In this apple pie crust recipe, cold butter, careful hydration, and enough chill time work together. None of those details is complicated on its own, but together they make the dough easier to roll and much less likely to bake up tough or greasy.

Cold butter creates flaky layers

Cold butter does most of the visible work. As the pie bakes, the butter melts and releases steam, which helps separate the dough into flaky layers. That is why you want sandy crumbs, pea-size butter pieces, and a few flat flakes instead of a perfectly smooth mixture.

If the butter gets too warm before baking, it can melt into the flour too early. Then the crust may taste rich, but it will not have the same light, flaky structure. So whenever the dough feels soft or greasy, chilling is the fix.

Gentle handling keeps the crust tender

Flour gives the pastry enough structure to hold apple filling, but too much mixing can make the crust tough. The goal is to bring the dough together just until it holds when pressed, not to knead it until it looks smooth.

A little sugar helps with browning, while salt keeps the crust from tasting flat. Meanwhile, slow hydration helps you avoid adding too much water, which is one of the most common reasons homemade pie dough turns hard instead of tender.

Chill time makes the dough easier to roll

Resting the dough gives the flour time to hydrate and the butter time to firm up again. As a result, the dough rolls more smoothly, seals more easily, and shrinks less in the oven.

You do not need a food processor for this dough. A bowl, your fingertips, a pastry cutter, or two forks are enough, and working by hand also makes it easier to feel when the butter and water are right.

Once those details are handled, the crust becomes reliable enough for a classic apple pie: sturdy around the fruit filling, tender at the bite, and flaky enough to feel properly homemade.

Apple pie crust explanation board with dough, butter, flaky crust, and callouts for cold butter, gentle handling, chill time, and apple filling support.
This dough works because the butter stays cold, the dough is handled gently, and the chill time lets it relax. As a result, the crust rolls more easily and bakes into flaky layers.

Before You Start: What Matters Most

If you remember only three things, keep the butter cold, add water slowly, and do not stretch the dough into the pie plate. Everything else is easier to fix. A small crack can be patched, a sticky dough can be chilled, and uneven edges can be trimmed after the crust is in the plate.

A perfect-looking dough disk is not the goal. You want dough that is cold, lightly hydrated, and just gathered enough to roll. Once it rests, it becomes easier to handle.

Equipment You Need

You do not need special equipment for this apple pie crust recipe, but a few basic tools make the dough easier to handle. If you do not have a pastry cutter, use your fingertips or two forks instead.

Tool Why it helps
Large mixing bowl Gives you enough room to toss the flour, butter, and water without overworking the dough.
Pastry cutter, fork, or fingertips Helps cut cold butter into the flour without needing a food processor.
Rolling pin Rolls the dough into a 12- to 13-inch / 30- to 33-cm round.
9-inch / 23-cm pie plate The recipe is sized for a standard 9-inch apple pie.
Baking sheet Catches drips and can help give the bottom crust stronger heat.
Foil or pie shield Protects the edges if they brown before the center is done.
Apple pie crust equipment guide showing mixing bowl, rolling pin, pastry cutter or forks, 9-inch pie plate, baking sheet, and pie shield or foil.
You do not need fancy pastry tools for homemade apple pie crust. However, a rolling pin, mixing bowl, pie plate, baking sheet, and simple shield for the edges make the process much easier.

Can You Make Pie Crust in a Food Processor?

Yes, a food processor can make apple pie crust faster, but it also makes overmixing easier. Pulse the flour, salt, and sugar first, then add the cold butter and pulse only until pea-size pieces remain. After that, add ice water slowly and stop as soon as the dough begins to clump.

By hand, you get more control because you can feel the butter and dough changing as you work. In a food processor, the key is restraint: do not let the dough turn into a smooth ball in the machine. Once it reaches the shaggy stage, finish gathering it by hand.

Comparison board showing pie crust made in a food processor and by hand, with pea-size butter pieces and do-not-overmix reminders.
A food processor is faster, but mixing by hand gives you more control. Either way, stop when pea-size butter pieces remain, because overmixing can make the crust tough.

Apple Pie Crust Ingredients

You only need a few ingredients for this apple pie crust recipe, but each one affects the final texture. Since pie dough is so simple, measuring carefully and keeping everything cold will make a noticeable difference.

Apple pie crust ingredients board with flour, cold butter, salt, sugar, ice water, optional vinegar, and egg wash.
Because pie dough has so few ingredients, each one matters. Cold butter creates flakiness, flour gives structure, and ice water brings the dough together without making it tough.

All-purpose flour

All-purpose flour gives the crust enough strength to hold apple filling without making the pastry heavy. If you use cups, spoon the flour into the measuring cup and level it off. Otherwise, too much flour can make the dough dry, crumbly, and difficult to roll.

Cold unsalted butter

Butter gives the crust its best flavor. It also helps create those flaky layers that make homemade pastry worth the effort. Cut the butter into small cubes, then keep it cold until you are ready to mix. You want a mix of sandy crumbs, pea-size butter pieces, and a few flatter flakes of butter in the dough.

Most importantly, do not work the butter in until it disappears completely. Those visible butter pieces may look imperfect, but they help the crust bake up flaky instead of dense.

Close-up pie dough mixture showing sandy crumbs, pea-size butter pieces, flat butter flakes, and a do-not-blend-smooth reminder.
Instead of blending the butter completely into the flour, leave a mix of sandy crumbs, pea-size pieces, and a few flat flakes. Those uneven butter pieces help create a flaky pie crust.

Salt

Salt keeps the pastry from tasting dull. Even though apple pie is sweet, the crust still needs balance. Without enough salt, the butter flavor and apple filling will both taste flatter.

A little sugar

Sugar is not always necessary in pie crust, but it works well here because it helps the dough brown and adds a gentle warmth to the pastry. Use only a small amount, though. The crust should still taste like pastry, not like a cookie.

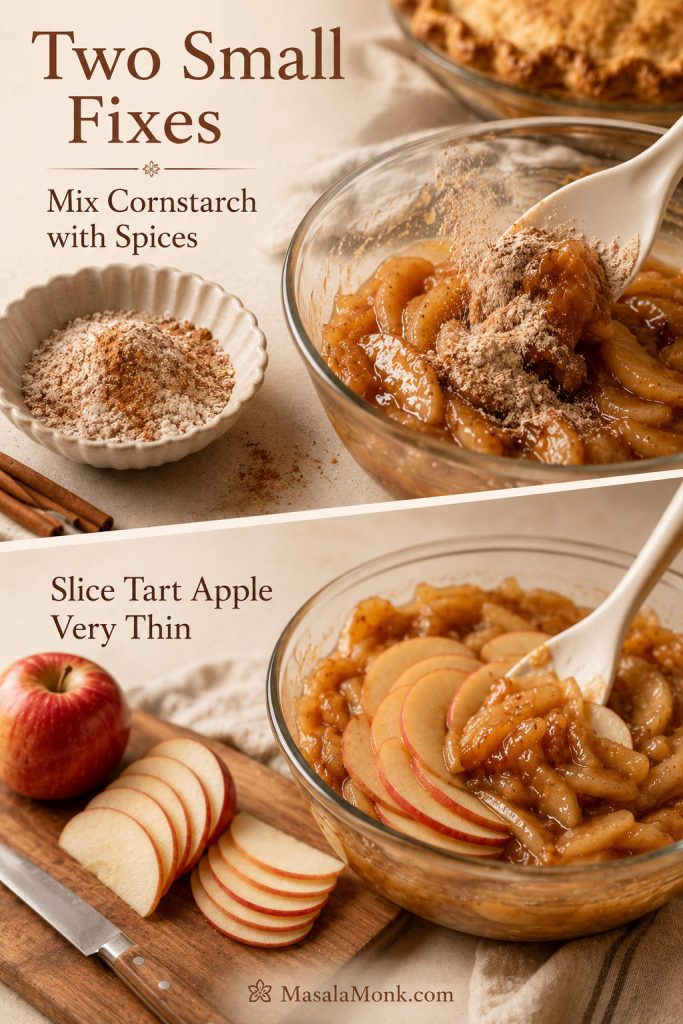
The crust itself stays simple, but the filling can lean warmer if you like more spice. Cinnamon is usually enough for apple pie, although a small pinch of homemade pumpkin pie spice can add ginger, nutmeg, allspice, and clove notes.

Ice water

Ice water brings the dough together. Add it slowly, because flour does not always absorb the same amount of water every time. On a humid day, you may need less. In a dry kitchen, you may need a little more. So the feel of the dough matters more than the exact tablespoon count.

The dough is ready when it holds together after you squeeze it in your hand. It should still look shaggy, not wet or smooth.

Optional apple cider vinegar

A small splash of apple cider vinegar can make the dough a little more forgiving. It is optional, and the crust will not taste sour. However, if you often end up with tough pastry, it can be a helpful backup.

Egg wash

Egg wash is used after the pie is assembled, not inside the dough. It helps the top crust bake up glossy and golden. For a simple finish, beat one egg with a tablespoon / 15 ml of milk or water, then brush it lightly over the chilled top crust before baking.

How to Make Apple Pie Crust

The main rule in any good apple pie crust recipe is simple: keep the butter cold and handle the dough gently. You are not kneading bread dough. Instead, you are bringing pastry together just enough so it can roll, chill, and bake into flaky layers.

If pie dough has ever cracked on you or turned sticky halfway through rolling, you are not doing anything unusual. Most crust problems are temperature problems. Chill the dough, use a little flour, patch what tears, and keep going.

Step-by-step apple pie crust board showing dry ingredients, cold butter, ice water, gathered dough, and chilled dough disks.
The method is simple, but the order matters. First mix the dry ingredients, then cut in cold butter, add ice water slowly, gather gently, and chill before rolling.

1. Mix the dry ingredients

Add the flour, salt, and sugar to a large mixing bowl. Then whisk them together so the salt and sugar are evenly distributed before the butter goes in.

This step is quick, but it matters. If the salt is not mixed evenly, some bites of crust can taste bland while others taste too salty.

2. Cut in the cold butter

Add the cold butter cubes to the flour mixture. Use your fingertips, a pastry cutter, or two forks to work the butter into the flour. Stop when the mixture has sandy crumbs, pea-size butter pieces, and a few thin, flat flakes of butter.

At this stage, the mixture should not look smooth. In fact, a little unevenness is useful because those butter pieces create steam pockets in the oven. If the butter starts to soften or smear, place the bowl in the refrigerator for 10 to 15 minutes before moving on.

3. Add ice water slowly

Drizzle in 1 tablespoon / 15 ml of ice water at a time, tossing the mixture with a fork after each addition. At first, the dough will look dry and loose. After several tablespoons, it will begin to clump together.

Stop adding water when a handful of dough holds together when squeezed. If the dough is sticky in the bowl, it has probably gone too far. On the other hand, if it falls apart completely, add another teaspoon or two of water and toss again.

4. Bring the dough together

Turn the shaggy dough onto a lightly floured surface. Then gather it gently with your hands and press it together until no large dry patches remain. Avoid kneading it smooth, because too much handling can make the crust tough.

If a few crumbly spots remain, press them into the dough with your hands. If needed, dampen your fingers lightly and pat the dry spots together. However, do not add water just to make the dough look neat. Pie dough should look a little rough before it chills.

5. Divide and chill the dough

Divide the dough into two equal pieces. Shape each piece into a flat disk about 1 inch / 2.5 cm thick. A disk chills faster and rolls more evenly than a ball of dough, so this small step makes rolling easier later.

Wrap each disk tightly and refrigerate for at least 1 hour. During that time, the flour hydrates, the butter firms up again, and the gluten relaxes. As a result, the dough becomes easier to roll and less likely to shrink in the oven.

Apple Pie Dough Texture Checkpoints

Pie dough is easier when you know what each stage should feel like. Instead of trying to make it look perfect, use these checkpoints as you work.

Stage What it should look or feel like What to do if it is wrong
Butter mixed into flour Sandy crumbs with pea-size pieces and a few flat flakes of butter If the butter smears, chill the bowl for 10 to 15 minutes.
After adding water Shaggy dough that holds together when squeezed If it falls apart, add water 1 teaspoon at a time.
Before chilling Rough but gathered, not smooth or sticky If sticky, dust lightly with flour and chill sooner.
After chilling Firm but rollable after a few minutes at room temperature If it cracks hard, rest it 5 more minutes before rolling.
Apple pie dough texture checkpoint board showing butter mixed in, shaggy dough after water, gathered dough before chilling, and firm chilled dough.
Each stage should look rough, cold, and workable rather than smooth or wet. Press a small handful together; when it holds without smearing, the dough is usually hydrated enough.
Comparison board showing too-dry crumbly pie dough, just-right shaggy dough held in a hand, and too-wet sticky dough.
Crumbly dough usually needs ice water a teaspoon at a time. Sticky or smeary dough usually needs chilling instead. The best pie dough is shaggy, cool, and firm enough to hold when squeezed.

How to Roll Apple Pie Dough

Let the chilled dough soften slightly

Once the dough has chilled, let one disk sit at room temperature for 5 to 10 minutes if it feels too firm to roll. It should be cool but not rock-hard. If it cracks immediately under the rolling pin, give it another minute or two.

Lightly flour your work surface and rolling pin. Then roll from the center outward, rotating the dough a quarter turn every few rolls. This keeps the round even and helps prevent sticking without forcing the dough into shape.

Hands rolling round apple pie dough with callouts for rolling from the center, quarter-turning, 12 to 13 inch size, and 1/8 inch thickness.
For a 9-inch apple pie, roll the dough from the center outward and turn it as you go. This keeps the crust round, even, and wide enough to fit the pie plate without stretching.

Roll to the right size and thickness

For a 9-inch / 23-cm apple pie, roll the bottom crust into a 12- to 13-inch / 30- to 33-cm round. Aim for a crust that is about 1/8 inch / 3 mm thick. If it is much thicker, it may bake up heavy; if it is much thinner, it can tear or soften under the filling.

For this apple pie crust recipe, that size gives you enough dough to settle into the pie plate and still leave a little overhang for trimming and crimping. Add small amounts of flour only as needed, because too much loose flour can make the crust dry.

Fit the dough without stretching it

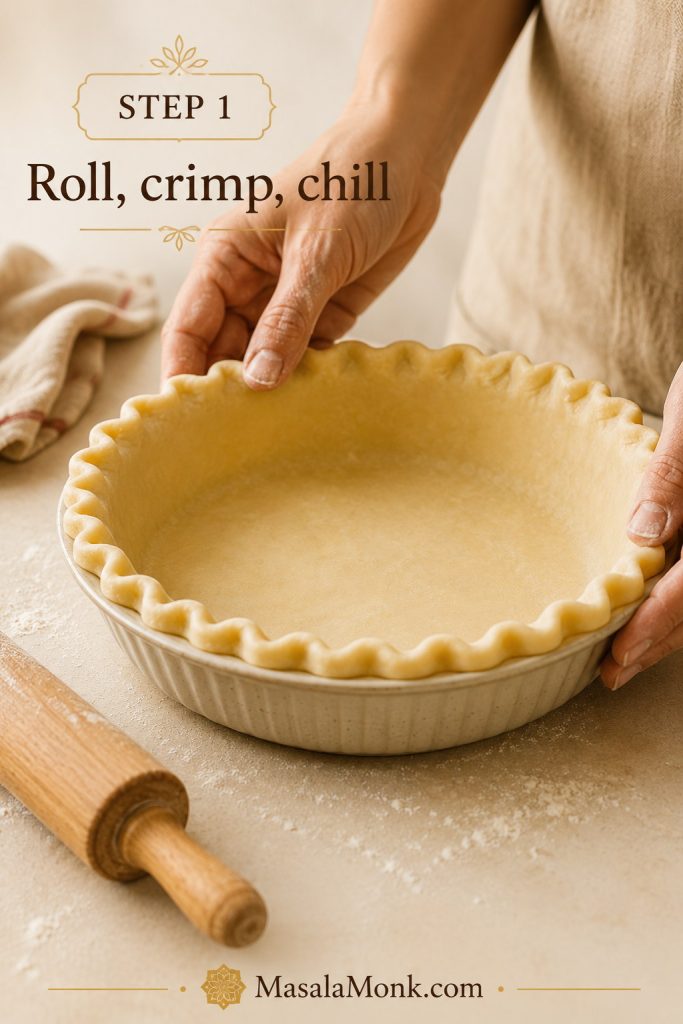
To transfer the dough, loosely roll it around the rolling pin, then unroll it over the pie plate. After that, ease the dough into the bottom and sides without pulling it tight. Stretching may seem harmless, but it is one of the most common reasons pie crust shrinks while baking.

Three-step guide showing pie dough rolled onto a pin, unrolled over a pie plate, and gently eased into the dish without stretching.
Once the dough is rolled, move it gently instead of pulling it into place. Rolling it over the pin, unrolling it over the plate, and easing it in helps prevent shrinking.

If the dough tears, patch it with a small piece from the edge and press it gently into place. Once the filling goes in and the pie bakes, small patches will not matter.

Double Crust vs Single Crust Apple Pie

Classic apple pie is usually a double-crust pie, which means it has a bottom crust and a top crust. However, not every apple pie needs two pastry layers. A crumb-topped pie, for example, only needs a bottom crust, while a graham cracker crust pie behaves more like a no-roll dessert.

Crust style Best for What to know
Double crust Classic apple pie Uses one crust on the bottom and one on top. It is the most traditional choice for homemade apple pie.
Lattice crust Apple pies with juicy filling Looks beautiful and lets steam escape through the open spaces, which can help the filling bake evenly.
Single crust Crumb topping or Dutch apple pie Easier than a double crust and useful when you do not want to roll a top crust.
Graham cracker crust No-roll apple pie Better for crumb-topped apple pie than for a classic sealed double-crust pie.
Puff pastry Quick apple desserts More tart-like or turnover-like than traditional apple pie crust.
Comparison of double-crust apple pie, lattice apple pie, and single-crust crumb-topped apple pie on a dark background.
A double crust gives apple pie its classic look, while lattice helps steam escape. Meanwhile, a single crust works beautifully when you want a crumb-topped apple pie.

If you are making homemade apple pie for the first time, a double crust or lattice crust is the safest place to start. Both use the same dough, and both pair well with a thick apple filling.

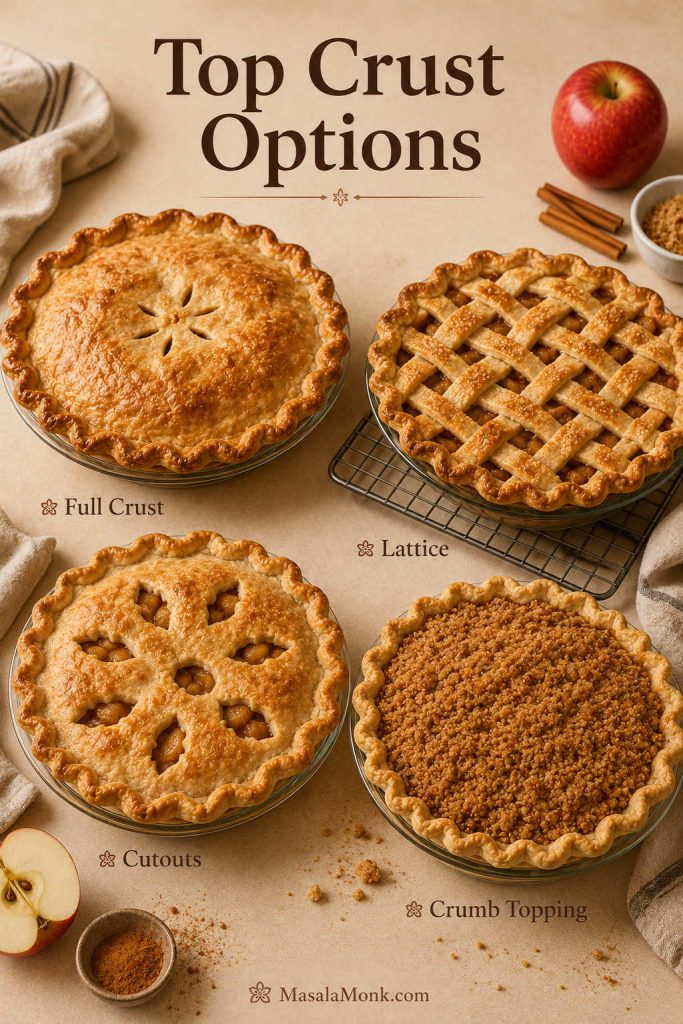
Full Top Crust, Lattice, or Crumb Topping?

A full top crust gives apple pie its most traditional look. After adding the filling, roll out the second disk of dough, lay it over the apples, trim the overhang, seal the edges, and cut vents in the top. Those vents are important because apple filling releases steam as it bakes.

A lattice crust is slightly more decorative, but it is not only for looks. Because the top is open in places, steam can escape naturally. To make a lattice, roll the second disk of dough, cut it into strips, weave the strips over the filling, and then seal and crimp the edges.

A crumb topping changes the pie completely. Instead of covering the apples with pastry, you cover them with a buttery crumble. This is closer to Dutch apple pie or apple crumble pie. It is also a good choice when you want a single-crust apple pie or when you do not feel like rolling a top crust.

For a classic apple pie, this crust works as a full top, lattice, or single bottom layer with crumb topping. If you use only one disk for a crumb-topped pie, wrap and freeze the second disk for another bake.

Top crust options for apple pie showing a full top crust, lattice crust, and crumb topping with labels.
The top crust changes more than appearance. A full crust feels classic, a lattice lets steam escape, and crumb topping gives a softer, buttery contrast to the apple filling.

Should You Prebake Apple Pie Crust?

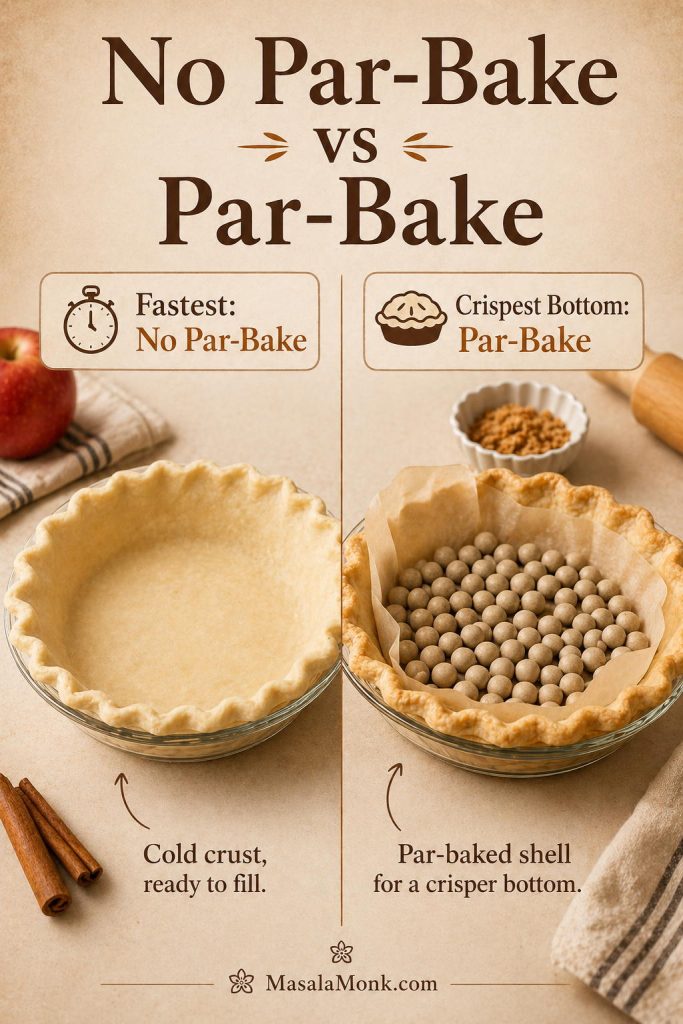
For a traditional double-crust apple pie, you usually should not fully prebake the bottom crust. Once the bottom crust is baked, it becomes harder to seal it to a raw top crust. In addition, a classic apple pie bakes long enough for the bottom crust to cook through as long as the filling is not too wet.

Instead of fully prebaking, focus on the details that help this apple pie crust recipe bake properly: use cooled filling, keep the dough cold, avoid stretching it, bake long enough, and place the pie where it gets enough bottom heat.

Single-crust apple pie is different. If you are making a pie with crumb topping, partial prebaking can help when your bottom crust often turns pale or soft. Since there is no raw top crust to seal, you have more flexibility. King Arthur’s guide to prebaking pie crust makes the same practical distinction between single-crust pies and double-crust fruit pies.

Also, do not poke holes in the bottom crust for a raw fruit pie unless you are blind baking it first. Docking is useful for some empty crusts, but in a juicy apple pie, those holes can let filling leak underneath the pastry.

Simple rule: do not fully prebake crust for classic double-crust apple pie. However, consider partial prebaking for a single-crust apple pie with crumb topping if soggy bottoms are a recurring problem.
Decision board explaining that double-crust apple pie usually does not need prebaking, while single-crust crumb pie sometimes does.
For classic double-crust apple pie, prebaking is usually not needed. However, a single-crust crumb pie may benefit from a partial prebake if soggy bottoms are a recurring problem.

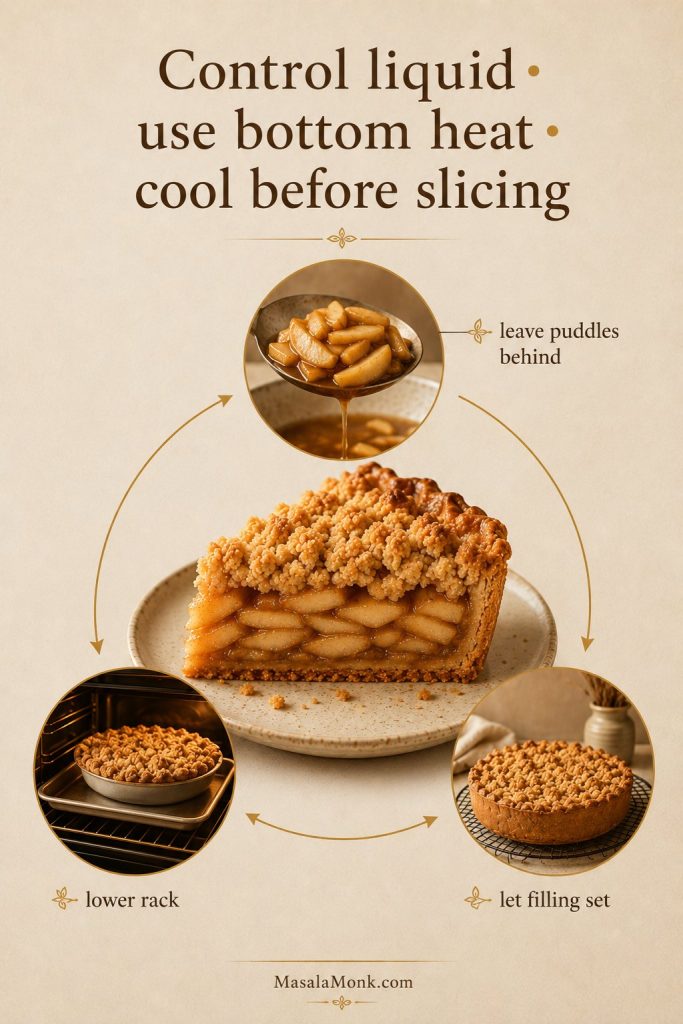
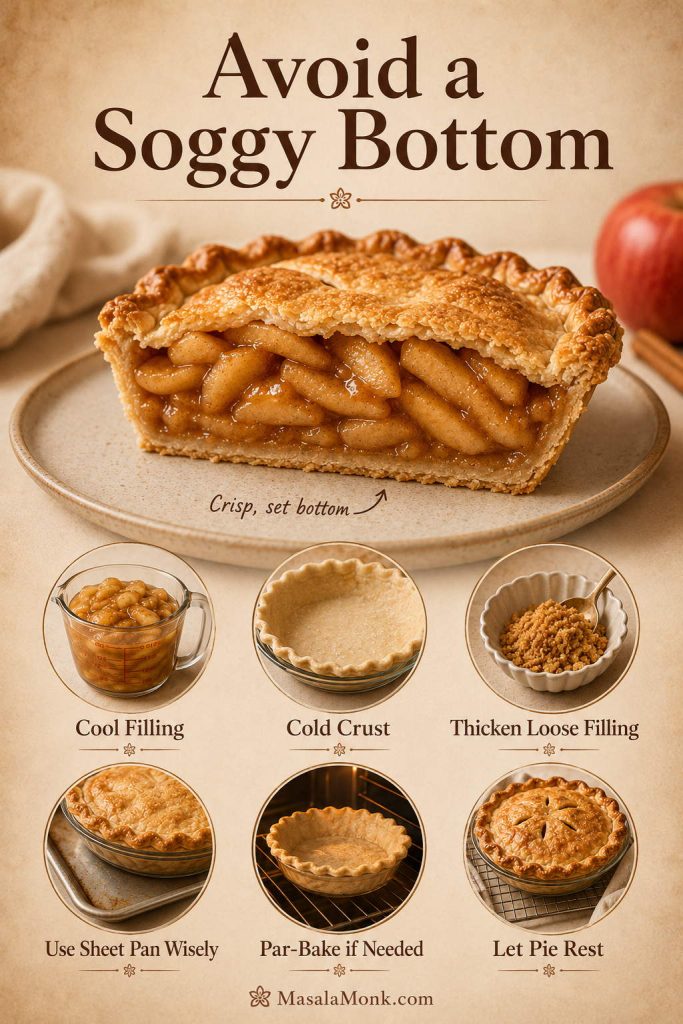
How to Keep Apple Pie Crust from Getting Soggy

Soggy bottom crust usually comes from excess moisture, hot filling, weak bottom heat, or underbaking. Fortunately, most of those problems are easy to prevent once you know where the moisture is coming from.

Soggy apple pie crust prevention guide with thick cooled filling, lower oven rack, hot baking sheet, vented top crust, and cooling before slicing.
To avoid a soggy bottom crust, start with thick cooled filling, bake with enough bottom heat, vent the top, and let the pie cool before slicing. Together, these steps protect the crust.

Start with thick, cooled filling

First, use thick apple pie filling. If the filling is loose and watery, the crust will absorb that liquid before it has time to set. A cooked, glossy filling gives you more control because the apples have already released some of their moisture before the pie goes into the oven.

Second, cool the filling before adding it to the crust. Hot filling melts the butter in the dough too early, which can make the pastry soft or greasy before baking even begins. So the filling should be spoonable and glossy, not steaming hot, when it goes into the pie shell.

Give the bottom crust enough heat

Third, bake the pie long enough for the bottom crust to cook through. A golden top does not always mean the bottom is done. If your oven runs cool or your pie plate is thick, the bottom may need more time.

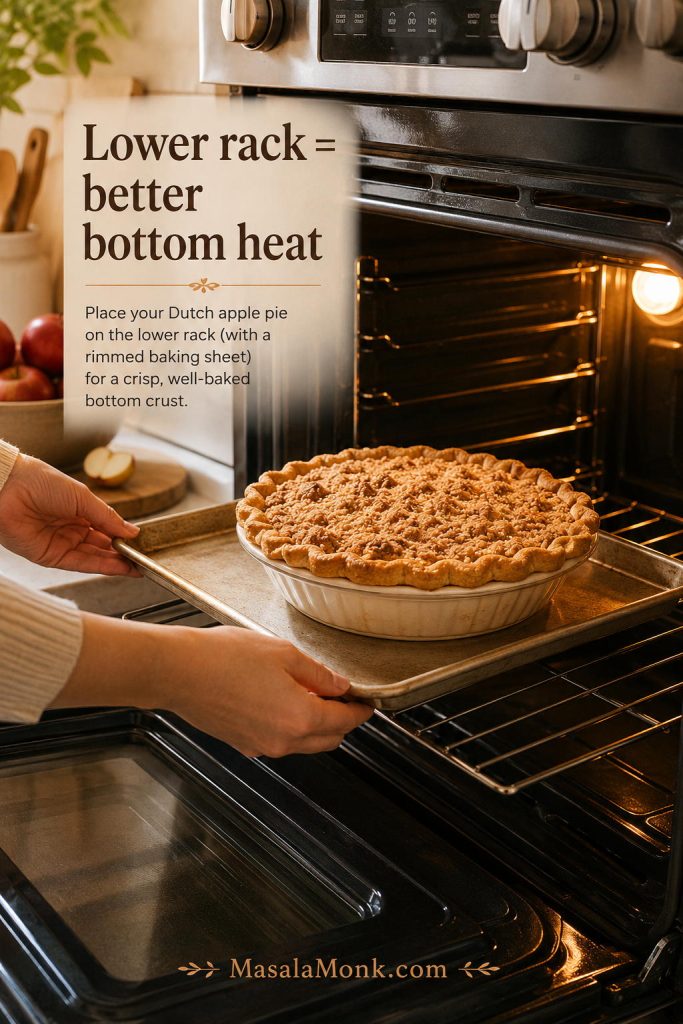
Finally, use bottom heat to your advantage. Bake on a lower oven rack or place the pie plate on a preheated baking sheet. For another helpful reference, this apple pie crust guidance from Martha Stewart also emphasizes giving the bottom crust enough heat and enough time to brown properly.

Choose the right pie plate

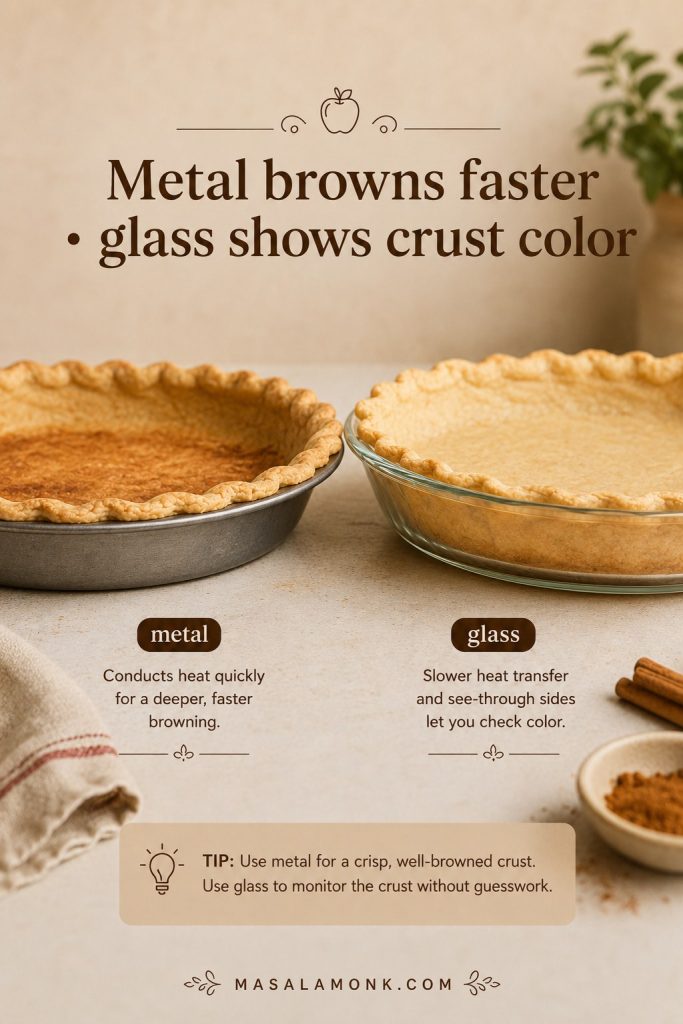
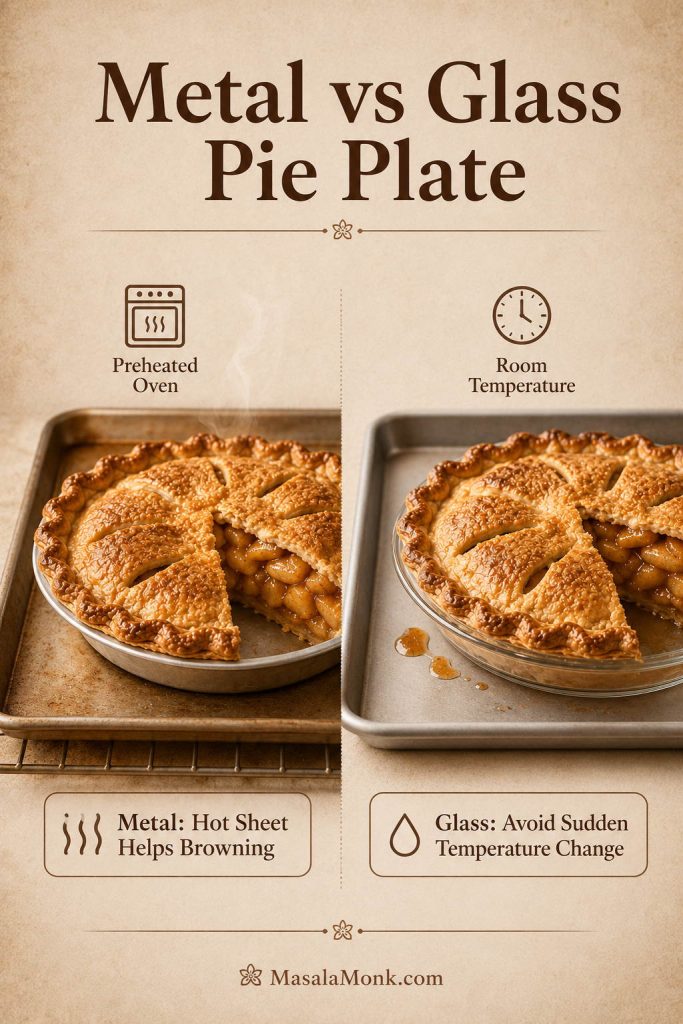
Pie plate material also matters. A glass pie plate makes it easier to check whether the bottom crust is browning, while metal usually conducts heat more quickly. Thick ceramic dishes can work beautifully, but they often need enough time and a lower oven rack so the bottom crust can finish baking.

Pie plate material guide comparing glass, metal, and ceramic dishes for apple pie crust browning and baking time.
The pie plate affects how the bottom crust bakes. Glass makes browning easier to check, metal conducts heat well, and ceramic may need a little more time.
Problem Best fix
Filling is watery Use thick apple pie filling and avoid pouring loose liquid into the crust.
Filling is hot Cool the filling before adding it to the dough.
Bottom crust is pale Bake on a lower rack or place the pie on a preheated baking sheet.
Top crust traps steam Cut vents in a full top crust or use a lattice crust.
Pie is sliced too soon Let the pie cool for at least 2 to 3 hours so the filling can thicken and settle.

For the easiest pairing, use this crust with cooled apple pie filling. The filling should be glossy and spoonable, not loose, watery, or steaming hot.

How to Know Apple Pie Crust Is Fully Baked

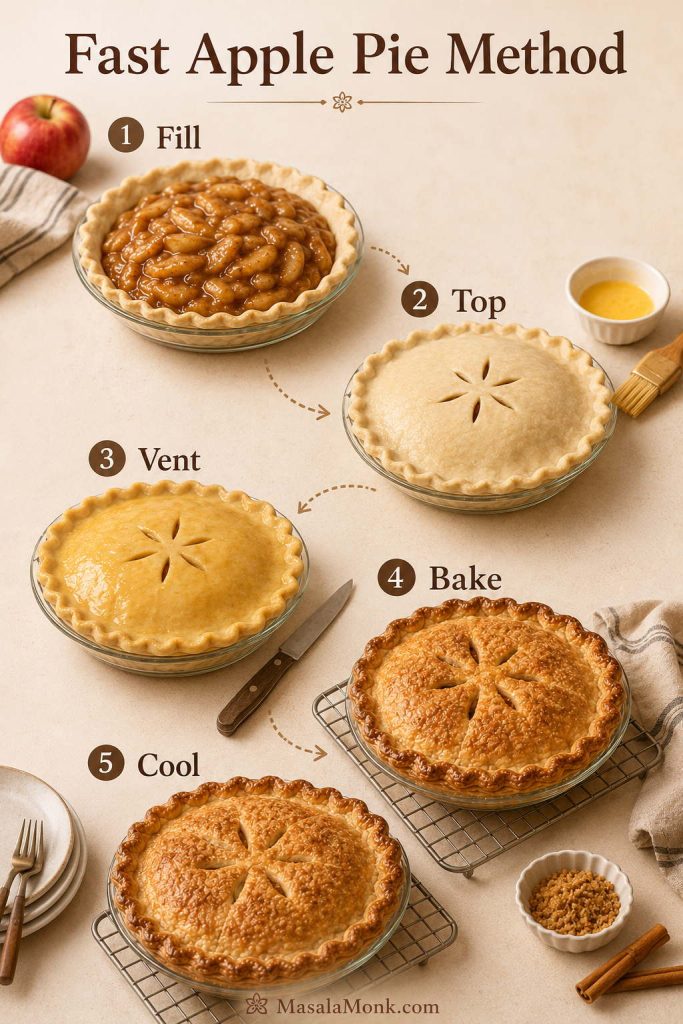
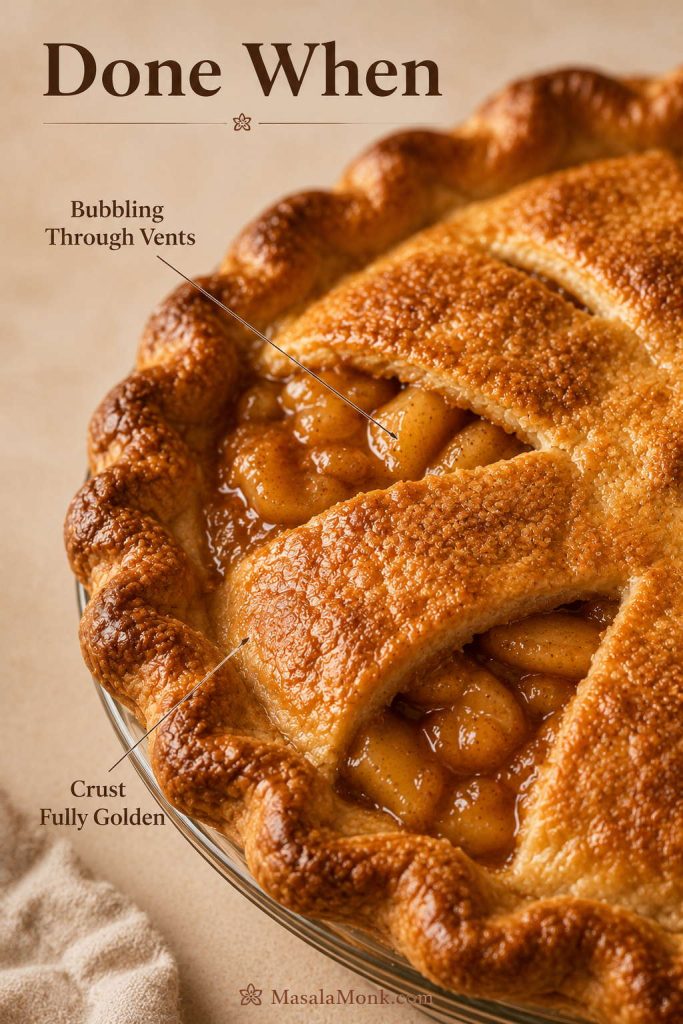
Apple pie is done when the top crust is deeply golden, the filling is bubbling through the vents or lattice, and the bottom crust has had enough time to brown. If the top looks ready but the bottom still seems pale, cover the edges loosely with foil and give the pie more time on the lower rack.

After baking, let the pie cool for at least 2 to 3 hours before slicing. Otherwise, even a well-baked crust can seem soft because the filling has not had time to thicken and settle.

Finished apple pie with callouts for deep golden top crust, bubbling filling, browned bottom crust, and cooling 2 to 3 hours before slicing.
A finished apple pie should be more than lightly golden. Look for a deep golden top, bubbling filling, and a browned bottom crust; then let it cool so the filling can settle.

Other Crusts You Can Use for Apple Pie

Homemade butter crust is the best choice for a classic apple pie, but it is not the only option. Sometimes convenience matters. Other times, you may want a no-roll crust, a crumb topping, or a quicker apple dessert. In those cases, the main thing is to match the crust to the kind of pie you are actually making.

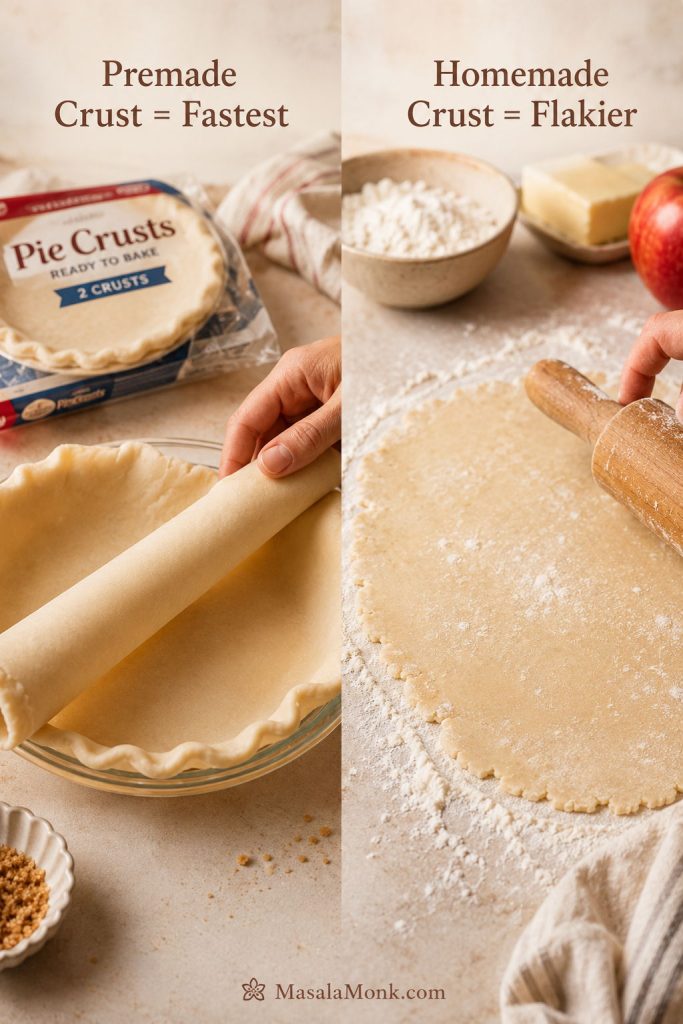
For classic apple pie, use this homemade butter crust. If speed matters, store-bought crust can still make a good apple pie when the filling is thick and the crust stays cold. For a no-roll version, graham cracker crust works better with crumb topping than with a sealed top crust. For a faster pastry-style dessert, puff pastry is useful, although it behaves more like a tart or turnover than classic pie crust.

Other crusts for apple pie board showing homemade butter crust, store-bought crust, graham cracker crumb pie, and puff pastry turnovers.
Homemade butter crust is best for classic apple pie. Still, store-bought crust, graham cracker crust, and puff pastry can work when you match each one to the right style of dessert.

Can I use store-bought crust?

Yes. Keep the crust cold, use a filling that is thick rather than runny, and cut vents in the top so steam can escape. Homemade dough tastes better and usually bakes flakier, but a premade crust can still make a solid apple pie when the filling and baking are handled well.

Can I use graham cracker crust?

Yes, although it works better for a single-crust apple pie with crumb topping than for a traditional double-crust pie. Graham cracker crust cannot form a sealed pastry top, so treat it as a different dessert style rather than a direct swap for pie dough.

Can I use puff pastry?

Yes, but puff pastry gives you a quicker, more tart-like apple dessert. It works well for turnovers, slab-style bakes, and apple pie-inspired pastries. However, it does not have the same tender, sturdy bite as homemade apple pie crust.

Is shortcrust pastry the same thing?

In many kitchens, pie crust, pie dough, pie pastry, shortcrust pastry, and pie shell describe similar flour-and-fat doughs. The exact formula can vary, but the goal for apple pie is the same: a tender crust that can hold fruit filling and bake into a flaky shell.

Using This Dough for Mini Apple Pies and Hand Pies

This apple pie crust dough also works for mini apple pies and hand pies, but the handling changes slightly. Smaller pastries need a thinner roll, less filling, tighter sealing, and a closer eye in the oven because they bake faster than a full 9-inch / 23-cm apple pie.

For mini apple pies, roll the dough a little thinner than you would for a deep pie, then cut rounds large enough to fit a muffin pan, mini pie pans, or small tart tins. Press the dough in gently without stretching it, add a small spoonful of cooled apple filling, and avoid overfilling so the juices do not leak over the edges.

For hand pies, diced cooled apple filling works better than long apple slices because it fits neatly inside the dough and seals more easily. After filling, press the edges firmly with a fork, cut a small vent in the top, and chill the shaped pies briefly before baking. That short chill helps the crust hold its shape and gives the filling less chance to burst out.

The same rules still matter: keep the dough cold, use thick filling, and do not stretch the pastry. Since mini pies and hand pies are smaller, start checking them earlier and pull them when the crust is golden and the filling is bubbling.

Mini apple pies and hand pies made with golden flaky dough, diced apple filling, sealed edges, and one cut-open hand pie showing filling.
This same dough can also make mini apple pies and hand pies. Because smaller pastries bake faster, use diced cooled filling, seal the edges well, and watch the crust color closely.
Most apple pie crust problems come from five things: warm butter, too much water, overworking the dough, stretching the crust into the pie plate, or adding hot/watery filling.

Apple Pie Crust Troubleshooting

Pie crust problems are common, especially if your kitchen is warm or you are making dough for the first time. Still, most issues come from a few fixable causes: warm butter, too much water, overworking, stretching the dough, or using filling that is too wet.

What went wrong Likely cause How to fix it next time
Dough cracks while rolling Too dry or too cold Let it rest for 5 minutes, then patch small cracks with damp fingers.
Dough feels sticky Too much water or butter is warming Dust lightly with flour and chill the dough before continuing.
Crust is tough Too much water or too much handling Add water slowly and stop mixing once the dough holds together.
Crust shrinks Dough was stretched or not chilled Ease the dough into the plate without pulling, then chill before baking.
Butter leaks out Dough got too warm Keep the butter cold and chill the assembled pie before baking.
Bottom crust is soggy Wet filling, hot filling, or not enough bottom heat Use cooled thick filling and bake on a lower rack or hot baking sheet.
Edges brown too fast Edges are thinner than the rest of the crust Use a pie shield or loose foil once the edges are golden.
Filling bubbles over Pie is overfilled or not vented well Leave a little space, cut vents, and bake on a lined sheet pan.
Apple pie crust troubleshooting board showing cracked dough, sticky dough, tough crust, shrinking crust, butter leaks, soggy bottom, and over-browned edges.
Most apple pie crust problems trace back to temperature, moisture, or handling. Therefore, many fixes begin with colder dough, less water, gentler mixing, and enough time to chill.

If the dough gives you trouble, do not panic. Chill it, patch it, and keep going. Small cracks and rough edges usually disappear once the pie is filled, sealed, brushed with egg wash, and baked until golden.

Make Ahead, Freeze, and Store

Apple pie crust is a good make-ahead recipe because the dough actually benefits from chilling. You can make the disks in advance, keep them wrapped in the refrigerator, and roll them when you are ready to assemble the pie.

For short-term storage, wrap the dough disks tightly and refrigerate them for up to 3 days. For longer storage, place the wrapped disks in a freezer bag and freeze them for up to 3 months.

When you are ready to use frozen dough, thaw it overnight in the refrigerator. If it feels too firm to roll, let it sit at room temperature for a few minutes. However, do not let it become warm or greasy, because softened butter can make the crust bake up heavy.

You can also roll the bottom crust, fit it into the pie plate, cover it well, and refrigerate it before filling. This is useful when you want to prepare the crust ahead but assemble the apple pie closer to baking time.

If you have extra cooked apples or leftover filling, you do not have to make another pie right away. Spoon them over buttermilk pancakes with stewed cinnamon apples for a softer breakfast-style use.

Make-ahead apple pie crust storage guide showing wrapped dough disks, fridge storage, freezer storage, thawing overnight, and keeping dough cold.
Pie dough is a good make-ahead recipe because chilling helps it relax. For best results, refrigerate it up to 3 days, freeze it up to 3 months, and thaw it overnight in the fridge.

Apple Pie Crust Recipe Card

Apple Pie Crust Recipe: Flaky Homemade Pie Dough

This buttery apple pie crust recipe makes enough dough for one 9-inch / 23-cm double-crust apple pie or two single-crust pies.

Prep Time20 minutes
Chill Time1 hour
Total Dough Time1 hour 20 minutes
Yield1 double crust

Ingredients

  • 2 1/2 cups all-purpose flour, or 315 g / about 11 oz
  • 1 teaspoon fine salt
  • 1 tablespoon granulated sugar, or about 12 g
  • 1 cup cold unsalted butter, cut into cubes, or 226 g / 8 oz
  • 6 to 8 tablespoons ice water, or 90 to 120 ml / 3 to 4 fl oz, plus more only if needed
  • Optional: 1 teaspoon / 5 ml apple cider vinegar

For finishing and filling

  • 5 to 6 cups cooled apple pie filling, about 1.1 to 1.4 kg / 2.5 to 3 lb, if baking a full 9-inch / 23-cm apple pie
  • 1 egg
  • 1 tablespoon / 15 ml milk or water
  • Optional coarse sugar for sprinkling

Instructions

  1. Whisk the flour, salt, and sugar together in a large bowl.
  2. Add the cold butter cubes and cut them into the flour until the mixture has sandy crumbs, pea-size butter pieces, and a few flatter butter flakes.
  3. Add ice water 1 tablespoon / 15 ml at a time, tossing with a fork after each addition.
  4. Stop adding water when the dough holds together when squeezed. It should look shaggy, not wet or smooth.
  5. Turn the dough onto a lightly floured surface and gather it gently with your hands. Do not knead it smooth.
  6. Divide the dough into two equal pieces, flatten each into a disk about 1 inch / 2.5 cm thick, wrap tightly, and refrigerate for at least 1 hour.

To use this crust for a full apple pie

  1. Place a rack in the lower third of the oven and preheat to 425°F / 220°C. For extra bottom heat, place a baking sheet in the oven while it preheats.
  2. Roll one disk into a 12- to 13-inch / 30- to 33-cm round, about 1/8 inch / 3 mm thick, and fit it into a 9-inch / 23-cm pie plate without stretching.
  3. Add 5 to 6 cups cooled apple pie filling, about 1.1 to 1.4 kg / 2.5 to 3 lb, or enough to fill the pie without mounding it too aggressively.
  4. Roll the second disk for a full top crust, or cut it into strips for lattice. Then seal and crimp the edges.
  5. Chill the assembled pie for 15 to 20 minutes if the dough has softened.
  6. Beat the egg with milk or water, then brush lightly over the top crust. Sprinkle with coarse sugar if using.
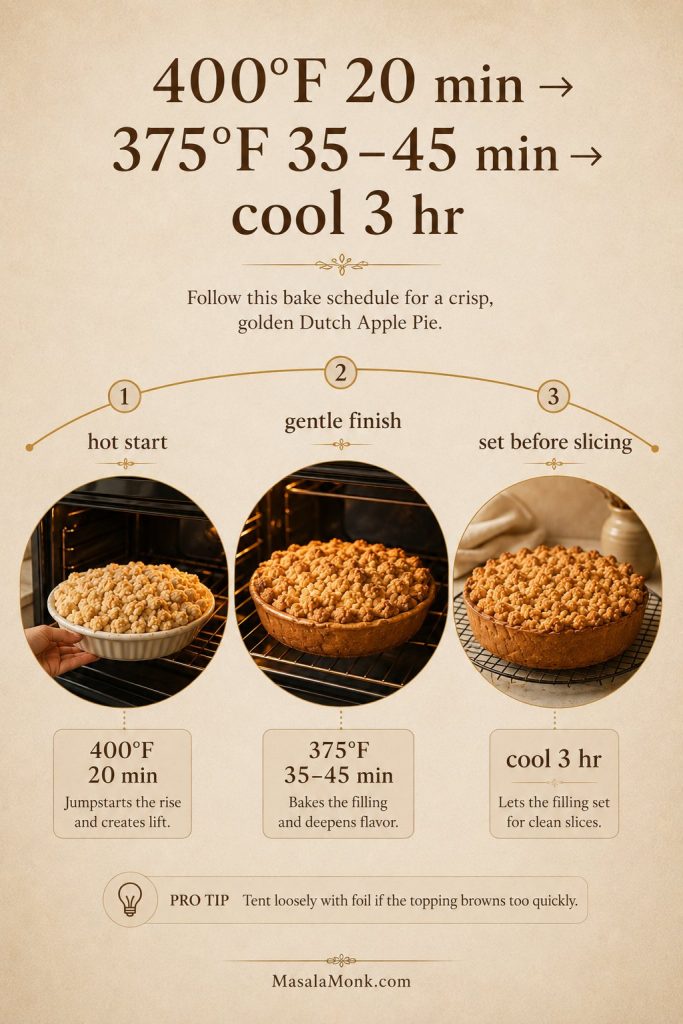
  7. Bake at 425°F / 220°C for 20 minutes. Then reduce the heat to 375°F / 190°C and continue baking for 35 to 45 minutes, or until the crust is deeply golden and the filling is bubbling. If the edges brown too quickly, cover them loosely with foil or a pie shield.
  8. Let the pie cool for at least 2 to 3 hours before slicing so the filling can thicken and settle.

Notes

  • Keep the butter cold for the flakiest crust.
  • Add water slowly; too much water can make the crust tough.
  • Do not knead the dough until smooth. Gentle handling keeps the pastry tender.
  • For classic double-crust apple pie, do not fully prebake the bottom crust.
  • Use thick, cooled apple pie filling to help prevent a soggy bottom crust.
  • The dough can be refrigerated for up to 3 days or frozen for up to 3 months.
Apple pie crust recipe card with yield, prep time, chill time, bake time, key ingredients, short method, and a finished apple pie.
Use this quick recipe card when you need the basic apple pie crust steps in one place: mix, cut in butter, add ice water, gather gently, and chill before rolling.

FAQs

What makes this a good apple pie crust recipe?

It uses cold butter for flaky layers, enough dough for a 9-inch / 23-cm apple pie, and clear chilling, rolling, and baking cues so the crust stays tender instead of tough.

Is apple pie crust the same as pie dough?

Usually, yes. Apple pie crust, pie dough, pie pastry, and pie shell often mean the same basic flour-and-fat dough. For apple pie, however, the dough should be flaky but sturdy enough to hold fruit filling.

Do I need two crusts for apple pie?

For a classic double-crust pie, yes. You need one crust on the bottom and one on top. However, if you are making a crumb-topped or Dutch-style apple pie, one bottom crust is enough.

Should apple pie crust be prebaked?

For a traditional double-crust pie, usually no. Instead, use cooled filling, keep the dough cold, and bake the pie long enough for the bottom crust to brown. For a single-crust pie with crumb topping, partial prebaking can help if the bottom often turns soft.

Why is my apple pie crust tough?

Tough crust usually comes from too much water, too much mixing, or kneading the dough until smooth. So add water slowly and stop handling the dough once it holds together.

Why is my bottom crust soggy?

The filling may have been too wet or too hot, or the pie may not have baked long enough. Use cooled, thick filling and bake on a lower rack or preheated baking sheet so the bottom gets enough heat.

Can I use this crust for lattice apple pie?

Yes. This dough makes enough for a bottom crust and lattice top. Roll the second disk, cut it into strips, weave the strips over the filling, and then seal the edges well.

Can I use store-bought crust instead?

Yes. Keep the crust cold, use thick filling, and vent the top so steam can escape. Homemade dough usually tastes better, but premade crust can still make a good apple pie.

Can I use graham cracker crust for apple pie?

Yes, but it works best for a crumb-topped apple pie rather than a sealed double-crust pie. Since graham cracker crust cannot form a pastry top, treat it as a separate no-roll apple pie style.

Can I use puff pastry for apple pie?

Yes, but puff pastry works better for apple turnovers, slab-style apple desserts, or tart-like bakes than for a classic deep apple pie. Keep it cold, avoid overfilling it, seal the edges well, and cut vents so steam can escape.

Can I make apple pie crust ahead?

Yes. Wrap the dough disks tightly and refrigerate them for up to 3 days or freeze them for up to 3 months. Then thaw frozen dough overnight in the refrigerator before rolling.

Final Tips for Flaky Apple Pie Crust

A reliable apple pie crust recipe comes down to cold butter, gentle handling, enough chill time, and filling that is thick rather than watery. Once the dough is ready, add cooled apple pie filling, seal the edges well, vent the top, and bake until the crust is deeply golden.

Close-up of flaky golden apple pie crust layers with glossy apple filling inside.
A good apple pie crust should look flaky at the edges and sturdy around the filling. When the layers are golden and crisp, every slice feels more homemade.

If your first pie is not perfect, the fix is usually simple. Next time, chill the dough longer, add less water, avoid stretching the crust into the plate, and make sure the filling is not hot when it touches the pastry.

A perfect-looking crust is not the goal. A crust that tastes buttery, holds the filling, and flakes when you cut into it is already a win.

If you try this crust with a different apple pie filling, crumb topping, or pie plate, leave a note with what changed. Those small details often help the next baker more than a perfect-looking slice ever could.

Posted on Leave a comment

Gingerbread Cookies Recipe

Gingerbread cookies recipe with soft cut-out gingerbread men and iced holiday cookies.

If you want a gingerbread cookies recipe that rolls cleanly, holds its shape, and still stays soft enough to enjoy, this is the one to make. These cookies bake with soft centers, lightly crisp edges, deep molasses-and-spice flavor, and enough structure for gingerbread men and other cut-out shapes. In other words, you get the classic holiday look without ending up with dry, hard cookies.

The best gingerbread cookies are not just the ones that look neat on the tray. They also need dough that stays manageable, cut-outs that hold their edges, and a texture that still tastes good once the icing dries. This dough is built to give you that balance.

The dough chills well, handles easily once firm, and gives you a smooth surface for glaze or royal icing. So whether you want homemade gingerbread cookies for gifting, simple gingerbread man cookies for family baking, or soft gingerbread cookies for a holiday tray, this guide walks you through the method, decorating options, make-ahead timing, and the fixes that matter most.

Gingerbread Cookies Recipe Quick Answers

These are soft gingerbread cookies made for cut-outs. They are tender enough to enjoy plain, yet firm enough to hold the shape of gingerbread men, stars, trees, and other holiday cookies without spreading into rounded blobs.

The dough is rich with molasses, brown sugar, ginger, and cinnamon, and it becomes much easier to handle after chilling. Once baked, the cookies stay fairly flat, so they work especially well for glaze, royal icing, or simple sugar decoration.

  • Yield: 24 medium cookies
  • Prep time: 25 minutes
  • Chill time: 1 hour
  • Bake time: 8 to 10 minutes per batch
  • Total time: about 1 hour 35 minutes
  • Texture: soft centers, lightly crisp edges
  • Best for: gingerbread men, cut-out cookies, and icing
  • Make-ahead friendly: yes

If you need a gingerbread cookies recipe that works for both decorating and eating, this one lands in the sweet spot. It gives you enough structure for clean cut-outs and enough tenderness to keep the cookies enjoyable after they cool.

Why this gingerbread cookies recipe works graphic showing clean cut-out shape, soft centers with crisp edges, easy decorating, and make-ahead dough.
This gingerbread cookies recipe works especially well when you want dough that rolls cleanly, keeps cut-out edges neat, stays soft in the center, and still handles decorating and make-ahead baking with less stress.

Gingerbread Cookies Recipe Card

Soft Gingerbread Cookies with clean cut-out edges, soft centers, lightly crisp edges, and classic molasses-spice flavor. This is the fast-scan version for baking day.

  • Yield: 24 medium cookies
  • Prep time: 25 minutes
  • Chill time: 1 hour
  • Bake time: 8 to 10 minutes per batch
  • Total time: about 1 hour 35 minutes
  • Best for: soft cut-outs, decorating, gifting, and make-ahead holiday baking

Before You Start Baking

  • Use regular unsulphured molasses, not blackstrap.
  • Weigh the flour if you can, or spoon and level it.
  • Chill the dough until firm before rolling.
  • Pull the cookies when the centers look matte and set, not dark brown.
Soft gingerbread cookies recipe card image with decorated gingerbread cookies, quick ingredients, method, and tips for soft centers and clean cut-out edges.
Here is a soft gingerbread cookies recipe card that gives you the quick-save version: the key ingredients, short method, and a few tips that help the cookies stay soft in the center while keeping neat cut-out edges.

Ingredients

  • 170 g unsalted butter, softened (3/4 cup)
  • 150 g packed dark brown sugar (3/4 cup)
  • 170 g unsulphured molasses (1/2 cup)
  • 1 large egg
  • 1 teaspoon vanilla extract
  • 360 g all-purpose flour (3 cups)
  • 1 teaspoon baking soda
  • 1/2 teaspoon fine salt
  • 1 tablespoon ground ginger
  • 2 teaspoons ground cinnamon
  • 1/4 teaspoon ground cloves
  • 1/4 teaspoon ground nutmeg
  • 1 to 2 teaspoons milk, only if the dough seems unusually dry

Method

  1. Beat the softened butter and brown sugar until creamy and smooth, about 2 minutes.
  2. Mix in the molasses, egg, and vanilla until fully combined.
  3. Whisk together the flour, baking soda, salt, ginger, cinnamon, cloves, and nutmeg in a second bowl.
  4. Add the dry ingredients to the wet mixture and stir just until a soft dough forms. Add 1 teaspoon of milk at a time only if the dough feels unusually dry.
  5. Divide into 2 discs, wrap, and chill for at least 1 hour.
  6. Heat the oven to 350°F / 175°C and line baking sheets with parchment paper.
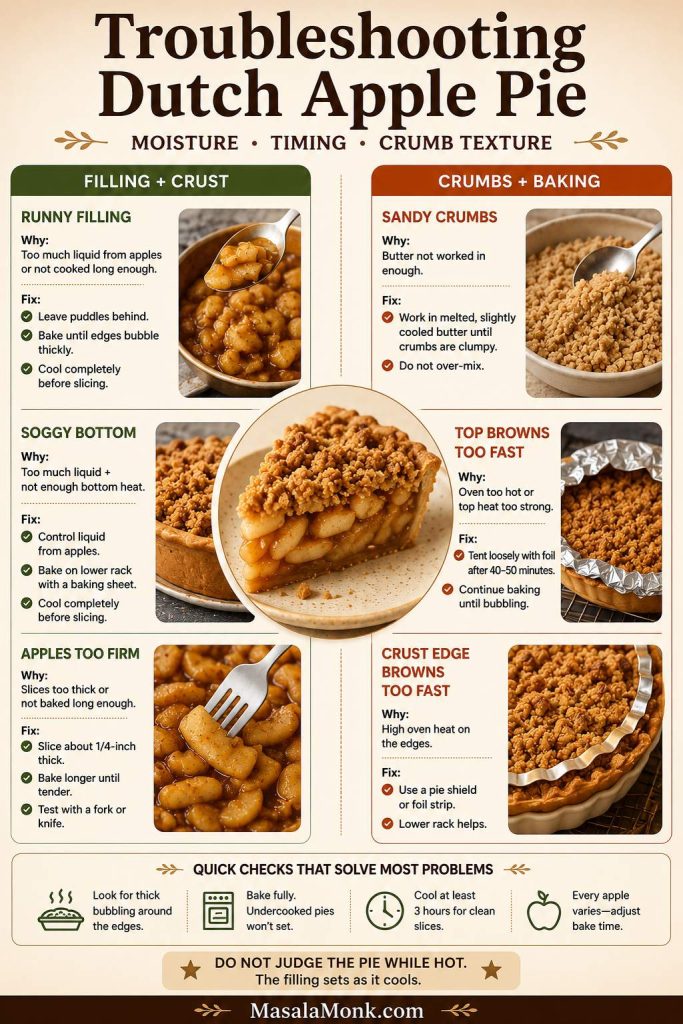
  7. Roll one disc at a time on a lightly floured surface. For softer cookies, aim for about 1/4 inch thick.
  8. Cut shapes, transfer to the tray, and chill the tray briefly if the dough has softened.
  9. Bake for 8 to 10 minutes, until the centers look matte and set and the edges feel lightly firm.
  10. Cool on the tray for 5 minutes, then move to a wire rack and cool completely before decorating.

Ingredients for This Gingerbread Cookies Recipe

This ingredient list is simple, but each part has a job. The butter and brown sugar keep the cookies tender, the molasses gives classic depth and color, and the flour-to-fat balance keeps the dough sturdy enough for cut-out shapes once chilled.

Labeled gingerbread cookies ingredient guide showing unsalted butter, dark brown sugar, unsulphured molasses, all-purpose flour, egg, vanilla extract, baking soda, ground ginger, ground cinnamon, ground cloves, ground nutmeg, and fine salt.
This gingerbread cookies ingredient guide shows the key ingredients that shape the dough’s flavor, softness, and clean cut-out structure, from unsulphured molasses and dark brown sugar to the warm spice blend and careful flour balance.
  • 170 g unsalted butter, softened (3/4 cup)
  • 150 g packed dark brown sugar (3/4 cup)
  • 170 g unsulphured molasses (1/2 cup)
  • 1 large egg
  • 1 teaspoon vanilla extract
  • 360 g all-purpose flour (3 cups)
  • 1 teaspoon baking soda
  • 1/2 teaspoon fine salt
  • 1 tablespoon ground ginger
  • 2 teaspoons ground cinnamon
  • 1/4 teaspoon ground cloves
  • 1/4 teaspoon ground nutmeg
  • 1 to 2 teaspoons milk, only if the dough seems unusually dry

Important: Use regular unsulphured molasses here, not blackstrap. In a gingerbread cookies recipe like this one, regular molasses gives you the best balance of sweetness, color, and classic gingerbread depth without dragging the flavor into bitterness.

If you can, weigh the flour. If not, spoon and level it rather than scooping straight from the bag. That one habit alone makes it much easier to avoid dry dough and hard cookies.

How to Make This Gingerbread Cookies Recipe Step by Step

The method is straightforward, but temperature and dough feel matter more than speed. So the goal is not to rush through the steps. Instead, mix until the dough comes together, chill it properly, and keep it cold enough that the cut-outs stay neat.

Step-by-step gingerbread cookie method graphic showing how to mix the dough, chill until firm, roll to thickness, cut and tray the cookies, then bake and cool.
This step-by-step gingerbread cookie method shows exactly how the dough should look at each stage, so it is easier to mix, chill, roll, cut, and bake cookies that hold their shape and stay soft in the center.

  1. In a large bowl, beat the softened butter and brown sugar until creamy and smooth, about 2 minutes. You want the mixture lightened and well combined, but not so whipped that it looks fluffy and airy.
  2. Add the molasses, egg, and vanilla, then mix until fully combined. At this stage, the mixture will look glossy, rich, and a little loose, which is exactly what you want.
  3. In a second bowl, whisk together the flour, baking soda, salt, ginger, cinnamon, cloves, and nutmeg.
  4. Add the dry ingredients to the wet mixture and stir just until a soft dough forms. If the dough seems crumbly rather than soft, add 1 teaspoon of milk at a time until it comes together. The finished dough should feel soft and a little sticky before chilling, not dry and not stiff.
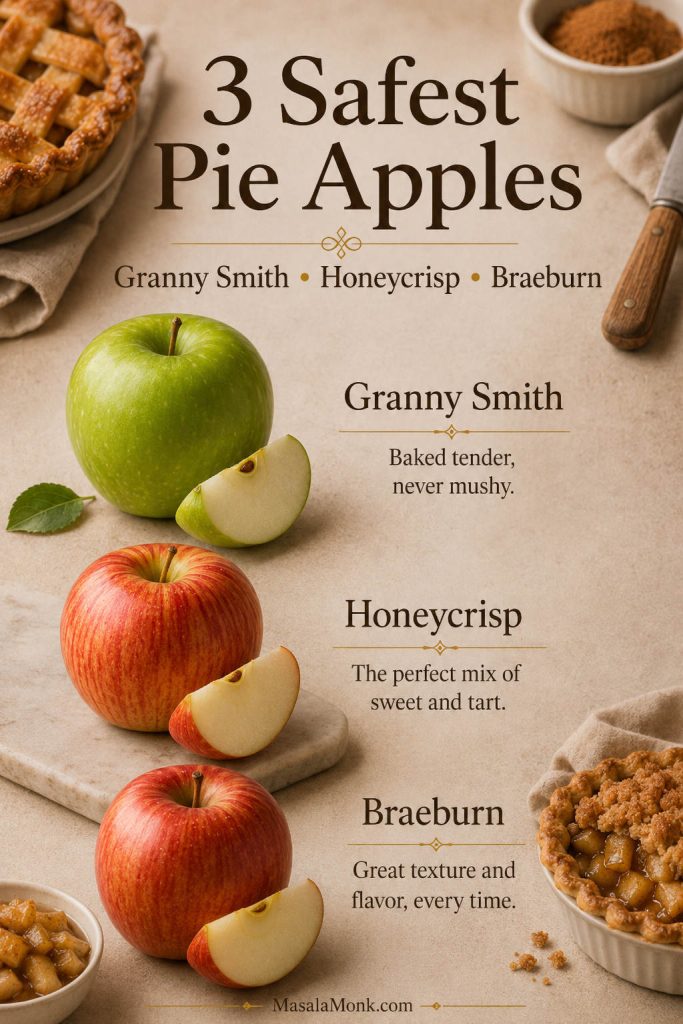
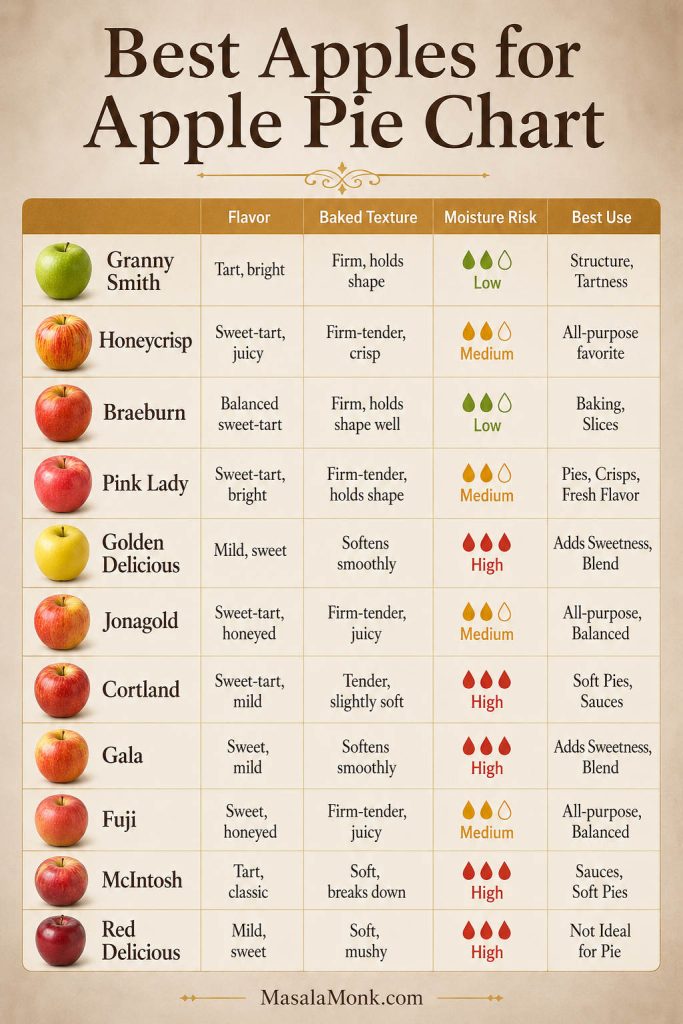
  5. Divide the dough into 2 discs, wrap them well, and chill for at least 1 hour.

Once the dough is properly chilled, it becomes much easier to roll and cut cleanly. More than anything else, this gingerbread cookies recipe depends on cold dough rather than extra flour for sharp cut-outs. If it still feels sticky after chilling, return it to the fridge for 15 to 20 minutes instead of forcing in more flour.

Gingerbread cookies recipe dough rolled out and cut into gingerbread men and stars, with clean shapes transferred to a parchment-lined baking tray before baking.
Cold dough is what keeps a gingerbread cookies recipe like this one easy to roll, cut, and transfer. Once the dough is firm, the shapes stay cleaner on the tray and bake with sharper edges instead of softening into blurred outlines.

This is the stage where many bakers accidentally add too much flour. Cold gingerbread dough should feel firm and workable, not dry.

If the dough cracks hard as soon as you try to roll it, let it sit on the counter for 5 to 10 minutes and try again. Usually that means it is slightly too cold, not ruined. On the other hand, if it sticks to everything, it is usually too warm, not under-floured.

For even cleaner edges, you can also roll the dough between sheets of parchment, chill or briefly freeze it flat, and then cut shapes from the cold sheet. If you want a useful visual on that method, King Arthur explains it well here: how to help cut-out cookies hold their shape.

Shape-retention guide for gingerbread cut-out cookies showing chilled dough, rolling between parchment, cutting while cold, and chilling the tray before baking.
The sharpest gingerbread men usually come from colder dough, not more flour. Keep the dough firm, roll and cut it while cold, and give the tray a short chill if the shapes start softening before they go into the oven.
  1. Heat the oven to 350°F / 175°C. Line baking sheets with parchment paper.

  2. Roll one disc of dough at a time on a lightly floured surface. For softer cookies, roll to about 1/4 inch thick. For a firmer bite, roll a little thinner, around 1/8 to 3/16 inch.
  3. Cut shapes and transfer them to the prepared baking sheets, spacing them about 1 to 2 inches apart. If the dough softens too much while you work, chill it again before baking. If the cut-outs feel especially soft, a quick 5 to 10 minute tray chill helps them hold sharper edges.
  4. Bake for 8 to 10 minutes. A 3-inch gingerbread man rolled to 1/4 inch thick usually takes about 8 minutes for a softer result. A slightly thinner cookie often needs 9 to 10 minutes.
Thickness guide for gingerbread cookies showing 1/4 inch for softer fuller cookies, 3/16 inch for balanced texture, and 1/8 inch for a firmer bite.
For softer gingerbread men and fuller cut-outs, stay close to 1/4 inch; go a little thinner only if you want a firmer bite, and pull the cookies once the centers look matte and set rather than waiting for deep browning.

The cookies are done when the centers look matte and set, the edges feel lightly firm, and the color is only a touch darker around the outer edge. Because they continue to firm up as they cool, do not wait for deep browning. When they are right, they should smell deeply spiced and look set without turning dark brown.

  1. Let the cookies cool on the tray for 5 minutes, then move them to a wire rack. Cool completely before decorating.
  2. Reroll scraps only after gathering them gently. If they have warmed up and turned sticky, chill them again before rolling so the second round stays easier to handle.
Thickness guide for gingerbread cookies showing about 1/4 inch dough for softer, fuller cookies and slightly thinner dough for a firmer bite, with baked gingerbread men and broken cookie cross-sections for comparison.
This gingerbread cookie thickness guide shows the tradeoff clearly: roll the dough about 1/4 inch thick for softer, fuller cookies, or go slightly thinner when you want a firmer bite and a flatter finished texture.

Why This Gingerbread Cookies Recipe Works

A really good gingerbread cookies recipe has to get three things right at once: flavor, texture, and handling. This one does. More importantly, it does so without making the dough fussy or the finished cookies dry, which is why it feels dependable from the first batch onward.

Soft gingerbread cookies without cakey puffiness

The butter, brown sugar, egg, and molasses keep the cookies tender, while the modest amount of baking soda keeps them from rising too much. That is what gives you a soft bite without thick, puffy shapes.

Soft gingerbread cookies recipe close-up with a bitten gingerbread man cookie in front and a whole iced cookie behind, showing a tender center, clean cut-out shape, and lightly crisp edges.
This is the texture you want from a good gingerbread cookies recipe: a tender center, lightly set edges, and enough structure for gingerbread men to stay neat without turning dry or cakey.

Why these gingerbread cookies hold their shape

Once chilled, the dough is firm enough to roll and cut neatly. As a result, hands, feet, stars, and tree points stay more defined in the oven instead of softening into rounded outlines.

Deep gingerbread flavor without bitterness

Molasses, ginger, and cinnamon do most of the heavy lifting, while clove and nutmeg stay in the background. The result is rich and classic, not bitter or overpowering.

Gingerbread cookies that decorate cleanly

Because the cookies bake relatively flat, the icing sits more neatly on top. As a result, both simple glaze and detailed royal icing are easier to manage, especially when you want gingerbread men that still look clear and readable after decorating.

Gingerbread Cookie Ingredient Notes That Matter

A few ingredient choices can make or break a gingerbread cookies recipe. In particular, the molasses, flour, butter texture, and spice balance affect both flavor and handling.

Ingredient guide for gingerbread cookies showing regular molasses, brown sugar, careful flour measurement, softened butter, and warm spice balance for better flavor and cleaner cut-outs.
A few ingredient choices do more for gingerbread cookies than extra decorating ever will: the right molasses, brown sugar, flour measurement, softened butter, and spice balance are what keep the dough flavorful, softer, and easier to handle.

The best molasses for gingerbread cookies

Use regular unsulphured molasses. It gives the cookies their classic depth and color without pushing them into bitterness. If you want a quick breakdown of light, dark, and blackstrap molasses, King Arthur’s guide is genuinely useful: light, dark, and blackstrap molasses.

Brown sugar keeps soft gingerbread cookies tender

Brown sugar adds moisture and a warmer flavor. As a result, the cookies stay softer and taste fuller than they would with a more neutral sugar base.

Too much flour makes the cookies dry

Too much flour is one of the fastest ways to ruin the texture. If you can, weigh it. If not, spoon and level rather than scooping straight from the bag.

Softened butter gives the dough the right feel

Softened butter should cream smoothly with the sugar, not look greasy or melted. Otherwise, the dough becomes much harder to control once you start rolling and cutting, and the cookies are more likely to lose those cleaner edges.

Keep the spice balance warm, not harsh

Ginger and cinnamon should lead. Clove and nutmeg should stay in supporting roles. Otherwise, the whole dough can start tasting medicinal instead of festive.

Vanilla or orange zest can round things out

A little vanilla rounds out the spice. Orange zest can brighten the dough too, although it should stay in the background so the classic gingerbread flavor stays in charge.

Decorating Gingerbread Cookies and Easy Variations

Once the dough is working well, the next choice is simple: decorate the cookies more neatly or tweak the batch slightly for a softer, darker, or faster finish. This section keeps those adjustments practical so the dough stays reliable.

For softer gingerbread cookies

For a softer result, roll the dough closer to 1/4 inch thick and bake just until the centers are set. That gives you a fuller cookie with a more bakery-style feel.

For faster holiday cookies

Choose simpler cutters, skip detailed piping, and finish the cookies with a quick glaze or sanding sugar. Even so, the batch still looks festive and feels finished. This is the easiest route when you want holiday cookies that still look good without turning decorating into a separate project.

For a darker, more old fashioned gingerbread flavor

Lean a little harder on ginger and use dark brown sugar if you want the cookies to taste deeper and more old fashioned. Just keep the clove controlled so the flavor stays warm and balanced rather than harsh. Do not swap in blackstrap molasses here unless you specifically want a more bitter result.

Best icing for gingerbread cookies

  • Choose royal icing when: you want cleaner outlines, button details, faces, or cookies you can decorate more precisely.
  • Choose simple glaze when: you want a faster, easier finish for a holiday tray, gifting, or casual family baking.

How to decorate gingerbread cookies without making it fussy

Use royal icing when you want clean outlines, button details, smiles, and defined flooding. Use a simple glaze when you want faster cookies that still look finished. In both cases, decorate only once the cookies are completely cool, or the icing can turn patchy and slide.

Decorating guide for gingerbread cookies showing outline first, let the icing set briefly, add dots or buttons, use royal icing for cleaner lines, and simple glaze for a faster finish.
Neat gingerbread cookies do not need complicated piping. Start with a simple outline, let it set briefly, then add a few dots, stripes, or buttons and choose royal icing or glaze based on how detailed you want the finish.

For the neatest beginner-friendly finish, start with three easy moves: outline the cookie first, let that line set briefly, then add dots, stripes, or a small flood rather than covering every inch. That keeps gingerbread men readable, faster to decorate, and less messy for family baking.

Simple decorated gingerbread cookies recipe on a dark plate with gingerbread men, star, and tree cookies finished with easy white icing details.
For a gingerbread cookies recipe like this one, a few clean outlines, dots, and smiles are enough to make the tray look festive without turning decorating into a fussy piping project.

Royal Icing vs Simple Glaze

Quick glaze: Stir 1 cup confectioners’ sugar with 1 1/2 to 2 teaspoons milk and a small splash of vanilla until thick but spreadable. Quick royal icing note: Use a thicker consistency for outlines, then thin it slightly with drops of water for flooding. If you plan to stack or gift the cookies, let royal icing dry fully for several hours or overnight first. If you want a useful visual guide to outline and flooding consistency, King Arthur’s cookie decorating guide is worth a look: cookie decorating guide.

A simple glaze is the better choice when you want an easier finish for a holiday tray, cookie box, or last-minute batch. It should be thick enough to coat the back of a spoon, but loose enough to spread without tearing the cookie surface. So if you want easy gingerbread cookies that still look festive, glaze is often the better call. Meanwhile, it keeps the decorating process much faster and less fussy.

Comparison guide for gingerbread cookies showing royal icing for cleaner lines and simple glaze for a quicker finish.
Royal icing makes more sense when you want crisp outlines and button details, while simple glaze is the easier choice for a faster tray of gingerbread cookies that still looks polished and festive.

If you are putting together a holiday cookie tray, these double chocolate chip cookies are another easy homemade bake to pair with gingerbread.

Troubleshooting Gingerbread Cookies

Most gingerbread cookie problems come down to temperature, flour balance, thickness, or bake time. Once you spot the cause, the fix is usually simple. In fact, many common issues are solved by chilling longer, measuring more carefully, or pulling the cookies a little earlier.

Troubleshooting guide for gingerbread cookies showing how to fix warm dough, too much flour, thin rolled dough, overbaking, and soft cut-outs on the tray.
When gingerbread cookies spread, crack, or bake up hard, the fix is usually simple: colder dough, lighter flour handling, a slightly thicker roll, and pulling the cookies once the centers look matte and set.

Why did my gingerbread cookies spread?

The dough was probably too warm, or the cut shapes sat out too long before baking. So chill the dough longer, work in smaller batches, and never bake on a still-warm sheet pan.

Why did they puff up too much?

Too much baking soda, dough rolled too thick, or over-creaming the butter and sugar can all cause extra puffing. Therefore, measure carefully and keep the mixing simple.

Why is my dough too sticky?

That usually means it needs more chill time. Because molasses-rich dough is often soft before chilling, this is one step you do not want to rush.

Why did the dough crack while rolling?

It is usually a little too cold or a little too dry. Let it sit for 5 to 10 minutes, then try again. On your next batch, make sure you are not over-measuring the flour.

Why did the cookies turn hard?

Overbaking and too much flour are the two most common reasons. Remember, too, that gingerbread cookies firm up more as they cool.

Why did my gingerbread men lose shape?

Warm dough, dull cutters, or too many rerolls usually cause blurred shapes. In many cases, chilling the cut cookies for 5 to 10 minutes before baking is enough to help.

Why is my icing too runny or too stiff?

Add more confectioners’ sugar if it runs everywhere. Add water a few drops at a time if it is too stiff to pipe or spread. After all, small changes go a long way with icing.

How to Store Gingerbread Cookies

This dough and the baked cookies both hold up well, which makes the recipe easy to split across a few days of holiday baking. Whether you want to prep the dough early, freeze cut-outs, or box up decorated cookies later, each stage stores well when handled the right way.

Storage guide for gingerbread cookies and dough showing how to refrigerate dough, freeze cut-outs, store baked cookies airtight, and pack decorated cookies for gifting.
Gingerbread cookies are much easier to fit into holiday baking when you store each stage the right way: chill dough for short-term prep, freeze cut-outs for later baking, and pack decorated cookies only after the icing is fully dry and set.
  • Dough in the fridge: up to 2 days, tightly wrapped
  • Dough in the freezer: up to 2 months, well wrapped
  • Unbaked cut-outs in the freezer: freeze until firm, then bag and bake from cold with a little extra time if needed
  • Baked undecorated cookies: 4 to 5 days airtight at room temperature, or freeze for up to 2 months
  • Decorated cookies: store only after the icing is fully dry and set

How far ahead you can make gingerbread cookie dough

You can make the dough up to 2 days ahead and keep it wrapped in the refrigerator. If it gets very firm, let it sit out briefly before rolling. That way, it softens just enough to handle without turning sticky again.

How to freeze cut dough vs baked cookies

Freeze dough discs or freeze cut shapes on a tray first, then transfer them to a freezer bag. Baked cookies also freeze well, especially if they are undecorated. Thaw them at room temperature before decorating or serving so condensation does not spoil the finish.

Best container for decorated gingerbread cookies

Let the icing dry fully, then store the cookies in a rigid airtight container. If you need layers, separate them with parchment. A shallow tin or hard-sided box is usually safer than a soft bag once the cookies are decorated.

Decorated gingerbread cookies packed in a parchment-lined tin for gifting after the icing has fully dried and set.
Once the icing is fully dry, gingerbread cookies are much easier to pack neatly in a rigid tin lined with parchment, which helps them travel better and keeps the finished details from smudging.

How to store homemade gingerbread cookies for gifting

Pack them only once the icing is dry and the cookies are fully cool. As a result, they stay neater, travel better, and look more polished when they reach the box or tray. In addition, they are less likely to smudge or stick together. For another festive edible gift idea, these easy festive Irish rum truffles are a natural holiday add-on too.

For the most natural cold-weather pairing, serve these cookies with homemade hot chocolate with cocoa powder.

Gingerbread cookies served with hot chocolate in a black mug, with a gingerbread man, tree, and star cookies decorated with simple white icing on a dark surface.
Serve gingerbread cookies with hot chocolate when you want the coziest cold-weather pairing: the warm drink softens the spice notes beautifully, and the simple decorated cookies still feel festive without turning the serving moment fussy.

Gingerbread Cookies Recipe FAQs

Are gingerbread cookies supposed to be soft or crisp?

They can be either, depending on the style. In this recipe, though, the goal is soft centers with lightly crisp edges. If you want them softer, roll a little thicker and pull them as soon as the centers look set. If you want them firmer, roll slightly thinner and bake a touch longer.

Do I need to chill cut gingerbread cookies before baking?

Not always, but it helps a lot when the dough has softened on the counter. If the cut-outs feel soft, sticky, or hard to transfer cleanly, chill them for 5 to 10 minutes before baking so the edges stay sharper.

Can I make gingerbread dough ahead of time?

Yes. In fact, gingerbread dough is one of the easiest cookie doughs to make ahead because chilling actually improves how it handles. A day or two in the fridge often makes rolling and cutting easier, not harder, as long as you let very firm dough sit briefly before rolling.

Can I freeze gingerbread cookies?

Yes. You can freeze the dough, unbaked cut-outs, or baked cookies. However, undecorated cookies usually freeze best if appearance matters most. Wrap them well, store them airtight, and let them come back to room temperature before decorating or serving so condensation does not ruin the finish.

What icing is best for gingerbread men?

Royal icing is best for detailed outlines, faces, buttons, and cleaner decorative lines. A simple glaze is better when you want a faster, easier finish. So the best choice really depends on whether you care more about precision or speed.

How thick should I roll gingerbread cookie dough?

About 1/4 inch is a strong starting point for softer cut-out cookies. Slightly thinner works if you want a firmer bite. If you are making gingerbread men for decorating, staying close to 1/4 inch usually gives the best balance of shape, softness, and sturdiness.

Can I decorate them the next day?

Yes. In many cases, decorating the next day is even easier because the cookies are fully cool and settled. That is especially helpful if you want cleaner royal icing lines or you are splitting the baking and decorating into two easier sessions.

↑ Back to top

Posted on 8 Comments

Cookie Pie Recipe: 10 Best Flavors, Fillings and Variations

Premium cookie pie recipe cover image showing a thick chocolate chip cookie pie with a sliced opening, gooey melted chocolate center, cream background, gold dessert fork, and text overlay reading Cookie Pie Recipe with bakery-style results.

A truly great cookie pie recipe gives you something a regular cookie often cannot: crisp edges, a thick soft center, generous slices, and that unmistakable contrast between structure and richness. It has the comfort of cookie dough, the shape and drama of a pie, and the kind of richness that feels just right for birthdays, dinner parties, holidays, or simply a weekend when you want dessert to feel a little more special.

That balance is a large part of the dessert’s appeal. It feels more substantial than a tray of cookies, yet it is far less fussy than a layered cake or a plated dessert with multiple components. With the base recipe in hand, you can move from a classic chocolate chip cookie pie to a stuffed Biscoff cookie pie, a rich Nutella cookie pie, a dark brookie pie, a shareable giant cookie pie, or even mini cookie pies without relearning the whole category from scratch.

This guide is meant to help you bake well, not merely skim the idea. You will find the practical details that matter in a dessert like this: pan guidance, filling amounts, dough feel, chilling time, doneness cues, texture goals, variation strategy, storage, and the most common mistakes that throw the result off. If rich chocolate bakes are already part of your comfort zone, these double chocolate chip cookies are a natural next stop. Likewise, if alternative flour blends matter in your kitchen, this guide to keto flour for baking will be useful when you reach the gluten free section later on.

Quick Cookie Pie Recipe Snapshot

Before getting into the full method, here is the quick-glance view so you can see the shape of the bake at once.

Cookie pie recipe at a glance graphic showing pan size, yield, prep time, chill time, bake time, cooling time, texture goal, best first bake, and best stuffed version beside a sliced cookie pie.
Before you get into the full method, this cookie pie recipe snapshot gives you the key setup at a glance: pan size, yield, timing, texture goal, and the best starting variation for the easiest first bake.

Yield and Pan Size

This base makes one deep 8-inch cookie pie, which usually gives you 8 to 10 slices depending on how generously you cut it. If you adapt the dough to a muffin tin, you can also turn it into about 10 to 12 mini cookie pies, although the exact number depends on the cavity size and how heavily you fill them.

For the main version, an 8-inch deep round cake tin or an 8-inch springform pan works best. Both give you enough depth for a properly soft center while still allowing the edges to brown cleanly. A shallower pan can still work, but the dessert will move closer to cookie cake territory and lose some of the thick, bakery-style feel that makes cookie pie so satisfying.

Timing, Bake Window, and Texture Goal

Plan for about 20 minutes of prep, 30 to 45 minutes of chilling, 32 to 40 minutes of baking, and at least 1 hour of cooling. In practice, that means a little over 2 hours from start to finish if you include the rest that allows the center to settle properly before slicing.

The texture target is simple, although it matters enormously: golden edges, a top that looks set rather than wet, and a center that still appears slightly softer than the outer ring. Once cooled, each slice should feel thick, rich, and tender without collapsing.

Best First Version to Bake

If this is your first time making cookie pie, start with Chocolate Chip Cookie Pie. It is the clearest version, the easiest to read in the oven, and the most forgiving in terms of structure and bake cues.

If a gooier, stuffed center is the main attraction, move next to Biscoff Cookie Pie. If your priority is darker, deeper chocolate, Brookie Pie is where the payoff becomes especially dramatic.

Also Read: Peach Cobbler with Canned Peaches (Dessert Recipe)

Why This Cookie Pie Recipe Works So Well

A strong cookie pie only becomes truly good when it balances three things at once: structure, softness, and flavor. The dough has to be strong enough to hold a thick center or a filling, yet still soft enough to feel richer and more indulgent than a standard cookie. At the same time, the dough itself has to feel complete in flavor. Otherwise, the dessert becomes overly dependent on the filling to carry the experience.

For that reason, this version leans on softened butter, brown sugar, enough flour for body, and a baking window that protects the middle from drying out. Brown sugar keeps the middle softer and more flavorful. Butter brings richness and helps the edges brown attractively. Flour gives the dough the strength it needs, although too much will quickly make the texture dull, heavy, or bready.

Just as importantly, this base is flexible. A plain chocolate chip cookie pie can use it almost exactly as written, while a stuffed Nutella cookie pie or Biscoff cookie pie only asks for a few handling changes rather than an entirely different formula. Once the structure makes sense, the whole category becomes much easier to navigate.

What Is Cookie Pie?

Cookie pie is a thick, sliceable dessert made by baking cookie dough in pie form. Sometimes that means a thick, deep dessert with a bottom shell, a filling, and a top layer of dough. At other times, it means a large, soft, pie-shaped cookie baked in a round tin and sliced at the table. Both styles sit comfortably under the cookie pie umbrella, although the texture and visual impact vary a little.

Part of its appeal is that it sits in a very pleasing middle ground. It is more substantial than ordinary cookies, less elaborate than cake, and easier to adapt than many classic desserts. As a result, it can feel just as natural at a celebration as it does on an ordinary evening when you simply want something warm, rich, and satisfying.

Comparison graphic explaining what cookie pie is, showing cookie pie versus cookie cake versus pie cookies, plus the two main cookie pie styles: classic cookie pie and stuffed cookie pie.
Cookie pie sits in a useful middle ground: deeper and softer than cookie cake, very different from pie-inspired cookies, and flexible enough to be made as either a classic dough-forward bake or a more dramatic stuffed version.

Cookie Pie vs Cookie Cake

A cookie cake is usually flatter and more focused on the top. Very often, it is decorated with frosting, writing, borders, or celebration-style details. Cookie pie, by contrast, is more interested in depth and internal texture. Even when the surface looks simple, the interior is where the payoff sits.

That is especially true in a giant cookie pie. Even though the format is large and shareable, the goal is still a soft center and thick slice rather than a broad flat cookie with decorations.

Cookie Pie vs Pie Cookies

These terms sound close, but they refer to different ideas. Pie cookies usually means cookies inspired by pie flavors, such as apple pie cookies or pecan pie cookies. A true cookie pie, on the other hand, is built from cookie dough and baked as one sliceable dessert.

That distinction matters because it changes both the method and the expectation. This guide is about the real cookie pie format: dough-forward, thick, sliceable, and centered on the texture of a rich baked middle.

The Two Main Cookie Pie Styles

Before you begin, it helps to separate the two main styles.

The first is the classic style, where the dough itself is the main event. Think of a deep chocolate chip cookie pie with a rich center and no dramatic stuffed filling. The second is the stuffed style, where the dough forms a shell and a separate middle goes inside. This is the route for Biscoff cookie pie, Nutella cookie pie, and some brownie-based versions.

Both are excellent, but they reward slightly different approaches. The classic version is easier to read and easier to learn on. The stuffed version offers a more dramatic slice, although it asks for better chilling, a more controlled filling border, and a little more patience.

Also Read: Avocado Chocolate Mousse Recipe

How to Choose the Best Cookie Pie Version for Your Needs

One of the nicest things about this dessert is that it suits very different dessert moods without requiring a completely new skill set. Even so, choosing the right version at the beginning makes the process smoother and the final result more satisfying.

Not every cookie pie is aiming for the same result. This quick chooser helps you match the version to the kind of bake you want most, whether that means an easier first attempt, a gooier center, deeper chocolate flavor, or a format that is easier to share.

Best Cookie Pie for First-Time Bakers

For the easiest place to begin, bake Chocolate Chip Cookie Pie. It asks the least from the baker, needs no separate filling disc, and gives you the best feel for how the dough should behave. The doneness cues are also easier to read because you are not evaluating a stuffed center at the same time.

Best Cookie Pie for a Gooey Center

For a dramatic, visibly gooey middle, Biscoff Cookie Pie and Nutella Cookie Pie are the strongest options. “Both give you that dramatic cross-section where the center looks noticeably different from the shell.

Biscoff is slightly easier to control because it stays thicker when chilled. Nutella is softer and more molten, which can be wonderful, although it also means the structure needs a little more care.

Best Cookie Pie for Chocolate Lovers

For a deeper chocolate direction, you have two especially strong choices. Brookie Pie gives you the contrast of cookie and brownie in the same slice, which makes the texture more layered and the chocolate flavor more varied.

Brownie Cookie Pie, by comparison, pushes the whole dessert in one darker, denser direction. It feels more unified, more intense, and slightly more serious in flavor.

Best Cookie Pie for Sharing, Gifting, or Parties

When ease of serving matters most, go with Mini Cookie Pies or Giant Cookie Pie. Mini versions are ideal for dessert trays, edible gifts, and testing multiple fillings in one batch. Giant cookie pie, meanwhile, is excellent when you want a relaxed centerpiece dessert that still feels generous once it lands on the table.

Also Read: Falafel Recipe: Crispy Homemade, Air Fryer and Baked Falafel

Best Base Cookie Pie Recipe

This base holds the whole post together. Once this version works for you, the rest of the variations become much easier because you are adjusting a structure you already understand rather than improvising through a completely different dessert every time.

What makes this version dependable is that it aims for the texture most people actually want: lightly crisp edges, a tender-set middle, enough depth to feel generous when sliced, and enough strength to support fillings without turning dense or cakey.

Recipe card for the best base cookie pie recipe showing an 8-inch deep cookie pie with a soft center, key timing details, ingredient list, and short method steps.
This is the base cookie pie recipe the rest of the post builds from. From here, it becomes much easier to branch into stuffed, darker, mini, or party-style variations without losing the texture that makes cookie pie worth baking in the first place.

At a Glance

  • Yield: 1 deep 8-inch cookie pie, about 8 to 10 slices
  • Best pan: 8-inch deep round cake tin or 8-inch springform pan
  • Prep time: about 20 minutes
  • Chill time: 30 to 45 minutes
  • Bake time: 32 to 40 minutes
  • Cooling time: at least 1 hour
  • Texture goal: golden edges, set top, soft center
  • Best first version: Chocolate Chip Cookie Pie
  • Best stuffed version: Biscoff Cookie Pie

Yield, Pan, and Texture Expectations

This recipe makes one deep 8-inch cookie pie with 8 to 10 slices. The ideal result is a dessert that feels lightly crisp at the outer edge, tender within, and thick through the middle without ever tasting raw.

For the best result, use an 8-inch deep round tin or springform pan. A shallower pan can still work, but the pie will bake flatter and edge closer to cookie cake territory. A deeper pan gives the dough enough height to stay tender through the middle while still browning well around the edges.

Ingredients

You will need:

  • 225 g unsalted butter, softened
  • 180 g light brown sugar
  • 90 g caster sugar
  • 2 large eggs
  • 2 teaspoons vanilla extract
  • 360 g all-purpose flour
  • 1 teaspoon baking soda
  • 1 teaspoon fine salt
  • 250 g chocolate chips or chopped chocolate

Optional, depending on the version:

  • 180 to 220 g filling such as Biscoff or Nutella
  • extra chocolate chunks for the top
  • white chocolate chips
  • chopped hazelnuts
  • brownie filling
  • cream cheese-style filling

Equipment

Keep the setup straightforward:

  • large mixing bowl
  • medium bowl
  • hand mixer or stand mixer
  • spatula
  • digital scale
  • 8-inch deep round tin or springform pan
  • parchment paper
  • cooling rack

A digital scale helps more than many bakers expect here, because even a modest excess of flour can make the center heavier and drier than intended.

Also Read: Mango Margarita Recipe (Frozen or On the Rocks)

Ingredient Notes That Matter Most

A few ingredients shape this dessert more noticeably than they would in an ordinary batch of cookies. Because the dough is thicker, deeper, and sometimes asked to hold a filling, small ingredient choices show up clearly in the final texture.

Cookie pie ingredients guide showing softened butter, brown sugar and white sugar, eggs, flour, and chilled filling or chilling as key factors that affect structure, softness, and flavor.
A great cookie pie starts feeling right long before it goes into the oven. Softened butter, the right sugar balance, enough structure from the eggs and flour, and a well-chilled filling all work together to give you a softer center, better browning, and cleaner slices.

Butter

Use softened butter, not melted butter. Softened butter creams properly with the sugars and helps the dough keep its structure. Melted butter makes the mixture looser, greasier, and harder to control, especially in stuffed versions.

You want butter that yields when pressed but is not shiny or oily. If it is too cold, it will not cream well. If it is too warm, the dough will lose some of its shape before it ever reaches the oven.

Brown Sugar and White Sugar

Brown sugar is one of the main reasons the center stays soft and chewy. It brings moisture, depth, and that darker caramel-like cookie flavor that makes a thick slice feel rich rather than flat.

White sugar still matters. It sharpens the sweetness, supports browning, and helps the outer structure bake more cleanly. Using both gives you a much better balance than relying on only one.

Eggs

Eggs do more than bind the dough. They help the pie set through the center, support sliceability, and add richness. In a dessert like this, where the center needs to stay soft without collapsing, the eggs do a great deal of structural work.

That is why it is worth using large eggs as written. Smaller eggs can leave the dough a little tighter, while oversize eggs can soften it more than intended.

Flour

Flour provides the body that lets the pie stay thick without sinking. Even so, too much flour will quickly push the texture toward dry, dull, and overly bready.

For that reason, weighing the flour is one of the simplest ways to improve your result. If you want a reliable refresher, King Arthur’s guide on how to measure flour correctly is worth reading.

Baking Soda and Salt

Baking soda gives the dough lift and helps it bake with tenderness rather than staying heavy all the way through. Salt is just as important. In a rich dessert like this, it keeps the sweetness from tasting flat and gives the chocolate, brown sugar, and fillings more definition.

Chocolate

Chocolate is not just a mix-in here. It helps shape the eating experience of the whole slice. A mix of chopped chocolate and chips usually gives a better result than chips alone, because chopped chocolate melts into softer streaks while chips stay more distinct.

That contrast makes the finished pie feel more layered and more polished once sliced.

Fillings

Stuffed versions work best when the filling is thick and cold before assembly. Biscoff, Nutella, brownie filling, and cream cheese-style centers all behave better when chilled first. Warm or loose fillings are far more likely to spread into the shell and blur the middle.

Chilling

Chilling is not optional if clean structure is the goal. It firms the dough, helps the shell hold its shape, slows spreading, and makes stuffed versions noticeably easier to bake well.

In plain versions, chilling improves control. In stuffed versions, it often makes the difference between a distinct center and a muddy one.

Also Read: Sourdough Pizza Dough Recipe (Crispy Crust & Easy Pizza Base)

How to Make Cookie Pie Step by Step

The method is straightforward, but the feel of the dough matters just as much as the order of the steps does.

Step 1: Cream the Butter and Sugars

Beat the softened butter, brown sugar, and caster sugar together until the mixture looks creamy and slightly lighter. You do not need huge volume here. You are looking for smoothness, evenness, and a texture that no longer looks grainy or uneven.

Step 2: Add the Eggs and Vanilla

Add the eggs one at a time, mixing well after each addition. Then stir in the vanilla. At this stage, the mixture should still look thick and cohesive rather than loose or split.

Step 3: Mix the Dry Ingredients

In a separate bowl, whisk together the flour, baking soda, and salt. This may seem like a minor step, but it helps the leavening and seasoning distribute more evenly through the dough.

Step 4: Bring the Dough Together

Add the dry ingredients to the butter mixture and mix just until combined. Once the flour disappears, fold in the chocolate. The finished dough should feel thick and scoopable, not runny and not cake-like.

Step 5: Prepare the Pan

Line the base of the pan with parchment and lightly grease the sides. This small piece of preparation makes it much easier to release the finished pie without tearing the edges or losing the clean round shape.

Step-by-step cookie pie assembly guide showing how to prepare the pan, press the dough shell, add filling in the center, and top, seal, and chill the cookie pie before baking.
Assembling cookie pie becomes much easier once you can see the order clearly: line the pan, press the dough into a shell, keep the filling centered, then top and chill the pie before baking.

Step 6: Build the Shell

Divide the dough so that about 60 percent is used for the base and sides, while the remaining 40 percent becomes the top. Press the larger portion into the base and slightly up the sides of the pan, keeping the thickness as even as you can.

That evenness matters more than it may seem at first. If the shell is thick in some places and thin in others, the bake can turn uneven once the filling or top layer goes in.

Step 7: Add the Filling if Using

If you are making a stuffed version, place the filling in the center and leave a border of about 1.5 cm around the edge. This gap helps contain the middle and keeps the filling from leaking outward during baking.

As a guide, use around 180 to 200 g for Biscoff or Nutella, about 150 g for brownie filling, or around 180 g for a cream cheese-style center.

Step 8: Add the Top

Flatten the remaining dough in portions and place it over the center. Seal the edges gently. Do not mash the top down hard. You want it enclosed, but still loose enough to bake tenderly rather than compactly.

Cookie pie step-by-step guide showing how long to chill before baking, bake at 175C 350F for 32 to 40 minutes, and cool for 1 to 2 hours before slicing for cleaner structure.
Once the cookie pie is assembled, the last part is mostly about patience. Chill it first so the dough holds its shape, bake until the edges are golden and the top is set, then cool fully before slicing so the center can settle and the wedges hold more cleanly.

Step 9: Chill the Assembled Pie

Chill the pie for 30 to 45 minutes before baking. The dough should feel cooler, firmer, and less sticky at the surface. That is a better signal than the clock alone, because room temperature changes how quickly the pie firms up.

Step 10: Bake

Bake at 175°C / 350°F until the edges are golden and the top looks set. Most versions take 32 to 40 minutes in an 8-inch deep pan.

If the top browns too quickly while the center still needs time, loosely tent with foil and continue baking.

Step 11: Cool Properly

Let the pie cool in the pan for at least 1 hour before slicing. For the cleanest and most stable slices, cool it for closer to 2 hours. Warm slices will always be looser and messier, especially in filled versions, so do not judge the final texture too early.

Also Read: Balti Paneer Gravy (Restaurant-Style, Creamy + Bold Recipe)

How to Know When Cookie Pie Is Done

This is one of the most important parts of the entire bake, because the line between soft and underbaked can feel confusing at first. The aim is not a dry, fully firm middle straight from the oven. Instead, you want a pie that looks set around the edges and on top while the middle still looks a little more relaxed and finishes settling as it cools.

A good cookie pie should not look wet or liquid in the center. At the same time, it should not look hard and fully dry all the way across the surface. The best way to think about it is this: the pie should look baked rather than raw, while still staying tender through the middle.

Cookie pie doneness guide showing four stages: perfectly baked, slightly underbaked, underdone, and overbaked, with visual examples of golden edges, set top, soft center, wet middle, and dark edges.
Because the line between soft and underbaked can be easy to misread, this visual guide shows what cookie pie should look like at each stage so you can pull it from the oven with more confidence.

Visual Signs to Trust

  • the edges look set and lightly golden
  • the top no longer looks glossy-wet
  • the center still looks slightly softer than the outer ring
  • the pie gives a little when nudged, but does not ripple like batter
  • the whole surface looks settled rather than shiny and loose

Properly Baked

Look for edges that are clearly golden and set, a top that no longer looks wet, and a center that yields slightly when nudged but still holds its shape. The pie should continue setting as it cools.

Slightly Underbaked but Still Fine

If the middle feels looser than expected, yet the edges are done and the top is set, do not panic. Many cookie pies finish settling during cooling, especially when the filling or chocolate content is high.

Truly Underdone

If the center still looks glossy and loose, sinks dramatically, or spills like batter when sliced after proper cooling, it needed more baking time. Too much filling can also cause this.

Overbaked

If the top looks dry all over, the edges darken too far, and the middle loses its soft character after cooling, the pie has gone too far. It may still taste good, but it will lose the texture that makes cookie pie special.

Texture Guide

  • Gooey: best for stuffed versions, very soft center, more dramatic slices
  • Soft-set: ideal for classic chocolate chip cookie pie
  • Fully set: firmer slices, easier for transport, less molten character

Most people are happiest somewhere between gooey and just set.

Also Read: Mojito Recipe (Classic) + Ratios, Pitcher, Mocktail & Easy Variations

Chocolate Chip Cookie Pie

If you want the clearest and most reliable version of the whole format, chocolate chip cookie pie is it. This is the variation that most clearly shows what a great slice should feel like: thick, buttery, soft through the middle, and generous with chocolate without needing a separate stuffed filling to make its point.

Because it uses the base dough almost exactly as written, it is also the easiest place to build confidence. You are not judging an extra center, managing a filling border, or wondering whether the pie is done because of two different textures. You are simply learning how the dough bakes and what the pie should look like when it is ready to come out.

Recipe card for chocolate chip cookie pie showing a thick soft-centered slice, quick timing details, best chocolate mix, and simple step-by-step guidance.
Chocolate chip cookie pie is the easiest version to learn on because the dough itself does the work. This recipe card keeps the process simple, shows the chocolate balance that gives the best texture contrast, and helps you focus on the soft center without the extra variable of a stuffed filling.

Best Chocolate Balance

A particularly good mix is 150 g dark or semi-sweet chopped chocolate plus 100 g milk chocolate chips. That combination gives you contrast in both sweetness and texture. Chopped dark chocolate melts into softer streaks, while the milk chocolate chips stay more distinct.

If you prefer, you can also lean toward dark and white chocolate for stronger visual contrast. Either way, using more than one kind of chocolate makes the final slice feel more layered.

Easiest Way to Get It Right

Do not overcomplicate this first version. Skip the filling, keep the dough thickness even, chill properly, and trust the soft-center bake cue. That is enough to give you a dependable result.

If you want to push the chocolate flavor slightly further without changing the structure, a drizzle of homemade chocolate syrup over a warm slice can be lovely.

Also Read: Paloma Recipe: 12 Paloma Cocktail Drinks

More Cookie Pie Variations Worth Baking

After the base clicks into place, the fun part begins. This is where the format starts showing how flexible it really is.

Best cookie pie variations guide showing chocolate chip cookie pie, Biscoff cookie pie, Nutella cookie pie, brookie pie, brownie cookie pie, mini cookie pies, giant cookie pie, vegan cookie pie, and gluten free cookie pie.
With the base dough in place, you can take the same cookie pie recipe in several directions. Use this variation guide to compare classic, stuffed, mini, giant, vegan, and gluten free options before choosing the version that best matches the texture, flavor, and baking style you want.

Biscoff Cookie Pie

Biscoff cookie pie is one of the best stuffed versions because the filling is flavorful, thick, and comparatively stable. Freeze or chill the Biscoff spread in a disc before assembly if you want the cleanest center and the most obvious stuffed effect in the final slice.

Recipe card for Biscoff cookie pie showing a thick stuffed slice with a caramelized cookie butter center, quick timing details, filling tips, and simple step-by-step guidance.
If you want to try a stuffed cookie pie without starting with the trickiest version, Biscoff is usually the smartest place to begin. Its thicker filling is easier to control, so you get a cleaner center, a more defined shell, and a bakery-style slice without fighting a filling that runs too quickly.

The overall result is caramelised, spiced, warm, and deeply indulgent. For a first filled version, this is usually the smartest one to choose.

Nutella Cookie Pie

Nutella cookie pie is looser and more dramatic. The hazelnut-chocolate center melts more easily than Biscoff, so chilling matters even more here.

Recipe card for Nutella cookie pie showing a thick stuffed slice with a soft chocolate-hazelnut center, quick timing details, handling tips, and simple step-by-step guidance.
Nutella cookie pie is softer and more molten than Biscoff, so this version rewards a little more care. Chilling the center well and keeping it away from the edges helps you get the dramatic middle you want without letting the filling run too far as the pie bakes.

For a richer finish, add a few chopped hazelnuts to the dough or scatter them over the top. Just keep the filling away from the edges, because Nutella is quick to travel once warm.

Brookie Pie

Brookie pie gives you the appeal of both desserts at once. Part of the pie stays firmly in the cookie world, while the center or one layer leans brownie. That contrast is what makes each slice especially memorable.

Recipe card for brookie pie showing a thick slice with cookie edges and a darker brownie-style center, plus quick timing details, baking cues, and simple method steps.
Brookie pie works best when the contrast stays clear: cookie around the edges, brownie depth through the middle, and a center that looks soft-set rather than fully firm. This version is richest when you let the brownie layer stay dense and fudgy without overbaking the whole pie.

Because brownie filling is denser, this version benefits from careful baking. The edges can be done before the very middle looks fully ready, so trust the just-set cue rather than waiting for a completely firm middle.

Brownie Cookie Pie

Brownie cookie pie is darker and more unified than brookie pie. Instead of building contrast between two layers, it pushes the whole dessert in one deeper chocolate direction.

Recipe card for brownie cookie pie showing a dark, fudgy chocolate cookie pie slice with base-recipe adaptation notes, texture goals, timing details, and simple step-by-step guidance.
Brownie cookie pie works best when you treat it as a darker adaptation of the base recipe rather than a stuffed variation. The aim here is a deeper chocolate crumb, a fudgier middle, and enough structure at the edge to keep the slice rich without turning dry.

To adapt the base, reduce the flour slightly to about 330 g, add 30 g cocoa powder, increase the dark chocolate, and optionally include 1 teaspoon espresso powder. The finished pie should feel chewy at the edge and almost fudgy in the middle. Because cocoa-heavy dough dries out quickly once overbaked, start checking early.

Mini Cookie Pies

Mini cookie pies are one of the most practical adaptations in the entire format. Use a muffin tin, press dough into each cavity, add a spoonful of filling or extra chocolate, top with more dough, and chill briefly before baking.

Recipe card for mini cookie pies showing several small cookie pies baked in a muffin tin, with yield, timing, mini format tips, and step-by-step assembly guidance.
Mini cookie pies are one of the easiest ways to turn the same idea into something more flexible. They bake faster, portion more neatly, and make it much easier to serve a crowd, test different fillings, or build a dessert tray without committing to one large pie.

They usually bake in about 14 to 18 minutes, so start checking early. These are especially useful for parties, gifting, or trying several fillings from one batch. They also sit very nicely alongside softer desserts such as no-bake banana pudding if you are building a mixed dessert table.

Giant Cookie Pie

A giant cookie pie is ideal for a relaxed, shareable centrepiece dessert. Use a 9-inch or 10-inch round cake pan, but keep enough dough depth that the center still stays soft. If you spread the dough too thin, the dessert will drift toward cookie cake rather than a proper pie-style slice.

Recipe card for giant cookie pie showing a thick shareable cookie pie with pan size guidance, slicing notes, and texture tips.
A giant cookie pie works best when it still feels like cookie pie in the middle rather than drifting into cookie cake. Keeping enough dough depth is what gives you those thicker, softer wedges that feel generous when sliced and much more satisfying to share at the table.

Chocolate chip works especially well here, although a light Nutella swirl or mixed chocolate chunks can also be lovely.

Vegan Cookie Pie

A vegan cookie pie works best with a firm plant-based baking block, flax eggs, and dairy-free chocolate. If you need a reference for the egg swap, this guide on how to make a flax egg is helpful.

Recipe card for vegan cookie pie showing a dairy-free, egg-free cookie pie with a lifted slice, vegan adaptation tips, timing details, texture goal, and simple step-by-step guidance.
A good vegan cookie pie should still feel like real cookie pie when you slice into it. The key is choosing swaps that protect structure as well as richness, so the finished pie stays thick, soft in the center, and satisfying enough that it never feels like a compromise version.

Start with a plain chocolate chip version before moving into heavier fillings. That makes the adapted dough easier to judge on its own.

Gluten Free Cookie Pie

A gluten free cookie pie is easiest with a dependable cup-for-cup baking blend and a lighter first filling, or no filling at all. Extra chilling also helps if the dough feels softer than usual.

Recipe card for gluten free cookie pie showing a thick soft-centered slice with cup-for-cup flour blend guidance, timing details, texture goal, and simple step-by-step instructions.
Gluten free cookie pie becomes much easier once the structure feels predictable. A dependable cup-for-cup blend, a little extra chilling when the dough runs soft, and a lighter first version all make it easier to get a slice that holds cleanly without losing the soft center that makes cookie pie feel worth baking.

Once the structure feels dependable, stuffed versions become much easier to attempt with confidence.

Also Read: Air Fryer Donuts Recipe (2 Ways): Glazed Homemade Donuts + Biscuit Donuts

Best Cookie Pie Fillings and What Each One Does

Choose spread fillings when you want a gooey, bakery-style center, chunky mix-ins when you want easier structure, and brownie or cream cheese-style fillings only when you want a more dramatic texture shift.

That simple distinction makes the whole category easier to navigate. A strong dough can handle several fillings, but the best choice depends on how you want the slice to feel once cut.

Spread fillings such as Biscoff, Nutella, thick peanut butter, and chocolate hazelnut spread give you the most obvious stuffed-center effect. They are especially useful in deep cookie pies and mini versions, provided they are chilled first.

Chunkier mix-ins are easier to control. Dark chocolate chunks, milk chocolate chips, chopped hazelnuts, and a modest amount of biscuit crumbs work especially well in classic and giant versions because they add interest without changing the overall structure.

Best cookie pie fillings guide showing Biscoff, Nutella, brownie filling, cream cheese-style filling, and extra chocolate, with visual comparisons for texture, flavor, and structure.
Different fillings change cookie pie more than most bakers expect. This guide helps you compare which centers give you the gooey, rich, creamy, or more structured result you want before you commit to one version.

Then there are the more specific fillings, such as brownie mixture for brookie pie or a cream cheese-style center. These can be excellent, but they change the texture more dramatically, so they need a steadier hand and a little more restraint.

Biscoff

  • Flavor payoff: caramelized, spiced, warm
  • Texture behavior: thick and stable when chilled
  • Difficulty: easier
  • Best use: gooey center with reliable control

Nutella

  • Flavor payoff: rich hazelnut chocolate
  • Texture behavior: softer, melts faster
  • Difficulty: moderate
  • Best use: indulgent dessert-style center

Brownie Layer or Brownie Filling

  • Flavor payoff: deep chocolate
  • Texture behavior: dense and fudgy
  • Difficulty: moderate
  • Best use: brookie pie or brownie cookie pie

Cream Cheese-Style Filling

  • Flavor payoff: creamy, tangy, balanced
  • Texture behavior: softer and lighter
  • Difficulty: moderate
  • Best use: cheesecake-leaning variations

Extra Chocolate Only

  • Flavor payoff: classic and dependable
  • Texture behavior: no separate center, just richer dough throughout
  • Difficulty: easiest
  • Best use: beginner-friendly baking and cleaner slicing

A good rule is simple: if the filling feels loose at room temperature, it probably needs more chilling before it goes into the pie.

Also Read: Tapas Recipe With a Twist: 5 Indian-Inspired Small Plates

Tips Before You Bake Cookie Pie

A few habits make this dessert noticeably easier to get right. None of them are difficult, but together they improve the final result noticeably.

The Most Helpful Things to Remember

Keep these points in mind:

  • use softened butter, not melted
  • weigh the flour if possible
  • start checking before you think you need to
  • chill the assembled pie before baking
  • use a deeper pan for stuffed versions
  • keep the filling away from the edges
  • do not overmix after adding flour
  • do not overfill just because it looks tempting
  • cool for 1 hour minimum, 2 hours for cleaner slices
  • use a metal pan when you want better structure control

These are small decisions, yet together they make the difference between a pie that merely tastes good and one that slices, bakes, and cools the way it should.

Where Bakers Usually Go Wrong

Most problems come from excess rather than lack. Too much enthusiasm with the filling makes the center unstable. Too much baking dries the pie. And then too much flour makes the crumb heavy.

By contrast, a slightly softer center is often correct and will settle as the pie cools.

Also Read: Air Fryer Salmon Recipe (Time, Temp, and Tips for Perfect Fillets)

Common Cookie Pie Mistakes and How to Fix Them

Even a strong method can go off track if the handling slips. Fortunately, most problems are easy to read once you know what caused them.

Cookie pie troubleshooting guide showing common problems including a sunken pie, leaking filling, dry texture, and a middle that seems raw, with quick causes to check for each issue.
Even when the dough is right, cookie pie can still go off track at the baking stage. Use these quick checkpoints to work out whether the problem came from warmth, filling placement, baking time, or structure, so the next pie comes out closer to the texture you wanted.

Sinking, Leaking, and Dryness

If the pie sinks heavily, the usual reasons are too much filling, not enough chilling, uneven shell thickness, or underbaking. If the filling leaks, it was probably too close to the edge, too warm, or not sealed well enough under the top dough. In both cases, the fix is usually simple: chill more, leave a cleaner border, and keep the shell more even.

If the pie turns out dry, the cause is usually too much flour, too much baking time, or a pan that spreads the dough too thin. In that case, weigh the flour, start checking earlier, and use a deeper pan next time.

The pie sank

This usually means the dough or filling was too warm, or the center needed a little longer in the oven. Chill more thoroughly and check doneness more carefully next time.

The filling leaked

This almost always comes down to one of three things: the filling sat too close to the edges, the filling was too warm, or the top was not sealed properly. Keep the center contained and leave a visible dough border around it.

The pie turned dry

This usually means it baked too long, the pan was too wide, or the flour was slightly heavy. Check earlier and keep the bake deeper rather than flatter whenever possible.

Raw Middle, Overbaked Minis, and Crumbly Gluten Free Versions

A tender center is not automatically raw. If the middle is clearly shiny and wet, it needs more time. If it is simply soft but structured, it may just need cooling.

Mini cookie pies, meanwhile, often overbake because bakers leave them in on full-pie timing. Start checking them around 14 minutes and let carryover heat do the rest.

For gluten free cookie pie, crumbliness usually comes from the flour blend, not enough chilling, or trying an ambitious filling too early. Start with the plain chocolate chip format first, then build outward when the dough starts to feel reliable.

The middle seemed raw

A proper center should be soft, but not liquid. If it stayed truly loose after cooling, it either needed more time or had too much filling for the size of pan.

The top browned too fast

Tent loosely with foil and keep baking. This is especially common in stuffed versions.

The dough was too soft to shape

Chill it briefly. Ten to fifteen minutes can make a surprising difference.

Mini cookie pies overbaked

Check them early. The smaller format gives you much less margin for error than a full-size pie.

Gluten free cookie pie crumbled

Use a better all-purpose blend, chill thoroughly, and do not slice before it has fully cooled.

Also Read: Masterclass in Chai: How to Make the Perfect Masala Chai (Recipe)

How to Make Cookie Pie Ahead of Time

One of the most practical things about cookie pie is how easily you can spread the work out. The dough can be made a day ahead and chilled. In fact, a short rest often improves both flavor and handling.

You can also assemble the pie ahead and refrigerate it before baking. If you do that, remember that a colder pie may need a little extra time in the oven. Stuffed pies can be frozen before baking as well, which often helps them hold their shape more neatly once the heat hits the filling.

That flexibility makes this dessert especially useful for parties, birthdays, and weekends when you want the dessert mostly ready before guests arrive.

Also Read: Pork Tenderloin in Oven (Juicy, Easy, 350°F or 400°F) Recipe

How to Store, Freeze, and Reheat Cookie Pie

Cookie pie stores well, which is one of the reasons it deserves a place in a regular baking rotation. Plain versions such as chocolate chip cookie pie, brownie cookie pie, and giant cookie pie can usually stay tightly covered at room temperature for up to 2 days, provided the filling is stable.

Cookie pie storage guide showing how to keep plain cookie pie at room temperature, refrigerate stuffed cookie pie, freeze dough or slices, and reheat gently without drying the center.
Cookie pie keeps well, but the best storage method depends on the filling. Use this guide to decide when to keep it covered at room temperature, when to refrigerate or freeze it, and how to warm it gently without losing the soft center.

Stuffed versions such as Biscoff cookie pie, Nutella cookie pie, or anything with a cream cheese-style center are better kept in the fridge. Even then, they usually taste best once brought closer to room temperature or gently warmed before serving.

The dough can be frozen, the assembled unbaked pie can be frozen, and baked slices can be frozen too. When reheating, go gently. The aim is to warm the middle and bring back some of the chocolate melt, not rebake the dessert. For broader leftover guidance, Foodsafety.gov’s food safety guidance for leftovers is a practical reference.

Also Read: How to Make a Flax Egg (Recipe & Ratio for Vegan Baking)

What to Serve with Cookie Pie

Because cookie pie is rich, the best pairings are usually the ones that cool it down or bring in contrast. Vanilla ice cream is the obvious favorite for a reason, although softly whipped cream, cold milk, iced coffee, or even a latte can all work beautifully.

Serving guide for cookie pie showing three ideas: a warm cookie pie slice with ice cream, a plain slice with coffee or milk, and dessert table pairings with softer sweet treats.
Cookie pie is richest at the center, so the best pairings either cool it down or balance it with contrast. Use this guide when deciding whether to serve it warm with ice cream, simply with coffee or milk, or as part of a fuller dessert spread.

If you are building a fuller dessert table, it helps to pair it with something texturally different. No-bake banana pudding gives you a softer spoon dessert, while avocado chocolate mousse offers a colder, smoother chocolate contrast. For a more casual party setup, even a bright party punch with pineapple juice can balance the richness surprisingly well.

Which Cookie Pie Should You Bake First?

If you bake only one version first, make it Chocolate Chip Cookie Pie. It teaches you the structure most clearly, gives you the easiest bake cues to read, and makes every later variation easier to handle.

If you want the most obviously bakery-style stuffed result, bake Biscoff Cookie Pie. If deep chocolate is the whole point, choose Brookie Pie or Brownie Cookie Pie. For gifting and sharing, go with Mini Cookie Pies. For a centerpiece, bake a Giant Cookie Pie.

Meanwhile, if you are working around dietary needs, start with a simple Vegan Cookie Pie or Gluten Free Cookie Pie before moving into heavier filled versions. That way, you learn the behavior of the adapted dough first instead of managing too many variables at once.

Also Read: Croquettes Recipe: One Master Method + 10 Popular Variations

Final Thoughts on This Cookie Pie Recipe

The best part of learning one strong cookie pie method is that it gives you much more than a single dessert recipe. It gives you a format you can return to and reshape depending on the mood, the season, the occasion, or the ingredients already in your kitchen.

On one day, it can be a warm chocolate chip cookie pie served with melting vanilla ice cream. On another, it can become a thick Biscoff cookie pie, a softer Nutella cookie pie, a rich brookie pie, or a shareable giant cookie pie cut into generous wedges. When you know how the dough should feel, how the middle should look, and when the bake is done, the whole category opens up in a way that feels genuinely practical rather than overwhelming.

Also Read: Ravioli Recipe Reinvented: 5 Indian-Inspired Twists on the Italian Classic

FAQs

1. What is a cookie pie recipe?

A cookie pie recipe is a dessert made by baking cookie dough in pie form, usually in a deep round pan so the center stays thicker and softer than a standard cookie. Unlike a cookie cake, it is less focused on decoration and more focused on texture.

2. Is cookie pie the same as cookie cake?

Not exactly. A cookie pie is usually deeper, softer in the center, and more likely to include a filling or a thicker middle. A cookie cake, by comparison, is often flatter and more surface-focused.

3. What is the difference between cookie pie and pie cookies?

Pie cookies usually means cookies inspired by pie flavors, such as apple pie cookies or pecan pie cookies. Cookie pie, by contrast, is built from cookie dough and baked as one large dessert.

4. What is the best cookie pie version for beginners?

For most bakers, the easiest starting point is chocolate chip cookie pie. It gives you the clearest feel for how the dough should look, how the center should bake, and when the pie is ready to come out of the oven.

5. How do I know when cookie pie is done?

It is usually done when the edges are set, the top no longer looks wet, and the center still appears slightly soft. If the middle looks shiny, loose, or obviously raw, it needs more time.

6. Should cookie pie be gooey in the middle?

Yes, but only to a point. Ideally, the center should feel soft, rich, and slightly gooey after cooling. It should not be wet or underbaked.

7. What pan is best for cookie pie?

An 8-inch deep round cake tin or an 8-inch springform pan is usually the best choice. That depth helps the dessert keep its soft center without spreading too thin.

8. Can I make cookie pie in a pie dish?

Yes, you can. However, the result will usually be shallower than a deep-pan version, so the texture may feel closer to a thick cookie than a stuffed bakery-style slice.

9. Can I make mini cookie pies instead of one large pie?

Absolutely. Mini cookie pies are one of the easiest ways to turn the same base dough into something more party-friendly. A muffin tin usually works best.

10. How long do mini cookie pies take to bake?

Most mini cookie pies bake in about 14 to 18 minutes, depending on the tin, the dough depth, and whether they include filling.

11. What are the best cookie pie fillings?

If you want a bakery-style stuffed center, Biscoff and Nutella are excellent options. If you want a more classic result, mixed chocolate chunks, chips, or chopped nuts are often better choices. Brownie filling also works beautifully for brookie pie.

12. How much filling should I use?

Generally, around 180 to 200 grams of spread-style filling is enough for an 8-inch deep pie. That gives you a visible, rich center without overwhelming the structure.

13. Why did my cookie pie sink in the middle?

A little sinking is normal, especially in filled versions. A major collapse usually points to too much filling, not enough chilling, uneven dough thickness, or underbaking.

14. Why did my cookie pie turn out dry?

Usually, dryness comes from too much flour, too much baking time, or using a pan that spreads the dough too thin.

15. Why did the filling leak out?

Filling tends to leak when it is too close to the edge, too warm during assembly, or not properly sealed under the top layer of dough.

16. Can I freeze cookie pie dough?

Yes. You can freeze the dough before assembly, freeze shaped dough for mini cookie pies, or even freeze the fully assembled unbaked pie. Colder dough often gives you cleaner structure, especially in stuffed versions.

Posted on 7 Comments

Sweetened Condensed Milk Fudge: 10 Easy Recipes

Dark marble food photo of sweetened condensed milk fudge in a parchment-lined tin, cut into squares, with “Base + 10 Variations” text overlay and MasalaMonk.com footer.

Some desserts are worth the effort. Fudge is worth it precisely because it doesn’t demand much effort at all—at least not in the versions you’ll make here. With fudge made from sweetened condensed milk, you get a shortcut that still tastes rich and finished: glossy, sliceable, and the kind of treat that looks at home on a festive platter or tucked into a small gift box.

Better yet, one dependable approach can branch into a whole set of flavors. That’s why this post is built like a guide you’ll actually use: a simple master method, then 10 full recipes that share the same rhythm. As you move through them, you’ll see the same ideas repeating in fresh ways—chocolate and sweetened condensed milk, peanut butter and condensed milk, cocoa powder structure, white chocolate as a firming backbone, and marshmallow crème for that plush “fantasy” bite.

Although the recipes vary, the goal stays the same: a smooth set, clean cuts, and a texture that feels creamy rather than crumbly or gritty. So, before we dive into the flavors, let’s set the stage properly—because a few small choices at the start make every pan easier to nail.


The simple rule that makes condensed milk fudge feel “no-fail”

Fudge is one of those candies where texture is everything. When it’s right, it’s firm but tender, dense yet smooth. When it’s off, it can turn sticky-soft, oddly greasy, or grainy in a way that makes you wish you’d just eaten a spoonful straight from the saucepan and called it a day.

In the condensed milk style, the easiest way to stay on the “right” side of that line is to remember one practical rule:

Sweetened condensed milk needs a strong setting partner.

Most often, that partner is melted chocolate (dark, milk, or white). Sometimes it’s a mix of cocoa powder and sugar for structure. In the marshmallow crème version, the fluff helps the mixture hold together while keeping the bite soft and cohesive. However it shows up, the setting partner is what turns a thick sauce into a sliceable square.

This is also why some “two ingredient” ideas—like condensed milk plus peanut butter—can feel unpredictable in warm kitchens. Peanut butter is rich, yes, but it doesn’t always firm up enough on its own. Once you add white chocolate (or another firming element), the entire batch becomes more stable, and the texture shifts from spoonable to sliceable.

If you’re curious about the classic condensed milk fudge baseline that inspired a lot of these modern shortcuts, you can glance at the traditional-style formula in Eagle Brand’s chocolate fudge recipe. It’s the same general idea you’ll use here—melt, stir, spread, chill—just translated into a full set of variations.

Also Read: Sourdough Recipe: 10 Easy Bread Bakes (Loaves, Rolls & Bagels)


Your setup (and why it matters more than you think)

Tin size (keep it consistent)

Every recipe below is written for a 20 × 20 cm (8 × 8-inch) square tin. You can use a slightly larger pan for thinner pieces, but consistency makes life easier—especially when you’re moving between flavors and you want them to set similarly.

Lining the tin

Line the pan with baking paper so it overhangs on two sides. That overhang becomes your handle later. As a result, you can lift the whole slab out cleanly, then slice it neatly without scraping corners.

Infographic titled “Line Your Pan for Perfect Fudge Squares (Sweetened Condensed Milk Fudge — Lift-Out Method)”. Shows four steps with photos: 1) cut parchment to fit base and sides, 2) press into the pan and leave a two-side overhang, 3) clip corners with small snips for sharp edges, 4) lift out after chilling and slice on a board. Includes specs: pan 20×20 cm, overhang two sides, best cuts with a warm knife. Pro tip says to lightly butter the pan first so parchment stays in place while spreading the fudge. MasalaMonk.com branding appears in the footer.
If you want clean, gift-box fudge squares, don’t skip the parchment overhang. This sweetened condensed milk fudge pan-lining guide shows the lift-out method that prevents stuck corners and broken edges: cut parchment, leave a two-side handle, snip corners for sharp sides, then lift and slice on a board. Save it once and you’ll use it for every condensed milk fudge batch—especially when you’re making multiple flavors for holiday trays.

Heat level

Low heat is your friend. Chocolate scorches quickly when pushed, and white chocolate is especially sensitive. So, even though it’s tempting to rush, keep the flame gentle and stir steadily.

A note on “chips”

You’ll see two roles in these recipes: chopped chocolate is for a smoother, more reliable melt in the base, while chocolate chips are best used as fold-ins when you want real chocolate pockets in each bite. Also, chips can look stubborn in the microwave and then suddenly melt once stirred—that’s why short bursts and frequent stirring matter. If you’d like a dependable microwave reference for the rhythm, King Arthur Baking’s easy microwave fudge demonstrates the stop-and-stir approach that prevents scorching.

Split infographic titled “Chocolate vs Chocolate Chips for Condensed Milk Fudge (Use the right one for the texture you want)”. Left side says “Best for the base: Chopped chocolate (bar/chunks)” with notes that it melts smoother, is best for classic condensed milk chocolate fudge, and gives a glossy uniform set, shown with a photo of melted fudge base with chopped chocolate. Right side says “Best as fold-ins: Chocolate chips” with notes that chips hold shape longer, should be folded in after a 2–3 minute cool-down, and create real chocolate chip pockets, shown with a photo of fudge topped with chips. A rule line reads “Base = chopped chocolate. Pockets = chips.” Pro tip box: “If chips start melting, your base is too hot—wait 2 minutes, then fold.” MasalaMonk.com branding is in the footer.
If you’re making fudge with sweetened condensed milk and chocolate chips, this quick guide prevents the most common mistake. Use chopped chocolate when you want a smooth, glossy base that sets cleanly—then use chocolate chips as fold-ins when you want real chip pockets in every bite. Save this card for any condensed milk fudge recipe so you get the texture you intended (uniform fudge vs chocolate-chip fudge) without scorching or melting your chips into streaks.

Cooling and slicing sweetened condensed milk fudge

Chill until firm—usually 2 to 4 hours—then slice with a warm knife. Warm doesn’t mean blazing hot; rather, run the knife under hot water, wipe it dry, and cut. Repeat as needed. Consequently, you get sharp edges instead of ragged cracks.

Also Read: Peanut Butter Fudge: Recipes & Guide (8 Methods + Easy Variations)

Step-by-step infographic titled “How to Cut Fudge Cleanly (Sweetened Condensed Milk Fudge — Gift-Box Neat Slices)”. Shows four photo steps: (1) chill fudge fully 3–4 hours (overnight cleanest), (2) warm knife with hot water then wipe dry, (3) cut straight down with no sawing, (4) wipe blade between cuts and repeat warm + wipe. Includes a “Too soft?” tip (chill longer and slice cold; next time add 30–50 g chocolate) plus storage guidance: cool room temperature 2–3 days airtight, fridge up to 7 days (best in warm weather), freezer up to 2 months with parchment between layers. MasalaMonk.com branding appears in the footer.
Want gift-box neat slices every time? Save this “warm knife” cutting guide for sweetened condensed milk fudge (and every other fudge, honestly). The difference between ragged edges and clean squares is simple: chill fully, warm the knife, cut straight down, wipe between cuts. It also includes the quick fix for warm kitchens—if fudge feels soft, slice it cold now, and next batch add 30–50 g extra chocolate for a firmer set. Keep this pinned for holiday trays, edible gifts, and Christmas fudge season.

The master method you’ll reuse (stovetop + microwave)

Most of the recipes below follow one of two paths:

  1. Melted chocolate + sweetened condensed milk, then flavor and set
  2. A structured cocoa base (cocoa + sugar + butter + condensed milk), then set

Because the steps repeat, you’ll get faster with every batch. In fact, after you make the first pan, the others feel almost effortless.

Infographic reference card titled “2-Ingredient Condensed Milk Fudge (Foolproof Ratio — Sliceable Every Time)”. Shows the ratio: 1 can sweetened condensed milk (397 g) + 340 g chocolate, with guidance for choosing dark/semi-sweet, milk, or white chocolate. Includes quick method steps (microwave or stove), pan size (20×20 cm), prep time (12 min), chill time (3–5 hrs), yield (~36 squares), a pro tip to add 30–50 g extra chocolate for a firmer set in warm kitchens, and MasalaMonk.com branding in the footer.
Save this 2 ingredient fudge with condensed milk ratio card for the moment you need an instant dessert that actually sets. The “foolproof” formula is simple: 1 can sweetened condensed milk + 340 g chocolate—then you can choose dark for a firmer, balanced bite, milk for a softer candy-bar vibe, or white as the base for flavors like maple and brown sugar. The pro tip is your safety net for warm kitchens: add a little extra chocolate for a clean, sliceable set every time.

Stovetop master method (best for control)

  1. Line the tin and set it aside.
  2. Add your chocolate (or white chocolate) plus sweetened condensed milk to a saucepan.
  3. Place on low heat and stir slowly but consistently until glossy.
  4. Remove from heat, then stir in salt, vanilla, and any flavor additions.
  5. Spread into the tin and smooth the top.
  6. Chill until firm.

Microwave master method (best for speed)

  1. Put chopped chocolate in a large microwave-safe bowl.
  2. Microwave in 20–30 second bursts, stirring very well each time, until the chocolate is mostly melted (a few soft lumps are fine).
  3. Keep stirring until those last lumps disappear and the chocolate turns smooth and shiny.
  4. Add sweetened condensed milk and mix until the mixture becomes thick and glossy.
  5. Warm for 10–15 seconds only if needed, then stir again until fully smooth. Stir in flavor additions, spread, and chill.

One reminder worth repeating: in microwave batches, stirring finishes the melt. Stop when the chocolate is mostly melted, then stir until smooth. That’s how you get a glossy set without scorched edges or greasy separation.

Also Read: 10 Vegan Chocolate Cake Recipes (Easy, Moist, & Dairy-Free)


Microwave sweetened condensed milk fudge (3–5 minute method that won’t scorch)

If you’re looking for microwave fudge with condensed milk, the trick isn’t “longer cooking.” It’s short bursts + aggressive stirring. Chocolate keeps melting from residual heat, so stirring is what finishes the job without scorching the edges or splitting the mixture.

Step-by-step infographic titled “3-Ingredient Microwave Milk Fudge (Sweetened Condensed Milk — 3–5 Minute ‘Stop & Stir’ Method)”. Shows pan size 20×20 cm (8×8), hands-on time 5 minutes, chill time 3–4 hours, yield about 36 squares. Lists ingredients: sweetened condensed milk 397 g (1 can), dark/semi-sweet chocolate 340 g, fine salt 1 g, optional vanilla 5 ml and butter 20–28 g. Includes a “Rhythm” timeline with timers: 30 seconds stir hard, 30 seconds stir hard, 20 seconds stir until smooth (thick + glossy), mix in condensed milk + salt, then 10 seconds only if needed and final stir. Troubleshooting notes: let sit 60 seconds if oily; add 30–50 g extra chocolate next time if too soft. MasalaMonk.com branding appears in the footer.
This 3 ingredient microwave fudge with sweetened condensed milk is the fast method that prevents scorching: short bursts + aggressive stirring. Save this “stop & stir” rhythm card for the days you want easy microwave fudge that sets cleanly—because the chocolate keeps melting from residual heat, and stirring is what makes it glossy (not grainy or oily). Bonus tip built in: if your kitchen runs warm, adding 30–50 g extra chocolate gives you a firmer, sliceable set without changing the flavor.

What you need (for a 20 × 20 cm tin)

  • Sweetened condensed milk: 397 g
  • Dark / semi-sweet chocolate, chopped: 340 g
  • Fine salt: 1 g
  • Optional (smoother bite): 20–28 g unsalted butter
  • Optional (rounds sweetness): 5 ml vanilla extract

Microwave method (the reliable rhythm)

  1. Line the tin with baking paper (overhang on two sides).
  2. Put the chopped chocolate in a large microwave-safe bowl.
  3. Microwave in 20–30 second bursts, stirring very well each time, until the chocolate is mostly melted (it can look lumpy, but should feel soft).
  4. Add the sweetened condensed milk + salt. Stir firmly until the mixture turns thick and glossy.
  5. If it still looks streaky or stubborn, microwave 10–15 seconds, then stir again until fully smooth.
  6. Stir in butter (if using) until melted, then vanilla.
  7. Spread into the tin, smooth the top, and chill until firm.

How long does it take?

  • Total microwave time is usually 60–120 seconds (plus stirring).
  • The more important number is how many times you stir: 4–8 proper stirs beats “one long blast” every time.

Microwave troubleshooting (quick fixes)

  • Grainy or oily look: the chocolate got too hot. Next time use shorter bursts. For now, let it sit 1 minute, then stir steadily; it often re-emulsifies as it cools slightly.
  • Too soft after chilling: you didn’t have enough “setting partner” (chocolate/white chocolate), or your add-ins softened the ratio. Chill longer, then store in the fridge. Next batch: increase chocolate by 30–50 g if your kitchen is warm.
  • Chocolate seized or clumped: Chocolate chips and some chocolates can clump before smoothing out because of stabilizers and uneven heating. Don’t blast it longer—let it sit 30–60 seconds, then stir steadily. Next time, use shorter bursts and a larger bowl for gentler heat.

Also Read: Kahlua Drinks: 10 Easy Cocktail Recipes (Milk, Vodka, Coffee)


Why fudge turns grainy (and how these recipes avoid it)

Graininess in fudge is almost always about sugar crystallization: you get crystals, but they’re too large to feel smooth. The interesting twist is that fudge actually wants crystals—just tiny ones that make the texture creamy rather than sandy. The science explanation in Exploratorium’s “What’s Special About Fudge?” is a surprisingly readable deep dive into that microcrystal sweet spot.

Vertical troubleshooting infographic titled “Sweetened Condensed Milk Fudge Troubleshooting (Grainy • Oily • Too Soft — Fast Fixes)”. It’s laid out as a 3-row table with columns for Problem, Cause, and Fix. Row 1 covers grainy/sandy fudge (overheated chocolate or cocoa/powdered sugar not fully mixed) with fixes: low heat, sift cocoa, stir until glossy, and stop microwaving when mostly melted—stir to finish. Row 2 covers oily/separated fudge (chocolate got too hot, often from long microwave blasts) with fixes: let sit 60 seconds, stir steadily to re-emulsify, and use shorter bursts next time. Row 3 covers fudge too soft after chilling (not enough setting chocolate, warm kitchen, too many mix-ins/liquid add-ins) with fixes: chill longer + refrigerate, next time add 30–50 g chocolate, and keep syrup/extract additions tiny. A callout reads “Golden rule: Stirring finishes the melt — heat is the risk.” Includes three small example photos along the bottom and MasalaMonk.com branding in the footer.
Save this sweetened condensed milk fudge troubleshooting card for the batch that goes sideways. It gives you fast fixes for the three most common problems—grainy fudge, oily/separated fudge, and fudge that’s too soft after chilling—plus the one rule that prevents most fails: stirring finishes the melt; too much heat is the risk. If you’re making holiday trays or gifting, this is the cheat sheet that helps every condensed milk fudge recipe set glossy and slice cleanly.

In condensed milk fudge, you usually sidestep the worst crystallization issues because you’re not boiling sugar syrup to a precise stage. Still, graininess can happen if:

  • the mixture overheats and separates,
  • you stir aggressively after it’s already thickening in a cooked style,
  • or dry ingredients clump and never fully dissolve.

That’s why these recipes emphasize gentle heat, steady stirring, and sifting cocoa where needed. In other words, the “no-fail” feeling isn’t magic—it’s good handling.

Also Read: Hot Chocolate Coffee: 3 Easy Recipes (Cocoa, Mix, or Espresso)


1) Sweetened condensed milk chocolate fudge (classic 3-ingredient style recipe)

This is the one you’ll come back to when you want something simple and dependable. It’s the core condensed milk fudge recipe—smooth, glossy, and sliceable without drama. It also adapts easily: change your chocolate, add nuts, switch the aroma with vanilla, and you still end up with a finished candy.

Ingredients (20 × 20 cm tin)

  • Sweetened condensed milk: 397 g
  • Dark or semi-sweet chocolate, chopped: 340 g
  • Fine salt: 1 g

Optional, but genuinely worth it:

  • Unsalted butter: 28 g
  • Vanilla extract: 5 ml
Recipe card image showing glossy 3-ingredient chocolate fudge made with sweetened condensed milk. Includes pan size (20×20 cm), prep and chill time, ingredient amounts in grams, 5-step stovetop/microwave method, a no-fail tip (“stirring finishes the melt”), and MasalaMonk.com branding in the footer.
This 3-ingredient chocolate fudge with sweetened condensed milk is the baseline “no-fail” recipe for the entire guide: one can of condensed milk + chopped dark/semi-sweet chocolate + a pinch of salt. Use the stovetop or microwave method, then chill until firm for clean slices. The key tip is simple but crucial—stop heating when the chocolate is mostly melted and let stirring finish the melt to avoid oily or grainy fudge. Save this card for quick holiday trays, edible gifts, or anytime you want dependable fudge without candy thermometers.

Method (stovetop)

  1. Line the tin and set it aside.
  2. Combine chocolate, sweetened condensed milk, and salt in a saucepan.
  3. Warm on low heat, stirring until the mixture becomes glossy and uniform.
  4. Remove from heat. Add butter (if using) and stir until fully melted. Then add vanilla.
  5. Spread into the tin, smooth the top, and chill until firm.

Microwave version (fast and clean)

Use the microwave master method above: melt chopped chocolate in short bursts, stirring until it’s mostly melted, then stir until fully smooth. Add sweetened condensed milk and salt and mix until the mixture turns thick and glossy. If it looks streaky, warm it for 10–15 seconds and stir again. Finish with vanilla, spread, and chill.

How it tastes (so you can choose your chocolate)

  • Dark chocolate makes the sweetness feel balanced and grown-up.
  • Milk chocolate makes it softer and sweeter—more “candy bar.”
  • A blend lands in the middle, which is often the safest crowd-pleaser.
Guide-style infographic titled “Best Chocolate for Sweetened Condensed Milk Fudge (Dark vs Milk vs White — How the Set Changes)”. Three columns compare dark/semi-sweet, milk chocolate, and white chocolate with photos of fudge squares. Dark/semi-sweet notes: most balanced sweetness, firmest clean slices, best for classic fudge. Milk chocolate notes: sweeter softer bite, can set softer in warm kitchens, best for candy-bar style. White chocolate notes: sweet creamy base, best for flavors like maple, peanut butter, and brown sugar, needs gentle heat because it scorches faster. A rule line says “Base = chopped chocolate. Pockets = chips.” A tip box says “Warm kitchen or softer chocolate? Add +30–50 g chocolate for a firmer set.” MasalaMonk.com branding appears in the footer.
Save this best chocolate for sweetened condensed milk fudge guide before you swap ingredients. Dark/semi-sweet gives the firmest, cleanest slices with balanced sweetness, milk chocolate makes a softer candy-bar style fudge (especially in warm kitchens), and white chocolate is the best base for flavors like maple fudge, peanut butter fudge, and brown sugar fudge—just melt it gently. If you want a firmer set, the card includes the simplest adjustment: add 30–50 g extra chocolate.

A serving direction that feels intentional

Instead of just stacking squares, treat it like a dessert plate. A thin drizzle of cocoa syrup and a pinch of flaky salt makes each piece feel “finished.” If you want a quick drizzle that’s already designed to stay smooth, try MasalaMonk’s 3-minute homemade chocolate syrup. It pairs beautifully with condensed milk chocolate fudge, especially when the fudge is slightly chilled and the syrup is warm.

Also Read: Cappuccino Recipe: How to Make a Perfect Cappuccino at Home


2) Chocolate chip and sweetened condensed milk fudge (quick set, classic flavor)

Sometimes you want that familiar holiday-tray vibe: a smooth chocolate fudge base with real chocolate chips baked right into the bite. This version delivers exactly that—rich, straightforward, and full of little chocolate pockets—because the chips are folded in at the end, not melted into the base.

Ingredients (20 × 20 cm tin)

Fudge base

  • Sweetened condensed milk: 397 g
  • Dark or semi-sweet chocolate, chopped: 300 g
  • Fine salt: 1 g
  • Vanilla extract: 7.5 ml (1½ tsp)

Fold-in chips (kept as chips)

  • Chocolate chips (semi-sweet or milk): 150 g

Optional (smoother bite)

  • Unsalted butter: 20 g
Recipe card showing chocolate chip fudge made with sweetened condensed milk. The image includes a photo of fudge squares with visible chocolate chips, pan size (20×20 cm), prep time (12 min), chill time (2–4 hrs), yield (~36 squares), ingredient amounts in grams, a 5-step method, a pro tip to rest before folding in chips so they don’t melt, and MasalaMonk.com branding in the footer.
This chocolate chip fudge with sweetened condensed milk is the “holiday tray” version of the classic—smooth chocolate base, plus real chocolate chip pockets in every bite. The key move is simple: rest the warm fudge base for 2–3 minutes before folding in the chips, so they stay as chips instead of melting into streaks. Save this card when you want an easy, sliceable fudge that looks impressive and tastes like a familiar chocolate-chip dessert—without candy thermometers or complicated steps.

Method (stovetop)

  1. Line the tin with baking paper and set it aside.
  2. In a saucepan on low heat, melt the chopped chocolate with sweetened condensed milk and salt, stirring steadily until glossy and completely smooth.
  3. Remove from heat. Stir in butter (if using), then vanilla.
  4. Let the mixture sit 2–3 minutes so it’s still warm but not scorching hot.
  5. Fold in the chocolate chips quickly so they stay intact rather than melting into streaks.
  6. Spread into the tin, smooth the top, and chill until firm.

Method (microwave)

  1. Melt the chopped chocolate in short bursts, stirring between bursts until smooth.
  2. Stir in sweetened condensed milk and salt until thick and glossy (warm briefly only if needed).
  3. Stir in butter (if using) and vanilla.
  4. Rest 2–3 minutes, then fold in chips.
  5. Spread and chill.

Why this stays a separate recipe from the chopped-chocolate classic

Even though the base is similar, the experience is different: instead of one uniform chocolate bite, you get bursts of chocolate from the chips. That “chip pop” is what people expect from chocolate chip fudge, and it’s the reason this version earns its own spot.

A small shift that makes it feel “new”

Add a handful of chopped walnuts or toasted pecans—about 60 g—and fold them in just before spreading. Then, once it’s set, slice and serve with hot coffee or iced coffee. If you’re building a “dessert and drink” pairing moment, the condensed milk angle flows naturally into MasalaMonk’s iced coffee recipes collection, which includes condensed milk-style coffee variations for that café feel.

Also Read: Cold Brew Espresso Martini: How to Make It (Step-by-Step Recipe)


3) Cocoa powder fudge with sweetened condensed milk (deep chocolate, no melted chocolate required)

This one leans into cocoa powder and structure. It’s bold, dark, and intensely chocolatey without relying on a mountain of melted chocolate. The texture is slightly more “fudge-like” in a traditional way—dense and smooth, with a clean slice.

Ingredients

  • Sweetened condensed milk: 397 g
  • Unsalted butter: 60 g
  • Cocoa powder (unsweetened), sifted: 60 g
  • Icing sugar (powdered sugar), sifted: 120 g
  • Fine salt: 1 g
  • Vanilla extract: 5 ml
Recipe card image for cocoa powder fudge made with sweetened condensed milk (no chocolate bars needed). Shows cocoa-dusted fudge squares plus pan size (20×20 cm), prep time (15 min), chill time (2–4 hrs), yield (~30–36 squares), ingredient amounts in grams (condensed milk, butter, cocoa powder, icing sugar, salt, vanilla), a 5-step low-heat method, a pro tip to sift cocoa and sugar for a silky texture, and MasalaMonk.com branding in the footer.
If you’re searching for a condensed milk cocoa powder fudge recipe, this is the reliable pantry version—no chocolate bars required. Sweetened condensed milk + butter builds a smooth base, while sifted cocoa powder and icing sugar give the fudge its structure and deep chocolate flavor. Save this card for those days when you want a bold, sliceable cocoa fudge fast—and remember the one detail that changes everything: sifting keeps the texture silky instead of lumpy.

Method

  1. Line the tin and set it aside.
  2. In a saucepan on low heat, warm condensed milk and butter until the butter melts and the mixture is unified.
  3. Add sifted cocoa and salt. Stir until smooth.
  4. Add sifted icing sugar gradually, stirring until the mixture thickens and becomes glossy.
  5. Remove from heat, stir in vanilla, then press into the tin.
  6. Chill until firm.

What to expect

This version sets quickly and tastes strongly of cocoa. Therefore, it’s a smart choice when you want the chocolate flavor to feel clear rather than candy-sweet.

A satisfying way to serve it

Cut into small squares and plate it with something crisp. Churros are especially good because they bring warmth, crunch, and cinnamon. If you want a full churros guide with sauces and variations, MasalaMonk’s churros recipe gives you plenty of options for turning fudge into a dip or a dessert board centerpiece.

Also Read: Cranberry Moscow Mule Recipe: A Festive Holiday Cocktail With Easy Variations


4) White chocolate fudge with sweetened condensed milk recipe (smooth, creamy, and versatile)

White chocolate condensed milk fudge is the quiet powerhouse of this collection. It’s creamy, sweet, and a perfect base for vanilla, maple, and “holiday tray” flavors. The key is gentle heat. White chocolate scorches faster than dark chocolate, so take your time.

Ingredients

  • Sweetened condensed milk: 397 g
  • White chocolate, chopped: 340 g
  • Fine salt: 1 g
  • Vanilla extract: 5 ml

Optional:

  • Unsalted butter: 20 g
Recipe card image for white chocolate fudge made with sweetened condensed milk. Shows creamy white fudge squares with vanilla flecks, pan size (20×20 cm), prep time (10 min), chill time (2–4 hrs), yield (~36 squares), ingredient amounts in grams (condensed milk, white chocolate, salt, vanilla, optional butter), a 5-step very-low-heat method, a pro tip to keep heat very low to prevent scorching, and MasalaMonk.com branding in the footer.
This white chocolate fudge with sweetened condensed milk is the smooth, sliceable base that powers the “non-dark-chocolate” side of the guide—think vanilla, maple, brown sugar, and butterscotch-style variations. The only rule that matters here is heat control: white chocolate scorches fast, so keep the flame very low and stir until glossy. Save this card when you want a creamy, gift-box-friendly fudge that sets cleanly and cuts into neat squares every time.

Method

  1. Line the tin and set it aside.
  2. Melt white chocolate with condensed milk and salt on very low heat, stirring often.
  3. Remove from heat and stir in butter (if using), then vanilla.
  4. Spread, smooth, chill.

Why this base matters

White chocolate fudge is the bridge between candy and dessert. It also behaves beautifully with add-ins like nuts, dried fruit, or maple. So, even if you make only one “non-chocolate” fudge from this post, make it this one—because it becomes several other recipes with minor shifts.

A gentle, natural pairing link

If you like desserts that lean creamy and layered rather than purely chocolate, you’ll probably love MasalaMonk’s savoiardi chocolate vanilla pudding. It’s a different format, yet it hits the same comfort-dessert note, especially after a meal.

Also Read: Baked Ziti Recipe Collection: 15 Easy Variations


5) Vanilla fudge (sweetened condensed milk) recipe with a clean, classic finish

Vanilla fudge often gets dismissed as “just white chocolate,” but it doesn’t have to taste vague. The difference comes from how you build the flavor: more vanilla, a pinch of salt, and an option for vanilla bean paste if you want that speckled bakery look.

Ingredients

  • Sweetened condensed milk: 397 g
  • White chocolate, chopped: 340 g
  • Fine salt: 1 g
  • Vanilla extract: 10 ml (2 tsp)

Optional:

  • Vanilla bean paste: 5 ml
  • Unsalted butter: 20 g
Recipe card image for vanilla fudge made with sweetened condensed milk. Shows pale vanilla-speckled fudge squares with vanilla beans and a spoon of vanilla paste. The card includes pan size (20×20 cm), prep time (10 min), chill time (2–4 hrs), yield (~36 squares), ingredients in grams (condensed milk, white chocolate, salt, vanilla extract, optional vanilla bean paste and butter), a 5-step very-low-heat method, a pro tip to add vanilla off the heat for stronger flavor, and MasalaMonk.com branding in the footer.
This vanilla fudge recipe using sweetened condensed milk is the “clean finish” version of white chocolate fudge—same easy method, but with the flavor turned up so it tastes unmistakably vanilla, not just sweet. The trick is timing: add vanilla (and vanilla bean paste, if using) off the heat so the aroma stays bold and fresh. Save this card for gift boxes, holiday trays, and quick make-ahead desserts when you want a creamy, sliceable fudge that feels bakery-level without extra work.

Method

  1. Melt white chocolate, condensed milk, and salt on very low heat.
  2. Remove from heat. Stir in vanilla extract (and paste if using).
  3. Spread into the tin. Chill until firm.

Make it feel special without making it complicated

Once set, sprinkle a light dusting of cinnamon or cardamom on top and press gently so it clings. It reads like a deliberate flavor choice rather than “plain.” Even more, it pairs beautifully with fruit-forward desserts, which makes it a nice companion to something like MasalaMonk’s no-bake blueberry cheesecake if you’re building a dessert table with variety.

Also Read: Manhattan Cocktail Recipe (Classic + 6 Variations)


6) Peanut butter fudge using sweetened condensed milk (firm, creamy, and sliceable)

This is where a lot of people get disappointed when they improvise: peanut butter and condensed milk taste wonderful, but the set can be too soft. So, this recipe uses white chocolate as the structure. The result is creamy, stable, and easy to cut—even when your kitchen runs warm.

For a broader peanut butter fudge universe (including old fashioned cooked versions, marshmallow crème methods, and more), MasalaMonk’s peanut butter fudge guide is a great companion read.

Ingredients

  • Sweetened condensed milk: 397 g
  • White chocolate, chopped: 300 g
  • Peanut butter (creamy): 180 g
  • Fine salt: 1 g
  • Vanilla extract: 5 ml

Optional:

  • Roasted peanuts, chopped: 50–60 g
Recipe card image for peanut butter fudge made with sweetened condensed milk. Shows tan peanut butter fudge squares drizzled with dark chocolate and topped with chopped peanuts. The card lists pan size (20×20 cm), prep time (12 min), chill time (3–5 hrs), yield (~36 squares), ingredients in grams (condensed milk, white chocolate, peanut butter, salt, vanilla, optional chopped peanuts), a 5-step method using very low heat, a pro tip explaining white chocolate as the “set partner” to prevent soft fudge, and MasalaMonk.com branding in the footer.
This peanut butter fudge with sweetened condensed milk is the sliceable, reliable version people are actually trying to get when they search “easy peanut butter fudge condensed milk.” The secret is structure: white chocolate acts as the setting partner, so the fudge firms up cleanly instead of staying soft—especially in warm kitchens. Save this card for quick batches, edible gifts, and dessert trays when you want that classic peanut-butter flavor with neat, gift-box cuts every time.

Method

  1. Line the tin and set it aside.
  2. Melt white chocolate with condensed milk on very low heat until smooth.
  3. Remove from heat and stir in peanut butter until glossy.
  4. Add salt and vanilla. Fold in peanuts if using.
  5. Spread into the tin and chill.

What the texture should look like

When you stir in the peanut butter, the mixture should turn silky and cohesive, not greasy or separated. If it looks oily, keep stirring gently until it emulsifies. In most cases, it comes together with patience rather than extra heat.

A dessert-board idea

Peanut butter fudge is fantastic with crisp cookies, bananas, or even spooned onto toast. If you want a no-oven dessert that shares the same “layer and chill” ease, MasalaMonk’s banana pudding sits in the same comfort zone and pairs well on a dessert spread.

Also Read: Green Chutney Recipe (Coriander–Mint / Cilantro Chutney)


7) Chocolate peanut butter fudge recipe (Sweetened condensed milk) — swirl or layers

Chocolate and peanut butter together are always a win, yet you can choose the vibe: swirled for a casual look, layered for that clean “buckeye” feel. Either way, this version is built to set firmly and slice beautifully.

Ingredients (two mixtures)

Peanut butter base

  • Sweetened condensed milk: 220 g
  • White chocolate: 170 g
  • Peanut butter: 150 g
  • Fine salt: 0.5 g
  • Vanilla extract: 2.5 ml

Chocolate layer/swirl

  • Sweetened condensed milk: 177 g
  • Dark or semi-sweet chocolate: 190 g
  • Fine salt: 0.5 g
  • Vanilla extract: 2.5 ml
Recipe card image for chocolate peanut butter fudge made with sweetened condensed milk, showing both swirl and layered versions. The image includes stacked two-layer fudge squares and one marbled swirl piece, pan size (20×20 cm), prep time (18 min), chill time (3–5 hrs), yield (~36 squares), separate ingredient lists with grams for the peanut butter layer and chocolate layer, a 5-step layered method, a short swirl option note, and MasalaMonk.com branding in the footer.
This chocolate peanut butter fudge with sweetened condensed milk is the showstopper version of the guide—choose clean layers for gift-box-perfect slices or a quick swirl for that bakery-style marbled top. The recipe is built to set firmly (thanks to the white-chocolate peanut-butter base) while still tasting rich and balanced. Save this card for holiday trays, edible gifts, or anytime you want a reliable “wow” fudge that cuts neatly and looks impressive with minimal effort.

Method (layered)

  1. Make the peanut butter mixture: melt white chocolate with condensed milk, then stir in peanut butter, salt, and vanilla. Press it into the tin.
  2. Make the chocolate mixture: melt dark chocolate with condensed milk and salt, then stir in vanilla.
  3. Pour the chocolate layer over the peanut butter base.
  4. Chill until firm, then slice with a warm knife.

Method (swirled)

Instead of pouring the chocolate as one layer, drop spoonfuls of chocolate mixture over the peanut butter base and swirl with a knife. Then chill.

Make it feel a bit more “dessert-like”

Serve a square with a spoonful of lightly sweetened cream, or drizzle with cocoa syrup. A warm cocoa drizzle (even a simple cocoa + sugar + hot water syrup) makes the swirl taste more ‘dessert’ than candy—especially when the fudge is chilled.

Also Read: Rob Roy Drink Recipe: Classic Scotch Cocktail (Perfect + Dry + Sweet Variations)


8) Nutella fudge with sweetened condensed milk (rich, glossy, and hazelnut-forward)

Nutella and condensed milk are an intuitive match: creamy, sweet, and deeply comforting. However, the best Nutella condensed milk fudge still benefits from real chocolate for structure and depth. This version keeps the hazelnut flavor clear without becoming overly sweet.

Ingredients

  • Sweetened condensed milk: 397 g
  • Dark or semi-sweet chocolate: 260 g
  • Nutella: 180 g
  • Fine salt: 1 g

Optional:

  • Toasted hazelnuts, chopped: 60 g
Recipe card image for Nutella fudge made with sweetened condensed milk, shown on a teal textured background. The card features stacked glossy Nutella-chocolate fudge squares topped with toasted chopped hazelnuts, plus a jar of Nutella and chocolate pieces in the scene. Text overlay includes pan size (20×20 cm), prep time (12 min), chill time (3–5 hrs), yield (~36 squares), ingredients in grams (condensed milk, dark/semi-sweet chocolate, Nutella, salt, optional hazelnuts), a 5-step low-heat method, a pro tip to stir Nutella in off heat for the smoothest set, and MasalaMonk.com branding in the footer.
This Nutella fudge with sweetened condensed milk is the glossy, hazelnut-forward variation people look for when they want something richer than plain chocolate fudge. The method stays simple—melt chocolate with condensed milk, then stir Nutella in off the heat so it emulsifies smoothly and sets into neat, sliceable squares. Finish with toasted hazelnuts for crunch, and you’ve got a gift-box-ready fudge that feels special without extra effort. Save this card for holiday trays, edible gifts, or anytime you want a quick Nutella dessert that actually slices cleanly.

Method

  1. Line the tin and set it aside.
  2. Melt chocolate with condensed milk and salt on low heat until glossy.
  3. Remove from heat and stir in Nutella until fully emulsified.
  4. Fold in hazelnuts if using, then spread and chill.

A festive pairing suggestion

Nutella fudge sits beautifully next to truffles on a holiday tray. If you want a second bite-sized chocolate treat that doesn’t require baking, MasalaMonk’s Irish rum truffles add variety while staying in the same “rich and celebratory” mood.

Also Read: Sandwich for Breakfast: Breakfast Sandwich Recipe + 10 Variations


9) Maple fudge recipe (sweetened condensed milk) with a warm caramel edge

Maple fudge can be tricky if you rely on maple syrup alone—too much liquid can affect the set. So, this recipe uses white chocolate as the structure and a balanced amount of syrup for flavor, then finishes with maple extract (optional but helpful) for that unmistakable maple aroma.

Ingredients

  • Sweetened condensed milk: 397 g
  • White chocolate: 300 g
  • Maple syrup: 60 g
  • Fine salt: 1 g
  • Maple extract: 2–3 ml (optional, to taste)

Optional:

  • Toasted pecans or walnuts: 60 g
Recipe card image for maple fudge made with sweetened condensed milk. Shows creamy maple fudge squares topped with chopped pecans and a maple syrup drizzle on a warm wooden background, plus a small cup of maple syrup and white chocolate pieces. Text overlay includes pan size (20×20 cm), prep time (12 min), chill time (3–5 hrs), yield (~36 squares), ingredients in grams (condensed milk, white chocolate, maple syrup, salt, optional maple extract and nuts), a 5-step method, a pro tip noting maple syrup adds liquid so white chocolate keeps the set firm, and MasalaMonk.com branding in the footer.
This maple fudge recipe with sweetened condensed milk is the cozy, sliceable version that actually sets cleanly—because maple syrup adds liquid, and white chocolate provides the structure. The result is creamy, warm-maple flavored fudge that looks gift-box ready with a simple pecan topping. Save this card for holidays, dessert trays, or anytime you want maple flavor without candy-thermometer stress—then use the pro tip as your “insurance” for neat squares.

Method

  1. Line the tin and set it aside.
  2. Melt white chocolate with condensed milk on very low heat.
  3. Remove from heat and stir in maple syrup and salt.
  4. Add maple extract gradually if using. Fold in nuts if you like.
  5. Spread into the tin and chill.

Make it feel seasonal without forcing it

Maple fudge pairs beautifully with coffee. If you enjoy desserts that lean into creamy sweetness and milk flavors, it also connects naturally to a three-milks dessert like MasalaMonk’s tres leches cake guide, which uses sweetened condensed milk in a completely different (and equally comforting) way.

Also Read: Paper Plane Cocktail Recipe + Best Amaro Substitutes & Tips


10) Marshmallow fluff fudge (sweetened condensed milk + chocolate) — plush “fantasy” texture

This is the soft, cohesive style that feels especially giftable because it stays tender and creamy. Marshmallow crème (or fluff) adds body and that signature “pull” to the bite. Meanwhile, chocolate provides structure so it still slices cleanly.

Ingredients

  • Sweetened condensed milk: 397 g
  • Dark or semi-sweet chocolate: 300 g
  • Marshmallow fluff/crème: 200 g
  • Unsalted butter: 28 g
  • Fine salt: 1 g
  • Vanilla extract: 5 ml
Recipe card image for marshmallow fluff fudge made with sweetened condensed milk. Shows chocolate fudge squares with visible marshmallow swirls, topped with mini marshmallows and cocoa dust on a grey background. The card lists pan size (20×20 cm), prep time (15 min), chill time (3–5 hrs), yield (~36 squares), ingredients in grams (condensed milk, dark/semi-sweet chocolate, marshmallow fluff/crème, butter, salt, vanilla), a 5-step method, a pro tip to add fluff off heat for a plush texture, and MasalaMonk.com branding in the footer.
If you’re searching for “never fail fudge” with sweetened condensed milk, this is the one to save. Marshmallow fluff + butter gives the fudge that plush, creamy bite people expect from classic holiday-tray fudge, while chocolate keeps the set firm enough for clean squares. The most important step is timing: stir the fluff in off the heat so it stays fluffy and smooth instead of melting away. Keep this card for edible gifts, dessert boards, and quick make-ahead fudge that slices neatly every time.

Method

  1. Line the tin and set it aside.
  2. Melt chocolate with condensed milk and salt on low heat until glossy.
  3. Remove from heat. Stir in butter until melted.
  4. Add marshmallow fluff and stir until fully combined and smooth.
  5. Stir in vanilla, spread into the tin, and chill.

How to make the slices look “clean”

Because this style is softer, it benefits even more from a warm knife. Chill thoroughly, warm the knife, wipe it dry, and cut with confident, straight pressure. If the edges smear, pause and rewarm the blade.

Also Read: Classic Rum Punch + 9 Recipes (Pitcher & Party-Friendly)


Sweetened condensed milk fudge variations (brown sugar, butterscotch, rocky road, peppermint, eggnog)

These are built on the same “strong setting partner” rule, so you don’t need a whole new method each time. Start with the base recipe that matches the flavor, then swap in the add-ins below.

1) Brown sugar sweetened condensed milk fudge (caramel-ish, holiday-tray friendly recipe)

Start with: White chocolate fudge with sweetened condensed milk (Recipe #4)
Add:

  • Brown sugar: 70–90 g
  • Unsalted butter: 30 g (use it here even if you skip it elsewhere)
  • Vanilla: 5 ml
  • Optional: toasted pecans/walnuts 60 g
Recipe card image for brown sugar fudge made with sweetened condensed milk. Shows caramel-colored fudge squares stacked on parchment with chopped nuts on top, plus bowls of brown sugar and butter in the background. Text overlay includes pan size (20×20 cm), prep time (15 min), chill time (3–5 hrs), yield (~36 squares), ingredients in grams (condensed milk, brown sugar, butter, white chocolate, salt, vanilla, optional pecans/walnuts), a 5-step very-low-heat method, a pro tip to dissolve brown sugar first for smooth (not gritty) fudge, and MasalaMonk.com branding in the footer.
This brown sugar condensed milk fudge is the caramel-ish, gift-box favorite—sweetened condensed milk makes it creamy, while white chocolate helps it set firm enough to slice cleanly. The key step is what most recipes skip: dissolve the brown sugar gently in condensed milk + butter first, then add white chocolate off the heat for a smooth, glossy finish (no gritty texture). Save this card for holiday trays, edible gifts, or whenever you want “butterscotch vibes” without candy thermometers.

How:
Warm sweetened condensed milk + butter + brown sugar on very low heat, stirring until the sugar feels fully dissolved and the mixture looks uniform. Remove from heat, add white chocolate, and stir until completely melted and glossy. Add salt and vanilla, fold in nuts if using, then spread and chill.

Why this works: brown sugar brings moisture; the white chocolate keeps the set firm and sliceable.

2) Butterscotch fudge with sweetened condensed milk (easy “gift box” flavor)

Start with: White chocolate fudge (Recipe #4)
Swap/Add:

  • Replace 100–120 g of the white chocolate with butterscotch chips (or butterscotch pieces)
  • Optional salt bump: add an extra pinch (butterscotch loves salt)
Recipe card image for butterscotch fudge made with sweetened condensed milk. Shows golden butterscotch fudge squares topped with butterscotch chips and flaky salt on a light background. Text overlay includes pan size (20×20 cm), prep time (12 min), chill time (3–5 hrs), yield (~36 squares), ingredients in grams (condensed milk, white chocolate, butterscotch chips, salt, vanilla, optional butter), a 5-step very-low-heat method, a pro tip warning that butterscotch chips scorch quickly so keep heat very low, and MasalaMonk.com branding in the footer.
This butterscotch fudge with sweetened condensed milk is the easiest “gift box” flavor—creamy, golden, and nostalgic, yet still firm enough to cut into neat squares. The success trick is temperature: butterscotch chips scorch faster than chocolate, so melt everything on very low heat and stir until glossy. Save this card for holiday trays, edible gifts, or quick make-ahead desserts when you want that classic butterscotch candy vibe without a thermometer.

How:
Melt gently (butterscotch scorches easily). Stir until fully smooth, then chill as usual.
Optional: top with flaky salt or crushed toasted nuts.

3) Rocky road sweetened condensed milk fudge (chocolate + marshmallow + crunch)

Start with: Sweetened condensed milk chocolate fudge (Recipe #1)
Fold in (off heat):

  • Mini marshmallows: 80–100 g
  • Toasted nuts (walnuts/almonds/peanuts): 60–80 g
  • Optional biscuit pieces: 40–50 g
Recipe card image for rocky road fudge made with sweetened condensed milk. Shows chunky chocolate fudge squares on a dark slate background with visible mini marshmallows and toasted nuts, plus extra marshmallows scattered around. Text overlay includes pan size (20×20 cm), prep time (15 min), chill time (3–5 hrs), yield (~36 squares), base ingredients in grams (sweetened condensed milk, dark/semi-sweet chocolate, salt, optional vanilla), fold-ins (mini marshmallows, toasted nuts, optional crushed biscuits/wafer), a 5-step method, a pro tip to cool 2–3 minutes before adding marshmallows so they stay as pockets, and MasalaMonk.com branding in the footer.
This rocky road fudge with sweetened condensed milk is the “texture contrast” superstar—rich chocolate base, chewy marshmallow pockets, and crunchy nuts in every bite. The make-or-break detail is simple: rest the melted fudge base for 2–3 minutes before folding in marshmallows, so they stay as soft pockets instead of melting into the chocolate. Save this card for dessert boards, edible gifts, and Christmas trays when you want a crowd-pleaser that looks chunky, festive, and bakery-style with almost zero effort.

How:
Make the chocolate base. Let it cool 2–3 minutes so it’s thick but not scorching hot, then fold in marshmallows + nuts (+ biscuit). Spread, chill.
Tip: if you fold marshmallows while the base is too hot, they’ll melt into the fudge instead of staying as pockets.

4) Peppermint fudge recipe condensed milk (clean, festive, not toothpaste-y)

Start with: Chocolate fudge (Recipe #1) or White chocolate fudge (Recipe #4)
Add:

  • Peppermint extract: 1–2 ml (start tiny, then adjust)
  • Crushed peppermint candy/candy cane: 25–40 g (sprinkle on top or fold in last)
Recipe card image for peppermint fudge made with sweetened condensed milk, showing two versions side-by-side: white peppermint fudge and chocolate peppermint fudge, both topped with crushed candy cane pieces. The card includes pan size (20×20 cm), prep time (12 min), chill time (3–5 hrs), yield (~36 squares), ingredients for each base in grams (condensed milk, white chocolate or dark chocolate, salt), flavor/topping amounts (peppermint extract 1–2 ml, crushed candy cane 30 g), a 5-step low-heat method, a pro tip to start with 1 ml peppermint extract and adjust, and MasalaMonk.com branding in the footer.
This peppermint fudge recipe with sweetened condensed milk is the easiest way to get that classic Christmas candy vibe—cool, minty, and perfectly sliceable. The card gives you two options (white peppermint or chocolate peppermint) so you can match your tray, then nails the one detail that matters: peppermint extract is powerful, so start tiny and adjust. Save this for holiday trays, edible gifts, and last-minute Christmas desserts when you want festive flavor with a reliable condensed milk fudge set.

How:
Stir extract in off heat. If using crushed candy, either press it on top (cleaner slices) or fold in at the very end (more candy bits inside).

5) Eggnog fudge recipe condensed milk (holiday flavor without extra work)

Start with: Vanilla fudge (Recipe #5)
Add:

  • Nutmeg: ¼ tsp
  • Cinnamon: ⅛ tsp
  • Vanilla: keep as written (don’t reduce)
  • Optional: rum extract 1–2 ml (only if you want that “eggnog” aroma)
Recipe card image for eggnog fudge made with sweetened condensed milk. Shows creamy white chocolate fudge squares dusted with nutmeg on a parchment-lined wooden board, with cinnamon sticks, whole nutmeg, and a glass of eggnog in the background. Text overlay includes pan size (20×20 cm), prep time (12 min), chill time (3–5 hrs), yield (~36 squares), ingredients in grams (sweetened condensed milk, white chocolate, salt, vanilla, nutmeg, cinnamon, optional rum extract), a 5-step method using very low heat, a pro tip to use spices + extract for eggnog flavor without adding extra liquid, and MasalaMonk.com branding in the footer.
This eggnog fudge with sweetened condensed milk is the cozy holiday flavor without the usual set problems—because it gets “eggnog” taste from nutmeg + cinnamon + vanilla (and optional rum extract), not extra liquid. The result is a creamy, sliceable white-chocolate fudge that looks gift-box ready with a simple nutmeg dusting. Save this card for Christmas trays and edible gifts when you want something festive that still behaves like a reliable condensed milk fudge.

How:
Make vanilla fudge as written, then stir spices in off heat. Chill.
Tip: spice blooms better if you stir it into the warm mixture, not after it’s cooling.

Also Read: 7 Pizza Sauce Recipes | Marinara, White Garlic, Alfredo, Buffalo, BBQ, Vodka & Ranch


A few gentle dessert connections (so the fudge isn’t alone on the table)

Even though fudge can be the star, it also plays well with other easy, make-ahead sweets. So, if you’re building a spread—especially for holidays—these pairings keep the table interesting without adding stress:

  • Something fruity and chilled like no-bake blueberry cheesecake complements the richness of chocolate and peanut butter fudge.
  • Something crisp and warm like homemade churros turns fudge into a dipping moment, especially if you soften a spoonful gently.
  • Something creamy and layered like savoiardi chocolate vanilla pudding offers a different texture while staying in the same comfort-dessert family.
  • Something cake-like with the same pantry charm, such as peach condensed milk cake, keeps the condensed milk theme running without repeating the same bite.

Sweetened condensed milk fudge add-ins that keep the set reliable

Once you’ve made one or two batches, it’s tempting to start improvising—and you should. Still, it helps to choose add-ins that don’t fight the texture.

Infographic titled “Condensed Milk Fudge Add-Ins That Set Reliably (Keep It Sliceable — No ‘Too Soft’ Surprises)”. It instructs to fold mix-ins in off heat after the base cools 2–3 minutes and lists safe add-in amounts for a 20×20 cm pan: nuts (pecans/walnuts/hazelnuts) 50–80 g (toasted best), mini marshmallows 40–60 g (add when base is warm, not hot), crushed biscuits/wafers 40–60 g, and chopped dried fruit 40–60 g (pat dry if sticky). It warns to avoid or limit big spoonfuls of syrup/extra liquid and too many mix-ins (over 150 g total). Includes a pro tip: if the kitchen is warm, add 30–50 g extra chocolate for a firmer set, plus MasalaMonk.com branding in the footer.
Save this sweetened condensed milk fudge add-ins cheat sheet before you start “just throwing things in.” These are the mix-ins that keep fudge sliceable—with the exact gram ranges for nuts, mini marshmallows, crushed biscuits, and dried fruit (for a 20×20 cm pan). The biggest win is timing: fold add-ins off heat after a 2–3 minute cool-down so marshmallows stay as pockets and your base doesn’t loosen. If you’re making Christmas trays or gifting, this one card helps every condensed milk fudge variation set cleanly.

Mix-ins that work beautifully with sweetened condensed milk fudge

  • Toasted nuts (pecans, walnuts, hazelnuts): 50–80 g
  • Crushed biscuits or wafer pieces: 40–60 g
  • Mini marshmallows (best in chocolate bases): 40–60 g
  • Dried fruit (chopped): 40–60 g

Fold these in at the end, off the heat, right before spreading.

Flavor additions that lift sweetened condensed milk fudge without changing texture

  • Vanilla, of course (especially in white chocolate bases)
  • A small pinch of cinnamon or cardamom in vanilla fudge
  • Espresso powder (½ to 1 tsp) in chocolate fudge for deeper flavor
  • Orange zest in dark chocolate fudge for a bright edge

When you keep add-ins modest, the fudge still sets cleanly and slices neatly.

Also Read: How to Cook Tortellini (Fresh, Frozen, Dried) + Easy Dinner Ideas


How to build a 10-flavor sweetened condensed milk fudge tray without chaos

Making one batch is easy. Making several batches in a row can still feel easy if you set up the flow.

Guide-style infographic titled “Sweetened Condensed Milk Fudge Tray (10 Flavors) — The Easy Plan” with a photo strip of assorted fudge squares at the top. The card explains how to make multiple batches without muddy flavors and lists a clean-to-strong batch order: 1) Vanilla/Eggnog (white base), 2) Maple/Brown Sugar/Butterscotch (white base variations), 3) Peanut Butter (white base + PB), 4) Chocolate Classic/Chocolate Chip, 5) Rocky Road/Peppermint (strong mix-ins last). A setup checklist recommends lining 2–3 pans (20×20 cm) or reusing with parchment overhang, keeping one “white chocolate” pot and one “dark chocolate” pot, and chilling slabs first before slicing everything with a warm knife. Portion guide notes 1 pan makes about 36 squares and a gift box holds 9–12 pieces (3–4 flavors). Pro tip: make mix-in flavors last to keep everything tasting clean. MasalaMonk.com is branded in the footer.
Planning a Christmas fudge tray with sweetened condensed milk? Save this 10-flavor game plan. It shows the best batch order (clean-to-strong) so your vanilla/maple flavors don’t get “muddy,” plus a simple setup checklist for making multiple pans efficiently. You’ll also get a portion guide for gift boxes (9–12 pieces across 3–4 flavors), so you can build a tray that looks intentional—without turning your kitchen into a full-day project.

Start with the “clean pan” flavors

Begin with vanilla or white chocolate fudge, then move into peanut butter, then finish with dark chocolate. That order keeps flavors distinct and reduces lingering aromas.

Line multiple tins, even if you reuse them

If you only have one tin, line it, chill the slab until firm enough to lift, then transfer it to a board to finish chilling while you line the tin again. You don’t need perfection—just a steady rhythm.

Keep your slicing moment separate

Let everything chill fully first, then slice all slabs at once. This makes your pieces more uniform and reduces the “warm kitchen” effect that can soften edges.


Storage (so your fudge stays the right texture)

Fudge is forgiving, but storage still matters because temperature affects texture.

  • Room temperature (cool climate): keep in an airtight container for 2–3 days.
  • Refrigerator (best in warm kitchens): store in an airtight container up to a week. Let pieces sit for a few minutes before serving so the bite softens slightly.
  • Freezer: wrap the slab (or individual squares) tightly and freeze for up to 2 months. Thaw in the fridge overnight, then bring to cool room temperature before serving.

If you’re making several flavors at once, keep strong aromas (like peppermint or heavy extracts) sealed separately so the flavors stay distinct.

Also Read: How to Cook Bacon in the Oven (Crispy, No-Mess, Crowd-Ready Recipe)


How to make this your “forever” Sweetened Condensed Milk Fudge guide

The best thing about sweetened condensed milk fudge is that it doesn’t ask for a special occasion—yet it still feels like one when you serve it. Once you’ve made a couple of these, you’ll notice something satisfying: you’re no longer “following a recipe,” you’re using a method. That method is what gives you freedom.

On a busy day, you can make condensed milk chocolate fudge and be done. Then on a festive week, you can stack your fridge with vanilla, peanut butter, Nutella, maple, and marshmallow crème slabs, then slice them into tidy squares that look like a gift. On a cozy weekend, you can build a dessert board with churros for dipping, a drizzle of chocolate syrup, and a few different fudge flavors so every bite feels slightly different.

If you’re in the mood to keep the condensed milk theme going beyond fudge, it’s worth pairing this with one creamy chilled dessert like no-bake blueberry cheesecake or a layered comfort dessert like banana pudding. That way, you get contrast in texture and style without adding stress.

Most importantly, don’t feel like you need to “save” these for holidays. Fudge is at its best when it’s part of real life—one square after dinner, a small box shared with someone you like, a sweet bite with coffee on an ordinary afternoon. Make one batch first, then choose the next flavor based on your mood. The guide will still be here when you’re ready to build the full ten. Whenever you want to expand beyond the core ten, use the white chocolate base for brown sugar and butterscotch, and the classic chocolate base for rocky road and peppermint.


Sweetened condensed milk fudge FAQ

1) What is sweetened condensed milk fudge, exactly?

Sweetened condensed milk fudge is a quick fudge method where sweetened condensed milk provides sweetness and creaminess, while chocolate (or other setting ingredients) helps the fudge firm up into sliceable squares. In other words, you get a rich, classic fudge texture without boiling sugar syrup to a specific temperature.

2) Is condensed milk fudge the same as sweetened condensed milk fudge?

Most of the time, yes. When recipes say “condensed milk fudge,” they usually mean sweetened condensed milk fudge. However, evaporated milk is sometimes confused with condensed milk, and it’s not the same product—so check the can before you start. Also, any brand of sweetened condensed milk works, but low-fat versions can set softer than expected.

3) Can I make fudge with condensed milk and chocolate chips?

Absolutely. Fudge with sweetened condensed milk and chocolate chips is one of the easiest versions: melt, stir, spread, and chill. That said, for a cleaner set, use enough chocolate so the mixture firms properly, especially if your kitchen is warm.

4) What’s the best condensed milk fudge recipe for beginners?

A simple sweetened condensed milk chocolate fudge with three ingredients—sweetened condensed milk, chocolate, and salt—is the most beginner-friendly. After that, peanut butter fudge with condensed milk or Nutella fudge with sweetened condensed milk are excellent next steps because they’re still straightforward.

5) Can I make two ingredient fudge with condensed milk?

You can, although “2 ingredient fudge condensed milk” often works best when one ingredient is chocolate (or white chocolate) and the other is sweetened condensed milk. On the other hand, condensed milk and peanut butter alone can turn out softer than expected, so many reliable versions include white chocolate for structure.

6) How do I make three ingredient fudge with condensed milk?

Three ingredient fudge with condensed milk typically uses sweetened condensed milk + chocolate + a pinch of salt (or vanilla). First, melt gently, then stir until glossy, and finally chill until firm. As a result, you get a no-fuss fudge that slices cleanly.

7) Can I make easy microwave fudge with sweetened condensed milk?

Yes—microwave sweetened condensed milk fudge is one of the fastest ways to make it. Still, the method works best with short bursts and frequent stirring so the chocolate melts evenly and doesn’t scorch.

8) Why is my sweetened condensed milk fudge too soft?

Usually it’s because there wasn’t enough setting ingredient (like chocolate or white chocolate), or the ratio shifted due to add-ins. Additionally, warm kitchens can keep fudge softer. To fix it next time, increase the chocolate slightly, chill longer, and store in the fridge if needed.

9) Why did my condensed milk fudge turn grainy?

Graininess typically comes from sugar crystallizing in larger grains or from dry ingredients not dissolving smoothly. Therefore, keep heat low, stir steadily, and sift cocoa or powdered sugar in cocoa-based versions so the mixture stays uniform.

10) Why is my fudge oily or separated?

Most often, the mixture got too hot or was heated too quickly. Instead of increasing heat, melt slowly and stir continuously. Also, when adding peanut butter or Nutella, stir them in off the heat so they emulsify smoothly.

11) Can I use cocoa powder and sweetened condensed milk instead of chocolate?

Yes. Cocoa powder condensed milk fudge is a popular option, yet it usually needs additional structure—commonly butter plus powdered sugar—so it sets properly and doesn’t taste dry. As long as cocoa is sifted and fully mixed, the texture can be smooth and dense.

12) Can I make chocolate fudge with condensed milk and marshmallows?

You can, and it’s a classic style. Marshmallow crème or fluff helps create a plush, creamy bite, which is why “marshmallow fudge recipe condensed milk” and “fluff fudge sweetened condensed milk” are so loved for gift trays.

13) What is “never fail” fudge with sweetened condensed milk?

“Never fail” usually refers to a very forgiving method—often a sweetened condensed milk fudge that uses chocolate plus marshmallow crème (or sometimes butter) to keep the texture creamy and stable. Consequently, it sets reliably and stays tender.

14) Can I make peanut butter fudge using sweetened condensed milk?

Yes, and it’s one of the most requested flavors. However, for a firm set, many peanut butter and condensed milk fudge recipes add white chocolate as the setting backbone. Otherwise, the fudge may stay too soft, especially in warm weather.

15) How do I make chocolate peanut butter fudge with sweetened condensed milk?

Use a chocolate condensed milk fudge mixture and a peanut butter condensed milk fudge mixture, then layer or swirl them before chilling. That way, you get distinct flavors in every bite and a clean slice once it’s firm.

16) Can I make Nutella fudge with sweetened condensed milk?

Yes—Nutella fudge condensed milk style is rich and glossy. Still, it works best with some real chocolate included for structure and depth, so the squares set cleanly and don’t become overly soft.

17) How do I make maple fudge with sweetened condensed milk?

Maple fudge condensed milk versions usually set best with white chocolate. Then, add maple syrup for flavor and, if you want a stronger aroma, a small amount of maple extract. As a result, you get a clear maple taste without a runny texture.

18) What about brown sugar fudge with sweetened condensed milk?

Brown sugar condensed milk fudge has a deeper, caramel-like sweetness. Typically, it works well as a variation of a white chocolate condensed milk fudge base, with brown sugar and butter helping create that butterscotch-style flavor.

19) Can I make white chocolate fudge with condensed milk?

Definitely. White chocolate and sweetened condensed milk fudge is one of the easiest non-dark-chocolate options. Even so, melt it gently—white chocolate can scorch faster—then chill until firm for clean squares.

20) Can I make vanilla fudge with sweetened condensed milk?

Yes. Vanilla condensed milk fudge is often based on white chocolate plus sweetened condensed milk, then boosted with extra vanilla (and a pinch of salt) so it tastes intentionally “vanilla” rather than just sweet.

21) Can I use evaporated milk instead of sweetened condensed milk?

Not in the same way. Evaporated milk fudge is a different method because evaporated milk isn’t sweetened and doesn’t have the same thickness. So, if a recipe calls for sweetened condensed milk, swapping evaporated milk usually won’t set correctly without other changes.

22) Can I make fudge without sweetened condensed milk?

Yes, but it becomes a different style of fudge—often old fashioned fudge made with sugar, milk (or evaporated milk), butter, and careful cooking. Therefore, if your goal is quick condensed milk fudge, it’s better to use the intended ingredient.

23) How long does sweetened condensed milk fudge take to set?

Most batches firm up in 2–4 hours in the refrigerator. Meanwhile, a thicker pan or a softer flavor (like peanut butter-heavy versions) may take longer. If you want the neatest cuts, chilling overnight is ideal.

24) Should I store condensed milk fudge in the fridge or at room temperature?

If your kitchen is cool, room temperature works for a couple of days in an airtight container. Otherwise, refrigeration keeps the texture firm and stable. For longer storage, freezing also works well once pieces are wrapped tightly.

25) Can I freeze sweetened condensed milk fudge?

Yes. Freeze it in layers with parchment between pieces, sealed well to prevent freezer smells. Then thaw in the fridge and let it sit a few minutes before serving so the texture softens slightly.

26) How do I scale a sweetened condensed milk fudge recipe up or down?

Start by scaling based on the sweetened condensed milk amount, then keep the chocolate ratio consistent. For example, doubling the batch usually means using two cans of sweetened condensed milk and roughly double the chocolate, then using a larger tin.

27) What’s the easiest way to cut fudge neatly?

First, chill until fully firm. Next, use a warm knife (run it under hot water, wipe dry). Then slice with steady pressure, wiping the blade between cuts. As a result, edges stay clean and the pieces look gift-box ready.

28) Why does my condensed milk fudge taste too sweet?

Milk chocolate and some white chocolates are very sweet on their own, and sweetened condensed milk adds more sugar. Instead, use darker chocolate, add a pinch more salt, or balance the flavor with nuts. Additionally, vanilla and espresso powder can make the sweetness feel more rounded.

29) Can I make a “creamy fudge recipe with condensed milk” on the stove without overcooking it?

Yes—low heat is the safest route. Stir constantly until the mixture is glossy and smooth, then remove it from heat promptly. Overheating is what most often causes separation or a dull, greasy texture.

30) What’s a good “Christmas fudge recipe condensed milk” approach without extra fuss?

Choose one dark chocolate batch, one white chocolate or vanilla batch, and one peanut butter batch for contrast. Then add simple mix-ins—nuts, crushed biscuits, or a peppermint sprinkle—so the tray feels festive while the method stays easy.