A Complete Guide for Food Lovers, Health Seekers, and DIY Cooks
Salami—the word conjures up visions of rustic Italian kitchens, spicy aromas, and mouthwatering slices enjoyed with cheese or olives. But if you care about health, clean eating, or just want to avoid additives, the question is: Can you make healthy, minimally processed salami at home?
The answer is YES—and it’s easier than you might think.
This post covers the what, why, and how of homemade salami, along with several practical, delicious recipes for any kitchen. Let’s dive in!
What is Salami, Really?
Salami is a family of cured sausages made by fermenting and air-drying meat, usually pork or beef, with spices and salt. Traditionally, salami was made to preserve meat for long periods without refrigeration.
Why make it yourself?
- Control every ingredient: Choose your own meat, salt, and spices.
- Skip preservatives: No unnecessary nitrates, nitrites, or chemical flavors.
- Customize for health: Go leaner, lower-sodium, or even plant-based!
The Basics: How is Salami Made?
- Meat Selection
Start with fresh, high-quality meat—pork, beef, chicken, or even game. For classic salami, a bit of fat (about 20%) is ideal for flavor and texture. - Seasoning
Salt, black pepper, garlic, wine, fennel seeds, or chili are common. Use what you love. - Curing or Cooking
Traditional salami is cured—fermented and air-dried for weeks or months. But home cooks can make oven-baked, steamed, or even instant “semi-cured” versions for speed and safety. - Casing
Either use natural/edible casings (from the butcher), plastic wrap, or simply foil for no-casing versions.
Is Homemade Salami Healthier?
It can be—IF you control the process:
- Use leaner meats, fresh spices, and skip artificial preservatives.
- Control salt levels.
- Choose oven-baked or steamed versions if you want to avoid nitrites or worry about curing at home.
- Add extra flavor and nutrition with herbs, veggies, or even plant-based swaps.
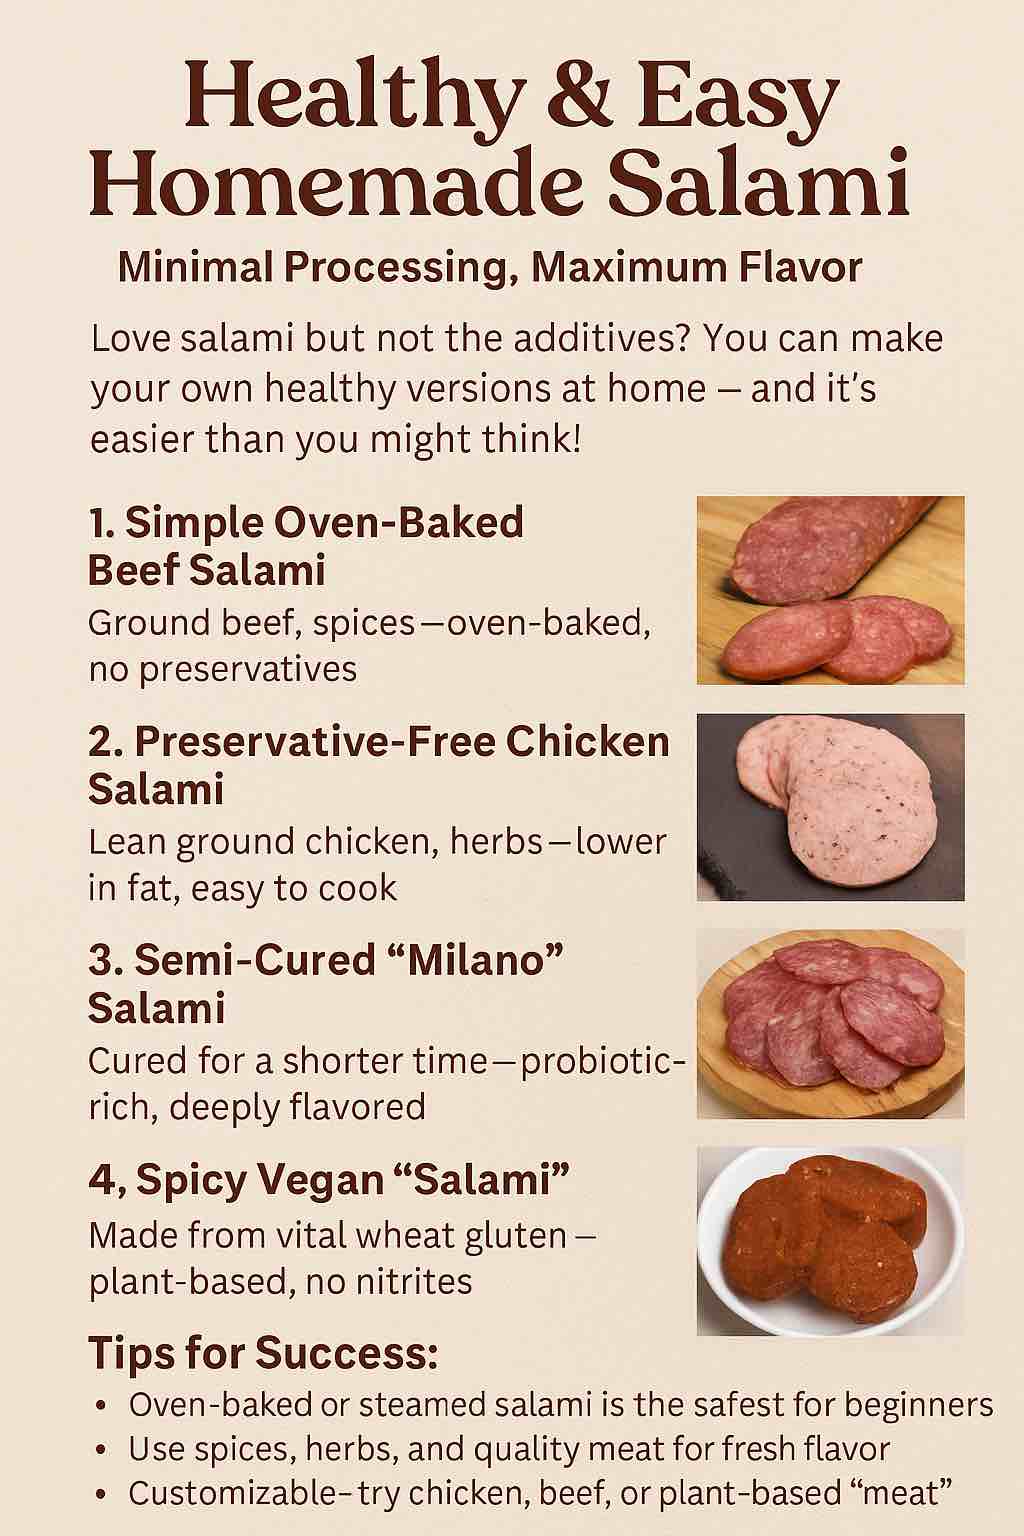
4 Healthy, Easy Salami Recipes for Home
1. Simple Oven-Baked Beef Salami
Best for: Fast, fuss-free, high-protein snacking
No fermentation, no casing, no preservatives!
You’ll need:
- 500g (1 lb) lean ground beef (or chicken/turkey)
- 1.5 tsp salt
- 1 tsp black pepper
- 1 tsp garlic powder
- 1 tsp mustard seeds
- ½ tsp smoked paprika or a few drops liquid smoke (optional)
- Pinch of sugar or honey (optional, helps flavor—not needed for keto)
Steps:
- Mix everything very well in a bowl (knead with hands for best texture).
- Shape into a thick log.
- Wrap tightly in plastic wrap, then foil.
- Chill in fridge 24 hours for flavors to meld.
- Remove wrap, place on rack in baking tray. Bake at 160°C (325°F) until internal temp is 70°C (160°F), about 45–60 mins.
- Cool fully before slicing thin.
Why it’s healthy:
- No chemicals, minimal salt, your meat and your flavors!
2. Preservative-Free Chicken Salami
Best for: Lean protein, lower fat, quick lunchboxes
You’ll need:
- 500g ground chicken
- 1 tsp salt
- 1 tsp black pepper
- 1 tsp red chili flakes
- 1 tsp garlic powder
- ½ tsp ground coriander
- 1 tbsp finely chopped bell pepper (optional for color)
Steps:
- Mix ingredients well.
- Shape into log, wrap tightly in baking paper and then foil.
- Steam for 25–30 mins or until cooked through, or bake at 160°C for 40 mins.
- Cool, unwrap, and chill before slicing.
Why it’s healthy:
- No nitrites or additives, high in protein, lower in fat.
3. Traditional-Style “Milano” Semi-Cured Salami (Short Ferment)
Best for: Classic salami fans with some patience, probiotic benefits
You’ll need:
- 400g pork shoulder (finely minced)
- 100g pork fat
- 2 tsp salt
- 1 tsp black pepper
- ½ tsp garlic powder
- 1 tbsp red wine
- Natural casing (from butcher)
- Optional: 1/4 tsp starter culture (for safe fermentation, see butchers or online)
Steps:
- Mix meat, fat, salt, pepper, garlic, wine. Add starter culture if using.
- Stuff tightly into soaked casing.
- Hang in cool, humid place (15–20°C, 80–90% humidity) for 3 days to ferment.
- Move to cooler, less humid area to dry for 2–4 weeks until firm.
- Slice thin and enjoy.
Note: Always follow food safety for curing (see trusted online guides).
Why it’s healthy:
- No commercial chemicals, natural fermentation for gut health, real ingredients.
4. Spicy Vegan “Salami” (No Meat, All Flavor)
Best for: Plant-based eaters, anyone avoiding meat or preservatives
You’ll need:
- 1 cup vital wheat gluten
- 1 tbsp chickpea flour
- 2 tbsp tomato paste
- 1 tbsp olive oil
- 2 tbsp nutritional yeast
- 1 tsp smoked paprika
- ½ tsp garlic powder
- ½ tsp onion powder
- 1 tsp black pepper
- 1 tbsp soy sauce or tamari
- 1 tsp miso paste (optional)
- ¾ cup water
Steps:
- Mix all dry ingredients.
- Whisk wet ingredients separately, then combine.
- Knead into a dough, shape into log, wrap tightly in foil.
- Steam for 40–50 mins.
- Cool and slice thin.
Why it’s healthy:
- No nitrates, cholesterol, or processed meat—just plant power and fiber!
Tips for Success & Safety
- Oven-baked/steamed salami is safest for beginners—no risk of unsafe fermentation.
- If curing, use a starter culture for reliable results.
- Cool and chill before slicing for best texture.
- Experiment! Add herbs, seeds, or chopped nuts for variety.
Final Thoughts
Homemade salami gives you real control, flavor, and nutrition with minimal fuss. Whether you want classic beef or chicken, probiotic-rich “semi-cured,” or a plant-powered version, there’s a healthy salami for every kitchen.
Why settle for store-bought with additives when you can make your own—clean, tasty, and tailored to your health goals?
Hungry for More?
Want step-by-step photos, video tutorials, or a printable recipe card? Or are you ready for an in-depth guide to fermentation safety and flavor mastery?
Let us know in the comments or read more on MasalaMonk.com!
Ready to slice into your own homemade salami? Try a recipe and share your creations—tag us @MasalaMonk!
10 FAQs for Healthy Homemade Salami
1. Is it safe to make salami at home?
Yes, if you follow proper recipes, hygiene, and temperature guidelines. Oven-baked or steamed salami is safest for beginners, while fermentation or curing requires more care and experience.
2. Do I need curing salts (nitrates/nitrites) for homemade salami?
For oven-baked or steamed salami, you can skip curing salts. For dry-cured or fermented salami, curing salts are recommended to prevent harmful bacteria—unless you’re very experienced with safe fermentation.
3. What meats can I use for healthy homemade salami?
Lean beef, chicken, turkey, pork, and even wild game. For healthier versions, choose lean cuts and trim excess fat.
4. Can I make salami without any preservatives or additives?
Yes! Use only meat, salt, herbs, and spices for oven or steamed salami. For dry-cured types, the process itself preserves the meat with salt, but food safety is essential.
5. How long does homemade salami last?
Oven-baked or steamed salami lasts up to 7–10 days in the fridge. Dry-cured salami can last several weeks or even months if stored properly.
6. Is homemade salami healthier than store-bought?
Usually, yes. You control the meat quality, salt, and spices, and avoid commercial additives, preservatives, and excess sodium.
7. Are there plant-based or vegan salami options?
Absolutely! You can make vegan salami using vital wheat gluten, spices, tomato paste, and olive oil, steamed or baked for firm texture.
8. Can I customize the flavor of my homemade salami?
Definitely. Add any herbs, spices, seeds, chili flakes, or even chopped nuts to suit your taste preferences.
9. What’s the easiest salami to make at home for beginners?
Oven-baked or steamed chicken or beef salami—no casing, no fermentation, just mix, shape, cook, and slice.
10. Do I need special equipment to make salami at home?
No special tools are required for oven or steamed recipes. For traditional cured salami, you’ll need casings and a cool, humid place for drying.


