Posted on 12 Comments

Blueberry Pancakes (6 Recipes) + Homemade Pancake Mix

For photo-worthy blueberry pancakes, keep the heat medium and add blueberries on the pan (especially if they’re frozen), then finish with a warm maple-syrup pour for glossy, golden edges.

Some mornings call for something simple. Others practically demand a warm stack, a pat of butter sliding into the edges, and that first bite where the blueberries burst and the pancake stays airy instead of heavy. That’s the promise here: blueberry pancakes that taste like blueberries, not like flour with a few berries sprinkled in out of obligation.

To get there, we’ll start with a dependable classic—your “best blueberry pancake” base—then move through the variations people actually look for: blueberry hotcakes, banana and blueberry pancakes, blueberry lemon pancake, blueberry ricotta hotcakes, blueberry oat pancakes (and blueberry oatmeal pancake), plus high protein blueberry pancakes that still taste like breakfast. Along the way, you’ll get a practical approach for frozen blueberries for pancakes, a homemade blueberry pancake mix you can stash for fast mornings, and an easy way to make blueberry pancakes with pancake mix taste like you made them from scratch.

If you’re the type who loves building a whole breakfast scene, there are plenty of natural pairings too: crisp bacon, cozy hot chocolate, café-style coffee, or even a bright smoothie. We’ll get to those at the end—without turning breakfast into a project.


Blueberry Pancakes That Stay Fluffy: A Simple Recipe That Works Every Time

Blueberry pancakes become reliably fluffy for a handful of reasons, and once you understand them, you can switch flavours, add protein, go gluten-free, or use frozen berries—without losing the texture you came for.
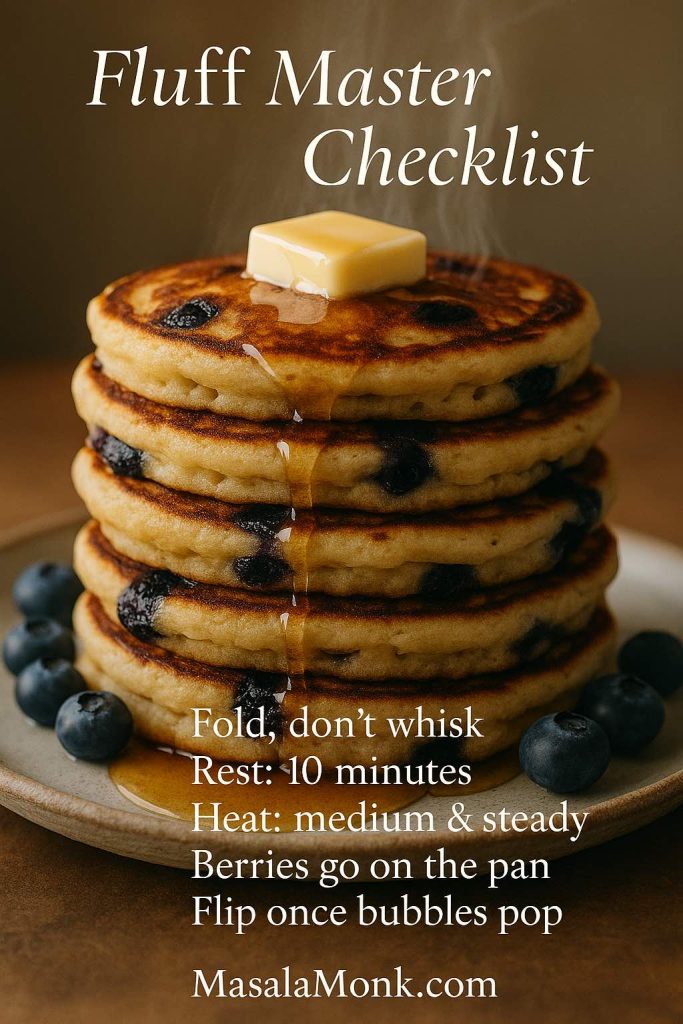
Fluffy blueberry pancakes with butter and maple syrup, featuring a quick checklist for keeping pancakes light and airy.
Pro tip: if your first pancake spreads too thin, let the batter rest 3–5 minutes more—hydration thickens it and improves lift.

First, keep the batter gentle

Pancakes want a light touch. As soon as flour meets liquid, gluten starts developing. Stir vigorously and the batter tightens; cook that batter and you’ll get dense pancakes that feel more like bread. Instead, fold until the dry flour disappears and stop. Even if you see a few lumps, leave them alone. They relax as the batter rests.

If you like seeing the logic behind the “don’t overmix” rule, King Arthur’s pancake guidance is consistently practical and clear: Simply Perfect Pancakes. Epicurious also explains why mixing matters in a way that’s easy to remember: why overmixing matters in baking.

Next, let the batter rest—briefly, not forever

A short rest—about 8 to 15 minutes—lets the flour hydrate and the leavening begin to work. The batter thickens slightly, bubbles form more evenly, and the pancakes cook up softer. Serious Eats has a great, tested perspective on pancake rest and texture: The Easiest, Fluffiest Pancake Recipe.

Meanwhile, treat heat like an ingredient

High heat is the fastest way to scorch the outside while leaving the middle undercooked. Low heat, on the other hand, can dry pancakes out before they brown. Medium heat is the sweet spot for most stoves—steady enough to set the center and gentle enough to cook through.

Finally, handle blueberries with intention

Fresh berries and frozen berries behave differently. Frozen blueberries for pancakes bleed juice as they warm; if you fold them into the bowl, you may end up with purple batter and uneven streaking. Consequently, the simplest move is also the smartest: add blueberries per pancake on the pan rather than mixing all of them into the batter. King Arthur recommends this approach for a reason.

With those basics in place, you’re ready for the classic.

Also Read: Double Chocolate Chip Cookies – Easy Recipe with 7 Variations


Classic Blueberry Pancakes (The Best Blueberry Pancake Base Recipe)

This is the stack that fits almost any situation: weekend brunch, quick weekday comfort, or the kind of morning when you want blueberries and pancakes without fuss. It also forms the backbone for many of the variations below.

Ingredients (makes about 10–12 medium pancakes)
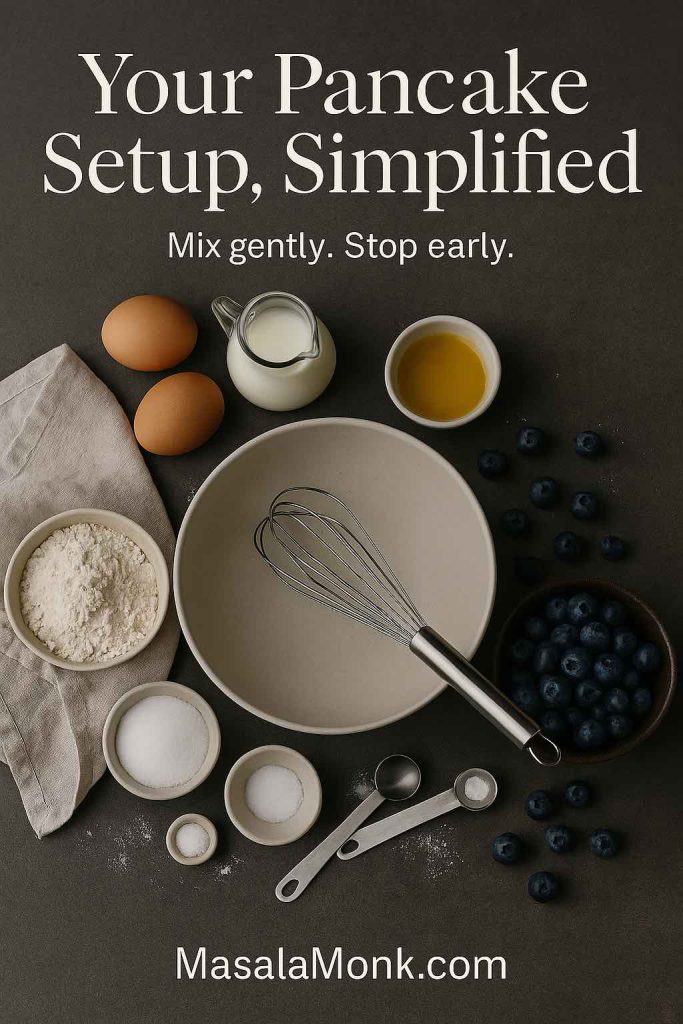
Overhead portrait photo of measured blueberry pancake ingredients arranged on a dark countertop with a mixing bowl and whisk, featuring text overlay “Your Pancake Setup, Simplified” and “Mix gently. Stop early.” with MasalaMonk.com in the footer.
Pre-measuring your ingredients keeps the batter calm—once wet meets dry, mix only until the flour disappears to keep blueberry pancakes light and fluffy.

Dry ingredients

  • 1 ½ cups (190 g) all-purpose flour
  • 2 tbsp (25 g) sugar
  • 2 tsp baking powder
  • ½ tsp baking soda
  • ½ tsp fine salt
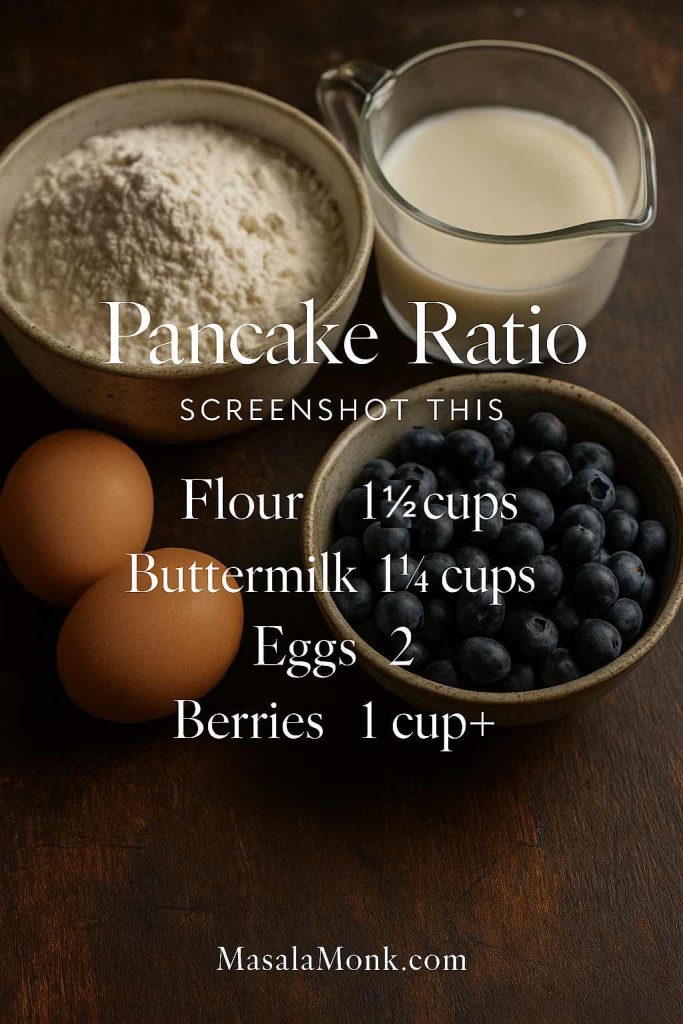
Pancake ingredient ratio card showing flour, buttermilk, eggs, and blueberries for classic blueberry pancakes.
Use this as your “batter compass”: if it feels thick like scoopable yogurt, you’re in the fluffy zone; if it pours like milk, add 1–2 tbsp flour.

Wet ingredients

  • 1 ¼ cups (300 ml) buttermilk
  • 2 large eggs
  • 3 tbsp (45 g) melted butter (or neutral oil)
  • 1 tsp vanilla extract (optional)

Berries

  • 1 to 1 ¼ cups blueberries (fresh preferred here)

Buttermilk substitute: If you don’t have buttermilk, stir 1 tbsp lemon juice (or vinegar) into 1 ¼ cups milk and let it stand for 5–10 minutes.
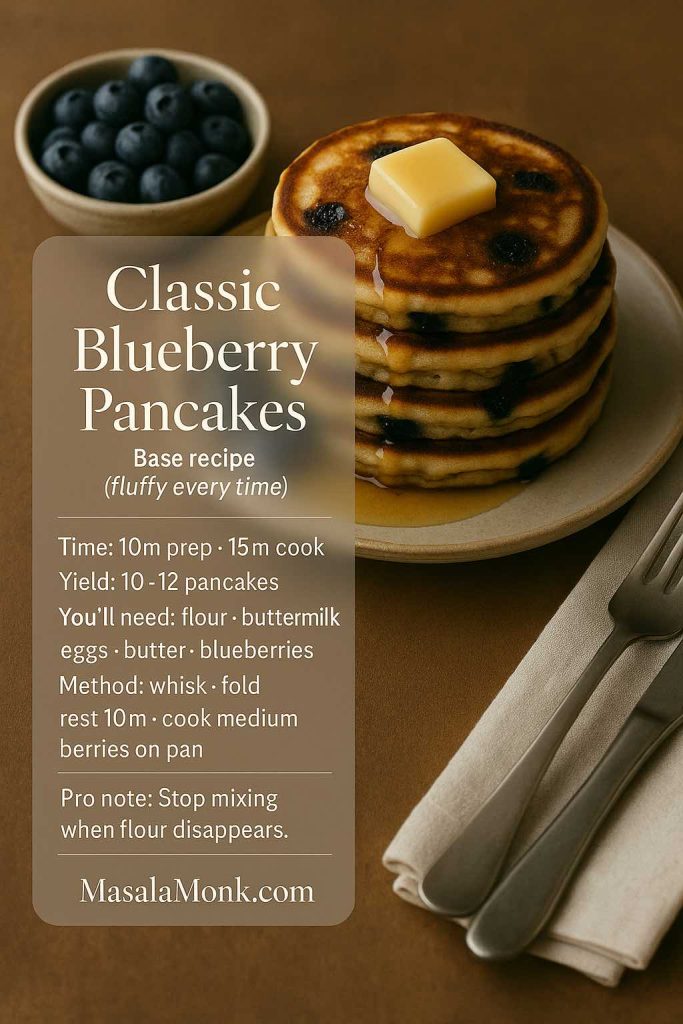
Classic blueberry pancakes recipe card with buttermilk batter, showing time, yield, key ingredients, and a quick method for fluffy pancakes.
Batter consistency check: it should mound, then slowly spread. If it pours like milk, add 1–2 tbsp flour; if it’s too thick to ribbon off a spoon, add a splash of buttermilk.

Step by Step Method – How to make Blueberry Pancakes

1. Whisk the dry ingredients in a large bowl: flour, sugar, baking powder, baking soda, salt.

Close-up portrait photo of a whisk mixing dry pancake ingredients in a ceramic bowl with text overlay “Whisk 20 Seconds” and “Even lift, no salty pockets,” with MasalaMonk.com in the footer.
A quick whisk spreads baking powder and salt evenly, so every blueberry pancake rises the same way—no bitter spots, no uneven texture.

2. Whisk the wet ingredients in a second bowl: buttermilk, eggs, melted butter, vanilla.
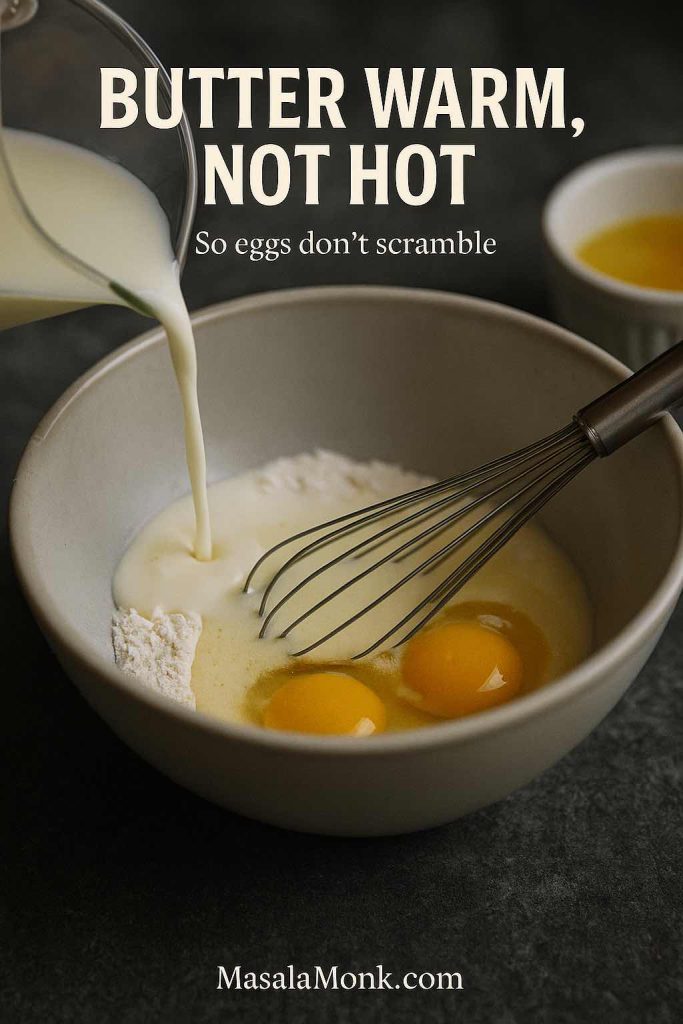
Portrait close-up of wet ingredients for blueberry pancakes—eggs and buttermilk in a mixing bowl with a whisk—featuring text overlay “Butter warm, not hot” and “So eggs don’t scramble,” with MasalaMonk.com in the footer.
Let melted butter cool slightly before whisking it in—smooth, glossy wet batter blends faster and keeps blueberry pancakes tender.

3. Combine gently. Pour wet into dry and fold with a spatula until just combined. Stop the moment the flour disappears.
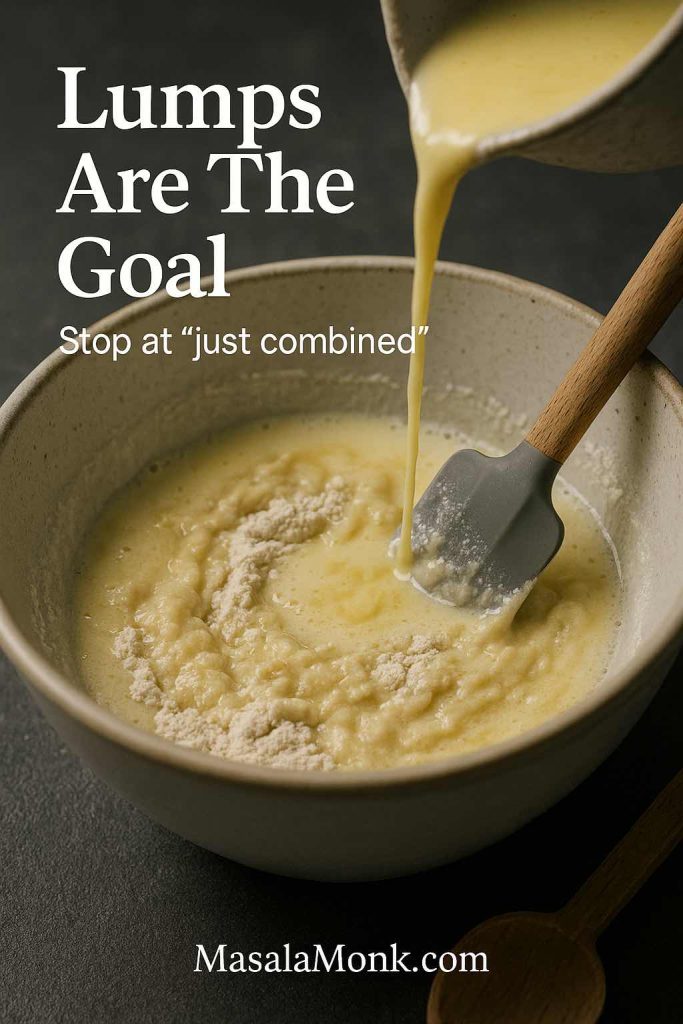
Portrait action shot of blueberry pancake batter as wet ingredients are poured into dry ingredients in a ceramic bowl, with a spatula folding gently and visible lumps, featuring text overlay “Lumps Are The Goal” and “Stop at ‘just combined’,” with MasalaMonk.com in the footer.
Resist smoothing the batter—those small lumps are what keep blueberry pancakes tender instead of chewy.

4. Rest the batter for 10 minutes while you warm your pan.
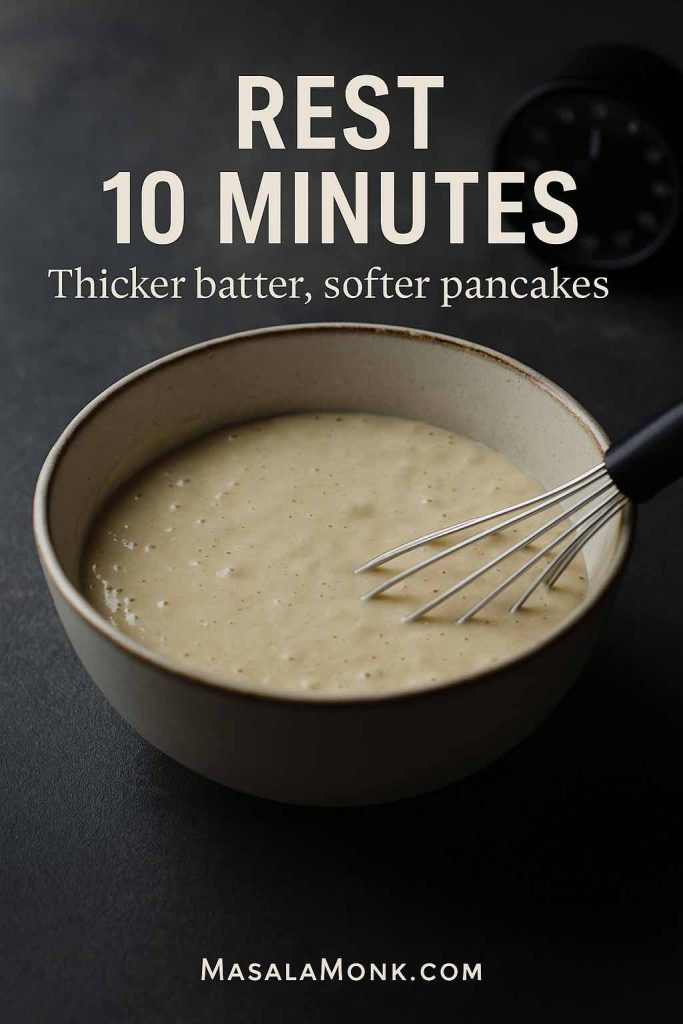
Portrait photo of blueberry pancake batter resting in a ceramic bowl on a dark counter with a whisk, featuring text overlay “Rest 10 Minutes” and “Thicker batter, softer pancakes,” with MasalaMonk.com in the footer.
A short rest lets the batter thicken and bubble—so your blueberry pancakes cook up fluffy instead of spreading thin.

5. Preheat a skillet over medium heat and lightly grease it.
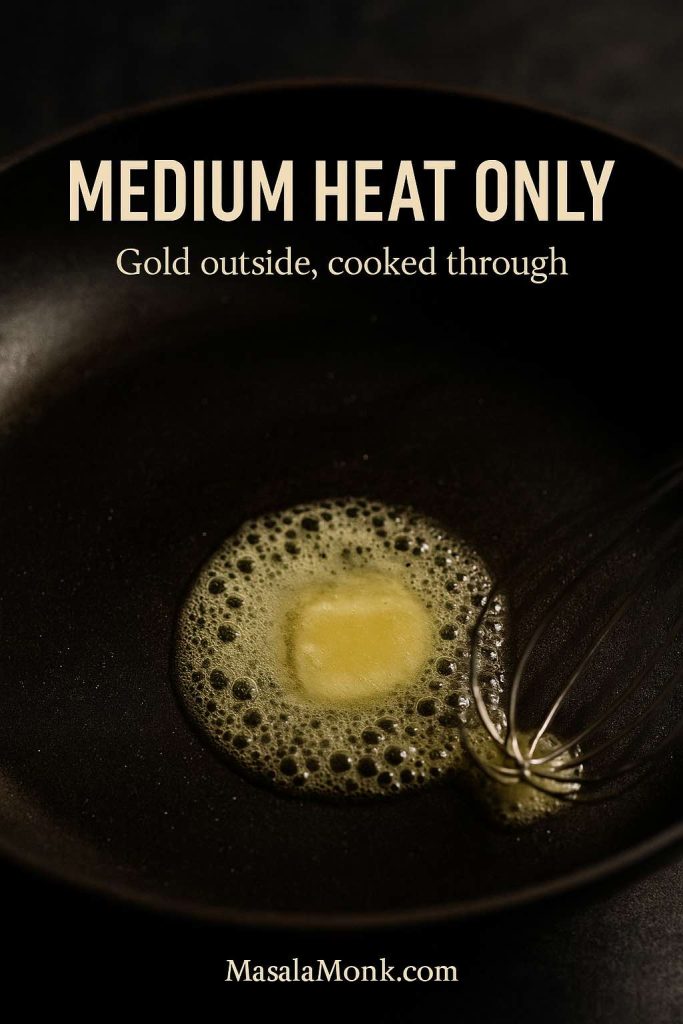
Portrait close-up of butter melting and foaming in a dark skillet for blueberry pancakes, with text overlay “Medium Heat Only” and “Gold outside, cooked through,” and MasalaMonk.com in the footer.
When butter foams gently (not smoking), the pan is ready—medium heat helps blueberry pancakes brown evenly while cooking through.

6. Spoon the batter (about ¼ cup per pancake). Immediately sprinkle blueberries on top of each pancake. This keeps the batter from turning grey-purple and ensures berries distribute evenly.
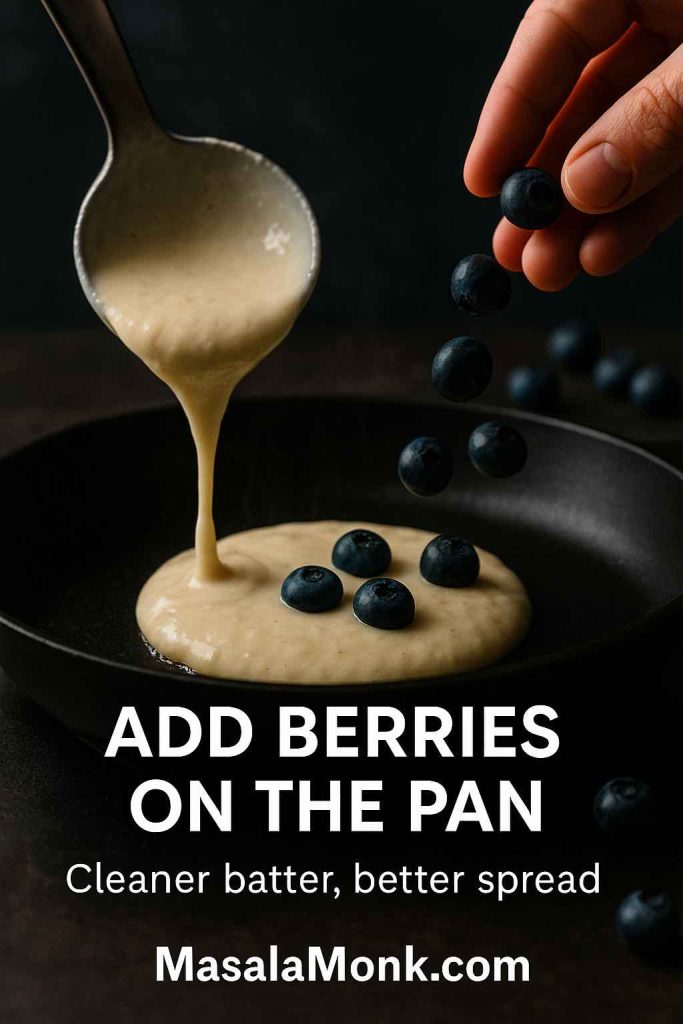
Portrait action photo of blueberry pancakes being cooked as batter is ladled onto a skillet and blueberries are added on top, with text overlay “Add berries on the pan” and “Cleaner batter, better spread,” and MasalaMonk.com in the footer.
Adding blueberries on the pan works for fresh berries and frozen blueberries for pancakes—your batter stays clean and each pancake gets an even scatter of fruit.

7. Flip when ready. Look for bubbles that rise and pop on the surface and edges that look set. Flip and cook 1–2 minutes more.
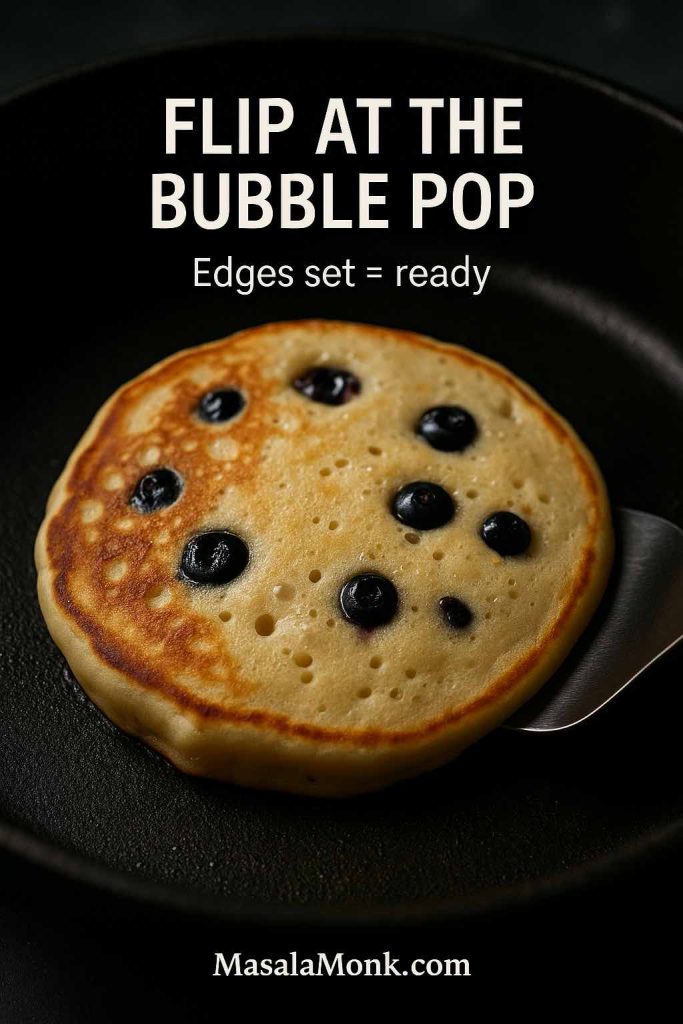
Portrait close-up of a blueberry pancake cooking in a skillet with bubbles on the surface and a spatula sliding underneath, featuring text overlay “Flip at the Bubble Pop” and “Edges set = ready,” with MasalaMonk.com in the footer.
Wait for popped bubbles and set edges before flipping—this timing helps blueberry pancakes cook through without tearing or going pale.
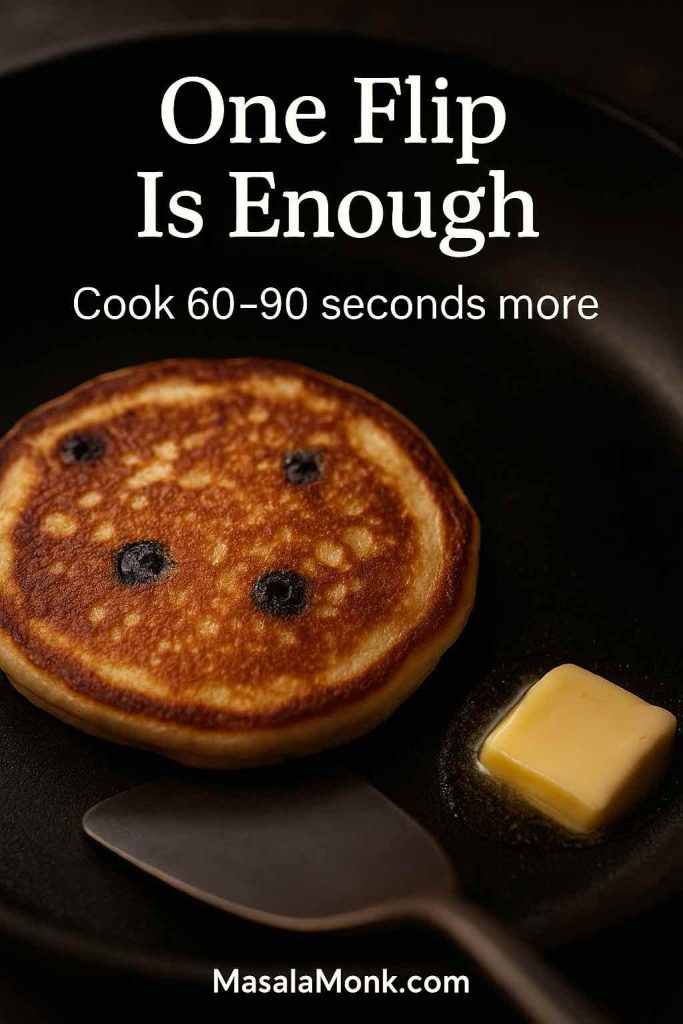
Portrait photo of a blueberry pancake in a skillet after flipping, showing an even golden-brown surface and a pat of butter melting nearby, with text overlay “One Flip Is Enough” and “Cook 60–90 seconds more,” plus MasalaMonk.com in the footer.
After flipping, cook briefly—just long enough to set the center—so blueberry pancakes stay fluffy instead of drying out.

Why this classic recipe works

Because the batter is thick enough to suspend bubbles, the rest improves hydration, and the berries are added at the right moment. In other words, the method protects the fluff.
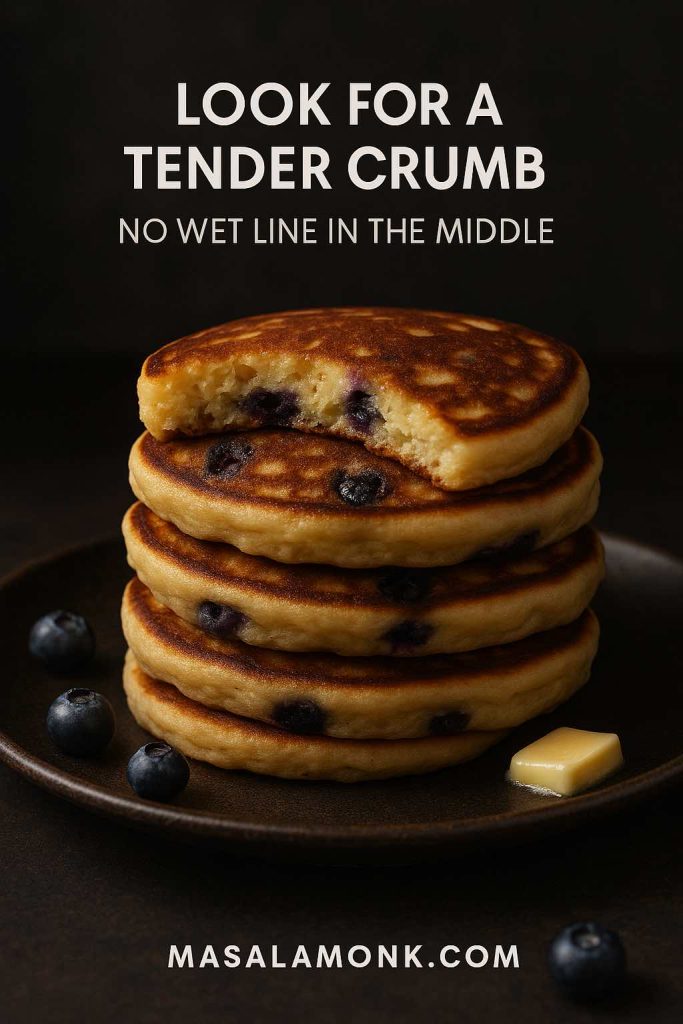
Portrait photo of a stack of blueberry pancakes with one pancake cut open to show the tender crumb and blueberries inside, featuring text overlay “Look for a tender crumb” and “No wet line in the middle,” with MasalaMonk.com in the footer.
A fully cooked blueberry pancake looks moist but not raw—check for a tender crumb with no wet line through the center.

If you’re making a bigger breakfast and want something warm-spiced on the side, you could borrow ideas from fluffy buttermilk pancakes with stewed cinnamon apples—even if you stick with blueberries here.


Blueberry Hotcakes: How to Choose and Store Blueberries for Pancakes

Blueberry hotcakes are only as good as the berries you put in them. Fortunately, “good berries” doesn’t always mean expensive berries—it usually means berries with the right texture and storage.

Choosing blueberries

  • Look for berries that are plump and deep blue, not shriveled.
  • A light silvery “bloom” is normal and protective.
  • Avoid wet or leaky containers; moisture speeds spoilage.

For practical storage guidelines on Blueberries, this Martha Stewart guide is straightforward.
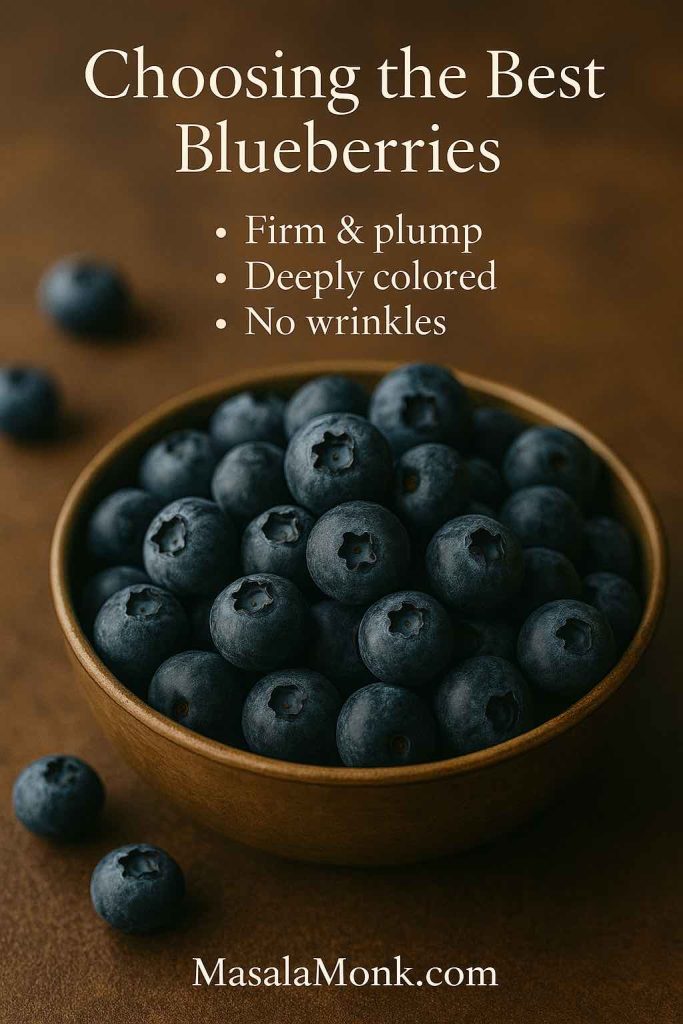
Close-up of fresh blueberries with a guide for choosing firm, deeply colored berries for blueberry pancakes and blueberry hotcakes.
Buying ahead? Keep berries unwashed in the fridge, then rinse right before cooking—dry berries brown better and prevent watery batter.

Storing blueberries

  • Don’t wash berries until you’re ready to use them.
  • Keep them chilled and dry.
  • If you notice a few soft berries, remove them quickly so the rest stay fresher longer.

If you also enjoy the “why blueberries are good for you” angle—without turning breakfast into homework—this reader-friendly overview is a solid companion: health benefits of blueberries. For a reputable broader look at blueberries and health, the American Heart Association has a helpful summary: fresh or frozen—what to know about blueberries and health.

Now, if fresh berries aren’t an option—or you simply prefer keeping a bag in the freezer—let’s make frozen blueberry pancakes that taste just as good.


Frozen Blueberry Pancakes: How to Use Frozen Blueberries for Pancakes Without Purple Batter

Frozen blueberry pancakes can be wonderful; they can also become streaky and odd-looking if the berries leak too much juice. Thankfully, there’s a calm, dependable approach.
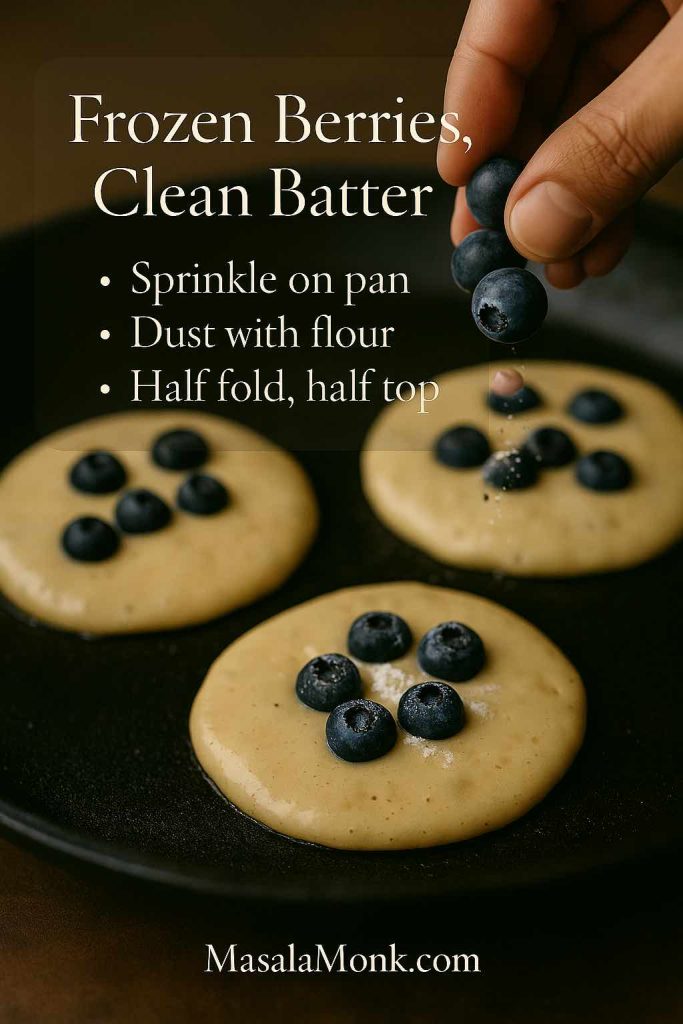
Frozen blueberries being sprinkled onto pancake batter on a skillet, showing methods to prevent purple batter when making frozen blueberry pancakes.
Keep berries frozen until the last second—cold berries bleed less. Sprinkle them on each pancake after ladling batter, then flip once bubbles pop for clean edges and even berry distribution.

The easiest method: add berries on the pan

Make your batter as usual, then ladle batter onto the hot skillet and sprinkle frozen blueberries right on top. Flip once the edges set. The berries warm inside the pancake rather than staining the whole bowl.

Frozen blueberry pancakes recipe card showing frosty blueberries and the no-purple method of adding frozen blueberries on the pan instead of mixing into batter.
Extra insurance: toss frozen berries with 1 tsp flour per cup before cooking—this helps them “grip” the batter and reduces streaking, especially if your kitchen is warm.

A second method: a light flour coat

If you prefer folding berries into the batter, toss frozen berries with 1 tsp flour per cup of berries. This reduces bleeding and helps the berries grip the batter. Then fold gently and cook immediately.
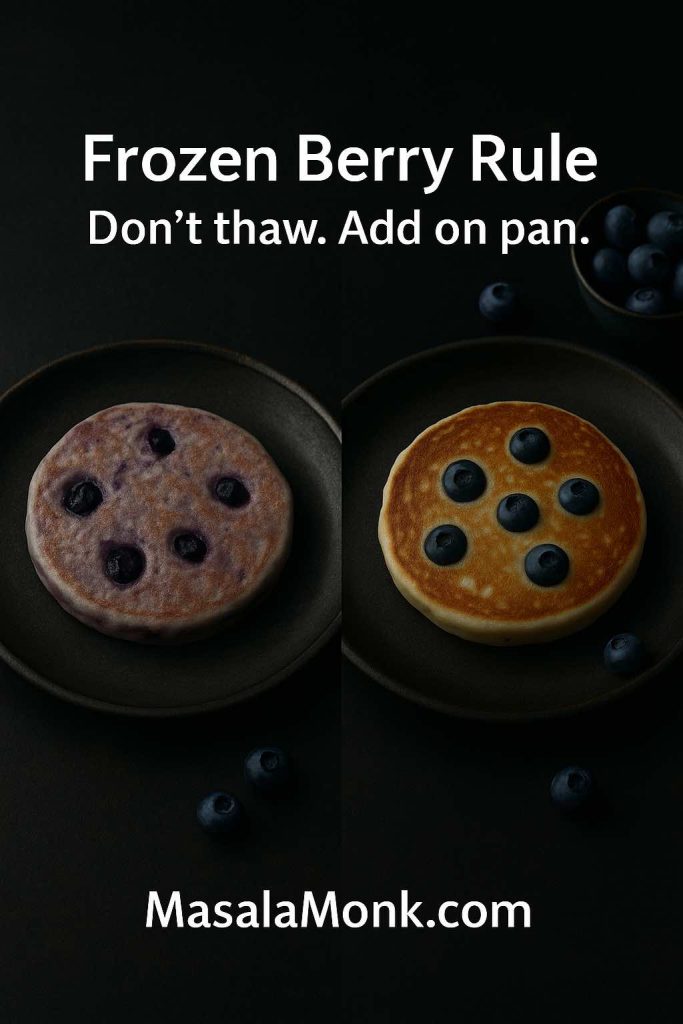
Portrait comparison image showing two blueberry pancakes side by side—one made with thawed frozen blueberries that stains the batter purple and one with frozen blueberries added on the pan—featuring text overlay “Frozen Berry Rule: Don’t thaw. Add on pan.” and MasalaMonk.com in the footer.
For frozen blueberry pancakes with clean color and better berry distribution, skip thawing and add frozen blueberries directly onto each pancake after ladling the batter.

A third method: half-and-half

Fold in half the berries, then add the rest per pancake on the skillet. This gives you berries throughout without turning everything purple.

For a well-tested, practical take on blueberry handling and pancake texture, King Arthur is again a dependable reference: Blueberry Pancakes recipe.


Banana Blueberry Pancake: Banana and Blueberry Pancakes That Stay Light

Banana blueberry pancake batter can become heavy because banana adds moisture and density. The trick is balance: enough banana for sweetness and structure, but not so much that the pancake turns cakey.

Ingredients (makes about 8–10 pancakes)

  • 1 ripe banana, mashed (about 120–140 g)
  • 1 ¼ cups (160 g) all-purpose flour
  • 2 tsp baking powder
  • ½ tsp salt
  • 1 tbsp sugar or honey (optional, depending on banana)
  • 1 large egg
  • ¾ cup (180 ml) milk
  • 2 tbsp melted butter or oil
  • ¾ to 1 cup blueberries
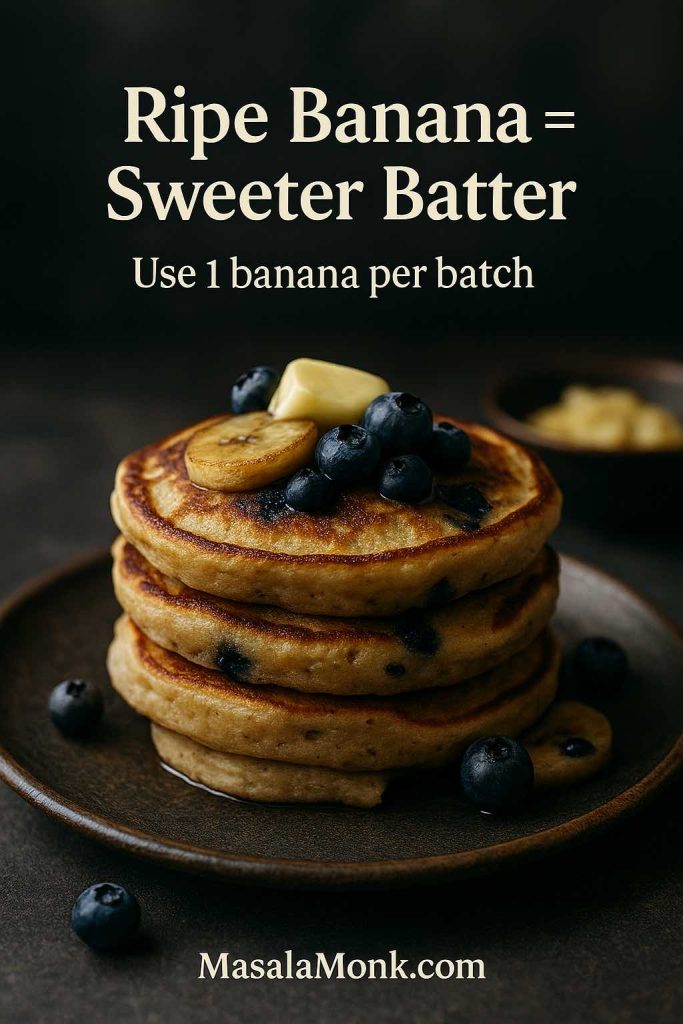
Portrait photo of a stack of banana blueberry pancakes topped with blueberries, a caramelized banana slice, and a small butter pat, featuring text overlay “Ripe Banana = Sweeter Batter” and “Use 1 banana per batch,” with MasalaMonk.com in the footer.
For banana and blueberry pancakes that stay fluffy, use one very ripe banana per batch—enough sweetness and moisture without turning the stack dense.

Method

  1. Mash banana until mostly smooth.
  2. Whisk in egg, milk, and oil.
  3. Add flour, baking powder, salt, and sugar if using; fold gently.
  4. Rest 5–8 minutes.
  5. Cook on medium heat and add blueberries per pancake on the skillet.
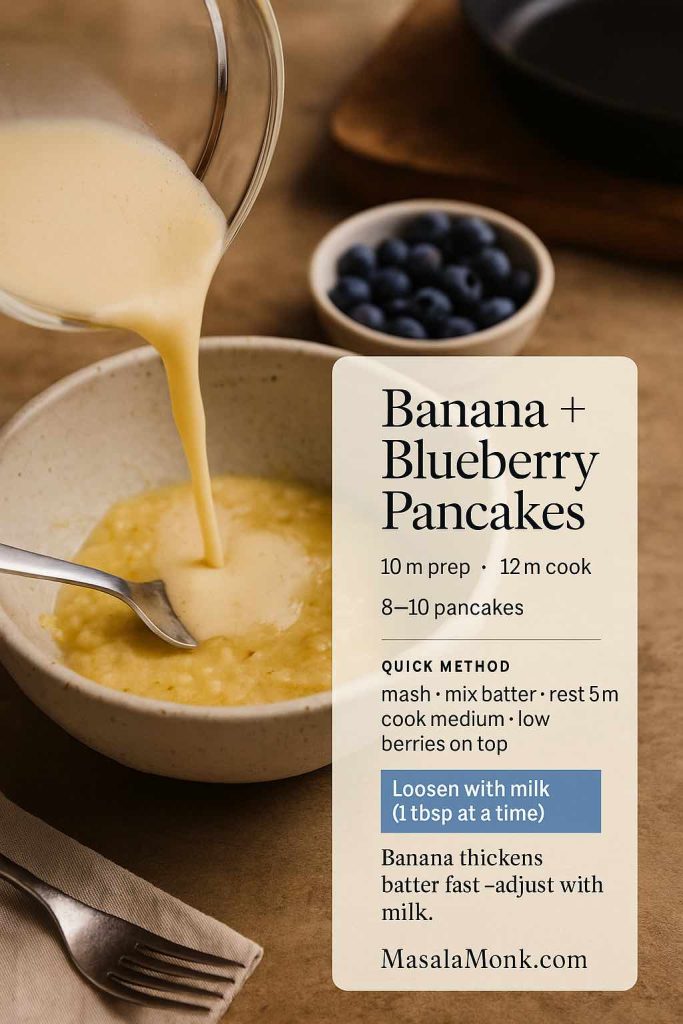
Banana and blueberry pancakes recipe card showing batter being poured into mashed banana, with tips to keep banana blueberry pancake batter fluffy and not dense.
Banana moisture changes by ripeness—aim for a batter that pours in a slow ribbon. If it’s too thick, add milk 1 tbsp at a time; if too loose, add 1 tbsp flour.

Small upgrades that feel special

  • A pinch of cinnamon makes the whole thing taste like banana bread meets blueberry pancakes.
  • A little lemon zest brightens the fruit flavour, especially if your blueberries are mild.

If you’re cooking for kids and want another soft breakfast option, you might enjoy apple pancakes for baby-led weaning or toddlers. It’s a different flavour, yet the easy, forgiving style pairs nicely with the banana-blueberry approach.

Also Read: 10 Best Espresso Martini Recipe Variations (Bar-Tested)


Blueberry Lemon Pancake: Bright, Fragrant, and Balanced

A blueberry lemon pancake should taste sunny, not sour. That’s why zest matters more than juice. Juice adds acidity; zest adds aroma and perceived sweetness.

Ingredients (makes about 10 pancakes)

  • 1 ½ cups (190 g) flour
  • 2 tbsp sugar
  • 2 tsp baking powder
  • ½ tsp baking soda
  • ½ tsp salt
  • Zest of 1 lemon
  • 1 ¼ cups buttermilk
  • 2 eggs
  • 3 tbsp melted butter
  • 1 cup blueberries
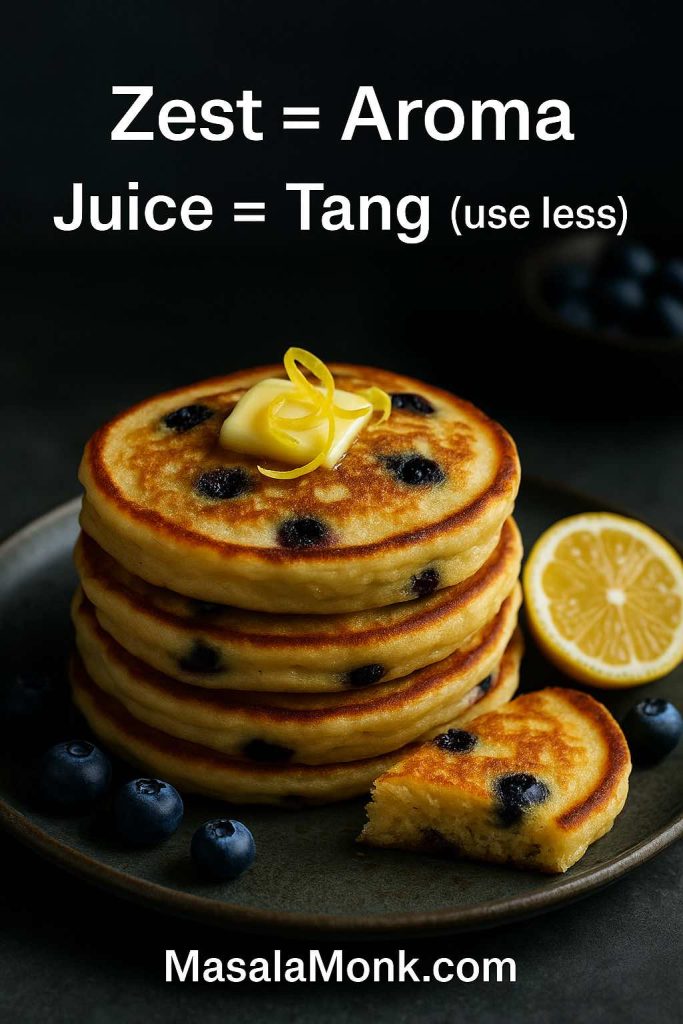
Portrait photo of a stack of blueberry lemon pancakes with a butter pat and lemon zest on top, a lemon half and blueberries on the plate, featuring text overlay “Zest = Aroma” and “Juice = Tang (use less),” with MasalaMonk.com in the footer.
For blueberry lemon pancakes that taste bright (not sour), lean on lemon zest for aroma and use lemon juice lightly for tang.

Method

  1. Whisk flour, sugar, baking powder, baking soda, salt, lemon zest.
  2. Whisk buttermilk, eggs, melted butter.
  3. Combine gently; rest 10 minutes.
  4. Cook on medium heat; add blueberries per pancake on the pan.
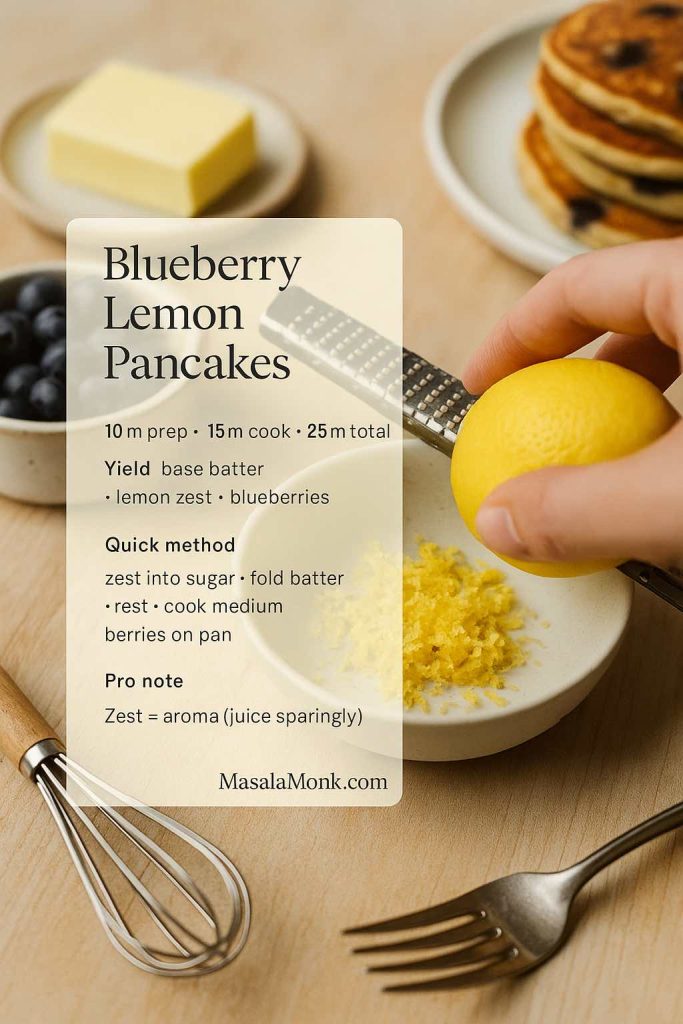
Blueberry lemon pancakes recipe card showing lemon zest added for aroma, with blueberries ready to sprinkle for a bright, balanced blueberry lemon pancake flavor.
Avoid bitter lemon notes: zest only the yellow skin (stop before the white pith). If you accidentally hit pith, reduce zest slightly and lean on vanilla for balance.

Turning this into blueberry lemon ricotta pancakes

If you want blueberry lemon ricotta pancakes—one of the most craveable brunch variations—stir ⅓ to ½ cup ricotta into the wet ingredients. If the batter looks too thick afterward, loosen it with a splash of milk. The result is softer, richer, and still balanced.

For a topping that leans into the citrus, lemon curd is a classic companion. If you’d like a reliable method you can make once and use all week, this is a solid starting point: silky smooth lemon curd.


Blueberry Ricotta Hotcakes: Blueberry and Ricotta Pancakes With a Café Feel

Blueberry ricotta hotcakes are tender and slightly rich, the kind of breakfast that feels like a treat even if you’re still in your pajamas. They also align beautifully with searches for blueberry and ricotta pancakes and blueberry ricotta hotcakes because the texture really is different: softer, thicker, and more luxurious.

Ingredients (makes about 8–10 thicker pancakes)

  • 1 ¼ cups (160 g) flour
  • 2 tbsp sugar
  • 2 tsp baking powder
  • ½ tsp salt
  • 3 eggs, separated
  • 1 cup ricotta
  • ¾ cup milk (plus a bit more if needed)
  • 1 tsp vanilla
  • 1 tbsp melted butter or oil
  • 1 cup blueberries
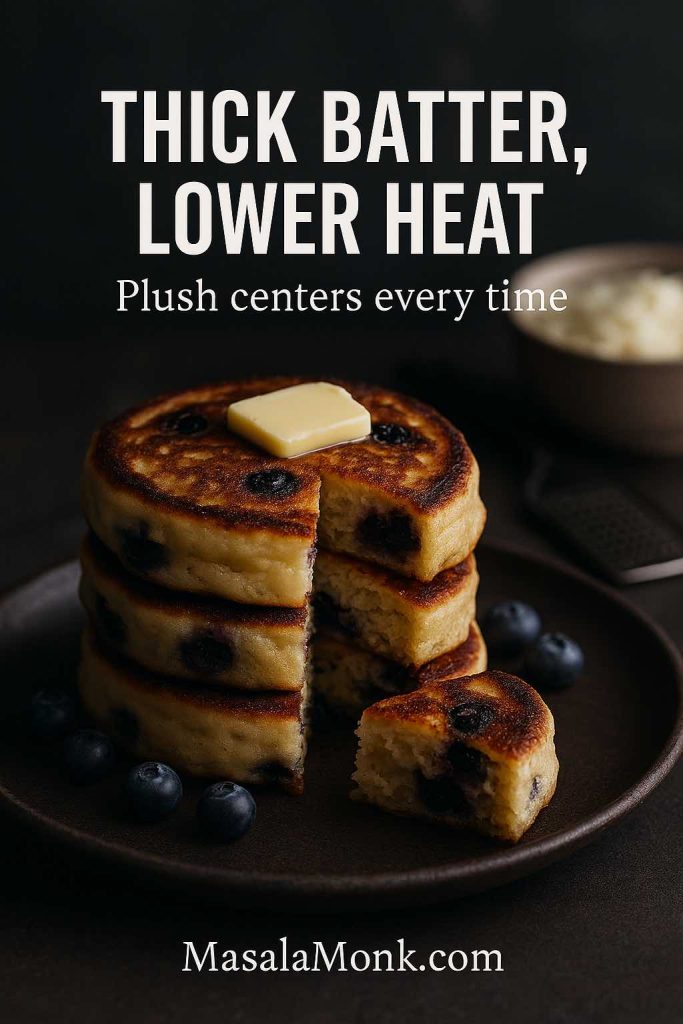
Portrait photo of blueberry ricotta hotcakes stacked on a dark plate with a butter pat and a cut-out piece showing the plush interior, featuring text overlay “Thick batter, lower heat” and “Plush centers every time,” with MasalaMonk.com in the footer.
Blueberry ricotta hotcakes cook best low and steady—thick batter needs gentler heat so the centers set soft and fully cooked.

Method

  1. Whisk flour, sugar, baking powder, salt in a bowl.
  2. In a separate bowl, whisk egg yolks, ricotta, milk, vanilla, melted butter.
  3. Combine wet and dry gently.
  4. Whip egg whites to soft peaks and fold them into the batter. This step is what makes the hotcakes airy rather than heavy.
  5. Cook on medium-low heat because the batter is thicker. Add blueberries per pancake on the skillet.
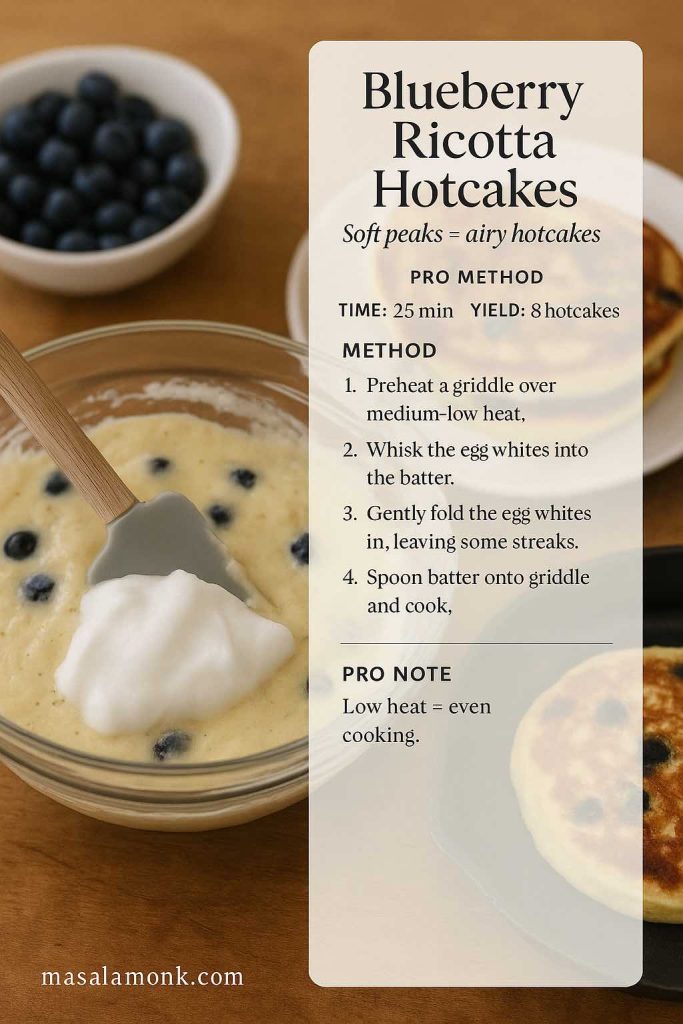
Blueberry ricotta hotcakes recipe card showing ricotta batter with blueberries and a dollop of whipped egg whites, highlighting the soft-peaks method for airy hotcakes.
Soft peaks, not stiff: stop whipping when the whites hold a gentle curve. Stiff whites fold poorly and can leave the batter dense instead of airy.

A lovely pairing

If you’re building a brunch plate, these ricotta hotcakes work beautifully with something crisp and salty—especially bacon cooked in a way that doesn’t splatter your kitchen. This method is simple and reliable: how to cook bacon in the oven.


High Protein Blueberry Pancakes: Blueberry Protein Pancakes That Don’t Taste “Healthy”

High protein blueberry pancakes get searched for constantly, yet many recipes lean too hard on protein powder and end up chalky. Instead, the goal is to keep the pancake structure familiar and use protein in a way that supports tenderness.

Below are two dependable routes: blueberry cottage cheese pancakes (especially easy) and a Greek-yogurt approach that can include protein powder without taking over.

Blueberry Cottage Cheese Pancakes (Blender Option)

These blueberry cottage cheese pancakes are especially popular because they cook up tender and filling, and the batter comes together quickly.

Ingredients

  • 1 cup cottage cheese
  • 2 eggs
  • ½ cup rolled oats (or oat flour)
  • 1 tsp baking powder
  • ½ tsp vanilla
  • Pinch of salt
  • ¾ cup blueberries
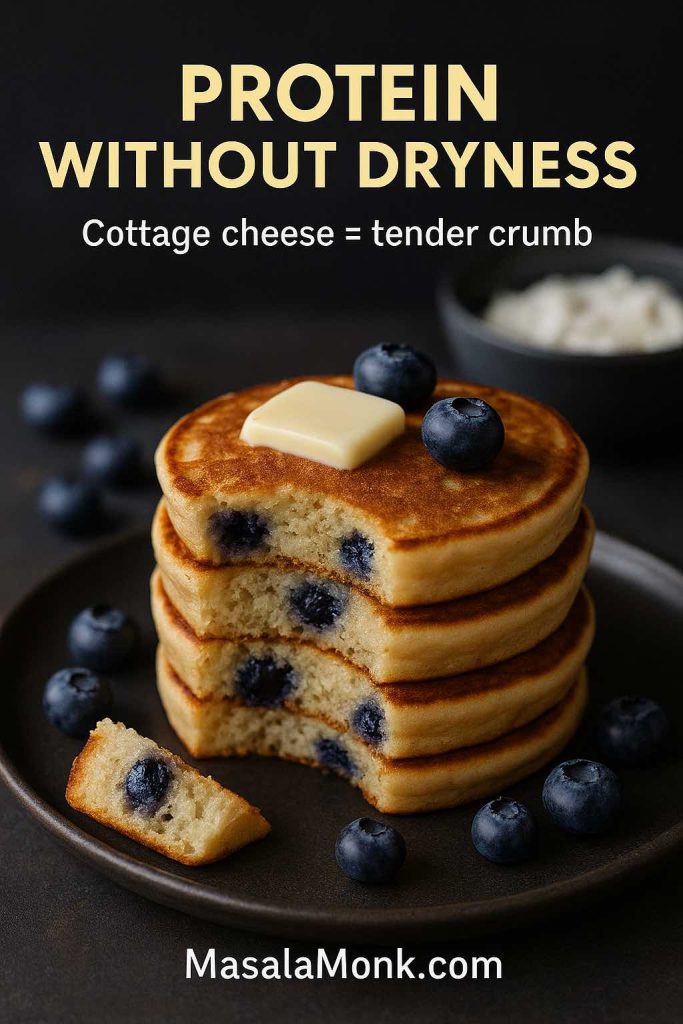
Portrait photo of high protein blueberry pancakes with a cut piece showing a tender crumb and blueberries inside, topped with a small butter pat, with text overlay “Protein Without Dryness” and “Cottage cheese = tender crumb,” and MasalaMonk.com in the footer.
High protein blueberry pancakes stay soft when the protein comes from dairy like cottage cheese—gentle heat and minimal mixing keep the crumb tender.

Method

  1. Blend cottage cheese, eggs, oats, baking powder, vanilla, and salt until smooth.
  2. Rest 5 minutes; the batter thickens slightly.
  3. Cook on medium-low heat; add blueberries per pancake on the pan.
  4. Flip gently once edges set.

If you enjoy learning how cottage cheese can fit into breakfasts beyond pancakes, this is a helpful read: cottage cheese for breakfast.
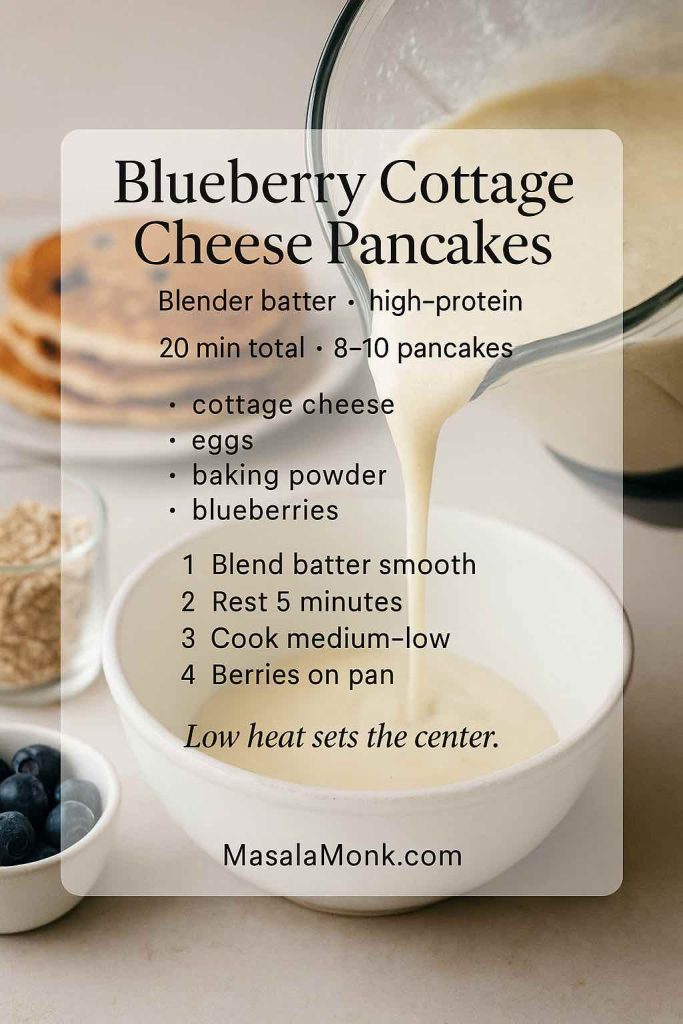
Blueberry cottage cheese pancakes recipe card showing blender batter being poured into a bowl, a high-protein pancake method with cottage cheese, eggs, and blueberries.
For the best texture, blend until the batter looks completely smooth, then rest 5 minutes so the oats hydrate—this prevents gummy centers and helps the pancakes set cleanly.

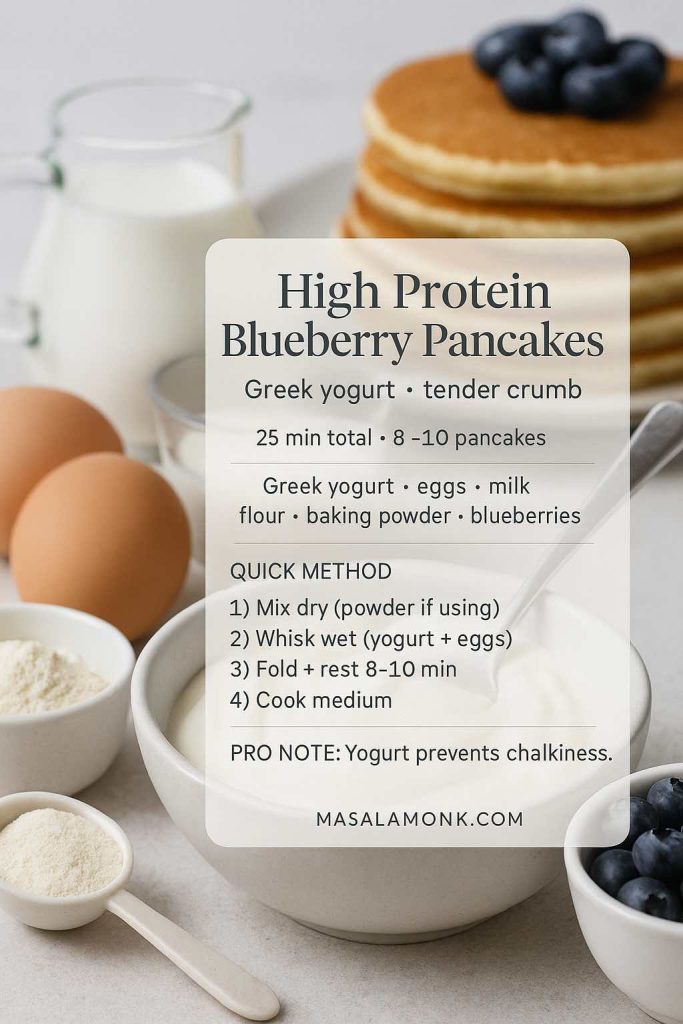
Blueberry Pancakes Protein Style (Greek Yogurt + Optional Protein Powder)

This version targets blueberry protein pancakes and blueberry pancakes protein queries naturally because the recipe genuinely is protein-forward—yet it still tastes like a pancake.

Ingredients

  • 1 cup flour (or ½ flour + ½ oat flour)
  • 2 tsp baking powder
  • ½ tsp salt
  • ¾ cup milk
  • ½ cup Greek yogurt
  • 2 eggs
  • 1 tbsp honey or sugar
  • Optional: 1 scoop protein powder (whey or plant)
  • ¾ to 1 cup blueberries
High protein blueberry pancakes recipe card featuring Greek yogurt, eggs, and blueberries, with quick steps for blueberry protein pancakes that stay tender and not chalky.
If you add protein powder, reduce flour by 2–3 tbsp (or add an extra splash of milk). Most powders absorb more liquid than flour, which is the #1 reason protein pancakes turn dry.

Method

  1. Mix dry ingredients first (including protein powder if using).
  2. Whisk milk, yogurt, eggs, honey.
  3. Combine gently; rest 8–10 minutes.
  4. Cook on medium heat; add blueberries per pancake on the skillet.

If you’re into high-protein breakfast planning more broadly, you might also like how to eat 100 grams of protein a day, as well as high protein overnight oats for mornings when you want “grab-and-go” instead of “stand-and-flip.”

For another protein-leaning pancake idea that’s fruit-based, this is a fun variation to browse: protein rich cherry pancakes.


Blueberry Oat Pancakes and Blueberry Oatmeal Pancake Variations

Blueberry oat pancakes sit in a sweet spot: heartier than classic flour pancakes, lighter than a dense “health” pancake, and ideal for anyone who wants a blueberry oatmeal pancake that still feels fluffy.

Here are two options—one softer and one more rustic—so you can pick based on what you have.
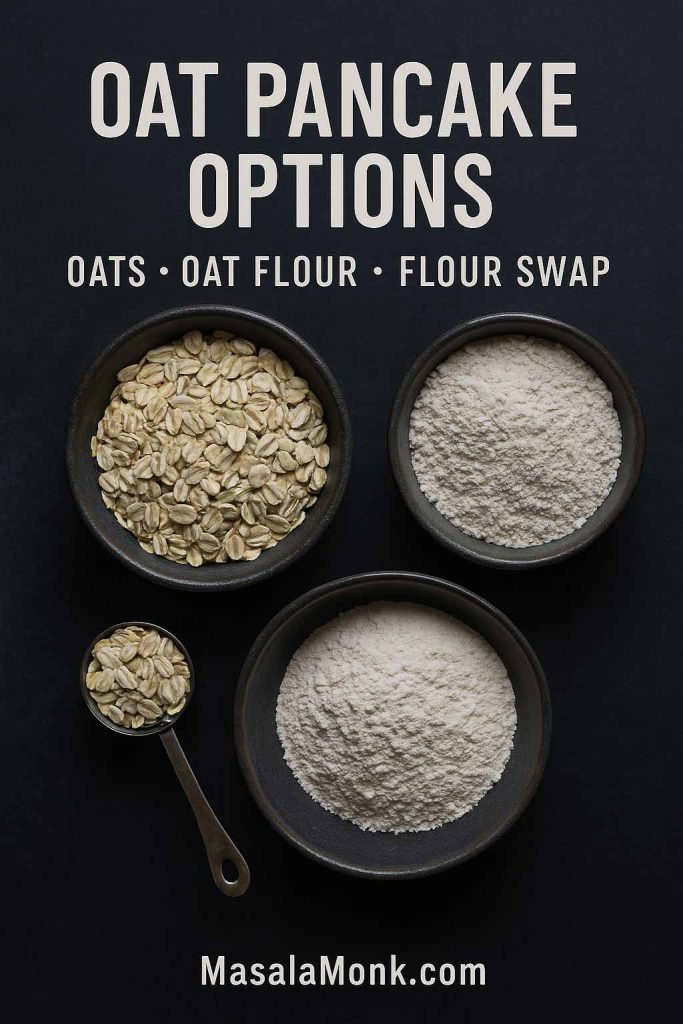
Portrait flatlay showing oats, oat flour, and flour swap options in dark bowls with a measuring spoon, featuring text overlay “Oat Pancake Options” and “Oats • Oat flour • Flour swap,” with MasalaMonk.com in the footer.
For blueberry oat pancakes (or a blueberry oatmeal pancake), choose your base: soaked rolled oats for texture, oat flour for a smoother crumb, or a simple flour swap for the easiest upgrade.

Option A: Soaked-Oat Blueberry Oatmeal Pancake

Ingredients

  • 1 cup rolled oats
  • ¾ cup buttermilk (or milk + lemon)
  • ¾ cup flour
  • 1 tbsp sugar or honey
  • 1 ½ tsp baking powder
  • ½ tsp baking soda
  • ½ tsp salt
  • 1 egg
  • 2 tbsp melted butter or oil
  • ¾ to 1 cup blueberries

Method

  1. Combine oats and buttermilk; soak 10–15 minutes.
  2. Add egg and melted butter.
  3. Fold in flour, sugar, baking powder, baking soda, salt.
  4. Cook on medium heat; add blueberries per pancake.
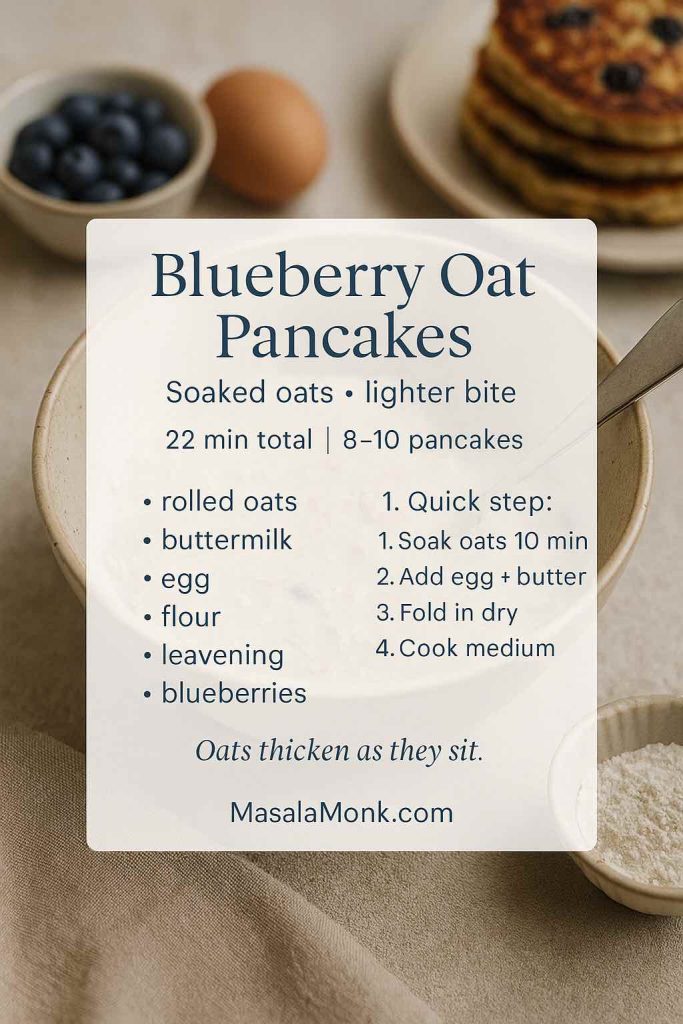
Blueberry oat pancakes recipe card showing rolled oats soaking in buttermilk with quick steps for a lighter blueberry oatmeal pancake texture.
Oats keep absorbing liquid after mixing—if the batter thickens while you cook, add a small splash of milk to the bowl and fold gently to keep later batches just as fluffy as the first.

Option B: Oat-Flour Blueberry Oat Pancakes

This is smoother and more uniform.

Swap

  • Replace ⅓ of the flour in the classic recipe with oat flour.

Let the batter rest the full 10–15 minutes so oat flour hydrates properly.

If you’re building meal-prep breakfasts, these oat-based pancakes pair nicely with snackable, make-ahead items like healthy oat protein bars.


Blueberry Pancakes Gluten Free: Blueberry Gluten Free Pancakes and Almond Flour Blueberry Pancakes

Gluten-free blueberry pancakes can be just as tender as the classic if you choose the right structure. Instead of chasing a “perfect substitute,” pick a method that suits the ingredients you have.
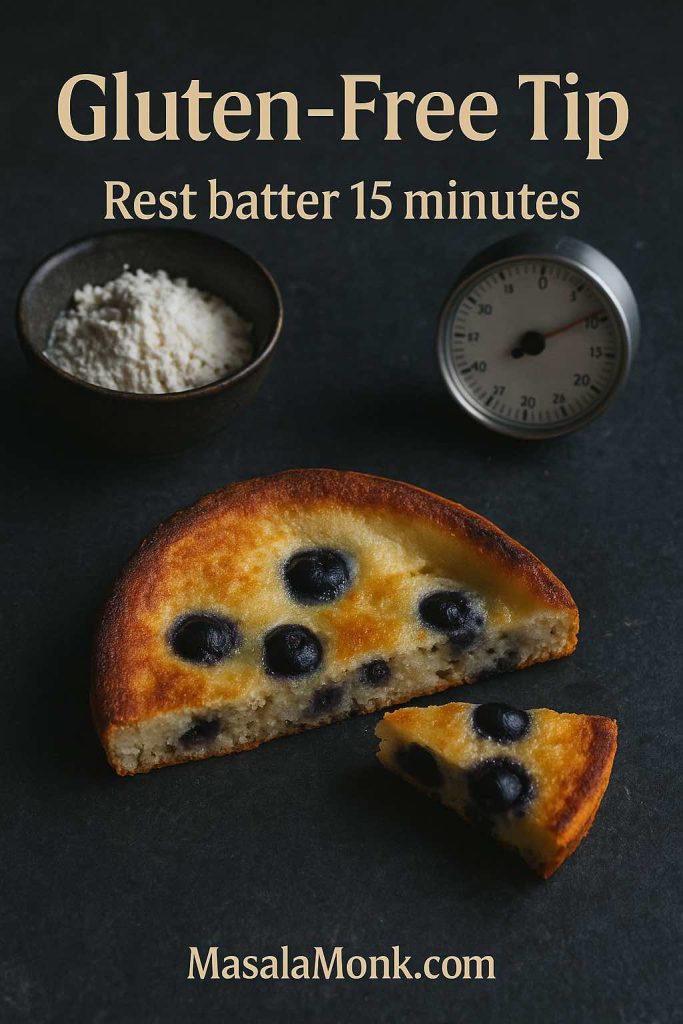
Portrait photo of a gluten-free blueberry pancake cut open on a dark surface with a bowl of gluten-free flour and a kitchen timer, featuring text overlay “Gluten-Free Tip” and “Rest batter 15 minutes,” with MasalaMonk.com in the footer.
For blueberry pancakes gluten free that hold together, let the batter rest longer—extra hydration improves structure and keeps the crumb tender.

Approach 1: Blueberry Pancakes Gluten Free with a 1:1 Blend

Use your favourite gluten-free 1:1 flour blend in place of all-purpose flour in the classic recipe. Then add one small adjustment: let the batter rest 15 minutes instead of 10. That extra time helps the starches hydrate, which improves tenderness.
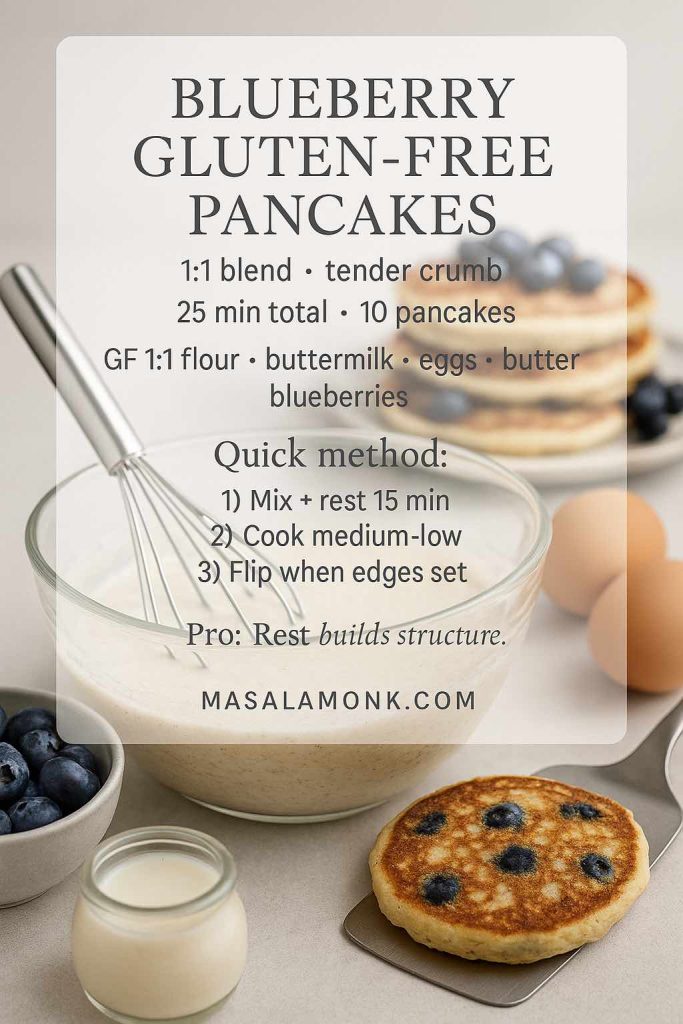
Blueberry gluten free pancakes recipe card using a 1:1 gluten-free flour blend, showing batter rest time, medium-low cooking, and flip-when-edges-set guidance.
Gluten-free batters benefit from patience: give the first side an extra 30–60 seconds so the starches set—then flip once and avoid pressing the pancake (pressing pushes out air).

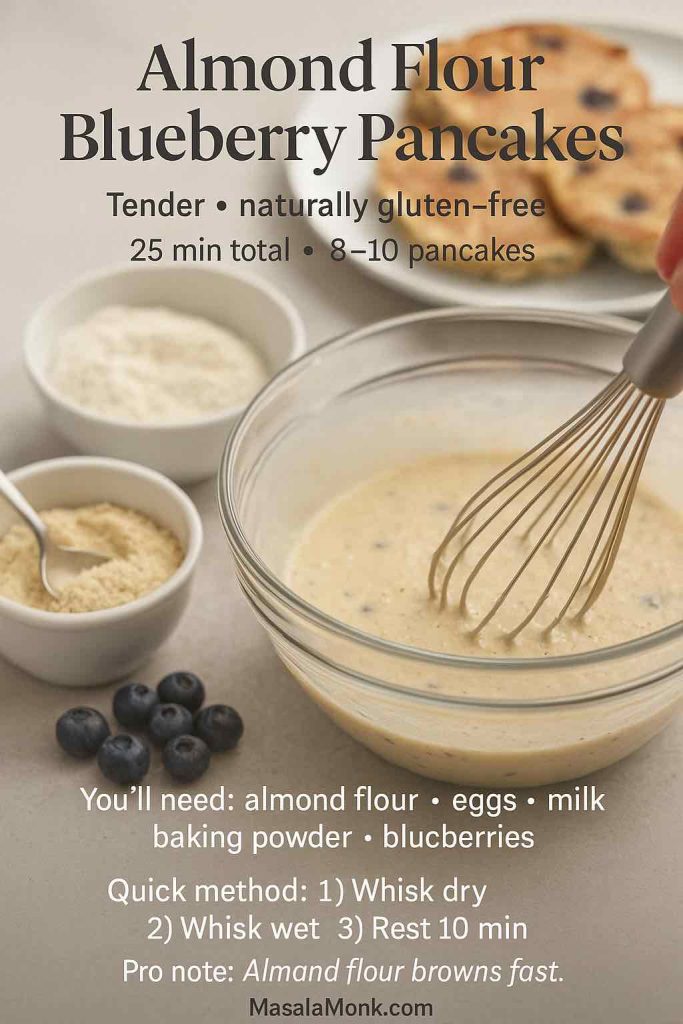
Approach 2: Almond Flour Blueberry Pancakes (Tender and Rich)

Almond flour blueberry pancakes tend to be moist and slightly rich; however, almond flour alone can be fragile. So this hybrid approach keeps them tender yet sturdy.

Ingredients

  • ¾ cup almond flour
  • ½ cup gluten-free 1:1 blend (or oat flour)
  • 2 tsp baking powder
  • ½ tsp salt
  • 2 eggs
  • ¾ cup milk (dairy or plant)
  • 2 tbsp melted butter or oil
  • 1 tbsp honey or sugar
  • ¾ cup blueberries
Almond flour blueberry pancakes recipe card showing almond flour batter being whisked with blueberries, with a note to cook on medium-low heat because almond flour browns quickly.
Almond flour sets differently than wheat flour—cook a little slower on medium-low and wait for firm edges before flipping so the centers finish without over-browning the crust.

Method

  1. Whisk dry ingredients.
  2. Whisk wet ingredients.
  3. Combine gently; rest 10 minutes.
  4. Cook on medium-low heat; add blueberries per pancake.

If you like exploring other gluten-free pancake styles, you might enjoy healthy millet protein packed pancakes as another naturally gluten-free direction.


Blueberry Pancake Mix: A Homemade Pancake Mix You’ll Actually Use

A blueberry pancake mix isn’t just about speed. It’s about setting yourself up for mornings when you want pancakes and blueberries without measuring five different leaveners while half-awake.

This homemade pancake mix is a neutral base: you can use it for classic pancakes, blueberry pancakes with pancake mix, blueberry mini pancakes, and even a quick blueberry Dutch pancake. Moreover, if you keep it in an airtight jar, it’s ready whenever you are.
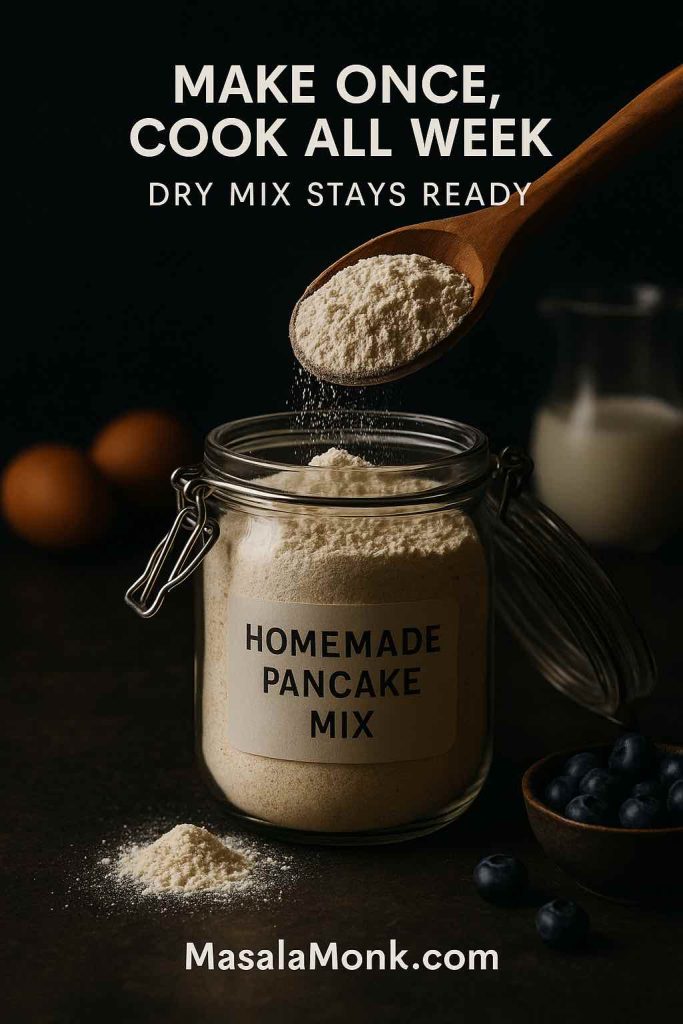
Portrait photo of a glass jar labeled “Homemade Pancake Mix” with flour being poured from a wooden scoop, blueberries and eggs nearby, featuring text overlay “Make once, cook all week” and “Dry mix stays ready,” with MasalaMonk.com in the footer.
A homemade pancake mix keeps weekday breakfasts effortless—stash the dry mix, then add milk, eggs, and butter when you’re ready to cook.

Homemade Pancake Mix (makes about 4–5 batches)

  • 4 cups (500 g) all-purpose flour
  • ¼ cup (50 g) sugar
  • 4 tbsp baking powder
  • 1 tbsp baking soda
  • 2 tsp fine salt

Whisk thoroughly and store airtight.

If you ever wonder whether your baking powder still has life, King Arthur has an easy freshness test: how to test baking powder and baking soda.
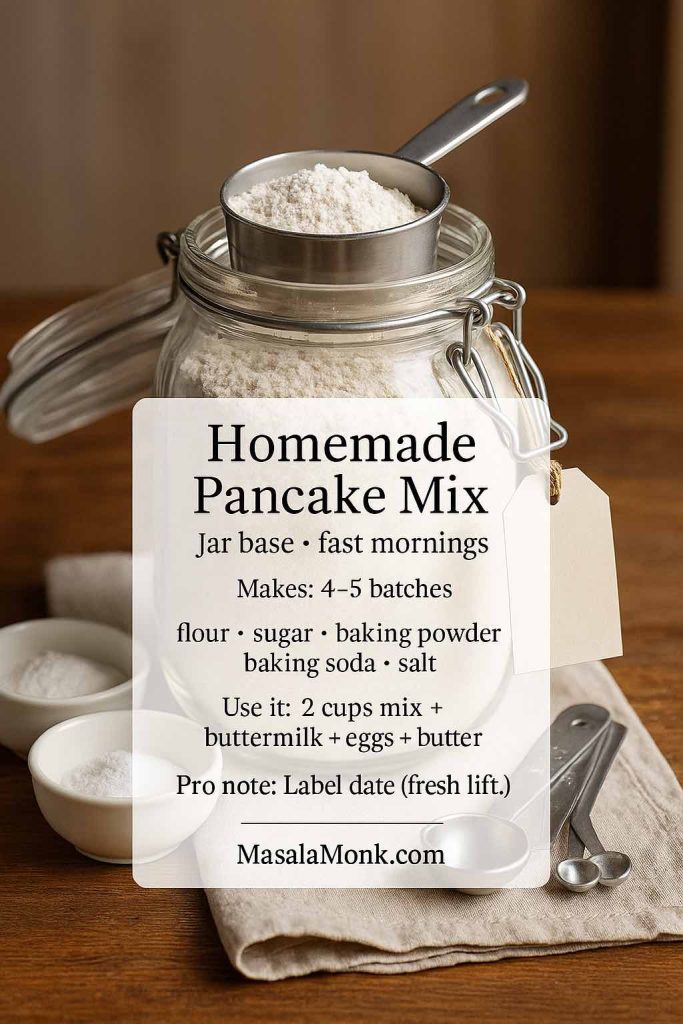
Homemade pancake mix in a jar recipe card showing dry ingredients and the “2 cups mix + buttermilk + eggs + butter” formula for making blueberry pancake mix quickly.
Whisk the jar mix for a full 30 seconds before storing—uneven baking powder distribution is the quiet reason some batches rise patchy while others stay flat.

Turning the mix into pancakes (one batch)

  • 2 cups pancake mix
  • 1 ½ cups buttermilk (or milk + lemon)
  • 2 eggs
  • 3 tbsp melted butter or oil
  • Optional: 1 tsp vanilla

Fold gently, rest 8–10 minutes, cook on medium heat.
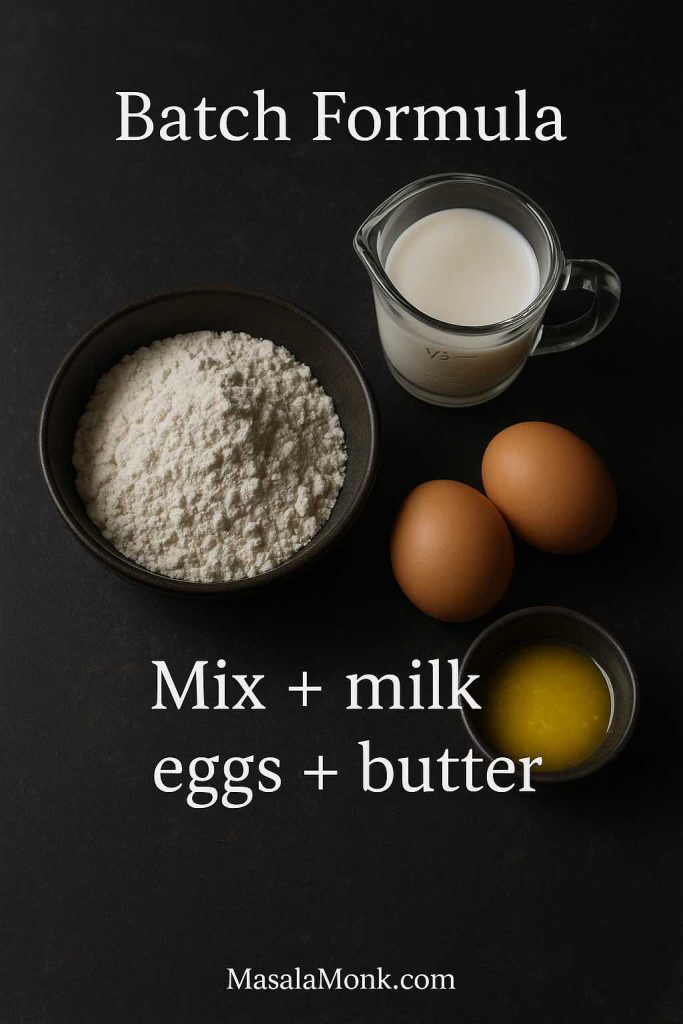
Portrait flatlay showing pancake mix in a bowl with a measuring cup of milk, two eggs, and melted butter, featuring text overlay “Batch Formula” and “Mix + milk + eggs + butter,” with MasalaMonk.com in the footer.
This simple batch formula turns homemade pancake mix into a smooth batter fast—then you can add blueberries on the pan for cleaner color and even fruit in every pancake.

Keeping it safe and sensible

Because flour is a raw ingredient, it’s best not to taste raw batter. The FDA explains why raw flour matters here: flour is a raw food. CDC also reinforces the same idea in plain language: don’t eat raw dough or batter.


Blueberry Pancakes with Pancake Mix: How to Make Pancakes from the Mix Taste Homemade

Blueberry pancakes with pancake mix can be excellent. The difference between “boxy” pancakes and “why are these so good?” pancakes is usually just a few small choices.
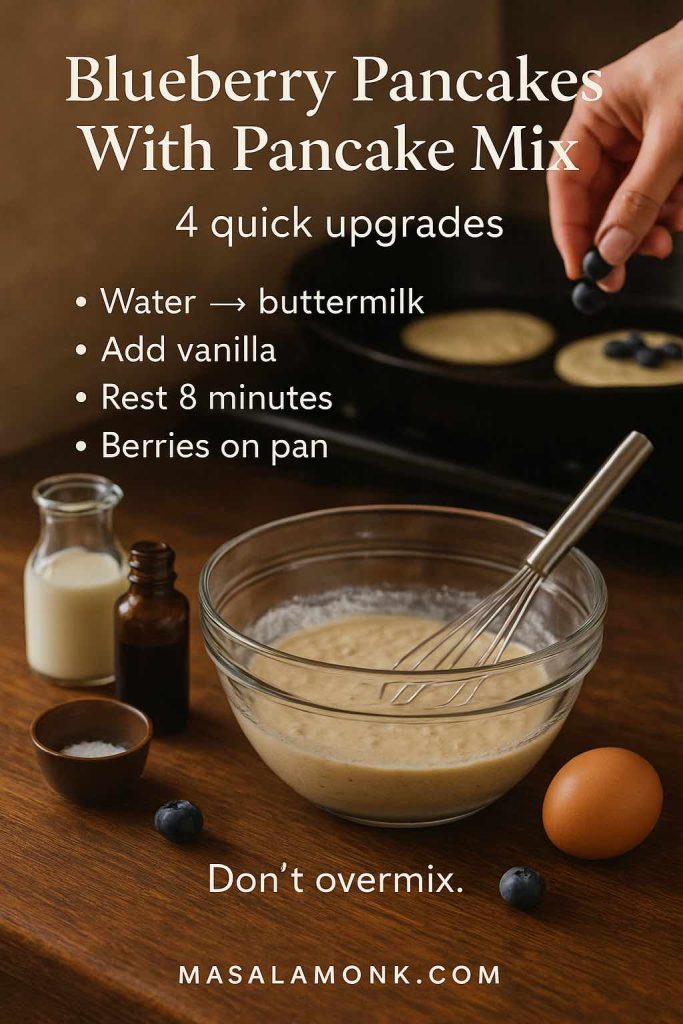
Blueberry pancakes with pancake mix recipe card showing four upgrades—swap water for buttermilk, add vanilla, rest the batter, and add blueberries on the pan—for fluffier pancakes.
If your mix batter gets foamy quickly, cook sooner—boxed mixes can lose lift if they sit too long. Rest 5–8 minutes, then start cooking.

A simple upgrade approach

  • Use buttermilk (or milk + lemon) instead of water.
  • Add vanilla for warmth.
  • Rest the batter briefly.
  • Add blueberries on the pan, especially if using frozen berries.

Serious Eats tested mix upgrades thoroughly and shares what’s worth doing: how to make boxed pancake mix even better.
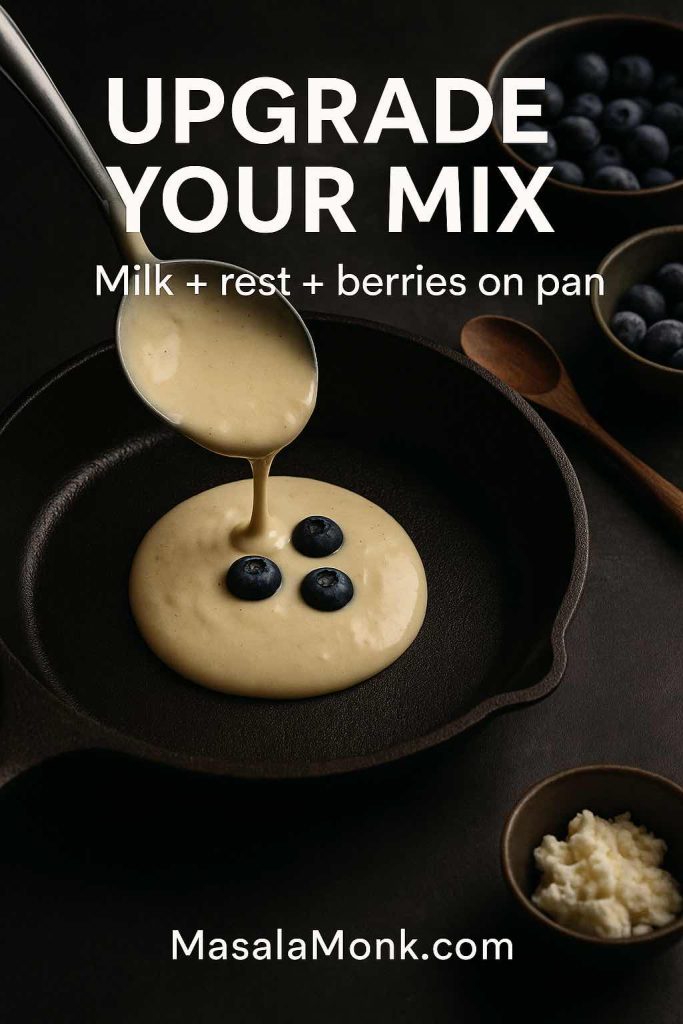
Portrait action photo of blueberry pancakes with pancake mix being cooked in a cast-iron skillet as batter is poured from a ladle and blueberries are placed on top, with text overlay “Upgrade Your Mix” and “Milk + rest + berries on pan,” and MasalaMonk.com in the footer.
For blueberry pancakes with pancake mix that taste homemade, swap in milk, let the batter rest briefly, then add blueberries on the pan for clean color and even fruit.

Blueberry pancake mix variations without a second recipe

Once you have the base pancake mix in a jar, you can steer it toward different styles:

  • For a more hearty flavour, replace part of the flour with oat flour and you’re halfway to blueberry oat pancakes.
  • For a lighter texture, add a tablespoon of cornstarch per batch.
  • For a warm brunch vibe, add cinnamon and a pinch of nutmeg—especially good for banana blueberry pancake stacks.

Blueberry Mini Pancakes: Tiny, Quick, Freezer-Friendly

Blueberry mini pancakes feel playful, yet they’re also practical. They cook faster, they’re easy for kids, and they reheat beautifully. Additionally, they’re perfect for those mornings when you want pancakes and blueberries but don’t want to commit to a tall stack.
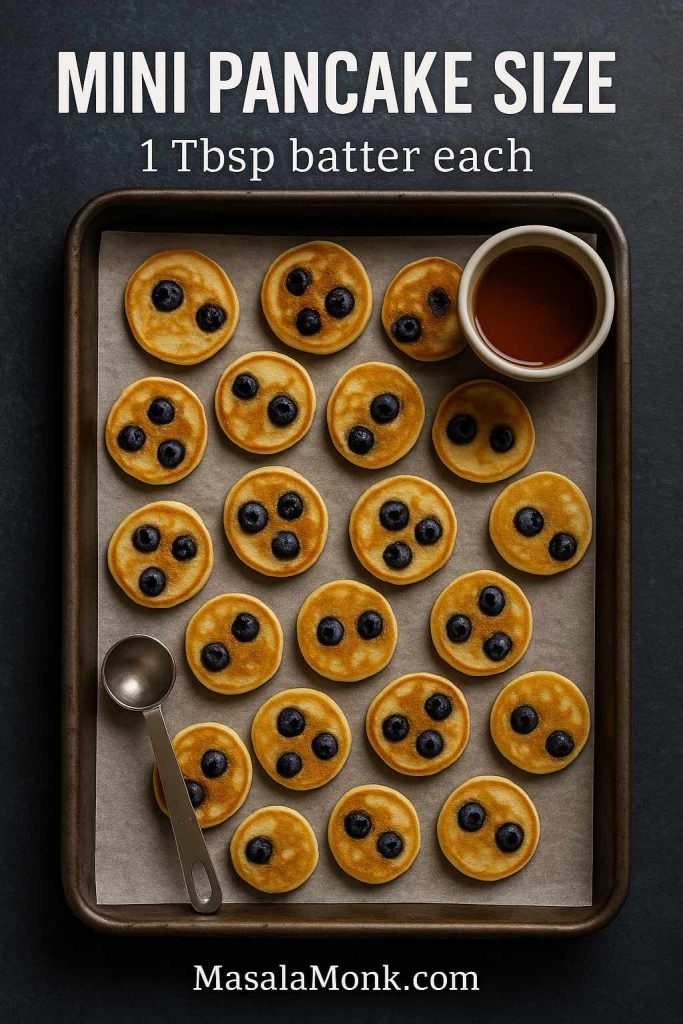
Portrait overhead photo of blueberry mini pancakes arranged on a parchment-lined baking sheet with a measuring tablespoon and a cup of syrup, featuring text overlay “Mini Pancake Size” and “1 Tbsp batter each,” with MasalaMonk.com in the footer.
Blueberry mini pancakes cook fast and freeze well—keep them uniform by using 1 tablespoon of batter per pancake for even browning and easy reheating.

How to make blueberry mini pancakes

Use any batter above—classic, pancake mix, oat, protein, or gluten-free—then spoon 1 to 2 tablespoons per pancake onto a medium skillet. Sprinkle blueberries on top. Flip sooner than usual; mini pancakes set fast.

Turning them into frozen blueberry pancakes for busy mornings

Cool completely, freeze in a single layer on a tray, then transfer to a bag. Reheat in the toaster for crisp edges.
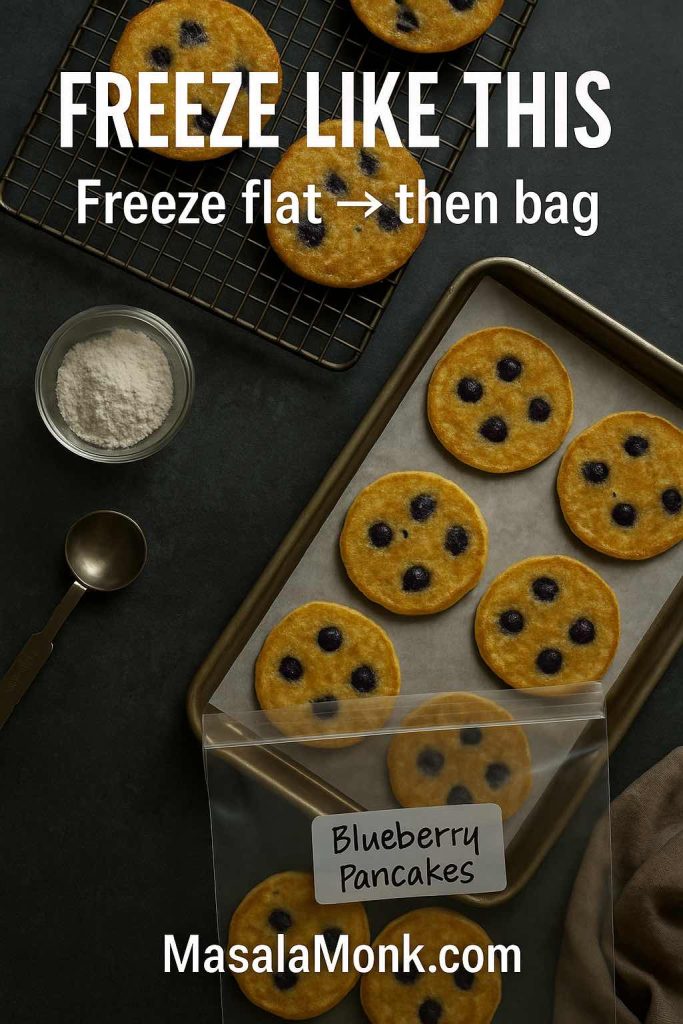
Portrait top-down photo showing blueberry pancakes cooling on a rack and freezing on a parchment-lined tray with a labeled freezer bag, featuring text overlay “Freeze Like This” and “Freeze flat → then bag,” with MasalaMonk.com in the footer.
For freezer-friendly frozen blueberry pancakes, freeze them flat first so they don’t stick together—then bag them for quick toaster reheats on busy mornings.

If you need a simple, reliable freezing and reheating guide, Better Homes & Gardens lays it out well: how to freeze and reheat pancakes. For broader freezer safety grounding, USDA has a clear overview: freezing and food safety.
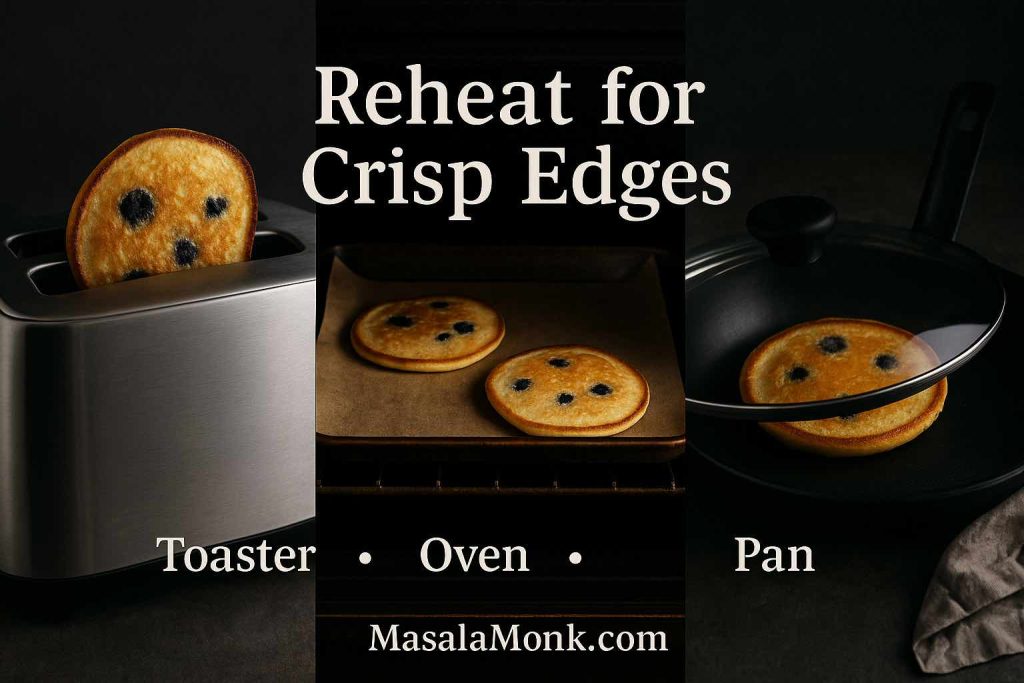
Portrait triptych image showing three ways to reheat blueberry pancakes—toaster, oven, and pan—featuring text overlay “Reheat for Crisp Edges,” method labels, and MasalaMonk.com in the footer.
To bring frozen blueberry pancakes back to life, reheat for crisp edges—use a toaster for speed, the oven for batches, or a covered pan for a softer center.

Blueberry Dutch Pancake: The Big, Puffy Oven Version

A blueberry Dutch pancake is a different experience from classic blueberry pancakes: it’s puffed and dramatic, more custardy in the center, crisp at the edges, and made in one pan. It’s also a great choice when you want blueberries and pancakes but don’t want to stand at the stove flipping.

Ingredients (serves 2–3)

  • 3 eggs
  • ¾ cup milk
  • ½ cup flour (or ⅓ cup pancake mix as a shortcut)
  • Pinch of salt
  • 1 tbsp sugar (optional)
  • 2 tbsp butter for the pan
  • ¾ cup blueberries
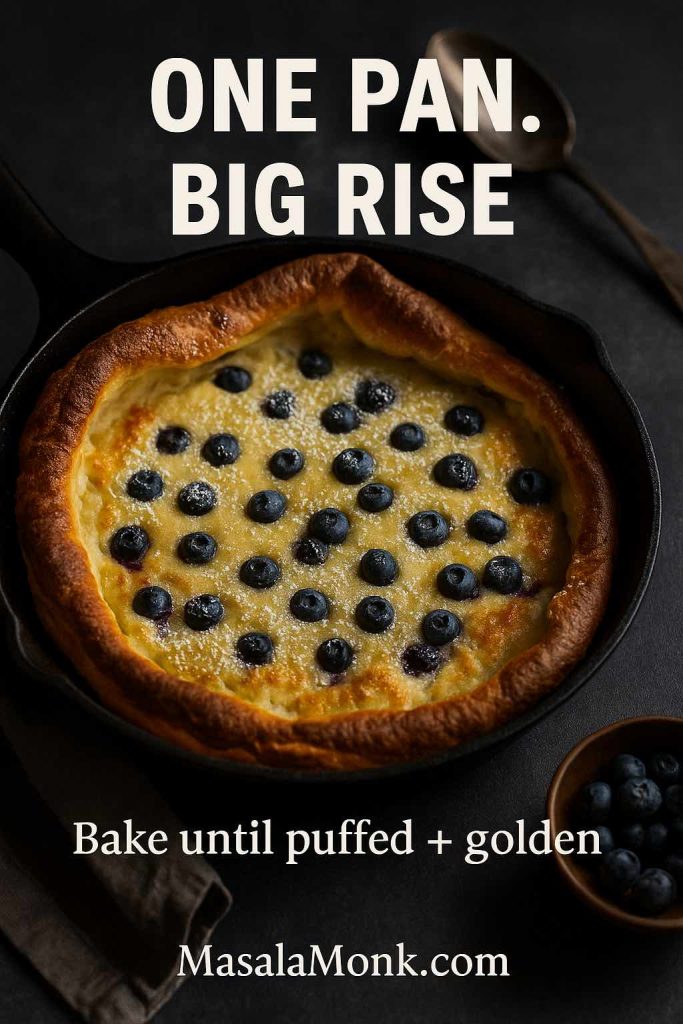
Portrait photo of a blueberry Dutch pancake baked in a cast-iron skillet with puffed golden edges and blueberries on top, featuring text overlay “One Pan. Big Rise.” and “Bake until puffed + golden,” with MasalaMonk.com in the footer.
A blueberry Dutch pancake is the no-flip option—bake until the edges puff deep golden, then slice and serve straight from the skillet.

Method

  1. Preheat oven to 220°C / 425°F. Put a cast-iron skillet (or oven-safe pan) in the oven to heat.
  2. Blend or whisk eggs, milk, flour (or pancake mix), salt, and sugar until smooth.
  3. Carefully remove hot pan, add butter, swirl to coat.
  4. Pour in batter and scatter blueberries over the top.
  5. Bake 14–18 minutes until puffed and golden.

Serve immediately; Dutch pancakes deflate quickly, but that’s part of their charm.

Also Read: What to Mix with Jim Beam: Best Mixers & Easy Cocktails


Blueberry Maple Pancakes and Other Toppings That Make the Stack Sing

Sometimes the pancake is the main event; other times, toppings turn a good pancake into a “remember this breakfast” pancake. Blueberry maple pancakes are a classic direction—blueberries and maple simply belong together.
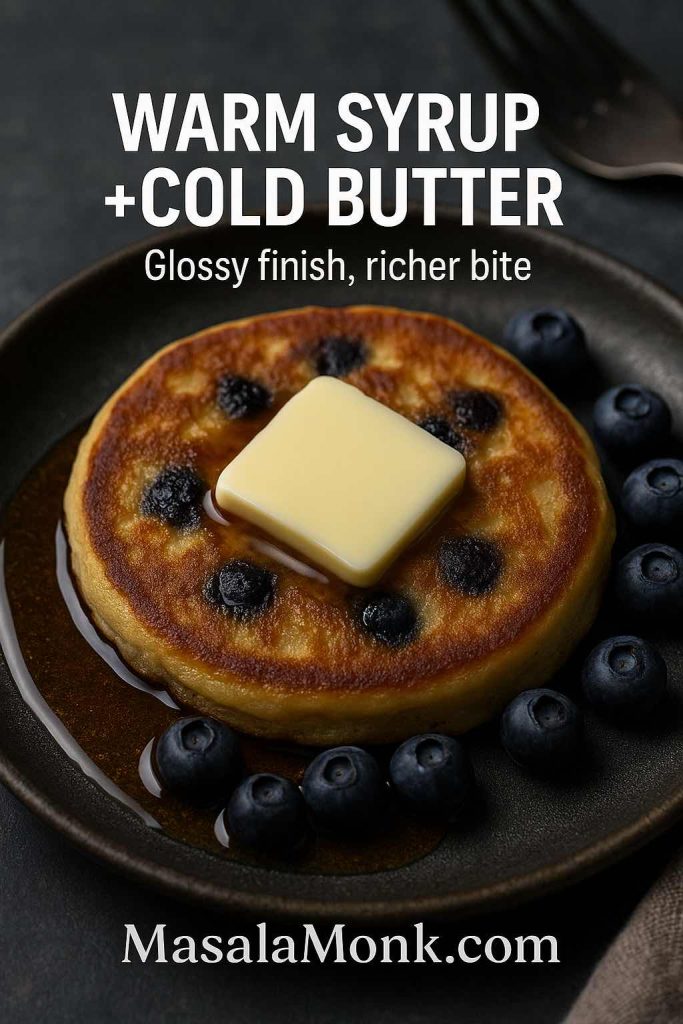
Portrait close-up of a blueberry maple pancake on a dark plate with warm maple syrup pooling around it and a cold pat of butter melting on top, featuring text overlay “Warm syrup + cold butter” and “Glossy finish, richer bite,” with MasalaMonk.com in the footer.
For blueberry maple pancakes with a restaurant-style sheen, warm the syrup and add cold butter at the end—the contrast creates a glossy finish and a richer bite.

A few topping routes that feel natural

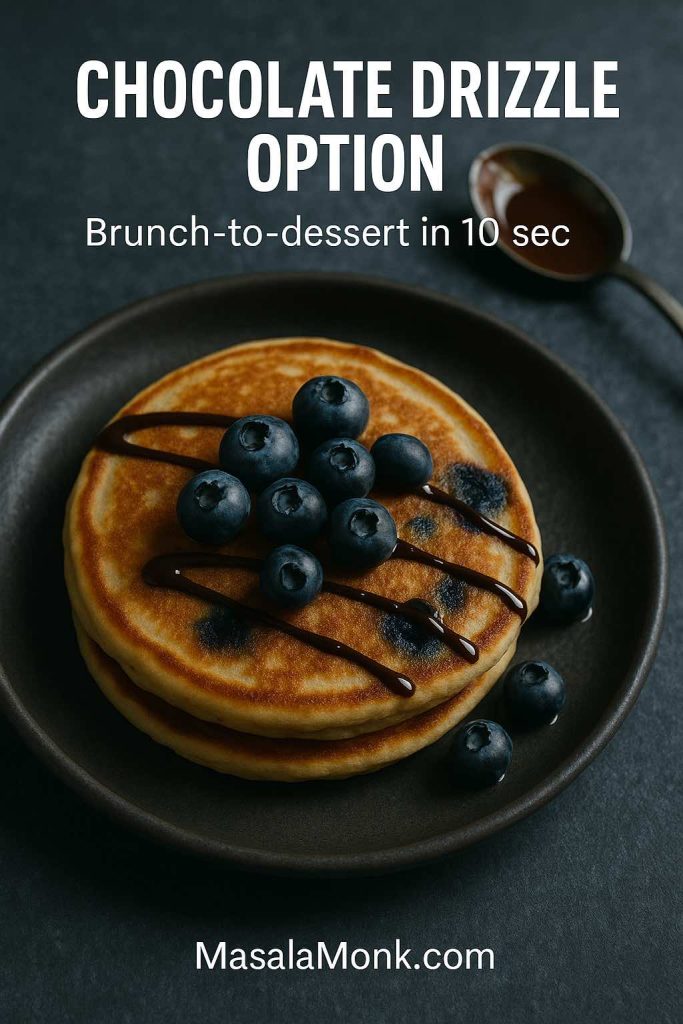
Portrait photo of blueberry pancakes on a dark plate with a chocolate drizzle and fresh blueberries, featuring text overlay “Chocolate Drizzle Option” and “Brunch-to-dessert in 10 sec,” with MasalaMonk.com in the footer.
Turn blueberry pancakes into an easy dessert by adding a quick chocolate drizzle—especially good with frozen blueberry pancakes when you want extra richness.

If you’d rather keep it ultra-simple, don’t underestimate fresh berries scattered on top. Sometimes blueberries and pancakes need no persuasion.


What to Serve with Blueberry Pancakes (So Breakfast Feels Complete)

A stack is wonderful on its own; nevertheless, adding one drink and one side can make breakfast feel like a proper moment.

Drinks that pair beautifully

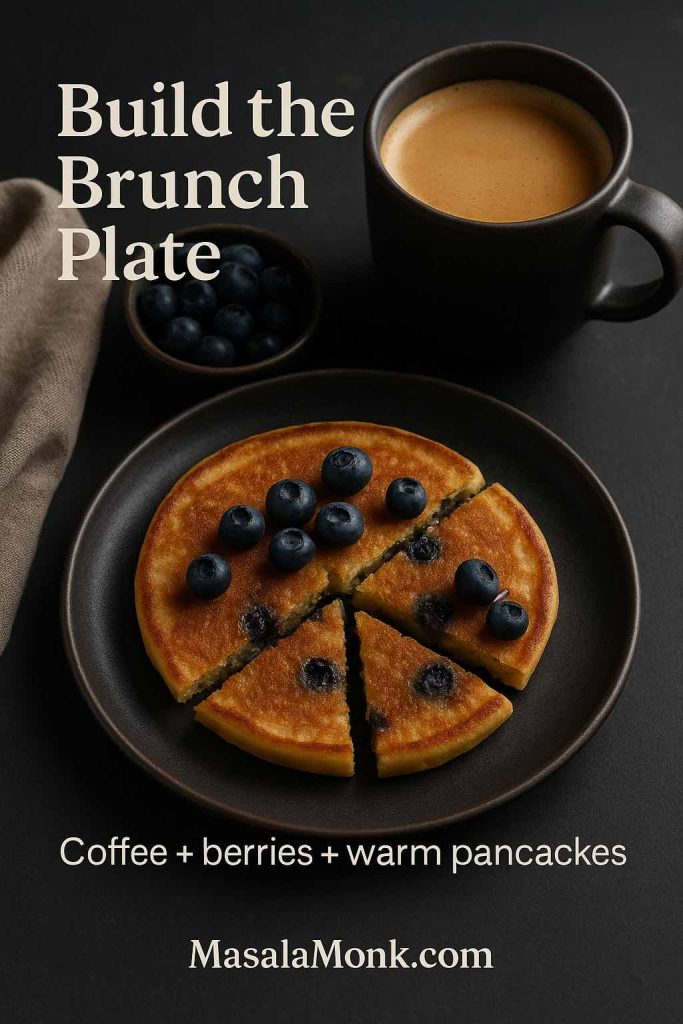
Portrait brunch pairing image showing a blueberry pancake sliced into wedges on a dark plate with fresh blueberries and a cup of coffee, featuring text overlay “Build the Brunch Plate” and “Coffee + berries + warm pancakes,” with MasalaMonk.com in the footer.
Serve blueberry pancakes with coffee and a side bowl of berries for an easy brunch plate that feels complete without extra cooking.

Sides that balance sweetness


A Few Final Details That Make Every Batch Better

Even a great recipe can stumble if one small detail goes off. So before you close the tab and heat the pan, here are the most common friction points—plus the quick fixes that keep blueberry pancakes fluffy.

If pancakes turn dense

Mix less. Seriously. Fold until the flour disappears and stop. Also, let the batter rest so the flour hydrates. If you want the science behind the tenderness, Scientific American has a friendly explanation on gluten and pancakes: the science of gluten in pancakes.

If pancakes brown too fast

Lower the heat. Thick pancakes—especially blueberry ricotta hotcakes and high protein blueberry pancakes—need steadier, gentler heat than thin batters.

If your blueberries sink

Either your batter is thin or your berries went in too early. In either case, add berries per pancake on the skillet. It’s a small habit that pays off immediately.

If you’re cooking for later

Freeze properly so your frozen blueberry pancakes reheat with good texture. The Better Homes & Gardens guide is a great quick reference: how to freeze and reheat pancakes.

Also Read: Mayo Recipe: 15+ Homemade Mayonnaise Variations

FAQs

1) What makes blueberry pancakes turn out fluffy instead of flat?

Fluffy blueberry pancakes usually come from a thicker batter, minimal mixing, and cooking over steady medium heat. In addition, letting the batter rest briefly helps the texture set up so the pancakes rise rather than spread.

2) Can I use frozen blueberries for pancakes without the batter turning purple?

Yes. To avoid streaky batter, use frozen blueberries straight from the freezer and add them after you pour the batter onto the pan. That way, the berries warm inside the pancake instead of bleeding into the bowl.

3) Should I fold blueberries into the batter or add them on top?

For the most even distribution, add blueberries on top of each pancake right after ladling the batter. This method works for blueberries and pancakes in general, and it’s especially helpful for frozen blueberry pancakes.

4) Why do my blueberries sink to the bottom of the pancakes?

Most often, the batter is too thin or the berries were stirred in early. As a result, the berries drop before the pancake sets. A thicker batter and adding berries per pancake solves it.

5) How do I keep blueberry hotcakes from burning on the outside?

If blueberry hotcakes brown too quickly, the heat is likely too high. Instead, lower the heat slightly and give the pan time to stabilize before cooking the next batch.

6) What’s the best blueberry pancake batter consistency?

The batter should be thick enough to mound slightly when spooned, then slowly spread. If it pours like milk, the pancakes may end up thin; conversely, if it’s stiff like dough, they can turn dense.

7) How long should I rest blueberry pancake batter?

Generally, 8–15 minutes is enough. Meanwhile, preheat the pan and prep toppings. Longer rests can work too, yet over-resting may reduce lift as the leavening loses strength.

8) Can I make blueberry pancakes with pancake mix and still get a homemade taste?

Absolutely. Start by using milk (or buttermilk) instead of water, then let the batter rest briefly. Finally, add blueberries on the pan so the mix stays light and the berries stay distinct.

9) What is blueberry pancake mix, and is it different from regular pancake mix?

Blueberry pancake mix may refer to a plain mix used to make blueberry pancakes, or a mix that already includes blueberry flavouring. Either way, you can create a better “blueberry pancakes with pancake mix” result by adding real berries during cooking.

10) How do I make pancakes from the mix without ending up with rubbery texture?

Mix gently, avoid over-stirring, and don’t cook on high heat. Additionally, resting the batter for a few minutes helps the flour hydrate, which leads to softer pancakes.

11) How can I make a blueberry oatmeal pancake that isn’t heavy?

Soak oats briefly before cooking, and keep the batter from getting too thick. Also, cook on medium heat so the center sets without drying out the edges.

12) Are blueberry oat pancakes the same as blueberry oatmeal pancakes?

They’re closely related. Blueberry oat pancakes often use oat flour or blended oats, while a blueberry oatmeal pancake usually features rolled oats for texture. Either way, both pair well with blueberries.

13) How do I make banana and blueberry pancakes without them becoming dense?

Use one ripe banana rather than multiple bananas, and keep mixing minimal. Furthermore, if the batter feels too thick, add a small splash of milk to loosen it.

14) What’s the difference between blueberry pancakes and blueberry hotcakes?

Typically, “hotcakes” are thicker and sometimes slightly sweeter, while “pancakes” can range from thin to thick. However, most recipes can be adjusted either way by tweaking batter thickness and pan temperature.

15) How do I make blueberry mini pancakes that cook evenly?

Use smaller portions of batter and keep the heat moderate. Then, add blueberries to each mini pancake before flipping so they don’t scatter in the pan.

16) Can I freeze blueberry pancakes for later?

Yes. Cool them fully, freeze in a single layer first, then store in a bag. Afterward, reheat in a toaster or oven for the best texture.

17) How do I reheat frozen blueberry pancakes so they don’t get soggy?

To avoid sogginess, reheat in a toaster or oven rather than microwaving. If you must microwave, use short bursts and finish briefly in a pan to restore texture.

18) How do I make high protein blueberry pancakes that still taste good?

Choose protein sources that add tenderness—like Greek yogurt or cottage cheese—rather than relying only on protein powder. Also, keep the batter moist and cook at a slightly lower heat.

19) Are blueberry protein pancakes and blueberry pancakes protein searches basically the same thing?

Yes—both phrases generally refer to pancakes designed to be higher in protein. Accordingly, the best recipes emphasize both nutrition and a fluffy, pleasant bite.

20) How do blueberry cottage cheese pancakes taste compared to classic pancakes?

They’re usually a bit creamier and more filling, with a tender interior. Moreover, they can be either smooth or lightly textured depending on whether you blend the batter.

21) What are blueberry ricotta hotcakes, and how are they different?

Blueberry ricotta hotcakes are thicker, softer pancakes enriched with ricotta. Consequently, they tend to feel more “brunch-style,” with a rich, delicate crumb.

22) Can I make blueberry and ricotta pancakes without separating eggs?

Yes. You can whisk ricotta into the wet ingredients and proceed normally. Still, separating eggs and folding in whipped whites often creates a lighter hotcake texture.

23) How do I make blueberry lemon pancake flavour stand out without making it sour?

Prioritize lemon zest for aroma and use lemon juice sparingly. Then, balance the brightness with a touch of sweetness and plenty of blueberries.

24) What are blueberry lemon ricotta pancakes, and why are they popular?

They combine berry sweetness, citrus fragrance, and creamy ricotta richness. As a result, they deliver a layered flavour that feels special while staying easy to cook.

25) Can I make blueberry pancakes gluten free without them crumbling?

Yes. Use a reliable gluten-free flour blend, let the batter rest longer, and avoid flipping too early. Additionally, cooking on medium-low heat helps the structure set before turning.

26) Are almond flour blueberry pancakes naturally gluten free?

They can be, since almond flour doesn’t contain gluten. Nevertheless, almond flour often benefits from extra eggs or a small amount of gluten-free blend to improve structure.

27) What’s the best way to keep blueberries from bursting too much?

Add blueberries on the pan rather than mixing aggressively, and avoid pressing them into the batter. Also, cook on moderate heat so the berries warm gently instead of exploding quickly.

28) Why do some “best blueberry pancake” recipes recommend buttermilk?

Buttermilk adds acidity that reacts with baking soda, which improves rise and tenderness. In turn, it creates a softer crumb and a pleasant tang that complements blueberries.

29) Can I make blueberry pancakes ahead for brunch guests?

Definitely. Make a large batch, keep them warm in a low oven, and serve in stacks. Meanwhile, you can cook bacon, prep toppings, or mix up drinks without rushing.

30) What’s a blueberry dutch pancake, and can I use blueberries in it?

A blueberry dutch pancake is an oven-baked, puffy pancake with crisp edges and a custardy center. Yes, blueberries work beautifully—scatter them over the batter before baking for a dramatic, fruit-studded result.
Posted on 16 Comments

French Toast Sticks (Air Fryer + Oven Recipe) — Crispy Outside, Custardy Inside

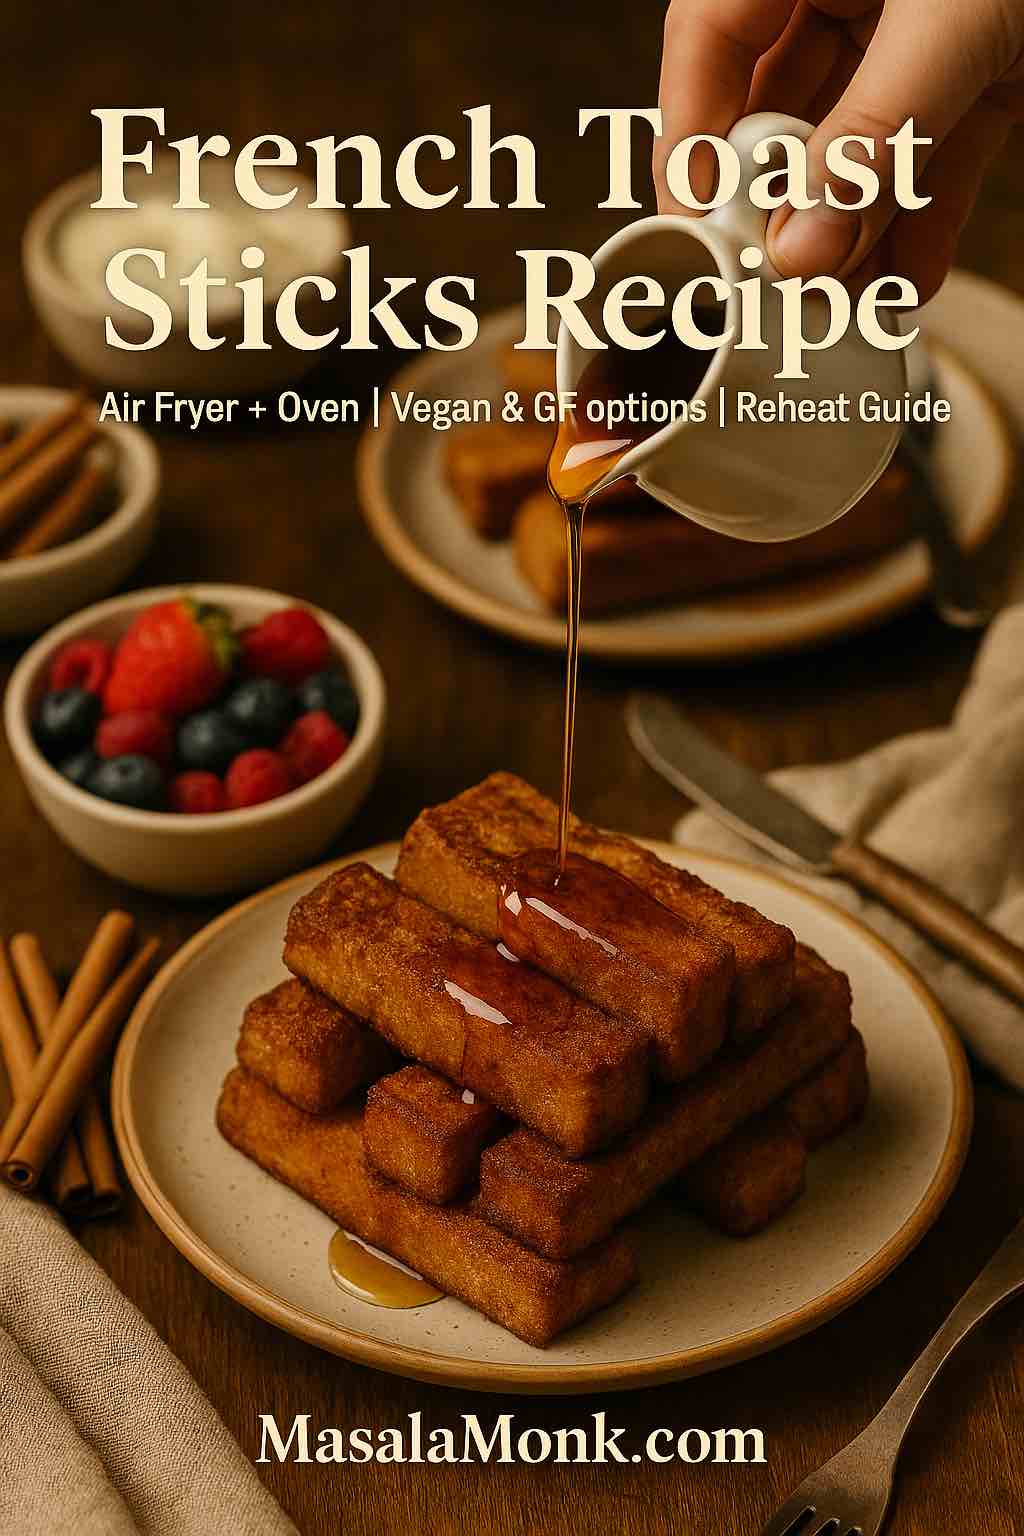
French toast sticks recipe cover with maple syrup poured over a crispy stack; air fryer and oven methods with vegan and gluten-free options.

There are breakfasts you make on autopilot and there are breakfasts that pull everyone to the table. This french toast sticks recipe sits firmly in the second camp: shatteringly crisp edges, a custardy middle that stays tender, and dippable batons that feel festive on a Tuesday and right at home on a holiday brunch board. The method is wonderfully forgiving once you understand three levers—custard ratio, heat management, and evaporation. We’ll walk through air fryer and oven paths, then branch into vegan, gluten-free, and protein-forward variations, plus copycat crunch coats, batch-freezing, and precise reheating. Along the way, when you need a plant-based base that already works, reach for the tried-and-true guide to Vegan French Toast: 6 Easy Recipes; it adapts to sticks beautifully with only a couple of tweaks.

Before we begin, a quick but important food-safety reminder: the center of an egg-based custard should reach about 71°C / 160°F; when you want belt-and-braces certainty, the USDA safe minimum temperature chart explains the number succinctly. With that in mind, let’s get cooking.


Core Ingredients (and Why They Work)

  • Bread (8 thick slices): Brioche, challah, or Texas toast excel because their enriched crumb absorbs custard without collapsing. Standard sandwich bread will do in a pinch if you lightly dry it first.
  • Eggs (3 large): Structure, gloss, and gentle richness.
  • Milk (¾ cup / 180 ml): Whole milk yields plush centers; almond or oat milk keep things dairy-free without losing crispness. If you love making your own nut milk, you can follow this simple primer on how to make almond milk at home for a clean, neutral base.
  • Sugar (1 tbsp): Quickens browning; keep it modest so the crust doesn’t scorch.
  • Vanilla (1 tsp) & Cinnamon (½ tsp): Aroma that plays well with maple, chocolate, or fruit.
  • Salt (pinch): Brightens everything.
  • Butter or neutral oil (1–2 tbsp): A whisper on the basket or pan dramatically boosts crunch.

As a north star for technique and proportions, the explainer at Serious Eats is an evergreen reference; we’ll echo the spirit while tuning for stick geometry and the speed of convection.


Classic French Toast Sticks Recipe — Air Fryer Method

Yield: 4 generous servings (20–24 sticks)
Active time: about 20 minutes

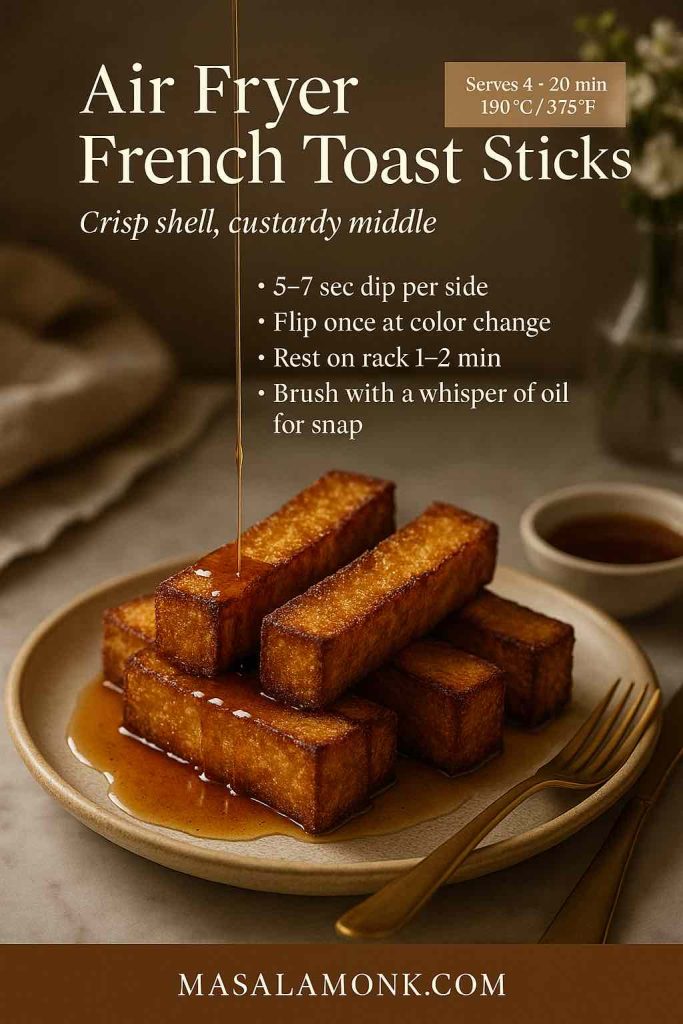
Air Fryer French Toast Sticks stacked on a stoneware plate as maple syrup drips—crisp edges, custardy centers; MasalaMonk recipe card.
Air Fryer French Toast Sticks—shatteringly crisp outside, custardy middle. Dip each stick 5–7 seconds per side, air-fry at 190°C / 375°F for 6–8 minutes, flip once when the color deepens, then rest 1–2 minutes on a rack. Brush a whisper of oil before the flip for extra snap; serve immediately with warm maple.

Step 1: Cut and Dry

Stack each slice and cut into thirds to form batons. Set them on a wire rack for 5–10 minutes while you mix the custard. Alternatively—and especially if the bread is very fresh—give the slices 2–3 minutes in a low oven to drive off a little surface moisture. This brief drying is your first insurance policy against sogginess.

Step 2: Whisk the Custard

In a shallow dish, whisk 3 eggs, ¾ cup (180 ml) milk, 1 tbsp sugar, 1 tsp vanilla, ½ tsp cinnamon, and a pinch of salt until perfectly smooth. The custard should coat the back of a spoon and leave a clean trail when you draw a finger through it.

Step 3: Quick Soak

Dip 6–8 sticks at a time for 5–7 seconds per side. Let excess drip until the coating thins to a glossy film. Because sticks have more edge area, they don’t need a deep soak; brevity yields better texture.

Step 4: Air Fry for Crunch

Preheat to 190°C / 375°F. Lightly brush or spray the basket with butter or oil. Arrange sticks with space between them—hot air needs room to circulate. Air fry 6–8 minutes total, flipping at the halfway point when the color deepens from gold to amber. For a dramatic shell, brush the exposed sides with a trace of oil just before the flip.

Step 5: Rest, Then Serve

Transfer to a wire rack for 1–2 minutes. That brief rest vents steam and sets the crust. Serve immediately with warm maple syrup, or go playful with a small bowl of 3-minute homemade chocolate syrup that turns glossy on contact.


Sheet-Pan French Toast Sticks — Oven Method (Batch-Friendly)

When you’re cooking for a crowd or stocking the freezer, the oven delivers consistency without babysitting.

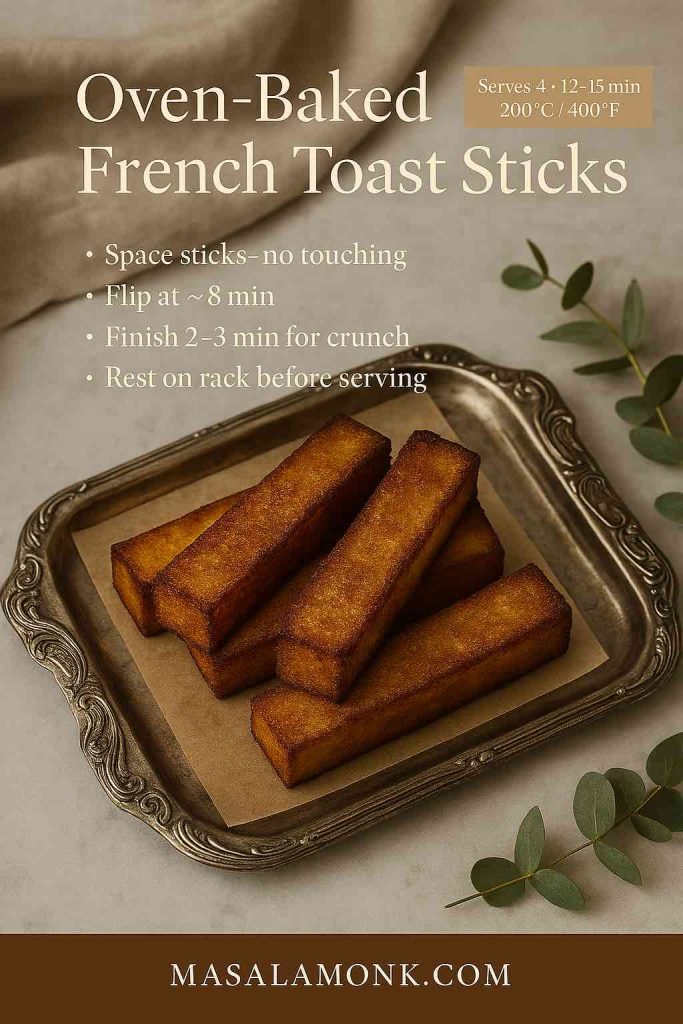
Oven-baked French toast sticks on an antique silver tray with parchment—golden, crisp edges and soft centers; MasalaMonk recipe card.
Oven-Baked French Toast Sticks—perfect for batches. Bake at 200°C / 400°F for 12–15 min on a lined rack, flip at ~8 min, then give 2–3 min extra for crunch. Space the sticks so they don’t touch and rest on a wire rack before serving for crisp bottoms.
  1. Heat oven to 200°C / 400°F. Line a rimmed sheet with parchment or set a rack over the sheet; brush with melted butter.
  2. Dip sticks as above and lay them out so they don’t touch.
  3. Bake 12–15 minutes, flipping around 8 minutes, until deeply golden.
  4. For extra crunch, give them 2–3 minutes more after the flip.
  5. Rest on a rack before plating or freezing.

Although times vary with ovens, color and feel tell the truth: crisp edges, bouncy centers. If the center indents and stays wet, a minute or two more will finish the set.


Stovetop Skillet Variation — When You Want Pan Caramelization

Sometimes you crave the scent of butter browning in a pan. In that case:

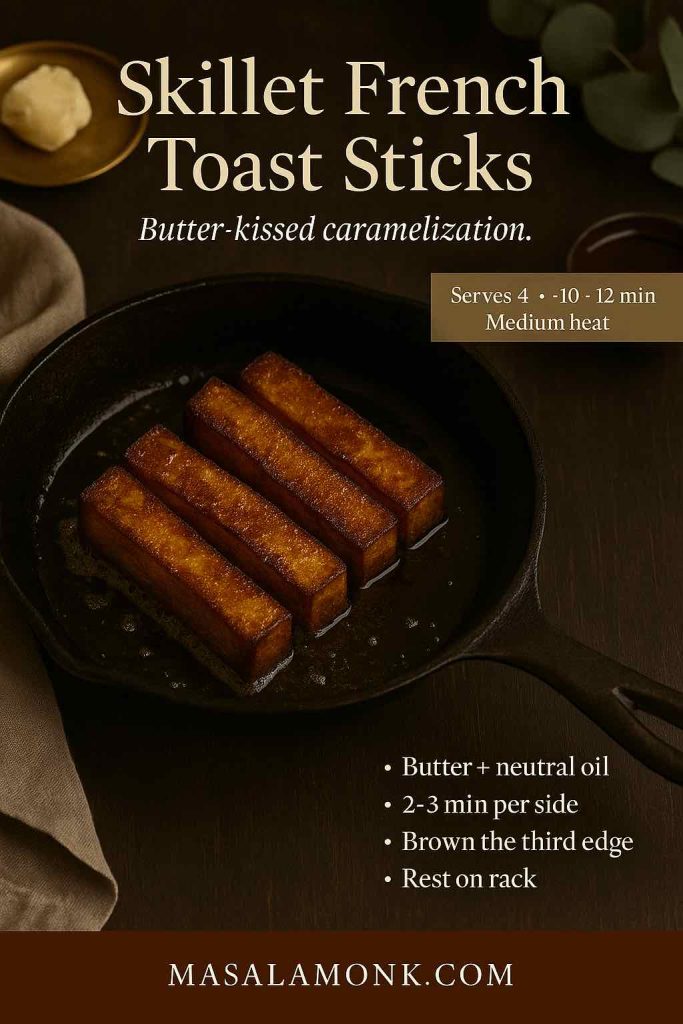
Skillet French toast sticks browning in a cast-iron pan with butter—golden, crisp edges and custardy centers; MasalaMonk stovetop recipe card.
Skillet French Toast Sticks—deep caramel notes from the pan. Heat medium with butter + a little neutral oil, cook 2–3 min per side, then brown the third edge. Work in small batches, wipe and refresh fat between rounds, and rest on a wire rack to keep bottoms crisp. Serve immediately with warm maple.
  • Heat a large nonstick or well-seasoned cast-iron skillet over medium.
  • Film the pan with a mix of butter and oil.
  • Cook sticks 2–3 minutes per side, turning to brown the third “edge” as needed.
  • Slide finished sticks onto a rack so the bottoms don’t steam.

This route gives you a slightly deeper caramel note and a touch more flexibility if your air fryer is busy with bacon or potatoes.


Vegan French Toast Sticks — Plant-Forward with Crisp Edges

If you’re cooking for vegans, egg allergies, or you simply like the flavor of plant-based custard, swap in the method from Vegan French Toast: 6 Easy Recipes and adapt it for sticks with two small upgrades:

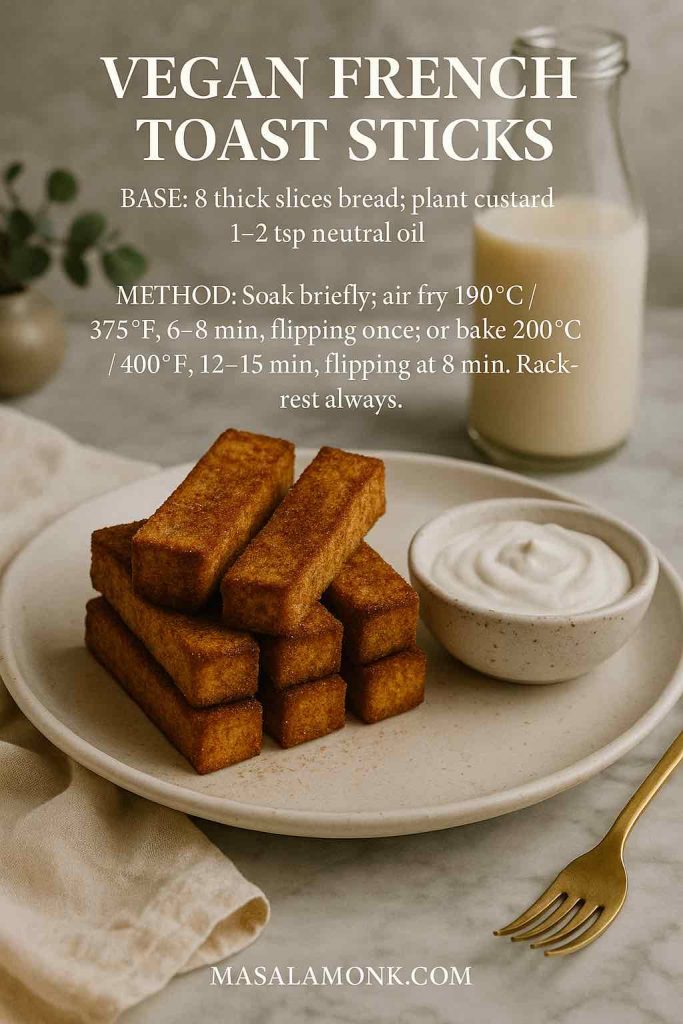
Vegan French toast sticks stacked on a stoneware plate with coconut yogurt and an almond-milk bottle—golden, crisp; MasalaMonk recipe card.
Vegan French Toast Sticks—crisp edges, tender middle without eggs. Enrich the plant custard with 1–2 tsp neutral oil, give each stick a brief soak, then air-fry at 190°C / 375°F for 6–8 min (flip once) or bake at 200°C / 400°F for 12–15 min (flip at 8). Rest on a wire rack to set the crust. Tip: use a tight-crumb loaf and keep the dip quick for best structure.
  • Add 1–2 tsp neutral oil directly to the vegan custard to enhance browning.
  • Keep the soak short (as above) so structure holds.
  • Air fry at 190°C / 375°F for 6–8 minutes total, flipping once, or bake per the oven method and extend a minute if edges look pale.

Because plant custards can set more gently, the rack rest is doubly important; it locks in crunch while the interior finishes.


Gluten-Free French Toast Sticks — Crisp Without Crumble

Gluten-free breads vary substantially, so choose a loaf with a close crumb and assertive structure—brioche-style GF loaves or thicker sandwich slices perform best. Dry the sticks slightly longer before dipping, and keep the soak short. Follow either the air fryer or oven timing above; add 1–2 minutes after the flip if the surface looks soft.

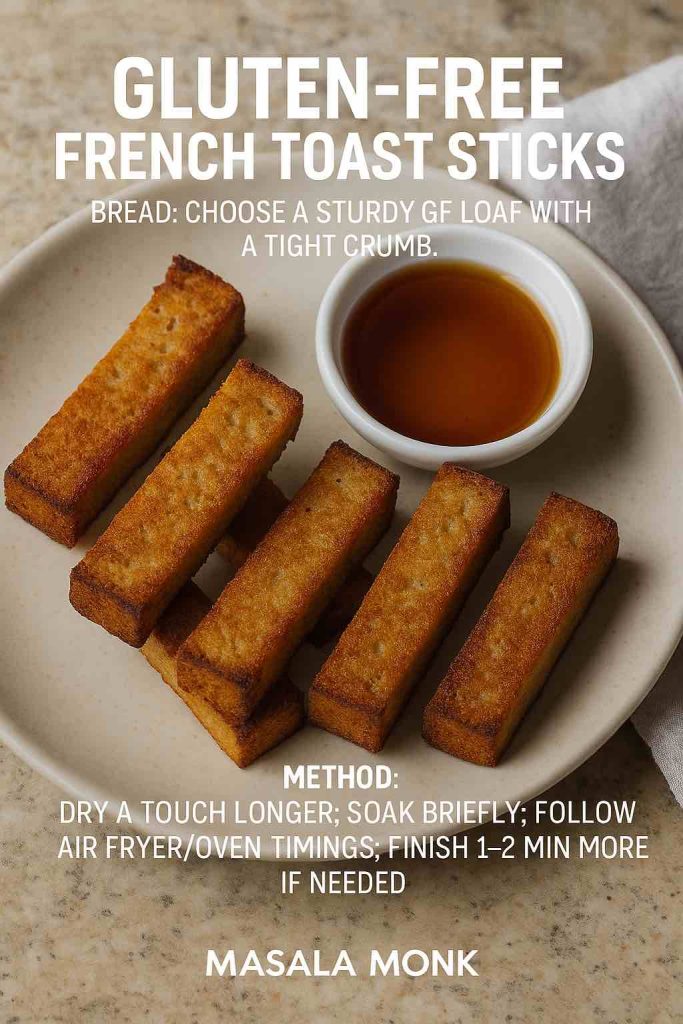
Gluten-free French toast sticks on a stoneware plate with a maple-syrup ramekin—golden, crisp edges and tender centers; MasalaMonk recipe card.
Gluten-Free French Toast Sticks—crisp without crumble. Pick a sturdy, tight-crumb GF loaf (brioche-style or thick sandwich). Dry 5–10 min, then brief soak so the sticks hold structure. Cook: Air fryer 190°C / 375°F, 6–8 min (flip once) or oven 200°C / 400°F, 12–15 min (flip at ~8). If the surface looks soft, finish 1–2 min more. Rest on a wire rack for crisp bottoms.

If gluten is new territory for you or your readers, a quick primer like What is Gluten? helps demystify labels. For a naturally GF side that complements sticks, consider a spoon of millet porridge or these ideas in millets as a gluten-free superfood—they round out the plate without competing on sweetness.


Protein French Toast Sticks — Higher Satiety, Same Crunch

For a more filling breakfast without leaning on syrup, whisk 10–15 g unflavoured whey or plant protein into the custard, then thin with milk until it returns to that glossy, spoon-coating texture. Because added protein browns quickly, watch color closely and lower the air fryer temperature to 185°C / 365°F if necessary. Serve with thick yogurt and chopped nuts, or keep it light and pair a few sticks with keto chia pudding with almond milk so everyone at the table gets what they prefer.

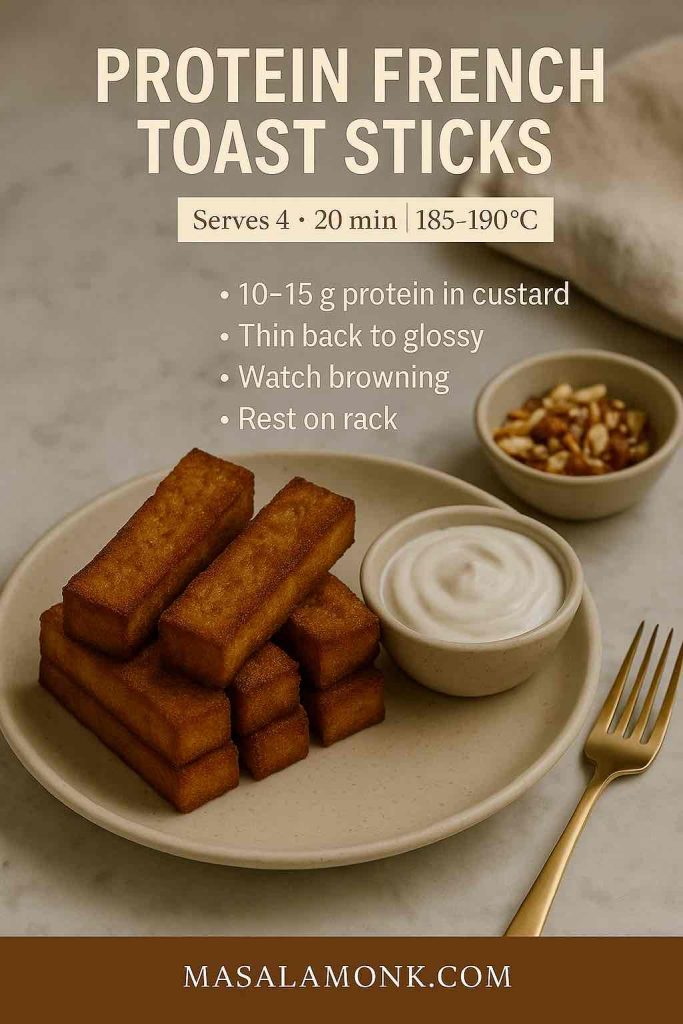
Protein French toast sticks on a stoneware plate with yogurt dip and chopped nuts—golden and crisp; MasalaMonk high-protein recipe card.
Protein French Toast Sticks—more satiety, same crunch. Whisk 10–15 g unflavoured whey or plant protein into the custard, then thin with milk until glossy. Cook 185–190°C / 365–375°F for 6–8 min in the air fryer, flip once, and rest on a rack. Protein speeds browning—watch color and reduce sugar slightly. Serve with thick yogurt and toasted nuts.

Crunch Coats & Copycat Textures — From Churro Sugar to Cornflake Crust

Now and then, you want that fairground crunch or a drive-thru echo at home. Happily, sticks invite embellishment:

  • Cinnamon Sugar “Churro” Finish: Toss just-cooked sticks in a blend of 3 tbsp sugar + 1 tsp cinnamon. Do this while they’re still hot so the sugar clings.
  • Cornflake Crust: After dipping, press each stick into lightly crushed cornflakes. Air fry as usual. The shards add audible crunch without deep-frying.
  • Graham Dust: Blitz plain grahams into coarse crumbs; press on as with cornflakes for a cookie-like halo.
  • Nutty Edge: Roll one long side in finely chopped, lightly toasted almonds or pecans before cooking; it creates a textural contrast without overwhelming the custard.

For inspiration and a sense of what diners expect from a fast-food take, a quick skim of the Sonic Drive-In menu will reveal how they pair sticks and dips. You’ll find that a simple vanilla-maple dip (equal parts maple syrup and thick yogurt, scented with vanilla) outshines most chain versions at home.


Sauces, Dips, and Fruit — Keep the Party on the Plate

Maple syrup is non-negotiable for purists; nevertheless, little jars of toppings make breakfast feel abundant:

  • Warm Chocolate Spoon Sauce: Drizzle a ribbon of 3-minute homemade chocolate syrup over a stack and watch it set into a gloss as the sticks cool.
  • Cinnamon Apples: Spoon over stewed cinnamon apples for a diner-style plate without the cloying sweetness.
  • Yogurt-Maple Dip: Whisk ½ cup thick yogurt with 2 tbsp maple and a pinch of salt.
  • Berry Smash: Crush berries with a touch of sugar and lemon; strain or leave rustic.
  • Orange Zest Sugar: Microplane zest into sugar with a whisper of nutmeg; toss hot sticks lightly for a holiday finish.

Because sauces add sweetness, you can reduce sugar in the custard slightly and lean on caramelization for flavor.


Freezer-Friendly: How to Batch, Store, and Reheat Perfectly

Sticks freeze and reheat better than whole slices thanks to their surface area. Here’s the straightforward route:

  • Cook completely and rest on a rack until room-temp.
  • Freeze in a single layer on a parchment-lined sheet until firm.
  • Bag & label, pressing out air.
  • Reheat from frozen:
    • Air fryer 180°C / 356°F for 3–5 minutes (shake once).
    • Oven 200°C / 400°F for 6–8 minutes on a rack set over a sheet.

If you keep a box of store-bought sticks as a back-pocket option, use these ranges as a starting point and adjust by brand. For context, you can glance at Eggo French Toaster Sticks or Farm Rich French Toast Sticks to see packaging guidance, then dial toward your preferred crispness. Either way, trust color and firmness more than labels.


Ratio Sense — Cook by Feel When Measuring Cups Vanish

Holiday rentals and late-night cravings share one trait: missing measuring cups. Fortunately, this recipe scales by intuition:

  • For 2 slices (6 sticks): 1 large egg + a scant splash of milk (about 60–80 ml).
  • For 4 slices (12 sticks): 2 eggs + ~150 ml milk.
  • For 8 slices (24 sticks): 3 eggs + 180 ml milk (our base).

Aim for a custard that’s thicker than milk and thinner than cream, glossy, and clingy. If it runs like water, add part of another egg; if it clumps, thin with a splash of milk. This single cue—how the custard coats the back of a spoon—unlocks consistency regardless of brand or bread.


Troubleshooting French Toast Sticks Recipe

  • Edges browned, center wet: Shorten the soak next time; for this batch, give the sticks 1–2 extra minutes on a rack in a hot oven to finish.
  • Pale even after time: Preheat longer and add a teaspoon more sugar to the custard; sugar fuels browning.
  • Eggy streaks: Whisk the custard more thoroughly and avoid letting sticks lounge in the liquid.
  • Soft after resting: Always move finished sticks to a wire rack; the air gap prevents steam from softening the bottom.
  • GF bread crumbling: Choose a denser loaf, cut slightly thicker, and keep the dip brisk.
  • Overly sweet: Reduce sugar in the custard and switch to yogurt-maple dip for balance.

For doneness anxiety, an instant-read thermometer ends the guesswork; custard-based dishes earn their melt-in-the-middle texture right around that 71°C / 160°F sweet spot highlighted by the USDA chart.


Flavor Variations That Behave Well in Stick Form

Because the format is stable, you can dress it up or down without losing structure:

  • Orange–Cardamom: Zest one orange into the custard and add a pinch of cardamom; finish with icing sugar.
  • Maple–Brown Butter: Brown 1–2 tbsp butter; brush it on hot sticks and drizzle maple.
  • Coconut: Stir a spoon of coconut cream into the custard; sprinkle toasted coconut to finish.
  • Hazelnut: Thin chocolate-hazelnut spread with warm milk for a pourable gloss.
  • Spiced Sugar: Combine cinnamon, a hint of ginger, and nutmeg; toss lightly while hot.

If you lean into crunchy coats (cornflake or graham), reduce custard sugar slightly to avoid tipping into brittle sweetness.


Scaling Up or Down French Toast Sticks Recipe

  • For one: 1 egg + 60–80 ml milk + 2 slices (6 sticks) → air fryer 6–7 minutes total.
  • For two: 2 eggs + ~150 ml milk + 4 slices (12 sticks) → same heat; cook in two rounds.
  • For a crowd: Double the base and use two sheet pans on convection; rotate pans and flip at the 8-minute mark.

Meanwhile, if you’re running a mixed table—vegan, dairy-free, and classic—cook the vegan batch first, followed by gluten-free if needed, then the standard custard last. Separate racks keep everything crisp and tidy.


A Note on Bread, Moisture, and Timing

Bread is a living variable. Even within the same brand, dryness swings with storage and climate. Consequently, your soak time is the dial you turn most. Fresh, soft brioche? Dry slightly longer and dip quickly. Day-old challah? Dip a hair longer. Very dry loaf? Add a tablespoon of milk and extend the soak by a second or two. Ultimately, color and feel tell you more than the clock: aim for caramel edges and a buoyant middle that springs back when pressed.

If you enjoy tinkering, the classic ratio outlined by pros—roughly one egg per ¼–⅓ cup milk—gives you leeway; the granular reasoning in the Serious Eats overview is a useful mental model as you experiment.


Serving Boards and Balanced Plates

Because sticks are sweet-leaning, anchor the plate with freshness or creaminess. Citrus segments and mint keep things bright; a small bowl of salted yogurt reins in syrup. For a sweet-savory spread, add salty nuts or crisp bacon; for a fully plant-based board, go with fruit, maple, and a side of millet ideas for texture variety. If dessert-for-breakfast is the vibe, a warm ribbon of house chocolate syrup and cinnamon apples earns applause every single time.


Quick Reference Cards (Copy/Paste Friendly)

Air Fryer French Toast Sticks Recipe

  • Ingredients (serves 4): 8 thick slices bread; 3 eggs; ¾ cup (180 ml) milk; 1 tbsp sugar; 1 tsp vanilla; ½ tsp cinnamon; pinch salt; butter/oil.
  • Method: Cut each slice into thirds; dry briefly. Whisk custard smooth. Dip 5–7 s/side. Air fry 190°C / 375°F, 6–8 min, flipping halfway. Rest on a rack. Serve immediately.

Oven-Baked French Toast Sticks Recipe

  • Ingredients: Same as above.
  • Method: Heat oven 200°C / 400°F. Line/rack pan; butter lightly. Dip quickly; arrange with space. Bake 12–15 min, flip at 8 min; add 2–3 min for extra crunch. Rest and serve.

Vegan French Toast Sticks (No Egg, No Dairy)

  • Base: Use plant custard from this vegan guide; add 1–2 tsp neutral oil to the mix.
  • Method: Soak briefly; air fry 190°C / 375°F, 6–8 min (flip once) or bake as above; extend a minute if pale. Rack-rest always.

Gluten-Free French Toast Sticks

  • Bread: Choose a sturdy GF loaf with a tight crumb.
  • Method: Dry a touch longer; soak briefly; follow air fryer/oven timings; finish 1–2 min more if needed.

Make-Ahead & Reheat

  • Freeze fully cooked sticks in a single layer; bag when firm.
  • Reheat from frozen: Air fryer 180°C / 356°F, 3–5 min; Oven 200°C / 400°F, 6–8 min on a rack.

Closing Thoughts

Once you’ve made this french toast sticks recipe a couple of times, you’ll feel the controls in your hands: how quickly to dip, when to flip, and exactly how deep a golden you prefer. From there, variations are easy—vegan when you need it, gluten-free for guests, a protein twist for longer mornings, a churro dust when nostalgia calls. And because the methods scale without drama, you can cook a few sticks for a sleepy kiddo or line up two trays for a party brunch without changing anything but the pan.

When you want the plant-based path that just works, lean on Vegan French Toast: 6 Easy Recipes. If you’re curious about the science of ratios and why small tweaks matter, browse the Serious Eats technique explainer for clarity. And whenever you want precise safety numbers, the USDA chart is the last word. Beyond that, trust your senses: the scent of browning butter, the feel of a springy center, and the sound of a crisp edge snapping are the only cues you really need.

FAQs

1) How long do I air fry french toast sticks, and at what temperature?

For a classic french toast sticks recipe, preheat the air fryer to 190°C / 375°F; cook 6–8 minutes total, flipping halfway. Moreover, if the bread is extra thick, add 1–2 minutes until edges are deeply golden and the center springs back.

2) What’s the best oven time and temperature for french toast sticks?

Bake at 200°C / 400°F for 12–15 minutes, turning at the 8-minute mark. Additionally, for an extra-crisp shell, finish 2–3 minutes more; the interior should feel bouncy rather than wet.

3) What is the ideal egg-to-milk ratio for the custard?

Generally, aim for about 1 large egg per ¼–⅓ cup (60–80 ml) milk. Conversely, if using very stale bread, increase milk slightly so the custard stays silky. This balance keeps the french toast sticks recipe tender without turning soggy.

4) How do I keep french toast sticks crispy instead of soggy?

Firstly, dry the bread briefly before dipping. Secondly, dip quickly (5–7 seconds per side), allowing excess custard to drip off. Furthermore, cook with space between sticks and rest them on a wire rack for a minute before serving.

5) Which bread works best for a french toast sticks recipe?

Brioche, challah, and Texas toast consistently shine thanks to sturdy crumbs and gentle sweetness. Nevertheless, thick-cut sandwich bread succeeds if you dry it slightly beforehand.

6) Can I make french toast sticks without eggs?

Yes. Use a vegan custard base (e.g., plant milk plus thickener and flavorings) and proceed with the same timings. Importantly, add a teaspoon of neutral oil to the batter to encourage browning.

7) How do I make dairy-free french toast sticks?

Simply replace milk with almond, oat, or coconut milk at a 1:1 ratio. Additionally, brush or spray the basket/pan lightly with oil to enhance crisp edges, since non-dairy custards brown a touch slower.

8) What if I have no vanilla or cinnamon?

Omit both and rely on butter browning and maple for aroma. Alternatively, use orange zest, cardamom, or a whisper of nutmeg. Notably, the french toast sticks recipe still tastes great with just salt and sugar.

9) How many eggs per slice (or per batch) should I plan?

As a rule of thumb, 1 egg covers 1–2 slices (3–6 sticks) depending on thickness. Accordingly, for 8 slices (about 24 sticks), 3 eggs plus ¾ cup milk is a dependable starting point.

10) How long should french toast sticks cook on each side in a skillet?

Use medium heat and cook about 2–3 minutes per side. Meanwhile, rotate briefly to brown the “third edge”; transfer to a rack so the bottoms don’t steam.

11) Can I freeze french toast sticks? How do I reheat them later?

Absolutely. Freeze fully cooked sticks in a single layer, then bag. Subsequently, reheat from frozen: air fryer 180°C / 356°F for 3–5 minutes, or oven 200°C / 400°F for 6–8 minutes on a rack.

12) What internal cues tell me the sticks are done?

Look for deep golden edges and a springy center that rebounds with a gentle press. Additionally, the custard should not ooze when cut; if it does, cook 1–2 minutes more.

13) How do I scale this french toast sticks recipe for one person or for a crowd?

For one, use 1 egg + 60–80 ml milk and 2 slices (6 sticks). For a crowd, double or triple the base; use two sheet pans and rotate them, flipping at 8 minutes. Likewise, hold finished sticks on a rack in a warm oven.

14) Can I add protein powder without making the texture chalky?

Yes—whisk in 10–15 g unflavoured whey or plant protein per 1–2 eggs, then thin with milk until the custard coats a spoon. However, because added protein browns faster, reduce heat slightly or watch carefully.

15) What are smart gluten-free adaptations?

Choose a dense GF loaf with a tight crumb, dry the sticks a bit longer, and keep the soak brisk. Moreover, add 1–2 minutes after the flip if the surface looks soft; the extra time sets structure.

16) How do I get a “crunch coat” like churro or cereal-crusted sticks?

Immediately after dipping, press sticks lightly into crushed cornflakes or graham crumbs. Afterward, air fry or bake as usual. Gently dust hot sticks with cinnamon sugar to finish if desired.

17) Can I make the custard richer with cream or half-and-half?

Certainly. Replace up to half the milk with heavy cream or half-and-half. Nevertheless, to prevent a greasy feel, keep cook temperature moderate and avoid over-soaking.

18) What’s the easiest way to avoid eggy streaks in the batter?

Whisk thoroughly until the custard is homogenous and glossy. Additionally, stir between batches, since spices can settle; a smooth custard gives even browning.

19) How do I keep the flavor balanced if I’m using very sweet dips?

Reduce sugar in the custard by a teaspoon and rely on caramelization for depth. Ultimately, the french toast sticks recipe should taste gently sweet on its own, with sauces providing the accent.

20) Can I make french toast sticks ahead for brunch service?

Yes. Cook completely, cool on a rack, and refrigerate up to 4 days. Then, just before serving, re-crisp: air fryer 180°C / 356°F for 3–4 minutes or oven 200°C / 400°F for 5–7 minutes.

21) What pan fat is best—butter or oil?

Butter delivers aroma and browning; a small blend with neutral oil raises the smoke point. Consequently, use butter for flavor and a touch of oil for resilience, especially on the second batch.

22) How do I adapt the french toast sticks recipe for very fresh, soft bread?

Dry the slices lightly in a low oven for 2–3 minutes per side, cool 1 minute, then dip quickly. Conversely, if the loaf is quite dry, increase milk slightly and extend the soak by a second or two.

23) What toppings pair well without overwhelming the texture?

Thick yogurt with a pinch of salt, warm berries, cinnamon apples, peanut-maple, or a restrained chocolate drizzle. Additionally, finish with citrus zest to brighten richer combinations.

24) How do I know I’ve nailed the texture every time?

Color, feel, and sound guide you: amber edges, a gentle spring in the center, and a faint crackle after a brief rack rest. In short, when those cues align, your french toast sticks recipe is spot on.

Posted on 13 Comments

Vegan French Toast: 6 Easy Recipes (Pan, Air Fryer, GF & High-Protein)

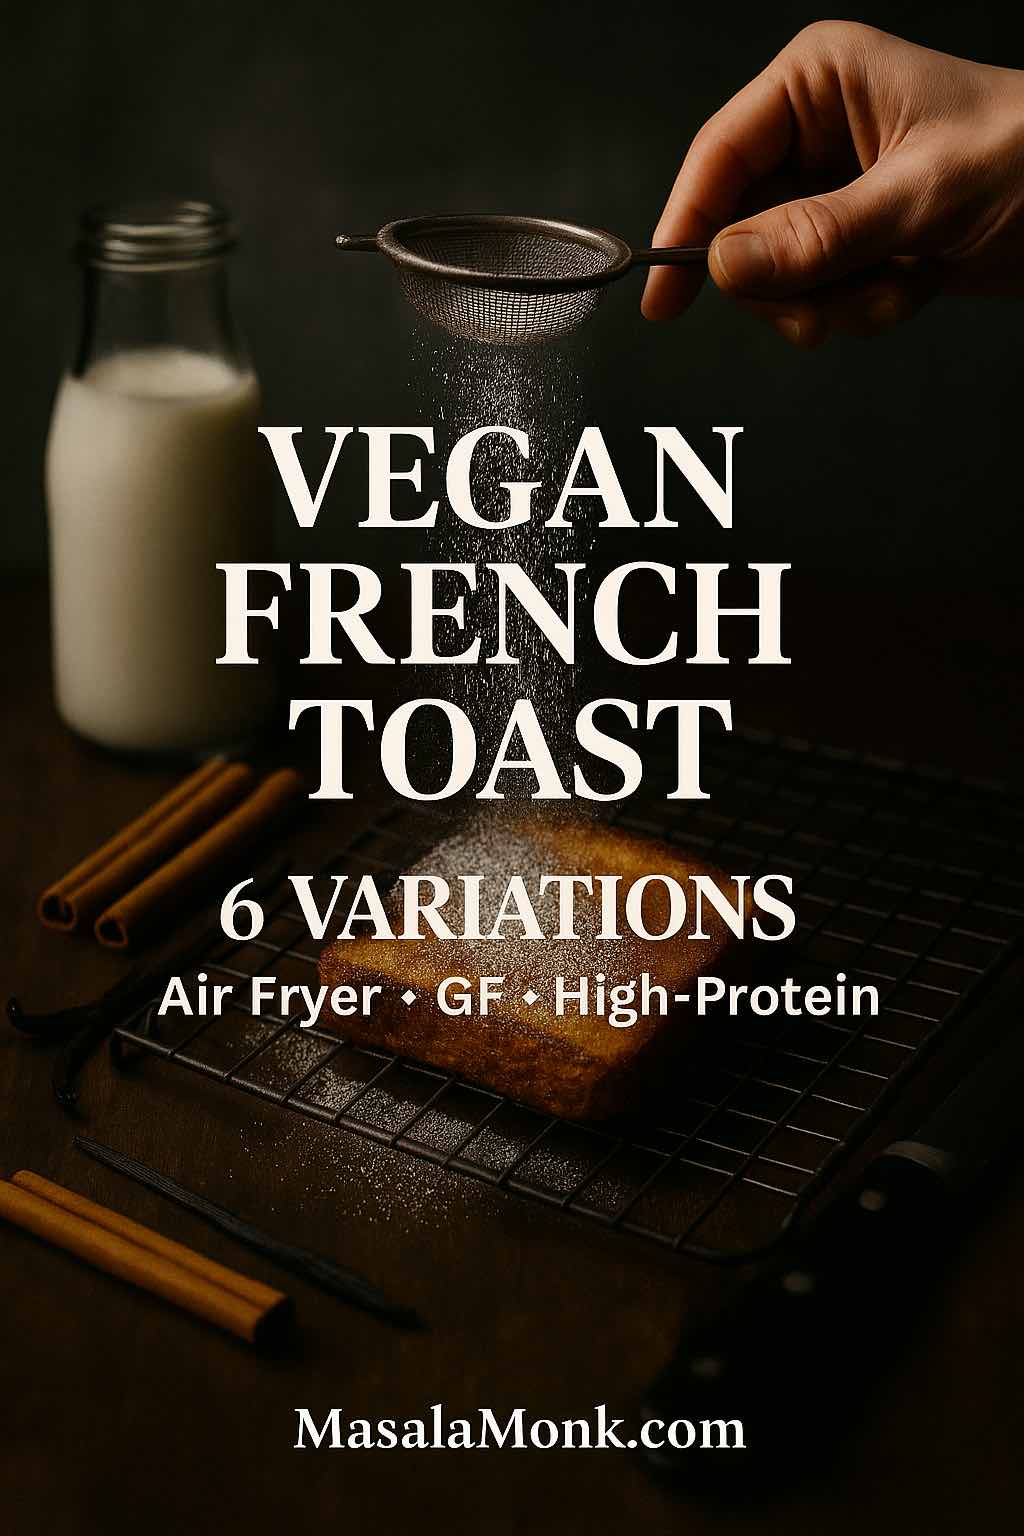
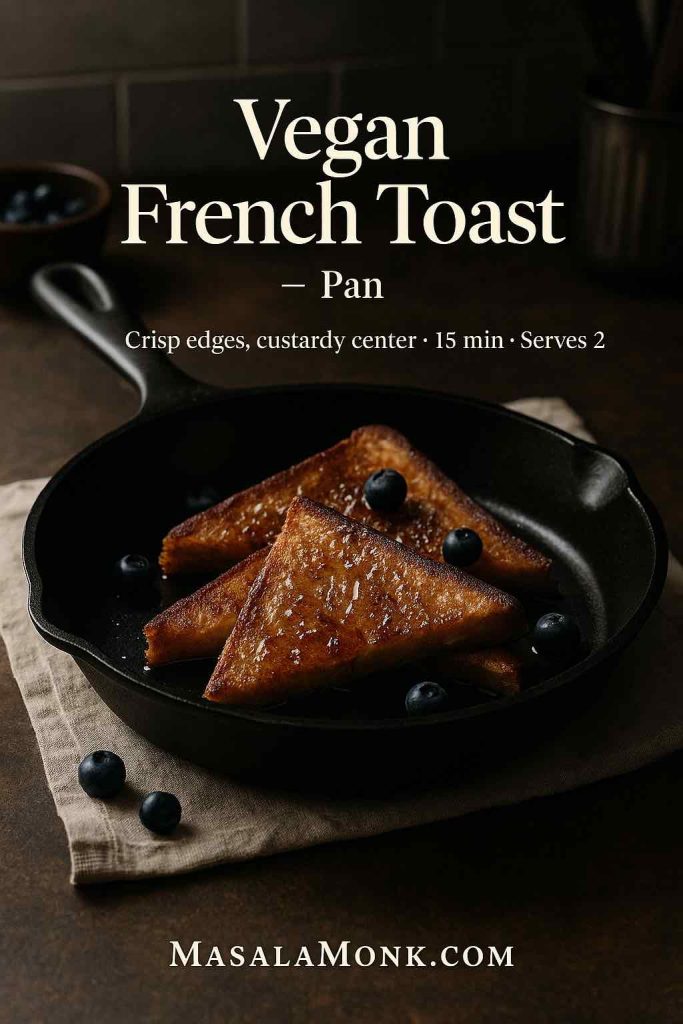
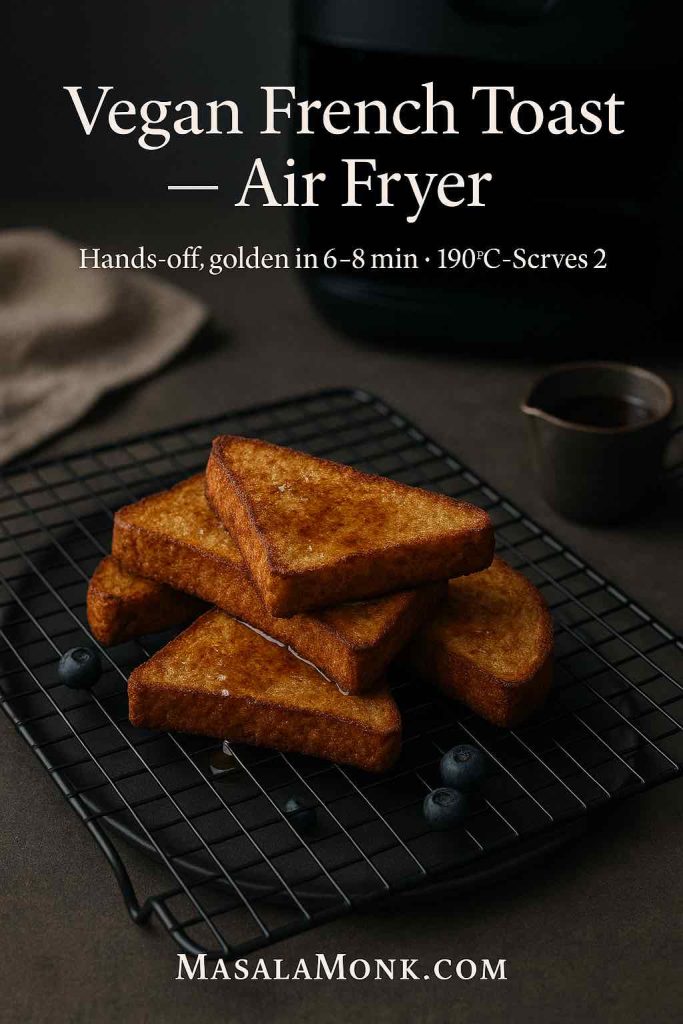
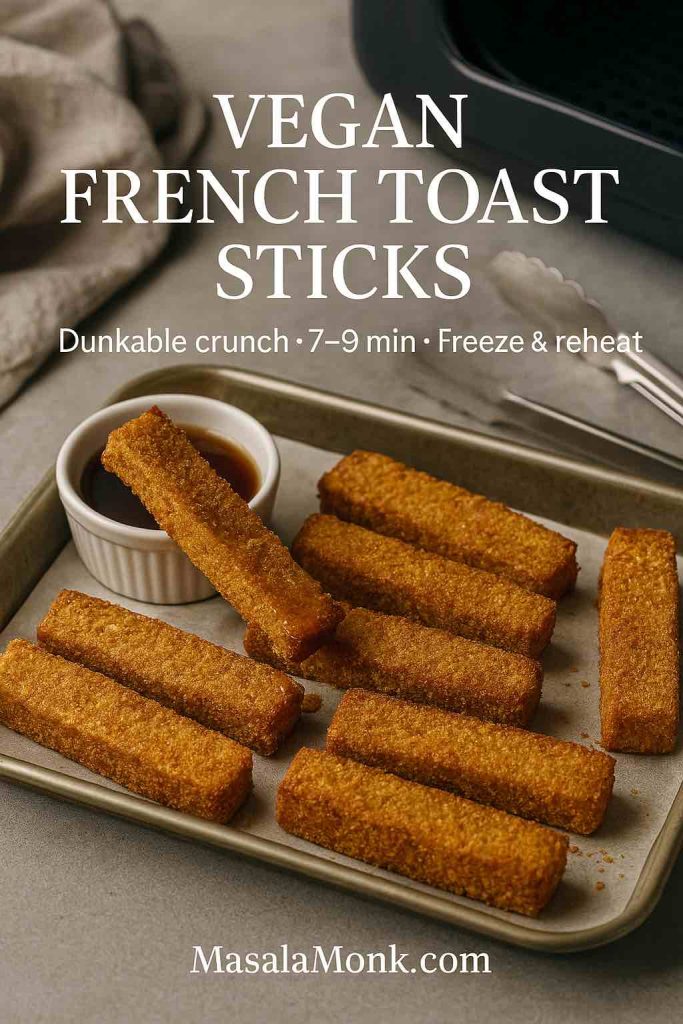
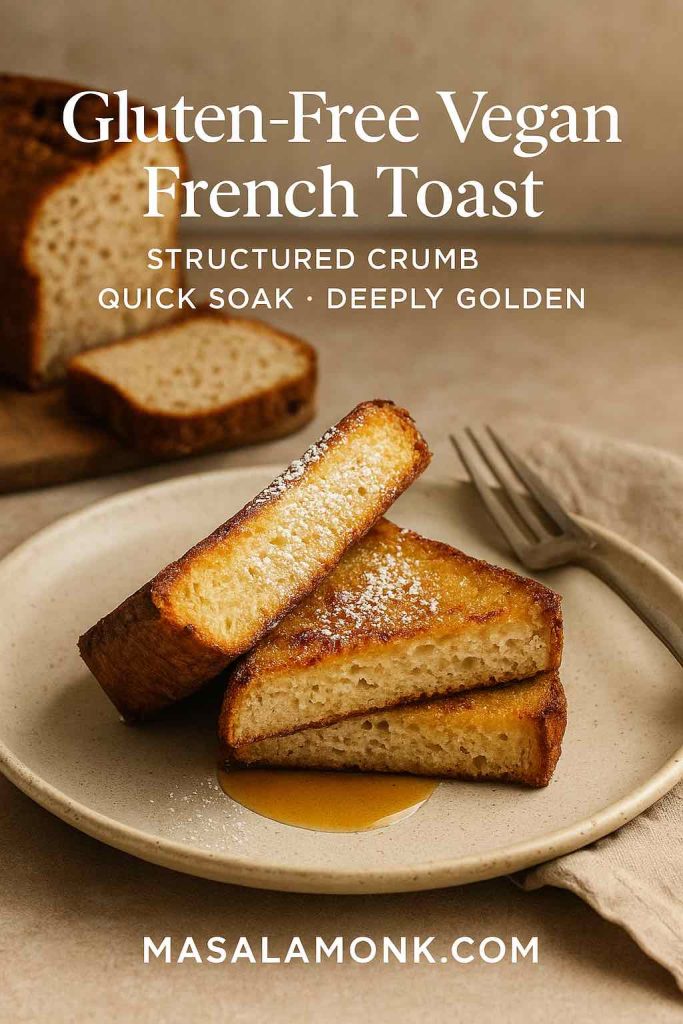
Hand dusting powdered sugar over golden vegan French toast on a cooling rack; cover for 6 recipe variations including air fryer, gluten-free, and high-protein. How to make Vegan French Toast Recipes Post.

If you’ve been craving vegan french toast (Dairy and Egg Free) that delivers diner-level crisp edges and a plush, custardy center—without eggs or dairy—you’re exactly where you need to be. This guide starts with a reliable base batter and then branches into five more variations that cover air fryer convenience, freezer-friendly sticks, gluten-free tweaks, chickpea-powered protein, and a beautifully silky tofu custard. Along the way, you’ll pick up small adjustments that transform “pretty good” slices into the ones everybody fights over. Moreover, you’ll find helpful links to deepen your understanding—whether you want to make your own almond milk, understand browning, or choose better gluten-free bread.

Before we cook, a quick mindset: french toast isn’t only a recipe; it’s a tiny set of decisions—bread, batter thickness, soak time, and heat. Tweak those four, and breakfast turns into brunch. Consequently, this page is organized to help you see exactly which lever to pull for your situation, so you can enjoy a stack that’s crisp outside, custardy inside, and absolutely worth repeating.


Core Vegan French Toast Recipe (Pan Method)

A classic slice needs a custard that clings. Here, eggs are replaced with a plant-milk base and a spoon of starch, which acts as a gentle thickener. Once the dipped bread hits the pan, that thin coating sets into a delicate shell while the interior remains soft. As a result, you get structure and tenderness without scrambling a single egg.

Ingredients (serves 2)

  • 1 cup unsweetened oat or almond milk
  • 1 Tbsp cornstarch (or 1½ Tbsp arrowroot)
  • 1½ Tbsp sugar or maple syrup
  • 1 tsp vanilla extract
  • ½ tsp ground cinnamon
  • Pinch of fine salt
  • 4 slices day-old thick bread (vegan)
  • 1 tsp neutral oil + 1 tsp vegan butter
Crisp vegan french toast in a pan with berries, brushed steel knife and linen napkin in a classy, moody kitchen setting.
Pan-seared vegan french toast with maple and berries. A quick custard, a steady medium heat, and a minute on a rack—that’s the formula.

Method for Dairy and Egg Free French Toast

First, whisk the cornstarch with a splash of plant milk until lump-free. Then add the remaining milk, sugar, vanilla, cinnamon, and salt; whisk again until the mixture looks smooth and lightly thickened. Meanwhile, set a nonstick pan or griddle over medium and add the oil plus vegan butter; let the fats mingle and shimmer. Next, dip each slice for 10–20 seconds per side (or 30–60 seconds if you’re using thick-cut bread), let the excess drip, and lay it into the hot pan. Cook 2–3 minutes per side for regular slices or 3–4 minutes for thick ones, turning once, until each face turns deep golden and the edges feel crisp. Finally, transfer the slices to a wire rack for a minute so steam escapes and the underside doesn’t soften.

Why this works

Put simply, starch helps keep the recipe egg free and delivers the grip that eggs usually provide. It gelatinizes as it heats, which helps the custard hug the bread instead of sliding off. At the same time, a little sugar encourages browning, while vanilla and cinnamon do the aromatic heavy lifting. Importantly, the rack rest is not negotiable; by elevating the slice even briefly, you preserve that fragile crispness you just created.

Browning, briefly

Oat or soy milk often brown more readily than very lean almond milk because they typically carry more natural sugars and a touch more protein—two participants in the Maillard reaction (the chemistry that gives you that rich, toasty flavor). However, if almond milk is your favorite, you can absolutely get great color: keep the batter’s small dose of sugar, preheat thoroughly, and avoid crowding the pan. Prefer to control ingredients from the start? Try making your own with this straightforward tutorial for homemade almond milk (clean flavor, short ingredient list, and pleasantly affordable).


Vegan French Toast — Ingredients & Ratios

For consistent results, keep this pocket rule close: per 4 standard slices, use 1 cup plant milk + 1 Tbsp starch. If you’re cooking for a crowd, double everything; if your bread is especially thick, extend the soak rather than thinning the batter. Conversely, if your loaf is very fresh and soft, lightly pre-toast the slices for a sturdier crumb that holds its shape. Moreover, remember that sweetness in the bread itself counts; cinnamon-raisin and similar loaves brown faster and need a touch lower heat.

Also Read: Easy Homemade Oats Milk with just One Ingredient- Non Slimy, at last


Vegan French Toast — Step-by-Step & Browning Tips

To avoid sogginess, let the custard cling and then drip cleanly; don’t send it into the pan dripping rivers of batter. Next, keep the heat at medium—hot enough to brown, gentle enough to set the interior. In addition, rotate slices if your pan has hot spots, and, if needed, nudge the heat down for sugar-rich breads so the exterior doesn’t darken before the center firms. Curious about the science behind that gorgeous color? A friendly primer on the Maillard reaction shows why proteins plus sugars under heat equal deep flavor and golden edges.

As a tiny flourish, dust one face of the dipped slice with a whisper-thin veil of cornstarch just before it hits the pan, then cook that side first. Consequently, you’ll get a glassier, extra-crisp crust without altering the interior at all.


How to make Vegan French Toast in Air Fryer

Some mornings, hands-off wins. The air fryer delivers consistent browning, less stovetop babysitting, and easy batching.

Two slices of vegan french toast from the air fryer on a wire rack over a tray, maple drizzle and linen.
The air fryer takes over while you pour coffee—375°F, a mid-cook flip, and a brief rack rest for that diner-style crunch.

Whole slices

Preheat to 190°C / 375°F and lightly coat the basket. Meanwhile, dip and drain the slices, then lay them in a single layer—no touching corners. Cook 6–8 minutes total, flipping at 4 minutes. Because space equals crispness, work in batches and resist stacking. To keep the first batch snappy, set finished slices on a rack instead of a plate. For a helpful benchmark that lives in the same temperature neighborhood (even though it uses sticks), this air-fryer range for french toast sticks is a useful reference you can adapt to whole slices.

If your air fryer runs hot, reduce the temperature by 10–15 degrees and add a minute to the total time; if it runs cool, go the other way. Furthermore, if the underside looks pale after flipping, mist lightly with oil and continue—little adjustments like that make a visible difference to this Egg and Dairy Free French Toast Recipe.

Also Read: 5 Delicious High-Protein Vegan Meal Prep Ideas Using an Air Fryer


Vegan French Toast Sticks (Air Fryer)

These are a guaranteed hit: easy to hold, perfect for dunking, and surprisingly freezer-friendly.

How to

After dipping, slice each piece into 3–4 sticks. Next, for a snack-shop crunch, roll the wet sides in fine panko or lightly crushed cornflakes. Subsequently, arrange in a single layer and air-fry 7–9 minutes, shaking or flipping at 4 minutes. Finally, rest the sticks for 1 minute; the coating sets as it cools, so patience pays off.

Air-fried vegan french toast sticks with light cornflake crunch cooling on a tray, tongs and linen beside a maple ramekin.
Cut, coat, air-fry. A quick dunk, a light crumb, and a brief rack rest turn simple sticks into a snack-shop classic.

Make-ahead, the simple way

Bake or air-fry a full tray, cool completely, and freeze the sticks in a single layer on a sheet pan. Then bag them. Later, reheat straight from frozen—no thawing—in a hot air fryer or toaster oven until the edges sing. If you prefer a clear workflow, this tutorial on freezing and speedy reheats lays out the steps in a way that’s easy to adapt to vegan batter.

For packed-lunch convenience, include a small lidded container of maple or a quick cinnamon-sugar dip. Notably, sticks travel better than whole slices; they keep their texture longer and fit neatly into bento-style boxes.


Gluten-Free Vegan French Toast

Gluten-free french toast can be crisp and custardy—no compromises—if you start with the right bread and thicken the custard slightly.

Choose sturdier breads

Seek out GF loaves that use psyllium husk (often with xanthan). In practice, psyllium forms a gel that mimics gluten’s elasticity, which helps slices survive a quick soak and a decisive flip. If you enjoy the “why,” this clear baking overview of psyllium’s role in structure explains how it strengthens doughs, while this sandwich loaf example shows the concept in a trustworthy recipe. Additionally, Bon Appétit’s take on psyllium for gluten-free baking is a handy companion read if you love nerdy kitchen notes.

Crisp gluten-free vegan french toast with powdered sugar on a stone counter; gluten-free loaf blurred in the background.
Structure first: choose a psyllium-supported GF loaf, dip briefly, then let the surface set before you flip for that deep golden finish.

Small tweaks, big payoff

  • Shorten the soak to 8–12 seconds per side; gluten-free crumb hydrates quickly.
  • Add ½ Tbsp extra cornstarch per cup of plant milk to the batter for a firmer set.
  • Prefer oat or soy milk when you want deeper browning on GF loaves.
  • If slices feel a touch dry after cooking, brush the edges with melted vegan butter just before serving.

Because readers often ask “who needs gluten-free, anyway?”, a concise explainer helps. This friendly overview—what is gluten—frames the basics without getting preachy. Consequently, you can give context without derailing the recipe.


High-Protein Vegan French Toast Recipe with Chickpea Flour

On days you want more protein and a gentle “eggy” vibe, chickpea flour (besan) shines.

Dairy and Egg Free Custard swap (serves 2)

  • 1 cup plant milk
  • 2 Tbsp chickpea flour
  • 1–2 Tbsp sugar or maple
  • 1 tsp vanilla, ½ tsp cinnamon, pinch salt
  • Optional ⅛ tsp baking powder for a soft lift
High-protein vegan french toast made with chickpea flour, crisp exterior and custardy interior on a ceramic plate.
Whisk plant milk with besan, cook gently, then rest on a rack: the result is crisp edges and a protein-rich, custardy bite.

Whisk until perfectly smooth and proceed exactly like the base recipe. Because chickpea flour binds so well, thick slices flip confidently and come off the pan with crisp, tidy edges. Moreover, the gram-flour aroma leans subtly savory in a way that many people associate with classic diner toast—especially if you stir in a pinch of kala namak (black salt) for that faint eggy aroma.

If you enjoy seeing how gram-flour batters behave in other cuisines, Meera Sodha’s beloved Pondicherry toast is a delightful read; although it’s a savory cousin, it demonstrates how crisp and golden a chickpea batter can be.

Also Read: 5 Facts about Besan (Chickpea Flour) and Its Place in the Keto Diet


Silken-Tofu Vegan French Toast Recipe (Blended Custard)

Prefer a silkier, richer bite? Silken tofu emulsifies into a creamy custard that sets like a dream.

Blend this (serves 2)

  • 150 g silken tofu
  • ½ cup plant milk
  • 1–2 Tbsp sugar or maple
  • 1 tsp vanilla, ½ tsp cinnamon, pinch salt
Hand dusting powdered sugar over golden vegan French toast on a cooling rack; cover for 6 variations including air fryer, gluten-free, and high-protein.
Blend silken tofu into the custard, cook low and steady, then rest briefly on a rack for a crisp edge and a velvet-soft middle.

Blend until completely smooth and glossy. Then dip briefly—this mixture clings—and cook over medium to medium-low so the surface doesn’t over-brown before the center sets. In addition, rest the slices on a rack for one minute to maintain that tender perimeter crunch.

If you’re currently avoiding soy, swing back to the starch-based master batter; it delivers excellent crispness with pantry staples and zero legumes. On the other hand, if you adore creamier centers, tofu delivers that “custard pull” when you cut the slice.

Also Read: ‘Tofu’ Instead of ‘Eggs’: 5 High Protein Plant-Based Breakfast Ideas


Flavor Add-Ins & Vegan Toppings

Once the base is set, it’s time to play. Because the batter is intentionally balanced, it welcomes many directions without seizing or splitting.

  • Vanilla-cinnamon classic: keep the base ratios as written.
  • Brown sugar + nutmeg: add 1 Tbsp brown sugar and a scant ⅛ tsp nutmeg to the custard.
  • Banana custard: mash ½ ripe banana into the mix and reduce plant milk by ¼ cup; consequently, you’ll get banana-bread vibes without going overly sweet.
  • Chocolate-hazelnut swirl: dot a dairy-free spread over hot slices so it melts into rivulets.
  • Bananas Foster topping: caramelize banana with a little vegan butter and brown sugar; optionally, finish with a splash of rum.
  • Ice-cream sundae breakfast: crown warm slices with a scoop of vegan vanilla and a ribbon of maple.

Meanwhile, if you like to prep a second dish the night before, a jar of creative chia puddings offers an effortless, dairy-free counterpoint—cool and creamy against hot and crisp. Alternatively, when you want a heartier plate, this roundup of quinoa breakfast and prep ideas delivers extra protein without crowding the skillet.


Bread Choices, Soak Times, and Crispness

Bread thickness, dryness, and sugar content steer results more than almost anything else, regardless of the custard you choose.

  • Thick, enriched loaves (vegan brioche or Texas-style sandwich bread) love a 30–60 second soak and 3–4 minutes per side. As a result, you’ll get that spoon-tender center people rave about.
  • Standard sandwich slices prefer a 10–20 second dip and 2–3 minutes per side cook—fast, tidy, weeknight-friendly.
  • Very fresh bread tends to go soft; therefore, pre-toast briefly to add backbone.
  • Cinnamon-raisin or sweeter breads brown faster; thus, reduce the heat slightly and lengthen the cook by 30–60 seconds.
  • Gluten-free loaves need shorter soaks and slightly thicker batter (see the GF section above).

Crucially, let slices rest on a wire rack rather than stacking them on a plate; otherwise, trapped steam softens the crust you carefully built. Additionally, if you want a glassier finish, dust one face of a dipped slice with cornstarch right before searing and cook that side first. Conversely, if you prefer a softer exterior, skip the dusting and cover the pan for the final minute to create a gentle steam.

Read More: Why is modern sandwich bread different from ‘real’ bread?


Plant Milks for Vegan French Toast (Oat vs Almond)

To keep Recipe of French Toast Vegan and free from dairy, choosing the milk is really important, as it shapes both flavor and color. By contrast with very lean almond milk, oat milk typically brings more carbohydrates—and sometimes a smidge more protein—which can deepen browning and enhance aroma. Nevertheless, almond milk has a wonderfully clean taste and keeps sweetness in check. Therefore, if you use almond milk, keep that small measure of sugar in the batter and preheat the pan until a drop of custard sizzles on contact. Furthermore, barista-style oat milks may be sweeter than you expect; if yours tastes notably sweet, reduce the added sugar by a teaspoon to maintain balance.

Prefer to skip additives and minimize packaging? Here’s a practical, step-by-step on almond milk from scratch you can keep on hand. Beyond that, consider experimenting with soy milk when you want extra browning; its protein content often nudges the Maillard reaction along.

Also Read: Coconut Milk Nutrition Facts & Glycemic Index Impact


Make-Ahead, Freezer-Friendly, and Crowd Service

If you’re cooking for more than two, organization beats speed. First, heat the oven to 95–120°C / 200–250°F and place a wire rack over a sheet pan. As each slice finishes, transfer it to the rack so it stays crisp while you finish the batch. Secondly, for brunch service, keep the pan at medium and rotate slices through in an even rhythm; it’s calmer than cranking the heat and hoping.

For weekly planning, the stick format is your friend. Prepare a double batch on Sunday, freeze them flat, and reheat on weekday mornings. Not only do they keep beautifully, but they also return to crisp with minimal fuss—especially in an air fryer. Meanwhile, if your family prefers whole slices, you can cool them on a rack, freeze between sheets of parchment, and reheat directly from frozen in a toaster oven.


Serving Ideas & Natural Pairings

Because the pan is already hot, you can build a small spread without extra stress. For instance, a bowl of berries and a spoonful of coconut yogurt turn a couple of slices into a complete breakfast. Alternatively, a wedge of citrus brightens heavier toppings like banana and brown sugar. Moreover, a sprinkle of toasted nuts or seeds adds welcome contrast—walnuts with maple, pistachios with rose syrup, almonds with cinnamon.

If you enjoy putting something make-ahead on the table, assemble a jar of chia pudding ideas the night before. For a higher-protein side, a warm quinoa breakfast bowl with fruit and nuts sits comfortably beside cinnamon-forward toast. And if you’re celebrating, vegan ice cream on hot slices never fails; it melts into the ridges like a sauce you didn’t have to make.


Troubleshooting on the Fly

  • Center still wet? Shorten the soak next time and add ½ Tbsp more starch per cup of plant milk. Also, give the slices another minute in a low oven on a rack; that gentle finish works wonders.
  • Edges burn before the interior sets? Lower the heat a notch and extend the cook by 30–60 seconds per side. Additionally, consider whether the bread is very sugary; if so, dial back batter sugar by a teaspoon.
  • Pale color? Preheat properly, avoid crowding (steam is the enemy of browning), and use oat or soy milk when you want deeper color. A dab more sugar in the custard can also help.
  • Slices fall apart when flipping? Reduce the soak, choose sturdier bread, and, for gluten-free, pick loaves with psyllium; the structure matters more than you think.
  • Texture too dry? Brush the edges lightly with melted vegan butter right before serving, or shorten the rack rest to 30 seconds instead of a minute.

Also Read: Vegan Keto Smoothie Kick-Start: 5 Macadamia Nut Recipes for Nutrient-Packed Mornings


The Six Vegan French Toast Recipes, At a Glance

For quick reference, here are compact summaries. Each follows the bread guidance above; timings assume medium heat on the stove or a preheated 190°C / 375°F air fryer.

1) Vegan French Toast — Pan (Base)

  • Batter: 1 cup plant milk + 1 Tbsp cornstarch + 1½ Tbsp sugar + 1 tsp vanilla + ½ tsp cinnamon + pinch salt.
  • Dip: 10–20 sec/side (30–60 sec for thick slices).
  • Cook: 2–3 min/side (3–4 for thick), then rest on a rack.

2) Vegan French Toast — Air Fryer (Whole Slices)

  • Batter: same as base.
  • Cook: 6–8 min total at 190°C / 375°F; flip at 4 min.
  • Note: leave space between slices for crispness; mist lightly with oil if needed.

3) Vegan French Toast Sticks — Air Fryer

  • Batter: base batter.
  • Form: cut each dipped slice into 3–4 sticks; optionally coat in fine panko or crushed cornflakes.
  • Cook: 7–9 min at 190°C / 375°F; shake/flip at 4 min.
  • Freeze & reheat: cool completely, freeze flat, then bag; reheat directly from frozen.

4) Gluten-Free Vegan French Toast

  • Batter: base batter + ½ Tbsp extra cornstarch per cup.
  • Bread: sturdier GF loaf with psyllium.
  • Dip: 8–12 sec/side.
  • Cook: 2–3 min/side; rest on a rack.

5) High-Protein Vegan French Toast — Chickpea Flour

  • Batter: 1 cup plant milk + 2 Tbsp chickpea flour + sugar + vanilla + cinnamon + salt (optional ⅛ tsp baking powder).
  • Dip/Cook: as base; go slightly lower/slower for thick bread.
  • Aroma tweak: a pinch of kala namak adds that classic breakfast note.

6) Silken-Tofu Vegan French Toast — Blended Custard

  • Batter: blend 150 g silken tofu + ½ cup plant milk + sugar + vanilla + cinnamon + salt until silky.
  • Dip: brief; this custard clings well.
  • Cook: medium to medium-low so it sets before over-browning.

Parting thought

Above all, remember that vegan french toast is more technique than trick. With a clingy batter, a measured soak, steady heat, and a short rest on a rack, you’ll serve stacks that taste as indulgent as anything from your favorite brunch spot—only friendlier to your pantry and your routine. Now pass the maple, pour the coffee, and enjoy the kind of breakfast that makes the whole day feel easier.

Also Read: Eggless French Toast Recipe – Crispy, Fluffy & Totally Irresistible!

FAQs

1) What is the best plant milk for vegan French toast?

Oat milk usually browns faster and tastes fuller; almond milk stays cleaner and less sweet; soy milk boosts Maillard browning thanks to protein. Choose based on flavor and color goals.

2) How do I get crisp edges and a custardy center without eggs?

Use a clingy batter (about 1 cup plant milk + 1 Tbsp starch for 4 slices), dip just long enough for the crumb to hydrate, cook over steady medium heat, then rest slices on a wire rack for one minute.

3) Why is my vegan French toast soggy?

Excess batter and overcrowding trap steam. Let slices drip cleanly, keep space in the pan, and avoid ultra-fresh bread unless lightly pre-toasted.

4) How long should I soak the bread?

Standard sandwich slices: 10–20 seconds per side. Thick vegan brioche or Texas toast: 30–60 seconds. Gluten-free slices: 8–12 seconds since the crumb hydrates quickly.

5) Which bread works best?

Day-old, sturdy loaves hold shape and deliver structure. Enriched vegan brioche gives a plush interior; plain sandwich bread is weeknight-friendly; psyllium-based gluten-free loaves flip reliably.

6) Can I make gluten-free vegan French toast?

Absolutely. Slightly thicken the batter (+½ Tbsp starch per cup of milk), shorten the soak, and choose a GF loaf with psyllium for elasticity and resilience.

7) What’s the ideal pan temperature?

Medium. Too hot scorches edges before the center sets; too low dries the slice without browning. A faint sizzle on contact signals you’re in the sweet spot.

8) How do I keep the exterior from burning on sweeter breads?

Dial the heat down a notch and extend cooking by 30–60 seconds per side. Cinnamon-raisin and similar loaves caramelize quickly, so patience pays off.

9) Can I use an air fryer for vegan French toast?

Yes. Preheat to 190°C / 375°F, arrange slices in a single layer, flip at the halfway point, and rest on a rack. For sticks, cut each slice into 3–4 pieces and cook a touch longer.

10) How can I add more protein?

Swap the starch for 2 Tbsp chickpea flour (besan) per cup of milk, or blend silken tofu into the custard. Optionally add a pinch of kala namak for a classic breakfast aroma.

11) What if my slices tear when flipping?

Reduce soak time, pick sturdier bread, and slide a thin spatula under the crust side first. For gluten-free, the psyllium crumb matters more than thickness alone.

12) How do I boost browning without over-sweetening?

Maintain a small amount of sugar in the batter, preheat thoroughly, and prefer oat or soy milk. Alternatively, dust one dipped face very lightly with cornstarch and cook that side first.

13) Can I meal-prep or freeze vegan French toast?

Definitely. Air-fry or bake sticks, cool completely, freeze flat, then bag. Reheat from frozen in an air fryer or toaster oven until crisp at the edges.

14) What toppings match vegan French toast?

Fresh berries, citrus wedges, toasted nuts, coconut yogurt, or a drizzle of maple keep balance; dairy-free chocolate-hazelnut spread or quick caramelized banana leans indulgent.

15) How do I adjust sweetness across milks and breads?

Taste your milk first—barista-style oat can be sweeter—then trim added sugar by 1 teaspoon if needed. Conversely, lean almond milk benefits from keeping the full measure for flavor and color.

16) What’s the quick ratio I should memorize?

Per 4 slices: 1 cup plant milk + 1 Tbsp starch + 1½ Tbsp sweetener + 1 tsp vanilla + ½ tsp cinnamon + pinch salt. Dip, sear over medium, then rack-rest to finish.

Posted on 2 Comments

Lemon, Cayenne Pepper, and Honey for Detox

Photorealistic portrait of a warm lemon, cayenne, and honey drink in a clear mug with lemon halves, cayenne powder, and a honey jar on a dark background; headline reads “Lemon + Cayenne + Honey — Recipe • Variations • Safety”; MasalaMonk.com footer.

Some mornings ask for something simple, warm, and a little zippy. That’s where lemon, cayenne, and honey shine. This drink isn’t a miracle cure—your liver and kidneys already handle detoxing—but it can absolutely be a comforting ritual that supports hydration, brings a citrusy lift of vitamin C, and adds a gentle, invigorating heat from cayenne. Because people often arrive with very specific questions, we’ll walk through the benefits of lemon and cayenne pepper, share a two-minute recipe, explore smart variations (ginger, apple cider vinegar, and the maple-syrup version), and finish with realistic safety tips so the habit stays friendly.


Quick Take: The Real Benefits of Lemon and Cayenne Pepper

First, let’s set expectations in plain language. Most of the feel-good effect comes from hydration; starting your day with fluid is an underrated win. Meanwhile, lemon contributes vitamin C—a water-soluble nutrient you need regularly (see Harvard’s Nutrition Source on vitamin C and Harvard Health’s explainer).

Next, cayenne’s warmth comes from capsaicin. Research suggests small, short-term bumps in thermogenesis and energy expenditure; think of it as a gentle assist rather than a dramatic change (skim this broad umbrella review on spicy foods and a focused paper on capsaicin and body weight).

Finally, honey smooths acidity and spice, making the habit easier to enjoy consistently. It does add antioxidants, yet it’s still added sugar, so a measured teaspoon is plenty. And importantly, never give honey to infants under 12 months—the CDC’s guidance on infant botulism is crystal clear.

Because this drink is often lumped into “detox” talk, it helps to keep perspective. If you’d like a balanced view on cleanse claims, start with Harvard Health on detox cleanses and this general look at detox diets. Afterwards, if you want to compare rituals, you can also read our plain-spoken, in-house overview of the Master Cleanse for Detox and how it differs from an everyday beverage.


Evidence-Aware Benefits of Lemon and Cayenne Pepper (and Honey)

Lemon Water with Cayenne Benefits: Hydration First, Vitamin C Next

To begin with, the biggest, most reliable win is drinking more water. That alone can help you feel sharper and more energized. On top of that, lemon adds vitamin C, which supports normal immune function and helps with iron absorption. Because it’s water-soluble, a little each day works well—and a citrusy drink simply makes “a little each day” easier to do.

If you’re torn between warm or cold, choose the version you’ll actually drink. For gentle routines, many people like a mug of warm lemon water in the morning; for hot afternoons, others prefer the crisp feel of cold lemon water. Either way, you’re hydrating, and that’s the main win.

Cayenne Pepper, Lemon and Honey Benefits: A Gentle Thermogenic Nudge

Meanwhile, the spice note from cayenne can feel naturally stimulating. Mechanistically, capsaicin seems to nudge energy expenditure and fat oxidation modestly. However, it’s not a magic switch; your best results still come from an overall routine—protein, fiber, movement, and sleep—while this drink adds a small assist and a pleasant ritual. In other words, let the warmth help you start the day well, then let food and movement do the deeper work.

Honey’s Role: Flavor, Mouthfeel, and Consistency

Next up, honey. A teaspoon rounds off the edges so the drink feels balanced rather than sharp. That matters because a habit you enjoy is a habit you keep. Still, because honey is added sugar, consider it a flavor accent, not a requirement. If you’re sharing sips with family, remember: no honey for infants under one.


How To Make Lemon–Honey–Cayenne Water (2 Minutes)

Ingredients (1 serving)

  • 250–300 ml warm water
  • Juice of ½–1 lemon (to taste)
  • ⅛ teaspoon cayenne pepper (start low; increase slowly)
  • 1 teaspoon honey (optional)
Close-up of a warm lemon, cayenne, and honey drink in a clear mug with a lemon half and cayenne powder on a dark surface; headline reads “Lemon + Cayenne + Honey” with bullets “Supports Hydration • Boosts Metabolism • Gentle Detox”; MasalaMonk.com footer.
Hydration is the main benefit here, with a small thermogenic nudge from cayenne and optional honey for balance. Try ½ lemon, a pinch to ⅛ tsp cayenne, and 1 tsp honey. Note: this doesn’t “detox” the body—sip, then rinse with water to protect enamel; no honey for infants under 12 months.

Method

  1. Stir lemon juice into warm water.
  2. Whisk in cayenne until dispersed.
  3. Add honey, stir, and sip while warm—or shake with ice if you prefer it cold.

Make-it-yours tips

  • If you’re spice-sensitive, begin with a pinch of cayenne and build up over a week.
  • If you love a brighter, crisper profile, make it iced by shaking with ice and straining.
  • If you care about tooth enamel, remember that acidic drinks can contribute to erosion when sipped for long periods. Therefore, sip (don’t swish), rinse with plain water afterward, and give it a bit of time before brushing. Practical overview: American Dental Association on erosive tooth wear.

Variations Readers Actually Use (Flavor First, Hype Last)

Because everyone tweaks this drink, here are three popular riffs. Each keeps the core intact while changing the flavor or mouthfeel, and each still aligns with the overall benefits of lemon and cayenne pepper story.

Variation 1 — Lemon Cayenne Honey Drink with Ginger

If you want a cosier, aromatic kick, grate ½–1 tsp fresh ginger into the mug (or steep a thin slice for 3–5 minutes and remove). Ginger is well-known for easing certain kinds of nausea (including pregnancy-related), and it pairs beautifully with citrus and gentle heat. For a level-headed overview of usefulness and safety, see NCCIH on ginger.
If you’d like more ways to use it at home, our round-up of ginger drinks has easy combinations you can try this week.

Photorealistic mug of warm ginger, lemon, and cayenne tea on a light marble surface with fresh ginger, a lemon half, and a small bowl of cayenne; headline reads “Ginger + Lemon + Cayenne” with bullets “Aids Digestion • Supports Immunity • Boosts Metabolism”; MasalaMonk.com footer.
Ginger adds cozy spice and may help settle stomachs; lemon brings a vitamin-C lift; cayenne adds gentle heat. Grate ½–1 tsp fresh ginger to steep 3–5 min, then add ½ lemon juice and a pinch of cayenne; sweeten lightly if desired. If acid-sensitive, dilute more and sip with food; rinse with water afterward.

Flavor note: If you want ginger to lead, steep it first, then add lemon and cayenne at the end so the citrus stays bright and the spice stays crisp.

Variation 2 — Lemon and Cayenne Pepper Water with Apple Cider Vinegar (ACV)

For a sharper, tangier sip, add 1–2 teaspoons ACV to the base recipe and dilute well. The lemon keeps the drink bright, while cayenne adds warmth behind the vinegar’s tang. Because ACV is acidic, it can aggravate reflux and, over time, contribute to enamel erosion; rinsing with water afterward is a good habit. For what the evidence really says (and realistic amounts people use), see Harvard Health on ACV.
Prefer to eat your vinegar? Try one of our simple ACV salad dressing recipes and let flavor do the heavy lifting at mealtime.

Photorealistic portrait of a lemon, cayenne, and apple cider vinegar drink in a clear glass with a lemon slice on the rim; ACV bottle and small bowl of cayenne on a light marble surface; headline reads “LEMON + CAYENNE + ACV” with bullets “Tangy & refreshing • Easy daily ritual • Rinse after acidic drinks”; MasalaMonk.com footer.
Lemon + cayenne + ACV makes a bright, tangy sip: mix 250–300 ml warm water, juice of ½ lemon, a pinch to ⅛ tsp cayenne, and 1–2 tsp ACV (diluted well). Optional: 1 tsp honey. Hydration is the main benefit; ACV is acidic, so if you’re reflux-prone dilute more, sip (don’t swish), and rinse with plain water afterward to protect enamel. Not a “detox,” just a simple daily ritual you can enjoy.

Pro tip: If lemon + ACV feels too intense, halve the lemon and go lighter on cayenne. Balance is everything.

Variation 3 — Lemon Cayenne “Cleanse” (the Maple Syrup Version)

This is the famous water-lemon-maple-cayenne combination, often used as a short fast. As a multi-day plan, it’s not nutritionally balanced and generally not recommended. If you’re simply curious about the taste, add 1–2 teaspoons maple syrup to the everyday recipe and stop there. For a straightforward overview, see WebMD’s Master Cleanse explainer.

Photorealistic portrait of a lemon, cayenne, and maple syrup drink in a clear mug on light marble with lemon slices, a maple syrup bottle, and a small bowl of cayenne; headline reads “LEMON + CAYENNE + MAPLE” with subhead “Flavor variation – not a multi-day cleanse”; MasalaMonk.com footer.
Maple adds round sweetness to lemon–cayenne water—enjoy it as a flavor variation, not a cleanse. Mix 250–300 ml warm water, juice of ½ lemon, a pinch to ⅛ tsp cayenne, and 1–2 tsp maple syrup. Optional: a little honey. Hydration is the main benefit; it’s still sugary and acidic—sip (don’t swish) and rinse with water afterward.


If you still want to understand how the cleanse compares to a daily beverage, our in-house overview—Master Cleanse for Detox—lays out the differences without the hype.


When To Drink It, How Often, and Small Tweaks That Matter

Now, let’s make this habit sustainable.

  • Timing: Many people like it first thing in the morning because it’s soothing and hydrating. However, if you’re acid-sensitive, try it with breakfast instead.
  • How much: One mug a day is plenty. More isn’t better; it’s still acidic, and honey or maple are still sugars.
  • Sweetness dial: Keep honey to ~1 teaspoon or skip it. If you switch to maple syrup, start with less—it tastes slightly sweeter per teaspoon.
  • Spice dial: You can move from a pinch to ⅛ teaspoon, and eventually to ¼ teaspoon if you love heat. Increase gradually and listen to your gut.
  • Temperature choice: Warm feels cosy and morning-friendly; iced feels bright and afternoon-friendly. Pick what keeps you consistent.

And if you enjoy the citrus theme, you may also like exploring how lemon and lime water compare in everyday life—our round-up on lemon vs lime water is a quick, practical read.


Safety Snapshot (So This Stays Friendly)

  • Infants: Absolutely no honey under 12 months (risk of infant botulism). See the CDC’s prevention page.
  • Stomach/GERD/ulcers: Lemon’s acid plus capsaicin’s heat can irritate sensitive stomachs. Therefore, dilute more, go gentler on cayenne, and consider having it with food.
  • Teeth: Acidic beverages can erode enamel with prolonged sipping. So, sip, rinse, and wait before brushing. Read more at the American Dental Association.
  • Weight expectations: The benefits of lemon and cayenne pepper are supportive, not transformative. Capsaicin’s effect is modest; lasting change comes from overall diet quality, protein, fiber, movement, and sleep. If you’re curious about the research, see capsaicin & body weight and the spicy-foods umbrella review.
  • Allergies & meds: If you have citrus sensitivities, mouth ulcers, or you’re on GI-sensitive medications, start mild and check with a clinician if unsure.

A Few Helpful Next Reads


Final thought

In the end, the biggest benefits of lemon and cayenne pepper come from a very human place: small habits that feel good are the ones we actually keep. A warm (or iced) citrus-and-spice mug can mark the start of your day, nudge you to hydrate, and invite you to take the next right step—whether that’s a balanced breakfast, a short walk, or a calmer pace. Keep it simple, keep it kind, and let the ritual do its quiet work.

FAQs

1) What are the real benefits of lemon and cayenne pepper (with honey)?

In short, the benefits of lemon and cayenne pepper are mostly practical: hydration from the water, a gentle boost from vitamin C in lemon, and a mild thermogenic nudge from cayenne’s capsaicin. Honey can make the drink smoother and easier to stick with as a daily ritual. However, it’s supportive rather than miraculous—use it alongside balanced meals, sleep, and movement.

2) Does lemon water with cayenne pepper actually “detox” the body?

Not exactly. Your liver and kidneys already handle detox 24/7. So, while lemon water with cayenne benefits include hydration, flavor, and a cozy warm-up, the drink itself doesn’t remove toxins. Instead, think of it as a pleasant habit that nudges you toward better daily choices.

3) How do I make a quick lemon–honey–cayenne detox drink?

Start simple: warm water, juice of ½–1 lemon, ⅛ teaspoon cayenne (or just a pinch at first), and 1 teaspoon honey if you like. Stir and sip. For an iced version, shake with ice and strain. This covers “how to make lemon honey–cayenne pepper detox drink” while keeping it realistic and gentle.

4) What’s the best time to drink it—morning or evening?

Because it’s warming and hydrating, many people enjoy it first thing in the morning. That said, if acidity bothers you on an empty stomach, consider sipping it with breakfast. In the evening, keep the cayenne light so it feels soothing rather than too stimulating.

5) How much cayenne should I use if I’m new to it?

Begin with a tiny pinch—less than ⅛ teaspoon—and notice how you feel. Then, over a few days, ease up to ⅛ teaspoon. If you genuinely love heat, you can work toward ¼ teaspoon, but there’s no prize for going hotter. Consistency matters more than intensity.

6) Are there benefits of lemon and cayenne pepper without honey?

Absolutely. The core benefits of lemon and cayenne pepper—hydration, vitamin C, and gentle warmth—don’t require honey. Honey is mainly for taste and mouthfeel, so if you’re managing sugars, simply skip it or reduce the amount.

7) What about cayenne pepper, lemon, and honey benefits for weight loss?

Here’s the balanced view: cayenne’s thermogenic effect is modest. Therefore, the trio can support a healthy routine by making hydration enjoyable and signaling a “fresh start” to the day. Still, lasting weight change comes from overall habits—protein, fiber, steps, strength, and sleep.

8) Is the lemon cayenne cleanse (with maple syrup) a good idea?

As a long cleanse, it’s not ideal—too low in protein and fiber. However, as a flavor variation of your usual drink, a small splash of maple syrup is fine now and then. In other words, enjoy the taste, but avoid turning it into a multi-day fast.

9) Can I add ginger—and if so, why would I?

Yes, and it’s delicious. Grate ½–1 teaspoon of fresh ginger or steep a thin slice, then finish with lemon and cayenne. As a result, you get a deeper, spicier profile. Many people find ginger comforting, especially on cooler mornings.

10) What about apple cider vinegar with lemon and cayenne?

You can add 1–2 teaspoons for a tangier sip. Nevertheless, go slowly: the added acidity can feel strong. If reflux or enamel sensitivity is a concern, dilute more, sip rather than swish, and rinse your mouth with plain water afterward.

11) Warm or cold—does temperature change the benefits?

Not really. The primary lemon cayenne benefits come from hydration, vitamin C, and gentle spice—all of which you’ll get whether it’s warm or iced. So, choose the version you’ll happily drink today and tomorrow.

12) Who should be cautious with lemon and cayenne pepper water?

If you have reflux, active mouth ulcers, or a very sensitive stomach, start gently or have the drink with food. And importantly, never serve honey to infants under 12 months. When in doubt, go lighter, dilute more, and listen to your body.

13) Will this help my skin or immunity?

Indirectly, yes—by encouraging hydration and adding a small bump of vitamin C. But to be clear, glowing skin and resilient immunity depend on many factors: sleep, protein, colorful produce, and stress management. This drink can fit into that bigger picture.

14) How often should I drink it for best results?

Once a day is plenty for most people. More doesn’t necessarily mean better—especially since it’s acidic and, if sweetened, contains added sugar. Remember, the biggest benefits of lemon and cayenne pepper show up when the habit is consistent and comfortable.

15) Can I prep a batch in advance?

You can prep components. For the freshest flavor, squeeze lemon close to drinking time, or refrigerate lemon water for a few hours max. As for cayenne, it disperses better when freshly stirred. If you’re rushing, premix the dry cayenne with a spoon of honey so it blends faster later.

16) Does using bottled lemon juice change the benefits?

Fresh lemon tends to taste brighter, yet bottled is convenient. If you use bottled, choose one with lemon juice as the only ingredient and adjust to taste. Ultimately, the habit you’ll keep—fresh or bottled—is the one that brings you the most day-to-day benefit.

17) Can I swap honey for maple syrup or skip sweetness entirely?

Yes on both counts. Maple syrup brings a rounder sweetness, but it’s still sugar; use sparingly. Or, for an unsweetened version, lean on the citrus and spice alone. Many people find that, over time, their palate naturally adjusts to less sweetness.

18) Will lemon and cayenne water hurt my teeth?

Acidic drinks can wear enamel if you sip for long periods. Therefore, enjoy your mug, avoid swishing, and then rinse your mouth with water. Waiting a bit before brushing helps, too. Small, simple habits like these keep the ritual teeth-friendly.

19) Can I drink it before a workout?

You can. The warm spice and light hydration can feel motivating. Still, if you’re training hard, you may want a bit of protein or carbs as well. Try the drink 20–30 minutes before and see how your stomach feels, then adjust the cayenne up or down.

20) What’s the biggest mistake people make with this drink?

Going too strong, too soon. Instead, start with a pinch of cayenne, a moderate squeeze of lemon, and a teaspoon of honey (or none). Then, gradually adjust. When the routine feels kind and sustainable, the benefits of lemon and cayenne pepper naturally add up over time.

Posted on 2 Comments

Maple Syrup VS Sugar: Is Maple Syrup Better Than Sugar?

MAPLE SYRUP vS. SUGAR

You stand in your kitchen, eyeing that bottle of pure maple syrup beside your familiar white sugar jar. The pancake is hot and ready—so what do you pour? If you’ve wondered whether maple syrup is actually a healthier alternative or just another sugar in disguise, you’re not alone.

Let’s dig deep—beyond marketing, beyond myths—and use the latest science (including a 2024 human clinical trial!) to discover: Is maple syrup better than sugar?


1. The Basics: What Are We Comparing?

White Sugar (Sucrose):

  • Made from sugar cane or sugar beets.
  • 100% refined sucrose (glucose + fructose).
  • Neutral flavor, highly versatile.
  • Virtually no nutrients beyond pure carbohydrate.

Maple Syrup:

  • Tapped from the sap of sugar maple trees, then boiled down.
  • Roughly 60% sucrose + water + traces of glucose/fructose.
  • Distinct, robust flavor and aroma.
  • Contains minerals, antioxidants, and unique plant compounds.

2. Nutrition Showdown: Calories, Carbs, and More

Per TablespoonMaple SyrupWhite Sugar
Calories52 kcal49 kcal
Carbohydrates13g12.5g
Sucrose Content~60%100%
Glycemic Index (GI)~54~65
Nutrients (e.g. Mn, Zn)Trace amountsNegligible
Antioxidants/PhenolicsYesNone

Takeaway:
Both are concentrated sources of sugar and calories. But maple syrup has a slightly lower GI, plus trace nutrients and plant compounds that white sugar lacks.


3. What Does the Latest Research Say?

🍁 The 2024 Human Trial: Maple Syrup Gets Its Day in Court

In late 2024, researchers ran a gold-standard, placebo-controlled trial (n=42 adults) where participants swapped 2 tablespoons of sugar a day for the same amount of maple syrup. After 8 weeks, those using maple syrup (vs sugar) saw:

  • Better blood sugar control: Lower blood glucose spikes during a glucose tolerance test.
  • Reduced abdominal fat: Small but measurable decreases in belly fat.
  • Lower systolic blood pressure: On average, a drop of nearly 3 mm Hg.
  • Healthier gut: Maple syrup improved gut bacteria, increasing helpful strains and reducing harmful ones.

Caveat: This is a small, short-term study. More research is needed for big health claims, but the results are promising.

🧬 Lab & Animal Studies

Animal studies confirm maple syrup’s modest benefits for blood sugar, fat metabolism, and inflammation, thanks to its unique antioxidants (like quebecol, formed only during the syrup’s boiling process).


4. Beyond Nutrition: The Flavors and Practical Kitchen Wisdom

Flavor

  • Maple syrup: Deep, caramelized, sometimes smoky. Pairs beautifully with pancakes, oatmeal, yogurt, roasted veggies, and more.
  • Sugar: Neutral—perfect for recipes where you don’t want added flavor.

Baking & Cooking Tips

  • Substitute: Maple syrup is sweeter by volume than sugar, so you can use slightly less. Try replacing 1 cup sugar with ¾ cup maple syrup, and reduce other liquid by 3 tablespoons.
  • Watch for moisture: Maple syrup adds liquid. Adjust recipes or cooking time, especially in baked goods.
  • Don’t use “pancake syrup”: Most commercial syrups are corn syrup + artificial flavor, not real maple.

5. The Real Health Bottom Line

Maple Syrup’s Advantages:

  • Lower glycemic index (raises blood sugar a bit more slowly).
  • More than 100 bioactive compounds, including polyphenols with anti-inflammatory and antioxidant effects.
  • Trace minerals: manganese, zinc, calcium, potassium.

But… Don’t Overdo It:

  • Both are added sugars.
    Overconsumption—of any sugar—raises risk for obesity, type 2 diabetes, heart disease, and tooth decay.
  • No miracle cure: To get significant minerals from maple syrup, you’d need to consume way too much.
  • Calories still count: Maple syrup is not “diet food.”

6. Environmental and Ethical Considerations

  • Maple syrup production: Often small-scale, supports sustainable forestry, low pesticide use, and keeps forests standing.
  • Sugar production: Can involve deforestation, heavy pesticide/fertilizer use, and global shipping.

7. Practical Verdict: Should You Switch?

If you love the taste, real maple syrup is a smarter sweetener choice—in moderation. It’s less processed, has a unique flavor, and delivers trace nutrients and plant compounds that sugar simply doesn’t.
But don’t fall for the “natural equals healthy” myth: you still need to limit all added sugars for long-term health.

Smart Strategies

  • Use pure maple syrup for flavor-forward dishes (pancakes, yogurt, roasted nuts).
  • Keep both sweeteners as occasional treats, not daily staples.
  • Train your palate to appreciate less overall sweetness—your body and taste buds will thank you.

References & Further Reading

  1. USDA FoodData Central: Maple Syrup
  2. PubMed: 2024 Human Clinical Trial
  3. Cleveland Clinic: Is Maple Syrup Healthier Than Sugar?
  4. Healthline: Maple Syrup
  5. Ohio State: Monthly Maple Review
  6. Verywell Health: Maple Syrup vs. Honey

Conclusion

Maple syrup wins on flavor, nutrients, and research-backed modest benefits. But the healthiest move? Sweeten less, no matter what you choose.

What’s your favorite way to use maple syrup? Any baking experiments or recipes you love? Let’s keep the conversation (and the pancakes) going in the comments!

10 FAQs About Maple Syrup vs Sugar

1. Is maple syrup healthier than white sugar?

Answer: Maple syrup has a lower glycemic index, more minerals, and antioxidants than white sugar. However, both are added sugars and should be used in moderation.


2. Can people with diabetes use maple syrup instead of sugar?

Answer: Maple syrup has a slightly lower impact on blood sugar but still raises glucose. People with diabetes should treat both as added sugars and limit their use.


3. How much maple syrup is safe to consume daily?

Answer: Nutritionists recommend limiting all added sugars to less than 6 teaspoons (25g) per day for women and 9 teaspoons (36g) for men—including maple syrup.


4. Does maple syrup contain nutrients that sugar doesn’t?

Answer: Yes. Maple syrup has trace amounts of manganese, zinc, calcium, potassium, and antioxidants. Sugar has virtually none.


5. Is “pancake syrup” the same as real maple syrup?

Answer: No. Pancake syrup is usually corn syrup with artificial flavor. Always check labels and choose “100% pure maple syrup” for health and flavor benefits.


6. Can I use maple syrup in baking instead of sugar?

Answer: Yes, but you’ll need to reduce the recipe’s other liquids by about 3 tablespoons for each cup of maple syrup used, since maple syrup adds moisture.


7. Does maple syrup help with weight loss?

Answer: No. Maple syrup is calorie-dense and, like sugar, can contribute to weight gain if overused. Use it as an occasional treat, not a weight-loss aid.


8. Is maple syrup environmentally friendly?

Answer: Generally yes. Maple syrup production is sustainable, supports forest preservation, and uses fewer pesticides compared to large-scale sugar cane or beet farming.


9. What are the unique compounds in maple syrup?

Answer: Maple syrup contains over 100 bioactive compounds, including antioxidants and a unique molecule called quebecol, formed during boiling.


10. Does maple syrup spoil? How should I store it?

Answer: Unopened maple syrup can last for years. Once opened, refrigerate it to prevent mold and use within 6–12 months.