Posted on — 17 Comments

Béchamel Sauce for Lasagna: Classic, Vegan & Ricotta Sauce Recipe

Hand pouring silky béchamel onto a golden lasagna slice; copper saucepan and pasta sheets behind — Béchamel Sauce for Lasagna.

Some lasagne land on the plate as tidy, satiny squares, their layers distinct yet tender; others slouch apart, rich but oddly heavy. The difference, more often than not, is a confident Béchamel Sauce for Lasagna. This classic white sauce—built from a butter-and-flour roux whisked with milk—glues the pasta, ragù, and cheese together without weighing everything down. It’s one of the five “mother sauces” of French cuisine, a family of preparations that underpin countless dishes; if you’re curious about that lineage, the overview from the Auguste Escoffier School of Culinary Arts is a neat primer on why béchamel matters and how cooks riff on it across traditions (including the Mornay variation, which adds cheese) (learn more).

As we go, we’ll explore the classic method, a luscious ricotta–béchamel hybrid, and a plant-based version that behaves exactly like the dairy original. We’ll also walk through consistency cues, layering logic, and common mistakes—with calm, practical fixes—so your Béchamel Sauce for Lasagna performs beautifully every time.

Also Read: Crock Pot Lasagna Soup (Easy Base + Cozy Slow-Cooker Recipes)


What Béchamel Is—and What It Isn’t

At its heart, béchamel is simply milk thickened with a roux. You make a roux by cooking equal parts butter and flour until the paste foams and smells nutty. Keep it blond (not browned) for lasagna; a pale roux thickens more efficiently, giving you a sleeker sauce with less cooking. Season gently with salt, a pinch of white pepper, and just a whisper of fresh nutmeg. That’s it: no cheese yet, no garlic, no stock—just a neutral, creamy backbone ready to support the rest of the dish.

Add cheese to béchamel and you’ve made Mornay, which is wonderful in mac and cheese or as a gratin glue but a bit richer than you need for traditional lasagne. If you’d like to see how gently folding cheese into a hot white sauce creates that glossy, elastic finish (without turning grainy), our Macaroni & Cheese recipe offers a practical demonstration of melting off the heat and letting the sauce stabilize before serving.

Historically, Italian lasagne—especially the Bolognese style from Emilia-Romagna—embraces béchamel as a structural element rather than a dramatic flavor spike. It complements ragù; it doesn’t compete with it. La Cucina Italiana’s concise recipe for besciamella mirrors what generations of home cooks do: modest fat and flour, whisked with milk to a soft, spoon-coating body (classic Italian method).

Also Read: Cottage Cheese Lasagna Recipe | Chicken, Spinach, & Ricotta


Classic Béchamel Sauce for Lasagna: The Master Ratio and Why It Works

While plenty of cooks eyeball their béchamel by feel, a ratio keeps things reproducible—especially when you’re scaling up for guests. A widely used proportion is equal parts butter and flour by weight, then roughly ten parts warm milk by weight. For everyday home cooking, Italy’s common kitchen ratio—40 g butter + 40 g flour + 500 ml milk—is a friendly benchmark. It yields a softly thick sauce that clings to the back of a spoon (the classic nappe texture) without turning pasty.

Why blond matters. A pale roux maintains more thickening power than a darker one because less starch has broken down during toasting. That’s exactly what we want here: a silken texture at a gentle simmer, not a roasty, nutty profile that’d be more appropriate for gumbo or étouffée. If you want a deeper dive into roux behavior and the trade-off between flavor and thickening power, the science-forward guides at Serious Eats are terrific for grasping what’s happening in the pot and how to correct course if you overshoot the color (roux 101), (béchamel basics).

Texture, not time, is your compass. Rather than obsessing over minutes, watch how the sauce moves. When you lift the spoon, it should slide off in a continuous sheet, not in watery rivulets. Draw a finger along the spoon’s back; the line should stay clean. If the sauce feels sluggish, whisk in a spoon or two of warm milk. If it’s thin, simmer delicately for another minute and reassess. With that steady, patient approach, your Béchamel Sauce for Lasagna will end up glossy and cooperative, ready to layer.

Classic Béchamel Sauce for Lasagna being whisked in a copper pan; ratio 40 g butter, 40 g flour, 500 ml warm milk; melt, whisk to blond roux, add milk and simmer to nappe; yields about 4 cups.
Classic Béchamel Sauce for Lasagna—use the 40 g butter + 40 g flour + 500 ml milk ratio, whisk to a blond roux, then simmer to nappe for a silky base (≈4 cups, perfect for a standard 9×13).

Also Read: How to Make Churros (Authentic + Easy Recipe)


The Method, Step by Step – How to Make Béchamel Sauce for Lasagna

Although the technique is short, each move earns its keep. Let’s walk through it explicitly, so nothing feels rushed.

  1. Warm your milk first. Heat the milk separately until it’s steaming, not boiling. Warm liquid integrates into the roux more willingly, minimizing lumps and shaving time off the final simmer.
  2. Cook a blond roux. In a heavy-bottomed saucepan, melt butter over medium-low. Scatter in an equal weight of flour and whisk constantly for 2–3 minutes. You’re aiming for a gentle foam and a pale straw color.
  3. Off heat, add milk gradually. Take the pot off the burner. Whisk in a small splash of warm milk; when it’s smooth, add a little more, and a little more. As the mixture loosens and turns glossy, you can add the remaining milk in a steady stream.
  4. Return to low heat and simmer. Put the pot back over low heat and whisk until the sauce gently bubbles. Keep it just below a boil; vigorous bubbling can scorch milk solids or create a grainy mouthfeel.
  5. Season and adjust. Salt, a pinch of white pepper, and a tiny grating of nutmeg bring it into focus. Check texture; it should coat a spoon and flow slowly off the whisk.

That’s the base. From here, you can drive in several directions—straight into a lasagna pan, gently into ricotta for a smooth hybrid, or toward a vegan variant that behaves like this one but uses plant milk and olive oil.

Also Read: How to Cook Bacon in the Oven (Crispy, No-Mess, Crowd-Ready Recipe)


How Much Béchamel Sauce for Lasagna You Actually Need

Because pan depth and noodle thickness vary, it’s easier to think in ranges. For a standard 9×13-inch lasagna, 4 to 5 cups of béchamel usually lands you in the sweet spot. Spread a thin smear on the bottom to prevent sticking; then build in repeating layers: béchamel → noodles → ragù → béchamel → grated cheese. Keep the béchamel layers thin yet continuous—enough to gloss the pasta and moisten the ragù so everything fuses.

Traditional Lasagne alla Bolognese from Emilia-Romagna follows precisely this logic—pasta, ragù, béchamel, Parmigiano, and repeat—resulting in slices that hold shape without drying out. For a lovely regional perspective on that structure, browse the official travel resources from Emilia-Romagna or articles documenting the classic recipe; they consistently place béchamel as the quiet, essential binder rather than a showy flavor bomb (regional context).

If you enjoy ricotta’s milky sweetness, you can absolutely keep it in play; we’ll fold it into béchamel in a moment. Meanwhile, if you’re looking to cross-reference other layering styles (including a cottage-cheese-forward path that meal-preps well), peek at Cottage Cheese Lasagna: Chicken, Spinach & Ricotta and adapt the assembly by swapping your béchamel for part of the cheese mix.


Ricotta–Béchamel Recipe: The Ultra-Smooth Cheese Layer

Some cooks love ricotta’s flavor but don’t always love its grainy, slightly crumbly texture in baked layers. Béchamel Sauce for Lasagna solves that beautifully when you blend the two.
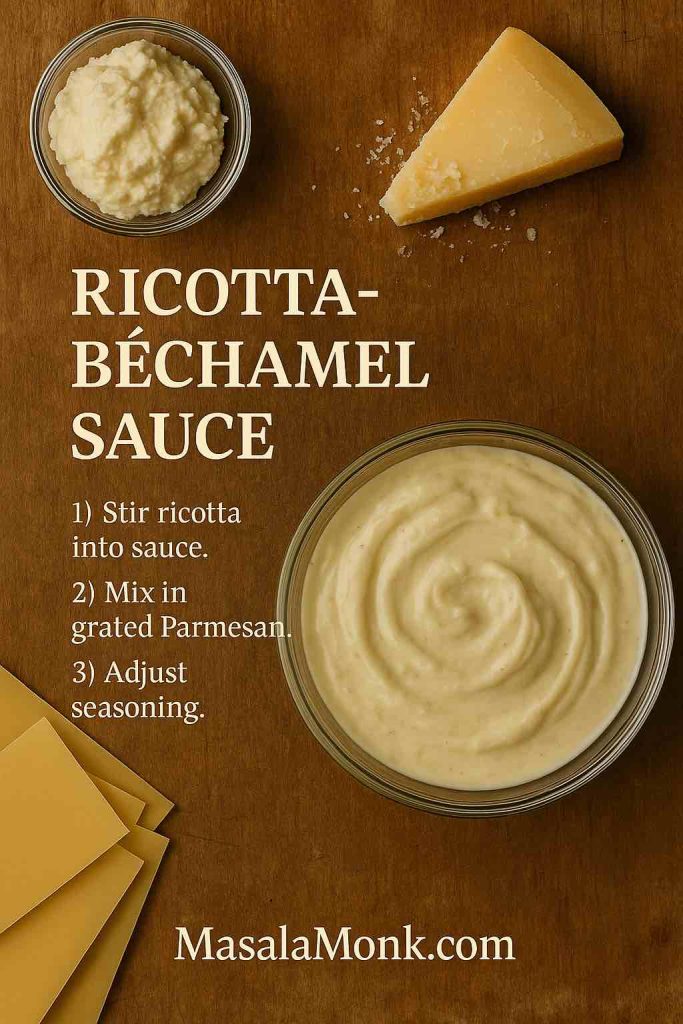
Top-down flatlay showing Ricotta–Béchamel Cheese Sauce for Lasagna: glass bowl of creamy sauce, small bowl of ricotta, wedge of Parmigiano, and lasagna sheets on a wooden board.
Ricotta–Béchamel Cheese Sauce—fold ricotta and finely grated Parmigiano into hot béchamel off heat for a glossy, non-grainy layer; makes about 5 cups, ideal for a standard 9×13 lasagna.

How to make it:

  • Start with 4 cups hot béchamel at nappe consistency.
  • Whisk in 1 cup finely grated Parmigiano Reggiano off the heat until melted and glossy.
  • Fold in ½–1 cup ricotta, choosing a smooth variety; if it’s dense, whisk it briefly to loosen before blending.
  • Taste for salt and, if needed, add an extra tablespoon of grated Parmesan to sharpen the finish.

This hybrid behaves like a mellow Mornay—silky, cohesive, and easy to spread—while preserving ricotta’s clean dairy notes. If you’re curious which cheese finishes the top layer best (for bronzing without greasy puddles), our primer on the difference between Parmesan and Parmigiano Reggiano explains why the real thing seasons with a savory snap and melts more cleanly than many pre-grated blends.


Vegan Béchamel Sauce for Lasagna: Same Feel, Plant-Based Recipe

The plant-based route is gratifyingly simple because the physics don’t change—only the fat and the milk do.

  • Fat: Use olive oil or a neutral vegan butter.
  • Flour: Stick to all-purpose. Chickpea or whole-grain flours can add flavor; if you enjoy that, use them sparingly at first.
  • Milk: Opt for unsweetened soy or oat milk. Unsweetened soy melts into the background; oat brings a subtle, round sweetness. Almond milk can work but is thinner and may need a minute more simmering.
  • Seasoning: Salt, white pepper, nutmeg, plus an optional teaspoon of onion powder for savory backbone. If you want a slightly “cheesy” direction without adding actual cheese, whisk in a tablespoon or two of nutritional yeast.
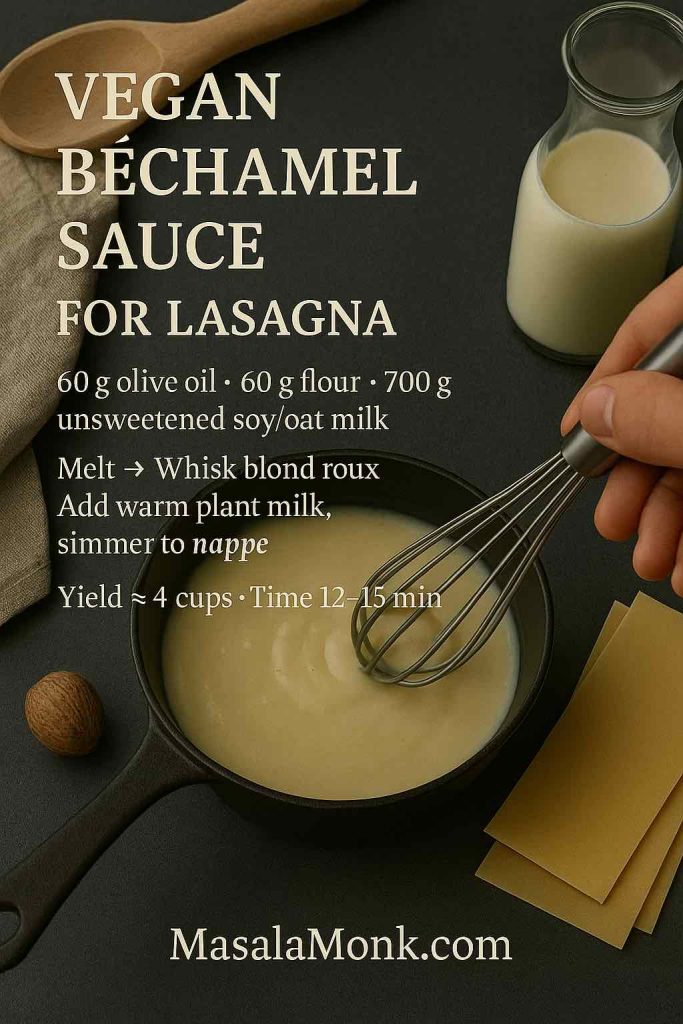
Vegan Béchamel Sauce for Lasagna whisked in a black pan—60 g olive oil, 60 g flour, 700 g unsweetened soy/oat milk—melt oil, whisk blond roux, add warm plant milk, simmer to nappe; yields about 4 cups.
Vegan Béchamel Sauce for Lasagna—use an olive-oil roux and warm unsweetened soy/oat milk, then simmer gently to nappe for a silky, slice-clean layer (≈4 cups in 12–15 minutes).

Technique-wise, everything mirrors the dairy version: warm the plant milk, cook a blond roux in oil, whisk off the heat, then return to a gentle simmer. If you’d like more ideas for building a fully vegan pasta night—high protein, big flavor—dip into our plant-based pasta collection for cashew-based sauces and other creamy profiles that pair beautifully with vegetables.


Seasoning and Aroma: Subtlety Wins

Because Béchamel Sauce for Lasagna plays a supporting role, restraint pays off. A scant pinch of nutmeg accentuates the sauce’s dairy sweetness without shouting; more than that can tilt perfumey. White pepper keeps flecks invisible and holds onto heat gently; black pepper works too, but the specks distract in a pale sauce. If your ragù is already intense, let béchamel stay quiet. Conversely, if your filling leans delicate—say, spinach and mushrooms—consider a whisper of fresh lemon zest to brighten the edges.

Crucially, avoid garlic in the béchamel itself; if you want a garlic presence, let it live in the ragù or a separate spinach layer, where it can sauté properly and won’t risk turning harsh in milk.

Also Read: 10 Best Espresso Martini Recipe Variations (Bar-Tested)


Layering Strategy: Structure Meets Tenderness

Successful layering is less about strict rules and more about a few guiding ideas:

  • Moisture distribution. Thin béchamel layers moisten the pasta while the ragù provides body. Too much béchamel in one spot can slip and puddle; too little leaves dry corners. Spread to the edges.
  • Cheese placement. Finely grate Parmigiano between layers rather than piling most of it on top. This encourages even melt and better slice integrity. Save a small handful for the surface to bronze.
  • Top management. Finish with a modest veil of béchamel and cheese, not a thick cap. That balance prevents rubbery tops and helps steam escape.
Layering Béchamel Sauce for Lasagna in a 9×13 pan—use about 4–5 cups; sequence: base smear, pasta, ragù, béchamel, Parmesan; repeat and finish with a thin béchamel cap; rest 10–15 minutes.
Layering Béchamel Sauce for Lasagna—plan ≈4–5 cups for a 9×13. Start with a base smear, then build pasta → ragù → béchamel → Parmesan; repeat, top lightly, and rest before slicing.

If you’re ever tempted to swap béchamel for a heavy cheese sauce on every layer, consider contrast. Let béchamel do the quiet binding and reserve richer, cheesier notes for a single inner layer or the finish. For a clear comparison of white sauces versus cream-based Alfredo styles (and when each shines), our Alfredo deep-dive lays out the differences so you can choose the right tool for the flavor you want.


Troubleshooting: Calm Fixes for Common Problems

Even experienced cooks run into little snags; the key is responding gracefully.

Lumps
If lumps form, kill the heat immediately. Whisk hard for 20–30 seconds; most will dissolve as the starch hydrates fully. Still not smooth? Pour the sauce through a fine sieve into a warm pot and carry on. Next time, remember to whisk off the heat when adding milk and add it gradually.

Too Thick or Too Thin
If your Béchamel Sauce for Lasagna feels gluey, whisk in warm milk a tablespoon at a time until it flows again. If it’s thin, give it a gentle simmer and the occasional whisk for another minute. Because a pale roux retains strong thickening power, tiny tweaks go a long way.

Nappe test for Béchamel Sauce for Lasagna—spoon coated with sauce showing a clean finger line, indicating pourable, spoon-coating consistency.
Nappe = the right thickness for béchamel: it coats the spoon, holds a clean finger line, and still pours smoothly—ideal for neat, sliceable lasagna layers.

Grainy After Adding Cheese
This usually means the cheese overheated or the sauce boiled after the cheese went in. Melt cheeses off heat and stop stirring once they dissolve. You can always rewarm gently if needed. For technique cues that keep melted cheese smooth, the process notes in our Macaroni & Cheese guide are directly transferable.

Scorching
Scorched milk is stubborn. If you catch the smell early, pour the unscorched top portion into a new pot, leaving any browned film behind. Keep heat low and whisk more frequently.

Breaking in the Oven
If a lasagna looks greasy on top, it’s often because the cheese was too fatty or piled too thickly. Use a firm grana like Parmigiano for most of the top and keep any mozzarella to a light sprinkle; you’ll get bronze without pools. Our Parmesan vs. Parmigiano Reggiano piece clarifies why the real stuff behaves better under heat.

Also Read: 10 Best Chicken Sandwich Recipes (BBQ, Parm, Buffalo & More)


Make-Ahead, Cooling, and Reheating

Béchamel is an ideal make-ahead component because it reheats predictably. After cooking, cool it quickly: transfer to a shallow container, press parchment or plastic directly onto the surface to prevent a skin, and refrigerate promptly. For general food-safety timing, U.S. guidelines recommend using refrigerated leftovers within 3–4 days, and, if you need a longer hold, freezing works well; thaw overnight and whisk while reheating, loosening with a splash of milk as needed (USDA/FSIS guidance), (FoodSafety.gov storage chart).

When reheating béchamel, keep the heat low and whisk patiently; it will return to its glossy self. If you’re turning it into a ricotta–béchamel blend, bring it to just-warm before whisking in cheese so everything integrates without curdling.

Also Read: French Toast Sticks (Air Fryer + Oven Recipe) — Crispy Outside, Custardy Inside
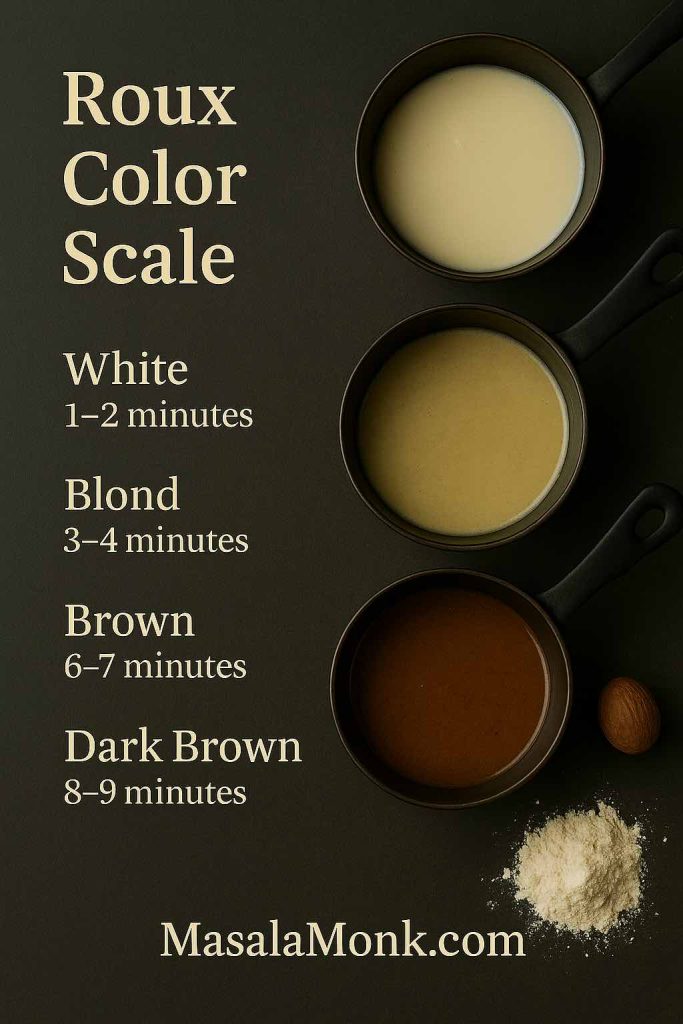
Side-by-side pans showing white roux and blond roux—the ideal stage for béchamel.
For Béchamel Sauce for Lasagna, cook the roux to blond: more thickening power and a silkier sauce.

Béchamel Sauce for Lasagna—Scaled Recipes You Can Memorize

Classic Béchamel (about 4 cups)

  • 60 g butter
  • 60 g all-purpose flour
  • 600 g whole milk, warmed
  • 1 tsp fine salt, pinch white pepper, tiny grating nutmeg

Directions: Make a blond roux (2–3 minutes). Off heat, whisk in warm milk gradually until smooth, then simmer gently for 6–8 minutes. Season and adjust to nappe.

Ricotta–Béchamel (for one 9×13-inch lasagna)

  • 4 cups hot béchamel
  • 1 cup finely grated Parmigiano Reggiano
  • ½–1 cup smooth ricotta

Directions: Off heat, whisk Parmesan into béchamel until glossy; fold in ricotta. Taste and season. Spread thinly between layers.

Vegan Béchamel (about 4 cups)

  • 60 g olive oil (or vegan butter)
  • 60 g all-purpose flour
  • 700 g unsweetened soy or oat milk, warmed (plant milks vary in body; start here)
  • 1–1½ tsp fine salt, pinch white pepper, tiny pinch nutmeg
  • Optional: 1 tsp onion powder; 1–2 tbsp nutritional yeast

Directions: Make a blond roux with oil; whisk in warm plant milk off heat; return to low simmer until nappe. Season and adjust with milk as needed.

Also Read: Lemon Drop Martini Recipe (Classic, 3-Ingredient, & More)


Beyond Lasagna: Using Béchamel Elsewhere (With Restraint)

Because béchamel is neutral and stabilizing, it shines in unexpected places:

  • Mac and Cheese. Fold in cheeses off heat to create a classic Mornay; the method used in our stovetop and baked mac & cheese keeps the sauce silky instead of clumpy.
  • Vegetable gratins. A modest layer underneath roasted cauliflower or leeks amplifies tenderness without drowning flavor.
  • Croque monsieur. Thin béchamel brushed onto the bread provides moisture insurance and browning potential.
  • Moussaka. A thicker béchamel (sometimes enriched with egg yolks) forms the custardy top; for a Greek-leaning lasagna night, it’s a lovely twist that still uses the same roux logic.

If you want to compare white-sauce approaches with cream-based pasta styles for variety in your weekly rotation, our Alfredo overview maps where béchamel-based sauces fit, and when to pivot to cream reductions instead.


Putting It All Together: A Calm, Confident Lasagna Flow

To bring the pieces together, work in an unhurried rhythm:

  1. Cook béchamel first. It holds well and gives you time to tweak texture.
  2. Taste your ragù. Salt it to where you want it, since béchamel will not compensate for underseasoning later.
  3. Par-cook or soak noodles as needed. No-boil sheets drink up moisture; béchamel helps, but be generous with sauce coverage so the edges don’t crisp prematurely.
  4. Layer lightly but completely. Each béchamel layer should be thin yet continuous, reaching every corner.
  5. Finish modestly. A veil of béchamel and Parmigiano on top will bronze and stay supple.
  6. Rest before slicing. Ten to fifteen minutes lets the starches set, giving you clean squares rather than slumps.

On nights when you want a lighter profile, choose the classic Béchamel Sauce for Lasagna and keep cheese modest. On nights when you crave dreamy richness, fold in ricotta for the hybrid. When cooking for plant-based friends, the vegan version slips into the stack quietly and delivers the same structure. Because the method is compact and forgiving, you’ll adjust by feel in no time.

Also Read: Pumpkin Spice, Your Way: Master Blend, Variations & Real-World Recipes


A Final Word on Confidence and Craft

Great béchamel is about attention, not fussiness. Warm the milk, whisk off heat, simmer gently, season with care, and trust your eyes more than the clock. Every pan, every burner, every batch of flour behaves a little differently; nonetheless, the cues never change. When the sauce coats a spoon and glides, when the layers spread thin and even, when the bake exhales a faint butter-and-nutmeg scent as it rests—you’ll know you’re there.

If you’d like more perspective on béchamel’s role in the wider culinary family, the Escoffier piece on mother sauces helps set the stage (read here). For nitty-gritty technique and starch science, Serious Eats offers clear, test-driven guidance on roux and white sauces (roux guide), (béchamel guide). And for your own kitchen reference, keeping an eye on safe cooling and storage windows will let you make sauce ahead without worry (USDA/FSIS), (FoodSafety.gov).

Meanwhile, for variations and related dishes in our repertoire, browse these companion reads on MasalaMonk:

Make your Béchamel Sauce for Lasagna once this way—patient, glossy, and balanced—and it will quietly upgrade every batch that follows.

FAQs

1) What is Béchamel Sauce for Lasagna, exactly?

Béchamel Sauce for Lasagna is a silky white sauce made from a blond roux (butter + flour) whisked with warm milk, lightly seasoned with salt, white pepper, and a hint of nutmeg. It binds layers, prevents dryness, and gives clean, sliceable structure.

2) What’s the ideal ratio for Béchamel Sauce for Lasagna?

Use equal parts butter and flour by weight, then about 10 parts milk by weight. For home cooking, 40 g butter + 40 g flour + 500 ml milk yields a classic, spoon-coating consistency.

3) How much béchamel do I need for a 9×13-inch pan?

Plan on 4–5 cups. Start with a thin smear in the pan, then use modest, even layers between noodles and ragù so everything fuses without becoming soupy.

4) Should I use béchamel, ricotta, or both?

Either works, yet combining them is lovely. Blend warm béchamel with ricotta and a little grated hard cheese for a smooth, cohesive “cheese sauce” that spreads evenly and bakes beautifully.

5) How thick should Béchamel Sauce for Lasagna be?

Aim for nappe: it should coat the back of a spoon and leave a clean line when you swipe a finger. If it’s too thick, add a splash of warm milk; if thin, simmer briefly to tighten.

6) Can I make Béchamel Sauce for Lasagna ahead of time?

Absolutely. Cool quickly, press parchment or plastic directly on the surface, and refrigerate. Reheat gently and whisk in a bit of milk to restore gloss.

7) Can I freeze béchamel?

Yes. Freeze in flat portions. Thaw overnight, reheat slowly, and whisk to smooth; add a spoon of milk if needed.

8) What’s the best milk to use?

Whole milk delivers classic body and flavor. For a lighter take, use 2% and simmer a minute longer. If you prefer richness, blend in up to 25% cream—but keep the texture pourable.

9) How do I fix lumpy béchamel?

Remove from heat and whisk vigorously; most lumps dissolve as starch hydrates. If needed, strain through a fine sieve into a warm pot and continue.

10) Why did my sauce turn grainy after adding cheese?

Cheese overheated. Next time, add cheese off heat and stir just until melted. For this recipe, keep béchamel plain between layers and use grated cheese sparingly for balance.

11) Can I make a vegan Béchamel Sauce for Lasagna?

Certainly. Swap butter for olive oil or vegan butter, use unsweetened soy or oat milk, and season as usual. Simmer a touch longer to remove any raw flour taste.

12) Is béchamel the same as white sauce?

Yes. “White sauce” is the common name for béchamel—milk thickened with a roux and gently seasoned. Add cheese and you’ve created a daughter sauce (often called Mornay).

13) Do I need nutmeg?

A small pinch accentuates dairy sweetness without dominating. Use a light hand so the sauce stays supportive rather than showy.

14) How do no-boil noodles change the amount of sauce?

No-boil sheets drink more liquid while baking. Consequently, keep your béchamel layers continuous (edge-to-edge) and lean toward the higher end of the 4–5 cup range.

15) Can I make gluten-free Béchamel Sauce for Lasagna?

Yes. Use a 1:1 gluten-free all-purpose blend for the roux. Cook the roux gently to remove raw flavors before whisking in warm milk.

16) How should I season béchamel for lasagna layers?

Season lightly—salt, white pepper, a whisper of nutmeg. Let the ragù and finishing cheeses carry most of the bold flavors, while béchamel provides balance and moisture.

17) Will béchamel make my lasagna watery?

Not if it’s cooked to nappe and spread thinly. Watery results usually come from under-reduced ragù, overpacked fillings, or uncooked vegetables releasing liquid.

18) What’s the best way to layer with Béchamel Sauce for Lasagna?

Begin with a thin béchamel smear in the pan, then alternate: noodles → ragù → béchamel → a light sprinkle of grated hard cheese. Finish with a modest veil of béchamel and cheese on top.

19) How long should lasagna rest after baking?

Give it 10–15 minutes. Resting allows starches and fats to settle, helping slices hold their shape.

20) Can I flavor béchamel with aromatics?

For lasagna, keep it quiet. If desired, infuse the milk with a bay leaf or onion, then strain. Avoid sautéed garlic in the béchamel itself; keep stronger flavors in the ragù or vegetable layers.

21) Why use Béchamel Sauce for Lasagna instead of heavy cream?

Béchamel delivers body without greasiness, sets cleanly, and prevents separation. Heavy cream alone can feel rich yet loose; béchamel provides dependable structure.

22) Does béchamel change the bake time?

Not meaningfully. Bake until bubbling around the edges and the top is lightly bronzed. If browning too fast, tent loosely with foil.

23) How much salt should I add?

Season béchamel modestly and taste the ragù separately. Since cheeses add salt, under-seasoning the béchamel a touch keeps the final dish balanced.

24) Can I add herbs to Béchamel Sauce for Lasagna?

If you like, whisk in finely chopped parsley or chives at the end, although restraint is key. The sauce should support, not overshadow, the other layers.

25) What’s the simplest way to scale béchamel?

Multiply the base ratio. For double, use 80 g butter + 80 g flour + 1 liter milk. Watch texture cues and adjust with a splash of milk if it thickens too much.
Posted on — 19 Comments

How to Cook Bacon in the Oven (Crispy, No-Mess, Crowd-Ready Recipe)

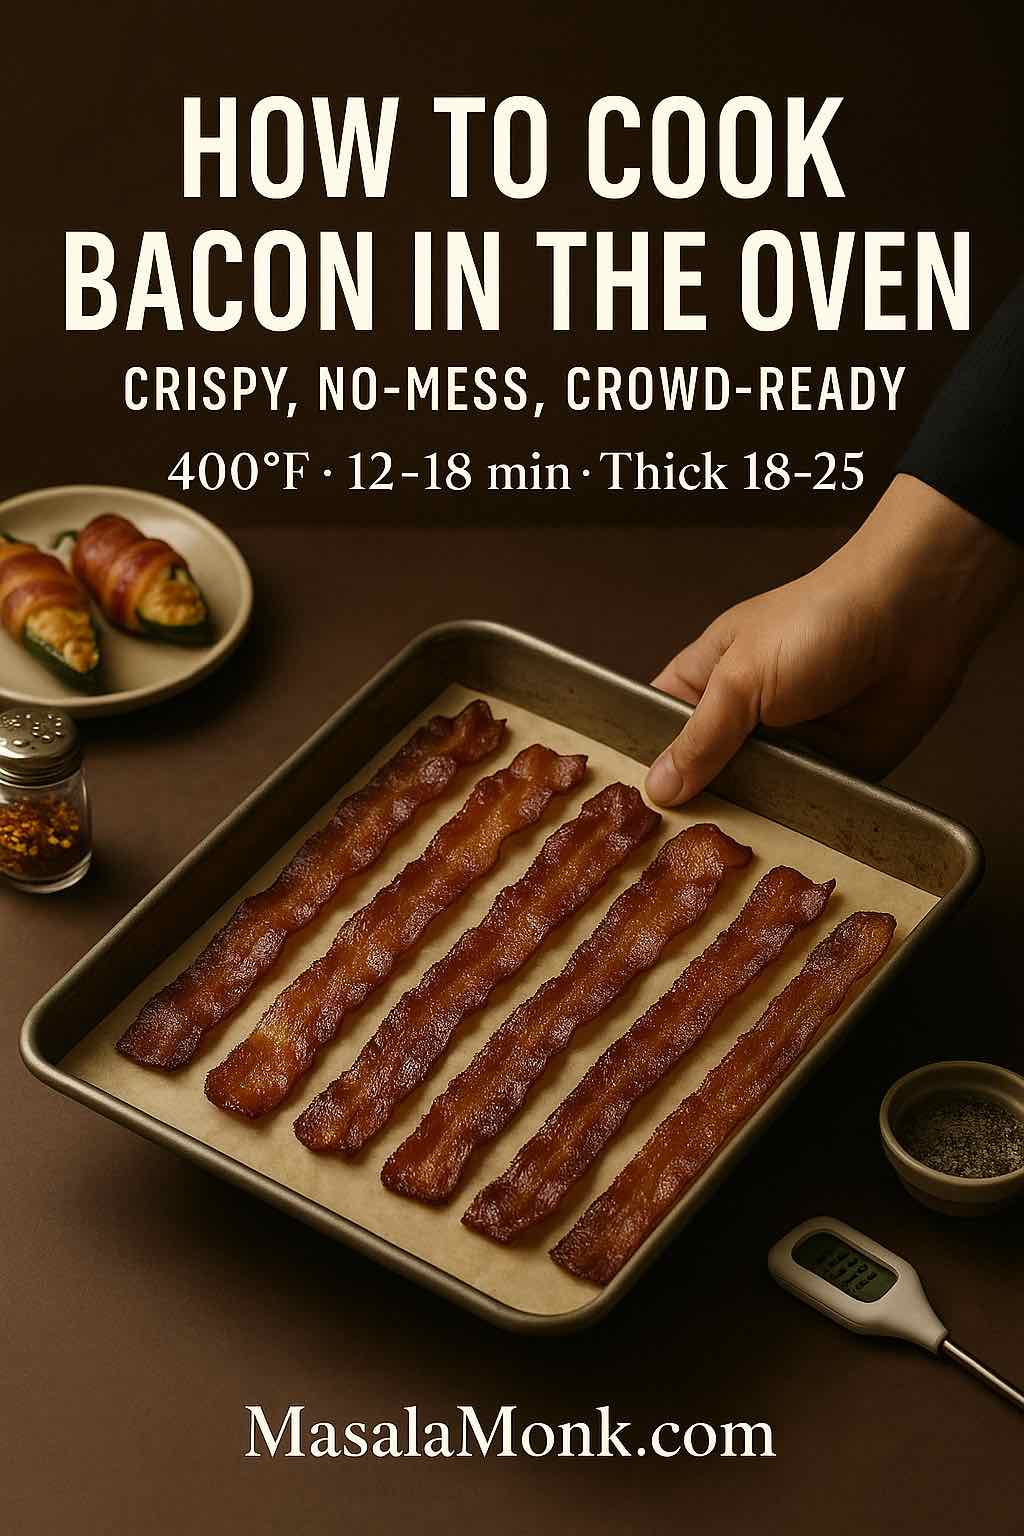
Hand holding a parchment-lined tray of crispy oven-baked bacon with warm, moody styling; headline ‘How to Cook Bacon in the Oven’ and timing 400°F 12–18 min (thick 18–25); jalapeño poppers and thermometer props.

There’s a reason so many pros and savvy home cooks quietly migrate from the skillet to the sheet pan: once you learn how to cook bacon in the oven, you get even browning, less fuss, almost no splatter, and—most importantly—perfectly crisp slices that finish at the same time. Instead of babysitting over popping fat, you slide a tray into a preheated oven, rotate once, and pour yourself coffee while the heat does the work. Independent tests routinely rank oven on parchment among the most reliable approaches for consistent texture and easy cleanup, and large-batch cooking becomes trivial. If you’re planning brunch, feeding a crowd, or just prefer your kitchen to smell like breakfast (and not like a grease fire), this is the method you’ll return to again and again. See the side-by-side from The Kitchn that named parchment-lined baking the winner in a multi-method showdown: baking on parchment paper is best and, for further mechanics, Serious Eats’ explanation of why bacon “fries in its own fat” on a flat, lined sheet helps lock in uniform browning: the best way to cook bacon.

Before we light the oven, let’s set the payoff: oven bacon frees your hands for everything else. With one tray working, you can mash yolks for a platter of classic deviled eggs or toss together a spread of potato appetizers—both pairings that vanish quickly when crisp bacon hits the table.

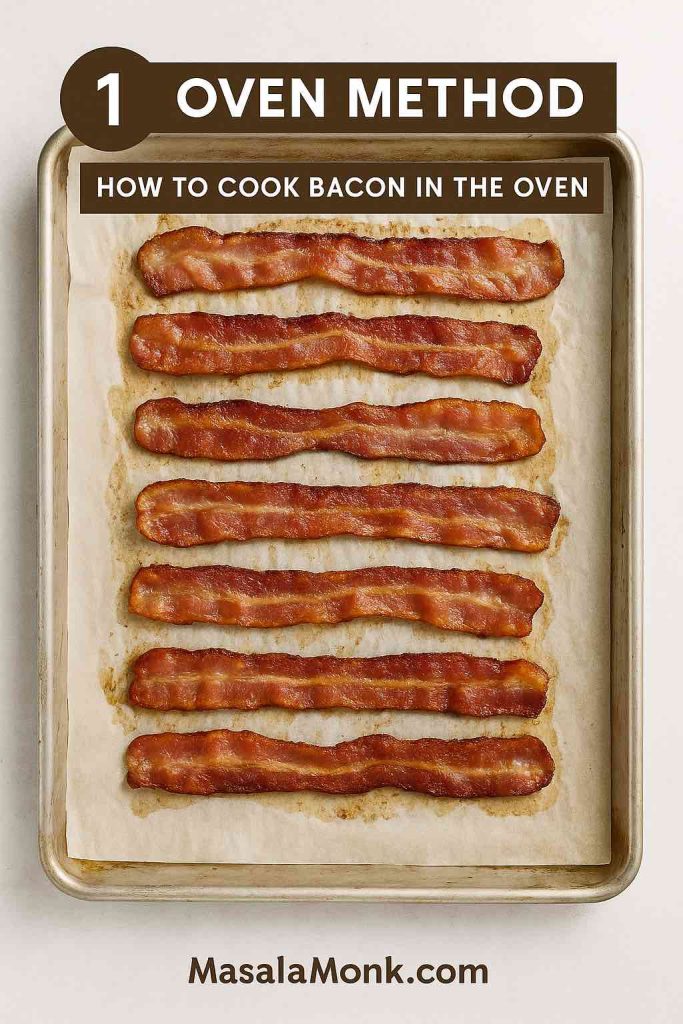
Parchment-lined sheet pan with evenly browned bacon strips—step 1 oven method for cooking bacon at 400°F
Even browning, minimal mess: line a rimmed sheet with parchment, bake on the middle rack, rotate once, then rest to crisp.

The Straightforward Way: How to Bake Bacon in the Oven

To master how to cook bacon in the oven, start simple. Preheat to 400°F (205°C). Line a rimmed sheet with parchment; fold the paper’s edges up slightly so they catch the drips. Arrange the strips in one layer with a sliver of space between each piece. Slide the tray onto the middle rack and bake until the edges are deeply rendered and the centers no longer look shiny: for regular slices, 12–18 minutes; for thick cut, 18–25 minutes. Rotate the pan once halfway to even out hot-spot differences. If you crave a touch more mahogany, finish under the broiler for 60–90 seconds, watching constantly. Transfer the bacon to a wire rack (or paper towels) and rest 1–2 minutes; it crisps further as it cools.

Although foil works, parchment typically releases better and wipes up faster—exactly what The Kitchn’s 8-method test concluded when it crowned the parchment-lined oven method the overall winner. If you enjoy method-nerd deep dives, bookmark that side-by-side here: We tried 8 methods; baking on parchment won.

And because brunch is a whole mood, tuck a few supporting bites alongside: creamy deviled eggs and a tray of crisp-tender potato bites build out the board with minimal extra effort.

Also Read: 10 Best Chicken Sandwich Recipes (BBQ, Parm, Buffalo & More)


Why Oven Bacon Beats the Skillet When It Matters

First, capacity. A full sheet pan fits far more slices than a skillet; everything finishes together instead of in waves. Second, predictability. With a steady 400°F and a lined pan, you aren’t fighting hot spots or flare-ups, and you can place the bacon exactly where you want it. Third, tranquility. No hovering with tongs, no fat popping onto your forearms, and no chaos near the stovetop when you’re scrambling eggs.

Moreover, this isn’t just opinion. Food & Wine tested seven methods and landed where many of us do: the oven delivers the most consistent, low-effort crisp while still accommodating big batches. Have a look at their summary here: We tested 7 ways; oven won. Serious Eats also lays out why convection and even heat promote browning more evenly than a crowded skillet can manage: how to cook bacon.

Meanwhile, if you’re outfitting your kitchen for long-term wins, give this a skim before you impulse-buy more heavy cookware: Buying a Cast Iron Skillet? 5 Warnings Before You Invest. Cast iron is brilliant for searing and oven finishes, but caring for it properly protects your sanity (and your bacon).

Also Read: 10 Best Espresso Martini Recipe Variations (Bar-Tested)


How to Make Bacon Extra Crispy in the Oven—Every Time

Now that you know how to cook bacon in the oven, let’s push for that shattery edge without overcooking.

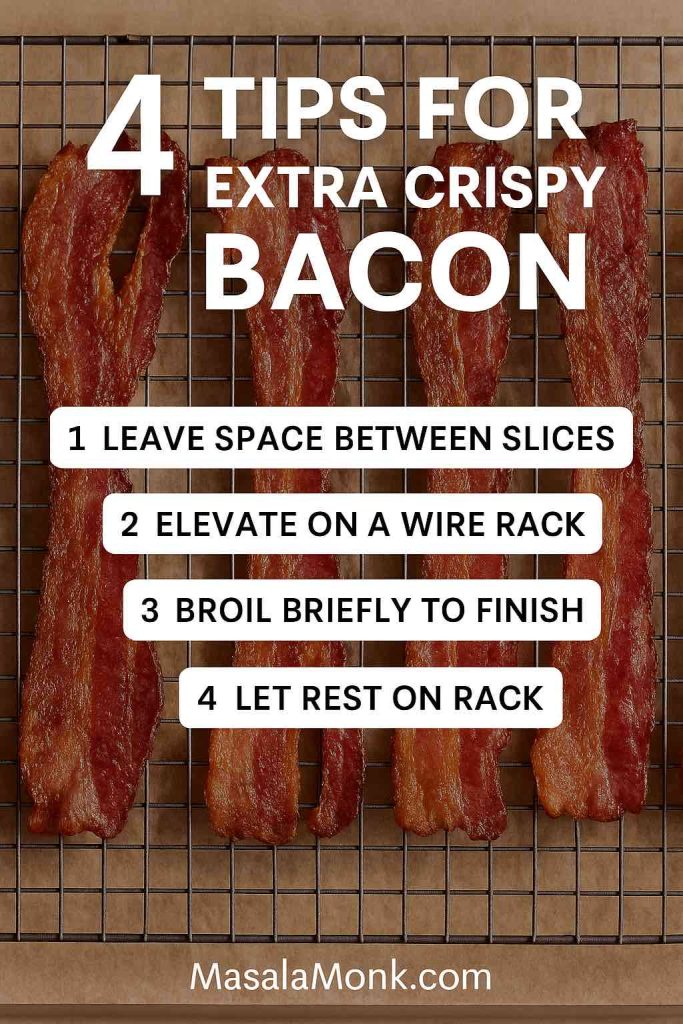
Space matters. Overlap creates steam, and steam softens. Leave small gaps so fat can render cleanly and the edges can dry.

Airflow wins. For the crispiest possible texture, elevate the slices on a wire rack set over the sheet pan. Air moving under the bacon tightens the texture and flattens the wave. Add 1–3 minutes to the timing when using a rack.

Finish fast. The broiler is a torch, not a strategy. Use it briefly—no more than 60–90 seconds—to burnish color at the end, not as the primary heat source.

Rest to set. Two minutes on a rack is the difference between “hot and floppy” and “cooled and crisp.”

Four tips overlay on bacon on a cooling rack: space slices, elevate on rack, brief broil, rest to set
Space the strips, lift on a rack, finish with a brief broil, then rest 1–2 minutes—hello shattery edges.

Curious why a flat, lined surface equals uniform browning? Because bacon essentially fries in its own fat on the sheet; parchment lets it baste, release, and crisp without sticking, which is exactly what Serious Eats describes in its method comparison: the best way to cook bacon. If you need ultra-flat slices for BLTs or breakfast sandwiches, try the pro trick of gently pressing the bacon beneath a second pan (with parchment between) as it bakes; Kenji López-Alt uses this in his “bacon for a crowd” method: baked bacon for a crowd.

Also Read: Macaroni & Cheese Recipe: Creamy Stovetop, Baked & Southern


Thickness, Temperatures, and Timelines

Because readers arrive with different ovens and cuts, it helps to position the timing windows clearly.

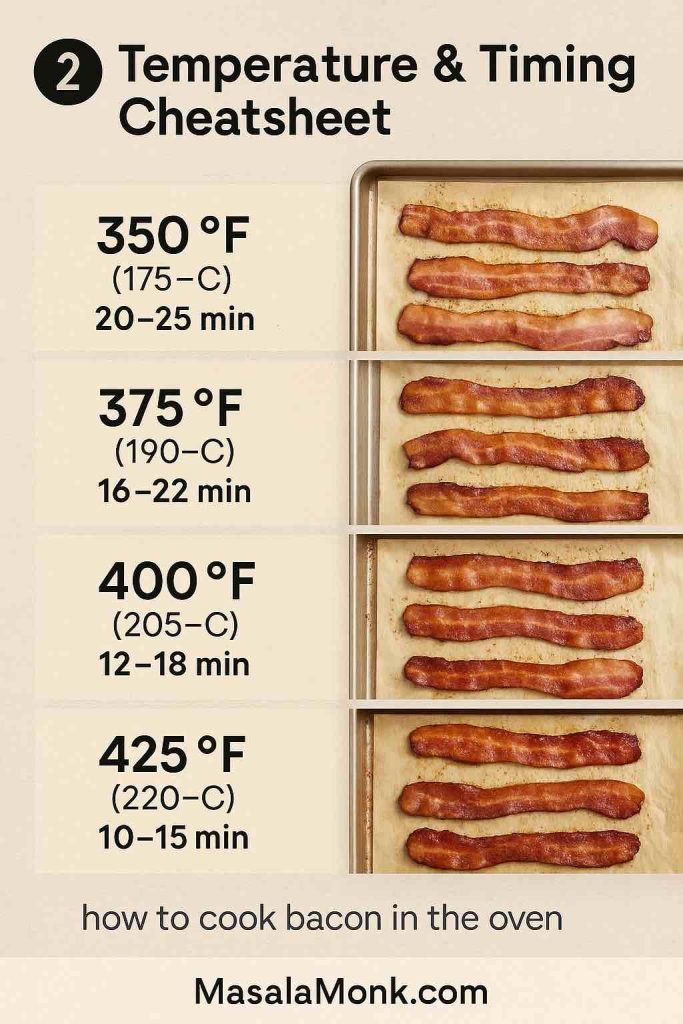
Oven bacon time and temperature chart for 350°F, 375°F, 400°F, and 425°F with doneness photos
Use this quick chart to hit your desired texture with bacon—400°F is the sweet spot for speed and crisp, while 350–375°F adds forgiveness.

How to Cook Bacon in the Oven at 400°F (the Sweet Spot)

Most kitchens get the best balance of speed and crisp at 400°F (205°C). Expect 12–18 minutes for standard slices and 18–25 for thick-cut, rotating the tray once. The Kitchn’s step-by-step lays out the same range with a straightforward setup: how to cook bacon in the oven at 400°F.

How to Cook Bacon in the Oven at 375°F (Even Browning)

Prefer a slightly gentler march toward crisp? At 375°F (190°C), you often see 16–22 minutes as the window. This is a sweet setting for big brunch trays where you’d rather have a touch more forgiveness.

How to Cook Bacon in the Oven at 350°F (Calmer, Fewer Pops)

At 350°F (175°C), you trade time for calm: 20–25 minutes for standard slices. If you’re new to your oven or worried about splatter, this conservative setting keeps things tidy.

How to Cook Bacon in the Oven at 425°F (Fast—Eyes on It)

When you’re sprinting, 425°F (220°C) can land 10–15 minutes, but it demands vigilance. The last three minutes determine whether you nail glossy, crisp mahogany or overshoot into brittle. Rotate, then watch like a hawk.

Also Read: French Toast Sticks (Air Fryer + Oven) — Crispy Outside, Custardy Inside


Thick-Cut Bacon: How to Cook Bacon in the Oven for Big Slices

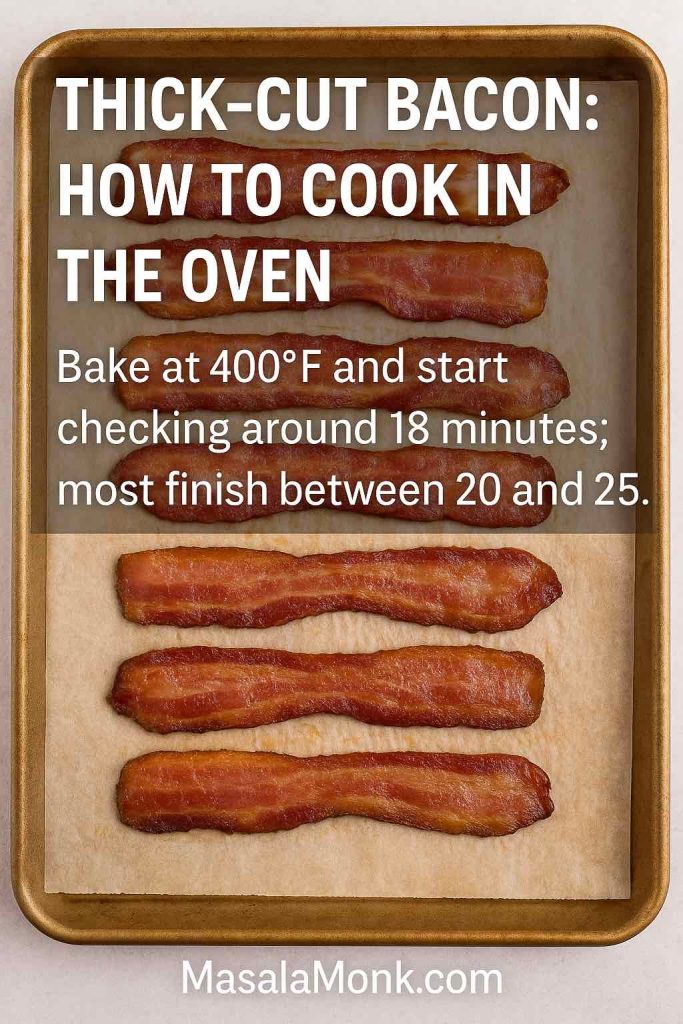
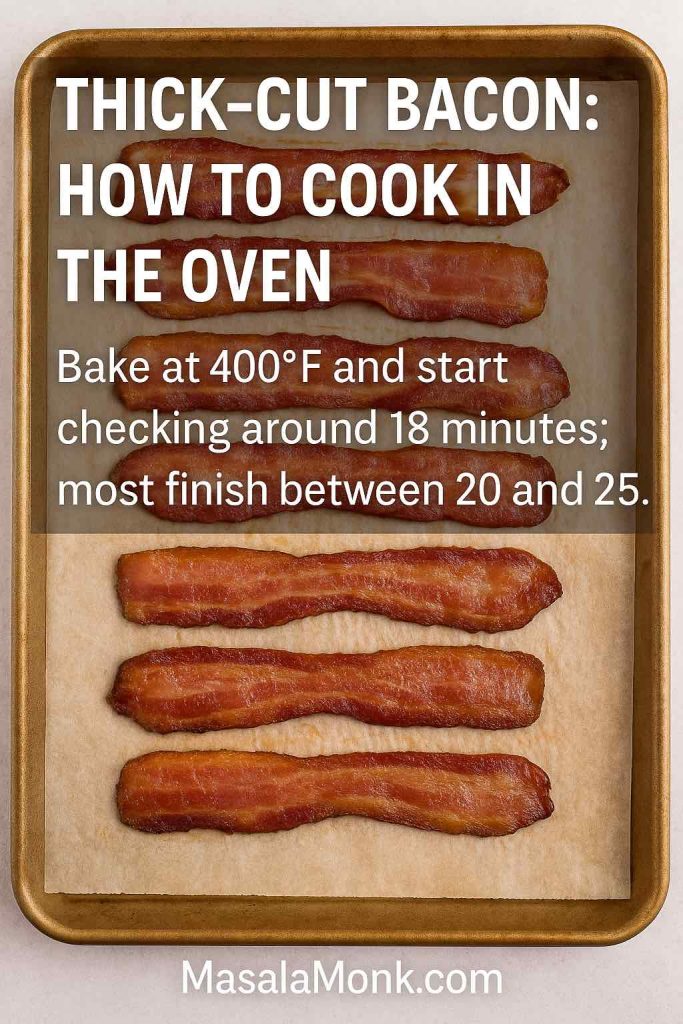
Thick-cut strips reward patience. They hold more fat and need a breath more time to render. Set 400°F, lift the slices on a rack if you have one, and start checking at 18 minutes. Most batches pull somewhere between 20–25 minutes. If the centers are right but the color wants another shade, broil briefly—truly, a minute can be plenty.

Thick-cut bacon baked on parchment with timing note to check at 18 minutes and finish by 25
Thick-cut needs patience—start checking at 18 minutes at 400°F; pull when centers lose shine and edges are deeply rendered.

If you like food gear insights while we’re here, this piece offers real-world cautions before you add more iron to your cabinet: cast-iron skillet warnings. Cast iron excels for many tasks, but it’s fine to keep oven bacon on parchment; you don’t need a heavy pan to nail it.

Also Read: Lemon Drop Martini Recipe (Classic, 3-Ingredient, & More)


Parchment vs Foil vs Rack: Choosing the Best Setup

It’s tempting to chase hacks, yet the basics outperform gimmicks.

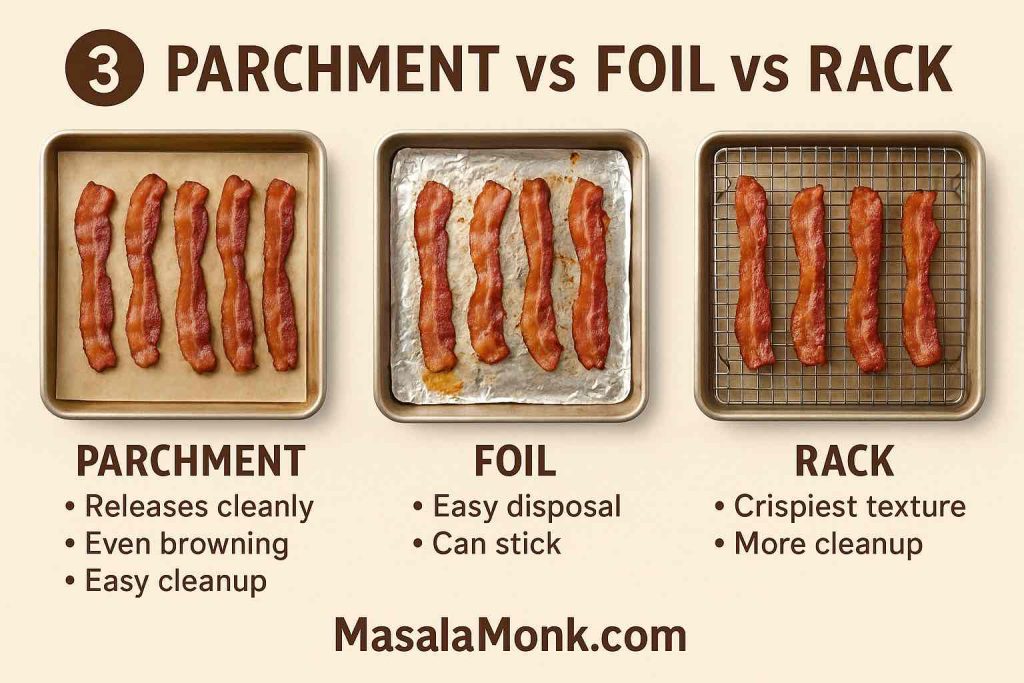
Side-by-side comparison of bacon baked on parchment, foil, and wire rack showing release and crispness differences
Parchment = easiest cleanup, Rack = crispiest (with more scrubbing), Foil = workable but can stick with sugary cures.

Parchment on a rimmed sheet is the dependable default: it releases cleanly, encourages even browning, and makes cleanup nearly effortless. The Kitchn’s comparison crowned this exact configuration: parchment-lined baking wins.

A rack over the sheet yields the crispiest texture with flatter slices and more airflow. Add a minute or two to timing and budget a moment to scrub the rack; the result is worth it for “glass-snappy” edges.

Foil-lined sheets also work and are easy to toss, though certain sugar-cured bacons can adhere slightly more to foil than to parchment. If you go foil, fold the edges up into a shallow tray to corral drips for mess-free disposal (Food & Wine even shows a DIY “ridge” rack with folded foil here: oven bacon trick).

For completeness, a few outlets promote cold-start tricks or twist techniques. If you enjoy experimenting, go for it. The fundamentals above, though, remain the most repeatable for week-to-week cooking.

Also Read: Classic vs. Authentic Alfredo: 5 Essential Recipes


Convection, Toaster Oven, and a Word on Microwaves

Because ovens vary, it’s smart to adapt. Convection fans accelerate browning by moving hot air constantly over the surface. As a rule, reduce by 25°F (≈15°C) and start checking 3–4 minutes earlier.

Bacon on a rack in a toaster oven with guidance to reduce temperature by ~25°F and check earlier
Convection speeds browning—drop temp by ~25°F and begin peeking 3–4 minutes early to avoid overshooting.

Toaster ovens are mini-ovens. The same guidance applies; just use a smaller tray and peek 2–3 minutes earlier because the elements sit closer to the food.

As for microwaves, they excel for 1–4 slices when you’re racing out the door: layer bacon between paper towels on a microwave-safe plate, cook about 1 minute per slice to start, then add 15–20 second bursts to finish. However, controlled tests still favor baked bacon for texture and consistency—especially with thick-cut. Food & Wine’s multi-method comparison places microwave near the bottom for taste and mouthfeel: 7 ways to make bacon—oven wins.

Also Read: Air Fryer Chicken Wings (Super Crispy, No Baking Powder)


How to Cook Bacon in the Oven—Without a Mess

If you’ve ever cleaned splatter from a stovetop, the oven already feels calmer; nevertheless, a few habits make it virtually mess-free.

  • Use a rimmed sheet so fat can’t cascade into the oven floor.
  • Middle rack positioning keeps hot coils above and below at safe distances.
  • Do not broil the entire time. Broiling drives popping; instead, broil only to finish for color.
  • Don’t crowd. Overlapping strips steam each other and spatter more.
  • Line with parchment and fold the edges up; this turns the paper into a drip tray you can lift and discard.
  • Start with a clean oven. Residual grease on the floor smokes before bacon does. A quick wipe pays dividends.

If you enjoy flavor-building extras across the rest of your brunch plan, take a peek at MasalaMonk’s seasoning ideas for eggs, which dovetail nicely with a bacon tray: egg-cellent seasoning options.


Turkey Bacon: How to Cook Bacon in the Oven When It Isn’t Pork

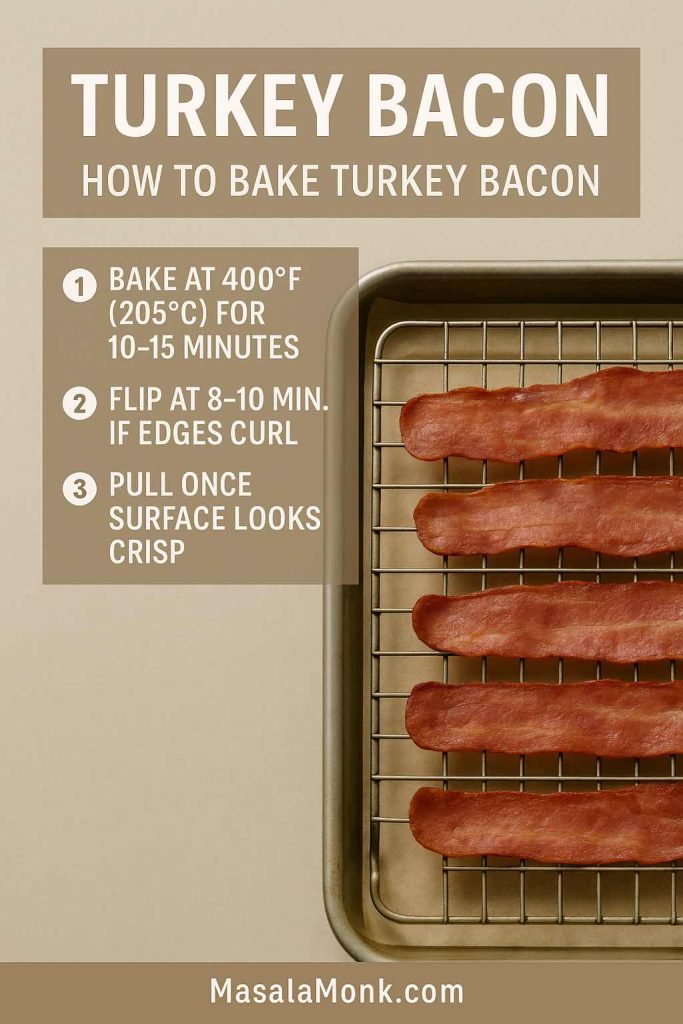
Turkey bacon behaves differently: less fat, quicker edges. Bake at 400°F (205°C) for 10–15 minutes. Flip at 8–10 minutes if the edges curl; pull once the surface looks uniformly crisp, because a minute too long dries it out.

Turkey bacon on a rack with steps: bake at 400°F 10–15 min, flip at 8–10 if edges curl, pull when surface looks crisp
Leaner strips cook faster—trust visual cues; flip if curling, then pull as soon as the surface crisps to prevent drying.

Because brand moisture and slice thickness vary, one must trust visual cues as much as the clock. If there’s ever a product advisory (they do happen), always check the official guidance—USDA FSIS maintains an updated recall hub and safety pages. For example, here’s the FSIS bacon safety backgrounder: Bacon and Food Safety.


Bacon Grease: Strain, Save, and Store

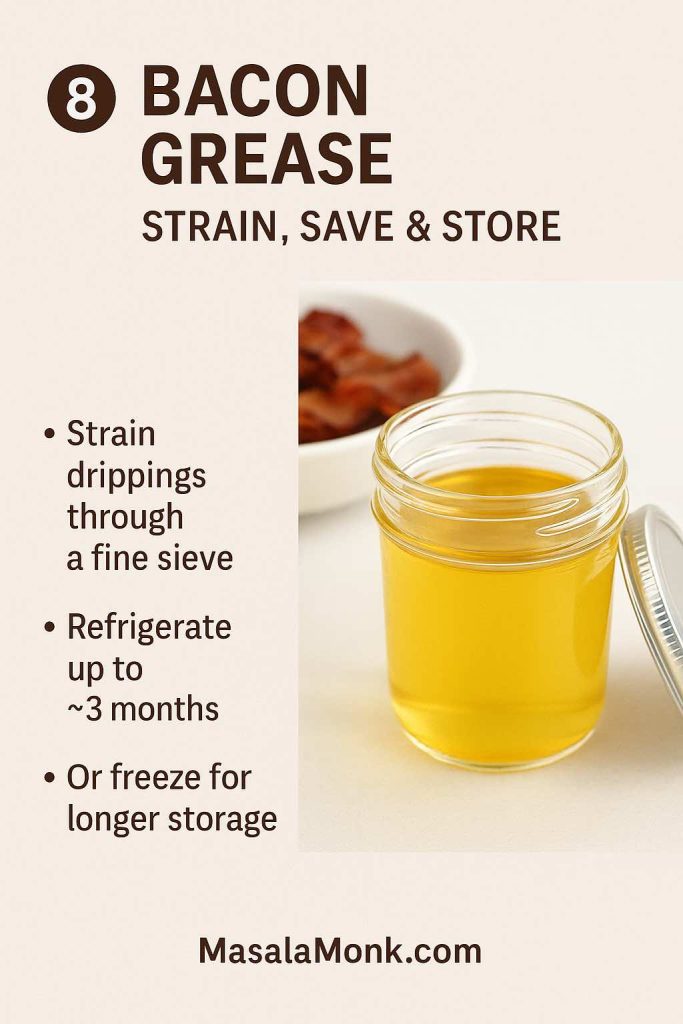
Once your tray cools a bit, pour the drippings through a fine sieve or a coffee filter into a clean jar. That liquid gold perfumes roasted potatoes, fried eggs, cornbread, even sautéed greens.

Jar of strained bacon grease with tips to refrigerate for about 3 months or freeze longer
Strain through a fine sieve or coffee filter; refrigerate up to ~3 months or freeze for longer—perfect for potatoes, eggs, and cornbread.

For storage, the simplest, most practical guidance is: refrigerate up to ~3 months and freeze for longer (6+ months), always discarding if the fat smells off or looks milky after warming. For broader food-safety context, tap FSIS’ comprehensive basics and temperature resources: Food safety basics and the safe internal temperature chart.


From Oven to Plate: What to Serve With Bacon (and How to Keep It Hot)

Because oven bacon scales so well, you can build the rest of the menu without anxiety. As mentioned earlier, classic pairings make you look like a catering pro with almost no extra labor: silky deviled eggs and crispy-creamy potato appetizers round out the plate. Or, pivot toward a slightly different vibe with sweet-potato starters—the salty-sweet play loves bacon.

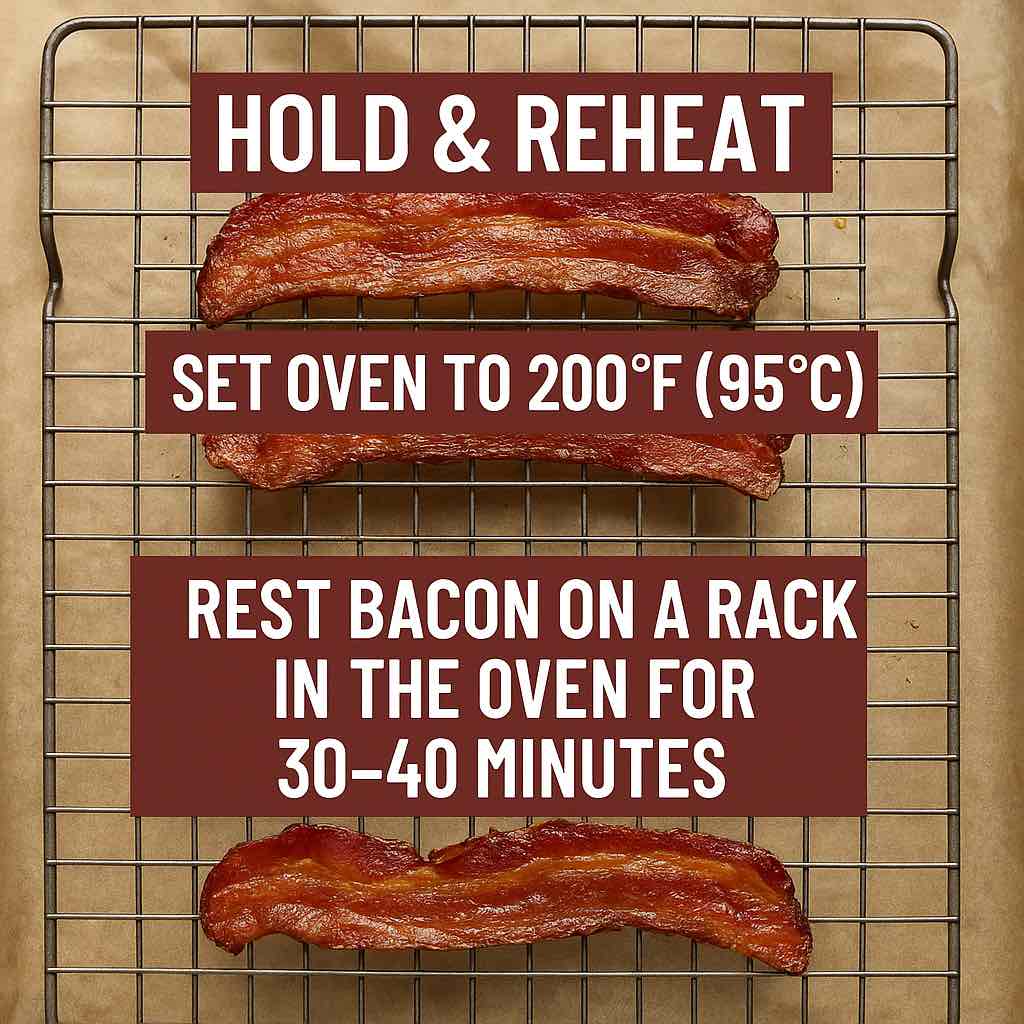
Bacon slices on a wire rack with text: hold and reheat at 200°F (95°C) for 30–40 minutes
Keep bacon crisp for service: rest cooked strips on a rack in a 200°F oven for 30–40 minutes—airflow prevents soggy edges.

To hold bacon for the table, set your oven to 200°F (95°C) and rest the strips on a rack set over a sheet; this keeps them crisp for 30–40 minutes. Avoid covering tightly with foil, which traps steam and softens the edges you worked to get.

Also Read: Punch with Pineapple Juice: Guide & 9 Party-Perfect Recipes


A Note on Food Safety (Because You’re the Grown-Up in the Room)

While bacon itself is fully cooked when crisp to your liking, many brunch menus combine it with proteins that do require strict temperature targets—bacon-wrapped chicken breasts for instance.

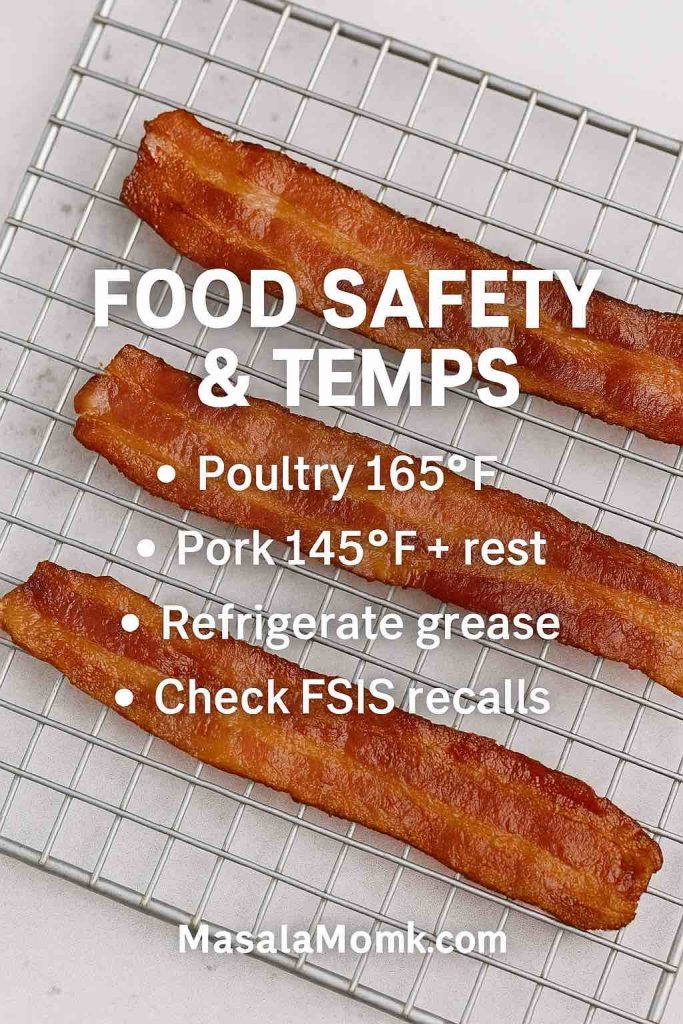
Bacon on cooling rack with food safety notes: poultry 165°F, pork 145°F plus rest, refrigerate grease, check FSIS recalls
Pair bacon with safe temps: poultry to 165°F, pork to 145°F + rest. Strain and refrigerate grease, and scan FSIS recalls for advisories.

Whenever you include cross-links to recipes with poultry or seafood, keep your stance clear and cite the USDA’s numbers: poultry to 165°F / 74°C, pork whole cuts to 145°F / 63°C plus a short rest. For a one-page refresher, the FSIS chart is here: safe temperature chart. And as for bacon storage and handling, FSIS’ backgrounder is again the anchor: Bacon and Food Safety.


Variations Worth Knowing (Without Straying From the Core)

Once you’re have learned enough from above about how to cook bacon in the oven, you can go through a few optional flourishes.

Maple-pepper glazed bacon. In the final 5 minutes, brush a whisper of maple syrup on top and dust with black pepper. Return to the oven just long enough to set the glaze. Watch closely—sugar accelerates browning.

“Pressed” bacon for sandwiches. As mentioned earlier, slide a second tray gently over a parchment-covered layer of bacon so it bakes flat; Kenji showcases this for ultra-uniform slices: baked bacon for a crowd.

Convection for snappier edges. If your oven offers it, cut the temperature by 25°F (≈15°C) and begin checking 3–4 minutes early.

Toaster-oven micro-batches. For two people, a quarter sheet pan in a toaster oven works beautifully at the same temperatures, with a slightly earlier check. Food & Wine’s tip for a DIY foil “ridge” can keep slices out of pooled fat if you don’t own a rack: make bacon on foil ridges.

Also Read: What to Mix with Jim Beam: Best Mixers & Easy Cocktails


Troubleshooting Without Tears

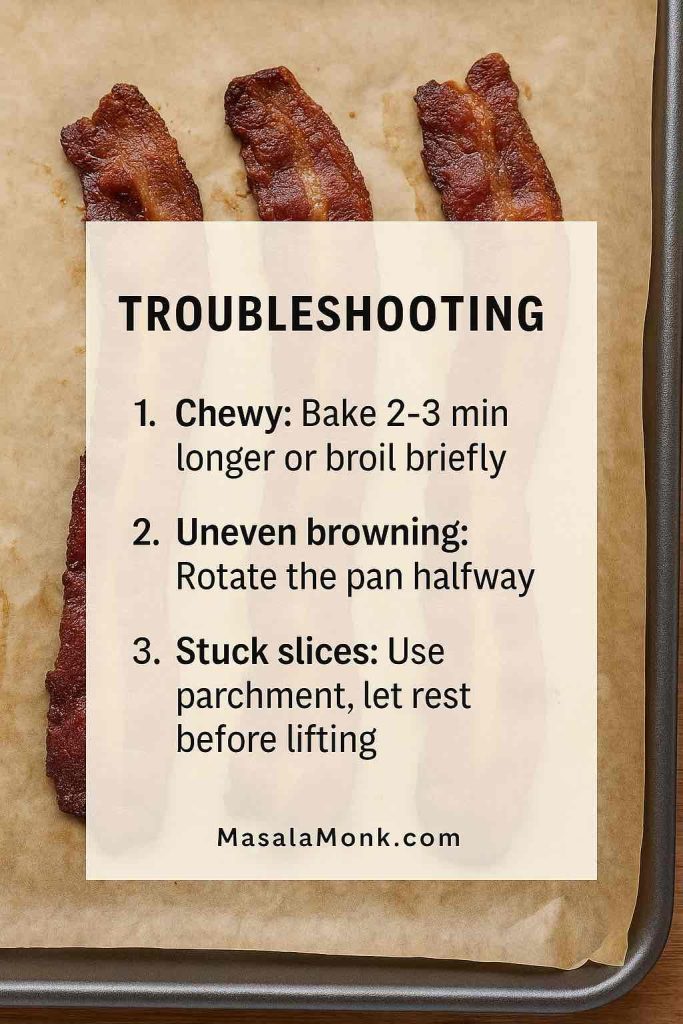
Troubleshooting overlay on baked bacon: bake longer or brief broil, rotate pan halfway, use parchment and let rest
Chewy? Add 2–3 minutes or a quick broil. Uneven color? Rotate the pan. Sticking? Switch to parchment and lift after a brief rest.

Even with a method this forgiving, a few hiccups are common. Fortunately, each has a simple fix:

Chewy, not crisp. Either the oven ran a little cool or the slices were crowded. Add 2–3 minutes, or finish with a 1-minute broil to nudge color without overcooking the lean.

Uneven browning. Ovens have hot spots. Rotate the pan halfway, and consider a rack for better airflow if your bacon warps.

Stuck slices. Switch to parchment and let the bacon rest on the tray 30–60 seconds before lifting; rendered fat re-absorbs slightly and helps release.

Smoky oven. The usual culprit is old oil on the floor or walls, not the bacon itself. A quick wipe before you bake prevents most smoke. Keep the tray centered; upper racks sit closer to hot elements.

Also Read: 10 Creative Chia Pudding Recipes for Every Taste


The Case for Oven Bacon, Restated—For Anyone Still on the Fence

To recap with crisp clarity: how to cook bacon in the oven boils down to a preheated 400°F oven, a parchment-lined rimmed sheet, and a single layer of strips baked 12–18 minutes (or 18–25 for thick-cut), rotated once. The method scales to crowds, leaves your stovetop spotless, and delivers evenly rendered slices that finish together. It’s also the approach most publications reach for when they test multiple methods head-to-head: We tested 7 ways; oven was the clear winner, and The Kitchn’s parchment method remains a go-to reference for a reason.

Also Read: Coconut Water Cocktails: 10 Easy, Refreshing Drinks


FAQs

1) How long do I bake bacon at 400°F?

At 400°F (205°C), most regular slices turn perfectly crisp in about 12–18 minutes, while thick-cut usually needs 18–25. Moreover, rotate the pan once to even out hot spots, then let the strips rest briefly so they firm up.

2) How to cook bacon in the oven at 375°F?

Set the oven to 375°F (190°C) and plan for roughly 16–22 minutes. Additionally, this gentler temperature delivers very even browning, which helps when you’re baking multiple trays at once.

3) How to cook bacon in the oven at 350°F?

At 350°F (175°C), expect a calmer bake that typically takes 20–25 minutes for standard-cut slices. Consequently, if your oven runs hot or you prefer fewer pops, this setting keeps things tidy while still producing crisp edges.

4) How to cook bacon in the oven at 425°F?

With the dial at 425°F (220°C), bacon cooks fast—about 10–15 minutes—so watch closely near the end. Subsequently, pull the tray as soon as the color deepens; residual heat will finish the job.

5) What’s the best temperature to cook bacon in the oven?

Generally, 400°F strikes the ideal balance of speed and crispness. Likewise, it’s the sweet spot most readers land on once they learn how to cook bacon in the oven consistently.

6) Do I need to flip bacon while baking?

Not necessarily. Nevertheless, turning the pan once midway promotes uniform rendering without the mess of flipping each slice.

7) How do I make bacon extra crispy in the oven?

Space the slices so steam can escape, then consider a wire rack over the sheet for airflow. Finally, if you want deeper color, finish with a very brief broil—think 60 to 90 seconds—while watching constantly.

8) Should I use parchment, foil, or a rack?

Parchment is the easiest for release and cleanup, whereas foil is fine if that’s what you have. Alternatively, a rack yields the crispiest texture, though you may need an extra minute or two and a touch more cleanup.

9) How to cook thick-cut bacon in the oven without chewy centers?

Bake at 400°F and start checking around 18 minutes; most thick-cut slices finish between 20 and 25. Importantly, a rack helps render the middle while keeping the edges snappy.

10) Can I use convection for oven bacon?

Yes—reduce the temperature by about 25°F (≈15°C) and begin checking 3–4 minutes earlier. Subsequently, the moving air speeds browning, so rely on visual cues as much as the clock.

11) How do I keep the kitchen clean when baking bacon?

Use a rimmed sheet lined with parchment, place it on the middle rack, and avoid broiling for the entire cook. Moreover, a quick wipe of old grease from the oven floor before you start prevents smoky surprises.

12) What’s the timing for turkey bacon in the oven?

Turkey bacon generally finishes faster: estimate 10–15 minutes at 400°F. Ultimately, pull it when the surface looks crisp, because an extra minute can push it from perfect to dry.

13) How long will bacon grease last once saved?

After straining through a fine sieve or coffee filter, refrigerate for up to a few months or freeze for longer. Specifically, discard it if the aroma turns off or the texture looks milky after warming.

14) Is microwave bacon worth it if I’m in a rush?

For one to four slices, the microwave is speedy—about a minute per slice to start with brief bursts to finish. Still, if you’re chasing the best texture or serving a crowd, learning how to cook bacon in the oven remains the more consistent approach.

15) How do I reheat baked bacon so it stays crisp?

Warm it on a rack at 350°F for 3–5 minutes, just until the fat re-liquefies and edges revive. Likewise, avoid covering tightly, since trapped steam softens the crunch you worked for.

Posted on — Leave a comment

How to make Chips at home? 5 Fruits and Vegetables that can be made into Chips at home

FRUIT & VEGETABLE CHIPS

Crispy, healthy, and surprisingly easy—homemade fruit and veggie chips are the snack everyone deserves to master. Whether you want to transform a bumper crop, reduce food waste, or just love snacking smart, this guide dives deep into everything you need to know to make delicious chips right in your kitchen.


Why Make Chips at Home?

Forget expensive store-bought bags with mystery ingredients. Homemade chips let you:

  • Control the oil, salt, and seasoning
  • Use any produce—from classic potatoes to leafy greens or even green bananas
  • Skip additives and preservatives
  • Customize flavors exactly how you like them

Plus, it’s a fun and creative way to get more fruits and veggies in your diet!


Getting Started: What You’ll Need

  • Sharp knife or mandoline slicer (for uniform, thin slices—this is non-negotiable for great chips)
  • Baking sheets or dehydrator trays
  • Parchment paper or silicone baking mats
  • Salad spinner or clean towels (for drying slices)
  • Large mixing bowl
  • Air fryer or deep fryer (optional, but helpful for certain veggies)

Pro Tip: A mandoline slicer makes the biggest difference—uneven slices = uneven chips.


Core Method: The Science of Perfect Chips

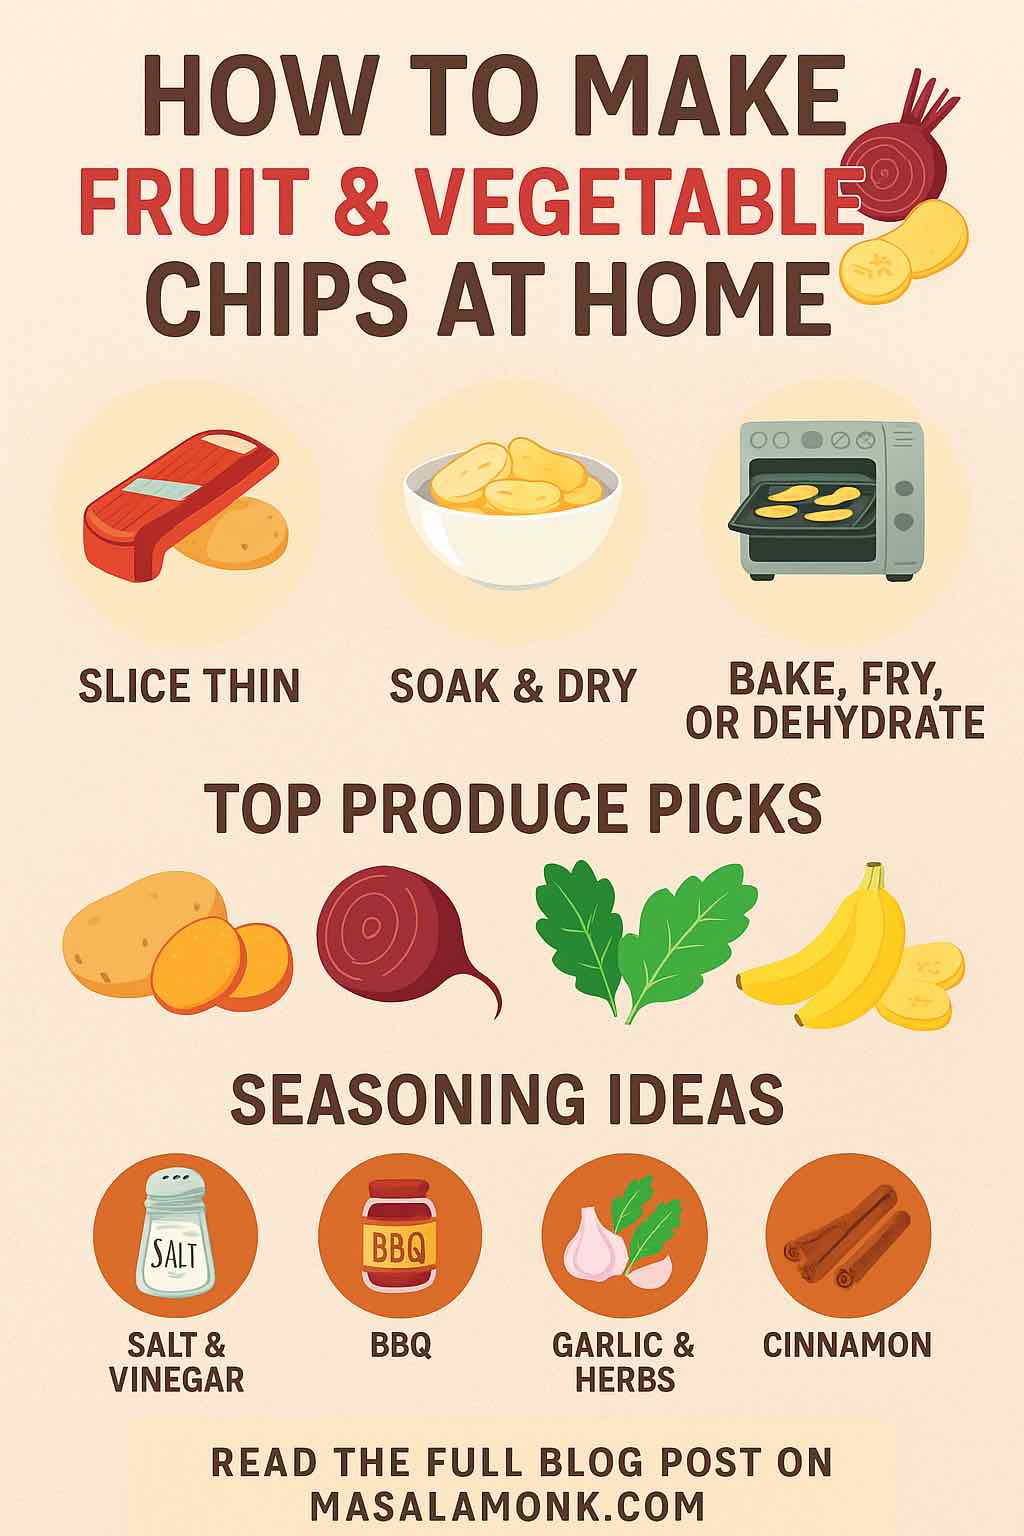
1. Slice Thin and Even

  • Aim for 1–2 mm thickness. Too thick? They’ll be chewy. Too thin? They might burn.
  • Mandoline slicers are best, but a sharp chef’s knife works with patience.

2. Soak and Dry

  • Starchy veggies (potato, sweet potato, beet): Soak in cold water 15–30 minutes to remove surface starch. This gives you crispier chips and reduces browning.
  • All chips: Pat slices completely dry—moisture is the enemy of crisp!

3. Season Creatively

  • Basic: Olive oil, salt, pepper.
  • Advanced: Smoked paprika, za’atar, garlic powder, cinnamon, nutritional yeast, chili powder, ranch mix.
  • Leafy greens: Add nutritional yeast for a cheesy crunch, or lemon zest for zing.

4. Choose Your Cooking Method

A. Oven-Baked

  • Preheat to 150–180 °C (300–350 °F).
  • Lay slices in a single layer on parchment. Don’t overlap!
  • Brush or spray with oil. Sprinkle seasoning.
  • Bake 15–30 min, flipping halfway. Check often in final 5 minutes!
  • Remove golden chips, return undercooked ones for a few extra minutes.

B. Air Fryer

  • Preheat to 160–180 °C (320–350 °F).
  • Arrange slices in a single layer.
  • Air-fry for 8–18 min, shaking the basket halfway.

C. Dehydrator

  • Set to 55–65 °C (130–150 °F).
  • Dry for 8–16 hours (depends on slice thickness and water content).
  • No oil needed—just patience!

D. Deep Frying (Occasional Treat)

  • Oil to 150–170 °C (300–340 °F).
  • Fry in batches, stirring so they don’t stick.
  • Drain on paper towels; season while hot.

5 Fruits & Vegetables That Make Awesome Chips

1. Potato & Sweet Potato

  • Prep: Peel (optional), slice thin, soak, dry.
  • Flavor: Classic (salt), BBQ, salt & vinegar, cinnamon-sugar (sweet potato).
  • Best method: Oven, air fryer, or deep fryer.

2. Beetroot

  • Prep: Peel, slice very thin, soak briefly.
  • Flavor: Sea salt, black pepper, or balsamic vinegar powder.
  • Best method: Oven for earthy sweetness and crispness.

3. Kale (or Spinach, Cabbage)

  • Prep: Tear into chip-size pieces, remove stems, wash and dry very thoroughly.
  • Flavor: Olive oil + nutritional yeast, or sesame oil + chili flakes.
  • Best method: Oven-baked at a low temp (150 °C/300 °F) for 10–15 min.

4. Zucchini/Carrot/Parsnip

  • Prep: Slice lengthwise or into coins, pat dry.
  • Flavor: Garlic powder, Italian herbs, or just salt.
  • Best method: Oven or dehydrator.

5. Banana/Plantain

  • Prep: Peel, slice diagonally, brush with lemon juice to prevent browning.
  • Flavor: Salt for savory (green banana), cinnamon for sweet (ripe banana).
  • Best method: Dehydrator or oven at low temp.

User Experiences: The Honest Truth

What Home Cooks Love:

  • “Mandoline slicing is key! Without it, I always get some soggy chips and some burnt.”
  • “Leaving chips in the (turned-off) oven for an hour after baking really crisps them up.”
  • “Green bananas make the crunchiest chips—ripe ones are just chewy.”

What Can Go Wrong:

  • Kale chips are notorious for being tricky: “They get brittle or burnt if you’re not careful. Low heat and watch closely.”
  • Dehydrators can take a long time (“Overnight at least!”) but reward patience.
  • Batches vary: Even with the same recipe, humidity and slice thickness make a big difference.

Best User Hacks:

  • Toss potato or beet slices in a bit of vinegar before baking for an extra tang and crisp.
  • For root veggies, try brining or lightly fermenting before baking—this boosts crunch and flavor!
  • Use a salad spinner for speedy, effective drying—no more damp chips.

Pro Tips & Troubleshooting

  • Chips aren’t crisp? Let them cool fully—many crisp up as they cool.
  • Still soggy? Return to a low oven (100 °C/210 °F) for 10–15 min, or leave in the warm, off oven to dry further.
  • Uneven browning? Your slices might be uneven or you’ve overcrowded the pan.
  • Too oily? Brush, don’t drizzle. Or skip oil and use a dehydrator.

Safety Note: Acrylamide Awareness

Some veggies (especially potatoes) produce a natural compound called acrylamide at high temperatures, which in large amounts could pose health risks.

  • How to reduce it?
    • Soak starchy veggies before cooking.
    • Bake/air fry at moderate temps.
    • Avoid over-browning.

Creative Seasoning Combos

  • BBQ: Smoked paprika, garlic, onion powder, a touch of brown sugar
  • Mediterranean: Za’atar, lemon zest, sumac
  • Spicy: Cayenne, black pepper, lime juice powder
  • Sweet: Cinnamon, nutmeg, coconut sugar (for apple, banana, or sweet potato chips)

Storage & Shelf Life

  • Store in airtight containers once chips are completely cool.
  • Homemade chips have no preservatives—eat within 1–4 days for peak crispness.
  • If chips lose crunch, re-crisp in a low oven for a few minutes.

Your First Batch: Simple Oven Beet Chips

Ingredients:

  • 2 medium beets
  • 1–2 tsp olive oil
  • Salt and pepper

Method:

  1. Preheat oven to 170 °C (340 °F).
  2. Peel and slice beets as thinly as possible.
  3. Toss with oil, salt, pepper.
  4. Lay out in a single layer on parchment.
  5. Bake 20–30 min, flipping halfway—watch carefully at the end!
  6. Remove crisp chips; let cool to finish crisping.

Final Thoughts: Start Simple, Experiment Often

The joy of homemade chips is in the creativity and discovery. Use what you have, try new flavors, and don’t worry about making them perfect every time. The more you experiment, the better your chips will get—and the more fun you’ll have.

Got your own chip hacks or flavor combos? Share in the comments below!


Happy crunching!


Want more snack ideas or troubleshooting tips? Leave your questions, and let’s make snack-time epic together.

10 FAQs and Answers

1. What’s the best way to get homemade chips super crispy?

Answer:
Slice your produce as thin and even as possible (1–2 mm) with a mandoline. Dry the slices thoroughly after washing or soaking. For oven or air fryer, don’t overcrowd the pan—single layers only. Bake/air fry at moderate heat, and let chips cool completely after cooking; they crisp up more as they cool.


2. My chips always turn out soggy. What am I doing wrong?

Answer:
Sogginess is usually from too much moisture or thick slices. Pat slices very dry before cooking, and make sure you slice thin. Avoid using too much oil—brush or spray lightly. Try leaving the chips in a turned-off oven after baking to help them dry out further.


3. Can I make chips without any oil?

Answer:
Yes! Dehydrators are great for oil-free chips. In the oven or air fryer, you can also skip oil, but chips may not be as golden or flavorful. Watch closely so they don’t burn or dry out too much.


4. What’s the healthiest vegetable for homemade chips?

Answer:
Kale, spinach, beets, and carrots are popular for their nutrients. Leafy greens are low-calorie and packed with vitamins, while beets and carrots provide fiber and antioxidants. Choose vegetables you enjoy—variety is key to nutrition!


5. How long do homemade chips last, and how do I store them?

Answer:
Let chips cool completely, then store in an airtight container at room temperature. They’re best eaten within 1–4 days. If they lose crunch, crisp them in a low oven (100°C/210°F) for a few minutes.


6. Which fruits work best for fruit chips?

Answer:
Apples, bananas, pears, and mangoes are favorites. Choose firm, not overripe fruit for better crispness. Green bananas or plantains make the crunchiest chips.


7. Can I use a microwave to make chips?

Answer:
Yes, the microwave can make small batches quickly! Lay slices between parchment or on a microwave-safe plate. Cook in 30–60 second bursts, flipping until crisp. Keep a close watch to avoid burning.


8. Why do my kale chips always turn out bitter or burnt?

Answer:
Kale chips burn easily if the oven is too hot or they bake too long. Use lower temperatures (around 150°C/300°F), and check after 10–12 minutes. Remove thinner pieces as they crisp up to avoid burning.


9. Is it possible to make chips from vegetable peels?

Answer:
Absolutely! Potato, carrot, beet, and parsnip peels can be washed, seasoned, and baked for a zero-waste, crunchy snack.


10. Are homemade chips healthier than store-bought?

Answer:
Definitely! You control the oil, salt, and additives. Homemade chips can be baked or air-fried with minimal or no oil, and they’re free of preservatives and artificial flavors found in most packaged chips.

Posted on — 5 Comments

Parmesan vs. Parmigiano Reggiano and Others

Parmesan vS. Parmigiano Reggiano

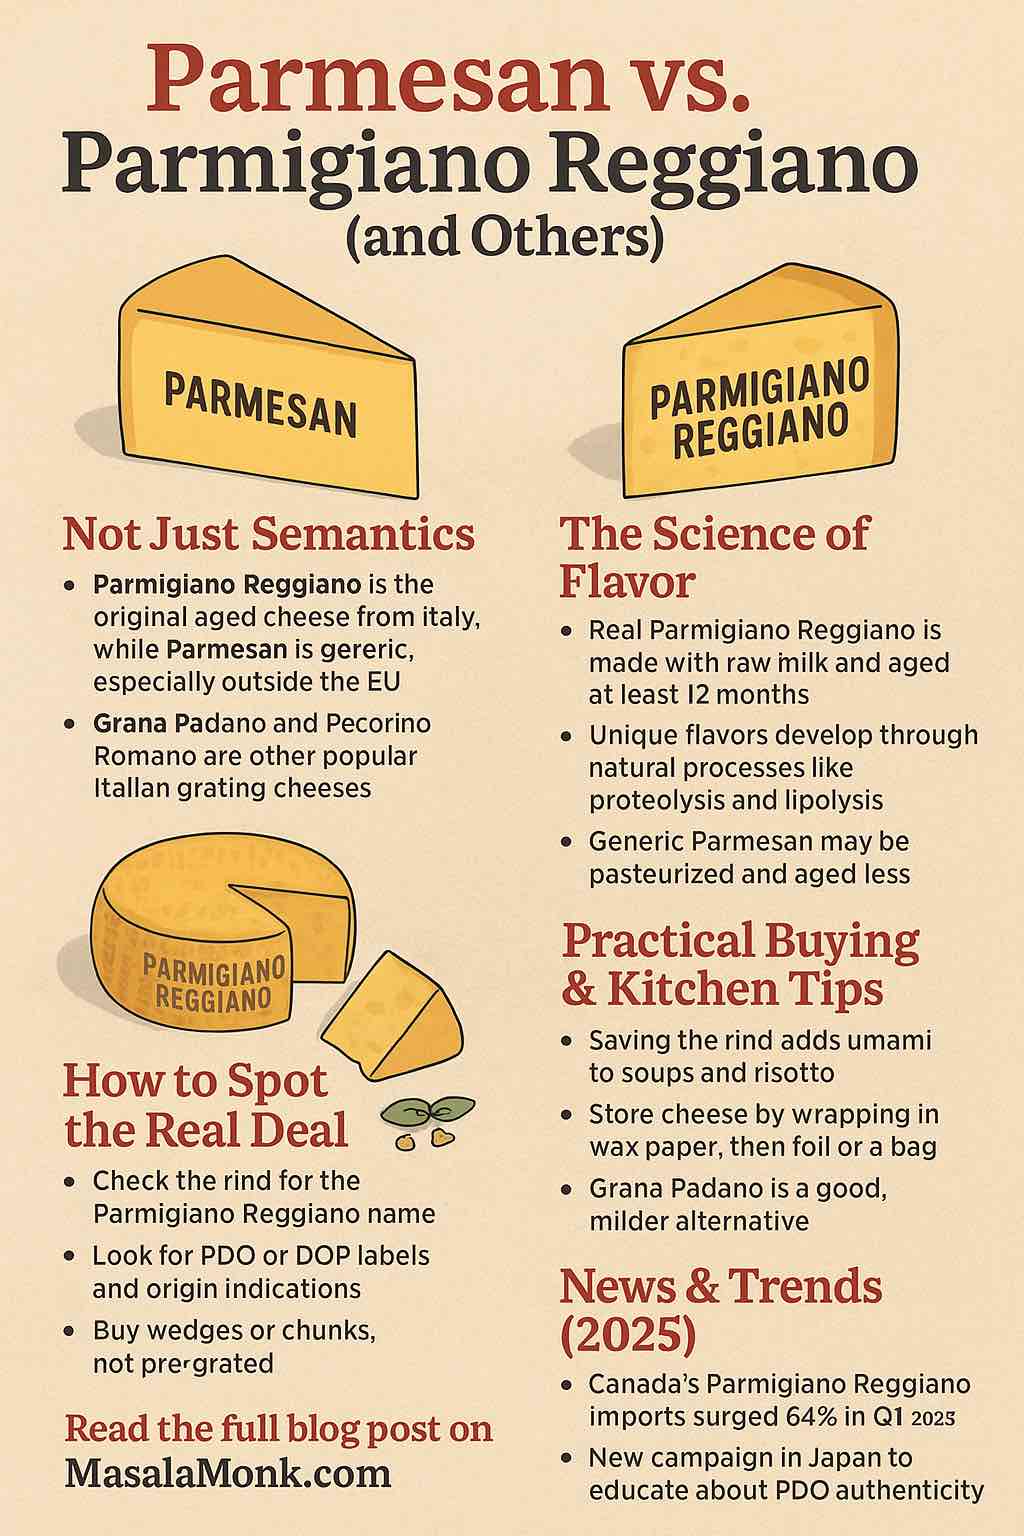
First: not all cheeses labeled “Parmesan” are created equal. In Europe, the law is strict: “Parmesan” is a legal synonym for Parmigiano Reggiano, and must come from select provinces in Italy, made according to centuries-old rules. It’s aged at least 12 months, but the best stuff is aged 24–36 months or more. Anything less is literally illegal to call “Parmesan” in the EU.

Cross an ocean, and things get muddy. In the US, Australia, India, and much of the world, “Parmesan” is generic—any hard, cow’s milk cheese vaguely inspired by Parmigiano can use the name. These cheeses are often industrially produced, aged less, and can contain added cellulose, potassium sorbate, or even anti-caking agents.

In other words: Not every Parmesan is Parmigiano Reggiano, but every Parmigiano Reggiano is a Parmesan. But if you want the real-deal experience, you need the full name.


Other Italian Grating Cheeses: Not Just for Show

  • Grana Padano: The “cousin” cheese—also from northern Italy, similar texture but a little milder, creamier, and usually cheaper. It’s aged less, and the cows’ diet can include silage as well as hay.
  • Pecorino Romano: This is a sheep’s milk cheese, grainy, intensely salty, and tangy. It’s the signature grating cheese of Rome and a backbone of cacio e pepe, carbonara, and amatriciana.
  • American Parmesan: In the U.S. (and similar markets), this can mean anything from a fairly faithful imitation of Parmigiano Reggiano to a mild, waxy, pre-grated cheese with fillers. Buyer beware.

How Parmigiano Reggiano Is Made: A Love Letter to Tradition

To qualify as Parmigiano Reggiano, a cheese must come from cows grazing in the designated region—fed mainly on local grass and hay. Milk from the morning and previous evening is mixed in massive copper vats. It’s gently warmed and curdled using natural calf rennet. The curds are broken into rice-sized grains, heated, then pressed into wheels and soaked in brine for nearly a month. Then, the real magic happens: aging in vast, cool warehouses, for years.

During this time, enzymes and microbes quietly go to work:

  • Proteolysis: Long protein chains break down into peptides and amino acids (like tyrosine and leucine—those little white “crystals” you crunch).
  • Lipolysis: Fats break down into free fatty acids and aromatic compounds. This is why real Parmigiano Reggiano is so intensely aromatic, with hints of nuts, pineapple, even brown butter.
  • No artificial enzymes, no shortcuts. Just milk, rennet, salt, and time.

Contrast this with most generic Parmesan, which may be made with pasteurized milk (which kills native bacteria), industrial enzymes, and can be aged as little as 10 months.


The Flavor and Texture Showdown

A wedge of real Parmigiano Reggiano is firm and grainy, with tiny crunchy crystals (a hallmark of slow, natural aging). When you break it, it splinters rather than slicing cleanly. The flavor is deeply savory, nutty, and complex, with a clean, lingering finish and almost sweet undertones.

Generic Parmesan is often smoother and waxier, with less granularity. It can taste simply salty, bland, or one-dimensional. Sometimes it has a slightly rubbery mouthfeel, especially in pre-grated forms. Even if the ingredient list is pure (“milk, salt, rennet”), if it’s aged less or industrially processed, the flavor never achieves the same depth.


Is It Worth the Price? A Practical Perspective

Real Parmigiano Reggiano is expensive—but it’s powerful. You need less to achieve a punch of flavor, and it lasts a long time if stored properly. You’re not just buying a “cheese topping,” you’re buying an ingredient that transforms simple dishes: pasta, risotto, salads, eggs, and even vegetables.

Budget tip:

  • Use generic Parmesan or Grana Padano for melting into sauces or bulk cooking, where the nuances get lost.
  • Save Parmigiano Reggiano for finishing, cheese boards, and snacking.

Also, consider buying a larger chunk (often more economical per gram), dividing it, and freezing extra portions. Well-wrapped, it keeps beautifully.


How to Spot the Real Deal: No More Cheese Scams

  • Check the Rind: Authentic Parmigiano Reggiano has the name stenciled repeatedly in dots around the rind. No rind? Ask to see the whole wheel, or skip it.
  • Aging Details: Look for “24 mesi” (months), “36 mesi,” or “Stravecchio” for extra-aged versions. Aging makes a huge difference in both texture and flavor.
  • Pre-grated Caution: Pre-grated cheese loses aroma rapidly and may be cut with cellulose to prevent caking. If it comes in a shaker and isn’t refrigerated, it’s not the real deal.
  • Country of Origin: In most countries, the real stuff will be labeled “Product of Italy” and “Parmigiano Reggiano DOP” (Protected Designation of Origin). If you see only “Parmesan” and a domestic producer, it’s a knockoff.

Pro tip: Some cheesemongers cut and wrap real Parmigiano to order. If you see a wedge with a visible rind, ask for a small taste—real cheese shops won’t mind.


The Hidden World of Cheese Fakes and the Global Market

Fake Parmesan is big business—worth billions. In some countries, up to 90% of “Parmesan” sold is not authentic. The Parmigiano Reggiano Consortium is constantly fighting imitations, even using microchip tracking and blockchain tech on their wheels!

Meanwhile, demand is booming. Canada’s imports jumped 64% in a single quarter this year. Massive tariffs in the US haven’t slowed enthusiasm—American fans are snapping up wheels even at $30+ per pound. In Japan, massive ad campaigns are educating new generations of cheese lovers about PDO rules. There’s even a world record: a 27-year-old Parmigiano Reggiano wheel, recently authenticated and valued over €20,000.


Storage, Serving, and Everyday Kitchen Tricks

  • Storage: Always wrap wedges in wax or parchment paper, then a loose layer of foil or a zip bag. Never plastic wrap alone—cheese suffocates and goes stale.
  • Grating: For fluffy snow, use a microplane. For chunkier bits (great on salads or in risotto), use the large holes on a box grater or a cheese knife to shave “flakes.”
  • Rind Magic: Never throw away the rind! Add it to simmering soups, beans, or sauces for a slow, subtle infusion of umami.
  • Freezing: Cut your wedge into small pieces and wrap tightly. Thawed Parmigiano Reggiano can be a little more crumbly, but the flavor is still there—perfect for cooking.

Tasting Exercise: Become a Cheese Detective

Grab a wedge of Parmigiano Reggiano and a chunk of generic Parmesan (even pre-grated if that’s what’s available). Break each in half and look at the texture—do you see crystals in the real one? Smell each: the real deal should be nutty, buttery, a little fruity. The imitation may have a “flat” or salty aroma.

Now taste, plain. Let a small piece dissolve on your tongue. Parmigiano Reggiano evolves—first sweet, then nutty, then deeply savory, and never just salty. It lingers, with a subtle crunch. The generic will likely be one-note and fade quickly.

Try grating both over pasta with nothing but butter and black pepper—see how the real cheese coats the noodles, melting into a creamy sauce with just a little pasta water.


Cheese in Global Cooking: Beyond Italian Pasta

Parmigiano Reggiano is a staple for classic Italian dishes, but don’t stop there.

  • Shave it onto roasted vegetables, or toss with olive oil for a savory salad.
  • Fold it into biscuit or bread dough for extra flavor.
  • Stir into polenta or scrambled eggs.
  • Add chunks to a cheese board with aged balsamic, dried figs, or walnuts.

Pecorino Romano is perfect in Roman-style pastas and on hearty greens, while Grana Padano is mellow and works anywhere you’d use Parmesan for a milder finish.


Cheese and Health: It’s Not Just an Indulgence

Hard, aged cheeses like Parmigiano Reggiano are protein-dense (about 30% by weight!), packed with calcium and phosphorus, and naturally low in lactose (the aging process breaks it down). Even people who are mildly lactose intolerant often tolerate aged cheese well.

A little goes a long way—flavorful cheeses mean you use less for the same satisfaction. Plus, real Parmigiano Reggiano contains no preservatives or additives, just three ingredients and time.


The Future: Innovation, Records, and Why Authenticity Matters

Producers in Italy are experimenting with new traceability methods, including edible microchips in the rind and blockchain-backed certificates. This is in response to ever more sophisticated counterfeiting. Producers are also responding to climate and market pressures, but the basics—milk, salt, rennet, and time—haven’t changed in centuries.

A wheel from 1997 recently became the world’s oldest certified edible Parmigiano Reggiano, and fetched record interest at auction. Meanwhile, consumer education campaigns are helping more people globally understand what’s in their cheese and why it’s worth seeking out the real thing.


Bottom Line: What Should You Actually Buy?

If you love cheese, you owe it to yourself to try true Parmigiano Reggiano at least once—especially aged 24 months or longer. Use it as a finishing cheese, where its flavor shines. For everyday melting, casseroles, or when feeding a crowd, Grana Padano or a decent generic Parmesan does the trick.

If price is a concern, buy a small piece, treat it well, and make it last. The flavor payoff is enormous, and the kitchen possibilities are endless.
Most of all: pay attention to what you’re eating, and enjoy the difference. You’ll never look at that green canister of “Parmesan” the same way again.


Have your own Parmesan tales, tips for storing wedges, or favorite recipes for using up the rind? Drop a comment below—let’s talk real cheese.

Frequently Asked Questions (FAQ)

1. Is there a real difference between Parmesan and Parmigiano Reggiano?
Answer: Yes. Parmigiano Reggiano is a protected cheese made in specific Italian regions under strict rules. Parmesan, outside Europe, is a generic term and may be made anywhere, often with less aging and different production standards. In the EU, “Parmesan” must legally be Parmigiano Reggiano.


2. How do I know if the Parmesan I’m buying is real Parmigiano Reggiano?
Answer: Look for the dotted “Parmigiano Reggiano” stenciled on the rind, the PDO or DOP seal, and “Product of Italy.” Real Parmigiano Reggiano is usually sold in wedges, not pre-grated, and will mention the aging period (e.g., 24 or 36 months).


3. What is Grana Padano, and can I use it instead of Parmigiano Reggiano?
Answer: Grana Padano is a hard, aged cow’s milk cheese from northern Italy. It’s similar to Parmigiano Reggiano but milder, creamier, and less expensive. It’s a good substitute for cooking, but has a gentler flavor and texture.


4. Why is Parmigiano Reggiano so expensive?
Answer: It’s made with raw milk from specific cows, using traditional methods, and aged for at least a year (often longer). The process is labor-intensive, and each wheel is carefully inspected and certified. The flavor and texture are a result of this care and time.


5. What should I look out for to avoid fake Parmesan?
Answer: Avoid ultra-cheap, pre-grated, or shelf-stable “Parmesan” (especially if it contains additives like cellulose). Always check for the origin, rind markings, and official seals. Buy from reputable cheesemongers or trusted shops when possible.


6. How should I store Parmigiano Reggiano or Parmesan at home?
Answer: Wrap it in wax or parchment paper, then a loose layer of foil or a resealable bag. Store it in the fridge (preferably the cheese drawer). Change the wrapping every 1–2 weeks. You can also freeze it in chunks for long-term storage.


7. Is pre-grated Parmesan as good as freshly grated?
Answer: No. Pre-grated Parmesan loses aroma and flavor quickly and may include anti-caking agents or fillers. For best taste and texture, buy a wedge and grate it fresh as needed.


8. Can people who are lactose intolerant eat Parmigiano Reggiano?
Answer: Most can! Parmigiano Reggiano is naturally very low in lactose due to the long aging process. However, those with severe allergies should consult their doctor.


9. What’s the best way to use the rind of Parmigiano Reggiano?
Answer: Add the rind to soups, stews, or risotto while cooking for a deep, savory umami boost. Remove the rind before serving. It’s a traditional Italian “chef’s secret” for extra flavor.


10. Is there a big difference in nutrition between these cheeses?
Answer: All hard, aged cheeses are rich in protein, calcium, and umami compounds. Parmigiano Reggiano is made without additives and has the cleanest label. Generic Parmesan can sometimes contain preservatives or anti-caking agents, so check ingredients if nutrition is a concern.

Posted on — Leave a comment

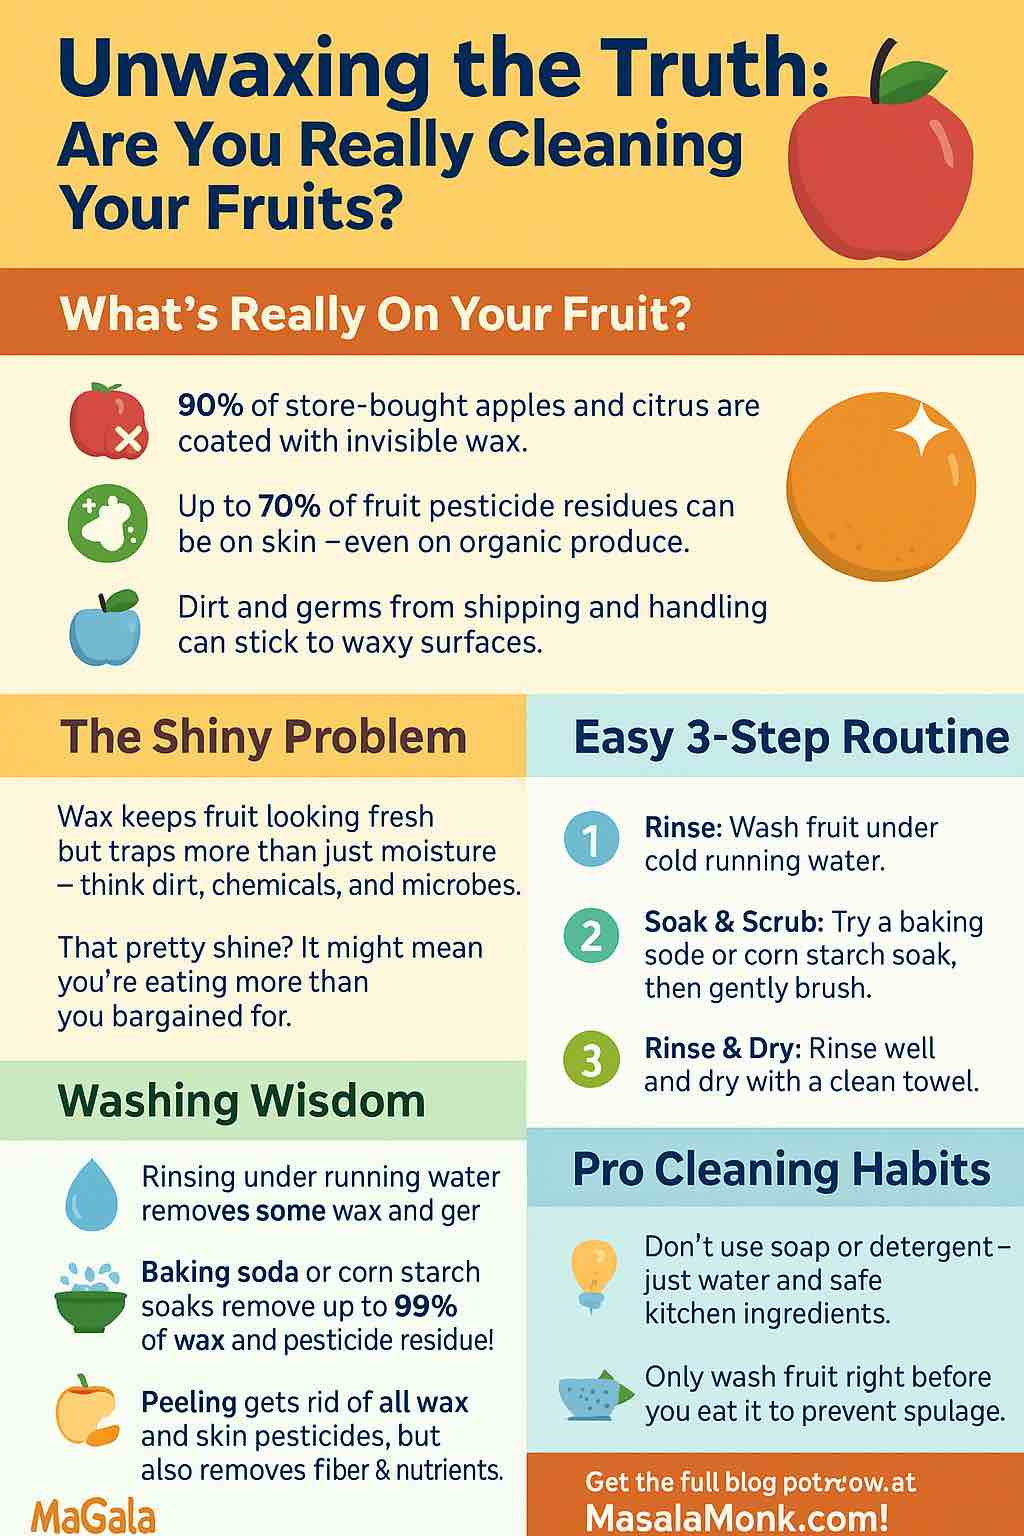
Unwaxing the Truth: How to Clean Your Fruits

How to Clean Your Fruits

Have you ever noticed how apples at the store seem to glisten? Or how oranges sometimes feel a little slippery, even after a rinse? That’s fruit wax—a perfectly legal, food-safe coating used to keep produce looking fresh and to slow down spoilage. But is it something you want to eat? And, more importantly, are you really getting rid of wax, dirt, and pesticides when you wash your fruit?

Let’s get into the practical steps and science behind cleaning your fruit—no hype, just what works.


What’s On Your Fruit?

  • Wax is added after harvest to help fruit last longer and look appealing. It forms a thin layer over the skin.
  • Pesticide residues can be found on (and sometimes inside) both conventional and organic produce.
  • Dirt and germs from handling and transport are also present—even on organic or homegrown fruit.

Key insight: Most of the time, wax and surface pesticides can be removed with a smart cleaning routine. But for some deep-penetrating chemicals, only peeling fully removes them.


The Smart Routine: Clean Fruit, Less Fuss

Here’s how you can actually get rid of most wax, dirt, and pesticides at home, with everyday ingredients.

1. Don’t skip the rinse

Before anything else, rinse your fruit under cold, running water. Use your hands to gently rub the surface. This alone removes a lot of dirt and some microbes.

2. Make a cleaning solution (optional, but very effective)

For an extra-clean feeling, especially with apples, pears, cucumbers, or anything with a waxy finish:

  • Corn Starch Soak:
    Mix 2 teaspoons of corn starch in 1 cup of water. Soak your fruit for about 10 minutes.
  • Baking Soda Soak:
    Afterwards, mix 2 teaspoons of baking soda in 1 cup of water. Soak for another 10 minutes.
  • For quick results, you can also just scrub with a little baking soda paste (baking soda + a splash of water) on a damp cloth.

3. Scrub if you can

Firm fruits (apples, cucumbers, citrus) benefit from a gentle scrub with a clean brush. This helps lift wax and dirt. For softer fruit (plums, peaches), rub gently with your hands.

4. Rinse again

Always rinse fruit thoroughly under running water after any soak or scrub, to wash away loosened wax and residue.

5. Dry with a clean towel

This step removes even more wax and helps keep your fruit from spoiling too fast. If you’re prepping fruit for storage, skip washing until you’re ready to eat.

6. Peel if needed

If you’re serving fruit to young kids, pregnant women, or anyone with a weakened immune system—and you’re worried about possible pesticide residues—peeling is the ultimate way to remove what’s left. Just remember, you lose some fiber and nutrients in the skin.


For Specific Fruits

  • Berries and grapes:
    Don’t use scrubs or soaks. Just rinse thoroughly in a colander right before eating. Too much soaking causes them to break down.
  • Leafy produce (like apples, cucumbers, citrus):
    The corn starch and baking soda method works best.
  • Stone fruit (peaches, nectarines):
    Gentle rubbing and a quick baking soda soak help if the skin feels slick or sticky.

Pro Cleaning Habits

  • Wash fruit right before you eat it. Washing and storing adds moisture and speeds up spoilage.
  • Don’t use soap or dish detergent. These aren’t meant for eating and can leave behind their own residues.
  • Even organic fruit needs a rinse. “Organic” doesn’t mean “clean.”

Final Word

You don’t need fancy produce washes or special gadgets. Cold water and a little time are the best start; baking soda or corn starch solutions are your next-level upgrades for waxy or heavily handled fruits. If you want total peace of mind, peel—otherwise, just rinse, scrub, and enjoy. Every bite is better when it’s clean!


Try this routine next time you prep fruit and see the difference. If you notice a residue come off, or the fruit’s shine dull, you’re actually seeing the wax and dirt go down the drain—right where they belong.

Frequently Asked Questions (FAQs)

1. Do I really need to wash fruit if I’m going to peel it anyway?
Yes. Washing removes dirt, bacteria, and pesticides from the surface. If you peel unwashed fruit, your knife can transfer residues from the skin to the flesh.


2. Can I use dish soap or hand soap to clean fruit?
No. Soaps can leave behind residues that aren’t safe to eat and aren’t approved for use on foods.


3. Does vinegar actually remove pesticides?
Vinegar can help reduce some surface bacteria and wax, but baking soda or the corn starch method are more effective for removing pesticides.


4. Is it safe to eat the wax on store-bought fruit?
Yes, most commercial waxes are food-grade and considered safe. However, washing can remove dirt and any trapped residues under the wax.


5. How do I clean delicate fruits like berries or grapes?
Rinse gently under cold, running water right before eating. Avoid soaking for long periods, as this can make them mushy.


6. Does organic fruit need to be washed too?
Yes. Organic fruits can still have dirt, bacteria, and natural residues, so always wash them before eating.


7. What’s the best way to wash leafy greens or herbs?
Swish them in a bowl of cold water, let dirt settle, lift out, and rinse under running water. Repeat if necessary.


8. Can I use commercial fruit and veggie washes?
Most health experts say they aren’t necessary—plain water or homemade solutions (like baking soda) work just as well and are safer.


9. Why should I avoid washing fruit before storing it?
Moisture left on fruit encourages mold and spoilage. Always wash fruit just before eating or using it.


10. What’s the fastest way to remove wax from apples and cucumbers?
A quick scrub with a baking soda paste (baking soda + a little water) and a brush, followed by a thorough rinse, removes most wax quickly.