Posted on Leave a comment

Lemon Pepper Chicken Recipe: Juicy, Easy, Skillet & Oven Friendly

Golden lemon pepper chicken cutlets in a dark skillet with lemon butter sauce, parsley, cracked black pepper, and lemon wedges.

Lemon pepper chicken should feel easy before you even start cooking: golden chicken, fresh lemon, cracked pepper, and a buttery pan sauce you can spoon over rice, potatoes, pasta, or vegetables. It should taste lively without being sour, peppery without being harsh, and tender enough that chicken breast does not feel like the boring part of dinner.

The usual problems are familiar: thick chicken dries out, bottled lemon pepper can be salty, and too much juice can make the sauce sharp. This version keeps the chicken thin, the seasoning flexible, and the lemon butter balanced.

It is especially useful when you have two chicken breasts, a bottle of lemon pepper seasoning, and no patience for another dry weeknight chicken dinner. When the skillet is right, the chicken picks up a light golden crust, the lemon zest smells fresh before the juice ever hits the pan, and the butter pulls the browned bits into a sauce that tastes bigger than the short ingredient list.

Quick Answer

Lemon pepper chicken is made by seasoning thin chicken breast cutlets with lemon pepper seasoning, searing them until golden, and finishing them in a lemon butter pan sauce. The key is to use lemon zest for flavor, lemon juice for brightness, and cook chicken breast to 165°F / 74°C in the thickest part.

For the skillet version, slice 2 large chicken breasts into 4 thin cutlets, season them with lemon pepper seasoning, garlic powder, salt only as needed, and a light flour coating, then sear for about 3–5 minutes per side. The pan sauce comes together in the same skillet with butter, broth, lemon zest, and fresh lemon juice.

This recipe is built around the three fixes that matter most: thin chicken so it stays juicy, flexible salt because lemon pepper blends vary, and fresh zest so the lemon flavor tastes bright instead of sour. The point is not to make chicken fancy; it is to make it reliable: juicy, bright, buttery, and easy to serve with whatever is already in the kitchen.

Before You Start: 5 Details That Matter

A few small choices decide whether this tastes bright and tender or just like seasoned chicken.

Chicken2 large breasts, sliced into 4 thin cutlets
ThicknessAbout 1.25 cm / 1/2 inch
SaltDepends on your lemon pepper blend
LemonZest for flavor, juice near the end
Doneness165°F / 74°C in the thickest part
Overhead guide showing thin chicken, lemon pepper seasoning, lemon zest, lemon juice, and a thermometer marked 165°F / 74°C.
Before cooking, check the details that prevent most mistakes: thin cutlets, restrained salt, zest for aroma, juice near the end, and a final 165°F / 74°C temperature.

If you only remember one thing before cooking, remember this: thin chicken gives you room to get color without drying out the center.

Use the seasoning you already have; just taste or check the label before adding extra salt. Some bottled blends are mostly pepper and lemon. Others are salty enough that the chicken barely needs any added salt at all.

Lemon Pepper Chicken Recipe Card

Start here when dinner needs to happen now. This is the skillet version to make first: thin chicken cutlets, lemon pepper seasoning, a light flour coating, and a quick lemon butter finish made in the same pan.

Recipe nameLemon Pepper Chicken
Prep time10 minutes
Cook time15 minutes
Total time25 minutes
Servings4
Yield4 thin chicken cutlets
Main methodSkillet
Internal temperature165°F / 74°C for chicken breast

Equipment

You need a large 10–12 inch skillet, tongs, a shallow plate for coating, a fine grater for zest, and ideally an instant-read thermometer. A meat mallet or rolling pin helps even out thick spots.

Ingredients

IngredientAmount
Boneless skinless chicken breasts2 large, about 550–650 g / 1.2–1.4 lb total
All-purpose flour3 tablespoons / 24 g
Lemon pepper seasoning2 teaspoons / about 5–6 g, depending on brand
Garlic powder1/2 teaspoon
Fine salt1/4 to 1/2 teaspoon, depending on seasoning
Olive oil or neutral oil1 1/2 tablespoons / about 22 ml
Unsalted butter3 tablespoons / 42 g
Chicken broth or stock1/2 cup / 120 ml
Fresh lemon juice1 to 2 tablespoons / 15–30 ml
Lemon zest1 to 2 teaspoons
Fresh parsley, chopped1 to 2 tablespoons
Fresh garlic, optional1 clove, minced

Before adding salt: Taste or check your lemon pepper seasoning. If it already tastes salty, start with 1/4 teaspoon extra salt or skip the added salt until the pan sauce is finished. Let the skillet juices do the balancing before you reach for more salt.

Instructions

  1. Slice the chicken. Place each breast flat on a board and slice horizontally into 2 thinner cutlets. Pound uneven spots to about 1.25 cm / 1/2 inch thick.
  2. Pat it dry. Use paper towels to remove surface moisture so the chicken browns better and holds seasoning evenly.
  3. Season the flour. In a shallow bowl or plate, mix the flour, lemon pepper seasoning, garlic powder, and salt.
  4. Coat lightly. Dredge each cutlet and shake off the excess. The coating should look thin and dusty, not thick or caked on.
  5. Sear until golden. Heat oil in a large skillet over medium to medium-high heat. Cook the cutlets in one layer for 3–5 minutes per side, until golden. Lower the heat if the coating colors too fast.
  6. Check the temperature. Test the thickest part before removing the chicken, or right after transferring it to a plate. It should read 165°F / 74°C.
  7. Start the pan finish. Lower the heat to medium, add butter, and stir in garlic, when using, for 20–30 seconds.
  8. Add broth and lemon. Pour in the broth, scrape up the browned bits, then stir in 1 tablespoon lemon juice and the zest. Simmer for 2–4 minutes, until glossy.
  9. Return the chicken. Add the cutlets back and spoon the lemon butter over the top. Warm gently instead of boiling hard.
  10. Finish and serve. Taste, then add more lemon juice, pepper, or salt only as needed. Sprinkle with parsley and serve warm.

Recipe Notes

  • Large chicken breasts cook better when sliced into cutlets instead of cooked whole.
  • Fresh lemon zest gives stronger lemon flavor than lemon juice alone.
  • Use 1 tablespoon lemon juice for a softer sauce and 2 tablespoons for a sharper lemon finish.
  • Broth and butter are the best way to bring a strong-tasting sauce back into balance.
  • For a gluten-free version, use a light gluten-free flour blend.
  • For a thinner coating, use 1 1/2 tablespoons cornstarch instead of flour, or skip the coating and reduce the sauce slightly longer.

Choosing another method? Jump to the oven, air fryer, thighs, and meal-prep options.

What Good Lemon Pepper Chicken Should Taste Like

Good lemon pepper chicken should taste lemony before it tastes sour, peppery before it tastes hot, and buttery without feeling heavy. Ideally, the cutlets are golden outside, tender in the center, and lightly coated rather than buried under sauce.

A little lemon butter should remain in the pan for rice, potatoes, pasta, or vegetables. The best bite makes the side dish better too, as if it caught the same bright, buttery finish.

Sliced lemon pepper chicken served with mashed potatoes, green vegetables, lemon butter sauce, parsley, and a lemon wedge.
A good side should catch the lemon-butter juices, not compete with them. That is why mashed potatoes, rice, pasta, and simple vegetables all work well here.

When the first bite tastes mostly salty, the bottled blend was probably too aggressive. A flat bite usually needs zest or a final squeeze of lemon. Sharpness, though, is better fixed with butter and broth than with more juice.

4 Small Details That Make or Break It

The recipe is simple, but these four choices decide whether it tastes bright and juicy or flat, salty, and dry.

Educational board showing thin cutlets, salt control, lemon zest and juice, and pan sauce for lemon pepper chicken.
Four details decide the final result: thin cutlets for even cooking, salt control for balance, zest and juice for lemon flavor, and a skillet finish for depth.
DetailWhat Can HappenHow This Recipe Handles It
Chicken thicknessThick pieces cook unevenly.Slice into thin cutlets and check the internal temperature.
Seasoning strengthBottled lemon pepper seasoning may already contain salt.Add salt carefully and adjust after the sauce is made.
Lemon balanceToo much lemon juice can taste sharp.Use zest for flavor and juice near the end.
Pan finishSeasoned chicken can still feel plain.Make a quick lemon butter pan sauce with broth and butter.

Why This Recipe Works

This recipe treats the dish as a balance problem, not just a seasoning problem.

Cutting the chicken into thin cutlets gives you more surface area for browning and shortens the cooking time. The outside can turn golden before the inside dries out. A thin coating of seasoned flour helps the breast meat brown and gives the skillet juices just enough body to cling lightly.

Zest brings the lemon aroma, juice brings the bright finish, butter rounds out the pepper, and broth lifts the browned bits from the skillet. When the finish is right, it tastes peppery first, buttery in the middle, and fresh at the end.

By the time it turns glossy and the chicken goes back in, dinner should smell like lemon, browned butter, and pepper — not like a complicated project.

Choose Your Version

If this is your first time making it, stay with the skillet. It gives you the golden crust, the full lemon-butter finish, and the best pan flavor. Once you know that version, you can bend the same flavor toward the oven, air fryer, grill, or slow cooker depending on the night.

Method guide showing lemon pepper chicken options for skillet, oven, air fryer, thighs, meal prep, and wings.
Choose the method based on what you need. Skillet lemon pepper chicken gives the strongest pan flavor, while oven, air fryer, thighs, meal prep, and wings offer easier variations.
VersionBest ForKey Tip
Skillet lemon pepper chickenFastest saucy dinnerUse thin cutlets and finish with lemon butter sauce.
Oven lemon pepper chickenHands-off cookingUse evenly thick pieces and spoon sauce over after baking.
Air fryer lemon pepper chickenQuick, low-mess cookingOil lightly so the coating does not stay floury.
Lemon pepper chicken breastLean weeknight dinnerSlice or pound evenly so the breast stays tender.
Lemon pepper chicken thighsJuicier, more forgiving chickenCook a little longer for softer texture.
Grilled lemon pepper chickenSmoky summer flavorUse zest and oil in the marinade, then add lemon after cooking.
Slow cooker lemon pepper chickenMeal prep, bowls, wraps, or shreddingUse less liquid than expected and brighten at the end.
Lemon pepper wingsCrispy party-style wingsUse a separate wings method for crisp skin.

Looking for crispy lemon pepper wings instead of skillet chicken? Wings need a different method for crisp skin and a dry or wet wing sauce. Use this lemon pepper chicken wings recipe when wings are the plan.

Ingredients You Need

The ingredient list is short, and each item has a job, which makes substitutions easier.

Chicken

Boneless skinless chicken breasts are quick, lean, and familiar. The key is to turn 2 large breasts into 4 thinner cutlets so they cook quickly and stay tender in the center.

Boneless thighs, bone-in thighs, or tenders also work. Thighs are juicier and more forgiving, while tenders are good for bowls, wraps, or kid-friendly dinners.

Lemon Pepper Seasoning

Lemon pepper seasoning gives the recipe its familiar flavor. Some blends are lemony and peppery with very little salt. Others are salty enough that you barely need any extra salt at all.

The bottle gives you the shortcut; the fresh zest makes it taste alive.

Fresh Lemon

Fresh lemon makes bottled seasoning taste brighter. The zest gives the strongest lemon aroma, while the juice adds tang to the pan finish. Avoid adding too much juice too early; it can turn sharp when it cooks down hard.

Butter, Broth, and Flour

Butter softens the pepper and acidity. Broth keeps the sauce spoonable and pulls flavor from the skillet. Flour gives the chicken a light coating, helps with browning, and gently thickens the pan sauce. Shake off the excess before cooking.

Salt-Control Guide

This is where many lemon pepper recipes go wrong. The label matters more than the measuring spoon because lemon pepper seasoning is not standardized. One brand may taste mostly like lemon peel and black pepper, while another may taste salty before it ever touches the chicken.

Salt-control guide with lemon pepper seasoning, salt, lemon zest, broth, butter, and labels about tasting the blend first.
Lemon pepper seasoning can be mild, salty, or sharp depending on the blend. Taste it first, then add salt only after you know what the chicken needs.
Your Seasoning Tastes…What to Do
Very saltySkip the added salt in the coating. Adjust only after the sauce is finished.
Mild but saltedUse 1/4 teaspoon salt for 550–650 g chicken.
Salt-freeUse 1/2 teaspoon salt in the coating, then taste the sauce.
Sour or citricUse less lemon juice and more lemon zest.
Weak or flatAdd fresh lemon zest and a little extra black pepper.
Very pepperyUse the lower amount of seasoning and soften the sauce with butter.

Start with less salt when unsure. It is much easier to add a little salt to the finished sauce than to rescue chicken that is already too salty. Avoid adding more lemon as the first fix because acidity can make salt taste sharper.

Once the salt is under control, the lemon tastes brighter, the butter tastes rounder, and the chicken finally tastes like dinner instead of seasoning.

Seasoning already tastes too strong? Go to troubleshooting or check zest vs juice.

Bottled Seasoning or Homemade?

Bottled lemon pepper seasoning is completely fine for a weeknight. This recipe is written to work with bottled seasoning, not to shame it. The only catch is that every brand behaves a little differently, especially around salt and citric sharpness.

  • Bottled lemon pepper seasoning: Fastest and easiest, but check the salt level.
  • Salt-free lemon pepper: Gives more control, but you need to add salt separately.
  • Homemade lemon pepper: Freshest lemon flavor, especially with fresh zest and cracked pepper.
  • Lemon pepper marinade: Better for grilled or baked chicken than for the skillet cutlet method.
  • Lemon butter pan sauce: The best finish for this skillet version.

Quick Homemade Lemon Pepper Blend

No bottled seasoning on hand? Mix a quick fresh blend for this recipe. It is not a shelf-stable pantry mix.

  • 1 tablespoon fresh lemon zest
  • 1 1/2 teaspoons cracked black pepper
  • 1 teaspoon garlic powder
  • 1/2 teaspoon fine salt
  • 1/4 teaspoon onion powder, optional
  • A tiny pinch of sugar, optional, to soften the lemon edge

This blend tastes fresher than many bottled seasonings, but the salt level depends on how much salt you add. Taste the sauce at the end and adjust from there.

Lemon Zest vs Lemon Juice

The simplest way to understand this recipe is this: use zest for lemon flavor and juice for brightness.

Lemon zest carries the fragrant oils from the outside of the lemon. It gives the chicken a strong lemon aroma without adding much acidity. Lemon juice gives the sauce its tang, but too much can make the dish sharp.

Hands zesting a lemon and squeezing lemon juice with labels for zest as flavor, juice as brightness, and yellow zest only.
Lemon zest and lemon juice do different jobs. Zest brings aroma without extra sourness, while juice adds brightness near the end of cooking.
  • Zest: Gives strong lemon aroma without extra sourness.
  • Juice: Adds a fresh, tangy finish to the pan sauce.
  • Lemon slices: Look good as garnish, but can turn mildly bitter if cooked too long.
  • Bottled lemon juice: Works in a pinch, although fresh lemon tastes cleaner.

When zesting a lemon, remove only the yellow part. The white pith underneath can taste bitter. A microplane or fine grater makes this easier.

How to Keep Chicken Breast Juicy

Once the lemon flavor is balanced, the next job is texture. Chicken breast only tastes good here if it stays tender.

  • Slice large breasts into cutlets. Thinner pieces cook faster.
  • Pound uneven spots. Even thickness helps the whole piece finish at the same time.
  • Pat the chicken dry. Dry chicken browns better than wet chicken.
  • Use enough heat. A properly heated skillet gives color before the chicken overcooks.
  • Do not crowd the pan. Crowding traps steam and makes the chicken pale.
  • Use a thermometer. Pull chicken breast when it reaches 165°F / 74°C.
  • Rest before slicing. Even a short rest helps the juices settle.
  • Spoon lemon butter over the chicken. The glossy finish protects the meat and makes every bite feel moist.

What Juicy Lemon Pepper Chicken Looks Like

The best visual cue is in the sliced center. Look for meat that is still moist, with a golden outside and just enough gloss to carry flavor.

Close-up of sliced lemon pepper chicken with a moist interior, golden crust, lemon butter sauce, black pepper, and parsley.
Use the sliced center as your doneness cue. The sliced center should look moist, the crust should look golden, and the surface should be lightly glossed rather than soaked.

The goal is chicken that slices cleanly and still looks moist, not chicken you have to hide under sauce.

That is the difference between chicken you eat because it is there and chicken people drag through the last spoonful of sauce.

Chicken breast giving you trouble in general? This baked chicken breast recipe goes deeper into thickness, timing, resting, and doneness so the meat stays juicy instead of chalky.

Ready for the pan? Jump to the cooking cues or check the time and temperature guide.

Step-by-Step Cooking Cues

The recipe card gives the steps. These are the little pan cues that tell you things are going right.

1. Cut the Chicken Into Thin Pieces

Place each chicken breast flat on a cutting board and slice it horizontally into two thinner cutlets. Pound thicker spots gently until the piece is even. The chicken does not need to be paper-thin; it just needs to cook evenly.

Raw chicken breast being sliced horizontally into thin cutlets on a wooden board with lemon and seasoning nearby.
Thin cutlets cook evenly, so the edges can brown before the center dries out.

2. Season and Coat Lightly

Mix the flour, lemon pepper seasoning, garlic powder, and salt in a shallow bowl. Coat the chicken lightly and shake off the extra flour. The coating should look like a light dusting, not a batter.

Chicken cutlet lightly coated in seasoned flour with lemon pepper seasoning and garlic powder on a shallow plate.
The flour coating should look light, not packed on. That thin layer helps the cutlet brown while keeping the finished bite tender instead of bready.

3. Sear Until Golden

A steady sizzle is the goal. If the pan is too quiet, the chicken may steam; if it smokes hard, the coating can brown before the center finishes. Let the underside release easily before flipping, and lower the heat if the cutlets color too quickly.

Lemon pepper chicken cutlets searing in a skillet with space between the pieces, golden edges, pepper flecks, and light pan juices.
Give the cutlets enough space to sear. Otherwise, trapped moisture turns the pan steamy and leaves the chicken pale instead of golden.

When to Flip Lemon Pepper Chicken

The first side is done when it lifts cleanly with tongs and shows a golden underside. If it still sticks, give the crust another minute before turning.

Tongs lifting the edge of a lemon pepper chicken cutlet to show the golden underside before flipping.
The first side is ready when the cutlet releases without tearing. If it still sticks, wait briefly so the crust can finish forming.

4. Make the Lemon Butter Pan Sauce

After the chicken comes out, let the pan calm down for a few seconds, then add butter. Stir in garlic when using, then add broth, lemon juice, and lemon zest. Scrape the bottom so the browned bits melt into the sauce.

Spoon dragging through glossy lemon butter pan sauce with browned bits, lemon zest, black pepper, and herbs in a skillet.
Aim for a loose, glossy lemon butter sauce rather than a thick gravy. That texture lets it spoon easily over chicken and flow into rice, potatoes, pasta, or vegetables.

5. Return the Chicken Gently

Add the chicken back to the skillet and spoon the sauce over the top. Taste before adding more lemon or salt. Boiling the cooked chicken hard can tighten the breast and take away tenderness.

Lemon butter sauce being spooned over sliced golden lemon pepper chicken with parsley, cracked pepper, and lemon zest.
Spoon the lemon butter over cooked chicken, not boiling-hard chicken, so the breast meat stays tender and glossy.

Need exact timing? Use the time and temperature guide before switching methods.

Time and Temperature Guide

Use this table as a starting point, not a promise. Chicken thickness always wins over the clock. The clock helps, but the thermometer is what saves dinner. For the simplest food-safety rule, cook chicken to 165°F / 74°C in the thickest part.

Instant-read thermometer inserted into cooked lemon pepper chicken in a skillet, showing 165°F.
Check the thickest part of the chicken, not the pan juices. For chicken breast, 165°F / 74°C is the safe internal temperature that still protects tenderness.
MethodBest CutTemperatureApprox TimeInternal Temp
Skillet cutletsBreast cutlets, about 1.25 cm thickMedium to medium-high3–5 min per side165°F / 74°C
Skillet thicker breastThicker breast piecesMedium5–6 min per side, then check165°F / 74°C
Oven thin cutletsThin breast cutlets400°F / 204°C15–18 min165°F / 74°C
Oven medium breasts6–8 oz / 170–225 g breasts425°F / 218°C18–22 min165°F / 74°C
Oven large breasts9–10 oz / 255–285 g breasts425°F / 218°C22–26 min165°F / 74°C
Boneless thighsChicken thighsSkillet or 400°F / 204°C oven22–28 min in oven165°F / 74°C safe, 175°F / 79°C for softer texture
Air fryer cutletsThin breast pieces375°F / 190°C10–14 min165°F / 74°C
Grilled breastChicken breastMedium-high grill6–8 min per side165°F / 74°C

Once you understand the skillet version, the rest is just choosing the method that fits your night. The next sections are quick adaptations, not separate full recipes.

Cooking another way? Jump to oven, air fryer, or chicken thighs.

Oven-Baked Lemon Pepper Chicken

Use the oven when you want the same flavor with less stove time. This is the oven version of the same recipe, not a separate full ingredient list. Thin cutlets usually take 15–18 minutes at 400°F / 204°C, while larger breasts usually take 18–26 minutes at 425°F / 218°C.

The oven cooks the chicken; a small pan makes the sauce. Bake the seasoned chicken until the thickest part reaches 165°F / 74°C, then spoon lemon butter sauce over the top after baking.

Oven-baked lemon pepper chicken cutlets in a metal baking dish with lemon wedges, parsley, black pepper, and pan juices.
Bake the cutlets until just done, then add the lemon-butter finish so the flavor stays bright instead of harsh.
Chicken PieceOven TempApprox Time
Thin breast cutlets400°F / 204°C15–18 minutes
Medium breasts, 6–8 oz / 170–225 g425°F / 218°C18–22 minutes
Large breasts, 9–10 oz / 255–285 g425°F / 218°C22–26 minutes
Boneless thighs400°F / 204°C22–28 minutes
Bone-in skin-on thighs400°F / 204°C35–45 minutes

Air Fryer Lemon Pepper Chicken

Use the air fryer when you want quick cutlets with less cleanup. Thin chicken breast pieces usually take 10–14 minutes at 375°F / 190°C. Tenders may cook faster, while thighs need a little more time.

Lightly oil the chicken, season it, and arrange it in a single layer. If using the flour coating, mist or brush the surface lightly with oil so no dry flour patches remain. Cook the chicken first, then spoon the sauce over it after it comes out.

Air fryer basket with browned lemon pepper chicken cutlets, parsley, black pepper, and a lemon wedge.
For air fryer lemon pepper chicken, coat the surface lightly with oil before cooking. Otherwise, the seasoned flour can stay pale, dry, and dusty.
CutAir Fryer TempApprox Time
Thin chicken breast cutlets375°F / 190°C10–14 minutes
Chicken tenders375°F / 190°C8–12 minutes
Boneless thighs380°F / 193°C14–18 minutes
Bone-in thighs380°F / 193°C20–24 minutes

Using Chicken Thighs

Chicken thighs are the more forgiving choice. They have more fat than chicken breasts, so they stay moist even when they cook a little longer.

Boneless thighs work well in a skillet or oven. Bone-in, skin-on thighs are better when you want crisp skin and deeper flavor. Chicken thighs are safe at 165°F / 74°C, but many cooks prefer the texture closer to 175°F / 79°C.

Lemon pepper chicken thighs with golden browned skin, lemon butter pan juices, black pepper, parsley, and lemon slices.
Lemon pepper chicken thighs are more forgiving than breast meat. Let them cook a little longer for richer texture, then finish with lemon so the flavor stays fresh.

Using Tenders, Drumsticks, and Other Cuts

The seasoning can travel; the cooking method just has to fit the cut. This is useful when the chicken in your fridge is not the exact cut in the recipe.

Chicken CutBest ApproachQuick Tip
Chicken tendersSkillet or air fryerCook like small breast pieces and check early.
Chicken stripsSkillet or air fryerSeason lightly and add sauce after cooking.
DrumsticksOven or air fryerTurn during cooking so the skin browns evenly.
Bone-in legsOvenCheck temperature near the bone, not just the surface.
WingsAir fryer, oven, or fried wing methodUse a separate wings recipe for crisp skin.

Grilled Lemon Pepper Chicken

Grilling takes this in a lighter, smokier direction. Skip the flour coating and use a marinade instead: oil, lemon zest, lemon pepper seasoning, garlic, and a small amount of lemon juice.

Grill chicken breast over medium-high heat for about 6–8 minutes per side, depending on thickness, until it reaches 165°F / 74°C. Finish with a little butter, lemon zest, or fresh lemon juice so the flavor tastes lifted rather than flat.

Slow Cooker Lemon Pepper Chicken

The slow cooker is for meal prep days, not for the golden skillet finish. Use thighs when possible because they stay softer and shred more easily.

Add lemon pepper seasoning, a small amount of broth, garlic, and butter. Start checking around 3–4 hours on low for breasts and 4–5 hours for thighs. Add fresh lemon juice and zest near the end, and reduce watery sauce in a pan before serving. For more slow-cooker chicken ideas, use these crock pot chicken breast recipes as a meal-prep starting point.

Lemon Pepper Chicken Marinade

You do not need a marinade for the skillet recipe. Use this only when the chicken is going on the grill, into the oven, or into the air fryer.

For 550–650 g / 1.2–1.4 lb chicken, start with 3 tablespoons / 45 ml olive oil, 1–2 teaspoons lemon zest, 1–2 tablespoons / 15–30 ml lemon juice, and 2 teaspoons lemon pepper seasoning. Add 1–2 minced garlic cloves, then add salt only when your seasoning needs it. One teaspoon honey is optional for better browning and a rounder finish.

Chicken CutMarinating Time
Boneless chicken breast30 minutes to 2 hours
Boneless thighs1 to 4 hours
Bone-in pieces2 to 8 hours
Very lemon-heavy marinadeAvoid overnight marinating

Longer marinating works better with more zest, oil, garlic, and seasoning, and less lemon juice. Marinate chicken in the refrigerator, never on the counter. For safety, USDA FSIS notes poultry can be refrigerated in marinade for up to 2 days, but this lemon-heavy version tastes better with the shorter times above. See the USDA poultry marinating guidance for the safety side.

Lemon Butter Sauce for Chicken

The pan sauce is what turns this from seasoned chicken into dinner. Without it, the chicken can taste dry, salty, or one-dimensional. With it, the chicken becomes glossy, fresh, and easy to serve with almost anything.

  • Butter: 3 tablespoons / 42 g, to round out the lemon and pepper.
  • Chicken broth: 1/2 cup / 120 ml, to lift the browned bits and keep the sauce spoonable.
  • Lemon juice: 1–2 tablespoons / 15–30 ml, for brightness.
  • Lemon zest: 1–2 teaspoons, for clean lemon aroma.
  • Parsley: 1–2 tablespoons, for freshness and color.

The sauce should taste peppery first, buttery in the middle, and fresh at the end. Add an extra tablespoon of butter for a richer finish. For a creamy version, stir in 2–3 tablespoons cream after the broth reduces, then keep the heat gentle.

What to Serve on the Side

Because the sauce is bright and buttery, it plays well with almost anything that can catch a spoonful.

  • Easy dinner: rice, roasted potatoes, or a simple salad.
  • Comfort plate: mashed potatoes, pasta, buttered noodles, or garlic bread.
  • Lighter side: green beans, asparagus, zucchini, broccoli, or cauliflower rice.
  • Meal prep: rice bowls, couscous, roasted vegetables, or wraps.

For a fresh, sharp side, a crisp cucumber salad recipe works especially well because the vinegar, dill, and onion cut through the buttery lemon sauce.

Serving potatoes? Creamy garlic mashed potatoes are one of the best ways to catch the lemon butter without making the plate feel too heavy.

Make It a Rice Bowl, Pasta, Salad, or Wrap

This is the kind of chicken that makes plain rice, pasta, or bowls feel intentional. Use the pan sauce as the bridge between the chicken and the rest of the plate.

Lemon pepper chicken rice bowl with sliced chicken, rice, broccoli, carrots, lemon wedge, sauce, and a leftover container behind it.
Leftovers work better with extra pan juices. Spoon them over rice bowls, wraps, pasta, or meal-prep containers so the chicken stays moist the next day.
  • Rice bowl: Spoon extra sauce over rice, then top with sliced chicken and parsley.
  • Pasta: Toss noodles with extra sauce, a splash of broth, and a little pasta water.
  • Chicken bowl: Add rice, roasted vegetables, sliced chicken, and a little extra lemon butter.
  • Salad: Serve sliced chicken over crisp greens with a lemony dressing.
  • Wrap: Use sliced chicken, lettuce, cucumber, and a little creamy sauce or yogurt dressing.

Making pasta often? The same loose-sauce habit matters in this chicken pesto pasta recipe too, where pasta water keeps the dish glossy instead of dry.

For a colder, crunchier salad plate, a wedge salad recipe works better as a full dinner side than a small garnish.

Storage and Reheating

Leftovers are best when the extra pan juices stay with the chicken.

  • Refrigerator: Store leftovers in an airtight container for 3–4 days.
  • Freezer: Freeze cooked chicken for up to 2 months. The sauce may look slightly different after thawing, but the flavor will still be good.
  • Skillet reheating: Reheat gently with a splash of broth or water until warmed through.
  • Microwave reheating: Cover and reheat at lower power in short bursts so the chicken does not dry out.
  • Best tip: Store the pan juices in the same container so the chicken stays moist.

Avoid overheating chicken breast when reheating. It is already cooked, so the goal is to warm it gently, not cook it again.

Leftover sliced chicken also works well in wraps and sandwiches. For more ways to turn cooked chicken into lunch, these chicken sandwich recipes give you BBQ, buffalo, Caesar, pesto, and quick café-style ideas.

Troubleshooting Dry, Salty, or Sharp Chicken

Most problems here have simple fixes once you know what went wrong.

Troubleshooting board showing dry chicken fixed with thin cutlets and temperature, salty seasoning balanced with broth and butter, and sharp lemon corrected with zest and less juice.
Most dry, salty, or sharp results come from thickness, salt, or lemon balance. Fix the cause directly with thinner cutlets, gentler seasoning, broth and butter, or more zest with less juice.
ProblemWhy It HappenedFix
Chicken is dryThe breast was too thick or overcookedSlice into cutlets, pound evenly, and use a thermometer.
Chicken tastes too saltyThe lemon pepper seasoning already had saltReduce added salt and balance with broth or butter.
Lemon tastes harshToo much lemon juice was added too earlyUse zest for flavor and add juice near the end.
Sauce is wateryToo much broth or not enough reducing timeSimmer for 2–4 minutes longer.
Sauce is too sharpToo much lemon juiceAdd butter or a splash of broth.
Coating falls offThe chicken was wet or the pan was not hotPat chicken dry and preheat the skillet.
Chicken is paleThe pan was crowdedCook in batches so the chicken sears instead of steams.
Air fryer chicken is dryThe pieces were small or cooked too longCheck early and add sauce after cooking.
Thighs are chewyThey were pulled too early for best textureCook thighs a little longer, closer to 175°F / 79°C.

A salty sauce usually needs dilution and fat, not more acid. Add broth and butter first, then taste again before reaching for more lemon.

If the sauce tastes a little too sharp, butter and broth fix that faster than more lemon.

This is not fussy chicken. It is the better kind of weeknight chicken: fast, bright, buttery, and useful with whatever side is already in your kitchen.

FAQs

What is lemon pepper chicken made of?

It is usually made with chicken breast or thighs, lemon pepper seasoning, garlic, fresh lemon, and butter or oil. This skillet version uses thin chicken cutlets and finishes them in a lemon-butter pan sauce.

How do you keep lemon pepper chicken from drying out?

Slice large chicken breasts into thin cutlets, pound uneven spots, cook only until the thickest part reaches 165°F / 74°C, and spoon sauce over the chicken before serving. Thick chicken breast and overcooking are the most common reasons it turns dry.

What temperature should lemon pepper chicken reach?

Chicken breast should reach 165°F / 74°C in the thickest part. Thighs are also safe at 165°F / 74°C, but they often taste more tender when cooked closer to 175°F / 79°C.

How long does lemon pepper chicken take?

This skillet dinner takes about 25 minutes total: 10 minutes to prep and about 15 minutes to cook. Thin chicken breast cutlets usually need 3–5 minutes per side. Oven versions usually take 15–26 minutes depending on thickness.

Do you use fresh lemon or lemon pepper seasoning?

Use both when possible. Lemon pepper seasoning gives the familiar peppery flavor, while fresh lemon zest and juice make it taste livelier. Bottled seasoning alone can taste flat or too salty depending on the brand.

Why does it taste too salty?

The seasoning blend probably already contained salt. Taste the seasoning before adding extra salt, and soften a salty sauce with broth and butter before adding more lemon.

Is it better with breasts or thighs?

Chicken breasts are lean, quick, and classic. Thighs are juicier and more forgiving. If breast meat often turns dry for you, thighs are the easier option.

Does lemon pepper chicken need to marinate?

No, the skillet version does not need to marinate. The seasoned coating and lemon butter sauce give plenty of flavor. Marinade is more useful for grilled, baked, or air fryer chicken.

How do you reheat it without drying it out?

Reheat it gently with a splash of broth or water. A skillet over low heat works well. In the microwave, cover the chicken and heat it in short bursts at lower power. Avoid cooking it a second time.

Why is my lemon pepper chicken bitter?

Bitterness usually comes from too much white pith in the lemon zest, lemon slices cooked too long, or a seasoning blend with a harsh citric taste. Zest only the yellow part of the lemon, use juice near the end, and balance sharpness with butter or broth.

Final Thoughts

This skillet dinner works best when it stays simple: thin chicken, smart seasoning, fresh lemon, and enough butter sauce to make the plate feel finished. That is what turns two plain chicken breasts into dinner you actually want to eat.

Keep this version for the nights when chicken needs to be fast but not boring, bright but not sour, buttery but not heavy. A little zest, a steady skillet, and one spoonful of pan sauce can do more than a long ingredient list.

That is the real win: chicken that tastes fresh, peppery, buttery, and complete without turning a simple dinner into a project.
Posted on Leave a comment

Panang Curry Recipe: Chicken Panang with Store-Bought Paste

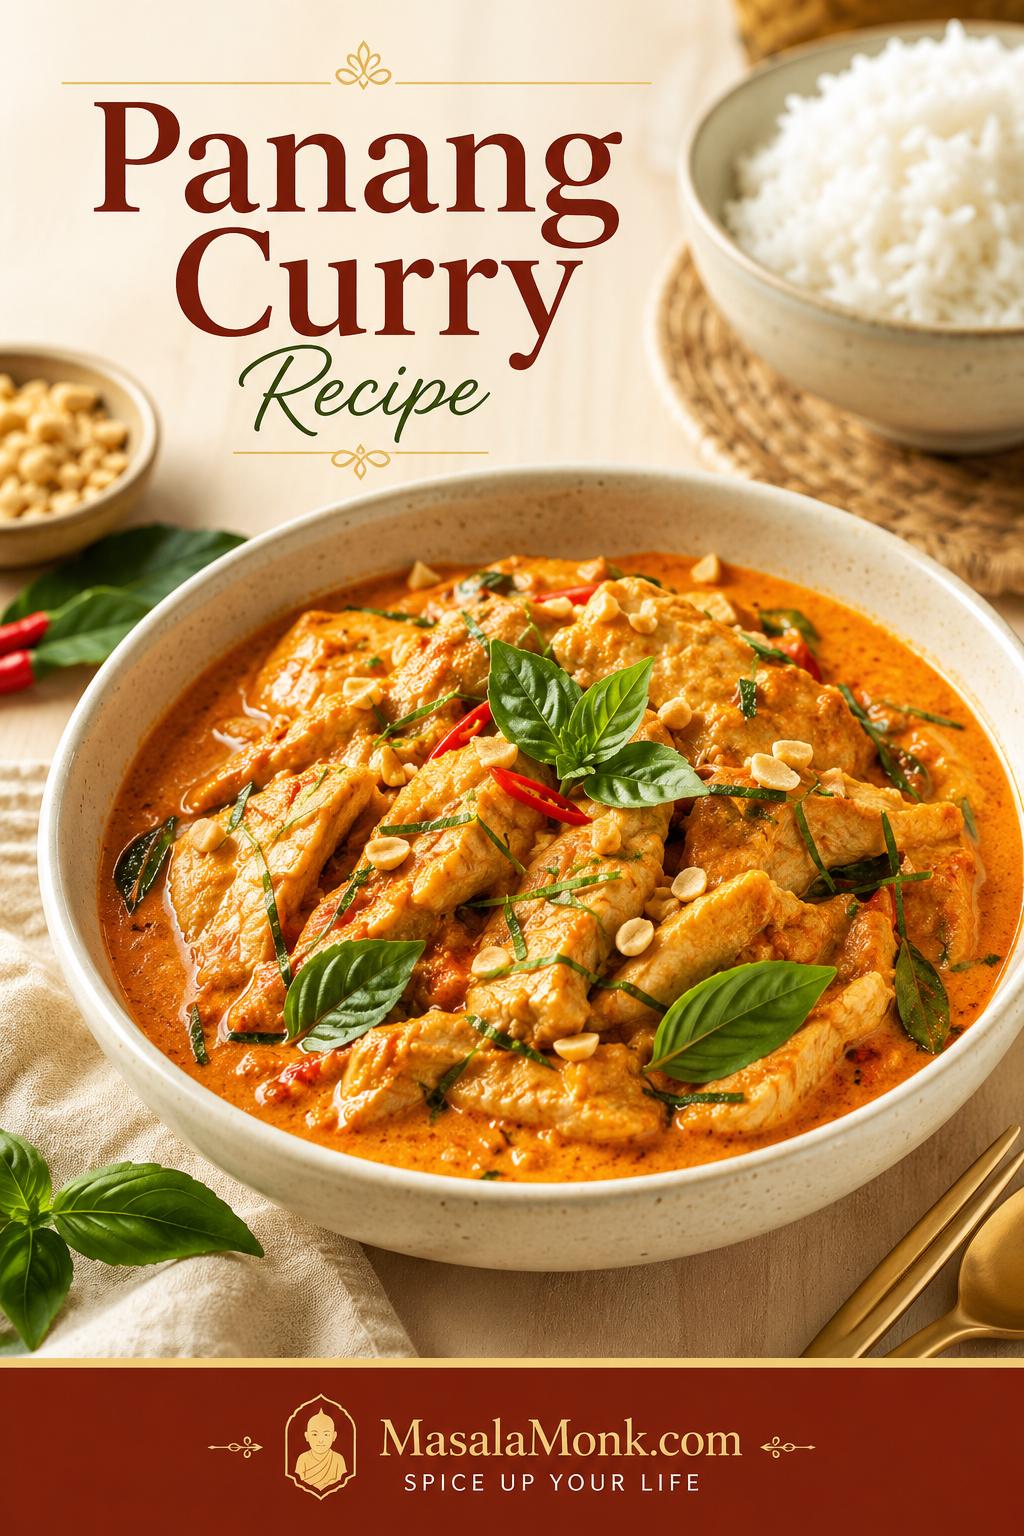
Bowl of chicken Panang curry with orange-red coconut sauce, sliced chicken, Thai basil, crushed peanuts, makrut lime leaves, and jasmine rice.

A good Panang curry starts changing the moment the paste hits hot fat: the raw edge softens, the chile smell deepens, and the pan begins to smell warmer almost immediately. When the coconut goes in, it turns orange-red around the paste. By the time the chicken is done, the curry should look glossy and generous, not thin or tired.

This Panang curry recipe is built for the home-cook problem most recipes do not talk about enough: store-bought paste can taste flat, watery, harsh, or too much like ordinary red curry when it is rushed. The fix is not a longer shopping list. It is better paste frying, full-fat coconut, and a few clear texture cues.
The result is a 40-minute curry that still feels special: tender chicken, glossy coconut sauce, fresh basil, jasmine rice, and enough depth that the store-bought paste never feels like a compromise. The base version is chicken Panang curry, also called Panang gai, but the same method works for beef, tofu, shrimp, or vegetables once you understand the texture.

It is generous weeknight food: fragrant, creamy, a little sweet, a little spicy, and made to spoon over rice. If you like fast Thai basil-heavy dinners, this Pad Kra Pao recipe is another bold option to keep nearby.

Table of Contents

Use this guide to make Panang curry that tastes creamy, balanced, aromatic, and clearly different from ordinary red curry.

Panang Curry Recipe: Quick Answer

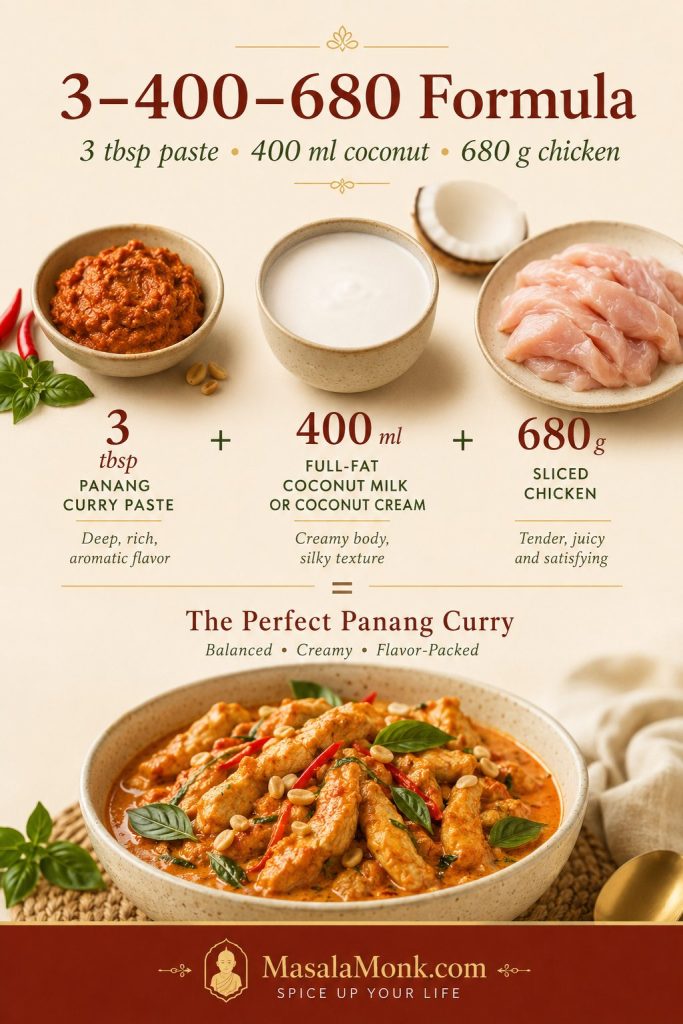
Remember it as 3–400–680: 3 tablespoons / about 45g Panang curry paste, 13.5–14 oz / 400ml full-fat coconut milk or coconut cream, and 1½ lb / 680g thinly sliced chicken for a generous 4-serving curry.

Fry the paste first in oil or thick coconut cream until it smells deeper and less raw. Stir in the coconut gradually, then add fish sauce, palm sugar or brown sugar, torn makrut lime leaves, and peanuts or peanut butter. Simmer gently until the chicken is cooked through, finish with Thai basil, and serve with jasmine rice.

Think of this as your safe starting bowl: enough paste to taste full, enough coconut to feel creamy, and enough body for the curry to settle over rice instead of running through it. Add 1–1½ cups vegetables if you want a fuller chicken curry; keep the amount modest so the flavor stays focused.

Most important cue: the spoon tells you more than the timer. The curry should coat the back of a spoon in a glossy layer while still being loose enough to serve over rice. Need the exact visual cue? Jump to the spoon-coating test. Ready to cook? Go straight to the recipe card.

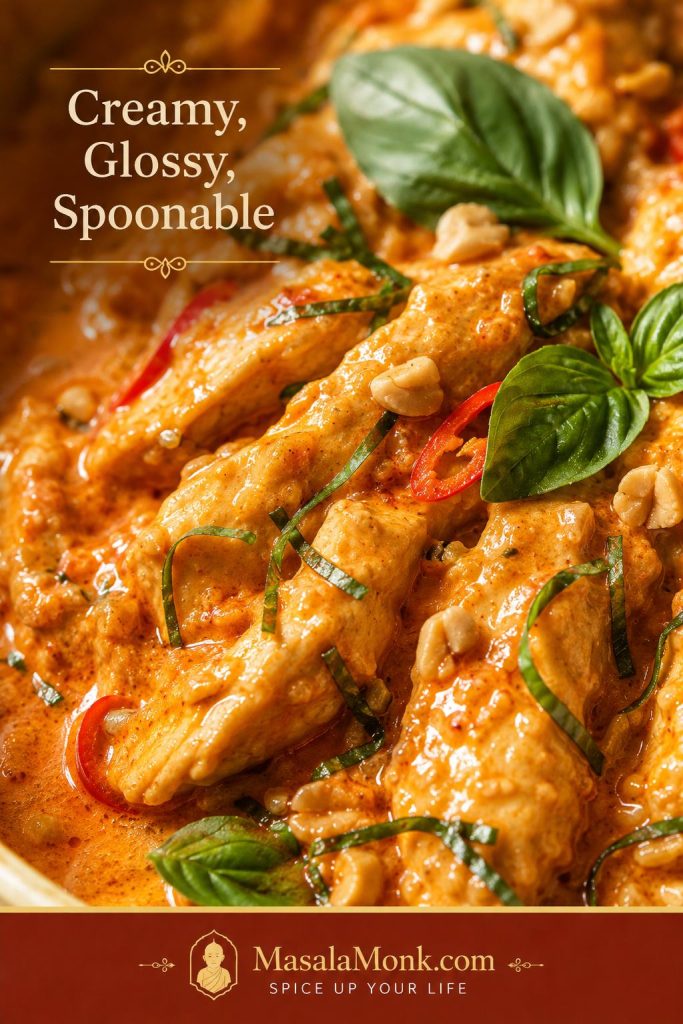
Close-up of chicken Panang curry with creamy sauce coating sliced chicken, red chile, Thai basil, peanuts, and makrut lime leaf garnish.
Look for sauce that clings to the chicken but still moves when spooned; that balance keeps Panang curry rich without making it heavy.

The Easy Panang Curry Formula

The 3–400–680 formula is not a test; it is a starting point. From there, you can adjust for paste strength, vegetable volume, protein choice, and how rich you want the final curry. More vegetables usually need a little more paste and a little more time in the pan. Saltier paste needs less fish sauce. Sweeter coconut needs less sugar.

Panang curry formula guide showing 3 tablespoons curry paste, 400 milliliters coconut milk, and 680 grams chicken.
The 3–400–680 formula gives you a reliable starting point before you adjust for paste strength, vegetable volume, or spice preference.
For 4 ServingsAmountWhy It Matters
Panang curry paste3 tbsp / about 45gThe flavor base. Start lower if your paste is very spicy or salty.
Coconut milk or coconut cream13.5–14 oz / 400mlThe body of the curry. Coconut cream gives the lushest result.
Chicken or other protein1½ lb / 680g chicken, or equivalentEnough protein for a full dinner without overcrowding the pan.
Fish sauce1–1½ tbsp / 15–22mlAdds salt and savory depth. Use less at first if your paste is salty.
Palm sugar or brown sugar2 tsp–1 tbsp / 8–15gRounds heat and salt. Start low if your paste or coconut tastes sweet.
Makrut lime leaves4–6 leavesTorn leaves perfume the simmering sauce; finely sliced tender leaves can finish the curry.
Peanuts or peanut butter2 tbsp / about 15g crushed peanuts, or 1 tbsp / about 16g peanut butterBrings Panang’s quiet nutty note without turning the sauce into satay.

Taste after the curry has simmered for a few minutes, not when the paste first hits the pan. Early tasting can trick you because the coconut is still loose, the paste has not settled, and the salt has not concentrated yet. If your paste tastes too mild or too harsh, use the store-bought paste guide before changing the whole recipe.

Why This Recipe Works

The difference between a forgettable Panang curry and a good one is usually not the ingredient list. It is the order. Curry paste needs fat and heat before the coconut goes in. The pan sauce needs enough time to come together. Basil needs to go in at the end, when its aroma will stay bright instead of disappearing into a long simmer.

If your first few homemade Thai curries have tasted thinner than takeout, this is usually where things change. You are not adding fancy ingredients; you are simply giving the paste and coconut enough time to become a sauce.

Frying the paste prevents flat flavor
Let it sizzle in fat first, and the smell changes from sharp to warm, deep, and curry-like.

Full-fat coconut gives the curry body
Light coconut milk makes the flavor feel spread out. Coconut cream gives the richest result.

The final balance happens at the end
Fish sauce, sugar, lime leaves, peanuts, and basil let you tune salt, sweetness, aroma, and nuttiness before serving.

The finished curry lands rich without feeling greasy, spicy without tasting harsh, and gently sweet without becoming sugary. It tastes like Panang curry, not red curry with peanut butter stirred in.

What Is Panang Curry?

Panang curry, also written as Phanaeng, Phanang, or Panaeng, is a Thai coconut curry with a richer, more concentrated character than a loose red curry. The easiest way to recognize a good Panang is this: if red curry pours, Panang clings.

In the bowl, Panang feels creamy, rounded, aromatic, and concentrated enough to coat the protein. Coconut gives body, curry paste gives heat and depth, makrut lime leaves give a citrusy lift, basil adds freshness, and peanuts add a quiet roasted note in the background.

Peanut belongs in the background here; it rounds the curry without turning it into satay. Chicken Panang curry is often called Panang gai or gaeng Panang gai. “Gai” means chicken, so Panang gai simply means the chicken version.

Panang Curry vs Red Curry

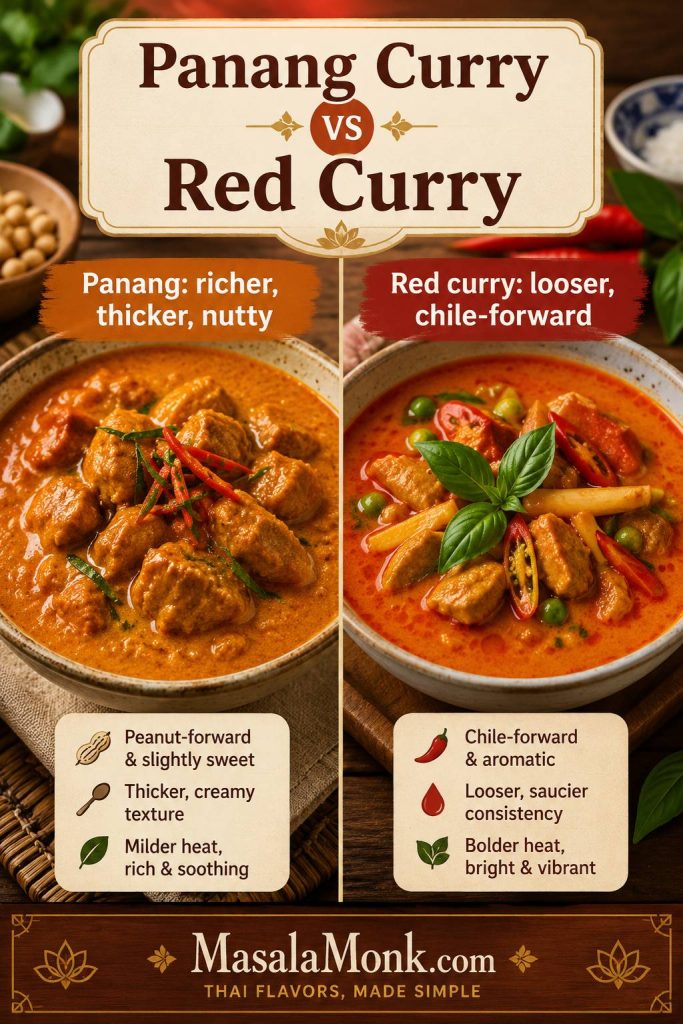
Panang curry and Thai red curry are related, but they should not taste identical. Red curry is usually looser and more chile-forward. Panang is creamier, richer, lightly sweet, and gently nutty. When homemade Panang tastes too much like red curry, the first fix is usually texture, then peanut and aromatic finish.

FeaturePanang CurryThai Red Curry
TextureThicker, creamier, more clingyLooser, saucier, more broth-like
FlavorRich, lightly sweet, savory, nuttyBrighter, chile-forward, more flexible
Paste profileRed-curry-style base with peanut and spice depthRed chile and aromatic base
Best cueCoats the protein clearlyPours more freely around the ingredients
Split-panel comparison of thicker Panang curry and looser Thai red curry with labels explaining texture and flavor differences.
Panang curry and red curry are related, but Panang is usually richer, thicker, and gently nutty, while red curry is looser and more chile-forward.

Quick fix: bring the curry back toward Panang by simmering the coconut base until it looks glossy, then finishing with peanut richness, Thai basil, and finely sliced tender makrut lime leaves if you have them.

If you are using red curry paste as a shortcut, add peanuts and a tiny pinch of warm spice so the sauce does not taste like ordinary red curry with coconut milk.

Panang Curry Ingredients

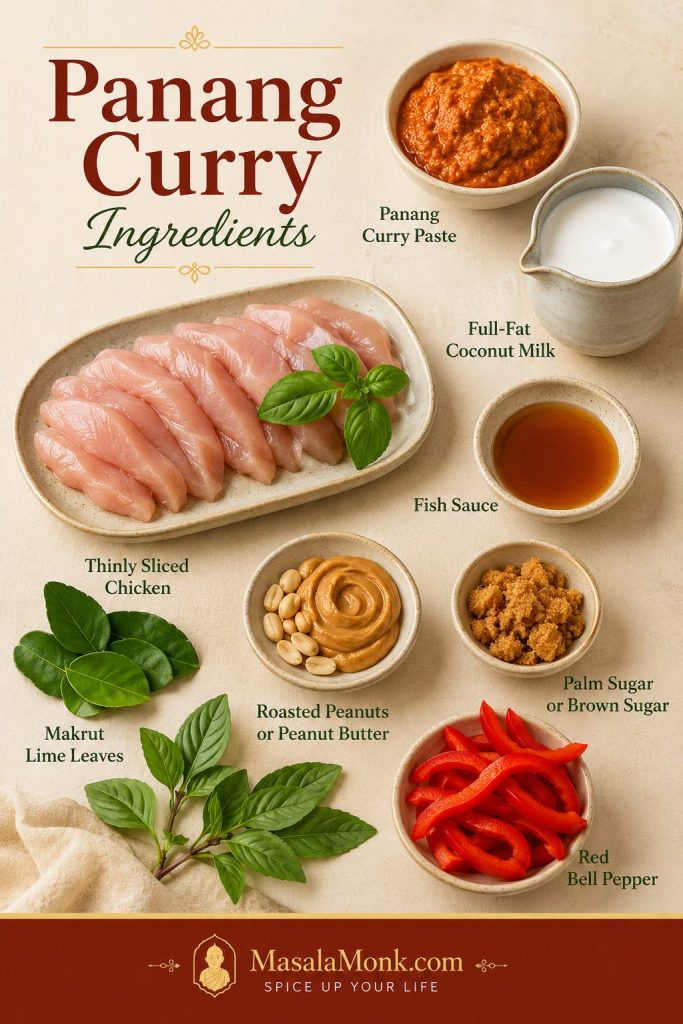
These ingredients are not equal. The paste, coconut, fish sauce, and lime leaves decide whether the curry tastes complete. Peanuts and basil finish the personality. Sugar is there to round the edges, not make the curry sweet.

The most important thing is timing. Paste goes first, coconut goes in gradually, protein cooks once the base has formed, and basil waits until the heat is low or off.

Panang curry ingredients including curry paste, coconut milk, chicken, fish sauce, sugar, makrut lime leaves, peanuts, Thai basil, and red bell pepper.
The ingredients work as a team: paste brings depth, coconut gives body, lime leaves add aroma, and peanuts round the curry without turning it into satay.

Panang curry paste

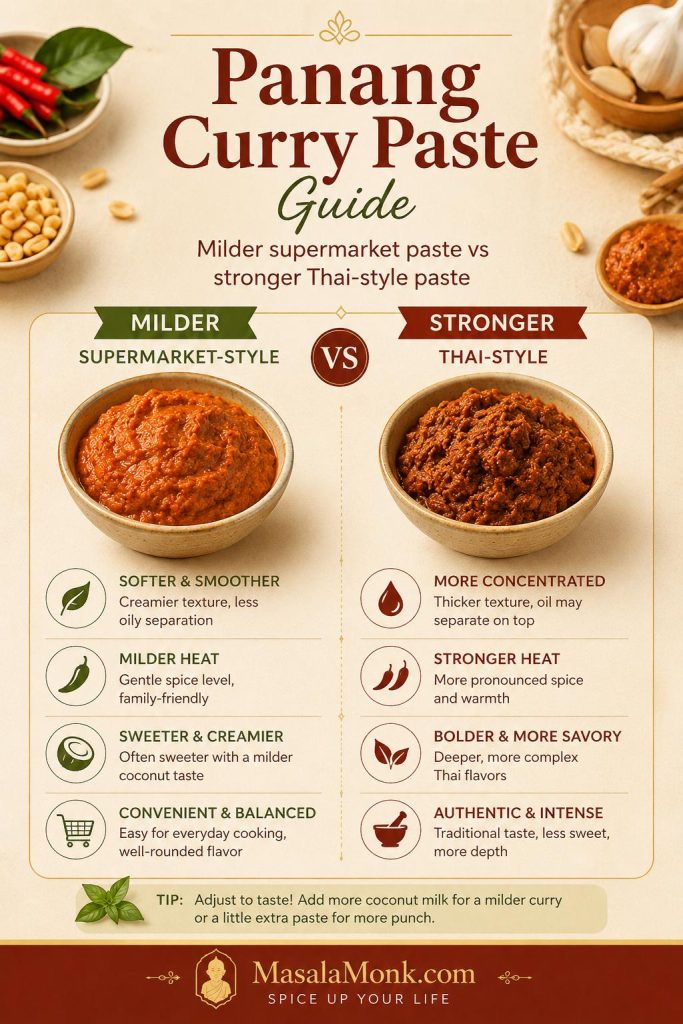
Use Thai Panang curry paste if you can find it. Some brands are stronger, saltier, and spicier than others, so start with a balanced amount and adjust. Thai Kitchen-style supermarket pastes are often milder, while Mae Ploy and Maesri-style Thai pastes are usually stronger, saltier, and more concentrated. Start lower if the brand is new to you.

Guide comparing milder supermarket-style Panang curry paste with stronger Thai-style paste for homemade Panang curry.
Because Panang curry paste brands vary in salt, heat, and intensity, taste after simmering before adding more fish sauce, sugar, or paste.

If your paste is very salty, begin with 1 tablespoon fish sauce, simmer, then add the remaining ½ tablespoon only if the curry needs it. When homemade Panang tastes flat, the paste often needed a better start: fat, heat, and enough time to smell cooked before the coconut went in. For the deeper technique, see how to bloom the paste in fat first.

Coconut milk or coconut cream

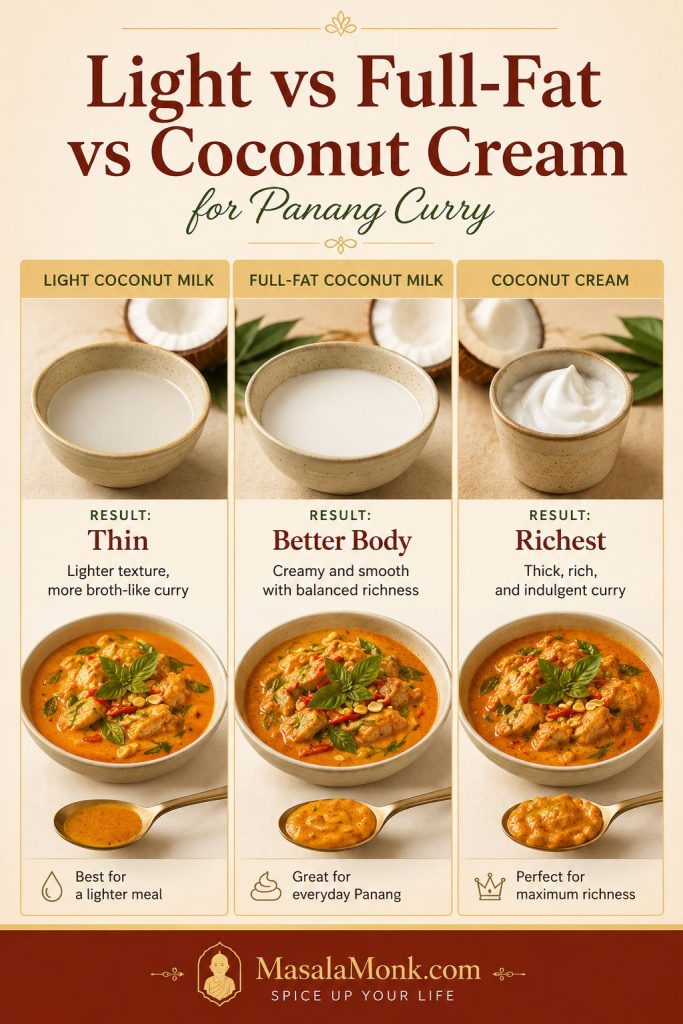
Coconut cream gives the lushest result. Full-fat coconut milk also works well; it just needs a few extra minutes in the pan. Light coconut milk makes the curry harder to concentrate and easier to dilute.

Comparison board showing light coconut milk, full-fat coconut milk, and coconut cream for Panang curry sauce texture.
For the richest Panang curry texture, full-fat coconut milk or coconut cream works better than light coconut milk, which can make the sauce feel thin.

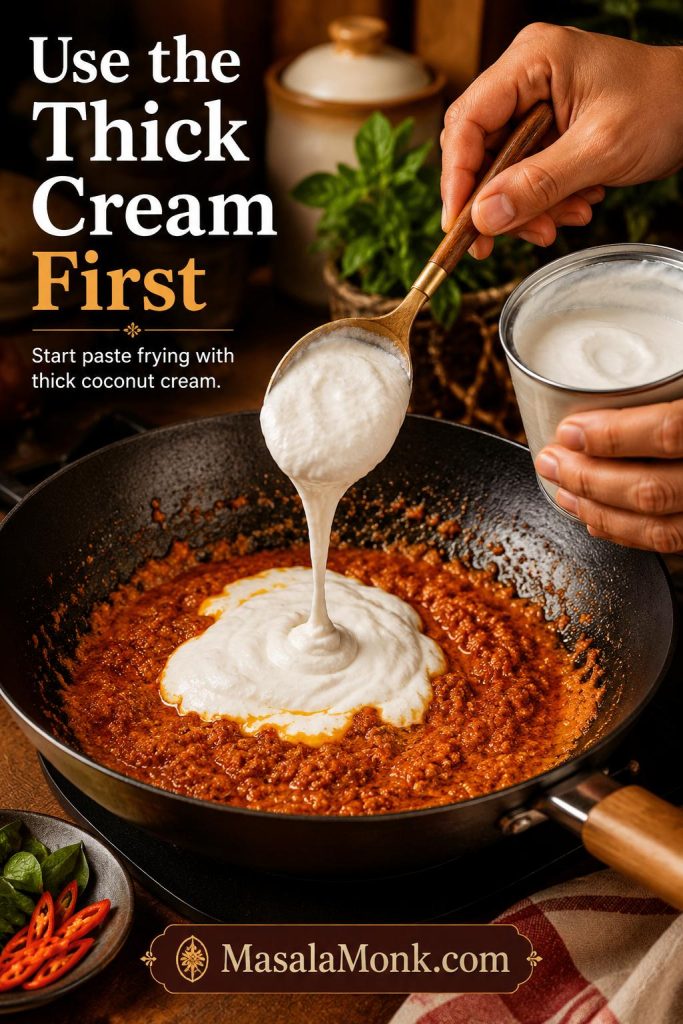
How to use thick coconut cream first

If the can has a thick layer of coconut cream at the top, scoop that into the pan first and use it to fry the curry paste. Then add the thinner coconut milk gradually. This gives the pan a richer start and helps the paste bloom in fat.

Thick coconut cream being added to fried Panang curry paste in a skillet to begin the curry sauce.
When a can has thick cream on top, use it first so the curry paste gets the fat it needs to bloom properly.

Fish sauce

Fish sauce keeps the coconut from tasting flat. You should not notice it as “fishy”; you should notice that the curry tastes deeper, saltier, and more complete. Add it gradually because the paste may already be salty.

For a vegan version, use soy sauce, tamari, or a vegetarian fish-sauce alternative. The flavor will be different, but the curry still needs savory depth.

Palm sugar or brown sugar

The sweetness should round the chile and salt; it should not announce itself first. Palm sugar gives a softer sweetness, while brown sugar works well in a home kitchen. Start with 2 teaspoons if your paste or coconut milk already tastes sweet.

Makrut lime leaves

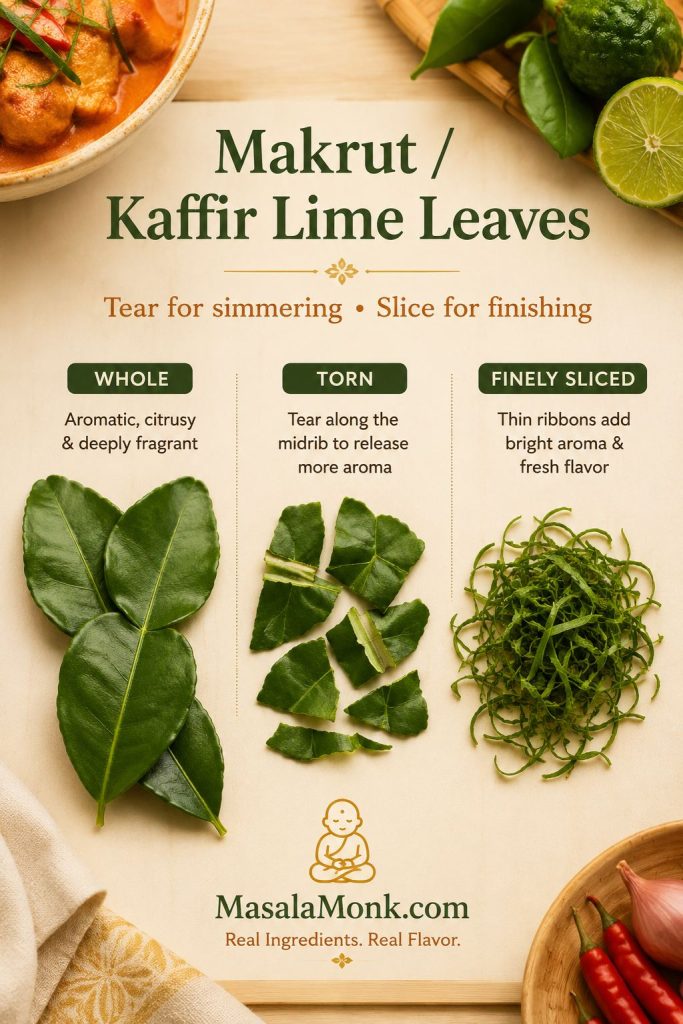
Makrut lime leaves, often sold as kaffir lime leaves, are the ingredient that makes the curry smell alive. Tear whole leaves before adding them to the simmering coconut sauce so their oils release into the pan. If you have tender leaves, slice a small amount very finely and use it at the end for a sharper aromatic finish.

Fresh or frozen leaves are best. Torn whole leaves can be left in the curry for aroma and picked out while eating. Lime juice is not a true replacement; if you need a backup, a little lime zest is closer than bottled lime juice, but use it gently. The goal is aroma, not sourness.

Makrut lime leaves shown whole, torn, and finely sliced, with guidance for simmering and finishing Panang curry.
Makrut lime leaves, often sold as kaffir lime leaves, give Panang curry its fresh citrus aroma without making the sauce sour.

Peanuts or peanut butter

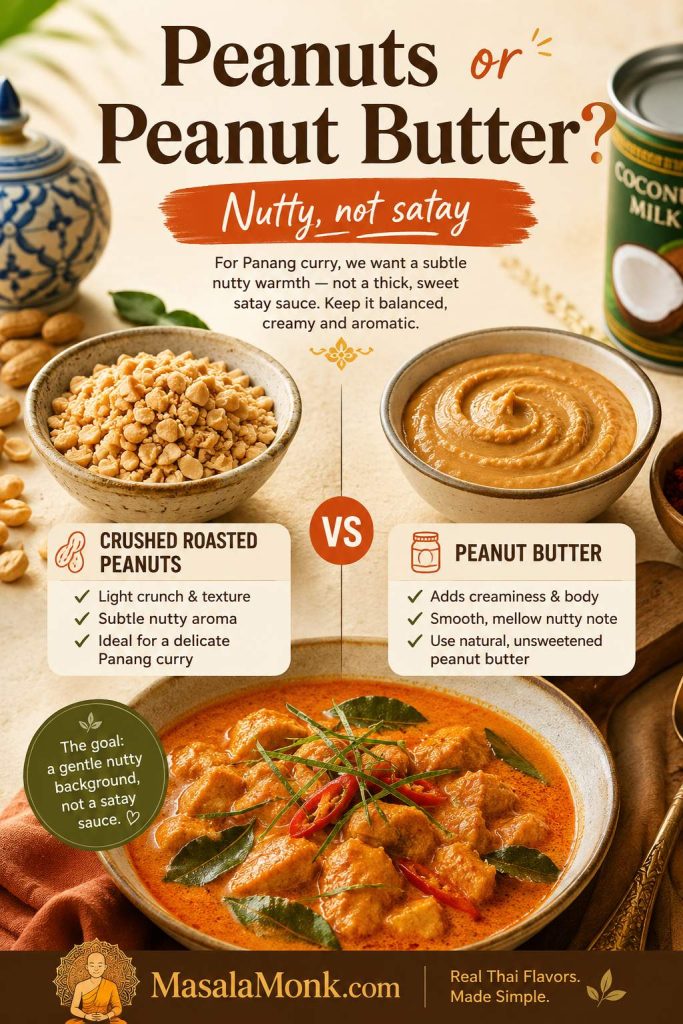
Crushed roasted peanuts give texture and a more traditional feel. Peanut butter is a practical shortcut that blends smoothly into the sauce. Either works, but keep the amount modest. The peanut note should sit in the background, not make the curry taste like peanut sauce.

Split image comparing crushed roasted peanuts and peanut butter for adding a nutty note to Panang curry.
Crushed peanuts add texture, while peanut butter blends in smoothly; either way, the peanut flavor should stay gentle and balanced.

Thai basil

Thai basil gives the finished dish a fresh, peppery lift. Add it after the sauce thickens and the heat is low or off. If it simmers for several minutes, that fragrance fades quickly.

Thai basil being added to finished Panang curry as a final aromatic, with text about fresh peppery lift.
Add Thai basil near the end, because its peppery fragrance is strongest when it meets the hot curry right before serving.

How to Make Store-Bought Panang Curry Paste Taste Better

This is a home-kitchen Panang curry built around store-bought paste, but the technique is the point: fry the paste properly, use full-fat coconut, simmer until glossy, and finish with basil and lime leaf.

Fry it first
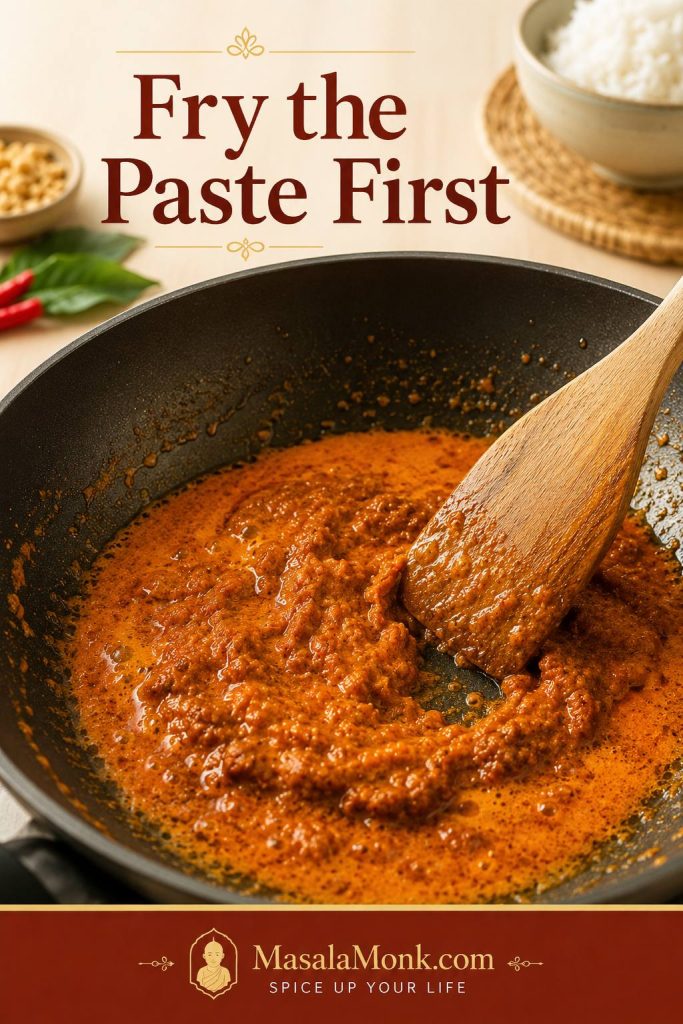
Cook the paste in oil or coconut cream until it smells warmer, deeper, and less raw.

Use full-fat coconut
Thin coconut milk makes the curry taste weaker. Full-fat coconut milk or cream gives body.

Finish the flavor
Fish sauce, sugar, lime leaves, peanuts, and basil make the sauce taste complete.

Bloom the paste in fat first

Traditional Panang methods often fry the paste in coconut cream until the oil separates. At home, canned coconut milk does not always separate well, so oil or the thick cream from the top of the can is more reliable.

Panang curry paste frying in a skillet with oil or coconut cream while a wooden spatula stirs it.
Frying the paste first is the flavor-building step that makes store-bought Panang curry paste taste fuller and less raw.

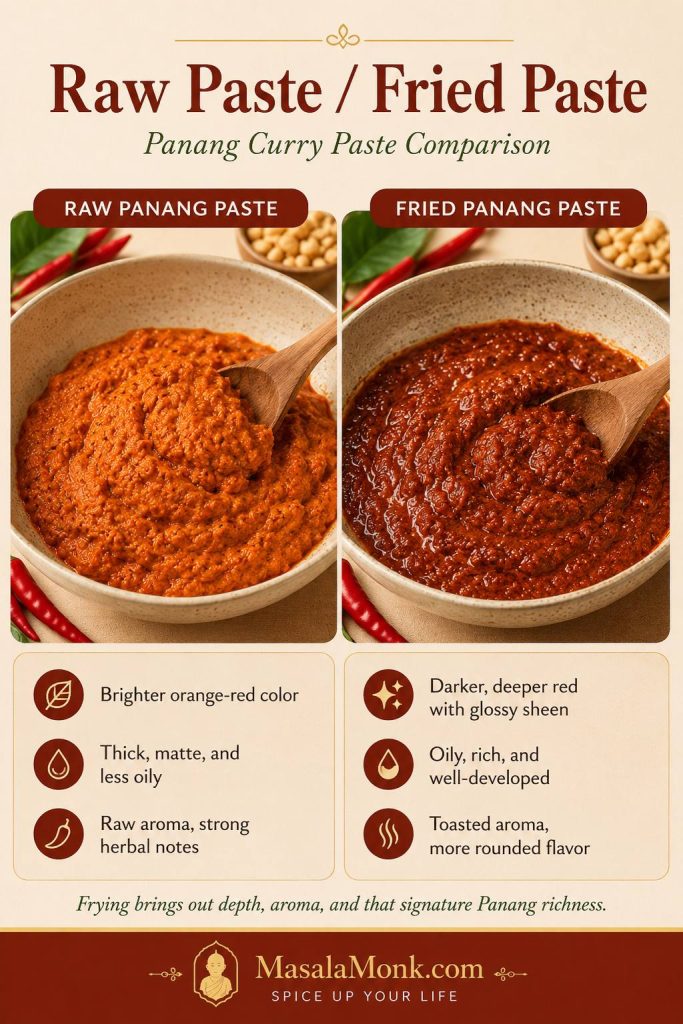
What fried Panang curry paste should look like

The color change is subtle but useful: the paste turns a little darker, smells rounder, and loses the raw edge before the coconut is stirred in.

Side-by-side comparison of raw Panang curry paste and darker fried Panang curry paste in a pan.
The paste does not need to burn or dry out; it just needs to darken slightly and smell warmer before the coconut goes in.

Choose the right paste amount

For one 13.5–14 oz / 400ml can of coconut milk or cream, use this as your starting point:

StylePaste AmountBest For
Mild2 tbsp / about 30gKids, spice-sensitive eaters, or very strong paste brands
Balanced3 tbsp / about 45gMost homemade Panang curry
Stronger4 tbsp / about 60gRestaurant-style intensity or a pan with more protein and vegetables

Adjust after simmering

If the curry tastes weak after simmering, check the texture first. A thin coconut base can make even a strong paste taste dull because the flavor is spread across too much liquid. Let the pan settle into a glossy consistency, then decide if you need more paste.

When you do add more paste, avoid stirring it in raw. Fry another teaspoon or two in a small pan with a spoon of coconut cream, then stir that back into the curry. This keeps the added flavor cooked and rounded. For a deeper look at the paste itself, Serious Eats has a helpful Panang curry paste guide that explains the peanut and warm-spice notes that separate it from a basic red curry paste.

Using red curry paste instead? For every 2–3 tablespoons red curry paste, add 1 tablespoon crushed roasted peanuts or peanut butter, a tiny pinch of nutmeg, and a small pinch of ground coriander or cumin if the sauce tastes plain. Add torn makrut lime leaves if you have them. This shortcut is best for a weeknight curry, not for a strict traditional version.

Check labels for vegan or vegetarian versions

If you are cooking for vegan or vegetarian eaters, check the paste label carefully. Many Thai curry pastes contain shrimp paste, fish sauce, or other seafood ingredients. Use a vegan Panang curry paste, or use vegan red curry paste and adjust it with peanuts and warm spices.

How to Make Panang Curry

Once the paste and coconut are ready, the cooking moves quickly. A wide skillet, wok, or 12-inch saucepan gives the paste room to fry and helps the coconut base come together faster. Have the chicken sliced, vegetables cut, herbs ready, and rice started before the paste hits the pan.

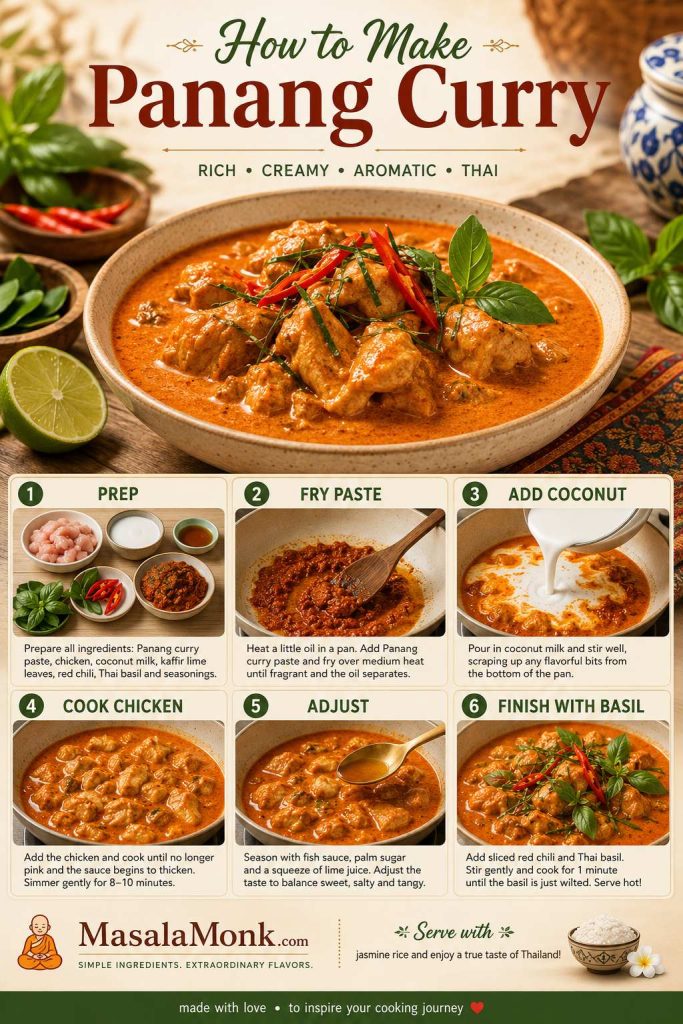
Visual overview: how to make Panang curry

Step-by-step Panang curry board showing prep, frying paste, adding coconut, cooking chicken, adjusting, and finishing with basil.
Follow the visual order before you start cooking: prep first, fry the paste, build the coconut base, cook gently, adjust, then finish fresh.

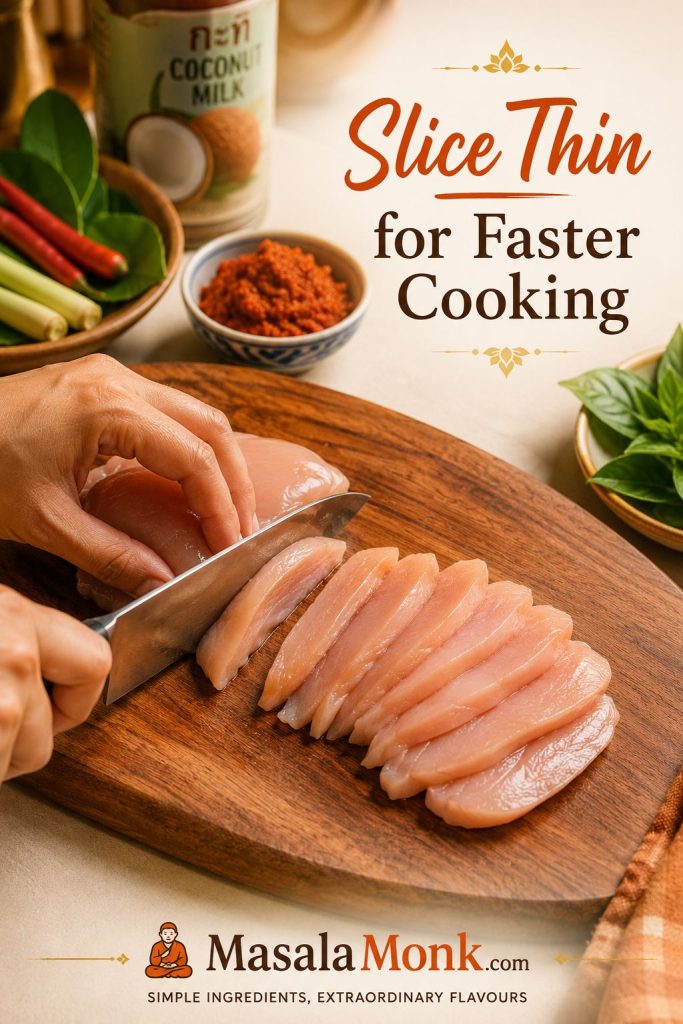
1. Slice the protein thinly

Thin slices cook quickly and pick up the curry better. Cut chicken across the grain into bite-size strips. Slice beef very thinly against the grain. For tofu, cut into cubes or slabs and pat dry before cooking.

Avoid large chunks of chicken here. Thick pieces take longer to cook, which can push the pan past its best texture before the center is done.

Hand slicing raw chicken into thin strips on a cutting board for Panang curry, with herbs and curry ingredients nearby.
Thin chicken slices cook quickly and absorb the curry better, so the meat stays tender while the sauce settles into the right texture.

2. Fry the curry paste

Heat neutral oil, or the thick cream from the top of the coconut milk can, in a wide skillet, wok, or 12-inch saucepan over medium heat. Add the paste and fry for 1–2 minutes for softer supermarket paste, or 3–5 minutes for a thicker Thai paste, stirring often, until it smells deeper and turns slightly darker.

When the paste starts sticking, lower the heat and loosen it with a spoonful of coconut cream or coconut milk. Water cools the pan, so use it only when you have no other choice.

This is the moment the curry starts smelling less like paste from a tub and more like dinner: chile, coconut fat, warm spice, and lime leaf waiting to open up.

3. Build the coconut sauce

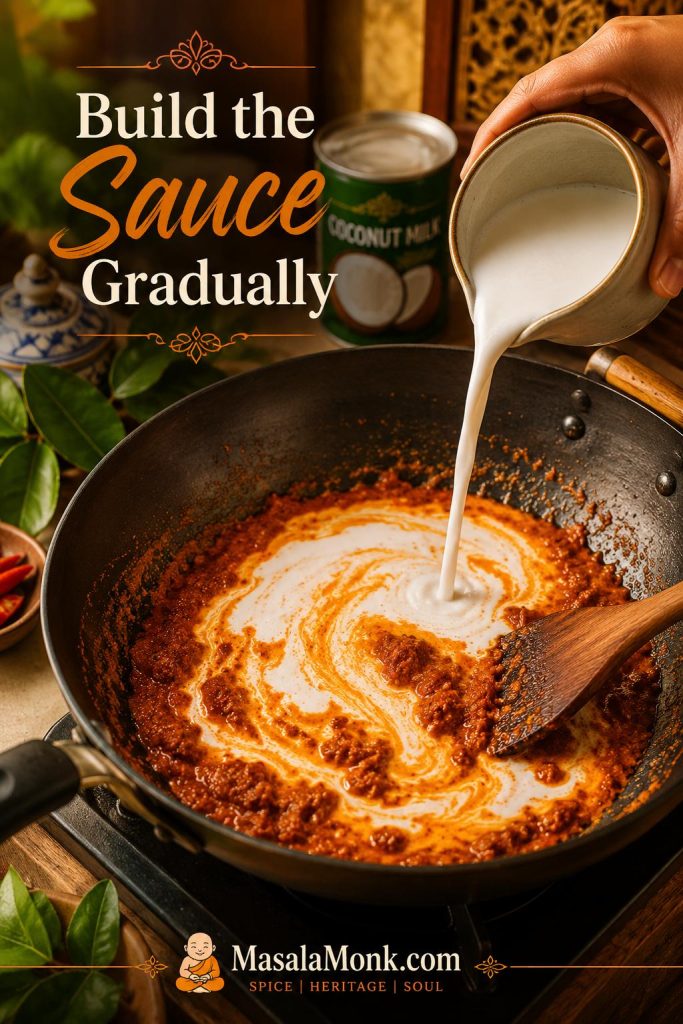
Stir in the coconut milk or coconut cream gradually until the paste dissolves into a smooth sauce. Add fish sauce, palm sugar or brown sugar, torn makrut lime leaves, and peanuts or peanut butter. Keep the curry at a gentle bubble, not a hard boil.

At this point, the pan should look creamy and red-orange. Let it bubble for a few minutes before adding delicate vegetables or herbs. A good Panang base looks slightly more intense than you think it needs to be; rice will soften everything later. When you are unsure, use the spoon-coating test before serving.

Coconut milk being poured into fried Panang curry paste in a wok, creating orange-red swirls as the sauce forms.
Add coconut gradually so the fried paste dissolves evenly; as it blends, the curry changes from separate ingredients into one smooth base.

4. Cook the protein and vegetables

Add chicken and firm vegetables such as carrots, green beans, baby corn, or broccoli stems first. Simmer gently until the chicken is cooked through; the thickest piece should reach 165°F / 74°C.

Add bell pepper, snap peas or snow peas, zucchini, or spinach later so they stay brighter and release less water. Save finely sliced makrut lime leaves for the end if you are using them as garnish.

Beef and shrimp go in later. Browned tofu can go in near the end so it keeps its shape.

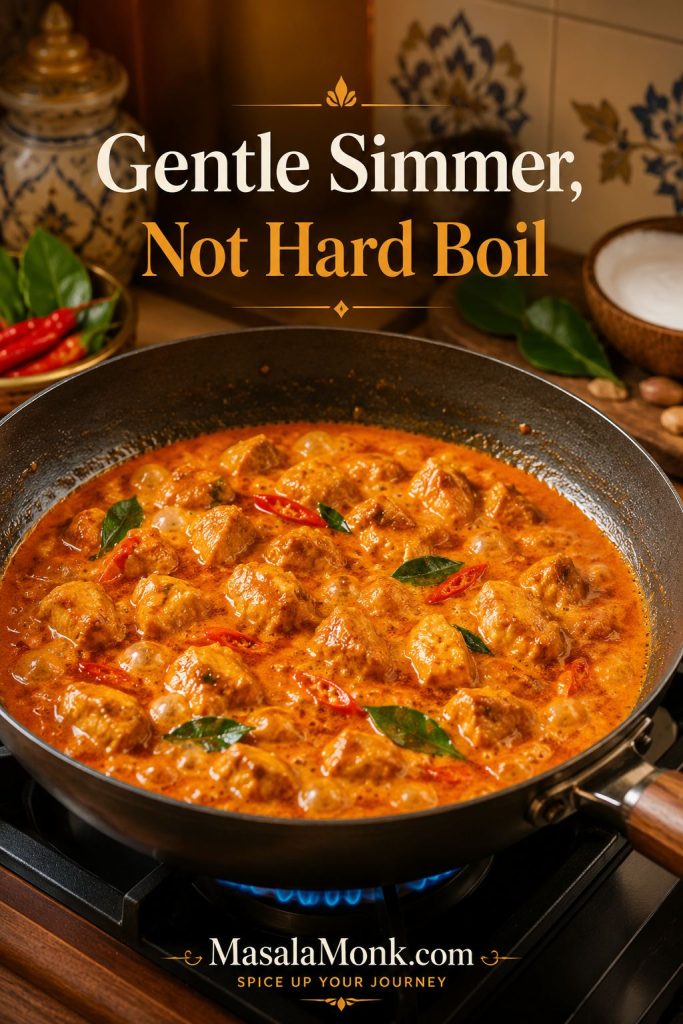
Chicken Panang curry gently simmering in a wide pan with small bubbles, orange-red sauce, chicken pieces, and herbs.
A gentle simmer gives the chicken time to cook while the coconut base thickens softly, without the rough look that comes from hard boiling.

5. Taste and finish

Give the curry a few uncovered minutes before final tasting. The flavor changes as the coconut settles: salt becomes clearer, sweetness rounds out, and the paste tastes less scattered.

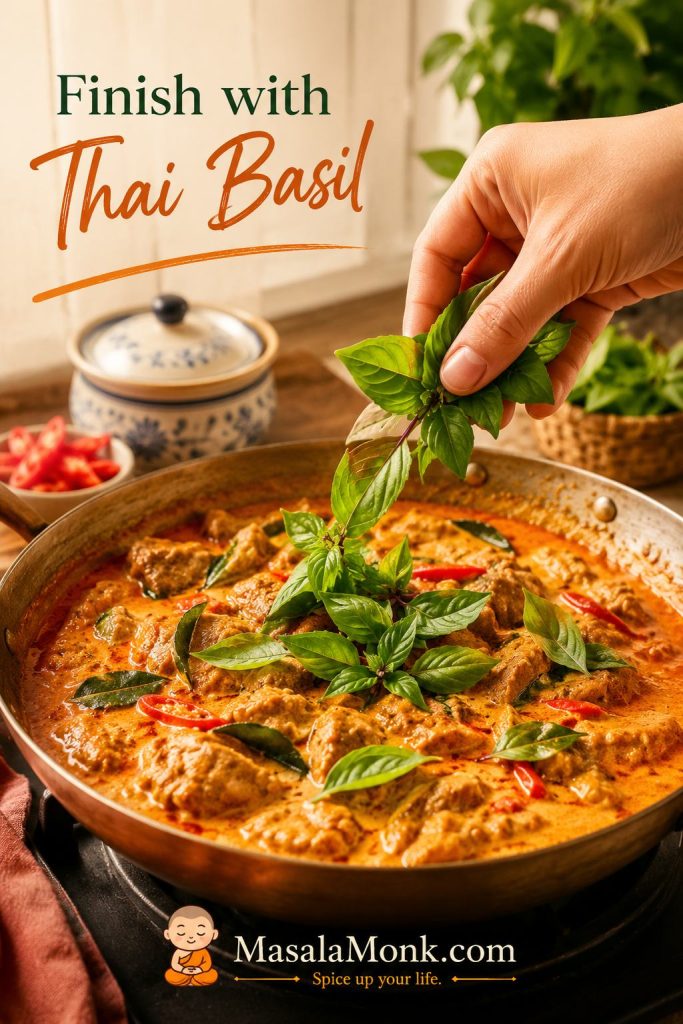
Turn off the heat and stir in Thai basil right before serving. Add extra finely sliced makrut lime leaves, crushed peanuts, or sliced red chile for a stronger finish. The basil should smell fresh as soon as it hits the hot curry.

Hand adding Thai basil to finished chicken Panang curry in a pan with red chile and creamy orange-red sauce.
Stir basil in right at the end, then stop cooking; as a result, the curry keeps its fresh Thai basil aroma.

Chicken safety note: chicken should reach 165°F / 74°C in the thickest piece. FoodSafety.gov lists this as the safe minimum internal temperature for poultry in its safe minimum internal temperatures chart.

The Spoon-Coating Test for Panang Curry Sauce

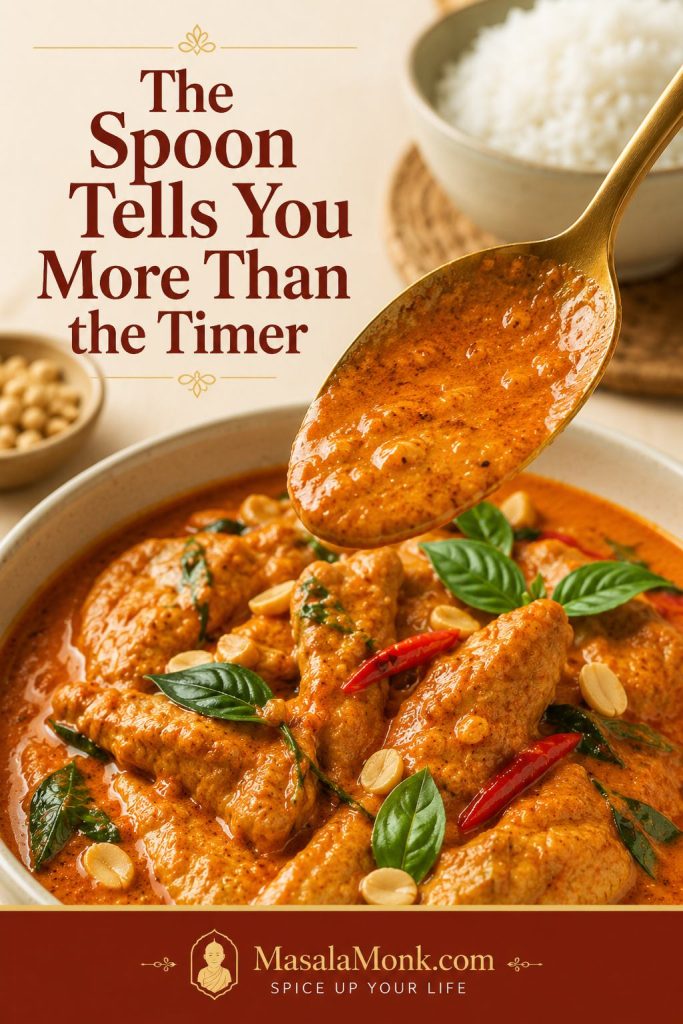
When you are not sure whether the curry is ready, trust the spoon more than the clock. Dip a spoon into the pan and lift it out. The sauce should coat the back in a visible layer instead of sliding off immediately.

Spoon lifted from Panang curry showing orange-red coconut sauce coating the back of the spoon above the pan.
Once the curry coats the spoon in a smooth layer, it is concentrated enough for rice but still loose enough to serve generously.

When it is right, the sauce leaves a glossy trail on the spoon and settles over rice instead of disappearing into it. If it becomes too heavy, loosen it with a spoonful of coconut milk, water, or stock. Cornstarch can rescue a rushed sauce, but it should not be the first fix. If the texture is already off, go to the sauce fixes before serving.

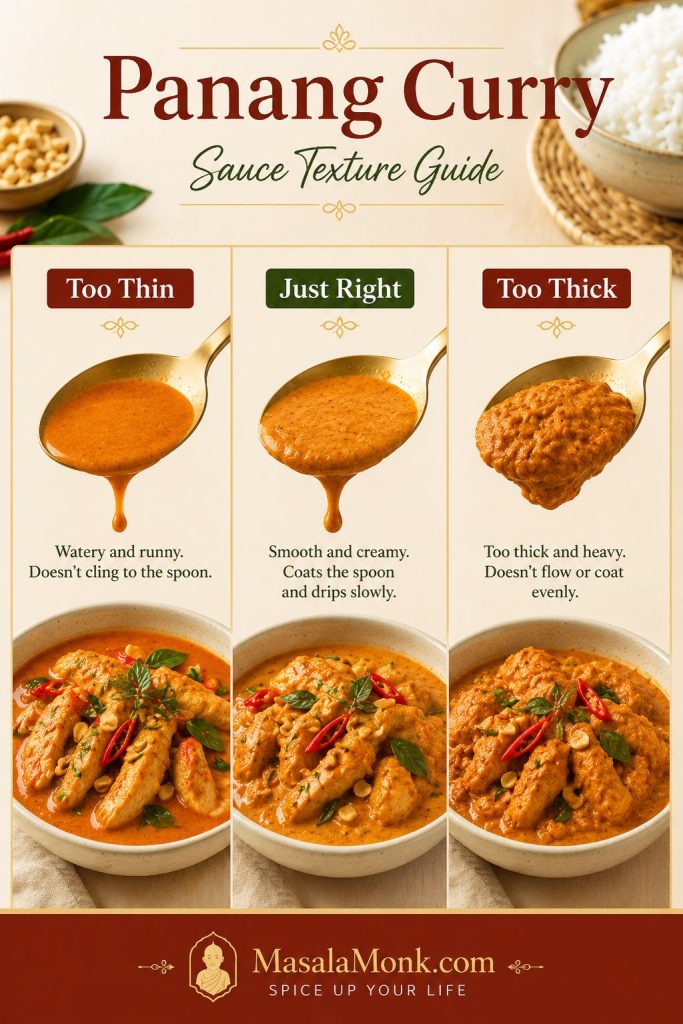
How thick should Panang curry sauce be?

The best texture sits between runny and pasty: it coats the spoon, moves slowly in the pan, and still spoons easily over rice.

Three-panel guide comparing Panang curry sauce that is too thin, just right, and too thick.
Use this texture guide before serving: thin curry needs more simmering, while overly thick curry needs a small splash of coconut milk or water.

Texture goal: glossy and spoonable, rich enough to coat the protein, but still loose enough for rice.

Best Vegetables for Panang Curry

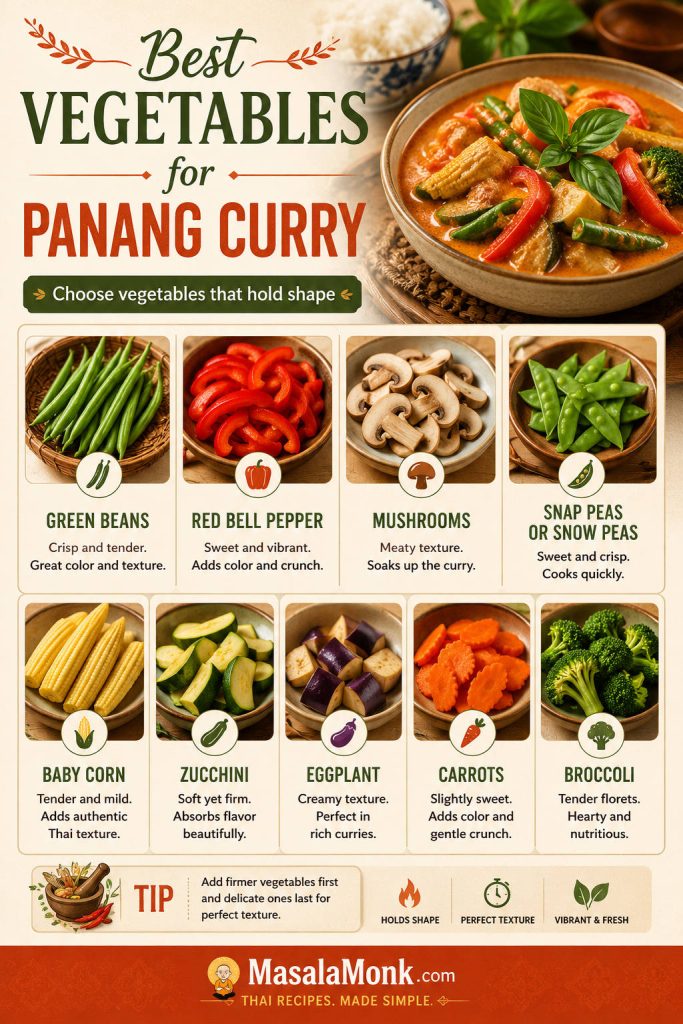
Vegetables can make Panang curry feel fuller and fresher, but they need good timing. Add firm vegetables first, tender vegetables later, and basil at the very end.

Vegetable guide for Panang curry showing green beans, red bell pepper, mushrooms, snap peas, baby corn, zucchini, eggplant, carrots, and broccoli.
Choose vegetables that hold their shape so the curry stays colorful, balanced, and concentrated instead of turning watery.

Keep watery vegetables modest, especially mushrooms, zucchini, and spinach. They are delicious here, but a crowded pan can turn a glossy Panang into a thinner curry.

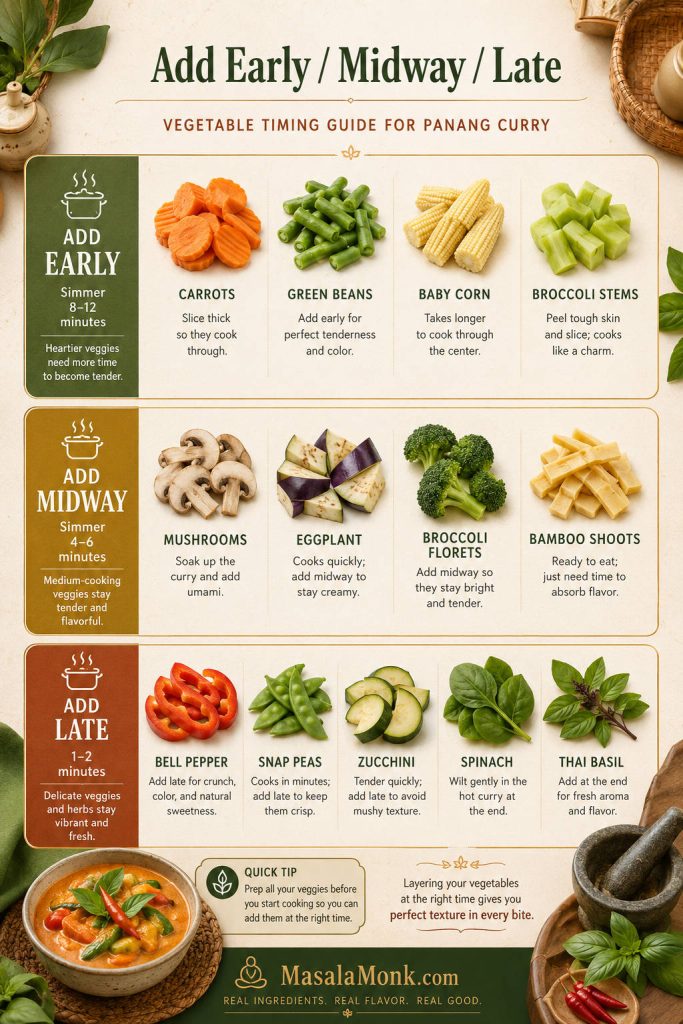
When to add vegetables to Panang curry

Vegetable timing guide for Panang curry with early, midway, and late groups for vegetables and Thai basil.
Add firmer vegetables first and delicate ones later; this way, the curry keeps both texture and fresh color.
Add EarlyAdd MidwayAdd Late
CarrotsMushroomsBell pepper
Green beansSmall eggplant piecesSnap peas or snow peas
Small cauliflower floretsBroccoli floretsZucchini
Broccoli stemsBamboo shootsSpinach
Baby cornThai basil

For a vegetable-heavy curry, use a little more paste and give the coconut base extra time to settle into the right texture. If you are skipping meat completely, jump to the vegetable Panang curry variation.

Chicken, Beef, Tofu, Shrimp and Vegetable Panang Curry

The curry base stays mostly the same, but each version has one thing to protect: juicy chicken, tender beef, intact tofu, just-cooked shrimp, or vegetables that do not water down the pan.

VersionHow Much to UseBest Method
Chicken Panang curry1½ lb / 680g chicken thighs or breastSlice thin and simmer until just cooked through. Thighs are juicier; breast cooks faster.
Beef Panang curry1–1¼ lb / 450–570g tender beefSlice thinly against the grain and add near the end so it stays tender.
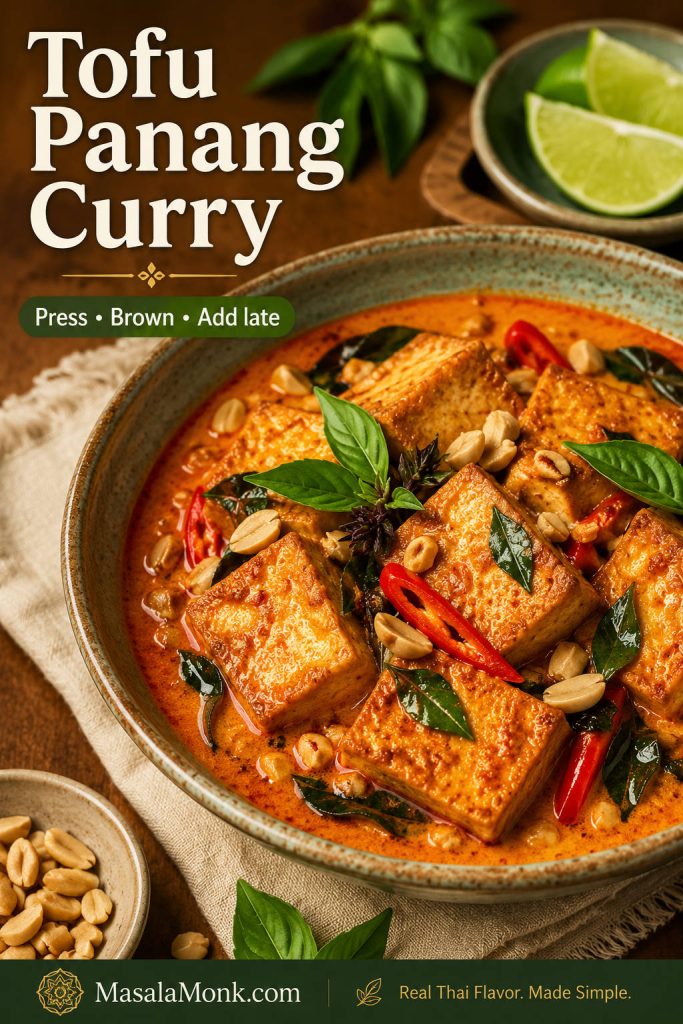
Tofu Panang curry14–16 oz / 400–450g firm tofuPress if watery, brown if desired, then add after the sauce has reduced.
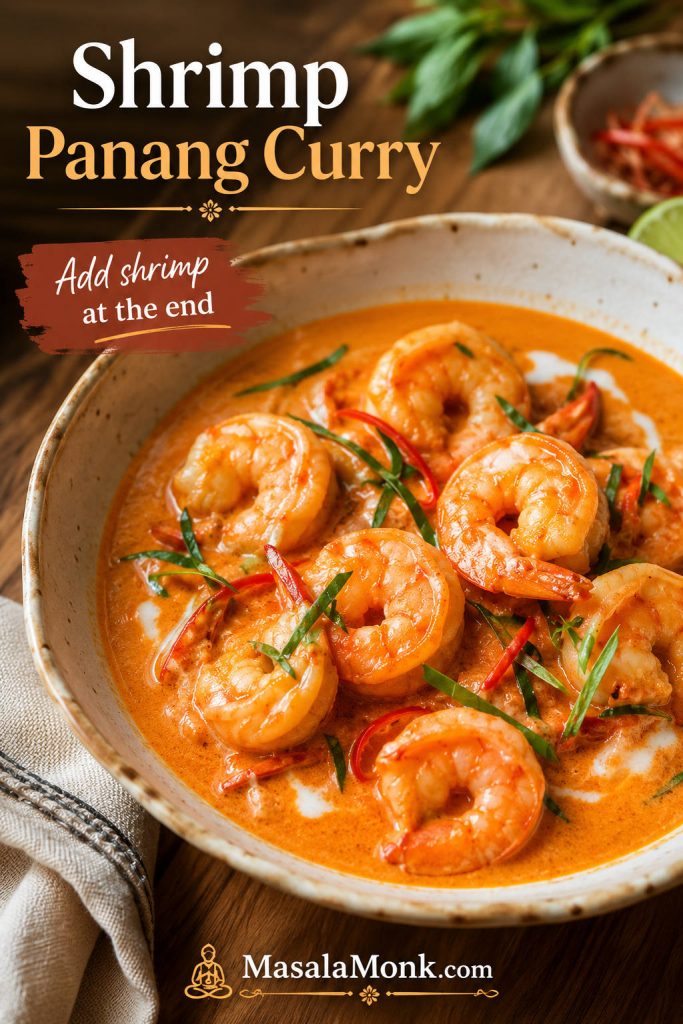
Shrimp Panang curry1 lb / 450g peeled shrimpAdd during the final few minutes and cook only until opaque.
Vegetable Panang curry3–4 cups mixed vegetablesAdd firm vegetables first and quick-cooking vegetables later.

Chicken Panang Curry

Chicken is the best first version because it is easy to cook and lets the curry shine. Thighs are the most forgiving choice because they stay juicy. Breast also works, but it needs thin slicing and close timing.

For the most reliable chicken version, use 1½ lb / 680g chicken, 3 tablespoons curry paste, one 400ml can of coconut milk or coconut cream, and 1–1½ cups vegetables. Red bell pepper, green beans, baby corn, mushrooms, and snap peas or snow peas all work well.

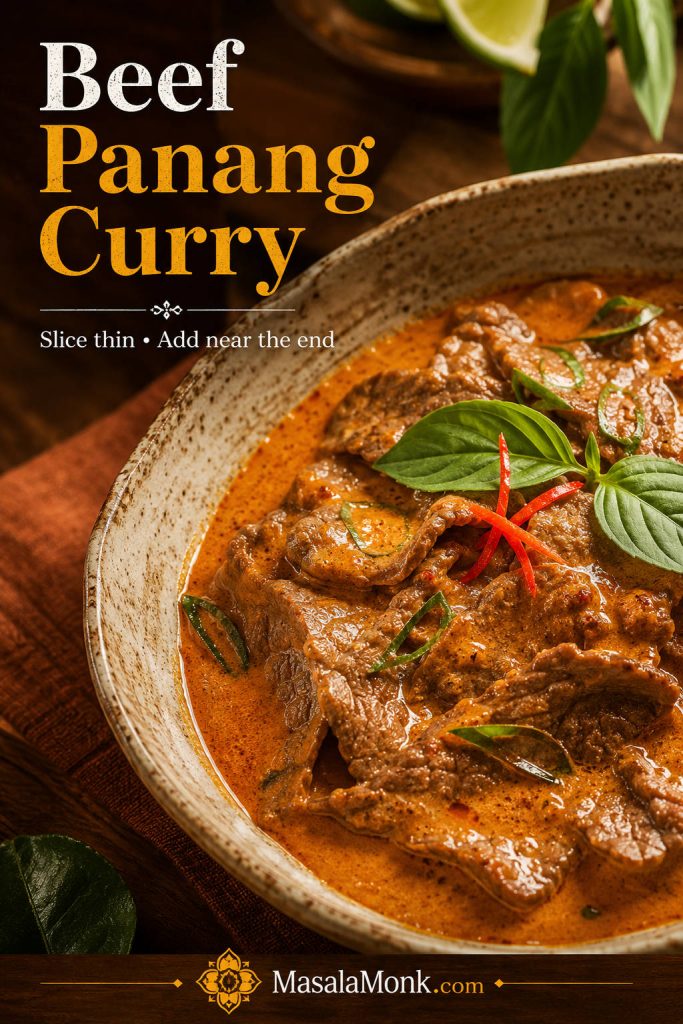
Beef Panang Curry

Use sirloin, ribeye, flank steak, flat iron, or another tender cut. Slice it thinly against the grain, then add it after the sauce is mostly finished. Simmer just until cooked through.

Beef Panang curry with thin slices of beef in orange-red coconut curry sauce, basil, makrut lime leaf garnish, and red chile.
Beef Panang curry works best with thin slices added near the end, so the beef stays tender instead of becoming chewy.

Do not simmer thin steak-style beef for 15 minutes the way you might simmer chicken. It can turn chewy, especially if it is very lean. For a slow-cooked beef Panang, use a tougher cut such as chuck or short rib and treat it as a separate slow-braised version.

Tofu or Vegan Panang Curry

Tofu Panang curry can be excellent, but the tofu needs texture and the curry paste needs a label check if you are cooking vegan. Use firm or extra-firm tofu. Press it for 15–20 minutes if it is watery, then cut it into cubes or slabs. For better texture, brown the tofu before adding it to the sauce.

Tofu Panang curry with tofu pieces in coconut curry sauce, Thai basil, peanuts, red chile, and makrut lime leaf garnish.
Press and brown tofu before adding it to the curry; then it holds its shape and gives the sauce something firm to coat.

Vegan paste warning: many Thai curry pastes contain shrimp paste, fish sauce, or other seafood ingredients. Use a vegan Panang curry paste, or use vegan red curry paste and adjust it with peanuts, a tiny pinch of nutmeg, and a little coriander or cumin.

Replace fish sauce with soy sauce or tamari. Add tofu after the sauce has reduced so it does not break apart while the curry thickens. Finish with basil and crushed peanuts.

Shrimp Panang Curry

Shrimp Panang is the fastest version, but it asks for restraint. The sauce should be ready before the shrimp goes in, because shrimp only needs a few minutes to turn sweet, opaque, and tender.

Shrimp Panang curry with curled shrimp in creamy orange-red coconut curry sauce, Thai basil, red chile, and lime leaf garnish.
Shrimp needs only a short finish in Panang curry, so build and balance the sauce before the shrimp goes into the pan.

Once the shrimp is in the pan, simmer only until it curls gently and loses its translucency. Serve right away.

Vegetable Panang Curry

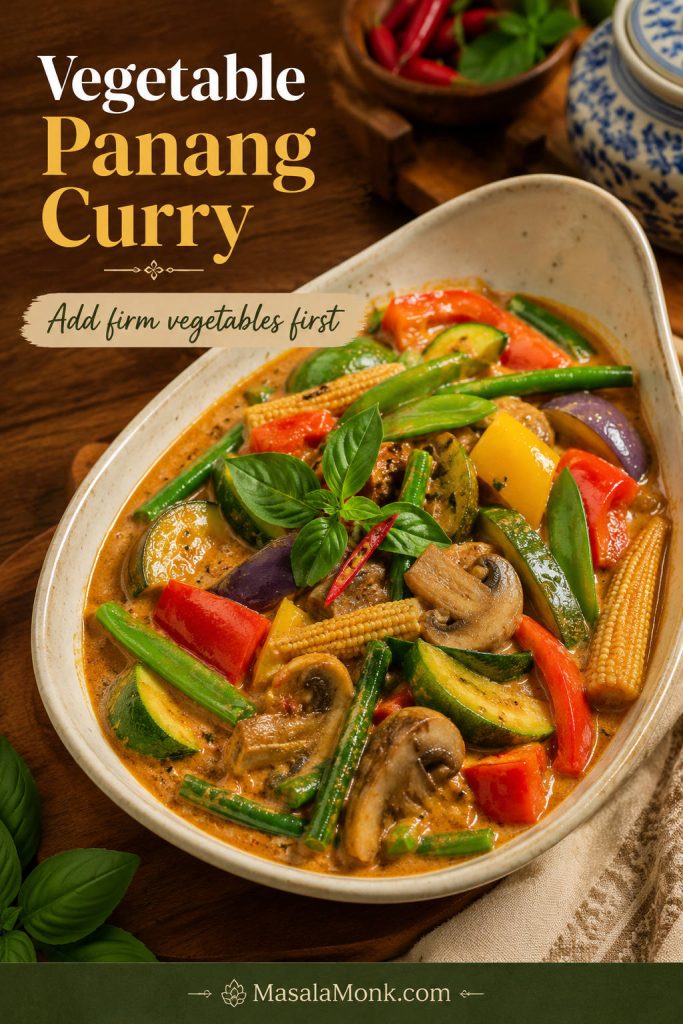
Vegetable Panang curry works best when you choose vegetables that hold their shape. Green beans, bell peppers, mushrooms, broccoli, snap peas or snow peas, baby corn, carrots, zucchini, and eggplant can all work, but they should not all go in at once.

Vegetable Panang curry with green beans, bell pepper, mushrooms, baby corn, zucchini, eggplant, snap peas, and basil in coconut curry sauce.
Vegetable Panang curry works best when the vegetables stay distinct, bright, and lightly tender instead of collapsing into the coconut sauce.

Add firm vegetables first, quick-cooking vegetables later, and basil at the very end. For a vegetable-heavy curry, start with 1 extra teaspoon of paste. A very full pan may need up to 1 extra tablespoon. Once you have chosen the version, return to the recipe card for the base method.

How to Fix Panang Curry Sauce

This is the section to use when the curry looks wrong five minutes before dinner. Most Panang problems are not disasters; they are small balance problems. A watery vegetable, a salty paste, thinner coconut milk, or too much heat can throw the pan off, but most of it is fixable.

You are looking for sauce that visibly coats the protein, but still has enough movement to spoon over rice. When the protein is already cooked, remove it with a slotted spoon and fix the sauce on its own.

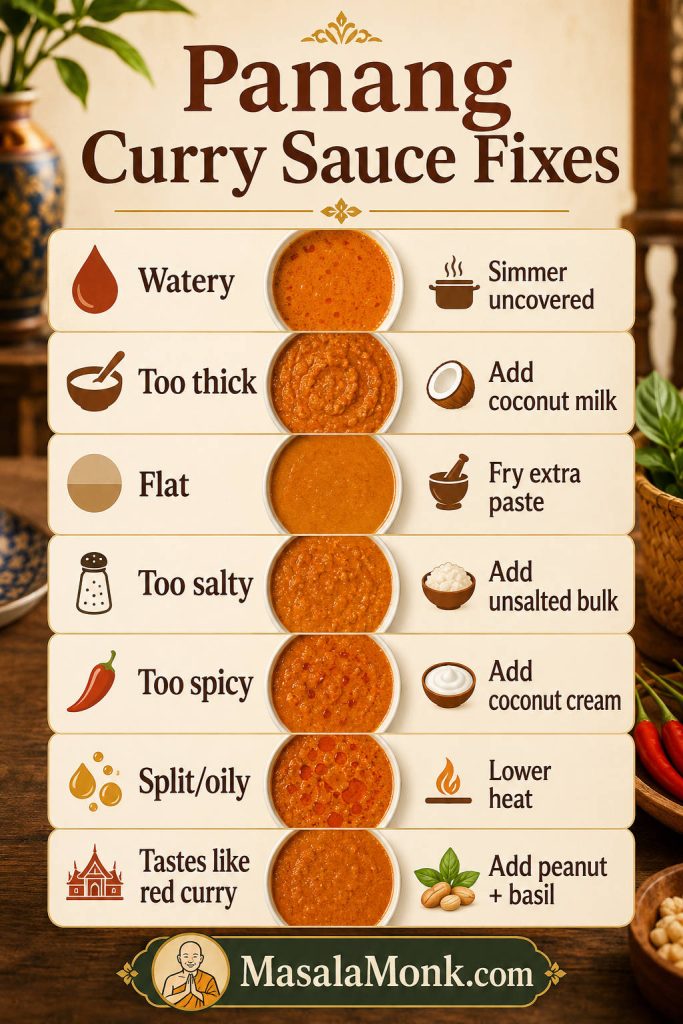
Quick fixes for Panang curry sauce

Panang curry sauce troubleshooting board with fixes for watery, thick, flat, salty, spicy, split, oily, or red-curry-like sauce.
Use this rescue guide before serving: most Panang curry sauce problems can be fixed with better simmering, coconut, paste, seasoning, or heat control.
Sauce ProblemWhat It Feels LikeHow to Fix It
Too wateryThe chicken looks like it is floating instead of coated.Simmer uncovered. If the protein is cooked, remove it and reduce the sauce alone. Use coconut cream next time.
Too thickThe curry looks heavy, pasty, or dry instead of glossy.Add coconut milk, water, or stock one spoonful at a time, then stop as soon as it turns spoonable.
Tastes flatThe curry smells fine but tastes dull or unfinished.Fry extra paste separately and stir it in. Add fish sauce, sugar, lime leaves, or basil.
Too saltyThe salt hits first and the coconut sweetness disappears.Add unsalted bulk such as coconut milk, vegetables, tofu, or chicken. Balance with a tiny amount of sugar.
Too spicyThe heat overwhelms the coconut and aromatics.Add coconut cream or coconut milk and serve with extra rice.
Oily or splitThe curry looks greasy around the edges.Lower the heat, stir gently, and add a splash of coconut milk.
Tastes like red curryThe curry is loose, chile-forward, and missing the rounded Panang note.Add peanuts or peanut butter, simmer briefly, and finish with Thai basil and finely sliced tender makrut lime leaves.

Panang Curry Recipe Card

A creamy chicken Panang curry with store-bought paste, full-fat coconut, makrut lime leaves, peanuts, and Thai basil. Rich, spoonable, and easy to adapt for beef, tofu, shrimp, or vegetables.

Yield
4 servings
Prep Time
15 minutes
Cook Time
25 minutes
Total Time
40 minutes

Ingredients

  • 1½ lb / 680g boneless chicken thighs or chicken breast, thinly sliced
  • 3 tbsp / about 45g Panang curry paste
  • 1 tbsp / 15ml neutral oil, or thick coconut cream from the top of the can
  • 13.5–14 oz / 400ml full-fat coconut milk or coconut cream
  • 1–1½ tbsp / 15–22ml fish sauce, plus more to taste, depending on paste saltiness
  • 2 tsp–1 tbsp / 8–15g palm sugar or brown sugar
  • 4–6 makrut lime leaves, torn, plus optional finely sliced tender leaves for finishing
  • 2 tbsp / about 15g crushed roasted peanuts, or 1 tbsp / about 16g peanut butter
  • 1 red bell pepper, thinly sliced, or 1–1½ cups mixed vegetables for the chicken version
  • ½ cup loosely packed Thai basil leaves
  • Optional garnish: sliced red chile, extra basil, crushed peanuts, finely sliced makrut lime leaves
  • Steamed jasmine rice, for serving

Instructions

  1. Prep. Slice the chicken thinly and prepare the vegetables, herbs, and garnishes before cooking.
  2. Fry the paste. Heat oil or thick coconut cream in a wide skillet, wok, or 12-inch saucepan over medium heat. Add the Panang curry paste and cook, stirring often, until fragrant and slightly darker — about 1–2 minutes for softer paste or 3–5 minutes for thicker Thai paste.
  3. Build the sauce. Stir in coconut milk or coconut cream gradually until smooth. Add fish sauce, sugar, torn makrut lime leaves, and peanuts or peanut butter.
  4. Simmer. Add chicken and firm vegetables such as carrots, green beans, or baby corn. Simmer gently until the chicken is cooked through: about 6–8 minutes for thin chicken breast or 8–12 minutes for thin chicken thighs. The thickest piece should reach 165°F / 74°C. Add bell pepper, snap peas or snow peas, zucchini, or spinach near the end.
  5. Adjust. If the sauce looks loose, simmer uncovered until glossy and spoonable. Taste after thickening, then adjust with fish sauce, sugar, coconut milk, or extra fried paste if needed.
  6. Finish. Turn off the heat and stir in Thai basil. Garnish with extra basil, crushed peanuts, sliced chile, or finely sliced makrut lime leaves.
  7. Serve. Serve hot with steamed jasmine rice.

Recipe Notes

  • Beef: use 1–1¼ lb / 450–570g thinly sliced sirloin, ribeye, flank steak, or another tender cut. Add near the end and simmer briefly.
  • Tofu: use firm or extra-firm tofu. Press if watery, brown first if desired, and add after the sauce has reduced.
  • Vegan Panang: use vegan curry paste and replace fish sauce with soy sauce or tamari.
  • Shrimp: build and thicken the sauce first, then add shrimp near the end and cook only until opaque.
  • Vegetable Panang: use 3–4 cups mixed vegetables and add 1 teaspoon to 1 tablespoon extra paste depending on volume.
  • Richer sauce: use coconut cream. For a milder curry, start with 2 tbsp paste and add more after tasting.

Once the paste smells cooked, the coconut turns glossy, and the basil hits the pan, the curry feels much easier to trust. Spoon it beside jasmine rice, add the final herbs, and you have the kind of weeknight Panang that tastes deliberate instead of rushed.

Instant Pot or Slow Cooker Panang Curry

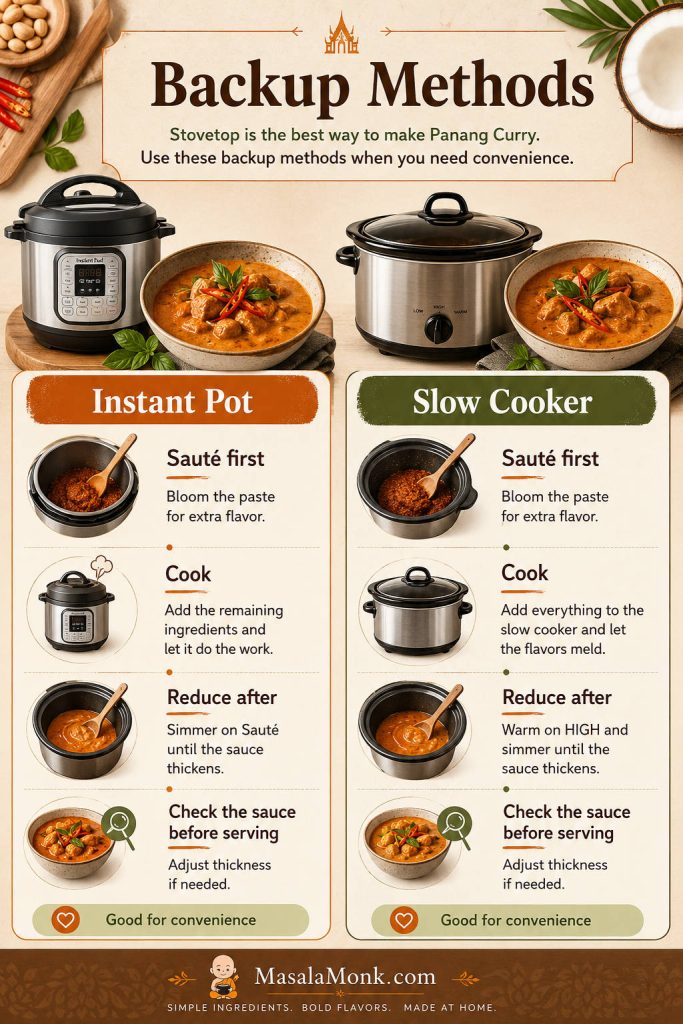
Panang rewards stovetop control, so treat Instant Pot and slow cooker versions as backup methods. They are useful for convenience, but both need a final look at the sauce before serving.

Backup-method guide for Panang curry showing Instant Pot and slow cooker options with sauté first, cook, reduce after, and check sauce cues.
Instant Pot and slow cooker Panang curry can be convenient, but the final sauce check still matters before the curry reaches the table.

Instant Pot Panang curry

Use sauté first. Fry the paste in oil or thick coconut cream for 1–2 minutes, then stir in coconut milk or cream, fish sauce, sugar, torn lime leaves, and thin chicken pieces. Pressure cook on high for 3–4 minutes, then quick release. Use sauté again to bring the sauce back to a spoonable texture, then finish with basil.

Slow cooker Panang curry

Slow cooker Panang works best with chicken thighs or beef, not thin chicken breast. Fry the paste separately first, then add it to the slow cooker with coconut milk, seasoning, and protein. Cook on low until the meat is tender, usually about 2–3 hours for boneless chicken thighs. If the sauce is thin at the end, reduce it uncovered in a saucepan before adding basil.

What to Serve with Panang Curry

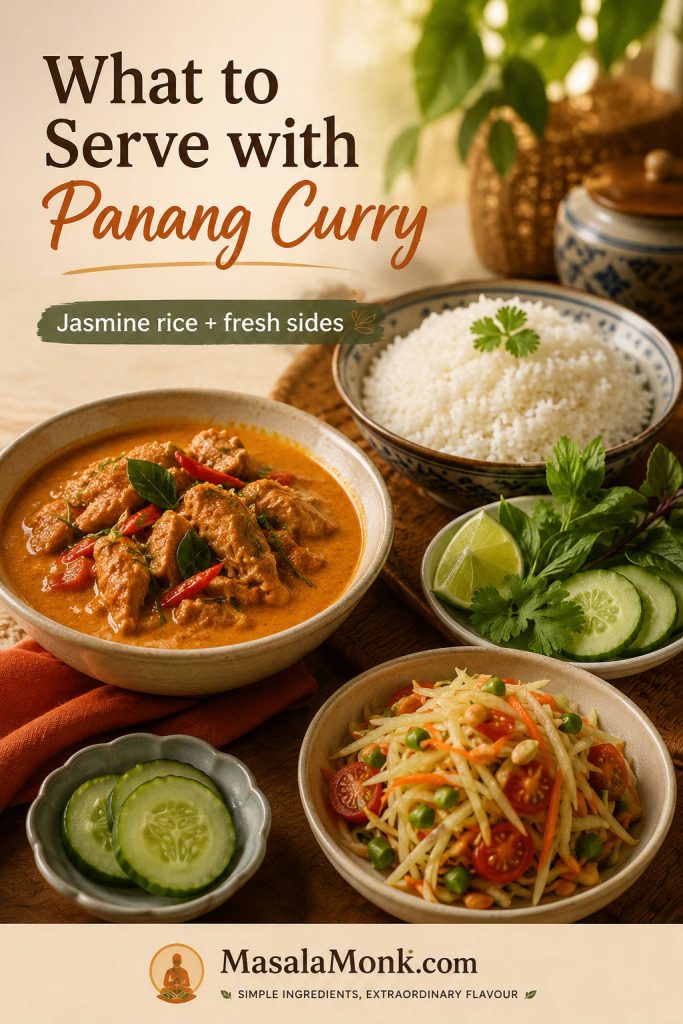
Panang is rich, so the best sides either catch the sauce or cut through it. Jasmine rice catches the glossy curry; cucumber, herbs, lime, green beans, or Som Tam keep the bowl from feeling heavy. Planning leftovers too? Jump to storage and reheating.

What goes well with Panang curry?

Panang curry served with jasmine rice, cucumber, herbs, lime, and a fresh Som Tam-style side dish on a warm table.
Pair Panang curry with jasmine rice and a crisp side so the meal has both coconut richness and fresh contrast.

Spoon the curry beside the rice rather than burying it. That way the first few bites stay glossy and concentrated, and the rice catches the sauce slowly instead of muting it all at once. If rice is the part that usually goes wrong, this guide to cooking perfect rice can help.

Serve WithWhy It Works
Steamed jasmine riceBest default; it absorbs the sauce without competing with the curry.
Cucumber salad, herbs, lime, or lightly steamed green beansFresh sides balance the coconut richness.
Roti, flatbread, rice noodles, or coconut riceComfort options for a fuller, more restaurant-style meal.

For a crisp Thai-style side, this Vegan Som Tam Salad gives the fresh, sharp contrast that works well beside a creamy coconut curry.

Storage, Freezing and Reheating

How to store Panang curry leftovers

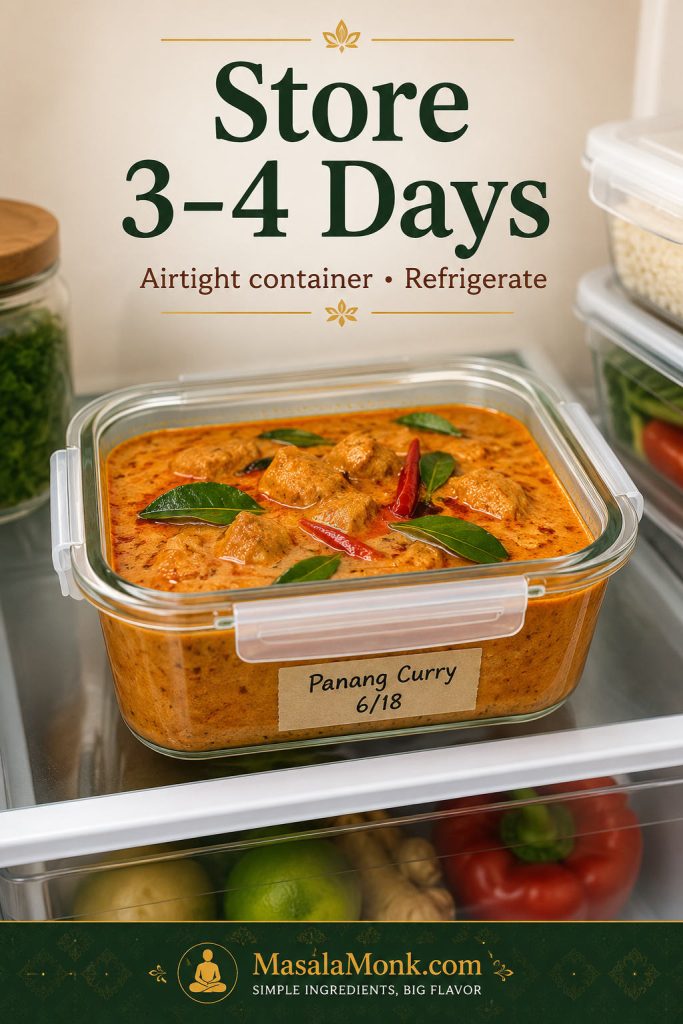
Store leftover Panang curry in an airtight container in the refrigerator for 3–4 days. The sauce will thicken as it chills, so add a splash of coconut milk, water, or stock when reheating.

Panang curry leftovers stored in an airtight glass container on a refrigerator shelf with text saying store three to four days.
Leftover Panang curry keeps well for 3–4 days in an airtight container; for the brightest flavor, add fresh basil after reheating.

How to reheat Panang curry

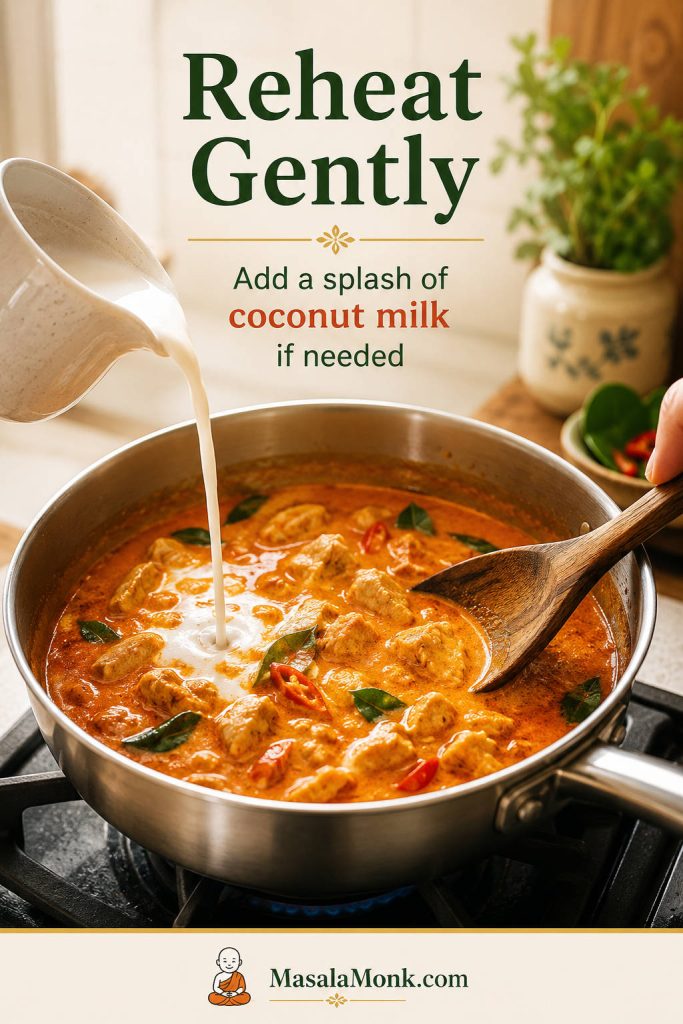
Reheat gently on the stovetop over low to medium-low heat. Avoid hard boiling because coconut-based sauces can split. If the curry looks oily after reheating, lower the heat and stir in a small splash of coconut milk.

Panang curry reheating gently in a saucepan while coconut milk is poured in and the sauce is stirred with a wooden spoon.
Reheat Panang curry gently, adding a splash of coconut milk if needed, so the sauce turns smooth again instead of splitting.

The curry reheats well, but fresh basil does not. For make-ahead cooking, stop before adding the basil if you can, then add it after reheating so the curry tastes fresh again.

You can freeze Panang curry for up to 2 months, but the sauce may look slightly separated or grainy after thawing. Reheat gently and stir in a little coconut milk to smooth it out. Shrimp Panang curry is less ideal for freezing because shrimp can become rubbery after thawing and reheating. Tofu may soften slightly after storage, but it still tastes good.

Panang Curry FAQs

Is Panang curry supposed to be thick?

Panang curry is usually thicker and more concentrated than Thai red curry. It should coat the chicken, tofu, shrimp, beef, or vegetables instead of running like soup.

Is Panang curry very spicy?

Most bowls land in the medium-spicy range, but the paste controls the heat. Start with 2 tablespoons for a gentler curry and add more after tasting.

What does Panang curry taste like?

It tastes creamy, savory, lightly sweet, and aromatic, with a quiet peanut note. Peanut belongs in the background; it rounds the curry without turning it into satay sauce.

Why does my Panang curry taste like red curry?

The curry may be too loose or missing the rounded peanut and lime-leaf finish. Simmer the coconut base until glossy, then add peanut richness, basil, and finely sliced tender makrut lime leaves if you have them.

Can I use red curry paste instead of Panang curry paste?

Yes, as a shortcut. Add peanuts or peanut butter, a tiny pinch of nutmeg, and a little coriander or cumin to move it closer to Panang flavor.

What is the best coconut milk for Panang curry?

Full-fat coconut milk works well, while coconut cream gives the richest result. Light coconut milk makes the curry thinner and less satisfying.

Is Panang curry the same as Panang gai?

Panang gai means chicken Panang curry. “Gai” means chicken, so the method is the same here: thin chicken, coconut sauce, and a fresh basil finish.

Can I make Panang curry without fish sauce?

Use soy sauce, tamari, or a vegetarian fish-sauce alternative. Taste after simmering because substitutes vary in saltiness and depth.

Why is my Panang curry watery?

The coconut may need more time, the milk may be too thin, or the vegetables may have released water. Simmer uncovered before reaching for cornstarch.

Can I make Panang curry ahead?

Chicken, beef, tofu, and vegetable versions reheat well. For the freshest flavor, hold back the basil and add it after reheating.

What vegetables go well in Panang curry?

Green beans, bell peppers, mushrooms, broccoli, snap peas, baby corn, carrots, zucchini, and eggplant all work. Add watery vegetables late.

Can I make this with shrimp?

Build and thicken the sauce first, then add shrimp near the end and cook just until opaque. Do not reduce the curry after shrimp goes in.

Back to top

Posted on 1 Comment

Cream of Mushroom Chicken Recipe

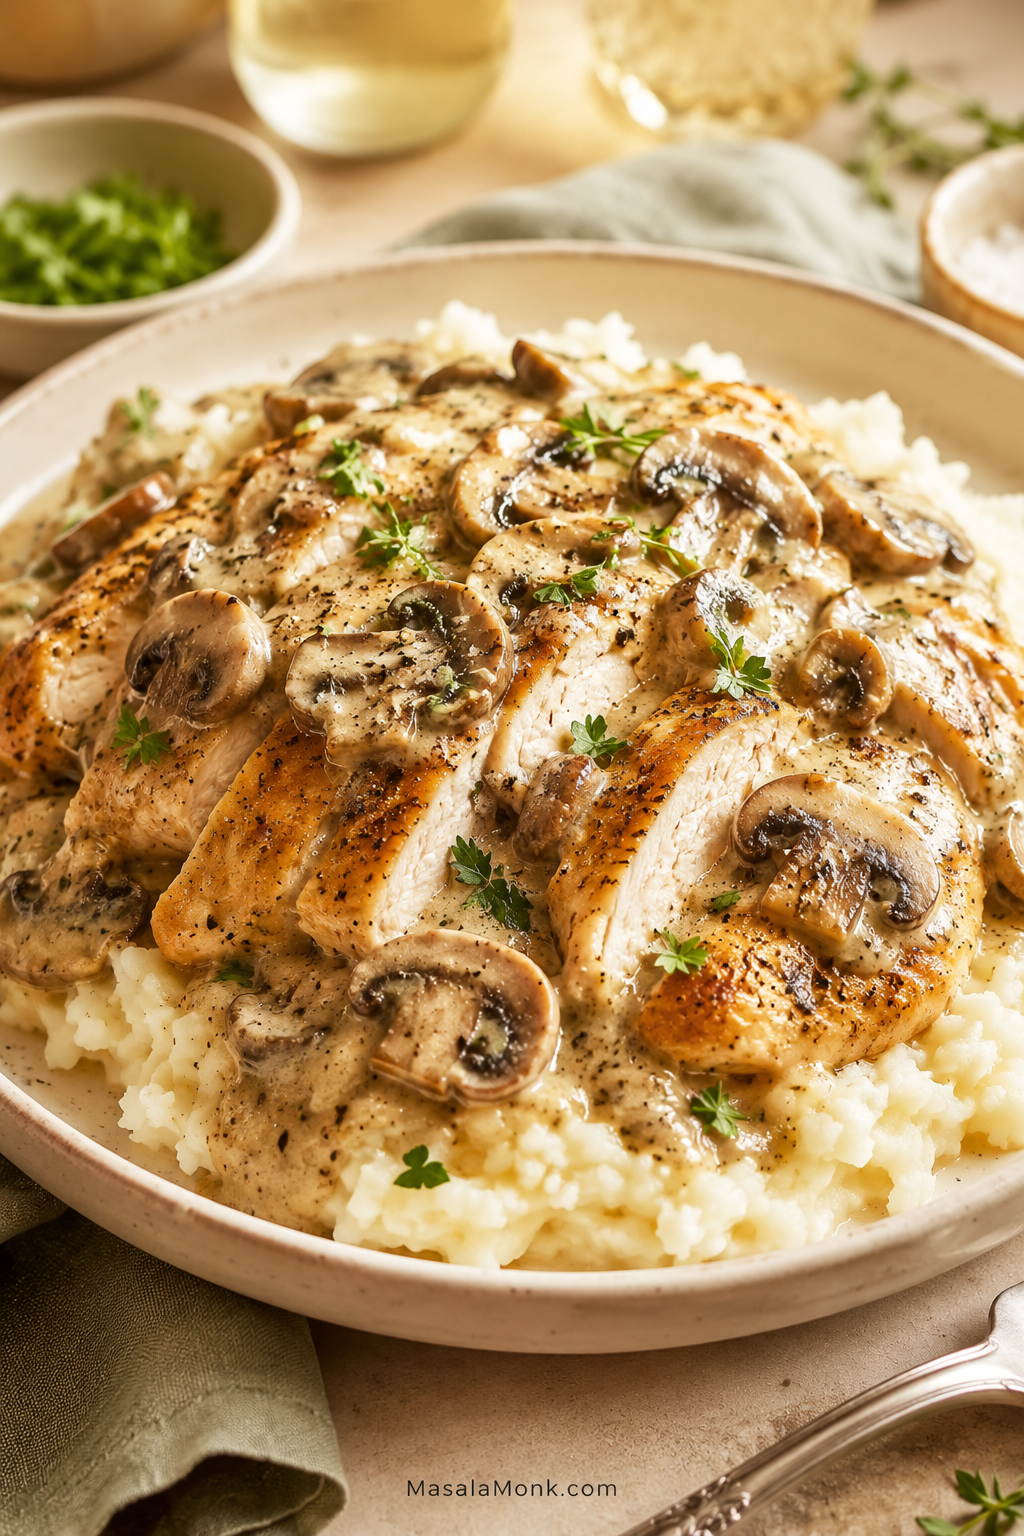
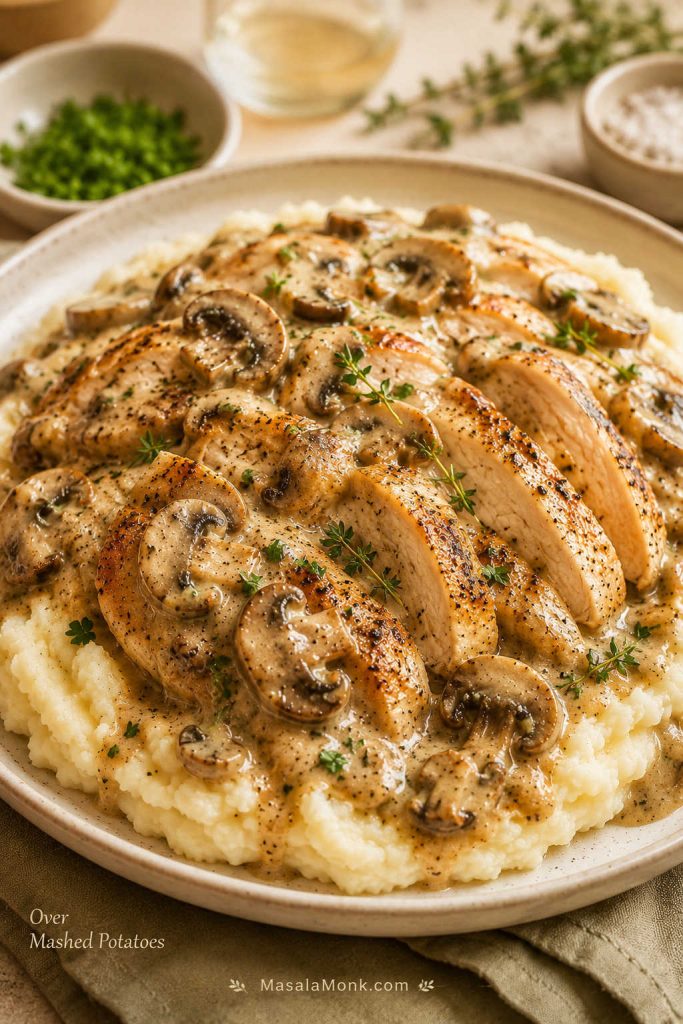
Cream of mushroom chicken served over mashed potatoes with sliced mushrooms, creamy sauce, black pepper, and fresh herbs.

This cream of mushroom chicken recipe is for the night when you have chicken in the fridge, a can of cream of mushroom soup in the pantry, and no patience for a complicated sauce. The goal is simple: tender chicken, creamy mushroom gravy, and a dinner that works with rice, egg noodles, mashed potatoes, biscuits, or whatever vegetable you already have.

This is the kind of dinner that feels like a shortcut while it cooks, but like comfort food once it hits the plate. It is not fancy food; it is the creamy, spoon-over-something meal you make when the day has been long and everyone still needs to eat.

Bake it when you want the easiest family dinner. Use the skillet when dinner needs to happen faster, the slow cooker when the meal should take care of itself, and the rice bake when chicken and rice should land in one dish.

The dish works best with condensed cream of mushroom soup, thin or evenly pounded chicken, and just enough milk or broth to turn the soup into a spoonable sauce. A thermometer keeps the chicken from drying out while still getting it safely to 165°F / 74°C.

Quick Answer: How to Make Cream of Mushroom Chicken

To make cream of mushroom chicken, season chicken breasts or thighs, place them in a baking dish, whisk condensed cream of mushroom soup with milk or low-sodium chicken broth, pour the sauce over the chicken, cover, and bake until the chicken reaches 165°F / 74°C. Uncover near the end if the sauce needs to thicken or cheese is going on top.

The result should be chicken that slices easily with creamy mushroom gravy you can spoon over rice, noodles, mashed potatoes, biscuits, or vegetables. This is still a low-effort dinner: about 10 minutes of prep, then the oven does most of the work.

The skillet version is faster, the slow cooker version is more hands-off, and the rice bake turns it into a one-dish meal. The trick is changing the liquid slightly for each method, so use the version guide or the soup and liquid ratios before switching methods.

Best first version: Bake thin chicken breasts or thighs with 1 can condensed cream of mushroom soup and ½ cup milk or broth at 375°F / 190°C. Cover first for moisture, then uncover near the end so the sauce thickens.
Quick answer board showing cream of mushroom chicken, chicken pieces, condensed soup, milk or broth, and covered baking instructions.
For the simplest version, build the dish in four parts: chicken, condensed cream of mushroom soup, a little milk or broth, and a covered bake.

For food safety, chicken should reach 165°F / 74°C in the thickest part; FoodSafety.gov lists poultry and casseroles at this internal temperature.

Which Version Should You Make?

Before you open the soup can, decide how dinner needs to work tonight. The same basic ingredients can become an easy oven dinner, a quick skillet meal, a slow cooker comfort dish, or a chicken-and-rice bake.

The one thing that changes most between versions is the soup-to-liquid ratio. The oven, skillet, slow cooker, and rice bake each need slightly different treatment, which is what keeps the chicken juicy and the sauce creamy instead of watery.

Choose This Version Best When Key Ratio
Baked cream of mushroom chicken You want the easiest family dinner with minimal prep. 1 can soup + ½ cup milk or broth
Skillet cream of mushroom chicken You want dinner faster and more control over the sauce. 1 can soup + ½–1 cup broth or milk
Slow cooker cream of mushroom chicken You want hands-off creamy chicken for rice, noodles, or potatoes. 2 cans soup + ½ cup liquid
Cream of mushroom chicken and rice You want a full one-dish meal. 1 can soup + 1 cup liquid + ¾ cup rice
Creamy chicken over egg noodles You want mushroom-sauce chicken without baking rice. Cook noodles separately and spoon sauce over them
Guide comparing baked, skillet, slow cooker, and chicken and rice versions of cream of mushroom chicken.
Instead of using one formula for every method, adjust the liquid for baked, skillet, slow cooker, and chicken-and-rice versions.

How Much Liquid to Add to Cream of Mushroom Soup

Use these ratios as starting points, then adjust until the sauce looks spoonable, not stiff and not soupy.

Version Condensed Soup Added Liquid Why It Works
Baked chicken 1 can / 10.5 oz / 298 g ½ cup / 120 ml milk or broth Creates a creamy, spoonable sauce without making the dish watery.
Skillet chicken 1 can / 10.5 oz / 298 g ½–1 cup / 120–240 ml broth or milk The sauce reduces as it simmers, so you can loosen or thicken it as needed.
Slow cooker chicken 2 cans / about 596 g total ½ cup / 120 ml broth or water The slow cooker traps moisture, so too much liquid makes the sauce thin.
Small chicken and rice bake 1 can / 10.5 oz / 298 g 1 cup / 240 ml liquid + ¾ cup rice Rice needs measured liquid and trapped steam to cook properly.
Large 9×13 rice bake 2 cans / about 596 g total 2 cups / 480 ml broth + 1¼ cups rice Better for a family-size casserole with more rice and chicken.
Liquid ratio guide for baked, skillet, slow cooker, and chicken and rice cream of mushroom chicken recipes.
Condensed soup gives the sauce body; however, each cooking method needs a different amount of liquid to stay creamy.

Once the ratio is right, everything gets easier: the chicken cooks gently, the sauce stays spoonable, and the sides do half the work. When you are ready to cook the oven version, go straight to the cream of mushroom chicken recipe card.

Water works in a pinch, but broth gives the dish more savory flavor and milk makes the sauce softer and creamier. Regular condensed soup, regular broth, cheese, and onion soup mix can all add salt, so taste before adding more.

Basic Oven Method at a Glance

Use this as the quick map before the full recipe card.

  1. Thin and season the chicken. Slice large breasts in half lengthwise or pound them evenly, then season lightly.
  2. Whisk the soup mixture. Mix condensed cream of mushroom soup with milk or broth until smooth.
  3. Cover and bake. Pour the mixture over the chicken, cover with foil, and bake so the meat stays moist.
  4. Uncover, check, and rest. Finish uncovered, cook to 165°F / 74°C, and rest before serving.
Four-step oven method for cream of mushroom chicken showing thin chicken, soup mixture, covered baking, and temperature check.
Once the chicken is even in thickness and the soup mixture is loosened, the oven version becomes simple and predictable.

Cream of Mushroom Chicken Recipe Card

This baked cream of mushroom chicken is the oven version to make first: tender chicken, condensed cream of mushroom soup, a little milk or broth, simple seasonings, and enough creamy mushroom sauce to spoon over rice, egg noodles, mashed potatoes, or vegetables.

Prep Time10 minutes
Cook Time30–35 minutes
Total Time40–45 minutes
Yield4 servings

Course: Dinner
Cuisine: American
Method: Baked
Equipment: 9×13-inch baking dish, foil, mixing bowl, instant-read thermometer

Ingredients

  • 1½ lb / 680 g boneless skinless chicken breasts or thighs
  • 1 can condensed cream of mushroom soup, 10.5 oz / 298 g
  • ½ cup / 120 ml milk or low-sodium chicken broth
  • ½ tsp garlic powder, divided
  • ½ tsp onion powder, divided
  • ½ tsp paprika, divided
  • ¼ tsp black pepper, divided, plus more to taste
  • 8 oz / 225 g sliced mushrooms, optional
  • ¼–½ cup / 60–120 g sour cream, optional
  • ¾–1 cup / 85–115 g shredded mozzarella, Monterey Jack, or cheddar, optional
  • Salt only after tasting, if needed

Instructions

  1. Heat oven to 375°F / 190°C. Lightly grease a 9×13-inch baking dish.
  2. Slice large chicken breasts in half lengthwise or pound them to an even thickness.
  3. Place the chicken in the baking dish. Sprinkle with about half of the garlic powder, onion powder, paprika, and black pepper.
  4. Scatter raw mushrooms around the chicken for convenience, or brown them first for deeper flavor and less extra moisture.
  5. In a bowl, whisk the condensed cream of mushroom soup with milk or broth and the remaining garlic powder, onion powder, paprika, and pepper until smooth. Whisk in sour cream now if using it for the baked version.
  6. Taste the sauce. Add salt only if it needs it. A flat-tasting sauce can take a little more pepper, paprika, thyme, garlic powder, or Dijon.
  7. Pour the sauce over the chicken and spread it so the chicken is mostly covered.
  8. Cover the dish tightly with foil.
  9. Bake for 25 minutes.
  10. Uncover and bake 5–10 minutes more, or until the chicken reaches 165°F / 74°C in the thickest part.
  11. Sprinkle cheese over the chicken during the uncovered finish if using it, then bake until melted.
  12. When the chicken is done but the sauce is still thin, move the chicken to a plate and thicken the sauce separately in a small pan, or in the baking dish only if your dish is stovetop-safe.
  13. Rest for 5 minutes before serving.
  14. Serve over rice, egg noodles, mashed potatoes, biscuits, broccoli, green beans, or roasted vegetables.

Notes

  • Use condensed cream of mushroom soup, not ready-to-eat mushroom soup.
  • Browned mushrooms give the sauce a deeper, less canned flavor.
  • Water works if that is all you have, but broth gives better flavor and milk makes the sauce creamier.
  • A cream of chicken swap works too: replace half or all of the cream of mushroom soup with condensed cream of chicken soup.
  • For skillet or slow cooker versions, add sour cream or cheese near the end over gentle heat for the smoothest finish.
Recipe card for cream of mushroom chicken with prep time, cook time, oven temperature, chicken, condensed soup, milk or broth, and method notes.
Save this basic baked cream of mushroom chicken formula first, then use the other sections when you want skillet, slow cooker, or rice variations.

Making a different version? Use the skillet method, slow cooker method, or chicken and rice bake so the liquid and timing stay right.

Why This Recipe Works

The baked version works because it solves two problems at once: thick chicken and loose sauce. Thin pieces cook before they dry out, while condensed soup gives the sauce enough body to stay creamy. A small splash of milk or broth loosens the canned base, covered baking protects the chicken, and the uncovered finish lets the sauce settle.

The real win is not making it fancy. It is keeping the chicken juicy and turning the canned soup into a sauce that tastes like it belongs on the plate.

Ingredient Notes That Keep It Creamy, Not Watery

Nothing here is precious. The point is knowing which shortcuts help and which ones make the dish watery, salty, or dry.

Ingredients for cream of mushroom chicken including chicken, condensed mushroom soup, milk or broth, mushrooms, seasonings, sour cream, and cheese.
A pantry base can still taste rounded when you add smart upgrades like broth, browned mushrooms, thyme, pepper, sour cream, or cheese.
  • Chicken: Boneless skinless breasts or thighs both work. Breasts give you a classic sliced dinner; thighs give you more forgiveness.
  • Condensed cream of mushroom soup: The word condensed matters because the soup starts thick and becomes sauce when you add liquid.
  • Milk, broth, or water: Broth gives savory depth, milk gives a softer creamy finish, and water works when that is all you have.
  • Fresh mushrooms: Raw mushrooms are convenient, but browned mushrooms add deeper flavor and release less water into the dish.
  • Sour cream: Use it for tang. Whisk it into the oven version before baking, or stir it into skillet and slow cooker versions near the end over gentle heat.
  • Cheese: Mozzarella, Monterey Jack, cheddar, Swiss, or Muenster can turn this into a richer family bake.
Taste before baking: Once the soup, liquid, and seasonings are mixed, taste the sauce before pouring it over the chicken. A bland sauce can take black pepper, garlic powder, paprika, thyme, or a small spoon of Dijon; a salty sauce does not need extra salt.

For the oven version, a 9×13-inch baking dish, foil, a mixing bowl, and an instant-read thermometer are enough. The stovetop route needs a lidded skillet, while the crockpot option works best in a 4–6 quart slow cooker.

Using Campbell’s or Any Condensed Mushroom Soup

Campbell’s condensed cream of mushroom soup works well here, and so do other condensed brands. The label matters less than the word condensed.

Condensed vs Ready-to-Eat Soup

Condensed soup is thick enough to become sauce when mixed with a small amount of milk, broth, or water. Ready-to-eat mushroom soup is already diluted, so it can make the dish watery unless you reduce or skip the added liquid.

Comparison of thick condensed cream of mushroom soup and thinner ready-to-eat mushroom soup.
Condensed cream of mushroom soup starts thick, while ready-to-eat soup is already diluted; that difference matters when you want a creamy sauce.

Low-sodium condensed soup gives you more control if you are also using broth, cheese, onion soup mix, or another salty ingredient.

The same cream-soup comfort logic shows up in MasalaMonk’s tuna noodle casserole recipe, where condensed soup turns into a creamy noodle bake.

Best Chicken to Use: Breasts, Thighs, or Cubed Chicken

That is really the whole chicken decision: breasts for a classic sliced dinner, thighs when you want more forgiveness, and cubed chicken when you want a faster skillet or casserole-style meal.

Chicken guide showing breasts, thighs, cubed chicken, and thinner cutlets for cream of mushroom chicken.
Your cut changes the result: breasts slice neatly, thighs stay juicy, and cubed chicken cooks quickly for skillet-style dinners.

Chicken Breasts

Chicken breasts work well when they are not too thick. Large breasts should be sliced in half lengthwise to make thinner cutlets, or pounded to an even thickness. This helps the chicken cook through before the sauce dries out.

For more detail on baking chicken breast without drying it out, see MasalaMonk’s baked chicken breast recipe.

Chicken Thighs

Boneless skinless thighs stay juicy even when the dish needs a few extra minutes. They are especially good for the slow cooker or chicken-and-rice versions because they can handle longer cooking better than thin breasts.

Cubed Chicken

Cubed chicken is useful for a quick skillet dinner or a casserole-style variation. It cooks faster and mixes easily with noodles or rice, though it does not give you the same sliced-chicken presentation as baked breasts or thighs.

Baked Cream of Mushroom Chicken

This is the version to make first. It gives you the classic creamy mushroom chicken experience without needing a skillet, a roux, or a separate sauce.

The best pan comes out bubbling around the edges, with mushroom gravy tucked around the chicken and enough creamy sauce to drag through rice, noodles, or mashed potatoes.

Before Baking

The dish should look assembled but not finished: chicken tucked into the mushroom mixture, mushrooms visible, and just enough sauce to coat the pan before it is covered.

Raw chicken breasts in a baking dish with cream of mushroom sauce, sliced mushrooms, foil, and a spoon nearby.
Before baking, the chicken should be coated and nestled into the mushroom mixture, not buried under too much liquid.

Baked Version at a Glance

Detail Best Answer
Oven temperature 375°F / 190°C
Baking dish 9×13-inch dish
Chicken 1½ lb / 680 g boneless skinless breasts or thighs
Soup 1 can condensed cream of mushroom soup, 10.5 oz / 298 g
Liquid ½ cup / 120 ml milk or low-sodium chicken broth
Covered bake 25 minutes
Uncovered finish 5–10 minutes
Safe internal temperature 165°F / 74°C
Resting time 5 minutes
Baked cream of mushroom chicken guide showing 375°F oven, covered baking, uncovered finish, 165°F temperature, and resting time.
Baked cream of mushroom chicken works best with a covered start, a short uncovered finish, and a thermometer check at 165°F.

Once this version is in the oven, there is not much left to do except make something for the sauce to land on.

Covered or Uncovered?

Cover the chicken for the first part of baking. The foil traps steam, keeps the meat moist, and prevents the sauce from drying out too quickly. The final uncovered minutes help looseness cook off and let cheese melt if you are using it.

Very thin pieces should be checked early. Thicker pieces need a thermometer more than they need a guessed time.

Comparison of covered and uncovered baked cream of mushroom chicken in a casserole dish.
Covering helps the chicken stay moist; afterward, uncovering lets the creamy mushroom sauce reduce just enough.
If the chicken is done but the sauce is thin: Do not keep baking the chicken just to thicken the sauce. Move the chicken to a plate, cover it loosely, and thicken the sauce in a small pan, or in the baking dish only if your dish is stovetop-safe.

What the Sauce Should Look Like

The finished sauce should be creamy and spoonable, thick enough to coat the chicken but loose enough to run into rice, noodles, or mashed potatoes. It should not be stiff like paste, and it should not run like soup.

A sauce that looks too thick before baking needs another splash of milk or broth. When the sauce looks watery but the chicken still needs time, uncover the dish for the last few minutes. Once the chicken is already at 165°F / 74°C, remove it and thicken the sauce separately instead of overbaking dinner.

Sauce texture guide for cream of mushroom chicken showing too thick, just right, and too thin sauces.
Look for sauce that coats a spoon without running like soup, since that texture will sit better on rice, noodles, or mashed potatoes.

In the oven version, ½ cup / 120 ml milk or broth per 10.5 oz / 298 g can of condensed soup is the safest starting point. The skillet version can handle more liquid because the pan sauce reduces as it simmers. The slow cooker needs less because the lid traps moisture as everything cooks. When the texture looks off, use the troubleshooting guide instead of guessing.

Skillet Cream of Mushroom Chicken

The skillet version is best when dinner needs to be faster and the sauce needs more hands-on control. It tastes a little more cooked, not just assembled, because the chicken and mushrooms get direct heat before the sauce comes together.

This is the version with the most dinner-pan flavor: a little browning, a little butter, and creamy mushroom sauce pulled together in the same skillet.

Skillet cream of mushroom chicken with seared chicken, browned mushrooms, creamy sauce, black pepper, and herbs.
The skillet version adds extra savory depth because the chicken and mushrooms brown before the cream sauce is finished.

Skillet Formula

  • 1½–2 lb / 680–900 g chicken
  • 1 tbsp oil or butter, for searing
  • 1 can condensed cream of mushroom soup, 10.5 oz / 298 g
  • ½–1 cup / 120–240 ml milk, water, or low-sodium chicken broth
  • 8 oz / 225 g sliced mushrooms, optional
  • Garlic powder, onion powder, paprika, black pepper, and herbs to taste

Oil helps the chicken sear without burning. A small knob of butter added with the mushrooms gives the pan a richer, rounder flavor.

Skillet Timing

Chicken Type Timing What to Watch
Thin chicken cutlets Sear 3–4 minutes per side, then simmer 5–8 minutes in sauce Check early so they do not dry out.
Boneless thighs Sear 4–5 minutes per side, then simmer 8–12 minutes in sauce They stay juicier and can handle a little longer cooking.
Cubed chicken Cook 8–12 minutes total, depending on cube size Stir often so the sauce coats the pieces evenly.
Skillet formula and timing guide for cream of mushroom chicken with cutlets, thighs, and cubed chicken.
Skillet cream of mushroom chicken cooks quickly, so cut size matters: thin cutlets, thighs, and cubed chicken all need different timing.

How to Make It in a Skillet

Season the chicken, then sear it in a large skillet until lightly browned on both sides. Add fresh mushrooms after removing the chicken briefly, then cook them until they release moisture and start to brown. Whisk in the condensed soup with enough broth or milk to make a sauce, then return the chicken to the pan.

Step-by-step skillet method showing seared chicken, browned mushrooms, sauce mixture, returned chicken, and gentle simmering.
Sear first, then simmer gently; that sequence builds flavor while keeping the chicken from drying out.

Cover and simmer gently until the chicken reaches 165°F / 74°C. A pan sauce that tightens too much only needs a tablespoon or two of milk or broth. A loose sauce needs the opposite: a few uncovered minutes so extra moisture can cook off. Use the sauce texture guide if you are unsure whether to loosen or reduce it. For a quick slurry, mix 1 tsp cornstarch with 1 tbsp cold water, then stir it into the simmering sauce. Sour cream should go in near the end over low heat so everything stays smooth.

Slow Cooker Cream of Mushroom Chicken

The slow cooker is best when you want tender, saucy chicken waiting for you later. It is less about speed and more about having creamy chicken ready when the rice, noodles, or potatoes are done.

Because the lid traps moisture, start with less liquid than you would use in the oven or skillet. Thawed chicken gives the most predictable timing and texture; frozen chicken releases more moisture and can make the sauce thin.

Slow cooker cream of mushroom chicken before and after cooking, with chicken, mushrooms, condensed soup, and creamy finished sauce.
Slow cooker cream of mushroom chicken needs a thicker starting mixture because the covered cooker creates its own moisture.

If you like this kind of hands-off chicken dinner, MasalaMonk’s crock pot chicken breast recipes has more ways to keep slow-cooked chicken juicy instead of dry.

Slow Cooker Formula

  • 1½–2 lb / 680–900 g chicken breasts or thighs
  • 2 cans condensed cream of mushroom soup, 10.5 oz / 298 g each
  • ½ cup / 120 ml low-sodium chicken broth or water
  • 8 oz / 225 g sliced mushrooms, optional
  • ½ packet onion soup mix, optional, only if you like a saltier old-school flavor
  • Sour cream or cheese near the end, optional
Slow cooker formula board for cream of mushroom chicken with chicken, condensed soup, broth or water, timing, and temperature.
Start the slow cooker with less liquid than the oven version, then adjust near the end if the sauce needs loosening or enrichment.

Cook on High for 3–4 hours or Low for 6–7 hours, until the chicken reaches 165°F / 74°C. Thighs handle the longer cook better than thin breasts. By the end, the chicken should be fork-tender and the sauce should taste like it has had time to settle into the meat.

Serve the pieces whole, or shred the chicken into the sauce if you want it to spoon over rice, noodles, or potatoes. Add sour cream or cheese near the end, not at the beginning, for the smoothest finish.

How to Thicken Slow Cooker Cream of Mushroom Chicken

A thin slow cooker sauce can be fixed by removing the lid for a short time, shredding the chicken into the sauce, or thickening it with a small slurry made from 1 tsp cornstarch and 1 tbsp cold water. Use this fix before the chicken overcooks.

Guide showing how to thicken slow cooker cream of mushroom chicken sauce by removing the lid, shredding chicken, or adding slurry.
If slow cooker sauce turns thin, you can fix it calmly with uncovered time, shredded chicken, or a small cornstarch slurry.

For another saucy crockpot chicken dinner, MasalaMonk’s slow cooker French onion chicken follows a similar comfort-food idea with onion gravy, cheese, and a base of noodles, potatoes, rice, or toast.

Cream of Mushroom Chicken and Rice

Rice can absolutely work here, but it needs its own formula. Dry rice needs extra liquid, trapped steam, and more time than the basic baked chicken version. Before you bake, scan the rice mistakes to avoid if you are using brown rice, instant rice, or thick chicken pieces.

Rice version rule: Use extra liquid, a tight foil cover, and longer baking time. The soup base alone is too thick to cook raw rice evenly.
Cream of mushroom chicken and rice casserole in a baking dish with tender rice, mushrooms, creamy sauce, and a serving spoon.
Cream of mushroom chicken and rice needs its own method, since dry rice requires extra liquid, trapped steam, and resting time.

Campbell’s classic one-dish chicken and rice bake follows this same condensed-soup pattern: condensed soup, measured liquid, uncooked long-grain white rice, and chicken baked together under a tight cover. You can see that reference here: Campbell’s One-Dish Chicken & Rice Bake.

Small Classic Chicken and Rice Bake

This smaller rice bake makes about 4 servings.

  • 1 can condensed cream of mushroom soup, 10.5 oz / 298 g
  • 1 cup / 240 ml water or low-sodium chicken broth
  • ¾ cup / about 140 g uncooked long-grain white rice
  • 1¼ lb / 565 g boneless skinless chicken breast or thighs
  • ¼ tsp paprika, plus pepper and garlic powder if desired

Mix the soup, liquid, rice, and seasoning in a greased baking dish. Place the chicken on top, cover tightly, and bake at 375°F / 190°C for about 45 minutes, or until the rice is tender and the chicken reaches 165°F / 74°C. Let it stand for 10 minutes before serving so the rice can finish absorbing the sauce.

Chicken and rice timing tip: Thicker chicken pieces or thighs work better for rice bakes because the rice needs longer to cook. Thin chicken breasts may finish before the rice is tender. When that happens, remove the chicken, keep the rice covered, and continue baking the rice until soft.

Larger 9×13 Family Rice Bake

A larger family-style casserole needs more soup, more rice, and more liquid.

  • 2 cans condensed cream of mushroom soup, 10.5 oz / 298 g each
  • 2 cups / 480 ml low-sodium chicken broth
  • 1¼ cups / about 230 g long-grain white rice
  • 1½–2 lb / 680–900 g chicken
  • Optional onion, thyme, Dijon, black pepper, or Parmesan

Cover tightly and bake at 350°F / 175°C for about 60 minutes. Check the rice, stir gently around the chicken if needed, add a splash of hot broth if the rice is still firm, then cover again and bake 10–15 minutes more. Rest 10 minutes before serving.

Chicken and Rice Formula Guide

Use the small bake when you want a compact dinner, and use the 9×13 formula when the casserole needs to feed more people without leaving the rice undercooked.

Formula guide for small and family-size cream of mushroom chicken and rice bakes with soup, liquid, rice, chicken, oven temperature, and time.
Use the right chicken-and-rice formula from the start, and you avoid the common problem of tender chicken with undercooked rice.

Rice Mistakes to Avoid

The rice version is forgiving once the steam is right, but it is less forgiving when the cover is loose or the liquid is guessed.

  • A loose cover will not trap enough steam. Rice needs a tight cover to soften properly.
  • Brown rice needs a different plan. It takes more time and usually more liquid than white rice.
  • Instant rice cooks too fast for this long bake. It can turn mushy unless you change the method.
  • Ready-to-eat soup can make the bake watery. It is already diluted, unlike condensed soup.
  • The chicken can finish before the rice. Check both before calling the dish done.
  • Resting matters. The rice absorbs the final sauce as it stands.
Chicken and rice mistakes guide showing loose cover, wrong rice, too little liquid, chicken done before rice, skipped resting time, and rice choices.
Long-grain white rice is the easiest choice; brown rice and instant rice need different liquid and timing to work well.

Serving the chicken over plain rice instead of baking rice in the dish? MasalaMonk’s how to cook rice guide is useful for getting fluffy grains that do not turn gummy under the sauce.

Cream of Chicken + Cream of Mushroom Variation

You can mix cream of chicken and cream of mushroom soup. Cream of chicken makes the sauce milder and more savory, while cream of mushroom adds deeper mushroom flavor. A 50/50 mix works especially well for larger bakes, chicken and rice, and slow cooker meals.

For a bigger casserole or crockpot dinner, try 1 can cream of mushroom soup and 1 can cream of chicken soup. Low-sodium versions are the safest choice because two condensed soups can make the dish salty fast.

Comparison of cream of mushroom soup, cream of chicken soup, and a 50 50 blend spooned over chicken.
Cream of mushroom brings deeper flavor, cream of chicken tastes milder, and a 50/50 blend gives a softer creamy sauce.

This same cream-soup swap logic also shows up in comfort casseroles like MasalaMonk’s green bean casserole recipe ideas, where condensed cream soup is part of the classic creamy base.

How to Make Cream of Mushroom Chicken Taste Better

The shortcut works as-is, but one or two small upgrades can make it taste more like a creamy mushroom dinner than plain canned soup.

The easiest upgrades are browned mushrooms for depth, broth for savoriness, and a small spoon of Dijon or thyme for balance.

Flavor upgrade board for cream of mushroom chicken with browned mushrooms, broth, thyme, Dijon, sour cream, cheese, pepper, and parsley.
Small upgrades like browned mushrooms, broth, Dijon, thyme, sour cream, cheese, pepper, and parsley make the shortcut taste more complete.

Browned vs Raw Mushrooms

Raw mushrooms can go straight into the dish, but browning them first gives the sauce more flavor and reduces the extra moisture that can loosen the pan.

Comparison of raw sliced mushrooms and browned mushrooms for cream of mushroom chicken.
Raw mushrooms keep prep easy; meanwhile, browned mushrooms add deeper flavor and reduce extra moisture in the sauce.
  • Brown fresh mushrooms first: This adds real mushroom flavor, cooks off extra moisture, and gives the sauce a deeper base.
  • Choose broth instead of water: Low-sodium chicken broth gives the dish more savory depth.
  • Add garlic and onion powder: These make the pantry version taste fuller.
  • Add thyme: Thyme works naturally with mushrooms and chicken.
  • Stir in a small spoon of Dijon: It cuts through the richness without making the dish taste mustardy.
  • Finish with sour cream: It gives the sauce a tangier, creamier finish. In skillet and slow cooker versions, add it near the end over gentle heat.
  • Melt cheese on top: Mozzarella, Monterey Jack, cheddar, Swiss, or Muenster can turn this into a cheesy baked chicken dinner.
  • Add black pepper and parsley at the end: This keeps the final plate from tasting too heavy.

What to Serve with Cream of Mushroom Chicken

The sauce is the point, so serve it with something that catches every spoonful: fluffy rice, buttered egg noodles, mashed potatoes, biscuits, broccoli, or green beans.

Side dish guide for cream of mushroom chicken with rice, egg noodles, mashed potatoes, biscuits, broccoli, and green beans.
The best sides give the sauce somewhere to go, whether you choose rice, egg noodles, mashed potatoes, biscuits, broccoli, or green beans.

Over Rice

Plain white rice is the easiest pairing. Brown rice, leftover rice, or seasoned rice also work, but keep them separate unless you are following a true chicken-and-rice bake formula.

Cream of mushroom chicken served over fluffy white rice with sliced mushrooms, creamy sauce, black pepper, and herbs.
Rice keeps this creamy chicken dinner simple, filling, and easy to serve on a busy weeknight.

Over Egg Noodles

Egg noodles make this feel like old-school chicken and gravy. Cook the noodles separately, then spoon the chicken and mushroom sauce over the top. Dry egg noodles should not go into the baking dish unless you are using a tested noodle-casserole formula.

Cream of mushroom chicken served over broad egg noodles with creamy mushroom sauce, chicken pieces, herbs, and a fork lifting a bite.
Broad egg noodles hold the mushroom sauce in their folds, so this version feels cozy without needing extra prep.

Over Mashed Potatoes

Mashed potatoes make the plate even cozier. If you want a creamy potato side that will hold the sauce without turning gluey, try MasalaMonk’s garlic mashed potatoes recipe.

Sliced cream of mushroom chicken served over mashed potatoes with mushrooms, creamy sauce, black pepper, and herbs.
Mashed potatoes make the richest plate because the soft potatoes hold the creamy mushroom sauce instead of letting it run.

With Vegetables

Green beans, broccoli, peas, carrots, roasted mushrooms, or a simple salad balance the richness. For a holiday-style comfort plate, serve it with green bean casserole, roasted vegetables, or a crisp side salad.

For a bigger comfort-food spread, MasalaMonk’s hashbrown casserole recipe also works as a creamy potato side, especially when the chicken is served with green beans or salad. Planning leftovers? The storage and reheating tips explain how to loosen the sauce again without drying out the chicken.

How to Fix Cream of Mushroom Chicken

Even when this dish goes a little sideways, it is usually fixable. Most problems are texture problems: the sauce is too thick, too watery, or too salty, while the chicken dries out because the pieces were too thick or cooked too long.

The usual culprits are ready-to-eat soup instead of condensed soup, too much liquid, a loose cover on rice, or thick chicken breasts that needed more time than the sauce did.

Common Sauce, Chicken, and Rice Fixes

Problem What Happened How to Fix It
Sauce is too thick or gluey Not enough liquid was added to the condensed soup. Add milk or broth 1–2 tbsp at a time until it is spoonable.
Sauce is watery Too much liquid was added, ready-to-eat soup was used, or raw mushrooms released extra moisture. When the chicken still needs time, bake uncovered 5–10 minutes. When the chicken is already done, remove it and thicken the sauce separately with a small slurry: 1 tsp cornstarch mixed with 1 tbsp cold water.
Sauce is too salty Condensed soup, broth, cheese, or onion soup mix added too much salt. Serve with rice, noodles, or potatoes to soften the saltiness. A spoonful of sour cream can also mellow the sauce. Next time, use low-sodium soup and broth.
Chicken is dry The pieces were too thick, uncovered too long, or cooked past 165°F / 74°C. Slice breasts thinner, cover while baking, check early, or use thighs.
Chicken is done but sauce is thin The sauce needs more time, but the chicken does not. Remove the chicken, cover it loosely, and thicken the sauce separately in a small pan.
Rice is undercooked The dish needed more steam, liquid, or time. Add ¼–½ cup hot broth, cover tightly again, and bake longer.
Rice is mushy Too much liquid or too much bake time. Use long-grain white rice, measure carefully, and rest the dish instead of overbaking.
Dish tastes bland The sauce was not boosted with enough seasoning or fresh ingredients. Add black pepper, garlic powder, onion powder, thyme, paprika, Dijon, or browned mushrooms.
Sauce splits when reheated It was reheated too aggressively. Reheat gently with a splash of milk or broth and stir slowly.
Troubleshooting guide for cream of mushroom chicken showing fixes for watery sauce, thick sauce, salty sauce, dry chicken, undercooked rice, and bland flavor.
Most cream of mushroom chicken problems are fixable once you know whether the issue is texture, salt, timing, or seasoning.

Storage, Freezing and Reheating

Store leftovers in an airtight container in the refrigerator for 3–4 days. Rice or noodles are best stored separately when possible so they do not soak up all the sauce.

To reheat, warm the chicken gently on the stovetop or in the microwave with a splash of milk or broth. The sauce thickens as it chills, so that splash of liquid helps bring it back to a spoonable texture.

You can freeze the cooked chicken and sauce, but the sauce may loosen or look slightly grainy after thawing. It is still usable; reheat gently and whisk in a splash of milk or broth to bring it back together.

Chicken-and-rice leftovers thicken more in the fridge because the rice keeps absorbing the sauce. Reheat them with a splash of broth or milk so the rice loosens instead of turning dry.

Storage guide for cream of mushroom chicken showing a fridge container, freezer bag, and reheating in a skillet with milk or broth.
Creamy leftovers thicken in the fridge, so reheat gently and add a splash of milk or broth to bring the sauce back.

Cream of Mushroom Chicken FAQs

How long should cream of mushroom chicken bake?

Thin boneless chicken breasts or thighs usually need about 25 minutes covered at 375°F / 190°C, then 5–10 minutes uncovered. Thickness matters more than the clock, so check that the chicken reaches 165°F / 74°C.

Covered or uncovered?

Cover the dish first so the chicken stays moist and the sauce does not dry out. Uncover near the end when the sauce needs to thicken or cheese is going on top.

Campbell’s soup vs other condensed brands

A standard 10.5 oz / 298 g can of Campbell’s condensed cream of mushroom soup works well, but other condensed brands work too. The important detail is that the soup is condensed, not ready-to-eat.

Chicken breasts vs thighs

Boneless skinless thighs are the more forgiving choice because they stay juicy even when the dish needs a few extra minutes. Breasts work well too, but they should be thin and even before baking.

How much liquid should I add to condensed soup?

For baked chicken, ½ cup / 120 ml milk or low-sodium broth per 10.5 oz / 298 g can makes a creamy sauce. Skillet chicken can take ½–1 cup / 120–240 ml because the pan sauce reduces as it simmers.

How to make it on the stove

The stovetop version works best with thin pieces because they cook quickly and stay tender. Sear them first, then simmer gently in the mushroom sauce until they reach 165°F / 74°C. A few uncovered minutes will tighten a loose pan sauce.

Homemade mushroom sauce instead of canned soup

This becomes a different style of recipe, but it can work. For a quick homemade mushroom cream sauce, start with 2 tbsp butter, 8 oz mushrooms, 1 minced garlic clove, 2 tbsp flour, 1 cup broth, and ½ cup milk or cream, then cook the chicken in that sauce. For the classic shortcut flavor, use condensed soup.

Adding rice safely

Rice can work beautifully, but treat it like its own bake, not a last-minute add-in. It needs extra liquid, trapped steam, and more time than the basic chicken version. Start with 1 can condensed soup, 1 cup / 240 ml water or broth, ¾ cup / about 140 g long-grain white rice, and about 1¼ lb / 565 g chicken.

Should you use frozen chicken?

Thawed chicken is the safer bet here because it cooks more evenly and keeps the sauce from turning watery. Frozen chicken can release a lot of moisture, especially in the oven or skillet, so thaw it first when you can.

Why the sauce turns watery

Watery sauce usually comes from too much liquid, ready-to-eat soup instead of condensed soup, raw mushrooms releasing moisture, or keeping the dish covered for the whole bake. Once the chicken is done, remove it and thicken the sauce separately with a small slurry made from 1 tsp cornstarch and 1 tbsp cold water.

Fixing a salty sauce

Condensed soup is already salty, and broth, cheese, or onion soup mix can add even more. Rice, noodles, or potatoes help soften the saltiness on the plate. A spoonful of sour cream can also mellow the sauce.

Best sides for creamy mushroom chicken

Rice, egg noodles, mashed potatoes, biscuits, broccoli, green beans, peas, carrots, and roasted mushrooms all work. The best side is something that catches the creamy mushroom sauce.

Slow cooker ratio

In the slow cooker, use less liquid than you might expect because the lid traps moisture. For 1½–2 lb / 680–900 g chicken, use 2 cans condensed cream of mushroom soup and about ½ cup / 120 ml broth or water. Cook on High for 3–4 hours or Low for 6–7 hours, until the chicken reaches 165°F / 74°C.

Final Thoughts

Start with the oven version first. Once you understand the soup-to-liquid ratio, the recipe bends to the night: faster in a skillet, easier in the slow cooker, or heartier with rice.

However you make it, the goal stays the same: juicy chicken, creamy mushroom gravy, and a dinner that asks very little from you but still feels like someone cared.

Back to top

Posted on Leave a comment

Slow Cooker French Onion Chicken

Slow cooker French onion chicken with melted cheese, soft onions, and onion gravy served over creamy mashed potatoes.

Slow Cooker French Onion Chicken is what you make when you want the comfort of French onion soup but need it to feel like dinner: tender chicken, soft onions, savory gravy, and melted cheese spooned over mashed potatoes, rice, egg noodles, or toasted bread.

The base version is a true shortcut dinner: chicken, sliced onion, condensed French onion soup, dry onion soup mix, a little broth, and cheese at the end. It is simple enough for a busy day, but a few small choices keep the chicken tender and the onion gravy balanced instead of watery, harsh, or too salty.

When you lift the lid, you want soft onions, a savory gravy smell, chicken that still tastes juicy, and cheese that melts over the top instead of disappearing into the sauce. That is why this guide covers cook times, chicken breasts vs thighs, onion soup mix balance, gravy thickening, and the best way to finish the cheese.

The main recipe uses condensed French onion soup and dry onion soup mix, but you can also make it creamy, use thighs instead of breasts, broil the cheese, add mushrooms, or use the no-canned-soup version when you want a more homemade onion sauce.

Before the timing details, this is the result to aim for: a full dinner plate with tender chicken, softened onions, glossy onion gravy, and something underneath to catch the sauce.

Finished slow cooker French onion chicken served over egg noodles with melted cheese, onion gravy, and toasted bread nearby.
Because the onion gravy needs something to catch it, noodles, potatoes, rice, or toast help turn the chicken into a complete comfort-food dinner.

Quick Answer: How Long to Cook Slow Cooker French Onion Chicken

Cook slow cooker French onion chicken on low for 4–6 hours or on high for 3–4 hours, depending on the thickness of the chicken and whether you want sliceable or shreddable meat. Thin chicken breasts may be ready closer to 3–4 hours on low. Boneless thighs can usually handle a little longer and stay juicier.

The chicken is done when the thickest piece reaches 165°F / 74°C on an instant-read thermometer. Add the cheese only after the chicken is cooked through, then cover the slow cooker until the cheese melts, or transfer the chicken to a broiler-safe dish for a browned, bubbling top.

Quick answer guide for slow cooker French onion chicken with low and high cook times, 165°F doneness, and cheese finish note.
Start with the cook time, but trust the thermometer: the thickest piece of chicken should reach 165°F / 74°C before the cheese goes on.

For food safety, use thawed chicken rather than frozen chicken in the slow cooker. FoodSafety.gov lists 165°F / 74°C as the safe minimum internal temperature for poultry, and USDA slow-cooker guidance recommends thawing meat or poultry before adding it to a slow cooker. FoodSafety.gov’s temperature chart and USDA/FSIS slow-cooker guidance are useful references if you want the safety details.

For more detail by chicken cut and thickness, use the low vs high cook-time guide below.

Slow Cooker French Onion Chicken at a Glance

Best slow cooker size 5- to 6-quart slow cooker for about 2 lb / 900 g chicken
Best chicken Boneless skinless breasts for a leaner, sliceable dinner; boneless thighs for juicier, more forgiving meat
Cook time Low 4–6 hours or high 3–4 hours, checking to 165°F / 74°C
Flavor base Condensed French onion soup, dry onion soup mix, sliced onions, low-sodium beef broth, Worcestershire, thyme, and cheese
Best cheese Gruyère for classic French onion flavor, Swiss for budget-friendly comfort, provolone for smooth melting
Best serving ideas Mashed potatoes, rice, egg noodles, pasta, toasted bread, roasted vegetables, or sandwich rolls
At-a-glance guide for slow cooker French onion chicken showing slow cooker size, chicken amount, onion soup mix, and cheese options.
A 5- to 6-quart slow cooker keeps the chicken mostly in one layer, helping the onions, broth, soup mix, and cheese cook more evenly around it.

Use the table as your baseline, then choose the texture you want: sliceable chicken for plates, shredded chicken for bowls and sandwiches, or a creamier sauce for noodles and rice.

Choose Your Result: Sliceable, Shredded, Creamy, or Extra Cheesy

The best version depends on how you want to serve it. For a plated dinner, keep the chicken sliceable. For rice, noodles, mashed potatoes, or sandwiches, let it go softer and shred it into the onion gravy.

Slow cooker French onion chicken result guide with sliceable, shredded, creamy, and broiled cheese finish options.
Choose the result before you cook: sliceable chicken for plates, shredded chicken for bowls, creamy sauce for noodles, or broiled cheese for a deeper finish.
What you want Use Best method
Sliceable chicken Thin or evenly pounded chicken breasts Check early, around 3–4 hours on low
Shredded chicken and gravy Breasts or thighs Cook longer, then shred into the onion sauce
Juiciest version Boneless chicken thighs Cook low and slow; thighs are more forgiving
Creamy version Sour cream, Greek yogurt, cream cheese, or heavy cream Stir in at the end, after cooking
French onion soup-style finish Swiss, Gruyère, or provolone Broil the cheese for 2–5 minutes after slow cooking

Slow Cooker French Onion Chicken Recipe

This slow cooker French onion chicken cooks tender chicken in a savory onion gravy, then finishes with melted Swiss, provolone, or Gruyère cheese. Keep it simple with condensed French onion soup and onion soup mix, or use the notes below for thicker gravy, a broiled cheese finish, chicken thighs, creamy sauce, or a no-canned-soup version.

Prep Time10 minutes
Cook Time3–4 hours high or 4–6 hours low
Total TimeAbout 3 hr 10 min–6 hr 10 min
Servings4–6

Equipment

  • 5- to 6-quart slow cooker
  • Instant-read thermometer
  • Medium mixing bowl
  • Tongs
  • Optional broiler-safe dish for browning the cheese

Ingredients

  • 2 lb / 900 g boneless skinless chicken breasts or thighs
  • 1 large yellow or sweet onion, thinly sliced, about 200–250 g
  • 1 can condensed French onion soup, 10.5 oz / about 298 g, undiluted
  • 1 packet dry onion soup mix, 1 oz / 28 g
  • ½ cup / 120 ml low-sodium beef broth, plus more if needed
  • 1 tbsp / 15 ml Worcestershire sauce
  • 1 tsp Dijon mustard or 2 tsp balsamic vinegar, optional
  • ½ tsp black pepper
  • ½ tsp dried thyme or 2–3 fresh thyme sprigs
  • 4–6 slices Swiss, provolone, or Gruyère, or 1 cup / 100–115 g shredded cheese
  • Optional for thickening: 1 tbsp cornstarch + 1 tbsp cold water

Instructions

  1. Add the sliced onions to the bottom of a 5- to 6-quart slow cooker.
  2. Place the chicken over the onions in a mostly even layer.
  3. In a bowl, stir together the undiluted condensed French onion soup, dry onion soup mix, beef broth, Worcestershire sauce, Dijon or balsamic if using, black pepper, and thyme.
  4. Pour the sauce mixture over the chicken.
  5. Cover and cook on high for 3–4 hours or on low for 4–6 hours, until the thickest piece of chicken reaches 165°F / 74°C.
  6. If you want thicker gravy, remove the chicken to a plate. Stir together cornstarch and cold water, then stir the slurry into the slow-cooker sauce. Cover and cook on high for 10–15 minutes, until slightly thickened.
  7. Return the chicken to the sauce. Top with cheese, cover, and cook 10–30 minutes until melted.
  8. For a browned cheese finish, transfer the cooked chicken and some sauce to a broiler-safe dish, top with cheese, and broil for 2–5 minutes, watching closely.
  9. Serve over mashed potatoes, rice, egg noodles, pasta, toasted bread, or vegetables.

Notes

  • Use low-sodium broth because condensed soup, onion soup mix, and cheese already season the gravy.
  • If you prefer a milder onion gravy, start with ½ packet onion soup mix and add more only after tasting.
  • For sliceable chicken breasts, check early and avoid cooking much past 165°F / 74°C.
  • For shredded chicken, cook until very tender, shred into the sauce, then add cheese.
  • For a creamier sauce, stir in sour cream, Greek yogurt, cream cheese, or heavy cream at the end, once the slow cooker is on warm or the sauce is no longer bubbling hard.
Saveable slow cooker French onion chicken recipe card with servings, cook time, main ingredients, method, and 165°F doneness cue.
Keep the basic build simple, then use the extra notes when you want thicker gravy, a browned cheese top, or a no-canned-soup version.

Why This Recipe Works

This recipe works because the onion flavor comes from three places: sliced onions for sweetness, condensed French onion soup for body, and dry onion soup mix for shortcut seasoning. Low-sodium broth loosens the sauce without diluting it, while Worcestershire, thyme, and a little Dijon or balsamic keep the flavor from tasting flat.

The cheese waits until the end because it has a job: it should sit on top like a French onion soup finish. Melt it in the slow cooker for the easiest version, or broil it for browned edges and a deeper, toastier flavor.

What the Finished Chicken Should Be Like

When this dish is right, the chicken should be tender enough to cut with a fork but not dry around the edges. The onions should be soft and tucked into the gravy, not sitting on top as sharp raw slices. You want a sauce that drapes over potatoes or noodles, not one that runs straight to the edge of the plate.

At the finish, the cheese should stay visible and melty instead of blending into the gravy. If you broil it, look for browned spots, bubbling edges, and that French onion soup feeling when the cheese pulls slightly as you serve it.

French onion chicken texture guide showing tender chicken, soft onions, melted cheese, and gravy draping over the food.
The best onion gravy should drape instead of run, so it coats potatoes, noodles, or rice without turning watery or paste-thick.

Ingredients You Need

The ingredient list is short, but each part has a job: onions for sweetness, soup mix for shortcut flavor, broth for a spoonable base, and cheese for the French onion finish. Amounts are written in both US and metric measurements where useful.

Ingredients for slow cooker French onion chicken including chicken, sliced onions, onion soup mix, broth, thyme, cheese, and cornstarch slurry.
Although the ingredient list is short, the balance matters: soup mix seasons, broth loosens, onions sweeten, and cheese gives the French onion finish.

Chicken

The chicken is the only part of this recipe that can really punish you if it overcooks. Use 2 lb / 900 g boneless skinless chicken breasts or thighs. Breasts give you a leaner, more sliceable dinner, while thighs stay juicier and are more forgiving if you want shredded chicken in the sauce.

Chicken Breast Thickness and Doneness

If your chicken breasts are very thick, slice them horizontally or pound them to a more even thickness. This helps them cook evenly and reduces the chance of dry edges before the center is done. For exact timing by cut, use the cook-time table.

Chicken breast doneness guide with thick chicken breast, thinner chicken pieces, and a 165°F target temperature.
Even thickness helps chicken breasts cook predictably. Slice or pound thick pieces, and start checking thin pieces early.

If you want more slow-cooker ideas built around lean chicken, these crock pot chicken breast recipes are helpful for keeping chicken breast tender instead of dry.

For a different dinner built around a whole bird instead of boneless pieces, this whole chicken in crock pot guide is the better match.

Onions

Use 1 large yellow or sweet onion, thinly sliced. This is usually about 200–250 g, or roughly 2 cups sliced onion. Yellow onions give classic savory-sweet flavor. Sweet onions make the sauce softer and slightly sweeter.

For a more onion-heavy, French onion soup-style sauce, add a second onion. On busy nights, 1 large onion is still enough because the soup base and onion soup mix bring plenty of onion flavor too.

Condensed French Onion Soup

The shortcut base is 1 can condensed French onion soup, usually 10.5 oz / about 298 g. Use it straight from the can; do not prepare it with water first. The condensed soup brings savory onion flavor, body, and seasoning.

Dry Onion Soup Mix

Use 1 packet dry onion soup mix, usually 1 oz / 28 g. Any standard dry onion soup mix works. Because the mix already seasons the sauce, the rest of the recipe uses low-sodium broth and waits until the end for final adjustments.

For a better-balanced gravy: use low-sodium broth and wait to add extra salt until the end. Condensed soup, onion soup mix, and cheese already season the sauce, so you may not need much more.

Beef Broth or Beef Consommé

Use ½ cup / 120 ml low-sodium beef broth for a saucier version. Beef consommé can also work when you want a deeper, more concentrated flavor, but it is often richer and saltier than broth. Taste the sauce before adjusting the seasoning.

Worcestershire, Dijon, Balsamic, and Thyme

Worcestershire gives the sauce a deeper savory edge, while Dijon or balsamic keeps the onion sweetness from feeling flat. Thyme brings it closer to the flavor of French onion soup.

Use 1 tbsp / 15 ml Worcestershire sauce, plus either 1 tsp Dijon mustard or 2 tsp balsamic vinegar. Add ½ tsp dried thyme or a few fresh thyme sprigs.

Cheese

Use 4–6 slices Swiss, provolone, or Gruyère, or about 1 cup / 100–115 g shredded cheese. Gruyère gives the most classic French onion soup flavor. Swiss is easy to find and budget-friendly. Provolone melts smoothly and is mild enough for kids or picky eaters.

Best cheese for French onion chicken guide showing Gruyère, Swiss, and provolone melted over chicken.
Gruyère gives the most classic French onion flavor, Swiss keeps it easy and budget-friendly, and provolone melts into a smooth, mild topping.

Slow Cooker French Onion Chicken with Onion Soup Mix

Dry onion soup mix is what gives this crock pot French onion chicken its easiest shortcut flavor. One standard packet, usually 1 oz / 28 g, is enough for the main recipe because the condensed French onion soup and cheese also season the gravy.

Onion Soup Mix Balance

If you prefer a milder gravy, start with half the packet, use low-sodium beef broth, and taste the sauce before adding any extra seasoning. Two packets can work in some creamy onion soup mix chicken recipes, but for this French onion chicken, one packet usually gives a better balance.

French onion chicken soup mix balance guide with condensed soup, dry onion soup mix, broth, onions, and slow cooker chicken.
Condensed French onion soup gives body, dry onion soup mix adds seasoning, and low-sodium broth helps keep the gravy savory instead of harsh.

For a creamier onion soup mix chicken variation, use the main recipe as written, then stir in sour cream, Greek yogurt, cream cheese, or heavy cream after the chicken has finished cooking. Keep the creamy ingredient out of the slow cooker during the long cook so the sauce stays smoother.

If you want the same comfort-food idea without condensed soup or dry soup mix, jump to the no-canned-soup French onion chicken version.

Best shortcut balance: use 1 can condensed French onion soup, 1 packet dry onion soup mix, ½ cup / 120 ml low-sodium beef broth, and cheese at the end. That gives you a rich onion gravy without making the sauce harsh.

Chicken Breasts vs Thighs

Both work, but they give different results. If you want tidy, sliceable pieces, use chicken breasts and check them early. If you want juicy, pull-apart chicken in onion gravy, use thighs.

Chicken breasts versus thighs comparison for French onion chicken showing sliced chicken breast and saucier thigh-style chicken.
Breasts work best for cleaner slices, while thighs stay juicier and more forgiving if you want pull-apart French onion chicken in gravy.
Chicken cut Best for What to watch
Boneless skinless breasts Lean, sliceable French onion chicken Can dry out if cooked too long; check early
Thin-sliced breasts Faster, more even cooking May be done closer to 3–4 hours on low
Boneless skinless thighs Juicier, richer, more forgiving chicken Best if you like shredded or very tender meat
Bone-in thighs Deeper flavor Less convenient to serve; check around the bone

If you are making this for the first time, boneless thighs are the most forgiving. If you prefer chicken breasts, keep the pieces even and start checking before the longest listed cook time.

Best Crock Pot Size for French Onion Chicken

A 5- to 6-quart slow cooker is the best size for about 2 lb / 900 g chicken. It gives the chicken enough room to sit in a mostly even layer while still keeping the onions and sauce close around it.

Best crock pot size guide showing chicken pieces arranged in one layer in a slow cooker with onions and sauce.
Keeping the chicken mostly in one layer helps it cook evenly while the onions stay close enough to soften into the slow-cooker sauce.

A very large slow cooker can let the sauce spread thin and cook down faster. A small one may stack thick chicken breasts and cook them unevenly. Whenever possible, keep the chicken in one layer.

How to Make Crock Pot French Onion Chicken

The method is simple, but the order matters: onions underneath, chicken in an even layer, sauce over the top, and cheese only once the chicken is cooked.

Do not let the extra notes make the recipe feel complicated. The basic version is still simple: layer the onions, add the chicken, pour over the sauce, cook until done, then finish with cheese. For more detail, use the cook-time guide or the gravy-thickening section.

Step-by-step board for slow cooker French onion chicken showing onions, chicken, sauce, slow cooking, thickening, and cheese finish.
Once the onions and chicken are layered, the slow cooker does most of the work; the final texture depends on doneness, gravy thickness, and cheese timing.

1. Layer the onions

Add the sliced onions to the bottom of a 5- to 6-quart slow cooker. Spreading the onions underneath the chicken helps them soften into the sauce instead of sitting raw on top.

Hand placing chicken pieces over sliced onions in a slow cooker for French onion chicken.
Layer the onions underneath the chicken so they soften into the sauce rather than sitting on top with a sharp, raw bite.

2. Add the chicken

Place the chicken in a single layer over the onions. A little overlap is fine, but try not to stack thick chicken breasts directly on top of one another.

3. Mix the sauce

In a bowl, stir together the undiluted condensed French onion soup, dry onion soup mix, low-sodium beef broth, Worcestershire sauce, Dijon or balsamic if using, black pepper, and thyme. Pour this mixture over the chicken.

4. Slow cook until done

Cook on low for 4–6 hours or on high for 3–4 hours, until the thickest piece of chicken reaches 165°F / 74°C.

5. Thicken the gravy if needed

If the sauce is thinner than you like, remove the chicken to a plate. Stir together 1 tbsp cornstarch and 1 tbsp cold water, then stir the slurry into the sauce. Cover and cook on high for 10–15 minutes, until the sauce thickens slightly.

6. Add cheese

Place the chicken back into the sauce, top with cheese, and cover until melted. For a browned French onion finish, transfer the chicken and some sauce to a broiler-safe dish, add cheese, and broil for 2–5 minutes, watching closely.

Cooking Time: Low vs High

Slow cookers vary, and chicken thickness matters. Use the times below as a guide, then trust the thermometer.

French onion chicken cook time guide showing thin breasts, regular breasts, thighs, and 165°F doneness.
Cook time changes with cut and thickness, so check thin breasts early and use 165°F as the final doneness cue.
Chicken style Low setting High setting Best result
Thin or lightly pounded chicken breasts 3–4 hours 2–3 hours Sliceable, tender chicken
Regular boneless chicken breasts 4–6 hours 3–4 hours Tender chicken that can be sliced or lightly shredded
Boneless chicken thighs 5–7 hours 3–4 hours Juicy, saucy, more forgiving meat
Shredded French onion chicken 5–6 hours 3–4 hours Pull-apart chicken mixed into the gravy
Frozen chicken Not recommended Not recommended Thaw first before slow cooking
Chicken breast tip: if your slow cooker runs hot or your chicken breasts are thin, start checking around 3 hours on low. The goal is tender chicken at 165°F / 74°C, not chicken that stays in the pot until the longest possible time.

The same “check by temperature, not just time” idea matters with other lean slow-cooker meats too. This slow cooker pork loin recipe uses that same approach to keep lean pork sliceable and juicy.

How to Make the Onion Gravy Spoonable, Not Watery

The sauce should thicken enough to coat chicken, potatoes, or noodles. If your slow cooker releases a lot of liquid from the chicken and onions, thicken the sauce at the end instead of adding more soup mix.

For a simple thickener, stir together 1 tbsp cornstarch with 1 tbsp cold water. Remove the chicken, stir the slurry into the sauce, cover, and cook on high for 10–15 minutes. Add the chicken back once the sauce has thickened.

Cornstarch slurry being poured into French onion chicken gravy in a slow cooker.
When the slow-cooker liquid looks thin, a cornstarch slurry helps turn it into onion gravy that coats the chicken instead of pooling underneath.

When the sauce tastes strong rather than thin, use the troubleshooting table instead of adding more soup mix.

For another slow-cooker dinner with a proper spoonable sauce, this slow cooker sausage casserole recipe has the same cozy, gravy-friendly feel.

For a thicker gravy from the start, use only ½ cup / 120 ml broth. And for more sauce to spoon over rice, noodles, or mashed potatoes, use up to 1 cup / 240 ml broth and thicken at the end.

French Onion Chicken Gravy Thickness Guide

The goal is not a stiff gravy or a watery sauce. You want the middle texture: glossy, spoonable, and thick enough to cling to whatever you serve underneath.

French onion chicken gravy guide showing too thin, just right, and too thick gravy textures.
Aim for the middle texture: glossy enough to flow, yet thick enough to coat a spoon and cling to potatoes, noodles, or rice.

Melt the Cheese in the Slow Cooker or Broil It Until Bubbly

You have two good options for the cheese. The easiest is to melt it right in the slow cooker. The most French onion soup-like finish is to broil it briefly.

If you are still choosing the topping, see the best cheese options before deciding between a slow-cooker melt and a broiled finish.

French onion chicken cheese finish comparison showing slow cooker melted cheese and browned broiled cheese.
The slow-cooker melt keeps dinner easy; the broiled finish adds browned, bubbling cheese for a more French onion soup-style result.
Finish How to do it Best for
Slow cooker melt Top the cooked chicken with cheese, cover, and cook 10–30 minutes until melted Easy weeknight dinners, no extra dishes
Broiled cheese finish Transfer chicken and sauce to a broiler-safe dish, add cheese, and broil 2–5 minutes Browned, bubbling, French onion soup-style cheese

The slow cooker melt is easiest. The broiled finish is best if you want this dish to feel closer to French onion soup. Transfer the cooked chicken and onion gravy to a broiler-safe dish, add Swiss, Gruyère, or provolone, and broil until the cheese is bubbling and browned in spots.

Watch closely under the broiler; the cheese can move from beautifully browned to burnt quickly.

Optional 5-Minute Upgrade for Deeper Onion Gravy

The easy version works well as written. But if you have five extra minutes, this is where the dish starts to taste less like a shortcut and more like slow-cooked French onion gravy.

Five-minute flavor upgrades for French onion chicken with sautéed onions, broth, seasonings, and browned cheese finish.
Small upgrades can make a big difference: sautéed onions, garlic, deeper broth, and a browned cheese finish all build more layered French onion flavor.
  • Sauté the onions first: cook them in butter for 5–8 minutes before adding them to the crock pot.
  • Add garlic: one or two minced cloves make the gravy taste less flat.
  • Use beef consommé: it gives a richer flavor than regular broth, but taste before adjusting the seasoning.
  • Add Worcestershire and Dijon or balsamic: this balances the sweetness of the onions.
  • Broil the cheese: the browned top gives the dish a more classic French onion soup finish.

Variations

Once you have made the basic version, the recipe is easy to bend toward what you have: thighs instead of breasts, mushrooms in the sauce, a creamy finish, or a broth-based gravy when you do not want canned soup.

This is also where the recipe becomes more personal: some people want it creamy, some want it onion-heavy, and some just want the easiest version with the cheese browned on top.

French onion chicken variations board showing creamy, no-canned-soup, mushroom, potato, and dip-style versions.
Once the base recipe works, you can make it creamier, more homemade, mushroom-rich, potato-friendly, or thicker and dip-style for toast.

Creamy French Onion Chicken

For a creamy version, stir in ¼–½ cup sour cream, Greek yogurt, cream cheese, or heavy cream at the end. This makes the gravy softer and richer, especially if you are serving the chicken over rice, mashed potatoes, or noodles.

Add the creamy ingredient after the chicken is cooked and the slow cooker is on warm or no longer bubbling hard. This keeps the sauce smoother and reduces the chance of splitting.

No Canned Soup French Onion Chicken

For a no-canned-soup version, use a broth-based onion gravy instead of condensed soup and dry onion soup mix. It tastes less salty and more homemade, but it needs either sautéed onions or a slurry at the end for body.

No-canned-soup French onion chicken ingredients with onions, broth, garlic, herbs, slurry, chicken, and cheese.
Instead of canned soup, this version builds flavor from onions, broth, garlic, herbs, and a simple slurry for a more homemade French onion chicken.

Choose this version when you want the dish to taste more like slow-cooked onions and broth than a pantry shortcut. It takes a little more effort, but the flavor is softer, deeper, and easier to adjust.

If you make the no-canned-soup version, the biggest choice is how onion-forward you want it. Two onions keep it balanced; three onions push it closer to French onion soup.

Use the same 2 lb / 900 g chicken and the same cheese finish from the main recipe; only the soup base changes.

  • 2–3 yellow or sweet onions, thinly sliced
  • 1 tbsp butter or oil for sautéing the onions, optional but helpful
  • 1½ cups / 360 ml low-sodium beef broth
  • 2 cloves garlic, minced
  • 1 tbsp / 15 ml Worcestershire sauce
  • 1 tbsp balsamic vinegar or 1 tsp Dijon mustard
  • ½ tsp dried thyme or 2–3 fresh thyme sprigs
  • 1 bay leaf, optional
  • 1 tbsp cornstarch + 1 tbsp cold water, added at the end

No-Canned-Soup Method

For best flavor, sauté the onions in butter for 8–10 minutes before adding them to the slow cooker. Cook the chicken in the broth mixture, then thicken the sauce at the end and finish with Swiss, Gruyère, or provolone.

No-canned-soup French onion chicken method board showing sautéed onions, broth base, slow cooking, thickening, and cheese finish.
Sautéing the onions first gives the no-canned-soup version a deeper base before the broth, chicken, thickener, and cheese finish come together.

Chicken Thighs and Potatoes

For a one-pot comfort dinner, use boneless chicken thighs and add halved baby potatoes under or around the chicken. Potatoes need enough time to soften, so keep them in small pieces and cook on low until both the potatoes are tender and the chicken reaches 165°F / 74°C.

French Onion Chicken with Mushrooms

Add 8 oz / 225 g sliced mushrooms with the onions. Mushrooms make the sauce deeper and more savory, especially if you are serving the chicken over egg noodles or mashed potatoes.

French Onion Dip-Style Chicken

For a richer dip-style version, reduce the added broth, then stir in sour cream or cream cheese at the end. This variation is thicker, creamier, and especially good served with toasted bread, rice, or roasted potatoes.

What to Serve with Slow Cooker French Onion Chicken

Spoon it over mashed potatoes for the coziest plate, pile it onto egg noodles for a weeknight dinner, or shred the leftovers into sandwich rolls with extra cheese.

This is not a recipe that wants to sit alone on a plate. It wants something soft underneath it — potatoes, noodles, rice, or toasted bread — so the onion gravy and melted cheese become part of the whole dinner.

Serving ideas for slow cooker French onion chicken with mashed potatoes, noodles, rice, toast, and sandwich rolls.
Mashed potatoes, noodles, rice, toast, and rolls all give the onion gravy somewhere to go, so the dish feels like a full dinner.
  • Mashed potatoes: the best comfort-food pairing.
  • Egg noodles: easy, cozy, and great for shredded chicken.
  • Rice: simple and practical for weeknights.
  • Toasted bread: gives the dish a French onion soup feel.
  • Pasta: works well if you keep the sauce loose enough.
  • Roasted vegetables: a good lighter side with the rich sauce.
  • Sandwich rolls: shred the chicken, spoon it into rolls, add cheese, and broil.

Leftover French Onion Chicken Melt

If you are making this for a family dinner, mashed potatoes or egg noodles make it feel the coziest. For leftovers, shred the chicken into the onion gravy, tuck it into sandwich rolls, add extra cheese, and broil until the top looks like a French onion melt.

Leftover French onion chicken sandwich melt with shredded chicken, onion gravy, rolls, and melted browned cheese.
For leftovers, the gravy does the work: shredded chicken, rolls, and melted cheese turn yesterday’s slow-cooker dinner into a French onion melt.

Because the chicken is rich, salty-savory, and cheesy, a crisp side helps. This cucumber salad recipe gives you a fresh, tangy contrast without adding much work.

Make-Ahead and Freezer Meal Tips

You can slice the onions and mix the sauce ingredients a day ahead, then keep them covered in the refrigerator until you are ready to cook. Keep the raw chicken separate until it goes into the slow cooker.

For a freezer meal, combine the chicken, sliced onions, undiluted condensed soup, onion soup mix, broth, Worcestershire, thyme, and pepper in a freezer-safe bag. Freeze without the cheese. Thaw overnight in the refrigerator before cooking, then add the cheese at the end.

Storage, Freezing, and Reheating

Store leftovers in an airtight container in the refrigerator for up to 3–4 days. Reheat gently on the stove, in the microwave, or in the slow cooker on low until hot. Add a splash of broth if the sauce has thickened too much.

You can freeze the cooked chicken and sauce for up to 2–3 months. For best texture, freeze the chicken and gravy without the cheese, then add fresh cheese when reheating and serving.

Small Mistakes That Can Change the Result

  • Adding cheese too early: it can melt into the sauce and disappear instead of giving you that French onion-style finish.
  • Salting before tasting: condensed soup, soup mix, broth, and cheese may already season the gravy enough.
  • Cooking thin chicken breasts all day: check early if you want sliceable chicken instead of shredded chicken.
  • Adding regular pasta at the beginning: it can turn mushy in the slow cooker, so serve the chicken over cooked pasta instead.

Troubleshooting Slow Cooker French Onion Chicken

Most issues are easy to fix at the end. The chicken can be shredded back into the sauce, thin gravy can be thickened, and a strong sauce can be softened with broth, cream, or a plain side.

If your main issue is thin sauce, start with the gravy-thickening method. If the problem is dry chicken, strong sauce, sharp onions, or disappearing cheese, use the fixes below.

Troubleshooting board for slow cooker French onion chicken with fixes for dry chicken, thin gravy, strong sauce, flat flavor, sharp onions, and disappeared cheese.
Most fixes are simple: add moisture to dry chicken, thicken thin gravy with slurry, and soften a strong sauce with broth or cream.
Problem Why it happened How to fix it
Chicken is dry Breasts cooked too long or pieces were too thin Shred the chicken into the sauce and add a splash of broth or cream
Sauce is too thin Chicken and onions released more liquid than expected Use a cornstarch slurry and cook on high for 10–15 minutes
Sauce is too strong Condensed soup, soup mix, broth, and cheese all season the gravy Add unsalted broth, cream, sour cream, or Greek yogurt; serve over potatoes, rice, or noodles
Sauce is too thick Not enough broth or too much thickener Add ¼ cup / 60 ml broth at a time until spoonable
Flavor tastes flat Needs acidity or savory depth Add Worcestershire, Dijon, balsamic, black pepper, or thyme
Cheese disappeared into the sauce Cheese was added too early Add cheese only after the chicken is cooked, or broil it separately
Onions are still sharp Onions were too thick or did not cook long enough Slice thinly next time; for this batch, cook a little longer if the chicken can handle it, or remove chicken while sauce continues cooking

FAQs

Frozen chicken in the slow cooker: safe or not?

Use thawed chicken for this recipe. USDA slow-cooker guidance recommends thawing meat or poultry before adding it to a slow cooker. Frozen chicken may take too long to heat evenly in the slow cooker.

Chicken breasts or thighs: which is better?

For sliceable pieces, chicken breasts are leaner and cleaner on the plate. Thighs are juicier, more forgiving, and better when you want shreddable chicken in a rich onion gravy.

Best cheese for French onion chicken

Gruyère is the most classic choice because it echoes French onion soup. Swiss is easier to find and usually cheaper. Provolone melts smoothly and gives a milder finish.

How to make French onion chicken without canned soup

Use extra sliced onions, low-sodium beef broth, Worcestershire sauce, Dijon or balsamic, garlic, thyme, and a cornstarch slurry at the end. Sautéing the onions first gives the best flavor, but you can still make a simpler no-canned-soup slow-cooker version.

Can I use French onion dip instead of condensed soup?

You can use French onion dip for a creamier, thicker version, but it will taste different from classic French onion soup-style chicken. Use less added broth, cook the chicken until done, then stir the dip in near the end so the sauce stays smoother.

How to balance a strong onion gravy

If the sauce tastes stronger than you like, it is usually from stacked seasoning in the condensed soup, dry onion soup mix, broth, and cheese. Use low-sodium broth next time, taste before adding salt, and soften the current batch with a splash of unsalted broth, cream, sour cream, Greek yogurt, or a plain side like mashed potatoes, rice, or noodles.

How to make the French onion gravy thicker

Remove the chicken, stir 1 tbsp cornstarch with 1 tbsp cold water, then stir that slurry into the sauce. Cover and cook on high for 10–15 minutes until the sauce thickens.

Rice or pasta in the crock pot: what works?

For this recipe, it is better to serve the chicken over cooked rice, noodles, or pasta instead of adding them at the beginning. Regular pasta can turn mushy in the slow cooker, and rice needs a recipe built specifically around rice timing and liquid ratios. If you want a chicken-and-pasta dinner instead, this Cajun chicken pasta guide uses a better method: cook the pasta separately, then fold it into the sauce.

How to make creamy French onion chicken without splitting the sauce

Stir in sour cream, Greek yogurt, cream cheese, or heavy cream at the end, after the chicken is cooked. Add it gently and avoid boiling the sauce hard after the dairy goes in.

Best sides for slow cooker French onion chicken

Mashed potatoes, rice, egg noodles, pasta, toasted bread, roasted vegetables, or sandwich rolls all work well. Anything that catches the onion gravy will make the dish feel more complete.

If you try this with thighs, mushrooms, or the broiled cheese finish, that is the kind of variation other readers will want to know about too.

Final Thoughts

Slow Cooker French Onion Chicken is at its best when it stays easy without tasting careless. Keep the chicken from overcooking, let the onions soften into the sauce, and finish it in a way that feels generous. Then serve it over potatoes, noodles, rice, or toasted bread — the kind of simple dinner that feels bigger than the effort it took.

Back to top