Posted on — Leave a comment

Icebox Cake Recipe: Classic Chocolate Wafer Cake With Whipped Cream

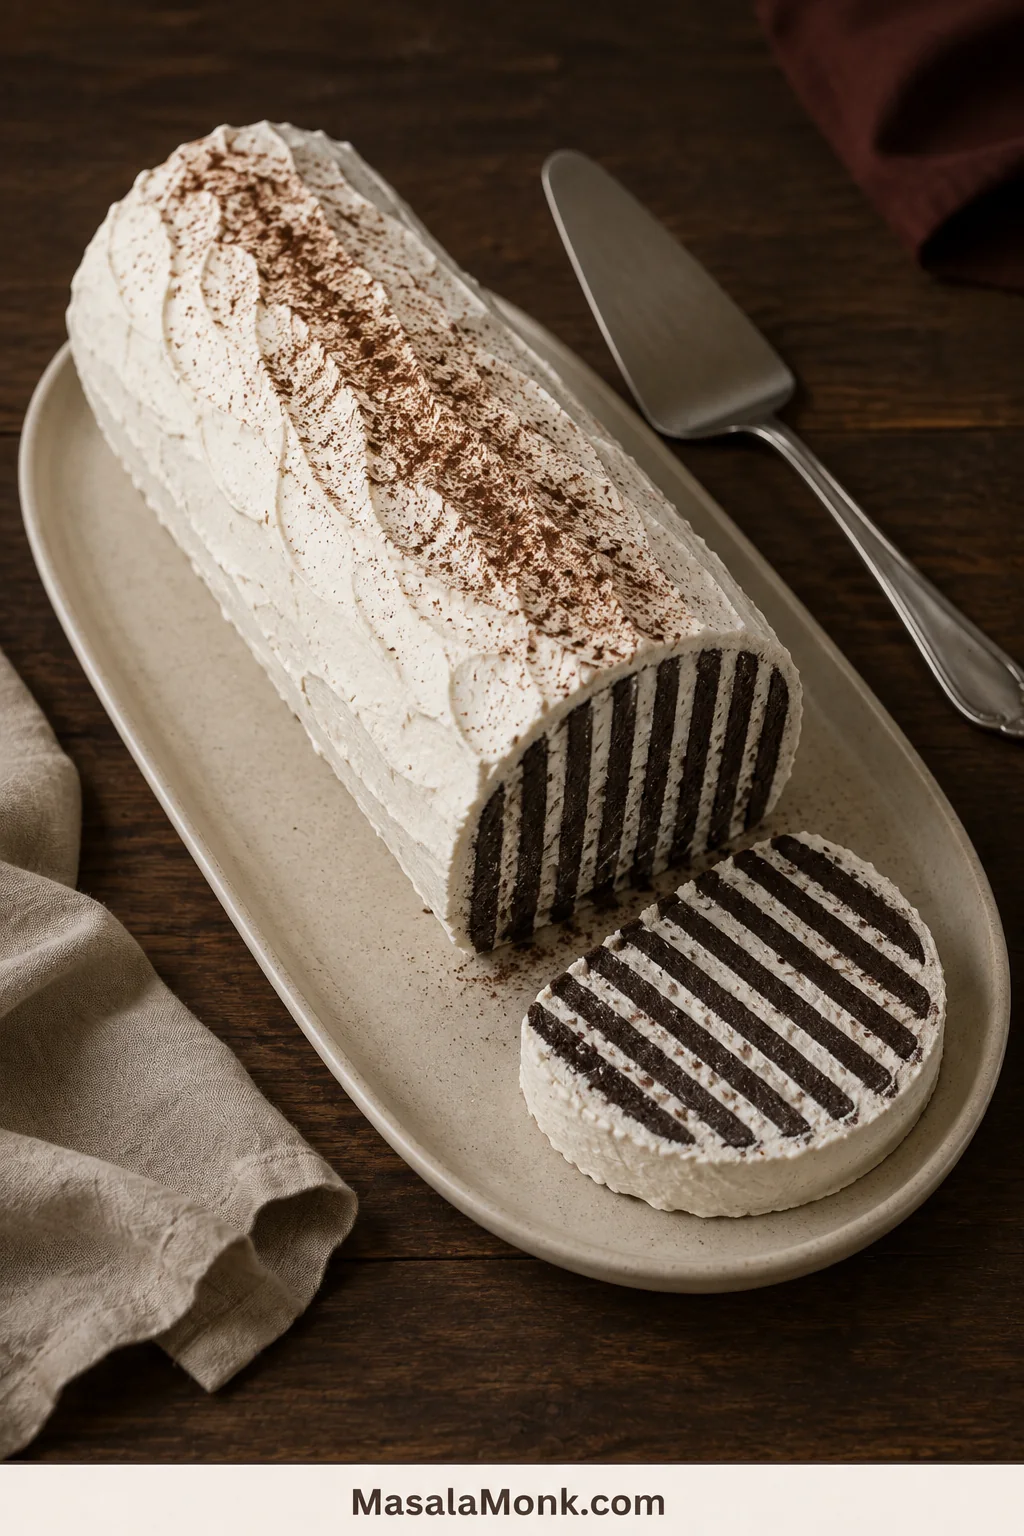
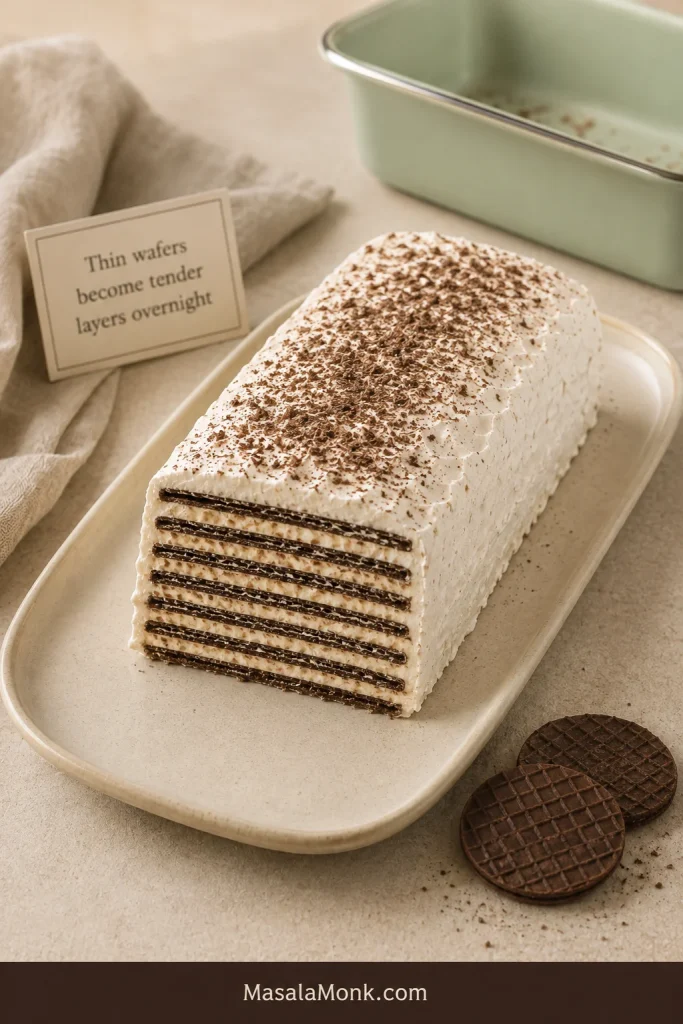
Chocolate wafer icebox cake log with whipped-cream coating and one diagonal slice showing dark chocolate and white zebra stripes.

Thin chocolate cookies and whipped cream do not look much like cake when they first meet on the platter. Leave them together in the refrigerator, though, and the cookies soften into tender chocolate layers while every diagonal slice opens into dark-and-white stripes.

The complication begins in the cookie aisle. Nabisco Famous Chocolate Wafers were discontinued, and the cookie named in the old refrigerator-roll recipe is no longer waiting on every supermarket shelf. One replacement softens beautifully. Another stays crunchy through the middle. A filled cookie may soften well enough but leave the finished cake far sweeter than the one people remember.

This classic icebox cake recipe brings the old chocolate-wafer roll back with the cookies available now. The original branded wafer may be gone, but the method was never dependent on a logo.

Quick Answer: How to Make Classic Icebox Cake

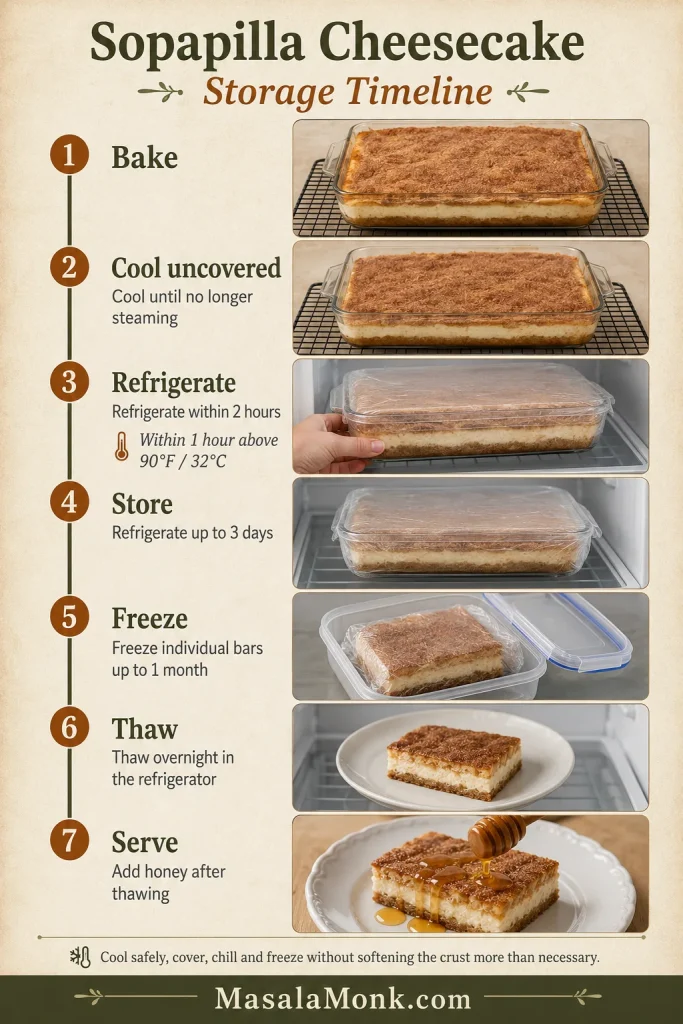
Layer 9 oz / 255 g thin chocolate wafer cookies with lightly sweetened whipped cream, join short stacks into a log and coat the outside with cream set aside before assembly. With five basic ingredients, no oven and about 35–40 minutes of active work, most of the preparation can be finished the day before.

Chill the coated cake for 45–60 minutes with nothing touching the cream, then cover it loosely and refrigerate for at least eight more hours. Most substitute cookies soften more fully after 10–12 hours.

It is ready when a thin knife passes through the center without meeting a hard cookie layer, dry crack or sharp crunch.

Refrigerator, not freezer: The cookies need time beside the whipped cream so they can absorb moisture and become cake-like. Freeze only after they have fully softened in the refrigerator.

Choose the Format Before You Start

A freestanding log needs thin cookies that can stand upright without a pan. Wider, thicker or filled cookies can still make an excellent refrigerator cake, but they usually need a format that supports them while they soften.
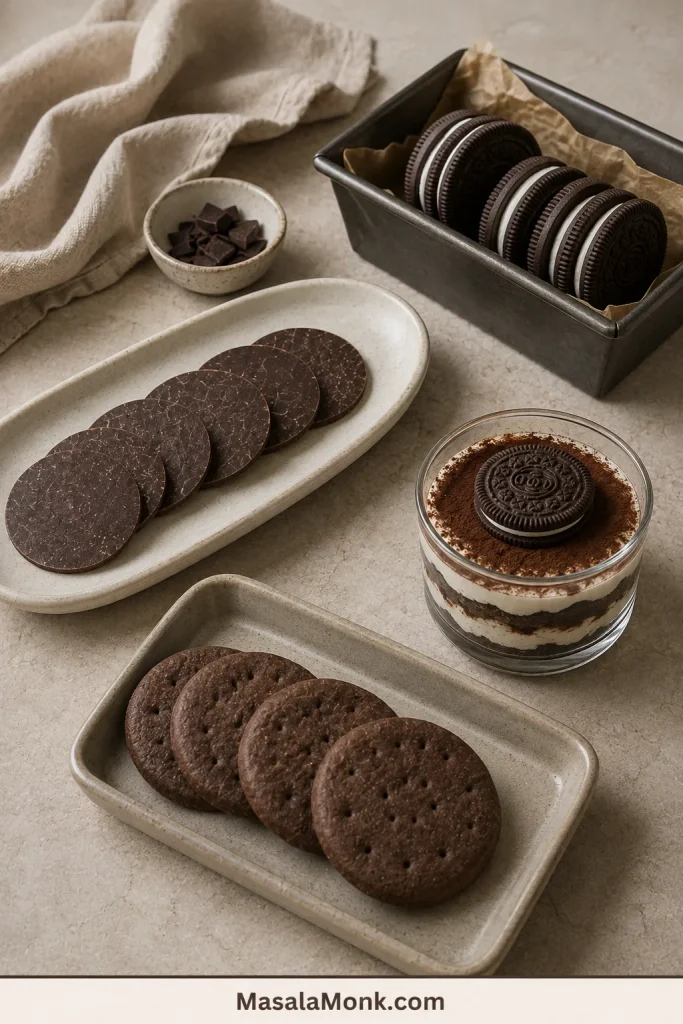
Assortment of thin chocolate wafers, sandwich cookies and wide biscuits arranged beside different icebox-cake pans and platters.
Thin plain wafers can stand as a log; wider, thicker or filled cookies are easier to control inside a pan.

Which cookie do you have—or which style of cake do you want? In the classic version, whipped cream does both jobs: it softens the cookies and holds the log together.

What you have or wantBest route
Thin, plain chocolate wafersFollow the classic log formula below.
Oreo ThinsJump to the Oreo Thin quantities after the main recipe.
Chocolate Maria biscuits or chocolate graham crackersThese wider biscuits soften more evenly in a layered pan cake. See the chocolate wafer substitute guide for the most suitable format.
Regular OreosUse a layered Oreo icebox cake designed for full sandwich cookies rather than forcing them into the classic log.
Pudding, cream cheese or condensed milkChoose a richer layered icebox dessert rather than the classic whipped-cream roll.

Classic Chocolate Wafer Icebox Cake

Recipe at a Glance

An old-fashioned chocolate-wafer log with lightly sweetened whipped cream, a long refrigerator rest and striped slices revealed by cutting diagonally across the cookies.

Active preparation35–40 minutes
Surface-firming chill45–60 minutes
Covered refrigerator timeAt least 8 hours; usually 10–12 hours
Total timeAbout 9½–14 hours
YieldAbout 10–14 diagonal slices, depending on cookie size, cutting angle and slice thickness
Finished sizeUsually an 8–12-inch / 20–30-cm log; use a platter at least 4 inches / 10 cm longer

Why This Simple Formula Works

Heavy cream provides both the moisture that softens the cookies and enough body to hold the log together. Powdered sugar dissolves quickly without leaving a gritty texture, vanilla rounds out the cocoa, and a small amount of salt keeps the cream from tasting flat.

Before you begin: Clear a level refrigerator shelf and set out the platter, cookies and spreading tools. If the kitchen is warm, chill the bowl and whisk for 10–15 minutes.

Do not worry if the freshly coated log looks a little rustic. The cream becomes easier to tidy once chilled, and the striped interior is what matters most.

Equipment

  • Electric hand mixer or stand mixer, plus a large mixing bowl
  • Kitchen scale, measuring cups and measuring spoons
  • Flexible spatula and small offset spatula or butter knife
  • Long serving platter
  • Thin paring knife and sharp, smooth-edged slicing knife
  • Covered cake carrier or plastic wrap

Ingredients

  • 9 oz / 255 g thin, flat, unfilled chocolate wafer cookies, usually about 30–50 depending on brand, diameter and thickness
  • 2 cups / 475 ml cold heavy cream, about 475 g
  • 2 tablespoons / about 15 g powdered sugar
  • 1 teaspoon / 5 ml vanilla extract
  • ⅛ teaspoon fine salt
  • Unsweetened cocoa powder, finely crushed chocolate cookies or dark chocolate curls, optional, for finishing

Prefer a sweeter cream? Increase the powdered sugar to 3 tablespoons / about 23 g. The smaller amount keeps the cream closer to the restrained sweetness of the old refrigerator roll.
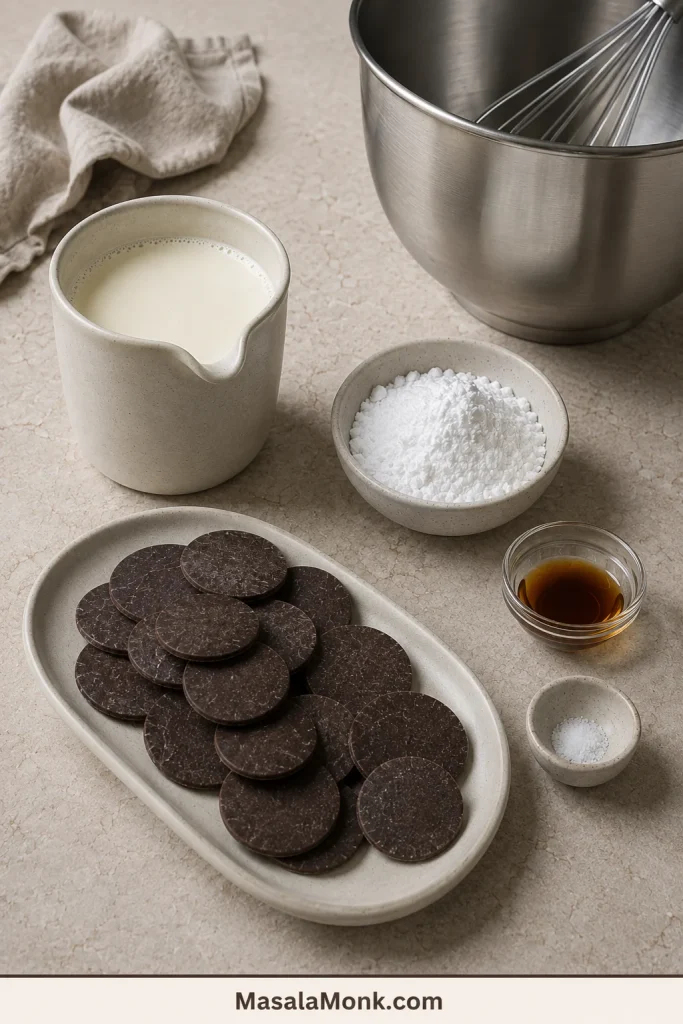
Thin chocolate wafers, heavy cream, powdered sugar, vanilla and salt arranged with a stainless-steel bowl and whisk.
Cold heavy cream supplies both the moisture that softens the wafers and the structure that supports the no-bake log.

Instructions

Whip the Cream and Prepare the Platter

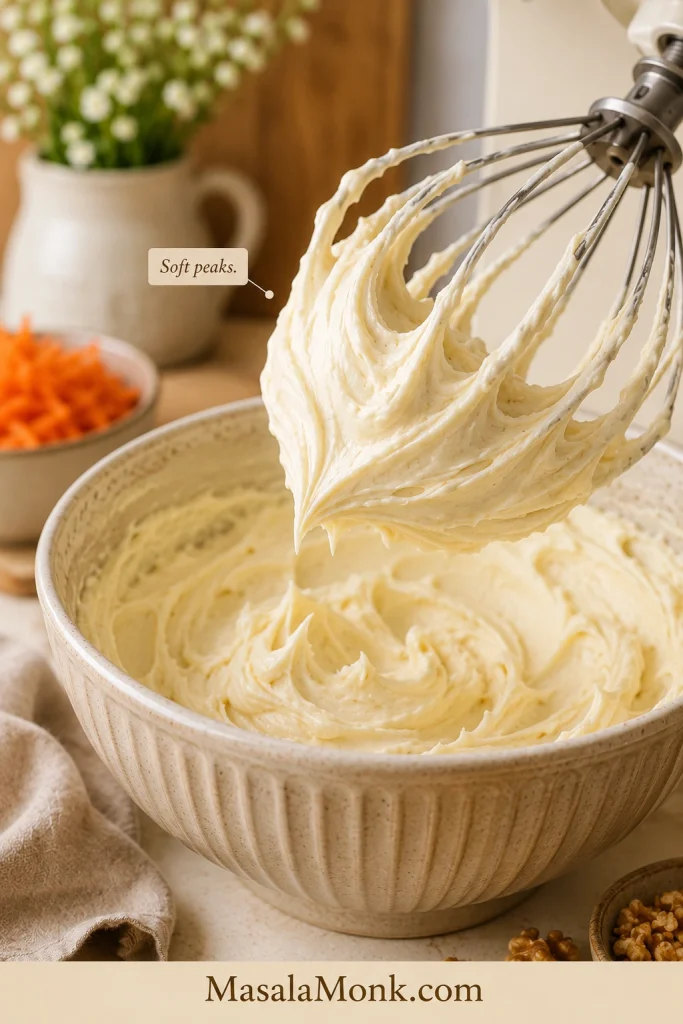
  1. Whip the cream. Combine the cold heavy cream, powdered sugar, vanilla and salt. Begin on low speed, then increase gradually to medium-high. Stop when the whisk leaves clear trails and a lifted peak stands with a slight bend. The cream should still look glossy and move under the spatula without running. For more control, finish the last few strokes by hand.
  2. Set aside the cream for coating. Reserve roughly one-third of the whipped cream—about 1½ loosely spooned cups—for the platter anchor, both ends and the outside of the log. Use the rest between the cookies.
  3. Make the anchor. Spread an 8-inch / 20-cm stripe of the coating cream down the center of the platter. Extend it as you add stacks if the finished log grows longer.
  1. Straighten the log. Look along its length and gently adjust any obvious bends while the cream is still soft. Fill visible cracks with small amounts of the cream set aside for coating.
  2. Coat the outside. Spread the remaining coating cream over the top, sides and both ends. Work along the length of the cake so the stacks remain aligned. You may have a spoonful or two left.

Chill and Serve

  1. Let the surface firm. Refrigerate for 45–60 minutes with nothing touching the cream. If the platter needs protection, place it inside a tall cake carrier whose lid sits well above the coating. Once the cream no longer smears easily, clean any marks from the platter with a damp paper towel.
  2. Cover without touching the cream. Keep the cake in its carrier or drape plastic wrap above the surface. Without a carrier, place a few toothpicks along the top to support the wrap.
  3. Leave the covered cake to soften. Refrigerate for at least eight more hours. Begin checking the center then, although many substitutes need closer to 10–12 hours. Slide a thin paring knife into the center from the back side of the log, where the small test mark will not show. It should pass through without a hard stop, dry crack or sharp crunch.
  4. Garnish and slice. Add cocoa, cookie crumbs or chocolate curls shortly before serving. Cut the cold log at roughly 45 degrees into ¾–1-inch / 2–2.5-cm slices, wiping the blade between cuts.

For a darker finish, drizzle a little homemade chocolate syrup beside each slice after cutting. Adding it before the long rest can streak the cream.

What a Good Slice Feels Like

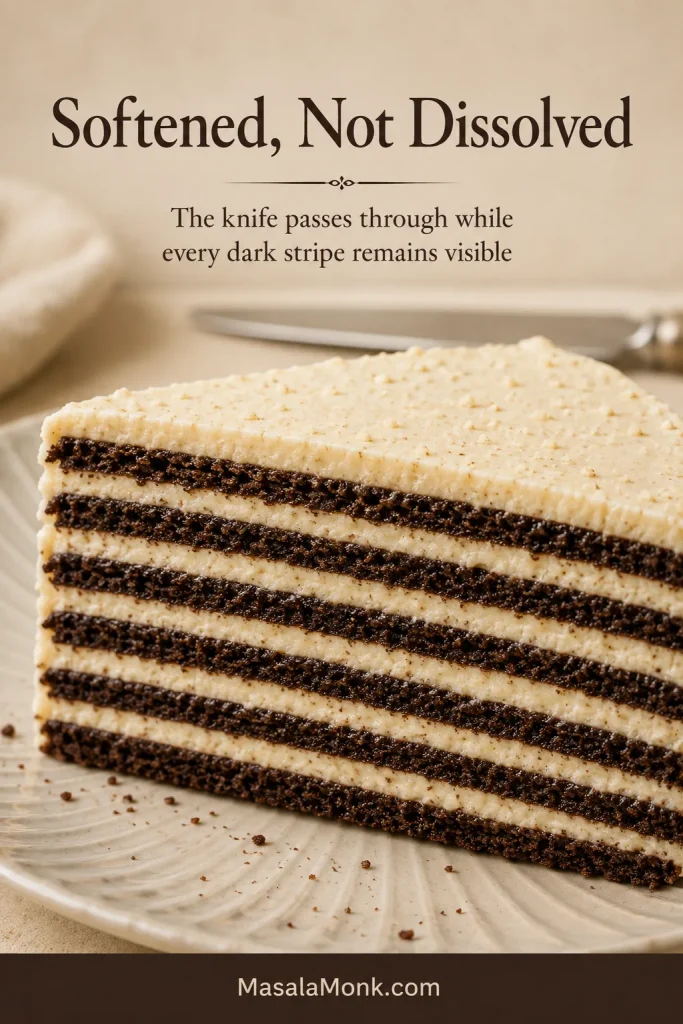
The cream should stay cool and airy while the cookies become tender enough to cut with the side of a fork. They should lose their snap but keep their dark cocoa character. You should still see every stripe, and the slice should remain together on the way to the plate without feeling stiff, frozen or heavy.

Recipe Notes

  • Use weight first. Modern cookie packages vary too much for “one package” to remain reliable.
  • A little extra cream is useful. Running out before the outside is covered is much harder to fix than having a spoonful left.
  • Broken cookies are usable. Place cracked wafers inside a short stack and patch small gaps with cream. Save badly shattered pieces for the garnish.
  • Slice directly from the refrigerator. A warm coating loses support, while cookies that are still firm can push cream outward.
  • If the cream becomes too firm: Fold in one tablespoon cold unwhipped heavy cream at a time until it spreads smoothly. This may rescue cream that has only just begun to overwhip, but it cannot reverse fully separated cream.

Adapt the Recipe

Using Oreo Thins Instead

  • Cookies: 8½–9 oz / 240–255 g Oreo Thins, approximately 33–35 cookies
  • Heavy cream: 1½ cups / 355 ml, about 355 g
  • Powdered sugar: 0–1 tablespoon / 0–8 g
  • Vanilla and salt: ¾ teaspoon / about 4 ml vanilla and a small pinch of salt
  • For a freestanding log: Set aside roughly one-third of the whipped cream—about 1–1¼ loosely spooned cups—for the anchor and outside. Spread about one heaped teaspoon between cookies.
  • Refrigerator time: begin checking after 10 hours; around 12 hours usually gives the most even texture
  • What to expect: a shorter, sweeter log with wider chocolate-and-cream stripes

For a freestanding Oreo Thin log, leave the filling intact, reduce the added sugar and follow the same short-stack method. Use only enough cream to fill the cookies and coat the outside neatly.

Classic Wafer Log vs Oreo Thin Loaf

These versions differ in both cookie structure and support. Plain wafers form a delicate freestanding log, while filled Oreo Thins benefit from a loaf pan and produce wider pale bands.
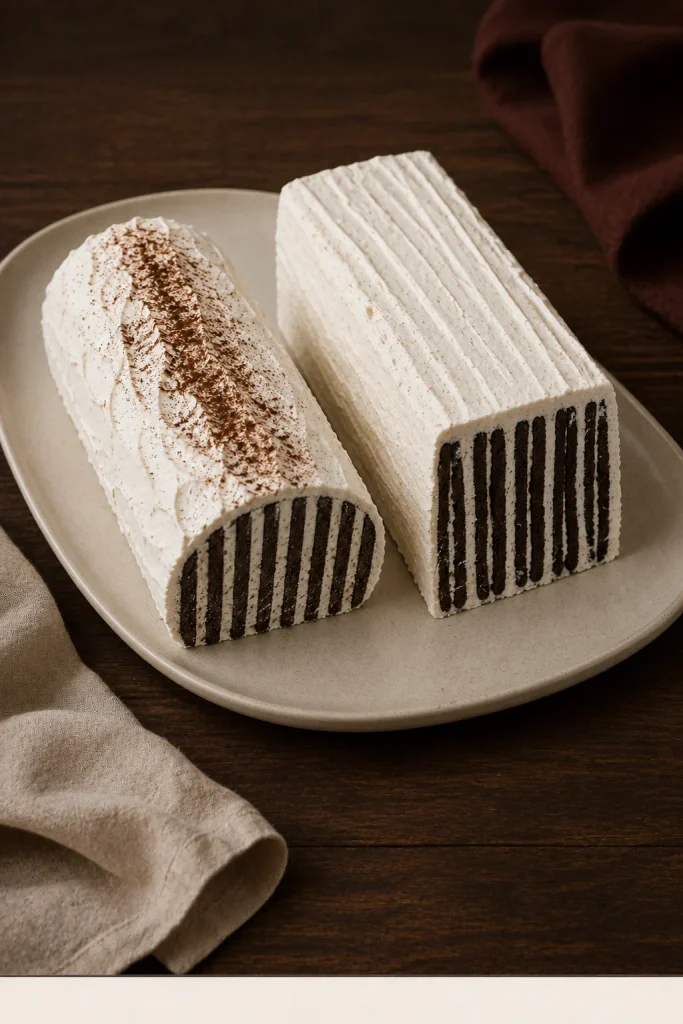
Classic rounded chocolate wafer log slice beside a rectangular Oreo Thin loaf slice with wider cream bands.
Plain wafers form a delicate freestanding log; Oreo Thins benefit from loaf-pan support and create wider dark-and-white bands.

How to Make Oreo Thin Icebox Cake in a Loaf Pan

Use the Oreo Thin quantities above and a 9×5-inch loaf pan. The pan supports the cake on four sides and is easier to transport than a long platter log.

Prepare the Pan and Cream Base

Line the pan before the cream is whipped so the overhang is ready when assembly begins. A thin coating across the base is enough to stop the first stack from shifting.
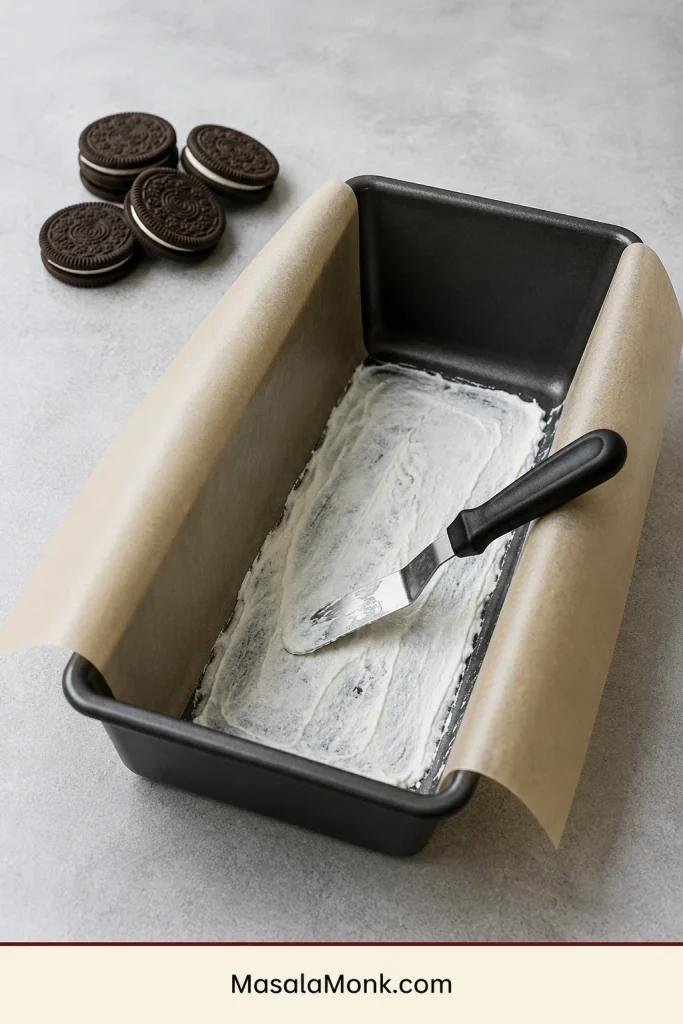
Dark loaf pan lined with parchment and coated with a thin layer of whipped cream, with thin chocolate sandwich cookies nearby.
Use only a thin film of cream to anchor the first Oreo Thin stack without adding unnecessary sweetness.
  1. Line the pan with plastic wrap or parchment, leaving enough overhang to lift the finished cake.
  2. Spread a thin layer of whipped cream across the bottom. For this version, do not reserve the large outside portion used for the log. Hold back only enough cream to fill the side gaps and cover the exposed surface.

Make compact groups before placing them in the pan. The stacks should run from one short end toward the other, rather than forming parallel rows across the width.
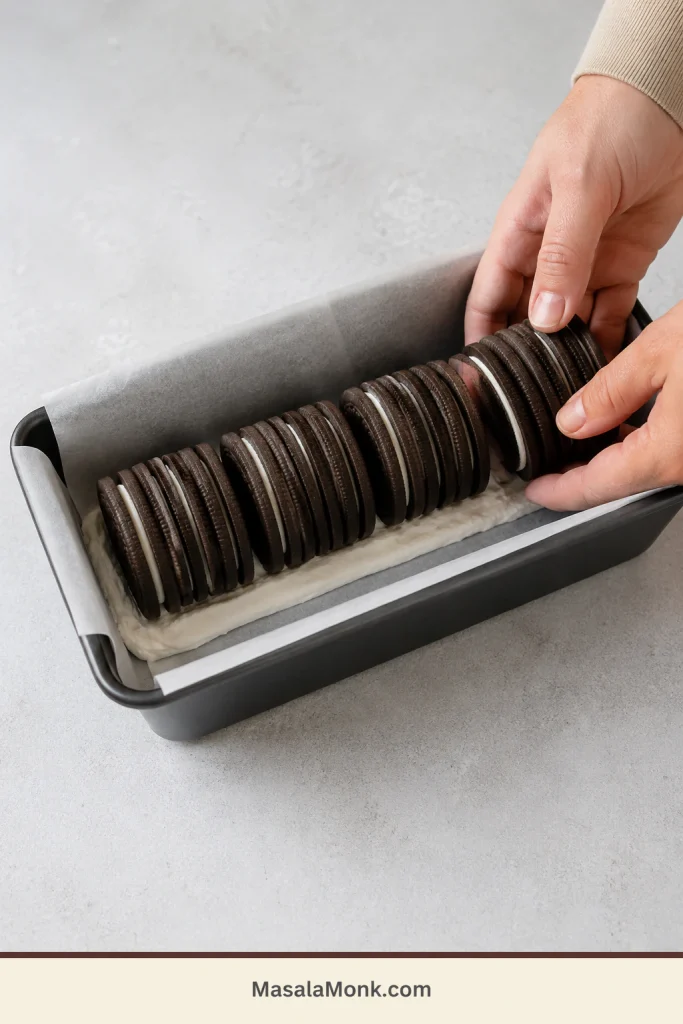
Four groups of upright thin chocolate sandwich cookies being joined along the length of a lined loaf pan.
Set four short stacks end to end along the pan—not as parallel rows—so they soften into one continuous loaf.
  1. Make four short stacks of eight Oreo Thins, spreading about one heaped teaspoon of cream between each cookie.
  2. Stand the first stack on edge at one short end of the pan. Join the remaining stacks end to end so the cookies run along the length of the pan.

Fill, Chill and Release the Loaf

  1. If the pan tapers or the final cookies do not fit comfortably, do not force them. Save any extras for the topping.
  2. Fill visible gaps around the stacks with cream, then cover the exposed surface. Tap the pan two or three times on a folded kitchen towel so the cream settles around the cookies.
  3. Cover and refrigerate for about 12 hours, or until a thin knife passes through the center without meeting a crisp layer.
  4. Lift or invert the cake onto a platter, remove the lining and crush any remaining cookies over the top.

Release it while cold. A thoroughly chilled loaf holds its rectangular shape more cleanly as the lining is peeled away.
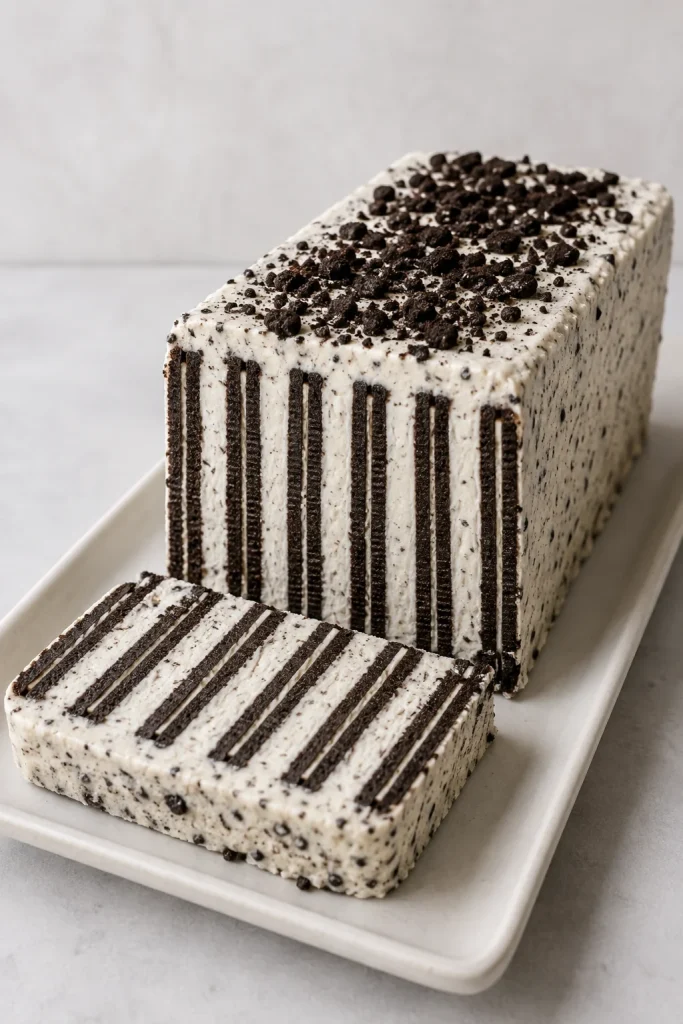
Rectangular Oreo Thin icebox cake loaf with one slice removed, revealing repeated upright dark cookie-and-cream bands.
Upright Oreo Thin stacks create repeated dark-and-white bands; the pan supports them until the cake is cold and sliceable.

Half Batch or Larger Crowd

Half batch: Use 4½ oz / 128 g plain wafers, 1 cup / 240 ml / about 240 g heavy cream, 1 tablespoon / about 8 g powdered sugar, ½ teaspoon vanilla and a pinch of salt. Set aside roughly one-third of the whipped cream—about ¾ loosely spooned cup—for the anchor and coating. Expect about 5–7 slices.

Double batch: Make two normal logs instead of one very long cake. Two shorter logs are easier to cover, transport, chill and slice.

Once the format is clear, the basic method becomes simple. From here, the guide explains what makes this the classic log, how different cookies behave and how to judge the deepest layers.

What Makes This the Classic Icebox Cake?

An icebox cake is assembled instead of baked. Crisp cookies sit against a moist filling until they become tender and sliceable. Its layers remain visible, but a fork meets something much closer to cake than cookie.

Historically, the dessert was promoted as Famous Chocolate Refrigerator Roll. Today, it is also known as chocolate wafer cake, chocolate refrigerator cake or zebra icebox cake.

It is not an ice cream cake or British chocolate fridge cake, where crushed biscuits are mixed with melted chocolate and butter. Pudding- and cream-cheese-based icebox cakes belong to the same broad no-bake family, but they need different ratios.

A similar transformation happens in no-bake banana pudding, where cookies soften as the layered dessert rests. Here, whipped cream creates a lighter cake that can stand upright and reveal clean stripes when sliced.

Choose the Right Chocolate Cookie

For the classic log, choose a thin, plain chocolate wafer or follow the Oreo Thin adjustment. Thicker and sweeter cookies can still work, but they change both the flavor and the waiting time.

Compare the best chocolate wafer substitutes, including plain wafers, Oreo Thins, brownie crisps and homemade options, in the complete cookie guide.

A sandwich cookie does not behave like a single wafer with a little extra sweetness. Its second shell and filling add thickness, change the moisture path and alter the balance between cookie and cream.
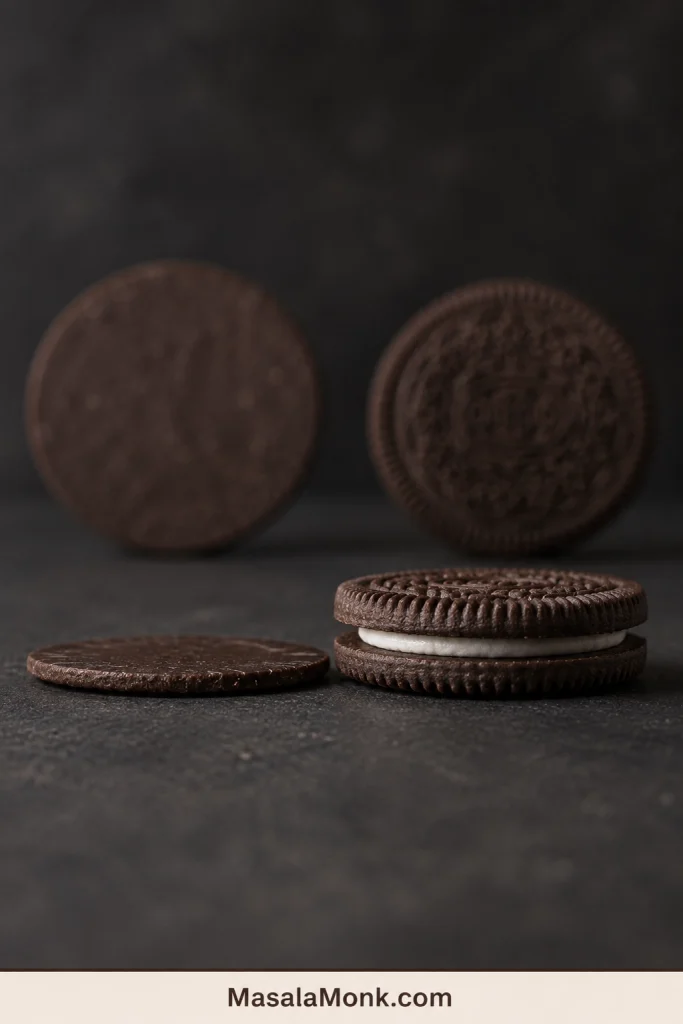
Side-profile comparison of a thin unfilled chocolate wafer and a thicker chocolate sandwich cookie with white filling.
The filled cookie is visibly thicker, changing the cream ratio, chilling time and finished stripe width.

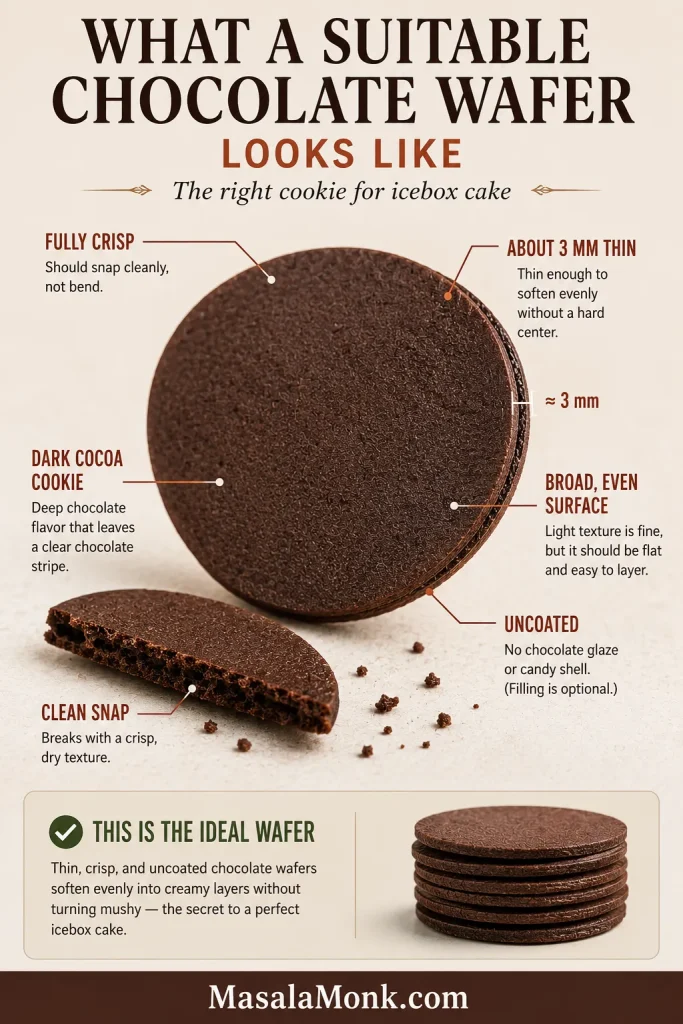
What a Suitable Chocolate Wafer Looks Like

  • Thin and flat: ideally close to ⅛ inch / 3 mm, without waffle-like layers
  • Crisp and dry: firm enough to absorb cream gradually
  • Uncoated: a chocolate shell can slow moisture absorption
  • Unfilled or lightly filled: thick filling changes both sweetness and softening time
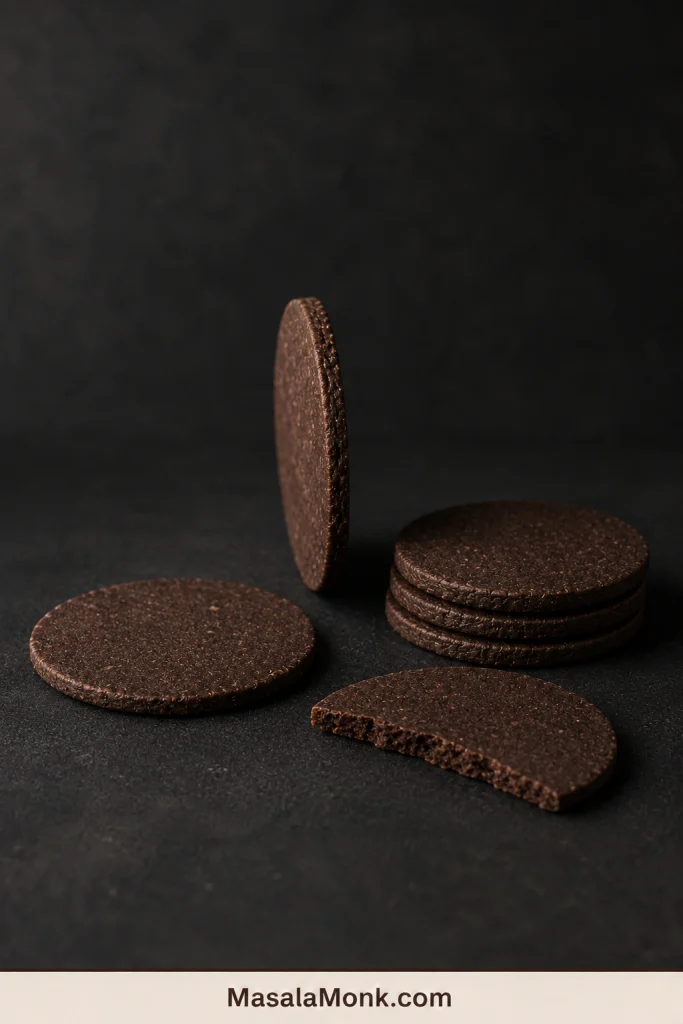
Thin dark chocolate wafers shown flat, upright, stacked and broken to reveal a dry crisp baked crumb.
Break one cookie: a clean snap and fine baked crumb are better signs than package wording alone.
Cookie routeWhat to expectAdjustment
Thin, unfilled dark-chocolate wafersClosest to the classic flavor and narrow stripe patternFollow the main recipe.
Oreo ThinsSweeter, shorter log with wider stripesFollow the separate Oreo Thin quantities.
Other thin, crisp chocolate cookiesThin brands may behave much like the classic waferReduce the sugar if the cookie is sweet or filled. Allow more refrigerator time if it is thicker.
Chocolate Maria biscuits or chocolate graham crackersWider, milder layers that suit a pan dessertUse a layered pan-cake format designed for wider biscuits.
Regular Oreos or filled waffle wafersToo much filling or uneven softening for the classic logUse a recipe designed for that particular cookie.

Cookies That Fight the Classic Log

Coatings, thick fillings and layered interiors can interrupt the steady movement of moisture from cream into cookie. A pan may support these cookies physically, but it cannot make an unsuitable texture behave like a thin plain wafer.
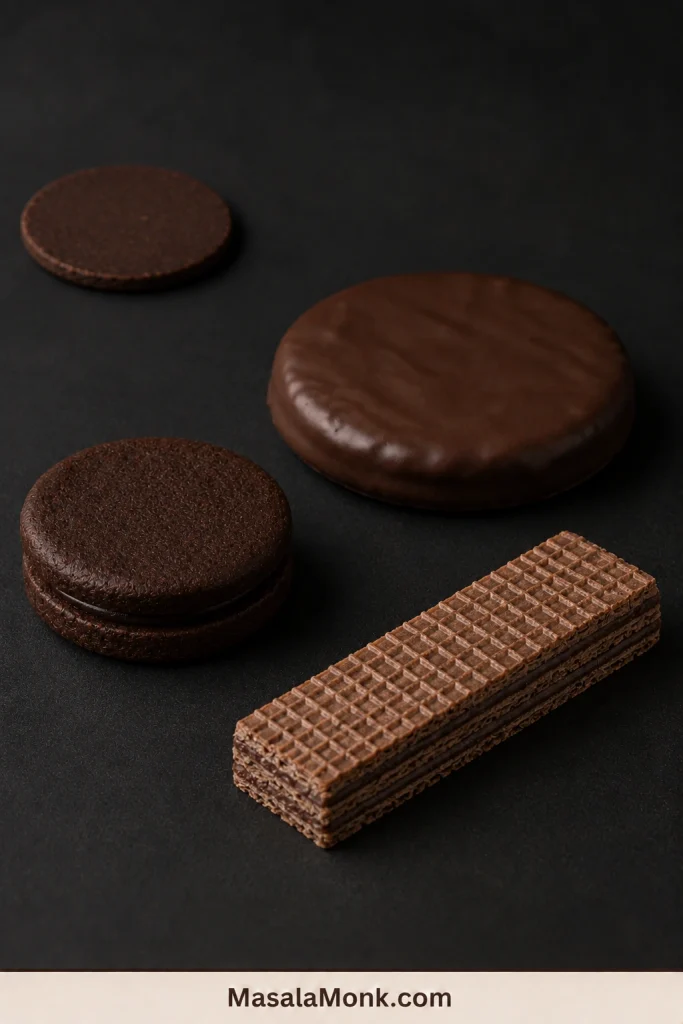
Thick chocolate sandwich cookie, chocolate-coated biscuit and layered chocolate wafer bar displayed on a dark surface.
Coatings, thick fillings and layered interiors make moisture movement—and therefore softening—less predictable in a freestanding log.

Nine ounces of cookies may mean around 30 pieces for one brand and close to 50 for another. Diameter and thickness change the count dramatically.

Use 9 oz / 255 g for the classic version. Weight controls the overall cookie-to-cream balance; count mainly helps estimate the length of the finished log.
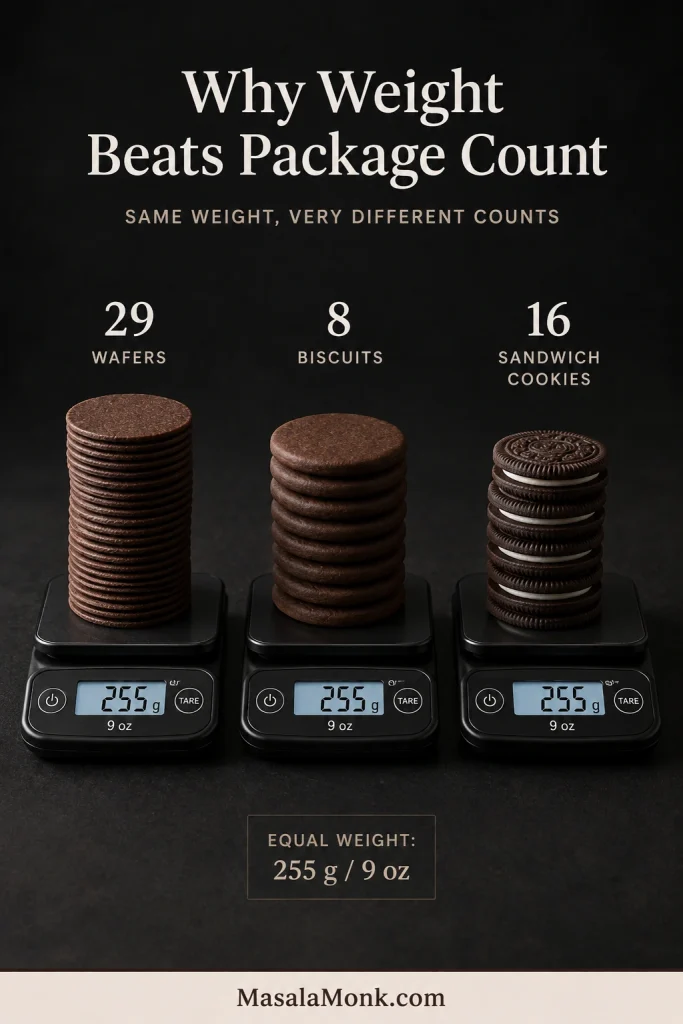
Three kitchen scales each showing 255 grams or 9 ounces with different quantities of thin wafers, wide biscuits and sandwich cookies.
Weigh the cookies first; use the count only to estimate the finished log length.

Visual Guide to a Neat, Stable Icebox-Cake Log

The finished cake looks precise, but assembly becomes manageable when each visual decision is made in the right order. These cues show what to look for before the log disappears beneath its final coating.

Whip and Reserve the Cream

Lift the whisk and watch the tip of the peak. It should stand clearly, then bend slightly instead of collapsing into the bowl or breaking into rough clumps.
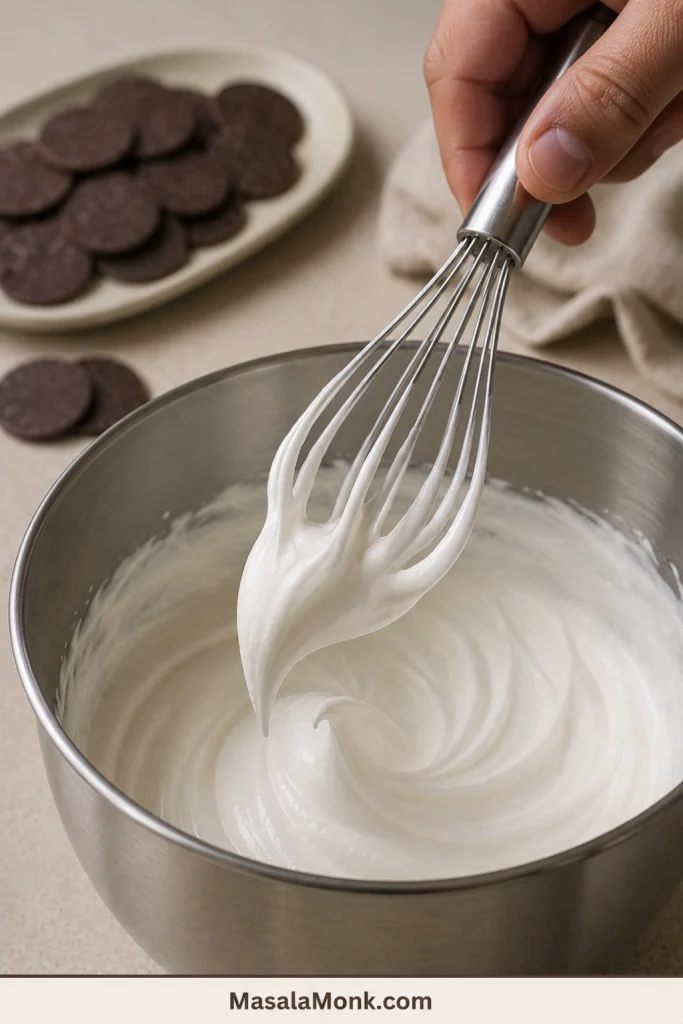
Whisk lifted above a stainless-steel bowl with smooth whipped cream forming a glossy peak that bends slightly at the tip.
Stop at a smooth, glossy medium peak before the cream becomes stiff, dull or grainy.

Separate the coating portion first. Move roughly one-third of the whipped cream into a second bowl before the first cookie is filled, so the outside cannot be short-changed later.
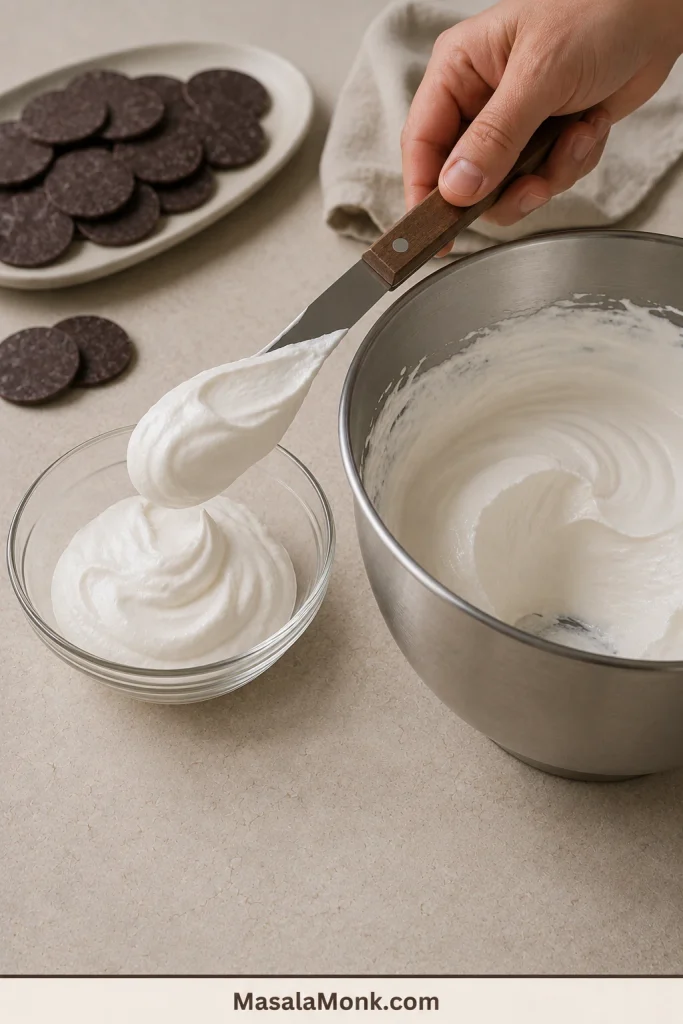
Large and small bowls holding roughly two-thirds and one-third portions of smooth whipped cream beside chocolate wafers.
Reserve roughly one-third before assembly so enough remains for the anchor, ends and outer coating.

Match the anchor to the stack. The cream stripe should support the cookie edges without spreading into a wide bed around them.
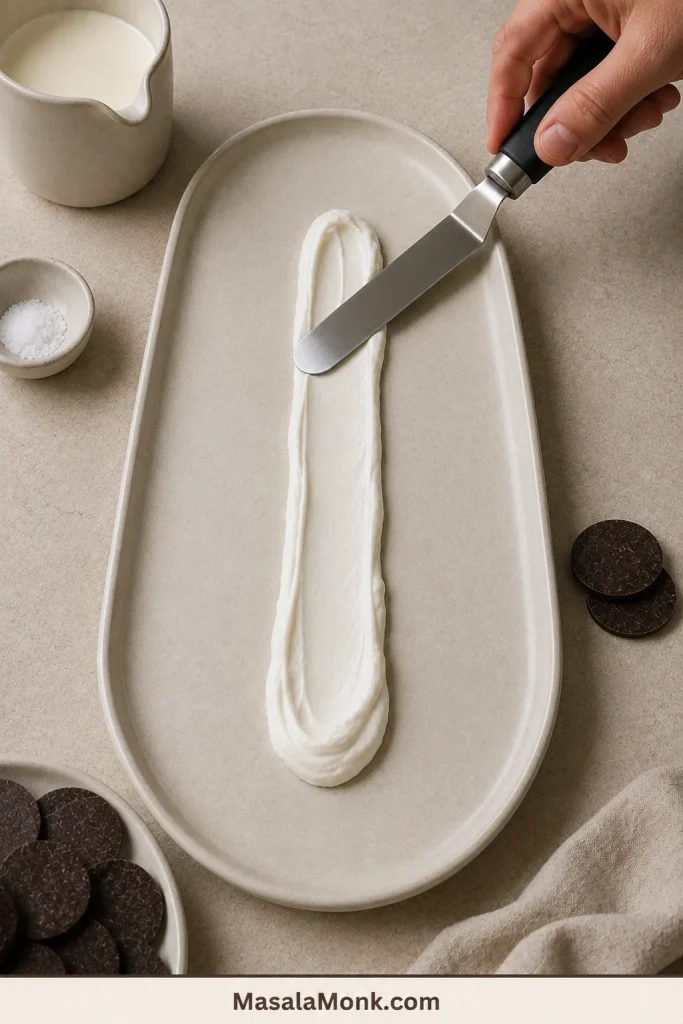
Offset spatula spreading a narrow line of whipped cream along the center of an ivory platter with chocolate wafers nearby.
Keep the anchor about as wide as the stack so cream is not wasted around the base.

Look for contact, not bulk. A controlled layer reaching almost to the edge gives the wafer moisture across its full face without creating heavy cream gaps.
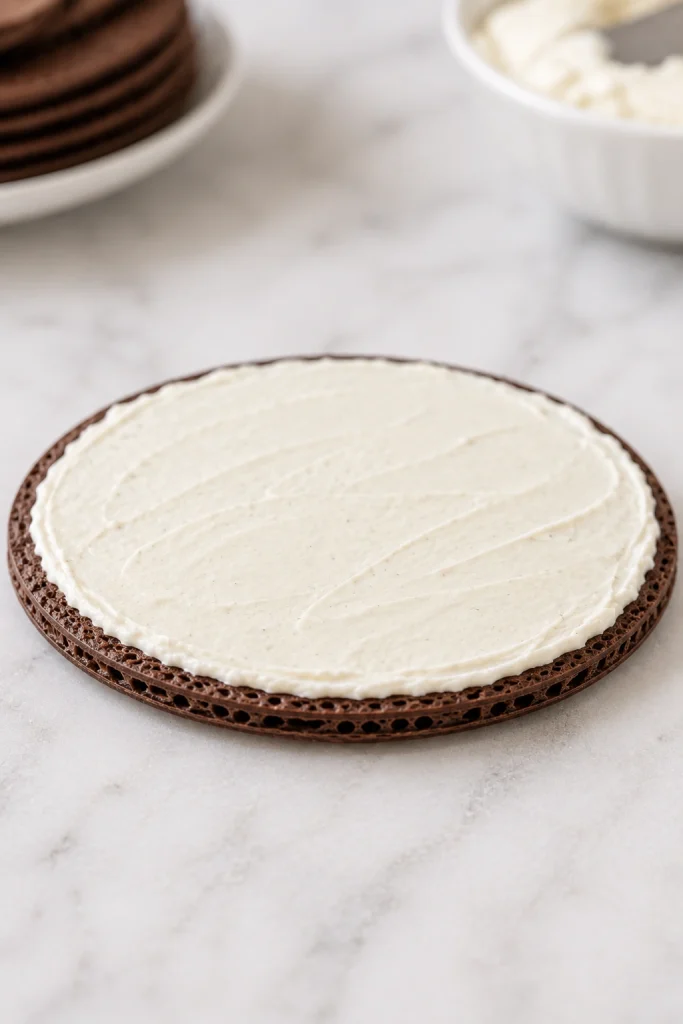
Thin round chocolate wafer spread almost to the edge with a restrained, even layer of whipped cream, viewed from a low angle.
A thin layer is enough: spread it almost to the edge while keeping the wafer visibly thicker than the cream.
Hand holding a short stack of five or six dark chocolate wafers with thin whipped-cream layers between them.
Five- or six-cookie stacks are easier to align and less likely to twist while being positioned.

Put cream between the groups as well as between individual cookies. The connection between short stacks needs the same moisture contact as every other layer.
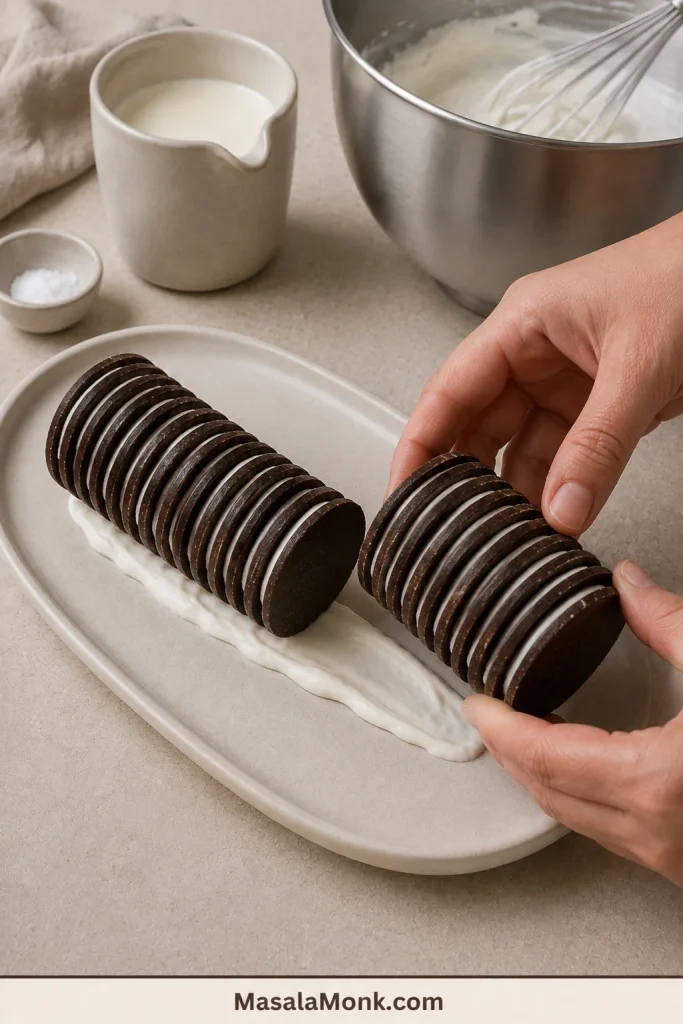
Hands joining two upright stacks of cream-filled chocolate wafers end to end on a whipped-cream anchor.
Add cream at every seam so the joins soften as evenly as the individual cookie layers.

Correct the line before coating. View the log from one end, support the curve with one hand and make small adjustments rather than compressing the cookies.
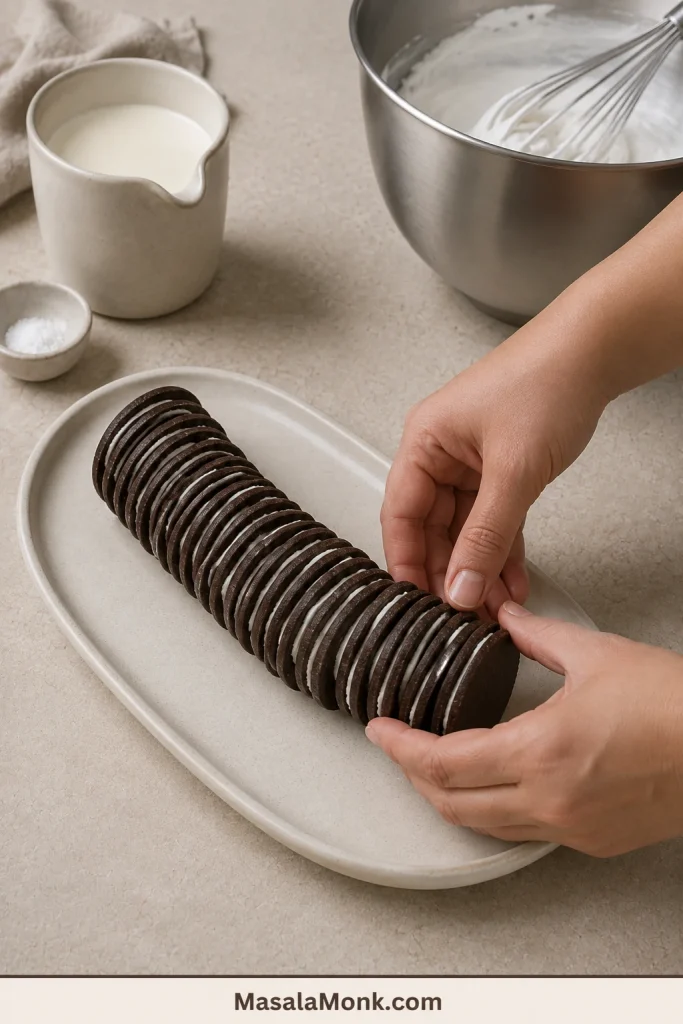
Hands gently straightening a slightly curved uncoated chocolate wafer log on an ivory platter.
Support and gently nudge a curve; squeezing can force cream from between the wafers.

Coat and Protect the Surface

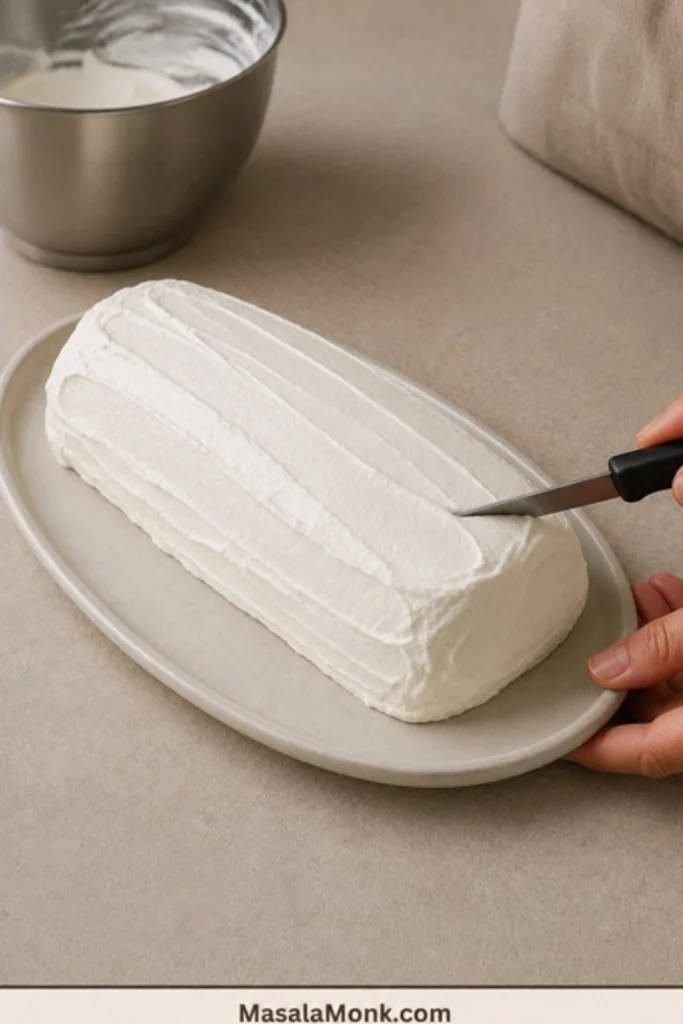
Cover every exposed wafer edge. The first coat can keep its natural spatula ridges, provided no dry cookie remains visible through the cream.
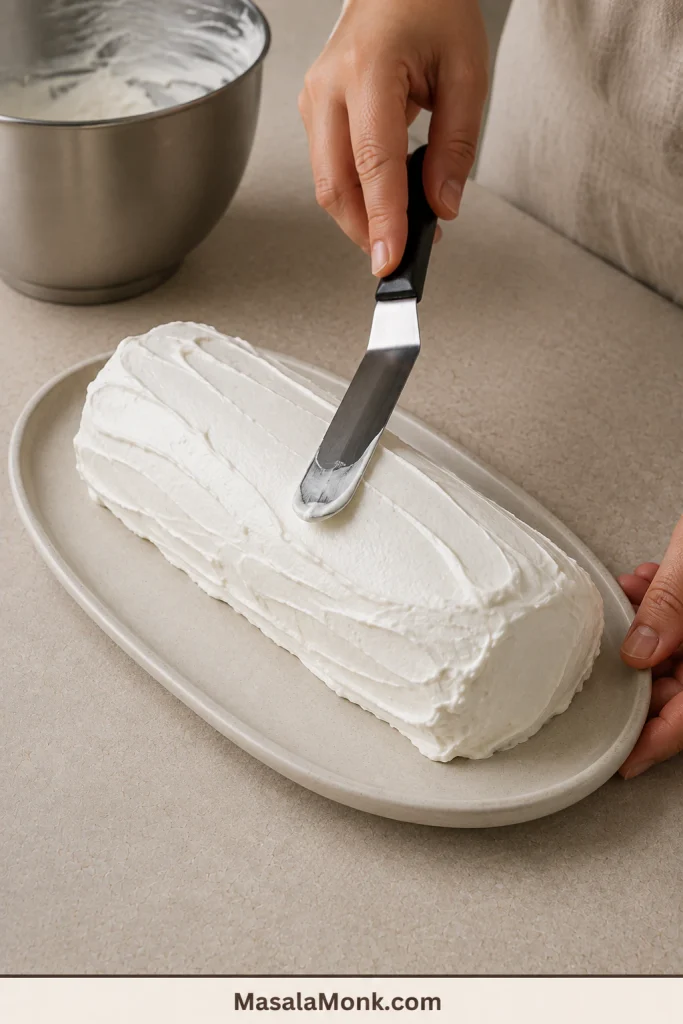
Freshly coated chocolate wafer icebox cake log with rustic whipped-cream ridges and an offset spatula making a final stroke.
Cover every exposed wafer edge; perfect smoothing can wait until the coating is cold.

Test the coating, not the center, after the short chill. The surface is firm enough to cover when a light touch no longer pulls up a wet ridge.
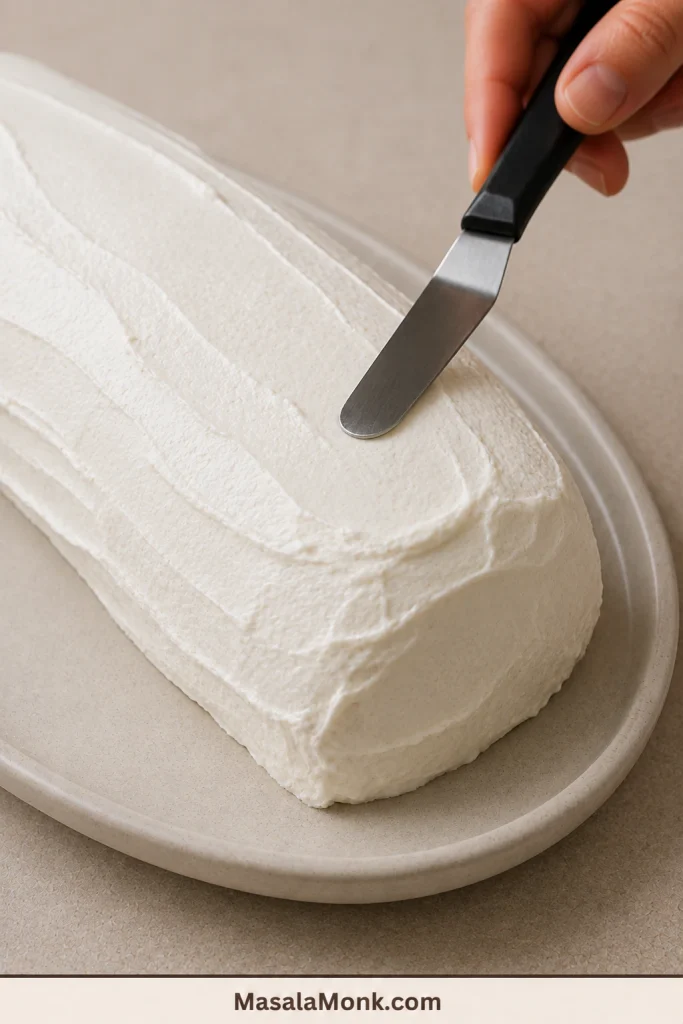
Small offset spatula lightly testing the chilled whipped-cream surface of a coated icebox cake log.
After 45–60 minutes, a light spatula touch should lift away without dragging a fresh wet groove.

Protect the air space above the cake. A tall carrier is simplest; otherwise, toothpicks can keep loose plastic wrap from settling onto the cream.
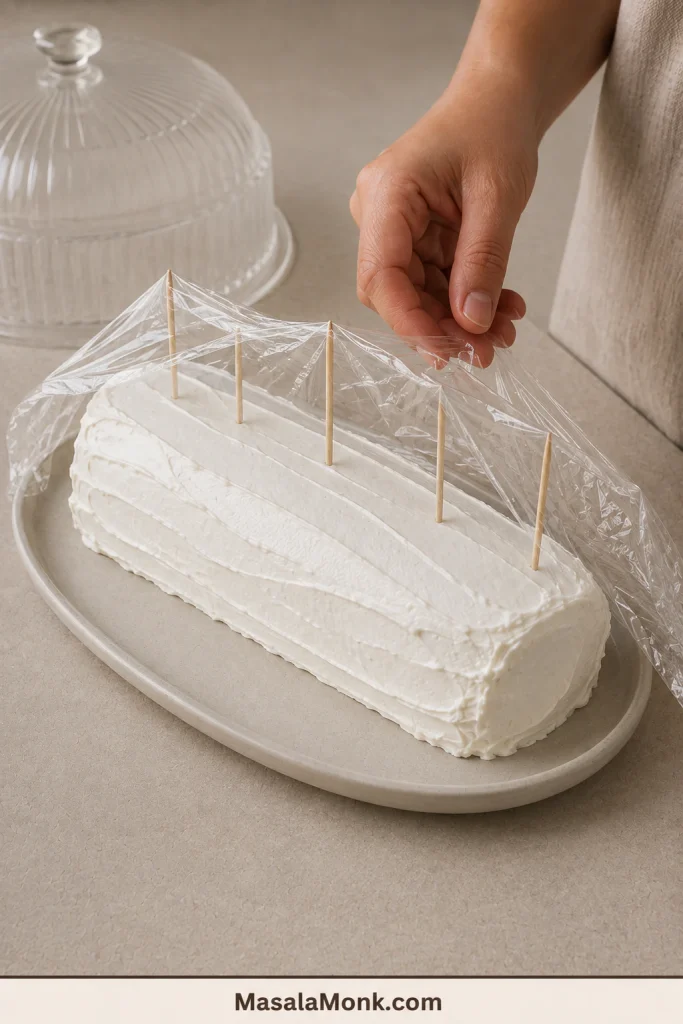
Clear plastic wrap tented above a whipped-cream-coated icebox cake and supported by several wooden toothpicks.
Leave visible air space so plastic wrap cannot stick to and lift the whipped-cream coating.

How Long Does Icebox Cake Need to Chill?

The ends soften before the center, so a log can look ready while the deepest cookies still hold a crisp core.

The Two Chilling Stages Do Different Jobs

First, the uncovered 45–60-minute rest settles the whipped-cream coating. After the surface firms, the covered overnight rest gives moisture time to travel through every cookie layer.
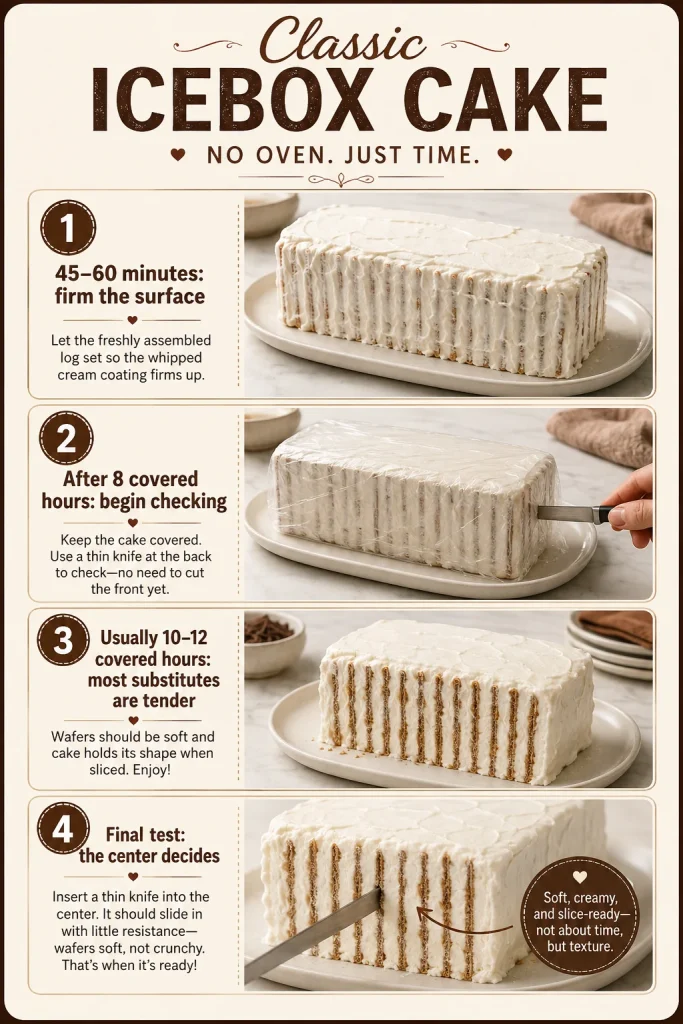
Four-stage icebox cake chilling timeline showing surface firming at 45 to 60 minutes, the first center check after 8 covered hours, typical tenderness at 10 to 12 hours and the final center test.
Firm the coating first, begin checking after eight covered hours, and let the center—not the clock alone—decide.

Why do many old recipes say four hours? The original Famous Wafers were unusually thin, and classic refrigerator-roll instructions commonly called for a four-hour rest. Modern substitutes vary much more in thickness, filling and coating, so four hours should be treated as old-package guidance rather than a promise for every substitute.

Cookie and formatBegin checkingReady when
Thin plain chocolate wafersAfter 8 hours; most need 10–12No hard layer remains in the center
Oreo ThinsAfter 10 hours; usually around 12The shell and filling cut as one tender layer
Other crisp chocolate cookiesAround 12 hours; very thin cookies may soften sooner, while thicker ones can need 18–24The knife passes without pushing the layers apart
Thicker homemade wafersAllow up to 24 hoursNo dry baked crunch remains
Start with the clock, but trust the center.

How to Know the Cake Is Ready

Judge the middle, not an end slice. Moisture reaches the exposed ends sooner, so a soft outer section does not prove that the deepest wafers are tender.
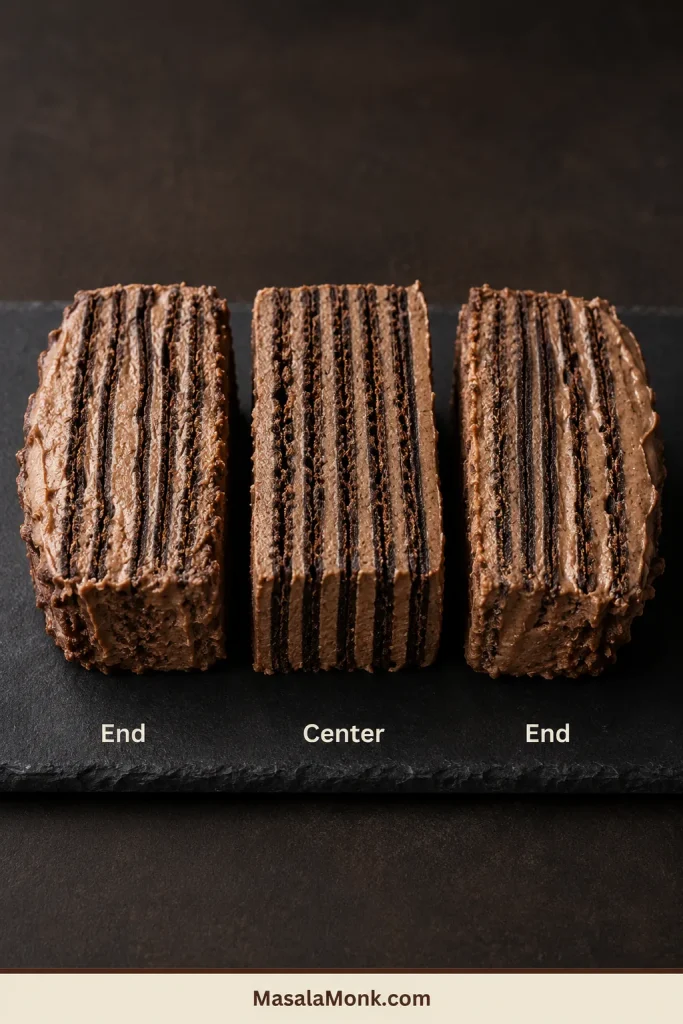
Three icebox cake sections labeled end, center and end, with the center showing firmer chocolate wafer layers than the softer ends.
A tender end slice can hide a crunchy center, so judge the middle before serving.

Probe from the hidden side. Insert a thin paring knife halfway along the back of the log, where the small test mark will not affect the presentation.

Thin knife entering the hidden rear side of a coated icebox cake while a hand steadies the serving platter.
Test halfway along the hidden rear side, the point farthest from both exposed ends.
  • A thin knife passes through the center without a hard stop.
  • No dry crack or sharp cookie crunch is audible.
  • Visible chocolate layers remain distinct.
  • Cold cream stays stable instead of becoming soft or runny.

If the center is still hard, cover the cake again and give it another two to four hours. It is probably early, not ruined.

Icebox Cake Troubleshooting

A cracked cookie, uneven log or slightly rough coating does not ruin this dessert. Most appearance problems disappear beneath the final cream, and many texture problems can still be corrected.

Cream and Assembly Problems

Before changing the recipe, identify the condition of the whipped cream. Loose, correctly whipped and overwhipped cream behave differently on the platter and need different fixes.
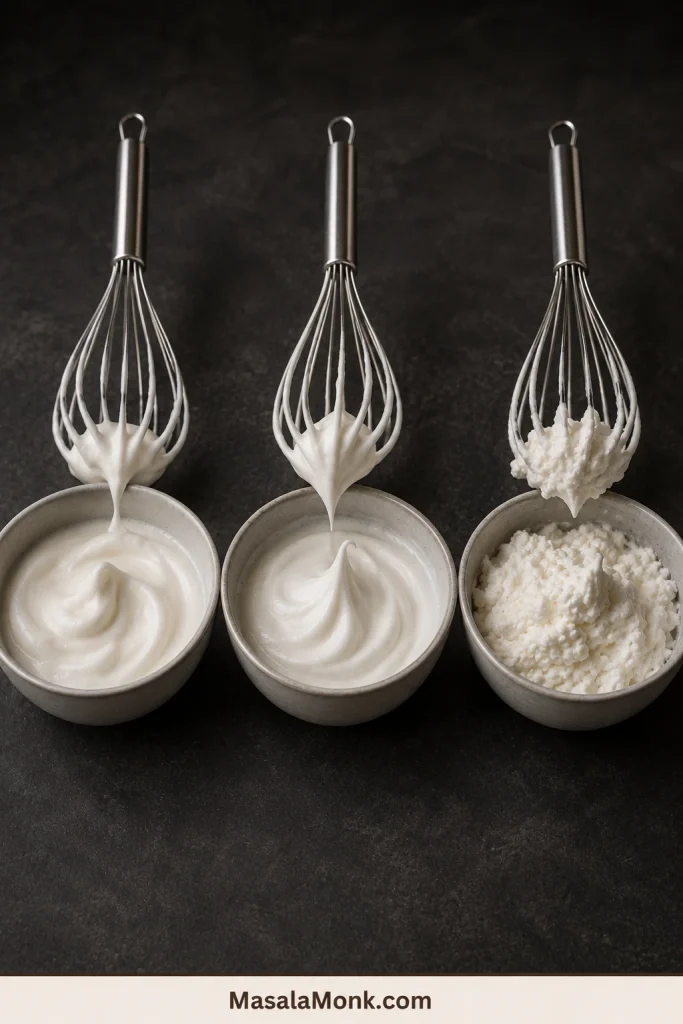
Three bowls and whisks showing loose underwhipped cream, smooth peaked cream and grainy overwhipped cream.
Loose cream slides, glossy medium peaks support the cake, and overwhipped cream looks coarse and clumpy.
ProblemLikely reasonWhat to do
The log slides apartThe cream is too soft or the platter has no cream anchorChill briefly, then straighten it gently. For the next cake, whip the cream until it holds its shape but still looks glossy.
The cream looks grainyIt was whipped too farFold in a little cold unwhipped heavy cream if it has not separated.
The cream is loose or wateryIt has warmed, remains underwhipped or does not contain enough fat to hold peaksWhen the cream has warmed, chill it for 10–15 minutes and whisk briefly. Cold but underwhipped cream only needs further whisking. Low-fat cream that cannot hold peaks must be replaced with cold heavy cream.
The outside is tornThe covering touched the cream before it had setPatch the area with a little newly whipped cream. Let the coating firm before covering.

Chilling, Texture and Slicing Problems

Texture gives a faster diagnosis than appearance alone. Compare the deepest layers: tender cookies yield cleanly, crunchy cookies resist, and gummy cookies compress into a pasty band.
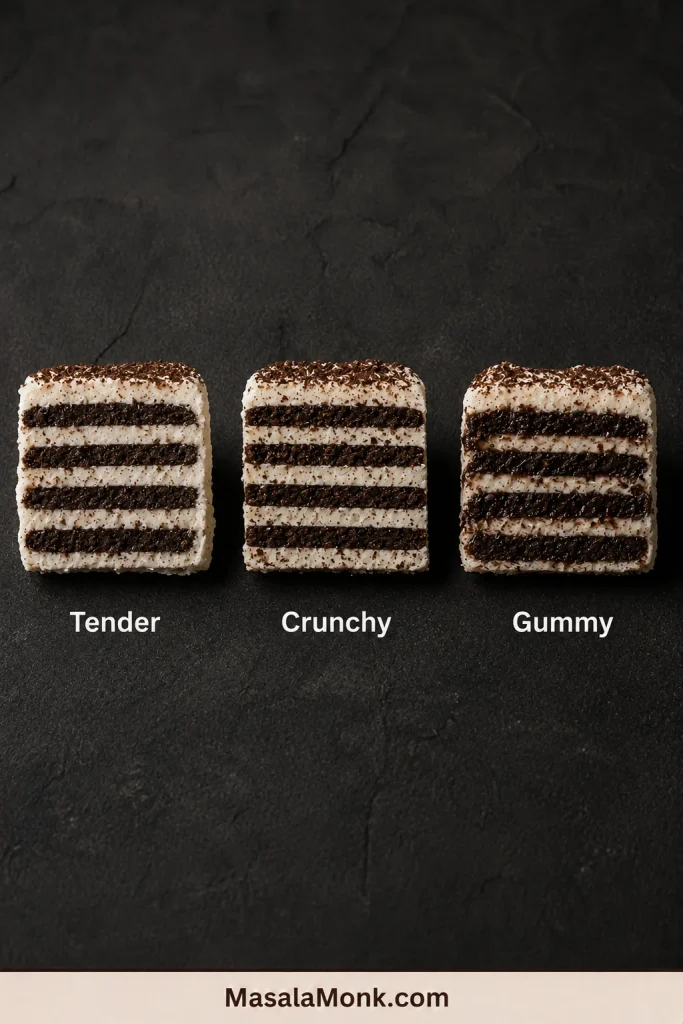
Three chocolate icebox cake samples labeled Tender, Crunchy and Gummy with visibly different cookie-layer textures.
Tender layers yield cleanly; crunchy layers resist, while gummy layers compress into a pasty band.
ProblemLikely reasonWhat to do
The center is still crunchyThe cookie is thick, the cream did not reach the edges or the cake was served earlyCover and chill another 2–4 hours. If you make it again, use a thinner cookie or spread the cream closer to the edge.
The cake tastes too sweetA filled cookie was paired with the full sugar amountServe with bitter cocoa or unsweetened cream. Reduce or omit sugar when using filled cookies.
The cookies become gummyLayered waffle wafers or heavily filled cookies softened unevenlyOnce those wafers turn gummy, more chilling will not restore the classic texture. Use a thin, flat and dry chocolate cookie for the next cake.
The stripes look weak or narrowToo much cream was spread between cookies, or the log was cut too squarely across the layersKeep the cake very cold and cut more diagonally across the log so the blade passes through several cookie layers. Use thinner, even cream layers when making another log.
The cake slumps while slicingThe coating is warm, the cream is soft or the inner cookies are still firmReturn the cake to the refrigerator before trying again.

How to Reveal the Zebra Stripes

Once the center is tender, the diagonal cut creates the stripe pattern people remember.
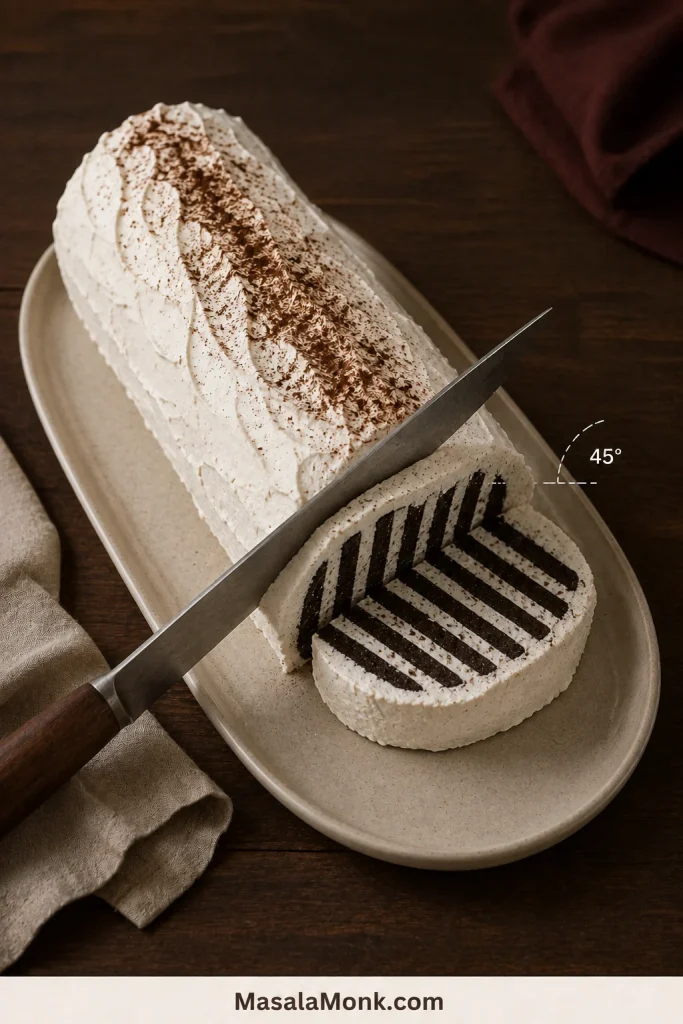
Long knife positioned at a marked 45-degree angle across a chocolate wafer icebox cake with one striped slice removed.
Cut at roughly 45 degrees and wipe the blade between slices to keep the stripes distinct.
  1. Keep the cake refrigerated until you are ready to cut.
  2. Use a long, sharp, smooth-edged knife.
  3. Position the blade at roughly 45 degrees to the log.
  4. Cut slices about ¾–1 inch / 2–2.5 cm thick.
  5. Wipe the blade between cuts so cream from one slice does not blur the next.
  6. Support the first slice with a small spatula. The first one is usually the awkward piece, and that is normal.

For especially neat slices, warm the blade briefly in hot water and dry it completely before cutting. Do not leave the warm knife against the whipped-cream coating.

Make Ahead, Transport, Store and Freeze

The waiting time is when the cookies become cake. Making it ahead also means dessert is already settled when everything else still needs attention.

The day before: Assemble the log, let the coating firm for 45–60 minutes, then cover loosely and refrigerate.

Before serving: Check the deepest layers, smooth any marked cream and add the garnish.

For the best texture: Serve within about two days, while the cream tastes fresh and the stripes remain distinct.
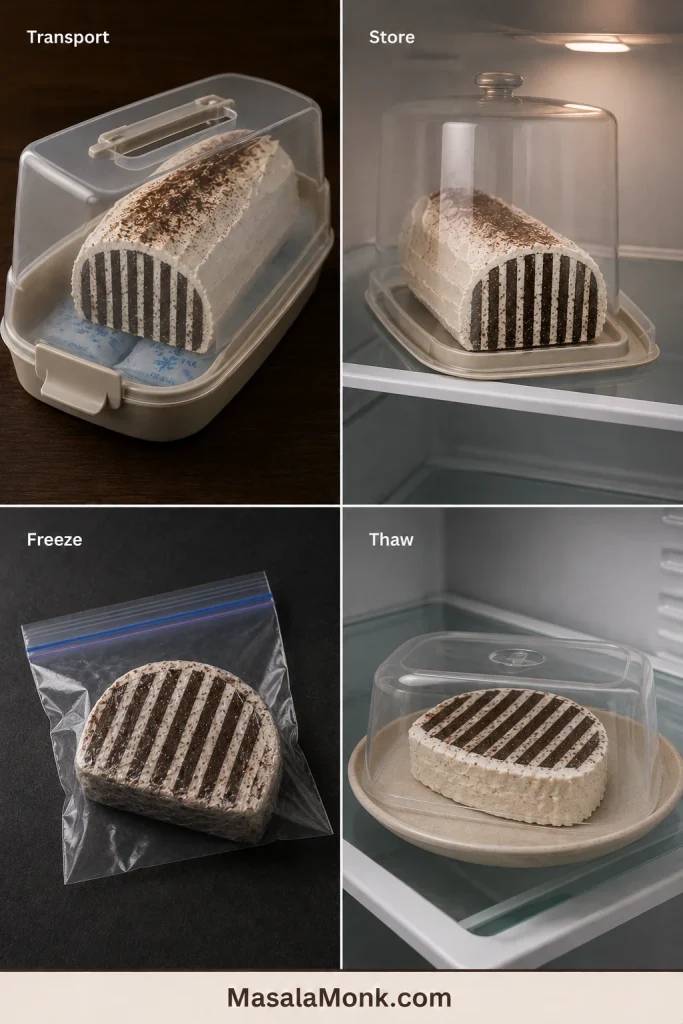
Four-part guide showing an icebox cake in a carrier over cold packs, covered in a refrigerator, wrapped for freezing and thawing covered in the refrigerator.
Freeze only after the cookies are fully tender, then thaw the wrapped cake in the refrigerator.

How to Store Leftovers

Keep the cake covered in a refrigerator at or below 40°F / 4°C, following the FDA’s cold-storage guidance. Store it away from strongly scented foods because whipped cream can absorb refrigerator odors. Use refrigerated leftovers within three days.

How to Transport It

Keep the cake on its original platter inside a covered carrier. Set the carrier flat over chilled ice packs, avoid tilting it during the journey and return it to a refrigerator as soon as you arrive.

How to Freeze It

Let the cookies soften fully in the refrigerator before freezing. Wrap the whole cake well, or place parchment between individual slices before wrapping them. Freeze for up to one month and thaw in the refrigerator until the cake is sliceable.

Do not leave a whipped-cream cake at room temperature for more than two hours. In weather above 90°F / 32°C, shorten that window to one hour.

Make It Work With What You Can Find

Change only the part you need to change—the cream, the cookie or the final texture—because each adjustment affects the cake differently.

Cool Whip Instead of Fresh Whipped Cream

One 8 oz / 227 g tub can work if you keep the filling and outside coating thin. For more comfortable coverage, use about 10–12 oz / 285–340 g thawed frozen whipped topping from a larger tub.

With 8 oz / 227 g, keep the filling layers thin and apply a light outer coat. Using 10–12 oz / 285–340 g leaves more room to finish the entire log comfortably.

Frozen whipped topping is already sweetened, so omit the powdered sugar. Expect a sweeter, slightly firmer result than the fresh-cream version. Aerosol canned whipped cream loses its volume too quickly for assembly.

Gluten-Free Chocolate Cookies

For a thin, plain gluten-free chocolate crisp, begin with the classic 9 oz / 255 g cookie weight and cream formula. Reduce the sugar if the cookie is filled or noticeably sweet, and begin checking by 10–12 hours. Continue chilling until the center is tender.

Check every packaged ingredient and preparation surface against your dietary requirements, especially when serving someone with celiac disease or a serious allergy.

Can You Add Mascarpone, Cream Cheese or Gelatin?

These ingredients change the texture and require their own ratios. For the classic refrigerator roll, use the lightly sweetened whipped cream in the main recipe rather than adding them casually.

When you want a taller, denser cream-cheese filling, use a recipe designed for it, such as no-bake cheesecake, rather than treating cream cheese as a direct swap.

Homemade Chocolate Wafers

Homemade wafers give you control over cocoa flavor, sweetness and thickness, but they remove the no-bake advantage. Roll them close to ⅛ inch / 3 mm thick, cool them completely and allow extra refrigerator time if they bake up thicker than a packaged wafer.

See the homemade chocolate wafer recipe and thickness guide for cocoa choices, dough method and store-bought alternatives.

Frequently Asked Questions

What can I use instead of Nabisco Famous Chocolate Wafers?

Choose a thin, flat, crisp chocolate cookie. Unfilled dark-chocolate wafers give the closest classic result, while Oreo Thins and other thin chocolate crisps can work with the adjustments above.

Can I use Oreo Thins for icebox cake?

Yes. For 33–35 Oreo Thins, use 1½ cups / 355 ml heavy cream and little or no added sugar. Leave the filling intact and refrigerate the covered cake for about 12 hours.

Can I use Cool Whip instead of whipped cream?

Yes. One 8 oz tub can work with very thin layers, while 10–12 oz / 285–340 g gives more comfortable coverage. Omit the powdered sugar.

How long does icebox cake need to chill?

After the 45–60-minute surface-firming chill, cover and refrigerate for at least eight more hours. Most substitute cookies soften more fully after 10–12 hours.

Does icebox cake go in the refrigerator or freezer?

Refrigerate it first so the cookies can soften beside the cream. Freeze only after the cookies have fully softened in the refrigerator.

Why is chocolate wafer cake cut diagonally?

The cookies stand upright along the log. Cutting across them at an angle reveals several chocolate-and-cream layers in every slice.

The First Slice

By the next day, crisp chocolate cookies have become tender stripes held inside cold whipped cream. The first diagonal slice still feels like a reveal, even when everyone at the table knows exactly what is coming.
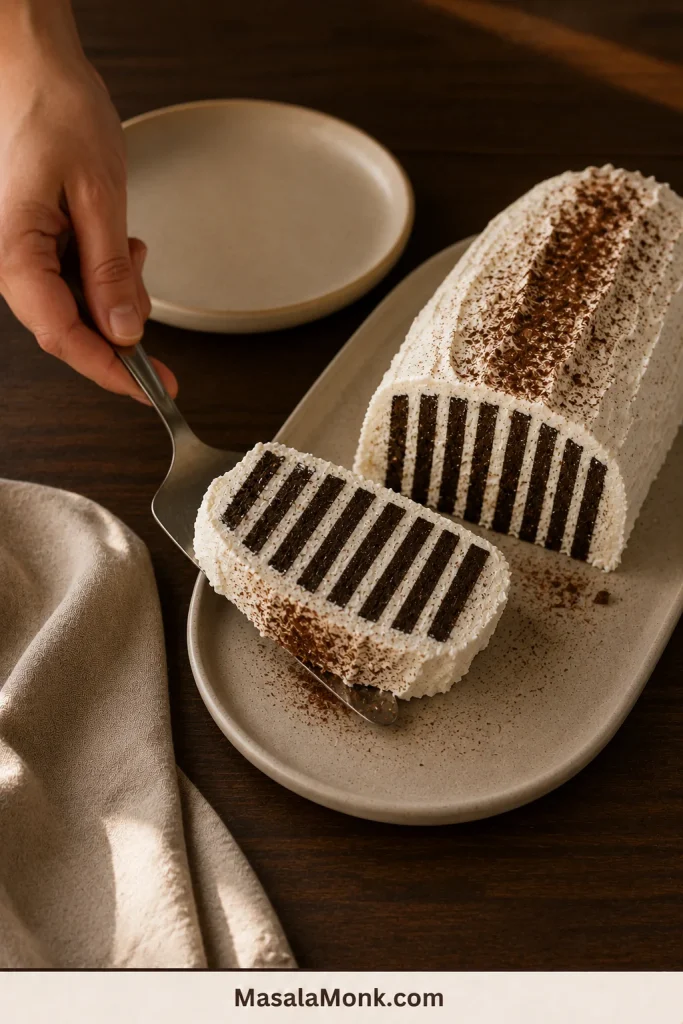
Hand lifting the first zebra-striped slice from a chocolate wafer icebox cake toward an empty dessert plate on a warm wooden table.
The first slice is rarely the easiest to lift, but it is where the overnight transformation becomes visible.

Tell us the exact cookie brand you used, whether it was plain or filled, and how many hours it needed after covering. Your note may help the next person standing in the cookie aisle.
Posted on — Leave a comment

Chocolate Wafer Cookies for Icebox Cake: Best Substitutes and Homemade Recipe

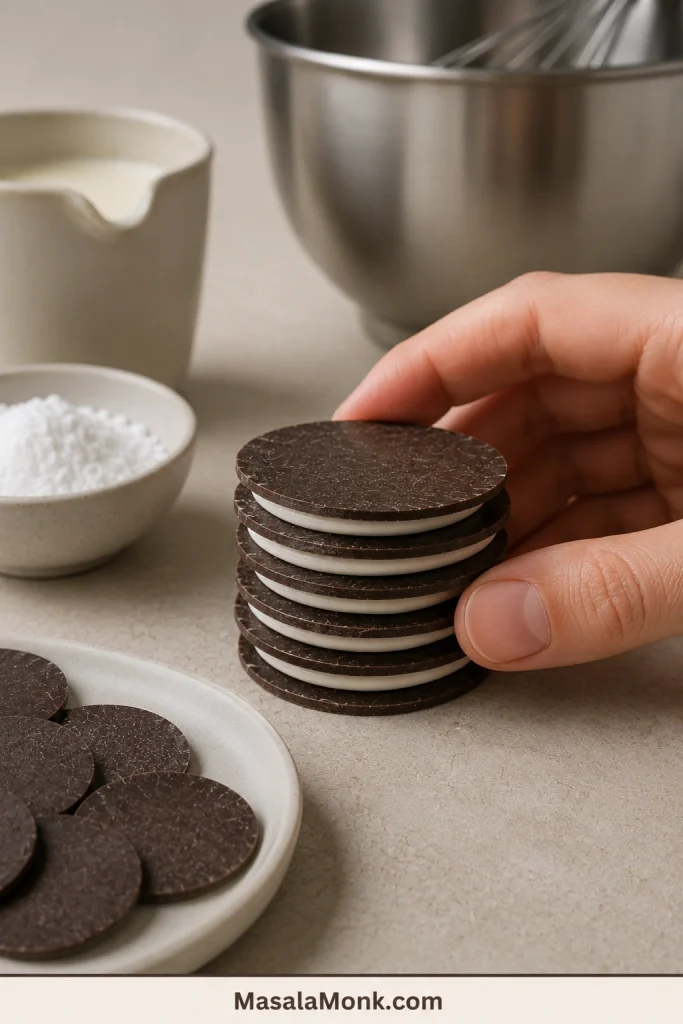
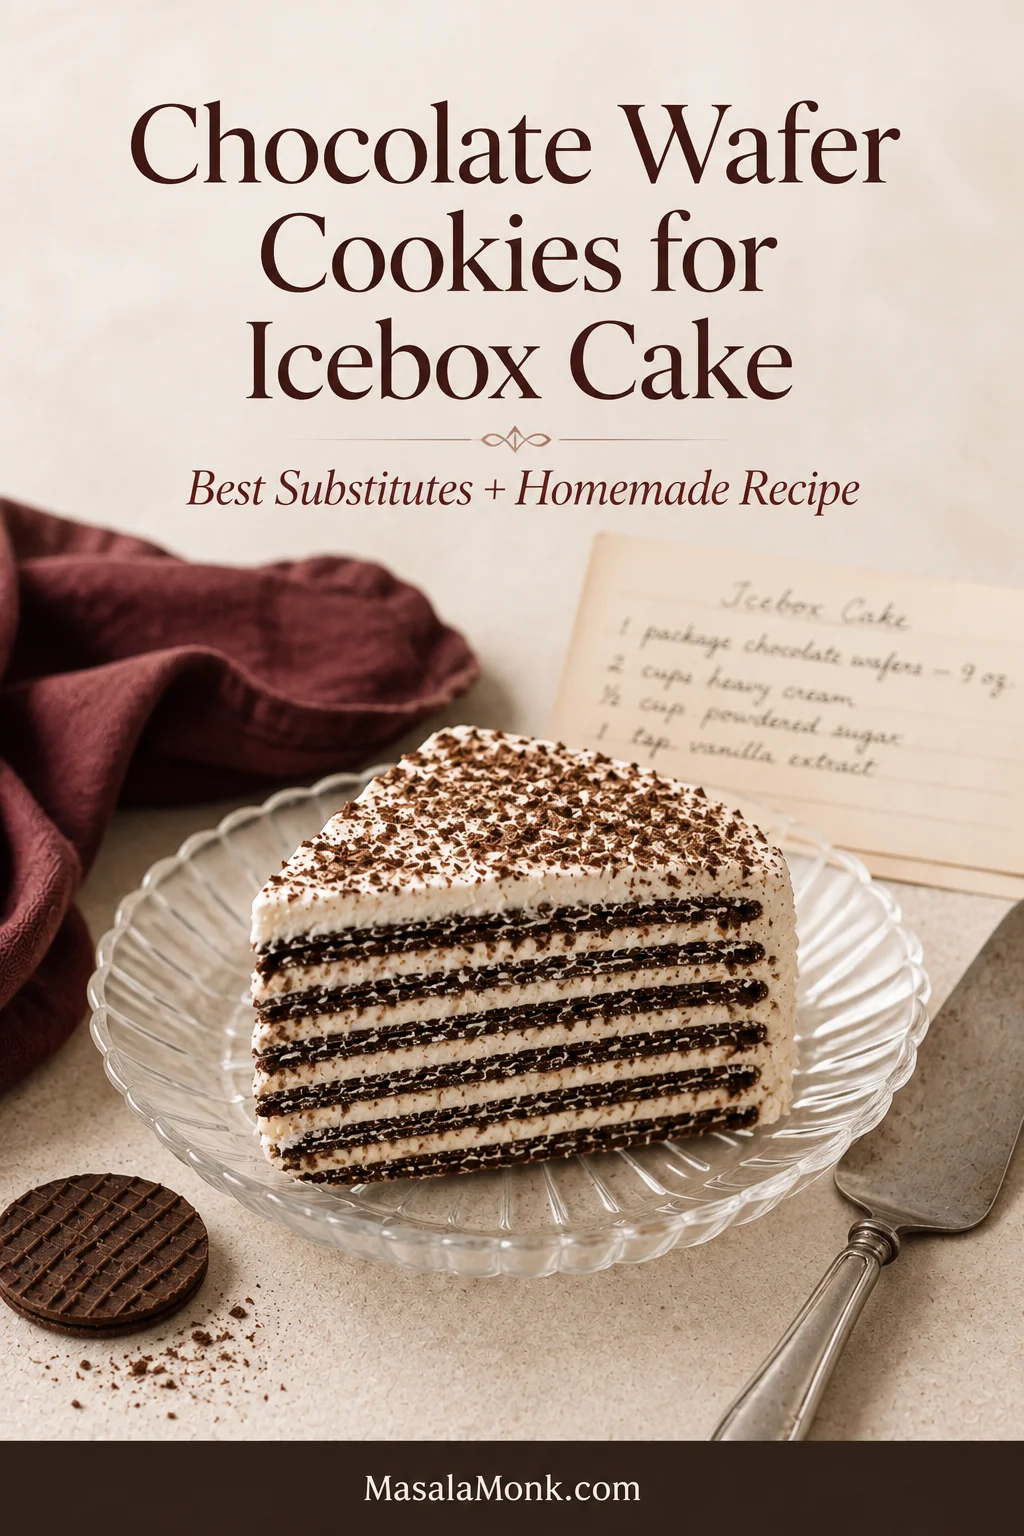
Slice of chocolate wafer icebox cake with alternating dark cookie and cream layers on a glass plate beside a wafer and cake server.

Icebox cake is supposed to be the easy dessert: crisp chocolate cookies, whipped cream, and enough refrigerator time to turn the two into tender striped slices. Then an inherited recipe tells you to open one 9-ounce package of Famous Chocolate Wafers—a product that disappeared from store shelves.

The best chocolate wafer cookies for icebox cake have a surprisingly specific job. They cannot merely taste chocolatey. They need to start thin and crisp, take in moisture without collapsing into paste, and soften all the way through while leaving a clear dark line in every slice.

Choose a store-bought substitute or make the wafers below, then use our complete classic chocolate wafer icebox cake recipe for the whipped cream, assembly, chilling, clean slicing, and finished-cake storage.

Quick Answer: What Can Replace Chocolate Wafers in Icebox Cake?

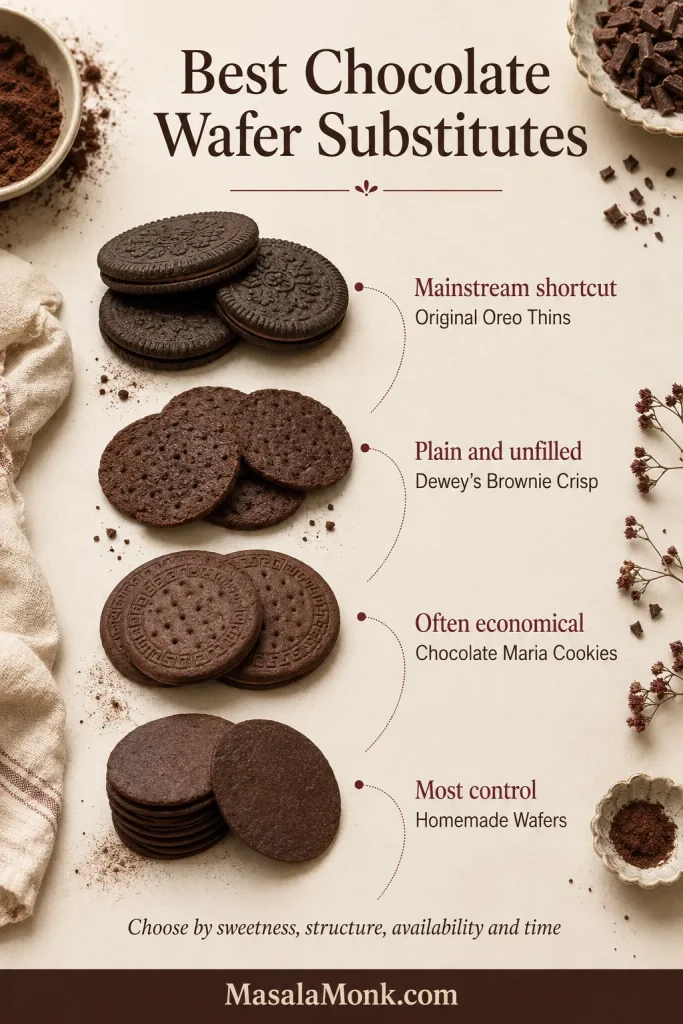
  • Most practical mainstream option: Original Oreo Thins with lightly sweetened cream.
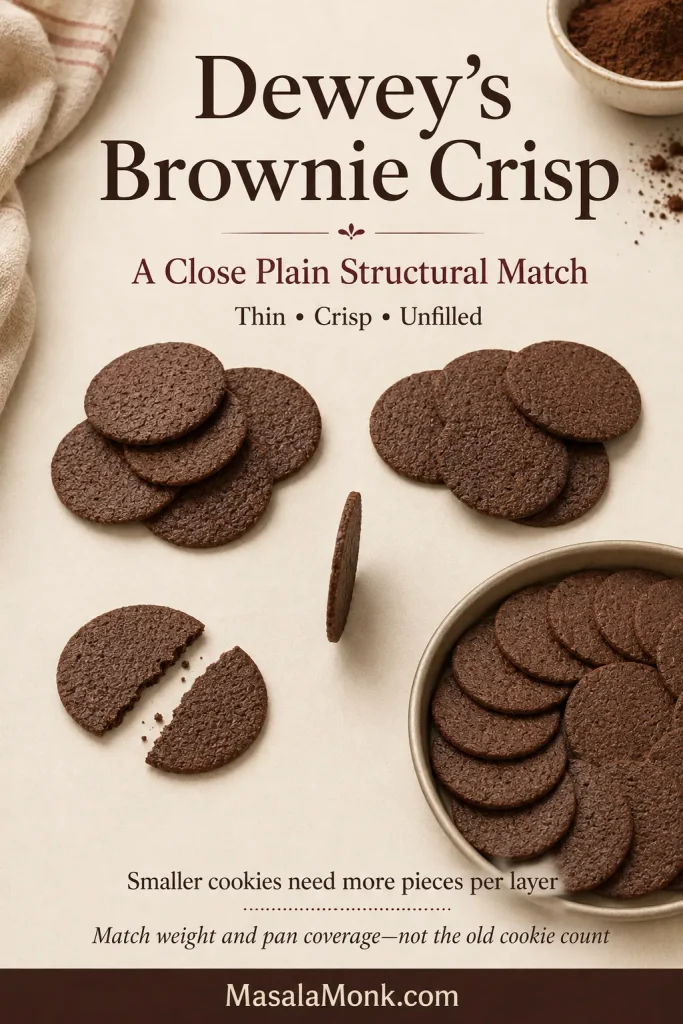
  • Closest plain structural match covered here: Dewey’s Brownie Crisp, when available.
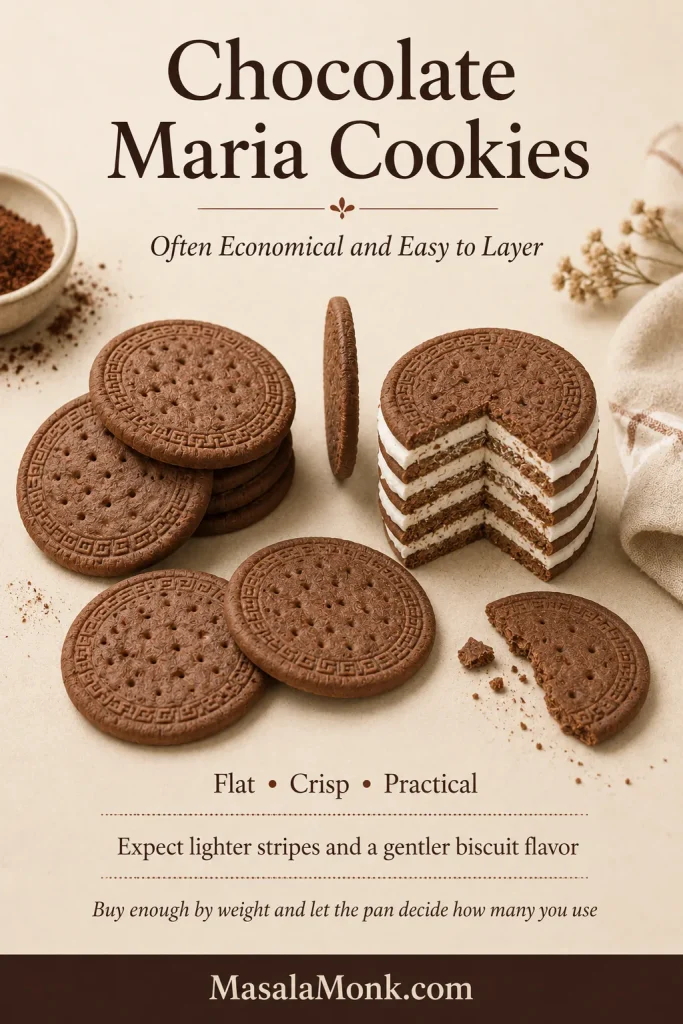
  • Often the economical option: Chocolate Maria cookies.
  • Most control: homemade wafers rolled to about 3 mm—just under ⅛ inch.

Match the cookie’s job, not the missing brand name.

For a plain-wafer result, look for a cookie that is thin, completely crisp, reasonably flat, and uncoated. Match the weight and the way the cookies cover the pan before worrying about an old piece count.

Choose Your Chocolate Wafer Route

One cook needs a cake tonight; another is trying to recreate the birthday or holiday dessert they remember. Choose by the trade-off that matters least: added sweetness, cost, shape, availability, or time.

On a phone, swipe sideways to see all columns.

Your situationStart withPlan for
You need a mainstream shortcutOriginal Oreo ThinsA sweeter, cookies-and-cream-style slice
You want a plain, unfilled cookieDewey’s Brownie Crisp, when availableMany small cookies; match weight and pan coverage
You want an economical, easy-to-layer optionChocolate Maria cookiesA milder cocoa flavor; buy enough by weight
You are building in a loaf pan or baking dishChocolate graham crackersBroad rectangular layers and a clear graham flavor
You want control over flavor and thicknessHomemade wafersCool completely, then set aside the amount your old recipe needs
Choose by the result and trade-off that matter most to your cake.

Whichever route you choose, the goal is the same: enough cream contact to turn every crisp cookie into a tender stripe without erasing the layers.

Rectangular chocolate wafer icebox cake with one slice removed, showing many dark cookie and pale cream layers on a platter.
Regular wafer sizes leave fewer gaps, improving cream contact and producing cleaner slices across a loaf pan.

Homemade Chocolate Wafer Cookies for Icebox Cake

These are not thick chocolate refrigerator cookies. They are dark, dry, thin wafers built for one particular change: crisp enough to snap today, then tender enough to cut after a night between layers of cream. They may look plain when they leave the oven, but that clean snap gives the refrigerator exactly what it needs to create a tender striped slice.

Recipe note: The ingredient proportions and parchment-rolling method are adapted from King Arthur Baking’s chocolate wafers. The guidance here applies that dough specifically to icebox-cake thickness, old-package conversion, chilling, and troubleshooting.

For one old 9-ounce package, set aside 9 oz (255 g) of fully cooled wafers. Use enough to cover the intended layers; keep any extras for gaps, crumbs, or another dessert.

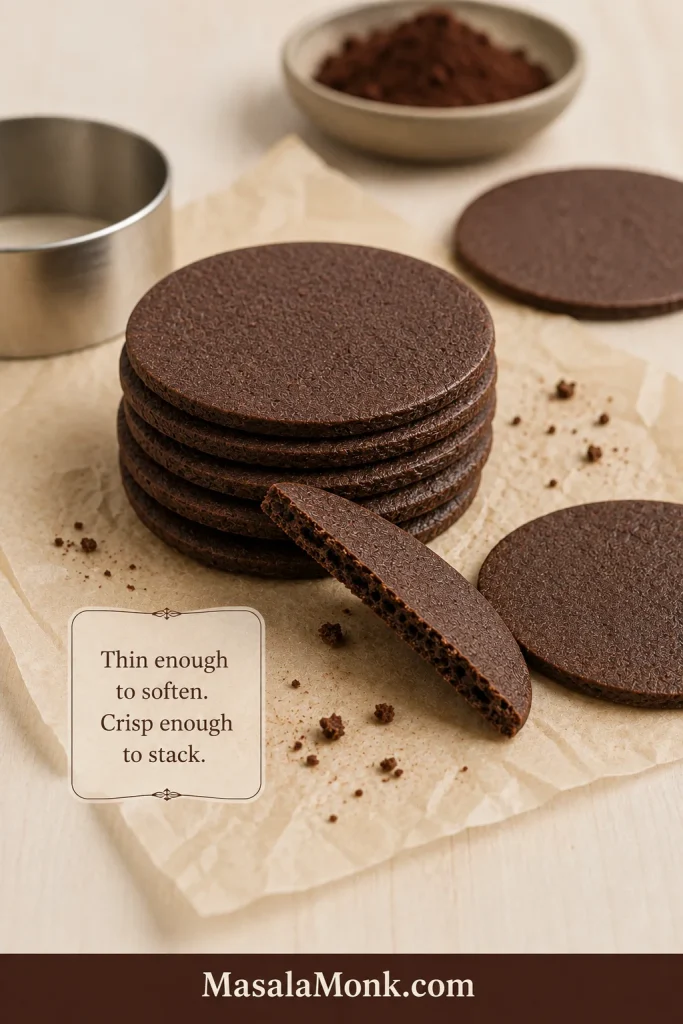
Stack of thin round homemade chocolate wafers on parchment, with one broken wafer showing its crisp edge.
Cool the wafers completely before stacking; trapped warmth can soften them before the cream ever does.

Recipe at a Glance

Prep timeAbout 30 minutes
Chilling30 minutes
Bake time14–17 minutes per batch
CoolingAbout 15–20 minutes, until completely cool
Total elapsed timeAbout 1½–2 hours, depending on tray capacity and whether scraps need another bake
Oven325°F (163°C)
ThicknessAbout 3 mm—just under ⅛ inch
Expected yieldRoughly 40 large rounds or 90 smaller squares; see the note below
For one old packageSet aside 9 oz (255 g) of fully cooled wafers

Yield note: The source recipe estimates about 40 rounds at 2½ inches or 90 smaller squares. Your count will change with thickness, cutter size, tray space, and rerolled scraps.

Equipment

Use a digital scale, medium mixing bowl, hand or stand mixer, rolling pin, parchment paper, and a 2½-inch (6.5 cm) cutter. You need at least two baking sheets, although three or four make the process smoother because the batch produces several trays and the wafers cool completely on the pans. A pizza wheel works well for squares; a separate cooling rack is unnecessary.

Useful extras include 3 mm rolling guides or spacer rings, a small offset spatula, and an oven thermometer.

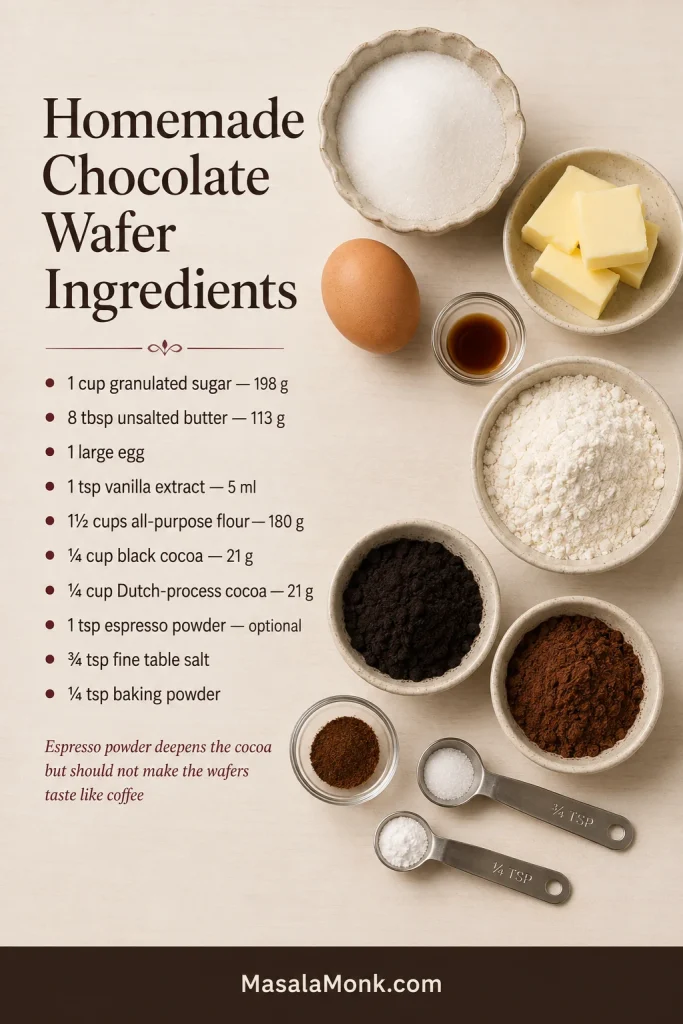
Ingredients

  • 1 cup granulated sugar — 198 g
  • 8 tablespoons unsalted butter, softened — 113 g
  • Espresso powder, optional — 1 teaspoon
  • Fine table salt — ¾ teaspoon
  • Baking powder — ¼ teaspoon
  • 1 large egg
  • 1 teaspoon vanilla extract — 5 ml
  • 1½ cups all-purpose flour — 180 g
  • ¼ cup black cocoa powder — 21 g
  • ¼ cup Dutch-process cocoa powder — 21 g
Overhead arrangement of sugar, butter, egg, vanilla, flour, black cocoa, Dutch-process cocoa, espresso powder, salt, and baking powder.
Weigh the flour and cocoa powders; packed cups can make the wafers thicker and tougher.

Instructions

Mix, Roll, and Chill the Dough

  1. Make a smooth butter base. Beat the sugar, softened butter, optional espresso powder, salt, and baking powder on medium-low until smooth, about 1–2 minutes. The mixture only needs to look even; it does not need to become pale or fluffy.
  1. Add the egg and vanilla. Beat until the mixture is smooth, scraping the bowl so no streaks of butter remain.
  1. Mix in the flour and cocoa. Add the flour, black cocoa, and Dutch cocoa. Mix on low until no pale flour streaks remain and the dough looks evenly dark from edge to edge.
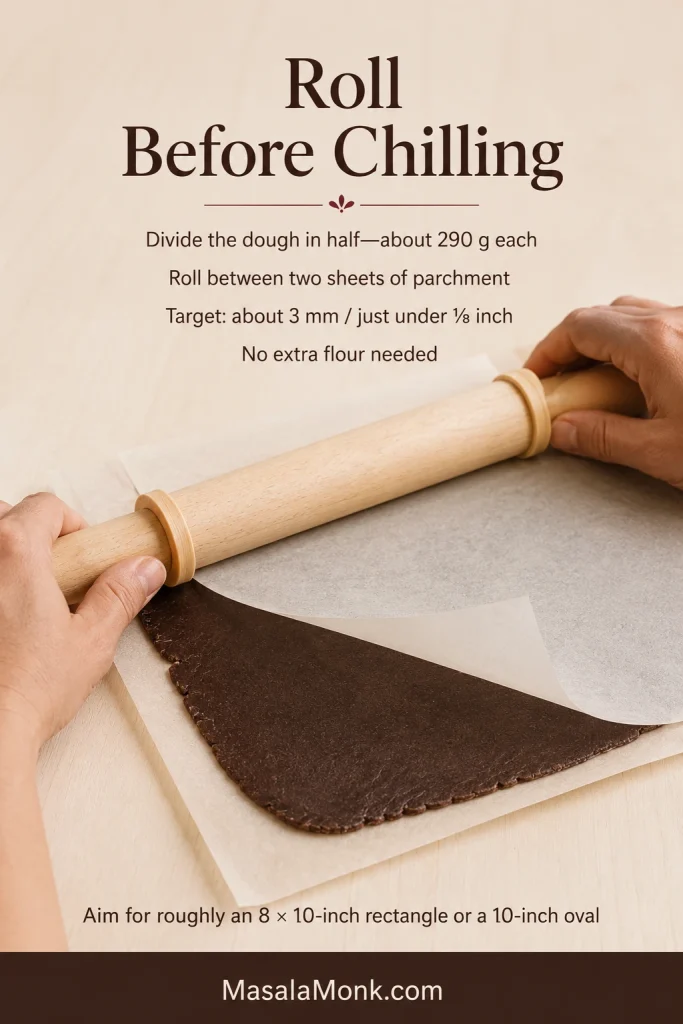
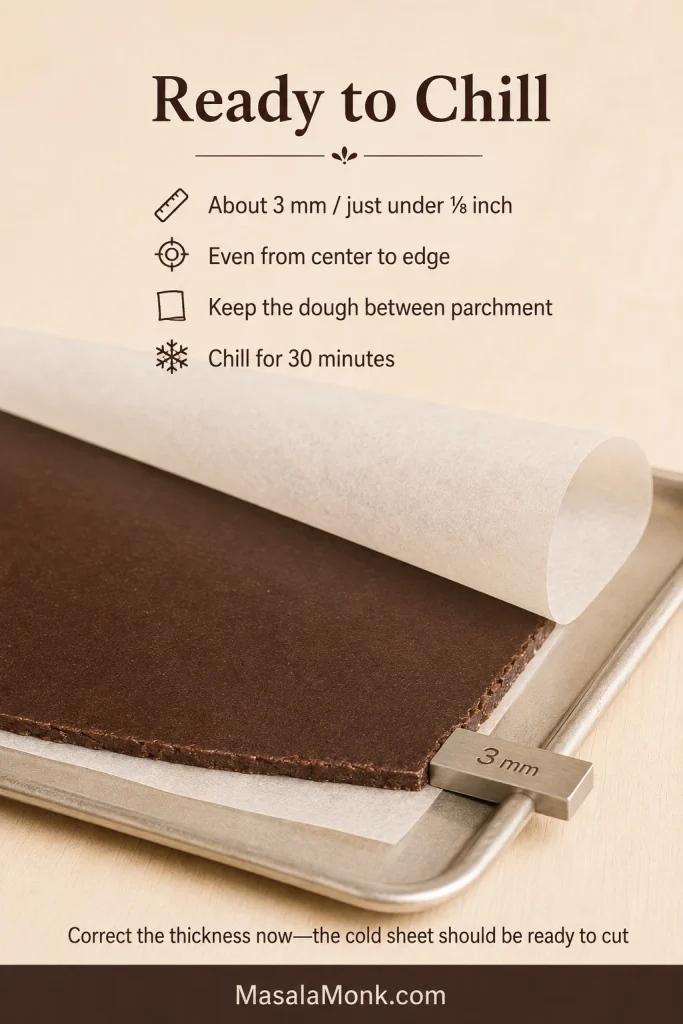
  1. Roll before chilling. Divide the dough in half, about 290 g per piece. Roll each piece between two sheets of parchment to about 3 mm—just under ⅛ inch—aiming for an 8 × 10-inch (20 × 25 cm) rectangle or a 10-inch (25 cm) oval.
Hands rolling dark chocolate wafer dough between parchment sheets with a wooden rolling pin and spacer rings.
Rotate the parchment packet as you roll; repeated pressure in one direction can leave the center thicker than the edges.
  1. Chill the sheets. Refrigerate the dough, still between parchment, for 30 minutes. Meanwhile, heat the oven to 325°F (163°C) with racks in the upper and lower thirds.
Dark chocolate wafer dough rolled on parchment to about 3 millimeters, with the upper parchment peeled back and a thickness guide at the edge.
Chilling firms the dough but cannot correct uneven thickness, so level the sheet first.

Cut, Bake, and Cool the Wafers

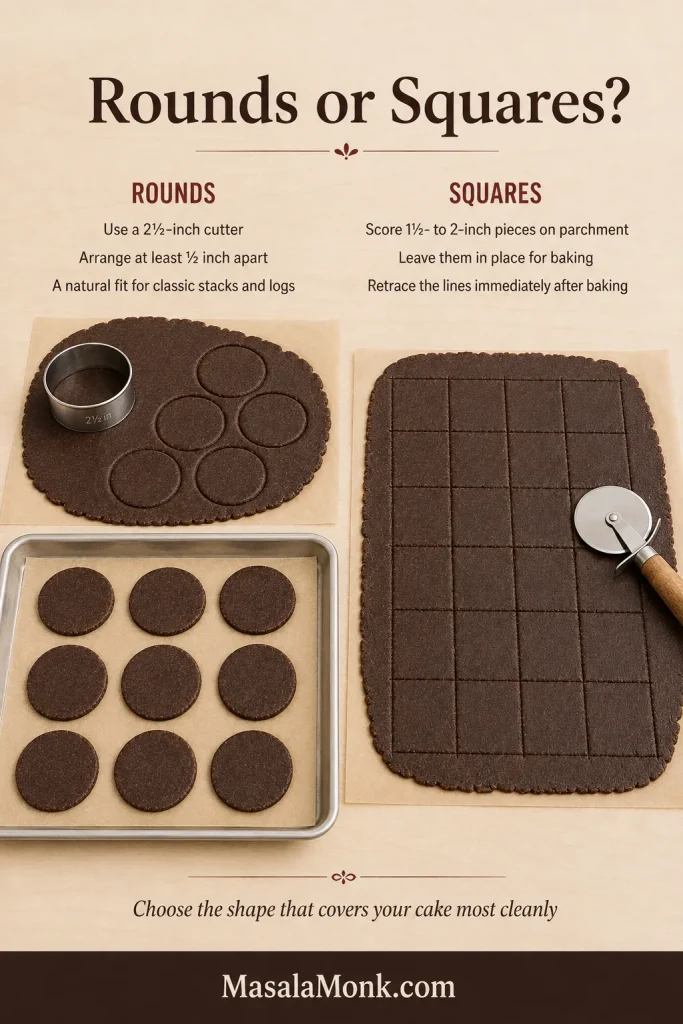
  1. Cut the wafers. Peel away the top sheet of parchment, leaving the chilled dough on the bottom sheet, then cut 2½-inch rounds. Arrange them at least ½ inch apart. For squares, score 1½- to 2-inch pieces directly on the parchment and leave them in place.
Chocolate wafer dough cut into rounds on one tray and scored into an intact grid of squares beside a pizza wheel.
Squares minimize rerolling; handle round-cookie scraps gently because repeated working can toughen the final wafers.
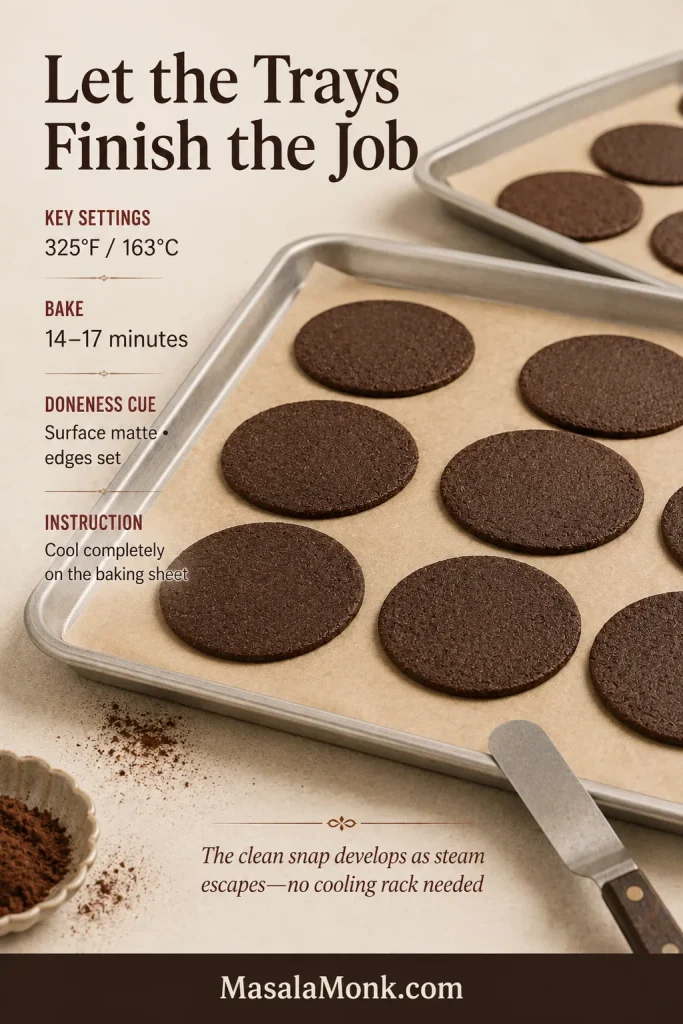
  1. Bake until dry and set. Bake two trays at a time for 14–17 minutes, rotating and switching their positions halfway through. The surface should look matte and the edges should feel set.
  1. Let the trays finish the job. If you made squares, retrace the cut lines immediately. Leave either shape on the baking sheets until completely cool; the clean snap develops as steam escapes.
Thin round chocolate wafers cooling on parchment-lined metal baking trays beside an offset spatula.
Let thin edges firm before lifting; hot wafers are fragile and do not yet show their final texture.
  1. Use every piece. Reroll scraps while the first trays bake, chilling the dough briefly if it becomes soft. Once everything is cool, set aside 9 oz (255 g) for one old package and save the remaining whole or broken wafers for another use.

Recipe Notes

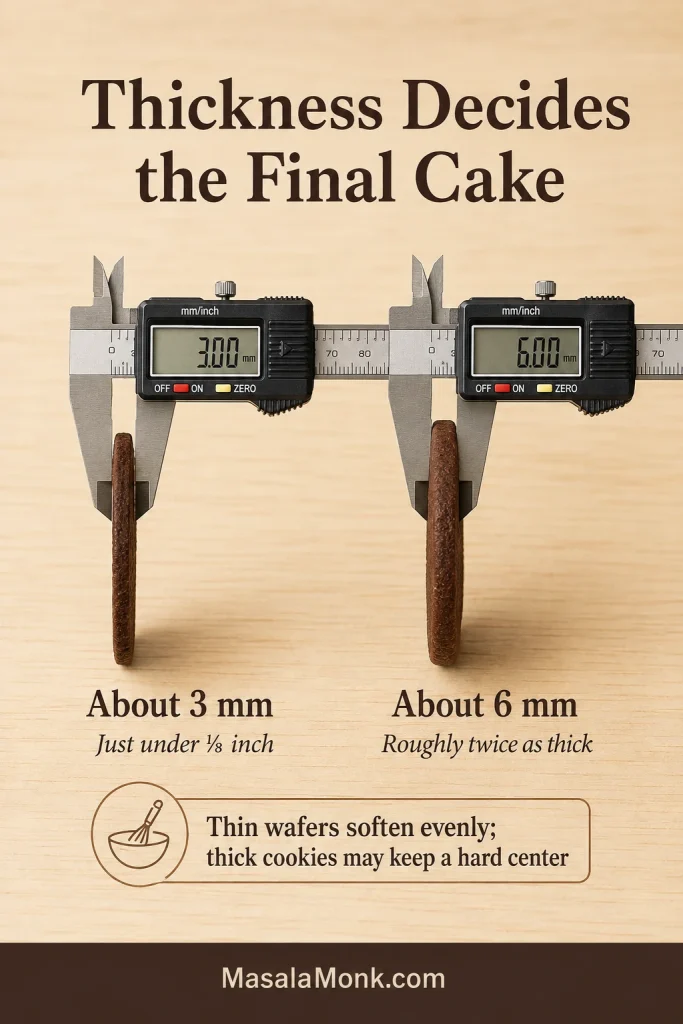
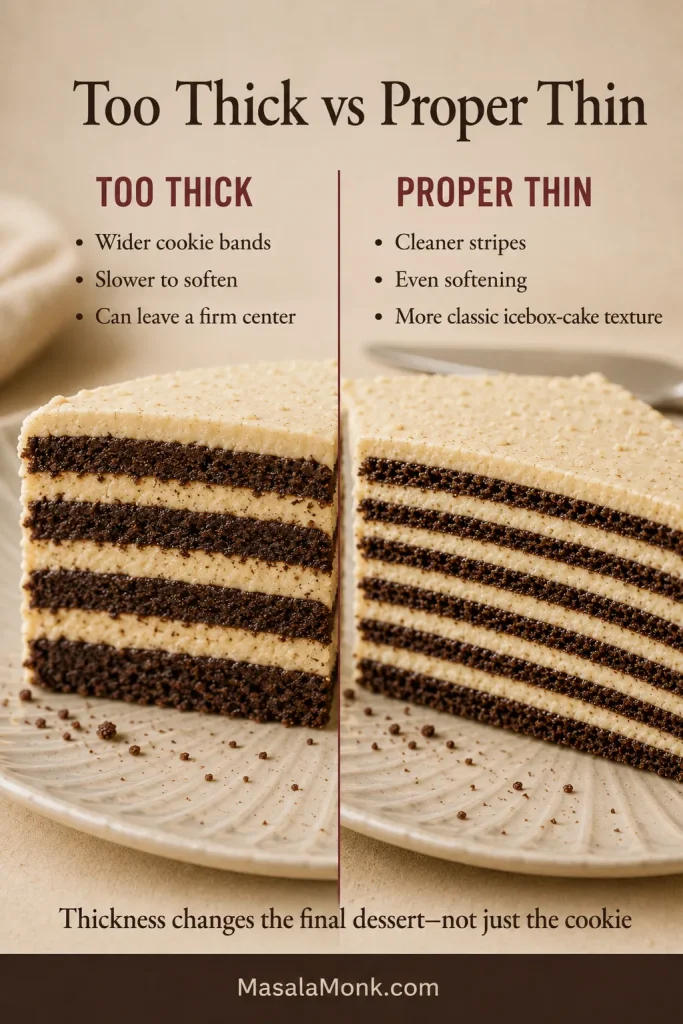
  • Thickness decides the final cake. A ¼-inch (6 mm) refrigerator cookie is roughly twice as thick and may keep a hard center.
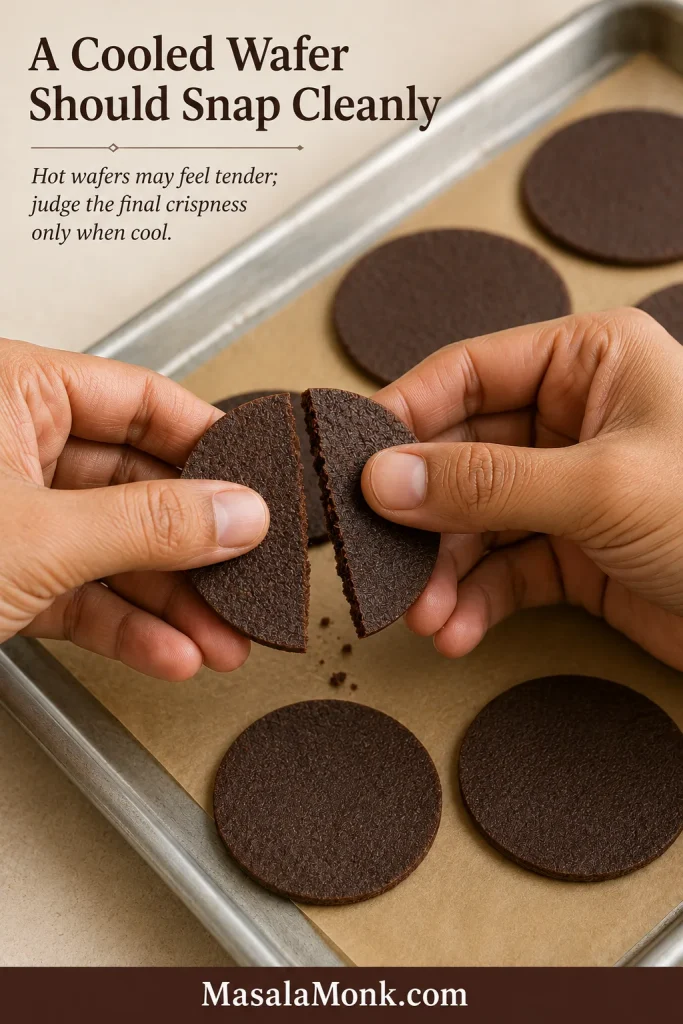
  • Judge crispness only when cool. The hot wafers are tender; their snap appears as they cool on the trays.
  • Espresso powder is optional. At this amount, it is intended to deepen the cocoa without making the wafers taste distinctly of coffee.
  • Save imperfect pieces. Broken wafers fill cake gaps, become crust crumbs, or add crunch to homemade mint chocolate chip ice cream.
Two hands snapping a cooled round chocolate wafer over a parchment-lined baking tray holding more wafers.
Test several cooled wafers when a tray baked unevenly; edge and center cookies may crisp at different times.

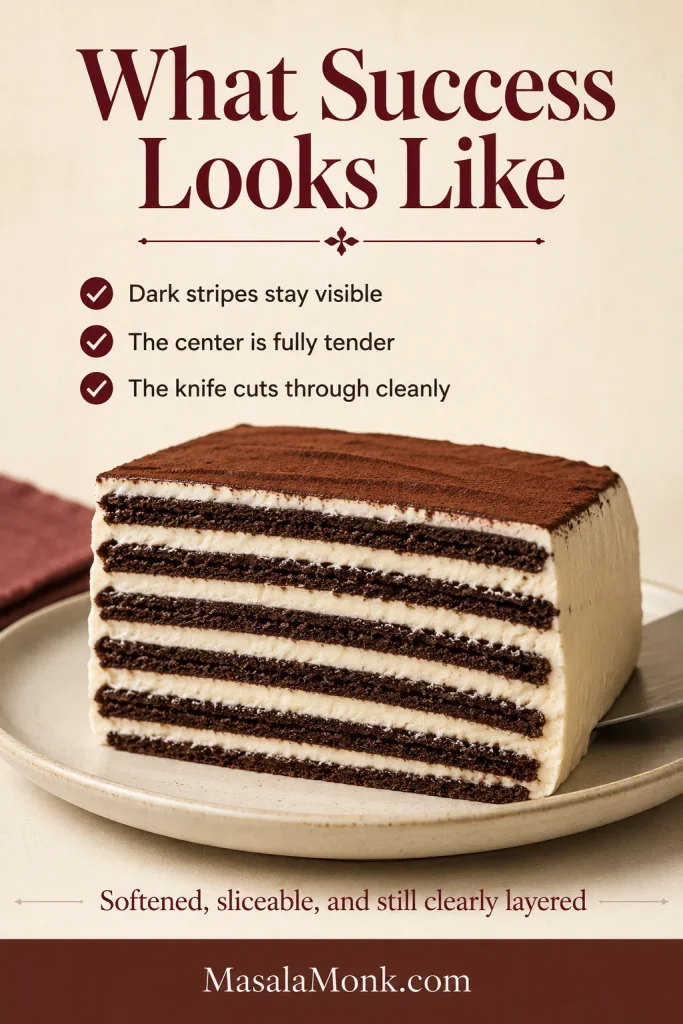
What Success Looks Like

Before assembly, a cooled wafer should look dry, snap cleanly, and taste dark but not aggressively bitter. After an overnight rest with cream, a thin knife should pass through the center without a crack. Each wafer should still leave a distinct chocolate stripe instead of dissolving into a gray-brown blur.

Clean slice of chocolate wafer icebox cake with even dark cookie stripes, pale cream layers, and a cake server behind it.
Slightly wavy stripes are fine; look for a tender center, visible dark layers, and cream that still holds.

Why the Homemade Wafers Work

Making the wafers yourself lets you control both their chocolate flavor and, crucially, their thickness. Rolled thin, cooled to a clean snap, and kept low in leavener, they hold together during assembly and soften evenly in the refrigerator.

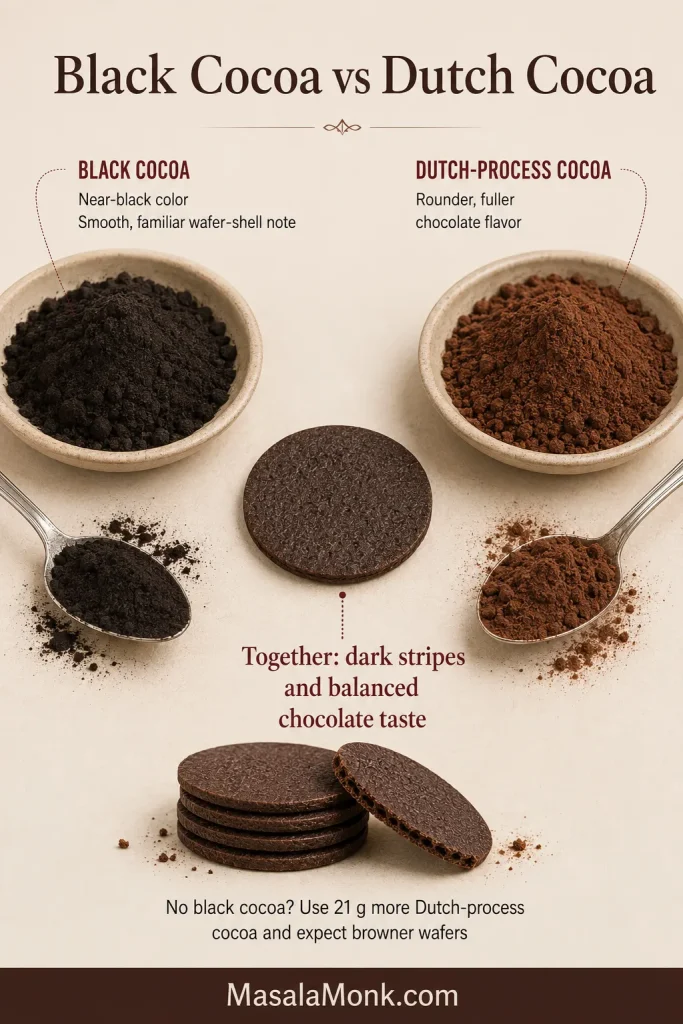
  • Black and Dutch cocoa share the work: one supplies the near-black color; the other keeps the chocolate flavor round and familiar.
  • The dough uses a straightforward butter base: the thin roll and full tray cooling produce the crisp finish.
  • A small amount of baking powder limits puffing: the wafers stay flat enough to stack and soften evenly.
  • Parchment keeps the dough clean and even: no extra flour is worked into the sheet while rolling.
  • Tray cooling completes the texture: the fragile hot cookies firm as steam escapes.

Black Cocoa, Dutch Cocoa, and the Flavor You Want

Black cocoa gives the wafer its near-black color and a smooth, familiar note associated with Oreo-style shells. It contributes more color than deep cocoa flavor. Dutch-process cocoa supplies the rounder chocolate character that black cocoa can lack on its own.

The split keeps the cookie dark enough to draw sharp stripes through white cream without making color the only thing you taste. If the labels themselves feel confusing, our cacao, cocoa, and chocolate guide explains the broader terminology; for this dough, stay with the black-cocoa and Dutch-process choices given here.

Bowls of nearly black cocoa and reddish-brown Dutch-process cocoa with spoons and finished chocolate wafers between them.
Equal weights balance black cocoa’s near-black color with Dutch cocoa’s fuller chocolate flavor.

Can You Make the Wafers Without Black Cocoa?

Yes. Replace the 21 g black cocoa with 21 g additional Dutch-process cocoa. The wafers will be brown instead of nearly black and taste more like a traditional chocolate biscuit, while the thin roll and crisp finish still make them suitable for icebox cake.

Natural cocoa can work in a pinch, but the wafers will be lighter, tangier, and may behave somewhat differently. Replacing the black cocoa with additional Dutch-process cocoa stays closer to the intended color and rounded chocolate flavor.

Rolled Versus Slice-and-Bake Wafers

  • Rolled to about 3 mm: gives the most even thickness and the most dependable icebox-cake result.
  • A log sliced to about 3 mm: is faster and naturally round, but uneven slices and cracking are harder to avoid.
  • A log sliced to about 6 mm: is easier to handle but roughly twice the target thickness; save those cookies for snacking, sandwich cookies, or crumbs.

Rolling is the safer method because every part of the sheet can be checked against the same guide. Slice-and-bake works only when the slices are genuinely thin and even.

← Back to the homemade recipe · Compare store-bought substitutes · ↑ Back to the top

What Kind of Chocolate Cookie Works in Icebox Cake?

For this dessert, “wafer” means a thin, dry, crisp chocolate cookie—not a candy melt and not a layered wafer biscuit. It must be sturdy enough to spread with cream today and porous enough to become tender by tomorrow.

The 30-Second Package Test

  • Thin: ideally about 3 mm—just under ⅛ inch. Thick sandwich cookies soften much more slowly.
  • Crisp: look for thin, snappy, crisp, or crunchy—not soft-baked or chewy.
  • Mostly plain: a thin sandwich filling can work; a thick filling changes the cake substantially.
  • Uncoated: chocolate shells and glazes slow the moisture that needs to enter the cookie.
  • Flat: broad, even surfaces are easier to layer and soften more predictably.

At home, snap one before committing the package. It should break cleanly. A cookie that bends, feels cakey, or leaves a greasy coating on your fingers is less likely to form neat layers.

Annotated round chocolate wafer with callouts identifying its thin edge, crisp break, flat surface, dark cocoa color, and uncoated finish.
Perfectly smooth faces are unnecessary; broad, flat cream contact matters more.

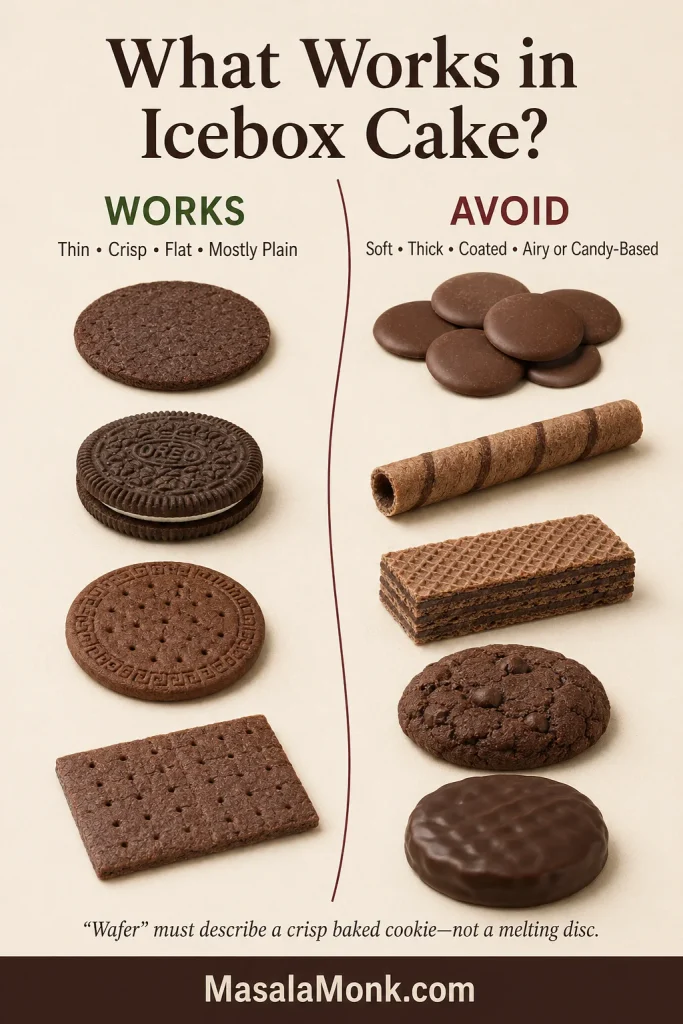
What Works—and What Does Not

Swipe on mobile to view the full comparison.

Cookie styleUse it?Likely result
Thin, crisp, plain chocolate cookieYesThe closest route to classic cake-like layers
Thin chocolate sandwich cookieUsuallySoftens well but adds filling and sweetness
Chocolate Maria biscuit or graham crackerYes, as a variationEasy layers with a milder or graham-style flavor
Thick or soft-baked cookiePoor fitMay stay hard in the center or turn pasty
Coated, airy layered, or rolled wafer biscuitAvoidCoating or internal air gaps cause uneven softening
Candy-melting wafer or coating discNoIt is confectionery coating, not a baked cookie
Suitable thin cookies shown on the left and unsuitable candy discs, wafer rolls, layered wafers, soft cookies, and coated cookies on the right.
Inspect the cross-section and coating, not the word “wafer”; many products with that name are structurally wrong.

Fastest way to avoid the wrong product: if it sits beside candy melts or coating discs, it is not the wafer cookie your icebox cake needs.

Vanilla wafers can make a perfectly good but entirely different icebox cake. They are not a close replacement when dark chocolate stripes are the point.

Thickness, Crispness, Sweetness, and Pan Coverage

Thickness and crispness: Roll homemade dough to about 3 mm—just under ⅛ inch. A ¼-inch (6 mm) cookie is roughly twice as thick and often softens at the edges before the center is ready. Every cookie should begin fully crisp; humidity-softened wafers can lose definition too quickly.

Digital calipers comparing a 3-millimeter chocolate wafer with a thicker 6-millimeter cookie.
Check the edge and center of the sheet; dough can hide extra thickness in the middle.

Cool before judging: Homemade wafers can feel tender while hot. Let them cool completely before deciding whether the bake was long enough.

Sweetness and filling: Filled cookies bring sugar into every layer, so pair them with lightly sweetened cream. Plain wafers leave more room to sweeten the cream itself. Our homemade whipped cream recipe explains sugar levels and the peak stages to watch.

Shape and coverage: Rounds suit classic logs and circular stacks. Squares and rectangles reduce gaps in loaf pans and baking dishes, while broken pieces neatly fill edges and open spaces. Covering the layer matters more than recreating an old cookie count.

Read the finished texture

  • Crunchy center: the cookie is too thick, dense, coated, or has not chilled long enough.
  • Muddy layer: the cookie began soft or dissolved faster than the cream could set.
  • Vanishing stripe: the cookie was too fragile to remain distinct.
  • Clean knife and visible stripe: the cookie softened at the right rate.

What Happened to Nabisco Famous Chocolate Wafers?

Nabisco Famous Chocolate Wafers were discontinued in 2023 after generations of refrigerator-roll, pie-crust, cheesecake, and icebox-cake recipes had been written around them. The Washington Post’s replacement comparison documented both the discontinuation and the scramble for modern alternatives.

Canadian readers may remember Christie or Mr Christie chocolate wafers. Old Canadian retailer pages can remain searchable after a product disappears, so the familiar regional name alone does not confirm fresh stock or current production. Check the actual package, manufacturer, and date.

For many families, the goal is not to invent a new dessert. It is to recreate the birthday or holiday cake they remember without letting one discontinued package end the tradition.

What were Famous Chocolate Wafers like? Very thin, dry, crisp, dark but not candy-sweet, flat enough to spread with cream, and porous enough to soften while keeping a clean chocolate stripe. A modern replacement needs those same qualities, even if the cookie looks completely different.

The old box still gives us one useful number: 9 ounces (about 255 g) of thin chocolate cookies. Weight transfers more reliably than an old piece count because modern substitutes vary in size, thickness, and filling.

Should you buy an old package online?

Usually, no. A fresh cookie with the right structure is a better baking ingredient than an expensive discontinued package with uncertain heat, humidity, and storage history.

  • Look for a photograph of the actual sealed package, not only an archived product image.
  • Look for a readable best-before date and current ingredient label.
  • Identify the manufacturer and seller before trusting claims of a “revived” equivalent.

The box was convenient. The real standard is the finished slice: dark layers that soften cleanly without disappearing.

Best Store-Bought Chocolate Wafer Substitutes

Once you know the qualities that matter, the store-bought choice becomes simpler. Each option solves a different problem involving availability, sweetness, shape, or cost.

Four chocolate wafer substitute options arranged vertically: thin sandwich cookies, plain brownie crisps, chocolate Maria cookies, and homemade wafers.
Compare filling, thickness, cocoa strength, and diameter—not availability alone—because each changes sweetness, coverage, and softening.

Before buying: Package sizes, formulations, and availability were checked in August 2026 and can change. Read the current label, then compare thickness, filling, coating, and package weight before choosing. The product visuals are illustrative comparison guides rather than package photography or controlled test results.

Where to Buy Chocolate Wafer Cookies Now

Start in the ordinary cookie aisle, where Original Oreo Thins are a practical mainstream option in many US stores. Check Hispanic or international foods for chocolate Maria cookies and specialty-cookie shelves for thin cocoa snaps.

Shopping online? Search for thin chocolate cookies, chocolate cookie thins, chocolate snaps, or plain chocolate thins. The broader phrase “chocolate wafers” often returns candy melts and filled wafer bars, so check the filling, coating, thickness, and package weight before ordering.

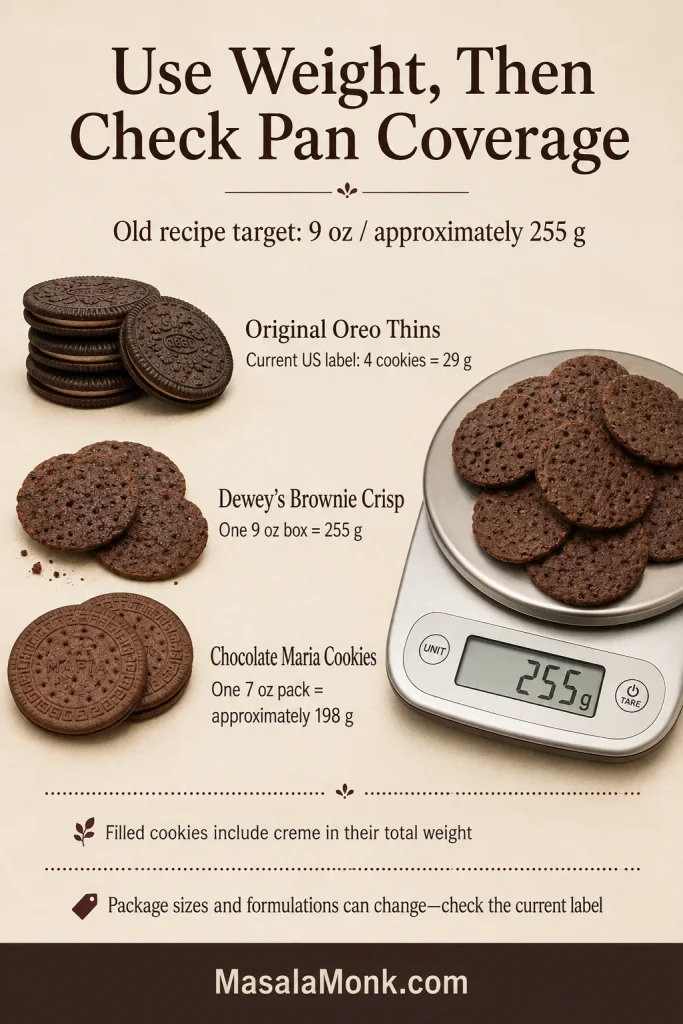
  • Original Oreo Thins: the current US label lists 4 cookies as 29 g. Weigh out approximately 255 g and dry-fit one layer because the creme contributes to the total and the number needed depends on the pan.
  • Dewey’s Brownie Crisp: one 9-ounce box matches the old package weight, but the smaller cookies require more pieces to cover each layer.
  • Goya Chocolate Maria: one 7-ounce pack is about 198 g, roughly 57 g short. Buy two and use only what the pan needs.

Oreo Thins, Plain Shells, and Regular Oreos

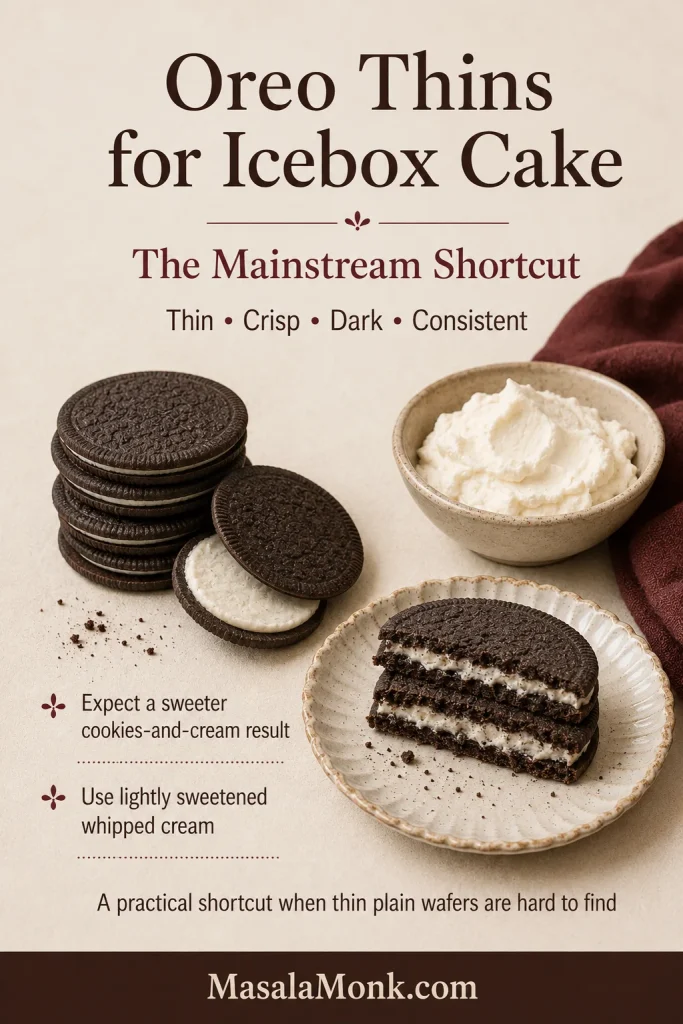
Original chocolate Oreo Thins are thin, crisp, dark, and consistent. Their light creme filling softens into the whipped cream, creating a sweeter, more cookies-and-cream-like slice with a faint white line between the dark shells. Choose the original version unless another filling flavor is part of the plan.

Thin chocolate sandwich cookies beside whipped cream and a cut three-cookie stack showing dark shells and pale filling layers.
Taste one Oreo Thin with prepared cream before stacking; sweetness is easiest to correct at this stage.
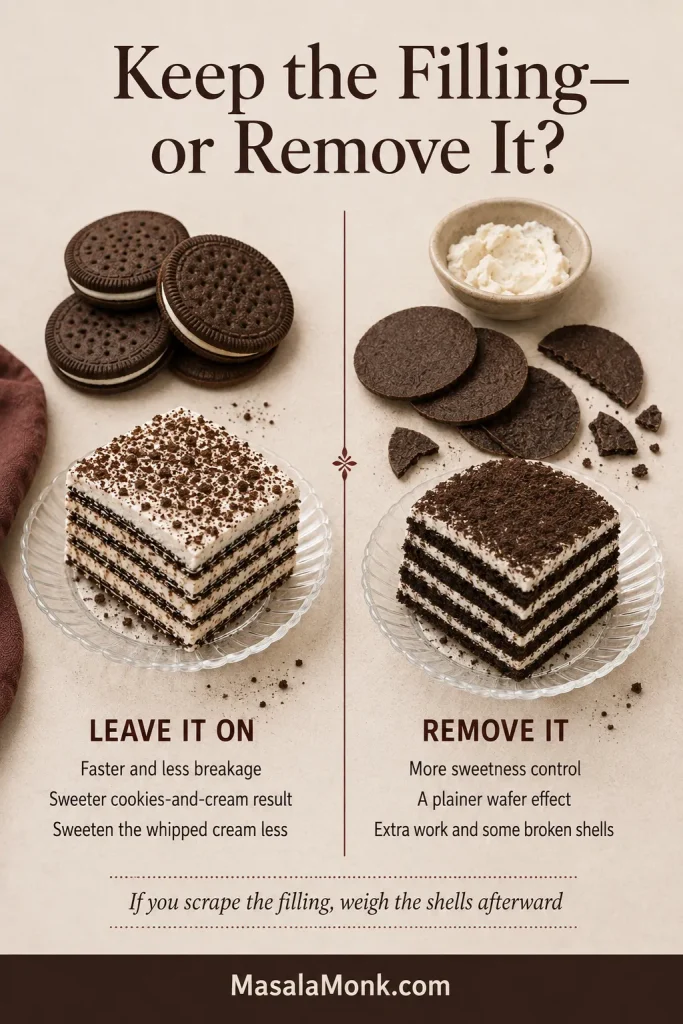
RouteChoose it whenResult
Leave the fillingSpeed matters and you like a sweeter cakeEasy, cohesive, and clearly cookies-and-cream
Remove the fillingYou want more sweetness controlA plainer wafer effect, with extra work and some breakage

Most consumer Oreo packages include filling. For a plain-shell route, separate Original Oreo Thins at home and allow a few extras for shells that crack.

Side-by-side comparison of filled chocolate sandwich cookies and separated plain cookie shells, each used in a layered cream cake.
After removing the creme, weigh the shells and allow extras for breakage.

What about regular Oreos? Whole regular Oreos make a thicker, sweeter Oreo icebox cake and usually need a longer rest. Separated shells behave better, though they remain thicker than Oreo Thin shells and the old Famous Wafers.

Dewey’s Brownie Crisp: A Close Plain Structural Match

Dewey’s Brownie Crisp is thin, crisp, and unfilled. Among the products covered here, those qualities make it a close plain structural match when it is available.

The cookies are smaller than the discontinued wafers, so arrange enough pieces to cover every layer rather than chasing the old count. Their unfilled form may produce darker-looking layers than a sandwich cookie and will not add a separate line of creme.

Small thin plain chocolate brownie-crisp cookies arranged in groups, with one standing on edge and another broken open.
Smaller cookies create more seams, so dry-fit one layer before estimating the quantity.

Chocolate Maria Cookies: Economical and Easy to Layer

Flat, crisp, often economical, and easy to arrange, chocolate Maria cookies are a practical alternative. Their cocoa flavor is usually lighter and more biscuit-like than the discontinued wafers, so the finished cake has lighter chocolate stripes and a gentler biscuit flavor beside the cream.

These cookies are commonly sold in packages smaller than the old 9-ounce box. Check the current package guide above, buy enough to cover the planned layers, and let the pan determine how much you use.

Chocolate Maria-style round biscuits with a cut cream stack showing lighter brown cookie layers.
Broad rounds cover efficiently, and broken edges can fill narrow gaps without building thicker spots.

Chocolate Graham Crackers: A Natural Fit for Rectangular Cakes

Chocolate graham crackers are not a flavor replica, but their broad rectangular shape makes them easy to layer in loaf pans, square dishes, and 9 × 13-inch baking dishes. Expect fewer gaps, less fiddly arrangement, and a finished dessert that tastes unmistakably like chocolate graham crackers—delicious in its own right, but different from the old wafer cake.

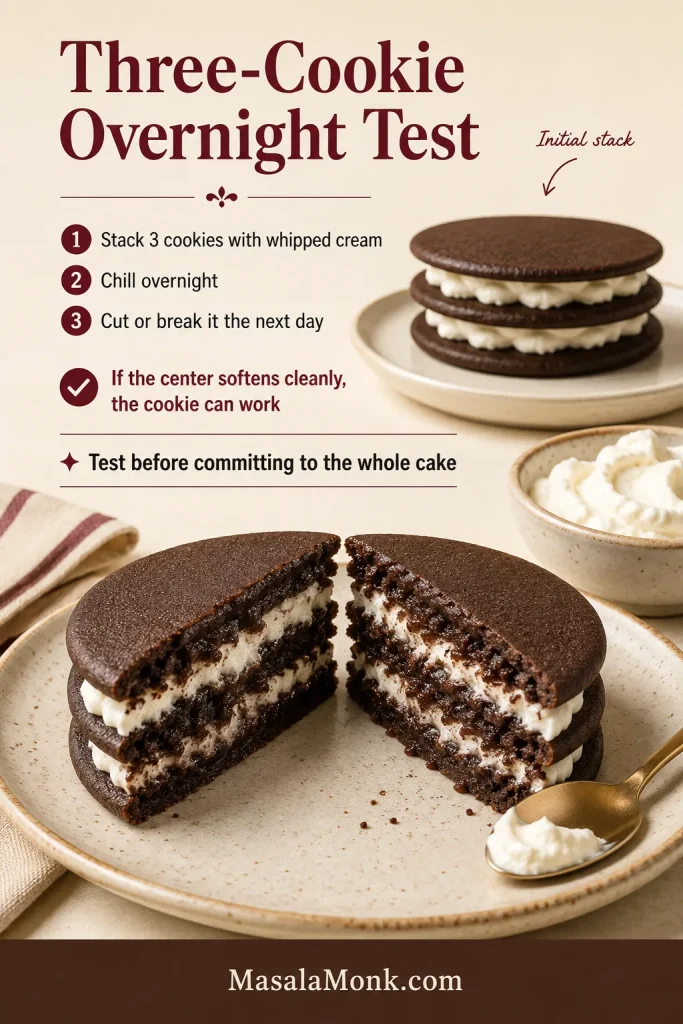
Three-cookie cream stack shown before chilling and cut open after an overnight rest, revealing softened chocolate layers inside.
Use the exact cream and chill time planned for the cake; changing either can mislead the test.

How Long Do Replacement Cookies Need to Soften?

Thick or dense cookies take longer to soften, and deeper cakes usually need more time. Refrigerator temperature and the amount of cream can shift the finish too, so use these as starting checks rather than fixed guarantees.

  • Very thin plain wafers: begin checking after about 6–8 hours.
  • Thin filled sandwich cookies: plan on an overnight rest.
  • Flat biscuits and graham crackers: plan on an overnight rest.
  • Thicker cookies or regular sandwich cookies: allow closer to 12–24 hours.
  • Any unfamiliar cookie: run the three-cookie test before assembling the full cake.

The center decides: Let the clock guide you, then confirm readiness with a thin knife through the middle. The blade should pass through without meeting a hard cookie center, while the dark layers remain visible in the slice.

How to Convert and Adapt One Old 9-Ounce Package

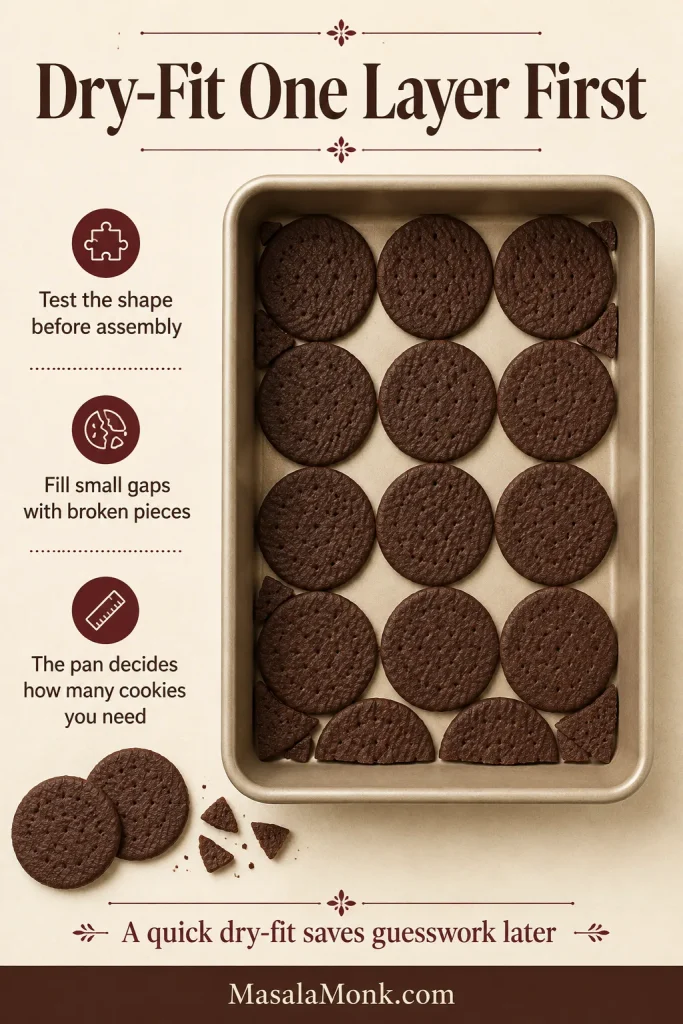
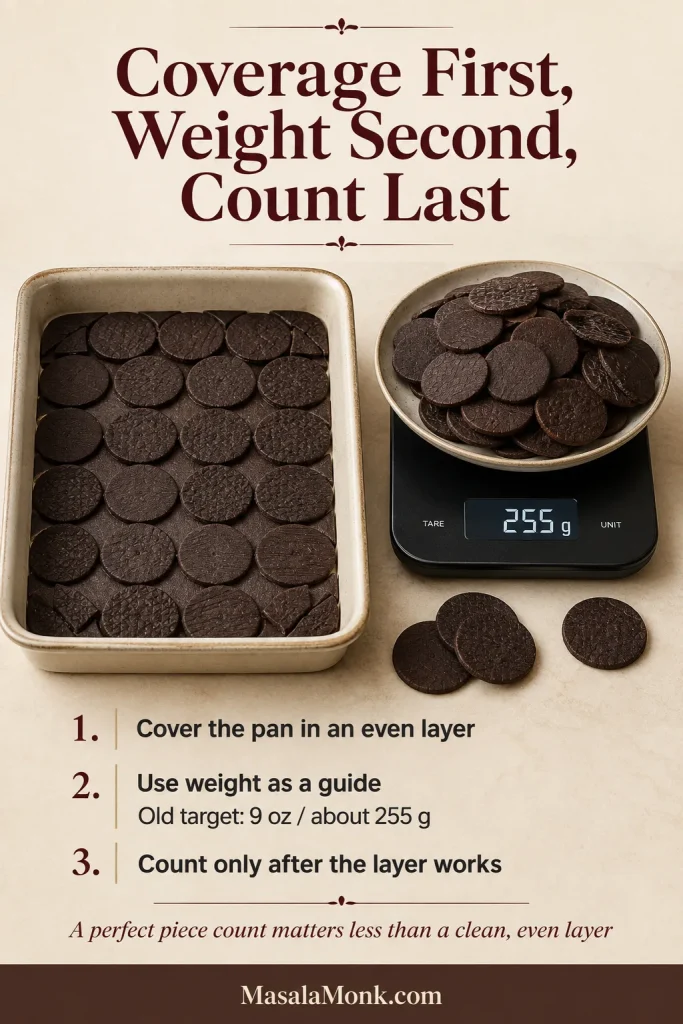
One dependable number remains from the old box: 9 ounces (about 255 g). Begin with that weight, then dry-fit one cookie layer in the pan before whipping the cream. The test shows whether the cookies can cover the layer and where broken pieces will help.

Guide comparing Oreo Thins, Dewey’s Brownie Crisp, and chocolate Maria cookies beside a digital scale reading 255 grams.
The same package weight can cover a pan differently when filling, diameter, and shape change.

Dry-fit one complete layer after weighing the cookies. The same 255 g can cover a pan differently when filling, cookie diameter, and shape change.

Overhead view of a rectangular pan containing one dry layer of round chocolate wafers with broken pieces filling the edge gaps.
Photograph or count the test layer before removing it so final assembly moves quickly.

Coverage first, weight second, count last.

A filled sandwich cookie spends part of its weight on creme. Small cookies need more pieces to cover the pan, while broad rectangular crackers need fewer. Both the scale and the pan matter.

Rectangular pan covered with round chocolate wafers beside a bowl of wafers on a digital scale reading 255 grams.
Weighing one completed dry-fit layer gives a useful total estimate; keep a reserve for gaps, breakage, and uneven edges.

Old-Package Conversion Table

Swipe on mobile to view the full conversion table.

Old recipe wordingInitial guideCheck before assembly
1 package or box, 9 ozSet aside 255 g cookiesDry-fit a layer and confirm full coverage
2 packages, 9 oz eachSet aside about 510 g cookiesUse weight, not the old piece count
36 Famous WafersMatch the old recipe’s coverage and approximate weightModern cookie sizes can make 36 too many or too few
Original Oreo ThinsWeigh 255 g from the packageThe filling contributes part of that weight
One 7 oz (198 g) Maria-cookie packageIt is about 57 g shortBuy a second package and use only what the layers need
Homemade full batchSet aside 255 g after the wafers coolKeep the remaining whole and broken wafers

If you remove sandwich-cookie filling, weigh the shells after scraping. The unopened package includes filling you will discard, so its weight overstates the cookie left for the cake.

Running a little short does not mean the recipe is lost. Fill the final spaces with compatible pieces and let the finished slice—not an inherited cookie count—judge the replacement.

The old recipe assumed one predictable wafer. A modern substitute usually changes sweetness, thickness, size, or cocoa flavor. Adjust only what the new cookie changes.

What changedAdjust thisWhat to expect
Sweeter or filled cookieSweeten the cream less; taste one cookie with a spoonful of creamA balanced cake without an overly sugary finish
Thicker cookieSpread cream against both sides and allow more chilling timeA heavier, more cookie-forward slice
Smaller cookieUse more pieces to cover each layer and fill gaps with broken piecesA different count but the same cake shape
Milder cocoa flavorAccept the variation or finish with unsweetened cocoa or grated dark chocolateLighter stripes with a deliberate chocolate accent
Do not add a large amount of extra cream simply to force thick cookies to soften; the cake can slump before the centers are ready.

For the cream ratio, cake shapes, assembly, final chill, and slicing, continue with the chocolate wafer icebox cake recipe.

← Back to substitutes · Jump to the recipe · ↑ Back to the top

Troubleshooting Chocolate Wafer Cookies

Thin wafers leave less room for measuring and temperature errors than thick drop cookies, but the symptoms are usually clear. Start with what the dough or cooled wafer is doing, then change the most likely cause on the next tray. The visuals below are diagnostic guides; actual softening still varies with cookie thickness, cream consistency, pan depth, and refrigerator temperature.

Dough Problems

Dry and crumbly: Too much flour or cocoa is the most common cause, and cocoa brands vary in absorbency. Continue mixing and press a handful together before adding liquid. If it still falls apart, add milk ½ teaspoon at a time and stop as soon as the dough holds.

Sticky while rolling: Keep the dough between parchment and chill the sheet before peeling away the top layer. Repeated dusting with flour or cocoa changes the formula and dries later cookies.

Baking Problems

Puffing or bubbling: Excess aeration, too much leavener, warm dough, or uneven thickness are the usual causes. Mix the butter and sugar only until smooth and roll evenly. If cut wafers become soft or greasy while you reroll scraps, chill that tray briefly before baking.

Spreading: Use a cool baking sheet for each batch, keep the butter cool and pliable, and chill only trays whose cut dough has become soft or greasy. Measure the flour and any added liquid carefully.

Soft after cooling: Let the wafers cool completely before judging them. If they still bend, use that tray for crumbs and bake the next tray a little longer, checking within the 14–17-minute range. Dark cocoa makes overbrowning difficult to see, so extend the bake cautiously.

Bitter flavor: Too much black cocoa, packed cocoa measurements, overbaking, or missing salt and vanilla are the likely causes. Black cocoa contributes darkness and a distinctive flavor; a larger amount can make the wafer harsher.

Assembly and Chilling Problems

Breaking during assembly: Overbaking, an unevenly thin sheet, moving the wafers while warm, or pressing too firmly with the spatula can all cause breakage. Place a small spoonful of cream on each wafer and ease it outward with short, gentle strokes.

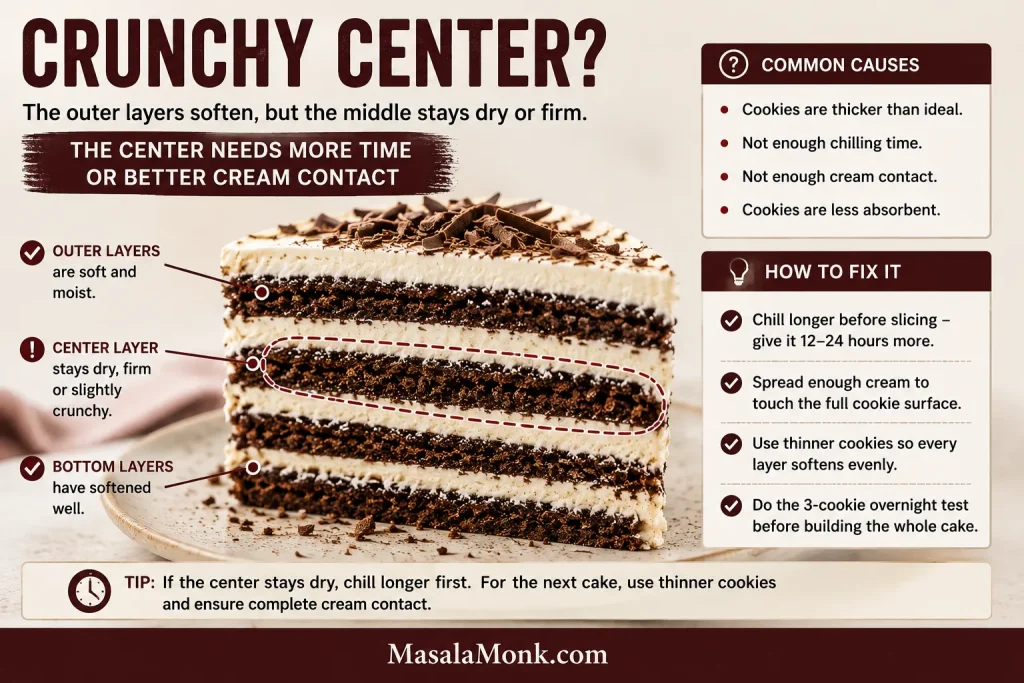
A crunchy cake center: The replacement is probably too thick, too dense, short on cream contact, or simply not chilled long enough. Return the cake to the refrigerator and test the middle again later.

Side-by-side icebox cake slices comparing wide thick cookie layers with narrow, evenly softened chocolate wafer layers.
A thicker cookie widens the stripe and slows the moisture path to the center.

Then check the cake itself: if the middle still resists after more chilling, use the dry center and softened edges as the deciding cues.

Landscape troubleshooting graphic showing an icebox cake slice with softened outer layers and a highlighted dry central cookie layer, alongside causes and fixes.
If 12–24 more hours do not soften the center, the cookie is probably too thick or insufficiently absorbent.

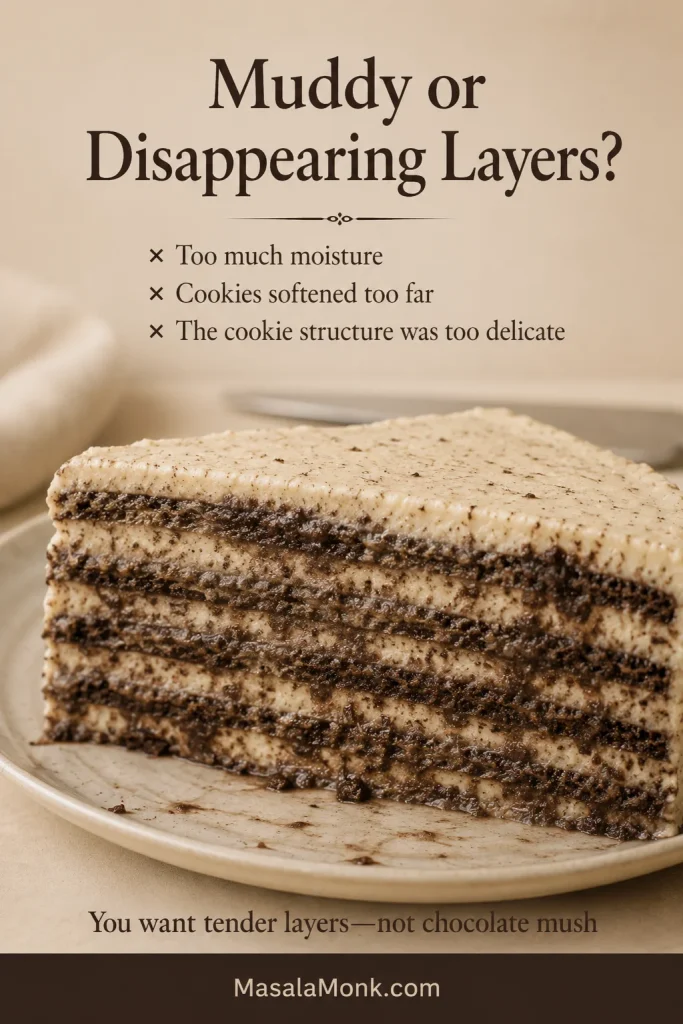
Muddy or disappearing layers: The cookies may have begun soft, the cream may be unusually loose, or the cookie may dissolve too readily. A suitable wafer begins crisp and softens without losing its identity completely.

Close-up of an over-softened chocolate wafer icebox cake with blurred dark layers mixing into the cream.
Serve an over-softened cake very cold; chilling can firm the cream but cannot restore dissolved stripes.

Jump to the recipe · Review the conversion guide · ↑ Back to the top

How to Store Dough and Baked Wafers

Cool baked wafers completely, then keep them in an airtight container at room temperature with parchment between fragile layers. Protect them from steam and humidity; for best texture, use them within several days or freeze them for longer storage. Room temperature is best for unassembled wafers because refrigerator humidity can soften the snap you worked to create.

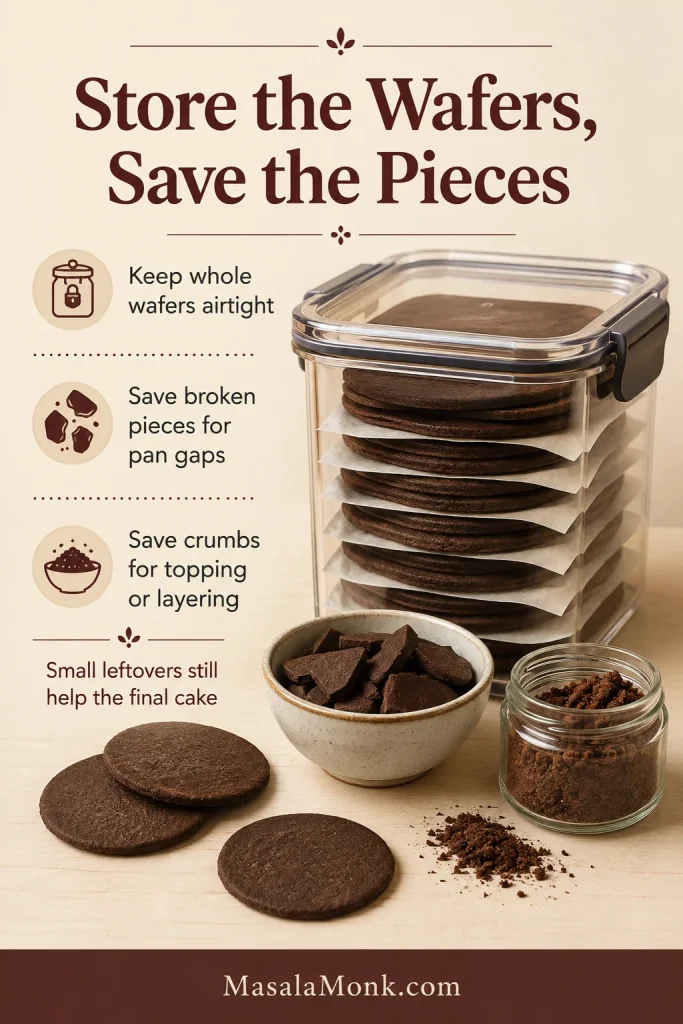
Airtight container of round chocolate wafers separated by parchment, with bowls of broken wafer pieces and chocolate crumbs.
A rigid airtight container controls humidity while protecting thin wafers from bending and breakage.

For make-ahead dough, freeze flat rolled sheets between parchment, wrapped dough portions, or a carefully shaped log for a thin slice-and-bake variation. Thaw in the refrigerator until firm but cuttable.

Fully cooled baked wafers can also be frozen in a rigid airtight container with parchment between layers. Thaw them in the closed container so condensation collects on the container instead of the wafers, then check crispness before assembly.

If stored wafers lose their snap, save them for crumbs rather than putting softened cookies into the cake.

Save broken or extra wafers for cake gaps, ice cream, or chocolate crumbs. For a crust, follow the pan and butter guidance in our no-bake cheesecake recipe and add butter gradually because plain wafers do not contain sandwich filling.

Gluten-Free, Vegan, and Lower-Sugar Options

Dietary needs do not end the dessert, but they change which shortcut is safest. When the cake is needed soon, a commercially made thin chocolate cookie with the dietary certification you need is usually more dependable than rebuilding this precise wafer formula one ingredient at a time.

For a gluten-free cake, choose a clearly labelled thin chocolate cookie that begins fully crisp, check all nut, seed, coconut, and sesame warnings, and run the three-cookie overnight test before building the cake.

For a vegan cake, use a commercially made thin vegan chocolate cookie and a plant-based whipping cream you already trust. Replacing the butter and egg in the homemade formula requires a separately developed recipe.

For a lower-sugar version, start with plain unfilled cookies and reduce the sweetness of the cream. Large changes to the cookie sugar affect spread, crispness, browning, and dough handling.

For any unfamiliar dietary cookie, the small overnight test is the safest way to check whether it becomes tender without dissolving.

Frequently Asked Questions

Are Nabisco Famous Chocolate Wafers still made?

No. They were discontinued in 2023. Old recipes and archived retailer pages may still name them, but they are no longer a dependable store-bought ingredient.

Are Famous Chocolate Wafers back?

As of August 2026, the original Nabisco wafers had not returned. Some websites and marketplace listings use the familiar name or nostalgic package imagery, so check the named manufacturer, ingredient label, package date, and seller before assuming the original product is back.

What is the closest substitute for Famous Chocolate Wafers?

Dewey’s Brownie Crisp is the closest plain structural match covered here when available. Original Oreo Thins are easier to find, but their filling makes the cake sweeter and more Oreo-like.

Do I need to remove the filling from Oreo Thins?

No. Leave the filling in for the easiest route and sweeten the whipped cream lightly. Remove it when you want a plainer chocolate-wafer effect and more control over sweetness. If you scrape it out, weigh the shells afterward because the package weight includes the creme.

What if my replacement package is only 7 ounces?

A 7-ounce package weighs about 198 g, roughly 57 g short of the old 9-ounce box. Buy a second package and use only as much as the cake needs.

Can I use vanilla wafers?

Yes, but they create a vanilla icebox cake without the dark chocolate stripes. They are a different flavor route, not a close Famous Wafer replacement.

Are chocolate melting wafers the same as wafer cookies?

No. Melting wafers are chocolate or candy coating designed to liquefy. Icebox cake needs a thin, crisp baked cookie.

How long do replacement cookies need to soften?

Overnight is the safest general plan. Very thin plain wafers may be ready sooner, while thicker cookies or whole Oreos can need closer to 12–24 hours. Use the clock as a guide and confirm the center with a thin knife.

The Cookie Should Disappear Into the Cake—But Not Completely

A good chocolate wafer starts with a snap and ends with a fork. Today it should be dark, dry, and sturdy enough to spread. Tomorrow it should be tender all the way through, yet still draw a clean chocolate line across the slice.

Close-up of a chocolate wafer icebox cake slice with thin dark cookie stripes separated by pale cream layers.
A crisp wafer should soften into the cake while leaving a visible dark stripe and enough structure for a clean slice.

That is what an old family recipe was really preserving—not a particular cardboard box, but the quiet transformation that happens overnight and the familiar striped piece placed on the plate the next day.

If you use a replacement, leave a comment with the exact cookie, package weight, cake shape, whether you kept any filling, and how long the center needed to soften. Those details can help the next reader standing in the same cookie aisle.
← Back to the homemade wafer recipe · ↑ Back to the top

Posted on — Leave a comment

Sopapilla Cheesecake Recipe: Easy Crescent Roll Cheesecake Bars

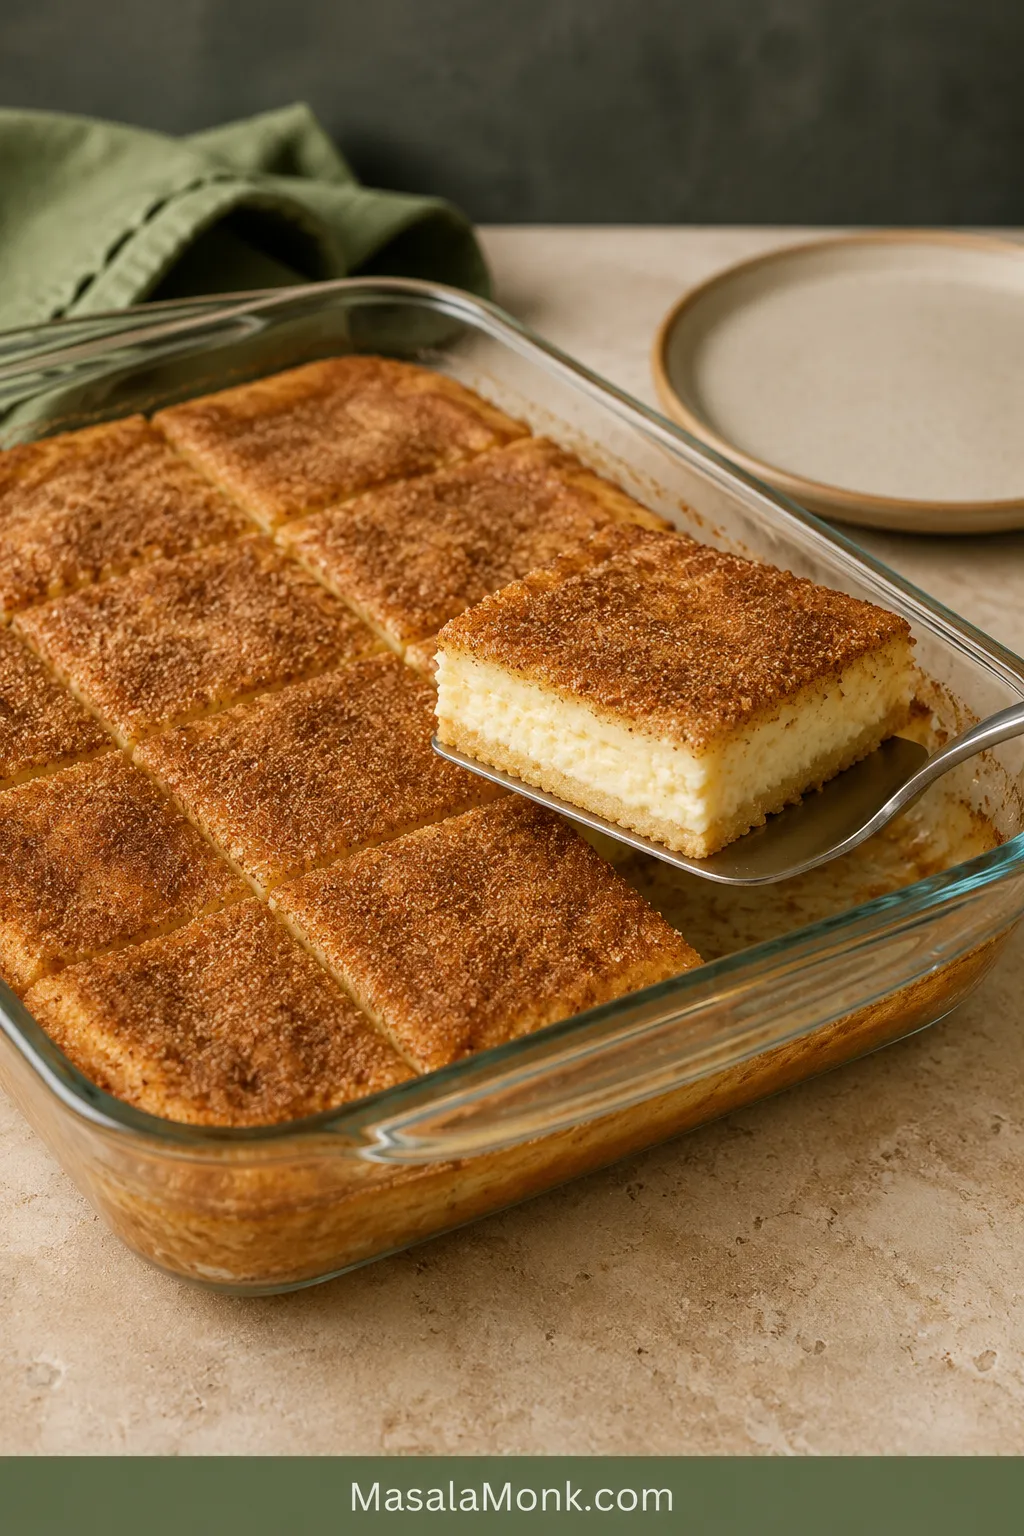
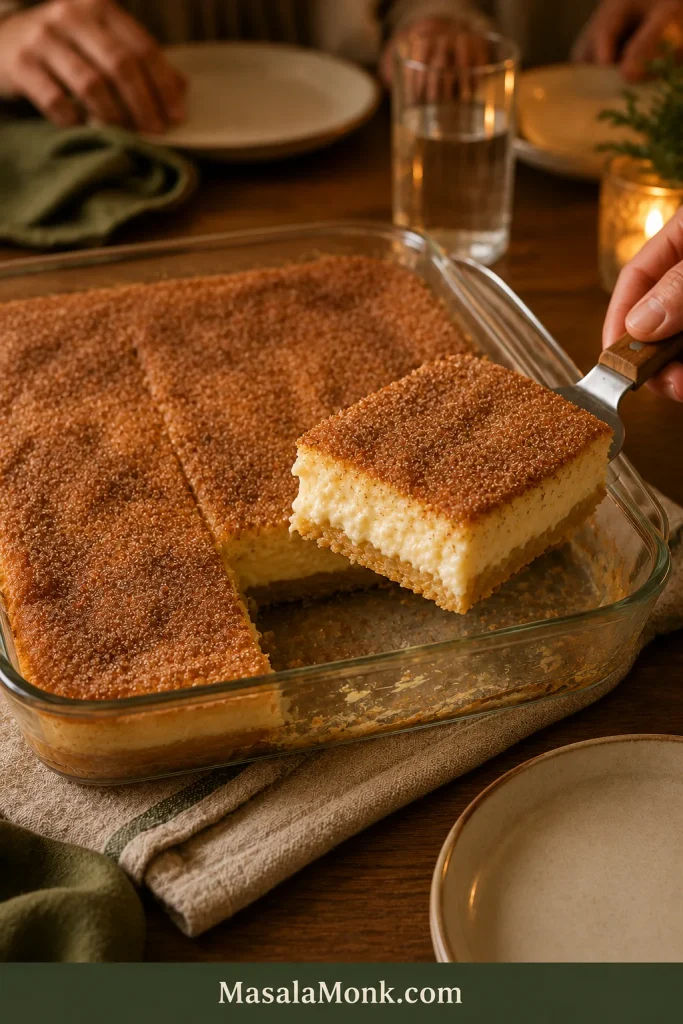
Clear glass pan of Sopapilla Cheesecake with one corner bar lifted on a metal spatula, revealing a cinnamon-sugar top, creamy filling and baked crescent base.

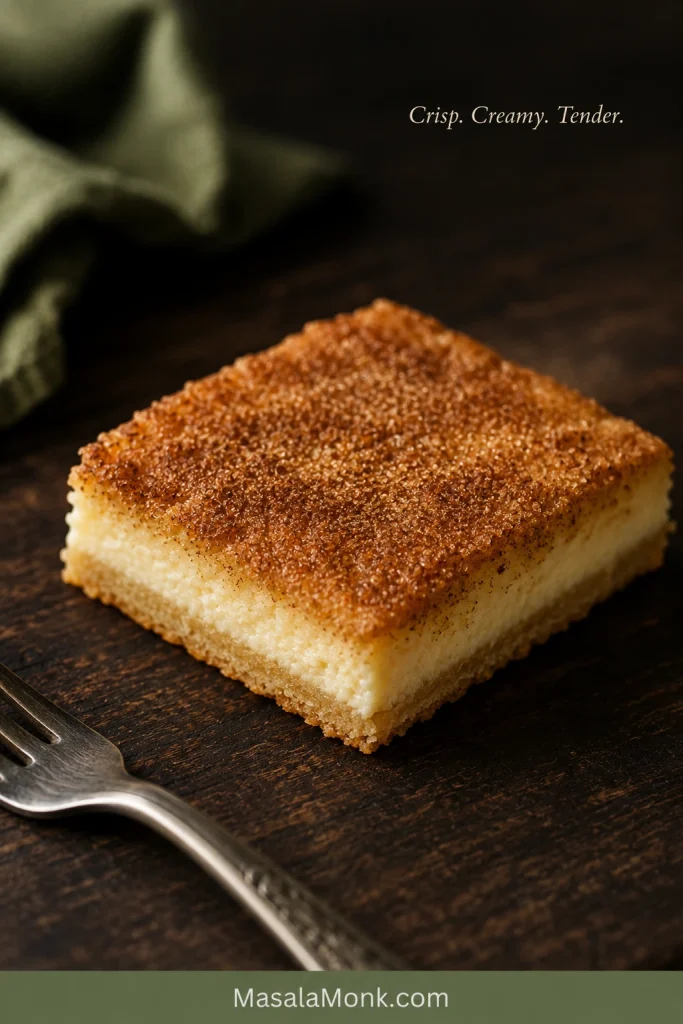
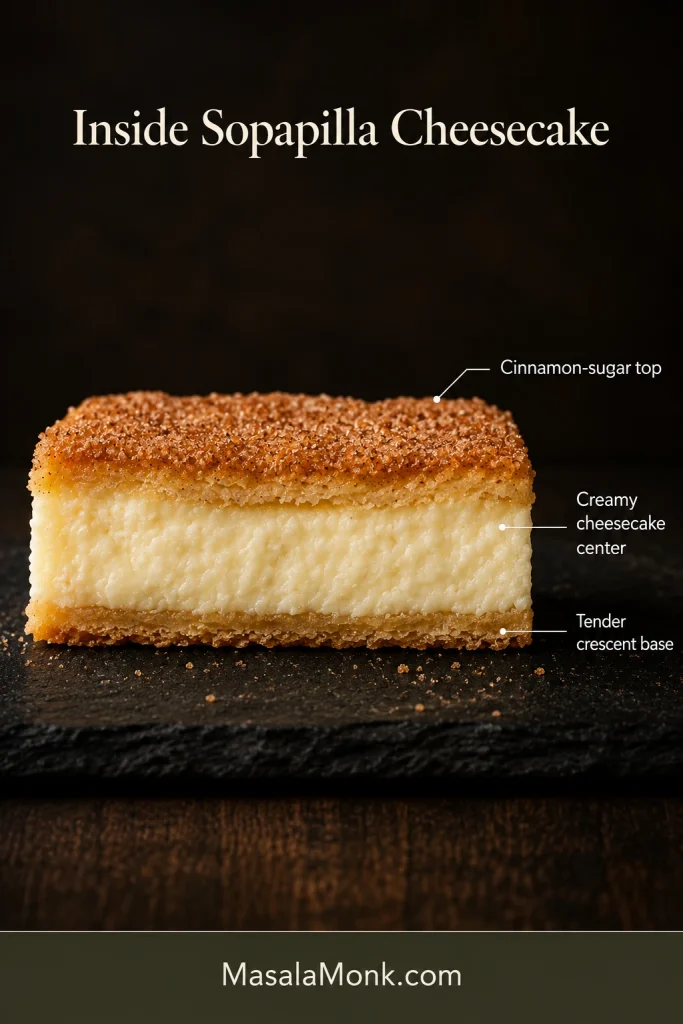
Two packages of crescent dough, one creamy filling and a cinnamon-sugar crust turn into a pan of Sopapilla Cheesecake with about 20 minutes of hands-on work. The top bakes golden and lightly crisp, the center settles into a smooth cheesecake layer, and the kitchen smells like cinnamon rolls and cheesecake arriving at the same time.

Yet one quiet problem trips people up: the upper pastry can look beautifully golden while the dough underneath is still pale and gummy.

Golden on top is not enough—check the bottom before you pull the pan.

Quick Answer: How to Make Sopapilla Cheesecake

Sandwich a lightly sweetened cream cheese filling between two cold crescent-dough sheets. Brush the top with melted butter, cover it with cinnamon sugar and bake at 350°F / 175°C.

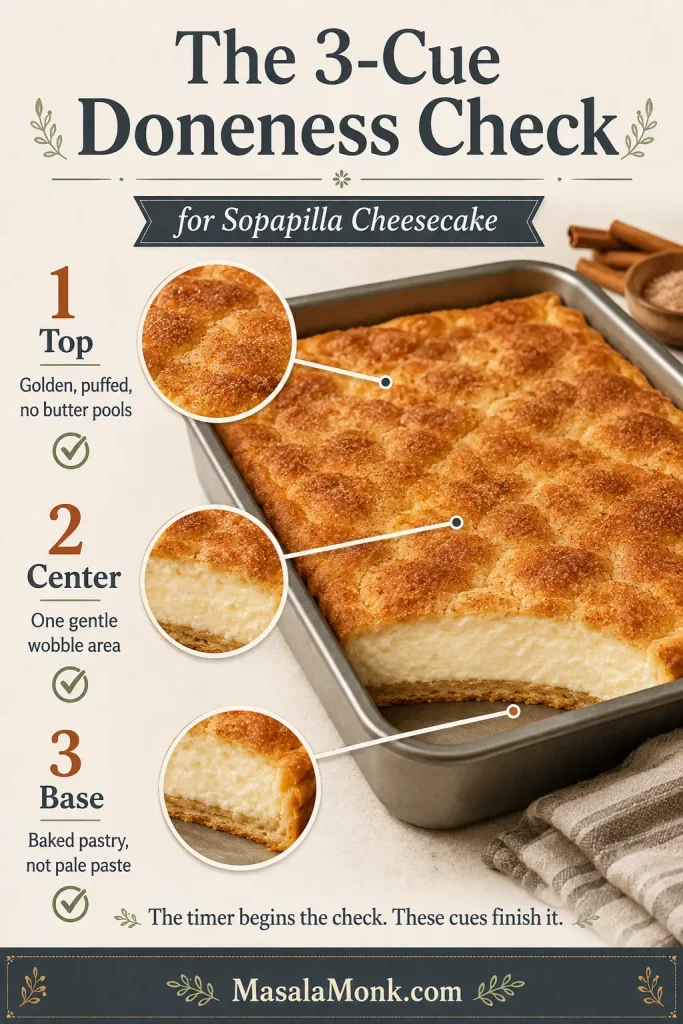
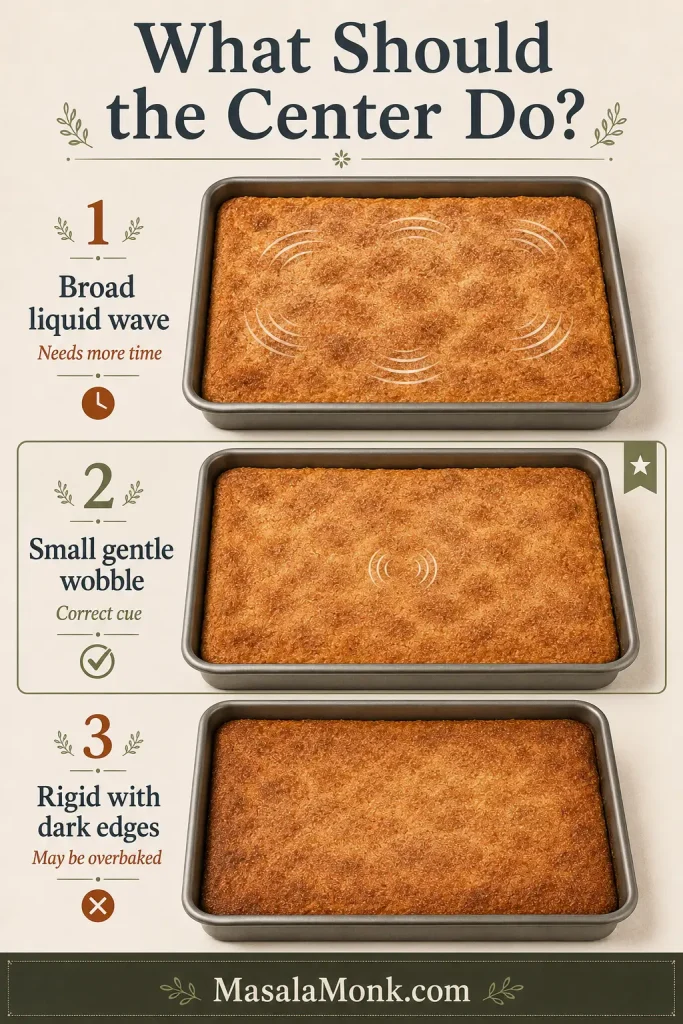
In a conventional oven, begin checking at about 28 minutes. The edges should look set with only a gentle wobble in the middle, and the lower pastry should look baked through—not pale and doughy. Cool for at least 20 minutes, or wait about one hour for bars that hold an edge.

Sopapilla Cheesecake Recipe

Easy Sopapilla Cheesecake Bars

Creamy, tangy cheesecake between tender crescent layers, finished with a crisp cinnamon-sugar top that tastes buttery without feeling heavy.

Active preparation20 minutes
Conventional ovenBegin checking at 28 minutes; usually 30–35 minutes
Fan-assisted ovenStart checking at about 25 minutes; continue until all three doneness cues are present
Cooling20 minutes to 1 hour
Total, excluding softeningAbout 1¼–2 hours
Optional chilling2–3 additional hours for the neatest squares
Yield16 standard bars
Pan9×13 inches / 23×33 cm
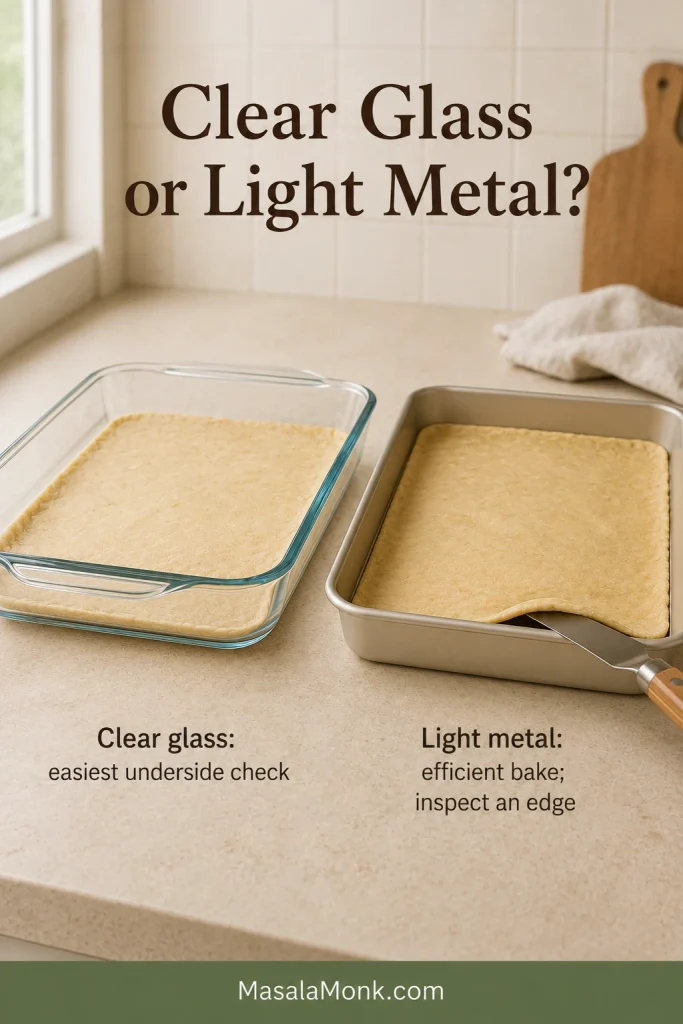
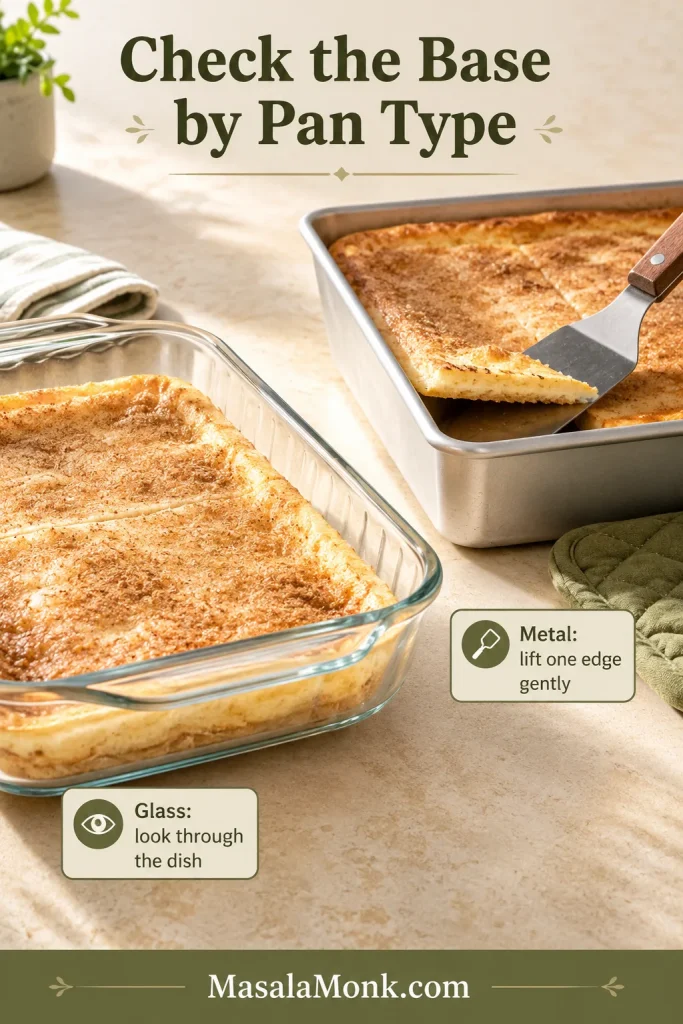
Clear glass makes the underside easiest to inspect. Light-colored metal may finish sooner, while glass and thick ceramic may need the longer end of the range.

Before you begin: Set out the cream cheese and egg. The cream cheese may need 45–60 minutes to soften; cutting it into smaller pieces will shorten the wait.

Equipment and Pan Choice

  • 9×13-inch / 23×33 cm clear glass baking dish for the easiest underside check, or a light-colored metal baking pan
  • Large mixing bowl and electric mixer
  • Flexible spatula and thin spatula
  • Parchment paper for shaping the upper dough
  • Small bowl and pastry brush or spoon

Pastry Layers

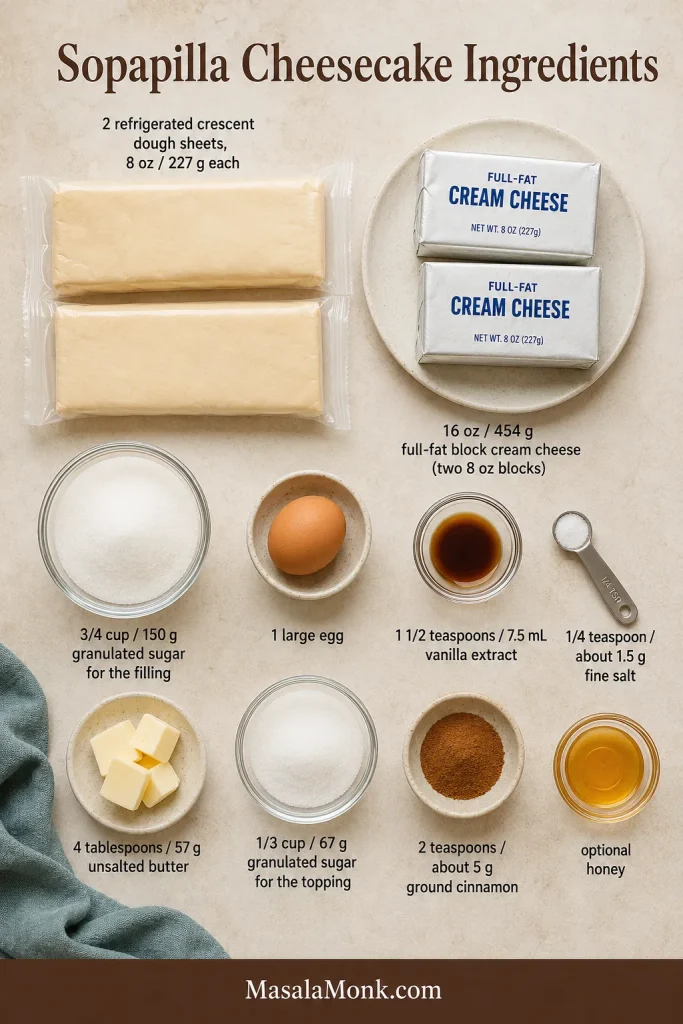
  • 2 packages refrigerated crescent dough sheets, 8 oz / 227 g each, 16 oz / 454 g total
  • Nonstick cooking spray or a small amount of additional softened butter, for the pan

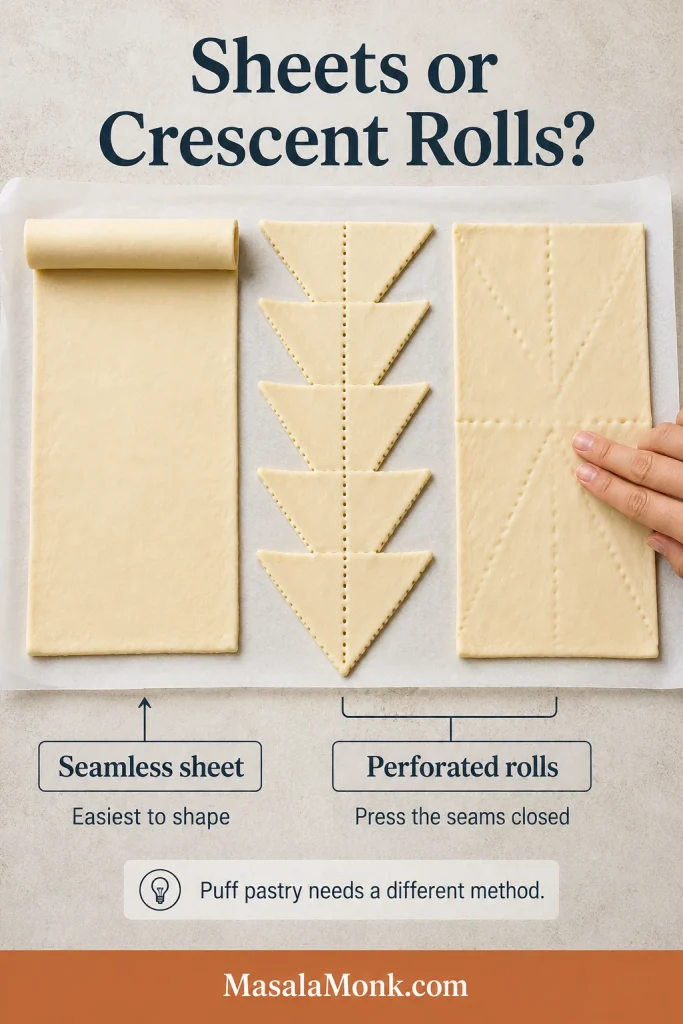
Regular perforated crescent rolls work too. Press the seams closed before assembling the dessert.

Cheesecake Filling

  • 16 oz / 454 g full-fat block cream cheese, softened
  • ¾ cup / 150 g granulated sugar
  • 1 large egg, about 50 g without the shell, at room temperature
  • 1½ teaspoons / 7.5 mL vanilla extract
  • ¼ teaspoon fine salt, about 1.5 g

Cinnamon-Sugar Top

  • 4 tablespoons / 57 g unsalted butter, melted and slightly cooled
  • ⅓ cup / 67 g granulated sugar
  • 2 teaspoons ground cinnamon, about 5 g
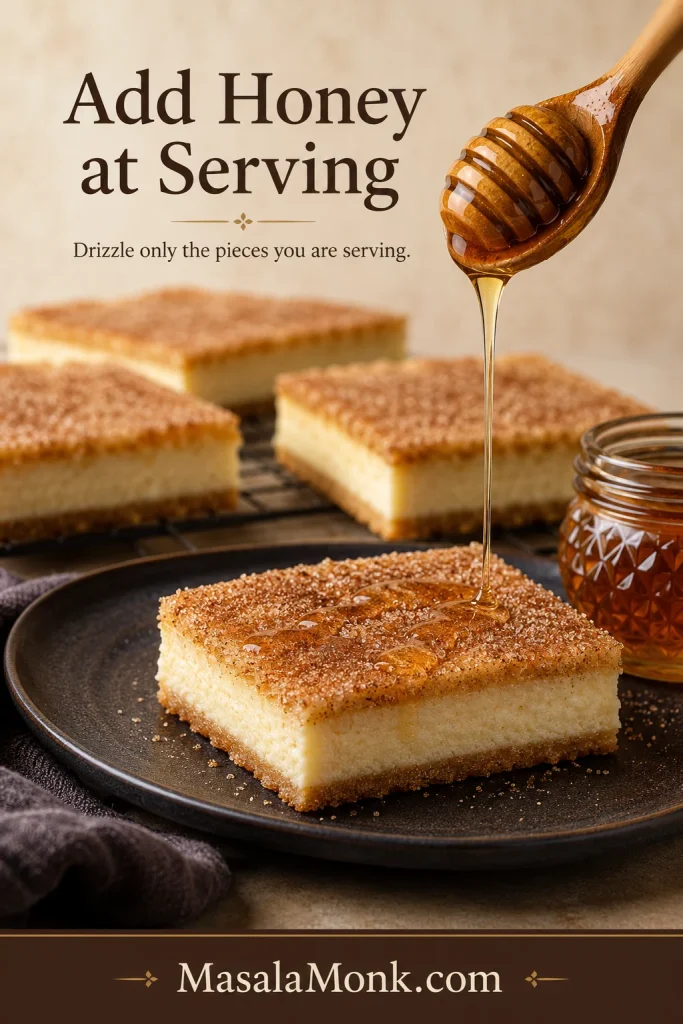
  • 2–4 tablespoons / 30–60 mL honey, optional, for serving

Before mixing, separate the filling sugar from the cinnamon-topping sugar. One sweetens the cheesecake layer, while the other creates the crisp upper crust; the ingredient board below shows the complete full-pan quantities together.

Instructions

Assemble the Layers
  1. Prepare the oven and pan. Arrange a rack in the middle. Preheat to 350°F / 175°C conventional, or 325°F / 160°C fan-assisted. Lightly coat the pan with nonstick spray or additional softened butter. Mix the cinnamon and topping sugar in a small bowl.
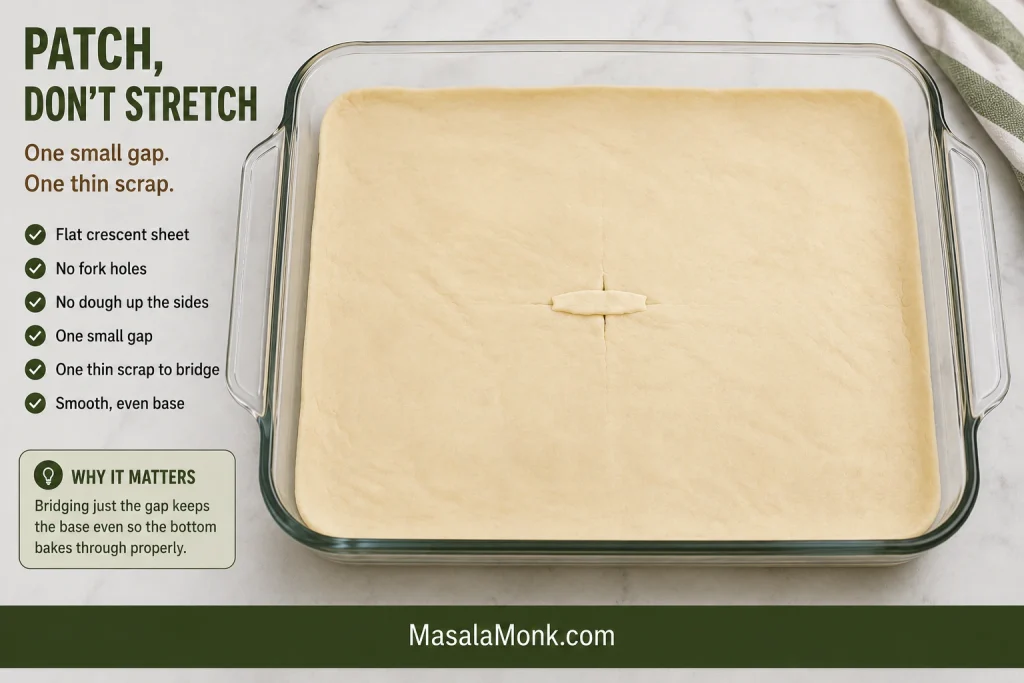
  2. Fit the lower dough into the pan. Press one crescent sheet toward the corners without pulling it paper-thin. If a small gap remains, patch it with a scrap of dough instead of stretching the whole sheet further. Seal any perforations.

A small gap does not require reshaping the whole base; bridge it with one thin scrap and keep the dough flat across the pan.

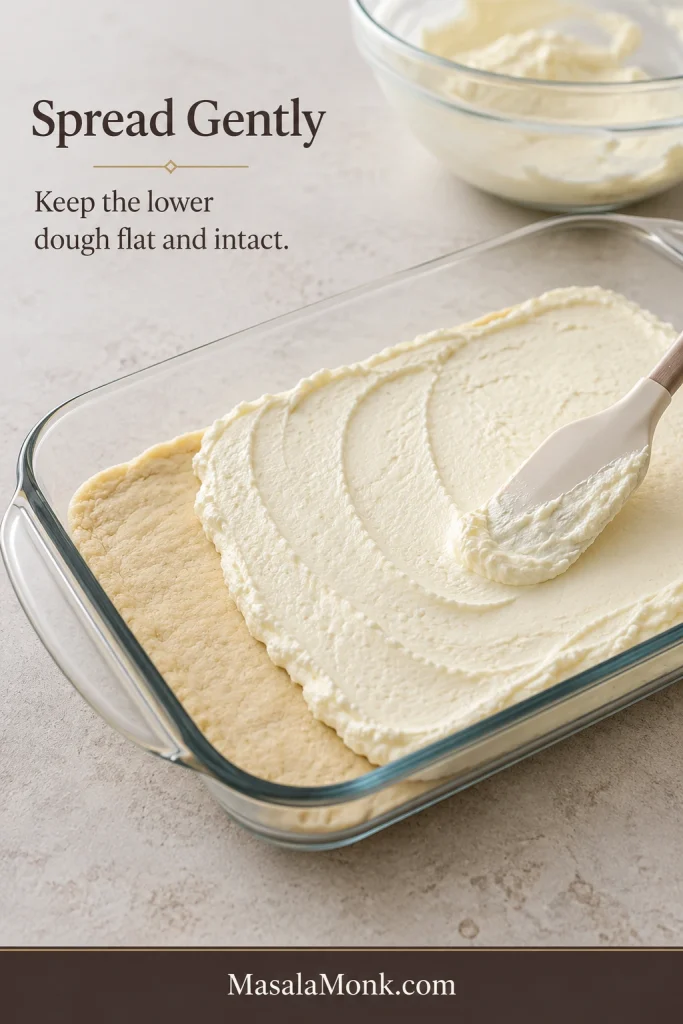
  1. Mix and spread the filling. Beat the softened cream cheese until smooth, scraping the bowl once. Add the sugar and salt, followed by the egg and vanilla. Mix only until combined, then spread the filling gently over the lower dough.
Place several small mounds across the lower dough, then join them with light strokes so the spatula does not drag or fold the base.

Cream cheese filling being spread over the lower crescent dough in a clear glass pan, with part of the pastry base still visible.
Level the filling so the center and edges set at a similar pace.
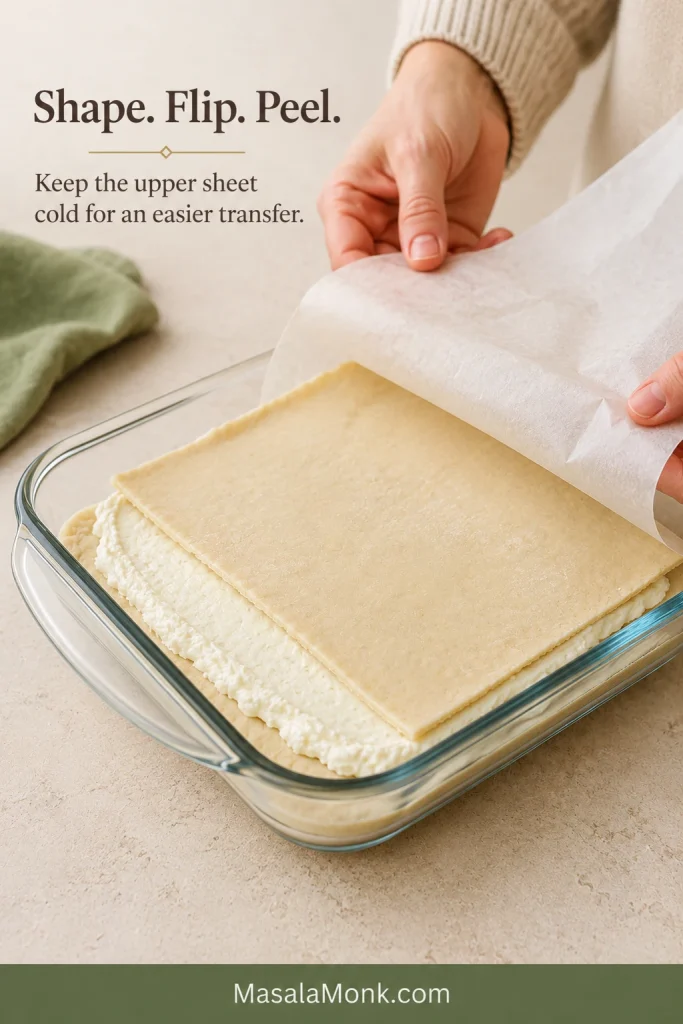
  1. Add the upper dough. Shape the second sheet on parchment, flip it over the cheesecake and peel away the paper. If the dough tears, stop stretching and patch the gap with a small scrap. The sheet doesn’t need to reach every corner perfectly.
Shape the upper sheet while it is cold, flip it onto the filling and peel away the parchment before the dough softens.

Hands peeling parchment from the upper crescent dough sheet after transferring it onto the cream cheese filling in a glass pan.
Keep the upper sheet cold, then flip and peel before it softens or stretches.
Bake, Check and Serve
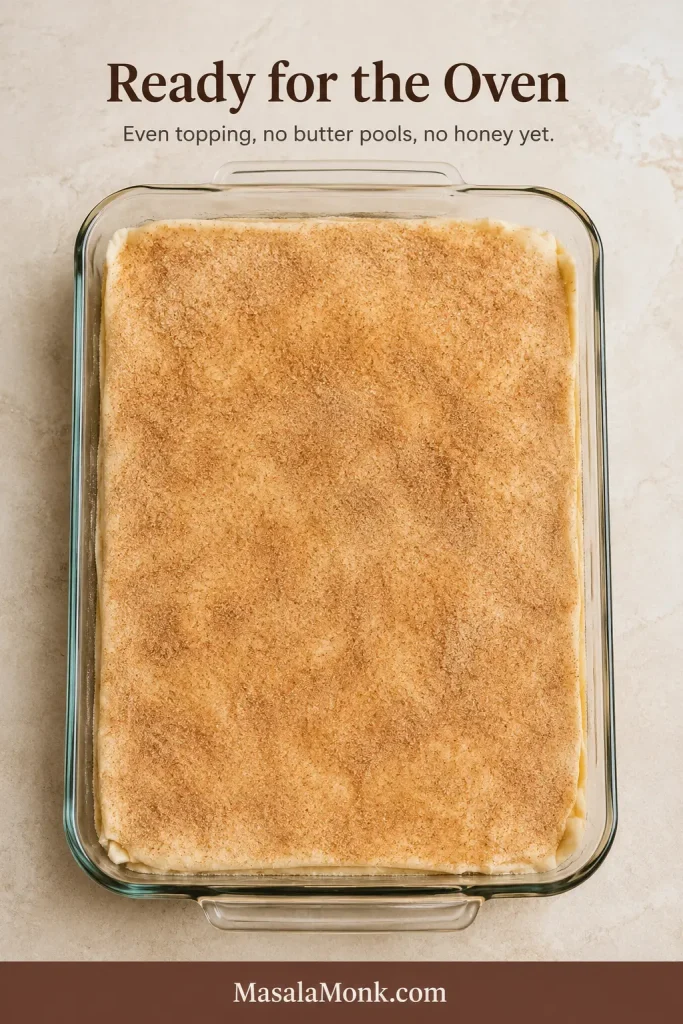
  1. Top and bake. Spread the slightly cooled butter over the dough, then cover it evenly with cinnamon sugar. Begin checking a conventional oven at about 28 minutes and a fan-assisted oven at about 25 minutes. The edges should look set, with only a gentle wobble in the middle.

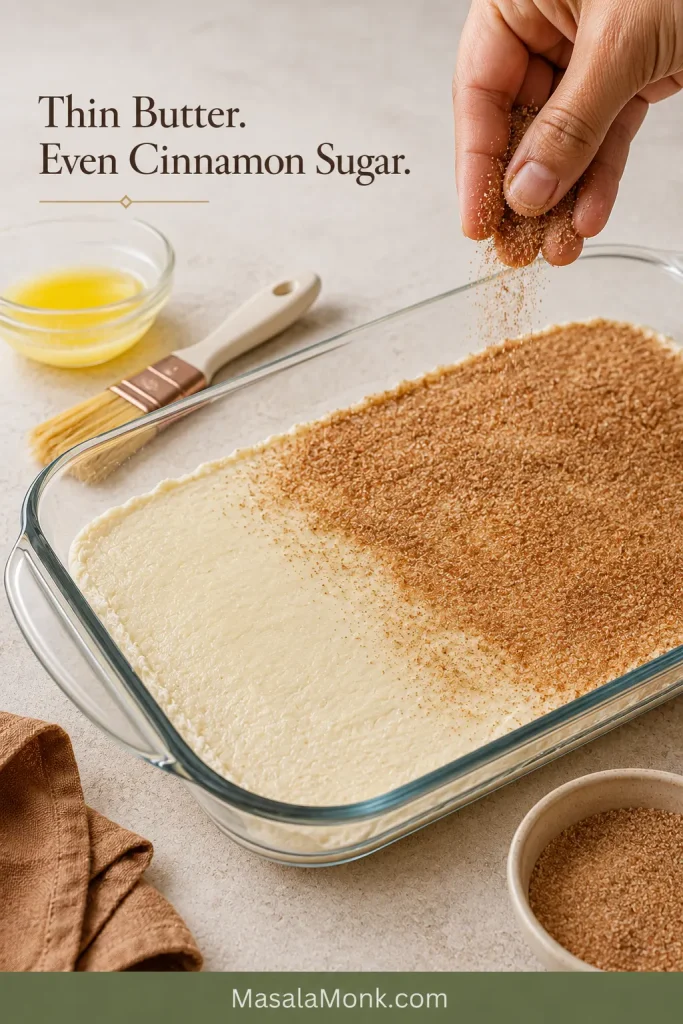
Spread the butter thinly, then add the cinnamon sugar in an even layer so no area begins the bake wet or bare.

Cinnamon sugar being sprinkled over a lightly buttered crescent dough top, with coated and uncoated areas visible.
A light butter sheen anchors the cinnamon sugar without creating greasy pools.

Before the pan goes into the oven, check that no filling is exposed through a large tear and that the butter forms a light sheen rather than standing pools.

  1. Check the lower pastry. Glass dish: Look through the bottom for pastry that appears baked instead of white and raw. Metal pan: Lift one exposed corner gently with a thin spatula. It should lift as pastry and show visible layers without smearing like paste. Top already dark? Cover it loosely with foil while the base finishes.
  2. Cool to the texture you want. Rest the pan for at least 20 minutes for warm, soft pieces served on plates, or about one hour for bars that hold an edge. Chill the cooled pan for 2–3 hours for the neatest squares.
  3. Cut and serve. Press down with a long, sharp knife instead of sawing through the pastry. Wipe the blade between cuts. Add honey just before serving when you want the cinnamon top to stay crisper.

In This Guide

Choose Your Serving Texture

The cleanest square and the crispiest square are rarely the same square. Serving time determines which texture you get because cooling firms the cheesecake while gradually softening the pastry.

If You WantCooling TimeWhat to Expect
Warm dessert pieces20–30 minutesFragrant pastry and a soft center; best served on plates
Creamy bars that hold an edgeAbout 1 hourA delicate cinnamon crackle with a center that stays together when cut
Neat potluck squaresCool fully, then chill 2–3 hoursThe firmest center and tidiest edges, with a less crisp refrigerated crust
Make-ahead dessertChill overnightVery neat pieces; let them stand briefly before serving for a softer bite
A potluck pan needs tidy squares; a quiet evening at home does not.

Cutting, Carrying and Serving

For a buffet or potluck, chill and transport the bars in their original pan, then move them to a serving tray after arrival. The colder center holds its shape better, while the pan protects the edges from shifting in transit.

Neatly cut chilled Sopapilla Cheesecake bars arranged on a serving tray with small dessert plates nearby.
Chill before transporting so the bars hold their shape and lift cleanly.

A warm first piece may lean or smear a little. That is simply what warm cheesecake does—not a sign that the bake failed.

For clean slices, press down decisively with a sharp knife and wipe the blade after each cut. Divide the pan into 12 large pieces, 16 standard bars or 24 smaller potluck squares. Cooling plays the same useful role in these pecan pie bars, where the filling becomes easier to portion after it settles.

Prefer a fully chilled dessert with a crumb crust? This no-bake cream cheese pie is the closer match.

What Is Sopapilla Cheesecake—and What Makes This Version Different?

Sopapilla Cheesecake lands somewhere between cheesecake bars, a cream cheese danish and cinnamon pastry. Sweetened cream cheese sits between two thin layers of refrigerated crescent dough, finished with butter and cinnamon sugar.

Close-up of one Sopapilla Cheesecake bar with a crackled cinnamon-sugar top, pale creamy center and thin baked crescent dough base.
The base should look like tender baked crescent pastry—not a thick crumb crust.

You may also see this recipe called crescent roll cheesecake bars or Churro Cheesecake. Some websites use the name “Mexican Cheesecake Bars,” though that is a loose online recipe label rather than one traditional Mexican cheesecake style.

It needs no crumb crust, springform pan or water bath. A New York cheesecake is the better choice when you want a tall, dense center and a more traditional baked-cheesecake structure.

One Egg and Two Blocks of Cream Cheese

Two pans of Sopapilla Cheesecake can look almost identical and still cut very differently. One egg helps this filling hold together without turning firm or custardy. Two blocks of cream cheese create a generous center while leaving the crescent layers noticeable in every bite.

Why the egg matters: Leave it out of this filling and the center becomes looser and more pastry-like. A third block of cream cheese changes the depth and texture enough to require its own egg, sugar and baking balance.

Cold Dough and Softened Cream Cheese

Leave each dough package refrigerated until it is needed. Cold dough behaves; warm dough stretches, sticks and fights back.

The cream cheese needs the opposite treatment. It should press easily while still feeling cool and holding its shape. Tiny specks may disappear during baking, but smooth out any larger cold lumps before spreading the filling. Tub-style cream cheese can contain more moisture and may leave the center loose.

Close-up of smooth pale cream cheese filling lifted on a flexible spatula and holding a soft ridge over a mixing bowl.
Smooth the cream cheese before adding sugar and egg, when cold lumps are easiest to remove.

Sugar, Butter and Cinnamon

The filling remains lightly sweet so the cream cheese tang still comes through. A thin, even coat of butter helps the cinnamon sugar bake into a crisp top without leaving oily patches.

Honey is optional. Pour it over warm pastry when you want it to soak in. To keep the remaining crust crisper, add it only to the pieces being served.

Thin stream of honey falling onto one plated Sopapilla Cheesecake bar, with undrizzled bars visible in the background.
Add honey only to the pieces being served if you want the remaining crust to stay crisp.

For the full yeast-dough version of that cinnamon aroma, this cinnamon roll recipe takes the longer, softer route.

Which Crescent Dough Works Best?

Crescent dough is not merely the shortcut here; its tender, lightly flaky texture is part of the dessert people expect.

  • Seamless crescent sheets are the easiest to shape and transfer.
  • Perforated crescent rolls work well once the seams are pressed closed.
  • Puff pastry flakes more dramatically and needs its own temperature, chilling and timing.

How to Tell When It Is Done

Once the top smells deeply of cinnamon, it is tempting to pull the pan. Give the center and lower pastry one final check first.

  1. Top: puffed, richly golden and mostly free of standing butter.
  2. Center: set around the edges, with one small area in the middle moving gently as a unit.
  3. Base: baked into a tender sheet that lifts without smearing or clinging like paste.

A liquid wave crossing the pan means the filling needs more time. Once all three cues are present, remove the pan. After cooling, the cinnamon top should crackle lightly under the knife.

How the Pan Changes the Check

  • Clear glass: easiest for first-time bakers because the lower pastry remains visible.
  • Light-colored metal: heats efficiently and may finish earlier. Check one exposed corner or edge with a thin spatula.
  • Ceramic: looks attractive on the table, though thick walls may slow the bake.
  • Dark metal: browns the edges more aggressively, so begin checking early.

If the surface is already dark, protect it loosely with foil while the base finishes.

Troubleshooting

Most problems come down to ingredient temperature, uneven butter or not giving the pan enough baking or cooling time.

ProblemWhy It Happens and What to Do
Top is dark but the base is paleThe upper sheet finished first. Protect the surface with foil and let the base continue baking.
Upper dough toreThe sheet became warm or was stretched too far. Patch the tear with a small dough scrap.
Filling contains white lumpsThe cream cheese was still too cold. Smooth large lumps before assembly; tiny specks are unlikely to matter.
Hot bars fall apartThe center has not cooled enough to hold an edge. Serve the pieces on plates or let the pan cool longer.
Topping looks greasy or powderyThe butter pooled or missed parts of the dough. Spread it in a thin, even coat before adding the cinnamon sugar.
A previous batch stayed doughy underneathConfirm that the oven reaches the set temperature, use clear glass when you want to monitor the base and allow additional baking time after the top looks ready.
Fix the cause first; changing the whole recipe usually creates another problem.

How to Make a Half Batch

When a full party pan feels like too much, an 8×8-inch / 20×20 cm pan gives you the same layered dessert in a more manageable batch.

Cut one crescent sheet crosswise. Shape each half separately on parchment to roughly 8×8 inches—one for the base and one for the top.

The pastry will be slightly thinner than in the full batch, so stop stretching if it begins to tear and patch the gap instead. With perforated rolls, use four triangles per layer.

IngredientHalf-Batch Amount
Crescent dough1 package, 8 oz / 227 g, divided equally
Full-fat block cream cheese8 oz / 227 g
Filling sugar6 tablespoons / 75 g
EggWhisk one large egg and use 25 g, or about 1 tablespoon plus 2 teaspoons
Vanilla¾ teaspoon
Fine salt⅛ teaspoon
Butter2 tablespoons / 28 g
Topping sugar2 tablespoons plus 2 teaspoons / about 33 g
Cinnamon1 teaspoon
Honey, optional1–2 tablespoons / 15–30 mL
Weighing the beaten egg is the easiest way to divide it accurately.

Begin checking around 25–26 minutes. Use the same top, center and base cues; depending on the pan, the half batch may still need close to the full baking time.

Variations and Ingredient Changes

Small Flavor Changes

  • Add 1–2 teaspoons finely grated orange or lemon zest to the filling.
  • Replace up to ¼ teaspoon of the vanilla with almond extract.
  • Reduce the topping sugar by 1–2 tablespoons for a less sweet cinnamon crust.

Can You Make Sopapilla Cheesecake Without Egg?

If you simply leave the egg out of this filling, it will be looser and more pastry-like after baking. That can still be enjoyable, but it will not hold the same edge as the main version after cooling.

When avoiding both eggs and the oven matters more than keeping the crescent layers, this no-bake cheesecake recipe is the simpler option.

Changes That Need Their Own Method

Fruit filling releases moisture directly above the lower dough, making a gummy base more likely. Pumpkin, homemade dough and gluten-free pastry also change the moisture level or the way the bars hold together.

Each can produce a good dessert, but none is a simple add-in for the method above.

Make Ahead, Storage and Freezing

This is an easy dessert to make a day ahead, especially when neat party squares matter more than a crisp, just-baked top. Chill the whole pan overnight, cut it while cold and let the pieces stand briefly before serving.

Does Sopapilla Cheesecake Need to Be Refrigerated?

Yes. Keep the bars at room temperature for no more than two hours—or one hour when the temperature is above 90°F / 32°C—in line with USDA guidance for perishable food. Let the pan cool uncovered until it is no longer steaming, then cover and refrigerate it. Store the bars for up to three days.

To take the chill off a refrigerated bar, leave it at room temperature for about 15 minutes. For a faster result, warm it at half microwave power in five-second bursts and stop as soon as the center softens slightly.

Freezing

  • Freeze fully cooled individual bars without honey.
  • Wrap each piece tightly and place it in a freezer-safe container.
  • Freeze for up to one month for the best pastry quality.
  • Thaw overnight in the refrigerator.
  • Add honey after thawing.

The cheesecake layer freezes well, though the pastry will be less crisp after thawing.

Refrigerated dough is useful for other quick bakes too. This apple cinnamon roll bake takes the same shortcut in a fruitier direction.

Sopapilla Cheesecake vs Churro Cheesecake

The names overlap in many online recipes. Recipes called “Churro Cheesecake” usually put more emphasis on the cinnamon-sugar coating, while “Sopapilla Cheesecake” more often includes honey and references the fried pastry behind the name.

Sopaipilla is another common spelling of sopapilla. In New Mexico, traditional sopaipillas are puffed pieces of fried dough commonly served with honey. The crescent-roll dessert borrows that combination but bakes it into cheesecake bars.

For the crisp fried dough itself, this guide to homemade churros follows a different technique altogether.

Frequently Asked Questions

Can I Use Regular Crescent Rolls Instead of Sheets?

Yes. Press the seams closed before transferring the dough, and keep the sheet cold so it remains easy to move. See the crescent dough comparison for the easiest handling method.

Can I Bake Sopapilla Cheesecake the Day Before?

Yes. Bake and chill the pan overnight, cut it while cold and let the bars stand briefly before serving. Follow the make-ahead and storage guide for cooling and refrigeration timing.

Why Is the Bottom Dough Still Raw?

The cream cheese layer insulates the lower dough, so it may need longer than the golden top. Protect the surface with foil and follow the glass- or metal-pan check in the doneness guide.

Can I Use Low-Fat or Tub-Style Cream Cheese?

Full-fat block cream cheese is the most dependable choice for a filling that sets neatly. Tub-style and lower-fat products can contain more moisture and may leave the center looser after cooling. The filling-texture section shows what properly softened block cream cheese should look like.

Keep the dough cold, bake the lower layer through and cool the pan to the texture you want. Those choices matter more than a perfectly smooth top.

A Pan Worth Sharing

At its best, every bite moves from a crisp cinnamon-sugar crust to a smooth cheesecake center and tender pastry underneath. It is easy enough for an ordinary evening and generous enough for a crowded table.

The first warm corner belongs to the cook; the rest of the pan is made for sharing.

Hand lifting a warm corner bar from a mostly intact glass pan of Sopapilla Cheesecake on a softly lit shared table.
Warm, soft and worth claiming first.

Did you serve the bars warm and soft or chill them for neat squares? Leave a comment and tell us which texture won at your table.

Return to recipe card ↑ Back to top ↑

Posted on — Leave a comment

Pumpkin Bread Recipe: Easy, Moist Pumpkin Loaf

Pumpkin bread should feel soft and generous when you cut into it: warmly spiced, unmistakably pumpkin and moist enough to stay tender after cooling. The challenge is getting that softness without leaving a heavy, wet stripe through the center.

A loaf that looks beautifully baked on top and turns wet when sliced is especially frustrating. The good news is that the middle gives you clues before the knife goes in. The thickness of the puree, the way the batter falls and the appearance of the center crack all help you judge what is happening inside.

This easy pumpkin bread recipe uses one bowl, a whisk and a spatula—no electric mixer and no complicated technique. It is simple enough for breakfast, warm enough for an autumn afternoon and sturdy enough to wrap and take to someone else. The first slice feels like a treat; the loaf often cuts even more cleanly the next morning.

Quick Answer

Use 340 g / 1½ cups plain pumpkin puree with 220 g / 1¾ cups all-purpose flour. Bake the batter in a light-colored 9×5-inch / 23×13 cm metal loaf pan at 350°F / 175°C and begin checking at 52 minutes.

The center crack should look matte rather than glossy. Press beside it for a gentle spring, then check that a toothpick or thin skewer shows moist crumbs instead of liquid batter. For final confirmation, an optional thermometer usually reads 200–205°F / 93–96°C.

Weigh the pumpkin. Read the crack. Cool before slicing.

These are the three checks to remember before baking.

Three-panel pumpkin bread guide showing 340 g pumpkin puree on a scale, a matte center crack and a cooled sliced loaf.
Weigh the pumpkin, read the crack and cool before slicing—three checks that protect texture.

Easy, Moist Pumpkin Bread Recipe

A lightly firm top gives way to a plush orange crumb. Pumpkin comes first, cinnamon follows, and ginger, nutmeg and cloves stay quietly in the background. The loaf itself is dairy-free, so serve it plain or choose a dairy-free topping when needed.

Judge the crumb after the loaf has cooled.

Close-up of a thick pumpkin bread slice showing orange, fully baked crumb with small pores and browned crust.
The crumb should look plush and moist, not shiny, wet or compressed.

Prep: 15 minutes
Bake: about 55–65 minutes
Cooling: 1½–2 hours

Total: about 2 hours 10 minutes–2 hours 30 minutes
Yield: 1 loaf / about 10 slices
Pan: 9×5 inches / 23×13 cm

Equipment

  • Light-colored metal 9×5-inch / 23×13 cm loaf pan
  • Large mixing bowl
  • Whisk
  • Flexible spatula

A kitchen scale is the most useful extra. Parchment paper and a cooling rack are strongly recommended. Use a toothpick or thin skewer for checking the middle; an instant-read thermometer is optional.

Ingredients

  • 1¾ cups all-purpose flour, 220 g
  • 1 teaspoon baking soda
  • ½ teaspoon baking powder
  • ¾ teaspoon fine salt
  • 2 teaspoons ground cinnamon
  • ½ teaspoon ground ginger
  • ¼ teaspoon ground nutmeg
  • ⅛ teaspoon ground cloves
  • 2 large eggs, preferably at room temperature
  • ¾ cup packed light brown sugar, 150 g
  • ¼ cup granulated sugar, 50 g
  • 1½ cups plain pumpkin puree, 340 g
  • ½ cup neutral oil, 120 ml
  • 2 teaspoons vanilla extract, 10 ml
  • Optional: 2 tablespoons pumpkin seeds
  • Optional cinnamon-sugar top: 1 tablespoon sugar mixed with ¼ teaspoon cinnamon

Pumpkin pie spice option: Replace the cinnamon, ginger, nutmeg and cloves with about 1 tablespoon of homemade pumpkin pie spice.

Keep the main formula steady before changing add-ins.

Overhead pumpkin bread ingredient board with flour, pumpkin puree, eggs, sugars, oil, vanilla, leaveners, salt and spices.
Pumpkin brings moisture, flour and eggs provide structure, and oil keeps the cooled crumb tender.

Instructions

Set Up the Oven and Pan

  1. Preheat the oven. Heat the oven to 350°F / 175°C. Position a rack in the center. When the top regularly browns too quickly, move the pan one level away from the oven’s strongest heat source. In many ovens, that means one level below center.
  2. Prepare the pan. Lightly grease a 9×5-inch loaf pan. If using parchment, line the base and long sides, leaving enough overhang to lift out the bread.

Mix the Batter

  1. Whisk the eggs and sugars. Whisk the eggs, brown sugar and granulated sugar in a large bowl until smooth and slightly lighter.
  2. Add the pumpkin and oil. Whisk in the pumpkin puree, oil and vanilla until the mixture looks evenly orange and no oily streaks remain.
  3. Add the leaveners and spices. Break up any lumps in the baking soda and baking powder. Sprinkle the leaveners, salt and spices across the entire surface, then whisk for about 20 seconds while scraping around the bowl.
  4. Fold in the flour. Add the flour and switch to a spatula. Fold from the bottom until the final dry streak disappears. Scrape across the base once, then stop.
  5. Check the batter. Lift the spatula. The mixture should fall in a slow, broad ribbon and settle back into the bowl. A rough-looking surface and a few small lumps are harmless.

Fill, Bake and Cool

  1. Fill the pan. Scrape in the batter and level the top lightly. Leave the pan about one-quarter to one-third empty so the loaf has room to rise. Add pumpkin seeds or cinnamon sugar, if using.
  2. Bake and protect the crust. Begin checking at 52 minutes. A 9×5-inch metal loaf generally needs about 55–65 minutes. Avoid opening the oven during the first 40 minutes. If the top has enough color before the middle is ready, tent it loosely with foil.
  3. Check the middle. Look for a matte center crack and gentle spring beside it. A toothpick or thin skewer should show moist crumbs rather than liquid batter. If one spot looks clean but the crack still appears glossy, test again slightly beside it.
  4. Cool completely. Leave the bread in the pan for 15 minutes, then transfer it to a wire rack or another dry, heatproof surface. Wait 1½–2 hours before judging the crumb or cutting clean slices.

A successful loaf: risen above the pan, matte inside the center crack and tender enough to bend slightly when sliced, with no wet stripe through the crumb. Moist crumbs are welcome; liquid batter or thick pumpkin paste needs more oven time.

Testing note: This loaf is written around a light-colored 9×5-inch metal pan and 340 g thick pumpkin puree. Treat other pan sizes and formats as starting windows, then finish with the center cues.

Need extra help? If you are using fresh pumpkin, start with choosing and preparing pumpkin puree. If the loaf is already baking, go straight to how to tell when pumpkin bread is done.

What’s in This Guide

Canned Pumpkin, Fresh Pumpkin and Pumpkin Pie Filling

The puree controls more of the final texture than any other wet ingredient. Plain canned pumpkin is the most predictable option because it is smooth and usually thick enough for quick-bread batter. Fresh pumpkin works too, but its water content varies, so adjust the consistency before measuring.

Plain pumpkin puree and pumpkin pie filling behave differently.

Comparison board showing canned pumpkin puree, fresh pumpkin puree and pumpkin pie filling in separate labeled bowls.
Use plain pumpkin puree; pie filling already contains sugar and spices.
Pumpkin productBest usePreparation
Plain canned pumpkin pureeRecommended first choiceMeasure 340 g and use directly.
Homemade cooked pureeGood alternativeBlend until smooth, drain or loosen to match thick canned puree, then weigh 340 g.
Pumpkin pie fillingNot a direct swapIt already contains sugar, spices and other ingredients.
Fresh steamed pumpkinUsually needs drainingPuree smoothly, drain and weigh 340 g.
Fresh roasted pumpkinOften naturally thickerPuree until smooth and loosen only when unusually dry.
Raw grated pumpkinUse a different formulaIt behaves differently from cooked puree.

Can You Use Pumpkin Pie Filling?

Not as a direct substitute here. Plain puree is cooked and blended pumpkin. Pumpkin pie filling has already been sweetened and seasoned and may contain additional ingredients, so it changes the flavor and moisture balance.

Look for plain pumpkin, pumpkin puree or 100% pumpkin on the label.

For fresh puree, choose dense cooking pumpkin when possible.

Pumpkin selection guide showing dense orange kaddu, sugar pumpkin and carving pumpkin with cut pieces and labels.
Dense cooking pumpkin makes thicker puree; watery carving pumpkin can loosen the batter.

How to Prepare Fresh Pumpkin Puree

Dense, orange-fleshed kaddu, sugar pumpkin or another cooking pumpkin works best. Large carving pumpkins tend to be stringier and more watery.

  1. Steam or roast peeled pumpkin pieces until completely tender.
  2. Blend until smooth.
  3. Drain puree that pours or spreads quickly. If roasted puree is dry and pasty, blend in water 1 teaspoon at a time.
  4. Once it resembles thick canned pumpkin, weigh 340 g.

Fresh puree needs thickness control before it goes into batter.

Four-step fresh pumpkin puree process showing peeled pumpkin cooking, blending, draining or loosening, and weighing 340 g.
Cook, blend, adjust thickness and weigh 340 g before adding fresh puree to the batter.

Drag a spoon through the puree. The track should remain visible for a moment. A soft mound that holds briefly is a better sign than a glossy puree that immediately runs flat.

Check the puree texture before measuring it.

Pumpkin puree consistency test showing watery puree, thick puree with a spoon track and overly dry puree.
A spoon track should hold briefly; runny puree can make the loaf heavy.

Can You Use the Whole Can? Why This Recipe Stops at 1½ Cups

A full 15-ounce / 425 g can adds more moisture and more batter than this formula is designed to hold. Whole-can pumpkin breads can be excellent, but they need their own balance of flour, egg, pan capacity and baking time.

This recipe leaves about 85 g, or roughly one-third cup. Keep it covered in the refrigerator for a few days, or freeze it in a labeled portion for oatmeal, pancakes, smoothies or soup.

The extra pumpkin is useful, but not in this loaf.

Pumpkin puree measurement board showing 340 g used in the recipe, about 425 g in a full can and about 85 g left over.
Use 340 g pumpkin puree; save the small leftover from a full can for another dish.

For the full reason this loaf stops at 340 g pumpkin puree, see why this pumpkin bread stays moist without turning gummy.

Why This Pumpkin Bread Stays Moist Without Turning Gummy

Using 340 g of puree keeps the pumpkin flavor clear while leaving enough flour and egg to support the moisture. The loaf stays pumpkin-first rather than tasting like a spice cake with pumpkin added to it.

Neutral oil keeps the cooled crumb soft. Brown sugar adds caramel depth and helps the bread retain moisture, while the smaller amount of granulated sugar rounds out the sweetness without bringing more molasses flavor.

Baking soda helps with early lift and browning. The small amount of baking powder supports the thick batter while the middle catches up. Because ovens and loaf pans vary, the timer tells you when to start looking; the center tells you when to stop.

This is the formula logic in one glance.

Ingredient-ratio board showing 340 g pumpkin puree, 220 g flour, 2 eggs and 120 ml oil with their roles in pumpkin bread.
Pumpkin adds moisture, flour and eggs set structure, and oil keeps the crumb tender.

Ingredient Notes

  • Flour: 220 g gives the most repeatable result. When measuring by cups, loosen the flour, spoon it into the measure and level without pressing.
  • Brown sugar: light brown sugar keeps the pumpkin and spices clear. Dark brown sugar gives the loaf a deeper molasses note and darker color.
  • Oil: vegetable, canola, sunflower, grapeseed or mild avocado oil all suit this loaf.
  • Spices: use cinnamon or a spice blend that still smells lively in the jar. Faint spices become even quieter after baking.

A packed cup can quietly change the loaf.

Flour measurement guide showing 220 g flour on a scale, spoon-and-level cup method and compressed scoop to avoid.
Weigh 220 g flour, or spoon and level it gently to avoid a dry loaf.

Apple pie spice can work when that is what you already have, although its balance is usually softer and less clove-forward. Add a tiny pinch of cloves for a more familiar pumpkin-spice finish.

The Best Pumpkin Bread Pan—and How Other Sizes Change the Bake

A light-colored metal 9×5-inch / 23×13 cm loaf pan is the most dependable choice. Measure across the inside of the top edge. An 8½×4½-inch pan holds the batter more deeply and usually needs extra time.

Pan Fill and Pan Size

Batter depth affects both rise and bake time.

Loaf pan fill-depth guide showing pumpkin bread batter filled two-thirds to three-quarters full with a too-full warning.
Keep the pan two-thirds to three-quarters full so the batter can rise and bake through.

Deeper batter usually needs more time in the center.

Comparison of 9×5 inch and 8½×4½ inch loaf pans showing shallower and deeper pumpkin bread batter.
A narrower pan holds deeper batter, so the center usually needs more time.

Bake Windows by Format

The following times are starting windows, not fixed finish times. How deeply the batter sits, the pan material and the behavior of your oven matter more than the label on the pan.

FormatOvenStarting guidance
9×5-inch light metal loaf350°F / 175°CStart at 52 minutes; expect roughly 55–65 minutes.
8½×4½-inch light metal loaf350°F / 175°CStart at 58 minutes; expect roughly 60–70 minutes, with more time possible in a deep pan.
9×5-inch glass loaf325°F / 165°CStart around 60 minutes; expect roughly 65–75 minutes and follow the center cues.
Small 5¾×3¼-inch mini loaves350°F / 175°CStart at 25 minutes. Bake until the centers spring back and a tester shows moist crumbs.
Standard muffins350°F / 175°CStart at 17 minutes; many batches fall around 18–24 minutes.

Pan Material Notes

Light metal allows the middle to finish without darkening the sides too aggressively. Glass warms more slowly and retains heat for longer, so reduce the oven by 25°F and expect additional time. King Arthur Baking explains the difference in its comparison of glass, metal and stoneware baking pans.

Pan material changes browning and timing.

Pan material guide showing light metal, dark metal and glass loaf pans with baking notes for pumpkin bread.
Light metal is the safest default; dark metal browns faster and glass bakes differently.

Fill mini loaf pans and muffin cups about two-thirds full. Move finished muffins to a rack or another dry, heatproof surface after a short rest so their bottoms do not become damp.

Bake-Windows Visual Guide

Start with the timing window, then trust the center.

Pumpkin bread baking chart showing start-check times for a 9×5 loaf, 8½×4½ loaf, glass loaf, mini loaves and muffins.
Use timing as a starting window, then finish with center cues.

Four Batter and Baking Cues That Matter

What the Batter Should Look Like

  1. Smooth orange base: the eggs, sugars, pumpkin, oil and vanilla should look evenly blended, without oily streaks around the bowl.
  2. Thick but mobile batter: it should fall from the spatula in a slow, broad ribbon. A slightly rough surface is fine; a glossy batter that immediately runs flat may be too loose.
  3. Safe batter depth: leave roughly one-quarter to one-third of the pan empty. A deeper layer takes longer to set through the middle.
  4. Protected crust: the cinnamon-and-pumpkin aroma may arrive before the loaf is ready. If the top darkens early, cover it loosely with foil and let the center continue baking.

The wet base should look smooth before the flour goes in.

Cream mixing bowl with smooth orange pumpkin bread wet mixture and a whisk, labeled no oily streaks.
Whisk until the pumpkin mixture is smooth, orange and free of oily streaks.

Distribute the small dry ingredients before adding flour.

Overhead bowl of pumpkin wet mixture with small amounts of spices, salt and leaveners scattered across the surface.
Scatter spices and leaveners across the wet mix so they distribute evenly.

Stop mixing as soon as the flour disappears.

Hands folding thick pumpkin bread batter with a spatula while a few final dry flour streaks remain in the bowl.
Fold just until the last dry flour streak disappears, then stop.

The finished batter should move slowly, not pour loosely.

Pumpkin bread batter test showing thick batter falling in a slow broad ribbon compared with looser batter that runs flat.
Finished batter should fall in a slow, broad ribbon instead of running flat.

How to Tell When Pumpkin Bread Is Done

Visual Doneness Cues

Color alone is unreliable in a loaf made with pumpkin, brown sugar and spices. Check the deepest part with these four signs:

The center crack tells you when to start checking.

Three-stage pumpkin bread center-crack guide showing glossy wet crack, partly set crack and matte crack ready to check.
A matte center crack means the loaf is ready for crumb, spring and temperature checks.
  • Center crack: the visible crumb looks matte and set, without a glossy pool underneath.
  • Gentle press: the surface beside the crack springs back instead of holding a deep indentation.
  • Toothpick or skewer: a few moist crumbs are ideal. Liquid batter or a thick coating of pumpkin mixture needs longer. When one spot looks clean but the crack remains glossy, test again slightly beside it.
  • Optional temperature: use 200–205°F / 93–96°C as final confirmation after the visual checks look right. Insert the probe through the center crack and place the tip in the deepest part of the loaf, away from the pan. ThermoWorks gives the same range in its guidance for quick-bread doneness temperatures.

Tester and Temperature Checks

Read what the tester brings out of the loaf.

Three toothpicks showing wet batter, moist crumbs and a dry tester beside sliced pumpkin bread.
Wet batter needs more time; moist crumbs usually mean the center is ready.

Temperature is most useful in the deepest center.

Instant-read thermometer inserted into the center of a pumpkin bread loaf with labels for 200–205°F and avoiding pan edges.
Check the thickest center and avoid the pan edges; aim for 200–205°F / 93–96°C.

Use the final cues together, not one by itself.

Four-panel doneness guide showing matte center crack, spring-back test, moist crumbs on a skewer and thermometer reading about 203°F.
Use the cues together: matte crack, gentle spring, moist crumbs and 200–205°F.

Pumpkin Bread Troubleshooting: Gummy, Sunken, Dry or Dark

Match the symptom before changing the whole recipe. Wet puree, inaccurate flour measurement, pan depth, uneven batter and an unfinished center explain many common problems.

If the loaf is still in the oven, check the doneness cues before diagnosing it as a failed loaf.

Wet, Gummy or Sunken Center

Compare the center only after the loaf has cooled.

Side-by-side pumpkin bread slices showing a proper even crumb and a gummy darker wet center.
A wet-looking, darker center usually means the loaf needed more time or thicker puree.

For a bottom stripe, check moisture and the lower crumb.

Comparison of pumpkin bread slices showing even crumb on one side and a dense darker bottom stripe on the other.
A dense bottom stripe usually points to excess moisture, uneven batter or an underbaked lower crumb.
ProblemLikely causesWhat to do next
Wet or gummy middleLoose puree, too much pumpkin, too little flour, deep pan, early removal or slicing while hotDrain fresh puree, weigh the key ingredients and bake until the deepest section no longer shows liquid batter.
Dense stripe along the bottomExcess liquid, separation in the batter or an underbaked lower crumbBlend the wet mixture evenly, confirm the puree is thick and give the lower center enough time.
Sunken middleCenter not set, too much liquid, excess leavening or repeated early oven openingKeep the oven closed during the rise and confirm the center before removing the pan.

Dry, Tough, Dark or Stored Too Soon

Match the symptom before changing the recipe.

Pumpkin bread troubleshooting chart listing gummy center, dry loaf, dense loaf, sunken middle and burnt edges with causes and fixes.
Most fixes trace back to moisture, flour, mixing, pan depth or bake time.
ProblemLikely causesWhat to do next
Dry or crumbly breadToo much flour, excessive baking, dark pan or major reductions in sugar or oilMeasure flour carefully, begin checking on time and protect the crust if it darkens early.
Tough or rubbery crumbVigorous mixing after the flour was addedFold only until the final dry streak disappears.
Dark crust with a wet middleDark pan, strong heat above the loaf, high oven temperature or batter sitting too deeplyUse light metal, move the pan one level away from the strongest heat source and tent the top once it has enough color.
Overflowing batterPan too small or filled too highKeep the batter below three-quarters full and bake excess as muffins.
Repeatedly wet middle despite normal timingOven running cool or not fully preheatedVerify the oven temperature with a separate thermometer before changing the formula.
Sticky bottom after storageLoaf wrapped before it was fully coolCool completely before storing and use parchment or a replaceable paper towel in humid conditions.

Substitutions and What They Change

Bake the original loaf once before changing several structural ingredients together. These exact substitutions have not been validated as separate versions of this formula, so change one structural ingredient at a time and expect the texture to shift.

Once the basic loaf is baking evenly, small changes are easier to judge. For topping ideas instead of structural swaps, jump to easy variations.

Use these swaps as texture direction, not tested ratios.

Substitutions board for pumpkin bread showing melted butter, brown sugar, whole wheat flour, egg-free caution and pumpkin pie filling warning.
Texture direction, not tested ratios: change one structural ingredient at a time.
  • Melted butter: creates a more buttery flavor and a firmer crumb after cooling.
  • Applesauce: adds water and fruit solids without oil’s tenderizing effect. Replace only a small portion rather than all the oil.
  • Yogurt or sour cream: brings richness and acidity, but a large amount can make an already-moist batter heavier.
  • Less sugar: reduces browning, moisture retention and tenderness. A modest reduction is gentler than removing half.
  • Honey or maple syrup: adds liquid as well as sweetness, so neither should replace the granulated sugars cup for cup.
  • Whole-wheat flour: creates a more robust, less delicate crumb. Begin with a partial replacement.
  • Oat, almond or coconut flour: behaves too differently from wheat flour for a dependable cup-for-cup swap here. Use a formula designed around the flour you want.

Gluten-free, vegan, keto and high-protein conversions change several structural parts of the loaf at once. They need separate formulas rather than a chain of small swaps.

Easy Variations

  • Pumpkin seeds: scatter 2 tablespoons over the batter and press lightly so they stay attached.
  • Cinnamon-sugar top: mix 1 tablespoon sugar with ¼ teaspoon cinnamon and sprinkle evenly over the surface.
  • Walnuts or pecans: fold in up to ¾ cup chopped toasted nuts.
  • Raisins: add ½ cup. Soak very dry raisins briefly, then drain and pat them dry.
  • Orange zest: add the finely grated zest of one small orange.
  • Maple glaze: whisk ½ cup / 60 g powdered sugar with 1 tablespoon maple syrup and 1–2 teaspoons milk, adding the milk gradually.

Banana, cream-cheese filling and sourdough change the batter more substantially. For a quick bread built around discard, use this sourdough banana bread recipe.

Keep the topping simple or add nothing at all; this loaf does not need a glaze to feel complete.

Keep the batter steady and change only the finish.

Four pumpkin bread finish options showing plain classic, pumpkin seeds, cinnamon sugar and light maple glaze.
Choose plain, seeded, cinnamon-sugar or lightly glazed depending on the finish you want.

How to Serve Pumpkin Bread

At room temperature, the pumpkin tastes fuller and the spices feel rounder. Serve the loaf plain with coffee, chai or black tea. A warm slice also works beautifully with salted butter, cream cheese or maple butter.

Cool first for clean slices, then rewarm if you like.

Sliced pumpkin bread served with butter, cream cheese, honey and a cup of coffee or tea on a light table.
Cool for clean slices, then serve plain, buttered, or with cream cheese and coffee or tea.
  • Toast day-old slices until the edges are lightly crisp.
  • Use older slices for pumpkin French toast.
  • Wrap a fully cooled loaf as an autumn or holiday gift.

For a richer warm-spice dessert with a tangy finish, try this spice cake with cream cheese frosting.

Why the Second-Day Slice Can Be Even Better

By the next morning, the crust has softened slightly and the loaf cuts more cleanly. Cinnamon, ginger and nutmeg also taste more unified. The first warm slice is hard to resist, but the loaf shows its best crumb after it has cooled completely.

Storage and Freezing

  • Cool room: wrap the completely cooled loaf or place it in an airtight container and keep it at room temperature for up to 3 days.
  • Hot or humid kitchen: refrigerate the loaf sooner. Let slices return toward room temperature or warm them gently before serving.
  • Freezer: wrap the loaf whole or as individual slices, place it in a freezer-safe container and label it with the date. Separate slices with parchment and use within about three months for the best texture.

Thaw pumpkin bread while it is still wrapped so condensation forms on the wrapping rather than soaking into the crumb.

Let steam escape before wrapping the loaf.

Pumpkin bread storage guide showing cooled loaf, airtight container, fridge storage and individually wrapped freezer slices.
Cool completely before wrapping; then store airtight, refrigerate if humid or freeze slices.

Frequently Asked Questions

Can I Prepare the Batter Ahead?

Prepare the wet and dry components separately, then combine them shortly before baking. Once the flour and leaveners meet the wet mixture, get the batter into the oven promptly.

Can I Make Pumpkin Bread Without a Loaf Pan?

Yes. A standard muffin tin is the easiest alternative. Fill the cups about two-thirds full and begin checking at 17 minutes.

Can I Freeze Leftover Pumpkin Puree?

Yes. Freeze it in a small airtight container or measured portion, label the amount and thaw it in the refrigerator. Stir before using and drain briefly if it releases water.

Save the short version once you know the full method.

Pumpkin bread recipe card with sliced loaf, ingredient list, method steps, bake time and doneness note for 200–205°F.
The saveable version: pumpkin amount, flour, pan size, bake window and doneness cue in one place.

Once the loaf is cool, cut a thick slice and notice the contrast: a lightly firm crust, a soft orange crumb and cinnamon arriving just after the pumpkin. Eat it plain, add a little salted butter or wrap part of the loaf for someone else.

Did you use canned or fresh pumpkin? Share your pan size, pan material and actual bake time—it may help the next reader using a similar setup.

Back to recipe ↑ · Back to top ↑