
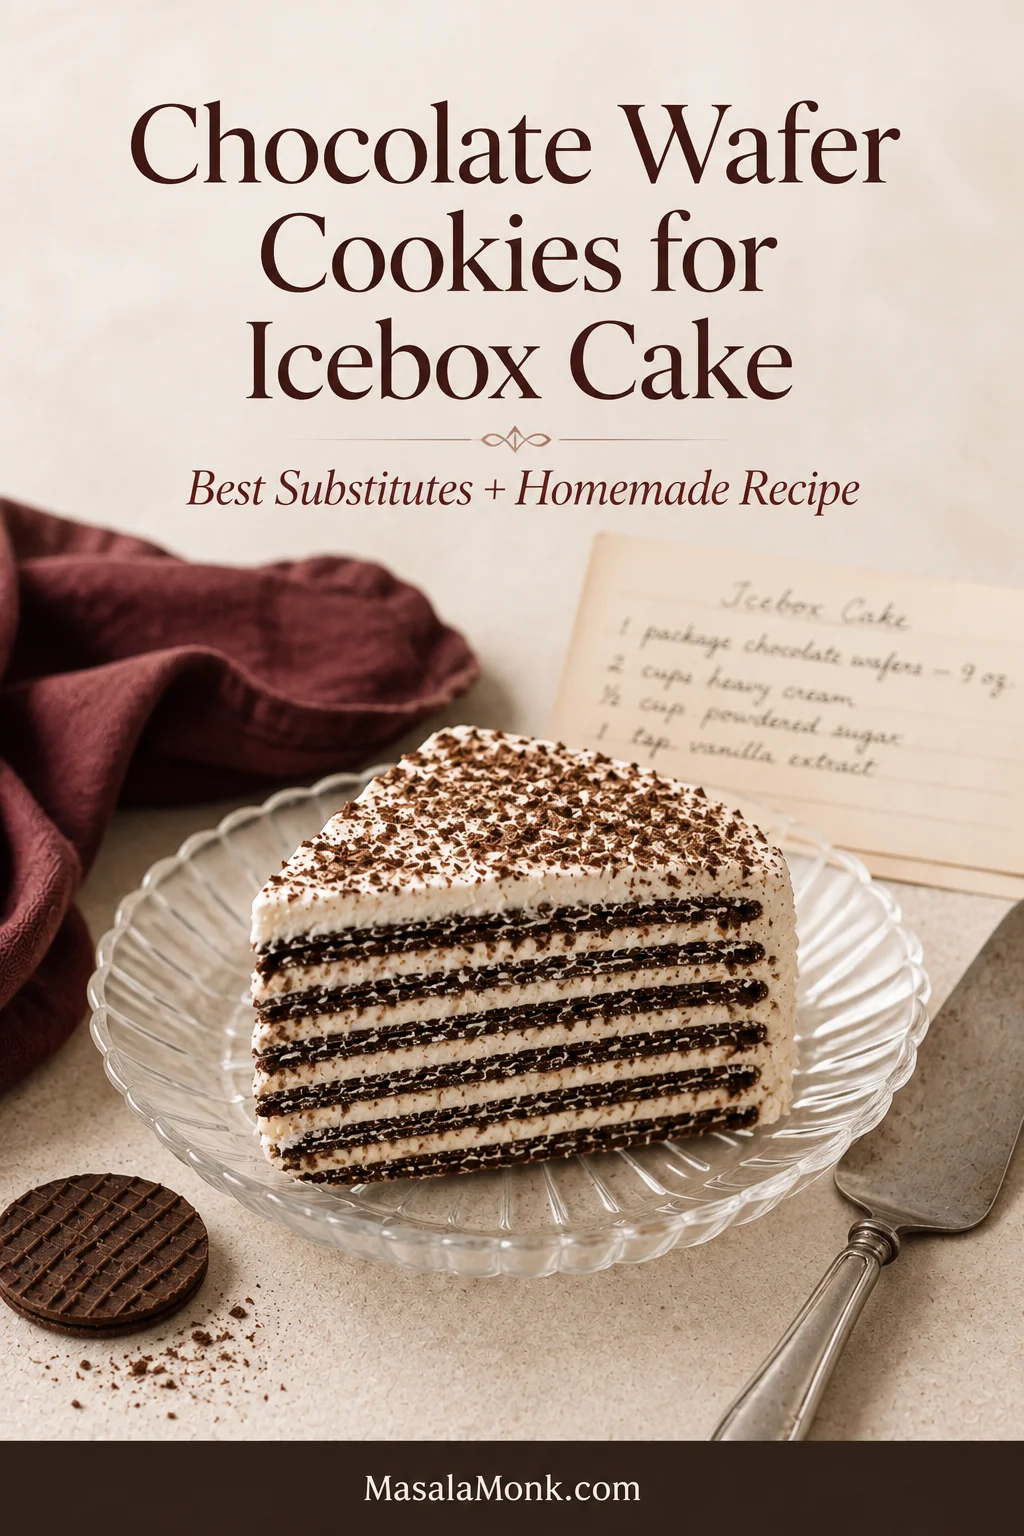
Icebox cake is supposed to be the easy dessert: crisp chocolate cookies, whipped cream, and enough refrigerator time to turn the two into tender striped slices. Then an inherited recipe tells you to open one 9-ounce package of Famous Chocolate Wafers—a product that disappeared from store shelves.
The best chocolate wafer cookies for icebox cake have a surprisingly specific job. They cannot merely taste chocolatey. They need to start thin and crisp, take in moisture without collapsing into paste, and soften all the way through while leaving a clear dark line in every slice.
Choose a store-bought substitute or make the wafers below, then use our complete classic chocolate wafer icebox cake recipe for the whipped cream, assembly, chilling, clean slicing, and finished-cake storage.
Quick Answer: What Can Replace Chocolate Wafers in Icebox Cake?
- Most practical mainstream option: Original Oreo Thins with lightly sweetened cream.
- Closest plain structural match covered here: Dewey’s Brownie Crisp, when available.
- Often the economical option: Chocolate Maria cookies.
- Most control: homemade wafers rolled to about 3 mm—just under ⅛ inch.
Match the cookie’s job, not the missing brand name.
For a plain-wafer result, look for a cookie that is thin, completely crisp, reasonably flat, and uncoated. Match the weight and the way the cookies cover the pan before worrying about an old piece count.
Choose Your Chocolate Wafer Route
One cook needs a cake tonight; another is trying to recreate the birthday or holiday dessert they remember. Choose by the trade-off that matters least: added sweetness, cost, shape, availability, or time.
On a phone, swipe sideways to see all columns.
| Your situation | Start with | Plan for |
|---|---|---|
| You need a mainstream shortcut | Original Oreo Thins | A sweeter, cookies-and-cream-style slice |
| You want a plain, unfilled cookie | Dewey’s Brownie Crisp, when available | Many small cookies; match weight and pan coverage |
| You want an economical, easy-to-layer option | Chocolate Maria cookies | A milder cocoa flavor; buy enough by weight |
| You are building in a loaf pan or baking dish | Chocolate graham crackers | Broad rectangular layers and a clear graham flavor |
| You want control over flavor and thickness | Homemade wafers | Cool completely, then set aside the amount your old recipe needs |
Whichever route you choose, the goal is the same: enough cream contact to turn every crisp cookie into a tender stripe without erasing the layers.
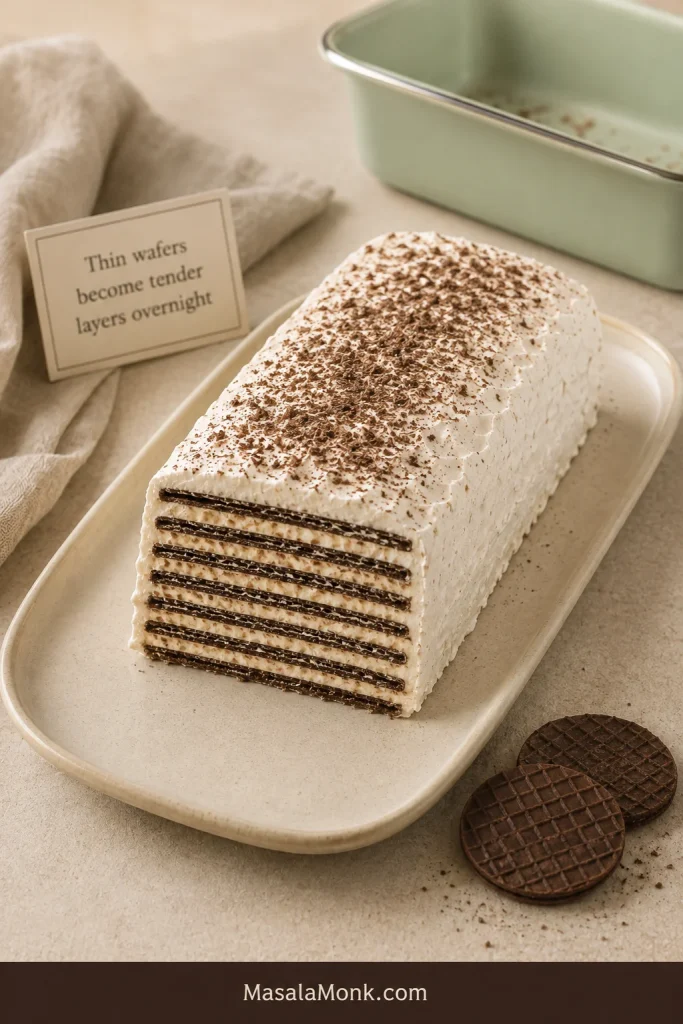
Homemade Chocolate Wafer Cookies for Icebox Cake
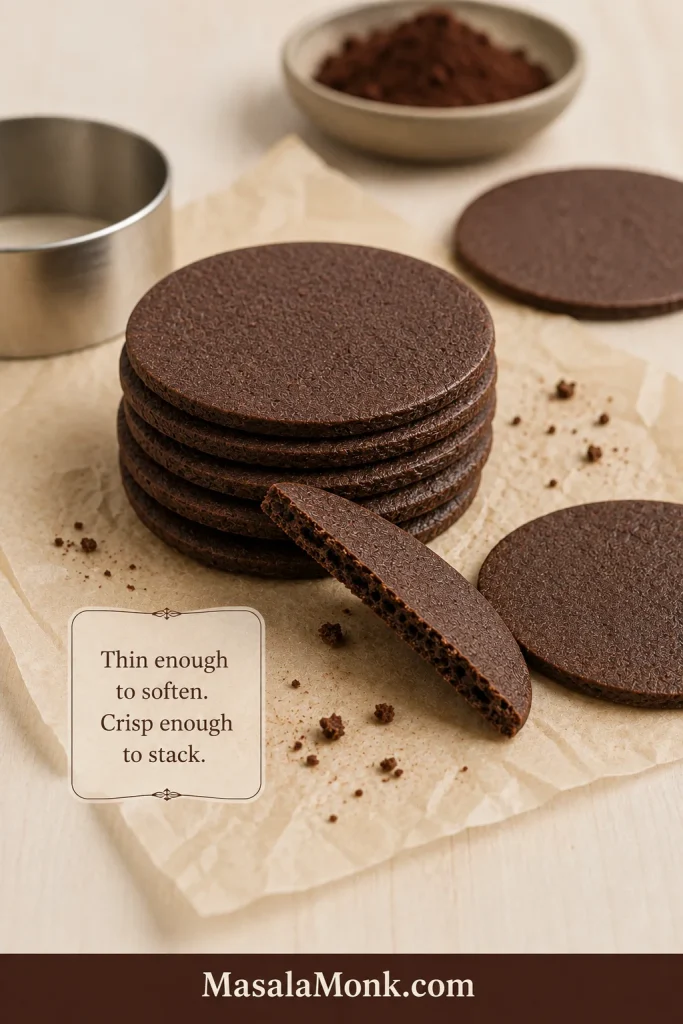
These are not thick chocolate refrigerator cookies. They are dark, dry, thin wafers built for one particular change: crisp enough to snap today, then tender enough to cut after a night between layers of cream. They may look plain when they leave the oven, but that clean snap gives the refrigerator exactly what it needs to create a tender striped slice.
Recipe note: The ingredient proportions and parchment-rolling method are adapted from King Arthur Baking’s chocolate wafers. The guidance here applies that dough specifically to icebox-cake thickness, old-package conversion, chilling, and troubleshooting.
For one old 9-ounce package, set aside 9 oz (255 g) of fully cooled wafers. Use enough to cover the intended layers; keep any extras for gaps, crumbs, or another dessert.
Recipe at a Glance
| Prep time | About 30 minutes |
|---|---|
| Chilling | 30 minutes |
| Bake time | 14–17 minutes per batch |
| Cooling | About 15–20 minutes, until completely cool |
| Total elapsed time | About 1½–2 hours, depending on tray capacity and whether scraps need another bake |
| Oven | 325°F (163°C) |
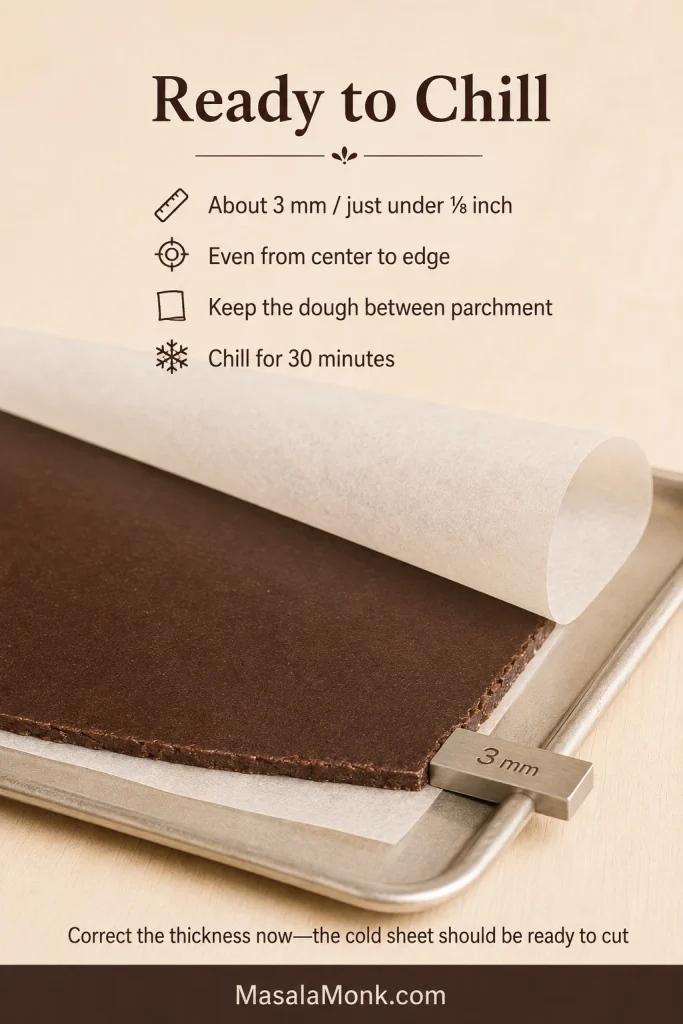
| Thickness | About 3 mm—just under ⅛ inch |
| Expected yield | Roughly 40 large rounds or 90 smaller squares; see the note below |
| For one old package | Set aside 9 oz (255 g) of fully cooled wafers |
Yield note: The source recipe estimates about 40 rounds at 2½ inches or 90 smaller squares. Your count will change with thickness, cutter size, tray space, and rerolled scraps.
Equipment
Use a digital scale, medium mixing bowl, hand or stand mixer, rolling pin, parchment paper, and a 2½-inch (6.5 cm) cutter. You need at least two baking sheets, although three or four make the process smoother because the batch produces several trays and the wafers cool completely on the pans. A pizza wheel works well for squares; a separate cooling rack is unnecessary.
Useful extras include 3 mm rolling guides or spacer rings, a small offset spatula, and an oven thermometer.
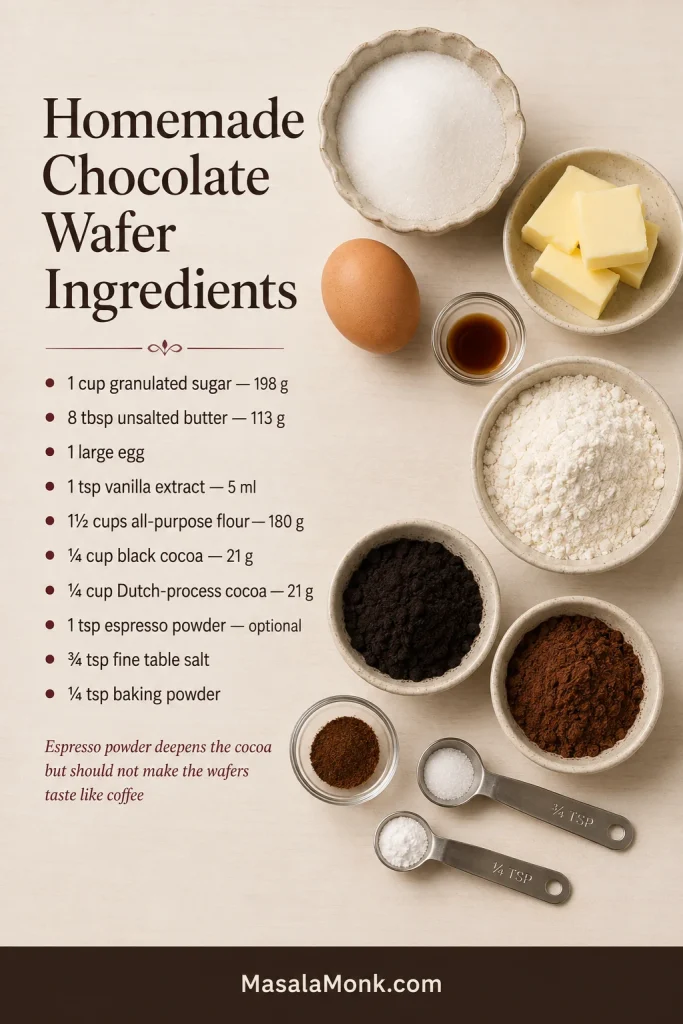
Ingredients
- 1 cup granulated sugar — 198 g
- 8 tablespoons unsalted butter, softened — 113 g
- Espresso powder, optional — 1 teaspoon
- Fine table salt — ¾ teaspoon
- Baking powder — ¼ teaspoon
- 1 large egg
- 1 teaspoon vanilla extract — 5 ml
- 1½ cups all-purpose flour — 180 g
- ¼ cup black cocoa powder — 21 g
- ¼ cup Dutch-process cocoa powder — 21 g
Instructions
Mix, Roll, and Chill the Dough
- Make a smooth butter base. Beat the sugar, softened butter, optional espresso powder, salt, and baking powder on medium-low until smooth, about 1–2 minutes. The mixture only needs to look even; it does not need to become pale or fluffy.
- Add the egg and vanilla. Beat until the mixture is smooth, scraping the bowl so no streaks of butter remain.
- Mix in the flour and cocoa. Add the flour, black cocoa, and Dutch cocoa. Mix on low until no pale flour streaks remain and the dough looks evenly dark from edge to edge.
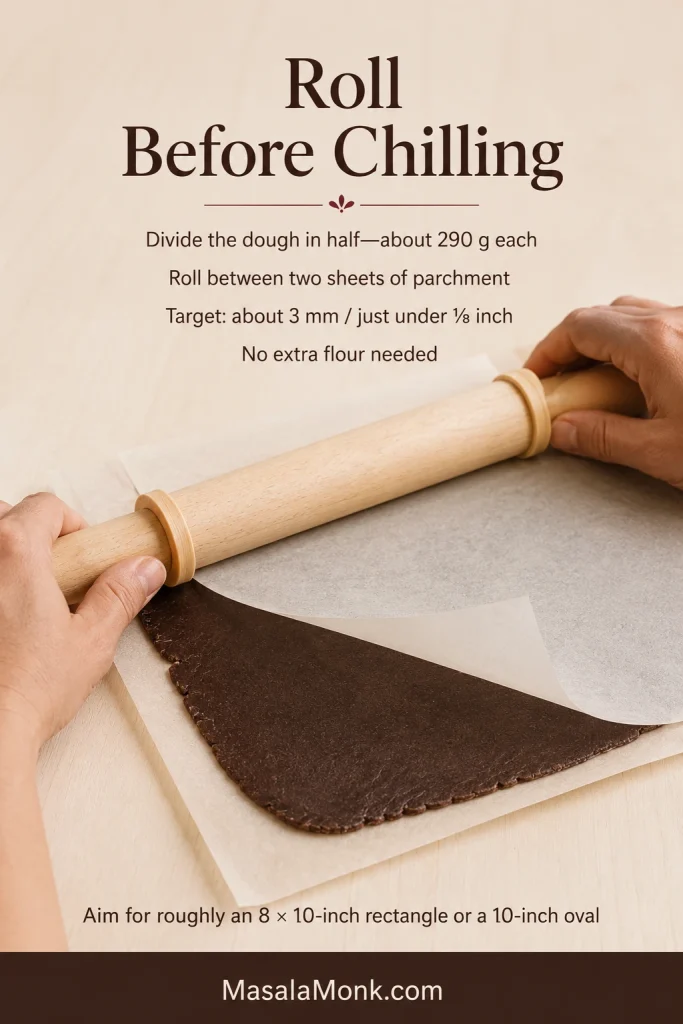
- Roll before chilling. Divide the dough in half, about 290 g per piece. Roll each piece between two sheets of parchment to about 3 mm—just under ⅛ inch—aiming for an 8 × 10-inch (20 × 25 cm) rectangle or a 10-inch (25 cm) oval.
- Chill the sheets. Refrigerate the dough, still between parchment, for 30 minutes. Meanwhile, heat the oven to 325°F (163°C) with racks in the upper and lower thirds.
Cut, Bake, and Cool the Wafers
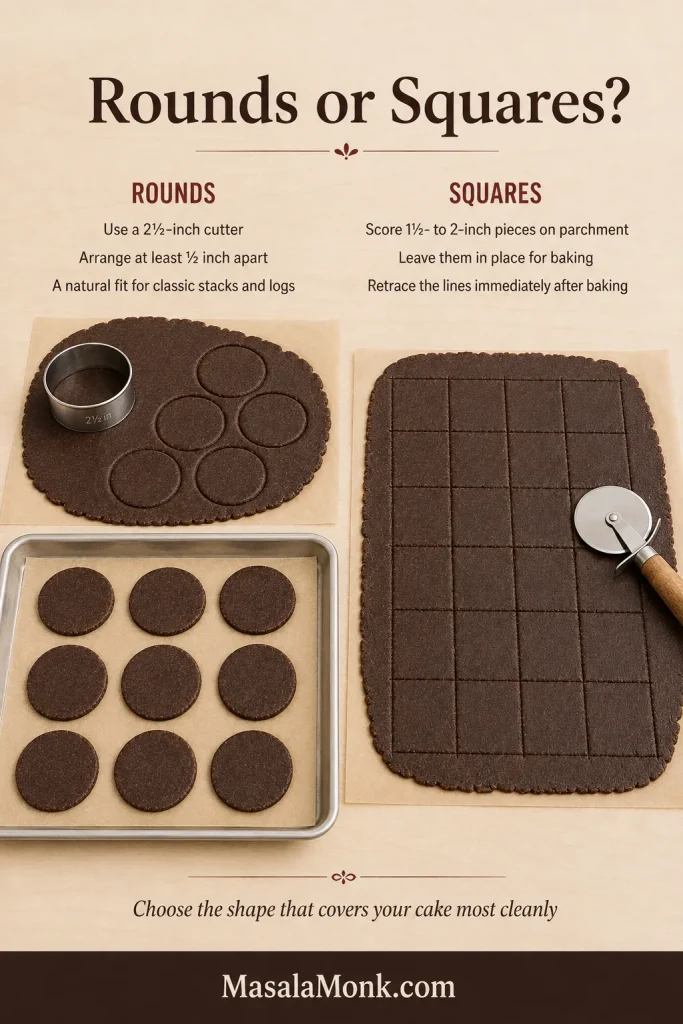
- Cut the wafers. Peel away the top sheet of parchment, leaving the chilled dough on the bottom sheet, then cut 2½-inch rounds. Arrange them at least ½ inch apart. For squares, score 1½- to 2-inch pieces directly on the parchment and leave them in place.
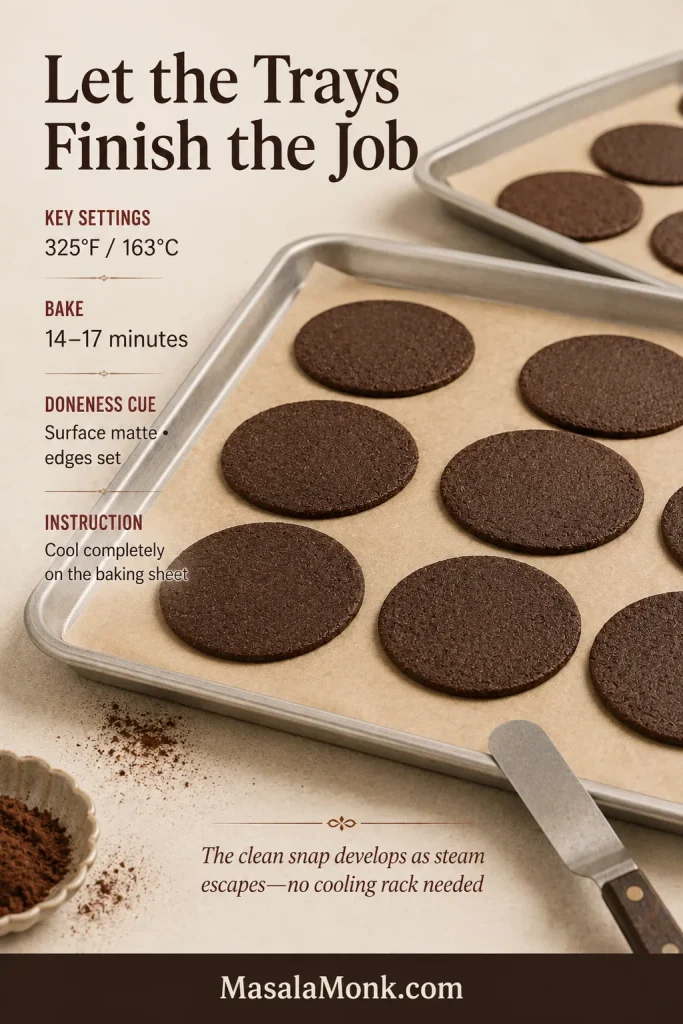
- Bake until dry and set. Bake two trays at a time for 14–17 minutes, rotating and switching their positions halfway through. The surface should look matte and the edges should feel set.
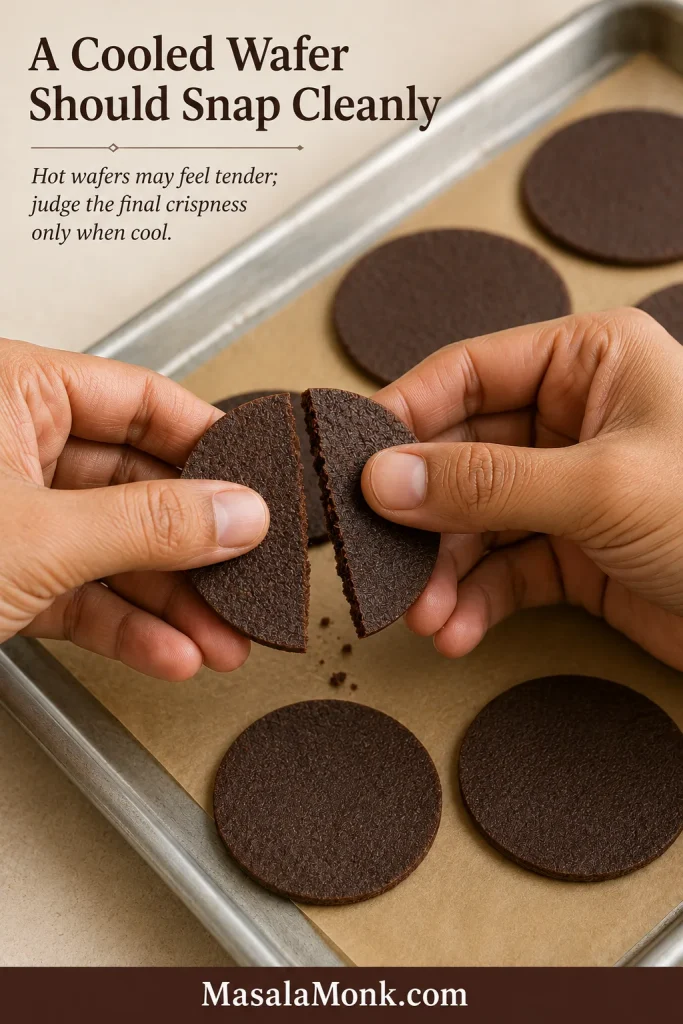
- Let the trays finish the job. If you made squares, retrace the cut lines immediately. Leave either shape on the baking sheets until completely cool; the clean snap develops as steam escapes.
- Use every piece. Reroll scraps while the first trays bake, chilling the dough briefly if it becomes soft. Once everything is cool, set aside 9 oz (255 g) for one old package and save the remaining whole or broken wafers for another use.
Recipe Notes
- Thickness decides the final cake. A ¼-inch (6 mm) refrigerator cookie is roughly twice as thick and may keep a hard center.
- Judge crispness only when cool. The hot wafers are tender; their snap appears as they cool on the trays.
- Espresso powder is optional. At this amount, it is intended to deepen the cocoa without making the wafers taste distinctly of coffee.
- Save imperfect pieces. Broken wafers fill cake gaps, become crust crumbs, or add crunch to homemade mint chocolate chip ice cream.
What Success Looks Like
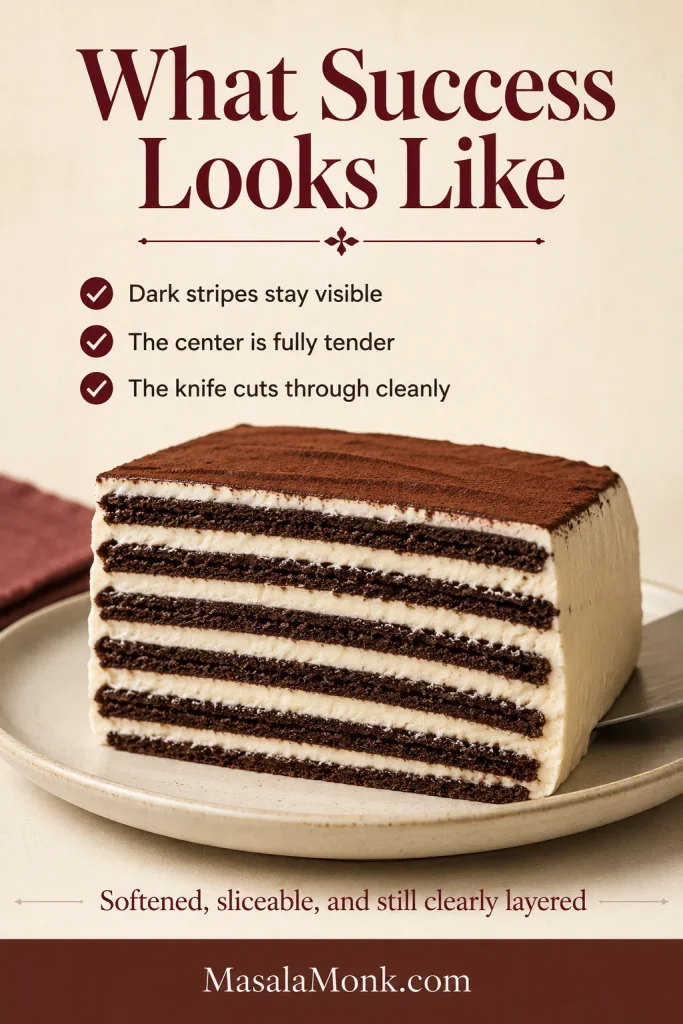
Before assembly, a cooled wafer should look dry, snap cleanly, and taste dark but not aggressively bitter. After an overnight rest with cream, a thin knife should pass through the center without a crack. Each wafer should still leave a distinct chocolate stripe instead of dissolving into a gray-brown blur.
Why the Homemade Wafers Work
Making the wafers yourself lets you control both their chocolate flavor and, crucially, their thickness. Rolled thin, cooled to a clean snap, and kept low in leavener, they hold together during assembly and soften evenly in the refrigerator.
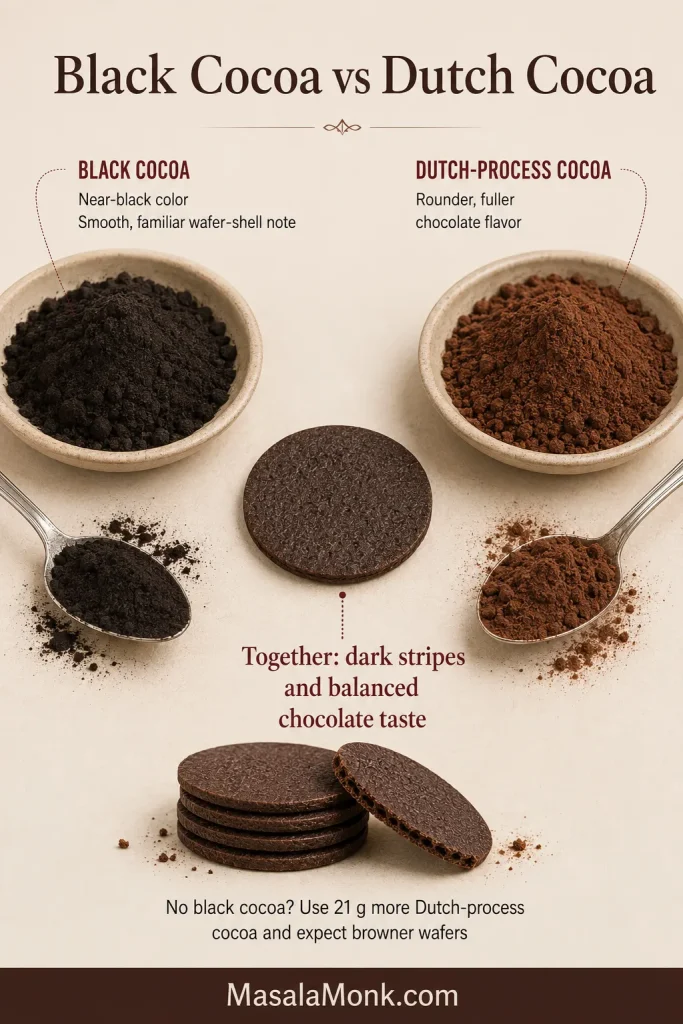
- Black and Dutch cocoa share the work: one supplies the near-black color; the other keeps the chocolate flavor round and familiar.
- The dough uses a straightforward butter base: the thin roll and full tray cooling produce the crisp finish.
- A small amount of baking powder limits puffing: the wafers stay flat enough to stack and soften evenly.
- Parchment keeps the dough clean and even: no extra flour is worked into the sheet while rolling.
- Tray cooling completes the texture: the fragile hot cookies firm as steam escapes.
Black Cocoa, Dutch Cocoa, and the Flavor You Want
Black cocoa gives the wafer its near-black color and a smooth, familiar note associated with Oreo-style shells. It contributes more color than deep cocoa flavor. Dutch-process cocoa supplies the rounder chocolate character that black cocoa can lack on its own.
The split keeps the cookie dark enough to draw sharp stripes through white cream without making color the only thing you taste. If the labels themselves feel confusing, our cacao, cocoa, and chocolate guide explains the broader terminology; for this dough, stay with the black-cocoa and Dutch-process choices given here.
Can You Make the Wafers Without Black Cocoa?
Yes. Replace the 21 g black cocoa with 21 g additional Dutch-process cocoa. The wafers will be brown instead of nearly black and taste more like a traditional chocolate biscuit, while the thin roll and crisp finish still make them suitable for icebox cake.
Natural cocoa can work in a pinch, but the wafers will be lighter, tangier, and may behave somewhat differently. Replacing the black cocoa with additional Dutch-process cocoa stays closer to the intended color and rounded chocolate flavor.
Rolled Versus Slice-and-Bake Wafers
- Rolled to about 3 mm: gives the most even thickness and the most dependable icebox-cake result.
- A log sliced to about 3 mm: is faster and naturally round, but uneven slices and cracking are harder to avoid.
- A log sliced to about 6 mm: is easier to handle but roughly twice the target thickness; save those cookies for snacking, sandwich cookies, or crumbs.
Rolling is the safer method because every part of the sheet can be checked against the same guide. Slice-and-bake works only when the slices are genuinely thin and even.
← Back to the homemade recipe · Compare store-bought substitutes · ↑ Back to the top
Prefer a store-bought shortcut, or are you working from an older recipe card? Continue with the sections that match the problem in front of you.
Continue With the Complete Wafer Guide
Choose the right cookie
- What Kind of Chocolate Cookie Works in Icebox Cake?
- What Happened to Nabisco Famous Chocolate Wafers?
- Best Store-Bought Chocolate Wafer Substitutes
- How Long Do Replacement Cookies Need to Soften?
Convert and troubleshoot
What Kind of Chocolate Cookie Works in Icebox Cake?
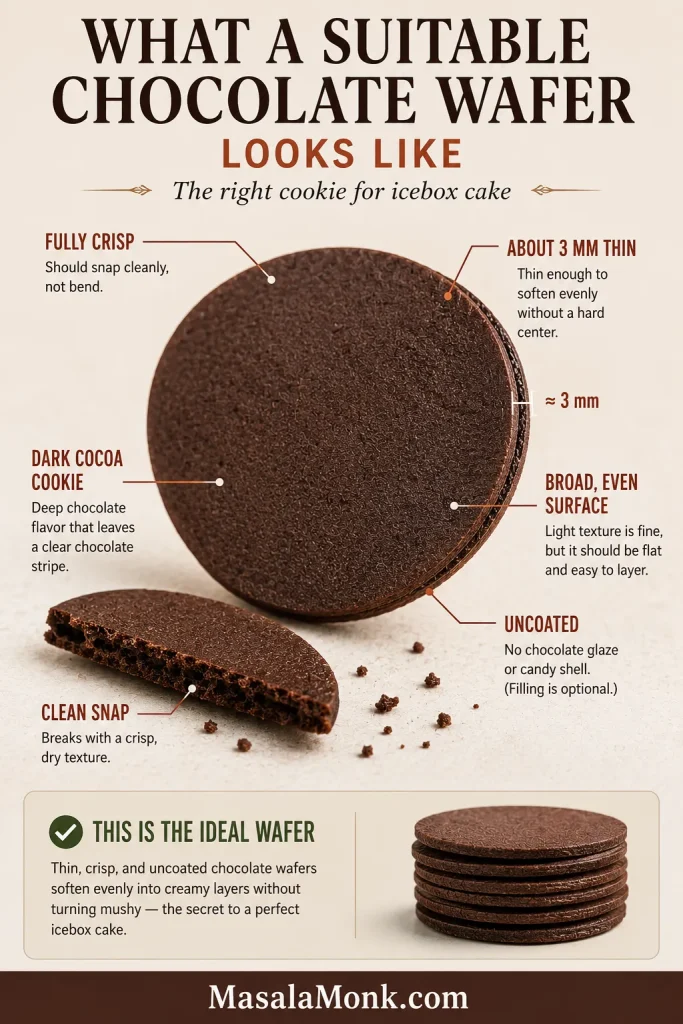
For this dessert, “wafer” means a thin, dry, crisp chocolate cookie—not a candy melt and not a layered wafer biscuit. It must be sturdy enough to spread with cream today and porous enough to become tender by tomorrow.
Whipped cream does more than fill the gaps. During refrigeration, moisture moves into the cookies, so the right replacement softens all the way through while keeping a visible chocolate stripe.
The 30-Second Package Test
- Thin: ideally about 3 mm—just under ⅛ inch. Thick sandwich cookies soften much more slowly.
- Crisp: look for thin, snappy, crisp, or crunchy—not soft-baked or chewy.
- Mostly plain: a thin sandwich filling can work; a thick filling changes the cake substantially.
- Uncoated: chocolate shells and glazes slow the moisture that needs to enter the cookie.
- Flat: broad, even surfaces are easier to layer and soften more predictably.
At home, snap one before committing the package. It should break cleanly. A cookie that bends, feels cakey, or leaves a greasy coating on your fingers is less likely to form neat layers.
What Works—and What Does Not
Swipe on mobile to view the full comparison.
| Cookie style | Use it? | Likely result |
|---|---|---|
| Thin, crisp, plain chocolate cookie | Yes | The closest route to classic cake-like layers |
| Thin chocolate sandwich cookie | Usually | Softens well but adds filling and sweetness |
| Chocolate Maria biscuit or graham cracker | Yes, as a variation | Easy layers with a milder or graham-style flavor |
| Thick or soft-baked cookie | Poor fit | May stay hard in the center or turn pasty |
| Coated, airy layered, or rolled wafer biscuit | Avoid | Coating or internal air gaps cause uneven softening |
| Candy-melting wafer or coating disc | No | It is confectionery coating, not a baked cookie |
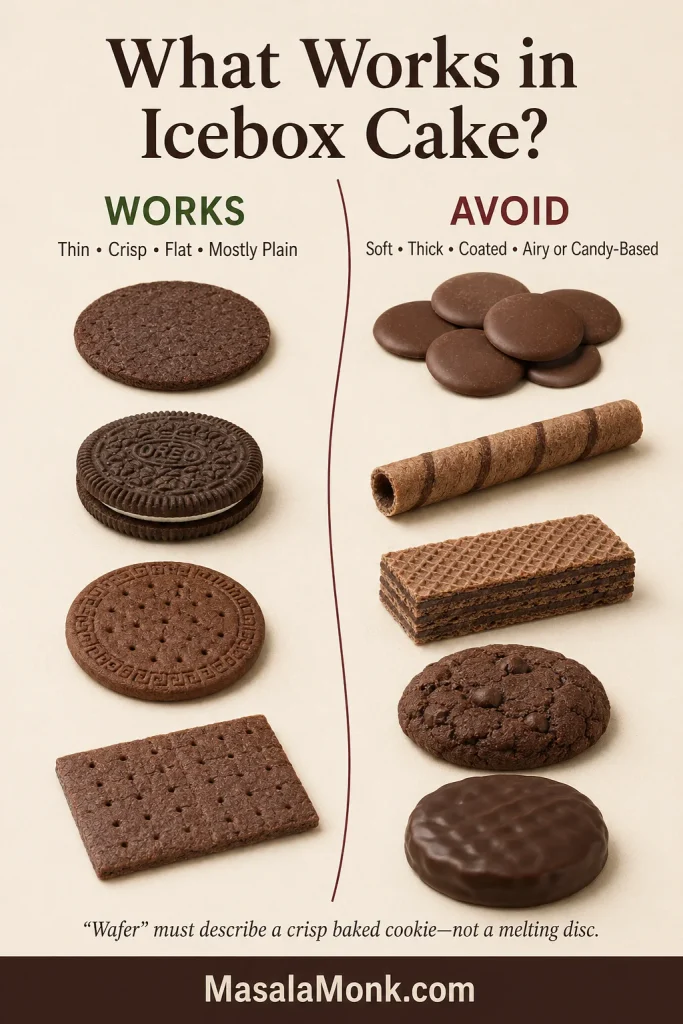
Fastest way to avoid the wrong product: if it sits beside candy melts or coating discs, it is not the wafer cookie your icebox cake needs.
Vanilla wafers can make a perfectly good but entirely different icebox cake. They are not a close replacement when dark chocolate stripes are the point.
Thickness, Crispness, Sweetness, and Pan Coverage
Thickness and crispness: Roll homemade dough to about 3 mm—just under ⅛ inch. A ¼-inch (6 mm) cookie is roughly twice as thick and often softens at the edges before the center is ready. Every cookie should begin fully crisp; humidity-softened wafers can lose definition too quickly.
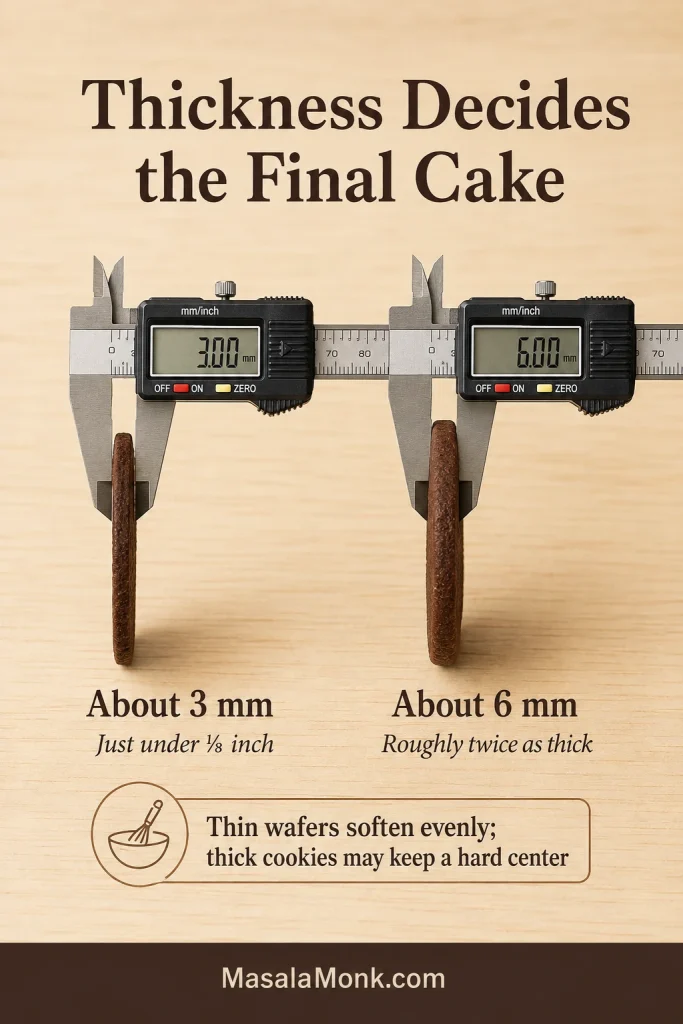
Cool before judging: Homemade wafers can feel tender while hot. Let them cool completely before deciding whether the bake was long enough.
Sweetness and filling: Filled cookies bring sugar into every layer, so pair them with lightly sweetened cream. Plain wafers leave more room to sweeten the cream itself. Our homemade whipped cream recipe explains sugar levels and the peak stages to watch.
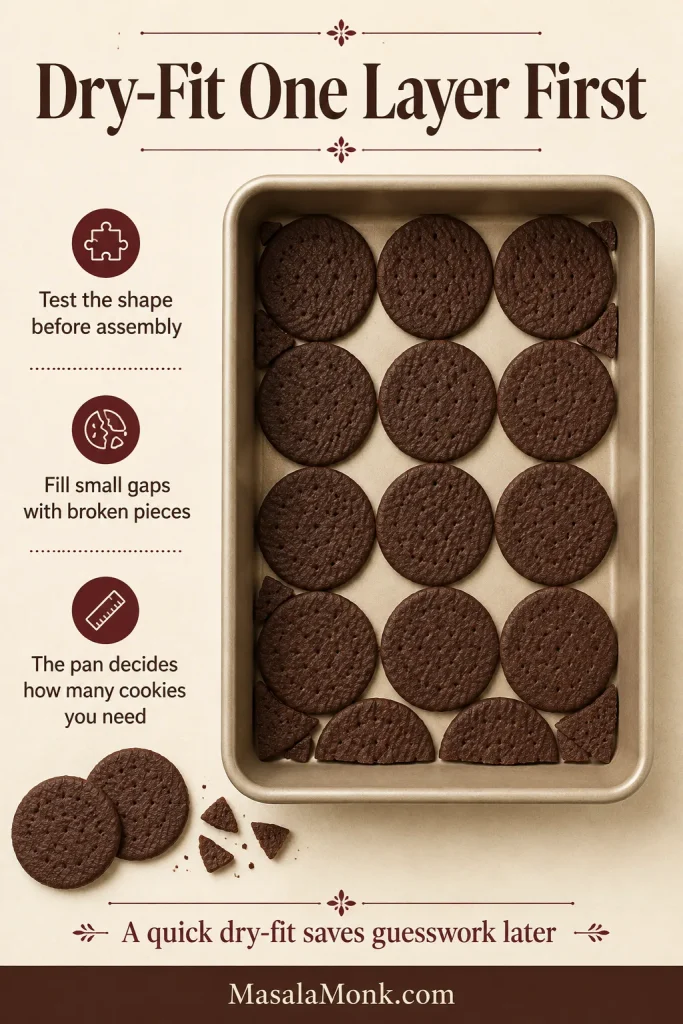
Shape and coverage: Rounds suit classic logs and circular stacks. Squares and rectangles reduce gaps in loaf pans and baking dishes, while broken pieces neatly fill edges and open spaces. Covering the layer matters more than recreating an old cookie count.
Read the finished texture
- Crunchy center: the cookie is too thick, dense, coated, or has not chilled long enough.
- Muddy layer: the cookie began soft or dissolved faster than the cream could set.
- Vanishing stripe: the cookie was too fragile to remain distinct.
- Clean knife and visible stripe: the cookie softened at the right rate.
What Happened to Nabisco Famous Chocolate Wafers?
Nabisco Famous Chocolate Wafers were discontinued in 2023 after generations of refrigerator-roll, pie-crust, cheesecake, and icebox-cake recipes had been written around them. The Washington Post’s replacement comparison documented both the discontinuation and the scramble for modern alternatives.
Canadian readers may remember Christie or Mr Christie chocolate wafers. Old Canadian retailer pages can remain searchable after a product disappears, so the familiar regional name alone does not confirm fresh stock or current production. Check the actual package, manufacturer, and date.
For many families, the goal is not to invent a new dessert. It is to recreate the birthday or holiday cake they remember without letting one discontinued package end the tradition.
What were Famous Chocolate Wafers like? Very thin, dry, crisp, dark but not candy-sweet, flat enough to spread with cream, and porous enough to soften while keeping a clean chocolate stripe. A modern replacement needs those same qualities, even if the cookie looks completely different.
The old box still gives us one useful number: 9 ounces (about 255 g) of thin chocolate cookies. Weight transfers more reliably than an old piece count because modern substitutes vary in size, thickness, and filling.
Should you buy an old package online?
Usually, no. A fresh cookie with the right structure is a better baking ingredient than an expensive discontinued package with uncertain heat, humidity, and storage history.
- Look for a photograph of the actual sealed package, not only an archived product image.
- Look for a readable best-before date and current ingredient label.
- Identify the manufacturer and seller before trusting claims of a “revived” equivalent.
The box was convenient. The real standard is the finished slice: dark layers that soften cleanly without disappearing.
Best Store-Bought Chocolate Wafer Substitutes
Once you know the qualities that matter, the store-bought choice becomes simpler. Each option solves a different problem involving availability, sweetness, shape, or cost.
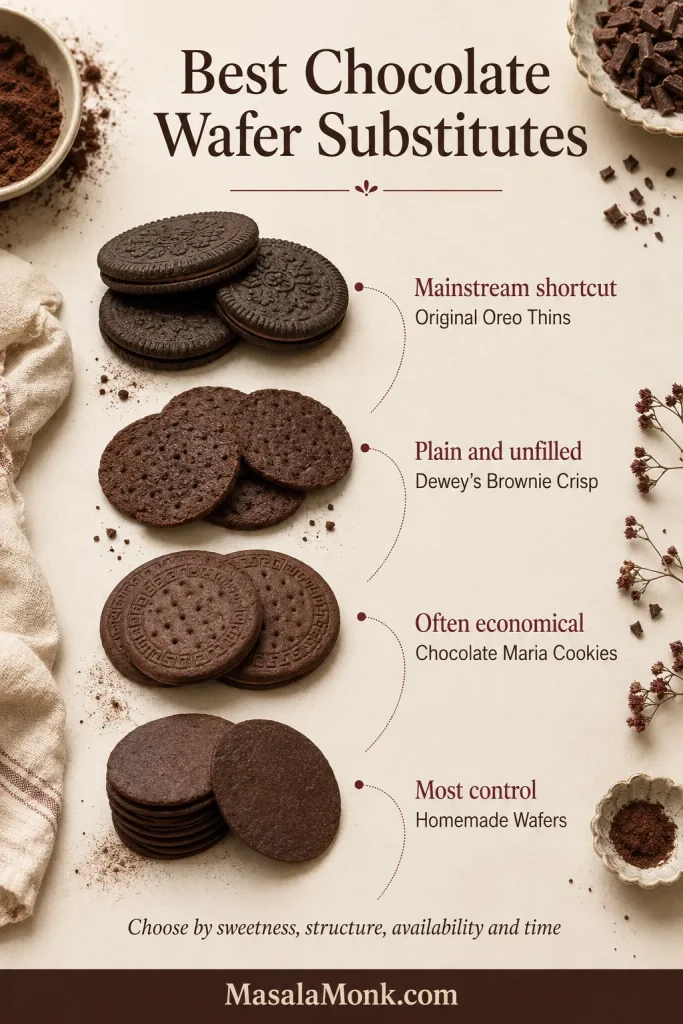
Before buying: Package sizes, formulations, and availability were checked in August 2026 and can change. Read the current label, then compare thickness, filling, coating, and package weight before choosing. The product visuals are illustrative comparison guides rather than package photography or controlled test results.
Where to Buy Chocolate Wafer Cookies Now
Start in the ordinary cookie aisle, where Original Oreo Thins are a practical mainstream option in many US stores. Check Hispanic or international foods for chocolate Maria cookies and specialty-cookie shelves for thin cocoa snaps.
Shopping online? Search for thin chocolate cookies, chocolate cookie thins, chocolate snaps, or plain chocolate thins. The broader phrase “chocolate wafers” often returns candy melts and filled wafer bars, so check the filling, coating, thickness, and package weight before ordering.
Current package guide, checked August 2026:
- Original Oreo Thins: the current US label lists 4 cookies as 29 g. Weigh out approximately 255 g and dry-fit one layer because the creme contributes to the total and the number needed depends on the pan.
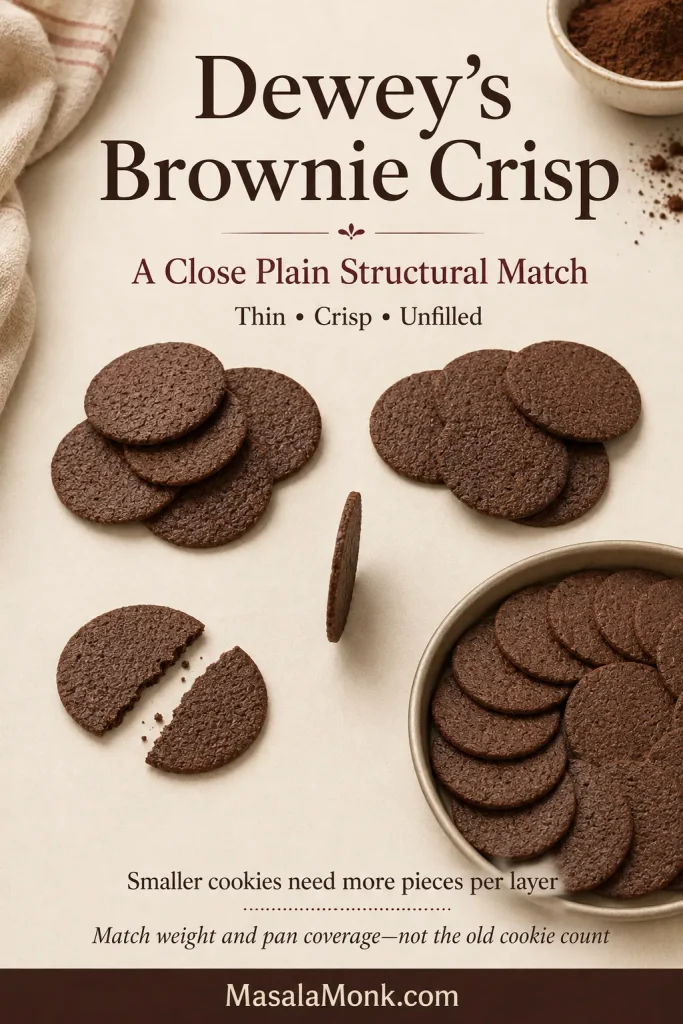
- Dewey’s Brownie Crisp: one 9-ounce box matches the old package weight, but the smaller cookies require more pieces to cover each layer.
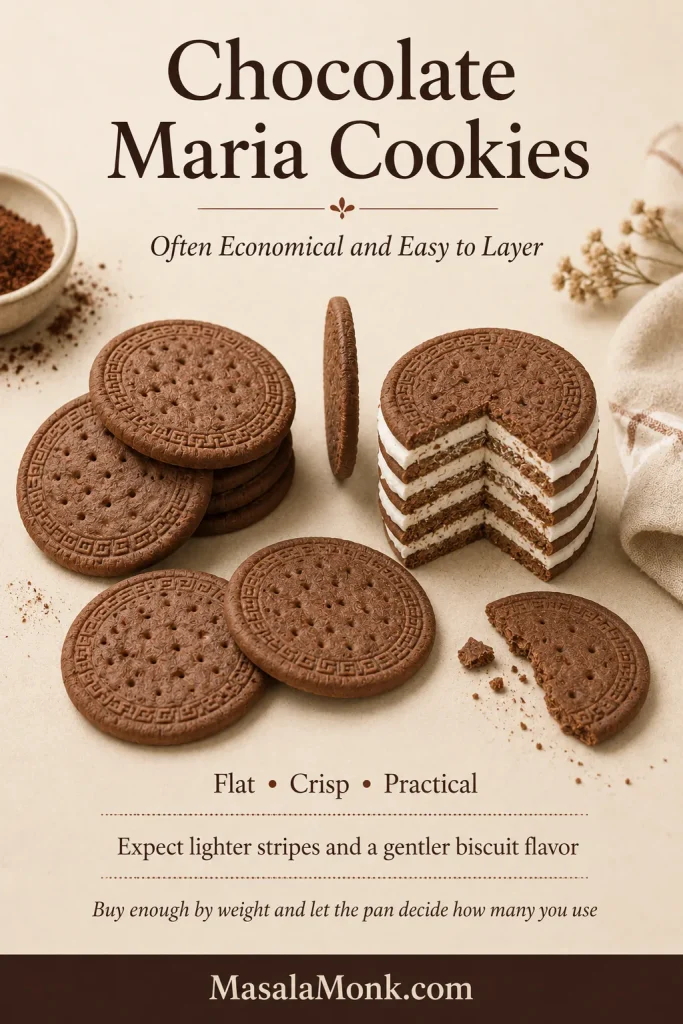
- Goya Chocolate Maria: one 7-ounce pack is about 198 g, roughly 57 g short. Buy two and use only what the pan needs.
Oreo Thins, Plain Shells, and Regular Oreos
Original chocolate Oreo Thins are thin, crisp, dark, and consistent. Their light creme filling softens into the whipped cream, creating a sweeter, more cookies-and-cream-like slice with a faint white line between the dark shells. Choose the original version unless another filling flavor is part of the plan.
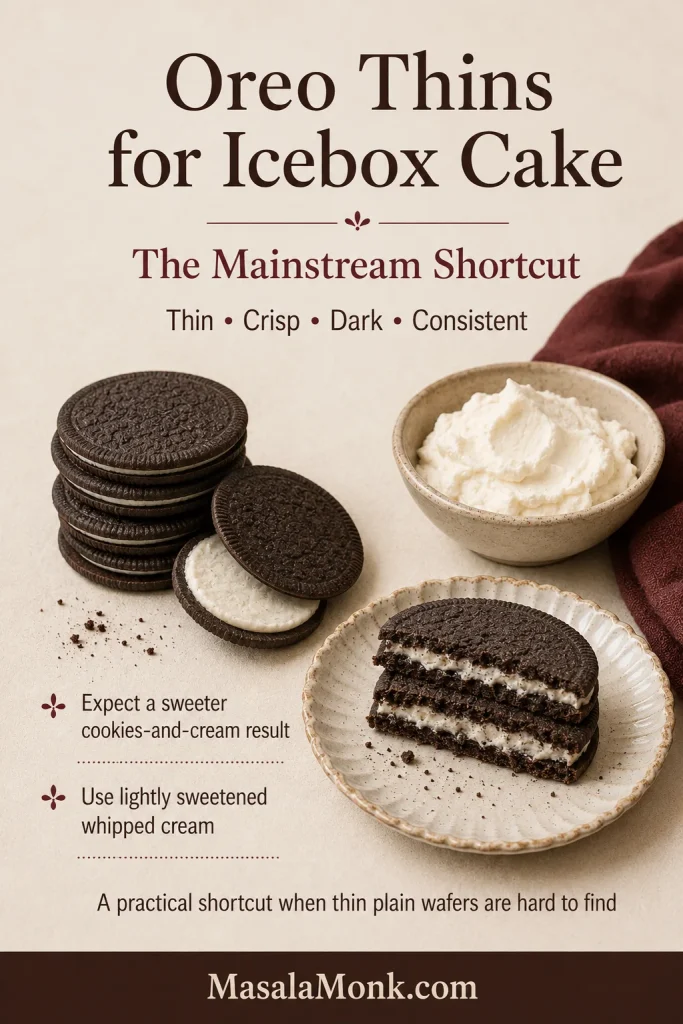
| Route | Choose it when | Result |
|---|---|---|
| Leave the filling | Speed matters and you like a sweeter cake | Easy, cohesive, and clearly cookies-and-cream |
| Remove the filling | You want more sweetness control | A plainer wafer effect, with extra work and some breakage |
Most consumer Oreo packages include filling. For a plain-shell route, separate Original Oreo Thins at home and allow a few extras for shells that crack.
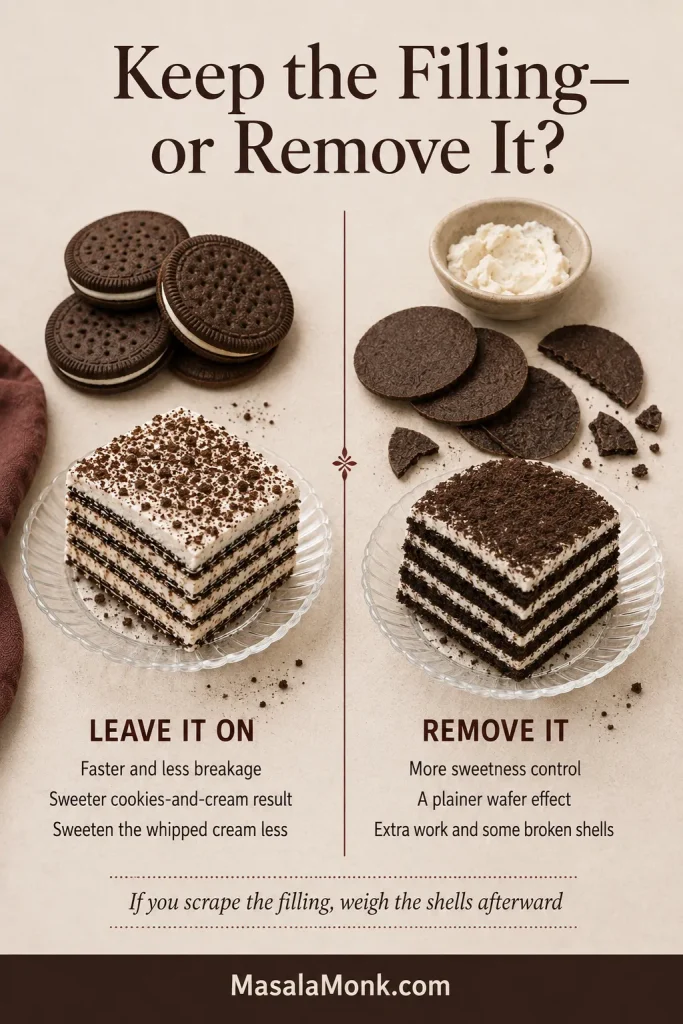
What about regular Oreos? Whole regular Oreos make a thicker, sweeter Oreo icebox cake and usually need a longer rest. Separated shells behave better, though they remain thicker than Oreo Thin shells and the old Famous Wafers.
Dewey’s Brownie Crisp: A Close Plain Structural Match
Dewey’s Brownie Crisp is thin, crisp, and unfilled. Among the products covered here, those qualities make it a close plain structural match when it is available.
The cookies are smaller than the discontinued wafers, so arrange enough pieces to cover every layer rather than chasing the old count. Their unfilled form may produce darker-looking layers than a sandwich cookie and will not add a separate line of creme.
Chocolate Maria Cookies: Economical and Easy to Layer
Flat, crisp, often economical, and easy to arrange, chocolate Maria cookies are a practical alternative. Their cocoa flavor is usually lighter and more biscuit-like than the discontinued wafers, so the finished cake has lighter chocolate stripes and a gentler biscuit flavor beside the cream.
These cookies are commonly sold in packages smaller than the old 9-ounce box. Check the current package guide above, buy enough to cover the planned layers, and let the pan determine how much you use.
Chocolate Graham Crackers: A Natural Fit for Rectangular Cakes
Chocolate graham crackers are not a flavor replica, but their broad rectangular shape makes them easy to layer in loaf pans, square dishes, and 9 × 13-inch baking dishes. Expect fewer gaps, less fiddly arrangement, and a finished dessert that tastes unmistakably like chocolate graham crackers—delicious in its own right, but different from the old wafer cake.
How Long Do Replacement Cookies Need to Soften?
Thick or dense cookies take longer to soften, and deeper cakes usually need more time. Refrigerator temperature and the amount of cream can shift the finish too, so use these as starting checks rather than fixed guarantees.
- Very thin plain wafers: begin checking after about 6–8 hours.
- Thin filled sandwich cookies: plan on an overnight rest.
- Flat biscuits and graham crackers: plan on an overnight rest.
- Thicker cookies or regular sandwich cookies: allow closer to 12–24 hours.
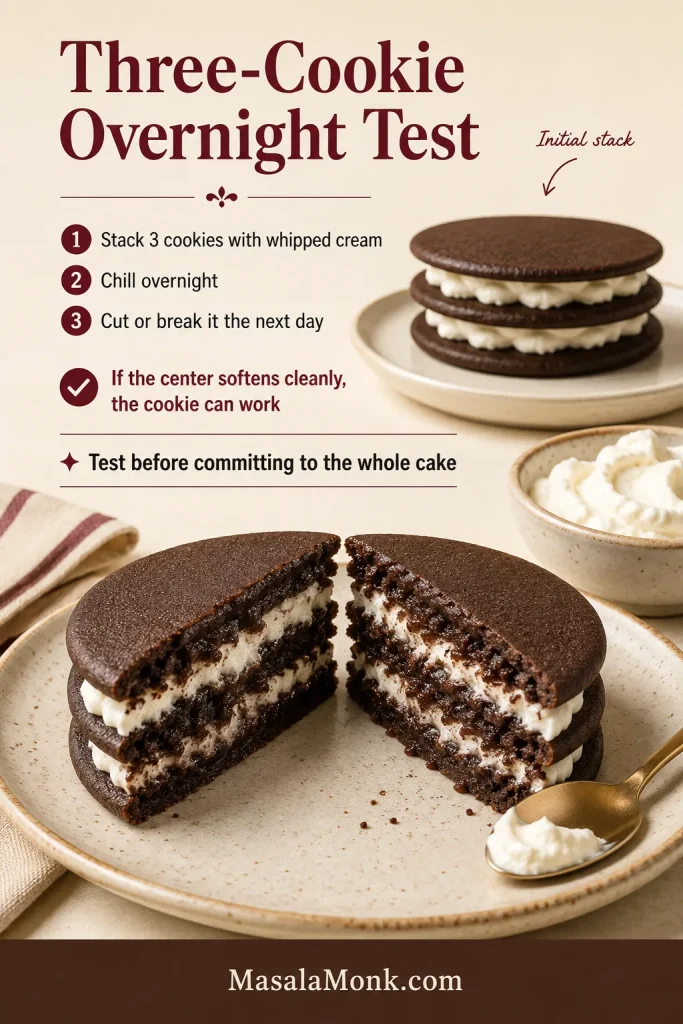
- Any unfamiliar cookie: run the three-cookie test before assembling the full cake.
The center decides: Let the clock guide you, then confirm readiness with a thin knife through the middle. The blade should pass through without meeting a hard cookie center, while the dark layers remain visible in the slice.
How to Convert and Adapt One Old 9-Ounce Package
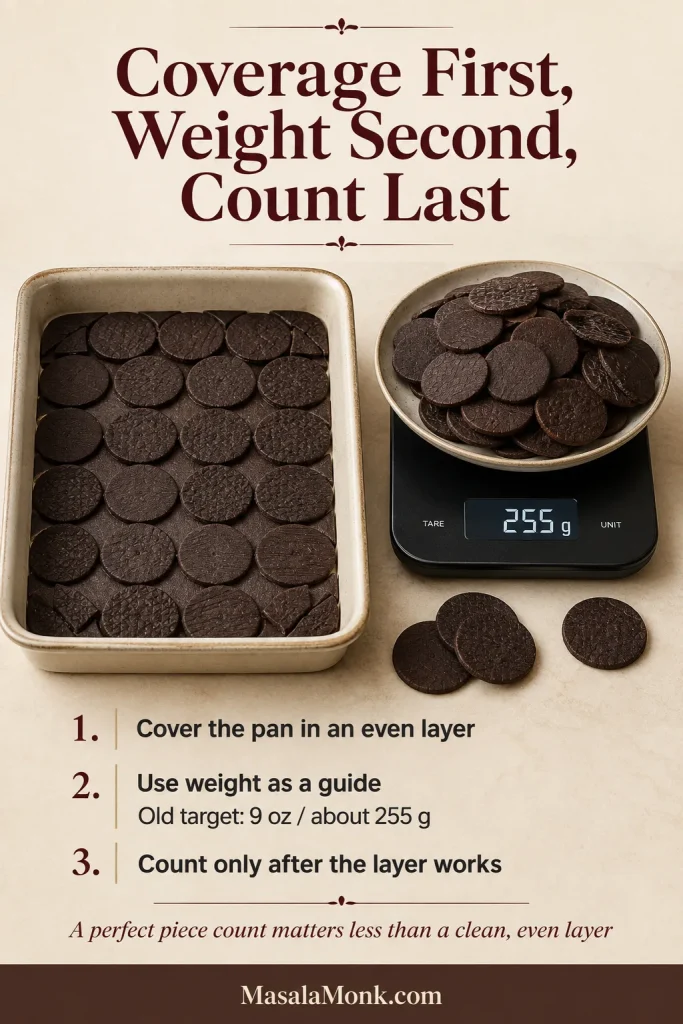
One dependable number remains from the old box: 9 ounces (about 255 g). Begin with that weight, then dry-fit one cookie layer in the pan before whipping the cream. The test shows whether the cookies can cover the layer and where broken pieces will help.
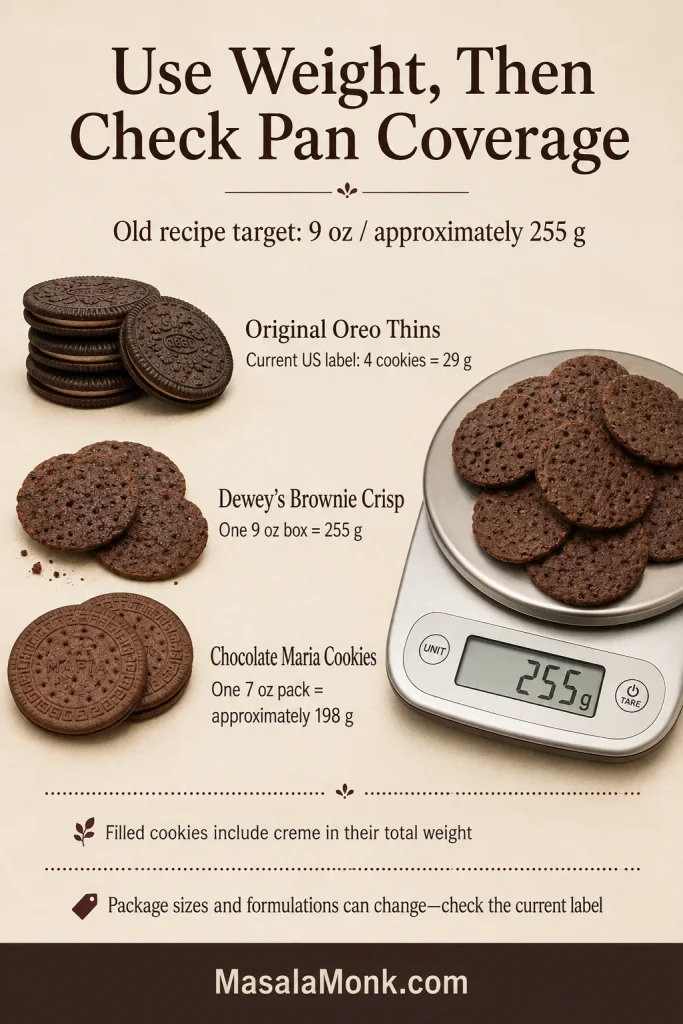
Dry-fit one complete layer after weighing the cookies. The same 255 g can cover a pan differently when filling, cookie diameter, and shape change.
Coverage first, weight second, count last.
A filled sandwich cookie spends part of its weight on creme. Small cookies need more pieces to cover the pan, while broad rectangular crackers need fewer. Both the scale and the pan matter.
Old-Package Conversion Table
Swipe on mobile to view the full conversion table.
| Old recipe wording | Initial guide | Check before assembly |
|---|---|---|
| 1 package or box, 9 oz | Set aside 255 g cookies | Dry-fit a layer and confirm full coverage |
| 2 packages, 9 oz each | Set aside about 510 g cookies | Use weight, not the old piece count |
| 36 Famous Wafers | Match the old recipe’s coverage and approximate weight | Modern cookie sizes can make 36 too many or too few |
| Original Oreo Thins | Weigh 255 g from the package | The filling contributes part of that weight |
| One 7 oz (198 g) Maria-cookie package | It is about 57 g short | Buy a second package and use only what the layers need |
| Homemade full batch | Set aside 255 g after the wafers cool | Keep the remaining whole and broken wafers |
If you remove sandwich-cookie filling, weigh the shells after scraping. The unopened package includes filling you will discard, so its weight overstates the cookie left for the cake.
Running a little short does not mean the recipe is lost. Fill the final spaces with compatible pieces and let the finished slice—not an inherited cookie count—judge the replacement.
Adjust Only What the New Cookie Changes
The old recipe assumed one predictable wafer. A modern substitute usually changes sweetness, thickness, size, or cocoa flavor. Adjust only what the new cookie changes.
| What changed | Adjust this | What to expect |
|---|---|---|
| Sweeter or filled cookie | Sweeten the cream less; taste one cookie with a spoonful of cream | A balanced cake without an overly sugary finish |
| Thicker cookie | Spread cream against both sides and allow more chilling time | A heavier, more cookie-forward slice |
| Smaller cookie | Use more pieces to cover each layer and fill gaps with broken pieces | A different count but the same cake shape |
| Milder cocoa flavor | Accept the variation or finish with unsweetened cocoa or grated dark chocolate | Lighter stripes with a deliberate chocolate accent |
For the cream ratio, cake shapes, assembly, final chill, and slicing, continue with the chocolate wafer icebox cake recipe.
← Back to substitutes · Jump to the recipe · ↑ Back to the top
Troubleshooting Chocolate Wafer Cookies
Thin wafers leave less room for measuring and temperature errors than thick drop cookies, but the symptoms are usually clear. Start with what the dough or cooled wafer is doing, then change the most likely cause on the next tray. The visuals below are diagnostic guides; actual softening still varies with cookie thickness, cream consistency, pan depth, and refrigerator temperature.
Dough Problems
Dry and crumbly: Too much flour or cocoa is the most common cause, and cocoa brands vary in absorbency. Continue mixing and press a handful together before adding liquid. If it still falls apart, add milk ½ teaspoon at a time and stop as soon as the dough holds.
Sticky while rolling: Keep the dough between parchment and chill the sheet before peeling away the top layer. Repeated dusting with flour or cocoa changes the formula and dries later cookies.
Baking Problems
Puffing or bubbling: Excess aeration, too much leavener, warm dough, or uneven thickness are the usual causes. Mix the butter and sugar only until smooth and roll evenly. If cut wafers become soft or greasy while you reroll scraps, chill that tray briefly before baking.
Spreading: Use a cool baking sheet for each batch, keep the butter cool and pliable, and chill only trays whose cut dough has become soft or greasy. Measure the flour and any added liquid carefully.
Soft after cooling: Let the wafers cool completely before judging them. If they still bend, use that tray for crumbs and bake the next tray a little longer, checking within the 14–17-minute range. Dark cocoa makes overbrowning difficult to see, so extend the bake cautiously.
Bitter flavor: Too much black cocoa, packed cocoa measurements, overbaking, or missing salt and vanilla are the likely causes. Black cocoa contributes darkness and a distinctive flavor; a larger amount can make the wafer harsher.
Assembly and Chilling Problems
Breaking during assembly: Overbaking, an unevenly thin sheet, moving the wafers while warm, or pressing too firmly with the spatula can all cause breakage. Place a small spoonful of cream on each wafer and ease it outward with short, gentle strokes.
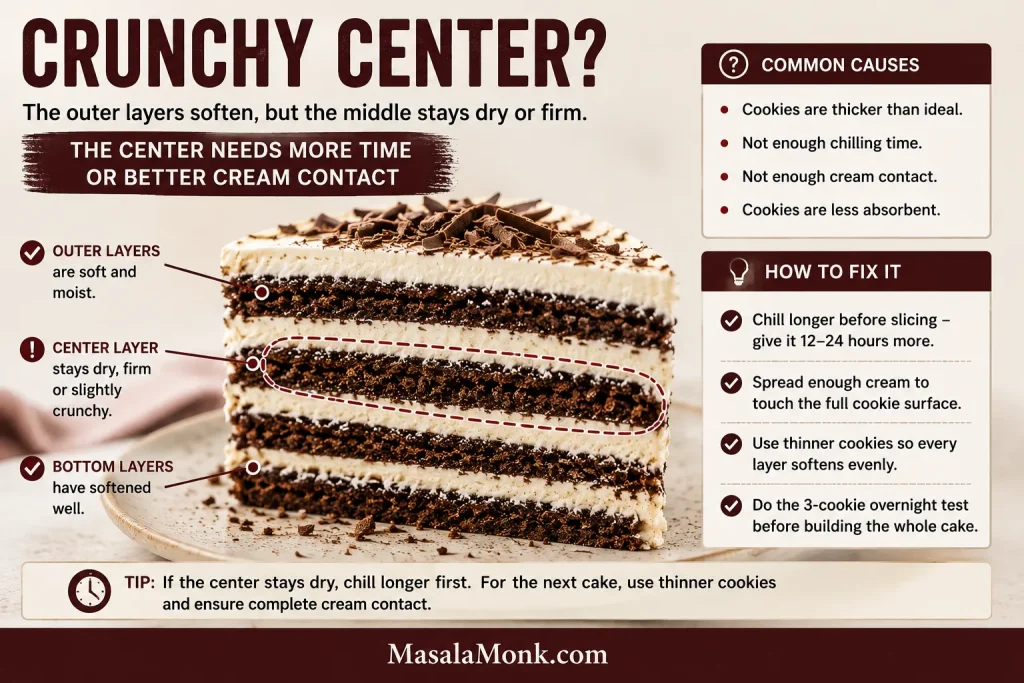
A crunchy cake center: The replacement is probably too thick, too dense, short on cream contact, or simply not chilled long enough. Return the cake to the refrigerator and test the middle again later.
Check the cookie’s cross-section: a thicker cookie creates a wider moisture path, so the edges can soften while the center remains firm.
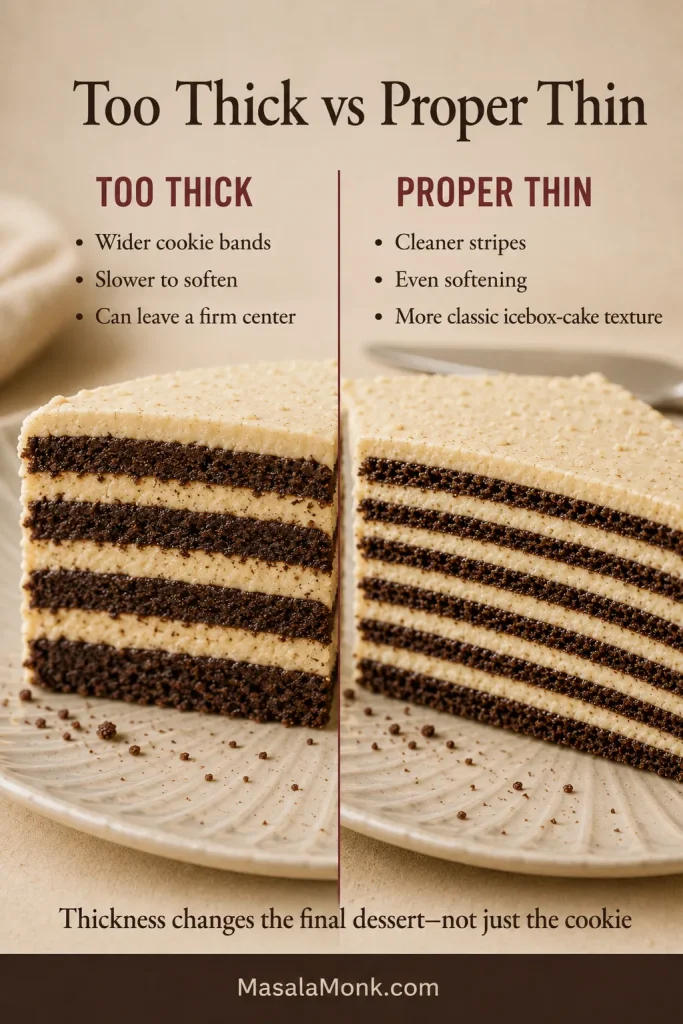
Then check the cake itself: if the middle still resists after more chilling, use the dry center and softened edges as the deciding cues.
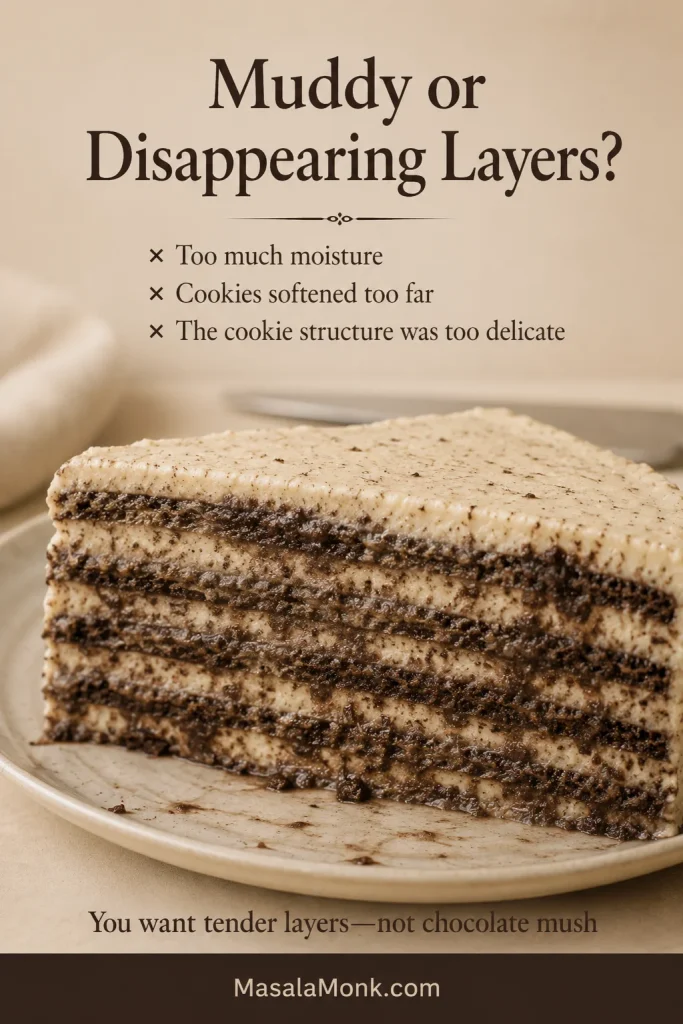
Muddy or disappearing layers: The cookies may have begun soft, the cream may be unusually loose, or the cookie may dissolve too readily. A suitable wafer begins crisp and softens without losing its identity completely.
Jump to the recipe · Review the conversion guide · ↑ Back to the top
How to Store Dough and Baked Wafers
Cool baked wafers completely, then keep them in an airtight container at room temperature with parchment between fragile layers. Protect them from steam and humidity; for best texture, use them within several days or freeze them for longer storage. Room temperature is best for unassembled wafers because refrigerator humidity can soften the snap you worked to create.
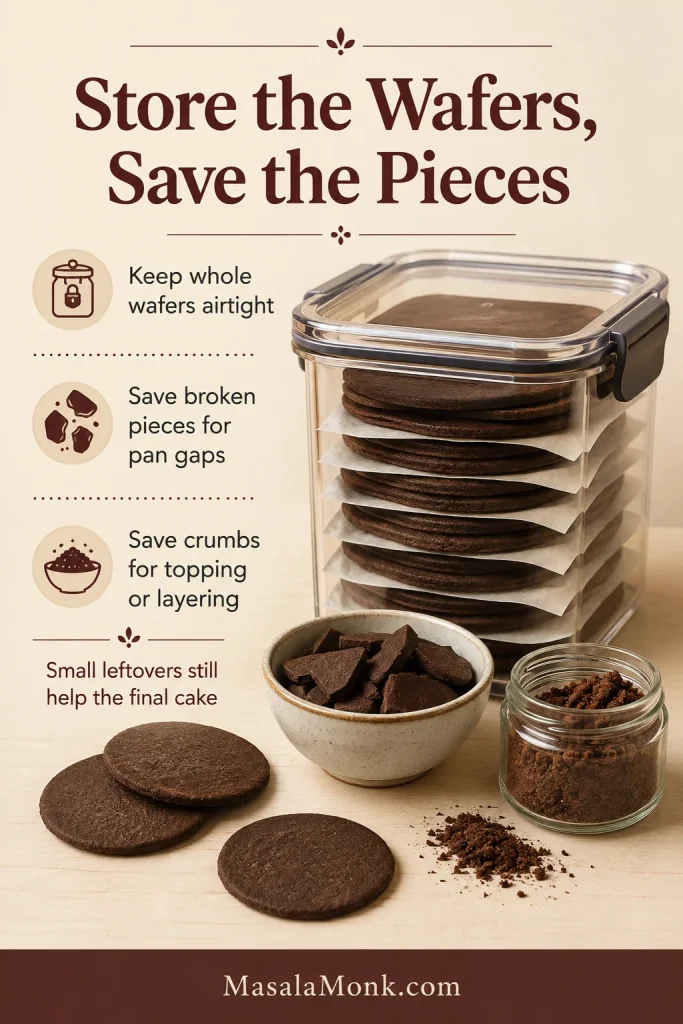
For make-ahead dough, freeze flat rolled sheets between parchment, wrapped dough portions, or a carefully shaped log for a thin slice-and-bake variation. Thaw in the refrigerator until firm but cuttable.
Fully cooled baked wafers can also be frozen in a rigid airtight container with parchment between layers. Thaw them in the closed container so condensation collects on the container instead of the wafers, then check crispness before assembly.
If stored wafers lose their snap, save them for crumbs rather than putting softened cookies into the cake.
Save broken or extra wafers for cake gaps, ice cream, or chocolate crumbs. For a crust, follow the pan and butter guidance in our no-bake cheesecake recipe and add butter gradually because plain wafers do not contain sandwich filling.
Gluten-Free, Vegan, and Lower-Sugar Options
Dietary needs do not end the dessert, but they change which shortcut is safest. When the cake is needed soon, a commercially made thin chocolate cookie with the dietary certification you need is usually more dependable than rebuilding this precise wafer formula one ingredient at a time.
For a gluten-free cake, choose a clearly labelled thin chocolate cookie that begins fully crisp, check all nut, seed, coconut, and sesame warnings, and run the three-cookie overnight test before building the cake.
For a vegan cake, use a commercially made thin vegan chocolate cookie and a plant-based whipping cream you already trust. Replacing the butter and egg in the homemade formula requires a separately developed recipe.
For a lower-sugar version, start with plain unfilled cookies and reduce the sweetness of the cream. Large changes to the cookie sugar affect spread, crispness, browning, and dough handling.
For any unfamiliar dietary cookie, the small overnight test is the safest way to check whether it becomes tender without dissolving.
Frequently Asked Questions
Are Nabisco Famous Chocolate Wafers still made?
No. They were discontinued in 2023. Old recipes and archived retailer pages may still name them, but they are no longer a dependable store-bought ingredient.
Are Famous Chocolate Wafers back?
As of August 2026, the original Nabisco wafers had not returned. Some websites and marketplace listings use the familiar name or nostalgic package imagery, so check the named manufacturer, ingredient label, package date, and seller before assuming the original product is back.
What is the closest substitute for Famous Chocolate Wafers?
Dewey’s Brownie Crisp is the closest plain structural match covered here when available. Original Oreo Thins are easier to find, but their filling makes the cake sweeter and more Oreo-like.
Do I need to remove the filling from Oreo Thins?
No. Leave the filling in for the easiest route and sweeten the whipped cream lightly. Remove it when you want a plainer chocolate-wafer effect and more control over sweetness. If you scrape it out, weigh the shells afterward because the package weight includes the creme.
What if my replacement package is only 7 ounces?
A 7-ounce package weighs about 198 g, roughly 57 g short of the old 9-ounce box. Buy a second package and use only as much as the cake needs.
Can I use vanilla wafers?
Yes, but they create a vanilla icebox cake without the dark chocolate stripes. They are a different flavor route, not a close Famous Wafer replacement.
Are chocolate melting wafers the same as wafer cookies?
No. Melting wafers are chocolate or candy coating designed to liquefy. Icebox cake needs a thin, crisp baked cookie.
How long do replacement cookies need to soften?
Overnight is the safest general plan. Very thin plain wafers may be ready sooner, while thicker cookies or whole Oreos can need closer to 12–24 hours. Use the clock as a guide and confirm the center with a thin knife.
The Cookie Should Disappear Into the Cake—But Not Completely
A good chocolate wafer starts with a snap and ends with a fork. Today it should be dark, dry, and sturdy enough to spread. Tomorrow it should be tender all the way through, yet still draw a clean chocolate line across the slice.
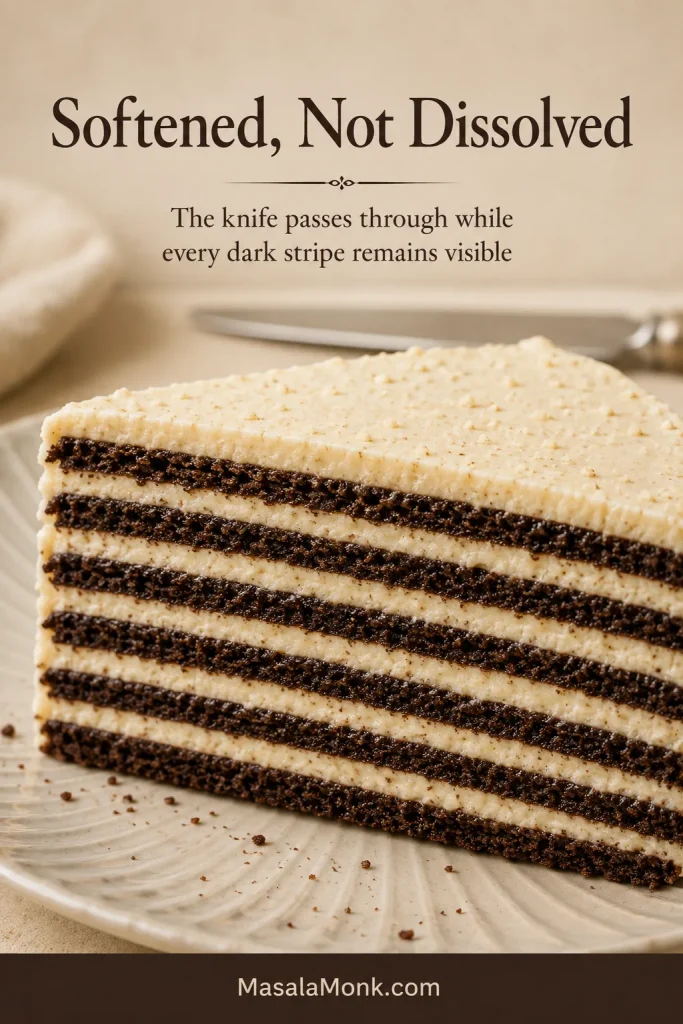
That is what an old family recipe was really preserving—not a particular cardboard box, but the quiet transformation that happens overnight and the familiar striped piece placed on the plate the next day.
If you use a replacement, leave a comment with the exact cookie, package weight, cake shape, whether you kept any filling, and how long the center needed to soften. Those details can help the next reader standing in the same cookie aisle.








