Posted on 1 Comment

Mint Chocolate Chip Ice Cream Recipe

Homemade mint chocolate chip ice cream scooped into a bowl with fine chocolate pieces and a creamy pale green texture.

This mint chocolate chip ice cream recipe makes cool, creamy homemade mint chip ice cream with a clean mint flavor, little crisp bits of chocolate, and a smooth scoopable texture. It tastes bright and refreshing without turning sharp or toothpaste-like, and the chocolate stays small enough to melt nicely as you eat.

The main method stays simple: whisk, chill, churn, add chocolate, and freeze. You do not need to cook a custard for the basic version, and you do not need any unusual ingredients. No ice cream maker? There is a no-churn version below. Prefer a softer, more natural mint flavor? The fresh mint variation shows you how to steep real mint leaves into the base.

The small details make the biggest difference here. A little restraint with mint extract keeps the flavor clean, chopped chocolate gives a better bite than large frozen chips, and a fully chilled base helps the ice cream freeze creamy instead of icy.

Quick Answer: How to Make Mint Chocolate Chip Ice Cream

To make mint chocolate chip ice cream, whisk together whole milk, sugar, salt, vanilla, mint extract, and heavy cream to make a cold ice cream base. Chill the base for at least 2 to 4 hours, then churn it in an ice cream maker for about 20 to 25 minutes. Add chopped chocolate during the last 5 minutes of churning, transfer the ice cream to a freezer container, and freeze it for 2 to 4 hours until scoopable.

For the best first batch, start with mint extract or peppermint extract and chopped semisweet or dark chocolate. A more natural herbal flavor comes from steeping fresh mint leaves in the dairy first. Without an ice cream maker, the easiest route is the no-churn version with whipped cream and sweetened condensed milk.

Make this version first: Use the main eggless ice cream maker recipe with mint extract and chopped semisweet or dark chocolate. It gives you the easiest balance of creamy texture, classic mint flavor, and reliable results.
Bowl of homemade mint chocolate chip ice cream with three pale green scoops, chocolate flecks, and a mint garnish.
Once the ice cream has set, the scoops should hold their shape while still looking creamy, with fine chocolate flecks spread evenly through the mint base.

Once you know the basic method, the variations are easy to choose. The no-churn version is best when you do not have a machine, fresh mint gives a softer herbal flavor, and the custard upgrade is there when you want the richest texture.

Why This Mint Chocolate Chip Ice Cream Recipe Works

This is the kind of mint chip ice cream that feels easy enough for a weekend dessert but still gets the important details right: a cold base, balanced mint, enough creaminess, and chocolate pieces that do not freeze into hard chunks.

The goal is not to make the most complicated mint ice cream. It is to make the version most people will actually repeat: creamy, minty, easy to churn, and easy to scoop.

The best mint chocolate chip ice cream is not the strongest mint version or the greenest version; it is the one with balanced mint, creamy texture, and chocolate pieces that are easy to bite once frozen.

  • The main method is easy. The recipe uses an eggless ice cream maker base, so there is no cooking, tempering, or straining required.
  • The texture stays creamy. Heavy cream, whole milk, sugar, and proper chilling help the ice cream churn smoothly.
  • The mint flavor is controlled. You start with a modest amount of extract, then adjust only if you want it stronger.
  • The chocolate bite is better. Chopped chocolate gives smaller, more pleasant pieces than large frozen chips.
  • The color is flexible. Keep the ice cream naturally pale or add a few drops of green coloring for the classic look.
  • There are backup methods. You get no-churn, fresh mint, and custard-style upgrade options without changing the main recipe.

Ingredients for Mint Chocolate Chip Ice Cream

Because the ingredient list is short, each choice matters. Cream and whole milk create the body. Sugar sweetens the base and keeps it scoopable. Mint gives the flavor, but it needs restraint. Chocolate adds the familiar chip texture, provided the pieces are small enough to eat comfortably when frozen.

Ingredients for mint chocolate chip ice cream, including heavy cream, whole milk, sugar, salt, vanilla, mint extract, chopped chocolate, and optional green coloring.
Because this homemade mint chip ice cream uses a short ingredient list, cream builds richness, sugar helps scoopability, mint controls flavor, and chopped chocolate improves the frozen bite.

Heavy Cream and Whole Milk

Heavy cream gives the ice cream its rich, smooth body. Whole milk lightens the base so it stays refreshing instead of tasting overly heavy. The ratio here is simple: 2 cups heavy cream to 1 cup whole milk.

Avoid skim milk for this recipe. A leaner base is more likely to freeze icy, especially in a home freezer.

Sugar and Salt

Sugar does more than make ice cream sweet. It also helps the finished ice cream stay scoopable. Reduce it too aggressively and the ice cream can freeze very hard. A small amount of salt keeps the sweetness from tasting flat and makes the mint and chocolate clearer.

Mint Extract or Peppermint Extract

Mint extract gives the familiar ice cream-shop flavor. Peppermint extract tastes sharper and cooler, so it should be used carefully. Start with 1 teaspoon mint extract or 3/4 teaspoon peppermint extract, taste the chilled base, and add a little more only if you want a stronger mint flavor.

Too much extract is the fastest way to make homemade mint ice cream taste medicinal. You want refreshing, not mouthwash-like.

Vanilla Extract

Vanilla softens the mint and makes the base taste more rounded. One teaspoon is enough for the whole batch.

Chopped Chocolate

Use chopped semisweet or dark chocolate for the best everyday version. Large chocolate chips can freeze hard, while chopped chocolate gives smaller, thinner pieces that are easier to bite through.

For the main recipe, use 4 ounces / 115 grams chopped chocolate. If you love a finer chip texture, use the chocolate shard method below.

Optional Green Food Coloring

Green color is optional. It gives the ice cream the nostalgic mint chip look, but it does not change the flavor. Add 1 to 3 drops if you want a pale green scoop, or skip it for a natural white mint chip ice cream.

Mint Extract vs Peppermint Extract vs Fresh Mint

Your mint choice changes the whole personality of the ice cream. Mint extract gives you the familiar mint chip flavor most people expect, peppermint extract tastes colder and sharper, and fresh mint tastes softer, greener, and more herbal.

Mint option Flavor Best for Watch out for
Mint extract Classic, sweet, ice cream-shop style Easy homemade mint chocolate chip ice cream Strength varies by bottle
Peppermint extract Sharper, cooler, stronger Bold mint flavor Can taste medicinal if overused
Fresh mint leaves Herbal, natural, softer A fresher, more delicate mint ice cream Needs steeping and straining
Comparison board showing mint extract, peppermint extract, and fresh mint as flavor options for homemade mint chocolate chip ice cream.
Using mint extract is the easiest classic route; meanwhile, peppermint extract tastes cooler and sharper, while fresh mint gives a gentler herbal finish.

For the classic mint chip flavor most people expect, use mint extract. Peppermint extract gives a stronger cooling effect, so add it carefully. Fresh mint is best when you want a softer garden-fresh flavor and have extra time for steeping and chilling.

Fresh mint gives a beautiful flavor, but it usually will not make the ice cream bright green by itself. Add a small amount of food coloring separately if you want the classic green look.

Chocolate Chips vs Chopped Chocolate in Mint Ice Cream

Chocolate behaves differently once it is frozen. Regular chocolate chips are convenient, but they can become hard in ice cream. Chopped chocolate gives a better bite because the pieces are thinner and more irregular. Thin chocolate shards give the smoothest texture of all.

Chocolate type Texture in ice cream Best use
Mini chocolate chips Small, crisp, convenient Easiest classic choice
Regular chocolate chips Often too firm once frozen Better chopped lightly first
Chopped semisweet chocolate Uneven pieces with a better bite Best everyday choice
Chopped dark chocolate Cleaner flavor and less sweetness Best grown-up flavor
Melted chocolate shards Thin, crisp, quicker-melting pieces Best premium texture
Comparison of mini chips, regular chocolate chips, chopped semisweet chocolate, chopped dark chocolate, and melted chocolate shards for mint chip ice cream.
Instead of relying on large chips, use chopped chocolate or thin shards when you want chocolate pieces that stay easier to bite after freezing.
Best choice for most batches: Use chopped semisweet chocolate. It is easier than making shards, more pleasant than large frozen chips, and balanced enough for both kids and adults.

If you like the mint-and-chocolate pairing in baked desserts too, MasalaMonk’s double chocolate chip cookies include a mint chocolate variation that uses the same flavor logic in cookie form.

Easy Chocolate Shard Method

Melt 4 ounces / 115 grams semisweet or dark chocolate with 1 teaspoon neutral oil or coconut oil. Let it cool slightly so it is fluid but not hot. During the last 1 to 2 minutes of churning, drizzle the melted chocolate slowly into the moving ice cream. It will harden into thin, irregular shards.

You can skip this step and still get excellent ice cream. However, if you want the chocolate to feel thinner and more delicate, the shard method is worth the extra minute. This stracciatella-style approach is also used in more technical mint chip ice cream methods, where melted chocolate with a little oil is drizzled into the churned base for smoother pieces.

How to Make Mint Chocolate Chip Ice Cream in an Ice Cream Maker

The main method is simple, but the base needs to be cold. If your ice cream maker uses a freezer bowl, that bowl should be fully frozen before you begin. The base should also be chilled before churning. A warm base takes longer to churn and can freeze with a coarser texture.

If you are using a stand-mixer attachment, MasalaMonk’s guide to making ice cream with a KitchenAid mixer explains freezer-bowl timing, base chilling, and churning cues in more detail.

Step 1: Freeze the Ice Cream Maker Bowl

If your machine uses a freezer bowl, freeze it for at least 12 to 24 hours. It should be completely solid before you start.

Step 2: Make the Mint Ice Cream Base

Whisk the whole milk, sugar, salt, vanilla, and 1 teaspoon mint extract or 3/4 teaspoon peppermint extract until the sugar dissolves. Stir in the heavy cream. Add 1 to 3 drops of green food coloring now if you want green mint chocolate chip ice cream.

Step 3: Chill the Base

Cover and chill the base for at least 2 to 4 hours. Overnight is even better. A very cold base churns faster and gives a smoother texture.

Step 4: Churn Until Thick

Pour the chilled base into the ice cream maker and churn according to your machine’s instructions. Most home machines take about 20 to 25 minutes. The churned ice cream should mound on a spoon but still look soft; it will not be scoop-shop firm until after the freezer set.

Step 5: Add the Chocolate Late

Add chopped chocolate during the last 5 minutes of churning. If you are using the melted chocolate shard method, drizzle the chocolate in during the last 1 to 2 minutes instead.

Do not add the chocolate too early: Let the base thicken first, then add chopped chocolate during the last 5 minutes of churning. This keeps the pieces evenly distributed without weighing down the texture.
Step-by-step guide showing mint chocolate chip ice cream being whisked, chilled, churned, mixed with chocolate, and frozen until scoopable.
Chill first, churn second, and add the chocolate near the end; this order keeps the base smooth and the chocolate evenly distributed.

Step 6: Freeze Until Scoopable

Transfer the churned ice cream to an airtight freezer container. Press parchment paper directly onto the surface, cover, and freeze for 2 to 4 hours. The ice cream will be soft right out of the machine and firmer after hardening in the freezer.

Texture Cues: Soft Serve First, Scoopable After Freezing

Texture cue: Right after churning, homemade ice cream usually looks like soft serve. That is normal. Extra freezer time turns it into scoopable ice cream.
Texture comparison showing mint chip ice cream as soft-serve after churning and firmer scoops after freezing.
Freshly churned mint chip ice cream should look like soft serve at first; after a freezer set, it becomes firm enough to scoop cleanly.

Recipe Card: Mint Chocolate Chip Ice Cream Recipe

Mint Chocolate Chip Ice Cream Recipe

This creamy homemade mint chocolate chip ice cream recipe uses an easy eggless base, mint extract or peppermint extract, and chopped chocolate for a smooth, scoopable mint chip ice cream you can repeat all summer.

Yield About 1.5 quarts / 6 cups
Servings 8 to 10
Prep Time 10 minutes
Churn Time 20 to 25 minutes
Chill Time 2 to 4 hours
Freeze Time 2 to 4 hours
Total Time About 4½ to 8½ hours
Method Ice cream maker
Difficulty Easy

Equipment

  • Ice cream maker
  • Mixing bowl
  • Whisk
  • Rubber spatula
  • Measuring cups and spoons
  • Airtight freezer container

Ingredients

  • 2 cups / 480 ml heavy cream
  • 1 cup / 240 ml whole milk
  • 3/4 cup / 150 g granulated sugar
  • 1/4 teaspoon fine salt
  • 1 teaspoon vanilla extract
  • 1 to 1 1/2 teaspoons mint extract, or 3/4 to 1 teaspoon peppermint extract
  • 4 oz / 115 g semisweet or dark chocolate, finely chopped
  • 1 to 3 drops green food coloring, optional

Instructions

  1. Freeze the bowl if needed. If your ice cream maker uses a freezer bowl, freeze it until fully solid, preferably overnight.
  2. Make the base. In a mixing bowl, whisk the whole milk, sugar, salt, vanilla, and 1 teaspoon mint extract or 3/4 teaspoon peppermint extract until the sugar dissolves.
  3. Add cream and color. Stir in the heavy cream. Add 1 to 3 drops green food coloring if you want green mint chocolate chip ice cream.
  4. Chill. Cover and refrigerate the base for at least 2 to 4 hours, or overnight for the smoothest texture.
  5. Taste and adjust. Taste the cold base. Add another 1/4 to 1/2 teaspoon mint extract, or a few drops more peppermint extract, only if you want stronger mint flavor.
  6. Churn. Pour the chilled base into the ice cream maker and churn for 20 to 25 minutes, or until thick like soft serve.
  7. Add chocolate. Add the chopped chocolate during the last 5 minutes of churning.
  8. Freeze. Transfer to an airtight container, press parchment onto the surface, cover, and freeze for 2 to 4 hours until scoopable.
  9. Serve. Let sit at room temperature for 5 to 10 minutes if the ice cream is very firm.

Notes

  • Increase extract gradually for stronger mint flavor. A large splash can quickly turn harsh.
  • Chopped chocolate gives a better frozen bite than large chocolate chips.
  • For chocolate shards, melt the chocolate with 1 teaspoon neutral oil and drizzle it into the ice cream during the last 1 to 2 minutes of churning.
  • For fresh mint ice cream, steep 1 to 2 packed cups / about 25 to 40 g fresh mint leaves in warm milk and cream for 30 to 60 minutes, strain, then chill and churn.
  • For no-churn mint chip ice cream, use the condensed milk and whipped cream method below.
  • You can make the ice cream 1 day ahead. Let it soften for 5 to 10 minutes before scooping if it freezes very firm.

No-Churn Mint Chocolate Chip Ice Cream Without an Ice Cream Maker

No ice cream maker? Use this no-churn version. It is sweeter than churned ice cream because sweetened condensed milk provides both sweetness and structure, but it is easy, creamy, and reliable. For a broader no-machine method, MasalaMonk’s homemade ice cream without a machine guide is a useful companion.

No-churn mint chip ice cream is usually sweeter and slightly denser than churned ice cream. For the cleanest texture, whip the cream to firm peaks and fold gently so you keep as much air in the mixture as possible.

If you want to see how condensed milk and whipped cream behave in a fruit-based no-churn dessert, the homemade mango ice cream recipe is a good comparison.

No-Churn Ingredients

  • 2 cups / 480 ml cold heavy cream
  • 1 can / 14 oz / 397 g sweetened condensed milk
  • 1 teaspoon mint extract or 3/4 teaspoon peppermint extract
  • 1 teaspoon vanilla extract, optional
  • 3/4 to 1 cup chopped semisweet or dark chocolate
  • 1 to 3 drops green food coloring, optional

No-Churn Method

  1. Chill a mixing bowl for 15 to 20 minutes if your kitchen is warm.
  2. Whip the cold heavy cream until stiff peaks form.
  3. In another bowl, stir together the condensed milk, mint extract or peppermint extract, vanilla, and optional green color.
  4. Fold the whipped cream into the condensed milk mixture gently.
  5. Fold in the chopped chocolate.
  6. Spread into a 9×5-inch loaf pan.
  7. Cover and freeze for at least 6 hours, or overnight.
No-churn mint chocolate chip ice cream process with whipped cream, condensed milk, chopped chocolate, and a loaf pan.
When you do not have an ice cream maker, whipped cream and condensed milk create a no-churn mint chocolate chip ice cream that freezes into a creamy scoop.

Fresh Mint Chocolate Chip Ice Cream Variation

Fresh mint gives the ice cream a softer, more herbal flavor. It tastes less like candy and more like real mint leaves. The trade-off is time: you need to steep the mint in warm dairy, strain it out, and then chill the base before churning.

How to Use Fresh Mint

  1. Warm the milk and cream until steaming, not boiling.
  2. Add 1 to 2 packed cups / about 25 to 40 g fresh mint leaves.
  3. Remove from heat, cover, and steep for 30 to 60 minutes.
  4. Strain very well, pressing gently on the leaves.
  5. Whisk in sugar, salt, and vanilla while the dairy is still slightly warm.
  6. Chill completely before churning.
  7. Add chopped chocolate near the end of churning.

Use more leaves and steep longer for a stronger fresh mint flavor. A shorter steep tastes gentler. Fresh mint ice cream usually stays pale, so add a little green color only if you want the classic look.

Fresh mint flavor varies: Young, fragrant mint leaves may need only 30 minutes of steeping, while milder bunches may need closer to 60 minutes. If the chilled base tastes too gentle, add 1/4 teaspoon mint extract before churning.
Fresh mint chocolate chip ice cream process showing mint leaves, warm cream and milk, straining, churning, and a finished scoop.
For fresh mint flavor, steep the leaves in warm dairy and strain them out before churning so the ice cream tastes clean rather than grassy.

Green vs White Mint Chocolate Chip Ice Cream

Mint chocolate chip ice cream can be green, white, or somewhere in between. Green is the nostalgic ice cream-shop version. White or pale mint chip looks more natural and often means no food coloring was used.

Green and white mint chocolate chip ice cream scoops compared side by side, both with chocolate pieces and mint garnish.
Green mint chip ice cream gives the nostalgic look; however, a white or pale mint base can taste just as minty without added color.

Color does not decide flavor. Mint extract, peppermint extract, fresh mint, sugar, dairy, and chocolate do that. If you want green ice cream, use only a few drops of color. Too much color can make the ice cream look artificial even when the flavor is balanced.

Custard-Style Mint Chocolate Chip Ice Cream Upgrade

The main recipe is eggless because it is easier and still creamy. Choose this route if you want a richer, silkier scoop and do not mind cooking the base. Stay with the eggless version if you want the easiest repeatable batch.

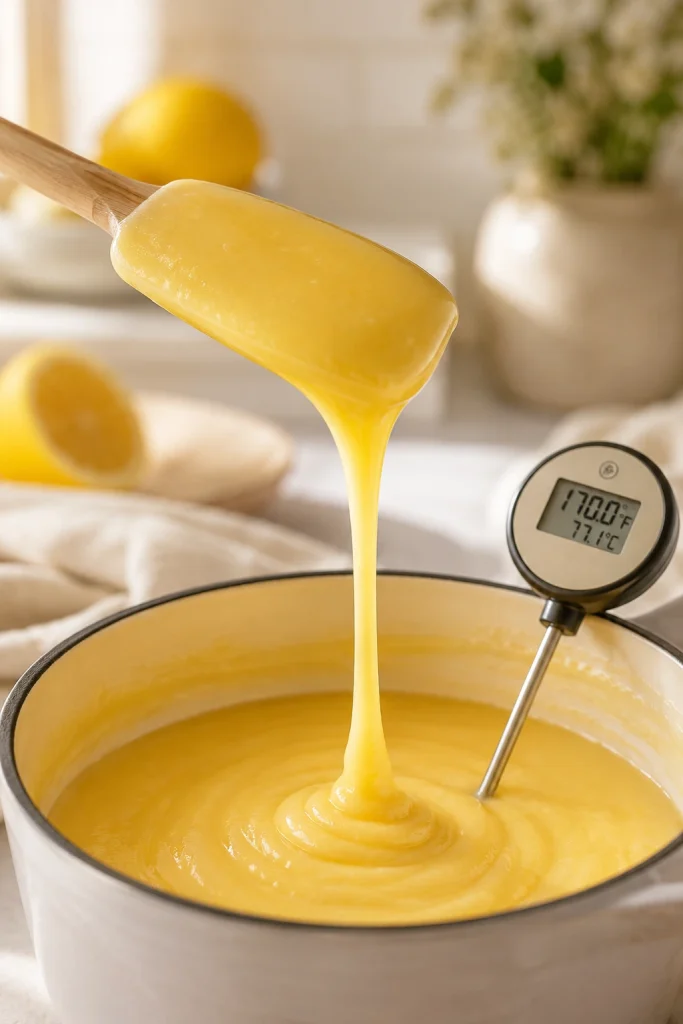
Use 4 large egg yolks for the batch. Warm the milk, cream, sugar, and salt in a saucepan until steaming. Whisk the yolks in a separate bowl, slowly stream in some of the hot dairy while whisking, then pour the yolk mixture back into the saucepan. Cook gently, stirring constantly, until the custard thickens enough to coat a spoon and reaches about 170°F / 77°C. Do not boil it.

Strain the custard, stir in vanilla and mint extract, then chill until very cold, preferably overnight. Churn as usual and add the chocolate near the end. This approach takes more attention than the eggless recipe, but the texture is richer and silkier.

Use the custard upgrade when: you want a richer, more premium texture and do not mind cooking the base. Use the eggless version when you want the easiest reliable homemade mint chip ice cream.
Eggless and custard-style mint chip ice cream compared with a cold base, cooked custard, egg yolks, and a 170°F temperature cue.
Choose the eggless base when you want the easiest batch, or use the custard-style method when you want a richer, silkier mint chocolate chip ice cream.

Ice Cream Maker, Cuisinart, KitchenAid, and Ninja Creami Notes

This recipe is written for a standard home ice cream maker, including freezer-bowl machines and stand-mixer ice cream attachments. The same base works well in most Cuisinart-style ice cream makers and KitchenAid freezer-bowl attachments as long as the bowl is fully frozen and the base is very cold before churning.

Equipment comparison for mint chip ice cream showing Cuisinart, KitchenAid, and Ninja Creami methods with churned and frozen pint steps.
Cuisinart and KitchenAid-style machines churn a cold liquid base, whereas the Ninja Creami works from a frozen pint and mixes chocolate in later.

Cuisinart Mint Chocolate Chip Ice Cream

For a Cuisinart ice cream maker, freeze the bowl until completely solid, chill the mint ice cream base for at least 2 to 4 hours, then churn for about 20 to 30 minutes. Add the chopped chocolate during the last 5 minutes, when the ice cream is already thick like soft serve.

KitchenAid Ice Cream Maker Attachment

For a KitchenAid ice cream maker attachment, freeze the bowl for at least 15 to 24 hours, start the mixer on the recommended low speed before pouring in the base, and churn until the ice cream thickens. Add chocolate near the end so it distributes evenly without sinking.

Ninja Creami Mint Chocolate Chip Ice Cream

The Ninja Creami method is different from a traditional ice cream maker. Instead of churning a liquid base, you freeze the base solid in a Creami pint for 24 hours, process it in the machine, then add chocolate using the Mix-In function. If the texture looks crumbly after the first spin, add a small splash of milk and use Re-Spin before adding the chocolate.

Do not pour this churned ice cream maker base directly into a Ninja Creami and expect the exact same timing. Use a Creami-specific base if you want the most reliable result, because the machine is designed around frozen pints rather than traditional churning.

How to Keep Homemade Mint Chocolate Chip Ice Cream Creamy

Homemade ice cream is sensitive to temperature and balance. A good base needs enough fat, enough sugar, and enough chilling time. The way you store it matters too, because air exposure can create ice crystals on the surface.

  • Use whole milk and heavy cream. Lower-fat dairy makes icier ice cream.
  • Keep enough sugar in the base. Sugar helps the finished ice cream stay scoopable.
  • Chill the base fully. A cold base churns smoother and faster.
  • Stop at soft-serve texture. Over-churning can make the texture heavy.
  • Store airtight. Press parchment onto the surface before covering.
  • Soften before scooping. Five to ten minutes at room temperature usually helps.
Guide to keeping homemade mint chocolate chip ice cream creamy, with tips for fat, sugar, chilling, soft-serve texture, airtight storage, and softening.
To keep homemade ice cream creamy, use enough fat and sugar, chill the base fully, stop at soft-serve texture, and store it airtight.

Troubleshooting Mint Chocolate Chip Ice Cream

Most mint chocolate chip ice cream problems come from one of four things: the base was not cold enough, the extract was too strong, the chocolate pieces were too large, or the sugar and fat balance was changed too much.

Problem Likely cause Fix
Tastes like toothpaste Too much peppermint extract Start lower next time and increase only after tasting the cold base.
Not minty enough Mild extract or a very rich base Increase the extract by 1/4 teaspoon before churning.
Too icy Lean dairy, warm base, or heavy sugar reduction Whole milk, heavy cream, full chilling, and balanced sugar give a smoother freeze.
Too hard to scoop Very cold freezer or reduced sugar Rest the container for 5 to 10 minutes before scooping.
Chocolate pieces are too hard Large chips or thick chunks Chopped chocolate, mini chips, or thin chocolate shards are easier to bite.
Color looks too artificial Too much green coloring One to three drops are usually enough for a pale green scoop.
Ice cream did not thicken Bowl or base not cold enough Freeze the bowl longer and chill the base overnight before trying again.
Troubleshooting board for mint chocolate chip ice cream with problems such as toothpaste taste, weak mint, icy texture, hard chocolate, artificial color, and not thickening.
If the texture, color, chocolate, or mint flavor feels off, check four things first: base temperature, extract amount, chocolate size, and sugar balance.

How to Store Homemade Mint Chocolate Chip Ice Cream

Transfer the churned ice cream to a shallow airtight freezer container. Press parchment paper or plastic wrap directly onto the surface, then cover with the lid. This helps reduce ice crystals on top.

Homemade mint chocolate chip ice cream tastes best within 2 to 4 weeks. It will still be safe longer if frozen properly, but the texture is usually best when eaten fresh. FoodSafety.gov notes that freezer storage guidance is about quality, while foods kept continuously at 0°F / -18°C or below remain safe. You can read their cold food storage chart for the broader freezer guidance.

You can make this ice cream a day ahead. Churn it, freeze it overnight, then let it soften for 5 to 10 minutes before serving.

Storage guide for mint chocolate chip ice cream showing an airtight container, parchment on the surface, 2 to 4 week quality guidance, make-ahead note, and softening time.
Press parchment onto the surface before freezing; as a result, the ice cream is better protected from air exposure and surface ice crystals.

Mint Chocolate Chip Ice Cream Variations

Mint Ice Cream Without Chocolate Chips

For plain mint ice cream, simply leave out the chopped chocolate. The same base works well without chips, especially if you want a smoother scoop or plan to serve it with brownies, chocolate sauce, or cookies on the side. Taste the chilled base before churning and keep the mint balanced, because there will be no chocolate to soften a sharp extract flavor.

Plain mint ice cream without chocolate chips served as smooth pale green scoops in a bowl with mint garnish.
For a smoother plain mint ice cream, skip the chocolate pieces and serve the scoop with brownies, cookies, or chocolate sauce on the side.
Need the base recipe? Jump to recipe card · Main method · All variations

Mint Oreo Ice Cream

For a cookies-and-cream style mint ice cream, replace half of the chopped chocolate with crushed chocolate sandwich cookies. Add the cookie pieces during the last 2 to 3 minutes of churning so they stay visible and do not completely dissolve into the base. For a stronger cookie flavor, sprinkle a few extra crushed cookies over the top before the final freezer set.

Mint ice cream with crushed chocolate sandwich cookie pieces mixed through the scoops, with broken cookies nearby.
Fold crushed chocolate sandwich cookies in near the end of churning so this mint Oreo ice cream keeps visible cookie pieces and a creamy base.
Need the base recipe? Jump to recipe card · Main method · All variations

Mint Chocolate Chip Ice Cream Cake Shortcut

For a quick mint chip ice cream cake, press an Oreo-style crumb crust into a loaf pan or small square pan, spread softened mint chocolate chip ice cream over it, add a thin layer of fudge or ganache, and freeze until firm. This is not the full cake method, but it is an easy way to turn one batch into a make-ahead dessert.

Mint chip ice cream cake shortcut with a dark crumb crust, mint chocolate chip ice cream layer, and smooth chocolate fudge layer.
A crumb crust, softened mint chip ice cream, and thin fudge layer turn the same batch into an easy make-ahead ice cream cake shortcut.
Need the base recipe? Jump to recipe card · Main method · All variations

Mint Chocolate Chip Milkshake

Turn a few scoops into a thick milkshake by blending 3 cups mint chocolate chip ice cream with 1 to 1 1/2 cups cold milk. Use 1 cup milk for a spoon-thick shake, 1 1/4 cups for a classic thick milkshake, and 1 1/2 cups for a more sippable texture.

A spoon of chocolate syrup makes the milkshake more dessert-like. For a homemade topping, this 3-minute homemade chocolate syrup works well for drizzling over scoops or blending into the shake.

Tall glass of mint chocolate chip milkshake with chocolate flecks, chocolate drizzle, and a striped straw.
Use 1 cup milk for a spoon-thick mint chocolate chip milkshake, then add more only if you want a lighter, more sippable texture.
Need the base recipe? Jump to recipe card · Main method · All variations

Mint Chocolate Chip Sundae

For a quick sundae, scoop the ice cream into chilled bowls and top with chocolate syrup, whipped cream, extra chopped chocolate, or crushed cookies. Keep the toppings simple so the mint flavor still comes through.

Mint chocolate chip sundae in a glass dish with chocolate syrup, whipped cream, chopped chocolate, and mint garnish.
Keep toppings simple here; chocolate syrup, whipped cream, and a few chopped pieces should support the mint chip ice cream rather than hide it.
Need the base recipe? Jump to recipe card · Main method · All variations

Dairy-Free Mint Chocolate Chip Ice Cream

Use a rich dairy-free base such as full-fat coconut milk or cashew cream, and choose dairy-free dark chocolate. Coconut-based versions can taste slightly tropical, which works well with dark chocolate but changes the classic flavor. If you are building a dairy-free dessert table, MasalaMonk’s avocado chocolate mousse is another creamy chocolate dessert with vegan and keto-friendly options.

Dairy-free mint chocolate chip ice cream with a coconut milk or cashew base, dark chocolate pieces, and a mint garnish.
A rich coconut milk or cashew base can make dairy-free mint chocolate chip ice cream creamy, although the flavor will be different from dairy.
Need the base recipe? Jump to recipe card · Main method · All variations

Sugar-Free, Keto, Low-Calorie, or Protein Mint Chocolate Chip Ice Cream

Sugar-free, keto, low-calorie, and protein versions need a different base because sugar, fat, and protein all affect how ice cream freezes. Do not simply remove the sugar from this recipe; sugar helps homemade ice cream stay scoopable. For a low-carb or keto batch, start with a tested low-carb ice cream formula, then add mint extract and finely chopped sugar-free dark chocolate.

For a higher-protein version, use MasalaMonk’s protein ice cream recipe as the base and adapt it with mint extract plus chopped dark chocolate. If you only want a slightly lighter batch, reduce the sugar modestly in the main recipe rather than cutting it heavily. Too little sugar usually means a harder, icier scoop.

Guide to sugar-free, keto, low-calorie, and protein mint chip ice cream options with notes to use a tested base, avoid simply cutting sugar, and adjust mint carefully.
Sugar-free, keto, low-calorie, and protein versions need their own tested bases because changing sugar, fat, or protein changes how ice cream freezes.
Need the base recipe? Jump to recipe card · Main method · All variations

Final Serving Texture

Final serving of homemade mint chocolate chip ice cream with creamy pale green scoops, chocolate pieces, mint garnish, and a spoon nearby.
After the base is chilled, churned, and frozen, the final scoop should hold its shape, taste cleanly minty, and soften within a few minutes for easy serving.
Ready to make it? Jump to recipe card · Main method · Recipe guide

FAQs

Is mint chocolate chip ice cream made with mint or peppermint?

Either one works. Mint extract usually gives a more classic ice cream-shop flavor, while peppermint extract tastes sharper and stronger. Start with a small amount because peppermint extract can quickly become too intense.

How do I make mint chocolate chip ice cream without an ice cream maker?

Use the no-churn version with whipped heavy cream and sweetened condensed milk. It will be sweeter and a little denser than churned ice cream, but it still freezes into a creamy scoopable dessert.

Why is my mint chocolate chip ice cream white instead of green?

Mint ice cream is not naturally bright green. The green color usually comes from food coloring. Without coloring, homemade mint chocolate chip ice cream will usually be white, cream-colored, or very pale green.

How do I use fresh mint instead of mint extract?

Warm the milk and cream, add fresh mint leaves, steep for 30 to 60 minutes, strain well, then chill and churn the base. Fresh mint gives a softer herbal flavor, while extract gives the classic mint chip taste.

When should I add chocolate chips to ice cream?

Add chopped chocolate or mini chocolate chips during the last 5 minutes of churning. This keeps the pieces evenly distributed without interfering with the base as it thickens.

Why are my chocolate chips too hard in homemade ice cream?

Large chocolate chips freeze very firm. Chopped chocolate, mini chips, or melted chocolate drizzled into the ice cream near the end of churning will give you thinner pieces that are easier to bite.

Is this mint chocolate chip ice cream eggless?

The main recipe is eggless. It uses heavy cream, whole milk, sugar, mint extract, vanilla, salt, and chopped chocolate.

How do I make dairy-free mint chocolate chip ice cream?

Use a rich dairy-free base such as full-fat coconut milk or cashew cream, then choose dairy-free chocolate. The flavor will not be exactly the same as classic dairy mint chip ice cream, but it can still be creamy and satisfying.

How long does homemade mint chocolate chip ice cream last?

It tastes best within 2 to 4 weeks. Store it in an airtight freezer container with parchment pressed against the surface to reduce ice crystals.

What chocolate is best for mint chocolate chip ice cream?

Semisweet or dark chocolate works best because it balances the sweetness of the mint ice cream. Chopped chocolate gives a better frozen texture than large chocolate chips.

Posted on 7 Comments

No Bake Cheesecake Recipe: Easy, Creamy, and Set Perfectly Without an Oven

Finished no-bake cheesecake with one slice removed, creamy white filling, golden crumb crust, berries, and lemon zest

A good no bake cheesecake recipe should be creamy, simple, and reliable. It should set properly in the refrigerator, slice cleanly, and taste like real cheesecake instead of sweet cream cheese in a crust.

This version uses a buttery graham cracker or digestive biscuit crust, a smooth cream cheese filling, cold whipped cream for lift, and enough chill time for clean slices. Because the filling is not baked, the recipe depends on the right dairy, the right mixing method, and patience in the refrigerator.

More importantly, this guide shows you how to control the details that usually make or break a no bake cheesecake: which cream cheese to use, how stiff to whip the cream, how long to chill it, when gelatin helps, and what to do if the filling feels too soft.

Why this version works: This no bake cheesecake sets without gelatin, works with graham crackers or digestive biscuits, slices cleanly after an overnight chill, and includes optional fixes for hot weather, condensed milk shortcuts, fruit toppings, and softer cream cheese.

Table of Contents

Use this guide to make the cheesecake first, then troubleshoot, choose toppings, try variations, store it, and serve it confidently.

Quick Answer: How Do You Make No Bake Cheesecake?

No bake cheesecake is made by pressing a graham cracker or digestive biscuit crust into a springform pan, spreading in a cream cheese and whipped cream filling, and chilling it until firm. Since there is no oven involved, this cheesecake recipe depends on full-fat cream cheese, cream whipped to stiff peaks, gentle folding, and at least 6 to 8 hours in the refrigerator.

Think of it this way: the crust chills, the filling firms in the refrigerator, and the oven stays off completely.

In other words, no bake cheesecake does not set like baked cheesecake. It does not use eggs or oven heat. Instead, it sets through the firmness of cream cheese, the structure of whipped cream, and enough time in the refrigerator.

No Bake Cheesecake at a Glance

Before you start, check the pan size, cream type, and chill time. Since this cheesecake sets without baking, these details decide how cleanly it slices.

Detail Best Choice
Pan 9-inch / 23cm springform pan
Crust Graham cracker crust or digestive biscuit crust
Cream cheese Full-fat block-style cream cheese if available
Cream Cold heavy cream or whipping cream that can whip to stiff peaks
Chill time 6 to 8 hours minimum
Best texture Overnight / about 12 hours
Gelatin Optional, not required for the main recipe
Oven Not needed
Eggs Not used
Quick-reference board for no-bake cheesecake with pan size, chill time, no oven, no eggs, and optional gelatin notes
Before mixing, check the pan and chill time; as a result, you will know whether you are making a sliceable cheesecake or a softer cup-style dessert.

Why This No Bake Cheesecake Recipe Works

Because this cheesecake recipe skips baking, each part has a job. The cream cheese gives the filling body, the whipped cream makes it lighter, and the long chill helps everything firm into a sliceable cheesecake.

The crust is also designed to hold. Since the crust chills instead of baking, fine crumbs, melted butter, and brown sugar create a compact base that firms in the refrigerator. As a result, the cheesecake slices cleanly instead of crumbling apart as soon as you lift a piece.

Finally, the recipe keeps the flavor classic. Sour cream or thick Greek yogurt adds tang, lemon juice brightens the filling, vanilla rounds it out, and a small pinch of salt keeps the sweetness from feeling flat.

Best result: Make this cheesecake the day before serving. It may slice after 6 to 8 hours, but the cleanest texture usually comes after an overnight chill.
Texture target: The finished cheesecake should be creamy, cold-set, and sliceable, not rubbery or runny. The slice should hold its shape but still feel soft when you cut through it.
Close-up slice of no-bake cheesecake showing smooth filling, golden crust, berries, lemon zest, and a fork
Use the side of the slice as your texture check; the filling should look smooth and cold-set, while the crust should stay compact underneath.

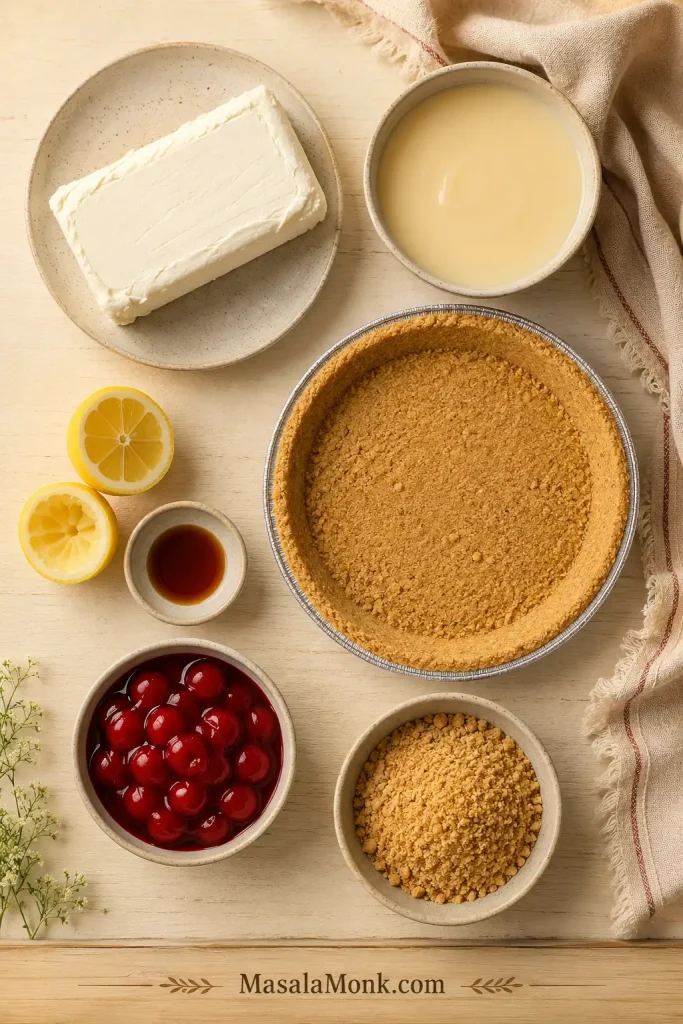
Ingredients for No Bake Cheesecake

The ingredients matter more in this cheesecake recipe because there is no oven heat to set a loose filling. Therefore, the cream cheese, cream, and crust crumbs need to be chosen carefully.

You can make the crust with graham crackers or digestive biscuits. Graham crackers give a classic American cheesecake flavor, while digestive biscuits are a practical substitute in many places where graham crackers are harder to find.

Ingredients for no-bake cheesecake including cream cheese, whipping cream, powdered sugar, lemon, vanilla, butter, graham crackers, and digestive biscuits
Because this filling is not baked, the ingredient texture matters: thick cream cheese, cold cream, and powdered sugar give the cheesecake a smoother set.

For the Crust

Graham Cracker Crust

  • 2 cups / 240g graham cracker crumbs
  • 1/3 cup / 67g brown sugar
  • 1/2 cup / 113g unsalted butter, melted
  • Pinch of salt, optional

Digestive Biscuit Crust

  • 270g digestive biscuit crumbs
  • 40 to 70g brown sugar, depending on biscuit sweetness
  • 1/2 cup / 113g unsalted butter, melted
  • Pinch of salt, optional

For the Filling

  • 1 1/4 cups / 300ml cold heavy cream or whipping cream
  • 24 oz / 678g full-fat cream cheese, softened
  • 3/4 to 1 cup / 90–120g powdered sugar or icing sugar, to taste
  • 1/4 cup / 60g sour cream or thick Greek yogurt
  • 2 teaspoons fresh lemon juice
  • 1 teaspoon vanilla extract
  • Pinch of salt, optional

Graham Cracker Crust or Digestive Biscuit Crust?

Use graham crackers if you want the classic cheesecake crust flavor. However, digestive biscuits work well when they are easier to find. Both can hold the filling as long as the crumbs are fine, the butter is evenly mixed, and the crust is chilled before filling.

Because digestive biscuits vary more in sweetness and texture, adjust the sugar slightly. If your biscuits are already quite sweet, use the lower amount of brown sugar.

Graham cracker crumbs and digestive biscuit crumbs compared for a no-bake cheesecake crust
Graham crackers give the familiar American-style crust; however, digestive biscuits can create the same firm base when the crumbs are fine and evenly buttered.

If you like chilled desserts with a biscuit base, you may also like this Banoffee Pie Recipe, which uses a similar no bake base-and-chill idea with bananas, caramel, and whipped cream.

How the Crust Mixture Should Feel

Before pressing the crust into the pan, squeeze a small handful of the crumb mixture. It should feel like damp sand and hold together when pinched.

Crust Texture What It Means Fix
Too dry Crumbs scatter and will not hold when squeezed. Add 1 tablespoon melted butter at a time, then test again.
Just right Mixture feels like damp sand and holds together when pinched. Press firmly into the pan and chill before filling.
Too wet Mixture feels greasy, heavy, or paste-like. Add more crumbs until the texture loosens and no butter pools.
Three cheesecake crust mixtures showing too dry, just right, and too wet crumb textures
The crumb mixture should clump like damp sand; if it scatters, add butter, but if it looks greasy, balance it with more crumbs.

Important Ingredient Notes

  • Cream cheese: Full-fat block-style cream cheese is best because it firms well when chilled. Spreadable cream cheese can be softer and may make the filling looser.
  • Cream: Use cold cream that can whip to stiff peaks. Otherwise, the filling has no eggs or oven heat to help it set later.
  • Sugar: Powdered sugar or icing sugar dissolves smoothly and helps the filling stay creamy. Use 90g for a lighter, tangier cheesecake or 120g for a sweeter dessert-style cheesecake.
  • Sour cream or Greek yogurt: Use thick, full-fat versions. Thin yogurt can loosen the filling.
  • Lemon juice: This is for brightness and balance, not a strong lemon flavor.
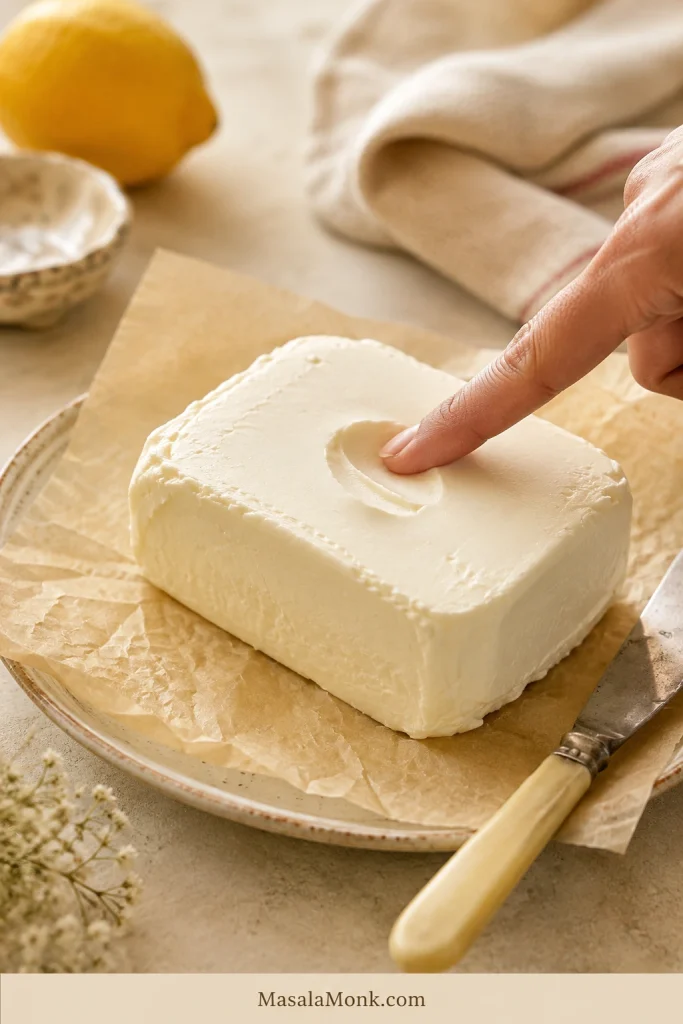
Ingredient note for non-US kitchens: If block-style cream cheese is not available, use the thickest full-fat cream cheese you can find and avoid very soft spreadable versions when possible. If your cream cheese is loose, chill the filling longer or use the optional gelatin method for extra stability. Use whipping cream that can hold stiff peaks; low-fat fresh cream or table cream may not set the cheesecake properly. If using yogurt, choose thick Greek yogurt or hung curd, not thin regular curd.
Cream cheese comparison showing thick full-fat cream cheese, softer spreadable cream cheese, and loose cream cheese
Choose the thickest full-fat cream cheese you can find, since softer tubs can make a no-bake cheesecake filling harder to firm up.

Equipment You Need

You do not need complicated equipment for this cheesecake recipe. However, a springform pan and mixer make the texture much easier to control because the filling sets in the refrigerator rather than the oven.

  • 9-inch / 23cm springform pan
  • Electric hand mixer or stand mixer
  • Mixing bowls
  • Spatula
  • Food processor or rolling pin for crushing crumbs
  • Flat-bottom measuring cup or glass for pressing the crust
  • Offset spatula or back of a spoon for smoothing the filling
  • Sharp knife for slicing

A springform pan makes the cleanest cheesecake because the sides release easily. If you do not have one, you can use a deep pie dish, but the slices will be harder to remove neatly.

How to Make No Bake Cheesecake

The method is simple: make the crust, whip the cream, beat the cream cheese, fold, fill, and chill. Since this cheesecake sets in the refrigerator, the final texture depends on proper mixing and enough cold time.

Step-by-step guide showing crust, whipped cream, cream cheese, folding, filling, chilling, and slicing
The sequence matters: prepare the crust first, build the filling gently, and then let the refrigerator do the setting work.

Step 1: Make the Crust

First, crush the graham crackers or digestive biscuits into fine crumbs. Then mix the crumbs with brown sugar, salt if using, and melted butter until the mixture looks like damp sand.

Next, tip the mixture into a 9-inch springform pan. Press it firmly into the base and slightly up the sides. A flat-bottom measuring cup helps you compact the crust evenly without using too much pressure.

After that, refrigerate or freeze the crust while you make the filling. This helps the butter firm up and gives the base a better hold.

Step 2: Whip the Cream

Add the cold heavy cream or whipping cream to a chilled mixing bowl. Then beat until stiff peaks form. The cream should hold its shape when you lift the beaters.

Do not stop at soft peaks. Since the filling is not baked, stiff whipped cream is one of the main things that helps it hold its shape.

Mixer beaters lifting whipped cream into stiff peaks in a bowl
Stiff peaks should stand tall on the beaters; otherwise, the whipped cream will add lightness but not enough structure.

Step 3: Beat the Cream Cheese

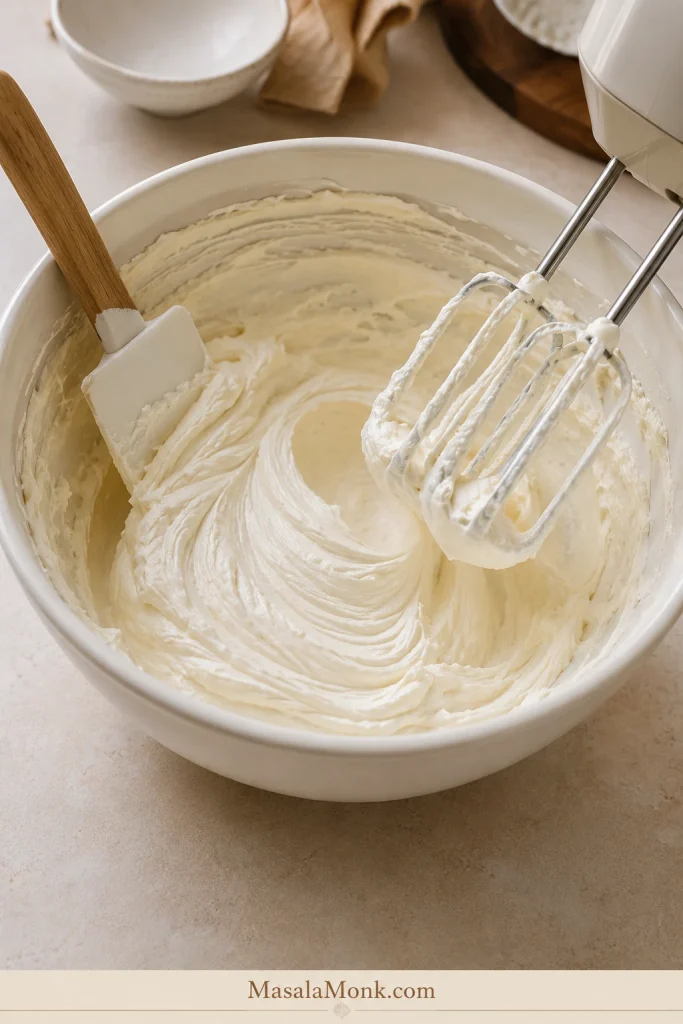
Meanwhile, beat the softened cream cheese in a separate bowl until smooth and creamy. Add the powdered sugar, sour cream or Greek yogurt, lemon juice, vanilla, and salt. Then beat until smooth.

If the cream cheese is too cold, the filling may become lumpy. If it is too warm, the filling can become loose. Therefore, softened but still cool cream cheese is ideal.

Cream cheese mixture being beaten smooth with powdered sugar, lemon, vanilla, and dairy ingredients nearby
Beat the cream cheese base until it is smooth first; once whipped cream is folded in, small lumps are much harder to remove.

Step 4: Fold the Filling

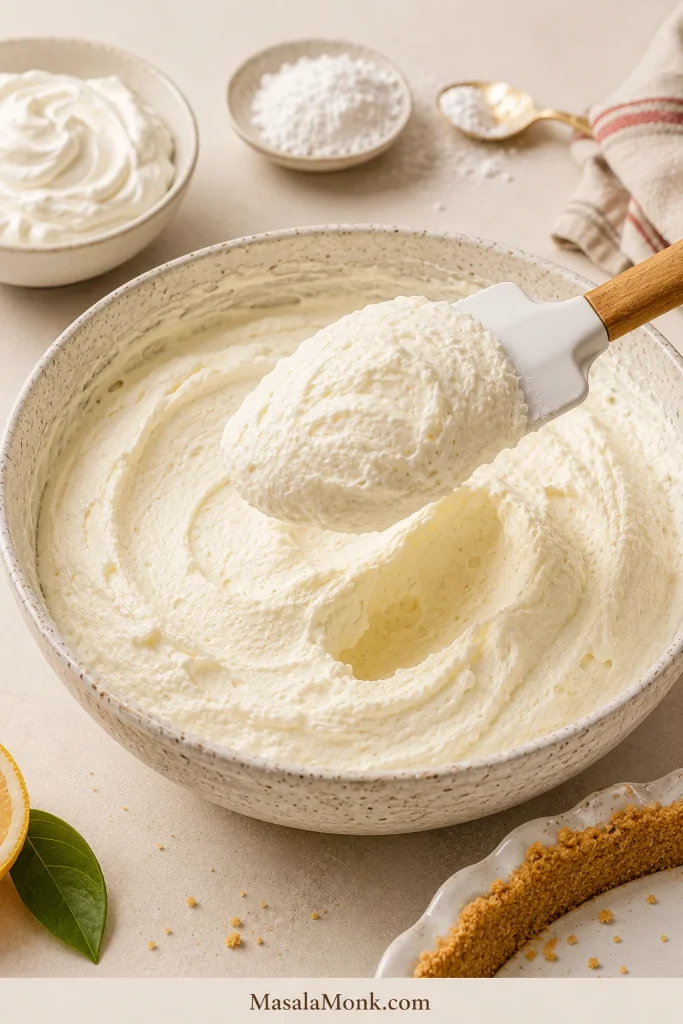
Add the whipped cream to the cream cheese mixture in two additions. Then fold gently with a spatula until no large streaks remain.

Avoid beating aggressively at this stage. Instead, keep the air in the whipped cream because that air helps the cheesecake feel light while still setting properly.

Thick cheesecake filling being folded with a spatula in a glass mixing bowl
Fold slowly instead of beating hard, so the filling keeps its air while the cream cheese still gives it enough body.

Step 5: Fill the Crust

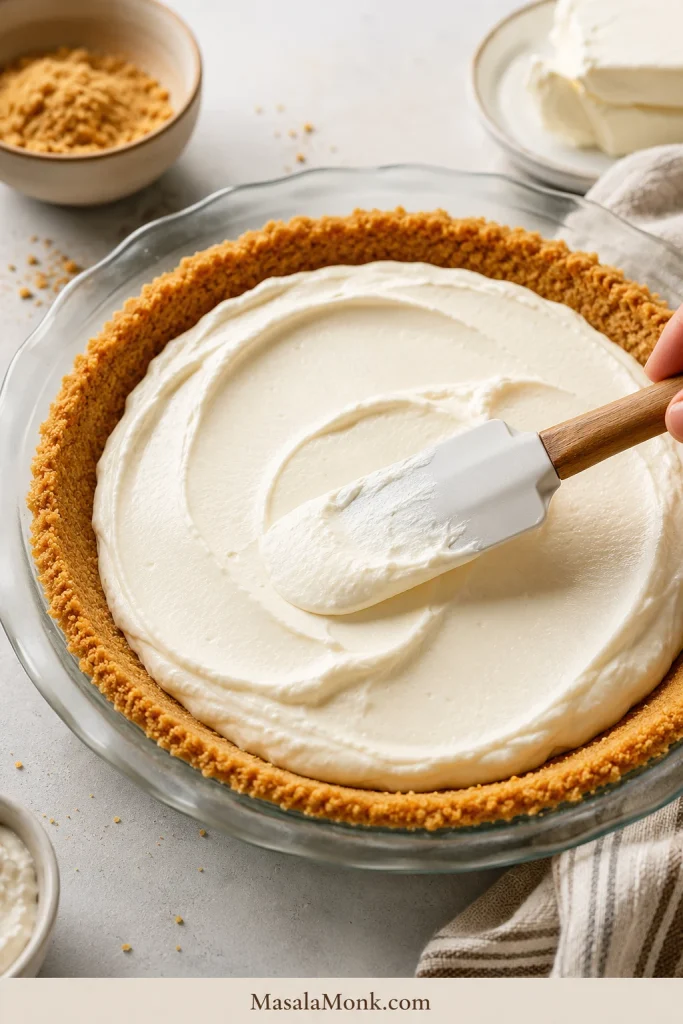
Spoon the filling into the chilled crust. Next, smooth the top with an offset spatula or the back of a spoon. Tap the pan very gently on the counter once or twice to remove large air pockets, but do not overdo it.

Thick cheesecake filling spread into a golden crumb crust in a springform pan with an offset spatula
When the filling goes into the crust, it should mound and spread rather than pour; that thickness is a good sign before chilling.

Step 6: Chill Until Set

Cover the cheesecake loosely and refrigerate for at least 6 to 8 hours. The filling needs a long chill because it sets without eggs or oven heat. For the cleanest slices, chill it overnight.

Also, do not rely on the freezer as the only setting method. Freezing can make the cheesecake firm temporarily, but the best texture comes from a proper refrigerator chill.

Step 7: Slice and Serve

Once chilled, run a thin knife around the edge of the cheesecake before releasing the springform ring. For clean slices, dip a sharp knife in hot water, wipe it dry, cut one slice, and then wipe the knife again before the next cut.

Finally, serve the cheesecake cold. It can sit out briefly while serving, but it should not be left at room temperature for long, especially in warm weather.

Final serving scene with a full no-bake cheesecake, a plated slice, berries, lemon zest, and a fork
Once the cheesecake has fully chilled, serve it cold so the filling stays creamy, the crust holds neatly, and each slice looks polished.

No Bake Cheesecake Recipe

This creamy no bake cheesecake recipe uses a graham cracker or digestive biscuit crust, full-fat cream cheese, whipped cream, and a 6 to 8 hour refrigerator chill, preferably overnight, for clean, sliceable pieces without an oven or eggs.

Yield10–12 slices
Prep Time30 minutes
Cook Time0 minutes
Chill Time6–8 hours
Total Time6 hours 30 minutes to overnight
Pan9-inch / 23cm springform
Best TextureOvernight chill
MethodNo oven, no eggs

Ingredients

For a Graham Cracker Crust

  • 2 cups / 240g graham cracker crumbs
  • 1/3 cup / 67g brown sugar
  • 1/2 cup / 113g unsalted butter, melted
  • Pinch of salt, optional

Or, for a Digestive Biscuit Crust

  • 270g digestive biscuit crumbs
  • 40 to 70g brown sugar, depending on sweetness
  • 1/2 cup / 113g unsalted butter, melted
  • Pinch of salt, optional

For the Filling

  • 1 1/4 cups / 300ml cold heavy cream or whipping cream
  • 24 oz / 678g full-fat cream cheese, softened
  • 3/4 to 1 cup / 90–120g powdered sugar or icing sugar, to taste
  • 1/4 cup / 60g sour cream or thick Greek yogurt
  • 2 teaspoons fresh lemon juice
  • 1 teaspoon vanilla extract
  • Pinch of salt, optional

Instructions

  1. Make the crust. Mix the crumbs, brown sugar, melted butter, and salt until evenly moistened.
  2. Press into the pan. Press the mixture firmly into the base of a 9-inch springform pan and slightly up the sides. Then chill or freeze while you make the filling.
  3. Whip the cream. Beat the cold cream until stiff peaks form. Set aside.
  4. Beat the cream cheese. In another bowl, beat softened cream cheese until smooth. Add powdered sugar, sour cream or Greek yogurt, lemon juice, vanilla, and salt. Beat until creamy.
  5. Fold gently. Fold the whipped cream into the cream cheese mixture in two additions. Stop once combined.
  6. Fill the crust. Spoon the filling into the chilled crust and smooth the top.
  7. Chill. Cover and refrigerate for at least 6 to 8 hours, preferably overnight.
  8. Slice. Release the springform ring, then slice with a hot, wiped knife for clean pieces.

Notes

  • Use full-fat cream cheese for the best set.
  • Use 90g powdered sugar for a lighter, tangier cheesecake or 120g for a sweeter dessert-style cheesecake.
  • Do not use low-fat cream or cream that cannot whip to stiff peaks.
  • For best results, chill the cheesecake overnight because the filling needs time to firm without baking.
  • For a firmer party cheesecake, see the gelatin option below.
  • For cheesecake cups or jars, the same filling can be chilled for a shorter time because it does not need to slice cleanly.
Saveable no-bake cheesecake recipe card with yield, prep time, chill time, ingredients, and method steps
Use the recipe card for the quick method, then rely on the texture cues for the crust, filling, and chill time as you work.

What Makes No Bake Cheesecake Set?

A cheesecake recipe without baking sets through chilled dairy and structure, not through eggs or oven heat. Since there are no eggs and no oven heat to firm the filling, you need the right ingredients and enough chill time.

For another tested baking reference, King Arthur Baking’s no bake cheesecake also uses cream cheese, sour cream, cold heavy cream, and confectioners’ sugar for a creamy refrigerator-set filling.

Use Full-Fat Cream Cheese

Cream cheese is the backbone of the filling. Full-fat cream cheese firms in the refrigerator and gives the cheesecake its body. Spreadable or tub-style cream cheese may work in some cases, but it is often softer and can make the filling less stable.

Whip Cold Cream to Stiff Peaks

Cold cream whips better and holds more structure. Stiff peaks mean the cream stands up when you lift the beaters. If the cream is only softly whipped, the cheesecake may taste good but slice poorly.

Fold Gently

Once the cream is whipped, fold it into the cream cheese mixture with a spatula. Beating too hard can knock out the air and make the filling heavier or looser.

Chill Long Enough

The refrigerator does the final work. First, the crust firms. Then the cream cheese tightens. Finally, the filling becomes sliceable. A short chill may work for cups or jars, but a full cheesecake needs more time.

Freezing Is Not the Same as Setting

The freezer can make a soft cheesecake feel firm quickly, but that firmness is temporary. Once the cheesecake thaws, a poorly set filling may soften again. For the best texture, chill the cheesecake properly in the refrigerator and use the freezer only for storage or brief firming before serving.

Setting guide showing cream cheese, stiff whipped cream, long chill time, and a clean no-bake cheesecake slice
No-bake cheesecake sets through thickness, trapped air, and cold time; therefore, cream cheese, whipped cream, and chilling all have to work together.

How Long Does No Bake Cheesecake Need to Chill?

For this cheesecake recipe, skipping the oven does not mean skipping the wait. The filling still needs at least 6 to 8 hours in the refrigerator, and overnight is better if you want neat slices for serving.

Chill Time Result
2–3 hours Usually too soft for clean slices
4 hours May work for cups or jars, but often soft for a full cheesecake
6–8 hours Sliceable for most cheesecakes
Overnight / about 12 hours Best clean slices and firmest creamy texture
Freezer only Temporary firmness, not a substitute for proper setting
No-bake cheesecake chill time guide showing soft, cup-ready, sliceable, and overnight stages
A short chill is fine for jars, while a full cheesecake needs more time because the whole filling must firm from edge to center.

How to Cut Clean Slices

For clean slices, chill the cheesecake overnight and serve it cold. Then run a thin knife around the edge before releasing the springform ring.

Next, dip a sharp knife in hot water, wipe it dry, and cut one slice at a time. Wipe the knife between slices. This small step makes a big difference, especially with a creamy no bake cheesecake filling.

Clean slice of no-bake cheesecake being cut with a knife, showing smooth filling, berries, and crumb crust
After the cheesecake is fully cold, a warm wiped knife helps each piece release neatly instead of dragging cream through the cut.

No Bake Cheesecake Filling

If you only need the filling from this cheesecake recipe, no bake cups, jars, parfaits, pie crusts, cake layers, cupcakes, and simple chilled desserts are all good options. However, the texture you need depends on how you plan to serve it.

Cheesecake filling used in cups, jars, cake layers, cupcakes, pie crust, and parfaits
The same no-bake cheesecake filling can become jars, cupcakes, parfaits, or cake layers; however, each use needs a slightly different firmness.

For a Whole Cheesecake

Use the recipe as written. A whole cheesecake needs enough structure to slice, so do not reduce the cream cheese or shorten the chill time too much.

For Cheesecake Cups or Jars

The same filling works well in small cups or jars. Because you are not slicing it, the chill time can be shorter. Plan on at least 2 to 4 hours, depending on the size of the cups.

For Cake Filling or Piping

For cake layers or piping, the filling should be thicker. Therefore, use full-fat cream cheese, whip the cream to stiff peaks, reduce loose ingredients like sour cream or yogurt slightly, and chill the filling before using it. Powdered sugar also helps the filling feel smoother.

How to Make Cheesecake Filling Thicker

  • Use full-fat cream cheese.
  • Whip the cream separately to stiff peaks.
  • Chill the filling before piping or spreading.
  • Avoid watery fruit puree in the filling.
  • Reduce sour cream or yogurt slightly if needed.
  • Use the gelatin option if you need extra stability.
Cheesecake filling texture guide showing loose, thicker, and pipeable stages with fixing tips
For piping or layer cakes, aim for the pipeable stage rather than the spoonable stage, and chill the filling before using it.

Best Toppings for No Bake Cheesecake

The safest way to flavor a no bake cheesecake is to keep the filling stable and add most of the fruit, compote, curd, or sauce on top. That way, the cheesecake still slices cleanly, while the topping adds color, freshness, and extra flavor.

Topping guide with strawberry, blueberry, mango, lemon curd, ganache, and salted caramel for no-bake cheesecake
Toppings are the safest place to add bold flavor, because fruit, curd, ganache, and caramel can sit on top without loosening the filling.

If using a cooked fruit topping, cool it completely before spooning it over the cheesecake. Warm topping can soften the filling and make the surface loose.

Cooked berry topping cooling beside a no-bake cheesecake before being spooned on top
Let cooked fruit topping cool completely first; otherwise, even a well-set cheesecake can soften where the warm sauce touches it.
Topping Best Use
Strawberry topping Best classic fruit topping; use thick cooked sauce or fresh berries added close to serving.
Blueberry topping Works well as a cooked compote because it stays glossy and spoonable without making the filling loose.
Mango topping Use thick mango puree, mango compote, or diced mango. Avoid thin puree unless it is reduced or stabilized.
Lemon curd Best for a sharper lemon cheesecake flavor without adding too much juice to the filling.
Chocolate ganache Best when you want a richer dessert-style cheesecake. Let the ganache cool slightly before spreading.
Caramel sauce Use lightly because the cheesecake is already sweet. Salted caramel usually balances better.

No Bake Cheesecake Variations

Once the classic version makes sense, the variations become much easier. You can keep the same basic cheesecake and adjust it for fewer ingredients, a sweeter shortcut, a firmer slice, or a brighter lemon flavor.

Four no-bake cheesecake variations showing classic, 3-ingredient, condensed milk, and lemon versions
Start with the classic version to learn the texture, then use the variations when you want a shortcut, a sweeter filling, or brighter lemon flavor.

3 Ingredient No Bake Cheesecake

A 3 ingredient cheesecake recipe can also be no bake, but it usually trades some flavor balance and slice quality for speed. Most versions use cream cheese, sweetened condensed milk, and either whipped cream or lemon juice.

Use this shortcut when speed matters more than perfect texture. However, use the main recipe when you want a more balanced cheesecake flavor, a lighter filling, and cleaner slices.

Simple 3 ingredient formula:

  • 16 oz / 450g cream cheese, softened
  • 14 oz / 397g sweetened condensed milk
  • 3/4 cup / 180ml cold heavy cream, whipped to stiff peaks
Three-ingredient no-bake cheesecake guide showing cream cheese, condensed milk, whipped cream, and a finished jar dessert
A 3-ingredient no-bake cheesecake is useful when speed matters; however, it is usually sweeter and softer than the full classic recipe.

Optional additions like vanilla or lemon juice make the flavor better, even if they technically take it beyond three ingredients.

No Bake Cheesecake with Condensed Milk

Condensed milk makes no bake cheesecake sweeter, creamier, and easier to mix. It is a useful shortcut, but it gives a different texture from the classic whipped cream version.

If you want to compare a classic condensed milk method, Martha Stewart’s no bake cheesecake uses cream cheese, sweetened condensed milk, vanilla, and lemon in a press-in graham cracker crust.

For a condensed milk version, use:

  • 16 oz / 450g cream cheese, softened
  • 14 oz / 397g sweetened condensed milk
  • 2 to 4 tablespoons fresh lemon juice
  • 1 teaspoon vanilla extract
  • Prepared crust of choice
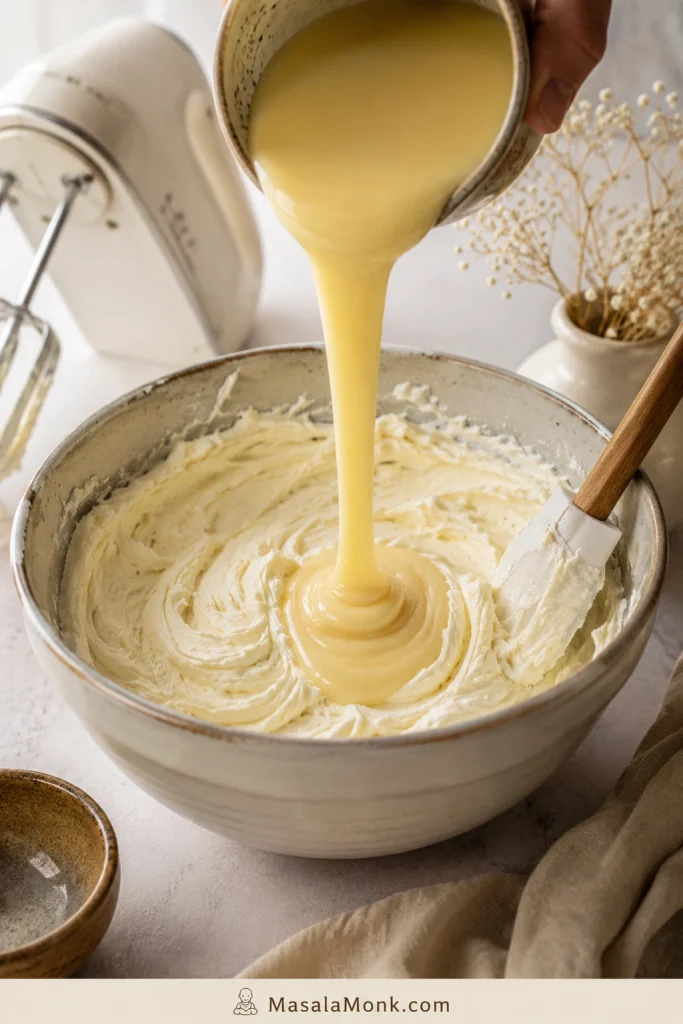
Condensed milk being poured into cream cheese mixture for no-bake cheesecake with lemon and vanilla nearby
Condensed milk creates a creamy shortcut filling, but lemon and proper chilling are still important to balance sweetness and improve the set.

Lemon juice is not only for flavor here. It balances the sweetness and helps the filling thicken. For cleaner slices, chill a condensed milk cheesecake overnight.

Gelatin vs No Gelatin in No Bake Cheesecake

This main recipe does not require gelatin. A no-gelatin cheesecake is creamy, simple, and easier for most home cooks. However, optional gelatin can help if you want very firm slices, need the cheesecake to sit out a little longer, or are serving it in warm weather.

Still, gelatin should be optional, not the default, because the main recipe is designed to set cleanly with full-fat cream cheese, stiff whipped cream, and enough refrigerator time.

As written, the main recipe is eggless and gelatin-free. If you add gelatin, it will no longer be suitable for readers avoiding animal-derived gelatin unless you use a tested vegetarian setting method. Agar-agar behaves differently from gelatin, so do not swap it 1:1 without following a tested agar method.

Optional gelatin method:

  • Use 2 teaspoons unflavored gelatin.
  • Sprinkle it over 2 tablespoons cold water.
  • Let it bloom for 5 minutes.
  • Warm gently until dissolved.
  • Let it cool slightly, then mix it into the cream cheese base before folding in the whipped cream.

Do not add hot gelatin to cold filling, and do not sprinkle dry gelatin directly into the cheesecake mixture. Both can cause clumps.

Two no-bake cheesecake slices compared side by side with labels for no gelatin, optional gelatin, chill time, and firmness
The main no-gelatin cheesecake stays creamy after a long chill, while optional gelatin is better when you need extra hold for heat or travel.

No Bake Lemon Cheesecake Variation

For a lemon no bake cheesecake, add the zest of 1 to 2 lemons and increase the lemon juice to 2 to 3 tablespoons. If the filling feels loose, reduce the sour cream or Greek yogurt slightly.

For stronger lemon flavor without weakening the filling, use lemon curd as a topping. Too much lemon juice inside the filling can make the cheesecake softer, so zest and topping are safer ways to build flavor.

No-bake lemon cheesecake slice with glossy lemon topping, lemon zest, mint, and golden crumb crust
Lemon curd gives stronger citrus flavor than extra lemon juice, so the cheesecake tastes brighter without making the filling too loose.
Fruit tip: For the safest set, add fruit as a topping after the cheesecake has chilled. Watery fruit puree mixed directly into the filling can make a no bake cheesecake soft unless the puree is reduced, thickened, or stabilized.

For a thicker cooked fruit topping idea, see this Apple Pie Filling Recipe. The same principle applies here: thick fruit works better than watery fruit.

More Easy Variations

Variation Best Approach
Berry no bake cheesecake Add berry topping after chilling instead of mixing watery puree into the filling. For a fruit cheesecake example, see this No-Bake Blueberry Cheesecake.
Mango no bake cheesecake Use a thick mango topping or swirl. Avoid thin puree unless it is reduced or stabilized.
Chocolate no bake cheesecake Fold in cooled melted chocolate or use a chocolate cookie crust.
Cheesecake cups Spoon crust and filling into cups or jars, then chill until set.
Cheesecake bars Use a square pan, line it with parchment, and chill overnight before slicing.
Mini no bake cheesecakes Use a muffin tin with liners and chill until firm.

For another easy no-oven dessert with a soft, chilled set, try this No-Bake Banana Pudding.

Why Your No Bake Cheesecake Didn’t Set

The Most Common Setting Problems

If your no bake cheesecake did not set, the problem is usually one of four things: soft cream cheese, under-whipped cream, too much liquid, or not enough chill time. Fortunately, most issues are easy to understand and prevent next time.

If the filling feels loose, remember that there is no baking step to firm extra liquid later. Therefore, ingredient thickness, whipped cream structure, and enough chilling matter more than they would in a baked dessert.

Troubleshooting board showing soft cream cheese, under-whipped cream, too much liquid, and not enough chill time
When a no-bake cheesecake will not set, check the structure points first: cream cheese thickness, whipped cream peaks, liquid level, and chill time.

Quick Fixes for Texture, Crust, and Slicing Issues

Problem Likely Reason What to Do
Filling is runny Cream was not whipped to stiff peaks, or too much liquid was added. Chill longer. Next time, whip the cream separately and avoid loose yogurt or watery fruit puree.
Cheesecake is soft after chilling It did not chill long enough. Refrigerate overnight. No bake cheesecake needs time to firm properly.
Filling is lumpy Cream cheese was too cold. Use softened cream cheese and beat it smooth before adding the other ingredients.
Slice collapses Cheesecake is under-set or too warm. Chill longer and serve cold. Also, use a hot, wiped knife for cutting.
Crust falls apart Crumbs were too coarse or not packed firmly enough. Use fine crumbs and press the crust firmly with a flat-bottom cup.
Crust is greasy Too much butter for the crumb type. Add more crumbs next time or reduce the butter slightly if using very buttery biscuits.
Filling tastes too sweet Condensed milk, sweet toppings, or too much sugar. Add lemon, salt, or use the classic recipe instead of a condensed milk version.
Fruit made the filling loose Watery puree was mixed directly into the filling. Use fruit as a topping or reduce puree before adding it.
Too soft in hot weather No stabilizer and a warm serving environment. Use the optional gelatin method and keep the cheesecake cold until serving.
Troubleshooting guide with runny filling, lumpy filling, crumbly crust, greasy crust, soft slice, and hot-weather softness
Most problems point back to one of three things: ingredient texture, mixing method, or temperature control during chilling and serving.

When to Serve It in Cups Instead

If the cheesecake tastes good but will not slice cleanly, do not waste it. Spoon the filling into cups or jars, add crumbs and topping, and serve it as a no bake cheesecake dessert instead. It will still taste good, even if it is too soft for neat slices.

No-bake cheesecake cups and jars with crumb layers, creamy filling, berries, lemon zest, and spoons
Cups and jars are a smart option when you want easier serving, smaller portions, or a softer cheesecake filling that does not need to slice.

Storage and Freezing

This cheesecake recipe stores well because the no bake filling improves after a long refrigerator chill. As a result, it is a strong make-ahead dessert for parties, holidays, and warm-weather meals.

Refrigerator

Store no bake cheesecake covered in the refrigerator for 4 to 5 days. However, the texture is usually best during the first 2 to 3 days, while the crust is still firm and the filling tastes fresh.

Freezer

You can freeze no bake cheesecake whole or in slices. First, chill it until firm. Then wrap it tightly and freeze for up to 2 months. Finally, thaw overnight in the refrigerator before serving.

Serving

Serve no bake cheesecake cold. In warm weather, keep it refrigerated until close to serving time. If the cheesecake needs to sit out for a party, the optional gelatin version will hold more firmly than the no-gelatin version.

For outdoor serving, summer parties, or very warm kitchens, keep the cheesecake chilled until the last possible moment. If it needs to sit out longer, use the optional gelatin method or serve the filling in cups instead of slicing a full cheesecake.

Storage guide showing covered cheesecake in the refrigerator, frozen slices, wrapped slices, and thawed cheesecake
Store the cheesecake cold and covered; for longer keeping, wrap individual slices well and freeze them as make-ahead portions.

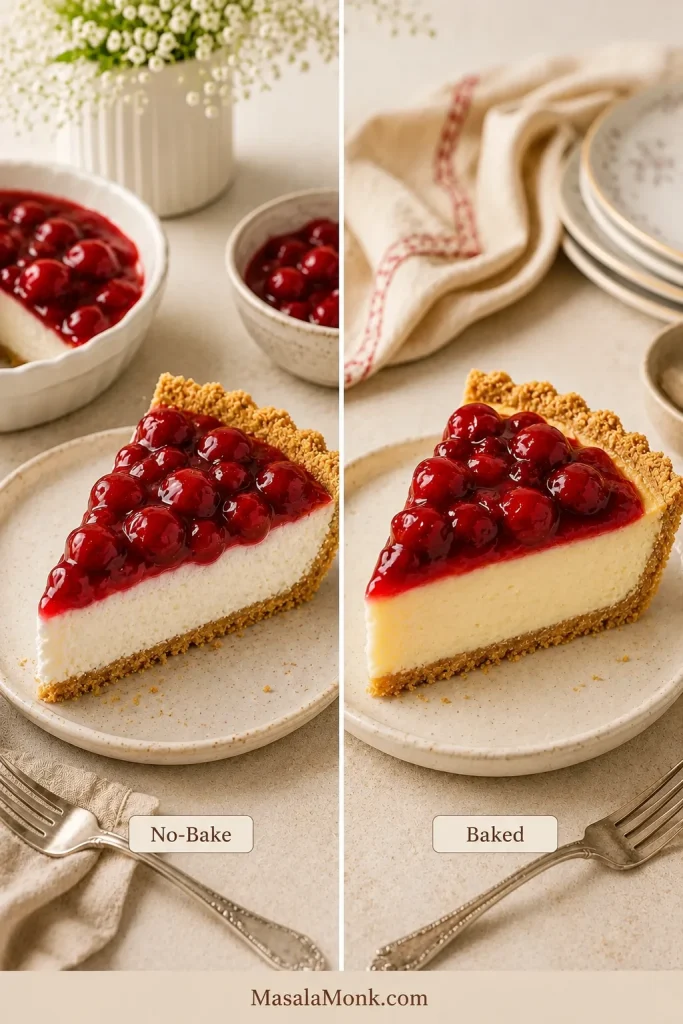
No Bake Cheesecake vs Baked Cheesecake

No bake cheesecake and baked cheesecake are both creamy desserts, but they set in different ways. Instead of eggs and oven heat, this refrigerator version firms with cream cheese, whipped cream, and chill time. By contrast, baked cheesecake usually relies on eggs and a low oven to set the filling.

No Bake Cheesecake Baked Cheesecake
No oven needed Uses oven heat
No eggs in this recipe Usually made with eggs
Sets in the refrigerator Sets while baking and then chilling
Lighter, creamier texture Denser, richer texture
Beginner-friendly More technical
No-bake cheesecake and baked cheesecake slices compared, showing chilled creamy texture and denser oven-set texture
No-bake cheesecake is chilled and creamy, while baked cheesecake is denser and oven-set; therefore, they need different methods and expectations.

Do not bake this no bake cheesecake filling. It is designed to set in the refrigerator, not in the oven.

If you are working with baked pies instead of refrigerator desserts, this Apple Pie Crust Recipe explains how a baked crust behaves differently from a no bake crumb crust.

FAQs

What makes this cheesecake recipe reliable without baking?

This cheesecake recipe works without baking because it uses full-fat cream cheese, whipped cream, a firm crumb crust, and enough refrigerator time to set cleanly.

Is this no bake cheesecake eggless?

It is eggless because the filling sets in the refrigerator instead of baking with eggs. The main recipe is also gelatin-free, so it works well for readers who want a creamy cheesecake without eggs or gelatin.

How does no bake cheesecake set without gelatin?

Full-fat cream cheese, stiff whipped cream, and enough refrigerator time give the filling structure. Gelatin is optional for a firmer slice or extra stability in warm weather, but it is not required for the main recipe.

Why did my no bake cheesecake not set?

The most common reasons are under-whipped cream, soft or spreadable cream cheese, too much liquid, watery fruit puree, or not enough chill time. Therefore, chill it overnight if it feels soft, and next time use full-fat cream cheese and cream whipped to stiff peaks.

How long does no bake cheesecake need to chill?

It needs at least 6 to 8 hours in the refrigerator. Overnight, or about 12 hours, gives the cleanest slices and best texture.

What can I use instead of graham crackers?

Digestive biscuits work well for a no bake cheesecake crust. Use about 270g digestive biscuit crumbs with 113g melted butter and 40 to 70g brown sugar, depending on how sweet the biscuits are.

Which cream works best for no bake cheesecake?

Cold heavy cream or whipping cream that can hold stiff peaks works best. Very low-fat cream will not give the same structure and may make the filling too soft.

Is whipped topping okay here?

Whipped topping works as a shortcut, but the filling will taste sweeter, lighter, and less classic than a version made with freshly whipped cream. For the best cheesecake flavor and a cleaner slice, use cold cream whipped to stiff peaks.

How does condensed milk change no bake cheesecake?

Condensed milk makes the filling sweeter, creamier, and easier to mix. It is useful for shortcut versions, but the classic recipe gives a more balanced flavor and usually slices more cleanly.

What is the best way to freeze no bake cheesecake?

First, chill the cheesecake until firm. Then wrap it tightly and freeze it whole or in slices for up to 2 months. Thaw overnight in the refrigerator before serving.

How should I use only the cheesecake filling?

The filling works in cups, jars, parfaits, cake layers, cupcakes, or pie crusts. For piping or cake filling, keep it thick, cold, and stable by using full-fat cream cheese and stiff whipped cream.

How do I get clean slices?

Chill the cheesecake overnight, serve it cold, and use a sharp knife dipped in hot water and wiped dry between cuts.

Once you understand the setting logic, no bake cheesecake becomes much easier to control. Keep the cream cheese full-fat, whip the cream properly, give the cheesecake enough time in the refrigerator, and use the troubleshooting table whenever the texture needs adjusting.

Posted on 2 Comments

Banoffee Pie Recipe

Whole Banoffee Pie with a clean slice showing biscuit base, caramel, bananas, whipped cream, and chocolate shavings.

A good banoffee pie recipe should give you everything people love about this classic dessert: a buttery biscuit base, thick caramel, fresh bananas, cool whipped cream, and slices that actually hold together. This version keeps the method easy and mostly no-bake, while giving you the texture tips you need to avoid a runny, messy pie.

Even better, this is a no-bake Banoffee pie unless you choose to bake the crust for a firmer slice. So, if you love chilled banana desserts like no-bake banana pudding, this is the richer banana-toffee version: less spoonable pudding, more dramatic layered dessert.

This recipe for banoffee pie is especially useful if you want the classic flavor but do not want to guess your way through the caramel, crust, bananas, or cream. The trick is getting each layer to behave before the next one goes on: firm base, thick caramel, fresh bananas, and stable cream.

Done well, Banoffee Pie tastes like cold caramel cream, fresh banana, and buttery biscuit in one forkful. Done badly, it can slide apart before it reaches the plate. This version is built to give you the first result, not the second.

Although the layers look impressive, the actual work is simple: crush, press, spread, slice, whip, and chill.

It is the kind of dessert that looks like you worked harder than you did, which makes it especially useful for parties, family dinners, birthdays, and make-ahead dessert tables.

Clean slice of Banoffee Pie on a plate with visible biscuit base, caramel, banana layer, and whipped cream.
Because the caramel is thick and the pie is properly chilled, the slice stays creamy and generous without collapsing on the plate.

Banoffee Pie at a Glance

Best pan9-inch / 23cm pie dish or tart tin
BaseDigestives, graham crackers, or Marie biscuits
CaramelThick dulce de leche or thick caramel
Chill time2 1/2 hours minimum, 4 hours best

This recipe keeps banoffee pie simple: a biscuit base, thick caramel, firm bananas, and whipped cream. For the cleanest slices, use thick caramel, chill the base first, and add the bananas close to serving.

Banoffee Pie at-a-glance guide showing pan size, thick caramel, firm bananas, and 2 to 4 hour chill time.
If you want the quick version, remember this: a 9-inch pan, thick caramel, firm bananas, and a 2–4 hour chill make this no-bake Banoffee Pie much easier to slice.

Quick Answer: What Is Banoffee Pie?

Banoffee Pie is a banana-and-toffee dessert made with a base, a thick caramel or toffee layer, sliced bananas, and whipped cream. Most modern versions use a biscuit base, although older versions may use pastry. The name comes from banana and toffee, which is why you may also see it written as Banoffi Pie.

The classic flavor is simple but powerful: buttery base, deep caramel, fresh banana, cool cream, and a little chocolate or cocoa on top. Since the dessert is chilled and layered, it feels impressive without needing a complicated baking method. Better still, each part can be prepared calmly, so the recipe is much easier than it looks.

If you enjoy the story behind classic desserts, the original Banoffi pie story is a lovely read because it comes from Ian Dowding, one of the people associated with the dessert’s creation.

Is Banoffee Pie the Same as Banoffee Pudding?

Banoffee Pie is the classic name, but you may also see people search for Banoffee pudding or Banoffee dessert because the dish is chilled, creamy, and layered. In British usage, “pudding” can also mean dessert in a general sense. For most home cooks, though, a Banoffee pudding recipe usually points to the same banana-toffee idea: a base, caramel, bananas, and cream.

Why This Banoffee Pie Works

This banoffee pie works because the recipe solves the problems that usually make the dessert disappointing: a crumbly base, loose caramel, browning bananas, soft cream, and messy slices. Each layer has a job, and the method keeps those layers distinct.

  • The base is sturdy but not greasy. A balanced biscuit-to-butter ratio gives the pie enough structure without making the crust heavy.
  • The caramel layer is thick. Dulce de leche, thick caramel, or homemade condensed milk toffee holds much better than thin caramel sauce.
  • The bananas stay fresh. Firm ripe bananas slice cleanly and release less liquid than overripe bananas.
  • The cream is whipped to the right stage. Medium or medium-firm peaks hold better than loose cream but still taste soft and fresh.
  • The chilling plan is practical. First, you chill the base. After that, you chill the finished pie so it cuts neatly.

Most importantly, this recipe is less about difficult technique and more about timing. Once the base is cold, the caramel is thick, and the cream is properly whipped, you get a pie that tastes rich and homemade but still holds together when you cut it.

Banoffee Pie Ingredients

The ingredients are simple, but this recipe for banoffee pie depends on a few small choices: biscuit texture, caramel thickness, banana ripeness, and cold cream all matter.

Banoffee Pie ingredients including biscuits, butter, caramel, bananas, cream, icing sugar, vanilla, and chocolate.
The ingredients look simple, but each one has a job: biscuits build structure, caramel gives body, bananas add freshness, and whipped cream keeps the dessert light.

For example, a thin caramel sauce may taste good, but it will not hold like thick dulce de leche or cooked condensed milk toffee. Similarly, very soft bananas may be sweet, yet they can make the filling wet and unstable.

What to Use in the US, UK, and India

Banoffee Pie travels well across kitchens, but ingredient names change from country to country. Use this quick guide before you shop.

Layer US Option UK Option Common India Option
Base Graham crackers Digestive biscuits Digestive biscuits or Marie biscuits
Caramel Dulce de leche Thick caramel or dulce de leche Dulce de leche, milk caramel, or condensed milk toffee
Cream Heavy cream Double cream or whipping cream Whipping cream; avoid low-fat table cream unless it whips reliably
Pan 9-inch pie dish 23cm loose-bottom tart tin 8–9 inch tart tin or springform pan
Ingredient swaps for Banoffee Pie in the US, UK, and India, including biscuits, cream, and caramel options.
Since ingredient names change by country, this Banoffee Pie guide helps you swap graham crackers, digestives, Marie biscuits, heavy cream, double cream, and whipping cream with confidence.

You may also see Brazilian-style Banoffee recipes call dulce de leche doce de leite, while a Maizena-style biscuit base may replace digestives or graham crackers. Either way, the idea is still the same: a crumb base, thick milk caramel, bananas, and cream.

Biscuits or Graham Crackers

Digestive biscuits give Banoffee Pie the most classic biscuit-base flavor. Graham crackers work well for a US-style crust, while Marie biscuits are lighter and easy to find in many Indian kitchens. For a richer variation, Biscoff or Lotus biscuits add a spiced caramel flavor. However, they also make the dessert sweeter, so skip extra sugar in the base if you use them.

Butter and Salt

Melted butter binds the crumbs so the base holds together after chilling. A pinch of salt is just as important because Banoffee pie has several sweet layers. Without salt, the base can taste flat and the caramel can feel too heavy.

Caramel, Dulce de Leche, or Condensed Milk Toffee

The caramel layer must be thick and spreadable. Dulce de leche is the easiest reliable option. Thick canned caramel can also work. However, thin caramel sauce should not be used as the main filling because it can make the pie runny.

If you keep condensed milk for quick pantry desserts, you may also like MasalaMonk’s guide to sweetened condensed milk fudge. For this pie, though, the condensed milk needs to become a thick toffee-style layer before it goes into the crust.

Bananas

Use firm ripe bananas. They should be yellow and sweet, but not mushy. Green bananas taste starchy, while overripe bananas can release too much moisture and make the pie harder to slice.

Cream

Use heavy cream, whipping cream, or double cream. Also, make sure the cream is cold before whipping. Canned spray cream is not ideal for the main recipe because it softens quickly and does not give the same clean finish.

Best Biscuit Base for Banoffee Pie

For this banoffee pie, the recipe works best with a biscuit base that is firm enough to hold caramel and bananas, but not so hard that it breaks when sliced. A good rule of thumb is 220g biscuits, 110g melted butter, and a pinch of salt.

First, crush the biscuits finely. Then, mix them with melted butter until the crumbs look like damp sand. After that, press the mixture into the base and sides of the tin. A flat-bottomed measuring cup or glass helps you level the crumbs neatly.

Biscuit crumb base being pressed into a tart tin with a flat-bottomed cup for Banoffee Pie.
The biscuit base should feel like damp sand before it is pressed; that way, it chills into a firm crust without turning greasy or rock-hard.

At this point, resist the urge to press too hard. Ideally, the base should be compact enough to hold, but still tender enough to cut with a fork.

Chill the base for at least 30 minutes before adding caramel. If you want a firmer slice, you can optionally bake the base for 8–10 minutes at 175°C / 350°F, then cool it completely before filling.

If you prefer a traditional pastry-style dessert instead of a crumb base, MasalaMonk’s apple pie crust recipe is the better starting point. Banoffee is usually easier as a biscuit-base pie, while apple pie dough needs cold butter, chilling, rolling, and baking.

Digestive Biscuits vs Graham Crackers vs Marie Biscuits vs Biscoff

Base Best For Watch-Out
Digestive biscuits Classic Banoffee base Usually balanced and sturdy
Graham crackers US-style pie crust Sweeter, so added sugar is often unnecessary
Marie biscuits Easy India option Lighter, so press well and add salt
Biscoff or Lotus biscuits Spiced caramel variation Sweeter and stronger flavored
Digestive biscuits, graham crackers, Marie biscuits, and Biscoff compared as Banoffee Pie base options.
Digestives give the most classic Banoffee Pie base, while graham crackers, Marie biscuits, and Biscoff each change the sweetness, crumb texture, and final flavor.

Dulce de Leche vs Caramel vs Condensed Milk Toffee

The caramel layer is where this banoffee pie recipe is worth slowing down. When the caramel is thick, the pie slices cleanly. When it is thin, the filling can slide, pool, and soak the crust.

Before you start layering, check the texture. For the cleanest slice, the caramel should spread like a thick filling, not pour like a dessert sauce.

Thick caramel being spread over a chilled biscuit base for Banoffee Pie.
Here is where the pie succeeds or fails: thick caramel should spread like a filling, not pour like a dessert sauce.
Option Use It? Best For Watch-Out
Thick dulce de leche Yes Easiest reliable pie Warm slightly if too stiff to spread
Thick canned caramel Yes Fast UK-style version Must be spreadable, not runny
Homemade condensed milk toffee Yes Best homemade flavor Stir constantly and cook gently
Thin caramel sauce No, not as filling Drizzle only Makes the pie runny
Boiled condensed milk can Avoid as main advice Old-school shortcut Use safer methods instead
Dulce de leche, thick caramel, homemade toffee, and thin caramel sauce compared for Banoffee Pie.
Dulce de leche, thick caramel, and homemade condensed milk toffee can all work well; however, thin caramel sauce is better saved for a light drizzle.

Easiest Option: Thick Dulce de Leche

Dulce de leche is the easiest option because it is already thick, creamy, and caramelized. Use about 397g / 14 oz for one 9-inch / 23cm pie. If it is too stiff to spread straight from the jar or can, warm it briefly until it loosens slightly.

Fast Option: Thick Ready Caramel

Thick ready caramel can work well, especially in a UK-style Banoffee Pie. The key word is thick. If the caramel pours like sauce, it is too loose for the main layer. Instead, save that kind of caramel for a final drizzle over the cream.

Homemade Option: Condensed Milk Toffee

For a homemade toffee layer, combine 397g sweetened condensed milk, 80g butter, and 80g brown sugar in a saucepan. Cook over low to medium-low heat, stirring constantly, for about 6–8 minutes, or until the mixture becomes thick, glossy, and spreadable.

Do not rush this step. High heat can scorch the sugar or make the mixture catch on the bottom of the pan. Once the toffee thickens, spread it into the chilled base and let it cool before adding bananas and cream.

Thick homemade condensed milk toffee in a saucepan with a spatula trail holding its shape.
Once condensed milk toffee looks glossy, thick, and spreadable, it is ready to hold its place in the Banoffee Pie instead of running into the biscuit base.

What Not to Use

Do not use thin caramel sauce as the main filling. It may look tempting at first, but it can run into the banana layer, soften the crust, and make the pie difficult to cut. If you have only a thin sauce, use it sparingly on top as a garnish.

Thick spreadable caramel compared with thin runny caramel sauce for Banoffee Pie.
A spreadable caramel layer gives this recipe for Banoffee Pie structure; on the other hand, a pourable sauce can soak the crust and make the filling slide.

Safety Note on Boiling Condensed Milk Cans

Some old Banoffee methods involve boiling unopened cans of condensed milk. For a home recipe, however, a safer approach is to use ready dulce de leche or make stovetop condensed milk toffee in a saucepan. Eagle Brand also says it does not recommend heating condensed milk in the can.

Best Bananas for Banoffee Pie

In this banoffee pie recipe, bananas should taste sweet but still behave like a clean layer. Choose fruit that is yellow with a few light speckles, not green and not soft enough for banana bread.

Banana ripeness guide for Banoffee Pie showing green, ripe but firm, and overripe bananas.
Ripe but firm bananas give the best balance because they taste sweet while still slicing cleanly and holding their shape under the cream.

Avoid green bananas because they taste starchy and flat. On the other hand, very dark, soft bananas can turn mushy under the cream and release extra moisture into the pie.

Slice the bananas about ¼ inch / 6mm thick. That way, you get a clear banana layer without making the pie bulky. If you prefer a chunkier banana layer, you can go up to 1cm, but thinner slices usually give cleaner pieces.

Banana slice thickness guide for Banoffee Pie showing 1/4 inch or 6 mm slices and a chunkier 1 cm slice.
Thinner banana slices layer more neatly, so the finished Banoffee Pie cuts cleaner and feels balanced in every bite.

If you need to assemble slightly ahead, use only a few drops of lemon juice and cover the bananas fully with cream. Otherwise, too much lemon juice can make the filling taste sharp.

Best Cream for Banoffee Pie

For clean slices, the cream should look billowy, not stiff and grainy. You want it thick enough to sit proudly on the pie, but still soft enough to melt into the caramel and bananas when you take a bite.

For most home cooks, cold heavy cream, whipping cream, or double cream works best. If the cream is too loose, the topping can slide. If it is overwhipped, it can taste heavy and look rough.

Whipped cream peak guide for Banoffee Pie showing soft peaks, medium peaks, medium-firm peaks, and overwhipped cream.
Medium to medium-firm peaks are the sweet spot for whipped cream: soft enough to taste fresh, yet stable enough to help the pie slice neatly.
Cream Stage What It Looks Like Best For
Soft peaks Falls gently from the whisk Spoonable desserts, not the cleanest slices
Medium peaks Holds shape but still looks smooth Best everyday Banoffee Pie topping
Medium-firm peaks Holds cleaner ridges without looking dry Best if the pie needs to hold longer
Overwhipped Grainy, stiff, or starting to split Avoid; it tastes heavy and can look rough

If you like desserts where whipped cream has to stay soft but still hold its shape, MasalaMonk’s strawberry shortcake recipe is another good guide. It uses fresh fruit and cream in a different way, but the same idea applies: the cream should feel light, not stiff or grainy.

If your kitchen is warm or the pie needs to sit longer, you can stabilize the cream with 1–2 tablespoons mascarpone, cream cheese, or milk powder. Keep the cream cold, whip it only until medium-firm, and spread it over the bananas before the final chill.

Stabilized whipped cream guide with mascarpone, cream cheese, milk powder, and cream spread on Banoffee Pie.
If your kitchen is warm or the dessert needs to sit longer, a small stabilizer can help whipped cream hold without making it stiff or heavy.

Equipment You Need

You do not need pastry-school equipment for this dessert. A simple pan, a way to crush biscuits, and cold cream are enough.

Tools for making Banoffee Pie, including a tart tin, saucepan, whisk, rolling pin, knife, glass, and measuring spoons.
You do not need special pastry equipment for this banoffee pie recipe; instead, a good tin, a pressing tool, a saucepan, and a whisk are enough for cleaner layers.
  • 9-inch / 23cm pie dish, tart tin, or springform pan
  • Food processor, or a zip-top bag and rolling pin for crushing biscuits
  • Mixing bowl
  • Flat-bottomed cup or measuring cup for pressing the base
  • Saucepan, only if making homemade condensed milk toffee
  • Hand mixer or whisk for the cream
  • Warm sharp knife for clean slices
Ready to build it? Method Chill time Recipe card

How to Make Banoffee Pie

Once the caramel is sorted, the rest is just layering and chilling: make the base, chill it, spread the caramel, add bananas, whip the cream, and chill before slicing.

Step 1: Make the Biscuit Base

Crush the biscuits into fine crumbs. From there, mix them with melted butter and salt until evenly moistened. Press into a 9-inch / 23cm pie dish, tart tin, or springform pan, then chill for at least 30 minutes.

Biscuit crumb base being pressed into a tart tin with a small metal cup for Step 1 of Banoffee Pie.
Press the crumb base evenly before chilling because a compact crust gives the caramel, bananas, and cream a sturdier foundation.

Step 2: Add the Caramel or Dulce de Leche

Spread thick dulce de leche, thick caramel, or homemade condensed milk toffee over the chilled base. Keep the layer even so every slice gets the same banana-toffee balance.

Thick caramel being spread with a spatula over a biscuit crust for Step 2 of Banoffee Pie.
After the base is chilled, spread the caramel evenly so every slice gets the same banana-toffee balance and the filling sets more predictably.

Step 3: Add the Bananas

Arrange sliced bananas over the caramel in a single layer or a slightly overlapping layer. For the cleanest slice, do not pile on too many bananas; a heavy banana layer can make the pie unstable.

Banana slices being arranged over caramel in a biscuit crust for Step 3 of Banoffee Pie.
Add the bananas in an even layer rather than piling them high; as a result, the pie stays easier to cut and serve.

Step 4: Whip the Cream

Whip cold cream with icing sugar and vanilla until it reaches medium or medium-firm peaks. It should hold soft shape on the whisk, but it should not look dry, grainy, or overbeaten.

Whisk lifting smooth whipped cream from a glass bowl for Step 4 of Banoffee Pie.
Stop whipping when the cream holds a soft shape on the whisk, since overwhipped cream can taste heavy and look grainy.

Step 5: Chill, Slice, and Serve

Spoon or spread the whipped cream over the bananas. Before slicing, chill the finished pie for at least 2 hours. For the cleanest slices, chill it closer to 4 hours, then finish with chocolate shavings, cocoa, or a very light caramel drizzle.

Finished Banoffee Pie with a clean slice removed, showing biscuit base, caramel, bananas, and whipped cream.
After chilling, the layers should look creamy but controlled, with the biscuit base, caramel, bananas, and cream holding together in each slice.

How Long to Chill Banoffee Pie

Chilling is not just a waiting step. It helps the base firm up, keeps the caramel layer stable, and makes the cream easier to slice through.

Banoffee Pie chill time guide showing 30 minute crust chill, 2 hour minimum chill, 4 hour best chill, and 10 to 15 minute rest.
Banoffee Pie chill time is not just waiting time; it firms the base, steadies the caramel, and gives the cream enough structure for cleaner slices.

For a soft but sliceable banoffee pie, this recipe works best when you chill the base for at least 30 minutes, then chill the finished pie for at least 2 hours. For the cleanest slices, especially if your caramel is slightly soft, chill the finished pie for closer to 4 hours.

  • Crust chill: at least 30 minutes before adding caramel.
  • Finished pie chill: 2 hours minimum.
  • Best clean-slice chill: closer to 4 hours.
  • If caramel is very firm: rest the pie for 10–15 minutes before slicing.

If you want the firmest possible base, bake it for 8–10 minutes at 175°C / 350°F, then cool completely before filling. The pie will no longer be fully no-bake, but the slices will be cleaner.

Can You Make Banoffee Pie Ahead?

Yes, you can make Banoffee Pie ahead, but for the best texture, prepare the components rather than fully assembling the whole pie too early.

Make-ahead Banoffee Pie guide showing biscuit base, caramel, whole bananas, whipped cream, and finished pie.
For make-ahead Banoffee Pie, prepare the base and caramel early, then add bananas and whipped cream closer to serving so the texture stays fresh.
Component Can You Make It Ahead? Best Timing
Biscuit base Yes 1–2 days ahead, covered in the fridge
Caramel layer Yes 1 day ahead, or spread into the chilled base before final assembly
Bananas Not sliced early Slice close to assembly for best color and texture
Whipped cream Same day is best Whip and add before the final chill
Fully assembled pie Yes, but short window Best within 4–8 hours; acceptable within 24 hours
Leftovers Yes Eat within 1–2 days, knowing the bananas and cream will soften

Leftovers can still taste good later, although the bananas will darken, the cream will soften, and the base may absorb moisture. For guests, assemble it the day you plan to serve it.

If you are planning ahead: Clean slices Variations Troubleshooting

How to Get Clean Slices

Clean slices mostly come down to patience and layer control. Because the pie has soft bananas, caramel, and cream, every layer needs to be slightly controlled.

Clean-slice tips for Banoffee Pie with a knife cutting through a chilled pie and text cues for chilling, thick caramel, and wiping the knife.
Clean slices come from several small choices working together: chill well, use thick caramel, warm the knife, and wipe the blade between cuts.
  • Use thick caramel or dulce de leche, not thin sauce.
  • Chill the base before filling.
  • Slice bananas evenly and avoid overloading the pie.
  • Whip cream to medium-firm peaks if the pie needs to hold longer.
  • Use a removable-bottom tart tin or springform pan if possible.
  • Cut with a warm sharp knife and wipe it between slices.

If your first slice is messy, let the pie chill longer before cutting the rest. Often, a little extra time in the fridge is all a soft caramel layer needs.

Banoffee Pie Variations

Once you know the classic method, Banoffee Pie is easy to adapt. The easiest way to keep it balanced is to change one thing at a time: the base, the topping, or the serving format.

Biscoff Banoffee Pie

Use Biscoff or Lotus biscuits instead of digestives or graham crackers. Because Biscoff is sweeter and more spiced, skip extra sugar in the base and keep the cream lightly sweetened. If you like the Biscoff idea, you may also enjoy this cookie pie recipe, especially when you want something baked, gooey, and sliceable.

Chocolate Banoffee Pie

A chocolate Banoffee Pie works best when chocolate supports the banana-toffee flavor instead of taking over. Use chocolate biscuits for the base or spread a thin cooled ganache over the caramel before adding the bananas.

Salted Caramel Banoffee Pie

To make it salted caramel-style, add a small pinch of fine salt to the caramel layer and finish the pie with a few flakes of sea salt. Use a light hand because the goal is balance, not a salty dessert.

Banoffee Cheesecake or Banoffee Tart

A Banoffee cheesecake moves the caramel and banana idea into a cream cheese filling, so it becomes a different dessert rather than a quick topping change. In a Banoffee tart, the same layers sit in a shallow tin for a neater, more elegant slice.

Mini Banoffee Pies or Banoffee Cups

Small jars or cups are easier to serve than slices at parties. Layer biscuit crumbs, caramel, banana slices, and whipped cream, then assemble them close to serving so the crumbs do not soften too much.

Vegan Banoffee Pie

A vegan version needs dairy-free biscuits, vegan butter, vegan caramel or condensed milk alternative, and a plant-based whipping cream. Because vegan caramel and plant-based cream behave differently, it is worth following a dedicated vegan method rather than swapping ingredients one-for-one.

Gluten-Free Banoffee Pie

Use certified gluten-free biscuits for the base and check that the caramel, chocolate, and toppings are gluten-free as well. The method stays similar, but the base may need a little extra chilling because gluten-free biscuits vary in texture.

Healthy Banoffee Pie

If you want a lighter version, plan it from the start instead of only reducing the sugar. Many healthier Banoffee-style desserts use oat, nut, or date-based crusts and a date-style caramel, so the base and filling usually need to change too.

What to Serve with Banoffee Pie

Banoffee Pie is rich, sweet, and creamy. That is why it pairs best with something bitter, cold, fruity, or lightly acidic.

  • Black coffee or espresso
  • Lightly sweet tea
  • Fresh berries
  • Vanilla ice cream
  • Extra chocolate shavings
  • A very small pinch of flaky salt on the caramel layer

For a summer meal or party spread, Banoffee Pie also pairs beautifully with homemade mango ice cream. The mango keeps things bright, while the Banoffee brings the caramel-and-cream richness.

For a bigger dessert table, a chilled cake like tres leches cake also makes sense beside Banoffee Pie. Both are creamy, cold desserts, but tres leches gives you a soft cake texture while Banoffee brings biscuit crunch and caramel.

Troubleshooting Banoffee Pie Recipe

Most Banoffee Pie problems come from texture. Fortunately, they are easy to understand once you know which layer caused the issue.

Banoffee Pie troubleshooting guide for crumbly base, runny caramel, brown bananas, weeping cream, and messy slices.
If the pie does not behave, check the layer causing trouble first; usually the fix is better chilling, thicker caramel, colder cream, or fresher bananas.
Problem Likely Cause Fix
Base crumbles Crumbs too coarse or not enough butter Crush the biscuits finer, add a little more melted butter, and chill longer
Base feels greasy Too much butter or very weak biscuits Next time, use slightly less butter and chill the base well before filling
Caramel runs Caramel too thin or not chilled Switch to thick dulce de leche, or cook condensed milk toffee a little longer
Caramel too stiff Dulce de leche too cold or thick Warm it briefly before spreading
Bananas brown Assembled too early Slice the bananas closer to serving and cover them fully with cream
Cream weeps Underwhipped or unstable cream Start with cold cream and whip it to medium-firm peaks
Pie is too sweet Sweet base, caramel, and cream together Balance the layers with salt in the base and less sugar in the cream
Slices are messy Not chilled, loose caramel, or soft bananas Chill the pie longer and cut with a warm knife
Ready to make it? Jump to recipe FAQs Back to top
Banoffee Pie recipe card with a finished pie slice, no-bake label, chill time, yield, and core layers.
This saveable Banoffee Pie recipe card keeps the method simple: biscuit base, thick caramel, bananas, cream, and enough chilling time to slice cleanly.

Banoffee Pie Recipe Card

This easy Banoffee Pie Recipe has a buttery biscuit base, thick caramel or dulce de leche, fresh bananas, whipped cream, and a simple chill-and-slice method.

Yield8–10 slices
Prep Time25 minutes
Chill Time2 1/2 hours minimum, 4 hours best
Total TimeAbout 3 hours minimum
Pan9-inch / 23cm pie dish or tart tin
DietVegetarian, eggless
OvenNot required
Best ServedSame day; best within 4–8 hours

Ingredients

Biscuit Base

  • 220g digestive biscuits, Marie biscuits, or graham crackers, finely crushed, about 2 cups crumbs
  • 110g unsalted butter, melted, about 1/2 cup
  • Pinch of salt
  • 1 tbsp sugar, optional, only if using very plain biscuits

Caramel Layer

  • 397g / 14 oz thick dulce de leche or thick caramel

Homemade condensed milk toffee option: Use 397g / 14 oz sweetened condensed milk, 80g butter / about 5 1/2 tbsp, and 80g brown sugar / about 1/3 cup plus 1 tbsp packed. Cook gently, stirring constantly, for about 6–8 minutes, or until thick, glossy, and spreadable.

Let homemade toffee cool until warm, not hot, before adding bananas and cream.

Banana Layer

  • 2–3 firm ripe bananas, sliced about 1/4 inch / 6mm thick

Cream Layer

  • 300ml heavy cream, whipping cream, or double cream, cold, about 1 1/4 cups
  • 1–2 tbsp icing sugar
  • 1 tsp vanilla extract

Topping

  • Chocolate shavings, cocoa powder, or a very light caramel drizzle

Method

  1. Start with the base. Mix crushed biscuits, melted butter, salt, and optional sugar until the crumbs look like damp sand.
  2. Shape and chill. Press the crumbs into a 9-inch / 23cm pie dish, tart tin, or springform pan, then chill for at least 30 minutes.
  3. Spread the caramel. Add thick dulce de leche, thick caramel, or homemade condensed milk toffee over the chilled base.
  4. Layer the bananas. Arrange banana slices over the caramel in a single or slightly overlapping layer.
  5. Whip the cream. Beat cold cream with icing sugar and vanilla until it reaches medium or medium-firm peaks.
  6. Cover the bananas. Spread or spoon the cream over the banana layer.
  7. Let it set. Chill the finished pie for at least 2 hours, or closer to 4 hours for cleaner slices.
  8. Finish and serve. Add chocolate shavings, cocoa, or a light caramel drizzle, then slice with a warm sharp knife.

Notes

  • For a firmer base, bake the crust for 8–10 minutes at 175°C / 350°F, then cool completely before filling.
  • If your caramel is thin, do not use it as the main layer because it can make the pie runny.
  • For the freshest color, add the bananas closer to serving.
  • Once fully assembled, Banoffee Pie is best within 4–8 hours and still acceptable within 24 hours.
  • Depending on where you live, use digestives for a classic UK-style base, graham crackers for a US-style crust, or Marie biscuits for a lighter India-friendly option.

FAQs About This Banoffee Pie Recipe

1. What is Banoffee Pie made of?

A classic Banoffee Pie usually has a biscuit or pastry base, thick caramel or toffee, sliced bananas, whipped cream, and a chocolate or cocoa topping. In this version, the base is made with biscuits, the filling uses dulce de leche or thick caramel, and the cream is lightly sweetened so the pie does not become too heavy.

2. Is Banoffee Pie no-bake?

Yes, this version is no-bake if you chill the biscuit base instead of baking it. For a firmer crust and cleaner slices, however, you can bake the base for 8–10 minutes at 175°C / 350°F and cool it completely before filling.

3. Is Banoffee Pie the same as Banoffee pudding?

The classic name is Banoffee Pie, although some people call it Banoffee pudding because it is chilled, creamy, and layered. In everyday searches, Banoffee pudding and Banoffee dessert often point to the same banana, caramel, biscuit, and cream combination.

4. Is dulce de leche good for Banoffee Pie?

Absolutely. Thick dulce de leche is one of the easiest and most reliable fillings because it spreads well, holds its shape, and gives the dessert the deep caramel flavor it needs.

5. What kind of caramel sauce works?

Only use caramel sauce if it is very thick and spreadable. If it pours easily, keep it for a light drizzle on top because thin sauce can make the main filling runny.

6. How do you make Banoffee Pie with condensed milk?

You can use condensed milk, but it needs to be cooked into a thick toffee-style filling first. The easiest homemade method is to cook sweetened condensed milk with butter and brown sugar until the mixture looks thick, glossy, and spreadable.

7. Can I make Banoffee Pie without condensed milk?

Yes. You can use thick dulce de leche or thick ready caramel instead of making condensed milk toffee. Just avoid thin caramel sauce because it will not hold as well in the pie.

8. How do I stop Banoffee Pie from going runny?

Start with thick dulce de leche or thick caramel, chill the base before filling, choose firm ripe bananas, and chill the finished pie before slicing. Most importantly, avoid thin caramel sauce as the main layer.

9. How long does Banoffee Pie last?

Once assembled, Banoffee Pie is best the same day, especially within 4–8 hours. It is still acceptable within 24 hours, but the bananas may darken, the cream may soften, and the base may lose some texture.

10. Can I make Banoffee Pie ahead?

For the best result, make the base and caramel ahead, then add the bananas and whipped cream closer to serving. That way, the bananas stay fresher and the cream holds better.

11. Is Banoffee Pie eggless?

Yes. This banoffee pie recipe is naturally eggless because it uses a biscuit base, caramel or dulce de leche, bananas, and whipped cream, with no eggs in the filling or crust.

12. Can you freeze Banoffee Pie?

Freezing a fully assembled Banoffee Pie is not ideal because bananas can turn watery and the cream can lose its texture after thawing. If you want to work ahead, freeze only the biscuit base, then add caramel, bananas, and cream after thawing.

Back to top

Posted on 4 Comments

Strawberry Shortcake Recipe

Classic strawberry shortcake recipe with biscuit-style shortcake, fresh strawberries, and soft whipped cream on a plate

Strawberry shortcake works best when each part of the recipe stays simple: tender biscuit-style shortcakes, ripe strawberries sitting in a little syrup of their own juices, and soft whipped cream. When one part goes too far, the dessert loses its balance. The berries turn watery, the shortcakes go dense, or everything gets soggy before it reaches the table.

This version keeps everything where it should be. The shortcakes are buttery and lightly sweet, the strawberries stay fresh instead of cooked down, and the whipped cream stays soft and light. If you want a classic strawberry shortcake recipe that tastes like the real thing, this is the one to make.

Quick Answer

If you are looking for the classic American strawberry shortcake recipe, biscuit-style shortcakes are the version to make. Classic strawberry shortcake is a biscuit-style dessert made with tender shortcakes, sugared strawberries, and soft whipped cream. The strawberries stay fresh rather than cooked, and the dessert is best assembled just before serving so the shortcakes stay tender instead of soggy.

  • Biscuits or cake? Traditionally, strawberry shortcake is biscuit-style.
  • Do the strawberries get cooked? Not here. They sit with sugar until juicy and glossy.
  • Can you make it ahead? Yes, but keep the parts separate until serving.
  • What should it feel like? Tender shortcake, juicy berries, and soft whipped cream in the same bite.

Is Strawberry Shortcake Made With Biscuits or Cake?

Strawberry shortcake is a classic American dessert made with sweet biscuit-style shortcakes, juicy strawberries, and whipped cream. It is not just strawberries spooned over cake. The classic version starts with a rich, tender shortcake that is closer to a lightly sweet biscuit than to sponge cake or angel food cake. That base matters because it gives the berries and cream something to settle into. You get contrast instead of collapse.

Comparison guide showing biscuit-style strawberry shortcake, pound cake, and angel food cake, with biscuit-style shortcake highlighted as the classic choice.
Classic strawberry shortcake starts with a tender biscuit, while pound cake and angel food cake take the dessert in a richer or lighter direction.

That is why a good strawberry shortcake feels a little rustic in the right way. It should not eat like a frosted celebration cake. It should feel buttery, fresh, and generous, with enough structure to catch the berry juices without turning tough.

If you like bakes with a similarly tender crumb and a cream-and-fruit feel, this easy English scone recipe is another good one to keep around.

Why This Strawberry Shortcake Recipe Works

  • The shortcakes stay tender. Cold butter, buttermilk, and a lightly handled dough keep them delicate instead of heavy.
  • The berries stay bright. A short rest with sugar gives you enough syrup without turning them flat or jammy.
  • The whipped cream stays soft. Soft peaks keep the dessert light instead of thick or overworked.
  • Each part does its job. The shortcakes bring structure, the berries bring juice and sweetness, and the cream ties it together.

This strawberry shortcake recipe stays close to the classic biscuit-style approach. The shortcakes are sturdy enough to hold berries and cream, but still tender enough to split easily with a serrated knife. The berries stay fresh, which keeps the whole dessert tasting brighter and cleaner.

Strawberry Shortcake Ingredients

The ingredient list is short, but the details matter. If you want the most reliable result, weigh the flour, butter, and strawberries instead of estimating by eye.

Ingredient guide for strawberry shortcake showing strawberries, sugar, lemon juice, shortcake ingredients, and whipped cream ingredients grouped into three simple parts.
Breaking the recipe into strawberries, shortcakes, and whipped cream makes strawberry shortcake feel much easier to prep.

Fresh Strawberries for Strawberry Shortcake

  • 680g fresh strawberries (about 1 1/2 pounds), hulled and sliced
  • 50g granulated sugar (1/4 cup)
  • 1 teaspoon lemon juice, optional

Ripe, fragrant berries matter more than perfect looks. If the berries are very sweet, you can use a little less sugar. If they taste flat, keep the full amount and add the lemon juice.

Shortcake Ingredients

  • 240g all-purpose flour (2 cups, spooned and leveled)
  • 50g granulated sugar (1/4 cup)
  • 12g baking powder (1 tablespoon)
  • 1g baking soda (1/4 teaspoon)
  • 3g fine salt (1/2 teaspoon)
  • 85g cold unsalted butter (6 tablespoons), cut into small cubes
  • 160g cold buttermilk (2/3 cup)
  • 15g heavy cream (1 tablespoon), for brushing
  • 12g coarse sugar (1 tablespoon), optional, for the tops

The baking soda supports the buttermilk and helps the tops brown a little better. The butter should stay cold all the way to the oven. If it starts softening while you work, chill the shaped shortcakes for a few minutes before baking.

Whipped Cream Ingredients

  • 240g cold heavy cream (1 cup)
  • 16g powdered sugar (2 tablespoons)
  • 1 teaspoon vanilla extract

Ingredients and Easy Swaps

If you do not have buttermilk, use 160g heavy cream as a fallback. The shortcakes will still be good, but a little richer and a little less tangy. What matters most is keeping both the butter and liquid cold from the start.

If your strawberries taste sweet but a little flat, a small squeeze of lemon juice usually helps more than extra sugar. If they are very tart, let them sit with the full sugar amount and check them again before adding more. For the whipped cream, the colder the cream and bowl are, the easier it is to stop at soft peaks instead of overwhipping.

If you want a deeper biscuit-method reference, King Arthur Baking’s tips for better biscuits is useful on cold butter and gentle handling.

How to Make Strawberry Shortcake

A good strawberry shortcake recipe comes together in three simple parts: prep the strawberries, bake the shortcakes, and whip the cream. The main thing is to keep each part clean and simple so the finished dessert stays balanced.

How to Prep the Strawberries

The berries should end up juicy and glossy, not collapsed. Toss the sliced strawberries with the sugar and lemon juice if using, then let them sit for 30 to 45 minutes at room temperature. Give them a stir once or twice so the sugar dissolves evenly.

Four-stage strawberry shortcake guide showing freshly sliced strawberries, strawberries tossed with sugar, strawberries after 30 to 45 minutes, and berries that have become too watery.
For strawberry shortcake, the berries should look juicy and glossy after resting with sugar, but they should still hold their shape instead of turning loose and watery.

By the end, the berries should have released a light red syrup, but they should still hold their shape. That is the sweet spot. If they are sitting in a lot of liquid, just spoon the syrup on gradually when serving instead of pouring it all on at once.

If the berries still taste dull after 30 minutes, add 1 to 2 more teaspoons of sugar and let them sit another 10 to 15 minutes. And if they are sweet enough but still flat, a small squeeze of lemon juice usually helps more than extra sugar.

How to Make the Shortcake Biscuits

Once the strawberries are resting, the shortcakes come together quickly. The dough should look rough and slightly shaggy, not smooth like bread dough. Handle it lightly and stop as soon as it comes together.
Five-stage strawberry shortcake biscuit guide showing dry ingredients, butter cut into flour, shaggy dough after buttermilk, dough patted and cut, and baked shortcakes.
For tender strawberry shortcake biscuits, keep the dough rough and shaggy, leave visible butter pieces, and stop baking once the tops turn lightly golden.
  1. Heat the oven and mix the dry ingredients. Heat the oven to 425°F / 220°C. Line a baking sheet with parchment paper. In a large bowl, whisk together the flour, sugar, baking powder, baking soda, and salt until evenly combined.
  2. Cut in the butter. Add the cold butter and work it into the flour with a pastry cutter, your fingertips, or two knives until you have a mix of pea-size and slightly flatter pieces. Do not rub it in until the mixture looks sandy. Visible butter pieces help create steam pockets and tenderness as the shortcakes bake.
  3. Add the buttermilk. Pour in the cold buttermilk and stir with a fork or spatula just until the dough starts clumping together. It should still look a little messy. If you stir until it looks neat, you have probably gone too far.
  4. Bring the dough together. Turn the dough onto a lightly floured surface and pat it into a rectangle about 1 inch thick. If it feels sticky, dust lightly with flour, but do not keep adding flour unless you truly need it. The dough should feel soft and cool, not dry or stiff.
  5. Cut the shortcakes. Cut 6 rounds with a sharp 2 1/2- to 3-inch biscuit cutter, pressing straight down rather than twisting. Twisting can seal the edges and limit the rise. If you do not want to reroll scraps, divide the dough into 6 rustic portions instead.
  6. Chill if needed, then bake. Transfer the shortcakes to the prepared baking sheet. If the butter feels soft or the kitchen is warm, chill the tray for 10 minutes before baking. Brush the tops with heavy cream and sprinkle with coarse sugar if using. Bake for 14 to 16 minutes, until the tops are lightly golden and the sides look set.
  7. Cool before splitting. Let the shortcakes cool for 10 to 15 minutes. They should feel warm, not hot, when you split them. Use a serrated knife and a gentle sawing motion so you do not compress the crumb.

How to Make Whipped Cream for Strawberry Shortcake

For the best texture, start with very cold cream and a chilled bowl if you can. Beat the cream, powdered sugar, and vanilla until soft peaks form. When you lift the beaters, the cream should stand up but curl over at the tip.

Three-stage whipped cream guide for strawberry shortcake showing cream that is too loose, ideal soft peaks, and cream that has become too stiff.
For strawberry shortcake, whipped cream should stay soft and spoonable: too loose and it slides, too stiff and it loses the light finish that settles best into the berries.

Stop before the cream turns stiff or grainy. Soft peaks fit strawberry shortcake better because the cream stays spoonable and settles into the berries and biscuit instead of sitting on top like frosting.

How to Assemble Strawberry Shortcake

Split each shortcake with a serrated knife. Spoon some strawberries and a little syrup over the bottom half, add whipped cream, and set the top half over it. Finish with more berries and cream if you like. Serve right away for the best contrast between tender shortcake, juicy fruit, and soft cream.

Five-step strawberry shortcake assembly guide showing a split biscuit shortcake filled with strawberries, whipped cream, and the top biscuit half, then served right away.
Build strawberry shortcake in gentle layers and keep the syrup light so the biscuits stay tender instead of turning soggy.

Assembly is where the dessert either stays balanced or turns soggy. Keep the syrup gradual rather than heavy, and do not build the shortcakes too far ahead.

Strawberry Shortcake Recipe Card

Yield: 6 shortcakes
Prep time: 25 minutes
Berry resting time: 30 to 45 minutes
Bake time: 14 to 16 minutes
Total time: About 1 hour 15 minutes

Classic strawberry shortcake made with a split biscuit-style shortcake, fresh strawberries, and soft whipped cream on a plate.
Right before serving, strawberry shortcake should feel balanced: a tender biscuit, juicy berries, and soft whipped cream that settles into the layers instead of sitting stiffly on top.

Ingredients

  • For the strawberries
    • 680g fresh strawberries (1 1/2 pounds), hulled and sliced
    • 50g granulated sugar (1/4 cup)
    • 1 teaspoon lemon juice, optional
  • For the shortcakes
    • 240g all-purpose flour (2 cups)
    • 50g granulated sugar (1/4 cup)
    • 12g baking powder (1 tablespoon)
    • 1g baking soda (1/4 teaspoon)
    • 3g fine salt (1/2 teaspoon)
    • 85g cold unsalted butter (6 tablespoons), cubed
    • 160g cold buttermilk (2/3 cup)
    • 15g heavy cream (1 tablespoon), for brushing
    • 12g coarse sugar (1 tablespoon), optional
  • For the whipped cream
    • 240g cold heavy cream (1 cup)
    • 16g powdered sugar (2 tablespoons)
    • 1 teaspoon vanilla extract

Method

  1. Toss the strawberries with the sugar and lemon juice if using. Let sit for 30 to 45 minutes, stirring once or twice.
  2. Heat the oven to 425°F / 220°C and line a baking sheet with parchment paper.
  3. Whisk together the flour, sugar, baking powder, baking soda, and salt.
  4. Cut in the cold butter until the mixture has pea-size and slightly flatter pieces.
  5. Add the buttermilk and stir just until a shaggy dough forms.
  6. Pat the dough to about 1 inch thick and cut 6 rounds, or divide into 6 rustic portions.
  7. Transfer to the baking sheet, brush with heavy cream, and sprinkle with coarse sugar if using.
  8. Bake for 14 to 16 minutes, until lightly golden. Cool for 10 to 15 minutes.
  9. Whip the cream, powdered sugar, and vanilla to soft peaks.
  10. Split the shortcakes with a serrated knife, fill with strawberries and whipped cream, and serve immediately.
Recipe Notes

  • The dough should look rough and soft, not smooth.
  • If the butter softens before baking, chill the tray for 10 minutes.
  • Use a serrated knife to split the shortcakes without crushing them.
  • Assemble just before serving for the best texture.

Strawberry Shortcake Storage and Make-Ahead Tips

After the first bake, storage is simple as long as the parts stay separate. You can make most of strawberry shortcake ahead, but the berries, shortcakes, and whipped cream should stay apart until serving. That is what keeps the shortcakes from going soggy.
Make-ahead and storage guide for strawberry shortcake showing chilled strawberries, baked shortcakes stored airtight, whipped cream, frozen shortcakes, and the dessert assembled just before serving.
Prep the parts ahead if you like, but keep the berries, shortcakes, and whipped cream separate until serving so the dessert stays tender instead of soggy.

Make-Ahead Timing

  • Strawberries: Up to 1 day ahead in the refrigerator, though they are best within a few hours.
  • Baked shortcakes: 1 day ahead at room temperature in an airtight container.
  • Unbaked shortcakes: Refrigerate the shaped rounds for up to 1 hour before baking, or freeze them for longer storage.
  • Whipped cream: Best made the same day, though a few hours ahead in the refrigerator is fine.

How to Freeze the Shortcakes

Freeze either the baked, cooled shortcakes or the shaped unbaked rounds. For unbaked shortcakes, freeze them on a tray until firm, then transfer to a freezer bag or airtight container. Do not brush with cream until just before baking. Bake from frozen at 425°F / 220°C, adding a few extra minutes as needed.

How to Serve for the Best Texture

Assemble right before serving. If the shortcakes have been stored overnight, you can warm them lightly in a low oven before splitting if you want to freshen the texture.

If you are serving strawberry shortcake for a group, set out the shortcakes, strawberries, syrup, and whipped cream separately so everyone can build their own. It is easier to serve, and it keeps the shortcakes from going soggy before they reach the table.

If you like fruit desserts that feel simple and comforting, this peach cobbler with canned peaches is another good one to keep in rotation.

Can You Use Pound Cake or Angel Food Cake for Strawberry Shortcake?

If you want a shortcut or a more cake-like dessert, you can. Pound cake makes strawberry shortcake richer and denser, while angel food cake makes it lighter and airier. Both can work, but they give you a different result from the classic biscuit-style version.

If you want a classic strawberry shortcake recipe, stay with the shortcakes in this post. If you want something faster or softer, pound cake or angel food cake can still carry the strawberries and cream well.

Troubleshooting Strawberry Shortcake Recipe

If something feels off, the cause is usually easy to spot. Most strawberry shortcake problems come down to overworked dough, overly juicy berries, or assembling the dessert too early.

Troubleshooting guide for strawberry shortcake showing dense shortcakes, dry shortcakes, watery strawberries, soggy assembled shortcake, and whipped cream that fell flat.
When strawberry shortcake goes off, it is usually a texture problem: overworked biscuits, berries that sat too long, layers assembled too early, or cream whipped past the sweet spot.

My Shortcakes Turned Dense

Cause: The dough was overmixed, overhandled, or the butter got too warm.
Fix: Stir only until the dough comes together, keep the butter cold, and pat the dough gently instead of kneading it.

My Shortcakes Turned Dry

Cause: They baked too long, or the dough had too much flour.
Fix: Pull them when the tops are lightly golden, and weigh the flour or spoon and level it carefully.

My Strawberries Got Too Watery

Cause: They sat too long with sugar, or they were very juicy to begin with.
Fix: Spoon the syrup on gradually and hold some back if needed.

My Strawberry Shortcake Got Soggy

Cause: The dessert was assembled too early.
Fix: Keep the berries, shortcakes, and cream separate until right before serving.

My Whipped Cream Fell Flat

Cause: The cream was not cold enough, or it sat too long after whipping.
Fix: Start with cold cream and beat only to soft peaks. If it loosens slightly, whisk it briefly by hand before serving.

Strawberry Shortcake FAQs

Is strawberry shortcake made with biscuits or cake?

The classic American version is biscuit-style. Cake versions exist, but the traditional first answer is the biscuit-style dessert.

Can I use frozen strawberries?

Fresh strawberries are better for this recipe, but frozen strawberries can work in a pinch. Thaw them first, drain off excess liquid if needed, then toss them gently with sugar. Expect a softer texture and a looser syrup than you would get from fresh berries.

Why is it called shortcake?

In baking, short points to a tender, crumbly texture created by fat worked into the flour. That is why strawberry shortcake is traditionally based on a rich biscuit-like shortcake rather than a fluffy cake layer.

How long should strawberries sit with sugar?

About 30 to 45 minutes is a good starting point. That gives them enough time to release juice while still tasting fresh.

Can I freeze the shortcakes?

Yes. Freeze only the shortcakes, not the fully assembled dessert.

↑ Back to top

Posted on Leave a comment

Gingerbread Cookies Recipe

Gingerbread cookies recipe with soft cut-out gingerbread men and iced holiday cookies.

If you want a gingerbread cookies recipe that rolls cleanly, holds its shape, and still stays soft enough to enjoy, this is the one to make. These cookies bake with soft centers, lightly crisp edges, deep molasses-and-spice flavor, and enough structure for gingerbread men and other cut-out shapes. In other words, you get the classic holiday look without ending up with dry, hard cookies.

The best gingerbread cookies are not just the ones that look neat on the tray. They also need dough that stays manageable, cut-outs that hold their edges, and a texture that still tastes good once the icing dries. This dough is built to give you that balance.

The dough chills well, handles easily once firm, and gives you a smooth surface for glaze or royal icing. So whether you want homemade gingerbread cookies for gifting, simple gingerbread man cookies for family baking, or soft gingerbread cookies for a holiday tray, this guide walks you through the method, decorating options, make-ahead timing, and the fixes that matter most.

Gingerbread Cookies Recipe Quick Answers

These are soft gingerbread cookies made for cut-outs. They are tender enough to enjoy plain, yet firm enough to hold the shape of gingerbread men, stars, trees, and other holiday cookies without spreading into rounded blobs.

The dough is rich with molasses, brown sugar, ginger, and cinnamon, and it becomes much easier to handle after chilling. Once baked, the cookies stay fairly flat, so they work especially well for glaze, royal icing, or simple sugar decoration.

  • Yield: 24 medium cookies
  • Prep time: 25 minutes
  • Chill time: 1 hour
  • Bake time: 8 to 10 minutes per batch
  • Total time: about 1 hour 35 minutes
  • Texture: soft centers, lightly crisp edges
  • Best for: gingerbread men, cut-out cookies, and icing
  • Make-ahead friendly: yes

If you need a gingerbread cookies recipe that works for both decorating and eating, this one lands in the sweet spot. It gives you enough structure for clean cut-outs and enough tenderness to keep the cookies enjoyable after they cool.

Why this gingerbread cookies recipe works graphic showing clean cut-out shape, soft centers with crisp edges, easy decorating, and make-ahead dough.
This gingerbread cookies recipe works especially well when you want dough that rolls cleanly, keeps cut-out edges neat, stays soft in the center, and still handles decorating and make-ahead baking with less stress.

Gingerbread Cookies Recipe Card

Soft Gingerbread Cookies with clean cut-out edges, soft centers, lightly crisp edges, and classic molasses-spice flavor. This is the fast-scan version for baking day.

  • Yield: 24 medium cookies
  • Prep time: 25 minutes
  • Chill time: 1 hour
  • Bake time: 8 to 10 minutes per batch
  • Total time: about 1 hour 35 minutes
  • Best for: soft cut-outs, decorating, gifting, and make-ahead holiday baking

Before You Start Baking

  • Use regular unsulphured molasses, not blackstrap.
  • Weigh the flour if you can, or spoon and level it.
  • Chill the dough until firm before rolling.
  • Pull the cookies when the centers look matte and set, not dark brown.
Soft gingerbread cookies recipe card image with decorated gingerbread cookies, quick ingredients, method, and tips for soft centers and clean cut-out edges.
Here is a soft gingerbread cookies recipe card that gives you the quick-save version: the key ingredients, short method, and a few tips that help the cookies stay soft in the center while keeping neat cut-out edges.

Ingredients

  • 170 g unsalted butter, softened (3/4 cup)
  • 150 g packed dark brown sugar (3/4 cup)
  • 170 g unsulphured molasses (1/2 cup)
  • 1 large egg
  • 1 teaspoon vanilla extract
  • 360 g all-purpose flour (3 cups)
  • 1 teaspoon baking soda
  • 1/2 teaspoon fine salt
  • 1 tablespoon ground ginger
  • 2 teaspoons ground cinnamon
  • 1/4 teaspoon ground cloves
  • 1/4 teaspoon ground nutmeg
  • 1 to 2 teaspoons milk, only if the dough seems unusually dry

Method

  1. Beat the softened butter and brown sugar until creamy and smooth, about 2 minutes.
  2. Mix in the molasses, egg, and vanilla until fully combined.
  3. Whisk together the flour, baking soda, salt, ginger, cinnamon, cloves, and nutmeg in a second bowl.
  4. Add the dry ingredients to the wet mixture and stir just until a soft dough forms. Add 1 teaspoon of milk at a time only if the dough feels unusually dry.
  5. Divide into 2 discs, wrap, and chill for at least 1 hour.
  6. Heat the oven to 350°F / 175°C and line baking sheets with parchment paper.
  7. Roll one disc at a time on a lightly floured surface. For softer cookies, aim for about 1/4 inch thick.
  8. Cut shapes, transfer to the tray, and chill the tray briefly if the dough has softened.
  9. Bake for 8 to 10 minutes, until the centers look matte and set and the edges feel lightly firm.
  10. Cool on the tray for 5 minutes, then move to a wire rack and cool completely before decorating.

Ingredients for This Gingerbread Cookies Recipe

This ingredient list is simple, but each part has a job. The butter and brown sugar keep the cookies tender, the molasses gives classic depth and color, and the flour-to-fat balance keeps the dough sturdy enough for cut-out shapes once chilled.

Labeled gingerbread cookies ingredient guide showing unsalted butter, dark brown sugar, unsulphured molasses, all-purpose flour, egg, vanilla extract, baking soda, ground ginger, ground cinnamon, ground cloves, ground nutmeg, and fine salt.
This gingerbread cookies ingredient guide shows the key ingredients that shape the dough’s flavor, softness, and clean cut-out structure, from unsulphured molasses and dark brown sugar to the warm spice blend and careful flour balance.
  • 170 g unsalted butter, softened (3/4 cup)
  • 150 g packed dark brown sugar (3/4 cup)
  • 170 g unsulphured molasses (1/2 cup)
  • 1 large egg
  • 1 teaspoon vanilla extract
  • 360 g all-purpose flour (3 cups)
  • 1 teaspoon baking soda
  • 1/2 teaspoon fine salt
  • 1 tablespoon ground ginger
  • 2 teaspoons ground cinnamon
  • 1/4 teaspoon ground cloves
  • 1/4 teaspoon ground nutmeg
  • 1 to 2 teaspoons milk, only if the dough seems unusually dry

Important: Use regular unsulphured molasses here, not blackstrap. In a gingerbread cookies recipe like this one, regular molasses gives you the best balance of sweetness, color, and classic gingerbread depth without dragging the flavor into bitterness.

If you can, weigh the flour. If not, spoon and level it rather than scooping straight from the bag. That one habit alone makes it much easier to avoid dry dough and hard cookies.

How to Make This Gingerbread Cookies Recipe Step by Step

The method is straightforward, but temperature and dough feel matter more than speed. So the goal is not to rush through the steps. Instead, mix until the dough comes together, chill it properly, and keep it cold enough that the cut-outs stay neat.

Step-by-step gingerbread cookie method graphic showing how to mix the dough, chill until firm, roll to thickness, cut and tray the cookies, then bake and cool.
This step-by-step gingerbread cookie method shows exactly how the dough should look at each stage, so it is easier to mix, chill, roll, cut, and bake cookies that hold their shape and stay soft in the center.
  1. In a large bowl, beat the softened butter and brown sugar until creamy and smooth, about 2 minutes. You want the mixture lightened and well combined, but not so whipped that it looks fluffy and airy.
  2. Add the molasses, egg, and vanilla, then mix until fully combined. At this stage, the mixture will look glossy, rich, and a little loose, which is exactly what you want.
  3. In a second bowl, whisk together the flour, baking soda, salt, ginger, cinnamon, cloves, and nutmeg.
  4. Add the dry ingredients to the wet mixture and stir just until a soft dough forms. If the dough seems crumbly rather than soft, add 1 teaspoon of milk at a time until it comes together. The finished dough should feel soft and a little sticky before chilling, not dry and not stiff.
  5. Divide the dough into 2 discs, wrap them well, and chill for at least 1 hour.

Once the dough is properly chilled, it becomes much easier to roll and cut cleanly. More than anything else, this gingerbread cookies recipe depends on cold dough rather than extra flour for sharp cut-outs. If it still feels sticky after chilling, return it to the fridge for 15 to 20 minutes instead of forcing in more flour.

Gingerbread cookies recipe dough rolled out and cut into gingerbread men and stars, with clean shapes transferred to a parchment-lined baking tray before baking.
Cold dough is what keeps a gingerbread cookies recipe like this one easy to roll, cut, and transfer. Once the dough is firm, the shapes stay cleaner on the tray and bake with sharper edges instead of softening into blurred outlines.

This is the stage where many bakers accidentally add too much flour. Cold gingerbread dough should feel firm and workable, not dry.

If the dough cracks hard as soon as you try to roll it, let it sit on the counter for 5 to 10 minutes and try again. Usually that means it is slightly too cold, not ruined. On the other hand, if it sticks to everything, it is usually too warm, not under-floured.

For even cleaner edges, you can also roll the dough between sheets of parchment, chill or briefly freeze it flat, and then cut shapes from the cold sheet. If you want a useful visual on that method, King Arthur explains it well here: how to help cut-out cookies hold their shape.

Shape-retention guide for gingerbread cut-out cookies showing chilled dough, rolling between parchment, cutting while cold, and chilling the tray before baking.
The sharpest gingerbread men usually come from colder dough, not more flour. Keep the dough firm, roll and cut it while cold, and give the tray a short chill if the shapes start softening before they go into the oven.
  1. Heat the oven to 350°F / 175°C. Line baking sheets with parchment paper.
  2. Roll one disc of dough at a time on a lightly floured surface. For softer cookies, roll to about 1/4 inch thick. For a firmer bite, roll a little thinner, around 1/8 to 3/16 inch.
  3. Cut shapes and transfer them to the prepared baking sheets, spacing them about 1 to 2 inches apart. If the dough softens too much while you work, chill it again before baking. If the cut-outs feel especially soft, a quick 5 to 10 minute tray chill helps them hold sharper edges.
  4. Bake for 8 to 10 minutes. A 3-inch gingerbread man rolled to 1/4 inch thick usually takes about 8 minutes for a softer result. A slightly thinner cookie often needs 9 to 10 minutes.
Thickness guide for gingerbread cookies showing 1/4 inch for softer fuller cookies, 3/16 inch for balanced texture, and 1/8 inch for a firmer bite.
For softer gingerbread men and fuller cut-outs, stay close to 1/4 inch; go a little thinner only if you want a firmer bite, and pull the cookies once the centers look matte and set rather than waiting for deep browning.

The cookies are done when the centers look matte and set, the edges feel lightly firm, and the color is only a touch darker around the outer edge. Because they continue to firm up as they cool, do not wait for deep browning. When they are right, they should smell deeply spiced and look set without turning dark brown.

  1. Let the cookies cool on the tray for 5 minutes, then move them to a wire rack. Cool completely before decorating.
  2. Reroll scraps only after gathering them gently. If they have warmed up and turned sticky, chill them again before rolling so the second round stays easier to handle.
Thickness guide for gingerbread cookies showing about 1/4 inch dough for softer, fuller cookies and slightly thinner dough for a firmer bite, with baked gingerbread men and broken cookie cross-sections for comparison.
This gingerbread cookie thickness guide shows the tradeoff clearly: roll the dough about 1/4 inch thick for softer, fuller cookies, or go slightly thinner when you want a firmer bite and a flatter finished texture.

Why This Gingerbread Cookies Recipe Works

A really good gingerbread cookies recipe has to get three things right at once: flavor, texture, and handling. This one does. More importantly, it does so without making the dough fussy or the finished cookies dry, which is why it feels dependable from the first batch onward.

Soft gingerbread cookies without cakey puffiness

The butter, brown sugar, egg, and molasses keep the cookies tender, while the modest amount of baking soda keeps them from rising too much. That is what gives you a soft bite without thick, puffy shapes.

Soft gingerbread cookies recipe close-up with a bitten gingerbread man cookie in front and a whole iced cookie behind, showing a tender center, clean cut-out shape, and lightly crisp edges.
This is the texture you want from a good gingerbread cookies recipe: a tender center, lightly set edges, and enough structure for gingerbread men to stay neat without turning dry or cakey.

Why these gingerbread cookies hold their shape

Once chilled, the dough is firm enough to roll and cut neatly. As a result, hands, feet, stars, and tree points stay more defined in the oven instead of softening into rounded outlines.

Deep gingerbread flavor without bitterness

Molasses, ginger, and cinnamon do most of the heavy lifting, while clove and nutmeg stay in the background. The result is rich and classic, not bitter or overpowering.

Gingerbread cookies that decorate cleanly

Because the cookies bake relatively flat, the icing sits more neatly on top. As a result, both simple glaze and detailed royal icing are easier to manage, especially when you want gingerbread men that still look clear and readable after decorating.

Gingerbread Cookie Ingredient Notes That Matter

A few ingredient choices can make or break a gingerbread cookies recipe. In particular, the molasses, flour, butter texture, and spice balance affect both flavor and handling.

Ingredient guide for gingerbread cookies showing regular molasses, brown sugar, careful flour measurement, softened butter, and warm spice balance for better flavor and cleaner cut-outs.
A few ingredient choices do more for gingerbread cookies than extra decorating ever will: the right molasses, brown sugar, flour measurement, softened butter, and spice balance are what keep the dough flavorful, softer, and easier to handle.

The best molasses for gingerbread cookies

Use regular unsulphured molasses. It gives the cookies their classic depth and color without pushing them into bitterness. If you want a quick breakdown of light, dark, and blackstrap molasses, King Arthur’s guide is genuinely useful: light, dark, and blackstrap molasses.

Brown sugar keeps soft gingerbread cookies tender

Brown sugar adds moisture and a warmer flavor. As a result, the cookies stay softer and taste fuller than they would with a more neutral sugar base.

Too much flour makes the cookies dry

Too much flour is one of the fastest ways to ruin the texture. If you can, weigh it. If not, spoon and level rather than scooping straight from the bag.

Softened butter gives the dough the right feel

Softened butter should cream smoothly with the sugar, not look greasy or melted. Otherwise, the dough becomes much harder to control once you start rolling and cutting, and the cookies are more likely to lose those cleaner edges.

Keep the spice balance warm, not harsh

Ginger and cinnamon should lead. Clove and nutmeg should stay in supporting roles. Otherwise, the whole dough can start tasting medicinal instead of festive.

Vanilla or orange zest can round things out

A little vanilla rounds out the spice. Orange zest can brighten the dough too, although it should stay in the background so the classic gingerbread flavor stays in charge.

Decorating Gingerbread Cookies and Easy Variations

Once the dough is working well, the next choice is simple: decorate the cookies more neatly or tweak the batch slightly for a softer, darker, or faster finish. This section keeps those adjustments practical so the dough stays reliable.

For softer gingerbread cookies

For a softer result, roll the dough closer to 1/4 inch thick and bake just until the centers are set. That gives you a fuller cookie with a more bakery-style feel.

For faster holiday cookies

Choose simpler cutters, skip detailed piping, and finish the cookies with a quick glaze or sanding sugar. Even so, the batch still looks festive and feels finished. This is the easiest route when you want holiday cookies that still look good without turning decorating into a separate project.

For a darker, more old fashioned gingerbread flavor

Lean a little harder on ginger and use dark brown sugar if you want the cookies to taste deeper and more old fashioned. Just keep the clove controlled so the flavor stays warm and balanced rather than harsh. Do not swap in blackstrap molasses here unless you specifically want a more bitter result.

Best icing for gingerbread cookies

  • Choose royal icing when: you want cleaner outlines, button details, faces, or cookies you can decorate more precisely.
  • Choose simple glaze when: you want a faster, easier finish for a holiday tray, gifting, or casual family baking.

How to decorate gingerbread cookies without making it fussy

Use royal icing when you want clean outlines, button details, smiles, and defined flooding. Use a simple glaze when you want faster cookies that still look finished. In both cases, decorate only once the cookies are completely cool, or the icing can turn patchy and slide.

Decorating guide for gingerbread cookies showing outline first, let the icing set briefly, add dots or buttons, use royal icing for cleaner lines, and simple glaze for a faster finish.
Neat gingerbread cookies do not need complicated piping. Start with a simple outline, let it set briefly, then add a few dots, stripes, or buttons and choose royal icing or glaze based on how detailed you want the finish.

For the neatest beginner-friendly finish, start with three easy moves: outline the cookie first, let that line set briefly, then add dots, stripes, or a small flood rather than covering every inch. That keeps gingerbread men readable, faster to decorate, and less messy for family baking.

Simple decorated gingerbread cookies recipe on a dark plate with gingerbread men, star, and tree cookies finished with easy white icing details.
For a gingerbread cookies recipe like this one, a few clean outlines, dots, and smiles are enough to make the tray look festive without turning decorating into a fussy piping project.

Royal Icing vs Simple Glaze

Quick glaze: Stir 1 cup confectioners’ sugar with 1 1/2 to 2 teaspoons milk and a small splash of vanilla until thick but spreadable. Quick royal icing note: Use a thicker consistency for outlines, then thin it slightly with drops of water for flooding. If you plan to stack or gift the cookies, let royal icing dry fully for several hours or overnight first. If you want a useful visual guide to outline and flooding consistency, King Arthur’s cookie decorating guide is worth a look: cookie decorating guide.

A simple glaze is the better choice when you want an easier finish for a holiday tray, cookie box, or last-minute batch. It should be thick enough to coat the back of a spoon, but loose enough to spread without tearing the cookie surface. So if you want easy gingerbread cookies that still look festive, glaze is often the better call. Meanwhile, it keeps the decorating process much faster and less fussy.

Comparison guide for gingerbread cookies showing royal icing for cleaner lines and simple glaze for a quicker finish.
Royal icing makes more sense when you want crisp outlines and button details, while simple glaze is the easier choice for a faster tray of gingerbread cookies that still looks polished and festive.

If you are putting together a holiday cookie tray, these double chocolate chip cookies are another easy homemade bake to pair with gingerbread.

Troubleshooting Gingerbread Cookies

Most gingerbread cookie problems come down to temperature, flour balance, thickness, or bake time. Once you spot the cause, the fix is usually simple. In fact, many common issues are solved by chilling longer, measuring more carefully, or pulling the cookies a little earlier.

Troubleshooting guide for gingerbread cookies showing how to fix warm dough, too much flour, thin rolled dough, overbaking, and soft cut-outs on the tray.
When gingerbread cookies spread, crack, or bake up hard, the fix is usually simple: colder dough, lighter flour handling, a slightly thicker roll, and pulling the cookies once the centers look matte and set.

Why did my gingerbread cookies spread?

The dough was probably too warm, or the cut shapes sat out too long before baking. So chill the dough longer, work in smaller batches, and never bake on a still-warm sheet pan.

Why did they puff up too much?

Too much baking soda, dough rolled too thick, or over-creaming the butter and sugar can all cause extra puffing. Therefore, measure carefully and keep the mixing simple.

Why is my dough too sticky?

That usually means it needs more chill time. Because molasses-rich dough is often soft before chilling, this is one step you do not want to rush.

Why did the dough crack while rolling?

It is usually a little too cold or a little too dry. Let it sit for 5 to 10 minutes, then try again. On your next batch, make sure you are not over-measuring the flour.

Why did the cookies turn hard?

Overbaking and too much flour are the two most common reasons. Remember, too, that gingerbread cookies firm up more as they cool.

Why did my gingerbread men lose shape?

Warm dough, dull cutters, or too many rerolls usually cause blurred shapes. In many cases, chilling the cut cookies for 5 to 10 minutes before baking is enough to help.

Why is my icing too runny or too stiff?

Add more confectioners’ sugar if it runs everywhere. Add water a few drops at a time if it is too stiff to pipe or spread. After all, small changes go a long way with icing.

How to Store Gingerbread Cookies

This dough and the baked cookies both hold up well, which makes the recipe easy to split across a few days of holiday baking. Whether you want to prep the dough early, freeze cut-outs, or box up decorated cookies later, each stage stores well when handled the right way.

Storage guide for gingerbread cookies and dough showing how to refrigerate dough, freeze cut-outs, store baked cookies airtight, and pack decorated cookies for gifting.
Gingerbread cookies are much easier to fit into holiday baking when you store each stage the right way: chill dough for short-term prep, freeze cut-outs for later baking, and pack decorated cookies only after the icing is fully dry and set.
  • Dough in the fridge: up to 2 days, tightly wrapped
  • Dough in the freezer: up to 2 months, well wrapped
  • Unbaked cut-outs in the freezer: freeze until firm, then bag and bake from cold with a little extra time if needed
  • Baked undecorated cookies: 4 to 5 days airtight at room temperature, or freeze for up to 2 months
  • Decorated cookies: store only after the icing is fully dry and set

How far ahead you can make gingerbread cookie dough

You can make the dough up to 2 days ahead and keep it wrapped in the refrigerator. If it gets very firm, let it sit out briefly before rolling. That way, it softens just enough to handle without turning sticky again.

How to freeze cut dough vs baked cookies

Freeze dough discs or freeze cut shapes on a tray first, then transfer them to a freezer bag. Baked cookies also freeze well, especially if they are undecorated. Thaw them at room temperature before decorating or serving so condensation does not spoil the finish.

Best container for decorated gingerbread cookies

Let the icing dry fully, then store the cookies in a rigid airtight container. If you need layers, separate them with parchment. A shallow tin or hard-sided box is usually safer than a soft bag once the cookies are decorated.

Decorated gingerbread cookies packed in a parchment-lined tin for gifting after the icing has fully dried and set.
Once the icing is fully dry, gingerbread cookies are much easier to pack neatly in a rigid tin lined with parchment, which helps them travel better and keeps the finished details from smudging.

How to store homemade gingerbread cookies for gifting

Pack them only once the icing is dry and the cookies are fully cool. As a result, they stay neater, travel better, and look more polished when they reach the box or tray. In addition, they are less likely to smudge or stick together. For another festive edible gift idea, these easy festive Irish rum truffles are a natural holiday add-on too.

For the most natural cold-weather pairing, serve these cookies with homemade hot chocolate with cocoa powder.

Gingerbread cookies served with hot chocolate in a black mug, with a gingerbread man, tree, and star cookies decorated with simple white icing on a dark surface.
Serve gingerbread cookies with hot chocolate when you want the coziest cold-weather pairing: the warm drink softens the spice notes beautifully, and the simple decorated cookies still feel festive without turning the serving moment fussy.

Gingerbread Cookies Recipe FAQs

Are gingerbread cookies supposed to be soft or crisp?

They can be either, depending on the style. In this recipe, though, the goal is soft centers with lightly crisp edges. If you want them softer, roll a little thicker and pull them as soon as the centers look set. If you want them firmer, roll slightly thinner and bake a touch longer.

Do I need to chill cut gingerbread cookies before baking?

Not always, but it helps a lot when the dough has softened on the counter. If the cut-outs feel soft, sticky, or hard to transfer cleanly, chill them for 5 to 10 minutes before baking so the edges stay sharper.

Can I make gingerbread dough ahead of time?

Yes. In fact, gingerbread dough is one of the easiest cookie doughs to make ahead because chilling actually improves how it handles. A day or two in the fridge often makes rolling and cutting easier, not harder, as long as you let very firm dough sit briefly before rolling.

Can I freeze gingerbread cookies?

Yes. You can freeze the dough, unbaked cut-outs, or baked cookies. However, undecorated cookies usually freeze best if appearance matters most. Wrap them well, store them airtight, and let them come back to room temperature before decorating or serving so condensation does not ruin the finish.

What icing is best for gingerbread men?

Royal icing is best for detailed outlines, faces, buttons, and cleaner decorative lines. A simple glaze is better when you want a faster, easier finish. So the best choice really depends on whether you care more about precision or speed.

How thick should I roll gingerbread cookie dough?

About 1/4 inch is a strong starting point for softer cut-out cookies. Slightly thinner works if you want a firmer bite. If you are making gingerbread men for decorating, staying close to 1/4 inch usually gives the best balance of shape, softness, and sturdiness.

Can I decorate them the next day?

Yes. In many cases, decorating the next day is even easier because the cookies are fully cool and settled. That is especially helpful if you want cleaner royal icing lines or you are splitting the baking and decorating into two easier sessions.

↑ Back to top