Posted on Leave a comment

Sopapilla Cheesecake Recipe: Easy Crescent Roll Cheesecake Bars

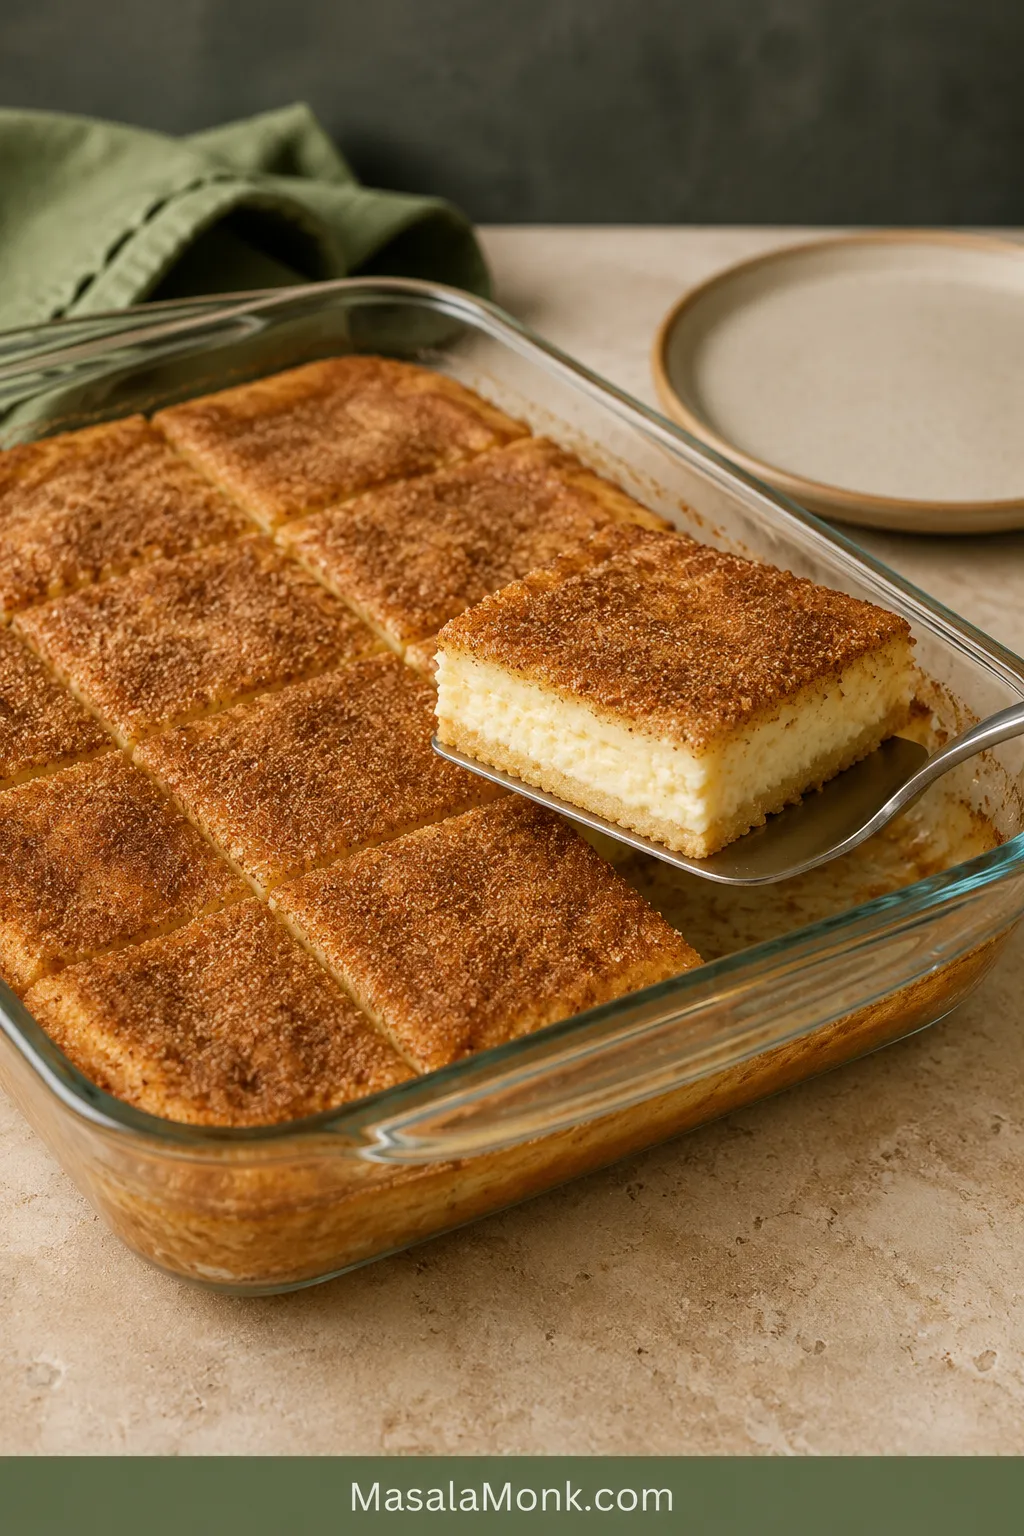
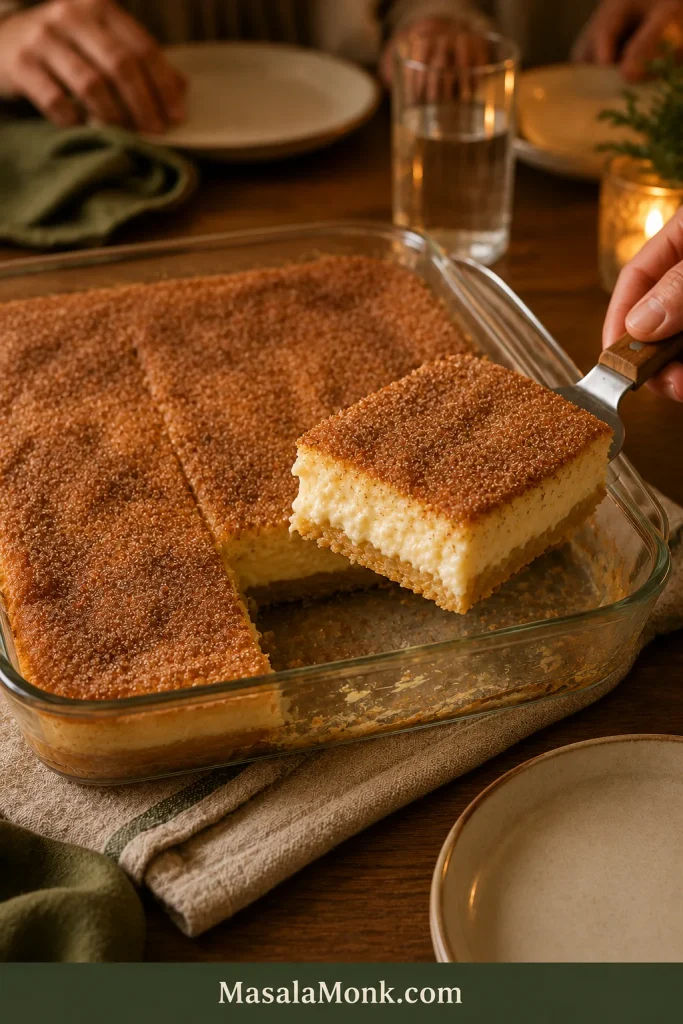
Clear glass pan of Sopapilla Cheesecake with one corner bar lifted on a metal spatula, revealing a cinnamon-sugar top, creamy filling and baked crescent base.

Two packages of crescent dough, one creamy filling and a cinnamon-sugar crust turn into a pan of Sopapilla Cheesecake with about 20 minutes of hands-on work. The top bakes golden and lightly crisp, the center settles into a smooth cheesecake layer, and the kitchen smells like cinnamon rolls and cheesecake arriving at the same time.

Yet one quiet problem trips people up: the upper pastry can look beautifully golden while the dough underneath is still pale and gummy.

Golden on top is not enough—check the bottom before you pull the pan.

Quick Answer: How to Make Sopapilla Cheesecake

Sandwich a lightly sweetened cream cheese filling between two cold crescent-dough sheets. Brush the top with melted butter, cover it with cinnamon sugar and bake at 350°F / 175°C.

In a conventional oven, begin checking at about 28 minutes. The edges should look set with only a gentle wobble in the middle, and the lower pastry should look baked through—not pale and doughy. Cool for at least 20 minutes, or wait about one hour for bars that hold an edge.

Sopapilla Cheesecake Recipe

Easy Sopapilla Cheesecake Bars

Creamy, tangy cheesecake between tender crescent layers, finished with a crisp cinnamon-sugar top that tastes buttery without feeling heavy.

Active preparation20 minutes
Conventional ovenBegin checking at 28 minutes; usually 30–35 minutes
Fan-assisted ovenStart checking at about 25 minutes; continue until all three doneness cues are present
Cooling20 minutes to 1 hour
Total, excluding softeningAbout 1¼–2 hours
Optional chilling2–3 additional hours for the neatest squares
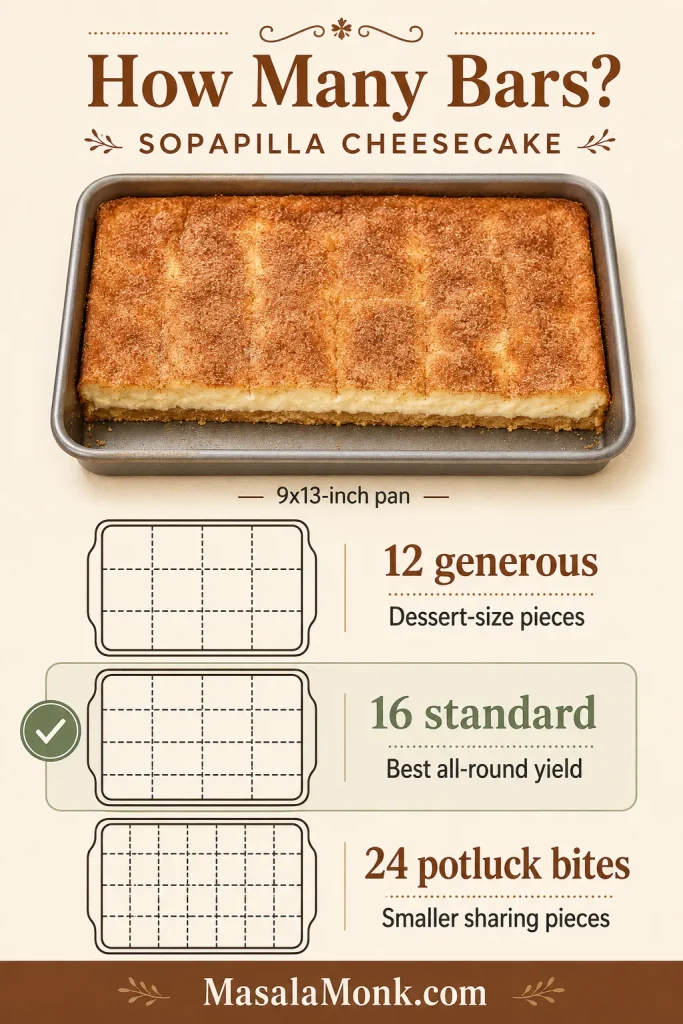
Yield16 standard bars
Pan9×13 inches / 23×33 cm
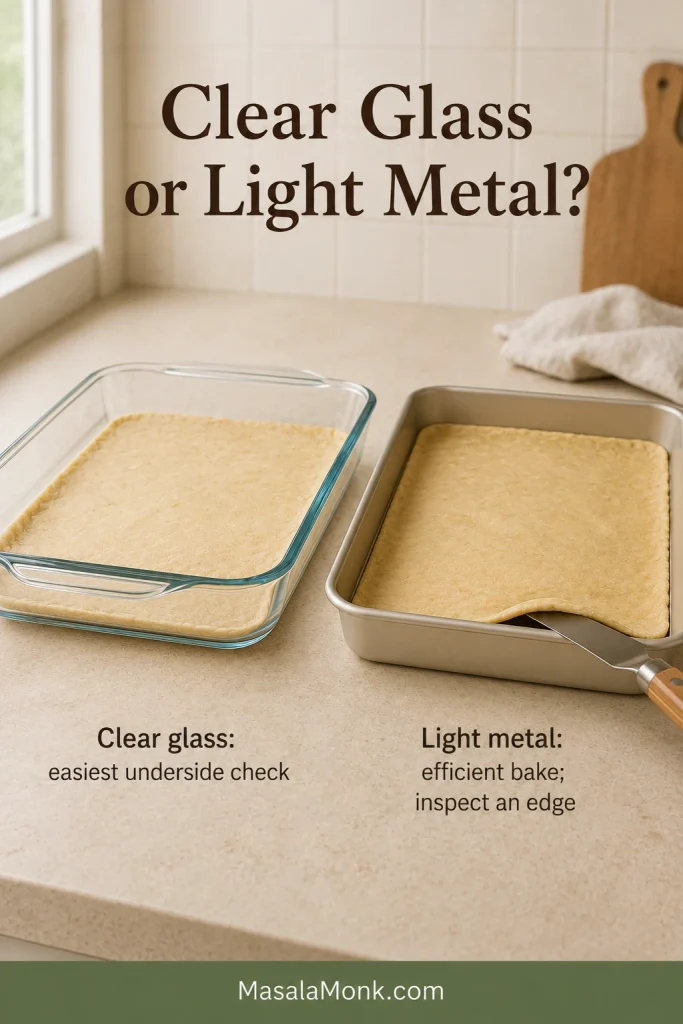
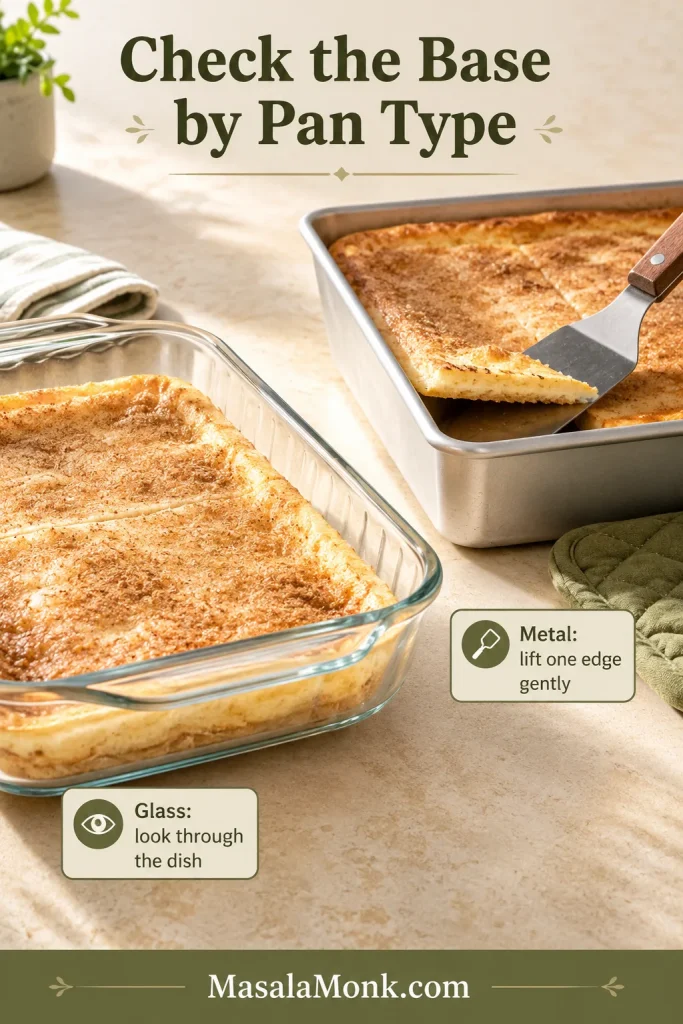
Clear glass makes the underside easiest to inspect. Light-colored metal may finish sooner, while glass and thick ceramic may need the longer end of the range.

Before you begin: Set out the cream cheese and egg. The cream cheese may need 45–60 minutes to soften; cutting it into smaller pieces will shorten the wait.

Equipment and Pan Choice

  • 9×13-inch / 23×33 cm clear glass baking dish for the easiest underside check, or a light-colored metal baking pan
  • Large mixing bowl and electric mixer
  • Flexible spatula and thin spatula
  • Parchment paper for shaping the upper dough
  • Small bowl and pastry brush or spoon

Pastry Layers

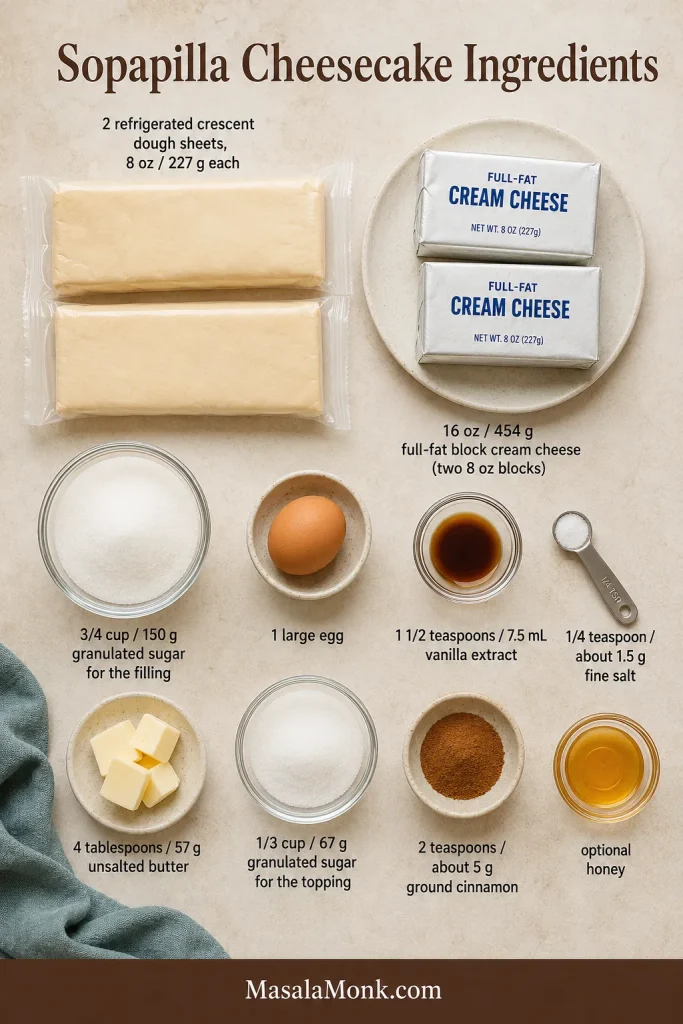
  • 2 packages refrigerated crescent dough sheets, 8 oz / 227 g each, 16 oz / 454 g total
  • Nonstick cooking spray or a small amount of additional softened butter, for the pan

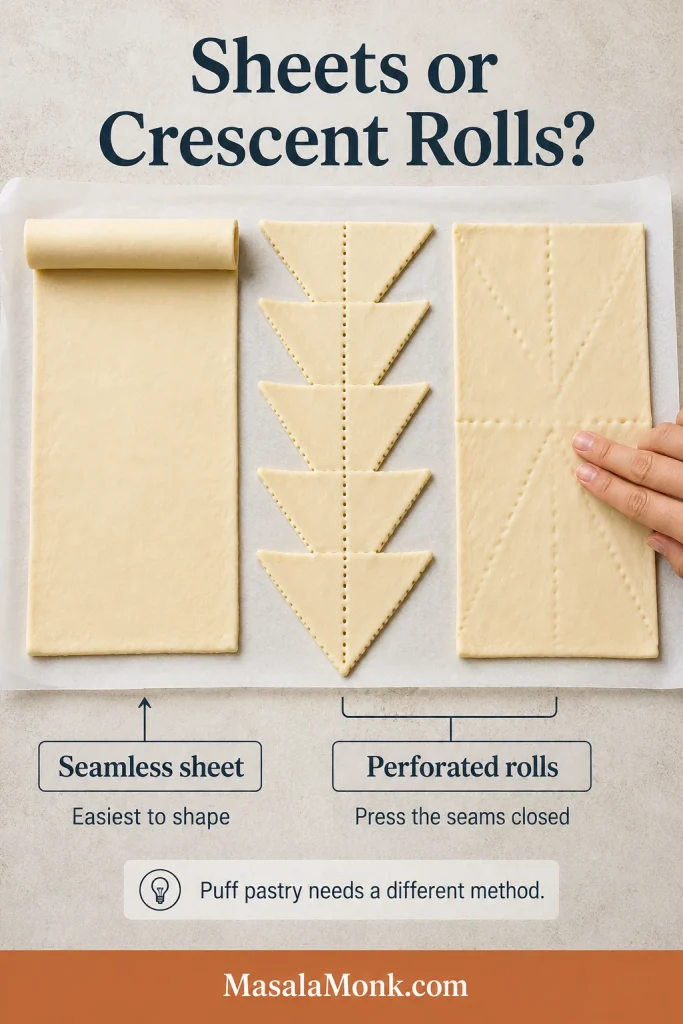
Regular perforated crescent rolls work too. Press the seams closed before assembling the dessert.

Cheesecake Filling

  • 16 oz / 454 g full-fat block cream cheese, softened
  • ¾ cup / 150 g granulated sugar
  • 1 large egg, about 50 g without the shell, at room temperature
  • 1½ teaspoons / 7.5 mL vanilla extract
  • ¼ teaspoon fine salt, about 1.5 g

Cinnamon-Sugar Top

  • 4 tablespoons / 57 g unsalted butter, melted and slightly cooled
  • ⅓ cup / 67 g granulated sugar
  • 2 teaspoons ground cinnamon, about 5 g
  • 2–4 tablespoons / 30–60 mL honey, optional, for serving

Before mixing, separate the filling sugar from the cinnamon-topping sugar. One sweetens the cheesecake layer, while the other creates the crisp upper crust; the ingredient board below shows the complete full-pan quantities together.

Instructions

Assemble the Layers
  1. Prepare the oven and pan. Arrange a rack in the middle. Preheat to 350°F / 175°C conventional, or 325°F / 160°C fan-assisted. Lightly coat the pan with nonstick spray or additional softened butter. Mix the cinnamon and topping sugar in a small bowl.
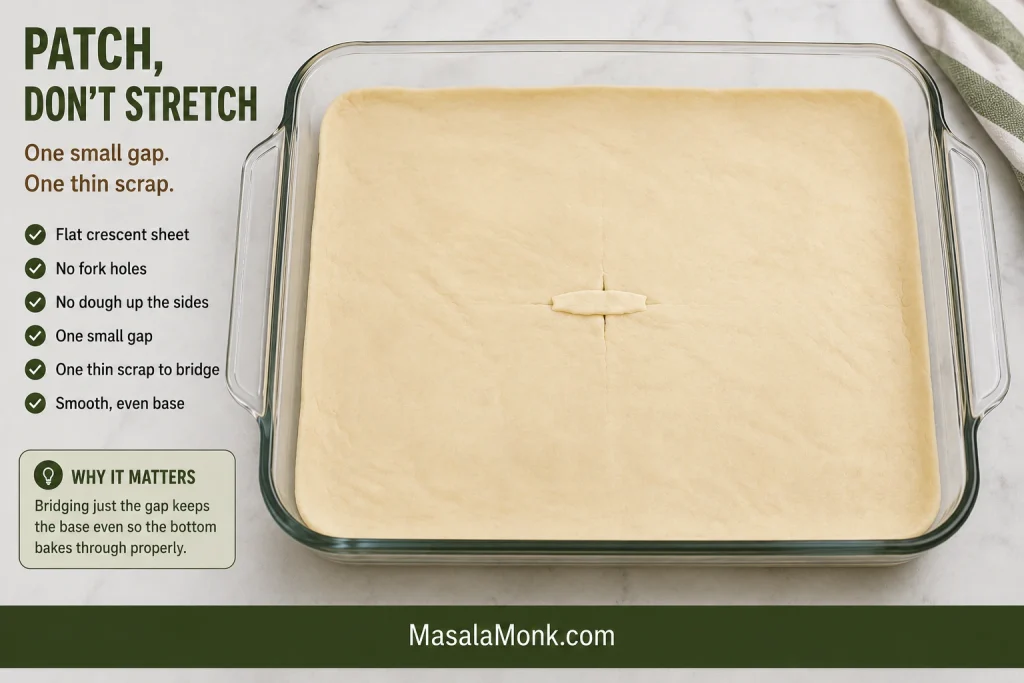
  2. Fit the lower dough into the pan. Press one crescent sheet toward the corners without pulling it paper-thin. If a small gap remains, patch it with a scrap of dough instead of stretching the whole sheet further. Seal any perforations.

A small gap does not require reshaping the whole base; bridge it with one thin scrap and keep the dough flat across the pan.

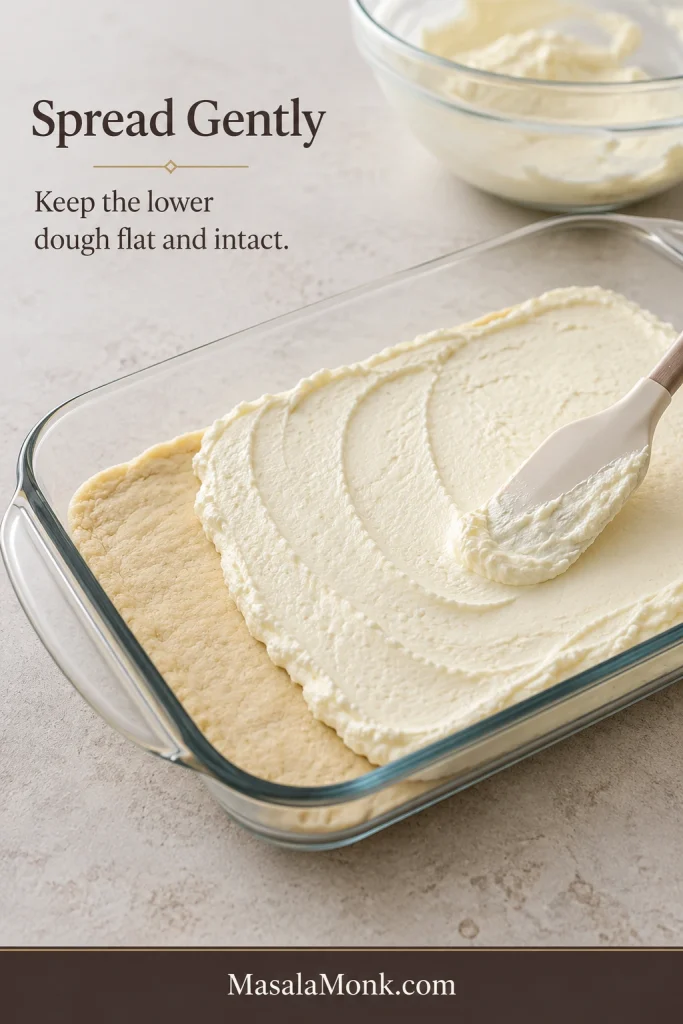
  1. Mix and spread the filling. Beat the softened cream cheese until smooth, scraping the bowl once. Add the sugar and salt, followed by the egg and vanilla. Mix only until combined, then spread the filling gently over the lower dough.

Place several small mounds across the lower dough, then join them with light strokes so the spatula does not drag or fold the base.

Cream cheese filling being spread over the lower crescent dough in a clear glass pan, with part of the pastry base still visible.
Level the filling so the center and edges set at a similar pace.
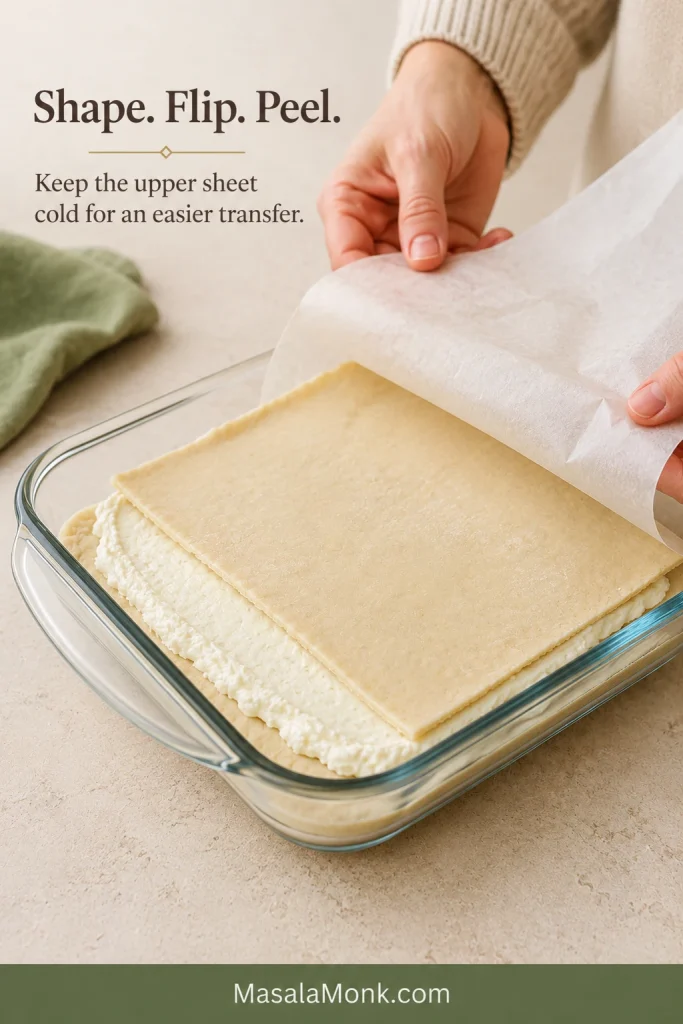
  1. Add the upper dough. Shape the second sheet on parchment, flip it over the cheesecake and peel away the paper. If the dough tears, stop stretching and patch the gap with a small scrap. The sheet doesn’t need to reach every corner perfectly.

Shape the upper sheet while it is cold, flip it onto the filling and peel away the parchment before the dough softens.

Hands peeling parchment from the upper crescent dough sheet after transferring it onto the cream cheese filling in a glass pan.
Keep the upper sheet cold, then flip and peel before it softens or stretches.
Bake, Check and Serve
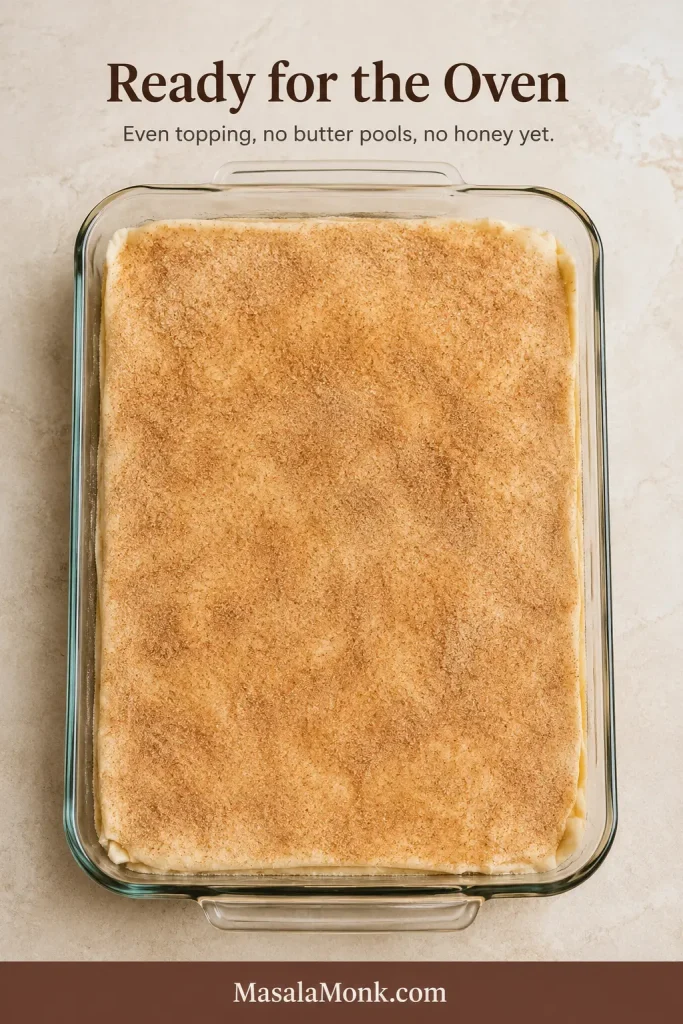
  1. Top and bake. Spread the slightly cooled butter over the dough, then cover it evenly with cinnamon sugar. Begin checking a conventional oven at about 28 minutes and a fan-assisted oven at about 25 minutes. The edges should look set, with only a gentle wobble in the middle.

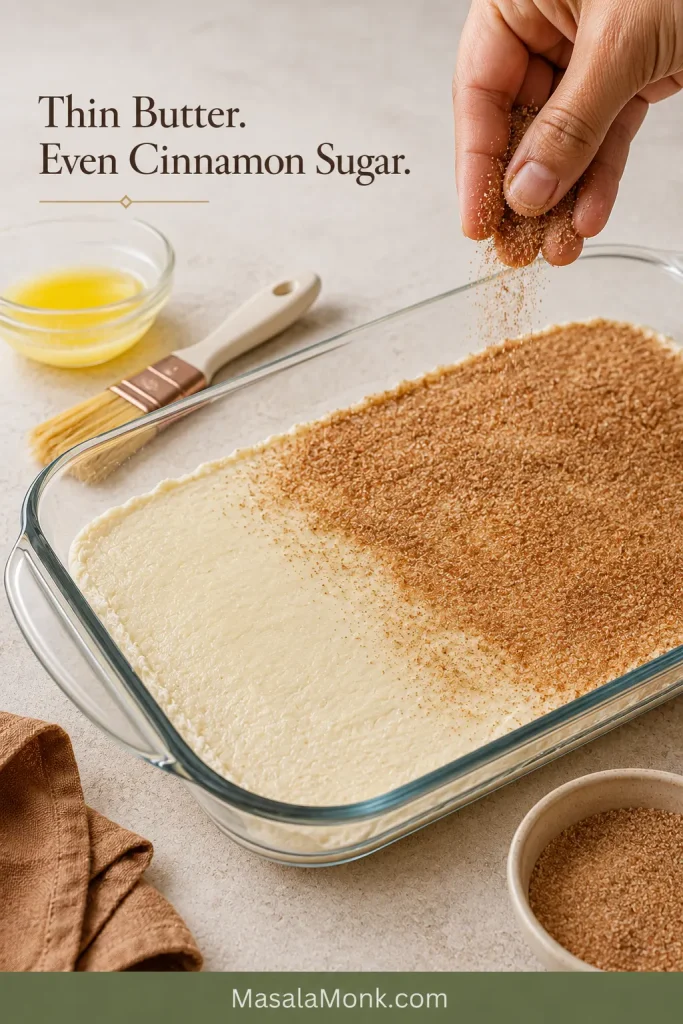
Spread the butter thinly, then add the cinnamon sugar in an even layer so no area begins the bake wet or bare.

Cinnamon sugar being sprinkled over a lightly buttered crescent dough top, with coated and uncoated areas visible.
A light butter sheen anchors the cinnamon sugar without creating greasy pools.

Before the pan goes into the oven, check that no filling is exposed through a large tear and that the butter forms a light sheen rather than standing pools.

  1. Check the lower pastry. Glass dish: Look through the bottom for pastry that appears baked instead of white and raw. Metal pan: Lift one exposed corner gently with a thin spatula. It should lift as pastry and show visible layers without smearing like paste. Top already dark? Cover it loosely with foil while the base finishes.
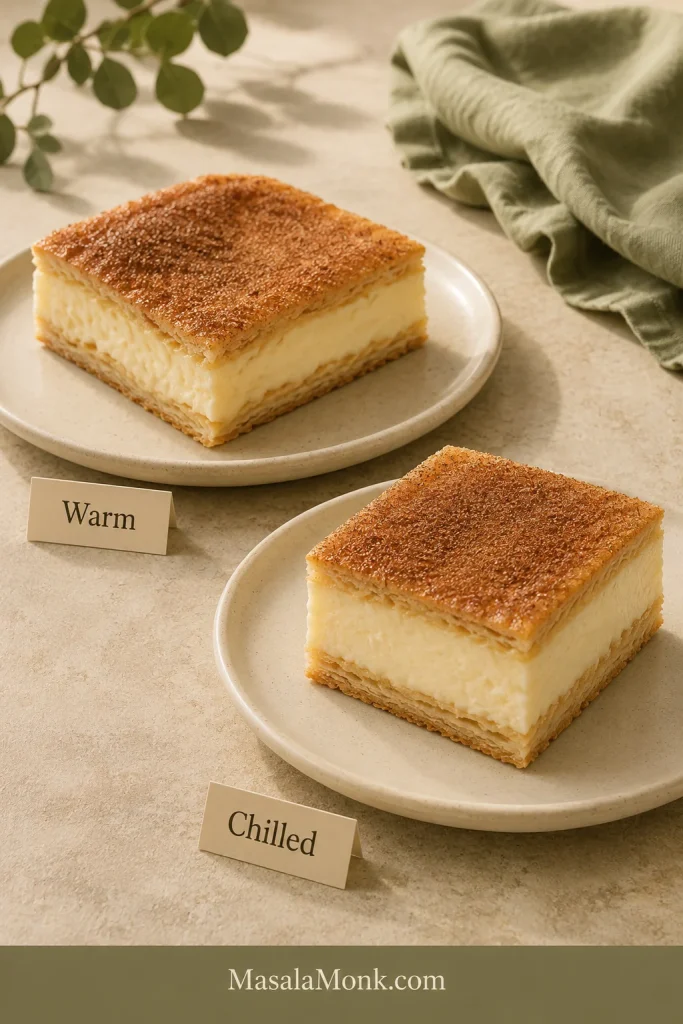
  2. Cool to the texture you want. Rest the pan for at least 20 minutes for warm, soft pieces served on plates, or about one hour for bars that hold an edge. Chill the cooled pan for 2–3 hours for the neatest squares.
  3. Cut and serve. Press down with a long, sharp knife instead of sawing through the pastry. Wipe the blade between cuts. Add honey just before serving when you want the cinnamon top to stay crisper.

In This Guide

Choose Your Serving Texture

The cleanest square and the crispiest square are rarely the same square. Serving time determines which texture you get because cooling firms the cheesecake while gradually softening the pastry.

If You WantCooling TimeWhat to Expect
Warm dessert pieces20–30 minutesFragrant pastry and a soft center; best served on plates
Creamy bars that hold an edgeAbout 1 hourA delicate cinnamon crackle with a center that stays together when cut
Neat potluck squaresCool fully, then chill 2–3 hoursThe firmest center and tidiest edges, with a less crisp refrigerated crust
Make-ahead dessertChill overnightVery neat pieces; let them stand briefly before serving for a softer bite
A potluck pan needs tidy squares; a quiet evening at home does not.

Cutting, Carrying and Serving

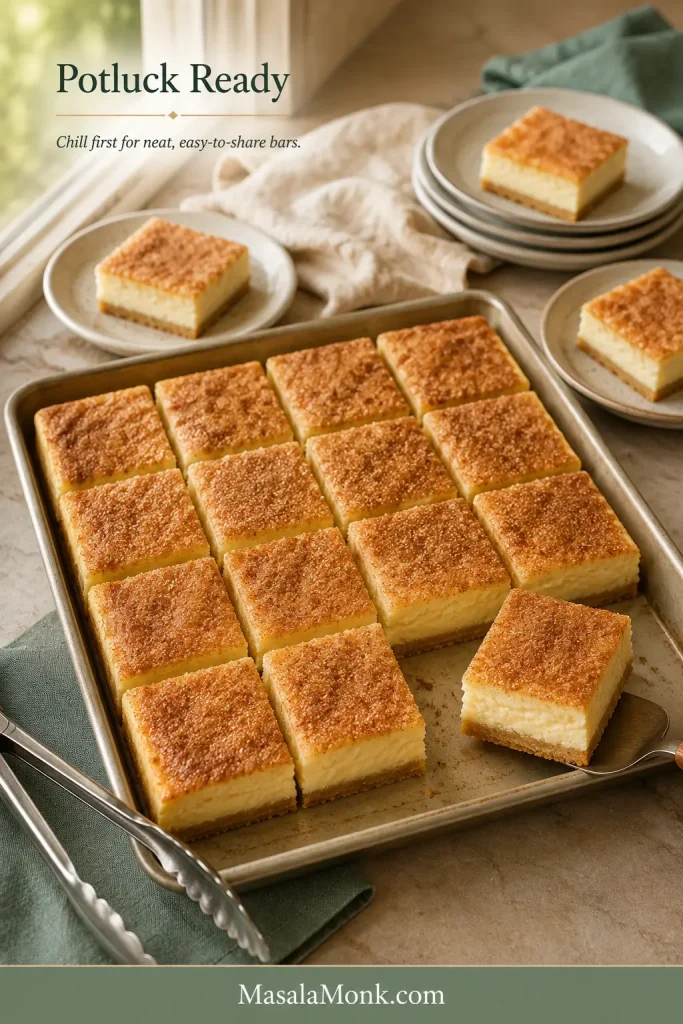
For a buffet or potluck, chill and transport the bars in their original pan, then move them to a serving tray after arrival. The colder center holds its shape better, while the pan protects the edges from shifting in transit.

Neatly cut chilled Sopapilla Cheesecake bars arranged on a serving tray with small dessert plates nearby.
Chill before transporting so the bars hold their shape and lift cleanly.

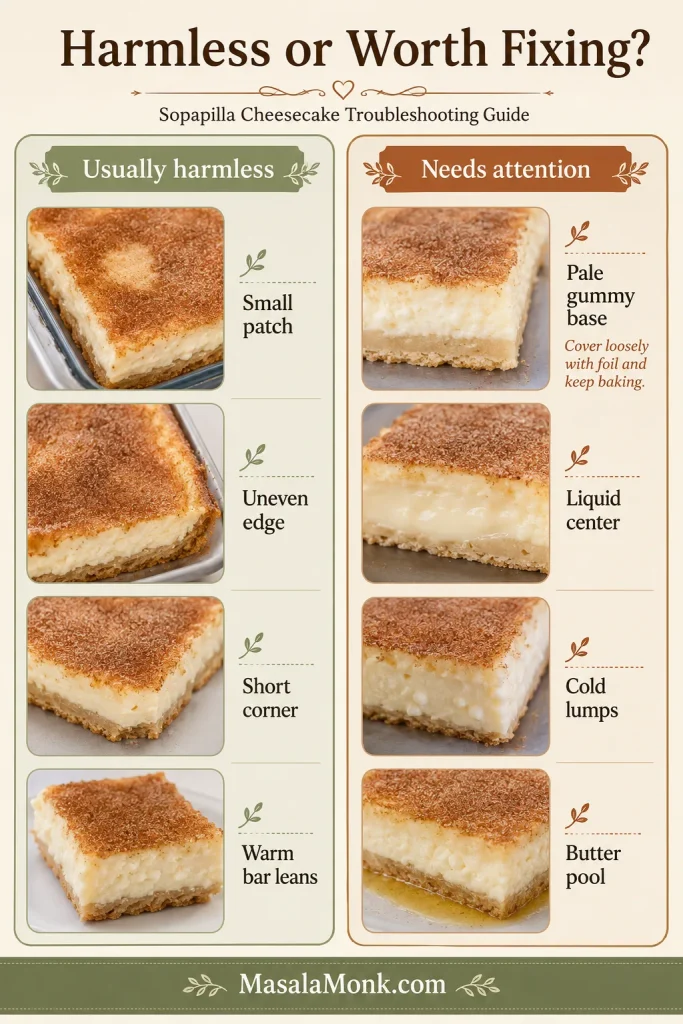
A warm first piece may lean or smear a little. That is simply what warm cheesecake does—not a sign that the bake failed.

For clean slices, press down decisively with a sharp knife and wipe the blade after each cut. Divide the pan into 12 large pieces, 16 standard bars or 24 smaller potluck squares. Cooling plays the same useful role in these pecan pie bars, where the filling becomes easier to portion after it settles.

Prefer a fully chilled dessert with a crumb crust? This no-bake cream cheese pie is the closer match.

What Is Sopapilla Cheesecake—and What Makes This Version Different?

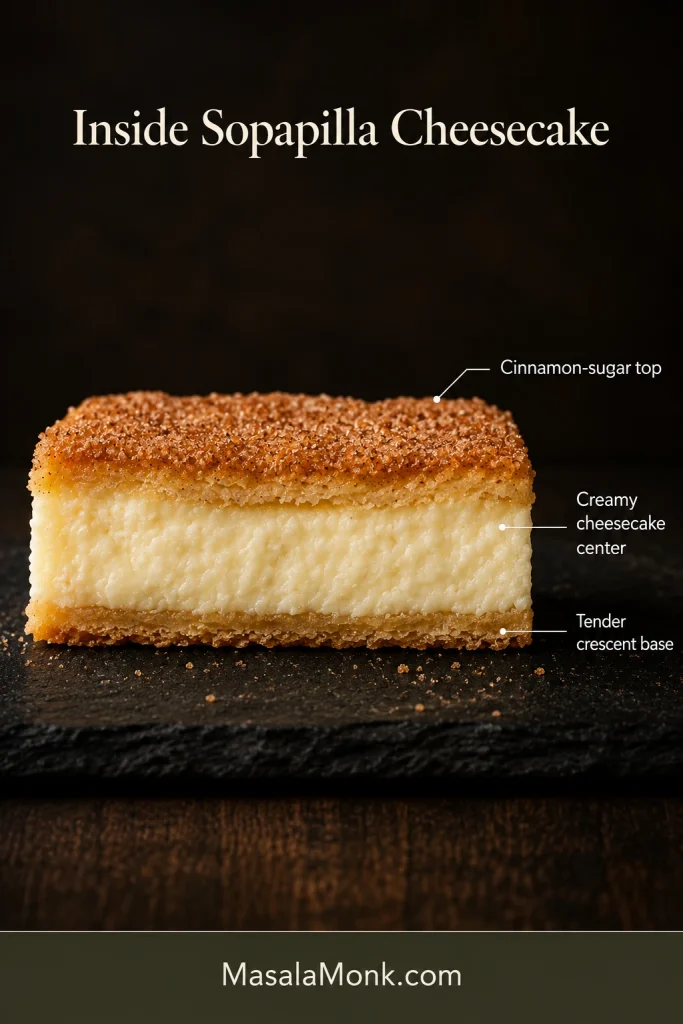
Sopapilla Cheesecake lands somewhere between cheesecake bars, a cream cheese danish and cinnamon pastry. Sweetened cream cheese sits between two thin layers of refrigerated crescent dough, finished with butter and cinnamon sugar.

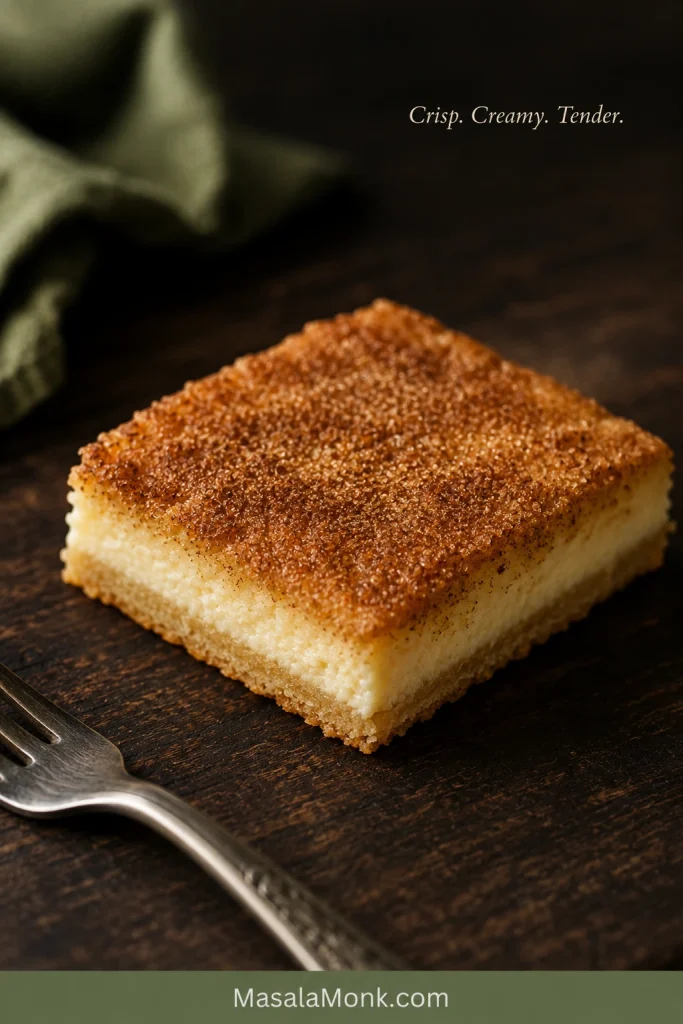
Close-up of one Sopapilla Cheesecake bar with a crackled cinnamon-sugar top, pale creamy center and thin baked crescent dough base.
The base should look like tender baked crescent pastry—not a thick crumb crust.

You may also see this recipe called crescent roll cheesecake bars or Churro Cheesecake. Some websites use the name “Mexican Cheesecake Bars,” though that is a loose online recipe label rather than one traditional Mexican cheesecake style.

It needs no crumb crust, springform pan or water bath. A New York cheesecake is the better choice when you want a tall, dense center and a more traditional baked-cheesecake structure.

One Egg and Two Blocks of Cream Cheese

Two pans of Sopapilla Cheesecake can look almost identical and still cut very differently. One egg helps this filling hold together without turning firm or custardy. Two blocks of cream cheese create a generous center while leaving the crescent layers noticeable in every bite.

Why the egg matters: Leave it out of this filling and the center becomes looser and more pastry-like. A third block of cream cheese changes the depth and texture enough to require its own egg, sugar and baking balance.

Cold Dough and Softened Cream Cheese

Leave each dough package refrigerated until it is needed. Cold dough behaves; warm dough stretches, sticks and fights back.

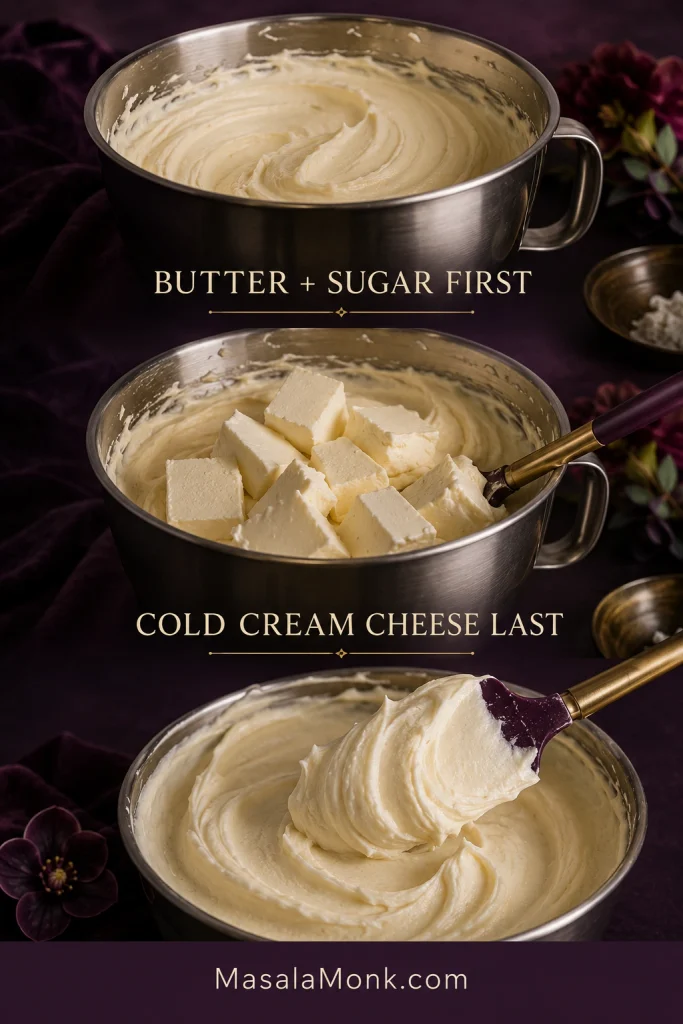
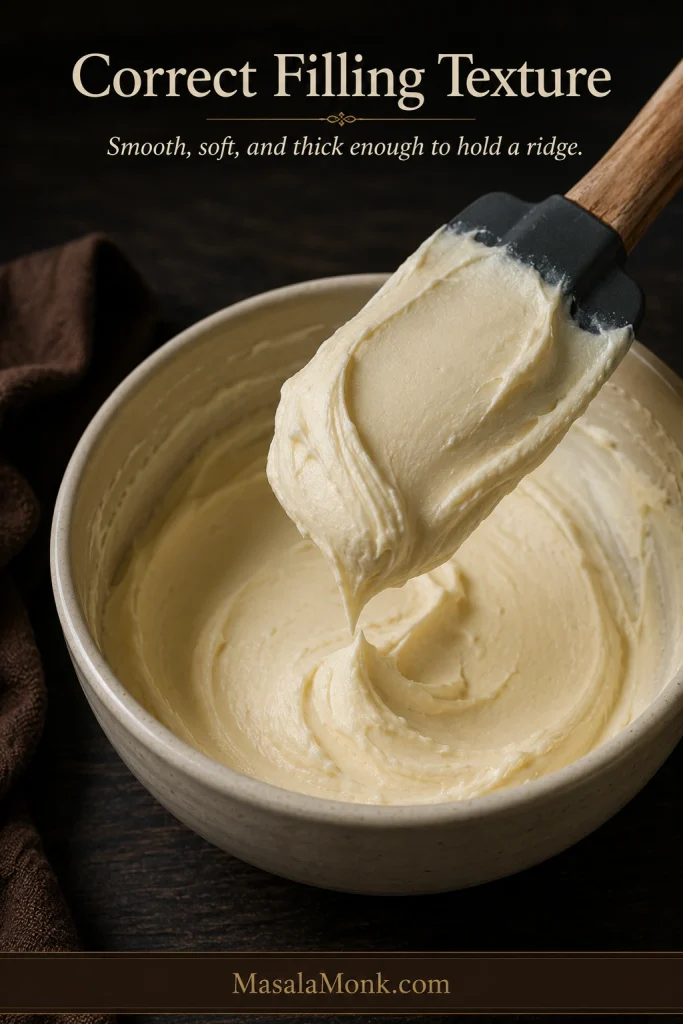
The cream cheese needs the opposite treatment. It should press easily while still feeling cool and holding its shape. Tiny specks may disappear during baking, but smooth out any larger cold lumps before spreading the filling. Tub-style cream cheese can contain more moisture and may leave the center loose.

Close-up of smooth pale cream cheese filling lifted on a flexible spatula and holding a soft ridge over a mixing bowl.
Smooth the cream cheese before adding sugar and egg, when cold lumps are easiest to remove.

Sugar, Butter and Cinnamon

The filling remains lightly sweet so the cream cheese tang still comes through. A thin, even coat of butter helps the cinnamon sugar bake into a crisp top without leaving oily patches.

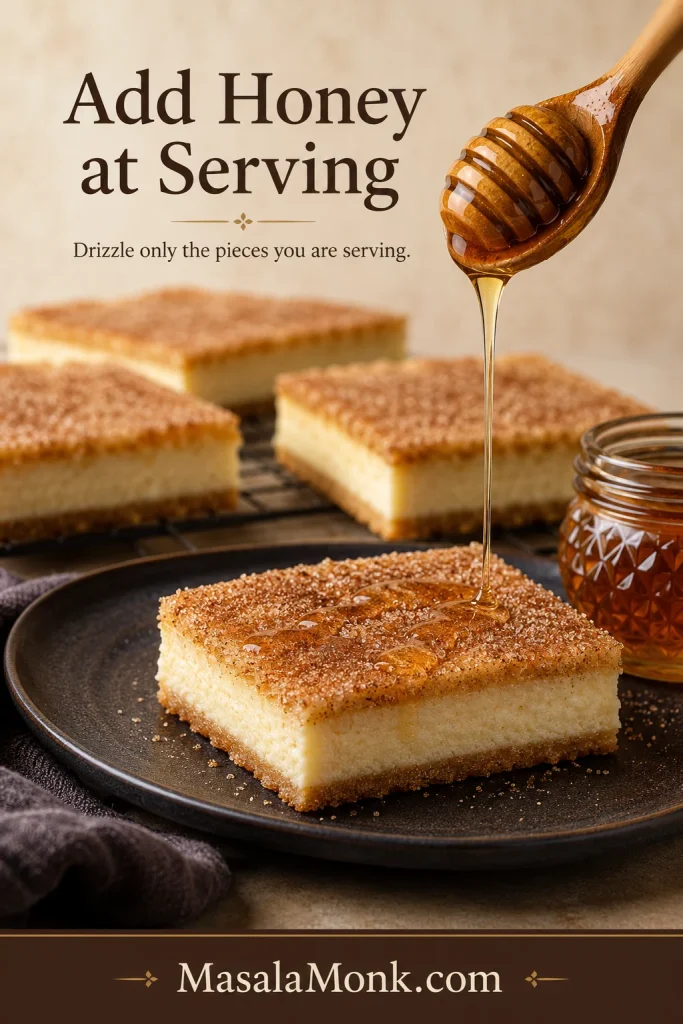
Honey is optional. Pour it over warm pastry when you want it to soak in. To keep the remaining crust crisper, add it only to the pieces being served.

Thin stream of honey falling onto one plated Sopapilla Cheesecake bar, with undrizzled bars visible in the background.
Add honey only to the pieces being served if you want the remaining crust to stay crisp.

For the full yeast-dough version of that cinnamon aroma, this cinnamon roll recipe takes the longer, softer route.

Which Crescent Dough Works Best?

Crescent dough is not merely the shortcut here; its tender, lightly flaky texture is part of the dessert people expect.

  • Seamless crescent sheets are the easiest to shape and transfer.
  • Perforated crescent rolls work well once the seams are pressed closed.
  • Puff pastry flakes more dramatically and needs its own temperature, chilling and timing.

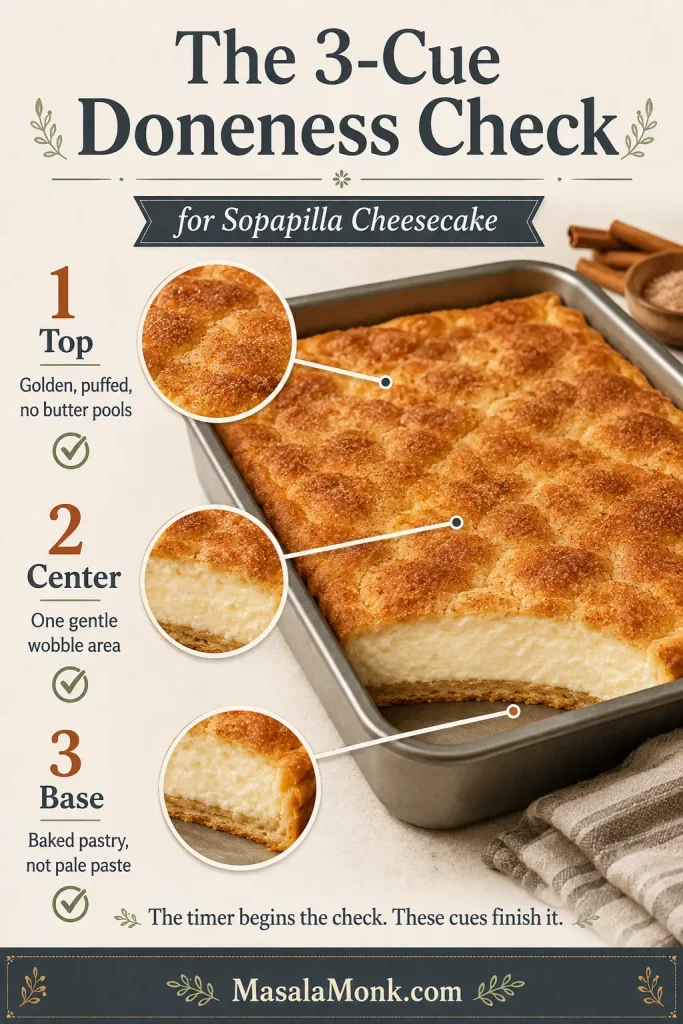
How to Tell When It Is Done

Once the top smells deeply of cinnamon, it is tempting to pull the pan. Give the center and lower pastry one final check first.

  1. Top: puffed, richly golden and mostly free of standing butter.
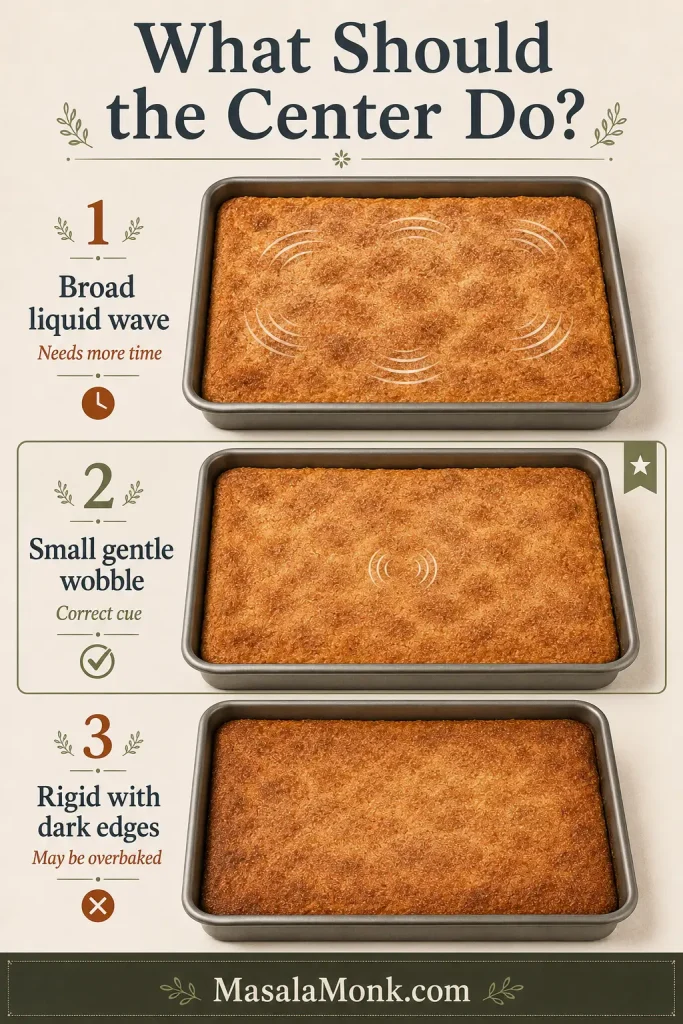
  2. Center: set around the edges, with one small area in the middle moving gently as a unit.
  3. Base: baked into a tender sheet that lifts without smearing or clinging like paste.

A liquid wave crossing the pan means the filling needs more time. Once all three cues are present, remove the pan. After cooling, the cinnamon top should crackle lightly under the knife.

How the Pan Changes the Check

  • Clear glass: easiest for first-time bakers because the lower pastry remains visible.
  • Light-colored metal: heats efficiently and may finish earlier. Check one exposed corner or edge with a thin spatula.
  • Ceramic: looks attractive on the table, though thick walls may slow the bake.
  • Dark metal: browns the edges more aggressively, so begin checking early.

If the surface is already dark, protect it loosely with foil while the base finishes.

Troubleshooting

Most problems come down to ingredient temperature, uneven butter or not giving the pan enough baking or cooling time.

ProblemWhy It Happens and What to Do
Top is dark but the base is paleThe upper sheet finished first. Protect the surface with foil and let the base continue baking.
Upper dough toreThe sheet became warm or was stretched too far. Patch the tear with a small dough scrap.
Filling contains white lumpsThe cream cheese was still too cold. Smooth large lumps before assembly; tiny specks are unlikely to matter.
Hot bars fall apartThe center has not cooled enough to hold an edge. Serve the pieces on plates or let the pan cool longer.
Topping looks greasy or powderyThe butter pooled or missed parts of the dough. Spread it in a thin, even coat before adding the cinnamon sugar.
A previous batch stayed doughy underneathConfirm that the oven reaches the set temperature, use clear glass when you want to monitor the base and allow additional baking time after the top looks ready.
Fix the cause first; changing the whole recipe usually creates another problem.

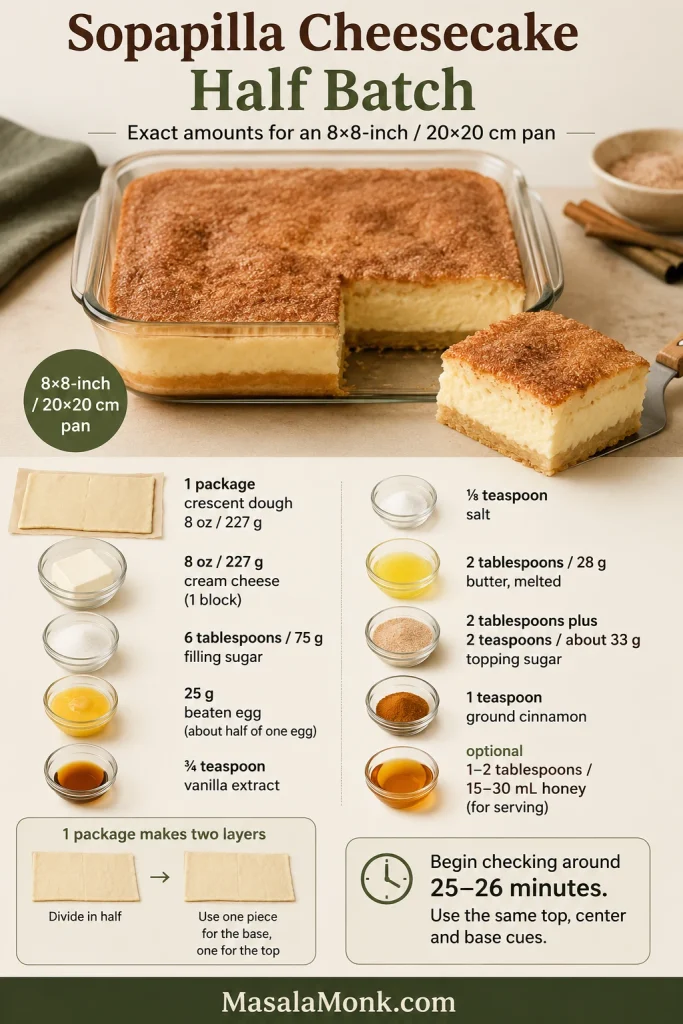
How to Make a Half Batch

When a full party pan feels like too much, an 8×8-inch / 20×20 cm pan gives you the same layered dessert in a more manageable batch.

Cut one crescent sheet crosswise. Shape each half separately on parchment to roughly 8×8 inches—one for the base and one for the top.

The pastry will be slightly thinner than in the full batch, so stop stretching if it begins to tear and patch the gap instead. With perforated rolls, use four triangles per layer.

IngredientHalf-Batch Amount
Crescent dough1 package, 8 oz / 227 g, divided equally
Full-fat block cream cheese8 oz / 227 g
Filling sugar6 tablespoons / 75 g
EggWhisk one large egg and use 25 g, or about 1 tablespoon plus 2 teaspoons
Vanilla¾ teaspoon
Fine salt⅛ teaspoon
Butter2 tablespoons / 28 g
Topping sugar2 tablespoons plus 2 teaspoons / about 33 g
Cinnamon1 teaspoon
Honey, optional1–2 tablespoons / 15–30 mL
Weighing the beaten egg is the easiest way to divide it accurately.

Begin checking around 25–26 minutes. Use the same top, center and base cues; depending on the pan, the half batch may still need close to the full baking time.

Variations and Ingredient Changes

Small Flavor Changes

  • Add 1–2 teaspoons finely grated orange or lemon zest to the filling.
  • Replace up to ¼ teaspoon of the vanilla with almond extract.
  • Reduce the topping sugar by 1–2 tablespoons for a less sweet cinnamon crust.

Can You Make Sopapilla Cheesecake Without Egg?

If you simply leave the egg out of this filling, it will be looser and more pastry-like after baking. That can still be enjoyable, but it will not hold the same edge as the main version after cooling.

When avoiding both eggs and the oven matters more than keeping the crescent layers, this no-bake cheesecake recipe is the simpler option.

Changes That Need Their Own Method

Fruit filling releases moisture directly above the lower dough, making a gummy base more likely. Pumpkin, homemade dough and gluten-free pastry also change the moisture level or the way the bars hold together.

Each can produce a good dessert, but none is a simple add-in for the method above.

Make Ahead, Storage and Freezing

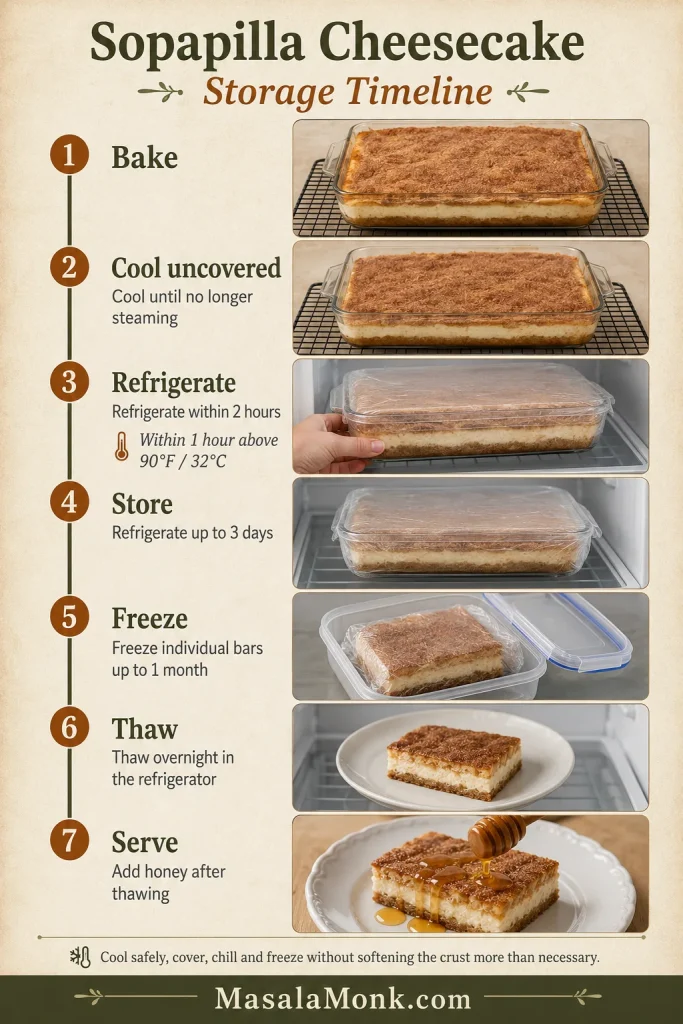
This is an easy dessert to make a day ahead, especially when neat party squares matter more than a crisp, just-baked top. Chill the whole pan overnight, cut it while cold and let the pieces stand briefly before serving.

Does Sopapilla Cheesecake Need to Be Refrigerated?

Yes. Keep the bars at room temperature for no more than two hours—or one hour when the temperature is above 90°F / 32°C—in line with USDA guidance for perishable food. Let the pan cool uncovered until it is no longer steaming, then cover and refrigerate it. Store the bars for up to three days.

To take the chill off a refrigerated bar, leave it at room temperature for about 15 minutes. For a faster result, warm it at half microwave power in five-second bursts and stop as soon as the center softens slightly.

Freezing

  • Freeze fully cooled individual bars without honey.
  • Wrap each piece tightly and place it in a freezer-safe container.
  • Freeze for up to one month for the best pastry quality.
  • Thaw overnight in the refrigerator.
  • Add honey after thawing.

The cheesecake layer freezes well, though the pastry will be less crisp after thawing.

Refrigerated dough is useful for other quick bakes too. This apple cinnamon roll bake takes the same shortcut in a fruitier direction.

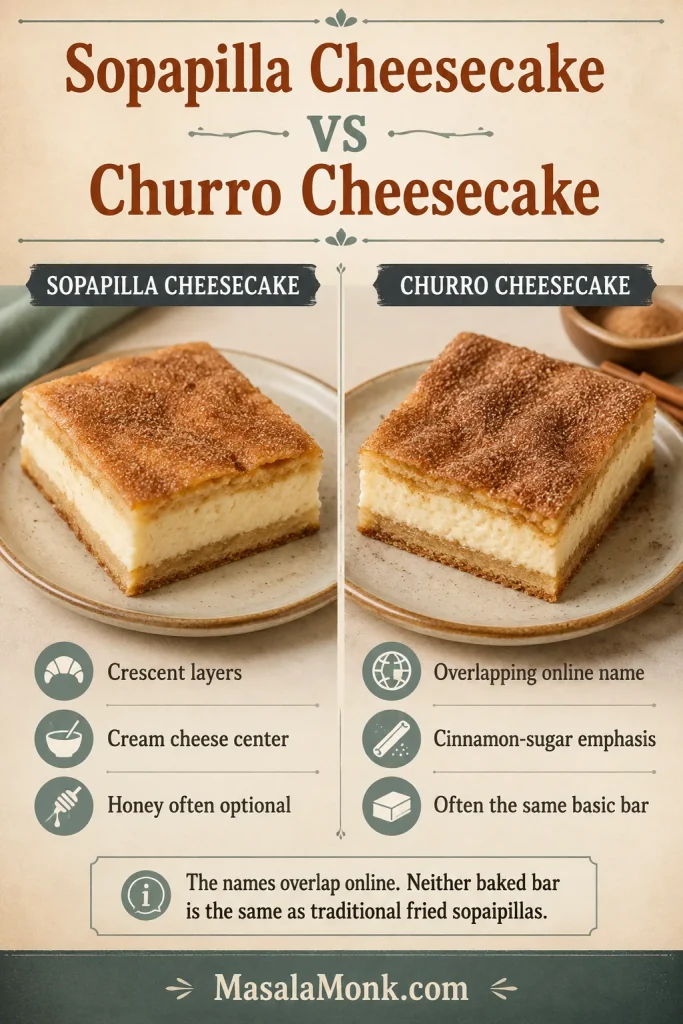
Sopapilla Cheesecake vs Churro Cheesecake

The names overlap in many online recipes. Recipes called “Churro Cheesecake” usually put more emphasis on the cinnamon-sugar coating, while “Sopapilla Cheesecake” more often includes honey and references the fried pastry behind the name.

Sopaipilla is another common spelling of sopapilla. In New Mexico, traditional sopaipillas are puffed pieces of fried dough commonly served with honey. The crescent-roll dessert borrows that combination but bakes it into cheesecake bars.

For the crisp fried dough itself, this guide to homemade churros follows a different technique altogether.

Frequently Asked Questions

Can I Use Regular Crescent Rolls Instead of Sheets?

Yes. Press the seams closed before transferring the dough, and keep the sheet cold so it remains easy to move. See the crescent dough comparison for the easiest handling method.

Can I Bake Sopapilla Cheesecake the Day Before?

Yes. Bake and chill the pan overnight, cut it while cold and let the bars stand briefly before serving. Follow the make-ahead and storage guide for cooling and refrigeration timing.

Why Is the Bottom Dough Still Raw?

The cream cheese layer insulates the lower dough, so it may need longer than the golden top. Protect the surface with foil and follow the glass- or metal-pan check in the doneness guide.

Can I Use Low-Fat or Tub-Style Cream Cheese?

Full-fat block cream cheese is the most dependable choice for a filling that sets neatly. Tub-style and lower-fat products can contain more moisture and may leave the center looser after cooling. The filling-texture section shows what properly softened block cream cheese should look like.

Keep the dough cold, bake the lower layer through and cool the pan to the texture you want. Those choices matter more than a perfectly smooth top.

A Pan Worth Sharing

At its best, every bite moves from a crisp cinnamon-sugar crust to a smooth cheesecake center and tender pastry underneath. It is easy enough for an ordinary evening and generous enough for a crowded table.

The first warm corner belongs to the cook; the rest of the pan is made for sharing.

Hand lifting a warm corner bar from a mostly intact glass pan of Sopapilla Cheesecake on a softly lit shared table.
Warm, soft and worth claiming first.

Did you serve the bars warm and soft or chill them for neat squares? Leave a comment and tell us which texture won at your table.

Return to recipe card ↑ Back to top ↑

Posted on Leave a comment

Carrot Cake Recipe: Easy, Moist Carrot Cake With Cream Cheese Frosting

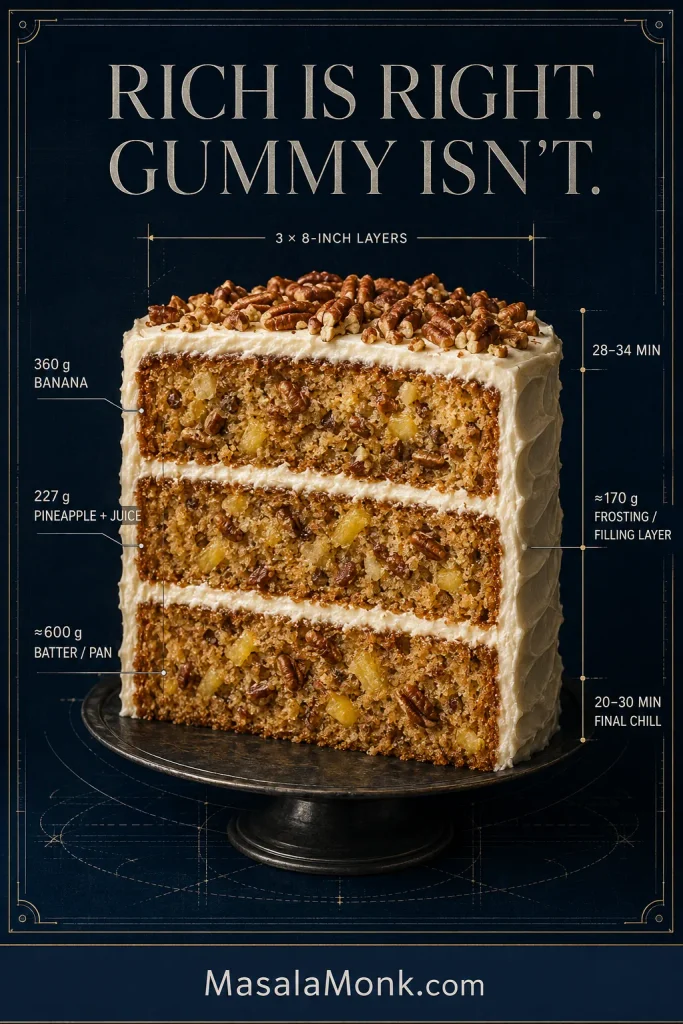
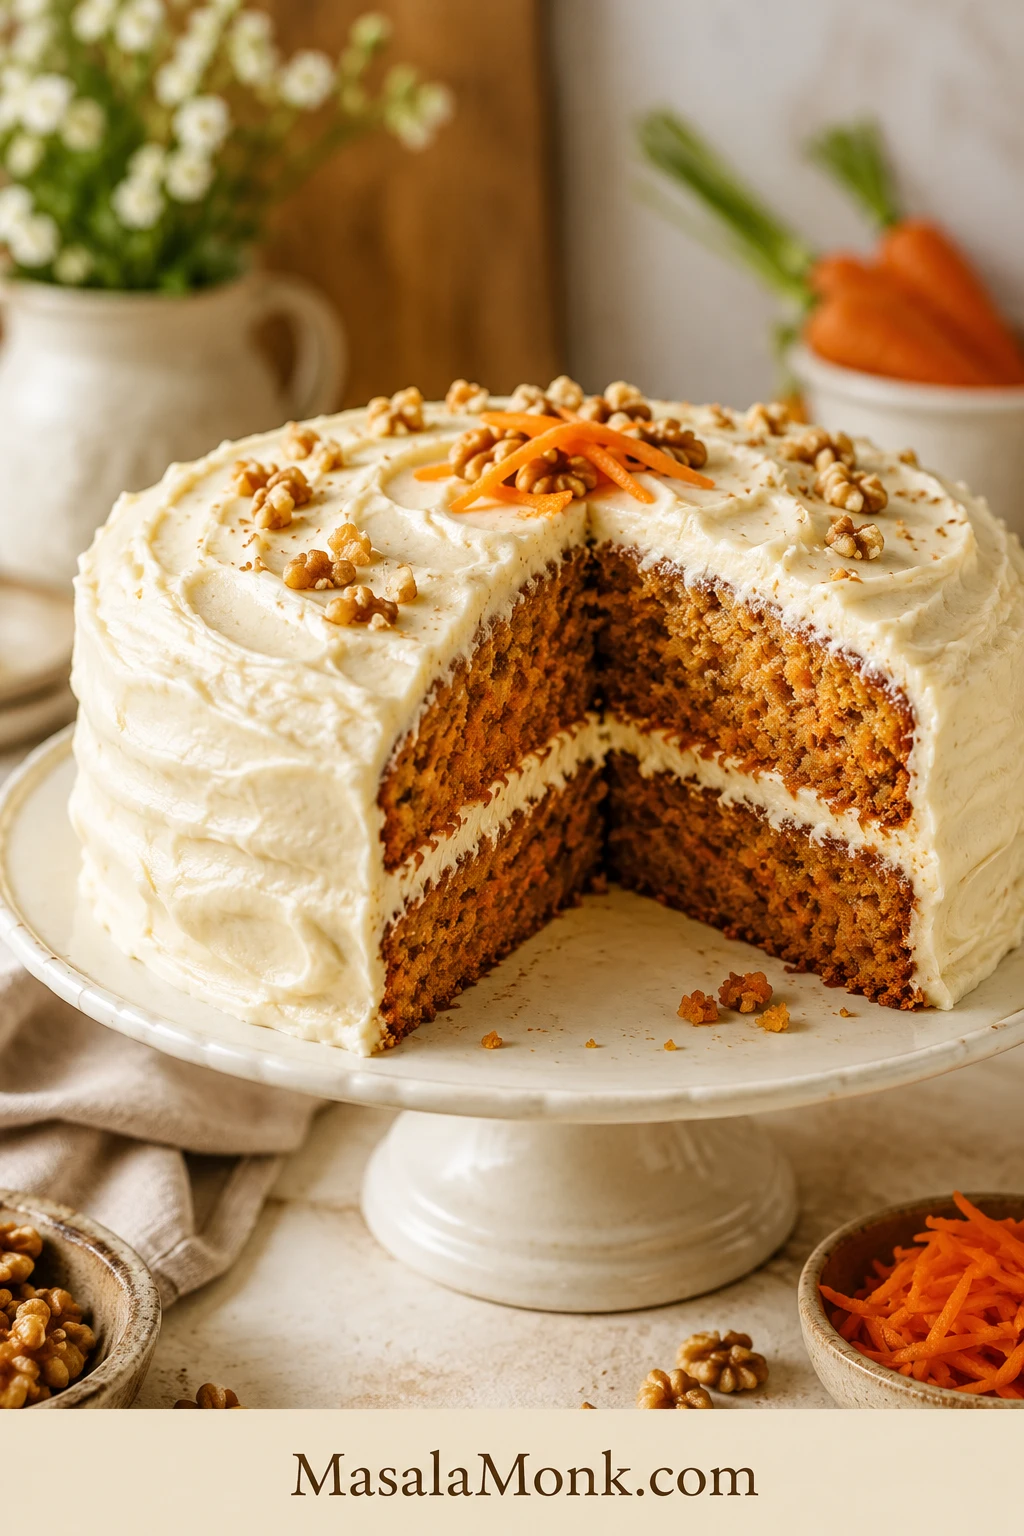
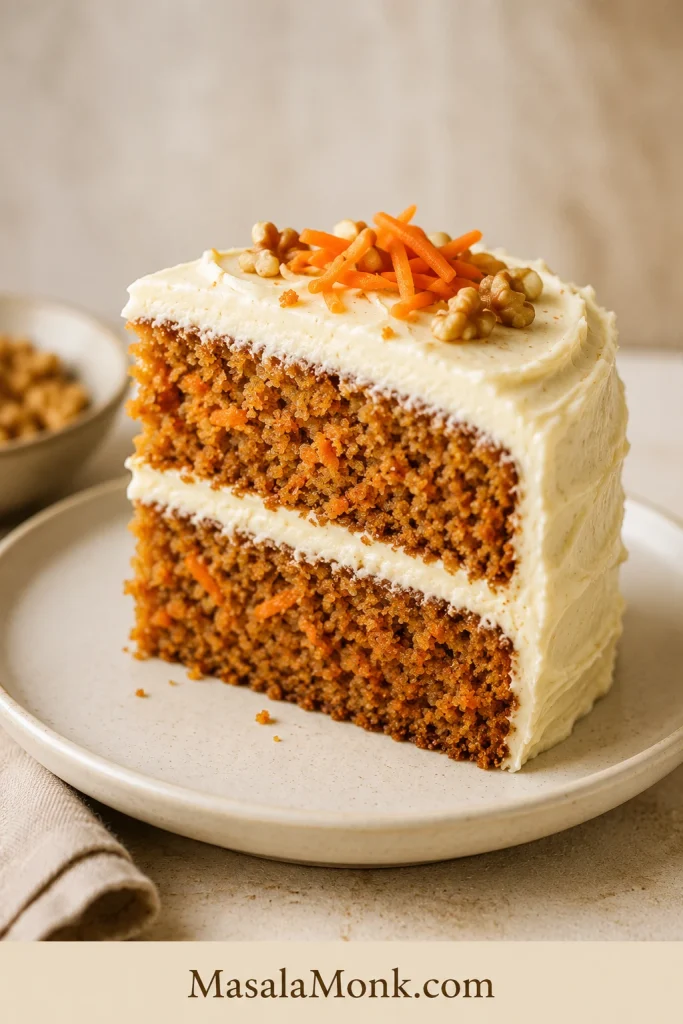
Two-layer carrot cake with cream cheese frosting on a cake stand, with one slice removed to show carrot flecks in the crumb.

Carrot cake should be soft under the fork, warmly spiced, full of carrot, and rich with cream cheese frosting. It should not be greasy, dry, heavy, or so crowded with add-ins that the carrot disappears.

The best version gives you a fork-tender crumb, little orange flecks in every slice, warm spice that does not bully the carrot, and frosting thick enough to stay where you put it. This carrot cake recipe is built around those details: fresh grated carrots, oil for softness, brown sugar for depth, a little applesauce or yogurt for a tender crumb, and a classic cream cheese frosting that slices cleanly.

Carrot cake people rarely agree on everything, so this recipe starts with the classic cake and then helps you choose the pineapple, nuts, raisins, pan size, and frosting texture that fit your table.

Make it as a two-layer cake, a simple 9×13 sheet cake, or cupcakes. Add nuts, skip raisins, bake it a day ahead, chill it overnight, or freeze the layers for later. A slightly rustic carrot cake is still a beautiful carrot cake. The frosting does not need to be perfect; it just needs to be thick, tangy, and spread over fully cooled layers.

Quick Answer: How Do You Make Moist Carrot Cake?

Moist carrot cake comes from oil, brown sugar, fresh grated carrots, careful flour measurement, and the right bake time. This recipe also uses applesauce or plain yogurt to keep the crumb soft without making the cake oily.

Grate the carrots yourself; dry bagged shreds do not soften into the crumb the same way. Fold the batter gently once the flour goes in. Bake until the center springs back and a toothpick shows clean crumbs or a few moist crumbs. A clean toothpick is good; a bone-dry toothpick is a warning.

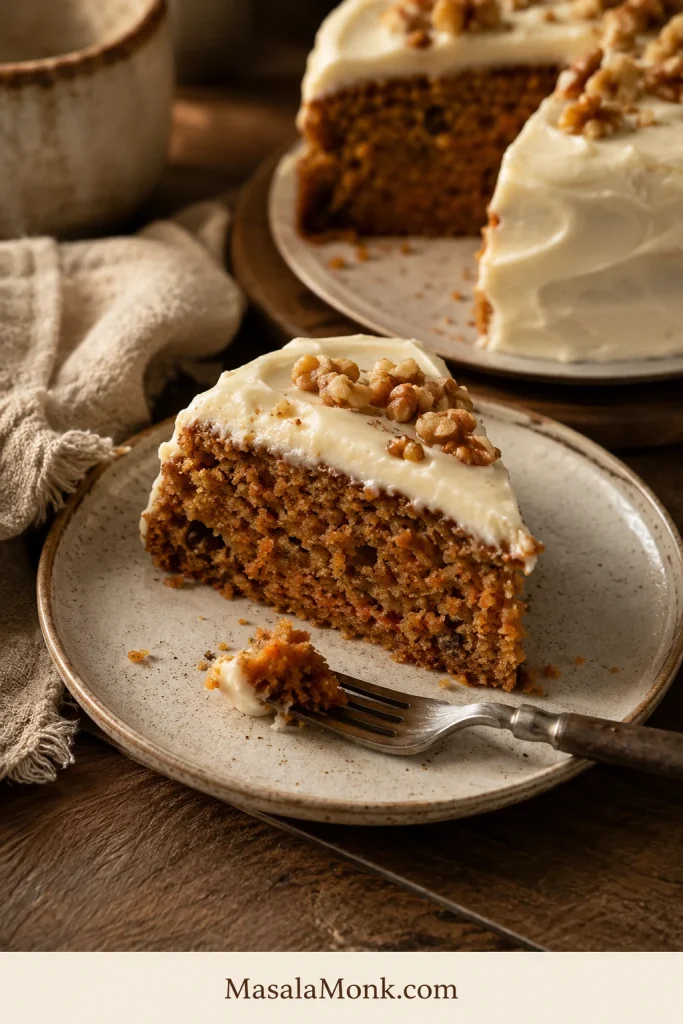
Texture cue: Fork pressure should show tenderness without collapse.

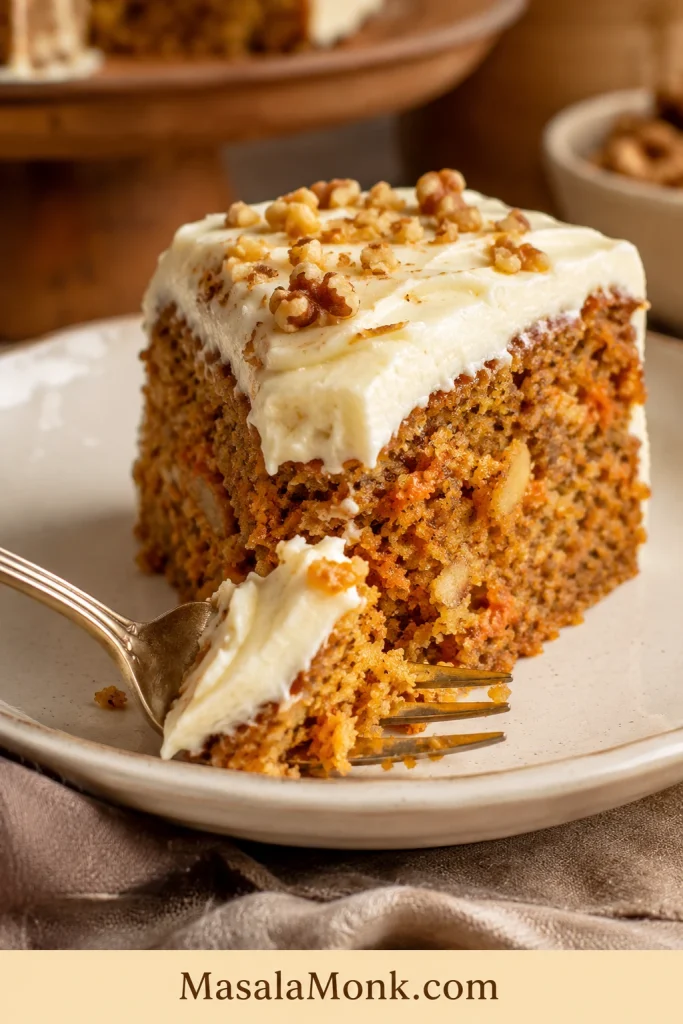
Fork cutting into a slice of carrot cake with cream cheese frosting and visible orange carrot flecks.
A fork should move through carrot cake easily, but the slice should not collapse. That tender bite comes from fresh grated carrots, enough fat for softness, and pulling the cake before the crumb dries out.

Carrot Cake at a Glance

StyleClassic carrot-spice cake with optional pineapple
TextureSoft, moist, sliceable, not oily
FrostingThick cream cheese frosting
Main panTwo 9-inch round cake pans
Easiest pan9×13 sheet cake pan
Oven350°F / 180°C / 160°C fan
Bake time28–35 minutes for 9-inch layers
Best carrotsFreshly grated, medium-fine
Make aheadExcellent baked or frosted 1 day ahead
Best forBirthdays, Easter, holidays, potlucks, family dessert

Carrot Cake Recipe Card

Easy Moist Carrot Cake With Cream Cheese Frosting

This is a classic two-layer carrot cake made with fresh grated carrots, brown sugar, oil, warm spices, and thick cream cheese frosting. The classic version does not rely on pineapple, but an old-fashioned pineapple variation is included in the notes. New to layer cakes? Use the same batter in a 9×13 pan and frost only the top.

Layer cue: Use this slice to check tidy layers after chilling.

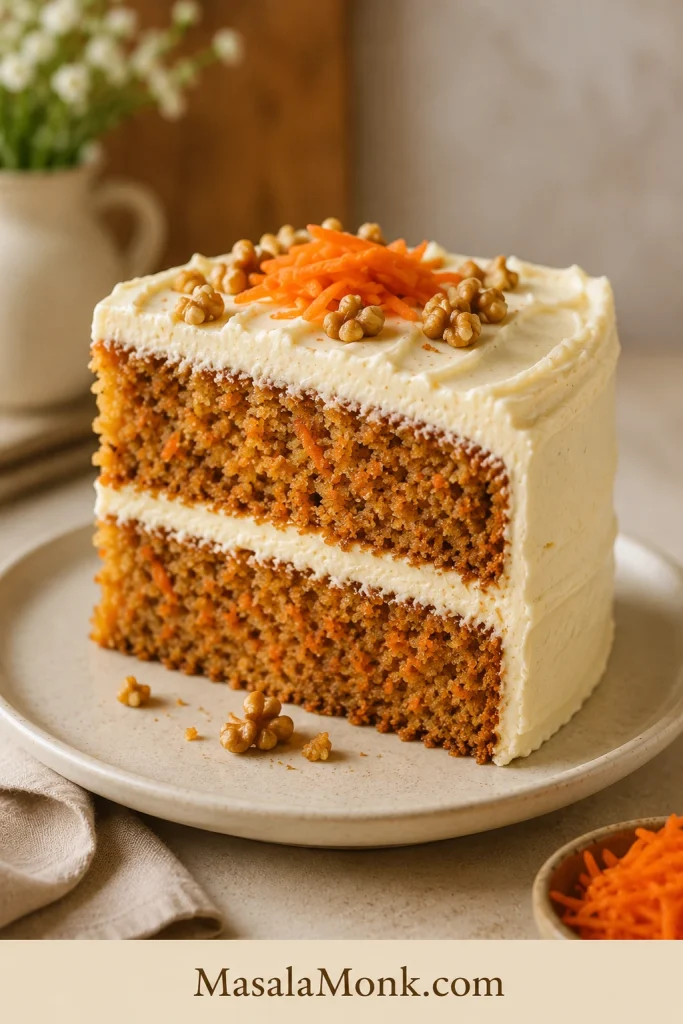
Clean plated slice of two-layer carrot cake with cream cheese frosting and orange carrot flecks throughout the crumb.
This slice shows the classic carrot cake structure clearly: two cake layers, a creamy middle, and frosting on top. After the cake chills, the layers cut cleaner while the crumb still looks tender and full of carrot.
Prep Time30 minutes
Cook Time28–35 minutes
Cooling and Frosting Time1 hour 30 minutes
Total TimeAbout 2½ hours
Yield12 slices
DifficultyEasy to moderate
Main PanTwo 9-inch round cake pans
Beginner Pan9×13 sheet cake pan
Oven Temperature350°F / 180°C / 160°C fan
Doneness CueCenter springs back; toothpick shows clean or moist crumbs

Equipment

  • Two 9-inch round cake pans or one 9×13 pan
  • Parchment paper
  • Box grater or food processor with grating disc
  • Large mixing bowls
  • Whisk
  • Rubber spatula
  • Electric hand mixer or stand mixer for frosting
  • Cooling rack
  • Offset spatula or butter knife

Cake Ingredients

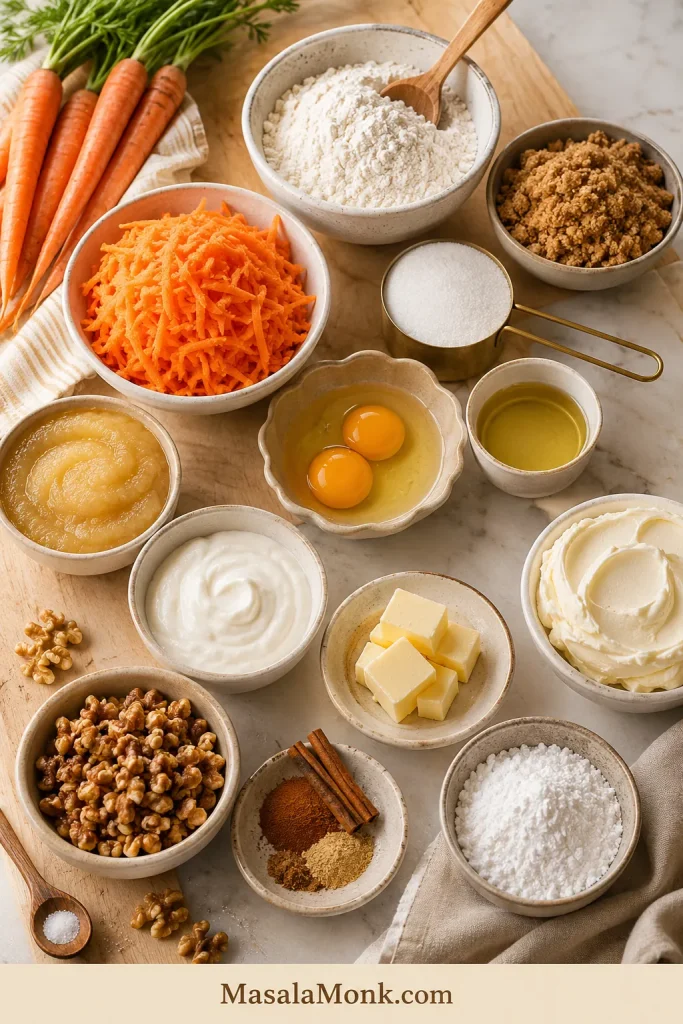
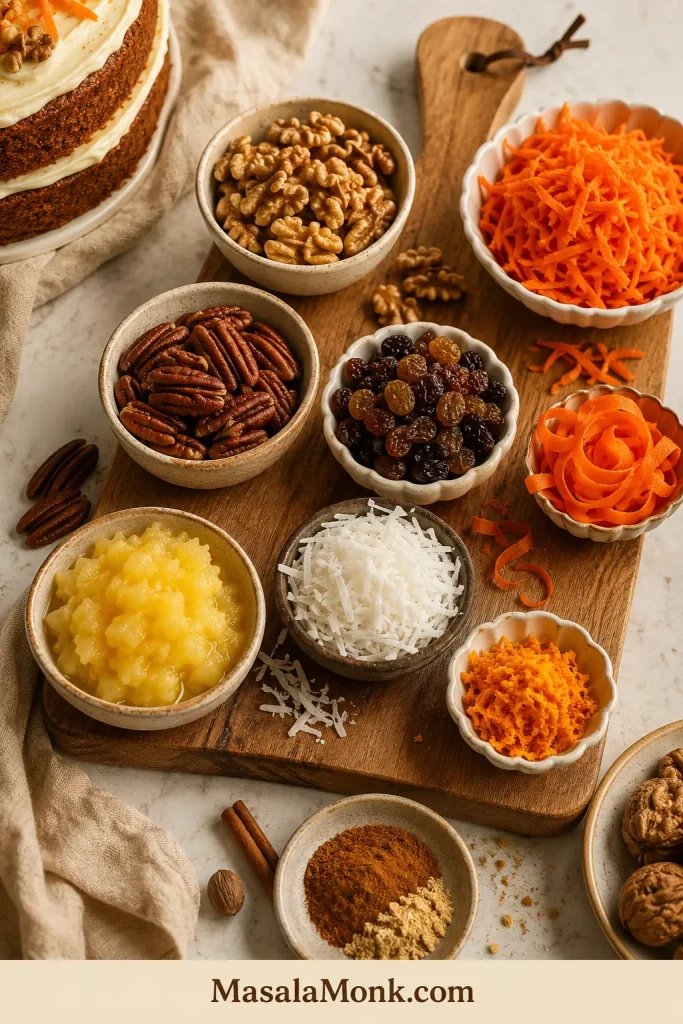
Ingredient cue: These ingredients carry moisture, spice, structure, and frosting stability.

Ingredient board with carrots, grated carrots, flour, sugar, eggs, oil, spices, walnuts, cream cheese, butter, and powdered sugar.
These are the ingredients that make carrot cake work: fresh carrots for texture, brown sugar for depth, warm spices for aroma, and full-fat cream cheese for frosting with structure.
IngredientAmount
All-purpose flour / maida2¼ cups / 270g
Baking powder2 teaspoons
Baking soda1 teaspoon
Fine salt¾ teaspoon
Ground cinnamon2 teaspoons
Ground ginger¾ teaspoon
Ground nutmeg¼ teaspoon
Ground cloves or allspicePinch, optional
Light brown sugar, packed1¼ cups / 250–260g
Granulated sugar½ cup / 100g
Neutral oil1 cup / 240ml / 8 fl oz
Unsweetened applesauce or plain yogurt½ cup / 120g
Large eggs, room temperature4
Vanilla extract2 teaspoons
Freshly grated carrots3 cups / 300g / 10.5 oz
Chopped walnuts or pecans¾ cup / 85–100g, optional
Raisins½ cup / 70–80g, optional

Cream Cheese Frosting Ingredients

IngredientAmount
Full-fat block cream cheese, softened16 oz / 454g
Unsalted butter, softened¾ cup / 170g / 6 oz
Powdered sugar / icing sugar, sifted3 to 4 cups / 360–480g
Vanilla extract2 teaspoons
Fine saltPinch

Instructions

  1. Prepare the pans. Preheat to 350°F / 180°C. Grease two 9-inch round pans and line the bottoms with parchment.
  2. Whisk the dry ingredients. In a large bowl, combine the flour, baking powder, baking soda, salt, cinnamon, ginger, nutmeg, and optional cloves or allspice.
  3. Whisk the wet ingredients. In another bowl, whisk the sugars, oil, applesauce or yogurt, eggs, and vanilla until smooth and glossy.
  4. Combine gently. Add the dry ingredients to the wet ingredients. Fold with a spatula until only a few flour streaks remain. Do not beat.
  5. Add carrots and mix-ins. Fold in grated carrots, then nuts, raisins, or well-drained pineapple if using. The batter should look thick, glossy, and evenly loaded.
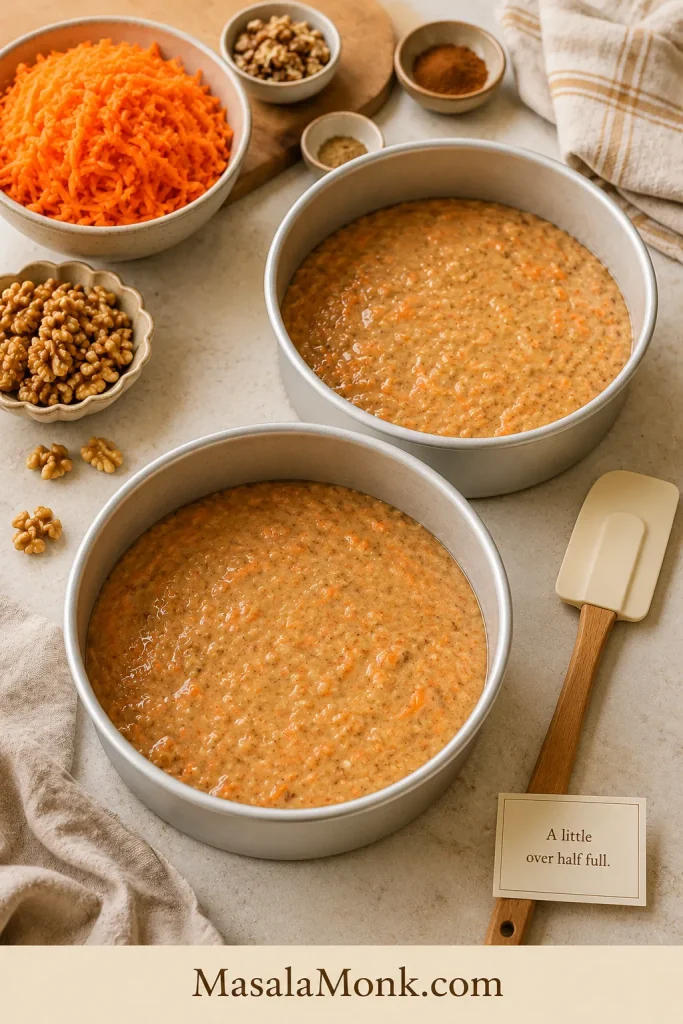
  6. Bake. Divide the batter between the pans. Each 9-inch pan should be a little over half full. Bake for 28 to 35 minutes, until the centers spring back and a toothpick shows clean or moist crumbs.
  7. Cool fully. Let the layers sit in the pans for 15 minutes, then turn them onto a rack. Wait until completely cool before frosting.
  8. Make the frosting. Beat the butter until smooth. Mix in cream cheese. Add 3 cups powdered sugar, vanilla, and salt, then beat until thick and fluffy. For firmer frosting, add more sugar.
  9. Frost the cake. Place one cooled layer on a stand. Spread frosting over the top, add the second layer, then frost the top and sides.
  10. Chill before slicing. Refrigerate the frosted cake for about 30 minutes. Wipe the knife between cuts for neat slices.

Recipe Notes

  • No mixer needed for the cake: Use a whisk and spatula for the batter. A mixer is only helpful for the frosting.
  • Best beginner version: Bake this as a 9×13 sheet cake if you do not want to stack and frost layers.
  • Pineapple carrot cake: Add ½ cup / 120g well-drained crushed pineapple and reduce applesauce or yogurt to ¼ cup / 60g. Drain well so the center does not turn gummy.
  • 9×13 sheet cake: Bake at the same temperature for about 35 to 45 minutes.
  • Sheet cake frosting: Use all the frosting for a thick bakery-style top, or hold some back for a lighter layer.
  • Cupcakes: This full batch makes about 24 standard cupcakes. Fill liners about ⅔ full and bake for 18 to 22 minutes.
  • Loaf cake: Do not pour the full batch into one 9×5 pan. Use about half the batter in one loaf pan, or divide the full batch between two loaf pans.
  • Frosting sweetness: Use 3 cups powdered sugar for a tangier frosting and 4 cups for a firmer, sweeter finish.
  • Best crumb: Grate the carrots fresh and do not squeeze them dry.
  • Do not frost warm cake: Warm layers will loosen the frosting and can make the cake slide.
  • Make-ahead: Bake and frost the cake 1 day ahead, then refrigerate. Let slices sit out briefly before serving.

What to expect: the batter will be thick enough to mound slightly in the bowl but loose enough to spread into the pans with a spatula. Baked layers feel tender while warm, and chilled cake slices more cleanly than a freshly frosted one. The crumb should be soft and moist, not wet or oily.

Make This Carrot Cake When

This is the cake for the person who wants carrot cake to taste like carrot cake: soft, spiced, tangy on top, and still good from the fridge the next day.

  • Classic carrot cake, but moist without a greasy crumb.
  • A carrot-spice cake that can go pineapple or no pineapple.
  • No mixer needed for the batter.
  • Clear choices for nuts, raisins, pan size, make-ahead baking, and frosting texture.
  • A gathering cake that can rest in the fridge overnight.
  • Fresh carrot flavor, not just spice cake with a few shreds mixed in.

It is the kind of cake that feels at home on an Easter table, a birthday stand, a potluck tray, or under foil in the fridge waiting for tomorrow’s second slice.

Make-ahead cue: Chilled cake slices cleaner once the frosting sets.

Plated slice of carrot cake with cream cheese frosting, a fork, and crumbs on a warm neutral surface.
Carrot cake is a useful make-ahead dessert because the spices mellow and the frosting firms as it rests. Therefore, baking it a day ahead can make serving easier and the flavor more rounded.

If you like this kind of easy, cozy fruit cake but want something unfrosted, this fresh apple cake is a softer, simpler bake for another day.

The Easiest Way to Make This Carrot Cake

If layer cakes make you nervous, start with the 9×13 version. It is not a lesser cake; it is the same soft, spiced carrot cake with the pressure removed.

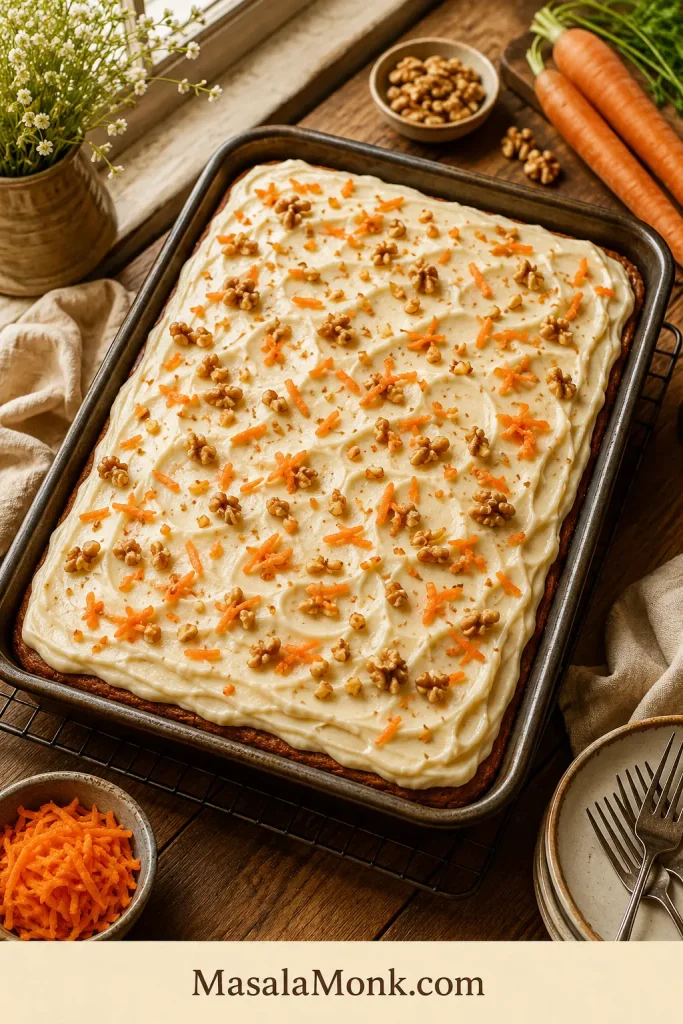
Sheet cake cue: Same batter, one pan, frosting only on top.

Rectangular 9x13 carrot cake sheet cake with swirled cream cheese frosting in a baking pan.
The 9×13 carrot cake version keeps the same cozy flavor while removing the pressure of stacking layers. It is the format to choose when you want easy slicing, transport, and serving.

You use the same batter, bake it in one pan, spread frosting over the top, and skip the stacking, side-frosting, and layer-sliding worries. A sheet cake is not the backup plan. It is the low-stress version.

Beginner path: make the batter by hand, bake it in a 9×13 pan, cool completely, spread frosting over the top, chill, and slice. No layer cake skills needed.

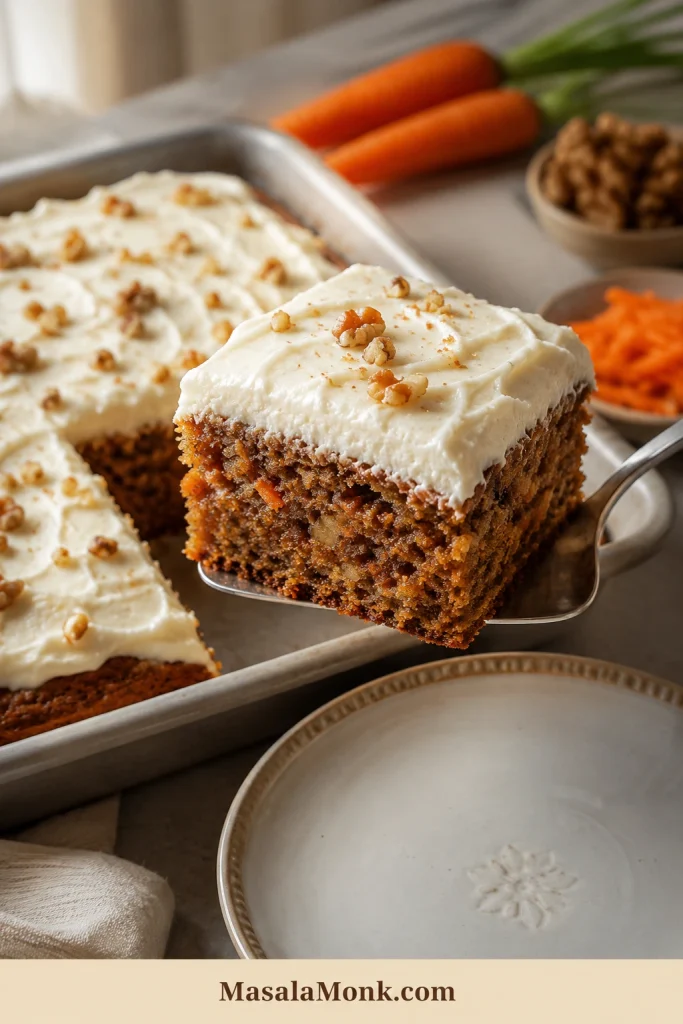
Serving cue: A sheet cake square should show cake texture, not just frosting.

Square piece of carrot cake sheet cake lifted with a spatula, showing frosting and carrot-flecked crumb.
A good sheet cake square should still show a tender carrot-flecked crumb under the frosting. Since it serves neatly from one pan, this version works especially well for potlucks and make-ahead desserts.

Pineapple or No Pineapple?

I like this cake best without pineapple first, because the carrot and spice stay clearer. That gives you a soft, sliceable carrot cake with a classic cream cheese frosting finish.

Pineapple carrot cake is not better or worse. It is a different mood: sweeter, softer, fruitier, and more old-fashioned. If that is what you want, use a small amount of well-drained crushed pineapple and reduce the applesauce or yogurt so the batter does not become too wet.

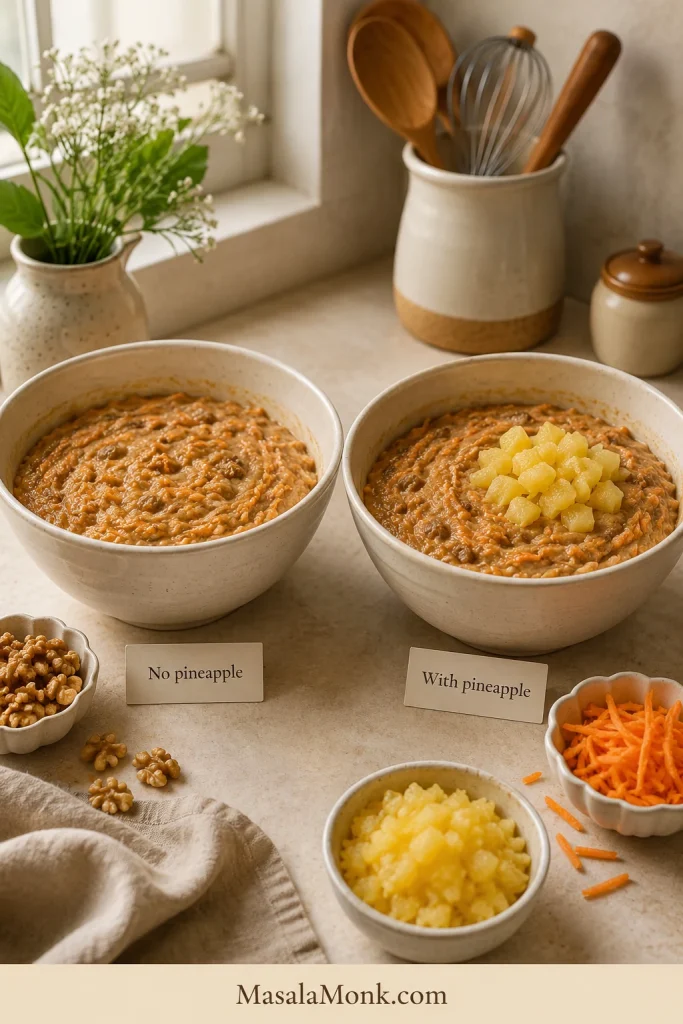
This is the carrot cake fork in the road: cleaner carrot-spice flavor, or fruitier old-fashioned comfort. Pineapple can make the cake softer and fruitier, but it should not turn the batter into a puddle.

Choice cue: Compare classic carrot-spice flavor with the softer pineapple version.

Two carrot cake batter bowls comparing a classic batter with a version that includes drained crushed pineapple.
Pineapple makes carrot cake sweeter, softer, and more old-fashioned in style. If you add it, drain it well first so the batter stays thick enough to bake evenly.
ChoiceBest ForWhat to Do
No pineappleClassic carrot-spice flavorMake the recipe as written
With pineappleOld-fashioned, fruitier cakeAdd ½ cup / 120g drained crushed pineapple and reduce applesauce/yogurt to ¼ cup / 60g

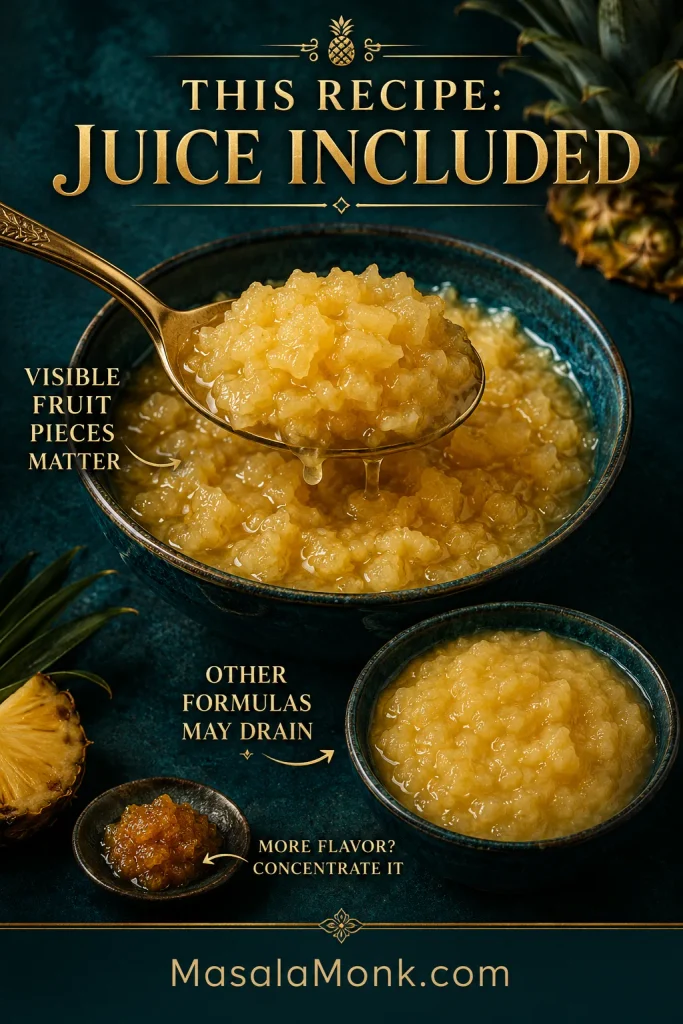
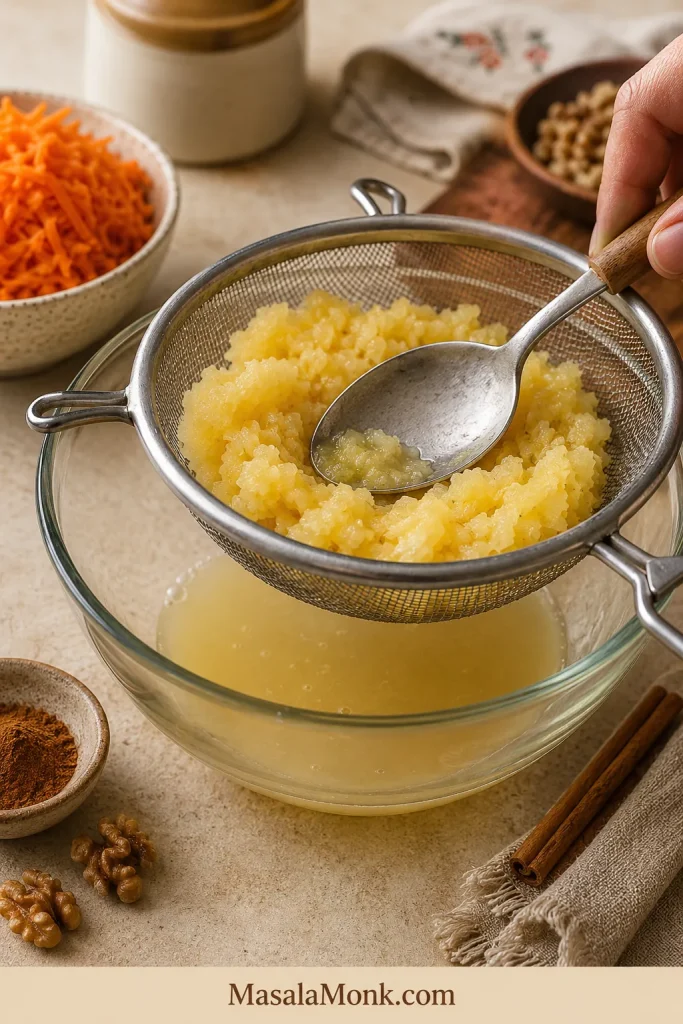
Use canned crushed pineapple for the easiest result. Drain it well. Leave the pineapple juice out here; this batter is balanced for drained fruit, not extra liquid.
Moisture cue: Drain pineapple so flavor stays and excess juice leaves.

Crushed pineapple draining in a small sieve over a bowl with juice collecting below.
Draining crushed pineapple protects the center of the cake. The fruit should add flavor and tenderness, but excess juice can make carrot cake gummy or slow to bake through.

Why This Carrot Cake Works

Carrot cake has to do something many cakes do not: taste good cold from the fridge and soft again once it sits out. That is why this recipe leans on oil, brown sugar, carrots, and a little applesauce or yogurt.

A full oil-only carrot cake can be very soft, but sometimes greasy. Reducing the oil too much makes the crumb feel lighter at first and drier later. This version uses oil for softness, then applesauce or yogurt for extra moisture without pushing the cake into oily territory.

Oil Keeps the Crumb Soft

Butter gives cakes flavor, but oil keeps carrot cake softer once it is cold. That matters because a frosted carrot cake should be refrigerated, and a good slice should still taste tender the next day.

Brown Sugar Makes It Deeper

Brown sugar brings moisture and a gentle caramel flavor. White sugar keeps the sweetness clean, but brown sugar gives the crumb its warmer bakery-style depth.

The Carrots Do Real Work

The carrots are not decoration here. They soften into the crumb, leave little orange flecks in every slice, and help the cake stay tender long after it cools.

Applesauce or Yogurt Keeps the Texture Balanced

Applesauce gives a slightly sweeter, softer crumb. Plain yogurt brings gentle tang and tenderness. Both help the cake stay soft without asking oil to do all the work.

If you like the soft apple-spice side of that moisture trick, this applesauce cake uses applesauce more directly in a simple 9×13 cake.

The Frosting Balances the Spice

Carrot cake needs tang. Cream cheese frosting cuts through the sweetness, softens the spice, and makes the cake feel complete instead of just sweet.

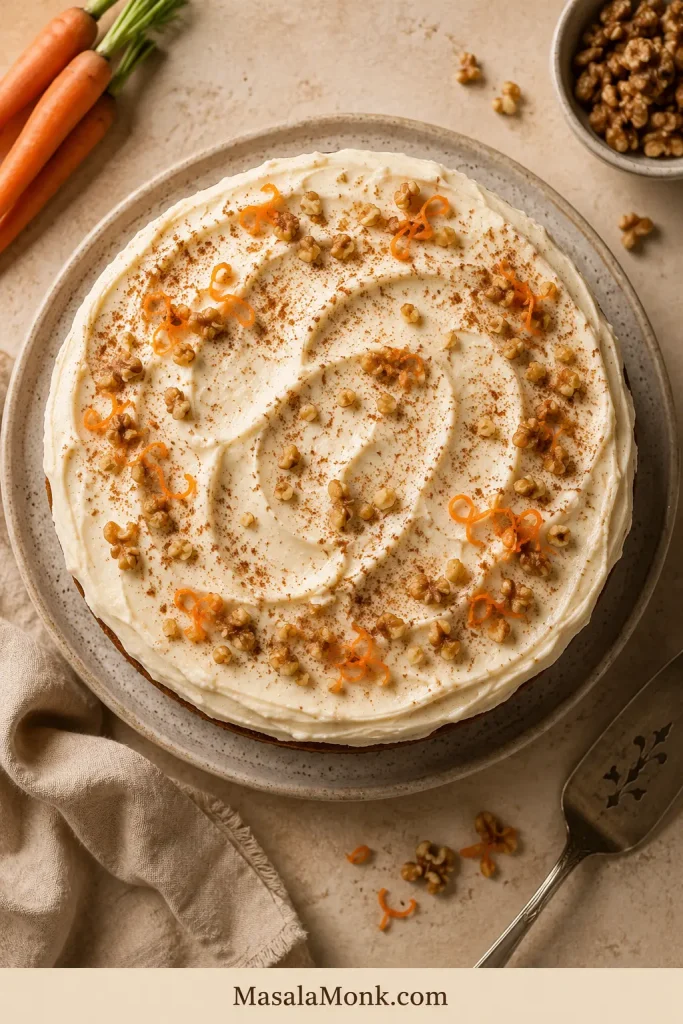
Frosting cue: Simple swirls suit carrot cake better than fussy decoration.

Overhead view of a whole carrot cake with cream cheese frosting swirls and light garnish on a neutral surface.
Simple frosting swirls give carrot cake a polished finish without making it look overworked. Instead of heavy decoration, let the cream cheese frosting, warm spice color, and soft crumb do the work.

Ingredients That Matter

Carrots

Fresh carrots are worth the few extra minutes. Use medium-fine shreds and do not squeeze them dry.

Oil

A neutral oil keeps the flavor classic. Sunflower, canola, vegetable, avocado, or light olive oil all work. Strong olive oil can be used if you enjoy the flavor, but it will make the cake taste less traditional.

Applesauce or Plain Yogurt

Use unsweetened applesauce for a slightly softer, sweeter crumb. Use plain yogurt if you want a little more tang. Both work, so choose the one that fits your pantry.

Sugar

Use more brown sugar than white sugar. Brown sugar gives depth, while the smaller amount of white sugar keeps the sweetness from tasting heavy.

Spices

Cinnamon is the base. Ginger adds warmth, nutmeg adds depth, and a tiny pinch of clove or allspice makes the cake taste rounder. Keep the stronger spices light so the carrot does not get buried.

Eggs

Room-temperature eggs blend more easily into the oil and sugar, so use them if you have time. Cold eggs will still work; just whisk the wet mixture a little longer until it looks smooth.

Flour

Too much flour is one of the easiest ways to make carrot cake dry. Weigh it if you can, or use the spoon-and-level method instead of scooping straight from the bag. King Arthur Baking’s guide to measuring flour is useful if you want a quick refresher.

Cream Cheese

Use full-fat block cream cheese for frosting. If block cream cheese is hard to find, choose the firmest full-fat cream cheese available and avoid very soft spreadable tubs. Soft cream cheese can make frosting loose, especially in warm kitchens.

Freshly Grated Carrots vs Pre-Shredded Carrots

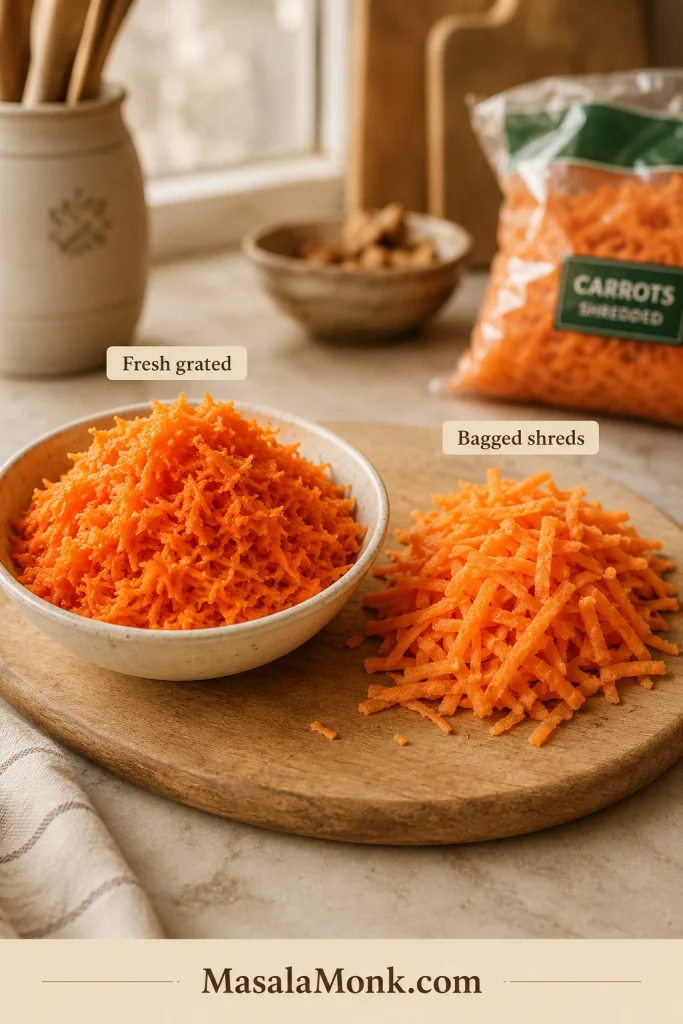
Freshly grated carrots are one of the biggest success details in carrot cake. Bagged shreds save a few minutes, but they ask the cake to do too much work. They are often dry and thick, so they can stay chewy instead of melting into the crumb.

Carrot texture cue: Fresh shreds soften; thick packaged shreds can stay chewy.

Two bowls comparing fine fresh grated carrots with thicker packaged carrot shreds.
Fresh carrots and bagged shreds can change the final texture. Freshly grated carrots usually soften into the cake, while thick packaged shreds may stay chewy unless chopped smaller.

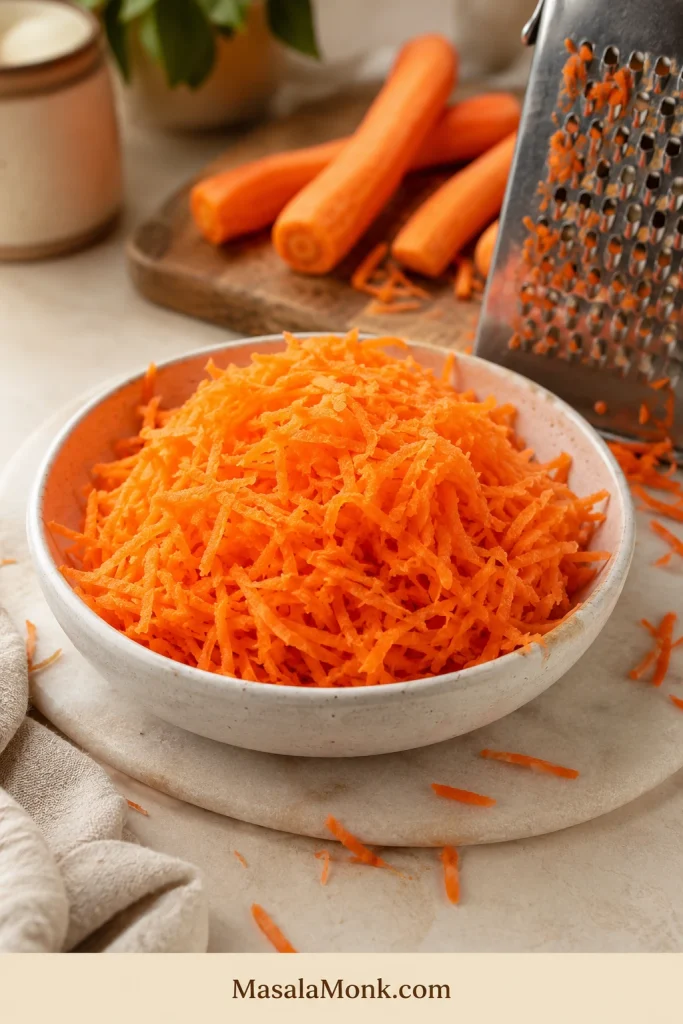
Grate the carrots on the medium or fine holes of a box grater. A food processor with a grating disc also works, but if the shreds are very long or thick, pulse them once or twice so they distribute more evenly.

Carrot cake rule: the carrot should feel moist and tender before it goes into the batter. Do not squeeze it dry; that moisture is part of the cake’s softness.

For this recipe, you need about 3 cups, 300g, or 10.5 oz of grated carrots. That is usually about 4 to 5 medium carrots, depending on size.

Carrot cue: Medium-fine shreds add moisture and visible orange flecks.

Freshly grated carrots in a bowl beside a box grater and whole carrots on a warm kitchen surface.
Fresh grated carrots are one of the easiest ways to improve homemade carrot cake. Because the shreds are moist and fine, they blend into the batter instead of staying tough in the crumb.

Nuts, Raisins, Coconut and Other Add-Ins

This is where carrot cake can get crowded fast. The cake still needs to taste like carrot, spice, and cream cheese frosting — not like a crowded trail mix cake.

Mix-in cue: Let nuts, raisins, coconut, or pineapple support the carrot.

Carrot cake add-ins arranged in bowls, including walnuts, pecans, raisins, coconut, orange zest, crushed pineapple, and spices.
Add-ins should bring contrast, not crowd the batter. Choose walnuts, pecans, raisins, coconut, orange zest, or pineapple with restraint so the carrot and spice flavor still lead.

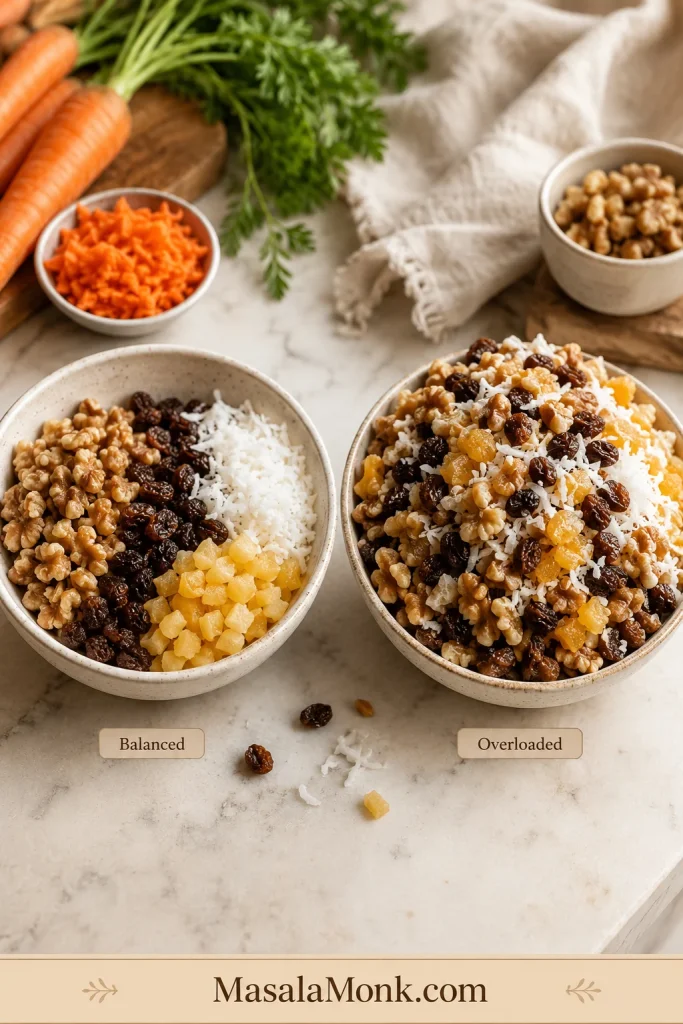
Keep total add-ins, not counting the carrots, to about 1½ cups. Walnuts or pecans add crunch, raisins add chewy sweetness, orange zest brightens the spice, shredded coconut makes the cake more old-fashioned, and pineapple makes it fruitier. Choose the two or three that actually make sense for your table.

When using pineapple, choose either nuts or raisins, or keep both modest, so the batter does not become overloaded. The carrot should lead; the add-ins should behave.

Balance cue: Keep add-ins controlled so the crumb stays light.

Side-by-side guide comparing a balanced amount of carrot cake add-ins with an overloaded mix of nuts, raisins, coconut, and pineapple.
Balanced add-ins keep carrot cake interesting without making it heavy. However, an overloaded mix can steal moisture, interrupt the crumb, and make the cake feel dense.

If your family has strong opinions about raisins, believe them. Raisins are optional. Family peace is not.

If you are baking for a group, the safest path is nuts optional, raisins optional, and pineapple optional. Those three choices divide carrot cake people more than almost anything else.

How to Make Carrot Cake

The cake batter does not need a mixer. The frosting is the only part where an electric mixer helps.

1. Prepare the Pans

Grease two 9-inch round cake pans and line the bottoms with parchment paper. Carrot cake is soft and moist, so parchment helps the layers release cleanly.

2. Whisk the Dry Ingredients

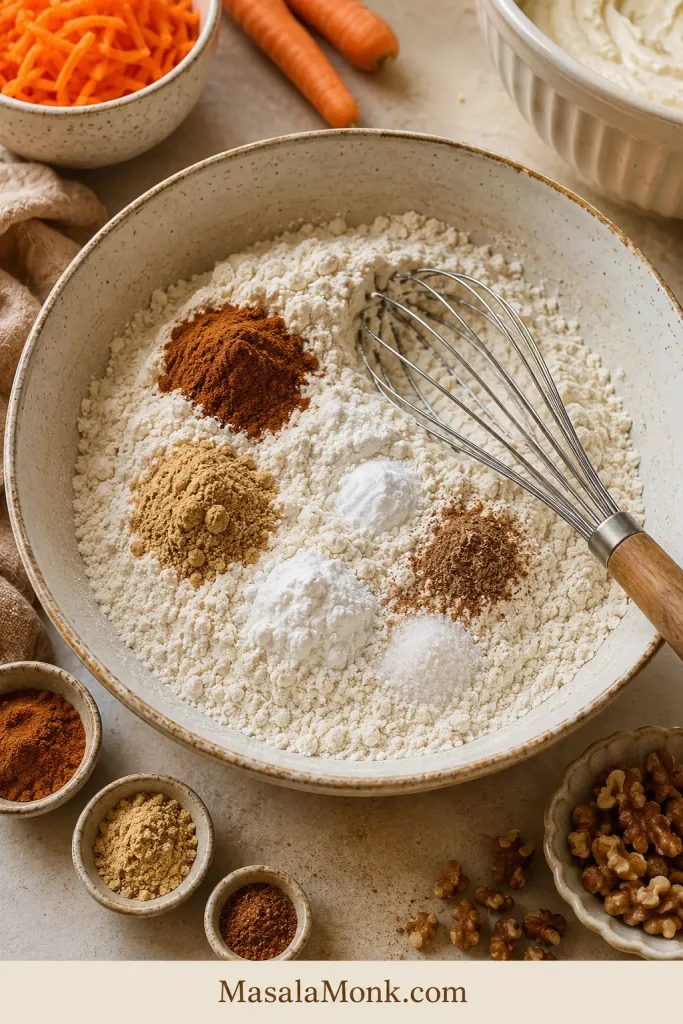
Whisk the flour, baking powder, baking soda, salt, cinnamon, ginger, nutmeg, and optional clove or allspice. This spreads the leavening and spices evenly before the wet ingredients go in.

Spice cue: Whisk dry ingredients so spice and leavening spread evenly.

Bowl of dry carrot cake ingredients with flour, cinnamon, ginger, nutmeg, baking powder, baking soda, salt, and a whisk.
Whisking the dry mix first helps the flour, spices, salt, and leavening distribute evenly. That way, the carrot cake bakes with consistent flavor and lift from edge to center.

3. Whisk the Wet Ingredients

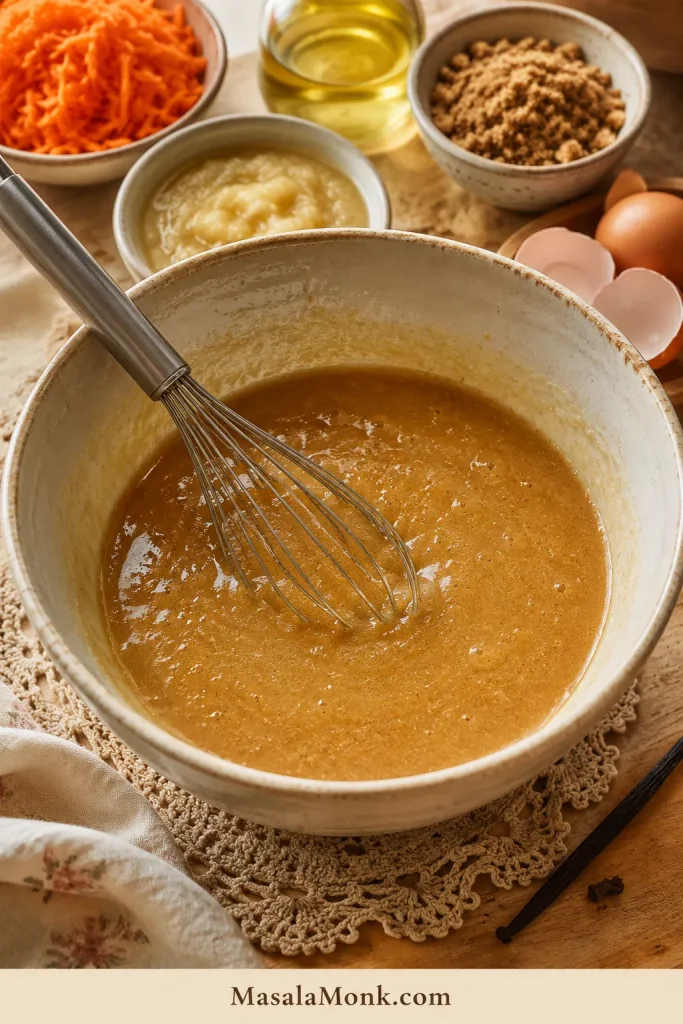
In another bowl, whisk the brown sugar, white sugar, oil, applesauce or yogurt, eggs, and vanilla. The mixture should look glossy, smooth, and slightly thick. If the eggs are cold, whisk a little longer so everything blends evenly.

Wet mix cue: A glossy base makes gentle folding easier.

Glossy wet carrot cake mixture in a cream mixing bowl with a spatula, grated carrots, and walnuts nearby.
The wet mixture should look smooth and glossy before the dry ingredients are added. Once this base is cohesive, the flour can be mixed in briefly without overworking the batter.

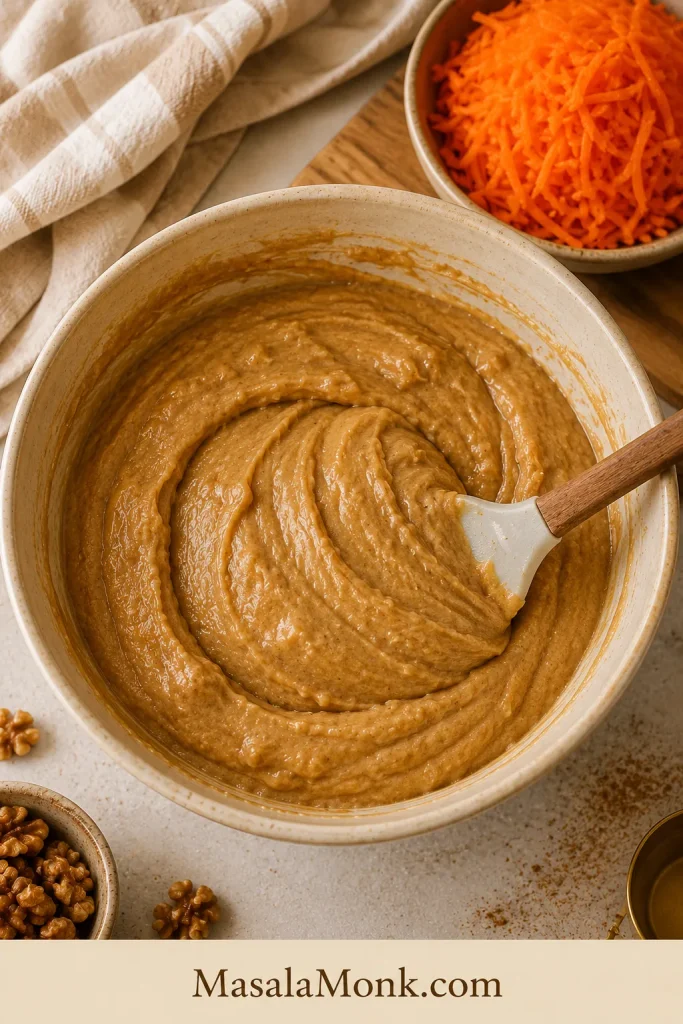
4. Fold the Batter Gently

Add the dry ingredients to the wet ingredients and fold gently. Stop when only a few flour streaks remain. Add the carrots, nuts, raisins, or drained pineapple if using, then fold just until evenly combined.

Batter base cue: Thick, unified batter is ready for carrots.

Thick tan carrot cake batter in a cream mixing bowl before carrots are added, with grated carrots and a spatula nearby.
Before the carrots go in, the batter should already look thick and unified. Then, as the grated carrots are folded through, they loosen the mixture slightly and add the texture carrot cake needs.

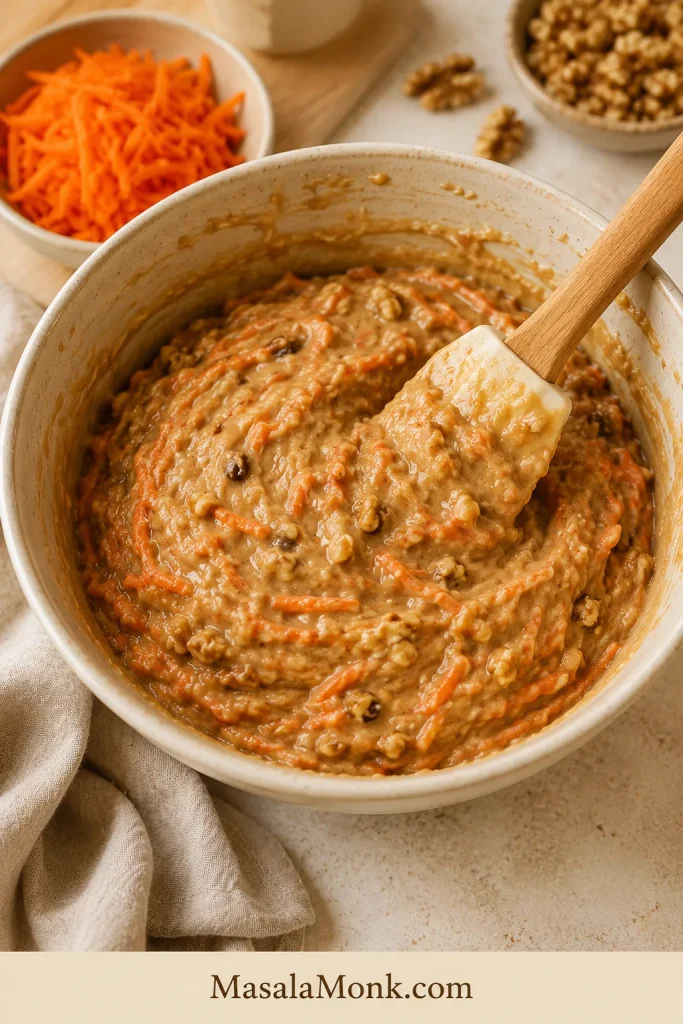
Look for a thick, glossy batter. After the carrots go in, it will look fuller and heavier than a vanilla cake batter. That is normal. Carrot cake batter is supposed to look loaded, but it should still spread easily into the pans.

Folding cue: Loaded but spreadable is the right final batter texture.

Carrot cake batter with fresh grated carrots and walnuts folded in, shown in a mixing bowl with a spatula.
After the carrots and add-ins are folded in, the batter should look loaded but still spreadable. Stop once everything is evenly distributed so the finished cake stays tender.

5. Bake Until the Center Is Set

Divide the batter between the pans and bake at 350°F / 180°C for 28 to 35 minutes. The edges should look set, the center should spring back lightly, and the kitchen should smell like cinnamon, brown sugar, and warm carrots.

Pan fill cue: A little over half full leaves room for rise.

Two round cake pans filled a little over half full with carrot cake batter, with carrots, walnuts, and a spatula nearby.
Do not fill carrot cake pans to the rim. A little over half full gives the layers room to rise, which helps prevent overflow and uneven doming.

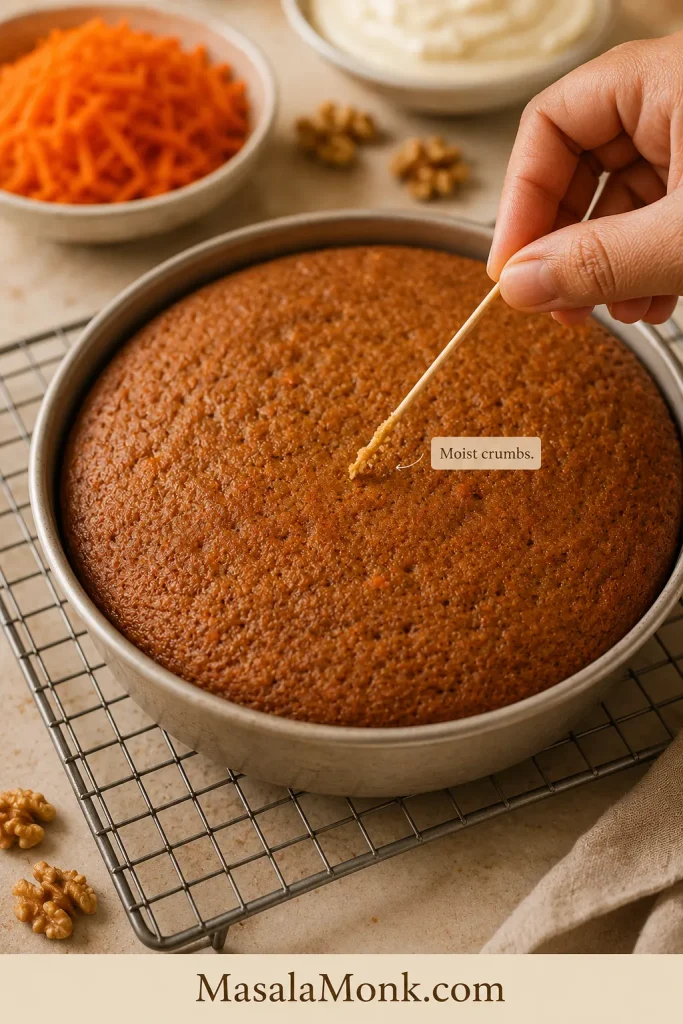
Do not wait for a bone-dry toothpick. Clean crumbs or a few moist crumbs mean the cake is ready. Wet batter on the toothpick means the center needs more time.

Doneness cue: Moist crumbs are done; wet batter needs more time.

Hand holding a toothpick with moist crumbs above a baked carrot cake layer in a round pan.
The toothpick should come out with a few moist crumbs, not wet batter. In contrast, waiting for a completely dry tester can push carrot cake toward overbaking.

6. Cool Completely Before Frosting

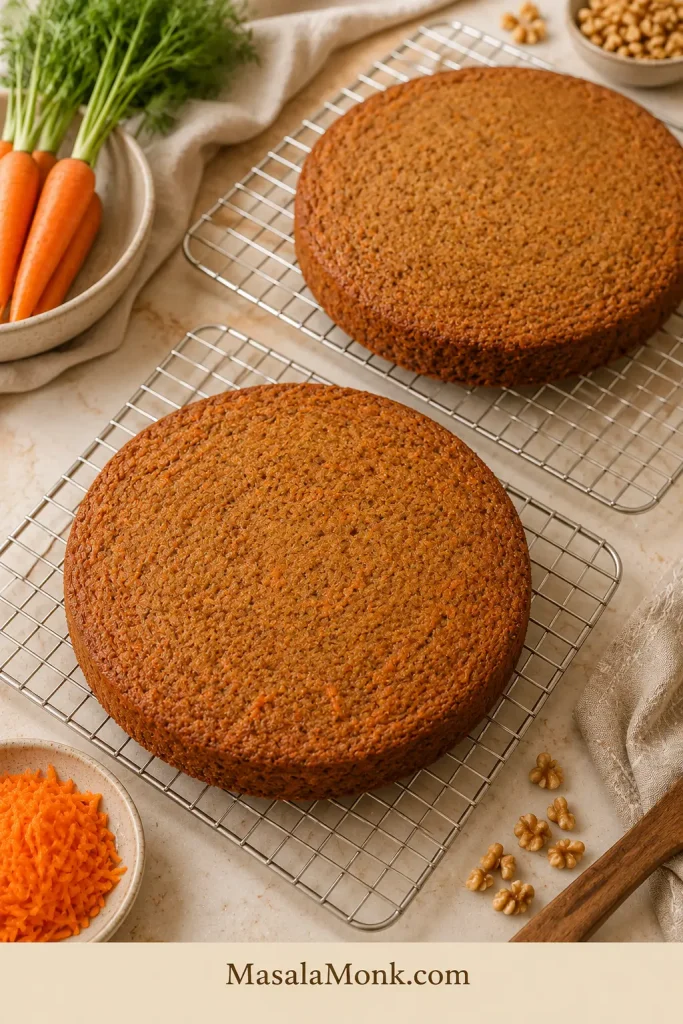
Let the cakes cool in the pans for 15 minutes, then turn them out onto a rack. Warm carrot cake layers are tender and a little fragile, so give them time. Cooling is not dead time here; it is part of getting clean slices.

Layer rest cue: Fully cooled layers protect the frosting and structure.

Two baked round carrot cake layers cooling on wire racks with carrots, grated carrots, walnuts, and linen nearby.
Cooling is part of the recipe, not dead time. Fully cooled carrot cake layers are easier to stack, frost, and slice because warm cake can soften the frosting too quickly.

If the warm layers feel soft, do not panic. Carrot cake firms as it cools, especially once it has been frosted and chilled.

7. Frost, Chill and Slice

Spread frosting between the layers, then cover the top and sides. Chill the frosted cake for about 30 minutes before slicing if you want cleaner cuts and neater layers.

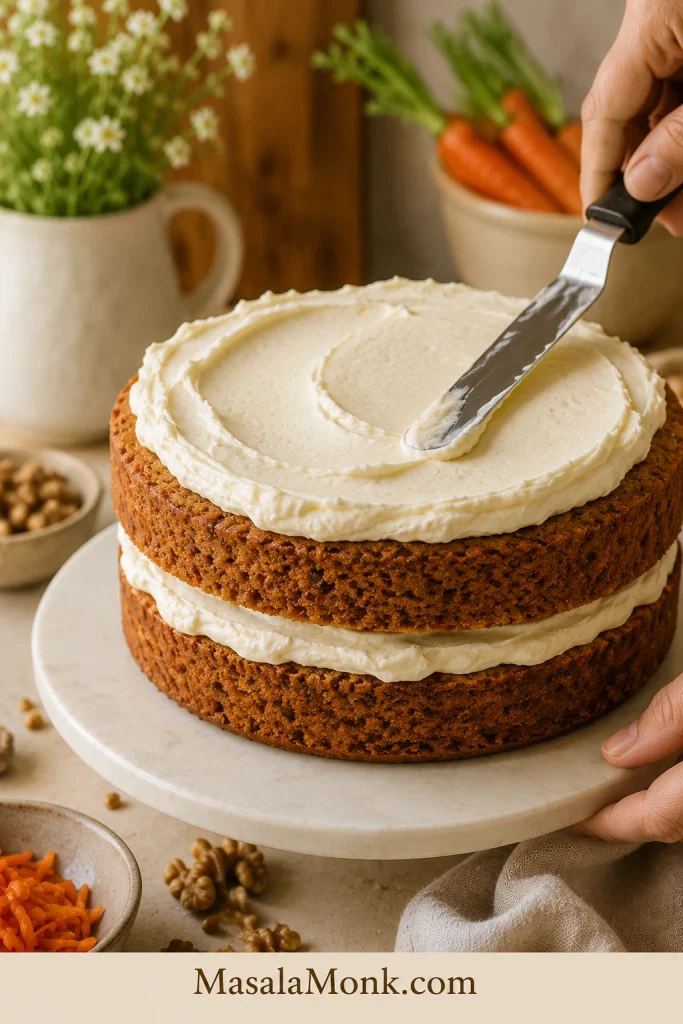
Filling cue: An even middle layer keeps the cake level.

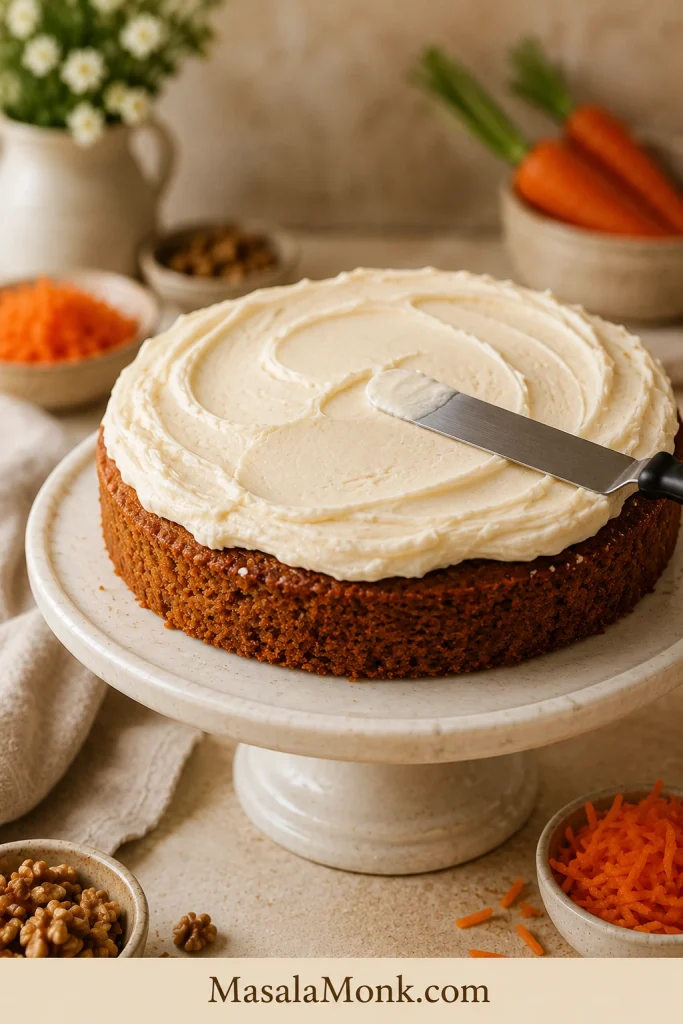
Single carrot cake layer on a cake stand with cream cheese frosting being spread over the top using an offset spatula.
An even filling layer helps the stacked cake stay level. Spread the frosting to the edges, but keep the layer controlled so it does not squeeze out heavily when the top layer is added.

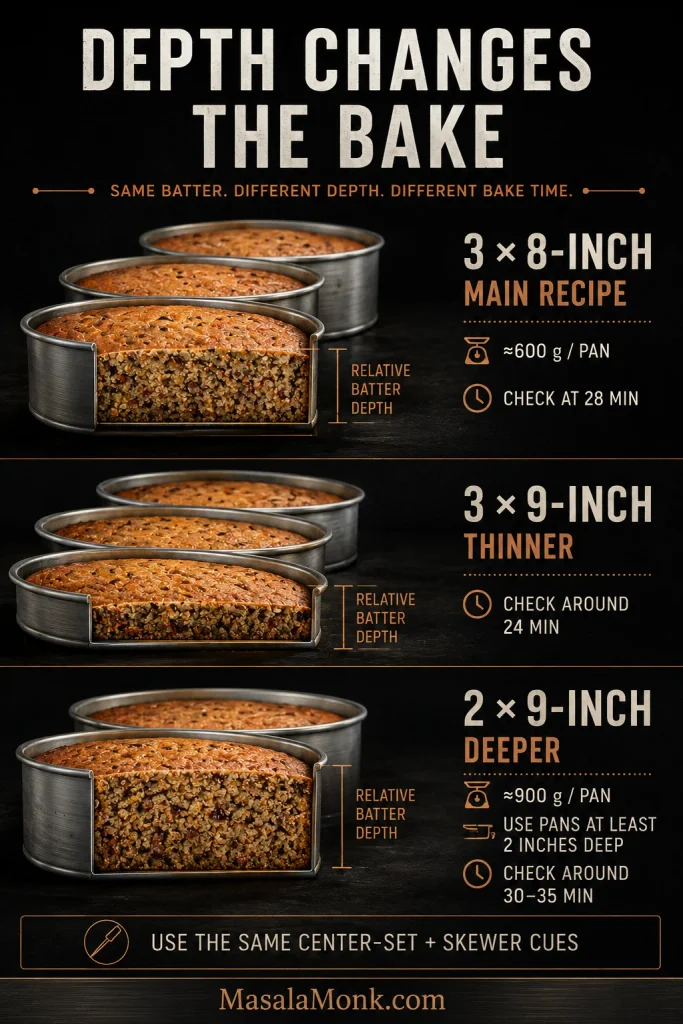
Pan Size, Time and Doneness Guide

The main recipe is written for two 9-inch round cake pans. You can use the same batter in other formats, but the bake time changes because the depth of the batter changes.

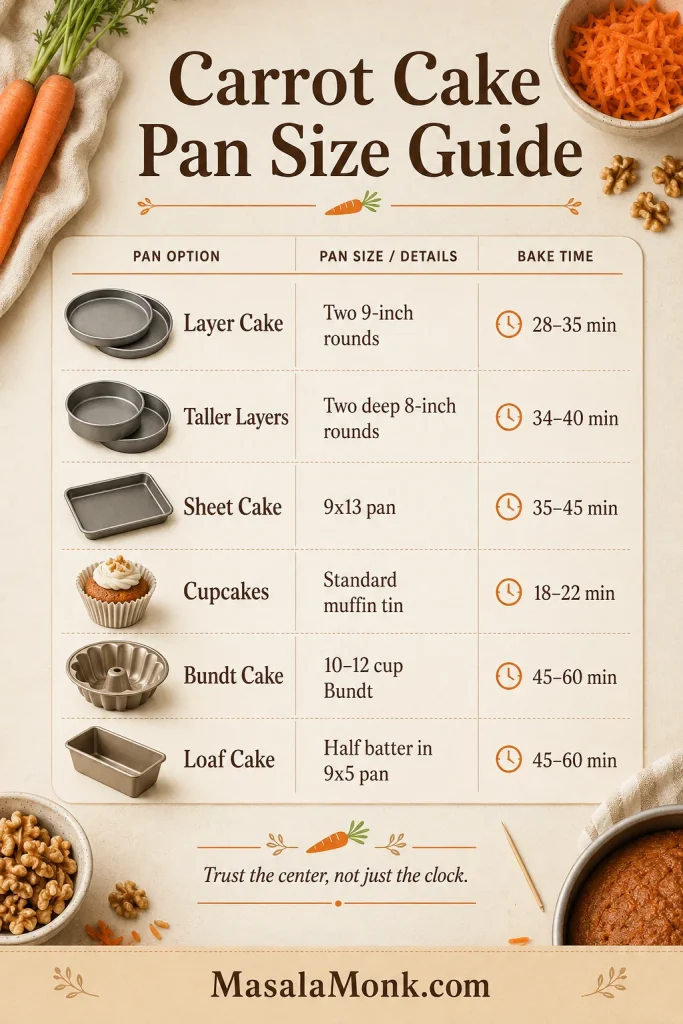
The clock matters, but the center of the cake matters more. Use the times below as a guide, then trust the spring-back and toothpick cues.

Timing cue: Use pan times, then trust the center.

Pan Times by Format

Carrot cake pan size guide with bake times for 9-inch layers, deep 8-inch layers, 9x13 sheet cake, cupcakes, Bundt cake, and half-batter loaf cake.
Pan size changes how quickly carrot cake bakes because batter depth changes. Use the guide for timing, but still check the center, spring-back, and toothpick crumbs before removing the cake.
FormatPanOvenApprox. TimeBest Doneness Cue
Layer cakeTwo 9-inch rounds350°F / 180°C28–35 minCenter springs back; toothpick has moist crumbs
Taller layer cakeTwo deep 8-inch rounds350°F / 180°C34–40 minCenter should not wobble
Sheet cake9×13-inch pan350°F / 180°C35–45 minMiddle springs back lightly
CupcakesStandard muffin tin350°F / 180°C18–22 minTops spring back; tester has crumbs
Bundt cake10–12 cup Bundt pan350°F / 180°C45–60 minLong tester comes out clean
Loaf cakeOne 9×5 pan with half batter, or two 9×5 pans for full batter350°F / 180°C45–60 minDeep center fully set

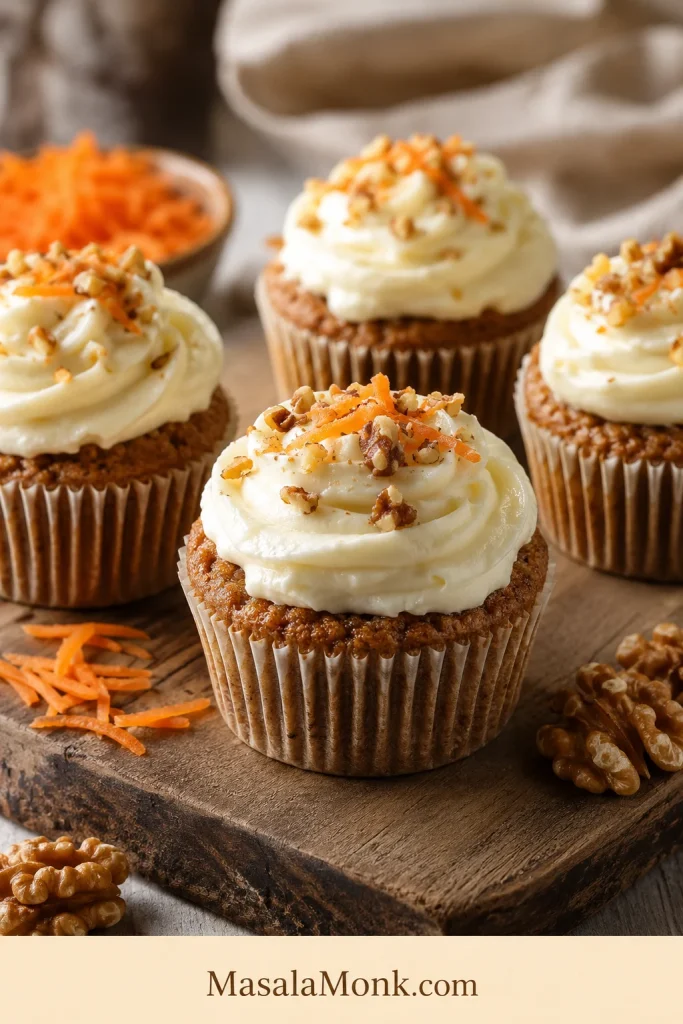
Cupcake cue: Fill liners two-thirds full for neat rise.

Group of carrot cake cupcakes with cream cheese frosting swirls in neutral cupcake liners.
Carrot cake cupcakes bake faster and portion easily for parties. For the best rise, fill the liners about two-thirds full, then leave room for a thick swirl of cream cheese frosting.

Loaf, Bundt and Deep-Pan Notes

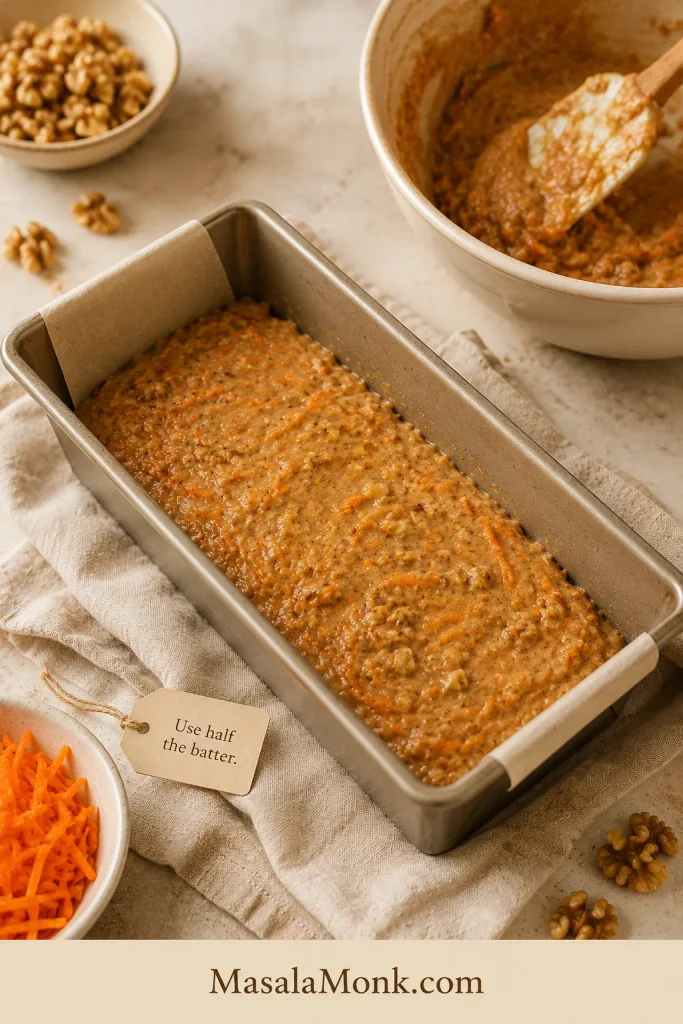
Do not pour the full batch into one 9×5 loaf pan. It is too much batter for one standard loaf and can overflow or bake unevenly. Use half the batter for one loaf, or divide the full batch between two loaf pans. Start checking around 45 minutes, then keep baking until the deep center is fully set.

Loaf cue: Use half the batter for one 9×5 loaf.

Loaf pan filled halfway with carrot cake batter and a small note reading “Use half the batter.”
For one 9×5 loaf, use only about half the batter. Otherwise, the loaf can overflow or look done on the edges while the deep center stays underbaked.

If using 8-inch round pans, choose deep pans and do not fill them to the rim. Taller layers need more time in the center, so check for spring-back instead of relying only on the clock.

For a Bundt cake, grease the pan very well, dust it lightly with flour, and let the cake cool for 15 to 20 minutes before turning it out. A soft carrot cake needs a little help releasing cleanly from a detailed pan.

Bundt cue: Grease well, cool briefly, then release gently.

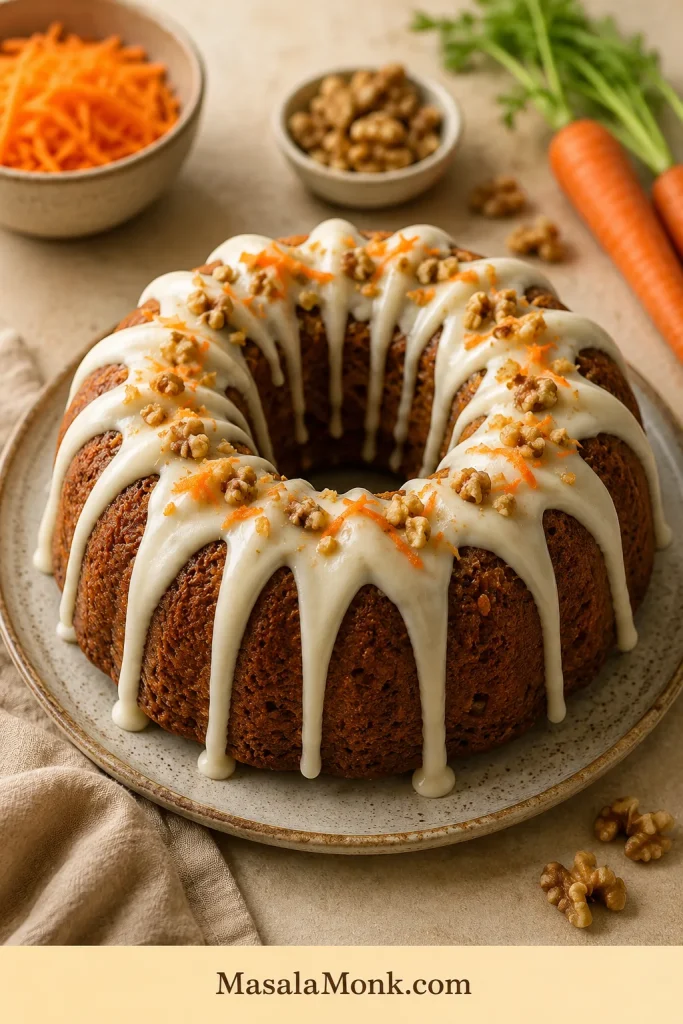
Carrot Bundt cake with cream cheese glaze and walnut garnish on a warm neutral surface.
A Bundt carrot cake gives the recipe a more dramatic shape, but the pan needs careful prep. Grease the grooves well, cool briefly after baking, and release gently so the cake keeps its shape.

For a simpler carrot-based tea cake rather than a frosted layer cake, this wholewheat carrot orange tea cake is a lighter direction.

Cream Cheese Frosting That Slices Cleanly

Good cream cheese frosting is tangy, thick, and spreadable. It should hold soft ridges, cover the cake generously, and stay in place when you cut into it.

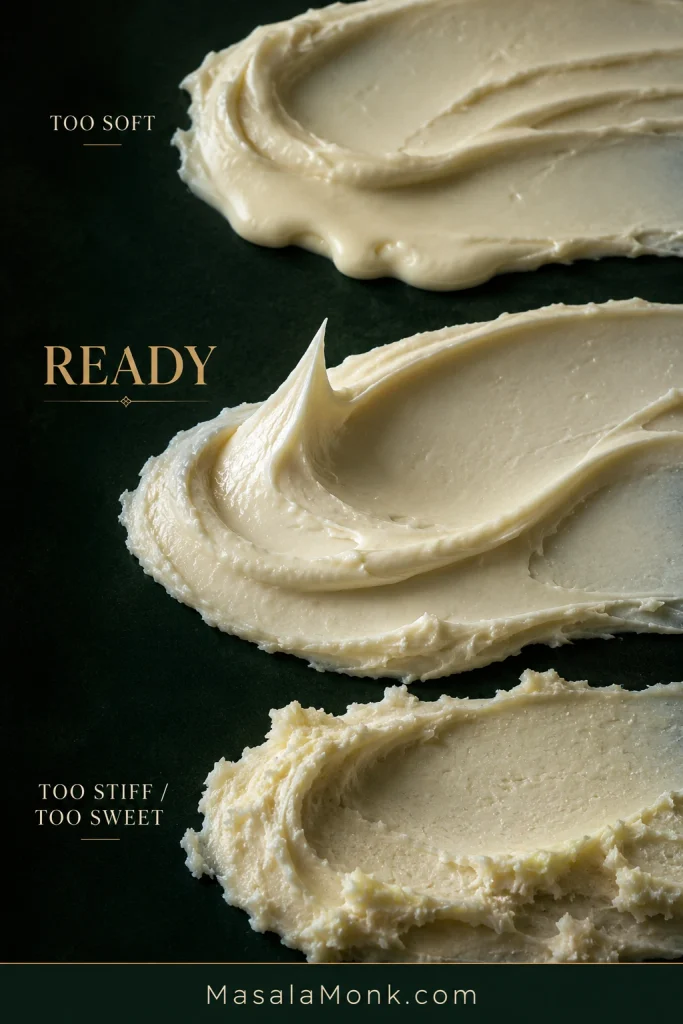
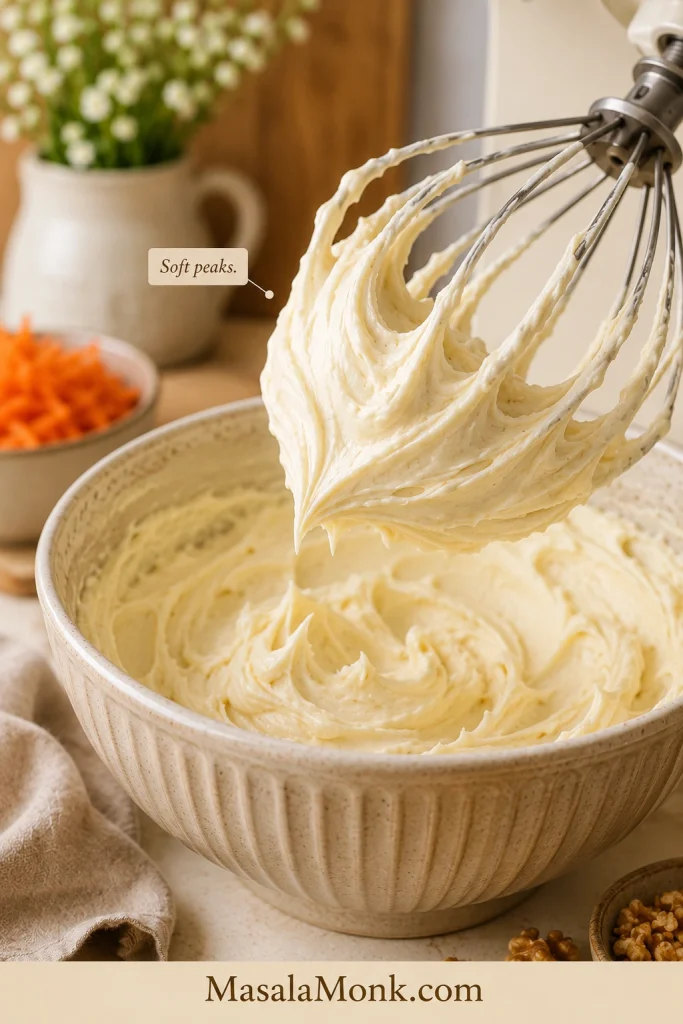
Frosting texture cue: Soft peaks show the frosting is ready.

Cream cheese frosting holding soft peaks on a whisk attachment above a bowl of frosting.
Cream cheese frosting should hold soft peaks before it touches the cake. If it looks loose, chill it briefly; then it will spread more cleanly and grip the layers better.

The biggest rule is to use full-fat block cream cheese, or the firmest full-fat cream cheese you can find. Tub-style cream cheese is softer and can make the frosting runny. The butter and cream cheese should be softened, but not melted or greasy.

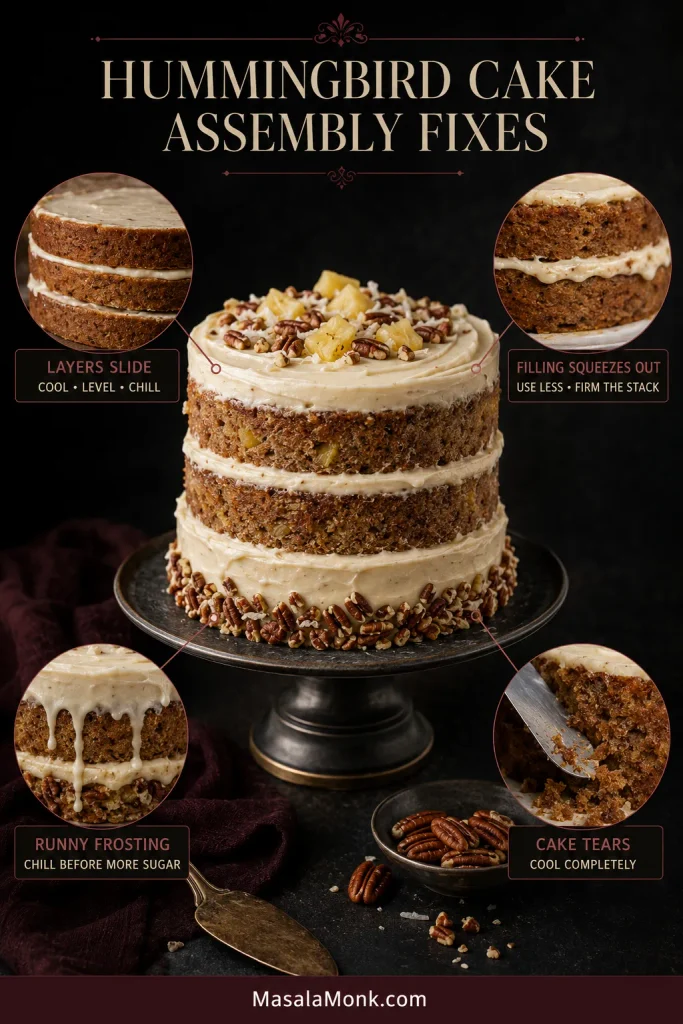
Assembly cue: Frost cool layers slowly; chill if they shift.

Two-layer carrot cake being frosted with an offset spatula while hands steady the cake on a stand.
Frosting the outside is easier when the cake is cool and steady. Use slow strokes with an offset spatula, and if the layers shift, chill the cake before finishing.

How to Keep Cream Cheese Frosting Thick

  • Use full-fat block cream cheese or the firmest full-fat cream cheese available.
  • Avoid whipped, spreadable, or very soft tub-style cream cheese.
  • Let butter and cream cheese soften, but do not let them melt.
  • Sift powdered sugar before adding it.
  • Add powdered sugar gradually until the frosting is thick enough.
  • Chill the frosting for 15 to 20 minutes if it feels loose.
  • Cool the cake completely before frosting.
  • Chill the frosted cake before slicing for the cleanest layers.

Cream cheese frosting is softer than buttercream, so do not try to force it to behave on a warm counter. If the frosting slumps, chill it for a few minutes and come back to it. That is not a failure; that is just cream cheese being cream cheese.

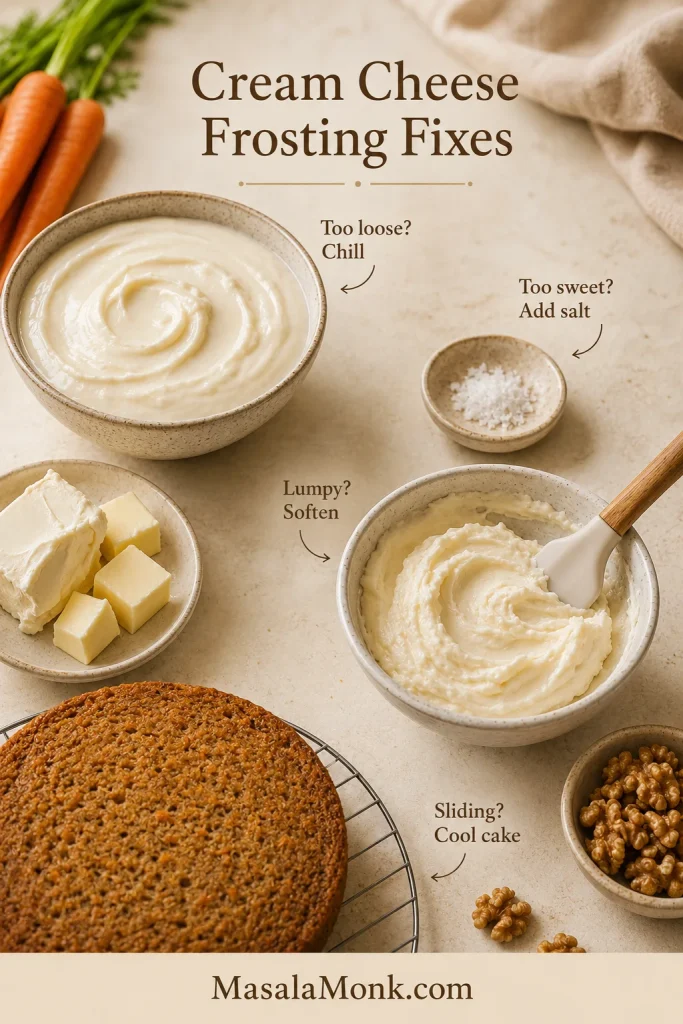
Quick Frosting Fixes

  • Runny frosting: chill it for 15 to 20 minutes, then beat again. Use firmer full-fat cream cheese next time.
  • Too sweet: add a pinch of salt or a little more cream cheese.
  • Lumpy: the butter or cream cheese was probably too cold. Let it soften slightly, then beat again.
  • Sliding layers: the cake or frosting is too warm. Cool the cake fully and chill before slicing.
  • Too stiff: let the frosting sit briefly, then beat until spreadable.

Frosting cue: when you lift the beater, the frosting should hold soft peaks for a few seconds before relaxing. If it looks shiny, loose, or slumps quickly, it is asking for the fridge.

Frosting fix cue: Chill loose frosting and keep cake layers cool.

Cream cheese frosting fixes guide with bowls of frosting, cream cheese, butter, salt, and short notes for loose, sweet, lumpy, and sliding frosting.
Cream cheese frosting can usually be rescued with small adjustments. Chill it if loose, soften ingredients if lumpy, add salt if too sweet, and frost only after the cake is cool.

Once you understand the texture, the same idea works in other flavors. For a chocolate version for cupcakes, brownies, or a different cake, this chocolate cream cheese frosting follows the same thick, spreadable idea.

Prefer a sweeter butter-based frosting without cream cheese? See this buttercream frosting guide. On carrot cake, though, cream cheese frosting is still the classic finish.

How to Make It Taste Like Bakery Carrot Cake

A good bakery-style carrot cake is not only sweet. It has a soft crumb, enough spice to smell warm before the first bite, visible carrot flecks, and frosting that feels generous without sliding everywhere.

  • Grate the carrots fresh. This gives the cake better moisture and texture than dry bagged shreds.
  • Use the full amount of salt and spice. Under-spiced carrot cake tastes flat once frosting is added.
  • Do not under-frost it. Cream cheese frosting is part of the classic carrot cake experience.
  • Chill before slicing. A cold, set cake gives cleaner bakery-style slices.
  • Make it a day ahead. The spice settles and the frosting firms, especially if the cake is refrigerated overnight.
  • Add nuts for texture. Walnuts or pecans make the cake feel more like a traditional bakery slice.
  • Add pineapple only if you want that old-fashioned style. It makes the cake fruitier and sweeter, not automatically better for every version.

Resting time is the quiet detail. The cake is good the day it is made, but the spice and frosting taste more settled after a night in the fridge. A chilled slice cuts cleanly, then softens back into that tender carrot-cake texture as it sits on the plate.

Slicing cue: Chilling firms frosting for cleaner cuts.

Neatly cut slice of chilled two-layer carrot cake with firm cream cheese frosting and visible carrot flecks.
Chilling the frosted cake before slicing helps the layers settle and the frosting firm up. As a result, you get cleaner pieces without sacrificing the tender texture people expect from carrot cake.

Make Ahead, Storage and Freezing

Carrot cake is a very good make-ahead cake. The spices settle, the crumb stays soft, and the frosting firms enough for cleaner slices.

Make Ahead

You can bake the cake layers 1 day ahead. Cool them completely, wrap them well, and keep them at room temperature if unfrosted. If your kitchen is hot or humid, refrigerate the wrapped layers instead.

You can also frost the whole cake 1 day ahead and refrigerate it. Let slices sit out briefly before serving so the crumb and frosting soften.

Storage

Because of the cream cheese frosting, frosted carrot cake should be stored in the refrigerator. Keep it covered so the cut edges do not dry out. The FDA food-safety guidance also lists cakes with cream cheese frosting among creamy desserts that should be kept refrigerated.

For the best texture, let slices sit at room temperature for 20 to 30 minutes before serving. The frosting softens slightly and the cake tastes more tender.

Freezing

Unfrosted carrot cake layers freeze well. Wrap each cooled layer tightly in plastic wrap, then in foil or a freezer-safe bag. Freeze for up to 2 months. Thaw overnight in the refrigerator before frosting.

Frosted slices can also be frozen. Freeze the slices until firm, wrap them well, then thaw in the refrigerator. Let them sit out briefly before eating so the crumb and frosting soften.

Fix Common Carrot Cake Problems

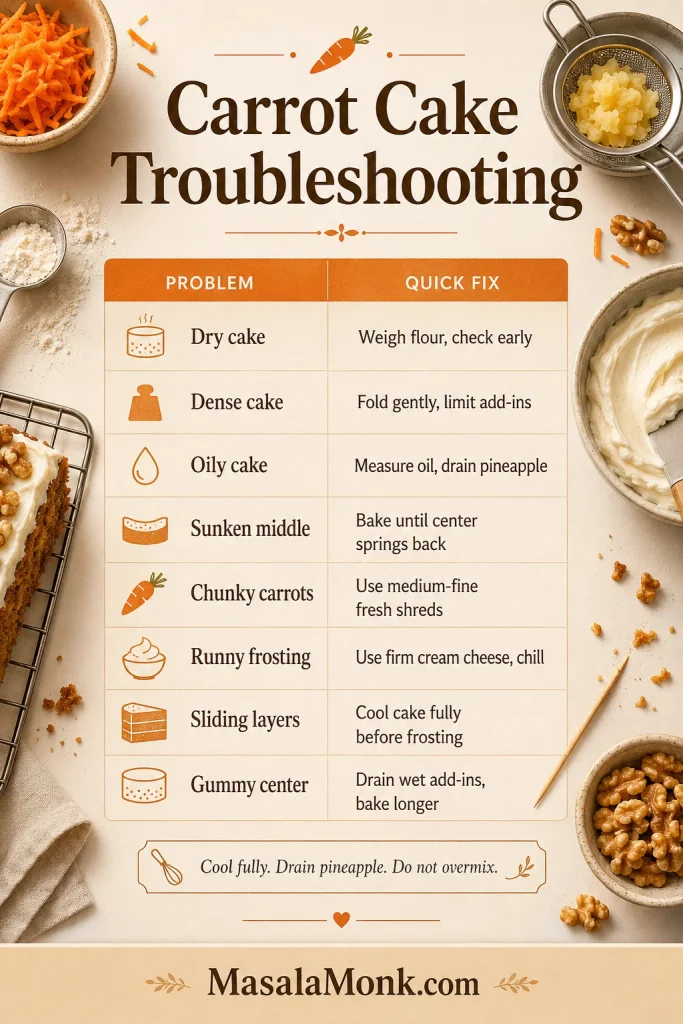
If something goes wrong, it is usually fixable next time. Most carrot cake problems come from dry carrots, too much flour, overmixing, overbaking, wet add-ins, or frosting while the cake is still warm.

Troubleshooting cue: Match each problem to the likely cause and fix.

Carrot cake troubleshooting chart listing dry cake, dense cake, oily cake, sunken middle, chunky carrots, runny frosting, sliding layers, and gummy center with quick fixes.
Most carrot cake problems come from flour, mixing, wet add-ins, bake time, or frosting temperature. This troubleshooting chart turns dry, dense, oily, gummy, or sliding results into specific fixes.
ProblemLikely ReasonFix
Cake is dryToo much flour, overbaking, or dry carrot shredsWeigh flour, check early, use moist medium-fine carrot shreds
Cake is denseOvermixed batter or too many add-insFold gently and keep add-ins controlled
Cake is oilyToo much oil or wet pineappleMeasure oil carefully and drain pineapple well
Middle sankUnderbaked cake or oven opened earlyBake until the center springs back lightly
Carrots stayed chunkyShreds were too thick or too dryUse medium-fine fresh grated carrots
Frosting is runnyTub cream cheese, warm butter, or not enough powdered sugarUse firm full-fat cream cheese and chill the frosting
Layers are slidingCake or frosting too warmCool fully and chill before slicing
Cake tastes flatNot enough salt or spiceUse the full salt and spice amounts
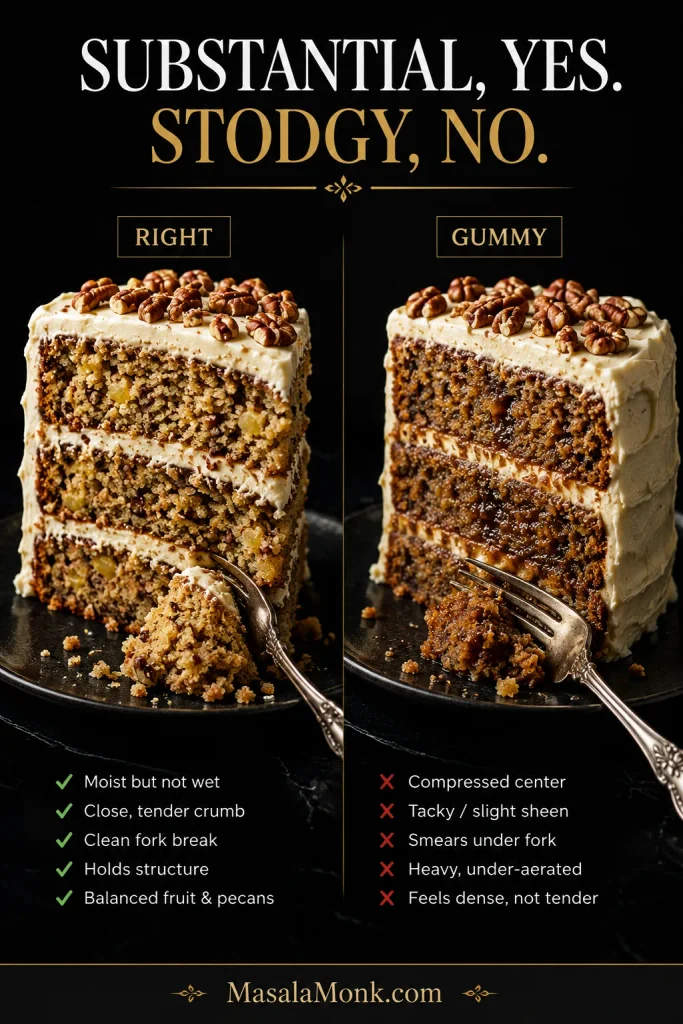
Cake is gummyToo much wet add-in or underbakingDrain pineapple, do not overdo applesauce/yogurt, bake until set

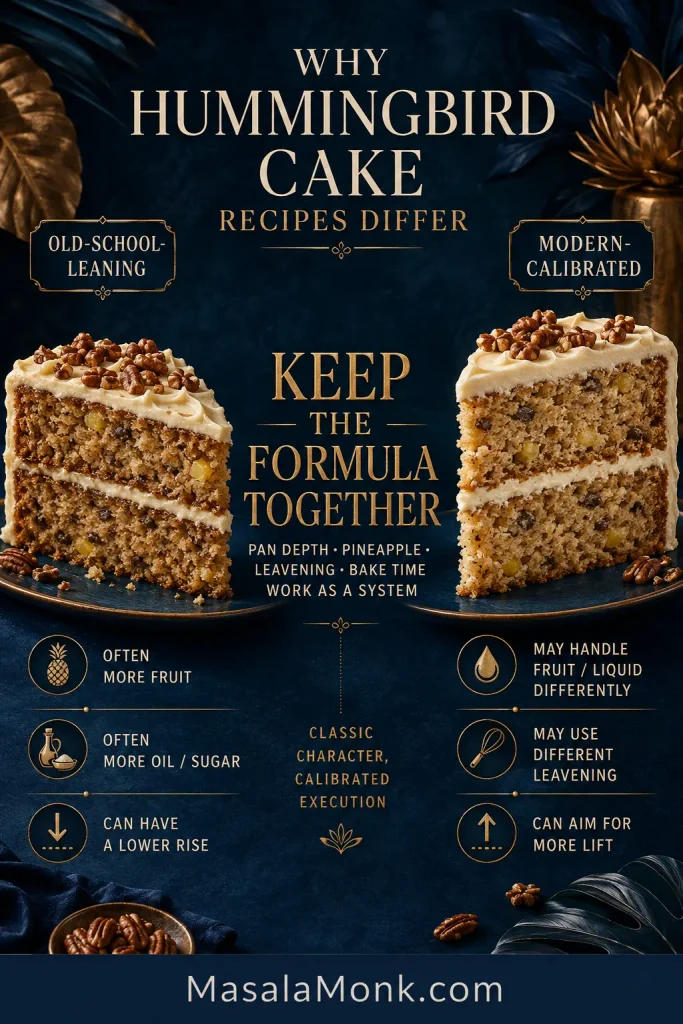
Carrot Cake vs Pineapple Carrot Cake vs Hummingbird Cake

A lot of carrot cake confusion comes from recipes that overlap with other cakes. If you are here for carrot cake, the carrot should still be the main flavor. Pineapple, coconut, raisins, and nuts should support the cake, not turn it into a different dessert.

Think of it this way: classic carrot cake is carrot and spice first; pineapple carrot cake is the fruitier old-fashioned cousin; hummingbird cake belongs to banana and pineapple. They can all be wonderful, but they are not the same craving.

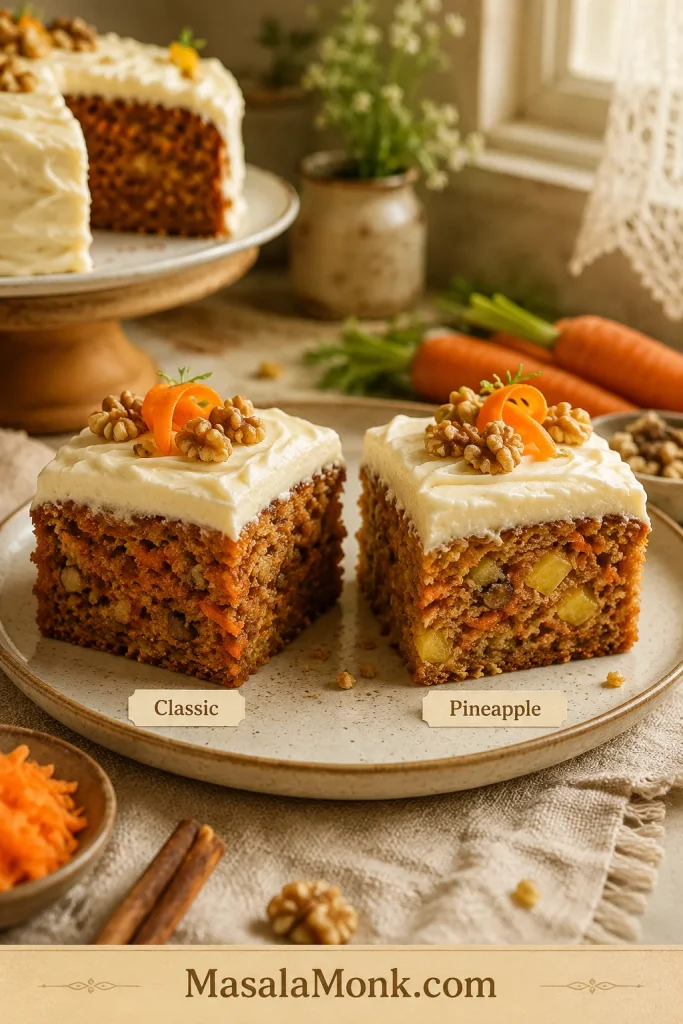
Flavor cue: Classic tastes spice-forward; pineapple leans fruitier.

Two slices of carrot cake side by side, showing a classic version and a pineapple version with cream cheese frosting.
Classic carrot cake tastes more spice-forward, while pineapple carrot cake leans fruitier and sweeter. Both can work beautifully, so the best choice depends on the flavor profile you want.
RecipeMain IdentityHow It Differs
Classic carrot cakeFresh grated carrots, warm spice, cream cheese frostingThis is the main recipe here
Pineapple carrot cakeCarrot cake with crushed pineappleSweeter, fruitier, more old-fashioned
Hummingbird cakeBanana, pineapple, pecans, spiceMore tropical and banana-led
Spice cakeWarm spices, usually no carrotsSofter spice-only profile
Carrot loafSmaller tea cake formatBetter with a loaf-specific formula
Carrot cupcakesIndividual carrot cakesUsually better with a slightly lighter cupcake structure

The carrot should lead; the pineapple, nuts, and raisins should only back it up. This recipe stays in the classic carrot cake lane first.

Choose the Version That Fits What You Need

Some carrot cake cravings need a different recipe, not just a different pan. This batter handles layers, sheet cake, cupcakes, Bundt, and careful loaf baking, but eggless, vegan, gluten-free, keto, and baked-oat versions need their own structure.

NeedBest VersionWhy
Easiest beginner bake9×13 carrot cake sheet cakeNo stacking, trimming, or side frosting
Party portionsCarrot cake cupcakesFaster baking and easier serving
Tea-time cakeCarrot cake loafSmaller cake, easier storage, better with a loaf-specific formula
Breakfast-style optionCarrot cake muffinsLess frosting, easier to portion
No eggsEggless carrot cakeNeeds a different binding and rising structure
No dairy or eggsVegan carrot cakeNeeds egg-free batter and vegan frosting logic
No glutenGluten-free carrot cakeGluten-free flour absorbs moisture differently
Low sugar or low carbKeto or sugar-free carrot cakeNeeds a separate flour and sweetener system
Meal prep breakfastCarrot cake baked oatsDifferent intent, texture, and ingredients
Old-fashioned fruitier cakePineapple carrot cakeCrushed pineapple changes the flavor and moisture

Egg-free and dairy-free cakes behave differently. This vegan chocolate cake guide shows how much the structure changes once eggs and dairy leave the batter.

If you need eggless, vegan, gluten-free, keto, or sugar-free, start with a recipe built for that need. Those cakes rely on different structure, and they turn out better when they are designed that way from the start.

Carrot Cake Recipe FAQ

What is the secret to moist carrot cake?

Use oil, brown sugar, fresh grated carrots, careful flour measurement, and the right bake time. Applesauce or yogurt adds extra softness without making the cake greasy.

Should carrots be grated fine or coarse for carrot cake?

Medium-fine grated carrots work best. Very coarse carrots can stay chunky, while very fine carrots can disappear too much. Freshly grated carrots are better than bagged pre-shredded carrots.

Do I need to peel carrots before grating them?

Peeling is optional if the carrots are clean and tender. If the skins are rough, dirty, or bitter, peel the carrots first.

Is carrot cake better with oil or butter?

Oil is usually better for carrot cake because it keeps the crumb soft after refrigeration. Butter adds flavor, but it can make chilled cake feel firmer.

Does carrot cake need pineapple?

No. This version stays moist without pineapple. Add it only if you want a fruitier, old-fashioned cake.

Can I leave out raisins or nuts?

Yes. Raisins and nuts are optional. Leave either one out without changing the batter. If you remove both, the cake will taste cleaner and softer, with more focus on carrot, spice, and frosting.

Why did my carrot cake turn out dense?

Dense carrot cake usually comes from overmixing, too much flour, too many add-ins, or underbaking. Fold gently and bake until the center springs back.

Why is my cream cheese frosting runny?

Runny cream cheese frosting usually comes from very soft cream cheese, overly warm butter, or not enough powdered sugar. Use firm full-fat cream cheese and chill the frosting briefly if it feels loose.

Does carrot cake need to be refrigerated?

Yes, frosted carrot cake should be refrigerated because of the cream cheese frosting. Let slices sit out for 20 to 30 minutes before serving for the best texture.

Can carrot cake be made ahead?

Yes. Bake the layers 1 day ahead or frost the whole cake 1 day ahead and refrigerate it.

Can I bake this as cupcakes or a sheet cake?

Yes. For cupcakes, fill liners ⅔ full and bake for 18 to 22 minutes. A 9×13 sheet cake takes about 35 to 45 minutes.

Can I bake this carrot cake in a loaf pan?

Yes, but do not put the full batter in one loaf pan. Use about half the batter in one 9×5 loaf pan, or divide the full batter between two loaf pans. Bake until the deep center is fully set.

Can I make this carrot cake eggless, vegan or gluten-free?

For best results, use a dedicated eggless, vegan, or gluten-free carrot cake recipe. Those versions need different binding, moisture, and structure than the classic recipe.

Carrot cake rewards small details: fresh carrots, enough spice, measured flour, a gentle hand with the batter, and frosting that is thick enough to hold. Get those right and the cake becomes soft, cozy, sliceable, and reliable enough for birthdays, Easter, holidays, potlucks, or any day that needs a proper slice of cake.

This is not a fussy cake. It is a generous one — the kind that tastes even better after a quiet night in the fridge and somehow disappears one thin “just a little” slice at a time.

A good carrot cake wins quietly: warm spice, soft crumb, tangy frosting, orange flecks in every slice, and the kind of second piece people go back for after they said they were full.

If you make this carrot cake, leave a comment with your version — layer cake or sheet cake, pineapple or no pineapple, nuts or no nuts, raisins or no raisins — and how it turned out. Carrot cake people have strong opinions, and your notes help the next baker choose their version.