Posted on 13 Comments

Crispy Homemade French Fries From Fresh Potatoes (Recipe Plus Variations)

Woman frying crispy homemade French fries in a pan on the stove, lifting golden fries from hot oil for a MasalaMonk recipe guide.

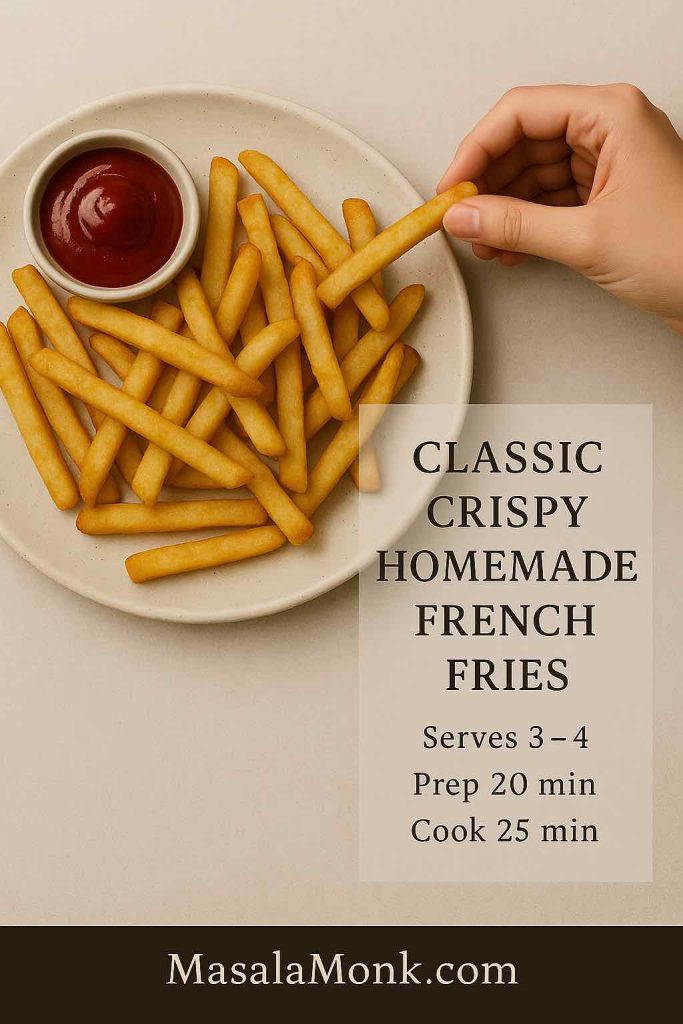
There’s a special kind of joy in biting into crispy homemade french fries that you made yourself. The outside is shatteringly crisp, the inside is fluffy and hot, and you can taste actual potato instead of just salt and grease. Once you learn how to do diy french fries at home, it becomes hard to go back to limp, lukewarm fast-food versions.

In this guide, we’ll walk through:

  • A straightforward french fries ingredients and procedure section you can follow every time
  • The best way to cook fries using a classic double-fry method
  • Easier options like oven fries at 425°F and air fryer frozen french fries
  • Fun variations: seasoned fries, garlic parmesan french fries, chili cheese french fries, truffle fries, and more
  • Smarter choices for healthy potato fries, from oil selection to veggie alternatives

The aim is simple: by the end, you’ll be able to make perfect french fries in several styles, whether you’re cooking for movie night, a party tray of loaded fries, or just a snack for one.

Also Read: Simple Bloody Mary Recipe – Classic, Bloody Maria, Virgin & More


Why Bother Making Crispy French Fries at Home?

At first glance, buying a bag of frozen fries or grabbing a portion from a takeaway seems easier. However, at home french fries come with a few big advantages.

To begin with, you control the ingredients. You choose the potatoes, the oil, and the salt level. You can keep things minimal for a simple fries recipe, or go wild with flavors like cajun french fries or cheese french fries. When you’re in charge, “quality fries” actually means something.

Moreover, you get to decide how indulgent you want your fries to be. Potatoes themselves are not villains. According to Potatoes USA’s nutrition overview, a medium potato has around 110 calories, zero fat, and offers vitamin C, potassium, and fiber when you keep some peel on. Deep frying adds fat and energy, of course, but with homemade fries, you can:

  • Use better oils
  • Fry at the right temperatures
  • Or choose oven fries potatoes and air fryer french fries most of the time

A typical restaurant portion of fries can be high in fat and sodium. Overviews like Verywell Fit’s french fries nutrition facts break down just how quickly calories add up when fries are cooked in old oil and then heavily salted. Making real potato fries at home lets you adjust all of that.

Finally, the flavor is simply better. Fresh potato fries have a clean, sweet, potato-forward taste that frozen fries rarely match. Once you’ve had real french fried potatoes straight from your own kitchen, it’s hard not to feel a tiny bit smug.

Also Read: Homemade Hot Chocolate with Cocoa Powder Recipe


Best Potatoes for Crispy Homemade French Fries

The heart of any good potato french fries recipe is, unsurprisingly, the potato. Not all varieties behave the same in hot oil or a hot oven, so it’s worth thinking about the type you buy.

Starchy vs “gold” potatoes

For classic crispy fries with fluffy interiors, starchy potatoes are ideal:

  • Russet / Idaho potatoes: High starch and low moisture. These are perfect for french fries from russet potatoes if you want that restaurant-style contrast between crisp outside and soft inside.
  • Yukon Gold and other yellow potatoes: Slightly waxier, with more moisture, but very creamy. These are excellent for gold potato fries or yukon gold french fries when you want a rich, buttery interior and deep golden exterior.

Side-by-side comparisons, like this piece on Russet vs Yukon Gold, point out that Russets crisp up more dramatically than yellows because of their starch and lower moisture, whereas Yukon Golds keep their shape and feel denser and creamier. That matches what you’ll see in your pan: Russets are your friend for the crispiest french fries, while golds are great when you lean toward golden potato french fries that feel more substantial.

In short:

  • For extra crispy french fries or skinny fries → choose Russet/Idaho.
  • For rich, slightly softer thick cut fries or steak fries → try Yukon Gold or another yellow potato.

You can mix them too, especially if you like serving a variety of textures on one platter.

Also Read: Mimosa Recipe: 10 Easy Versions from Classic to Caramel Apple


Oils, Heat, and Tools for Homemade French Fries that are Crispy

Once you’ve got your potatoes sorted, the next question is: what do you fry them in, and how?

Oils that work well for fries

When you’re deep-frying, you want oils that can handle high temperatures and stay reasonably stable:

  • Refined peanut or sunflower oil
  • Canola or rapeseed oil
  • Rice bran oil
  • High-oleic vegetable blends
  • Light or refined olive oil (for fries in olive oil, not extra virgin)

Articles on the healthiest oils for cooking and frying highlight avocado, refined olive, peanut, and similar oils because they combine decent smoke points with more monounsaturated fats. They’re not magic health potions, but they’re a smarter choice than repeatedly overheated, low-quality oils.

For full-on indulgence, some people love beef tallow fries or duck fat french fries. Both fats give incredible flavor, but they are obviously richer and make the most sense for occasional “wow” dinners. On the other end of the spectrum, you can choose very light oil coatings in the oven or air fryer for healthier french fries.

Helpful tools (and what you can skip)

You do not need a dedicated “french fry fryer” to make excellent fries. You can absolutely make french fries at home using basic tools:

  • A heavy pot or deep frying pan
  • A thermometer (to manage that best way to fry fries temperature window)
  • A large bowl for soaking
  • A colander or sieve
  • A clean towel for drying
  • A wire rack and tray for draining cooked fries

A dedicated fryer can make things more convenient if you make home made fries often, but it’s not a requirement. A sharp knife is also plenty for cut fries, although a mandoline or fry cutter can be fun if you often crave french fries shoestring, crinkle cut french fries, or thick cut french fries.

Also Read: French 75 Cocktail Recipe: 7 Easy Variations


Ingredients for Classic French Fries

The nice part about a simple french fries recipe is how short the shopping list is. Here’s a good base for four people.

Core ingredients

  • 1 kg (about 2.2 lb) potatoes (Russet for crispiest; Yukon Gold for creamier)
  • Oil for frying (enough to fill your pot 5–7 cm / 2–3 inches deep)
  • 2–3 teaspoons fine salt

That’s your essential french fries ingredients list: nothing fancy, just the basics that define fresh french fries.

Optional extras for crunch and flavor in Crispy Homemade French Fries

If you’d like to push things toward the crunchy fries recipe end of the spectrum or turn out seasoned fries, keep these on hand:

  • Cornstarch or rice flour (for french fries with crispy coating)
  • Garlic powder, onion powder, smoked paprika, chili powder (for seasoned french fries or cajun french fries)
  • Grated Parmesan, cheddar, or other cheese (for parmesan french fries or cheesy french fries)
  • Truffle oil and fresh parsley (for truffle french fries recipe)
  • Fresh garlic and butter or olive oil (for garlic french fries recipe)

With these extras, the same basic batch of fries can become restaurant style fries, garlic parmesan fries, or loaded french fries without much extra effort.

Also Read: Tres Leches – Mexican 3 Milk Cake Recipe


Step-by-Step Crispy Homemade French Fries (Stovetop)

Let’s start with the classic version: crispy homemade french fries cooked in oil on the stove. This method gives you extra crispy fries if you follow the temperatures and timing closely.

Recipe card showing classic crispy homemade French fries on a plate with ketchup and text for serves, prep time, and cook time.
Classic crispy homemade French fries – a MasalaMonk recipe card with serving size and cook times, perfect for pinning or saving for later.

Step 1: Cut and soak the potatoes

First, scrub your potatoes well. You can peel them if you prefer, but leaving the skins on makes more rustic real potato fries and adds a touch of fiber.

Cut the potatoes into sticks about 8–10 mm thick. For skinny french fries or french fries shoestring, go thinner; for steak fries or thick cut fries, cut chunky batons or wedges.

As soon as you cut them, drop the sticks into a big bowl of cold water. This rinses away surface starch and stops oxidation. Swish them around, then drain and refill with fresh cold water. If you like, add a spoonful of vinegar or lemon juice; it can help them hold their structure during cooking.

Soaking for 20–30 minutes helps prevent the outside from turning gummy and gives you a better chance at truly crispy french fries rather than soggy ones. Once you’re done soaking, drain the potatoes thoroughly and spread them out on a clean towel. Pat them dry until they feel matte. Water on the surface is the enemy here: it lowers oil temperature and encourages splattering.

Step 2: First fry (par-cooking)

Heat your oil to around 150–160°C (300–320°F). At this stage, the goal is to cook the potatoes through without browning them much. For deep frying, a two-stage cook—first at a lower temperature, then at a higher one—is key to combining a fluffy interior with crisp exterior.

Working in small batches, gently lower the dried potato sticks into the hot oil. Fry for about 4–6 minutes. They should turn from opaque to slightly translucent and feel tender if you poke them with a knife, but they should not yet be golden.

Lift them out with a slotted spoon and place them on a rack set over a tray. Repeat with the remaining batches. At this point, you have par-cooked fries: soft, pale, and flexible. You can pause here, cool them, and even refrigerate for several hours if you want to fry just before serving. That’s how many restaurant style french fries are prepped.

Step 3: Second fry (crisping and coloring)

For the second fry, raise the oil temperature to 185–190°C (365–375°F). That hotter environment is where you’ll develop the golden crust that makes crispiest french fries such a pleasure.

Again in small batches, slide the par-cooked fries back into the oil. Fry for 2–4 minutes, until they’re uniformly golden, with little blistered areas and crisp edges. Keep an eye on their color; you’re aiming for golden potato french fries, not dark brown or burnt ones.

There’s a health reason for that, too. When starchy foods like potatoes are fried or baked at high heat, they can form acrylamide, a compound that health agencies monitor. The US FDA’s guidance on acrylamide in foods suggests aiming for light golden colors and avoiding burnt bits whenever possible. The National Institute of Environmental Health Sciences also notes that french fries and similar foods can be significant acrylamide sources when heavily browned. So, aim for gold, not mahogany.

Once the fries are ready, lift them onto the rack or a paper-towel-lined tray. Immediately sprinkle them with salt while they’re still sizzling, so the crystals cling. If you like seasoned fries, this is the moment to toss with paprika, garlic powder, or any spice mix you enjoy.

And just like that, you’ve completed the core french fries procedure: cut, soak, dry, par-fry, then finish hot.

Also Read: High Protein Overnight Oats | 5 Recipes (Low Calorie, Vegan, Bulking & More)


Slightly Smarter, Still Crispy: Health Notes and Oil Choices

Even though fried fries recipes are not exactly health food, you can still make better choices without losing all pleasure.

First, use fresh or properly filtered oil and avoid letting it smoke. Overheated, repeatedly reused oil isn’t just unpleasant in flavor; it can contribute to off flavors and degraded fats. A thermometer makes it much easier to maintain that best way to fry french fries temperature range, whether you’re in a pot or a countertop fryer.

Second, consider how often you go for fully deep-fried crispy french fries versus lighter versions. You might save deep-fried extra crispy french fries for weekends, while turning to oven fries or air fryer homemade fries on busy weeknights.

Third, balance your plate. Fries alongside grilled chicken, salad, or roast vegetables feel different from fries plus more fried items. That’s where side dishes and smarter recipes around your fries come in—and we’ll circle back to those in a bit.

Also Read: 10 High Calorie Protein Shakes & Smoothie Recipes for Healthy Weight Gain


Oven Fries at 425°F: Baked, Seasoned, and Easy

When you’d rather not deal with a pot of hot oil, oven fries 425°F are a great compromise. They won’t be identical to deep-fried fries, yet you can get delicious baked seasoned fries with crisp edges and tender middles.

Recipe card showing a tray of oven-baked seasoned fries at 425 degrees, held with an oven mitt, with serving size and baking time details.
Oven-baked fries at 425°F – crispy seasoned fries with less oil, with prep and bake times highlighted so you can see the whole MasalaMonk method at a glance.

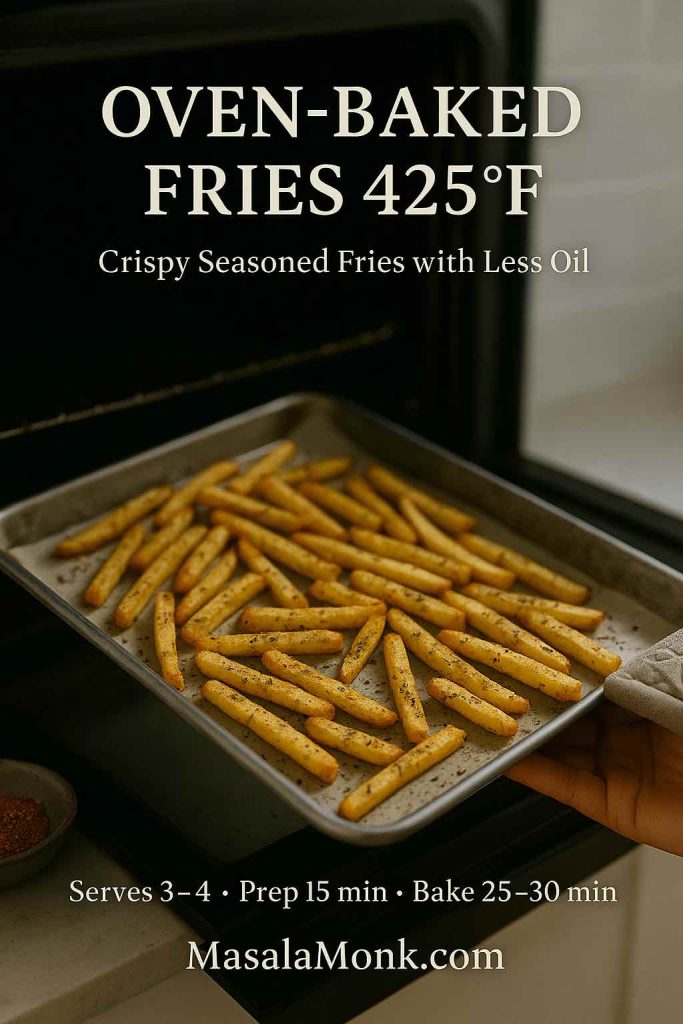
Basic oven fries method

  1. Preheat your oven to 220°C / 425°F.
  2. Cut your potatoes into wedges or sticks, just as before.
  3. In a bowl, toss them with 1–2 tablespoons of oil—this can be olive, avocado, or any neutral oil you like.
  4. Season generously with salt, pepper, and any spices you enjoy: garlic powder, smoked paprika, dried thyme, or a ready-made seasoning blend.
  5. Spread the fries out in a single layer on a baking sheet, leaving a bit of space between pieces. Crowding leads to steaming rather than crisping.
  6. Bake for about 20–25 minutes, turning once halfway through, until the edges are golden brown and the fries are tender inside.

At this point, you’ve made seasoned oven fries that work beautifully with the same sauces and toppings you’d use for deep-fried versions. They’re particularly nice as a side to oven-baked mains or as part of a lighter tray meal.

If you’re planning a party spread that doesn’t revolve solely around fries, you can point guests toward other potato-centric snacks too. A collection like MasalaMonk’s potato appetizers fits naturally alongside oven fries on a buffet table, giving people more variety while still leaning into that potato comfort.

Also Read: How to Cook Perfect Rice Every Time (Recipe)


Air Fryer Fries: Crispy Homemade French Fries With Less Oil

Next, let’s move to fries airfryer style. Air fryers circulate very hot air around food, using far less oil than deep frying. Comparative work on deep-fried vs air-fried potatoes has shown that air-fried samples can have dramatically less fat and slightly fewer calories per serving, which makes them a handy tool when you’d like healthier french fries more often.

Recipe card showing air fryer French fries made from fresh-cut potatoes, with seasoning sprinkled over the basket and serving and cook times displayed.
Air fryer French fries made from fresh-cut potatoes – a MasalaMonk recipe card that highlights how to get crispy fries with less oil, plus prep and air-fry times at a glance.

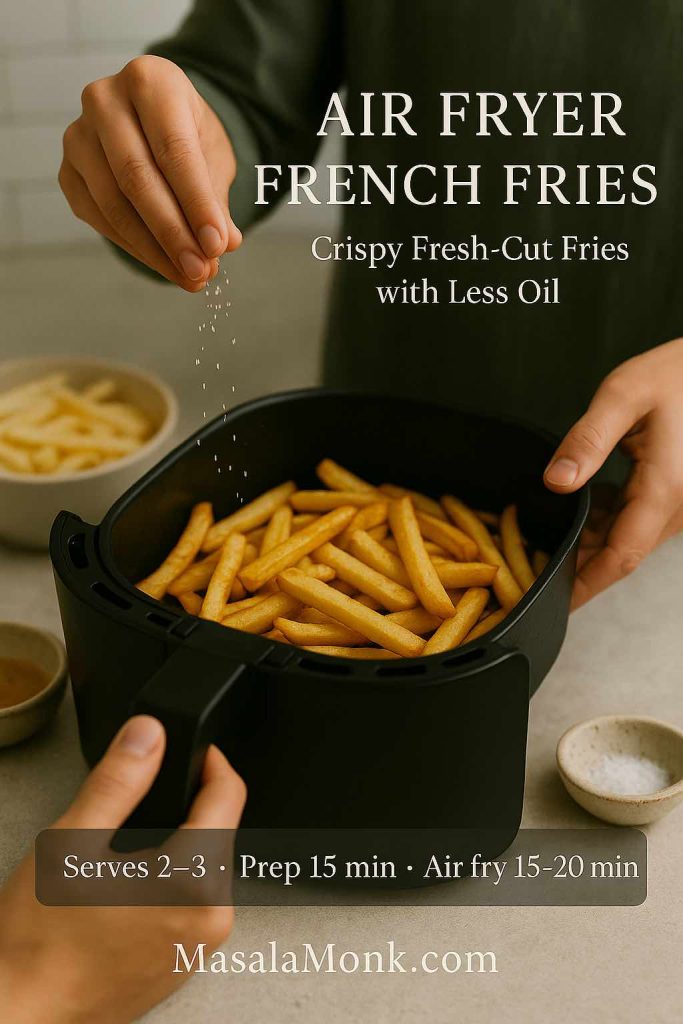
Fresh potato fries in the air fryer

For easy french fries recipe done in the air fryer:

  1. Cut your potatoes into sticks and soak them as you would for deep frying.
  2. Drain and dry thoroughly.
  3. Toss with 1–2 teaspoons of oil, salt, and seasonings.
  4. Place them in the air fryer basket in a loose, even layer.
  5. Cook at 190°C / 375°F for 15–20 minutes, shaking every 5 minutes so they brown evenly.
  6. For extra crispy french fries, finish with a final 3–5 minutes at 200°C / 400°F.

This method gives you healthy potato fries that still feel indulgent. They’re especially good as skinny fries, where the higher surface area means lots of crunchy bits.

Frozen Crispy Homemade French Fries in the air fryer

For those nights when you want the best frozen fries for air fryer with minimal fuss:

  1. Preheat the air fryer to 200°C / 400°F.
  2. Tip frozen shoestring fries, straight cut fries, frozen waffle fries, or other shapes into the basket. Try not to overstack them.
  3. Air fry for 10–18 minutes depending on thickness, shaking halfway through.
  4. Season as soon as they come out of the basket.

Most brands are already partially fried in oil, so you often don’t need extra. However, a light spray of oil can help paler brands crisp a little better. This technique works well if you want to focus your kitchen time on main dishes but still end up with crispy fries recipe results.

If you’re fond of multitasking with your air fryer, ideas like air fryer hard-boiled eggs fit nicely into the same workflow. You might prepare homemade fries for dinner and a batch of eggs for breakfast with very little extra effort.

Also Read: Béchamel Sauce for Lasagna: Classic, Vegan & Ricotta Sauce Recipe


Playing With Shapes: Shoestring, Thick Cut, Steak, and Crinkle

Once you have a reliable french fries recipe, the next step is having fun with shapes. Different cuts give you different textures and cooking times.

Skinny and shoestring fries

Thin skinny fries or french fries shoestring are all about extreme crispness:

  • Cut the potatoes into matchsticks.
  • Soak, dry, and fry exactly as for the classic recipe.
  • Shorten the par-fry to keep them from overcooking, and watch carefully during the second fry—they go from golden to too dark very quickly.

Shoestring fries are fantastic when you’re making loaded french fries recipe variations like chile-topped fries, because so many edges catch sauce and cheese.

Thick cut fries and steak fries

On the opposite end, thick cut french fries and steak fries are all about a soft, potato-y center:

  • Cut the potatoes into chunky batons or wedges.
  • Lengthen the par-fry slightly or start them in the oven with a bit of water in the pan, then finish in hot oil or under the broiler.
  • Because there’s more potato in each piece, they stay creamy inside even when the exterior is thoroughly crisp.

Thick cut fries shine alongside robust dishes: grilled steak, roasted chicken, or as part of a plate with gravy and vegetables.

Crinkle cut and waffle fries

For crinkle cut french fries, fries crinkle cut, or french fries crinkle, you’ll need a crinkle cutter or a mandoline that makes ridges. The technique stays the same—soak, dry, par-fry, then crisp—but the ridges create extra surface area. That means more crunch, and it also means they hold onto seasonings and sauces really well.

Similarly, frozen waffle fries from the store become great canvases for fancy fries toppings. Their lattice structure acts like a little basket for cheese, carne asada, or creamy sauces.

Also Read: Peanut Butter Cookies (Classic Recipe & 3 Variations)


Veggie Fries: Sweet Potato, Yuca, Jicama, and Rutabaga

While classic french fries from white potatoes are iconic, you can also explore veggie french fries when you’re craving variety or want to shift the nutrition profile a bit.

Sweet potato fries

Sweet potato french fries deserve their own shout-out. They bake and air fry beautifully, and they pair well with both sweet and savory seasonings, from cinnamon and chili to garlic and smoked paprika. You can even make crinkle cut sweet potato fries for added texture.

Sweet potatoes tend to be softer and more prone to burning at high heat, so a light coating of cornstarch and oil, plus slightly lower temperatures, often work best. For more detail on how sweet potatoes differ nutritionally from white potatoes, you might enjoy MasalaMonk’s sweet potato nutrition breakdown and their piece on the potato debate: white vs sweet. Those articles go into fiber, vitamins, and even blood sugar considerations in a way that helps you decide when to reach for which.

Recipe card showing crispy spiced sweet potato fries in a round tray with dipping sauce, lime, and sweet potato pieces, plus serving and cook time details.
Crispy, spiced sweet potato fries with a creamy dip – a MasalaMonk recipe card that highlights this naturally sweet, oven or air-fried alternative, complete with prep and cook times.

Yuca, jicama, and rutabaga fries

Beyond sweet potatoes, you can experiment with:

  • Yuca french fries: dense, starchy, and very satisfying. They need peeling and careful boiling before frying, but the final texture is almost creamy.
  • Jicama french fries: lower in carbs, with a fresh crunch and a subtle sweetness. These are typically best baked or air fried with strong seasonings.
  • Rutabaga french fries: slightly earthy and sweet, good roasted until caramelized and then tossed with spices.

These alternatives work well when you want healthy potato fries style sides on repeat without always using white potatoes. They’re also fun for guests who’ve never tried such variations.

Also Read: Chicken Alfredo Pasta, 5 Ways (Classic to Cajun, Veg, 15-Minute Jar, Healthy)

Four glasses lined up on a board, each filled with a different veggie fry—sweet potato, yuca, jicama and rutabaga—with a hand picking up one fry and dipping sauces blurred in the background.
Veggie fries medley: sweet potato, yuca, jicama and rutabaga, for nights when you want all the crunch of fries with a little extra colour and variety on the MasalaMonk table.

Seasoned, Spiced, and Coated Fries

Once you’ve mastered the basics, it’s time to play with seasoned fries, homemade seasoned french fries, and light coatings for texture.

Basic seasoned Crispy Homemade French Fries

For a straightforward seasoned fries recipe, start with fresh, hot fries and toss them with:

  • Fine salt
  • Garlic powder
  • Onion powder
  • Smoked paprika
  • A pinch of black pepper or chili powder

This base mix instantly transforms simple french fries into something closer to best seasoned fries, and you can adjust the heat level to taste.

Top-down view of a wooden board with three piles of seasoned fries labeled Cajun, Garlic Herb and Smoky Paprika, each with a matching dipping sauce and a hand picking up a fry.
Seasoned fries three ways – Cajun, garlic herb and smoky paprika – so you can turn one batch of MasalaMonk fries into a full flavour tasting board.

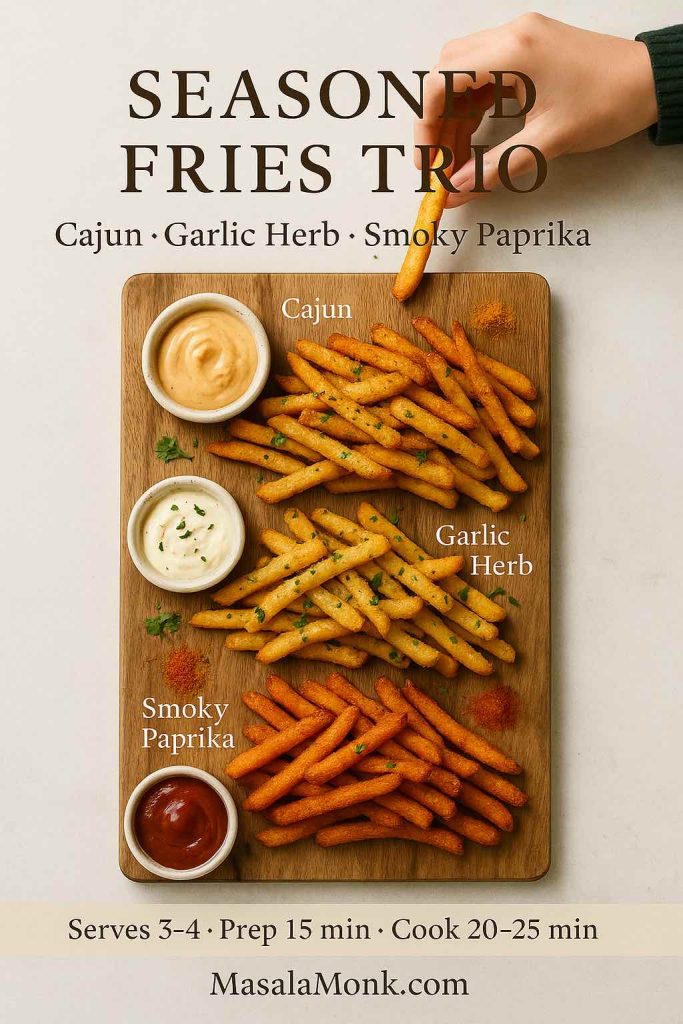
Cajun and herby variations

To steer your fries toward cajun french fries, blend:

  • Paprika
  • Cayenne
  • Garlic powder
  • Oregano
  • Thyme
  • A bit of brown sugar and black pepper

Toss this through hot fries and you’ll have spicy, deeply flavored seasoned homemade fries that go especially well with tangy dips like tzatziki or yogurt-based sauces.

Alternatively, if you’d rather lean into herbs, use rosemary, thyme, cracked black pepper, and flaky salt. These herby seasoned french fries feel more rustic and pair beautifully with roast meats and vegetables.

Crispy coatings for Homemade French Fries

If you want french fries with crispy coating without turning them into full battered french fries, a light dusting of starch can help. After soaking and drying, toss the raw potato sticks in a spoonful of cornstarch or rice flour, shake off the excess, and then fry as usual. The coating makes subtle bubbles and ridges on the surface, giving you extra crispy fries that stay crunchy a little longer.

Also Read: Crock Pot Lasagna Soup (Easy Base + Cozy Slow-Cooker Recipes)


Cheesy, Loaded, and Fancy Fries

Now comes the most playful part: turning a bowl of fries into a full meal or an irresistible shareable plate.

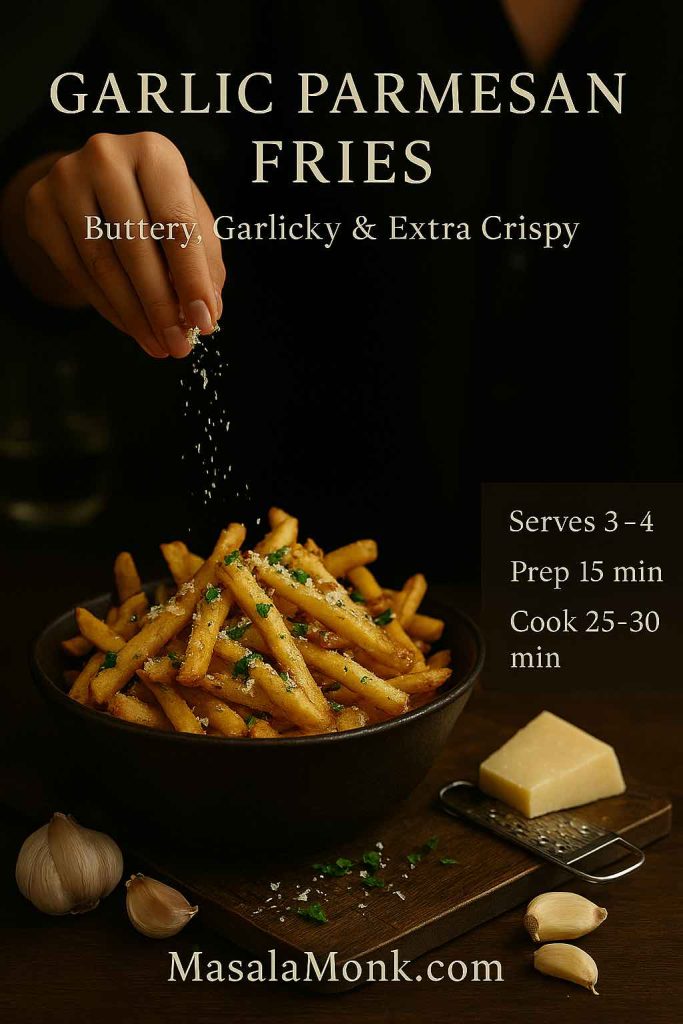
Garlic parmesan fries

To create garlic parmesan french fries, start with a batch of hot, freshly fried fries.

  1. In a small pan, gently warm a bit of butter or olive oil with minced garlic until fragrant, not browned.
  2. Toss the hot fries with this garlic mixture.
  3. Add a handful of grated Parmesan and chopped parsley.
  4. Season with salt and pepper as needed.

This same approach also works for simple parmesan french fries if you skip the garlic or for sweet french fries if you play with honey and chili flakes instead.

Recipe card showing garlic parmesan fries in a bowl with cheese being sprinkled on top, surrounded by garlic cloves and a parmesan wedge, plus serving and cook time details.
Buttery, garlicky parmesan fries piled high in a bowl – a MasalaMonk recipe card that highlights this extra-crispy variation, complete with prep and cook times for easy reference.

Chili cheese and carne asada fries

For fully loaded chili cheese french fries, layer:

  • A bed of crispy fries
  • A ladle of hot chili (vegetarian or meaty)
  • Grated cheddar or Monterey Jack
  • Jalapeños, scallions, maybe a drizzle of sour cream

Slide the whole thing under the broiler for a minute until the cheese melts. Suddenly, your crispy fries have become serious comfort food.

Recipe card showing chili cheese loaded fries in a cast iron skillet, topped with chili, melted cheese, jalapeños and sour cream, with serving and bake time details
Chili cheese loaded fries served in a cast iron skillet – a MasalaMonk recipe card for the ultimate comfort fry platter, complete with prep and bake times for easy game-night planning.

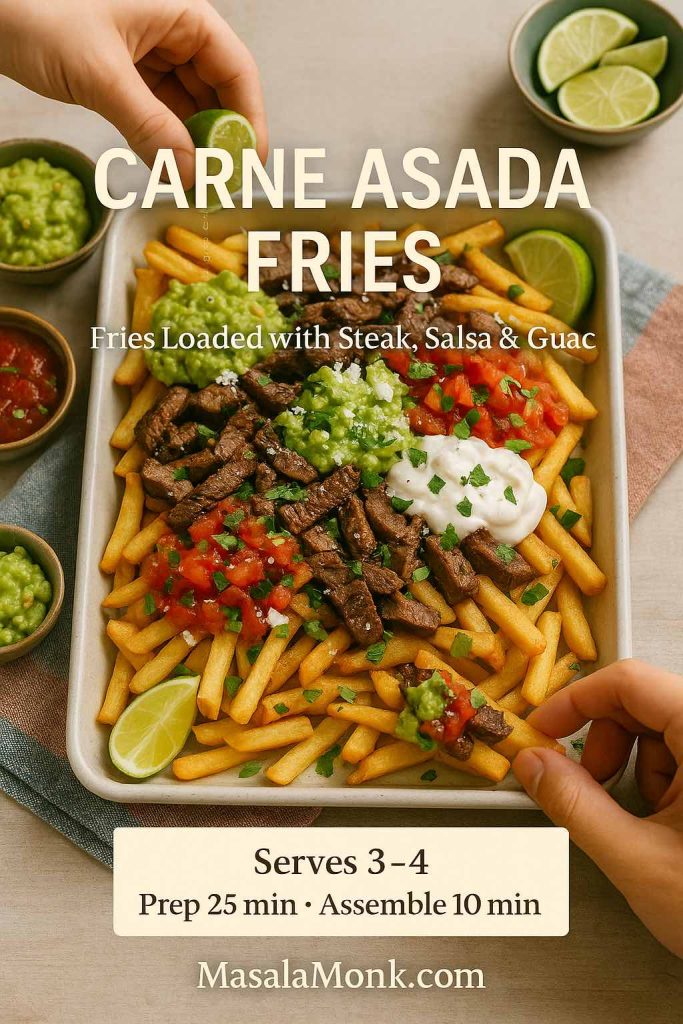
Similarly, carne asada french fries combine:

  • Fries
  • Chopped grilled steak
  • Pico de gallo or salsa
  • Guacamole
  • Sour cream or crema
  • Fresh coriander

They’re messy, delicious, and perfect for sharing.

Carne asada fries on a rectangular tray topped with grilled steak strips, guacamole, salsa, sour cream and cilantro, with hands squeezing lime and reaching for a fry.
Carne asada fries loaded with steak, salsa, guacamole and sour cream – a MasalaMonk feast that turns a simple tray of fries into a full-on meal.

Truffle and “fancy” fries

When you want fancy fries without too much effort, truffle french fries recipe style toppings make a big impression.

  • Toss hot fries with a little truffle oil (a few drops go a long way).
  • Add grated Parmesan and parsley.
  • Season with salt and cracked pepper.

Because truffle oil can dominate, it’s best used with neutral, simply salted fries rather than heavily seasoned ones.

If you’d like more ideas for dips and cheesy sides that pair well with loaded fries, MasalaMonk’s spinach dip collection and their buffalo chicken dip recipes offer plenty of inspiration. Both kinds of dip are excellent alongside loaded french fries or even spooned over the top.

Tall metal cup filled with truffle fries topped with parmesan and herbs, served on a dark plate with aioli, styled like an elegant restaurant snack.
Skinny truffle fries finished with parmesan, herbs and a side of aioli – a simple MasalaMonk twist that turns fries into a wine-bar style treat.

Sauces and Dips for Crispy Homemade French Fries

Good fries deserve good sauces. Beyond ketchup, you can easily mix and match flavors for your own french fry dip recipe collection.

Creamy dips

For creamy dipping sauce for french fries, try ideas like:

  • A simple garlic mayonnaise with lemon juice
  • A smoky paprika mayo
  • A yogurt-based dip with herbs and garlic

These work especially well with seasoned fries and cajun fries, where the spices already bring a lot of personality.

If you want to branch out further, the cool, garlicky punch of tzatziki is a great contrast to hot fries. A guide like MasalaMonk’s Greek tzatziki sauce recipes shows how versatile that sauce can be across different herbs and add-ins, and every version is happy to share a plate with crispy fries.

Four quick fries dipping sauces – garlic mayo, smoky ketchup, spicy mayo and herb yogurt – so you can switch up the flavour of every MasalaMonk fries night in minutes.

Cheesy and baked dips for Crispy Homemade French Fries

Meanwhile, cheesy dips make perfect companions to french fries loaded with toppings. Spinach and artichoke dip, hot cheese dips, or buffalo chicken dip can all sit in the center of a platter surrounded by straight cut french fries, curly french fries, or crinkle cut fries for dipping.

Because fries and rich dips can be quite substantial, you may find it useful to round out your menu with lighter but still indulgent favorites. Dishes like classic deviled eggs with variations or high-protein snacks and breakfasts, such as overnight oats recipes, help keep things balanced over the course of a day, even if dinner is definitely in “treat” territory.


What to Serve With Crispy Homemade French Fries

Rather than thinking of fries as an afterthought, you can build entire meals around them in a way that feels intentional and satisfying.

Classic comfort plates

On one hand, there’s the timeless pairing of chicken and french fries:

  • Grilled or fried chicken
  • Homemade fries (deep-fried, oven-baked, or air fried)
  • Coleslaw or a fresh salad

You can also swap chicken pieces for sandwiches. A platter of fries next to juicy sandwiches from a range like MasalaMonk’s chicken sandwich recipe collection makes a complete, crowd-pleasing spread.

For full comfort food mode, consider serving fries alongside creamy classics:

Those casseroles and bakes give you vegetables and dairy in forms people love, while the fries bring crunch and a salty edge to balance the creaminess.

Party spreads and grazing boards

For parties or movie nights, a fries-centric board can be a huge hit. You might:

  • Offer multiple shapes: thick cut fries, skinny fries, crinkle cut fries
  • Provide several seasonings: plain salted, cajun, garlic herb
  • Add bowls of dips: tzatziki, spinach dip, buffalo chicken dip, ketchup, mustard-based sauces

Alongside that, including a few extra nibbles from potato-focused ideas like MasalaMonk’s potato appetizers roundup keeps everyone happy without making fries the sole attraction.


Leftovers, Crispy Homemade French Fries, and Casseroles

Every now and then, you might find yourself with cooked fries left over. They won’t be as crisp the next day, but they are far from useless.

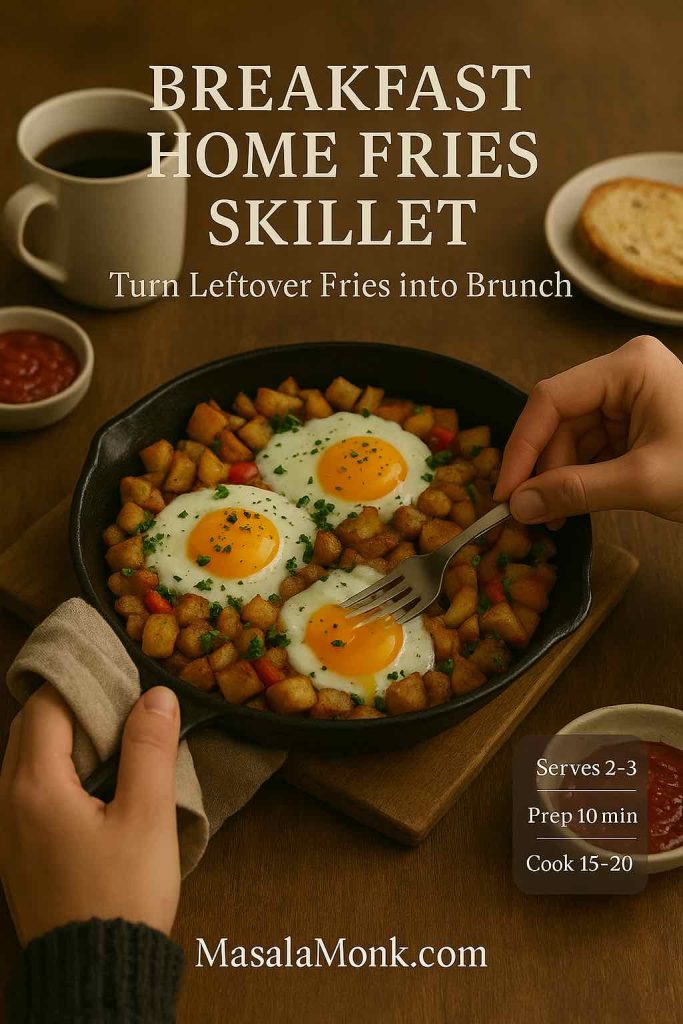
Turning fries into home fries

One option is to make a sort of shortcut home fries recipe:

  1. Chop leftover fries into bite-sized pieces.
  2. Heat a skillet with a spoon of oil or butter.
  3. Add onions or peppers if you like, then the chopped fries.
  4. Cook over medium-high heat until the edges crisp and the pieces heat through.
  5. Season again and serve with eggs for breakfast.

These cooking home fries from leftover fries are especially good with runny yolks or as part of a brunch plate.

Cast iron skillet filled with breakfast home fries made from chopped leftover fries, peppers and three fried eggs, served with coffee, toast and salsa
Turn last night’s fries into this cosy breakfast home fries skillet, topped with sunny-side eggs and peppers for an easy MasalaMonk-style brunch.

Casseroles with Crispy Homemade French Fries

Another route is to layer leftover fries into a bake:

  • Assemble a cheeseburger casserole with french fries: fries on the bottom, cooked ground meat or meat alternative, cheese, and pickles or onions, then bake until bubbly.
  • Create a riff on shepherd’s pie using fries as a topping instead of mashed potatoes.

These dishes aren’t traditional, but they’re a fun way to avoid waste and to reimagine fries in a new context.

Also Read: Coconut Water Cocktails: 10 Easy, Refreshing Drinks


Bringing It All Together

To sum everything up, making french fries at home doesn’t need to be complicated. You start with good potatoes, a sensible approach to oil and heat, and a simple french fries recipe that you can repeat without thinking too hard. From there, the world opens up: you can lean toward healthy potato fries most days, then indulge in deep-fried extra crispy french fries when the mood hits.

You’ve seen how to:

  • Choose between Russet and Yukon Gold for the best french fry potato
  • Use soaking, drying, and double frying to achieve reliably crispy homemade french fries
  • Swap in oven fries, air fryer fries, or veggie french fries like sweet potato, yuca, jicama, and rutabaga
  • Turn plain fries into seasoned fries, garlic parmesan fries, chili cheese fries, carne asada fries, and truffle fries
  • Build full meals and snack boards around fries with dips, casseroles, sandwiches, and brunch ideas

Whether you keep it simple with a plate of lightly salted fresh french fries, or go all out with a giant platter of loaded french fries recipe piled high with cheese and toppings, you now have the tools to make them taste the way you want, every time you crave them.

Also Read: Cottage Cheese Lasagna Recipe | Chicken, Spinach, & Ricotta

FAQs about Crispy Homemade French Fries

1. What is the best potato for crispy homemade french fries?

For truly crispy homemade french fries, starchy potatoes work best. Russet or Idaho potatoes are usually considered the best french fry potato because they have a high starch, low moisture content that turns fluffy inside and crisp outside after frying. Yukon Gold or other “gold” potatoes also make excellent golden potato french fries, although they come out a little creamier and denser. If you prefer extra crunch and light interiors, reach for Russets; if you like a richer bite, go for Yukon Golds.


2. How do I keep fries crispy and not soggy?

To keep fries crunchy instead of limp, several small steps matter. Dry the potatoes thoroughly after soaking so you’re not dropping water into the oil. Then, cook them twice: a gentle first fry to cook the potato through, followed by a hotter second fry that creates the crisp crust. Avoid crowding the pan, since too many fries at once will cool the oil and make everything greasy. Salt and season fresh french fries right after the second fry while they are still hot, and serve them soon so the crust stays crisp.


3. Why do recipes tell me to soak potatoes before frying?

Soaking sliced potatoes in cold water helps pull out surface starch, which can otherwise form a gummy coating and prevent crispy fries from developing. A soak of 20–30 minutes is usually enough for a simple french fries recipe. After soaking, draining and drying thoroughly is just as important. When excess starch and moisture are removed, the fries brown more evenly and stay crisp longer, which is essential for the crispiest french fries.


4. Can I make crispy homemade french fries without a deep fryer?

Yes, you absolutely can make homemade fries without a dedicated fryer. A deep, heavy pot or a sturdy frying pan works fine as long as you use enough oil to submerge the potatoes and maintain consistent heat. A thermometer helps you hit the right temperature range. In addition, you can make oven fries and air fryer fries with just a thin coating of oil if you’d rather skip deep-frying altogether. The technique changes slightly, yet you still end up with easy french fries that taste fantastic.


5. What is the best way to fry french fries for perfect results?

A classic double-fry method is often considered the best way to fry french fries. First, fry the potatoes at a lower temperature so they cook through without much color. Then, after a short rest, fry them again at higher heat so the outside turns crisp and golden. During both steps, keep the oil temperature steady and avoid crowding the pan. Using this approach, even a beginner can turn out perfect french fries from a straightforward easy french fries recipe.


6. How hot should the oil be for french fries?

For the first fry, aim for oil around 150–160°C (300–320°F). This lets the interior of the potato cook gently without the outside browning too quickly. For the second fry, raise the temperature to about 185–190°C (365–375°F). At this higher heat, the surface dries out and browns into a crisp shell. Keeping the oil in this range is one of the main secrets behind extra crispy french fries and prevents the fries from soaking up too much oil.


7. Can I make french fries without oil?

You can make french fries without oil in the strict sense by baking or air frying plain potato sticks, though they will taste more like roasted potatoes than true fries. More realistically, very small amounts of oil—just enough to lightly coat the potatoes—create healthy potato fries that still feel indulgent. Oven-baked oven fries 425 and air-fried potatoes both work well with only a teaspoon or two of oil per serving, especially when you add bold seasonings.


8. Are homemade fries healthier than fast food fries?

While fries are still an occasional treat, homemade fries can be a better option than many fast-food versions. You decide the portion size, which oil to use, and how much salt to add. You can also make french fries from fresh potatoes instead of relying on heavily processed products. If you alternate deep-fried batches with oven fries or air fryer homemade fries, and you pair them with protein and vegetables, french fry meals can fit more comfortably into a balanced way of eating.


9. What’s the difference between shoestring, thick cut, steak fries, and crinkle cut?

All these names refer mainly to shape and thickness. Shoestring fries and skinny fries are very thin and cook quickly, giving you lots of crunchy texture. Thick cut fries and steak fries are chunkier sticks or wedges with a soft, fluffy center. Crinkle cut french fries have wavy ridges that increase surface area and help hold onto sauce and seasoning. You can use the same basic french fries recipe for each style; just adjust cooking time so the inside cooks before the outside browns too much.


10. How do I make seasoned fries at home?

To make a seasoned fries recipe at home, start with freshly cooked, hot fries. Immediately toss them with salt, then add your favorite flavors. A simple mix might include garlic powder, onion powder, smoked paprika, and black pepper. For cajun french fries, you can add cayenne, oregano, and thyme. If you prefer herby seasoned homemade fries, try rosemary, thyme, or mixed Italian herbs. Because you apply the spices while the fries are hot, they cling well and create deeply flavorful seasoned french fries.


11. How can I make fries extra crispy with a coating?

For french fries with crispy coating, a light starch layer helps. After soaking and drying the potatoes, toss them in a spoonful of cornstarch or rice flour until just lightly dusted. Shake off the excess, then fry using the usual two-step method. The starch forms tiny bubbles and ridges on the surface, leading to extra crispy fries. You still get the flavor of real potato fries, but with a more pronounced crunch that holds up better under sauces and toppings.


12. Can I make french fries in the air fryer from frozen?

Yes, air fryer frozen french fries are one of the easiest weeknight options. Place frozen fries in air fryer—whether they are shoestring, waffle, or steak-cut—in a single layer, set the temperature around 200°C / 400°F, and cook until they’re crisp and hot, shaking the basket once or twice. Many people look for the best frozen fries for air fryer because par-fried frozen fries crisp quickly and take well to extra seasonings. With this method, you still get satisfying crunch without using much additional oil.


13. Can I microwave french fries?

You can microwave fries, yet they rarely come out crisp. Microwave french fries tend to steam rather than brown, so they soften instead of staying crunchy. If you want to use the microwave, you can briefly pre-cook thick wedges or steak fries, then finish them in a hot oven, pan, or air fryer to reintroduce crispness. For reheating leftovers, a skillet or air fryer generally gives better results than the microwave alone.


14. How do I reheat leftover fries so they don’t turn floppy?

To revive fries, spread them in a single layer in a hot pan with a thin film of oil, or place them in a preheated air fryer basket. Heat until the outside becomes crisp again and the centers are warmed through. This method works for frozen fried potatoes, french fries and chips, or leftover home made fries from the day before. Reheating on a baking sheet in a hot oven also helps, though it may take slightly longer to recapture the original crunch.


15. How can I make fries healthier without losing too much flavor?

If you want healthier french fries without giving them up entirely, there are several strategies. Bake or air fry potato sticks with just a small amount of oil instead of deep-frying. Switch between white potatoes and alternatives like sweet potato french fries, yuca french fries, jicama french fries, or rutabaga french fries for more variety in fiber and nutrients. Additionally, serve your crispy homemade french fries as a side with lean protein, salads, or vegetable-rich dishes rather than pairing them only with other heavy foods.


16. What sauces go well with homemade fries?

Although ketchup is classic, homemade fries welcome a wide range of sauces. Garlic mayonnaise, mustard-based dips, smoky paprika mayo, yogurt-and-herb sauces, and spicy chili dips all pair beautifully with crispy fries. Cheese-based sauces turn simple fries into french fries loaded with flavor, while lighter dips like tzatziki give a refreshing contrast. By keeping a few favorite sauces on hand, you can turn one basic easy fries recipe into many different experiences just by changing what you serve alongside.

Posted on 5 Comments

Mimosa Recipe: 10 Easy Versions from Classic to Caramel Apple

Tall mimosa cocktail in a champagne flute on an outdoor brunch table, with oranges, pastries and flowers, promoting a mimosa recipe with 10 variations from classic to caramel apple.

There are very few drinks that say “slow, happy morning” as clearly as a glass of mimosa. It looks sunny, tastes bright, and somehow makes even a regular Sunday feel like a small celebration. At the same time, a good mimosa recipe is almost ridiculously simple: chilled sparkling wine, chilled juice, and a moment’s care when you pour.

Yet once you start playing with that basic formula, things get interesting fast. A splash of orange liqueur suddenly turns your drink into something restaurant-worthy. A bit of pineapple or strawberry purée sends it straight to the tropics. Apple cider and caramel transform it into a cosy fall treat. In other words, there isn’t just one mimosa recipe—there are dozens, and most of them are only a tiny tweak away from the classic.

Before we jump into all the fun twists, it’s worth grounding ourselves in what a mimosa actually is and where it came from. That way, every variation feels like part of a story rather than just a random splash of juice.


What Is a Mimosa?

At its core, a mimosa is a simple mixed drink made with sparkling wine and orange juice, usually served in a champagne flute. Most sources agree that it’s closely related to the Buck’s Fizz, a drink created in the 1920s at Buck’s Club in London. The Buck’s Fizz tends to use more Champagne and less juice, whereas the mimosa often leans toward equal parts. Over the years, the mimosa has become tightly linked with brunch, weddings, and leisurely daytime events.

Consequently, the mimosa picked up a reputation as the “acceptable” morning drink. Because the orange juice feels familiar and breakfast-y, the bubbles don’t come across as heavy or “too much.” This combination of freshness and festivity is why the mimosa recipe remains such a favourite.

However, there’s nothing in the original idea that says the juice must be orange, or that you can’t add a small splash of something extra. Once you accept that, a whole world of variations opens up. Still, everything begins with one foundational drink.

Also Read: 10 Best Chicken Sandwich Recipes (BBQ, Parm, Buffalo & More)


Classic Mimosa Recipe (Champagne and Orange Juice)

Think of this as the blueprint. Once you can make this with your eyes half-closed, every other version will feel easy and natural.

Ingredients (Per Glass)

  • 2 ounces (60 ml) chilled orange juice
    • Freshly squeezed is wonderful; good-quality not-from-concentrate works too.
  • 4 ounces (120 ml) chilled dry sparkling wine
    • Brut Champagne, cava, or prosecco are all excellent choices.
  • 1 thin orange slice or twist, to garnish (optional)
Classic mimosa recipe card with two champagne flutes of orange juice and brut sparkling wine on a vibrant brunch table, MasalaMonk.com branding.
Classic Mimosa – 2 oz chilled orange juice topped with 4 oz brut sparkling wine. This simple 1:2 ratio is the base recipe for all the mimosa variations below, perfect to save or pin for your next brunch.

Step-by-Step Method

  1. Chill everything thoroughly
    First of all, get the temperature right. Pop the orange juice and sparkling wine into the fridge for several hours, or even overnight, so they’re properly cold. If you have room, you can even chill the glasses. A cold base means the bubbles last longer and the drink tastes much cleaner.
  2. Pour the orange juice first
    Next, pour the orange juice into the flute. Beginning with juice gives you more control and keeps the carbonation from going wild right away.
  3. Top with sparkling wine
    After that, tilt the glass slightly and pour the sparkling wine in a thin stream down the side. Many detailed guides, such as this classic mimosa recipe from Love & Lemons, recommend this order for exactly that reason—it preserves the delicate fizz.
  4. Garnish and serve immediately
    Finally, garnish with an orange slice or twist if you like, and serve right away. Mimosas aren’t meant to sit around; they’re brightest and most effervescent in the first 10–15 minutes.

What’s the Best Ratio for a Mimosa Recipe?

Although plenty of traditional recipes suggest a 1:1 ratio of orange juice to sparkling wine, modern tastes often drift toward a slightly drier drink. For that reason, a lot of bartenders and home hosts now prefer 1 part juice to 2 parts bubbly. It still tastes familiar and citrusy, yet it doesn’t feel heavy or overly sweet.

That said, the “best” ratio depends on your guests:

  • Equal parts for people who like a juicier, softer drink
  • 1:2 juice-to-wine for a crisper, more Champagne-forward profile
  • Just a splash of juice in a tall glass of bubbles for those who mainly want sparkling wine with a hint of orange

You can even set up a small card at your brunch that suggests all three options, then let people choose their style.

Choosing Sparkling Wine for a Mimosa Recipe

Because you’re mixing the wine with juice, there’s no need to splurge. In fact, a number of tastings suggest that an affordable, well-made cava or similar sparkling wine beats expensive Champagne once you add orange juice. Pieces like the roundup on The Kitchn’s best Champagne for mimosas and the expert picks in Simply Recipes’ guide to sparkling wines for mimosas both lean toward dry, budget-friendly options.

As a rule of thumb:

  • Look for “brut” or “extra dry” to balance the sweetness of the juice.
  • Choose bottles with good acidity; they cut through the fruit and keep each sip refreshing.
  • Save vintage Champagne for drinking on its own, where all those subtle flavours can shine.

Once you’re comfortable with this classic mimosa recipe, you’re ready to branch out into more playful territory.

Also Read: Chicken Alfredo Pasta, 5 Ways (Classic to Cajun, Veg, 15-Minute Jar, Healthy)


10 Easy Mimosa Recipe Variations from Classic to Caramel Apple

The beauty of a mimosa is that you can change its personality just by switching juices or adding a small splash of liqueur. Nevertheless, the basic technique stays the same, so you never have to relearn the whole process.

Below you’ll find ten versions that cover everything from summer pool days to winter holidays, from soft and fruity to stronger, cocktail-style flavours. You can serve them one at a time, or mix and match several as part of a mimosa bar.


1. Classic Mimosa Recipe for Laid-Back Weekends

The very first variation is the one you’ve already seen, yet it deserves a spot in the lineup. Sometimes you just want the original.

Per glass:

  • 2 oz orange juice
  • 4 oz dry sparkling wine

Pour the juice, then the wine, garnish, and you’re done. You can make a whole tray of these to greet guests as they come in, and then move on to other mimosa recipe experiments once everyone’s settled.

If you’re planning a whole range of Champagne-style drinks, you might later enjoy stepping up to something slightly stronger and more sophisticated, such as the French 75 cocktail recipe on MasalaMonk, which blends gin, lemon, and bubbly in a beautifully balanced way.


2. Grand Marnier Mimosa Recipe (Grand Mimosa)

Now let’s upgrade that simple base. By adding a little orange liqueur, you create a “grand” mimosa that feels like it belongs on a hotel brunch menu.

Ingredients (per glass):

  • 2 oz orange juice
  • ½–1 oz Grand Marnier or Cointreau
  • 3–4 oz dry sparkling wine
  • Orange twist, to garnish
Grand Marnier mimosa recipe card with an elegant Champagne flute filled with a golden orange cocktail made from 60 ml orange juice, 30 ml Grand Marnier and 90 ml brut sparkling wine, MasalaMonk.com branding.
Grand Marnier Mimosa – 60 ml orange juice, 30 ml Grand Marnier and 90 ml brut sparkling wine for a richer, hotel-style brunch mimosa.

How to build it:

  1. Start by pouring orange juice into your glass.
  2. Then add Grand Marnier. If you’d like more warmth and depth, go closer to 1 ounce; for a gentler effect, ½ ounce is plenty.
  3. Next, pour in the sparkling wine, slowly and at an angle.
  4. Finally, garnish with a twist of orange peel.

Because Grand Marnier brings both orange and a subtle cognac base, this mimosa recipe feels richer and more layered than the original. On the other hand, if you prefer a cleaner citrus profile, you might swap Grand Marnier for Cointreau. Either way, this is an effortless way to impress guests without making your life harder.

Also Read: Béchamel Sauce for Lasagna: Classic, Vegan & Ricotta Sauce Recipe


3. Vodka Mimosa Recipe (Playful Manmosa)

Occasionally, the table wants something a little stronger. That’s where a vodka mimosa recipe comes in. It’s still bubbly and citrusy, yet it carries more of a cocktail-style punch.

You’ll need:

  • 2 oz orange juice
  • 1 oz vodka
  • 3–4 oz sparkling wine
Vodka mimosa recipe card showing a bright orange Champagne flute cocktail made with 60 ml orange juice, 30 ml vodka and 90 ml brut sparkling wine on a modern brunch table, MasalaMonk.com branding.
Vodka Mimosa – 60 ml orange juice, 30 ml vodka and 90 ml brut sparkling wine. A stronger, cocktail-style mimosa for guests who like a little extra kick with their brunch.

Method:

  1. Pour orange juice and vodka into the flute.
  2. Stir briefly to blend the vodka into the juice.
  3. Top with sparkling wine and serve at once.

Some people call this a “manmosa,” although the name is more joke than rule. It’s simply a bright, easy-drinking cocktail with added backbone from the vodka. If you have guests who enjoy vodka-based drinks, you could, later on, direct them toward more complex options like the vodka with lemon cocktails or the mango vodka cocktail drinks on MasalaMonk for after-brunch sipping.


4. Pineapple Mimosa Recipe with Malibu Option

As soon as the weather warms up, a pineapple mimosa recipe feels almost essential. It’s juicy, sunny, and incredibly refreshing.

Classic Pineapple Mimosa

Per glass:

  • 2 oz pineapple juice
  • 4 oz prosecco or cava
  • Pineapple wedge or lime wheel, for garnish

Pour the pineapple juice, then add the sparkling wine. A squeeze of lime over the top lifts the flavour beautifully.

Pineapple mimosa recipe card with a bright yellow Champagne flute cocktail made from 60 ml pineapple juice and 120 ml prosecco, garnished with a pineapple wedge on a sunny tropical-style brunch table, MasalaMonk.com branding.
Pineapple Mimosa – 60 ml pineapple juice topped with 120 ml prosecco or cava and a squeeze of lime. A sunny, tropical twist on the classic mimosa that’s perfect for warm-weather brunches.

Pineapple Mimosa with Malibu

For a more tropical twist, add a bit of coconut rum:

  • 2 oz pineapple juice
  • 1 oz Malibu or another coconut rum
  • 3 oz sparkling wine

Mix the juice and Malibu first, then top with bubbly and garnish with pineapple. Suddenly, your mimosa recipe tastes like a tiny vacation in a glass.

Pineapple coconut mimosa recipe card with an elegant Champagne flute filled with a tropical yellow cocktail made from 60 ml pineapple juice, 30 ml coconut rum and 90 ml brut sparkling wine, garnished with pineapple and coconut on a bright brunch table, MasalaMonk.com branding.
Pineapple Coconut Mimosa – 60 ml pineapple juice, 30 ml coconut rum and 90 ml brut sparkling wine. A Malibu-style tropical mimosa that tastes like a beach holiday in a Champagne flute.

If you’d like to build a full tropical-themed drinks menu, you can easily combine these pineapple mimosas with coconut water cocktails and some playful piña colada variations as the day goes on.


5. Cranberry Mimosa Recipe (Holiday Pink Mimosa)

When autumn and winter roll around, a cranberry mimosa recipe fits the mood perfectly. It’s tart, jewel-toned, and very festive.

Ingredients:

  • 2 oz cranberry juice (100% juice if possible)
  • 4 oz sparkling wine
  • Optional: ¼ oz orange liqueur
  • Fresh cranberries and orange slice, to garnish
Cranberry mimosa recipe card with a festive pink Champagne flute cocktail made from 60 ml cranberry juice, 120 ml brut sparkling wine and an optional 15 ml orange liqueur, garnished with cranberries and orange on a holiday-style table, MasalaMonk.com branding.
Cranberry Mimosa – 60 ml cranberry juice, 120 ml brut sparkling wine and an optional 15 ml orange liqueur. A jewel-toned holiday mimosa that’s perfect for Christmas morning, New Year’s brunch or any winter celebration.

How to make it:

  1. Pour cranberry juice into the flute.
  2. Add the orange liqueur if you like a slightly richer profile.
  3. Top with sparkling wine.
  4. Drop a few cranberries into the glass and hang an orange slice on the rim.

Because of its colour, this mimosa recipe works beautifully for Christmas morning, holiday brunch, or even New Year’s Day. If you blend equal parts cranberry and orange juice instead, you’ll get a softer pink mimosa that still looks glamorous but tastes a bit less sharp.

Also Read: Natural Detoxification: Cranberry Juice and Apple Cider Vinegar for Weight Loss


6. Strawberry Mimosa Recipe (Plus Watermelon Twist)

Next, we turn to strawberries. A strawberry mimosa recipe feels romantic and celebratory—ideal for Mother’s Day, birthdays, or any spring gathering.

Strawberry Purée

To begin with, make a simple purée:

  • 1 cup strawberries (fresh or thawed frozen)
  • 1–2 tablespoons sugar or honey, to taste
  • 1–2 teaspoons lemon juice

Blend everything until smooth. If you prefer a very silky drink, strain the mixture to remove seeds.

Strawberry Mimosa

Per glass:

  • 1½–2 oz strawberry purée
  • 3–4 oz sparkling wine

Spoon the purée into your glass, then add the sparkling wine carefully. If the purée is thick, you might stir once, gently, to combine.

Strawberry mimosa recipe card with a blush pink Champagne flute cocktail made from 45 ml strawberry purée and 120 ml brut sparkling wine, garnished with fresh strawberries on an elegant brunch table, MasalaMonk.com branding.
Strawberry Mimosa – 45 ml strawberry purée topped with 120 ml brut sparkling wine and an optional splash of orange juice. A soft, pink mimosa that’s perfect for spring brunches, Mother’s Day and romantic celebrations.

For extra brightness, feel free to add a small splash of orange juice or lemonade between the purée and the sparkling wine.

Watermelon Variation

If you’re craving something even more summery, you can adapt this mimosa recipe to watermelon. Simply blend cubes of seedless watermelon, strain the juice, and use that instead of the strawberry purée. A touch of lime juice makes the flavour pop.

Later on, if your guests fall in love with watermelon in their drinks, you can steer them toward a whole set of watermelon margarita variations for evening cocktails.

Watermelon mimosa recipe card with a coral pink Champagne flute cocktail made from 60 ml fresh watermelon juice and 120 ml brut sparkling wine, garnished with a watermelon wedge and lime on a sunny summer brunch table, MasalaMonk.com branding.
Watermelon Mimosa – 60 ml fresh watermelon juice topped with 120 ml brut sparkling wine and a squeeze of lime. A super-refreshing, summery twist that’s perfect for hot-weather brunches and pool parties.

7. Peach Mimosa Recipe (Bellini-Style)

This peach mimosa recipe slides very close to the classic Bellini, and that’s exactly why people adore it. It’s soft, fragrant, and just a little decadent.

Ingredients:

  • 2 oz peach nectar or peach purée
  • 4 oz prosecco
  • Peach slice, to garnish
Peach mimosa recipe card with an elegant Champagne flute filled with a pastel peach Bellini-style cocktail made from 60 ml peach nectar and 120 ml prosecco, garnished with a peach slice on a light marble brunch table, MasalaMonk.com branding.
Peach Mimosa – 60 ml peach nectar or purée topped with 120 ml prosecco and finished with a peach slice. A Bellini-style mimosa that’s perfect for bridal showers, engagement brunches and any soft, romantic celebration.

Instructions:

  1. Pour the peach nectar or purée into the flute.
  2. Top slowly with prosecco so it foams gently rather than exploding over the rim.
  3. Garnish with a thin peach slice.

Because it feels so elegant, this mimosa recipe is lovely for bridal showers, engagement brunches, or any gathering where you want something a bit special. It also pairs nicely with light desserts and fruit-forward sweets, especially something creamy like a tres leches cake.


8. Grapefruit Paloma Mimosa Recipe

If you enjoy a slightly bitter edge in your drinks, this grapefruit Paloma mimosa recipe will be right up your street. It’s bright, zesty, and just bold enough to wake everyone up.

Per glass:

  • 2 oz pink grapefruit juice
  • ½–1 oz blanco tequila (optional)
  • 3 oz sparkling wine
  • Salt or Tajín, for the rim
  • Grapefruit wedge, to garnish
Grapefruit Paloma mimosa recipe card with a pale pink Champagne flute cocktail made from 60 ml pink grapefruit juice, 90 ml brut sparkling wine and optional 15–30 ml tequila, served with a salted Tajín rim and grapefruit wedge on a modern brunch table, MasalaMonk.com branding.
Grapefruit Paloma Mimosa – 60 ml pink grapefruit juice, 90 ml brut sparkling wine and an optional 15–30 ml tequila with a salted or Tajín rim. A bright, slightly bitter mimosa that bridges brunch and taco-hour perfectly.

How to assemble:

  1. First, run a grapefruit wedge around the rim of the glass, then dip it in salt or Tajín.
  2. Next, pour grapefruit juice and tequila into the prepared flute.
  3. After that, top with sparkling wine.
  4. Finally, garnish with a small grapefruit wedge.

This mimosa recipe straddles the line between breakfast drink and cocktail, so it’s ideal for brunch that stretches into an afternoon filled with snacks and tacos. Later in the day, once people are in a more “cocktail hour” mood, you might bring out classics such as a Negroni recipe for those who love bitters.


9. Caramel Apple Cider Mimosa Recipe (Cozy Fall Favourite)

As soon as the air turns chilly, it’s time for a caramel apple mimosa recipe. It tastes like dessert but looks just as elegant as the classic.

Ingredients:

  • Cinnamon sugar, for rimming the glass
  • 2 oz chilled apple cider
  • 1 oz caramel vodka
  • 3 oz sparkling wine
  • Thin apple slice, for garnish
Caramel apple cider mimosa recipe card with a golden Champagne flute cocktail made from 60 ml apple cider, 30 ml caramel vodka and 90 ml brut sparkling wine, served with a cinnamon sugar rim and apple slice on a cozy fall brunch table, MasalaMonk.com branding.
Caramel Apple Cider Mimosa – 60 ml chilled apple cider, 30 ml caramel vodka and 90 ml brut sparkling wine with a cinnamon sugar rim. A dessert-like fall mimosa that’s perfect for chilly weekend brunches and holiday mornings.

Method:

  1. Pour a little apple cider onto a plate and dip the rim of the glass in it. Then roll the rim in cinnamon sugar.
  2. Add the apple cider and caramel vodka to the glass.
  3. Top gently with sparkling wine.
  4. Add a thin apple slice as garnish.

If you’d like a lighter apple cider mimosa recipe, you can skip the vodka and simply enjoy the cider and bubbles with that fragrant cinnamon rim. Alongside this drink, you could serve dishes leaning into the same cosy mood: maybe something seasoned with homemade pumpkin pie spice, or a warm side like green bean casserole or crock pot lasagna soup.


10. Non-Alcoholic Mimosa Recipe (Sparkling Mock Mimosa)

Lastly, no mimosa collection feels complete without a non-alcoholic mimosa recipe. Everyone deserves a pretty, bubbly drink, whether they’re drinking alcohol or not.

Mock mimosa (per glass):

  • 2 oz orange juice
  • 2–3 oz sparkling water, club soda, or non-alcoholic sparkling wine
  • Optional: splash of pineapple juice or white grape juice
  • Orange slice, to garnish
Non-alcoholic sparkling mock mimosa recipe card with a bright orange Champagne flute drink made from 60 ml orange juice and 90 ml sparkling water or alcohol-free bubbly, garnished with an orange slice on a light brunch table, MasalaMonk.com branding.
Sparkling Mock Mimosa – 60 ml orange juice topped with 90 ml sparkling water or alcohol-free bubbly and an optional splash of pineapple juice. A zero-proof mimosa that looks just as festive as the classic so everyone can join the toast.

Instructions:

  1. Pour orange juice into the flute.
  2. Add the optional extra juice if you’d like more complexity.
  3. Top with sparkling water or alcohol-free bubbly.
  4. Garnish and serve.

Some mocktail versions use ginger ale and citrus-flavoured sparkling water, as in this mimosa mocktail idea, while others mix several juices and flavoured sparkling water, as in this non alcoholic mimosa version.

Meanwhile, if you’d like to round out your zero-proof options, you can add a margarita mocktail or a few keto mocktails to keep everyone happy all day.


How to Make Any Mimosa Recipe Taste Its Best

Although the recipes above give you plenty to play with, a few general habits will make every mimosa recipe you pour taste better, no matter which variation you choose.

Keep Everything Cold, Not Just the Wine

To begin with, treat the juice with as much respect as the bubbly. Store juices and purées in the coldest part of the fridge, and don’t leave them on the counter too long while you set up. Cold ingredients:

  • Preserve the fizz in the sparkling wine
  • Keep flavours bright and refreshing
  • Make each mimosa recipe feel more polished and intentional

If you can, chill the glassware too. Even a quick 20 minutes in the fridge or freezer helps.

Use the Right Order and Gentle Pours

Furthermore, the sequence in which you pour makes a noticeable difference. Juice goes in first, then any spirit or liqueur, then sparkling wine. This order:

  • Stops the fizz from erupting and overflowing
  • Makes it easier to estimate your ratio
  • Keeps the drink visually neat

Moreover, always pour the sparkling wine slowly and at an angle. You’re not just filling a glass; you’re preserving bubbles.

Choose Good, Not Fancy, Sparkling Wine

As mentioned earlier, there’s broad agreement that you don’t need expensive bottles for a mimosa recipe. Guides such as the mimosa-focused tasting on The Kitchn and expert opinions on Simply Recipes consistently favour dry, affordable options.

Therefore, you can happily:

  • Reach for cava, a dry prosecco, or any well-made brut sparkling wine
  • Keep a couple of different bottles on hand for variety
  • Save the top-shelf Champagne for sipping later in the day

Add Spirits Sparingly

Because it’s tempting to think “more is more,” it’s easy to overdo vodka, bourbon, or tequila. However, the charm of a mimosa recipe lies in its gentle nature. For that reason:

  • ½ ounce of spirit is enough for a subtle twist
  • 1 ounce is plenty for a stronger brunch cocktail
  • Anything beyond that risks turning the drink into something harsh and unbalanced

Think of the spirit as seasoning—just a touch to shift the mood, not the main feature.

Also Read: How to Cook Perfect Rice Every Time (Recipe)


Building a Mimosa Bar Around Your Favourite Mimosa Recipe

Once you’ve tried a few variations, you might feel inspired to put it all together into a full mimosa bar. That way, guests can customise their own drinks, and you can relax and enjoy your own glass.

Step 1: Arrange the Juices

Start with a few chilled carafes or jugs. At minimum, you might offer:

  • Orange juice
  • Pineapple juice
  • Cranberry juice

In addition, if you’d like more variety, you can add:

  • Pink grapefruit juice
  • Peach nectar
  • Apple cider (especially in autumn)
  • Strawberry or watermelon purée in small bottles or jugs

Label each one clearly so people know what they’re choosing. You can also add a small sign with suggested combinations, such as “cranberry + orange,” “peach + prosecco,” or “apple cider + caramel vodka.”

Step 2: Offer a Couple of Bubbly Options

Next, set out the sparkling choices in an ice bucket or large bowl filled with ice and water. You don’t need a huge lineup. Two or three options are plenty:

  • One dry cava
  • One prosecco
  • One non-alcoholic sparkling wine or citrus-flavoured sparkling water

That way, people can create an alcoholic or non-alcoholic mimosa recipe with exactly the same flavours.

If you’re expecting a large crowd, you might also mix a big pitcher of pineapple-based punch to sit alongside the mimosa bar. The ideas in these punch recipes with pineapple juice give you easy ways to extend the menu without much extra work.

Step 3: Add Spirits and Liqueurs as “Upgrades”

After that, you can create a small “upgrade station” with a few carefully chosen bottles:

  • Grand Marnier or Cointreau, for a grand mimosa
  • Vodka, for stronger orange or cranberry mimosa recipes
  • Malibu or another coconut rum, for tropical pineapple mimosas
  • Blanco tequila, for grapefruit Paloma mimosas
  • Bourbon, for cosy apple or orange-bourbon variations

Place tiny jiggers or measuring spoons nearby to encourage moderation. A small card can list combinations like “orange + Grand Marnier + bubbles,” “grapefruit + tequila + bubbles,” or “apple cider + bourbon + bubbles.”

Step 4: Finish with Garnishes and Glassware

Finally, add the finishing touches that make everything feel polished:

  • Orange slices, wedges, and twists
  • Lemon and lime wheels
  • Pineapple wedges
  • Strawberry halves and raspberries
  • Fresh cranberries in a little bowl during the holidays
  • Herbs such as mint or rosemary
  • Dishes of cinnamon sugar and Tajín for rimming glasses

Set out plenty of flutes, coupes, or even sturdy wine glasses if you expect people to be moving around. A small tray for used garnishes or toothpicks helps keep the table tidy.

Also Read: Homemade Hot Chocolate with Cocoa Powder Recipe


What to Serve with Any Mimosa Recipe

A great mimosa recipe becomes even more memorable when you serve it alongside simple, comforting food. Furthermore, you don’t need restaurant-level skills to create a spread that feels thoughtful and generous.

Classic Brunch Companions

To start, think about familiar breakfast favourites and lean into those.

  • French toast sticks
    They’re easy to eat with your hands and always a hit. A batch of French toast sticks with maple syrup on the side works beautifully with citrusy drinks.
  • Crispy oven bacon
    Instead of standing over a pan, bake your bacon. A tray of oven-cooked bacon gives you crisp, evenly cooked strips with almost no mess.
  • Fluffy pancakes
    For something sweet and soft, serve a stack of fluffy buttermilk pancakes with stewed cinnamon apples. The cinnamon and apple flavours mirror the caramel apple mimosa recipe wonderfully.
  • Mediterranean-inspired plates
    If you’d rather go a little lighter, create brunch boards inspired by these popular Mediterranean breakfasts: think eggs, olives, tomatoes, cucumbers, cheese, and good bread. These flavours are vibrant but not too rich, which makes them ideal partners for all kinds of mimosas.

Heartier Party and Holiday Ideas

On the other hand, if your mimosa recipe is showing up at a party or holiday gathering rather than a pure breakfast, you can reach for more substantial dishes.

  • Potato appetisers
    Little bites always disappear quickly when people have a glass in hand. A selection of snacks inspired by these easy potato appetizers pairs nicely with both classic and fruity mimosas.
  • Mac and cheese
    A bubbling baking dish of macaroni and cheese feels comforting and familiar. Guests can spoon out a scoop whenever they need something hearty between refills.
  • Casseroles and soups
    Especially in cooler months, dishes like green bean casserole, cottage cheese lasagna, or crock pot lasagna soup work beautifully alongside richer mimosa recipes like the caramel apple or bourbon twists.
  • Sweet finishes
    Once people are ready to move from mimosas to coffee, desserts such as tres leches cake or a plate piled with homemade churros round off the gathering in a very satisfying way.

Bringing It All Together

In the end, a mimosa recipe is one of the most forgiving and flexible things you can make for guests. At its simplest, it’s just orange juice and sparkling wine in a cold glass. However, with a little curiosity and a few extra ingredients, that same idea can stretch into Grand Marnier mimosas, vodka manmosas, pineapple and strawberry spins, grapefruit Paloma mashups, caramel apple cider creations, and even non-alcoholic mock mimosas that look just as celebratory.

Because the method hardly changes—chill, pour juice, add spirit if using, top with bubbles—you can focus on enjoying the process rather than worrying about perfection. Meanwhile, a small selection of brunch dishes or party snacks turns those drinks into a full experience, whether you’re hosting a quiet weekend breakfast, a loud holiday brunch, or a relaxed evening get-together.

So the next time you reach for a bottle of sparkling wine, you don’t have to stop at one standard mimosa. Instead, you can choose any mimosa recipe from this collection, set out a few juices and garnishes, and let the people you care about mix, sip, and linger as long as they like.

Also Read: Peanut Butter Cookies (Classic Recipe & 3 Variations)

FAQs

1. What is the classic mimosa recipe ratio?

To begin with, the most popular mimosa recipe ratio is 1 part orange juice to 2 parts sparkling wine. This gives you a drink that tastes bright and citrusy without becoming too sweet or heavy. However, if you prefer a softer, more juice-forward mimosa recipe, you can absolutely go for a 1:1 ratio instead. Conversely, if you like your drink drier, use just a splash of juice in a flute mostly filled with bubbles.


2. How are mimosas made, step by step?

Firstly, chill your orange juice, sparkling wine, and glasses thoroughly. Next, pour the juice into the glass so you can easily control the amount. After that, add any optional liqueur or spirit if you’re upgrading your mimosa recipe. Finally, tilt the flute slightly and slowly top it with sparkling wine to preserve the fizz. Serve right away, because mimosas are at their best when they’re freshly poured and still dancing with bubbles.


3. What is the best champagne or sparkling wine for a mimosa recipe?

Generally, the best choice is a dry, affordable sparkling wine rather than an expensive bottle. In particular, brut cava, dry prosecco, and other brut “champagne-style” wines work brilliantly in a mimosa recipe. They bring crisp acidity and subtle fruit without clashing with the sweetness of the juice. On the other hand, very sweet sparkling wines can make the drink taste cloying, so it’s wiser to keep those for desserts.


4. Can I make a mimosa recipe ahead of time?

Strictly speaking, you shouldn’t fully assemble mimosas in advance, because the bubbles will fade. Instead, prepare everything except the sparkling wine beforehand. For example, you can chill juices, mix juice blends (like cranberry–orange or pineapple–orange), and even rim glasses with sugar or cinnamon. Then, just before serving, you pour the juice and top each glass with bubbly. That way, your mimosa recipe still tastes fresh but your prep work is mostly done.


5. How do I make a pitcher of mimosas for a crowd?

For a pitcher, it’s usually easiest to start with the juice. As a guideline, combine about 3 cups of chilled juice in a large jug (plain orange or a mix) and keep it in the fridge. When guests arrive, gently pour in one 750 ml bottle of chilled sparkling wine, taste, and adjust if you want more bubbles or more juice. Alternatively, you can keep the pitcher filled just with juice and let everyone top their glass with sparkling wine individually, which keeps every mimosa recipe fizzy from first pour to last.


6. What juices work best for different mimosa recipes?

In most cases, orange juice is the classic starting point. Nevertheless, many other juices make fantastic variations. For instance, pineapple is perfect for tropical mimosas, cranberry suits holidays and “pink mimosa recipe” versions, grapefruit creates a slightly bitter, grown-up twist, peach nectar gives Bellini-style vibes, and apple cider turns a mimosa recipe into a cosy fall drink. Additionally, purées like strawberry or watermelon add colour, texture, and a dessert-like feel without needing much extra effort.


7. How do I make a stronger “manmosa” or vodka mimosa recipe?

If you’d like something a bit bolder, you can build a vodka mimosa recipe very easily. Simply start with 2 ounces of orange juice, then add about 1 ounce of vodka. Afterward, top the glass with 3–4 ounces of sparkling wine. This variation is sometimes called a “manmosa,” although anyone who enjoys a stronger brunch drink can absolutely order it. Just remember, because the spirit adds extra alcohol, it’s wise to sip slowly and serve some food alongside.


8. How do I set up a simple mimosa bar at home?

To create a mimosa bar, first arrange several chilled juices in labelled carafes—orange, pineapple, cranberry, grapefruit, peach nectar, and perhaps apple cider. Next, place two or three bottles of chilled sparkling wine in an ice bucket, including at least one dry option and one non-alcoholic bubbly or sparkling water. Then, add a few optional spirits like Grand Marnier, vodka, Malibu, or tequila for guests who want to upgrade their mimosa recipe. Finally, provide garnishes such as orange slices, berries, pineapple wedges, herbs, and rimming mixes like sugar or Tajín. Guests can then pick a juice, add bubbles, and customise their own glass.


9. Can I make a non-alcoholic mimosa recipe?

Absolutely, and it’s kinder to include one. For a mock mimosa, simply combine 2 ounces of chilled orange juice with 2–3 ounces of sparkling water, club soda, or alcohol-free sparkling wine in a flute. Optionally, you can also introduce pineapple juice, white grape juice, or cranberry juice for extra flavour. This non-alcoholic mimosa recipe still looks festive and bubbly, so everyone at the table can join in the toast without feeling left out.


10. Is prosecco or cava better for a mimosa recipe?

Both options work extremely well, although they offer slightly different personalities. Prosecco often tastes fruitier and softer, which suits lighter, fruit-forward variations such as strawberry or peach. Cava, by contrast, usually brings higher acidity and a more “Champagne-like” structure, making it ideal for a very classic mimosa recipe or anything with sweeter juice like orange or pineapple. Ultimately, you can keep one bottle of each and experiment to see which style your guests prefer.


11. How sweet should a mimosa recipe be?

Ideally, a mimosa should taste refreshing rather than sugary. Consequently, you want the sweetness of the juice balanced by the dryness of the sparkling wine. If your drink feels too sweet, try one of these quick fixes: add more brut sparkling wine, squeeze in a bit of lemon or lime, or switch to a less sugary juice blend. Conversely, if the drink seems too sharp, a tiny extra splash of juice will soften it. Over time, you’ll find a personal sweet spot that makes your favourite mimosa recipe feel just right.


12. How many mimosas can I get from one bottle of sparkling wine?

Roughly speaking, a 750 ml bottle of sparkling wine will pour about five to six standard mimosas, depending on your ratio and glass size. For example, if you use 4 ounces of sparkling wine and 2 ounces of juice per glass, you usually get six servings. Therefore, if you’re hosting, it helps to estimate one bottle for every two to three guests, especially when you’re planning multiple mimosa recipe variations and expect people to try more than one flavour.


13. What food goes best with a mimosa recipe?

Generally, mimosas pair beautifully with classic brunch dishes. Soft scrambled eggs, crispy bacon, French toast, pancakes, and breakfast casseroles all work wonderfully. Additionally, fresh fruit, yoghurt parfaits, and pastry baskets give people something light to snack on between sips. For heartier occasions, you can also serve potato appetisers, small sandwiches, or even pasta bakes. As long as the food isn’t overwhelmingly spicy or smoky, it will usually play nicely with a citrusy, sparkling mimosa recipe.


14. Can I use rosé or red wine in a mimosa-style drink?

Yes, although the drink will feel a bit different. A rosé mimosa recipe can be delightful: just replace the usual sparkling wine with dry sparkling rosé and pair it with juices such as orange, cranberry, or pomegranate. In contrast, red wine generally isn’t used in traditional mimosas, yet you could experiment with light, chilled reds in sangria-style brunch cocktails instead. If you do try rosé in place of white bubbly, keep the juice ratio similar so the drink stays balanced and refreshing.

Posted on 13 Comments

French 75 Cocktail Recipe: 7 Easy Variations

Woman in a green dress holding a French 75 cocktail in a champagne flute with a lemon twist, with text overlay reading ‘How to Make a French 75 Plus 7 Refreshing Variations’ above MasalaMonk.com.

There’s something wonderfully sneaky about a French 75. It looks delicate in the glass, but it drinks like a tiny, sparkling cannon. Gin, lemon, sugar, Champagne: that’s it. This French 75 cocktail recipe is your base. From there, we’ll walk through the most-loved variations people actually look for—vodka French 76, Mexican 75 with tequila, bourbon French 95, cognac, elderflower, lavender, Prosecco/Italian 75, batch versions and a mocktail—so you can pour exactly the kind of 75 you’re in the mood for.


What Is a French 75?

At its core, a French 75 is a classic sour (spirit + citrus + sugar) lengthened with Champagne. In most modern bars that means:

  • Gin
  • Fresh lemon juice
  • Simple syrup
  • Dry sparkling wine (usually Champagne or another Brut)

Served in a flute or coupe, garnished with a lemon twist, it’s bright, bubbly and deceptively easy to drink.

The drink’s name comes from the French 75mm field gun used during World War I. According to Wikipedia’s French 75 entry, the idea was that this pretty little cocktail hits with the power of artillery when you aren’t paying attention. Meanwhile, the International Bartenders Association recognises it as an official contemporary classic, listing a stripped-back recipe of gin, lemon, sugar and Champagne.

You’ll see slight differences in ratios from one book to the next, and some early recipes even used cognac instead of gin. That’s actually good news for home bartenders: once you understand the pattern, you can comfortably switch spirits, bubbles and flavours without losing the soul of this French 75 cocktail recipe.


Classic French 75 Cocktail Recipe (Gin, Lemon & Champagne)

Let’s start with the template every other riff builds on.

Ingredients

Makes one drink

  • 1½ oz (45 ml) gin
  • ¾ oz (22 ml) fresh lemon juice
  • ½–¾ oz (15–22 ml) simple syrup (1:1 sugar and water)
  • 3 oz (90 ml) Brut Champagne or other dry sparkling wine
  • Ice, for shaking
  • Lemon twist or thin lemon wheel, for garnish

A juniper-forward London Dry gin like Beefeater or Tanqueray gives the most classic profile, although softer, more aromatic gins absolutely work. If you enjoy exploring gin in general, you might also like the ideas in these creative gin cocktail recipes, which use similar sour-style ratios in very different ways.

Classic French 75 cocktail recipe card showing a coupe glass with a lemon-twist garnish on a wooden bar, surrounded by lemon, sugar and jigger, with text listing gin, lemon, simple syrup, Champagne and three simple preparation steps.
Classic French 75 at a glance – gin, lemon, simple syrup and Champagne with quick step-by-step instructions so you can mix this bubbly favourite in seconds.

Step-by-step French 75 Cocktail Recipe

  1. Chill your glass
    Slide a Champagne flute or coupe into the freezer for a few minutes. Cold glass, cold drink, happy you.
  2. Build the sour base
    In a cocktail shaker, combine the gin, fresh lemon juice and simple syrup.
  3. Shake with ice
    Fill the shaker with ice and shake for about 10–15 seconds. You want the metal to frost over and the contents to be very cold, with just enough dilution to soften the lemon’s sharpness.
  4. Strain into your chilled glass
    Fine-strain the mixture into the flute or coupe. A fine strainer catches ice shards and pulp so the drink stays silky and elegant.
  5. Add the bubbles
    Gently top with Champagne or another dry sparkling wine. Pour slowly, letting the foam settle as you go—you don’t want to lose half the drink in a fizzy overflow.
  6. Garnish and serve
    Express a strip of lemon peel over the surface to release the oils, rake it around the rim, then drop it in or curl it along the edge. Serve straight away, while the drink is icy and effervescent.

The Liquor.com French 75 recipe follows almost this exact pattern: gin and lemon balanced with sugar, brought to life by Champagne. It’s a simple combination, but when everything is fresh and cold it feels like you’ve stepped into a classic hotel bar.


Choosing Ingredients for the Best French 75 Cocktail Recipe

The French 75 is incredibly sensitive to ingredient quality. Small tweaks make a big difference, so this section walks through the main choices and how they change the drink.

Picking a gin

For a classic French 75 cocktail recipe, start with:

  • London Dry gin – crisp, juniper-led, slightly peppery. Tanqueray, Beefeater or similar will give you that familiar structure.
  • Softer, floral gins – brands like Hendrick’s can work beautifully if you like cucumber and rose notes playing with the lemon.

If this drink becomes a favourite, you’ll probably enjoy branching out into gin-forward recipes like the Negroni and its variations, which show how the same bottle behaves when stirred with vermouth and bitters instead of shaken with citrus.

Champagne vs Prosecco vs other bubbles

The IBA specifies Champagne for the official build, but in a home kitchen your options are broader:

  • Champagne (Brut) – toasty, bready, layered. Ideal when you want the drink to feel extra special.
  • Cava – usually very dry, clean and great value; perfect for parties and batch servings.
  • Prosecco – slightly fruitier and often a touch sweeter; we’ll lean into this in the Italian/Prosecco variations later.

Whichever you use, stay in the Brut or Extra Brut range. If the sparkling wine is sweeter (often labelled “Extra Dry” in Prosecco), you might want to reduce the simple syrup slightly so the French 75 doesn’t become cloying.

For inspiration on how sparkling wine behaves in bigger, party-ready bowls, have a look at the pineapple punch recipes that add prosecco or Champagne right at the end; the same timing works brilliantly when you batch French 75s, too.

Balancing lemon and sweetness in French 75 Cocktail Recipe

Lemon juice is non-negotiable here. Bottled lemon tends to taste flat and harsh; fresh juice brightens the drink without turning it sour for the wrong reasons.

As for sugar, think of the simple syrup range like this:

  • ½ oz (15 ml) – sharp, spritzy, more “adult”.
  • ¾ oz (22 ml) – rounder, more approachable, likely to please a mixed crowd.

You can use that same idea in other lemon-based cocktails. A good example is the lemon drop martini recipe: it leans a little sweeter because there’s no sparkling wine to help with balance, so the sugar has to do more work.


A Quick Look at the French 75’s History

The story behind the French 75 is messy in a charming way. Different books claim different origins, and arguments rage about whether the “real” drink uses gin or cognac.

Early printed recipes in the early 20th century show the drink appearing in Paris around World War I. The Wikipedia article on the French 75 mentions Harry’s New York Bar in Paris as an important early home, and notes that some of the earliest written versions were brandy-based, with champagne and lemon added. Later, gin versions became far more widespread, and today those are what most people recognise.

Writers at Difford’s Guide dig into old bar manuals and argue that cognac versions (sometimes called French 125s) have a strong claim to authenticity as well. Meanwhile, Jeffrey Morgenthaler’s essay on the French 75 walks through a tangle of recipes that includes gin, apple brandy, orgeat, grenadine and more. The takeaway? The drink has always been more like a family of Champagne cocktails than a single fixed formula.

Even Ultimate Mai Tai’s discussion of gin vs cognac in the French 75 concludes that while the IBA gives the modern gin-based template its stamp of approval, cognac versions are arguably more “French” and luxuriously dessert-friendly.

All of that means you have permission to treat this French 75 cocktail recipe as a flexible sketch. Gin is the starting point, not a prison.


French 75 Cocktail Recipe Variations

Once you’ve made a few classic French 75s, it becomes very natural to bend the recipe. Swap the spirit, change the sweetener, or alter the bubbles and you have something new that still feels like part of the family.

The pattern stays the same:

  • Around 1½ oz spirit
  • Around ¾ oz citrus
  • ½–¾ oz sweetener (syrup or liqueur)
  • 2½–3 oz sparkling wine

From here on, we’ll walk through seven prominent variations, plus a few bonus twists that are worth trying at least once.


1. Cognac French 75 (French 125) Cocktail Recipe

This variation sits closest to some of the earliest printed versions of the drink. Cognac brings warmth, dried-fruit notes and a plush mouthfeel that make the French 75 lean toward dessert.

Ingredients

  • 1½ oz cognac (VS or VSOP)
  • ¾ oz fresh lemon juice
  • ½–¾ oz simple syrup
  • 3 oz Brut Champagne or dry sparkling wine
Recipe card for a Cognac French 75, also called a French 125, showing a golden cocktail in a coupe glass with lemon twist on a dark wooden bar, plus text listing cognac, lemon, simple syrup, Champagne and three simple preparation steps.
Cognac French 75 (French 125): a richer take on the classic, made with cognac, fresh lemon, simple syrup and Champagne for a silky, dessert-worthy sparkle.

Method

Shake the cognac, lemon and syrup with ice. Fine-strain into a chilled flute or coupe, top with Champagne and garnish with a lemon twist or even a thin orange peel if you want a slightly richer aroma.

The cognac version works beautifully with after-dinner desserts. Pair it with something creamy like tres leches cake or even a plate of authentic churros dusted with cinnamon sugar for an indulgent end to the evening.


2. Vodka French 75 (French 76) Cocktail Recipe

Replace the gin with vodka and you have a French 76. The structure is identical, but the flavour shifts: cleaner, more neutral, less herbal. This is a great choice when you want the lemon and Champagne to shine without the botanical kick of gin.

Several mainstream recipes, such as the ones from Simple Joy or Southern Living, keep the ratios almost identical to the gin-based French 75. You can follow that same logic at home.

Ingredients

  • 1½ oz vodka
  • ¾ oz fresh lemon juice
  • ¾ oz simple syrup
  • 3 oz dry sparkling wine
Vodka French 76 cocktail recipe card showing a tall champagne flute with a pale yellow vodka French 76 garnished with a lemon twist, next to a frosted vodka bottle and jigger, with text listing vodka, lemon, simple syrup, Champagne and three simple preparation steps.
Vodka French 76: a clean, citrusy twist on the French 75 made with vodka, fresh lemon, simple syrup and a Champagne top-up for easy sparkle.

Method

Shake vodka, lemon juice and syrup with ice until well chilled. Strain into a cold flute, top with Champagne or another dry sparkling and garnish with a lemon twist.

If you like this direction, you’ll probably also enjoy other vodka–lemon combinations, such as the drinks in this guide to vodka with lemon cocktails and infusions, which stretches that pairing into everything from martinis to long, refreshing highballs.


3. Tequila French 75 (Mexican 75) Cocktail Recipe

When tequila joins the party, you get a Mexican 75—essentially a sparkling margarita. Tequila, lime or lemon, a touch of agave, and bubbly on top. Several recipes online, including those from tequila brands themselves, stick to that pattern.

Ingredients

  • 1½ oz tequila blanco (or a gentle reposado)
  • ¾ oz fresh lime or lemon juice
  • ½–¾ oz agave syrup (or simple syrup)
  • 3 oz sparkling wine
Recipe card for a Mexican 75 cocktail showing a pale yellow-green tequila French 75 in a coupe glass with a lime twist, set on a wooden bar with lime wedges and salt, plus text listing tequila, lime or lemon juice, agave or simple syrup, sparkling wine and three easy preparation steps.
Mexican 75: a lively tequila twist on the French 75, shaken with citrus and agave, then topped with sparkling wine for a bright, bubbly fiesta in a coupe.

Method

Add tequila, citrus and syrup to your shaker, fill with ice and shake until properly cold. Strain into a flute or coupe, then top with prosecco, cava or Champagne. Garnish with a lime wheel or a thin strip of lime peel.

For a summer party, you might serve Mexican 75s alongside something more relaxed and fruity such as these watermelon margarita variations. Together they give your guests a choice between sparkling and on-the-rocks tequila drinks.

And if some of those guests prefer to skip alcohol, it’s very easy to offer a zero-proof but equally zesty option using the margarita mocktail guide.


4. Bourbon or Whiskey French 75 (French 95) Cocktail Recipe

Swap in bourbon or rye and you’ll arrive at a French 95. Think of it as a whiskey sour in a party dress: lemon, sweetness and whiskey lengthened with sparkling wine.

Ingredients

  • 1½ oz bourbon or rye whiskey
  • ¾ oz fresh lemon juice
  • ½–¾ oz simple syrup or honey syrup
  • 3 oz sparkling wine
Bourbon French 95 cocktail recipe card showing a golden whiskey French 75 in a champagne flute with a lemon twist, set on a dark wooden bar with whiskey decanter, honey jar and lemon, plus text listing bourbon or rye, lemon juice, simple or honey syrup, sparkling wine and three simple preparation steps.
Bourbon French 95: a whiskey sour–style French 75 made with bourbon or rye, fresh lemon, a touch of simple or honey syrup and a sparkling wine top for rich, bubbly comfort.

Method

Combine the whiskey, lemon and syrup in your shaker with ice. Shake until chilled, strain into a flute and finish with Champagne or similar. A lemon twist is classic, though an orange twist can complement the caramel and vanilla notes in bourbon.

Honey syrup (one part honey to one part hot water) makes this feel cosy and comforting, almost like a festive, sparkling hot toddy—just cold. For a look at how those flavours play without bubbles, you can refer to the classic whiskey sour recipe, which uses a very similar balance of whiskey, lemon and sweetness.


5. Elderflower French 75 (St-Germain / “Saint 75”) Cocktail Recipe

Elderflower liqueur, such as St-Germain, slips easily into the French 75 template, adding floral, lychee-like sweetness. This riff is often nicknamed a “Saint 75”.

Ingredients

  • 1 oz gin
  • ½ oz elderflower liqueur (St-Germain or similar)
  • ¾ oz fresh lemon juice
  • ¼–½ oz simple syrup (optional, to taste)
  • 3 oz sparkling wine
Elderflower French 75 cocktail recipe card showing a pale golden drink in a slender champagne flute with lemon twist and white blossoms, plus text listing gin, elderflower liqueur, lemon juice, optional simple syrup, sparkling wine and three simple preparation steps.
Elderflower French 75: a soft, floral twist on the classic French 75 with gin, St-Germain, fresh lemon and sparkling wine for a brunch-ready sparkle.

Method

Shake the gin, elderflower liqueur, lemon and any additional syrup with ice. Strain into your glass and top with chilled sparkling wine. A thin lemon twist or even a few edible flowers make beautiful garnishes.

Because this variation is so brunch-friendly, it’s a smart one to batch. You can pre-mix the still ingredients in a jug, keep it chilled, then pour individual servings and top with bubbles as guests arrive—similar to how some of the coconut water cocktail recipes approach batching.


6. Lavender French 75 Cocktail Recipe

Lavender plays beautifully with gin’s botanicals, but it’s potent, so a little goes a long way. The safest way to bring it into a French 75 is via lavender simple syrup.

Lavender syrup

  • Combine equal parts sugar and water in a small saucepan.
  • Add a small spoonful of culinary lavender.
  • Warm gently until the sugar dissolves, then switch off the heat and let it steep.
  • Strain when it smells fragrant and cool before using.

Ingredients

  • 1½ oz gin
  • ¾ oz fresh lemon juice
  • ½–¾ oz lavender simple syrup
  • 3 oz sparkling wine
Lavender French 75 cocktail recipe card showing a pale golden drink in a coupe glass with a lavender sprig garnish on a wooden bar, soft purple background, and text listing gin, lemon juice, lavender simple syrup, sparkling wine and three simple preparation steps.
Lavender French 75: a soft, floral riff on the classic French 75, shaken with lavender syrup and lemon, then topped with sparkling wine for a romantic, spring-ready sip.

Method

Shake gin, lemon and lavender syrup with ice, strain, top with bubbles and garnish with a small lavender sprig or lemon twist.

If colour is your thing, you might enjoy going even further with vibrant drinks like the ones in this collection of purple cocktails and mocktails, many of which play the same visual tricks that Empress 1908 gin does.


7. Prosecco / Italian 75 (with Limoncello Option) Cocktail Recipe

The easiest Prosecco version simply substitutes Champagne for Prosecco in the classic French 75 cocktail recipe. That alone gives you a slightly more fruit-driven, often more affordable drink.

Simple Prosecco French 75

  • Classic French 75 specs
  • Swap Champagne for a dry Prosecco

If your Prosecco label reads “Extra Dry” (which paradoxically means a little sweeter than Brut), you may want to reduce the simple syrup to ½ oz so the drink still tastes bright.

To push things further into Italian territory, add limoncello.

Italian 75 cocktail recipe card showing a tall flute filled with a bright yellow Prosecco French 75 garnished with a lemon twist, set on a wooden board with Prosecco bottle, limoncello bottle and lemon slices, plus text listing gin, limoncello, lemon juice, Prosecco and simple preparation steps.
Italian 75 with Prosecco: a sunny limoncello twist on the French 75, shaken with gin and fresh lemon, then topped with chilled Prosecco for a zesty, sparkling aperitivo.

Italian 75 with limoncello

  • 1 oz gin (optional, for extra backbone)
  • ½–1 oz limoncello (taste yours and adjust)
  • ½ oz fresh lemon juice (or less, if the limoncello is very tart)
  • Top with Prosecco

Shake the still ingredients with ice, strain into a flute and complete with Prosecco. The result sits somewhere between a French 75 and a sparkling lemon dessert. It pairs nicely with creamy cakes and citrus sweets, especially if you already enjoy the flavours in a lemon drop martini.


Bonus Twists: Fruit, Colour & Seasonality

Beyond the core seven, there are a few other ways to personalise this French 75 cocktail recipe without much extra effort.

Strawberry French 75

Muddle one or two ripe strawberries in your shaker before adding the classic gin, lemon and syrup. Shake, fine-strain (to catch the seeds) and top with sparkling wine. The colour becomes a soft blush pink, and the flavour leans toward strawberry lemonade with bubbles.

Cranberry French 75

Replace part of the lemon juice and syrup with unsweetened cranberry juice:

  • 1¼ oz gin
  • ½ oz lemon juice
  • ½ oz cranberry juice
  • ½ oz simple syrup
  • 3 oz sparkling wine

Shake the still ingredients, strain, top and garnish with a few floating cranberries. For more ideas on colourful, fizzy non-alcoholic drinks in this style, you might like the mocktails in this overview of grenadine-based mocktails, which often use the same flute-and-bubbles presentation.

Fall spice and honey

In cooler months, a “fall 75” can be as simple as switching the gin to bourbon, the syrup to honey syrup, and adding a very small pinch of ground cinnamon or a dash of spiced bitters before you shake. It still feels like a French 75; it just leans into sweater weather.


Batch French 75 for a Crowd

When you’re making French 75s for more than a couple of people, shaking each one individually can turn you into a full-time bartender. Fortunately, this recipe scales neatly.

Here’s a starting point for about 8 drinks:

  • 1½ cups (360 ml) gin (or another base spirit)
  • ¾ cup (180 ml) fresh lemon juice
  • ¾ cup (180 ml) simple syrup
  • 1 bottle (750 ml) chilled Champagne, Cava or Prosecco
Batch French 75 cocktail recipe card showing a frosty pitcher of French 75 base on a wooden table with several champagne flutes being filled and garnished with lemon twists, along with text listing gin, lemon juice, simple syrup, a bottle of sparkling wine and three simple steps to serve eight cocktails.
Batch French 75: an easy pitcher recipe for about eight cocktails—mix gin, lemon and syrup in advance, then top each glass with chilled sparkling wine and a lemon twist when guests arrive.

How to batch

  1. In a large jug, combine gin, lemon juice and syrup. Stir and refrigerate until very cold.
  2. Just before serving, pour the base into flutes or coupes, filling each glass about one-third full.
  3. Top each serving with sparkling wine, then garnish with lemon twists.

The key is to add the bubbles at the last moment, just as you would with prosecco-based punches like the ones in these pineapple punch recipes. That way the carbonation doesn’t fade while the jug sits on the table.


Virgin French 75 Mocktail

Not everyone at the table will want alcohol, but it’s easy to make a French 75–style drink that looks and feels just as celebratory.

Option 1: With non-alcoholic gin

  • 1½ oz alcohol-free gin
  • ¾ oz fresh lemon juice
  • ½–¾ oz simple syrup
  • 3 oz alcohol-free sparkling wine or sparkling water

Shake the non-alcoholic gin, lemon and syrup with ice. Strain into a flute or coupe, then top with your chosen bubbles. Garnish with a lemon twist so it visually matches the alcoholic version.

Virgin French 75 mocktail recipe card showing a pale yellow non-alcoholic French 75 in a champagne flute with a lemon twist, alcohol-free sparkling bottle and lemon halves in the background, plus text listing alcohol-free gin, lemon juice, simple syrup, alcohol-free sparkling wine and simple preparation steps.
Virgin French 75 Mocktail: all the bubbles and citrusy sparkle of a French 75, made with alcohol-free gin, fresh lemon and fizzy zero-proof bubbles so everyone gets a celebratory glass.

Option 2: Simple citrus sparkle

If you don’t have non-alcoholic gin to hand:

  • 1 oz lemon juice
  • 1 oz simple syrup
  • Chilled sparkling water or alcohol-free prosecco

Add lemon and syrup to a flute, stir gently, then top with sparkling water. A twist of lemon peel on top keeps the same look and aroma.

From there, it’s easy to suggest other zero-proof options so guests don’t feel restricted to just one style. The margarita mocktail guide offers another citrus-forward, salt-friendly choice, while these keto mocktails show how to keep sugar lower without sacrificing flavour.


What to Serve with a French 75

A French 75 has three main traits that drive food pairing: acidity from the lemon, bubbles from the Champagne, and a hint of sweetness from the syrup. Together they make it incredibly forgiving with snacks and starters.

Savoury snacks

Anything salty and a bit fatty will sing next to this French 75 cocktail recipe:

Charcuterie and cheese

French 75s are naturals alongside a small cheese and charcuterie spread. The acidity cuts through creamy brie and cured meats, while the bubbles keep everything feeling light. If you’d like a simple rule for arranging the board, you can follow the “3-3-3-3” framework in this guide to building a charcuterie board.

To add a touch of sweetness, a good fig preserve or marmalade is lovely next to blue cheese and goat’s cheese. It works as a bridge between savoury bites and your French 75, echoing both the citrus and the softness.

Desserts

Because a French 75 cocktail recipe leans bright rather than heavy, it’s particularly good with:

  • Citrus desserts (lemon tarts, lemon drizzle cake, key lime bars)
  • Light sponge cakes soaked in milk or syrup, such as tres leches cake
  • Crisp fried sweets like homemade churros that like having their richness cut by acid and bubbles

Glassware and Presentation

Most recipes serve a French 75 in a Champagne flute, but coupes and even stemmed wine glasses are perfectly acceptable. Each option comes with trade-offs:

  • Flute – preserves bubbles longer, very classic look.
  • Coupe – feels more vintage, but the wider surface means the bubbles escape a bit faster.
  • Stemmed wine glass – ideal for bigger, more relaxed servings or when you’re pouring a batch for a crowd.

If you’re curious about how different glass shapes affect aroma and bubble retention, you might enjoy this broader guide to choosing the right wine glass. The same principles apply to sparkling cocktails: taller, narrower bowls keep carbonation around longer; wider bowls emphasise aroma and feel a touch more glamorous.

Regardless of the glass you pick, a well-cut lemon twist and icy cold temperature will do as much for the drink’s appeal as any fancy stemware.


After the French 75: Where to Go Next

Once you’re comfortable making this French 75 cocktail recipe and a few of its variations, you’ve essentially learned a reusable template:

  • Sour structure – spirit, citrus, sweetener
  • Sparkling lengthener – Champagne, Cava, Prosecco or alcohol-free bubbles
  • Aromatic garnish – usually a simple twist of lemon or lime

From there, you can branch into other families:

In the end, that’s the real charm of the French 75. It’s not just a single drink; it’s a doorway into a whole world of sparkling, citrusy cocktails. Master this French 75 cocktail recipe once, and you’ll have a reliable party starter, a flexible template for experimentation, and an easy way to make any gathering feel just a bit more celebratory.

FAQs

1. What is a French 75, and how is it different from other Champagne cocktails?

A French 75 is a classic Champagne cocktail made with gin, fresh lemon juice, simple syrup, and dry sparkling wine. Unlike a plain glass of Champagne, this drink starts with a sour-style base—spirit, citrus, and sugar—then is lengthened with bubbles. Compared with cocktails like a Bellini or Mimosa, a French 75 is stronger, more citrus-forward, and built around a clear spirit rather than fruit purée or juice alone. This is why a good French 75 cocktail recipe feels both refreshing and surprisingly potent.


2. What are the main ingredients in a French 75 cocktail recipe?

A traditional French 75 cocktail recipe uses four core ingredients: gin, lemon juice, simple syrup, and Champagne (or another dry sparkling wine). Typically, the drink is shaken with ice using the gin, lemon, and syrup, then strained into a chilled flute or coupe before topping with bubbles. A lemon twist finishes it off. Because there are so few elements, using fresh lemon juice and decent sparkling wine makes a noticeable difference.


3. What is the best gin for a French 75?

For a classic French 75 cocktail recipe, a London Dry gin is usually the best choice. Brands with a clear juniper backbone and crisp profile help the drink taste structured rather than vague. However, you can also choose a more floral gin if you’d like softer botanicals or cucumber and rose notes. As a rule, avoid heavily flavoured or very sweet gins, since they can clash with the lemon and Champagne.


4. Do I have to use Champagne, or can I make a French 75 with Prosecco or other sparkling wine?

You absolutely can use other sparkling wines. While Champagne is traditional, many home bartenders make a French 75 with Cava or Prosecco instead. Dry (Brut) styles keep the drink bright and balanced. If the sparkling wine is slightly sweeter, you might reduce the simple syrup a little so the cocktail doesn’t end up too sugary. Consequently, choosing a good but affordable bottle is often more important than insisting on Champagne every time.


5. Is gin or cognac the “original” spirit in a French 75 cocktail recipe?

The answer depends on which historical recipe you look at. Some early versions used cognac with lemon, sugar, and Champagne, while others called for gin. Over time, the gin-based build became dominant and is now the standard in most bars. Nevertheless, a cognac French 75 (often called a French 125) is still very much part of the same family. In practice, think of gin as the modern default and cognac as a richer, more luxurious variant rather than a completely different drink.


6. What is a French 76, and how does it differ from a French 75?

A French 76 swaps the gin for vodka. The rest of the structure is identical: lemon juice, simple syrup, and sparkling wine on top. As a result, a French 76 tastes cleaner and less botanical, with the citrus and bubbles standing out more clearly. If you have guests who aren’t fond of gin but still want a sparkling cocktail, offering the vodka-based version alongside your main French 75 cocktail recipe is a simple solution.


7. What is a Mexican 75, and how do I make it?

A Mexican 75 is essentially a French 75 made with tequila instead of gin. Usually, tequila blanco pairs with fresh lime or lemon, a touch of agave or simple syrup, and sparkling wine. The build is shaken and then topped with bubbles just like the original. Because of the agave and citrus, it feels a bit like a sparkling margarita, which makes it especially suited to summer parties or taco nights.


8. What is a French 95, and what other “French number” cocktails exist?

A French 95 substitutes bourbon or rye for gin and keeps the rest of the blueprint: lemon, sweetener, and sparkling wine. It tastes like a whiskey sour that has been extended with Champagne, making it rounder and more comforting. Beyond that, you may come across names like French 45, 55, 57, 65, 74, 76, and 85; these typically indicate different spirit bases or subtle ratio tweaks. Instead of memorising every number, it’s easier to remember the core French 75 cocktail recipe and view those cocktails as variations on the same sparkling sour theme.


9. Can I make a French 75 with bourbon, whiskey, or brandy?

Yes. Bourbon and rye are the base spirits in a French 95, which is a recognised variant and a favourite among whiskey drinkers. Similarly, using cognac or another brandy gives a French 125-style drink that feels richer and more dessert-friendly. In each case, the process remains the same: shake the spirit with lemon and sugar, then add sparkling wine. Therefore, you can adapt the drink to the bottles you already have without learning an entirely new method.


10. How do I make an elderflower or St-Germain French 75?

To make an elderflower French 75, you simply replace part of the simple syrup with elderflower liqueur such as St-Germain. For instance, you can use gin, lemon juice, a small amount of syrup, and a splash of elderflower liqueur, then finish with sparkling wine. The result is a French 75 cocktail recipe that tastes softer, more floral, and very brunch-friendly. Just be mindful of sweetness; elderflower liqueur is already sugary, so you may not need much extra syrup.


11. What about a lavender French 75 or other floral versions?

A lavender French 75 usually relies on lavender-infused simple syrup. You keep the typical gin and lemon base but swap plain syrup for one that has been gently steeped with culinary lavender. The key is moderation, since too much lavender can make the drink taste perfumed. Beyond lavender and elderflower, you can also experiment with rose, hibiscus, or other floral syrups, always starting with small amounts and adjusting gradually.


12. Can I use Prosecco instead of Champagne in my French 75 cocktail recipe?

Prosecco works very well in a French 75, especially in casual settings or when you’re making several cocktails at once. To keep everything balanced, look for a Brut style and consider reducing the simple syrup slightly if the wine tastes notably sweet. Interestingly, combining Prosecco with limoncello and a little gin creates an Italian-inspired twist that still follows the French 75 pattern but leans even more into lemon and fruitiness.


13. How strong is a French 75 compared with a glass of wine or a typical cocktail?

A French 75 is stronger than it looks. It contains a full measure of spirit plus sparkling wine, so its alcohol content sits somewhere between a standard cocktail and a large glass of wine. Because the lemon and bubbles make it taste very refreshing, people sometimes underestimate its strength. Consequently, it’s wise to treat a French 75 as you would any other mixed drink: enjoy slowly, sip water between rounds, and keep track of how many you’ve had.


14. Can I batch French 75s for a party?

You absolutely can batch them. To do so, mix the spirit, lemon juice, and simple syrup in a large jug and chill this base thoroughly. Then pour individual portions into glasses and top each one with sparkling wine just before serving. In this way, the carbonation stays lively, and you avoid shaking every single drink to order. As a bonus, batching lets you offer several versions—gin-based, vodka-based, or tequila-based—while keeping the workflow simple.


15. Is there a way to make a non-alcoholic or low-alcohol French 75?

A non-alcoholic French 75 is easy to create. You can shake alcohol-free gin (or simply lemon juice and syrup) with ice, then strain into a flute and top with alcohol-free sparkling wine or fizzy water. The look, aroma, and basic flavour profile stay similar, but the drink is safe for anyone avoiding alcohol. For a low-alcohol route, you can reduce the amount of base spirit and rely more on the sparkling wine, or choose a lower-ABV sparkling option and keep the rest of the French 75 cocktail recipe unchanged.


16. What glass should I use for a French 75?

Traditionally, a French 75 is served in a Champagne flute, which preserves bubbles and gives that tall, elegant silhouette. Nevertheless, many people prefer coupes for a more vintage feel, especially at home. Stemmed wine glasses work as well, particularly when you’re pouring batch cocktails or larger servings. Whatever glass you choose, chilling it beforehand and adding a neat lemon twist will make the drink feel polished.


17. Can I prepare a French 75 in advance?

You can prepare the still components in advance but not the finished cocktail. For best results, mix and chill the spirit, lemon juice and simple syrup together in the refrigerator. Then, when it’s time to serve, shake with ice if you want extra aeration, strain into glasses, and top with sparkling wine. If you were to add the bubbles too early, they would lose their fizz and the French 75 would taste flat by the time you pour it.


18. Why is this drink called a French 75 if I’m using gin instead of cognac?

The name references the French 75mm field gun rather than a specific spirit, so it doesn’t actually depend on cognac being the base. Early recipes used both brandy and gin at different times, and the drink shifted shape as it travelled and evolved. Now, the gin-based build is widely accepted as the standard French 75 cocktail recipe, while cognac versions sit alongside it as legitimate, closely related variations.

Posted on 13 Comments

Tres Leches – Mexican 3 Milk Cake Recipe

Hand pouring sweet milk over a slice of tres leches cake topped with fresh strawberries on a plate, with the text Tres Leches Cake Recipe – From-Scratch, Box Mix & 10 Easy Variations

If you’ve ever cut into a slice of tres leches cake and watched the fork slide through like it’s cutting clouds, you already know why this dessert has fans for life. It’s soft, cool, milky and somehow rich and light at the same time. This post walks you through a reliable tres leches cake recipe from scratch, then shows you how to turn the same base into an easy box-mix version, a party sheet cake, and a whole line-up of flavours like strawberry, chocolate, pistachio, Biscoff, cupcakes, cheesecake style, eggless and more.

No hunting around ten different posts. One base, many ways to play.


What Is Tres Leches Cake, Really?

At its heart, tres leches is a sponge cake soaked in three kinds of milk until it’s luxuriously moist, then finished with a blanket of whipped cream. Most versions use:

  • Sweetened condensed milk
  • Evaporated milk
  • Whole milk or heavy cream

Those three milks are where the name comes from: tres leches = three milks. The idea is simple, but the texture is unique: a cake that’s drenched yet not stodgy. The Simple English Wikipedia entry on tres leches cake describes it as a sponge cake soaked in evaporated milk, condensed milk and whole milk, and that’s exactly what you’re aiming for here.

Where it comes from is a little more tangled. Many Latin American countries claim it with pride. A piece in Food52, “The Long, Winding Origin Story of Tres Leches Cake”, traces how similar soaked cakes were made in Europe, then evolved through Latin America, with Nicaragua, Mexico and others all laying some claim to the modern version. However you slice the history, tres leches has settled into the “comfort dessert” category across the region and now far beyond it.

If you want another take on the basics, you can peek at the classic tres leches cake article, but you don’t need it to get baking. Let’s set you up with everything you need right here.


The Backbone of a Good Tres Leches Cake Recipe

Before diving into the step-by-step, it helps to understand what makes this cake work so well.

A good tres leches cake recipe has three pillars:

  1. A strong but airy sponge
    The cake needs a structure with enough air bubbles to drink in liquid without collapsing. Think of it a bit like the logic behind tiramisu or trifle.
  2. A balanced milk mixture
    Too much condensed milk and it’s cloying, too much plain milk and it’s bland. You want sweet, creamy and milky in harmony.
  3. Time to soak and chill
    Tres leches isn’t an impatient dessert. It tastes much better once the milks have had hours to seep into the crumb.

Other recipes – like Natasha’s Kitchen’s popular tres leches cake or this authentic version on Hola Jalapeño – follow a similar pattern: airy sponge, three-milk soak, whipped cream topping. You’ll be doing the same, just adapted to your kitchen.


Ingredients for the Classic Tres Leches Cake Recipe

You can make this in a 9×13 inch (23×33 cm) pan for a crowd-pleasing sheet cake or in a slightly smaller dish for a taller, more dramatic dessert.

For the sponge cake

  • All-purpose flour
  • Baking powder
  • Fine salt
  • Eggs, separated into whites and yolks
  • Granulated sugar
  • Vanilla extract
  • A splash of whole milk

This composition is similar to many sponge-style tres leches recipes, including the long-trusted tres leches (milk cake) recipe on Allrecipes, which keeps the batter light but sturdy enough to soak.

For the three-milk mixture

  • Sweetened condensed milk
  • Evaporated milk
  • Whole milk or heavy cream (or a mix of the two)

You can adjust the balance slightly according to how rich you like your cake, but this trio is non-negotiable if you want that classic flavour.

For the topping

  • Heavy whipping cream
  • Icing sugar or fine caster sugar
  • Vanilla extract
  • Ground cinnamon (optional)

Fresh fruit – strawberries, mango, berries, cherries – is optional but excellent.


Recipe card showing a slice of classic tres leches cake topped with whipped cream and a strawberry, with a hand holding a fork and overlay text listing ingredients and simple steps for a light, moist 3-milk sponge
Classic Tres Leches Cake Recipe – a light, moist 3-milk sponge with whipped cream, shown here as a quick recipe card so you can see the ingredients and key steps at a glance on MasalaMonk.com.

Step-by-Step: Classic Tres Leches Cake Recipe From Scratch

Take it one stage at a time and the process feels very straightforward.

1. Prepare the pan and oven

First, heat your oven to the temperature your recipe specifies, usually around 175–180°C (350°F). Grease your 9×13 inch pan lightly and line the bottom with baking paper. That simple step makes the cake easier to slice neatly later, especially once it’s soaked.

Step 1 photo for a classic tres leches cake recipe showing a hand lining a greased 9x13 inch baking pan with parchment paper beside a preheated oven, with text overlay saying Prepare Pan & Oven
Step 1 – Prepare your pan and oven: lightly grease a 9×13 inch tin, line the base with baking paper and preheat the oven so your tres leches sponge bakes evenly and releases cleanly.

2. Mix the dry ingredients

In a medium bowl, whisk together:

  • Flour
  • Baking powder
  • Salt

Set this aside so it’s ready to fold into your egg mixture without over-mixing.

Step 2 photo for a tres leches cake recipe showing a hand whisking flour, baking powder and salt together in a ceramic bowl on a dark kitchen counter with small ingredient bowls and measuring spoons around it
Step 2 – Mix the dry ingredients: whisk flour, baking powder and salt together in a bowl and set aside so they’re ready to fold gently into your tres leches sponge batter.

3. Whip the egg whites

In a clean, grease-free bowl, beat the egg whites until soft peaks form. Then, slowly add about half the sugar while continuing to whisk until glossy and thick. This meringue gives your tres leches sponge its lift and delicate crumb.

Once you get the hang of airy, moist cakes, you might enjoy experimenting with others that rely on good structure and moisture too – MasalaMonk’s orange olive oil cake is a great example of a simple cake that stays beautifully tender, using fat instead of milk soak for its softness.

Step 3 photo for a tres leches cake recipe showing a hand lifting a mixer whisk with soft peaks of whipped egg whites over a glass bowl, with eggshells, sugar and measuring spoons on a dark counter
Step 3 – Whip the egg whites: beat the whites to soft peaks, then add half the sugar and whisk until the meringue is glossy and thick so your tres leches sponge gets maximum lift.

4. Beat the yolks

In another bowl, whisk the egg yolks with the remaining sugar until the mixture turns pale and thick. Add vanilla and a splash of milk. This forms a rich, flavourful base that will blend into your meringue.

Step 4 photo for a tres leches cake recipe showing a hand whisking egg yolks with sugar, vanilla and milk in a bowl on a dark counter, with text overlay explaining to beat until pale and thick
Step 4 – Beat the yolks: whisk the egg yolks with the remaining sugar, vanilla and a splash of milk until the mixture turns pale, thick and creamy, ready to be folded into the whipped whites for your tres leches sponge.

5. Combine gently

Now, pour the yolk mixture into the whipped whites and fold gently with a spatula. Try to keep as much air in the mixture as you can.

Once combined, sift the dry ingredients over the top in two or three additions, folding carefully after each one. Stop as soon as there are no visible streaks of flour; over-mixing here will deflate the batter.

Step 5 – Combine gently: fold the yolk mixture into the whipped whites, then sift in the dry ingredients and fold only until you no longer see flour streaks, keeping the batter light so your tres leches sponge bakes up tall and airy.

6. Bake the sponge

Pour the batter into your prepared pan and smooth the top lightly. Bake until the cake is golden and springs back when touched lightly in the centre, or a skewer inserted comes out clean.

As it bakes, your kitchen will start to smell like a promise: something simple now that will become something luxurious later.

Step 6 photo for a tres leches cake recipe showing a golden sponge cake in a 9x13 inch pan being pulled out of the oven with a cloth, with text overlay saying Bake the Sponge and instructions to bake until golden and springy
Step 6 – Bake the sponge: pour the batter into your prepared 9×13 inch pan, smooth the top and bake until the cake is risen, golden and springy to the touch so it’s ready to soak up the three milks.

Mixing the Three Milks for Tres Leches Cake Recipe

While the cake is cooling slightly, you’ll prepare the soaking mixture that turns it into tres leches.

In a jug or bowl with a spout, whisk together:

  • 1 part sweetened condensed milk
  • 1 part evaporated milk
  • 1 part whole milk or a mix of milk and cream
Step 7 photo for a tres leches cake recipe showing a hand whisking a mixture of condensed milk, evaporated milk and whole milk or cream in a glass jug, with open milk cans and a bottle on a dark counter and text saying Mix the Three Milks
Step 7 – Mix the three milks: whisk condensed milk, evaporated milk and whole milk or cream together until smooth, then taste and adjust the sweetness before you pour it over the warm sponge for your tres leches cake.

Different recipes tweak those ratios – the tres leches cake on A Cozy Kitchen and Natasha’s version are good examples – but the idea is the same: a sweet, pourable mixture that’s rich but not gluey.

Taste as you go. If it feels too sweet for your liking, thin it with a little extra whole milk. If it seems too thin, a splash more condensed milk usually does the trick.

This is also the moment to decide whether you’d like to bring in flavours later: strawberry, chocolate, pistachio, Biscoff and more. For now, though, keep it classic.


Soaking the Cake Without Turning It to Mush

The key to a successful tres leches cake recipe is soaking without shredding.

  1. Let the cake cool for 10–15 minutes once it comes out of the oven. It should be warm, not piping hot.
  2. Use a skewer or fork to poke holes all across the surface. Go right to the edges and corners so the milks can travel.
  3. Slowly pour the milk mixture evenly over the cake. Give the liquid time to sink in rather than flooding one spot.
  4. Tilt the pan gently if needed to help the milks travel into drier areas.
Step 8 photo for a tres leches cake recipe showing a hand pouring a creamy three-milk mixture from a glass jug over a fork-poked sponge cake in a metal pan, with text overlay explaining to cool, poke, pour and chill
Step 8 – Soak the cake: let the sponge cool for 10–15 minutes, poke holes all over, then slowly pour the three-milk mixture evenly across the surface and chill for several hours so every bite is moist but not mushy.

Some recipes, like The Pioneer Woman’s tres leches cake, use almost all the milk and hold back just a little if it starts to pool excessively. You can follow the same instinct: you want a well-soaked cake, not a cake floating in a pond.

Once you’re satisfied, cover the pan and slide it into the fridge for at least 4 hours. Overnight is even better; the milks mellow, the crumb relaxes, and the flavours get cozy.


Topping: The Soft Cloud on Top

When you’re close to serving time, it’s topping time.

  1. Pour chilled heavy cream into a bowl.
  2. Add sugar and vanilla.
  3. Beat until you get soft to medium peaks – you want the cream to hold its shape, but still look smooth and billowy.
Step 9 photo for a tres leches cake recipe showing a hand using an offset spatula to spread whipped cream over a chilled cake in a pan, with bowls of cream, sugar and cinnamon on a dark counter and text explaining to whip the cream and finish the cake
Step 9 – Whip the cream and finish: beat cold cream with sugar and vanilla to soft–medium peaks, spread it over the chilled tres leches cake in swoops and add a light dusting of cinnamon if you like before slicing and serving.

Spread the whipped cream over the chilled cake in swoops and swirls. If you like, dust with ground cinnamon for a gentle warmth.

At this point, you’ve nailed a classic tres leches cake. If that’s all you wanted, you can stop here, cut generous slices, and pour coffee or chai. A plate of this alongside a cup of masala chai for a rainy day is as comforting as dessert gets.

But the fun is only just starting.


Easy Tres Leches Cake Recipe with Box Mix

Maybe you love baking, but sometimes you just don’t have the energy to whip egg whites and fold flour. That’s when a box of cake mix becomes your best friend.

Plenty of bakers have proven that a tres leches cake recipe with cake mix can be just as satisfying. If you want to see how others do it, check out this easy tres leches cake with cake mix or this tres leches cake with a cake mix. The approach below follows a similar path, tailored to the same milk mixture and topping you already made.

Recipe card for Easy Tres Leches Cake with Box Mix, showing a hand pouring three-milk mixture over a slice beside a poked sheet cake, with overlay text listing ingredients and simple step-by-step instructions
Easy Tres Leches with Box Mix – a quick 15-minute prep recipe where a simple boxed cake is soaked in a rich three-milk mixture, then chilled and topped with whipped cream for bakery-style results at home.

Step 1: Bake the box-mix base

Choose a white or yellow cake mix. Follow the package instructions to make the batter, using the eggs, oil and water it asks for. Bake it in the same 9×13 inch pan.

A couple of small adjustments help:

  • If the box gives a range of baking times, pull the cake out on the earlier side so it stays soft.
  • Avoid over-mixing the batter; just stir until combined.

Step 2: Soak like the classic Tres Leches Cake Recipe

Once the cake has cooled for 10–15 minutes:

  1. Poke all over with a fork or skewer.
  2. Pour your three-milk mixture slowly and evenly over the surface.
  3. Let the cake cool to room temperature, then cover and refrigerate for several hours.

Because box-mix cakes are often a little softer and sweeter, they actually take to the milk mixture beautifully. The result is a super easy tres leches cake recipe that tastes like you put in much more effort than you did.

Step 3: Finish with whipped cream

Top the chilled cake with whipped cream exactly as you would with the scratch version. Add fruit or sprinkles and you’re done.

This is the version to tuck away for weeknights, office potlucks, or days when you want dessert but your energy is on strike.


Strawberry Tres Leches Cake Recipe: Sweet, Fruity and Pretty

Once you’ve mastered the base tres leches cake recipe, strawberry is usually the first variation people ask for. It adds freshness, colour and a little tartness to balance all the cream.

There are many ways to bring strawberries in. One lovely approach is using strawberry milk in the soak, like in A Cozy Kitchen’s strawberry milk tres leches. You can borrow that idea and adapt it to your own cake.

Dark and moody recipe card for Strawberry Tres Leches Cake, showing a slice of soaked three-milk sponge with a strawberry layer and whipped cream while a hand places fresh strawberry slices on top, with text listing key ingredients and simple instructions
Strawberry Tres Leches Cake – a classic three-milk sponge upgraded with a bright strawberry layer, fresh berries and whipped cream, shown here as a quick-reference recipe card from MasalaMonk.com.

Here are a few ways to strawberry-fy your tres leches:

  • In the milk mixture: Swap some of the whole milk for strawberry milk or blend fresh strawberries with milk, strain, and use that in the mix.
  • Between layers: Spread a thin layer of sliced strawberries over the soaked cake before adding whipped cream.
  • In the topping: Fold finely chopped strawberries or a spoonful of puree into the whipped cream for a pale pink cloud.

Finish with extra slices on top. It becomes the kind of dessert that looks like it belongs at a spring party without being fussy to make.

If you enjoy fruity desserts in general, you might later wander into the world of mango – MasalaMonk has an addictive mango cheese mousse cake and a fun round-up of mango dessert recipes that play with fruit and cream in different ways.


Chocolate Tres Leches Cake Recipe: For Cocoa Lovers

Chocolate fans don’t have to sit this one out. There are two simple routes to a chocolate tres leches:

  1. Cocoa in the sponge
    Replace a few tablespoons of flour with cocoa powder in your scratch batter, or use a chocolate box mix as your base.
  2. Chocolate in the topping and finish
    Keep the milk mixture classic, then:
    • Dust cocoa powder over the whipped cream,
    • Grate dark chocolate on top, or
    • Drizzle melted chocolate in thin lines.
Recipe card for Chocolate Tres Leches Cake, showing a slice of cocoa-soaked three-milk sponge topped with whipped cream and strawberries while a hand grates chocolate over it, with ingredients and step-by-step instructions listed below
Chocolate Tres Leches Cake – a rich cocoa sponge soaked in three milks, chilled, then topped with whipped cream and grated chocolate, captured here as a quick-reference recipe card from MasalaMonk.com.

The result is something like a cross between a classic tres leches and a light chocolate mousse cake – rich, but not heavy. For another soaked-texture dessert with chocolate notes, you can look at MasalaMonk’s savoiardi chocolate vanilla pudding; it’s not tres leches, but it plays with similar comfort-dessert vibes.


Pistachio & Biscoff Tres Leches Cake Recipe: Crowd-Pleasers

Beyond strawberry and chocolate, pistachio and Biscoff (Lotus biscuit) variations have become internet favourites.

Pistachio tres leches cake recipe

Recipe card for Pistachio Tres Leches Cake, showing a square slice of three-milk sponge topped with whipped cream and a thick layer of chopped pistachios while a hand sprinkles more nuts, with ingredients and simple instructions below
Pistachio Tres Leches Cake – a classic three-milk sponge infused with cardamom and finished with a generous pistachio crunch, presented as a quick-reference recipe card from MasalaMonk.com.

For a nutty, elegant twist:

  • Add a little ground pistachio to the sponge batter.
  • Stir a pinch of cardamom into the milk mixture.
  • Scatter chopped roasted pistachios generously over the whipped cream.

The pale green and white look beautiful on a table, and the flavour leans gently into Middle Eastern dessert territory without losing its tres leches soul.

Biscoff tres leches cake recipe

Recipe card for Biscoff Tres Leches Cake showing a slice of three-milk sponge topped with whipped cream while a spoon drizzles warm Biscoff spread over it, with crushed biscuits on the plate and ingredients and instructions written below
Biscoff Tres Leches Cake – a soft three-milk sponge soaked and chilled, then finished with whipped cream, warm Biscoff drizzle and crunchy biscuit crumbs, captured here as a quick-reference recipe card from MasalaMonk.com.

This one practically sells itself:

  • Warm a few spoonfuls of Biscoff spread until it’s pourable.
  • Swirl some into the milk mixture, keeping a portion back for drizzling.
  • After topping the cake with whipped cream, drizzle the remaining Biscoff on top and crumble Lotus biscuits over everything.

It’s sweet, nostalgic and guaranteed to disappear quickly.

Also Read: French Toast Sticks (Air Fryer + Oven Recipe) — Crispy Outside, Custardy Inside


Tres Leches Cupcakes, Jars and Mini Desserts

Sometimes you don’t want to deal with slicing a large cake, or you’re feeding a crowd who will be walking around with plates. That’s where mini formats come in.

Recipe card for Tres Leches Cupcakes and Cups showing a cupcake topped with whipped cream and a strawberry, glass cups layered with soaked cake and cream, and text listing ingredients and simple party-friendly instructions
Tres Leches Cupcakes & Cups – bite-sized three-milk sponge desserts topped with whipped cream, strawberries and sprinkles, perfect for buffets, picnics and parties, presented here as a quick-reference recipe card from MasalaMonk.com.

Cupcakes

Use the same batter (scratch or box mix) but bake it in a lined muffin tin. Once cooled:

  • Poke each cupcake several times with a skewer.
  • Spoon the milk mixture over the top of each one until it’s nicely soaked.
  • Chill the cupcakes in the tin (to contain any escaping milk) and then top them individually with whipped cream.

They’re perfect for buffets, potlucks and birthdays where everyone wants their own little treat.

Dessert cups or jars

Alternatively, bake the cake in a pan, cut it into cubes and layer it in dessert glasses or jars:

  1. Cake cubes
  2. Spoonful of milk mixture
  3. Whipped cream
  4. Fruit, nuts or Biscoff crumbs

Repeat the layers. These can be sealed and transported easily, making them ideal for picnics or potluck dinners.

Also Read: Peanut Butter Cookies (Classic Recipe & 3 Variations)


Cheesecake-Style Tres Leches

If you love creamy, chilled desserts, consider a cheesecake-inspired tres leches.

Recipe card for Cheesecake-Style Tres Leches showing a slice with cookie crumb crust, soaked sponge layer and creamy topping drizzled with caramel, with ingredients and simple step-by-step instructions below
Cheesecake-Style Tres Leches – a layered dessert with biscuit crust, soaked sponge and a silky cream topping, drizzled with caramel and presented as a quick-reference recipe card from MasalaMonk.com.

One way to play it:

  • Press a simple biscuit or cookie crust into the bottom of your pan (like you would for a cheesecake).
  • Bake your sponge layer on top of this crust.
  • Soak the sponge layer only, then chill.
  • Finish with a slightly thicker topping, such as whipped cream with a little cream cheese folded in.

The cookie base adds a pleasant crunch, and the cream-cheese-boosted topping makes it feel closer to a mash-up between tres leches and cheesecake. If that idea excites you, you may enjoy MasalaMonk’s no-bake blueberry cheesecake, which uses similar chilled, creamy textures in a different direction.


Eggless and Gluten-Free Tres Leches Ideas

Tres leches is naturally adaptable for different diets because most of the magic lives in the milk mixture and topping.

Eggless variations

To go egg-free:

  • Use an eggless sponge cake recipe you already trust, or
  • Pick an eggless box mix as your base.
Recipe card for Eggless Tres Leches Cake showing a slice of three-milk sponge topped with whipped cream and a strawberry while a hand places an Eggless sign, with ingredients and simple step-by-step instructions below
Eggless Tres Leches Cake – a soft, three-milk soaked sponge made without eggs, topped with whipped cream and fresh fruit, presented as a quick-reference recipe card from MasalaMonk.com.

Once baked, you treat it exactly like the classic: poke holes, soak with the three milks, chill, top with whipped cream. Because eggs are responsible for much of the structure in traditional sponge, it’s important to choose an eggless base that doesn’t crumble easily.

Gluten-free versions

For gluten-free:

  • Swap the base for a gluten-free cake mix that you know bakes up well, or
  • Use a home-made gluten-free sponge recipe you like.
Recipe card for Gluten-Free Tres Leches Cake showing a slice of three-milk sponge topped with whipped cream, raspberries and a small GF flag, with ingredients and step-by-step gluten-free instructions written below
Gluten-Free Tres Leches Cake – a moist three-milk sponge made with a gluten-free base, chilled and finished with whipped cream and fresh berries, presented as a quick-reference recipe card from MasalaMonk.com.

Again, everything else stays the same: soak, chill, top. The milk mixture and cream are already wheat-free, so the main challenge is getting a cake that’s sturdy enough to handle the soak without falling apart.

Also Read: Vegan French Toast: 6 Easy Recipes (Pan, Air Fryer, GF & High-Protein)


Turning Tres Leches into a Birthday or Celebration Cake

A well-made tres leches cake is a brilliant birthday cake because it stays moist for days and feels like a treat without heavy frosting.

Recipe card for Tres Leches Birthday Sheet Cake showing a 9x13 three-milk cake topped with whipped cream, sprinkles and lit candles while a hand lights one candle, with ingredients and step-by-step instructions written below
Tres Leches Birthday Sheet Cake – a 9×13 three-milk sponge you can soak and chill the day before, then finish with whipped cream, sprinkles and candles for an easy make-ahead party dessert from MasalaMonk.com.

Here are some ways to lean into that:

  • Use a sheet pan: A 9×13 inch cake feeds a crowd comfortably and slices into neat squares.
  • Decorate with intention: Pipe whipped-cream rosettes around the edges, add sprinkles or edible flowers, and arrange fruit in patterns.
  • Write on it: Once the cake is fully chilled, you can pipe “Happy Birthday” or a message using melted chocolate or coloured whipped cream.

If you’re planning a full meal around it, you can keep the main course homely and satisfying. For instance, a hearty vegetable dish like kathal ki Bihari style sabzi with rice makes a lovely dinner that doesn’t overshadow dessert. And if rice tends to intimidate you, MasalaMonk’s guide on how to cook rice perfectly every time is a handy reference.

For an adult celebration, you can happily serve tres leches alongside a classic cocktail. A chilled slice next to a well-balanced whiskey sour with easy twists hits that sweet spot between indulgent and grown-up.


Serving, Storage and Leftovers

Tres leches is one of those desserts that rewards patience and planning.

Serving

  • Serve it chilled or just slightly cooler than room temperature. Warm tres leches tends to feel heavy; cold tres leches feels refreshing.
  • Cut with a sharp knife, wiping the blade between slices if you want picture-perfect edges.

Because it’s rich, smaller pieces often satisfy, especially after a filling meal. That said, people frequently go back for seconds.

Storage

  • Keep the cake covered in the fridge. It generally stays good for 2–3 days, sometimes longer if your kitchen is cool and everything was fresh to begin with.
  • If you’ve decorated with very juicy fruit, you may notice the fruit softening after a day or two, but the cake itself will still taste wonderful.

Leftovers

Leftover tres leches is a happy problem. You can:

  • Eat it as is, straight from the fridge – it tastes even better the next day.
  • Turn small squares into layered dessert cups with extra fruit.

While you’re thinking about using up bits and pieces, you might enjoy how cleverly savoury leftovers can be transformed too – the paneer sabji sandwich on MasalaMonk is a great example of giving yesterday’s curry a fresh life.

If you know a heavy dessert is coming after dinner, you can balance your day with lighter choices earlier on: something like high protein overnight oats with five flavour variations for breakfast or one of these high-calorie protein shakes and smoothies if you’re trying to gain weight in a more intentional way than just eating all the cake.


Bringing It All Together

A good tres leches cake recipe is less about fancy techniques and more about respecting a few simple rules:

  • Build a sponge that can hold its shape.
  • Mix milks that taste good even before they touch the cake.
  • Give everything time to soak and soften in the fridge.

Once you have that foundation, you can go in almost any direction:
from classic vanilla to strawberry-studded, chocolate-dusted, pistachio-sprinkled or Biscoff-swirled; from a tall birthday centrepiece to neat cupcakes and dessert jars; from scratch-baked weekends to weeknight box-mix shortcuts.

The next time you’re craving something creamy and celebratory, you’ll have a tres leches game plan ready – and all the tools to make it your own.

Also Read: Homemade Hot Chocolate with Cocoa Powder Recipe

FAQs

1. What exactly is tres leches cake and how is it different from regular milk cake?

Tres leches cake is a very light sponge that gets soaked in a mixture of three milks (usually evaporated milk, sweetened condensed milk and whole milk or cream). After soaking, it’s topped with whipped cream and often finished with fruit or cinnamon.

A regular “milk cake” or plain milk-based dessert might simply use milk in the batter or syrup, but a proper tres leches cake recipe is built around that deep soak in three milks. The texture should be moist all the way through, yet still sliceable, almost like a hybrid between cake and pudding.


2. What are the three milks in a traditional tres leches cake recipe?

In a classic tres leches cake recipe, the three milks are:

  1. Sweetened condensed milk
  2. Evaporated milk
  3. Whole milk or heavy cream

Together, they create a pourable mixture that’s sweet, creamy and rich without feeling heavy. Occasionally, people switch the whole milk for half-and-half or cream for extra indulgence, but the idea stays the same: one very sweet milk, one cooked-down milk, and one fresh milk to balance everything.


3. How do I make the milk mixture for tres leches cake?

To make the milk mixture for your tres leches cake recipe, whisk together equal parts condensed milk and evaporated milk, then add enough whole milk or cream until it’s pourable but still luxurious. Taste as you go.

If it’s too sweet, add a splash more regular milk. If it feels thin, trickle in a little extra condensed milk. The mixture should coat the back of a spoon and taste delicious on its own, because that flavour is what will soak into every crumb of your cake.


4. Is tres leches cake Mexican and what does “pastel de tres leches” mean?

Tres leches cake is loved across Latin America, and you’ll often see it in Mexican bakeries and restaurants. That’s why many people search for Mexican tres leches cake or authentic pastel de tres leches.

“Pastel de tres leches” simply means “three milks cake” in Spanish. Different countries have their own versions and small tweaks, but the foundation is the same: a sponge, three milks, and a creamy topping. Your tres leches cake recipe will feel right at home on a Mexican-inspired menu, yet it’s flexible enough to fit into almost any cuisine.


5. Can I make an easy tres leches cake recipe at home if I’m a beginner?

Absolutely. Even if you’re new to baking, you can make an easy tres leches cake recipe without stress. There are two straightforward paths:

  1. From-scratch sponge: You’ll whip eggs, fold in flour and bake a simple sponge, then soak it in the three milks.
  2. Box-mix shortcut: You bake a plain box cake (white or yellow), poke holes in it and pour the same milk mixture on top.

In both cases, the whipped cream topping is very forgiving, and the long chill in the fridge actually hides small mistakes. As long as the cake is baked through and the milk mixture tastes good, you’re already most of the way there.


6. Can I use a box cake mix for a tres leches cake recipe?

Yes, a box mix works beautifully and it’s one of the most searched-for shortcuts. To adapt a mix:

  1. Bake a white or yellow box cake in a 9×13 inch pan according to package directions.
  2. Let it cool slightly, then poke holes all over with a fork or skewer.
  3. Pour your three-milk mixture slowly over the top so it soaks in evenly.
  4. Chill for several hours and finish with whipped cream.

This method turns an ordinary box cake into a moist, impressive dessert, and it’s a great option for busy days, office parties or last-minute celebrations.


7. Can I make tres leches cake with yellow cake mix or other flavours?

You can use yellow cake mix, white cake mix or even chocolate cake mix as the base of a tres leches cake recipe. Each one brings a slightly different personality:

  1. Yellow cake mix: Richer flavour, slightly denser crumb, great for birthdays.
  2. White cake mix: Lighter and more neutral, ideal for fruit toppings like strawberries or mango.
  3. Chocolate cake mix: Perfect for a chocolate tres leches with cocoa, chocolate shavings or chocolate sauce on top.

The important thing is to bake the cake just until done, avoid drying it out, and then soak it patiently with the milk mixture.


8. How do I make a simple chocolate tres leches cake?

To turn your tres leches cake recipe into a chocolate version, you can:

  1. Replace a few tablespoons of flour with cocoa powder in your scratch batter, or start with a chocolate box mix.
  2. Keep the three-milk mixture the same or add a spoonful of cocoa for an extra chocolate hint.
  3. Dust cocoa powder over the whipped cream and add chocolate curls, chips or shavings on top.

This approach gives you a cake that tastes like a cross between chocolate sponge and creamy pudding, without changing the basic method too much.


9. How can I make a strawberry tres leches cake at home?

Strawberry tres leches is a favourite twist, and it’s easier than it looks. To start:

  1. Prepare your usual tres leches cake recipe and soak the sponge as normal.
  2. Layer sliced fresh strawberries over the soaked cake before adding whipped cream.
  3. Stir chopped strawberries or a little strawberry puree into the whipped cream for a soft pink tint.
  4. Decorate the top with extra strawberries.

For even more flavour, you can swap some of the plain milk in the soak for strawberry milk or a blend of milk and strawberry puree.


10. Can I make tres leches cake eggless?

Yes, you can make an eggless tres leches cake by switching the base cake rather than the milk mixture:

  1. Use a reliable eggless sponge cake recipe you already like, or
  2. Choose an eggless box cake mix from the store.

After baking, poke holes, soak with the same three-milk mixture, chill, and top with whipped cream. Because eggs provide structure in traditional sponges, it helps to pick an eggless base that doesn’t crumble easily and holds together when soaked.


11. Is there a gluten-free version of tres leches cake?

A gluten-free tres leches cake recipe is absolutely possible. The three milks and whipped cream are naturally gluten-free, so the only change you need is the base cake:

  1. Choose a gluten-free cake mix that bakes up light and sturdy, or
  2. Use a home-made gluten-free sponge cake recipe that you trust.

Once baked, soak it in the milk mixture exactly as you would with a regular cake. The key is avoiding a gluten-free cake that’s too crumbly or fragile, because it still needs to hold its shape after the soak.


12. How do I turn a tres leches cake recipe into a birthday cake?

Tres leches makes an excellent birthday cake because it’s moist, creamy and not overly sweet. To turn it into a celebration centrepiece:

  1. Bake the cake in a 9×13 inch pan or slightly larger if you’re feeding many people.
  2. Chill the soaked cake overnight so it’s firm enough to handle.
  3. Pipe whipped cream swirls around the edges and add sprinkles, fruit or chocolate decorations.
  4. Write your birthday message on top using a small piping bag filled with frosting, chocolate or coloured whipped cream.

Because the cake is served cold, it’s refreshing even after a big meal and holds up well on a buffet table.


13. How long should I soak tres leches cake and can I make it ahead of time?

To let the milks really work their magic, a tres leches cake recipe needs time in the fridge:

  1. After pouring the milk mixture over the cake, let it sit at room temperature until it cools down.
  2. Then, cover it and chill for at least 4 hours.
  3. For the best texture and flavour, aim for an overnight rest (8–12 hours).

Tres leches is a perfect make-ahead dessert; you can prepare it the day before an event and simply add the whipped cream topping a few hours before serving.


14. How long does tres leches cake keep in the fridge?

Generally, a tres leches cake keeps well for about 2–3 days in the refrigerator. The milk mixture continues to keep the crumb moist, and the flavour often improves by the next day.

To store it properly:

  1. Cover the cake tightly so it doesn’t absorb fridge smells.
  2. If you’ve added fresh fruit, expect the fruit to soften slightly over time, even though the cake itself will still taste lovely.

After three days, the texture may become too soft and the whipped cream can start to lose its shape, so it’s best enjoyed within that window.


15. Can I freeze a tres leches cake?

Freezing a fully-soaked tres leches cake isn’t ideal because the texture can change once it thaws. The milk mixture and whipped cream may separate slightly, and the crumb can become unevenly soggy.

Instead, if you need to plan far ahead:

  1. Bake the sponge cake and let it cool completely.
  2. Wrap the un-soaked sponge well and freeze it.
  3. On the day before serving, thaw the sponge, soak it with the three milks and let it chill in the fridge.
  4. Finally, add the whipped cream topping on the day you plan to serve.

This way, you get the convenience of advance prep without sacrificing the smooth, creamy texture that makes a tres leches cake recipe so special.

Posted on 13 Comments

High Protein Overnight Oats | 5 Recipes (Low Calorie, Vegan, Bulking & More)

High protein overnight oats in a glass jar with berries and peanut butter, showing 5 easy ways for weight loss, bulking, vegan and more

If you like the idea of breakfast quietly getting ready for you while you sleep, high protein overnight oats are one of the easiest wins you can build into your routine. You stir a few ingredients into a jar at night, tuck it into the fridge, and wake up to something cold, creamy, filling and actually useful for your goals—whether that’s dropping a bit of weight, building muscle, eating more plant-based, or simply avoiding chaos in the morning.

At their core, high protein overnight oats are just oats soaked in liquid with enough protein-rich ingredients added to push the bowl into the 20–30 gram range. Because oats already bring slow-digesting carbohydrates and fibre, you get a steady release of energy instead of a blood-sugar spike and crash. When you add protein and a few smart toppings, you end up with a breakfast that feels like dessert in a jar but behaves like something a dietitian would approve of.

In this guide, you’ll first see a flexible base recipe for high protein overnight oats. After that, we’ll walk through four simple variations: a low-calorie, weight-loss–friendly version, a bulking/bodybuilder version, a vegan and dairy-free version, and finally a no-protein-powder version for days when you want everything to come from regular foods. Along the way, you’ll find links to deeper resources on oats, chia, peanut butter and more so you can tweak things to perfectly fit your macros and taste.


What Makes High Protein Overnight Oats So Powerful?

Before getting into measurements and jars, it’s worth understanding why this basic idea has so much staying power.

Oats are one of those old-school ingredients that have quietly earned their place in modern nutrition. They provide complex carbohydrates, a decent amount of plant protein, and a type of soluble fibre called beta-glucan. That fibre forms a gentle gel in your digestive system, slowing the release of glucose into your bloodstream and helping you feel full for longer. If you want to geek out on the details, the Harvard overview of oats explains how they support heart health, cholesterol and digestion without being complicated to cook.

Because oats are a whole grain, they also bring B-vitamins and minerals along for the ride. The key, though, is not to drown them in sugar. A piece on oatmeal as a smart breakfast choice makes the point that the base is excellent; it’s the flavoured instant sachets and excessive sweeteners that usually cause problems. In overnight oats, you’re in control of every ingredient, which makes it easy to keep things balanced.

Now add protein to that picture. Breakfasts that contain around 20–30 grams of protein are consistently associated with better appetite control and fewer random cravings later in the day. If you’re aiming to manage weight or just avoid mid-morning snack attacks, that’s a big deal. A simple explainer on protein at breakfast and weight loss breaks down why that 20-gram mark is such a useful target. High protein overnight oats are basically a painless way to hit that threshold.

Also Read: 10 High Calorie Protein Shakes & Smoothie Recipes for Healthy Weight Gain

Toppings for Extra Protein

On top of all that, you have chia seeds, nuts and seeds, Greek yogurt, soy products and protein powders—each of which brings its own extra protein, fibre and healthy fats. A quick look at chia seeds and their benefits shows how much fibre and omega-3 fat you get from just a couple of spoonfuls. When you combine all these pieces inside one jar, you get a breakfast that’s easy to prepare, genuinely satisfying, and far more interesting than a plain bowl of porridge.


Choosing Your Oats and Other Building Blocks

Although “oats are oats” is a nice simple idea, the supermarket shelves tell a different story. You’ll see steel-cut, rolled, old-fashioned, quick-cooking and instant oats, plus flavoured packets and granola mixes. The good news is that most plain, unflavoured oat types can work in high protein overnight oats, as long as you adjust the liquid and soaking time.

If you’re a bit confused by the options, MasalaMonk has a detailed guide to oat types and nutrition that walks through steel-cut, rolled, quick and instant oats in simple language. Pair that with their breakdown of oats vs oatmeal and you’ll never stand in the cereal aisle unsure what to buy again.

For overnight oats specifically:

  • Rolled or old-fashioned oats are the sweet spot. They soften nicely overnight and keep some texture.
  • Quick oats will give you a softer, more pudding-like texture and tend to thicken faster.
  • Steel-cut oats need more liquid and time; if you like a bit of chew, they can be great, but you may want to pre-soak or use slightly warm liquid.

If you want to see what happens when oats and chia get together specifically for weight loss and texture, take a look at MasalaMonk’s article on harnessing the power of oats and chia seeds for weight loss. It’s essentially a deep dive into the same idea we’re using here: using fibre and volume to keep hunger in check.

Beyond the oats themselves, you’ll be choosing:

  • Liquid – milk, oat milk, soy milk, almond milk, coconut milk or a mix. If you enjoy DIY projects, the homemade oat milk tutorial at MasalaMonk gives you a one-ingredient version that works beautifully in jars.
  • Protein source – Greek yogurt, skyr, cottage cheese, silken tofu, protein powder (whey or plant-based), or combinations of these.
  • Thickeners and boosters – chia seeds, ground flax, nut butters, seeds.
  • Flavour and sweetness – fruit, cocoa powder, vanilla, cinnamon, cardamom, a small amount of honey, jaggery or dates.

Once you see high protein overnight oats as a formula rather than a single strict recipe, it becomes much easier to customise them.

Also Read: How to Cook Perfect Rice Every Time (Recipe)


The Base High Protein Overnight Oats Recipe

Let’s start with a foundation you can come back to repeatedly. This base high protein overnight oats recipe is designed to land around the 22–28 gram protein mark for most people, depending on your protein powder and yogurt.

Ingredients for One Jar

  • ½ cup (around 40 g) rolled oats
  • ¾ cup (about 180 ml) milk of choice (dairy, soy, or another plant milk)
  • ¼ cup (60 g) thick Greek yogurt or hung curd
  • 1 scoop (20–25 g) protein powder
  • 1 tablespoon chia seeds
  • ½ medium banana, mashed or 1–2 teaspoons honey/jaggery powder
  • A pinch of salt
  • ½ teaspoon vanilla extract or ground cinnamon
  • Optional toppings in the morning: berries, sliced banana, a few chopped nuts, a teaspoon of nut butter, extra seeds

If you’re sensitive to sweetness, err on the side of less banana or sweetener at first. You can always drizzle a bit of honey or maple syrup on top the next day.

Base High Protein Overnight Oats recipe card showing a glass of creamy overnight oats with banana slices and chia seeds on a wooden board, plus a simple list of ingredients and 3-step method.
Screenshot or pin this base high protein overnight oats formula—oats, milk, Greek yogurt, protein powder and chia—then tweak the toppings to match your calories and macros for the day.

Step-by-Step Method

  1. Combine the dry ingredients.
    Add oats, protein powder, chia seeds, salt and any spices into a jar or container. Stir them together so the powder and seeds are evenly distributed.
  2. Whisk the wet ingredients.
    In a small bowl, whisk milk, yogurt and mashed banana or liquid sweetener. This little step helps your protein powder dissolve more evenly and keeps clumps away.
  3. Bring everything together.
    Pour the wet mixture over the oats mixture. Stir thoroughly, scraping down the sides and bottom of the jar. If it looks very thick, add a splash more milk; if it looks thin, remember that chia and oats will thicken it overnight.
  4. Let the fridge do the work.
    Seal the jar and refrigerate it for at least 4 hours. Overnight (8–12 hours) is ideal. A simple overnight refrigerator oatmeal recipe from Mayo Clinic notes that this kind of mixture can keep for a couple of days if stored properly, which makes prepping multiple jars at once very practical.
  5. Top and adjust in the morning.
    When you’re ready to eat, open the jar and give your high protein overnight oats a quick stir. If it’s too thick, loosen it with a little extra milk or yogurt. Then add toppings: a handful of berries, a spoonful of chopped nuts, some seeds, or a drizzle of peanut butter.

If you enjoy this kind of “prepped once, ready for several days” breakfast, you’ll probably also like MasalaMonk’s healthy oat protein bars. Those bars use oats and protein in a portable, no-sugar way that pairs naturally with this overnight oats approach.

From this base, you can move in four directions depending on your goals and preferences.

Also Read: Homemade Hot Chocolate with Cocoa Powder Recipe


Low Calorie High Protein Overnight Oats for Weight Loss

Sometimes you want your breakfast to be filling and high in protein, but not too heavy on calories. In that case, the idea is to keep protein high while dropping the overall energy density and increasing fibre and water content.

A low calorie high protein overnight oats version is especially useful when:

  • You’re in a fat-loss phase
  • You tend to snack a lot mid-morning
  • You’d rather save more calories for lunch and dinner

How to Lighten the Base Recipe

Starting from the base, you can make a few simple adjustments:

  • Reduce oats to ⅓ cup instead of ½ cup.
  • Use 1 cup unsweetened almond milk, oat milk or skimmed dairy milk instead of ¾ cup regular milk.
  • Keep ¼ cup of low-fat Greek yogurt, or use a slightly smaller portion if you’re very calorie-conscious.
  • Leave the protein powder scoop as-is so protein stays high.
  • Increase chia seeds to 1½ tablespoons; they add fibre and volume for very few additional calories.
  • Swap mashed banana for grated apple and cinnamon or use a zero-calorie sweetener if needed.
  • Focus toppings on fruit and a few seeds rather than heavy nut butters.
Low Calorie High Protein Overnight Oats recipe card showing a glass jar of creamy overnight oats topped with berries, with a simple list of lighter ingredients and quick method for a weight-loss friendly breakfast.
Save this low calorie high protein overnight oats formula for busy mornings—use less oats, more milk, extra chia and fruit for sweetness to stay full on fewer calories while still hitting 20–25 g of protein.

This gives you a jar of high protein overnight oats that feels generous in size, thanks to extra liquid and chia, but doesn’t eat up your entire calorie budget for the morning. If you like reading about how oats and chia can support fat loss specifically, the MasalaMonk post on oats and chia seeds for weight loss goes into both the science and practical tips.

Importance of Protein

On the protein side, starting your day with a substantial amount can help you feel satisfied for longer and spontaneously eat a little less later on. An accessible explainer on protein at breakfast and weight loss points out that aiming for around 20 grams or more can be particularly helpful for hunger and cravings. With this lighter jar, you remain in that target zone without feeling like you’re dieting.

If you’re building a broader plan around this approach, you might enjoy moving on to other whole-grain, high-protein options during the week, like oat-based snack bars or savoury legumes. The important thing is that this low calorie high protein overnight oats version gives you a stable, predictable base to fall back on during busy mornings.


Bulking and Bodybuilder High Protein Overnight Oats

Of course, not every phase is about eating less. When you’re trying to add muscle mass, train harder or simply maintain weight on an active schedule, you often need more calories in a compact, digestible form. That’s where a bulking version of high protein overnight oats shines.

Instead of nibbling on toast after toast, you can get a serious hit of calories and protein in one bowl or jar, without feeling like you’re stuffing yourself.

Also Read: Peanut Butter Cookies (Classic Recipe & 3 Variations)

Turning the Base Into a Bulking Jar

Using the base high protein overnight oats recipe, make the following changes:

  • Increase oats to ¾ cup for more carbohydrates and volume.
  • Use 1 cup whole milk or even add a splash of cream if you’re really struggling to get enough calories.
  • Keep ¼ cup Greek yogurt, or go up to ⅓ cup if you enjoy the tang.
  • Keep the full scoop of protein powder.
  • Add 1–2 tablespoons peanut butter or almond butter into the mixture.
  • Top with 1–2 tablespoons chopped nuts (almonds, walnuts, peanuts) and a spoon of seeds in the morning.
  • If you tolerate sugar well, a small drizzle of honey or dates syrup can add pleasant sweetness and extra energy.
Bulking High Protein Overnight Oats recipe card showing a creamy jar of overnight oats on a wooden board with nuts and chia seeds, plus a short list of higher-calorie ingredients and a simple how-to for mass-gainer breakfast.
Use this bulking high protein overnight oats formula on heavy training days—extra oats, whole milk, Greek yogurt, protein powder and nut butter give you a dense, 30+ gram protein jar that helps you hit your calorie surplus without feeling stuffed.

This kind of bodybuilder high protein overnight oats can easily reach the 500–700 kcal range depending on your exact ingredient choices, while still leaving you feeling comfortable rather than bloated. It’s the sort of breakfast that pairs nicely with heavy training days or long work mornings when lunch is far away.

Why this combination of Oats and Peanut Butter works

The combination of oats and peanut butter, in particular, is a classic for a reason. It brings complex carbohydrates, protein, fibre and healthy fats together in a simple package. MasalaMonk has a full article on oatmeal and peanut butter as a powerful combination that, while written with weight management in mind, also explains why the pairing is so effective for energy and satiety.

For extra protein and crunch, it’s worth looking at which nuts and seeds give you the most per serving. The MasalaMonk guide to protein-packed nuts and seeds breaks down the standouts, making it easier to choose toppings that aren’t just tasty but also macro-friendly for a bulking phase.

Also Read: Béchamel Sauce for Lasagna: Classic, Vegan & Ricotta Sauce Recipe


Vegan and Dairy-Free High Protein Overnight Oats

If you avoid dairy or just prefer a plant-based diet, you might wonder whether high protein overnight oats are still realistic. The good news is that they absolutely are. You simply shift the emphasis towards soy, pea protein and seeds instead of yogurt, cottage cheese or whey.

A vegan high protein overnight oats jar can still hit the same 20–25 gram range while feeling light and fresh.

Building a Plant-Based High Protein Jar

Here’s how you can adapt the base recipe without any dairy:

  • Use ½ cup rolled oats, as usual.
  • Swap dairy milk for 1 cup unsweetened soy milk; it’s one of the highest-protein plant milks.
  • Replace Greek yogurt with ¼ cup soy yogurt or a few spoons of silken tofu blended into the liquid.
  • Choose a plant-based protein powder, such as pea, soy or a rice-pea blend.
  • Keep at least 1 tablespoon chia seeds, and consider adding some ground flax for extra omega-3 fats.
  • Sweeten naturally with mashed banana, blended dates or a small spoonful of maple syrup.
Vegan High Protein Overnight Oats recipe card showing a jar of creamy dairy-free overnight oats with berries and seeds, plus a simple list of plant-based ingredients and a quick how-to for a 20–25 g protein breakfast.
Screenshot this vegan high protein overnight oats formula for dairy-free mornings—rolled oats, soy milk, plant-based protein powder, chia seeds and fruit give you a creamy 20–25 g protein jar without any yogurt or whey.

Chia seeds play an especially important role in vegan high protein overnight oats, because they add both protein and fibre, helping you reach your targets without relying on dairy. For a deeper look at why these tiny seeds are often described as nutritional heavyweights, you can read a concise summary on chia seed nutrition and benefits, which explains their fibre, protein and omega-3 content in a straightforward way.

If you’re looking to generally increase your plant-based protein intake at breakfast, MasalaMonk’s article on high protein plant-based breakfast ideas fits nicely alongside this jar formula. You could rotate between tofu scrambles, chickpea patties and this vegan high protein overnight oats recipe throughout the week to keep things interesting.

Also Read: Cottage Cheese Lasagna Recipe | Chicken, Spinach, & Ricotta


High Protein Overnight Oats Without Protein Powder

Protein powders are convenient, versatile and usually taste good in overnight oats. Even so, you might prefer to get all your protein from “regular” foods, or you may occasionally run out of your favourite tub. In those situations, high protein overnight oats without protein powder are absolutely possible.

The key is to lean heavily on Greek yogurt, curd, cottage cheese or paneer, along with seeds and milk.

A Whole-Food, No-Powder Version

Use this pattern when you’d rather skip the scoop:

  • ½ cup rolled oats
  • ½–¾ cup milk or fortified plant milk
  • ½ cup thick Greek yogurt or hung curd
  • Optional: ¼ cup soft paneer or cottage cheese, crumbled finely
  • 1–2 tablespoons chia seeds or a mix of chia and ground flax
  • A little honey, jaggery or mashed fruit for sweetness
  • Cinnamon, cardamom or vanilla for flavour
  • Fruit and a small handful of chopped nuts on top
High Protein Overnight Oats without protein powder recipe card showing a creamy jar of oats with seeds and fruit, plus a simple list of whole-food ingredients like yogurt, milk, paneer and chia.
Keep this high protein overnight oats formula handy for days you don’t want to use protein powder—Greek yogurt, milk, a little paneer or cottage cheese and chia seeds give you a 20–25 g protein breakfast built entirely from everyday foods.

Greek yogurt can provide 8–10 grams of protein in just 100 grams, and cottage cheese or paneer adds even more. Between that, the milk and the seeds, you can still reach a meaningful protein intake without relying on any processed powders.

You might see recipes online that add raw egg whites straight into overnight oats to raise the protein. It’s best to be cautious there. If you do experiment, use pasteurised liquid egg whites and heat the mixture gently before serving rather than eating them fully raw from the fridge.

For the bigger picture—how this jar fits into your whole day—it’s worth checking out MasalaMonk’s article on how to eat 100 grams of protein a day. That guide shows you how a strong breakfast like high protein overnight oats can take some pressure off lunch and dinner, especially if you’re trying to hit more ambitious protein targets.

Also Read: French Toast Sticks (Air Fryer + Oven Recipe) — Crispy Outside, Custardy Inside


Flavour Ideas to Keep High Protein Overnight Oats Interesting

Once you understand the structure of high protein overnight oats, you can create an almost endless range of flavours without losing the macro balance. Keeping things exciting is important; even the healthiest recipe will get abandoned if it feels boring after three days.

Here are a few flavour profiles you can use across all four variations:

Chocolate Peanut Butter High Protein Overnight Oats

Stir cocoa powder into the base mixture along with a spoon of peanut butter. In the bulking version, you can be generous with both; in the low-calorie version, go lighter on the peanut butter and rely more on cocoa and a few crushed peanuts for flavour. A little chopped dark chocolate on top makes it feel like dessert.

If you want to understand why oats and peanut butter are such a satisfying combination, the MasalaMonk piece on oatmeal and peanut butter explores how they work together for fullness and nutrition.

Chocolate Peanut Butter High Protein Overnight Oats recipe card showing a jar of chocolate overnight oats on a wooden board with peanuts, cocoa and peanut butter, plus a simple list of ingredients and a quick how-to.
Turn your basic high protein overnight oats into a chocolate peanut butter jar—just add cocoa, peanut butter and a chocolate or vanilla protein powder for a dessert-style breakfast that still delivers around 25–30 grams of protein.

Apple Cinnamon High Protein Overnight Oats

Grate half an apple into the jar before refrigerating and add a generous pinch of cinnamon. The apple softens overnight, adding natural sweetness and volume. In the morning, you can top with a few raisins and a sprinkle of chopped walnuts to echo classic apple-pie flavours while still keeping the jar balanced.

Apple Cinnamon High Protein Overnight Oats recipe card showing a jar of creamy oats with apple slices and cinnamon on a wooden board, plus a simple list of ingredients and a quick how-to.
Save this apple cinnamon high protein overnight oats formula for cozy mornings—grated apple, cinnamon, oats, Greek yogurt, protein powder and chia give you warm apple-pie flavour with 20–25 grams of protein in each jar.

Pumpkin Pie High Protein Overnight Oats

For a seasonal twist, add a few spoons of pumpkin purée, cinnamon, nutmeg and a touch of sweetener. This works especially well with the no-powder or vegan versions, as the pumpkin adds thickness and comfort without much extra fat. A small handful of toasted pumpkin seeds on top brings extra crunch and protein.

Pumpkin Pie High Protein Overnight Oats recipe card showing a jar of pumpkin-coloured overnight oats topped with nuts and cinnamon on a wooden board, with a simple ingredient list and quick how-to for a cozy high protein breakfast.
Pin this pumpkin pie high protein overnight oats formula for autumn—stir pumpkin purée, cinnamon, nutmeg, oats, Greek yogurt, protein powder and chia together for a dessert-style jar that still delivers around 20–25 grams of protein.

Tiramisu-Inspired High Protein Overnight Oats

Add a shot of strong coffee (or a spoonful of instant coffee dissolved in your milk), along with cocoa and vanilla. In the morning, dust the top with a little more cocoa powder and add a spoon of yogurt for a “cream” effect. This variation leans heavily on the idea that high protein overnight oats can feel like a treat rather than a chore.

Tiramisu-Inspired High Protein Overnight Oats recipe card showing a jar of coffee-and-cocoa overnight oats with a creamy topping and cocoa dusting, alongside a simple ingredient list and quick how-to for a 20–25 g protein breakfast.
Turn your morning coffee into breakfast with this tiramisu-inspired high protein overnight oats—espresso, cocoa, oats, Greek yogurt, protein powder and chia come together for a dessert-style jar that still delivers around 20–25 grams of protein.

Berry Cheesecake High Protein Overnight Oats

Use a mix of Greek yogurt and cottage cheese in the base, plus a little vanilla and lemon zest. Top with a small handful of mixed berries. This flavour profile sits very naturally inside the no-powder version, because the dairy itself creates that cheesecake-like tang and creaminess.

You can also borrow ideas from other jar-style recipes. For instance, MasalaMonk’s chia pudding with steel-cut oats and mango uses layered textures and fruit in a way that translates beautifully to high protein overnight oats. The formats are similar; only the exact macro balance and ingredients change.

Berry Cheesecake High Protein Overnight Oats recipe card showing a jar of creamy cheesecake-style overnight oats topped with mixed berries, alongside a short ingredient formula and step-by-step method including folding in berries and topping them in the morning.
Screenshot this berry cheesecake high protein overnight oats formula for days you want dessert at breakfast—Greek yogurt, soft paneer or cottage cheese, oats, protein powder and chia make a tangy cheesecake-style base, then you fold in berries and add a fresh berry topping in the morning for 20–25 grams of protein per jar.

Also Read: 10 Best Chicken Sandwich Recipes (BBQ, Parm, Buffalo & More)


Making High Protein Overnight Oats Part of Your Week

A single jar is great, but where high protein overnight oats really shine is in repeatable meal prep. Because the ingredients are simple and inexpensive, you can batch-prepare several jars at once and line them up in the fridge.

A few practical strategies make life easier:

  • Choose one or two base patterns for the week—perhaps the low calorie version on workdays and the bulking version on heavy training days.
  • Prep 3–4 jars of the same base high protein overnight oats, then vary the toppings in the morning with different fruits, nuts and spices so you don’t get bored.
  • Keep a small box of mixed nuts and seeds ready to sprinkle over the top; the guide to protein-rich nuts and seeds can help you stock up on the most efficient options.
  • On days when you’re in the mood for something different, switch to a bar or baked format like the healthy oat protein bars or an oat-based snack, but keep the overall ingredients similar.

Overnight oats also sit comfortably inside a more general pattern of eating that emphasises whole grains, plenty of plants and adequate protein. If you enjoy exploring that style of eating, resources like the Harvard Healthy Eating Plate give a simple visual summary of how to balance your plate (or jar) without obsessing over exact numbers.

Also Read: Vegan French Toast: 6 Easy Recipes (Pan, Air Fryer, GF & High-Protein)


Bringing It All Together

High protein overnight oats are one of those rare habits that manage to be practical, enjoyable and nutritionally solid at the same time. Once you’re comfortable with the base method—mix, soak, top—you can adapt them in countless ways.

You’ve seen:

  • A base recipe that can easily reach 20–30 grams of protein.
  • A low-calorie version that supports weight loss and appetite control while still feeling generous.
  • A bulking and bodybuilder version for days when you need more energy and strength.
  • A vegan and dairy-free version that keeps everything plant-based without sacrificing protein.
  • A no-powder version built entirely from regular foods like yogurt, paneer, milk and seeds.

From there, you can apply as many flavour layers as you like—chocolate peanut butter, apple cinnamon, pumpkin pie, tiramisu and beyond—while still respecting your macro goals. You can keep things simple on busy weekdays and get creative when you have more time, all without changing the underlying habit of prepping your high protein overnight oats the night before.

With a few jars, some rolled oats, a protein source you like and a handful of toppings, you’re only a five-minute stir away from a breakfast that quietly takes care of you every morning.

Also Read: Pumpkin Spice, Your Way: Master Blend, Variations & Real-World Recipes


FAQs

1. How much protein should be in high protein overnight oats?

For most people, high protein overnight oats make sense when each serving delivers at least 20 grams of protein. Plenty of bowls will land between 20–30 grams, depending on how much yogurt, milk and protein powder you use. That kind of overnight oats protein content is usually enough to support better appetite control and muscle repair after training.

To nudge your jar into the high end of that range, simply combine rolled oats with a scoop of protein powder, Greek yogurt and a little milk. Together, those ingredients turn regular oats into genuinely high protein overnight oats instead of just a carb-heavy breakfast.


2. Are high protein overnight oats good for weight loss?

Yes, high protein overnight oats can fit very well into a fat-loss plan, especially when you build low calorie high protein overnight oats on purpose. Protein and fibre help you feel full, which makes it easier to avoid random snacking later in the day. Meanwhile, the slow-digesting carbs from oats give you steady energy rather than a crash.

To keep your bowl helpful for weight loss, emphasise high protein low calorie overnight oats: reduce the amount of oats slightly, choose a lean protein source, increase chia seeds or fruit for volume, and be modest with nut butters and sugary toppings. In that way, you enjoy a big jar, satisfying texture and a proper hit of protein without blowing through your calorie budget.


3. Which oats are best for high protein overnight oats?

Rolled or old-fashioned oats tend to be the best choice for high protein overnight oats because they soften nicely overnight while still keeping some bite. Quick oats also work, particularly if you enjoy a smoother, pudding-like texture, although they can get a bit mushy if you leave the jar for several days.

Steel-cut oats are an option too, yet they usually need more liquid and a longer soak. If you like a chewier texture, you can mix a spoonful of steel-cut oats into rolled oats and adjust the liquid accordingly. In short, any plain oat variety can be used, but rolled oats give the most reliable texture for high protein overnight oats recipes.


4. What is the best protein powder for overnight oats and oatmeal?

There isn’t a single “best protein powder for overnight oats,” because it depends on your taste, digestion and dietary needs. Even so, there are a few reliable patterns. Whey concentrate or isolate dissolves easily and creates creamy whey protein overnight oats with a dessert-like texture. Casein, on the other hand, thickens the mixture a little more and keeps you full for longer.

If you prefer a plant-based option, pea, soy or a rice–pea blend often makes the best protein powder for oats and oatmeal because those powders usually mix smoothly without chalkiness. Flavours such as vanilla, chocolate or cinnamon roll pair especially well with oats. Regardless of which you choose, start with a small scoop and adjust the liquid until your high protein overnight oats feel just right.


5. Can I make high protein overnight oats without protein powder?

Absolutely. High protein overnight oats without protein powder are easy to build if you lean on whole foods. Thick Greek yogurt, hung curd, cottage cheese or paneer, plus milk and seeds, can all add meaningful protein. When you combine these with oats, it’s still simple to reach 20 grams of protein per serving.

To do this, simply increase your yogurt or curd to at least half a cup, keep a generous splash of milk, and include one or two tablespoons of chia or other seeds. That way, you end up with high protein overnight oats that rely entirely on familiar ingredients and still feel indulgent and creamy.


6. Can I use whey protein in overnight oats, or will it get gritty?

You can definitely use whey protein in overnight oats, and it usually blends in very well. To avoid any gritty texture, first whisk the whey with your milk and yogurt before pouring it over the oats. Once everything is smooth, stir in the oats and chia seeds. After chilling, whey protein overnight oats become thick, creamy and easy to eat straight from the jar.

Because whey tends to dissolve quickly, it is particularly good for people who want high protein overnight oats with a simple, milkshake-like flavour. If your scoop is very sweet, you may not need extra sugar, honey or banana at all.


7. Is it possible to make high protein overnight oats low carb?

It’s tricky to make overnight oats truly low carb, since oats themselves are a carbohydrate-rich grain. Nevertheless, you can move toward high protein low carb overnight oats by adjusting the ratios. For example, you can use a slightly smaller portion of oats, then increase protein sources such as Greek yogurt, protein powder and seeds.

In addition, focus on toppings like berries and nuts rather than bananas, dried fruit or large amounts of honey. The result will still contain some carbs from the oats, yet the overall balance shifts toward higher protein, more healthy fats and fewer sugars. As a result, your high protein overnight oats feel steadier on blood sugar while still being enjoyable.


8. Are high protein overnight oats suitable for vegans and people who are dairy-free?

Yes, it’s straightforward to make vegan high protein overnight oats. Instead of dairy milk and yogurt, choose soy milk, almond milk or oat milk and use a plant-based yogurt or silken tofu. Then add a scoop of vegan protein powder made from pea, soy or a blend, and finish with chia seeds, flaxseeds and nuts.

This approach gives you vegan high protein overnight oats that still reach a solid protein target, without any dairy at all. On top of that, you add extra fibre and good fats, which makes the jar satisfying and nutrient-dense even without animal products.


9. How long do high protein overnight oats last in the fridge?

Typically, high protein overnight oats keep well for around three days in the fridge when stored in a sealed container. The texture often improves on day two as the oats and chia seeds absorb more liquid. After that, the mixture can become very thick, and fruit mixed in from the beginning may start to soften too much.

If you want to meal prep several portions, it’s better to prepare the base high protein overnight oats in jars and then add fresh toppings on the day you plan to eat each one. In that manner, you get the convenience of batch-prep while keeping the flavours and textures bright.


10. Can high protein overnight oats really replace a full breakfast?

For most people, a well-balanced serving of high protein overnight oats can absolutely stand in for a complete breakfast. You’re getting complex carbohydrates from oats, a solid chunk of protein, and depending on your toppings, fibre, healthy fats and micronutrients from fruit, nuts and seeds. That combination tends to keep you full and focused for several hours.

To turn the jar into a more substantial meal, you can simply scale the recipe slightly upward or add an extra side such as a small piece of fruit or a handful of nuts. Consequently, high protein overnight oats become a flexible foundation that you can adjust up or down depending on your hunger, training schedule and goals.