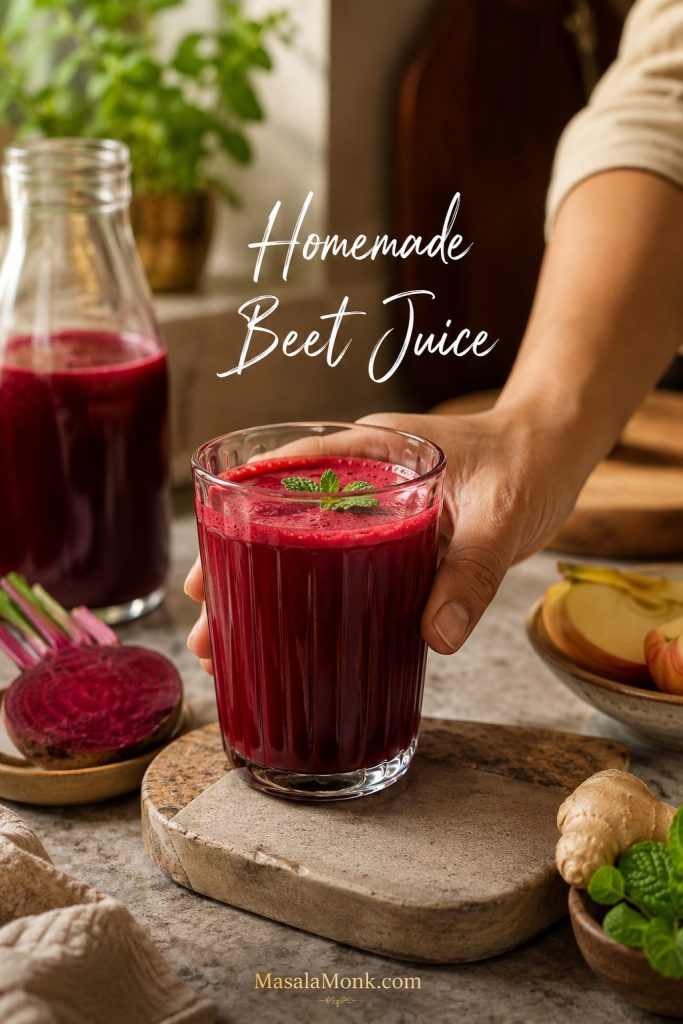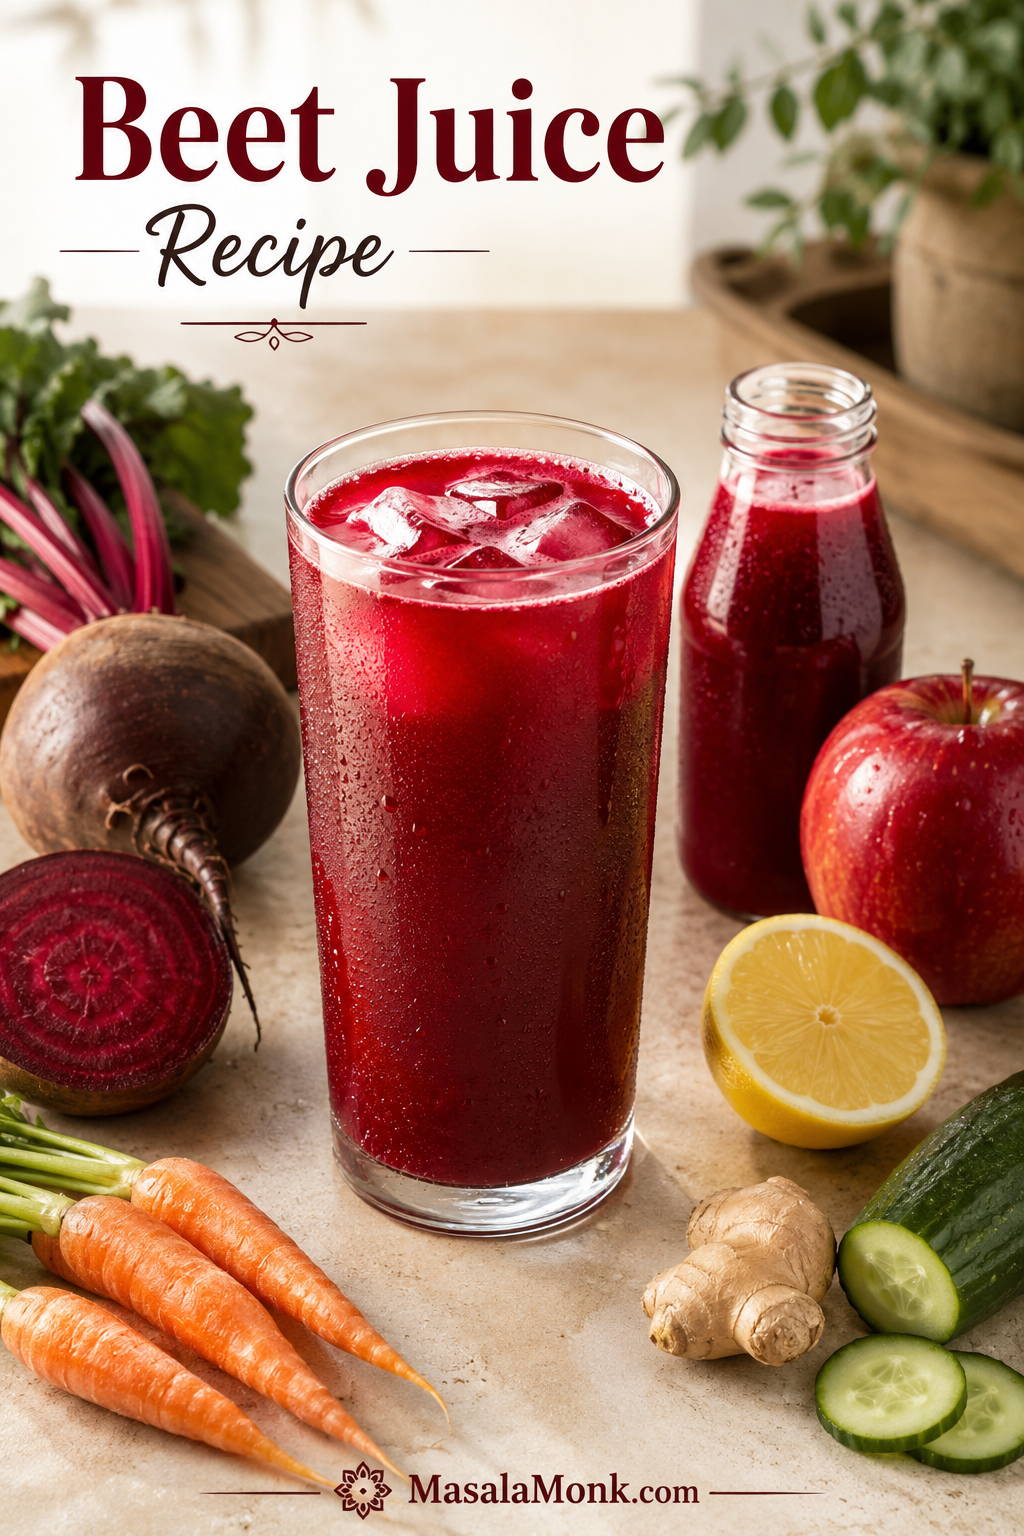
Beet juice can go one of two ways. Made carelessly, it tastes earthy, heavy, and a little too close to drinking a glass of soil. Made with the right balance, it turns into a chilled, ruby-red juice that tastes lively, lightly sweet, tart, and just spicy enough from ginger.
This beet juice recipe is for that second version. It uses raw beetroot for color and depth, carrot and apple for natural sweetness, lemon for brightness, ginger for lift, and optional cucumber to make the whole glass easier to sip. The first taste should feel clear and awake, not muddy.
This is not straight beetroot juice. It is a balanced beet-carrot-apple juice designed to taste cool, tart, lightly sweet, and easy to finish.
You can make this beetroot juice recipe in a juicer for the smoothest texture, or in a blender if you do not own a juicer. The blender version needs water and proper straining, but it still works beautifully when you know what the mixture should look and feel like. It is especially helpful if you are making it for the first time, dislike plain beetroot juice, or want a balanced glass without added sugar.
No juicer at home? Skip to the blender method. Already ready to make it? Jump to the full recipe card.
Start with the quick recipe, then come back to the sections below when you want to adjust the flavor, make it without a juicer, store it safely, or understand what the health claims actually mean.
Beet Juice Recipe Guide
Use this as a quick recipe first, then as a troubleshooting guide whenever you want a smoother blender batch, a less earthy glass, or a safer way to store leftovers.
Make the Juice
Use, Store & Understand It
Quick Answer: How to Make Beet Juice
To make beet juice, juice or blend raw beetroot with carrot, apple, lemon, ginger, and optional cucumber. If using a juicer, feed the produce through the machine, then stir in the lemon juice and serve over ice. If using a blender, add cold water, blend until smooth, then strain through a nut milk bag, cheesecloth, or fine mesh strainer.
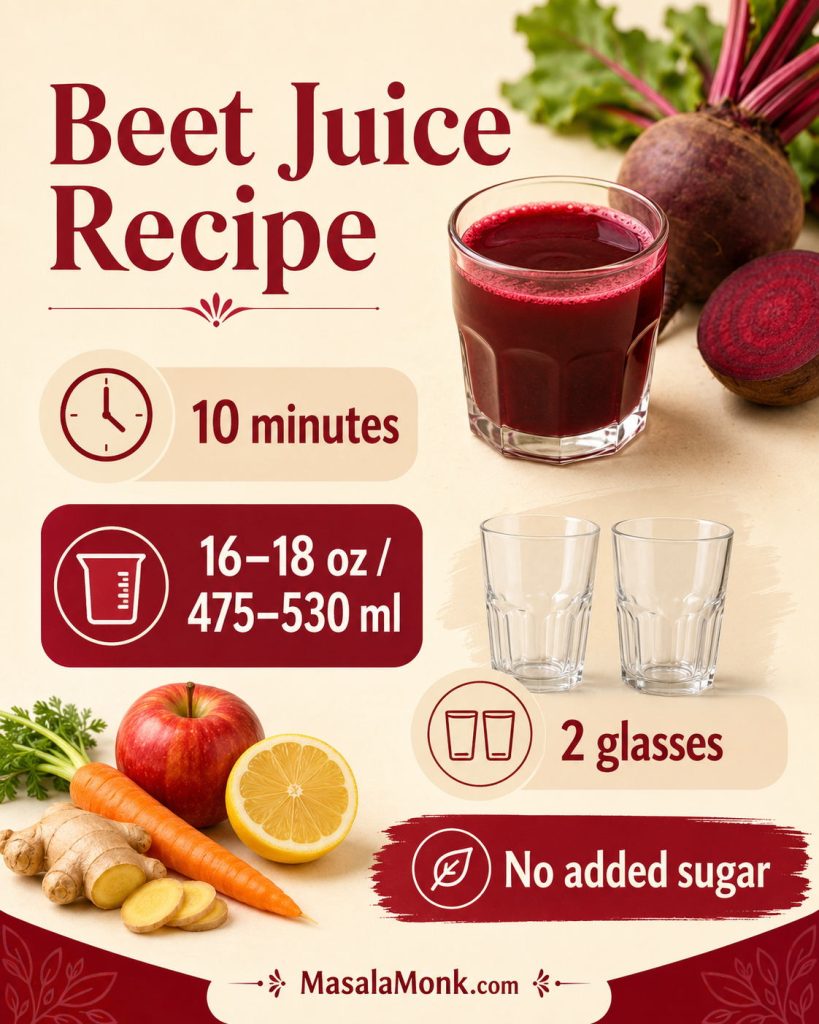
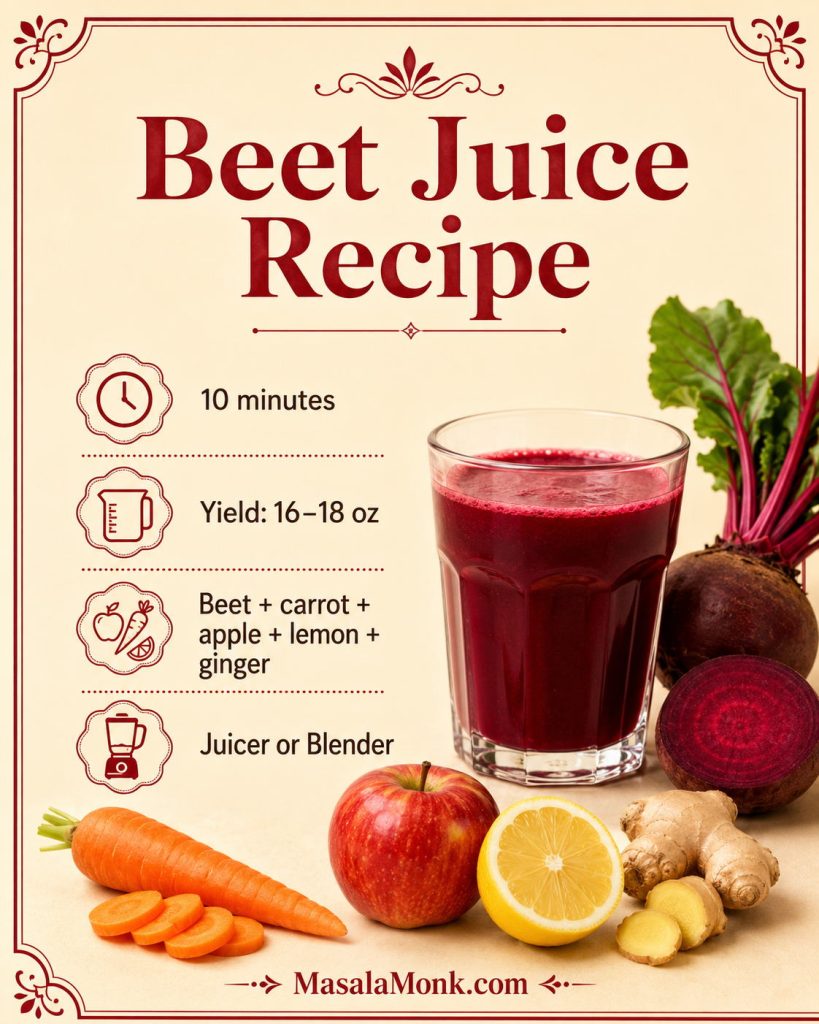
This beetroot juice recipe makes about 16–18 oz / 475–530 ml, enough for 2 standard 8 oz / 240 ml glasses or 3 smaller 5 oz / 150 ml servings. It takes about 10 minutes, uses no added sugar, and tastes brightest right after making. Here, beet juice and beetroot juice mean fresh juice made from raw red beetroot, not pickled beet brine, canned beet liquid, or beet powder mixed into water.
Easiest first glass: if your first memory of beet juice is something thick, muddy, or aggressively earthy, do not start with straight beetroot. Make the apple-beet-carrot version first, serve it over ice, then adjust lemon, cucumber, or ginger after tasting.

Still worried about the earthy flavor? See the taste fixes before you make your first batch.
Quick Beet Juice Formula
- Base: 1 medium-large beetroot or 2 small beets, about 225–250 g / 8–9 oz
- Balance: 2 carrots and 1 large apple for natural sweetness
- Brightness: ½ lemon, about 15–20 ml juice
- Lift: ½–1 inch fresh ginger, about 5–10 g
- Lightness: ½ cucumber, optional, about 75–100 g / 3–4 oz
- Blender only: ½–1 cup / 120–240 ml cold water
- Serve: over ice, right after making
The 10-Minute Version
Juice or blend 1 beetroot, 2 carrots, 1 apple, ½ lemon, ½–1 inch ginger, and optional cucumber. If blending, add ½ cup / 120 ml cold water, blend for 45–60 seconds, strain well, and serve over ice. Add more water only if the blender needs help.
Serve it with breakfast, as an afternoon caffeine-free drink, or as a small pre-workout glass after you know how your body handles it.
Why This Beet Juice Recipe Works
The trick is not hiding the beetroot. It is balancing it. Beetroot gives the drink its deep color, earthy sweetness, and unmistakable flavor, but it needs the right supporting ingredients so the glass does not taste flat or muddy.
Carrot is the quiet helper here: it softens beetroot’s rooty edge without making the glass taste like fruit punch. Apple makes the drink more beginner-friendly. Lemon is the difference between a dull beet juice and one that tastes like it belongs in a glass with ice. Ginger adds a bright, spicy finish. Cucumber is the ingredient to add when the juice feels a little too serious, dense, or beet-forward.
For a beginner-friendly glass, keep beetroot to roughly one-third of the total produce volume and let carrot, apple, cucumber, and citrus do the balancing. If your batch tastes too rooty or heavy, it usually does not need sugar first. It needs acid, coldness, dilution, or a better mix.
Temperature matters too. Room-temperature juice tastes flatter and heavier than a chilled glass, so use refrigerated produce when possible or serve the finished glass over plenty of ice. The final drink should pour easily, taste lightly sweet and tart, and finish with gentle ginger warmth.
What Does Beet Juice Taste Like?
The drink tastes earthy, lightly sweet, mineral-like, and bold. That rooty note is the part people either love or struggle with. Straight beetroot juice can feel intense, especially if you are new to it.
The first sip of this version should be cool and lightly tart, with apple-carrot sweetness in the middle and gentle ginger warmth at the end. Juicer beet juice will feel thinner and clearer. The blender version, even after straining, may feel slightly fuller. Both should still pour like juice, not spoon like a smoothie.
Best beginner version: Use 1 small beet, 2 carrots, 1 apple, ½ lemon, ½ inch ginger, and ½ cucumber. This keeps the beet flavor present but not overpowering.
Once you like the base, adjust one thing at a time: more lemon for tartness, more apple for sweetness, more cucumber for lightness, or more ginger for heat.
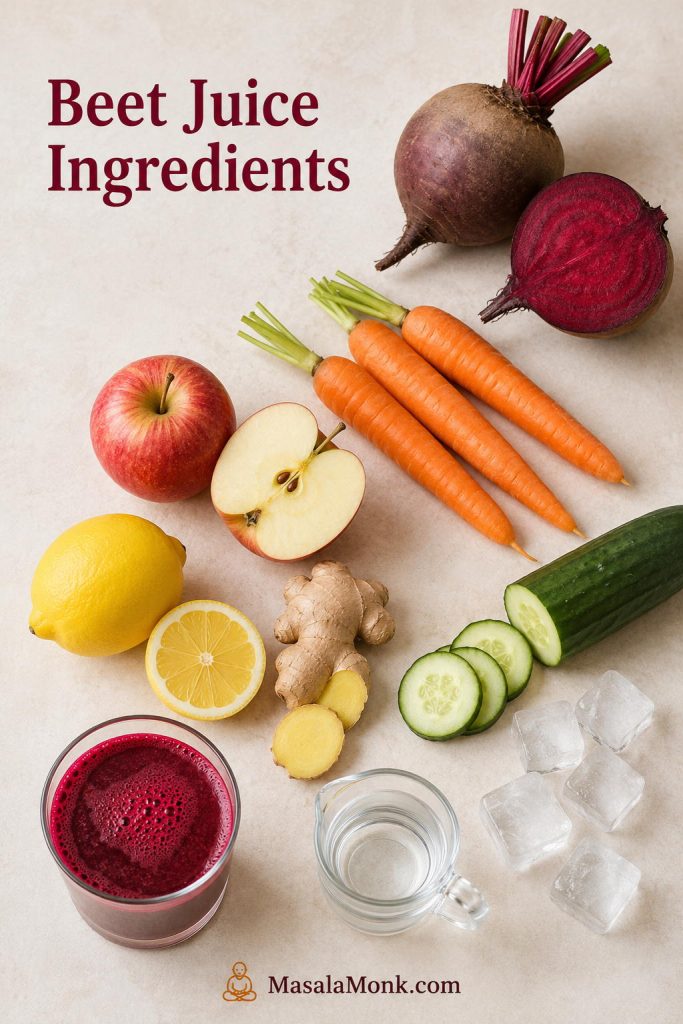
Ingredients for the Best Beet Juice
The best glass needs contrast. You want enough beetroot for color and flavor, enough natural sweetness to soften the mineral notes, enough citrus to keep it crisp, and enough chill or cucumber to make it easy to sip.
| Ingredient | Amount | Why it matters |
|---|---|---|
| Raw red beetroot | 1 medium-large or 2 small beets, about 225–250 g / 8–9 oz | The base of the juice; gives color, earthy sweetness, and the classic beet flavor. |
| Carrots | 2 medium, about 120–150 g / 4–5 oz | Adds natural sweetness and helps round out beetroot’s deeper edge. |
| Apple | 1 large, about 170–200 g / 6–7 oz | Makes the juice more beginner-friendly and naturally sweet without added sugar. |
| Lemon | ½ lemon, about 15–20 ml juice | Brightens the juice and keeps the beet flavor from tasting flat. |
| Fresh ginger | ½–1 inch, about 5–10 g | Adds warmth, sharpness, and a lively finish. |
| Cucumber, optional | ½ small cucumber, about 75–100 g / 3–4 oz | Lightens the flavor and makes the juice more refreshing. |
| Cold water | ½–1 cup / 120–240 ml, blender method only | Helps the blender move and controls thickness. Do not add it when using a juicer. |
| Ice | As needed | Makes the finished glass more refreshing. |
Juice yield varies by beet size, carrot freshness, apple variety, juicer type, and how firmly you press the pulp in the blender method. The amounts above usually make about 16–18 oz / 475–530 ml strained juice. A juicer usually gives the clearest yield without added water, while the blender version may make a little more volume because of the water, but with a slightly softer flavor.
Beetroot
Use raw red beets for the brightest color and crispest flavor. Scrub them well because beets grow in soil and often carry grit around the root end. Peeling is optional if the beets are tender-skinned and scrubbed well, but peel them if the skin is rough, bitter, waxed, or hard to clean.
How to Choose Beets for Juice
Choose firm, heavy beets with smooth skin and no soft, wrinkled, moldy, or badly bruised spots. Small to medium beets often taste sweeter and less woody than very large ones. If the beets come with greens attached, trim the greens off before storing, then scrub the roots well before peeling or cutting.
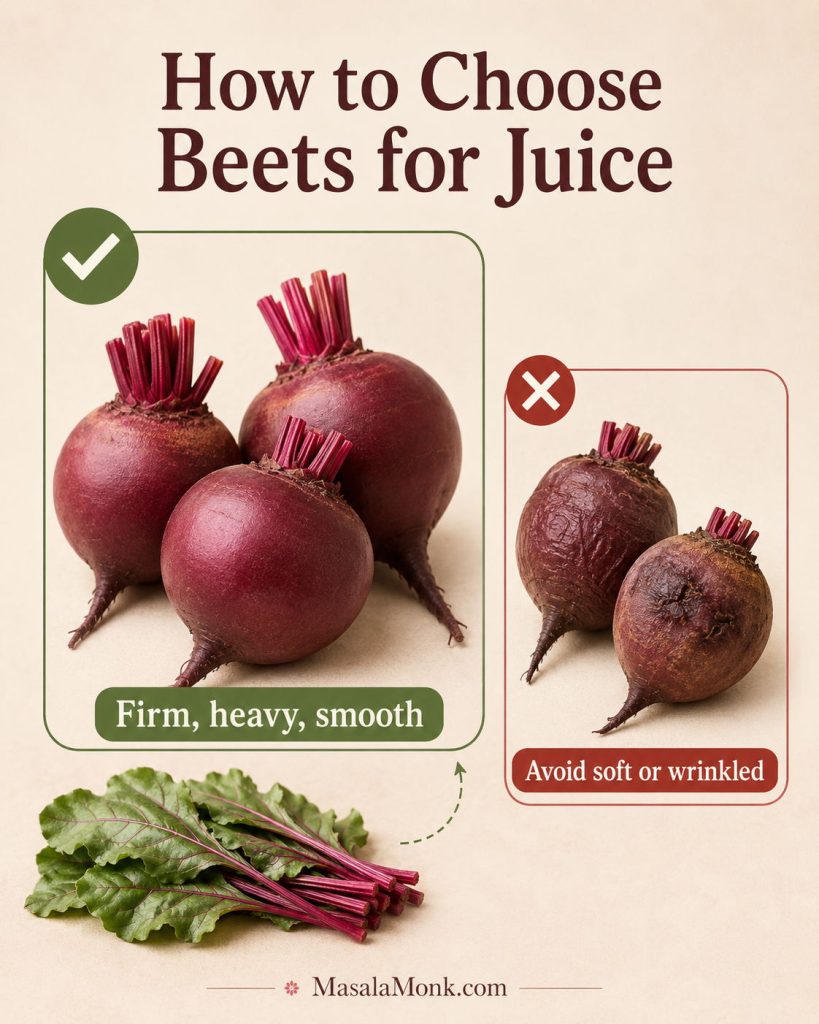
If your beets come with greens, save the tender leaves for cooking rather than adding a large handful to this juice. Beet greens can make the drink taste more grassy and bitter.
Carrot
Carrot is one of the easiest ways to make this drink taste better. It brings mellow sweetness without turning the glass into a fruit-heavy juice, and it also works beautifully in apple beet carrot juice, often called ABC juice. MasalaMonk’s guide to vitamins in carrots goes deeper into carrot juice, raw carrots, cooked carrots, and their key nutrients.
Apple
A crisp sweet-tart apple is ideal. Gala, Fuji, Honeycrisp, Pink Lady, or any good eating apple will work. Green apple gives a sharper, less sweet result. Red apple gives a softer, sweeter glass.
Lemon or Lime
Citrus makes the beet taste awake. Stir lemon juice in at the end if you are using a juicer, or peel the lemon and blend it with the produce if you are using a blender. Avoid blending too much white pith because it can make the drink bitter.
Ginger
Fresh ginger makes the flavor lighter and less heavy. Start with ½ inch if you are sensitive to heat. Use the full inch if you want a stronger beet ginger juice with a spicy finish.
Cucumber or Celery
Cucumber is optional, but it is one of the most useful ways to make the glass easier to drink. It increases the yield, cools the flavor, and gives the juice a more refreshing finish. Celery works too, though it tastes more savory and slightly salty. If you like the cucumber-lemon-ginger side of this recipe but want something lighter than juice, MasalaMonk’s guide to cucumber, lemon, and ginger water is a good companion.
Raw Beets vs Cooked Beets for Juice
Use raw beets for the most refreshing beet juice. Raw beetroot gives the drink a crisp, earthy-sweet flavor. Cooked beets are softer and sweeter, but they make the drink taste more like cooked beet puree than just-made juice.
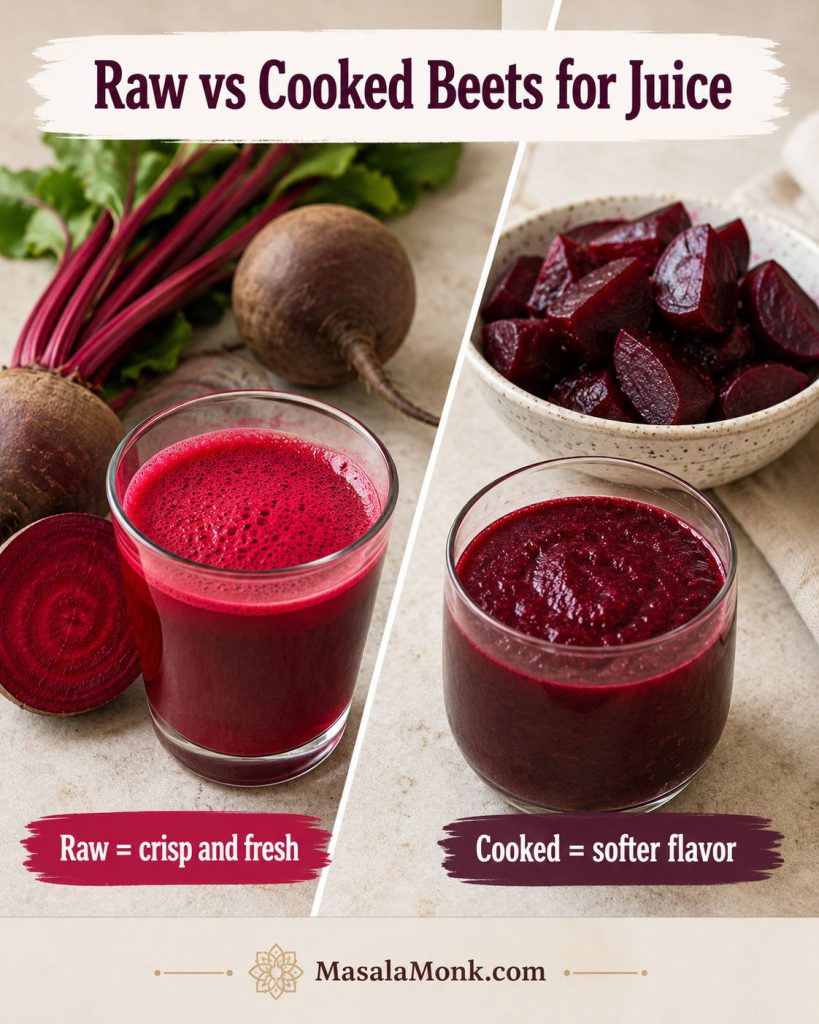
If you only have cooked beets, you can blend them with apple, lemon, ginger, and cold water, then strain the mixture. However, cooked beets do not work well in most juicers, and they will not give the same lively flavor as raw beetroot.
Avoid pickled beets for this recipe unless you specifically want a vinegar-heavy drink. Pickled beet juice has a completely different flavor profile because it usually contains vinegar, salt, and sometimes sugar.
How to Make Beet Juice in a Juicer
The juicer method is the fastest way to make a smooth, clear glass. It gives you the crispest flavor because you do not need to dilute the produce with water.
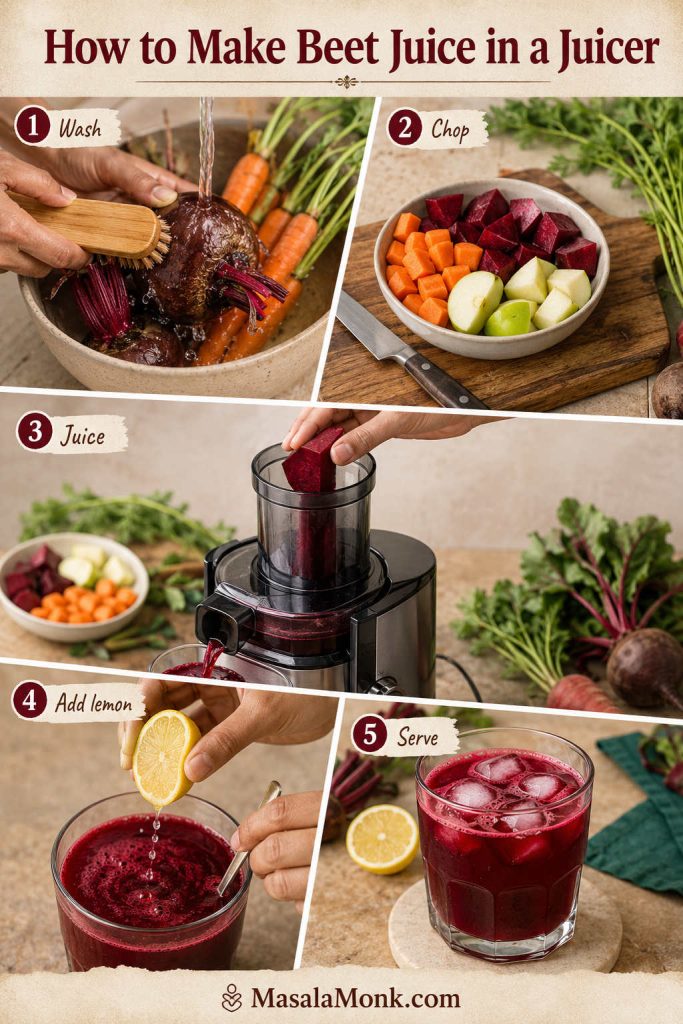
- Wash and scrub the produce. Pay special attention to the beetroot and carrots.
- Trim the beetroot. Cut off the root end and any rough top area.
- Peel if needed. Peeling is optional for tender-skinned beets that have been scrubbed well. Peel rough, waxed, or dirty beets.
- Cut everything to fit the juicer chute. Do not force oversized beet chunks through the machine.
- Juice the beet, carrots, apple, cucumber, and ginger. Alternate hard and softer produce so the juicer runs smoothly.
- Stir in lemon juice. Adding lemon at the end keeps the citrus flavor lively.
- Serve over ice. Drink right away for the brightest taste.
The finished juice should pour easily and look deep ruby-red, not thick like puree. Fresh juice naturally separates as it sits, so stir or shake it before drinking. If the flavor tastes flat, add a little more lemon. If it feels too heavy, pour it over extra ice or add cucumber next time.
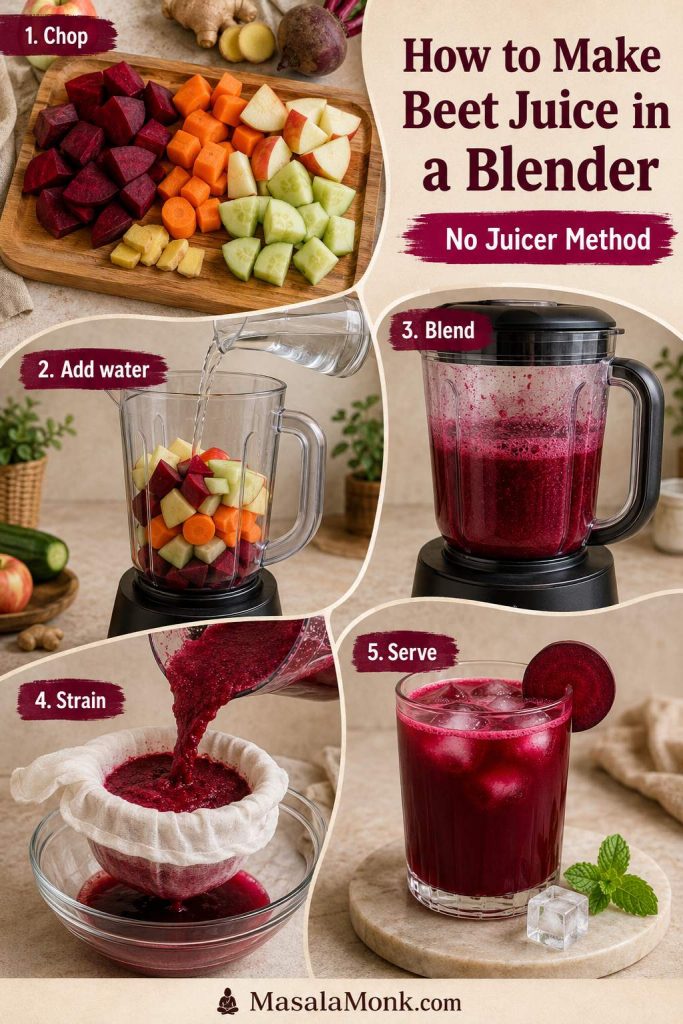
How to Make Beet Juice in a Blender Without a Juicer
If you came here wondering how to make beetroot juice without a juicer, the blender method is the easiest place to start. It asks for one extra step — straining — but that step is what turns a thick beet puree into something you actually want to sip.
Still deciding between tools? Compare juicer vs blender beet juice before choosing your method.
- Chop the produce smaller than you would for a juicer. Dice the beetroot, carrot, apple, cucumber, and ginger so the blender can handle them.
- Add ½ cup / 120 ml cold water first. This helps the blades move without making the juice weak.
- Blend on high for 45–60 seconds. The mixture should look like a smooth, thick ruby puree.
- Add more water only if needed. If the blender stalls or groans, pause, scrape down the sides, and add water 2 tablespoons / 30 ml at a time, up to 1 cup / 240 ml total.
- Strain the mixture. Pour it into a nut milk bag, cheesecloth-lined strainer, or fine mesh strainer set over a bowl or jug.
- Let it sit briefly, then squeeze. Give it 2–5 minutes to drain, then press or squeeze to extract as much juice as possible.
- Serve over ice. Drink while the flavor is still lively.
How to Strain Beet Juice Smoothly
For blender beet juice, the straining step is where the texture changes from thick puree to a lighter drink. Give the pulp a few minutes to drain before squeezing, especially if you are using a nut milk bag.
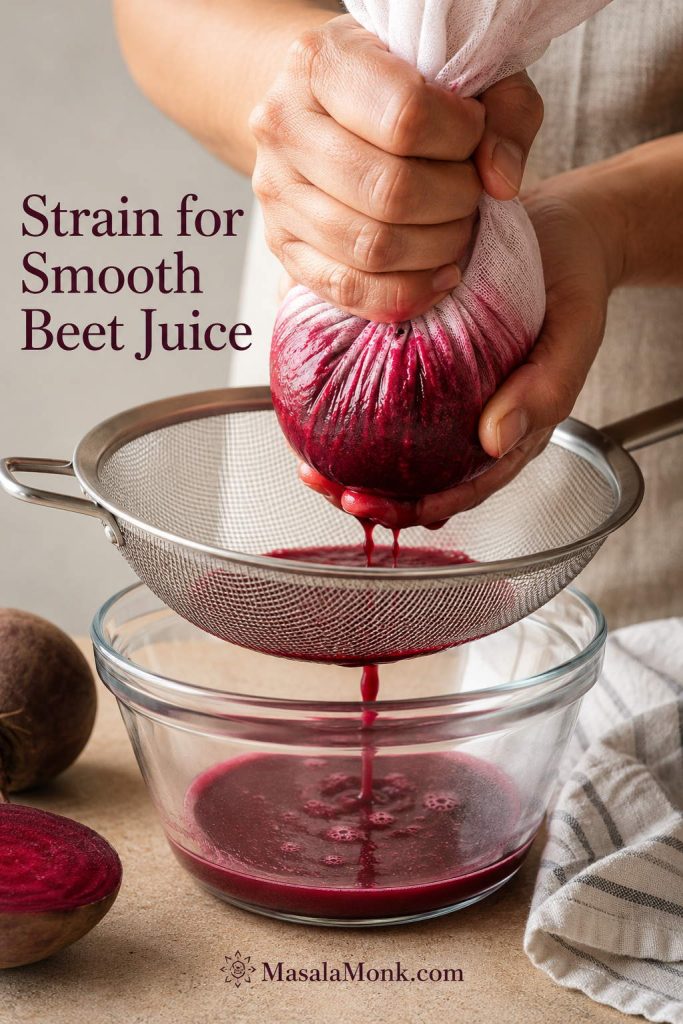
Blender note: If your first batch looks more like a thick smoothie than juice, you have not failed. It just needs better straining, smaller beet pieces, or a little more patience while the pulp drains. If your blender is not very powerful, use the full 1 cup / 240 ml water and blend in two rounds if needed.
For a little more yield, add 2–3 tablespoons / 30–45 ml cold water to the squeezed pulp, stir or briefly blend again, then strain once more. Skip this second press if you want the strongest flavor.
If your batch is already too thick, watery, or sharp, jump to the troubleshooting guide.
Equipment Needed
Beet juice is simple, but it is not tidy. A little setup saves you from pink fingers, stained towels, and a blender that refuses to move. A juicer gives the smoothest glass, while a blender works well as long as you give it enough liquid and strain properly.
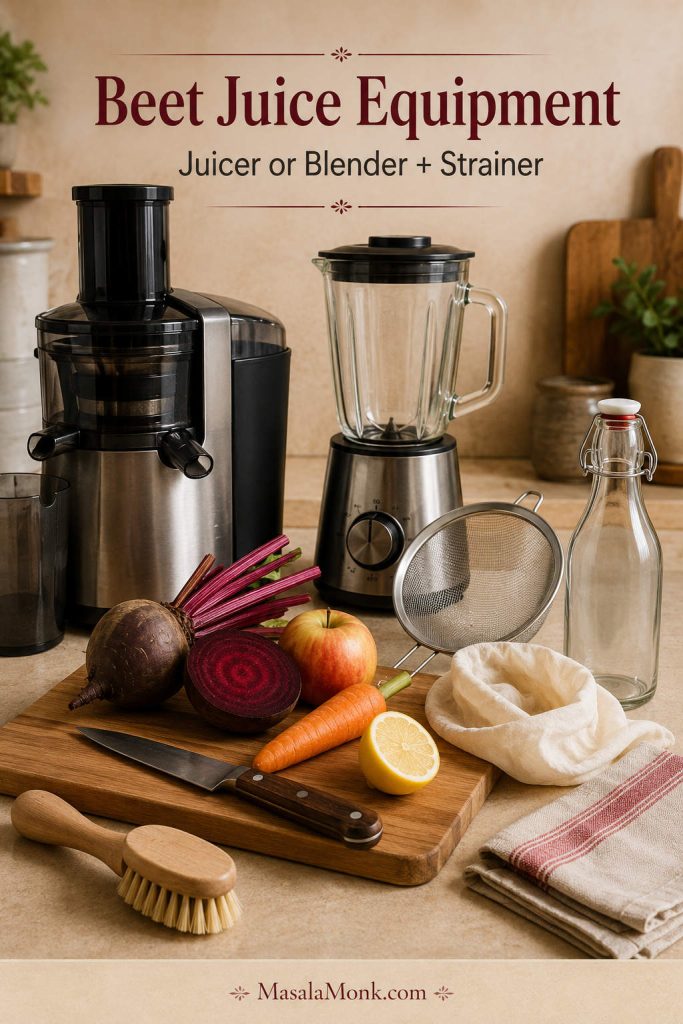
- Juicer: best for thin, smooth juice with no added water.
- Blender: useful if you do not own a juicer; you will need water and a strainer.
- Nut milk bag, cheesecloth, or fine mesh strainer: needed for the blender method.
- Vegetable brush: helpful for scrubbing raw beets and carrots.
- Washable cutting board and knife: important because beet juice stains.
- Glass bottle or jar: useful if refrigerating leftovers.
Stain warning: Beet juice is beautiful in the glass and ruthless on white towels. Wipe spills quickly, rinse tools right away, and use gloves if you do not want pink fingers.
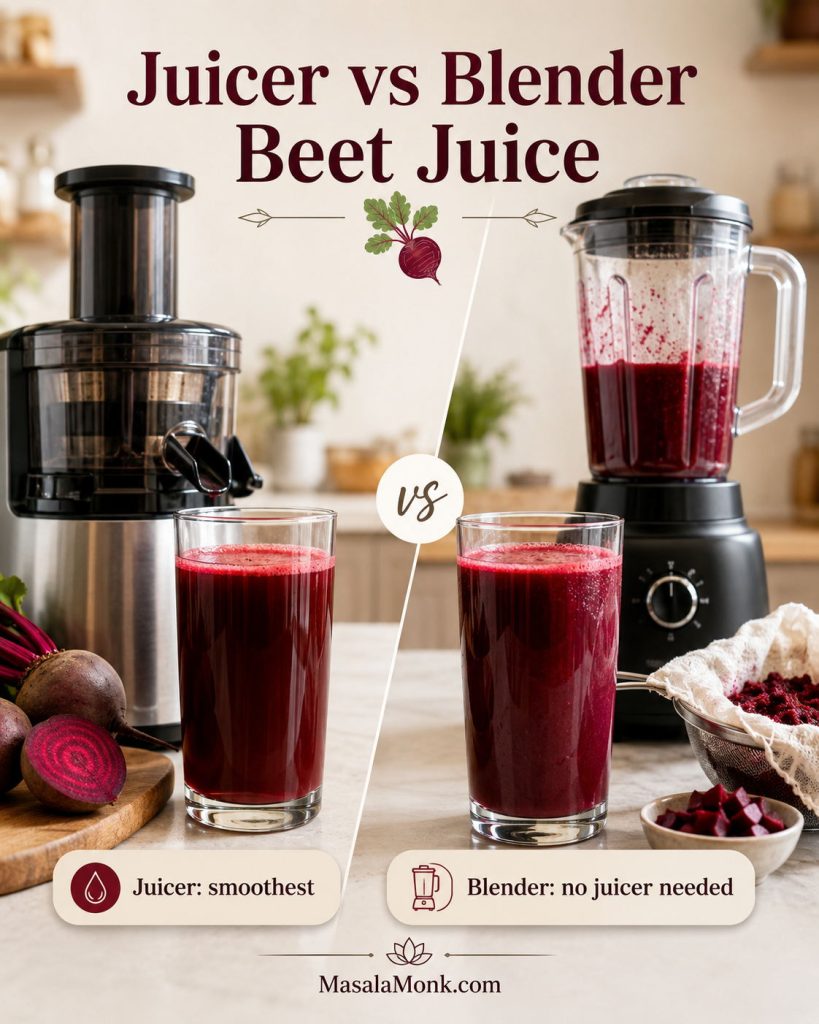
Juicer vs Blender: Which Method Is Better?
Both methods work, but they do not produce exactly the same drink. A juicer gives you a clearer, lighter result. A blender gives you more flexibility if you do not own a juicer, but you need water and straining.
| Method | Best for | Texture | Pros | Cons |
|---|---|---|---|---|
| Juicer | Smooth beet juice | Thin, smooth, bright | Fast, no added water, smoothest juice texture | Requires a juicer |
| Blender + strainer | No-juicer homes | Slightly thicker but still juice-like | Accessible, flexible, works with common equipment | Needs water and straining |
| Blender, unstrained | Thicker blended drink | Pulpy, smoothie-like | Keeps more fiber, less waste | Not a true clear juice |
| Beet powder | Convenience | Depends on brand and mixing | Fast, shelf-stable | Not the same flavor or texture as fresh beet juice |
If you are deciding whether to buy a juicer, a cold press juicer is often preferred for fresh juice quality, while centrifugal juicers are usually faster and more affordable. MasalaMonk’s guide to cold press vs centrifugal juicers explains the difference in more detail.
Common Beet Juice Mistakes to Avoid
Most disappointing batches come from a few simple mistakes. Before you start, avoid these and the drink becomes much easier to love.
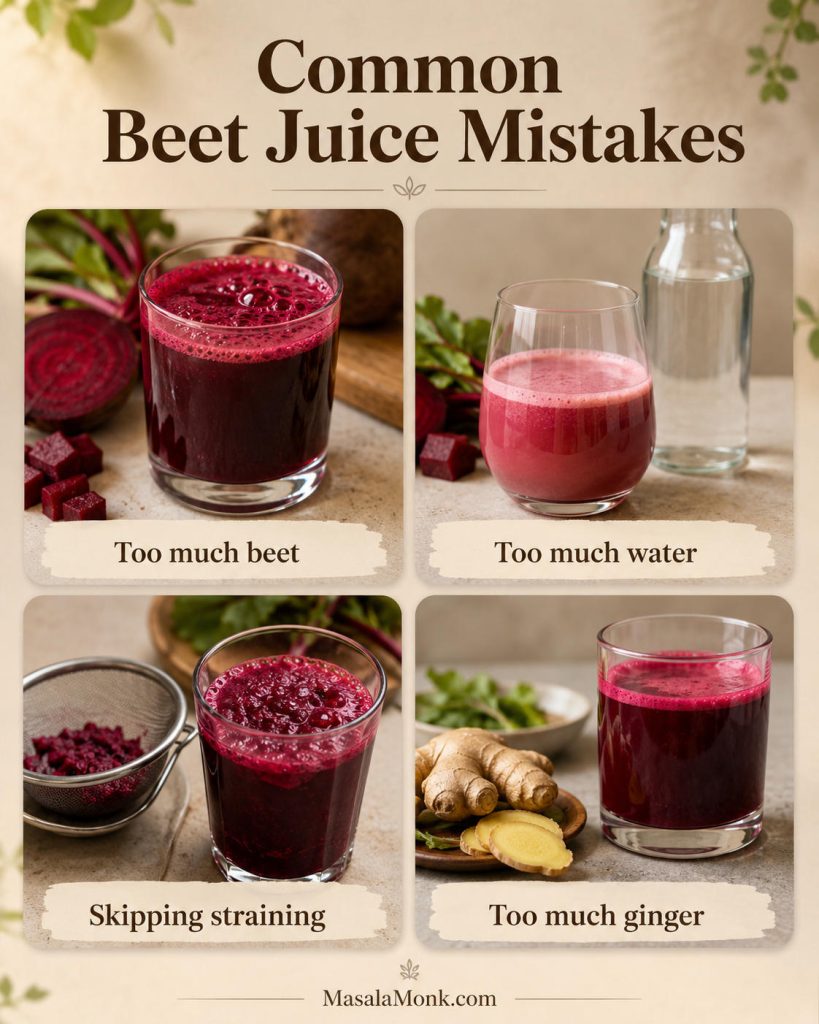
- Using only beetroot as a beginner: a pure beetroot batch can taste too intense. Start with apple, carrot, lemon, and ginger.
- Adding too much blender water: begin with ½ cup / 120 ml and add more only if the blender needs help.
- Skipping the strainer: unstrained blender juice will be thick and pulpy, closer to a smoothie.
- Overdoing sharp ingredients: too much ginger or citrus pith can make the juice harsh or bitter, so start small and use lemon juice or peeled citrus.
How to Make Beet Juice Taste Better
The main reason people give up on this drink is not the color or the effort. It is the taste. Beetroot is naturally earthy, so it needs brightness, sweetness, chill, or dilution to feel balanced.
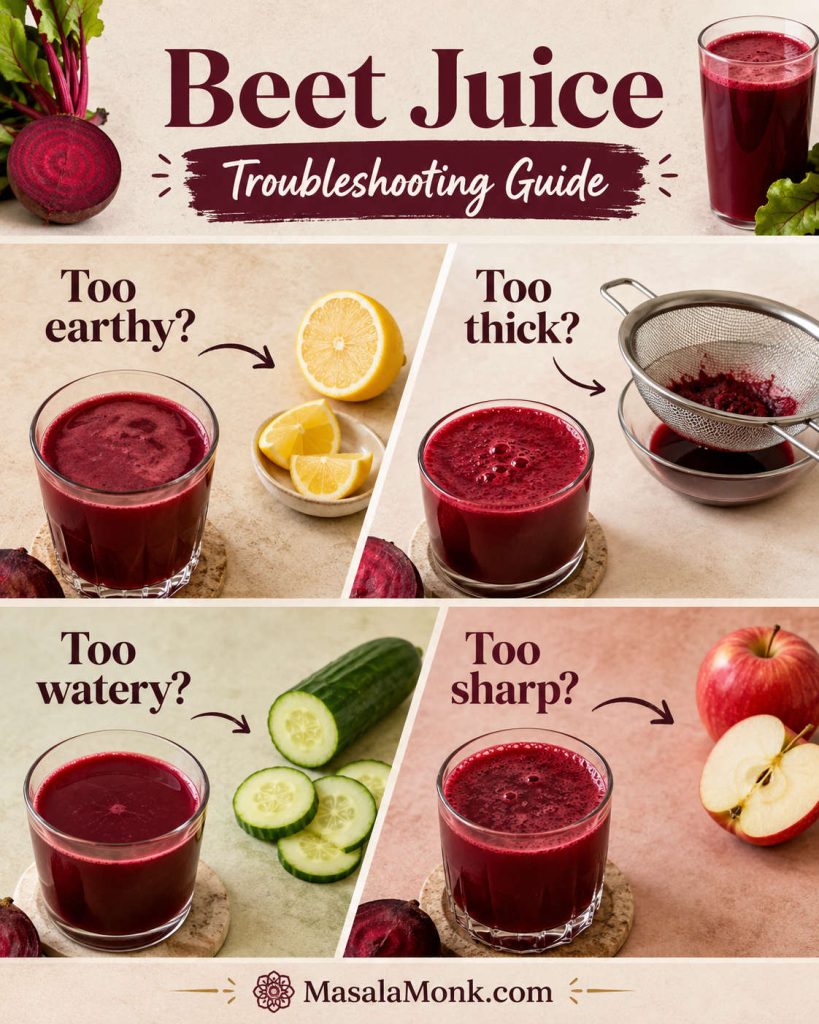
| Problem | Fix |
|---|---|
| Too earthy | Add more apple, orange, lemon, cucumber, or carrot. |
| Too sweet | Add lemon or lime, cucumber, celery, or a little extra ginger. |
| Too sharp from ginger | Use ½ inch ginger instead of 1 inch next time. Dilute this batch with more apple, carrot, or cucumber juice. |
| Too thick | Use a nut milk bag or cheesecloth and squeeze well. Add a little cold water if needed. |
| Too watery | Use less water next time. Start with ½ cup / 120 ml for blender juice and add only as needed. |
| Too bitter | Peel citrus fully and avoid blending too much white pith. |
| Too strong for beginners | Use half a beet and increase the carrot or apple. |
| Not refreshing | Serve over ice or chill the juice before drinking. |
The easiest beginner version is beetroot with both apple and carrot. The crispest version adds cucumber and lemon. The punchiest version leans on ginger and citrus. If the glass tastes flat, it almost always needs lemon. If it tastes heavy, it needs cucumber, ice, or less beet next time.
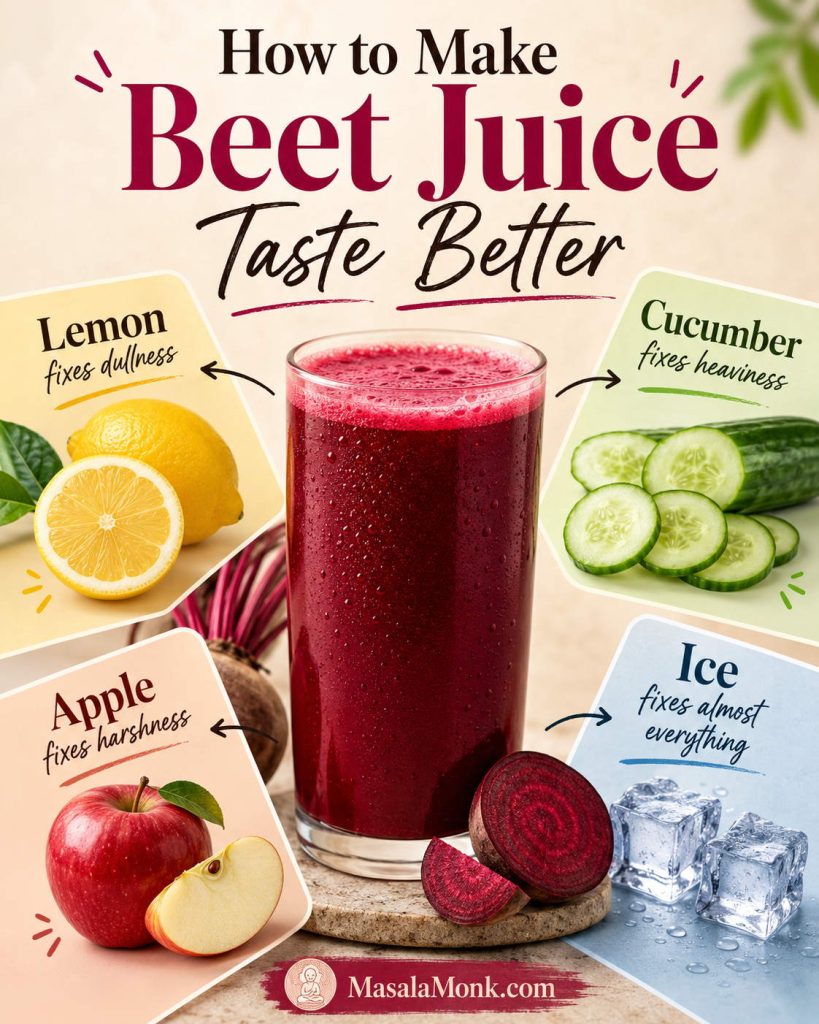
Remember this flavor rule: lemon fixes dullness, cucumber fixes heaviness, apple fixes harshness, and ice fixes almost everything.
Once the basic glass tastes right, the variations become much easier. You are not guessing anymore; you are choosing whether you want the drink sweeter, sharper, lighter, or stronger.
For the gentlest first variation, try the apple beet carrot juice version.
Best Beet Juice Variations
Once you know the base formula, this juice is easy to adjust. Use these variations as mini-recipes. The juicer method works as written. For the blender method, add ½–1 cup / 120–240 ml cold water and strain unless the variation says it is a smoothie.
Easy Beet Juice Combinations
| Variation | Mini formula | Best for |
|---|---|---|
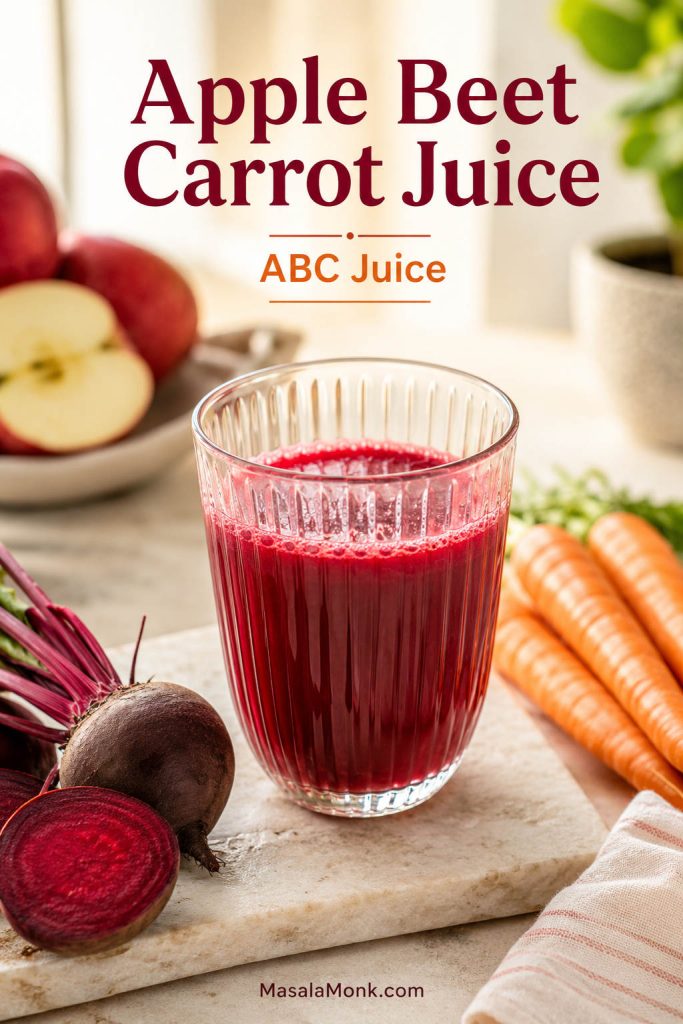
| Apple Beet Carrot Juice / ABC Juice | 1 beet + 1 apple + 2 carrots + ½ lemon + optional ½ inch ginger | Beginner-friendly sweetness and a softer beet flavor |
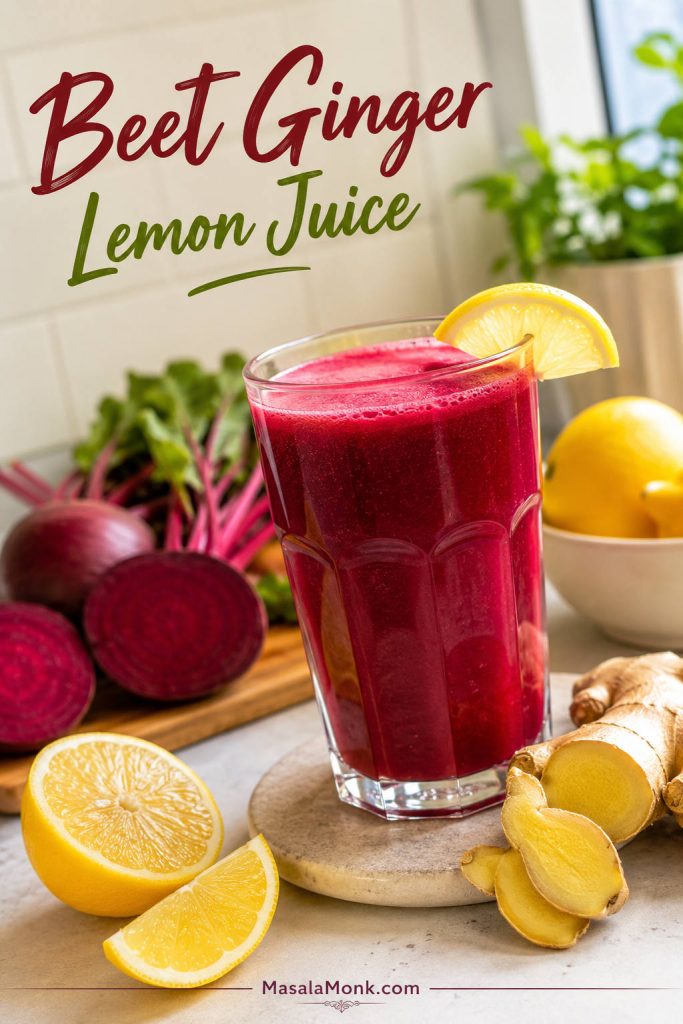
| Beet Ginger Lemon Juice | 1 beet + 1 apple + ½ lemon + 5–10 g ginger + optional cucumber | A sharper, livelier juice |
| Beet Orange Juice | 1 beet + 1 peeled orange + 1 carrot + 5 g ginger | A citrusy breakfast-style glass |
| Beet Pineapple Juice | 1 beet + 1 cup pineapple chunks + ½ cucumber + ½ lemon | A sweeter tropical version |
| Beet Pomegranate Juice | 1 beet + ½–¾ cup unsweetened pomegranate juice + ½ lemon | A tart, deep red juice |
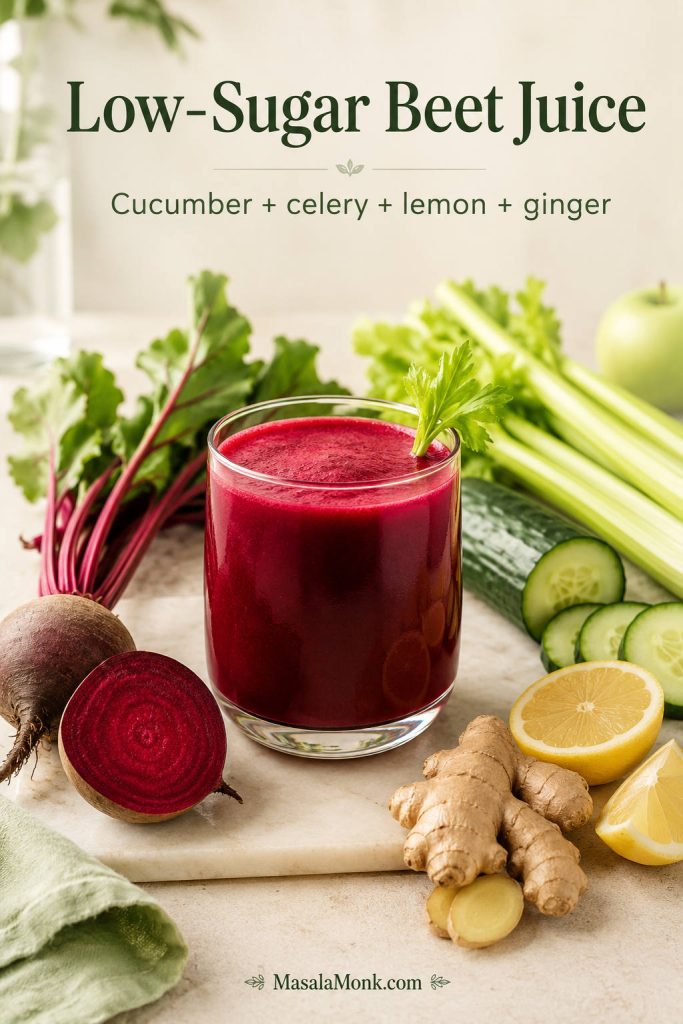
| Low-Sugar Beet Juice | ½–1 beet + ½ cucumber + 1 celery stalk + ½ lemon + ½ inch ginger | A lighter vegetable-forward version |
| Beet Turmeric Ginger Juice | 1 beet + ½ inch ginger + small piece fresh turmeric or ¼ tsp ground turmeric + ½ lemon | A strong, spicy flavor |
| Beet Juice Shot | Beet + lemon + ginger + small apple piece if needed | Small 2–3 oz / 60–90 ml servings |
| Beet Juice Smoothie | Beet juice or blended beet + banana or berries + yogurt or plant milk | A thicker, more filling drink |
Apple Beet Carrot Juice / ABC Juice
This is the safest first version if beetroot usually tastes too strong to you. Use a sweet apple for a softer drink or green apple for a sharper one. The carrot keeps the juice mellow, so the beet still shows up without taking over the glass. For more beetroot drink ideas, including beet-ginger-turmeric and ABC-style combinations, see MasalaMonk’s guide to the power of beetroot and beet juice.
Beet Ginger Lemon Juice
This version is sharper and less sweet. It is the one to make when you want beet ginger juice with a brighter, spicier finish. Start with less ginger unless you already know you like the heat.
Beet Orange Juice
Orange makes the drink rounder and more breakfast-friendly. Peel the orange well so the white pith does not make it bitter. This is a good choice when you want something sweeter than lemon but brighter than apple alone.
Beet Pineapple Juice
Pineapple gives this variation tropical sweetness that helps soften the deep beet flavor. Cucumber keeps the drink from becoming too syrupy. This is especially useful when you want the juice to taste more fruity and less vegetable-heavy.
Beet Pomegranate Juice
Pomegranate makes the juice tart, deep, and bold. For the easiest version, use unsweetened pomegranate juice. If using fresh pomegranate arils, blend gently and strain very well, or juice them only if your juicer handles pomegranate arils cleanly.
Low-Sugar Beet Juice
This version skips most of the fruit and uses cucumber, celery, lemon, and ginger for a cleaner vegetable-forward flavor. It will not taste as sweet as the apple-carrot version, but it is lighter and more refreshing.
Beet Turmeric Ginger Juice
This has a strong, spicy flavor. Use turmeric carefully because it can dominate the drink. Add black pepper only if you already like that taste; it is not needed for the recipe to work.
Beet Juice Shot
A beet shot is stronger and smaller than a full glass. Keep the beet, lemon, and ginger more concentrated, then use just enough apple to soften the edge if needed. Serve 2–3 oz / 60–90 ml at a time.
Beet Juice Smoothie
To turn this into a smoothie, do not strain the blended mixture. Add banana, berries, yogurt or plant milk, and a little ginger. A smoothie keeps more pulp and fiber, so it will be thicker and more filling than strained beet juice. For more smoothie-style ideas, MasalaMonk’s guide to high-iron smoothies and shakes includes beetroot-friendly combinations that lean more filling than juiced.
Flavor comes first. Once the drink is something you actually enjoy, then it makes sense to talk about where it fits in a routine.
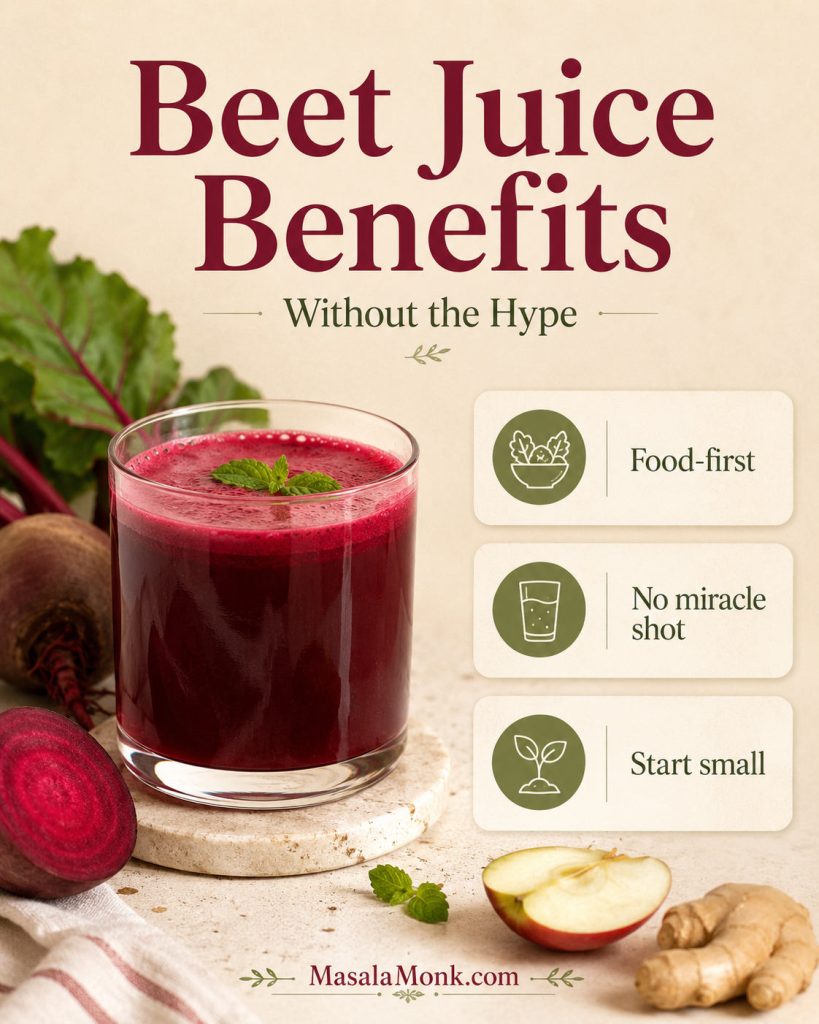
Beet Juice Benefits, Without the Hype
Once the flavor is right, the next question is usually what this drink actually does for you. The honest answer is that beet juice can be useful, but it works best when you treat it as food, not as a miracle shot.
Think of this as a bright vegetable drink with a few smart use cases: a small pre-workout serving, a lower-sugar vegetable-forward version, or an occasional way to enjoy beets when you do not feel like eating them.
Planning to drink it often? Read the safety notes before making beet juice a daily habit.
Beetroot is naturally colorful, plant-rich, and known for dietary nitrates. Much of the research interest comes from those nitrates and their possible effects on cardiovascular markers. You can read more about that research background on PubMed.
At the same time, juice is not the same as eating whole beets. When you juice and strain beets, carrots, and apples, you remove much of the fiber. That makes the drink lighter and easier to sip, but it also means it is less filling than whole vegetables or a smoothie.
| If you care about… | Best way to use this juice |
|---|---|
| Blood pressure interest | Keep servings moderate and check with a qualified professional if you take medication or tend to run low. |
| Workout use | Try a small strained serving first, not a huge pulpy glass right before training. |
| Weight-conscious drinking | Use cucumber, celery, lemon, ginger, less fruit, and no added sugar. |
| Daily nutrition | Rotate it with whole vegetables, smoothies, meals, and other drinks instead of making it your only “healthy” habit. |
| Detox-style flavor | Use cucumber, celery, lemon, and ginger for a crisp, light glass without treating it as a cleanse. |
For a broader look at whole beets beyond juice, MasalaMonk’s guide to what beets are good for covers beetroot as a food, not just as a drink.
Is Beet Juice Good for Weight Loss?
For weight-conscious readers, the most useful approach is a moderate, vegetable-forward drink — especially when you keep fruit lower and skip added sugar. It is not a fat-loss shortcut, but it can fit into a balanced routine when the portion and ingredients make sense.
The same idea applies to other “weight loss drink” combinations too. MasalaMonk’s article on pineapple, cucumber, and ginger for weight loss separates useful habits from miracle claims without treating the drink as a shortcut.
Lighter Beet Juice Formula
- ½–1 beetroot
- ½ cucumber
- 1 celery stalk
- ½ lemon
- ½ inch ginger
- Optional: ½ green apple if you need a little sweetness
This version is less sweet and more vegetable-forward. For more fullness, choose an unstrained beet smoothie instead of strained juice because the smoothie keeps more fiber.
Beet Juice and Blood Pressure
Beetroot contains dietary nitrates, which is why this drink often comes up in blood pressure conversations. Still, drinking it once in a while is different from turning it into a daily habit; regular use matters more if you already take medication or tend to run low.
Beetroot’s dietary nitrates can be converted in the body into nitric oxide, a compound involved in blood-vessel relaxation and blood flow, which is why beet juice appears in blood pressure research.
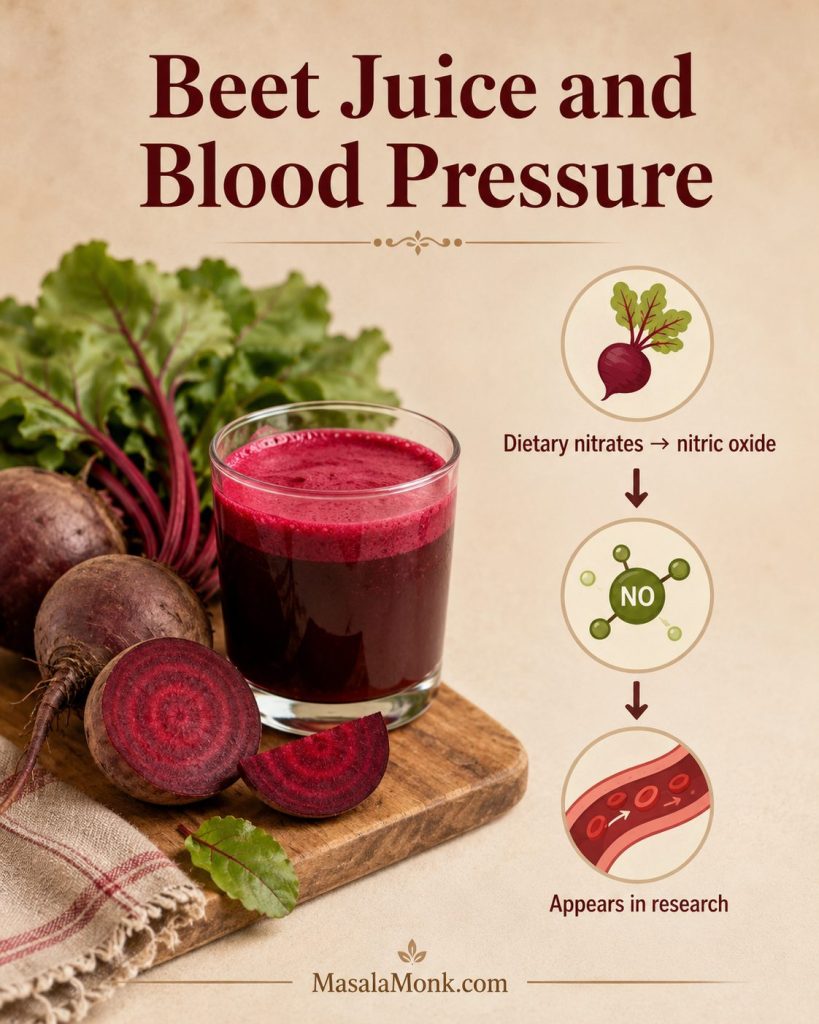
Any blood-pressure effect can vary by person, serving size, timing, and overall diet, so treat this as a food habit to discuss if it overlaps with medication or a medical condition.
If you have low blood pressure, take blood pressure medication, have kidney concerns, or manage a medical condition, treat regular beet juice as something to discuss with your healthcare professional rather than a casual daily habit.
For the broader caution list, see side effects and safety notes.
MasalaMonk has a deeper article on beets and blood pressure if you want a more focused discussion of fresh, canned, pickled, and juiced beets.
Is Beet Juice a Detox or Liver Cleanse?
If you like the word “detox” because you mean light, cold, vegetable-forward, and refreshing, beet juice can fit that mood. If you mean a drink that cleanses the liver, flushes toxins, or resets the body, it does not work that way.
Your liver and kidneys already do the work of filtering and processing waste. A glass of beet juice can be colorful and refreshing, but it should not be treated as a liver cleanse or cure.
For a detox-style flavor without the misleading promise, use beetroot, cucumber, celery, lemon, and ginger. It will taste crisp and clean, but it is still just a drink.
Beet Juice for Energy or Pre-Workout
Runners, cyclists, and workout-focused readers often pay attention to beet juice because of beetroot’s natural nitrate content. If you want to try it before exercise, start with a small serving first. Some people tolerate it easily; others find that a large or pulpy drink feels too heavy before movement.
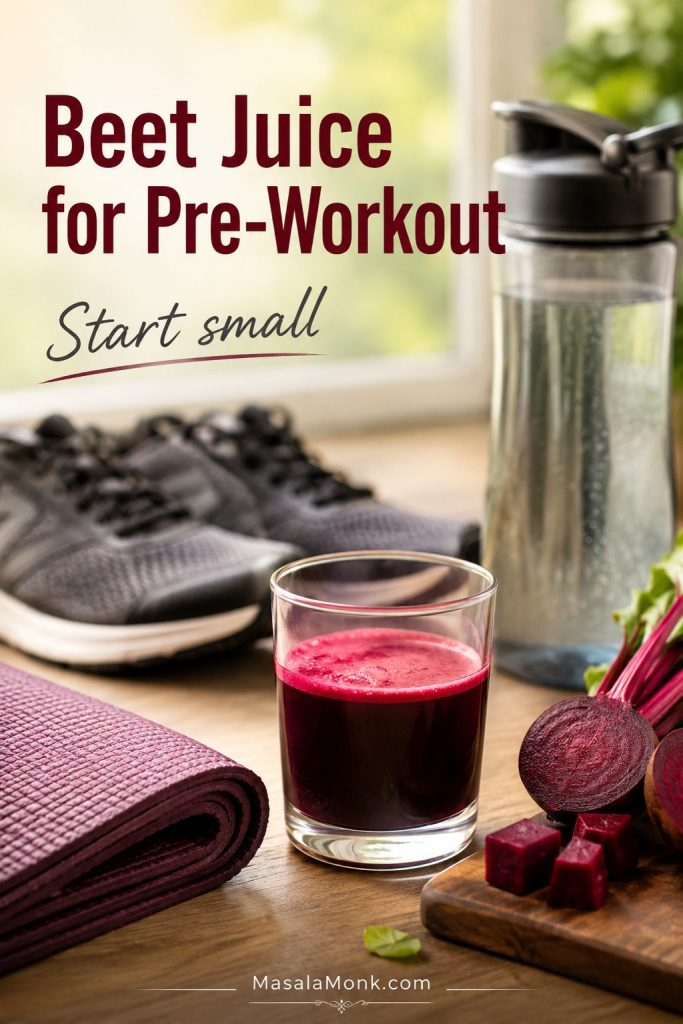
For a pre-workout style version, keep the flavor bright and the texture light: beetroot, orange or apple, lemon, and ginger works well. If you are using the blender method, strain it thoroughly so the drink is easier to sip before exercise.
For performance use, many beetroot juice studies focus on nitrate dose and timing rather than casual sipping, so treat a small pre-workout glass as an experiment, not a guaranteed effect.
When to Drink Beet Juice and How Much to Start With
There is no single perfect time to drink beet juice. Choose the moment that fits how you want to use it and how your body responds. If you are new to this drink, start with a smaller serving because the flavor, color, and digestive effect can surprise people, especially if the glass is strong or ginger-heavy.
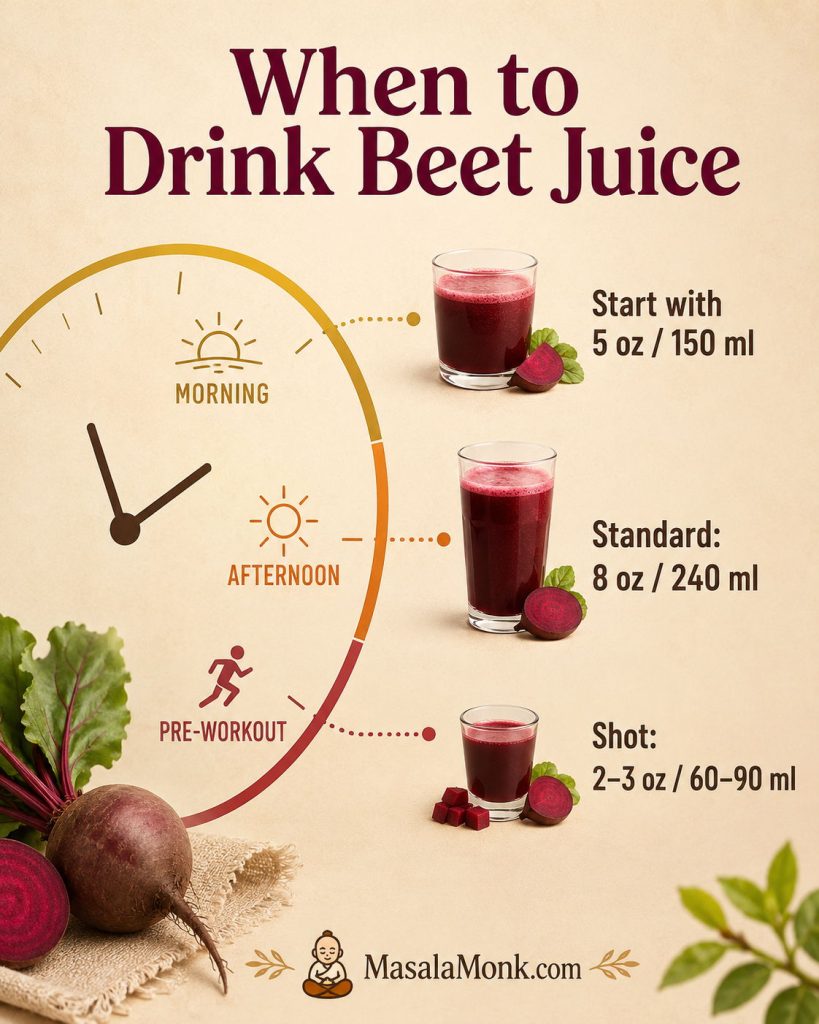
- Morning: a simple option with or after breakfast, especially if raw juice bothers your stomach on its own.
- Afternoon: useful when you want something cool, colorful, and caffeine-free.
- Before a workout: try a small strained serving first; avoid a large pulpy glass right before training.
- Night: fine for many people, but skip it late if it bothers your digestion or makes you wake up to use the bathroom.
- Daily: keep portions reasonable and rotate with whole vegetables, fruits, smoothies, meals, and other drinks.
- Small serving: 5 oz / 150 ml
- Standard serving: 8 oz / 240 ml
- This recipe yield: about 16–18 oz / 475–530 ml
- Beet shot: 2–3 oz / 60–90 ml
You do not need to turn beet juice into a daily project to enjoy it; a good glass now and then still counts. Occasional beet juice and daily beet juice are not the same decision, especially if you have blood pressure, kidney-stone, digestive, or blood sugar concerns.
After drinking beet juice, some people notice pink or red urine or stool. This is often called beeturia and can happen after eating or drinking beets. It is usually harmless, but if you are unsure whether the color is from beets or something else, or if you have pain or unusual symptoms, seek medical advice.
The sections below cover storage and safety because homemade beet juice is raw, deeply pigmented, and more concentrated than eating a few slices of beetroot.
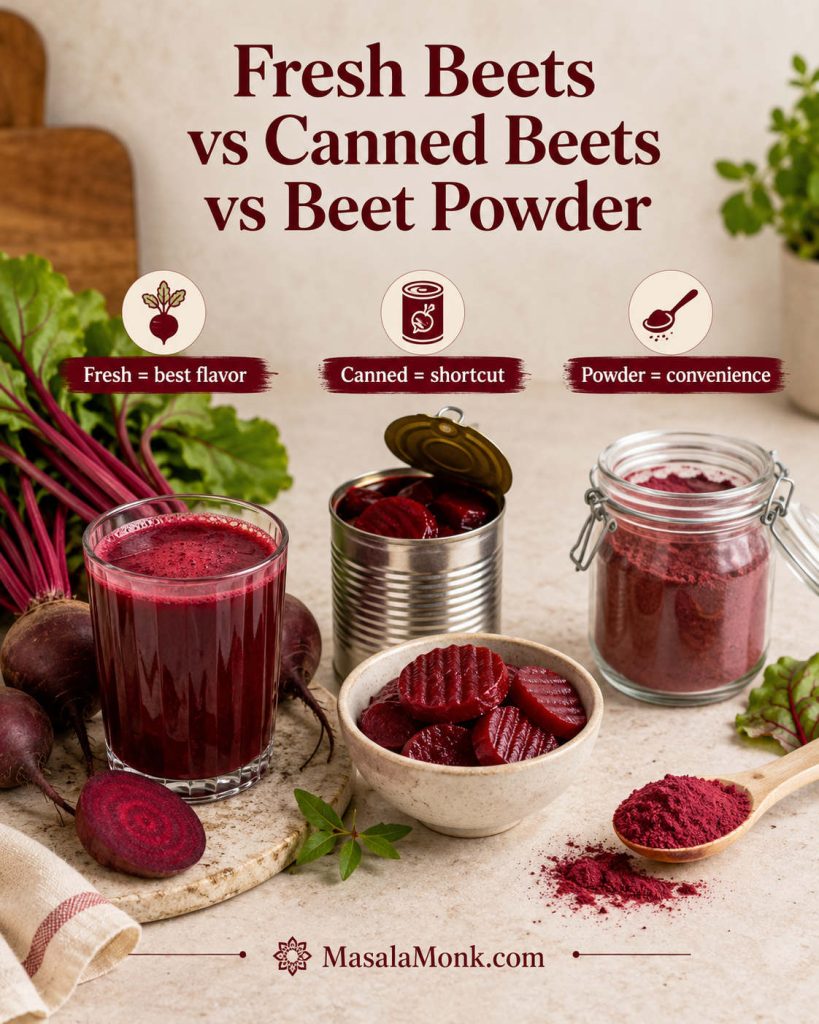
Fresh Beets vs Canned Beets vs Beet Powder
Fresh raw beetroot gives the best glass: brighter color, clearer flavor, and a more refreshing finish. Canned, cooked, pickled, and powdered beets can help in a pinch, but they each move the drink away from that just-made taste.
| Option | Can you use it? | Best use |
|---|---|---|
| Fresh raw beets | Yes, best choice | Main beet juice recipe |
| Cooked beets | Yes, blender only | Emergency shortcut, softer flavor |
| Canned beets | Possible | Blended shortcut; check salt, sugar, and additives |
| Pickled beets | Not ideal | Only if you want a vinegar-style drink |
| Beet powder | Different product | Convenience drink, not the same as fresh juice |
If you use canned beets, drain them well and check the label. Some canned beets contain added salt or sugar, and pickled beets contain vinegar that will completely change the flavor. If you use beet powder, treat it as a separate convenience drink rather than a true fresh beet juice recipe.
What to Do With Beet Juice Pulp
Beet pulp is not glamorous, but it does not have to go straight into the bin. If you use a juicer or strain the blender mixture, you will have pulp left behind. It is fibrous and deeply colored, so use it in small amounts where the color and earthiness make sense. Think of it as a small add-in, not the main event.
- Add small amounts to veggie patties or fritters.
- Stir into soups or stews where the color makes sense.
- Mix into muffins, quick breads, or pancakes.
- Blend into hummus or bean dips.
- Freeze in small portions for later cooking.
- Compost it if you do not want to cook with it.
Remember that beet pulp stains. If the pulp includes ginger and lemon, use it in recipes where those flavors will not feel out of place.
How to Store Beet Juice
Just-made beet juice loses its sparkle quickly, so treat leftovers gently. It tastes best right after making, when the lemon is sharp, the ginger still tastes lively, and the beet flavor has not dulled. Because homemade raw juice is not pasteurized, it also needs careful storage if you are not drinking it right away.
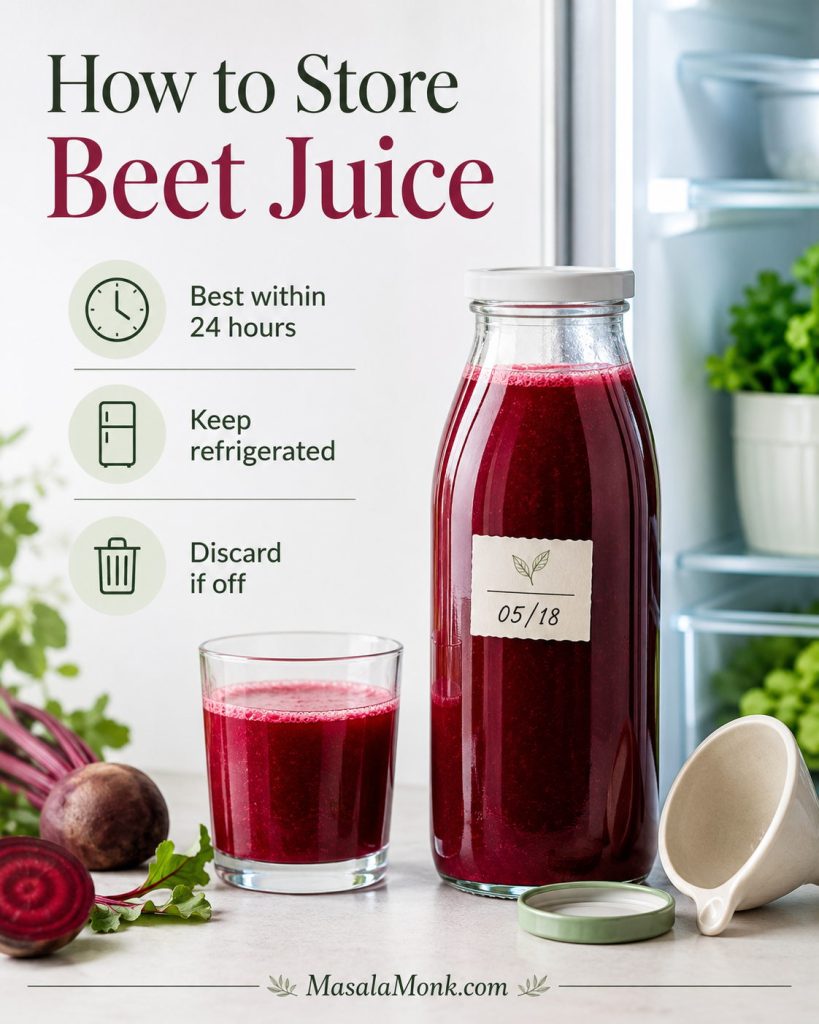
- Best flavor: drink immediately.
- Best refrigerated quality: within 24 hours.
- Maximum practical home storage: 24–48 hours in a clean airtight glass bottle in the refrigerator.
- Room temperature: do not leave fresh juice out for more than 2 hours.
- Refrigerator temperature: keep chilled at 40°F / 4°C or colder.
- Serving after storage: shake or stir before drinking.
- Discard if: it smells sour, fizzy, fermented, moldy, or off.
You can wash and chop the beetroot, carrot, apple, and cucumber a few hours ahead and refrigerate them in a covered container. Juice or blend just before serving for the liveliest flavor.
The FDA has a useful overview of fresh juice safety, especially because homemade raw juice is not pasteurized.
You can freeze beet juice in ice cube trays or small containers, but the flavor and texture will be less crisp after thawing. Frozen beet juice cubes are better for smoothies than for drinking plain.
Side Effects and Who Should Be Careful
For most people, a moderate glass is simply a colorful way to enjoy beetroot. Still, start small the first time, especially if you plan to drink it often. Beet juice has a strong color, strong flavor, and for some people, a strong digestive effect too.
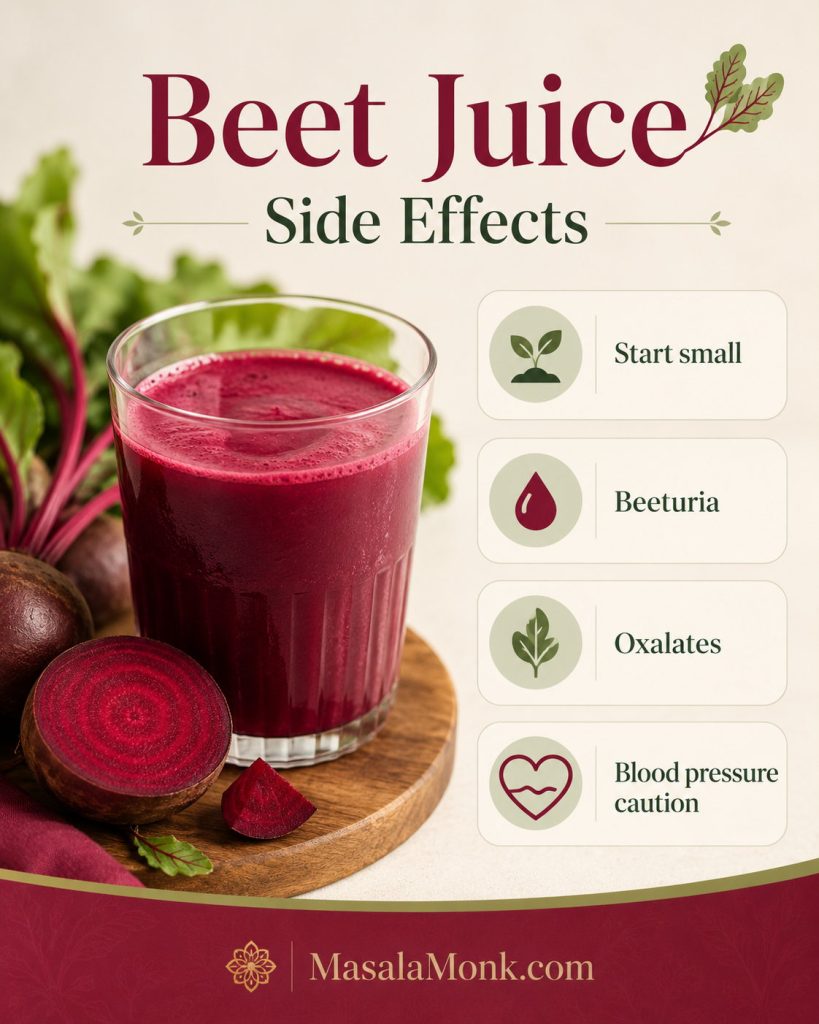
- Red or pink urine/stool: Beet juice can cause beeturia, a temporary red or pink color change after eating or drinking beets.
- Kidney-stone concerns: Beets contain oxalates, so people prone to certain kidney stones should be cautious.
- Low blood pressure or medication: If you take blood pressure medication or have low blood pressure, ask a healthcare professional before drinking beet juice regularly.
- Digestive sensitivity: Start with a smaller serving if raw juices bother your stomach.
- Blood sugar management: If you manage blood sugar, fruit-heavy beet juices may need smaller portions or more vegetable-forward formulas.
For more detail on oxalates and beetroot, see MasalaMonk’s guide to beetroot and kidney health.
Beet Juice Troubleshooting
Beet juice is forgiving if you know what to adjust. If the batch did not taste the way you expected, do not throw it out yet. Most problems are fixable with lemon, cucumber, ice, apple, or another pass through the strainer.
| Issue | Why it happened | Fix now | Fix next time |
|---|---|---|---|
| Too earthy | Too much beet or not enough acid/sweetness | Add lemon, orange, apple, or cucumber juice | Use less beet and more carrot/apple |
| Too thick | Blender juice was not strained enough | Strain again through cheesecloth or a nut milk bag | Chop smaller, blend smoother, and squeeze pulp well |
| Too watery | Too much water in the blender | Add lemon, ginger, or a little more fresh juice | Start with ½ cup / 120 ml water only |
| Too sharp | Too much ginger or lemon | Dilute with apple, carrot, cucumber, or ice | Start with ½ inch ginger |
| Too sweet | Too much apple, orange, pineapple, or pomegranate | Add lemon, cucumber, celery, or ginger | Use the low-sugar variation |
| Separates in the glass | Fresh juice naturally separates | Stir or shake | This is normal |
FAQs About Beet Juice
These are the small questions that usually come up after the first batch.
Juicer or blender: which is better for beet juice?
A juicer makes lighter, smoother juice without added water. A blender works well if you do not own a juicer, but the juice needs water and straining.
How much water do you add when making beet juice in a blender?
Start with ½ cup / 120 ml cold water. Add more only if the blender needs help, up to 1 cup / 240 ml total. Too much water makes the juice taste thin.
How do you make beet juice without a juicer?
Blend chopped beetroot, carrot, apple, lemon, ginger, and cold water until smooth. Then strain through a nut milk bag, cheesecloth, or fine mesh strainer and squeeze the pulp well.
Should you use raw or cooked beets for juice?
Raw beets are best for fresh juice. Cooked beets can be blended in a pinch, but they taste softer and less crisp. They are not ideal for juicing.
Do you need to peel beetroot before juicing?
Peeling is optional if the beetroot is fresh, tender-skinned, and scrubbed very well. Peel it if the skin is rough, dirty, waxed, or bitter.
How many beets make one glass of juice?
One medium-large beet, about 225–250 g / 8–9 oz, combined with carrot, apple, lemon, and ginger usually makes about two standard glasses of mixed beet juice. A medium beet on its own may give roughly ⅓–½ cup juice in many home juicers, though freshness, size, and machine efficiency can change that noticeably.
Why does beet juice taste earthy?
Beetroot naturally has an earthy, mineral-like flavor. Apple, carrot, lemon, ginger, cucumber, orange, and pineapple all help balance that flavor.
How do you make beet juice sweeter without sugar?
Add apple, carrot, orange, pineapple, or pomegranate. Apple and carrot are the easiest everyday choices because they sweeten the drink without overpowering the beetroot.
Is it okay to drink beet juice every day?
You can drink it regularly if it suits you, but you do not need to make it a daily habit to enjoy the recipe. Keep portions moderate, especially if you have kidney-stone risk, low blood pressure, digestive sensitivity, blood sugar concerns, or take blood pressure medication.
What is the best time to drink beet juice?
Morning is simple, afternoon works when you want something cool and caffeine-free, and pre-workout use is best tested with a small strained serving before you make it a routine.
Why does beet juice turn urine or stool red?
Beets can turn urine or stool pink or red. This is common after eating or drinking beetroot. If you are unsure whether the color is from beets, or if you have pain or unusual symptoms, seek medical advice.
What should you know about beet juice and blood pressure?
Beetroot contains dietary nitrates, so occasional juice is one thing; a daily habit is worth discussing with your healthcare professional if you take blood pressure medication or tend to run low.
How long does homemade beet juice keep?
Homemade beet juice tastes best immediately. Refrigerate it in a clean airtight bottle and drink within 24 hours for best flavor, or within 24–48 hours at most.
Can you use canned beets in beet juice?
You can blend canned beets with water, apple, lemon, and ginger in a pinch, but the flavor will be softer and less fresh than raw beetroot. Check the can for added salt, sugar, or vinegar.
How do you turn this recipe into a beet juice shot?
For a beet shot, use less apple and cucumber, keep the beet, lemon, and ginger more concentrated, and serve just 2–3 oz / 60–90 ml at a time. Beet shots are intense, so start small.
Tried it with apple, orange, cucumber, or ginger? Share which version finally made beet juice work for you — the best fixes often come from small adjustments.
Beet Juice Recipe
This is the balanced base version: beetroot for color, carrot and apple for sweetness, lemon for brightness, ginger for lift, and cucumber if you want a cooler, easier sip.
Make it in a juicer for crisp, smooth juice, or use a blender and strain it. Once you like the base, adjust lemon, apple, cucumber, or ginger to make the glass sharper, sweeter, lighter, or spicier.
The finished juice should pour easily, taste sweet-earthy and tart, and finish with gentle ginger warmth.
Estimated nutrition: One 8 oz / 240 ml serving is roughly 135–150 calories, with about 32–36 g carbohydrates depending on produce size and juicing method. Most sweetness comes naturally from the apple, carrot, and beetroot. Strained juice has much less fiber than whole produce or an unstrained smoothie.
Equipment: juicer or blender, fine mesh strainer or nut milk bag, knife, cutting board, and a clean bottle or jar if storing.
Ingredients
- 1 medium-large raw beetroot or 2 small beets, about 225–250 g / 8–9 oz
- 2 medium carrots, about 120–150 g / 4–5 oz
- 1 large apple, about 170–200 g / 6–7 oz
- ½ lemon, about 15–20 ml juice
- ½–1 inch fresh ginger, about 5–10 g
- ½ small cucumber, optional, about 75–100 g / 3–4 oz
- ½–1 cup cold water, blender method only, 120–240 ml
- Ice, to serve
Juicer Method
- Wash and scrub the beetroot, carrots, apple, cucumber, lemon, and ginger.
- Trim the beetroot and peel it if the skin is rough, waxed, or not fully clean.
- Cut the beetroot, carrots, apple, cucumber, and ginger to fit your juicer chute.
- Juice the beetroot, carrots, apple, cucumber, and ginger, alternating hard and soft produce as needed.
- Stir in the lemon juice.
- Pour over ice and drink immediately.
Blender Method
- Chop the beetroot, carrots, apple, cucumber, and ginger into small pieces.
- Add them to a blender with ½ cup / 120 ml cold water and the lemon juice.
- Blend on high for 45–60 seconds, until smooth. Add more water only if needed, up to 1 cup / 240 ml total.
- Pour the mixture through a nut milk bag, cheesecloth-lined strainer, or fine mesh strainer.
- Let it drain for 2–5 minutes, then press or squeeze the pulp to extract the juice.
- Optional: add 2–3 tablespoons / 30–45 ml cold water to the squeezed pulp, stir or briefly blend, then strain once more for a little extra yield.
- Serve over ice.
Notes
- For a milder glass, use half a beet and increase the apple or carrot.
- Use green apple for a sharper juice or red apple for a sweeter one.
- For a lighter flavor, add cucumber.
- For a sharper flavor, use the full inch of ginger and extra lemon.
- If using a blender, strain the mixture for true beet juice. Unstrained beet juice will be thicker and smoothie-like.
- Drink immediately for best flavor, or refrigerate in a clean airtight glass bottle for 24–48 hours.
- For regular use or medical concerns, read the safety section above.
Once the recipe is made, serve the juice cold, taste before adjusting, and keep the glass balanced enough that it feels like a drink you chose — not a health chore.