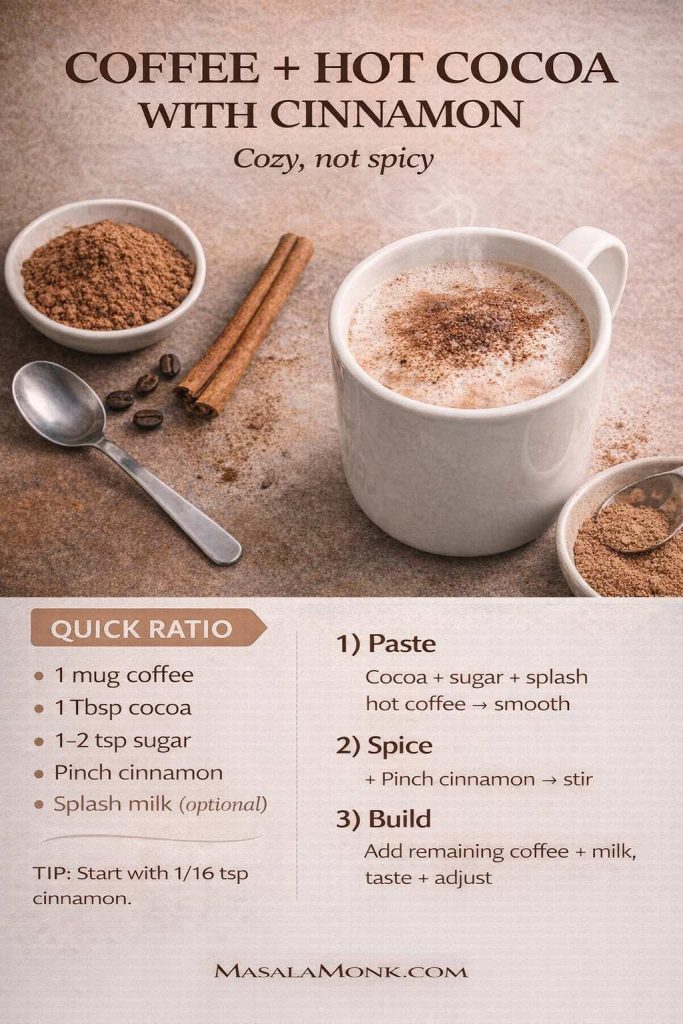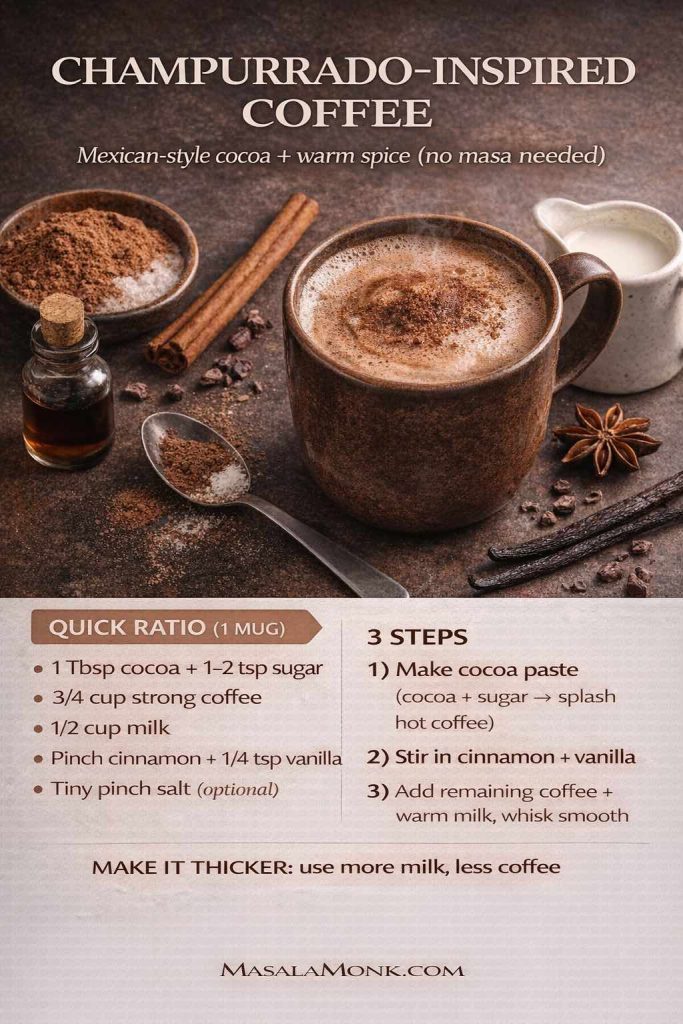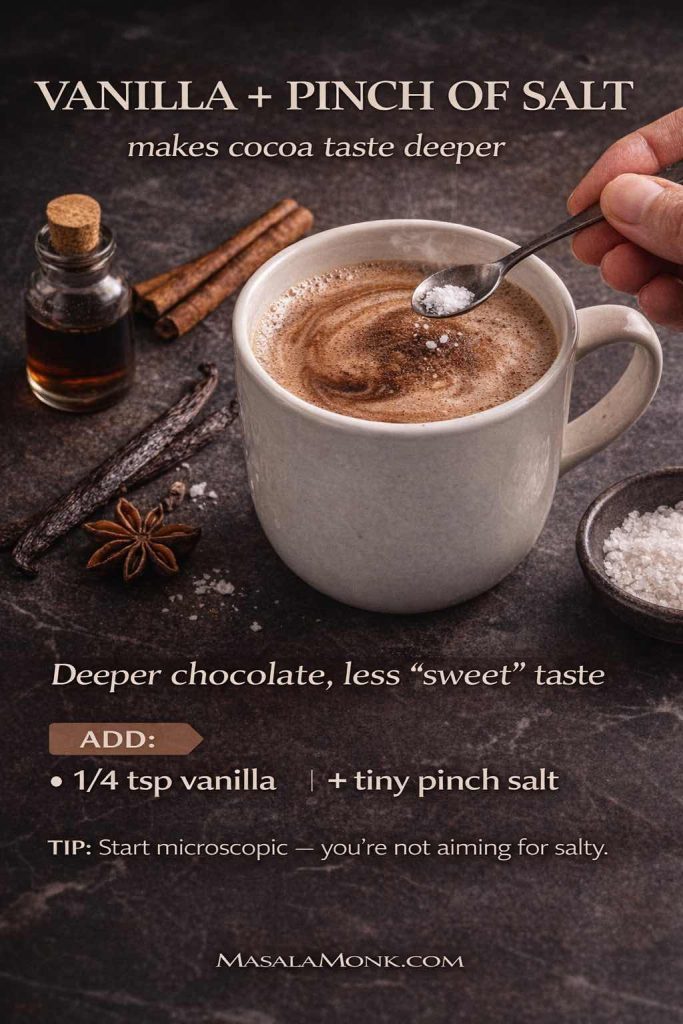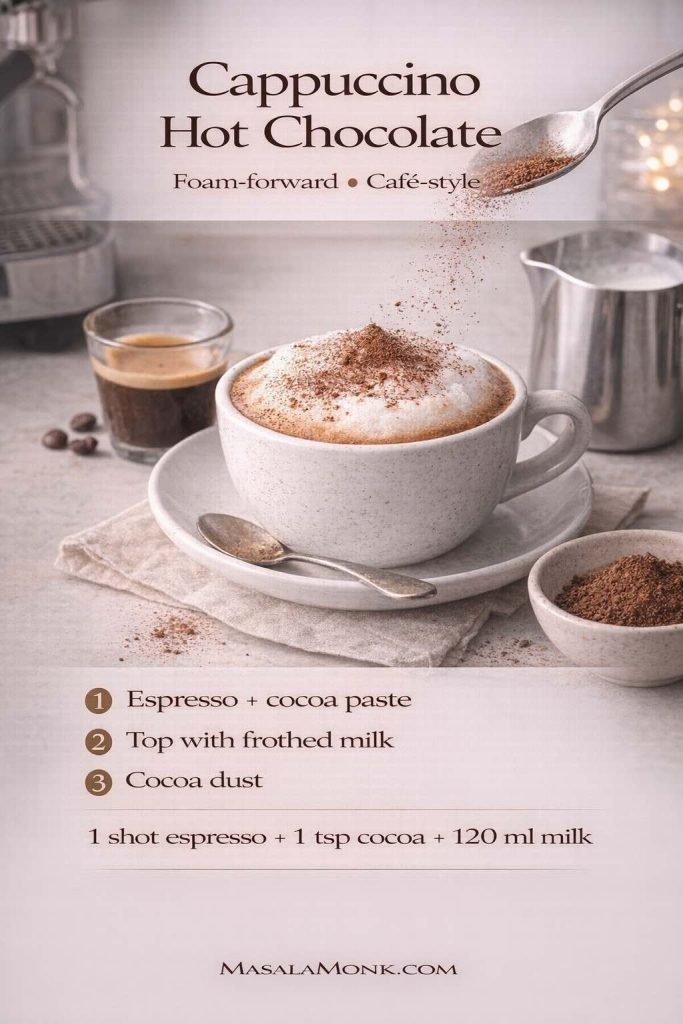
Posted on 1 Comment

Iced Matcha Latte Recipe

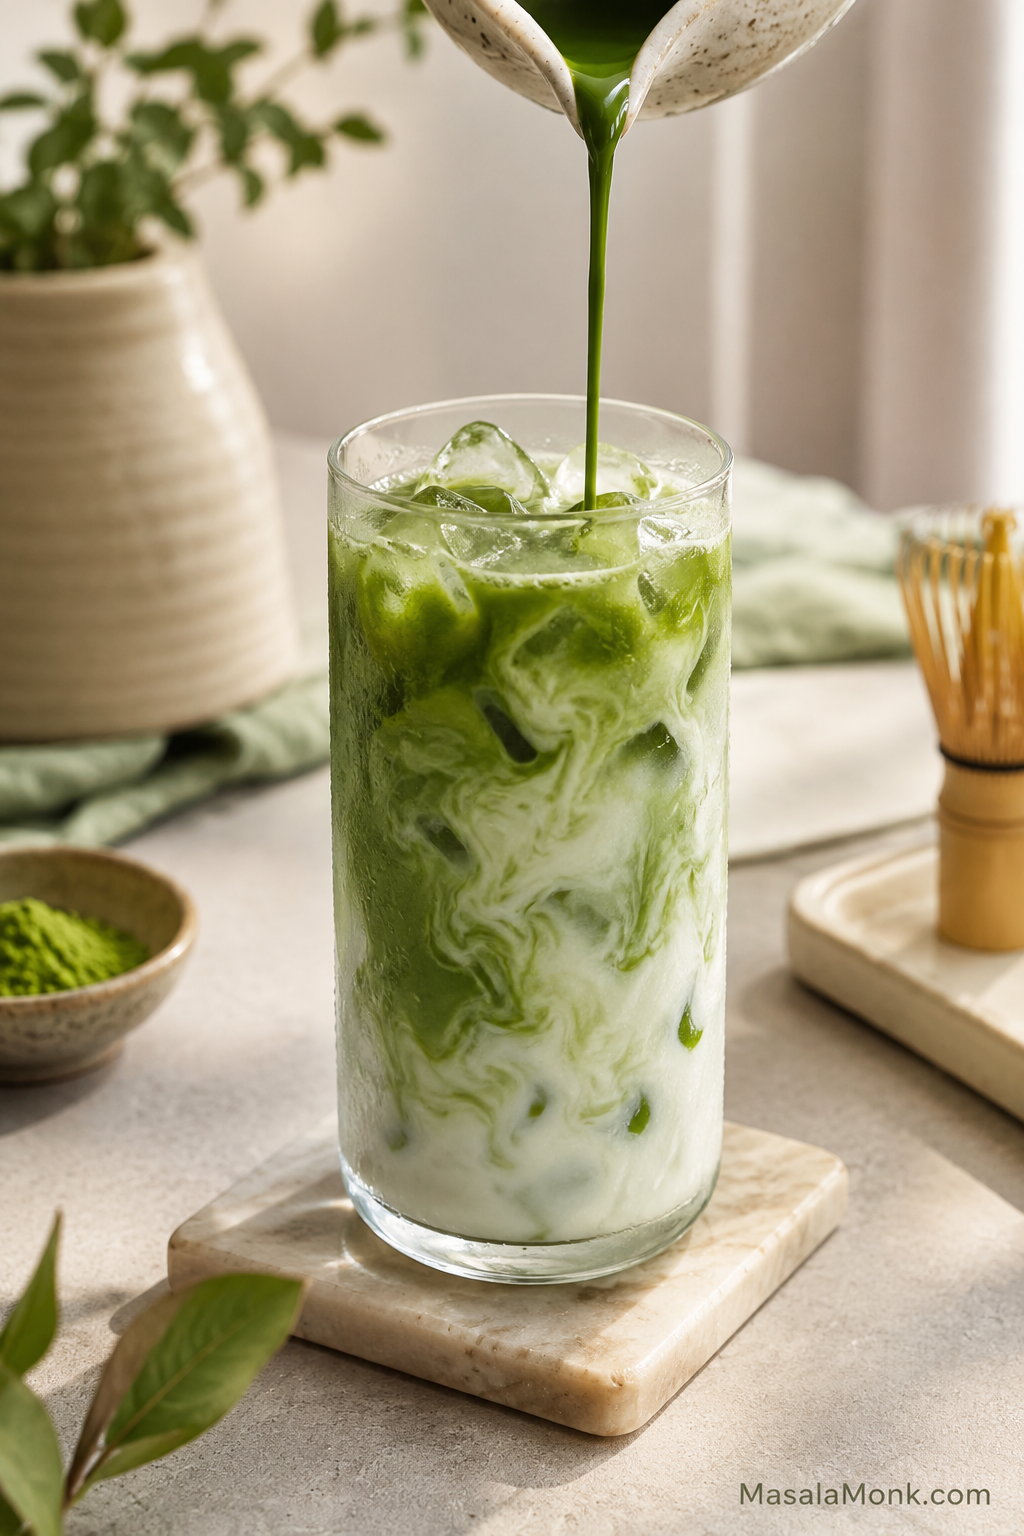
Tall glass of iced matcha latte with matcha swirled into cold milk and ice on a pale café counter.

A homemade iced matcha latte should not taste like cold milk with dry green specks drifting through it. The best version is cold, creamy, bright green, and smooth from the first sip to the last. The trick is simple: sift the matcha, whisk it with a small amount of hot water, then pour it over cold milk and ice.

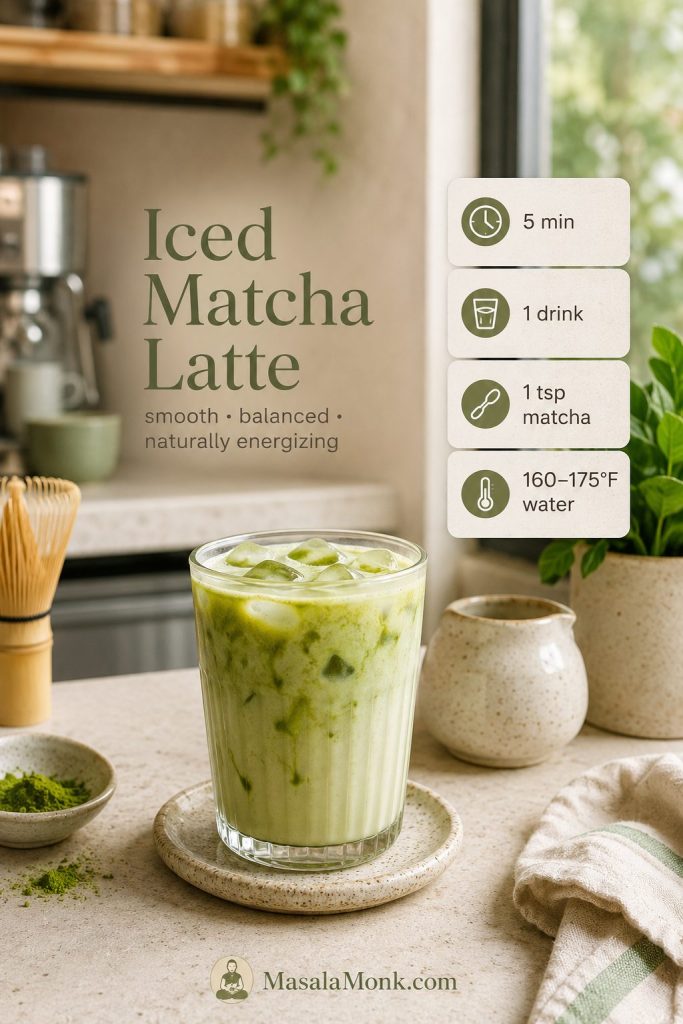
This recipe gives you the everyday version first, then shows you how to adjust it: stronger, less sweet, Starbucks-style, vanilla, oat milk, cold foam, or strawberry. The goal is a chilled, milky green tea drink that tastes clean from the first sip — not powdery, bitter, or watered down.
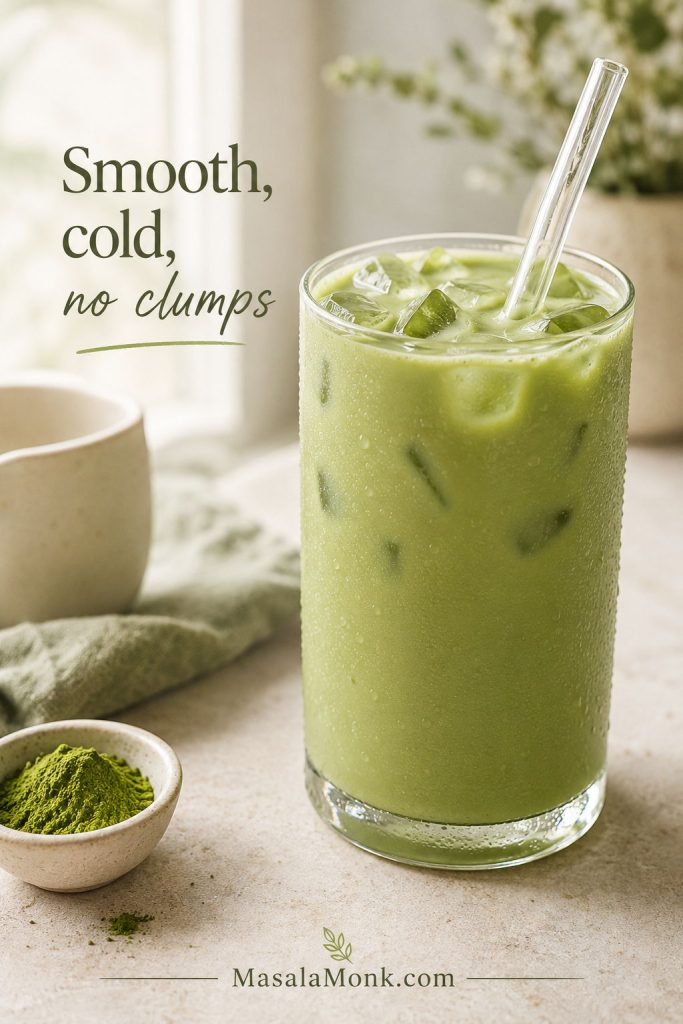
Close-up of a smooth iced matcha latte with ice and no visible matcha clumps
Blending the matcha before adding milk keeps the texture silky, so you do not get dry green specks floating through the drink.

Quick Answer

To make an iced matcha latte, sift 1 teaspoon matcha powder into a small bowl or cup, whisk it with 2 tablespoons hot water until smooth, then pour it over a glass filled with ice, cold milk, and a little simple syrup or vanilla syrup if you like it sweet.

  • Matcha: 1 teaspoon / about 2 grams
  • Water: 2 tablespoons / 30 ml hot water, not boiling
  • Milk: ¾ to 1 cup / 180 to 240 ml cold milk
  • Sweetener: 1 to 2 teaspoons simple syrup, maple syrup, or vanilla syrup
  • Ice: about 1 cup, enough to fill a 12 to 16 oz glass

Use the visual formula below as a quick scan of the base iced matcha latte before you adjust sweetness or milk.
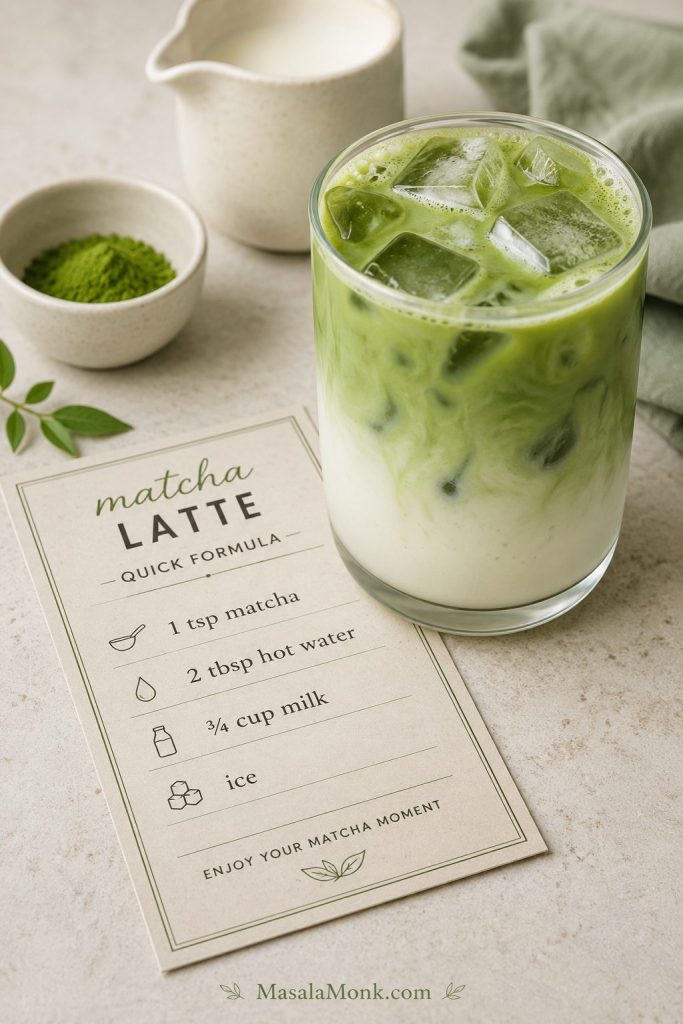
Iced matcha latte beside a quick formula card showing matcha, hot water, milk, and ice
Begin with the base formula, then change only one thing at a time so you know whether matcha, milk, or syrup made the difference.

Start here: Choose 1 teaspoon matcha, 2 tablespoons hot water, ¾ cup cold milk, 1 teaspoon syrup, and a full glass of ice the first time.

The small 2-tablespoon matcha shot is the key: enough water to smooth the powder, not so much that it thins the latte. Starting with ¾ cup milk also leaves room to soften the drink after tasting instead of making it too pale from the beginning.

Already know the basic method? You can also jump to the ratio guide, which version to make first, or quick fixes.

Keep this 2-tablespoon hot-water shot in mind: it is the difference between a creamy latte and a watered-down glass.
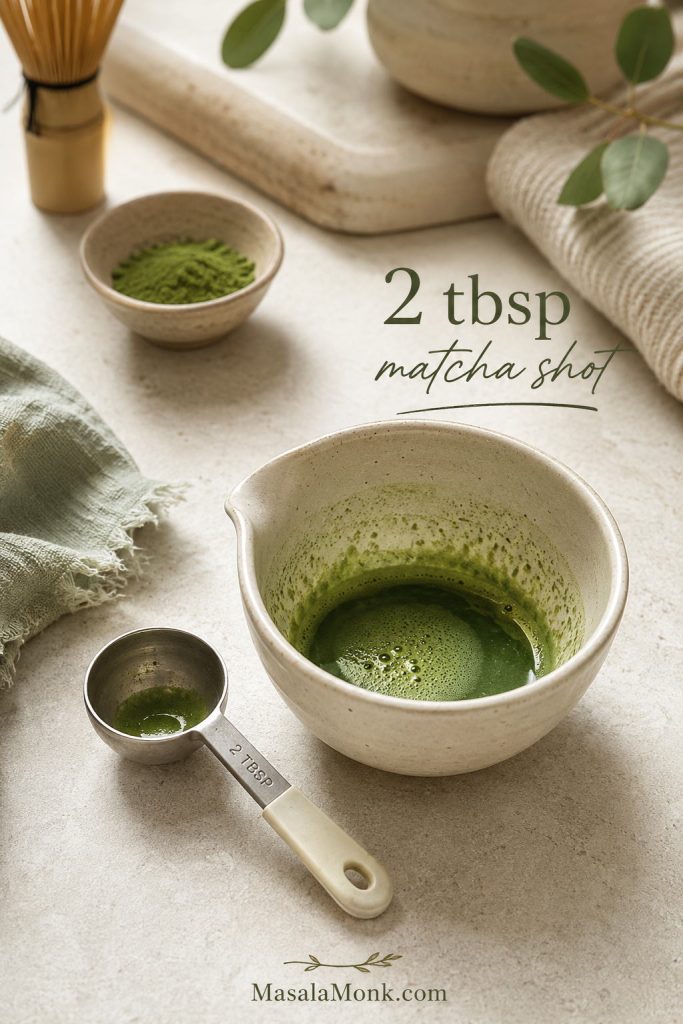
Small concentrated matcha shot in a cup with a tablespoon measure beside it
This small hot-water shot gives the powder enough room to smooth out while keeping the finished latte creamy instead of thin.

Iced Matcha Latte at a Glance

Yield1 drink, about 12 to 16 oz depending on milk and ice
Total time5 minutes
Matcha amount1 teaspoon / about 2 grams
Water temperature160 to 175°F / 70 to 80°C
Milk amountStart with ¾ cup / 180 ml, then add more if needed
ToolsBamboo whisk, handheld frother, shaker jar, or blender
Main fixSift first, then whisk matcha with water before adding milk

Use this quick reference to check the timing, water temperature, and base ratio before you start whisking.
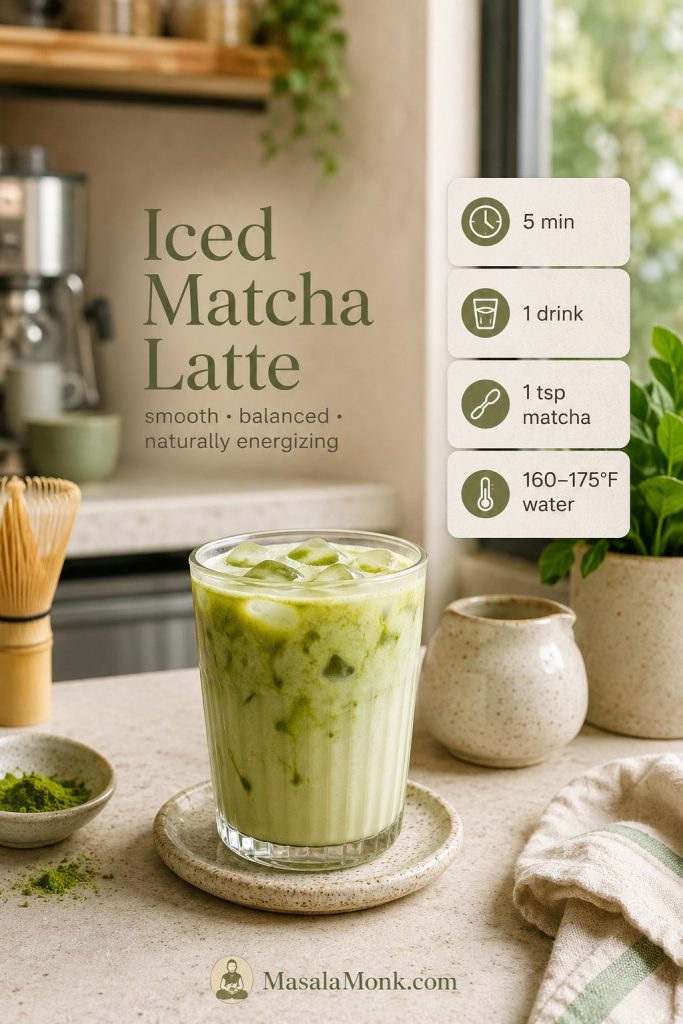
Iced matcha latte with quick recipe details for time, yield, matcha amount, and water temperature
A clear starting point saves guesswork: the right powder amount, warm water, cold milk, and ice make the first glass much easier.

After a couple of tries, the order becomes easy: sift, whisk, ice, milk, pour. Matcha does not dissolve like instant coffee; it stays suspended in the drink. That is why it can settle as it sits, why the last few sips may taste stronger, and why stirring before drinking helps.
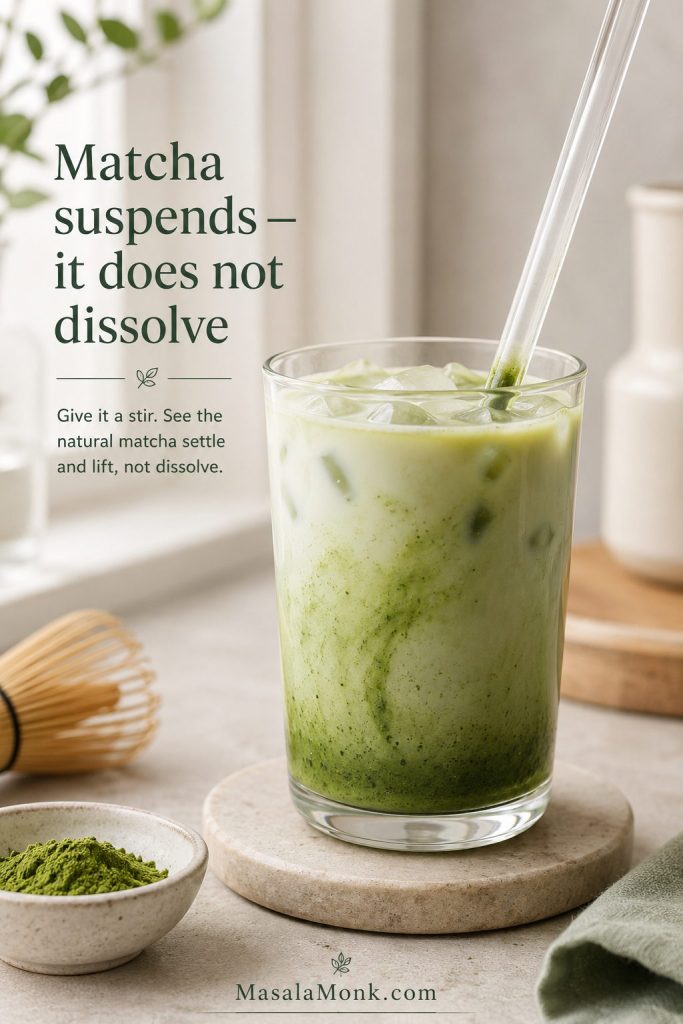
Side-view iced matcha latte showing matcha settling slightly while being stirred back into the drink
Since matcha is finely ground tea leaf, stirring before drinking helps redistribute the green tea flavor through the milk.

Why This Method Works

The key move is the concentrated matcha shot: just 2 tablespoons hot water, enough to blend the powder without watering down the glass. Think of it like a small green espresso shot: smooth, concentrated, and strong enough to flavor the milk without turning the latte thin.

You want a smooth matcha base, not a diluted cup of tea. Cold milk keeps the drink soft and refreshing, while a little syrup rounds off the earthy edge without covering the green tea flavor.
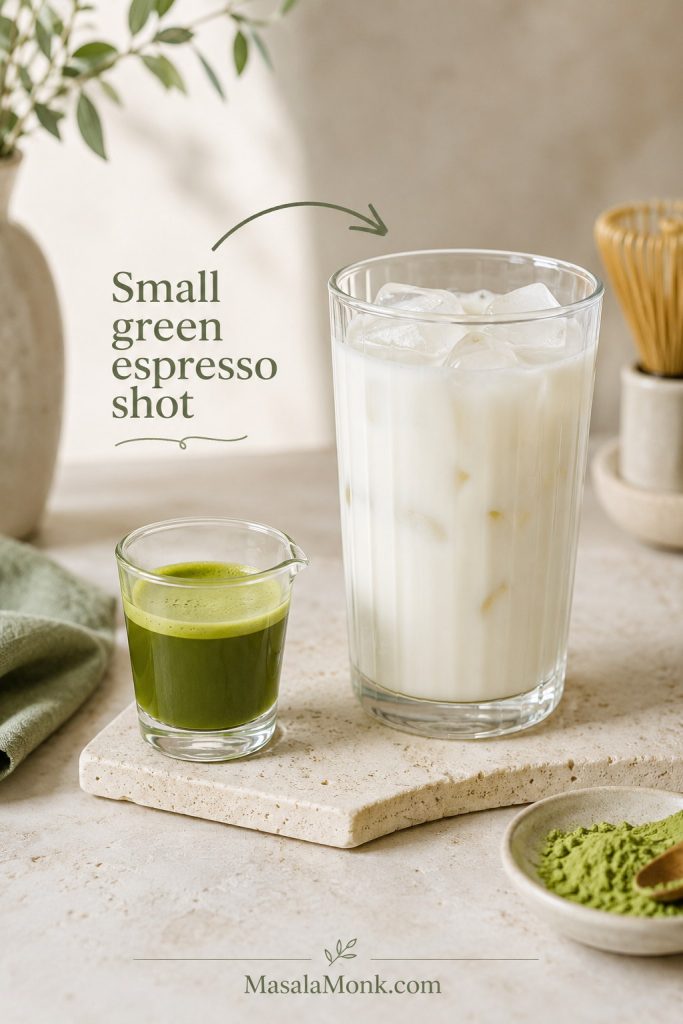
Small concentrated matcha shot beside a larger glass of milk and ice
Treat the prepared matcha like a concentrated base: strong enough to carry the milk, but small enough to keep the drink refreshing.

Iced Matcha Latte Ingredients

Before you start, set up the matcha, hot water, milk, ice, and syrup in the same order the drink comes together.
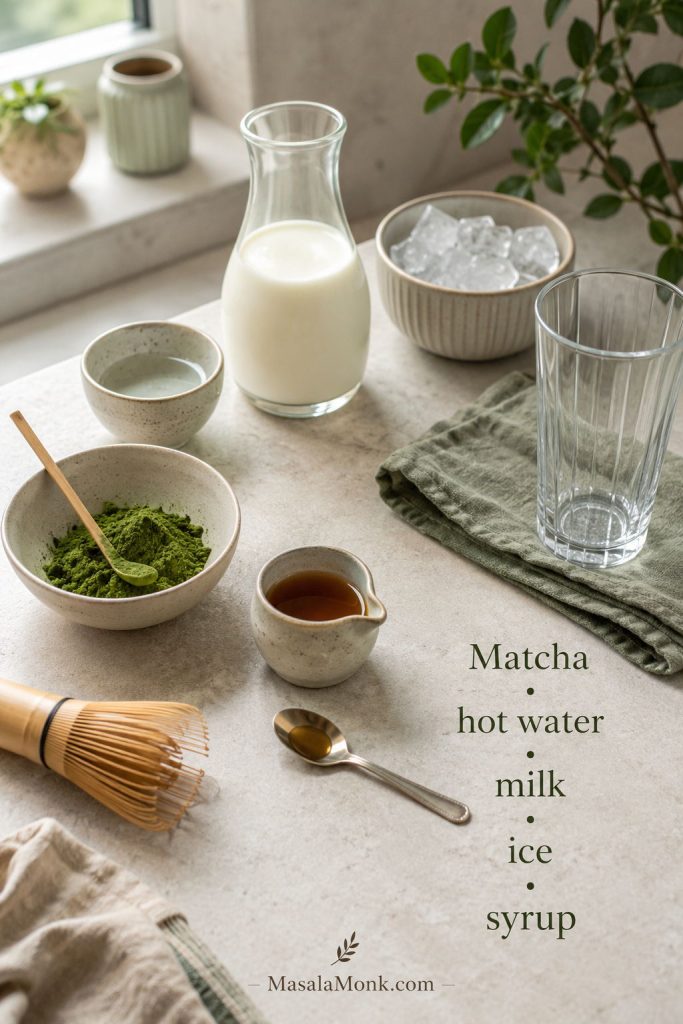
Matcha powder, hot water, milk, ice, syrup, and a glass arranged on a pale counter
A short ingredient list still needs the right sequence: loosen the powder first, then build the cold milk drink around it.

Matcha powder

Plain, unsweetened matcha powder gives you the most control. One teaspoon / about 2 grams makes a balanced drink. If you have a small kitchen scale, 2 grams is more reliable than a packed teaspoon. For a stronger version, increase the matcha to 1½ teaspoons. If you are new to matcha or your powder tastes intense, start with ½ to ¾ teaspoon and increase next time.

Some matcha blends already contain sugar. If yours is sweetened, reduce or skip the syrup so the finished latte does not taste too sweet.

Hot water

A small amount of hot water turns the powder into a smooth matcha shot before it touches the cold milk. The water should be hot but not boiling, which keeps the flavor smoother and less harsh. If you do not have a thermometer, boil the water, turn off the heat, and wait about 1 to 2 minutes before using it.
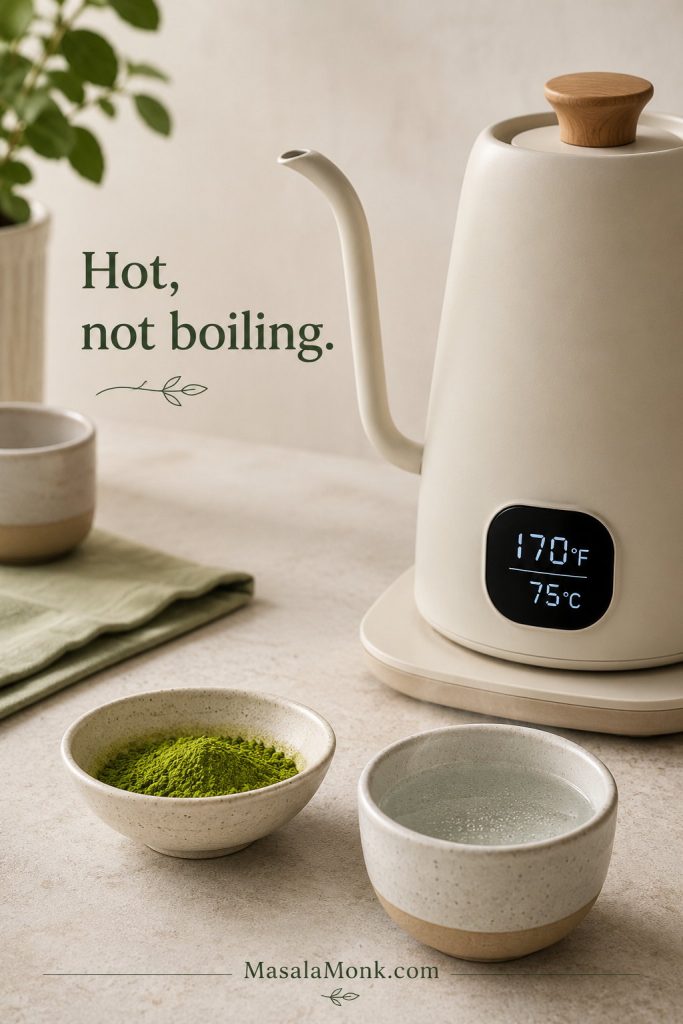
Digital kettle showing 170°F and 75°C beside matcha powder and hot water
Warm water helps the powder blend quickly; however, boiling water can push matcha toward a sharper, more bitter finish.

Milk

Dairy milk, oat milk, almond milk, coconut milk, and soy milk all work. Whole milk gives the richest texture, 2% milk feels balanced and familiar, and barista oat milk is usually the creamiest dairy-free choice.

Ice

About 1 cup ice is enough for a 12 to 16 oz glass. A full glass keeps the milk cold and helps the matcha pour slowly over the top. Large cubes melt more slowly, while crushed ice feels extra refreshing but waters the drink down faster.

Sweetener

Simple syrup, vanilla syrup, maple syrup, honey, or agave all work. Liquid sweeteners are easier to mix into cold drinks than granulated sugar. If you choose honey, whisk it into the warm matcha shot first so it blends evenly.

If your first sip tastes too grassy, that does not mean you did anything wrong. A little more milk, a touch of vanilla syrup, or fresher matcha can make the drink softer and more rounded.

How to Make an Iced Matcha Latte

The whole drink depends on the matcha shot. When that little green base is smooth, the milk and ice have an easy job.

1. Sift the matcha

Sift 1 teaspoon matcha powder into a small bowl, cup, or measuring jug. This step takes only a few seconds, but it prevents the powdery clumps that often float through homemade matcha drinks.
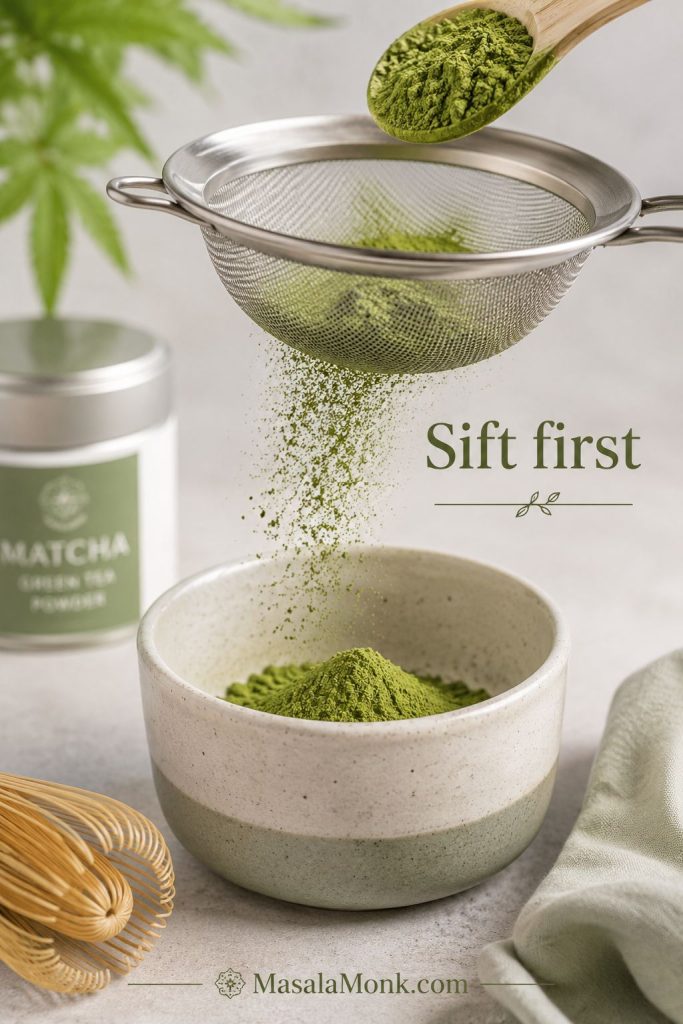
Matcha powder falling through a fine mesh sieve into a bowl
Sifting breaks up compacted powder before whisking, which is why this tiny step makes such a big difference in clump control.

2. Add hot water

Add 2 tablespoons / 30 ml hot water. If you have a temperature-controlled kettle, aim for 160 to 175°F / 70 to 80°C. If not, boil the water, turn off the heat, and let it sit for about 1 to 2 minutes.

3. Whisk until smooth

Whisk for 15 to 20 seconds, using a quick W or M motion if you have a bamboo matcha whisk. A handheld milk frother also works well. The matcha should look blended and lightly foamy, with no dry powder stuck to the sides.
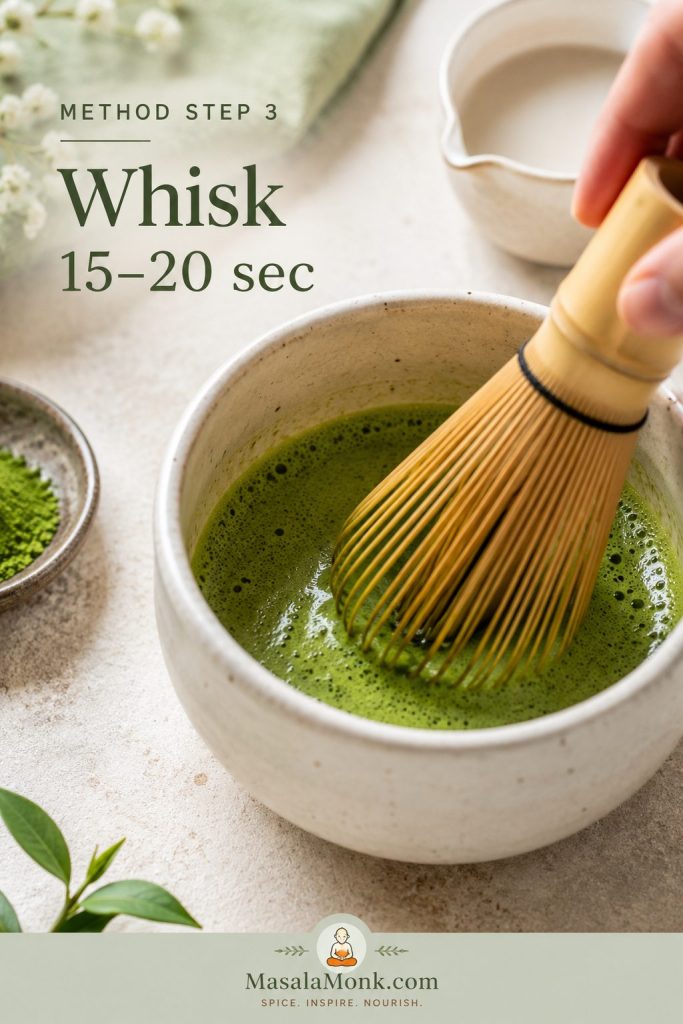
Matcha being whisked with hot water in a small bowl until smooth and lightly foamy
Look for a glossy, lightly foamy surface before adding milk; that tells you the matcha is hydrated and ready to pour.

4. Add ice and milk

Fill a tall glass with ice, then pour in ¾ cup cold milk. Taste after the matcha is added, then add up to ¼ cup more milk if you want the drink softer and creamier. This is easier than trying to rescue a latte that started too milky.

5. Sweeten

Add 1 to 2 teaspoons simple syrup, maple syrup, or vanilla syrup. You can stir it into the milk or whisk it into the warm matcha shot. For a sweeter drink, start with 1 tablespoon syrup and adjust from there.

6. Pour and stir

Slowly pour the matcha shot over the milk and ice. At first, the pour gives you the pretty green layer; after that, stirring gives you the best flavor. The layered glass is pretty for a minute, but the stirred glass is better: cold milk, soft sweetness, and a clean green tea finish without powder at the bottom of the glass.
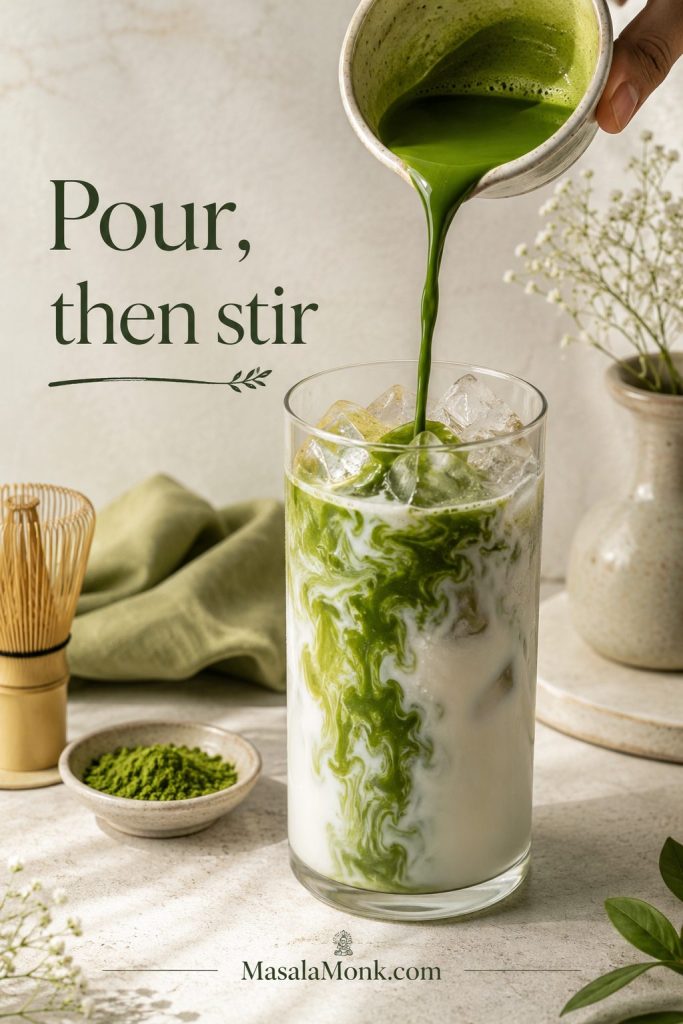
Matcha shot being poured over cold milk and ice in a clear glass
A green ribbon gives the glass its café look, but the real test comes after stirring, when the flavor should taste even.

This comparison shows why the layered look is only the starting point and the stirred glass gives the better sip.
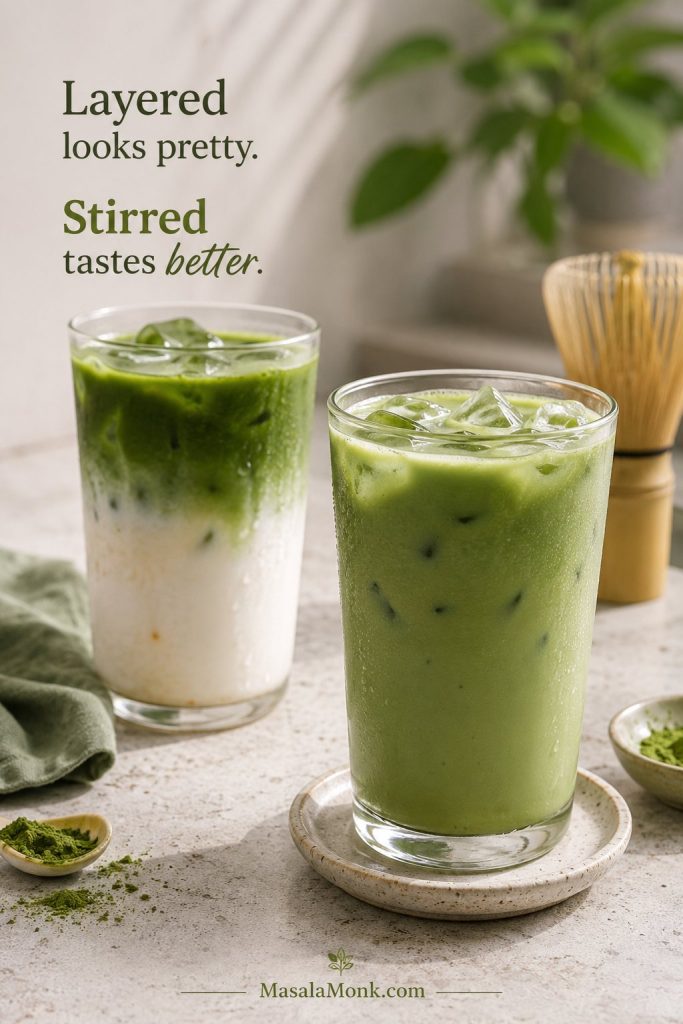
Layered iced matcha latte beside a stirred iced matcha latte on a café counter
Layers are beautiful for serving photos, while the stirred glass is usually the one that tastes balanced all the way down.

Iced Matcha Latte Recipe

This iced matcha latte is cold, milky, lightly earthy, and easy to adjust. Start with 1 teaspoon matcha for a balanced drink or 1½ teaspoons for a stronger version.

Yield
1 drink
Prep Time
5 minutes
Total Time
5 minutes
Skill Level
Easy

Ingredients

  • 1 teaspoon matcha powder / about 2 grams
  • 2 tablespoons hot water / 30 ml, 160 to 175°F / 70 to 80°C
  • ¾ to 1 cup cold milk / 180 to 240 ml
  • 1 to 2 teaspoons simple syrup, maple syrup, or vanilla syrup
  • About 1 cup ice, enough to fill a 12 to 16 oz glass

Instructions

  1. Sift the matcha powder into a small bowl, cup, or measuring jug.
  2. Add the hot water and whisk for 15 to 20 seconds, until blended and lightly foamy.
  3. Fill a tall 12 to 16 oz glass with ice.
  4. Pour in ¾ cup cold milk.
  5. Add the sweetener to the milk or whisk it into the warm matcha shot.
  6. Pour the matcha over the milk and ice.
  7. Stir, taste, and add up to ¼ cup more milk if you want a softer drink.

Notes

  • The 2-tablespoon hot-water shot keeps the drink smooth without making it watery.
  • A stronger glass starts with 1½ teaspoons matcha.
  • For a sweeter coffee-shop style drink, use about 1 tablespoon simple syrup or vanilla syrup.
  • Clumps are easiest to prevent before they start: sift first, then whisk.
  • If your matcha is already sweetened, reduce or skip the syrup.

Use the saveable recipe-card visual below when you want the base method without rereading the full guide.
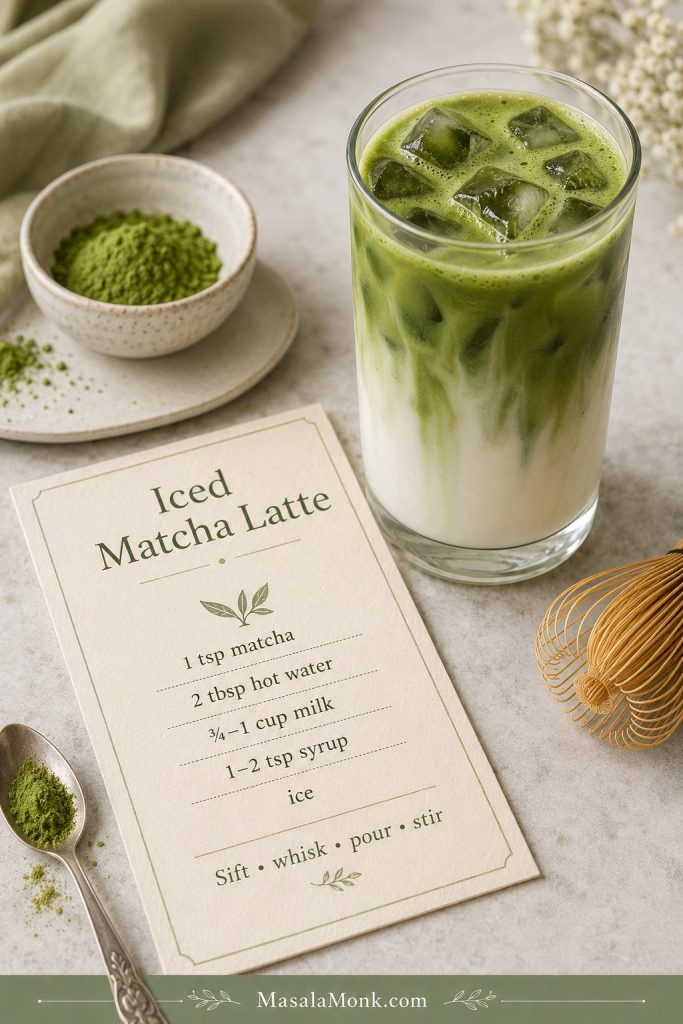
Iced matcha latte with a recipe card showing matcha, hot water, milk, syrup, ice, and method steps
Keep the base recipe handy; once this version works, every variation becomes an adjustment instead of a new drink to relearn.

That is the whole base drink. When the matcha shot is right, the glass looks café-pretty, but more importantly, it tastes smooth all the way down. After you have made it this way once or twice, it stops feeling like a café trick: you know how strong you like the matcha, how much milk softens it, and exactly when to stir. From here, use the ratio guide if you want to adjust strength, the no-whisk tools if you want an easier method, and the matcha powder guide if your drink tastes flat or bitter.

Hot Water vs Cold Water for Iced Matcha

The main texture question is whether the matcha gets mixed with hot water, cold water, or milk. For the most reliable result, whisk the powder with a small amount of hot water first, then pour it over cold milk and ice.

This same sequence — sift, whisk with warm water, then combine with cold milk and ice — also appears in Ippodo’s iced matcha latte method. See Ippodo’s iced matcha latte method here.

MethodBest forDownside
Hot water firstSilky texture, fewer clumps, balanced flavorNeeds hot water
Cold water firstFast shaker or bottle methodCan clump if the matcha is not sifted well
Directly into milkFastest methodHighest chance of clumps
Blender methodFoamy, lump-free, no-whisk versionExtra cleanup

Water amount matters: Two tablespoons hot water makes a stronger, creamier latte. Up to ¼ cup / 60 ml is easier to whisk, but the drink will taste lighter and more tea-forward.

If clumps are your main issue, the no-whisk tool options and troubleshooting section will help you choose the easiest fix.

This method comparison shows why warm water is more reliable than adding dry matcha straight to cold milk.
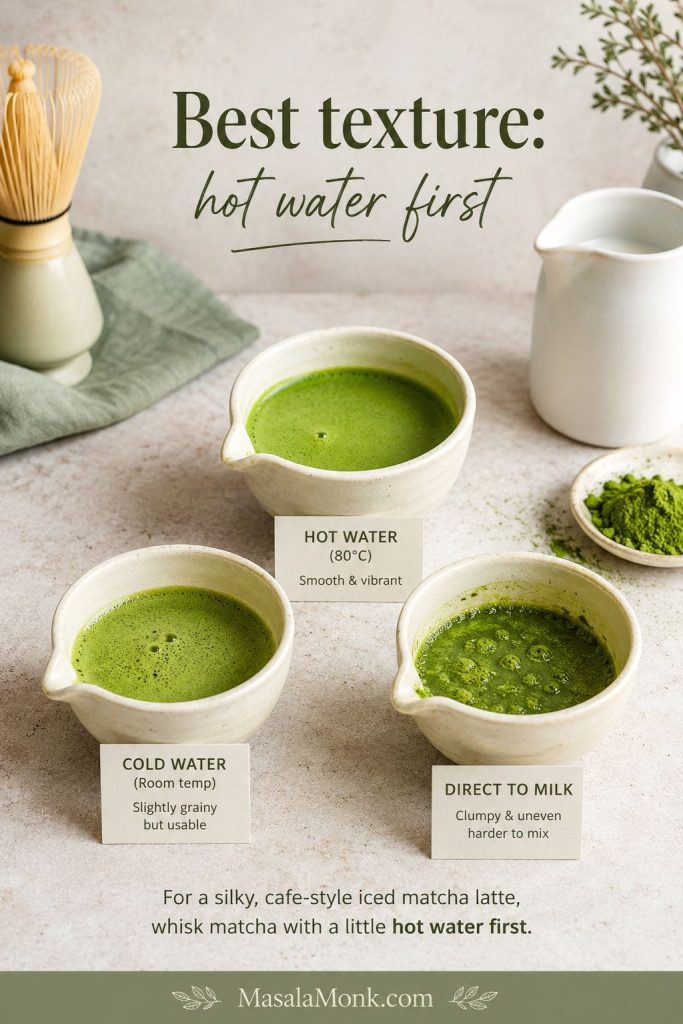
Three matcha mixing methods showing hot water, cold water, and direct-to-milk results
Cold water can work with enough shaking, but warm water gives the powder a better start before it meets cold milk.

How to Make an Iced Matcha Latte Without a Whisk

You do not need a full matcha setup. The only real mistake is expecting dry matcha and cold milk to become silky on their own.

A bamboo matcha whisk is lovely, but it is not required. You can also make a lump-free drink with a frother, shaker jar, or blender if the powder is sifted first.
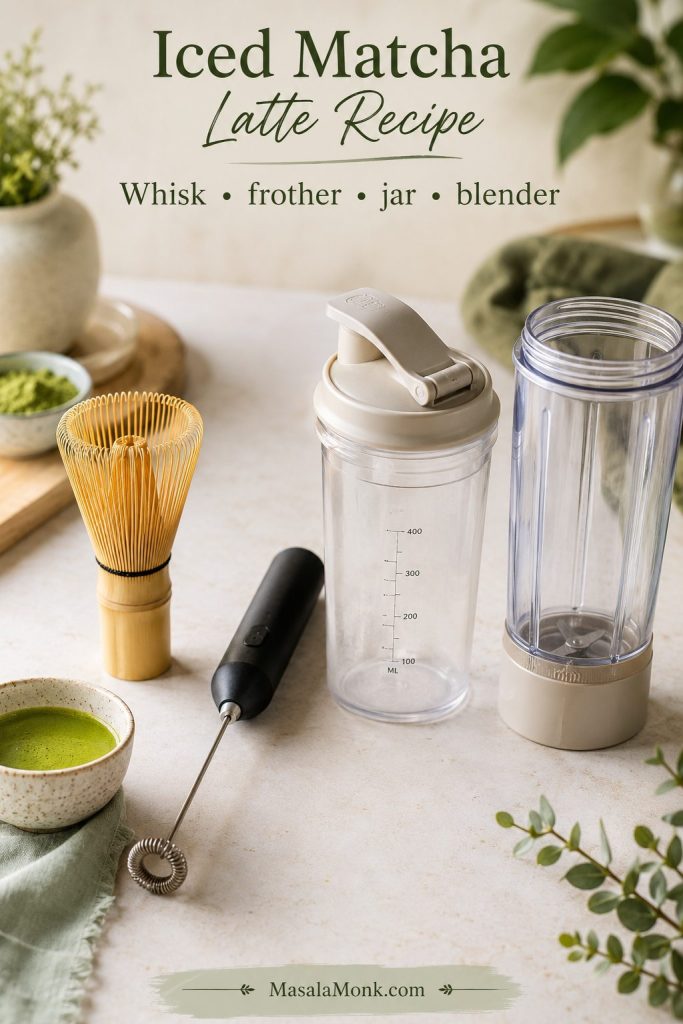
Bamboo whisk, handheld frother, shaker jar, and blender cup for making iced matcha latte
Traditional bamboo whisking is helpful, yet a frother, shaker jar, or blender can still make a smooth matcha latte when used in the right order.
ToolBest useHow to use it
Bamboo matcha whiskBest traditional textureSift matcha, add hot water, then whisk quickly in a W or M motion.
Handheld milk frotherFast everyday methodFroth the matcha shot in a tall cup for 15 to 20 seconds.
Shaker jarNo-whisk iced matchaShake sifted matcha with water first, then add milk and ice.
BlenderSmoothest, foamiest versionBlend the matcha shot or the full latte briefly.
Spoon or forkLast resortMake a paste first, then slowly loosen it with more water.

A narrow cup gives the frother less room to splash and more control over the small matcha base.
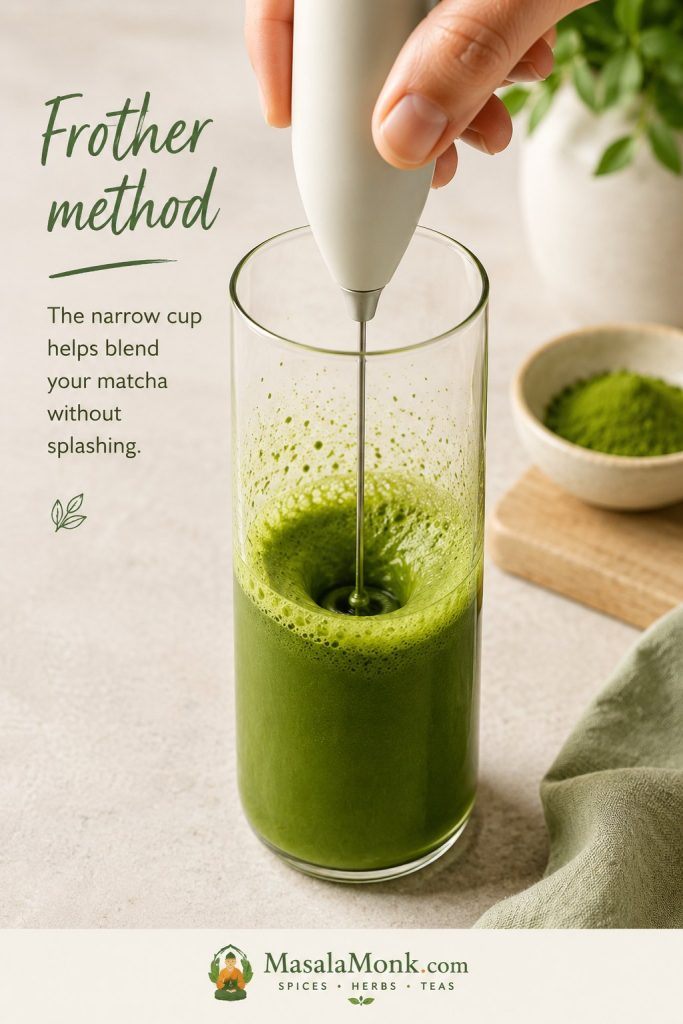
Handheld frother blending matcha in a tall narrow cup
A tall narrow cup keeps the frother’s motion focused, so the matcha blends faster and splashes less.

With the jar method, the order still matters: shake the matcha with water first, then add milk and ice.
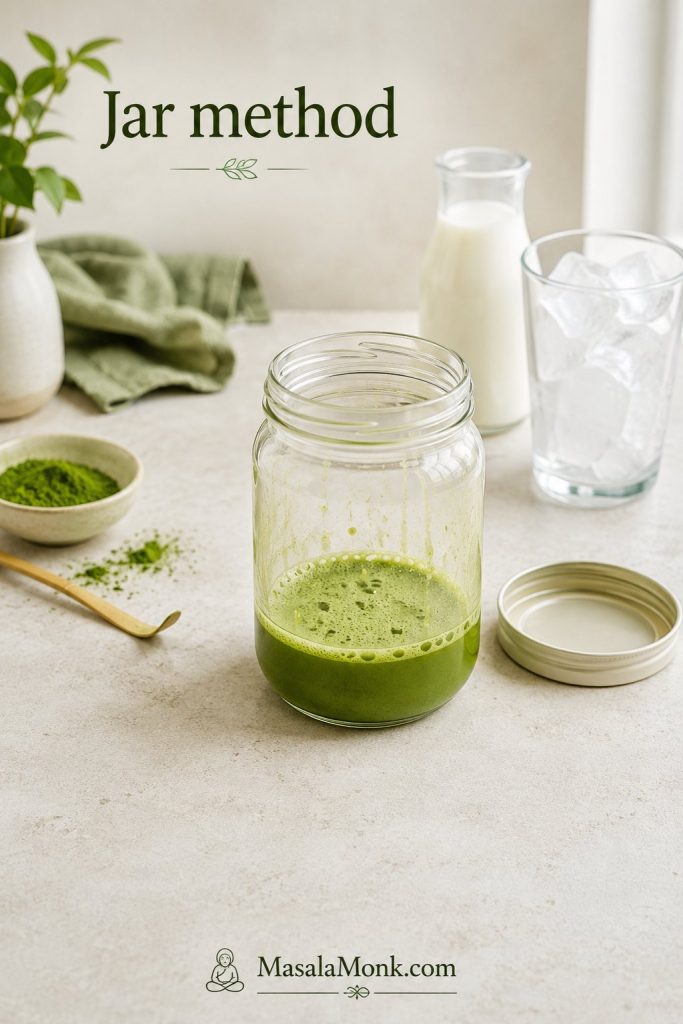
Foamy matcha shot in a clear shaker jar with milk and ice nearby
Shake the matcha with water first; after that, milk and ice can chill the drink without trapping dry powder.

Best Matcha Powder for This Latte

What to look for in the powder

Technique matters most, but the powder still matters. A good method can smooth out matcha, but it cannot completely hide powder that tastes stale before it reaches the glass.

For this recipe, the best buy is usually a fresh, vivid green latte-grade matcha from a seller with good turnover. Save the expensive ceremonial tin for plain matcha if you drink it that way. Good matcha makes the drink feel clean and fresh; tired matcha often makes you keep adding syrup and milk, trying to soften a flavor that has already lost its brightness.

Do not judge matcha only by the word “ceremonial” on the label. Color, aroma, freshness, and taste matter more than marketing language. Vivid green matcha usually gives a cleaner drink, while dull olive, yellow-green, or brownish matcha is more likely to taste flat or muddy.
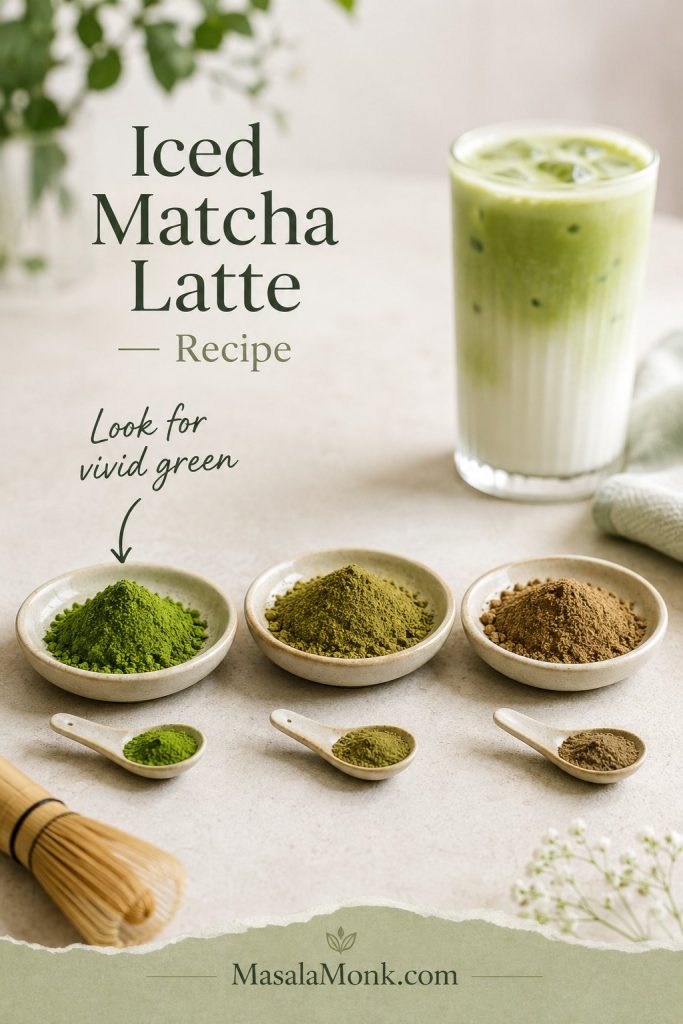
Three matcha powder samples comparing vivid green, dull olive, and brownish matcha
Color is not everything, but vivid green powder is often a good sign that your latte will taste cleaner and fresher.

Ceremonial vs latte-grade matcha

Matcha typeBest useWhat to know
Ceremonial matchaBest for drinkingSmooth, bright, and usually less bitter. Good if you drink matcha often.
Latte-grade matchaBest everyday valueOften the smartest choice for milk drinks if it is fresh and vivid green.
Culinary matchaBaking, smoothies, stronger milk drinksNot automatically bad, but it should not taste muddy, stale, or overly bitter.

For milk drinks, this comparison helps separate everyday latte value from labels that only sound more expensive.
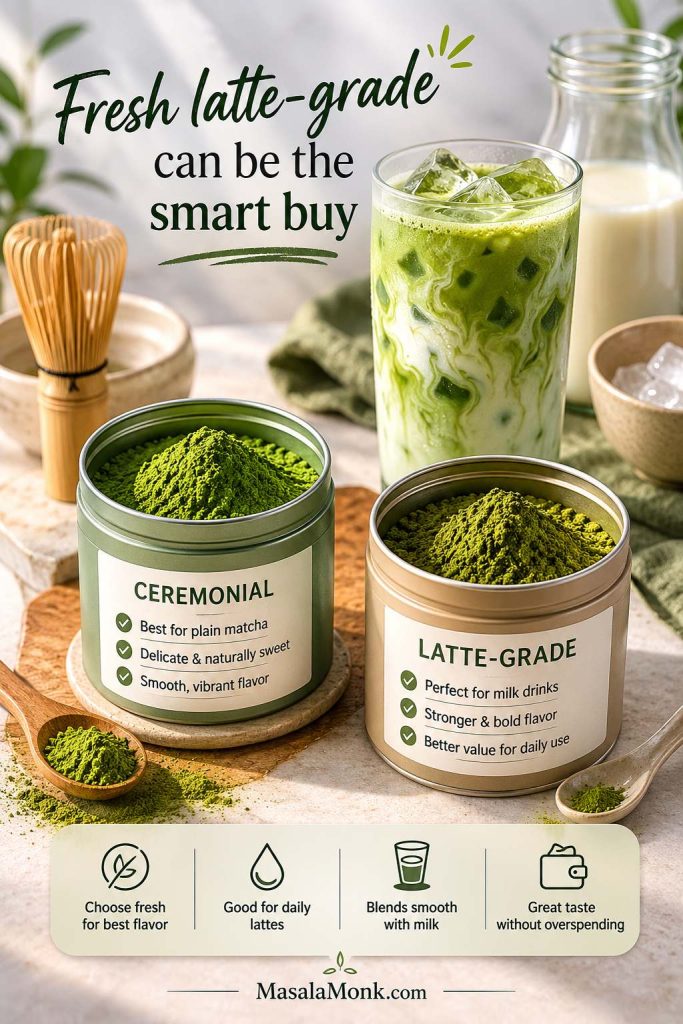
Ceremonial and latte-grade matcha containers compared beside an iced matcha latte
For milk drinks, freshness matters more than prestige, so a bright latte-grade matcha can be the better everyday buy.

Keep matcha fresh after opening

If you only make matcha occasionally, buy a smaller tin so it stays fresh. Store it airtight, cool, dark, and dry. Matcha loses its color and aroma when it sits too long near heat, light, or moisture.

If your matcha tastes strong but not stale, use the ratio guide to soften the drink with milk or reduce the powder before adding extra syrup.
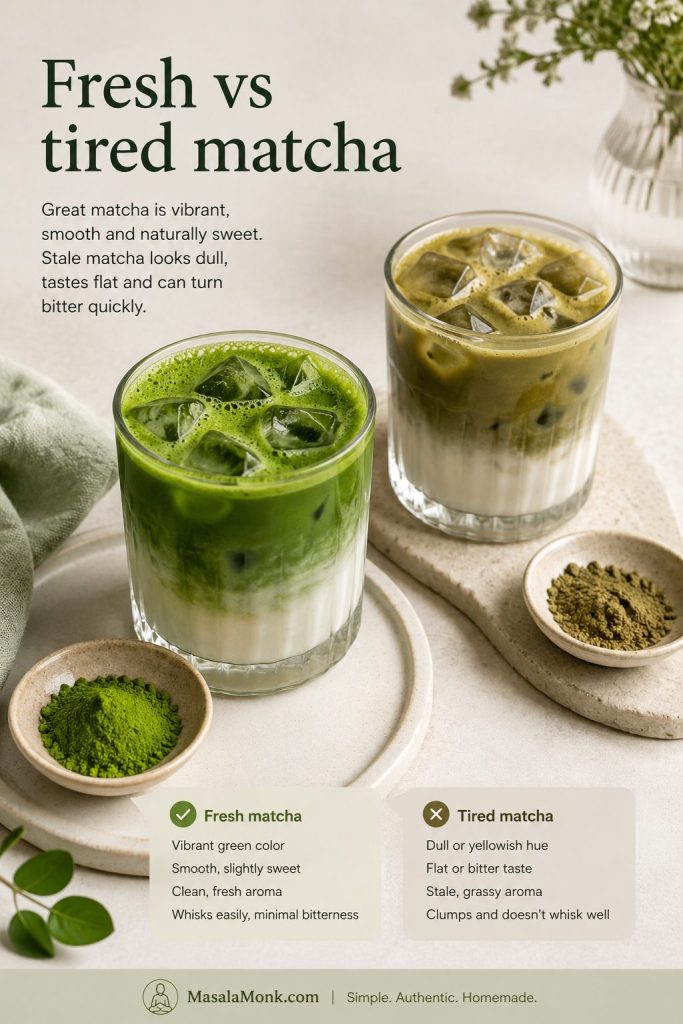
Fresh green iced matcha latte compared with a dull tired matcha latte and powder samples
If the drink tastes flat even after adjusting milk and syrup, the problem may be tired matcha rather than your method.

Iced Matcha Latte Ratio Guide

Use the table below to adjust after your first glass. For most people, the balanced version is the best starting point.

If you are still finding your ideal glass, adjust only one thing at a time. More matcha makes it greener and stronger, more milk makes it softer, and more syrup makes it rounder.
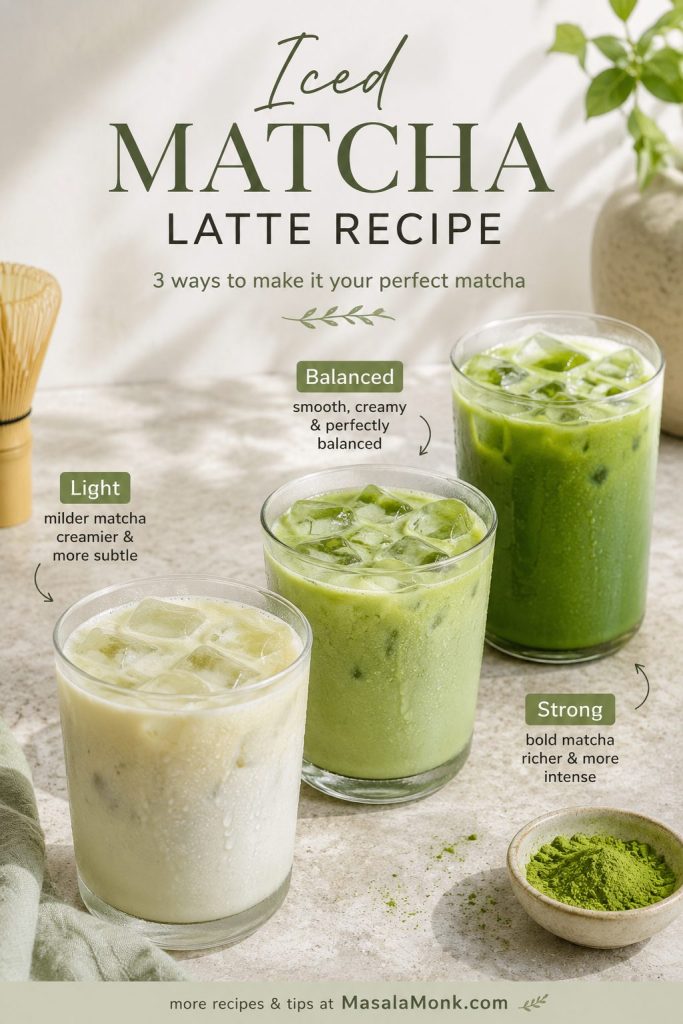
Three iced matcha lattes showing light, balanced, and strong matcha color differences
Strength is not only about color; a stronger version should taste more tea-forward without needing to become overly sweet.
StyleMatchaWaterMilkSweetener
Light½ to ¾ tsp2 tbsp / 30 ml1 cup / 240 ml1 tsp
Balanced1 tsp / about 2 g2 tbsp / 30 ml¾ to 1 cup / 180 to 240 ml1 to 2 tsp
Strong1½ tsp / about 3 g2 to 3 tbsp / 30 to 45 ml¾ cup / 180 ml1 to 2 tsp, then add more only if it tastes too sharp
Less sweet1 tsp2 tbsp / 30 ml¾ to 1 cup / 180 to 240 ml0 to 1 tsp
Starbucks-style1½ tsp1 to 2 tbsp hot water if whisking first1 cup / 240 ml1 to 2 tbsp syrup

Use the ratio board as a saveable shortcut for light, balanced, strong, and coffee-shop style drinks.
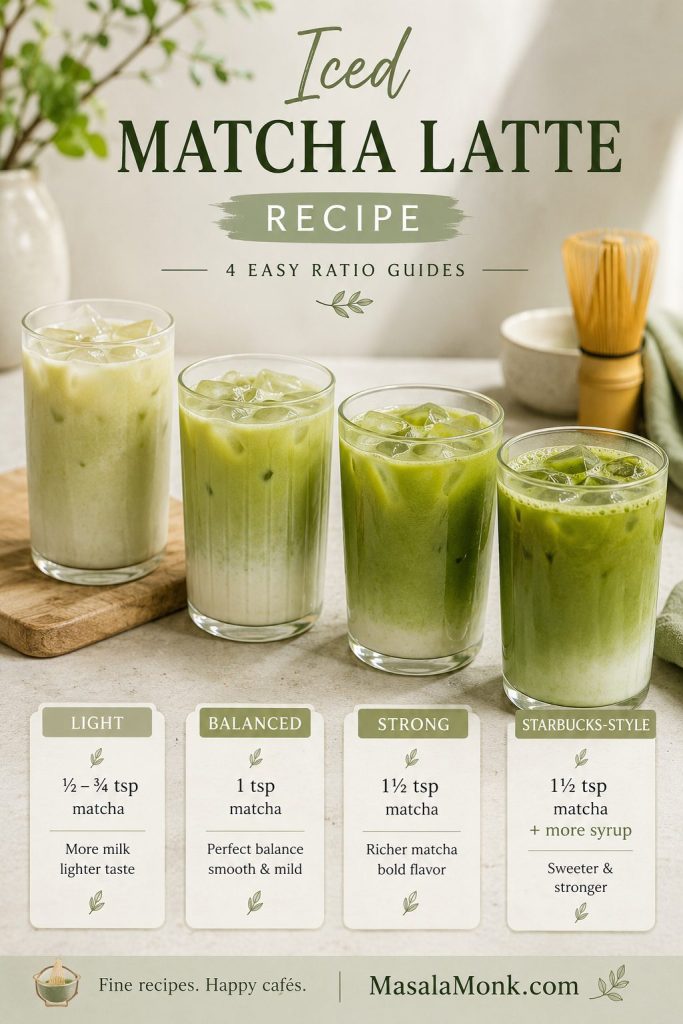
Four iced matcha latte glasses showing light, balanced, strong, and Starbucks-style ratios
The ratio guide helps you steer the drink: more powder for a greener taste, more milk for softness, and more syrup for a café-style finish.

Still unsure where to start? The which version guide turns these ratios into quick choices for gentle, strong, café-style, or dairy-free drinks.

Which Version Should You Make First?

Once you know your ratio, the rest is personal. Make the balanced version once, then use this table to move the drink toward your own taste. Some days you want the cleaner green tea version; other days you want the sweeter café-style glass with more milk, more ice, and vanilla syrup. The method stays the same — only the mood changes.

If you want…Start with…
A gentle first matcha latte½ to ¾ teaspoon matcha, 1 cup milk, and 1 teaspoon syrup
The best balanced everyday version1 teaspoon matcha, ¾ cup milk, and 1 to 2 teaspoons syrup
A stronger green tea flavor1½ teaspoons matcha, ¾ cup milk, and 1 to 2 teaspoons syrup; add more only if it tastes too sharp
A sweeter coffee-shop drink1½ teaspoons matcha, 1 cup milk, and 1 tablespoon vanilla syrup
The creamiest dairy-free version1 teaspoon matcha, barista oat milk, and 1 teaspoon syrup
The least clumpy methodSift first, then use the hot-water shot with a frother, whisk, shaker, or blender

This chooser helps you pick a first version before you start changing matcha, milk, or syrup.
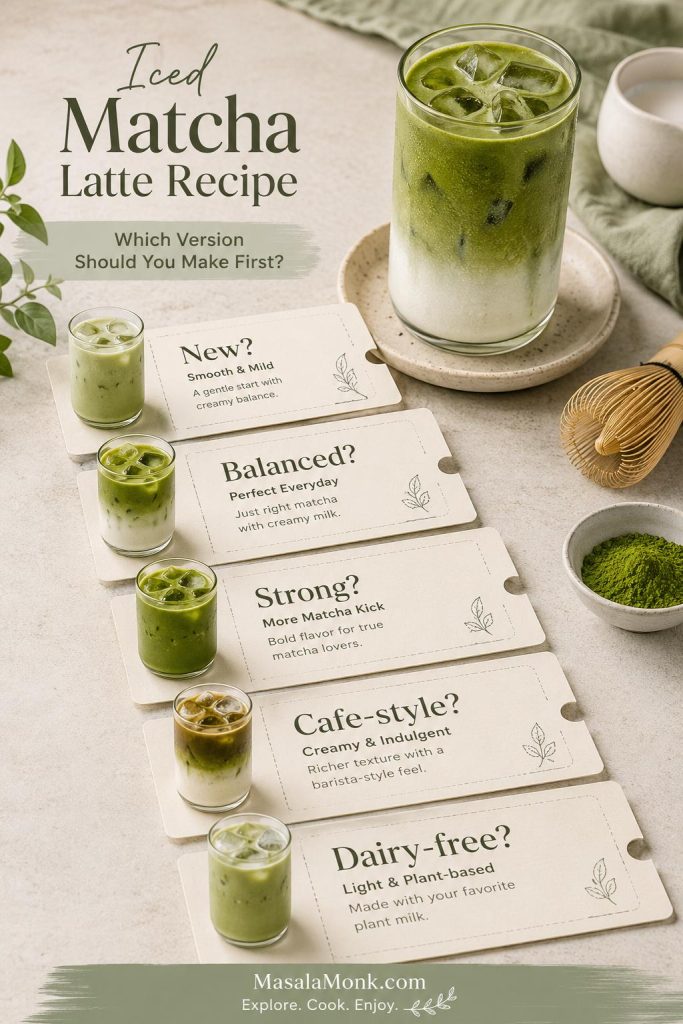
Café order cards showing different iced matcha latte choices for new, balanced, strong, café-style, and dairy-free versions
Pick the version that matches your mood first, then use the same method to move the drink lighter, stronger, sweeter, or creamier.

Starbucks-Style Iced Matcha Latte

Copy the profile, not the exact sweetness

For a Starbucks-style iced matcha latte at home, the main thing to copy is the sweet, milky profile — not the exact sweetness level. Starbucks’ U.S. iced matcha latte listing includes milk, ice, matcha, and classic syrup, so syrup is what gives the homemade version that sweeter coffee-shop profile. You can see the official Starbucks iced matcha latte page here.

This is where homemade is nicer: you can keep the café feel while choosing exactly how sweet you want the glass.
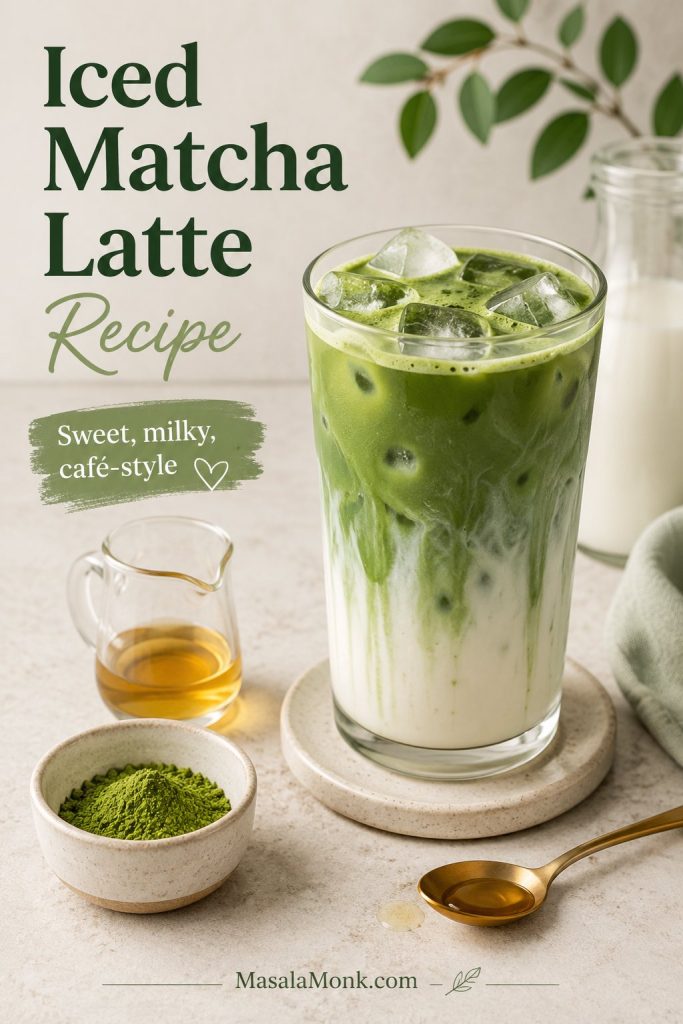
Unbranded café-style iced matcha latte with syrup, matcha powder, and milk on a pale counter
A coffee-shop style glass is mainly about a sweeter milk profile, so start with less syrup and build up only if needed.

Adjust sweetness and texture

GoalWhat to do
Sweeter Starbucks-style flavorAdd 1 to 2 tablespoons simple syrup or vanilla syrup.
Stronger matcha flavorIncrease the matcha to 1½ teaspoons.
Creamier textureChoose whole milk, 2% milk, or barista oat milk.
Less sweetnessStart with 1 teaspoon syrup and add more only after tasting.
Fewer clumpsWhisk matcha with hot water before adding milk and ice.

Add syrup in stages so you can stop when the latte tastes rounded instead of overly sweet.
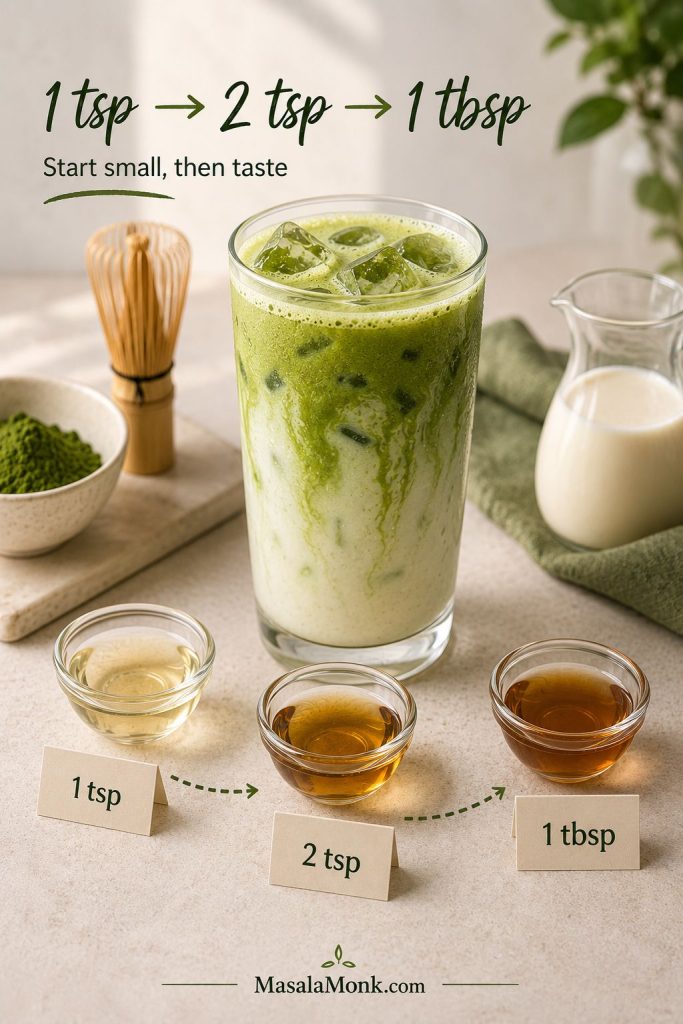
Iced matcha latte with syrup amounts labeled one teaspoon, two teaspoons, and one tablespoon
Sweetness is easiest to control in stages; once the drink is too sweet, the only real fix is more unsweetened milk.

To fine-tune the coffee-shop profile, compare the milk and sweetener options before adding more syrup.

Make a 16-ounce-style glass

A 16-ounce-style drink works well with 1½ teaspoons matcha, 1 cup milk, 1 cup ice, and 1 to 2 tablespoons simple syrup or vanilla syrup. For the most even texture, whisk the matcha with 1 to 2 tablespoons hot water first instead of shaking dry powder directly into cold milk.

Once the method is smooth, the rest of the drink becomes personal. At this point, milk changes the body, sweetener changes the finish, and small adjustments can make the same matcha taste clean, cozy, café-style, or dessert-like.

Milk and Sweetener Choices

After the matcha shot, milk and sweetener decide the mood of the drink: clean and tea-forward, soft and milky, or sweet like a coffee-shop treat.

Choose your milk

MilkResultBest for
Whole milkRich, creamy, roundedClassic creamy version
2% milkLighter but still roundedBalanced everyday version
Barista oat milkCreamy, slightly sweet, full-bodiedBest dairy-free option
Almond milkLighter, thinner, nuttyLower-calorie or lighter version
Coconut milkRich, tropical, more noticeable flavorCoconut variation
Soy milkCreamy and neutral if unsweetenedBalanced dairy-free option

Compare the milks by body as much as flavor: some soften matcha, while others keep it sharper and more tea-forward.
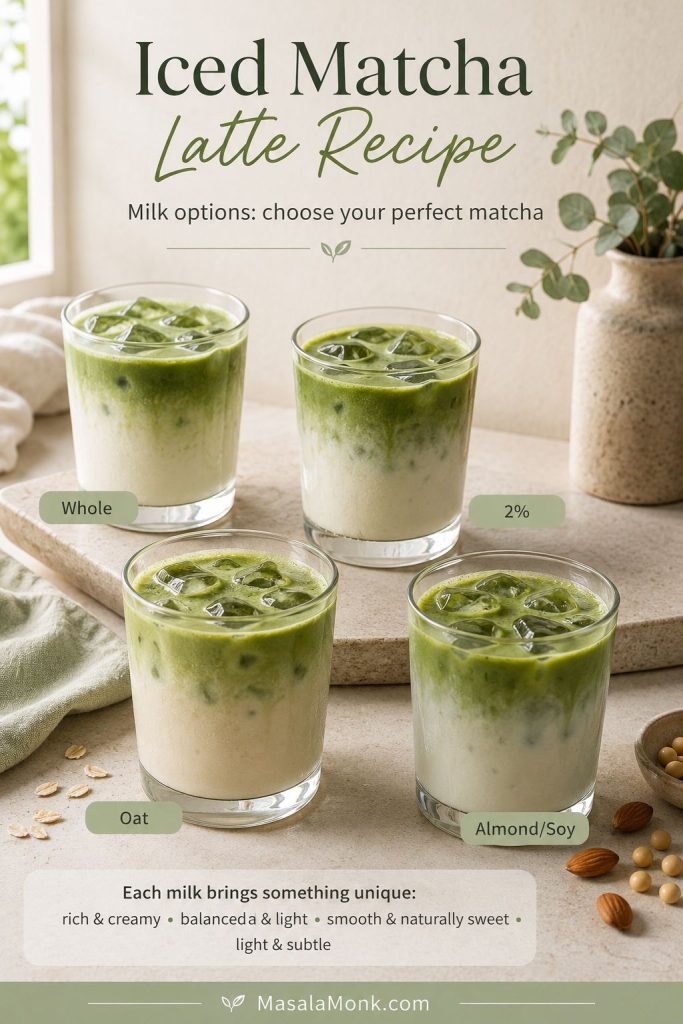
Four iced matcha latte glasses comparing whole milk, two percent milk, oat milk, and almond or soy milk
This comparison shows more than color: richer milks soften green tea flavor, while lighter milks keep the drink sharper.

For the creamiest dairy-free drink, barista oat milk is the easiest choice. For a cleaner, less sweet finish, go with unsweetened dairy milk or unsweetened soy milk.

Sweeteners that mix well

Liquid sweeteners work best here because cold milk will not dissolve granulated sugar evenly. Simple syrup keeps the flavor clean; vanilla syrup makes the drink softer and more dessert-like.

SweetenerFlavorAmount
Simple syrupClean, neutral sweetness1 to 2 tsp, or 1 tbsp for sweeter
Vanilla syrupSoft, sweet, rounded1 to 2 tsp
Maple syrupWarm and rounded1 to 2 tsp
HoneyFloral and stronger1 tsp, whisked into warm matcha first
AgaveMild and smooth1 to 2 tsp
Sugar-free syrupDepends on brandTo taste

Choose a liquid sweetener when possible, since it blends into cold matcha more evenly than dry sugar.
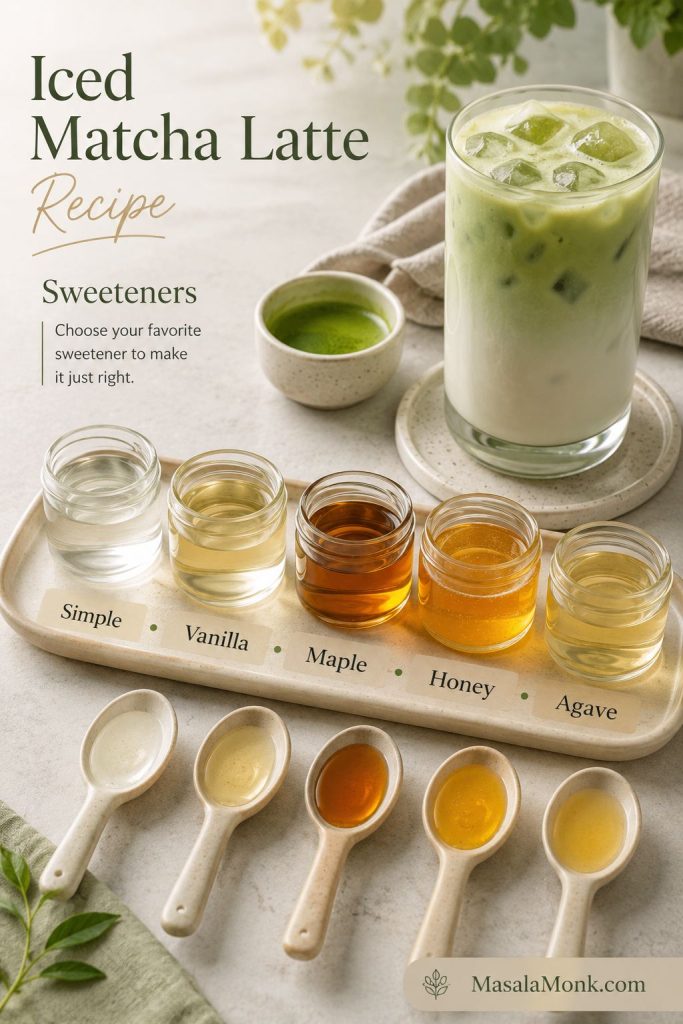
Simple syrup, vanilla syrup, maple syrup, honey, and agave arranged beside an iced matcha latte
Liquid sweeteners mix into cold drinks more evenly, whereas dry sugar can settle before it has a chance to dissolve.

Quick simple syrup: Stir equal parts sugar and hot water until dissolved, then cool before using. Keep it in the fridge for quick iced matcha, iced coffee, lemonade, and other cold drinks.

Variations

This is where the drink starts feeling less like a formula and more like your own café order: the same smooth matcha base, shifted with vanilla, oat milk, fruit, foam, coffee, or coconut.

If a variation tastes too strong, too sweet, or too thin, use the quick fixes instead of starting over.

Vanilla iced matcha latte

Vanilla is the easiest coffee-shop adjustment. Add 1 to 2 teaspoons vanilla syrup to the milk or warm matcha shot; it rounds off the grassy edge without making the drink taste like dessert. It is the best first variation if plain matcha tastes a little too green but you do not want the drink to become sugary.
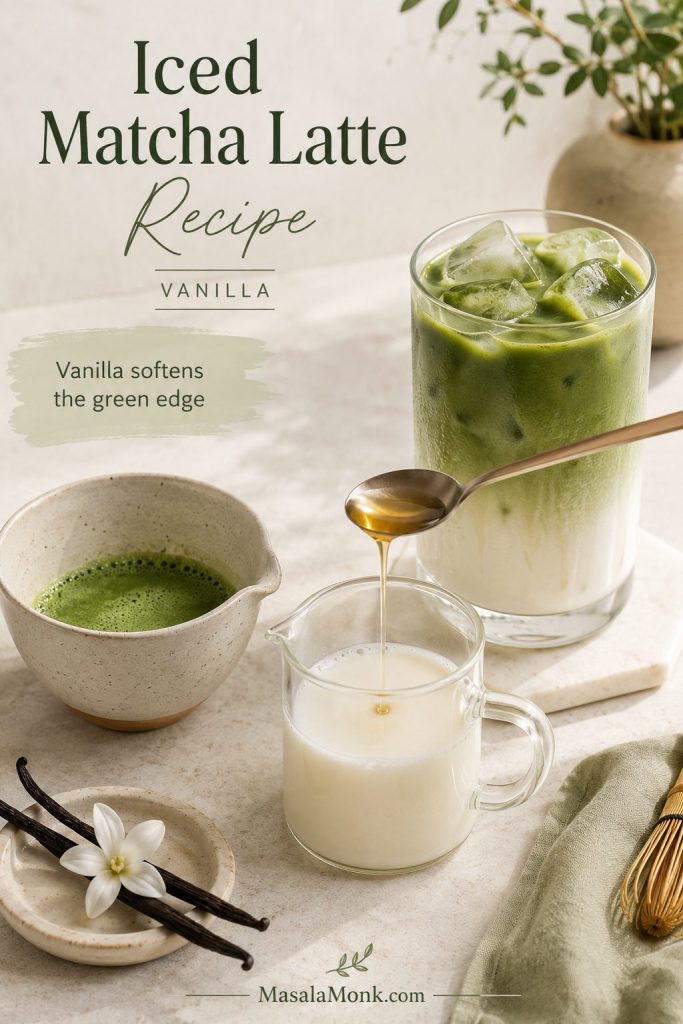
Vanilla syrup being added near an iced matcha latte and matcha bowl
Vanilla rounds the edges of grassy matcha, making it a smart first variation when plain green tea flavor feels too strong.

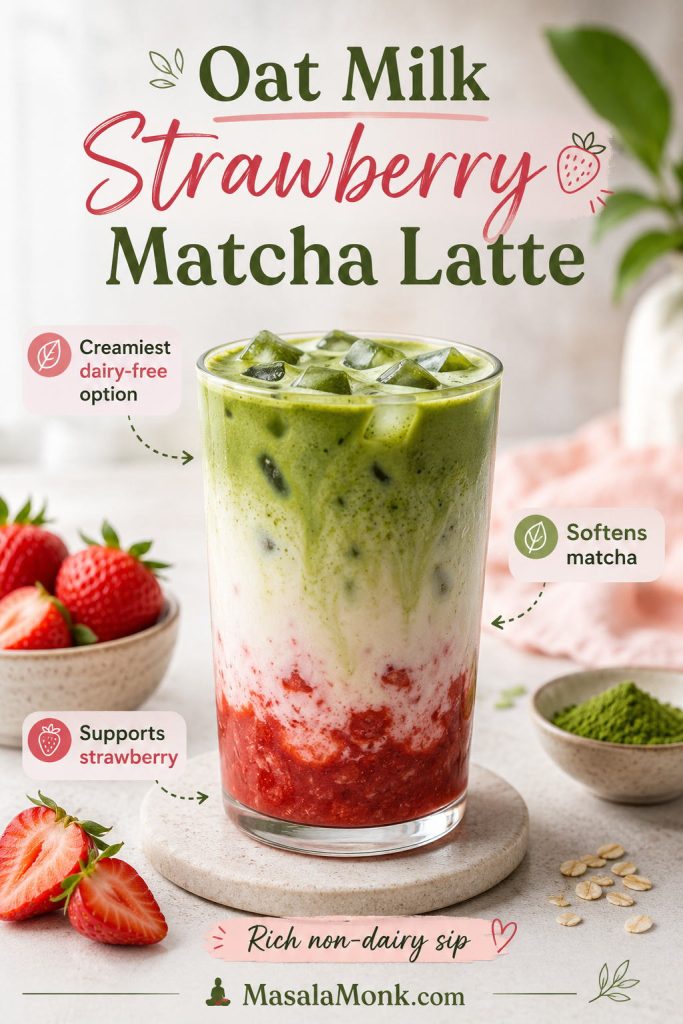
Oat milk iced matcha latte

Barista oat milk makes the latte rounder and fuller, especially if almond milk makes your matcha taste a little sharp. Because oat milk has natural sweetness, start with less syrup and add more only after tasting. It also helps the drink feel fuller without needing as much syrup.
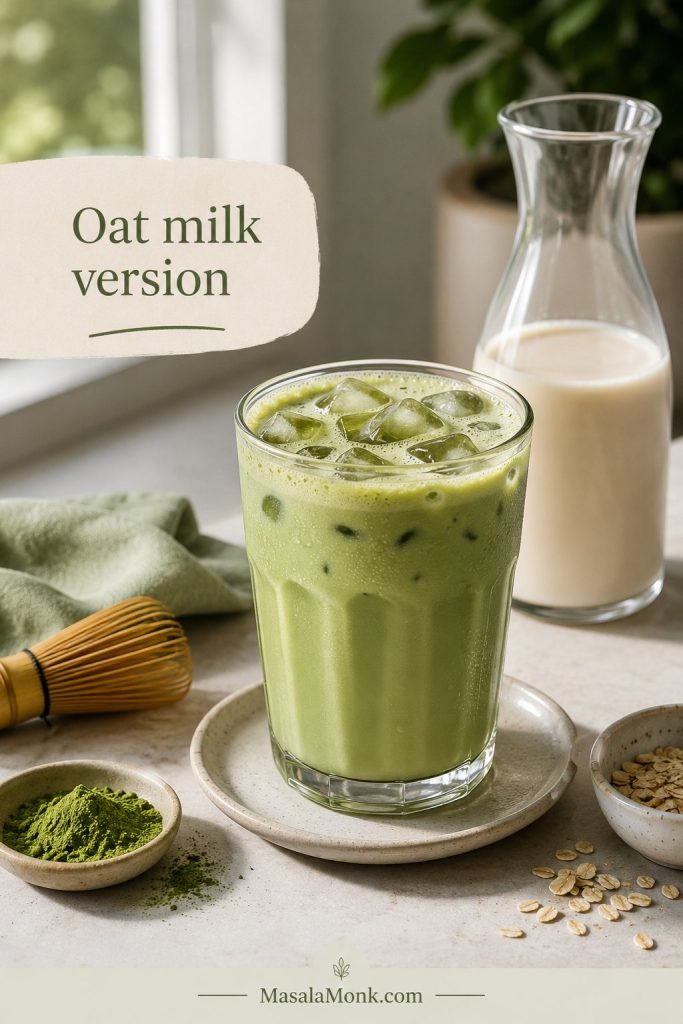
Creamy oat milk iced matcha latte with ice and an unbranded milk carafe
Oat milk is especially useful when you want a dairy-free matcha latte that still feels full, creamy, and lightly sweet.

Iced matcha latte with cold foam

Cold foam turns this into a slower, dessert-leaning drink. Make the base latte, then top it with 2 to 3 tablespoons vanilla cold foam. Keep the foam soft and pourable rather than piling it on like whipped cream.
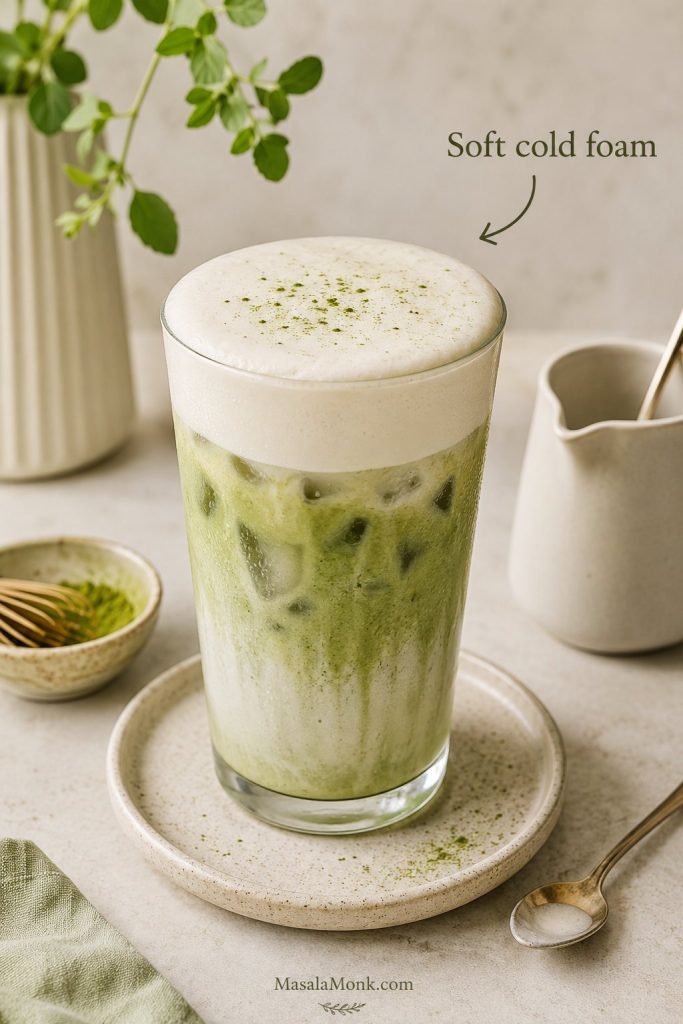
Iced matcha latte topped with soft cold foam and a light dusting of matcha
Cold foam adds a café-style finish, but it should stay soft enough to blend into the latte rather than sit like whipped cream.

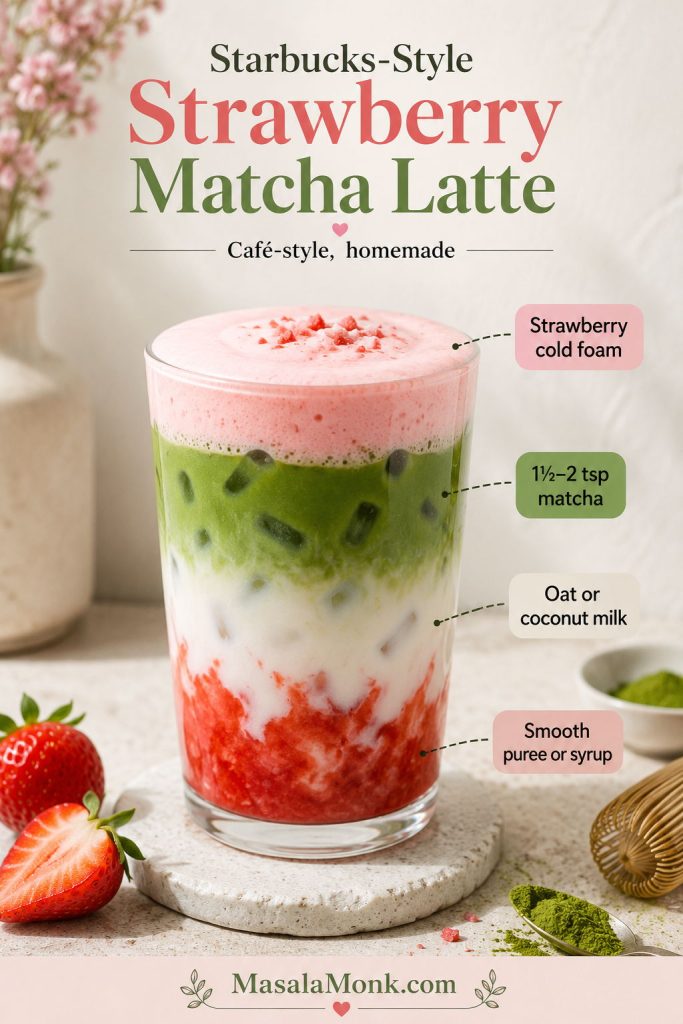
Strawberry iced matcha latte

Spoon strawberry puree or strawberry syrup into the glass first, add ice and milk, then pour the matcha shot over the top. A thicker fruit layer gives you the café look; stirring gives you the better sip. For the full layered version with strawberry base options, ratios, and fixes, see MasalaMonk’s strawberry matcha latte recipe.
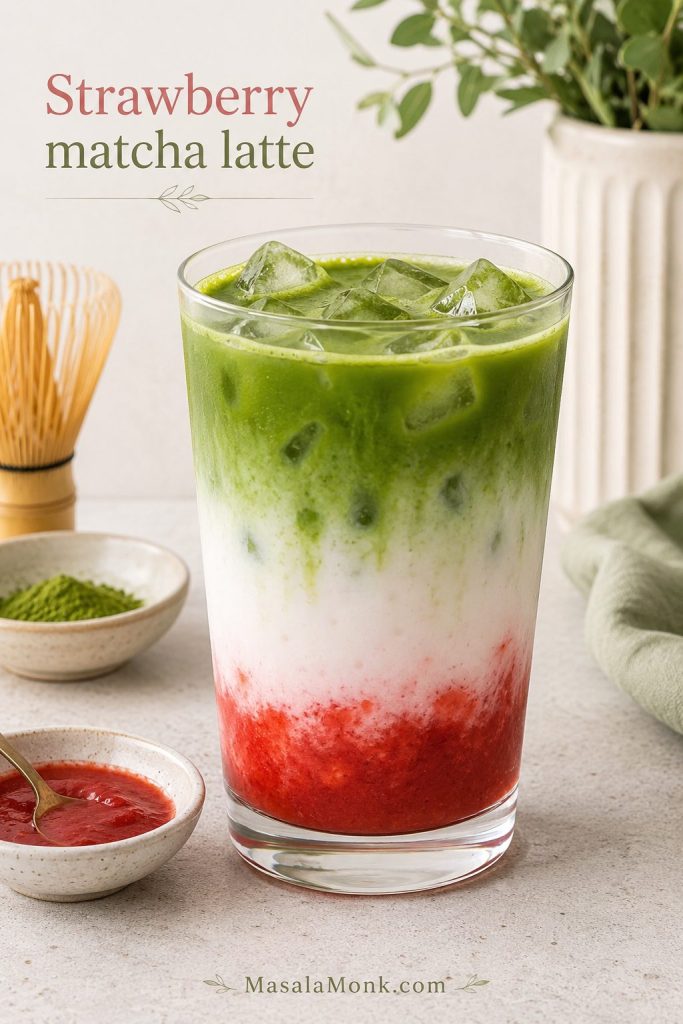
Strawberry iced matcha latte with red strawberry puree, milk, matcha, and ice in visible layers
The thicker the strawberry layer, the cleaner the visual contrast; after stirring, the fruit should support the matcha instead of hiding it.

Dirty iced matcha latte

Add one shot of espresso to the milk before pouring over the matcha. This version is stronger, slightly bitter, and more coffee-forward. Vanilla syrup or oat milk helps soften the edges.
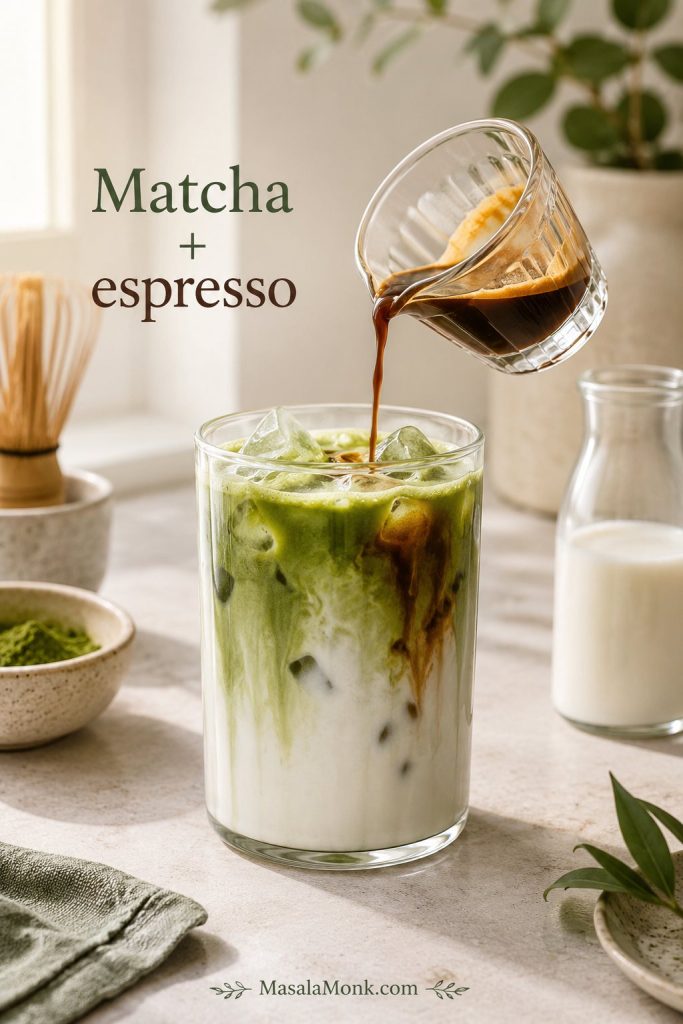
Espresso being poured into an iced matcha latte with milk and ice
Espresso adds a stronger coffee note, so a creamy milk or a little vanilla helps keep the dirty matcha from tasting harsh.

Coconut iced matcha latte

Use coconut milk with a small amount of maple syrup or vanilla syrup. Because coconut milk is richer and more noticeable, it works best if you enjoy a clear tropical flavor.
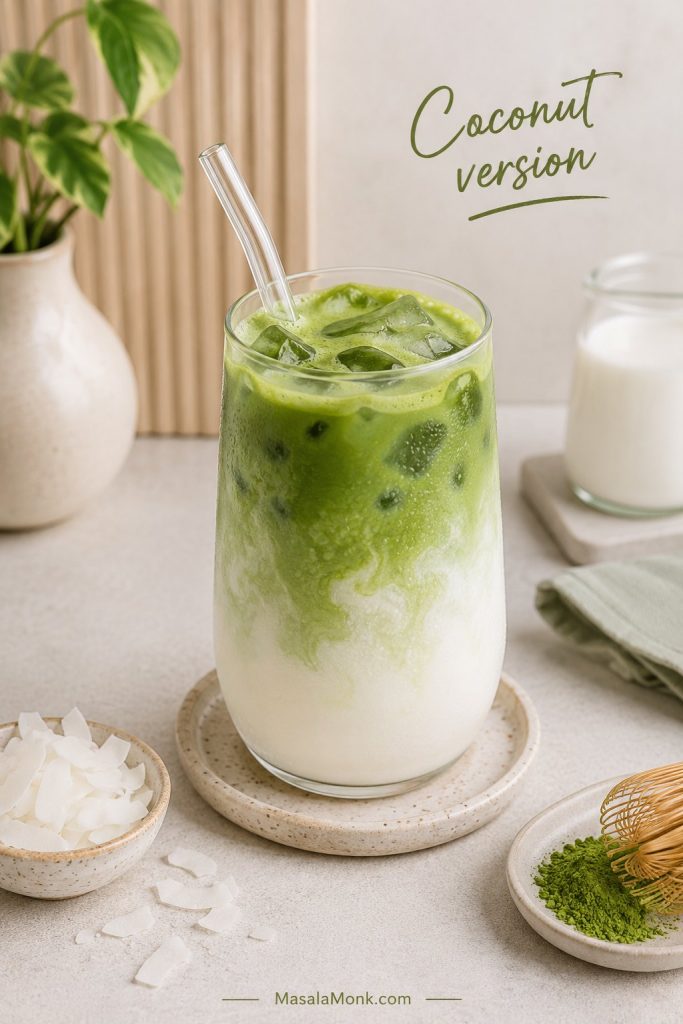
Coconut iced matcha latte with coconut flakes, matcha powder, milk, and ice
This version brings a richer body and a clear tropical note, which makes it best when you want coconut flavor to show.

When you want another chilled café-style drink, MasalaMonk’s iced coffee recipes guide has ideas for iced lattes, cold brew, frappes, syrups, and cold foam.

How to Fix an Iced Matcha Latte

The drink is rarely ruined. Most problems are one small adjustment away from working.

If your first glass is not perfect, do not throw it out. Matcha lattes are unusually easy to correct once you know what went wrong.
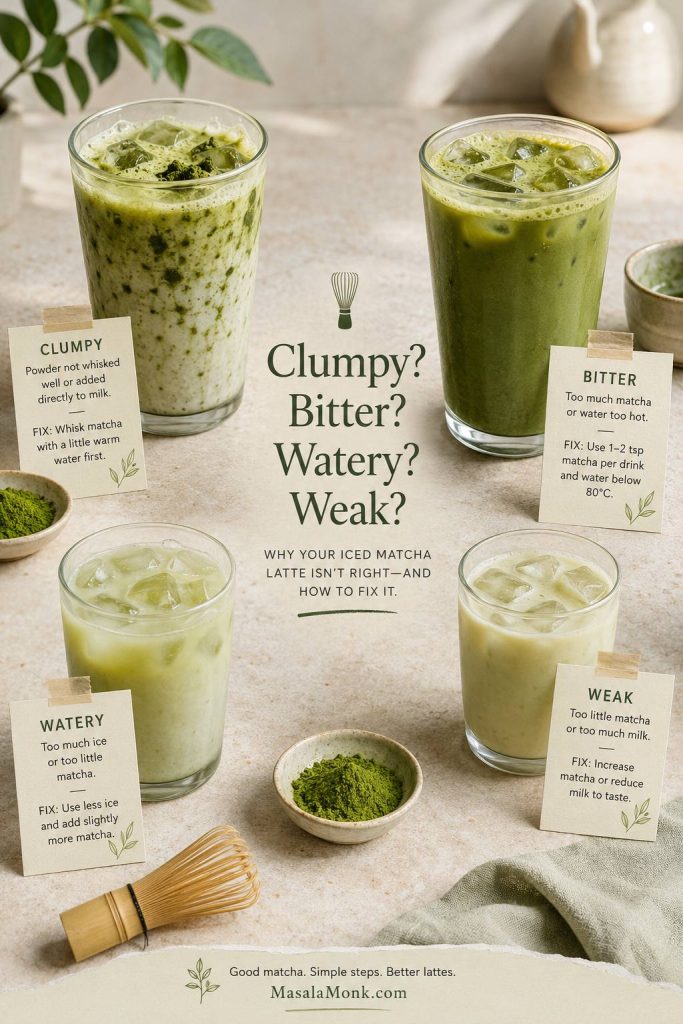
Four iced matcha latte problems shown with labels for clumpy, bitter, watery, and weak drinks
Troubleshooting gets easier when you identify the issue first: texture, bitterness, dilution, and weak flavor each need a different fix.

Quick fixes by problem

Most issues come from the same few places: dry matcha hitting cold milk, water that is too hot, too much melted ice, or a ratio that does not match your taste.

Texture and dilution fixes

ProblemLikely causeFix
Clumpy matchaMatcha was not sifted or was added directly to cold milkSift first, then whisk with hot water before adding milk.
Watery latteToo much water or melted iceUse 2 tablespoons water, cold milk, and fresh ice.
Layers disappearMatcha was poured too fast or the glass had too little iceFill the glass with ice and pour matcha slowly over the top.

Flavor balance fixes

ProblemLikely causeFix
Bitter tasteWater was too hot, matcha is old, or too much powder was usedCooler water and fresher matcha usually fix the harsh edge; if it still tastes strong, reduce the powder to ¾ teaspoon.
Weak matcha flavorToo much milk or too little matchaIncrease the matcha to 1½ teaspoons or reduce milk to ¾ cup.
Too grassyStrong matcha, stale matcha, or not enough milk/sweetnessAdd vanilla syrup, use oat milk, start with less matcha, or switch to fresher matcha if the flavor tastes harsh rather than pleasantly earthy.
Too sweetToo much syrup or sweetened matcha/milkAdd more unsweetened milk and stir well. Next time, start with 1 teaspoon syrup and taste before adding more.

Bitter and watery examples

When bitterness shows up, check water temperature, powder freshness, and matcha amount before adding more syrup.
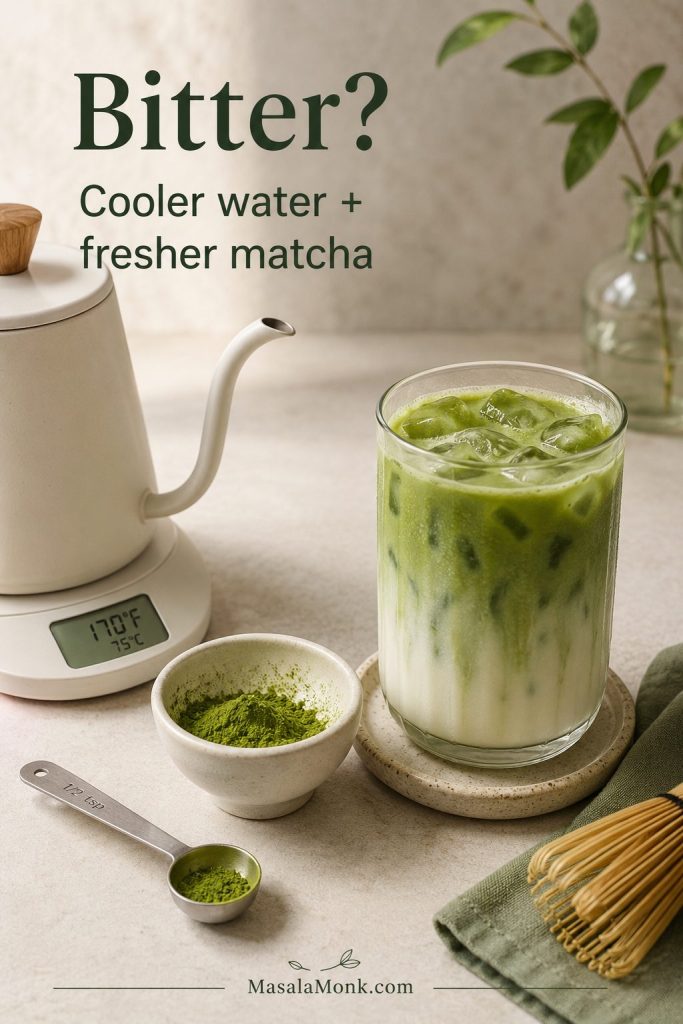
Iced matcha latte beside kettle temperature reading, matcha powder, and a small measuring spoon
If the latte tastes bitter, try cooler water or less powder before adding more sweetener; syrup can cover bitterness, but it rarely solves it.

When the latte tastes thin, look at dilution first: too much water or melted ice can flatten even good matcha.
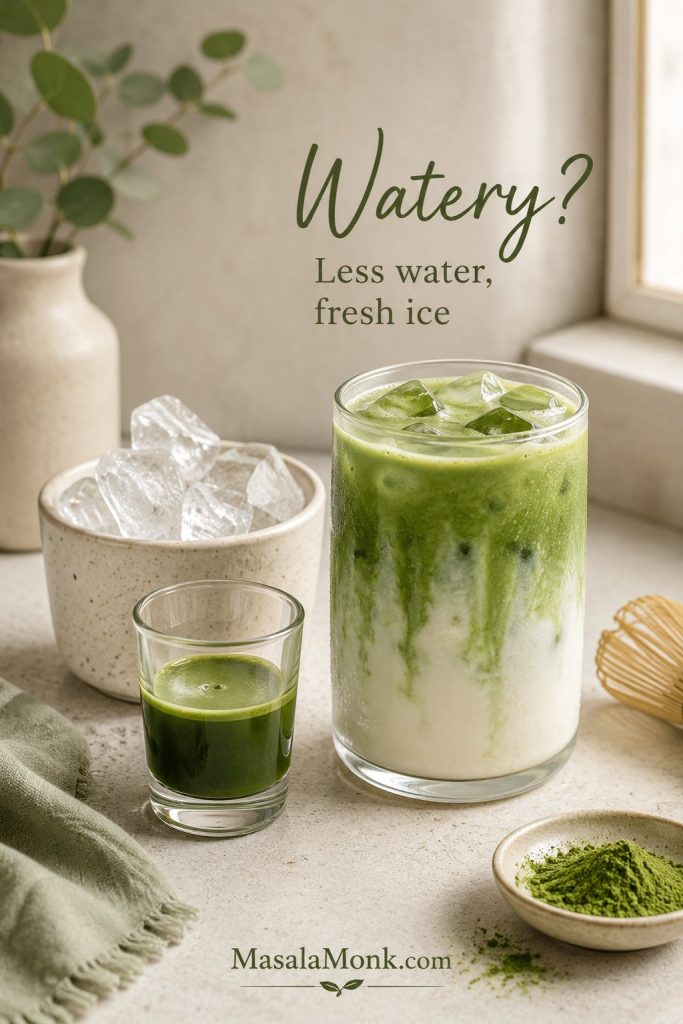
Iced matcha latte beside a bowl of fresh ice and a small concentrated matcha shot
Watery matcha usually comes from too much dilution, so fresh ice and a smaller water amount keep the green tea flavor clearer.

Still clumpy after whisking?

If the drink is still clumpy even after whisking, check the details: the powder may not have been sifted, the cup may be too wide for a frother, the matcha may have stuck to wet sides before whisking, or the milk may have been added before the powder had a chance to fully blend with water.
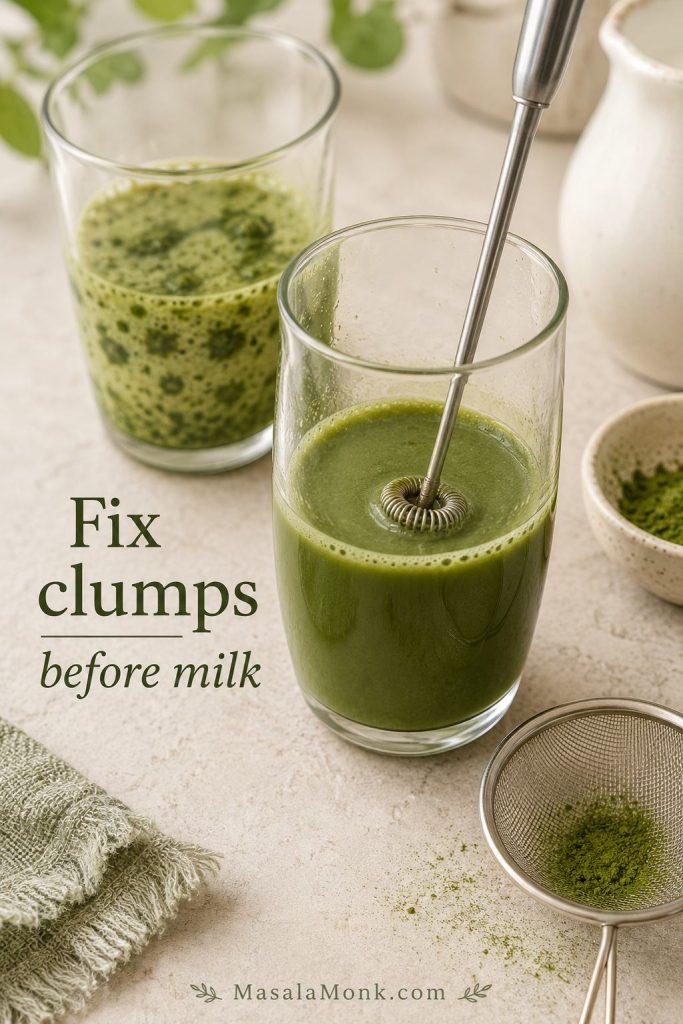
Smooth matcha shot being mixed with a frother beside a clumpy matcha drink and sieve
Fix clumps at the source: sift dry powder, hydrate it with water, then add milk only after the matcha looks smooth.

Can You Make It Ahead?

This drink tastes best right after you make it. Once the ice sits in the milk, the latte slowly becomes watery. However, a few parts can be prepped ahead.

  • Simple syrup: Make it ahead and keep it in the fridge.
  • Matcha shot: Whisk matcha with water and chill it for a few hours if needed.
  • Milk: Keep it cold until serving.
  • Finished drink: Assemble with ice right before drinking.

For make-ahead success, prep the stable parts early and save the ice for the moment you serve.
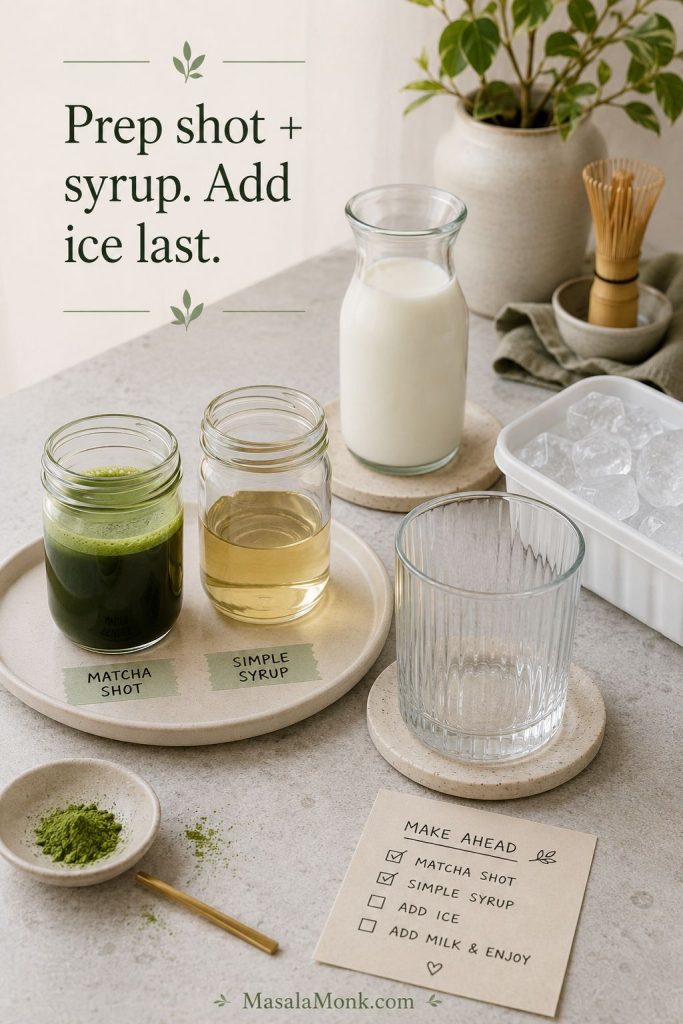
Make-ahead setup with matcha shot, simple syrup, milk, ice tray, and an empty glass
Make ahead the parts that hold well, such as syrup and the matcha base; however, add ice only when you are ready to drink.

If a chilled matcha shot settles in the fridge, shake or whisk it again before using. Since matcha stays suspended in liquid, a little settling is normal.

FAQs

No whisk? Use a frother, jar, or blender

A handheld frother is the easiest swap, but a shaker jar or blender also works. Sift the matcha first, mix it with water, then add milk and ice.

Hot water or cold water — which is better?

Hot water usually makes a smoother matcha shot. Cold water can work if you sift well and shake or froth strongly, but it is less forgiving if your matcha is compacted or slightly clumpy.

Why the drink gets clumpy

It usually happens when dry matcha is added directly to cold milk, when the powder is not sifted, or when the matcha sticks to the sides of the cup before whisking. Sift the powder, whisk it with hot water first, then pour it over milk and ice.

Does matcha dissolve in milk?

Not exactly. Matcha is finely ground tea leaf, so it suspends in liquid rather than dissolving like sugar or instant coffee. That is why a whisk, frother, shaker, or blender helps — and why stirring before drinking keeps the flavor even.

How much matcha goes in one iced latte?

One teaspoon / about 2 grams gives a balanced drink. For a stronger version, increase the matcha to 1½ teaspoons. If you are new to matcha, start with ½ to ¾ teaspoon and build up from there.

Best milk for a creamy iced matcha latte

Whole milk is richest, 2% milk tastes balanced, and barista oat milk is the best dairy-free option for a full-bodied texture. Unsweetened soy milk is another good choice if you want a dairy-free drink with less natural sweetness than oat milk.

How to make it taste more like Starbucks

Use 1½ teaspoons matcha, 1 cup milk, 1 cup ice, and 1 tablespoon simple syrup or vanilla syrup. Add more syrup only after tasting. The syrup gives the drink its sweeter coffee-shop profile.

How to make a sugar-free iced matcha latte

Skip the syrup or use a sugar-free liquid sweetener, and check that both your matcha powder and milk are unsweetened. Vanilla extract plus unsweetened oat milk or soy milk can make the drink taste softer without adding much sweetness. MasalaMonk’s keto mocktails guide also has a matcha latte spritz for another low-carb matcha drink idea.
Sugar-free iced matcha latte setup with unsweetened milk, vanilla extract, matcha shot, and optional syrup
For a sugar-free version, check both the matcha and milk first, then use vanilla to soften the flavor without adding regular syrup.

Caffeine in matcha lattes

Matcha naturally contains caffeine because it is made from finely ground green tea leaves. A latte made with 1 teaspoon matcha usually feels like a moderate-caffeine drink, while 1½ teaspoons will taste and feel stronger. If you are sensitive to caffeine, use ½ to ¾ teaspoon matcha or drink it earlier in the day.
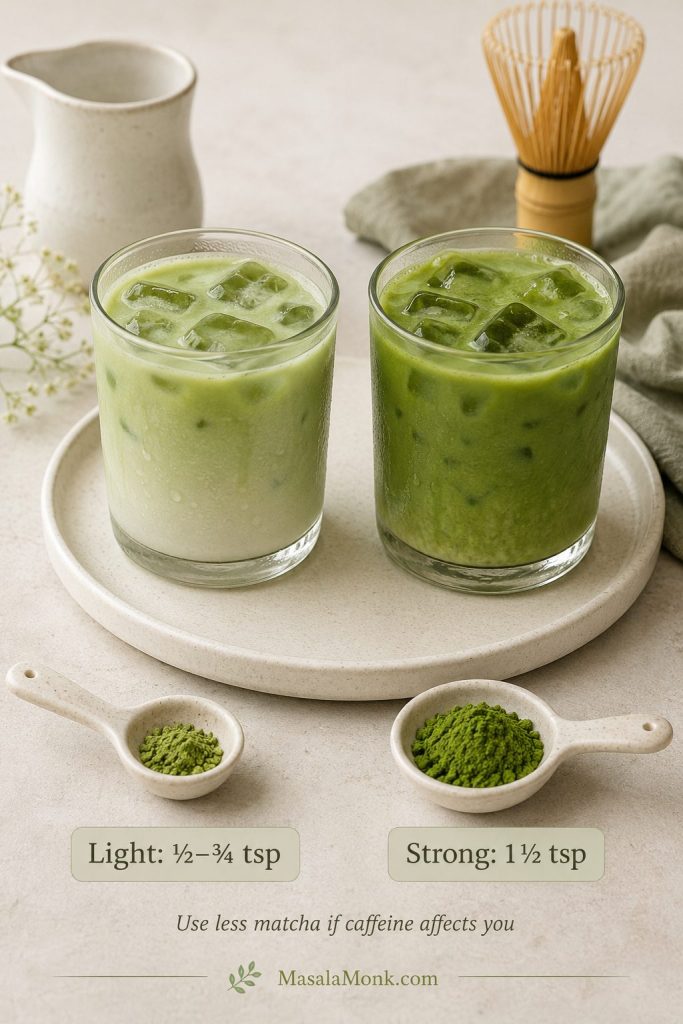
Two iced matcha lattes showing light and strong matcha amounts with matcha powder spoons
Adjusting the powder amount is the simplest way to make the drink gentler or stronger without changing the whole recipe.

Strawberry version

Add strawberry puree or syrup to the bottom of the glass, then add ice, milk, and the matcha shot. Stir before drinking, or leave it layered for a pretty green-and-pink drink. A thicker puree gives cleaner layers, while a thinner syrup blends faster. For exact strawberry amounts and step-by-step layering, use the full strawberry matcha latte recipe.

Final Thoughts

Once the matcha shot is smooth, the rest is easy. Pour it over cold milk and ice, sweeten only as much as you like, and you have the kind of iced matcha latte that feels calm, creamy, and worth making again tomorrow.

The small details matter most: sift the matcha, whisk it before adding milk, and avoid boiling water. Those three steps turn a clumpy green drink into something cold, balanced, and genuinely satisfying — the kind of iced matcha latte that tastes like you finally figured out the café version at home.
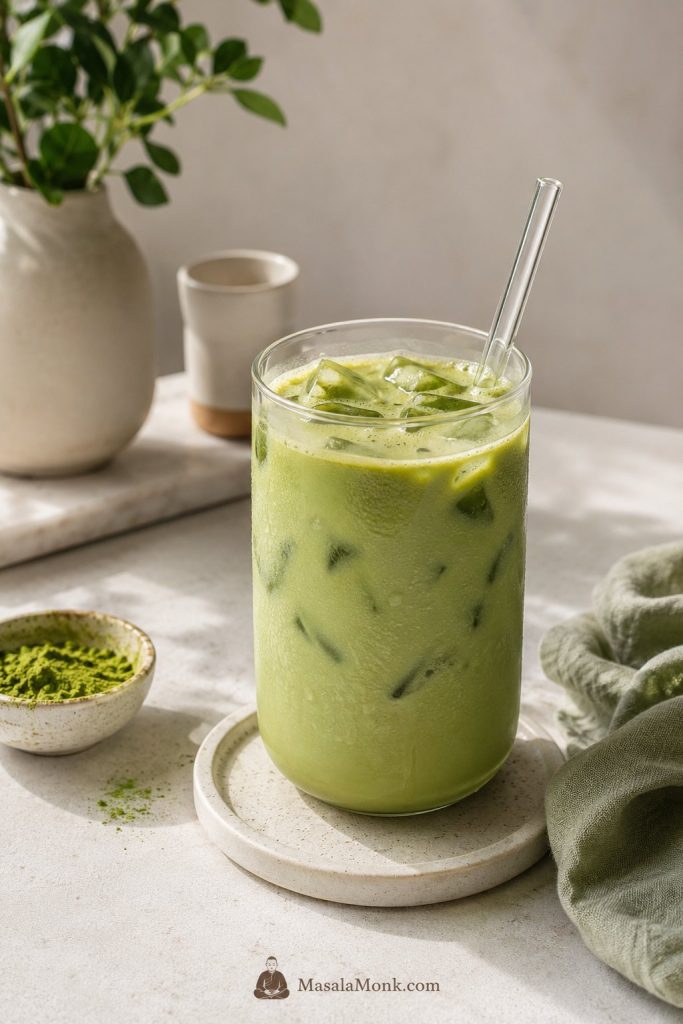
Finished iced matcha latte in a clear glass with ice, matcha powder, glass straw, and sage napkin
Once you understand the matcha base, the final glass becomes repeatable: cold, creamy, balanced, and easy to make again.
Posted on 2 Comments

Strawberry Matcha Latte Recipe

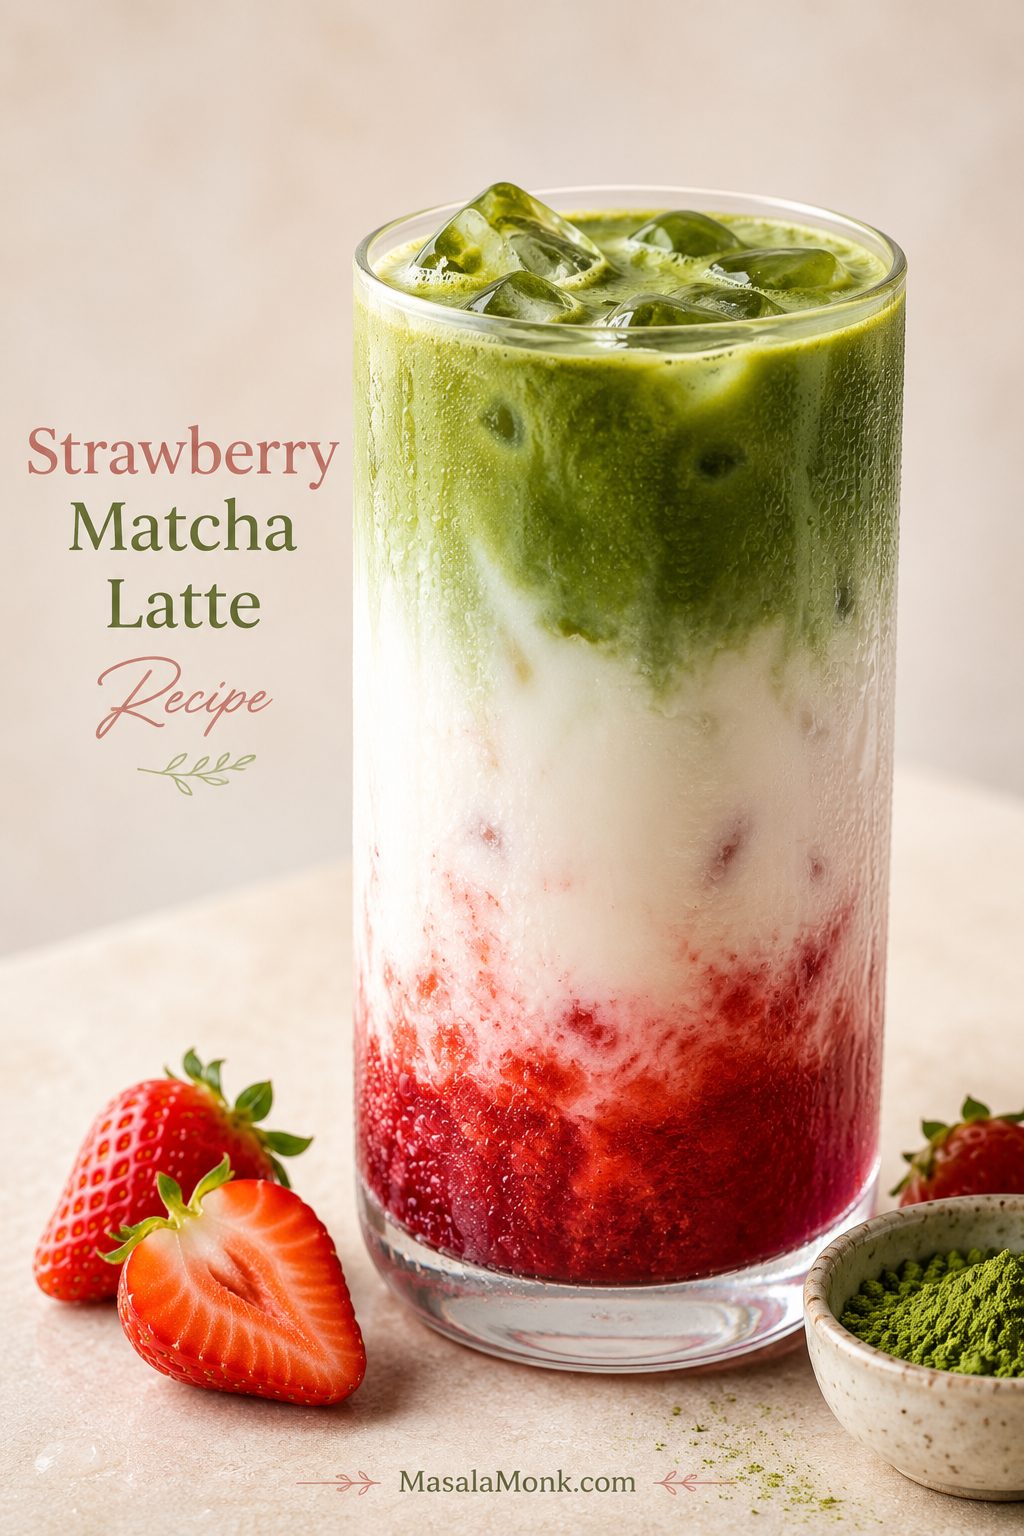
Tall iced strawberry matcha latte in a clear glass with red strawberry base, cold milk, green matcha, ice, strawberries, and matcha powder nearby.

The first thing you notice is the color: juicy red strawberry at the bottom, cold milk turning pale and creamy in the middle, and a glossy green matcha pour floating over the top. Then you stir it, take a sip, and the drink finally makes sense: fresh strawberry, smooth milk, and earthy green tea all in one cold glass.

It is the kind of iced drink that feels like a small afternoon reset: pretty enough to slow down for, but simple enough to make before the ice in your glass even thinks about melting.

This strawberry matcha latte recipe is for the drink you want when a plain iced matcha feels a little too serious and strawberry milk feels a little too sweet. It gives you the pretty layered look, but more importantly, it gives you a balanced glass that tastes creamy, fruity, refreshing, and smooth.

It takes about 10 minutes, needs no cooking for the main version, and feels much more special than the effort suggests. Make the strawberry base, whisk the matcha separately, build the glass over ice, and pour slowly. Warm—not boiling—water keeps the matcha gentler, a thicker berry mixture helps the colors stay separated, and enough ice slows the pour.

Quick Answer: Best Ratio

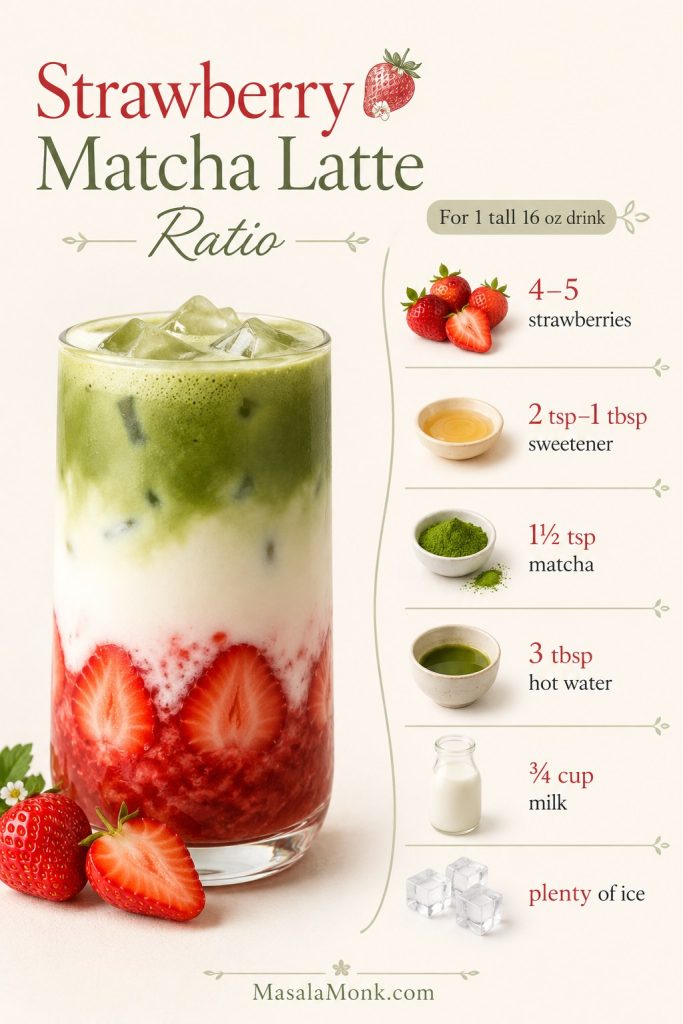
For one tall iced strawberry matcha latte, use 4–5 strawberries, 2 teaspoons to 1 tablespoon sweetener, 1½ teaspoons matcha, 3 tablespoons hot water, ¾ cup milk, and plenty of ice.

At a glance: 10 minutes, no cooking for the main version, 1 tall glass, fresh or frozen strawberries, dairy or non-dairy milk.

Quick method

Muddle or blend the strawberries with sweetener, spoon them into the bottom of a clear glass, add ice, pour in the milk, then slowly pour whisked matcha over the top. The gentlest flavor comes from whisking the matcha with hot water around 175°F / 80°C, not boiling water.

Matcha strength

A milder drink works best with 1 teaspoon matcha. For a stronger, more matcha-forward latte, use 2 teaspoons. Serve it layered if you want the dramatic red-white-green look, then stir before drinking so the strawberry, milk, and matcha taste balanced in every sip.

16 oz ratio

For 1 tall 16 oz drink Use this amount Why it works
Strawberries 4–5 medium / 70–90 g Enough fruit for a visible base and real strawberry flavor.
Sweetener 2 tsp to 1 tbsp Start lower. Add more only if the berries are tart.
Matcha 1½ tsp / about 3 g Balanced strength for milk and strawberry.
Hot water 3 tbsp / 45 ml Makes a concentrated matcha pour without thinning the latte.
Milk ¾ cup / 180 ml Creamy enough for a tall iced latte.
Ice 1 cup, or enough to fill the glass halfway to three-quarters full Helps keep the strawberry, milk, and matcha separated.

Keep the simple rule in mind: thick berries, warm-not-boiling matcha, plenty of ice, a slow pour, and one good stir before judging the flavor.

After one round, you will know exactly where your taste sits: more strawberry if you want it fruitier, more milk if you want it softer, or a little more matcha if you want that green tea finish to lead.

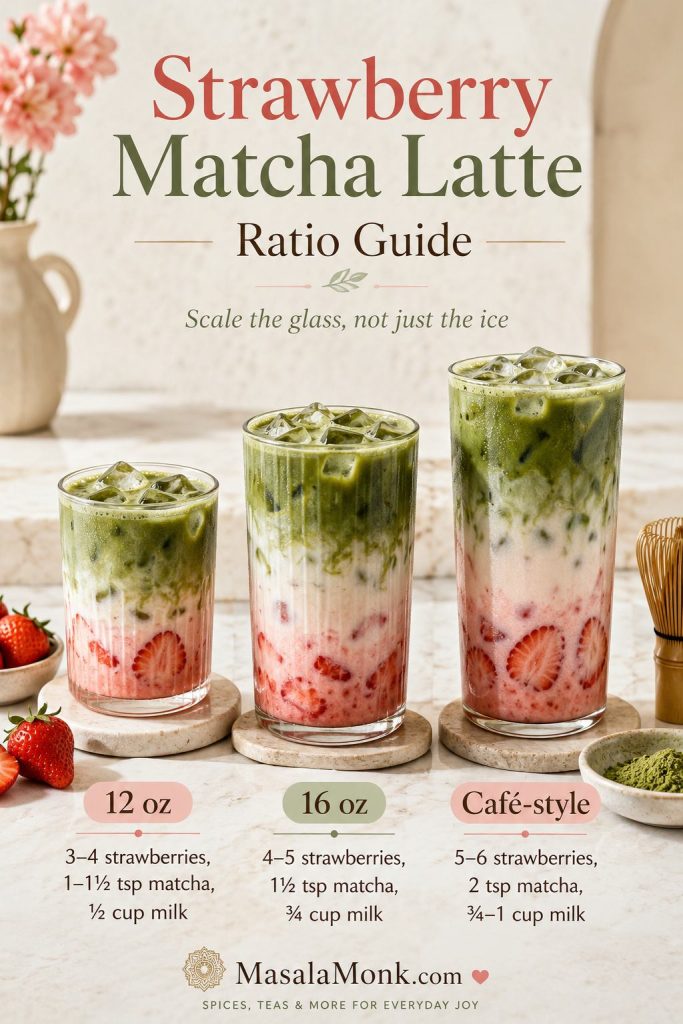
Need to scale the drink up or down? See the 12 oz, 16 oz, and café-style ratio guide.

Strawberry matcha latte ratio guide showing one layered drink with strawberries, sweetener, matcha, hot water, milk, and ice amounts.
Start with this 16-ounce strawberry matcha latte ratio, then adjust sweetness, berry flavor, or matcha strength after tasting the drink stirred.

Strawberry Matcha Latte Recipe

Creamy Iced Strawberry Matcha Latte

A layered café-style latte with a bright berry base, cold milk, and glossy whisked matcha — pretty enough for a café moment, easy enough for home.

Yield1 tall drink
Prep Time10 minutes
Cook Time0 minutes
Total Time10 minutes

Ingredients

  • 4–5 medium strawberries, hulled and chopped, about 70–90 g
  • 2 teaspoons sweetener, plus up to 1 tablespoon total if the berries are tart
  • 1½ teaspoons matcha powder, about 3 g
  • 3 tablespoons / 45 ml hot water, about 175°F / 80°C
  • ¾ cup / 180 ml cold milk, dairy or non-dairy
  • 1 cup ice, or enough to fill the glass halfway to three-quarters full

Instructions

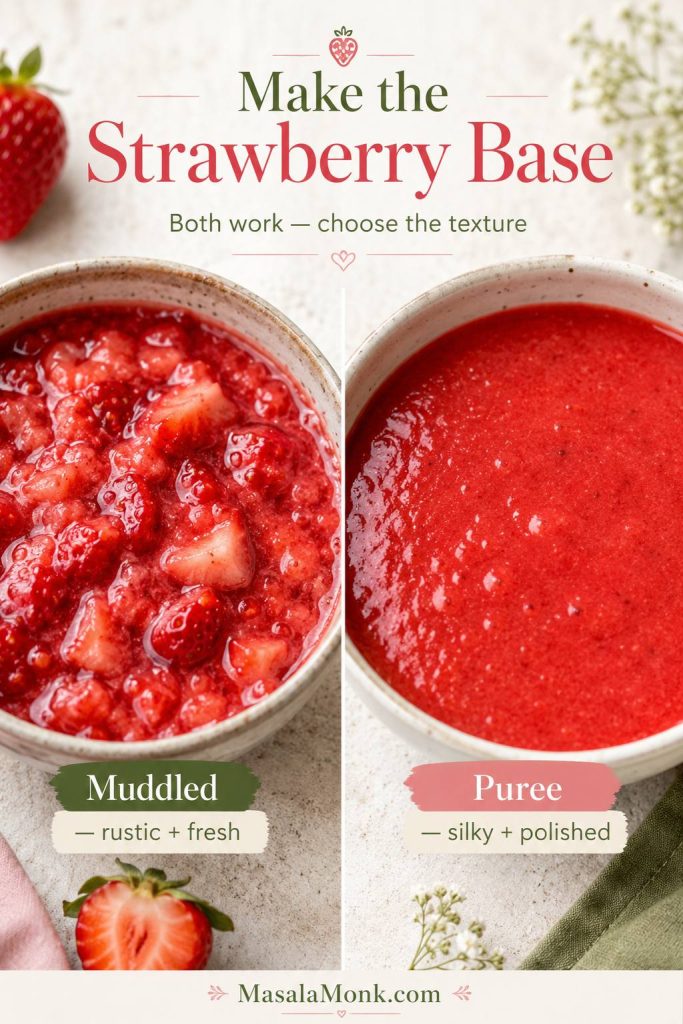
  1. Make the strawberry base. Add chopped strawberries and sweetener to a small bowl or glass. Muddle until juicy, or blend for a smoother base.
  2. Prepare the matcha. Sift matcha into a small bowl. Add hot water and whisk until glossy and lightly frothy.
  3. Build the drink. Spoon the strawberry mixture into a tall clear glass. Add ice. Pour milk slowly over the ice.
  4. Pour the matcha. Slowly pour the whisked matcha over the back of a spoon or directly over the ice so it settles on top.
  5. Serve and stir. Serve layered, then stir before drinking so the strawberry, milk, and matcha taste balanced.

Notes

  • Use 1 teaspoon matcha for mild, 1½ teaspoons for balanced, or 2 teaspoons for strong.
  • For clear layers, keep the berry base thick and pour over plenty of ice.
  • If using jam, start with 1 tablespoon and reduce the added sweetener.
  • The matcha is concentrated on purpose; more water makes the latte thinner.

If the matcha turns clumpy, bitter, watery, or the layers mix too fast, use the troubleshooting guide.

What Is a Strawberry Matcha Latte?

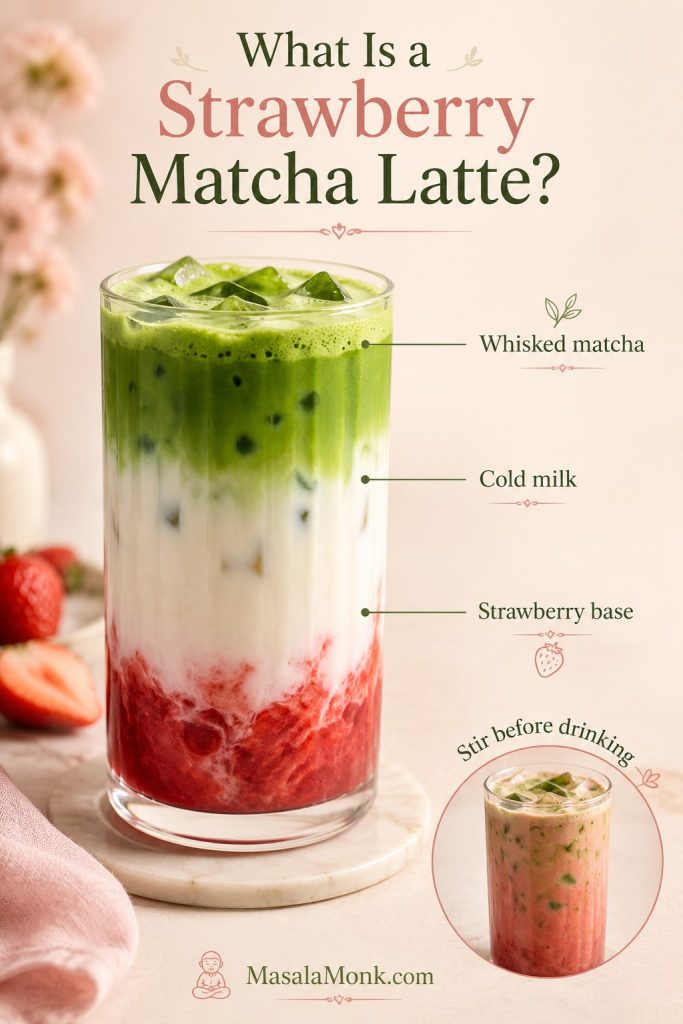
A strawberry matcha latte is an iced matcha drink made with a strawberry base, milk, ice, and whisked matcha. The popular version is layered: red strawberry at the bottom, white milk in the middle, and green matcha on top.

Labeled strawberry matcha latte showing strawberry base, cold milk, whisked matcha, and a small stirred drink inset.
Think of the layers as a map: fruit gives the base, milk softens the middle, and matcha brings the green tea finish.

It is not just strawberry milk with matcha poured over it, and it is not only a plain iced matcha with syrup. The best version keeps each part doing a job: strawberry brings fruit and color, milk softens the sip, and matcha gives the clean green tea finish.

The layered look is mostly for the first impression; the real flavor happens after stirring.

Homemade also gives you control. You can keep the strawberry base fresh instead of candy-sweet, make the matcha stronger or softer, and choose a milk that makes the whole glass taste the way you like it.

Why This Latte Works

This latte works because it is pretty without being fussy, sweet without becoming syrupy, and creamy without hiding the matcha. You get the pretty layered look, but the real win is the way the flavors come together after stirring.

  • The fruit base is thick enough to stay visible. It gives the drink real strawberry flavor instead of a candy-syrup taste.
  • The sweetness starts low. You can adjust based on your berries instead of making the latte syrupy from the start.
  • The matcha is whisked separately. That keeps dry green clumps out of the milk.
  • The water is warm, not boiling. This helps the matcha taste smoother and less harsh.
  • The ice does real work. It slows the milk and matcha as they pour, which helps the colors stay separated.

The best part of making it at home is control: the strawberry can taste like real fruit, the matcha can stay smooth instead of harsh, and the sweetness does not have to hit like a syrup pump.

That balance is the goal; here is what to taste for once the drink is stirred.

What It Should Taste Like

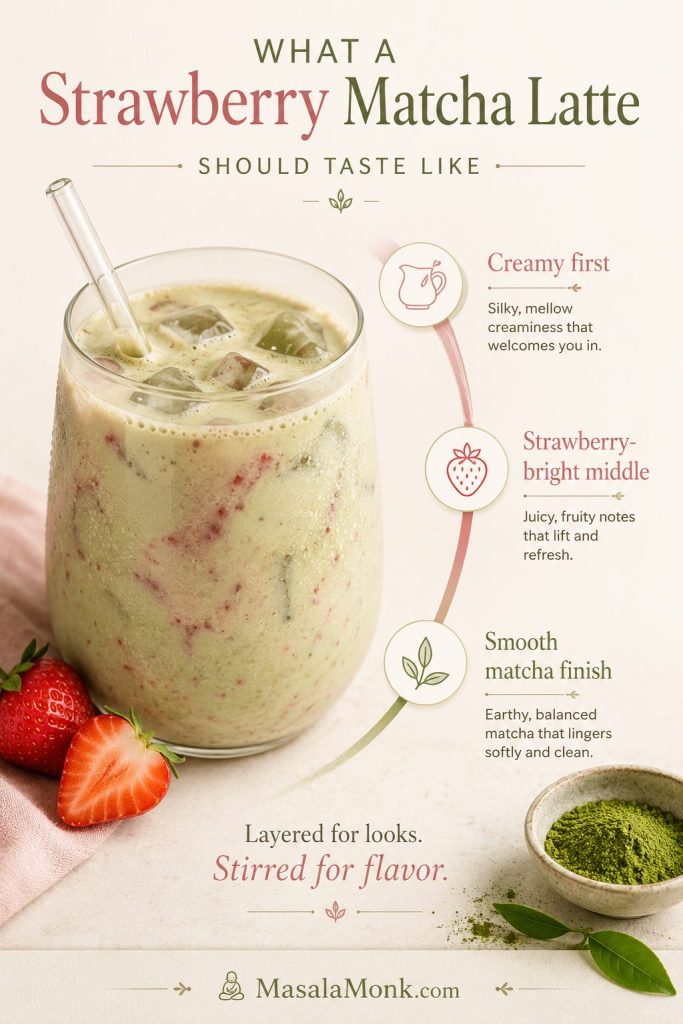
Once stirred, the latte should taste cold and creamy first, then bright with strawberry, with matcha finishing gently instead of taking over. It should not taste like strawberry syrup with green tea on top, or like bitter matcha hiding behind milk. The sweet spot is fruit, creaminess, and a smooth green-tea finish in the same sip.

Stirred strawberry matcha latte with flavor callouts for creamy first, strawberry-bright middle, and smooth matcha finish.
A balanced strawberry matcha latte should taste like one drink after stirring, not three separate layers competing in the glass.

Ingredients You Need

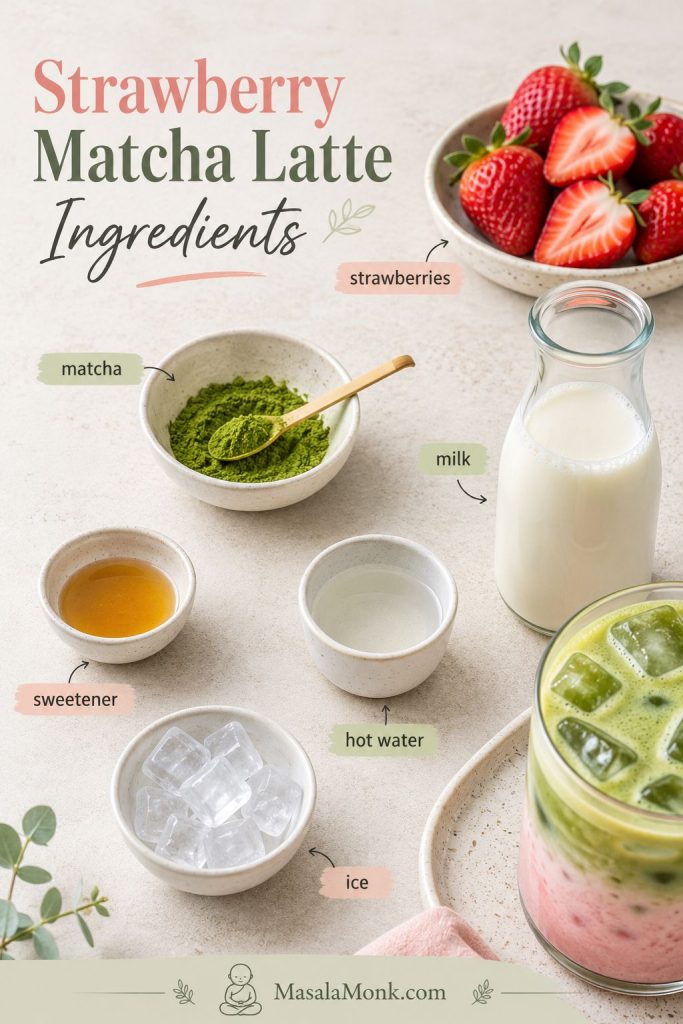
You only need a few ingredients, but each one changes the final latte. Choose the strawberries, matcha, milk, and sweetener with the kind of sip you want in mind.

Ingredients for strawberry matcha latte including strawberries, matcha powder, milk, sweetener, hot water, ice, and a partial finished drink.
Because the ingredient list is short, each choice matters: ripe berries, fresh matcha, cold milk, and restrained sweetness shape the final sip.

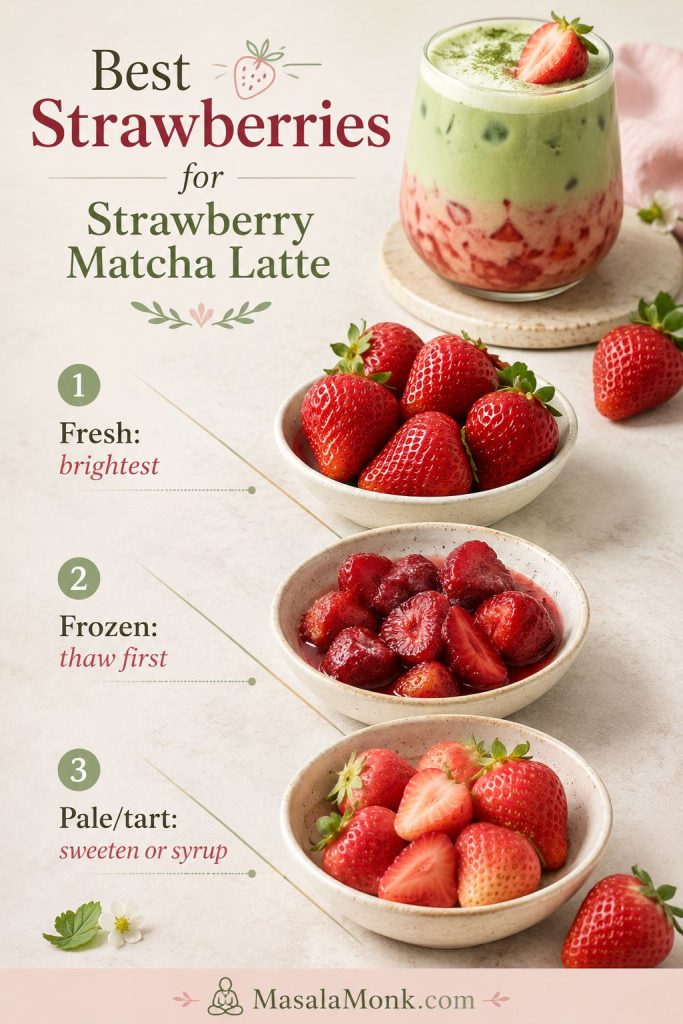
Strawberries

Fresh strawberries give this latte the brightest flavor and color. If the berries smell sweet before you cut them, the drink will taste fresher and need less sugar. Pale, watery, or tart berries can still work, but they usually need a little more sweetener or a quick syrup treatment.

Frozen strawberries are useful when fresh berries are out of season. Thaw them first, then blend or mash them with sweetener. For the silkiest red base, strain the puree so it sits evenly at the bottom of the cup.

For a deeper comparison of muddled berries, puree, syrup, and jam, see the strawberry base options.

Comparison of fresh ripe strawberries, thawed frozen strawberries, and pale tart strawberries for strawberry matcha latte.
Ripe fresh strawberries give the brightest flavor, while frozen berries need thawing and pale berries usually need extra sweetness or syrup.

If your strawberries are especially ripe and you have extra, this strawberry shortcake recipe is another simple way to use them while they are still fresh and juicy.

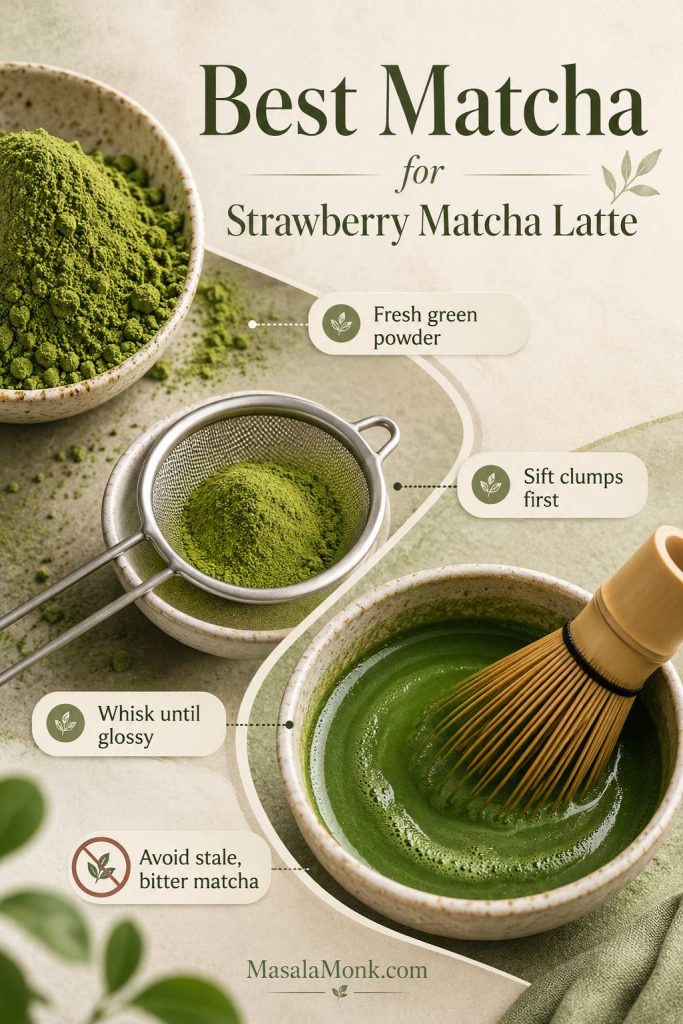
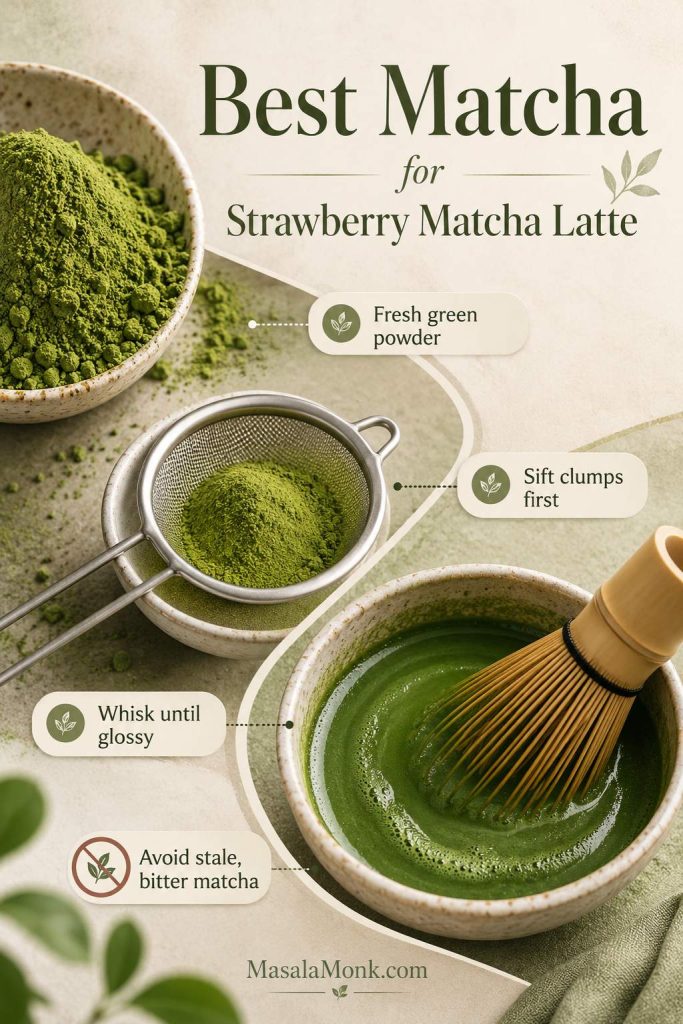
Matcha powder

Choose a matcha powder you enjoy drinking, not the stale green powder hiding at the back of the pantry. Ceremonial-style matcha gives the smoothest flavor, but a good latte-grade matcha is usually enough for an iced drink with milk and strawberry.

Sift the matcha before whisking if it looks clumpy. Matcha does not dissolve like instant coffee; it suspends in water, so whisking matters. The goal is a smooth, balanced sip, not a bitter powdery one.

Matcha guide with fresh matcha powder, sifted matcha, glossy whisked matcha, and a clump-prevention cue.
Fresh matcha and proper whisking matter because milk can soften bitterness, but it cannot fully hide stale powder or dry green clumps.
Matcha temperature tip: Use hot water around 175°F / 80°C, not boiling water. This keeps the matcha smoother and less sharp; Ippodo’s matcha latte guide uses the same 80°C / 176°F benchmark.

If matcha usually tastes harsh to you, this one change helps most: let boiling water cool for a minute before whisking. The finished latte should taste fresh instead of flat or sharp.

Why the main recipe uses only 3 tablespoons water: This is a concentrated matcha pour for one 16 oz iced strawberry latte, not a full plain matcha tea. The drink already has strawberry, milk, and ice, so less water keeps the final glass creamy instead of thin. If you use 2 teaspoons matcha for a larger glass, you can increase the water to ¼ cup / 60 ml.

If clumps are your main problem, the step-by-step matcha whisking section is the fastest fix.

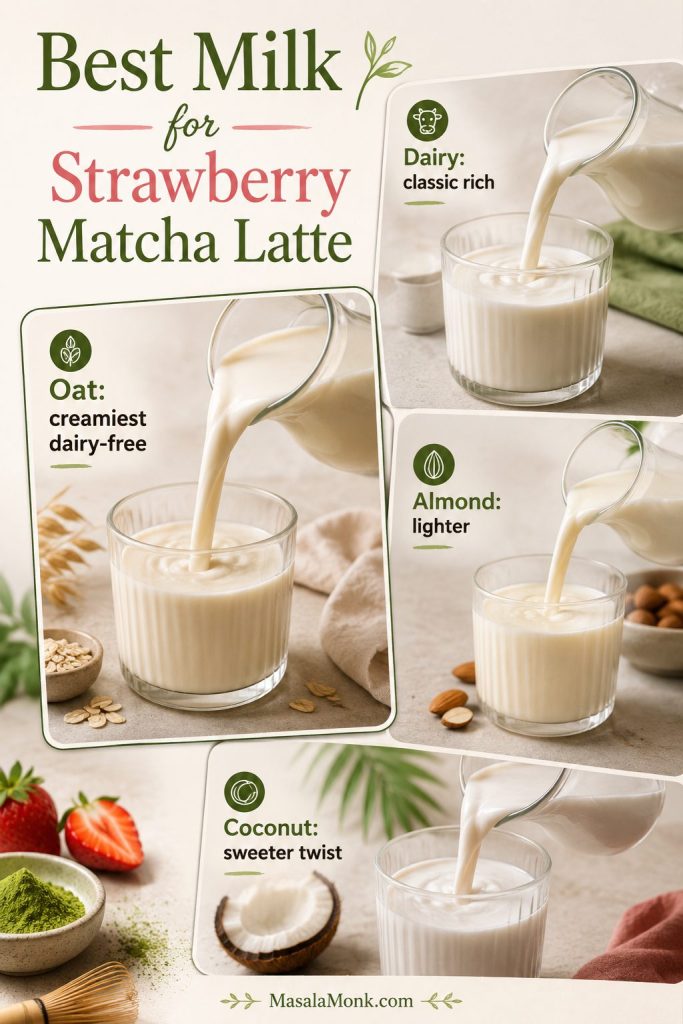
Milk

Oat milk gives the creamiest dairy-free version. Dairy milk tastes clean and rich. Almond milk makes a lighter drink, while coconut milk gives a sweeter, more tropical flavor that works well with strawberry.

Think of the milk as the soft middle. It should round out the fruit and matcha without making the latte taste flat. Cold milk and plenty of ice also help the colors stay separated.

Milk comparison for strawberry matcha latte with dairy milk, oat milk, almond milk, and coconut milk options.
Milk changes the body of the latte: oat milk tastes creamiest, dairy feels classic, almond keeps it lighter, and coconut adds a sweeter twist.

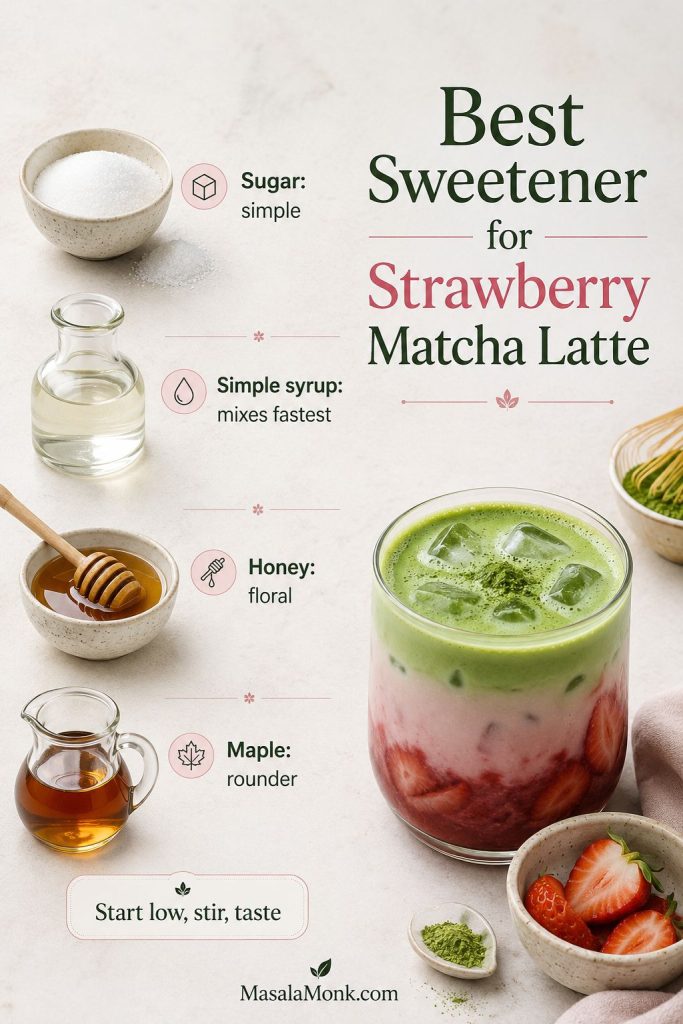
Sweetener

Sugar, honey, maple syrup, or simple syrup all work. Granulated sugar is fine if you muddle it into juicy strawberries. Simple syrup mixes fastest. Honey and maple syrup add their own flavor, so they are better when you want a softer, rounder sweetness.

Start with 2 teaspoons for one drink. Add more only after tasting the fruit. Many café-style versions are very sweet, but this homemade latte tastes better when the berries, milk, and matcha stay in balance.

Before adding more sweetener, stir and taste once. The strawberry tastes sweetest at the bottom, the matcha tastes strongest at the top, and the final flavor only makes sense after everything is mixed.

Sweetener guide for strawberry matcha latte with sugar, simple syrup, honey, maple syrup, and a small drink cue.
Start with less sweetener than you think, because the strawberry base tastes stronger once the latte is fully stirred.

If the latte still tastes too sweet, weak, or flat after stirring, check the troubleshooting table before changing the whole recipe.

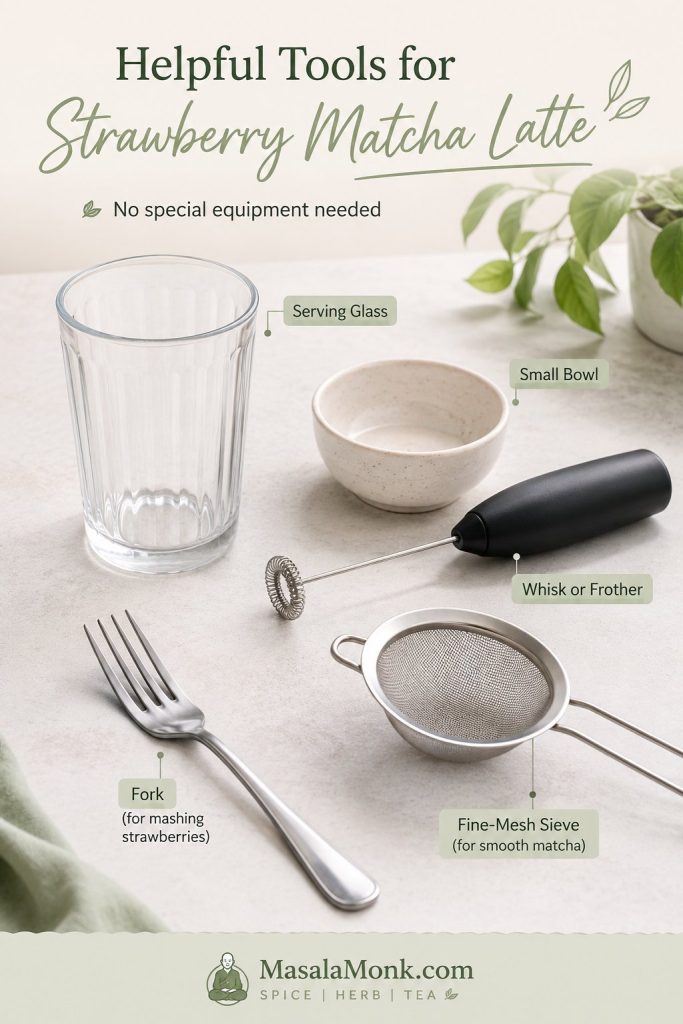
Helpful Tools

You do not need special equipment for this drink. A clear glass, small bowl, and whisk or frother are enough; a sieve, blender, thermometer, and long spoon simply make the finish smoother and neater.

  • Clear glass: Shows the layers and gives you room for ice.
  • Small bowl: Makes it easier to whisk matcha before pouring.
  • Whisk or frother: Helps prevent dry green clumps.
  • Muddler, fork, or blender: Use whichever fits the strawberry texture you want.
  • Fine-mesh sieve: Optional, but useful for sifted matcha or smoother puree.
No matcha whisk? Use a handheld frother or shake the sifted matcha with hot water in a small jar. The goal is a glossy matcha pour with no dry green clumps.
Tools for making strawberry matcha latte including clear glass, small bowl, whisk or frother, fork, and fine-mesh sieve.
You do not need café equipment; a clear glass, small bowl, and whisk or frother are enough to build clean layers.

Ratio Guide for 12 oz, 16 oz, and Café-Style Drinks

The right ratio depends on your cup size and how strong you like matcha. A 12 oz serving needs less milk and ice. A 16 oz serving gives you more room for dramatic colors and a creamier drink.

Glass size Strawberry base Matcha Hot water Milk Ice
12 oz 3–4 strawberries + 1½–2 tsp sweetener 1–1½ tsp 2½–3 tbsp / 37–45 ml ½ cup / 120 ml About ¾ cup
16 oz 4–5 strawberries + 2 tsp–1 tbsp sweetener 1½ tsp 3 tbsp / 45 ml ¾ cup / 180 ml About 1 cup
Large café-style 5–6 strawberries + 1 tbsp sweetener 2 tsp ¼ cup / 60 ml ¾–1 cup / 180–240 ml Enough to fill the glass
Three strawberry matcha lattes in 12-ounce, 16-ounce, and café-style sizes with ratio labels for berries, matcha, and milk.
Once the 16-ounce strawberry matcha latte tastes right, scaling up or down is easier than guessing with extra ice.

Do not treat the numbers like a test. The 16 oz version is your baseline; the next glass is where you make it yours.

To make two drinks, double the strawberries, milk, matcha, and sweetener, but whisk the matcha in one slightly larger bowl so it stays even. Build each serving separately if you want the colors to stay clear.

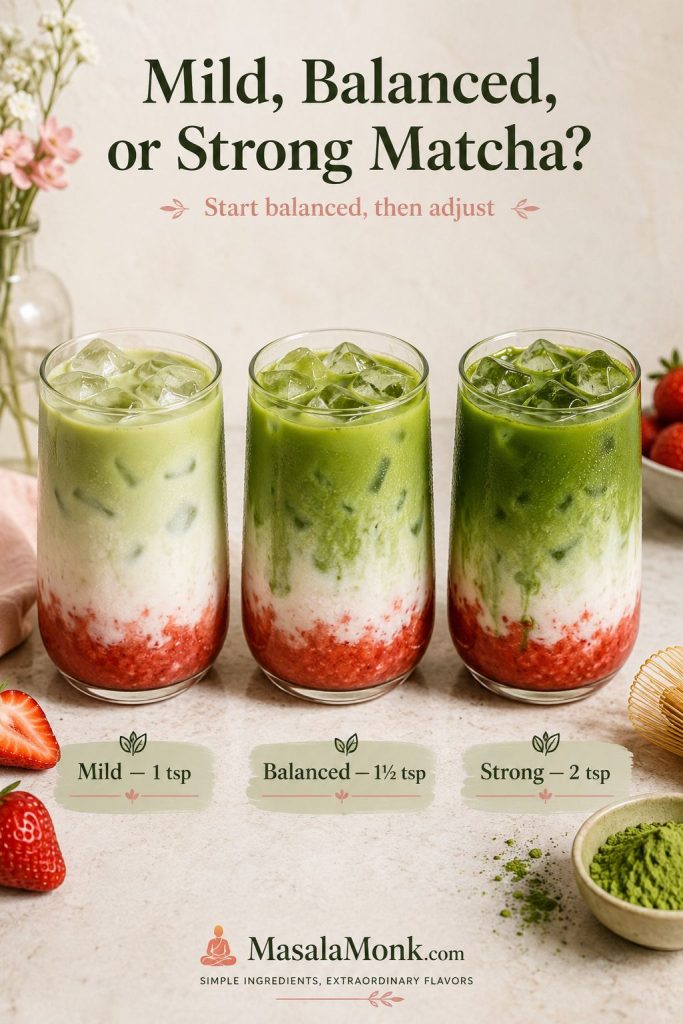
Mild, Balanced, or Strong Matcha?

New to matcha? Start mild. Already love iced matcha? Use the balanced amount. Want the green tea flavor to lead even after milk and strawberry are added? Go stronger.

Matcha strength Amount for 1 drink Works well for
Mild 1 tsp / about 2 g Beginners, sweeter strawberry drinks, lighter almond milk versions.
Balanced 1½ tsp / about 3 g Most 16 oz iced strawberry matcha lattes.
Strong 2 tsp / about 4 g Oat milk drinks, extra ice, and stronger matcha flavor.

Start with the balanced 16 oz version once, then adjust by taste: more berries for a fruitier sip, more milk for a softer sip, or more matcha when you want the green tea flavor to lead.

Three strawberry matcha lattes showing mild, balanced, and strong matcha levels from 1 teaspoon to 2 teaspoons.
Matcha strength changes the whole drink, so begin balanced and move stronger only when you want the green tea flavor to lead.

How to Make an Iced Strawberry Matcha Latte

The order matters. If everything goes in at once, the drink will taste fine but look muddy. For clear separation, build from heaviest to lightest: strawberry, ice, milk, then matcha.

There is also a small pleasure in the pour: the milk softens the red strawberry base, then the matcha slides over the ice and settles into green. It looks fancy, but it is really just a few careful steps.

Build it like a little stack: fruit first, ice next, milk slowly, matcha last.

Step-by-step strawberry matcha latte process showing strawberry base, ice, milk pour, and matcha pour ending with a finished drink.
Build from heavy to light so the strawberry stays low, the milk cushions the middle, and the matcha finishes on top.

Step 1: Make the strawberry base

Hull and chop 4–5 medium strawberries. Add them to a small bowl or directly to the bottom of a sturdy glass with 2 teaspoons sweetener. Muddle until the berries release their juice and look saucy.

For a smoother base, blend the strawberries with the sweetener, then spoon the puree into the cup. Strain it if you want the neatest red stripe at the bottom.

Close-up comparison of muddled strawberry base with fruit pieces and smooth strawberry puree in bowls.
Muddled berries taste fresh and rustic, while puree gives a smoother strawberry base for cleaner layers and a more polished finish.

Step 2: Whisk the matcha

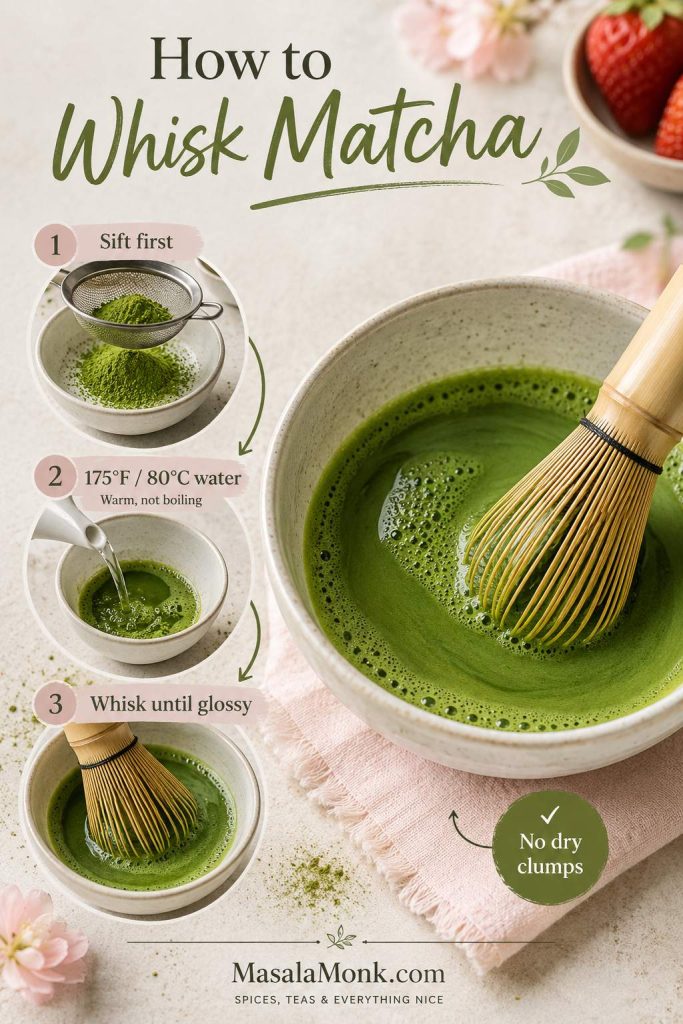
Sift 1½ teaspoons matcha into a small bowl. Add 3 tablespoons hot water around 175°F / 80°C. Whisk until the matcha is glossy and lightly frothy. There should be no dry clumps left at the bottom of the bowl.

A bamboo whisk works beautifully, but a small whisk, handheld frother, or shaker jar can also do the job. With a frother, keep the head fully submerged at first so the matcha does not splash.

Matcha whisking guide showing sifted matcha, warm water, whisking, glossy matcha, and no dry clumps.
Sift first and use warm-not-boiling water, because smooth matcha before pouring means a better latte after stirring.

Step 3: Build the drink

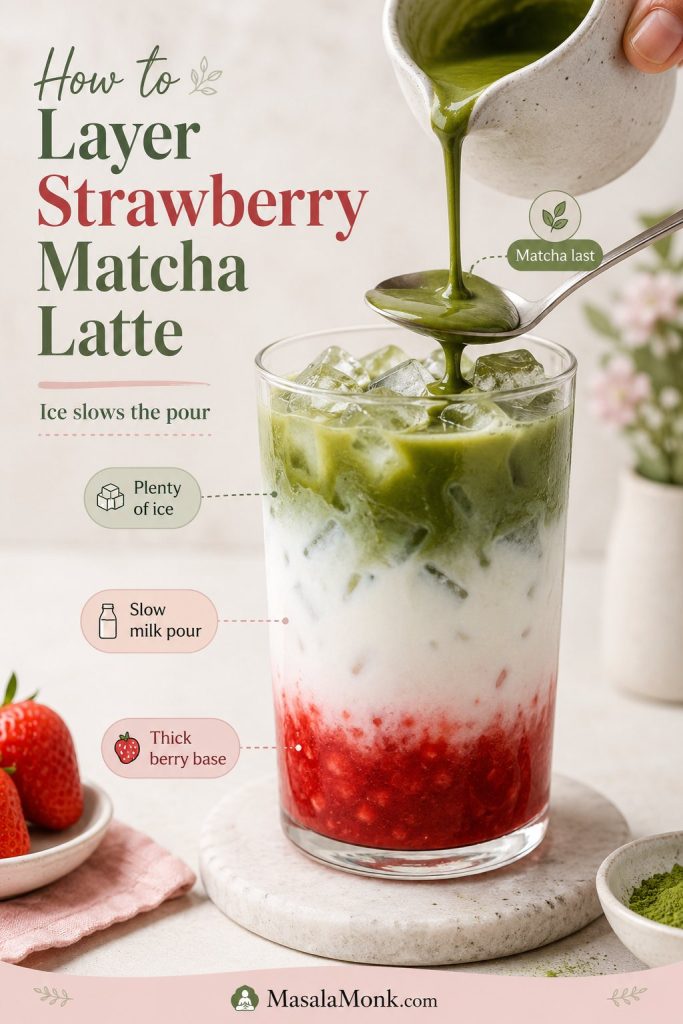
Spoon the strawberry mixture into the bottom of a tall clear glass. Add ice until the glass is at least halfway full. Pour the milk slowly over the ice, not directly into the fruit.

Finally, pour the whisked matcha over the ice or over the back of a spoon. This slows the pour and helps the green matcha sit above the milk for that red-white-green look.

Tall strawberry matcha latte being layered with strawberry base, milk, ice, and matcha poured slowly over a spoon.
Plenty of ice slows the pour, which helps the milk and matcha settle into layers instead of turning muddy immediately.

Step 4: Serve, then stir

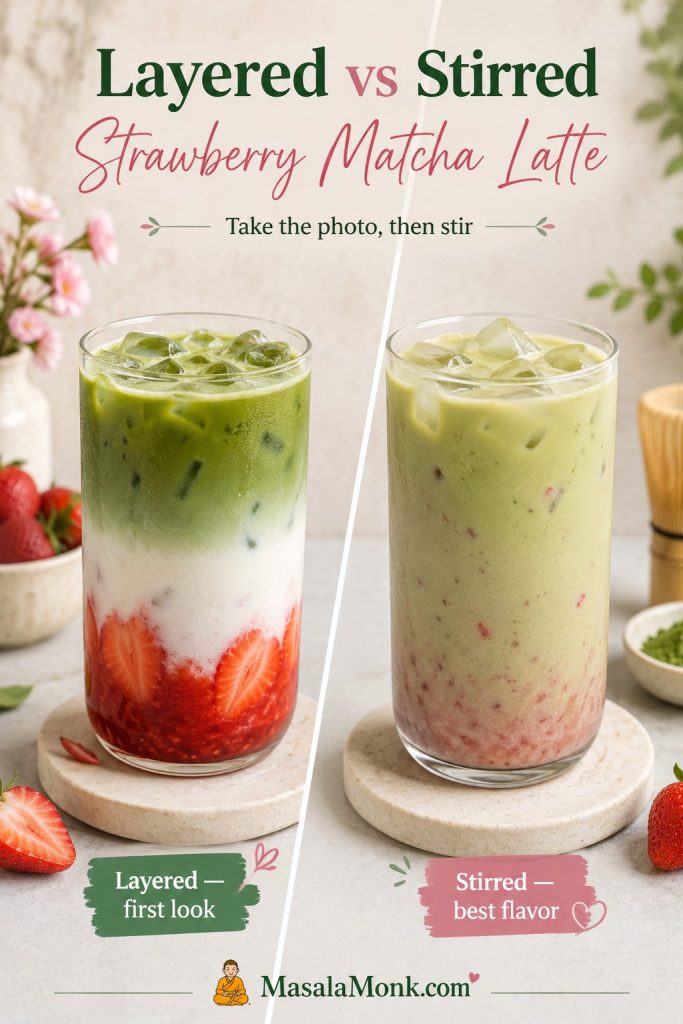
Serve it layered for the first beautiful moment, then stir before drinking. The sip gets better once the berry, milk, and matcha stop sitting in separate lanes.

If you do not care about visible colors, simply stir the strawberry, milk, and matcha together after building the drink. The flavor will be just as good, and the drink is easier to sip evenly from the start.

Do not worry if the first pour is not perfect. The colors are fun, but this latte is forgiving; once you stir it, the flavor matters much more than the stripes.

Side-by-side comparison of a layered strawberry matcha latte and a stirred strawberry matcha latte ready to drink.
The layered version wins the first look, while the stirred version gives you strawberry, milk, and matcha in one balanced sip.

If the layers disappear too quickly, the fixes section covers ice, pouring speed, and berry thickness.

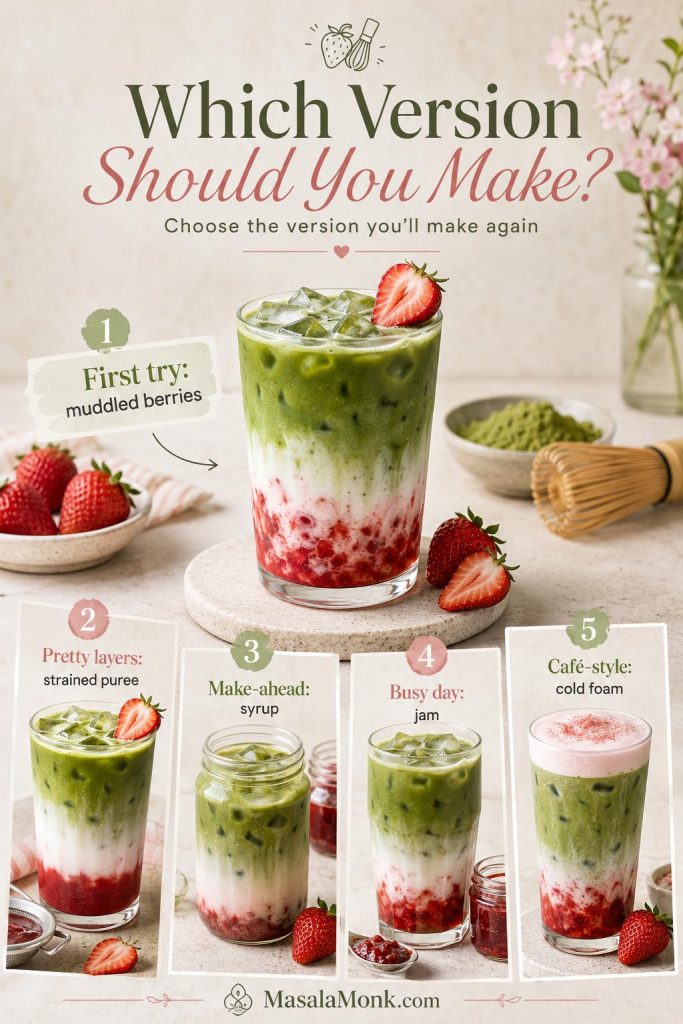
Which Version Should You Make?

For your first try, start with muddled berries. For the cleanest layers, strain the puree. On a busy day, jam is completely fine; the point is a balanced latte you would actually make again.

  • Best everyday version: fresh muddled berries for the brightest, quickest flavor.
  • Best pretty layered version: strained strawberry puree for a cleaner red base.
  • Best make-ahead version: cooked strawberry syrup chilled in a jar.
  • Best busy-day shortcut: 1–2 tablespoons strawberry jam with less extra sweetener.
  • Best café-style version: smooth puree or syrup with oat milk, stronger matcha, and optional cold foam.
Version chooser for strawberry matcha latte with first try, pretty layers, make-ahead syrup, busy-day jam, and café-style cold foam.
Choose the version that fits the moment: fresh berries for everyday, puree for layers, syrup for prep, jam for speed, or cold foam for café style.

Strawberry Base Options

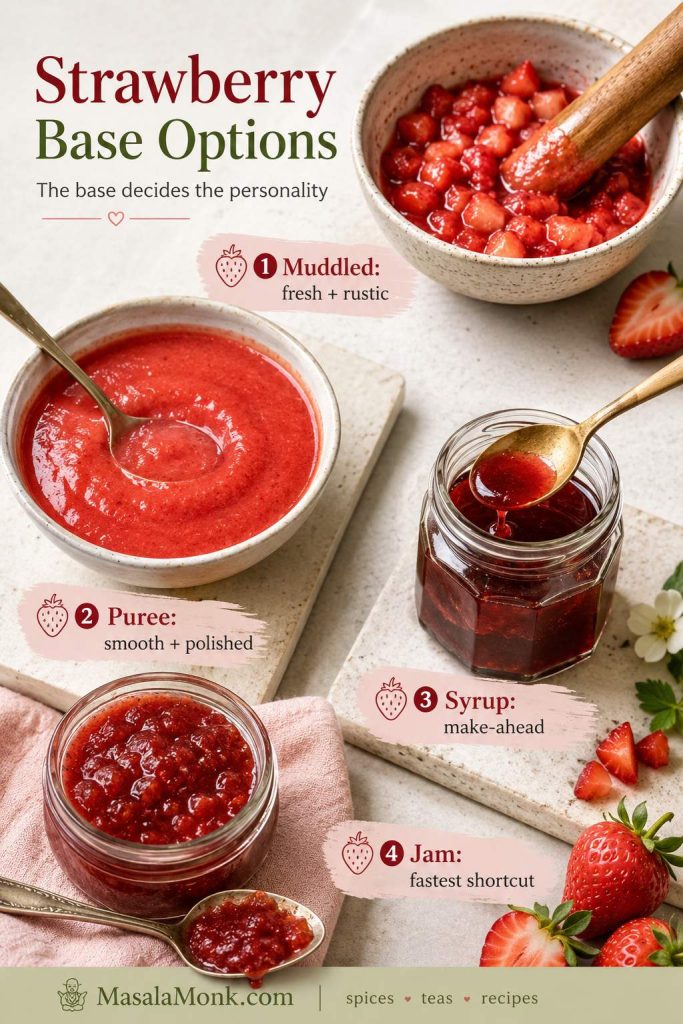
Once you know which direction you want, the strawberry base is where the latte gets its personality: rustic and fresh, smooth and polished, syrupy and make-ahead, or fast and jammy.

Four strawberry base options for strawberry matcha latte including muddled berries, puree, syrup, and jam shortcut.
The strawberry base decides the personality of the drink, from fresh and rustic to silky, syrupy, or fast and jammy.

Fresh muddled strawberries

Ripe strawberries are where this version shines. It tastes fresh, takes only a few minutes, and keeps the drink from feeling too syrupy. The texture is slightly rustic, which can be lovely if you enjoy real fruit in the glass.

Smooth strawberry puree

Blend strawberries with sweetener for a silkier fruit base. This gives the latte a more polished look and makes the strawberry flavor spread more evenly once stirred. If seeds bother you, strain the puree before adding it to the glass.

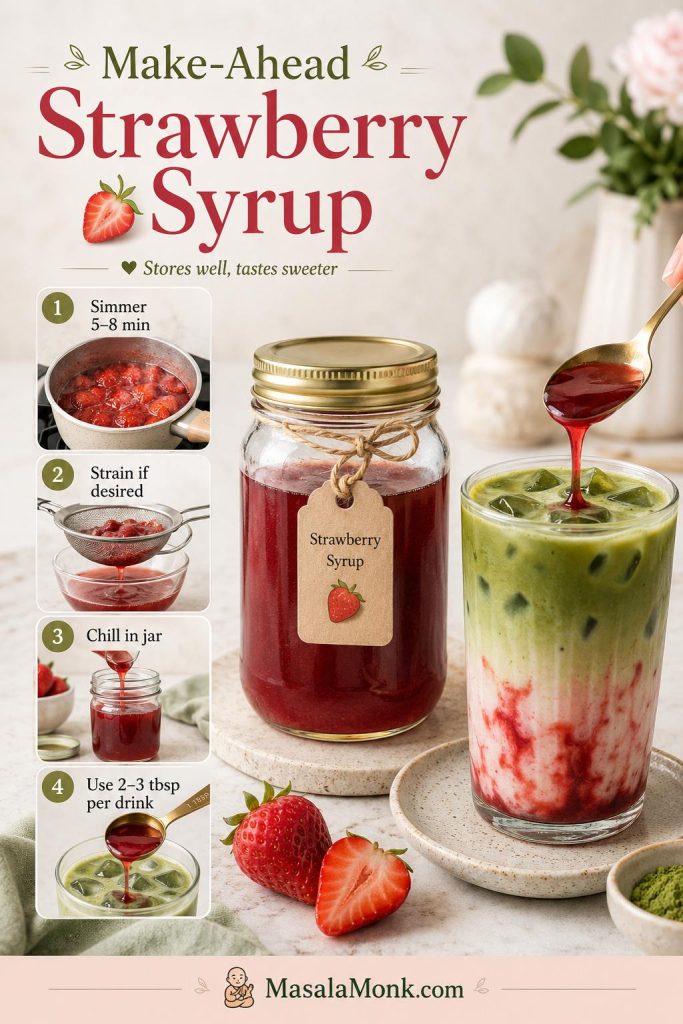
Make-ahead strawberry syrup

To make syrup ahead, simmer 1 cup chopped strawberries, about 140–160 g, with ¼ cup sugar and ¼ cup water for 5–8 minutes, until the fruit softens and the liquid turns red. Mash, strain if desired, cool, and refrigerate. Use 2–3 tablespoons syrup per drink.

This makes roughly enough syrup for 3–4 drinks, depending on how much you reduce it. Syrup stores well and gives stronger strawberry flavor, but it tastes sweeter and less fresh than muddled berries. Store-bought syrup can work in a pinch; start with less than you think you need.

That jammy berry flavor also works beautifully in desserts; this strawberry ice cream recipe uses the same idea of concentrating juicy strawberries before they water things down.

Make-ahead strawberry syrup guide with simmered strawberries, straining, syrup in a jar, and syrup spooned into a matcha latte.
Use strawberry syrup when convenience matters more than fresh berry texture, especially for repeat lattes during the week.

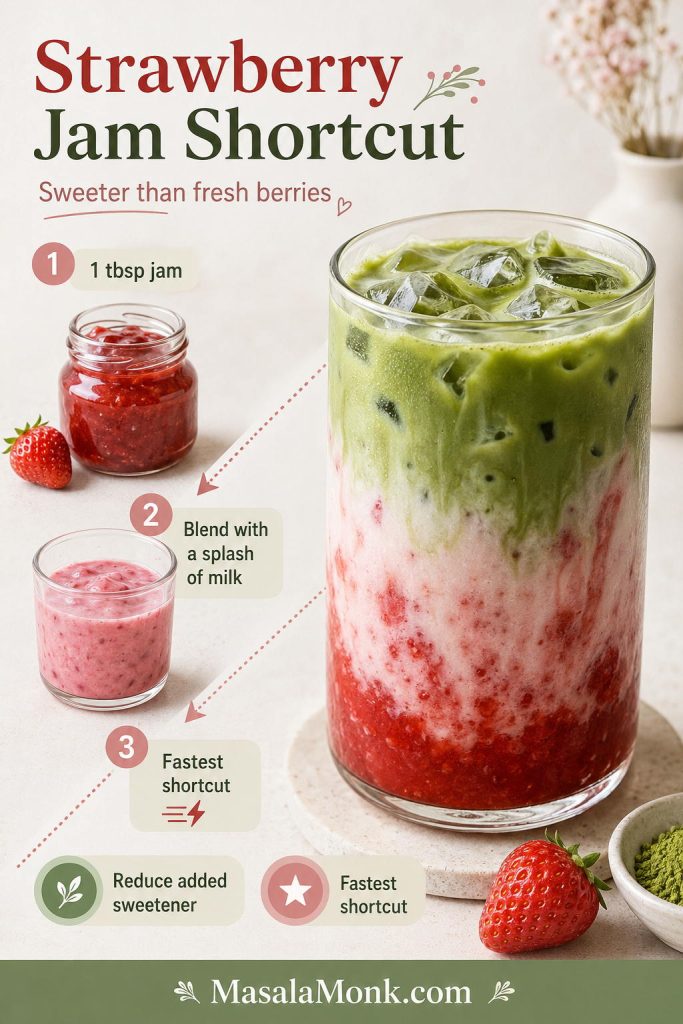
Strawberry jam shortcut

Jam works when speed matters, but it gives the drink more candy-shop sweetness than fresh berry lift. Start with 1 tablespoon, stir or blend it with a spoonful of milk, then add the rest of the milk and matcha.

Strawberry jam shortcut guide showing jam, jam mixed with milk, and a finished strawberry matcha latte.
Jam is the fastest shortcut when fresh berries are not available, but reduce added sweetener because the base is already sweet.

Starbucks-Style Notes

For a Starbucks-style strawberry matcha latte, use smooth strawberry puree or syrup, oat milk or coconut milk, 1½–2 teaspoons matcha, and strawberry cold foam if you want the café-style finish.

Puree or syrup gives you more café polish; muddled berries give you the fresher homemade sip.

For the homemade version that fits your situation, compare the fresh, syrup, jam, and café-style options.

The exact Starbucks version can vary by country, season, and custom order. Starbucks EMEA announced an Iced Strawberry Matcha Tea Latte with strawberry cream cold foam, while in other places people often recreate the flavor through custom orders or homemade copycat versions.

Café-style strawberry matcha latte with strawberry cold foam, matcha layer, milk, strawberry base, and callouts for puree, milk, and matcha.
For a Starbucks-style direction, use a smoother strawberry base, slightly stronger matcha, creamy milk, and strawberry cold foam on top.

Variations

Once you know the base ratio, this iced matcha drink is easy to adapt. Keep the same building order, then change the milk, fruit base, or topping.

For the basic build before changing the milk, foam, or fruit base, start with the main method.

Strawberry Milk Matcha

Blend strawberries or strawberry jam directly into the milk, then pour whisked matcha over the top. Choose this when you care more about a creamy, evenly fruity latte than the dramatic red-white-green layers.

Creamiest Dairy-Free Version

Oat milk gives you the creamiest dairy-free glass. Because it is naturally a little sweet and rich, it works especially well with 1½–2 teaspoons matcha and a lightly sweetened strawberry base.

Oat milk strawberry matcha latte in a clear glass with strawberry base, milk, matcha, ice, and dairy-free callouts.
Oat milk is usually the easiest dairy-free choice because it softens matcha while keeping the strawberry layer creamy and full.

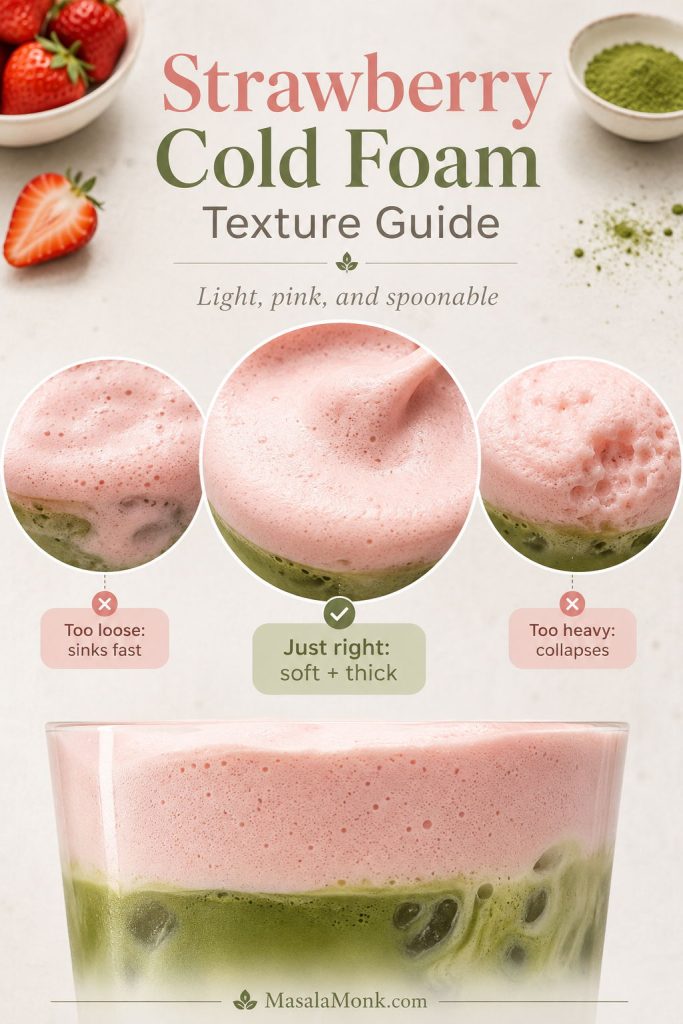
Strawberry Cold Foam Matcha

For a creamier cold foam variation, froth 3 tablespoons heavy cream or barista-style milk with 1 tablespoon strawberry puree or jam and ½ teaspoon vanilla. Spoon it over an iced matcha latte, or use it on top of the layered strawberry-matcha drink.

If fresh strawberry puree makes the foam too loose, use freeze-dried strawberry powder or a small amount of thick strawberry jam instead. The goal is a pink, lightly sweet foam that tastes like strawberry without sinking straight into the glass.

For a thicker topping, the same timing cues from this whipped cream recipe can help you stop before the foam turns heavy.

Strawberry cold foam texture guide showing too loose, just right, and too heavy foam on matcha drinks.
Good strawberry cold foam should be light and spoonable, not runny enough to sink or heavy enough to feel like frosting.

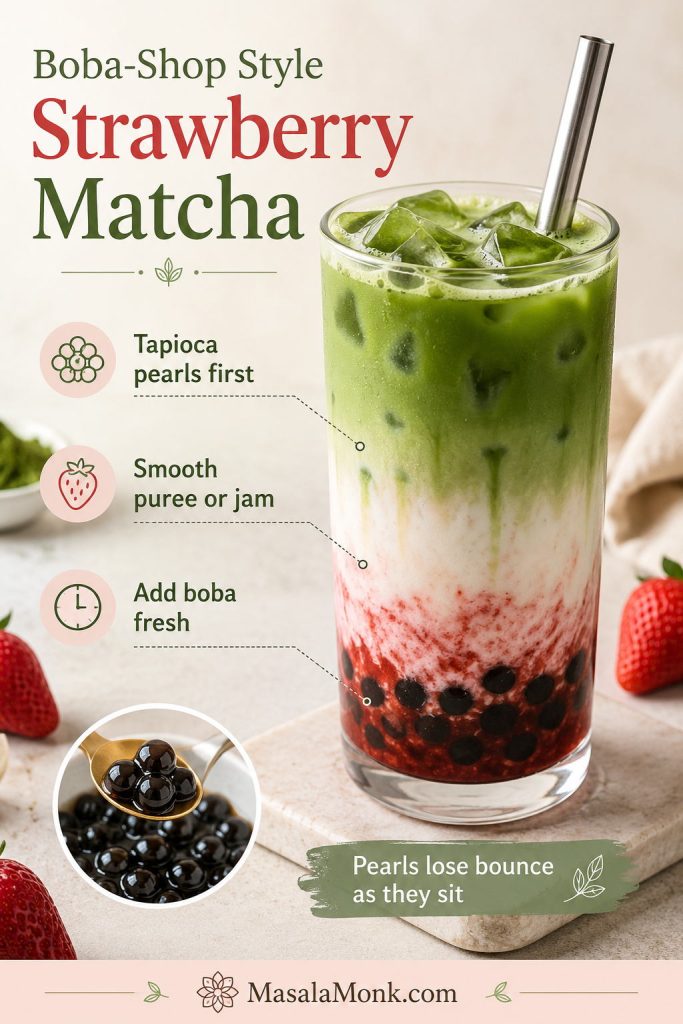
Boba-Shop Style Strawberry Matcha

Add cooked tapioca pearls to the bottom before the strawberry base, then build with ice, milk, and matcha. Use a smooth puree or jam so the cup does not feel too busy, and add boba fresh because cooked tapioca pearls lose their bounce as they sit.

Boba-style strawberry matcha drink with tapioca pearls, strawberry base, milk, matcha, ice, and a wide straw.
Add tapioca pearls fresh and keep the strawberry base smooth, because boba already brings plenty of texture to the glass.

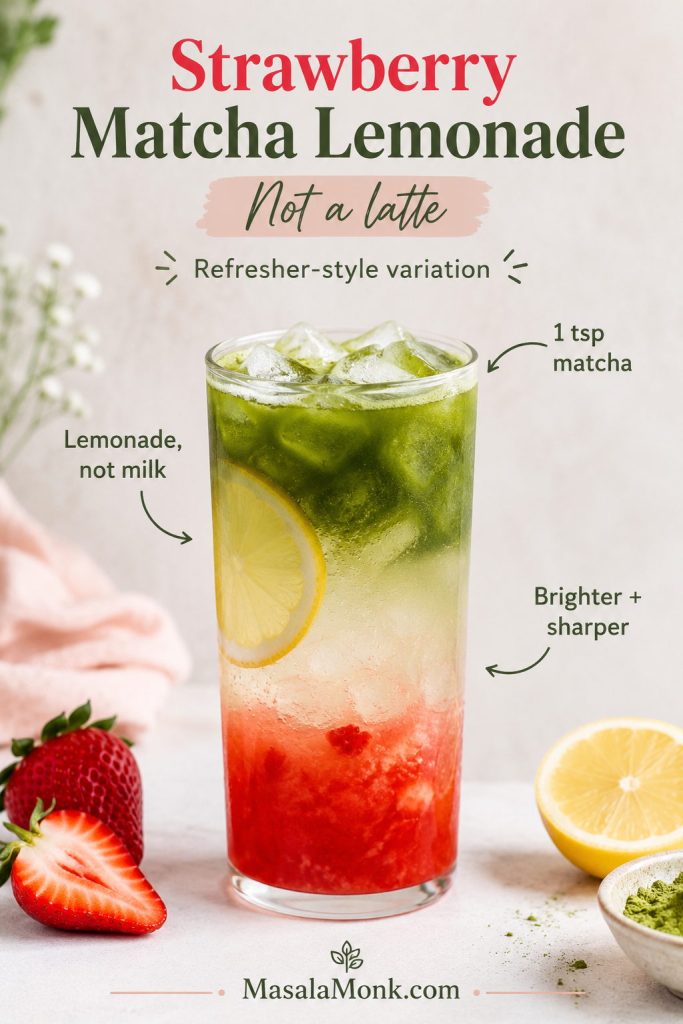
Strawberry Matcha Lemonade, Not a Latte

For a brighter refresher-style variation, replace the milk with cold lemonade and keep the strawberry base at the bottom. This is a separate summer drink, not a creamy latte. Use 1 teaspoon matcha because the acidity makes the green tea taste stronger.

Strawberry matcha lemonade with strawberry base, lemonade layer, matcha top, ice, lemon slice, and not-a-latte label.
This variation leaves latte territory; instead of creamy milk, lemonade makes the drink brighter, sharper, and more refreshing.

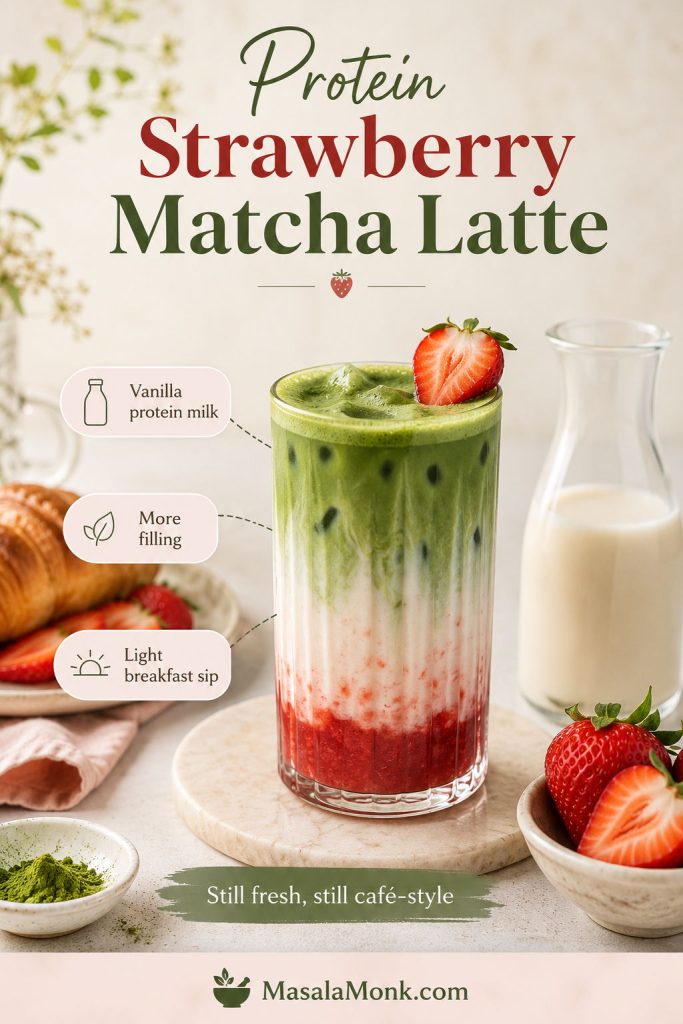
More Filling Protein Version

Use vanilla protein milk or a vanilla protein shake for part of the milk. This is the version to make when you want the drink to act more like a light breakfast than a pretty afternoon sip. For a more fruit-forward breakfast drink, this berry smoothie recipe is a better direction.

Protein strawberry matcha latte with vanilla protein milk, strawberry base, milk layer, matcha, ice, strawberries, and breakfast props.
Vanilla protein milk turns the drink into a more filling option, while the strawberry and matcha keep it tasting fresh rather than heavy.

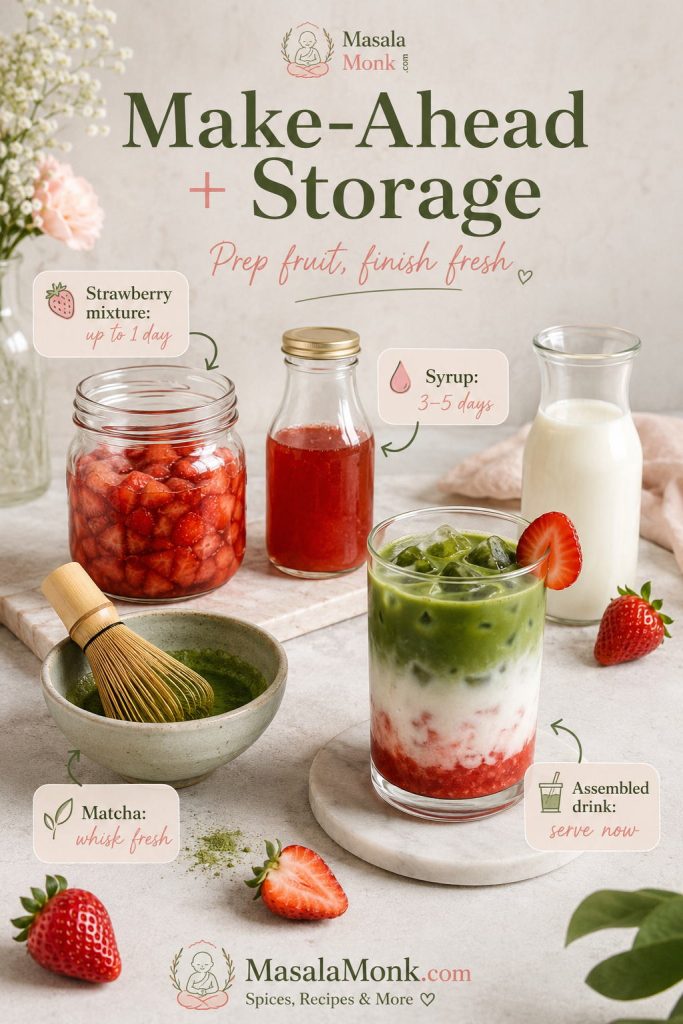
Make-Ahead and Storage

This drink tastes best right after it is assembled, but you can prepare the parts ahead. Keep the strawberry mixture and matcha separate until you are ready to build the glass.

The best make-ahead plan is simple: prep the strawberry part, chill the milk, and leave the matcha for the last minute. The matcha is the part worth making fresh; whisk it at the end so the top tastes bright instead of dull.

Component Make-ahead timing Storage tip
Fresh strawberry mixture Up to 1 day Refrigerate in a covered jar. Stir before using.
Cooked strawberry syrup 3–5 days Refrigerate in a clean jar and use a clean spoon each time.
Whisked matcha Best fresh Whisk right before serving for the smoothest texture.
Fully assembled drink Serve immediately The colors fade and the ice waters it down over time.

If you want to make several drinks for guests, prepare the strawberry base ahead and chill the milk. Whisk the matcha fresh, then assemble each serving just before serving.

Make-ahead and storage guide with strawberry mixture, strawberry syrup, milk, fresh-whisked matcha, and assembled strawberry matcha latte.
Make-ahead works best when the fruit is ready and the matcha is fresh, so the drink still tastes bright when assembled.
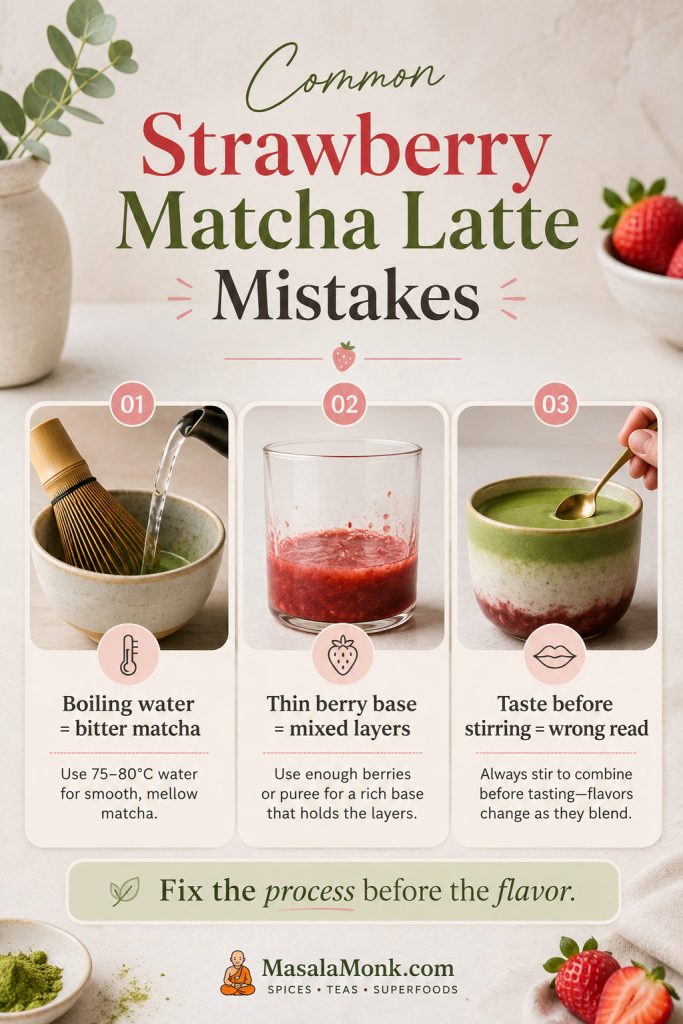
Avoid the three easiest mistakes: do not use boiling water for matcha, do not pour milk directly into a thin strawberry mixture if you want visible separation, and do not judge the sweetness until the drink has been stirred.
Common strawberry matcha latte mistakes showing boiling water, thin berry base, and tasting before stirring.
Most mistakes happen before the first sip, so fix the process: avoid boiling water, thicken the berry base, and stir before judging.

Troubleshooting: Bitter, Clumpy, Watery, or Mixed Layers

Even if the glass does not look perfect, it is usually easy to fix the flavor. Most problems come down to heat, sweetness, ice, or how fast everything was poured.

A messy glass is not a failed latte. If the flavor is balanced, you are already close.

Fix matcha problems first

When a strawberry matcha latte tastes bitter, clumpy, or watery, start with the matcha. The water temperature, whisking, and dilution usually explain the problem.

Problem Likely cause How to fix it
Matcha tastes bitter Water was too hot, matcha was low quality, or too much matcha was used. Use water around 175°F / 80°C, start with 1 tsp matcha, and add more milk if needed.
Matcha is clumpy Powder was not sifted or whisked enough. Sift first, add hot water gradually, and whisk until glossy before pouring.
Drink tastes watery Too much water in the matcha or too much melted ice. Use 3 tbsp water for the matcha and serve immediately after building.

Fix layers, sweetness, and berry flavor

If the matcha is smooth but the latte still feels off, check the strawberry base, ice, sweetness, and milk balance next.

Problem Likely cause How to fix it
Colors disappeared Not enough ice, thin strawberry mixture, or pouring too fast. Use more ice, make the fruit base thicker, and pour milk and matcha slowly over the ice.
Too sweet Too much syrup, jam, or sweetened milk. Use fresh strawberries next time. For this glass, add more milk and a little extra matcha.
Too grassy Matcha is too strong for your taste. Use 1 tsp matcha, add more milk, or sweeten the fruit base slightly.
Not enough strawberry flavor Berries were pale or watery. Use a cooked syrup, add 1 extra strawberry, or mix in 1 tsp strawberry jam.
Drink tastes flat Not enough strawberry, weak matcha, or too much milk. Add a spoonful of strawberry mixture, use 1½–2 tsp matcha, or reduce the milk slightly next time.
Troubleshooting guide for strawberry matcha latte with fixes for bitter, clumpy, watery, mixed layers, too sweet, too grassy, weak berry, and flat flavor.
If the latte tastes off, the fix is usually small: cooler water, more ice, better whisking, or a quick adjustment to sweetness and matcha.

When it is right, the first sip is creamy and cool, then berry-bright, with just enough matcha to keep the sweetness in check.

Make it from memory

After the troubleshooting guide, this saveable card brings the core ratio, build order, taste target, and quick fixes into one easy reference.

Saveable strawberry matcha latte recipe card with ratio, method order, taste target, quick fixes, and a layered drink.
This card turns the full recipe into a memory system: ratio, build order, flavor target, and the fixes that matter most.

FAQs

These quick answers cover the practical questions readers usually have once they start making the drink, from whisking matcha to using jam, oat milk, and make-ahead parts.

Quick fixes board for strawberry matcha latte with answers about whisking, warm water, jam, oat milk, make-ahead prep, and caffeine strength.
These quick answers help the next glass taste better, especially if you need a no-whisk method, jam shortcut, oat milk option, or caffeine adjustment.

Does strawberry taste good with matcha?

Strawberry works well with matcha because its sweet-tart flavor softens matcha’s grassy edge. Milk brings the two together, so the drink tastes fruity, creamy, and lightly earthy instead of sharp.

No bamboo whisk?

A bamboo whisk gives the best traditional texture, but a small whisk, handheld milk frother, blender, or shaker jar can also make glossy matcha. Sifting the powder first helps no matter which tool you use.

Cold water or warm water for matcha?

Cold water can work with a shaker or handheld frother, but warm water usually makes matcha easier to whisk smooth. For this recipe, a small amount of hot water gives the matcha a smoother texture before it hits the ice.

Fresh strawberries or jam?

Fresh berries or puree usually taste brighter and less sugary. Strawberry jam is the fastest shortcut. Use 1–2 tablespoons and blend or stir it with a little milk before adding the rest.

Why is my latte bitter?

The matcha may have been whisked with water that was too hot, or you may have used too much matcha for your taste. Use hot water around 175°F / 80°C, avoid boiling water, and start with 1 teaspoon matcha if you are new to the flavor.

Why did the colors mix together?

The glass probably needed more ice, a thicker strawberry mixture, or a slower pour. Add the strawberries first, fill the glass with ice, pour milk slowly over the ice, then pour matcha gently over the top.

Do I have to layer the drink?

No. The layered look is pretty, but the best flavor comes after stirring. Take the beautiful first look, then mix it so the strawberry, milk, and matcha land in the same sip.

If you want a fully blended matcha drink instead of an iced latte, these matcha smoothie recipes are a better fit.

Oat milk and vegan options

Oat milk works especially well because it is creamy enough to soften the matcha and naturally sweet enough to pair with strawberries. For a vegan version, use oat milk, almond milk, coconut milk, or another non-dairy milk, and sweeten the strawberries with sugar, maple syrup, or simple syrup instead of honey.

Is this the same as strawberry milk matcha?

Not exactly. A layered version keeps the strawberry at the bottom, milk in the middle, and matcha on top. Strawberry milk matcha blends the strawberry into the milk first, so the drink tastes creamier and more evenly fruity but looks less dramatic.

How strong is the caffeine?

The caffeine depends on the matcha powder and how much you use, but this is definitely a caffeinated latte. A 1-teaspoon version is gentler; a 2-teaspoon version tastes closer to the stronger café-style matcha people expect when they want the green tea to show up.

Make-ahead plan

Prepare the strawberry mixture or syrup ahead, but whisk the matcha and assemble the latte fresh. Once ice, milk, fruit, and matcha sit together, the colors fade and the texture turns watery.

How to double it

Double the strawberry mixture, milk, matcha, and sweetener, then build two glasses separately. If everything goes into one pitcher, the flavor will still be good, but the layered look will disappear.

Start with the fresh strawberry version first. Stir before judging, then adjust only one thing in the next glass: more berry, stronger matcha, oat milk, cold foam, or the jam shortcut on a busy day. Once the balance clicks, this becomes the kind of small café drink you can make from memory.

Back to top

Posted on 8 Comments

Hot Chocolate Coffee: 3 Easy Recipes (Cocoa, Mix, or Espresso)

Hot chocolate coffee in a ceramic mug with cocoa powder sprinkled on top, showing three easy ways: cocoa, mix, and espresso

Some days call for a clean, straight cup of coffee. Other days beg for hot chocolate—thick, sweet, and unapologetically comforting. Then there are the in-between days, when you want both: the aroma and edge of coffee plus the soft, chocolatey warmth of cocoa. That’s where hot chocolate coffee earns its place.

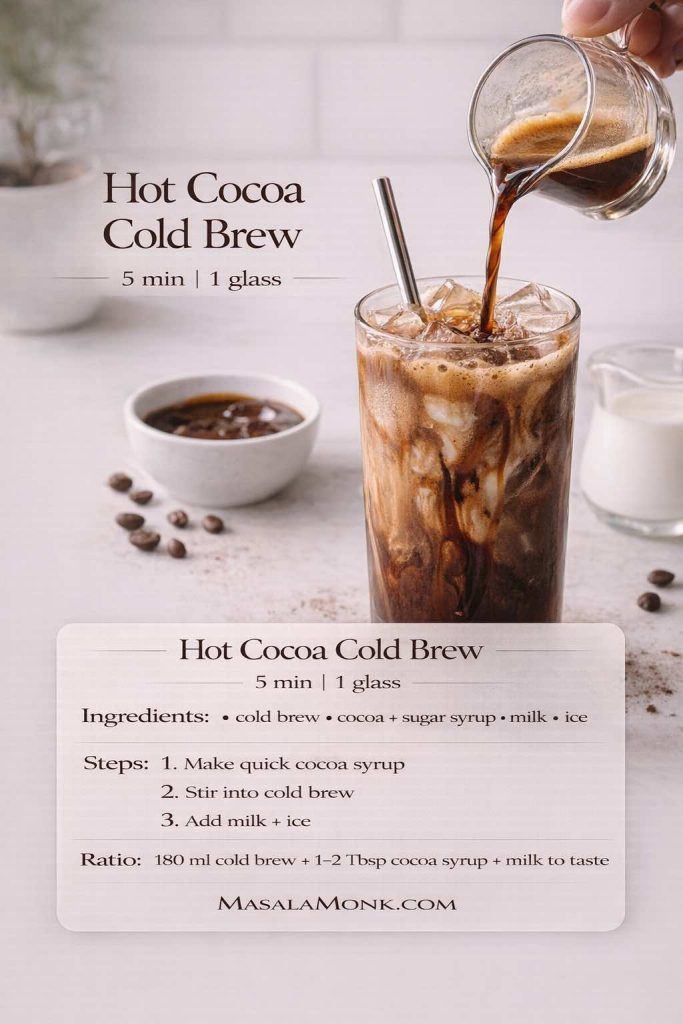
Hot chocolate coffee is simple in concept—coffee and chocolate together in one drink—but it’s surprisingly flexible in practice. You can make it bold or mellow, intensely chocolatey or lightly kissed with cocoa. You can go fast with a packet, slow with a real cocoa paste, or café-style by adding espresso to a proper hot chocolate base. And when the weather refuses to match your cravings, you can even pivot into a chilled version—hot cocoa cold brew—so you still get chocolate comfort without the steam.

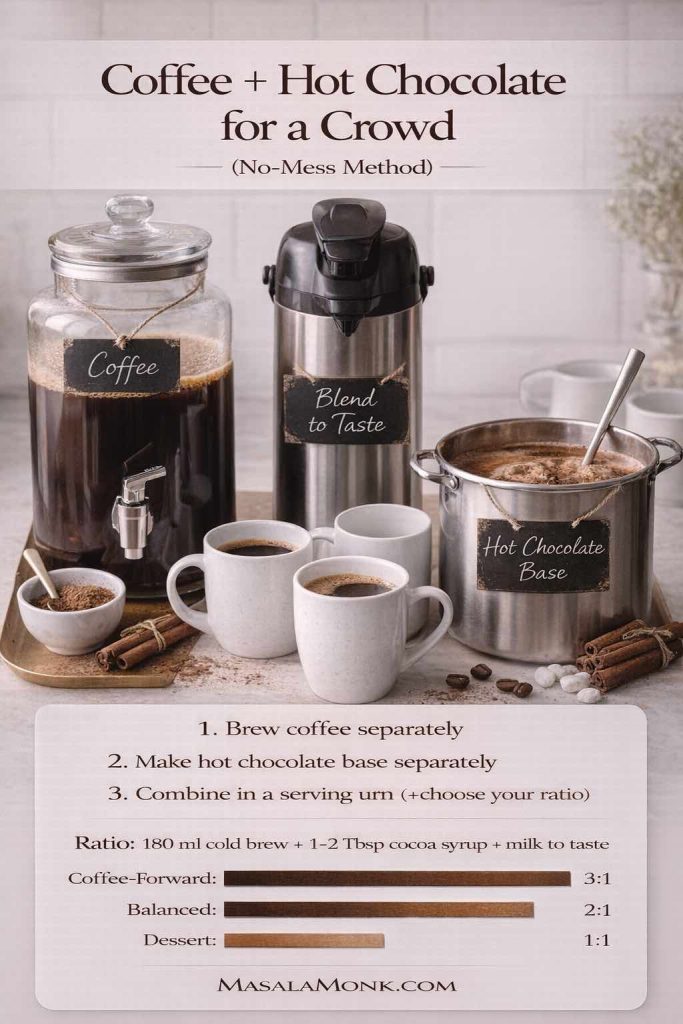
This is a reader-first guide built to be genuinely useful. You’ll get three reliable methods (each with clear steps), the small decisions that make the difference between “fine” and “I’m making this again,” a set of ratios you can memorize, variations that taste distinct (not like the same drink in a new outfit), plus a crowd-friendly approach for gatherings that won’t punish your equipment.

If you want a stronger foundation for choosing a coffee base—because strength matters when chocolate enters the picture—this guide to coffee brewing methods is a helpful companion.


Hot chocolate coffee at a glance

If you want the “what should I do today?” answer before you read a word more:

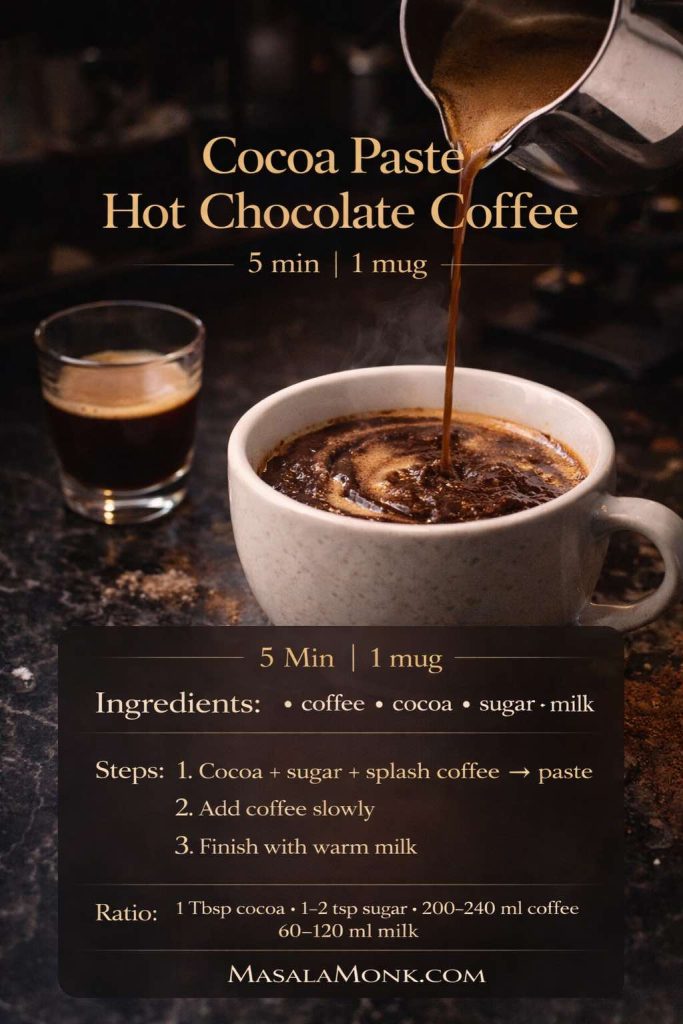
  • Best everyday version: cocoa paste + strong brewed coffee + milk
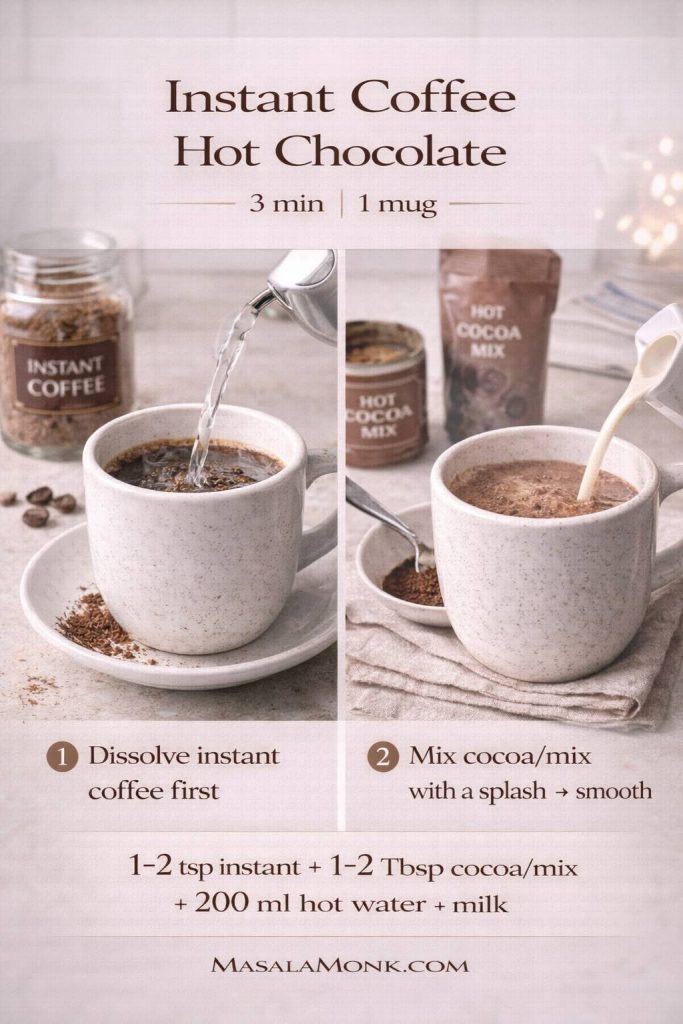
  • Fastest version: hot chocolate mix in coffee (two-minute comfort)
  • Most café-like version: espresso added to hot chocolate (deep, dessert-forward, bold)
Hot chocolate coffee guide showing 3 easy ways—cocoa paste, hot cocoa mix, and espresso—with simple ratios on a cozy linen background.
Hot chocolate coffee at a glance: choose cocoa paste for the smoothest mug, hot cocoa mix for the fastest fix, or espresso for a café-style finish—each with a simple ratio you can remember.

Each method works. The difference is mood, time, and whether you want coffee leading or chocolate leading.

Also Read: Cold Brew Espresso Martini: How to Make It (Step-by-Step Recipe)


Coffee and hot chocolate: what it is, and why it works

At its heart, hot chocolate coffee is exactly what it sounds like: coffee combined with chocolate in one drink. The chocolate might come from cocoa powder, from hot chocolate mix, from chocolate syrup, or from a full hot chocolate base made with milk. The coffee might be brewed coffee, espresso, moka pot concentrate, instant coffee, or cold brew.

The reason it works is beautifully simple: coffee brings bitterness, roastiness, and aroma; chocolate brings richness, sweetness, and body. When the balance is right, the mug feels cohesive—like one drink that happens to have two kinds of comfort, instead of coffee and cocoa competing for attention.

Mocha vs hot chocolate coffee comparison infographic showing two drinks side by side and explaining mocha as espresso with chocolate and milk versus hot chocolate coffee as coffee with cocoa or mix and milk.
Mocha vs hot chocolate coffee: both are coffee-and-chocolate drinks, but mocha is espresso with chocolate and milk (café-style), while hot chocolate coffee uses brewed coffee with cocoa or hot cocoa mix plus milk (home-friendly).

You’ll often hear people call this a “mocha.” In most cafés, a mocha usually means espresso + chocolate + milk (often with foam). Definitions support the same idea; you can see it in the Cambridge Dictionary’s mocha entry and Merriam-Webster’s mocha definition. Still, you don’t need the label to enjoy the mug. If anything, thinking in terms of “hot chocolate coffee” helps because it keeps the drink flexible—you can go coffee-forward, chocolate-forward, or right down the middle.

And that’s the magic: you decide what the drink becomes, every single time. One day you’re adding hot chocolate to coffee for a quick cozy upgrade. Another day you’re adding coffee to hot chocolate because you want chocolate to lead and caffeine to quietly support. Both are valid. Both are delicious. And both can happen at home, without a café line or a complicated setup.

Also Read: Cranberry Moscow Mule Recipe: A Festive Holiday Cocktail With Easy Variations

Which hot chocolate coffee should you make infographic comparing three methods: cocoa paste for smooth customizable flavor, cocoa mix for the fastest mug, and espresso in hot chocolate for café-style richness.
Not sure where to start? This quick guide helps you pick the best hot chocolate coffee method—cocoa paste for a smooth customizable mug, cocoa mix for the fastest hot cocoa coffee, or espresso in hot chocolate for a richer café-style drink.

The two decisions that change everything

Before we jump into the methods, two small choices matter more than people expect:

  1. How strong your coffee is
  2. How you introduce cocoa

These aren’t fussy details. They’re the difference between “a little watery” and “exactly what I wanted.”

1) Coffee strength: don’t let chocolate bully your coffee

Chocolate has a surprisingly loud voice. If your coffee is weak, the drink can drift into “sweet cocoa with a faint coffee memory.” Sometimes that’s fine. Often, it’s not what you were craving—especially if you wanted coffee aroma and a bit of roast edge.

Coffee base strength selector infographic for hot chocolate coffee showing four options—strong brewed coffee, moka pot, espresso, and cold brew concentrate—with quick notes on when to use each.
Chocolate can overpower a weak brew—use this quick selector to choose a coffee base that stays noticeable beside cocoa: strong brewed coffee for everyday mugs, moka pot for bold concentration, espresso for the most café-like depth, and cold brew concentrate for iced hot cocoa coffee.

So aim for a base that can hold its own:

  • Robust brewed coffee (slightly stronger than your usual cup)
  • Moka pot coffee (concentrated and bold)
  • Espresso (one or two shots)
  • Cold brew concentrate (for iced versions)

If you want to sharpen your moka pot technique, this moka pot mastery guide is a great refresher. And if you want clarity on espresso—especially outside café contexts—this quick espresso guide is a useful primer.

2) Cocoa clumps: always give cocoa a head start

Cocoa powder doesn’t dissolve like sugar. If you toss cocoa into a full mug of coffee, it tends to float, clump, and form dry pockets that never fully integrate. That’s why so many people conclude that coffee with hot chocolate powder “always turns gritty.” It doesn’t have to.

No-clumps cocoa paste method for hot chocolate coffee, showing cocoa and sugar mixed with a splash of hot coffee to make a smooth paste before adding the rest of the coffee and milk.
Stop cocoa powder clumps in coffee: mix cocoa and sugar with a splash of hot coffee to make a smooth paste, then pour in the rest of the coffee and finish with milk for a silky hot chocolate coffee.

The fix is simple: make a paste first. Cocoa + sweetener + a small splash of hot coffee, stirred until smooth and glossy. Once the cocoa is hydrated, it blends beautifully.

This one habit turns hot chocolate coffee from a gamble into a repeatable ritual.

Also Read: Baked Ziti Recipe Collection: 15 Easy Variations


Method 1: Hot chocolate coffee with cocoa powder (the best everyday version)

If you want the version you’ll come back to again and again, start here. This method is controllable, consistent, and easy to personalize. It also scales well—once you learn it, you can adjust sweetness, intensity, and texture without needing a new recipe every time.

Time: 3–5 minutes
Difficulty: Easy
Best for: Balanced mugs that taste intentional

Ingredients (one generous mug)

  • 200–240 ml hot brewed coffee (strong is best)
  • 1 tablespoon unsweetened cocoa powder
  • 1–2 teaspoons sugar (or jaggery powder), to taste
  • 60–120 ml milk (dairy, oat, soy—whatever you like)
  • ¼ teaspoon vanilla (optional)
  • Tiny pinch of salt (optional, but genuinely helpful)
Cocoa paste hot chocolate coffee recipe card with espresso being poured into a mug, showing ingredients, quick steps, and ratio for a 5-minute drink.
Cocoa paste hot chocolate coffee (5 minutes): stir cocoa and sugar with a splash of coffee into a smooth paste, pour in the rest of the coffee slowly, then finish with warm milk for a rich, café-style mug.

Step-by-step method

Step 1: Make the cocoa paste (this is the whole trick)

Add cocoa powder and sugar to your mug. Pour in 1–2 tablespoons of hot coffee (hot matters; lukewarm coffee makes cocoa harder to smooth). Stir until you have a glossy paste—no visible dry cocoa, no gritty pockets.

Think of this as a miniature chocolate “starter.” Once it’s smooth, the rest is easy.

Step 2: Build the drink gradually

Add the remaining coffee slowly, stirring as you go. This keeps the drink silky and prevents cocoa from clumping. It also helps the chocolate flavor distribute evenly so you don’t get “chocolate at the bottom, coffee at the top.”

Step 3: Soften with milk

Add warm milk until the mug feels balanced. More milk makes it gentler and creamier; less milk keeps it coffee-forward. If you like your coffee bold, start with a small splash and adjust. If you want a softer, rounder drink, be generous.

Step 4: Finish thoughtfully (optional, but worth it)

A little vanilla can make chocolate taste rounder and more dessert-like, even if you don’t add much sugar. A tiny pinch of salt can make chocolate taste deeper without making the drink taste salty. It’s subtle, but it works.

How to tune it without overthinking

This is where the method becomes yours:

  • Too intense? Add milk before adding sugar. Milk changes both texture and flavor balance.
  • Too bitter? Increase sugar slightly or reduce cocoa by ½ teaspoon next time.
  • Too mild? Add ½ teaspoon more cocoa and stir briskly (or use a stronger coffee base next time).
  • Too sweet? Reduce sugar, then add a pinch of salt or a touch more cocoa to deepen chocolate flavor without leaning on sweetness.
Hot chocolate coffee fixes infographic with color-coded troubleshooting tips for clumpy cocoa, too bitter, too sweet, too thin, too mild, and not coffee enough.
Hot chocolate coffee troubleshooting, fast: fix clumpy cocoa by making a paste first, soften bitterness with milk, balance sweetness with stronger coffee and a pinch of salt, and adjust cocoa or milk to dial in body and flavor.

A smoother shortcut: chocolate syrup

If you want something that blends instantly—especially for iced versions—chocolate syrup can deliver a seamless chocolate base with minimal effort. If you like making your own, this quick homemade chocolate syrup is fast enough to feel practical.

Zero-clump shortcut infographic showing chocolate syrup being poured into an iced coffee/cold brew glass with steps: 1 Tbsp chocolate syrup, add coffee or cold brew, milk optional.
Zero-clump iced cocoa coffee shortcut: add 1 tablespoon chocolate syrup first, pour in coffee or cold brew, then swirl—finish with a splash of milk if you want it creamier. It’s the smoothest way to get a chocolate-coffee drink without gritty cocoa powder.

A DIY “hot chocolate coffee mix” you can keep in a jar

If you like the convenience of packets but want a homemade approach, make a small jar of dry blend: cocoa + sugar + a pinch of salt. Then you can make hot chocolate coffee in seconds—just scoop your mix, add a splash of coffee to form a paste, and build the mug.

Hot chocolate coffee dry mix jar label showing cocoa, sugar, and a pinch of salt with simple “scoop → paste first → add coffee → finish with milk” instructions and a 1–2 tablespoon per mug ratio.
DIY hot chocolate coffee dry mix (make once, use all week): combine cocoa + sugar + a pinch of salt in a jar, then for each mug scoop 1–2 tablespoons, stir into a smooth paste with a splash of hot coffee, top up with coffee, and finish with milk for a fast, clump-free hot cocoa coffee.

If you want a deeper ingredient lens (and why cocoa type changes flavor), this cacao vs chocolate guide is worth reading.

Also Read: Green Chutney Recipe (Coriander–Mint / Cilantro Chutney)


Method 2: Hot cocoa mix in coffee (the quickest mug you’ll ever love)

Some days don’t invite ceremony. They demand speed, comfort, and a clean path from “not awake” to “functioning.” This is where hot chocolate mix shines.

Yes—adding hot cocoa mix to coffee can taste genuinely good. The key is not dumping powder into a full mug and hoping for the best. The “smooth way” takes about ten extra seconds and saves the whole drink.

Time: 2 minutes
Difficulty: Easiest
Best for: Quick comfort, minimal cleanup

Ingredients (one mug)

  • 200–240 ml hot coffee
  • 2 tablespoons hot chocolate mix (start here)
  • Optional: 30–90 ml milk
Hot cocoa mix in coffee recipe card showing cocoa powder falling from a spoon into a mug of coffee, with 2-minute steps and ratio for a smooth drink.
Hot cocoa mix in coffee (2 minutes): stir the powder with a small splash of hot coffee first, then top up and mix well—add a little milk if you want a creamier hot chocolate coffee drink.

Step-by-step method

Step 1: Start with the mix

Add your hot chocolate mix to the mug.

Step 2: Add a small splash of coffee and stir smooth

Pour in just a little hot coffee and stir until the powder is fully moistened and smooth. This is the same logic as the cocoa paste method, only you’re working with a sweeter, pre-blended powder. It prevents the classic “powdery pockets” problem.

Step 3: Add the rest of the coffee and stir again

Now build the mug with the remaining coffee. Stir well.

Step 4: Add milk if you want it creamier

A splash of milk rounds everything out. If your hot chocolate mix includes powdered milk, you might not need much. If it’s a dark or intense mix, milk can help balance it without adding more sugar.

How to make it taste less “packet-like”

Some mixes lean very sweet. That’s not always bad, but if you want more depth:

  • Use 1 tablespoon of mix + 1 teaspoon cocoa powder
  • Add a small splash of milk

This gives you more real cocoa flavor without overloading the mug with sugar.

When you want a “real” hot chocolate baseline

It’s helpful to know what truly rich hot chocolate tastes like, even if you don’t make it every time. A straightforward, dependable reference is this homemade hot chocolate recipe. Once you have that flavor in your mind, it becomes easier to adjust your coffee-and-chocolate balance: you’ll know when you want coffee to lead versus when you want chocolate to lead.

Also Read: Paper Plane Cocktail Recipe + Best Amaro Substitutes & Tips


Method 3: Espresso in hot chocolate (café-style, deeply satisfying)

If you want the chocolate to feel like a true base—rich, thick, and cozy—then espresso in hot chocolate is your move. Instead of adding cocoa to coffee, you’re adding coffee to cocoa. That sounds like a small change, but the result often feels dramatically more indulgent.

This is also the method that most closely resembles what cafés serve when you order a mocha: espresso + chocolate + milk, balanced and bold.

Time: 5–7 minutes
Difficulty: Easy–Medium
Best for: Dessert-forward mugs that still feel like coffee

Option A: Espresso hot chocolate (classic café direction)

Ingredients

  • 1–2 espresso shots
  • 200 ml hot chocolate (milk-based cocoa, or mix made with milk for body)
  • Optional: foam, whipped cream, or shaved chocolate

Method

  1. Make your hot chocolate in your preferred style. Milk-based versions taste richer and help everything integrate.
  2. Pull 1–2 espresso shots.
  3. Pour espresso into the hot chocolate and stir gently. (Adding espresso into the chocolate base helps it integrate smoothly.)
  4. Finish with foam or whipped cream if you want the full café mood.
Espresso in hot chocolate (café-style): pour 1–2 espresso shots into a rich hot chocolate base, stir gently, and you’ve got a bold, silky espresso hot chocolate in minutes.

Option B: “Espresso-style” hot chocolate coffee without a machine (moka pot version)

No espresso machine? You can still create a concentrated coffee that behaves beautifully in chocolate using a moka pot. Brew a strong moka coffee, make your hot chocolate base, and combine them the same way.

If you want a step-by-step refresher, this moka pot mastery guide is a great companion. And if you want clarity on espresso as a concept—strength, concentration, and what “one shot” means—this espresso guide helps.

Make it feel even more café-like: foam, texture, balance

If you love that cappuccino texture—foam, warmth, airy lift—borrow technique from this cappuccino recipe guide. Then you can build a chocolate-leaning drink that feels like a mocha cappuccino: espresso (or moka concentrate) + cocoa base + foamed milk.

Also Read: Manhattan Cocktail Recipe (Classic + 6 Variations)


The ratios that make hot chocolate coffee feel intentional

Once you know the methods, ratios become your quiet superpower. They help you get exactly what you’re craving without needing a full recipe every time. Think of these as flexible defaults rather than rigid rules.

Hot chocolate coffee ratios infographic showing coffee-forward, balanced, chocolate-forward, and extra creamy measurements with cocoa, hot cocoa mix, espresso-style coffee, and milk.
Hot chocolate coffee ratios, made simple: go coffee-forward for a cozy coffee-first mug, choose balanced for a café-style blend, try chocolate-forward for half coffee half hot chocolate, or make it extra creamy with more milk.

Coffee-forward (for “I want coffee, but make it cozy”)

  • 240 ml coffee
  • 1 tablespoon cocoa
  • 1–2 teaspoons sugar
  • 30–60 ml milk

This reads as coffee first, with chocolate acting like a warm accent.

Balanced (for “I want a chocolate-coffee café drink”)

  • 180 ml coffee
  • 1 tablespoon cocoa or 2 tablespoons hot chocolate mix
  • 60–90 ml milk

This lands in the middle—neither too dark nor too sweet.

Chocolate-forward (for “dessert in a mug”)

  • Half coffee + half hot chocolate

Make hot chocolate first (milk-based is best), then add coffee until it tastes right. This approach works especially well when you want body, richness, and a cozy thickness.

Extra creamy (for “soft, rounded, lingering”)

  • Use more milk than usual and slightly less coffee
  • Keep cocoa steady, let milk carry the chocolate flavor

Oat milk is especially good here because it naturally reads sweet and creamy.

Also Read: Strawberry Smoothie Recipes (12 Easy Blends + Bowls & Protein Shakes)


Hot chocolate coffee variations you’ll want to repeat

The three methods cover most moods. Still, the fun starts when you make small changes on purpose. The goal with variations is not novelty for its own sake—it’s creating mugs that feel genuinely different, so you don’t get bored after three days.

Infographic titled “8 Hot Chocolate Coffee Variations” listing cinnamon cozy, champurrado-inspired, vanilla + salt, cappuccino-style foam, decaf night mug, cocoa cold brew, instant emergency mug, and coffee liqueur treat.
8 hot chocolate coffee variations to save: cinnamon cozy, champurrado-inspired, vanilla + salt, cappuccino-style foam, decaf night mug, cocoa cold brew, instant emergency mug, and coffee liqueur treat—use these as flavor upgrades for any base method (cocoa paste, hot cocoa mix, or espresso in hot chocolate).

1) Coffee and hot cocoa with cinnamon (cozy without being spicy)

Cinnamon makes chocolate feel warmer and more aromatic. Instead of adding a lot, keep it light.

Recipe card photo for coffee + hot cocoa with cinnamon showing a creamy mug topped with cinnamon and a quick ratio plus three steps: make cocoa paste, stir in a pinch of cinnamon, then add coffee and milk to taste.
Coffee + hot cocoa with cinnamon (cozy, not spicy): make a cocoa paste with a splash of hot coffee, stir in just a pinch of cinnamon, then build with the remaining coffee and a little milk. Start light (about 1/16 tsp) and adjust after tasting.

How to do it:

  • Make the cocoa paste (cocoa + sugar + splash of coffee)
  • Add a pinch of cinnamon to the paste
  • Build the drink as usual, then taste before adding more spice

If you like the idea of spicing coffee more broadly, this cardamom-in-coffee guide is a lovely rabbit hole.

2) Champurrado-inspired coffee (Mexican-style comfort in a coffee mug)

Champurrado is traditionally a thick chocolate drink often made with masa and warming spices. This version borrows the vibe—deep cocoa, cozy body, aromatic spice—without requiring a full traditional setup.

Champurrado-inspired coffee recipe card photo showing a frothy cocoa-coffee mug with cinnamon and vanilla, plus a quick ratio and three steps for making Mexican-style hot chocolate coffee without masa.
Champurrado-inspired coffee (Mexican-style cocoa + warm spice): start with a smooth cocoa paste, then add cinnamon and vanilla before finishing with more milk and slightly less coffee for a thicker, cozier mug.

How to do it:

  • Use the cocoa paste method as your base
  • Add cinnamon and vanilla
  • For extra body, use a bit more milk and slightly less coffee

For a deeper ingredient lens that helps you choose between cacao and chocolate, this cacao vs chocolate guide is worth reading.

3) Vanilla + a tiny pinch of salt (the “richer than it should be” trick)

This doesn’t look different. It just tastes more expensive.

Vanilla and pinch of salt hot chocolate coffee hack card showing salt being added to a cocoa-coffee mug with text overlay: add 1/4 tsp vanilla and a tiny pinch of salt for deeper chocolate and less sweet taste.
Vanilla + a tiny pinch of salt (the “tastes more expensive” trick): add 1/4 tsp vanilla and the smallest pinch of salt to your hot chocolate coffee to deepen cocoa flavor and make the sweetness feel calmer—start microscopic, then adjust.

How to do it:

  • Add ¼ teaspoon vanilla
  • Add the tiniest pinch of salt

If you’re skeptical, start microscopic. You’re not aiming for “salty.” You’re aiming for depth.

4) Cappuccino-style hot chocolate coffee (foam-forward, café-like)

This one is a joy when you want texture. The trick is building chocolate flavor without crushing the foam.

Cappuccino hot chocolate recipe card showing a foamy cappuccino-style hot chocolate topped with cocoa dust, plus 3-step method and ratio.
Cappuccino hot chocolate (foam-forward, café-style): combine espresso with cocoa paste, top with frothed milk, then finish with a cocoa dusting for a plush, chocolate-coffee mug that feels straight from a coffee bar.

How to do it:

  • Stir cocoa paste into espresso (or moka concentrate)
  • Add steamed or frothed milk
  • Finish with cocoa dusting or shaved chocolate

For foam technique and proportions, this cappuccino guide is your friend.

5) Decaf hot chocolate coffee (comfort without the buzz)

Perfect for evenings when you want a warm mug without the same caffeine lift.

Decaf hot chocolate coffee recipe card on a cozy nightstand with warm lamp light, showing an evening-friendly ratio and 3 simple steps
Decaf hot chocolate coffee for nights: use decaf coffee with cocoa (or a little hot cocoa mix), then finish with milk for a cozy mug that feels like dessert without the buzz.

How to do it:

  • Use decaf brewed coffee (or decaf instant)
  • Make any version you like—cocoa paste, mix-in-coffee, or espresso-style with decaf shots

If you want general caffeine context, the FDA’s overview Spilling the Beans: How Much Caffeine Is Too Much? is a clear reference point.

6) Hot cocoa cold brew (summer comfort that still tastes like chocolate)

Chocolate and coffee can feel refreshing when the structure is right. Cold brew concentrate gives you strength; a quick cocoa syrup keeps everything smooth.

How to do it:

  1. Start with cold brew concentrate or very strong chilled coffee
  2. Make a quick cocoa syrup: cocoa + sugar + a spoon of warm water (or warm coffee), stirred smooth
  3. Stir syrup into cold brew
  4. Add milk and ice
Hot cocoa cold brew recipe card showing cold brew pouring over ice with chocolate syrup swirls, plus ingredients, steps, and ratio for a cool and creamy cocoa coffee
Hot cocoa cold brew (cool & creamy): stir quick cocoa syrup into cold brew, then add milk and ice for a chocolatey iced coffee that’s refreshing, smooth, and easy to remake.

If you want more iced directions beyond this one mug, these internal guides are great companions: iced coffee recipes and cold brew vs iced latte vs frappe.

7) Instant coffee + cocoa (a surprisingly good emergency mug)

When brewed coffee isn’t happening, instant coffee can still make a satisfying hot chocolate coffee if you treat it kindly.

Instant coffee hot chocolate 3-minute recipe card showing hot water poured into a mug, cocoa mix stirred smooth, milk added, and a simple ratio for one mug.
Instant coffee hot chocolate (3 minutes, 1 mug): dissolve instant coffee first, smooth cocoa or hot cocoa mix with a small splash, then combine and finish with milk for a quick chocolate-coffee drink that never turns gritty.

How to do it:

  • Dissolve instant coffee fully in a small amount of hot water first
  • Make a cocoa paste in the mug (cocoa + sugar + a splash of the hot coffee)
  • Add remaining liquid and milk, then adjust

Same rule, different day: don’t dump powders into a full mug and expect silk.

8) Hot chocolate coffee with coffee liqueur (optional, festive, dessert-forward)

This one is optional, but undeniably festive. Coffee liqueur brings sweetness and a roasted note that pairs naturally with cocoa. If you’re using a well-known coffee liqueur like Kahlua, remember it already leans sweet—so dialing back sugar in your base keeps the mug balanced rather than syrupy.

Kahlua hot chocolate coffee recipe card showing a creamy chocolate-coffee drink with whipped cream and cinnamon, plus steps to add 1 oz coffee liqueur and cocoa dust.
Kahlua hot chocolate coffee (optional treat): make your hot chocolate coffee slightly less sweet, add 1 oz coffee liqueur, then stir and finish with a cocoa dusting for a dessert-in-a-mug vibe.

How to do it:

  • Make your base slightly less sweet than usual
  • Add a small pour of coffee liqueur at the end and stir
  • Finish with cocoa dusting or shaved chocolate

Also Read: Sandwich for Breakfast: Breakfast Sandwich Recipe + 10 Variations


Making hot chocolate coffee for a crowd (without wrecking your equipment)

A cozy chocolate-coffee drink feels even better when it’s shared—winter evenings, family gatherings, holiday brunches, or a casual “come over” moment that turns into an unplanned hangout. But scaling up changes the rules.

In general, it’s best not to run cocoa powder, hot chocolate mix, chocolate syrup, or milk-based mixtures through brewing systems. Doing so can leave residue, affect taste, and make cleanup much harder—especially in percolators and urn setups that aren’t designed for chocolate or dairy.

So if someone asks, “Can we brew hot chocolate in a coffee maker?” the most reliable answer is: brew coffee in the coffee maker, then mix it with a hot chocolate base afterward. You get the same result—coffee and hot chocolate together—without turning your machine into a sticky project.

Coffee and hot chocolate for a crowd guide showing separate coffee and hot chocolate base dispensers, then mixing in a serving urn with quick ratios for coffee-forward, balanced, and dessert-style.
Making coffee and hot chocolate for a crowd—without wrecking your equipment: brew coffee separately, make a hot chocolate base separately, then combine in an urn and choose your ratio (3:1 coffee-forward, 2:1 balanced, 1:1 dessert).

The reliable large-batch method (best for most homes)

  1. Brew coffee normally using your coffee maker or brewer (coffee only).
  2. Make a concentrated hot chocolate base separately in a pot: warm milk + cocoa + sugar stirred smooth (or hot chocolate mix made with milk for body).
  3. Combine in a serving vessel—a large pot, dispenser, or insulated carafe—then adjust to taste.
  4. Keep it gently warm, not boiling. Milk-based mixes can scorch if held too hot for too long.

If you want a dependable hot chocolate base that scales cleanly, this homemade hot chocolate recipe is a solid anchor.

Hot cocoa in a coffee maker: the “yes, but not through the machine” version

People often mean one of two things when they say “hot cocoa in a coffee maker”:

  • They want to use the coffee maker to heat and mix everything (not ideal)
  • Or they want a way to serve hot cocoa and coffee together for a group (very doable)

The safe approach:

  • Brew coffee in the coffee maker
  • Make cocoa or mix separately with milk (stovetop is easiest)
  • Combine in a pot or dispenser

This gives you a crowd-friendly hot chocolate coffee without chocolate residue in your machine.

Do not run cocoa powder, hot cocoa mix, or milk through a coffee maker, urn, or percolator; brew coffee separately, make a chocolate base separately, then combine for hot chocolate coffee.
Can you brew hot chocolate in a coffee maker (or percolator/urn)? Don’t run cocoa, mixes, or milk through the machine—brew coffee separately, build a chocolate base separately, then combine. It’s the same hot chocolate coffee result with better flavor and far easier cleanup.

Coffee percolator for hot chocolate: keep cocoa out of the brew chamber

Percolators are great for coffee. They’re not designed for cocoa powder or milk-based mixes circulating through the system. If you’re tempted to try “coffee percolator for hot chocolate,” treat the percolator as a coffee-only brewer:

  • Percolate coffee
  • Mix hot chocolate separately
  • Combine afterward in a serving vessel

You’ll protect your equipment and preserve flavor.

Hot cocoa urn setup: build the chocolate base first

A hot cocoa urn is often the right tool for events—easy serving, steady warmth, familiar setup. But the same logic applies: don’t treat the urn like a brewer for cocoa powder. Instead:

  • Make a milk-based hot chocolate base in a stockpot
  • Brew coffee separately
  • Combine in the hot cocoa urn using your preferred ratio
  • Hold at gentle heat to avoid scorching

For events, it can be helpful to offer two profiles:

  • Coffee-forward (for people who want “coffee, but cozy”)
  • Dessert-forward (for people who want “hot chocolate, but energized”)

Add a toppings station—cocoa dusting, cinnamon, shaved chocolate, whipped cream—and suddenly the drink feels like an experience, not just a beverage.

Also Read: Waffle Recipe Without Milk: Fluffy, Golden, and Crisp


A deeper hot chocolate base (when you want chocolate to lead)

Sometimes you don’t want “coffee with cocoa.” You want hot chocolate with coffee energy. In those moments, start with a real hot chocolate base, then add coffee to taste. This keeps the chocolate rich and structured while still giving you the lift you’re after.

If you prefer a guided approach to a cocoa-and-milk base, this homemade hot chocolate with cocoa powder recipe is an excellent internal companion.

Once your hot chocolate is ready:

  • Add brewed coffee little by little
  • Stop at a whisper of coffee, or push toward a bolder, mocha-like finish
  • If you want the simplest “dessert mug” rule, try half coffee and half hot chocolate, then adjust

This is one of the easiest ways to make the drink feel deliberate, indulgent, and café-adjacent—without needing equipment beyond a pot and a mug.

Also Read: Vodka Pasta (Penne alla Vodka) + Spicy Rigatoni, Chicken, and Gigi Recipes


Flavor directions that keep the drink from feeling repetitive

After a few mugs, you might crave variety without changing the entire routine. That’s when choosing a direction helps more than looking for a totally new recipe.

The warm-spice lane

Cinnamon, cardamom, nutmeg—these make hot chocolate coffee feel seasonal even when it’s not a holiday. If you want a cozy entry point, cardamom in coffee is a wonderful starting place.

The dessert lane

Chocolate syrup, whipped cream, shaved chocolate, extra milk—this makes the mug feel like a treat. If you like making syrup quickly, this 3-minute chocolate syrup keeps it practical.

The café lane

Espresso in hot chocolate, foam on top, balanced sweetness. If foam is part of the vibe you’re chasing, this cappuccino guide is the technique bridge that makes your home mug feel more like a café cup.

The chilled lane

Cold brew meets cocoa in a way that can be refreshing rather than heavy. For more iced directions, explore these iced coffee recipes and this guide comparing cold brew vs iced latte vs frappe.

Also Read: 7 Pizza Sauce Recipes | Marinara, White Garlic, Alfredo, Buffalo, BBQ, Vodka & Ranch


A seasonal twist (when you want it to taste like “winter” even if it isn’t)

There’s a flavor mood that shows up every year—warm spice, soft sweetness, cozy nostalgia. If you love that, you can borrow the vibe of spiced lattes and apply it to hot chocolate coffee without turning every mug into a production.

A gentle version:

  • Vanilla + cinnamon (subtle, comforting, easy)

A bolder version:

  • Borrow pumpkin spice energy

If that’s your lane, you’ll probably enjoy this sister drink: healthy pumpkin spice latte.

Having one “winter mode” mug you can make on autopilot is surprisingly satisfying. It’s the beverage equivalent of throwing on a warm hoodie.

Also Read: Pumpkin Spice, Your Way: Master Blend, Variations & Real-World Recipes


Small finishing touches that make the mug feel special

Sometimes you don’t need a new recipe. You need a small ending—something that makes the mug feel like you meant it.

  • A dusting of cocoa powder makes it smell like chocolate before you sip
  • Grated dark chocolate melts into the surface and tastes richer than it looks
  • A spoon of foam (even shaken milk) changes mouthfeel dramatically
  • A cinnamon stick scents the mug in a quiet, cozy way
  • A tiny pinch of salt turns “sweet cocoa” into “deep chocolate”
Hot chocolate coffee flavor add-ins infographic showing cinnamon, vanilla, pinch of salt, chocolate syrup, and whipped cream to make the drink taste richer
Flavor add-ins that make hot chocolate coffee taste expensive: a pinch of cinnamon for warmth, vanilla for roundness, a tiny pinch of salt for deeper chocolate, chocolate syrup for richness, and whipped cream or foam for a café-style finish.

None of these are mandatory. Still, they’re the difference between “I mixed something” and “I made something.”

Also Read: How to Cook Tortellini (Fresh, Frozen, Dried) + Easy Dinner Ideas


Putting it all together: choose your mug today

When you want hot chocolate coffee, you have options that match the day you’re having.

  • If you want the most reliable everyday version, go with the cocoa paste method. It’s quick, flexible, and consistently smooth.
  • If you want speed above all else, use hot chocolate mix in coffee, but stir the powder with a small splash of coffee first so it dissolves properly.
  • If you want café depth, make espresso in hot chocolate (or use a moka concentrate). It’s the most dessert-forward approach, and it still feels unmistakably like coffee.

From there, you can tilt coffee-forward or chocolate-forward, warm it with spice, cool it into hot cocoa cold brew, or add a foamy café finish. Whether you’re adding hot chocolate to coffee or adding coffee to hot chocolate, the best cup is the one you’ll actually make again.

Also Read: How to Make Churros (Authentic + Easy Recipe)

FAQs

1) What is hot chocolate coffee?

Hot chocolate coffee is a single drink that blends coffee with chocolate flavor. Depending on how you make it, the chocolate can come from cocoa powder, hot chocolate mix, chocolate syrup, or a prepared hot chocolate base, while the coffee can be brewed coffee, espresso, moka pot coffee, instant coffee, or cold brew.

2) Is coffee and hot chocolate the same as a mocha?

In many cases, yes—at least in flavor and concept. Generally, a mocha refers to coffee (often espresso) combined with chocolate and milk. However, “coffee and hot chocolate” can be looser and more flexible, because you can build it with cocoa powder, hot chocolate mix, or a full hot chocolate base.

3) How do I make hot chocolate coffee at home?

You can make hot chocolate coffee in three straightforward ways: (1) mix cocoa powder and sweetener into a smooth paste, then add coffee and milk; (2) stir hot chocolate mix into coffee; or (3) add espresso to hot chocolate for a café-style result.

4) Can I put hot chocolate powder in coffee?

Yes, you can. To avoid gritty clumps, first stir hot chocolate powder with a small splash of hot coffee until smooth, and only then add the rest of the coffee. As a result, the drink blends more evenly and tastes less “powdery.”

5) Can I add cocoa powder to coffee?

Absolutely. In fact, cocoa powder is one of the easiest ways to control sweetness and chocolate intensity. To keep it smooth, make a quick cocoa paste with sugar and a little hot coffee before topping up the mug.

6) Why is my cocoa powder clumping in coffee?

Cocoa powder tends to clump because it doesn’t dissolve like sugar. When it hits liquid all at once, dry pockets form and float. Instead, mix cocoa and sweetener with a small splash of hot coffee first, then add the remaining liquid gradually.

7) How much hot chocolate mix should I add to coffee?

A practical starting point is 2 tablespoons of hot chocolate mix for one mug of coffee (around 200–240 ml). If it turns out too sweet, reduce to 1 tablespoon and deepen the chocolate flavor with a teaspoon of cocoa powder.

8) What’s the best ratio for coffee and hot chocolate?

It depends on the experience you want. For a coffee-forward mug, use a full mug of coffee with about 1 tablespoon cocoa and only a small splash of milk. For a dessert-like version, go half coffee and half hot chocolate. Meanwhile, for a balanced café-style drink, aim for roughly 3 parts coffee to 1 part milk or chocolate base.

9) What’s the difference between hot cocoa coffee and hot chocolate coffee?

In everyday use, they often mean the same thing: coffee combined with chocolate flavor. Still, “hot cocoa” commonly suggests cocoa powder or a cocoa mix, whereas “hot chocolate” can imply a richer base made with milk and sometimes melted chocolate. Even so, both can land in a very similar place once blended with coffee.

10) Can I add espresso to hot chocolate?

Definitely. Espresso in hot chocolate is one of the most café-like methods. Simply add 1–2 espresso shots to prepared hot chocolate and stir gently until the flavor is integrated.

11) How many espresso shots are best for espresso hot chocolate?

Usually, 1 shot gives a softer coffee note, while 2 shots create a more pronounced coffee presence. If your hot chocolate is especially sweet, 2 shots often balance it better.

12) How can I make espresso hot chocolate without an espresso machine?

Instead of espresso, you can use a concentrated coffee base. For example, moka pot coffee behaves similarly in hot chocolate because it’s stronger than standard drip coffee. After brewing, mix it into hot chocolate the same way you would with espresso.

13) Can I make hot chocolate with coffee instead of water?

Yes. For a creamier result, prepare hot chocolate with milk first, then add brewed coffee to taste. This approach keeps the chocolate base rich while still delivering clear coffee aroma.

14) Can I mix hot cocoa mix with coffee and milk?

Yes, and it often tastes smoother than coffee plus mix alone. In addition, milk rounds the edges and makes the drink feel more like a hot chocolate coffee drink rather than simply sweetened coffee.

15) What coffee works best for hot chocolate coffee?

Typically, medium to dark roast works best because it stays noticeable beside chocolate. Likewise, brewing the coffee slightly stronger than usual helps prevent the drink from tasting like cocoa first and coffee second.

16) How do I make coffee with cocoa powder taste less bitter?

First, add more milk to soften the bitterness before adding more sugar. Next, reduce cocoa slightly if the mug feels too intense. Finally, a touch of vanilla or a tiny pinch of salt can make the chocolate taste rounder and less sharp.

17) How do I make hot chocolate coffee less sweet?

Start by using unsweetened cocoa powder instead of a sweet mix, or cut the amount of mix in half. Then increase milk slightly for a gentler profile. Alternatively, add a bit more coffee to balance sweetness without losing chocolate flavor.

18) Can I make hot cocoa in a coffee maker?

You can brew coffee in a coffee maker and combine it with hot chocolate afterward. However, it’s usually better not to run cocoa powder or hot chocolate mix through the machine because it can leave residue and complicate cleaning.

19) Can I brew hot chocolate in a coffee maker?

If by “brew” you mean running cocoa or milk through the machine, that’s not recommended. Instead, brew coffee normally, then stir it into a hot chocolate base made separately. That way, you get the same flavor outcome with much easier cleanup.

20) Can I make hot cocoa in a coffee percolator?

It’s best to use the percolator for coffee only, then mix hot chocolate separately and combine afterward. Otherwise, cocoa powder and milk-based mixes can create buildup and affect performance over time.

21) What is a hot cocoa urn and can I make a coffee-and-cocoa mix in it?

A hot cocoa urn is a large dispenser used for serving warm drinks at gatherings. Yes, you can serve a coffee-and-cocoa blend in it—however, it works best when you prepare hot chocolate and coffee separately, then combine them in the urn and keep the heat gentle to avoid scorching.

22) How do I make coffee and hot chocolate for a crowd?

For consistent results, brew a large batch of coffee separately and make a concentrated hot chocolate base in a pot. Then combine them in a serving vessel and adjust the ratio based on whether you want a coffee-forward or dessert-forward drink.

23) Can I make half coffee half hot chocolate taste balanced?

Yes. Start with equal parts and then adjust. If it tastes too sweet, add more coffee. Conversely, if it tastes too strong or bitter, add more hot chocolate or a splash of milk.

24) Can I make hot cocoa cold brew?

Yes. Use cold brew concentrate or strong chilled coffee, then mix in a cocoa syrup (cocoa + sugar + a small splash of warm water or warm coffee stirred smooth). After that, add milk and ice for a refreshing chocolate-coffee drink.

25) Does hot chocolate coffee work with instant coffee?

Yes. Dissolve instant coffee fully in hot water first so it’s smooth, then combine it with cocoa paste or hot chocolate mix. That extra step helps avoid grittiness and improves texture.

26) Can I make a decaf hot cocoa coffee?

Absolutely. Use decaf brewed coffee (or decaf instant), then follow any method you like. Consequently, you get the flavor and comfort of a chocolate-coffee mug without the same caffeine lift.

27) Can I make coffee liqueur hot chocolate?

Yes, if you want an adult, dessert-style version. Make the base slightly less sweet, then add a small pour of coffee liqueur at the end and stir. That way, the final drink tastes balanced rather than overly sugary.

28) What’s the difference between chocolate hot coffee and hot chocolate coffee?

They’re often used interchangeably in casual searches. Generally, “hot chocolate coffee” suggests coffee mixed with a cocoa or hot chocolate base, while “chocolate hot coffee” can imply coffee flavored with chocolate notes. Either way, the result is a warm chocolate-coffee drink—your method determines whether coffee or chocolate leads.

Posted on 6 Comments

Cappuccino Recipe: How to Make a Perfect Cappuccino at Home

Perfect cappuccino at home in a white cup on a marble counter with cocoa-dusted foam, plus text overlay: Machine & No-Machine Methods (MasalaMonk.com).

A cappuccino recipe can feel deceptively simple: coffee, milk, foam. Yet when it’s done well, it tastes like more than the sum of its parts—deep, fragrant espresso wrapped in sweet, warm milk, finished with a cap of foam that holds long enough for you to draw a spoon through it and still find coffee underneath.

This cappuccino recipe is written for real kitchens, not showroom counters. You’ll learn how to make cappuccino coffee at home whether you have an espresso setup, a moka pot, or nothing more than a saucepan and a jar. Along the way, you’ll also see how to make an iced cappuccino at home, how to make a cold cappuccino that stays creamy, and how to make homemade cappuccino mix for the mornings when you want “easy cappuccino” energy without sacrificing taste.

If you want a tidy, competition-style reference point, the cappuccino is typically described as a 5–6 oz (roughly 150–180 ml) coffee-and-milk drink with a clear foam layer and a balanced espresso-to-milk profile—an idea echoed in specialty definitions such as those discussed in this overview of cappuccino standards and evolution: What is a cappuccino & how has it developed over time? and in the official competition language inside the World Barista Championship rules and regulations PDF. That said, you don’t need to “compete” to make the perfect cappuccino. You just need a repeatable method.

Let’s build that method from the cup up.


Cappuccino recipe basics: what makes it taste “right”

Cappuccino ingredients (and why each one matters)

At its cleanest, cappuccino ingredients are short:

  • espresso (or a strong espresso-like coffee base)
  • milk
  • foam (made from that same milk)
  • optional toppings like cocoa powder, cinnamon, or chocolate sprinkles

What’s missing from that list is the thing that makes cappuccino tricky: technique. The drink relies on contrast—concentrated coffee against sweet milk; silky liquid under a foam blanket. When that contrast disappears, you end up with something closer to a milky coffee than a cappuccino coffee recipe worth repeating.

If you like a quick orientation on espresso itself (what it is, how it behaves in milk drinks, and why it anchors the whole experience), this internal guide is a helpful companion: Quick Espresso Guide – Know Your Coffee. It’s especially useful if you’re still deciding whether your base tastes “espresso-forward” enough for cappuccino.

Cappuccino recipe ratio: espresso, milk, and foam

You’ll see “equal thirds” mentioned often: one-third espresso, one-third steamed milk, one-third milk foam. That picture is useful because it nudges you toward the cappuccino’s signature structure.

Cappuccino ratio and cup size cheat sheet showing a 150–180 ml cup with labeled layers—espresso, steamed milk, and foam—plus base options (espresso or moka pot concentrate).
Use this cappuccino ratio and cup-size cheat sheet to keep your drink balanced: build a small 150–180 ml cup, layer espresso (or moka pot concentrate), add steamed milk, then finish with a foam cap.

In practice, the best way to make cappuccino at home is to think in cup size first, then fill it with the right balance:

  • Choose a 150–180 ml cup if you want a classic feel.
  • Use one strong espresso base (single or double depending on your preference and cup size).
  • Add enough milk to soften the espresso without burying it.
  • Finish with foam that sits confidently on top.

If your cup is much larger, the drink will drift toward latte territory unless you increase espresso and keep the total volume controlled. Conversely, if you keep the cup small, the cappuccino stays intense and aromatic—exactly what many people mean when they say “the perfect cappuccino.”

Cappuccino vs latte vs flat white comparison chart showing cup size, foam thickness, milk amount, and taste, with three drinks displayed side by side and MasalaMonk.com footer.
Cappuccino vs latte vs flat white: cappuccino is smaller with a thicker foam cap, latte is taller and milkier with lighter foam, and flat white stays short with thin microfoam and a stronger, silkier finish.

What coffee to use for cappuccino (and why roast matters)

“What coffee to use for cappuccino” is less about a single best bean and more about choosing a profile that still tastes like coffee after milk enters the room.

  • If you prefer chocolatey, nutty comfort: medium to medium-dark roasts tend to shine.
  • If you like fruitier brightness: lighter roasts can work, although you may want a slightly smaller milk volume to keep clarity.
  • If your cappuccino tastes thin: the problem is often the base, not the milk. A stronger extraction or a more concentrated brew method helps.

For a practical overview of brew variables—grind, ratio, brew time—MasalaMonk’s foundational explainer is worth a skim: Coffee Brewing Methods: A Fusion of Art, Science, and Flavor. Even if you’re not obsessing over numbers, it helps you recognize why one cup tastes full and another tastes flat.

Also Read: Cold Brew Espresso Martini: How to Make It (Step-by-Step Recipe)


What do you need to make a cappuccino at home?

There’s a version of this drink for every setup. So instead of asking, “Do I have the right gear?”, ask, “Which cappuccino style am I making today?”

Cappuccino tools checklist showing what you need to make a cappuccino at home, with a machine list (espresso machine, milk pitcher, steam wand, thermometer) and a no-machine list (moka pot, saucepan, French press or jar frother, small cup).
What you need to make cappuccino at home: use an espresso machine and milk pitcher if you have one—or make cappuccino without a machine using a moka pot, a saucepan, and a French press or jar to froth milk.

Option 1: Espresso machine + steam wand (classic)

If you have a machine to make cappuccino with a steam wand, you’re closest to café method:

  • espresso machine (or espresso-capable machine)
  • milk pitcher
  • thermometer (optional but helpful early on)

Option 2: Moka pot + DIY milk foam (best no-machine taste)

If you’re aiming for “cappuccino recipe without machine” but still want a bold base, the moka pot is a standout. It’s beloved precisely because it makes an espresso-like concentrate that holds up beautifully in milk drinks. For an in-depth walkthrough, see: Moka Pot Mastery: Elevate Your Coffee Game. If you want an outside perspective on why the moka pot works so well as a cheap espresso alternative, this piece captures the spirit: Why We Love the Bialetti Moka Pot.

Option 3: Strong brewed coffee + foam (gentler, still satisfying)

If you don’t have espresso tools, you can still make a coffee that tastes like cappuccino in spirit:

  • brew strong coffee (reduce water, increase coffee, or brew a concentrate)
  • heat milk
  • foam milk with a French press, jar, whisk, or handheld frother

It won’t be identical to espresso-based cappuccino, but it can be delicious—especially when your milk texture is on point.

Option 4: Instant cappuccino mix or homemade cappuccino mix (fastest)

This is the “instant cappuccino mix” route—simple, sweet, and quick. It’s also the route where ingredient choices matter most, because the mix itself becomes the personality of the cup. We’ll cover a good homemade cappuccino mix recipe later.

If you’re still deciding what coffee maker for cappuccino fits your home—espresso machine, pod system, semi-automatic, or fully automatic coffee machine for home—keep your cappuccino recipe post focused on making the drink, then point readers to a separate gear overview when needed. MasalaMonk’s internal machine explainer is a neat, non-salesy link for that: A Coffee Lover’s Guide to Machines.

Also Read: Baked Ziti Recipe Collection: 15 Easy Variations


Cappuccino recipe method: how to make a cappuccino at home (step by step)

This is the heart of it: cappuccino recipe step-by-step, from base to foam to pour.

Classic cappuccino recipe card showing a cappuccino in a white cup with cocoa-dusted foam, plus ingredients, 3-step method (espresso, steam/froth milk, pour), cup size guidance, and a quick fix tip.
Classic cappuccino recipe in one card: brew espresso, steam or froth milk into microfoam, then pour espresso → milk → foam for a café-style cappuccino at home.
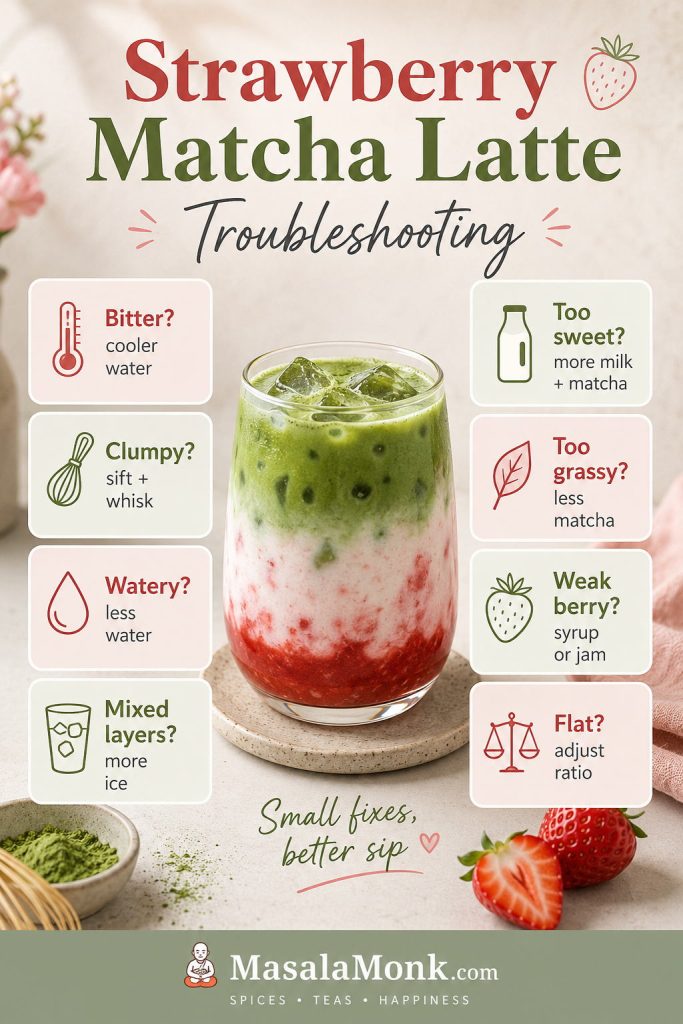
5-minute cappuccino flow checklist showing warm cup, brew base, heat milk, froth, and pour + finish, with a cappuccino, moka pot, milk pitcher, and timer on a kitchen counter.
Short on time? This 5-minute cappuccino flow keeps it simple: warm your cup, brew a strong base, heat and froth milk, then pour espresso (or moka pot coffee) → milk → foam for a fast café-style cappuccino at home.
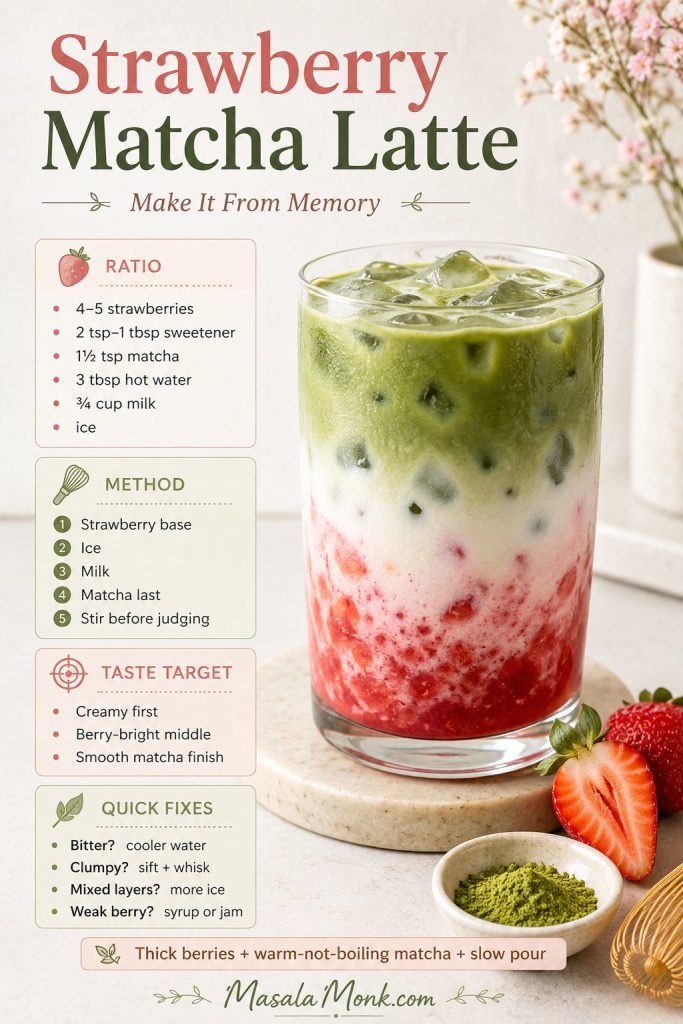
Step 1: brew the coffee base (espresso or espresso-like)

If you have an espresso machine

Pull a shot into a warmed cup. If you’re making a traditional cappuccino size (150–180 ml), a single shot can work; a double shot gives a deeper coffee presence. If you love bolder cappuccino, the double shot is often the best cappuccino recipe starting point.

A small detail makes a bigger difference than it should: warm your cup with hot water while the machine heats. That warmth preserves aroma and keeps the milk from cooling too quickly.

Choose your cappuccino base infographic comparing espresso, moka pot concentrate, and strong brewed coffee, with a note that a stronger base makes a better cappuccino at home.
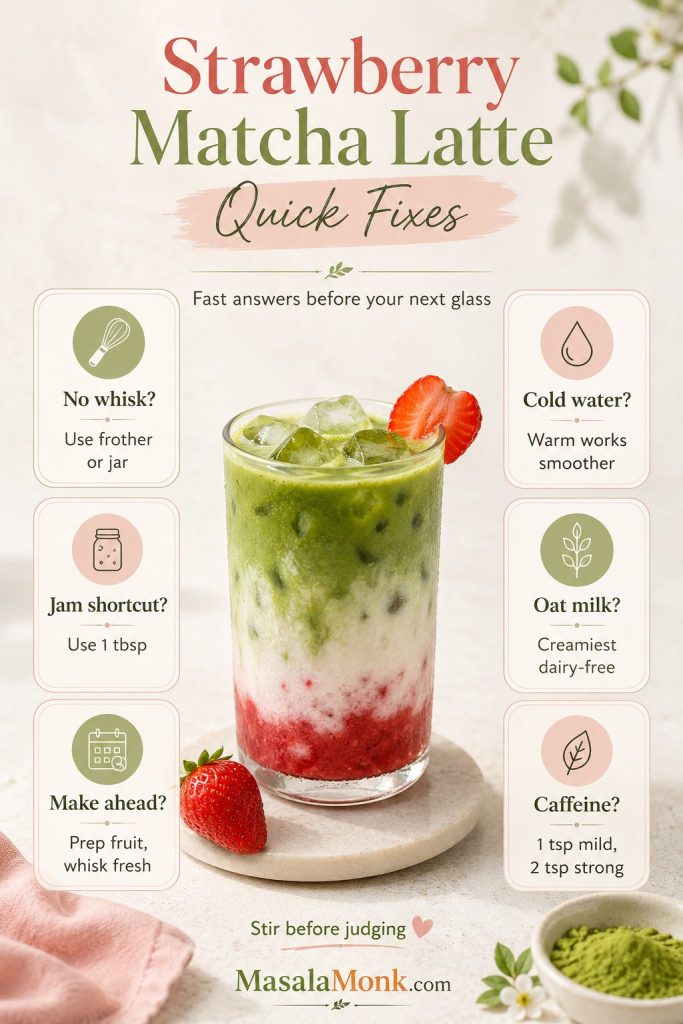
Not sure what to brew first? Choose your cappuccino base: espresso for a bold classic cup, moka pot for a rich concentrate, or strong brewed coffee as the easiest backup—stronger base means a better cappuccino.

If you’re using a moka pot (best way to make cappuccino at home without an espresso machine)

The moka pot’s strength is that it produces concentrated coffee with enough intensity to remain recognizable under milk. Follow your moka pot routine, then pour the coffee into your cappuccino cup immediately.

If you’d like to refine your moka pot technique—heat management, grind, and how to avoid harsh bitterness—the internal guide is genuinely useful: Moka Pot Mastery: Elevate Your Coffee Game.

If you’re brewing strong coffee (French press, drip, etc.)

Brew it stronger than usual. That could mean:

  • using less water
  • increasing coffee
  • steeping slightly longer (where appropriate)

If your base tastes like “normal coffee,” it’s likely to disappear once milk arrives. A stronger base is the difference between “home made cappuccino” and “coffee with milk.”

Step 2: texture and heat milk (the foam is the point)

If espresso is the backbone, foam is the signature. Milk that’s merely hot isn’t enough; cappuccino wants milk that’s sweet, glossy, and stable.

A widely referenced target range for steaming milk is about 55–65°C, which helps preserve sweetness and avoid scalding; this overview discusses the recommended range and why it matters: What temperature should your cappuccino milk be?.

Milk frothing guide for cappuccino showing microfoam that doesn’t collapse, with tips for glossy foam, 150–160°F milk temperature, texture cues, and fixes for big bubbles.
This milk frothing guide helps you get cappuccino foam right: aim for glossy microfoam (tiny bubbles), heat milk to about 150–160°F, and use the quick fixes to avoid big bubbles or collapsing foam.

If you’re using a steam wand: how to steam milk for cappuccino

Milk texturing is often taught as a two-part motion: introduce air early, then mix and heat to create microfoam. Barista Hustle breaks that “two-part” idea down clearly here: Making microfoam (the two-part heuristic) and also in their general microfoam lesson: Making microfoam.

Here’s the home-friendly version:

  1. Start with cold milk in a cold pitcher.
  2. Purge the steam wand briefly.
  3. Keep the tip near the surface just long enough to add air—listen for a gentle paper-tearing sound, not loud splashing.
  4. Then sink the tip slightly deeper to create a rolling motion that polishes the foam into a glossy texture.
  5. Stop when the pitcher feels hot but still touchable; if you use a thermometer, aim roughly within the 55–65°C zone.

If your milk ends up with large bubbles, aeration was too aggressive or too long. On the other hand, if it’s silky but completely foam-less, you didn’t add enough air at the beginning.

If you don’t have a wand: how to froth milk for cappuccino without a frother

This is where “cappuccino recipe without machine” becomes practical rather than aspirational. You have several good paths:

French press foam (reliable and surprisingly good)
Heat milk on the stove until it’s hot but not boiling. Pour it into a French press and pump the plunger briskly until it becomes foamy. Then let it rest briefly so the biggest bubbles rise and settle.

Serious Eats even calls out the French press as a handy tool for frothing milk in its moka pot piece: Why We Love the Bialetti Moka Pot. If you want a broader love letter to the French press (including why it stays useful even if you later upgrade), this is a fun read: Don’t forget about the French press.

Jar shake (fast, no special tools)
Heat milk, pour it into a jar (leave headspace), seal tightly, shake vigorously, then pour milk first and spoon foam on top. It’s simple, which is exactly why it’s still one of the best ways to make cappuccino at home when you’re traveling or short on tools.

Handheld frother (quick texture with minimal cleanup)
A handheld whisk-style frother makes foam quickly, although the foam can be a bit “drier” depending on your milk and technique. If you’re choosing a countertop frother, this Serious Eats guide gives a helpful sense of what makes good foam at home: We tested milk frothers and landed on favorites.

Step 3: pour and assemble (where cappuccino becomes cappuccino)

Now the fun part—making cappuccino feel like a real drink rather than two layers fighting.

  1. Pour espresso into your cup.
  2. Swirl your milk pitcher (or stir your foamed milk gently) so foam and liquid are integrated, not separated.
  3. Pour steamed milk first to blend with espresso.
  4. Finish with a deliberate foam layer on top.
Three-panel cappuccino pouring guide showing espresso first, then milk, then foam, with a tip to swirl milk before pouring for a better cappuccino at home.
Pouring order matters for a proper cappuccino: start with espresso, add milk to blend, then finish with foam for a stable cap—swirling the milk first helps keep the texture silky.

If you’re after a classic look, you can dust the foam with cocoa powder. If you want a slightly more playful finish, cappuccino chocolate sprinkles are a simple touch that reads like a café garnish without changing the drink itself.

Pause for a moment before sipping. The aroma from the foam carries upward, and that first breath is half the experience.

Also Read: Cranberry Moscow Mule Recipe: A Festive Holiday Cocktail With Easy Variations


How to make perfect cappuccino at home: small adjustments that change everything

A cappuccino can be “good” in a forgiving way, yet the perfect cappuccino is a different creature—balanced, sweet, and structured.

Make it smaller than you think

A cappuccino drink that’s too large often becomes indistinguishable from a latte. Keeping the cup modest helps the espresso stay present and the foam stay meaningful.

Strengthen the base before you add more milk

If the coffee tastes weak, the fix is not always “less milk.” Sometimes it’s:

  • a finer grind (for espresso)
  • a more concentrated moka pot brew
  • a stronger brewed coffee ratio

That’s why “best coffee to make cappuccino” is often a coffee that’s comfortable being intense.

Heat milk to the sweet spot, not the scorch point

Milk sweetness peaks before it tastes cooked. If you frequently get “hot milk” rather than “sweet milk,” aim for that 55–65°C zone discussed here: What temperature should your cappuccino milk be?. It’s the simplest way to upgrade a hot cappuccino recipe without changing anything else.

Also Read: Green Chutney Recipe (Coriander–Mint / Cilantro Chutney)


Cappuccino recipe without machine: a complete no-machine cappuccino you’ll actually want again

Let’s put it together as a full method.

Cappuccino without a machine infographic showing a moka pot, milk frothing in a French press, and a finished cappuccino with steps: brew moka pot concentrate, heat milk, froth, and pour coffee–milk–foam.
Cappuccino without a machine is completely doable: brew moka pot concentrate, heat milk until steaming, froth it in a French press (or jar), then pour coffee → milk → foam for a café-style cup at home.
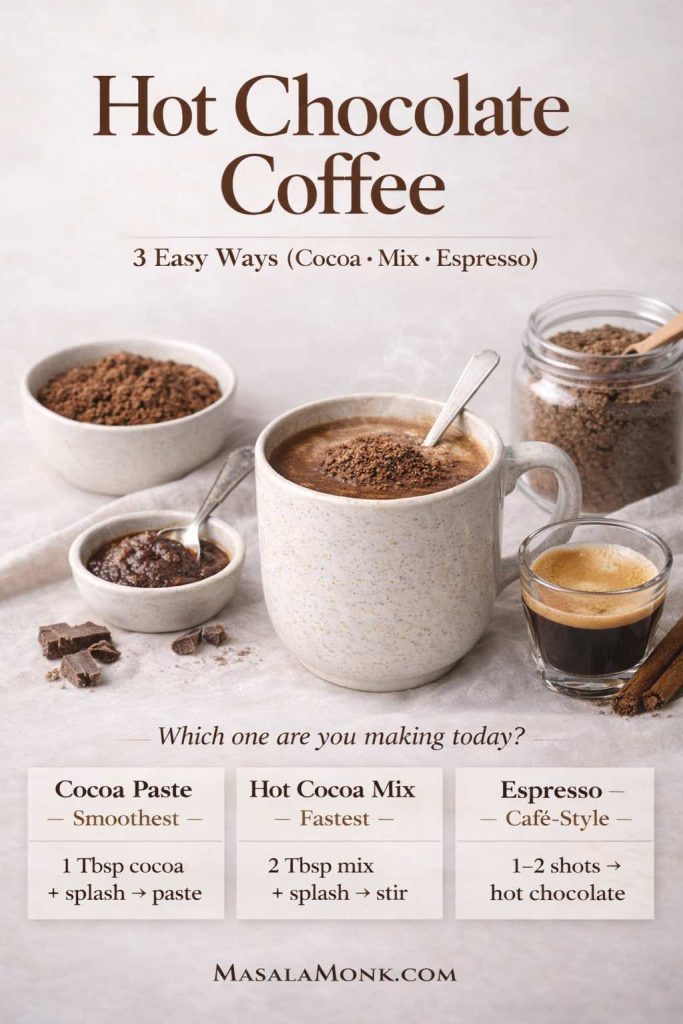
Cappuccino home recipe (moka pot + French press foam)

  1. Brew moka pot coffee.
  2. Heat milk in a small pan until steaming (not boiling).
  3. Froth milk in a French press until foamy.
  4. Pour coffee into your cup.
  5. Add hot milk first, then spoon foam on top.

This method nails the feeling of “real cappuccino” because the base is concentrated and the foam is generous. It’s also flexible: you can make a cappuccino for one or scale it for guests, and the texture remains consistent.

If you want more home-brewing inspiration beyond cappuccino—French press, pour-over, or other methods—MasalaMonk’s internal guide is a nice sidebar without stealing focus from this recipe: Art of Home Coffee Brewing: A Quick Guide.

Easy cappuccino at home (strong brew + jar foam)

If you don’t have a moka pot, make your strongest brewed coffee, then build foam with the jar method. It won’t be identical to espresso-based cappuccino, although it can still hit that “comforting café drink” note. In particular, this approach is friendly for anyone who wants to do a cappuccino at home without buying a new coffee machine.

Also Read: Paper Plane Cocktail Recipe + Best Amaro Substitutes & Tips


Iced cappuccino recipe: make iced cappuccino at home without watery disappointment

An iced cappuccino recipe has one enemy: dilution. Ice melts, flavor thins, and suddenly your “iced coffee cappuccino recipe” tastes like vague sweetness.

The solution is to use a strong base and treat foam as a topping rather than something you stir away.

Iced cappuccino at home with cold foam in a tall glass, showing espresso and milk layers, plus text overlay with the cold foam method steps and MasalaMonk.com footer.
Iced cappuccino at home, done right: start with a strong espresso base, chill quickly, add cold milk, then finish with cold foam so the drink stays bold instead of watery.

How to make a cold cappuccino that stays creamy

  1. Brew espresso or moka pot coffee.
  2. Cool it quickly (a short stir over ice works, or a brief chill in the fridge).
  3. Add cold milk to taste.
  4. Top with cold foam.

Cold foam can be made in a jar, with a handheld frother, or in some countertop frothers that include a cold setting. The key is that you want the foam to sit like a cap—so each sip moves from airy to creamy to coffee.

For a broader menu of cold coffee drinks—because sometimes you want to rotate beyond cappuccino—this internal roundup is easy to weave in: Iced Coffee: 15 Drink Recipes—Latte, Cold Brew, Frappe & More. If you’re curious about the differences between cold brew, iced latte, and frappe (especially when you’re deciding what texture you want), this explainer also fits naturally: Iced Coffee Simplified: Cold Brew vs Iced Latte vs Frappe & More.

Iced cappuccino at home (quick shaker method)

If you want a frothier iced coffee cappuccino, shake:

  • espresso + milk + ice in a sealed jar for 10–15 seconds
  • strain into a glass
  • top with fresh foam (optional, but lovely)

This creates tiny bubbles and a slightly thicker feel, which is why it reads as “iced cappuccino” rather than simply “iced coffee with milk.”

Cappuccino with ice cream (dessert-style, still balanced)

Sometimes you want the drink to feel like a treat. In that case, pour hot espresso over a small scoop of vanilla ice cream, then add a little foamed milk. It lands somewhere between an affogato mood and a frozen cappuccino recipe, without turning into an overly sweet milkshake.

Also Read: Sandwich for Breakfast: Breakfast Sandwich Recipe + 10 Variations


Cappuccino mix recipe: homemade cappuccino mix that tastes clean, not chalky

Instant cappuccino mix is convenient, yet it’s often either too sweet or oddly flat. A homemade cappuccino mix recipe lets you control sweetness, coffee strength, and the “creaminess” that makes the drink satisfying.

Homemade cappuccino mix in a mason jar with text overlay showing an easy pantry jar recipe using milk powder, instant coffee, sugar (or sweetener), and optional cocoa plus a pinch of salt.
Homemade cappuccino mix makes quick cappuccino at home easy—stir 2–3 tablespoons into hot milk (or water) for a creamy, café-style cup in minutes.

Homemade cappuccino mix recipe (base blend)

A good mix has three jobs:

  1. provide coffee flavor (instant coffee)
  2. add body (milk powder or a non-dairy creamer powder)
  3. balance sweetness (sugar or a chosen sweetener)

A simple homemade cappuccino mix formula can look like this:

  • milk powder (largest portion, for body)
  • instant coffee (enough to taste like coffee, not cocoa)
  • sugar (or a low-cal substitute)
  • optional cocoa powder (for roundness)
  • a pinch of salt (tiny, but it makes the flavors pop)

Because cocoa quality varies widely, it helps to understand cocoa behavior in hot drinks. MasalaMonk’s internal recipe is great for that: Homemade Hot Chocolate with Cocoa Powder Recipe. It’s not a cappuccino post, of course, yet it teaches you why one cocoa tastes smooth and another tastes dusty.

Cappuccino mix measurements infographic showing 2 tbsp, 3 tbsp, or 4 tbsp homemade cappuccino mix per mug, with a serving note to use hot milk (or half milk/half water).
Use this cappuccino mix measurement guide to get the cup you want: 2 tablespoons for lighter, 3 for classic and creamy, or 4 for a stronger, dessert-like mug—best mixed with hot milk (or half milk/half water).

How to make your own cappuccino mix (and actually enjoy it)

To use your mix:

  • Add 2–3 tablespoons to hot water, or better yet hot milk.
  • Whisk thoroughly so it dissolves without clumps.
  • Finish with a small spoon of foam if you want the cappuccino look and mouthfeel.

If you want a mocha-style drizzle that’s quick and glossy, this internal recipe can be linked naturally right where readers would want it: 3 Minutes Homemade Chocolate Syrup. It’s an easy way to turn a cappuccino powder mix recipe into something that feels café-like.

Cappuccino sweetness control infographic showing three options—sugar-free, low-carb, and less sweet—with ingredient swaps and a cappuccino cup on a countertop.
Customize your cappuccino at home: go sugar-free with a sweetener plus vanilla or cinnamon, keep it low-carb with a lower-sugar mix and aroma boosters, or make it less sweet by cutting sugar and adding a pinch of salt with cocoa.

Sugar free decaf cappuccino mix and low carb cappuccino mix (simple swaps)

If you want a sugar free decaf cappuccino mix, the idea is the same:

  • use decaf instant coffee
  • swap sugar for your preferred sweetener
  • choose milk powder or a low-carb creamer option that suits your diet

Likewise, a low carb cappuccino mix usually comes down to milk choice and sweetener. The drink can still taste indulgent; it just relies on aroma (vanilla, spice) rather than sugar to create that “dessert-like” feeling.

Also Read: Classic Rum Punch + 9 Recipes (Pitcher & Party-Friendly)


Cappuccino and latte recipes: how to keep your cappuccino from turning into a latte

Cappuccino and latte recipes share ingredients but differ in structure. A latte tends to be larger, milk-forward, and built with thinner microfoam integrated into the drink. A cappuccino is typically smaller and more foam-capped.

Cappuccino vs latte visual guide comparing cup size, foam cap thickness, milk amount, and taste, shown with a cappuccino in a small cup and a latte in a tall glass.
Cappuccino vs latte in one glance: cappuccino stays smaller with a thicker foam cap and a stronger coffee bite, while latte is larger, milkier, and topped with thinner foam.

If you want a deeper context piece (history, size, and how modern versions drifted larger over time), this overview is a good reference: What is a cappuccino & how has it developed over time?. Even if you never think about definitions again, it’s reassuring to know why your “cappuccino latte recipe” sometimes feels confused: you’re really choosing between two valid styles.

A simple rule keeps you aligned:

  • If you want cappuccino: keep it smaller and foam-forward.
  • If you want latte: make it larger and more integrated.

Also Read: Rob Roy Drink Recipe: Classic Scotch Cocktail (Perfect + Dry + Sweet Variations)


Flavored cappuccino recipe variations (without losing the cappuccino soul)

Once your base method is solid, flavored cappuccino becomes playful rather than chaotic. The goal is to add flavor without drowning coffee.

Cappuccino flavor variations guide showing four cups—vanilla, mocha, pumpkin spice, and cardamom—with quick instructions for each and MasalaMonk.com branding.
Four easy cappuccino variations to try at home: vanilla (add to the cup before milk), mocha (cocoa + espresso, then milk + foam), pumpkin spice (spice + light sweetener, finish with a dusting), and cardamom (a pinch in the base or on the foam).
Cappuccino toppings guide showing a cocoa-dusted cappuccino with ramekins of cocoa powder, cinnamon, chocolate sprinkles, and vanilla/caramel swirl, plus recommended amounts for each topping.
Cappuccino toppings that elevate flavor without overpowering it: a light cocoa dusting, a pinch of cinnamon, a few chocolate shavings or sprinkles, or a small vanilla/caramel swirl—aim for aroma first, sweetness second.

Vanilla cappuccino recipe (clean, not perfumey)

Vanilla can taste artificial if you overdo it. Instead:

  • add a small amount of vanilla extract or vanilla syrup to the cup before pouring milk
  • keep sweetness restrained so espresso still shows up

This is especially good when you’re making a cappuccino with instant coffee at home, because vanilla can smooth rough edges without turning the drink into candy.

Mocha cappuccino recipe (chocolate that complements coffee)

Mocha cappuccino works best when coffee leads and chocolate follows.

  • Use cocoa powder + a little sugar, or a thin drizzle of chocolate syrup.
  • Avoid heavy chocolate sauces that make the drink feel thick and syrupy.

If you’d like an internal link that supports a more “from-scratch” vibe, this one fits naturally: Exploring the combination of coffee and hot chocolate. It gives readers ideas for chocolate-coffee balance without turning your cappuccino post into a dessert manifesto.

Pumpkin spice cappuccino recipe (cozy and balanced)

Pumpkin spice is easiest to love when it doesn’t taste like pure sweetness. A more grounded approach uses real pumpkin purée, warm spices, and a controlled sweetener.

MasalaMonk’s internal recipe is already structured around those principles, so it’s a natural link inside a pumpkin spice cappuccino paragraph: Healthy Pumpkin Spice Latte (Hot or Iced). If readers want to mix their own spice blend, this companion guide makes the flavor feel intentional rather than random: Homemade Pumpkin Pie Spice.

Even if you keep pumpkin spice as an occasional variation, the same idea improves any flavored cappuccino recipe: build aroma first, then add sweetness only as needed.

Italian cappuccino recipe twist: a hint of spice (cardamom works beautifully)

If you want a subtle “Italian cappuccino recipe meets warm spice” direction, add a tiny pinch of cardamom to the coffee base or dust the foam lightly. It doesn’t need to be loud; it just needs to be present enough to make the aroma feel a little more layered.

For a deeper look at how cardamom and coffee pair (and why it’s such a natural fit), this internal piece is a lovely addition: Cardamom in Coffee: A Delightful Fusion of Aromas.

Also Read: 7 Pizza Sauce Recipes | Marinara, White Garlic, Alfredo, Buffalo, BBQ, Vodka & Ranch


Making a cappuccino with a coffee machine: keeping automatic drinks from tasting watery

Automatic machines can be a joy: press a button, get a drink. Still, “coffee machine make cappuccino” often translates to a larger, milkier beverage unless you guide it.

Pod machine cappuccino guide showing Nespresso-style and Keurig-style steps: brew a strong shot, froth milk, then pour coffee/espresso → milk → foam in a small cup.
Making cappuccino with a pod machine is all about keeping it small: brew the strongest shot your machine allows, froth milk, then build the drink coffee/espresso → milk → foam for a richer, café-style result.

If your cappuccino from a coffee machine tastes diluted, try this sequence:

  • Choose the smallest cappuccino size setting.
  • Use the strongest coffee intensity option.
  • Reduce the milk volume slightly (even 10–20 ml less can bring espresso back into focus).
  • If the machine lets you customize ratios, prioritize coffee first, then milk.

This is also where the “best way to make a cappuccino” might look like making less drink rather than adding more settings. A smaller cup and a stronger base create cappuccino structure instantly.

If you’re deciding between a small cappuccino machine for home, a fully automatic coffee machine for home, or something more manual, keep your priorities clear: the best cappuccino at home is the one you’ll actually make often. For a broader overview of how different machines behave, this internal explainer is a natural place to send readers without derailing the recipe: A Coffee Lover’s Guide to Machines.

Also Read: Vodka Pasta (Penne alla Vodka) + Spicy Rigatoni, Chicken, and Gigi Recipes


Best cappuccino recipe troubleshooting: how to fix taste and foam fast

Even a good cappuccino recipe has a few predictable failure points. Fortunately, most fixes are quick.

Cappuccino troubleshooting infographic listing five common issues—watery, bitter, sour, big bubbles, and foam collapses—with quick fixes, shown beside a cocoa-dusted cappuccino.
If your cappuccino tastes watery or bitter—or your foam keeps collapsing—use these quick fixes to adjust cup size, strength, temperature, and bubble texture for a better cappuccino at home.
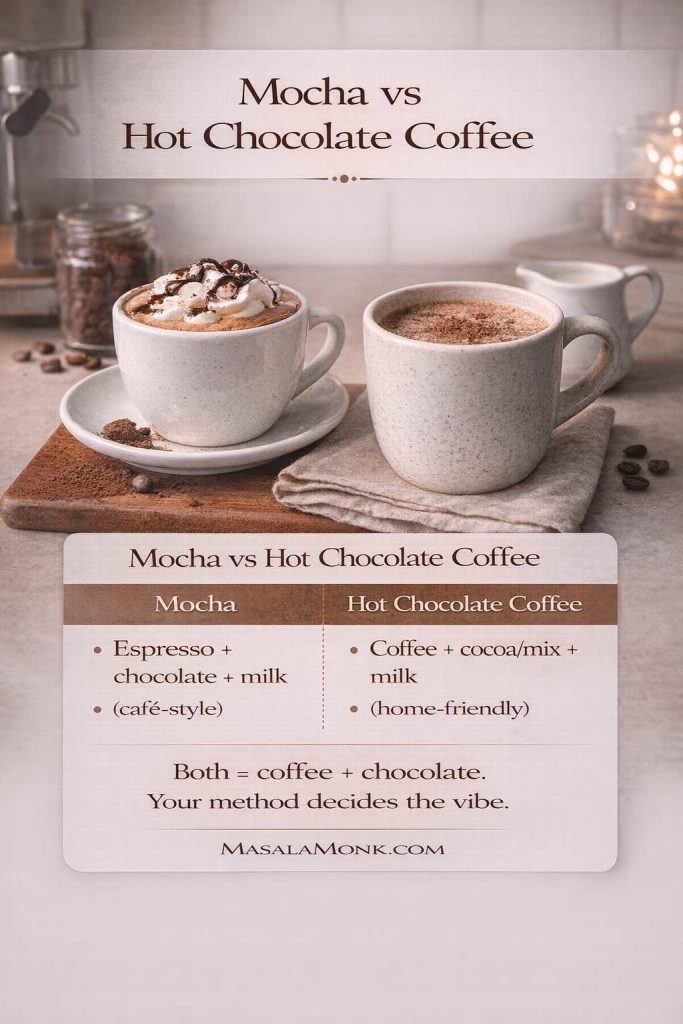
If your cappuccino tastes bitter

This can come from over-extracted coffee or overheated milk.

  • Shorten extraction slightly (espresso) or adjust grind.
  • With moka pot, avoid blasting heat; steady heat tends to taste smoother.
  • Keep milk in the sweet zone rather than letting it scorch.

If you want to zoom out and understand how extraction variables create bitterness (or sourness), revisit the fundamentals here: Coffee Brewing Methods: A Fusion of Art, Science, and Flavor.

If it tastes sour or thin

This usually means the base is underpowered.

  • Strengthen the coffee base.
  • Reduce milk volume.
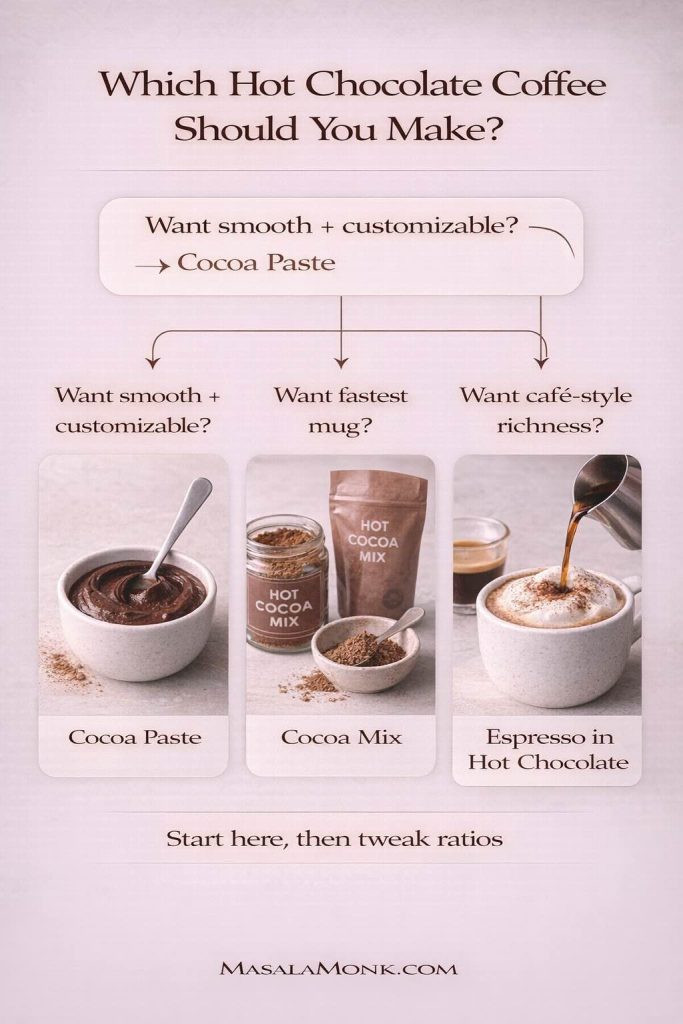
  • Use a smaller cup.

In other words, if you’re thinking “what coffee to use for cappuccino,” the immediate answer might be: use coffee that’s brewed strong enough to stand up to milk.

If your foam is big and bubbly

Large bubbles make cappuccino feel like it has “bath foam” instead of creamy foam.

  • Aerate less aggressively.
  • Swirl the milk to integrate foam and liquid.
  • If using a jar method, let it rest briefly so big bubbles pop.

Barista Hustle’s microfoam explanations are especially useful if you want to understand why bubble size matters and how “drainage” affects foam stability: Microfoam (concepts and stability).

If your foam collapses immediately

This often happens when milk overheats or when there isn’t enough protein structure to hold bubbles.

  • Try a different milk (whole dairy milk is typically easiest).
  • Keep temperature controlled.
  • For plant-based milks, “barista” blends often foam more predictably.

Also Read: Belgian Waffle Recipe + 5 Indian Twists on a Breakfast Classic


A few satisfying cappuccino directions to keep in rotation

Once you can make cappuccino at home reliably, it’s worth having a handful of variations that feel distinct without requiring a new learning curve.
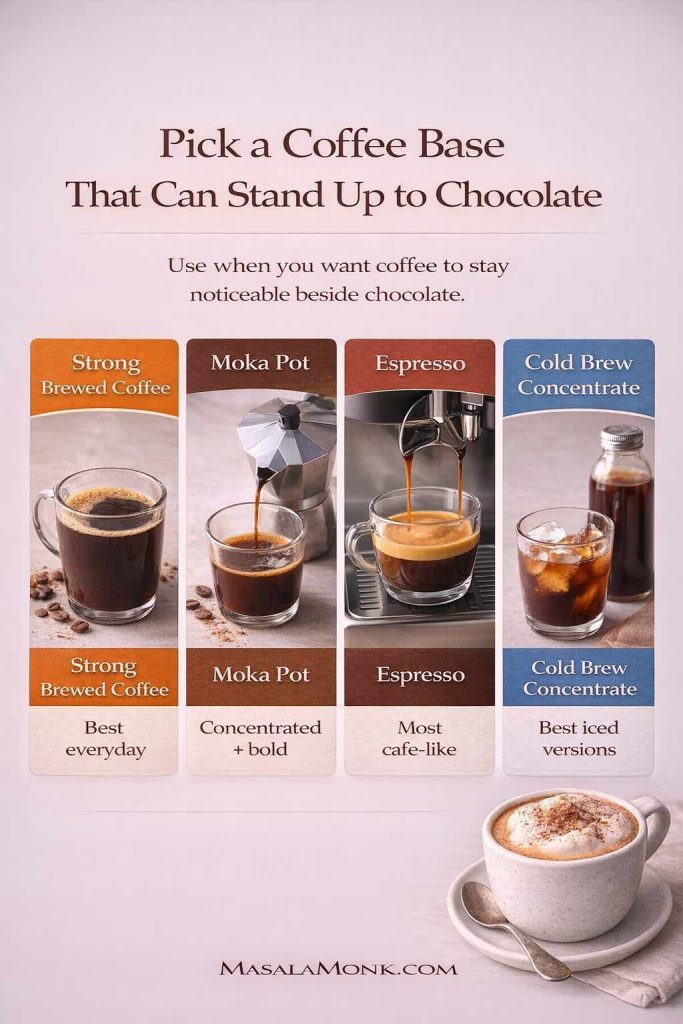
Simple cappuccino recipe (weekday version)

  • strong coffee base
  • milk heated and foamed with your easiest method
  • no toppings, no syrup

It’s the version you’ll make most often, which is why it deserves to taste good.
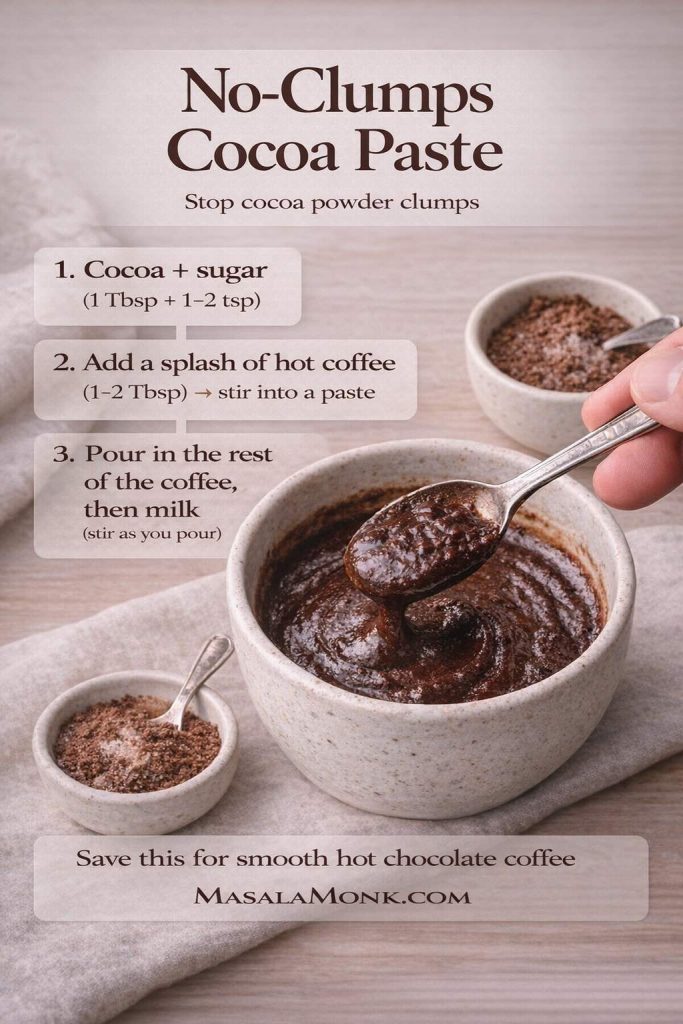
Cappuccino easy recipe (guest-friendly batch approach)

If you’re making cappuccino for a few people:

  • brew bases back-to-back (espresso shots or moka pot)
  • foam milk in larger batches (a countertop frother helps here)
  • pour coffee first, then milk, then foam

The rhythm makes it feel effortless, and the results look impressive without extra work.

Healthy-ish cappuccino (less sugar, same comfort)

If you like sweetness but don’t want a sugar-heavy drink, lean on aroma: vanilla, cinnamon, or cardamom. For cold coffee days with a lighter approach, this internal recipe is a natural link for readers who want a plant-based direction: Vegan and Sugar Free Creamy Cold Coffee.

Also Read: Oat Pancakes Recipe (Healthy Oatmeal Pancakes)


Closing thought: the perfect cappuccino is the one you can repeat

The most satisfying cappuccino recipe isn’t the one that demands perfect tools. It’s the one you can make on a random Tuesday, half-awake, and still feel proud of after the first sip.

Start with a strong base, keep your milk sweet and controlled, and give foam the respect it deserves. From there, everything opens up: cappuccino recipe at home becomes second nature, cappuccino without machine stops being a compromise, and iced cappuccino at home becomes a summer staple rather than a watery disappointment.

Whenever you want to deepen a specific part of the craft, these reads fit naturally alongside the sections above:

FAQs

1) What is the best cappuccino recipe for beginners?

A beginner-friendly cappuccino recipe starts with a strong coffee base and focuses on milk texture rather than fancy techniques. Brew espresso if you have it; otherwise, use a concentrated moka pot coffee or extra-strong brewed coffee. Then heat milk until steaming (not boiling), froth it, and pour so you finish with a visible foam cap. The simplest path is: strong base + hot milk + stable foam.

2) How do you make a cappuccino at home step by step?

To make a cappuccino at home, brew a strong espresso (or espresso-like concentrate), heat milk, froth it into fine foam, then assemble: coffee first, milk second, foam last. Keep the cup size moderate so the drink stays bold and structured rather than drifting into latte territory.

3) How can I make cappuccino without a machine?

For a cappuccino without machine, choose a strong coffee base (moka pot works especially well). Next, heat milk in a saucepan and froth it using a French press, jar-shake method, whisk, or handheld frother. Finally, pour the milk into the coffee and spoon foam on top. This cappuccino recipe without machine still delivers the classic layered feel.

4) How do I froth milk for cappuccino without a frother?

If you don’t have a frother, you can still froth milk for cappuccino using everyday tools. A French press is reliable: pour hot milk in and pump until foamy. Alternatively, shake hot milk in a sealed jar, then pour milk first and add the foam on top. In a pinch, vigorous whisking can also create foam, although it’s usually lighter and less stable.

5) How do I steam milk for cappuccino without a machine?

Without a steam wand, “steaming” becomes gentle heating plus aeration. Warm milk until it’s steaming but not boiling, then create foam with a French press, jar, or whisk. Aim for smaller bubbles rather than large froth; that smoother texture makes the drink taste closer to a classic cappuccino coffee recipe.

6) What coffee should I use for cappuccino?

What coffee to use for cappuccino depends on the flavor you enjoy, yet the key is strength. Espresso is ideal; if you’re using brewed coffee, make it concentrated so it doesn’t vanish under milk. Medium to medium-dark roasts often read well in milk drinks because they keep chocolatey, nutty notes even after dilution.

7) What do I need to make a cappuccino at home?

At minimum, you need coffee, milk, a way to heat milk, and a way to create foam. With an espresso machine, you’ll use a steam wand and pitcher. Without one, you can rely on a moka pot (or strong coffee), a saucepan, and a French press or jar for foaming. In other words, what do you need to make cappuccino? A strong base and a workable foam method.

8) What are the basic cappuccino ingredients?

Cappuccino ingredients are straightforward: espresso (or concentrated coffee), milk, and foam made from the milk. Optionally, you can add cocoa powder, cinnamon, or chocolate sprinkles on top. Still, the texture—especially the foam—is what makes it feel like a cappuccino rather than regular coffee with milk.

9) What is the perfect cappuccino ratio?

Many people describe the perfect cappuccino ratio as equal parts espresso, steamed milk, and foam. In everyday home terms, that usually means one strong espresso base and enough milk to balance it, finished with a noticeable foam layer. If you want a “perfect cappuccino” feel, keep the total drink smaller so espresso remains the lead voice.

10) Why does my cappuccino taste watery?

A watery cappuccino usually happens when the coffee base is too weak, the cup size is too large, or too much milk is added. Strengthen the espresso (or brew more concentrated coffee), reduce the drink volume, and keep the milk-to-coffee balance tighter. Often, the best cappuccino at home comes from making a smaller cup with a stronger base.

11) Why is my cappuccino foam too bubbly?

Big bubbles typically mean the milk was aerated too aggressively or for too long. Instead, aim for finer foam by adding only a little air at first, then mixing it into a smooth texture. Additionally, swirling the milk before pouring helps collapse oversized bubbles and improves consistency.

12) Why does my foam collapse so quickly?

Foam collapses when milk overheats, when bubbles are too large, or when the milk doesn’t have enough structure to hold air well. Keep the milk hot but not boiling, focus on smaller bubbles, and try a different milk if needed. With practice, your cappuccino foam will become thicker, glossier, and longer-lasting.

13) How do I make iced cappuccino at home?

To make iced cappuccino at home, start with a strong espresso or concentrate, cool it, add cold milk, then top with cold foam. This method keeps the drink creamy even as ice melts. If you shake coffee and milk with ice, you’ll get a frothier texture—then you can finish with an extra spoon of foam for a true iced cappuccino feel.

14) What’s the easiest iced cappuccino recipe that still tastes good?

An easy iced cappuccino recipe is: strong coffee concentrate + cold milk + ice + a foam topping. The main trick is concentration—if the coffee is strong, the drink won’t taste diluted. For extra body, shake the coffee and milk briefly with ice, strain, and add foam on top.

15) How do I make a cold cappuccino that stays frothy?

A cold cappuccino stays frothy when the foam is added last and treated like a cap, not stirred away. Use cold milk foam made with a handheld frother, jar, or French press method. Meanwhile, keep your coffee base strong and cooled so the foam doesn’t melt into the drink immediately.

16) Can I make cappuccino with instant coffee?

Yes—cappuccino with instant coffee works best when you build it like a milk drink rather than a watered-down cup. Dissolve instant coffee in a small amount of hot water first, add hot milk (or mostly hot milk), then top with foam. This approach tastes closer to homemade cappuccino than simply mixing instant coffee into a full mug of water.

17) What is a good homemade cappuccino mix recipe?

A good homemade cappuccino mix recipe typically combines milk powder (for creaminess), instant coffee (for flavor), sugar or sweetener (for balance), and optional cocoa (for roundness). For use, whisk a few spoonfuls into hot water or hot milk. If you want the best homemade cappuccino mix, keep the coffee strong enough that it still tastes like cappuccino after mixing.

18) How do I make my own cappuccino mix less sweet?

To make your own cappuccino mix less sweet, reduce sugar and boost aroma instead. A little cocoa, vanilla, cinnamon, or a pinch of salt can make the mix feel richer without relying on extra sweetness. You can also increase the instant coffee portion slightly so the drink tastes more robust.

19) How do I make a low carb cappuccino mix?

A low carb cappuccino mix usually swaps sugar for a low-carb sweetener and uses a milk powder or creamer option that fits your carb goals. Beyond that, the method stays the same: mix into hot water or hot milk and finish with foam if you want the classic cappuccino texture.

20) What’s the difference between cappuccino and latte?

A cappuccino is generally smaller and foam-forward, while a latte is typically larger with more steamed milk and a thinner foam layer. Consequently, if you prefer a stronger coffee presence and a thicker foam cap, cappuccino is the better fit. If you want a milkier drink with a smoother, integrated texture, latte may suit you more.

21) How do I make a vanilla cappuccino at home?

For a vanilla cappuccino at home, add a small amount of vanilla extract or vanilla syrup to the cup, brew your coffee base, then pour steamed milk and finish with foam. Keep vanilla subtle so the drink remains a cappuccino rather than a dessert beverage.

22) How do I make a mocha cappuccino at home?

To make a mocha cappuccino at home, add cocoa (or a light chocolate syrup) to the coffee base, stir until smooth, then add steamed milk and top with foam. The best mocha cappuccino keeps chocolate supportive, not overpowering, so coffee flavor still comes through.

23) How do I make a pumpkin spice cappuccino?

A pumpkin spice cappuccino can be made by adding pumpkin spice flavor (spice blend and a touch of sweetener) to your coffee base, then pouring steamed milk and finishing with foam. If you want it more aromatic, sprinkle spice lightly on top rather than stirring in too much at once.

24) How can I make cappuccino taste like a café drink?

To make cappuccino taste like a café drink, keep the coffee base strong, control milk temperature, and aim for fine, glossy foam rather than big bubbles. Also, use a smaller cup and pour with intention—milk first to integrate, then foam to finish. Over time, these small choices add up to a noticeably better cappuccino recipe result.

Posted on 7 Comments

Iced Coffee: 15 Drink Recipes—Latte, Cold Brew, Frappe & More

Photorealistic magazine-style cover of an iced coffee with citrus garnish and ice, titled “15 Iced & Cold Coffee Recipes,” with MasalaMonk.com in the footer.

There’s a particular kind of relief that only an iced coffee can deliver—the first clink of ice, the quick bloom of aroma, the way bitterness softens into something bright and drinkable. Some days you want a plain iced coffee that tastes clean and snappy. On other days, you want a creamy iced latte that feels like dessert but still counts as “just coffee.” And then there are afternoons when only a blended coffee frappé—thick, frosty, almost milkshake-like—will do.

Instead of treating all cold coffee as the same drink with different names, it helps to think in styles. The method you choose changes everything: body, aroma, sweetness, even how quickly the drink becomes watery. For a simple overview of how the big families differ, this MasalaMonk guide to cold brew vs iced latte vs frappé lays it out clearly.

What follows is a full, reader-first collection of iced coffee drinks you can actually rotate through: quick flash-brew for “right now” mornings, pitcher cold brew for busy weeks, espresso-forward drinks for crisp clarity, and a few indulgent options—caramel, mocha, condensed milk, and the inevitable coffee-and-ice-cream drink for when you want the day to feel a little more like a holiday.


The small things that make iced coffee taste “best”

Before the recipes, it’s worth understanding why one iced coffee tastes like a café drink while another tastes like cold brown water. The good news is that the difference usually comes down to a few small decisions—ice, sweetness, method, milk, and how you store what you make. Once those are dialed in, even a simple drink starts tasting “intentional.”

Iced coffee ratios cheat sheet infographic with six methods: flash brew, cold brew concentrate, iced latte, iced Americano, shaken espresso, and blended frappe, with MasalaMonk.com branding.
Keep this iced coffee ratios cheat sheet handy—six café-style cold coffee methods at a glance, from flash brew and cold brew concentrate to iced latte, Americano, shaken espresso, and blended frappe.

1. Ice is an ingredient with a timer

Ice isn’t a garnish—it’s dilution in slow motion. The faster your ice melts, the quicker your drink goes from bold to bland.

If you want a strong iced coffee that holds its flavor, use larger cubes whenever possible. They melt more slowly, which means your drink stays concentrated for longer. If you want the “why didn’t I do this earlier?” upgrade, freeze leftover coffee into coffee ice cubes. They keep the drink cold without watering it down, so your last sip can be as satisfying as the first.

Pinterest-style tip card showing iced coffee with small ice vs big ice cubes, explaining that large cubes melt slower and coffee ice cubes prevent dilution, with MasalaMonk.com footer.
Watery iced coffee fix: chill your coffee first, then use large ice cubes—or coffee ice cubes—for a stronger, better-tasting iced coffee from first sip to last.

A useful habit is to think in two stages:

  • Chill the coffee first (even briefly), so the ice doesn’t do all the cooling work.
  • Use better ice (bigger cubes or coffee cubes), so the drink doesn’t collapse halfway through.

2. Cold sweetening needs a different strategy

Sweetness behaves differently in cold drinks. Granulated sugar is stubborn in an iced glass—it can sink, clump, and refuse to dissolve, which creates that “sweet at the bottom, bitter at the top” problem.

Tip card showing two iced coffees comparing sugar settling at the bottom versus simple syrup dissolving evenly, with advice to sweeten cold coffee using syrup and MasalaMonk.com branding.
For smoother iced coffee, skip granulated sugar—use simple syrup (or condensed milk) so sweetness blends evenly instead of sinking and clumping at the bottom.

Syrup is the easiest fix because it blends instantly. Even a quick homemade “coffee syrup” can be as simple as stirring sugar with a splash of hot water until clear, then cooling it. From there, you can steer flavor in small, controlled ways—vanilla, caramel, cinnamon—without turning the whole drink into a sugar rush.

Condensed milk is its own category. It doesn’t just sweeten; it changes texture. That’s why Vietnamese-style iced coffee feels so smooth and rich: condensed milk adds sweetness and body at the same time, creating something closer to a dessert-coffee hybrid than a standard iced latte.

3. Method is the real lever

Two iced coffees can use the same beans and still taste like totally different drinks—because extraction changes everything.

Flash brew vs cold brew: flash brewing keeps iced coffee bright and aromatic, while cold brew leans smooth and mellow—pick the method that matches the flavor you want.

Cold brew is steeped slowly, which tends to emphasize smoothness and mute sharp edges. Chilled hot coffee (whether flash-brewed over ice or cooled and refrigerated) holds onto more of the aromatic “top notes” you notice in a fresh cup. Both are great, but they’re not interchangeable. The Specialty Coffee Association breaks down that difference clearly in How cold brew differs from chilled hot brew, and it’s worth reading if you’ve ever wondered why one cold coffee tastes mellow while another tastes bright.

Infographic comparing flash brew iced coffee (hot coffee brewed over ice) and cold brew coffee (steeped cold then filtered), including taste differences, brew time, and when to choose each.
Flash brew vs cold brew (quick guide): Flash brew is hot coffee brewed over ice for a brighter, more aromatic iced coffee in minutes; cold brew is steeped in cold water for 12–24 hours for a smoother, mellower cup—choose based on flavor, time, and how you like it with milk.

A simple way to choose:

  • If you want smooth and forgiving, cold brew is your friend.
  • If you want aroma and clarity, hot-brewed coffee cooled quickly usually wins.

4. Milk changes the finish more than you expect

Milk isn’t just “creaminess.” It changes the entire ending of a sip—how long flavors linger, whether bitterness feels sharp or softened, and whether the drink tastes light, rich, or dessert-like.

Milk can change an iced coffee completely: whole milk tastes classic and rounded, oat milk feels fuller, and almond milk stays lighter—start with less milk in strong coffee and add gradually.

Whole milk tends to make iced coffee feel rounded and classic. Oat milk often reads sweeter and fuller without needing much sugar, which is why it’s so popular in shaken espresso-style drinks. Almond milk stays lighter and nutty, especially if it’s unsweetened. Coconut milk brings a soft richness and a subtle tropical note that can be surprisingly good with chocolate or caramel.

If you like having options ready for different moods, a small “milk bar” at home is a game-changer. MasalaMonk’s guides to homemade almond milk, easy oats milk, and homemade coconut milk make it easy to keep a few styles on hand.

One extra trick: if you’re adding milk to a very strong coffee base (like espresso or concentrate), start smaller than you think. You can always add more, but you can’t take “washed out” back.

5. Make-ahead drinks deserve a quick food-safety moment

Batch-making iced coffee is one of the best ways to make mornings easier. Still, it helps to treat make-ahead coffee like a perishable beverage—especially when milk, cream, or flavored creamers enter the picture.

Tip card showing two bottles labeled cold brew base and creamer with fridge styling, advising storing coffee plain and adding milk per glass, with MasalaMonk.com footer.
Make-ahead iced coffee that tastes fresher: store coffee plain, keep it cold and sealed, and add milk only when you pour a glass.

Keep brewed coffee refrigerated once it cools, store it in a clean, closed container, and plan to finish it within a short window. For quick reference charts, FoodSafety.gov’s cold storage guide is practical, and the USDA’s leftovers guidance is a helpful companion—particularly for milk-based mixtures and creamers.

If you’re making a pitcher of cold brew concentrate, store the concentrate plain, then add milk and sweeteners in the glass. It tastes fresher, and it keeps the “dairy clock” from starting early.

With that foundation, you’re ready to build iced coffee drinks that don’t taste watery, flat, or accidentally bitter. If you enjoy the “why” behind brewing, MasalaMonk’s coffee brewing methods guide adds useful context. Then, when espresso is in the picture, this quick espresso guide keeps things approachable—and Moka Pot Mastery is perfect for days you don’t want to pull out a machine.

Also Read: Cranberry Moscow Mule Recipe: A Festive Holiday Cocktail With Easy Variations


1) Flash-Brew Iced Coffee (Japanese-Style Cold Coffee)

If you want iced coffee with almost no waiting, flash brew is the fastest path to a cup that still tastes aromatic. Hot coffee blooms on the way down; ice locks that aroma in. As a result, the drink tastes vivid rather than dull—closer to a fresh pour-over, just cold.

Ingredients (2 drinks)

  • Ice (enough to fill a carafe or sturdy glass)
  • Fresh coffee grounds (medium-coarse)
  • Near-boiling water
Recipe card showing Japanese-style flash-brew iced coffee made by brewing hot coffee over ice, with a pour-over dripper and a tall glass of iced coffee.
Flash-brew iced coffee (Japanese-style) chills hot coffee instantly over ice, keeping the flavor bright and bold—especially with large cubes or coffee ice cubes.

Method

  1. Add ice to a carafe or heatproof server.
  2. Brew directly over the ice (pour-over, drip, or any method that lets you control flow).
  3. Swirl gently, then pour over fresh ice if you want it colder.

For a clean reference version, Serious Eats explains the technique in Japanese-Style Iced Coffee, and their companion piece What’s the Best Way to Brew Iced Coffee? helps you choose a method that fits your gear.

Make it your own

  • For a “strong iced coffee” feel, use slightly less water and slightly more coffee.
  • For a cleaner finish, skip milk and add a thin citrus peel twist.
  • For a creamy version, add a small splash of milk after brewing, not before.

Also Read: Baked Ziti Recipe Collection: 15 Easy Variations


2) Classic Iced Coffee Recipe (Brew, Chill, Pour Over Ice)

Flash brew is about capturing aroma fast. Classic iced coffee is about building a steady base you can pour anytime—especially if you already brew coffee in the morning. Here, the goal is simple: make coffee that tastes good cold, then chill it properly so ice doesn’t turn it thin.

Ingredients (2–3 drinks)

  • Freshly brewed coffee (make it slightly stronger than usual)
  • Ice
  • Optional: milk or cream
  • Optional: syrup (vanilla, caramel, or simple syrup)
Classic iced coffee recipe card showing brewed coffee chilled and poured over ice, with coffee ice cubes and a pro tip for preventing dilution.
Classic iced coffee (brew, chill, pour over ice): brew slightly stronger, chill fully, then pour over ice. Bonus upgrade: coffee ice cubes keep it bold to the last sip.

Method

  1. Brew coffee a touch stronger than your normal cup.
  2. Cool it to room temperature, then refrigerate until truly cold.
  3. Fill a glass with ice and pour the cold coffee over it.
  4. Add milk or syrup if you like, then stir once and taste.

Two upgrades that change everything

  • Coffee ice cubes: freeze leftover coffee in an ice tray; use those cubes for a no-dilution drink.
  • Chill fast: pour warm coffee into a wide container before refrigerating so it cools quickly and evenly.

For a straightforward baseline, The Pioneer Woman’s Perfect Iced Coffee shows the classic “brew then ice” approach in a simple way.

Also Read: Manhattan Cocktail Recipe (Classic + 6 Variations)


3) Iced Coffee Pitcher Recipe (Make-Ahead Cold Brew)

This is the answer to “easy homemade iced or cold coffee” when mornings are busy. You do the work once, then you’re pouring iced coffee all week. Better still, cold brew is the easiest route to iced coffee concentrate—ideal for milk drinks, foam, syrups, or ice cream.

Ingredients (about 1 quart / 1 liter)

  • Coarsely ground coffee
  • Cold water
  • A jar or pitcher
  • A strainer (fine mesh + filter works best)
Recipe card showing a cold brew pitcher of iced coffee concentrate being poured over ice, with coffee ice cubes and a serving glass with milk.
Cold brew concentrate is the easiest make-ahead iced coffee base—brew once, then pour over ice and dilute with milk or water until it tastes just right.

Method

  1. Combine coffee and cold water in a pitcher. Stir to fully saturate grounds.
  2. Cover and steep in the fridge (or a cool place) for 8–18 hours.
  3. Strain thoroughly until the liquid looks clean, not muddy.
  4. Store cold. Pour over ice as-is, or dilute if you brewed it as a concentrate.

For a detailed baseline, Serious Eats’ Cold Brew Iced Coffee is a reliable reference, and their Guide to Cold Brew Coffee helps you adjust steep time and strength.

Serve it as iced coffee concentrate

  • Pour a smaller amount of concentrate over ice.
  • Add water or milk until it tastes right.
  • Use coffee ice cubes when you want it bold from start to finish.

Also Read: Green Chutney Recipe (Coriander–Mint / Cilantro Chutney)


4) Cold Drip Coffee (Bright, Slow, and Special Recipe)

Cold drip is the slow-brew cousin of cold brew. Instead of immersing grounds in water, you let water drip over coffee bit by bit for hours. Consequently, the cup can taste bright and clean—often with a lighter, more perfumed profile than immersion cold brew.

Ingredients (makes a concentrate)

  • A cold drip tower (or any cold drip setup you already own)
  • Medium-coarse ground coffee
  • Room-temperature water
  • Ice (for serving)
Cold drip coffee recipe card showing a cold drip tower brewing coffee over ice with simple ingredients, drip timing, and dilution tips.
Cold Drip Coffee (Bright, Slow & Special): A clean, aromatic cold coffee made by slow dripping water over coffee grounds. Use a medium-coarse grind, aim for ~1 drip/second, then chill and dilute over ice to taste.

Method (general approach)

  1. Add ground coffee to the middle chamber (or coffee bed area) of your dripper.
  2. Fill the top chamber with water.
  3. Set a slow drip rate and let it brew for several hours.
  4. Chill the concentrate, then dilute with water or milk over ice.

For a practical, step-by-step guide to drip rate and timing, Padre Coffee’s Cold Drip Coffee – The Definitive Guide is a helpful reference.

Small adjustments that help

  • If it tastes sharp, dilute a little more and serve with extra ice.
  • If it tastes thin, tighten the grind slightly or slow the drip rate.
  • If you want creaminess without heaviness, finish with oat milk.

Also Read: Rob Roy Drink Recipe: Classic Scotch Cocktail (Perfect + Dry + Sweet Variations)


5) Classic Iced Latte (Espresso + Milk)

An iced latte is the cleanest “creamy” iced coffee drink: espresso for structure, milk for softness, ice for snap. Because the build is so simple, it’s also the easiest to customize without losing the coffee’s backbone.

Ingredients (1 drink)

  • 1–2 shots espresso (or strong moka pot coffee)
  • Cold milk
  • Ice
  • Optional: syrup for sweetness
Recipe card for a classic iced latte showing espresso poured over ice and finished with cold milk in a tall glass, with step tip text overlay.
Classic iced latte is the clean, café-style staple: pour espresso over ice, add cold milk, and keep the layers crisp for a smooth, balanced sip.

Method

  1. Fill a tall glass with ice.
  2. Add espresso.
  3. Pour in cold milk and stir.

Milk choices that change the drink

  • For a lighter profile, try homemade almond milk (especially unsweetened).
  • For café-style creaminess, oats milk is an easy win.
  • For a richer, tropical note, coconut milk is surprisingly good with iced coffee.

For beans, medium roasts usually read sweet and balanced when chilled; nonetheless, taste wins—so follow your preference and adjust strength with the coffee-to-milk ratio.

Also Read: Sandwich for Breakfast: Breakfast Sandwich Recipe + 10 Variations


6) Iced Americano (The Crisp, Black-Ice Coffee Lane)

Sometimes you don’t want milk at all—you want clarity. An iced Americano is espresso + cold water + ice: bold, clean, and refreshing. It lands between plain iced coffee and straight espresso, which makes it especially good on hot days.

Ingredients (1 drink)

  • 1–2 shots espresso
  • Cold water
  • Ice
  • Optional: a lemon peel
Recipe card for an iced Americano made with espresso, cold water, and ice in a rocks glass with a citrus twist, with MasalaMonk.com in the footer.
Iced Americano is pure, crisp coffee flavor—espresso topped with cold water and plenty of ice, finished with a citrus twist for a brighter, cleaner sip.

Method

  1. Fill a glass with ice.
  2. Add espresso.
  3. Top with cold water to taste.

Espresso tonic (a bright detour) If you like bitter-bright drinks, espresso tonic is oddly addictive—sparkling, layered, and summer-ready. Serious Eats’ Espresso Tonic is a great reference build.

Also Read: Paper Plane Cocktail Recipe + Best Amaro Substitutes & Tips


7) Shaken Espresso (Brown Sugar Oat Milk Style)

A shaken espresso tastes different from a stirred espresso. The reason is texture: shaking chills fast, aerates the coffee, and creates a light foam that makes the drink feel lively. Add brown sugar syrup and a splash of oat milk, and suddenly the glass tastes like a café treat—without being cloying.

Ingredients (1 drink)

  • 1–2 shots espresso (or strong moka pot coffee)
  • Ice
  • Brown sugar syrup (or brown sugar dissolved in a little hot water)
  • Optional: oat milk
Recipe card for a homemade iced shaken espresso with brown sugar and oat milk, showing espresso shaken with ice and topped with oat milk in a tall glass.
Shaken espresso turns a quick shot into a café-style iced drink—shake espresso with ice and brown sugar for foam, then finish with oat milk for a silky, lightly sweet balance.

Method

  1. Add ice to a cocktail shaker or tight-lidded jar.
  2. Pour espresso over the ice.
  3. Add syrup.
  4. Shake vigorously for 10–20 seconds.
  5. Strain into a glass. Add oat milk if you want it creamy.

For a classic Italian reference, Serious Eats’ Caffè Shakerato is a great technique anchor, even if you flavor it differently.

Flavor steering, without losing balance

  • Add a pinch of cinnamon for a brown-sugar-cinnamon latte vibe.
  • Use vanilla syrup for a softer, rounder finish.
  • Drizzle caramel in the glass first for a caramel-macchiato mood.

If you don’t own an espresso machine, a moka pot is a strong substitute; MasalaMonk’s Moka Pot Mastery makes it easy to dial in.

Also Read: Strawberry Smoothie Recipes (12 Easy Blends + Bowls & Protein Shakes)


8) Iced Coffee with Cold Foam (Texture on Top)

Cold foam makes iced coffee feel layered rather than flat. Even a simple black iced coffee changes personality when topped with a soft cap of foam. The best part is how little equipment you need: a hand frother works, a blender works, and a French press works surprisingly well.

Ingredients (1 drink)

  • Iced coffee or cold brew
  • Cold milk (or half-and-half for extra richness)
  • Sweetener (syrup dissolves best)
  • Ice
Recipe card of iced coffee topped with thick cold foam, showing milk frothing and spooning foam over iced coffee in a glass.
Iced coffee with cold foam adds a creamy, café-style finish—froth very cold milk until silky, then spoon it over iced coffee for a smooth, layered sip.

Method

  1. Froth very cold milk with a hand frother, blender, or French press.
  2. Pour iced coffee over ice.
  3. Spoon foam on top so it floats.

For a simple walkthrough, Better Homes & Gardens explains how to make cold foam. Then, if you’re curious why the French press works so well for foaming, Serious Eats’ essay Why I Love the French Press is a good read.

A small trick: sweeten the foam, not the coffee. That way, each sip starts creamy and ends clean.

Also Read: Best Vermouth for a Negroni Cocktail Drink Recipe


9) Instant Iced Coffee (Greek-Style Frappé)

Instant coffee doesn’t have to taste flat. In a Greek-style frappé, instant coffee becomes the point: it foams dramatically, turning into a drink that feels playful, cold, and refreshing. When you want speed and texture at the same time, this is the move.

Ingredients (1 drink)

  • Instant coffee
  • A small splash of water
  • Sugar (optional)
  • Ice
  • Optional: milk
Recipe card for instant iced coffee (Greek-style frappe) showing a tall glass with thick foamy top, ice, and coffee layers, plus instant coffee and sugar cubes on the table.
Greek-style instant iced coffee (frappe) is all about the foam—shake instant coffee with a splash of water until frothy, then add ice and top with water or milk.

Method

  1. Add instant coffee and a splash of water to a jar.
  2. Shake hard until thick foam forms.
  3. Add ice and shake again briefly.
  4. Pour into a glass; top with water or milk.

Serious Eats has a clear reference recipe: Foamy Greek-Style Iced Coffee (Frappé).

Make it taste more “premium”

  • Add a dash of vanilla.
  • Use coffee ice cubes so it stays bold.
  • Top with a small cap of cold foam for a café finish.

Also Read: 7 Pizza Sauce Recipes | Marinara, White Garlic, Alfredo, Buffalo, BBQ, Vodka & Ranch


10) Blended Iced Coffee (Frappe-Style, Thick and Frosty)

This is the frozen iced coffee you make when it’s too hot to think. Texture is everything here: you’re aiming for thick-but-sippable—somewhere between a slush and a milkshake. Once you have the base right, variations become effortless.

Ingredients (1 large drink)

  • Strong chilled coffee or concentrate
  • Ice
  • Milk (or a dairy-free option)
  • Sweetener (optional)
  • Optional: caramel or chocolate
Recipe card for blended iced coffee (frappe) showing a thick frozen coffee drink in a tall glass with whipped cream and chocolate drizzle, with a blender in the background.
Blended iced coffee (frappe) is the frozen, café-style treat—blend cold coffee, milk, and ice until thick, then finish with whipped cream and a drizzle for a dessert-like sip.

Method

  1. Add coffee, ice, and milk to a blender.
  2. Blend until thick and smooth.
  3. Taste, then adjust thickness (more ice = thicker; more coffee = bolder).

Two easy variations

  • Frozen caramel coffee: add caramel and a tiny pinch of salt; drizzle caramel inside the glass first.
  • Chocolate frappé: add chocolate syrup and a small pinch of instant coffee for depth.

If you like a quick homemade chocolate component that blends smoothly, MasalaMonk’s 3-minute chocolate syrup is a handy add-in.

Also Read: Classic Rum Punch + 9 Recipes (Pitcher & Party-Friendly)


11) Caramel Cold Brew (Including Salted Caramel)

Caramel and coffee are old friends. Still, caramel can quickly turn an iced coffee into dessert—so the trick is restraint, plus a little balance from milk or cold brew. When done well, the flavor reads “toffee and roast” instead of “sticky sweet.”

Ingredients (1 drink)

  • Cold brew or iced coffee concentrate
  • Ice
  • Caramel (syrup or sauce)
  • Optional: milk or cream
  • Optional: pinch of salt
Recipe card for caramel cold brew with a salted option, showing cold brew poured over ice in a caramel-drizzled glass with a small bowl of sea salt and MasalaMonk.com footer.
Caramel cold brew turns smooth concentrate into a dessert-like iced coffee—stir caramel into cold brew over ice, then add a tiny pinch of salt for a deeper, less-sweet finish.

Method

  1. Drizzle caramel inside the glass.
  2. Add ice.
  3. Pour in cold brew.
  4. Add milk/cream if desired; stir well.
  5. For salted caramel, add a tiny pinch of salt and stir again.

A crème brûlée-ish variation Add vanilla, then finish with a whisper of cinnamon. Suddenly the drink reads like toasted sugar rather than pure caramel.

If you like keeping flavor jars in the fridge, MasalaMonk’s DIY coffee creamer guide offers a lot of directions that pair naturally with iced coffee.

Also Read: Vodka Pasta (Penne alla Vodka) + Spicy Rigatoni, Chicken, and Gigi Recipes


12) Mocha Iced Coffee (Classic, Cold Brew Mocha, and White Chocolate Twist)

Mocha is where coffee meets chocolate and decides to be charming. It’s also the easiest upgrade from plain iced coffee into something richer. The key is dissolving chocolate fully so it tastes smooth, not gritty.

Ingredients (1 drink)

  • Cold brew or strong iced coffee
  • Milk
  • Chocolate syrup (or cocoa + syrup)
  • Ice
Recipe card for mocha iced coffee with a cold brew mocha option, showing an iced mocha topped with whipped cream and cocoa, with chocolate drizzle in the glass.
Mocha iced coffee is coffee and chocolate in one glass—stir coffee with chocolate until smooth, add ice and milk, then finish with cocoa and chocolate shavings for a rich café-style treat.

Method

  1. Add chocolate syrup to the glass first.
  2. Add ice.
  3. Pour in coffee and stir until the chocolate fully blends.
  4. Top with milk and stir again.

For syrup that tastes “real” and blends cleanly into cold drinks, MasalaMonk’s 3-minute chocolate syrup is a great staple.

White chocolate twist For a gentler, creamier mocha lane, use a white chocolate sauce, or build the sweetness with vanilla creamer and call it a day.

If you enjoy coffee-and-chocolate combinations beyond syrup, MasalaMonk’s piece on coffee and hot chocolate together is a cozy way to think about mocha as a flavor family.

Also Read: Moscow Mule Recipe (Vodka Mule): The Master Formula + 9 Variations


13) Vietnamese Iced Coffee (Condensed Milk Cold Coffee)

Vietnamese iced coffee is the drink you make when you want sweetness, depth, and an almost caramelized richness—all in one glass. Condensed milk doesn’t just sweeten; it creates a thick, silky texture that turns strong coffee into something plush.

Ingredients (1 drink)

  • Strong coffee (espresso, moka pot, or strong drip)
  • Sweetened condensed milk
  • Ice
Recipe card for Vietnamese iced coffee with condensed milk, showing layered coffee over ice with condensed milk at the bottom and a spoon drizzling condensed milk.
Vietnamese iced coffee (condensed milk) is sweet, strong, and creamy—stir hot strong coffee into condensed milk first, then add ice for a smooth, café-style finish.

Method

  1. Add condensed milk to the bottom of a glass.
  2. Pour in hot coffee and stir until fully blended.
  3. Add ice and stir again.

For a classic reference, Serious Eats’ Vietnamese Coffee (Cà phê sữa đá) lays out the essentials.

Where this style goes next

  • Add cocoa syrup for a mocha-condensed milk hybrid.
  • Add a pinch of cinnamon for a warmer, rounder finish.
  • Serve it with coffee ice cubes so it stays bold as it melts.

If you like building bases—creamers, flavor jars, mix-ins—MasalaMonk’s coffee creamer flavors guide pairs nicely with this style because condensed milk is essentially a built-in creamer.

Also Read: Marinara Sauce Recipe: Classic Homemade Marinara


14) Thai Iced Coffee (Sweet, Creamy, and Brisk Recipe)

Thai iced coffee sits in a beautiful middle ground: bold coffee, gentle sweetness, and a creamy finish that still tastes refreshing. The profile is often made with condensed milk, sometimes paired with evaporated milk, and occasionally finished with a small pinch of salt for balance.

Ingredients (1 drink)

  • Strong brewed coffee (hot)
  • Sweetened condensed milk
  • Optional: evaporated milk (or regular milk)
  • Ice
  • Optional: tiny pinch of salt

Method

  1. Stir condensed milk into hot coffee until fully dissolved.
  2. Let the coffee cool slightly so it doesn’t melt all your ice instantly.
  3. Fill a glass with ice and pour the coffee over.
  4. Top with evaporated milk (or regular milk) if you want extra creaminess.
  5. Add a tiny pinch of salt if the sweetness needs rounding.

For a traditional, approachable reference, The Spruce Eats shares an Easy Thai Iced Coffee recipe. For more Thai coffee context beyond one drink, Hot Thai Kitchen’s Thai Coffee (4 Ways) is a fun exploration.

Small variation: if you like spice warmth, add a light dusting of cinnamon on top—just enough to perfume the first sip.

Also Read: Oat Pancakes Recipe (Healthy Oatmeal Pancakes)


15) Affogato (Coffee + Ice Cream, the Holiday-in-a-Glass)

At some point, iced coffee stops being a drink and becomes dessert. That’s not a problem; it’s a feature. An affogato is the simplest coffee-and-ice-cream drink: ice cream in a glass, espresso poured over it, immediate happiness.

Ingredients (1 dessert drink)

  • Vanilla gelato or ice cream
  • Fresh espresso (or very strong hot coffee)
Recipe card showing an affogato made by pouring hot espresso over vanilla gelato in a glass, with “Affogato: Coffee + Ice Cream” text overlay and MasalaMonk.com in the footer.
Affogato is the quickest coffee-dessert: a scoop of vanilla gelato topped with hot espresso—pour, serve immediately, and enjoy the creamy coffee melt.

Method

  1. Scoop ice cream into a small glass.
  2. Pour espresso over the top.
  3. Eat immediately while it’s half-melted and dramatic.

For a classic reference, Serious Eats has an affogato recipe that keeps it simple.

Dessert variations that still taste like coffee

  • Cookies-and-cream direction: crumble a chocolate cookie on top.
  • Cookie dough mood: add tiny cookie dough bites for a playful finish.
  • Chocolate chip energy: sprinkle mini chips on the melting foam.
  • Gelato lane: swap ice cream for gelato for a denser, silkier melt.

If you want an “iced coffee with whipped cream” moment, affogato is the easiest place to do it. A small swirl on top turns it into a sundae that still tastes like coffee.

Also Read: Belgian Waffle Recipe + 5 Indian Twists on a Breakfast Classic


Bonus: Dalgona Iced Coffee (Whipped Coffee on Ice)

Dalgona is pure texture: a fluffy coffee cream that sits on cold milk like a cloud, then slowly dissolves as you sip. It’s playful, dramatic, and surprisingly satisfying when you want an iced coffee that feels like an event.

Ingredients (1 drink)

  • Instant coffee
  • Sugar
  • Hot water
  • Cold milk (any milk you like)
  • Ice
Recipe card for Dalgona coffee showing whipped iced coffee foam spooned over iced milk in a tall glass, with “Whipped Iced Coffee” text overlay and MasalaMonk.com in the footer.
Dalgona coffee is whipped instant coffee piled over iced milk—fluffy, dramatic, and easy to stir into a creamy cold coffee as you sip.

Method

  1. In a bowl, combine instant coffee, sugar, and hot water.
  2. Whisk until thick, pale, and fluffy (a hand mixer makes this fast).
  3. Fill a glass with ice and cold milk.
  4. Spoon the whipped coffee on top, then swirl gently as you drink.

For a simple reference ratio and method, Allrecipes’ Dalgona Coffee (Whipped Coffee) is a clear baseline.

Also Read: How to Cook Tortellini (Fresh, Frozen, Dried) + Easy Dinner Ideas


Seasonal detours that still belong in the iced coffee universe

Seasonal cravings are real. Rather than building one-off recipes that only work for a few weeks each year, it’s easier to thread seasonal flavors into the styles you already make. That way, your “core” method stays steady while the mood changes.

Iced pumpkin latte (and the chai-leaning version)

Pumpkin spice tastes best when it’s anchored by real ingredients and balanced spice, not just sweetness. MasalaMonk’s Healthy Pumpkin Spice Latte (Hot or Iced) works beautifully over ice, especially when finished with cold foam. For a pumpkin chai mood, swap espresso for strong chai concentrate, pour over ice, then top with a soft cap of milk foam.

Recipe card for an iced pumpkin latte (pumpkin spice iced) showing a swirled iced latte topped with foam and cinnamon, with pumpkin purée and spices in the background.
Iced pumpkin latte brings cozy spice to cold coffee—stir pumpkin spice mix into coffee, add cold milk and ice, then finish with a cinnamon-dusted foam cap.

Iced peppermint mocha

Peppermint mocha is simply iced mocha with a clean mint lift. Start with the mocha method above, then add peppermint extract with a careful hand (peppermint is intense), or use a mint syrup for a gentler finish.

Recipe card for iced peppermint mocha showing an iced mocha topped with whipped cream and a candy cane stirrer, with chocolate and mint notes and MasalaMonk.com in the footer.
Iced peppermint mocha is a cool chocolate treat with a clean mint lift—build a mocha base over ice, then add just a tiny touch of peppermint so the coffee stays in charge.

Also Read: 10 Best Espresso Martini Recipe Variations (Bar-Tested)


A gentle at-home guide to bottled iced coffee

Bottled cold brew can be convenient; still, it often tastes flatter than fresh coffee. Even so, you can upgrade it quickly with a few smart moves—especially when you treat the bottle as a base rather than a finished drink.

  • Prevent dilution: add coffee ice cubes instead of plain ones.
  • Add texture: top with cold foam for a café feel.
  • Bring aroma forward: shake it with ice to aerate, then pour.
  • Steer flavor: add a small spoon of caramel or chocolate syrup, then stir well.

If you enjoy taste-test style reading, Serious Eats has covered store-bought cold brew comparisons in Cold Brew Coffee Taste Test.

Also Read: Béchamel Sauce for Lasagna: Classic, Vegan & Ricotta Sauce Recipe


Spiked iced coffee (for nights that want a little sparkle)

Spiked iced coffee works best when it tastes like coffee first and cocktail second. A strong base matters, so cold brew concentrate or a shaken espresso is usually the right starting point. From there, the drink becomes easy to shape: a little spirit, a little sweetness, a creamy finish if you want it.

Recipe card for spiked iced coffee showing cold brew over ice in a rocks glass with amber spirit being poured in, plus an orange twist garnish and MasalaMonk.com footer.
Spiked iced coffee is a simple coffee cocktail—pour cold coffee over a big ice cube, add a splash of bourbon or whiskey, and keep sweetness light so the coffee stays the star.

A simple blueprint

  • Start with cold brew concentrate or strong flash-brew iced coffee.
  • Add a small pour of whiskey, bourbon, vodka, or a cream liqueur.
  • Sweeten lightly if needed.
  • Finish with a small cap of cold foam or whipped cream.

If you like espresso-martini flavor ideas for inspiration, MasalaMonk’s spiced espresso martini recipe ideas offer fun combinations you can translate into iced builds.

Also Read: Whole Chicken in Crock Pot Recipe (Slow Cooker “Roast” Chicken with Veggies)


Closing thought: the best iced coffee is the one you’ll actually make again

It’s tempting to hunt for one ultimate method until you realize something simpler: the “best” iced coffee is the one that fits your day. On impatient mornings, that might be an instant frappé shaken into foam. On slow weekends, it might be flash-brew iced coffee that tastes like a fresh pour-over—only colder. During busy weeks, it’s a pitcher of cold brew that turns into a week of easy wins. When you want comfort, caramel cold brew with cold foam feels like a small reward. When you want dessert, it’s affogato with gelato. Either way, the glass in your hand should feel like a yes.

If you want to keep exploring techniques, it’s worth bookmarking MasalaMonk’s Art of Home Coffee Brewing alongside the method overview in Iced Coffee Simplified. Then, when curiosity strikes about why different cold methods taste different, the Specialty Coffee Association’s cold brew vs chilled hot brew piece is a fascinating deep dive.

Cold coffee add-ins and upgrades infographic showing coffee ice cubes, cold foam, condensed milk, caramel drizzle, mocha swirl, cinnamon and vanilla, peppermint hint, and an ice cream scoop, with MasalaMonk.com branding.
Save this cold coffee add-ins guide—eight quick upgrades (from cold foam and caramel drizzle to condensed milk and coffee ice cubes) that instantly change flavor and texture.

Also Read: How to Make Churros (Authentic + Easy Recipe)

FAQs

1) What’s the easiest way to make iced coffee at home?

If you want the simplest route, brew coffee slightly stronger than usual, cool it fully, then pour it over a glass packed with ice. After that, adjust with a splash of milk, a pinch of salt, or a little syrup. This “brew–chill–ice” approach is quick, reliable, and doesn’t require special equipment.

2) What’s the difference between iced coffee and cold brew coffee?

Iced coffee is usually hot-brewed coffee that’s cooled and served over ice. Cold brew, by contrast, is brewed cold over many hours. Because the extraction is different, cold brew often tastes smoother and less sharp, while iced coffee can taste brighter and more aromatic.

3) How do I make iced coffee without it tasting watery?

First, chill the coffee before it hits the ice. Next, use large ice cubes so they melt more slowly. Even better, freeze leftover coffee into coffee ice cubes so the drink stays bold as it chills.

4) How can I make “smooth cold brew” that doesn’t taste bitter?

Start with coarse grounds and clean, cold water. Then steep until the flavor is full but not harsh—most people land somewhere between 12 and 18 hours. Finally, strain thoroughly; muddy sediment is one of the quickest paths to bitterness.

5) What’s the best way to make cold brew coffee if I want it strong?

Make it as a concentrate: use more coffee relative to water, steep as usual, then dilute in the glass with water or milk. That way, you can dial strength precisely instead of guessing after the fact.

6) How do I make iced coffee concentrate for busy mornings?

Brew a strong batch of cold brew or strong chilled coffee, store it cold, and pour smaller amounts over ice as needed. Then dilute with milk, water, or a mix until it tastes balanced. In other words, concentrate gives you flexibility without sacrificing speed.

7) How do I make a good iced Americano at home?

Fill a glass with ice, add espresso, then top with cold water to taste. If you want extra lift, a twist of citrus peel can make the drink feel brighter without adding sweetness.

8) Can I make iced coffee with an espresso machine?

Absolutely. Pull a shot (or two), pour it over ice, then add cold milk for an iced latte—or cold water for an iced Americano. For a softer finish, shake the espresso with ice before pouring; it chills faster and adds a light foam.

9) How do I make a shaken espresso at home that tastes café-style?

Combine espresso, ice, and sweetener in a sealed jar or shaker, then shake vigorously for 10–20 seconds. Afterward, strain into a glass and top with milk (often oat milk) if you want it creamy. The shaking step matters because it creates that airy, foamy texture.

10) How do I make a homemade brown sugar oat milk shaken espresso?

Dissolve brown sugar in a small splash of hot water (or use a brown sugar syrup), add espresso and ice, then shake until frothy. Pour into a glass and top with oat milk. If you want a warmer profile, a pinch of cinnamon turns it into a brown-sugar-cinnamon style drink.

11) What’s the best milk for iced coffee?

It depends on the finish you want. Whole milk is rounded and classic, oat milk is naturally creamy and slightly sweet, almond milk stays light, and coconut milk feels richer with a subtle tropical note. If you’re aiming for a “dessert-adjacent” iced coffee without extra sugar, oat milk is usually the easiest win.

12) How do I make iced coffee with cold foam at home?

Froth very cold milk until it turns thick and spoonable, then float it on top of iced coffee. To keep the drink balanced, sweeten the foam lightly rather than over-sweetening the coffee underneath.

13) How do I make instant iced coffee that actually tastes good?

Mix instant coffee with a small splash of water and shake (or whisk) until foamy, then pour over ice and add milk or water. This method creates texture, which makes instant coffee feel less flat.

14) What’s the difference between a Greek frappé and a blended coffee frappé?

A Greek-style frappé uses instant coffee shaken into foam, so it’s airy and light. A blended frappé uses a blender with ice and brewed coffee (or concentrate), so it’s thicker and more slushy—closer to a frozen drink.

15) How do I make a frozen iced coffee recipe in a blender?

Blend strong chilled coffee, ice, and milk until thick. Then adjust: more ice for thickness, more coffee for boldness, and a little syrup if you want it sweeter. For a frozen caramel coffee, add caramel plus a tiny pinch of salt.

16) How do I make caramel cold brew and salted caramel cold brew?

Add caramel to the glass first, add ice, then pour cold brew over it and stir. For salted caramel, add the smallest pinch of salt—just enough to make the caramel taste deeper rather than simply sweeter.

17) How do I make a mocha cold brew or cold brew mocha recipe?

Stir chocolate syrup (or a cocoa-sugar mix) into a small splash of warm coffee or warm water first, then add cold brew and ice. This prevents gritty chocolate and keeps the drink smooth.

18) How do I make iced coffee with condensed milk?

Add condensed milk to the glass first, pour in hot strong coffee and stir until fully blended, then add ice. The condensed milk sweetens and thickens at the same time, which is why this style tastes so silky.

19) What’s the easiest way to make iced coffee “creamy” without tons of sugar?

Start with cold brew or a strong coffee base, add milk of choice, then sweeten lightly with syrup if needed. A small pinch of salt can also make the drink taste rounder without adding more sweetness.

20) How do I make a vanilla caramel iced coffee at home?

Use a cold coffee base, add a little vanilla syrup and caramel, then finish with milk or cold foam. If it starts tasting too dessert-like, dilute with a splash of cold water to bring the coffee flavor back forward.

21) How do I make a cinnamon iced coffee without it tasting dusty?

Mix cinnamon into syrup (or into a small amount of warm coffee) before adding it to the cold drink. That way, the spice blends smoothly instead of floating in gritty clumps.

22) How do I make an iced caramel brûlée-style coffee at home?

Combine caramel and vanilla first, then add coffee and milk. To mimic that toasted-sugar feeling, add a very small pinch of cinnamon and a tiny pinch of salt. The result tastes richer and more “baked” rather than simply sweet.

23) How do I make iced pumpkin coffee and iced pumpkin chai latte at home?

For iced pumpkin coffee, stir pumpkin spice flavoring (pumpkin + warm spices + sweetener) into the coffee base, then add milk and ice. For iced pumpkin chai, use a strong chai concentrate instead of espresso, then pour over ice and finish with milk or foam.

24) How do I make an iced peppermint mocha?

Make a mocha iced coffee first, then add peppermint in tiny amounts. Peppermint can take over quickly, so start with less than you think, taste, and increase slowly.

25) How do I make an affogato or a coffee drink with ice cream?

Scoop vanilla ice cream or gelato into a glass and pour hot espresso over it. For a thicker “coffee-and-ice-cream drink,” add a splash of cold brew too, then eat it as it melts.

26) What are some dairy-free coffee ice cream ideas for affogato-style drinks?

Use dairy-free vanilla ice cream, then pour espresso over it as usual. You can also add chocolate chips, cookie pieces, or cookie dough bites for a dessert feel while keeping it dairy-free.

27) What’s a simple “coffee gelato” style dessert at home?

Use gelato instead of ice cream, then add espresso or strong coffee over the top. Gelato melts more densely, so the final bite tastes extra coffee-forward.

28) How do I make “bulletproof” iced coffee?

Blend iced coffee with a fat source (often butter or a neutral oil) until it emulsifies and turns creamy. For an iced version, blend the mixture first, then add ice and blend briefly again so it stays smooth rather than separating.

29) Can I add collagen or protein powder to iced coffee?

Yes—however, it helps to dissolve powders in a small amount of room-temperature or slightly warm coffee first, then add the rest of the cold coffee and ice. That prevents clumps and keeps the drink smooth.

30) Does iced coffee help with weight loss?

Iced coffee can fit into a weight-loss plan if it stays low in added sugar and heavy add-ins. Black iced coffee or lightly sweetened cold brew is typically easier to keep lighter, while blended drinks and syrup-heavy builds add calories quickly.

31) How do I make decaf iced coffee that still tastes satisfying?

Brew decaf a little stronger than you would drink it hot, cool it fully, then serve over ice. Because chilling can mute flavor, stronger brewing and better ice make a bigger difference with decaf.

32) What’s the best ground coffee for iced coffee?

Medium roasts often taste balanced cold—sweet enough, not too sharp. Coarser grounds work best for cold brew, while medium grind suits drip or pour-over. If you notice bitterness, go slightly coarser or reduce brew time.
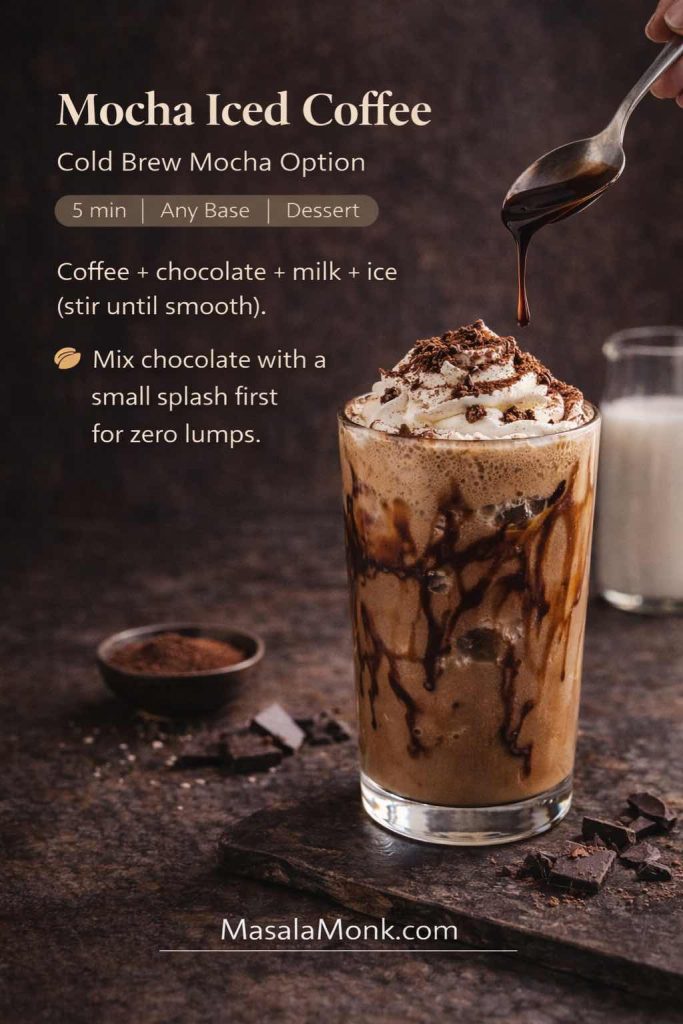
33) What’s the best coffee to make cold brew with?

A medium or medium-dark roast is usually forgiving and chocolatey in cold brew. If you prefer fruitier notes, try a lighter roast but keep the brew time in check so it doesn’t turn astringent.

34) How long does homemade cold coffee last in the fridge?

Plain brewed coffee or cold brew lasts longer than milk-mixed drinks. For best flavor, aim to finish plain coffee within a few days, and finish milk-based versions sooner. When in doubt, store coffee plain and add milk in the glass.

35) How do I upgrade pre-made iced coffee or canned iced coffee so it tastes better?

Pour it over coffee ice cubes, shake it briefly with ice to refresh the aroma, then add a small cap of cold foam. If it tastes flat, a tiny pinch of salt can make the coffee flavor pop.

36) How do I make iced Irish coffee or cold Irish coffee at home?

Start with a strong cold coffee base, add Irish cream (or a mix of cream + sweetener + a splash of spirit), then pour over ice. For a cleaner style, use whiskey plus lightly sweetened cream instead of a heavy liqueur pour.
37) What’s a simple boozy iced coffee recipe that doesn’t taste harsh?

Use cold brew concentrate, add a modest amount of spirit, then soften with milk, cream, or cold foam. A little sweetness helps, but too much can bury the coffee—so keep the balance coffee-forward.

38) How do I make iced coffee with whipped cream without making it overly sweet?

Use a strong coffee base and keep the drink lightly sweetened. Then add a small swirl of whipped cream as a finish rather than mixing it in heavily. That way, the drink stays coffee-like while still feeling indulgent.

39) What are the best cold coffee drinks for different moods?

For something clean, go iced Americano or flash-brew iced coffee. If you are looking for something smooth, choose cold brew. Want something creamy? Reach for an iced latte or shaken espresso. And for dessert, go mocha, caramel cold brew, blended coffee, or affogato.

40) How do I make iced coffee taste “best” without overcomplicating it?

Chill the coffee before serving, use better ice, sweeten with syrup instead of sugar, and keep the ratios simple. Once those basics are steady, every variation—caramel, mocha, cinnamon, condensed milk, or even ice cream—starts tasting like a deliberate recipe rather than a happy accident.