Posted on Leave a comment

Coconut Shake Recipe: Creamy Tender Coconut Milkshake

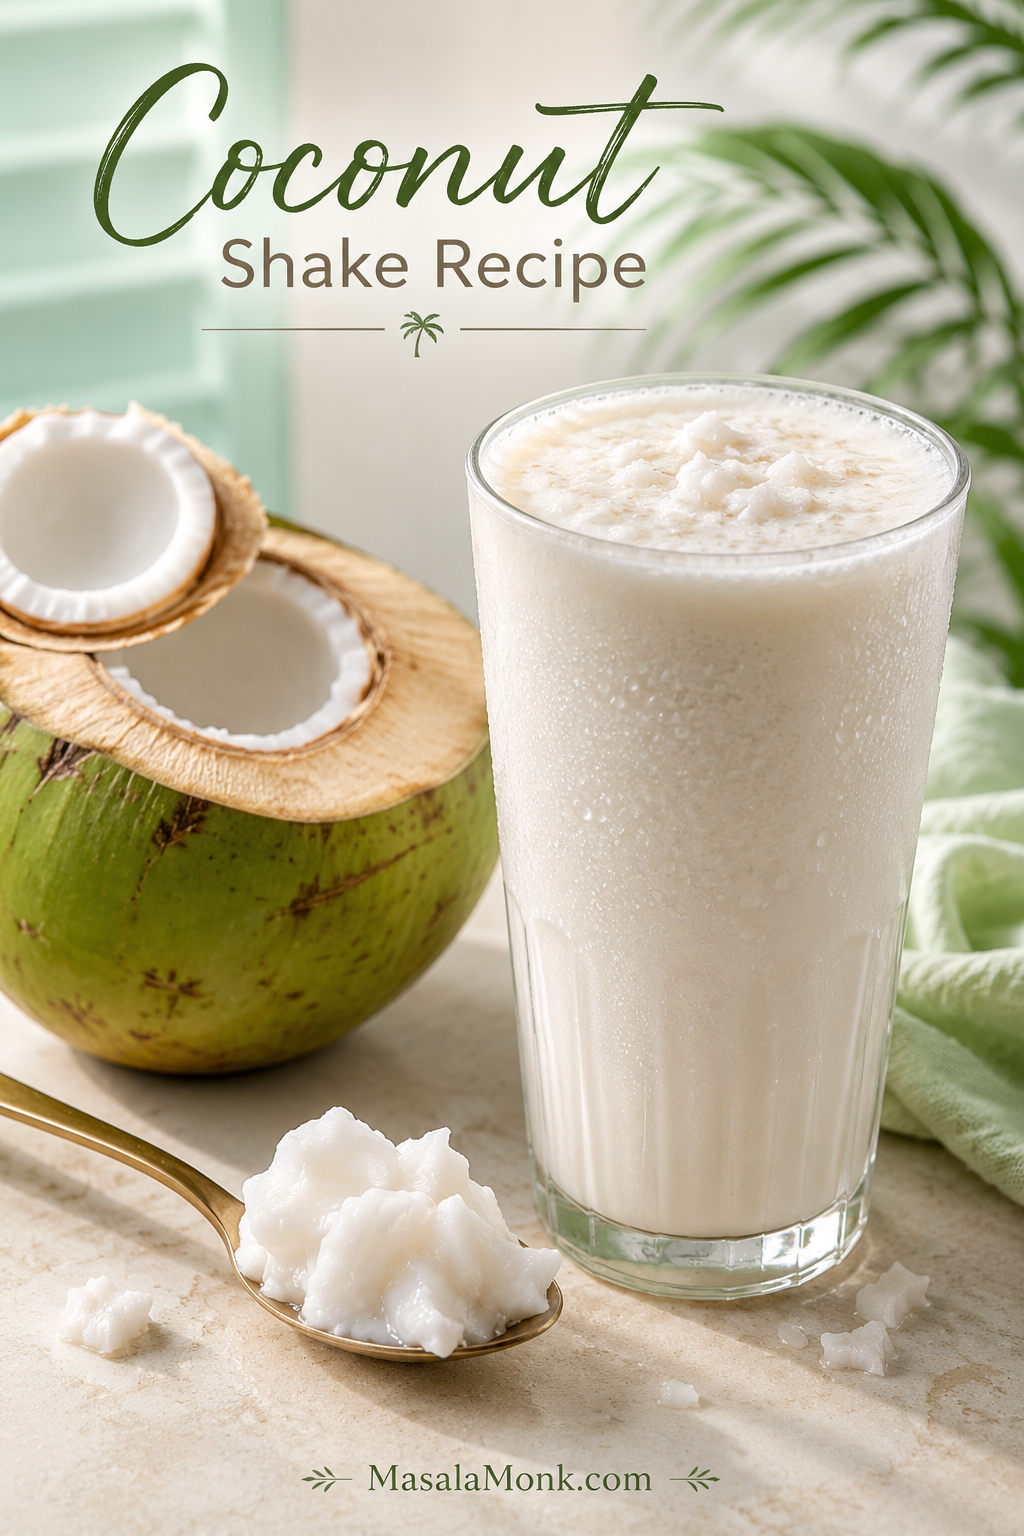
Tall chilled glass of coconut shake with tender coconut malai, coconut water, and an opened young coconut.

A good coconut shake recipe should give you a drink that tastes like opening a fresh tender coconut on a hot day, then turning that freshness into something colder, creamier, and more satisfying. The glass should taste clearly of coconut, feel lightly sweet, sip smoothly, and have enough thickness to feel like a real milkshake without becoming heavy or icy.

This coconut shake recipe starts with the best part of a tender coconut: the soft malai and the naturally sweet coconut water inside. From there, you can keep it light and fresh, make it creamy with chilled milk, or turn it into a dessert-style tender coconut milkshake with vanilla ice cream.

The problem with many coconut shakes is not the idea; it is the balance. Add too much ice and the drink turns watery. Pour in too much milk and the coconut disappears. Extra sugar can make the flavor taste flat instead of clean, while mature coconut can turn the whole glass grainy if it is not blended properly.

Start with the creamy tender coconut milkshake, then use the same base to make it lighter, dairy-free, no-ice-cream, or café-style without losing the fresh coconut taste. You will also find cup, ml, oz, and gram guidance for small 250 ml glasses, tall 16 oz café cups, and 500 ml bottles.

Quick Answer: Best Ratio for 2 Tall Glasses

Best ratio for 2 tall glasses: 1 cup tender coconut malai + ¾ cup coconut water + ¾ cup chilled milk + 1½–2 scoops vanilla ice cream.
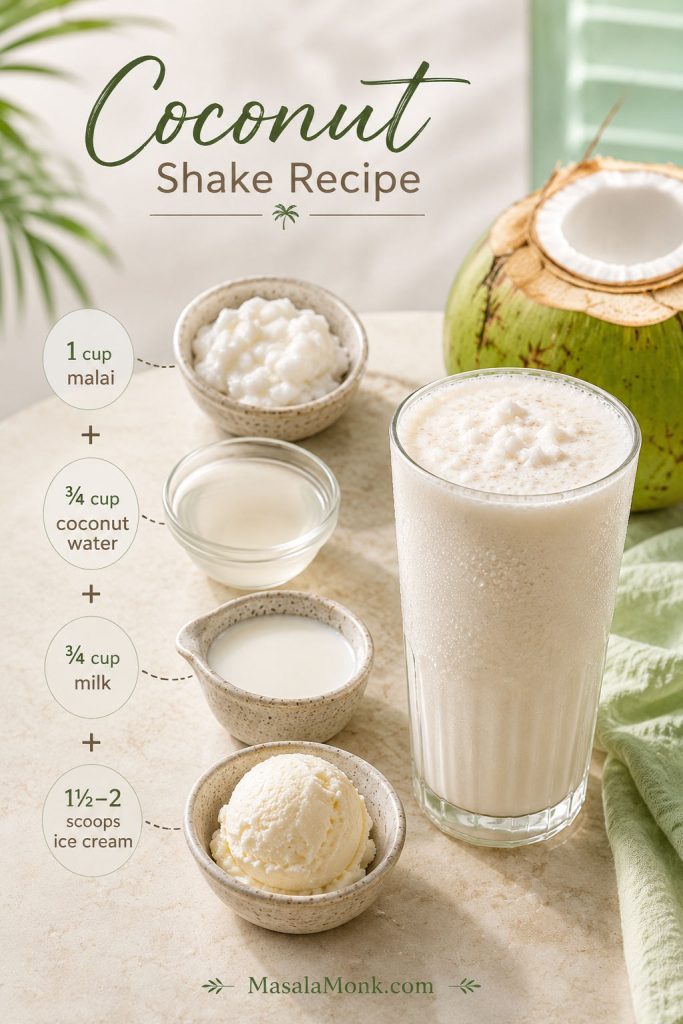
Recipe ratio board showing tender coconut malai, coconut water, chilled milk, vanilla ice cream, and a coconut shake glass.
Use this ratio for two tall glasses. Then adjust coconut water, milk, or ice cream to control texture.

For the creamiest result in this coconut shake recipe, blend the tender coconut flesh with coconut water first, then add chilled milk, ice cream, and sweetener only after tasting. For a lighter homemade glass, jump to the no-ice-cream version; for dairy-free, go to the vegan coconut shake.

This is also a handy recipe when you have already drunk the coconut water and have soft malai left behind. Instead of letting it sit in the fridge until it loses that fresh coconut aroma, blend it into a cold shake while it still tastes delicate and sweet.
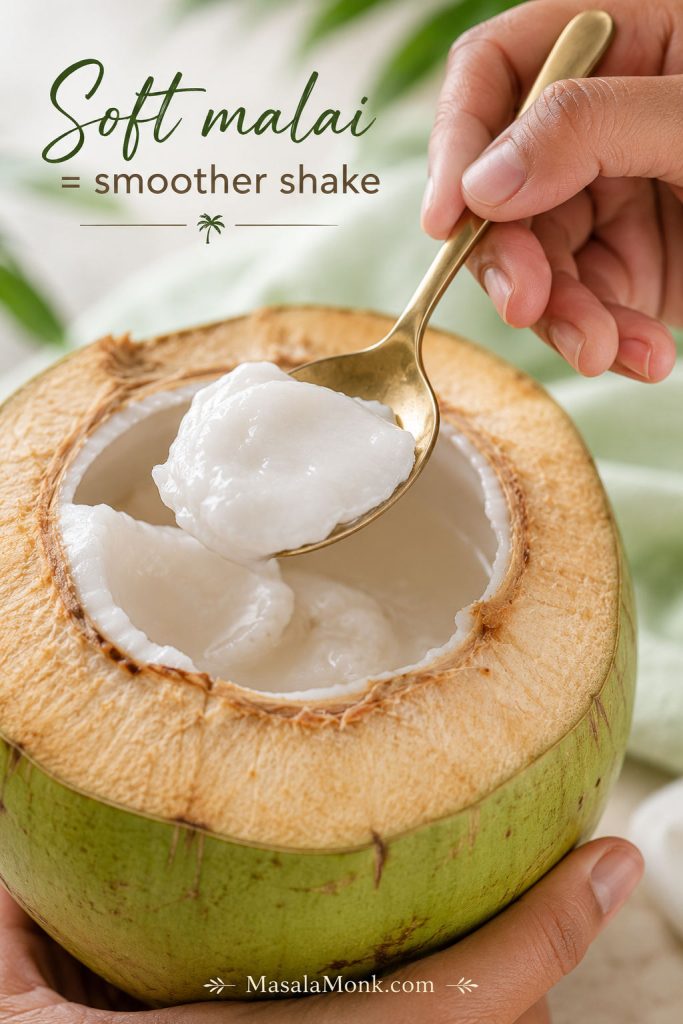
Spoon scooping soft tender coconut malai from a young coconut shell.
Soft, spoonable malai blends more smoothly than firm coconut, so it gives the shake a creamy texture without turning the drink grainy.

The best glass should feel cold from the first sip, but not icy and hollow. It should taste like tender coconut first, then creaminess.

Best coconutTender coconut malai/flesh
Main liquidCoconut water + chilled milk
Creamy versionAdd 1½–2 scoops vanilla ice cream
No-ice-cream versionUse frozen milk cubes or extra malai
Vegan versionUse chilled coconut milk
Prep time10 minutes
Cook time0 minutes
Yield2 tall glasses or 3 small glasses, about 600–750 ml / 20–25 fl oz

What Is Coconut Shake?

Coconut shake is a cold blended drink made with coconut flesh and a chilled liquid such as coconut water, milk, or coconut milk. In many Indian and South Asian kitchens, it usually means a tender coconut milkshake: soft coconut malai blended with tender coconut water, chilled milk, and sometimes ice cream.
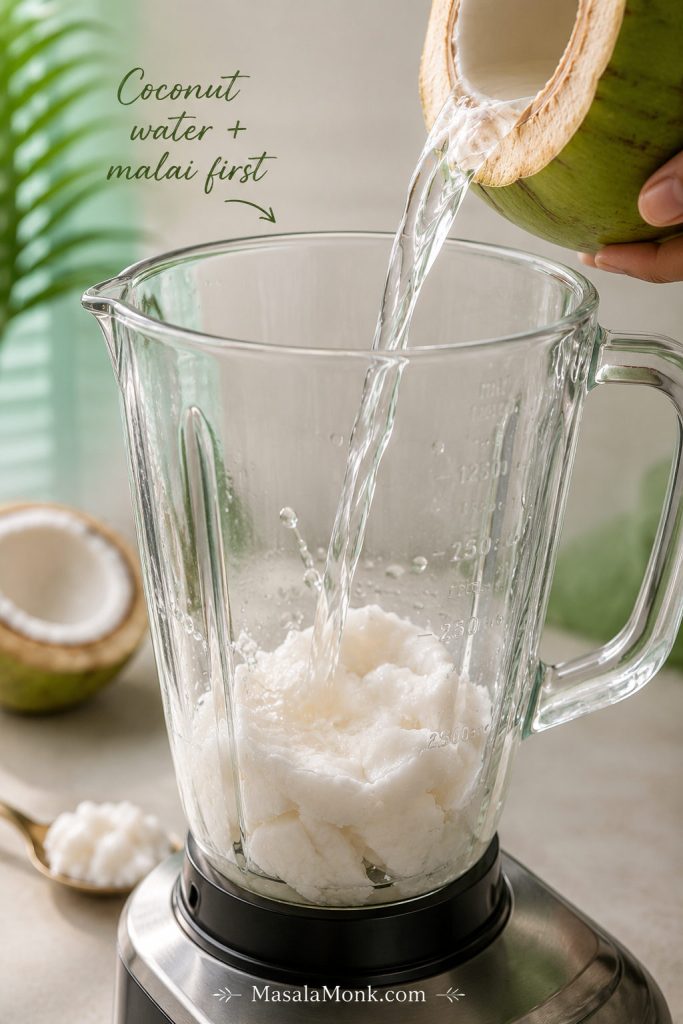
Coconut water being poured into a blender jar filled with tender coconut malai.
Blend coconut water with malai first. The tender coconut breaks down more easily before milk, ice cream, or coconut milk go in.

When coconut is the star, call it a shake. Once coconut milk becomes mostly the base for banana, berries, yogurt, protein powder, or greens, the drink starts behaving more like a smoothie. For fruitier coconut drinks, the flavor variations section covers banana, mango, pineapple, protein, and cardamom ideas.
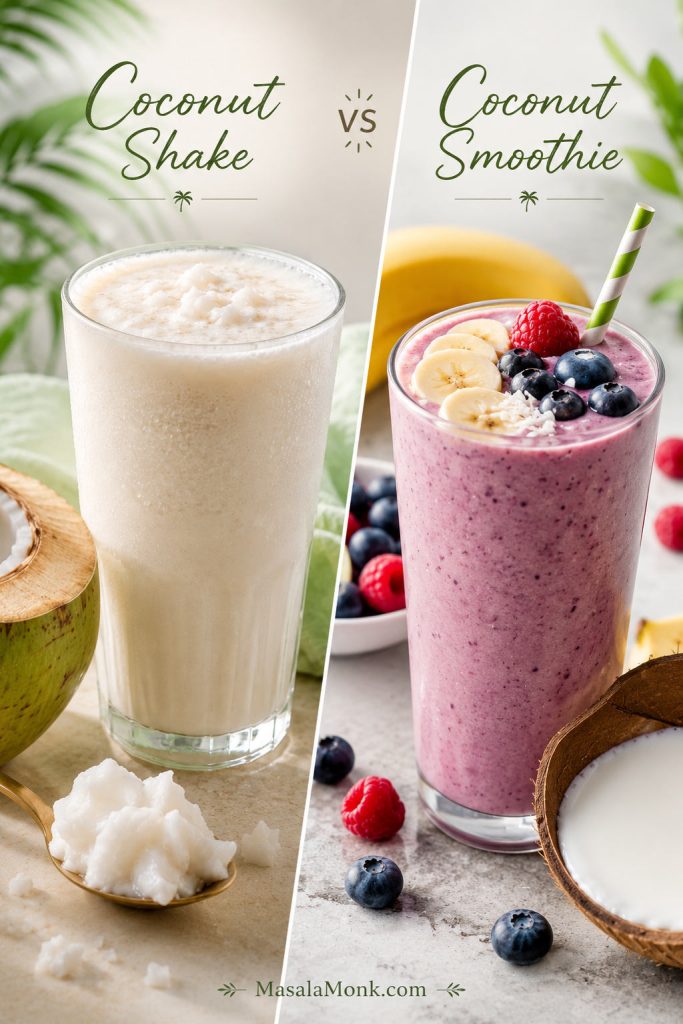
Comparison of a tender coconut shake and a fruit smoothie made with coconut milk.
A coconut shake keeps tender coconut as the main flavor, whereas a coconut smoothie usually uses coconut milk as a base for fruit, protein, or greens.

Coconut water and coconut milk are very different ingredients: coconut water is the clear liquid inside young coconuts, while coconut milk is made from coconut flesh and water. For more on using coconut water in drinks, read our guide to coconut water.

If plain coconut water feels too light and a full ice-cream milkshake feels too heavy, coconut shake sits right in the middle: fresh first, creamy second.

Why This Recipe Works

This is not just a matter of blending coconut and milk. Order, temperature, and balance all matter. The method below keeps coconut in front and creaminess in the background, so the shake tastes full without losing its fresh tender-coconut character.

  • Blending the malai with coconut water first helps the coconut break down before milk and ice cream make the jar heavier.
  • Chilled liquids reduce the need for ice, so the shake stays creamy instead of diluted.
  • Sweetening after tasting keeps the drink balanced when the coconut water is already naturally sweet.
  • Ice cream or frozen milk thickens without hollowing out the flavor, while plain ice mostly adds coldness and dilution. To get that thickness without ice cream, use the no-ice-cream formula instead of adding more plain ice.
  • A short final blend protects the chill, because overblending warms the shake and loosens the texture.

The core idea: Keep coconut water and malai in charge, then add only enough milk, coconut milk, ice cream, or frozen milk to match the glass you want.
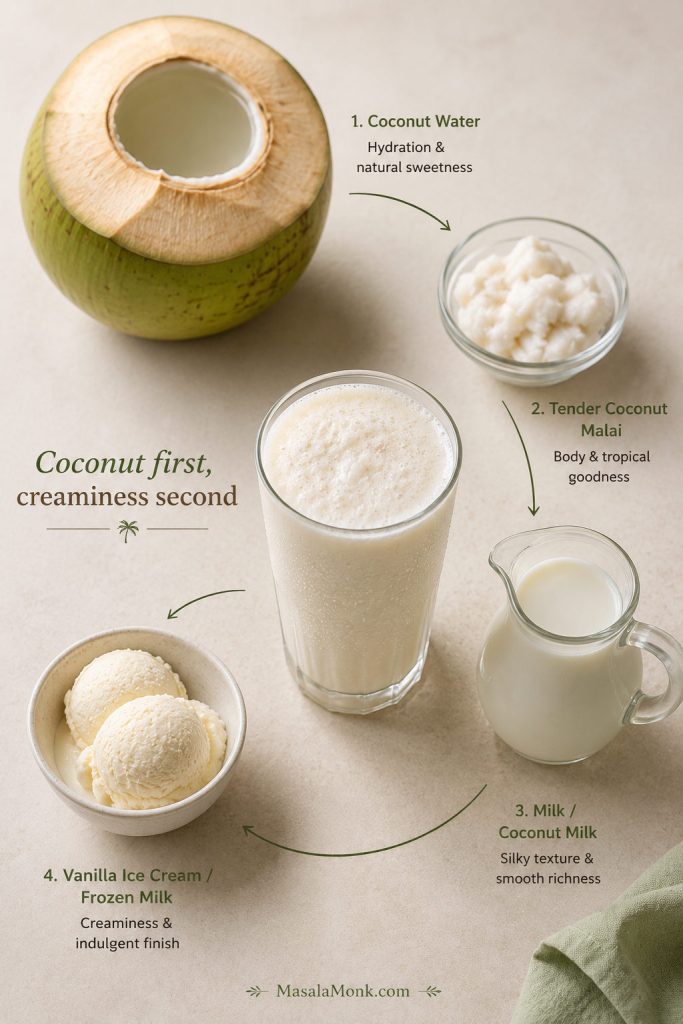
Circular ingredient guide showing coconut water, malai, milk, ice cream, and a finished coconut shake.
Keep coconut water and malai in charge first; then use milk, coconut milk, ice cream, or frozen milk to shape the final glass.

Ingredients That Matter

The ingredient list is short, but the balance matters. Start with fresh malai and coconut water, then decide how rich you want the glass to be. Milk, ice cream, coconut milk, frozen milk, and sweetener are all adjustable; the coconut should stay in charge.
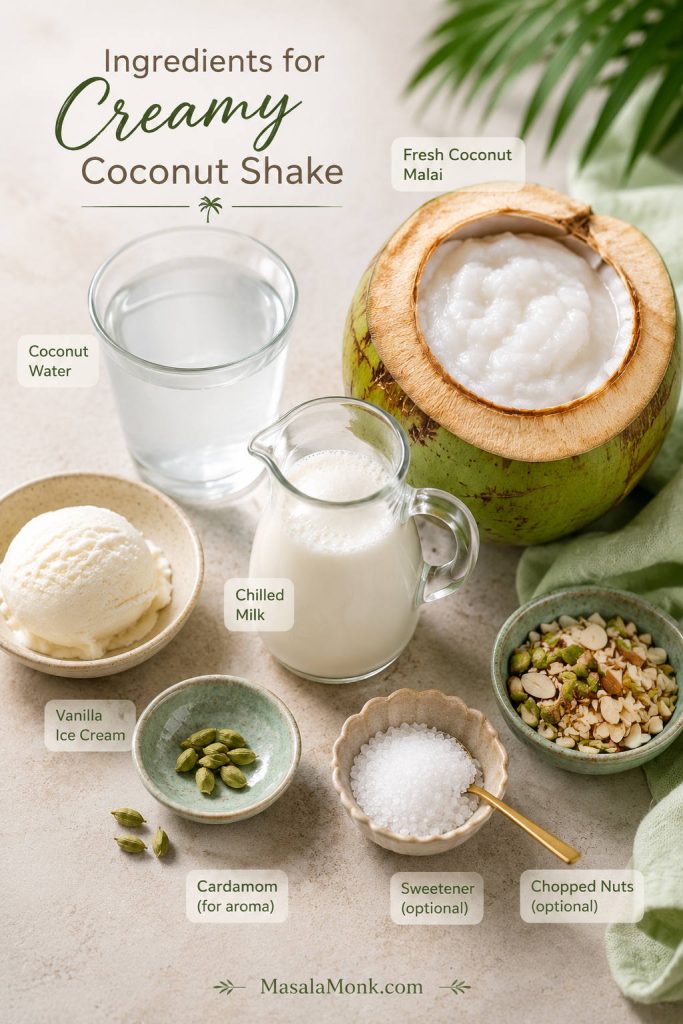
Ingredients for coconut shake including tender coconut malai, coconut water, milk, vanilla ice cream, cardamom, sweetener, and nuts.
Think of the ingredients as texture controls. Malai carries the coconut flavor, chilled liquid keeps it fresh, and ice cream or frozen milk decides thickness.
IngredientAmount for 2 tall glassesWhy it matters
Tender coconut flesh / malai1 cup / about 80–120 gCreates the soft, pulpy coconut base.
Tender coconut water¾–1 cup / 180–240 ml / 6–8 fl ozKeeps the shake light and unmistakably tender-coconut flavored.
Chilled milk¾–1 cup / 180–240 ml / 6–8 fl ozRounds the texture into milkshake territory.
Vanilla ice cream1½–2 scoops / about 90–130 gOptional, but gives dessert-style thickness and sweetness.
Sugar, honey, or dates1–2 tbsp, or to tasteUse only if the coconut water is not sweet enough.
Cardamom or vanilla⅛ tsp cardamom or ½ tsp vanillaAdds aroma without hiding the coconut.
Ice cubes2–4, only if neededChills the shake; use more only for a café-style icy version.
Chopped pistachios, almonds, or coconut bits1–2 tbsp, optionalAdds small bites that make the glass feel freshly blended.

Ingredient Measurement Notes

Measurement note: Tender coconut malai is not as predictable as flour, sugar, or mature grated coconut. Very soft malai can be watery and delicate, while firmer tender coconut flesh weighs more per cup. That is why this recipe gives a practical range of 80–120 g per cup instead of pretending every tender coconut measures the same.

Quick coconut note: Tender coconut is best here because the soft malai blends smoothly and the coconut water gives fresh aroma. If you are using mature coconut or only coconut milk, see which coconut works best so the drink does not turn grainy or too heavy.

Coconut Shake Recipe: Creamy Tender Coconut Milkshake

Classic texture cue: Make the creamy tender coconut milkshake first so you know the target balance before changing the recipe for no-ice-cream, vegan, or lighter versions.
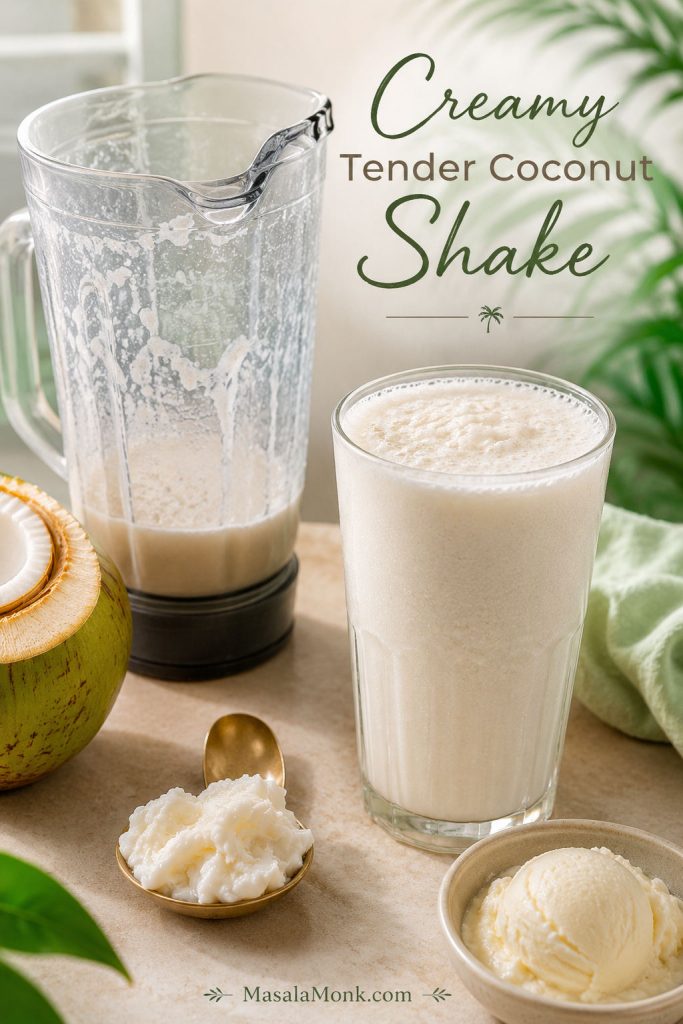
Creamy tender coconut shake in a glass beside a blender jar, malai, coconut water, and vanilla ice cream.
Make the classic tender coconut milkshake first so you know the balance: soft malai, cold coconut water, chilled milk, and optional vanilla ice cream.

Creamy Tender Coconut Shake

This is the coconut shake recipe to make first: soft malai, coconut water, chilled milk, and optional vanilla ice cream blended into a cold, drinkable tender coconut milkshake. It makes about 600–750 ml, depending on the amount of malai and ice cream, which is enough for 2 tall glasses or 3 smaller home glasses.

Prep Time10 minutes
Cook Time0 minutes
Total Time10 minutes
Yield2 tall glasses or 3 small glasses

Total quantity: About 600–750 ml / 20–25 fl oz, depending on the amount of malai and ice cream

Equipment: Blender, mixer-grinder, or high-speed blender; measuring cup; tablespoon; chilled serving glasses.

Ingredients

  • 1 cup tender coconut flesh/malai, about 80–120 g
  • ¾ cup tender coconut water, 180 ml / 6 fl oz, plus more if needed
  • ¾ cup chilled milk, 180 ml / 6 fl oz
  • 1½–2 scoops vanilla ice cream, about 90–130 g, optional but recommended for the creamy version
  • 1 tbsp sugar, honey, or date syrup, optional
  • ⅛ tsp cardamom powder or ½ tsp vanilla extract
  • 2–4 ice cubes, only if the ingredients are not already very cold; use more only for a café-style icy shake
  • 1 tbsp chopped pistachios, almonds, or tender coconut bits, optional

Method

  1. Chill the ingredients. Cold coconut water, cold milk, and chilled glasses give a better shake than a blender full of ice.
  2. Blend the coconut first. Add tender coconut flesh and coconut water to the blender. Blend for 20–30 seconds, until the malai breaks down and the mixture looks slightly cloudy and pulpy.
  3. Add the creamy ingredients. Add chilled milk, vanilla ice cream, cardamom or vanilla, and only a little sweetener.
  4. Blend briefly. Blend for 15–20 seconds, just until the shake looks creamy and moves as one smooth liquid in the blender. Do not overblend after adding ice cream.
  5. Taste and adjust. Add a little more sugar, honey, or date syrup only if the shake needs sweetness. If it is too thick, add coconut water 1–2 tbsp at a time.
  6. Add ice only if needed. Add a few ice cubes and pulse briefly if the shake is not cold enough. Use more ice only when you want a café-style icy shake.
  7. Pour and finish. Pour while the top is still cold and lightly frothy. Garnish with chopped nuts or a few tiny tender coconut bits if you like a little texture.

Recipe Notes

  • Best texture cue: The shake should pour easily but coat the glass lightly.
  • Sweetness cue: Taste before adding sugar because fresh coconut water can already be sweet.
  • No-ice-cream cue: Replace ice cream with ½ cup frozen milk cubes for a lighter but still creamy version.
  • Blending cue: After adding ice cream or frozen milk, blend only until creamy so the shake stays cold and thick.

Visual Method Cues

Chill cue: Cold ingredients protect the texture before the blender even starts.
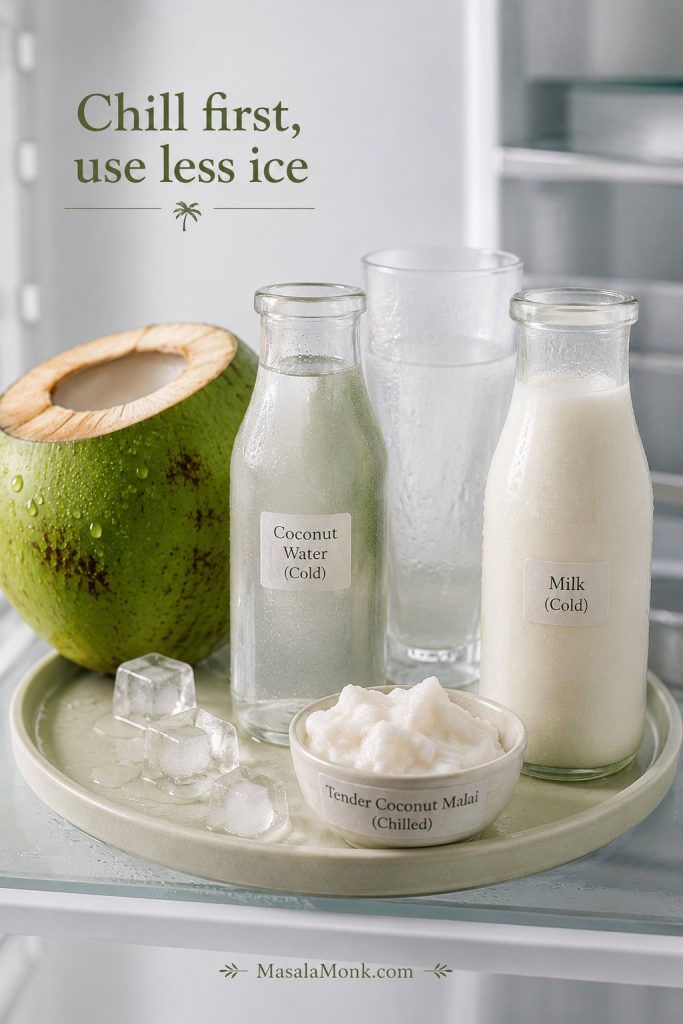
Chilled coconut water, milk, glasses, and tender coconut malai prepared for making coconut shake.
Cold ingredients do more than chill the drink: they protect the creamy texture, so you can use less plain ice and avoid a watery shake.

Blending cue: The coconut water and malai should move together before the heavier ingredients go in.
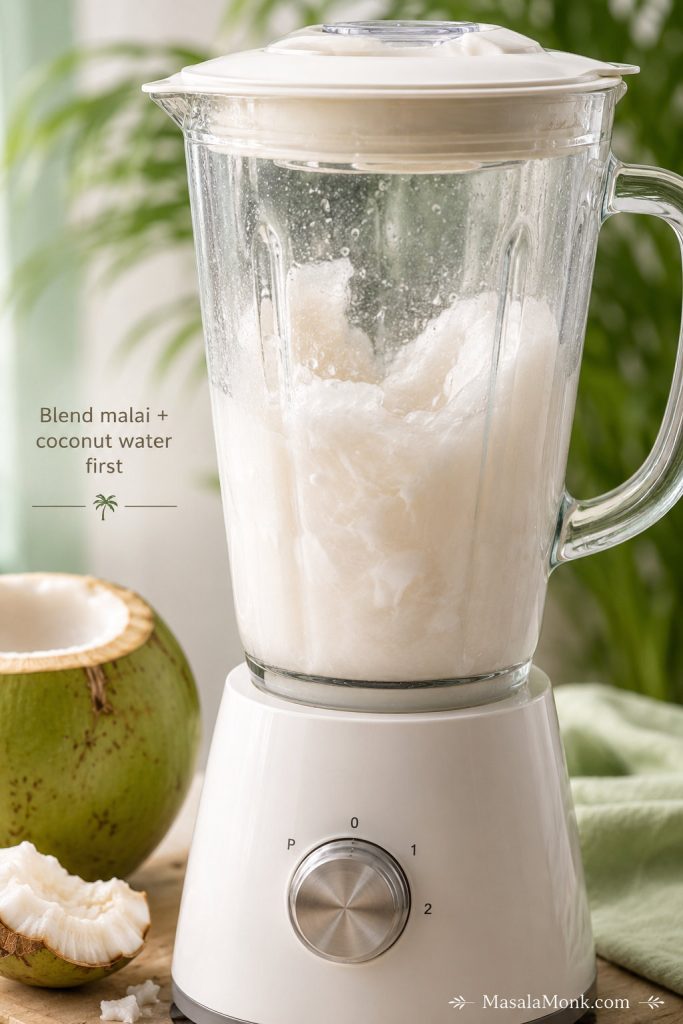
Blender jar with tender coconut malai and coconut water blended into a cloudy, pulpy base.
Once the malai and coconut water move smoothly together, the base is ready for milk, ice cream, or dairy-free coconut milk.

Creamy ingredient cue: Milk and ice cream work best after the coconut base is already loose and blended.
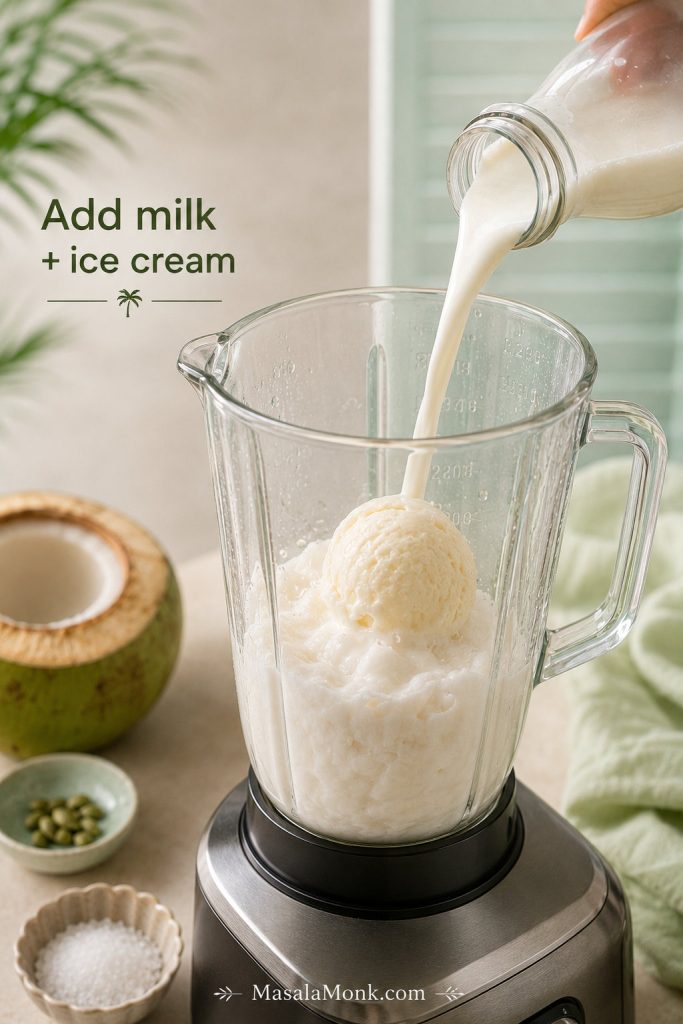
Chilled milk being poured into a blender with tender coconut base and a scoop of vanilla ice cream.
Add milk and ice cream after the coconut base is moving smoothly; otherwise, the blender can struggle before the malai breaks down.

Pouring cue: The best time to serve is when the shake still looks cold, smooth, and lightly frothy.
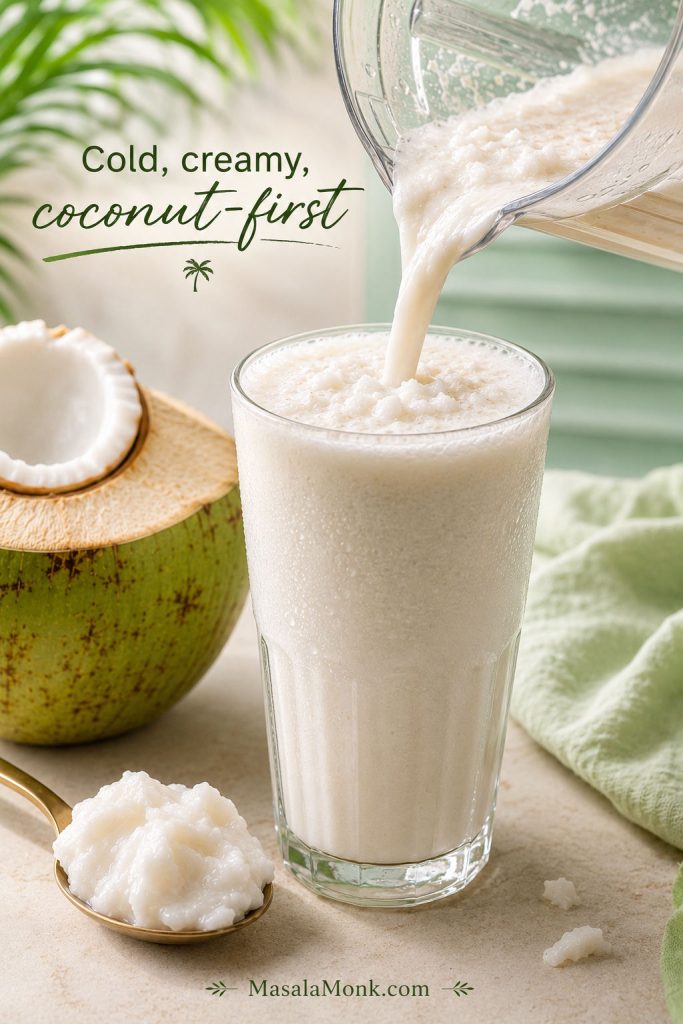
Creamy coconut shake being poured from a blender into a tall glass with light froth.
Pour as soon as the shake looks cold and lightly frothy. At this point, it should coat the glass without feeling heavy.

If your shake turns watery, grainy, too sweet, or too thick, use the troubleshooting table before changing the whole recipe.

You will know this coconut shake is right when it pours smoothly, smells like fresh coconut water, and tastes creamy without losing that tender coconut freshness.

Tender Coconut, Mature Coconut, or Coconut Milk: What Works Best?

Tender coconut gives the best flavor and texture, but the recipe can still work if you only have mature coconut, coconut milk, or coconut cream. The key is knowing what each option changes.
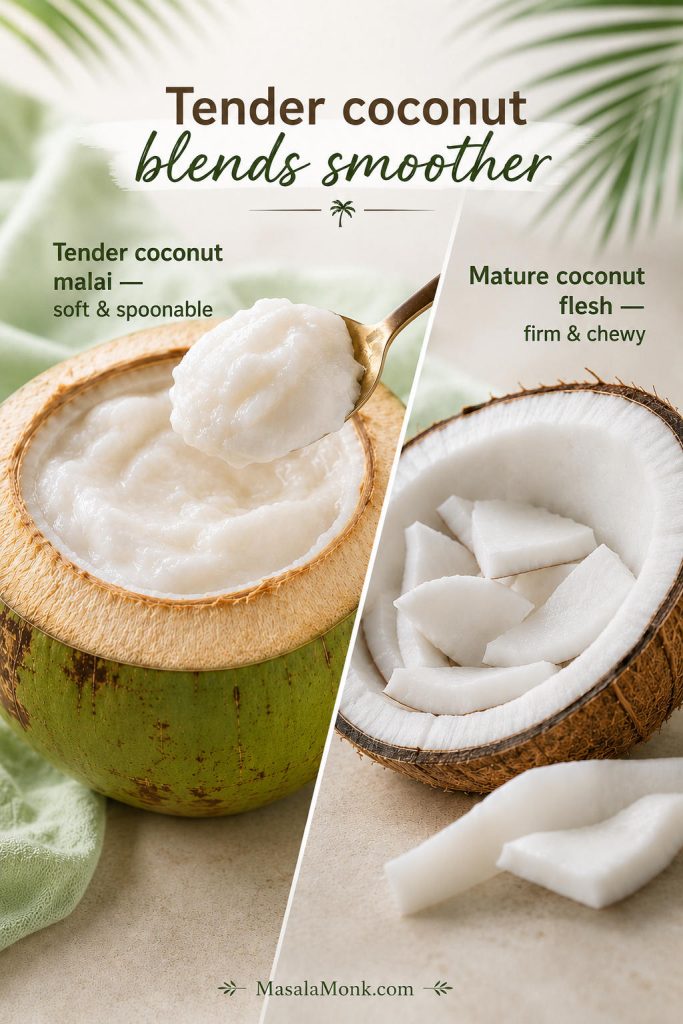
Comparison of soft tender coconut malai and firm mature coconut flesh for making coconut shake.
Tender coconut malai is soft and spoonable, while mature coconut flesh is firmer; therefore, mature coconut may need chopping, longer blending, or straining.

The best malai for this shake should be soft enough to scoop with a spoon. Very soft malai bends, tears, or slips easily, which helps it blend into a smoother drink. Chewy coconut can still work, but chop it small and expect a more pulpy finish.
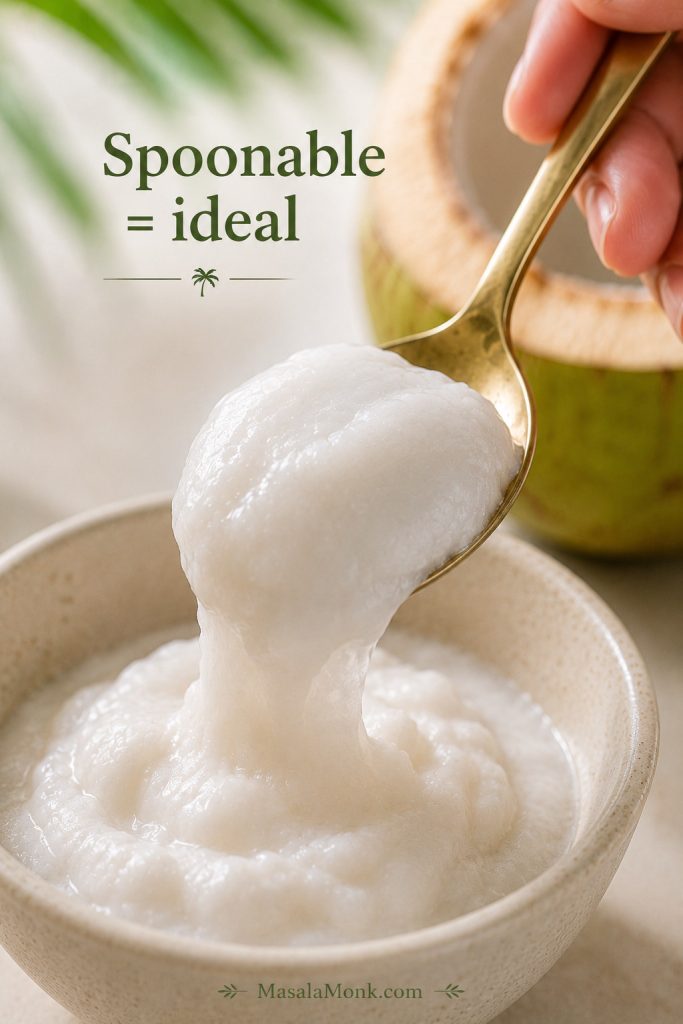
Spoon lifting soft tender coconut malai to show the ideal texture for blending.
A quick spoon test tells you what to expect: soft malai blends smoothly, while firmer coconut needs smaller pieces, longer blending, or straining.

For an outside ingredient comparison, this coconut milk vs coconut water guide explains why coconut water keeps drinks light while coconut milk adds body.

  • Tender coconut / young coconut is the best choice because the malai blends soft and the water adds fresh coconut aroma.
  • Mature fresh coconut is usable in a pinch, but it is firmer and more likely to turn grainy. Grate it finely, blend it longer with coconut water, and strain if needed.
  • Coconut milk is the easiest dairy-free route, but it should support the tender coconut rather than replace it completely when fresh malai is available.
  • Coconut cream makes the shake very thick and rich, so a little goes a long way. Use it when you want a dessert-style vegan shake.

What Should Coconut Shake Taste Like?

A well-made coconut shake should taste cold before it tastes sweet, and like coconut before it tastes like milk. It should sip smoothly through a straw, with just enough thickness to coat the glass lightly. A few tiny malai bits are welcome; grit is not.
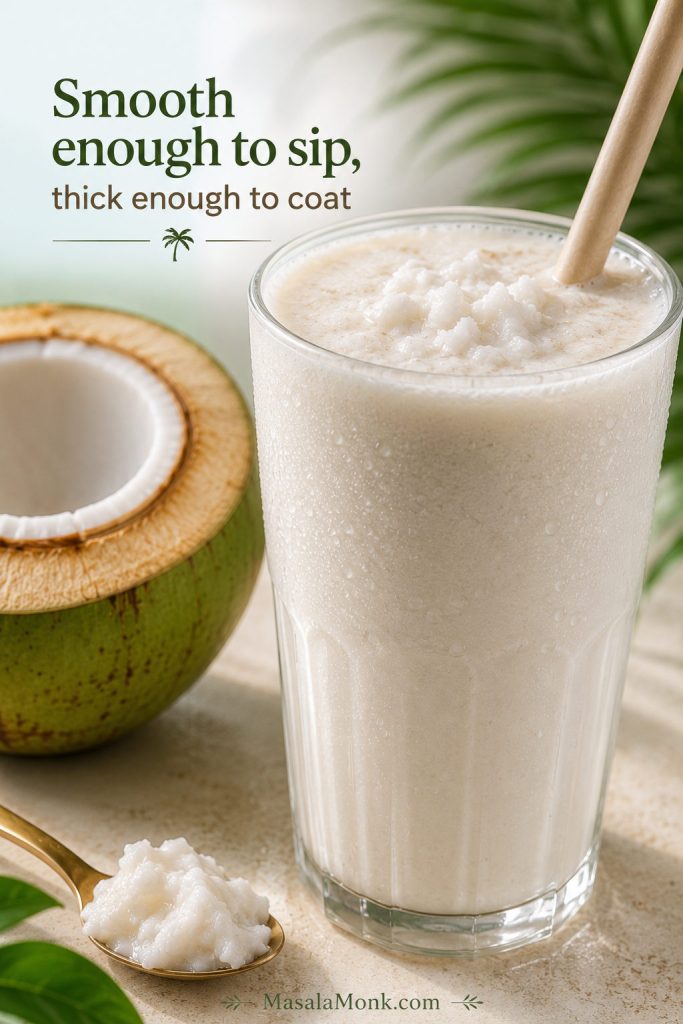
Close-up of coconut shake with a straw, lightly coated glass wall, froth, and tiny malai bits.
The right texture should sip through a straw and lightly coat the glass; if it feels gritty, heavy, or hollow, the balance needs adjusting.

A glass that tastes like melted vanilla ice cream with coconut hiding in the background needs less dairy next time. When the first sip tastes mostly like milk, the coconut ratio is too low. A cold but empty-tasting shake usually has too much ice. For flat flavor, use fresher coconut water, a pinch of cardamom or vanilla, and just a tiny pinch of salt.

Choose Your Style Before You Blend

The easiest way to avoid a disappointing shake is to choose the style before you blend. A café-style shake, a no-ice-cream homemade shake, and a fresh coconut-water shake use similar ingredients, but they should not taste the same.
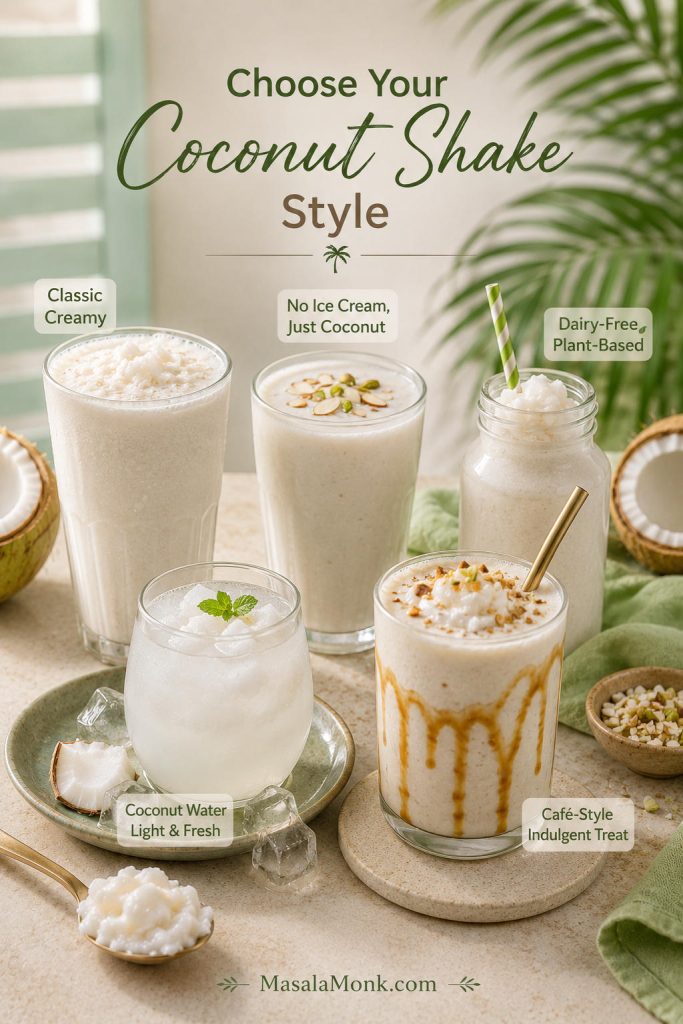
Five coconut shake styles arranged together: classic creamy, no ice cream, dairy-free, coconut water, and café-style.
Choose the style before you blend: café-style needs cold pulpy richness, while coconut water and no-ice-cream versions need a lighter balance.
You want…Make this versionUse this base
A creamy café-style shakeMain recipe with ice creamTender coconut + coconut water + milk + ice cream
A homemade shake without ice creamFrozen milk versionTender coconut + coconut water + milk + frozen milk cubes
A dairy-free coconut shakeVegan coconut shakeTender coconut + coconut water + coconut milk
No milk and no added sugarFresh coconut water shakeCoconut water + malai + optional dates
A lighter summer drinkCoconut water shakeCoconut water + tender coconut + optional yoghurt or coconut milk
A 500 ml bottleScaled bottle versionUse the measurement table and leave headspace
A thicker smoothie-like drinkBanana or extra-malai variationAdd frozen banana or more tender coconut flesh

Without Ice Cream

No ice cream does not mean thin or boring. The trick is to replace the cold thickness ice cream gives, not just its sweetness. Frozen milk cubes, extra malai, soaked cashews, coconut cream, or frozen banana can all make the shake feel full instead of thin.
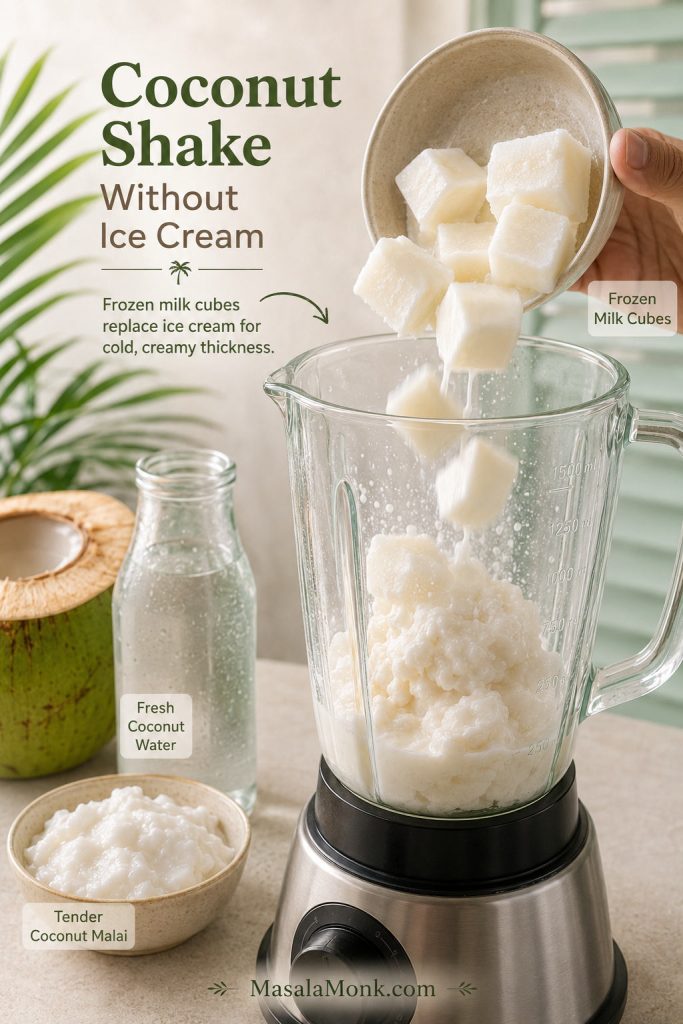
Frozen milk cubes being added to a blender with tender coconut malai and coconut water for a no-ice-cream coconut shake.
Frozen milk cubes replace the cold thickness that ice cream gives, so the shake stays creamy without turning into a dessert-style milkshake.

This version is for the days when you want homemade creaminess, not dessert. It feels lighter than the ice-cream shake but still has enough richness to taste deliberate.

No-Ice-Cream Formula

  • 1 cup tender coconut flesh/malai, about 80–120 g
  • ¾ cup tender coconut water, 180 ml
  • ½ cup chilled milk, 120 ml
  • ½ cup frozen milk cubes
  • 1–2 tbsp sugar, honey, date syrup, or 1–2 soft dates
  • Pinch of cardamom or ½ tsp vanilla

Blend the tender coconut and coconut water first. Add chilled milk, frozen milk cubes, sweetener, and cardamom. Blend briefly until creamy and serve immediately.

Texture cue: When you skip ice cream, the thickener matters more than extra ice because it decides whether the drink feels creamy, rich, or smoothie-like.
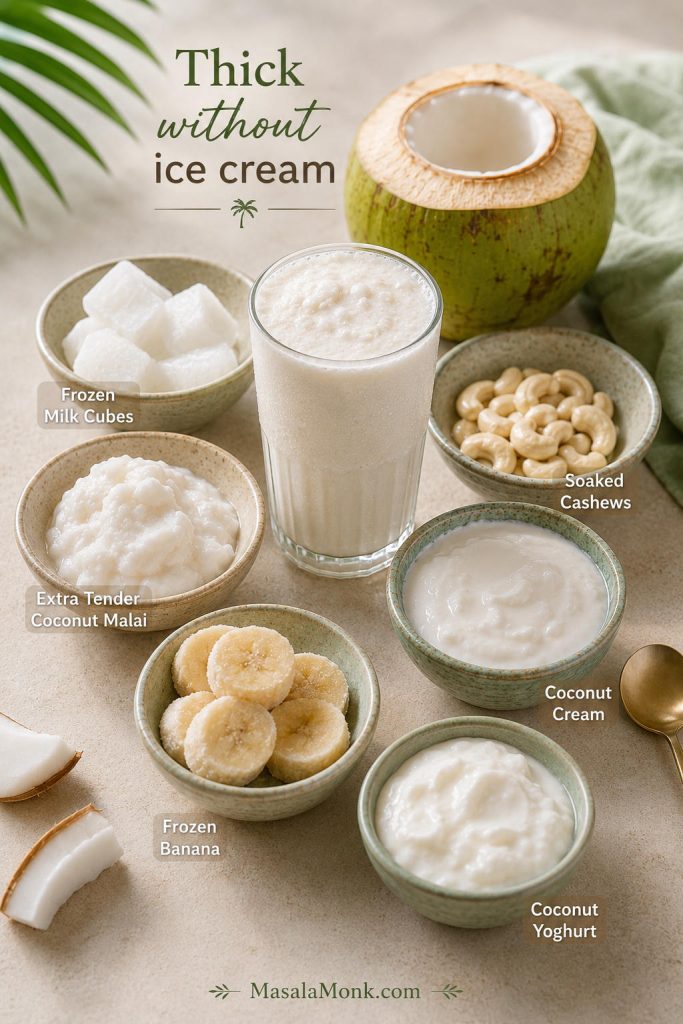
Thickener board with frozen milk cubes, malai, soaked cashews, coconut cream, frozen banana, coconut yoghurt, and coconut shake.
Without ice cream, choose the thickener by texture: frozen milk keeps it classic, cashews add richness, and banana makes it more smoothie-like.
ThickenerBest forAmount for 2 tall glasses
Frozen milk cubesClassic no-ice-cream shake½ cup
Extra tender coconut malaiMore coconut flavor¼ cup extra
Soaked cashewsRich Indian café texture1–2 tbsp
Coconut creamThick vegan shake2–4 tbsp
Frozen bananaDairy-free body½ banana
Coconut yoghurtLight tangy version2–3 tbsp

For a lighter drink, use fewer frozen milk cubes and more coconut water. To make it richer, add soaked cashews or a spoon of cream. Cold ingredients matter more here than extra ice, because frozen milk gives body while plain ice mostly dilutes.

Without Milk or Added Sugar

This is the cleanest version, but also the least forgiving. Because there is no milk, ice cream, or sugar to cover anything, the coconut itself has to taste good. When the coconut water is sweet and the malai is soft, the result is light, cold, and beautifully fresh.
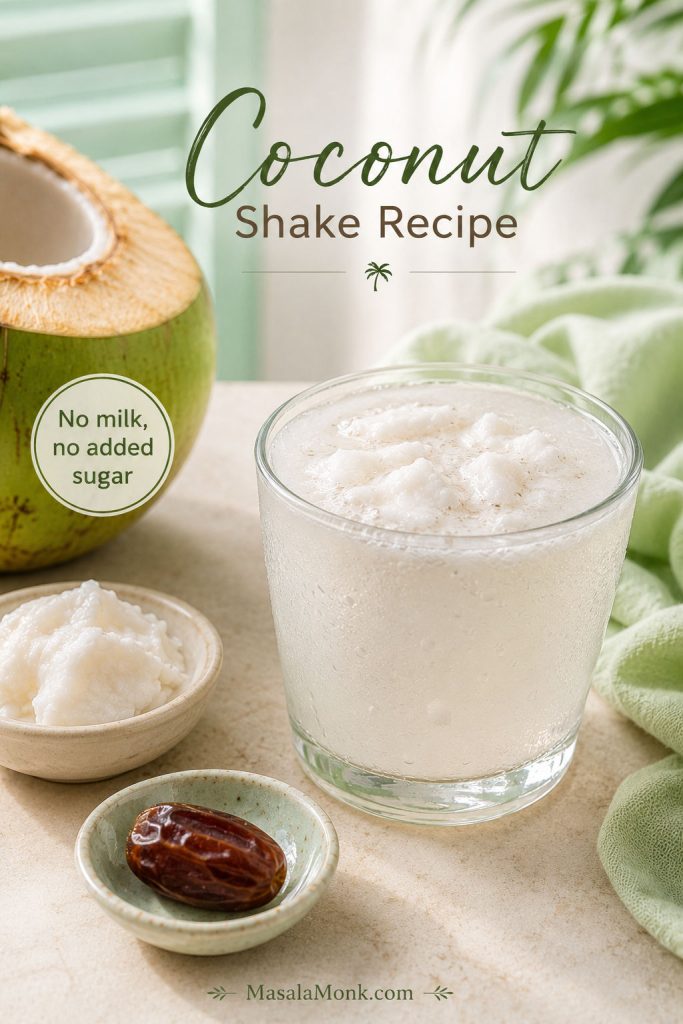
Light coconut shake made with coconut water, tender coconut malai, and an optional date, without milk or sugar.
This no-milk, no-added-sugar coconut shake works best when the coconut water is naturally sweet and the malai is soft enough to blend.
  • 1 cup tender coconut water, 240 ml / 8 fl oz
  • ¾–1 cup tender coconut flesh, about 80–120 g
  • 4–5 ice cubes, or use chilled coconut water instead
  • 1–2 soft dates, optional
  • Pinch of cardamom, optional

Blend the coconut water and tender coconut flesh until smooth. Add ice only if needed and pulse briefly. If the shake tastes flat, add one soft date or a tiny pinch of salt. Do not add sugar automatically; taste the coconut water first.

This version depends on the coconut more than any other. If the coconut water is sweet and the malai is soft, it tastes fresh and delicate. If the coconut is bland, add one date, a spoon of coconut cream, or a few frozen coconut-water cubes to give it more body without turning it into the rich ice-cream version.

Dairy-Free Version with Coconut Milk

For a vegan coconut shake, replace dairy milk with chilled coconut milk while keeping tender coconut at the center. Carton coconut milk keeps the drink lighter, canned coconut milk gives it more milkshake body, and coconut cream is the richest option, so treat it like a thickener rather than the main liquid.
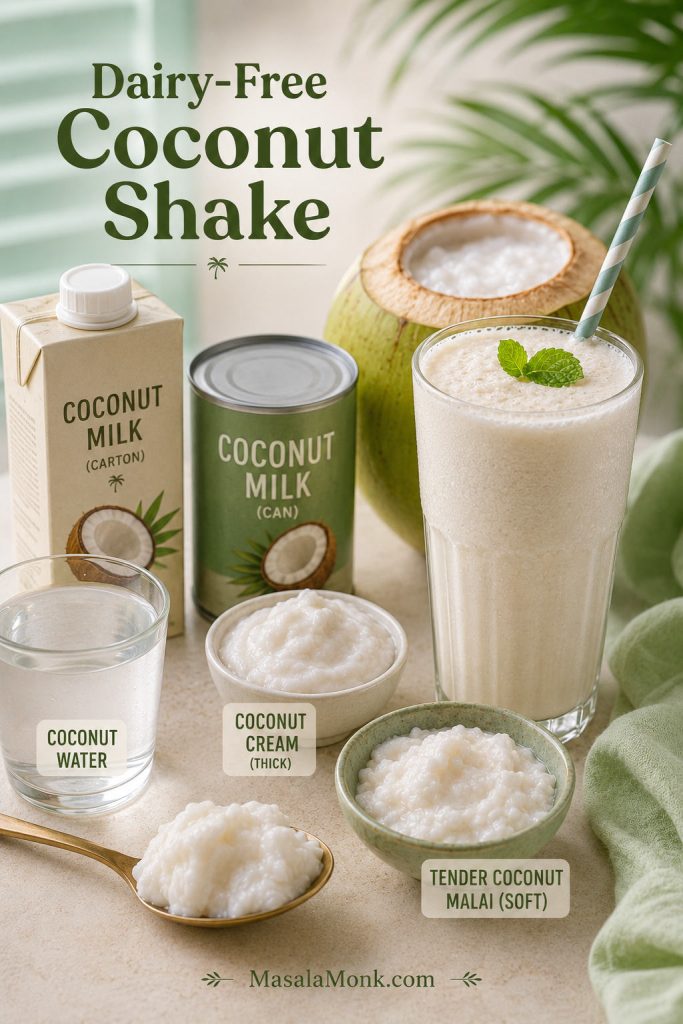
Dairy-free coconut shake with coconut milk options, coconut cream, tender coconut malai, and coconut water.
Carton coconut milk keeps a vegan coconut shake light, canned coconut milk adds body, and coconut cream makes it richer fast.
  • 1 cup tender coconut flesh/malai
  • ¾ cup tender coconut water
  • ¾ cup chilled coconut milk
  • 1–2 dates or 1 tbsp maple syrup, optional
  • ½ frozen banana or 2 tbsp coconut cream, optional for thickness
  • Pinch of cardamom or ½ tsp vanilla

Start with a smaller amount if you use canned coconut milk, then thin the shake with coconut water. Carton coconut milk may need frozen banana, extra malai, or a little coconut cream to get a thicker result. Keep tasting as you adjust; the drink should still feel fresh and coconut-forward, not like a heavy smoothie that has lost the tender coconut flavor.

The Lighter Coconut Water Version

A coconut water shake is lighter than a coconut milkshake, but it is not the lesser version. Make it when the coconut water is sweet, the malai is soft, and you want the drink to stay refreshing instead of rich.
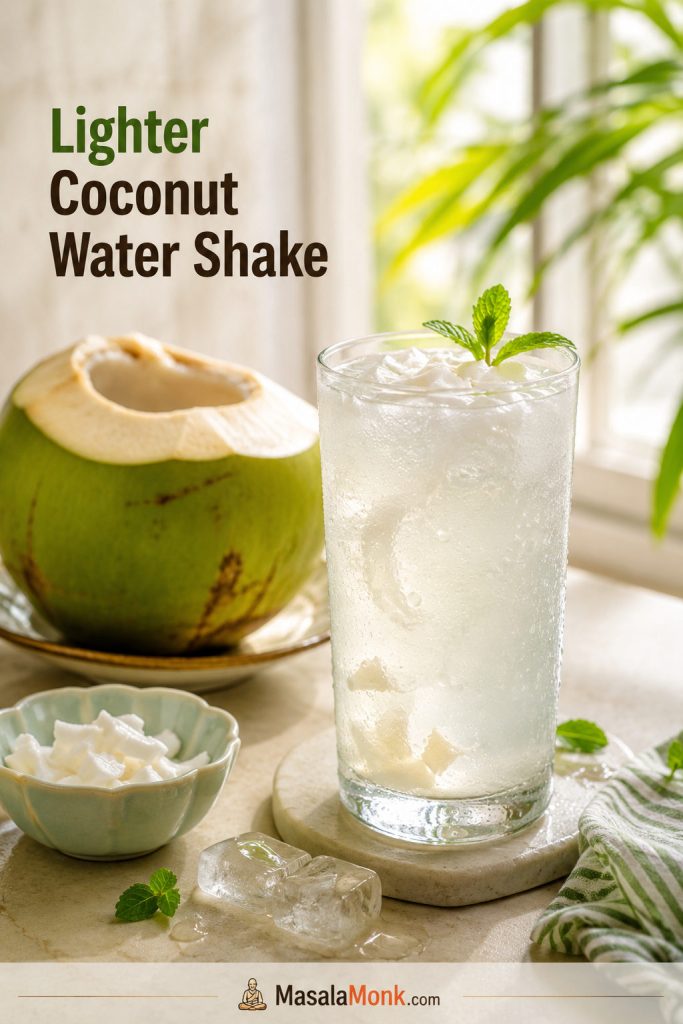
Lighter coconut water shake in a tall chilled glass with tender coconut malai and an opened young coconut.
The lighter coconut water version is not a compromise; instead, it lets sweet coconut water and soft malai taste clean, cold, and easy to finish.
  • 1 cup coconut water, 240 ml / 8 fl oz
  • ½–¾ cup tender coconut flesh
  • 1 tbsp cream, milk, coconut milk, or yoghurt, optional for body
  • 1 tsp sugar, honey, or date syrup, optional
  • Ice only if needed

Blend the coconut flesh with coconut water until smooth. Add the optional creamy ingredient only if you want more body. This lighter version also works well with mango, pineapple, berries, or banana when you want a fruitier coconut-water drink. For more ideas in that direction, see our coconut water smoothie and health drink ideas.

Once you have chosen the version you want, the next question is usually quantity. This coconut shake recipe is flexible because a small glass needs a different balance from a 500 ml bottle, especially when ice cream or frozen milk is involved.

Measurements: 250 ml, 16 oz, and 500 ml

Most coconut shake recipes give only “1 glass” or “2 servings,” but glass size changes everything. A small Indian glass, a tall café cup, and a 500 ml bottle do not need the same amount of coconut water, milk, or thickener. The numbers below are approximate blends for the final serving size.
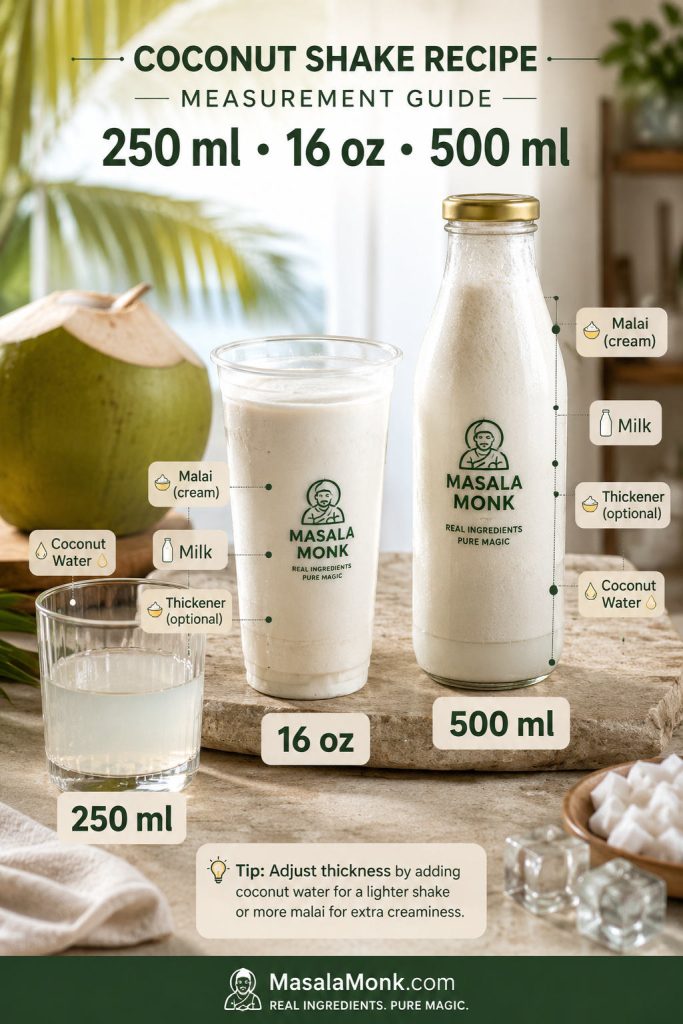
Measurement guide showing coconut shake portions for a 250 ml glass, 16 oz cup, and 500 ml bottle.
A 250 ml glass, 16 oz cup, and 500 ml bottle need different ratios. Malai, milk, ice cream, foam, and headspace all change the final pour.

If you are using ice cream, start with the lower end of the coconut water and milk range so the glass does not overflow.

Target servingCoconut waterTender coconut fleshMilk or coconut milkIce cream or thickener
250 ml glass70–90 ml35–50 g60–80 ml½ scoop ice cream or 2–3 tbsp frozen milk
16 oz / 475 ml cup140–180 ml70–90 g120–140 ml1–1½ scoops or ⅓–½ cup frozen milk
500 ml bottle160–200 ml80–100 g120–150 ml1½ scoops or ½ cup frozen milk
2 tall glasses / 600–750 ml180–240 ml80–120 g180–240 ml1½–2 scoops or ½ cup frozen milk

How to Adjust the Ratios

For a 500 ml bottle: Leave a little headspace if using ice cream or frozen milk. The shake can foam slightly after blending and may thicken as it sits. Shake the bottle before drinking.

Do not worry if your coconut does not match the table perfectly. Tender coconuts are not standardized ingredients; some give lots of water, some give thick malai, and some barely give enough flesh for one small glass. Blended drinks do not measure like water either: malai, ice cream, frozen milk, and foam can all change the final volume.

Treat these as starting ratios, then adjust by texture: malai or frozen milk for thickness, coconut water for loosening.
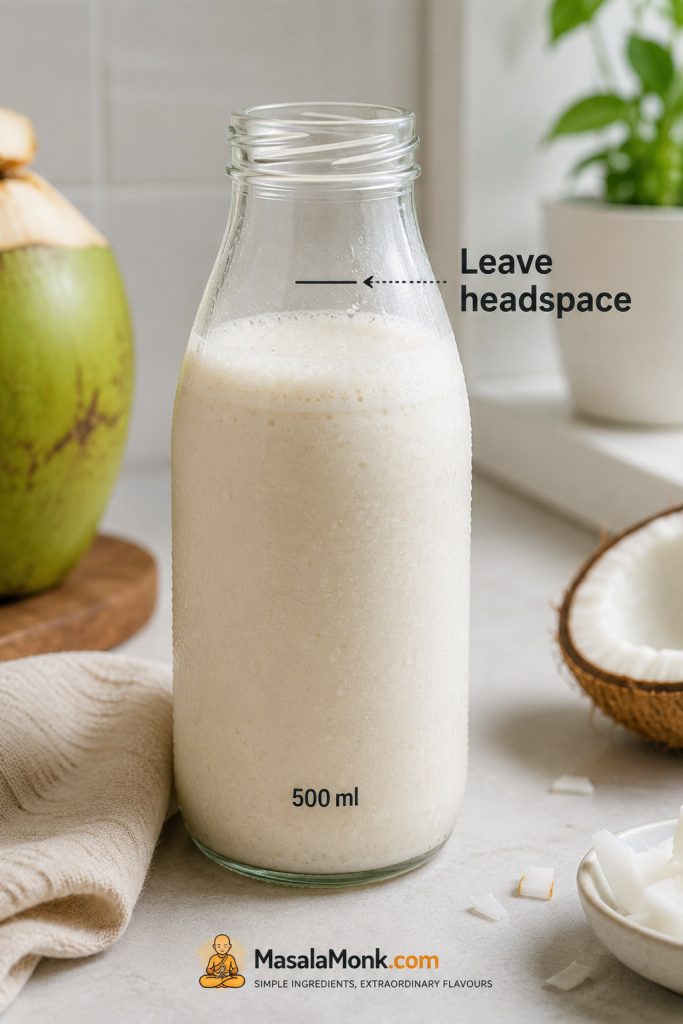
Clear 500 ml bottle of coconut shake filled below the shoulder with visible headspace and condensation.
For a 500 ml coconut shake bottle, stop below the shoulder so there is room for foam, shaking, and slight thickening as it sits.

Once you know your serving size, the next thing that affects texture is the blender itself. A powerful blender can make even firmer coconut smoother, while a small portable blender needs softer malai, smaller pieces, and more liquid to move properly. After scaling, check the texture ladder so the larger bottle does not turn watery or too heavy.

Equipment: Blender, Mixer-Grinder, or Portable Blender

You do not need special equipment, but the blender does affect texture. A small blender can still make a good coconut shake, but it needs a little kindness: smaller malai pieces, liquid first, and no overpacking.
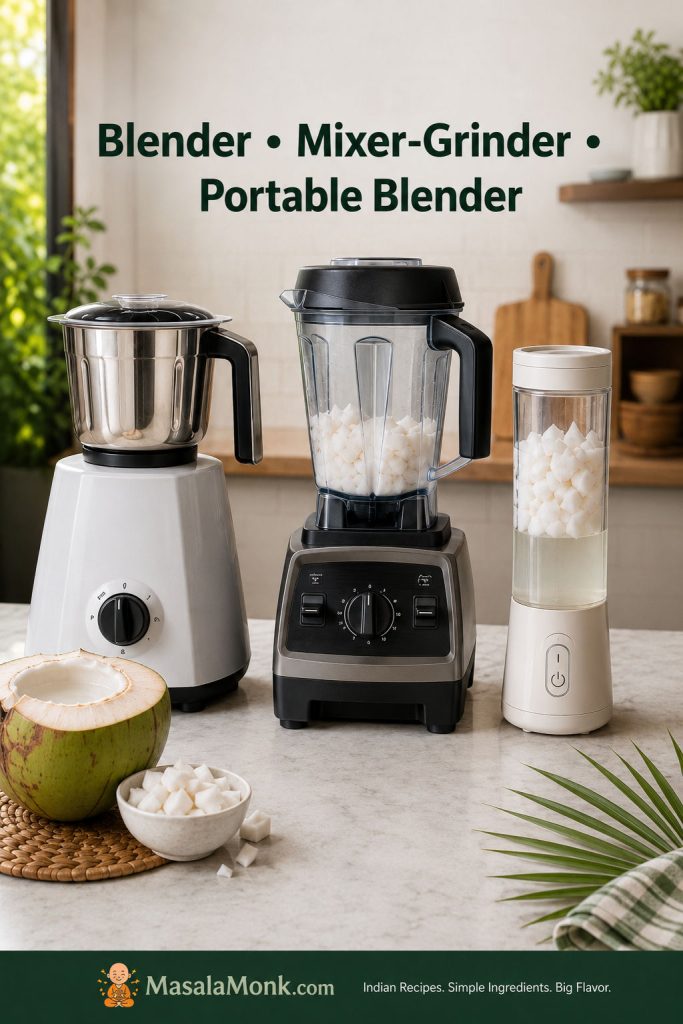
Mixer-grinder, high-speed blender, and portable blender set up for coconut shake with chopped malai and coconut water.
A mixer-grinder, blender, or portable blender can all work; however, smaller jars need liquid first so the malai can move.
  • Indian mixer-grinder: good for the everyday home version. Chop the malai first and blend it with coconut water before adding milk.
  • High-speed blender: gives the smoothest texture, especially if the coconut is slightly firmer or the shake is thick.
  • Portable blender: works for a small 300–500 ml shake if you add liquid first, then chopped malai, then ice or frozen milk. Do not pack the jar tightly.
  • Fine strainer: useful only if mature coconut makes the drink gritty. If you are using soft tender coconut, a little pulp is usually pleasant.

If the blades spin but the malai is not moving, the jar needs more liquid, not more blending time. Stop, shake the jar gently, add a splash more coconut water, and blend again. If your blender is small, make the shake in two short blends instead of forcing everything into one jar.

How to Make Coconut Shake Thick and Creamy

Thickness should come from coconut, milk, frozen milk, or ice cream — not from a blender full of plain ice. Use this as a texture ladder and stop when the shake matches the glass you want.
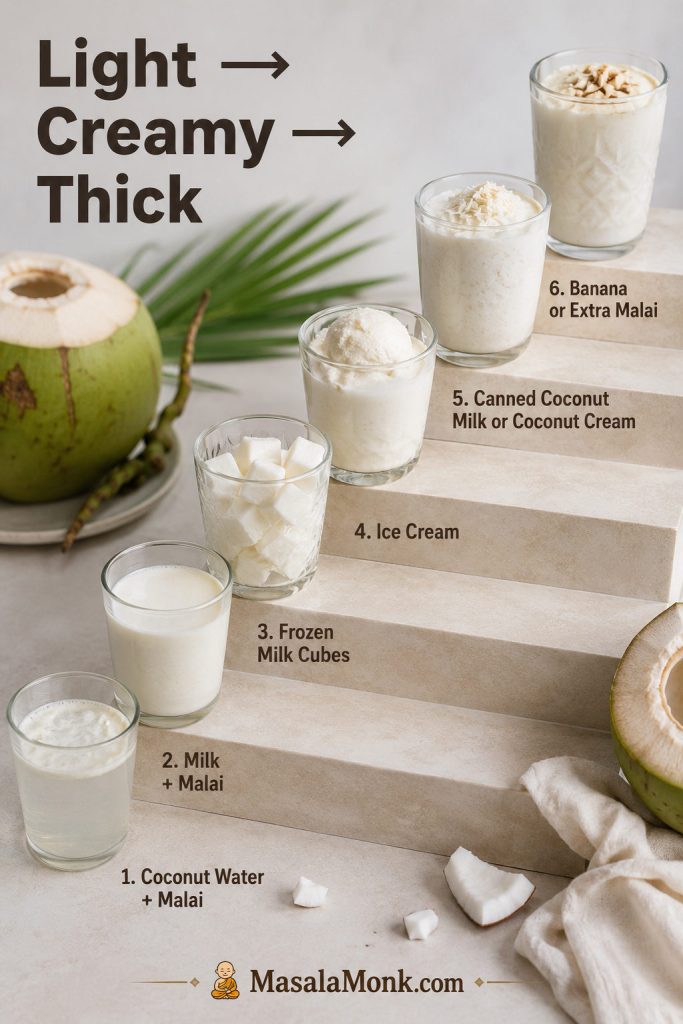
Texture ladder showing coconut shake styles from light coconut water to thicker milk, ice cream, coconut cream, and banana versions.
Thickness should come from malai, frozen milk, coconut milk, ice cream, or banana—not from filling the blender with plain ice.
Texture wantedBest baseWhat it tastes like
Light and freshCoconut water + soft malaiClean, cold, coconut-first
Creamy homemadeMilk + malaiSmooth and gentle, not too rich
Thick without ice creamFrozen milk cubesCold and full without dessert sweetness
Dessert-styleVanilla ice creamRicher, sweeter, café-like
Vegan thickCanned coconut milk or a spoon of coconut creamCreamy and dairy-free
Smoothie-likeFrozen banana or extra malaiThicker, softer, more filling

Texture check: before serving, compare the shake with what you wanted: light, creamy, thick, or dessert-style.
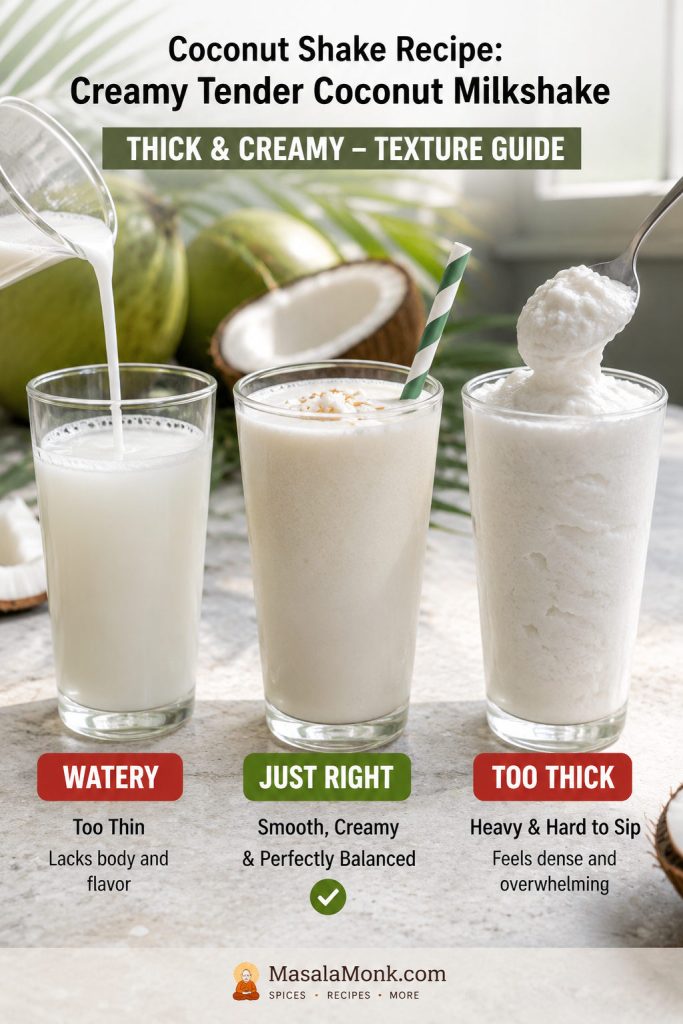
Three coconut shake glasses showing watery, just-right creamy, and too-thick textures.
A good coconut shake should pour easily, look creamy, and still taste like tender coconut; when it looks watery or heavy, adjust before serving.

If your homemade shake never tastes like the one from a juice shop, the answer is usually not more sugar. The shop-style glass is colder, slightly thicker, and a little pulpy. Chill the liquids, keep a spoonful of tiny malai bits for the end, and avoid blending the final shake until it turns warm.

After you make the plain coconut version once, variations become much easier. You will know how thick the base should feel, so fruit, protein powder, or extra flavorings become adjustments rather than guesses.

Flavor Variations

Once you understand the base, variations stop feeling random. Keep the coconut in charge, then add only enough fruit, spice, protein, or extra creaminess to change the mood of the glass.
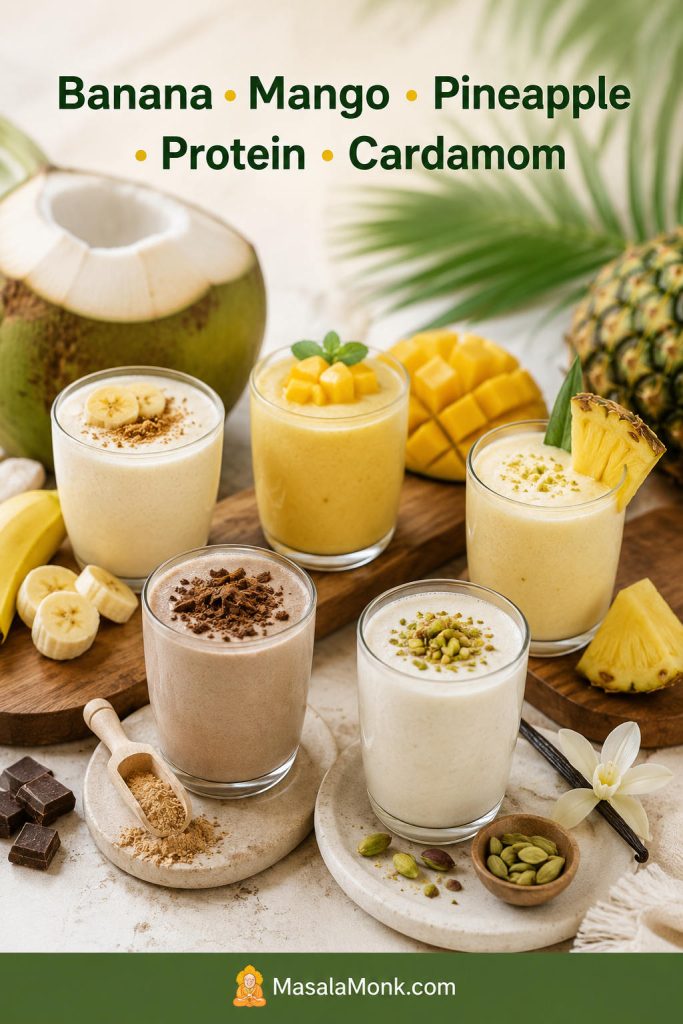
Flavor variation board with coconut shakes for banana, mango, pineapple, protein, and cardamom.
Once the base is balanced, banana, mango, pineapple, protein powder, cardamom, or vanilla can change the mood without hiding the coconut.

Banana Coconut Shake

For a thicker banana version, blend in ½ frozen banana. It adds natural sweetness and a soft smoothie-like texture, so start with little or no added sugar. This works especially well in no-ice-cream and vegan coconut shakes.

Mango Coconut Shake

Mango makes the shake sweeter, thicker, and more seasonal. Use ½ cup mango pulp or chopped ripe mango, then taste before adding sugar. If you want a classic Indian mango drink without the coconut angle, see our mango shake recipe.

Pineapple Coconut Shake

Pineapple changes the mood completely. Blend in ½ cup frozen pineapple for a colder, brighter, tropical version, especially if you are using coconut milk instead of dairy milk. For more pineapple-coconut inspiration, our piña colada drinks guide has classic, frozen, and virgin-style ideas.

Protein Coconut Shake

For a higher-protein version, blend in 1 scoop vanilla protein powder and add 2–4 tbsp extra coconut water or milk if the shake becomes too thick. Keep the flavor simple; chocolate or heavily flavored powders can easily overpower the tender coconut.

Cardamom, Vanilla, and Flavor Notes

Cardamom gives coconut shake a soft Indian milkshake flavor, especially with pistachios or almonds. Vanilla makes the drink taste more café-style, especially when you use vanilla ice cream. Use either lightly; the coconut should still be the first thing you notice.

Café-Style or Mr Coconut-Inspired Coconut Shake

For a café-style or Mr Coconut-inspired coconut shake, do not make it perfectly smooth or overly milky. The charm is cold coconut water, soft malai, a little vanilla richness, and tiny coconut bits that remind you it came from a real tender coconut.
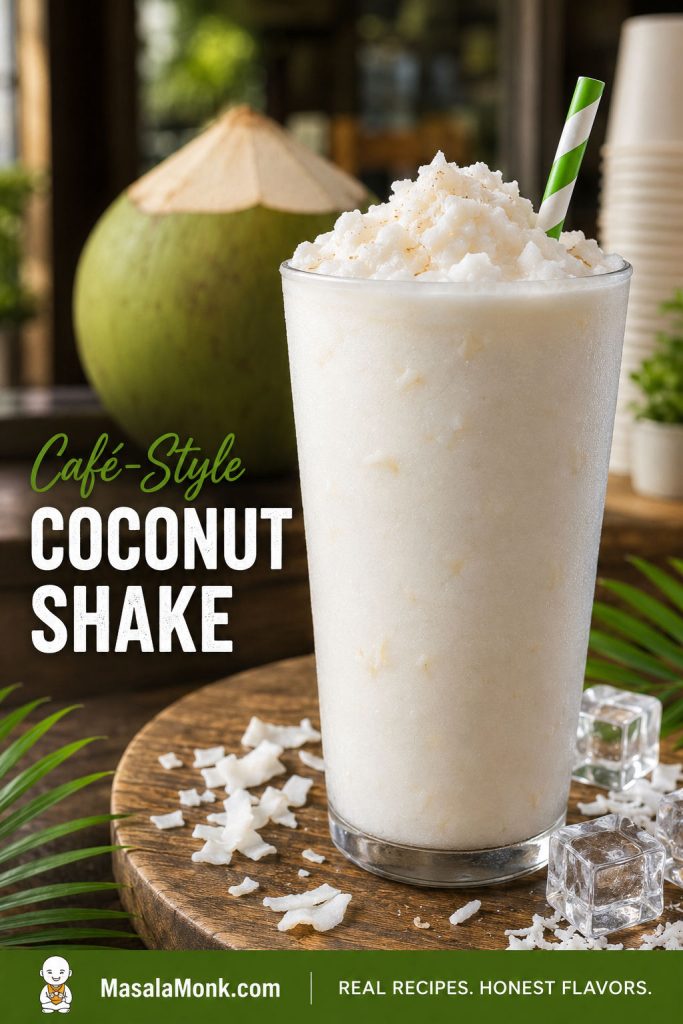
Café-style coconut shake in a tall chilled glass with icy texture, straw, froth, and tiny coconut bits.
A café-style coconut shake should feel colder, slightly pulpy, and more indulgent while still letting tender coconut stay noticeable.

If you are chasing the shop-style version, do not make it too polite. It should be colder, a little sweeter, and slightly pulpy, with more emphasis on cold refreshment than dairy creaminess.

To make one café-style glass, blend ¾ cup coconut water, ½ cup tender coconut malai, 1–1½ scoops vanilla ice cream, and 4–5 ice cubes. Blend until mostly smooth, then stir in 1 tablespoon tiny coconut bits for texture. The trick is not to make it perfectly smooth; those little coconut bits make each sip taste fresh instead of flat.

Thai-Style Coconut Shake

A Thai-style coconut shake is usually icier and sweeter than the classic tender coconut milkshake. Use coconut water, coconut milk, ice, sugar syrup, and a spoon of coconut cream if you want it richer. Serve it very cold so it stays refreshing rather than heavy.
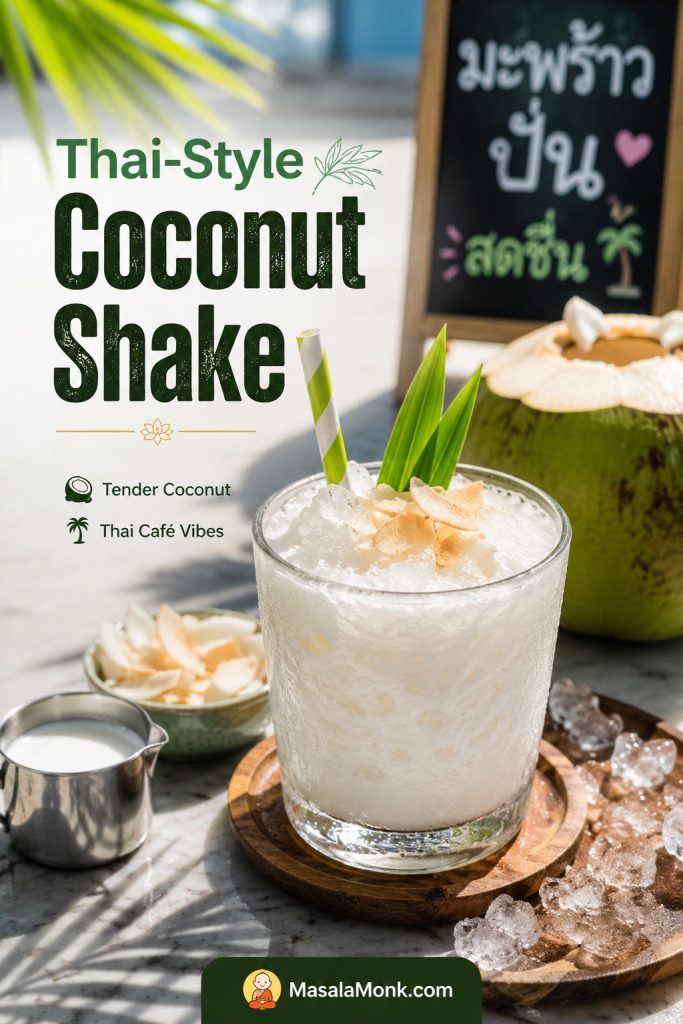
Thai-style coconut shake in a shorter icy glass with coconut milk, coconut cream, and tropical café styling.
Thai-style coconut shake is usually icier and sweeter, so serve it very cold and use coconut cream carefully to avoid making it too heavy.

Is Coconut Shake Light or Dessert-Like?

The lighter version is not the punishment version. On a very hot day, coconut water and soft malai can taste better than a heavy ice-cream shake because the coconut stays clean, cold, and easy to finish. If the coconut itself is sweet and fragrant, the lighter glass may taste more coconut-forward than the rich one.

For dessert-style richness, add milk, ice cream, cream, condensed milk, or nuts. For a lighter summer glass, stay closer to coconut water, malai, and just enough milk or coconut milk to round the texture.
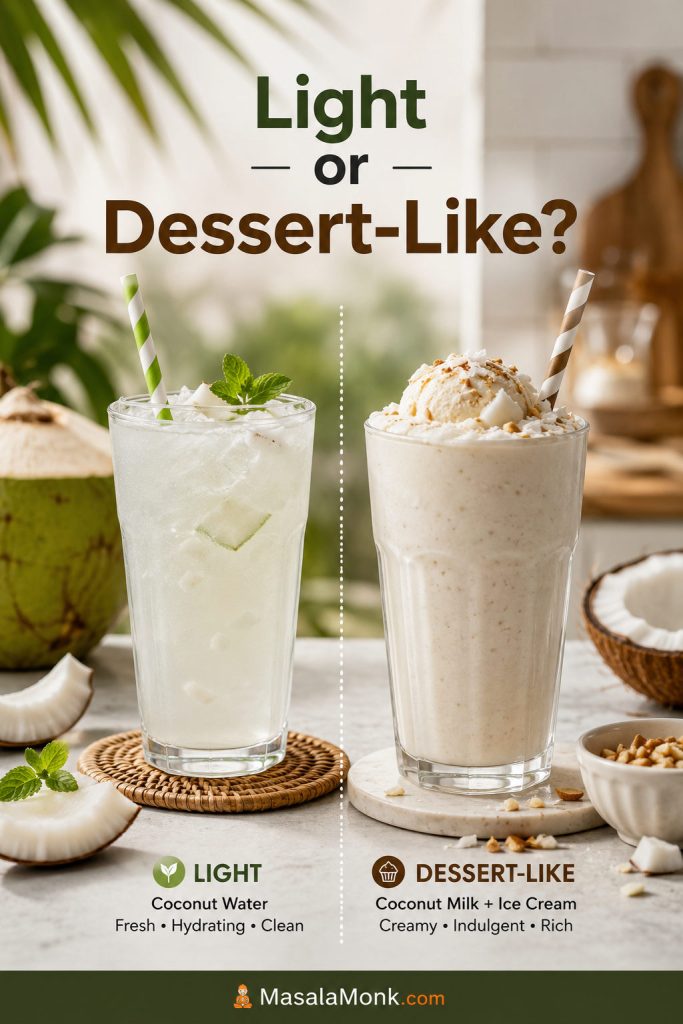
Comparison of a light coconut water shake and a richer dessert-style coconut milk and ice cream shake.
The lighter version is not the punishment version; meanwhile, the dessert-style shake is best when you want a richer, creamier glass.

How to Store Coconut Shake Without Losing the Fresh Taste

This is not a make-ahead milkshake. It rewards you for blending it right before serving, when it is still cold, creamy, and fragrant. Fresh tender coconut drinks lose their clean flavor quickly, and milkshake-style versions can separate as they sit. When you must hold it, keep it covered in the fridge and drink it the same day.
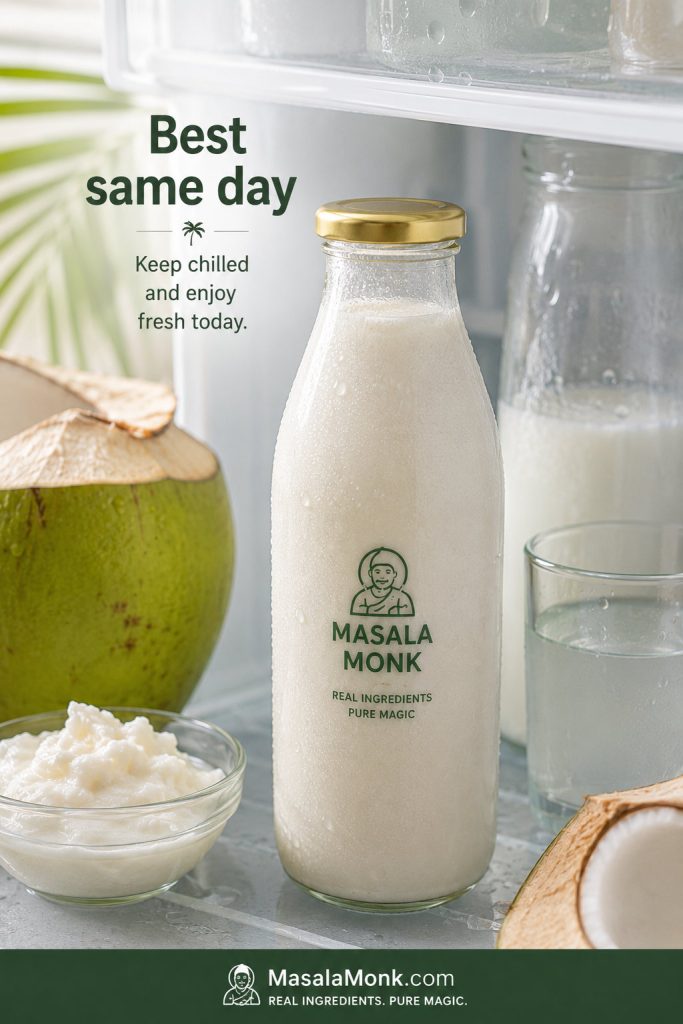
Covered bottle of coconut shake kept chilled with condensation, coconut water, malai, and tender coconut nearby.
Coconut shake is best blended fresh; when you need to hold it, keep it covered and cold, then drink it the same day for the cleanest flavor.

Discard the shake if it smells sour, stale, or fermented instead of trying to fix it with sugar or flavoring.

  • Keep the blended shake covered and cold until serving.
  • Refrigerate it briefly in a covered bottle or jar if needed.
  • Shake or blend again before serving if it separates.
  • Avoid leaving milk, ice cream, or coconut milk versions out at room temperature.
  • Freeze milk cubes or coconut water cubes instead of freezing the finished shake.

For prep-ahead ease, chill the coconut water, milk, and glasses. You can also freeze milk cubes ahead of time for the no-ice-cream version. Save the actual blending for the moment you want the shake to taste fresh.

Troubleshooting

Most problems come from warm ingredients, too much ice, mature coconut, or sweetness added too early. Use the table below to fix the glass you already made and improve the next batch.
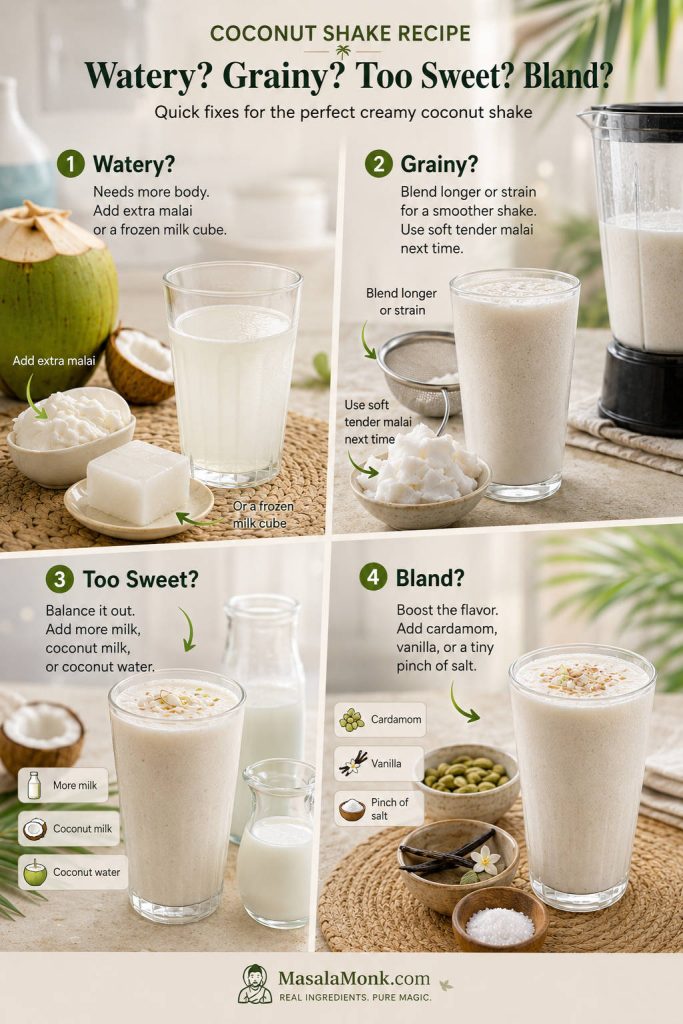
Troubleshooting guide for watery, grainy, too sweet, and bland coconut shake with visible fix ingredients.
Watery, grainy, too-sweet, and bland coconut shakes usually need one targeted correction. Add body, blend or strain, dilute, or brighten the flavor.

A coconut shake that tastes like sweet milk usually has too much milk or ice cream for the amount of malai. Thin texture, even after adding ice, means the problem is not coldness; the drink needs body from malai, frozen milk, ice cream, banana, or coconut cream. For dull flavor, a tiny pinch of salt can wake up the coconut without making the shake taste salty.

ProblemWhy it happenedFix nowFix next time
Watery shakeToo much coconut water or iceAdd ice cream, frozen milk, banana, or extra malaiChill ingredients and use less ice
Grainy shakeMature coconut or under-blendingBlend longer or strainUse soft tender coconut malai
Too sweetIce cream + sugar + sweet coconut waterAdd milk or coconut milkTaste before adding sugar
BlandWeak coconut, too much milk, no aromaAdd cardamom, vanilla, or a tiny pinch of saltUse fresh coconut water and less milk
Too thickToo much ice cream or frozen milkAdd coconut water 1–2 tbsp at a timeUse less thickener
SeparatedCoconut fat and liquid separatingReblend brieflyServe soon after blending
Warm or thinOverblending or warm ingredientsAdd a frozen milk cube and pulseChill everything first

Once you start adjusting the shake to your coconut, blender, and glass size, these are the questions that usually come up.

FAQs

What is the difference between coconut shake and coconut smoothie?

If the drink is built around tender coconut malai and coconut water, think of it as a coconut shake. The coconut should be the main flavor, not just the liquid in the blender. If coconut is mainly the base for banana, berries, mango, protein powder, or greens, the drink is closer to a coconut smoothie.

Which coconut is best for coconut shake?

A tender coconut with soft, spoonable malai and sweet coconut water is best. If the flesh is firm and chewy, the shake can still work, but you may need to chop it small, blend longer, and strain if the texture turns gritty.

Do I need ice cream for coconut shake?

No. Ice cream gives the fastest café-style thickness, but frozen milk cubes are the closest homemade substitute. They make the shake cold and creamy without watering it down or making it taste too much like dessert.

How do I make coconut shake without milk?

Use coconut water as the main liquid and tender coconut flesh for body. If you still want creaminess, add chilled coconut milk or a small spoon of coconut cream. If the coconut water is not naturally sweet, one soft date is usually enough.

Why did my coconut shake become watery?

The usual reason is too much ice or too much coconut water for the amount of malai. To fix the glass you already made, add more tender coconut flesh, frozen milk, a scoop of ice cream, coconut cream, or half a frozen banana.

Should coconut shake be strained?

Usually, no. Soft tender coconut malai blends into a pleasant, slightly pulpy drink. Strain only if you used mature coconut or the shake feels gritty. If you like café-style texture, keep a spoonful of tiny malai bits aside and stir them in after blending.

How much coconut shake does one tender coconut make?

It depends on the size of the coconut and how much soft malai it has. A coconut with plenty of malai can usually make 1 large glass or 2 smaller glasses when blended with its coconut water and some milk. If it has mostly water and very little malai, the shake will be lighter unless you add frozen milk, ice cream, banana, or coconut milk.

What can I do with leftover tender coconut malai?

Coconut shake is one of the easiest ways to use leftover tender coconut malai. Blend it with chilled coconut water, milk or coconut milk, and a little sweetener only if needed. If you also have extra coconut water, these creative coconut water recipes are useful for using it beyond a shake. If the malai still smells fresh and sweet, this shake is usually the fastest and best use for it.

How soon should I drink coconut shake after blending?

As soon as you can. The first 10–15 minutes are when the shake tastes coldest, freshest, and creamiest. After that, it can separate or lose some of the tender coconut aroma. If you need to hold it, keep it covered in the fridge and shake or reblend before serving.

Final Tips for the Best Coconut Shake
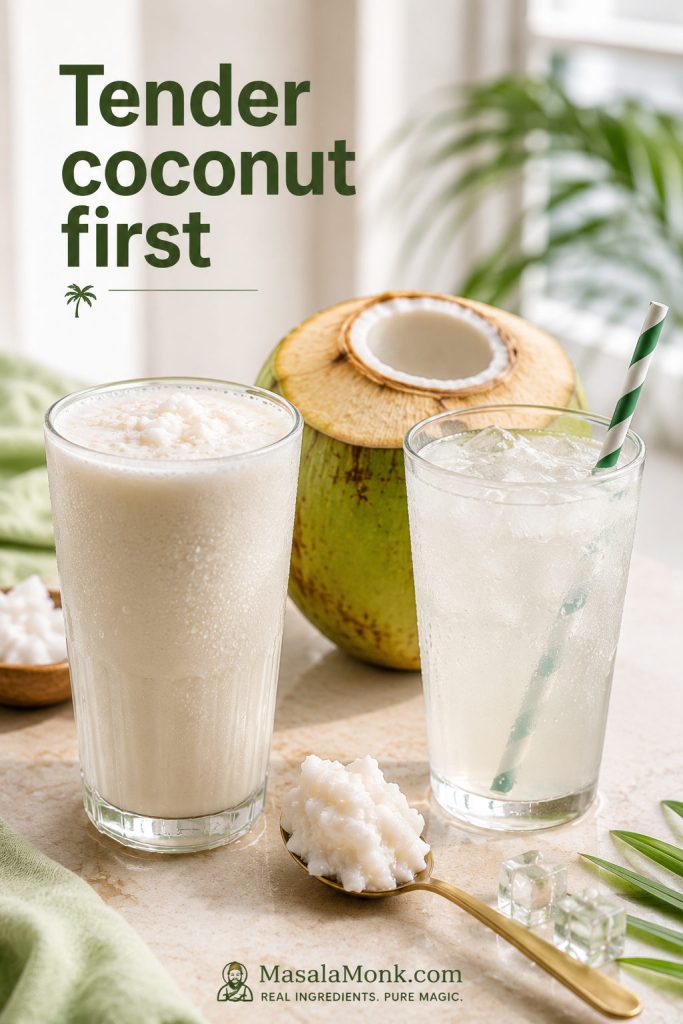
Final serving of one creamy coconut shake and one lighter coconut water shake with tender coconut and malai.
The best coconut shake is not always the thickest or sweetest; ultimately, the winning glass is the one that still tastes like tender coconut.

In this coconut shake recipe, tender coconut should lead the flavor. Blend the coconut flesh with coconut water first, then add the creamy ingredients. Ice should only finish the chill, not carry the whole texture.

Make it once with the classic balance, then adjust from there. More coconut water makes it lighter, frozen milk makes it thicker without ice cream, coconut milk makes it dairy-free, and ice cream makes it dessert-like. Still, the real test never changes: the best coconut shake is not the thickest one or the sweetest one. It is the glass that still tastes like tender coconut after you add everything else.
Back to top

Posted on Leave a comment

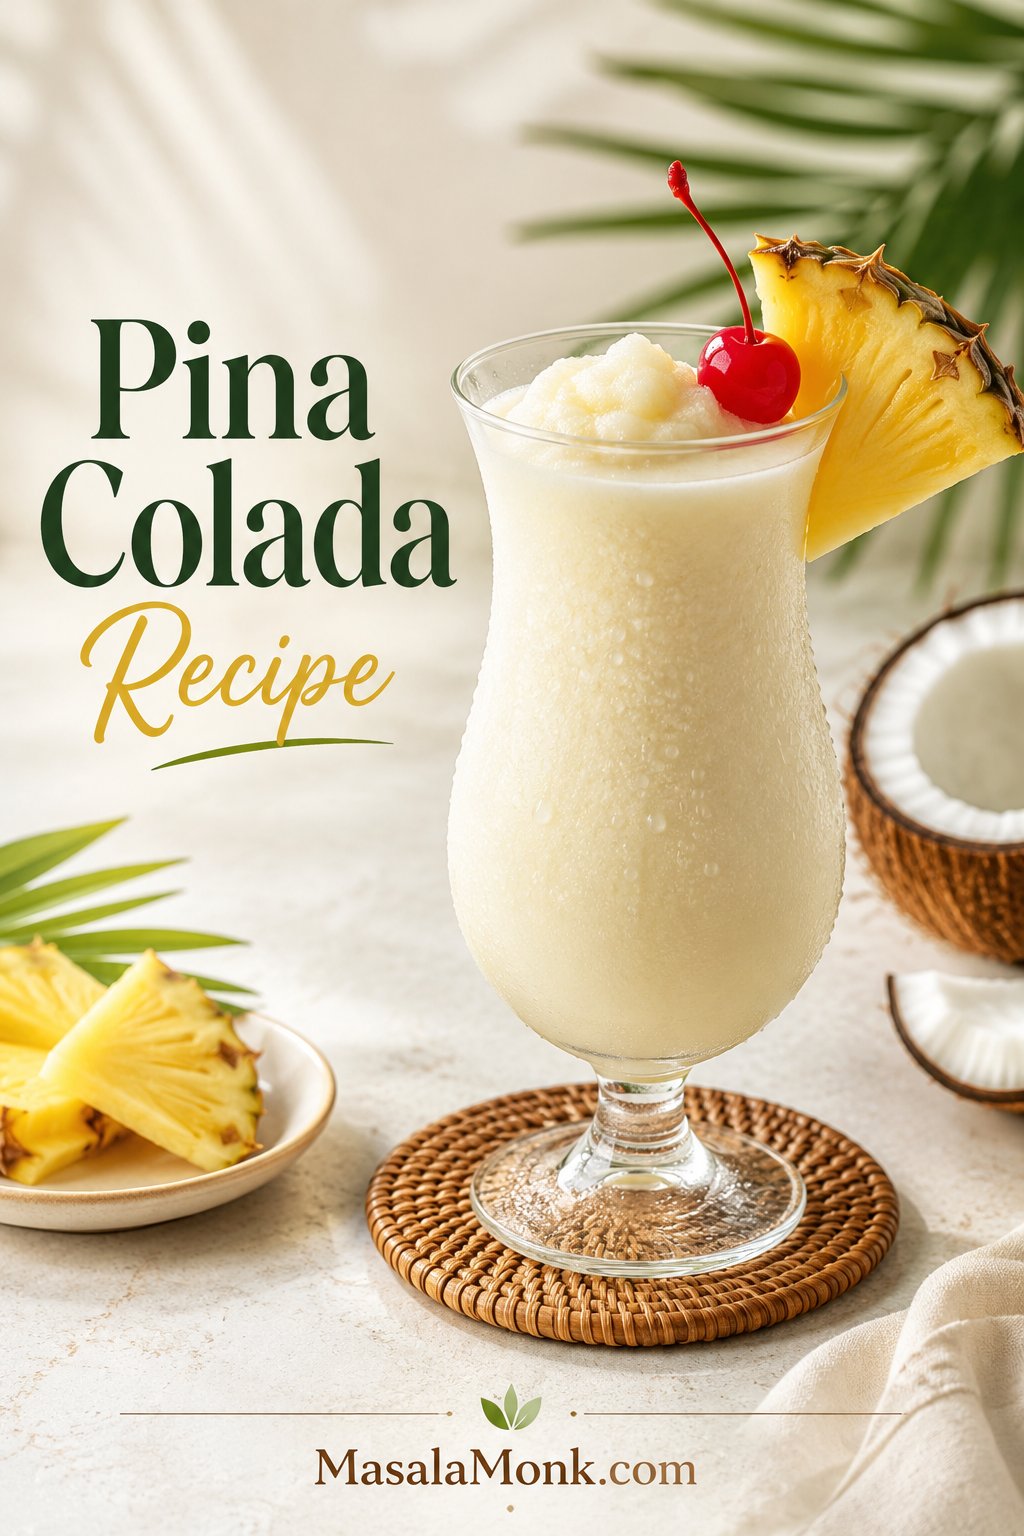
Pina Colada Recipe: Frozen, Virgin, Malibu & Mix Tips

Frozen pina colada in a hurricane glass with a pineapple wedge, cherry garnish, coconut pieces, and MasalaMonk.com footer branding.

Most disappointing piña coladas fail for the same few reasons: the drink turns thin, tastes like straight sugar, or the alcohol-free version feels empty once the rum is gone. A great piña colada recipe — often searched as a pina colada recipe — solves that with the right coconut base, enough pineapple, the right chill, and a small hit of lime.

The first sip should taste cold before it tastes sweet: pineapple first, coconut next, rum in the background, and a clean finish that makes the glass feel refreshing instead of heavy.

Start with the frozen blender version, then use the same balance to make it shaken, virgin, Malibu-style, lighter with coconut milk, mixed ahead, or batched for a party. The promise is simple: a piña colada that stays smooth, avoids syrupy sweetness, and tells you exactly which coconut product belongs in the glass.

Quick Answer: The Best Pina Colada Recipe Ratio

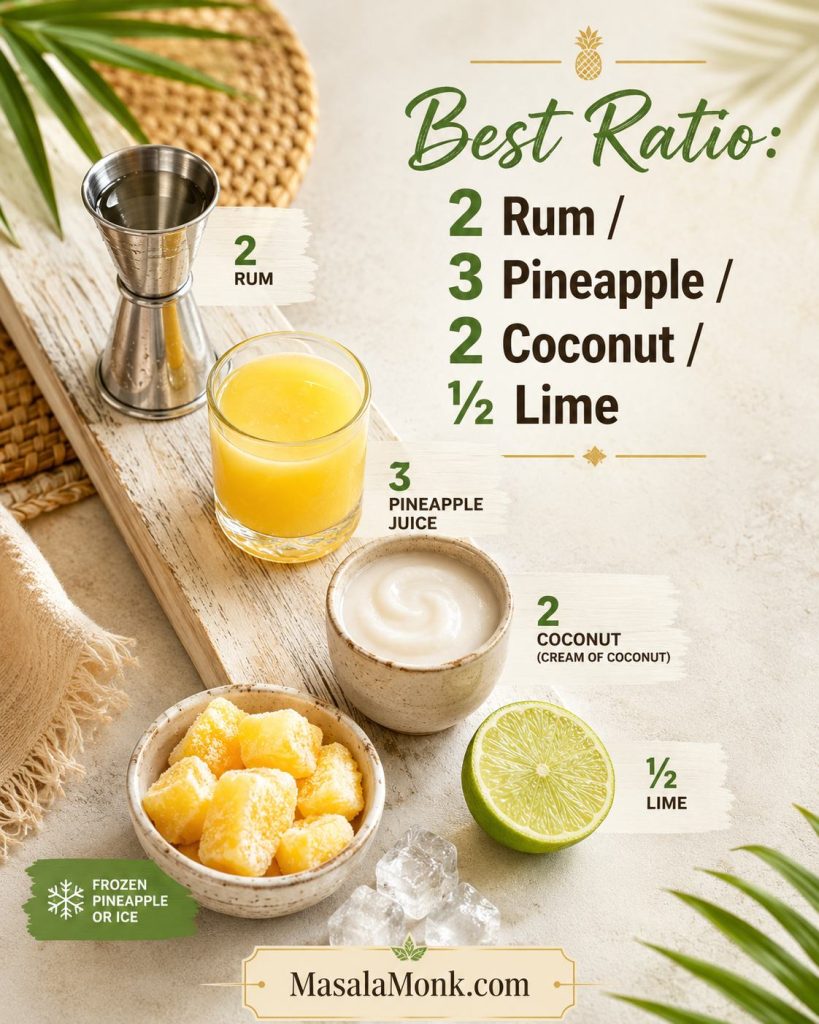
For one frozen piña colada, use 2 oz white rum, 3 oz pineapple juice, 2 oz cream of coconut, ½ oz fresh lime juice, and 1 to 1½ cups ice. For a thicker, fruitier drink, add ½ cup frozen pineapple.

Frozen, shaken, or alcohol-free shortcuts

No blender? Shake 2 oz white rum, 2 oz pineapple juice, 1½ oz cream of coconut, and ½ oz lime juice, then strain into a fresh glass over fresh ice. No alcohol? Blend frozen pineapple, pineapple juice, cream of coconut, lime, and a tiny pinch of salt so the mocktail still has depth.

Need a different route? Go straight to the on-the-rocks version, the virgin pina colada, or the pina colada mix section.

The classic flavor is simple — rum, pineapple, coconut — but the texture depends on measurement. Cream of coconut gives the familiar sweet body, while lime keeps the finish from turning sticky.

Measured ratio for one drink

IngredientAmount for 1 drinkJob in the glass
White rum2 oz / 60 mlClean cocktail base that lets the fruit lead.
Pineapple juice3 oz / 90 mlMain tropical flavor and blending liquid.
Cream of coconut2 oz / 60 mlSweet coconut body and classic richness.
Fresh lime juice½ oz / 15 mlClean finish and better balance.
Ice1–1½ cups / 140–210 gCold, frosty texture.
Frozen pineapple½ cup / 70–75 g, optionalFruitier thickness without dulling the flavor.

Once the base ratio makes sense, use the version guide to pick your path or the success checks to fine-tune the glass.

Measured pina colada ingredients showing rum, pineapple juice, cream of coconut, lime, and frozen fruit with a best ratio guide.
The best pina colada ratio gives you a reliable base before you start adjusting. Once rum, pineapple, coconut, and lime are balanced, texture fixes become much easier.

Best first batch: measure the coconut base and frozen ingredients once. After that, you can adjust by feel without turning the drink thin, syrupy, or heavy.

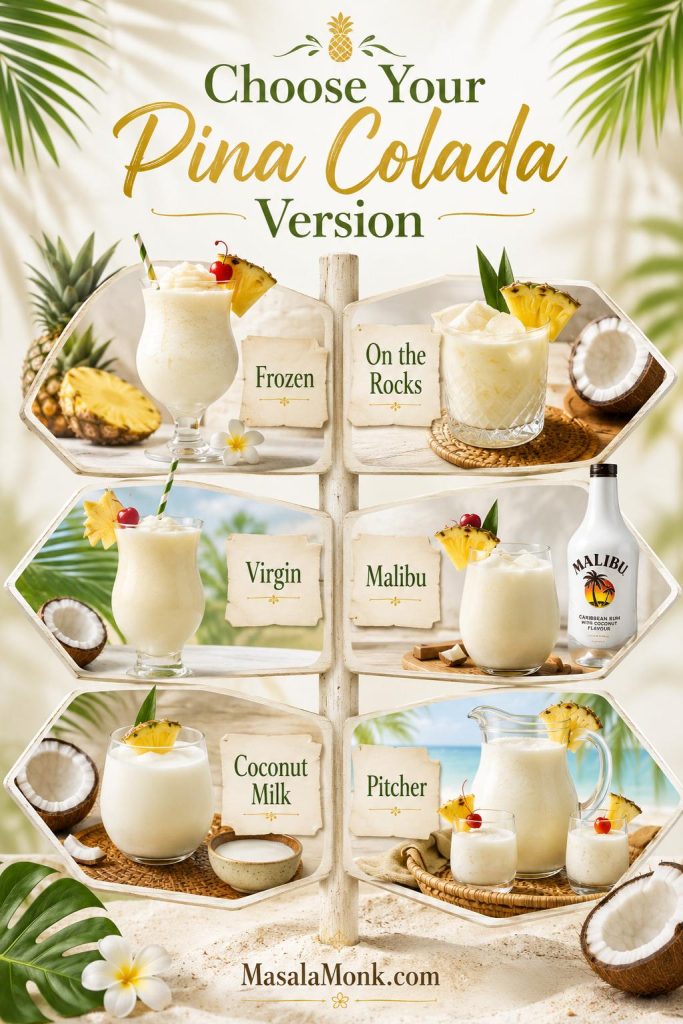
Pina Colada at a Glance: Choose Your Version

The best version depends on the glass you want: thick and vacation-style, lighter and shaken, alcohol-free but still complete, or party-ready without turning watery. Start with the classic frozen version once, then use this guide to choose your path.

VersionBest forTextureKey adjustment
Frozen Pina Colada RecipeClassic resort-style drinkFrosty, smooth, sippableUse the base ratio and optional frozen fruit.
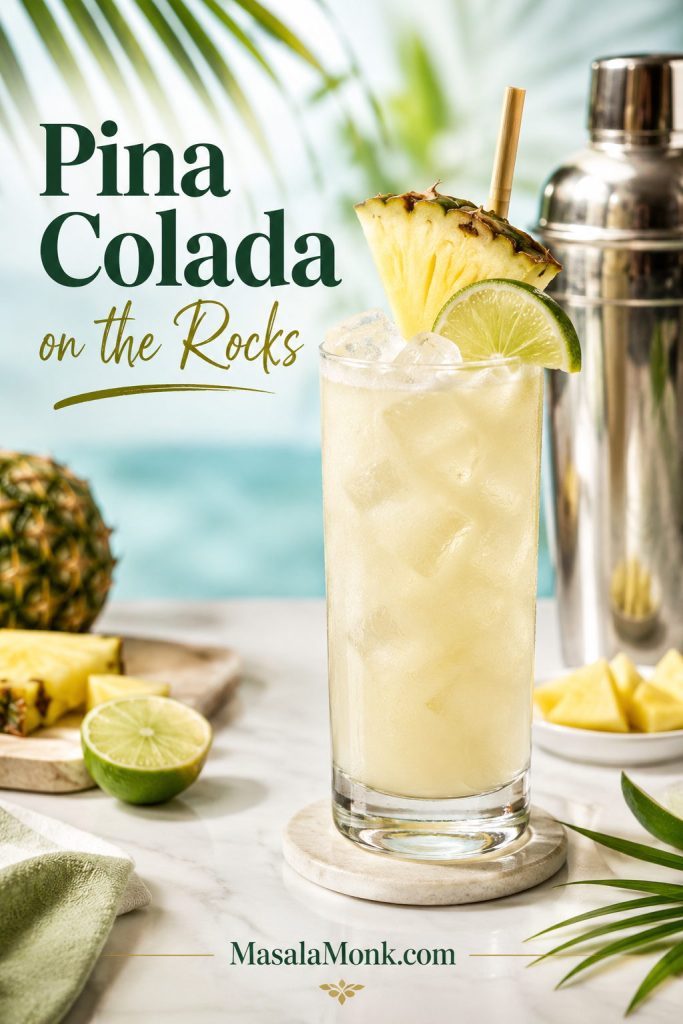
Pina Colada on the RocksNo blender, lighter cocktailChilled and frothyShake hard; serve right away.
Virgin Pina Colada MocktailNon-drinkers and family-friendly glassesCreamy and fruit-forwardUse lime, salt, and pineapple for depth.
Malibu Pina Colada RecipeSweeter coconut-rum flavorSoft and coconut-forwardUse less cream of coconut.
Pina Colada with Coconut MilkLighter, less dessert-like drinkThinner and fresherAdd sweetener only if needed.
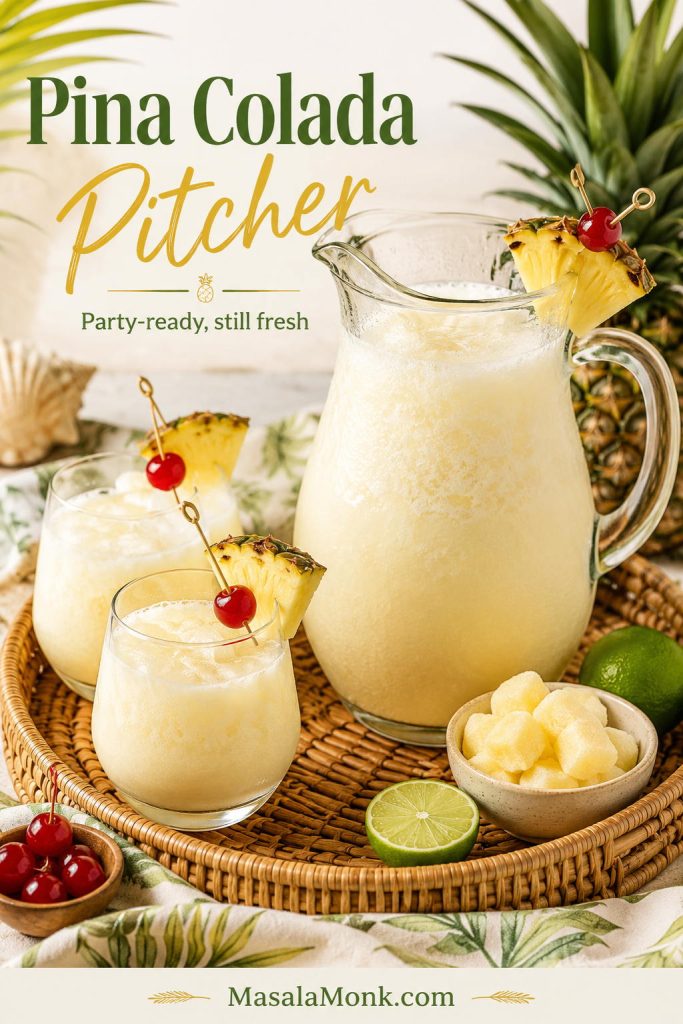
Pina Colada PitcherPartiesDepends on serving methodChill the base; finish at serving.
Six-panel pina colada version guide showing frozen, on the rocks, virgin, Malibu, coconut milk, and pitcher options.
The right pina colada version depends on the moment. Choose frozen for plush texture, on the rocks for no-blender ease, virgin for alcohol-free depth, or pitcher-style when you are serving more than one glass.

Why This Pina Colada Ratio Works

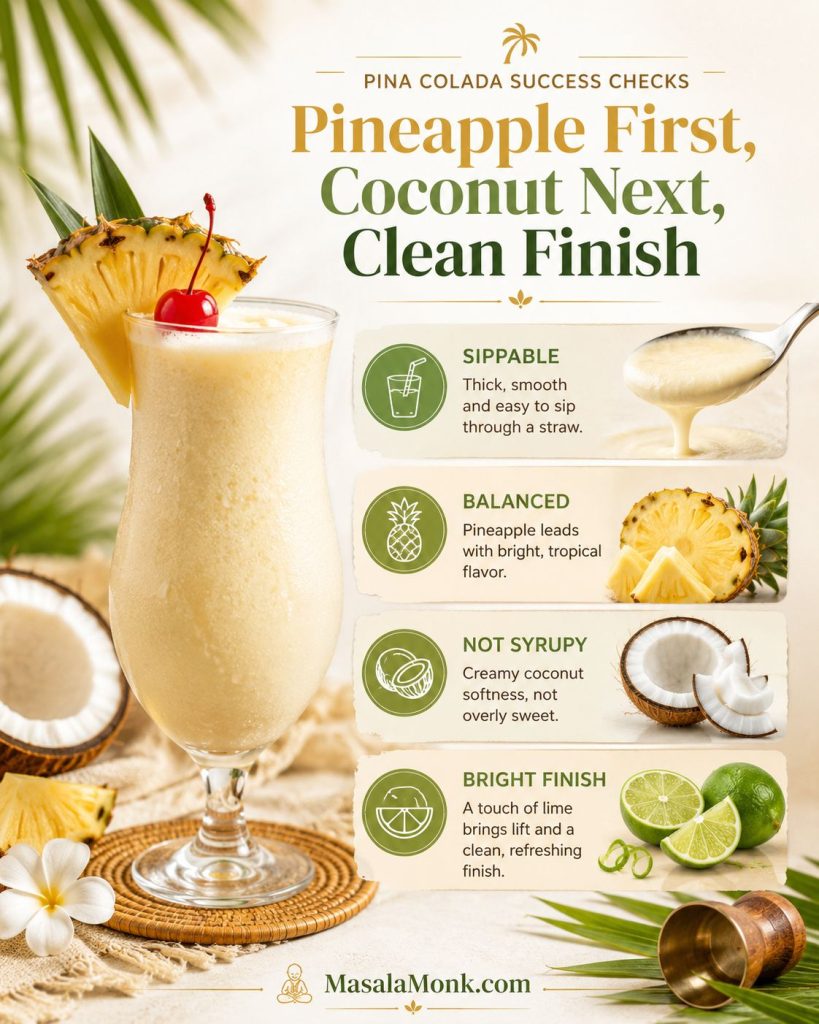
This recipe is built around three checks: the drink should pour thick but sip easily, taste pineapple-first, and finish clean instead of sticky. That is the difference between a lush piña colada and a glass of sweet melted slush.

Success checkWhat you should noticeAdjustment
TextureFrosty pour, but still sippable through a straw.Too heavy? Add a splash of juice. Too thin? Add frozen fruit.
Flavor orderPineapple first, coconut second, rum in the background.If rum dominates, add a little more pineapple or coconut base.
SweetnessSoft and tropical, not candy-like.Use less cream of coconut next time, or add a small squeeze of lime now.
FinishCool, clean, and refreshing.Flat drinks need acid or a tiny pinch of salt, not more sugar.
Pina colada success-check graphic with pineapple first, coconut next, clean finish, and cues for sippable balanced texture.
Use this as the final taste test before serving. If the drink feels heavy, sharp, or candy-sweet, adjust one small thing instead of rebuilding the whole blender jar.

What success looks like: a good frozen pina colada should move like a soft milkshake, not crushed ice in juice. It should feel lush for the first sip and still clean by the last.

Pina Colada Recipe Card

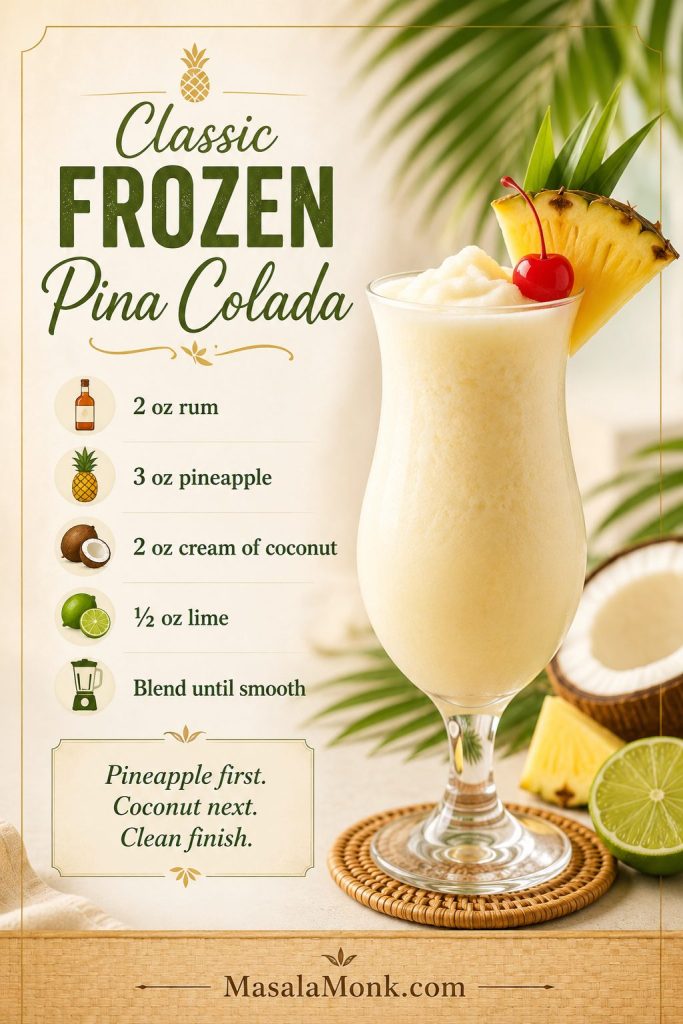
Classic Frozen Pina Colada Recipe

This frozen pina colada is pineapple-forward, coconut-rich, cold, smooth, and balanced with fresh lime. It makes one generous drink or two smaller cocktail glasses.

Prep Time
5 minutes
Total Time
5 minutes
Yield
1 large or 2 small drinks
Method
Blended / frozen

Equipment

  • Blender
  • Jigger, measuring cup, or kitchen scale
  • Hurricane glass, highball, or tall glass

Ingredients

  • 2 oz / 60 ml white rum
  • 3 oz / 90 ml pineapple juice, chilled if possible
  • 2 oz / 60 ml cream of coconut, shaken or stirred well before measuring
  • ½ oz / 15 ml fresh lime juice
  • 1 cup / about 140 g ice, plus more only if needed
  • ½ cup / about 70–75 g frozen pineapple chunks, optional but recommended
  • Pineapple wedge and maraschino cherry, optional

Method

  1. Add the pineapple juice, white rum, cream of coconut, and lime juice to the blender.
  2. Add the frozen pineapple, if using, then add the ice.
  3. Blend for 20–30 seconds, just until smooth and frosty.
  4. Check before pouring: it should look thick but still sip easily through a straw.
  5. Too thick? Blend in 1 tablespoon pineapple juice. Too thin? Add a little frozen pineapple and blend briefly.
  6. Pour into a chilled glass, garnish if you like, and serve immediately.

Success Cue

Before serving, check three things: the drink should sip easily, taste pineapple-first, and finish clean rather than sticky. Thin drinks need frozen fruit; heavy drinks need pineapple juice; overly sweet drinks need lime.

Recipe Notes

  • Prefer it less sweet? Use 1½ oz cream of coconut.
  • Want a lighter cocktail? Use 1½ oz rum.
  • Want more rum warmth? Use up to 2½ oz rum and keep the finish bright.
  • Making it alcohol-free? Use the mocktail formula below instead of simply removing the rum.
Classic frozen pina colada recipe card with rum, pineapple, cream of coconut, lime, and blend-until-smooth instructions.
This frozen pina colada card is the quick-save version of the recipe. Keep the base measured, then use the texture cue to decide whether the drink needs more fruit or more flow.

What Is a Pina Colada?

A piña colada is a tropical cocktail made with rum, pineapple, coconut, and a cold blended or shaken texture. It is strongly associated with Puerto Rico, but home versions vary because shoppers often find cream of coconut, coconut cream, coconut milk, and coconut water sitting near each other.

Classic formulas are simple; the home-cocktail confusion usually starts in the coconut aisle. Cream of coconut gives the familiar sweet resort-style body, coconut cream creates a richer but less sweet path, and coconut milk makes a lighter glass. The biggest mistake usually happens before the blender starts: choosing the wrong can.

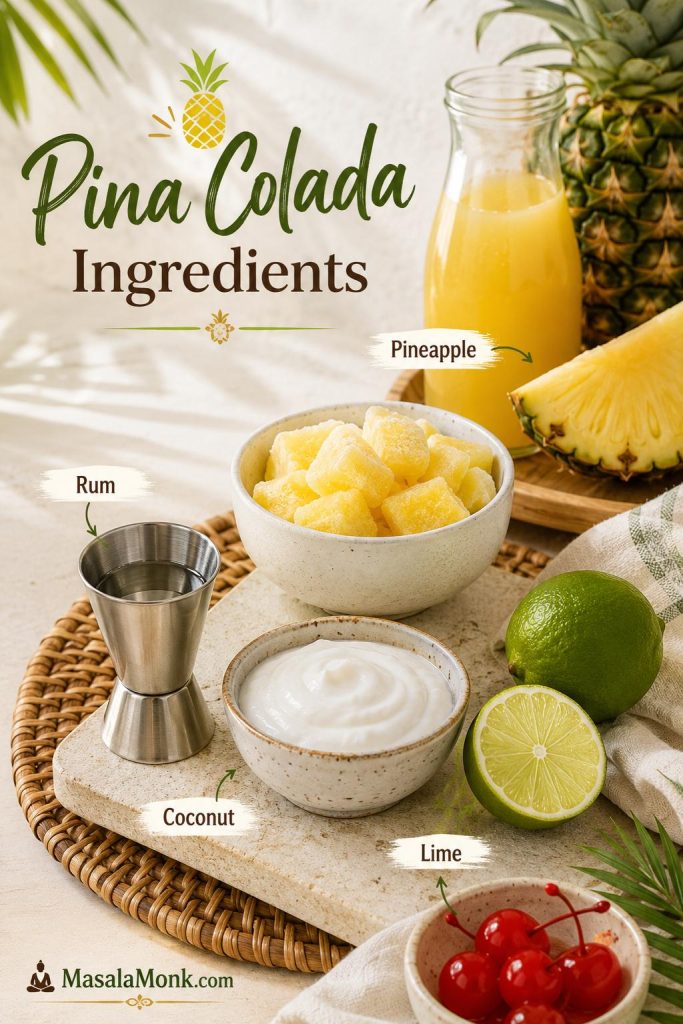
Pina Colada Ingredients

The ingredient list is short, so each choice shows up clearly in the glass. Use the classic route when you want a sweet, creamy vacation-style drink; use the lighter swaps only when you actually want a fresher, less dessert-like result.

If the coconut aisle is the confusing part, jump to the cream of coconut vs coconut cream guide before you start blending.

Pina colada ingredients arranged with rum, pineapple juice, cream of coconut, lime, frozen pineapple, pineapple garnish, and cherry.
A short ingredient list leaves less room to hide mistakes. For the best pina colada, use pineapple for lift, cream of coconut for structure, lime for contrast, and rum as the background note.

White rum

White rum is the best default because it keeps the drink clean, sunny, and pineapple-forward. Coconut rum is softer and sweeter. Dark or aged rum adds warmth, especially as a small float.

Pineapple

Use 100% pineapple juice for the smooth base. Fresh juice tastes vivid but varies by fruit; canned juice is more consistent. Avoid pineapple juice cocktail unless you are prepared to reduce sweetness elsewhere.

Frozen pineapple chunks are the easiest upgrade for a blender version because they add structure and real fruit flavor. Drained canned chunks can work, but syrup-packed fruit may push the drink too sweet.

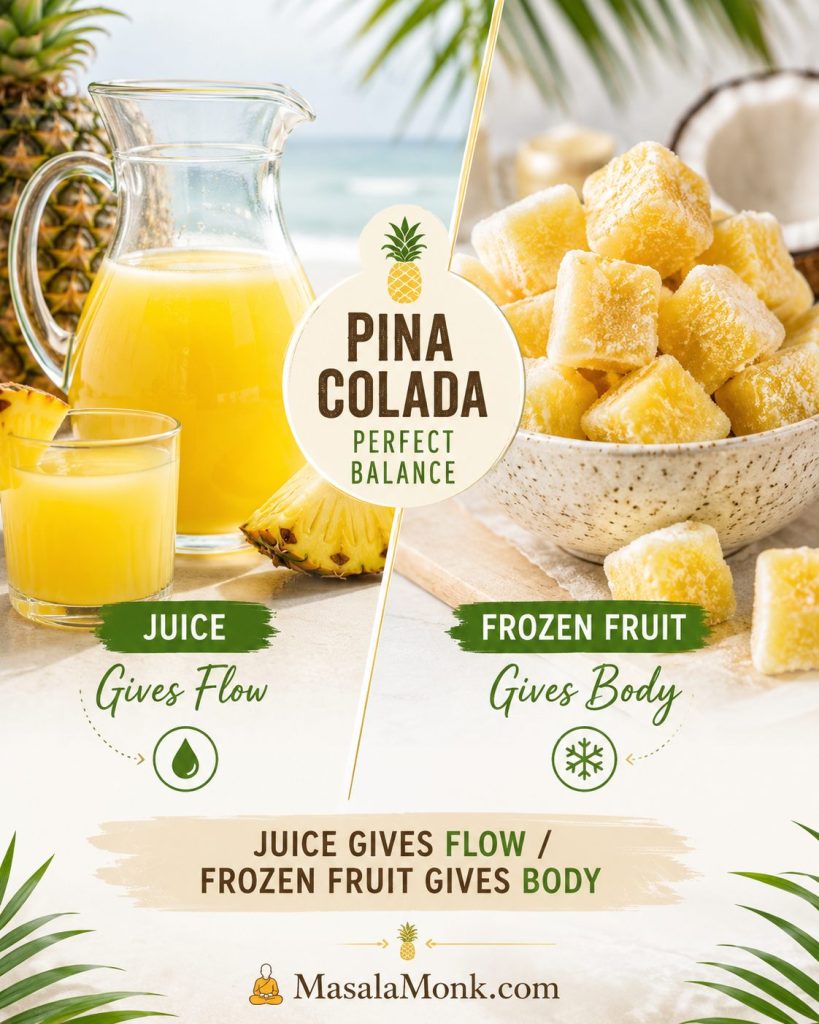
Pineapple juice vs frozen pineapple

Use pineapple juice when the blender needs flow and frozen pineapple when the drink needs body. Together, they create a frozen pina colada that tastes like fruit rather than diluted ice.

Split graphic comparing pineapple juice for flow with frozen pineapple chunks for body in a pina colada.
Pineapple juice and frozen pineapple solve different problems. Juice keeps the drink pourable, while frozen fruit adds body and helps prevent a watery blender drink.

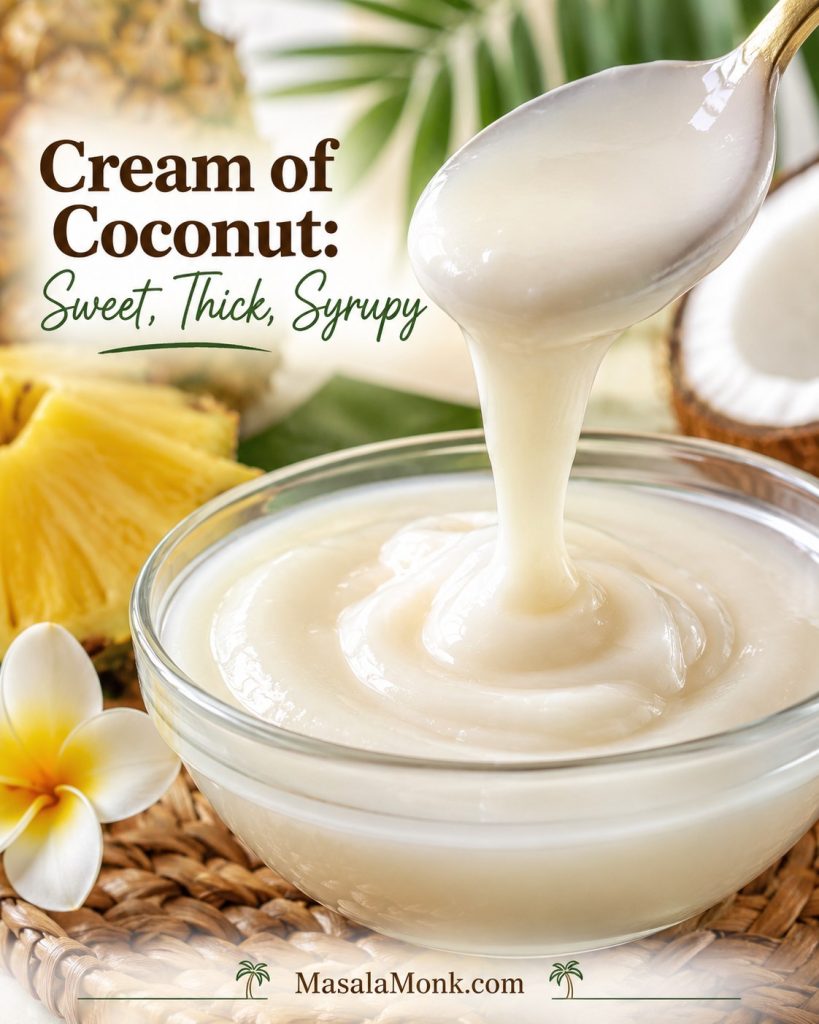
Cream of coconut

Cream of coconut is sweetened, thick, and syrupy. It gives the familiar body most people expect from a classic pina colada, so shake or stir the can well before measuring.

If it is too thick to pour, warm the closed container in a bowl of warm water for a few minutes, then shake again. Brands vary, so taste before making big adjustments.

Fresh lime juice

Lime is the small polish move. It is not required in every traditional formula, but it keeps the coconut from tasting heavy and makes the pineapple feel brighter.

Frozen texture ingredients

For a frozen drink, measured ice gives chill while frozen fruit gives body. Too much plain ice can dull the flavor, so use pineapple chunks when you want a thicker drink that still tastes tropical.

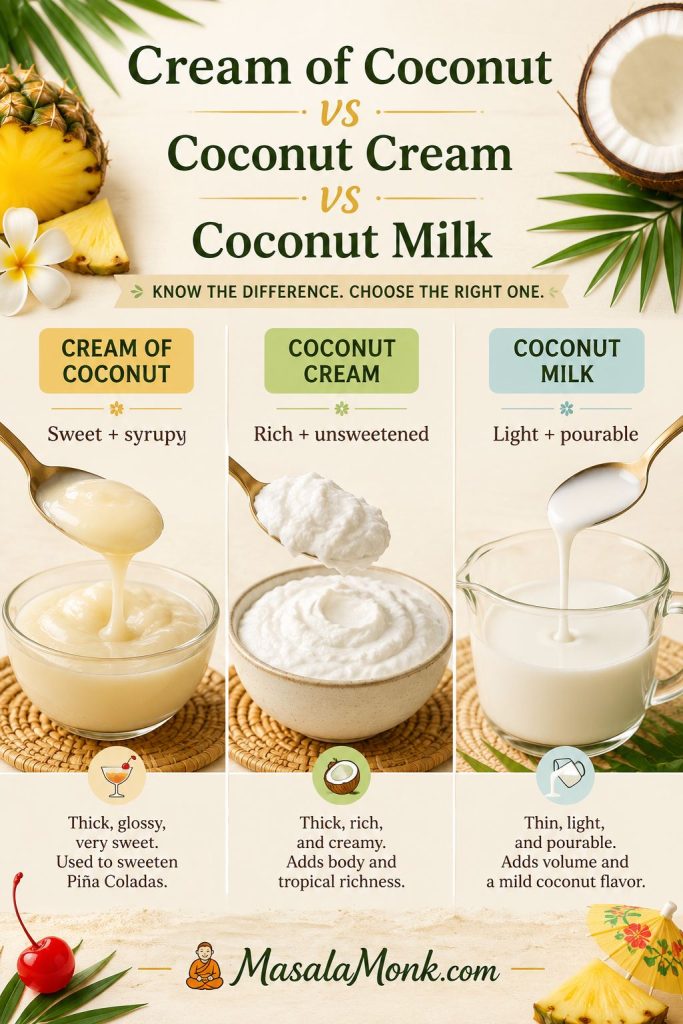
Cream of Coconut vs Coconut Cream vs Coconut Milk

This is the aisle where many homemade piña coladas are won or lost. The names sound close, but the products do not behave the same way. If you have ever stood in front of coconut milk, coconut cream, and cream of coconut wondering which one the recipe actually means, this is the part that saves the drink.

ProductSweetened?TextureBest use in a pina colada
Sweetened cream of coconutYesThick, syrupy, richClassic sweet, creamy version.
Unsweetened coconut creamUsually noThick and richLess sweet version when paired with simple syrup or agave.
Full-fat coconut milkUsually noThinner and fluidLighter drink with a fresher, less dessert-like finish.
Coconut waterNoThin and refreshingSkinny or hydrating variation, not a classic creamy one.
Homemade coconut syrupYesAdjustableFallback when bottled cream of coconut is not available.
Comparison graphic showing cream of coconut, coconut cream, and coconut milk with texture and sweetness differences.
Cream of coconut, coconut cream, and coconut milk do not behave the same way. Choosing the right one is one of the fastest ways to control sweetness, body, and classic pina colada texture.

Already have the right coconut base? Move to the frozen method, the coconut milk version, or the fix guide if your drink is too thin, too sweet, or not creamy enough.

For the safest classic choice, use cream of coconut. A less-sweet modern route starts with coconut cream plus sweetener. If you want a lighter glass, use full-fat coconut milk with extra pineapple for body.

What cream of coconut should look like

Look for a thick, glossy pour. That texture is what gives the classic pina colada its familiar body without needing to overdo the ice.

Close-up of thick cream of coconut being poured slowly, showing a glossy syrupy texture.
Cream of coconut should move slowly, almost like a glossy syrup. If your coconut ingredient pours thin like milk, the finished pina colada will usually taste lighter and less classic.

Quick homemade fallback: gently warm 1 cup full-fat coconut milk or coconut cream with ¾ cup sugar and a small pinch of salt, stirring until dissolved. Cool, refrigerate in a clean jar, and use within about 1 week. Shake before measuring.

For more detail on the coconut-aisle confusion, Epicurious has a helpful guide to cream of coconut, coconut cream, and coconut milk.

If the coconut-water direction sounds more refreshing than creamy, our coconut water cocktails guide has more long, bright drinks built around coconut water, lime, and ice.

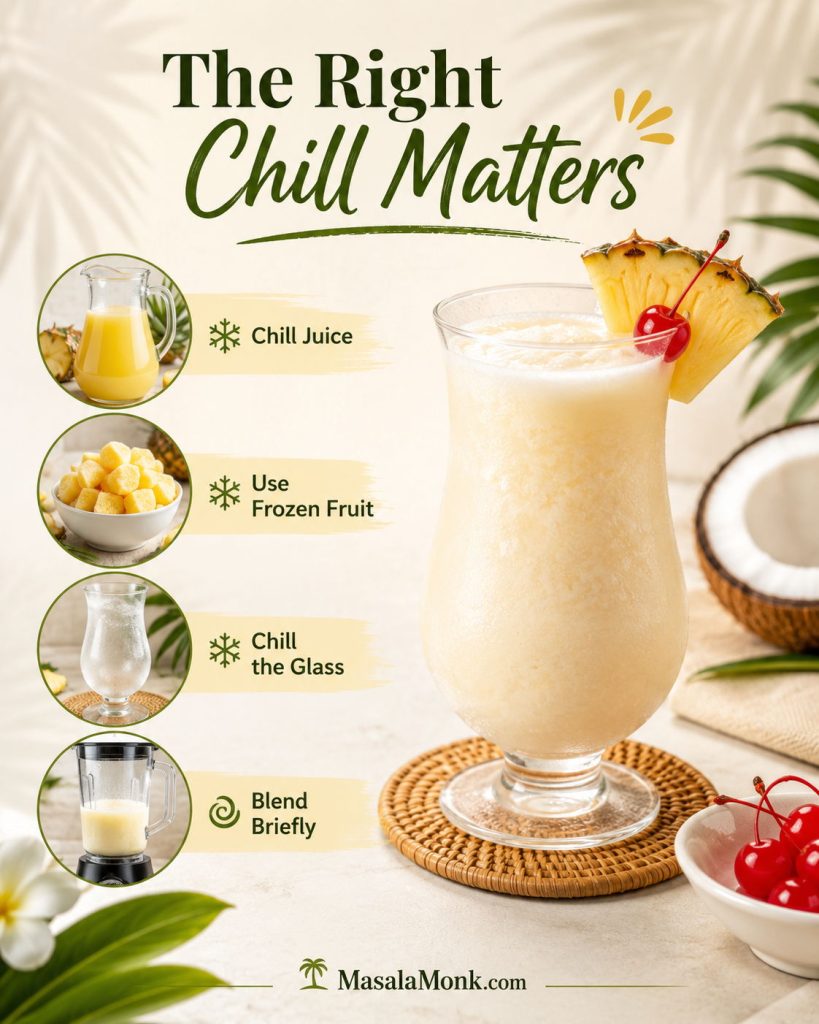
Equipment and Cold Control

A piña colada has no cooking temperature, but it does have a temperature problem: once it warms up, the tropical flavor turns dull and the texture collapses.

  • Use a blender for the frozen version and a shaker or clean jar for the on-the-rocks version.
  • Chill the juice when possible so the drink starts cold.
  • Add liquids first so the blender catches before the frozen ingredients settle around the blades.
  • Blend briefly, usually 20–30 seconds, then stop once smooth.
  • For pitchers, chill the base ahead and finish each round right before serving.
Cold control guide for pina colada showing chilled juice, frozen fruit, a chilled glass, and brief blending tips.
Cold control matters more than simply adding more ice. Chilled juice, frozen fruit, a cold glass, and brief blending help a creamy pina colada stay smooth instead of melting too quickly.

These small moves protect the drink’s first-sip feeling: frosty, lush, and refreshing instead of loose and tired.

Avoid these common mistakes: do not use unsweetened coconut milk as a direct cream-of-coconut swap, do not over-blend after the drink turns smooth, and do not fix a flat mocktail with more sugar. Use acid and a tiny pinch of salt instead.

How to Make a Frozen Pina Colada

A frozen pina colada should pour thick, then relax slightly in the glass. It should not scoop like sorbet or run like juice.

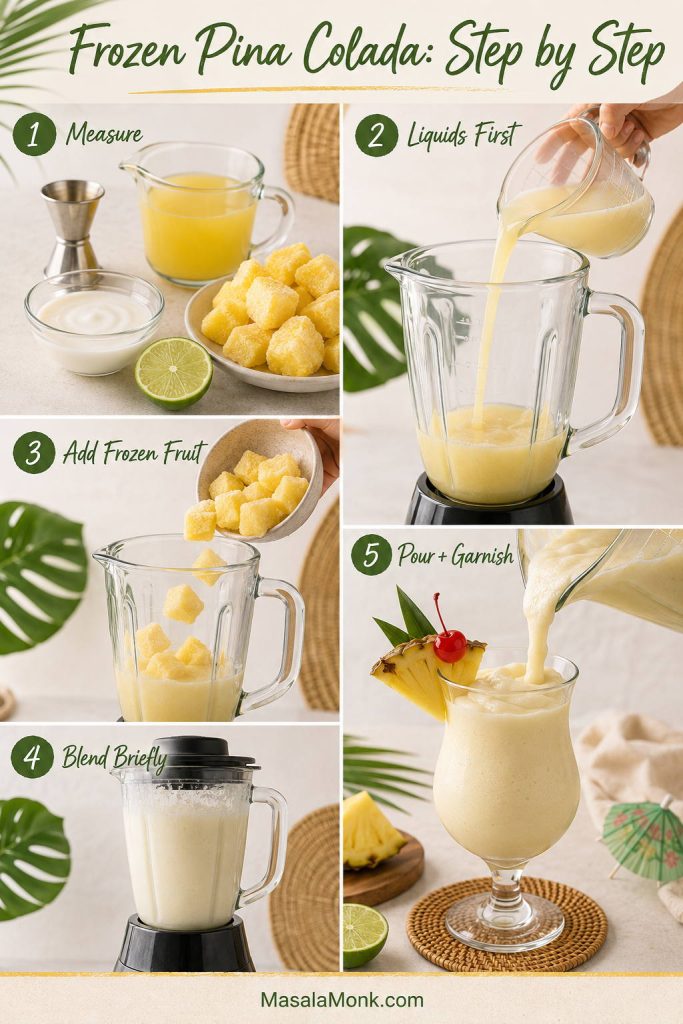
Step-by-step frozen pina colada guide showing measuring, adding liquids, adding frozen fruit, blending briefly, and pouring to garnish.
The frozen method works best when the blender gets help from the start. Add liquids first, then frozen fruit, so the drink blends quickly without losing its thick, sippable texture.

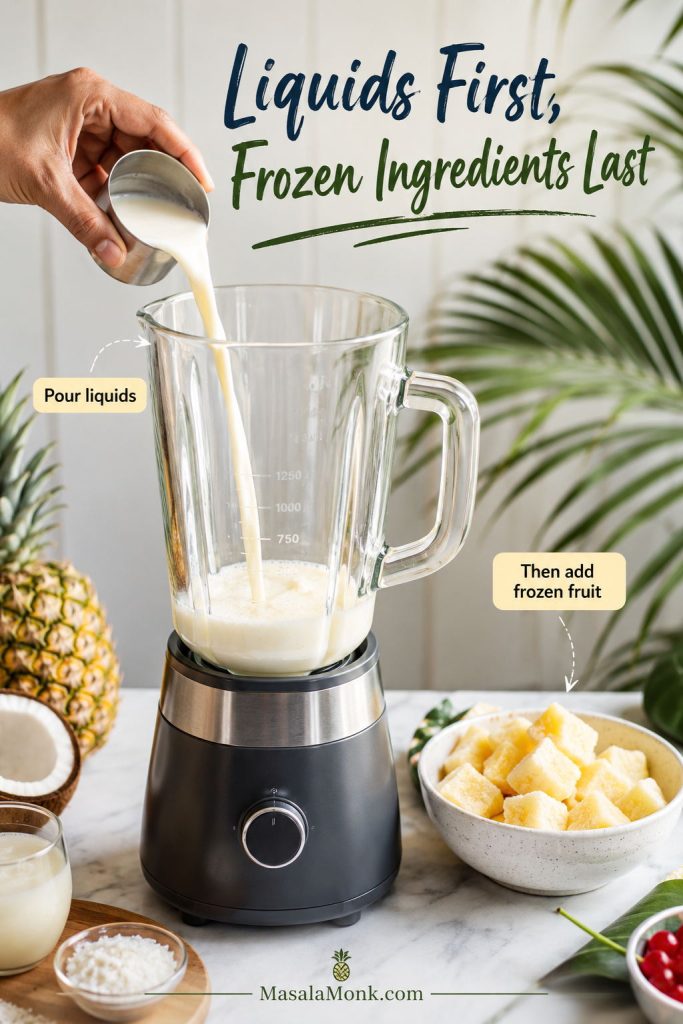
Add pineapple juice, rum, cream of coconut, and lime to the blender first. Add frozen pineapple and ice last so the blades can catch and move smoothly.

Blender jar with liquid being poured in first and frozen pineapple waiting nearby for a pina colada blender order guide.
Blender order can change the final texture. Liquids first help the blades move freely; after that, frozen pineapple can thicken the pina colada without turning it into a frozen block.

Blend for 20–30 seconds, just until smooth. If the blender struggles, start with less frozen material, blend the liquid and fruit, then add the rest gradually.

Texture target: thick enough to look lush, loose enough to sip. Too heavy? Add pineapple juice. Too thin? Add frozen pineapple. Too sweet? Add lime.

Frozen pina colada texture target

Use this texture cue before you pour. A frozen pina colada should look plush, but it should still move through a straw without effort.

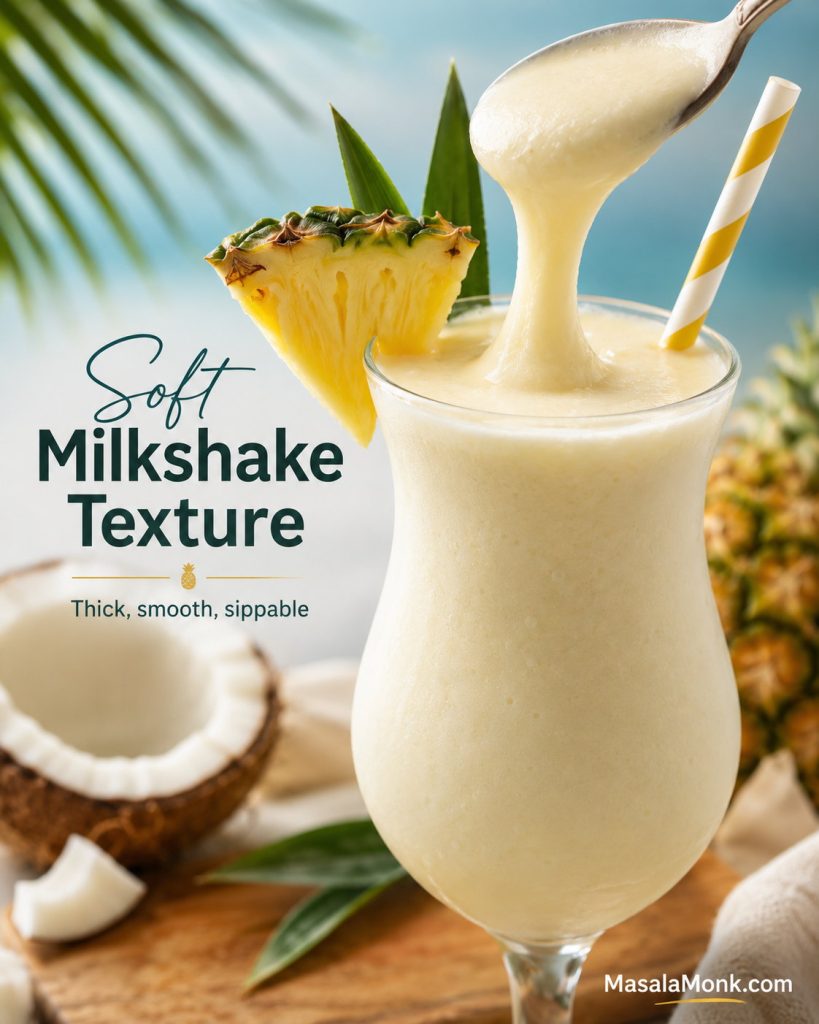
Finished frozen pina colada with thick, smooth, sippable texture shown close up with garnish and MasalaMonk.com footer.
The ideal frozen pina colada should move like a soft milkshake. If it scoops like sorbet, loosen it; if it runs like juice, add more frozen pineapple.

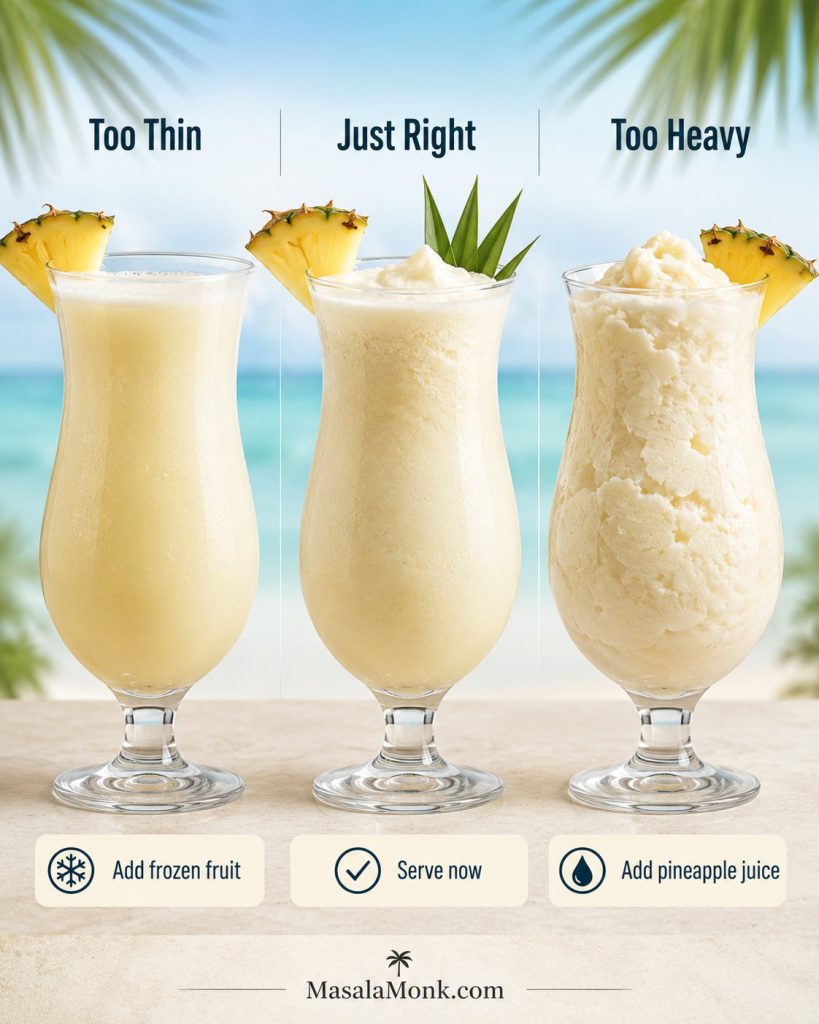
Too thin, just right, or too heavy?

For quick rescue, compare your drink with this texture guide or jump to the full pina colada troubleshooting section.

Three-part pina colada texture comparison showing too thin, just right, and too heavy with quick fix cues.
Texture fixes work better when you identify the problem first. A thin pina colada needs more frozen body, while a heavy one needs pineapple juice to bring back flow.

The same frozen-fruit logic is useful in a frozen strawberry daiquiri: fruit gives body, lime keeps it bright, and the blender stays on your side instead of against you.

If you want to compare this with a bartender-style baseline, the International Bartenders Association lists a simple white-rum, pineapple, and coconut piña colada formula.

How to Make a Pina Colada on the Rocks

A pina colada on the rocks is the cleaner, faster version: same pineapple-coconut flavor, but lighter on the palate and less dessert-like than the frozen drink. Choose it when you want a chilled cocktail that still feels tropical without turning into a smoothie.

Pina colada on the rocks in a tall glass with fresh ice, pineapple garnish, lime, and cocktail shaker in the background.
A pina colada on the rocks is the best route when you want the flavor without the blender. Shake it hard, strain over fresh ice, and the drink stays lighter while still tasting tropical.
IngredientAmount for 1 drink
White rum2 oz / 60 ml
Pineapple juice2 oz / 60 ml
Cream of coconut1½ oz / 45 ml
Fresh lime juice½ oz / 15 ml
Fresh iceFor shaking and serving

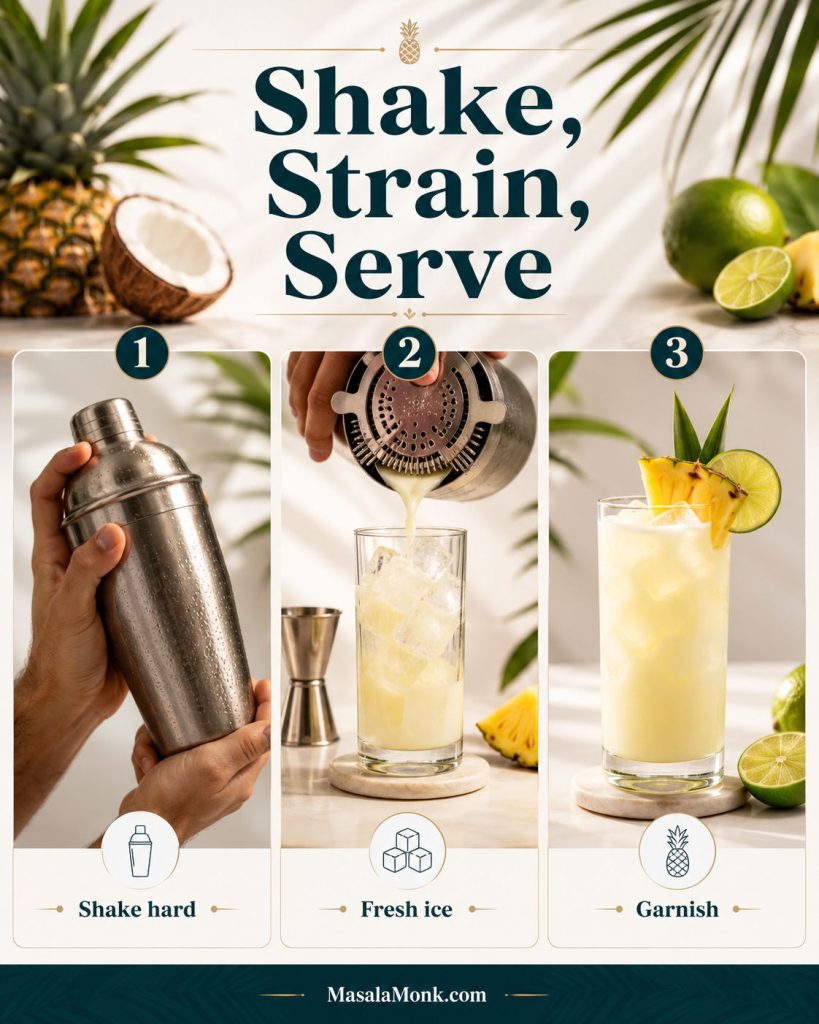
Add the rum, pineapple juice, cream of coconut, and lime juice to a cocktail shaker. Shake hard for 12–20 seconds, until the outside feels cold and the drink looks lightly frothy. Strain into a fresh glass over fresh ice.

Three-step on-the-rocks pina colada guide showing shake hard, strain over fresh ice, and garnish.
For a no-blender pina colada, fresh ice is not just decoration. It keeps the shaken drink crisp, cold, and clean instead of letting it turn loose in the glass.

The shorter ratio matters because this version has no blender full of frozen fruit to soften the drink. It should land silky and cold, with coconut on the edges rather than a thick milkshake texture.

No cocktail shaker? Use a clean jar with a tight lid. No strainer? Pour carefully or use a small sieve. If your coconut base is very thick, stir it with the pineapple juice first so it shakes evenly.

If you like the cleaner shaken style, a classic daiquiri is the leaner rum-lime cousin: no coconut, no blender, just balance.

Virgin Pina Colada / Non-Alcoholic Pina Colada Mocktail

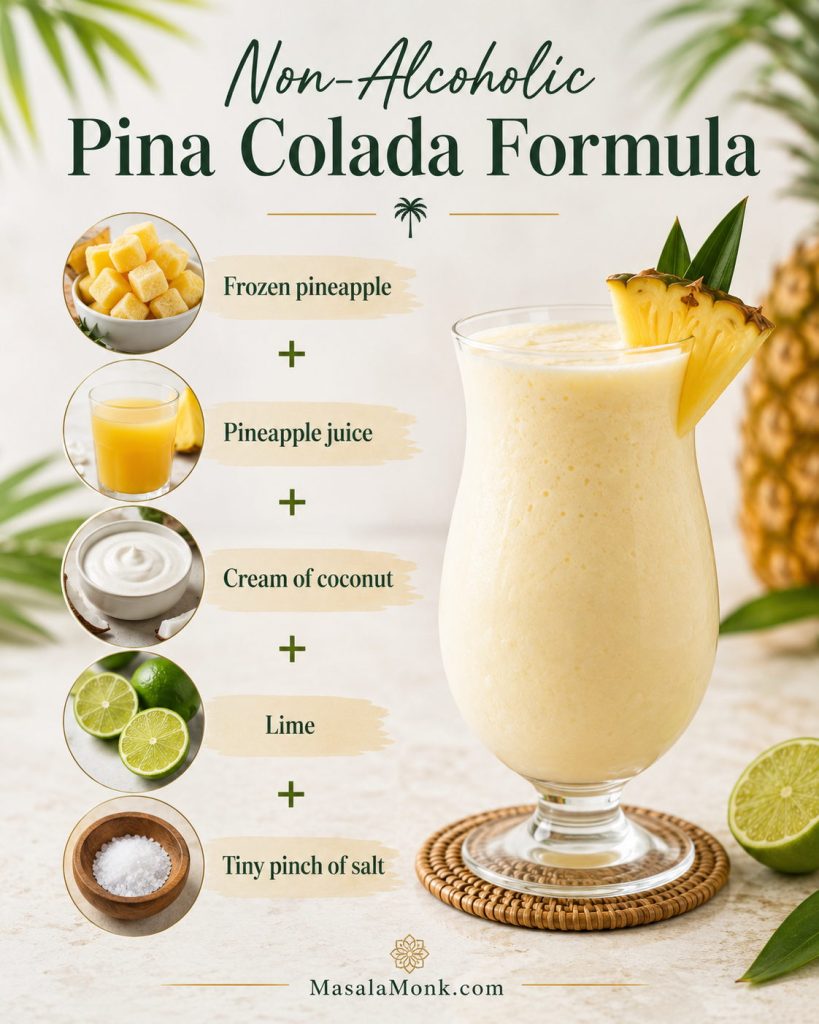
For one generous virgin pina colada, blend 1 cup frozen pineapple, ½ cup pineapple juice, ⅓–½ cup cream of coconut, 1 tablespoon lime juice, ½–1 cup ice, and a tiny pinch of salt. Use the smaller amount of coconut for a less sweet adult mocktail and the larger amount for a creamier dessert-style drink.

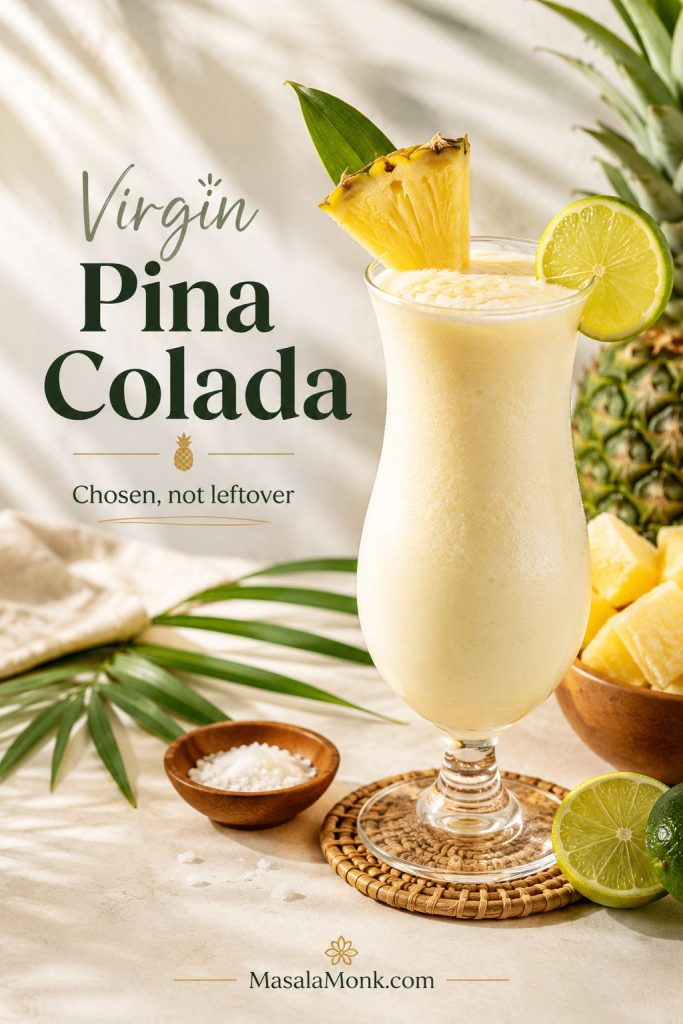
Virgin pina colada mocktail in an elegant glass with pineapple and cherry garnish, lime, and tropical styling.
A virgin pina colada should feel complete, not like rum was simply removed. Frozen pineapple, lime, and a tiny salt cue help the mocktail keep depth and brightness.

A good non-alcoholic pina colada should not taste like the rum was simply removed. Lime, frozen fruit, and a tiny pinch of salt replace some of the bite and depth, while the coconut keeps the drink smooth. The mocktail should still feel like a drink someone chose, not the version left after the rum was removed.

Non-alcoholic pina colada formula

IngredientClassic sweet mocktailLess sweet mocktail
Frozen pineapple1 cup / about 140 g1 cup / about 140 g
Pineapple juice½ cup / 120 ml½ cup / 120 ml
Cream of coconut½ cup / 120 ml⅓ cup / 80 ml
Coconut milk or coconut waterOptional splash2–3 tablespoons
Fresh lime juice1 tablespoon / 15 ml1 tablespoon / 15 ml
Ice½–1 cup, as needed½–1 cup, as needed
Optional depthTiny pinch of salt, 2–3 drops vanilla, or non-alcoholic rumTiny pinch of salt, 2–3 drops vanilla, or non-alcoholic rum
Non-alcoholic pina colada formula graphic showing frozen pineapple, pineapple juice, cream of coconut, lime, and a tiny pinch of salt.
The non-alcoholic pina colada formula needs more than pineapple and coconut. A little lime and a tiny pinch of salt make the alcohol-free version taste fuller without making it salty.

Serving both versions? Use the pitcher section to make a shared pineapple-coconut base, then add rum only to the glasses that need it.

Blend until smooth, then taste before serving. Too sweet? Add lime. Dull? Add the smallest pinch of salt. Too thick? Loosen it with pineapple juice, coconut milk, or coconut water.

For a more grown-up mocktail, add a few drops of vanilla or a splash of non-alcoholic rum. If you are also serving lighter alcohol-free drinks, our low-sugar mocktails guide has more ideas.

Classic vs virgin pina colada

Use the same care with garnish, texture, and balance for both versions. That is what makes the non-alcoholic glass feel intentional instead of secondary.

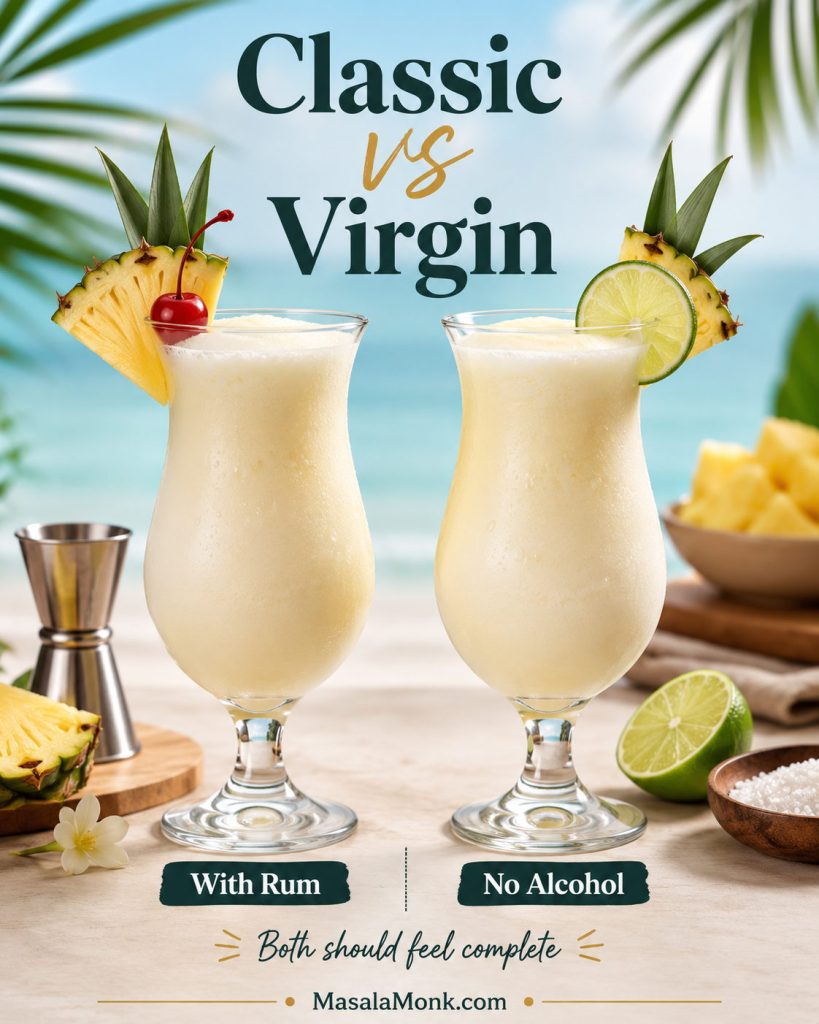
Side-by-side classic and virgin pina coladas, showing one with rum and one alcohol-free, both garnished and served in tropical glasses.
Classic and virgin pina coladas should both feel worth choosing. Keep the same care with texture, garnish, and bright finish so the mocktail does not feel like a backup drink.

Best Rum for Pina Colada

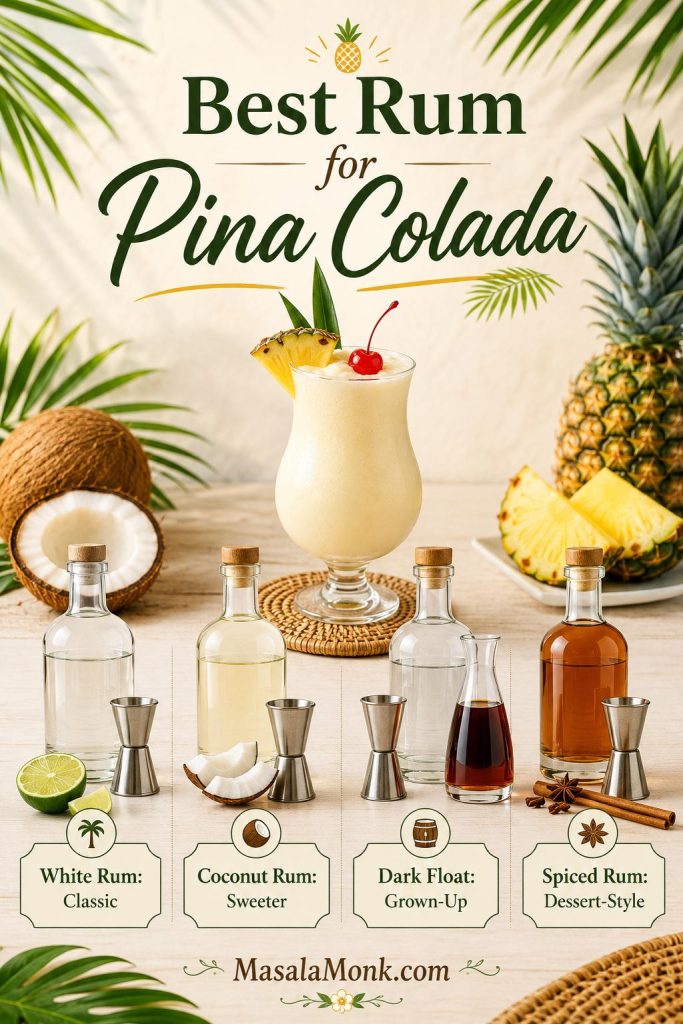
The best rum for a pina colada depends on the mood of the drink. Choose white rum for the clean classic. Coconut rum gives you a sweeter party glass. For a more grown-up finish, keep white rum as the base and add a small dark rum float.

Rum choiceBest useWhat to adjust
White rumBest default for the classic pineapple-coconut flavor.Use the main recipe as written.
Malibu or coconut rumBest sweet party version.Reduce cream of coconut so the drink does not turn candy-sweet.
White rum + dark rum floatBest deeper, more grown-up version.Keep the base light, then float a little dark rum on top.
Spiced rumDessert-style variation, not the clean classic.Use extra lime and keep the coconut controlled.
Rum chooser graphic for pina colada with white rum, coconut rum, dark rum float, and spiced rum options.
For the best rum in a pina colada, start with white rum if you want the classic to taste clean. Then move to coconut rum, a dark float, or spiced rum when you want a sweeter or deeper variation.

First time making this recipe? Start with white rum. It lets the pineapple and coconut stay in front, which is the easiest way to understand the drink before you make it sweeter, darker, or warmer.

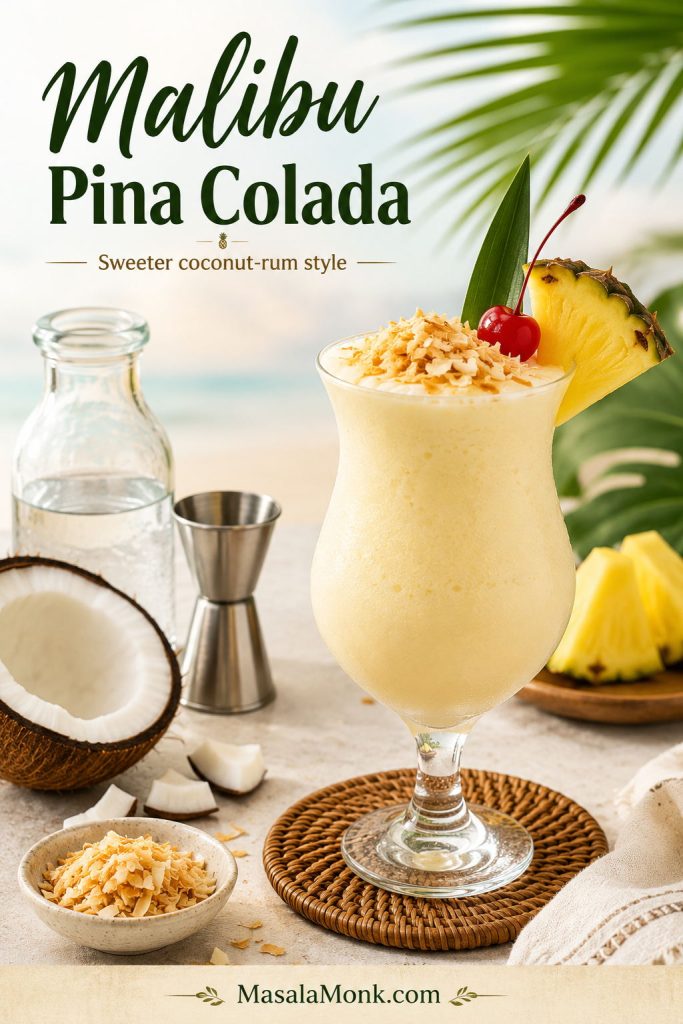
Malibu Pina Colada

For one Malibu pina colada, use 2 oz Malibu or coconut rum, 2 oz pineapple juice, 1 oz cream of coconut, ½ oz fresh lime juice, and ice. Because Malibu is already sweet and coconut-flavored, do not use the full classic amount of cream of coconut unless you want a very sweet drink.

IngredientAmount for 1 drink
Malibu or coconut rum2 oz / 60 ml
Pineapple juice2 oz / 60 ml
Cream of coconut1 oz / 30 ml
Fresh lime juice½ oz / 15 ml, optional but useful
IceFor shaking or blending
Malibu-style pina colada with toasted coconut topping, pineapple wedge, cherry, and coconut pieces.
A Malibu pina colada leans sweeter because coconut rum already brings flavor and sugar. Reduce extra sweetness or add a little more lime to keep the drink balanced.

Shake the ingredients with ice and strain over fresh ice, or blend with about 1 cup ice for a frozen drink. Too sweet? Add lime. Too light? Use half Malibu and half white rum. Want it more coconutty without making it sugary? Add a splash of unsweetened coconut milk instead of more cream of coconut.

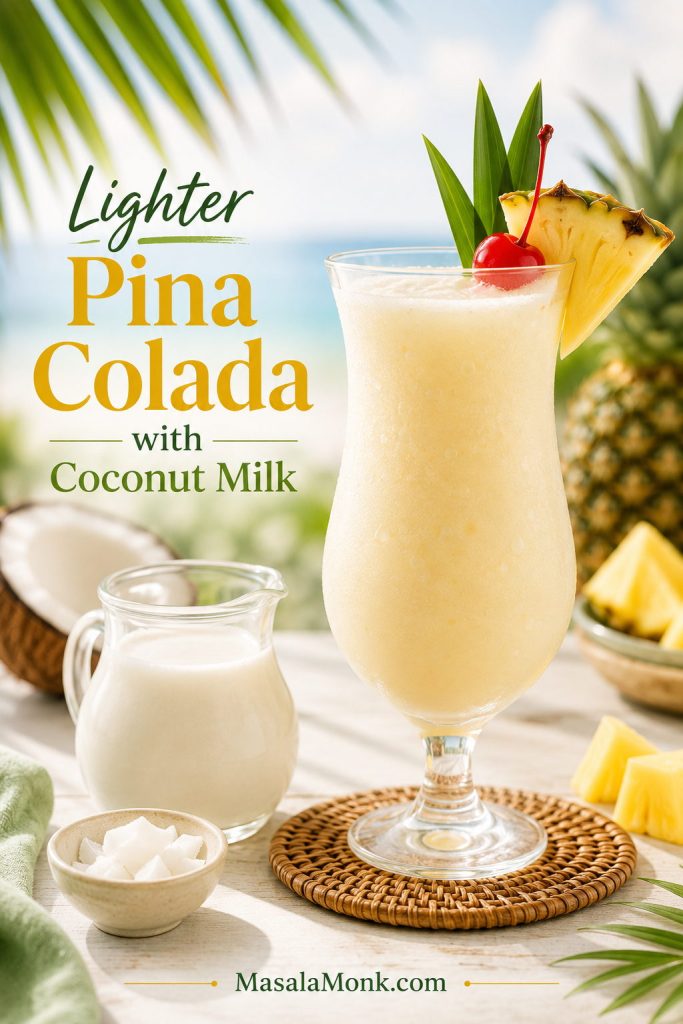
Pina Colada with Coconut Milk

A pina colada with coconut milk is lighter than the cream-of-coconut version. Choose it when you want the pineapple to feel brighter and the coconut to whisper rather than coat the glass.

Use full-fat coconut milk, not watery light coconut milk. Because it is usually unsweetened, add a little simple syrup, maple syrup, or agave only if the drink tastes sharp or thin.

IngredientAmount for 1 lighter drink
White rum2 oz / 60 ml
Pineapple juice3 oz / 90 ml
Full-fat coconut milk2 oz / 60 ml
Fresh lime juice½ oz / 15 ml
Simple syrup, maple syrup, or agave½–1 oz / 15–30 ml, to taste
Frozen pineapple½ cup / about 70–75 g
Ice½–1 cup, as needed
Lighter pina colada made with coconut milk, shown with a coconut milk pitcher, pineapple garnish, cherry, and tropical background.
A coconut milk pina colada tastes lighter and brighter than the classic. Because coconut milk is thinner and less sweet, the drink needs help from pineapple and careful chilling.

Blend just until smooth. Thin? Add more frozen pineapple. Sharp? Add sweetener gradually. Want it richer? Add 1 tablespoon cream of coconut or coconut cream.

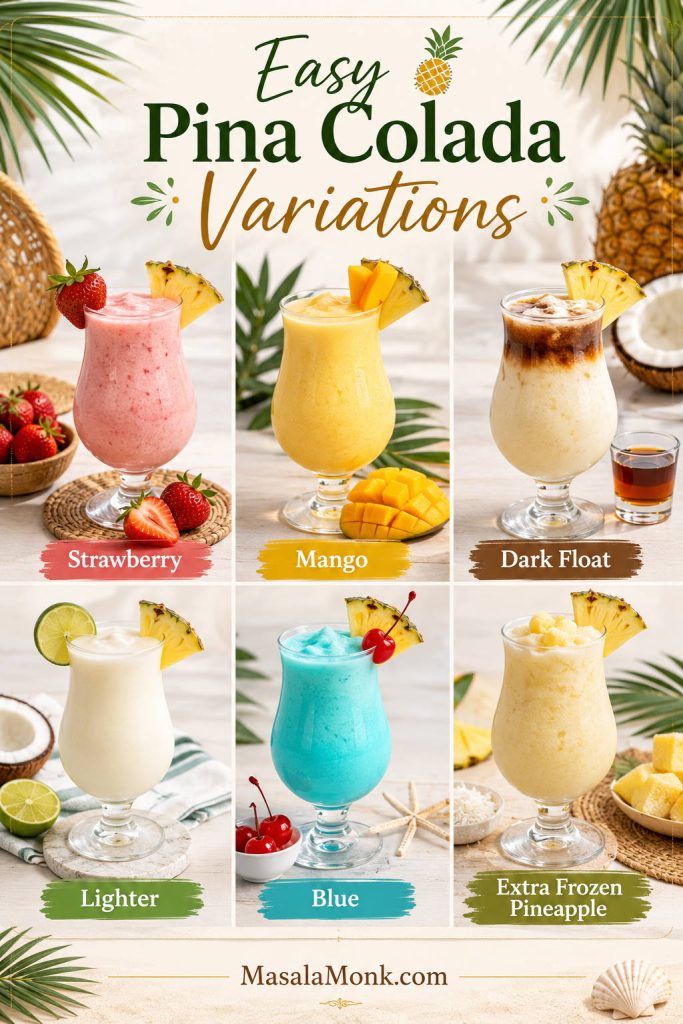
Easy Pina Colada Variations

Once the base ratio is clear, variations become easy. Keep the pineapple-coconut structure, then change one thing at a time: fruit, rum, sweetness, or finish.

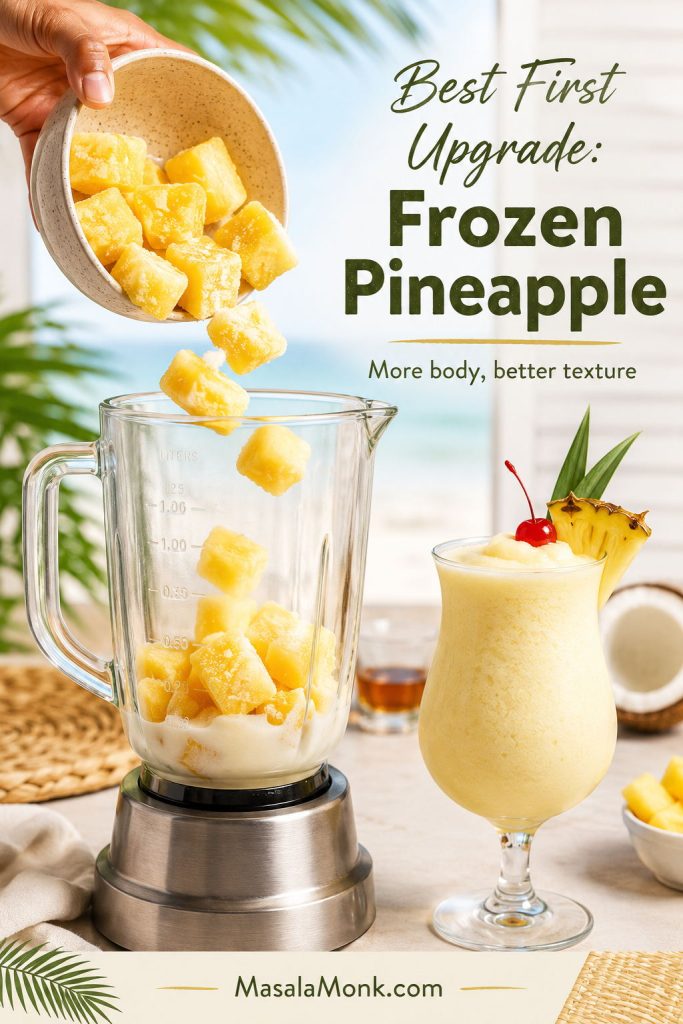
If you only try one variation first, make the frozen pineapple version. It improves body and fruit flavor without changing the identity of the drink.

Frozen pineapple chunks being poured into a blender for a thicker pina colada, with a finished drink beside it.
Frozen pineapple is the best first upgrade for a frozen pina colada. It adds body, keeps the flavor tropical, and reduces the need for extra ice.
VariationHow to make it
Strawberry pina coladaAdd ½–1 cup frozen strawberries and keep the coconut slightly lighter.
Mango pina coladaAdd ½ cup frozen mango for a thicker, golden tropical version.
Frozen pineapple pina coladaUse more frozen pineapple for stronger fruit flavor and a smoother pour.
Blue pina coladaAdd a small amount of blue curaçao and reduce other sweet elements.
Dark rum floatMake the classic recipe, then float a little dark rum on top before serving.
Skinny pina coladaUse coconut water or coconut milk, frozen fruit, and less cream of coconut.
Pina colada variations board showing strawberry, mango, dark float, lighter, blue, and extra frozen pineapple versions.
Pina colada variations work best when you change one lever at a time. Add fruit for flavor, a dark rum float for depth, or extra frozen pineapple for thicker texture.

For a deeper list of flavor twists, see our full guide to Piña Colada variations, including strawberry, mango, coconut rum, frozen pineapple, and non-alcoholic versions.

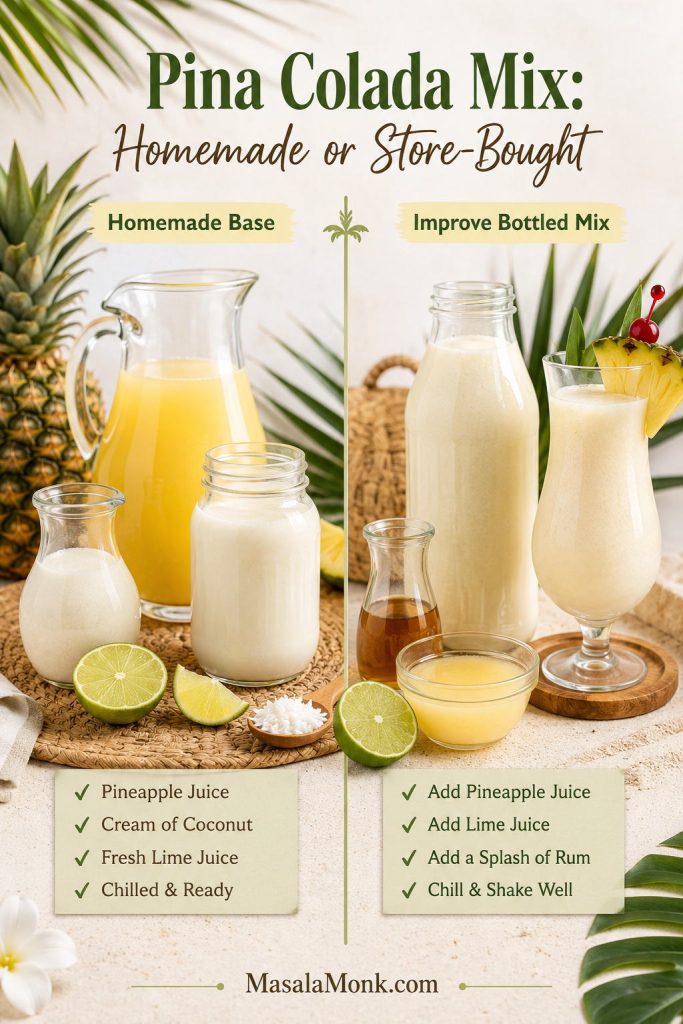
Pina Colada Mix: Homemade or Store-Bought

Pina colada mix is useful when speed matters, but it can taste dull if you only add rum and blend. Store-bought mix is not a failure; it just needs freshness added back. Treat it as a shortcut base, then wake it up with acid, cold, and real pineapple flavor.

Pina colada mix guide comparing homemade base with improved bottled mix using pineapple juice, cream of coconut, lime, and a finished drink.
A homemade pina colada mix gives you control over sweetness, coconut body, and lime. Bottled mix can still work, but it usually needs freshness added back before serving.

Homemade pina colada mix

Homemade mix ingredientAmount
Cream of coconut1 cup
Pineapple juice¾ cup
Fresh lime juice3 tablespoons

Stir or blend until smooth, then refrigerate in an airtight container for 2–3 days. This is the liquid base, not the finished cocktail.

How much mix per drink?

Use about 4 oz homemade mix with 2 oz white rum. Blend for a frozen drink or shake for an on-the-rocks version. For a mocktail, skip the rum and add pineapple or coconut water if the glass needs loosening.

Using bottled mix for a party? The pitcher guide and store-bought mix fixes will help keep the drink fresh instead of flat.

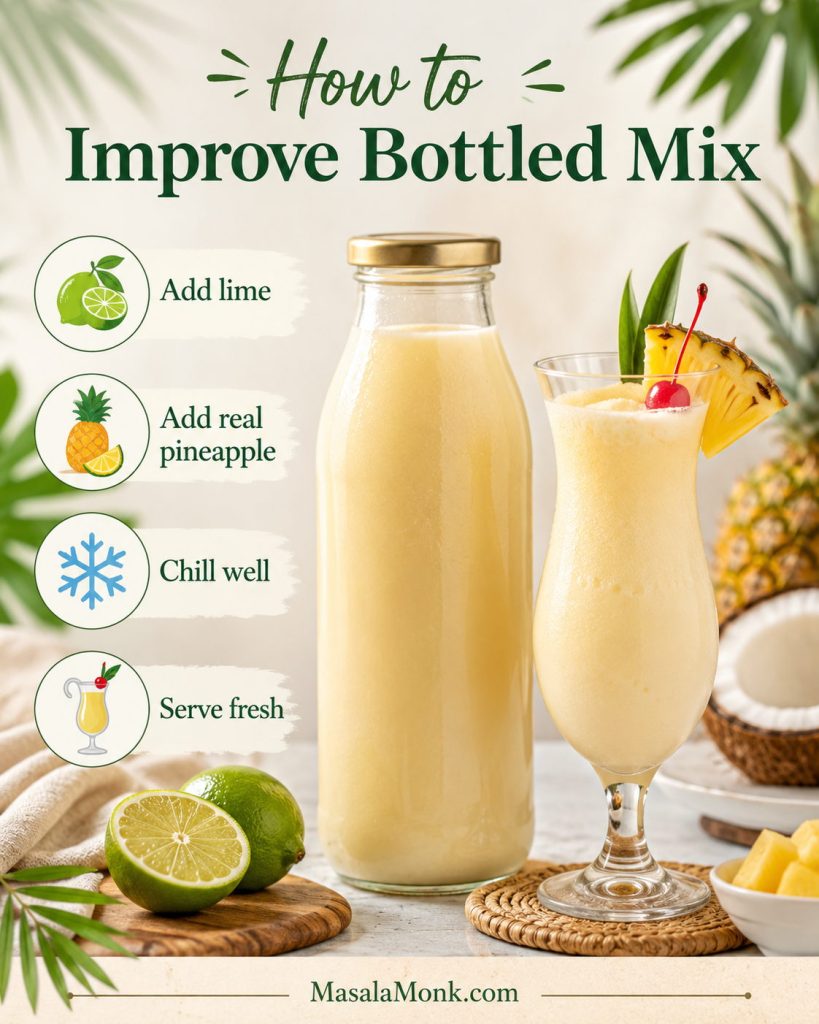
How to improve store-bought pina colada mix

  • Add fresh lime if it tastes syrupy.
  • Use white rum instead of coconut rum when the mix is already very sweet.
  • Add frozen pineapple if the flavor feels thin.
  • Avoid extra cream of coconut unless the drink truly lacks body.
Guide to improving bottled pina colada mix with lime, real pineapple, chilling, and fresh serving cues.
Store-bought pina colada mix often tastes dull because it lacks fresh edges. Start with lime and real pineapple flavor, then chill well so the shortcut still tastes alive.

If you are making a big non-blended bowl instead, this punch with pineapple juice guide is better for ginger ale, Sprite, sherbet, cranberry, lemonade, and party punch variations.

Pina Colada Pitcher for a Party

A pitcher works best when you make the liquid base ahead and finish each round at serving. Do not blend the whole pitcher and park it in the fridge; that is how a good piña colada becomes sweet pineapple-coconut water.

IngredientFor 4 drinks
White rum1 cup / 240 ml
Pineapple juice1½ cups / 360 ml
Cream of coconut1 cup / 240 ml
Fresh lime juice¼ cup / 60 ml
Pina colada pitcher with serving glasses, pineapple wedges, cherries, lime, frozen pineapple, and rattan tray styling.
A pina colada pitcher should be party-ready without tasting tired. Keep the base cold and serve close to drinking time so each glass tastes fresh, not leftover.

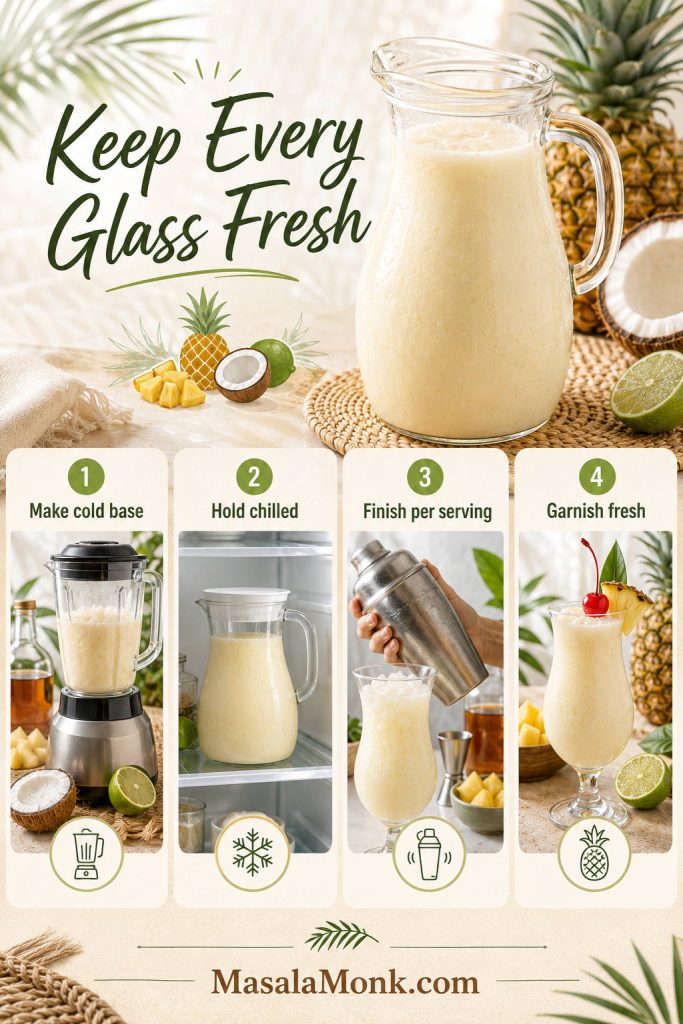
Whisk or blend the base until smooth, then refrigerate. For frozen drinks, blend in 1–2 drink portions. For on-the-rocks drinks, shake individual servings or stir the base well over fresh crushed ice. This way, every glass tastes like the first one, not the leftover one.

Batch pina colada guide showing make cold base, hold chilled, finish per serving, and garnish fresh steps.
Batch the base, not the finished frozen drink. This keeps the pina colada smooth and bright, especially when you want every guest’s glass to taste like the first one.

If serving both alcoholic and alcohol-free drinks, make a pineapple-coconut-lime base without rum. Add rum to individual glasses for adults and label the alcohol-free batch clearly.

For alcohol-free guests, use the virgin pina colada formula. For texture problems during serving, use the troubleshooting table.

If you want a pitcher-first tropical drink rather than individual frozen glasses, this rum punch recipe is built for fruit juice, lime, rum, and party-style serving.

How to Fix a Pina Colada

Most piña colada problems are easy to fix once you know what caused them. Taste first, then adjust one thing at a time.

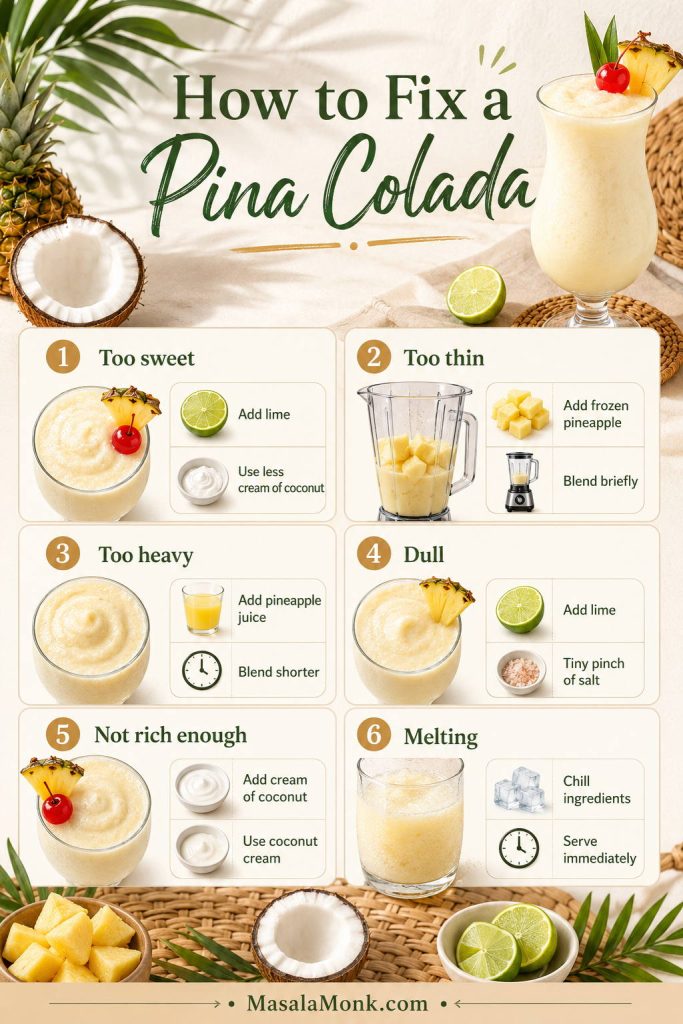
Fast rescue guide: thin? Add frozen pineapple. Heavy? Add pineapple juice. Too sweet? Add lime. Dull? Add lime and a tiny pinch of salt. Not rich enough? Add a little more coconut base.

Pina colada troubleshooting guide with fixes for too sweet, too thin, too heavy, dull, not rich enough, and melting drinks.
Troubleshoot by fixing the biggest problem first. Too sweet needs lime, too thin needs frozen pineapple, too heavy needs pineapple juice, and melting usually means the ingredients were not cold enough.
ProblemLikely reasonFix
Too wateryToo much liquid, melted dilution, or over-blendingAdd frozen pineapple, then blend briefly.
Too thickToo much frozen fruit or not enough liquidAdd pineapple juice 1 tablespoon at a time.
Too sweetToo much cream of coconut or coconut rumAdd lime juice, pineapple juice, or a splash of white rum.
Not creamyCoconut milk was used instead of cream of coconutAdd cream of coconut or coconut cream.
Bland or flatNot enough acid or contrastAdd fresh lime and a tiny pinch of salt.
SeparatingThe drink sat too long or the coconut was not mixed wellStir, shake, or re-blend briefly and serve immediately.
Too icyToo much frozen bulk and not enough creamy liquidAdd pineapple juice or coconut base and blend briefly.

Make-Ahead and Storage

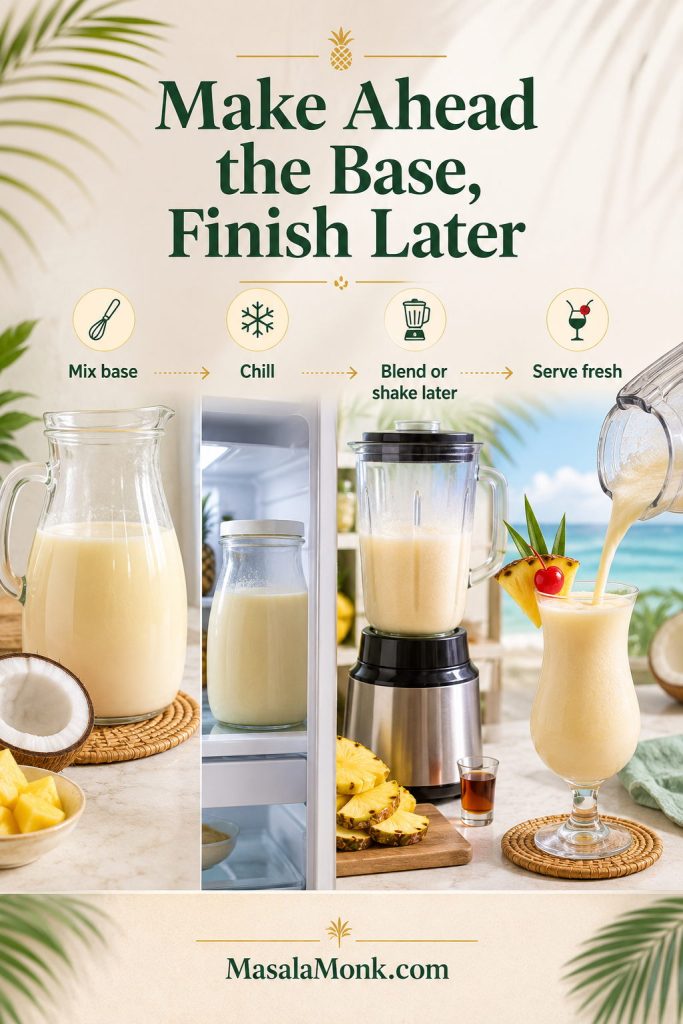
A pina colada is best served immediately, especially when frozen. The make-ahead move is simple: prepare the pineapple-coconut-rum base, chill it, then finish the drink right before serving.

Make-ahead pina colada guide showing cold base, chill step, blend or shake later, and serve fresh.
For a make-ahead pina colada, prepare the base early but finish the drink later. That way, the flavor is ready and the texture still tastes freshly blended or shaken.

An alcohol-free base works the same way. Keep it cold, then blend or shake when guests are ready. Leftover blended drink can be frozen and re-blended with a splash of pineapple juice, but the fresh texture will always be better.

Pina Colada FAQs

What are the three main ingredients in a pina colada?

Rum, pineapple, and coconut are the core ingredients. Most creamy home versions also need a frozen element, and fresh lime makes the finish cleaner.

What is the best alcohol for a pina colada?

White rum is the best classic choice. Coconut rum is sweeter, while a small dark rum float gives a deeper finish.

Should I use cream of coconut or coconut milk?

Use cream of coconut for the classic sweet, creamy piña colada. Use coconut milk only when you want a lighter drink and are willing to adjust sweetness.

Is cream of coconut the same as coconut cream?

No. Cream of coconut is sweetened and syrupy; coconut cream is usually unsweetened and rich, so it needs added sweetener in most recipes.

How do I make a non-alcoholic pina colada taste less flat?

Use frozen pineapple, lime, and a tiny pinch of salt. Vanilla or non-alcoholic rum can add some of the depth that regular rum normally brings.

How do I make a pina colada without a blender?

Shake rum, pineapple juice, cream of coconut, and lime hard until cold, then serve in a fresh glass. It will be frothy and chilled, not frozen.

What makes a pina colada too watery?

Too much liquid, melted dilution, weak coconut body, or over-blending can make it watery. Measure the first batch and serve right away.

How do I make a pina colada less sweet?

Use less cream of coconut, choose white rum instead of coconut rum, or add fresh lime. Make small changes so the drink stays balanced.

Can I make pina coladas ahead of time?

Yes, but make only the liquid base ahead. Chill it, then blend or shake with the frozen/cold ingredients when ready to serve.

What is the difference between a pina colada and a Chi-Chi?

A pina colada is usually made with rum. A Chi-Chi is the similar pineapple-coconut drink made with vodka instead.

Final Sip

A good piña colada should taste cold before it tastes sweet: pineapple first, coconut next, rum in the background, and lime keeping the finish clean. Once that balance is right, the rest is easy — frozen, shaken, virgin, Malibu, lighter with coconut milk, or batched for a party.

Make the classic version once with measured ingredients. After that, you will know exactly how the drink should feel: tropical, smooth, refreshing, and just rich enough to feel like a small vacation in the glass.

Back to top

Posted on 14 Comments

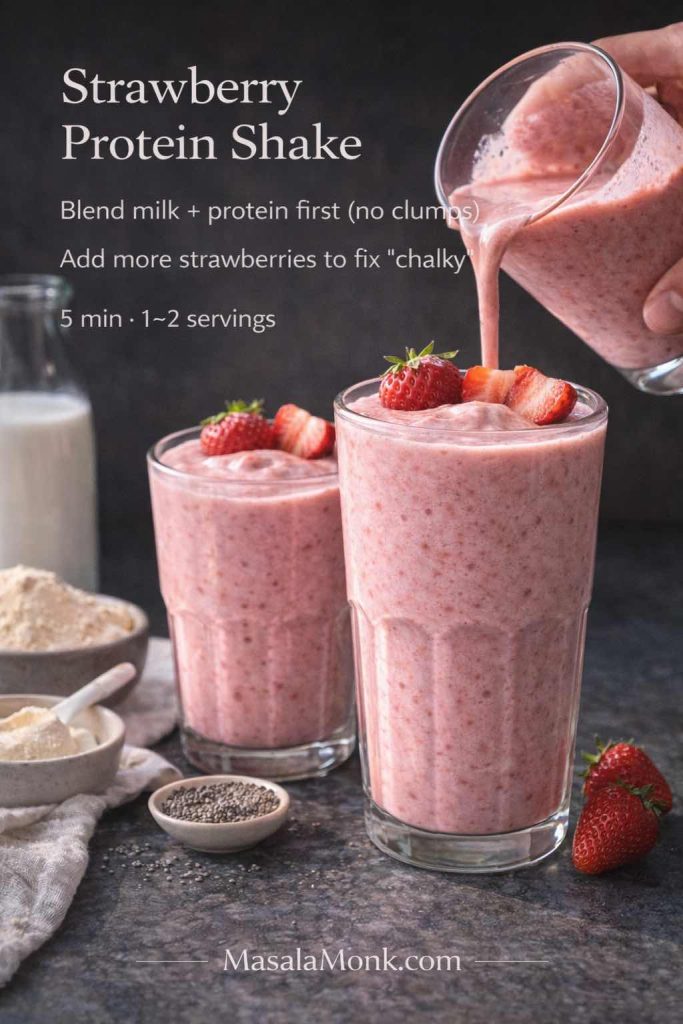
Strawberry Smoothie Recipes (12 Easy Blends + Bowls & Protein Shakes)

The Ultimate Strawberry Smoothie Guide cover featuring a creamy strawberry smoothie in a glass topped with fresh strawberries and chia seeds on a dark background.

A strawberry smoothie recipe can be as simple as fruit and milk—sweet, cold, and comforting in the way only strawberries manage. Still, it can also be the kind of drink that feels a little more intentional: thicker, creamier, packed with protein, or bright and tropical depending on what you toss into the blender. That’s the charm. You can keep it basic on a sleepy morning, then lean into something spoonable and extra on the weekend.

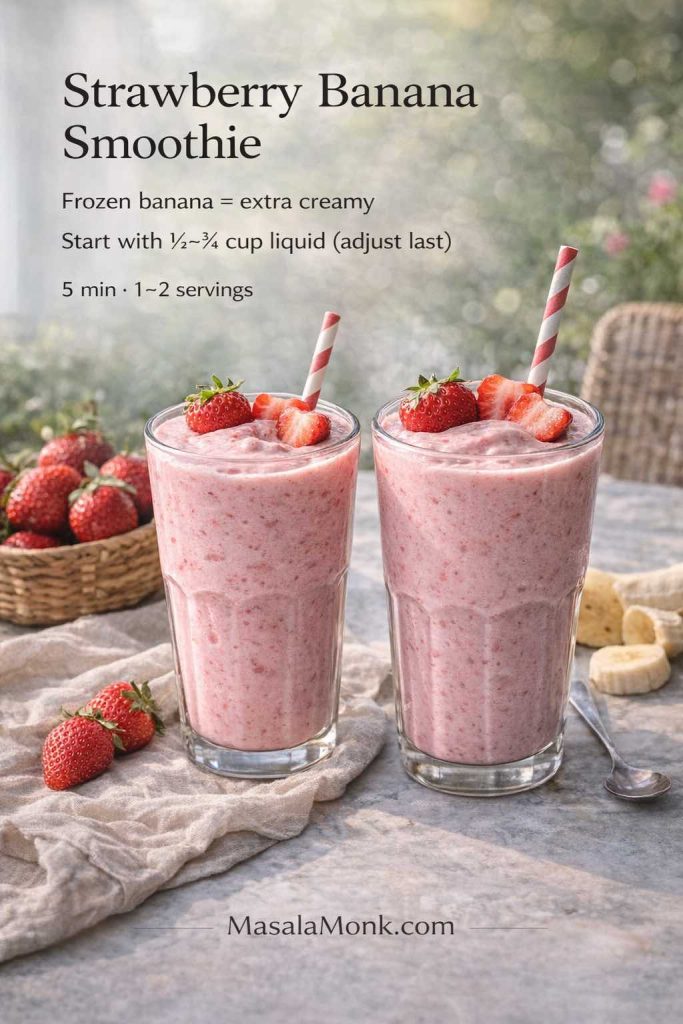
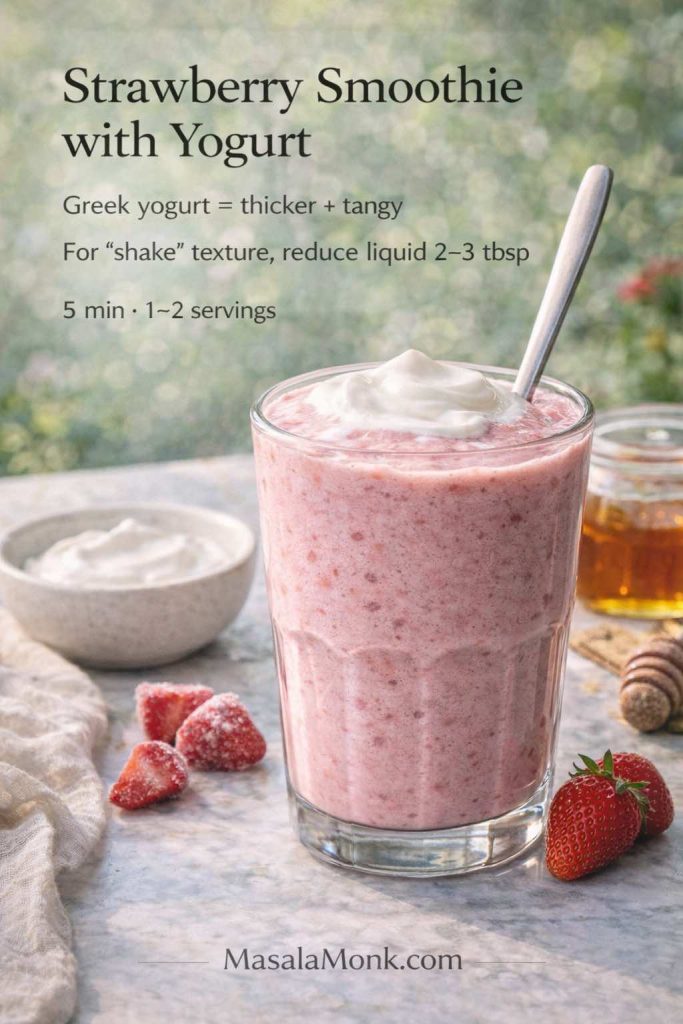
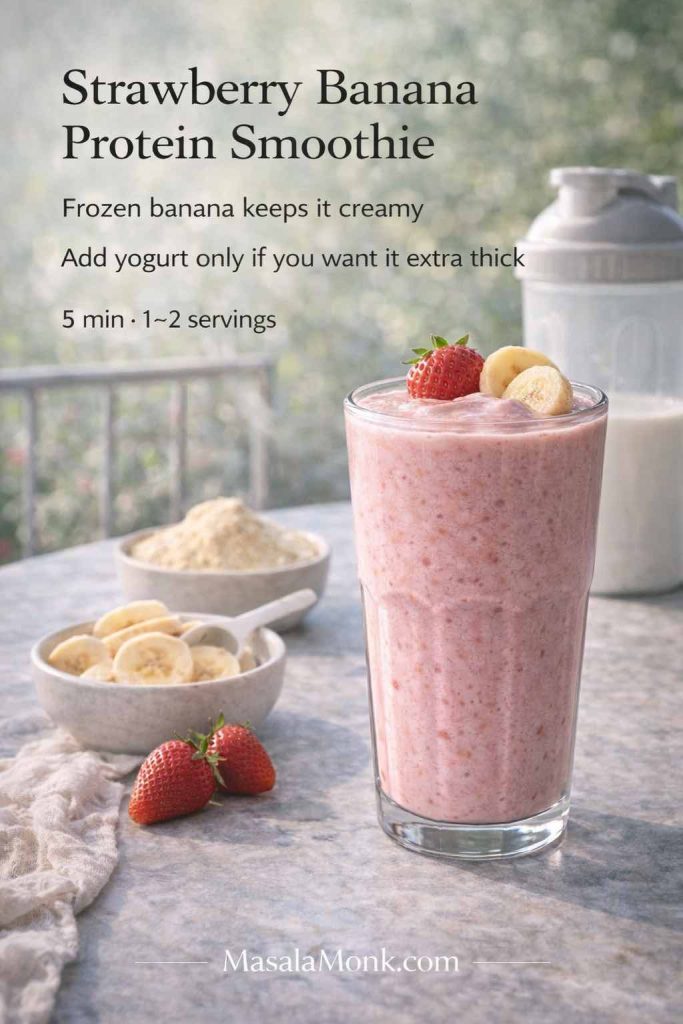
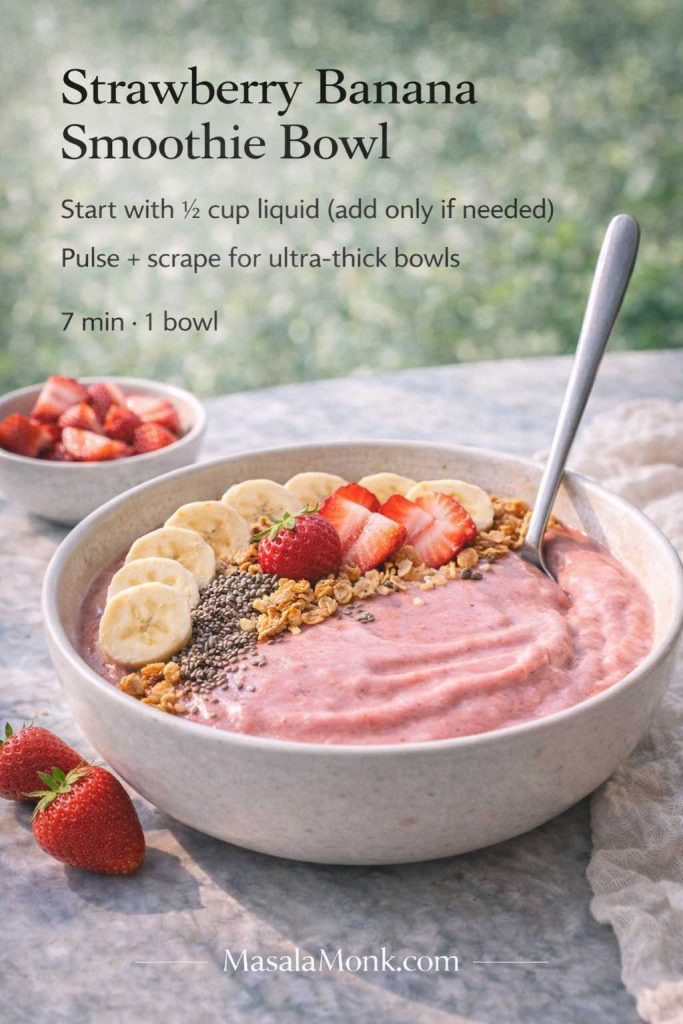
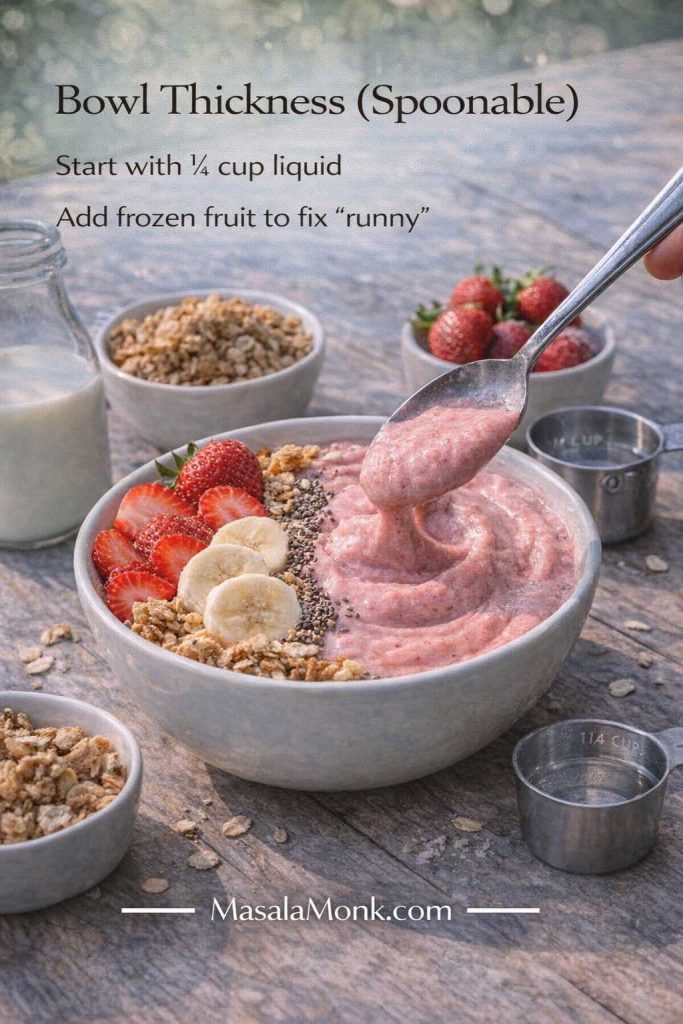
Even if you start with one strawberry smoothie recipe, the variations open up fast. Add banana and you’ve got a strawberry banana smoothie that tastes like a classic diner treat. Stir in yogurt and it turns into a strawberry smoothie with yogurt—tangy, creamy, and quietly luxurious. Blend in protein powder and you’re suddenly in strawberry protein shake territory, where the smoothie stops being “just a drink” and starts pulling real weight as breakfast or post-workout fuel. Push the texture thicker and you’ve stepped into strawberry smoothie bowl land, with toppings and crunch and the satisfaction of eating your smoothie with a spoon.

Before any of that, though, it’s worth doing two quick things that make every version better.

First, wash fresh strawberries properly. The FDA’s guidance on handling produce is practical and straightforward in their page on selecting and serving produce safely. Second, if you ever like checking nutrition basics for ingredients you use often, the USDA FoodData Central strawberry listings are a dependable reference.

Now that you’ve got clean berries and a blender, let’s make smoothies that taste like strawberries—whether you want them light and drinkable, thick and creamy, or bold enough to count as a full meal.

Also Read: Fight Anemia and Boost Hemoglobin: 10 High Iron Shakes & Smoothie Ideas


The small details that make smoothies taste smoother, richer, and more “finished”

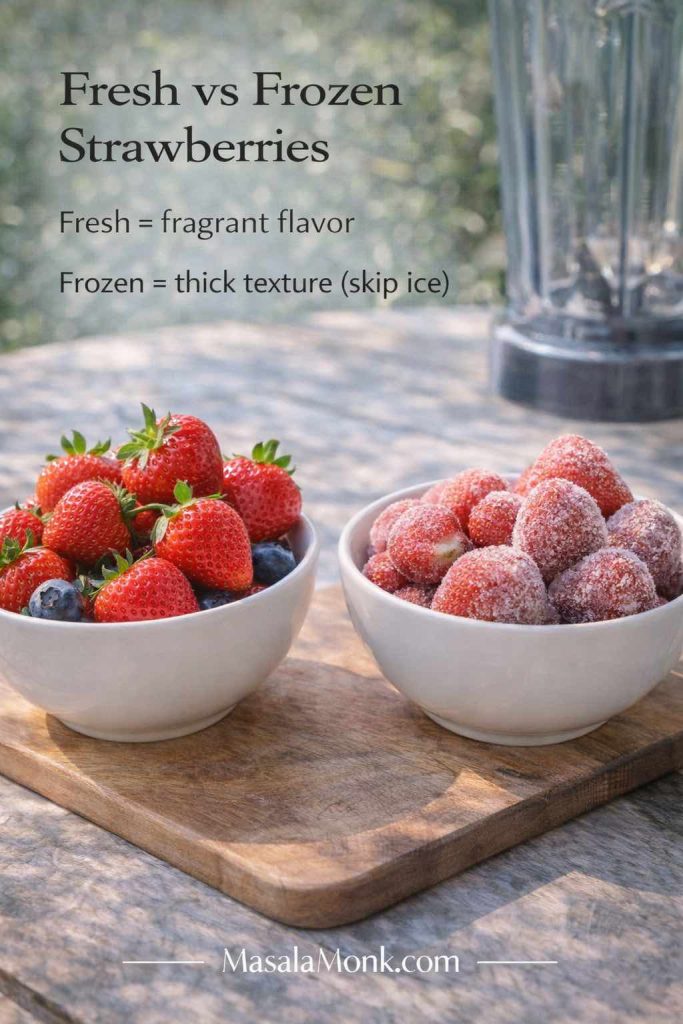
Start with the fruit: fresh strawberries vs frozen strawberries

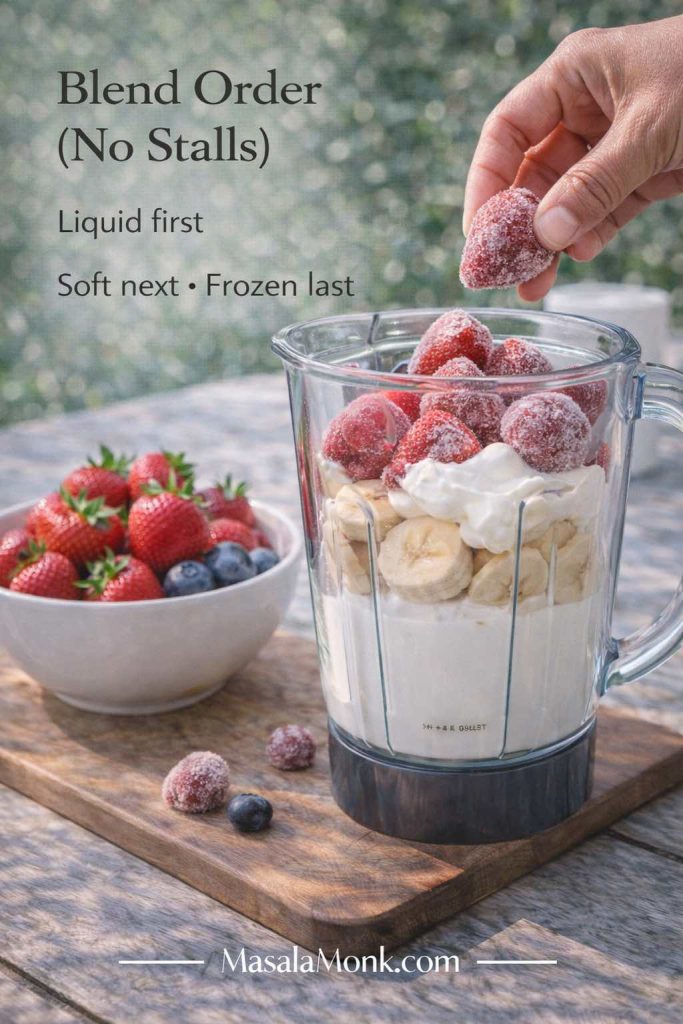
Fresh strawberries taste vivid and perfumed when they’re in season. Frozen strawberries, on the other hand, are the secret to texture. If you’re chasing that thick café-style consistency, a strawberry smoothie made with frozen strawberries is hard to beat.

Fresh vs frozen strawberries guide card for smoothies showing two bowls of strawberries outdoors, with tip that frozen strawberries make thicker smoothies and help you skip ice.
Fresh vs Frozen Strawberries: Use fresh berries when you want the most fragrant strawberry flavor—use frozen berries when you want thickness and a frosty smoothie without watering it down with ice.

When you use frozen fruit, you’re essentially replacing ice with flavor. That’s why the “smoothie frozen fruit” approach works so well: you get frost and thickness without watering down the fruit. The same logic applies to any recipe for smoothie with frozen fruit—frozen berries, frozen mango, frozen pineapple—because cold fruit behaves like a built-in thickener.

If your blender is strong, you can go fully frozen. If it struggles, you can use half frozen and half fresh, then adjust.

A simple ratio that keeps you out of watery territory

A lot of disappointment comes from one thing: too much liquid too soon. Instead, begin conservatively and add more only when the blender needs it.

A reliable starting point for most drinkable smoothies:

  • 2 cups fruit (more if you want it extra thick)
  • ¾ cup liquid (milk, almond milk, coconut water, juice)
  • ½ cup creamy element (yogurt, banana, oats, nut butter)
No-watery smoothie ratio guide card showing milk being poured into a blender jar beside strawberries, with tip to use 2 cups fruit and start with 3/4 cup liquid.
The No-Watery Smoothie Ratio: Start thick on purpose—use plenty of fruit and add liquid only as needed. It’s the easiest way to avoid a bland, watery smoothie without adding ice.

For thicker blends, especially smoothie bowls:

  • 2½ to 3 cups frozen fruit
  • ¼ to ½ cup liquid (start low)
  • Optional yogurt, but don’t lean on it too heavily unless you like a tang-forward bowl

Once you get comfortable with this, you can improvise endlessly—banana strawberry fruit smoothie one day, strawberry mango smoothie the next—without thinking too hard about measurements.

Choosing the liquid sets the vibe

The liquid you choose isn’t just “what makes the blender spin.” It decides the flavor direction and the mouthfeel.

Pick your liquid guide card for strawberry smoothies showing three glasses of milk, almond milk, and coconut water, with tip that milk makes smoothies creamy, almond milk keeps them light, and coconut water tastes tropical.
Pick Your Liquid: Milk gives the creamiest strawberry smoothie, almond milk keeps it lighter, and coconut water makes fruit taste brighter—choose based on whether you want “milkshake” comfort or a refreshing finish.
  • Milk makes a classic strawberry smoothie with milk: creamy, mild, and familiar.
  • Almond milk keeps things lighter and slightly nutty, which is perfect for an almond milk strawberry smoothie or a banana strawberry smoothie almond milk version.
  • Yogurt-based liquids (like kefir or drinkable yogurt) create a tangy, thicker “strawberry smoothie drink” feel.
  • Coconut water brightens tropical smoothies. If you like that clean, refreshing finish, MasalaMonk’s coconut water smoothie ideas are a great source of flavor combinations.

Yogurt: regular, Greek, or strawberry yogurt?

Yogurt is one of the easiest ways to turn “nice” into “wow.”

Choose your yogurt guide card for strawberry smoothies showing Greek yogurt, regular yogurt, and strawberry yogurt in small bowls, with tip that Greek yogurt is thick, regular yogurt is more drinkable, and strawberry yogurt is sweeter.
Choose Your Yogurt: Want a thick, café-style strawberry smoothie? Go Greek. Prefer a lighter sip? Use regular yogurt. Want extra sweetness without adding honey? Strawberry yogurt does the job.
  • Greek yogurt makes thick smoothies and supports the kind of creamy texture people want when they look up smoothie recipes with Greek yogurt.
  • Regular yogurt is softer and more drinkable; it’s ideal for strawberry fruit smoothie recipes with yogurt that feel light but still creamy.
  • Strawberry yogurt adds extra sweetness and a dessert-like flavor. It’s also handy if you want a strawberry smoothie with strawberry yogurt and you don’t feel like adding a sweetener.

If you like the idea of a strawberry yogurt shake recipe that feels like a treat without ice cream, yogurt is the cleanest path.

Blend order matters more than you think

If your blender ever stalls, it’s usually because frozen fruit got stuck around the blades. The fix is simple: blend in layers.

Smoothie blend order guide card showing a blender jar layered with milk, banana, yogurt, and frozen strawberries, with tip to add liquid first, soft ingredients next, and frozen fruit last.
Blend Order (No Stalls): Putting liquid in first helps the blades catch—then add soft ingredients, and finish with frozen fruit so everything blends smooth without getting stuck.
  1. Liquid first
  2. Soft ingredients next (yogurt, banana, nut butter, protein powder)
  3. Frozen fruit last

With leafy greens, blend greens with liquid first, then add fruit. You’ll see why when we get to the strawberry spinach smoothie.

Sweetness: aim for balance, not sugar

Strawberries can be sweet or tart depending on the batch. Instead of reaching straight for sugar, you can sweeten through ingredients:

  • ripe banana
  • dates
  • honey or maple
  • a splash of orange juice (especially good with pineapple)
Sweeten strawberry smoothies naturally guide card showing a strawberry smoothie with banana slices, dates, honey, and a pinch of salt, with tip that salt makes fruit taste brighter.
Sweeten the Smart Way: If your strawberries are tart, sweeten with banana, dates, or a little honey—then add a tiny pinch of salt to make the fruit flavor pop without making the smoothie taste “salty.”

A tiny pinch of salt can also make fruit taste brighter. It won’t taste salty; it just rounds out the flavor.

A note on “shake” style smoothies (without ice cream)

When someone wants a strawberry shake recipe, they often mean a smoothie that feels like a milkshake—thicker, creamier, a little frothy—without adding ice cream.

Strawberry shake without ice cream guide card showing a frothy strawberry shake in a tall glass with frozen strawberries and cold milk, with tip to blend longer for a fluffier texture.
Shake Style (No Ice Cream): Skip the ice cream and the ice—use cold milk plus frozen strawberries, then blend a little longer to whip in air for that milkshake-like fluff.

To get that strawberry milkshake without ice cream feel:

  • use cold milk
  • use frozen strawberries
  • include banana or yogurt for thickness
  • blend a little longer for fluff

That’s it. You’ll get a strawberry shake without ice cream that still feels indulgent.

Also Read: How to Make Churros (Authentic + Easy Recipe)


Recipe 1: Strawberry Smoothie (Classic, flexible, and dependable)

This is the foundational strawberry smoothie recipe you can return to anytime. It’s simple enough to memorize, yet it’s also the base that supports dozens of strawberry fruit smoothie recipes.

Ingredients for Strawberry Smoothie Recipe

  • 2 cups strawberries (fresh or frozen)
  • ¾ cup milk (or almond milk)
  • ½ cup yogurt (optional)
  • 1–2 teaspoons honey or maple (optional)
  • Ice (only if using fresh strawberries and you want it extra cold)
Classic strawberry smoothie recipe card in a tall glass, with tip to use frozen strawberries for a thicker smoothie and start with less liquid.
Classic Strawberry Smoothie: For a thicker café-style blend, use frozen strawberries instead of ice and add liquid gradually—start low, then loosen only if the blender needs it.

Method

Add the liquid to the blender first, followed by strawberries. Blend until smooth. If you’re using yogurt, add it after the berries break down, then blend again. Taste and adjust.

Make it three different ways (without changing the spirit)

Strawberry smoothie with yogurt
Add ½ cup Greek yogurt for a creamy, thick finish. This is the version that often feels like the best strawberry smoothie recipe when you want something satisfying.

Strawberry smoothie recipe without yogurt
Skip yogurt and add ½ banana, or 2 tablespoons oats, or 1 tablespoon chia. Each makes it creamy in a different way.

Strawberry smoothie with milk
Use cold milk and frozen strawberries for a smooth, classic drink. If you want it extra thick, reduce the milk slightly and add more frozen strawberries instead.

If you’re ever unsure what to do with a batch of berries, this is the “good strawberry smoothie recipe” you can make without thinking.

Also Read: Peanut Butter Cookies (Classic Recipe & 3 Variations)


Recipe 2: Strawberry Banana Smoothie (the classic everyone loves)

A strawberry banana smoothie is sweet, creamy, and forgiving. It’s also the smoothie that most people associate with the phrase “fruit smoothie.” Whether you call it banana and strawberries smoothie or banana strawberry fruit smoothie, the goal is the same: smooth texture, bright berry flavor, and a sweetness that feels natural.

Ingredients for Strawberry Banana Smoothie Recipe

  • 2 cups strawberries (frozen is ideal)
  • 1 banana (fresh or frozen)
  • ¾ cup milk (or almond milk)
  • ½ cup yogurt (optional)
  • Pinch of salt (optional)
Strawberry banana smoothie recipe card showing two creamy smoothies, with tip to use frozen banana for a thicker texture and start with less liquid.
Strawberry Banana Smoothie: Freeze the banana for built-in creaminess, then add milk slowly—thickness comes from fruit, not extra liquid.

Method

Blend milk and strawberries first. Once the strawberries break down, add banana and yogurt (if using), then blend until creamy.

Variation options you’ll actually use

Strawberry banana smoothie with yogurt
Use Greek yogurt for extra thickness. If you’re building smoothie recipes with yogurt and strawberries into your routine, this is a great staple.

Strawberry banana smoothie with milk
Keep it simple: cold milk + frozen strawberries + banana. It feels like a strawberry banana drink, especially if you blend it until slightly frothy.

Strawberry banana smoothie without yogurt
Frozen banana does the heavy lifting. Use slightly less liquid and you’ll still get a thick smoothie.

If you enjoy comparing techniques, Serious Eats has a clear, straightforward strawberry banana smoothie method that’s easy to read alongside your own version.

And if you ever want a more filling, nutty twist, MasalaMonk’s nut-infused smoothie recipes are a great way to borrow ideas—like adding walnuts for richness without making the smoothie taste heavy.

Also Read: Double Chocolate Chip Cookies – Easy Recipe with 7 Variations


Recipe 3: Strawberry Smoothie With Yogurt (extra creamy, lightly tangy)

Sometimes the “best strawberry smoothie” isn’t the simplest one—it’s the one with that lush, creamy texture that tastes like it came from a café. Yogurt is the easiest way to get there.

This recipe also naturally fits smoothie recipes with Greek yogurt, strawberry smoothie recipe with yogurt, and even the idea of a strawberry yogurt milk smoothie if you prefer a thinner pour.

Ingredients for Strawberry Smoothie With Yogurt Recipe

  • 2 cups frozen strawberries
  • ½ cup Greek yogurt
  • ¾ cup milk (or almond milk)
  • 1 teaspoon honey (optional)
  • ½ teaspoon vanilla (optional)
Strawberry smoothie with yogurt recipe card showing a thick smoothie topped with Greek yogurt, with tip to use Greek yogurt for a thicker, tangy texture.
Strawberry Smoothie with Yogurt: Greek yogurt gives you that café-thick texture—if it feels too pourable, reduce the liquid by a couple tablespoons instead of adding ice.

Method

Blend milk and yogurt first until smooth. Then add strawberries and blend until thick and creamy. Taste; sweeten lightly if needed.

Two directions to take it

If you want something closer to a strawberry yogurt shake recipe, use cold whole milk and blend longer so it becomes a little airy. On the other hand, if you prefer a brighter, lighter smoothie, use regular yogurt and almond milk.

Either way, you’ll get a strawberry smoothie drink that feels creamy without being heavy.

Also Read: French Toast Sticks (Air Fryer + Oven Recipe) — Crispy Outside, Custardy Inside


Recipe 4: Strawberry Smoothie Without Yogurt (still creamy, still satisfying)

If yogurt isn’t your thing—or you simply ran out—you can still make a strawberry smoothie that’s thick and silky. The trick is replacing yogurt with something that brings body.

Ingredients for Strawberry Smoothie Recipe Without Yogurt

  • 2 cups frozen strawberries
  • ¾ cup milk or almond milk
  • One creamy option:
    • ½ banana, or
    • 2 tablespoons oats, or
    • 1 tablespoon chia (let it sit for a few minutes after blending), or
    • ¼ avocado
  • Optional sweetener if your berries are tart
Strawberry smoothie without yogurt recipe card showing a creamy pink smoothie with banana, oats, and chia as yogurt-free thickening options.
Strawberry Smoothie Without Yogurt: If it tastes great but feels thin, thicken with fruit or fiber—banana for sweetness, oats for a breakfast-like body, or chia (rest 3 minutes) for a naturally thicker finish.

Method

Blend liquid and your creamy option first. Add frozen strawberries and blend until smooth.

What it tastes like

With banana, the smoothie leans sweet and classic—almost like a strawberry banana smoothie but lighter. When making it with oats, it becomes more breakfast-like, especially if you let it sit briefly so it thickens. And with avocado, it feels plush and rich, yet it still tastes like strawberries.

This is a simple strawberry smoothie solution that feels complete even without yogurt.

Also Read: 10 Best Chicken Sandwich Recipes (BBQ, Parm, Buffalo & More)


Recipe 5: Strawberry Protein Shake (filling, fast, and surprisingly delicious)

A strawberry protein shake should still taste like fruit, not like a supplement. The best versions are creamy, balanced, and easy to drink even when you’re not in the mood for something heavy.

It’s also a natural fit for strawberry protein drink, strawberry protein smoothie, and strawberry protein shake powder type blends.

Ingredients for Strawberry Protein Shake Recipe

  • 2 cups frozen strawberries
  • 1 cup milk (or almond milk)
  • 1 scoop vanilla protein powder
  • ½ banana or 1 date (optional)
  • 1 tablespoon chia or ground flax (optional)
Strawberry protein shake recipe card showing a thick pink shake being poured into a glass, with tips to blend milk and protein powder first and add more strawberries to reduce chalky taste.
Strawberry Protein Shake: For a smooth, non-chalky shake, blend your liquid with protein powder first, then add frozen strawberries—extra fruit fixes texture and flavor better than extra sweetener.

Method

Blend the milk and protein powder first. Next, add strawberries and blend until thick. If you’re using chia, pulse it in at the end.

Make it more satisfying in a clean way

A spoonful of nut butter adds richness and makes the smoothie feel like a meal. Hemp seeds work well too; MasalaMonk’s hemp seed smoothie ideas include combinations that pair nicely with berries.

If you’re in a season where you want higher-calorie blends, MasalaMonk’s high calorie protein shakes can inspire how to build a thicker, more substantial shake while keeping your own version strawberry-forward.

For an external reference point, Healthline has a simple strawberry banana protein powder smoothie that’s easy to compare if you like seeing alternate ratios.

Also Read: Almond Flour Pancakes (Easy Recipes) Fluffy, High-Protein, Keto & More


Recipe 6: Strawberry Banana Protein Smoothie (breakfast + gym-friendly)

This is what happens when a strawberry banana smoothie grows up. It’s still sweet and familiar, yet it carries you further thanks to protein.

It also naturally matches phrases like strawberry banana protein smoothie, banana and strawberry protein shake, and protein banana strawberry smoothie.

Ingredients for Strawberry Banana Protein Smoothie Recipe

  • 1½ cups frozen strawberries
  • 1 banana
  • 1 cup milk or almond milk
  • 1 scoop protein powder
  • ½ cup yogurt (optional)
Strawberry banana protein smoothie recipe card on an outdoor patio, showing a thick pink smoothie with banana and strawberry garnish and tips for keeping it creamy.
Strawberry Banana Protein Smoothie: Use frozen banana for creaminess, then decide your texture—skip yogurt for a lighter shake, or add a little Greek yogurt when you want it extra thick and filling.

Method

Blend milk and protein powder until smooth. Add strawberries and banana, then blend until creamy.

Two easy adjustments

If you want it lighter, skip the yogurt and rely on frozen banana for creaminess. Conversely, if you want it extra thick, add yogurt and reduce the milk slightly.

If you’re using almond milk, you’ll end up close to a strawberry banana smoothie with almond milk—just with more staying power.

Also Read: Bolognese Sauce Recipe: Real Ragù & Easy Spag Bol


Recipe 7: Strawberry Banana Smoothie Bowl (thick, spoonable, topping-ready)

A smoothie bowl is all about texture. Instead of “drinkable,” you’re aiming for thick enough to hold toppings without everything sinking.

This covers strawberry banana smoothie bowl, smoothie bowl strawberry banana, and strawberry smoothie bowl recipe style blends naturally—without turning it into a project.

Ingredients for Strawberry Banana Smoothie Bowl Recipe

  • 2 cups frozen strawberries
  • 1 frozen banana (sliced before freezing)
  • ¼ to ⅓ cup milk or almond milk (start small)
  • Optional: ¼ cup yogurt for tang
Strawberry banana smoothie bowl recipe card showing a thick pink smoothie bowl topped with banana slices, strawberries, granola, and chia, with tip to use minimal liquid for a spoonable texture.
Strawberry Banana Smoothie Bowl: Bowl thickness comes from frozen fruit, not extra yogurt—start with very little liquid, then pulse and scrape until it turns spoonable enough to hold toppings.

Method

Add frozen fruit to the blender first. Then add the smallest amount of liquid to help it catch. Blend, stop, scrape, blend again until thick. Spoon into a bowl.

Toppings that work every time

  • Granola + sliced strawberries
  • Banana coins + nut butter drizzle
  • Coconut flakes + pineapple chunks
  • Chia seeds + cacao nibs
Strawberry smoothie bowl thickness guide card showing a spoonable pink smoothie bowl with toppings, with tip to start with 1/4 cup liquid and add frozen fruit to fix a runny bowl.
Bowl Thickness (Spoonable): Smoothie bowls should be blended “thick first”—start with very little liquid, then correct texture by adding more frozen fruit (not more yogurt or milk) if it turns runny.

If you want a quick visual reference for thickness, Bakerita’s strawberry banana smoothie bowl shows a classic approach. Meanwhile, Minimalist Baker’s smoothie bowl method explains the key principle: minimal liquid and patience in the blender.

For a make-ahead angle, MasalaMonk’s meal prepping with strawberries is a great companion read, especially if you like prepping frozen fruit packs for quick blending.

Also Read: Classic Rum Punch + 9 Recipes (Pitcher & Party-Friendly)


Recipe 8: Strawberry Peanut Butter Smoothie (comforting, rich, and balanced)

Strawberries and peanut butter sound unusual until you taste them together. The berries keep it bright; the peanut butter adds depth. The result feels like dessert while still being breakfast-friendly.

This naturally fits strawberry peanut butter smoothie, peanut butter and strawberry smoothie, and strawberry banana peanut butter smoothie variations.

Ingredients for Strawberry Peanut Butter Smoothie Recipe

  • 2 cups frozen strawberries
  • 1 banana
  • 1–2 tablespoons peanut butter
  • ¾ cup milk or almond milk
  • Optional: pinch of cinnamon, pinch of salt, splash of vanilla
Strawberry peanut butter smoothie recipe card showing a creamy pink smoothie topped with peanut butter, with tips to blend peanut butter with milk first and adjust richness with 1–2 tablespoons.
Strawberry Peanut Butter Smoothie: For a smooth, creamy blend, emulsify peanut butter with milk first—then choose your richness: 1 tablespoon keeps it light, 2 tablespoons makes it dessert-like.

Method

Blend milk and peanut butter first so it emulsifies. Add strawberries and banana and blend until thick and creamy.

A few ways to change the mood

If you want something lighter, use almond milk and stick to 1 tablespoon peanut butter. If you want it more like a strawberry shake without ice cream, use cold milk and blend longer so it becomes airy.

Either direction, you’ll have a smoothie that feels indulgent without being heavy.

Also Read: Moscow Mule Recipe (Vodka Mule): The Master Formula + 9 Variations


Recipe 9: Chocolate Strawberry Smoothie (cocoa-forward, not syrupy)

Chocolate and strawberry is a classic pairing, although it can become overly sweet if you lean on syrups. Cocoa powder keeps things grounded while frozen strawberries keep it bright.

This is a natural fit for chocolate strawberry smoothie, chocolate and strawberry smoothie, and cocoa strawberry smoothie versions.

Ingredients for Chocolate Strawberry Smoothie Recipe

  • 2 cups frozen strawberries
  • 1 banana (or 2 dates)
  • 1 tablespoon cocoa powder
  • 1 cup milk (or almond milk)
  • Optional: ½ cup yogurt for extra creaminess
Chocolate strawberry smoothie recipe card showing a creamy strawberry smoothie topped with cocoa powder, with tip to mix cocoa into milk first for a smooth, grit-free texture.
Chocolate Strawberry Smoothie: To avoid gritty cocoa, dissolve it into the milk first—then keep it to about 1 tablespoon so the chocolate supports the strawberries instead of overpowering them.

Method

Blend cocoa powder with milk first so it dissolves smoothly. Add strawberries and banana, then blend until creamy.

A protein-friendly approach

If you like the idea of a strawberry banana chocolate protein smoothie, you can add vanilla or chocolate protein powder and keep the cocoa modest. That way, the smoothie stays fruit-forward rather than tasting like a protein bar in liquid form.

If you’re curious about adding seeds for extra richness, MasalaMonk’s hemp seed smoothie ideas include combinations that pair beautifully with cocoa.

Also Read: 7 Pizza Sauce Recipes | Marinara, White Garlic, Alfredo, Buffalo, BBQ, Vodka & Ranch


Recipe 10: Strawberry Mango Smoothie (sunny, tropical, and silky)

Strawberry mango smoothie blends are bright, cheerful, and naturally creamy—even without much dairy. Mango has a way of smoothing everything out, so the texture feels “finished” with very little effort.

This fits strawberry mango smoothie, mango and strawberry smoothie, mango and strawberry smoothie recipe, and smoothie strawberry mango phrasing naturally.

Ingredients

  • 1½ cups frozen strawberries
  • 1 cup frozen mango
  • ¾ cup coconut milk beverage or milk
  • Optional: ½ banana or 1 date
  • Optional: 1 tablespoon chia
Strawberry mango smoothie recipe card showing a tropical smoothie in a tall glass with mango and strawberries, with tip that mango makes it naturally silky and coconut milk is creamier than coconut water.
Strawberry Mango Smoothie: Mango gives you a naturally silky blend—choose coconut milk when you want it creamy, or coconut water when you want a lighter, more refreshing tropical finish.

Method

Blend liquid and fruit until smooth. If you’re using chia, pulse it in at the end.

An easy twist if you like “shake” style blends

If you enjoy mango drinks beyond smoothies, MasalaMonk’s mango shake guide offers variations that translate well—especially if you want a dairy-free or lower-sugar direction.

Also Read: Vodka Pasta (Penne alla Vodka) + Spicy Rigatoni, Chicken, and Gigi Recipes


Recipe 11: Strawberry Blueberry Smoothie (berry-forward, vibrant, and satisfying)

A strawberry blueberry smoothie tastes like berries—not just sweetness. It’s also endlessly flexible, because you can keep it lean and bright or make it creamy and thick depending on your mood.

This naturally covers strawberry blueberry smoothie, strawberry and blueberry smoothie, strawberry blueberry smoothie recipe, and smoothie strawberry and blueberry phrasing.

Ingredients

  • 1½ cups frozen strawberries
  • 1 cup frozen blueberries
  • ¾ to 1 cup milk or almond milk
  • Optional: ½ cup yogurt
  • Optional: sweetener only if needed
Strawberry blueberry smoothie recipe card with a thick berry smoothie in a glass, blueberries and strawberries on the side, and tip to add a squeeze of lemon and optional banana for creaminess.
Strawberry Blueberry Smoothie: Berries taste brighter with a tiny squeeze of lemon—then add half a banana only if you want a smoother, creamier finish (especially with frozen fruit).

Method

Blend liquid and berries until smooth. Add yogurt if using, then blend again until creamy.

Triple-fruit variation (banana blueberry and strawberry smoothie)

Add ½ banana. You’ll end up with a strawberry blueberry banana smoothie that tastes rounder and creamier, and it also aligns beautifully with the classic banana blueberry and strawberry smoothie style.

Strawberry blueberry banana smoothie recipe card at an outdoor market table, showing a thick berry smoothie with banana slices and fresh strawberries and blueberries, with tip that banana makes berry smoothies creamier.
Strawberry Blueberry Banana Smoothie: When berry smoothies taste too sharp, half a banana rounds them out—use frozen fruit for thickness and a smoother, creamier finish without extra dairy.

If you enjoy berry blends in general, you can also push this into “berry smoothies” territory by adding raspberries or blackberries—just keep your liquid modest so it stays thick.

Also Read: Golden Milk Recipe: The Best Bedtime Detox Drink!


Recipe 12: Strawberry Pineapple Smoothie (bright, tangy, refreshing)

Pineapple brings a tropical sharpness that makes strawberries taste even sweeter. If you like a smoothie that feels light and energizing, strawberry pineapple smoothie blends are a great choice.

This naturally fits pineapple and strawberry smoothie and smoothie with strawberries and pineapple versions.

Ingredients

  • 1½ cups frozen strawberries
  • 1 cup pineapple chunks (fresh or frozen)
  • ¾ cup coconut water or milk
  • Optional: ½ banana for sweetness
Strawberry pineapple smoothie recipe card showing a tropical smoothie by a pool with pineapple and strawberries, with tip to use frozen pineapple for thickness and choose coconut water for a lighter smoothie or milk for a creamier one.
Strawberry Pineapple Smoothie: For a bright, refreshing tropical blend, use frozen pineapple to keep it thick and frosty—then choose coconut water for a lighter finish or milk when you want it creamy.

Method

Blend coconut water and pineapple first until smooth. Add strawberries and blend until frosty.

If you enjoy the clean, refreshing finish of coconut water, MasalaMonk’s coconut water smoothie ideas pair naturally with this style.

And if you like the idea of “tropical” but want more structure, MasalaMonk’s meal prepping with strawberries includes a tropical bowl direction that’s easy to adapt using strawberry, pineapple, mango, and banana.

Also Read: Authentic Louisiana Red Beans and Rice Recipe (Best Ever)


Bonus: Strawberry Kiwi Smoothie (zippy, bright, and a little fancy recipe)

This one isn’t part of the numbered list above, but it deserves a spot in your rotation. Strawberry kiwi smoothies taste like a fruit salad that decided to become a drink—bright, juicy, and refreshing.

It also naturally matches strawberry kiwi smoothie, kiwi and strawberry smoothie, and smoothie with kiwi and strawberry phrasing.

Ingredients

  • 2 cups strawberries (frozen works best)
  • 1–2 kiwis, peeled
  • ¾ cup apple juice or milk
  • Optional: ½ banana if you want it sweeter
Strawberry kiwi smoothie recipe card on an outdoor garden table, with kiwi slices on the glass and tip to add kiwi last and blend briefly, plus apple juice vs milk for a fresh or creamy finish.
Strawberry Kiwi Smoothie: Kiwi tastes brightest when it’s blended briefly—add it at the end, then choose apple juice for a crisp, fresh smoothie or milk when you want it creamier.

Method

Blend strawberries with your liquid first. Add kiwi and blend briefly until smooth.

Kiwi can get slightly bitter if over-blended in some machines, so keeping it quick helps the flavor stay clean.

Also Read: 10 Creative Chia Pudding Recipes for Every Taste


Bonus: Strawberry Spinach Smoothie Recipe (green, but still tastes like strawberries)

If you want greens without sacrificing flavor, this is the one. Strawberry spinach smoothie blends are at their best when they taste like fruit first, spinach second.

This naturally covers smoothie with spinach and strawberries and strawberry smoothie with spinach variations.

Ingredients

  • 2 cups frozen strawberries
  • 1 banana
  • 1–2 packed cups baby spinach
  • ¾ to 1 cup milk or almond milk
  • Optional: chia or flax for extra body
Strawberry spinach smoothie recipe card showing a pink-green smoothie in a mason jar on a kitchen counter with spinach, banana, and frozen strawberries, with tip to blend spinach with milk first for a smooth texture.
Strawberry Spinach Smoothie: For a smooth, fruit-forward green smoothie, blend spinach with your liquid first until completely silky—then add frozen strawberries and banana for sweetness and thickness.

Method

Blend milk and spinach first until completely smooth. Then add strawberries and banana and blend until thick and creamy.

If you’re interested in iron-friendly directions, MasalaMonk’s high-iron smoothies and shakes includes ideas in the same spirit—greens plus vitamin C–rich fruits—without turning the smoothie into something that tastes medicinal.

Also Read: Tres Leches – Mexican 3 Milk Cake Recipe


How to build your own “mix and match” variations without overthinking it

Once you’ve made a few of these, you’ll start noticing patterns. From there, you can spin off new combinations easily—whether you’re craving smoothie strawberry ingredients that feel light, or something thicker and more filling.

If you want a smoothie recipe without strawberries

Sometimes you land here even though you’re not in a strawberry mood. In that case, you can swap strawberries for another frozen fruit and keep the same method. Mango, blueberries, pineapple, and mixed berries all work beautifully. The blending logic stays exactly the same as any recipe for smoothie with frozen fruit.

If you want smoothie ideas with strawberries but not banana

Banana is popular, although not everyone loves it. If you want a strawberry smoothie no banana or strawberry smoothie without banana direction, try one of these as your “creamy element” instead:

  • Greek yogurt
  • oats
  • chia (let it rest briefly after blending)
  • avocado (use a small amount)

That’s how you get a creamy strawberry smoothie without banana, without needing special ingredients.

If you want a strawberry smoothie recipe no banana and no yogurt

Use frozen strawberries, almond milk, and oats or chia. It turns into a simple strawberry smoothie that’s creamy enough to satisfy, yet still light.

If you want a strawberry fruit shake feel

Lean on cold milk, frozen strawberries, and an extra banana slice or two. Blend longer until the texture looks fluffy. You’ll end up with a strawberry fruit shake that feels like a treat, especially if you add a splash of vanilla.

Also Read: How to Cook Perfect Rice Every Time (Recipe)


Make-ahead smoothie packs (the easiest way to drink smoothies more often)

If you’ve ever bought frozen strawberries and bananas with good intentions, only to watch the bananas over-ripen on the counter, smoothie packs are the answer.

They also make mornings smoother because you’re not measuring fruit while half awake.

What to do

Portion fruit into freezer bags or containers. Then, when you want a smoothie, dump a pack into the blender and add liquid plus any creamy element you like.

Make-ahead smoothie packs guide card showing three freezer bags labeled classic strawberry, banana strawberry, and mango strawberry with tip to portion fruit ahead and add liquid plus yogurt or protein when blending.
Make-Ahead Smoothie Packs: Pre-portion frozen fruit once, then smoothies become a 5-minute habit—just dump a pack into the blender and add your liquid (plus yogurt or protein) when you’re ready.

Packs to try (easy, practical, and delicious)

Classic Strawberry pack

  • 2 cups strawberries
    This one works with milk, almond milk, or yogurt. It’s the base for most strawberry smoothie recipes.

Banana Strawberry pack

  • 1½ cups strawberries
  • 1 banana, sliced
    This is your go-to for a strawberry banana smoothie recipe whenever you want it.

Mango Strawberry pack

  • 1½ cups strawberries
  • 1 cup mango
    Add coconut milk beverage for the smoothest, sunniest result.

Blueberry Strawberry pack

  • 1½ cups strawberries
  • 1 cup blueberries
    Great with milk, almond milk, or yogurt, depending on whether you want it bright or creamy.

Strawberry pineapple pack

  • 1½ cups strawberries
  • 1 cup pineapple
    Try coconut water for a fresh finish, especially on hot days.

Turning packs into smoothie bowls

If you want a smoothie bowl, use the same packs—but cut your liquid down dramatically. Instead of ¾ cup, start with ¼ cup, then increase only if the blender needs it.

Also Read: Whole Chicken in Crock Pot Recipe (Slow Cooker “Roast” Chicken with Veggies)


A few serving ideas that make smoothies feel less repetitive

It’s easy to love smoothies for a week and then get bored. A small change in presentation can keep them interesting.

Strawberry smoothie serving ideas guide card showing a classic smoothie in a glass, a strawberry smoothie bowl with toppings, and a portable protein smoothie bottle, with tips to change the glass, add toppings, and use bowls or bottles.
Serving ideas: Keep smoothies from getting boring by changing the format—glass for a classic sip, bowl for weekend toppings, and a bottle when you need something grab-and-go.
  • Pour your strawberry smoothie with milk into a chilled glass and add a few sliced strawberries on top. It feels more “finished.”
  • Turn a strawberry banana smoothie into a smoothie bowl on weekends and add crunchy toppings.
  • Make a chocolate strawberry smoothie when you’re craving dessert, then add a spoonful of yogurt to keep it creamy and satisfying.
  • Blend a strawberry protein smoothie after workouts, then sprinkle chia on top for a little texture.

Small shifts keep the routine enjoyable, which is often the real secret to sticking with it.

Also Read: Mayo Recipe: 15+ Homemade Mayonnaise Variations


FAQs

1. What’s the easiest strawberry smoothie recipe for beginners?

To keep it simple, start with strawberries + milk and blend until smooth. For an easy strawberry smoothie recipe that’s consistently creamy, use frozen berries and begin with less liquid than you think you need. Afterward, adjust: add a splash more milk if it’s too thick, or add more frozen strawberries if it’s too thin. That approach turns a basic strawberry smoothie into a good strawberry smoothie recipe you can repeat without measuring perfectly every time.

2. What are the best strawberry smoothie ingredients for a creamy texture?

In practice, creaminess comes from a combination of frozen fruit and one “softener.” Strawberries provide flavor; banana, yogurt, oats, chia, or nut butter provide body. For a classic strawberry smoothie recipe, frozen strawberries + milk + yogurt is hard to beat. Alternatively, if you prefer fewer ingredients, frozen strawberries + milk + banana creates a thick, smooth result with a naturally sweet finish.

3. Can I make a strawberry smoothie with yogurt, and what yogurt works best?

Absolutely—strawberry smoothie with yogurt is one of the creamiest versions. Greek yogurt yields a thicker, tangier blend, while regular yogurt makes it lighter and more drinkable. As it happens, flavored strawberry yogurt can also work when you want extra sweetness without adding honey. If your goal is a strawberry smoothie recipe with yogurt that feels like a treat, choose a thicker yogurt and keep the liquid modest.

4. How do I make a strawberry smoothie recipe without yogurt that’s still creamy?

For that reason, you’ll want a substitute that adds body. A ripe banana is the easiest swap; it thickens and sweetens at the same time. Otherwise, oats (2 tablespoons) add a breakfast-like texture, while chia seeds thicken after blending if you let the smoothie rest briefly. In a pinch, a small piece of avocado can create a velvety mouthfeel without overpowering the strawberry flavor.

5. What’s a simple strawberry smoothie recipe with only 3 ingredients?

A simple strawberry smoothie recipe can be as straightforward as: frozen strawberries, milk, and banana. That combination also doubles as an easy strawberry smoothie recipe when you don’t want yogurt. By the same token, you can swap banana for yogurt if you prefer tang over sweetness. Either way, keeping the ingredient list short tends to make the strawberry flavor stand out more.

6. How do I make a strawberry smoothie with milk that doesn’t taste watery?

All things considered, wateriness comes from too much liquid or too much ice. Use frozen strawberries rather than ice, and start with about ¾ cup milk for 2 cups fruit. Next, blend thoroughly so the fruit fully breaks down—under-blended smoothies can taste thin even when they aren’t. If it still feels light, add more frozen strawberries instead of adding more milk.

7. What’s the best strawberry banana smoothie recipe for a thick, creamy result?

A reliable strawberry banana smoothie recipe uses frozen strawberries and a ripe banana, plus just enough milk to get the blender moving. At the same time, blending the milk with strawberries first can prevent clumps, especially if your berries are very icy. If you want a richer strawberry and banana smoothie recipe, add yogurt; if you’d rather keep it simpler, rely on the banana for creaminess and reduce the liquid slightly.

8. How do I make a strawberry banana smoothie with yogurt?

In contrast to the no-yogurt version, a strawberry banana smoothie with yogurt has more tang and a thicker texture. Add yogurt after the fruit begins to blend—this helps the blender stay smooth and prevents the mixture from getting stuck. Subsequently, tweak consistency with frozen fruit rather than extra liquid. If you want a more dessert-like finish, a dash of vanilla makes the flavor feel rounder.

9. How do I make a strawberry banana smoothie with milk that tastes like a shake?

To get that “strawberry shake recipe” vibe, use cold milk, frozen strawberries, and a ripe banana, then blend a little longer to introduce air. In addition, skip ice whenever possible—ice can dull the flavor and thin the texture as it melts. For a strawberry shake without ice cream, a spoonful of yogurt can mimic milkshake creaminess without making it heavy.

10. What’s the easiest way to use frozen fruit in smoothies?

In practice, the best smoothie frozen fruit method is to treat frozen fruit as your thickener. Start with frozen strawberries (or a frozen fruit mix), add liquid gradually, and blend in stages. If you’re following a recipe for smoothie with frozen fruit, begin with less liquid than suggested and increase only if the blender stalls. That strategy keeps the smoothie thick and prevents the “watery aftertaste” that can happen when you over-pour liquid.

11. How do I make a frozen strawberry smoothie that’s smooth, not icy?

A frozen strawberry smoothie turns silky when you blend long enough and use a creamy element. Yogurt, banana, or a spoonful of nut butter helps prevent an icy texture. Moreover, letting frozen fruit sit for 2–3 minutes before blending can reduce harsh ice crystals. If your blender struggles, blend the liquid with softer ingredients first, then add the frozen strawberries gradually.

12. Can I make a strawberry smoothie bowl recipe if I only have a regular blender?

Yes—strawberry smoothie bowl recipes are doable in most blenders with one adjustment: use far less liquid. Begin with frozen strawberries and frozen banana, add only a small splash of milk, and stop to scrape down the sides. In the same vein, pulsing can help the blades catch. If it becomes too thick to blend, add liquid a tablespoon at a time rather than pouring freely.

13. How do I thicken a strawberry banana smoothie bowl if it turns runny?

In that situation, add more frozen fruit first—frozen strawberries or frozen banana fixes texture quickly. Alternatively, a spoonful of oats or chia can thicken the bowl if you let it sit a couple of minutes. Avoid adding extra yogurt once it’s already runny, because yogurt can add moisture. For a reliable strawberry banana smoothie bowl, starting with minimal liquid is the best prevention.

14. What’s a good strawberry protein shake that still tastes like fruit?

A strawberry protein shake works best when protein supports the flavor rather than taking over. Blend your liquid with protein powder first to prevent clumps, then add frozen strawberries. Next, consider adding a banana or yogurt to keep the texture creamy and the taste balanced. If you want a strawberry protein smoothie that feels more like dessert, a small pinch of cocoa or vanilla can round out the flavor without burying the strawberries.

15. How do I make a strawberry banana protein smoothie without it tasting chalky?

To reduce chalkiness, use less powder than you think you need and build creaminess with banana or yogurt instead. Additionally, blending the powder with liquid first makes a smoother base. If the flavor still feels strong, add more strawberries rather than more sweetener—extra fruit softens the protein taste while keeping the smoothie bright. That approach usually produces a better strawberry protein drink overall.

16. Can I make a strawberry smoothie no banana that’s still thick?

Certainly—strawberry smoothie without banana is easy if you replace banana’s thickening role. Greek yogurt is the simplest option; oats and chia also work well. In particular, chia thickens after blending, so a short rest can transform texture. If you need a strawberry smoothie recipe no banana and no yogurt, use oats or chia with frozen strawberries and start with minimal liquid.

17. How do I make a non dairy strawberry smoothie or an almond milk strawberry smoothie?

A non dairy strawberry smoothie works beautifully with almond milk, oat milk, or coconut milk beverage. For an almond milk strawberry smoothie, blend frozen strawberries with almond milk and add a creamy element like banana, oats, or nut butter. In addition, skip ice and rely on frozen fruit for thickness. If you’re aiming to make smoothie without milk entirely, coconut water can be used, although it’ll taste lighter and more refreshing.

18. How do I make a strawberry shake without ice cream?

A strawberry shake without ice cream comes down to cold milk, frozen strawberries, and one thickener. Banana creates a classic milkshake-style sweetness; yogurt adds tang and creaminess. After that, blend longer than usual to make it slightly frothy. If you’re after a strawberry milkshake without ice cream that feels extra rich, add a small spoonful of nut butter and a pinch of salt.

19. What’s the best way to add strawberry puree for smoothies?

Strawberry puree for smoothies works best as a flavor booster rather than the main thickener. Use puree when you want a strong strawberry taste from fresh berries, then add frozen fruit (or a banana/yogurt) to build texture. Likewise, puree is handy in smoothie bowls if your blender needs help catching—use a little puree as the base, then blend in frozen fruit for thickness.

20. Can I prep frozen strawberries and bananas ahead for quick smoothies?

Yes—frozen strawberries and bananas are one of the easiest make-ahead combos. Slice bananas before freezing so they blend smoothly. Then, portion frozen fruit into packs so you can dump and blend. For a drinkable smoothie, add milk or almond milk; for a thicker bowl, add only a small splash. As a result, you’ll make strawberry banana smoothie recipes far more often because the hardest part is already done.

21. What if I’m using frozen smoothie mixes or strawberry smoothie mix packets?

Frozen smoothie mixes can be convenient, although flavor varies. To make them taste fresher, add extra frozen strawberries and keep sweeteners minimal. If you’re working with a strawberry smoothie mix or strawberry smoothie powder, use it lightly and let real fruit lead. In general, blending the mix with milk or almond milk and adding a banana improves both texture and taste.

22. What can I make if I want a smoothie recipe without strawberries?

A smoothie recipe without strawberries can follow the same structure—frozen fruit + liquid + a creamy element. Mango, pineapple, blueberries, and mixed berries all work well. Consequently, you can still keep a thick, creamy texture by relying on frozen fruit instead of ice. If you like tropical flavors, mango and pineapple blends are naturally smooth; if you prefer a deeper berry taste, blueberries make a rich base.

Posted on 15 Comments

Moscow Mule Recipe (Vodka Mule): The Master Formula + 9 Variations

Photo-realistic Moscow Mule recipe cover showing a copper mug with ice, lime and mint, featuring the text “Moscow Mule – A master recipe, refined – The Perfect Ratio + 9 Variations” and MasalaMonk.com.

A moscow mule recipe can look almost too easy to be memorable: vodka, lime, ginger fizz, ice. And yet, when it’s built well, it tastes like clarity—cold, bright, and sharply refreshing, with ginger heat that arrives just after the sip. Still, because it’s so simple, it can also fall apart fast. If the lime is dull, the ginger is warm, or the ice is stingy, the whole thing turns flat or sweet or watery. Fortunately, once you understand the structure behind a dependable moscow mule recipe, you can make it confidently, adjust it on the fly, and branch into variations without learning a new cocktail every time.

This guide gives you one master formula first. Then, step by step, it takes you through the versions people keep coming back to at home: Mexican Mule, Kentucky Mule, Irish Mule, Gin Mule, Italian Mule, Cranberry Moscow Mule, Apple Mule, a Ginger-forward Mule, and a Tropical Mule with coconut water that feels especially at home on MasalaMonk. Along the way, you’ll also learn what to do when you only have ginger ale, how to make a Moscow Mule without ginger beer, how to build a quick make-ahead base, and how to serve a crowd without losing fizz.

For classic reference points, the backbone of this drink shows up consistently across trusted cocktail sources such as Serious Eats’ Moscow Mule and Liquor.com’s Moscow Mule cocktail recipe. However, the most useful thing isn’t memorizing any single set of numbers. Instead, it’s learning the “why” behind the balance so the drink works with the ginger fizz you have, the bottle you have, and the mood you’re in.


Moscow mule recipe: the master ratio that makes everything easy

Before measurements, think in parts. A reliable moscow mule recipe is simply a long, fizzy highball built from four ideas:

  1. a clean spirit foundation
  2. a bright citrus snap
  3. a spicy ginger lift
  4. a cold temperature and controlled dilution
Moscow Mule recipe ratio card showing a copper mug with ice, lime and mint, with the text “Moscow Mule Recipe” and the ratio 1 vodka, ½ lime, 2–3 ginger beer.
Moscow Mule recipe made simple: follow the classic ratio—1 vodka : ½ lime : 2–3 ginger beer—then build it over plenty of ice for a crisp, gingery, lime-bright mule every time.

So, the master ratio is:

  • 1 part vodka
  • ½ part fresh lime
  • 2–3 parts ginger beer
  • a lot of ice

Because ginger beers vary wildly in sweetness and spice, that 2–3 parts range matters. Consequently, you’re not “failing the recipe” if you pour a little more or less—rather, you’re tailoring it to the fizz in your fridge.

Moscow mule recipe (single-serve master build)

Ingredients

  • 60 ml vodka
  • 20–25 ml fresh lime juice
  • 120–180 ml chilled ginger beer
  • plenty of ice
  • lime wheel or wedge (mint optional)
Moscow Mule recipe card showing a copper mug with ice, lime and mint, plus overlay text with measurements (60 ml vodka, 20–25 ml lime, top with ginger beer) and quick build steps.
Classic Moscow Mule recipe card: squeeze fresh lime, add 60 ml vodka, then top with ginger beer over plenty of ice—stir gently for a crisp, gingery, lime-bright Moscow Mule that stays fizzy.

Method

  1. Chill your mug or glass briefly if possible; even a few minutes helps.
  2. Fill it completely with ice.
  3. Add vodka and lime juice.
  4. Top with cold ginger beer.
  5. Stir gently once or twice—just enough to combine.
  6. Garnish and serve immediately.

That’s the core moscow mule recipe, and it’s the one you’ll return to. From here, everything is just a variation on the same theme.

Also Read: Vodka Pasta (Penne alla Vodka) + Spicy Rigatoni, Chicken, and Gigi Recipes


Moscow mule ingredients: the few details that change the whole drink

Because the ingredient list is short, each piece has an oversized role. Therefore, small upgrades matter more here than they do in a complicated cocktail.

Moscow Mule ingredients infographic showing vodka, fresh lime, ginger beer and ice tips, plus “fix it fast” adjustments and optional accents like bitters, mint, syrup and salt for a better Moscow Mule recipe.
Moscow Mule ingredients that change everything: choose a clean vodka, squeeze fresh lime, pick a ginger beer that matches your taste (spicy or sweet), and use a full glass of ice—then fix the balance fast with more ginger beer (too strong) or more lime (too sweet).

Vodka: keep it clean, keep it quiet

In a classic moscow mule recipe, vodka is the support beam, not the decoration. It should taste neutral enough that ginger and lime stay in front. That said, you don’t need a luxury bottle. Instead, choose a vodka you find reasonably smooth in a simple soda-and-lime.

If your vodka tastes sharp, you can still make a great Mule. However, you’ll likely prefer:

  • slightly more ginger beer to lengthen the drink
  • slightly more lime to brighten the finish
  • plenty of ice to keep the alcohol from feeling loud

Lime: freshness is everything

Fresh lime gives both acidity and aroma. Meanwhile, bottled lime can taste muted or “cooked,” which makes the drink feel less alive. If you only upgrade one thing in your moscow mule recipe, make it fresh lime.

Also, lime quantity isn’t fixed in stone. If your ginger beer is sweeter, you can use more lime. Conversely, if your ginger beer is very dry and spicy, you may prefer slightly less lime so the drink doesn’t feel sharp.

Ginger beer: the defining character

Ginger beer is the “spark” that makes this drink feel special. Moreover, different ginger beers produce noticeably different Mules:

  • spicy, peppery ginger beer → crisp, punchy Mule
  • sweet, mild ginger beer → softer, rounder Mule
  • very carbonated ginger beer → bright and lively, with more lift

If you’re curious about how ginger beer differs from ginger ale in practical terms, this quick explainer is useful: ginger beer vs. ginger ale. The short version is that ginger ale is often sweeter and gentler, while ginger beer tends to be bolder and more ginger-forward.

Ice: more ice usually means less dilution

It sounds backwards, yet it’s true: a glass packed with ice often dilutes more slowly than a glass with a few cubes. Consequently, a Mule built with “a mountain of ice” stays balanced longer. On the other hand, a Mule built with minimal ice warms fast and becomes watery.

Optional accents: only when they solve a specific problem

A Mule doesn’t need much else. Still, these small accents can help:
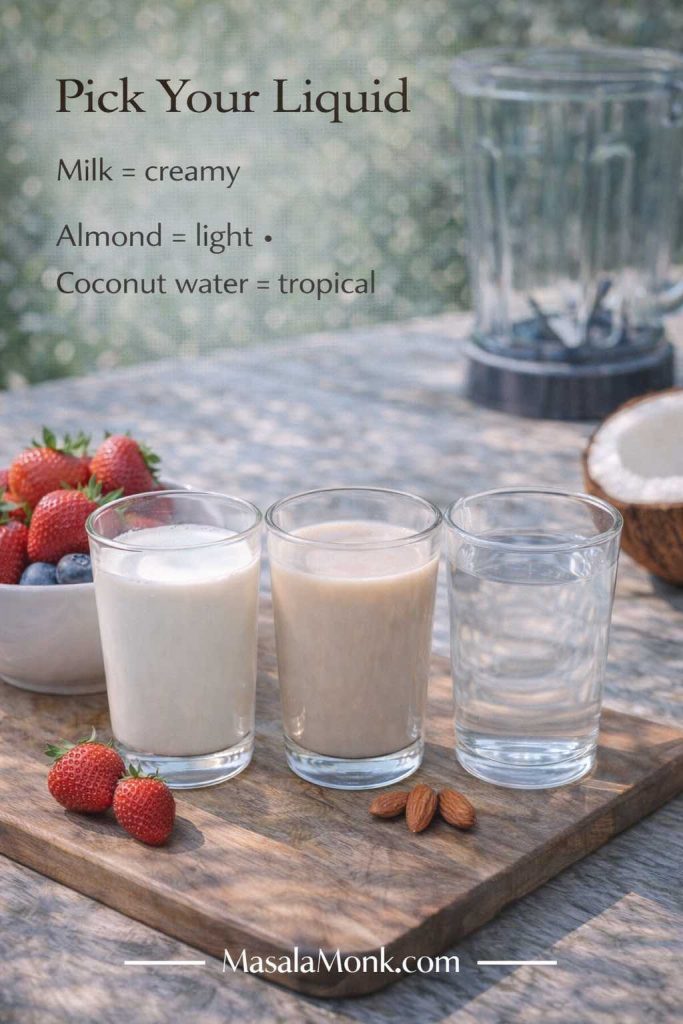
  • Simple syrup (tiny amount): only if your ginger beer is extremely dry and you want a rounder sip
  • Aromatic bitters: especially helpful in bourbon or whiskey versions for depth
  • Mint: adds aroma and freshness, especially in gin mules
  • A pinch of salt: surprisingly useful when your ginger fizz makes the drink taste too sweet

If you enjoy the ginger side of this drink beyond cocktails, you might also like MasalaMonk’s ingredient-focused read: Ginger And Its Stunning Health Benefits. It’s not a cocktail guide, but it does deepen appreciation for ginger’s role in drinks.

Also Read: French 75 Cocktail Recipe: 7 Easy Variations


How to make a Moscow mule recipe that stays crisp to the last sip

A Mule’s charm is how quickly it comes together. Nevertheless, a few habits separate a bright, snappy drink from a flat one.

Step 1: Chill what you can, because temperature matters

If the ginger beer is cold, carbonation feels sharper. If it’s warm, the drink tastes softer and flatter. So, chill your ginger beer and chill your glass when possible.

How to make a Moscow mule recipe (Step 1): pack the mug with plenty of ice—more ice melts slower, so your Moscow Mule stays colder, crisper, and less watery to the last sip.

Step 2: Pack the ice, then build quickly

A packed ice bed keeps everything cold. Moreover, it slows down dilution. Build the drink swiftly so the ice doesn’t melt while you’re hunting for garnish.

How to make a Moscow Mule step 2: measuring 60 ml vodka into a jigger and squeezing fresh lime into an iced copper mug, showing the classic Moscow mule recipe proportions.
How to make a Moscow mule recipe (Step 2): measure 60 ml vodka and add 20–25 ml fresh lime—this is where the drink gets its clean backbone and bright citrus snap before the ginger fizz goes in.

Step 3: Add ginger beer last, then stir gently

Because ginger beer is carbonated, it loses sparkle when it’s shaken or stirred aggressively. Therefore, stir just once or twice, gently.

How to make a Moscow Mule step 3: pouring chilled ginger beer into a copper mug with ice, lime and mint, with a gentle stir to keep the Moscow mule recipe fizzy.
How to make a Moscow mule recipe (Step 3): top with well-chilled ginger beer, stir gently once or twice, and serve immediately—this keeps the Mule crisp, bubbly, and ginger-bright instead of flat.

This is why the classic method in sources like Liquor.com’s Moscow Mule and Serious Eats’ Moscow Mule keeps things simple: build in the glass, top with ginger beer, and don’t overwork it.

Also Read: Negroni Recipe: Classic Cocktail & Its Variation Drinks


Moscow mule recipe with ginger beer vs ginger ale: how to balance either one

Sometimes you have ginger beer. Sometimes you have ginger ale. Either way, you can make a refreshing drink. Still, because the sweetness and spice differ, the balancing approach changes.

Ginger beer vs ginger ale comparison for a Moscow Mule recipe, showing a copper mule mug with lime and mint alongside bottles of ginger beer and ginger ale, plus a tip to add extra lime when using ginger ale.
Ginger beer vs ginger ale for a Moscow Mule recipe: ginger beer makes a spicier, sharper mule, while ginger ale creates a softer, sweeter drink—so add extra lime when you use ginger ale to keep your Moscow Mule crisp and balanced.

When ginger beer is spicy and dry

In that case, the moscow mule recipe can stay very clean:

  • vodka at 60 ml
  • lime around 20–25 ml
  • ginger beer to lengthen as you like

Because the ginger has bite, the drink tastes lively even without extra tricks.

When ginger beer is sweet and mild

Then you’ll often want:

  • slightly more lime
  • slightly less ginger beer at first
  • no additional sugar

Otherwise, the drink can drift into soda territory.

Moscow mule recipe with ginger ale (the version that still tastes “right”)

Ginger ale tends to be milder and sweeter. Consequently, the best approach is to push brightness and keep sugar out.

Try this structure:

  • 60 ml vodka
  • 25–30 ml lime juice
  • chilled ginger ale to top
  • plenty of ice

If it tastes too sweet, you have two easy levers:

  • increase lime slightly
  • add a tiny pinch of salt (it doesn’t taste salty; it tastes more balanced)

For a non-alcoholic detour with similar “fizz + fruit + citrus” logic, MasalaMonk’s Apple Juice Mocktails are a great companion. Even though those drinks aren’t Mules, the balancing instincts are surprisingly transferable.

Moscow mule recipe without ginger beer (still bright, still refreshing)

If you don’t have ginger beer and you don’t want to rely only on ginger ale, you can still build something close to the Mule experience.

Moscow Mule recipe without ginger beer substitution card showing a copper mule mug with lime and mint, plus ginger ale, soda water, ginger syrup and fresh ginger, with tips for making a mule when ginger beer isn’t available.
No ginger beer? You can still make a Moscow Mule: use ginger ale with extra lime for a quick fix, or combine soda water with ginger syrup for a cleaner, sharper mule-style fizz—always serve ice-cold and stir gently.

Approach A: Ginger ale + fresh ginger boost
Build vodka + lime over ice, top with ginger ale, then add:

  • a thin slice of fresh ginger, lightly muddled, or
  • a small splash of ginger syrup

Because fresh ginger adds bite, the drink feels more Mule-like.

Approach B: Soda water + lime + ginger syrup
This becomes a ginger-lime highball. It’s not identical to the classic moscow mule recipe, yet it delivers the same cold, zippy satisfaction.

Either way, chill everything and keep the stir gentle.

Also Read: 10 Best Espresso Martini Recipe Variations (Bar-Tested)


Moscow mule recipe adjustments: fix the drink in the glass

Even a good moscow mule recipe can taste “off” because ginger fizz varies, limes vary, and ice varies. Fortunately, you can fix most issues fast.

If it tastes too sweet

First, add more lime. Then, if it still feels candy-like, add a tiny pinch of salt. Next time, choose a spicier ginger beer or start with a smaller pour and top up slowly.

If it tastes too strong

Instead of adding more ice, add more ginger beer. That lengthens the drink while keeping it lively. Meanwhile, keep lime steady so it stays bright.

If it tastes flat

Usually, one of these happened:

  • the ginger fizz wasn’t cold
  • the bottle was opened long ago
  • the drink was stirred too hard
  • the drink sat too long before serving

Next time, chill harder and add ginger beer at the last second.

If it tastes watery

This is almost always an ice problem. Use more ice and build quickly. Also, don’t let the drink sit around before it’s served.

Also Read: Whiskey Sour Recipe: Classic Cocktail, Best Whiskey & Easy Twists


Moscow mule recipe variations: one template, many personalities

The Mule works because it’s a template: spirit + lime + ginger fizz. Consequently, swapping the spirit changes the character without requiring new technique. That “template” idea is reflected even in mainstream recipe sources like Epicurious’ Moscow Mule, which notes how naturally it spins into different versions.

Moscow Mule variations selector card showing four options—Mexican Mule (tequila), Kentucky Mule (bourbon), Cranberry Mule, and Tropical Mule (coconut water)—with copper mule mugs and ingredients like lime, mint, cranberries, and orange peel.
Moscow Mule variations made easy: start with the classic Moscow Mule recipe, then pick your mood—Mexican Mule with tequila for bright citrus, Kentucky Mule with bourbon for cozy warmth, Cranberry Mule for a festive twist, or Tropical Mule with coconut water for a lighter summer sip.

Below are the variations that truly earn their place. Each one starts from the same master build, then shifts one major element.


Mexican mule recipe: tequila mule with bright, bold energy

A Mexican Mule is often the first variation people fall for, because tequila and ginger are natural friends. Moreover, tequila’s agave character makes the drink feel sunny and lively.

For a classic reference, see Difford’s Mexican Mule.

Mexican mule recipe (classic build)

  • 60 ml tequila (blanco for crispness, reposado for warmth)
  • 20–25 ml lime
  • ginger beer to top (chilled)
  • optional: a small spoon of syrup if your ginger beer is very dry
Mexican Mule recipe card (tequila mule) showing a copper mug with ice, lime and mint, plus text with measurements (60 ml tequila, 20–25 ml lime, top with ginger beer) and an optional chaat and black salt rim.
Mexican Mule recipe (tequila mule): swap vodka for tequila, keep fresh lime bright, and top with chilled ginger beer—then, if you want a MasalaMonk-style kick, rim the mug with a little chaat masala and black salt for a bold, snack-friendly finish.

A MasalaMonk-style twist: a chaat rim that makes sense

Instead of treating garnish like decoration, use it like seasoning. Rim half the glass with:

  • a pinch of chaat masala
  • a pinch of black salt

Suddenly, the drink feels like it belongs next to street snacks. Consequently, the Mexican mule recipe becomes more than a cocktail; it becomes a pairing.

If you want an easy, satisfying snack partner, Homemade French Fries are an obvious win—especially with a chili-lime dust. Meanwhile, for something herby and tangy, Falafel with Indian twists fits beautifully.


Kentucky mule recipe: bourbon mule that’s warm, spicy, and comforting

A Kentucky Mule takes the moscow mule recipe structure and makes it richer. Bourbon brings vanilla and caramel notes; ginger keeps the finish snappy. Therefore, it feels cozy without becoming heavy.

For a whiskey-mixer perspective that aligns with this logic, MasalaMonk’s What to Mix with Jim Beam is a helpful companion.

Kentucky Mule recipe card (bourbon mule) showing a copper mug with crushed ice, mint and orange peel, plus text with measurements (60 ml bourbon, 20 ml lime, top with ginger beer) and optional bitters, with MasalaMonk.com branding.
Kentucky mule recipe (bourbon mule): build 60 ml bourbon and 20 ml fresh lime over plenty of ice, top with chilled ginger beer, then finish with orange peel and a dash or two of bitters for a warmer, deeper mule that still drinks crisp.

Kentucky mule recipe (easy build)

  • 60 ml bourbon
  • 20 ml lime
  • ginger beer to top
  • optional: 1–2 dashes aromatic bitters
  • garnish: lime or orange peel

A small shift that makes it feel “bar-quality”

Instead of changing ingredients, change emphasis:

  • choose a spicier ginger beer
  • keep lime slightly lower if your bourbon is delicate
  • add bitters if you want depth without sugar

As a result, the drink tastes layered rather than sweet.

Also Read: Daiquiri Recipe (Classic, Strawberry & Frozen Cocktails)


Irish mule recipe: smooth, bright, and quietly addictive

An Irish Mule often feels gentler than a bourbon version, because Irish whiskey can be lighter and less oaky. Consequently, ginger and lime remain front and center.

Irish mule recipe: pour 60 ml Irish whiskey over plenty of ice, add 20–25 ml fresh lime, then top with chilled ginger beer—finish with mint or extra lime for a smooth, bright mule that stays crisp and easy to sip.

Irish mule recipe (simple build)

  • 60 ml Irish whiskey
  • 20–25 ml lime
  • ginger beer to top
  • garnish: mint or lime

Because this version is so approachable, it works well as a “welcome drink” when friends arrive. Meanwhile, if you want it even fresher, mint adds aroma without changing the structure.

Also Read: Simple Bloody Mary Recipe – Classic, Bloody Maria, Virgin & More


Gin mule recipe: botanical freshness with ginger lift

Gin changes the Mule’s personality immediately. Instead of “clean and crisp,” the drink becomes aromatic and herbal. Moreover, cucumber and mint fit naturally.

A closely related drink, the Gin-Gin Mule, leans into mint; see The Spruce Eats’ Gin-Gin Mule for a reference build.

Gin mule recipe: build 45–60 ml gin and 20 ml fresh lime over plenty of ice, top with chilled ginger beer, then finish with mint and a cucumber ribbon for a mule that tastes extra bright, botanical, and refreshing.

Gin mule recipe (everyday build)

  • 45–60 ml gin
  • 20 ml lime
  • ginger beer to top
  • mint garnish
  • optional: cucumber slice

Because gin mules feel lighter, they pair especially well with tangy, herby foods. Therefore, Falafel with Indian twists makes a lot of sense here, particularly if you serve it with a bright sauce.

Also Read: Bolognese Sauce Recipe: Real Ragù & Easy Spag Bol


Italian mule recipe: aperitivo bitterness meets ginger fizz

An Italian Mule adds gentle bitterness—often through Aperol or a light amaro. As a result, the drink tastes more layered and “menu-worthy,” even though it’s just as easy to build.

Italian Mule recipe card (Aperol Mule) showing a tall cocktail with ice, orange slice and mint, with measurements (45 ml vodka, 15 ml Aperol, 20 ml lime) topped with ginger beer, on MasalaMonk.com.
Italian mule recipe (Aperol mule): add 45 ml vodka, 15 ml Aperol, and 20 ml fresh lime over ice, then top with chilled ginger beer—finish with an orange slice for a lightly bitter, citrusy mule that stays bright instead of sweet.

Italian mule recipe (aperitivo build)

  • 45 ml vodka
  • 15 ml Aperol (or a light amaro)
  • 20 ml lime
  • ginger beer to top
  • garnish: orange slice

This version is especially useful when your ginger beer runs sweet. Consequently, bitterness keeps the drink from feeling like orange soda.

Also Read: Blueberry Pancakes (6 Recipes) + Homemade Pancake Mix


Cranberry Moscow mule recipe: tart, festive, and easy to love

A cranberry Moscow mule feels celebratory without being heavy. Moreover, it’s a crowd-pleaser because it tastes fruity while staying sharp.

For a close external reference, see Liquor.com’s Apple Cranberry Moscow Mule. Even if you don’t add apple, the balancing logic is similar.

Cranberry Moscow Mule recipe: add 60 ml vodka and 20 ml fresh lime over plenty of ice, splash in 15–30 ml cranberry, then top with chilled ginger beer—garnish with cranberries and lime for a festive mule that stays tart, bright, and fizzy.

Cranberry Moscow mule recipe (balanced build)

  • 60 ml vodka
  • 15–30 ml cranberry juice (start small)
  • 20 ml lime
  • ginger beer to top

A tangy detour for readers who enjoy “bright” drinks

If you like cranberry’s sharpness, you might also enjoy a zero-proof cousin with similar flavors. MasalaMonk’s ACV and cranberry drink ideas fit naturally as a companion read because the taste family overlaps: tart, refreshing, and a little zippy.

Dessert pairing that fits the mood

Because cranberry loves spice, a warm, fragrant dessert works beautifully alongside it. For an indulgent but on-brand option, Churros with Indian-inspired variations can turn a simple drink night into something that feels planned.


Apple mule recipe and cinnamon-apple mule recipe: crisp, cozy, and surprisingly elegant

Apple and ginger are a natural pairing: apple brings sweetness and aroma, while ginger adds bite. Therefore, this variation works year-round—light in summer, cozy in cooler months.

Apple Mule recipe card showing a highball with ice, apple slices, lime and mint, with measurements (60 ml vodka, 30–60 ml apple juice/cider, 15–20 ml lime) topped with ginger beer and MasalaMonk.com branding.
Apple mule recipe: combine 60 ml vodka with 30–60 ml apple juice (or cider) and 15–20 ml fresh lime over plenty of ice, then top with chilled ginger beer—garnish with an apple slice for a crisp mule that turns cozy with a cinnamon stick.

Apple mule recipe (crisp build)

  • 60 ml vodka (or bourbon for a warmer version)
  • 30–60 ml apple juice or cider
  • 15–20 ml lime
  • ginger beer to top
  • garnish: apple slice
Cinnamon Apple Mule recipe card showing a highball with ice, apple slices, lime and mint, plus a cinnamon stick, with measurements (60 ml vodka, 30–60 ml apple, 15–20 ml lime) topped with ginger beer on MasalaMonk.com.
Cinnamon apple mule recipe: combine vodka, apple juice (or cider), and fresh lime over plenty of ice, then top with chilled ginger beer—finish with a cinnamon stick for a cozy, spiced mule that still tastes crisp and bright.

Cinnamon-apple mule recipe (cozy twist)

Use the Apple Mule build, then add:

  • a cinnamon stick garnish, or
  • a tiny pinch of cinnamon

Keep it subtle, because cinnamon can dominate if you’re heavy-handed.

For a non-alcoholic sibling that still captures the “apple + citrus + fizz” vibe, MasalaMonk’s Apple Juice Mocktails are a lovely companion link.


Ginger mule recipe: when you want more bite and less sweetness

Sometimes you don’t want a longer drink—you want the ginger to lead. In that case, choose a spicier ginger beer, keep lime bright, and avoid extra sugar.

Ginger Mule recipe card showing a tall mule-style cocktail with ice, lime and mint plus fresh ginger root, with text for an extra-ginger, less-sweet mule (60 ml vodka, 25 ml lime, top with spicy ginger beer) and MasalaMonk.com branding.
Ginger mule recipe (extra ginger, less sweet): build 60 ml vodka and 25 ml fresh lime over plenty of ice, top with a spicy ginger beer, and add a thin slice of fresh ginger for more bite—crisp, bright, and boldly ginger-forward.

Ginger mule recipe (extra-ginger build)

  • 60 ml vodka
  • 25 ml lime
  • ginger beer to top (start modest; add if needed)
  • optional: fresh ginger slice, lightly muddled
  • skip syrup unless your ginger beer is extremely dry

If you enjoy ginger beyond cocktails, MasalaMonk’s Ginger And Its Stunning Health Benefits is a natural internal link here because it keeps the reader in the same ingredient universe.
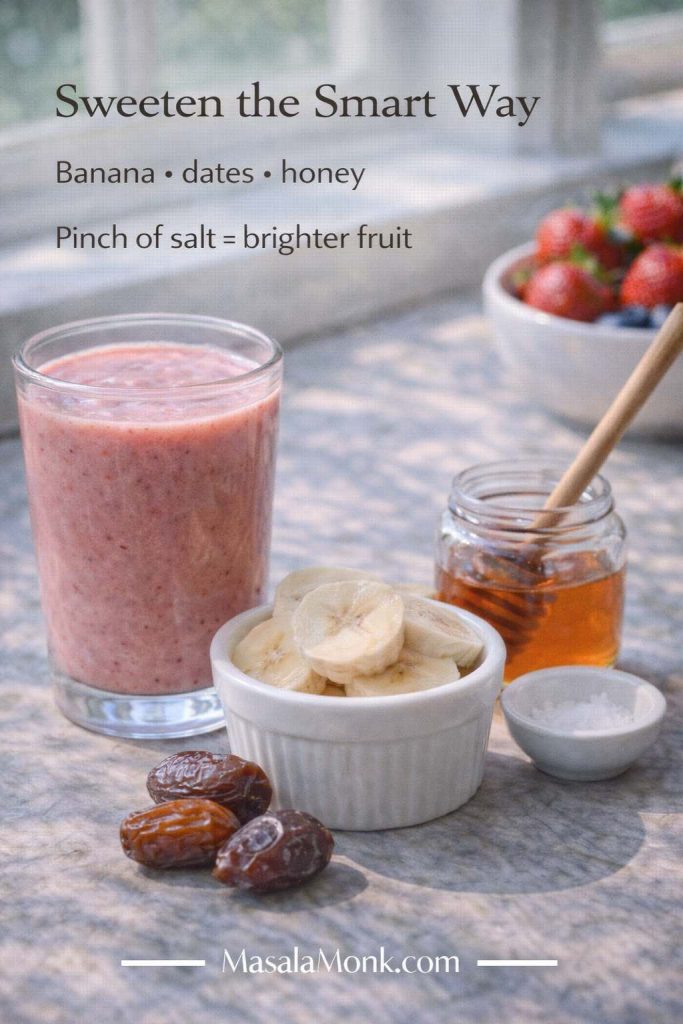
Also Read: One-Pot Chicken Bacon Ranch Pasta (Easy & Creamy Recipe)


Tropical mule recipe: coconut water, lime, and ginger fizz for hot evenings

A Tropical Mule feels like summer logic. Coconut water softens the edges, lime keeps it bright, and ginger adds the signature snap. Consequently, it’s an easy “conversion” drink for people who usually avoid cocktails.

MasalaMonk already plays in this space with Tropic Like It’s Hot: Coconut Water Cocktails, which includes Mule-style ideas that fit perfectly as a variation.

Tropical Mule recipe card showing a coconut water mule in a highball glass with ice, lime and mint, plus coconut water and coconut props, with measurements (60 ml vodka, 20 ml lime, 60–90 ml coconut water) topped with ginger beer.
Tropical mule recipe (coconut water mule): add vodka and fresh lime over plenty of ice, pour in chilled coconut water, then top with ginger beer—use slightly less ginger beer so the coconut stays light while the mule still finishes crisp and fizzy.

Tropical mule recipe (quick build)

  • 60 ml vodka
  • 20 ml lime
  • 60–90 ml chilled coconut water
  • ginger beer to top (slightly less than usual so ginger stays present)

Because coconut water adds volume, the slightly smaller ginger beer pour keeps the drink from becoming too diluted.

Also Read: French Toast Sticks (Air Fryer + Oven Recipe) — Crispy Outside, Custardy Inside


Moscow mule recipe with the bottle you already have: keeping balance without overthinking

Sometimes the only decision you’ve already made is the bottle sitting on your counter. Fortunately, the Mule is forgiving: you don’t need a brand-specific recipe; you just adjust balance.
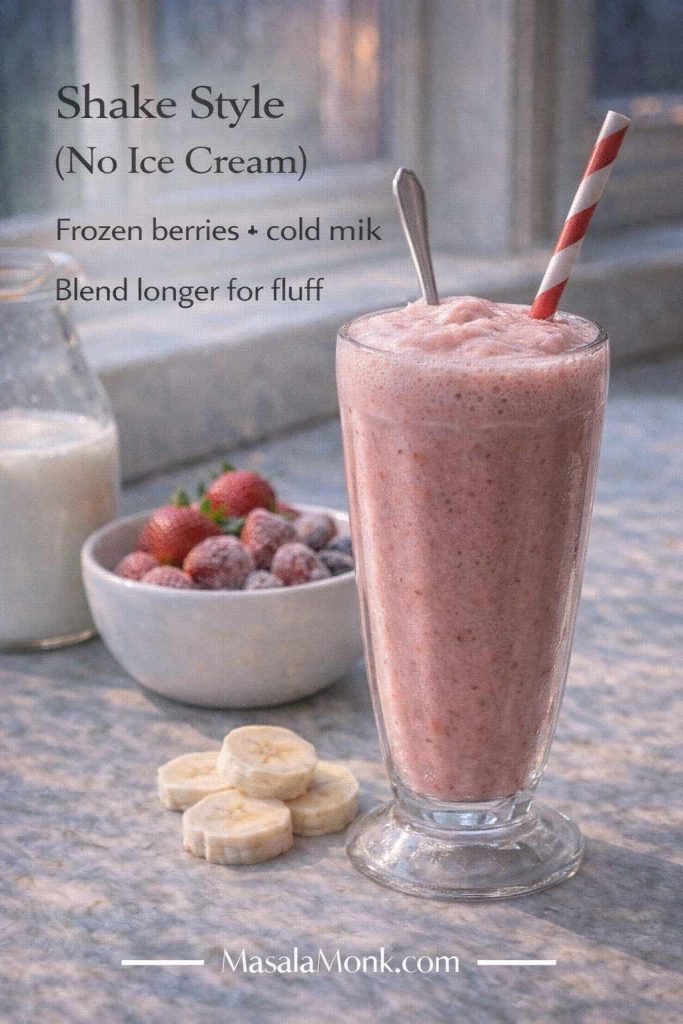
  • If your vodka tastes very clean and neutral, the Mule will feel crisp and classic, so you can push lime slightly higher if you enjoy sharpness.
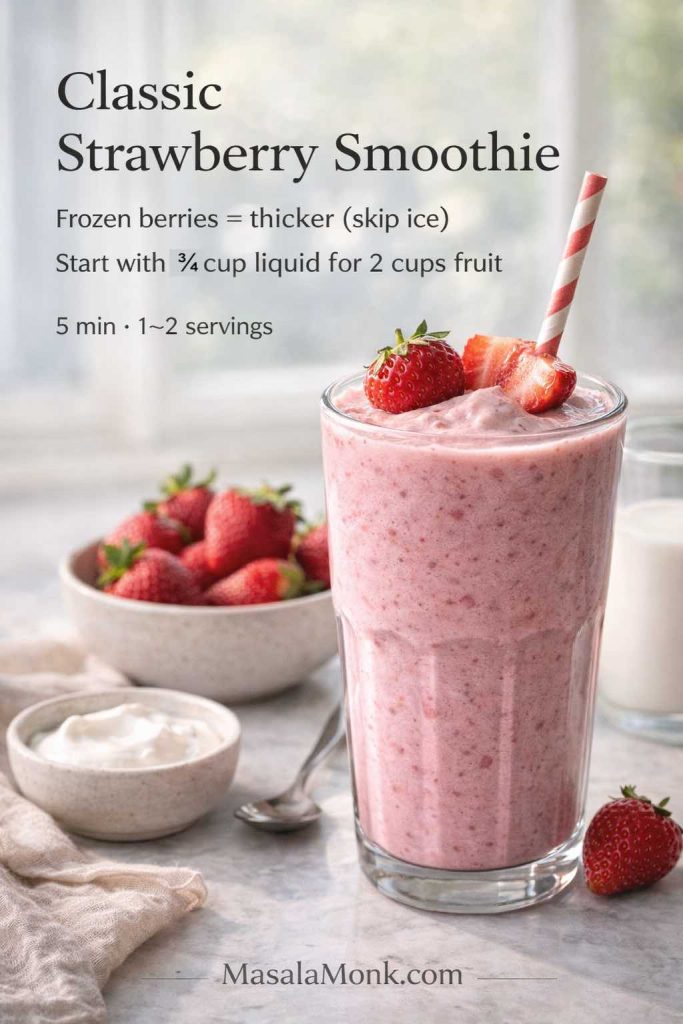
  • If your vodka tastes rounder or softer, a spicier ginger beer keeps the finish lively.
  • If your vodka is exceptionally smooth, adding a touch more ginger bite (or a ginger garnish) keeps the drink from feeling muted.

The same logic applies to whiskey versions. Irish whiskey tends to make a brighter, gentler drink; bourbon tends to make a warmer, richer one. Consequently, once you know the master moscow mule recipe structure, you can adapt it without stress.

Also Read: Whole Chicken in Crock Pot Recipe (Slow Cooker “Roast” Chicken with Veggies)


Moscow mule recipe as a make-ahead base: fast drinks without losing fizz

Sometimes you want a Mule to be effortless—something you can make in under a minute while still tasting fresh. That’s where a make-ahead base helps. However, the trick is to keep carbonation separate until the last moment.

Make-ahead Moscow Mule base: mix vodka + fresh lime (no bubbles), chill it hard, then pour over ice and add ginger beer only when serving—so every Moscow Mule stays bright, cold, and properly fizzy.

Make-ahead base (still ingredients only)

Combine:

  • vodka
  • lime juice
  • optional: a very small amount of syrup (only if needed)

Chill the base. Then, when serving, pour it over ice and top with ginger beer. As a result, you get the convenience of a “mix” without sacrificing sparkle.

What you don’t want to do is pre-mix ginger beer and let it sit. Carbonation fades, and the drink loses its lift.

Also Read: Authentic Louisiana Red Beans and Rice Recipe (Best Ever)


Batch Moscow mule recipe for a party: keep it bright, keep it fizzy

A pitcher Mule sounds perfect until the last glass is flat. Nevertheless, batching can work beautifully if you respect the order of operations: still ingredients first, carbonation last.

For a clear, practical guide to cocktail batching principles, see Serious Eats’ how to batch cocktails. The key idea is simple: chill the base hard, then add bubbly components right before serving.

If you enjoy entertaining, it’s also helpful to see how party-friendly prep works in other drink formats. MasalaMonk’s Punch recipes with pineapple juice offer a nice internal companion link because they live in the same hosting universe: big flavors, smart dilution, and last-minute fizz.

Batch Moscow Mules (stay fizzy) recipe card showing a vodka and lime base bottle, chilled ginger beer, ice bucket, limes, and tools, with steps to mix ahead, chill hard, and add ginger beer when serving.
Batch Moscow mules for a party without losing sparkle: mix the vodka + lime base ahead, chill it hard, then add ginger beer only when you’re ready to pour—ice first, pour fast, and stir gently for a crisp Moscow Mule every time.

A party setup that prevents flat drinks

Instead of one giant pitcher, set up a quick build station:

  • chilled base (vodka + lime, optional syrup)
  • plenty of ice
  • ginger beer on the side
  • lime wedges
  • optional garnishes (mint, orange slices, apple slices)

Then, guests can build classic Mules or variations. Meanwhile, you avoid the “sad final glass” problem entirely.

Also Read: Pepper Sauce Recipe Guide: Classic Vinegar Heat to Chipotle, Ají & Peppercorn


Moscow mule recipe and copper mugs: iconic style, plus one calm safety note

Copper mugs are part of the Mule’s identity: they look great, they stay cold, and they make the drink feel special. If you want the story in a quick read, why Moscow mules are served in copper mugs is a good explainer.

At the same time, lime juice is acidic, and unlined copper isn’t ideal for acidic drinks. For an official reference point, the FDA Food Code discusses copper use limitations for acidic foods and beverages here: FDA Food Code (Food Code 2022).

Copper mugs for Moscow mules guide card showing a lined copper mug with lime, explaining to choose lined mugs, avoid storing citrus in copper, and serve immediately.
Copper mugs make a Moscow Mule feel extra cold and special—just choose a lined mug, don’t store lime juice in copper, and serve the drink right after you build it for the freshest, fizziest mule.

In practical terms, it’s simple:

  • choose lined copper mugs if you’re buying
  • don’t store citrus drinks in copper
  • use a glass when you’re unsure

Either way, the moscow mule recipe still tastes fantastic.

Also Read: Baked Jalapeño Poppers (Oven) — Time, Temp & Bacon Tips


What to serve with a Moscow mule recipe: snacks, food, and desserts that match

A Mule tastes bright, gingery, and lime-forward. Therefore, it loves foods that are salty, crispy, tangy, or gently spiced. When you pair it thoughtfully, the drink seems even brighter.

What to serve with a Moscow mule: lean into snacks that echo the drink’s bright lime and ginger bite—crispy fries for salt and crunch, falafel for tangy-herby balance, and churros for a warm spiced finish that still plays nicely with a fizzy Moscow Mule.
What to serve with a Moscow Mule pairing card featuring fries, falafel and churros with lime and mint, suggesting crispy, tangy and spiced snacks that match a Moscow mule recipe.

Crispy, salty comfort (easy and satisfying)

Fries are a classic pairing for a reason: salt amplifies ginger, while lime keeps everything from feeling heavy. For a great home version, MasalaMonk’s Homemade French Fries are perfect—especially if you finish them with a spice dust.

This pairing works across variations. For example, it’s excellent with a Mexican Mule because tequila and chili-lime seasoning are natural friends. Similarly, it’s great with a Kentucky Mule because ginger cuts through bourbon warmth.

Tangy, herby bites (lighter, brighter)

Falafel is a surprisingly good companion for Mules: crisp outside, tender inside, and often served with sauces that echo the drink’s citrus. For an Indian-leaning take that fits MasalaMonk’s style, Falafel with Indian twists is an easy internal link that feels genuinely relevant.

This pairing shines with gin mules and Irish mules, because those drinks lean refreshing and aromatic. Consequently, the whole table feels light rather than heavy.

Desserts that don’t fight the drink

Because Mules are zippy, desserts that lean into spice and warmth match beautifully. A cinnamon-apple mule, for instance, practically begs for something fragrant. Meanwhile, a cranberry Moscow mule loves festive spice.

For a sweet companion that still feels on-brand, Churros with Indian-inspired variations can turn “just drinks” into a full evening.


The simple reason this Moscow mule recipe keeps working

The Mule lasts because it solves a craving: cold, bright, fizzy, and ginger-spiced. Moreover, it’s flexible without becoming complicated. Once you learn the master moscow mule recipe, you can keep the structure and shift the personality depending on season and mood.

On a warm evening, the Tropical Mule makes sense. On a festive night, the cranberry Moscow mule feels right. When you want comfort, the Kentucky mule recipe is the move. When you want something sharper and louder, the Mexican mule recipe delivers. Meanwhile, when you want fragrance and lift, a gin mule recipe changes the whole atmosphere of the drink.

So start with the master build, keep everything cold, let lime and ginger do their job, and adjust with confidence. After all, the best moscow mule recipe is the one you’ll actually make again—and this one is designed to earn that repeat.

Also Read: Vegan Mayo Recipe Guide: 5 Plant-Based Mayonnaise

FAQs

1) What is the best Moscow mule recipe for beginners?

If you’re just starting, the best Moscow mule recipe is the classic build: vodka, fresh lime juice, and chilled ginger beer over plenty of ice. To begin with, use 60 ml vodka, 20–25 ml lime, then top with ginger beer. After that, adjust the ginger beer amount based on how strong or light you want the drink.

2) What are the essential Moscow mule ingredients?

At minimum, Moscow mule ingredients include vodka, fresh lime juice, ginger beer, and ice. Additionally, a lime wedge is the most common garnish. Occasionally, mint or bitters are added, although the core Moscow mule recipe doesn’t require them.

3) How do I make a Moscow Mule that doesn’t taste watery?

Primarily, pack the glass completely with ice and use well-chilled ginger beer. Next, build the drink quickly so the ice doesn’t melt while you measure. Finally, stir only once or twice; otherwise, you’ll speed up dilution and flatten the fizz.

4) How to make a Moscow mule at home without a copper mug?

Simply make the Moscow mule recipe in a highball or any sturdy glass. Even so, the most important part is keeping everything cold. In fact, glassware matters far less than fresh lime, cold ginger fizz, and plenty of ice.

5) Why are Moscow mules served in copper mugs?

Traditionally, copper mugs became associated with the drink because they look distinctive and feel colder in the hand. Still, you can enjoy the same Moscow mule cocktail flavor from any glass, so it’s more about experience than necessity.

6) Can I make a Moscow mule with ginger ale instead of ginger beer?

Yes. Instead of ginger beer, use ginger ale and increase lime slightly so the drink stays bright. Also, skip extra sweeteners, since ginger ale is often sweeter. As a result, the Moscow mule with ginger ale stays balanced rather than tasting like soda.

7) How do I make a Moscow mule without ginger beer?

If you don’t have ginger beer, you can use ginger ale plus a small boost of fresh ginger or ginger syrup. Alternatively, you can combine soda water with lime and ginger syrup for a similar ginger-lime highball feel. Either way, keep everything cold so the drink remains crisp.

8) What’s the difference between a vodka Moscow mule and a vodka mule drink?

Practically speaking, they’re the same drink. In other words, “vodka mule drink” is simply another way of referring to the classic Moscow mule recipe built with vodka, lime, and ginger beer.

9) What is the best vodka for a Moscow mule?

Generally, the best vodka for a Moscow mule is clean and neutral, because the Moscow mule cocktail is meant to highlight ginger and lime. If your vodka tastes sharper, add a touch more ginger beer; conversely, if it’s very smooth, choose a spicier ginger beer to keep the finish lively.

10) How much alcohol is in a Moscow Mule?

Typically, a standard Moscow mule recipe uses a single 60 ml pour of vodka, then gets lengthened by ginger beer and ice. Consequently, it often drinks lighter than a straight spirit, even though it can still be strong. If you want a lower-alcohol mule drink, reduce the vodka slightly and top with more ginger beer.

11) How many calories are in a Moscow Mule?

Calories depend mostly on the vodka pour and the sweetness of the ginger beer. For example, a sweeter ginger beer raises calories noticeably, whereas a drier ginger beer keeps them lower. Therefore, if calories matter, pick a less-sweet ginger fizz and avoid added syrup.

12) What is a Mexican mule, and how is it different from a Moscow Mule?

A Mexican mule replaces vodka with tequila while keeping lime and ginger beer. As a result, it tastes brighter and more “agave-citrus” than the classic. If you like the Moscow mule recipe but want a bolder twist, the Mexican mule is usually the easiest upgrade.

13) What is a Kentucky mule recipe?

A Kentucky mule recipe swaps vodka for bourbon. Because bourbon is warmer and sweeter, the drink feels more comforting, while ginger keeps it snappy. Additionally, a dash of bitters can add depth without adding sugar.

14) What is an Irish mule?

An Irish mule uses Irish whiskey instead of vodka. Compared with a bourbon mule, it often tastes lighter and smoother. Consequently, it’s a great option when you want a whiskey mule that still feels bright and refreshing.

15) What is a gin mule recipe?

A gin mule recipe replaces vodka with gin, creating a more aromatic, botanical version. Furthermore, mint or cucumber can fit naturally here, although the core formula—spirit, lime, ginger beer—stays the same.

16) What is an Italian mule cocktail?

An Italian mule cocktail usually adds an aperitivo element (like a light bitter orange spirit) alongside vodka, lime, and ginger beer. Therefore, it often tastes slightly more complex and less sweet, especially when your ginger beer is mild.

17) How do I make a cranberry Moscow mule recipe?

A cranberry Moscow mule recipe adds a small amount of cranberry juice to the classic Moscow mule ingredients. Start with a modest splash so it stays tangy rather than sugary, then top with ginger beer. Similarly, keep lime present; otherwise, cranberry can take over.

18) How do I make an apple mule drink?

An apple mule drink adds apple juice or cider to the Mule template. Next, keep lime in the mix so it remains bright, then top with ginger beer. If you want a cozier version, add a cinnamon stick garnish for a cinnamon-apple mule feel.

19) What is a ginger mule, and how do I make it less sweet?

A ginger mule is simply a Mule where ginger leads. To achieve that, choose a spicier ginger beer, increase lime slightly, and avoid syrup. Additionally, a thin slice of fresh ginger can intensify bite without adding sweetness.

20) Can I make a Moscow mule mix ahead of time?

Yes, but only the still parts. First, combine vodka and lime juice (and optional syrup if needed), then chill. Right before serving, pour over ice and top with ginger beer. Otherwise, if you add ginger beer early, the bubbles fade and the mule drink loses its lift.

21) How do I batch Moscow mules for a party?

For batching, pre-mix vodka and lime, chill the mixture thoroughly, and set up ginger beer separately. Then, when guests are ready, build each Moscow mule recipe over ice and top with ginger beer. Consequently, every glass stays fizzy instead of going flat in a pitcher.

22) What’s the best garnish for a Moscow Mule?

Most commonly, a lime wedge or wheel is ideal, because it reinforces the citrus aroma. Alternatively, mint adds freshness, and orange peel pairs nicely with whiskey or Italian mule variations. Either way, keep garnish simple so it supports the Moscow mule cocktail instead of distracting from it.

23) How do I make a Moscow Mule less sweet without changing the whole recipe?

First, add a bit more lime. Next, reduce the ginger beer pour slightly and choose a drier ginger beer if available. In addition, a tiny pinch of salt can sharpen the drink’s profile, so sweetness feels calmer rather than loud.

24) How do I make a Moscow Mule stronger or lighter?

To make it stronger, reduce ginger beer slightly while keeping lime steady. On the other hand, to make it lighter, add more ginger beer and keep plenty of ice. As a result, you can shift strength without breaking the Moscow mule recipe balance.

Posted on 3 Comments

Electrolyte Elixir: The Science Behind Coconut Water as a Natural Sports Drink

Athlete sprinkles salt into a bottle of coconut water beside halved coconut and lime—Coconut Water & Electrolytes cover

For years, athletes and everyday movers have reached for coconut water after a run, ride, or humid commute. Coconut water delivers a naturally occurring electrolytes mix of potassium, sodium, magnesium, calcium, & phosphorus—a profile that can hydrate efficiently for everyday use and light-to-moderate training. The appeal is obvious: it tastes light, it’s easy on the stomach, and it comes with minerals that your body uses to keep fluids where they belong. Even so, hydration is more than “drink something wet.” The composition of your drink—especially the balance of sodium and potassium—changes how quickly you absorb fluid and how well you retain it during heat, illness, or long workouts.

To ground this discussion, it helps to start with a simple idea: effective hydration is about water + electrolytes + context. In other words, what you’re doing (a slow 30-minute jog vs. a 2-hour tempo run), where you’re doing it (cool office vs. tropical afternoon), and how much you sweat all determine whether plain coconut water is enough—or whether you’ll want to tweak it.

If you want a primer on the broader health story, you can skim our friendly overview of the health benefits of coconut water before diving deeper. It sets the stage without repeating what follows.


The science under the sip

When you drink, the small intestine absorbs fluid fastest when the solution is roughly isotonic and when sodium is present to drive water across the gut wall via sodium–glucose co-transport. Meanwhile, potassium is crucial inside cells, stabilizing nerve impulses and muscle function. Coconut water naturally provides potassium, a little sodium, and smaller amounts of magnesium and calcium. Consequently, many people feel great sipping it during day-to-day life or after light training.

However, two real-world factors complicate things. First, sweat sodium losses can vary wildly by person (some lose under 500 mg per liter of sweat; others lose over 1,000 mg). Second, the electrolyte numbers in coconut water vary by variety, growing conditions, and processing. To keep claims concrete, compare brand labels against a public reference. As a starting point for nutrient baselines and cross-checking, browse USDA FoodData Central. It’s not a substitute for your exact bottle, but it keeps you anchored in real data.

Also Read: Benefits of Lemon and Lime Water: Refreshing Hydration with a Citrus Twist


What Coconut Water & Electrolytes actually look like in the bottle

In practice, packaged coconut water tends to be potassium-forward with modest sodium. That’s a wonderful profile for everyday hydration, and it explains why people feel refreshed quickly without the heavy, syrupy feel of many sports drinks. Notably, individual labels tell the real story; for example, one typical retail panel for a premium pink Nam Hom style lists hundreds of milligrams of potassium per serving with tens of milligrams of sodium—a pattern you’ll see often. If you’re curious about a concrete example of this potassium-high, sodium-modest pattern, take a look at a representative store label for a leading organic brand like this Harmless Harvest nutrition panel. Once you start scanning a few labels, you’ll notice how consistent that ratio can be.

All the same, your needs might not be “typical.” If you’re training in hot weather, racing, working outdoors, or you consider yourself a “salty sweater,” sodium replenishment matters more than flavor. That’s where a practical approach to Coconut Water & Electrolytes comes in—enjoy the taste and potassium, then adjust the sodium to match the day.

Also Read: Watermelon: The Hydration Hero for Your Skin – Benefits, Myths, and 5 Quenching Recipes for Dewy Skin


Coconut Water & Electrolytes vs. sports drinks: choosing with intention

Although sports drinks dominate stadium coolers for a reason, coconut water holds its own for many scenarios. To decide confidently, focus on use case rather than brand loyalty.

For short efforts and daily sipping, coconut water’s natural sweetness and high potassium content are often perfect. You hydrate, you avoid sticky aftertastes, and you take in gentle carbohydrates. For extended efforts, heavy sweat, or back-to-back sessions, sodium drives the bus. In that context, products formulated specifically for higher sodium can be advantageous.

To see how labels differ, peek at a few manufacturer pages. For instance, Gatorade lists about 160 mg sodium per 12 fl oz on its official panel (PepsiCo Product Facts). Meanwhile, Pedialyte Classic—built as an oral rehydration solution—comes in far higher, around 390 mg sodium per 12 fl oz, with a notable potassium contribution as well (Pedialyte Classic). By contrast, Liquid I.V. Hydration Multiplier supplies a robust sodium dose per stick when mixed as directed, which many endurance athletes appreciate for long efforts or very hot days (Hydration Multiplier). Finally, Electrolit Coconut offers a ready-to-drink, pharmacy-style electrolyte profile; the brand’s coconut flavor showcases the flavor you like alongside a broader mineral blend (Electrolit Coconut), and some retail panels show substantially more sodium than plain coconut water in a similar serving (example retail facts).

In short, coconut water shines when you don’t need so much sodium; sports drinks or ORS-style formulas shine when you do.

Also Read: Pedialyte and Electrolytes for Diarrhea


Making Coconut Water & Electrolytes “endurance-ready” without losing the taste

Happily, you don’t need to abandon coconut water on hard days—you can upgrade it. Rather than reinvent the wheel, start with a bottle you enjoy, then follow three steps:

  1. Add sodium deliberately. A pinch of fine salt (⅛–¼ tsp) raises sodium quickly without turning the drink into soup. Stir, sip, and adjust for taste.
  2. Dilute to the day. If it’s sweltering outside, top up with cold water and ice; you’ll keep coconut flavor while bringing the overall drink closer to an easy-to-absorb concentration.
  3. Match carbohydrates to effort. For longer sessions at a steady tempo, a teaspoon or two of sugar or honey smooths energy delivery; for easy days, you can skip the extras.

For more ideas—and to keep your pantry versatile—check our kitchen-tested guide to natural homemade electrolyte drinks. You’ll find straightforward combinations you can tailor on the fly, including coconut-forward options that don’t taste like liquid candy.

Also Read: Coconut Water Cocktails: 10 Easy, Refreshing Drinks


When Coconut Water & Electrolytes aren’t the right tool

Despite its many strengths, coconut water isn’t always ideal. During gastrointestinal illness, severe dehydration, or sustained heat stress, the body benefits from a composition close to oral rehydration solution (ORS) standards. Clinically, ORS balances sodium and glucose to enhance absorption at a known osmolarity. For a concise medical summary—not marketing—review this professional write-up on oral rehydration therapy. It outlines why sodium and glucose together move water efficiently across the gut wall.

Accordingly, on tough days, you may choose a stick of Liquid I.V., a bottle of Electrolit, or a serving of Pedialyte to meet higher sodium needs, then return to coconut water as your pleasant, everyday baseline.

Also Read:  Is Energy drink Gatorade Worth the Hype?


Everyday uses for Coconut Water & Electrolytes that feel effortless

While race-day decisions get attention, most hydration moments are ordinary: a gym session squeezed between meetings, a walk in muggy weather, or a late night after spicy food. In those moments, coconut water’s gentle taste and naturally high potassium make it easy to sip enough without forcing it.

  • Desk days: keep a chilled bottle nearby and alternate sips with plain water. You’ll cover potassium comfortably while staying light.
  • Hot commutes: pre-cool the bottle; the cold shock plus mild sweetness makes consistent drinking almost automatic.
  • Short workouts: drink a little before to prime, a little after to re-balance, and keep the rest in the fridge for cooking (it brightens smoothies surprisingly well).

And because delight matters, try flavor pivots that keep the profile clean. For instance, these cooling cucumber electrolyte quenchers ride the same hydration logic while giving you a fresh, spa-like twist that never feels cloying.


A practical recipe: build your own Coconut Water & Electrolytes

Here’s a fast, flexible mix that scales up effortlessly:

  • Base: 1 cup coconut water
  • Sodium: ⅛–¼ tsp fine salt (start small; increase on hotter, longer days)
  • Citrus: 1–2 tbsp lemon or lime juice for brightness
  • Optional carbs: 1–2 tsp sugar or honey if you’re training long
  • Top up: cold water/ice to ~700–750 ml total

Shake, taste, and adjust. On easy days, reduce salt. On simmering afternoons or hilly runs, nudge it upward. If you prefer a precise pantry system with variations for different goals, you’ll love our roundup of post-workout electrolyte drink recipes; it maps effort to ingredients without overcomplicating your kitchen.

Meanwhile, if you’re experimenting with low-carb or keto, you can still keep coconut water in your rotation, just in smaller, well-timed amounts. For templates that respect carb budgets yet remain practical, lean on these keto electrolyte drink ideas and tweak from there.

And if you’re training while fasting—or supporting long focus blocks with minimal calories—you can use fasting-friendly builds that stay gentle on the stomach. For thoughtful, tasteful options, see our fasting electrolyte recipes.


Brand reality check without the noise

Because labels evolve, it’s smart to verify numbers at the source. Manufacturer or retailer panels let you check sodium and potassium per serving and compare apples to apples.

  • For a mainstream benchmark, consult Gatorade’s nutrition panel here: PepsiCo Product Facts.
  • When you need ORS-style sodium, Pedialyte Classic spells out its formulation clearly on the brand site: Abbott Nutrition Pedialyte.
  • If you want portable sticks with a stronger sodium profile, Liquid I.V. lists ingredient details and serving directions on the Hydration Multiplier page.
  • For a coconut-flavored RTD electrolyte drink, Electrolit Coconut blends sodium with other minerals; browse the product page and, when comparing, peek at a retail nutrition panel example to gauge per-serving sodium.

By checking labels periodically and matching them to your use case, you’ll stay ahead of reformulations without chasing trends.


How to choose: a label checklist for Coconut Water & Electrolytes

When your goal is clear, decisions get easy. Use this quick, human-friendly checklist:

  1. Sodium: for long, sweaty sessions—or if you know you’re a salty sweater—prioritize higher sodium or plan to add a pinch of salt.
  2. Potassium: coconut water typically covers this well. If you’re aiming for balanced daily intake, you’re already winning here.
  3. Total sugars: align to effort; enjoyable sweetness supports longer sessions, but on easy days you can dilute.
  4. Serving size realism: convert the label to per bottle numbers, not just per cup, so you know what you actually drink.
  5. Stomach feel: if syrupy drinks never sit right, let coconut water lead; if you need punch on race day, use a higher-sodium option sparingly and test in training.
  6. Context: hot weather, double sessions, or illness change the math—choose accordingly.

As you refine the habit, your taste buds and performance will tell you when you’ve hit the sweet spot.

Also Read: Lemon Mint Water: 5 Refreshing Recipes to Hydrate and Invigorate


Whole-food pairings that elevate Coconut Water & Electrolytes

Hydration doesn’t happen in a vacuum. Pair your drink with foods that bring potassium and a touch of sodium to the table. A banana with a lightly salted rice cake, a baked potato with a pinch of salt, or a bowl of broth alongside your bottle can round out recovery without extra fuss. For a concise reference you can save on your phone, grab our printable Potassium-Rich Foods List. It keeps choices simple when you’re busy or traveling.


Putting Coconut Water & Electrolytes to work—scenarios and solutions

Because “what should I drink?” is usually a context question, here are a few everyday scenarios with practical decisions:

  • Morning mobility + short jog (cool weather): sip half a bottle of coconut water beforehand, finish it afterward, and call it good. No tweaks necessary.
  • Lunchtime strength session (air-conditioned gym): start with coconut water, add a whisper of salt if your shirt shows salt rings regularly, and keep plain water nearby.
  • Evening tempo run (warm, humid): pre-salt your coconut water lightly, top with ice, and bring a small soft flask; refill with plain water at a fountain if needed.
  • Outdoor workday (high heat): alternate between coconut water and a higher-sodium helper such as Electrolit or a Liquid I.V. mix; prioritize cooling the drinks.
  • Travel day + spicy dinner: coconut water plus a salty snack balances fluids without overdoing sugar; finish with herbal tea and call it a night.
  • Recovery after mild stomach upset: when you’re ready for fluids again, begin with small sips; if losses were significant, consider an ORS-style drink guided by the oral rehydration therapy overview, then return to coconut water as appetite normalizes.

Step by step, you’ll learn to treat hydration less like a rulebook and more like a dial you turn with weather, effort, and taste.


A final word on confidence and consistency

Ultimately, the smartest hydration routine is the one you’ll follow consistently. Coconut Water & Electrolytes make that easier because they taste good, feel light, and deliver real minerals your cells use every minute. On easy days, drink it straight. On hard days, salt it and dilute. When illness or extreme heat raises the stakes, reach for an ORS-style option, then transition back.

Rather than chase perfect numbers, choose clarity over complication: keep a bottle of coconut water in the fridge, a small salt tin in your gym bag, and a plan for long or hot days. With those simple tools—and a habit of checking labels on official pages like Gatorade, Pedialyte, Liquid I.V., and Electrolit Coconut—you’ll hydrate on purpose, not by accident.

Meanwhile, keep things enjoyable. Rotate flavors, add citrus, pour over ice, or build one of our gentle post-workout electrolyte drink recipes. You’ll feel the difference not only in how you perform, but also in how quickly you bounce back. And that, more than anything, is what smart hydration is supposed to deliver.

FAQs

1) What are Coconut Water & Electrolytes, exactly?

Coconut Water & Electrolytes refers to the naturally occurring minerals—primarily potassium, plus sodium, magnesium, calcium, and phosphorus—found in coconut water. Collectively, they help regulate fluid balance, nerve impulses, and muscle contraction during activity.

2) Does coconut water actually have enough electrolytes for workouts?

Generally, yes for light-to-moderate sessions because potassium is abundant; however, sodium is often modest. Consequently, for long, sweaty efforts many people benefit from adding extra sodium or alternating with a higher-sodium drink.

3) How much sodium and potassium are typical in Coconut Water & Electrolytes?

Typically per cup (240 ml), many packaged coconut waters provide several hundred milligrams of potassium but only a few dozen milligrams of sodium. Therefore, the drink is potassium-forward and sodium-light compared with classic sports drinks.

4) Is coconut water isotonic?

Broadly speaking, the carbohydrate concentration can be near isotonic, yet the sodium concentration is usually below sweat losses. Accordingly, coconut water is excellent for everyday hydration and shorter workouts, while endurance sessions may require additional sodium.

5) Is coconut water good for electrolyte balance after running?

Frequently, yes. Potassium helps restore intracellular balance and supports normal muscle function. Still, runners who lose lots of salt may need to complement Coconut Water & Electrolytes with a sodium boost to feel fully recovered.

6) Which is better: Coconut Water & Electrolytes or Gatorade?

It depends on the situation. Coconut water offers a lighter taste and higher potassium with fewer additives; Gatorade typically supplies more sodium and predictable carbohydrates for extended or very hot workouts.

7) How does coconut water compare with Liquid I.V. or similar mixes?

Powdered mixes often deliver substantially more sodium per serving and a set ratio with glucose for rapid absorption. Meanwhile, Coconut Water & Electrolytes bring natural potassium and an easy-drinking profile—great for moderate efforts or daily use.

8) What about Electrolit, Pedialyte, or ORS-style options?

Those formulas emphasize sodium first, targeting fast rehydration during illness, heat stress, or prolonged exercise. In contrast, coconut water is typically more pleasant for routine hydration but may need sodium support in these tougher scenarios.

9) Best coconut water for electrolytes—what should I look for?

Prioritize straightforward ingredient lists and transparent nutrition panels. Ideally, you’ll see high potassium per serving and, if you train in heat, either moderate sodium or a plan to add a pinch of salt.

10) Is coconut water high in sodium?

Usually, no. Most packaged options are relatively low in sodium compared with sports drinks. Consequently, heavy sweaters should either add salt or pair Coconut Water & Electrolytes with a higher-sodium beverage.

11) Does coconut water contain magnesium and calcium?

Yes, but in modest amounts relative to potassium. These minerals still contribute to overall electrolyte intake, though they shouldn’t be your sole source if you specifically need higher magnesium or calcium.

12) Can Coconut Water & Electrolytes help with cramps?

Sometimes. Adequate potassium and fluids can ease cramp risk in certain cases; however, cramps are multifactorial. When sweat sodium losses are high, meeting sodium needs typically matters as much—or more—than potassium alone.

13) Is coconut water good for low sodium levels (hyponatremia)?

No beverage should be used to “treat” a medical condition without guidance. That said, because coconut water is usually low in sodium, it is not the ideal choice when sodium repletion is urgently required.

14) Are “coconut juice” or “buko juice” different from Coconut Water & Electrolytes?

Terminology varies by region. Many products labeled “coconut juice” are essentially coconut water. Nevertheless, always check the label for added sugars or flavors, which can change the electrolyte-to-carb balance.

15) Is coconut milk or coconut oil useful for electrolytes?

Not really. Electrolytes reside in the water portion of the fruit. Coconut milk is predominantly fat and coconut oil is pure fat—neither is an electrolyte beverage.

16) Can Coconut Water & Electrolytes fit keto or low-carb plans?

Often in small, well-timed servings. Because coconut water contains natural carbs, strict keto followers tend to use smaller amounts around workouts or dilute with water to manage carbohydrate totals.

17) What’s the best time to drink coconut water for training?

Commonly: a little before easy sessions to prime, then more afterward to replenish. During longer efforts, many athletes sip steadily while ensuring separate sodium coverage if conditions are hot or sweat rates are high.

18) How can I make Coconut Water & Electrolytes more “endurance-ready”?

Practically speaking, add a small pinch of fine salt, top with cold water to taste, and—if needed—include a teaspoon of sugar or honey for longer efforts. This simple adjustment raises sodium, improves absorption, and keeps flavor clean.

19) Are flavored coconut waters okay for electrolytes?

Often yes, provided the flavoring doesn’t dramatically increase sugar or mask the mineral profile. Prefer options with straightforward ingredients and consistent nutrition panels so you know what you’re getting each bottle.

20) Do brands like BODYARMOR, NOOMA, ROAR Organic, or Vita Coco change the equation?

Each positions Coconut Water & Electrolytes a bit differently—some add minerals or vitamins, others keep it simple. Because formulations can vary, the smartest move is to compare sodium, potassium, and total sugars per serving against your training demands.

21) Can kids or older adults use coconut water for hydration?

Typically, yes for casual hydration when eating normally. However, during illness or significant fluid loss, higher-sodium solutions are often preferred; Coconut Water & Electrolytes can still play a role alongside regular food once appetite returns.

22) Will Coconut Water & Electrolytes upset my stomach during workouts?

Rarely, as coconut water is generally easy to tolerate. Even so, personal digestion differs. Therefore, test during training—not on race day—and adjust dilution and sodium to your comfort.

23) What serving size makes sense?

A practical starting point is 250–500 ml around easy sessions, then adjust for duration, temperature, and sweat rate. For long or hot efforts, scale volume gradually and ensure your sodium strategy keeps pace.

24) Do I still need plain water if I’m drinking coconut water?

Usually, yes. Alternating Coconut Water & Electrolytes with water helps you manage sweetness and total carbohydrate intake while maintaining steady fluid absorption over time.

25) Quick summary: when should I choose Coconut Water & Electrolytes?

Choose it for day-to-day hydration, short or moderate workouts, and times you want a lighter, more natural taste. Choose a higher-sodium option—or fortify your coconut water—when heat, duration, or heavy sweat make sodium replacement the priority.