Posted on 16 Comments

Lemon Drop Martini Recipe (Classic, 3-Ingredient & More)

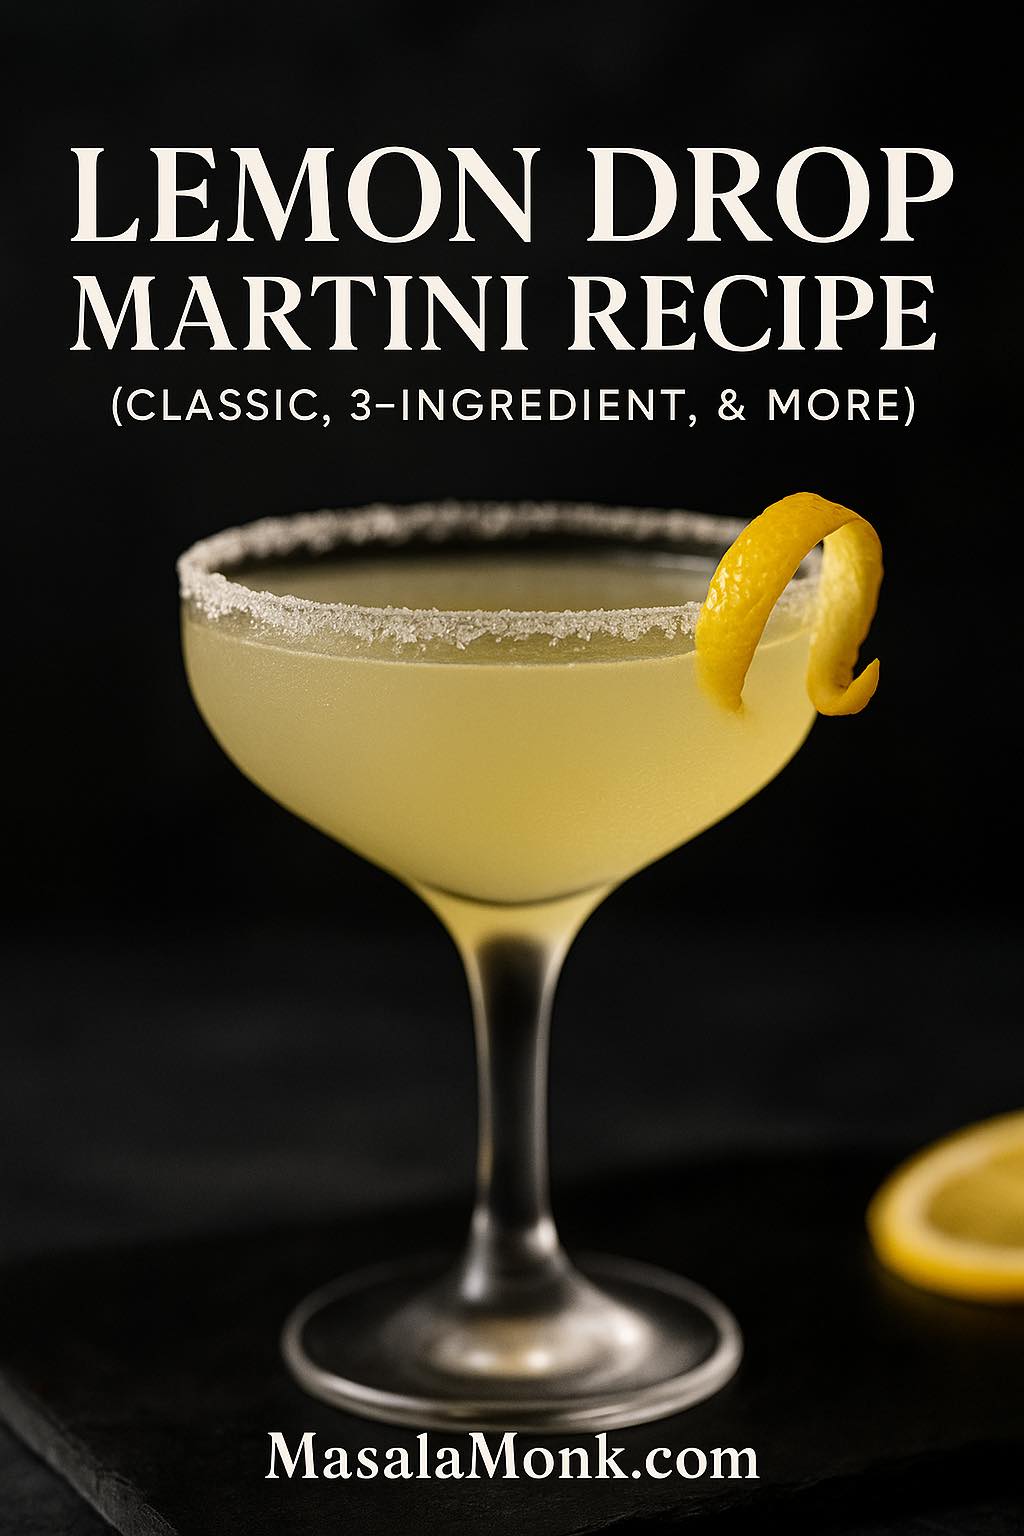
Chilled lemon drop martini in a sugar-rimmed glass with a lemon twist, fresh lemons, and cocktail tools on a styled bar surface.

A good lemon drop martini should taste lively before it tastes sweet. The glass is deeply chilled, the rim sparkles lightly, and the first sip lands with just-squeezed lemon, clean vodka, a soft orange note, and enough sweetness to smooth the sharp edge. It should feel polished, not syrupy; refreshing, not harsh; easy, but still pretty enough to make the glass feel special.

This easy lemon drop martini starts with a balanced classic ratio: vodka, Cointreau or triple sec, fresh lemon juice, and simple syrup, shaken hard and poured into a lightly sugared glass. Once that baseline tastes right, you can make it without triple sec, soften it with limoncello, turn it into shots, batch it for guests, or add fruit without losing the crisp citrus snap.

Quick Answer: How to Make a Lemon Drop Martini

To make a classic lemon drop martini, shake 2 oz (60 ml) vodka, ¾ oz (22 ml) Cointreau or triple sec, 1 oz (30 ml) fresh lemon juice, and ½ oz (15 ml) simple syrup with firm ice for 15–20 seconds. Fine-strain into a chilled, lightly sugar-rimmed 5–6 oz coupe or martini glass, then garnish with a lemon twist.

No jigger? Use 4 tablespoons vodka, 1½ tablespoons Cointreau or triple sec, 2 tablespoons fresh lemon juice, and 1 tablespoon simple syrup.

Before you shake, remember this: chill the glass, sugar only the outside rim, and adjust by teaspoons instead of guessing. Add syrup if the drink is too sour; add lemon if it tastes too sweet.

This is the drink to pour when you want something dressed up but not fussy: before dinner, for a small party, beside a dessert table, or as the first round when people want something bright and familiar.

Jump to What You Need

Classic Lemon Drop Martini Recipe

Make this version first. It is the classic baseline: lemon-forward, deeply chilled, gently sweet, and easy to adjust. A well-made Lemon Drop should hit in this order: cold lemon, smooth vodka, a soft orange note, then a small sparkle from the rim — not sour lemonade, melted candy, or a glass full of sugar.

Yield1 cocktail
Prep time5 minutes
Glass5–6 oz coupe or martini glass
FlavorLemon-forward, crisp, gently sweet
Shake time15–20 seconds
ServeImmediately

Ingredients

IngredientAmount
Vodka2 oz / 60 ml
Cointreau or quality triple sec¾ oz / 22 ml
Fresh lemon juice, fine-strained1 oz / 30 ml / 2 tbsp
Simple syrup, 1:1½ oz / 15 ml / 1 tbsp
Superfine sugar, for rim1–2 tbsp / about 12–25 g
Lemon twist or thin lemon wheel1

Method

  1. Chill a 5–6 oz coupe or martini glass for 5–10 minutes, or fill it with ice water while you work.
  2. Place superfine sugar on a shallow plate, moisten only the outside rim with lemon, and dip lightly.
  3. Add vodka, Cointreau or triple sec, fresh lemon juice, and simple syrup to a shaker.
  4. Fill the shaker with firm ice.
  5. Shake for 15–20 seconds, until the outside feels very cold.
  6. Fine-strain into the prepared glass.
  7. Express a lemon peel over the surface, then garnish with the twist or a thin lemon wheel.

You will know it is right when the drink feels cold and sharp at first, then softens almost immediately. The rim should add sparkle, not a mouthful of sugar.

Taste before changing the recipe. Too sharp? Add 1 teaspoon simple syrup and shake briefly with fresh ice. Too sweet? Add 1 teaspoon lemon juice and re-shake. A Lemon Drop loses its edge as it warms, so pour it last-minute rather than letting filled glasses sit on a tray.
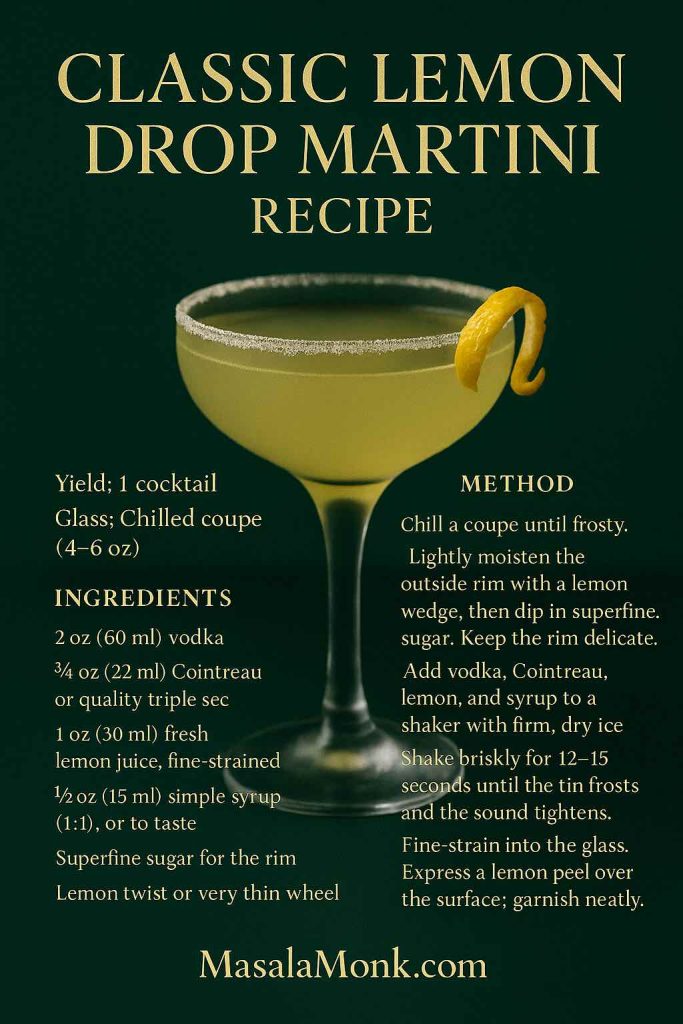
Classic lemon drop martini recipe card with a pale yellow cocktail, sugar rim, lemon garnish, and recipe measurements.
Use the classic recipe card as your baseline before changing the drink. Once the vodka, lemon, orange liqueur, and syrup work together, every variation becomes easier to adjust.

No-Jigger Lemon Drop Measurements

Use this quick conversion when measuring at home. Tablespoons keep the drink accurate, and teaspoon-sized adjustments keep the final sip from swinging too sour or too sweet.
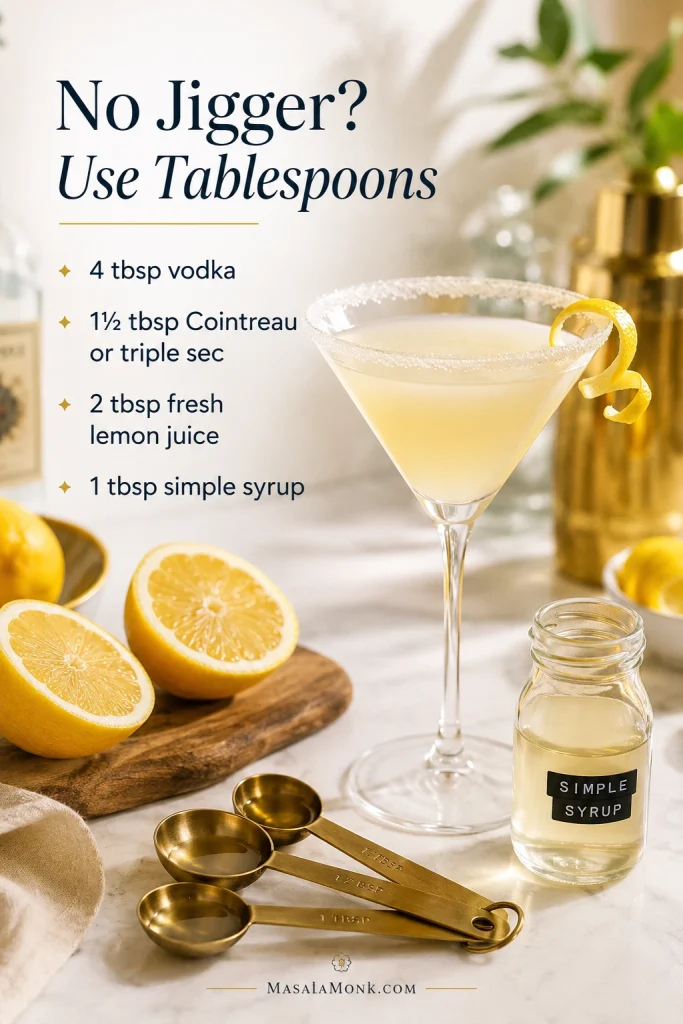
Tablespoon measurement guide for a lemon drop martini with measuring spoons, lemons, simple syrup, and a finished cocktail.
Tablespoons are accurate enough for a home Lemon Drop when the ratio is clear. Measure first, then adjust in teaspoons so the drink stays lively without turning too sour or too sweet.

Before You Mix: 3 Details That Make It Taste Better

The recipe is simple, but the small details matter. Small technique choices make the drink feel bar-clean instead of last-minute.

1. Use fresh, strained lemon juice

A lemon drop is only as good as its lemon. Fresh juice tastes vivid and fragrant, while bottled juice often tastes flat or stale. Strain out pulp before shaking so the drink stays smooth.

2. Keep the sugar rim thin

The rim should frame the first sip, not turn the cocktail into dessert. Moisten only the outside edge of the glass so sugar does not fall into the drink.

3. Shake hard with firm ice

Shaking does more than chill the drink. It adds a small amount of water, softens the lemon, and gives the cocktail a smoother finish. If the shaker frosts or feels painfully cold, you are there.

Shake and Fine-Strain for a Cleaner Pour

Once the drink is measured, the shake controls texture as much as temperature. Cold ice, firm shaking, and fine-straining help the cocktail pour clean, bright, and smooth.

Cocktail shaker and fine strainer pouring a lemon drop martini into a prepared sugar-rimmed glass.
A firm shake chills, aerates, and lightly dilutes the drink. Fine-straining then gives the Lemon Drop Martini a cleaner texture with fewer ice shards or pulp flecks in the glass.

Need to rescue a drink that tastes off?

Choose Your Lemon Drop

Start with the classic, then change one thing at a time. That keeps the drink recognizable while letting you make it drier, sweeter, fruitier, stronger, softer, or easier to serve.
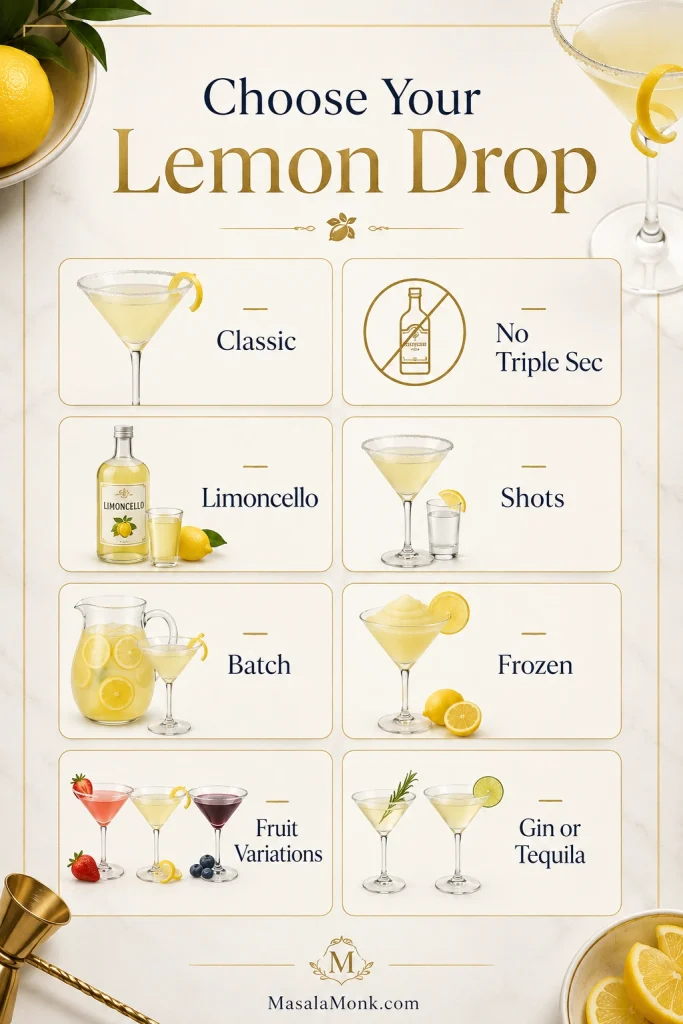
Decision guide showing lemon drop martini options including classic, no triple sec, limoncello, shots, batch, frozen, fruit variations, and gin or tequila.
Match the Lemon Drop to the moment: no triple sec for a simple pour, limoncello for softness, shots for a tray, and batch or frozen versions for guests.
Mood or needMake thisWhy it works
Clean and classicClassic Lemon Drop MartiniBest balance of vodka, orange, lemon, and syrup
No orange liqueur3-Ingredient Lemon DropVodka, lemon, syrup; rim optional
Softer and more lemonyLimoncello Lemon DropLimoncello adds round lemon perfume
Party trayLemon Drop ShotsSmaller, brighter, faster to serve
Hosting dinnerPitcher Lemon DropBatch ahead, then shake or dilute properly
Hot afternoonFrozen Lemon DropBlended, cold, citrusy
Pretty brunch drinkStrawberry or Lavender Lemon DropColor, aroma, and a softer mood
Drier twistGin Lemon DropMore botanical and less candy-like

Not sure where to start? Make the classic once, then decide whether you want it softer with limoncello, quicker as shots, or fruitier for a party glass.

Lemon Drop Martini Ingredients

With only a few ingredients in the shaker, every choice shows up in the glass. Fresh lemon smells brighter, measured syrup keeps the drink crisp, and a neutral vodka lets the citrus lead.
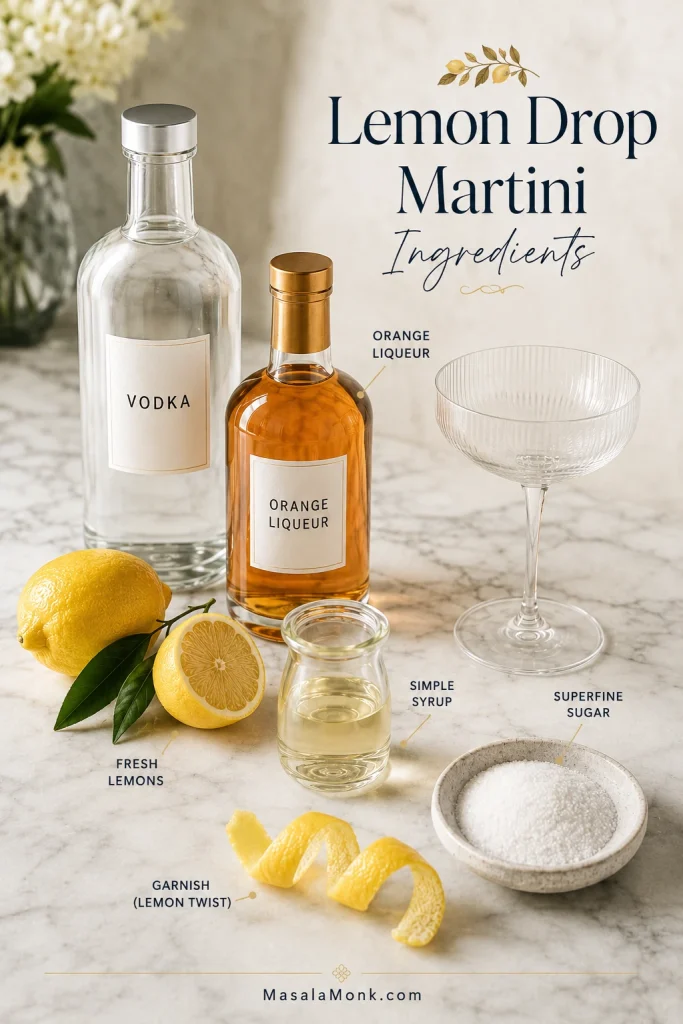
Lemon drop martini ingredients on a marble surface, including vodka, orange liqueur, fresh lemons, simple syrup, superfine sugar, lemon twist, and glassware.
With so few ingredients, every shortcut shows quickly. Fresh lemon juice, measured syrup, orange liqueur, and neutral vodka create the polished Lemon Drop flavor.

Vodka

Plain vodka is the safest choice for the cleanest classic Lemon Drop. It does not need to be expensive; it just needs to stay out of the lemon’s way. Lemon vodka works if you want a louder citrus aroma, but reduce the syrup slightly so the drink does not turn candy-like.

Cointreau, Triple Sec, or Grand Marnier

Cointreau gives the clearest orange note. A good triple sec keeps the drink accessible and works well in the classic ratio. Grand Marnier tastes richer and rounder, so use a little less syrup if the cocktail feels too sweet.

Fresh Lemon Juice

Choose lemons that feel heavy for their size, then roll them before juicing. One medium lemon usually gives about 2 tablespoons juice, though dry lemons may give less. Plan on one lemon per cocktail, plus an extra lemon nearby.

Simple Syrup

For syrup, begin with a basic 1:1 mix made from equal parts sugar and water. Half an ounce is the best starting point for one drink. To make a small batch, stir ½ cup sugar with ½ cup hot water until clear, cool, then refrigerate in a clean jar and use within 2–3 weeks.

Superfine Sugar

Superfine sugar gives the smoothest rim because it dissolves quickly on the lips. Granulated sugar works, but it feels crunchier. Avoid powdered sugar; it can clump, turn pasty, and taste dusty.

No bar tools?

No shaker? A jar with a tight lid works. Use tablespoons instead of a jigger and a tea strainer instead of a cocktail strainer. One ounce equals 2 tablespoons. If using a jar, wrap it in a towel and make sure the lid seals tightly before shaking.

The Best Lemon Drop Ratio for a Balanced Drink

The Lemon Drop Ratio at a Glance

Use this ratio as the starting point before you change the syrup, rim, or liqueur. It keeps the lemon bright while giving the vodka sour enough softness to feel polished.
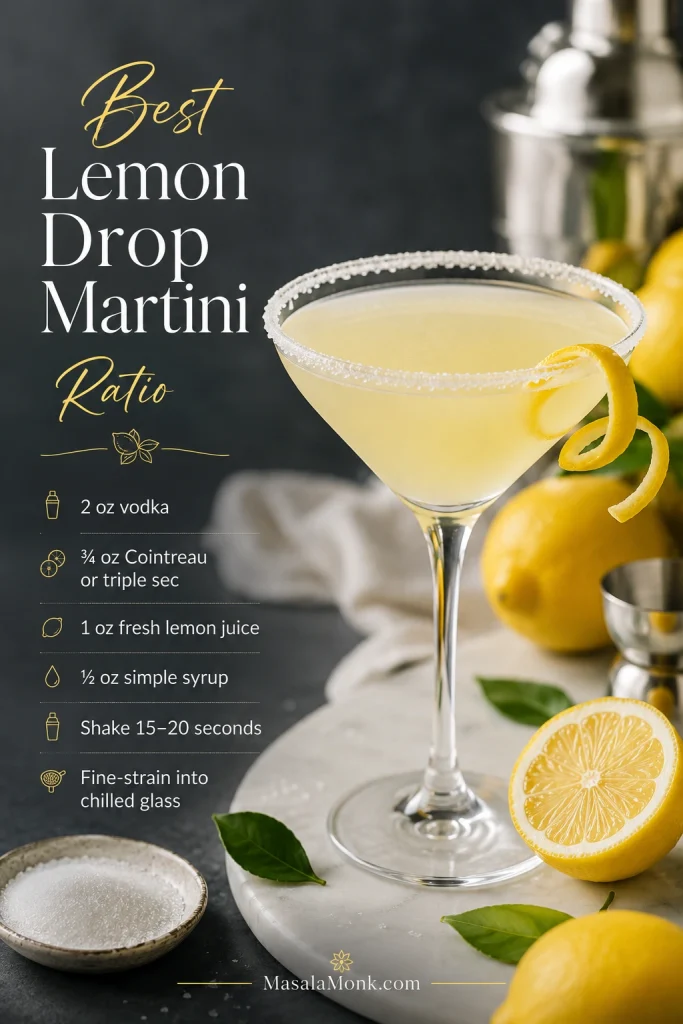
Lemon drop martini ratio card showing vodka, Cointreau or triple sec, fresh lemon juice, simple syrup, shake time, and a sugar-rimmed cocktail.
Use this Lemon Drop Martini ratio as the drink’s control panel: vodka gives structure, lemon brings sharpness, orange liqueur adds aroma, and syrup rounds the edge.

Think of the drink as a vodka sour served up: the vodka keeps it clear, the lemon gives it lift, the orange liqueur adds perfume, and the syrup softens the edge so the drink feels bright instead of sharp. Shaking supplies the cold dilution that makes it rounded instead of harsh. The sugar rim should stay outside the glass so the first taste sparkles while the cocktail underneath stays crisp. If you like this spirit-citrus-sugar balance, the Daiquiri recipe follows the same sour-cocktail logic with rum and lime.

If you want it…Adjust this way
Sharper and more citrus-forwardKeep syrup at ½ oz / 15 ml
Softer and sweeterIncrease syrup to ¾ oz / 22 ml
Drier and more bar-styleUse ½ oz / 15 ml orange liqueur and ½ oz / 15 ml syrup
More party-styleUse up to 1 oz / 30 ml syrup
Less sweet overallRim only half the glass
More aromaticExpress a fresh lemon peel over the drink

How to Balance a Lemon Drop That Tastes Off

Small corrections work better than big guesses. Taste once, adjust by the teaspoon, and shake briefly again so the fix blends into the drink.
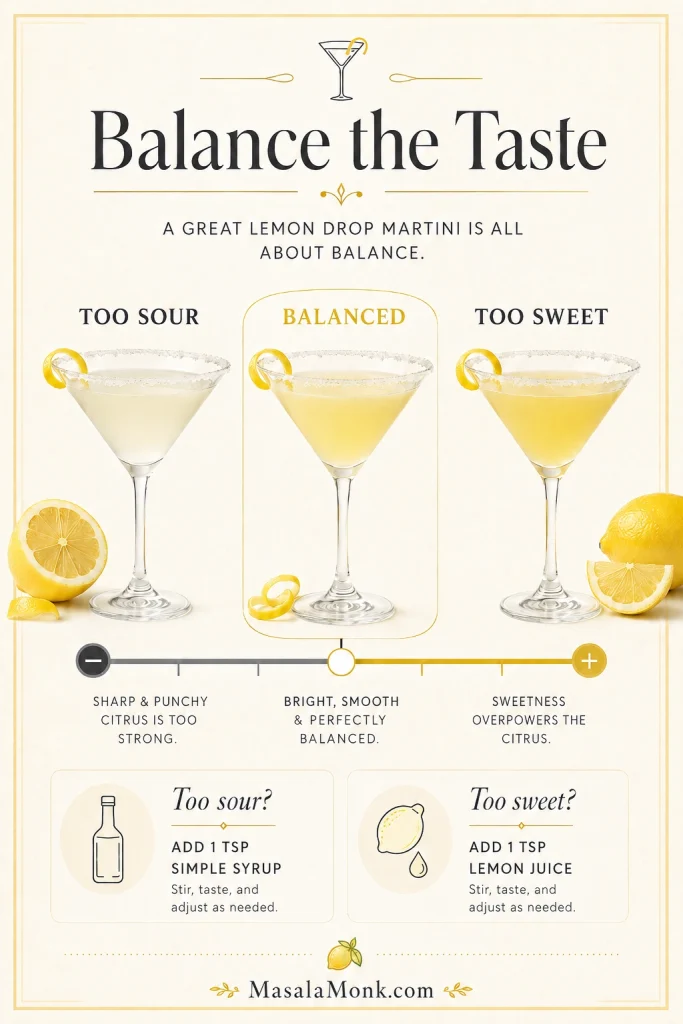
Lemon drop martini balance guide showing too sour, balanced, and too sweet drinks with syrup and lemon juice adjustments.
Taste first, then fix the drink in teaspoons. Syrup softens a too-sharp Lemon Drop, while fresh lemon cuts a too-sweet one before a brief re-shake.

How to Make a Lemon Sugar Rim

The rim should sparkle, not clump. A heavy sugar crust makes the first sip awkward and can drop sugar into the cocktail. The best lemon sugar rim is thin, even, and only on the outside edge of the glass.

  1. Add superfine sugar to a small shallow plate.
  2. Rub in 1 teaspoon finely grated lemon zest if you want a brighter rim.
  3. Run a lemon wedge around the outside edge of the glass only.
  4. Dip the moistened outside rim into the sugar.
  5. Let the glass sit for 2–3 minutes while you make the cocktail.
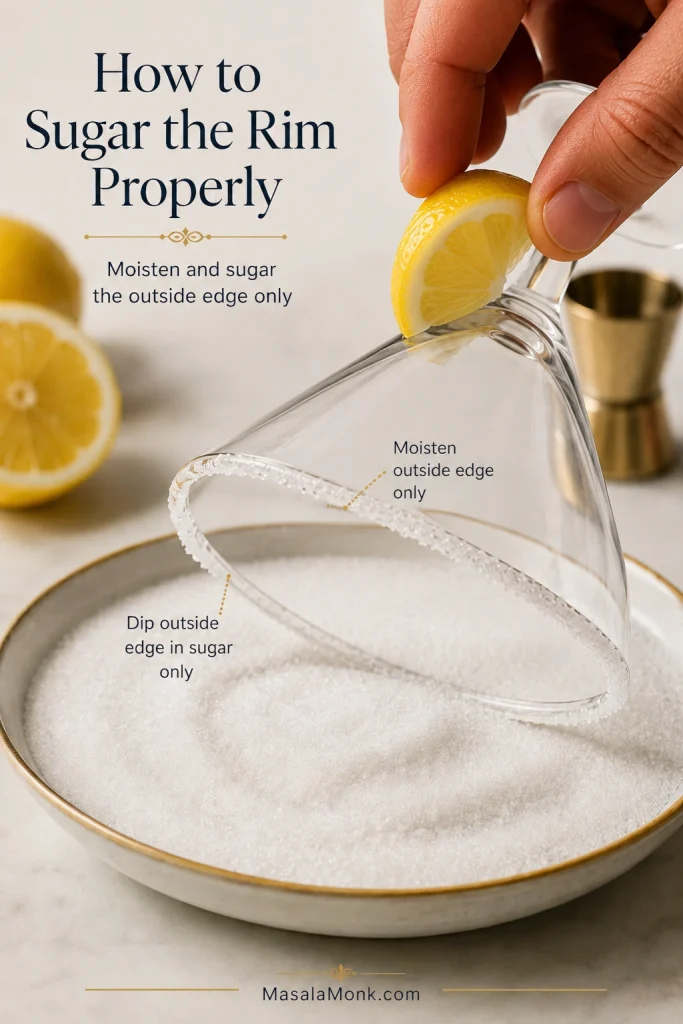
Close-up of a lemon drop martini glass being moistened and sugared only on the outside edge with superfine sugar.
Rim only the outside edge of the glass so sugar sweetens each sip, not the whole cocktail. The drink stays cleaner, brighter, and less likely to turn syrupy.

Prefer it less sweet? Rim only half the glass. Guests can choose the sugared side or the clean side, and the drink still looks polished without turning the first sip into candy.

That little sugared edge is part of the charm: the glass looks ready before the drink is even poured.

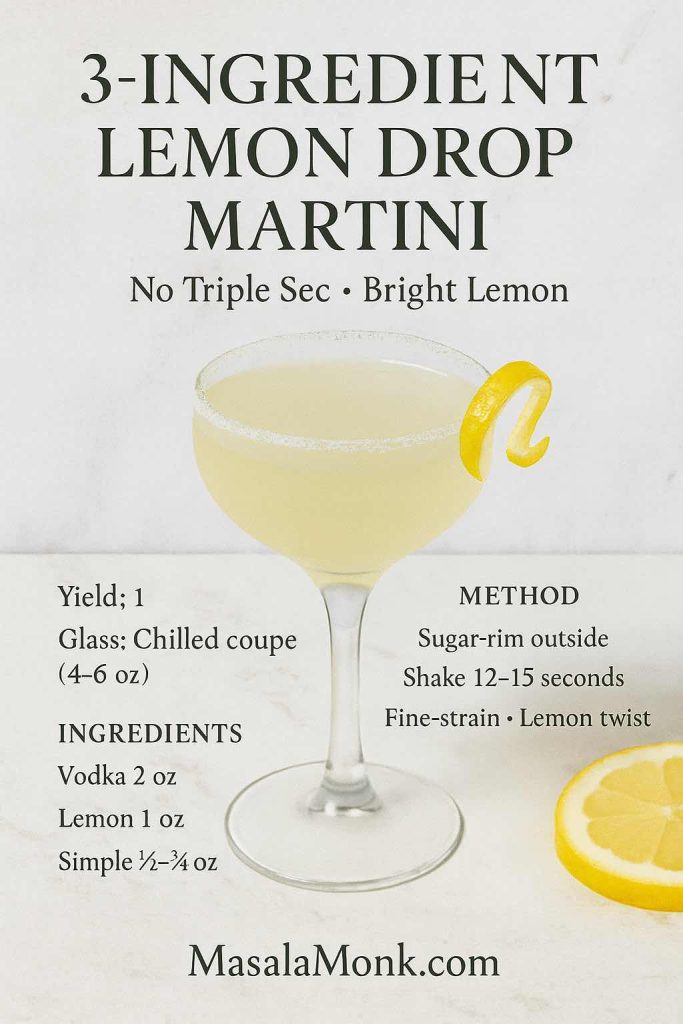
3-Ingredient Lemon Drop Martini, No Triple Sec or Cointreau

You can make a clean lemon drop martini without Cointreau or triple sec: vodka, lemon juice, and simple syrup. The sugar rim and lemon twist are optional, but they make even the simplest version feel complete.

IngredientAmount
Vodka2 oz / 60 ml
Fresh lemon juice1 oz / 30 ml
Simple syrup½–¾ oz / 15–22 ml
Optional superfine sugar for rim1–2 tbsp / about 12–25 g
Optional lemon twist1
Three-ingredient lemon drop martini card showing vodka, fresh lemon juice, simple syrup, and a sugar-rimmed cocktail.
Vodka, fresh lemon juice, and syrup keep this 3-ingredient Lemon Drop simple. A light sugar rim and lemon twist make the shortcut feel complete.

Shake the vodka, lemon juice, and syrup with firm ice for 15–20 seconds, then fine-strain into a chilled glass. Use ½ oz syrup for a sharper drink, or ¾ oz if you want it softer. Missing the orange aroma? Add 1–2 dashes of orange bitters.

Back to the classic recipe · Try the limoncello version

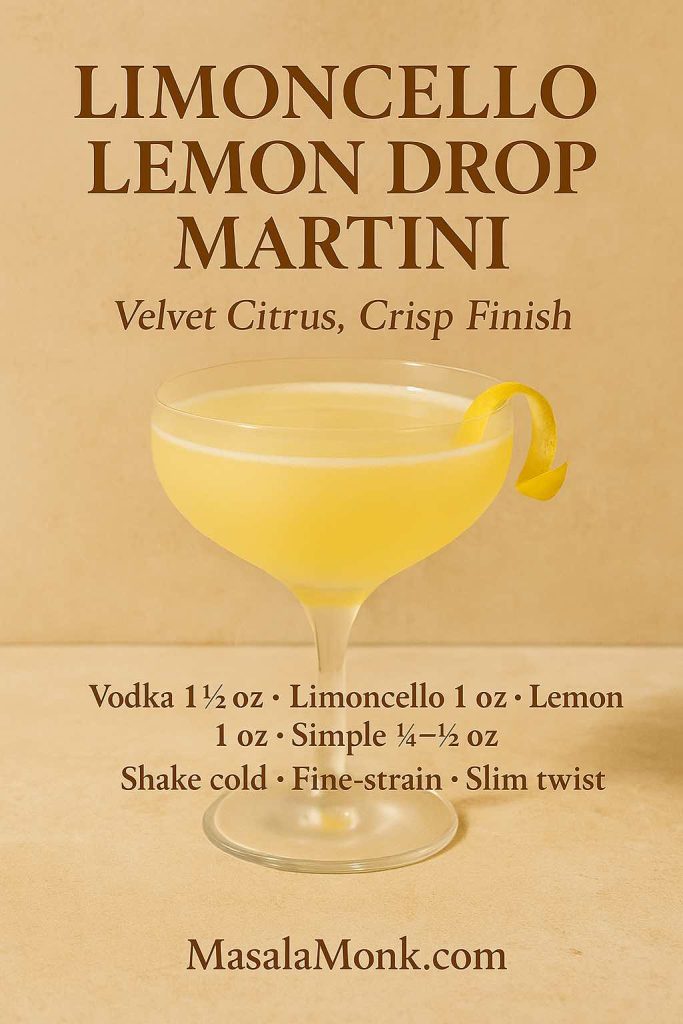
Limoncello Lemon Drop Martini

Limoncello makes a lemon drop softer, rounder, and more perfumed — the version to pour when you want the drink to feel sunnier and a little more generous. Since limoncello is already sweet, use less simple syrup than you would in the classic drink.

IngredientAmount
Vodka1½ oz / 45 ml
Limoncello1 oz / 30 ml
Fresh lemon juice1 oz / 30 ml
Simple syrup¼–½ oz / 7–15 ml, to taste
Superfine sugar for rimoptional, or half rim
Lemon twist1
Limoncello lemon drop martini card with a golden lemon cocktail, limoncello bottle, lemons, and a sugar-rimmed glass.
Since limoncello already brings sweetness, reduce the syrup before you shake. That keeps the variation sunny and lemony instead of drifting into dessert-drink territory.

Shake with ice until very cold, then fine-strain into a chilled glass. Start with ¼ oz syrup and increase only if the lemon feels too sharp.

  • Too sweet? Skip the simple syrup and use a half rim.
  • Too heavy? Add ¼ oz / 7 ml more lemon juice.
  • Too flat? Add the tiniest pinch of fine salt before shaking; it should not taste salty, just more awake.

More ways to fix the taste · Back to the classic recipe

Lemon Drop Shot Ratio

This is the version for the tray: quick to shake, easy to pass around, and brighter than a plain vodka shot. Lemon drop shots for a party should taste like smaller, punchier versions of the cocktail, not plain vodka chased with sugar.

VersionVodkaLemon juiceSimple syrup
Bright shot1 oz / 30 ml½ oz / 15 ml¼ oz / 7 ml
Sweeter party shot1 oz / 30 ml½ oz / 15 ml½ oz / 15 ml
6 shots6 oz / 180 ml3 oz / 90 ml1½–3 oz / 45–90 ml
Tray of sugar-rimmed lemon drop shots with lemon garnish and a small shot-ratio overlay.
Small, cold batches make better Lemon Drop shots. Pour right before serving so each glass tastes lively instead of warm, flat, or overly sweet.

Shake shots with ice for 8–10 seconds, then strain into lightly sugared shot glasses. Work in small batches so every round tastes lively instead of warm and syrupy.

Serving more than shots? Jump to pitcher and batch Lemon Drops.

Batch Lemon Drop Martini: Pitcher, Party Batch, and Freezer-Door Lemon Drops

Serving more than two people? The only trick is dilution. A shaken Lemon Drop gets a little water from the ice, and that water is part of the drink. For guests, the goal is simple: keep the first round cold and the second round just as good.

Pitcher Lemon Drops for a Party

A pitcher setup works best when the base is cold, the glasses are ready, and the dilution plan is settled before guests arrive.

Clear pitcher of pale yellow lemon drop martinis with lemon slices, sugar-rimmed coupe glasses, lemons, and cocktail tools.
Chill the base and prepare the glasses before guests arrive. For a pitcher Lemon Drop, the dilution plan matters more than the garnish pile.
Serving styleBest choiceAdd water?
Best qualityBatch ingredients, shake each drinkNo
Easiest pitcherAdd water and chillYes
Freezer-door bottleUse smaller batch, shake each servingNo
Ready-pour bottleAdd measured water before chillingYes

Batch Dilution: Shake-to-Order vs Ready-Pour

Use this choice before you bottle the drink. If the batch will not be shaken with ice later, it needs measured water now.
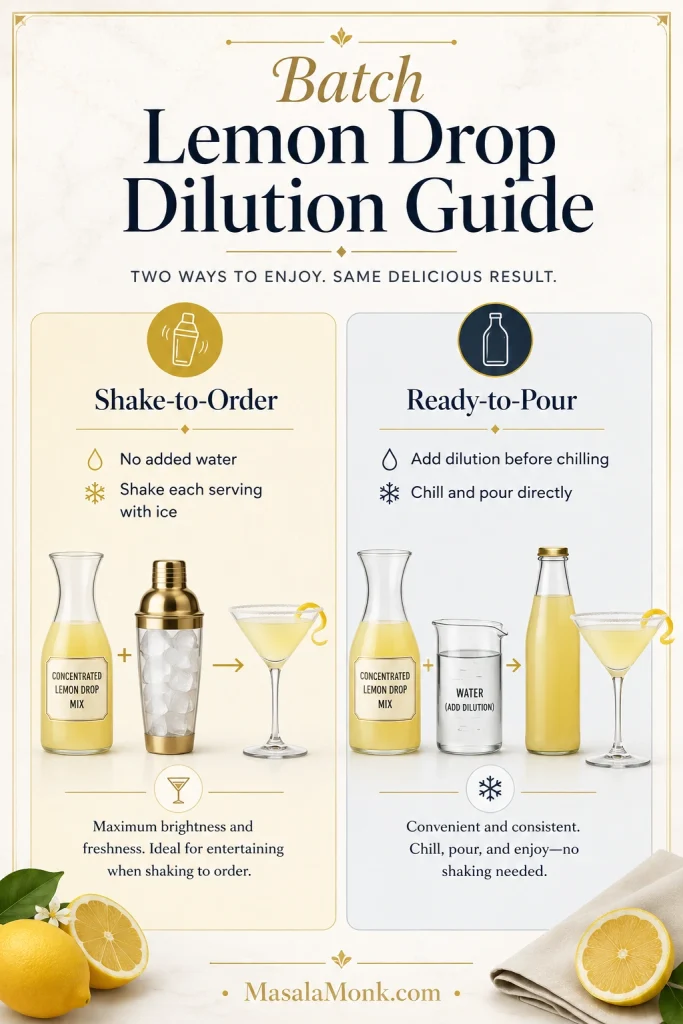
Infographic comparing shake-to-order lemon drop batches with ready-to-pour batches that include water for dilution.
Decide the serving style before batching. Shake-to-order Lemon Drops stay undiluted until the final shake, while ready-pour batches need measured water ahead of time.

If a batched Lemon Drop tastes strong, sharp, or oddly flat, it usually does not need more sugar first; it needs the water that shaking would have added.

After dilution, one shaken cocktail usually pours around 5 oz, sometimes closer to 5½ oz. Because Lemon Drops taste bright and smooth, they can feel lighter than they are. Serve them small, cold, and freshly poured.

Shake-to-order batches

BatchVodkaOrange liqueurLemon juiceSyrupWater
4 cocktails8 oz / 240 ml3 oz / 90 ml4 oz / 120 ml2–3 oz / 60–90 mlnone
8 cocktails16 oz / 480 ml6 oz / 180 ml8 oz / 240 ml4–6 oz / 120–180 mlnone

Ready-pour and freezer batches

BatchVodkaOrange liqueurLemon juiceSyrupWater / dilution
8 ready-pour cocktails16 oz / 480 ml6 oz / 180 ml8 oz / 240 ml4–6 oz / 120–180 ml8–10 oz / 240–300 ml
750 ml freezer bottle, shake-to-serve, about 5 cocktails10 oz / 300 ml3¾ oz / 110 ml5 oz / 150 ml2½ oz / 75 mlnone; shake each serving with ice
1 liter ready-pour bottle, about 6 cocktails12 oz / 360 ml4½ oz / 135 ml6 oz / 180 ml3–4 oz / 90–120 ml6–7 oz / 180–210 ml

Use a large pitcher or a 1.5 liter bottle for the 8-drink ready-pour batch; it will not fit in a standard 750 ml bottle. Do not fill a freezer bottle to the top. Leave headspace, cap tightly, and shake or invert before pouring.

Freezer-Door Lemon Drop Bottle

A freezer-door bottle is convenient, but it still needs room at the top and a quick shake before serving so the citrus and syrup stay even.
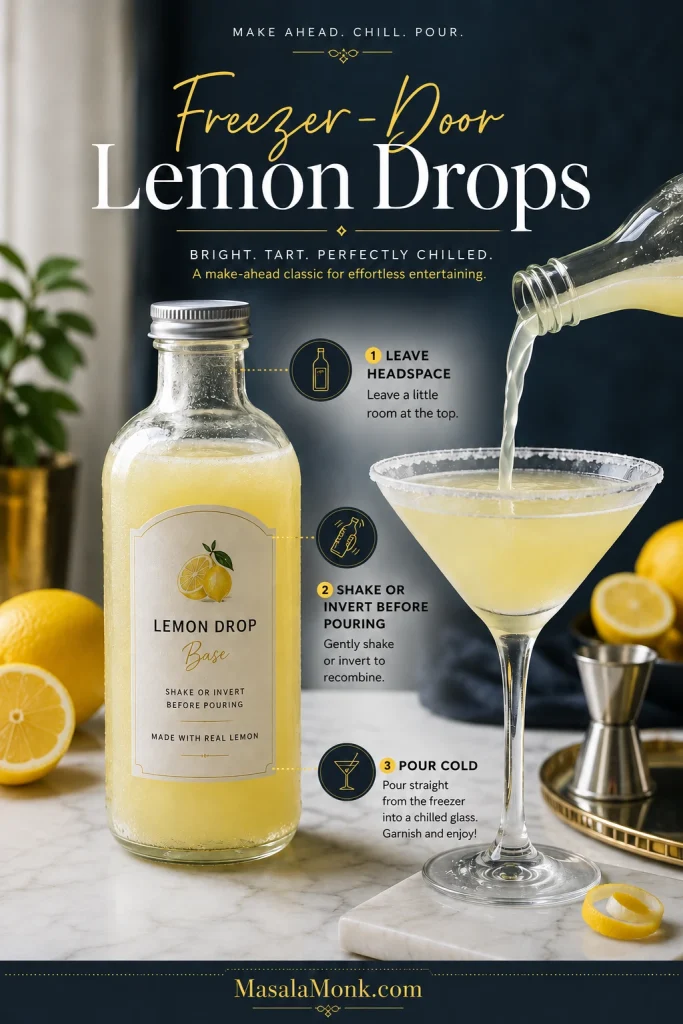
Frosted freezer-door lemon drop bottle with headspace, pouring pale cocktail into a sugar-rimmed martini glass with lemon garnish.
A freezer-door Lemon Drop batch needs headspace and a quick shake or invert before pouring. That recombines citrus and syrup so every glass tastes consistent.

Batches with fresh lemon juice taste best the same day. To prep further ahead, mix the vodka, orange liqueur, and syrup first, then add fresh lemon juice closer to serving. For a built-over-ice vodka drink that is easy to serve by the round, the Moscow Mule recipe is another good party option.

Back to Jump Menu

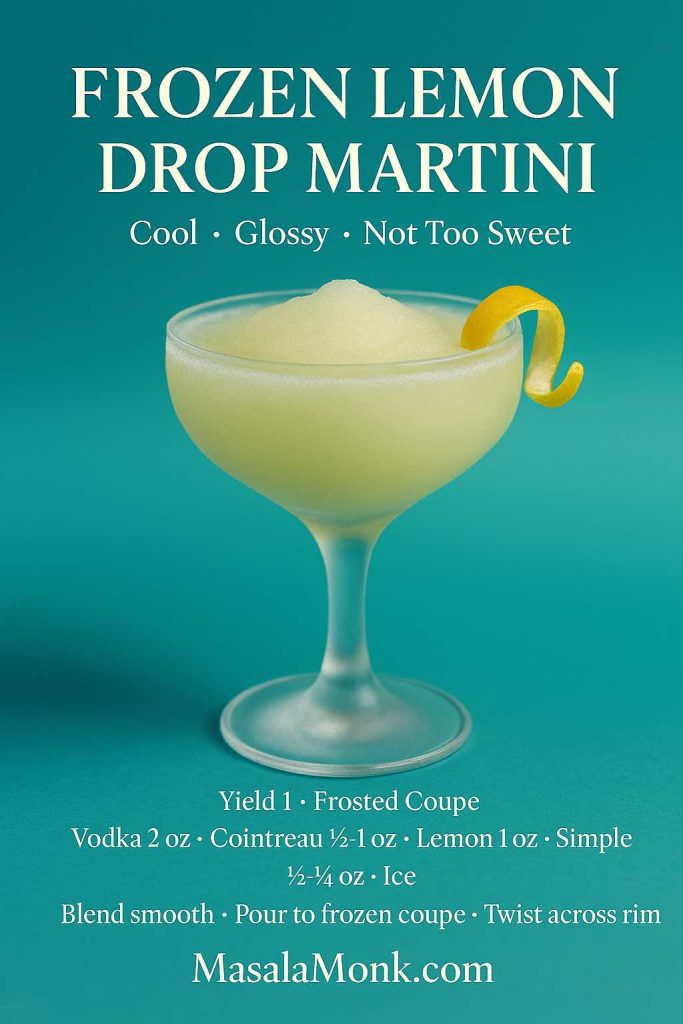
Frozen Lemon Drop Martini

A frozen lemon drop should still taste like a cocktail, not a syrupy lemon slush with vodka hiding underneath. Start with ½ oz syrup. Frozen drinks taste muted at first, then sweeter as they soften, so it is easier to add syrup than fix a slushy that turns cloying.

IngredientAmount
Vodka2 oz / 60 ml
Cointreau or triple sec½–1 oz / 15–30 ml
Fresh lemon juice1 oz / 30 ml
Simple syrup½–¾ oz / 15–22 ml
Iceabout 1 heaping cup
Frozen lemon drop martini recipe card showing an icy pale yellow cocktail with lemon garnish.
Frozen Lemon Drops should still taste like cocktails, not lemon slush. Start with restrained syrup because the drink can taste sweeter as it softens.

Blend until smooth, then pour into a chilled glass. If the drink feels too sharp, blend in a small spoonful of syrup. If it feels too sweet, add a squeeze of lemon and pulse once more. For another frozen party drink with a creamier tropical mood, try this Piña Colada recipe.

Fruit and Floral Lemon Drop Variations

Variations are where the drink gets playful, but the rule stays the same: let the lemon lead and use fruit as the accent, not the whole personality. Fruit should dress the lemon, not take over the whole glass.

Fruit and floral lemon drop martini guide with strawberry, blueberry, raspberry, blackberry, lavender, ginger, basil, and a lemon cocktail.
Let fruit and herbs frame the lemon instead of hiding it. Berries, lavender, ginger, or basil work best as accents, with fine-straining for a smoother finish.

For most fruit lemon drops, start with the classic recipe and replace the simple syrup with ½–¾ oz fruit syrup, or muddle fresh fruit before shaking. Fine-strain well and keep the total sweetness steady.

VariationUseBest cue
Strawberry Lemon Drop½–¾ oz strawberry syrup or 2 muddled berriesBest party color
Blueberry Lemon Drop½–¾ oz syrup or 8–10 berriesStrain well for a cleaner look
Raspberry Lemon Drop½ oz raspberry syrupTart and vivid; strain seeds
Blackberry Lemon Drop½–¾ oz syrup or 2–3 berriesDarker, silkier mood
Lavender Lemon Drop¼–½ oz lavender syrupKeep it subtle
Ginger Lemon Drop¼–½ oz ginger syrupSpicy-bright
Basil Lemon Drop3–4 leaves, gently muddledFresh and herbal

Use syrup when you want a clearer, prettier party drink. Muddled fruit tastes fresher but can add pulp, skins, or seeds.

Strawberry Lemon Drop Martini

Strawberry is the easiest fruit variation to make feel party-ready. Keep the sweetness measured, then fine-strain so the pink color stays clean.
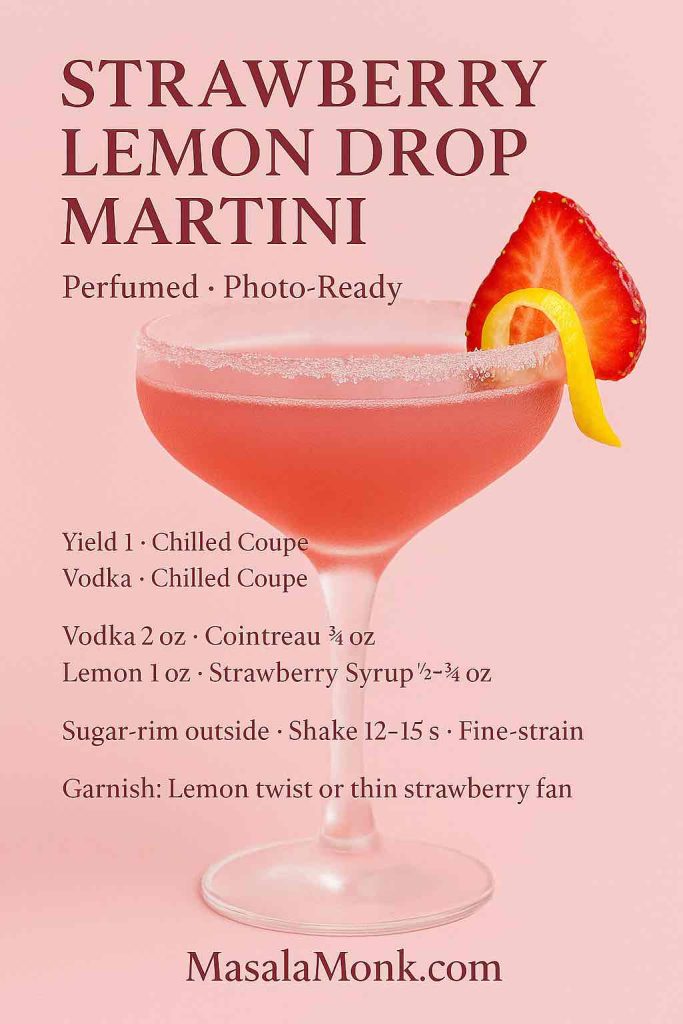
Strawberry lemon drop martini card with a pink cocktail, fresh strawberries, lemon garnish, and a sugar-rimmed glass.
A few strawberries add color and softness without turning the drink jammy. Use a small amount, then fine-strain so the cocktail stays clean.

Other spirit swaps: gin or tequila

A gin lemon drop tastes more botanical and a little drier. Try 2 oz London Dry gin, ¾ oz Cointreau, 1 oz lemon juice, and ¼–½ oz syrup. Keep the rim delicate so the botanicals do not feel heavy. For another gin-and-lemon classic, the French 75 cocktail recipe is also worth saving.

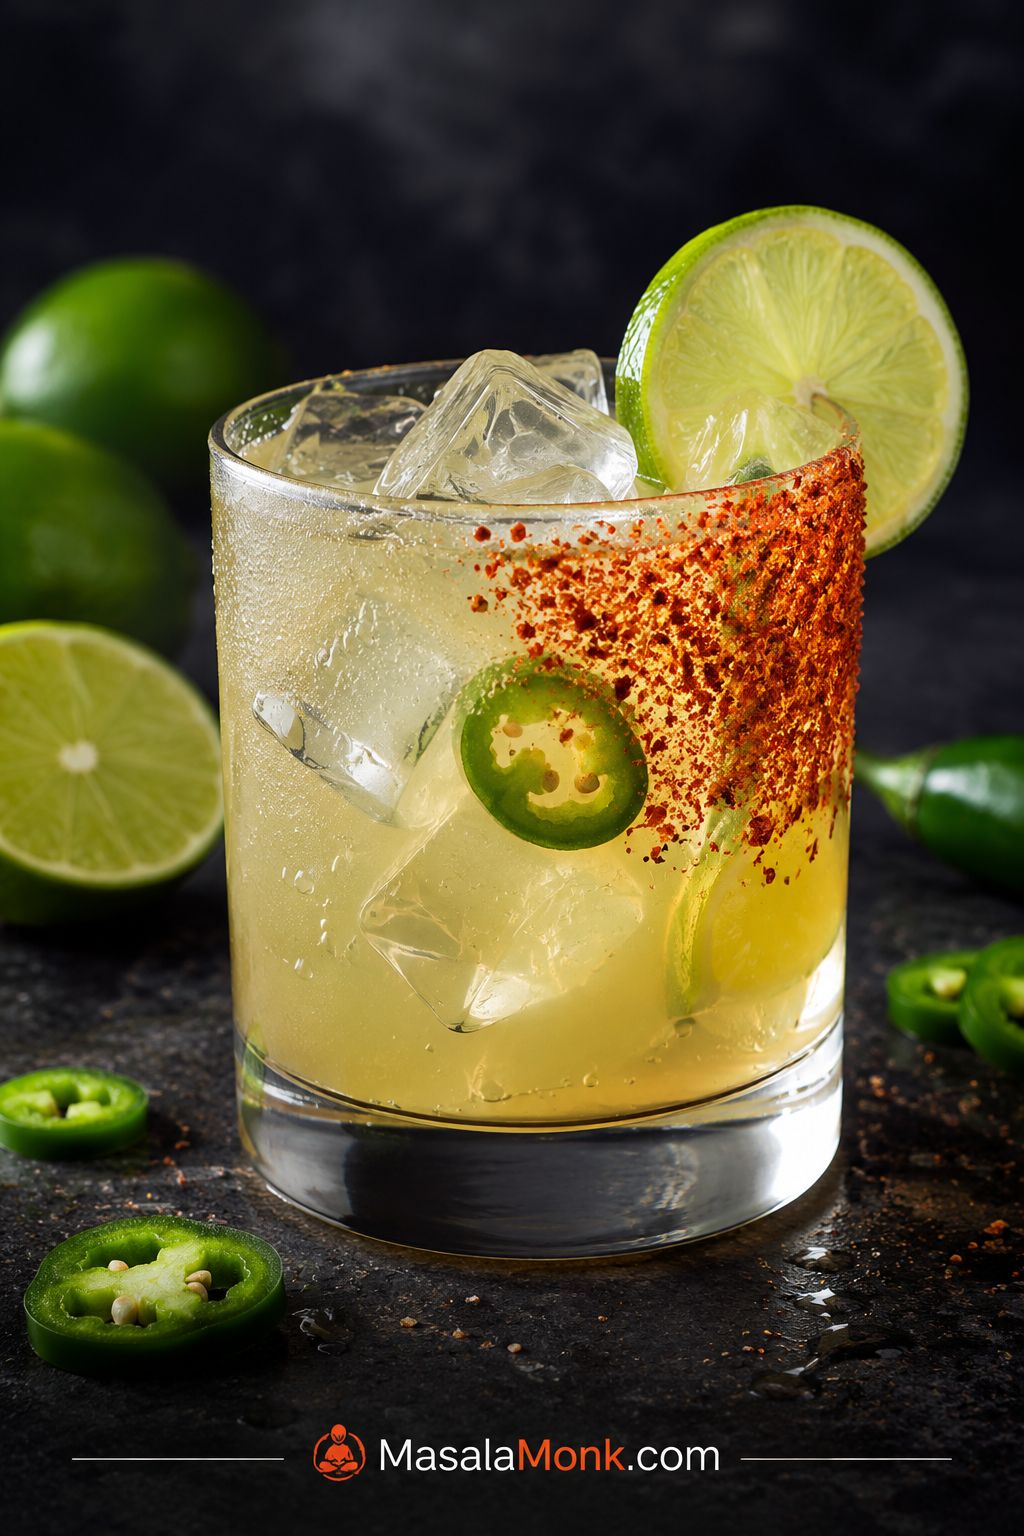
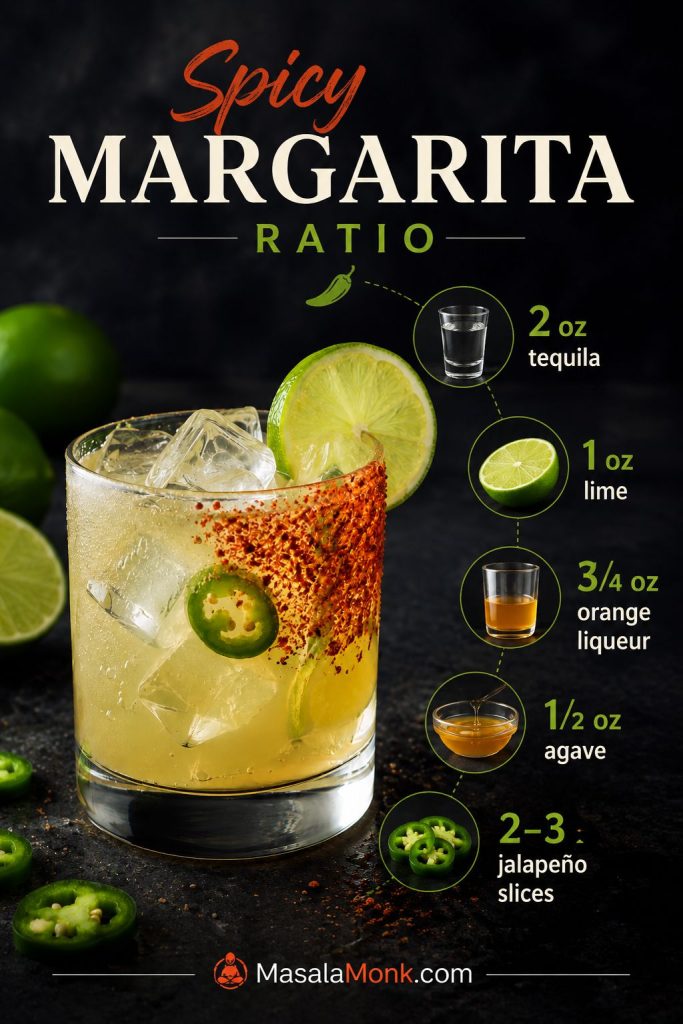
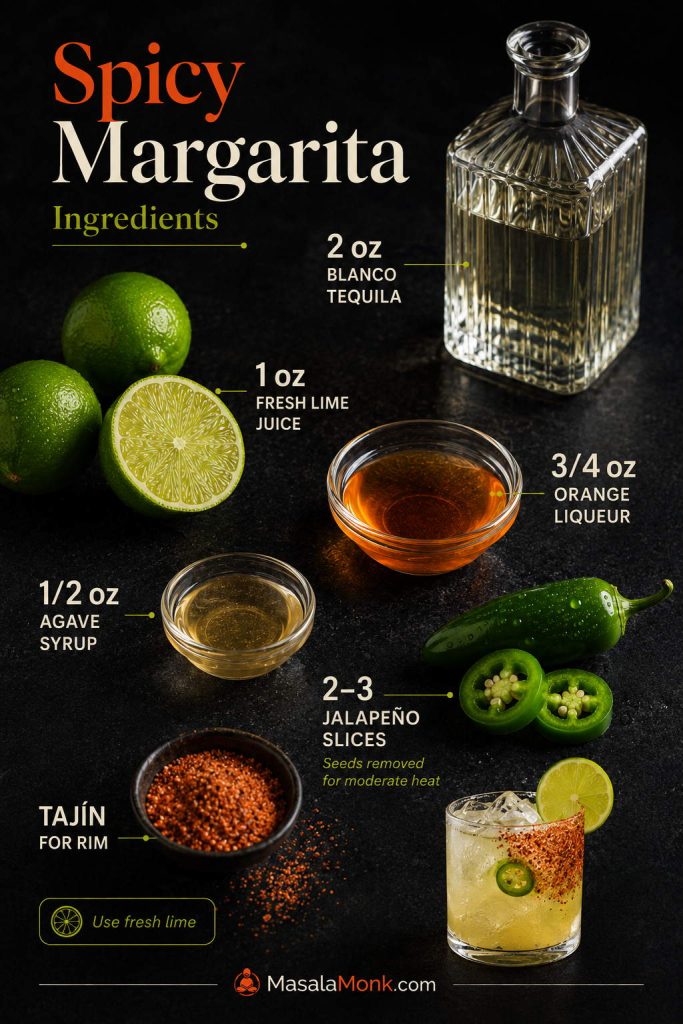
A tequila lemon drop leans toward a lemony margarita. Try 2 oz blanco tequila, ¾ oz Cointreau, 1 oz lemon juice, and ½ oz syrup. A half-sugar, half-salt rim works especially well here. If that version catches your eye, the Spicy Margarita recipe goes deeper into citrus, tequila, and a bold rim.

Back to the classic recipe · Fix the taste · Back to Jump Menu

Best Vodka for a Lemon Drop Martini

Vodka does not need to be expensive here, but it does need to disappear cleanly behind the lemon. A harsh bottle becomes more obvious once fresh citrus sharpens everything around it. Chilling helps, but it cannot turn a rough vodka smooth.

Vodka choiceUse it whenAdjustment
Plain neutral vodkaYou want the classicUse the main ratio
Smoother premium vodkaYou want a cleaner finishDo not over-sweeten
Budget vodkaCasual party drinksShake colder; use fresh lemon
Lemon vodkaYou want louder citrus aromaReduce syrup
Sweet citron vodkaOnly for party-style drinksHalf rim; less syrup
Vodka decision guide for a lemon drop martini comparing plain vodka, premium vodka, lemon vodka, and sweet citron vodka.
Plain vodka is the safest choice for a crisp Lemon Drop Martini. Lemon vodka or sweet citron vodka can also work, but start with less syrup.

For another chilled vodka drink with a sweet-tart edge, the Appletini is a natural next pour. It uses the same basic lesson: keep the fruit sharp, the glass cold, and the sweetness controlled.

Fresh Lemon Juice vs Sour Mix or Lemon Drop Mix

Fresh lemon juice and simple syrup give the freshest, clearest lemon drop. Mixes and sour mix can work when convenience matters, but they usually taste sweeter, flatter, or less fresh.

Using a mix? Treat it as both citrus and sweetener. Do not add the full simple syrup from the classic recipe. Add vodka first, taste, then brighten with a small squeeze of fresh lemon if the drink feels dull.
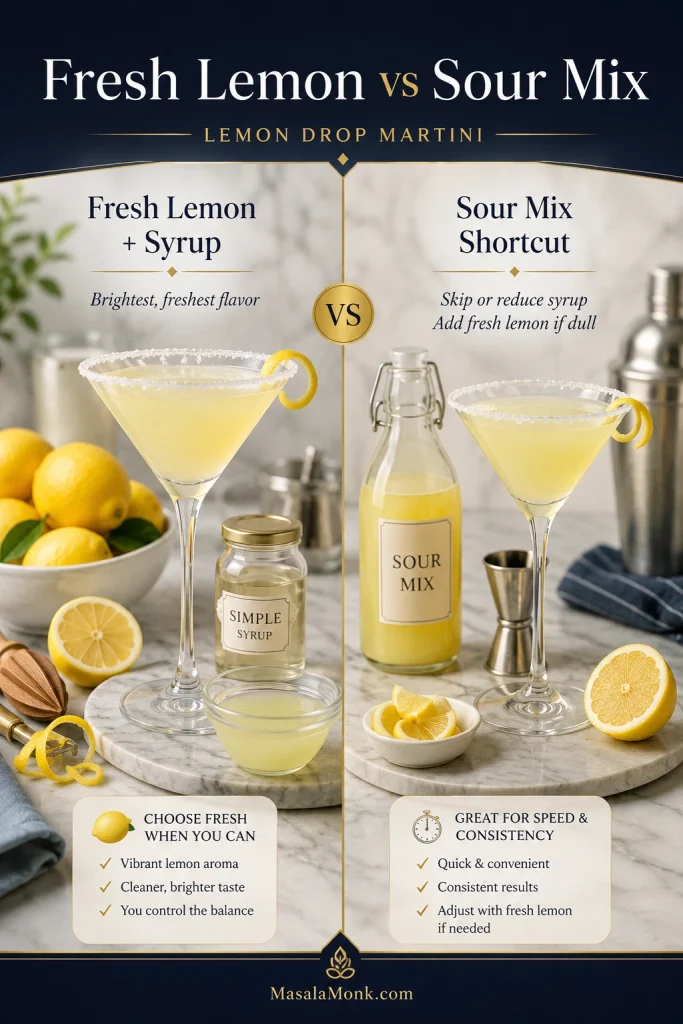
Side-by-side comparison of fresh lemon with simple syrup and a generic sour mix shortcut for making a lemon drop martini.
Fresh lemon juice and simple syrup give you the most control. Sour mix is faster, but skip extra syrup at first and add fresh lemon if the drink tastes flat.
OptionResultAdjustment
Fresh lemon + syrupBrightest and bestUse the main recipe
Bottled lemon juiceFlatter and sharperAdd a fresh twist; reduce syrup slightly
Sour mixSweeter and less freshSkip or reduce simple syrup
Lemon drop mixEasiestAdd vodka and a squeeze of fresh lemon if possible
Premixed bottleLeast flexibleChill hard and garnish with fresh lemon

Fix the Taste

Do not dump the drink if the first sip is off. Lemon drops are forgiving when you adjust slowly. Taste, adjust by teaspoons, and shake briefly again with fresh ice.
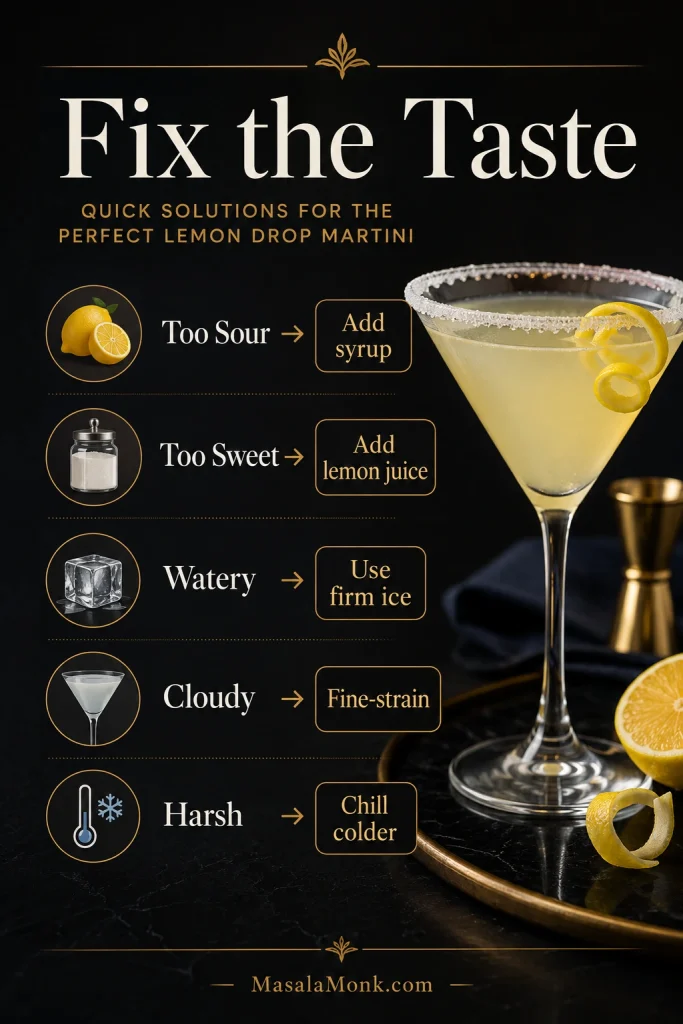
Lemon drop martini troubleshooting guide showing fixes for too sour, too sweet, watery, cloudy, and harsh drinks.
Small adjustments fix most Lemon Drop Martini problems. Syrup softens sharp lemon, fresh juice cuts sweetness, firm ice controls dilution, and fine-straining clears the pour.
ProblemWhat probably happenedHow to fix it
Too sourThe lemons are sharp or syrup is too lowAdd 1 tsp simple syrup and shake briefly
Too sweetToo much syrup, sweet liqueur, or heavy rimAdd 1 tsp lemon juice and re-shake
WateryWet ice or too much shakingUse firm ice and shake 15–20 seconds
CloudyPulp, ice shards, or sugar fell inFine-strain and rim outside only
HarshDrink is warm or vodka is roughChill the glass and shake colder
Rim too crunchySugar is too coarse or too thickUse superfine sugar and a lighter dip
Limoncello version too sweetLimoncello plus syrup overloadReduce syrup or use a half rim
Fruit version tastes jammyToo much syrup or pureeAdd lemon juice and strain well

Back to the classic recipe · Back to Jump Menu

Make-Ahead and Storage Notes

You can prepare parts of a lemon drop ahead, but the best texture comes from shaking close to serving. A Lemon Drop feels most alive when the glass is cold, the rim is neat, and the citrus still smells fresh.

  • Lemon juice: Juice lemons the same day if possible. Strain and refrigerate until needed.
  • Simple syrup: Store in a clean jar in the fridge and use within 2–3 weeks.
  • Rimmed glasses: Rim glasses shortly before serving so the sugar stays neat.
  • Pitcher batch: Mix and chill up to a few hours ahead.
  • Best service: Shake each serving with ice and pour immediately.
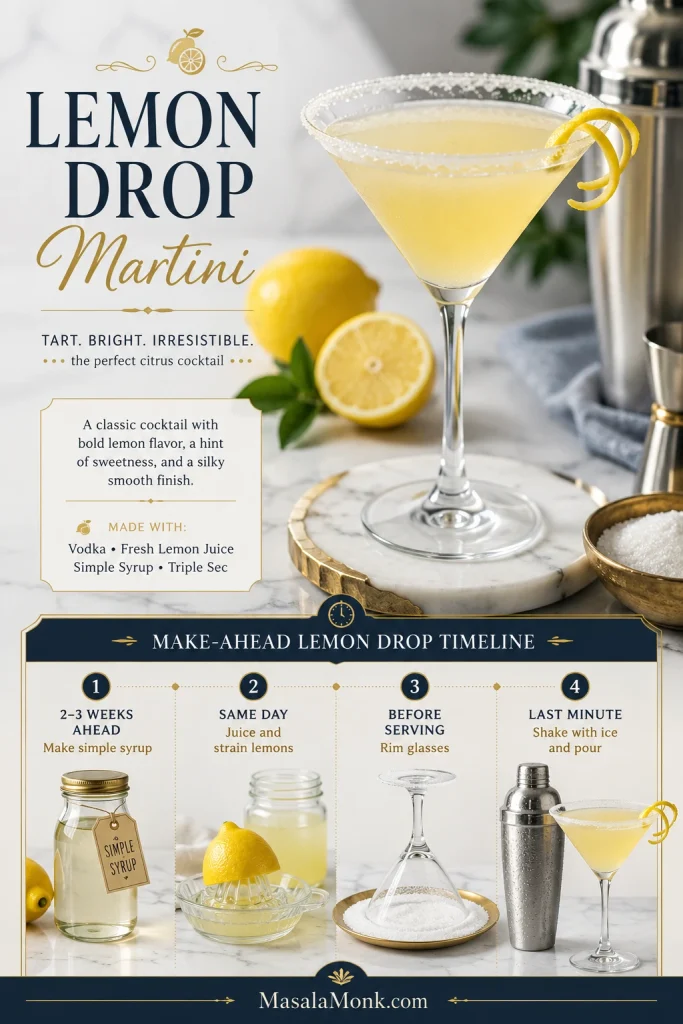
Make-ahead lemon drop martini timeline showing simple syrup, juiced lemons, rimmed glasses, shaker, and finished cocktail.
Prepare the parts instead of the finished cocktail. Make syrup ahead, juice lemons the same day, rim glasses close to serving, and shake with ice at the last minute.

Serve alongside: mango lemonade for a non-alcoholic citrus option.

Bartender-Style Reference: Drier Classic vs Softer Home Version

Despite the martini glass, the Lemon Drop was born as a bright 1970s bar drink, closer in spirit to a vodka sour than a true martini.

The International Bartenders Association’s Lemon Drop Martini shows the drier classic skeleton of vodka, triple sec, and fresh lemon juice. Liquor.com’s Lemon Drop recipe also centers vodka, triple sec, fresh lemon juice, simple syrup, and a sugar rim.

This version sits between those worlds: it keeps the classic vodka-orange-lemon structure, then uses measured syrup and a delicate rim so the drink lands bright without turning harsh.

If you enjoy martini-style drinks with a different mood, try an Espresso Martini.

FAQs

These quick answers cover the swaps and shortcuts people usually ask about once the shaker is already out.

What is a Lemon Drop Martini?

A Lemon Drop Martini is a chilled vodka cocktail with fresh lemon juice, balanced sweetness, orange liqueur, and usually a sugar rim.

Is a Lemon Drop Martini the same as a Lemon Martini?

The names overlap, but a Lemon Drop Martini usually means vodka, lemon, sweetener, and a sugar rim. “Lemon Martini” can refer more broadly to lemon-flavored martini-style drinks, so recipes vary.

Which vodka works best?

A clean neutral vodka is the safest choice for the classic version. Lemon vodka works when you want stronger citrus aroma, but reduce the syrup slightly.

Fresh lemon juice or bottled?

Fresh lemon juice is best because the aroma is part of the drink. Bottled lemon juice works only as a shortcut and may taste flatter.

How sweet should a Lemon Drop be?

It should be balanced, not dessert-sweet. Start with ½ oz / 15 ml simple syrup for one cocktail, then add more only if the lemon tastes too sharp.

No triple sec — what should I use?

Use vodka, fresh lemon juice, and simple syrup for a three-ingredient lemon drop. Add 1–2 dashes of orange bitters if you want a little orange aroma without liqueur.

Cointreau, triple sec, or Grand Marnier?

Cointreau tastes crisp and clear. Triple sec is more budget-friendly and varies by brand. Grand Marnier tastes richer and rounder, so use a little less syrup if the drink feels too sweet.

How long should you shake a Lemon Drop Martini?

Shake for 15–20 seconds, or until the shaker feels very cold. For shots, 8–10 seconds is usually enough because the serving is smaller.

Lemon Drop Martini vs Lemon Drop Shot — what is the difference?

A Lemon Drop Martini is a full cocktail served up in a coupe or martini glass. A Lemon Drop Shot is smaller, stronger, and served in a shot glass with less dilution.

How do you make Lemon Drop shots?

For one bright shot, shake 1 oz / 30 ml vodka, ½ oz / 15 ml lemon juice, and ¼ oz / 7 ml simple syrup with ice for 8–10 seconds. Strain into a lightly sugared shot glass.

Can you make a Lemon Drop Martini with sour mix?

Yes. Use vodka and sour mix, then skip or reduce the simple syrup because most sour mixes already contain sugar. A squeeze of fresh lemon helps brighten the drink.

What is the best way to batch Lemon Drops for a party?

Mix the vodka, orange liqueur, lemon juice, and syrup ahead, then chill. For the best texture, shake each serving with ice. For ready-pour service, add cold water to replace shake dilution.

Does limoncello work in a Lemon Drop Martini?

Yes. Limoncello makes the cocktail softer and more lemon-perfumed. Since it is sweet, reduce the simple syrup and consider using only a half sugar rim.

Back to Jump Menu

Closing Pour

The Lemon Drop lasts because it gives a simple promise and delivers it quickly: cold vodka, just-squeezed lemon, a soft edge of sweetness, and a glass that looks festive before anyone takes the first sip. Make the classic first, keep the rim delicate, and shake until the tin feels icy.

After that, the variations are easy: limoncello for softness, shots for the party tray, frozen for hot afternoons, strawberry when the room needs color. The goal stays the same every time: citrus first, smooth second, sweet only enough.

If you make it, start with the classic first. Then come back and tell us what your table chose next: limoncello, frozen, strawberry, or shots.
Posted on Leave a comment

Lychee Martini Recipe

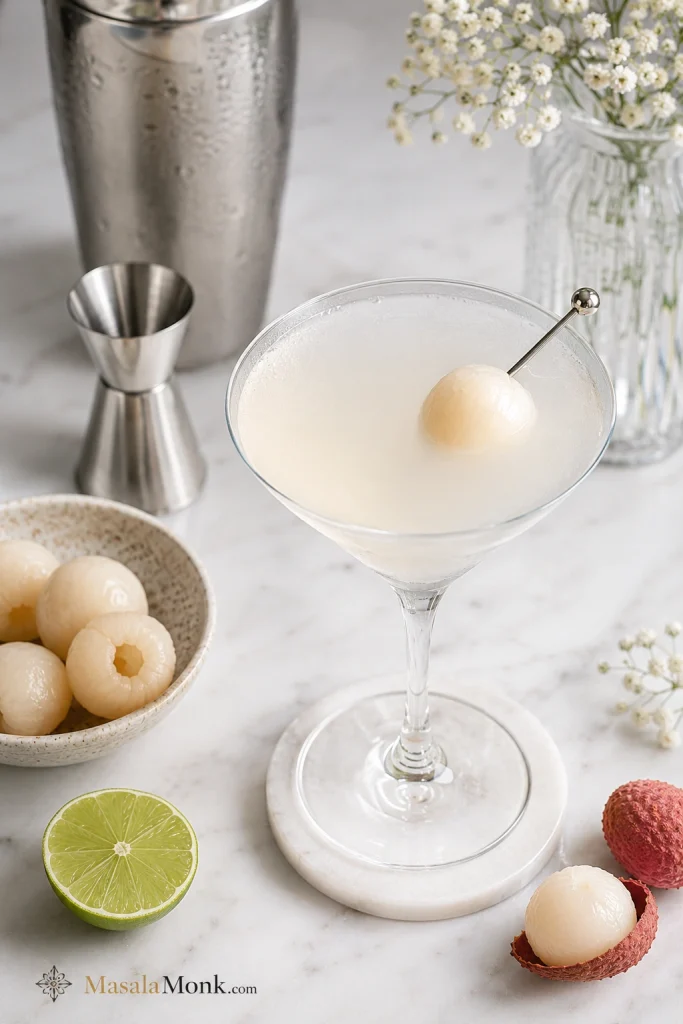
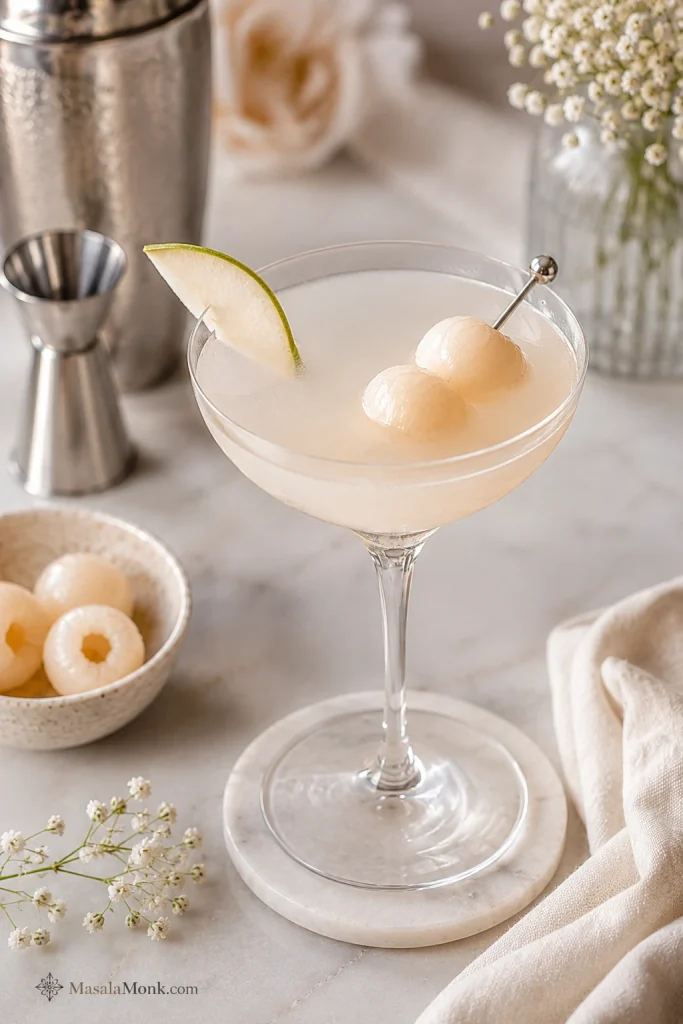
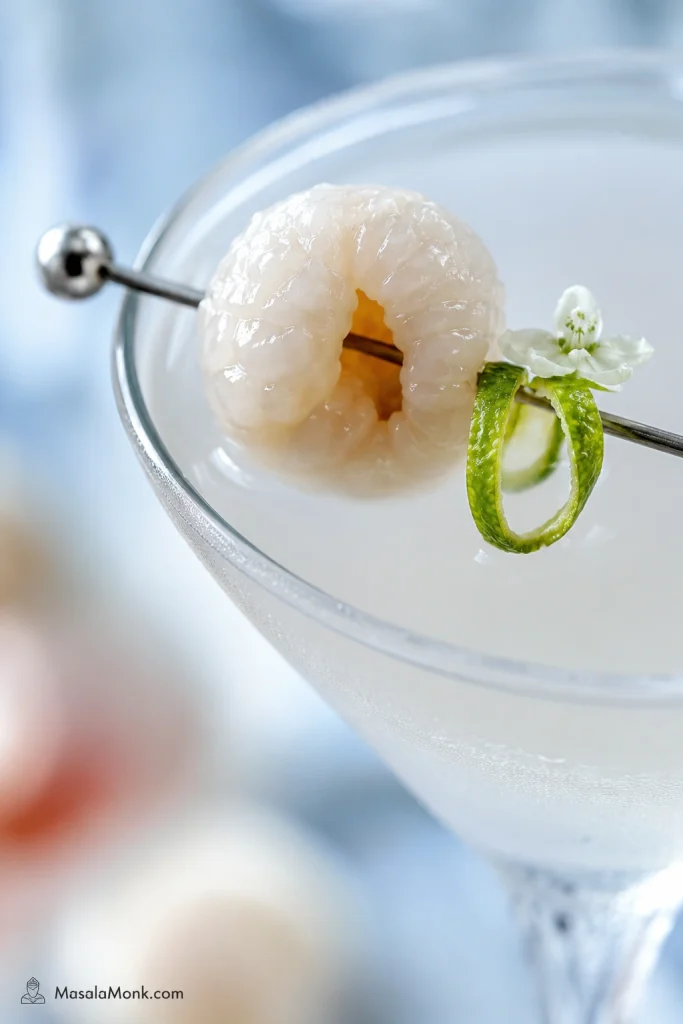
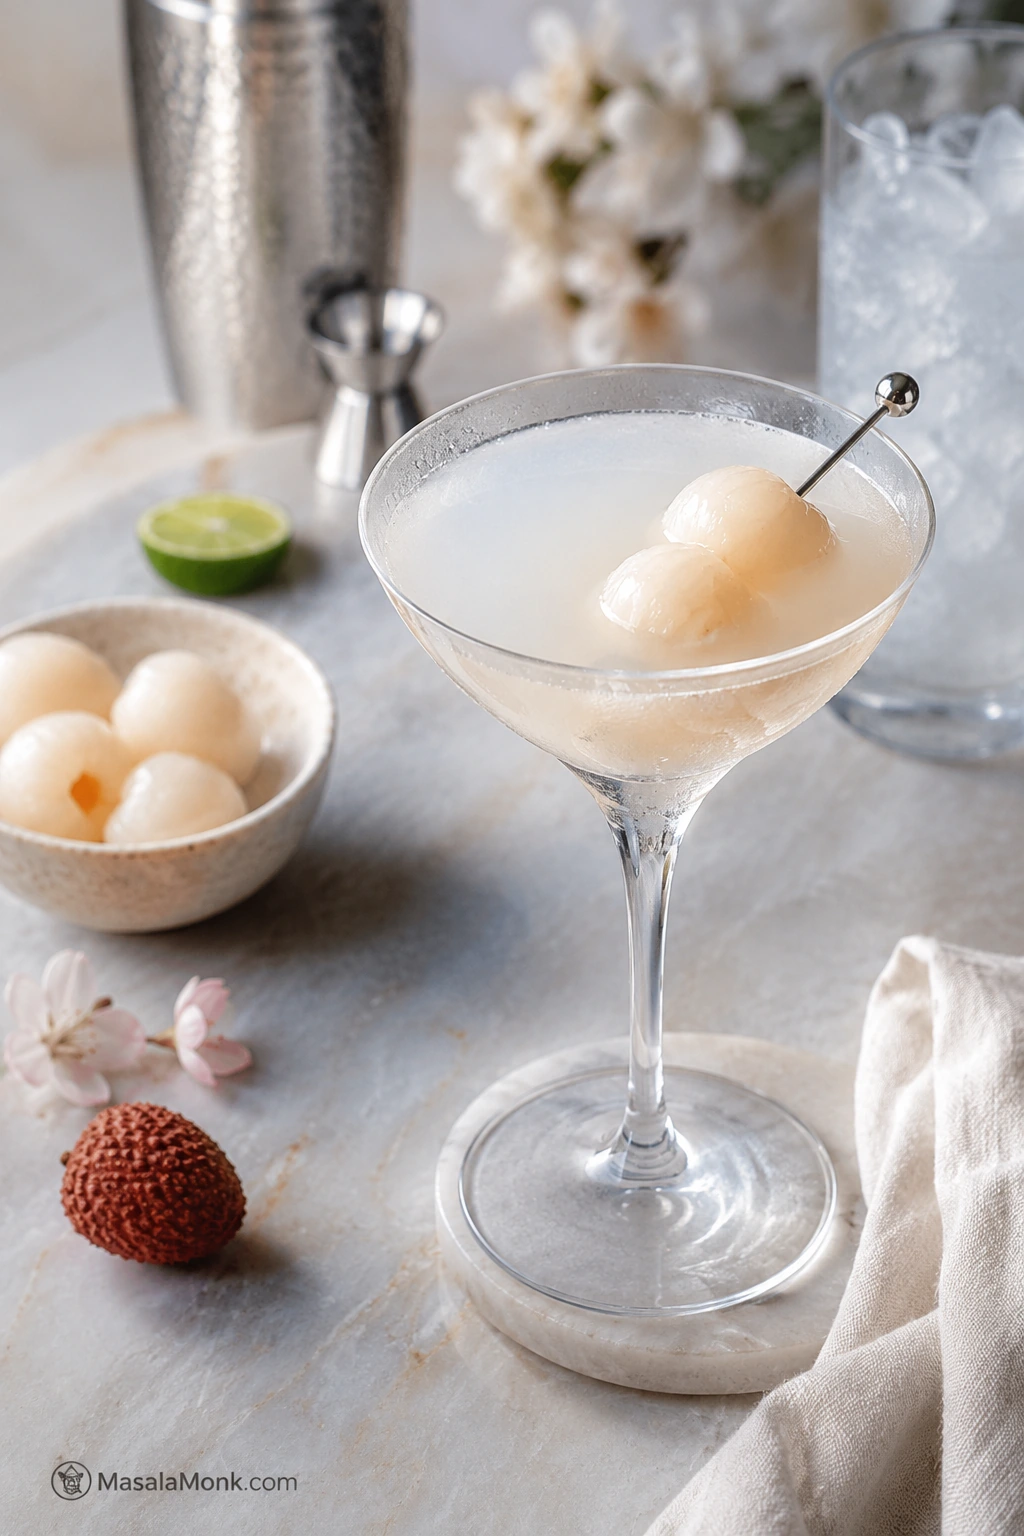
Chilled lychee martini in a coupe glass with lychee garnish on a cocktail pick on a pale stone surface.

If you have a can of lychees and a bottle of vodka, you are five minutes away from a pale, glossy lychee martini that smells floral, tastes bright, and feels far more elegant than the effort it takes.

This is the lychee martini people wanted the old version to be: still pretty, still fragrant, still a little nostalgic, but colder and cleaner. It is a good drink for people who want something beautiful without wanting something sugary.

Canned lychee syrup gives you the flavor base, the whole fruit becomes the garnish, and a small splash of dry vermouth keeps the finish crisp. This is the kind of cocktail that makes a small dinner feel planned, even if all you did was chill the glasses and open a can of lychees.

Make this simple vodka version first. Once that glass tastes right, the rest is just mood: gin for floral, puree for body, pear for elegance, or sparkling water for a zero-proof version.

Lychee Martini at a Glance

This cocktail takes about 5 minutes, serves 1, and is best shaken hard with ice until very cold. Use 2 oz vodka, 3/4 to 1 oz canned lychee syrup, 1/2 oz fresh lime juice, and 1/4 oz dry vermouth. Start with 3/4 oz syrup if your can tastes very sweet.

Prep Time5 minutes
Yield1 cocktail
MethodShake with ice
Best BaseCanned lychee syrup

The Best Lychee Martini Ratio

Think of the base as 2 oz vodka, about 1 oz lychee, and 1/2 oz citrus, with a small dry accent.

IngredientAmount
Vodka2 oz / 60 ml
Canned lychee syrup3/4 to 1 oz / 22 to 30 ml
Fresh lime juice1/2 oz / 15 ml
Dry vermouth1/4 oz / 7.5 ml
IceEnough to fill the shaker halfway
Lychees for garnish1 to 2 canned or fresh lychees
No-table version

2 oz vodka, 3/4 to 1 oz lychee syrup, 1/2 oz lime juice, and 1/4 oz dry vermouth. Shake with ice for 15 to 20 seconds, strain into a chilled glass, and garnish with lychee.

The MasalaMonk lychee martini rule

Lychee for aroma, lime for lift, vermouth for restraint. Use dry vermouth for the default version. Choose Cointreau only if you want a brighter, slightly rounder bar-style glass.

Tested balance note

I prefer 3/4 oz lychee syrup when the canned syrup is thick and very sweet, and the full 1 oz when the syrup tastes lighter. The 1/4 oz dry vermouth is small, but it makes the finish noticeably cleaner.

A quick measure note: 1/4 oz is about 1 1/2 teaspoons, and 1/2 oz is about 1 tablespoon.

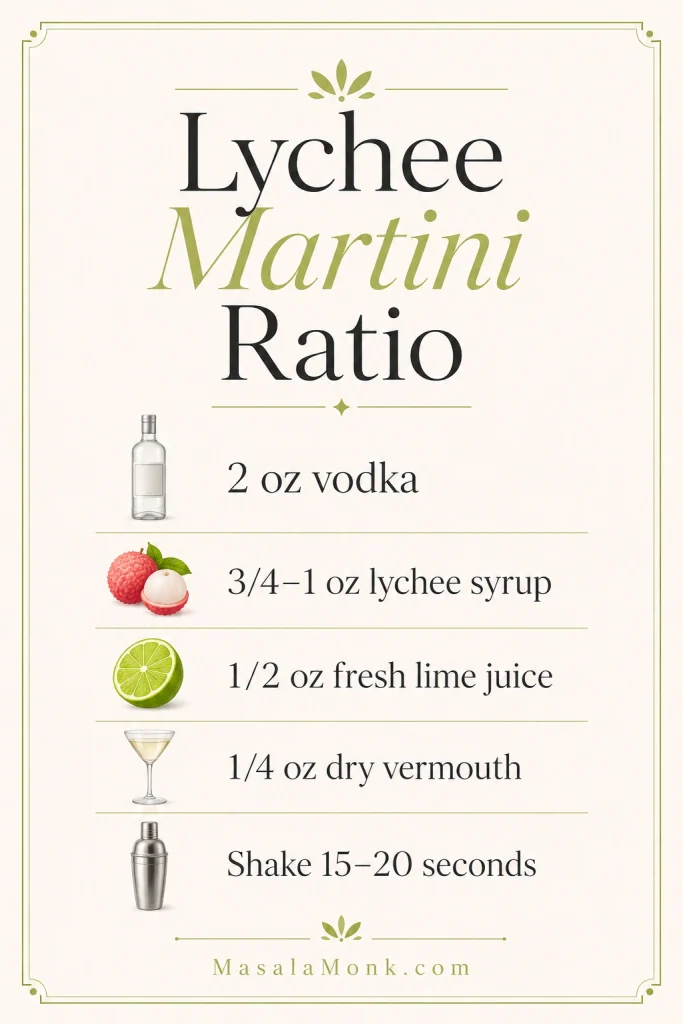
Graphic showing a lychee martini ratio with vodka, lychee syrup, lime juice, and dry vermouth.
Use this ratio as the first-glass baseline; adjust only the syrup after tasting your canned lychees.

Lychee Martini Recipe Card

Balanced Lychee Martini

This is the version to make first: vodka, canned lychee syrup, fresh lime, dry vermouth, ice, and a simple lychee garnish.

Prep5 minutes
Serves1 cocktail
GlassCoupe or martini
MethodShaken

Ingredients

  • 2 oz / 60 ml vodka
  • 3/4 to 1 oz / 22 to 30 ml canned lychee syrup
  • 1/2 oz / 15 ml fresh lime juice
  • 1/4 oz / 7.5 ml dry vermouth
  • Ice, enough to fill the shaker halfway
  • 1 to 2 canned or fresh lychees, for garnish

Method

  1. Chill a coupe or martini glass.
  2. Add vodka, lychee syrup, lime juice, and dry vermouth to a shaker.
  3. Add ice and shake hard for 15 to 20 seconds.
  4. Strain into the chilled glass.
  5. Garnish with one or two lychees and serve right away.

Optional adjustments: Use lemon instead of lime for a softer finish, Cointreau instead of dry vermouth for a rounder citrus note, lychee puree for fuller body, or a tiny pinch of salt if the drink tastes flat.

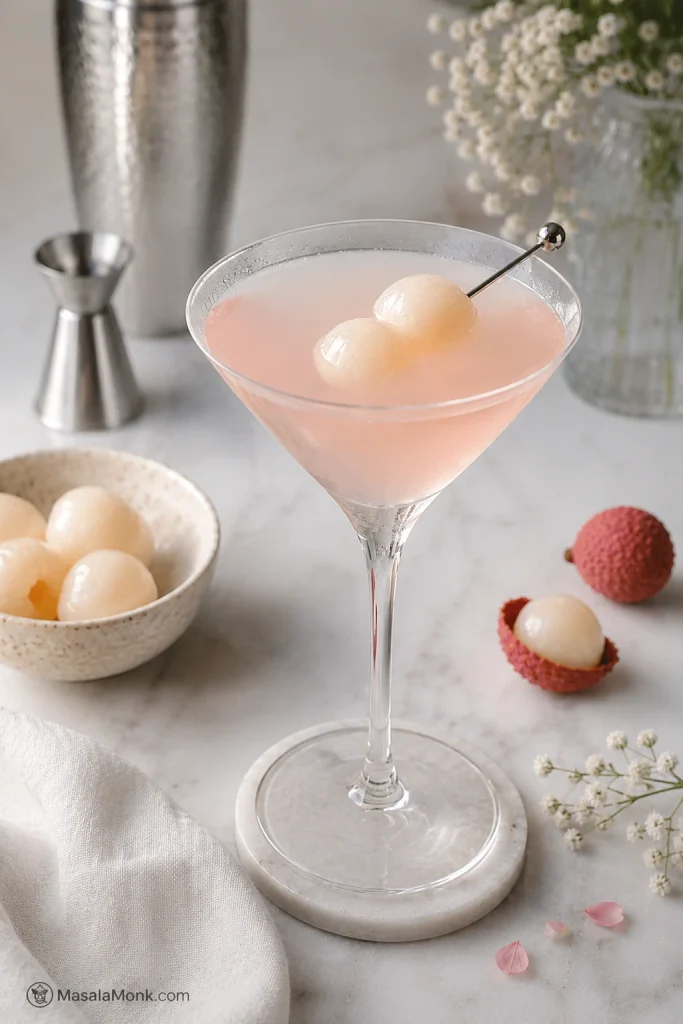
Classic vodka lychee martini in a stemmed glass with lychee garnish and bar tools nearby.
The classic vodka version is the baseline for judging sweetness, citrus, and dilution before you change the recipe.

Want to change the mood of the drink after this first glass? Go to Choose Your Version or jump straight to the variation section.

How to Make a Lychee Martini

1. Chill the glass

Place a martini glass or coupe in the freezer for 5 to 10 minutes. If you do not have time, fill the glass with ice water while you make the cocktail, then empty it before pouring. A warm lychee martini tastes heavier than a well-chilled one.

Choose a coupe if you are serving guests because it is easier to carry. A martini glass gives the drink that sharper classic look.

2. Add the ingredients to a shaker

Add vodka, canned lychee syrup, fresh lime juice, and dry vermouth to a cocktail shaker. If you are using puree, muddled fresh lychee, or lychee liqueur, add it here.

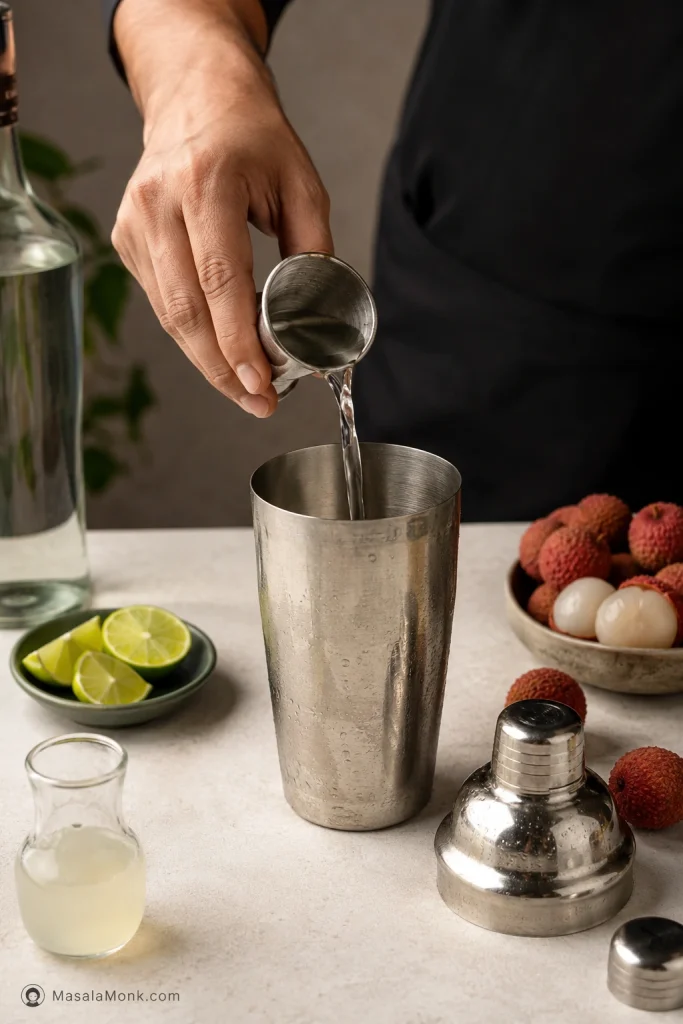
Hand pouring liquid from a jigger into a cocktail shaker while making a lychee martini.
Measure into the shaker first; in a simple drink, one careless extra pour can throw off the whole glass.

3. Add ice

Fill the shaker about halfway with fresh ice. Good ice matters because it chills the drink before it waters it down.

4. Shake hard

Shake for 15 to 20 seconds, or until the shaker feels very cold.

Why shake instead of stir?

Classic spirit-only martinis are usually stirred, but this one has citrus and lychee syrup, juice, or puree. Shaking chills it faster, blends the fruit, and gives the drink a smoother texture.

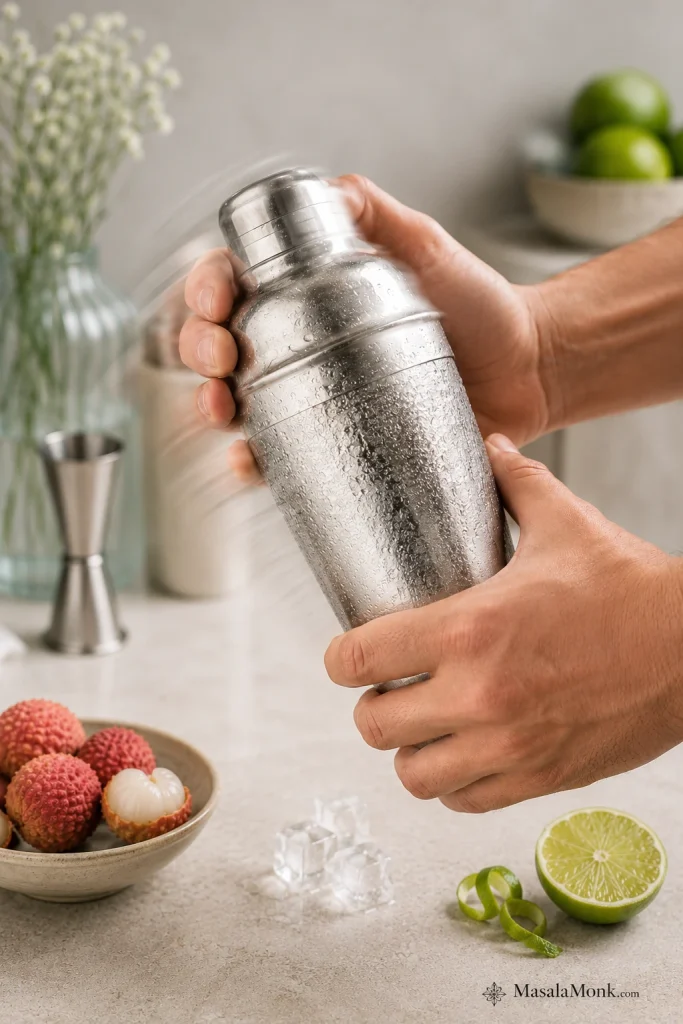
Hands shaking a metal cocktail shaker with ice while preparing a lychee martini.
Shake until the metal feels cold so the drink lands smoother, colder, and brighter.

5. Strain into the glass

Strain into your chilled martini glass or coupe. Use a regular strainer for the syrup or juice version. Double strain through a fine mesh strainer if you used puree or muddled fresh lychee.

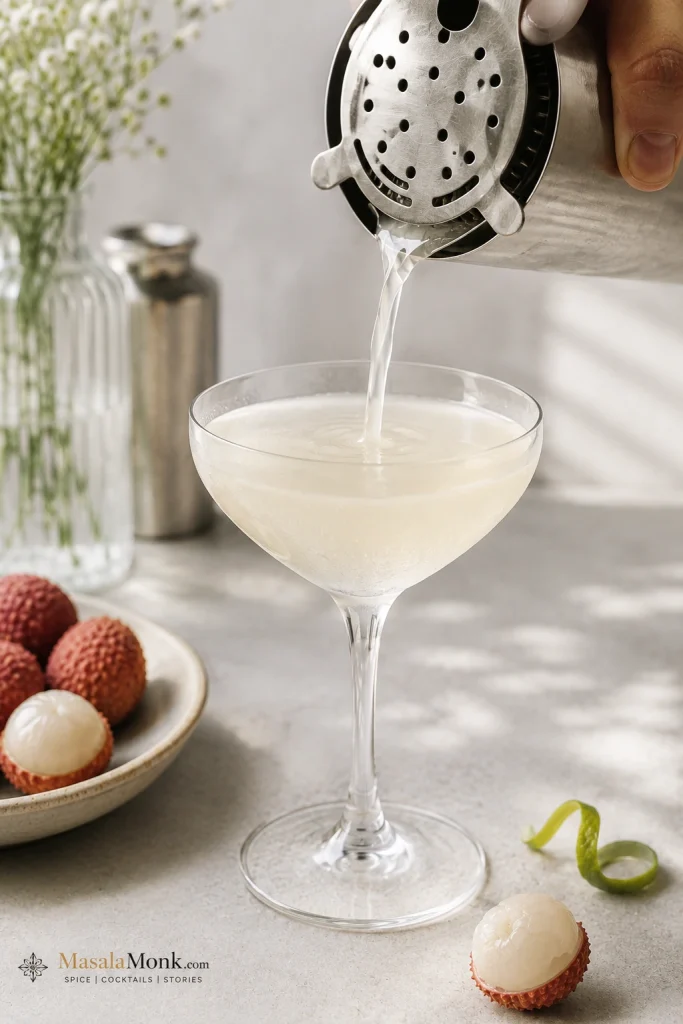
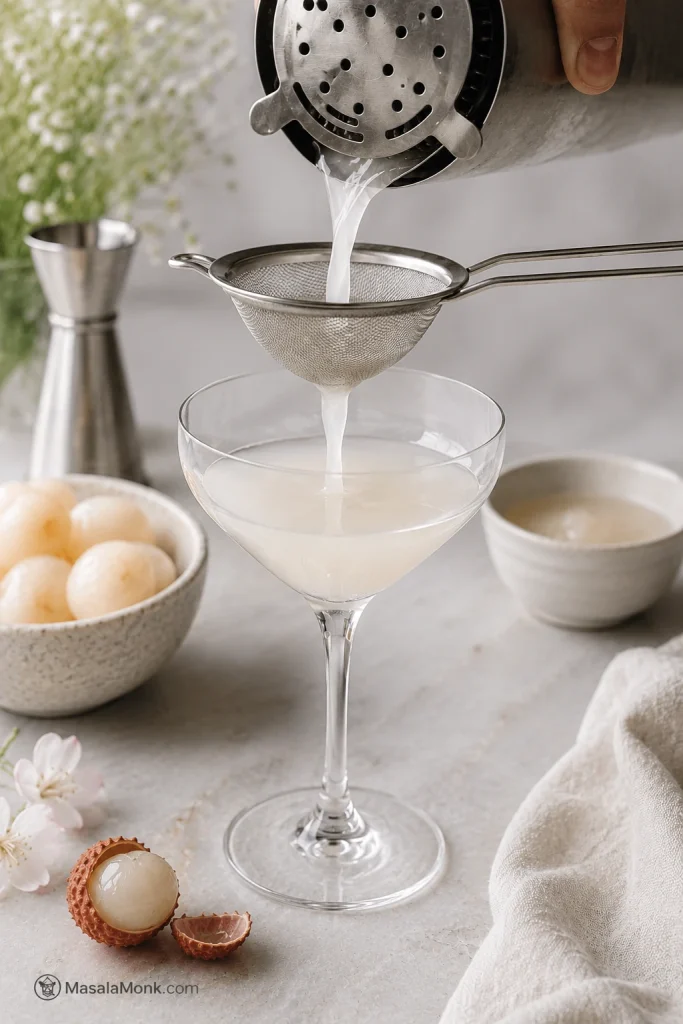
Pale lychee martini being strained from a shaker into a chilled cocktail glass.
A clean strain into a cold glass makes the final pour clearer and more polished.

6. Garnish and serve

Skewer one or two lychees on a cocktail pick and rest it across the glass, or drop one lychee gently into the drink. Serve right away while the glass is still cold and the aroma is fresh. The first sip should feel cold and fragrant before it feels sweet.

No Cocktail Shaker?

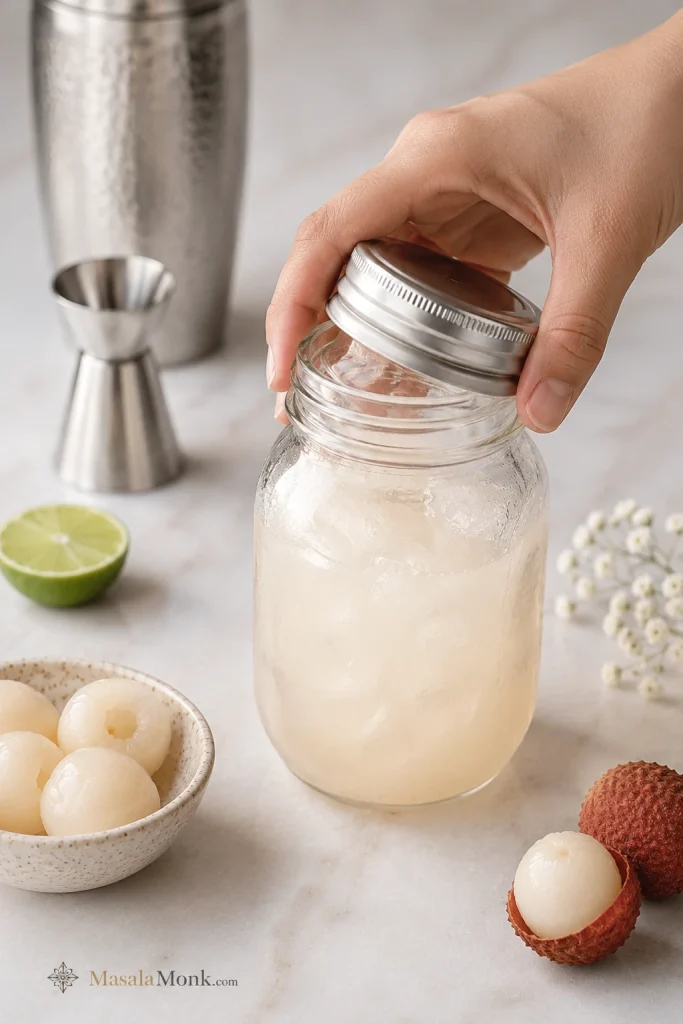
Use a mason jar with a tight lid. Add the ingredients and ice, seal it well, shake hard, then strain into a chilled glass. It will not feel quite as polished as a proper shaker, but it works well for a home cocktail.

Mason jar filled with pale lychee martini mixture and ice, with a hand holding the lid.
A mason jar works when there is no shaker, as long as it seals tightly and the drink is strained.

Using puree or fresh lychee instead of syrup? See Best Lychee to Use before moving to the second round.

Remember this before you adjust

If you remember nothing else: start with canned lychee syrup, keep the lime fresh, and shake until the tin is cold.

The finished drink should land in this order: lychee aroma first, cool vodka body second, lime at the end.

Back to top ↑

Choose Your Version

Make the default glass first. Once you know how sweet, tart, and strong you like it, use this table to adjust the mood.

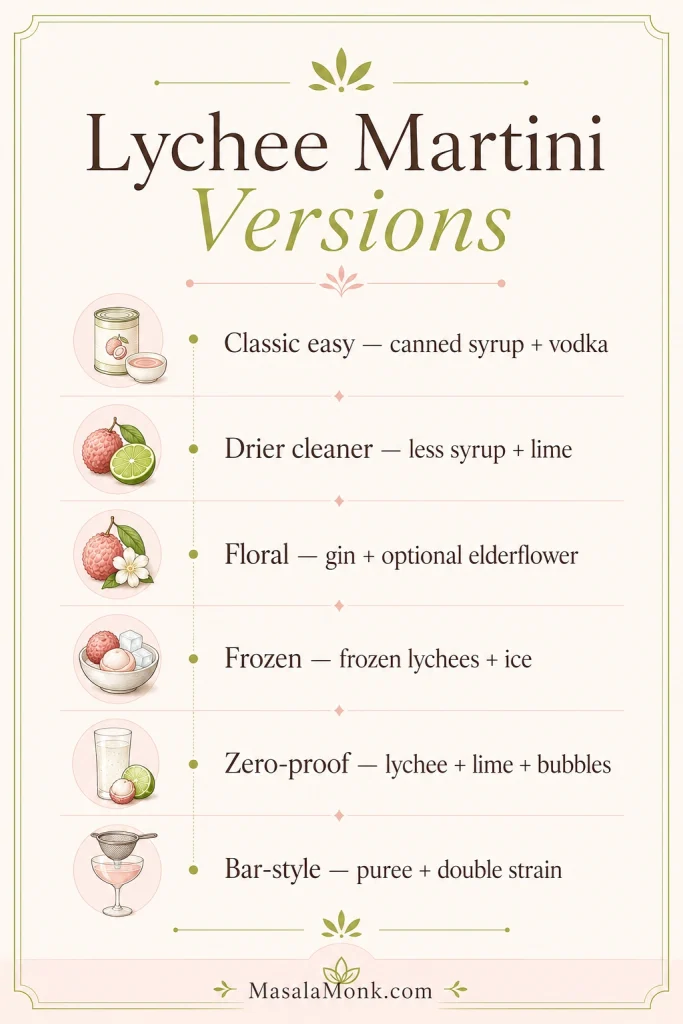
Graphic listing lychee martini versions including classic, drier, floral, frozen, zero-proof, and bar-style.
Use this chart to choose your next direction: classic, drier, floral, frozen, zero-proof, or bar-style.
You WantUse This Route
Classic easy versionCanned lychee syrup + vodka + lime + dry vermouth
Drier, cleaner versionLess syrup + extra citrus + dry vermouth
More floral and grown-upGin + lychee syrup + lime + optional elderflower
Frozen party versionFrozen lychees + vodka or gin + lime + ice
Zero-proof versionLychee juice + lime + sparkling water or tonic
Smoother bar-style versionLychee puree + vodka + lemon + Cointreau or elderflower
First-glass rule

If you are making this for the first time, do not start with rose, pear, liqueur, or puree. Make the canned-syrup vodka version first, then adjust the second glass. Your biggest choice is not the garnish. It is syrup vs puree, lime vs lemon, vodka vs gin.

Need help choosing the base first? See Best Lychee to Use. Trying to fix sweetness before changing the whole recipe? Go to less-sweet fixes.

What Is a Lychee Martini?

A lychee martini is a martini-style cocktail, not a strict classic martini. It borrows the cold glass, elegant serve, and spirit-forward feel, then adds lychee and citrus for a softer fruit finish.

It is usually made with vodka, lychee syrup or juice, citrus, ice, and a lychee garnish. The drink should be pale and almost delicate, but the flavor should not be weak. You want lychee on the nose, citrus on the finish, and enough chill that the vodka feels smooth rather than sharp.

Lychee is also spelled litchi in many places, so a litchi martini and a lychee martini usually mean the same drink.

What Does a Lychee Martini Taste Like?

A lychee martini tastes floral, juicy, lightly tropical, and gently sweet, with a citrus finish. It should taste like lychee first, not sugar syrup.

Vodka keeps the cocktail quiet and lets the lychee lead. Gin pushes it in a more botanical direction. Lychee liqueur makes the fruit louder, so it needs citrus to stay crisp. Lime gives the drink a sharper edge, while lemon makes it softer and more elegant.

A good lychee martini should feel delicate, not weak. If the glass smells like lychee before you sip, you are already close. The first sip should be floral; the finish should be cleaner than expected.

Why This Recipe Works

This version works because it respects what lychee is good at: aroma, softness, and a little perfume. Lime gives it shape, vodka gives it room, and vermouth keeps the finish dry.

Canned lychee syrup gives instant flavor.
You do not need a special mixer. The syrup from canned lychees is fragrant, easy to measure, and available all year.
Fresh lime keeps the drink lifted.
If the cocktail tastes flat, it usually does not need more fruit. It needs acid. Lime gives the drink a clear finish.
Vodka keeps the fruit in front.
Because vodka is neutral, the lychee stays central.
Dry vermouth adds restraint.
You do not taste it loudly, but it keeps the finish clear-edged.

Why Lychee Martinis Are Back

The older lychee martini was often all syrup and perfume. The better modern version is colder, brighter, and more restrained: real lychee flavor, fresh citrus, and a softer finish. Punch has also covered the lychee martini’s return to real lychee flavor and layered balance, which is exactly the direction this recipe takes.

Back to top ↑

Ingredients You Need

You do not need a bar cart full of bottles. The main thing is choosing one lychee base and keeping the drink cold, fresh, and clean.

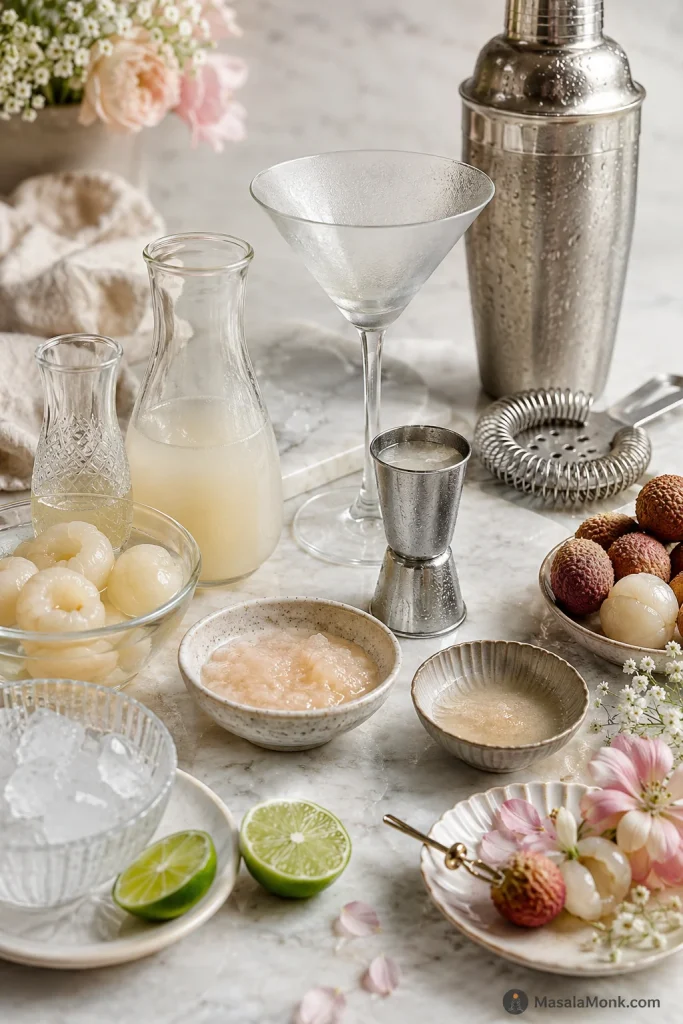
Overhead view of vodka, dry vermouth, canned lychees, lime, shaker, jigger, and ice arranged for a lychee martini.
Lychee brings aroma, lime adds lift, and vodka plus vermouth give the cocktail its cold, crisp backbone.

Vodka

Vodka is the easiest and most common base for a lychee martini. It is smooth, neutral, and lets the fruit stay in front. Use something clean and mid-shelf. If you would not drink it in a vodka soda, it will not disappear here.

Plain vodka is the best starting point. Citrus vodka can work if you want a sharper drink, but vanilla or strongly flavored vodka can make the cocktail feel less crisp.

Canned Lychee Syrup

For the default recipe, use the syrup from canned lychees. It gives you lychee flavor and a ready-made garnish in one can. Start with 3/4 oz / 22 ml if your syrup tastes very thick. Use the full 1 oz / 30 ml if the syrup tastes lighter or you want a softer fruit note.

Fresh Lime Juice

Fresh lime juice keeps the drink lifted. Bottled lime can taste dull in a cocktail this simple. Lime makes the cocktail sharper and more tropical. Lemon makes it softer and more elegant. Yuzu can work too, but use it lightly because it is aromatic and sharp.

For a deeper citrus cocktail comparison, the lemon drop martini is a useful companion because it also depends on keeping sweetness and citrus in balance.

Dry Vermouth

Dry vermouth is the default accent in this recipe. Use 1/4 oz / 7.5 ml for a subtle edge. Use up to 1/2 oz / 15 ml if you want the vermouth to be more noticeable. It should not shout. It should simply make the lychee taste cleaner.

Cointreau or Orange Liqueur

Cointreau is lovely, but it changes the drink. Use it when you want a rounder citrus cocktail, not when you want the driest martini-style version.

If using Cointreau instead of dry vermouth, start with the lower amount of lychee syrup and adjust after tasting. The orange-citrus structure is similar to fruit-forward drinks like a mango margarita recipe, where fruit, citrus, and orange liqueur all need to stay in check.

Ice

Ice chills, dilutes, and smooths the cocktail. Use plenty of fresh, cold ice. Old, wet, half-melted ice can make the drink watery before it is properly chilled.

Lychee Garnish

One or two whole lychees on a cocktail pick are enough. Canned lychees are perfect because they are soft, glossy, and easy to skewer. Fresh peeled lychees also work when they are in season.

The garnish is doing more than looking pretty. It tells the drink what flavor to expect before the first sip.

Best Lychee to Use for a Lychee Martini

For most home kitchens, canned lychees are the smartest option: predictable, easy, and already packed with garnish. Fresh lychees are wonderful when they smell floral before you even peel them, but they should feel like a bonus, not a requirement.

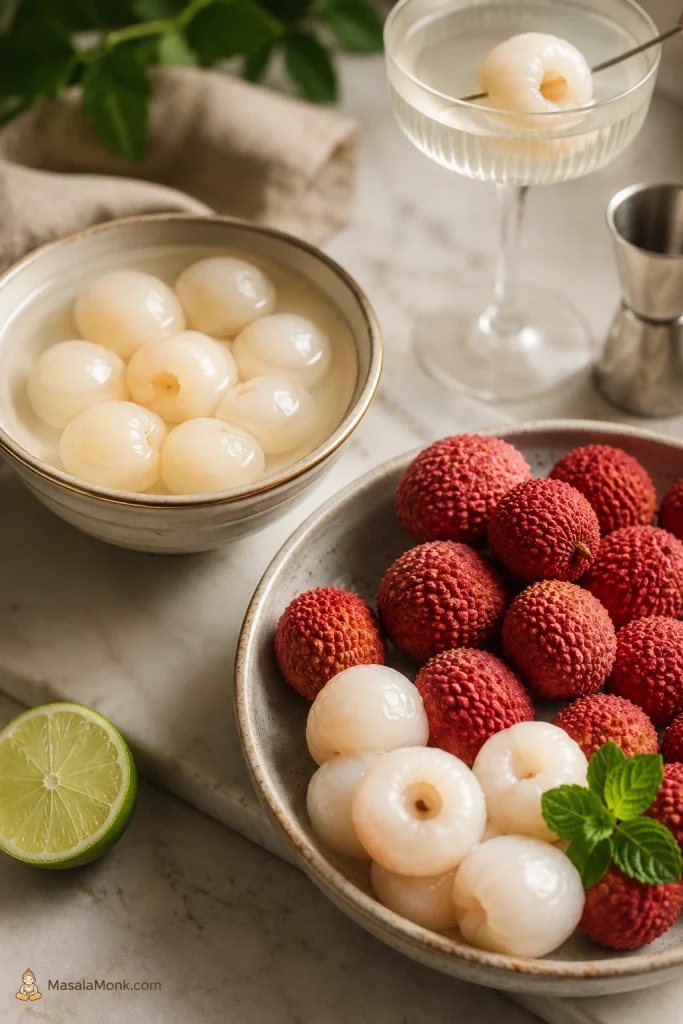
Canned lychees in syrup and fresh peeled lychees arranged side by side for comparing lychee martini ingredients.
Canned lychee is more consistent for cocktails; fresh lychee is delicate but needs more prep.
What You HaveHow to Use ItAdjustment
Canned lychees in syrupUse syrup in the cocktail and fruit as garnishAdd lime to keep the finish bright
Fresh lycheesPeel, pit, muddle or blend, then strainAdd a little simple syrup if needed
Lychee juice or nectarUse as a lighter fruit baseReduce added syrup
Lychee pureeUse for fuller fruit flavor and bodyDouble strain for smooth texture
Lychee liqueurUse for intense flavor and extra alcoholReduce or skip extra syrup
Lychee martini mixUse only if that is what you haveAdd fresh citrus, start small, and taste before adding more
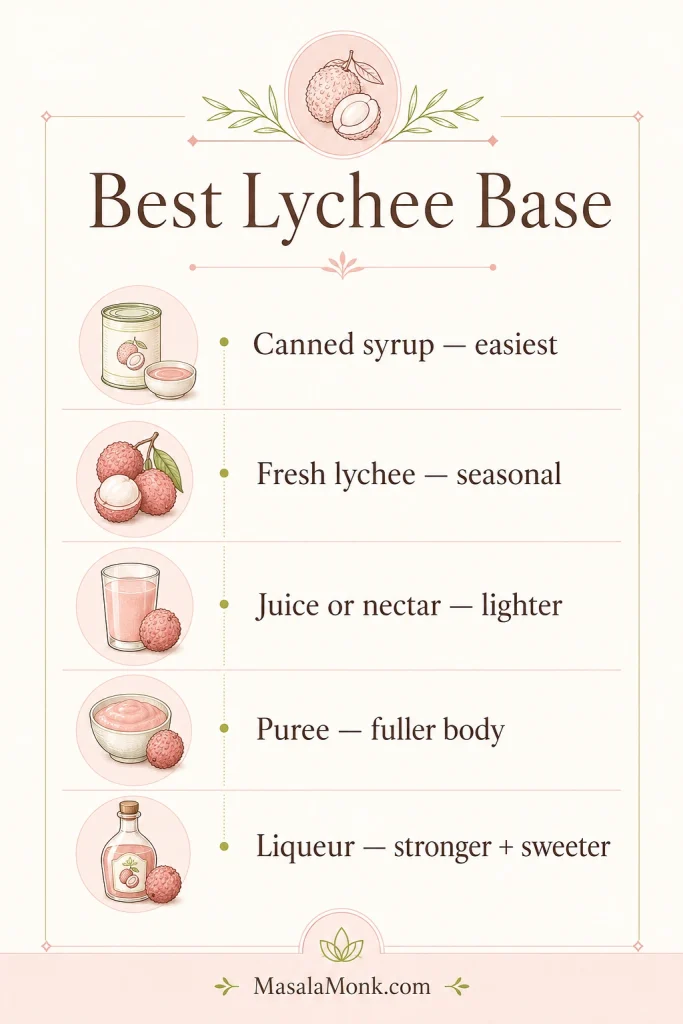
Chart comparing canned lychee syrup, fresh lychee, juice or nectar, puree, and liqueur for making lychee martinis.
Match the lychee base to the result: easy, lighter, stronger, fuller, or silkier.
Clear vs Cloudy Lychee Martinis

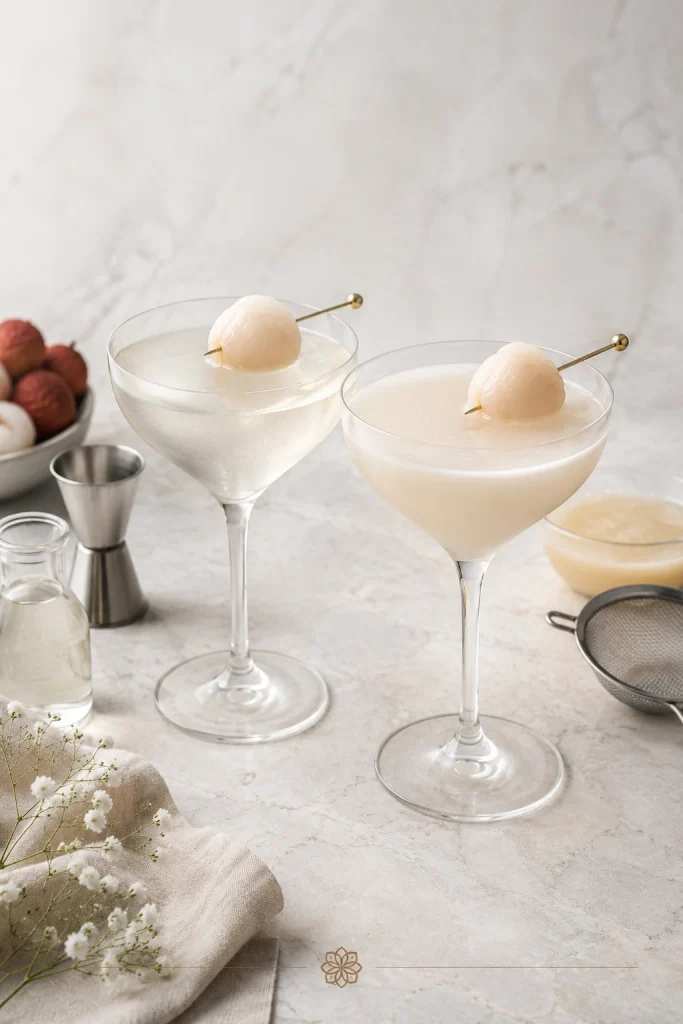
For the clearest drink, use canned lychee syrup and strain well. For stronger fruit flavor, use lychee puree or muddled fresh lychee. The cocktail will be slightly cloudy, but it will taste more fruit-forward. Double strain puree or muddled fruit if you want a smoother finish.

Two lychee martinis side by side, one clearer and more translucent and the other cloudier and creamier.
Syrup makes a clearer drink; puree or fresh fruit gives a cloudier, fuller-bodied glass.

How to Use Canned Lychees

  1. Open the can and strain the syrup into a small cup.
  2. Pick the firmest whole lychees for garnish.
  3. Chill the syrup if you have time.
  4. Use 3/4 to 1 oz / 22 to 30 ml syrup per cocktail.
  5. Save any leftover lychees for garnish, dessert, or mocktails.

If the syrup is very thick, start with less. You can always add more, but it is harder to pull sweetness back once the drink is mixed.

How to Use Fresh Lychees

  1. Peel the lychees.
  2. Remove and discard the seed.
  3. Muddle 2 to 3 lychees in the shaker if you only want a fresh fruit accent.
  4. If using fresh lychee as the full fruit base, blend or muddle 4 to 6 peeled, pitted lychees.
  5. Strain and measure about 1 oz / 30 ml of juice or puree for one cocktail.
  6. Add a little simple syrup only if the fruit is not sweet enough.

Use only the peeled white fruit, never the seed.

Back to top ↑

How to Make It Less Sweet

This is the part that separates a good lychee martini from a one-note one. If the glass tastes heavy, fix the balance before adding more fruit.

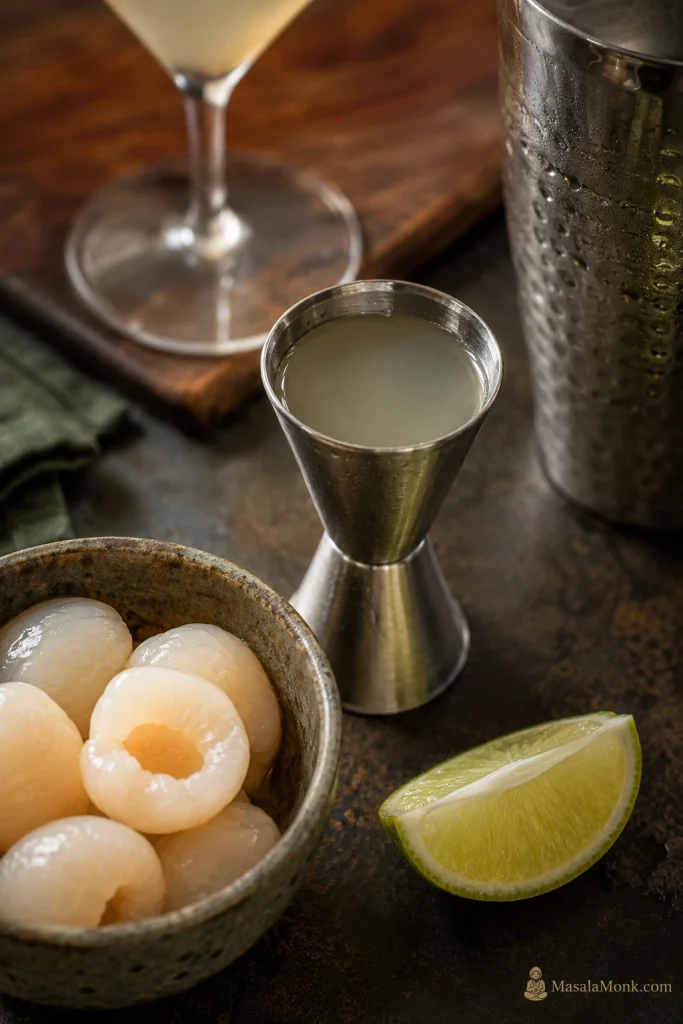
Jigger measuring lychee syrup beside canned lychees and a lime wedge for a lychee martini.
Start with a smaller syrup pour when the can tastes thick, then add more only if the glass needs fruit.
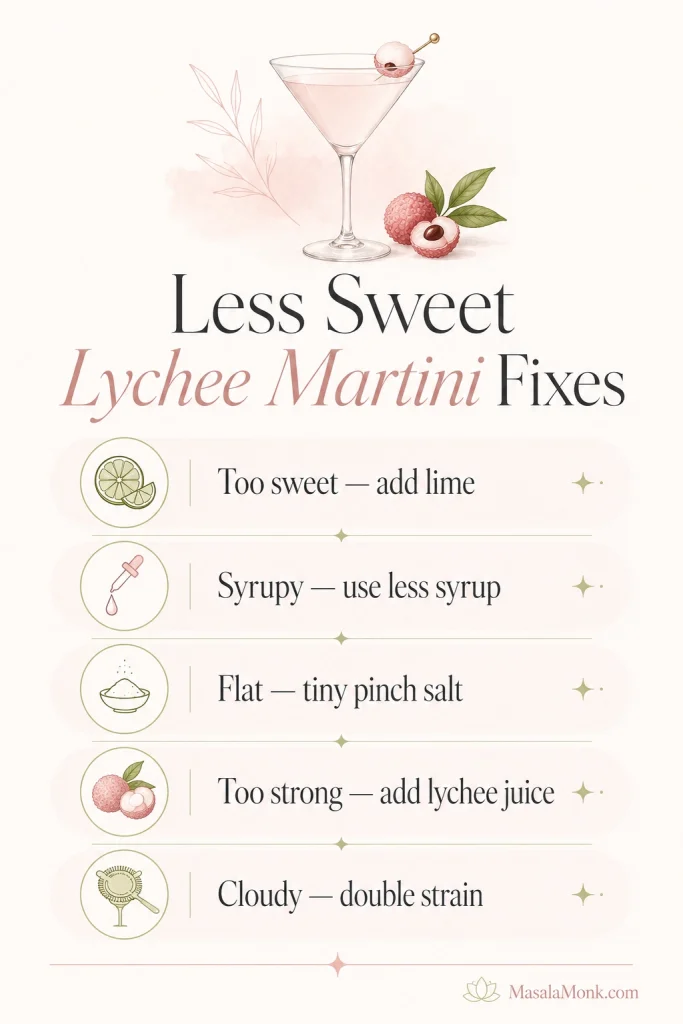
ProblemFix
Too sweetAdd 1/4 oz / 7.5 ml more lime or lemon juice
SyrupyReduce lychee syrup to 3/4 oz / 22 ml or 1/2 oz / 15 ml
Too candy-likeUse dry vermouth instead of Cointreau
Flat flavorAdd a tiny pinch of salt before shaking
Too strongAdd 1/2 oz / 15 ml lychee juice
Too wateryUse colder ice and shake only 15 to 20 seconds
Not enough lychee flavorAdd muddled lychee, puree, or a small amount of lychee liqueur

A tiny pinch of salt may sound unusual, but it can make the lychee taste clearer. Use only a few grains, not enough to make the drink taste salty.

Quick quality checks

Before you change the whole recipe, check the simple things: fresh citrus, cold glass, enough ice, and syrup amount. If using liqueur, reduce syrup; if using puree or fresh lychee, double strain.

Graphic listing fixes for a lychee martini that is too sweet, syrupy, flat, too strong, or cloudy.
Use the chart to fix sweetness, flatness, strength, or cloudiness without starting over.

Still not getting the balance right? Check the troubleshooting section before changing the whole recipe again.

Vodka, Gin, or Lychee Liqueur?

The default lychee martini is vodka-based, but the best spirit depends on the style you want.

Vodka Lychee Martini

Vodka gives the cleanest glass. It is smooth, simple, and lets the fruit stay in front. Use the main recipe if you are making the drink for the first time.

Gin Lychee Martini

Gin makes the drink more botanical and floral. It works especially well if your gin has citrus, rose, cucumber, or elderflower notes.

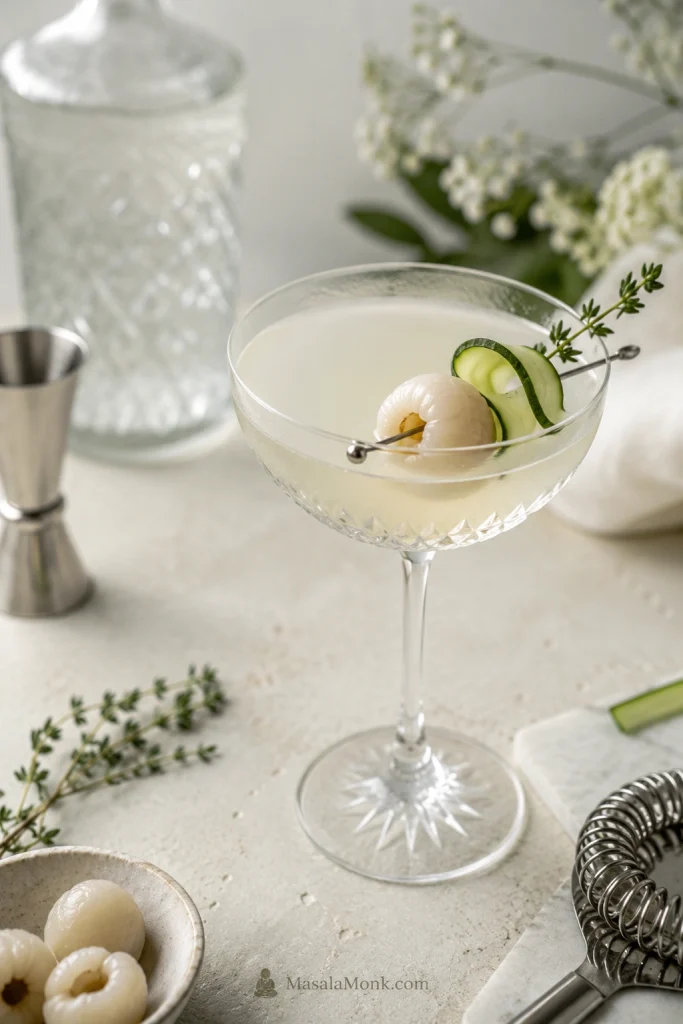
Pale gin lychee martini with lychee garnish, cucumber ribbon, and botanical accents in a stemmed glass.
Gin shifts the drink toward a brighter, greener, more botanical profile.
  • 2 oz / 60 ml gin
  • 1 oz / 30 ml lychee syrup or juice
  • 1/2 oz / 15 ml lime juice
  • 1/4 to 1/2 oz / 7.5 to 15 ml elderflower liqueur, optional
  • 1 to 2 lychees for garnish

Shake with ice and strain into a chilled glass. If using elderflower liqueur, reduce the lychee syrup slightly because both are sweet. If gin is the direction you like, the French 75 cocktail is another elegant gin-and-citrus drink that works well for parties.

Lychee Liqueur Martini

Lychee liqueur gives stronger fruit flavor, but it also adds sweetness and alcohol. Treat it as part of the lychee base, not as something to add on top of a full pour of syrup.

  • 1 1/2 oz / 45 ml vodka
  • 3/4 oz / 22 ml lychee liqueur
  • 1/2 oz / 15 ml lychee juice or canned syrup
  • 1/2 oz / 15 ml lime or lemon juice
  • Ice
  • Lychee garnish

Shake hard and strain into a chilled glass. This route tastes more intense and bar-like, but the citrus is important. Without it, the drink can become cloying.

Lychee Martini Variations

Once the base drink tastes right, the variations are easy. Think of them as small turns in mood, not totally new recipes. Save the rose water, pear vodka, and Halloween garnish for round two.

Every variation should still protect the same thing: lychee aroma first, clean citrus finish last.

Frozen Lychee Martini

A frozen lychee martini is thicker, softer, and more slushy than the shaken version. Because very cold drinks can taste less tart, add enough lime so it stays bright.

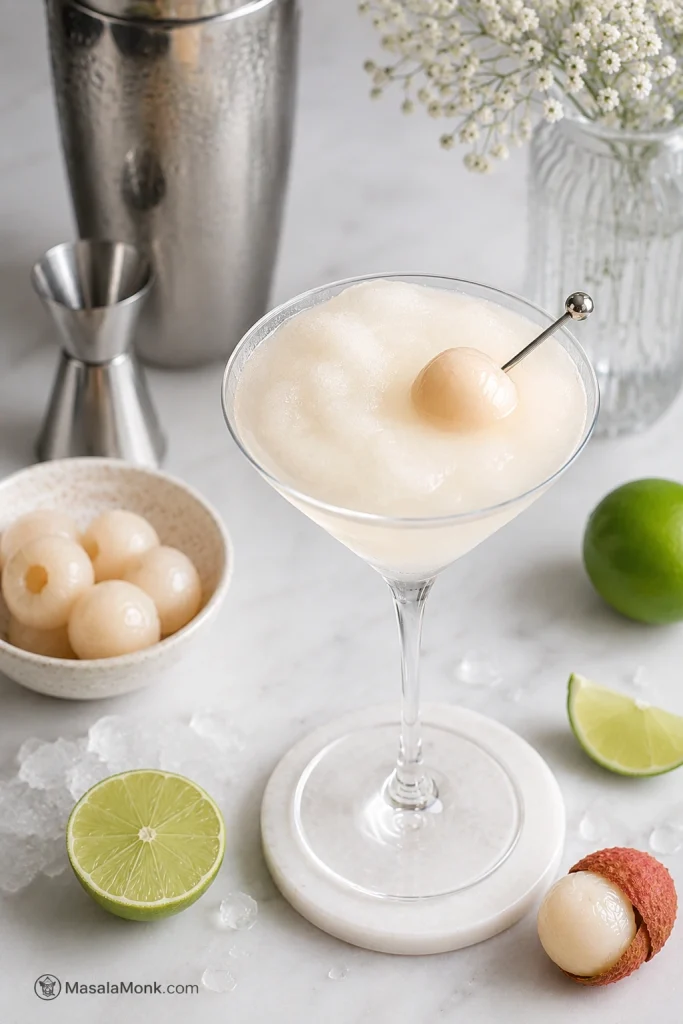
Frozen lychee martini with slushy texture in a chilled glass with lime and lychee nearby.
The frozen version turns the drink softer and slushier, with fruit taking the lead over the spirit.
  • 1 cup frozen lychees, about 8 to 10 lychees or 100 to 120 g
  • 2 oz / 60 ml vodka or gin
  • 1 oz / 30 ml lychee syrup
  • 1/2 oz / 15 ml lime juice
  • 1/2 oz / 15 ml dry vermouth, optional
  • 1/2 to 3/4 cup ice

Blend until slushy and pour into a chilled coupe or martini glass. If it is too thick, add a splash of lychee juice. If it is too sweet, add a little more lime.

Virgin Lychee Martini

A virgin lychee martini should still feel like a proper drink, not just juice in a fancy glass.

Virgin lychee martini mocktail in a stemmed glass with bubbles, lychee garnish, and lime.
Bubbles and lime keep the zero-proof glass bright enough to feel like a proper cocktail.
  • 2 oz / 60 ml lychee juice or nectar
  • 1 oz / 30 ml canned lychee syrup
  • 1/2 oz / 15 ml fresh lime juice
  • 1 to 2 oz / 30 to 60 ml sparkling water or tonic
  • 1/2 teaspoon grenadine or cranberry juice, optional for color
  • Lychee garnish

Shake the lychee juice, syrup, and lime with ice. Strain into a chilled glass, top with sparkling water or tonic, and garnish with lychee. For a less sweet mocktail, use more sparkling water and less syrup. You can also add a thin slice of ginger, a few mint leaves, or 1 to 2 drops of rose water.

For more zero-proof lychee ideas, MasalaMonk also has lychee virgin mojitos built around lychee, lime, mint, coconut water, and sparkling water.

Rose Lychee Martini

Rose is lovely here, but it is powerful. A few drops make the drink feel romantic; too much makes the lychee disappear.

  • 2 to 4 drops rose water, or
  • 1/4 teaspoon rose syrup

Shake it with the main recipe. Garnish with a lychee and, if available, one edible rose petal.

Pear Lychee Martini

A pear lychee martini gives the drink a softer, elegant fruit note.

Pear lychee martini in a coupe glass with lychee garnish and pear accent.
Pear makes the drink gentler, softer, and more dinner-party friendly.
  • 2 oz / 60 ml pear vodka or regular vodka
  • 3/4 oz / 22 ml lychee syrup or juice
  • 1/2 oz / 15 ml lemon juice
  • 1/4 to 1/2 oz / 7.5 to 15 ml elderflower liqueur, optional
  • Lychee garnish

Shake with ice and strain. This variation is especially good for dinner parties because it feels delicate rather than tropical.

For a Din Tai Fung-inspired pear lychee martini, use pear vodka, lychee, lemon, and a small amount of elderflower liqueur. This is not the official restaurant recipe, but it follows the pear-lychee-elderflower direction people often associate with that style; Din Tai Fung’s own menu describes its Pear Lychee Martini with pear vodka, St-Germain, fresh lemon juice, and lychee fruit.

Pink Lychee Martini

A classic lychee martini is usually pale, not pink. Add cranberry, pomegranate, raspberry, or grenadine only if you want color, not because the drink needs it.

Pale blush-pink lychee martini with lychee garnish in an elegant stemmed glass.
Keep the color blush and translucent so berry or pomegranate does not bury the lychee.
  • 1/4 oz / 7.5 ml cranberry juice
  • 1 teaspoon grenadine
  • 1/4 oz / 7.5 ml raspberry liqueur
  • A small splash of pomegranate juice

The goal is a blush-pink drink, not a berry cocktail with lychee in the background.

Restaurant-Style Lychee Martini

Most restaurant-style searches are really about texture, balance, and a colder finish — not a secret bottle. The trick is mouthfeel: the drink should feel silkier, not heavier.

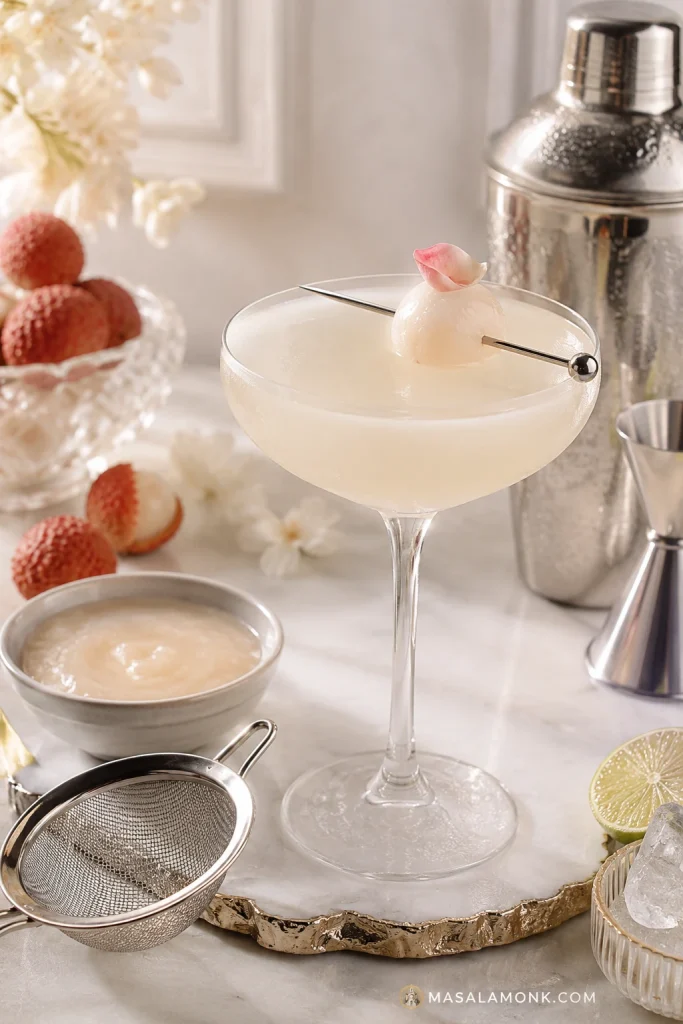
Pale lychee martini in a chilled coupe glass with lychee garnish, fine strainer, and small bowl of puree nearby.
Puree gives this bar-style version a silkier body while keeping the glass pale and elegant.

When the canned syrup version tastes a little too light, this is the upgrade: puree for body, lemon for softness, and Cointreau or elderflower for a rounder bar-style finish.

  • 2 oz / 60 ml vodka
  • 1 oz / 30 ml lychee puree
  • 1/2 oz / 15 ml lemon juice
  • 1/4 to 1/2 oz / 7.5 to 15 ml Cointreau or elderflower liqueur
  • Ice
  • Lychee garnish

Double Strain Lychee Puree Martini

Shake hard and double strain.

Lychee martini being poured through a fine mesh strainer into a coupe glass.
A fine mesh strain keeps puree smooth while preserving the extra fruit body.

For a Nobu-inspired lychee martini, aim for the style rather than a claimed official recipe: very cold, smooth, lychee-forward, and polished. This captures the direction with vodka, lychee juice or puree, fresh citrus, and a chilled glass.

Soho-Style Lychee Martini

If your bottle is Soho or another lychee liqueur, treat it as both flavor and sweetener. That means you need less syrup and more citrus than you might expect.

  • 1 1/2 oz / 45 ml vodka
  • 3/4 oz / 22 ml Soho or another lychee liqueur
  • 1/2 oz / 15 ml lychee juice
  • 1/2 oz / 15 ml lime juice

Shake with ice and strain. Taste before adding extra syrup.

Other Easy Flavor Twists

  • For a softer version, replace 1/2 oz / 15 ml vodka with chilled sake.
  • To make the citrus sharper, use 1 teaspoon yuzu juice in place of part of the lime.
  • A light coconut note can come from a small splash of coconut water.
  • For Halloween, stuff a canned lychee with a blueberry, raspberry, or small dark grape and rest it on the glass with a cocktail pick.

Coconut milk or cream of coconut will make the drink cloudy and heavier, so use it only if you want a creamy tropical version.

Garnish Ideas

A lychee martini should look clean and elegant. You do not need a crowded glass. A lychee garnish is enough drama for one drink.

Close-up of glossy lychee garnish on a cocktail pick resting across the rim of a chilled lychee martini glass.
The lychee garnish sets the flavor expectation before the first sip.
  • One whole lychee on a cocktail pick
  • Two lychees skewered together
  • Lychee with a lime twist
  • Lychee with an edible rose petal
  • Lychee stuffed with blueberry for Halloween
  • Lychee with a tiny mint sprig
  • A very light sugar rim for a sweeter party version

The whole lychee is part of the charm: pale, glossy, and almost jewel-like in a frosty glass. For the most classic look, use one or two pale lychees in a clear, ice-cold drink.

For photos, place the lychee garnish across the rim instead of dropping it into the drink. It keeps the glass cleaner and shows the fruit.

Common Lychee Martini Mistakes

Prep table with syrup, wet ice, warm glass, puree, strainer, garnish, and bar tools arranged for a lychee martini.
Too much syrup, weak ice, warm glassware, or poor straining can change the drink more than garnish ever will.
Avoid these first
  • Using too much syrup: Start with 3/4 oz if your canned lychee syrup tastes thick.
  • Skipping fresh citrus: Bottled lime can make the drink taste flatter.
  • Serving it warm: Chill the glass and shake until the tin feels cold.
  • Adding every floral ingredient at once: Rose, elderflower, pear, and lychee can blur together quickly.
  • Not straining puree: Double strain if you want a smooth restaurant-style glass.
  • Using a harsh vodka: A simple drink will not hide a rough spirit.

Need exact fixes for a glass that already went wrong? Jump to Troubleshooting.

Back to top ↑

Make-Ahead and Party Tips

How to Make the Base Ahead

Make the base ahead, not the finished cocktail. A lychee martini is best after it has been freshly shaken with ice.

For parties, this is the kind of drink you want partly ready before guests arrive: chilled base in the fridge, glasses waiting, and the firmest lychees picked for garnish. It lets you look prepared without doing much in front of guests.
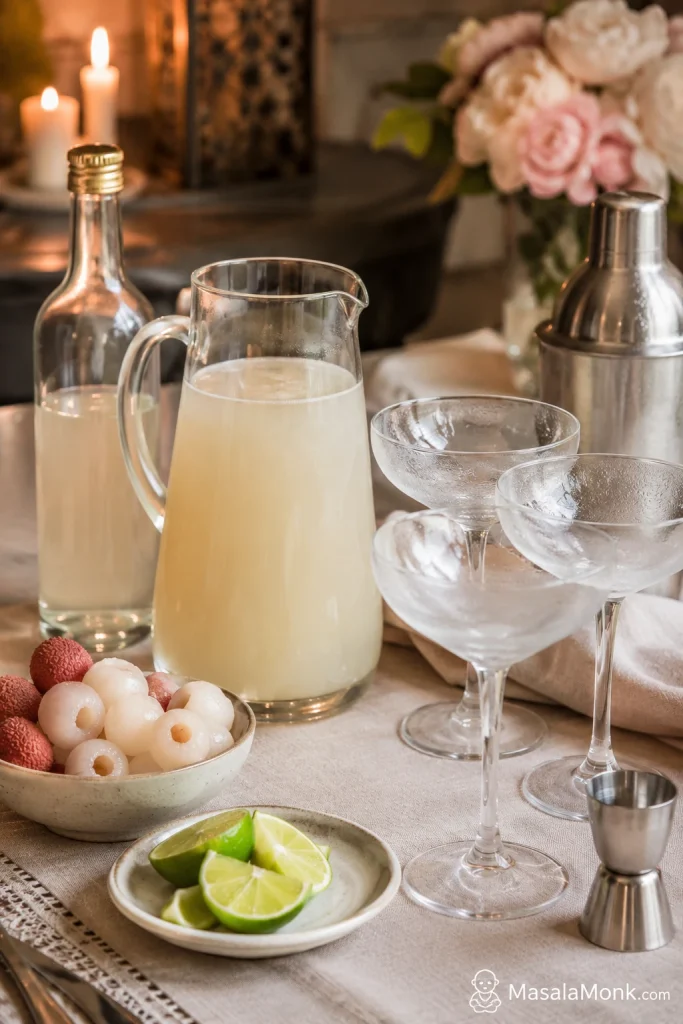
Clear pitcher and bottle of lychee martini base with empty chilled glasses, lychees, lime, shaker, and jigger on a table.
Chill the base in advance, then shake each serving to order so dilution stays controlled.

To prep a single cocktail ahead, combine the vodka, lychee syrup, citrus, and dry vermouth in a small jar and refrigerate. When ready to serve, shake the chilled mixture with ice and strain into a cold glass.
Scale for a Party

If you are batching for a group, multiply the recipe by the number of drinks you want. Keep ice out of the pitcher and shake individual portions at serving time. If you like pitcher-friendly vodka drinks, MasalaMonk’s Moscow Mule recipe is a useful companion because it also separates the make-ahead base from the fresh or fizzy finishing element.
Before batching for guests, mix one test drink. It is much easier to fix one glass than eight, and a pitcher tastes different before dilution.

ServingsVodkaLychee SyrupCitrusDry Vermouth or Cointreau
12 oz / 60 ml3/4 to 1 oz / 22 to 30 ml1/2 oz / 15 ml1/4 oz / 7.5 ml
24 oz / 120 ml1 1/2 to 2 oz / 45 to 60 ml1 oz / 30 ml1/2 oz / 15 ml
48 oz / 240 ml3 to 4 oz / 90 to 120 ml2 oz / 60 ml1 oz / 30 ml
816 oz / 480 ml6 to 8 oz / 180 to 240 ml4 oz / 120 ml2 oz / 60 ml

Serve It Without Losing Texture

For a batch, start with the lower amount of lychee syrup. Taste the chilled base, then add more only if needed. Cointreau adds sweetness as well as citrus, so keep that in mind when scaling.

For best texture, shake individual servings with ice. If serving straight from a pitcher, add about 1/2 oz / 15 ml cold water per cocktail to replace the dilution from shaking.

Garnish just before serving so the lychees look fresh. If using fresh citrus, the batch tastes best the same day.

Planning food too? Go straight to What to Serve with Lychee Martinis.

Troubleshooting

Most lychee martini problems are easy to fix. They usually come down to sweetness, temperature, or straining.

IssueLikely CauseFix
Too sweetToo much syrup or liqueurAdd lime/lemon, reduce syrup, or use dry vermouth
Too sourToo much citrusAdd a splash of lychee syrup or juice
Too strongToo much vodka or not enough dilutionAdd 1/2 oz / 15 ml lychee juice or shake with fresh ice
Too wateryWarm glass, weak ice, or overshakingChill the glass and shake only 15 to 20 seconds
Cloudy drinkPuree, juice, or muddled fruitDouble strain or use canned syrup for a clearer look
Not enough lychee flavorWeak juice or too much citrusAdd muddled lychee, puree, or a little lychee liqueur
Tastes flatNeeds acid or saltAdd a tiny pinch of salt or a little more citrus
Garnish sinks awkwardlyLychee is too soft or tornUse a cocktail pick and choose firmer lychees

What to Serve with Lychee Martinis

Serve lychee martinis with food that gives the drink contrast: salt, crunch, spice, or clean seafood. The cocktail is floral and lightly sweet, so it works best with snacks that keep the glass feeling fresh.

Best Pairings by Mood

Pairing MoodGood Options
Salty and crunchyCroquettes, fried wontons, crispy tofu
Fresh and lightSushi-style bites, shrimp appetizers, cucumber salad
SpicyChilli garlic snacks, spicy chicken skewers, spring rolls
Party boardFruit, cheese, deviled eggs, light crackers
Pairing chart showing foods to serve with lychee martinis, including croquettes, wontons, crispy tofu, sushi bites, shrimp, cucumber, chilli garlic snacks, chicken skewers, fruit, cheese, and deviled eggs.
Match the drink with salty, fresh, spicy, or party-board foods depending on the serve.

Easy Party Pairings

Lychee martini in a stemmed glass served beside a plate of golden croquettes on a tray.
Warm, crisp snacks give this floral cocktail the contrast it needs.

Crisp, hot party bites are a natural match. Croquettes work beautifully because the salty crunch balances the cocktail’s fruitiness.

Creamy snacks can also work if they are not too heavy. A platter of classic deviled eggs gives the drink something savory and rich to cut through.

Avoid very heavy dishes if you want the cocktail to stay fragrant and refreshing.

Serving a crowd as well? Pair this section with the make-ahead and party tips.

Responsible Serving Note

This recipe is intended for adults of legal drinking age. Because this uses a full spirit pour, serve smaller portions and keep the virgin lychee martini available for guests who prefer not to drink.

Back to top ↑

FAQs

What is a lychee martini made of?

A lychee martini is usually made with vodka, lychee syrup or juice, fresh lime or lemon juice, ice, and a lychee garnish. This version also uses a small amount of dry vermouth for a cleaner finish.

What does a lychee martini taste like?

It tastes floral, juicy, lightly tropical, and gently sweet, with a citrus finish. A good one smells delicate, tastes bright, and finishes cleaner than you expect.

Can I make a lychee martini with canned lychee?

Yes. For most home bartenders, canned lychee is the smartest starting point because it gives you consistent syrup and whole lychees for garnish.

Can I use the syrup from canned lychees?

Yes. Start with 3/4 to 1 oz / 22 to 30 ml per cocktail, depending on how sweet the syrup tastes.

Do I need lychee liqueur?

No. Lychee liqueur can make a good drink, but canned lychee syrup is easier to find and easier to control. If you use liqueur, reduce the syrup.

Can I make a lychee martini without vermouth?

Yes. Use vodka, lychee syrup or juice, and fresh lime or lemon. Vermouth gives the drink its dry edge, so skip it only if you want a softer fruit cocktail.

Should a lychee martini be shaken or stirred?

Shake this version because it contains citrus and lychee syrup, juice, or puree. Shaking chills and blends the drink better than stirring.

Is vodka or gin better for a lychee martini?

Vodka is best for the cleanest lychee flavor. Gin works if you want a more botanical, floral drink.

What is the best vodka for a lychee martini?

Use a clean, smooth, mid-shelf vodka that tastes good chilled. Avoid strongly flavored vodka unless you specifically want that flavor in the drink.

How strong is a lychee martini?

A lychee martini is closer to a martini than a tall mixed drink. For a lighter glass, add 1/2 oz / 15 ml lychee juice or make the virgin version with sparkling water.

How do I make a lychee martini less sweet?

Use less lychee syrup, add more lime or lemon juice, choose dry vermouth instead of Cointreau, or add a tiny pinch of salt before shaking.

Can I use fresh lychee?

Yes. Peel and pit the lychees, then muddle or blend them before shaking. Double strain if you want a smoother drink.

Can I make a frozen lychee martini?

Yes. Blend frozen lychees with vodka or gin, lychee syrup, lime juice, and ice until slushy.

Can I make a virgin lychee martini?

Yes. Use lychee juice or nectar, canned lychee syrup, lime juice, and sparkling water or tonic. Shake the juice, syrup, and lime with ice, then top with bubbles.

What is a Nobu-style lychee martini?

A Nobu-style or restaurant-style lychee martini usually means a very cold, smooth, lychee-forward vodka drink with a polished bar feel. Aim for the style with vodka, lychee puree or juice, citrus, and a small amount of Cointreau or elderflower liqueur rather than claiming an official copycat.

Can I make lychee martinis ahead for a party?

Yes. Mix the vodka, lychee syrup, citrus, and dry vermouth ahead and refrigerate. Keep ice out of the pitcher, then shake each serving with ice before pouring.

Final Tips for the Best Lychee Martini

Make the first one simple: canned lychee syrup, vodka, lime, dry vermouth, and a glass cold enough to fog at the edges. Once that balance is right, the rest is just mood — gin for floral, puree for body, pear for elegance, or sparkling water for a zero-proof glass.

Keep the garnish simple, taste before adding extra syrup, and let the lychee do the work.

Tried it with fresh lychee, gin, rose, pear, or as a mocktail? Tell us what changed the drink most for you — lime or lemon, syrup or puree, vodka or gin? Your answer may help the next reader adjust their glass too.

Back to top ↑

Posted on Leave a comment

Screwdriver Recipe: Vodka & Orange Juice Cocktail

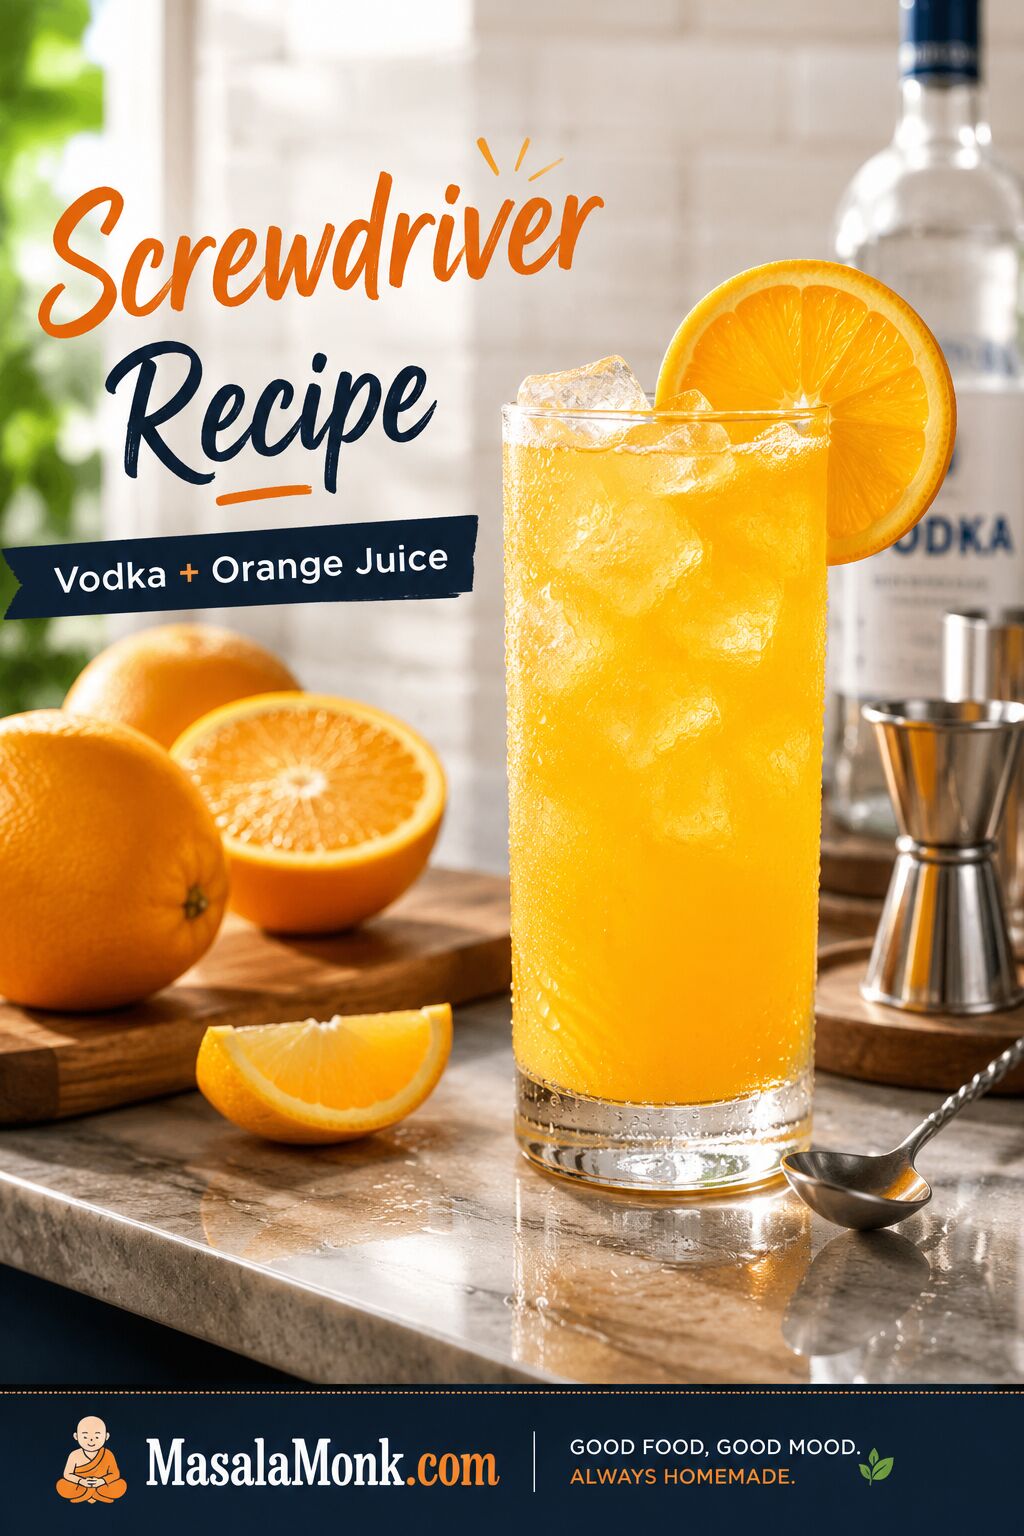
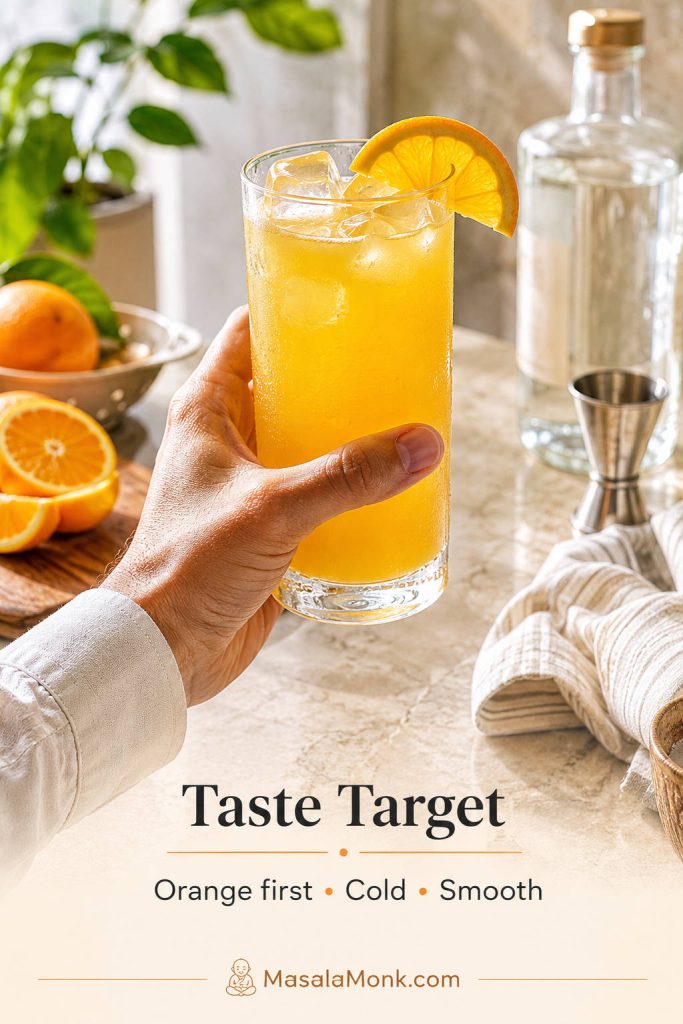
Tall highball glass of Screwdriver cocktail with vodka, orange juice, clear ice, orange wheel garnish, jigger, and bar spoon on a light counter.

A screwdriver is only vodka and orange juice, which is exactly why the ratio matters. Too little juice and the vodka takes over. Too much juice, and it stops feeling like a cocktail at all. This screwdriver recipe keeps that simple balance clear: cold juice, enough ice, and the right pour, so the same two ingredients taste fresh, smooth, and properly mixed.

This screwdriver recipe gives you the classic vodka and orange juice cocktail first, then shows you how to adjust it for a stronger glass, a lighter brunch pour, or a pitcher for guests. You do not need syrup, liqueur, or a full home bar. You just need clean vodka, chilled orange juice, plenty of ice, and a ratio that fits the moment.

It is the kind of drink people make when they want something familiar, cold, and easy without turning the kitchen into a bar.

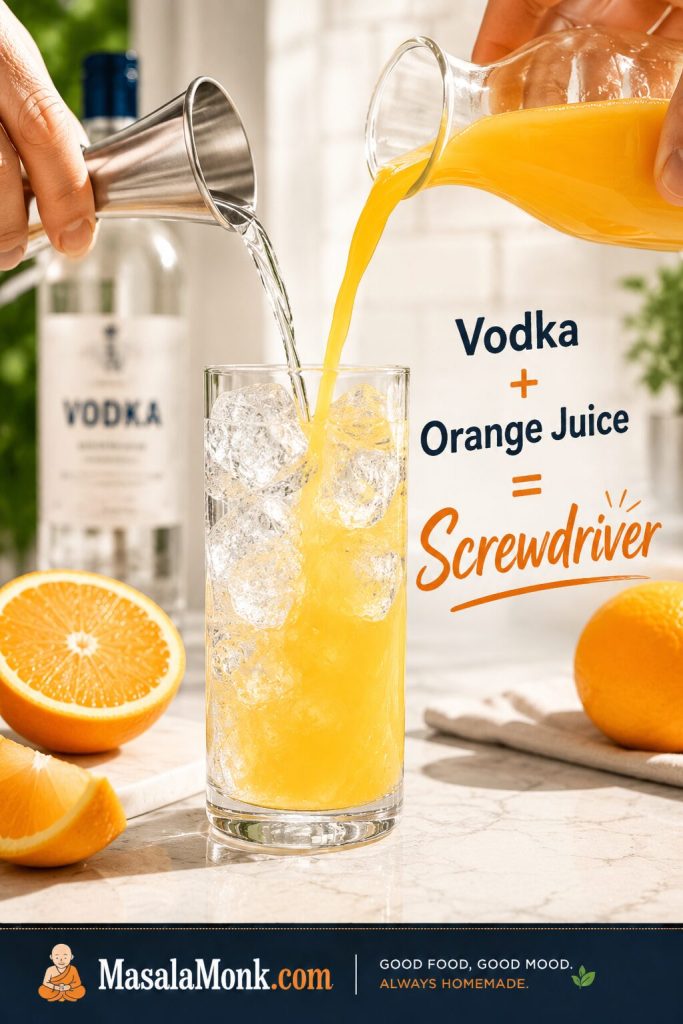
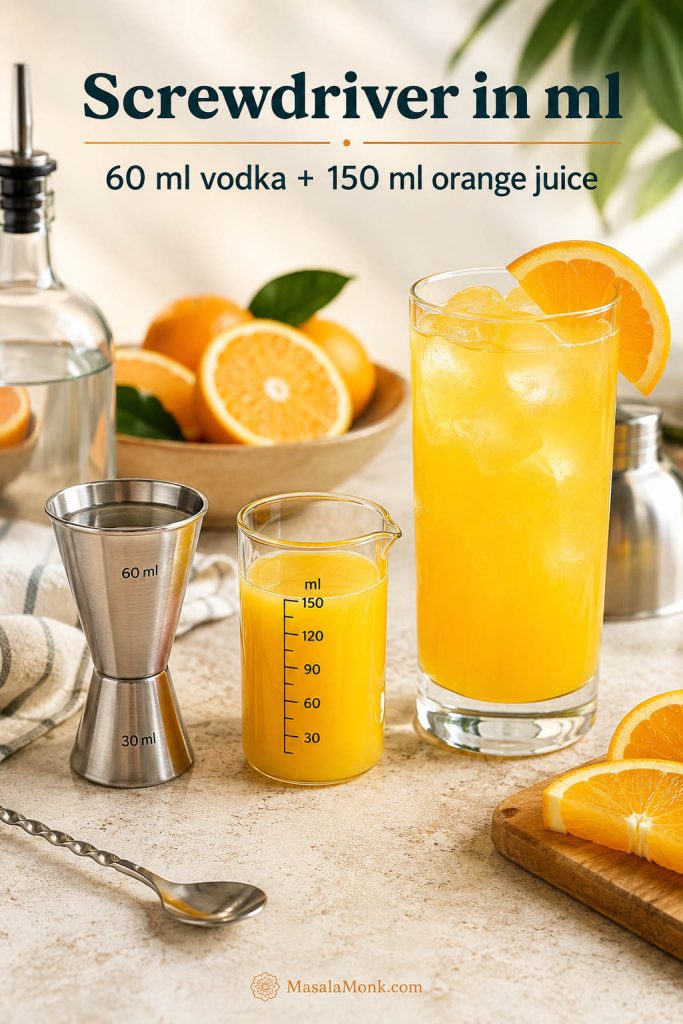
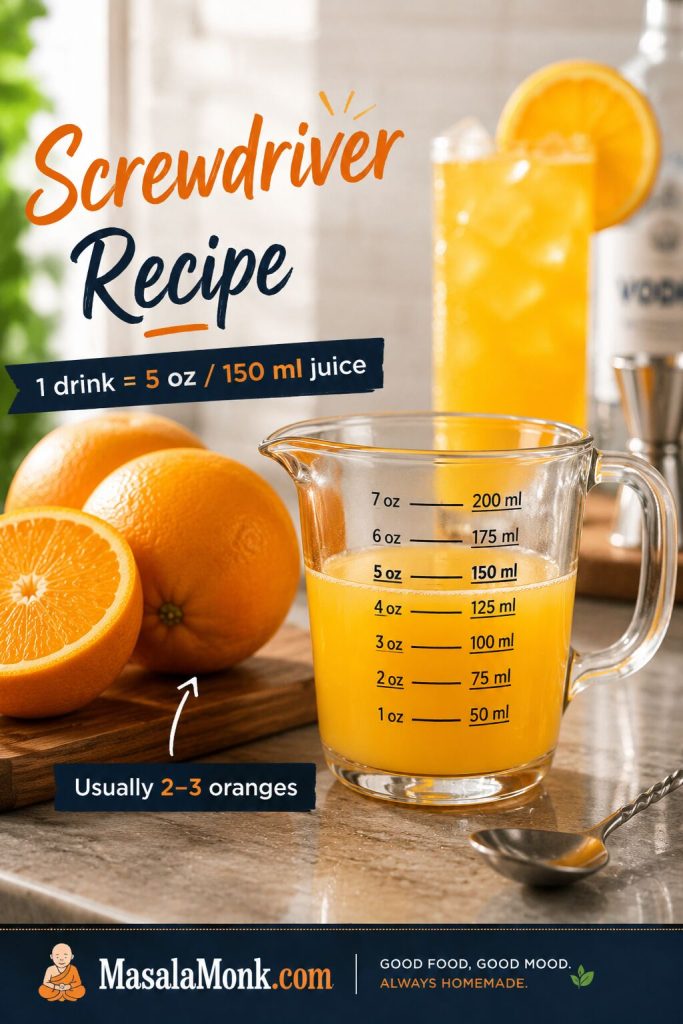
Vodka and orange juice is called a Screwdriver. Start with 2 oz / 60 ml vodka and 5 oz / 150 ml orange juice. The finished glass should smell like orange first, feel properly cold, and leave the vodka in the background rather than in charge.

Quick Answer: What Is Vodka and Orange Juice Called?

Vodka and orange juice is called a Screwdriver. The simple version is vodka and orange juice over ice, usually served in a highball or Collins glass with an optional orange slice, wedge, or wheel.

The easiest screwdriver ratio to start with is 1 part vodka to 2–3 parts orange juice. For one balanced drink, use 2 oz / 60 ml vodka and 5 oz / 150 ml orange juice. Build it directly in the glass and give it a brief stir.

Vodka and orange juice being poured into an ice-filled highball glass to make a Screwdriver cocktail.
Vodka and orange juice becomes a Screwdriver when it is poured over ice, which is why the drink works best as a simple cold highball.

Make One Now

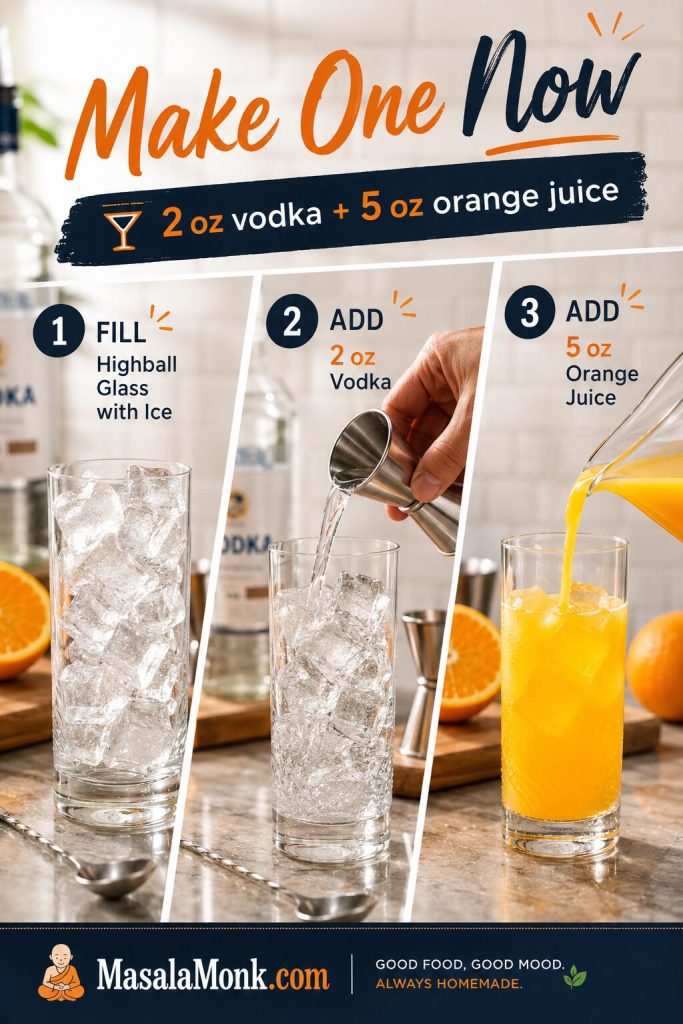
Fill a tall glass with ice. Add 2 oz / 60 ml vodka and 5 oz / 150 ml chilled orange juice. Stir just until combined, garnish with orange if you like, and serve right away.

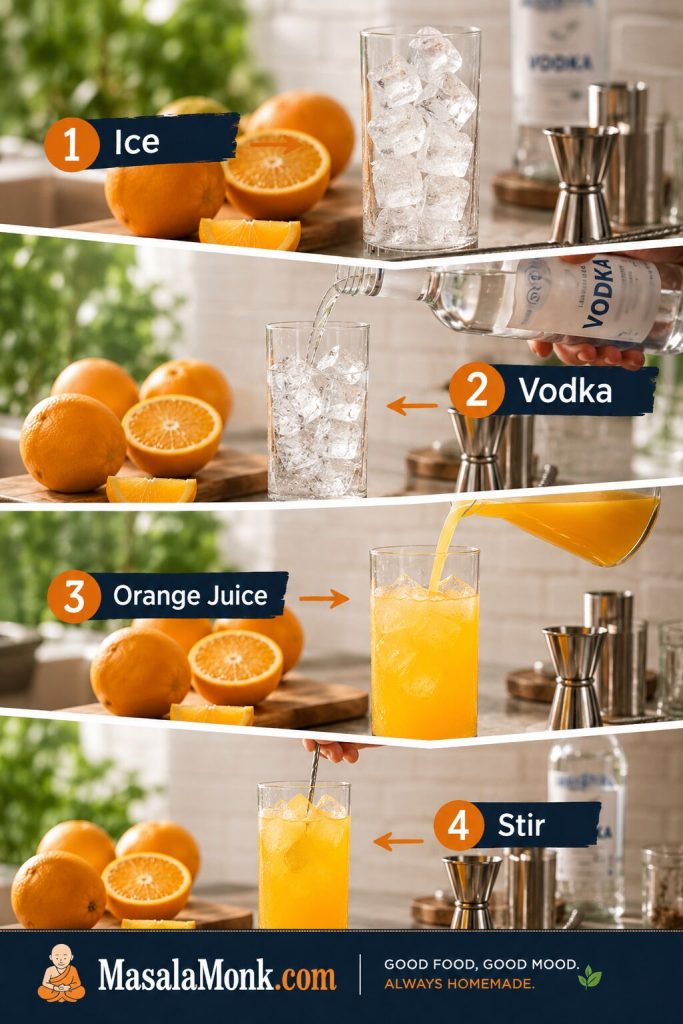
Three-step Screwdriver recipe visual showing ice in a glass, vodka being measured, and orange juice being poured.
When you want one drink quickly, 2 oz vodka and 5 oz chilled orange juice gives you a reliable starting point before you fine-tune the strength.

Want it stronger or lighter? Use the ratio guide before your next pour.

Screwdriver Recipe

This is the balanced version: cold vodka, chilled orange juice, plenty of ice, and a simple orange garnish.

Prep time5 minutes
Cook time0 minutes
Total time5 minutes
Servings1
Yield1 cocktail
MethodBuilt in glass

Glass: highball or Collins glass
Ratio: 2 oz / 60 ml vodka to 5 oz / 150 ml orange juice
Method: build over ice and stir briefly

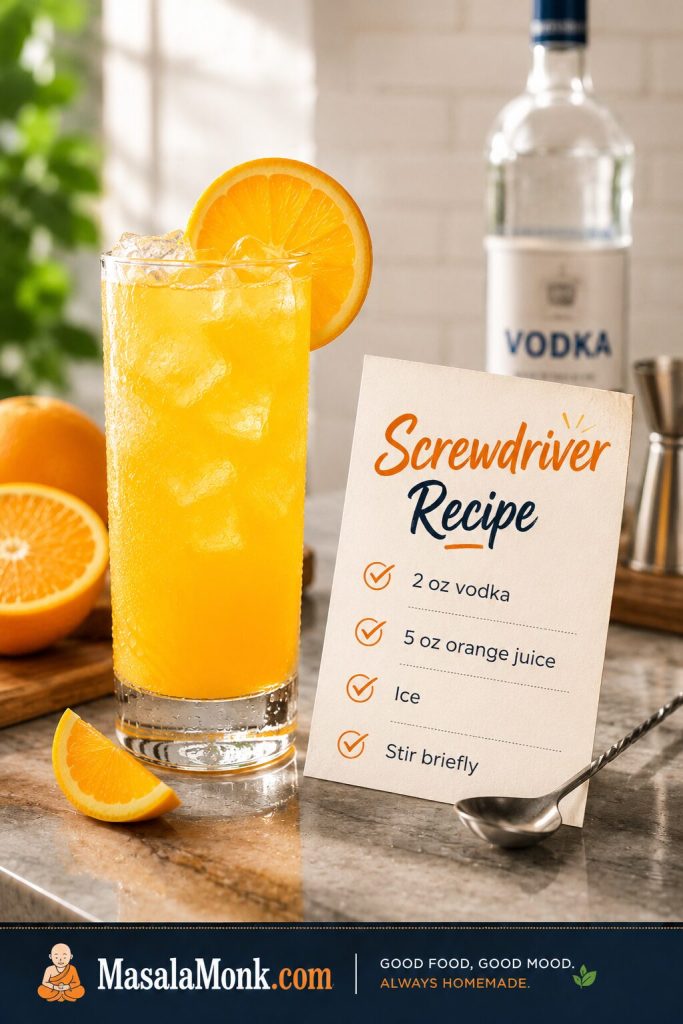
Saveable Screwdriver recipe card beside a finished orange cocktail with vodka, orange juice, ice, and brief stirring instructions.
Think of this as the base pour: once it tastes right in one glass, it becomes much easier to scale, lighten, or serve for guests.

Ingredients

  • 2 oz / 60 ml vodka
  • 5 oz / 150 ml orange juice, chilled
  • Ice, enough to fill the glass
  • Orange wedge, wheel, or slice, optional

Instructions

  1. Fill a highball or Collins glass with ice.
  2. Pour in the vodka.
  3. Add the chilled orange juice.
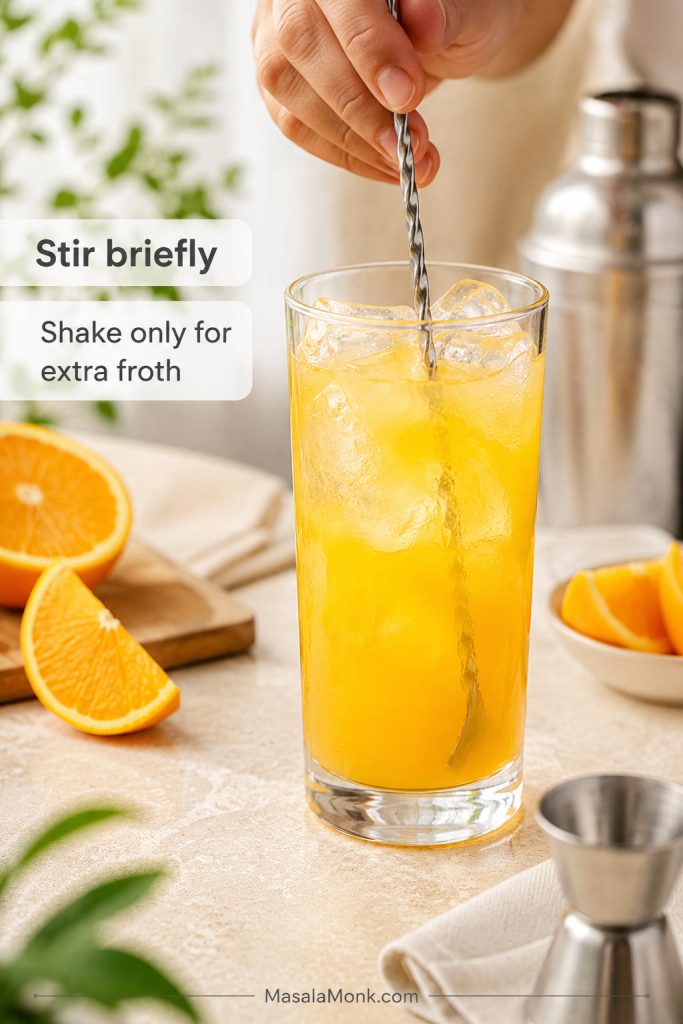
  4. Stir for 5–10 seconds, just enough to chill and combine. Do not churn it aggressively.
  5. Garnish with orange and serve immediately.

Notes

  • For a stronger screwdriver, use 4 oz / 120 ml orange juice.
  • For a lighter screwdriver, use 6 oz / 180 ml orange juice.
  • If the first sip tastes sharp, add another ounce or two of orange juice.
  • Fresh orange juice tastes brightest, but chilled 100% bottled orange juice works well when you need speed or consistency.
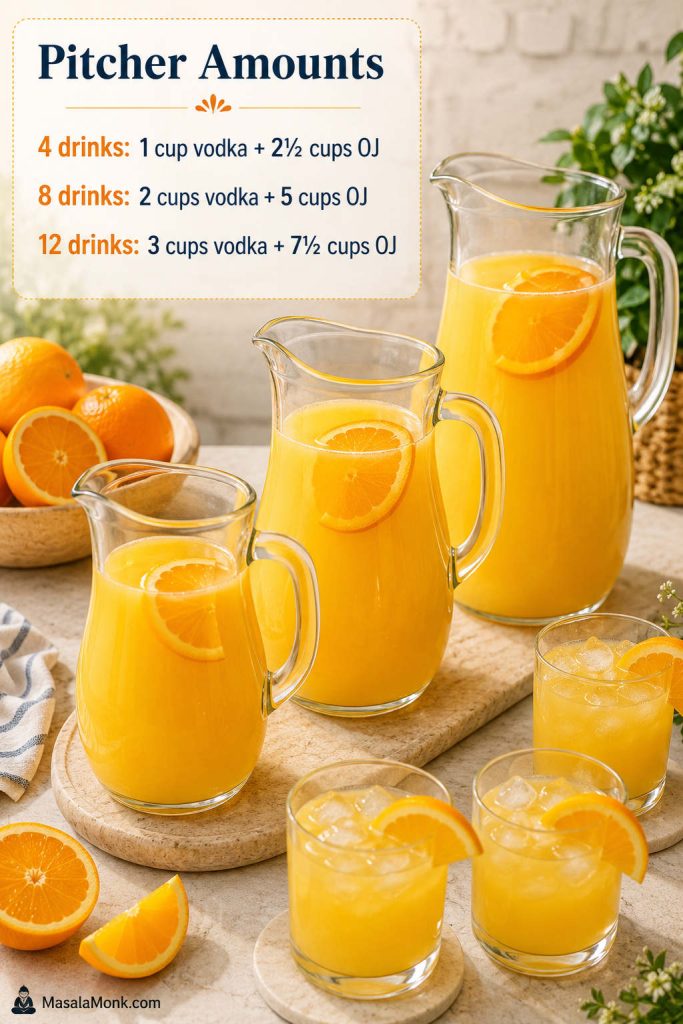
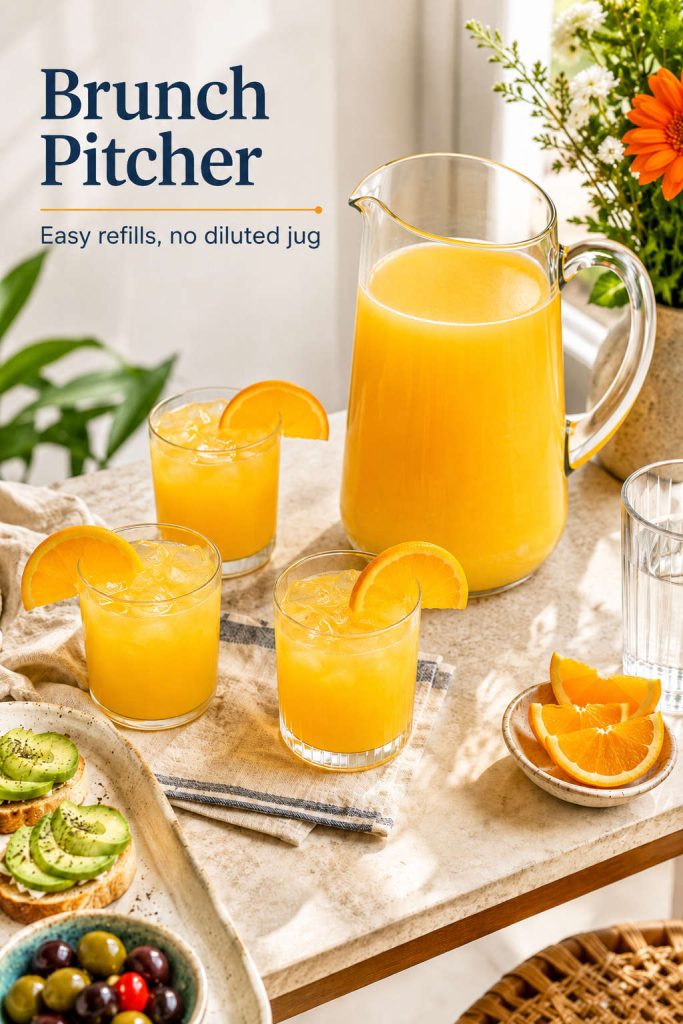
  • For pitchers, mix vodka and orange juice ahead, but add ice to individual glasses. Making more than one? Use the pitcher amounts.

If your glass already tastes right, you can stop there. But if the first sip is too sharp, too flat, too sweet, or too much like plain orange juice, the rest of this guide shows you how to adjust the pour, choose better juice, batch it for guests, or turn it into a variation.

Keep Reading For

Serve It Well

From here, the best version depends on the glass you want: stronger, lighter, fresher, easier to batch, or more playful.

What Is a Screwdriver Drink?

A screwdriver works because orange juice does most of the flavor work while vodka gives the drink structure. That is why temperature, ice, and ratio matter more than complicated technique.

In the UK, many people simply call the same drink “vodka and orange.”

That simplicity is the charm. A good one should taste orange first, with the vodka supporting it. A weak one tastes watery; a badly balanced one tastes like orange juice with a rough spirit edge. The ratio fixes both problems.

If you like simple vodka cocktails, this sits in the same easy-mixing world as a crisp Moscow Mule or a citrusy vodka with lemon. The screwdriver is even simpler because the orange juice does most of the work.

Screwdriver Ingredients

You only need a few ingredients, so keep them cold and choose them well. This is not a drink that rewards overthinking, but it does reward balance.

Screwdriver ingredients arranged on a light counter, including vodka, orange juice, oranges, ice, highball glass, jigger, and bar spoon.
Because a Screwdriver has only a few ingredients, vodka, orange juice, and ice each matter more than they would in a more complicated cocktail.

Vodka

Because orange juice is the only real mixer here, choose a vodka that tastes clean rather than one you need to hide. You do not need an expensive bottle, but avoid anything very harsh.

Plain vodka keeps the drink simple. Citrus vodka can push the orange flavor forward, while vanilla or whipped cream vodka turns the drink toward orange cream.

Orange Juice

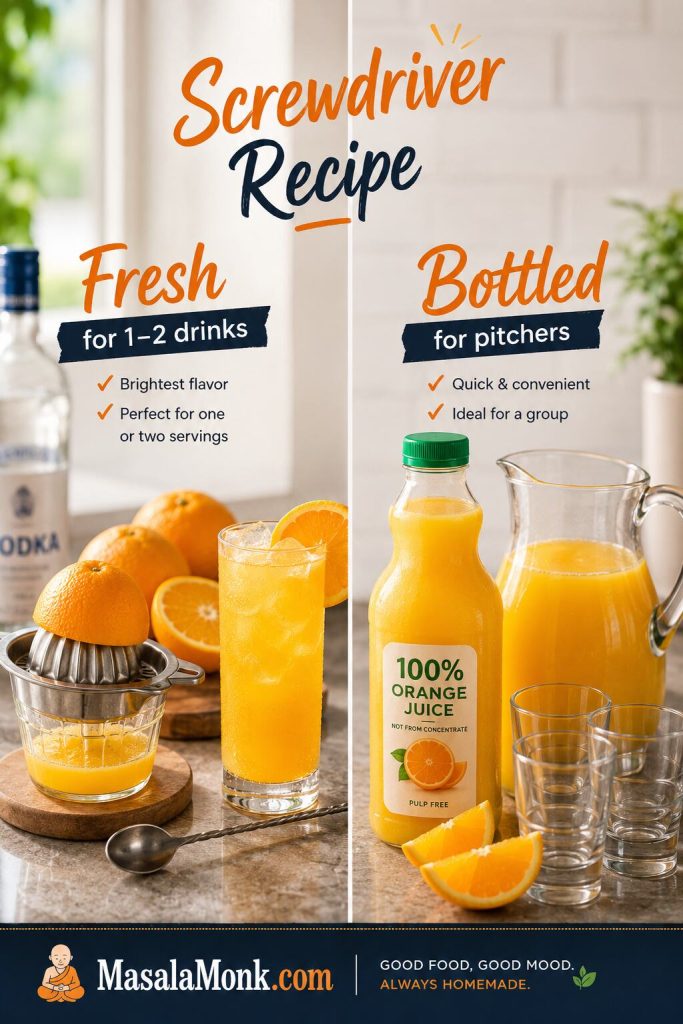
Fresh orange juice gives you that lifted orange smell before the first sip; bottled juice gives you consistency and speed. Chilled 100% bottled orange juice is especially useful for pitchers. Pulp or no pulp is personal: pulp feels fuller, while no-pulp juice makes a smoother glass. Choosing juice for a bigger batch? See the fresh vs bottled guide.

Orange drink can work in a pinch, but it pushes the cocktail toward sweet punch instead of fresh orange. For the cleanest flavor, use orange juice that tastes good cold on its own.

Ice and Garnish

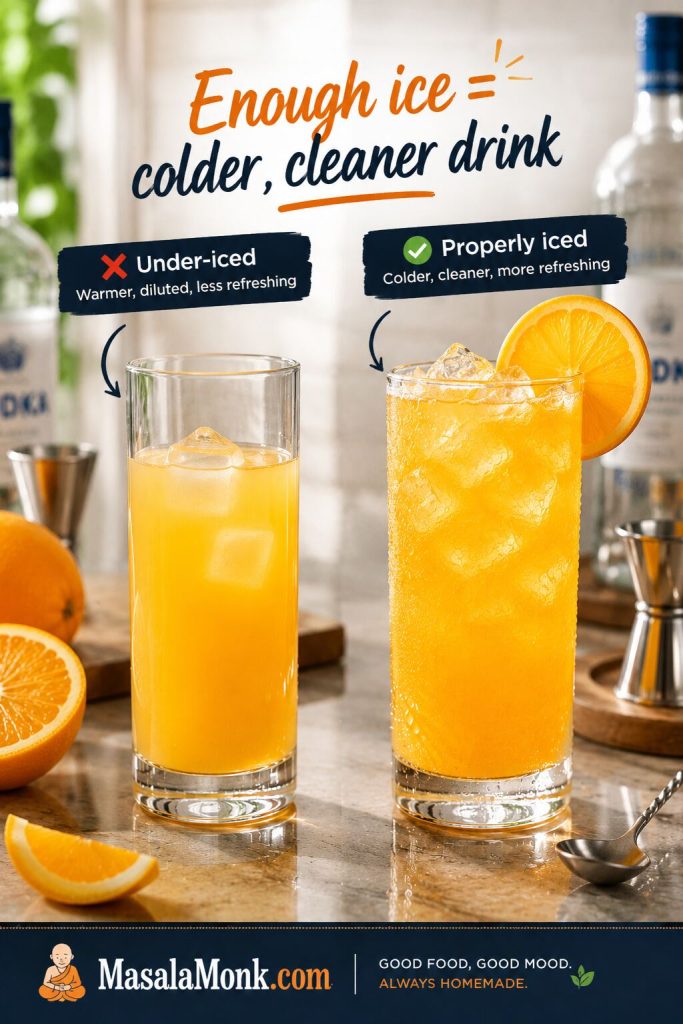
Do not be shy with the ice. A tall glass filled with ice keeps the drink colder for longer and helps avoid that thin, warm-orange-juice taste. An orange wedge, wheel, slice, or peel twist is optional, but it adds aroma and makes the glass feel finished.

Side-by-side comparison of an under-iced Screwdriver and a properly iced Screwdriver with clear ice and condensation.
Enough ice keeps a Screwdriver colder and cleaner; otherwise, the orange juice warms quickly and the drink starts to taste thin.

An 8–12 oz highball or Collins glass works best for the balanced pour. If your glass is smaller, use the stronger 2 oz vodka + 4 oz orange juice version or pour a slightly shorter drink.

Glass size comparison for a Screwdriver cocktail showing a small glass, an 8 to 12 ounce highball glass, and a larger glass.
An 8–12 oz highball or Collins glass leaves room for the vodka-orange mix, ice, and garnish without making the drink feel cramped.

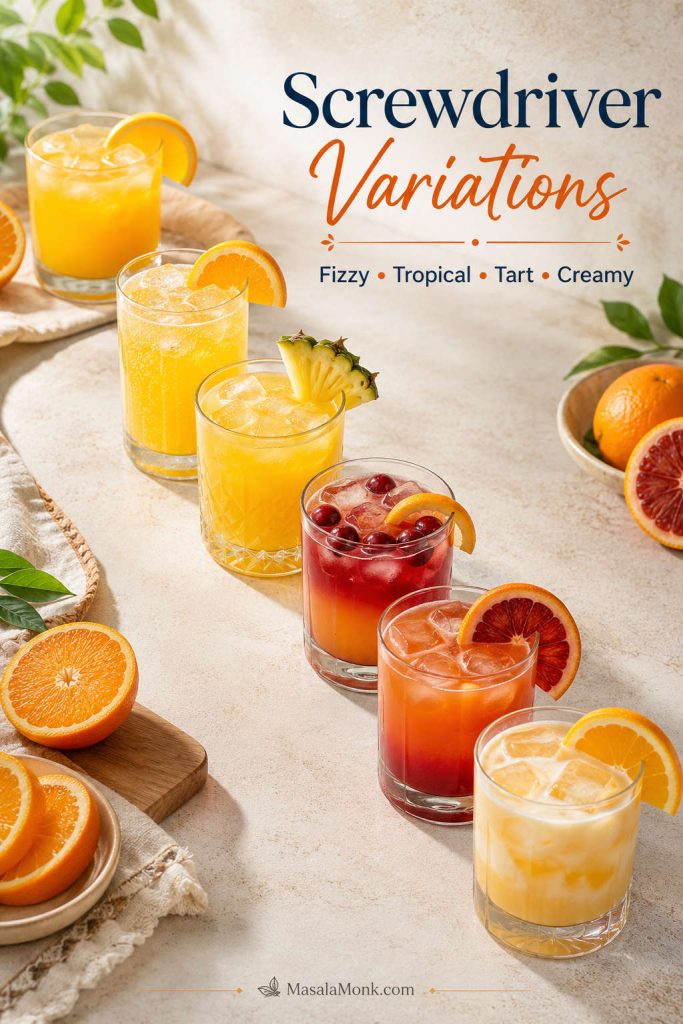
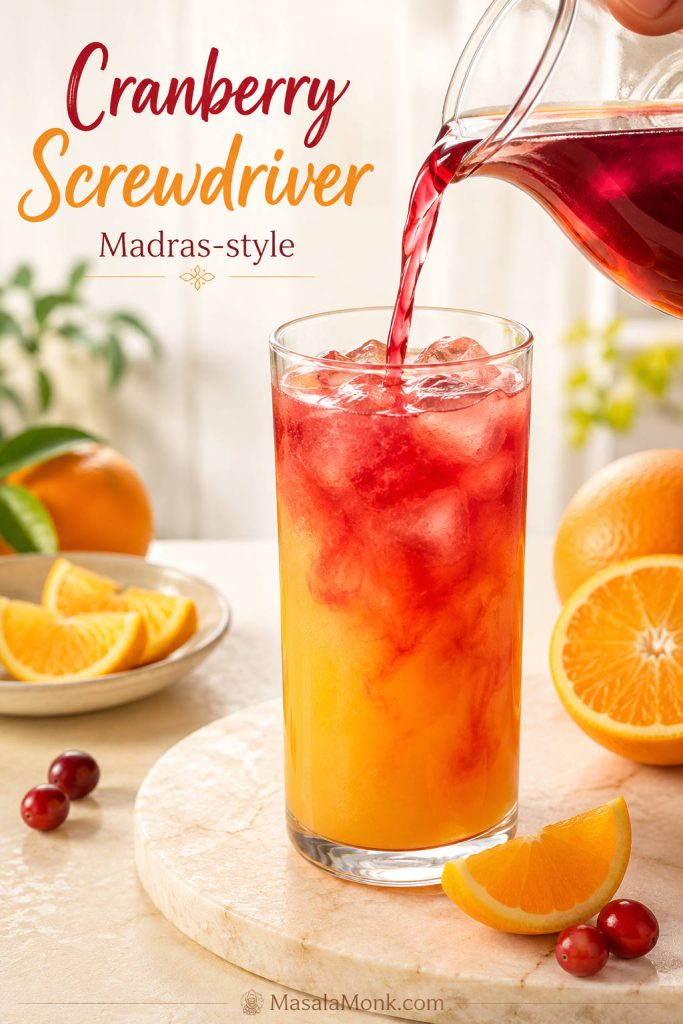
What counts as the simple drink? Vodka, orange juice, ice, and optional orange garnish. Add-ins like Sprite, club soda, cranberry juice, pineapple juice, peach schnapps, Galliano, triple sec, grenadine, or bitters turn it into a twist.

Best Screwdriver Ratio

This is where screwdrivers usually go wrong: people pour by instinct, then wonder why the drink tastes either sharp or flat. The ratio decides whether the glass feels like a cocktail or just cold orange juice with a little vodka hiding in it.

Classic Screwdriver recipes vary because the drink can be built as a stronger cocktail or a lighter brunch highball. A 1:2 pour tastes more cocktail-forward; 1:3 or 1:4 tastes lighter and more orange-led. This recipe uses 2 oz vodka to 5 oz orange juice because it sits in the middle: clearly a cocktail, but still fresh, cold, and orange-first.

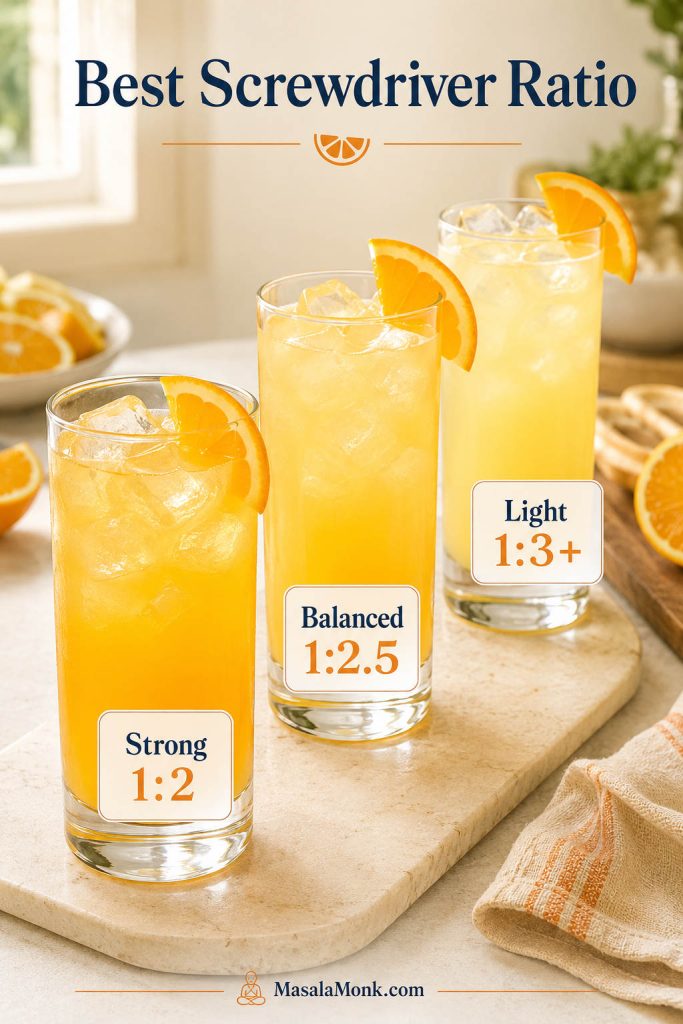
Three highball glasses labeled strong, balanced, and light to show different vodka-to-orange-juice ratios for a Screwdriver.
The best Screwdriver ratio depends on the glass you want: stronger and cocktail-forward, balanced and orange-led, or lighter for brunch.

Choose your pour: Use 2 oz / 60 ml vodka + 4 oz / 120 ml orange juice for a stronger cocktail, 2 oz / 60 ml + 5 oz / 150 ml for the balanced house version, 1.5 oz / 45 ml + 5–6 oz / 150–180 ml for a lighter brunch glass, or mix the pitcher ahead and pour over ice in individual glasses.

Screwdriver Ratio Chart

A useful starting range is 1 part vodka to 2–3 parts orange juice; go closer to 1:4 when you want a very light, mostly-orange glass. Use 1:2 for a stronger pour, 1:2.5 for the most balanced glass, and 1:3 for a lighter drink. The easiest formula to remember is 2 oz / 60 ml vodka + 5 oz / 150 ml orange juice.

StyleVodkaOrange juiceRatioBest for
Strong2 oz / 60 ml4 oz / 120 ml1:2A stronger glass
Balanced2 oz / 60 ml5 oz / 150 ml1:2.5Start here
Light brunch1.5 oz / 45 ml5–6 oz / 150–180 mlAbout 1:3 to 1:4A lighter glass
Metric classic50 ml100 ml1:2A simple measured version
Very light1 oz / 30 ml4 oz / 120 ml1:4Mostly orange juice

How strong is it? Even when it tastes orange-forward, a balanced Screwdriver with 2 oz vodka is still a full cocktail. Use the lighter version for brunch, slow sipping, or a longer glass.

Treat the table as a starting point, not a rule. Orange juice changes from carton to carton and orange to orange. Very sweet juice may need a squeeze of lemon or lime. Sharper vodka may need more juice and ice. The right ratio is the one that tastes smooth in your glass. For a group, use the pitcher table instead of multiplying by eye.

Screwdriver Measurements in ml

For metric measurements, start with the balanced version unless you already know you want a stronger or lighter glass.

Metric Screwdriver measurement setup with a jigger, measuring cup, orange juice, and a highball glass labeled 60 ml vodka and 150 ml orange juice.
For metric readers, 60 ml vodka and 150 ml orange juice gives the same balanced pour as the 2 oz / 5 oz version.
VersionVodkaOrange juice
Balanced60 ml150 ml
Stronger60 ml120 ml
Lighter45 ml150–180 ml
Classic 1:2 formula50 ml100 ml

Method Details

The standard order is ice first, vodka second, orange juice third, then a brief stir. Shaking is fine when you want it extra cold and slightly frothy, but the glass-built version is faster and cleaner.

Bar spoon stirring an orange Screwdriver cocktail in a tall highball glass with a cocktail shaker blurred in the background.
Stirring is the classic move because it keeps the Screwdriver smooth, while shaking is better reserved for extra chill and a slightly frothier texture.
  1. Fill the glass with ice. Use a highball or Collins glass if you have one.
  2. Add the vodka. Pour in 2 oz / 60 ml vodka for the balanced version.
  3. Add orange juice. Pour in 5 oz / 150 ml chilled orange juice.
  4. Stir briefly. Stir for 5–10 seconds, just enough to chill and combine. Do not churn it aggressively.
  5. Garnish and serve. Add an orange wedge, wheel, slice, or peel twist if you like.
Step-by-step Screwdriver cocktail guide showing ice, vodka, orange juice, and stirring in a highball glass.
The method stays simple for a reason: building in the glass keeps the drink fast, cold, and easy to adjust after the first sip.

You are not trying to whip or aerate the drink; you are just making the first sip taste even from top to bottom.

After stirring, the drink should smell like orange, feel cold against the glass, and taste citrusy first with the spirit supporting the orange, not dominating it. If the drink tastes too sharp, add more orange juice. For a flat glass, add a tiny squeeze of lemon or lime. If it tastes watery, use more ice next time and serve it right after mixing.

Hand holding a cold highball glass of Screwdriver cocktail with ice, orange garnish, and taste target text.
After mixing, the drink should smell like orange first, feel properly cold, and let the vodka sit in the background rather than take over.

If the first sip still tastes off, jump to the fixes instead of starting over.

Fresh Orange Juice vs Bottled Orange Juice

Fresh juice is worth it when you are making one or two drinks and want that first sip to smell like real orange, not just cold sweetness. But for a pitcher, bottled 100% orange juice is usually the smarter move: consistent, already strained, and easy to chill.

Fresh oranges with a juicer compared with bottled orange juice and a pitcher setup for making Screwdriver cocktails.
Fresh orange juice gives the brightest aroma for one or two cocktails; meanwhile, bottled 100% orange juice keeps pitcher prep easier and more consistent.

One balanced glass needs about 5 oz / 150 ml orange juice, which usually takes 2–3 medium oranges depending on size and juiciness.

Two to three oranges beside a measuring cup filled with 5 ounces or 150 milliliters of orange juice for one Screwdriver.
One balanced Screwdriver needs about 5 oz / 150 ml orange juice, so two to three medium oranges are usually enough for a single glass.

If you are already using orange juice for brunch, the same bottle can work for a simple mimosa beside the screwdriver pitcher. Whatever you use, keep it well chilled. Warm orange juice makes the whole drink feel dull, even when the ratio is right.

  • Freshly squeezed orange juice: brightest aroma and freshest finish for one or two drinks.
  • Chilled 100% bottled orange juice: practical, consistent, and easy to scale for pitchers.
  • No-pulp orange juice: smoother and cleaner in the glass.
  • Pulp orange juice: fuller texture and a more natural orange feel.
  • Blood orange juice: deeper color and a slightly tart twist.
  • Warm or overly sweet orange drink: avoid it when you want a cleaner, fresher screwdriver.

Flat bottled juice wakes up with a tiny squeeze of lemon or lime. Tart juice works better with the lighter 1:3 ratio or a little more orange juice. Very sweet juice is best kept simple, without grenadine or lemon-lime soda.

Best Vodka for a Screwdriver

You do not need a luxury vodka here, but you do need one that smells clean. If the vodka smells harsh before it reaches the glass, the orange juice will soften it, not erase it. Use a bottle you would not feel the need to bury.

Plain vodka keeps the drink classic. Citrus vodka makes the orange flavor more direct. Vanilla or whipped cream vodka turns it toward an orange-cream flavor. Chill the bottle if you can, then let the orange juice do most of the work.

Screwdriver Pitcher Recipe

To make a pitcher, mix the vodka and orange juice ahead, but add ice to the glasses. That one choice keeps the batch fresher for longer and prevents a watered-down jug after ten minutes.

Clear pitcher of vodka and orange juice being poured into ice-filled highball glasses with orange slices nearby.
A Screwdriver pitcher works best when the batch is mixed ahead and poured over fresh ice, so the drink stays bright instead of watered down.

That is the version you want when people are arriving at different times, helping themselves, or choosing between a stronger and lighter pour. Keep a little extra orange juice nearby so guests can lighten their glass without remaking the batch.

For exact batches, use these pitcher amounts as your starting point instead of multiplying by eye.

Three glass pitchers of orange Screwdriver mixture with text showing pitcher amounts for 4, 8, and 12 drinks.
These pitcher amounts scale the vodka-orange mix for 4, 8, or 12 drinks, so batching for guests stays consistent from the first pour to the last.
Servings / styleVodkaOrange juiceUse when
4 drinks, balanced1 cup / 240 ml2½ cups / 600 mlYou want a small pitcher
8 drinks, stronger2 cups / 480 ml4 cups / 960 mlYou want a bolder pitcher
8 drinks, balanced2 cups / 480 ml5 cups / 1.2 LStart here for a group
8 drinks, lighter1½ cups / 360 ml5–6 cups / 1.2–1.4 LYou want a lighter brunch pitcher
12 drinks, balanced3 cups / 720 ml7½ cups / 1.8 LYou are serving more guests

These cup amounts use U.S. cups; the ml measurements are included for precision.

How to Make a Screwdriver Pitcher

  1. Chill the vodka and orange juice first if possible.
  2. Stir the vodka and orange juice together in a pitcher.
  3. Add a few orange slices to the pitcher when serving soon.
  4. Keep the pitcher refrigerated until ready to serve.
  5. Pour into ice-filled glasses and garnish each glass separately.

Pitcher tip: Do not add ice directly to the pitcher unless you are serving the entire batch immediately. Instead, keep the pitcher cold and add ice to individual glasses.

For brunch, a screwdriver pitcher works well beside Bloody Marys when you want one savory option. If the table needs a fruitier batch drink too, add something like jungle juice and let the screwdriver stay the clean orange option.

Brunch table with a Screwdriver pitcher, ice-filled glasses, orange slices, snacks, and a water glass.
A brunch pitcher works well because guests can refill their own glasses while the main batch stays cold and the ice melts only where it should.

Screwdriver Variations

Once you know the base drink, variations are easy. But do not turn it into mystery punch. Instead, add one change at a time so the drink still tastes like orange first.

Think about what you want from the glass before you add anything. Bubbles make it lighter. Pineapple makes it tropical. Cranberry makes it tart. Galliano or peach schnapps moves it toward a known cocktail variation. Colorful add-ins are best when you are intentionally making something playful. Not sure what a twist becomes? Check the drink-name guide.

Keep the first batch simple, then let the second glass become the playful one. That way, you still know what made the drink better instead of turning every add-in into one loud glass.

Six Screwdriver cocktail variations in tall glasses, including classic, fizzy, tropical, cranberry, blood orange, and orange-cream versions.
Once the classic glass tastes right, variations become easier to control, whether you want fizz, cranberry tartness, tropical fruit, or a creamier finish.
What you wantAdd thisHow to use it
Fizzy and lighterClub soda, Sprite, 7UP, or sparkling waterAdd after stirring the vodka and orange juice.
TropicalPineapple juiceReplace part of the orange juice with pineapple juice.
Tart and colorfulCranberry juiceUse about 3 oz orange juice and 2 oz cranberry juice with 2 oz vodka.
Sunrise-style colorGrenadineAdd a small splash for sweetness and red-orange color.
Harvey Wallbanger-styleGallianoAdd a small float to the finished drink.
Fuzzy / peachyPeach schnappsAdd a small pour and keep the orange juice cold.
FrozenIce and optional frozen orangeBlend vodka, orange juice, and ice until slushy.
Blood orangeBlood orange juiceUse it instead of regular orange juice or split the two.
Orange-creamVanilla or whipped cream vodkaUse in place of plain vodka for a dessert-like glass.
No alcoholOrange juice, soda water, citrus, and garnishNot a true screwdriver, but still a bright orange drink.

Fizzy, Pineapple, and Cranberry Versions

For fizz, make the drink first, then top with Sprite, 7UP, club soda, or sparkling water. Sprite and 7UP make it sweeter; club soda keeps it lighter and drier.

For a pineapple version, use 2 oz / 60 ml vodka, 3 oz / 90 ml orange juice, and 2 oz / 60 ml pineapple juice. If pineapple is the direction you like, a punch for a pitcher with pineapple juice gives you a fruitier batch option for guests.

For a cranberry version, use 2 oz / 60 ml vodka, 3 oz / 90 ml orange juice, and 2 oz / 60 ml cranberry juice. This moves the drink close to a Madras. If cranberry is your favorite part, a cranberry Moscow Mule gives you the same tart-vodka direction with ginger beer instead of orange juice.

Cranberry juice being poured into an orange Screwdriver cocktail, creating a red-orange swirl in a tall glass with ice.
Cranberry juice adds tartness and color to vodka and orange juice, moving the drink close to a Madras-style cocktail without losing the citrus base.

Frozen, Creamy, and Blood Orange Versions

For a frozen glass, blend vodka, orange juice, and ice until slushy. To make the orange flavor stronger, add frozen orange segments or a little frozen orange juice concentrate, then serve it immediately so it stays thick and cold.

For an orange-cream direction, use vanilla vodka or whipped cream vodka in place of plain vodka. Blood orange juice gives deeper color and a slightly tart edge, whether you use it alone or split it with regular orange juice.

Colorful and Non-Alcoholic Versions

Colorful versions are playful rather than standard. Pink can come from cranberry juice, blood orange juice, or grenadine. Blue or green versions usually depend on colored liqueurs or flavored mixers, so treat them as party-style riffs rather than classic Screwdrivers. For a no-alcohol orange drink, use orange juice, soda water, citrus, and a fresh garnish.

Vodka and Orange Juice Drink Names

Orange juice shows up in several familiar cocktails, so the names can blur together. Here is the quick way to keep the nearby drinks straight.

Circular drink-name map showing Screwdriver, Madras, Harvey Wallbanger, Fuzzy Navel, Hairy Navel, Tequila Sunrise, and Mimosa around an orange drink.
Since orange juice appears in several classic drinks, this map helps separate a Screwdriver from Madras, Harvey Wallbanger, Fuzzy Navel, and other close cousins.
If you mix…It is usually called…
Vodka + orange juiceScrewdriver
Vodka + orange juice + cranberry juiceMadras-style drink
Vodka + orange juice + GallianoHarvey Wallbanger
Peach schnapps + orange juiceFuzzy Navel
Vodka + peach schnapps + orange juiceHairy Navel / Fuzzy Screwdriver-style
Tequila + orange juice + grenadineTequila Sunrise
Sparkling wine + orange juiceMimosa

Names can vary by bar, region, and recipe style, but the screwdriver itself stays the straightforward vodka-orange drink.

Common Screwdriver Mistakes and Fixes

Most bad screwdrivers fail in obvious ways: the first sip burns, tastes dull, or feels like watered-down juice. The good news is that most fixes happen right in the glass.

Four-panel Screwdriver troubleshooting guide showing fixes for harsh, flat, watery, and too-sweet drinks.
If a Screwdriver tastes off, fix the cause instead of starting over: more juice for harshness, citrus for flatness, more ice for dilution, or less sweetness.
ProblemWhat to do
Tastes harshAdd more orange juice and stir briefly. Next time, use the 1:3 ratio.
Tastes flatAdd a tiny squeeze of lemon or lime, or use an orange peel twist.
Tastes wateryUse more ice and serve right after mixing.
Too sweetUse less sweet orange juice and skip soda or grenadine.
Too warmChill the vodka and orange juice before mixing.
Pulp settlesStir briefly before serving.
Pitcher is dilutingAdd ice to glasses, not the pitcher.
Garnish tastes bitterAvoid too much white pith on orange peel.

Screwdriver Recipe FAQs

These quick answers cover the questions that usually come up after you know the basic vodka-orange ratio.

What is vodka and orange juice called?

Vodka and orange juice is called a Screwdriver when it is served simply over ice. The name usually refers to the vodka-orange drink, not a bottled ready-to-drink product.

What is the best screwdriver ratio?

For this screwdriver recipe, start with 2 oz vodka and 5 oz orange juice for a balanced glass. Move to 4 oz juice if you want it stronger, 6 oz if you want it lighter, and adjust after one sip because orange juice varies.

What are screwdriver measurements in ml?

Use 60 ml vodka + 150 ml orange juice for the balanced version. Go to 60 ml + 120 ml for stronger, or 45 ml + 150–180 ml for lighter.

How many oranges do I need for one screwdriver?

For one balanced screwdriver, you need about 5 oz / 150 ml orange juice, which usually takes 2–3 medium oranges depending on size and juiciness.

Do you shake or stir a screwdriver?

Stir it in the glass for the easiest version. Shake only if you want it extra cold and slightly frothy.

Can I make a screwdriver ahead of time?

Yes, for a pitcher. Mix the vodka and orange juice the same day, keep it chilled, and add ice only to the glasses.

How do I make a screwdriver pitcher?

For 8 balanced drinks, mix 2 cups / 480 ml vodka with 5 cups / 1.2 L orange juice. Keep the pitcher chilled, then pour into ice-filled glasses. For exact 4, 8, and 12 drink batches, use the pitcher amounts table.

Can I use Sprite in a screwdriver?

Yes, but treat it as a twist. Sprite makes the drink sweeter and fizzy; club soda or sparkling water keeps it lighter and drier. Add bubbles right before serving.

What is a screwdriver with cranberry juice called?

A screwdriver-style drink with cranberry juice often moves toward a Madras, which is made with vodka, orange juice, and cranberry juice. A small splash of cranberry can also simply be treated as a cranberry version.

Is a Harvey Wallbanger the same as a screwdriver?

Think of a Harvey Wallbanger as the screwdriver’s liqueur-finished cousin: vodka, orange juice, and a float of Galliano. It is closely related, but not the same as the plain drink.

Is a Fuzzy Navel the same as a screwdriver?

Not quite. A Fuzzy Navel skips the vodka and uses peach schnapps with orange juice. Add vodka as well, and you move closer to a Hairy Navel or fuzzy screwdriver-style drink.

Is Smirnoff Ice Screwdriver the same as a homemade screwdriver?

Not quite. A homemade screwdriver is freshly mixed in the glass, while ready-to-drink screwdriver-style products may be carbonated, sweetened, flavored, or made with a different alcohol base.

Final Tips for a Better Screwdriver

Use this screwdriver recipe as your starting point, taste once, then adjust. More orange juice makes the drink lighter; less orange juice makes it stronger. Keep everything cold, garnish simply, and add extras only after the vodka and orange juice taste right together.

Two finished Screwdriver cocktails with ice and orange garnish, a pitcher behind them, orange peel, orange slices, and a water glass nearby.
When the ratio is right, a Screwdriver should feel easy to serve and easy to drink: fresh orange aroma, cold glass, and a pour people are happy to come back to.

The goal is not to make the fanciest cocktail in the room. It is to make the simple one people are happy to refill.

Good hosting is simple too: label the pitcher, keep food and water nearby, and offer a non-alcoholic option. For readers who want a reference point, the National Institute on Alcohol Abuse and Alcoholism U.S. standard-drink guide is useful.

Once the ratio is right, the drink should feel almost effortless: cold glass, fresh orange aroma, and a pour that tastes like a cocktail without asking much from you.

Back to top

Posted on Leave a comment

Pina Colada Recipe: Frozen, Virgin, Malibu & Mix Tips

Frozen pina colada in a hurricane glass with a pineapple wedge, cherry garnish, coconut pieces, and MasalaMonk.com footer branding.

Most disappointing piña coladas fail for the same few reasons: the drink turns thin, tastes like straight sugar, or the alcohol-free version feels empty once the rum is gone. A great piña colada recipe — often searched as a pina colada recipe — solves that with the right coconut base, enough pineapple, the right chill, and a small hit of lime.

The first sip should taste cold before it tastes sweet: pineapple first, coconut next, rum in the background, and a clean finish that makes the glass feel refreshing instead of heavy.

Start with the frozen blender version, then use the same balance to make it shaken, virgin, Malibu-style, lighter with coconut milk, mixed ahead, or batched for a party. The promise is simple: a piña colada that stays smooth, avoids syrupy sweetness, and tells you exactly which coconut product belongs in the glass.

Quick Answer: The Best Pina Colada Recipe Ratio

For one frozen piña colada, use 2 oz white rum, 3 oz pineapple juice, 2 oz cream of coconut, ½ oz fresh lime juice, and 1 to 1½ cups ice. For a thicker, fruitier drink, add ½ cup frozen pineapple.

Frozen, shaken, or alcohol-free shortcuts

No blender? Shake 2 oz white rum, 2 oz pineapple juice, 1½ oz cream of coconut, and ½ oz lime juice, then strain into a fresh glass over fresh ice. No alcohol? Blend frozen pineapple, pineapple juice, cream of coconut, lime, and a tiny pinch of salt so the mocktail still has depth.

Need a different route? Go straight to the on-the-rocks version, the virgin pina colada, or the pina colada mix section.

The classic flavor is simple — rum, pineapple, coconut — but the texture depends on measurement. Cream of coconut gives the familiar sweet body, while lime keeps the finish from turning sticky.

Measured ratio for one drink

IngredientAmount for 1 drinkJob in the glass
White rum2 oz / 60 mlClean cocktail base that lets the fruit lead.
Pineapple juice3 oz / 90 mlMain tropical flavor and blending liquid.
Cream of coconut2 oz / 60 mlSweet coconut body and classic richness.
Fresh lime juice½ oz / 15 mlClean finish and better balance.
Ice1–1½ cups / 140–210 gCold, frosty texture.
Frozen pineapple½ cup / 70–75 g, optionalFruitier thickness without dulling the flavor.

Once the base ratio makes sense, use the version guide to pick your path or the success checks to fine-tune the glass.

Measured pina colada ingredients showing rum, pineapple juice, cream of coconut, lime, and frozen fruit with a best ratio guide.
The best pina colada ratio gives you a reliable base before you start adjusting. Once rum, pineapple, coconut, and lime are balanced, texture fixes become much easier.

Best first batch: measure the coconut base and frozen ingredients once. After that, you can adjust by feel without turning the drink thin, syrupy, or heavy.

Pina Colada at a Glance: Choose Your Version

The best version depends on the glass you want: thick and vacation-style, lighter and shaken, alcohol-free but still complete, or party-ready without turning watery. Start with the classic frozen version once, then use this guide to choose your path.

VersionBest forTextureKey adjustment
Frozen Pina Colada RecipeClassic resort-style drinkFrosty, smooth, sippableUse the base ratio and optional frozen fruit.
Pina Colada on the RocksNo blender, lighter cocktailChilled and frothyShake hard; serve right away.
Virgin Pina Colada MocktailNon-drinkers and family-friendly glassesCreamy and fruit-forwardUse lime, salt, and pineapple for depth.
Malibu Pina Colada RecipeSweeter coconut-rum flavorSoft and coconut-forwardUse less cream of coconut.
Pina Colada with Coconut MilkLighter, less dessert-like drinkThinner and fresherAdd sweetener only if needed.
Pina Colada PitcherPartiesDepends on serving methodChill the base; finish at serving.
Six-panel pina colada version guide showing frozen, on the rocks, virgin, Malibu, coconut milk, and pitcher options.
The right pina colada version depends on the moment. Choose frozen for plush texture, on the rocks for no-blender ease, virgin for alcohol-free depth, or pitcher-style when you are serving more than one glass.

Why This Pina Colada Ratio Works

This recipe is built around three checks: the drink should pour thick but sip easily, taste pineapple-first, and finish clean instead of sticky. That is the difference between a lush piña colada and a glass of sweet melted slush.

Success checkWhat you should noticeAdjustment
TextureFrosty pour, but still sippable through a straw.Too heavy? Add a splash of juice. Too thin? Add frozen fruit.
Flavor orderPineapple first, coconut second, rum in the background.If rum dominates, add a little more pineapple or coconut base.
SweetnessSoft and tropical, not candy-like.Use less cream of coconut next time, or add a small squeeze of lime now.
FinishCool, clean, and refreshing.Flat drinks need acid or a tiny pinch of salt, not more sugar.
Pina colada success-check graphic with pineapple first, coconut next, clean finish, and cues for sippable balanced texture.
Use this as the final taste test before serving. If the drink feels heavy, sharp, or candy-sweet, adjust one small thing instead of rebuilding the whole blender jar.

What success looks like: a good frozen pina colada should move like a soft milkshake, not crushed ice in juice. It should feel lush for the first sip and still clean by the last.

Pina Colada Recipe Card

Classic Frozen Pina Colada Recipe

This frozen pina colada is pineapple-forward, coconut-rich, cold, smooth, and balanced with fresh lime. It makes one generous drink or two smaller cocktail glasses.

Prep Time
5 minutes
Total Time
5 minutes
Yield
1 large or 2 small drinks
Method
Blended / frozen

Equipment

  • Blender
  • Jigger, measuring cup, or kitchen scale
  • Hurricane glass, highball, or tall glass

Ingredients

  • 2 oz / 60 ml white rum
  • 3 oz / 90 ml pineapple juice, chilled if possible
  • 2 oz / 60 ml cream of coconut, shaken or stirred well before measuring
  • ½ oz / 15 ml fresh lime juice
  • 1 cup / about 140 g ice, plus more only if needed
  • ½ cup / about 70–75 g frozen pineapple chunks, optional but recommended
  • Pineapple wedge and maraschino cherry, optional

Method

  1. Add the pineapple juice, white rum, cream of coconut, and lime juice to the blender.
  2. Add the frozen pineapple, if using, then add the ice.
  3. Blend for 20–30 seconds, just until smooth and frosty.
  4. Check before pouring: it should look thick but still sip easily through a straw.
  5. Too thick? Blend in 1 tablespoon pineapple juice. Too thin? Add a little frozen pineapple and blend briefly.
  6. Pour into a chilled glass, garnish if you like, and serve immediately.

Success Cue

Before serving, check three things: the drink should sip easily, taste pineapple-first, and finish clean rather than sticky. Thin drinks need frozen fruit; heavy drinks need pineapple juice; overly sweet drinks need lime.

Recipe Notes

  • Prefer it less sweet? Use 1½ oz cream of coconut.
  • Want a lighter cocktail? Use 1½ oz rum.
  • Want more rum warmth? Use up to 2½ oz rum and keep the finish bright.
  • Making it alcohol-free? Use the mocktail formula below instead of simply removing the rum.
Classic frozen pina colada recipe card with rum, pineapple, cream of coconut, lime, and blend-until-smooth instructions.
This frozen pina colada card is the quick-save version of the recipe. Keep the base measured, then use the texture cue to decide whether the drink needs more fruit or more flow.

What Is a Pina Colada?

A piña colada is a tropical cocktail made with rum, pineapple, coconut, and a cold blended or shaken texture. It is strongly associated with Puerto Rico, but home versions vary because shoppers often find cream of coconut, coconut cream, coconut milk, and coconut water sitting near each other.

Classic formulas are simple; the home-cocktail confusion usually starts in the coconut aisle. Cream of coconut gives the familiar sweet resort-style body, coconut cream creates a richer but less sweet path, and coconut milk makes a lighter glass. The biggest mistake usually happens before the blender starts: choosing the wrong can.

Pina Colada Ingredients

The ingredient list is short, so each choice shows up clearly in the glass. Use the classic route when you want a sweet, creamy vacation-style drink; use the lighter swaps only when you actually want a fresher, less dessert-like result.

If the coconut aisle is the confusing part, jump to the cream of coconut vs coconut cream guide before you start blending.

Pina colada ingredients arranged with rum, pineapple juice, cream of coconut, lime, frozen pineapple, pineapple garnish, and cherry.
A short ingredient list leaves less room to hide mistakes. For the best pina colada, use pineapple for lift, cream of coconut for structure, lime for contrast, and rum as the background note.

White rum

White rum is the best default because it keeps the drink clean, sunny, and pineapple-forward. Coconut rum is softer and sweeter. Dark or aged rum adds warmth, especially as a small float.

Pineapple

Use 100% pineapple juice for the smooth base. Fresh juice tastes vivid but varies by fruit; canned juice is more consistent. Avoid pineapple juice cocktail unless you are prepared to reduce sweetness elsewhere.

Frozen pineapple chunks are the easiest upgrade for a blender version because they add structure and real fruit flavor. Drained canned chunks can work, but syrup-packed fruit may push the drink too sweet.

Pineapple juice vs frozen pineapple

Use pineapple juice when the blender needs flow and frozen pineapple when the drink needs body. Together, they create a frozen pina colada that tastes like fruit rather than diluted ice.

Split graphic comparing pineapple juice for flow with frozen pineapple chunks for body in a pina colada.
Pineapple juice and frozen pineapple solve different problems. Juice keeps the drink pourable, while frozen fruit adds body and helps prevent a watery blender drink.

Cream of coconut

Cream of coconut is sweetened, thick, and syrupy. It gives the familiar body most people expect from a classic pina colada, so shake or stir the can well before measuring.

If it is too thick to pour, warm the closed container in a bowl of warm water for a few minutes, then shake again. Brands vary, so taste before making big adjustments.

Fresh lime juice

Lime is the small polish move. It is not required in every traditional formula, but it keeps the coconut from tasting heavy and makes the pineapple feel brighter.

Frozen texture ingredients

For a frozen drink, measured ice gives chill while frozen fruit gives body. Too much plain ice can dull the flavor, so use pineapple chunks when you want a thicker drink that still tastes tropical.

Cream of Coconut vs Coconut Cream vs Coconut Milk

This is the aisle where many homemade piña coladas are won or lost. The names sound close, but the products do not behave the same way. If you have ever stood in front of coconut milk, coconut cream, and cream of coconut wondering which one the recipe actually means, this is the part that saves the drink.

ProductSweetened?TextureBest use in a pina colada
Sweetened cream of coconutYesThick, syrupy, richClassic sweet, creamy version.
Unsweetened coconut creamUsually noThick and richLess sweet version when paired with simple syrup or agave.
Full-fat coconut milkUsually noThinner and fluidLighter drink with a fresher, less dessert-like finish.
Coconut waterNoThin and refreshingSkinny or hydrating variation, not a classic creamy one.
Homemade coconut syrupYesAdjustableFallback when bottled cream of coconut is not available.
Comparison graphic showing cream of coconut, coconut cream, and coconut milk with texture and sweetness differences.
Cream of coconut, coconut cream, and coconut milk do not behave the same way. Choosing the right one is one of the fastest ways to control sweetness, body, and classic pina colada texture.

Already have the right coconut base? Move to the frozen method, the coconut milk version, or the fix guide if your drink is too thin, too sweet, or not creamy enough.

For the safest classic choice, use cream of coconut. A less-sweet modern route starts with coconut cream plus sweetener. If you want a lighter glass, use full-fat coconut milk with extra pineapple for body.

What cream of coconut should look like

Look for a thick, glossy pour. That texture is what gives the classic pina colada its familiar body without needing to overdo the ice.

Close-up of thick cream of coconut being poured slowly, showing a glossy syrupy texture.
Cream of coconut should move slowly, almost like a glossy syrup. If your coconut ingredient pours thin like milk, the finished pina colada will usually taste lighter and less classic.

Quick homemade fallback: gently warm 1 cup full-fat coconut milk or coconut cream with ¾ cup sugar and a small pinch of salt, stirring until dissolved. Cool, refrigerate in a clean jar, and use within about 1 week. Shake before measuring.

For more detail on the coconut-aisle confusion, Epicurious has a helpful guide to cream of coconut, coconut cream, and coconut milk.

If the coconut-water direction sounds more refreshing than creamy, our coconut water cocktails guide has more long, bright drinks built around coconut water, lime, and ice.

Equipment and Cold Control

A piña colada has no cooking temperature, but it does have a temperature problem: once it warms up, the tropical flavor turns dull and the texture collapses.

  • Use a blender for the frozen version and a shaker or clean jar for the on-the-rocks version.
  • Chill the juice when possible so the drink starts cold.
  • Add liquids first so the blender catches before the frozen ingredients settle around the blades.
  • Blend briefly, usually 20–30 seconds, then stop once smooth.
  • For pitchers, chill the base ahead and finish each round right before serving.
Cold control guide for pina colada showing chilled juice, frozen fruit, a chilled glass, and brief blending tips.
Cold control matters more than simply adding more ice. Chilled juice, frozen fruit, a cold glass, and brief blending help a creamy pina colada stay smooth instead of melting too quickly.

These small moves protect the drink’s first-sip feeling: frosty, lush, and refreshing instead of loose and tired.

Avoid these common mistakes: do not use unsweetened coconut milk as a direct cream-of-coconut swap, do not over-blend after the drink turns smooth, and do not fix a flat mocktail with more sugar. Use acid and a tiny pinch of salt instead.

How to Make a Frozen Pina Colada

A frozen pina colada should pour thick, then relax slightly in the glass. It should not scoop like sorbet or run like juice.

Step-by-step frozen pina colada guide showing measuring, adding liquids, adding frozen fruit, blending briefly, and pouring to garnish.
The frozen method works best when the blender gets help from the start. Add liquids first, then frozen fruit, so the drink blends quickly without losing its thick, sippable texture.

Add pineapple juice, rum, cream of coconut, and lime to the blender first. Add frozen pineapple and ice last so the blades can catch and move smoothly.

Blender jar with liquid being poured in first and frozen pineapple waiting nearby for a pina colada blender order guide.
Blender order can change the final texture. Liquids first help the blades move freely; after that, frozen pineapple can thicken the pina colada without turning it into a frozen block.

Blend for 20–30 seconds, just until smooth. If the blender struggles, start with less frozen material, blend the liquid and fruit, then add the rest gradually.

Texture target: thick enough to look lush, loose enough to sip. Too heavy? Add pineapple juice. Too thin? Add frozen pineapple. Too sweet? Add lime.

Frozen pina colada texture target

Use this texture cue before you pour. A frozen pina colada should look plush, but it should still move through a straw without effort.

Finished frozen pina colada with thick, smooth, sippable texture shown close up with garnish and MasalaMonk.com footer.
The ideal frozen pina colada should move like a soft milkshake. If it scoops like sorbet, loosen it; if it runs like juice, add more frozen pineapple.

Too thin, just right, or too heavy?

For quick rescue, compare your drink with this texture guide or jump to the full pina colada troubleshooting section.

Three-part pina colada texture comparison showing too thin, just right, and too heavy with quick fix cues.
Texture fixes work better when you identify the problem first. A thin pina colada needs more frozen body, while a heavy one needs pineapple juice to bring back flow.

The same frozen-fruit logic is useful in a frozen strawberry daiquiri: fruit gives body, lime keeps it bright, and the blender stays on your side instead of against you.

If you want to compare this with a bartender-style baseline, the International Bartenders Association lists a simple white-rum, pineapple, and coconut piña colada formula.

How to Make a Pina Colada on the Rocks

A pina colada on the rocks is the cleaner, faster version: same pineapple-coconut flavor, but lighter on the palate and less dessert-like than the frozen drink. Choose it when you want a chilled cocktail that still feels tropical without turning into a smoothie.

Pina colada on the rocks in a tall glass with fresh ice, pineapple garnish, lime, and cocktail shaker in the background.
A pina colada on the rocks is the best route when you want the flavor without the blender. Shake it hard, strain over fresh ice, and the drink stays lighter while still tasting tropical.
IngredientAmount for 1 drink
White rum2 oz / 60 ml
Pineapple juice2 oz / 60 ml
Cream of coconut1½ oz / 45 ml
Fresh lime juice½ oz / 15 ml
Fresh iceFor shaking and serving

Add the rum, pineapple juice, cream of coconut, and lime juice to a cocktail shaker. Shake hard for 12–20 seconds, until the outside feels cold and the drink looks lightly frothy. Strain into a fresh glass over fresh ice.

Three-step on-the-rocks pina colada guide showing shake hard, strain over fresh ice, and garnish.
For a no-blender pina colada, fresh ice is not just decoration. It keeps the shaken drink crisp, cold, and clean instead of letting it turn loose in the glass.

The shorter ratio matters because this version has no blender full of frozen fruit to soften the drink. It should land silky and cold, with coconut on the edges rather than a thick milkshake texture.

No cocktail shaker? Use a clean jar with a tight lid. No strainer? Pour carefully or use a small sieve. If your coconut base is very thick, stir it with the pineapple juice first so it shakes evenly.

If you like the cleaner shaken style, a classic daiquiri is the leaner rum-lime cousin: no coconut, no blender, just balance.

Virgin Pina Colada / Non-Alcoholic Pina Colada Mocktail

For one generous virgin pina colada, blend 1 cup frozen pineapple, ½ cup pineapple juice, ⅓–½ cup cream of coconut, 1 tablespoon lime juice, ½–1 cup ice, and a tiny pinch of salt. Use the smaller amount of coconut for a less sweet adult mocktail and the larger amount for a creamier dessert-style drink.

Virgin pina colada mocktail in an elegant glass with pineapple and cherry garnish, lime, and tropical styling.
A virgin pina colada should feel complete, not like rum was simply removed. Frozen pineapple, lime, and a tiny salt cue help the mocktail keep depth and brightness.

A good non-alcoholic pina colada should not taste like the rum was simply removed. Lime, frozen fruit, and a tiny pinch of salt replace some of the bite and depth, while the coconut keeps the drink smooth. The mocktail should still feel like a drink someone chose, not the version left after the rum was removed.

Non-alcoholic pina colada formula

IngredientClassic sweet mocktailLess sweet mocktail
Frozen pineapple1 cup / about 140 g1 cup / about 140 g
Pineapple juice½ cup / 120 ml½ cup / 120 ml
Cream of coconut½ cup / 120 ml⅓ cup / 80 ml
Coconut milk or coconut waterOptional splash2–3 tablespoons
Fresh lime juice1 tablespoon / 15 ml1 tablespoon / 15 ml
Ice½–1 cup, as needed½–1 cup, as needed
Optional depthTiny pinch of salt, 2–3 drops vanilla, or non-alcoholic rumTiny pinch of salt, 2–3 drops vanilla, or non-alcoholic rum
Non-alcoholic pina colada formula graphic showing frozen pineapple, pineapple juice, cream of coconut, lime, and a tiny pinch of salt.
The non-alcoholic pina colada formula needs more than pineapple and coconut. A little lime and a tiny pinch of salt make the alcohol-free version taste fuller without making it salty.

Serving both versions? Use the pitcher section to make a shared pineapple-coconut base, then add rum only to the glasses that need it.

Blend until smooth, then taste before serving. Too sweet? Add lime. Dull? Add the smallest pinch of salt. Too thick? Loosen it with pineapple juice, coconut milk, or coconut water.

For a more grown-up mocktail, add a few drops of vanilla or a splash of non-alcoholic rum. If you are also serving lighter alcohol-free drinks, our low-sugar mocktails guide has more ideas.

Classic vs virgin pina colada

Use the same care with garnish, texture, and balance for both versions. That is what makes the non-alcoholic glass feel intentional instead of secondary.

Side-by-side classic and virgin pina coladas, showing one with rum and one alcohol-free, both garnished and served in tropical glasses.
Classic and virgin pina coladas should both feel worth choosing. Keep the same care with texture, garnish, and bright finish so the mocktail does not feel like a backup drink.

Best Rum for Pina Colada

The best rum for a pina colada depends on the mood of the drink. Choose white rum for the clean classic. Coconut rum gives you a sweeter party glass. For a more grown-up finish, keep white rum as the base and add a small dark rum float.

Rum choiceBest useWhat to adjust
White rumBest default for the classic pineapple-coconut flavor.Use the main recipe as written.
Malibu or coconut rumBest sweet party version.Reduce cream of coconut so the drink does not turn candy-sweet.
White rum + dark rum floatBest deeper, more grown-up version.Keep the base light, then float a little dark rum on top.
Spiced rumDessert-style variation, not the clean classic.Use extra lime and keep the coconut controlled.
Rum chooser graphic for pina colada with white rum, coconut rum, dark rum float, and spiced rum options.
For the best rum in a pina colada, start with white rum if you want the classic to taste clean. Then move to coconut rum, a dark float, or spiced rum when you want a sweeter or deeper variation.

First time making this recipe? Start with white rum. It lets the pineapple and coconut stay in front, which is the easiest way to understand the drink before you make it sweeter, darker, or warmer.

Malibu Pina Colada

For one Malibu pina colada, use 2 oz Malibu or coconut rum, 2 oz pineapple juice, 1 oz cream of coconut, ½ oz fresh lime juice, and ice. Because Malibu is already sweet and coconut-flavored, do not use the full classic amount of cream of coconut unless you want a very sweet drink.

IngredientAmount for 1 drink
Malibu or coconut rum2 oz / 60 ml
Pineapple juice2 oz / 60 ml
Cream of coconut1 oz / 30 ml
Fresh lime juice½ oz / 15 ml, optional but useful
IceFor shaking or blending
Malibu-style pina colada with toasted coconut topping, pineapple wedge, cherry, and coconut pieces.
A Malibu pina colada leans sweeter because coconut rum already brings flavor and sugar. Reduce extra sweetness or add a little more lime to keep the drink balanced.

Shake the ingredients with ice and strain over fresh ice, or blend with about 1 cup ice for a frozen drink. Too sweet? Add lime. Too light? Use half Malibu and half white rum. Want it more coconutty without making it sugary? Add a splash of unsweetened coconut milk instead of more cream of coconut.

Pina Colada with Coconut Milk

A pina colada with coconut milk is lighter than the cream-of-coconut version. Choose it when you want the pineapple to feel brighter and the coconut to whisper rather than coat the glass.

Use full-fat coconut milk, not watery light coconut milk. Because it is usually unsweetened, add a little simple syrup, maple syrup, or agave only if the drink tastes sharp or thin.

IngredientAmount for 1 lighter drink
White rum2 oz / 60 ml
Pineapple juice3 oz / 90 ml
Full-fat coconut milk2 oz / 60 ml
Fresh lime juice½ oz / 15 ml
Simple syrup, maple syrup, or agave½–1 oz / 15–30 ml, to taste
Frozen pineapple½ cup / about 70–75 g
Ice½–1 cup, as needed
Lighter pina colada made with coconut milk, shown with a coconut milk pitcher, pineapple garnish, cherry, and tropical background.
A coconut milk pina colada tastes lighter and brighter than the classic. Because coconut milk is thinner and less sweet, the drink needs help from pineapple and careful chilling.

Blend just until smooth. Thin? Add more frozen pineapple. Sharp? Add sweetener gradually. Want it richer? Add 1 tablespoon cream of coconut or coconut cream.

Easy Pina Colada Variations

Once the base ratio is clear, variations become easy. Keep the pineapple-coconut structure, then change one thing at a time: fruit, rum, sweetness, or finish.

If you only try one variation first, make the frozen pineapple version. It improves body and fruit flavor without changing the identity of the drink.

Frozen pineapple chunks being poured into a blender for a thicker pina colada, with a finished drink beside it.
Frozen pineapple is the best first upgrade for a frozen pina colada. It adds body, keeps the flavor tropical, and reduces the need for extra ice.
VariationHow to make it
Strawberry pina coladaAdd ½–1 cup frozen strawberries and keep the coconut slightly lighter.
Mango pina coladaAdd ½ cup frozen mango for a thicker, golden tropical version.
Frozen pineapple pina coladaUse more frozen pineapple for stronger fruit flavor and a smoother pour.
Blue pina coladaAdd a small amount of blue curaçao and reduce other sweet elements.
Dark rum floatMake the classic recipe, then float a little dark rum on top before serving.
Skinny pina coladaUse coconut water or coconut milk, frozen fruit, and less cream of coconut.
Pina colada variations board showing strawberry, mango, dark float, lighter, blue, and extra frozen pineapple versions.
Pina colada variations work best when you change one lever at a time. Add fruit for flavor, a dark rum float for depth, or extra frozen pineapple for thicker texture.

For a deeper list of flavor twists, see our full guide to Piña Colada variations, including strawberry, mango, coconut rum, frozen pineapple, and non-alcoholic versions.

Pina Colada Mix: Homemade or Store-Bought

Pina colada mix is useful when speed matters, but it can taste dull if you only add rum and blend. Store-bought mix is not a failure; it just needs freshness added back. Treat it as a shortcut base, then wake it up with acid, cold, and real pineapple flavor.

Pina colada mix guide comparing homemade base with improved bottled mix using pineapple juice, cream of coconut, lime, and a finished drink.
A homemade pina colada mix gives you control over sweetness, coconut body, and lime. Bottled mix can still work, but it usually needs freshness added back before serving.

Homemade pina colada mix

Homemade mix ingredientAmount
Cream of coconut1 cup
Pineapple juice¾ cup
Fresh lime juice3 tablespoons

Stir or blend until smooth, then refrigerate in an airtight container for 2–3 days. This is the liquid base, not the finished cocktail.

How much mix per drink?

Use about 4 oz homemade mix with 2 oz white rum. Blend for a frozen drink or shake for an on-the-rocks version. For a mocktail, skip the rum and add pineapple or coconut water if the glass needs loosening.

Using bottled mix for a party? The pitcher guide and store-bought mix fixes will help keep the drink fresh instead of flat.

How to improve store-bought pina colada mix

  • Add fresh lime if it tastes syrupy.
  • Use white rum instead of coconut rum when the mix is already very sweet.
  • Add frozen pineapple if the flavor feels thin.
  • Avoid extra cream of coconut unless the drink truly lacks body.
Guide to improving bottled pina colada mix with lime, real pineapple, chilling, and fresh serving cues.
Store-bought pina colada mix often tastes dull because it lacks fresh edges. Start with lime and real pineapple flavor, then chill well so the shortcut still tastes alive.

If you are making a big non-blended bowl instead, this punch with pineapple juice guide is better for ginger ale, Sprite, sherbet, cranberry, lemonade, and party punch variations.

Pina Colada Pitcher for a Party

A pitcher works best when you make the liquid base ahead and finish each round at serving. Do not blend the whole pitcher and park it in the fridge; that is how a good piña colada becomes sweet pineapple-coconut water.

IngredientFor 4 drinks
White rum1 cup / 240 ml
Pineapple juice1½ cups / 360 ml
Cream of coconut1 cup / 240 ml
Fresh lime juice¼ cup / 60 ml
Pina colada pitcher with serving glasses, pineapple wedges, cherries, lime, frozen pineapple, and rattan tray styling.
A pina colada pitcher should be party-ready without tasting tired. Keep the base cold and serve close to drinking time so each glass tastes fresh, not leftover.

Whisk or blend the base until smooth, then refrigerate. For frozen drinks, blend in 1–2 drink portions. For on-the-rocks drinks, shake individual servings or stir the base well over fresh crushed ice. This way, every glass tastes like the first one, not the leftover one.

Batch pina colada guide showing make cold base, hold chilled, finish per serving, and garnish fresh steps.
Batch the base, not the finished frozen drink. This keeps the pina colada smooth and bright, especially when you want every guest’s glass to taste like the first one.

If serving both alcoholic and alcohol-free drinks, make a pineapple-coconut-lime base without rum. Add rum to individual glasses for adults and label the alcohol-free batch clearly.

For alcohol-free guests, use the virgin pina colada formula. For texture problems during serving, use the troubleshooting table.

If you want a pitcher-first tropical drink rather than individual frozen glasses, this rum punch recipe is built for fruit juice, lime, rum, and party-style serving.

How to Fix a Pina Colada

Most piña colada problems are easy to fix once you know what caused them. Taste first, then adjust one thing at a time.

Fast rescue guide: thin? Add frozen pineapple. Heavy? Add pineapple juice. Too sweet? Add lime. Dull? Add lime and a tiny pinch of salt. Not rich enough? Add a little more coconut base.

Pina colada troubleshooting guide with fixes for too sweet, too thin, too heavy, dull, not rich enough, and melting drinks.
Troubleshoot by fixing the biggest problem first. Too sweet needs lime, too thin needs frozen pineapple, too heavy needs pineapple juice, and melting usually means the ingredients were not cold enough.
ProblemLikely reasonFix
Too wateryToo much liquid, melted dilution, or over-blendingAdd frozen pineapple, then blend briefly.
Too thickToo much frozen fruit or not enough liquidAdd pineapple juice 1 tablespoon at a time.
Too sweetToo much cream of coconut or coconut rumAdd lime juice, pineapple juice, or a splash of white rum.
Not creamyCoconut milk was used instead of cream of coconutAdd cream of coconut or coconut cream.
Bland or flatNot enough acid or contrastAdd fresh lime and a tiny pinch of salt.
SeparatingThe drink sat too long or the coconut was not mixed wellStir, shake, or re-blend briefly and serve immediately.
Too icyToo much frozen bulk and not enough creamy liquidAdd pineapple juice or coconut base and blend briefly.

Make-Ahead and Storage

A pina colada is best served immediately, especially when frozen. The make-ahead move is simple: prepare the pineapple-coconut-rum base, chill it, then finish the drink right before serving.

Make-ahead pina colada guide showing cold base, chill step, blend or shake later, and serve fresh.
For a make-ahead pina colada, prepare the base early but finish the drink later. That way, the flavor is ready and the texture still tastes freshly blended or shaken.

An alcohol-free base works the same way. Keep it cold, then blend or shake when guests are ready. Leftover blended drink can be frozen and re-blended with a splash of pineapple juice, but the fresh texture will always be better.

Pina Colada FAQs

What are the three main ingredients in a pina colada?

Rum, pineapple, and coconut are the core ingredients. Most creamy home versions also need a frozen element, and fresh lime makes the finish cleaner.

What is the best alcohol for a pina colada?

White rum is the best classic choice. Coconut rum is sweeter, while a small dark rum float gives a deeper finish.

Should I use cream of coconut or coconut milk?

Use cream of coconut for the classic sweet, creamy piña colada. Use coconut milk only when you want a lighter drink and are willing to adjust sweetness.

Is cream of coconut the same as coconut cream?

No. Cream of coconut is sweetened and syrupy; coconut cream is usually unsweetened and rich, so it needs added sweetener in most recipes.

How do I make a non-alcoholic pina colada taste less flat?

Use frozen pineapple, lime, and a tiny pinch of salt. Vanilla or non-alcoholic rum can add some of the depth that regular rum normally brings.

How do I make a pina colada without a blender?

Shake rum, pineapple juice, cream of coconut, and lime hard until cold, then serve in a fresh glass. It will be frothy and chilled, not frozen.

What makes a pina colada too watery?

Too much liquid, melted dilution, weak coconut body, or over-blending can make it watery. Measure the first batch and serve right away.

How do I make a pina colada less sweet?

Use less cream of coconut, choose white rum instead of coconut rum, or add fresh lime. Make small changes so the drink stays balanced.

Can I make pina coladas ahead of time?

Yes, but make only the liquid base ahead. Chill it, then blend or shake with the frozen/cold ingredients when ready to serve.

What is the difference between a pina colada and a Chi-Chi?

A pina colada is usually made with rum. A Chi-Chi is the similar pineapple-coconut drink made with vodka instead.

Final Sip

A good piña colada should taste cold before it tastes sweet: pineapple first, coconut next, rum in the background, and lime keeping the finish clean. Once that balance is right, the rest is easy — frozen, shaken, virgin, Malibu, lighter with coconut milk, or batched for a party.

Make the classic version once with measured ingredients. After that, you will know exactly how the drink should feel: tropical, smooth, refreshing, and just rich enough to feel like a small vacation in the glass.

Back to top

Posted on Leave a comment

Spicy Margarita Recipe

Spicy margarita on the rocks with a half Tajín rim, lime garnish, jalapeño slice, clear ice, and condensation on the glass.

A spicy margarita should hit cold first, then lime-bright, then finish with a clean jalapeño kick and a salty chili-lime edge from the rim. This version keeps the classic margarita balance — tequila, just-squeezed lime juice, orange liqueur, and just enough agave — while making the pepper easy to adjust.

The trick is not simply adding more jalapeño. A great spicy margarita recipe needs the right ratio, enough citrus, just enough sweetness to soften the pepper, and a rim that supports the cocktail instead of taking over every sip. That is why this recipe uses a half Tajín rim, 2–3 seedless jalapeño slices, and a clear heat ladder for mild, medium, hot, or restaurant-style heat.

The result is sharp, cold, lightly sweet, and spicy in the right place — not a cocktail that burns before you can taste the lime.

Start with the quick ratio when you want one drink now, then use the heat levels, half-rim tips, pitcher timing, frozen texture notes, and zero-proof or lower-sugar versions when you want to adjust the drink.

Spicy Margarita Guide

Use this guide to jump to the part you need, whether you are mixing one glass, choosing the right heat level, rimming the glass, or making a pitcher.

Quick Answer: Spicy Margarita Ratio

For one balanced spicy margarita, shake 2 oz blanco tequila, 1 oz fresh lime juice, ¾ oz orange liqueur, ½ oz agave syrup, and 2–3 thin jalapeño slices with ice. Strain over fresh ice into a rocks glass with a half Tajín rim.

This main version is a spicy margarita on the rocks, not a frozen margarita. Shaking and straining over fresh ice gives you a colder, cleaner, more classic margarita.

Start with 2 seedless jalapeño slices if you are unsure. Shake them without muddling for a gentler margarita, or muddle them lightly for more heat. The first sip should taste like a margarita; the pepper should arrive at the end.

For a milder or hotter version, adjust the jalapeño method before changing the recipe ratio.

Ingredient Amount Why it matters
Blanco tequila 2 oz / 60 ml Gives the cocktail its agave backbone.
Fresh lime juice 1 oz / 30 ml Brings the sharp citrus structure a margarita needs.
Orange liqueur ¾ oz / 22 ml Rounds the lime without making the pour too sweet.
Agave syrup or simple syrup ½ oz / 15 ml Softens the lime and jalapeño heat.
Jalapeño 2–3 thin slices Adds adjustable pepper heat.
Tajín or chili-lime salt About 1 tbsp / 8–10 g Creates the salty, spicy, limey rim.
Spicy margarita ratio board showing tequila, lime juice, orange liqueur, agave syrup, jalapeño slices, and Tajín.
Use this spicy margarita ratio as your baseline before adjusting heat, sweetness, or the rim; it keeps tequila, lime, and jalapeño in balance.

Spicy Margarita at a Glance

Start here if you want the safest first round: cold, citrusy, lightly sweet, and spicy without going overboard.

Best tequilaBlanco tequila
GlassRocks glass
RimHalf Tajín rim
Heat2–3 seedless jalapeño slices
Shake time15–20 seconds
ServeOver fresh ice
Make aheadMix base first; add jalapeño later
Best garnishLime wedge or jalapeño slice

What Is a Spicy Margarita?

A spicy margarita is a classic margarita with a heat source added. Most home versions use sliced jalapeño, so a spicy margarita and a jalapeño margarita often mean almost the same thing: tequila, lime juice, orange liqueur, a little sweetener, ice, and jalapeño shaken together.

The best versions do not taste like jalapeño juice. They taste like a classic margarita first, with a pepper finish that makes the next sip more tempting.

Some versions use serrano, chili syrup, hot sauce, or spicy infused tequila. However, jalapeño is the easiest place to start because you can adjust the cocktail by changing the number of slices, removing the seeds and membrane, or deciding whether to muddle the pepper or simply shake it with the liquid.

You may also see this style called a chili margarita or chilli margarita. The idea is the same: a lime-forward margarita with a spicy edge, usually finished with salt, Tajín, or a chili-lime rim.

If you like the tequila-and-citrus side of this cocktail but want something lighter and fizzier next time, MasalaMonk’s Paloma recipe is the natural next pour.

Why This Recipe Works

The reason this version works is that the heat is treated like seasoning, not the main event. You still get the snap of lime, the clean pull of tequila, the soft orange roundness, and that salty chili-lime edge from the rim.

The jalapeño shows up at the finish, where it should — enough to make the next sip tempting, not so much that the cocktail turns into a dare. Shake the slices without muddling for a gentle tingle, muddle them lightly for medium heat, or use a short tequila steep for a smoother restaurant-style spicy margarita.

Meanwhile, the half Tajín rim gives you a salty chili-lime sip when you want one, while leaving part of the glass clean. That is what keeps this margarita party-friendly: people get a pepper kick, not a mouthful of raw chile.

The best starting point

Begin with 2 seedless jalapeño slices, a half Tajín rim, and the base ratio in this recipe. Taste the margarita before making the next round hotter. Jalapeños can vary a lot from one pepper to the next.

Spicy Margarita Ingredients

You only need a few ingredients, but each one changes the cocktail. A spicy margarita should taste rounded and refreshing, not like tequila buried under heat and salt.

Ingredients for a spicy margarita including blanco tequila, fresh lime juice, orange liqueur, agave syrup, jalapeño slices, and Tajín.
Because the ingredient list is short, every choice has a job: lime brings brightness, agave rounds the heat, and jalapeño should season rather than overpower.

Blanco Tequila

Blanco tequila is the best first choice because it tastes crisp and agave-forward. It does not fight the lime, jalapeño, or Tajín rim. Look for 100% agave tequila when possible.

Fresh Lime Juice

Use just-squeezed lime juice here. Bottled lime can make the margarita taste flat, harsh, or metallic, especially when jalapeño and salt are involved. One juicy lime usually gives close to 1 oz / 30 ml, but measuring keeps the cocktail reliable.

Fresh lime juice compared with bottled lime juice for making a spicy margarita.
Fresh lime juice keeps a spicy margarita sharp and clean; bottled lime can turn flat or metallic once tequila, salt, and jalapeño are in the mix.

Orange Liqueur

Orange liqueur gives the margarita its classic roundness. Triple sec, Cointreau-style orange liqueur, or another clear orange liqueur will work. This recipe uses ¾ oz / 22 ml, or roughly 20–25 ml, which keeps the finished cocktail rounded without making it too sweet.

Can You Make It Without Orange Liqueur?

Yes. Skipping orange liqueur makes the drink closer to a spicy Tommy’s-style margarita. Use 2 oz tequila, 1 oz fresh lime juice, ½–¾ oz agave syrup, and 2 jalapeño slices. It will taste cleaner, sharper, and more tequila-forward.

If you want the classic version first, use the main spicy margarita recipe card, then try this sharper variation next.

Classic spicy margarita with orange liqueur compared with a Tommy’s-style spicy margarita without orange liqueur.
Orange liqueur makes the drink rounder and more classic; however, skipping it gives a sharper Tommy’s-style spicy margarita with more tequila-lime focus.

Jalapeño

Use jalapeño cut into thin slices. For predictable heat, remove the seeds and white membrane before shaking or muddling. The membrane holds much of the heat, so leaving it in can make the margarita much hotter.

The seeds can taste hot because they touch the membrane, but the white membrane is the real part to watch. Remove both before slicing when you want a milder, more controlled first round.

Jalapeño heat control guide showing sliced jalapeño, seeds, and white membrane for adjusting margarita spice level.
For better heat control, remove the white membrane before shaking or muddling; it is the part most likely to push the margarita from spicy to harsh.

Fresh jalapeño gives the cleanest green pepper heat. Pickled jalapeño works in a pinch, but it makes the margarita tangier, saltier, and more bar-snack flavored, so use it carefully.

Fresh jalapeño slices and pickled jalapeño slices compared for use in a spicy margarita.
Fresh jalapeño gives clean green heat, whereas pickled jalapeño adds tang and salt, so use it only when that sharper flavor fits the drink.

For the full mild, medium, hot, and restaurant-style breakdown, jump to the spicy margarita heat levels.

Agave or Simple Syrup

Agave syrup pairs naturally with tequila, but simple syrup also works. The sweetener is not there to make the cocktail sugary. It softens the lime and pepper so the spicy margarita tastes rounded instead of sharp.

Tajín, Salt, or Chili-Lime Rim

Tajín gives the rim a chili-lime tang that works especially well with jalapeño and fruit variations. Kosher salt gives a cleaner classic margarita feel. A mix of Tajín and kosher salt is a good middle ground if you want less tang and more balance.

Tajín rim, kosher salt rim, and mixed chili-lime salt rim options for a spicy margarita.
Tajín adds chili-lime punch, kosher salt keeps the rim classic, and a mixed rim gives you spice without making every sip too intense.

Equipment You Need

You do not need a full bar setup. A shaker or sealed jar, a way to measure, a rocks glass, fresh ice, and something to strain with will get you most of the way there.

  • Shaker or sealed jar: chills and blends the cocktail.
  • Jigger or measuring spoon: keeps the tequila, lime, and sweetener in balance.
  • Rocks glass: best for a spicy margarita on the rocks.
  • Strainer: keeps jalapeño pieces and cracked shaker ice out of the glass.
  • Muddler or wooden spoon handle: helpful for medium or hotter pepper flavor.
  • Citrus juicer and small plate: useful for lime juice and rimming, but not dealbreakers.

How to Make a Spicy Margarita

The method is simple, but the little choices matter: rim before you shake, use enough ice, and keep the jalapeño in check so the cocktail tastes cold and bright instead of hot and muddy.

Step-by-step spicy margarita guide showing rimming the glass, adding jalapeño, adding liquids, shaking, straining over fresh ice, and garnishing.
Rimming first, shaking hard, and straining over fresh ice are the small steps that make a spicy margarita taste colder, cleaner, and more polished.

Rim the Glass

Run a lime wedge around the outside edge of a rocks glass. Dip or roll half the rim into Tajín, chili-lime salt, or kosher salt. Fill the glass with fresh ice and set it aside so it is ready the moment the cocktail is cold.

Step-by-step guide showing a rocks glass rimmed with lime and dipped halfway into Tajín for a spicy margarita.
Wet only the outside edge before dipping the rim; this keeps Tajín on the glass instead of letting it fall into the margarita.

Muddle or Shake the Jalapeño

Add 2–3 thin jalapeño slices to the shaker. For a mild margarita, leave them unmuddled and simply shake them with the liquid. For medium heat, press them gently 2–3 times with a muddler or the handle of a wooden spoon. Do not crush them aggressively unless you want a much hotter, greener pepper flavor.

Comparison showing jalapeño slices shaken for mild heat and lightly muddled for medium spicy margarita heat.
Shake jalapeño slices for a mild pepper finish, or muddle gently for medium heat; either way, avoid crushing the pepper into a bitter mash.

Shake Until Cold

Add tequila, lime juice, orange liqueur, agave, and ice to the shaker. Shake hard for 15–20 seconds, until the shaker feels very cold. That chill and dilution are what keep the lime sharp but not harsh.

Strain Over Fresh Ice

Strain the margarita into the prepared glass over fresh ice. Do not pour the broken shaker ice into the glass; it is already cracked, diluted, and melting fast.

Spicy margarita being strained from a shaker over fresh ice with a comparison to cracked shaker ice.
Fresh ice melts more slowly than cracked shaker ice, so straining over solid cubes keeps the margarita colder, brighter, and less watery.

Taste and Adjust

Taste the first sip and adjust from there. A tart margarita needs a small splash of agave; a sweet one needs more lime. When the flavor feels muted, add a tiny pinch of salt or a squeeze of lime. When the heat goes too far, strain away the jalapeño and soften the pour with lime, orange liqueur, agave, or sparkling water.

For more specific fixes, use the troubleshooting guide before remaking the drink.

How Spicy Should It Be?

The best spicy margarita is not automatically the hottest one. You want a pepper finish, not a dare. Heat should make the next sip more tempting, not make people brace before they drink.

Start gentler than you think you need to, especially with a new jalapeño. Treat the pepper like seasoning, not the main ingredient.

Heat level Jalapeño method Best for
Mild 1–2 seedless slices, shaken but not muddled First-time spicy margarita drinkers or anyone who wants only a light pepper tingle.
Medium 2–3 seedless slices, muddled with 2–3 gentle presses The best default version: clearly spicy, but still controlled.
Hot 3–4 slices or a tiny piece of membrane People who already know they like heat in cocktails.
Very hot Brief jalapeño tequila steep, tasted carefully Restaurant-style heat or pitchers, but only with careful timing.
Spicy margarita heat level guide showing mild, medium, hot, and restaurant-style jalapeño heat options.
Heat depends on pepper contact as much as pepper quantity, so start mild and move toward muddled or infused jalapeño only after tasting.

Mild Spicy Margarita

Start with 1–2 seedless jalapeño slices and do not muddle them. Shake the slices with the cocktail, then strain well. This gives a light pepper aroma and a gentle finish without much burn.

Medium Spicy Margarita

For the best default version, gently muddle 2–3 seedless jalapeño slices with only 2–3 presses before adding the liquids. The margarita should taste clearly spicy without overpowering the tequila and lime.

Hot Spicy Margarita

For more heat, add 3–4 slices or include a small amount of the white membrane. Avoid adding lots of seeds unless you already know the pepper is mild. Seeds and membrane can push the margarita from pleasantly hot to harsh very quickly.

Restaurant-Style Jalapeño-Infused Tequila Option

For a smoother restaurant-style spicy margarita, infuse the tequila briefly instead of muddling jalapeño into every glass. Add ½ sliced seedless jalapeño to 1 cup / 240 ml blanco tequila, steep for 15–30 minutes, then taste. Remove the pepper once the tequila has the heat you want.

Longer infusions can taste deeper, but they are easier to overdo because every jalapeño is different. For a party, a short controlled steep is safer than leaving pepper in the tequila for hours.

Jalapeño-infused tequila guide with sliced jalapeño steeping in blanco tequila for a restaurant-style spicy margarita.
A short jalapeño tequila steep gives smoother restaurant-style heat, but tasting early and removing the pepper keeps the infusion controlled.

How to Make It Less Spicy

Strain the cocktail away from the jalapeño immediately. Add more lime juice, orange liqueur, agave, or sparkling water to soften the heat. If the margarita is still too hot, pour it over extra ice and let it dilute slightly before serving.

Tajín Rim or Spicy Salt Rim

The rim should support the cocktail, not dominate it. A full Tajín rim looks dramatic, but a half rim usually drinks better.

Why a Half Tajín Rim Works Better

A good rim should feel like seasoning, not sand. The half rim lets you choose the sip: chili-lime edge on one side, clean tequila-lime brightness on the other.

Close-up of a spicy margarita with a half Tajín rim showing one seasoned side and one clean sipping side.
A half Tajín rim gives you two sipping options: chili-lime seasoning on one side and clean tequila-lime brightness on the other.

Which Rim Style Works Best?

Rim style Best for How to use it
Half Tajín rim Best default Rim only one side of the glass so every sip does not have to taste salty and spicy.
Full Tajín rim Big chili-lime flavor Use when the margarita is very limey or fruit-based.
Kosher salt rim Classic margarita feel Cleaner and less tangy than Tajín.
Tajín + kosher salt Balanced spicy rim Mix equal parts for a softer, less sour rim.
Chamoy + Tajín Sweet, sticky, dramatic rim Best with mango, pineapple, or watermelon versions.
No rim Cleaner sip Choose this when you want less salt or the margarita already tastes bold enough.

How to Keep Tajín Out of the Margarita

For the neatest rim, wet only the outside edge of the glass. The seasoning stays where your lips touch it, instead of sliding into the margarita and turning the bottom of the glass gritty.

If your rim tastes too intense, mix Tajín with kosher salt or rim only one small section of the glass. The rim should season the cocktail, not make every sip taste dusty or salty.

The same half-rim idea works beautifully with fruit margaritas too. MasalaMonk’s watermelon margarita recipe uses salt, Tajín, chili-salt, and half-rim logic to keep sweet fruit tasting sharper and colder.

Tajín works beautifully on chili-lime rims, but for this homemade version, a simple half rim is usually cleaner, easier, and better balanced. The official Tajín spicy margarita also uses a coated section of the glass rather than a heavy full rim.

Need the cleanest technique? Go back to how to rim the glass before dipping into Tajín or salt.

Spicy Margarita Recipe Card

A cold, lime-forward spicy margarita with blanco tequila, fresh lime juice, orange liqueur, agave, jalapeño, and a half Tajín rim. Shake it mild, medium, or hot, then serve over fresh ice for a clean pepper finish.

Yield1 drink
Prep Time5 minutes
Cook Time0 minutes
Total Time5 minutes

Equipment

  • Rocks glass
  • Cocktail shaker or sealed jar
  • Jigger or measuring spoon
  • Strainer
  • Muddler or wooden spoon handle
  • Small plate for the rim

Ingredients

  • 2 oz / 60 ml blanco tequila
  • 1 oz / 30 ml fresh lime juice
  • ¾ oz / 22 ml orange liqueur
  • ½ oz / 15 ml agave syrup or simple syrup
  • 2–3 thin jalapeño slices, seeds and most white membrane removed for moderate heat
  • 1 tbsp Tajín, chili-lime salt, or kosher salt, for the rim
  • 1 lime wedge, for rimming and garnish
  • Ice

Instructions

  1. Rub a lime wedge around the outside edge of a rocks glass. Dip half the rim into Tajín, chili-lime salt, or kosher salt.
  2. Fill the glass with fresh ice and set it aside.
  3. Add jalapeño slices to a cocktail shaker. Muddle with 2–3 gentle presses for medium heat, or leave them unmuddled for a milder margarita.
  4. Add tequila, lime juice, orange liqueur, agave, and ice.
  5. Shake hard for 15–20 seconds, until the shaker feels very cold.
  6. Strain over fresh ice into the prepared glass.
  7. Garnish with lime or jalapeño. Taste and adjust the next round with more lime, agave, or jalapeño if needed.

Notes

  • For mild heat, use 1–2 seedless jalapeño slices and do not muddle.
  • For medium heat, gently press 2–3 seedless slices only 2–3 times.
  • Jalapeños vary, so start lower when using a new pepper.
  • A half Tajín rim gives better sip control than a full rim.
  • Wet only the outside edge of the glass so Tajín does not fall into the margarita.
  • For pitchers, steep jalapeño for 10–20 minutes, then remove it once the heat tastes right.
  • Serve right after shaking, over fresh ice rather than broken shaker ice.
Saveable spicy margarita recipe card with tequila, lime juice, orange liqueur, agave syrup, jalapeño slices, Tajín, ice, and instructions.
Save this spicy margarita recipe card for the core ratio, then use the heat notes to decide whether to shake the jalapeño for mild heat or muddle it for medium heat.

Making drinks for a group? Use the spicy margarita pitcher instead of scaling glass by glass.

Best Tequila for a Spicy Margarita

Once the base ratio is set, tequila choice is mostly about the kind of finish you want: crisp, round, or smoky. For most people, 100% agave blanco tequila is the best first choice because it keeps the margarita sharp and lime-forward.

  • Best first choice: blanco tequila for a bright, clean, lime-friendly spicy margarita.
  • Softer option: reposado tequila if you want rounder oak and vanilla notes behind the citrus.
  • Smoky option: half blanco tequila and half mezcal for smoke without overwhelming the cocktail.
  • Usually skip: añejo tequila, because the oak and age can fight the lime, jalapeño, and Tajín.

If you want smoke without losing the lime, see the spicy mezcal margarita variation.

Tequila chooser board for spicy margaritas showing blanco tequila, reposado tequila, blanco with mezcal, and añejo as an option to skip.
Blanco tequila keeps the drink crisp, reposado makes it rounder, and a blanco-mezcal split adds smoke without overwhelming the lime and jalapeño.

For a classic benchmark, Liquor.com’s spicy margarita also uses blanco tequila, lime, orange liqueur, agave, and jalapeño as the core structure.

Skinny Spicy Margarita / Lower-Sugar Version

For a lighter margarita, reduce the sweetener before you reduce the flavor. The mistake with skinny margaritas is making them so lean that they taste like plain tequila and lime over ice.

The goal is not to strip the cocktail down until it tastes thin. Keep the lime, salt, and jalapeño bright while using less sweetener, reducing the orange liqueur, or adding a splash of sparkling water when the margarita tastes too sharp.

Skinny spicy margarita board with tequila, lime juice, reduced agave, jalapeño slices, optional sparkling water, and optional orange juice.
A skinny spicy margarita should reduce sugar without losing structure; keep the lime, salt, and jalapeño bright so the drink still feels complete.
Ingredient Amount
Blanco tequila 2 oz / 60 ml
Fresh lime juice 1 oz / 30 ml
Agave syrup ¼–½ oz / 7–15 ml
Jalapeño 2 thin slices
Orange juice ½ oz / 15 ml, optional
Sparkling water 1–2 oz / 30–60 ml, optional
Tajín or salt rim Optional

Shake the tequila, lime, agave, and jalapeño with ice. Strain over fresh ice, then top with sparkling water when you want a lighter, longer pour. Add orange juice only if you miss the roundness that orange liqueur normally gives.

For another lighter tequila-lime direction, MasalaMonk’s coconut water cocktails guide includes a coconut water margarita that lengthens the drink without turning it into a sugary mix.

For a no-alcohol version with the same lime-jalapeño idea, use the virgin spicy margarita.

Virgin Spicy Margarita / Non-Alcoholic Version

Without tequila, the mocktail needs something to replace that edge. Lime, orange, jalapeño, salt, and bubbles do the job better than simply topping juice with soda water.

This works best when it tastes like a zero-proof cocktail, not citrus soda with a jalapeño floating in it. The tiny pinch of salt matters because tequila normally brings body and bite; without alcohol, salt, orange, jalapeño, and sparkle help the mocktail taste complete.

Virgin spicy margarita mocktail with lime juice, orange juice, agave, jalapeño slices, salt, sparkling water, and a Tajín rim.
Without tequila, the mocktail needs lime, orange, salt, jalapeño, and bubbles to create enough bite for a zero-proof spicy margarita.
  • 1 oz / 30 ml fresh lime juice
  • 1 oz / 30 ml orange juice
  • ½ oz / 15 ml agave syrup or simple syrup
  • 2 thin jalapeño slices
  • Tiny pinch of salt, optional but helpful
  • 3 oz / 90 ml sparkling water, added after shaking
  • Tajín rim, recommended

Shake the lime juice, orange juice, agave, jalapeño, salt, and ice first. Strain over fresh ice in a rimmed glass, then top with sparkling water. Do not shake the sparkling water or the mocktail will lose its fizz.

For a broader zero-proof path, MasalaMonk’s margarita mocktail guide is a useful next stop for building non-alcoholic margarita-style drinks.

Frozen Spicy Margarita

Blending changes the problem: now texture matters as much as balance. A frozen spicy margarita is fun, but plain ice can make the pour watery and sharp. Frozen fruit helps the texture more than simply adding extra ice.

Frozen spicy margarita with tequila, lime juice, orange liqueur, agave, jalapeño, ice, optional frozen fruit, and Tajín rim.
Frozen fruit gives better texture than extra plain ice, while using less jalapeño keeps the pepper from tasting sharp as the frozen margarita melts.
  • 2 oz / 60 ml blanco tequila
  • 1 oz / 30 ml fresh lime juice
  • ¾ oz / 22 ml orange liqueur
  • ½ oz / 15 ml agave syrup
  • 1–2 thin jalapeño slices
  • 1½ cups ice, plus more as needed
  • ½ cup frozen mango, pineapple, or watermelon, optional but helpful for texture

Blend the liquid ingredients first, then add ice and frozen fruit. This helps the jalapeño and lime distribute before the margarita thickens. If the mixture is too thick, add 1–2 tablespoons of cold water or lime juice. If it is too thin, blend in more ice or frozen fruit.

Use slightly less jalapeño in frozen versions; cold dulls some flavors, but raw pepper can taste sharper as the margarita melts.

A plain frozen spicy margarita melts faster than a fruit-based one. For a thicker slush, frozen mango, pineapple, or watermelon will give better texture than adding more plain ice.

For fruit directions that also work on the rocks, see the spicy margarita variations.

Spicy Margarita Pitcher for a Crowd

A spicy margarita pitcher should taste like the first round of the party, not the dare people regret halfway through. The main mistake is letting jalapeño sit in the batch too long.

This is the version to make when people are hovering around the snack table and you do not want to shake drinks one at a time all night.

Spicy margarita pitcher recipe board with tequila, lime juice, orange liqueur, agave, jalapeño, Tajín, an ice-free pitcher, and rimmed glasses with fresh ice.
For a spicy margarita pitcher, chill the base without ice, steep jalapeño briefly, and pour over fresh ice so the batch stays controlled and undiluted.

What You Can Make Ahead

Mix the tequila, lime juice, orange liqueur, and agave a few hours ahead, then chill the base. Add jalapeño only 10–20 minutes before serving, then remove it once the heat tastes right. Rim glasses separately and pour over fresh ice.

Make-ahead spicy margarita guide showing the tequila-lime base mixed ahead, chilled, jalapeño added later, jalapeño removed, glasses rimmed separately, and drinks poured over fresh ice.
Mix the tequila-lime base ahead, but add jalapeño close to serving so the pitcher stays fresh without letting the pepper take over.
Ingredient For 8 drinks
Blanco tequila 16 oz / 480 ml
Fresh lime juice 8 oz / 240 ml
Orange liqueur 6 oz / 180 ml
Agave syrup or simple syrup 4 oz / 120 ml
Jalapeño 1 seedless jalapeño, thinly sliced
Ice For serving, not for storing in the pitcher
Tajín or salt For rimming glasses separately

Stir the tequila, lime juice, orange liqueur, and agave in a pitcher. Add the jalapeño slices and let them steep for 10–20 minutes. Taste the batch, then remove the jalapeño once the heat is where you want it.

Chill the pitcher base until serving. Rim the glasses separately and pour the margaritas over fresh ice only when serving. Do not store the pitcher with ice in it, or the batch will dilute before guests pour their first glass.

Party tip

Keep the pitcher slightly less spicy than your personal glass. Guests can add a jalapeño slice to their own pour, but you cannot rescue the whole batch once the pepper takes over. A small bowl of extra jalapeño slices beside the glasses works better than leaving pepper in the pitcher.

If the batch gets hotter than planned, use the troubleshooting fixes instead of adding more ice to the pitcher.

Because pitcher drinks can taste easygoing even when they are strong, keep the pours modest and serve them with food.

Spicy Margarita Variations

Once the classic version is balanced, the variations become easy to control. Choose the mood before you change the ratio: mango for lush sweetness, pineapple for a louder tropical glass, watermelon for something lighter, cucumber for cooling green freshness, serrano for sharper heat, or mezcal for smoke.

Spicy margarita variations board showing mango, pineapple, watermelon, cucumber, serrano, and mezcal versions.
Once the base ratio works, variations are easier: mango turns lush, pineapple goes tropical, cucumber cools the heat, serrano sharpens it, and mezcal adds smoke.

Spicy Mango Margarita

Add mango nectar, mango puree, or blended fresh mango to the base cocktail. Mango loves Tajín, chamoy, lime, and jalapeño, so this is one of the strongest spicy margarita variations. For a dedicated fruit version, use MasalaMonk’s mango margarita recipe and add the jalapeño heat level you prefer.

Pineapple Jalapeño Margarita

Pineapple makes the margarita sweeter, sunnier, and more tropical, so it usually needs less agave and loves a chili-lime rim. Use pineapple juice or muddled pineapple with the same tequila-lime-jalapeño base.

Spicy Watermelon Margarita

Use watermelon juice, lime, tequila, jalapeño, and a Tajín rim. Watermelon is softer than mango or pineapple, so keep the jalapeño moderate and avoid over-sweetening. A pinch of salt or a half rim makes the fruit taste colder, sharper, and more refreshing.

Cucumber Jalapeño Margarita

Muddle a few cucumber slices gently with the jalapeño, then double strain the cocktail so cucumber pulp does not cloud the glass. Cucumber cools the pepper heat, so the whole pour feels greener, cleaner, and more refreshing.

Serrano Margarita

Use serrano instead of jalapeño when you want a sharper, hotter pepper finish. Start with 1 thin slice, especially if you are muddling, because serrano can take over the margarita quickly.

Spicy Mezcal Margarita

Swap part or all of the tequila for mezcal. A half tequila, half mezcal split is the easiest first step because it gives smoke without overwhelming the lime and jalapeño.

If you want a citrus-forward margarita instead of a pepper-forward one, MasalaMonk’s blood orange margarita recipe is a good next drink to try.

Troubleshooting

Spicy margaritas are forgiving. Most problems come down to balance: heat, acid, sweetness, salt, dilution, or the way the jalapeño was handled.

Spicy margarita troubleshooting board showing fixes for heat, sourness, sweetness, watery texture, muted flavor, harsh pepper, and rim problems.
Most spicy margarita problems are balance problems; lime, agave, salt, fresh ice, or shorter jalapeño contact can usually bring the cocktail back.
Problem Fix
Heat is overpowering Strain out the jalapeño. Add lime, orange liqueur, agave, or sparkling water to soften the heat.
Sharp or sour Add ¼ oz agave syrup or a small splash of orange liqueur.
Sweetness takes over Add fresh lime juice and a tiny pinch of salt.
Flavor feels weak Use a full 2 oz tequila next time, shake hard but not too long, and avoid serving with melted shaker ice.
Watery finish Strain over fresh ice, not broken shaker ice. Do not store pitcher margaritas with ice.
Flat or muted flavor Add a tiny pinch of salt, a squeeze of lime, or a little fresh ice. Make sure the lime juice is fresh.
Harsh pepper bite Remove seeds and membrane, muddle more gently, or use fewer jalapeño slices.
Metallic edge Use fresh lime juice instead of bottled lime, remove jalapeño membrane, and avoid over-muddling.
Green or vegetal taste Use fewer jalapeño slices, avoid aggressive muddling, and remove the membrane before shaking.
Rim will not stick Rub lime on the outside edge only, then dip or roll the rim while it is still wet.
Tajín falls into the margarita Rim only the outside edge of the glass or use a half rim.

What to Serve with Spicy Margaritas

Spicy margaritas love salty, creamy, crunchy food — chips, salsa, guacamole, grilled corn, shrimp, tacos, creamy dips, and anything with a little char. The lime and jalapeño cut through richness, while the Tajín rim makes snacky, chili-lime flavors feel even brighter.

Food pairing board for spicy margaritas showing chips and guacamole, jalapeño poppers, tacos, creamy dip, grilled corn, and a spicy margarita.
Spicy margaritas work best with salty, creamy, crunchy food that can stand up to lime, jalapeño, and a chili-lime rim.

For a party tray, baked jalapeño poppers are the obvious match: creamy filling, pepper heat, and crisp edges beside a cold margarita. For something cooler and scoopable, a jalapeño-style cheese ball recipe gives guests a richer bite between citrusy sips.

Once the ratio is right, this is the kind of cocktail that disappears fast: cold glass, lime on the rim, a little pepper at the end, and just enough salt to make you want the next sip.

FAQs

These quick answers cover the decisions most people run into while mixing a spicy margarita at home.

Is a spicy margarita the same as a jalapeño margarita?

In most home recipes, yes. “Spicy margarita” is the broader name, while “jalapeño margarita” tells you the heat source. Some spicy margaritas use serrano, chili syrup, hot sauce, or infused tequila, but sliced jalapeño is the easiest and most reliable home method.

What is in a spicy margarita?

A classic spicy margarita usually has tequila, fresh lime juice, orange liqueur, agave or simple syrup, jalapeño, ice, and a salt or Tajín rim. This recipe uses blanco tequila, 1 oz fresh lime juice, ¾ oz orange liqueur, ½ oz agave, and 2–3 jalapeño slices.

Should I muddle the jalapeño?

Muddle it only when you want clear pepper heat. For a mild spicy margarita, shake the jalapeño slices without muddling. For medium heat, press the slices 2–3 times; do not crush them into a paste.

How do I make a spicy margarita less spicy?

Use fewer jalapeño slices, remove seeds and membrane, and shake the slices without muddling. If the margarita is already too spicy, strain it away from the jalapeño and soften it with lime, agave, orange liqueur, or sparkling water.

What makes a spicy margarita hotter?

More jalapeño, muddling, membrane, seeds, longer steeping, or infused tequila will make the cocktail hotter. For most people, 2–3 seedless slices gently muddled is enough.

Can I use serrano instead of jalapeño?

Serrano works, but it needs a lighter hand. It is usually sharper and hotter than jalapeño, so begin with 1 thin slice and muddle gently.

Should I use Tajín or salt on the rim?

Tajín gives the rim chili-lime flavor, especially with jalapeño or fruit margaritas. Kosher salt gives a cleaner classic margarita taste. A half Tajín rim is the best default because it gives you spicy-salty control without overwhelming every sip.

What tequila works best in a spicy margarita?

Blanco tequila is the best first choice because it is clean, bright, and lime-friendly. Reposado makes the cocktail rounder, while mezcal adds smoke. Añejo tequila is usually too oaky and expensive for this style of margarita.

Can I make a spicy margarita without orange liqueur?

Yes. Skip the orange liqueur and use 2 oz tequila, 1 oz fresh lime juice, ½–¾ oz agave syrup, and 2 jalapeño slices. The result is sharper, cleaner, and more tequila-forward.

How do I make a skinny spicy margarita?

For a lower-sugar version, keep the tequila and lime intact, reduce the agave to ¼–½ oz, and top with sparkling water if you want a longer pour. Keep the jalapeño and salt so it still tastes like a cocktail.

What is the best non-alcoholic spicy margarita method?

Shake fresh lime juice, orange juice, agave, jalapeño, a tiny pinch of salt, and ice. Strain over fresh ice in a Tajín-rimmed glass, then top with sparkling water. Add the sparkling water last so the drink stays fizzy.

Can margarita mix work in a spicy margarita?

It can, but fresh lime and orange liqueur taste better. If using margarita mix, shake it with 1–2 jalapeño slices and add a squeeze of lime to brighten the margarita. Use less sweetener because most mixes are already sweet.

A tiny splash of pickled jalapeño brine can add quick spicy-salty tang, but it changes the flavor from fresh pepper to pickled pepper.

How far ahead can I make a spicy margarita pitcher?

You can mix the tequila, lime juice, orange liqueur, and agave a few hours ahead and chill it. Add jalapeño only 10–20 minutes before serving, taste, then remove it once the heat is right. Rim glasses separately and serve over fresh ice.