Happy hour isn’t only about alcohol. It’s about the pause—the glass that feels special, the first cold sip, the tiny ritual that tells your brain the day is shifting gears. That’s exactly why keto mocktails hit differently than “just water.” They have a point of view. They’re bright without being sharp, sweet without tasting fake, and fizzy in a way that makes you reach for another sip before you even realize you’re doing it.
Better still, once you know how to build keto mocktails the right way, you stop feeling like you’re missing out. Instead, you end up with a lineup of low carb, no sugar drinks you genuinely crave—whether you’re cooking dinner, hosting friends, or simply wanting something cold and satisfying around 4 pm.
This guide is built around simple, repeatable formulas. You’ll get ten keto mocktails that taste like real cocktails, plus the foundations that let you remix them endlessly: a lemonade base that becomes five different drinks, fizz tricks that mimic soda, tea and coffee options that feel cozy yet grown-up, and a hydration lane that’s surprisingly useful if you’ve ever felt a little “flat” on low carb.
Throughout, we’ll keep it practical. No weird gear. No fussy syrups you’ll use once and forget. Just smart ingredients and a few small techniques that add up fast.
What makes keto mocktails taste like the real thing
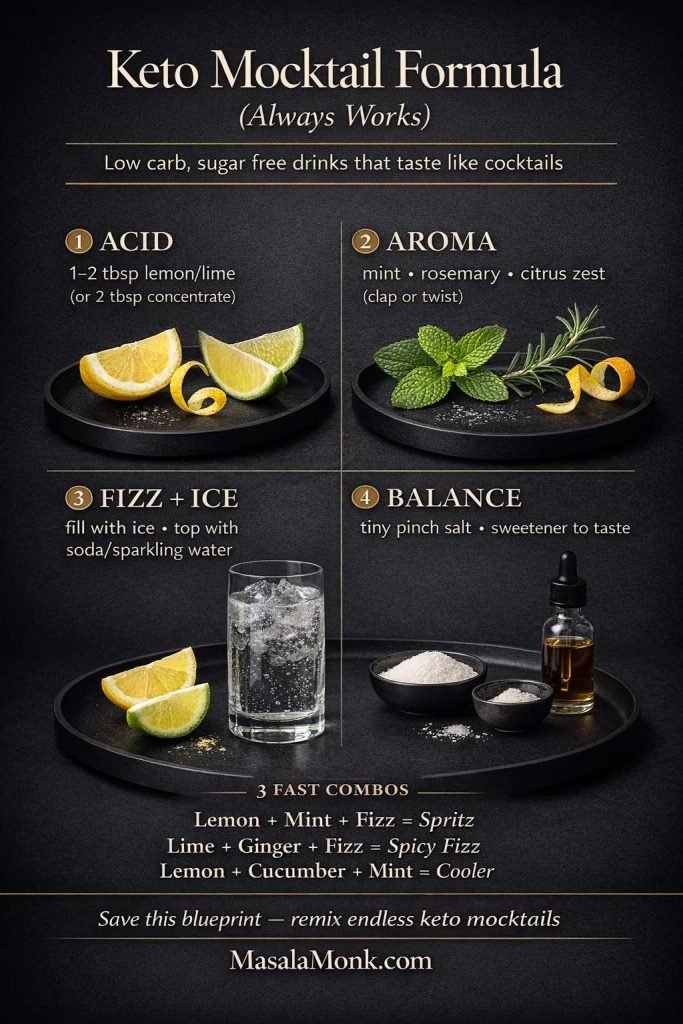
The difference between a forgettable sugar free drink and a memorable keto mocktail is rarely the sweetener. Most of the time, it’s structure. Cocktails taste good because they’re balanced—acid, aroma, bitterness, sweetness, and texture all working together. Once you borrow that logic, non alcoholic keto drinks stop feeling like substitutes and start feeling like choices.
Start with a base that’s naturally low carb & suits keto mocktails
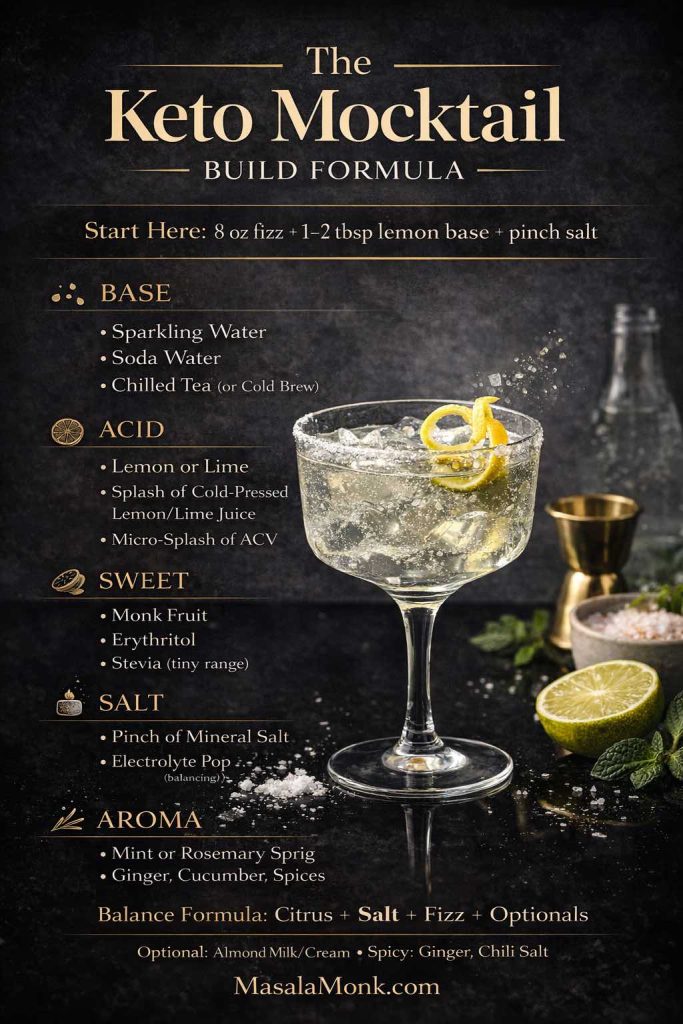
Your base decides whether the drink feels crisp, creamy, punchy, or soothing. Fortunately, most of the best options are already friendly to a low carb lifestyle.
For bright drinks, sparkling water, soda water, and club soda do most of the work. For softer drinks, chilled tea, iced coffee, or diluted lemonade concentrate gives you body without relying on sugar. Meanwhile, a creamy base—unsweetened almond milk, coconut cream used lightly, or a small splash of cream—creates dessert-style mocktails that feel like treats without a sugar crash.
If you’re building a tea or coffee lane, it helps to understand how these drinks fit into your day, especially if you fast. This guide to coffee timing and fasting is a useful companion when you’re deciding whether a chilled latte-style mocktail belongs in your afternoon or evening routine: coffee and fasting basics.
Then add acid and aroma, not just sweetness to mocktails that are keto
A good keto drink doesn’t need to be sweet to be delicious. Acid creates lift and clarity. Aroma makes the drink feel complex even when the ingredient list is short.
Think beyond “lemon and sweetener.” Lime zest makes a drink smell like a cocktail bar. A bruised mint sprig adds freshness before the first sip. Ginger brings heat and depth. A pinch of salt makes citrus taste rounder and less harsh. Bitters—used carefully, and chosen thoughtfully—can bring that adult, cocktail-like edge.
This is why certain flavors translate so beautifully. A mojito works because of mint and lime. A spritz works because of bitterness and bubbles. A margarita works because of salt, citrus, and a clean finish. Once you build with those ideas, you don’t need sugar to fake flavor.
Finally, choose a sweetener strategy that stays clean in keto mocktails
Sweeteners matter, but they’re not the headline. They’re the balancing tool. Used well, they disappear into the drink and make everything else taste better.
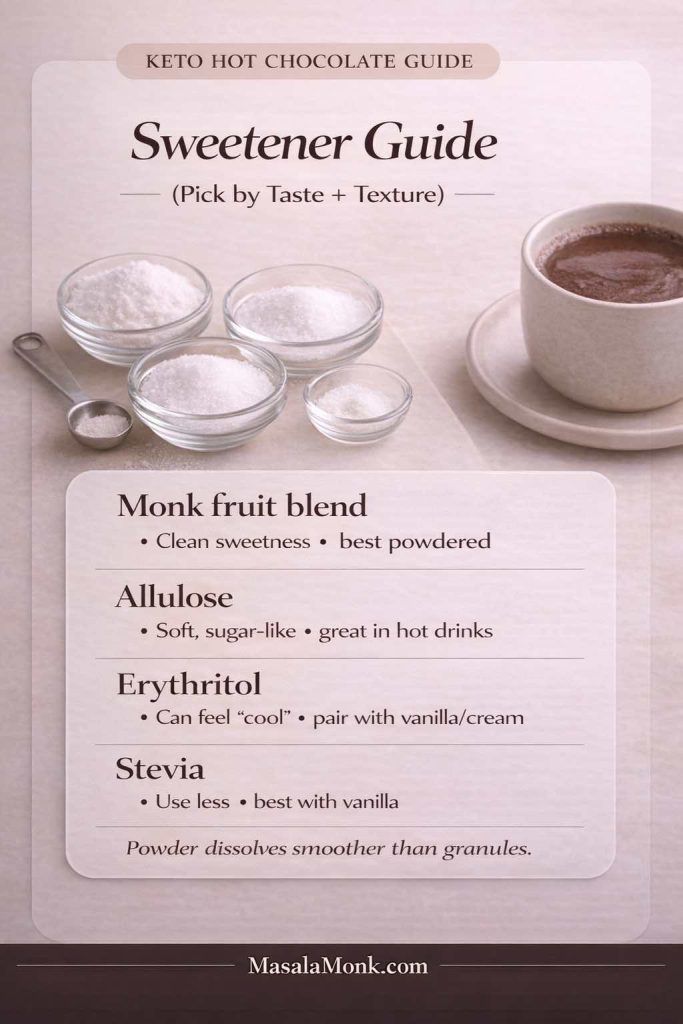
Allulose often tastes the most “sugar-like” in cold drinks. Monk fruit blends are convenient, but quality varies. Stevia is powerful and works best with citrus and salt. Erythritol can be fine, yet it sometimes feels “cooling” and may not dissolve well unless you make a simple syrup first.
If you ever feel uncertain about what “added sugar” actually means on labels—especially when you’re buying mixers—this FDA explainer is one of the clearest references: how added sugars are defined on the Nutrition Facts label. It’s not glamorous reading, yet it makes choosing bottles dramatically easier.
Also Read: Slow Cooker Pork Tenderloin (Crock Pot Recipe) — 3 Easy Ways
Sweeteners for keto mocktails that don’t taste like “diet”
Let’s make this easy: the goal isn’t to build a drink that tastes like candy. The goal is to build a drink that tastes balanced—like a cocktail, not a soda.
That’s why “less sweet, more aromatic” is usually the best starting point. Instead of chasing a sweet hit, you create satisfaction through freshness, bite, and finish. Then you add just enough sweetener to soften the sharp edges.
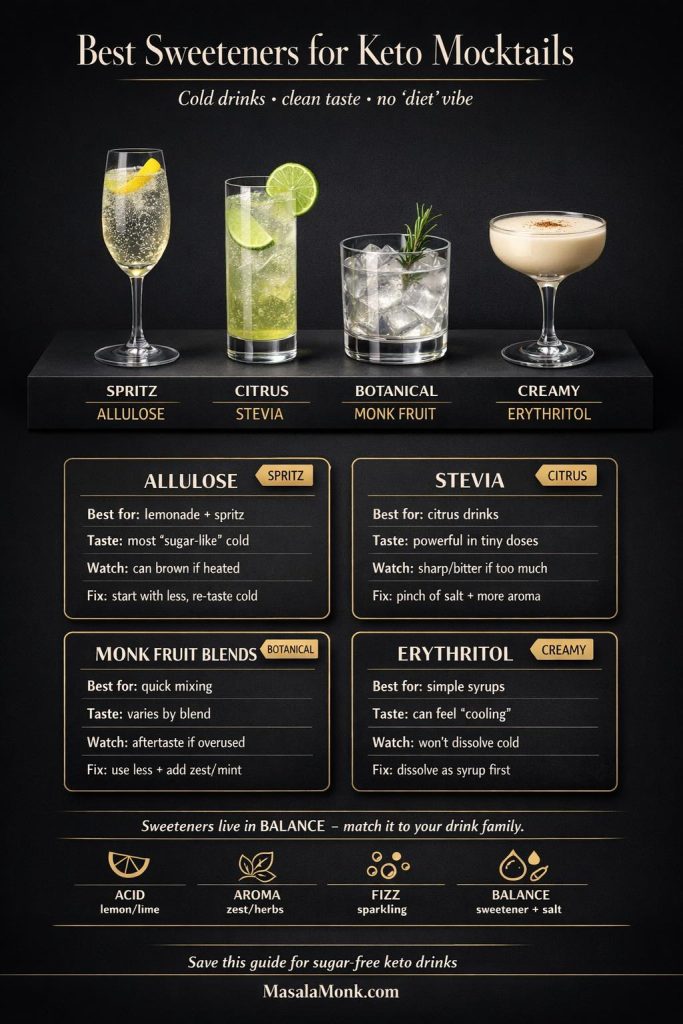
Allulose: the smoothest in cold drinks
Allulose tends to dissolve well and tastes natural in lemonade, citrus spritzers, and berry drinks. It’s especially helpful when you’re aiming for “zero sugar zero carb drinks” vibes without tasting artificial. In practice, your exact carb impact depends on serving size and your chosen sweetener, so treat it as a flexible tool rather than a promise.
Monk fruit blends: convenient for keto mocktails, but choose carefully
Monk fruit can be great. However, many blends include extra ingredients that change the flavor or the way it behaves in drinks. If the aftertaste bothers you, reduce the amount and increase aroma instead—more zest, more mint, more ginger, or a pinch of salt.
Stevia: small doses, big payoff
Stevia can be brilliant when used lightly. If your drink suddenly tastes “sharp” or “thin,” it often means the stevia is too intense relative to the acid. Pull back, then add a tiny pinch of salt and a bit more citrus zest. Surprisingly, that fixes the problem more often than adding more sweetener.
Erythritol: best as a syrup in keto friendly mocktails
Erythritol can crystalize in cold drinks. If you like it, dissolve it into a syrup first. A small jar of syrup in the fridge makes your low carb mocktails far more consistent.
Also Read: Chicken Pesto Pasta (Easy Base Recipe + Creamy, One-Pot, Baked & More)
Keto mocktail mixers that stay low carb and still feel festive
Mixers are where most drinks either shine or quietly fail. Fortunately, the rules are simple.
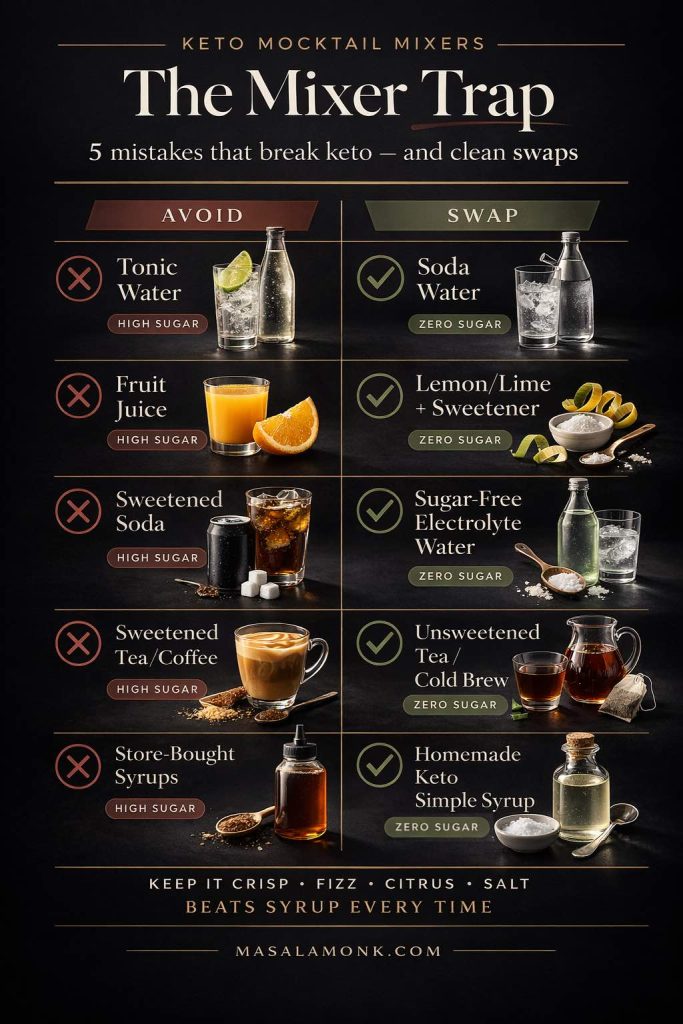
Choose fizz wisely
Sparkling water and soda water are the cleanest foundation for keto fizzy drinks. They deliver the party feeling—bubbles, lift, cold refreshment—without turning your drink into a sugar trap.
If you want a more “soda” experience, a low carb soda or zero carb soda can work well. Just keep the rest of the drink simple so it doesn’t become overly sweet or chemically tasting. When in doubt, treat flavored soda like a garnish, not the entire personality of the drink.
Build flavor with real ingredients, not sugary syrups
Instead of syrups, build with:
- citrus juice and zest
- herbs (mint, basil, rosemary)
- spices (cinnamon, cardamom, roasted cumin)
- ginger in a homemade concentrate
- salt and chili for contrast
- extracts used sparingly (vanilla, coconut, almond)
If you want an Indian-inspired direction, jal jeera is an underrated flavor blueprint. It’s tangy, savory, and intensely refreshing—exactly the kind of profile that makes sugar feel unnecessary. Traditional recipes may include sweetener, yet the spice architecture is the real star: jal jeera (Indian lemonade) flavor inspiration.
Keep a hydration lane in your rotation
Sometimes you don’t want a “dessert drink.” You want something that makes you feel better after a long day—especially if you’re eating lower carb and notice cramps, headaches, or that heavy tired feeling.
That’s where electrolyte-style mocktails come in. A salted citrus spritz, a cucumber mint cooler, or a lightly spiced lemonade can feel like a reset. If you want more ideas in that lane, these DIY recipes are handy to keep around: keto electrolyte drinks you can make at home.
For label literacy in general, this FDA guide is also useful when you’re comparing bottled mixers: how to understand and use the Nutrition Facts label.
Also Read: Pork Tenderloin in Oven (Juicy, Easy, 350°F or 400°F) Recipe
Keto lemonade: the “zero carb lemonade” vibe base that unlocks dozens of mocktails
If you make one thing from this post, make a lemonade base. It turns keto mocktails from “special occasion effort” into “I can do this anytime.”
Instead of mixing lemonade from scratch every time, you make a concentrate. That way you can build drinks quickly, keep the taste consistent, and adjust sweetness per glass. Moreover, you’ll avoid the classic mistake of over-sweetening early, then trying to fix it with more lemon, then ending up with something harsh and watery.
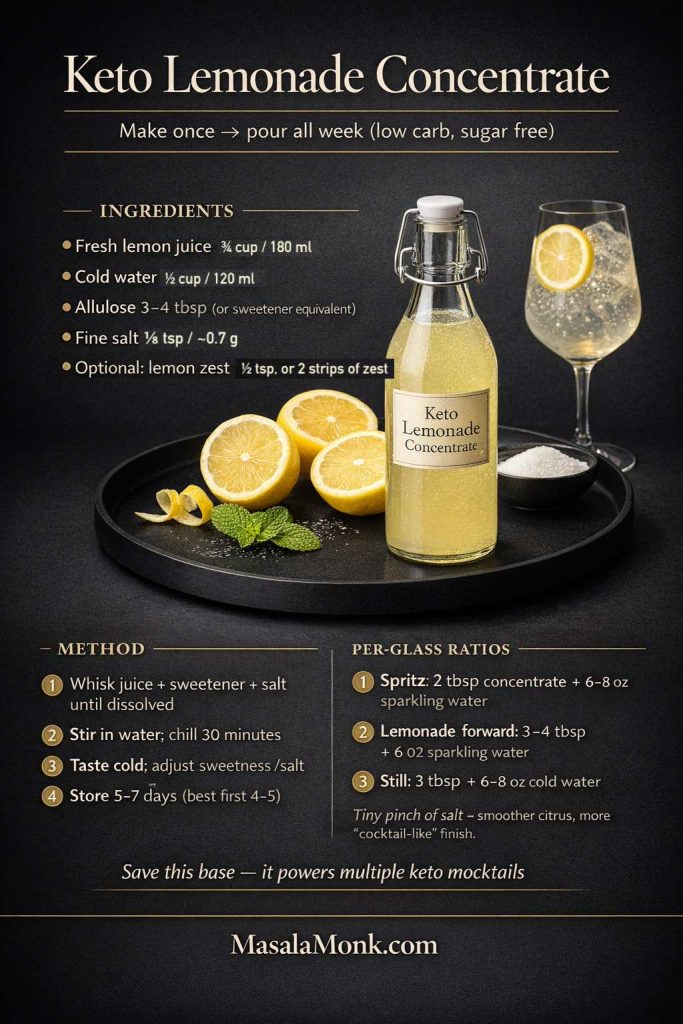
Keto lemonade concentrate (fridge base for mocktails)
This is the “make once, pour all week” foundation that turns your fridge into a mocktail bar. Because it’s a concentrate, you can keep it punchy and bright, then dilute per glass—so every drink stays crisp instead of watery.
Makes: about 1¼ cups / ~300 ml (enough for ~6–10 drinks, depending on how strong you like it)
Fridge life: 5–7 days, best flavor in the first 4–5 days
You’ll use it for: spritzers, coolers, mockaritas, and spiced lemonades
Texture goal: bright, clean, slightly rounded
- Fresh lemon juice (start with enough for a small jar)
- Cold water (a little, to soften the sharpness)
- Your sweetener of choice (allulose is often the smoothest here)
- A pinch of salt
Stir until dissolved and chill. Once it’s cold, taste again. The flavor shifts after chilling; it usually tastes sharper at first, then smoother later. Below is a precise recipe, tips, & upgrades to help you along the way.
Ingredients
- Fresh lemon juice: ¾ cup / 180 ml (from about 4–6 lemons)
- Cold water: ½ cup / 120 ml
- Allulose (recommended): 3–4 tbsp / 36–48 g
- or monk fruit blend / stevia blend: use the equivalent sweetness for 3–4 tbsp sugar (start low, then adjust)
- Fine salt: ⅛ tsp / ~0.7 g
- Optional (for extra “cocktail” depth): lemon zest ½ tsp, or 2 strips of zest (no white pith)
Method
- Juice the lemons into a bowl or measuring jug. If you’re adding zest, do it now so the oils perfume the base.
- Add sweetener + salt, then whisk until fully dissolved.
- Stir in the cold water and taste. At this stage it should be bold—slightly too intense to drink straight—because it will be diluted in the glass.
- Chill completely (at least 30 minutes). Then taste again. Cold changes the balance; you may want a touch more sweetener or a pinch more salt.
How to use it in Keto Mocktails (per drink)
- Classic “lemonade spritz” strength: 2 tbsp / 30 ml concentrate + 6–8 fl oz / 180–240 ml sparkling water
- More lemonade-forward: 3–4 tbsp / 45–60 ml concentrate + 6 fl oz / 180 ml sparkling water
- Still lemonade (no bubbles): 3 tbsp / 45 ml concentrate + 6–8 fl oz / 180–240 ml cold water
Easy flavor upgrades (add to the jar)
These upgrades let you create “variants” without re-making the base:
- Ginger-lime lane: add 1–2 tbsp / 15–30 ml ginger concentrate (recipe in the Ginger Lime Fizz)
- Mint lane: add 8–10 mint leaves, bruise lightly, steep 15 minutes, then strain
- Cucumber lane: add 6–8 cucumber slices, steep 20 minutes, then strain
- Spiced jal jeera lane: don’t add spices to the jar—add them per glass so they don’t settle and intensify too much
Quick balance fixes (so it never tastes “off”)
- Too sharp / too sour: add ½–1 tbsp / 6–12 g allulose (or sweetener equivalent), stir, chill 10 minutes, re-taste.
- Too sweet: add 1 tbsp / 15 ml lemon juice + a pinch more salt.
- Tastes flat or “thin”: add a tiny pinch of salt (yes, again). It’s the easiest way to make citrus taste rounded.
At this point, you’ve basically created a keto-friendly lemonade base. It can feel like “no carb lemonade” in practice, depending on how you portion it and which sweetener you use. Either way, it’s the backbone for many low carb, sugar free drinks.
If you’re the kind of person who likes a simpler morning ritual—less sweet, more gentle—warm lemon water is a separate lane that pairs nicely with the citrus theme. This piece covers that habit in a calm, practical way: the warm lemon water morning ritual.
A quick label note when you buy mixers
If you’re using bottled lemon juice or “lemonade flavor” products, it helps to understand how labels handle sugars and serving sizes. The FDA guides here are genuinely useful when you want clarity:
Now you can plug this concentrate directly into every drink in the mocktails section—especially the spritz, cucumber cooler, berry sparkler, and jal jeera lemonade—without re-measuring lemons every time.
Also Read: How to Make a Flax Egg (Recipe & Ratio for Vegan Baking)
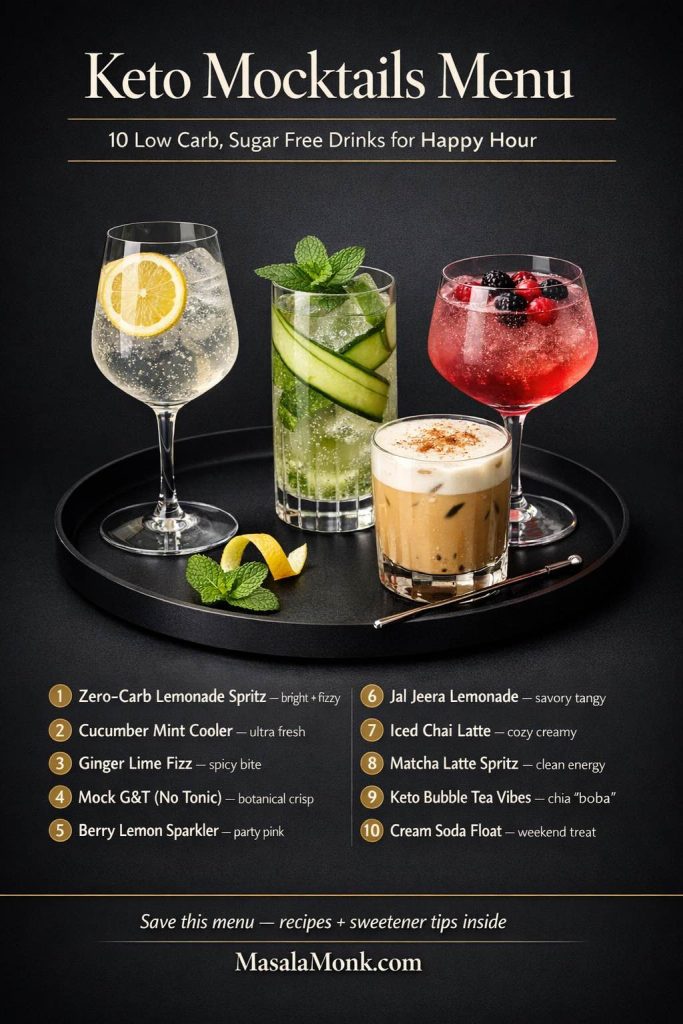
10 keto mocktails that feel like cocktails (low carb, no sugar drinks you’ll repeat)
Each recipe below is built to be practical, not precious. In other words, you won’t need obscure ingredients, and you won’t need a blender unless you genuinely want one. Even so, every drink still has a clear “job”: crisp refreshment, spicy bite, creamy comfort, or party-ready fizz.
Meanwhile, you’ll notice the same foundations coming back—citrus + salt, herb + bubbles, tea + spice, ginger + lime, creamy + vanilla. Rather than feeling repetitive, that’s exactly what makes the set useful: once you master a few bases, you can improvise confidently.
1) Zero-carb lemonade spritz (a bright keto mocktail staple)
This is the fastest path to a satisfying fizzy drink that still feels intentional. Even better, it tastes like lemonade soda—only cleaner, sharper, and less cloying—so it works as a weeknight “reset” as well as a party pour.
Makes: 1 drink
Glass: tall glass (highball)
Ingredients
- Ice: 1 cup / ~140 g
- Keto lemonade concentrate: 2–4 tbsp / 30–60 ml
- Sparkling water (plain): 6–8 fl oz / 180–240 ml
- Lemon wheel or lemon zest: 1 wheel or a few strips
Optional upgrades (choose 1–2)
- Fine salt: tiny pinch (about 1/16 tsp)
- Fresh ginger: 2–3 thin slices (or ginger juice 1 tsp / 5 ml)
- Fresh mint: 6–8 leaves
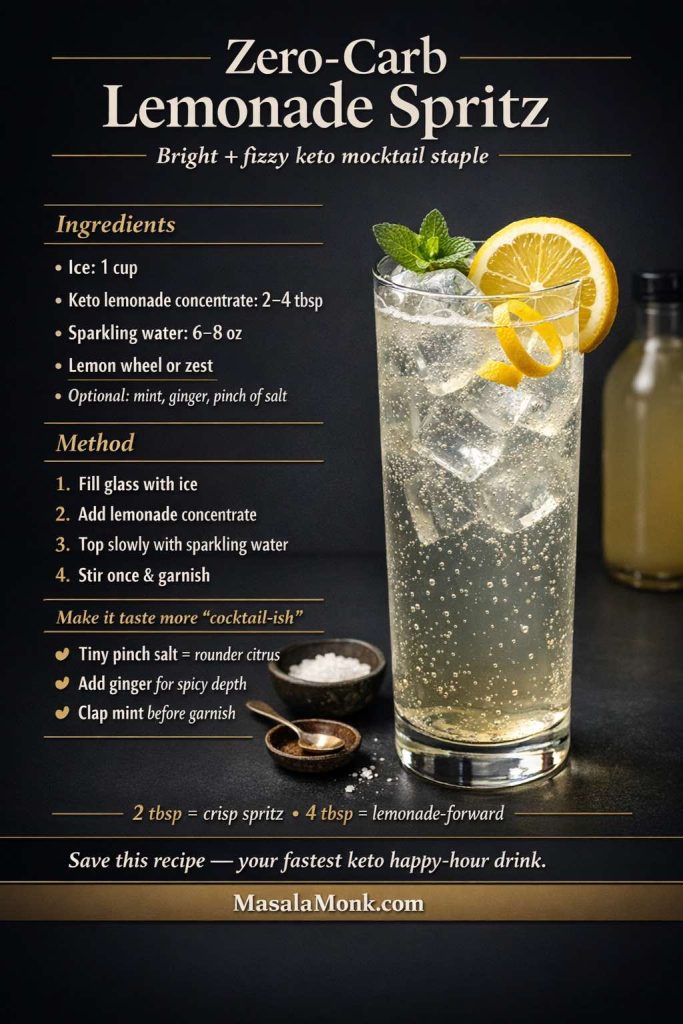
Method
- First, fill a tall glass with ice so everything stays aggressively cold.
- Next, pour in the lemonade concentrate. If you’re unsure where to start, use 2 tbsp (30 ml) for a crisp drink or 4 tbsp (60 ml) for a more lemonade-forward sip.
- Then top with sparkling water slowly; this keeps the carbonation lively instead of foamy.
- After that, stir once—just one gentle turn is enough.
- Finally, garnish with lemon wheel or zest. If you’re using mint, clap it once between your palms before adding; that quick move releases aroma immediately.
Make it taste more “cocktail-ish”
- Add the tiny pinch of salt. Surprisingly, it doesn’t make the drink salty; instead, it makes the lemon taste rounder and more “complete.”
- Alternatively, add ginger slices and keep the sweetener minimal—ginger brings a natural sense of richness without extra sweetness.
Also Read: Croquettes Recipe: One Master Method + 10 Popular Variations
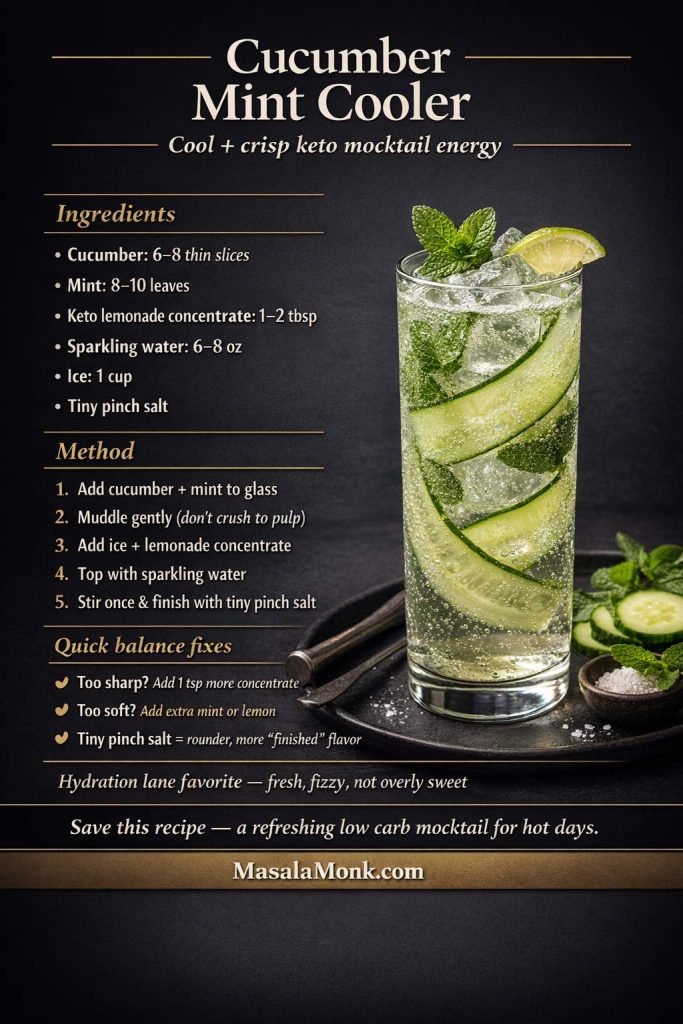
2) Cucumber mint cooler (cool, crisp keto mocktail energy)
When your brain wants “fresh and hydrating” rather than “sweet,” this is the one to reach for. Moreover, it’s almost impossible to mess up, which makes it ideal for busy evenings. The cucumber brings clean, watery crunch; the mint brings lift; the lemon ties it all together.
Makes: 1 drink
Glass: tall glass
Ingredients
- Cucumber: 6–8 thin slices / 40–60 g
- Fresh mint: 8–10 leaves
- Keto lemonade concentrate: 1–2 tbsp / 15–30 ml
- Sparkling water: 6–8 fl oz / 180–240 ml
- Ice: 1 cup / ~140 g
- Fine salt: tiny pinch (about 1/16 tsp)
Method
- Start by adding cucumber and mint to the bottom of the glass.
- Then muddle gently—6 to 8 presses is plenty. You’re aiming to bruise the mint and lightly crush the cucumber, not turn everything into pulp.
- Add ice, pour in the lemonade concentrate, and top with sparkling water.
- Stir once, and only once.
- Lastly, add the tiny pinch of salt and taste. If the drink feels too sharp, add another teaspoon (5 ml) of lemonade concentrate; if it feels too soft, add an extra squeeze of lemon or more mint.
If you like this “hydration lane”
You’ll probably enjoy keeping electrolyte-style sips in rotation, especially on hot days or after workouts. For more DIY ideas you can adapt, see homemade electrolytes for fasting with zero-cal DIY options.
3) Ginger lime fizz (keto mocktail that scratches the ginger beer itch)
This is spicy, sharp, and unmistakably bar-like. Instead of relying on bottled “ginger beer” (often a sugar trap), you make a quick ginger concentrate that lasts several drinks. As a result, this becomes one of those recipes you repeat constantly because it tastes far more impressive than the effort involved.
Makes: 1 drink
Glass: tall glass
Quick ginger concentrate (makes 6–8 drinks)
Ingredients
- Fresh ginger, grated: 2 oz / 60 g
- Hot water: 1 cup / 240 ml

Method
- Pour hot water over the grated ginger and steep 10–15 minutes.
- Strain well, then chill. The flavor intensifies once cold, so it’s worth tasting again after refrigeration.
Drink ingredients
- Lime juice: 1–1½ tbsp / 15–22 ml
- Ginger concentrate: 1–2 tbsp / 15–30 ml
- Sweetener: to taste (start small)
- Sparkling water: 6–8 fl oz / 180–240 ml
- Ice: 1 cup / ~140 g
- Lime zest: pinch or 1 strip
Optional
- Chili salt: tiny pinch
- Fresh ginger slice: 1 for garnish
Method
- Fill the glass with ice.
- Add lime juice, ginger concentrate, and sweetener; then stir until the sweetener dissolves.
- Top with sparkling water and give a single gentle stir.
- Finish with lime zest. That aroma is what makes the drink feel like a cocktail instead of “lime water.”
- If you want extra heat, add a tiny pinch of chili salt and let the drink sit 30 seconds before your first sip.
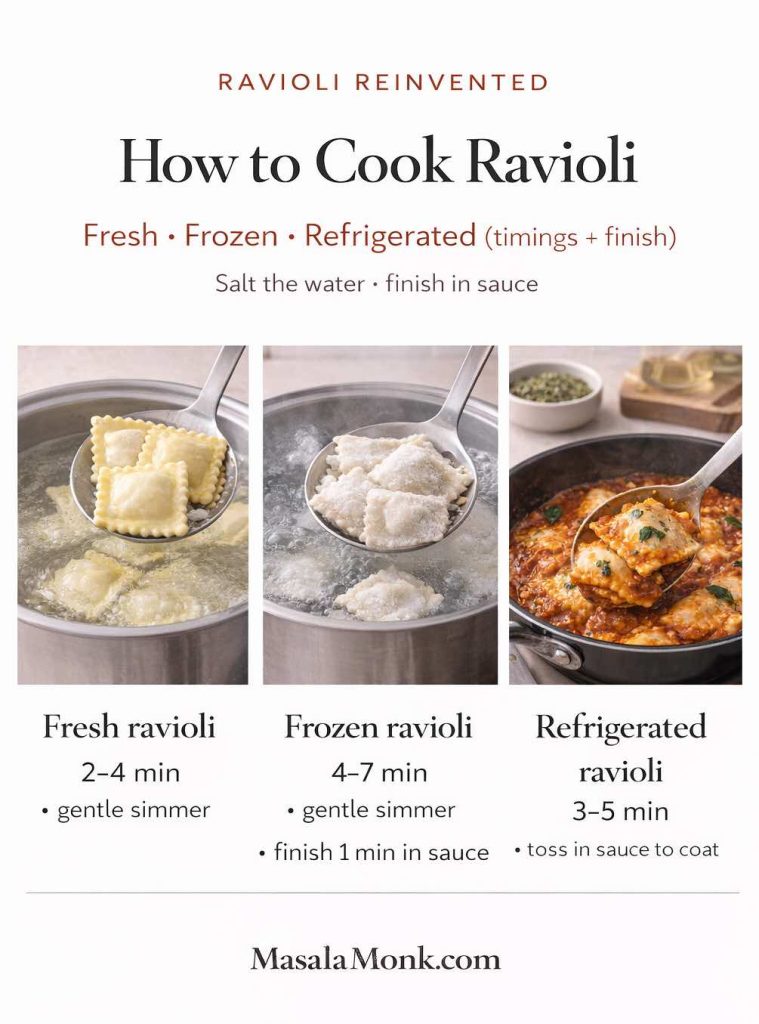
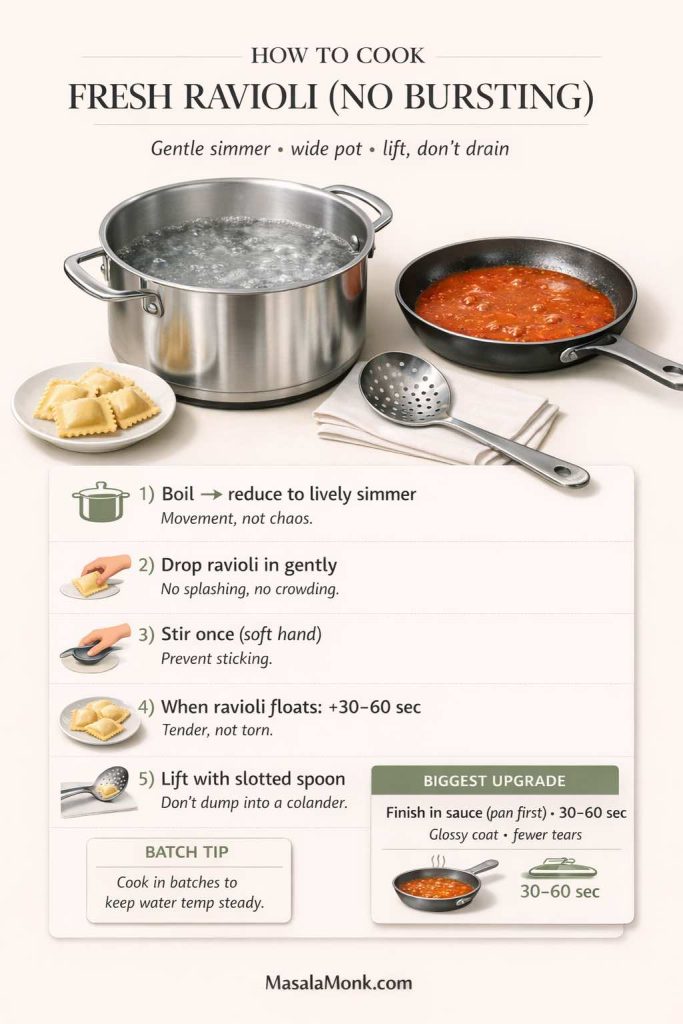
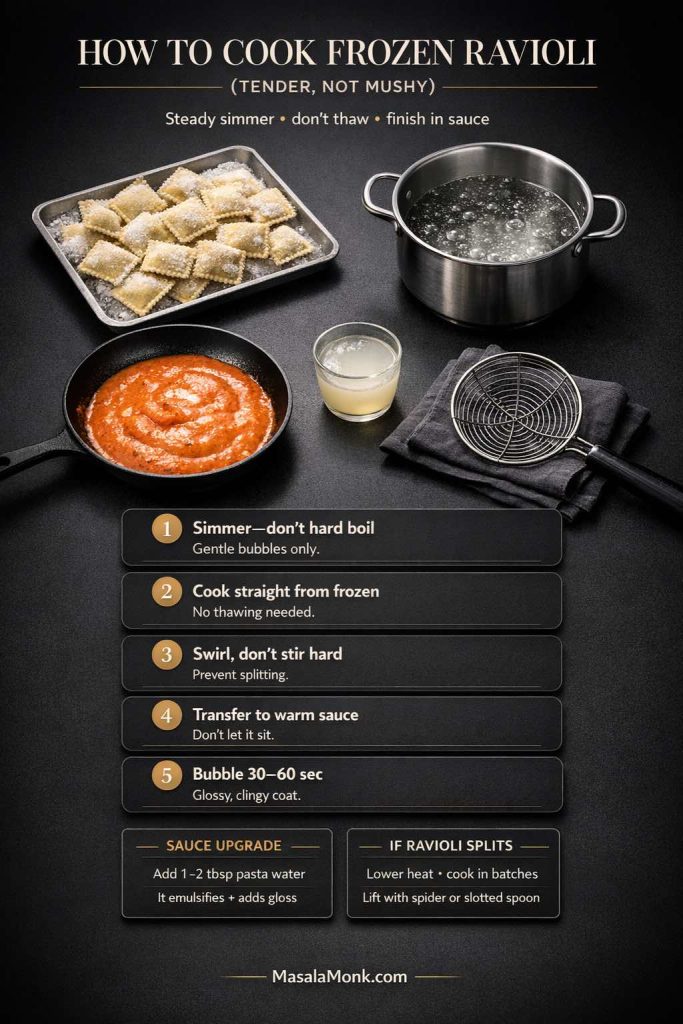
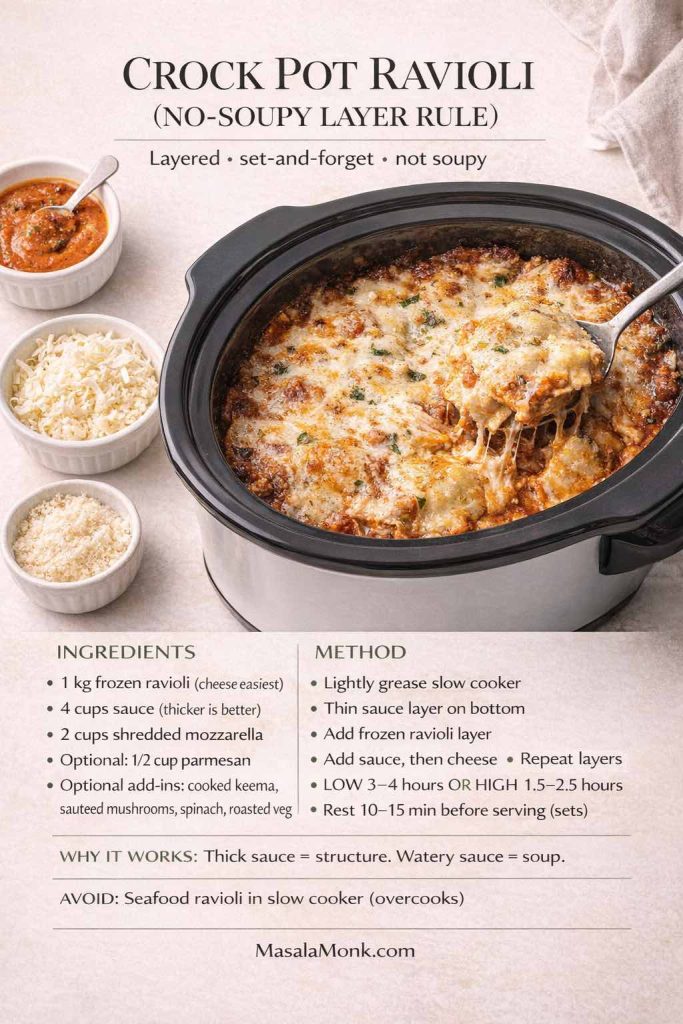
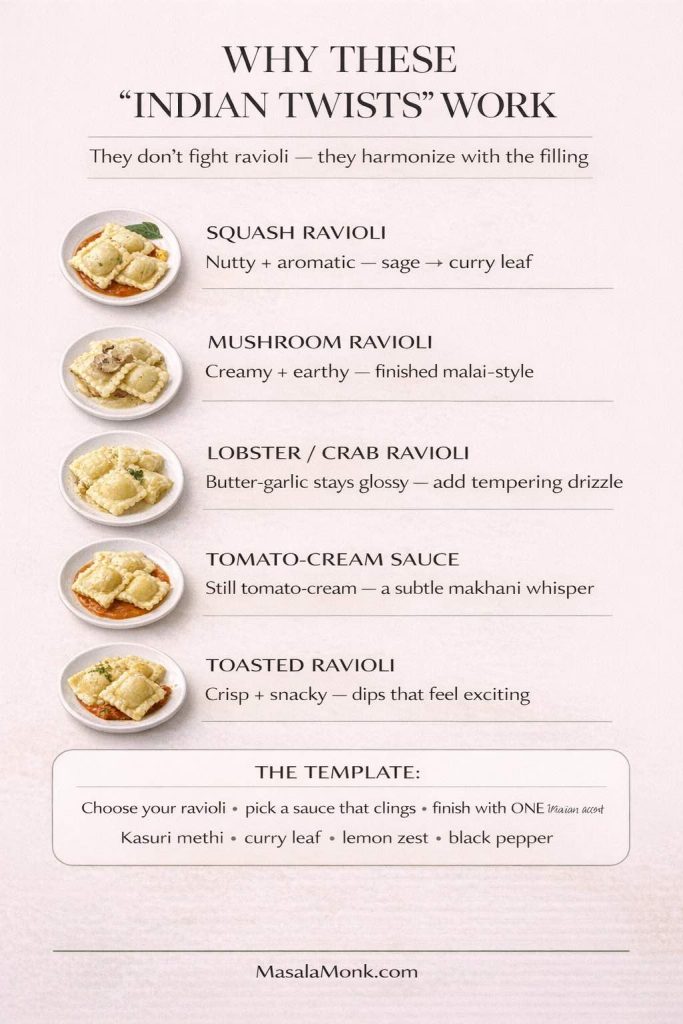
Also Read: Ravioli Recipe Reinvented: 5 Indian-Inspired Twists on the Italian Classic
4) “Mock G&T” without the tonic trap (a crisp botanical keto mocktail)
Tonic water is the classic troublemaker—sweet, sneaky, and rarely as “light” as it tastes. Instead, this version recreates the crisp botanical vibe with aromatics and clean fizz. Even better, it’s adaptable: cucumber for spa freshness, rosemary for piney elegance, or citrus zest for pure lift.
Makes: 1 drink
Glass: rocks glass or tall glass
Ingredients
- Soda water: 6–8 fl oz / 180–240 ml
- Lime or lemon juice: 1 tbsp / 15 ml
- Cucumber slices: 4–6 slices / 30–40 g or rosemary: 1 small sprig
- Ice: 1 cup / ~140 g
Optional (for bite)
- Apple cider vinegar: ½ tsp / 2.5 ml
- Lemon zest: 1 strip
- Fine salt: tiny pinch

Method
- Add ice to the glass.
- Pour in citrus juice (and vinegar, if using).
- Add cucumber or rosemary.
- Top with soda water and stir once.
- Finish with zest so it smells “grown-up” before it tastes “grown-up.”
When you want it extra “cocktail-like”
Use rosemary + lemon zest + that tiny pinch of salt. The combination reads herbal, sharp, and sophisticated rather than sweet.
Also Read: Fish and Chips Reimagined: 5 Indian Twists (Recipe + Method)
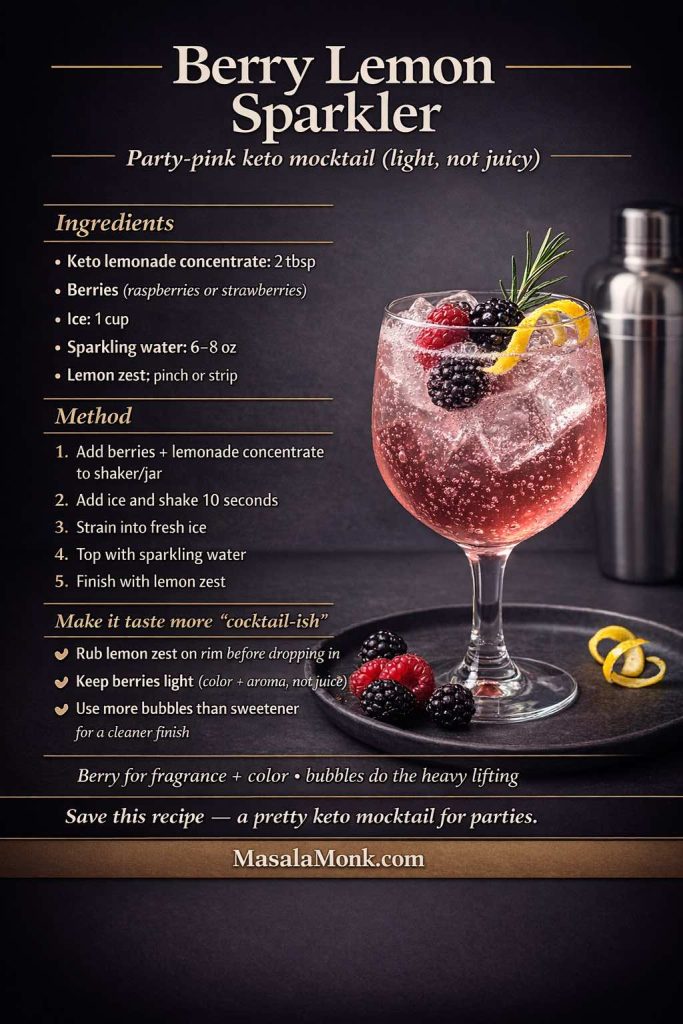
5) Berry-lemon sparkler (a bright keto mocktail that stays light, not juicy)
This is a party-friendly “pink drink” that doesn’t become fruit juice. The secret is using berries for fragrance and color, then letting bubbles do the heavy lifting. Consequently, you get something festive and pretty without the sugar baggage.
Makes: 1 drink
Glass: tall glass
Ingredients
- Keto lemonade concentrate: 2 tbsp / 30 ml
- Berries (raspberries or strawberries): 3–5 berries / 25–40 g
- Ice: 1 cup / ~140 g
- Sparkling water: 6–8 fl oz / 180–240 ml
- Lemon zest: pinch or strip
Method
- Add berries and lemonade concentrate to a jar or shaker.
- Add ice and shake hard for 10 seconds. This step matters because it pulls aroma and color quickly without needing a blender.
- Strain into a fresh glass filled with ice.
- Top with sparkling water and stir gently.
- Finish with lemon zest. If you want it more “cocktail bar,” rub the zest around the rim first, then drop it in.
If you ever want to sanity-check carbs for a specific berry portion, USDA FoodData Central is the most straightforward nutrition lookup.
Also Read: Dirty Martini Recipe (Classic, Extra Dirty, No Vermouth, Spicy, Blue Cheese, Tequila + Batched)
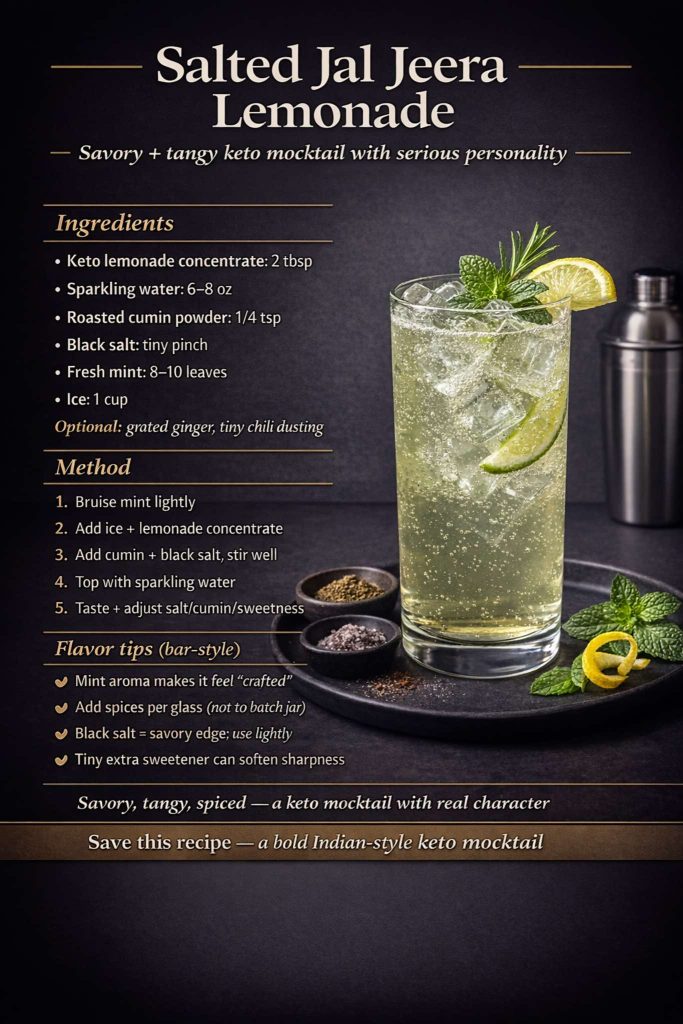
6) Salted jal jeera lemonade (Indian-spiced keto mocktail with serious personality)
This is where things get genuinely memorable: savory, tangy, and shockingly refreshing. It’s not trying to taste like soda; instead, it tastes like a crafted bar drink—sharp, aromatic, and layered. If you’ve never tried jal jeera flavors, this is a wildly satisfying place to start.
Makes: 1 drink
Glass: tall glass
Ingredients
- Keto lemonade concentrate: 2 tbsp / 30 ml
- Sparkling water: 6–8 fl oz / 180–240 ml
- Roasted cumin powder: ¼ tsp / ~0.5 g
- Black salt: tiny pinch (start with less than 1/16 tsp)
- Fresh mint: 8–10 leaves
- Ice: 1 cup / ~140 g
Optional
- Fresh ginger, grated: ¼ tsp / ~1 g
- Chili powder: tiny dusting
Method
- Bruise the mint first (clap it once or press gently in the glass). That step changes the aroma immediately.
- Add ice, then pour in the lemonade concentrate.
- Sprinkle cumin and black salt, then stir well so the spices don’t float on top.
- Top with sparkling water and stir once more.
- Taste and adjust: if it’s too sharp, add a touch more sweetener; if it’s too flat, add a hair more black salt or cumin.
For the classic flavor inspiration, see jal jeera as Indian lemonade.
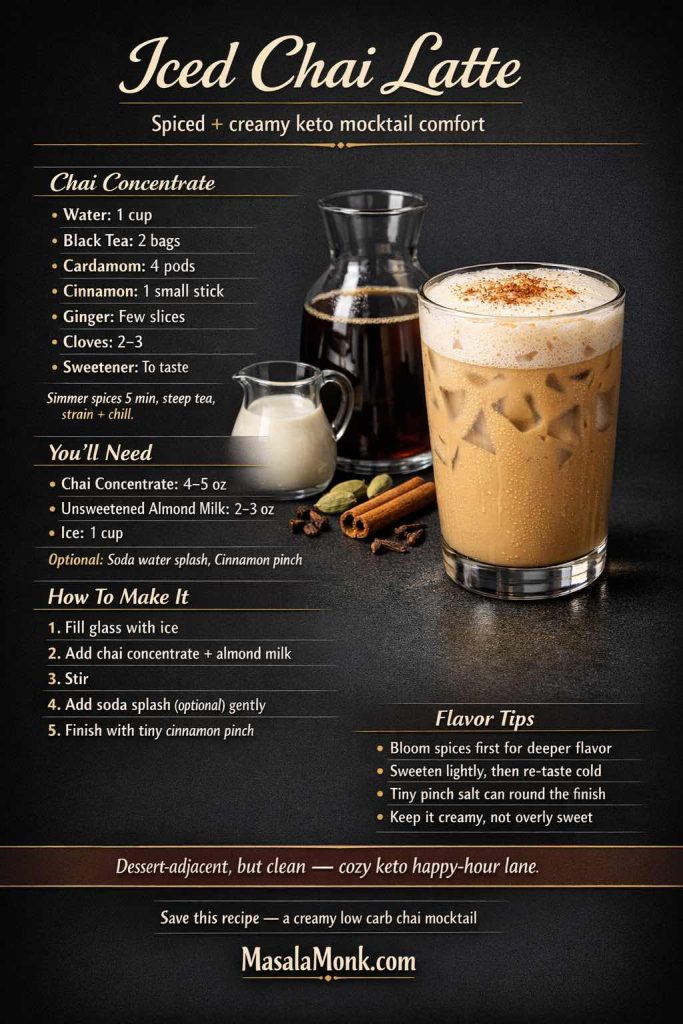
7) Iced chai latte (spiced, creamy keto mocktail comfort)
This one feels cozy without being heavy, which makes it perfect for evenings when you want something “dessert-adjacent” but still clean. Furthermore, it’s flexible: keep it still for calm comfort, or add a little soda water for a surprisingly elegant lift.
Makes: 1 drink
Glass: tall glass
Chai concentrate (makes 2–3 drinks)
Ingredients
- Water: 1 cup / 240 ml
- Black tea: 2 tea bags (or 2 tsp / ~4 g loose leaf)
- Cardamom pods: 4, lightly crushed
- Cinnamon stick: 1 small
- Fresh ginger: 4–5 thin slices (or ½ tsp / ~2 g grated)
- Cloves: 2–3
- Sweetener: to taste
Method
- Simmer the water and spices for 5 minutes so the flavors actually bloom.
- Remove from heat, add tea, and steep 3–4 minutes.
- Strain, sweeten lightly, then chill completely.
Drink ingredients
- Chai concentrate: 4–5 fl oz / 120–150 ml
- Unsweetened almond milk (or a small splash of cream): 2–3 fl oz / 60–90 ml
- Ice: 1 cup / ~140 g
Optional
- Soda water: 2–3 fl oz / 60–90 ml (for lift)
- Ground cinnamon: tiny pinch
Method
- Fill a tall glass with ice.
- Pour in chai concentrate and almond milk; stir.
- If using soda water, add it last and stir very gently.
- Finish with a tiny pinch of cinnamon on top.
If you want to level up your chai base—spice balance, brewing technique, and depth—this guide is excellent: how to make the perfect masala chai.
8) Matcha latte spritz (bright, clean keto mocktail energy)
This drink scratches the “energy drink” itch in a calmer way. It’s bright, earthy, and refreshing; meanwhile, the bubbles make it feel celebratory rather than functional. If you want it creamy, add a small splash of milk; if you want it sharper, add lemon zest. Either way, it feels deliberate.
Makes: 1 drink
Glass: tall glass
Ingredients
- Matcha: ½ tsp / 1–1.5 g
- Cold water: 2 fl oz / 60 ml
- Sweetener: to taste (start tiny)
- Ice: 1 cup / ~140 g
- Sparkling water: 6 fl oz / 180 ml
- Optional unsweetened milk: 1–2 fl oz / 30–60 ml
- Optional lemon zest: pinch
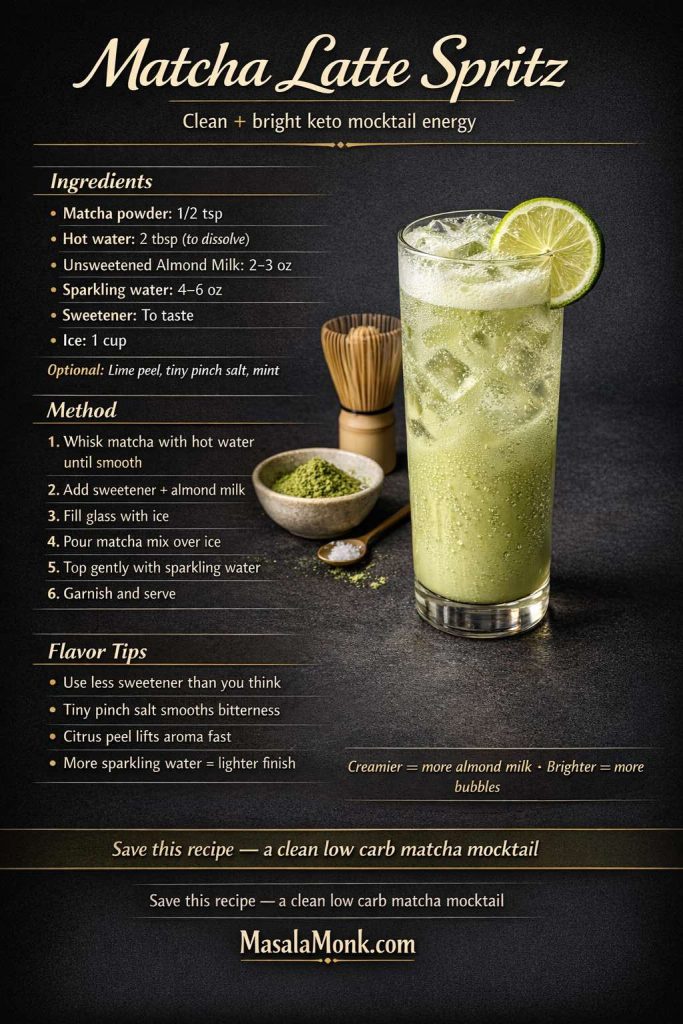
Method
- Shake matcha + cold water + sweetener in a jar for 10–15 seconds (or whisk until smooth).
- Fill a tall glass with ice.
- Pour in the matcha mixture.
- Top with sparkling water and stir once—very gently.
- Add milk if desired, then finish with lemon zest for a brighter aroma.
If tea-based rituals are your thing, you may enjoy this deeper read: tea and cortisol.
9) Bubble tea vibes (boba-style keto mocktail workaround)
This doesn’t pretend to be tapioca boba. Instead, it gives you the creamy tea satisfaction plus a fun texture—without the sugar-heavy bubble tea base. The result feels playful and comforting, especially when you want something different from endless fizz.
Makes: 1 drink
Glass: tall glass
Ingredients
- Strong black tea, chilled: 6 fl oz / 180 ml
- Unsweetened milk alternative: 2–3 fl oz / 60–90 ml
- Sweetener: to taste
- Ice: ½–1 cup / 70–140 g
“Boba-style” texture
- Chia seeds: 1 tbsp / 12 g
- Water (to soak): 3 tbsp / 45 ml
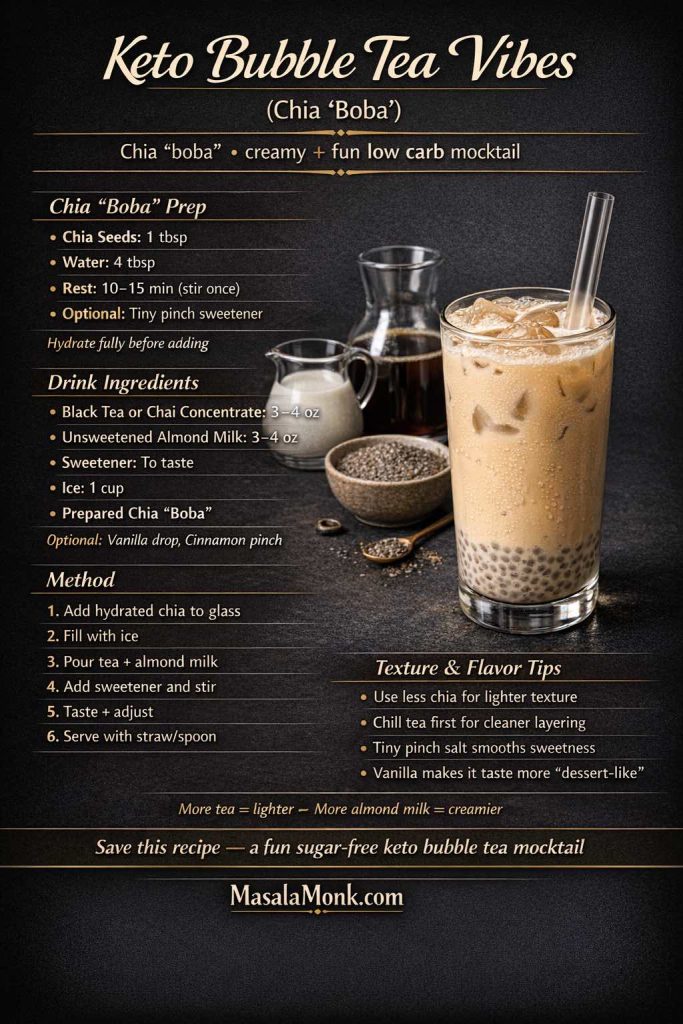
Method
- Soak chia seeds in water for 10–15 minutes until gel-like; stir once halfway so it doesn’t clump.
- Spoon the chia gel into the bottom of a tall glass.
- Add ice, then pour in chilled tea and milk alternative.
- Sweeten, then stir well so the sweetness distributes evenly.
- Sip with a wide straw if you have one; otherwise, use a spoon-sip approach and enjoy the texture.
Variations that actually work
- For dessert vibes, add 2 drops vanilla extract.
- For a sharper finish, add a tiny pinch of salt and keep the sweetness lighter.
Also Read: 10 Low Carb Chia Pudding Recipes for Weight Loss (Keto, High-Protein, Dairy-Free)
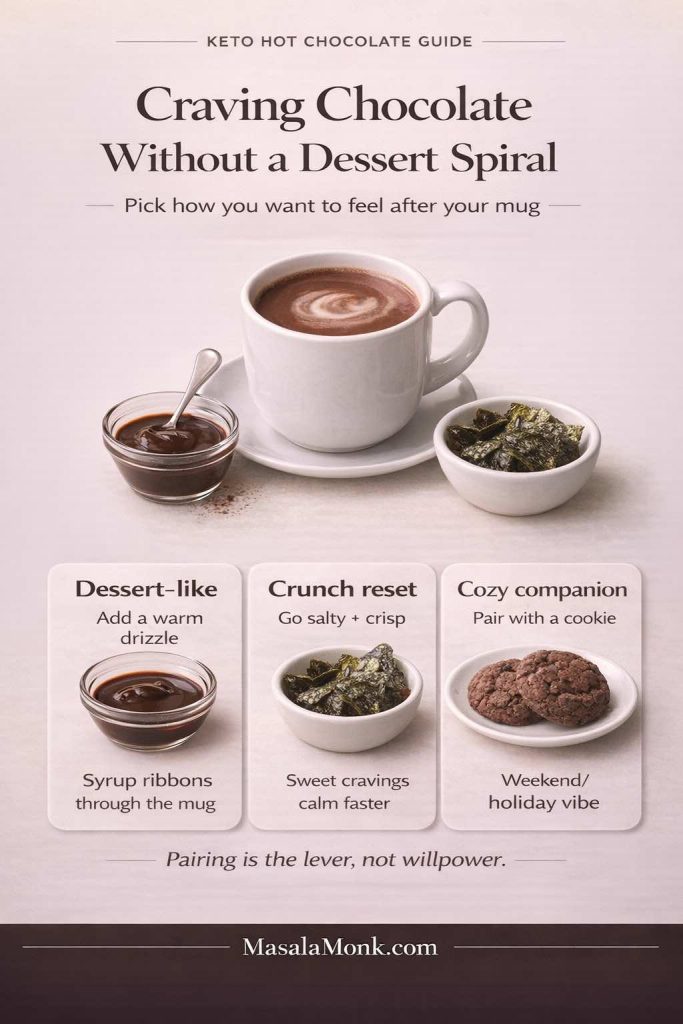
10) Cream soda float (dessert-style keto mocktail fun)
This is the “I want something fun” drink—nostalgic, creamy, and oddly satisfying. It’s not an everyday sip for most people; nevertheless, it’s perfect when you want a treat without turning the evening into a sugar spiral.
Makes: 1 drink
Glass: tall glass
Ingredients
- Ice: 1 cup / ~140 g
- Soda water: 6–8 fl oz / 180–240 ml
- Vanilla extract: ¼ tsp / 1.25 ml (start with less if you prefer subtle vanilla)
- Sweetener: to taste
- Optional cream (or coconut cream): 1–2 tbsp / 15–30 ml
- Optional lemon zest: tiny pinch (adds brightness)
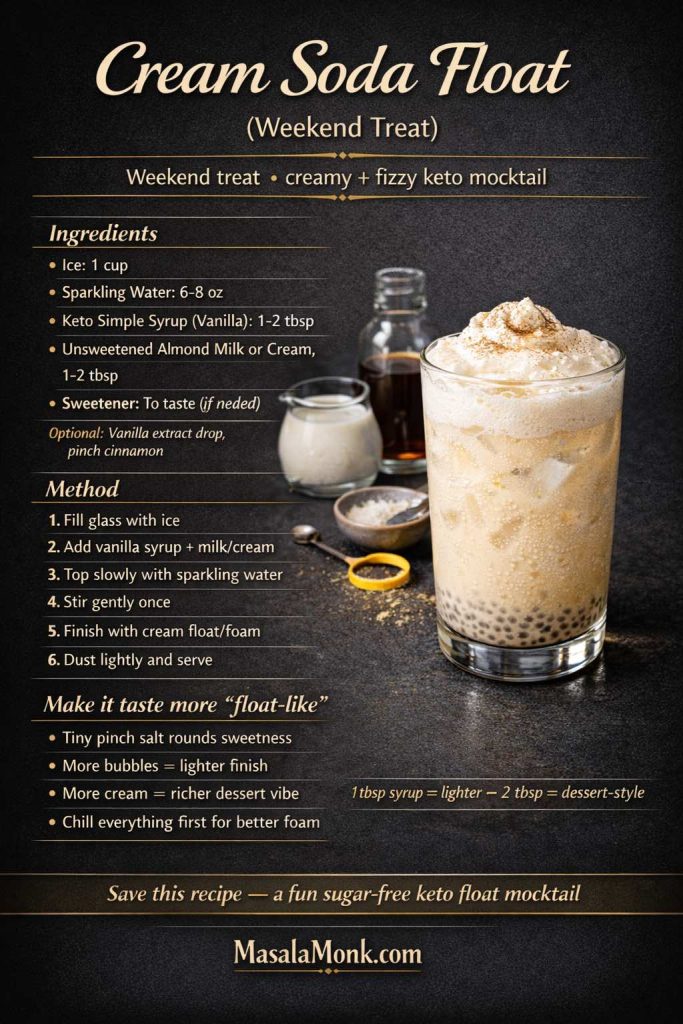
Method
- Fill a tall glass with ice.
- Add vanilla extract and sweetener, then pour in soda water slowly.
- Stir gently to dissolve the sweetener without killing the fizz.
- Add cream last and give it one slow swirl so it stays “floaty” instead of fully mixing.
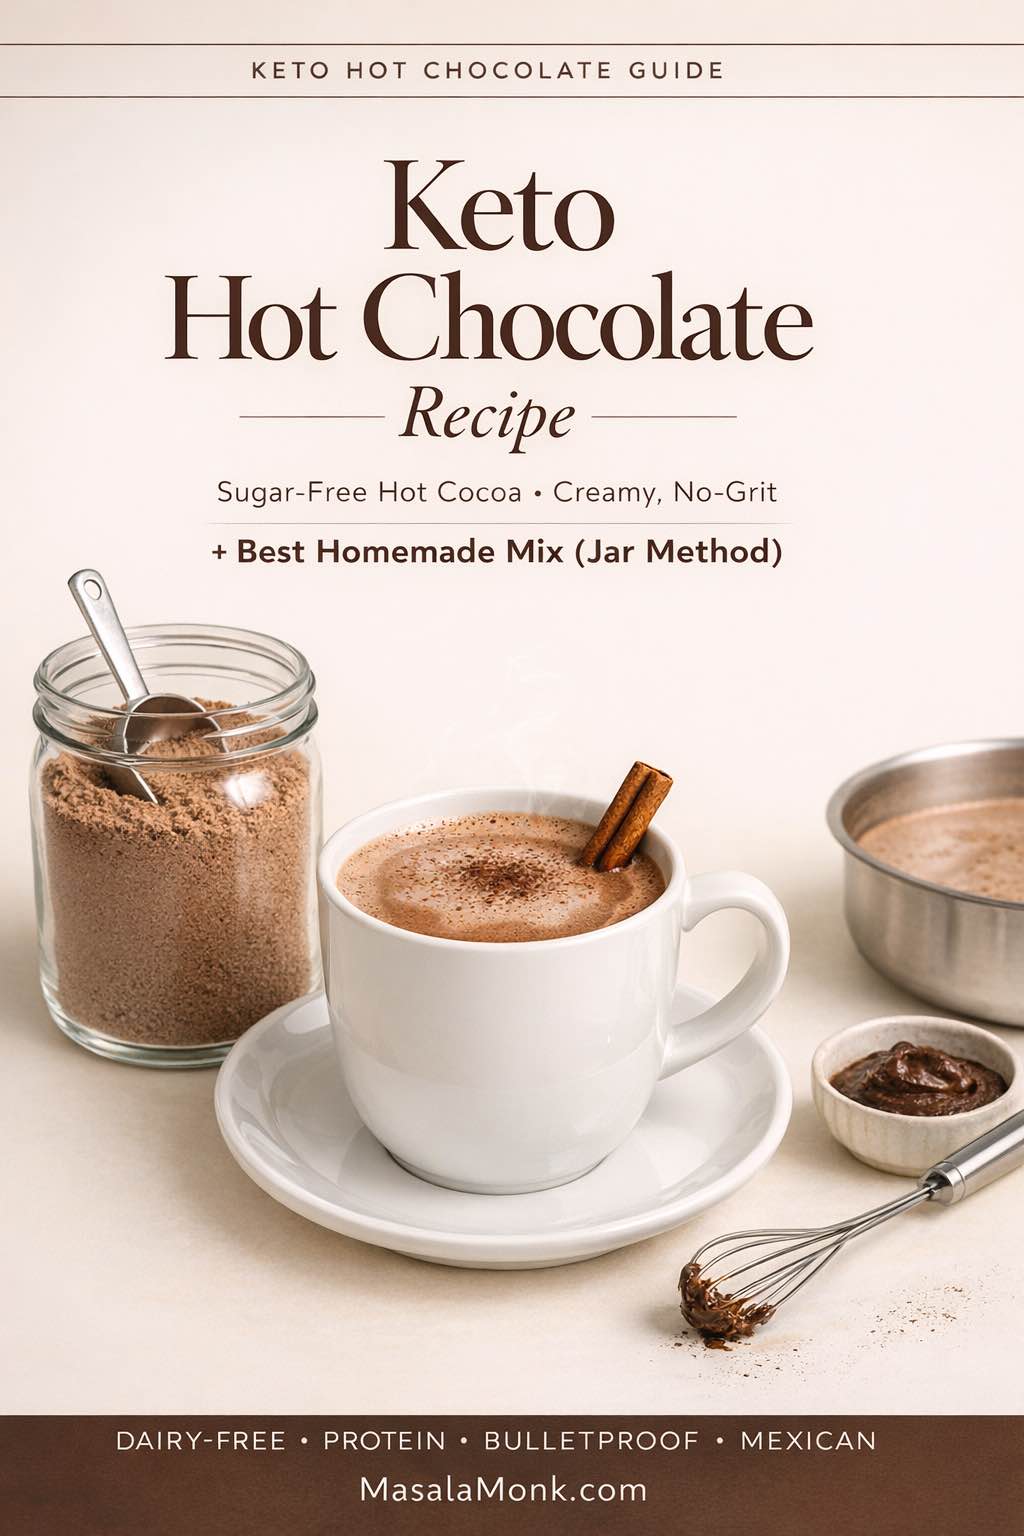
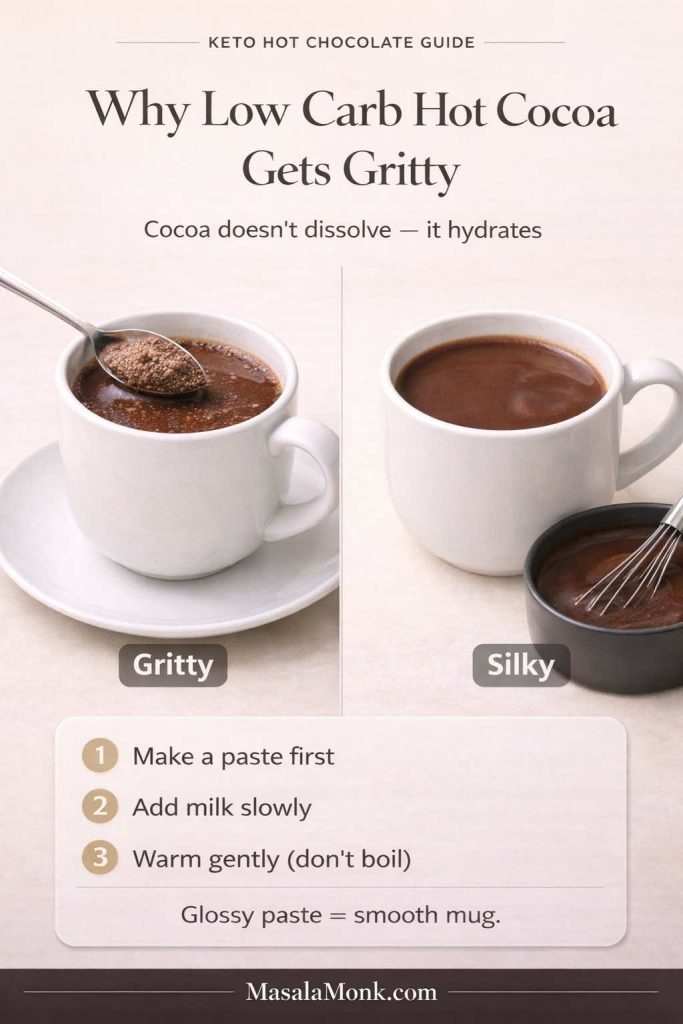
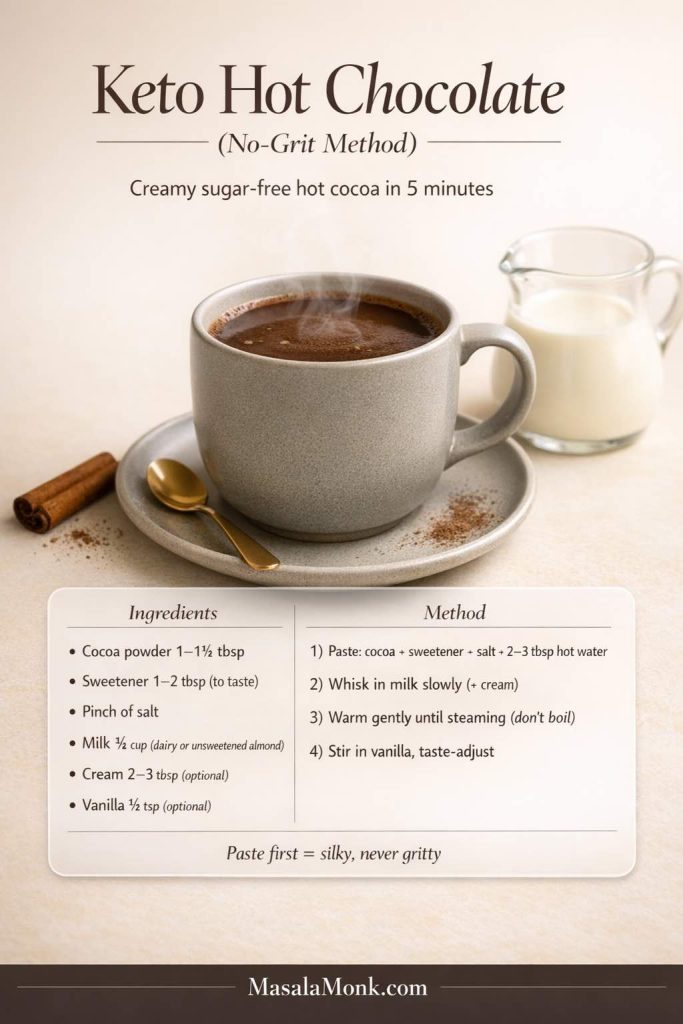
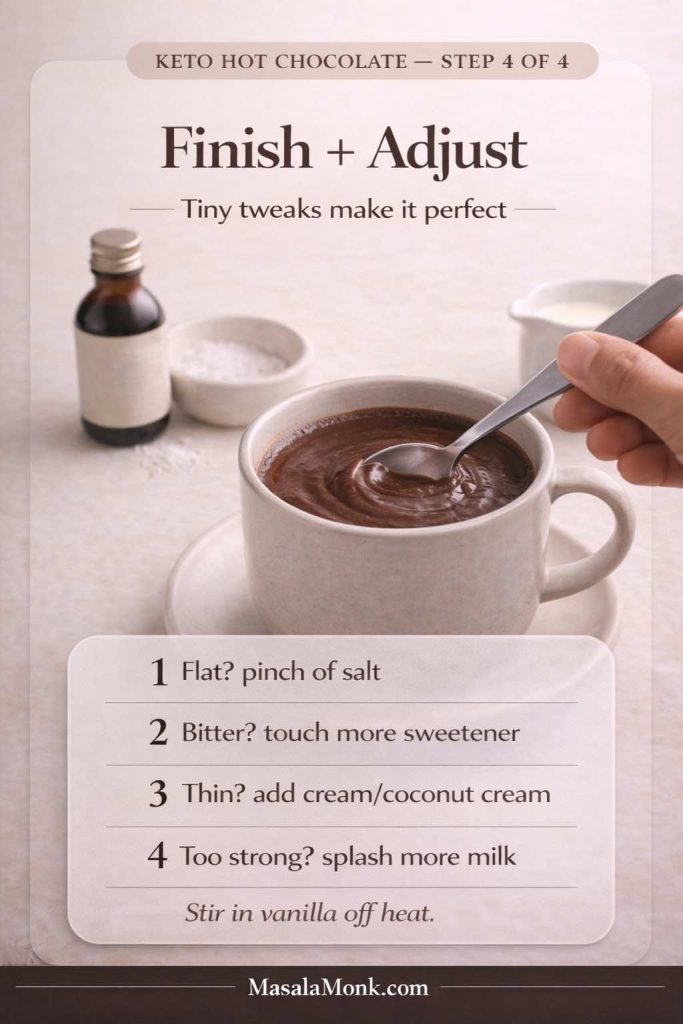
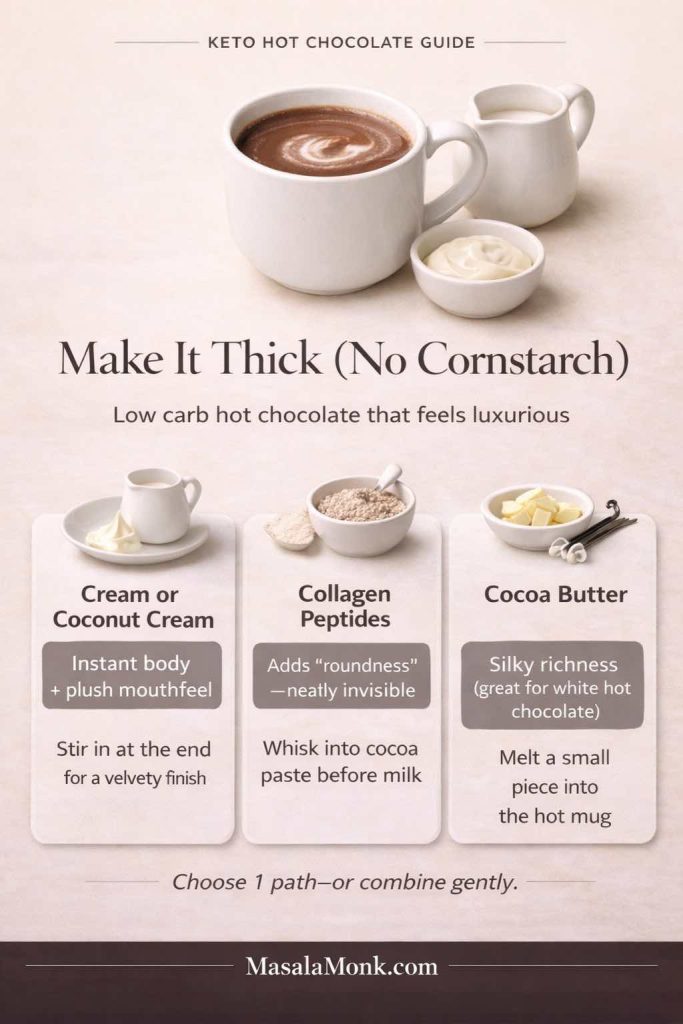
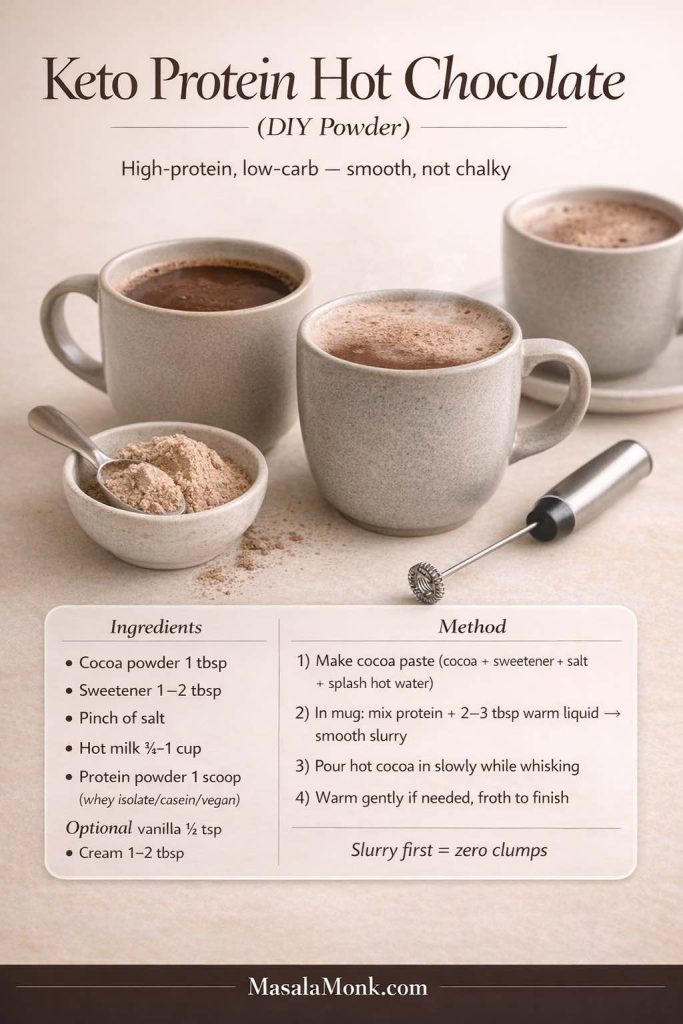
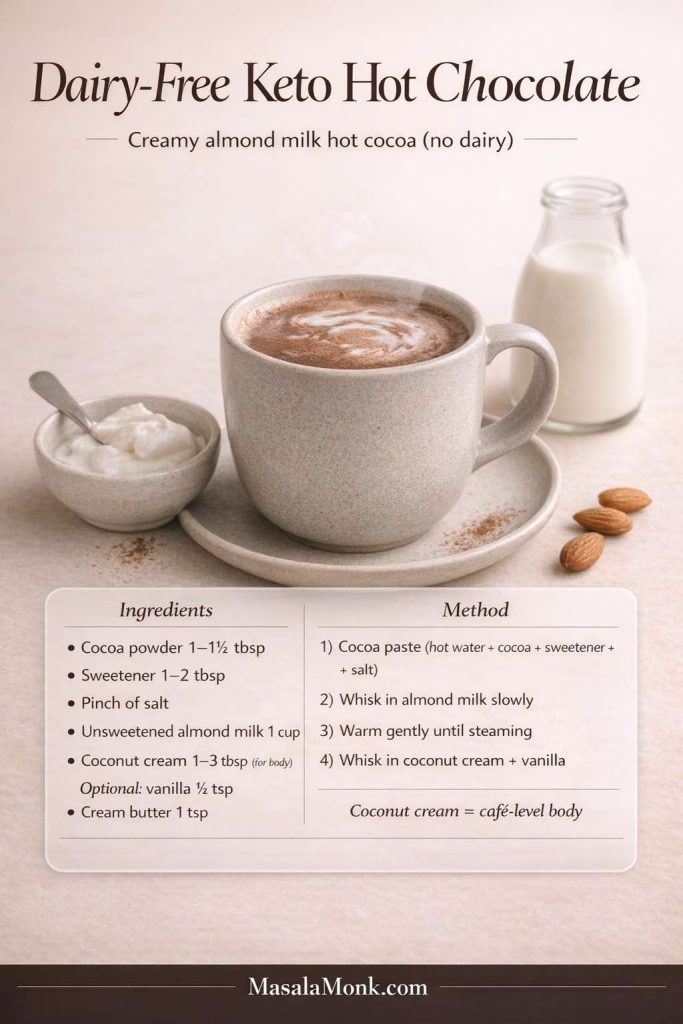
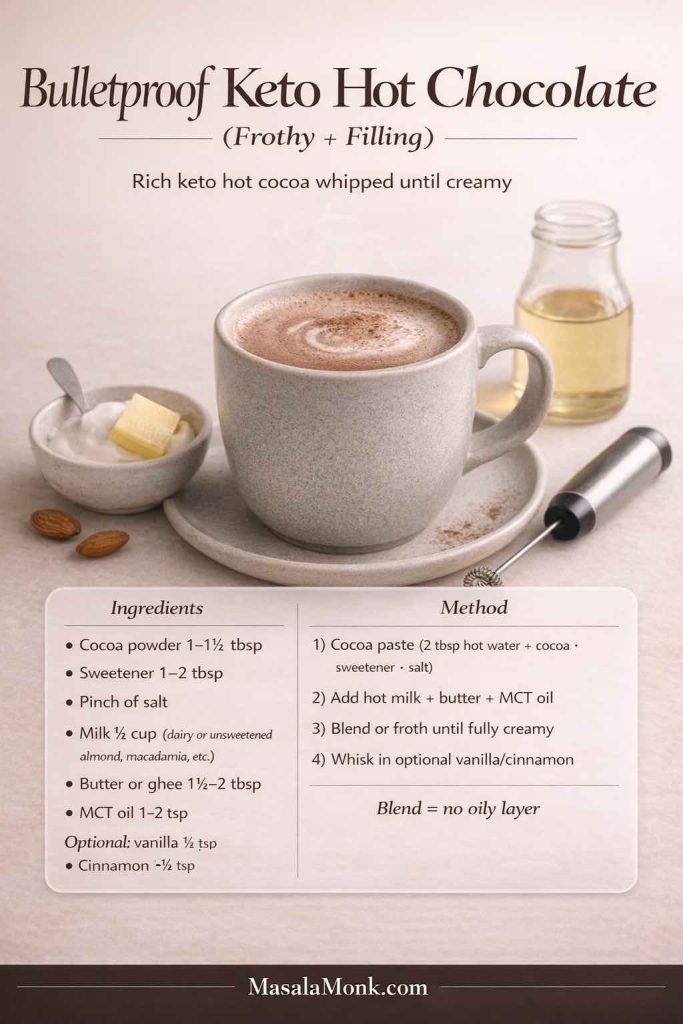
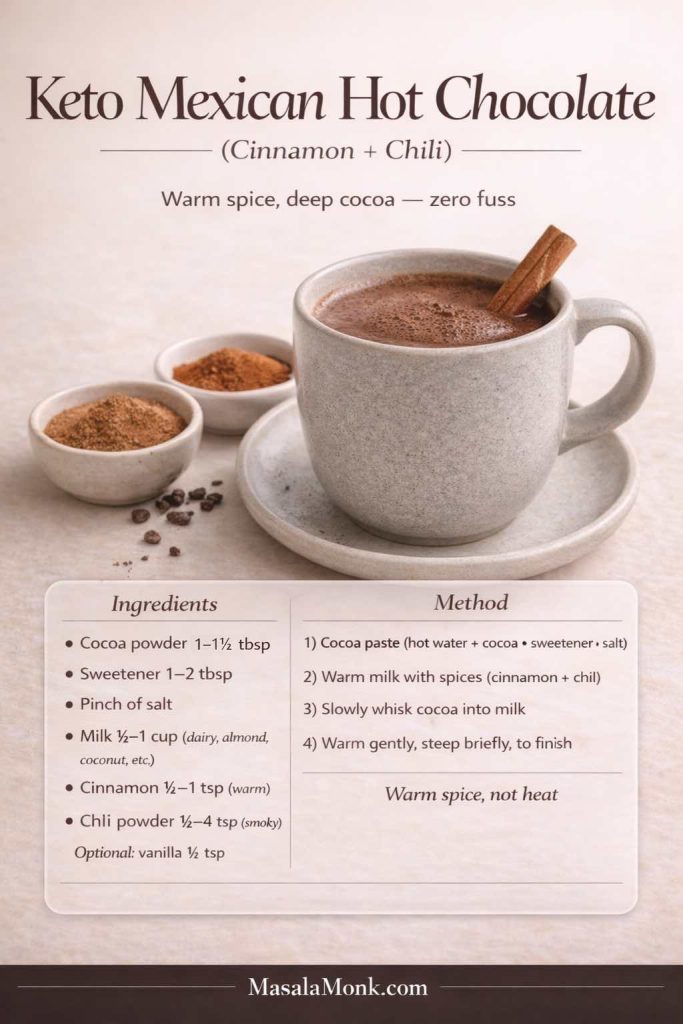
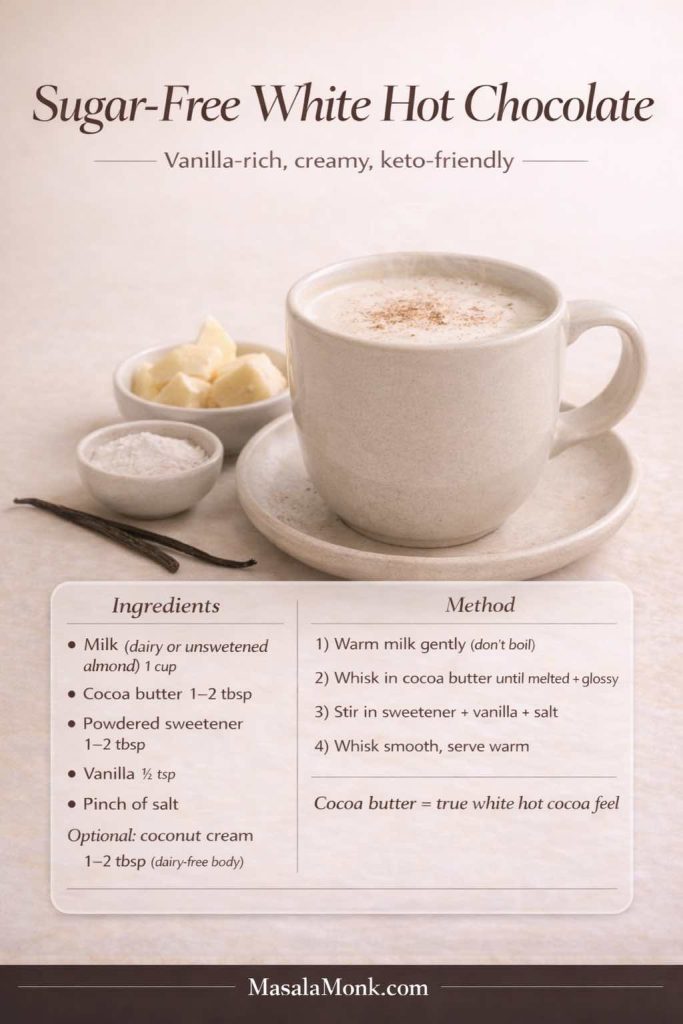
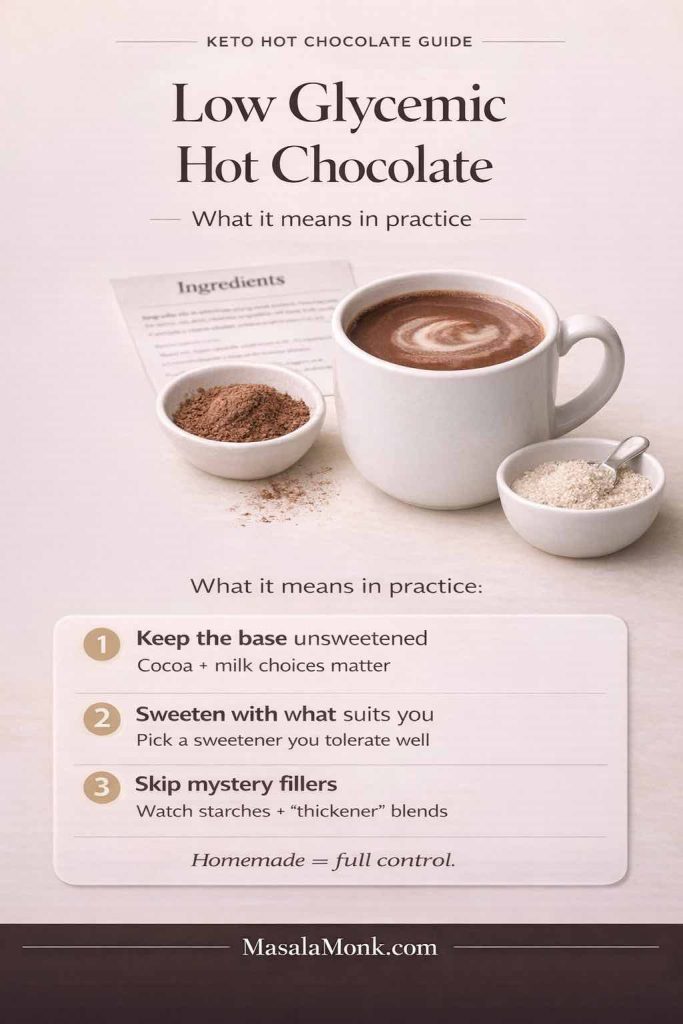
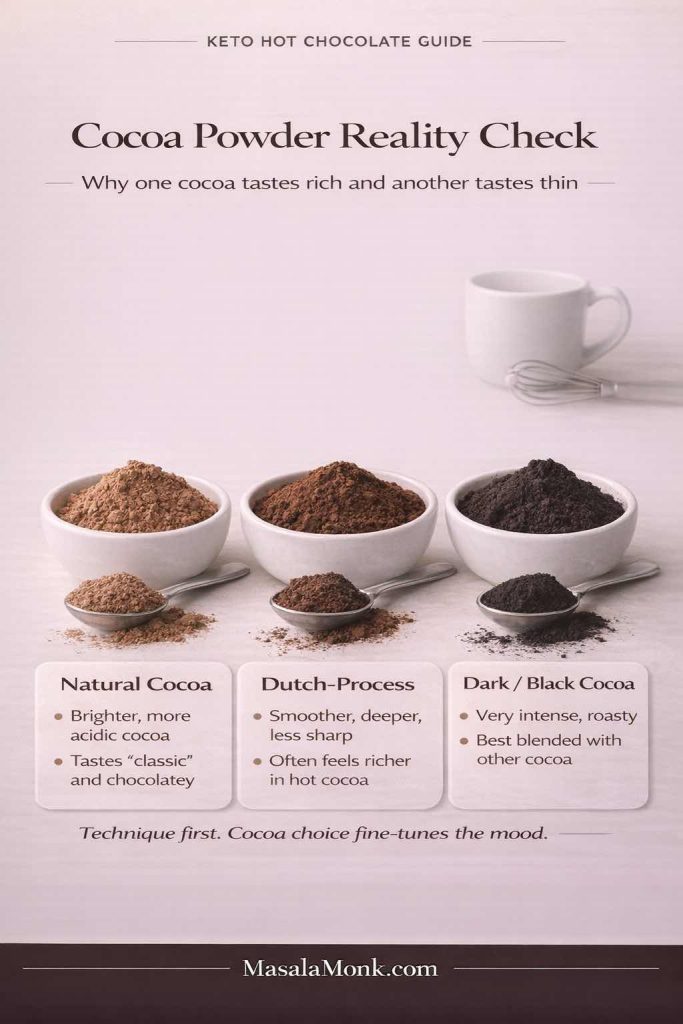
If you like dessert drinks as a category, there’s a warm companion for colder nights: keto hot chocolate with a sugar-free homemade mix.
How to keep keto mocktails from becoming “hidden carb drinks”
Here’s the frustrating truth: most people do everything right at home, then one “healthy” bottle ruins it. The label looks innocent. The marketing sounds clean. Then you pour it into your drink and wonder why it tastes like candy.
The problem is usually one of these:
- juice concentrates hiding in “mocktail mixers”
- sweetened tonic water
- syrups dressed up as wellness
- serving sizes that quietly double the carbs
- “no sugar added” that still contains plenty of sugar naturally
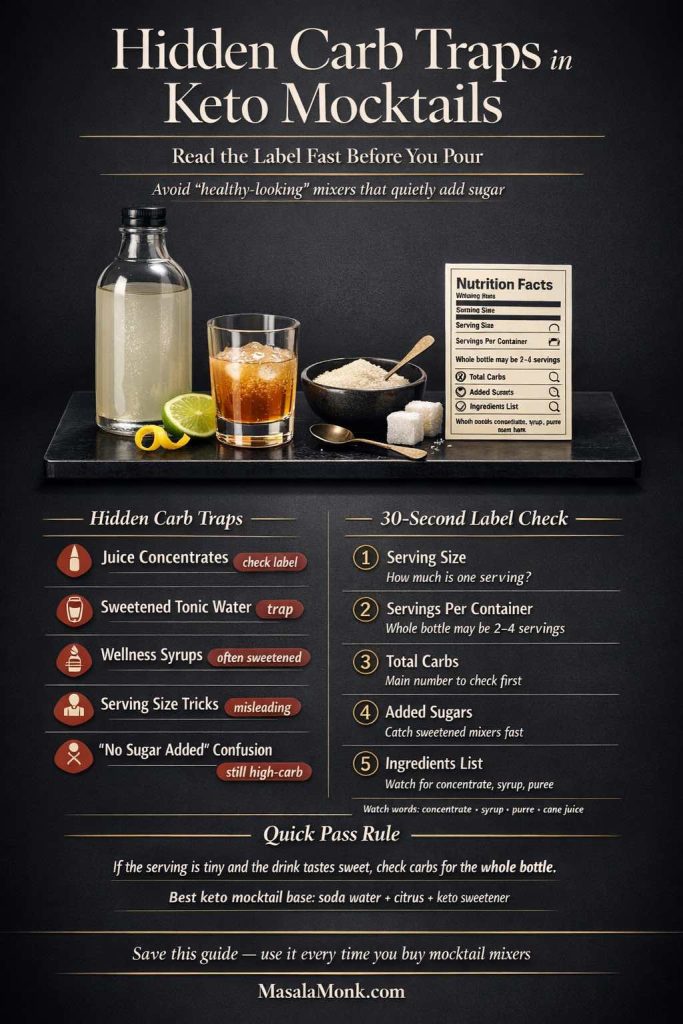
If you want to keep your low carb, no sugar drinks truly low carb, use the label like a tool. The FDA’s guide makes the basics clear without drama: how to use the Nutrition Facts label. It’s especially useful for catching serving-size tricks and spotting added sugars fast.
For anything that still feels ambiguous—fruit portions, juices, or even some “natural” drinks—checking the nutrition data directly can save you time: USDA FoodData Central.
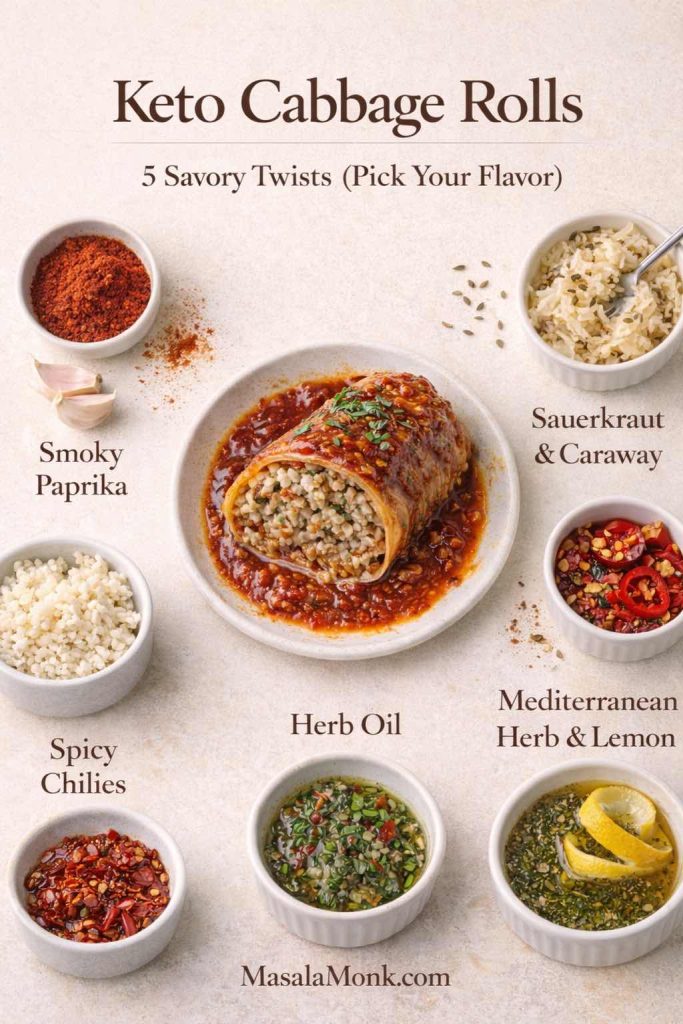
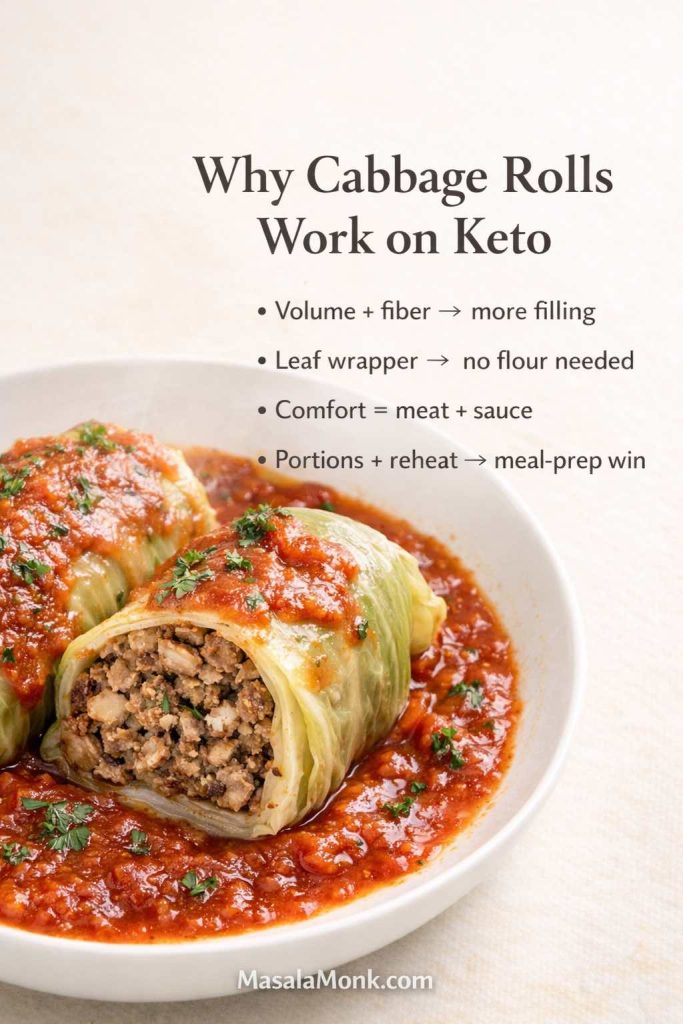
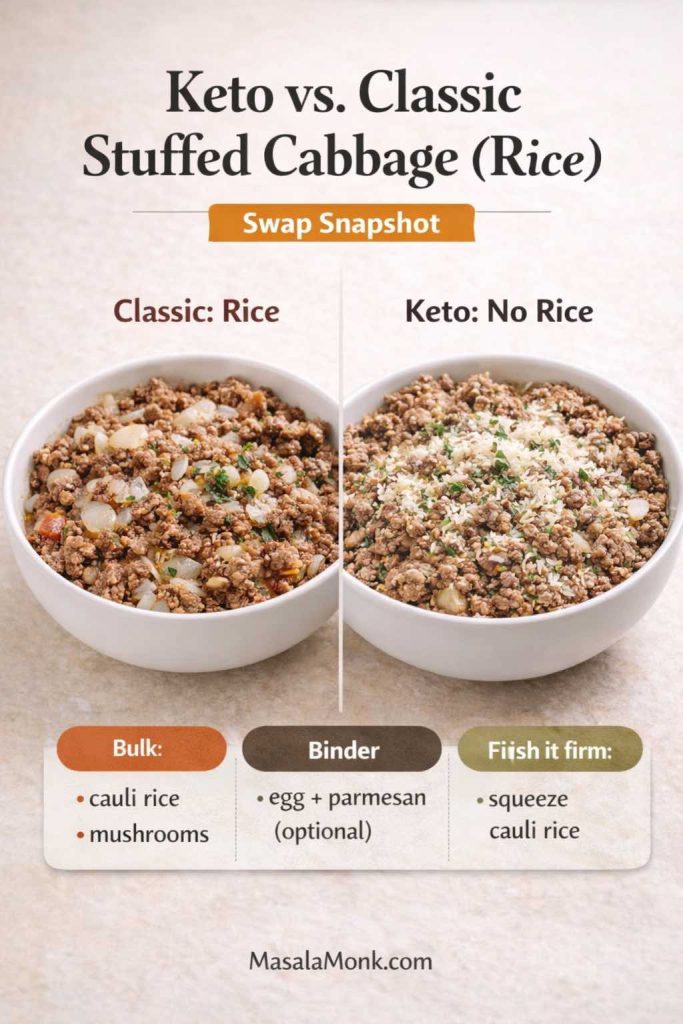
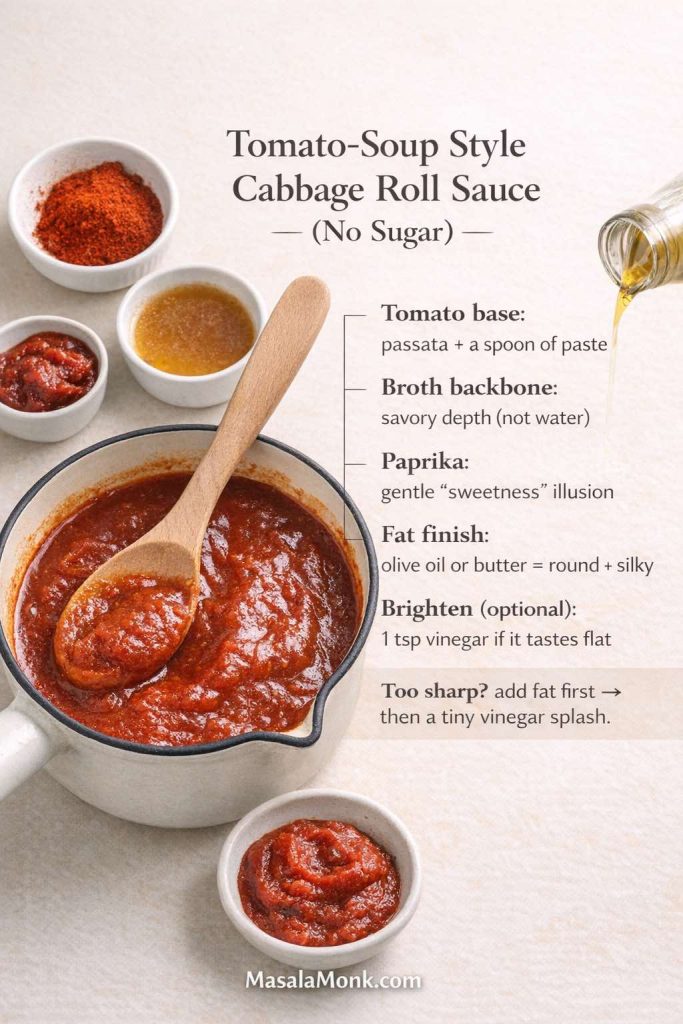
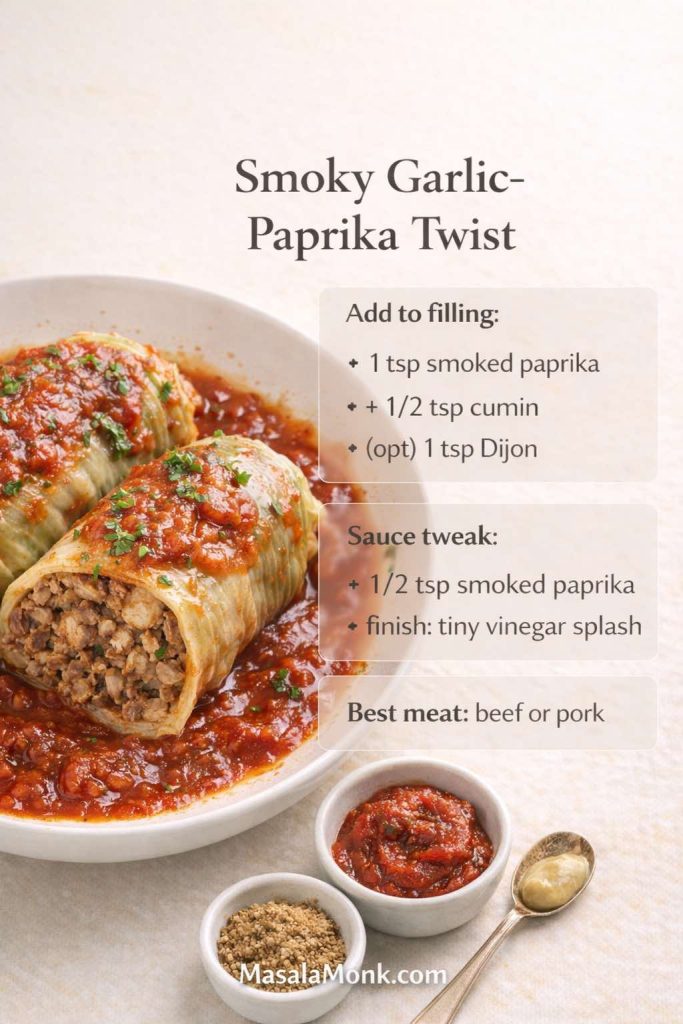
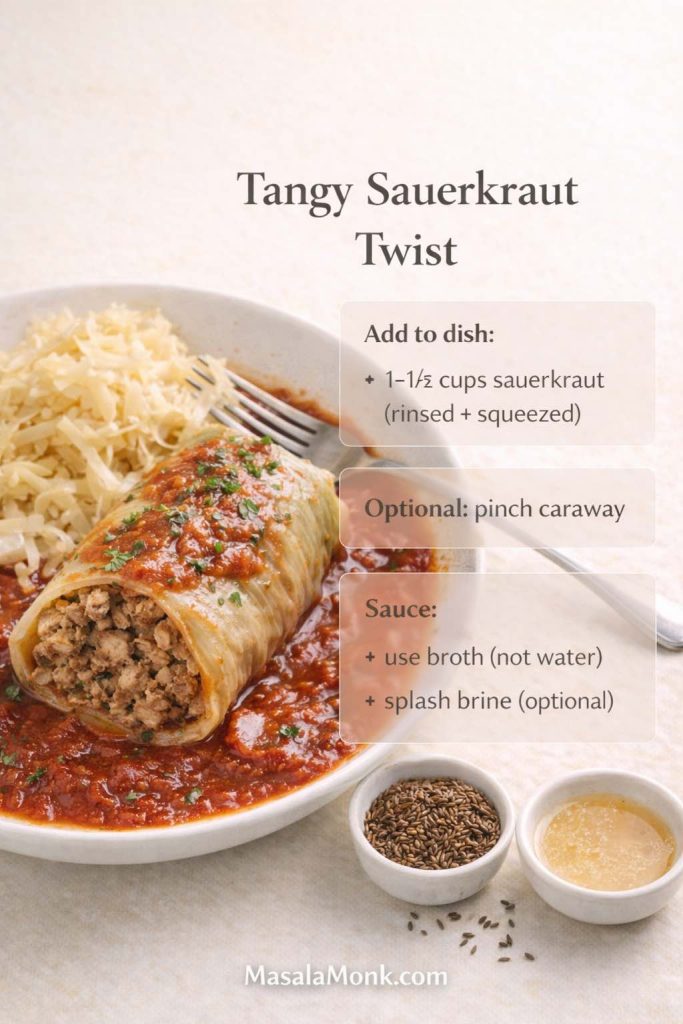
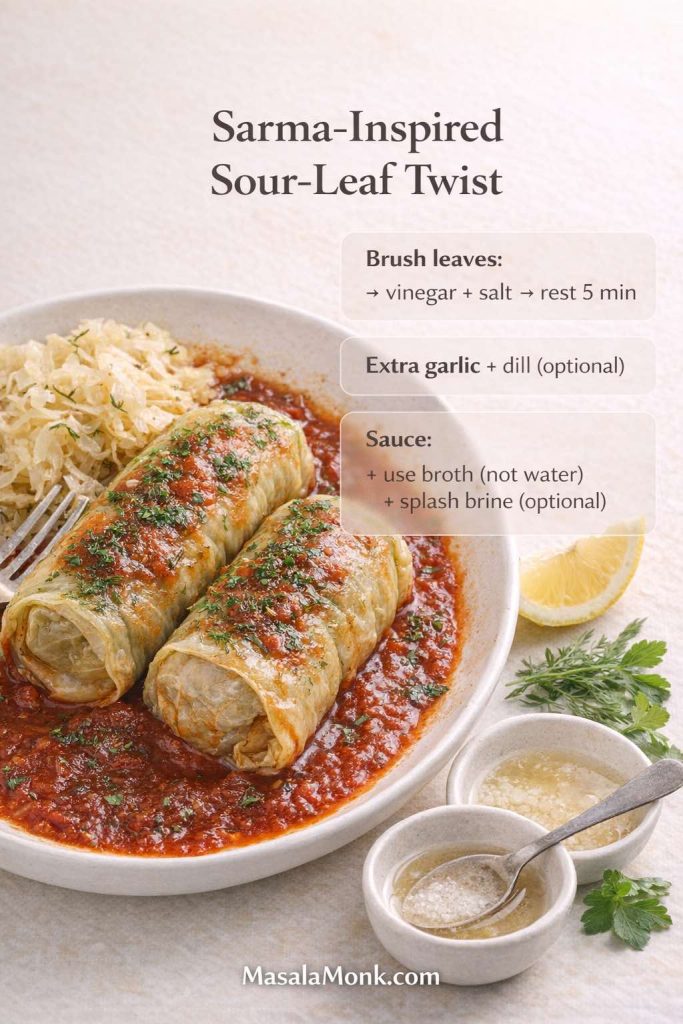
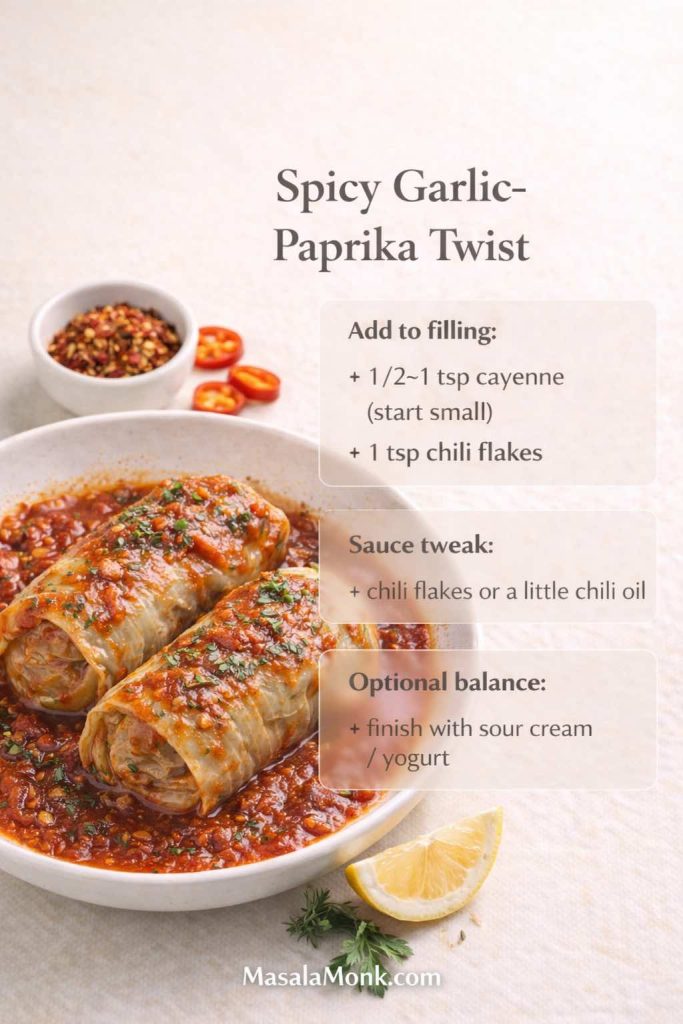
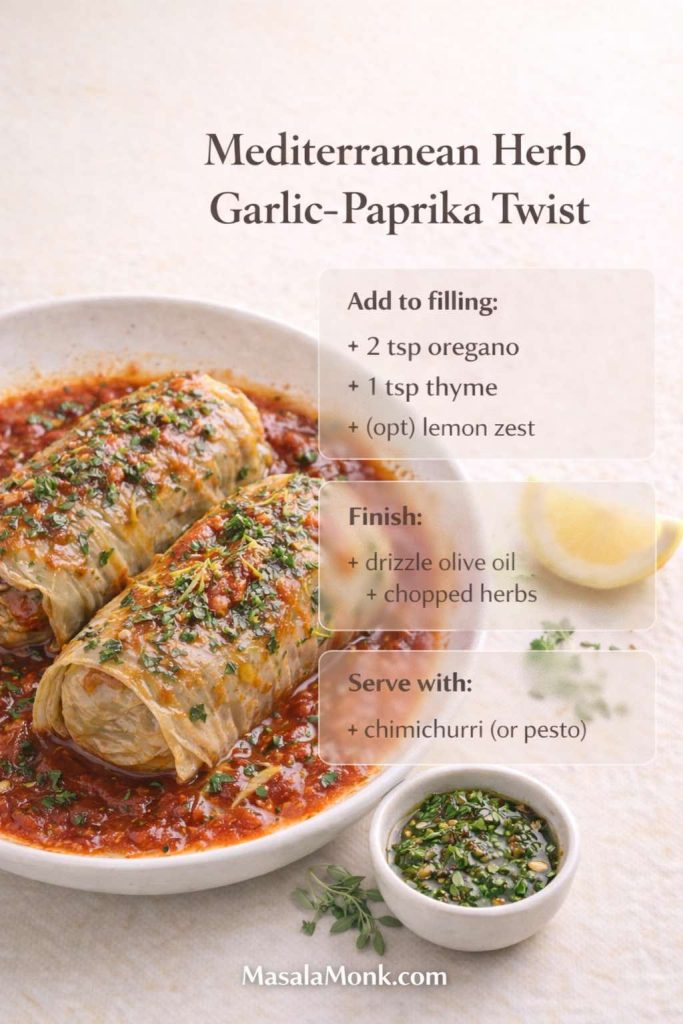
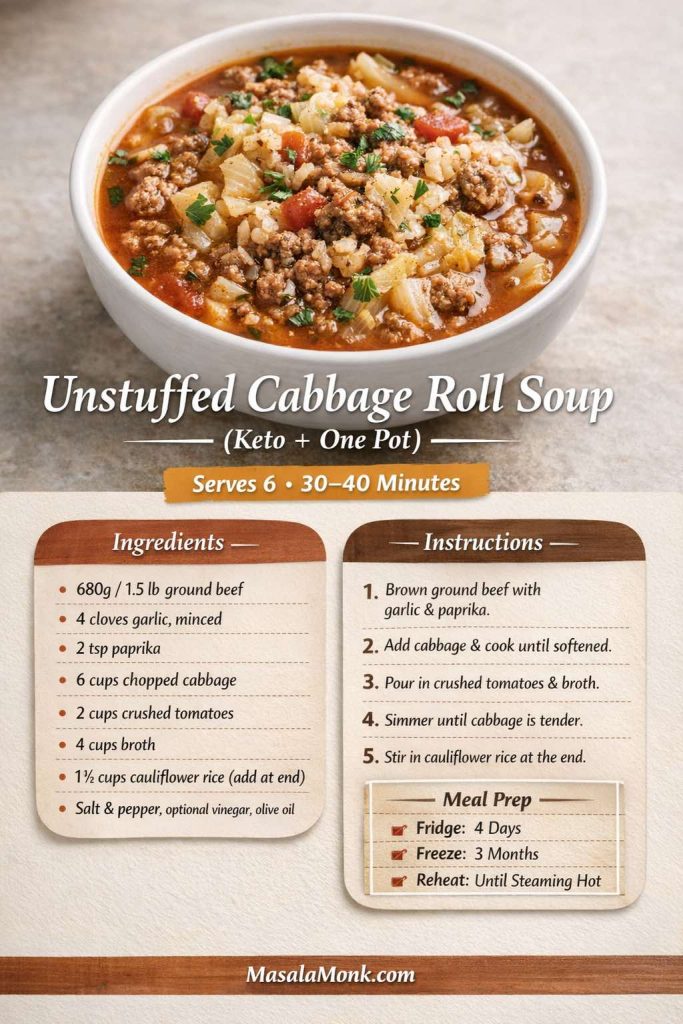
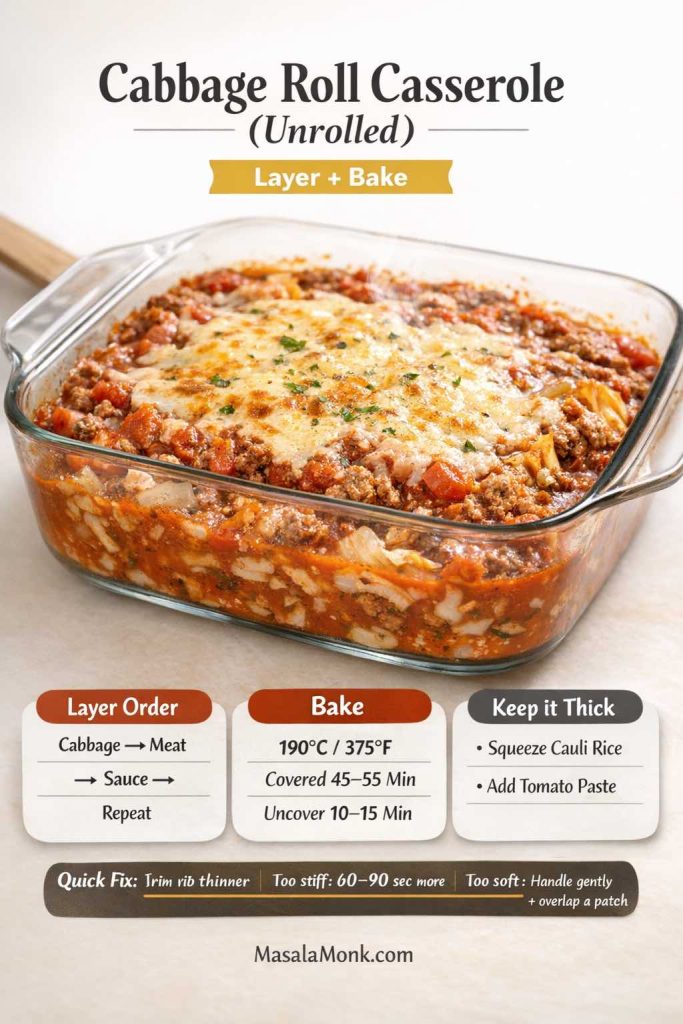
Also Read: Garlic & Paprika Cabbage Rolls (Keto-Friendly Recipes) – 5 Bold Savory Twists
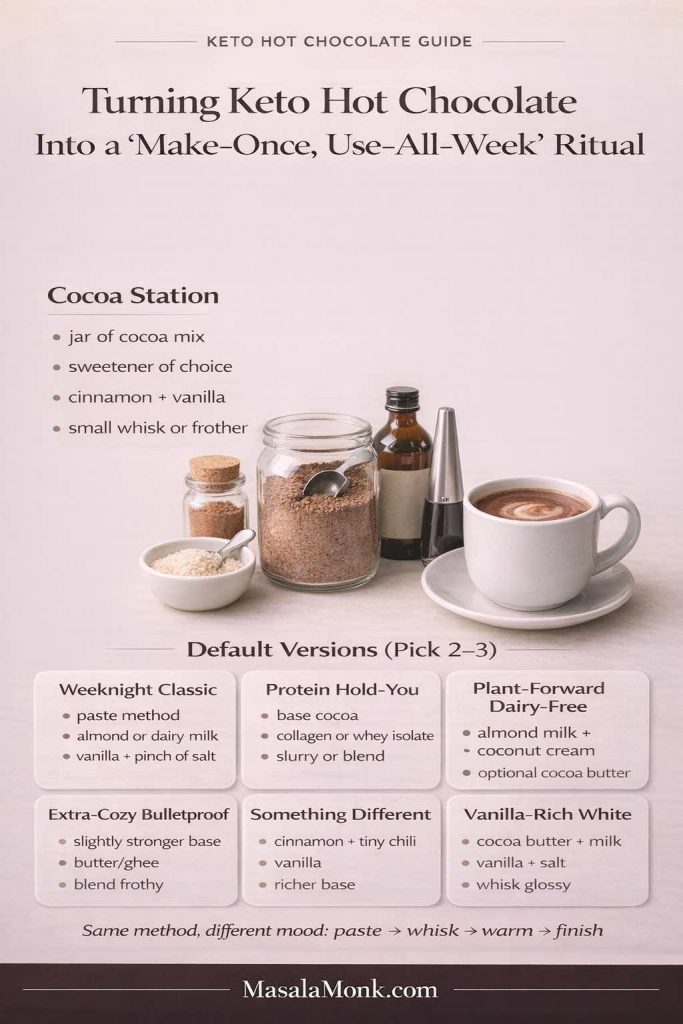
Turning keto mocktails into a weekly ritual
A mocktail becomes a habit when it’s easy. That’s why the smartest setup isn’t a long ingredient list. It’s a small “bar” of repeatable building blocks.
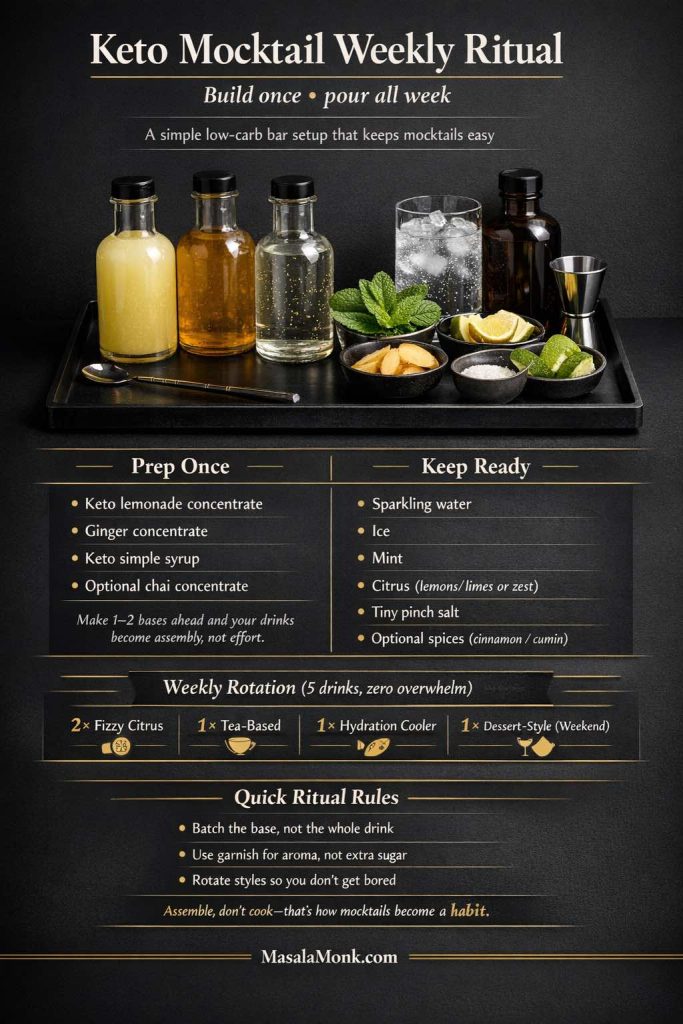
Keep one concentrate in the fridge
Your keto lemonade base is the obvious choice, but you can also keep:
- a ginger concentrate
- a chai concentrate
- a simple syrup made with your preferred sweetener
Then, when you want a drink, you’re assembling rather than cooking.
Keep garnishes simple, but intentional
A garnish isn’t decoration. It’s aroma. That’s why mint, citrus zest, and ginger matter more than complicated fruit carvings. Even a small twist of lemon peel changes how the drink smells, which changes how it tastes.
Rotate styles so you don’t get bored
A good weekly rhythm might look like this:
- two fizzy citrus drinks
- one tea-based mocktail
- one hydration-style cooler
- one dessert-style drink on the weekend
That rotation covers cravings without turning your kitchen into a beverage lab.
If you want an additional set of celebration-friendly options to keep your rotation fresh, here’s a fun companion read: more keto mocktail ideas for parties and gatherings.
A gentle note on “salty rims” and electrolyte-style drinks
Salt makes citrus taste better. It also makes certain low carb drinks feel oddly satisfying, especially if you’ve ever felt sluggish on keto or after a long day in the heat.
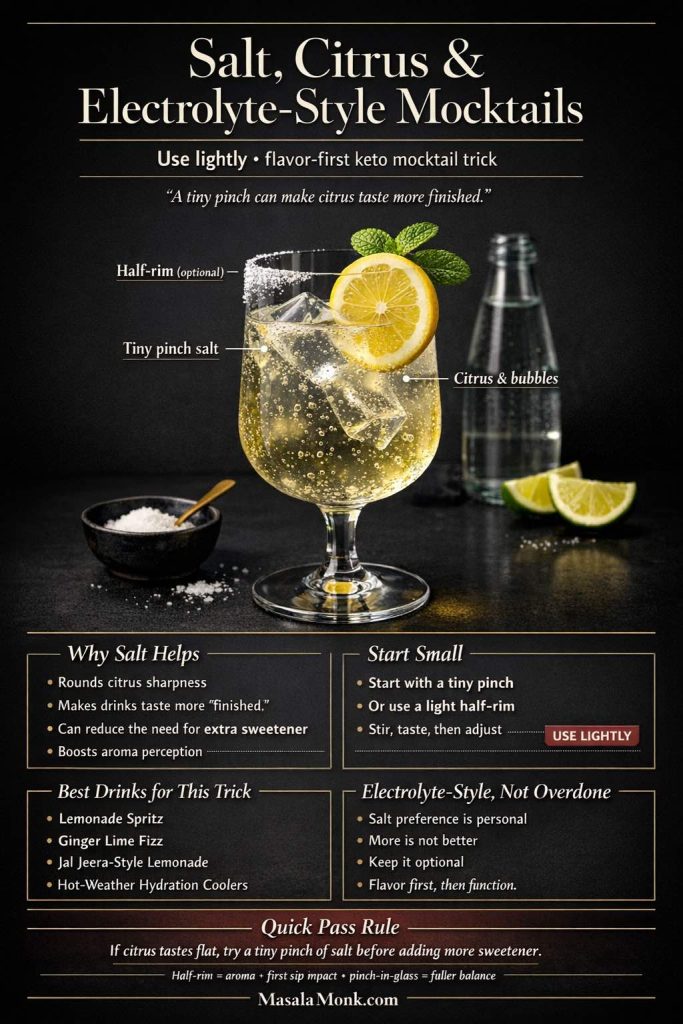
Still, salt is personal. Some people feel amazing with a salted lemonade spritz. Others prefer to keep it minimal. If you’d like a general reference point for daily sodium considerations, the American Heart Association’s overview is straightforward: how much sodium per day. It’s a useful compass while you experiment with salty rims and hydration-style mocktails.
Similarly, when people talk about electrolytes, potassium is part of the conversation. If you’re curious about potassium as an electrolyte in general nutrition terms, the NIH Office of Dietary Supplements has a detailed fact sheet: potassium overview.
Also Read: Peanut Butter Fudge: Recipes & Guide (8 Methods + Easy Variations)
Beyond mocktails: when fizzy drinks, kombucha, and “gut-friendly” fizz fit in
Sometimes you want bubbles but don’t want sweetener at all. Other times, you want something that feels like a soda replacement without being just flavored water. That’s where kombucha enters the conversation.
Kombucha isn’t automatically keto-friendly, because sugar and fermentation vary wildly. Still, small portions of lower-sugar kombucha can work for some people, and it’s often used as a “bridge drink” away from soda habits.
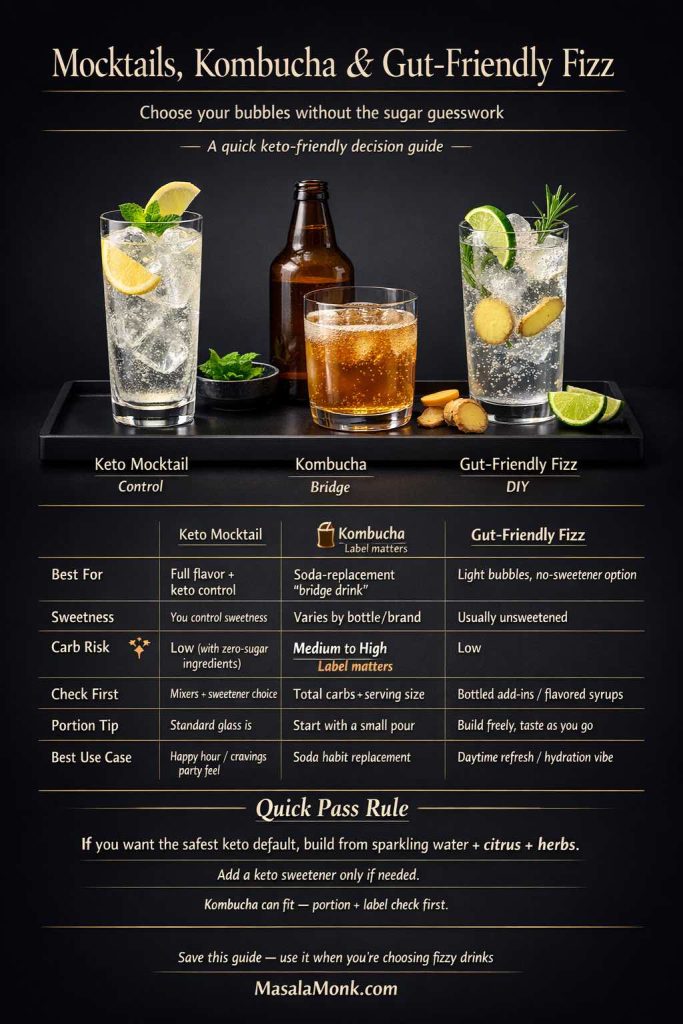
If you want a thoughtful breakdown, these reads help you understand the landscape and decide how it fits your routine:
Even if you decide kombucha isn’t for you, the idea is useful: you can build gut-friendly fizz vibes through herbs, ginger, citrus, and sparkling water without needing sugar at all.
Also Read: Sourdough Recipe: 10 Easy Bread Bakes (Loaves, Rolls & Bagels)
Making your keto mocktails feel like happy hour, not “health drinks”
If there’s one mindset shift that improves everything, it’s this: stop trying to make drinks “healthy.” Start trying to make them enjoyable.
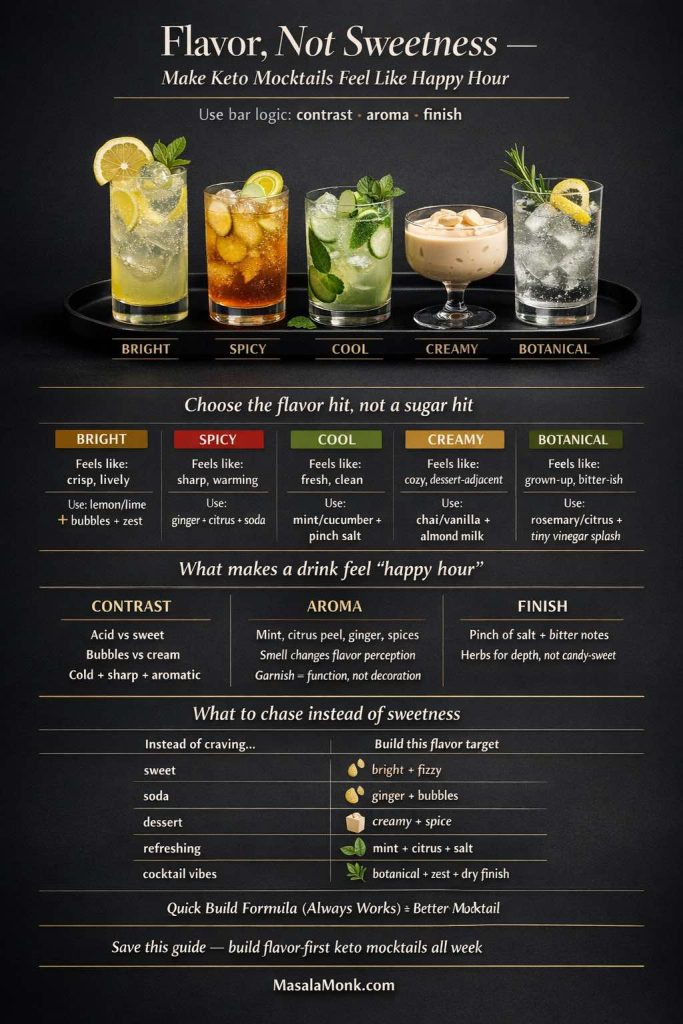
Enjoyable drinks have contrast. They have aroma. They have a beginning and a finish.
That’s why a salted rim matters. That’s why ginger matters. And that’s why mint matters. Those are cocktail ideas, not diet ideas. You’re borrowing the logic of the bar and applying it to low carb non alcoholic drinks.
Once you do that, you’ll notice something else: your cravings change. You stop wanting a sugar hit and start wanting a flavor hit. Instead of chasing “sweet,” you chase “bright,” “spicy,” “cool,” “creamy,” or “bitter.” That’s a better place to be—not because it’s virtuous, but because it’s sustainable.
Also Read: Sweetened Condensed Milk Fudge: 10 Easy Recipes
A few more drink directions you can keep in your back pocket
Sometimes the best keto mocktails are the ones you can customize to your day.
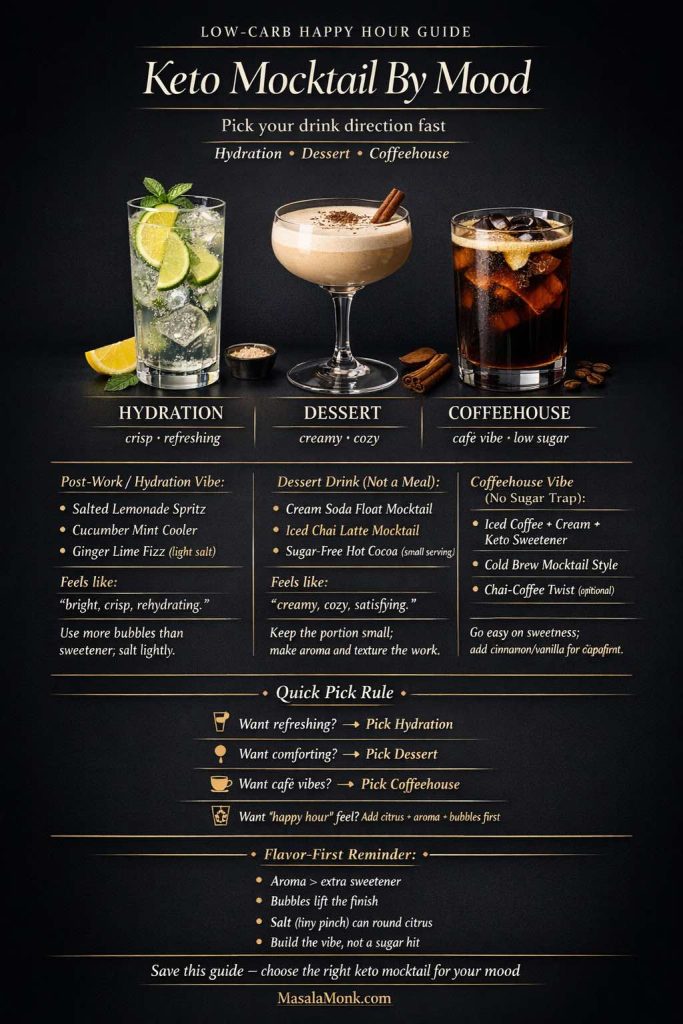
When you want a post-work vibe without the sugar
A lot of “sports drinks” and powdered mixes rely on sweeteners and flavors that feel heavy. Instead, try:
- salted lemonade spritz
- cucumber mint cooler
- ginger lime fizz with extra salt (lightly)
If you want more hydration drink ideas that fit fasting and low carb days, this DIY collection is an easy reference: zero-cal electrolyte drink recipes.
When you want a dessert drink without turning it into a meal replacement
If you’re craving a creamy drink, keep it simple:
- cream soda float mocktail
- iced chai latte mocktail
- a small mug of sugar-free hot cocoa on colder nights
That last one deserves its own moment—because it’s not just a recipe, it’s a comfort ritual: keto hot chocolate that stays rich and glossy.
When you want a coffeehouse vibe without the sugar trap
Cold coffee mocktails can be incredible. A simple iced coffee with a splash of cream and a touch of sweetener is often enough. If fasting is part of your routine, it’s useful to understand how coffee fits into that pattern: coffee and fasting guidance.
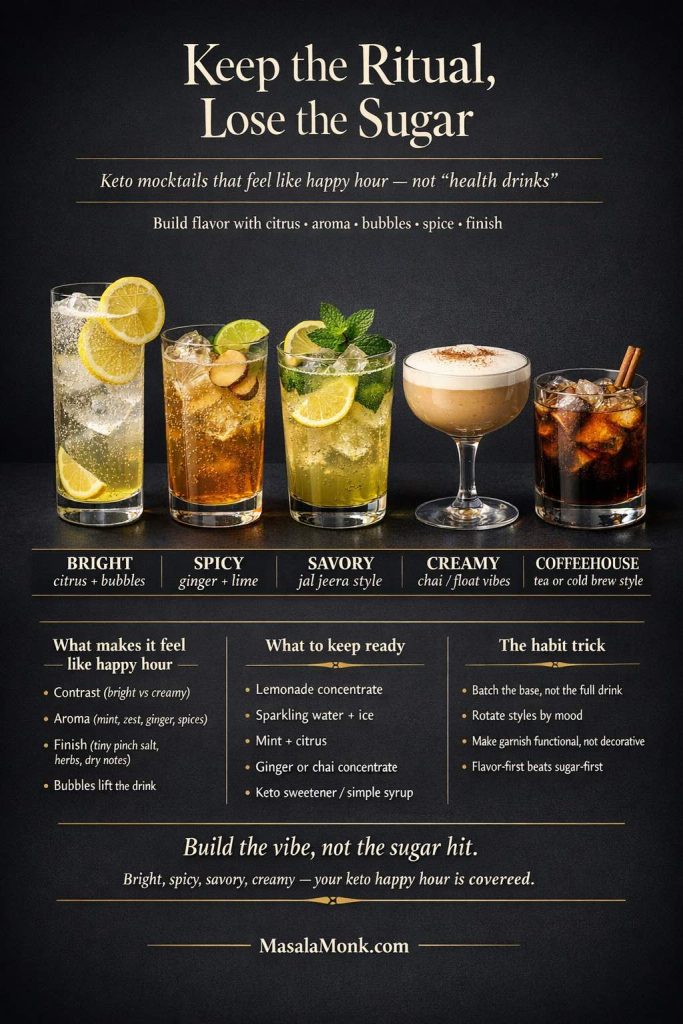
Closing thought: keep the ritual, lose the sugar
Keto mocktails work because they respect the moment. They don’t ask you to give up the “special drink” habit. Instead, they upgrade it.
With a lemonade base in your fridge, a jar of ginger concentrate ready to go, and a small set of garnishes, you can make low carb mocktails that feel like happy hour—bright citrus spritzers, savory jal jeera lemonade, spicy ginger fizz, creamy dessert sips, and tea-based drinks that feel like a treat.
Then, over time, you’ll notice your default changes. You won’t reach for sugary mixers because your drinks already taste good. You won’t miss the syrup because aroma does the heavy lifting. And you won’t feel stuck, because you’ll have more options than you did before—options that keep your day on track while still feeling indulgent.
If you’re in the mood to keep experimenting, try building a “two-lane” rotation: one lane for fizzy citrus and party drinks, another lane for warm or creamy comfort drinks. Between those two, you can cover almost any craving without leaving the world of keto-friendly, sugar free mocktails behind.
Also Read: Keto Chips: Best Low-Carb Snacks (For Salsa, Dips & Nachos)
FAQ: Keto Mocktails (Low Carb, Sugar Free Drinks)
1) What are keto mocktails?
Keto mocktails are non-alcoholic drinks made to stay low in carbs and sugar while still tasting like a “real” cocktail. Instead of juice-heavy mixers and syrups, they lean on sparkling water, citrus, herbs, spices, and keto-friendly sweeteners to create balance and flavor.
2) Are keto mocktails really sugar free?
They can be. Many keto mocktails are built as sugar free mocktails by using zero-sugar sweeteners and avoiding juice concentrates, tonic water, and premade mixers. However, “sugar free” depends on what you pour in—so the ingredients matter more than the name.
3) Are there truly zero carb keto mocktails?
Sometimes, yes—especially when you use plain sparkling water, citrus zest, herbs, and very small amounts of lemon or lime juice. That said, many “zero carb” style drinks are best thought of as near-zero, because even citrus juice can add trace carbs depending on portion size.
4) What are the best low carb non alcoholic drinks for a party?
If you want crowd-friendly options, choose keto fizzy drinks that are easy to batch: lemonade spritzers, cucumber-mint coolers, ginger-lime fizz, or berry-lemon sparklers with a light fruit touch. In addition, tea-based mocktails (like iced chai) can be made ahead and served over ice.
5) What’s the easiest keto mocktail to start with?
A keto lemonade spritz is usually the simplest: lemonade concentrate plus sparkling water over ice. From there, you can branch into mint, ginger, cucumber, or spice variations without changing the base.
6) How do I make keto friendly lemonade without it tasting “diet”?
Instead of pushing sweetness, aim for balance. A small pinch of salt smooths sharp lemon. Zest adds aroma. Ginger adds depth. Also, sweeten lightly, then chill and re-taste—cold temperatures change how sweetness reads.
7) Which sweeteners work best in sugar free keto drinks?
Allulose tends to taste the most “clean” in cold lemonade-style drinks. Monk fruit blends are convenient, although different brands vary in aftertaste. Stevia works well in tiny amounts, particularly with citrus. Erythritol can be fine too, yet it often dissolves best when used as a syrup.
8) What should I avoid if I’m trying to keep drinks low carb and no sugar?
Avoid tonic water, regular soda, cocktail syrups, juice blends, and “mocktail mixers” that rely on fruit concentrates. Likewise, watch for sweetened flavored waters that appear light but still contain sugars or high-carb ingredients.
9) Can keto mocktails help with cravings for soda?
Often, yes. Because keto mocktails can mimic the fizz, the cold bite, and the flavor complexity of soda, they can be a smoother replacement than plain sparkling water. Additionally, citrus zest and ginger can add that “satisfying hit” soda drinkers miss.
10) What are the best keto fizzy drinks when I want something bubbly?
Sparkling water with lemon or lime is the simplest. Beyond that, lemonade spritzers, ginger-lime fizz, mint coolers, and “mock G&T” style drinks are strong go-to choices. If you like a sweeter profile, a light cream-soda style mocktail can work as well.
11) Is kombucha keto friendly?
It depends. Some kombuchas are lower sugar than others, and portion size changes everything. Therefore, if you include kombucha, treat it as an occasional small pour rather than a default base for keto mocktails—unless you’ve checked its sugar content and it fits your carb limits.
12) Can I drink keto mocktails while fasting?
It depends on what you mean by fasting. Plain sparkling water, herbs, and citrus zest are more likely to fit a “clean” approach. In contrast, sweeteners, cream, and juice—even if low carb—may not fit stricter fasts. Consequently, if fasting is a priority, keep mocktails simpler and more mineral-forward.
13) What are keto hydration drinks, and how are they different from keto mocktails?
Keto hydration drinks focus on fluids plus minerals like sodium and potassium, rather than “cocktail-style” flavor. Nevertheless, many keto mocktails can double as hydration drinks when you use citrus, salt, and plenty of water or sparkling water—especially in hot weather or after a workout.
14) What’s a good keto post workout drink if I don’t want a shake?
A salted lemonade spritz, cucumber-mint cooler with a pinch of salt, or a ginger-lime fizz with extra water can be a refreshing alternative. Also, keeping sweetness light may feel better after training, particularly if you’re aiming for low carb, low sugar recovery.
15) Can I make low carb mocktails creamy without making them heavy?
Yes. Use small amounts of cream or unsweetened milk alternatives, then balance with vanilla, spice, or tea. Moreover, keeping the base cold and the sweetener minimal helps it taste like a “treat” rather than a thick dessert drink.
16) How do I make keto bubble tea or keto boba tea at home?
Use chilled black tea (or jasmine tea), a low-carb milk option, and sweetener to taste. For a boba-style texture, chia seeds soaked into a gel can mimic that fun chew. Then adjust sweetness gradually so it stays balanced rather than overly sweet.
17) What’s the best way to batch keto mocktails for guests?
Make concentrates ahead—lemonade, chai, ginger—and chill them. When serving, build each drink over ice, then top with sparkling water at the last moment. That way, every glass stays fizzy and fresh instead of flat.
18) Can I turn these into low carb drinks that feel like cocktails without alcohol?
Absolutely. Focus on cocktail cues: aroma (zest, herbs), bite (ginger, acid), contrast (salt, spice), and texture (bubbles, a small creamy swirl). As a result, your keto mocktails will taste intentional—like happy hour—rather than like a substitute.