Posted on 4 Comments

Upma Recipe: 10+ Easy Variations (Rava, Millet, Oats, Semiya & More)

Top-down flatlay of five Indian upma varieties—rava, millet, oats and semiya—arranged with chutney, lemon wedges and herbs, hand holding a spoon, cover image for ultimate upma recipes guide on MasalaMonk.

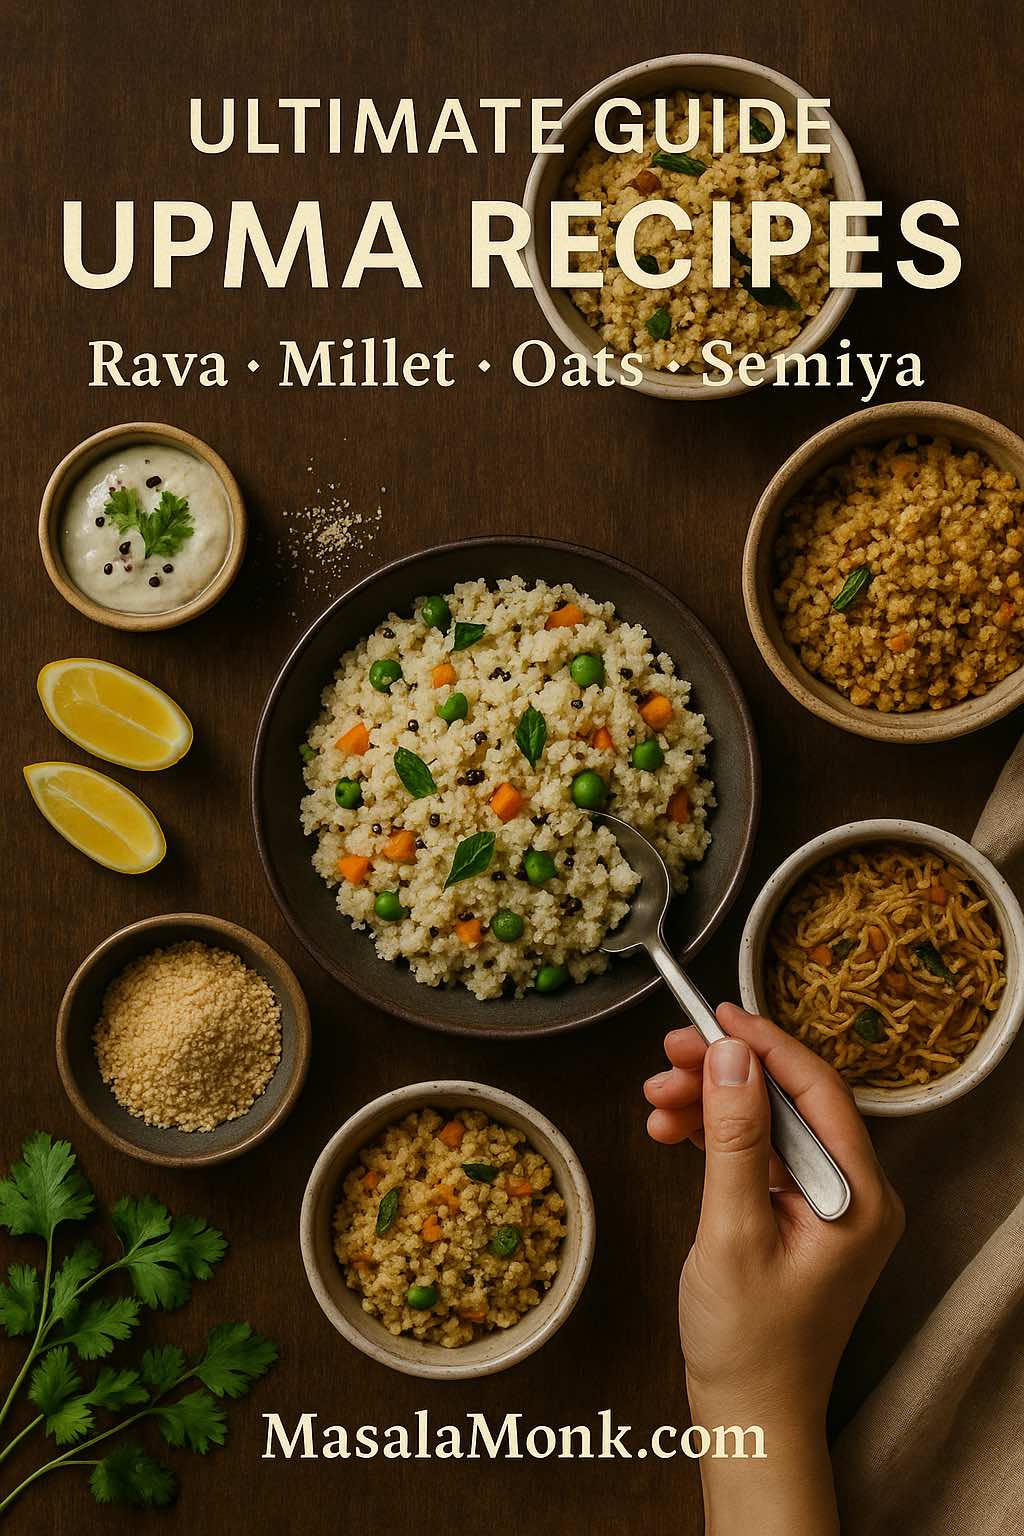
Upma is one of those breakfasts that feels like home, no matter which part of India you’re from. It’s warm, soft, gently spiced, and endlessly adaptable. With a few pantry staples and one basic upma recipe in your head, you can improvise everything from a simple rava upma for rushed mornings to a millet upma for days when you want something a little more wholesome, or even an oats or quinoa upma when you’re leaning towards high-fibre bowls.

For people looking for “upma recipe”, “how to make upma”, “simple upma recipe”, “millet upma recipe”, “semiya upma”, “instant upma premix” or even “upit recipe”, this long, no-rush guide is meant to sit in your kitchen as a one-stop reference. You’ll get:

  • A detailed, step-by-step rava upma recipe with all the tiny tricks that matter
  • Vegetable and masala variations that turn it into a one-bowl meal
  • Millet upma with different grain options and real health context
  • Semiya (vermicelli) upma, for tiffin boxes and kids who love noodles
  • Oats upma and quinoa upma, with links to what science actually says about them
  • Wheat and rice rava upma for days when you don’t feel like semolina
  • A homemade instant upma mix for travel or office lunches
  • Plenty of ideas for what to serve with upma to build a complete breakfast plate

Along the way, you’ll also find links out to trusted recipe writers and nutrition resources, so you’re not just taking one blog’s word for it. For instance, if you like cross-checking your basics, you can always compare with this lovely, traditional South Indian rava upma method on Indian Healthy Recipes, which you’ll find under the title traditional South Indian rava upma recipe.


What Is Upma, Really?

At its heart, upma is a savoury porridge or pilaf made by roasting a grain (most commonly semolina / suji) and then simmering it in a seasoned, tempered liquid. The tempering usually includes mustard seeds, lentils like urad dal and chana dal, curry leaves, green chillies, onion and sometimes ginger. Once the grain absorbs the water and steams, it turns soft and fluffy, ready to be fluffed, finished with lemon and coriander, and eaten hot.

Cast iron skillet filled with soft rava upma topped with peas and curry leaves, surrounded by bowls of semolina, lentils and spices, with a hand sprinkling curry leaves, illustrating the upma cooking method.
One pan, so many breakfasts – a skillet of gently simmering rava upma with all the classic tempering elements that define the upma method.

Traditionally, rava upma is especially popular in South India, often served with coconut chutney and filter coffee. If you’re curious about that version, you can see another take on it at Veg Recipes of India under their traditional upma with coconut chutney, which matches closely with what many homes actually make.

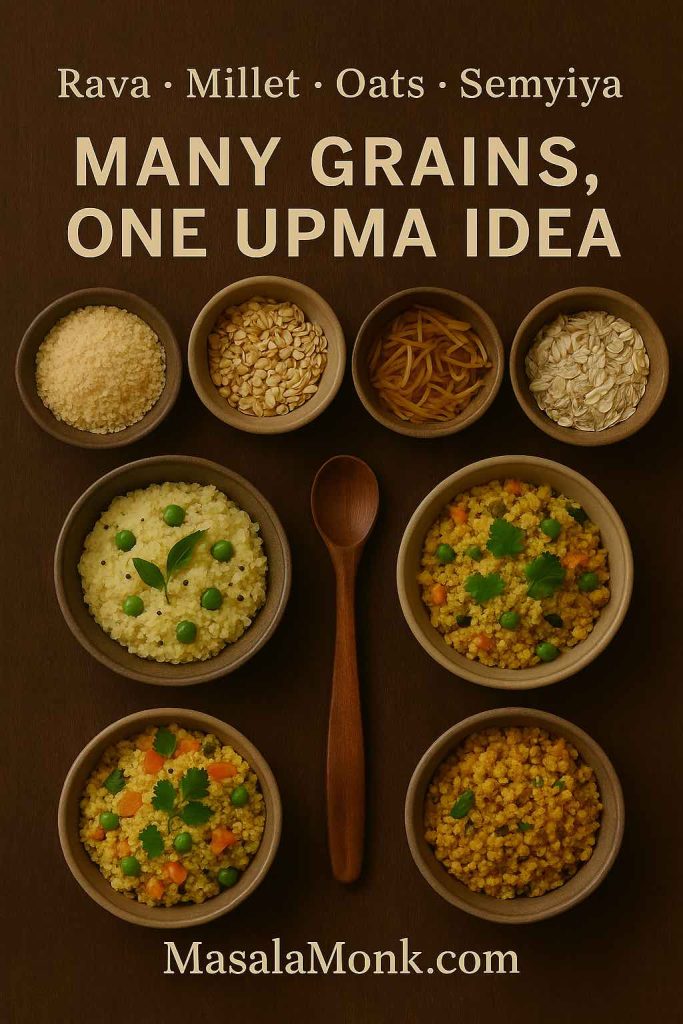
However, the family of upma is much bigger than just semolina. As grains like ragi, foxtail millet, jowar, oats and quinoa become more common in pantries, the same technique is being reused with different bases. That means an “upma recipe” today can be:

  • A classic suji upma with just onions and chillies
  • A colourful vegetable upma
  • A masala upma with sambar powder or garam masala
  • A millet upma packed with fibre and minerals
  • A semiya upma that looks like a noodle stir-fry
  • An oats upma that quietly helps your cholesterol numbers
  • A quinoa upma that feels modern but very Indian in flavour
Flatlay of small bowls showing raw rava, millet, semiya and oats at the top, with cooked rava, vegetable millet and semiya upma in bowls below and a wooden spoon in the centre, illustrating that many grains can be used to make upma.
Rava, millet, semiya and oats in their raw and cooked forms, side by side – a reminder that upma is a method you can apply to many grains, not just semolina.

Instead of treating each of these as a totally separate dish, it helps to understand the common logic once, then play.

Also Read: Double Chocolate Chip Cookies – Easy Recipe with 7 Variations


The Classic Rava Upma Recipe (Suji Upma)

Let’s begin with the version you’re most likely to cook again and again: a simple rava upma. Once you get comfortable with this, switching to millet rava or wheat rava upma becomes almost automatic.

Close-up of a neatly domed serving of soft rava upma with peas, carrots and curry leaves on a ceramic plate, hand reaching for the spoon, with text describing it as an everyday suji breakfast bowl.
Soft, fluffy rava upma piled into an everyday suji breakfast bowl, scented with curry leaves, mustard seeds, onions and a squeeze of lemon.

Ingredients for 2 Servings

  • Semolina / suji / upma rava – ½ cup (medium or slightly coarse)
  • Water – 1½ cups (you can move between 1¼ and 1¾ depending on how soft you like it)
  • Oil or ghee – 2 tablespoons
  • Mustard seeds – ½ teaspoon
  • Urad dal – 1 teaspoon
  • Chana dal – 1 teaspoon
  • Cashew halves – 6–8 (optional but lovely)
  • Onion – 1 small, finely chopped
  • Green chillies – 1–2, slit or chopped
  • Ginger – ½ inch piece, finely chopped
  • Fresh curry leaves – 8–10
  • Salt – to taste
  • Lemon juice – 1–2 teaspoons
  • Fresh coriander – a small handful, chopped

Home cooks and bloggers disagree very gently about the perfect ratio of rava to water. Some prefer it soft and spoonable, others a little drier and crumbly. If you want to dig deeper into this, Raks Kitchen has a useful breakdown of textures and ratios in her rava upma water ratio tips. For now, though, 1:3 is a safe, beginner-friendly place to start.

Step 1: Roast the Rava

Begin by dry-roasting the semolina in a wide pan. Keep the flame low-medium and stir continuously so it doesn’t catch at the bottom.

Step 1 of making rava upma showing a hand stirring semolina in a black skillet with a wooden spatula, with text explaining to dry toast suji on low heat till aromatic to keep upma non-sticky.
Step 1 – gently roasting the rava on low heat so every grain of suji stays separate and the final upma turns out soft, fluffy and never sticky.

You’re looking for:

  • A slightly deeper colour, but not brown
  • A warm, nutty aroma
  • Grains that feel separate when you stir them

This step might feel skippable if you’ve bought “roasted upma rava”, but it’s worth doing anyway. Roasting removes raw flavours and, more importantly, helps the rava swell up evenly without turning sticky.

Once roasted, transfer the rava to a plate and let it cool slightly while you prepare the tempering.

Step 2: Build the Tempering

In the same pan, add the oil or ghee. When it heats up, drop in mustard seeds. As soon as they splutter, stir in urad dal and chana dal.

Step 2 of making upma showing mustard seeds, urad dal, chana dal and cashews sizzling in oil in a black skillet while a hand adds fresh curry leaves with a spoon, illustrating the tempering stage for classic rava upma.
Step 2 – tempering mustard seeds, lentils, cashews and curry leaves in hot oil to create the nutty, fragrant base that makes every rava upma taste authentic.
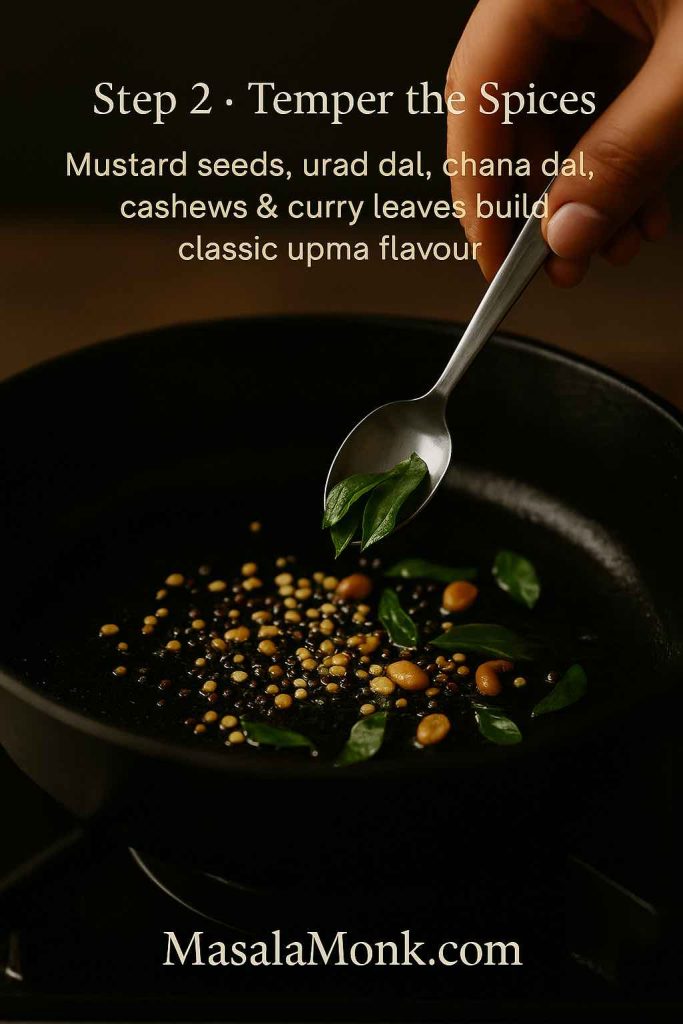
  • Fry the dals on medium heat until they turn golden and crisp.
  • Add cashews at this stage if you’re using them and fry till lightly golden.

The sizzling mix of mustard, dals and nuts is not just for taste; it contributes crunch in every bite. After this, tip in the curry leaves, chopped ginger and green chillies. They’ll sputter a bit, so stand back for a moment.

Finally, add the chopped onion. Sauté until it turns soft and translucent. You don’t really need to brown the onion for a basic upma recipe; you just want the raw bite to vanish.

Step 3: Bring the Spiced Water to a Boil

Now pour in the measured water and add salt. Taste the water – it should be slightly saltier than you’d like the final upma to be, because the rava will absorb some of that salt.

Step 3 of the rava upma recipe showing a cast-iron skillet of spiced water at a rolling boil with curry leaves and lentils, while a hand sprinkles salt from a wooden spoon, with text explaining to boil the water so the rava cooks quickly and evenly.
Step 3 – add water and salt to the tempering, then bring it to a proper rolling boil so the suji swells quickly and the upma cooks evenly without turning lumpy.

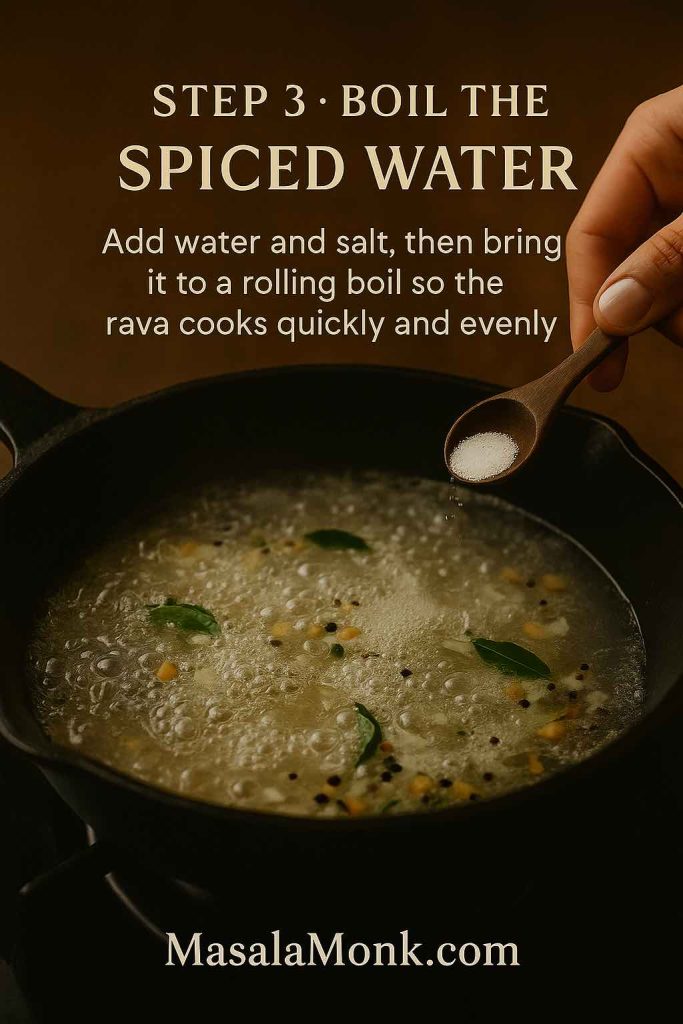
Bring this to a rolling boil. This matters more than it seems:

  • Boiling water helps rava swell quickly and evenly.
  • It dramatically reduces your chances of ending up with lumpy upma.

Meanwhile, if you feel like cross-checking a slightly different style of tempering or vegetable add-ins, you could glance through the traditional South Indian rava upma recipe at Indian Healthy Recipes; you’ll notice the same broad steps.

Step 4: Add the Rava Without Lumps

Once the water is bubbling, lower the flame. Hold the roasted rava in one hand and a spatula in the other.

Step 4 of the rava upma method showing a hand pouring roasted semolina in a thin stream into a skillet of bubbling spiced water while another hand stirs with a wooden spatula, with text explaining to sprinkle suji slowly and stir constantly to avoid lumps.
Step 4 – “raining in” the roasted rava, sprinkling suji slowly into boiling spiced water while stirring so every grain cooks evenly without clumping.
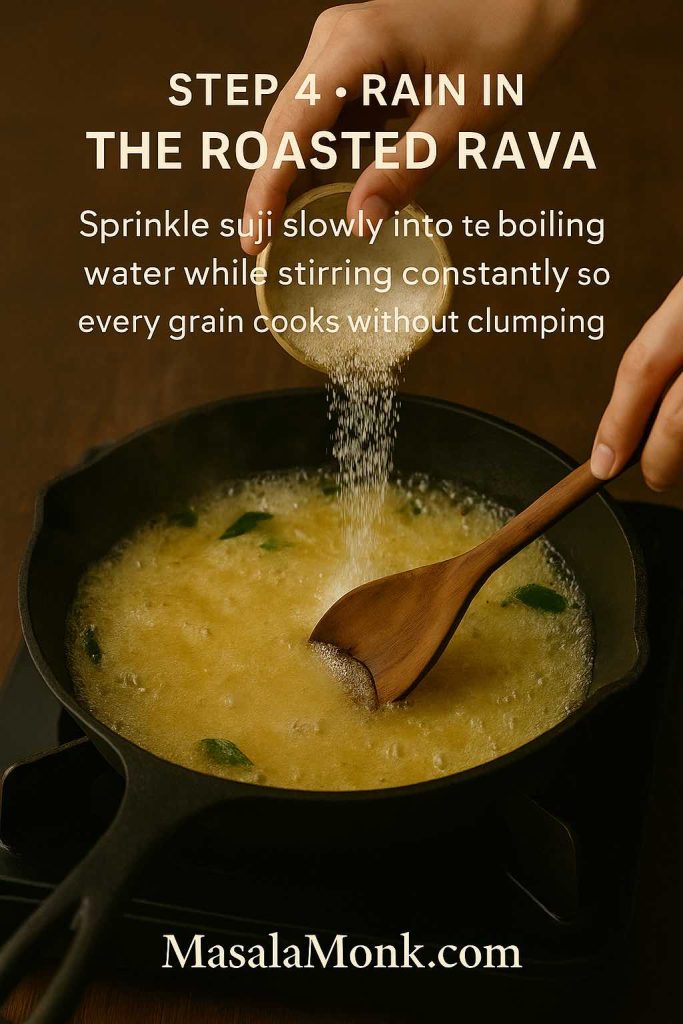
  • Slowly sprinkle the rava into the boiling water in a steady stream.
  • Keep stirring continuously.

The idea is to give each little sprinkle of rava a chance to meet the hot liquid and swell individually. If you dump it all in at once, it will clump and form dumplings.

Within a minute or two, the mixture will start thickening and pulling away from the sides.

Step 5: Steam, Fluff and Finish

At this point, cover the pan and let the upma steam on the lowest flame for about 3–4 minutes. Switch off the heat and allow it to sit, still covered, for another 2 minutes.

Step 5 of the rava upma recipe showing a hand lifting the lid off a steaming skillet of fluffy upma while another hand fluffs it with a spoon, with lemon wedge and coriander nearby and text explaining to steam, fluff and finish with lemon and coriander.
Step 5 – let the upma steam on low, then fluff it and finish with lemon juice and fresh coriander for a soft, airy bowl.

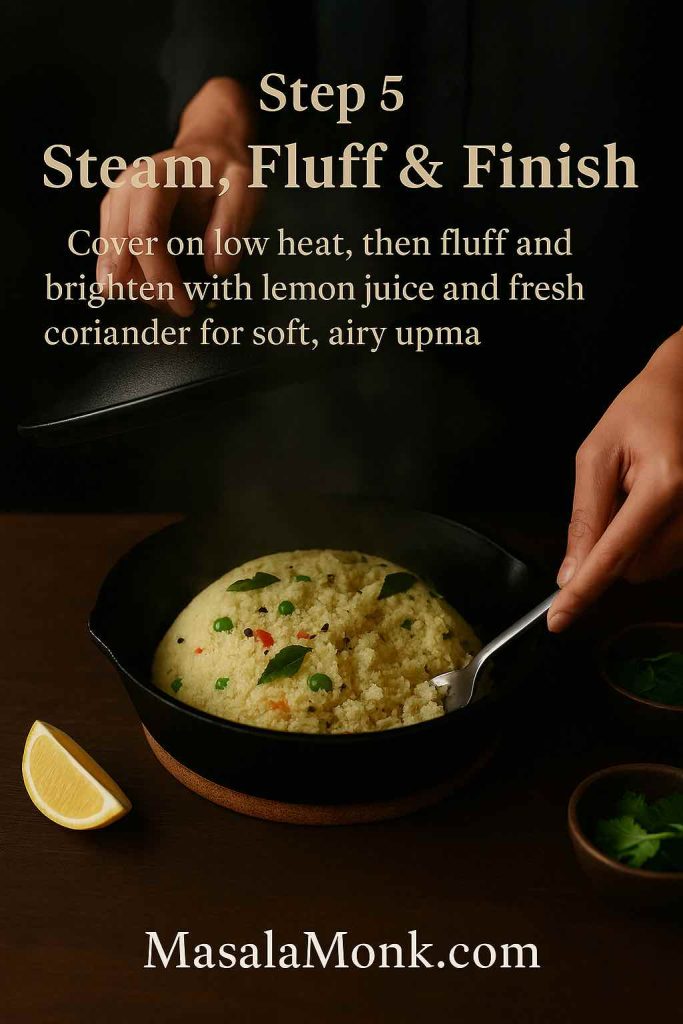
When you open the lid:

  • The rava should be cooked through, soft and fluffy.
  • The surface might look a little dome-like; that’s fine.

Fluff gently with a fork or spatula to loosen up the grains. Finally, add lemon juice and chopped coriander, and fold everything together. Taste and adjust salt or lemon once more.

Serve hot with coconut chutney, podi, pickle or simply a drizzle of ghee on top. For another angle on serving ideas (especially with coconut chutney), you can refer to the version at Veg Recipes of India under their traditional upma with coconut chutney.

Also Read: Carbonara Recipe: Italian Pasta (Creamy, Veggie, Chicken, Shrimp, Tuna & Keto)


Vegetable Upma, Masala Upma Recipe and Other Rava Upma Variations

Once the basic method feels natural, you’ll inevitably start tweaking it. Some mornings you’ll want more vegetables, some days more heat, and sometimes you’ll be in the mood for a slightly indulgent, ghee-laced bowl of “mom upma”.

Vegetable Upma

For a simple vegetable upma, follow the classic recipe with one change: after sautéing the onion, add about ½ to 1 cup of finely chopped vegetables such as:

  • Carrots
  • Green beans
  • Green peas
  • Sweet corn
  • Capsicum
Recipe card style image for vegetable upma showing small bowls of chopped carrots, beans, peas, corn and capsicum on a board with a skillet of onions in the background, plus text explaining to add ½–1 cup mixed veggies after the onions and sauté before continuing the rava upma recipe.
Veggie upgrade – turn plain rava upma into colourful vegetable upma by adding a generous ½–1 cup of finely chopped carrots, beans, peas, corn and capsicum after the onions and sautéing till they brighten.

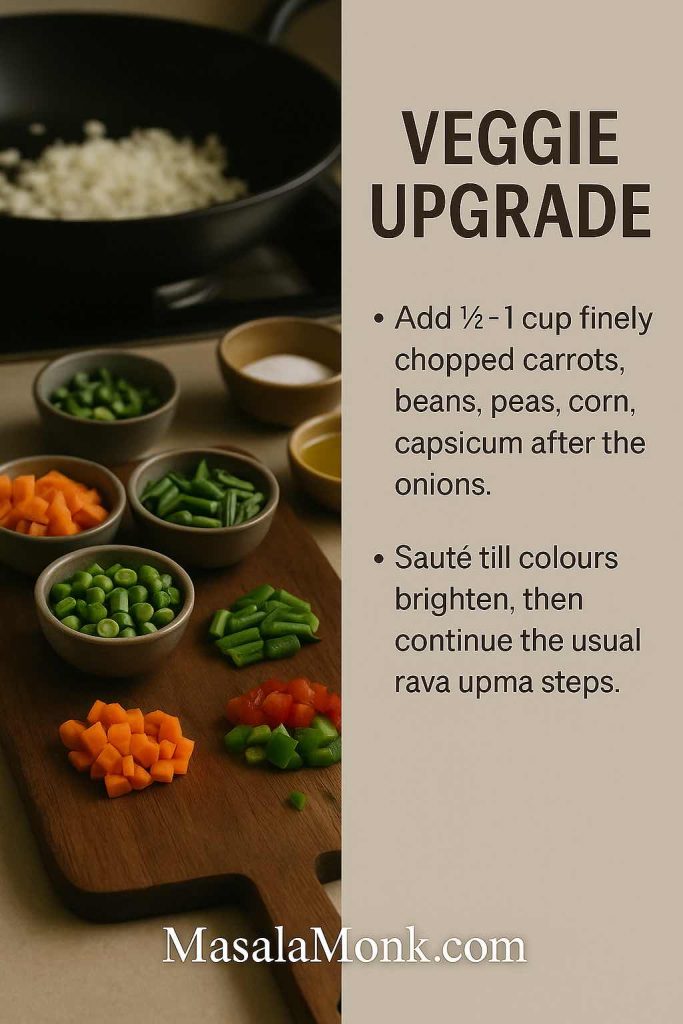
Sauté the vegetables for a couple of minutes until the colours brighten and they lose their rawness. After that, proceed with water, salt and rava as usual.

This variation cleverly answers many searches like “simple upma recipe”, “veggie upma” or “upma recipe for kids”, without changing the core technique.

Masala Upma

For mornings when you want something closer to a one-bowl lunch, a masala upma works beautifully.

Hand sprinkling turmeric into a pan of vegetable upma with peas, carrots and beans, with small bowls of turmeric and red spice in front and text explaining how to turn veggie upma into masala upma with turmeric and sambar or garam masala.
Masala twist – once the veggies are in, add turmeric for colour and a spoon of sambar or mild garam masala to turn everyday vegetable upma into a fuller, lunch-style masala upma.

In addition to the vegetables:

  • Add ¼ teaspoon turmeric powder for a bright colour.
  • Sprinkle in ½ teaspoon sambar powder or a mild garam masala.

Those additions transform the flavour just enough to make it feel more lunch-worthy, especially if you serve it with a dollop of yoghurt and a salad on the side.

Red Rava Upma Recipe

Sometimes you’ll come across red rava (made from whole wheat or red rice) labelled as “upma rava” too. You can treat it in almost the same way as suji, with slight adjustments:

Recipe card for whole-grain red rava upma showing bowls of regular suji and coarse red rava in the foreground with a skillet of rustic red rava upma behind them, plus text explaining to roast red rava longer and use about 1:3 to 1:3.25 rava to water for a nutty, softer texture.
Whole-grain red rava upma – roast the red rava a little longer, add more water and give it extra time on the stove for a deeper, nuttier bowl that feels closer to a whole grain breakfast.
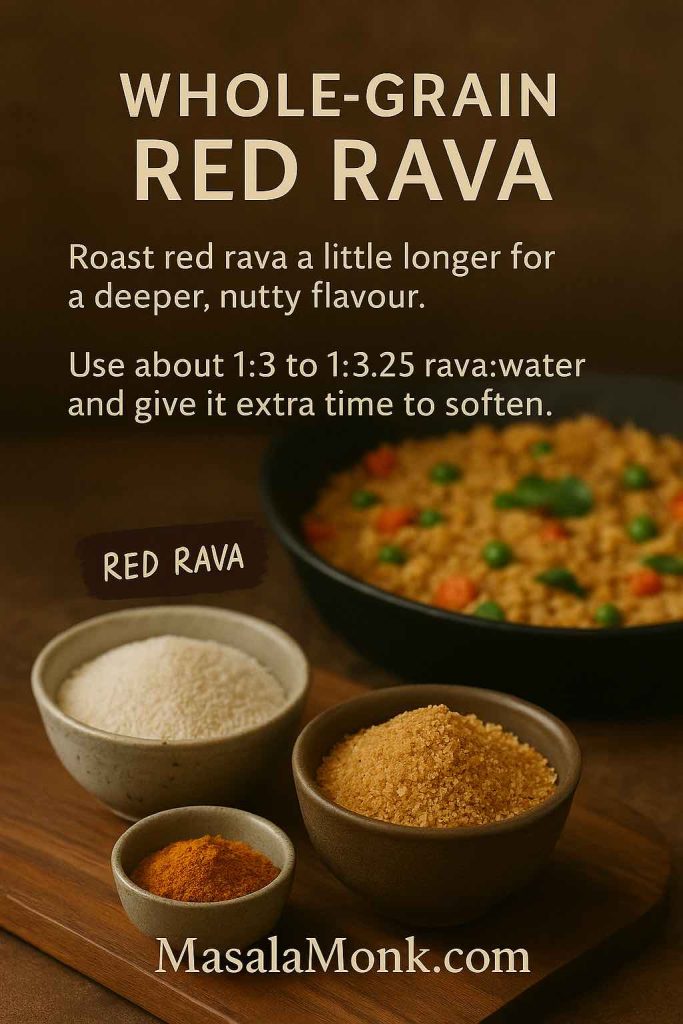
  • Roast it a little longer; whole-grain rava benefits from deeper roasting.
  • Increase the water slightly to around 1:3 or even 1:3.25 if it’s very coarse.
  • Be patient with cooking time; whole grains take longer to soften.

The result is a nuttier, more rustic upma that fits nicely on days when you want something closer to a whole grain breakfast.

Recipe of “Mom-Style” Ghee Rava Upma

If you grew up on upma made by a mother or grandmother who didn’t shy away from ghee, you might crave that taste from time to time.

Mom-style ghee rava upma in a cast-iron pan topped with deep golden cashews and curry leaves while a hand pours ghee from a spoon, with text explaining to use ghee for tempering and finish each serving with an extra spoon of ghee.
Ghee-lover’s home version – swap oil for ghee, fry the cashews till deep golden and finish each serving with an extra spoon of ghee for that nostalgic, mom-style rava upma flavour.

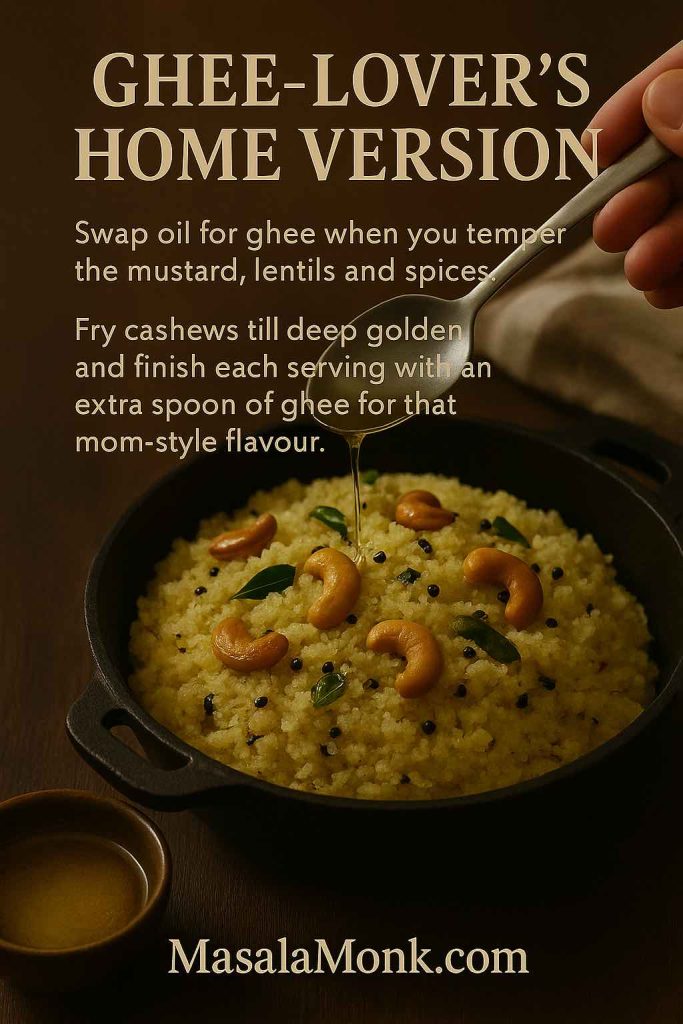
To get that flavour:

  • Use ghee instead of oil for the tempering.
  • Fry the cashews till deep golden.
  • Finish with a small spoonful of ghee drizzled over each serving.

The extra richness hides in the background, but it makes every spoonful taste like a hug.

Also Read: One-Pot Chicken Bacon Ranch Pasta (Easy & Creamy Recipe)


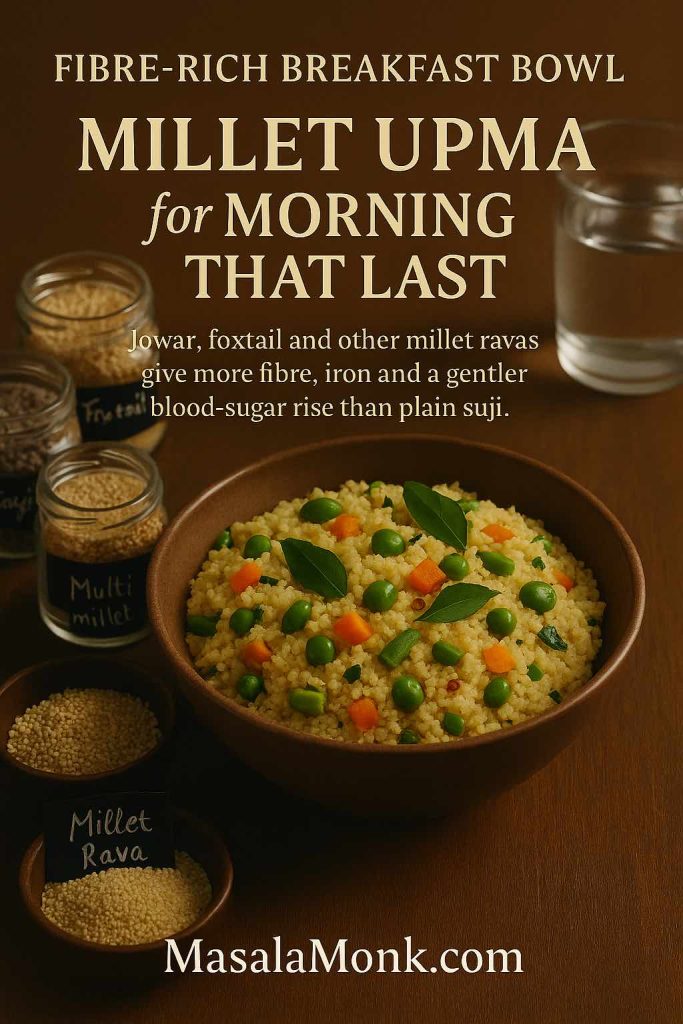
Millet Upma: Jowar, Foxtail, Ragi and Multi-Millet Rava Recipe

Over the last few years, millet upma has become a favourite for people who want a more nutrient-dense breakfast without sacrificing Indian flavours. Millets are naturally rich in fibre, minerals like iron, calcium and zinc, and often have a gentler effect on blood sugar compared to refined grains.

If you’d like to see the bigger picture before you start cooking, two good reads are MasalaMonk’s own overview Millets: The Gluten-Free Superfood and their guide exploring the various types of millets in India. For a more formal look, you can also glance at the ICMR–NIN document on nutritional and health benefits of millets, or FSSAI’s classification of millets as “nutri-cereals” in their millets guidance notes.

Portrait photo of a fibre-rich millet upma bowl with peas, carrots and curry leaves on a wooden table, surrounded by jars labelled multi millet, foxtail and millet rava, with text describing millet upma as a breakfast that gives more fibre, iron and a gentler blood-sugar rise than plain suji.
Millet upma for mornings that last – a fibre-rich bowl made with multi-millet rava, jowar and foxtail-style grains, offering more iron and a gentler blood-sugar rise than plain suji upma.

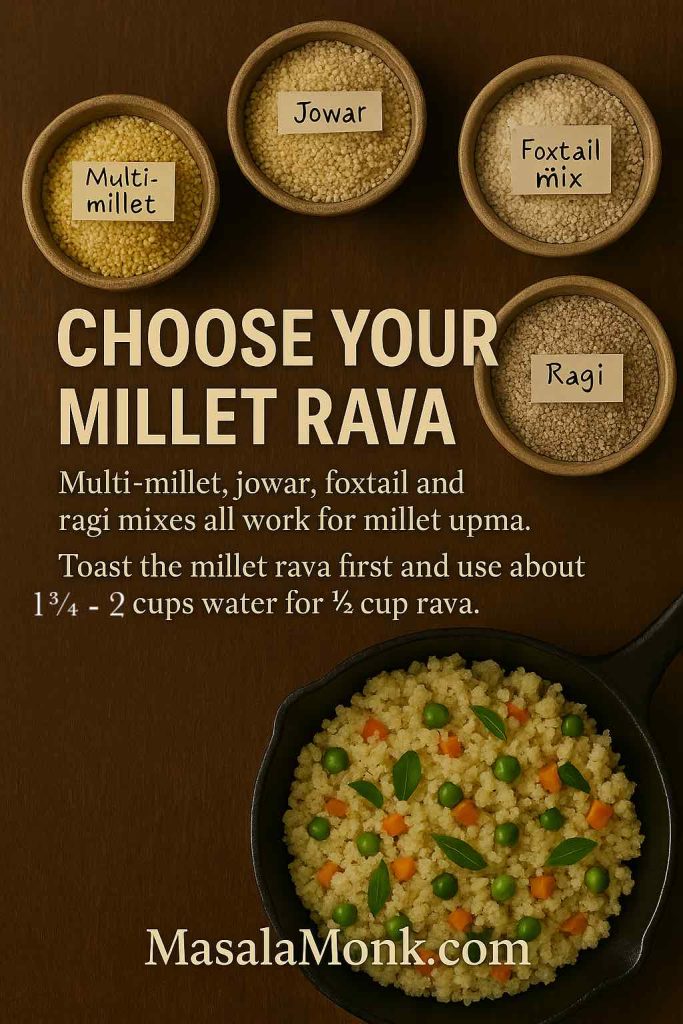
Which Millet Rava Works Well for Upma?

You can make a millet upma recipe using:

  • Multi-millet rava blends
  • Jowar rava, often called jonna rava in some regions
  • Foxtail millet rava
  • Ragi-based mixed millet rava (often combined with other millets for better texture)

For a clearer sense of what’s available in Indian markets, this breakdown of common types of millet available in India is handy.

Basic Millet Upma Recipe

For 2 servings:

  • Millet rava – ½ cup
  • Water – 1¾ to 2 cups (millets generally need more water than suji)
  • Oil – 2 tablespoons
  • Mustard seeds – ½ teaspoon
  • Urad dal – 1 teaspoon
  • Chana dal – 1 teaspoon
  • Cashews – a small handful (optional)
  • Onion – 1 small, chopped
  • Ginger – ½ inch, chopped
  • Green chillies – 1–2
  • Curry leaves – a few sprigs
  • Mixed vegetables – ½ to 1 cup
  • Salt, lemon juice, coriander – to taste

The method mirrors rava upma, with a few tweaks:

Recipe card image showing small bowls of millet rava labelled multi-millet, jowar, foxtail mix and ragi above a skillet of cooked millet upma, with text explaining that all these millet ravas work for upma and need to be toasted and cooked with about 1¾–2 cups water for ½ cup rava.
Choose your millet rava – multi-millet, jowar, foxtail and ragi mixes all work beautifully for millet upma when you toast the rava first and use a little extra water for soft, fluffy grains.
  1. Dry roast the millet rava in a pan till it smells toasty and feels lighter.
  2. In another pan (or the same pan after transferring the roasted millet), make the tempering: oil, mustard, dals, cashews, curry leaves, ginger, chillies, onion.
  3. Add vegetables and sauté till they brighten.
  4. Pour in water and salt; bring to a good boil.
  5. Lower the flame and slowly stir in the roasted millet rava, stirring as you go.
  6. Cover and cook on a low flame till the grains soften. Rest for a few minutes and fluff.

Because millets can feel new if you haven’t cooked them much before, you might also enjoy trying other breakfast-style millet recipes, such as fermented ragi (finger millet) idlis or barnyard millet and foxnuts savoury pancakes, which give you more ideas on how to rotate millets through your mornings.

Also Read: Katsu Curry Rice (Japanese Recipe, with Chicken Cutlet)


Wheat and Rice Rava Upma Recipe (Godhuma, Bansi, Samba, Arisi Upma)

Beyond millets, many households regularly switch between suji, wheat rava and rice rava. People looking for “wheat rava upma”, “samba rava upma”, “bansi rava upma”, “rice rava upma” and “arisi upma mix” are all essentially trying to do this rotation with confidence.

Digital food photo showing two bowls of upma on a wooden board, one labelled wheat rava upma and the other rice rava or arisi upma, with small piles of wheat rava and rice rava, curry leaves, green chutney and lemon, plus text explaining that wheat rava needs more water and time while rice rava feels closer to soft rice.
Beyond suji – side-by-side bowls of wheat rava upma and rice rava (arisi) upma, showing how you can swap in godhuma or arisi rava for a heartier, rice-like take on classic upma.

Wheat Rava Upma Recipe

Wheat rava goes by many names: godhuma rava, bansi rava, samba rava, broken wheat and so on. This base yields a slightly chewier, almost pilaf-like upma.

To prepare it:

  • Replace suji with the same quantity of wheat rava.
  • Roast it gently before use.
  • Use around 1½ to 2 cups of water for ½ cup wheat rava, depending on how coarse it is.

The tempering and vegetable combination can be identical to rava upma. The only real difference is the cooking time, which tends to be a touch longer.

If someone at home has to avoid wheat because of an allergy or suspected intolerance, it’s worth reading a focused guide such as wheat allergy: symptoms, causes, and treatment and then leaning on rice or millet-based upma instead of wheat rava versions.

Instructional graphic showing a bowl of wheat rava upma with a pile of wheat rava, and a bowl of rice rava or arisi upma with a pile of rice rava, plus text explaining to roast wheat rava well and use about 1:3 water, and to roast rice rava gently and use about 1:3–1:3.5 water for a soft rice-like texture.
Quick tweaks for wheat and rice rava upma – roast wheat rava well and simmer with about 1:3 water for chewier grains, while rice rava or arisi upma prefers gentler roasting and a little extra water for a soft, rice-like finish.

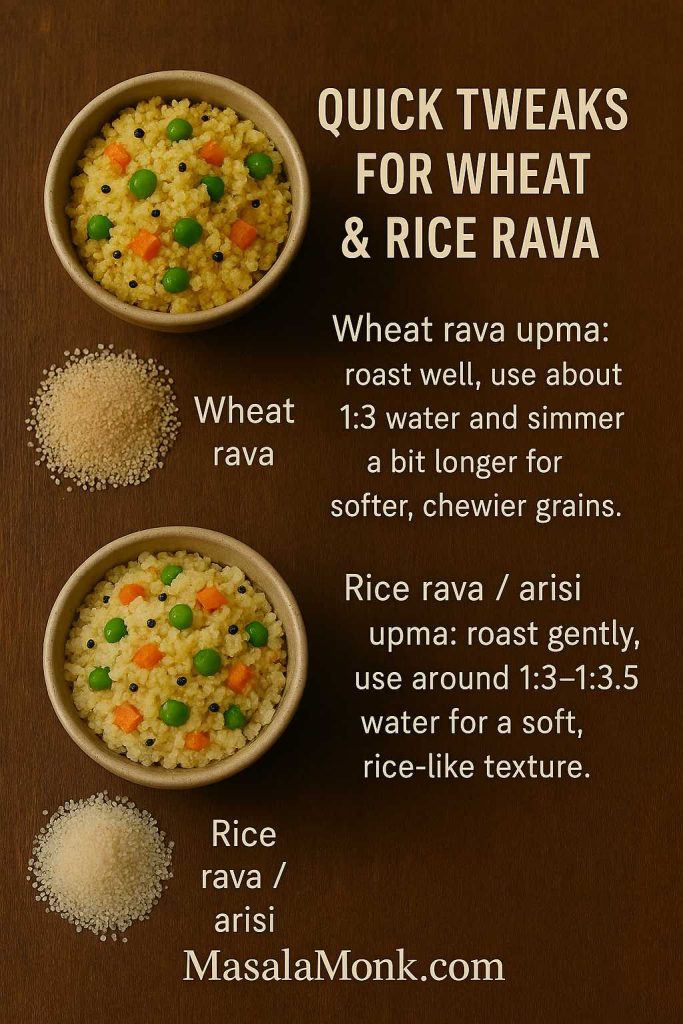
Recipe for Rice Rava Upma / Arisi Upma

Rice rava (or arisi rava) is simply broken rice. It tends to taste closer to soft rice cooked in a tempering, but still follows the “roast, simmer, steam” logic.

You can:

  • Use ½ cup rice rava to start with.
  • Roast it lightly, just until it loses any raw aroma.
  • Temper oil with mustard seeds, dals, curry leaves, ginger, chillies and onions.
  • Add water and salt (start with about 1½ to 1¾ cups, adjusting as needed).
  • Stir in rice rava, then simmer covered till the grains are soft but not mushy.

If you’re already cooking plain rice alongside, you might find MasalaMonk’s guide on how to cook perfect rice every time helpful; it walks through stovetop, cooker and Instant Pot methods and helps time everything together in a busy kitchen.

Also Read: 10 Best Espresso Martini Recipe Variations (Bar-Tested)


Semiya Upma Recipe (Vermicelli / Seviyan Upma)

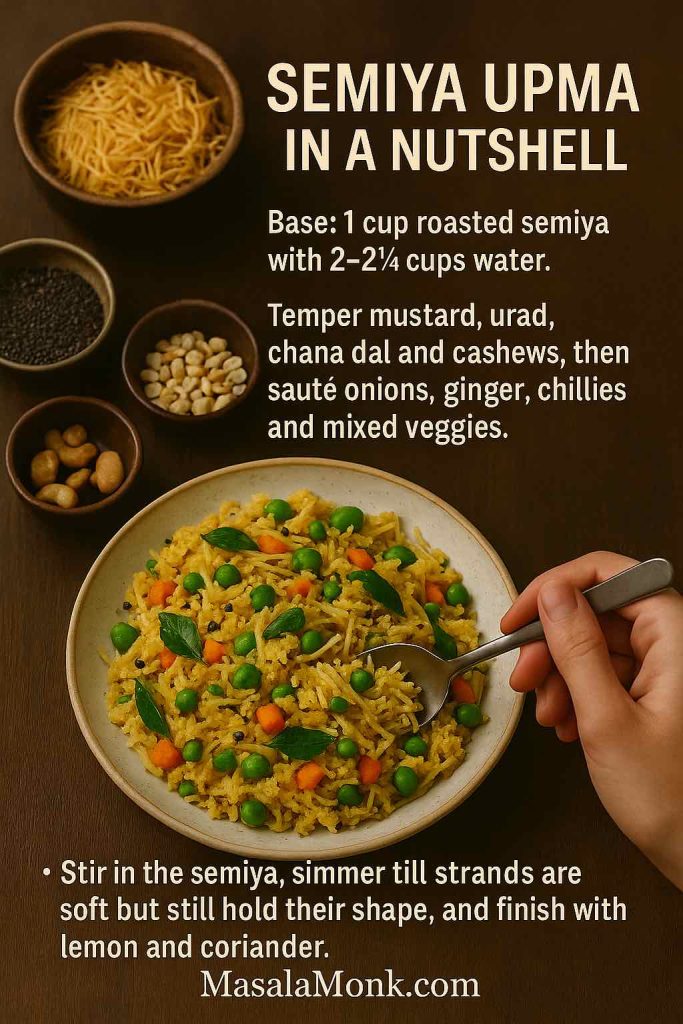
Switching gears a little, semiya upma is what many people reach for when they’re dealing with fussy children, tiffin boxes or days when they’re simply bored of rava. Vermicelli upma feels lighter, looks fun on the plate, and still uses the same basic building blocks.

Ingredients for 2 Servings

  • Roasted vermicelli (semiya) – 1 cup
  • Water – 2 to 2¼ cups
  • Oil – 1½ to 2 tablespoons
  • Mustard seeds – ½ teaspoon
  • Urad dal – 1 teaspoon
  • Chana dal – 1 teaspoon
  • Cashew nuts – a small handful (optional)
  • Onion – 1 small, chopped
  • Ginger – ½ inch, minced
  • Green chillies – 1–2, chopped
  • Curry leaves – a sprig or two
  • Mixed vegetables – ½ to 1 cup (peas, carrots, beans, corn)
  • Salt, lemon juice, coriander – to taste
Recipe card for semiya upma showing a bowl of colourful vermicelli upma with peas, carrots and curry leaves, surrounded by bowls of roasted semiya, mustard seeds, lentils and cashews, with text summarising the base ratio, tempering and cooking method for semiya upma.
Semiya upma recipe in a nutshell – roasted vermicelli simmered with tempered mustard, lentils, cashews, onions and mixed veggies for a lighter, tiffin-friendly twist on classic upma.

Method

  1. If the vermicelli isn’t pre-roasted, dry roast it till it turns a light golden-brown and gives off a nutty aroma.
  2. In a separate pan, prepare the tempering exactly as you would for rava upma: oil, mustard, dals, cashews, curry leaves, ginger, chillies, onion.
  3. Add vegetables and sauté briefly until they brighten in colour.
  4. Pour in water and salt, bring to a boil.
  5. Add the roasted vermicelli gradually while stirring so it doesn’t clump.
  6. Lower the heat and cook uncovered or partially covered until the water is absorbed and the semiya is soft but still holds its shape.
  7. Finish with lemon and coriander.

Unlike some other variations, semiya upma doesn’t always need chutney; it tastes quite complete on its own, especially if you’re generous with the vegetables and cashews.

Also Read: Greek Tzatziki Sauce Recipe (1 Master Sauce + 10 Easy Variations)


Oats Upma Recipe: A Savoury, High-Fibre Bowl

Once you’re comfortable with the idea that almost any grain can become an upma, oats are a natural next step. Many readers searching for “oats upma” are looking for a way to eat oats that doesn’t feel like a bowl of sweet porridge.

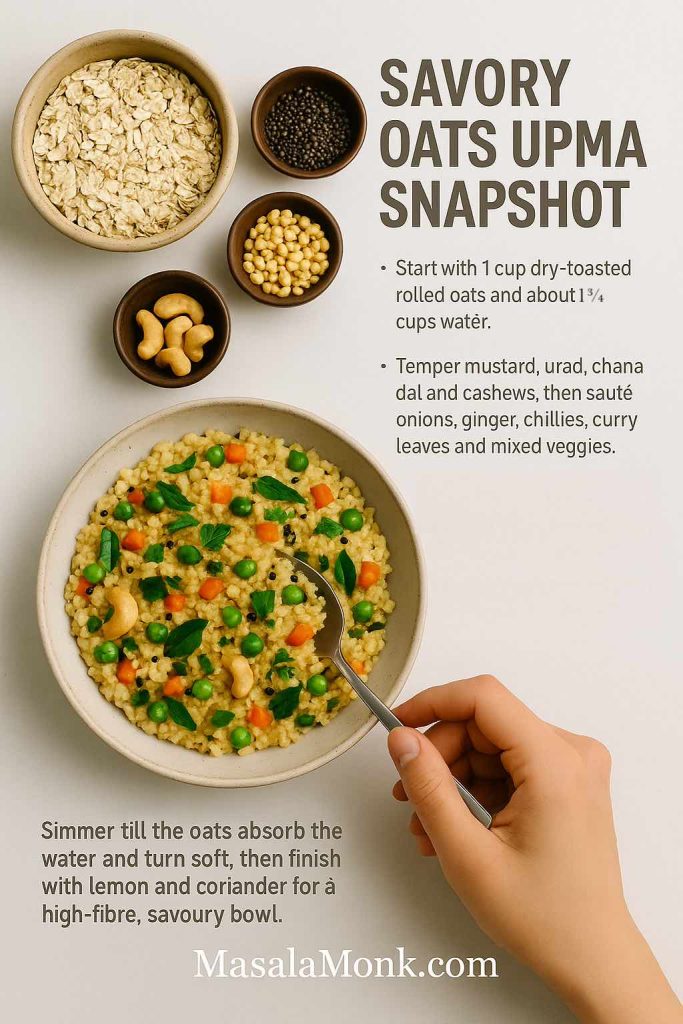
From a nutrition point of view, oats are rich in beta-glucan, a soluble fibre that helps with satiety and cholesterol regulation. Harvard’s Nutrition Source has a concise explainer under their overview of oats and beta-glucan benefits, and Mayo Clinic offers a practical perspective in their guide to starting your day with healthy oatmeal.

Ingredients for 2 Servings

  • Rolled oats – 1 cup
  • Water – about 1¾ cups (adjust if you like it looser or firmer)
  • Oil – 1½ tablespoons
  • Mustard seeds – ½ teaspoon
  • Urad dal – 1 teaspoon
  • Chana dal – 1 teaspoon
  • Cashew nuts – a few (optional)
  • Onion – 1 small
  • Ginger – ½ inch
  • Green chillies – 1–2
  • Curry leaves
  • Mixed vegetables – ½ cup or more
  • Salt, lemon juice, coriander – as usual
Recipe snapshot for savory oats upma showing a bowl of colourful oats upma with peas, carrots and cashews, surrounded by bowls of rolled oats, mustard seeds, lentils and cashews, with text summarising the ratio, tempering and simmering steps for a high-fibre Indian breakfast bowl.
Savory oats upma recipe snapshot – dry-toasted rolled oats simmered with tempered mustard, lentils, cashews, onions and veggies, then finished with lemon and coriander for a high-fibre Indian breakfast bowl.

Method

  1. Dry toast the oats in a pan for 2–3 minutes until they smell toasty and slightly nutty. This step keeps the final texture pleasant and prevents mushiness.
  2. In another pan, temper oil with mustard, dals and cashews.
  3. Add curry leaves, ginger, chillies and onion, sauté till the onion softens.
  4. Stir in vegetables and fry briefly.
  5. Add water and salt; bring to a boil.
  6. Tip in the toasted oats, lower the flame and cook, stirring occasionally, until they absorb the water and turn soft.
  7. Rest for a couple of minutes, then fluff and garnish with lemon and coriander.

If you enjoy oats in both sweet and savoury forms, you might want to keep a few ideas bookmarked. MasalaMonk’s high protein overnight oats and their guide on turning plain oats into a high-protein meal are both excellent for days when you want more variety and protein without abandoning oats as a base.

Meanwhile, if you’re curious about the “hard” science on oats and cholesterol, you’ll find clinical-trial style evidence in publications that examine oat beta-glucan and LDL reduction in detail; those are reassuring when you commit to eating oats upma regularly.

Also Read: Simple Bloody Mary Recipe – Classic, Bloody Maria, Virgin & More


Quinoa Upma: Low-GI, High-Protein Comfort Recipe

Quinoa might not be native to Indian kitchens, but it slips into Indian flavours surprisingly well. When you treat it like rava and build an upma recipe around it, you get a bowl that tastes familiar but behaves a little differently in your body.

As a grain, quinoa tends to have a lower glycaemic index than both white and brown rice and also brings more protein and minerals per cup. A recent comparison on quinoa vs rice for blood sugar and weight management lays this out in an accessible way, and if you enjoy science-y talks, you might appreciate this Royal Society of Chemistry event that explored whether quinoa can be a healthier alternative to rice.

Ingredients for 2 Servings

  • Quinoa – ½ cup, rinsed thoroughly
  • Water – 1½ cups
  • Oil – 1½ to 2 tablespoons
  • Mustard seeds – ½ teaspoon
  • Urad dal – 1 teaspoon
  • Chana dal – 1 teaspoon
  • Cashews – a handful (optional)
  • Onion – 1 small, chopped
  • Ginger – ½ inch
  • Green chillies – 1–2
  • Curry leaves
  • Mixed vegetables – ½ to 1 cup
  • Salt, lemon juice, coriander
Recipe snapshot for quinoa upma showing a bowl of quinoa upma with peas, carrots and cashews beside small bowls of quinoa and lentils, with text explaining rinsing, tempering and simmering quinoa for a low-GI, high-protein upma bowl.
Quinoa upma recipe snapshot – well-rinsed quinoa simmered with tempered mustard, lentils, cashews, onions and veggies until the grains show little “tails”, then fluffed with lemon and coriander for a low-GI, high-protein upma bowl.

Method

  1. Place the quinoa in a fine-mesh sieve and rinse thoroughly under running water. This helps wash away saponins, which can taste bitter.
  2. In a pan, prepare the tempering with oil, mustard seeds, dals and cashews, followed by ginger, chillies, curry leaves and onion.
  3. Add chopped vegetables and sauté briefly.
  4. Stir in the drained quinoa and sauté for a minute or two; this step gives the grains a lightly toasted flavour.
  5. Pour in the water, add salt, and bring to a boil.
  6. Reduce to a simmer, cover and cook until the water is absorbed and the quinoa grains show little “tails”.
  7. Rest off the heat for a few minutes, then fluff and finish with lemon and coriander.

To see how quinoa compares directly to rice in everyday meals, including dishes like pulao and bowls similar to upma, you might enjoy MasalaMonk’s own quinoa vs rice overview, which brings the conversation back into a very Indian kitchen.


Homemade Instant Upma Mix: Just Add Hot Water

There are days when you have no time to chop onions, wash curry leaves or even stand at the stove for long. That’s when searches like “instant upma mix for travel”, “instant rava upma mix”, “readymade upma packet” and “upma premix” start appearing.

Instead of only relying on store-bought packets, you can make your own instant upma mix in a small weekend batch and use it through the week, or carry it in a jar or pouches when you travel.

Instructional image showing a glass jar labelled Instant Upma Mix surrounded by bowls of roasted rava, mustard seeds, lentils, dried curry leaves and spices, with text explaining how to combine them into a homemade instant upma premix for the week.
Instant upma premix – combine roasted rava with cooled tempering, dried curry leaves, ginger powder, chilli and salt, then store it in a jar or pouches so a hot bowl of upma is only boiling water away all week.

What You Need for a Small Batch

  • Roasted rava – 1 cup
  • Oil – 1 tablespoon (you can leave this out and keep the mix completely dry if you prefer)
  • Mustard seeds – ½ teaspoon
  • Urad dal – 1 teaspoon
  • Chana dal – 1 teaspoon
  • Dried curry leaves – a tablespoon or so
  • Ginger powder – a pinch or two
  • Green chilli powder or red chilli flakes – to taste
  • Salt – ¾ to 1 teaspoon (or pack separately)

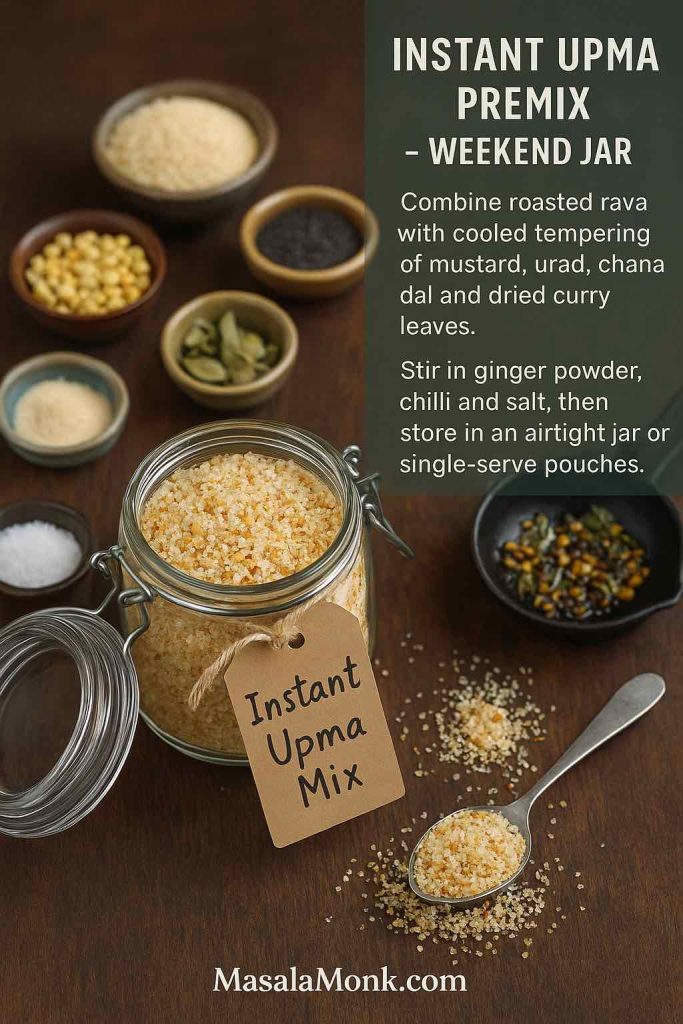
Making the Instant Upma Premix at Home

  1. Dry roast the rava if it isn’t already roasted; let it cool completely.
  2. In a small pan, heat the oil and fry mustard seeds, urad dal, chana dal and dried curry leaves until crisp and fragrant. Allow this tempering to cool fully.
  3. Mix the roasted rava with the cooled tempering, ginger powder, chilli powder and salt.
  4. Store the mix in a clean, dry, airtight jar. For travel, portion it into small zip pouches or tiny containers so you can make one serving at a time.

Because the mix already contains salt and spices, all you need at the destination is boiling water and a bowl.

Instructional image showing boiling water being poured from a kettle into an insulated mug filled with instant upma premix on a desk, with text explaining how to add premix, pour hot water, cover and wait a few minutes for an easy travel- or office-friendly upma.
Instant upma, anywhere – add premix to a mug, pour boiling water, cover and wait a few minutes for a hot, comforting bowl at your desk, in a hostel or on a train journey.

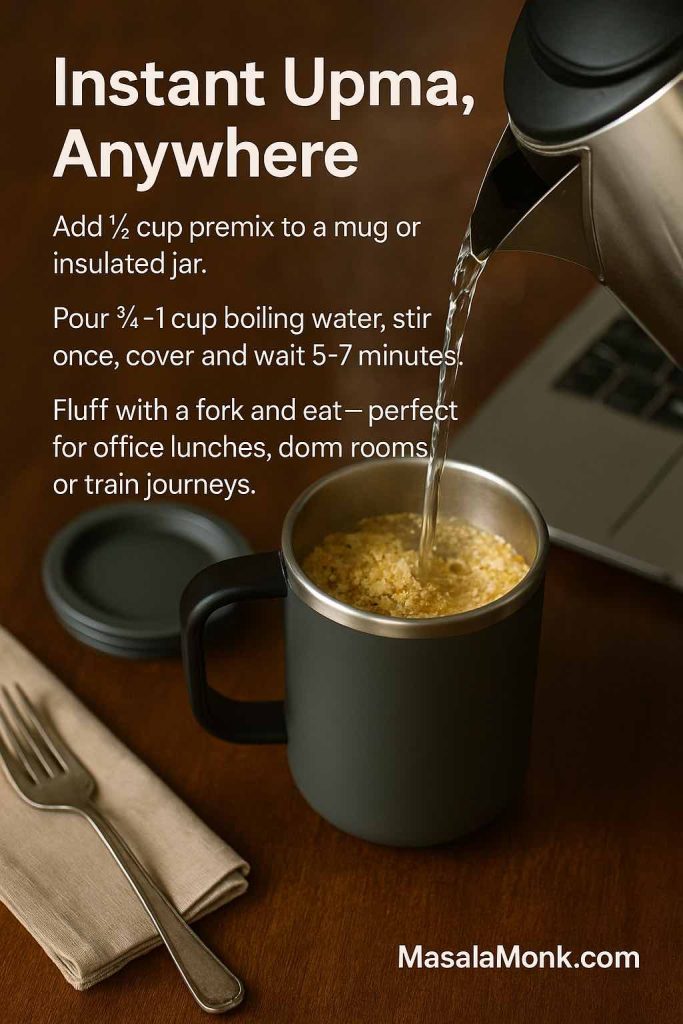
How to Cook Instant Rava Upma from the Mix

For one serving:

  • Instant upma premix – ½ cup
  • Boiling water – ¾ to 1 cup

You simply:

  1. Add the premix to a bowl or small insulated container.
  2. Pour boiling water over it, stir well and cover.
  3. Let it stand for 5–7 minutes.
  4. Fluff with a fork and eat.

This approach is especially useful for office lunches, dorm rooms and overnight train journeys. If you’re into meal prepping more broadly, you can pair a home-made upma premix with larger batch cooks using guides like MasalaMonk’s vegetarian and high protein meal prep ideas from Indian cuisine, which help you think in terms of components instead of one-off meals.


What to Serve With Upma (and How to Build a Breakfast Around It)

While upma can absolutely be the only thing on your plate, it often plays very well with other small dishes. On some mornings you might want something cooling and tangy alongside; on others, you might want a hot drink or even a sweet treat to nibble with the last few bites.

Upma breakfast platter on a wooden tray with a bowl of rava upma, coconut and tomato chutneys, podi with ghee, curd, lemon wedges and a tumbler of filter coffee, with text suggesting pairing upma with chutneys, pickle and a warm drink for a complete morning meal.
Build your upma breakfast – pair any bowl of rava, semiya or millet upma with coconut and tomato chutney, podi with ghee, curd, lemon pickle and a warm drink like filter coffee to turn it into a complete morning ritual.

Here are a few ways to round out the experience:

  • Coconut chutney, tomato chutney, gunpowder (podi) with ghee, lemon pickle or even a simple bowl of curd all sit naturally next to a bowl of suji upma, semiya upma or millet upma.
  • A warm drink balances the savoury comfort of upma nicely. In winter, for instance, you could make a mug of homemade hot chocolate with cocoa powder on the side and turn breakfast into a cosy ritual.
  • On days when you’re fasting for part of the day, sipping on homemade electrolytes for fasting before or after your eating window—within which you eat a lighter millet upma—can help you feel more balanced.

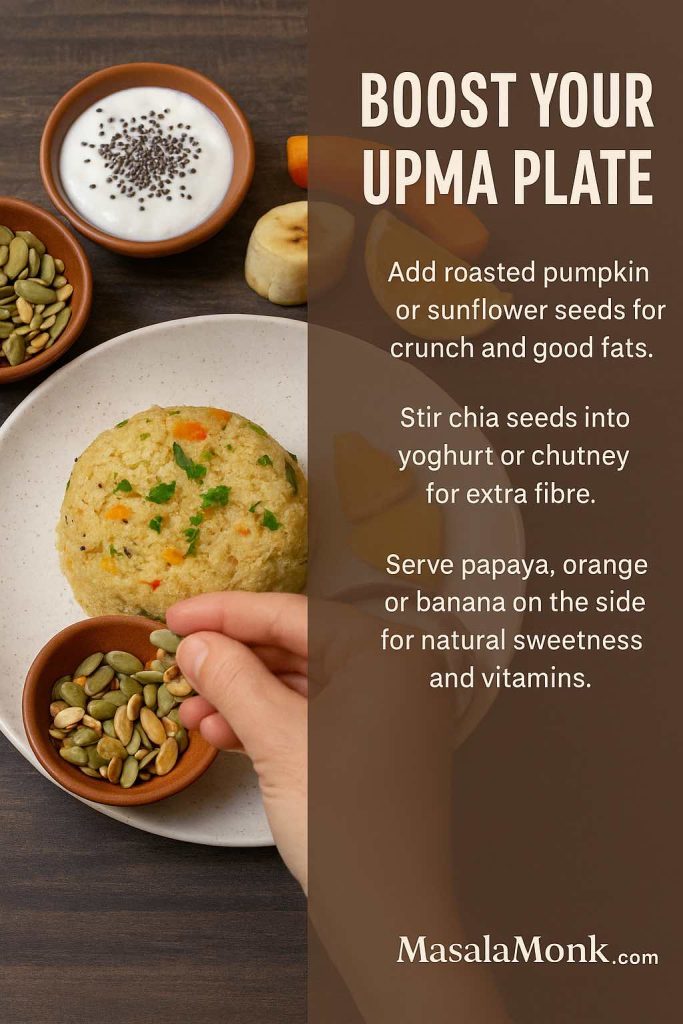
Boosting the Nutrition

If you’re trying to boost the overall nutrition of the plate, there are a few simple tweaks that add up over time:

  • Sprinkle roasted seeds, such as pumpkin or sunflower, on your upma for a bit of crunch and good fats.
  • Stir soaked chia seeds into yoghurt or chutney; for ideas on how to use chia in Indian-style meals, MasalaMonk’s guide on benefits of chia seeds & how to use them in Indian diet offers plenty of inspiration.
  • Add a small fruit component—slices of papaya, orange segments, a banana—to bring in vitamins and sweetness naturally.
Instructional image showing a plate of upma with small bowls of roasted pumpkin and sunflower seeds, yoghurt topped with chia seeds and sliced banana and orange, with text explaining how to add seeds, chia and fruit to make an upma breakfast more nutritious.
Boost your upma plate – sprinkle roasted seeds, stir chia into yoghurt and add a side of fruit so a simple bowl of upma turns into a more balanced, fibre- and nutrient-rich breakfast.

And if you like mixing Indian and Western breakfast styles on weekends, nothing stops you from serving a simple vegetable upma alongside a couple of slices of vegan French toast or baked toast sticks. MasalaMonk’s collection of vegan French toast recipes and their crispy French toast sticks can give you a head start there.


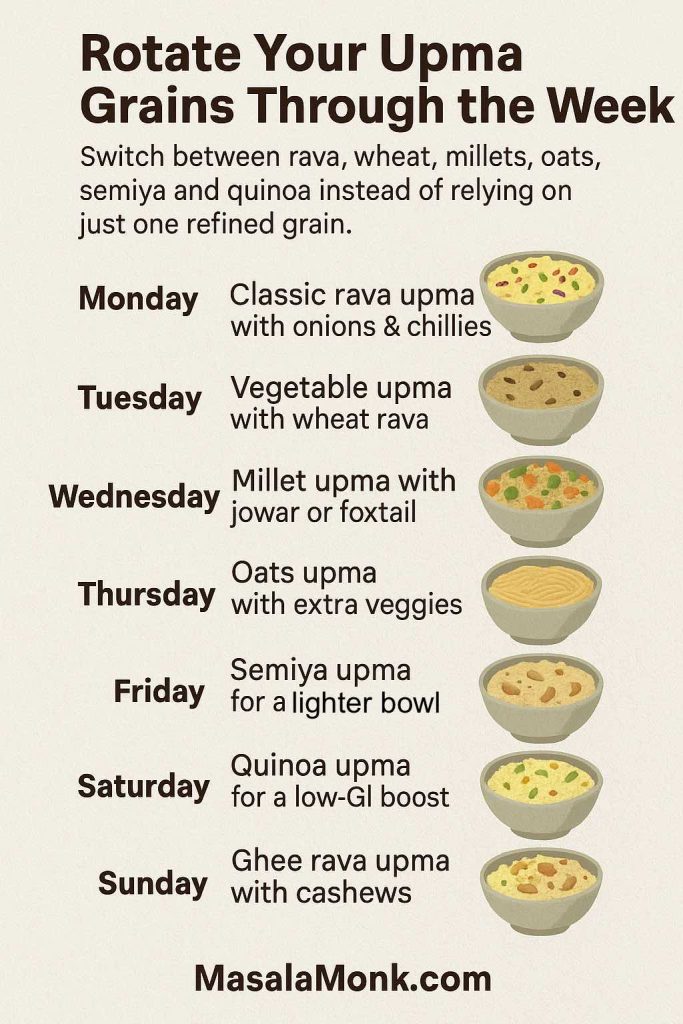
Rotating Grains Through the Week

One quiet advantage of mastering a few upma recipes is that you can then build a weekly rhythm around rotating grains. Instead of eating only suji or only oats, you can switch between several bases while keeping flavours familiar.

For example:

  • Monday – Classic rava upma with onions and chillies
  • Tuesday – Vegetable upma using wheat rava
  • Wednesday – Millet upma with jowar or foxtail millet rava
  • Thursday – Oats upma with lots of vegetables
  • Friday – Semiya upma for a lighter, comforting bowl
  • Saturday – Quinoa upma when you want something special
  • Sunday – A more indulgent ghee rava upma with cashews

The idea of variety is not just about boredom; it’s also about nutrition. The updated Indian dietary guidelines from ICMR emphasise including a range of cereals and millets over the week rather than relying only on refined grains. You can read more about that in the ICMR document on cereals and millets in the diet, which explains why shifting between rice, wheat, millets and other grains matters for long-term health.

Vertical infographic titled Rotate Your Upma Grains Through the Week showing a weekly planner from Monday to Sunday with small illustrations of different upma bowls and text suggesting classic rava upma, wheat vegetable upma, millet upma, oats upma, semiya upma, quinoa upma and ghee rava upma to encourage rotating grains instead of relying on one refined grain.
Rotate your upma grains through the week – move from rava to wheat, millets, oats, semiya and quinoa so breakfast stays interesting while your plate gradually shifts away from a single refined grain.

On top of that, broader resources that list foods rich in soluble fibre—such as this round-up of soluble-fibre-rich foods on Health.com—help you see where oats, barley, pulses and fruits fit into the larger picture of heart and gut health. As you get comfortable with those patterns, you’ll see that a thoughtfully made upma can anchor a very respectable breakfast, especially when it’s paired with pulses, vegetables and a side of fruit or nuts.

Also Read: Air Fryer Hard-Boiled Eggs (No Water, Easy Peel Recipe)


Bringing It All Together

When you step back and look at everything you can do with one simple technique, the humble upma starts to look less like a single dish and more like a framework. With one basic method—roast the grain, build a tempering, simmer, steam and fluff—you can create:

  • A straightforward suji upma for days when you want something quick and familiar
  • A vegetable or masala upma that almost counts as a complete meal
  • A millet upma that uses jowar, foxtail or ragi rava for extra minerals and fibre
  • A wheat or rice rava upma that tweaks the texture just enough to keep things interesting
  • A semiya upma that feels tiffin-friendly and child-approved
  • An oats upma that quietly supports your cholesterol and blood sugar goals
  • A quinoa upma that borrows global ingredients but stays rooted in Indian seasoning
  • A home-made instant upma mix that travels with you wherever you go
Family sitting at a wooden table enjoying bowls of rava upma, with a close-up of hands holding a bowl in the foreground and text reading “Bringing It All Together – master one upma method and spin it into a cozy, nutritious breakfast”.
Bringing it all together – once you’ve mastered one simple upma method, you can keep serving it in different grains and styles, but what really matters is the shared bowl at the table and the comfort it brings to busy mornings.

You don’t have to memorise separate instructions for each of these. Instead, you only need to internalise the proportions, roasting times and cooking times for each grain. Once you’ve done that, everything else is just small variations: more vegetables one day, more spices another, extra ghee on a Sunday, milder seasoning when someone’s unwell.

Somewhere between “how to make upma” and “which upma recipe should I choose today?”, you’ll probably find your own favourite combination of grain, vegetables, fat and accompaniments. And when that happens, upma stops being just a default breakfast and becomes one of those dishes you can cook almost on autopilot—leaving you free to enjoy the aroma of curry leaves in hot oil, the steam rising from the pan, and the simple pleasure of a warm, comforting bowl at the start of the day.

Also Read: Tres Leches – Mexican 3 Milk Cake Recipe

FAQs

1. What is upma, and how is it different from other Indian breakfasts?

Upma is a savoury, spoonable dish usually made by roasting a grain like rava (semolina, also called suji or upma rava) and then simmering it in a spiced liquid with a tempering of mustard seeds, lentils, curry leaves, chillies and onions. Unlike poha, which uses flattened rice, or idli, which relies on fermented batter, an upma recipe is quick, does not need soaking or grinding, and can be easily adapted to use different grains such as wheat rava, rice rava, millets, oats or quinoa.


2. What is the best rava for a classic rava upma recipe?

For a traditional rava upma or suji upma, medium or slightly coarse upma rava works best. Very fine suji can turn pasty, while extremely coarse rava may feel too chewy. Typically, packets labelled “upma rava” or “bombay rava” are ideal. Wheat rava (bansi or samba) and rice rava also make good upma, but they give a slightly different texture and flavour compared to the classic semolina-based upma recipe.


3. What is the ideal water ratio for soft, fluffy upma?

For most rava upma recipes, a ratio of 1:2½ to 1:3 (rava:water) works well. If you love very soft, hotel-style upma, you can lean closer to 1:3. On the other hand, if you prefer a firmer, grainier texture, you might enjoy 1:2½ more. Millet upma, wheat rava upma and rice rava upma usually need a little extra water; oats upma and quinoa upma also behave differently and often fall somewhere between 1:2 and 1:3 depending on the exact grain and cut.


4. How can I prevent lumps in my rava upma?

To keep your upma smooth and lump-free, the grain needs two things: roasting and careful mixing. First, dry roast the upma rava on a low to medium flame until it smells nutty and feels lighter. Next, bring the water and tempering to a full boil, then lower the heat. Gradually sprinkle the roasted rava into the boiling water with one hand, while you stir constantly with the other. This way, each little bit of rava meets the hot water separately and swells on its own, instead of clumping into balls.


5. Why does my upma turn sticky or mushy?

Upma often becomes sticky if the rava is not roasted enough, if the water ratio is too high for the grain, or if it is stirred aggressively after cooking. For a classic rava upma recipe, roast the semolina until it is aromatic, measure the water accurately, and once it has steamed, fluff gently rather than vigorously mixing it. For semiya upma (vermicelli upma) and oats upma, overcooking or adding too much water can also create a gluey texture, so it helps to keep the flame low and stop cooking as soon as the grain is just tender.


6. How do I make a simple upma recipe without vegetables?

A basic suji upma without vegetables is straightforward. Dry roast the rava, prepare a tempering with oil or ghee, mustard seeds, urad dal, chana dal, curry leaves, ginger, green chillies and onions, then add water and salt and bring it to a boil. Slowly stir in the roasted rava, cook covered for a few minutes, and finally finish with lemon juice and coriander. Even though there are no vegetables, this minimal upma recipe still tastes satisfying because of the fragrant tempering and the roasted flavour of the rava.


7. Can I make upma without onion or garlic?

Many people prefer a satvik upma recipe without onion or garlic, and that version is absolutely possible. In that case, rely more on curry leaves, ginger, green chillies, mustard seeds and lentils in the tempering. You can also add grated coconut or chopped coriander at the end for extra freshness. This style of upma is common on fasting days or festival mornings, and it works equally well with rava upma, millet upma and even oats upma.


8. Is upma healthy, or is it just a heavy breakfast?

Upma can be as light or as indulgent as you choose to make it. A plain rava upma recipe made with a moderate amount of oil or ghee, plenty of vegetables and served with yoghurt or chutney can fit into a balanced diet. Nevertheless, rava is a refined grain, so if you want a more nutrient-dense bowl, it helps to rotate with millet upma, wheat rava upma, oats upma or quinoa upma. By changing the base grain, increasing the amount of vegetables and moderating the fat, you can turn a simple upma recipe into a wholesome, everyday breakfast.


9. Which type of upma is better for weight management or diabetes?

Although individual needs differ, many people looking for a “healthy upma recipe” gravitate towards millet upma, oats upma or quinoa upma. These versions often have more fibre and a gentler impact on blood sugar compared to an upma recipe made only with refined semolina. In addition, adding vegetables, a small portion of nuts or seeds and pairing the bowl with yoghurt or a protein-rich side makes the meal more filling and may reduce the urge to snack soon after. Even so, portion size still matters, so lighter, moderate servings usually work best.


10. What are some easy variations beyond rava upma?

Beyond the classic rava upma, it is quite simple to explore other versions using the same basic method. For instance, semiya upma (vermicelli upma) swaps rava for roasted vermicelli threads; millet upma uses millet rava such as jowar, foxtail or multi-millet blends; oats upma relies on rolled oats; quinoa upma uses rinsed quinoa simmered with the tempering; and rice rava or arisi upma uses broken rice. The seasoning and vegetables can remain almost identical, so once you grasp one upma recipe, the others become natural extensions.


11. How do I prepare an instant upma mix for travel or busy mornings?

An instant upma mix starts with roasted rava and a very dry tempering. To assemble it, first roast the semolina thoroughly and cool it, then fry mustard seeds, urad dal, chana dal and dried curry leaves in a little oil until crisp. Once everything is completely cool, mix the rava, the tempering, dry spices such as ginger powder and chilli powder, and salt. Store the mixture in an airtight jar or in single-serving pouches. Later on, you only need to combine a portion of this instant upma mix with boiling water, allow it to stand covered for a few minutes, and fluff it before eating.


12. How long can roasted rava or instant upma premix be stored?

Roasted rava alone, if cooled thoroughly and kept in an airtight container away from moisture and insects, keeps well for several weeks and often even a couple of months. Instant upma premix that contains oil and spices generally has a shorter shelf life, though it still lasts a few weeks at room temperature in a cool, dry cupboard. If your climate is very humid, keeping smaller quantities of the premix in the fridge can be a safer choice. In any case, it is wise to check aroma and appearance before use; if the mix smells stale or looks clumpy, it is better not to use it.


13. Can I make upma in a pressure cooker or microwave?

Upma is traditionally cooked in an open pan, but it can also be adapted to a pressure cooker or microwave when needed. In a cooker, you can prepare the tempering, add rava and water, then cook on low heat without placing the whistle, treating the cooker like a heavy pan. In a microwave, you may roast rava and prepare the tempering separately, then combine everything with hot water in a microwave-safe bowl and cook in short bursts, stirring in between. Both methods work, although controlling texture and avoiding overcooking is usually easiest on the stovetop.


14. Is upma suitable for toddlers and children?

Upma can be very child-friendly, especially when you keep the spices gentle and cut the vegetables finely. For toddlers, it helps to make the rava upma slightly softer, use only a mild amount of chilli (or skip it altogether), and mash or blend the bowl lightly if needed. As children grow older, you can gradually introduce vegetable upma, semiya upma, millet upma and even a lightly spiced masala upma. Because the basic upma recipe is soft and easy to chew, it often works well as one of the early family foods that kids can share with adults.

Posted on 4 Comments

Are Lentils Good for Weight Loss? Benefits, Recipes, and Science Explained

ARE LENTILS GOOD FOR WEIGHT LOSS? WHY EAT LENTILS FOR WEIGHT LOSS?

Lentils have been a dietary staple around the world for thousands of years, valued for their affordability, quick cooking time, and dense nutritional profile. In recent years, however, they’ve gained special recognition for their potential to support weight loss and fat reduction. So if you’ve ever wondered, “Are lentils good for weight loss?” or “Can lentils help you shed fat naturally?”, you’re not alone. These questions have become increasingly common as more people turn to whole foods for sustainable health results.

In this post, we’ll walk you through everything you need to know about lentils and weight loss—starting with the science behind their nutritional benefits, then moving into the best lentil types, cooking tips, and practical ways to incorporate them into your daily meals. Along the way, we’ll also answer common questions and share low-calorie lentil recipes that align with your weight management goals.

By the end, you’ll understand why lentils are often called a superfood for weight loss—and how you can use them strategically in your diet without worrying about unwanted weight gain.

My Person experience 147 Kgs to 90 Kgs: 3 Lentils for Fat Loss Win.


Why Lentils Are a Hidden Gem for Weight Loss

Let’s start with the basics. Lentils are small, mighty legumes packed with nutrients. But what makes them especially powerful for weight loss is their low calorie density, high fiber, and protein content. These three factors work together to keep you full, satisfied, and energized without overeating.

One cup of cooked lentils provides 230 calories, 18 grams of protein, and 15 grams of fiber — a simple way to stay full while losing weight.
Infographic showing nutritional facts of lentils per 1 cup cooked: 230 calories, 18g protein, 15g fiber, low glycemic index, and rich in iron.

A Look at the Numbers

Here’s what one cup (about 198 grams) of cooked lentils offers:

  • Calories: ~230
  • Protein: ~18 grams
  • Fiber: ~15 grams
  • Fat: Less than 1 gram
  • Glycemic Index: Low (21–30 depending on type)

In simple terms: You get a lot of food volume and nutrients, for relatively few calories. That’s a winning combo for weight loss.


Nutritional Profile of Lentils: Why They’re Great for Weight Loss

Before exploring how lentils affect weight loss directly, it’s important to understand their nutritional foundation.

1. Calorie Content

Lentils are relatively low in calories compared to many other protein-rich foods. For instance, one cup (about 198 grams) of cooked lentils provides approximately 230 calories. This makes them an excellent choice for those looking to reduce their calorie intake without sacrificing satisfaction or fullness.

2. High Protein Content

Protein plays a crucial role in weight loss because it helps maintain lean muscle mass while promoting satiety. Lentils offer around 18 grams of protein per cooked cup, which is impressive for a plant-based source. As a result, they serve as a smart alternative to animal proteins, especially for vegetarians and vegans focused on weight management.

3. Fiber-Rich Food

Another key benefit of lentils is their fiber content. A single cooked cup delivers about 15 grams of dietary fiber. This not only slows digestion and extends the feeling of fullness but also helps regulate blood sugar levels. Together, these effects can reduce overeating and curb unhealthy snacking—two essential factors in successful fat loss.

4. Low Glycemic Index

Lentils have a low glycemic index (GI), which means they release glucose into the bloodstream gradually. This helps maintain steady energy levels and reduces fat storage associated with insulin spikes. It’s especially beneficial for individuals managing insulin resistance or type 2 diabetes, which are commonly linked to excess weight.

5. Rich in Micronutrients

Beyond macronutrients, lentils provide a variety of essential vitamins and minerals that support metabolic health. These include:

  • Iron, which aids in energy production and oxygen transport
  • Magnesium, important for metabolism and muscle function
  • Folate, which supports cell repair and DNA synthesis
  • Potassium, which regulates fluid balance and blood pressure

These nutrients work together to support healthy metabolism and energy balance, both of which are foundational for sustainable weight loss.

Summary: Why Lentils Are Nutrient-Dense for Weight Loss

  • Low in calories (230 per cooked cup)
  • High in protein (18g) to promote satiety and preserve muscle
  • Packed with fiber (15g) to aid digestion and reduce cravings
  • Low glycemic index to support blood sugar control
  • Rich in essential vitamins and minerals that fuel metabolism

Taken together, these attributes make lentils one of the best foods for healthy, long-term weight loss.


Are Lentils Good for Weight Loss? What Does the Science Say?

So, are lentils truly good for weight loss? The evidence strongly suggests they are.

How Lentils Promote Weight Loss

Lentils support fat loss through several mechanisms. First, their combination of protein and fiber increases satiety, helping you feel full longer and reduce overall calorie intake. Second, the fiber slows digestion and stabilizes blood sugar levels, preventing insulin spikes that lead to fat storage and sugar cravings.

Additionally, lentils contain prebiotic fibers that feed beneficial gut bacteria. An increasingly large body of research links a healthy gut microbiome with better weight regulation, reduced inflammation, and improved metabolic health.

Lentils are also low in caloric density, which means you can eat satisfying portions without consuming excessive calories. This makes them a great option for people who want to feel full while still creating a calorie deficit.

What the Research Really Says About Lentils and Weight Loss

When it comes to losing weight in a healthy, sustainable way, lentils offer more than just nutrition—they’re backed by science. From supporting satiety and gut health to regulating blood sugar and improving metabolic markers, here’s what the research shows.

Lentils Can Help You Eat Less Without Feeling Hungry

A systematic review and meta-analysis found that eating just one serving of pulses like lentils per day helped people lose weight—without making any other dietary changes. Participants also experienced improved cholesterol levels, further reinforcing lentils’ heart-healthy benefits.

Smiling young woman eating a healthy lentil salad, with overlay text saying ‘Stay Full, Snack Less — Protein + Fiber keep hunger away for hours’.
Enjoying a fresh lentil salad — protein and fiber together help you stay full and snack less.

They Improve Blood Sugar and Inflammation

In a 2024 clinical trial, adults at higher metabolic risk who replaced meat with lentils saw notable improvements in their blood sugar response and inflammation markers—without reporting digestive discomfort. You can read more about that here.

Fiber and Resistant Starch Support Your Gut and Metabolism

Lentils are rich in both soluble and insoluble fiber, as well as resistant starch—components that help stabilize blood sugar, prolong fullness, and feed beneficial gut bacteria. According to Harvard’s School of Public Health, these properties make lentils a powerful tool in managing weight and improving digestion over time.

Lentils vs. Animal Protein: Why It Matters

Unlike red meat or cheese, lentils contain no cholesterol, are low in fat, and offer more fiber per gram. That’s why the Cleveland Clinic lists lentils as one of the best plant-based proteins for improving heart health and supporting weight loss.

Higher Fiber = Lower Risk of Disease and Death

A large 2022 study involving over 86,000 adults found that higher dietary fiber intake—including from lentils—was linked to significantly reduced risk of death from heart disease and cancer. For the full breakdown, check the Health.com report.


Which Lentils Are Best for Weight Loss?

While all lentils are healthy, some varieties may be slightly more effective for supporting weight loss due to their specific nutritional profiles.

Red Lentils

These cook quickly and have a soft texture, making them ideal for soups and purees. They’re slightly lower in calories and still provide a solid amount of protein and fiber.

If you’re looking for easy ways to use them, don’t miss these red lentil recipes that support weight loss.

Green Lentils

Known for holding their shape after cooking, green lentils are excellent in salads and side dishes. They typically contain more fiber and slightly more protein compared to red lentils.

Brown Lentils

As the most commonly available type, brown lentils are highly versatile. They have a balanced ratio of protein to fiber and work well in stews, curries, and mixed dishes.

Black Lentils (Beluga)

These small, shiny lentils are dense in protein, fiber, and antioxidants. They also have the lowest caloric content per gram, making them especially nutrient-dense for those focused on weight loss.

You can explore some of our favorite black lentil recipes designed for weight loss.

Which Lentil is Best?

If you’re targeting maximum fiber and protein per serving, green and black lentils are excellent choices. However, all lentil types contribute positively to a weight loss plan. Feel free to choose based on your preferred flavor, texture, or recipe.


How to Eat Lentils for Weight Loss

Your preparation method can significantly influence how lentils support your weight loss goals.

Portion Control

Aim for one to two cups of cooked lentils per day to ensure you’re getting adequate protein and fiber without consuming too many calories. Keep in mind that lentils expand as they cook—one cup of dry lentils yields roughly 2.5 cups cooked.

Cooking Tips

Stick to healthy preparation methods. Avoid frying or using cream-based sauces, and instead opt for boiling, pressure cooking, or simmering in broth. Flavor them with herbs, spices, lemon juice, or low-calorie sauces.

You can also pair lentils with nutrient-dense, non-starchy vegetables like spinach, bell peppers, or cucumbers to add bulk and enhance their fat-burning benefits.

Eating Lentils Daily

Adding lentils to your meals every day can help reduce appetite, improve blood sugar stability, and promote steady energy throughout the day. Many people report feeling fuller and more satisfied when lentils are a regular part of their diet.


Healthy Recipe Ideas to Enjoy Lentils and Lose Weight

One of the best things about lentils—besides their nutrition—is how incredibly versatile and delicious they are. Whether you’re craving something warm and comforting, light and refreshing, or even something with a bit of a spicy kick, there’s a lentil recipe that fits. Here are some easy, healthy ideas to get you started.

Recipe graphic showing three healthy lentil dishes: lentil soup cooked with tomatoes and spices, a colorful lentil salad with vegetables, and whole-grain tortillas filled with seasoned lentils and avocado.
Healthy lentil recipes made simple — from cozy lentil soup to refreshing salad and nourishing lentil tacos.

Lentil Soup (Comfort in a Bowl)

When you’re in the mood for something hearty and nourishing, lentil soup is a perfect choice. Start with a base of low-sodium vegetable broth, then add in diced tomatoes, chopped onions, garlic, and your favorite vegetables. To give it depth and warmth, season generously with spices like turmeric, cumin, paprika, and black pepper. Let it simmer until everything is tender and fragrant. It’s the kind of meal that feels like a hug on a cold day—and it just so happens to be great for your waistline, too.

For more inspiration, check out our vegan lentil soup recipes for weight loss.

Lentil Salad (Light, Fresh & Filling)

If you prefer something cooler and crisp, lentil salad is quick to throw together and endlessly customizable. Mix cooked green or brown lentils with chopped cucumbers, tomatoes, bell peppers, and red onions. Then drizzle with fresh lemon juice and olive oil, and toss in some fresh herbs like parsley or cilantro. For extra flavor, add a pinch of cumin or a splash of apple cider vinegar. It’s a refreshing meal or side that keeps you full without weighing you down.

Lentil Tacos (Plant-Based and Packed with Flavor)

Looking for a fun and creative way to use lentils? Try turning them into taco filling! Cook lentils with onions, garlic, cumin, chili powder, and a bit of tomato paste or crushed tomatoes. Once thickened, scoop the mixture into crisp lettuce wraps or whole-grain tortillas. Top with shredded cabbage, avocado slices, fresh salsa, or a dollop of Greek yogurt. It’s a satisfying, protein-rich dinner that even meat-lovers will enjoy—plus it’s completely customizable.

Lentil Curry (Rich, Warming, and Satisfying)

Nothing beats a cozy lentil curry when you want something deeply satisfying but still healthy. Red or brown lentils work especially well here. Sauté garlic, onions, and ginger in a bit of oil, then add curry powder, cumin, and turmeric. Stir in crushed tomatoes and your lentils, and let everything simmer until soft and creamy. You can toss in some spinach or cauliflower for added fiber and nutrients. Serve with a small portion of brown rice or enjoy it on its own for a one-pot, plant-powered meal.


Lentil Diet Plans and Tips for Weight Loss

Incorporating lentils into your daily meals doesn’t have to be complicated. In fact, once you get into the rhythm of it, they can become the foundation of a delicious, nutrient-dense eating routine that supports steady, sustainable fat loss.

To help you get started, here’s a simple one-day sample meal plan that shows how easy it is to make lentils a part of your day. Of course, you can mix and match ingredients to suit your tastes, and feel free to swap in seasonal produce or different proteins as needed.

For those who like to prep ahead, here are some plant-based high-protein lentil meal prep ideas that work beautifully for weight loss.

🥣 Breakfast: Light, Energizing, and Fiber-Filled

Begin your day with a breakfast that’s both light and satisfying. A fruit and nut bowl is a great place to start—think sliced banana, berries, a handful of almonds or walnuts, and maybe a sprinkle of chia or flax seeds for added fiber. This kind of meal helps regulate your appetite and sets the stage for more mindful eating throughout the day.

Alternatively, if you’re someone who prefers to drink their breakfast, a smoothie is a fantastic option. Blend almond milk or oat milk with a scoop of protein powder, frozen berries, spinach, and a spoonful of nut butter or flaxseed. It’s quick, refreshing, and keeps you fueled all morning.

🥗 Lunch: Refreshing, Filling, and Balanced

By midday, you’ll want something that’s hearty enough to fill you up, yet balanced enough to avoid that post-lunch slump. A lentil salad checks all the boxes. Start with a base of cooked green or brown lentils, and add in chopped cucumber, cherry tomatoes, red onion, and mixed greens. Then drizzle on a dressing of lemon juice and olive oil for a fresh, zesty flavor.

For an extra protein boost, consider adding grilled tofu, a boiled egg, or lean grilled chicken. This kind of lunch offers the perfect mix of fiber, protein, and healthy fats to carry you through the afternoon without cravings.

🥕 Snack: Crunchy, Satisfying, and Guilt-Free

Rather than letting hunger sneak up on you later in the day, plan ahead with a simple, wholesome snack. Raw vegetables like carrots, bell peppers, or cucumber slices pair well with a few tablespoons of hummus. If you’re in the mood for something crunchy, try roasted chickpeas or a small handful of almonds or pumpkin seeds.

Not only do these snacks satisfy your taste buds, but they also help keep your energy levels steady between meals—so you’re less likely to overeat at dinner.

🍛 Dinner: Comforting, Nutrient-Dense, and Easy to Prepare

As the day winds down, dinner should be comforting yet light enough to support restful digestion and sleep. A bowl of lentil soup or a gently spiced lentil curry makes for the perfect evening meal. Use ingredients like garlic, onion, tomatoes, ginger, turmeric, and cumin to boost both flavor and health benefits.

To round out your plate, add a serving of steamed vegetables—such as broccoli, zucchini, or spinach—and if you need a little more substance, include a small portion of whole grains like brown rice or quinoa. This combination is not only delicious but also deeply nourishing and naturally supportive of your weight loss goals.

Key Tips

  • Balance your meals by combining lentils with healthy fats and lean proteins
  • Stay hydrated, especially when increasing your fiber intake
  • Vary your meals to avoid boredom and improve nutrient diversity
  • Exercise regularly to maximize fat loss
  • Watch portions, even with healthy foods

Want More Lentil Inspiration?

If you’re excited to start cooking with lentils but want a bit more variety or meal prep guidance, we’ve got you covered. Whether you’re into comforting soups, quick salads, or prepping ahead for the week, these posts will give you fresh, weight-loss-friendly ideas.

Explore These Reader Favorites:

These posts are full of practical tips, balanced meal ideas, and step-by-step recipes to keep your lentil journey exciting and effective.


Can You Eat Only Lentils?

Lentils are highly nutritious, but eating only lentils isn’t advisable for the long term. Your body requires a wide range of nutrients that only a varied diet can provide. For best results, use lentils as a base and build your meals around them using other whole foods.


Nutrition Chart of Common Types of Lentils (per 1 cup cooked, ~198g):

Type of LentilCaloriesProtein (g)Fiber (g)Carbs (g)Fat (g)Iron (% DV)Glycemic Index
Red Lentils23017.815.639.90.837%Low (21–29)
Green Lentils23018.015.639.00.835%Low (22–30)
Brown Lentils23018.015.039.90.836%Low (29–32)
Black Lentils (Beluga)18024.017.930.00.740%Very Low (~21)
Yellow Lentils (Split Moong)21014.015.438.00.728%Moderate (~32–35)
Masoor Dal (Split Red Lentils)23018.015.640.00.837%Low (21–29)

⚠️ Note:

  • Nutritional values can vary slightly by source, preparation method, and origin of lentils.
  • %DV (Daily Value) is based on a 2,000-calorie diet.
  • Glycemic Index (GI) estimates are approximate and vary depending on processing and how lentils are cooked.

Key Takeaways:

  • Best for Weight Loss (Fiber + Protein): Black lentils (Beluga)
  • Most Versatile: Brown and green lentils (hold shape well, good for salads and soups)
  • Quickest Cooking & Best for Soups/Purees: Red lentils and Masoor dal
  • Gentlest on Digestion: Yellow lentils (Split Moong)

If you’re curious how to cook Beluga or Black Lentil creatively, don’t miss our guide on Beluga lentil benefits and recipes for fat loss.


Common Questions and Myths About Lentils and Weight Loss

Are lentils fattening?

Not at all. Lentils are naturally low in fat and calories, and they’re packed with fiber and protein—both of which actually help prevent overeating. As long as you’re not adding heavy cream or frying them in oil, lentils are one of the least “fattening” foods you can eat.

Can lentils cause weight gain?

Only if you’re consistently eating more calories than your body needs—including from lentils. But on their own, lentils are unlikely to cause weight gain. In fact, most people find that lentils help them feel full on fewer calories, which makes weight gain less likely.

Are lentils really good for weight loss?

Yes, absolutely. Lentils support weight loss in multiple ways—they keep you full, stabilize your blood sugar, and offer a high amount of protein and fiber without a lot of calories. Plus, they’re inexpensive and easy to prepare, which makes healthy eating more sustainable.

Is dal good for weight loss?

It can be! Dal—essentially lentil stew—is great for weight loss when made with minimal oil and plenty of vegetables. Use spices like cumin, turmeric, and coriander to add flavor without the extra calories. Just avoid adding too much ghee, butter, or fried toppings.

How much lentils should I eat per day to lose weight?

Around 1 to 2 cups of cooked lentils per day is a good target. That gives you enough fiber and protein to feel full and satisfied without going overboard on calories.

Can I eat lentils every day?

Yes, and many people do. Lentils are gentle on digestion, easy to cook, and work well in a variety of meals. Just be sure to also eat a range of other foods—like vegetables, fruits, whole grains, and healthy fats—for balanced nutrition.

Which lentils are best for weight loss?

Green and black lentils are often considered the best for weight loss because they’re slightly higher in fiber and protein. But all lentils—red, brown, yellow—are good choices, so feel free to mix it up based on what you enjoy eating.

What’s the best way to cook lentils for fat loss?

Boiling or pressure cooking is best. Avoid frying or adding high-calorie ingredients like cream or lots of oil. Instead, season with herbs, lemon, garlic, or low-sodium broth for flavor without the calories.

Do lentils help with belly fat?

Lentils won’t “target” belly fat specifically, but because they help reduce overall calorie intake and improve blood sugar balance, they can support full-body fat loss—including belly fat—when combined with a healthy diet and regular exercise.

What happens if I eat lentils for 30 days?

Most likely, you’ll feel more full, snack less, and notice more stable energy levels. Some people even report weight loss just from swapping processed carbs with lentil-based meals. Just be sure to keep meals balanced with other nutrient-rich foods.

Are lentils high in carbs?

They do contain carbohydrates, but they’re complex carbs paired with fiber and protein—which means they’re digested slowly and don’t cause blood sugar spikes. Unlike refined carbs, lentils keep you full and energized.

Can I eat lentils at night?

Yes, lentils are a great dinner option. Their fiber and protein can actually help prevent late-night snacking. Just keep portions reasonable and avoid pairing them with heavy, oily foods.

What’s healthier—lentils or rice?

Both can be part of a healthy diet, but lentils generally offer more protein, fiber, and nutrients per calorie. That said, combining lentils with small portions of whole grains like brown rice or quinoa gives you a balanced, satisfying meal.

Can lentils help reduce sugar cravings?

They can! Because they stabilize blood sugar and promote satiety, lentils help curb the cravings that come from energy crashes. Try having a lentil-based lunch and see how much more stable your afternoon energy feels.

Do I need to soak lentils?

Not always. Most lentils (especially red and yellow varieties) don’t require soaking. However, soaking can help reduce cooking time and may improve digestion for some people.

A rustic bowl filled with cooked lentils with bold text overlay reading ‘Lentils for Weight Loss’ highlighting how lentils are affordable, nutritious, and backed by science.
Lentils for weight loss — affordable, nutritious, and backed by science at MasalaMonk.

Final Thoughts: Why Lentils Are a Weight Loss Superfood

Lentils combine all the key qualities that support weight loss:

  • Low in calories yet nutrient-dense
  • High protein to preserve muscle and reduce appetite
  • Rich fiber to control hunger and stabilize blood sugar
  • Versatile and easy to incorporate into many meals
  • Affordable and accessible for most diets

In summary, lentils offer a unique combination of nutrients that make them ideal for weight loss: they’re low in calories, yet rich in protein and fiber, which helps keep you full and satisfied.

Unlike many processed weight-loss products, lentils are natural, unprocessed, and incredibly versatile. Whether you prefer soups, salads, curries, or tacos, lentils can easily be integrated into your meals without sacrificing flavor or nutrition.

Moreover, their high fiber content aids digestion, their low glycemic index stabilizes blood sugar, and their impressive micronutrient profile supports your metabolism. All things considered, lentils are not just weight-loss-friendly—they’re one of the most effective, affordable, and accessible foods for anyone looking to lose weight in a healthy, sustainable way.

So, whether you’re starting your weight loss journey or looking to optimize your current diet, lentils deserve a place on your plate. By including lentils regularly in your diet—whether as soups, salads, curries, or snacks—you can enhance fullness, reduce overall calorie intake, and promote healthy fat loss without feeling deprived.

Posted on 7 Comments

10 Examples of Egg Dishes, with 2 Eggs

10 Irresistible Egg Dishes With Just 2 Eggs

Let’s be honest: Sometimes, the most magical things in the kitchen happen when you have just a couple of eggs left in the fridge, a growling stomach, and a spark of curiosity. Eggs are like little edible treasures—packed with protein, affordable, and capable of starring in dishes from every corner of the world.

But what if you only have two? Is that enough? The answer: Absolutely! From quick weekday breakfasts to cozy solo dinners, here are 10 detailed, creative ways to transform just two eggs into something wonderful. We’ll sprinkle in tips, flavor twists, and point you to more deep-dives on MasalaMonk.com along the way!


1. Creamy Classic Scrambled Eggs

There’s a reason every culture has its own version of scrambled eggs. They’re soothing, reliable, and quick to make—plus, they’re a blank canvas for your favorite flavors.

How to Make (the Right Way):
Crack 2 eggs into a bowl, add a generous pinch of salt, a grind of black pepper, and just a tiny splash of milk or cream (totally optional, but adds a lovely softness). Whisk with a fork or small whisk until everything is smoothly combined and a little frothy.

Classic Scrambled Eggs
Fluffy scrambled eggs made with just 2 eggs, butter, and a hint of chives—perfect for a quick, protein-packed breakfast or brunch.

Melt a pat of butter in a nonstick pan over gentle heat (don’t rush it—good scrambled eggs are all about patience). Pour in your eggs, and with a silicone spatula, slowly stir from the edges to the center, letting soft curds form. The moment they look barely set, remove from heat—they’ll keep cooking from residual warmth.

Flavor Upgrade:
A handful of chopped chives or coriander, a sprinkle of grated cheddar, or a dusting of smoked paprika can work wonders. For even more ways to amp up your eggs, visit Egg-cellent Seasoning Options for Flavorful Eggs.

Personal Touch:
Serve with buttered sourdough or even spoon them onto hot rice, Japanese-style. Some days, it’s the simplest things that feel like a big, warm hug.


2. Soft or Hard-Boiled Eggs (the Anytime Snack)

Eggs don’t need much to be a satisfying snack or lunch. Boiled eggs are portable, filling, and can be dressed up in countless ways.

How to Make (Foolproof):
Place 2 eggs in a saucepan, cover with cold water by about an inch, and bring to a gentle boil. For soft-boiled (runny yolk, firm white), cook for 6-7 minutes. For hard-boiled (set all the way through), go for 10-12 minutes. Immediately transfer eggs to a bowl of ice water (or run under cold water) to stop cooking and make peeling a breeze.

Perfect Boiled Eggs
Soft or hard-boiled eggs done right—enjoy these easy, protein-rich boiled eggs on toast, salads, or as a healthy snack.

Slice them over salads, nestle into a bento box, or sprinkle with flaky salt and a little chili powder for a quick snack.

Egg Nutrition:
Curious about how much nutrition you’re actually getting? Check out How Much Protein in Two Boiled Eggs? for the details on protein, calories, and why boiled eggs are a dietitian’s favorite.

Pro Tip:
Experiment with flavor: Try marinating peeled eggs in soy sauce and garlic for “ramen eggs,” or toss slices with a bit of chaat masala for an Indian twist.


3. Masala Omelette (Spicy Indian Comfort Food)

If you’ve ever visited an Indian railway station or a roadside dhaba, you’ve probably spotted someone expertly flipping a masala omelette on a sizzling tawa. Two eggs, a few chopped veggies, and a handful of spices make for a breakfast that’s bursting with flavor and memories.

How to Make:
Whisk 2 eggs with salt. Add finely chopped onion, tomato, green chili, and fresh coriander. Toss in a pinch each of turmeric, red chilli powder, and black pepper. Heat oil or ghee in a pan, pour in the mixture, and cook on medium heat, swirling to spread evenly. Flip to brown both sides, then serve hot.

Masala Omelette
Spicy Indian masala omelette loaded with onions, tomatoes, green chilies, and fresh coriander—ready in minutes with just 2 eggs.

Level It Up:
Stuff with cheese, leftover sabzi, or even crumbled paneer for extra richness. For a truly “desi” twist, pair with pav or tuck inside buttered bread for a street-style sandwich.
Want to explore even more Indian-inspired egg fusion? Head over to Eggs Benedict: Desi Twist Challenge.


4. Shakshuka (Eggs Poached in Spicy Tomato Sauce)

Shakshuka is the kind of breakfast (or dinner!) that makes you want to mop the bowl clean with a hunk of bread. Originating from North Africa and wildly popular across the Middle East, it’s a celebration of eggs and bold, tangy-sweet flavors.

How to Make:
In a skillet, sauté chopped onion, bell pepper, and garlic in olive oil until soft. Add a can of diced tomatoes (or fresh if you have), a teaspoon of cumin, paprika, and a pinch of cayenne. Simmer until thickened, then make two small wells and gently crack your eggs into them. Cover and cook on low heat until the whites are set but yolks remain runny.

Shakshuka
A single-serve shakshuka with two eggs poached in a flavorful tomato and pepper sauce—bring Middle Eastern breakfast to your table.

Serving Suggestion:
Finish with a sprinkle of feta, a handful of parsley, and serve straight from the pan with toasted sourdough or warm pita.

Want to know where this dish fits into Mediterranean mornings? See 10 Most Popular Mediterranean Breakfasts.


5. Cloud Eggs (For When You Feel Fancy)

Cloud eggs are part breakfast, part magic trick. They’re fluffy, photogenic, and taste like a cross between a soufflé and a poached egg. Perfect for impressing guests—or just brightening a grey morning.

How to Make:
Separate your 2 eggs, placing whites and yolks in different bowls. Whip the whites until stiff peaks form (electric beaters are your friend). On a lined baking tray, dollop the whipped whites into two mounds and create a small nest in each. Bake at 190°C (375°F) for 3 minutes, then add a yolk to each nest and bake for another 2 minutes until just set.

Cloud Eggs
Whip up Instagram-worthy cloud eggs with just two eggs—fluffy whites, golden yolks, and a sprinkle of herbs for a show-stopping brunch.

Science Corner:
Curious why egg whites whip so dramatically? Find out in Can You Really Not Whip Egg Whites if There’s Yolk in Them? Let’s Crack This Myth.

Garnish:
A little parmesan, chives, or smoked paprika on top and you’re set for an Instagram post.


6. Mini Frittata (Eggs for Dinner, or Anytime)

A frittata is essentially an Italian open-faced omelette—thick, fluffy, and endlessly adaptable. With two eggs, you can create a mini version perfect for solo meals or meal prep.

How to Make:
Beat 2 eggs with salt, pepper, and a tablespoon of milk or cream. Pour into a small, greased oven-safe dish or a muffin tin. Scatter over whatever you have: sautéed spinach, chopped tomatoes, cooked potato, cheese, or herbs. Bake at 180°C (350°F) until puffed and golden, about 12–15 minutes.

Mini Frittata
Easy mini frittata baked with vegetables and cheese—healthy, customizable, and perfect for meal prep or quick dinners with 2 eggs.

Why You’ll Love It:
Frittatas are brilliant for using up leftovers and sneaking extra veggies into your diet. Serve warm or at room temperature with a fresh salad.


7. Egg Drop Soup (For Rainy Evenings or Sick Days)

Egg drop soup is Chinese comfort in a bowl—warm, soothing, and ready in minutes. If you love silky, ribbon-like egg textures, this one’s for you.

Egg Drop Soup
Classic Chinese egg drop soup made from scratch with two eggs—silky egg ribbons in savory broth, ideal for a light meal or appetizer.

How to Make:
Bring 2 cups of chicken or vegetable broth to a gentle simmer. Beat 2 eggs in a small bowl. With a fork or chopsticks, swirl the broth in one direction, then slowly drizzle in the eggs. Watch as soft egg “ribbons” form instantly. Add a splash of soy sauce, white pepper, and finish with chopped scallions.

Plant-Based Twist:
Eggs not your thing today? Try a tofu scramble instead—see Tofu Instead of Eggs: 5 High-Protein Plant-Based Breakfast Ideas.

Optional:
Toss in a handful of spinach or a few drops of sesame oil for depth.


8. Classic Egg Salad (Perfect for Sandwiches and Snacks)

Egg salad is a retro lunchbox hero and comes together in no time with just two eggs. It’s creamy, tangy, and perfect for spreading on toast or spooning into lettuce wraps.

How to Make:
Boil 2 eggs until firm, peel, and chop them up. In a bowl, mix with a spoonful of mayonnaise, a dash of mustard, salt, pepper, and fresh herbs like dill or parsley. Want to spice it up? Add a little chopped celery, onion, or even a pinch of curry powder.

Egg Salad
Creamy, tangy egg salad made from just two eggs—great for sandwiches, wraps, or as a low-carb, protein-rich lunch.

Health Note:
Egg yolks are packed with nutrients and healthy fats. If you’re curious about what makes them so good for you, read Egg Yolks or Yellow: Nutritional & Protein Profile.

Serving Suggestion:
Slather on toast, stuff into pita bread, or serve as a dip with crackers.


9. Mini Spanish Tortilla (Tortilla Española)

Don’t let the name fool you—a Spanish tortilla is not a wrap, but a tender, thick omelette loaded with potatoes and onions. Making a mini version with just two eggs is perfect for a hearty meal-for-one.

How to Make:
Thinly slice a small potato and half an onion. Sauté in olive oil over low heat until golden and soft (patience pays off here). Beat 2 eggs, season, and combine with the veggies. Pour back into the pan, smooth the top, and cook gently until the bottom is golden. Carefully flip (use a plate if you must) and finish cooking the other side.

Mini Spanish Tortilla
Spanish tortilla for one: thin-sliced potato and onion cooked with two eggs for an authentic, satisfying tapa or breakfast.

Variations:
Try adding red peppers, cooked chorizo, or a sprinkle of smoked paprika for a twist. Serve warm or at room temperature with a tomato salad.


10. Eggs Kejriwal (Mumbai’s Spicy Toasted Egg & Cheese)

Eggs Kejriwal is a cult favorite from Mumbai’s old Irani cafés—a spicy, cheesy open-faced sandwich that’s so much more than “egg on toast.”

How to Make:
Toast a slice of bread, slather with a little butter, then add grated cheese (cheddar works well) and a finely chopped green chilli for heat. Place under the broiler or in a hot pan until the cheese bubbles. Then, top with a fried egg (or even a soft-boiled one split open) and a sprinkle of black pepper.

Eggs Kejriwal
Iconic Mumbai-style Eggs Kejriwal—crisp toast topped with cheese, green chilies, and a runny fried egg for a spicy, satisfying treat.

Pro Tip:
Serve with ketchup, chutney, or a cup of strong chai for the full experience.


Final Thoughts: Two Eggs, Endless Possibilities

Next time you peer into your fridge and see just two eggs, remember this list. Whether you’re feeling classic, creative, healthy, or indulgent, there’s a two-egg recipe waiting to make your day better.
Experiment, taste, and make it your own—eggs are forgiving and open to nearly infinite flavor combinations.

Eggs are also a nutritional powerhouse:
Rich in protein, vitamins, and healthy fats, they’re ideal for building muscle, fueling your brain, or simply starting your day on a happy note.


Pro Tips for the Best Egg Dishes

  • Always season eggs before cooking—it makes a world of difference in texture and flavor.
  • Cook on low heat for tender results—high heat toughens eggs.
  • Get creative with toppings and sides: Chutneys, salsas, and pickles all love eggs.
  • Don’t waste the yolk! That’s where much of the nutrition and flavor live.

For more tips, inspiration, and the latest egg trends, keep browsing MasalaMonk.com. Your kitchen, your rules—happy cooking!

FAQs for 10 Egg Dishes with 2 Eggs

1. Can I double these recipes if I have more eggs?

Absolutely! Each recipe is designed for two eggs but can be scaled up easily. Just multiply the ingredient quantities by the number of eggs you’re using, and adjust the pan size and cooking time as needed.


2. What are the health benefits of eating two eggs a day?

Two eggs provide about 12–14 grams of high-quality protein, healthy fats, vitamin D, choline, and a host of other nutrients. They keep you full, support muscle health, and are generally considered safe for most people as part of a balanced diet. For more on nutrition, see How Much Protein in Two Boiled Eggs?.


3. Can I use egg substitutes in these recipes?

Yes! For plant-based options, use tofu scramble in place of scrambled eggs, or try commercially available vegan egg replacers for frittatas and omelettes. For more ideas, check Tofu Instead of Eggs: 5 High-Protein Plant-Based Breakfast Ideas.


4. How do I keep my scrambled eggs soft and creamy, not rubbery?

Cook on low heat, stir gently, and remove the eggs from heat just before they’re fully set. They’ll finish cooking with residual warmth. Adding a splash of milk or cream helps too.


5. What are some good side dishes to serve with these egg recipes?

Pair eggs with toasted bread, parathas, rice, sautéed greens, roasted potatoes, or fresh salads. Chutneys, salsas, and pickles also make excellent accompaniments.


6. Are brown eggs healthier than white eggs?

No—brown and white eggs have virtually the same nutritional value. The color difference comes from the breed of chicken, not the nutritional content.


7. Can I prepare these egg dishes ahead of time?

Some dishes, like boiled eggs, egg salad, and mini frittatas, store well in the fridge for up to 3 days. Scrambled eggs and omelettes are best enjoyed fresh.


8. What’s the best way to peel hard-boiled eggs?

Cool eggs in ice water immediately after boiling. Crack the shell all over and peel gently under running water. Older eggs often peel more easily than very fresh ones.


9. How can I make my egg dishes more flavorful?

Use fresh herbs, spices, or seasoned salts. Try flavor boosters like garlic, onions, cheese, or even a drizzle of chili oil. For more ideas, read Egg-cellent Seasoning Options for Flavorful Eggs.


10. Can I make these dishes if I don’t have a nonstick pan?

Yes. Use a well-seasoned cast iron pan or a stainless steel pan with enough oil or butter to prevent sticking. For oven-baked dishes like frittatas, line your baking dish with parchment or grease it well.

Posted on Leave a comment

5 Best Wheat Flour Or Atta in India 🍞🌾

Best Wheat Flour Or Atta in India

When you walk through any bustling Indian market, bags of “chakki atta” and “whole wheat flour” line the shelves—often sold by brands you see on TV. But have you ever paused to wonder: What wheat is actually in your atta? Is it the same as what your grandmother used? Why do some rotis taste richer, feel softer, or keep you full longer?

The answers are rooted deep in Indian history, soil, and tradition. Before modern hybrids took over the fields, India’s farms were filled with a rainbow of wheat varieties—each unique in flavor, nutrition, and story. Today, let’s journey back to our roots and discover why traditional, heirloom wheat varieties (and their stone-ground atta) matter more than ever.


Why Traditional Wheat Matters

The Hybrid Takeover

Since the 1960s, the Green Revolution transformed Indian agriculture. High-yielding hybrid wheat made India food-secure, but it also pushed out the rich diversity of ancient grains. Today, most commercial atta is made from just a few hybridized types bred for yield and storage—not taste, nutrition, or digestibility.

The Heirloom Comeback

Across India, small farmers and conscious consumers are reviving heirloom wheat varieties. These grains aren’t just relics of the past—they offer practical benefits for our kitchens, our health, and even our planet.


5 Must-Know Traditional Wheat Varieties for Atta

1. Khapli Wheat (Emmer, Triticum dicoccum)

History & Region:
Cultivated since the Indus Valley Civilization, still grown in Maharashtra, Karnataka, and parts of Gujarat.

Nutrition:

  • Protein: 12.8–13 g/100 g
  • Fiber: 10–15 g/100 g
  • Low Gluten: ~5–6%
  • Low Glycemic Index: 39–50
  • Rich in: Magnesium, iron, antioxidants

Health Benefits:

  • Clinical studies show khapli lowers cholesterol and blood sugar better than modern wheat.
  • It’s easier to digest—ideal for people with mild gluten sensitivity or diabetes.

Kitchen Tips:
Khapli atta dough absorbs more water—let it rest 20–30 minutes before rolling. Rotis stay soft for hours. Use in parathas, rotis, dosa, or even pilafs!


2. Paigambari Wheat (Sona Moti, Triticum aestivum sphaerococcum)

History & Region:
Pearl-like ancient wheat from Punjab, MP, and the Deccan Plateau. Called “sugar-free” wheat by some old-timers!

Nutrition:

  • Low Glycemic Index: ~55
  • Higher Protein & Minerals: More folic acid, iron, zinc than hybrids
  • Lower Gluten: Easy on the gut

Health Benefits:
Excellent for people wanting lighter rotis, slow-release energy, and improved digestion.

Kitchen Tips:
Perfect for fluffy rotis, upma, and traditional sweets. If you’ve never tried it, make “paigambari lapsi”—a sweet cracked-wheat pudding!


3. Bansi Wheat (Triticum durum)

History & Region:
Indigenous to Madhya Pradesh and Rajasthan, this golden-hued wheat survived colonial displacement and hybrid takeovers.

Nutrition:

  • High in fiber, protein, minerals
  • Weak gluten network—makes it easier on the stomach

Health Benefits:
Gives slow energy release; traditional wisdom says it “sticks to the ribs” and keeps you full.

Kitchen Tips:
Bansi atta is loved for making rustic, nutty rotis, upma, dhokla, and even semolina for sweets.


4. Kathia Wheat (Tetraploid Durum Landrace)

History & Region:
Traditional wheat of Gujarat and Haryana—farmed organically and adapted to harsh, low-water conditions.

Nutrition:

  • High fiber and protein
  • Strong taste, robust texture

Health Benefits:
Praised for satiety and “desi” flavor.

Kitchen Tips:
Makes slightly chewier rotis—great for those who love hearty breads. Use in porridge (lapsi) or flatbreads with dollops of ghee.


5. Lokwan (Lok-1) Wheat

History & Region:
Bread wheat landrace of Maharashtra, MP, Gujarat. Still found in home mills and local mandis.

Nutrition:

  • Protein: ~12.7 g/100 g
  • Fiber: ~10–11 g/100 g
  • Balanced gluten—chewy but soft

Health Benefits:
Traditional “daily” atta for many households, supports satiety and digestive wellness.

Kitchen Tips:
Versatile for chapati, puri, or even pancakes (“thalipeeth”). Lokwan atta works especially well in wood-fired chulha breads.


Why Stone-Ground Atta Makes a Difference

Traditional wheat truly shines when milled on a slow, stone “chakki.” Here’s why:

  • Less Heat: Retains vitamins, enzymes, natural flavor
  • More Bran & Germ: Keeps all the fiber, minerals, and healthy oils
  • Better Taste: Earthy, nutty, and distinctly aromatic—unlike bland, roller-milled flour

How to Find and Use Heirloom Wheat Atta

1. Where to Buy

  • Local Mandis: Old grain markets in MP, Rajasthan, Gujarat, Maharashtra
  • Organic/Artisan Stores: Brands like Two Brothers Organic, Satvyk, Graminway, Organic Tattva often sell Khapli, Bansi, Paigambari, and Lokwan atta
  • Online: Look for “heritage wheat,” “khapli atta,” “bansi wheat flour,” or “stone-ground chakki atta” from reputable sellers

2. How to Use

  • Rotis/Chapati: Use as you would regular atta—expect richer flavor, and sometimes softer or chewier texture.
  • Mix & Match: Blend two or more heirloom wheats for custom flavor and nutrition.
  • Traditional Recipes: Try lapsi, dhokla, dosas, upma, parathas, or simply the classic phulka.

3. Pro Tips

  • Water Content: Heirloom atta often needs more water—start with a soft dough.
  • Rest the Dough: Especially for khapli, resting helps gluten relax, making softer breads.
  • Taste: Expect a deeper, slightly earthy, and sometimes sweeter taste.

The Bigger Picture: Supporting Tradition, Health, and Sustainability

Choosing heirloom wheat atta isn’t just a food trend—it’s a way to support India’s agricultural biodiversity, honor generations of farmers, and reclaim richer nutrition for your family.

Every time you cook with these ancient grains, you’re bringing history, flavor, and health back to your table.


Final Thoughts

Modern life moves fast—but some things are worth slowing down for. Next time you reach for a bag of atta, pause and look for these traditional wheats. Your rotis (and your body) will thank you—and you’ll become part of a movement that celebrates India’s living food heritage.

Ready to try it out?
Share your experiences with heirloom wheat, your favorite recipes, or questions in the comments! Let’s keep the conversation (and the tradition) alive.

FAQs

1. What is the difference between traditional and hybrid wheat?
Answer:
Traditional wheat varieties are indigenous, non-hybridized grains grown for centuries in India—like Khapli, Bansi, and Paigambari. Hybrids are modern, high-yielding breeds introduced after the Green Revolution. Traditional wheats tend to have more flavor, nutrition, and digestibility, while hybrids are bred mainly for yield and uniformity.


2. Why is stone-ground chakki atta better than regular roller-milled atta?
Answer:
Stone grinding preserves more fiber, vitamins, minerals, and healthy oils by generating less heat and retaining the wheat’s bran and germ. This results in more flavorful and nutritious atta compared to roller-milled flour, which is often more refined and less nutrient-dense.


3. Is heirloom wheat suitable for people with gluten sensitivity?
Answer:
Traditional wheats like Khapli have a simpler, lower gluten structure, making them easier to digest for many people with mild gluten intolerance. However, they still contain gluten and are not safe for people with celiac disease.


4. Which traditional wheat is best for diabetics?
Answer:
Khapli wheat (Emmer) is scientifically proven to have a low glycemic index and glycemic load, making it an excellent choice for managing blood sugar levels. Paigambari wheat is also considered better than modern wheat for diabetics.


5. Where can I buy heirloom wheat or atta in India?
Answer:
You can buy these grains or their stone-ground atta in local mandis in states like Maharashtra, Madhya Pradesh, Rajasthan, and Gujarat. Many organic or artisan brands and online stores (e.g., Two Brothers Organic, Graminway, Satvyk) also sell them across India.


6. Does traditional wheat atta taste different from regular atta?
Answer:
Yes, traditional wheats offer a richer, nuttier, and sometimes slightly sweet flavor. Rotis made from these grains are often softer or chewier, with a distinct aroma that many find superior to modern commercial atta.


7. Do I need to change my cooking method when using heirloom atta?
Answer:
Heirloom atta usually needs a bit more water, and the dough benefits from a 20–30 minute rest before rolling. Otherwise, you can use it in the same way as regular atta for rotis, parathas, and more.


8. Are these traditional grains more expensive?
Answer:
Generally, yes—they are grown in smaller quantities, often organically, and require more careful processing. However, the nutritional and culinary benefits make them worth the investment for many families.


9. Can I mix traditional and modern atta?
Answer:
Absolutely! Many people blend heirloom wheat atta with regular atta to balance taste, texture, and budget—while still enjoying health benefits.


10. What is the best way to store heirloom wheat atta?
Answer:
Keep it in an airtight container in a cool, dry place. Since stone-ground atta retains natural oils, it’s best to use within 2–3 months or store in the fridge for longer freshness.

Posted on Leave a comment

Embark on a Culinary Adventure: Discover Tempeh in High Protein Vegan Indian Recipes

Tempeh in High-Protein Vegan Indian Recipes

In a world where conscious eating meets culinary creativity, the quest for plant-based, protein-rich meals has taken center stage. For those who crave bold flavors without compromising on nutrition, there’s an exciting ingredient waiting to be explored: Tempeh. While its roots trace back to Indonesia, tempeh is now making waves across global kitchens, including those steeped in the aromatic traditions of Indian cuisine. If you’re looking to add a high-protein punch to your vegan Indian meals, this fermented soybean superfood might just be your new best friend.


What is Tempeh?

Tempeh is a fermented soy product, traditionally made by culturing cooked soybeans with the Rhizopus mold. Unlike tofu, which is made from soy milk, tempeh retains the whole soybean, resulting in a denser texture and higher nutritional content. Its nutty, earthy flavor and firm structure make it a versatile ingredient for frying, grilling, sautéing, or simmering.

Nutritional Highlights:

  • Protein: ~19g per 100g (complete protein)
  • Fiber: Supports gut health
  • B Vitamins: Especially riboflavin and niacin
  • Probiotics: Thanks to fermentation
  • Low Glycemic Impact: Great for blood sugar control

Why Tempeh Works in Indian Cuisine

Indian cooking thrives on layers of flavor, spice blends, and textural variety. Tempeh, with its porous structure and mild tang, readily absorbs marinades and masalas, making it a fantastic canvas for Indian flavors. Unlike tofu, it doesn’t fall apart easily and can withstand long simmering in gravies or high-heat pan-frying.

The inclusion of tempeh aligns perfectly with Indian culinary principles:

  • Ayurvedic Balance: Fermented foods support digestion and balance doshas.
  • Regional Compatibility: Works well across North Indian curries, South Indian stir-fries, and even Indo-Chinese fusion.
  • Satvik Diet Suitability: Whole, unprocessed, and natural.

Getting Started: Preparing Tempeh for Indian Dishes

Before diving into recipes, here are a few preparation tips:

1. Steam Before Use:

Tempeh can have a slight bitter aftertaste. Steaming it for 10–15 minutes softens the texture and removes bitterness, helping it better absorb marinades.

2. Marinate Generously:

Use yogurt (or coconut yogurt), lemon juice, ginger-garlic paste, and spices like turmeric, red chili, and cumin. Let it sit for at least 30 minutes.

3. Cook for Texture:

Tempeh can be grilled, pan-fried, or crumbled like paneer bhurji. Crisp edges and spice infusion are key for a satisfying bite.


High-Protein Tempeh Recipes with an Indian Twist

1. Tempeh Tikka Masala

Serves 2–3

Ingredients:

  • 200g tempeh (cubed)
  • 1/2 cup coconut yogurt
  • 1 tbsp lemon juice
  • 1 tsp ginger-garlic paste
  • Spices: turmeric, garam masala, cumin, coriander, chili powder
  • 1 cup tomato puree
  • 1/2 cup coconut milk or cashew cream

Steps:

  1. Steam and marinate tempeh.
  2. Grill or pan-fry until golden.
  3. In a pan, cook tomato puree with spices.
  4. Add coconut milk and grilled tempeh. Simmer for 10 mins.
  5. Garnish with coriander. Serve with brown rice or roti.

2. South Indian-Style Tempeh Stir-Fry

Inspired by poriyal and thoran traditions

Ingredients:

  • 200g tempeh (cubed or shredded)
  • 1/4 cup grated coconut
  • Curry leaves, mustard seeds, urad dal
  • Green chilies, turmeric, asafoetida

Steps:

  1. Temper mustard seeds, urad dal, and curry leaves in coconut oil.
  2. Add green chilies, turmeric, and tempeh.
  3. Stir-fry until golden.
  4. Add coconut, mix well, and serve hot.

3. Tempeh Bhurji (Scrambled Tempeh)

Great for breakfast or as a filling for wraps

Ingredients:

  • 200g crumbled tempeh
  • Onion, tomato, green chili
  • Spices: turmeric, cumin, coriander
  • Fresh coriander and lemon juice to finish

Steps:

  1. Sauté onion, tomato, and chili with spices.
  2. Add tempeh and cook for 5–7 minutes.
  3. Finish with lemon juice and fresh herbs.

Practical Tips for the Indian Kitchen

  • Storage: Keep tempeh refrigerated and use within a week. Can be frozen for longer shelf life.
  • Sourcing: Available at health stores, specialty grocers, and online platforms. Some Indian startups now produce local varieties (e.g., chickpea-based tempeh).
  • Substitutions: If soy-based tempeh is unavailable, try lentil or chickpea tempeh.

The Verdict: A Worthy Adventure

Incorporating tempeh into Indian cuisine isn’t just a fusion gimmick—it’s a deeply practical choice for those seeking better nutrition without sacrificing flavor. With its high protein content, probiotic benefits, and ability to carry bold Indian flavors, tempeh stands tall among plant-based ingredients.

So next time you’re prepping your masalas or tossing together a stir-fry, consider reaching for tempeh. It’s more than just soy—it’s a gateway to nourishing, adventurous, and delicious eating.


Ready to try tempeh in your next Indian meal? Share your creations and tag us with #TempehTadka

Frequently Asked Questions (FAQs)

1. What is the best way to reduce the bitterness of tempeh before cooking?
Steam or simmer the tempeh for 10–15 minutes before marinating or adding to dishes. This not only reduces bitterness but also improves texture and flavor absorption.


2. Can I use tempeh directly in Indian curries without pre-cooking?
While you can, it’s highly recommended to steam and then lightly fry or grill it first. This enhances flavor and prevents it from turning soggy in the curry.


3. Is tempeh safe for people with soy allergies?
No. Traditional tempeh is made from soybeans. However, soy-free versions made from chickpeas or lentils are available and suitable for those with soy allergies.


4. Where can I buy tempeh in India?
Tempeh is available in organic stores, gourmet grocery chains, and online platforms like Amazon India, BigBasket, or from local producers like Hello Tempayy or Veggie Champ.


5. Can I substitute paneer or tofu with tempeh in Indian recipes?
Yes. Tempeh can be a great substitute in dishes like tikka masala, bhurji, or stir-fries. Keep in mind its stronger flavor and firmer texture.


6. Is tempeh a complete protein?
Yes. Tempeh contains all nine essential amino acids, making it one of the best complete plant-based protein sources.


7. How long can tempeh be stored?
Fresh tempeh lasts about 5–7 days in the refrigerator. For longer storage, freeze it in an airtight container for up to 2 months.


8. Can I use tempeh in South Indian recipes like thoran or poriyal?
Absolutely. Tempeh pairs well with curry leaves, mustard seeds, grated coconut, and chilies—making it ideal for South Indian-style stir-fries.


9. Does tempeh have probiotic benefits like yogurt?
Tempeh contains live cultures during fermentation, but many store-bought versions are pasteurized, reducing probiotic content. Still, it supports gut health due to its prebiotic fiber and digestibility.


10. Is tempeh suitable for weight loss diets?
Yes. It’s high in protein and fiber, which promote satiety. Its low glycemic index also makes it beneficial for blood sugar control and weight management.