Posted on 9 Comments

10 Examples of Egg Dishes, with 2 Eggs

10 Irresistible Egg Dishes With Just 2 Eggs

Let’s be honest: Sometimes, the most magical things in the kitchen happen when you have just a couple of eggs left in the fridge, a growling stomach, and a spark of curiosity. Eggs are like little edible treasures—packed with protein, affordable, and capable of starring in dishes from every corner of the world.

But what if you only have two? Is that enough? The answer: Absolutely! From quick weekday breakfasts to cozy solo dinners, here are 10 detailed, creative ways to transform just two eggs into something wonderful. We’ll sprinkle in tips, flavor twists, and point you to more deep-dives on MasalaMonk.com along the way!


1. Creamy Classic Scrambled Eggs

There’s a reason every culture has its own version of scrambled eggs. They’re soothing, reliable, and quick to make—plus, they’re a blank canvas for your favorite flavors.

How to Make (the Right Way):
Crack 2 eggs into a bowl, add a generous pinch of salt, a grind of black pepper, and just a tiny splash of milk or cream (totally optional, but adds a lovely softness). Whisk with a fork or small whisk until everything is smoothly combined and a little frothy.

Classic Scrambled Eggs
Fluffy scrambled eggs made with just 2 eggs, butter, and a hint of chives—perfect for a quick, protein-packed breakfast or brunch.

Melt a pat of butter in a nonstick pan over gentle heat (don’t rush it—good scrambled eggs are all about patience). Pour in your eggs, and with a silicone spatula, slowly stir from the edges to the center, letting soft curds form. The moment they look barely set, remove from heat—they’ll keep cooking from residual warmth.

Flavor Upgrade:
A handful of chopped chives or coriander, a sprinkle of grated cheddar, or a dusting of smoked paprika can work wonders. For even more ways to amp up your eggs, visit Egg-cellent Seasoning Options for Flavorful Eggs.

Personal Touch:
Serve with buttered sourdough or even spoon them onto hot rice, Japanese-style. Some days, it’s the simplest things that feel like a big, warm hug.


2. Soft or Hard-Boiled Eggs (the Anytime Snack)

Eggs don’t need much to be a satisfying snack or lunch. Boiled eggs are portable, filling, and can be dressed up in countless ways.

How to Make (Foolproof):
Place 2 eggs in a saucepan, cover with cold water by about an inch, and bring to a gentle boil. For soft-boiled (runny yolk, firm white), cook for 6-7 minutes. For hard-boiled (set all the way through), go for 10-12 minutes. Immediately transfer eggs to a bowl of ice water (or run under cold water) to stop cooking and make peeling a breeze.
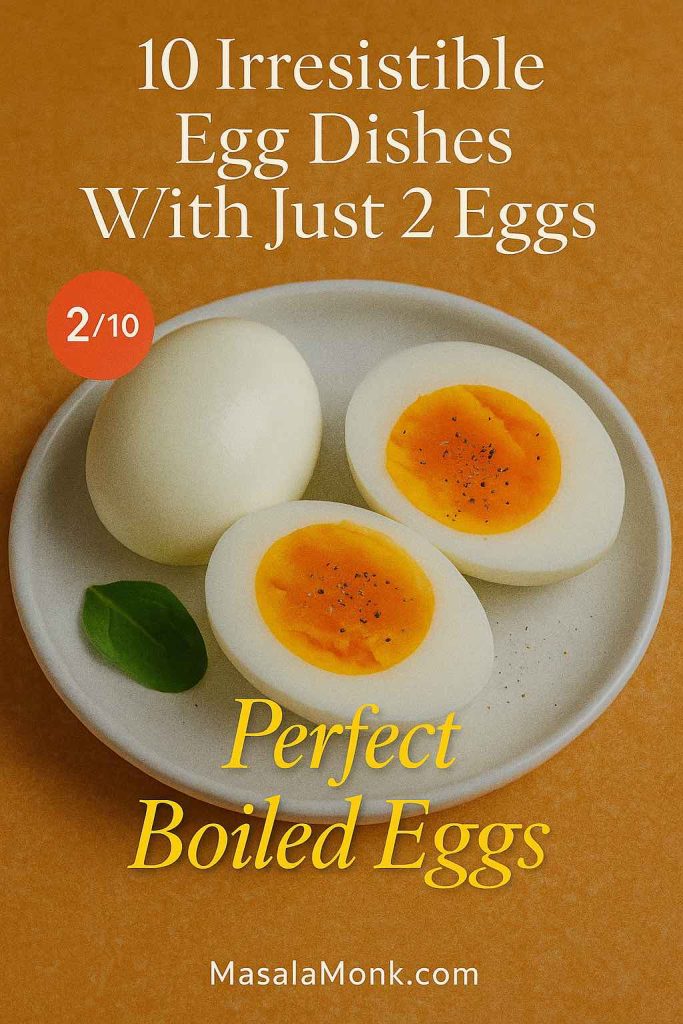
Perfect Boiled Eggs
Soft or hard-boiled eggs done right—enjoy these easy, protein-rich boiled eggs on toast, salads, or as a healthy snack.

Slice them over salads, nestle into a bento box, or sprinkle with flaky salt and a little chili powder for a quick snack.

Egg Nutrition:
Curious about how much nutrition you’re actually getting? Check out How Much Protein in Two Boiled Eggs? for the details on protein, calories, and why boiled eggs are a dietitian’s favorite.

Pro Tip:
Experiment with flavor: Try marinating peeled eggs in soy sauce and garlic for “ramen eggs,” or toss slices with a bit of chaat masala for an Indian twist.


3. Masala Omelette (Spicy Indian Comfort Food)

If you’ve ever visited an Indian railway station or a roadside dhaba, you’ve probably spotted someone expertly flipping a masala omelette on a sizzling tawa. Two eggs, a few chopped veggies, and a handful of spices make for a breakfast that’s bursting with flavor and memories.

How to Make:
Whisk 2 eggs with salt. Add finely chopped onion, tomato, green chili, and fresh coriander. Toss in a pinch each of turmeric, red chilli powder, and black pepper. Heat oil or ghee in a pan, pour in the mixture, and cook on medium heat, swirling to spread evenly. Flip to brown both sides, then serve hot.

Masala Omelette
Spicy Indian masala omelette loaded with onions, tomatoes, green chilies, and fresh coriander—ready in minutes with just 2 eggs.

Level It Up:
Stuff with cheese, leftover sabzi, or even crumbled paneer for extra richness. For a truly “desi” twist, pair with pav or tuck inside buttered bread for a street-style sandwich.
Want to explore even more Indian-inspired egg fusion? Head over to Eggs Benedict: Desi Twist Challenge.


4. Shakshuka (Eggs Poached in Spicy Tomato Sauce)

Shakshuka is the kind of breakfast (or dinner!) that makes you want to mop the bowl clean with a hunk of bread. Originating from North Africa and wildly popular across the Middle East, it’s a celebration of eggs and bold, tangy-sweet flavors.

How to Make:
In a skillet, sauté chopped onion, bell pepper, and garlic in olive oil until soft. Add a can of diced tomatoes (or fresh if you have), a teaspoon of cumin, paprika, and a pinch of cayenne. Simmer until thickened, then make two small wells and gently crack your eggs into them. Cover and cook on low heat until the whites are set but yolks remain runny.

Shakshuka
A single-serve shakshuka with two eggs poached in a flavorful tomato and pepper sauce—bring Middle Eastern breakfast to your table.

Serving Suggestion:
Finish with a sprinkle of feta, a handful of parsley, and serve straight from the pan with toasted sourdough or warm pita.

Want to know where this dish fits into Mediterranean mornings? See 10 Most Popular Mediterranean Breakfasts.


5. Cloud Eggs (For When You Feel Fancy)

Cloud eggs are part breakfast, part magic trick. They’re fluffy, photogenic, and taste like a cross between a soufflé and a poached egg. Perfect for impressing guests—or just brightening a grey morning.

How to Make:
Separate your 2 eggs, placing whites and yolks in different bowls. Whip the whites until stiff peaks form (electric beaters are your friend). On a lined baking tray, dollop the whipped whites into two mounds and create a small nest in each. Bake at 190°C (375°F) for 3 minutes, then add a yolk to each nest and bake for another 2 minutes until just set.

Cloud Eggs
Whip up Instagram-worthy cloud eggs with just two eggs—fluffy whites, golden yolks, and a sprinkle of herbs for a show-stopping brunch.

Science Corner:
Curious why egg whites whip so dramatically? Find out in Can You Really Not Whip Egg Whites if There’s Yolk in Them? Let’s Crack This Myth.

Garnish:
A little parmesan, chives, or smoked paprika on top and you’re set for an Instagram post.


6. Mini Frittata (Eggs for Dinner, or Anytime)

A frittata is essentially an Italian open-faced omelette—thick, fluffy, and endlessly adaptable. With two eggs, you can create a mini version perfect for solo meals or meal prep.

How to Make:
Beat 2 eggs with salt, pepper, and a tablespoon of milk or cream. Pour into a small, greased oven-safe dish or a muffin tin. Scatter over whatever you have: sautéed spinach, chopped tomatoes, cooked potato, cheese, or herbs. Bake at 180°C (350°F) until puffed and golden, about 12–15 minutes.

Mini Frittata
Easy mini frittata baked with vegetables and cheese—healthy, customizable, and perfect for meal prep or quick dinners with 2 eggs.

Why You’ll Love It:
Frittatas are brilliant for using up leftovers and sneaking extra veggies into your diet. Serve warm or at room temperature with a fresh salad.


7. Egg Drop Soup (For Rainy Evenings or Sick Days)

Egg drop soup is Chinese comfort in a bowl—warm, soothing, and ready in minutes. If you love silky, ribbon-like egg textures, this one’s for you.

Egg Drop Soup
Classic Chinese egg drop soup made from scratch with two eggs—silky egg ribbons in savory broth, ideal for a light meal or appetizer.

How to Make:
Bring 2 cups of chicken or vegetable broth to a gentle simmer. Beat 2 eggs in a small bowl. With a fork or chopsticks, swirl the broth in one direction, then slowly drizzle in the eggs. Watch as soft egg “ribbons” form instantly. Add a splash of soy sauce, white pepper, and finish with chopped scallions.

Plant-Based Twist:
Eggs not your thing today? Try a tofu scramble instead—see Tofu Instead of Eggs: 5 High-Protein Plant-Based Breakfast Ideas.

Optional:
Toss in a handful of spinach or a few drops of sesame oil for depth.


8. Classic Egg Salad (Perfect for Sandwiches and Snacks)

Egg salad is a retro lunchbox hero and comes together in no time with just two eggs. It’s creamy, tangy, and perfect for spreading on toast or spooning into lettuce wraps.

How to Make:
Boil 2 eggs until firm, peel, and chop them up. In a bowl, mix with a spoonful of mayonnaise, a dash of mustard, salt, pepper, and fresh herbs like dill or parsley. Want to spice it up? Add a little chopped celery, onion, or even a pinch of curry powder.

Egg Salad
Creamy, tangy egg salad made from just two eggs—great for sandwiches, wraps, or as a low-carb, protein-rich lunch.

Health Note:
Egg yolks are packed with nutrients and healthy fats. If you’re curious about what makes them so good for you, read Egg Yolks or Yellow: Nutritional & Protein Profile.

Serving Suggestion:
Slather on toast, stuff into pita bread, or serve as a dip with crackers.


9. Mini Spanish Tortilla (Tortilla Española)

Don’t let the name fool you—a Spanish tortilla is not a wrap, but a tender, thick omelette loaded with potatoes and onions. Making a mini version with just two eggs is perfect for a hearty meal-for-one.

How to Make:
Thinly slice a small potato and half an onion. Sauté in olive oil over low heat until golden and soft (patience pays off here). Beat 2 eggs, season, and combine with the veggies. Pour back into the pan, smooth the top, and cook gently until the bottom is golden. Carefully flip (use a plate if you must) and finish cooking the other side.
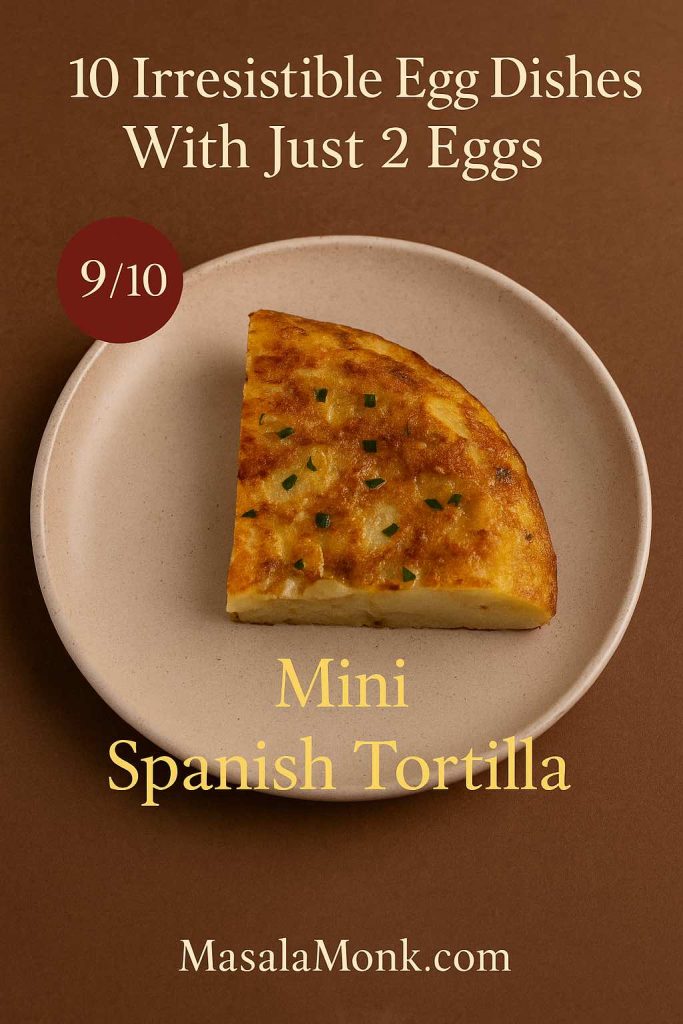
Mini Spanish Tortilla
Spanish tortilla for one: thin-sliced potato and onion cooked with two eggs for an authentic, satisfying tapa or breakfast.

Variations:
Try adding red peppers, cooked chorizo, or a sprinkle of smoked paprika for a twist. Serve warm or at room temperature with a tomato salad.


10. Eggs Kejriwal (Mumbai’s Spicy Toasted Egg & Cheese)

Eggs Kejriwal is a cult favorite from Mumbai’s old Irani cafés—a spicy, cheesy open-faced sandwich that’s so much more than “egg on toast.”

How to Make:
Toast a slice of bread, slather with a little butter, then add grated cheese (cheddar works well) and a finely chopped green chilli for heat. Place under the broiler or in a hot pan until the cheese bubbles. Then, top with a fried egg (or even a soft-boiled one split open) and a sprinkle of black pepper.

Eggs Kejriwal
Iconic Mumbai-style Eggs Kejriwal—crisp toast topped with cheese, green chilies, and a runny fried egg for a spicy, satisfying treat.

Pro Tip:
Serve with ketchup, chutney, or a cup of strong chai for the full experience.


Final Thoughts: Two Eggs, Endless Possibilities

Next time you peer into your fridge and see just two eggs, remember this list. Whether you’re feeling classic, creative, healthy, or indulgent, there’s a two-egg recipe waiting to make your day better.
Experiment, taste, and make it your own—eggs are forgiving and open to nearly infinite flavor combinations.

Eggs are also a nutritional powerhouse:
Rich in protein, vitamins, and healthy fats, they’re ideal for building muscle, fueling your brain, or simply starting your day on a happy note.


Pro Tips for the Best Egg Dishes

  • Always season eggs before cooking—it makes a world of difference in texture and flavor.
  • Cook on low heat for tender results—high heat toughens eggs.
  • Get creative with toppings and sides: Chutneys, salsas, and pickles all love eggs.
  • Don’t waste the yolk! That’s where much of the nutrition and flavor live.

For more tips, inspiration, and the latest egg trends, keep browsing MasalaMonk.com. Your kitchen, your rules—happy cooking!

FAQs for 10 Egg Dishes with 2 Eggs

1. Can I double these recipes if I have more eggs?

Absolutely! Each recipe is designed for two eggs but can be scaled up easily. Just multiply the ingredient quantities by the number of eggs you’re using, and adjust the pan size and cooking time as needed.


2. What are the health benefits of eating two eggs a day?

Two eggs provide about 12–14 grams of high-quality protein, healthy fats, vitamin D, choline, and a host of other nutrients. They keep you full, support muscle health, and are generally considered safe for most people as part of a balanced diet. For more on nutrition, see How Much Protein in Two Boiled Eggs?.


3. Can I use egg substitutes in these recipes?

Yes! For plant-based options, use tofu scramble in place of scrambled eggs, or try commercially available vegan egg replacers for frittatas and omelettes. For more ideas, check Tofu Instead of Eggs: 5 High-Protein Plant-Based Breakfast Ideas.


4. How do I keep my scrambled eggs soft and creamy, not rubbery?

Cook on low heat, stir gently, and remove the eggs from heat just before they’re fully set. They’ll finish cooking with residual warmth. Adding a splash of milk or cream helps too.


5. What are some good side dishes to serve with these egg recipes?

Pair eggs with toasted bread, parathas, rice, sautéed greens, roasted potatoes, or fresh salads. Chutneys, salsas, and pickles also make excellent accompaniments.


6. Are brown eggs healthier than white eggs?

No—brown and white eggs have virtually the same nutritional value. The color difference comes from the breed of chicken, not the nutritional content.


7. Can I prepare these egg dishes ahead of time?

Some dishes, like boiled eggs, egg salad, and mini frittatas, store well in the fridge for up to 3 days. Scrambled eggs and omelettes are best enjoyed fresh.


8. What’s the best way to peel hard-boiled eggs?

Cool eggs in ice water immediately after boiling. Crack the shell all over and peel gently under running water. Older eggs often peel more easily than very fresh ones.


9. How can I make my egg dishes more flavorful?

Use fresh herbs, spices, or seasoned salts. Try flavor boosters like garlic, onions, cheese, or even a drizzle of chili oil. For more ideas, read Egg-cellent Seasoning Options for Flavorful Eggs.


10. Can I make these dishes if I don’t have a nonstick pan?

Yes. Use a well-seasoned cast iron pan or a stainless steel pan with enough oil or butter to prevent sticking. For oven-baked dishes like frittatas, line your baking dish with parchment or grease it well.
Posted on 4 Comments

Pineapple Chia Pudding Recipe: Creamy & Spoonable Every Time

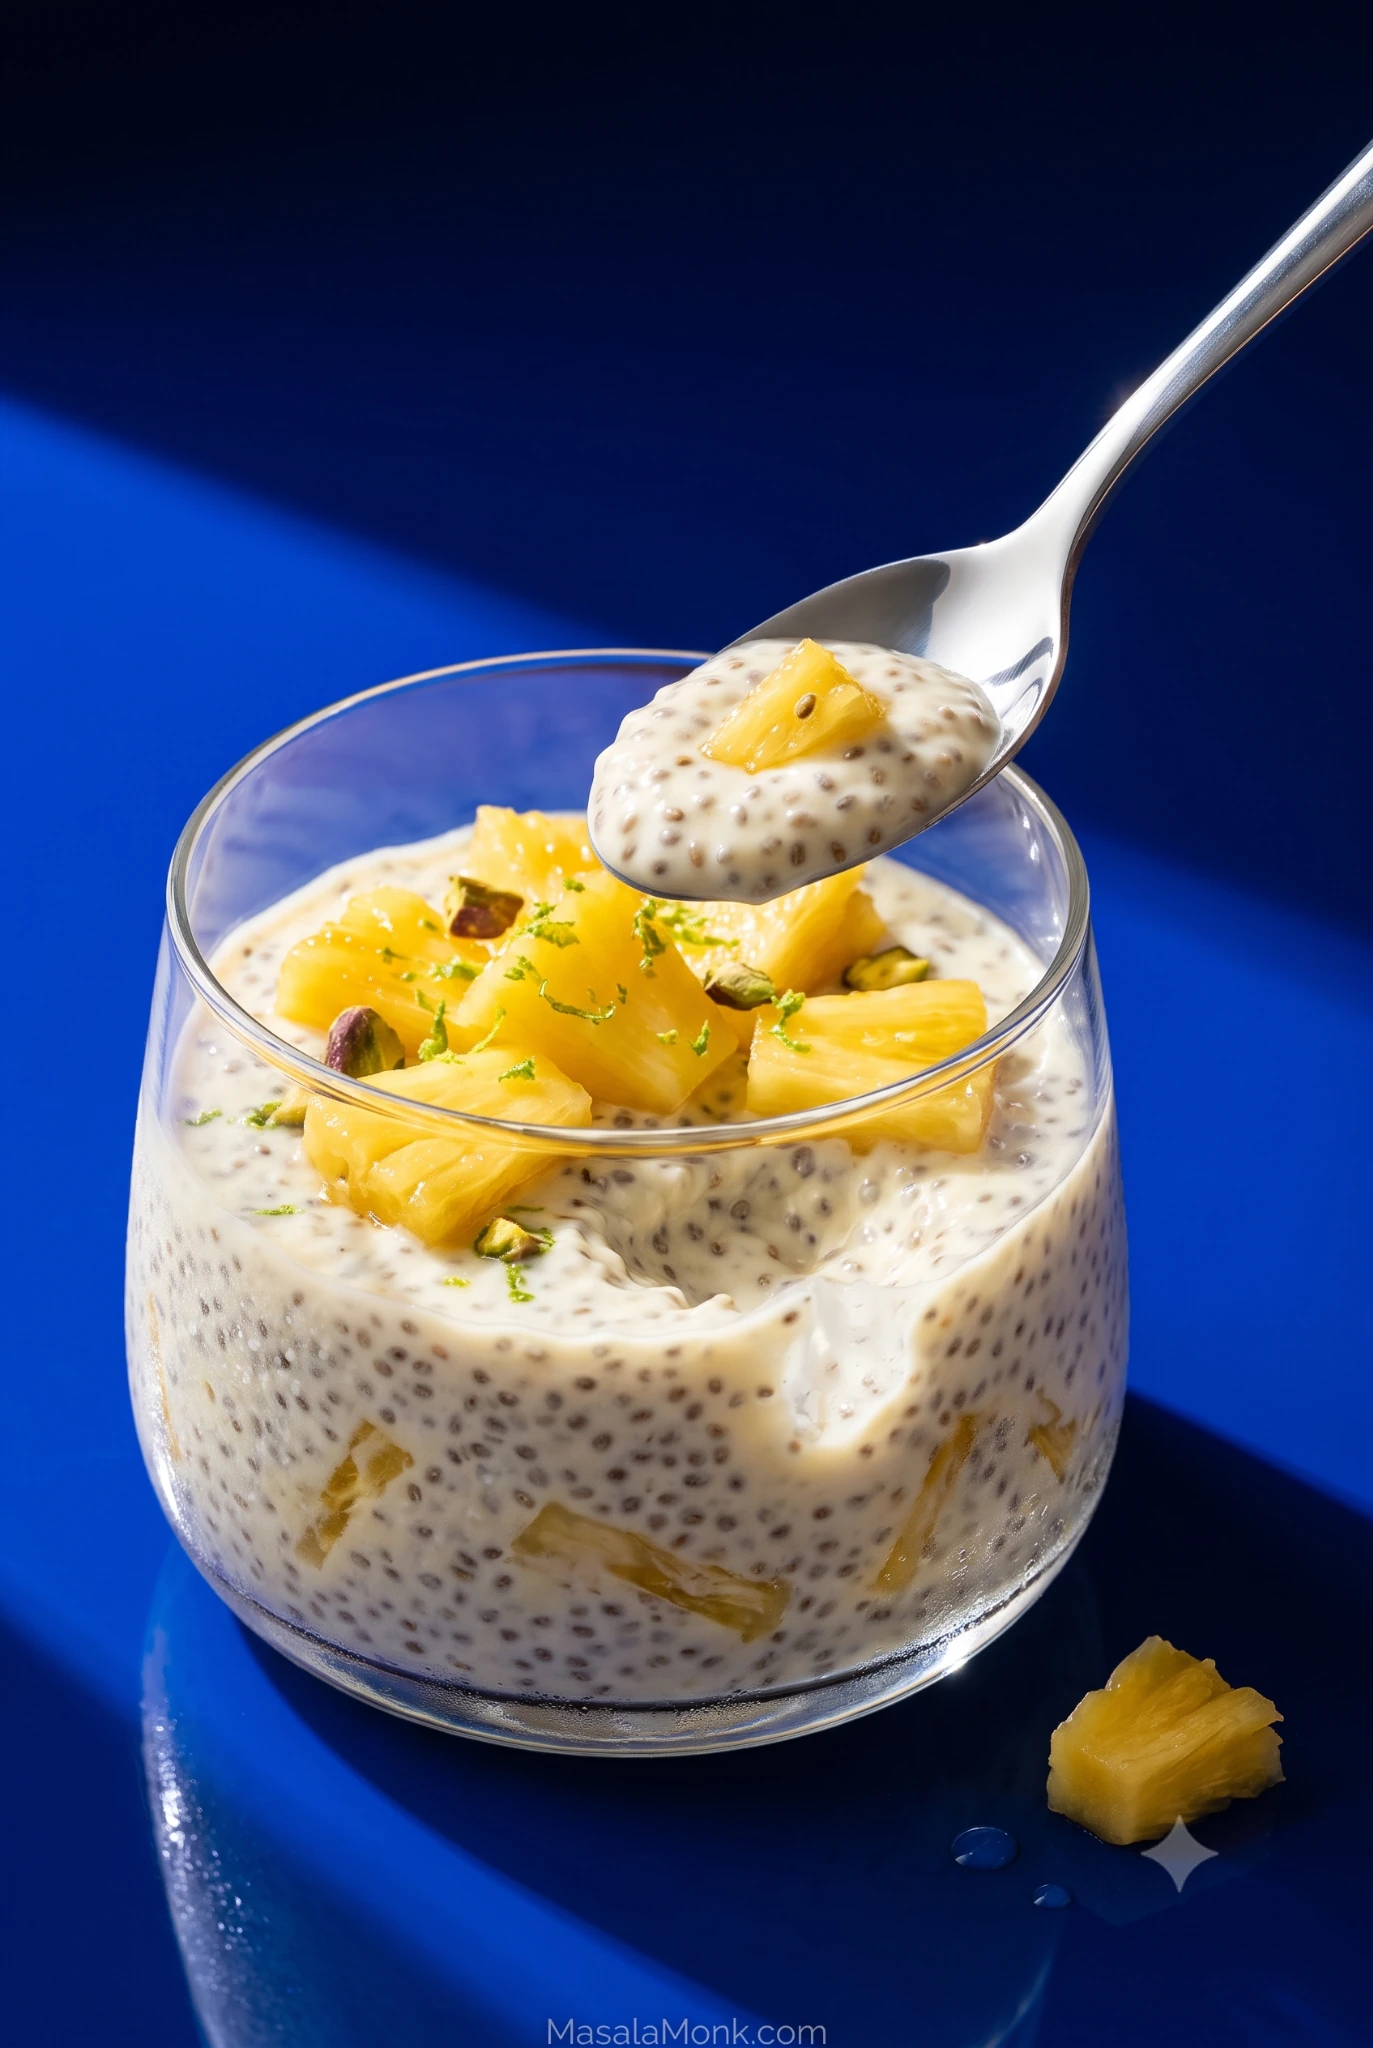
Pineapple chia pudding in a clear glass, topped with juicy pineapple, lime zest and pistachio, with a spoon lifting a soft chia-filled bite.

This post was last updated on:

Pineapple chia pudding should be cold, creamy and bright with fruit. It should not have milk floating above a chia slab or be so thick you can stand a spoon in it.

Juicy pineapple, fresh lime and just enough vanilla make it taste like something you would actually look forward to finding in the fridge. Mixing it takes minutes. Getting that soft, spoonable texture is where most jars go sideways.

This pineapple chia seed pudding uses a slightly firmer base so there is room for the fruit’s moisture. Give it a second stir before it goes into the fridge, and by morning the work is done: stir, add cold pineapple and eat.

Quick Answer

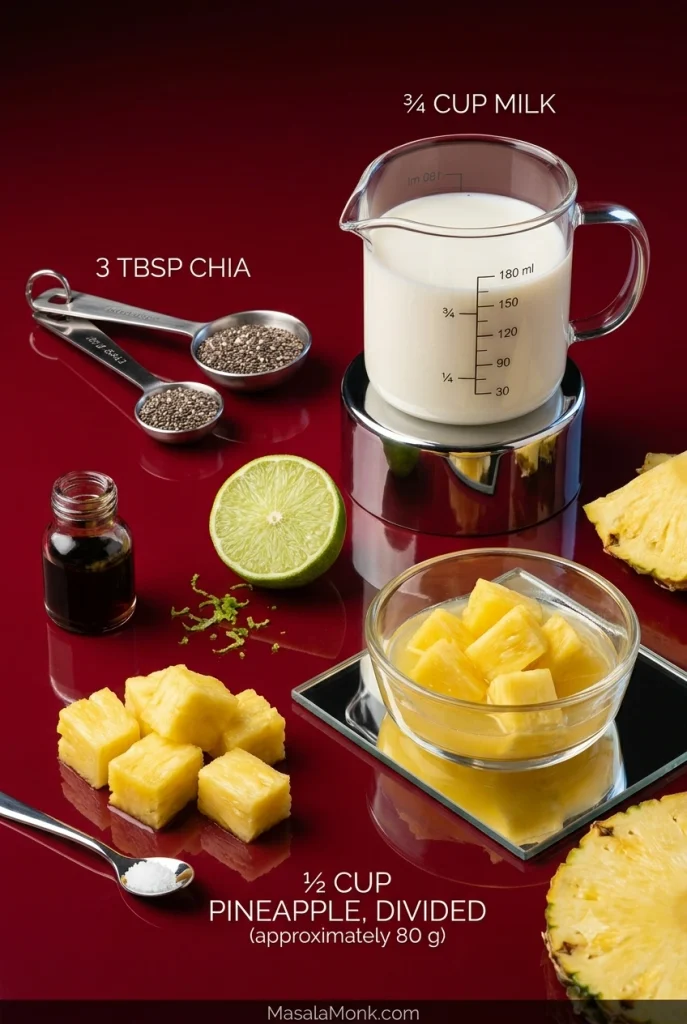
For one breakfast jar, use 3 tablespoons / about 35 g chia seeds + ¾ cup / 180 ml / 6 fl oz milk + ½ cup / about 80 g pineapple, divided. Stir well, wait 5–10 minutes, stir again, fold in about half the fruit, then chill for at least 2 hours. Four hours or overnight gives the most dependable texture; save the remaining pineapple for serving.

It is ready when the chia holds softly on a spoon and there is no loose milk pooling around it.

Pineapple Chia Pudding Recipe

Start with plenty of pineapple, a creamy but not heavy base, and enough lime and vanilla to keep the fruit tasting fresh and lively.

  • Makes: 1 breakfast jar or 2 small snack portions
  • Prep: about 5 minutes
  • Second stir: after the brief initial rest
  • Minimum chill: about 2 hours
  • Best texture: about 4 hours to overnight
  • Cook time: none

A 16 oz / 475 ml jar leaves plenty of room to stir and add toppings. A 12 oz / 350 ml jar works if you mix in a bowl first.

Equipment: a bowl or wide jar, a whisk or spoon, measuring spoons and a lidded container. A small blender is optional for the smooth version.

Ingredients

  • Whole chia seeds: 3 tablespoons, about 35 g / 1.2 oz
  • Unsweetened almond or coconut drinking milk: ¾ cup / 180 ml / 6 fl oz; soy or dairy milk also works
  • Finely diced pineapple: ½ cup / about 80 g / 2.8 oz, divided
  • Vanilla extract: ½ teaspoon
  • Finely grated lime zest: ½ teaspoon
  • Fresh lime juice: ½–1 teaspoon / 2.5–5 ml
  • Fine salt: a small pinch
  • Sweetener: up to 1 teaspoon, if needed

Chia tablespoon weights vary slightly between brands and measuring styles, so the tablespoon measure is the main functional measurement here.

Store-bought unsweetened almond milk keeps things easy, but homemade almond milk works too. Homemade batches vary in richness, so you may need a little more or less milk at the end.

Using dairy milk? The recipe still works. When the jar will sit overnight, keep raw fresh or frozen pineapple separate and add it at serving; the reason is explained below.

Optional toppings: choose one or two so the pineapple still gets to be the point.

  • Toasted unsweetened coconut
  • Chopped pistachios
  • Plain Greek or plant-based yogurt
  • Granola
  • Extra lime zest or fresh mint
Measured chia seeds, three-quarter cup of milk and half a cup of pineapple divided into two portions, with lime, vanilla and salt.
The firmer base leaves room for pineapple’s juice. The goal is still a soft, spoonable pudding once the fruit is folded in.

Method

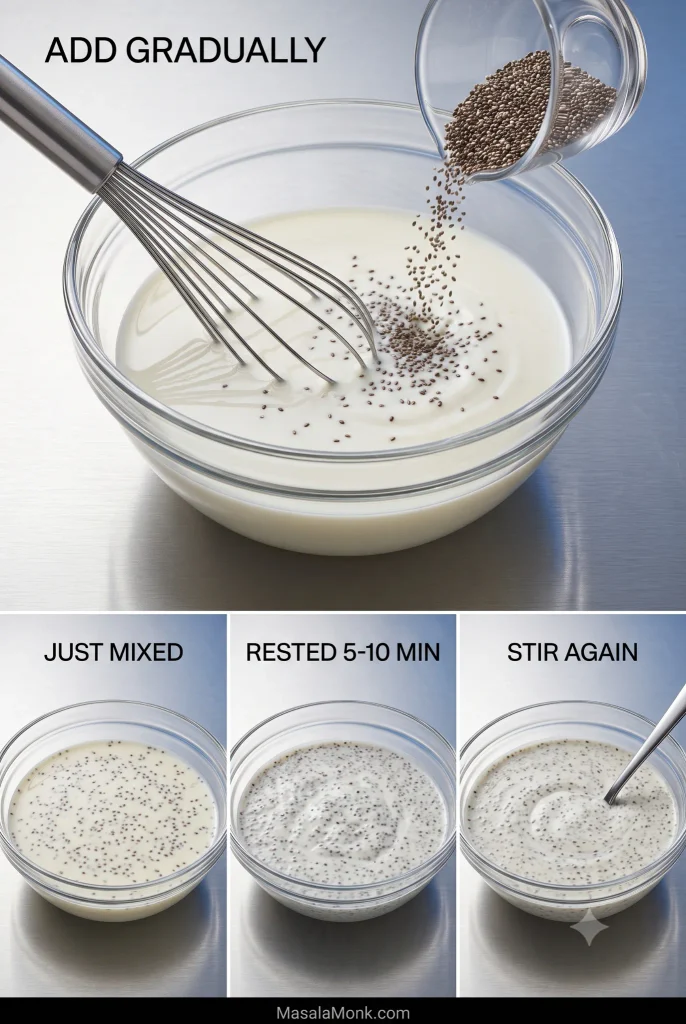
  1. Mix the base. Add the milk, vanilla, lime zest, lime juice, salt and any sweetener to a bowl or wide jar. With the whisk moving, sprinkle in the chia gradually and whisk for about 20–30 seconds. Scrape the bottom and corners so no dry pockets remain.
  2. Wait, then stir again. Leave it for 5–10 minutes, then scrape the bottom and sides and break apart any clusters. This is what prevents milk on top and a dense chia layer underneath.
  3. Add half the pineapple. Fold in about ¼ cup / 40 g well-drained diced pineapple. Very juicy fruit—and fruit going into jars for several days—is better kept separate until serving.
  4. Cover and chill. Refrigerate for at least 2 hours. Four hours gives a more dependable set; overnight is easiest. Still seeing the seeds settle—or making a large batch? Give it one more stir 30–60 minutes later. Most single jars will not need it.
  5. Check the texture. Give the pudding a good stir. The seeds should be evenly hydrated and the mixture should hold softly on a spoon without loose milk around it.
  6. Adjust only if needed. Too thick? Add milk 1 tablespoon / 15 ml at a time. Still clearly too thin after several hours? Add 1 teaspoon chia and wait another 15–30 minutes.
  7. Finish and eat. Add the remaining pineapple and any crunchy toppings. Taste it cold: if the pineapple seems muted, add a little extra lime zest; if the fruit is tart, add a touch more sweetener.

Why the Second Stir Matters

Four-step chia pudding process showing chia sprinkled into milk while whisking, then the mixture just mixed, rested for 5 to 10 minutes, and stirred again until evenly distributed.
The useful moment for the second stir is after hydration has started but before settling has fully taken hold. By then the seeds are tackier, so redistributing them now is more effective than trying to break up a compact layer later.

If your jar is already in the fridge, stop here—you have done everything you need. The rest is for choosing different pineapple or milk, making several breakfasts at once, or rescuing a jar that did not behave as expected.

Choose What You Need

The Chia-to-Liquid Ratio for Pineapple Pudding

Three tablespoons of chia per cup of liquid gives a softer pudding; four gives a noticeably firmer one. Pineapple adds its own moisture, so the main recipe starts toward the thicker end.

Chia seedsLiquidResult
3 tbsp1 cup / 240 mlSofter, looser pudding
4 tbsp1 cup / 240 mlFirmer, spoonable pudding
3 tbsp¾ cup / 180 mlThicker base with room for juicy fruit

A very ripe fresh pineapple can be surprisingly juicy, thawed fruit leaks water, and crushed pineapple carries more liquid than neat chunks. The main recipe’s 3 tablespoons chia to ¾ cup / 180 ml milk leaves room for that extra moisture.

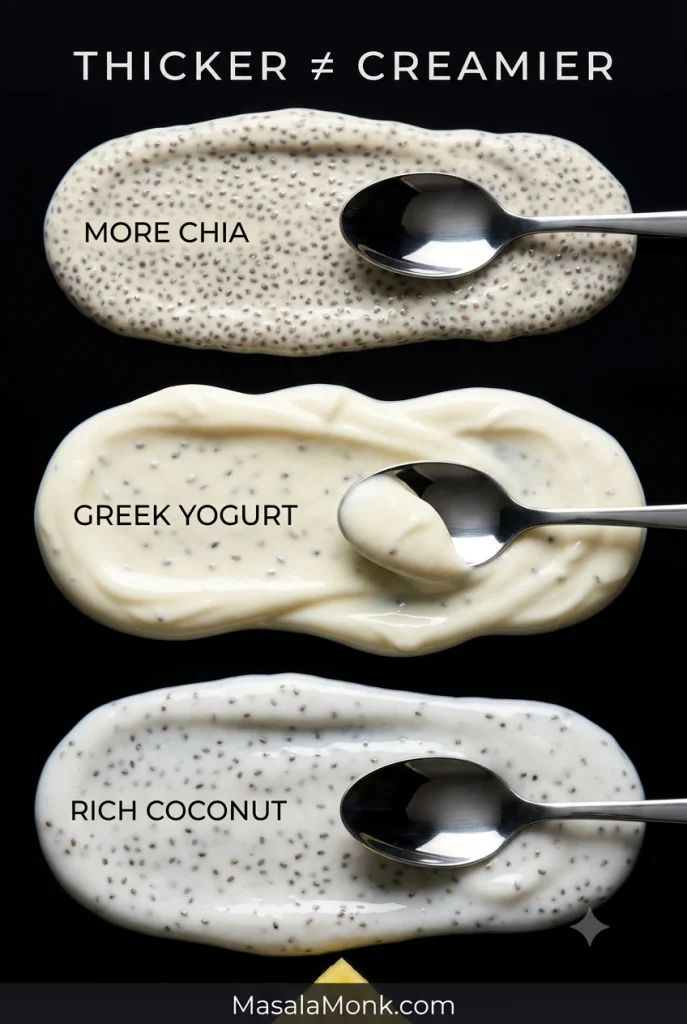
More chia makes the pudding thicker. Yogurt or richer coconut milk makes it feel creamier. That distinction matters when you are chasing a lush café-style spoonful rather than simply trying to make the pudding stand up on the spoon.

The same basic method works with plenty of other flavors in our chia pudding guide.

What Should Properly Set Chia Pudding Look Like?

Whole-seed chia pudding is never quite as smooth as custard. Each seed develops a soft gel coating while the seed remains perceptible. The finished pudding lands somewhere between tiny tapioca and a soft seeded gel.

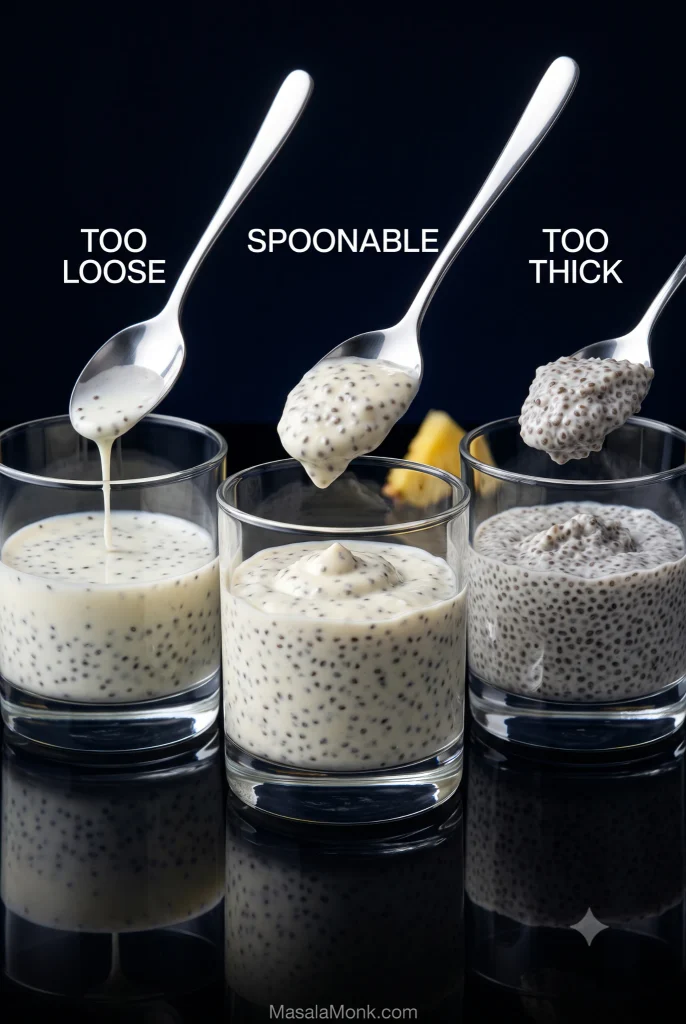
  • It should hold a soft mound on a spoon.
  • The seeds should look evenly hydrated.
  • There should be no pool of milk floating around it.
  • There should be no dense seed slab stuck underneath.
  • The overall texture should feel creamy rather than rubbery.

A little seed texture is normal. Dry, hard pockets are not.

Three glasses compare chia pudding textures: runny pudding dripping from a spoon, properly spoonable pudding holding a soft mound, and very thick pudding forming a dense stiff scoop.
After one good stir, watch what the spoon track does. A loose mixture flows closed, a ready pudding relaxes slowly around a soft scoop, and an over-thick jar leaves ridges that stay sharply defined.

Sometimes the pudding is exactly right and you still dislike the texture. That is allowed. Try the blended version. If that still does not appeal, there are plenty of good breakfasts in the world and no reason to force yourself into a chia habit.

Does your jar look different? Jump to Troubleshooting.

Fresh, Frozen or Canned Pineapple?

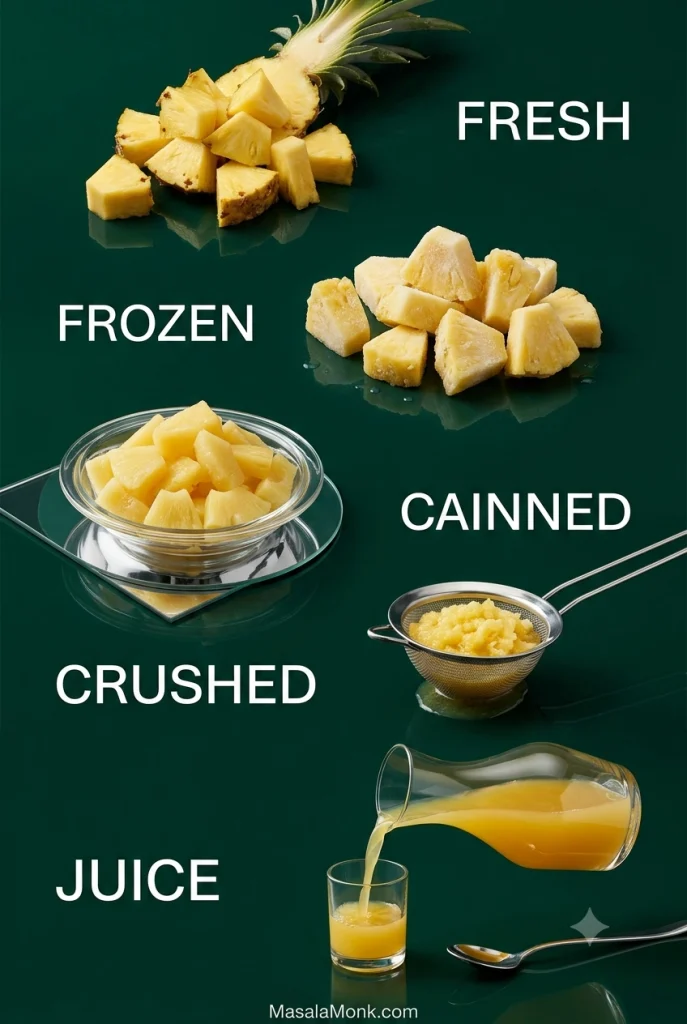
PineappleBest forWatch for
FreshBright flavor, topping, juicy piecesVariable juice
FrozenBlending into the baseThaw liquid
Canned in juiceEasy meal prepDrain well
CrushedFruit in every spoonfulExtra liquid
JuiceStronger pineapple flavorCounts as liquid

Fresh pineapple gives the brightest bite. For the sweetest jar, look for a clean sweet aroma at the base and a little give, then dice it fairly small.

Frozen pineapple is best when you want fruit through the base. Blend about ¼ cup / 40 g with the measured milk and keep the rest for serving. Drain thawed fruit before folding it into an already-set pudding.

Canned pineapple is easy for meal prep; choose fruit packed in juice and drain it well. Crushed pineapple spreads fruit through every spoonful but brings more liquid, so drain it or keep it as a separate layer.

Five pineapple forms labeled fresh, frozen, canned, crushed and juice, showing fresh pieces, frozen chunks, drained canned fruit, crushed pineapple in a strainer and pineapple juice.
A useful rule is to watch what escapes the fruit. If thawed, crushed or canned pineapple leaves noticeable liquid behind, drain it. Once that moisture starts pouring rather than clinging to the fruit, treat it as part of the liquid budget.

Pineapple Juice Changes the Ratio

Chia hydrates perfectly well in pineapple juice, but the juice has to come out of the liquid somewhere else. Add ¼ cup / 60 ml pineapple juice and reduce the milk by about the same amount.

Juice makes the pudding fruitier and sweeter; milk, coconut or yogurt supplies more of the creamy body. Diced fruit gives bite, purée makes a fruit layer, and fully blended pineapple behaves more like liquid. Once the fruit pours like juice, treat it like juice.

Using Yogurt? One Pineapple Quirk Matters

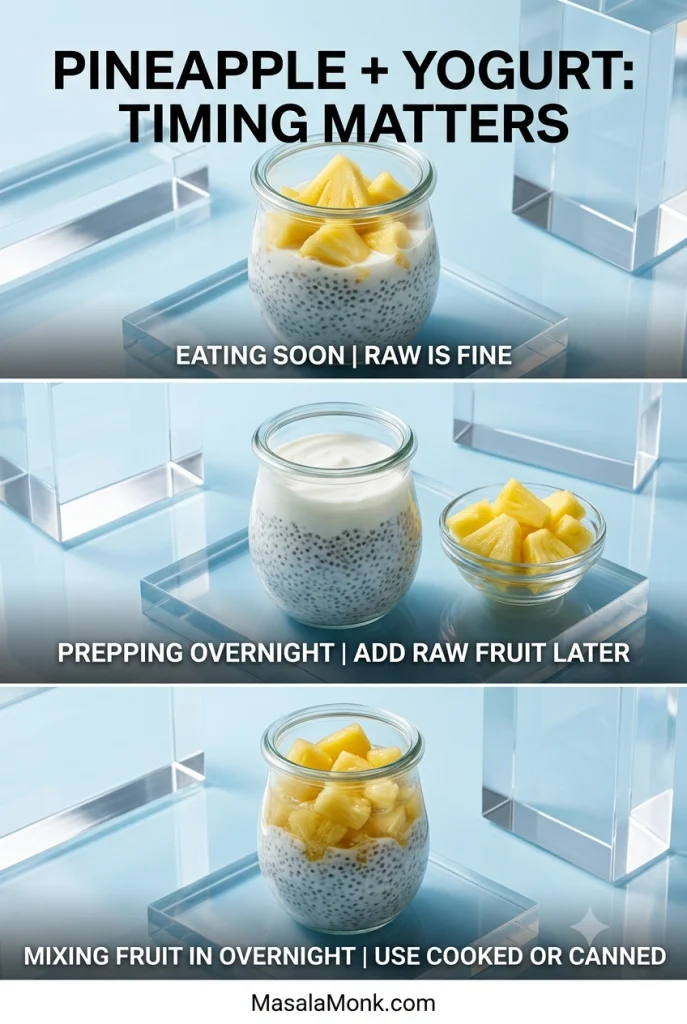
Fresh pineapple contains bromelain, an enzyme that breaks down milk proteins, and freezing raw pineapple does not reliably switch that enzyme off. Pineapple and yogurt are still perfectly normal foods to eat together. Odd bitterness or texture can show up when raw fresh or frozen pineapple sits in yogurt or skyr for hours.

For an overnight dairy-based jar, use canned or cooked pineapple, or add raw fresh or frozen fruit in the morning. With protein-rich soy yogurt, keeping raw pineapple separate until serving is a simple precaution when prepping well ahead.

Three pineapple and yogurt chia pudding examples: raw pineapple mixed in for eating soon, raw pineapple kept separate for overnight prep, and cooked or canned pineapple mixed into an overnight jar.
Keeping raw pineapple separate for an overnight yogurt jar has a sensory payoff too. Besides avoiding hours of enzyme contact, you preserve more of the fruit’s fresh aroma, brighter acidity and firmer bite for breakfast.

Using ordinary almond or coconut drinking milk and fresh pineapple? Follow the main recipe and move on.

Using yogurt for the base? Jump to the high-protein Greek yogurt version.

How to Make Pineapple Chia Pudding Creamier

Almond milk keeps the jar light, Greek yogurt makes it silkier, and coconut brings richness.

BaseResultBest move
Almond milkLight, cleanUse main ratio
Soy milkMore body, more proteinUse main ratio
Dairy milkRounder, creamierFresh pineapple at serving for overnight prep
Coconut drinkLight, tropicalUse main ratio
Canned coconut milkRich, denseDilute with lighter milk
Greek yogurt or skyrSilky, tangy, protein-richUse yogurt ratio below
Three close-up chia pudding textures compare a dense mixture with more chia, silky Greek yogurt chia pudding and glossy rich coconut chia pudding.
Look at the spoon tracks rather than the color. Extra chia creates tighter, more rigid grooves; Greek yogurt gives rounded silky folds; richer coconut shows more gloss and a fuller cold-set body.

Carton coconut drink, light canned coconut milk and full-fat canned coconut milk behave very differently once cold. Our guide to coconut milk types and nutrition goes deeper into those differences.

If you are happy with almond or coconut drinking milk and the main recipe, you do not need to change a thing. For a more café-style spoonful, Greek yogurt or skyr gives the base more body and a silkier feel. Let the pineapple do most of the flavor work, then add vanilla, lime and something crisp—perhaps toasted coconut, pistachios or a little granola.

Full-fat canned coconut milk can become surprisingly firm when it gets cold. A mixture that looked creamy at night may feel almost waxy by breakfast. Whisk a separated can smooth before measuring it, and combine rich canned coconut milk with a thinner drink rather than using it alone.

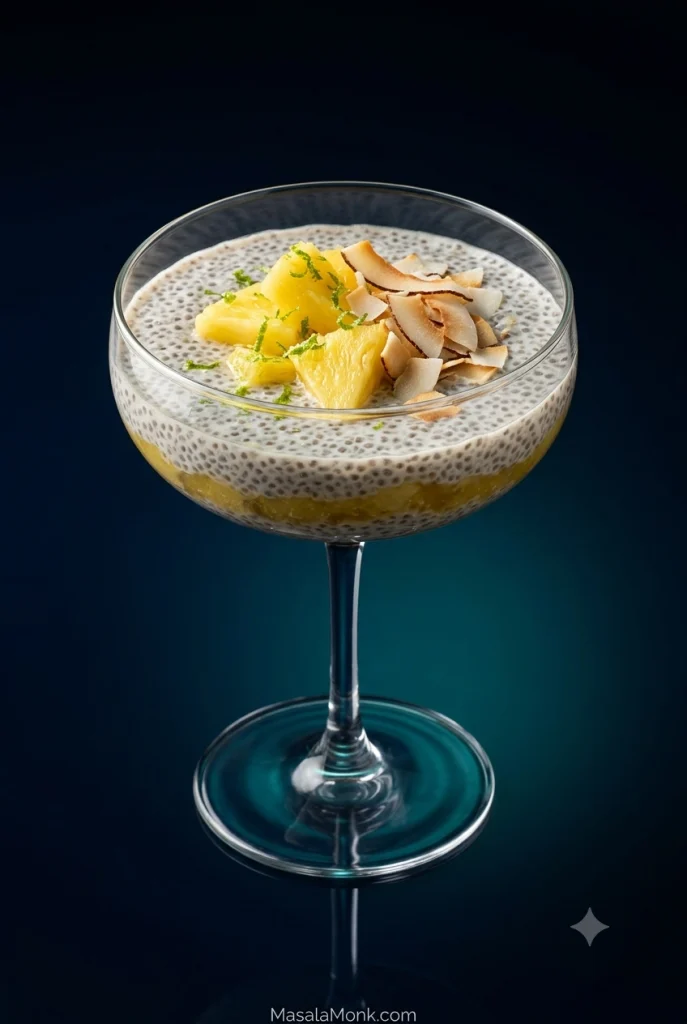
Pineapple Coconut Chia Pudding

Here the coconut softens pineapple’s sharper edges without burying the fruit.

Pineapple coconut chia pudding in a clear coupe with a pineapple layer, fresh pineapple, toasted coconut and lime zest.
The coconut blend is really a cold-texture decision. Lighter coconut drink provides most of the hydration. A smaller amount of canned coconut milk adds richness without letting chilled coconut fat dominate the finished pudding.
  • Chia seeds: 3 tbsp, about 35 g
  • Coconut drinking milk: ⅔ cup / 160 ml
  • Well-mixed canned coconut milk: ¼ cup / 60 ml
  • Pineapple: ½ cup / about 80 g, divided
  • Vanilla: ½ tsp
  • Lime zest: ½ tsp
  • Lime juice: ½–1 tsp
  • Salt: a pinch
  • Sweetener: only if needed

Use the same two-stir method as the main recipe. Fold about half the pineapple through and keep the rest for the top.

For a piña colada-style jar, pulse some of the pineapple into a thick purée. Layer it with the coconut chia so each spoonful gets a clearer hit of fruit.

That same pineapple-coconut-lime combination runs through our piña colada guide.

High-Protein Pineapple Chia Pudding with Greek Yogurt

Greek yogurt or skyr is the simplest way to add substantial protein while making the chia base silkier at the same time.

  • ½ cup plain Greek yogurt or skyr, about 120 g
  • ⅓ cup milk, about 80 ml
  • 2 tbsp chia seeds, about 24 g
  • ½ tsp vanilla
  • Lime zest to taste
  • Pinch of salt
  • Sweetener, if needed
  • ½ cup pineapple, about 80 g
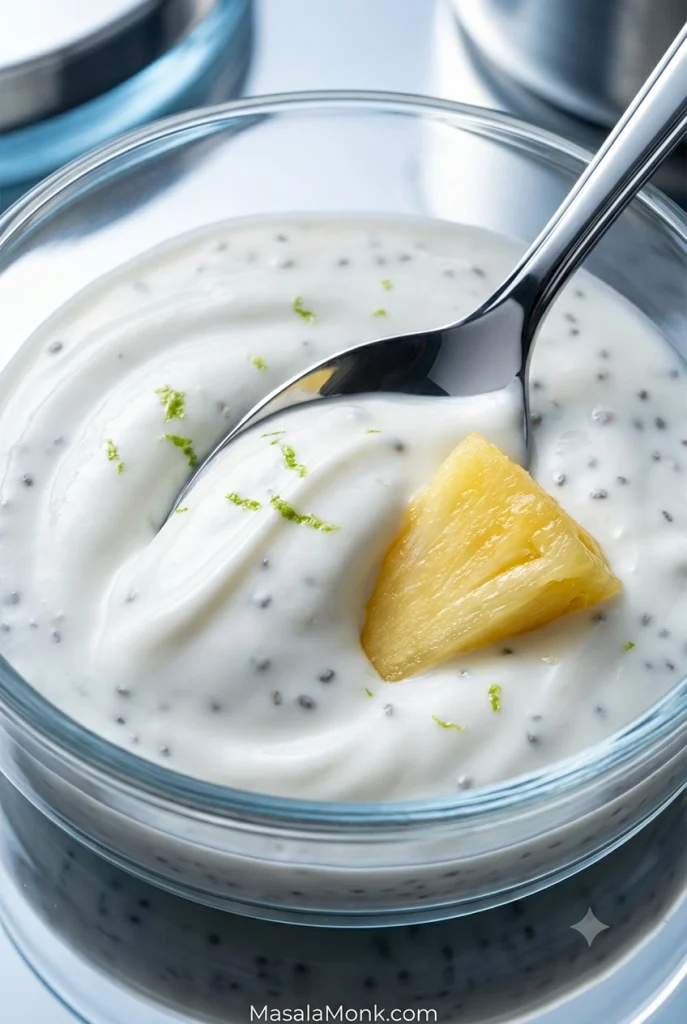
Close-up of thick pineapple chia pudding made with Greek yogurt, with a spoon drawn through the creamy chia mixture and a piece of pineapple in the pudding.
The lower chia amount here is deliberate. Greek yogurt already supplies substantial body. Using 2 tablespoons instead of the master recipe’s 3 helps the high-protein pineapple chia pudding stay silky rather than crowded with seeds.

Whisk the yogurt, milk, vanilla, lime zest and salt first, then add the chia and follow the same two-stir method. Very thick Greek yogurt may need another tablespoon or two of milk so the chilled pudding stays silky rather than pasty.

For an overnight jar, heat-treated or canned pineapple can go straight into the pudding. Raw fruit, whether fresh or frozen, is better added in the morning.

For a plant-based version, use soy milk with a thick soy yogurt. Using protein powder? Start with about 1 tablespoon. Depending on the powder, you may need another 1–3 tablespoons / 15–45 ml milk to keep the pudding creamy rather than pasty.

Prefer It Smooth? Blend It After Chilling

Whole chia always keeps a tiny-seed texture. For something closer to mousse, let the pudding hydrate fully first and then blend it with the pineapple until creamy.

Smooth blended pineapple chia pudding in a glass coupe with fine chia flecks, a pineapple purée swirl and lime zest.
Blend this version to change mouthfeel, not to rescue a runny pudding. Fully hydrated chia becomes smoother and mousse-like after blending, but an under-set ratio still needs time or adjustment before the blender comes out.

Blending after the set usually gives a smoother result than grinding dry chia at the beginning. Ground chia can feel finer, but it can also turn gummy. Hydrating whole seeds first and blending later smooths out most of the seed texture, although chia’s natural gel-like feel will still be there.

Ready to make it? Back to the main recipe.

Lower-Carb Pineapple Chia Pudding

For a lower-carb jar, use a smaller amount of pineapple and let lime zest, vanilla and a pinch of salt make that fruit go further. The easiest way to lower the carb load is simply to use less pineapple.

  • 3 tbsp chia seeds, about 35 g
  • ¾ cup unsweetened almond milk, 180 ml
  • 2–4 tbsp finely diced pineapple, about 20–40 g
  • ½ tsp vanilla
  • Plenty of fresh lime zest
  • Pinch of salt
  • Optional monk fruit, stevia or another preferred non-sugar sweetener

With less pineapple in the jar, lime zest matters more. Start toward the upper end of the fruit range if flavor matters more than shaving off every possible gram of carbohydrate. There is little point making a pineapple pudding with two apologetic cubes of pineapple.

Watching added sugar? Ripe pineapple may be sweet enough on its own. Honey, maple syrup and agave still count as added sugars even when they are described as “natural” sweeteners.

For a stricter base, use our keto chia pudding with almond milk.

Meal Prep & Storage

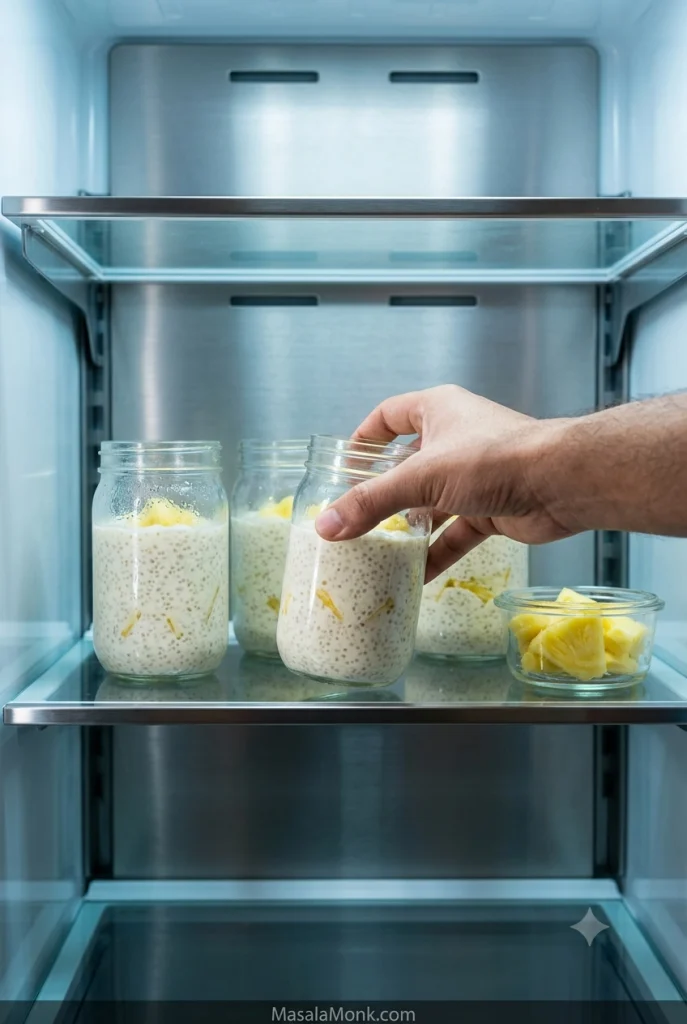
Making four breakfasts at once? Do not stand there stirring four tiny jars separately. Mix one big batch, give it the second stir, then divide it up.

Four jars of pineapple chia pudding on a refrigerator shelf, with a hand reaching for one jar and a small container of pineapple nearby.
Before portioning a batch, give the bowl one last thorough stir so the first and last jars receive the same seed-to-liquid balance. Then divide promptly rather than letting the chia begin settling again while you fill containers.

Scaling the recipe is straightforward:

MakeChiaMilkPineapple
1 jar3 tbsp / ~35 g¾ cup / 180 ml½ cup / ~80 g
2 jars6 tbsp / ~70 g1½ cups / 360 ml1 cup / ~160 g
4 jars¾ cup / ~140 g3 cups / 720 ml2 cups / ~320 g

Mix all of the milk and chia in one large bowl, wait 5–10 minutes, and stir thoroughly again. If a large batch is still settling, keep it in the bowl for one more stir 30–60 minutes later; then divide it between containers. Use roughly half the pineapple in or alongside the jars and save the rest for serving. Keeping all of the fruit separate gives the most consistent texture over several days.

Keeping Meal-Prep Jars at Their Best

Crunchy toppings belong at the last minute. Granola, nuts, seeds and toasted coconut are much more enjoyable crisp than after three nights sitting in chia gel.

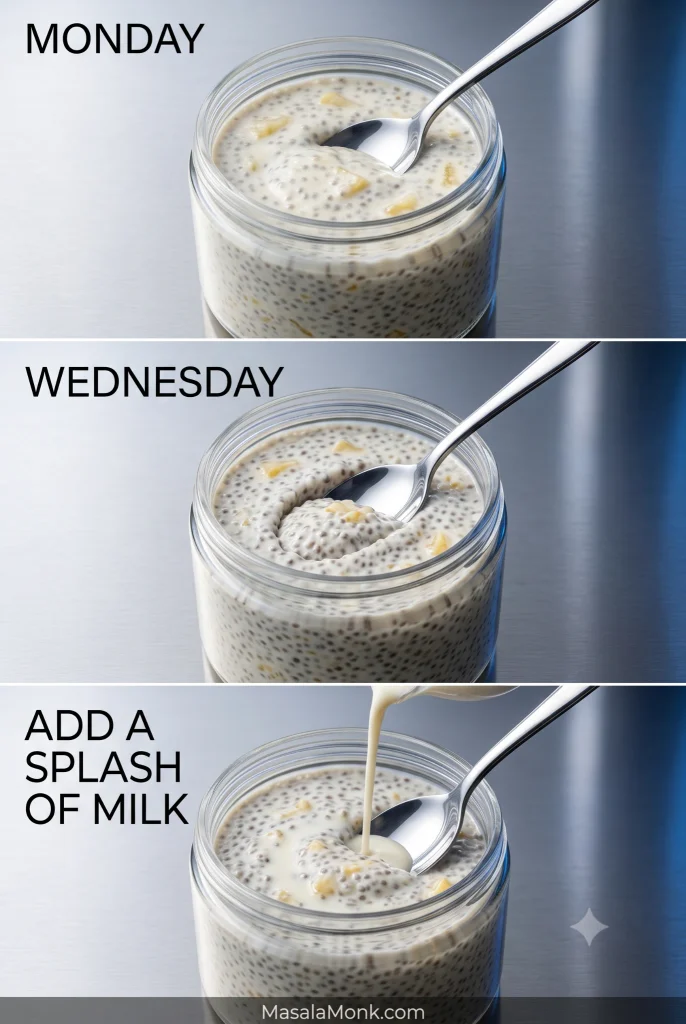
A jar that is just right on Monday can be noticeably thicker on Wednesday. Stir in 1–2 tablespoons / 15–30 ml milk and it usually comes straight back.

Three stages of stored chia pudding labeled Monday, Wednesday and add a splash of milk, showing a soft pudding, a firmer pudding two days later and milk being poured into the thicker jar.
Loosen the jar you are eating, not the entire batch in advance. Because stored chia keeps changing, adjusting each serving with a little milk preserves more control over tomorrow’s texture.

For the best fruit and texture quality, aim to eat prepared pineapple chia pudding within about 3–4 days. Keep it covered and refrigerated at 40°F / 4°C or below.

If you enjoy opening the fridge to find breakfast already handled, overnight oats work on much the same evening-prep rhythm with a completely different texture.

↑ Back to Recipe · ↑ Back to Top

Pineapple Chia Pudding Troubleshooting

Before fixing anything, check how long the pudding has actually been chilling. A jar that looks loose after 45–60 minutes may simply need more time.

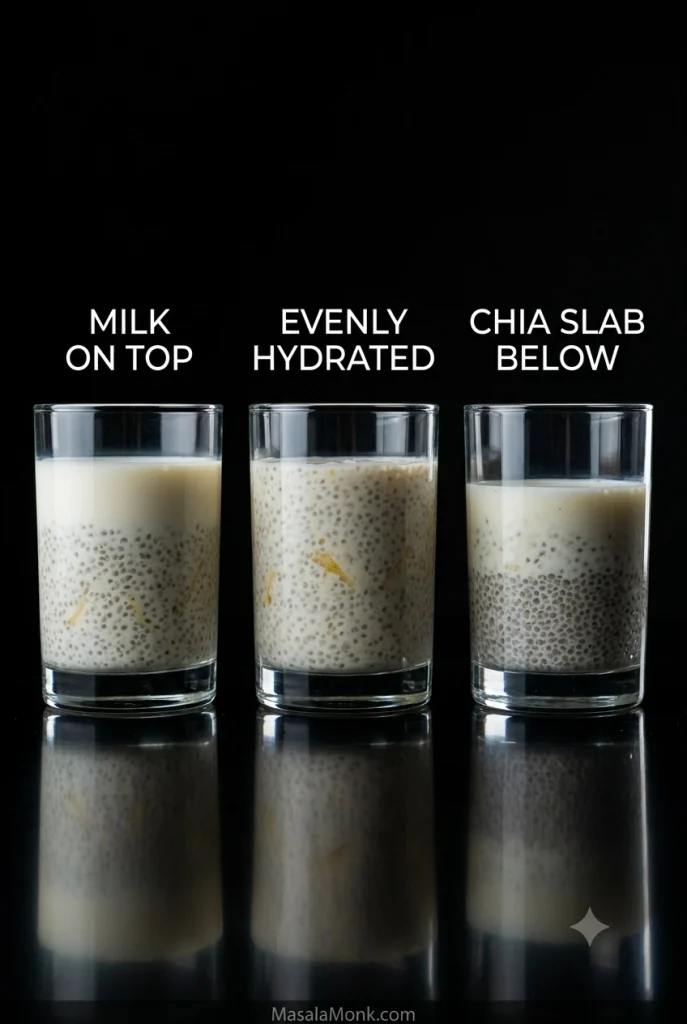
Three clear glasses compare separated chia pudding with milk on top, evenly hydrated chia pudding, and a dense chia layer settled at the bottom beneath thinner liquid.
Treat separation as a distribution problem before treating it as a ratio problem. If milk is sitting above compacted chia, first break up and redistribute the seeds already there. Adding more chia immediately can make the bottom even heavier.

Setting and Texture Problems

My chia pudding is still watery. What now?

After several hours, excess liquid usually means the ratio was too loose or the pineapple brought more juice than expected. Stir first. If it is still clearly too thin, add 1 teaspoon chia, wait 15–30 minutes, then check again. Next time, drain the fruit more thoroughly or keep it as a topping.

Why is there milk on top and a solid chia layer underneath?

The seeds settled before they had hydrated enough to stay suspended. Break the layer apart vigorously if you still can. Next time, stir once when you mix the pudding and again 5–10 minutes later.

My pudding is much too thick.

Stir in milk 1 tablespoon / 15 ml at a time until the spoon moves through it comfortably again. Very thick yogurt, extra chia and rich coconut milk can all push a jar past creamy into dense.

Why are there dry or crunchy chia pockets?

The seeds clumped before enough liquid could reach them. Break up any pockets you can find. Next time, sprinkle the chia in while whisking and do not skip the second stir.

Pineapple, Coconut and Yogurt Problems

The pineapple made my pudding watery.

Very ripe, thawed, crushed or poorly drained pineapple can contribute much more liquid than neat fresh pieces. A teaspoon of extra chia can rescue a clearly loose batch. Draining the fruit or keeping it as a separate layer prevents the problem next time.

Why did the coconut version become firm or waxy?

Coconut fat firms when chilled. Loosen the pudding with a little thinner milk and stir well. Next time, combine rich canned coconut milk with coconut drink or another lighter milk instead of using only full-fat canned coconut.

Why did my pineapple-yogurt pudding turn bitter?

Uncooked pineapple—fresh or frozen—can still contain active bromelain, which breaks down milk proteins during a long rest. For overnight yogurt or skyr pudding, use canned or cooked fruit, or add the raw pineapple in the morning.

It set properly, but I still hate the texture.

You may dislike whole chia pudding. Try blending the fully hydrated pudding. If that still does not help, the texture simply is not for you.

If the Chia Barely Gels at All

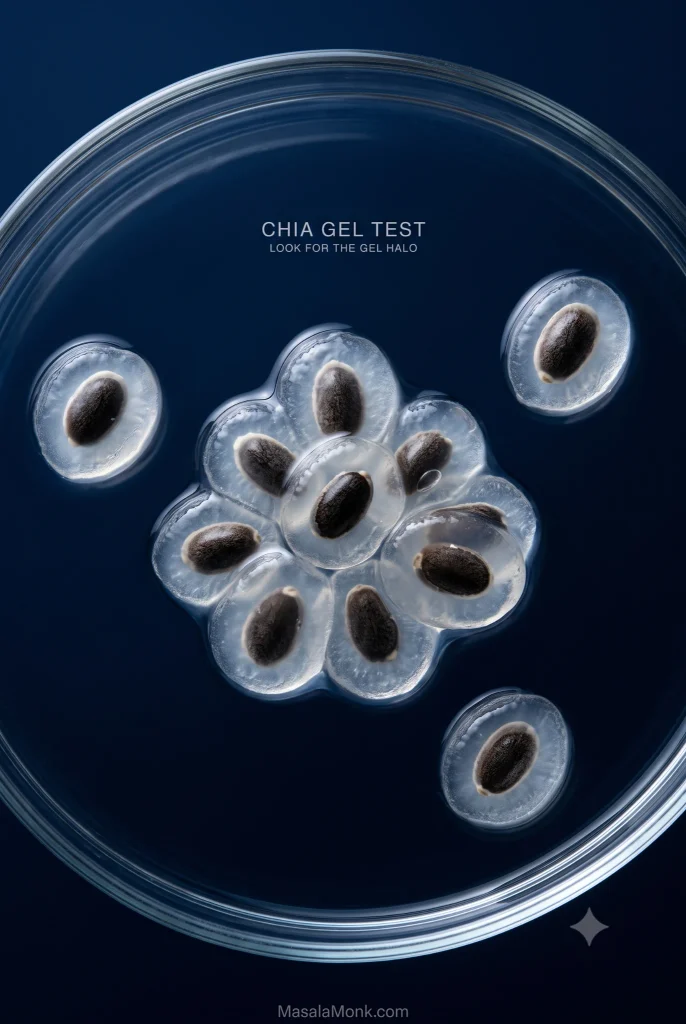
Brands and batches can thicken at different speeds, so give a correctly measured pudding several hours—or overnight—before blaming the seeds. If a familiar recipe suddenly stops setting, mix 1 teaspoon chia with 2 tablespoons water. After about 10–15 minutes, you would normally expect a clear gel halo. Very little gel is a good reason to try fresher chia rather than adding more and more seeds.

Macro view of hydrated chia seeds in water, each surrounded by a translucent gel halo, with several gelled seeds overlapping in a small cluster.
Judge the gel test across several seeds rather than looking for one perfect specimen. Visible translucent mucilage around multiple chia seeds is the useful sign that hydration is happening, even when individual halos vary in size and shape.

↑ Back to Recipe · ↑ Back to Top

A Few Flavor Ideas

Pineapple, cardamom & pistachio: stir a scant ⅛ teaspoon ground green cardamom into the milk, then finish with pineapple and chopped pistachios.

Pineapple, ginger & lime: add about ¼ teaspoon finely grated fresh ginger to the base and finish with extra lime zest. Start small; ginger gets loud quickly.

For a softer, sweeter fruit direction, try mango chia pudding.

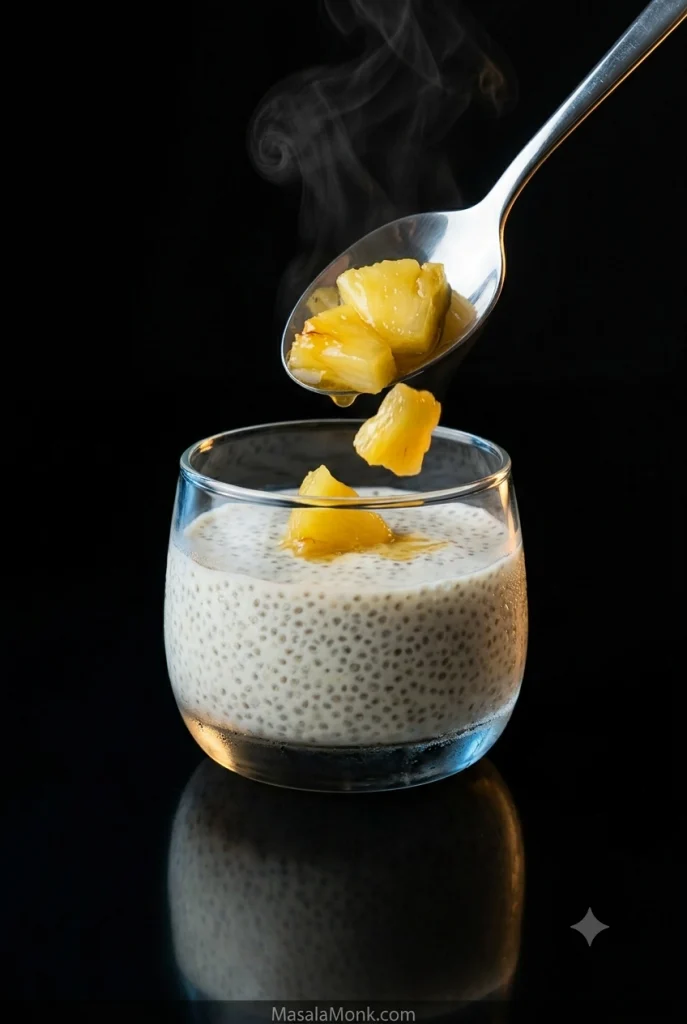
Warm pineapple over cold chia: cook diced pineapple over medium heat for about 5 minutes, until hot, glossy and softened. Add cardamom, ginger or cinnamon, then spoon it over the cold pudding.

Warm glossy pineapple being spooned onto cold chia pudding in a clear glass, with steam rising from the fruit and condensation visible on the chilled glass.
Add the warm pineapple only when you are ready to eat. The fruit stays glossy and aromatic, the chia stays properly cold, and the temperature contrast survives long enough to reach the first spoonful.

A Quick Nutrition Note

Chia contributes dietary fiber, plant protein, unsaturated fats and ALA omega-3 fatty acids. Harvard’s Nutrition Source has a fuller evidence-based overview. The rest of the jar matters too—Greek yogurt, coconut milk, sweeteners, granola and nuts can change the nutritional picture substantially.

Frequently Asked Questions

Can I make pineapple chia pudding overnight?

It works well overnight. Do the second stir, cover and refrigerate; the extra time gives the seeds plenty of time to hydrate.

Can I use pineapple juice instead of milk?

You can. Count pineapple juice as part of the measured liquid: add ¼ cup / 60 ml juice and reduce the milk by about the same amount.

Can I use fresh pineapple with Greek yogurt?

Fresh pineapple is fine for immediate serving. For an overnight yogurt jar, use canned or cooked pineapple, or add uncooked fruit in the morning.

Can I use ground chia seeds?

Yes, but ground chia can turn gummy. For a smoother result, hydrate whole chia first and blend the chilled pudding.

Why didn’t my chia pudding thicken?

Usually it needs more time, extra fruit liquid is involved, or the seeds clumped early. Check the troubleshooting section before adding more chia.

How long does pineapple chia pudding last?

Aim for 3–4 days refrigerated at 40°F / 4°C or below. Keep it covered and add crunchy toppings at serving.

When You’re Ready to Eat

Give the chilled pudding one good stir. Loosen it with a splash of milk if it needs it, then pile on the remaining pineapple, a little lime zest and something crunchy.

The best spoonful has soft, creamy chia, a juicy piece of pineapple and a little lime in the same bite. Cold, bright and ready when you open the fridge—not bad for five minutes the night before.

Did your jar behave differently? Tell us which milk and pineapple you used and how long it chilled; those details usually reveal what happened.

↑ Back to Recipe · ↑ Back to Top

Posted on 6 Comments

6 Bestselling Air Fryers on Amazon India this Season

6 Bestselling Air Fryers on Amazon India this Season

An AI-Powered Research Guide with Amazon’s Official Bestsellers, Full Specs, Deep-Dive Reviews, and a Handy Comparison Table

Looking for a new air fryer and confused by dozens of choices? You’re not alone!
We’ve scoured Amazon’s bestseller lists, official specs, hundreds of user reviews, and expert sources using AI-powered research to bring you the definitive list of the 6 bestselling air fryers in India right now.

Disclaimer: This post is not based on hands-on kitchen testing, but on AI-aggregated research, verified customer feedback, and technical comparisons. All links are affiliate links—your purchase helps us keep sharing practical Indian kitchen advice at no extra cost to you!


Why Trust This List?

  • Ranked & Updated by Amazon’s current bestseller data.
  • Specs & features verified from Amazon, brand sites, and leading review platforms
  • Each product’s full, AI-powered deep-dive review linked
  • Internal links to our detailed, India-specific air fryer reviews on MasalaMonk.com
  • Affiliate links clearly marked for transparency

The Top 6 Bestselling Air Fryers on Amazon India

We’re counting down in reverse order—#6 (bulk batch king) to #1 (current #1 Amazon bestseller).


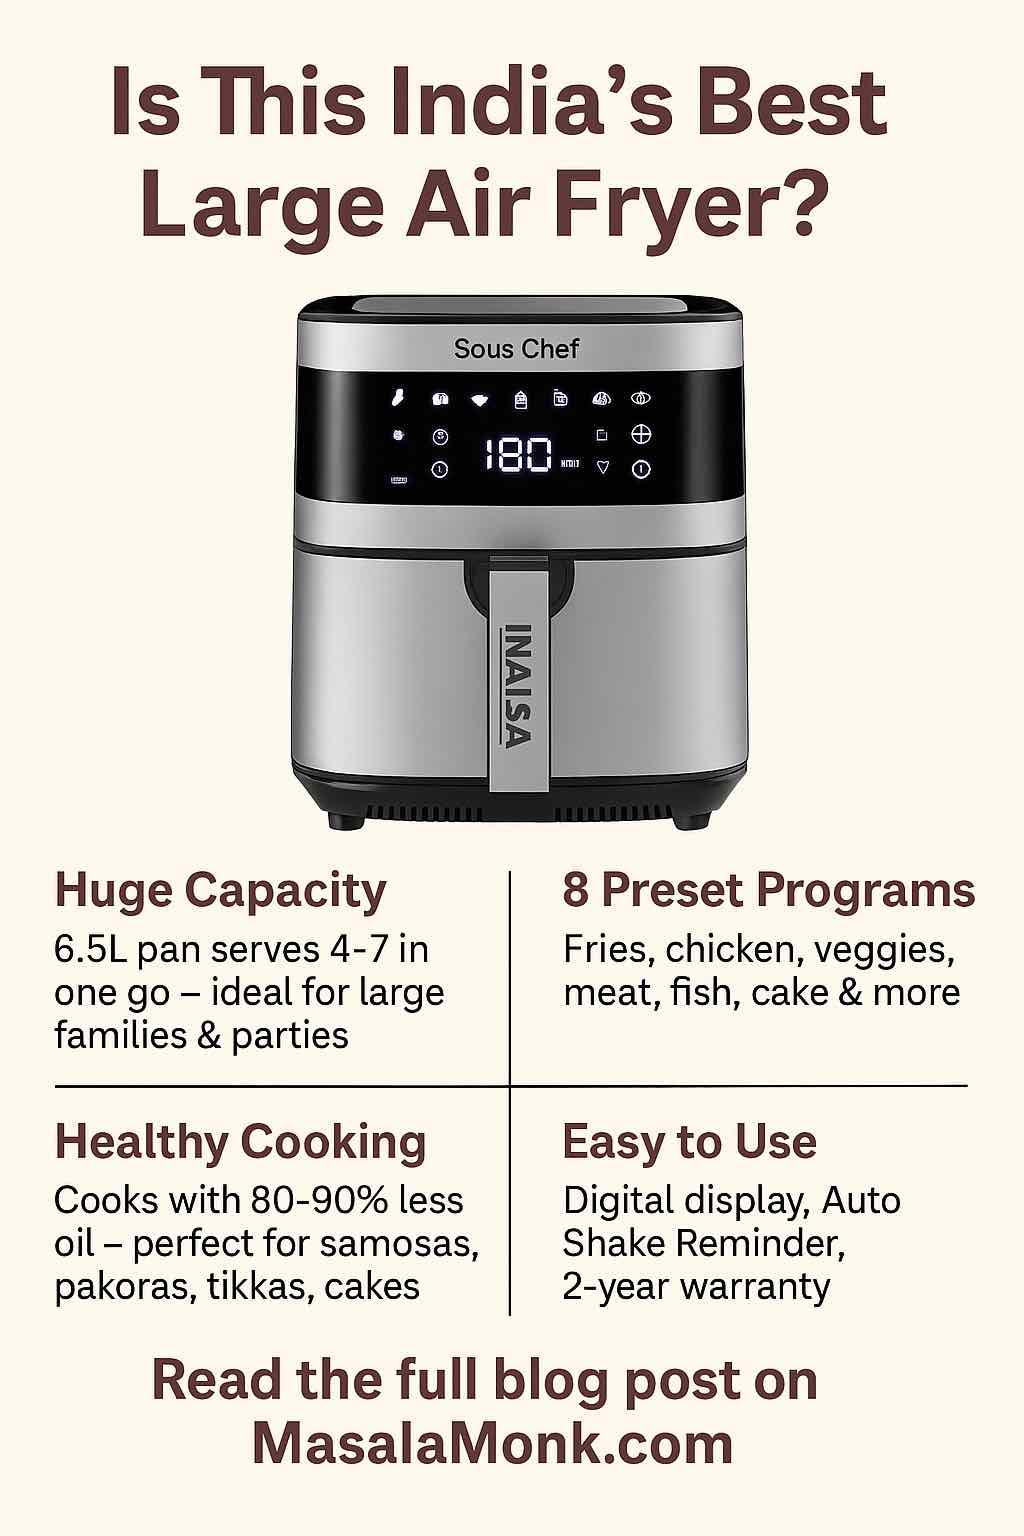
6. INALSA Sous Chef 6.5L Digital Air Fryer – King of Capacity

Full review: Inalsa Sous Chef 6.5L Digital Air Fryer
Check latest price and deals on Amazon

Why it’s a bestseller:
The largest air fryer in this lineup, the INALSA Sous Chef 6.5L Digital Air Fryer is a true batch-cooking beast. Its massive 6.5L pan (5.5L basket), 1650W heating, and digital controls make it perfect for large Indian families, home entertainers, and anyone who wants to cook everything in one go.

Key Features:

  • 6.5L pan / 5.5L basket (feeds 6–7 in one batch!)
  • 8 digital presets including fries, chicken, veggies, cake, fish, sausage, meat
  • Auto shake reminder for even results
  • Smoke vent, overheat protection, cool-touch handle
  • Non-stick basket, dishwasher-safe (but hand-wash is best for longevity)
  • 2-year Inalsa warranty

What users say:
Batch cooks fries, tikkis, and kebabs for big gatherings. The auto shake feature is great for Indian snacks. Easy cleaning. Needs a big countertop. Panel is sensitive to water/oil.

Best for:
Large families, batch cookers, party hosts, meal preppers

👉 Read our in-depth review, with Indian snack tips


5. INALSA 5.5L Digital Air Fryer – Large Family Value

Full review: Inalsa 5.5L Digital Air Fryer
Check latest price and deals on Amazon

Why it’s a bestseller:
The INALSA 5.5L Digital Air Fryer is a staple for big families who want value, size, and convenience. At 5.5L and 1700W, it’s powerful, roomy, and comes with user-friendly digital presets—making healthy snack and meal prep fast and simple.

Key Features:

  • 5.5L non-stick basket (serves 4–6)
  • 1700W rapid heating
  • Digital touchscreen, 8–10 presets
  • Grill rack/skewers in some bundles
  • 2-year warranty

What users say:
Batch cooks for the whole family, fries crisp, easy to clean, best for Indian tikkis, kebabs, and cakes. Takes up space. Non-stick basket needs gentle handling.

Best for:
Medium/large families, batch snackers, grill fans

👉 See our hands-on, AI-researched review


4. Kent 1300W Classic Fryer – Budget-Friendly & Simple

Full review: Kent 1300W Classic Fryer
Check latest price and deals on Amazon

Why it’s a bestseller:
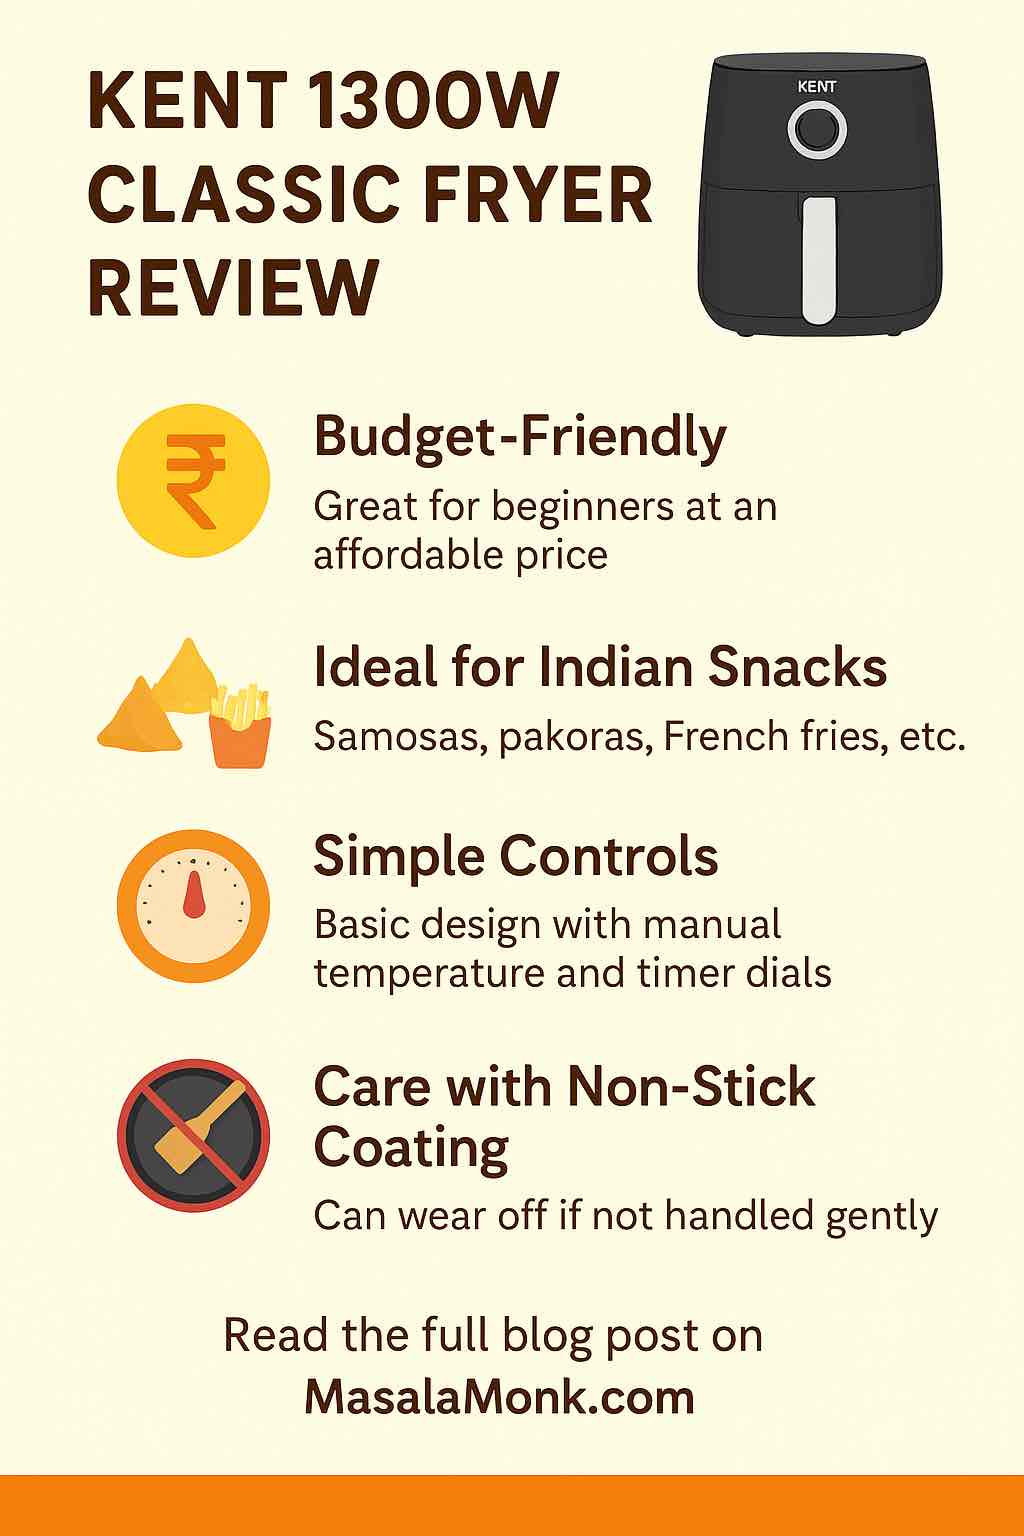
For singles, couples, or those on a budget, the Kent 1300W Classic Fryer is an unbeatable entry-level option. Analog controls, compact build, easy to clean—just set and go!

Key Features:

  • 4.0L capacity (ideal for 2–3)
  • 1300W, analog dials (no touch panel)
  • Simple timer and temp controls
  • Light, portable, fits any kitchen
  • 1-year Kent warranty

What users say:
Affordable, reliable, makes great fries/pakoras, compact size. Not for big batches. Max 30-min timer, basic build. Non-stick needs care.

Best for:
Singles, couples, elders, students, budget seekers

👉 Read the complete review & user tips


3. Philips HD9252/90 Digital Air Fryer – Digital All-Rounder

Full review: Philips HD9252/90 Digital Air Fryer
Check latest price and deals on Amazon

Why it’s a bestseller:
Philips is a leader in air frying, and the HD9252/90 model combines a 4.1L basket, digital touchscreen, rapid air tech, and superb after-sales service for busy Indian kitchens.

Key Features:

  • 4.1L basket (serves 3–5)
  • 1400W, digital controls, 7+ presets
  • Rapid Air technology for even, fast crisping
  • Easy to clean, reliable build
  • 2-year Philips warranty

What users say:
Delivers on crispness, consistency, and reliability. Presets are easy but may need tweaks for Indian recipes. Premium for its size.

Best for:
Families of 3–5, Philips loyalists, digital convenience seekers

👉 Check out the full review & Indian use-cases


2. Philips HD9200/90 Air Fryer – Classic Analog & Trusted

Full review: Philips HD9200/90 Air Fryer
Check latest price and deals on Amazon

Why it’s a bestseller:
If you like it simple, the Philips HD9200/90 Air Fryer offers the same rapid air tech as its digital siblings, but with classic dials—no learning curve for elders or analog lovers.

Key Features:

  • 4.1L basket (serves 2–4)
  • Analog controls, easy timer/temp
  • Sturdy build, rapid air for fast, healthy snacks
  • 2-year warranty

What users say:
Easy, reliable, makes snacks and mains with little oil, trusted Philips quality. No digital presets. Smaller capacity for price.

Best for:
Couples, small families, elders, analog fans

👉 Read our AI-powered, practical review


1. Philips NA231/00 Air Fryer – Amazon’s No.1 Bestseller, 6.2L Basket

Full review: Philips NA231/00 Air Fryer
Check latest price and deals on Amazon

Why it’s a bestseller:
This is Philips’ biggest air fryer yet for India: a massive 6.2L pan (basket), 1700W heating, large window for viewing, digital controls, and rapid air tech. A perfect all-rounder for families that want both big capacity and brand reliability.

Key Features:

  • 6.2L pan, 1700W, digital touchscreen
  • 9 preset programs: fries, chicken, paneer, cake, etc.
  • Transparent window for cooking visibility
  • Easy cleaning, robust Philips build, 2-year warranty
  • Modern design, fits large batches in a relatively compact footprint

What users say:
Cooks for families (4–7) in one go, easy presets, top-notch Philips support. Transparent window is handy for checking food without opening. Premium price, but capacity and results impress.

Best for:
Medium/large families, anyone who wants the newest, most feature-rich Philips

👉 See the full review, tips & Indian recipe advice


Comparison Table: The 6 Bestselling Air Fryers in India (2024, AI-Verified)

RankModel & LinkCapacityWattageControlsPresetsBest ForProsConsLink
1Philips NA231/00 Air Fryer6.2L pan1700WDigitalYes (9)Families (4–7), latest tech loversHuge capacity, viewing window, Philips servicePremium price, takes up spaceCheck latest price and deals
2Philips HD9200/90 Air Fryer4.1L1400WAnalog dialsNoCouples/small families, eldersSimple, reliable, quick crispingNo presets, smaller sizeCheck latest price and deals
3Philips HD9252/90 Digital Air Fryer4.1L1400WDigitalYes3–5 people, digital fansTouchscreen, rapid air, brand valueSmaller batch, costlier per litreCheck latest price and deals
4Kent 1300W Classic Fryer4.0L1300WAnalogNoSingles/couples, small kitchensBudget, compact, easy to useSmall batch, manual timerCheck latest price and deals
5INALSA 5.5L Digital Air Fryer5.5L1700WDigitalYesLarge/batch cookingBig size, fast heating, presetsBulky, plastic buildCheck latest price and deals
6INALSA Sous Chef 6.5L Air Fryer6.5L pan (5.5L basket)1650WDigitalYesParties, huge batchesLargest capacity, auto shakeVery bulky, panel sensitiveCheck latest price and deals

How to Choose? Smart Tips for Indian Kitchens

Always check latest deals on Amazon, compare prices, and read full in-depth reviews linked above before you buy!


Affiliate Disclosure: All Amazon links above are affiliate links. We earn a small commission if you purchase, supporting honest AI-powered kitchen guides at no extra cost to you. This guide is based on deep online research, not hands-on testing.

10 Most Useful FAQs About Air Fryers in India (2024)

1. Which air fryer is best for large Indian families or parties?
The Philips NA231/00 (6.2L) and INALSA Sous Chef (6.5L) offer the largest capacities—perfect for families of 5–7 or entertaining guests. Both can batch-cook fries, samosas, kebabs, and more for everyone in one go.


2. Do all these air fryers work well for Indian snacks like samosas, pakoras, and tikkis?
Yes! All six models reviewed here are used by Indian buyers to make samosas, pakoras, aloo tikki, cutlets, kebabs, and even sweets like cakes. Preheating, shaking midway, and using a light oil spray ensure the best results.


3. What is the difference between digital and analog air fryers?
Digital air fryers (like Philips NA231/00, HD9252/90, INALSA models) offer touch panels, presets, and precise controls. Analog models (Kent Classic, Philips HD9200/90) use simple dials—great for elders or those who dislike touchscreens.


4. Are these air fryers easy to clean?
Yes. All featured models have removable, non-stick baskets that are easy to wash by hand. Most are technically dishwasher-safe, but hand-washing helps preserve the coating for longer.


5. Can I bake cakes, cupcakes, or bread in these air fryers?
Absolutely! Most air fryers in this list support basic baking. Use a cake tin or silicone mould that fits in the basket and follow temperature/time guidelines (lower temp, monitor for browning).


6. Which air fryer is best for small kitchens or single users?
The Kent 1300W Classic and Philips HD9200/90 (4.1L) are compact, easy to store, and ideal for singles, couples, or anyone with limited counter space.


7. Is it safe to cook daily in an air fryer?
Yes. Air fryers use rapid hot air to cook food, drastically reducing oil usage. Use wooden or silicone utensils, avoid metal scrubbers, and clean regularly for best safety and hygiene.


8. What are the most common complaints or drawbacks?
The main issues are: basket coating wearing off (if scrubbed with metal), digital panel sensitivity to wet hands, and bulky models needing extra counter space. Always use soft sponges and dry hands for digital controls.


9. Which air fryer brand has the best after-sales service in India?
Philips has a well-established service network and gets consistently good reviews for support. Inalsa and Kent also offer service, but responses can vary by city/town.


10. Can I use aluminium foil, parchment paper, or accessories inside these air fryers?
Yes, you can use parchment paper or aluminium foil to prevent sticking or catch crumbs—just don’t block air vents. Most models are compatible with cake tins, grill racks, and skewers designed for air fryer use.

Posted on 6 Comments

INALSA Sous Chef 6.5L Digital Air Fryer Review

INALSA Sous Chef 6.5L Digital Air Fryer

Are you tired of making fries and tikkis in two or three rounds just to feed your family? Dreaming of an air fryer that’s actually big enough for everyone at home, but still easy to use? The INALSA Sous Chef 6.5L Digital Air Fryer may be the solution you’ve been hunting for—now one of the most talked-about large-capacity air fryers in India.

Here’s your in-depth, no-fluff guide: real buyer reviews, all the features that matter, what works (and what doesn’t) for Indian kitchens, cleaning and maintenance, and every practical detail you’ll want to know before you buy.


Why Consider the INALSA Sous Chef 6.5L Digital Air Fryer?

Key Specs at a Glance

  • Capacity: 6.5L pan (5.5L basket) – largest in the segment, serves 4–7 in one batch
  • Power: 1650W for fast, even heating and crisping
  • Digital Controls: Touchscreen panel, 8 preset cooking programs, manual adjustment possible
  • Programs: Fries, potatoes, veggies, chicken, sausage, meat, fish, cake (plus manual mode)
  • Auto Shake Reminder: Midway prompt to shake food for even results (rare in this price range)
  • Safety: Smoke vent, cool-touch handle, auto shut-off, overheat protection
  • Basket: Removable, non-stick, “dishwasher safe” (hand washing preferred for long life)
  • Body: Black/silver, stainless-look (but actually robust plastic for light weight)
  • Extras: Recipe booklet, 2-year Inalsa India warranty
  • Approx. Size: 38 × 40.5 × 34.2 cm (be sure to check your counter space!)
  • Weight: About 5.7 kg

Unboxing, Design & Build: First Impressions

Opening up the INALSA Sous Chef 6.5L Digital Air Fryer, you’re struck by its sheer size and presence—this isn’t just a gadget, it’s a centerpiece for your kitchen. The basket is seriously deep and wide, perfect for large Indian families, and the panel feels modern and intuitive.

While it boasts a “stainless-steel” finish, the body is actually plastic (which is common for air fryers at this price and helps keep weight manageable). The handle stays cool even after a long cook, and the basket mechanism feels sturdy and secure.


What Real Indian Buyers Are Saying

The Good

  • Batch Cooking Without Compromise: “We have five at home and this is the first air fryer that lets us do all fries, nuggets, or cutlets in one round! Makes snacks for everyone together. Total time-saver.”
    Amazon Review
  • Digital Convenience + Safety: “Touch panel is clear, presets work well. The auto shake alert is surprisingly helpful—no more half-burnt samosas!”
    Flipkart User
  • Healthy Eating That Actually Feels Easy: “Tandoori chicken, kebabs, cakes, all with 80–90% less oil. My kids use it for fries and even reheating pizza. Cleaning is a breeze too.”
    Amazon Buyer, Mumbai
  • Deep Basket, Fast Heating: “French fries for six in one go, done in 16 minutes flat. And the basket fits easily in my normal sink.”
    YouTube User Review

What Users Warn About

  • It’s BIG—Plan Your Counter: “Definitely check your shelf or counter size, this is not for cramped kitchens. I had to rearrange my appliances!”
    Amazon User
  • Plastic, Not Real Steel: “Looks premium but it’s plastic. Still, it’s light and easy to move, but don’t scrub the outside hard.”
    Amazon Review
  • Panel Needs Dry Hands: “Touch screen sometimes won’t respond if hands are oily or wet, so keep it away from the sink.”
    Flipkart Review
  • Non-stick Basket Care: “Don’t use metal spatulas! Only soft sponges and wooden spoons, otherwise the coating peels after some months.”
    Amazon Review
  • Recipe Booklet Is Basic: “The included recipes are very generic—look up Indian air fryer recipes online for best results.”

Batch Cooking for Indian Families: What Can You Really Make?

Perfect For:

  • Samosa, Pakora, Tikki, Fries:
    Up to 1.2 kg (10–15 pieces) per batch, single-layer for best crispiness, shake when the fryer prompts.
  • Tandoori Chicken, Paneer Tikka, Seekh Kabab:
    Can cook multiple skewers or a whole tray at once. Baste with ghee/oil mid-way for restaurant color.
  • French Fries, Potato Wedges, Cutlets:
    Feeds everyone at once—no more cooking in shifts!
  • Fish Fry, Sausage, Nuggets, Chana, Roasted Peanuts:
    The deep basket makes it easy to toss and shake large batches.
  • Cakes, Cupcakes, Garlic Bread:
    Fits a 6–7 inch cake pan (round or square); great for birthday bakes and Sunday brunch.

Good For:

  • Reheating Roti, Pizza, Rolls:
    Restores crunch, unlike microwaves—no more soggy parathas!

Pro Cooking Tips:

  • Preheat for 2–3 minutes for perfect texture.
  • Toss or baste with a little oil/ghee for best color and authentic flavor.
  • Don’t overload: single layer always crisps better.
  • Flip or shake when prompted—the auto shake alert is genuinely useful for Indian snacks.

Cleaning & Maintenance: What to Expect

  • Basket and pan are removable: Fit most sinks and clean up quickly, especially if you soak them first after sticky snacks.
  • Hand washing is best: Dishwasher safe, but gentle hand washing extends life.
  • Non-stick lasts if you avoid metal utensils and harsh scrubbers.
  • Body can be wiped with a damp cloth—avoid harsh abrasives and never submerge the digital panel.
  • Let everything cool before cleaning.
  • Use parchment or silicone liners for cakes, cheese, or extra-messy foods.

“I just soak the basket 5–10 minutes, wipe with a sponge, and it’s like new. My last Inalsa air fryer lasted over a year this way.”
Amazon Review, Hyderabad


Pros & Cons: Real-World Snapshot

ProsCons
Massive 6.5L pan/5.5L basket—serves 4–7 in one goNeeds significant counter space
Powerful 1650W—quick and even cookingBody is robust plastic, not real steel
Digital panel, 8 presets, and auto shake reminderDigital panel sensitive to wet hands/steam
Healthier snacks & mains, less oil and messBasket coating can peel if handled roughly
Safe: cool handle, smoke vent, auto shut-offIncluded recipe booklet is basic
Quick, easy cleaning—basket fits in normal sinksService can be slower outside big cities
2-year warranty from Inalsa India
Good and Bad of INALSA Sous Chef 6.5L Digital Air Fryer

Who Is the INALSA Sous Chef 6.5L Digital Air Fryer Best For?

  • Large and medium families (4–7 people)
  • Hosts and entertainers who love serving up big platters of snacks
  • Health-conscious cooks who want real air frying for daily meals
  • Anyone tired of batch cooking or crowding small air fryers
  • People who want digital convenience (presets, timer, shake alert)
  • Home bakers who want to make cakes and bakes along with snacks

Not the best for:

  • Single users, couples with very little space
  • Those needing ultra-portable or tiny appliances
  • Kitchens where counter space is already maxed out

Unique Features That Matter

  • Auto Shake Reminder:
    The fryer beeps mid-cycle to remind you to shake or flip food—crucial for even browning of Indian snacks.
  • Large Capacity:
    One of the biggest in India for under ₹8,500—ideal for big families, meal prepping, or get-togethers.
  • Preset Programs:
    Easily choose the right mode for fries, meats, veggies, or cakes—manual override for custom Indian recipes.
  • Safety First:
    Cool handle, auto shut-off, smoke vent—all useful for Indian homes where appliances often run long and kitchens get crowded.

Honest Verdict: Should You Buy It?

The INALSA Sous Chef 6.5L Digital Air Fryer is a true batch-cooking powerhouse. It’s perfect for big Indian families who are tired of cooking in rounds and want to enjoy more healthy, oil-free snacks and meals. It’s also a strong value, often beating Philips and other big names on sheer capacity and digital features at this price point.

A few things to keep in mind:
You need to care for the non-stick basket, reserve enough counter space, and learn a few tricks for Indian recipes (YouTube is your friend). The panel is digital—keep it dry for best results. If you do these, you’ll have one of the best air fryer experiences for Indian kitchens!


Quick Comparison: Why Pick This Over Others?

  • Vs. Philips HD9252/90 (4.1L): Much larger, digital presets, cheaper per litre.
  • Vs. Inalsa 5.5L Digital: Even bigger basket, newer features like auto shake alert.
  • Vs. Kent 4L: Bigger, more modern, digital panel, better for baking and grilling.
  • Vs. Oven-Style Air Fryers: Easier to clean, less complex, heats up faster, but doesn’t fit huge roasts.

Tips to Get the Most Out of Your Air Fryer

  • Always preheat and don’t crowd your basket.
  • Shake or flip snacks at the halfway mark—don’t ignore the alert!
  • Oil spray makes a BIG difference for color and crispness, even with “no oil needed” claims.
  • Use parchment liners for baking or messy snacks—protects the non-stick.
  • Keep the panel dry and away from steam—prolongs life.
  • Explore Indian air fryer recipes online or on YouTube—get creative!

The Bottom Line

The INALSA Sous Chef 6.5L Digital Air Fryer is hands-down the best choice for Indian families who want to batch-cook, bake, grill, and snack without compromise. It’s not just an air fryer—it’s an upgrade for your kitchen and your lifestyle.


Ready to make healthy, crispy snacks for the whole family—in one go?

Buy the INALSA Sous Chef 6.5L Digital Air Fryer on Amazon India →


(Affiliate Disclosure: We may earn a small commission at no extra cost to you if you buy via our link. Your support helps us bring you the most honest, hands-on Indian kitchen reviews!)

Explore More Top Air Fryers for Your Home:


FAQs for INALSA Sous Chef 6.5L Digital Air Fryer

1. What is the actual usable capacity of the INALSA Sous Chef 6.5L Digital Air Fryer?
It features a 6.5-litre pan with a 5.5-litre basket, making it ideal for families of 4–7 or for preparing snacks and mains for parties.


2. What types of Indian dishes can I cook with this air fryer?
You can make samosas, pakoras, paneer tikka, seekh kabab, chicken wings, fries, cutlets, roasted chana, peanuts, cakes, garlic bread, and even reheat rotis and parathas.


3. Does it really save oil?
Yes! Most users report using up to 80–90% less oil than deep frying. A light oil spray is enough for crispy snacks.


4. How does the Auto Shake Reminder work?
The fryer beeps midway through the cooking process to remind you to shake or flip your food, ensuring even browning—especially useful for fries, tikkis, and pakoras.


5. Is the basket dishwasher safe?
Yes, the basket and pan are claimed to be dishwasher safe. However, hand washing with a soft sponge is recommended for longer non-stick life.


6. Does the digital panel work if my hands are wet or oily?
No, for best results use dry hands. The panel is sensitive and may not register wet/oily touches. Keep away from kitchen sinks and steam.


7. How much counter space does it need?
It’s larger than most air fryers—approx. 38 × 40.5 × 34.2 cm. Check your counter before purchase, especially if you have a compact kitchen.


8. Is it good for baking cakes and breads?
Absolutely! The deep basket fits a 6–7 inch cake tin or multiple cupcakes. Use parchment paper or silicone liners for easy removal.


9. What is the warranty and how is service support?
It comes with a 2-year warranty from Inalsa India. Most metro users report good service, but in smaller towns there can be a wait for spare parts.


10. Who is the INALSA Sous Chef 6.5L Digital Air Fryer best for?
It’s perfect for medium and large families, batch cookers, entertainers, and anyone who wants to prepare big portions of healthy, oil-free snacks and meals with digital ease. Not ideal for singles or very small kitchens.

Posted on Leave a comment

KENT 1300W Classic Fryer Review

KENT 1300W CLASSIC FRYER REVIEW

Introduction

Air fryers have changed the way Indians snack and cook, promising less oil, less mess, and faster results. If you’re considering a budget model, the KENT 1300W Classic Fryer (Black) is among the most affordable and widely used in India.
But is it just a “cheap alternative,” or can it handle Indian snacks, masalas, and daily demands? This post goes deep with user experiences, cleaning tips, service realities, performance for desi recipes, and actionable buying advice.


🛒 Quick Specs & What You Get

  • Capacity: 4 litres (serves 2–3 people per batch)
  • Power: 1300W, manual controls for temperature (up to 200°C) and timer (up to 30 min)
  • Controls: Analog rotary dials—no digital/touch screen
  • Basket: Non-stick, removable, fits in most sinks, hand-wash recommended
  • Body: Lightweight plastic (easy for elders, but less “premium” than Philips)
  • Included in the box: Air fryer unit, basket (no baking tray, no recipe book)
  • Warranty: 1 year via Kent customer care (keep invoice)
  • MRP: ₹3,500–₹5,000 (often discounted at Amazon India)

🎁 Unboxing & First Impressions

The KENT 1300W Classic Fryer (Black) arrives in a compact box, well-padded, with simple packaging. The unit itself feels light, the black plastic body is easy to handle, and the dials are clearly marked.
Many users note that there are no extras in the box—you get just the fryer and basket (no grill rack, no extra tray, no recipe booklet), so you’ll want to look up air fryer recipes online.


🏠 Real User Experiences: Who Is Loving This Air Fryer (and Who Isn’t)?

⭐ Why It’s Popular:

  • Low Price, High Value: “Best at this price point—delivers crisp French fries and chicken nuggets. Kids love it. We use it 3–4 times a week.”
    Amazon Review, Chennai
  • Simple, Elder-Friendly Controls: “Bought for my mother—simple dials, no confusing menu. Works great for samosas and pakoras.”
    Amazon Review, Delhi
  • Compact Size: “Fits perfectly in my tiny hostel kitchen. No oil smell, easy to use even for a beginner.”
    Flipkart Buyer, Pune

⚠️ What Users Warn About:

  • Basket Coating Wears if Abused: “Non-stick is good for the first 6 months, then food started sticking. Use only a soft sponge and never metal spoons!”
    Amazon User, Lucknow
  • Build Is Not Heavy-Duty: “Handle became loose after a year, but still works. Not as strong as Philips, but for the price, can’t complain.”
    Flipkart Buyer, Surat
  • Timer Limitations: “Only goes up to 30 minutes—can be limiting for baking or slow-roasting.”
    Amazon Verified, March 2024
  • Kent Service Is Hit-or-Miss: “Kent replaced my basket under warranty but it took almost 3 weeks. Keep your invoice safe!”
    Amazon Review, Kolkata

🍟 Indian Snack Performance: What Works, What Doesn’t

Great For:

  • Samosa & Pakora:
    Up to 6 at a time, crisp with a brush of oil, 12–15 min at 180°C.
  • Frozen Snacks (McCain/ITC Master Chef):
    Evenly cooked in 10–12 min. Preheat for best results.
  • French Fries:
    500–600g batch, single layer for max crispiness.
  • Aloo Tikki & Veg Cutlets:
    Up to 6 in a batch, flip halfway, golden and tasty.
  • Roasted Peanuts/Chana & Papad:
    Peanuts ready in under 8 min (shake twice); papad in 1–2 min—watch closely!

Good, but Some Compromises:

  • Paneer Tikka, Chicken Wings/Nuggets:
    Tastes great, but “char” is lighter vs. higher-wattage fryers. Always flip halfway.
  • Reheating Parathas & Pizza:
    Restores crispness, much better than microwaving.

Not Great For:

  • Large Cakes or Breads:
    No baking rack or big tray. Batch size is small, timer is short.
  • Big-Batch Meal Prep:
    Takes 2–3 rounds for party quantities; best for small families.

🧼 Cleaning & Maintenance: The Real Picture

Easy at first:

  • Basket fits in most sinks, non-stick wipes clean with soft sponge and mild soap.
  • Light and easy to dry.

Long-term tips:

  • NEVER use metal spoons or abrasive scrubbers—will peel non-stick!
  • Use parchment paper or air fryer liners for sticky foods (like cheese, batter).
  • For greasy snacks (tikkis, marinated meats), allow the coil to cool, then gently wipe it with a soft damp cloth to avoid smoke next time.
  • Plastic body can collect oil smudges—wipe regularly to keep it looking fresh.
  • Hand-washing preserves the basket longer than using a dishwasher (which is not officially recommended).

🛠️ Build Quality & Service Realities

  • Plastic Build: Lightweight, easy for elders or students, but less “premium” than pricier brands.
  • Basket: Non-stick works well if you handle gently. A few users report handle loosening or basket wobbling after 8–12 months of daily use.
  • Dials: Simple, but not “smooth” or luxe feeling. Timer bell is loud enough, but there’s no digital beep.
  • Warranty: 1 year, but service experience is variable. Urban users fare better; those in smaller towns sometimes face delays in basket or spare part replacements.
  • Parts: Replacement baskets are available through Kent, but shipping can take 1–3 weeks if not in stock.

📊 Pros & Cons Table

ProsCons
Lowest price among branded air fryers in IndiaPlastic build, not premium feel
Perfect for singles, couples, and eldersTimer maxes out at 30 min
Simple controls, no digital confusionBasket coating peels if handled roughly
No oil smell, less mess than deep fryingManual flip/shake always required
Quick, even heating for most Indian snacksNot suited for big families or parties
Easy to clean (with care)Warranty support can be slow

💡 Expert Tips & Tricks from Indian Users

  • Always preheat 3 min for extra crispiness—especially with fries, tikkis, and nuggets.
  • Don’t overcrowd the basket: Single layer gives best browning and avoids soggy spots.
  • Shake or flip halfway: Set your phone alarm if needed (there’s no beep/pause).
  • A light oil spray/brush really enhances texture and color—much less than deep frying, but just as tasty.
  • Wipe the heating coil after masala or greasy dishes to avoid burnt smells or smoke.
  • Use parchment for cheese or sticky batters: Saves your non-stick and speeds up clean-up.
  • Store your Amazon invoice: If you need service, you’ll need it for a warranty claim.

📝 Who Is This Air Fryer Best For?

  • First-time buyers testing air frying on a budget
  • Students, working couples, small families, or elders who want healthy snacks without deep frying
  • Anyone wanting a simple, analog device with no digital learning curve

Not for:

  • Joint families, heavy bakers, party hosts, or anyone who hates manual effort.

🚚 Service, Warranty & Customer Support

  • Warranty: 1 year (keep your bill safe!).
  • Support: Kent has a toll-free helpline; be ready to email your bill and photo of the issue.
  • Spare baskets/parts: Available, but replacement is slower than Philips (typical wait 1–3 weeks).
  • No walk-in service centers in most small towns.

🔎 How Does It Compare (and Why Buy This Over Others)?

  • Biggest advantage: Price and simplicity. The KENT 1300W Classic Fryer (Black) undercuts Philips and Inalsa by ₹2,000–₹4,000 and does all the basics for Indian snacks.
  • Direct competitors: Inalsa Fry-Light, Glen Air Fryer, Agaro Regal, Havells Prolife Digi.
  • Buy if: You want a starter air fryer and will care for the non-stick basket. For digital presets, big batches, or “set and forget” convenience, you’ll need to pay more.

🛒 Final Verdict: Should You Buy the KENT 1300W Classic Fryer?

If you want a reliable, no-nonsense entry into air frying and are willing to handle the basket with care, the KENT 1300W Classic Fryer (Black) is a best-value buy for Indian kitchens. It won’t win awards for build or features, but for crisp samosas, pakora, fries, and day-to-day snacks with far less oil and mess, it’s genuinely hard to beat at this price.

Recommended for:

  • Students, elders, working couples, anyone starting with air frying
  • Those who want easy Indian snacks, less oil, and less mess
  • Budget-conscious buyers wanting brand warranty

Not for:

  • Anyone expecting Philips build, digital features, or big batch cooking
  • Large families or people wanting to bake cakes/breads regularly

Ready to make your kitchen healthier for less?
Buy the KENT 1300W Classic Fryer (Black) on Amazon India →


(Affiliate Disclosure: If you buy via our link, we may earn a small commission at no extra cost to you. Thank you for supporting honest, real-world Indian kitchen reviews!)

Curious About More Air Fryers? Read These:

FAQs for KENT 1300W Classic Fryer (Black)

1. What is the capacity of the KENT 1300W Classic Fryer (Black)?
It has a 4-litre basket, ideal for preparing snacks or meals for 2–3 people per batch.


2. Can I cook Indian snacks like samosas and pakoras in this air fryer?
Yes, you can make samosas, pakoras, aloo tikki, French fries, roasted peanuts, and more. Just use a light oil spray or brush for maximum crispiness.


3. Does it require preheating before use?
Preheating for 2–3 minutes gives the crispiest results, especially for fries and frozen snacks.


4. Is the basket dishwasher safe?
The basket is removable and easy to clean by hand. Officially, hand-washing is recommended to preserve the non-stick coating. Avoid harsh scrubs.


5. Does the non-stick coating last?
The coating lasts longer if you use only wooden/plastic spatulas and soft sponges. Metal utensils and rough cleaning can cause it to peel over time.


6. Is the KENT 1300W Classic Fryer (Black) good for baking cakes or breads?
It can bake small cakes or muffins, but there are no baking trays or presets. Timer maxes out at 30 min, so large bakes are not ideal.


7. What are the power requirements?
It runs on 1300W and works with a standard Indian 16A plug point. Avoid overloading the power strip.


8. How does the warranty work?
The fryer comes with a 1-year warranty from Kent. Keep your purchase invoice and contact Kent customer care for any claims. Spare baskets can take 1–3 weeks to arrive.


9. Is it suitable for large families or parties?
No, the 4-litre capacity is best for singles, couples, or small families. For bigger gatherings, you’ll need to cook in multiple batches.


10. Is it easy for elders or beginners to use?
Yes! The analog dials are simple and elder-friendly, with no digital screens or complicated settings. Great for anyone new to air frying.