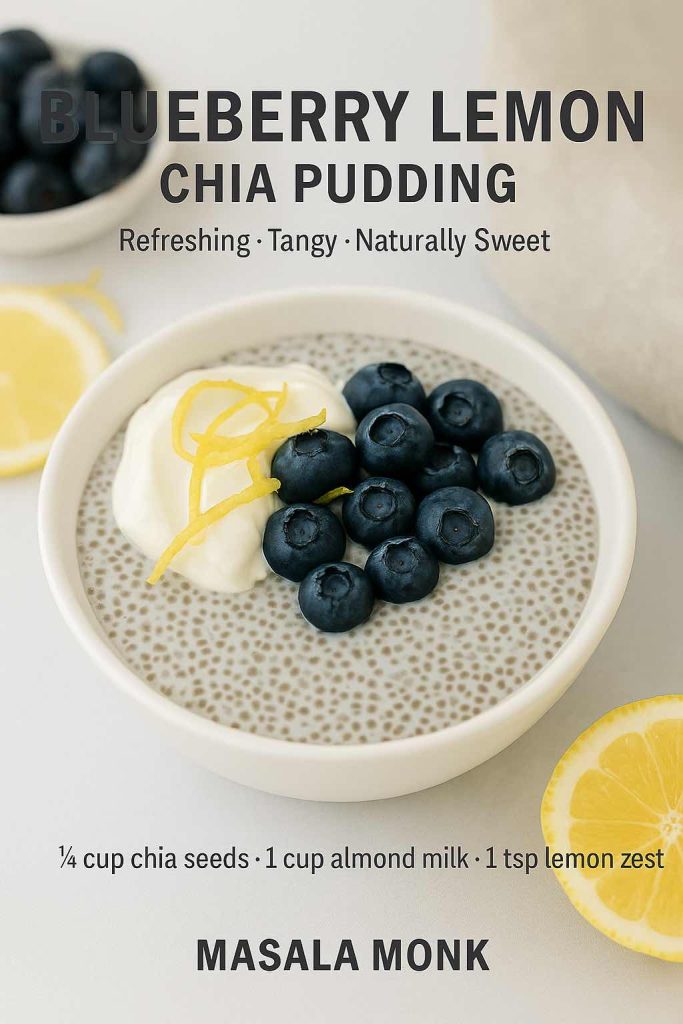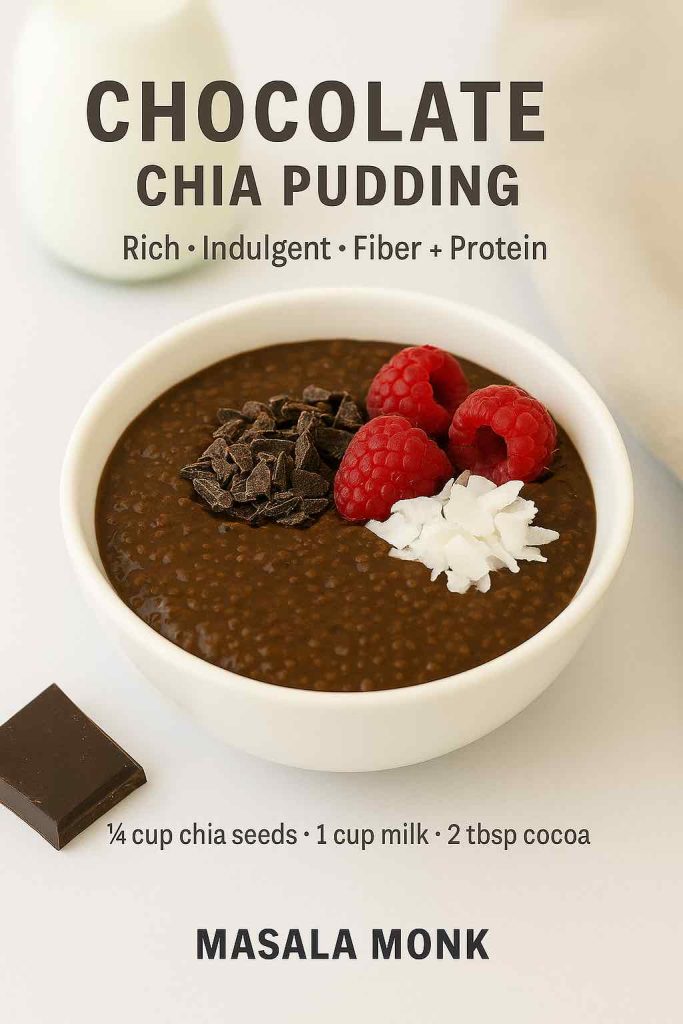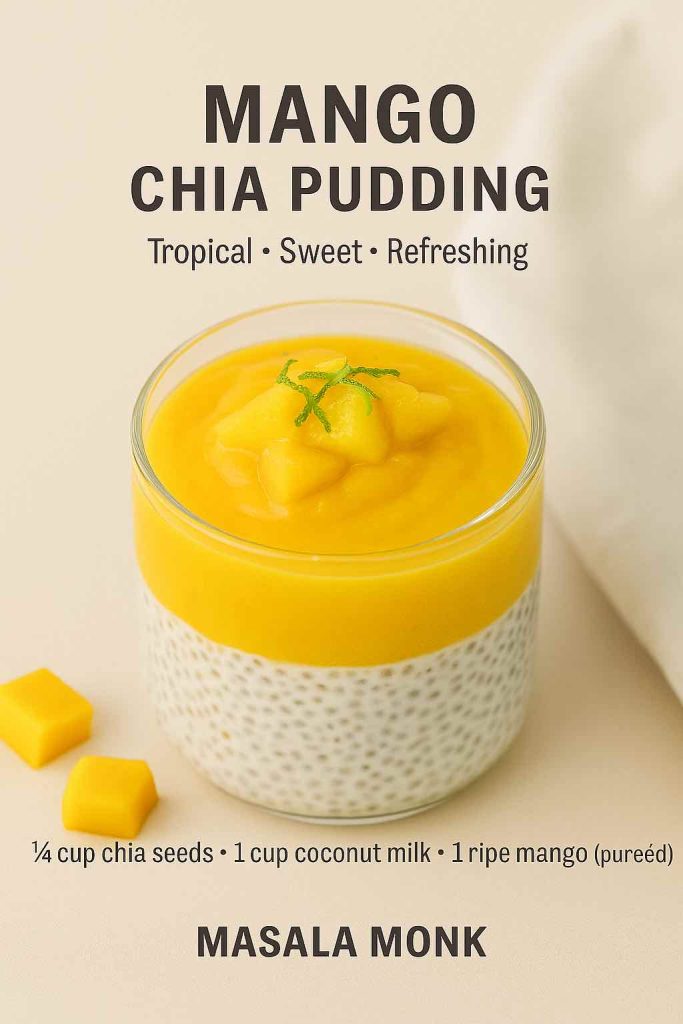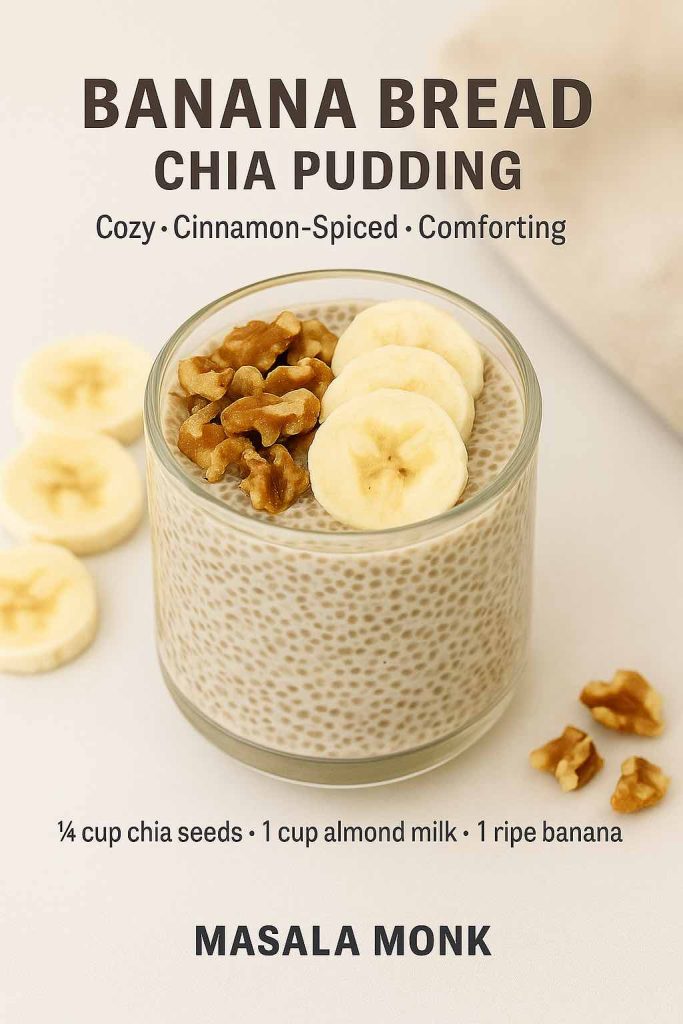
Posted on 14 Comments

7 Pizza Sauce Recipes | Marinara, White Garlic, Alfredo, Buffalo, BBQ, Vodka & Ranch

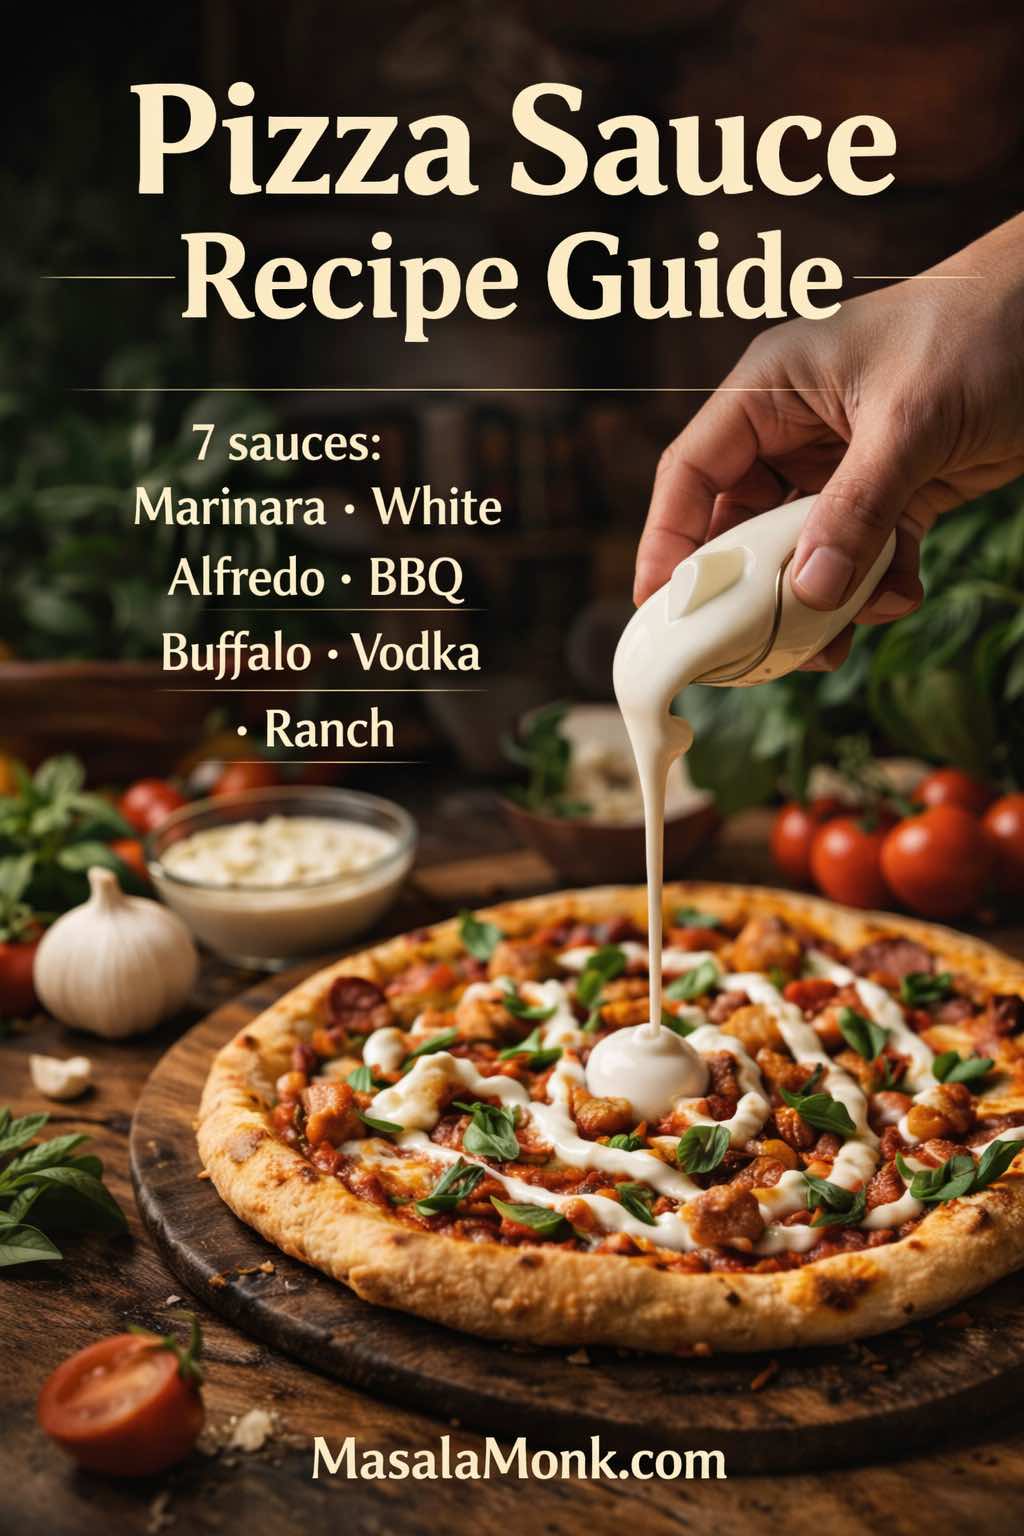
Hand pouring ranch over a buffalo chicken pizza on a wooden board for MasalaMonk’s pizza sauce recipe guide featuring 7 sauces.

If you’ve ever looked up a pizza sauce recipe and somehow ended up with a dozen tabs open, you already know what’s going on: pizza night isn’t one craving, it’s several. One person wants marinara pizza that tastes bright and classic. Someone else is hoping for a white base pizza with a creamy, garlicky bite. Meanwhile, another person is basically chanting “buffalo sauce on pizza” and refusing to negotiate unless pizza ranch dressing is on the table.

So, rather than forcing everyone into a single sauce choice, this post gives you a practical lineup of seven sauces that cover the major moods—red, white, rich, spicy, smoky, creamy-tomato, and tangy-cool. Each pizza sauce recipe is written to work in a hot oven (so your crust stays crisp), and each one includes the small decisions that make a big difference: whether it should be a base, a swirl, or a finish, plus the toppings that actually make sense with it.

If you like a lighter foundation for your pizza nights, you can also borrow ideas from MasalaMonk’s Satvic pizza approach. On the other hand, if you want full comfort-mode slices, you’re still in the right place—because these sauces are built to taste bold even under cheese.


The pizza sauce recipe basics: thickness, layering, timing

A sauce can taste perfect in a spoon and still fail on pizza. However, that usually isn’t because the recipe is “bad.” More often, it’s because pizza cooking is unforgiving: high heat, dry air, and dough that turns steamy if the sauce is too loose.

So before you pick your favorite pizza sauce recipe below, keep these three rules in mind. They’ll protect your crust, sharpen your flavor, and make the whole night feel smoother.
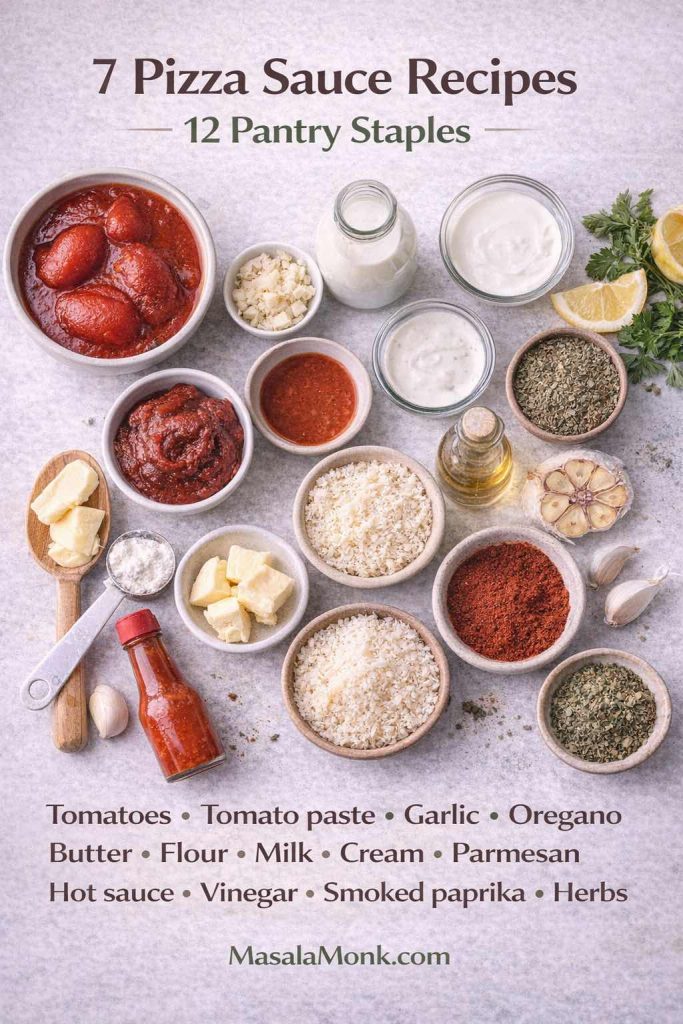
Top-down flatlay of ingredients used across 7 pizza sauce recipes, including tomatoes, tomato paste, garlic, oregano, butter, flour, milk, cream, parmesan, hot sauce, vinegar, and smoked paprika.
With a handful of pantry staples—tomatoes, tomato paste, dairy basics, and a few bold seasonings—you can make seven distinct pizza sauce recipes that cover red, white, creamy, spicy, and smoky styles.

1) Make it thicker than a pasta sauce

Pasta sauces can be a little loose because pasta carries them. In contrast, pizza sauce sits on top of dough and has to behave under heat. Therefore, if your sauce pours like soup, reduce it longer. When the sauce coats a spoon and slowly slides off, you’re in the right range.

If you’re starting from fresh tomatoes, MasalaMonk’s guide on tomato sauce from fresh tomatoes is useful, especially for learning how reduction changes texture.
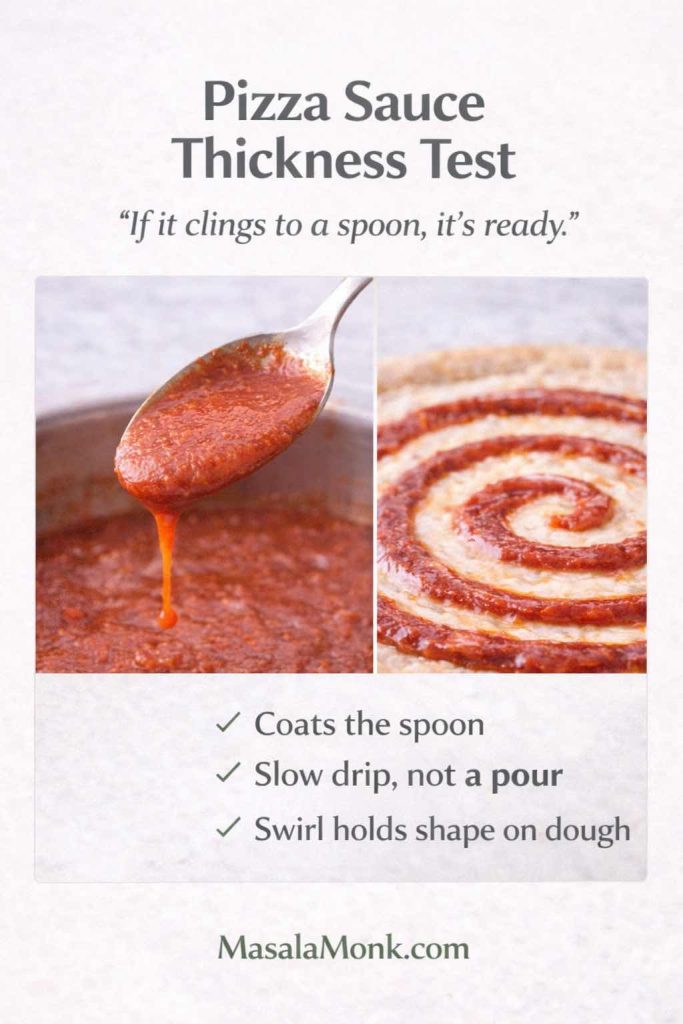
Pizza sauce thickness test infographic showing sauce clinging to a spoon with a slow drip and a swirl holding shape on pizza dough, with quick visual cues.
If your sauce coats the spoon and drips slowly, it’s pizza-ready—thicker sauce means a crisp center and better flavor in every slice.

2) Decide: base, swirl, or finisher

This is where pizza starts tasting like you planned it.

  • Base sauce goes under cheese (marinara, white pizza sauce, Alfredo sauce, barbecue pizza sauce, pizza vodka sauce).
  • Swirl sauce goes lightly on top (buffalo sauce on pizza works best like this; vodka and BBQ can, too).
  • Finisher goes on after baking (pizza ranch dressing is the classic example).

Because of that simple choice, you stop oversaucing by default, and your crust stops turning soggy.
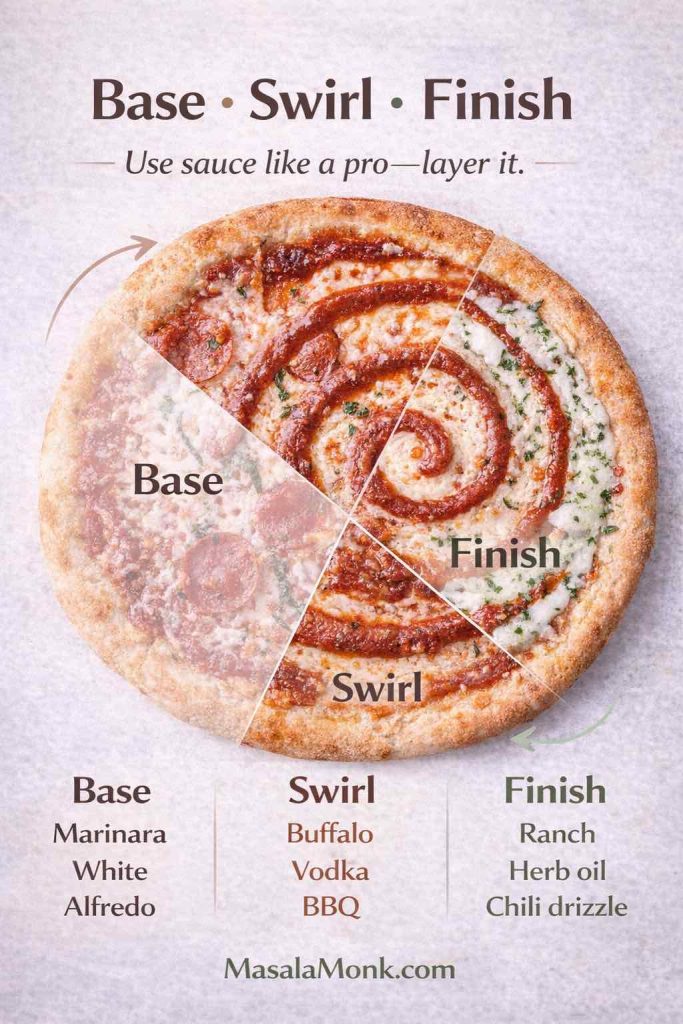
Infographic showing how to layer pizza sauces using base, swirl, and finish, with examples like marinara and white sauce for the base, buffalo and BBQ for swirls, and ranch as a finishing drizzle.
Layer your sauces for better flavor and texture: start with a base sauce, add a bold swirl for impact, then finish with a cool drizzle like ranch after baking.

3) Use less than your instincts suggest

Most home pizzas go wrong in the middle because there’s too much moisture. Instead of spreading a thick layer edge-to-edge, start modestly, then add extra flavor as a swirl or drizzle later. As a result, your pizza slices hold together and taste cleaner.
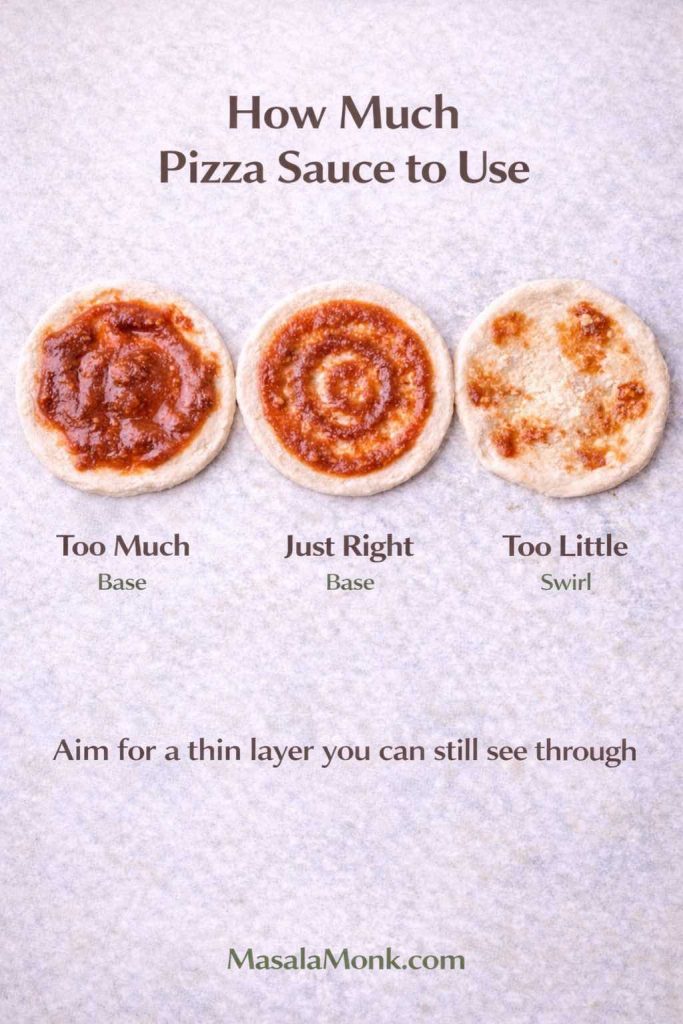
Infographic showing how much pizza sauce to use on dough, comparing too much sauce, a just-right thin layer, and too little sauce, with a tip to aim for a layer you can still see through.
The best pizza sauce layer is thin enough to see the dough through it—too much sauce can make the center soggy, while too little leaves dry bites.

A quick safety note on leftovers

If you’re making sauce ahead, you’ll want to store it safely. For reliable refrigerator and freezer guidance, the USDA’s Leftovers and Food Safety page and FoodSafety.gov’s Cold Food Storage Chart are good references.

And if you want a dependable dough to carry all of these sauces, King Arthur Baking’s Pizza Crust Recipe is straightforward and reliable.

Now, with that framework set, let’s get into the seven sauces—starting with the red classic.

Also Read: Negroni Recipe: Classic Cocktail & Its Variation Drinks


1) Marinara sauce recipe for pizza (marinara pizza / pizza marinara)

When people say “marinara pizza,” they usually mean a tomato base that tastes bright, garlicky, and clean—not heavy, not sweet, and not overloaded with spices. In other words, this is the pizza red sauce lane in its simplest form.

If you want a deeper companion version, MasalaMonk’s dedicated marinara sauce recipe is worth bookmarking. Additionally, Serious Eats has a solid technique reference for a classic marinara-style sauce: Serious Eats marinara.

This pizza sauce recipe, however, is tuned specifically for pizza: thick enough to cling, balanced enough to taste vivid under cheese.
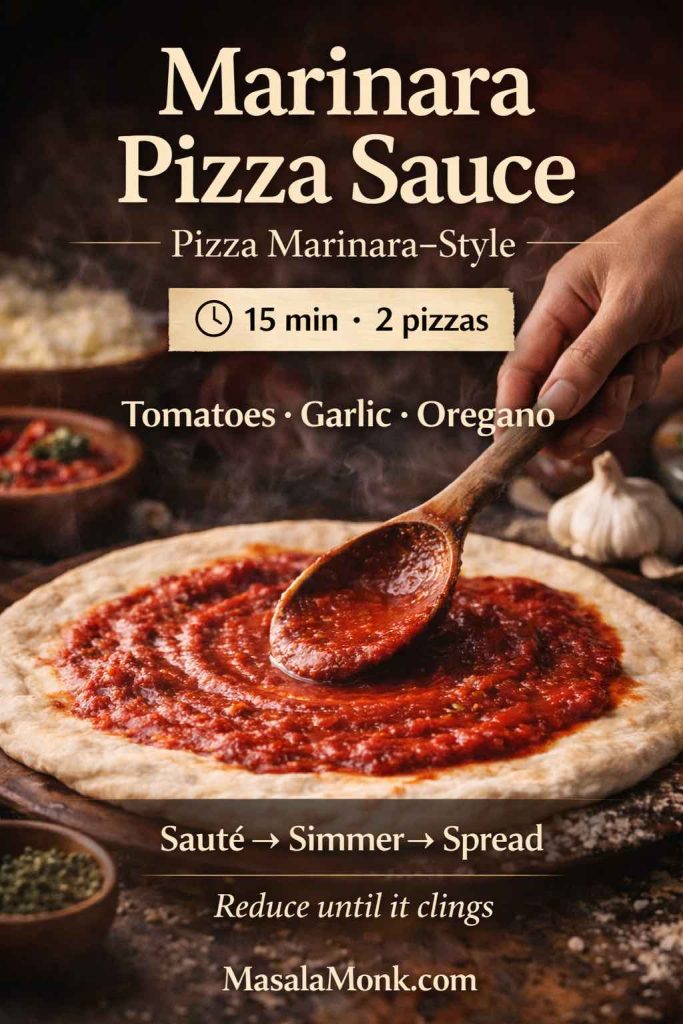
Marinara pizza sauce recipe card showing sauce being spread on pizza dough with quick steps (sauté, simmer, spread) and key ingredients.
A classic marinara pizza sauce in its simplest form—reduce it until it clings to a spoon, then spread a thin layer for a crisp, non-soggy base.

Ingredients for marinara pizza sauce recipe

  • 1 tbsp olive oil
  • 1 medium onion, finely chopped (optional, but helpful for body)
  • 4–6 garlic cloves, finely chopped or grated
  • 1 can (400g) crushed tomatoes (or blended whole peeled tomatoes)
  • 1 tsp salt (start here; adjust later)
  • ½ tsp dried oregano
  • ½ tsp dried basil (or fresh basil at the end)
  • Pinch chilli flakes (optional)
  • ½ tsp sugar (optional, only if your tomatoes are sharp)

Method

  1. Warm olive oil over medium heat. If using onion, add it first with a pinch of salt. Then cook until soft and glossy, about 6–8 minutes.
  2. Add garlic and stir for 30–45 seconds. You want fragrance, not browning.
  3. Add tomatoes, salt, oregano, basil, and chilli flakes if you like.
  4. Bring to a gentle simmer and cook uncovered until thickened, usually 12–18 minutes.
  5. Taste and adjust. If it feels sharp, add a pinch of sugar; if it tastes flat, add salt gradually.

If you like comparing different classic approaches, Ooni’s Classic Pizza Sauce is another good reference point.

How to use it for pizza marinara

Spread a thin layer, then add mozzarella and minimal toppings. After baking, finish with fresh basil if you have it. That last touch makes pizza marinara feel brighter immediately.

Toppings that work especially well

Because marinara sauce for pizza is bright, it pairs beautifully with:

  • mushrooms, olives, roasted bell peppers
  • onions, jalapeños, sweet corn
  • chicken, paneer, or tofu

Make-ahead and storage

Marinara thickens further as it cools, which is ideal for pizza sauce. So, you can cook it earlier in the day, chill it, and spread it easily at night.

Quick fixes

  • If it’s watery, simmer longer or whisk in a spoon of tomato paste.
  • If it’s too acidic, add a pinch of sugar or cook onions longer next time.
  • If it tastes dull, add salt in small increments, then reassess.

This is one of the most useful “base” answers to the general pizza sauce query, and it’s the simplest pizza sauce recipe to master first.

Also Read: Classic Deviled Eggs (Easy) + 8 Flavorful Variations


2) Pizza sauce from tomato paste (fast pantry pizza sauce recipe)

Sometimes you don’t want to open a can of tomatoes. Sometimes you don’t want to simmer anything. You just want pizza—fast. That’s exactly where pizza sauce from tomato paste shines.

Because tomato paste is concentrated, this sauce tastes bold even with lots of cheese. Additionally, it starts thick, which means it’s naturally pizza-friendly. So, as a weeknight shortcut, this pizza sauce recipe is hard to beat.
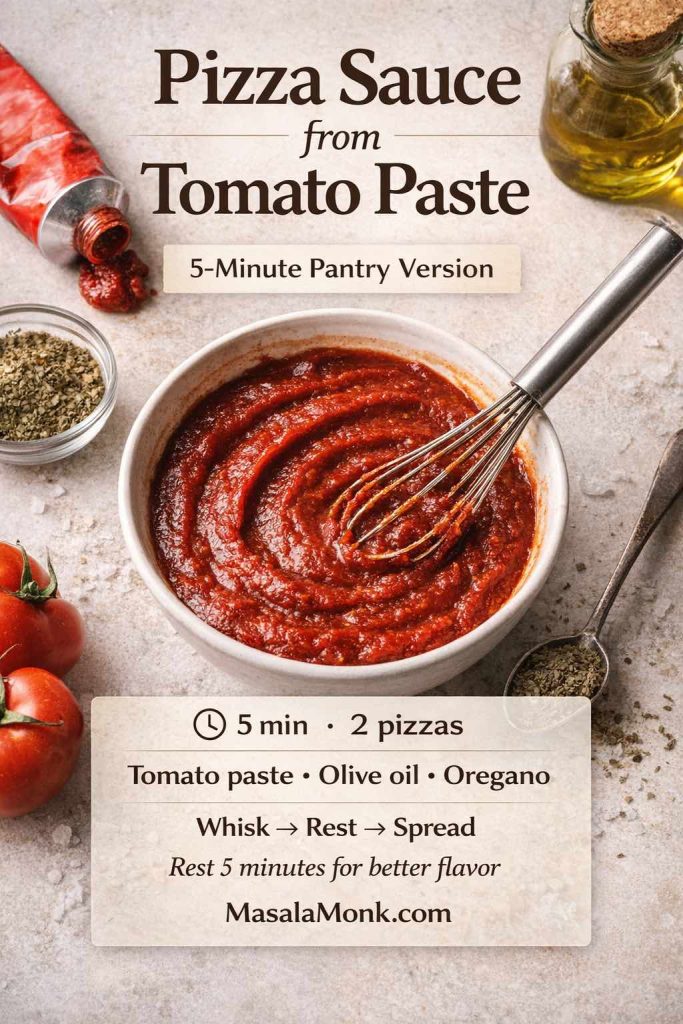
Recipe card showing pizza sauce from tomato paste in a bowl with a whisk, plus quick steps (whisk, rest, spread) and pantry ingredients.
Short on time? This tomato paste pizza sauce is ready in 5 minutes—rest it briefly so the herbs bloom, then spread a thin layer for a bold, crisp base.

Ingredients

  • 6 tbsp tomato paste
  • 6–10 tbsp warm water (adjust for thickness)
  • 1–2 tbsp olive oil
  • 1 tsp dried oregano
  • ½ tsp garlic powder (or 1 small grated garlic clove)
  • ¾ tsp salt (adjust later)
  • Pinch black pepper
  • Pinch chilli flakes (optional)
  • Optional: a squeeze of lemon or a tiny pinch of sugar (choose one only if needed)

Method

  1. Whisk tomato paste and warm water until smooth.
  2. Stir in olive oil, oregano, garlic, salt, pepper, and chilli flakes if using.
  3. Let it sit 5 minutes so the herbs hydrate and the flavor rounds out.

Two easy upgrades (if you have time)

  • Warm it in a small pan with a drizzle of olive oil for 2–3 minutes; it will taste richer.
  • Add a spoon of finely grated onion; it softens the sharp edge quickly.

How to use it

Spread a thin layer as your base. Then add cheese and toppings. Because it’s concentrated, you don’t need much.

Best toppings for this style

This sauce loves bold flavors:

  • spicy toppings (jalapeños, chilli flakes, hot chicken)
  • smoky toppings (roasted peppers, tandoori-style pieces)
  • mixed cheeses (mozzarella plus something sharper)

When you want variety without extra work, pairing this with a white sauce pizza in the same night is a great move.

Also Read: Baked Jalapeño Poppers (Oven) — Time, Temp & Bacon Tips


3) White pizza sauce recipe (white sauce in pizza / white garlic pizza sauce / white base pizza)

White sauce in pizza isn’t just “cream on bread.” A proper white pizza sauce has structure, seasoning, and enough thickness to hold up under cheese.

The classic foundation is béchamel: butter, flour, milk. From there, turning it into white garlic pizza sauce is easy. If you want a clear baseline, MasalaMonk’s béchamel guide is helpful. Likewise, Serious Eats has a detailed method: béchamel / white sauce technique.

This pizza sauce recipe focuses on a white base that tastes garlicky and cozy, not bland.
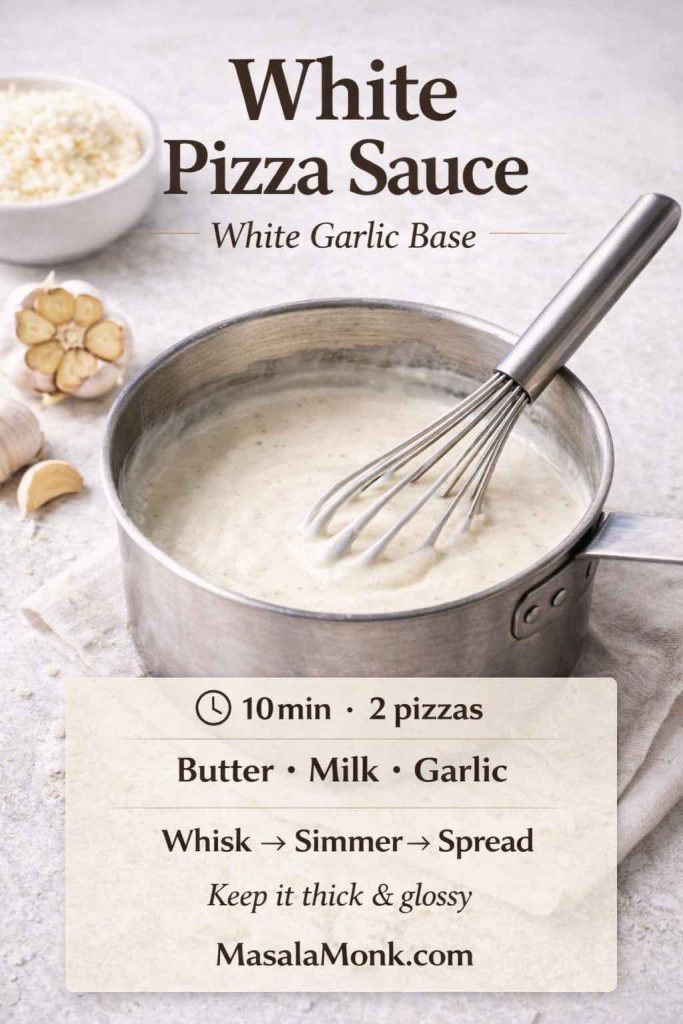
White pizza sauce recipe card showing creamy white garlic sauce being whisked in a saucepan with quick steps (whisk, simmer, spread) and key ingredients.
White pizza sauce works best when it’s thick and glossy—whisk it smooth, simmer briefly, then spread a thin layer for a rich white base pizza that won’t turn watery.

Ingredients for White pizza sauce recipe

  • 2 tbsp butter
  • 2 tbsp all-purpose flour
  • 1½ cups milk (warm if possible)
  • 3–5 garlic cloves, grated (depending on preference)
  • ½ tsp salt (start light)
  • ¼–½ tsp black pepper
  • Pinch nutmeg (optional, but excellent)
  • Optional: 2–3 tbsp grated cheese (parmesan, mozzarella, or both)

Method

  1. Melt butter over medium heat.
  2. Add flour and whisk constantly for 1–2 minutes, until it smells lightly nutty.
  3. Add milk gradually while whisking. At first it may clump; nevertheless, keep whisking and it will smooth out.
  4. Simmer gently until thick, usually 3–6 minutes.
  5. Add garlic, salt, pepper, and nutmeg if using.
  6. If adding cheese, stir it in off heat to keep the sauce smooth.

How to use it on a white base pizza

Spread a thin layer—less than you’d use for marinara. Then build toppings that add contrast.

Toppings that make white pizza sauce recipe shine

  • mushrooms + caramelized onions
  • spinach + corn
  • roasted bell peppers + olives
  • chicken, paneer, or tofu

If you want plant-forward topping inspiration that fits a white base pizza, MasalaMonk’s tofu Italian meal prep ideas includes concepts that adapt nicely.

Make-ahead notes

White sauce thickens a lot in the fridge. So, when reheating, warm gently and loosen with a spoon of milk. Avoid aggressive boiling; otherwise, it can split.

Quick fixes

  • Too thick? Add warm milk, a tablespoon at a time.
  • Too bland? Add salt gradually, then recheck.
  • Too heavy? Use less sauce and finish with something bright (like a squeeze of lemon after baking).

This is the pizza sauce recipe that usually convinces people that white sauce belongs on pizza.

Also Read: Peanut Butter Cookies (Classic Recipe & 3 Variations)


4) Alfredo sauce pizza: pizza sauce recipe for a creamy base

Alfredo sauce pizza is its own craving. It’s richer than white sauce, more buttery, and more cheese-forward. At the same time, Alfredo can separate if overheated or handled roughly. Therefore, the trick is gentle heat and careful mixing.

For Alfredo variations and styles, MasalaMonk has two useful reads: Classic vs Authentic Alfredo and Alfredo Pasta Reinvented: Indian-inspired twists.

This pizza sauce recipe gives you a pizza-friendly Alfredo: smooth, rich, and spreadable.
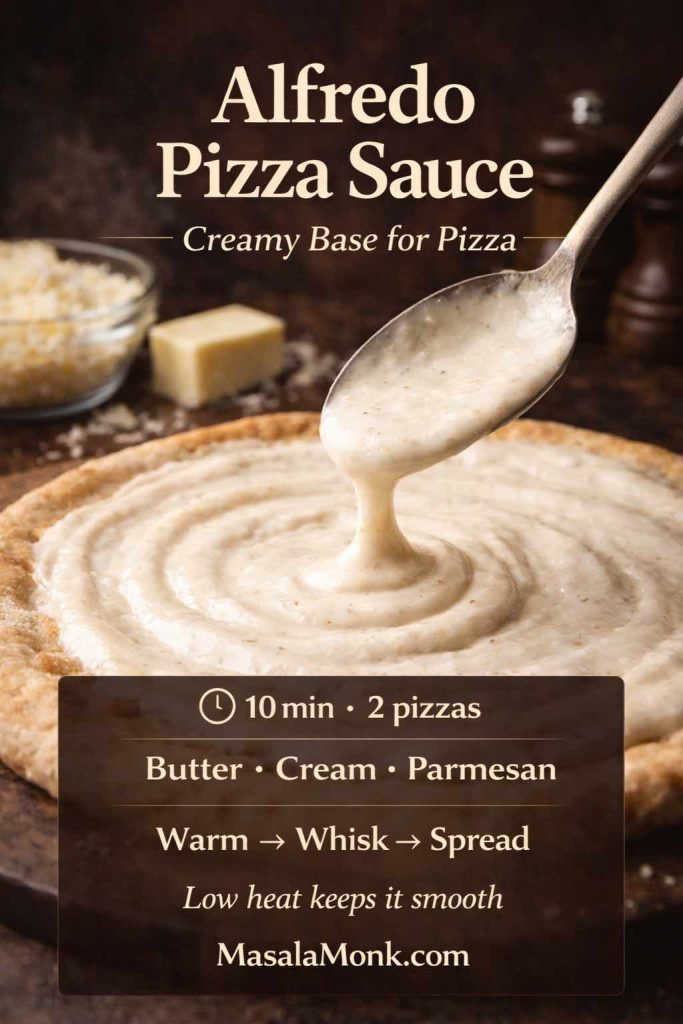
Alfredo pizza sauce recipe card showing creamy Alfredo being spooned onto pizza dough with quick steps, time, yield, and key ingredients (butter, cream, parmesan).
For Alfredo sauce pizza, keep the heat low and spread a thin layer—this keeps the sauce smooth and creamy instead of separating under high oven heat.

Ingredients for Alfredo pizza sauce recipe

  • 3 tbsp butter
  • 1 cup cream (or half-and-half for lighter)
  • ¾ cup finely grated parmesan (or parmesan + a little mozzarella)
  • Black pepper to taste
  • Optional: 1 small garlic clove, grated
  • Salt only after tasting

Method

  1. Melt butter on low heat.
  2. Add garlic if using and stir briefly.
  3. Warm the cream gently—avoid a hard boil.
  4. Lower heat further, then whisk in cheese gradually until smooth.
  5. Add pepper, taste, and add salt only if needed.

How to use Alfredo sauce on pizza

Spread lightly as a base. Then, instead of piling on more rich items, add toppings that bring contrast: greens, roasted vegetables, or something spicy.

Best toppings for Alfredo sauce pizza

  • spinach + mushroom
  • chicken + corn
  • paneer tikka-style topping (great Indo-Italian vibe)

Make-ahead notes

Alfredo is best fresh. Still, if you store it, reheat gently with a splash of cream or milk. Stir continuously, and keep the heat low.

Quick fixes

  • Grainy texture usually means the heat was too high. Next time, lower heat and add cheese slowly.
  • Oily separation often comes from overheating or too much sauce on the pizza. Use a thinner layer.

This is a pizza sauce recipe that feels restaurant-like without requiring restaurant equipment.

Also Read: Oat Bars: The Perfect Snack or Breakfast, Tastier than Candy, No Sugar, No Baking, Ready in 5 Minutes!


5) Buffalo sauce on pizza: pizza sauce recipe used as a swirl

Buffalo sauce on pizza can be incredible. However, if you spread it thick like marinara, you’ll usually end up with a damp center and harsh acidity. So, the smartest approach is to treat buffalo as a swirl or finisher.

If you want to explore hot sauce ideas beyond buffalo, MasalaMonk’s pepper sauce guide is a great rabbit hole. For classic buffalo sauce logic (hot sauce + butter), Serious Eats’ wing technique is a useful reference: buffalo wings technique.

This pizza sauce recipe is intentionally simple so it tastes like true buffalo.
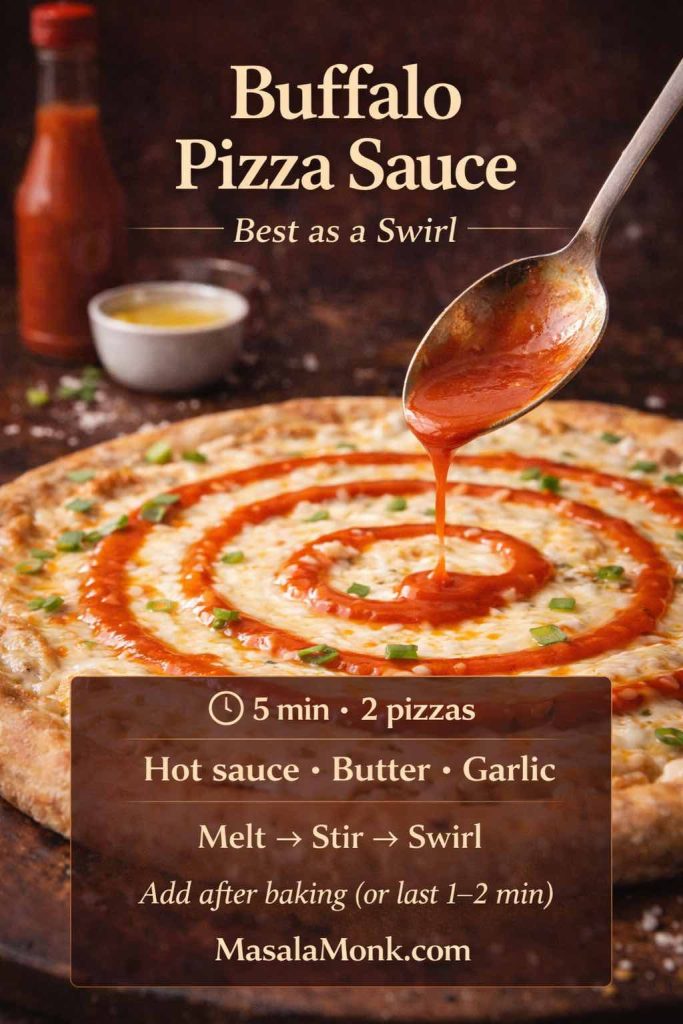
Buffalo pizza sauce recipe card showing buffalo sauce swirled over a cheese pizza with quick steps (melt, stir, swirl) and ingredients (hot sauce, butter, garlic).
Buffalo sauce on pizza works best as a swirl—add it after baking (or in the last minute) so the flavor stays bright and the crust doesn’t turn soggy.

Ingredients

  • ⅓ cup hot sauce
  • 3 tbsp butter
  • ½ tsp garlic powder (optional)
  • Optional: tiny drizzle of honey (only if you want a sweet edge)

Method

  1. Melt butter over low heat.
  2. Stir in hot sauce.
  3. Add garlic powder if using.
  4. Taste and adjust.

Two ways to use buffalo sauce on pizza

Swirl method (recommended):
Bake the pizza with a base sauce underneath (marinara, white sauce, or Alfredo). Then, right at the end, swirl buffalo sauce over the top. As a result, the flavor stays bold and the crust stays crisp.

Reduced base method:
If you want pizza with buffalo sauce as the base, simmer it for 2–3 minutes to thicken slightly, then spread very thinly.

Toppings that match pizza with buffalo sauce

  • shredded chicken (or crispy chicken)
  • onions, jalapeños
  • mozzarella + cheddar blend
  • ranch drizzle after baking

If you want the whole table to lean into the buffalo theme, MasalaMonk’s buffalo chicken dip is a natural side.

Also, because buffalo pairs beautifully with wings, MasalaMonk’s air fryer chicken wings can turn pizza night into a full-on party spread.

This is one of the most high-impact sauces in the lineup, and it’s a pizza sauce recipe that rewards restraint.

Also Read: Potato Salad Recipe: Classic, Russian, German, Vegan & More


6) BBQ pizza sauce recipe (bbq pizza sauce / barbecue pizza sauce / barbeque pizza)

Barbeque pizza is a crowd-pleaser, yet it needs balance. Many BBQ sauces are sweet, and sweetness can flatten under cheese. Therefore, the best bbq pizza sauce is smoky, thick, and slightly sharp so it stays interesting.

If you want a classic external baseline for simmer-and-thicken, BBC Good Food’s barbecue sauce recipe is a solid reference.

This pizza sauce recipe is tuned specifically for pizza: thicker and more “clingy” than a dipping BBQ sauce.
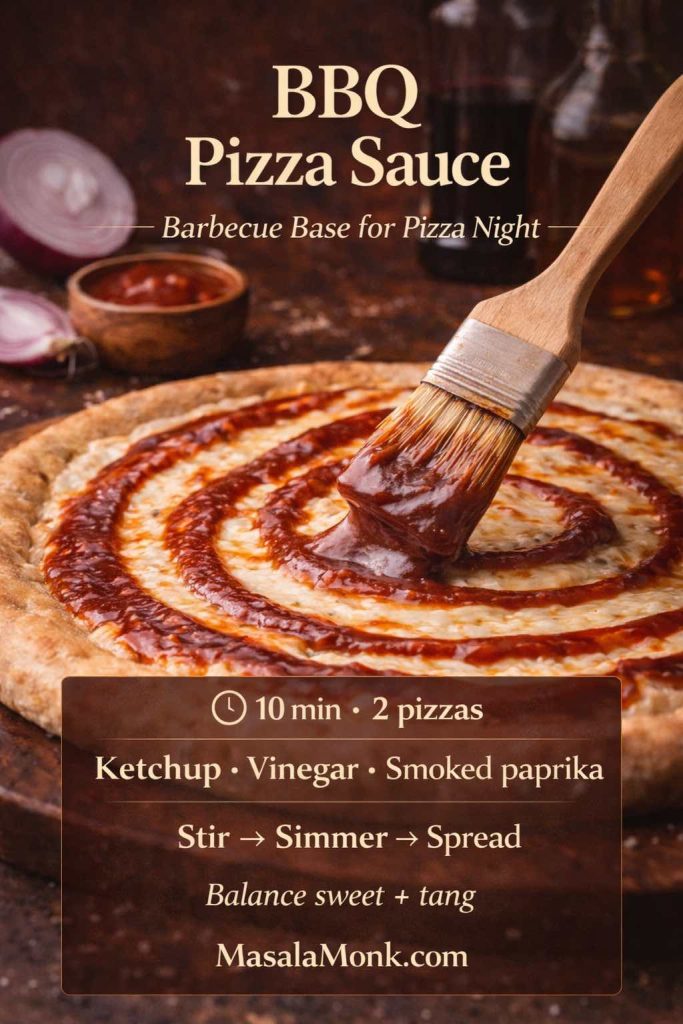
BBQ pizza sauce recipe card showing thick barbecue sauce being brushed in a swirl on pizza dough, with quick steps (stir, simmer, spread) and key ingredients.
A good BBQ pizza sauce should be thick and glossy—simmer it briefly, then spread a light layer so the crust stays crisp and the smoky-sweet flavor doesn’t overwhelm.

Ingredients for BBQ pizza sauce recipe

  • ¾ cup ketchup (or passata + extra sweetener)
  • 2 tbsp vinegar
  • 2 tbsp brown sugar or jaggery (adjust to taste)
  • 1 tbsp soy sauce
  • 1 tsp smoked paprika (or paprika + pinch cumin)
  • 1 garlic clove, grated
  • Optional: chilli flakes or hot sauce

Method

  1. Combine everything in a small pan.
  2. Simmer 8–12 minutes until glossy and thicker.
  3. Cool slightly; it thickens more as it rests.

How to use barbecue pizza sauce

Use a thin layer as a base. Then add toppings that cut sweetness: onions, jalapeños, pickled elements, or even a squeeze of lime after baking.

Best toppings for barbeque pizza

  • chicken, paneer, or tofu
  • onions (fresh or caramelized)
  • bell peppers
  • mozzarella + a sharper cheese

If you want a vegetable topping prep that works well here, MasalaMonk’s mushroom and zucchini stir fry can be adapted into a drier topping (cook off moisture, then scatter).

This pizza sauce recipe is also great for “mixed crowd” nights because you can keep it mild and still flavorful.

Also Read: Homemade Hot Chocolate with Cocoa Powder Recipe


7) Pizza vodka sauce recipe (pizza vodka sauce / vodka pizza / pizza with vodka sauce)

Pizza vodka sauce sits between marinara and Alfredo: it has tomato depth, but it’s also creamy and a little luxe. That’s why vodka pizza has become such a thing—it tastes like a “restaurant slice” even when made at home.

For technique reference, Serious Eats has a widely referenced vodka sauce method. And if you like the story behind its popularity, Bon Appétit’s piece on why vodka sauce is everywhere is a fun read.

This pizza sauce recipe is written so the sauce stays smooth and thick enough for pizza.
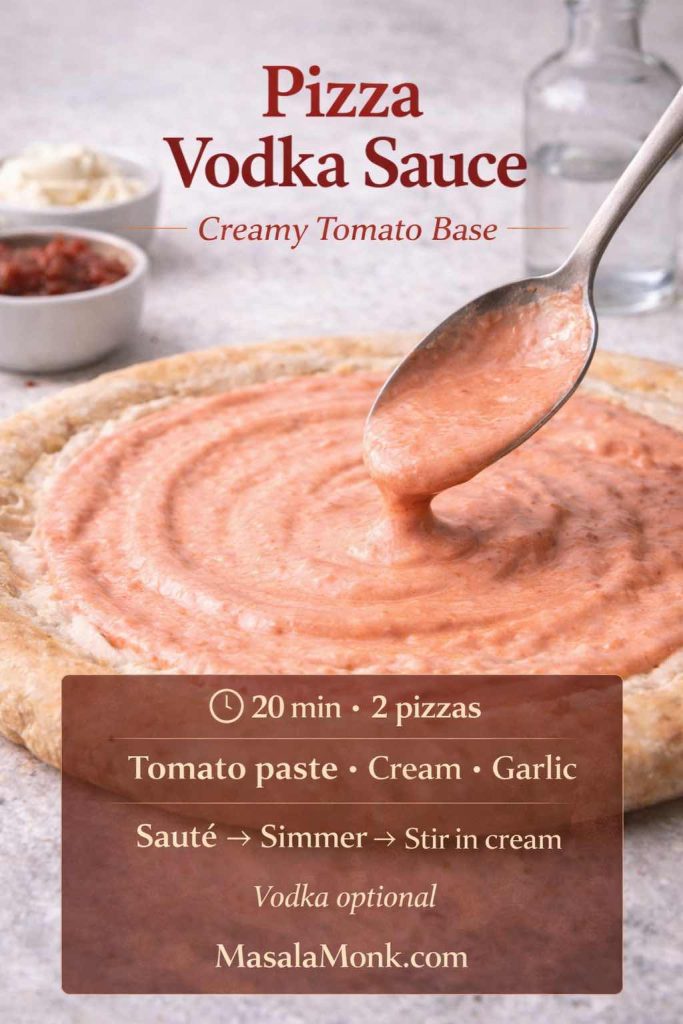
Pizza vodka sauce recipe card showing creamy tomato vodka sauce being spooned onto pizza dough, with quick steps and key ingredients (tomato paste, cream, garlic).
Pizza vodka sauce is a creamy tomato base that stays bold under cheese—build depth with tomato paste first, then stir in cream and keep the layer light on the dough.

Ingredients for Pizza vodka sauce recipe

  • 1 tbsp butter
  • 1 tbsp olive oil
  • 1 small onion, finely chopped
  • 2–3 garlic cloves, sliced
  • 3–4 tbsp tomato paste
  • ¼ cup vodka (optional)
  • ¾ cup crushed tomatoes (or blended peeled tomatoes)
  • ½–¾ cup cream
  • Chilli flakes
  • Salt to taste

Method

  1. Warm butter and oil. Add onion with a pinch of salt and cook until soft.
  2. Add garlic briefly, then stir in tomato paste.
  3. Cook tomato paste 1–2 minutes until it darkens slightly; this step builds depth quickly.
  4. Add vodka if using and simmer briefly.
  5. Add tomatoes and simmer 5–8 minutes.
  6. Stir in cream, add chilli flakes, and season with salt.

No-alcohol option

If you don’t want vodka, skip it and add a splash of water or stock instead. You’ll still have a creamy tomato sauce that behaves well on pizza. In other words, you can still do “vodka pizza vibes” without the vodka.

How to use pizza vodka sauce

You can use it as a base, or you can swirl it over mozzarella on top of a marinara base. Either way, keep the layer modest because cream sauces loosen under heat.

Toppings that match vodka pizza

  • mozzarella + parmesan
  • basil
  • chilli flakes
  • roasted peppers
  • spicy chicken or paneer

This is the pizza sauce recipe for nights when you want something different from classic pizza sauce, but still want tomato at the center.

Also Read: Vodka Pasta (Penne alla Vodka) + Spicy Rigatoni, Chicken, and Gigi Recipes


Ranch as the finishing move (pizza ranch dressing / pizza and ranch dressing)

Pizza and ranch dressing is a real thing for a reason: ranch is cooling, tangy, and creamy, which makes spicy pizza feel balanced. That said, ranch is almost always best as a finisher or dip—not baked into the base.

For an external reference, Serious Eats has a strong homemade ranch dressing recipe. For an egg-free foundation, MasalaMonk’s eggless mayonnaise recipe is a great starting point.

This pizza sauce recipe (in the “finisher” category) is quick, flexible, and easy to adjust.
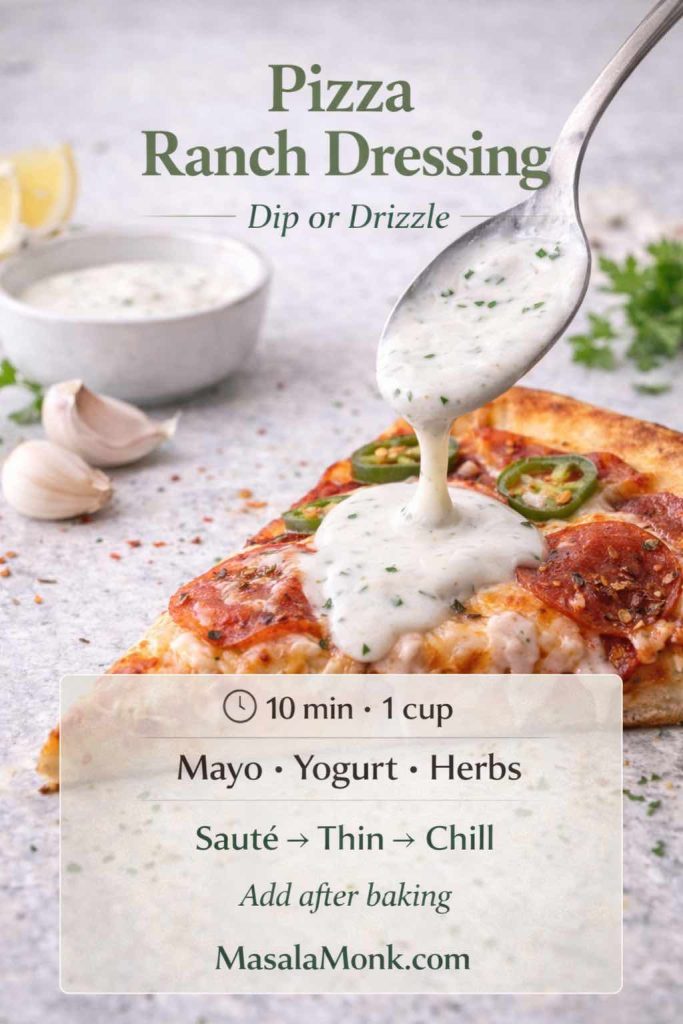
Pizza ranch dressing recipe card showing ranch sauce being drizzled over a spicy pizza slice, with quick steps and key ingredients for dipping or drizzling.
Pizza ranch dressing is best added after baking—use it as a cool drizzle or dip to balance spicy buffalo and peppery slices.

Ingredients

  • ⅓ cup mayonnaise
  • ⅓ cup sour cream or thick yogurt
  • 2–4 tbsp buttermilk (or milk + lemon)
  • 1 tsp lemon juice
  • 1 garlic clove, grated
  • dried dill/parsley (or fresh)
  • salt and pepper

Method

  1. Whisk mayo and sour cream/yogurt until smooth.
  2. Thin gradually with buttermilk until it’s dip- or drizzle-consistency.
  3. Add lemon, garlic, herbs, salt, and pepper.
  4. Chill briefly if you can; the flavor improves as it rests.

How to serve pizza ranch dressing

Drizzle after baking, not before. Or serve it as a dip for crusts. In both cases, you get that cooling contrast that makes buffalo sauce on pizza taste even better.

Also Read: One-Pot Chicken Bacon Ranch Pasta (Easy & Creamy Recipe)


A simple way to plan pizza night so it never feels repetitive

Once you have these sauces, you don’t need to reinvent pizza night every time. Instead, you can rotate styles based on mood. As a result, even the same dough and cheese can feel completely different from week to week.
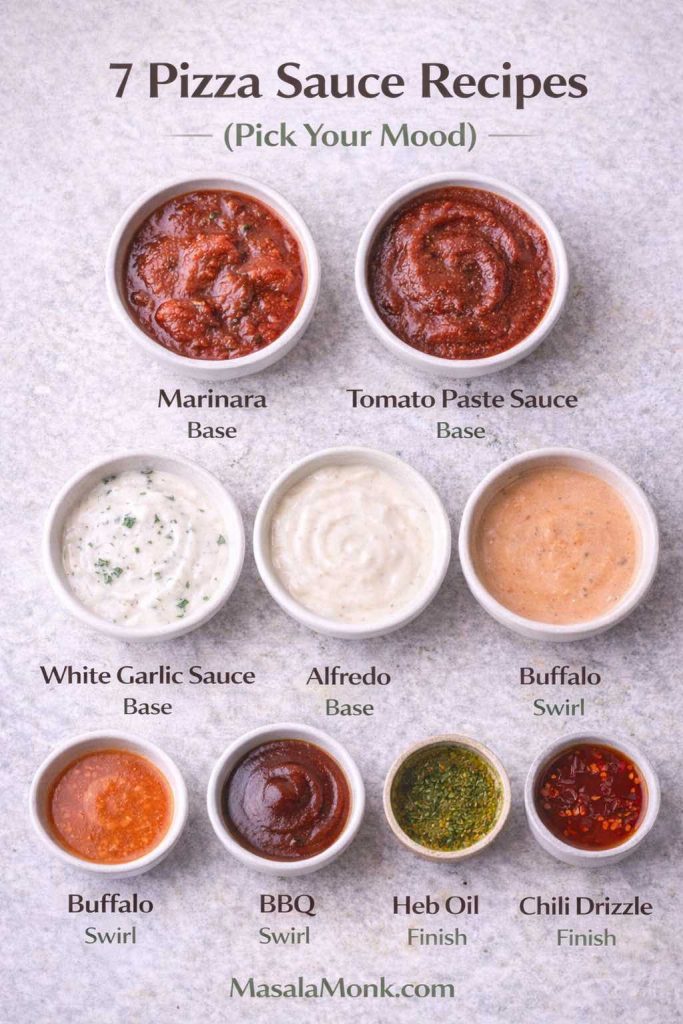
Top-down lineup of seven pizza sauce recipes in bowls—marinara, tomato paste sauce, white garlic sauce, Alfredo, buffalo, BBQ, and finishing drizzles—labeled as base, swirl, or finish.
Choose your sauce based on how you’ll use it: thick sauces work best as a base, bold sauces shine as a swirl, and cool drizzles finish the slice after baking.

Here’s a rhythm that works surprisingly well:

Build “pairs” instead of picking one pizza sauce recipe forever

If you’re making two smaller pizzas, do one red and one white. For example:

  • marinara pizza on one
  • white pizza sauce on the other

Or, for bolder nights:

  • bbq pizza sauce on one
  • pizza vodka sauce on the other

Because the flavor profiles are different, the table feels satisfied without anyone feeling like they “lost the vote.”

Use contrast like a secret ingredient

  • If the sauce is bright (marinara), you can go heavier on cheese or earthy toppings.
  • If the sauce is rich (Alfredo), add something sharp or spicy.
  • If the sauce is sweet (barbecue pizza sauce), bring acidity or heat.

In practice, this keeps every slice from tasting one-note.
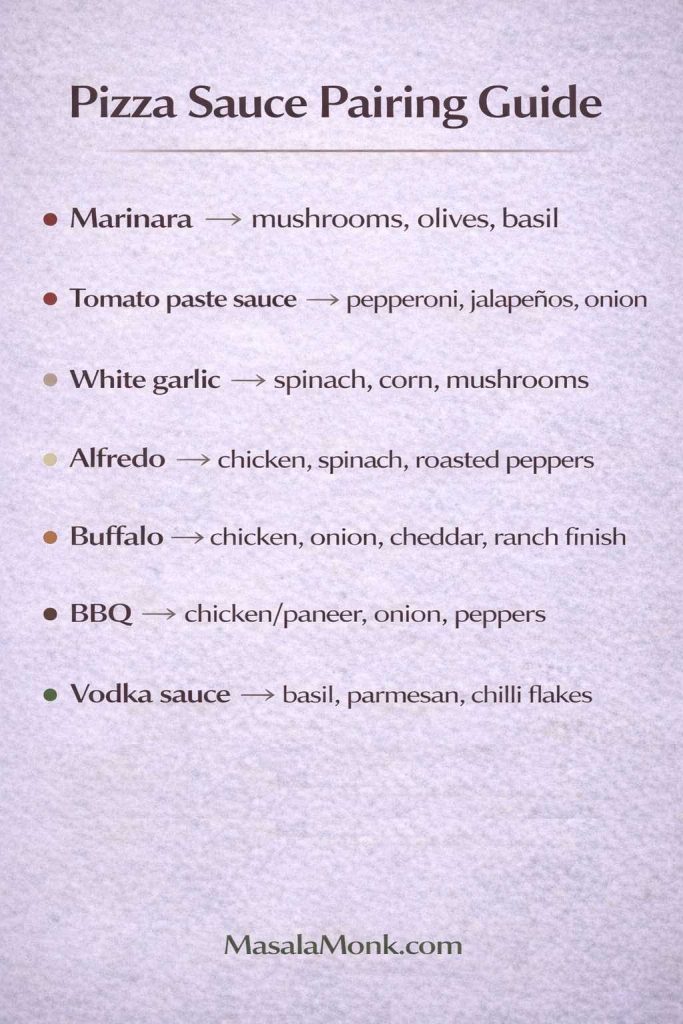
Pizza sauce pairing guide infographic listing marinara, tomato paste sauce, white garlic, Alfredo, buffalo, BBQ, and vodka sauce with suggested toppings, plus MasalaMonk.com branding.
Use this quick pairing guide to match each pizza sauce recipe with toppings that balance it—bright marinara loves herbs and olives, while buffalo and BBQ taste best with savory toppings and a cooling finish.

Add sides that match the mood

If you’re leaning into marinara pizza, a side like MasalaMonk’s homemade garlic bread loaf makes the meal feel complete.

Meanwhile, if you’re doing buffalo or BBQ, wings can tie the whole spread together, and MasalaMonk’s air fryer chicken wings are an easy way to get that crispy side without fuss.


Make-ahead strategy: cook once, eat twice (or three times)

If you want this lineup to feel effortless, treat it like prep. Even one extra batch can make pizza night smoother later.

Tomato sauces (marinara and tomato paste sauce)

These store and reheat well. Additionally, they often taste better the next day. So, you can make marinara once, use it for pizza marinara tonight, and then use leftovers for another marinara pizza or a quick pasta later.

White sauce and Alfredo

These are more delicate. Still, they can be stored for a couple of days if cooled quickly and reheated gently. When reheating, add a splash of milk or cream and keep the heat low. Otherwise, they can split.
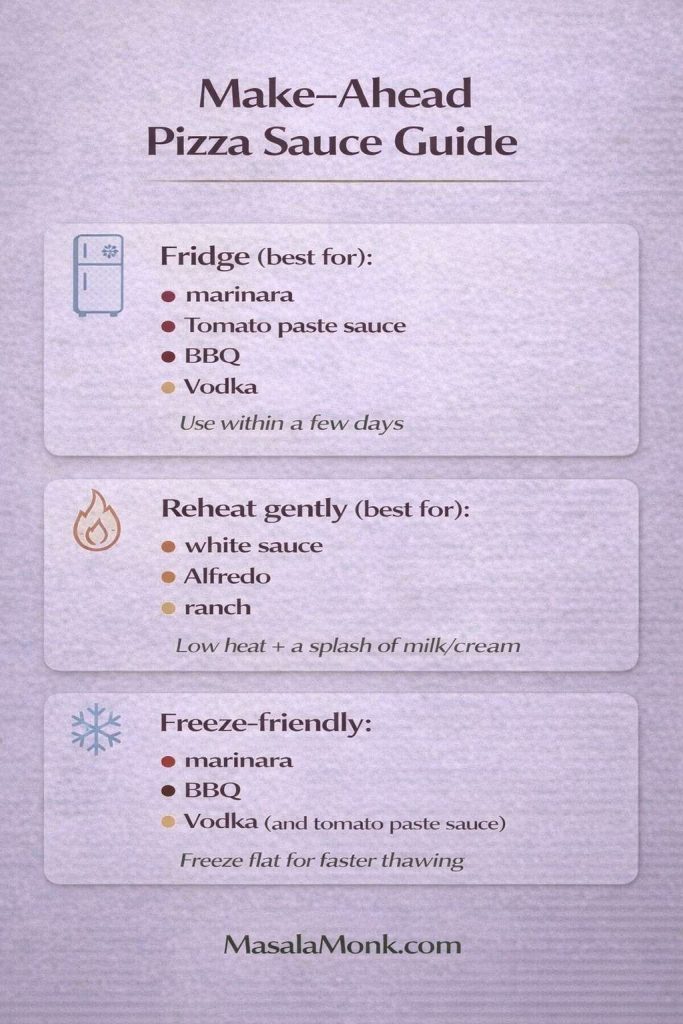
Photo-realistic magazine-style cover showing a hand drizzling creamy ranch over a freshly baked pizza on a rustic wooden board, titled “Pizza Sauce Recipe,” with MasalaMonk.com in the footer.
A quick visual cheat sheet: use thicker sauces as the base, then finish bold pizzas (like buffalo or BBQ) with a cool drizzle such as ranch to balance heat and keep the crust crisp.

Buffalo and BBQ

Both are easy to store, and both are flexible. In fact, buffalo often tastes best warmed gently and applied as a swirl at the end. Likewise, BBQ sauce thickens as it cools, which actually makes it more pizza-ready the next day.

Vodka sauce

Vodka sauce stores well, although it can thicken in the fridge. Therefore, warm it gently and loosen with a spoon of water or cream until spreadable again.

And if you ever want to add a green sauce into the rotation later, pesto is the natural next step. MasalaMonk’s pesto variations fit the same structure without changing your overall process.


Bringing it back to the point: a lineup you’ll actually use

Pizza night doesn’t need to be complicated. It just needs a small set of reliable sauces that match different cravings. That’s why this post is built as a rotation rather than a single “one true sauce.”

To recap the seven core styles covered here:

  • marinara sauce for pizza for classic pizza marinara nights
  • pizza sauce from tomato paste for speed and intensity
  • white pizza sauce for white base pizza comfort
  • Alfredo sauce pizza for rich, buttery slices
  • buffalo sauce on pizza for spicy tang and party vibes
  • bbq pizza sauce / barbecue pizza sauce for smoky-sweet crowd-pleasers
  • pizza vodka sauce for creamy tomato “restaurant slice” energy
  • plus pizza ranch dressing as the cooling finisher that makes spicy slices sing

If you save only one idea from this post, make it this: each pizza sauce recipe works best when it’s used in the right role—base, swirl, or finish—and when it’s thick enough to respect the crust.

And once that clicks, pizza night stops being stressful. Instead, it becomes the easiest kind of creative: pick a sauce, pick a couple toppings that make sense, and let the oven do the rest.
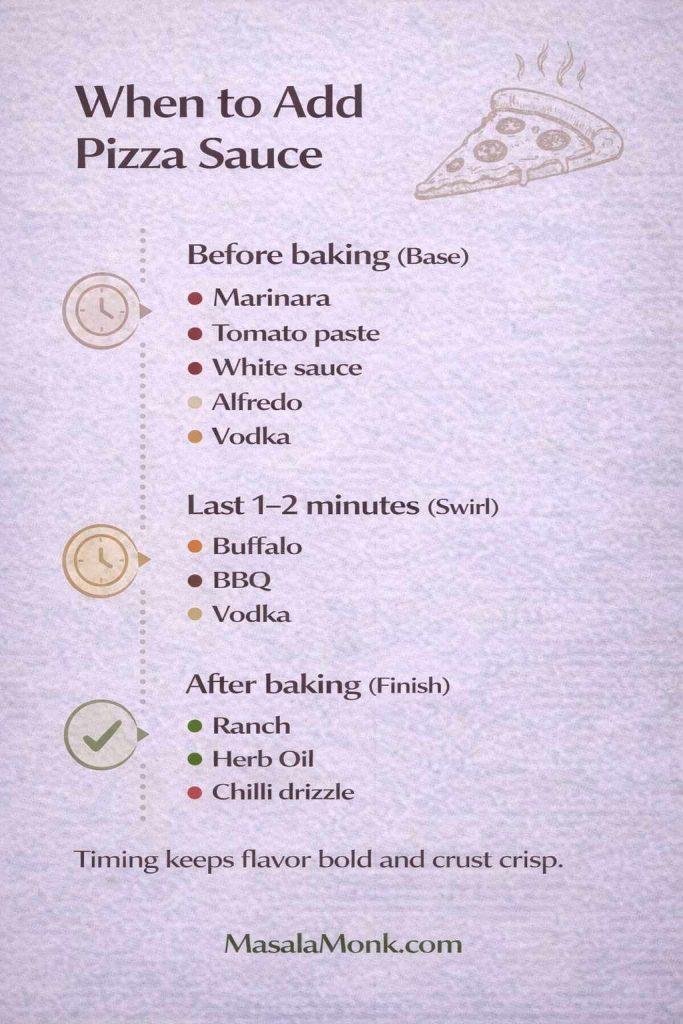
When to add pizza sauce infographic showing timing for base sauces before baking, swirl sauces in the last 1–2 minutes, and finishing sauces like ranch after baking.
Sauce timing changes everything: use thicker sauces as a base before baking, add bold swirls near the end, and finish with ranch or herb oil after the pizza comes out for the brightest flavor.

FAQs

1) What is the best pizza sauce recipe for beginners?

If you’re starting out, a basic marinara-style pizza sauce recipe is usually the easiest because it’s forgiving, fast, and doesn’t rely on tricky temperature control. Additionally, it tastes familiar under cheese, so you can focus on getting the texture right rather than chasing complex flavors.

2) What’s the difference between pizza sauce and marinara pizza sauce?

Although they’re close, marinara pizza sauce is often a little brighter and simpler, while a classic pizza sauce recipe is typically thicker and more seasoned to stand up to heavy toppings. In practice, the main difference is consistency: pizza sauce tends to be reduced more so it doesn’t waterlog the crust.

3) How do I make pizza sauce from tomato paste?

To make pizza sauce from tomato paste, whisk tomato paste with warm water until it turns smooth and spreadable, then stir in olive oil, oregano, garlic, salt, and pepper. Afterward, let it rest a few minutes so the dried herbs bloom; as a result, the flavor tastes more “cooked” even before it hits the oven.

4) Why does my pizza sauce make the center soggy?

Usually it happens because the sauce is too thin or there’s simply too much of it. Instead, aim for a thicker pizza sauce recipe and spread a lighter layer; then, if you want extra punch, add a small swirl on top near the end rather than soaking the dough from the start.

5) What is white sauce in pizza, exactly?

White sauce in pizza is a creamy base—often built from a butter-and-flour thickener plus milk—then seasoned with garlic, pepper, and sometimes cheese. Consequently, a white pizza sauce recipe behaves more like a structured cream sauce than plain cream, which is why it bakes well without turning runny.

6) Is white pizza sauce the same as Alfredo sauce?

Not necessarily. White pizza sauce is usually a lighter, béchamel-style base, whereas an Alfredo sauce pizza base is richer and more cheese-forward. Put differently, both are creamy, yet Alfredo tends to taste buttery and intense, while white sauce feels smoother and more neutral.

7) How do I keep an Alfredo sauce pizza from turning greasy?

First, keep the heat gentle when making the sauce so it stays cohesive. Then, use a thinner layer on the dough, because Alfredo loosens under oven heat. Finally, pair it with toppings that add contrast—greens, roasted vegetables, or a little spice—so the slice doesn’t feel heavy.

8) Can I use buffalo sauce on pizza as the base?

Yes, but it’s often better as a swirl. Since buffalo sauce is thinner and more acidic, spreading it as a full base can make the crust damp. Alternatively, bake with a different base sauce and add buffalo sauce on pizza as a finishing swirl so the flavor stays bright.

9) What toppings go best on pizza with buffalo sauce?

Generally, chicken, onions, jalapeños, and a mozzarella-cheddar mix work well because they balance heat and tang. Moreover, a cooling drizzle makes the whole bite feel complete, which is why pizza and ranch dressing is such a common pairing for buffalo-style slices.

10) What’s the difference between bbq pizza sauce and regular barbecue sauce?

BBQ pizza sauce is usually thicker and slightly more balanced for baking, because regular barbecue sauce can be too sweet or too loose under cheese. Therefore, a barbecue pizza sauce recipe often includes extra simmering (to thicken) and enough tang to keep the flavor lively.

11) What does “barbeque pizza” usually mean in recipes?

Typically, barbeque pizza refers to a pizza built around a smoky-sweet sauce base, often topped with onions and a savory protein like chicken or paneer. In addition, it frequently benefits from something sharp—pickled onions or jalapeños—so the sweetness doesn’t dominate.

12) What is pizza vodka sauce, and why is vodka pizza popular?

Pizza vodka sauce is a creamy tomato sauce that often starts with tomato paste cooked for depth, then finished with cream for a plush texture. Meanwhile, vodka pizza became popular because that sauce tastes “restaurant-like” at home: rich, slightly spicy, and still tomato-forward.

13) Do I need vodka to make a pizza vodka sauce recipe?

No. You can still make a great pizza vodka sauce recipe by skipping the vodka and using a small splash of water or stock instead. Even without it, the tomato paste plus cream combination delivers the same creamy tomato character most people want.

14) What’s the best way to use pizza ranch dressing?

Most of the time, pizza ranch dressing works best as a dip or a post-bake drizzle. That way, it stays cool and tangy, which contrasts nicely with hot, spicy slices. Conversely, baking ranch into the pizza can mute its flavor and make it feel heavier.

15) How much sauce should I use on one pizza?

As a rule of thumb, use just enough to lightly coat the dough—more like a thin spread than a thick layer. Then, if you want stronger sauce flavor, add a small extra swirl near the end. This approach keeps the center crisp while still delivering sauce in every bite.

16) Can one post really cover multiple pizza sauce recipes without confusing readers?

Yes, provided each section is clearly separated by sauce type and purpose. For instance, marinara pizza sauce recipe content serves a classic red base intent, while white pizza sauce recipe sections handle creamy base intent, and buffalo or ranch sections cover finishing/drizzle intent. As long as each sauce solves a distinct craving, the structure stays easy to follow.

17) Which pizza sauce recipe is best for a party crowd?

If you’re cooking for a mixed crowd, bbq pizza sauce and marinara-style sauces are usually safest because they’re familiar and broadly liked. Then, for guests who want bolder flavors, offer buffalo sauce on pizza as a swirl and keep ranch available as an optional dip.

18) How do I thicken a sauce quickly if it’s already made?

If it’s a tomato sauce, simmer it uncovered for a few minutes until it reduces. If it’s a creamy sauce, warm it gently and let it simmer briefly so water evaporates without splitting. In either case, aim for a texture that clings—because a thicker pizza sauce recipe is almost always easier to bake successfully.

Posted on 6 Comments

Marinara Sauce Recipe: Classic Homemade Marinara

A couple stirring a pot of homemade marinara sauce in a warm, elegant kitchen with fresh tomatoes, garlic, and basil on the counter.

Some sauces demand a Sunday afternoon, a stocked pantry, and a willingness to hover over the stove. Marinara isn’t that kind of sauce. Instead, a good marinara is built for real life: dinner after a long day, a quick lunch you still want to enjoy, or a last-minute plan that somehow turns into friends at your table. That’s why a reliable marinara sauce recipe is one of the most useful things you can learn—it’s simple, adaptable, and endlessly repeatable.

At the same time, marinara is honest. Because the ingredient list is short, every choice matters. Consequently, a watery tomato can make the sauce taste thin. Likewise, a scorched garlic clove can tint the whole pot bitter. Yet, when you get the fundamentals right, the payoff is immediate: a classic homemade marinara sauce that tastes bright, rich, and clean all at once.

In this post, we’ll start with one sturdy marinara sauce recipe you can memorize. Then, we’ll branch into variations that still feel like marinara—just tuned for different needs. For instance, we’ll make a thicker version for pizza. Additionally, we’ll build a punchier marinara dipping sauce. Moreover, we’ll cover options like sugar free marinara sauce, tomato sauce keto and low carb tomato sauce, and low sodium marinara sauce without turning the sauce bland. Finally, we’ll talk storage and reheating, because having marinara ready in the fridge is basically a superpower.

Also Read: Tomato Sauce From Fresh Tomatoes (Food Mill Method & Recipe)


What marinara is, and why it works

Marinara is a quick tomato sauce that’s meant to taste fresh, not heavy. In other words, it’s not a long-simmered ragù built on meat and bones, and it’s not a creamy tomato sauce. Instead, marinara leans on the flavor of tomatoes and a few supporting ingredients: garlic, olive oil (optional), basil, and salt. As a result, it tastes direct and vibrant, while still feeling comforting.

Because marinara is uncomplicated, it’s also flexible. Once you have a base marinara sauce recipe, you can use it as a pasta sauce, a pizza sauce, a dipping sauce, or a component in baked dishes. Meanwhile, you can keep the same method and adjust only one or two “dials” to meet different preferences: less salt, no added sugar, no oil, more heat, or a different tomato choice.

Also Read: Double Chocolate Chip Cookies – Easy Recipe with 7 Variations


Marinara sauce ingredients

A classic marinara sauce ingredients list is short for a reason. Still, each ingredient has a job, so it helps to know what you’re aiming for.

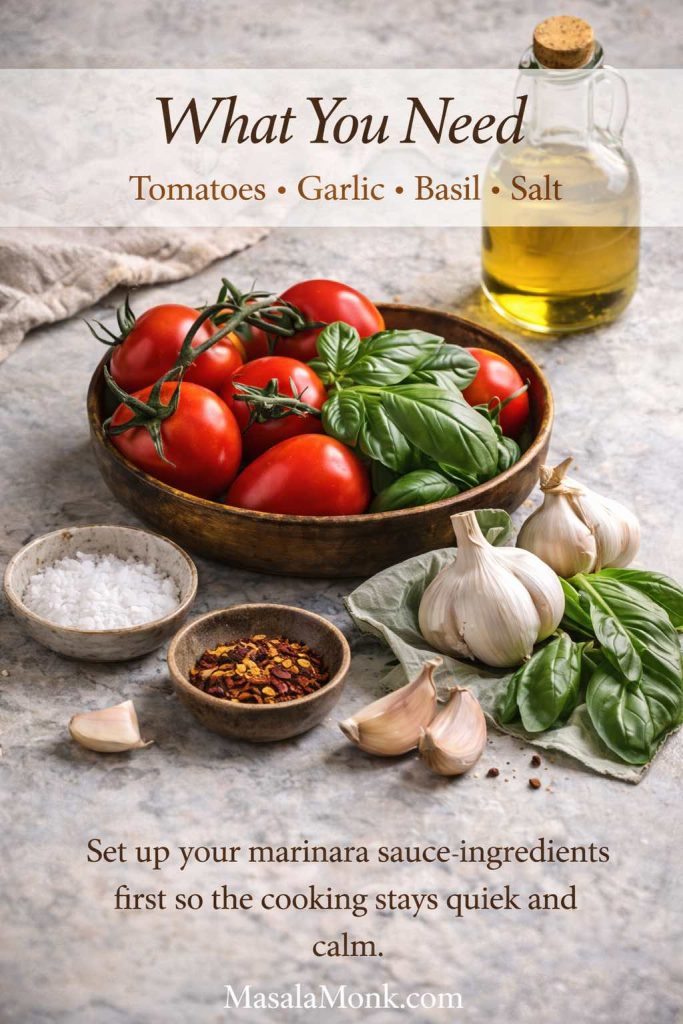
Flat lay of tomatoes, garlic, basil, olive oil, salt, and chili flakes on a marble counter for a homemade marinara sauce recipe.
Setting up the marinara sauce ingredients first keeps the cooking fast—so you can focus on aroma, simmer, and texture.

Tomatoes: the main character

  • Canned tomatoes are the most consistent option for most of the year. Therefore, they’re the default in this marinara sauce recipe.
  • Fresh tomatoes can be wonderful in season. However, they require a bit more simmering to concentrate flavor and reduce water.
  • San Marzano sauce / San Marzano tomatoes can be an upgrade when you want a smoother, more balanced tomato profile. If you’re curious about what PDO (Protected Designation of Origin) means and how it’s used, the European Commission’s explanation is a solid reference: PDO and quality schemes explained. Likewise, for San Marzano specifically, the official consortium offers background: San Marzano consortium site and about the consortium.

Aromatics: the backbone

  • Garlic is the signature. Nevertheless, you can make a garlic free marinara sauce with a few smart swaps (we’ll do that later).
  • Onion is optional. If you want a minimalist, authentic Italian marinara sauce feel, you can skip it. On the other hand, if you like a slightly rounder sweetness, onion is helpful.

Fat: optional, but useful

  • Olive oil adds richness and carries aroma. Even so, an oil free marinara sauce can still taste good if you rely on gentle reduction and careful seasoning.

Herbs and seasoning: the finishing touch

  • Basil is classic. Additionally, black pepper adds warmth.
  • Salt is essential for “completeness.” However, if you’re making low sodium marinara sauce, you can build flavor using other levers.

If you enjoy understanding ingredients beyond flavor—especially tomatoes—this MasalaMonk post on tomato nutrition and benefits is a useful deep dive that pairs naturally with marinara.

Also Read: Upma Recipe: 10+ Easy Variations (Rava, Millet, Oats, Semiya & More)


A classic marinara sauce recipe you can repeat anytime

This is the heart of the post: a dependable, classic homemade marinara sauce. It’s also intentionally adaptable, which is why it serves as the foundation for every variation later on.

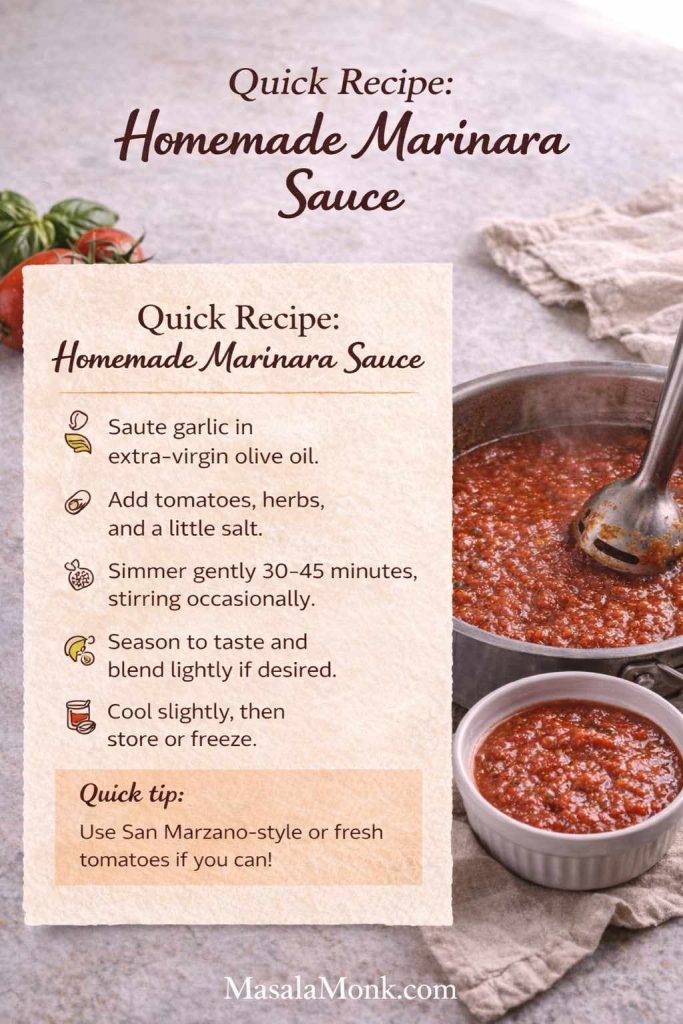
Quick recipe card for homemade marinara sauce on a photo of simmering marinara in a pan, with MasalaMonk.com in the footer.
Save this quick marinara sauce recipe for busy nights—once you know the base steps, you can tweak it for pasta, pizza, or dipping in minutes.

Classic homemade marinara sauce recipe (base)

Makes: ~3–4 cups
Time: ~25–35 minutes

Ingredients

  • 2 tbsp olive oil (or see the oil-free variation later)
  • 4–6 garlic cloves, thinly sliced or minced
  • 1 small onion, finely chopped (optional)
  • 800 g / 28 oz canned whole peeled tomatoes, crushed by hand (or crushed tomatoes)
  • 1 tsp salt to start, then adjust
  • Black pepper to taste
  • 8–12 basil leaves (fresh is best; dried works in a pinch)
  • Optional: pinch of red pepper flakes

How to make Marinara Sauce – Step by Step Method

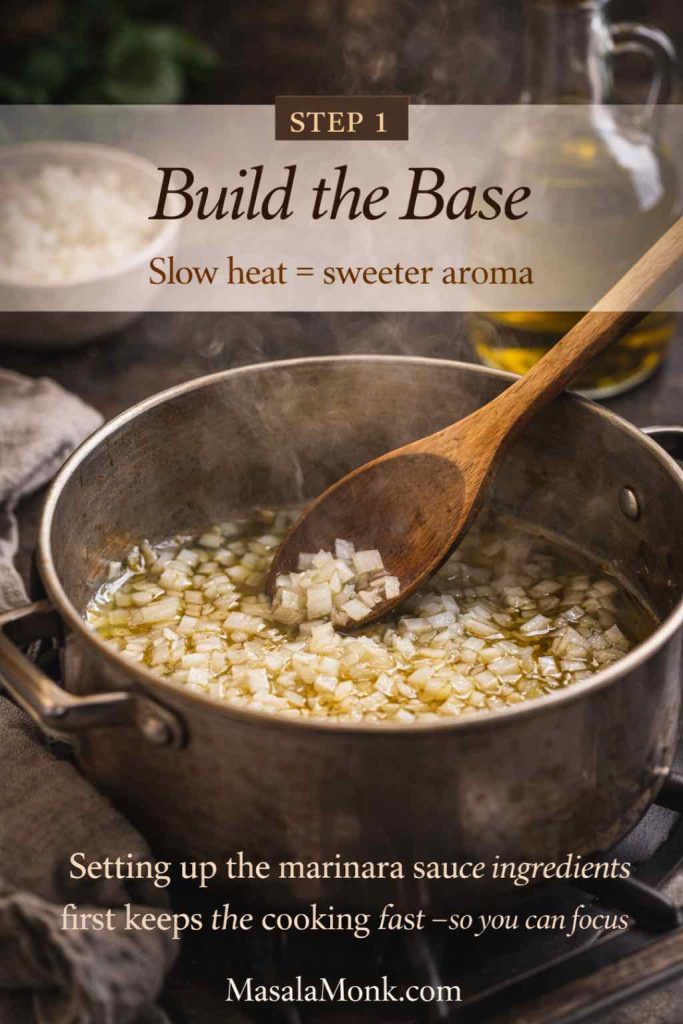
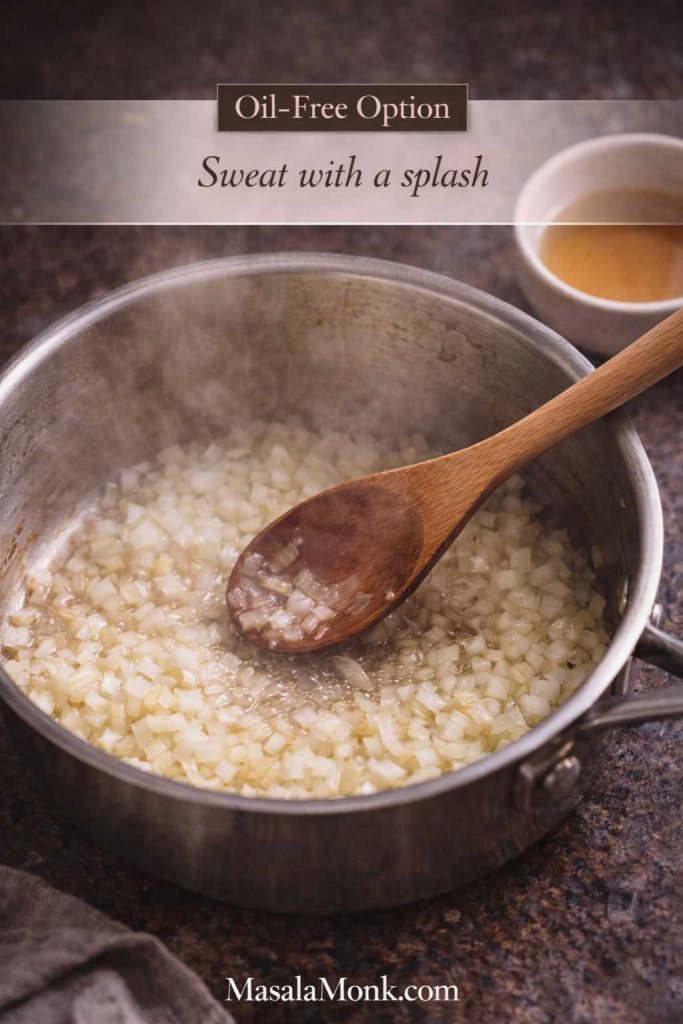
1. Start gently. Place a saucepan over medium heat. Add olive oil. If you’re using onion, cook it slowly until soft and translucent. The goal is sweetness and aroma, not browning.

Chopped onion softening in olive oil in a saucepan with a wooden spoon, showing step 1 of a homemade marinara sauce recipe.
Keep the heat low while the onion turns glossy and sweet—this gentle start makes the final marinara taste fuller without extra ingredients.

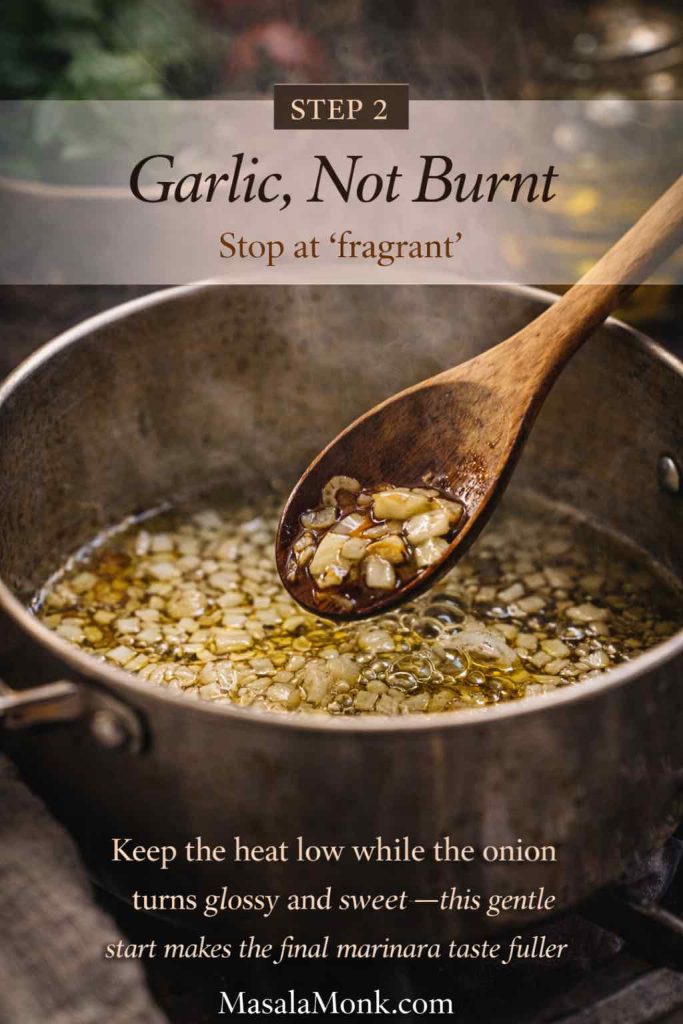
2. Add garlic carefully. Stir in garlic and cook just until fragrant. If the garlic starts to brown aggressively, lower the heat. Otherwise, a bitter edge can show up later.
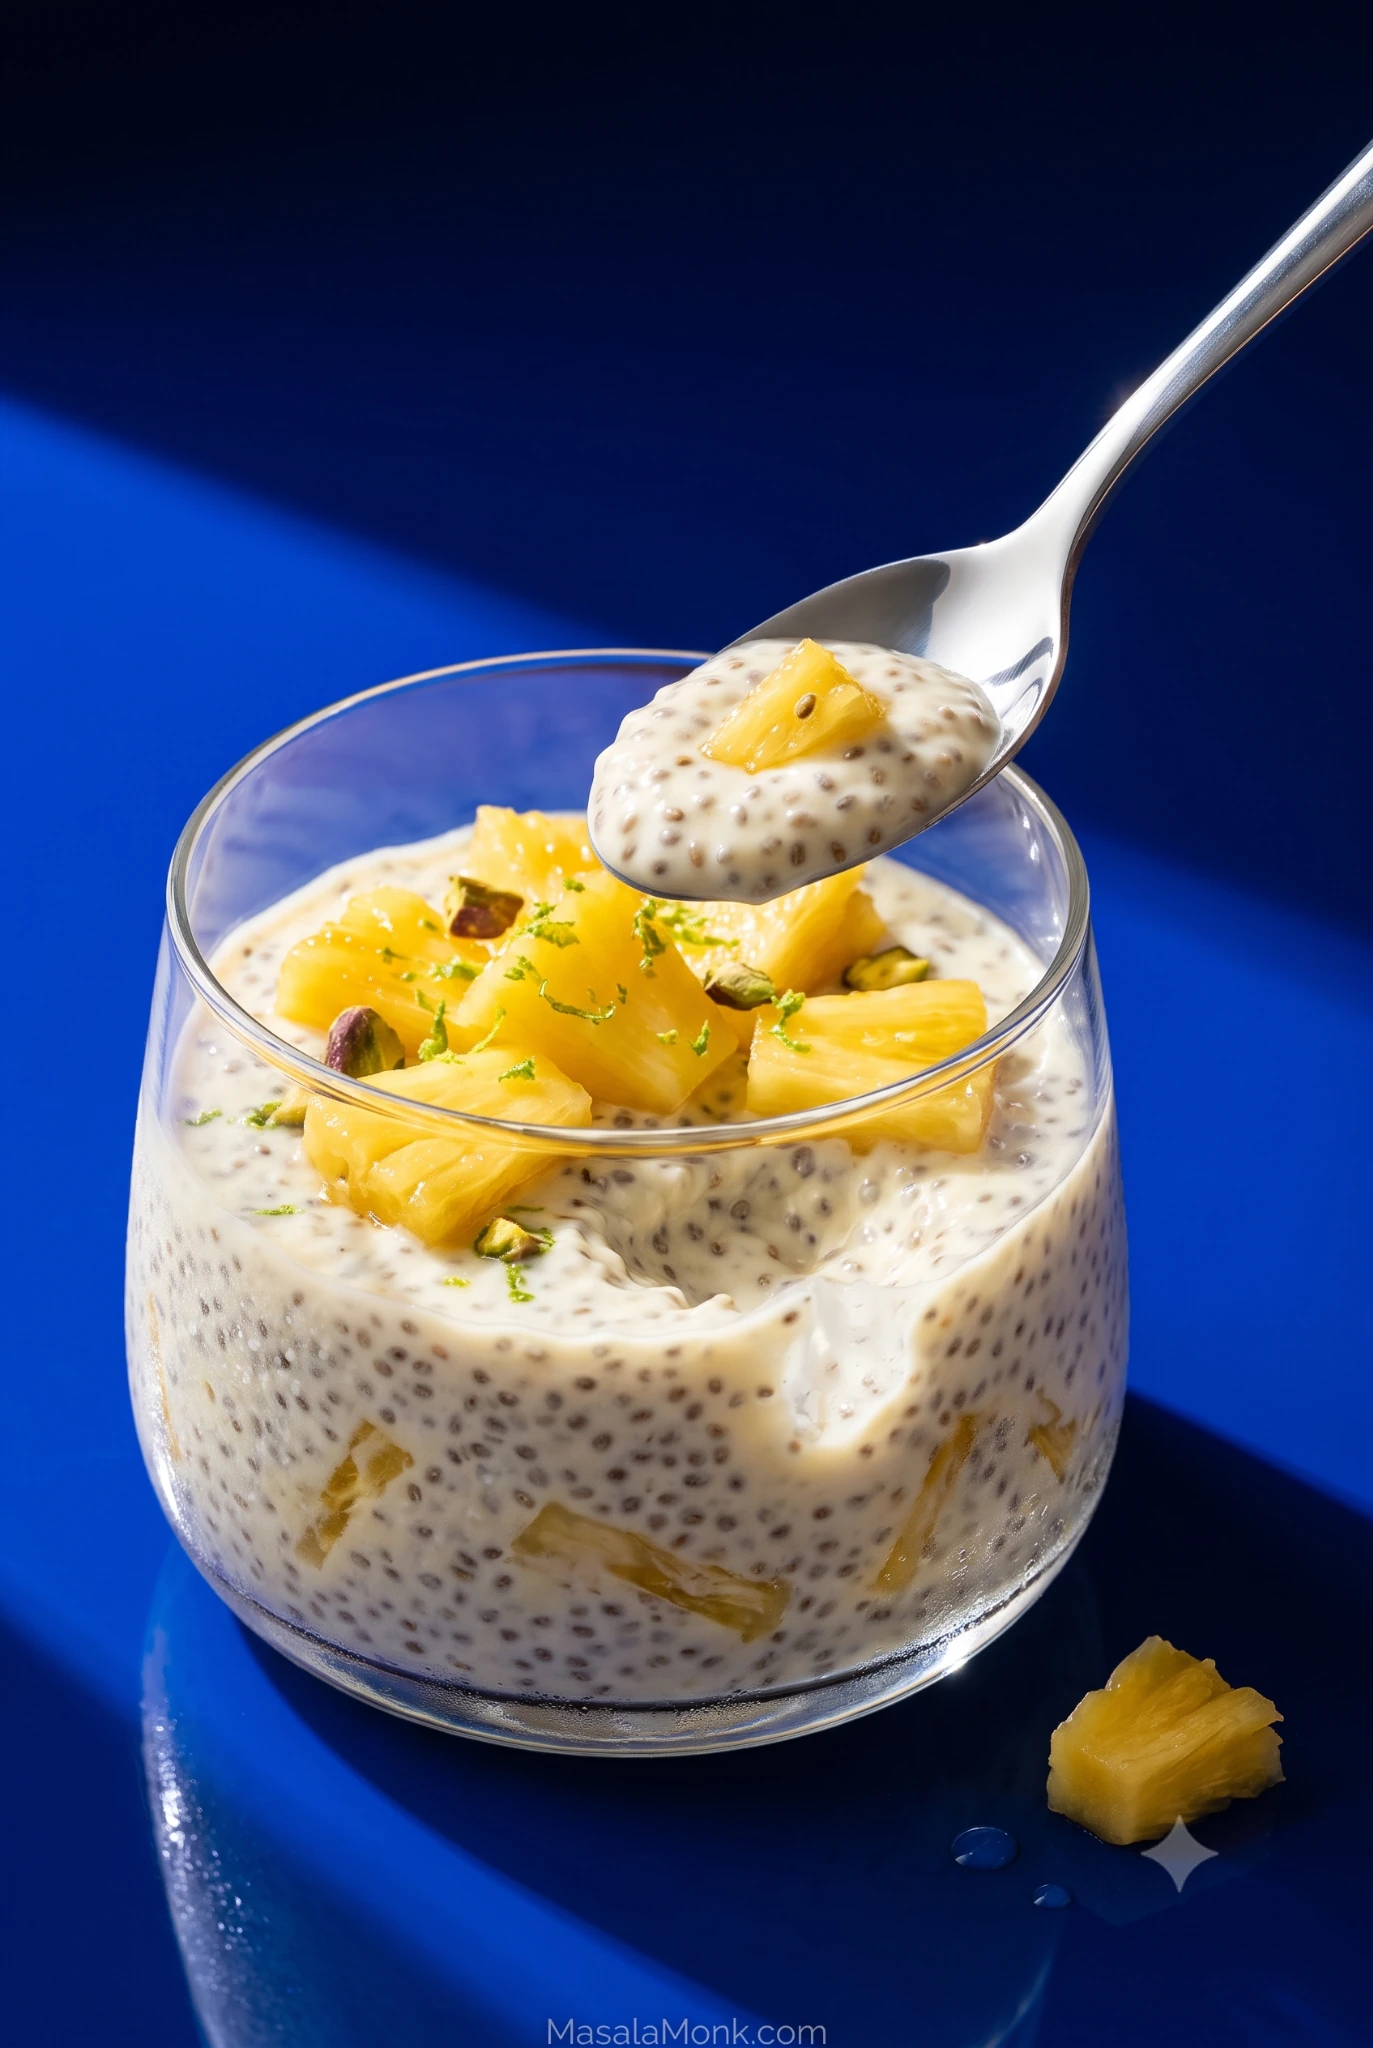
Garlic gently sizzling in olive oil with softened onion in a saucepan, showing step 2 of a homemade marinara sauce recipe before adding tomatoes.
The moment garlic smells nutty and warm, move on—another 20–30 seconds can shift it from fragrant to bitter.

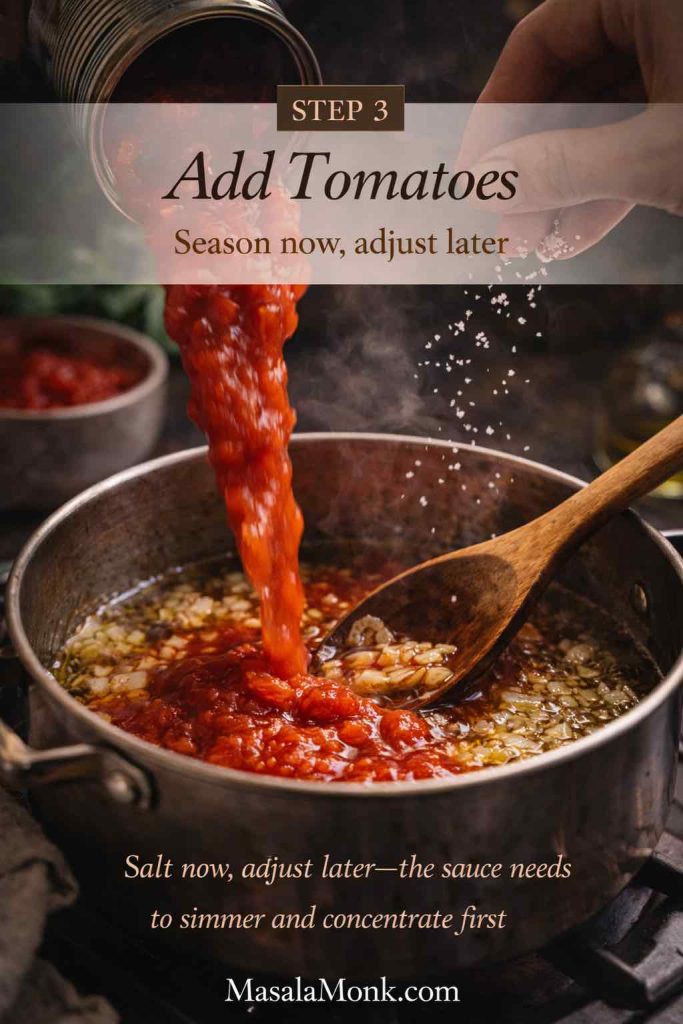
3. Add tomatoes and season. Pour in tomatoes, then add salt, pepper, and optional chili flakes.

Crushed tomatoes being poured into a saucepan with softened onion and garlic, while salt is sprinkled in, showing step 3 of a homemade marinara sauce recipe.
Add tomatoes first, then season lightly—once the marinara reduces, you can fine-tune salt without overshooting.

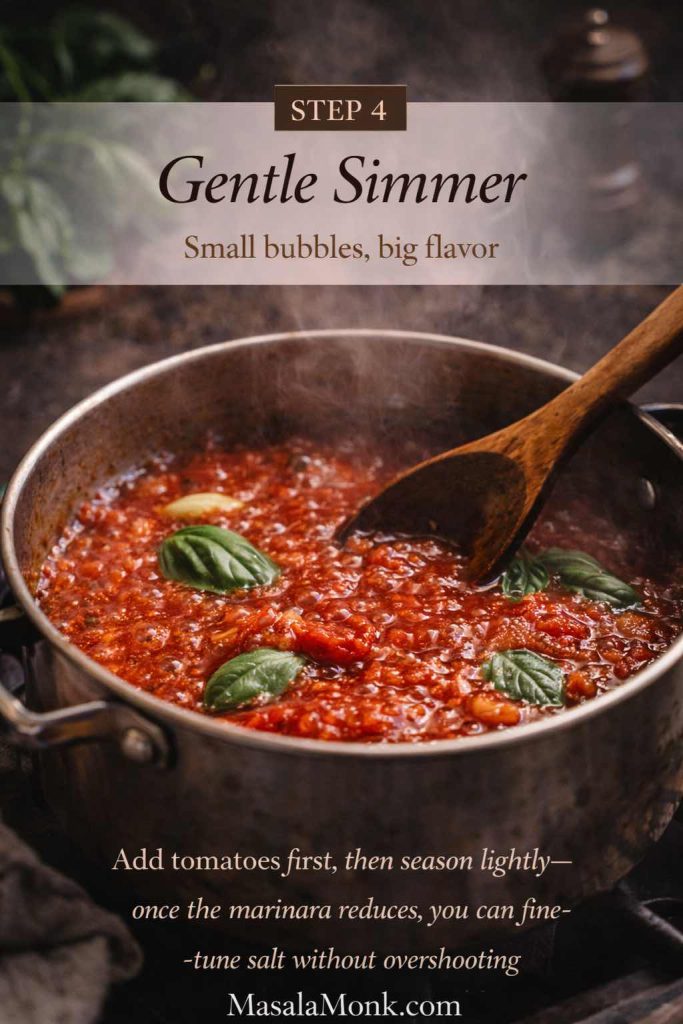
4. Simmer steadily. Bring to a gentle bubble, then reduce heat to maintain a calm simmer. Stir occasionally. Over time, the sauce thickens and tastes more cohesive.
Marinara sauce gently simmering in a saucepan with small bubbles and basil leaves, showing step 4 of a homemade marinara sauce recipe.
Look for small, steady bubbles—this is the sweet spot where marinara thickens and deepens without tasting harsh or overcooked.

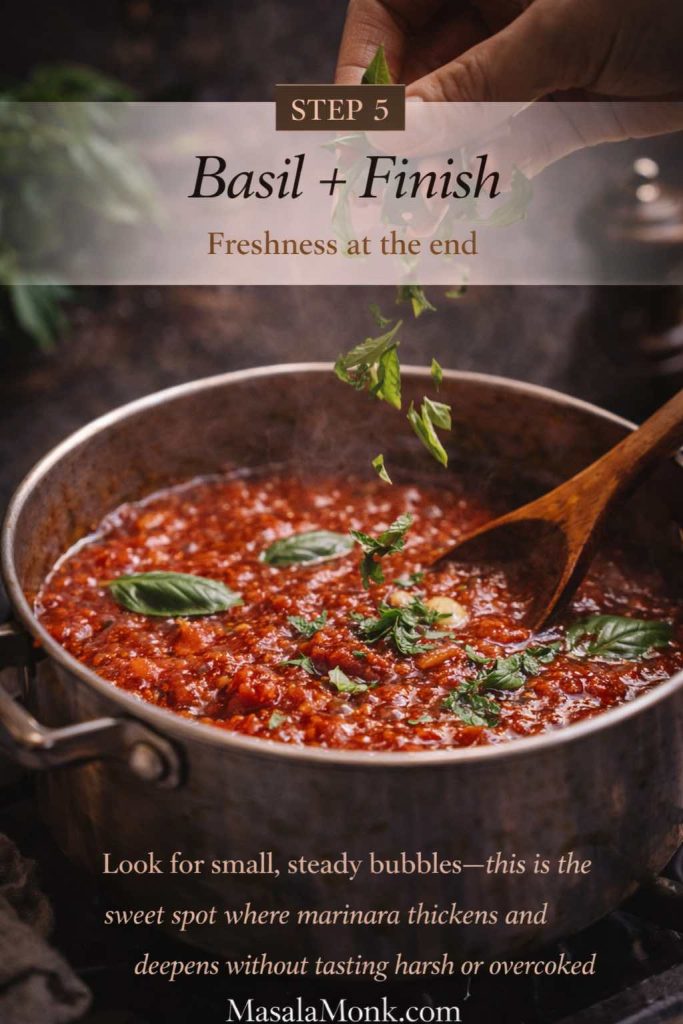
5. Finish bright. Stir in basil at the end, then taste and adjust salt. If you want it smoother, blend briefly. If you prefer rustic texture, leave it chunky.
Fresh basil being torn and sprinkled into a pot of thickened marinara sauce, showing step 5 of a homemade marinara sauce recipe just before serving.
Add basil at the very end so the sauce keeps its bright, fresh aroma—then taste once more and adjust salt and texture.

This is the kind of marinara sauce you can cook without measuring once you’ve made it a few times. In fact, after you learn the rhythm—soften aromatics, add tomatoes, simmer, finish with basil—you’ll be able to steer it by taste.

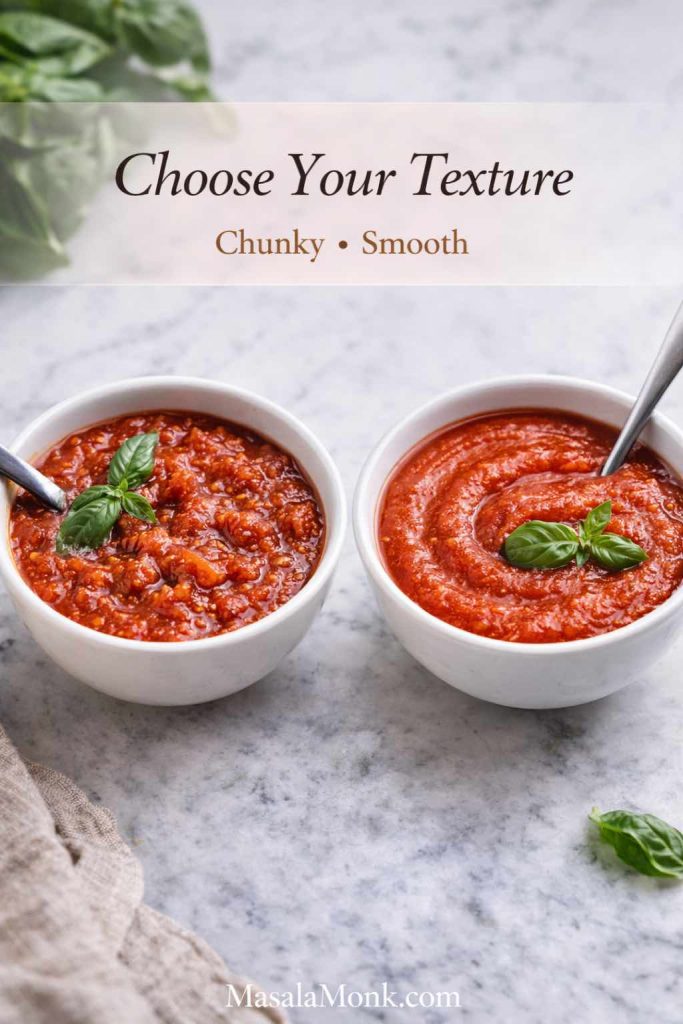
Two bowls of marinara sauce on a marble counter, one chunky and one smooth, showing texture options for homemade marinara sauce.
Chunky marinara is perfect for rustic pasta, while a smooth blend spreads beautifully for pizza or dipping—same sauce, different finish.

If you like reading technique explanations, Serious Eats offers a well-respected reference for a similar style of method: a marinara technique reference. Notice how the logic is the same: gentle aromatics, controlled simmer, and a clean tomato finish.

Also Read: Potato Salad Recipe: Classic, Russian, German, Vegan & More


Why some marinara tastes watery, sharp, or flat

If your marinara has ever felt “almost good,” it usually helps to identify what’s missing. Then, you can fix it quickly next time.

Watery sauce

Often, watery marinara is simply under-reduced. Therefore, simmer a little longer with the lid off. Alternatively, choose a more concentrated tomato product, like crushed tomatoes, when you want a faster cook.

Sharp, sour, or acidic sauce

Sometimes the tomatoes are naturally sharper. In that case, a longer simmer helps. Additionally, finishing with basil can soften the perception of acidity. If you’re specifically aiming for low acid marinara sauce, we’ll cover that variation in detail.

Flat sauce

Flat marinara usually needs one of three things:

  • more salt (or a smarter low-sodium strategy)
  • a little more reduction
  • fresher finishing aromatics (especially basil)

Consequently, a sauce that tastes “fine” can become genuinely satisfying with one small adjustment.

Also Read: Healthy Tuna Salad – 10 Easy Recipes (Avocado, Mediterranean, No Mayo & More)


Authentic Italian marinara sauce, in spirit

“Authentic” can mean many things, so it’s better to talk about intent. Traditional Italian-style marinara tends to be restrained. Instead of piling in herbs and sugar, it relies on tomatoes, garlic, olive oil, and basil, with a gentle simmer. As a result, the sauce feels clean and tomato-forward.

If you want a different classic pasta direction that’s still deeply Italian but completely tomato-free, MasalaMonk’s carbonara guide is a great companion for another night.


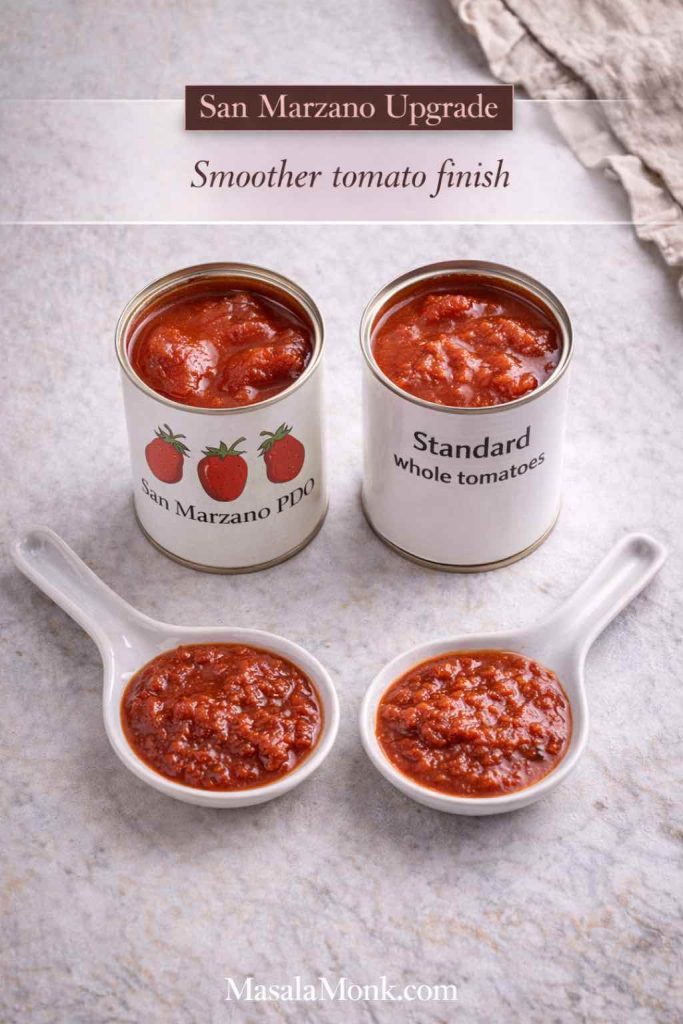
San Marzano marinara (San Marzano sauce upgrade)

If you’ve been curious about san marzano sauce or san marzano marinara sauce, the simplest approach is to swap the tomatoes and keep the rest minimal. That’s it.

Comparison of San Marzano PDO tomatoes and standard whole tomatoes with two spoonfuls of marinara sauce, showing how tomato choice affects marinara texture and finish.
If you want a smoother, more polished marinara, start with better tomatoes—San Marzano-style tomatoes often give a cleaner finish with less effort.

How to do it

  • Use San Marzano tomatoes (ideally with clear PDO/DOP references if that matters to you).
  • Keep herbs restrained; basil is enough.
  • Simmer only until the sauce tastes cohesive and slightly thickened.

Because San Marzano tomatoes are prized for balance, you often don’t need extra sweetness tricks. Nevertheless, the technique still matters: gentle simmer, careful garlic, and basil at the end.

For context, PDO is a protected origin scheme; you can read the official overview here: PDO explained. Similarly, if you want the “source-of-truth” angle for San Marzano DOP/PDO, the consortium links are here: San Marzano consortium site and about the consortium.

Also Read: Whiskey Sour Recipe: Classic Cocktail, Best Whiskey & Easy Twists


Marinara sauce from fresh tomatoes

A marinara sauce from fresh tomatoes can taste brighter and more “garden-like,” especially when tomatoes are in peak season. However, fresh tomatoes also bring more water. Consequently, the key is patient reduction.

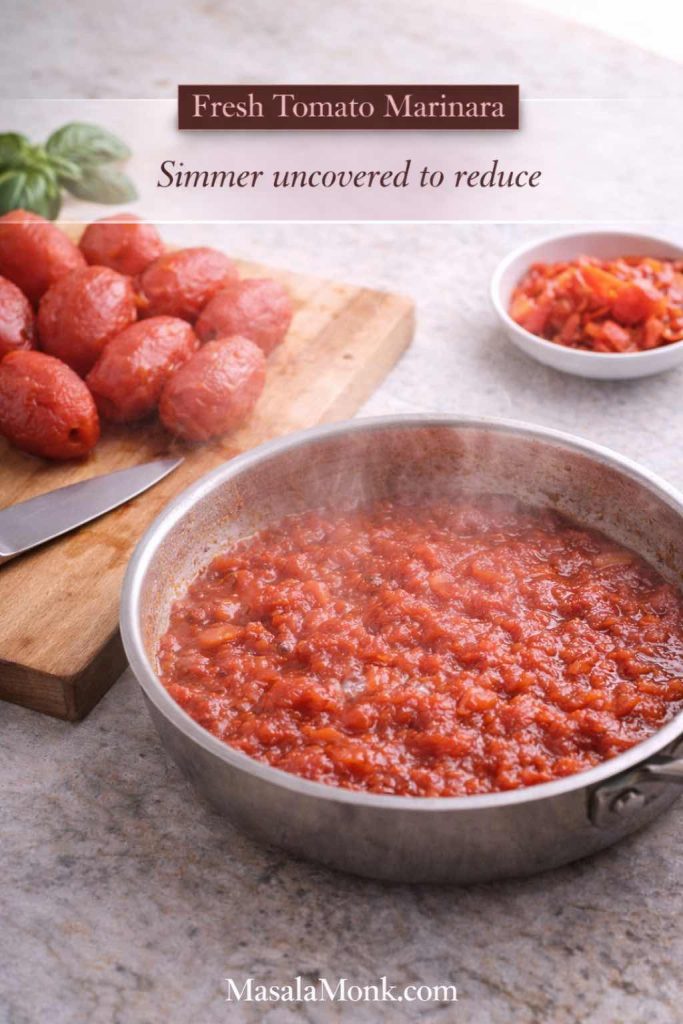
Fresh tomatoes simmering in a wide pan with peeled tomatoes on a cutting board, showing how to make marinara sauce from fresh tomatoes by reducing uncovered.
When you cook fresh tomatoes uncovered, excess water evaporates fast—so the sauce thickens naturally and tastes brighter than a long, covered simmer.

A simple fresh tomato method

  1. Score tomatoes with a small “X” at the bottom. Then, blanch them in boiling water for 30–45 seconds.
  2. Transfer to cool water, peel, and chop.
  3. Sauté garlic (and onion if using) gently, then add chopped tomatoes and salt.
  4. Simmer uncovered until thickened. Finally, finish with basil.

This variation naturally satisfies the idea of a marinara sauce made with fresh tomatoes, while still using the same overall structure as the base marinara sauce recipe. In other words, you’re not learning a new sauce—you’re simply changing the tomato input.

Also Read: High Protein Overnight Oats | 5 Recipes (Low Calorie, Vegan, Bulking & More)


Spicy marinara sauce

Spicy marinara sauce should feel warm and lively, not harsh. Therefore, the best method is to bloom chili flakes briefly in the oil before adding tomatoes. That way, the heat spreads evenly and tastes integrated.

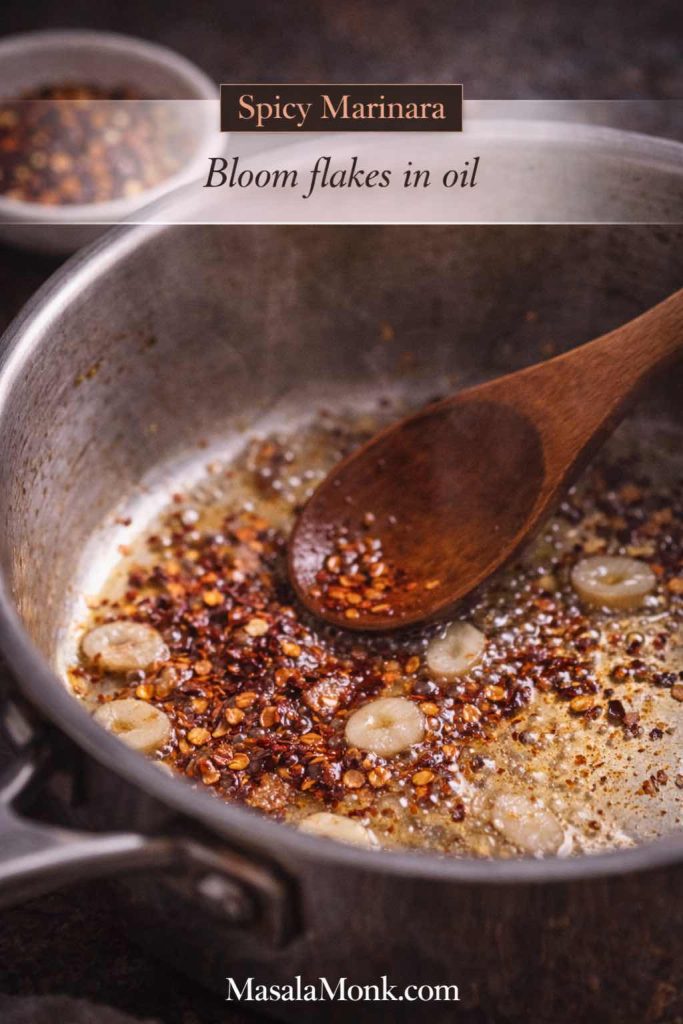
Chili flakes blooming in olive oil with sliced garlic in a saucepan, showing how to start a spicy marinara sauce before adding tomatoes.
Blooming chili flakes in oil perfumes the whole pot, so the heat tastes smooth and even instead of sharp or raw.

How to build balanced heat

  • Add a pinch of red pepper flakes right before garlic.
  • Simmer as usual.
  • Taste near the end, because heat perception changes as the sauce reduces.

If you like playing with different kinds of heat beyond chili flakes, MasalaMonk’s pepper sauce guide can inspire a range of spicy add-ins without forcing you into one flavor profile.


Marinara dipping sauce (including mozzarella sticks)

A marinara dipping sauce should be thicker and slightly more assertive than your everyday pasta marinara. Consequently, you don’t need new ingredients—you need a small shift in reduction and seasoning.

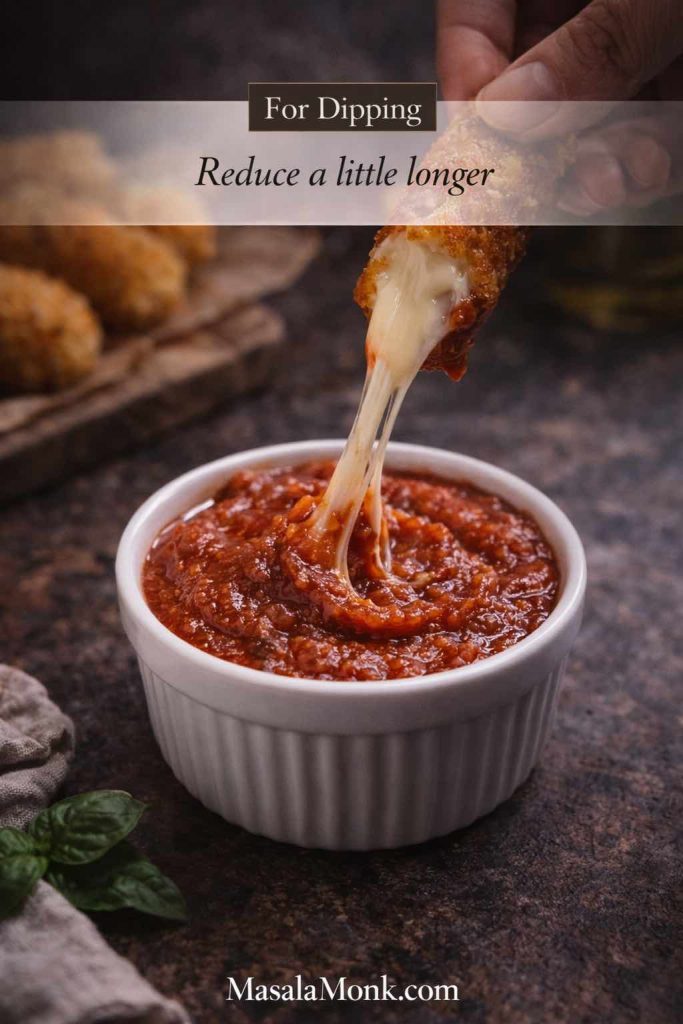
Mozzarella stick with a cheese pull dipping into a ramekin of thick marinara dipping sauce, showing a reduced marinara for dipping.
When marinara is reduced a little longer, it turns into a dip that clings—perfect for mozzarella sticks and any crispy snack.

How to adapt the base

  • Simmer 5–10 minutes longer so it thickens.
  • Add an extra clove of garlic, if you like.
  • Optionally add a pinch more chili flakes for “snack” energy.

This version works naturally as marinara sauce for mozzarella sticks, but it’s also great with toasted bread, roasted vegetables, or anything crispy.

If you want a natural pairing idea that fits beautifully, try it with arancini. MasalaMonk’s arancini balls post is an easy internal read for a snack that practically demands a tomato dip.

Also Read: Authentic Louisiana Red Beans and Rice Recipe (Best Ever)


Marinara sauce for pizza

Marinara sauce for pizza needs to be thick enough to spread without soaking the crust. Therefore, the “pizza shift” is mainly about texture.

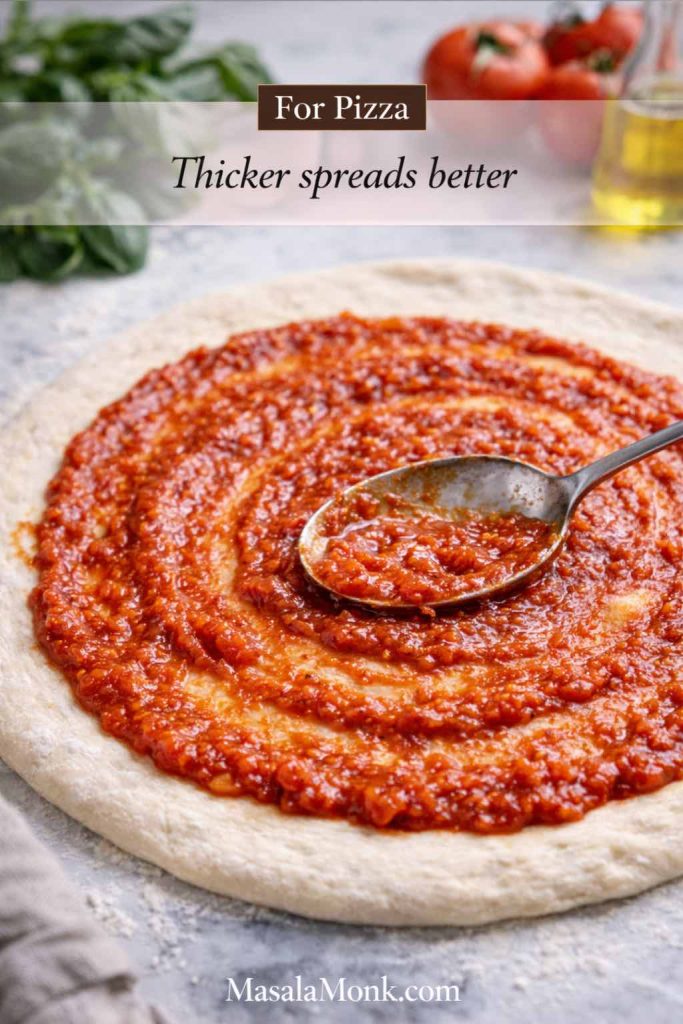
Thick marinara sauce being spread with a spoon on pizza dough, showing how to use marinara sauce for pizza without making the crust soggy.
A thicker marinara spreads in a thin, even layer—so the pizza stays crisp while still tasting boldly tomato-forward.

How to make it pizza-ready

  • Reduce the sauce slightly more than usual.
  • Blend for a smooth consistency, if you like.
  • Go easy on basil inside the sauce; instead, use fresh basil on top after baking.

If you enjoy a lighter homemade pizza approach, MasalaMonk’s Satvic pizza recipe is a good internal companion for dough and topping ideas.

Also Read: Air Fryer Hard-Boiled Eggs (No Water, Easy Peel Recipe)


Marinara sauce for pasta (and how to make it cling)

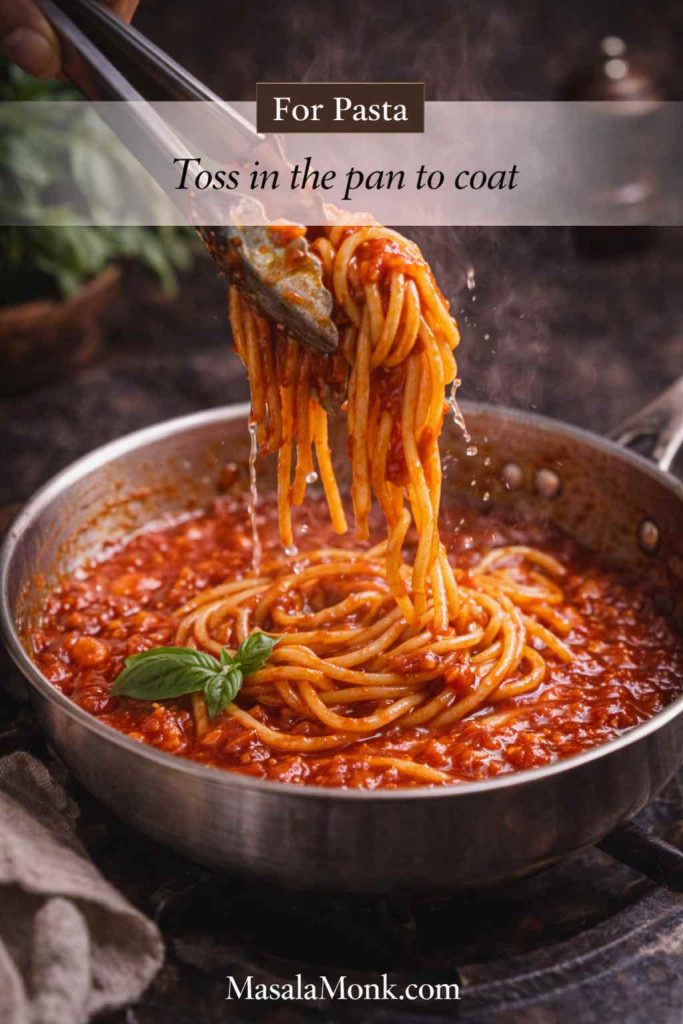
Marinara sauce for pasta is at its best when it coats, not pools. Consequently, the finishing technique matters as much as the sauce itself.

Spaghetti being lifted with tongs from a skillet of marinara sauce, showing how to toss pasta in the sauce for a glossy coating.
Tossing pasta directly in marinara helps the sauce cling to every strand, so each bite tastes evenly seasoned and rich.

The simplest upgrade

  • Reserve a splash of pasta water.
  • Toss pasta with marinara in a pan for 30–60 seconds.
  • Add a little pasta water as needed.

As a result, the sauce emulsifies slightly and clings more smoothly. If you want a technique-oriented reference for sauce behavior and pasta finishing, the Serious Eats approach to sauce method is a helpful baseline: a marinara technique reference.

Also, when you want a meatier cousin to marinara, bolognese is the logical next step. MasalaMonk’s bolognese recipe is a natural internal link for a different kind of red sauce night.


Diet-friendly marinara variations that still taste good

This is where many sauces fall apart: they chase “diet” first and flavor second. Instead, we’ll keep the core identity intact. Then, we’ll adjust only what’s necessary so each version still tastes like marinara.

Sugar free marinara sauce (and no-sugar variations)

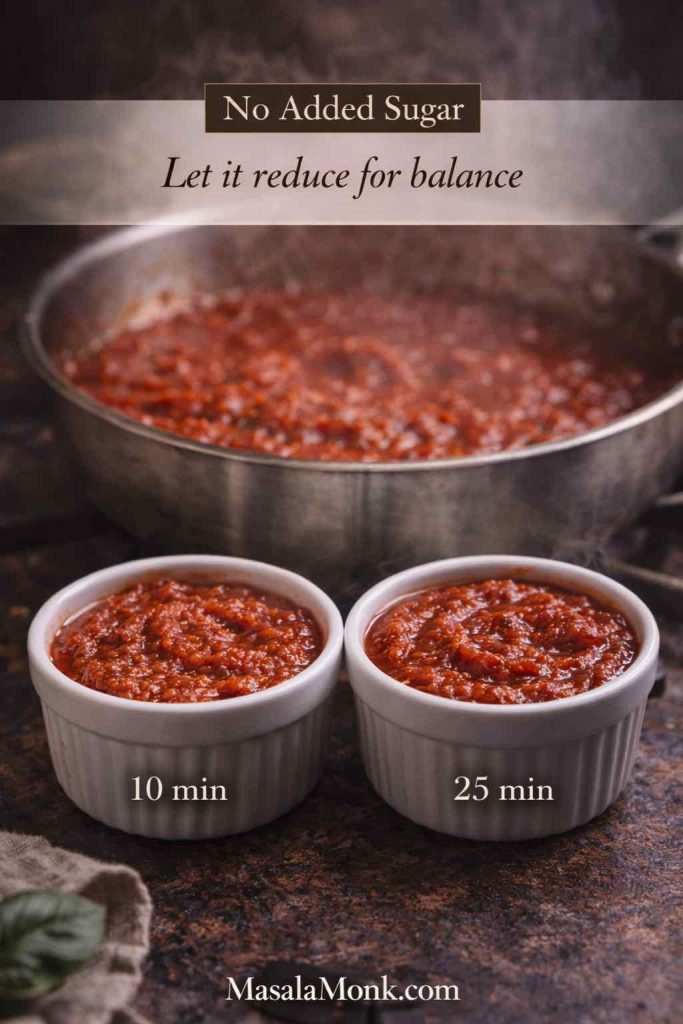
A sugar free marinara sauce is mostly about avoiding the need for sugar in the first place. Therefore, focus on tomato quality and simmering, rather than adding sweeteners.

Two ramekins of marinara sauce labeled 10 min and 25 min in front of a simmering pot, showing how longer reduction naturally deepens flavor without added sugar.
Instead of adding sugar, let the sauce reduce—extra simmer time concentrates tomatoes, darkens the color, and makes marinara taste naturally balanced.

How to make it work

  • Use tomatoes with no added sugar.
  • Simmer long enough for the tomato edge to soften.
  • Finish with basil for sweetness-by-aroma.

If you still want more balance, add a small piece of carrot while simmering, then remove it at the end. Consequently, you get a gentle sweetness without making the sauce taste sugary.

This approach also aligns naturally with no sugar marinara sauce, no sugar added marinara sauce, and zero sugar marinara sauce expectations, while keeping the base marinara sauce recipe intact.

Tomato sauce keto and low carb tomato sauce

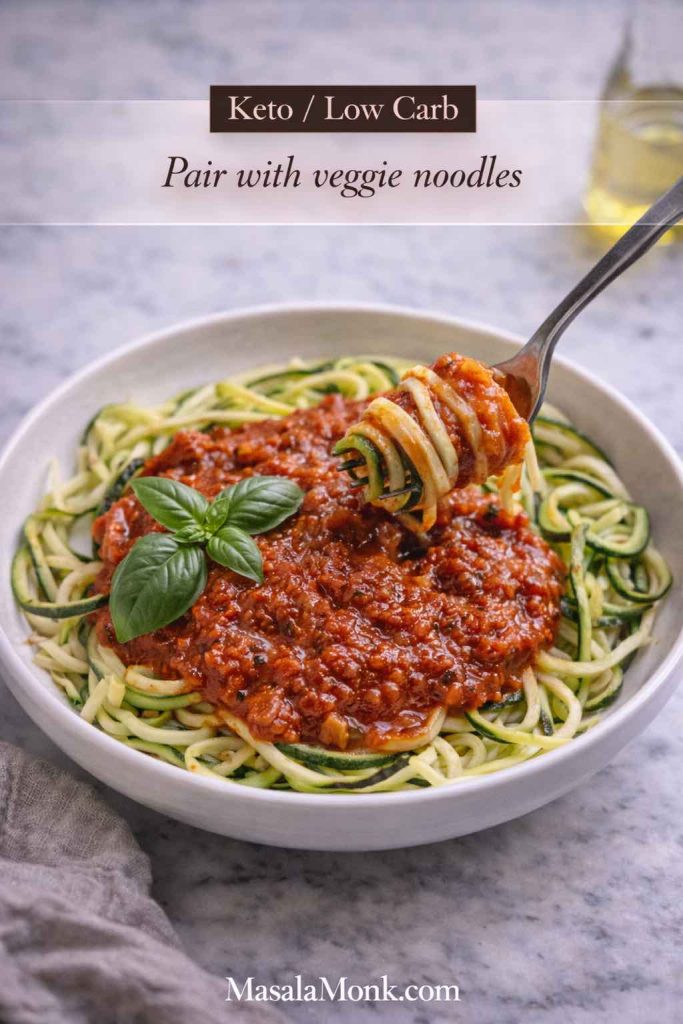
Tomato sauce keto and low carb tomato sauce usually depend more on serving context than the sauce itself. Nonetheless, the sauce should be clean: tomatoes, garlic, basil, and no added sugar.

Zucchini noodles topped with marinara sauce and basil in a bowl, showing a keto and low carb way to serve tomato sauce.
For a keto or low carb plate, keep the marinara the same and swap the base—zucchini noodles (or spaghetti squash) carry the sauce without the extra carbs.

A practical keto-leaning approach

  • Keep onions minimal if you’re strict.
  • Avoid any sweetener additions.
  • Pair the sauce with low-carb “noodles” (zucchini, spaghetti squash) or roasted vegetables.

For serving ideas, MasalaMonk’s keto pasta alternatives fits naturally here, since it helps you build a satisfying plate around a low carb tomato sauce.

Low sodium marinara sauce (and salt-free options)

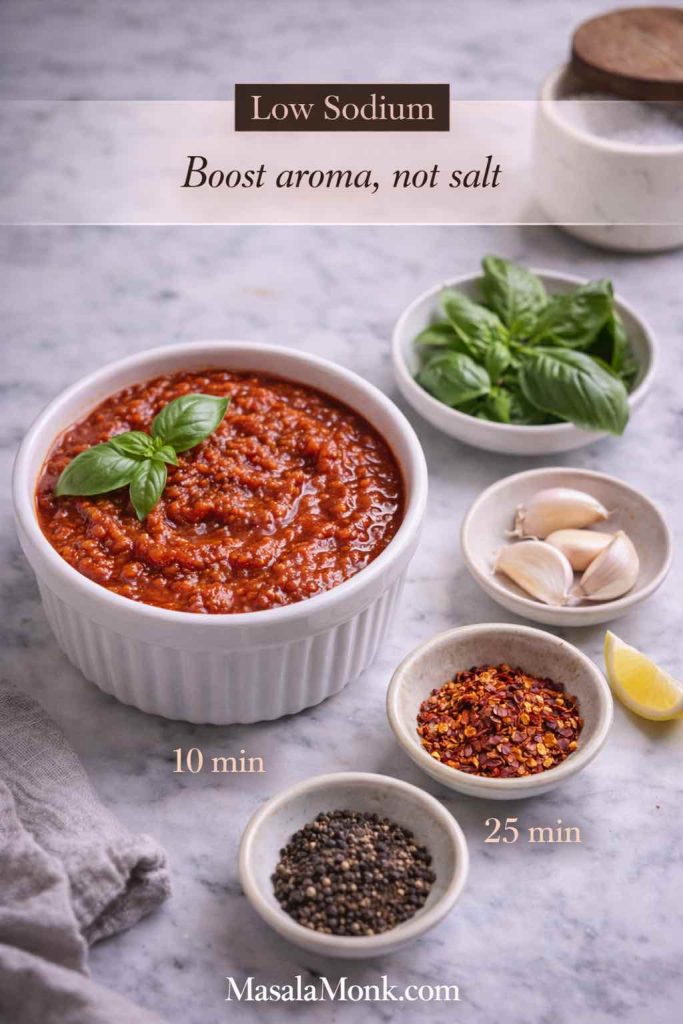
Low sodium marinara sauce isn’t just “less salt.” Instead, it’s a different strategy for building completeness. Therefore, you replace salt’s job with other kinds of intensity.

Bowl of low sodium marinara sauce with basil, garlic, chili flakes, black pepper, and lemon on a marble counter, showing flavor boosters used instead of extra salt.
When you cut back on salt, lean on aroma—garlic, basil, pepper, and a tiny squeeze of citrus can make low sodium marinara taste vivid and complete.

How to keep flavor strong with less salt

  • Sweat onion longer for more natural sweetness.
  • Use a little more garlic.
  • Add black pepper for warmth.
  • Finish with basil for lift.

If you’re going toward no salt marinara sauce or salt free marinara sauce, it helps to simmer a little longer so the sauce concentrates. Moreover, the carrot trick can be helpful here too, because perceived sweetness can reduce the “need” for salt.

Oil free marinara sauce and low fat marinara sauce

An oil free marinara sauce can still be delicious; it just tastes cleaner and slightly lighter. Consequently, reduction becomes even more important.

Chopped onions sweating in a saucepan with a splash of broth or water instead of oil, showing how to start an oil free marinara sauce.
For oil-free marinara, use a small splash of water or broth to soften onions—then let the sauce simmer a bit longer to build body.

Oil-free method

  • Start with a few tablespoons of water or unsalted broth.
  • Sweat onion gently, stirring often.
  • Add garlic briefly, then tomatoes.
  • Simmer a bit longer, then finish with basil.

This also supports low fat marinara sauce and light marinara sauce goals while keeping the sauce recognizable.

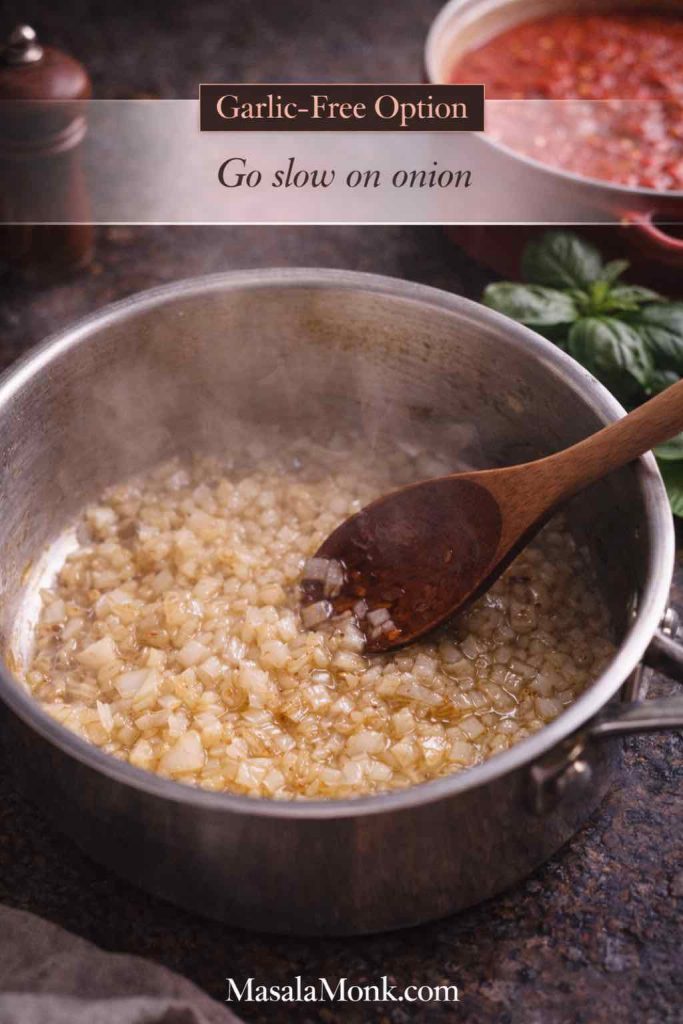
Garlic free marinara sauce

Garlic free marinara sauce is trickier because garlic is a signature note. However, you can still make a satisfying tomato sauce by leaning on onion, basil, and black pepper.

Onions slowly cooking in a saucepan with basil nearby and no garlic present, showing the base technique for a garlic free marinara sauce.
Without garlic, slow-cooked onion becomes the flavor engine—let it turn soft and sweet before tomatoes go in.

How to make it taste “complete”

  • Cook onion slowly until very soft.
  • Use basil generously at the end.
  • Add black pepper and optional chili flakes.

It won’t taste identical to the base marinara sauce recipe, yet it will still land as a classic tomato sauce you can use across meals.

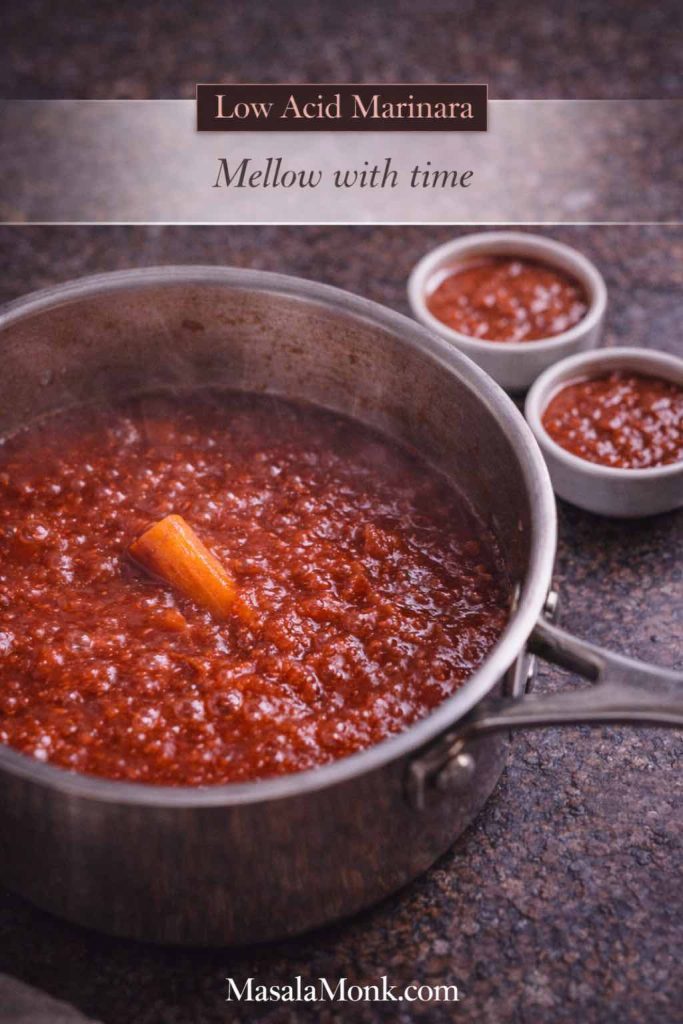
Low acid marinara sauce

Low acid marinara sauce is mostly about perception. In other words, you’re reducing sharpness, not rewriting tomato chemistry.

Marinara sauce gently simmering with a piece of carrot in the pot and two ramekins in the background, showing a low acid marinara method that softens sharp tomato flavor.
A gentle simmer is the real fix for sharp tomato sauce—time smooths the edges, and a small carrot can round the flavor without making it taste sweet.

The most reliable moves

  • Start with better tomatoes when possible.
  • Simmer gently and long enough to soften harshness.
  • Use the carrot balancing trick if needed.
  • Avoid adding extra acidic ingredients.

As a result, the sauce reads smoother and easier to eat, especially for people sensitive to sharp tomato flavors.

Also Read: Blueberry Pancakes (6 Recipes) + Homemade Pancake Mix


Taking marinara into full meals

Once you’ve built confidence with a marinara sauce recipe, it becomes a building block, not just a pasta topping. Therefore, it’s worth knowing a few natural ways to fold it into dinner without repeating the same plate.

Lasagna and baked pasta nights

Marinara is often one half of lasagna’s personality. The other half is the creamy layer that creates structure and comfort. If you want that classic route, MasalaMonk’s béchamel guide for lasagna is a natural internal link, especially because it includes options beyond the standard approach.

Alternatively, if you want the cozy flavor profile without assembling layers, MasalaMonk’s crock pot lasagna soup is a fun pivot that still uses marinara logic in a more relaxed form.

Two-sauce pasta nights

Sometimes you want tomato brightness plus something creamy or herbal. Consequently, pairing marinara with a second sauce can make dinner feel intentional without extra work.

  • For basil-forward variety, MasalaMonk’s pesto recipes fit beautifully alongside marinara.
  • For creamy comfort, MasalaMonk’s Alfredo recipes provide a different direction, while still keeping dinner in the “simple and satisfying” lane.

A snack table that actually feels complete

A thick marinara dipping sauce anchors a snack spread. Meanwhile, a cool sauce creates contrast. If you want that refreshing counterpoint, MasalaMonk’s tzatziki guide pairs nicely with warm tomato-based dips.

Likewise, if you want something herbal with bite, MasalaMonk’s chimichurri post offers a different kind of sauce energy that still makes sense on the same table.


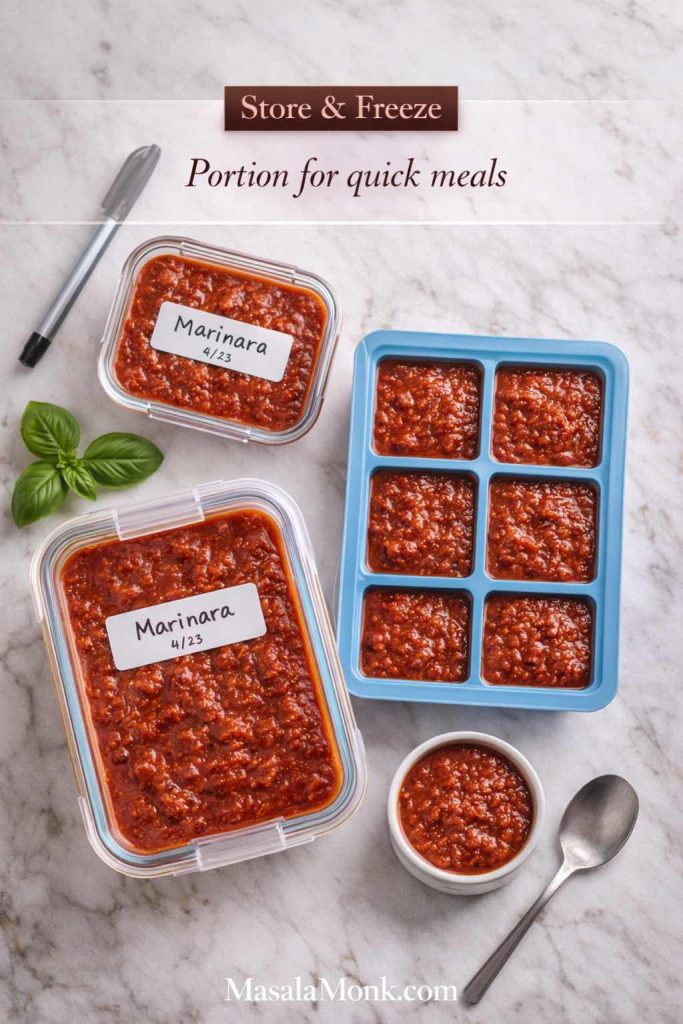
Storage, freezing, and reheating

Marinara is one of the best batch-cook sauces because it freezes well and reheats with minimal quality loss. Therefore, it’s worth making a bigger pot when you can.

Homemade marinara sauce portioned into labeled glass containers and a silicone freezer tray on a marble counter, showing how to store and freeze marinara.
Freeze marinara in small portions so you can thaw exactly what you need—perfect for fast pasta, pizza, and dipping sauce nights.

Refrigeration

Let the sauce cool, then store it in a sealed container. For reliable guidance on how long leftovers keep, FoodSafety.gov’s cold storage charts are a strong reference: cold food storage charts.

Reheating

When reheating, bring the sauce up to a safe temperature. The USDA’s guidance on leftovers includes reheating to 165°F, and also notes that sauces, soups, and gravies should be brought to a boil when reheating: USDA leftovers and food safety.

Freezing

Freeze marinara in portions so you only thaw what you need. Consequently, you reduce waste while preserving texture.

Also Read: How to Cook Bacon in the Oven (Crispy, No-Mess, Crowd-Ready Recipe)


Bringing it all together

A good marinara sauce recipe is less like a single dish and more like a kitchen skill. Once you know the base, you can create a classic marinara sauce for pasta, a thicker marinara sauce for pizza, or a marinara dipping sauce for mozzarella sticks without starting over. Moreover, you can adjust the same core recipe into sugar free marinara sauce, tomato sauce keto or low carb tomato sauce, low sodium marinara sauce, oil free marinara sauce, or even garlic free marinara sauce—each one still recognizable as marinara.

So start with the base marinara sauce recipe and cook it once exactly as written. Then, cook the same marinara sauce again, but tweak one dial—maybe texture for pizza, maybe heat for a spicy marinara sauce, or maybe the salt strategy for a low sodium marinara sauce. After that, repeat with a fresh tomato version when tomatoes are at their best. Eventually, you’ll stop thinking of it as “a recipe” and start thinking of it as “your sauce.”

And that’s the point: a marinara sauce recipe should make dinner easier, not harder.

Also Read: Coconut Water Cocktails: 10 Easy, Refreshing Drinks

FAQs

1) What is the best marinara sauce recipe for beginners?

If you’re new to cooking, the best marinara sauce recipe is the one that stays simple: tomatoes, garlic, salt, basil, and a gentle simmer. More importantly, keep the heat moderate so the garlic doesn’t brown too fast. Afterward, taste near the end and adjust salt little by little, because that final tweak usually makes the biggest difference.

2) What are the essential marinara sauce ingredients?

At minimum, marinara sauce ingredients include tomatoes, garlic, salt, and basil. Additionally, olive oil is common for richness, while onion is optional for sweetness. Meanwhile, black pepper and a pinch of chili flakes are helpful if you want extra warmth without changing the sauce’s core character.

3) How do I make a marinara sauce recipe easy and quick on weeknights?

For a marinara sauce recipe easy enough for busy nights, start with canned tomatoes and keep the simmer short—about 15–25 minutes—so it thickens without turning heavy. Moreover, slice garlic thinly so it releases flavor fast. Then, finish with basil at the end for a fresher taste.

4) How do I make homemade marinara sauce taste less acidic?

To reduce sharpness, simmer the homemade marinara sauce a little longer at a steady, gentle bubble so the flavors mellow. Also, add basil near the end because it softens the perception of acidity. In some cases, a small piece of carrot simmered in the sauce can round out the flavor without making it sweet.

5) How do I make low acid marinara sauce without adding sugar?

For low acid marinara sauce, focus on tomato quality and time rather than sweeteners. Instead of sugar, use a longer simmer, finish with basil, and consider the carrot-balancing method if the tomatoes taste especially sharp. As a result, the sauce becomes smoother while still tasting like classic marinara.

6) Can I make marinara sauce from fresh tomatoes?

Yes—marinara sauce from fresh tomatoes works beautifully when tomatoes are ripe and flavorful. However, fresh tomatoes release more water, so you’ll typically need a longer uncovered simmer. Once it thickens, you can keep it rustic or blend it briefly for a smoother texture.

7) What’s the easiest marinara sauce recipe fresh tomatoes method?

For a marinara sauce recipe fresh tomatoes version that isn’t complicated, peel tomatoes quickly by blanching, then chop and simmer them with garlic and salt until reduced. Next, finish with basil and adjust seasoning. If the sauce stays watery, simply simmer longer rather than adding extra ingredients.

8) What’s the difference between marinara sauce and tomato sauce?

Marinara sauce is usually a quick, bright tomato-based sauce with garlic and basil, whereas tomato sauce can be broader and sometimes cooked longer or seasoned differently. In other words, marinara is typically lighter and faster, while tomato sauce may be more general-purpose depending on how it’s made.

9) How do I make classic marinara sauce thicker?

To thicken classic marinara sauce, simmer it uncovered so excess water evaporates. Alternatively, use crushed tomatoes for a naturally thicker starting point. If you prefer a smooth finish, blending can also create a thicker mouthfeel even without extra cooking.

10) How do I make marinara sauce for pizza so it doesn’t soak the crust?

Marinara sauce for pizza should be thicker and more concentrated than pasta marinara. Consequently, simmer it a bit longer and, if you want, blend it so it spreads evenly. Also, avoid making it too watery with extra liquid, since that’s what can soften the crust.

11) How do I make marinara sauce for pasta that clings to noodles?

For marinara sauce for pasta, toss the cooked pasta with the sauce in a pan for about a minute, adding a small splash of pasta water as needed. Then, keep stirring so the sauce coats evenly. This approach helps the marinara cling rather than slide off.

12) What is marinara dipping sauce and how is it different from pasta marinara?

Marinara dipping sauce is usually thicker and more boldly seasoned than a pasta version. For example, you might simmer it longer and add slightly more garlic or chili flakes. That way, it tastes punchy even when served in small amounts.

13) How do I make marinara sauce for mozzarella sticks?

For marinara sauce for mozzarella sticks, reduce the sauce until it’s thick enough to cling to the food. Additionally, a little extra garlic and a pinch of chili flakes can make it taste more “snack-friendly.” If you want it smoother, blend briefly so it becomes dip-like.

14) How do I make spicy marinara sauce without overpowering the tomatoes?

To make spicy marinara sauce, bloom chili flakes gently in oil before adding tomatoes, so heat spreads evenly. Still, start small—heat intensifies as the sauce reduces. Finally, taste near the end and add more only if needed.

15) How do I make sugar free marinara sauce that still tastes balanced?

Sugar free marinara sauce relies on tomato choice and simmering rather than sweeteners. In addition, finishing with basil can make the sauce taste rounder. If the tomatoes are sharp, simmering a small piece of carrot can soften the edge without adding refined sugar.

16) What’s the difference between no sugar marinara sauce and no sugar added marinara sauce?

No sugar marinara sauce generally means the recipe contains no added sugars, while no sugar added marinara sauce emphasizes that nothing was added beyond naturally occurring sugars in tomatoes. Practically speaking, both aim for the same goal: a sauce without sweeteners. Therefore, check ingredients and keep the method simple.

17) How do I make zero sugar marinara sauce at home?

To make zero sugar marinara sauce, use tomatoes with no added sugar and avoid sweeteners entirely. Then, rely on reduction, basil, and careful seasoning for balance. If it tastes too sharp, extend the simmer rather than adding sugar.

18) Is marinara sauce keto friendly?

Marinara can be keto friendly in moderation, although tomatoes contain natural carbs. Consequently, keep portions reasonable and avoid recipes that add sugar. Additionally, pairing it with low-carb noodles or vegetables makes it easier to fit into a tomato sauce keto style meal.

19) What’s the best low carb tomato sauce approach for everyday meals?

For low carb tomato sauce, keep the ingredient list clean and skip sweeteners. Next, build the meal around low-carb pairings like zucchini noodles or roasted vegetables. That way, the sauce stays familiar while the plate stays lighter.

20) How do I make low sodium marinara sauce without it tasting bland?

Low sodium marinara sauce tastes better when you boost flavor in other ways: more garlic, plenty of basil, black pepper, and a longer simmer for concentration. Also, adding salt gradually at the end helps you avoid oversalting. If you’re cutting sodium sharply, a slightly thicker sauce often tastes fuller.

21) How do I make no salt marinara sauce or salt free marinara sauce that still tastes good?

For no salt marinara sauce or salt free marinara sauce, focus on concentration and aromatics. In particular, simmer longer to intensify tomato flavor, and use garlic, basil, and pepper more generously. If the sauce tastes harsh, the carrot-balancing trick can help smooth it out.

22) How do I make oil free marinara sauce?

Oil free marinara sauce is made by sautéing onion and garlic gently with a little water or broth instead of oil. Then, add tomatoes and simmer a bit longer for body. As the sauce reduces, it becomes richer tasting even without oil.

23) How do I make garlic free marinara sauce?

Garlic free marinara sauce works best when you lean into onion, basil, and black pepper. Start by cooking onion until very soft, then add tomatoes and simmer until thickened. Finally, finish with basil so the sauce still tastes aromatic.

24) How long does homemade marinara sauce last in the fridge?

Homemade marinara sauce is best used within a few days for quality, although exact timing depends on storage temperature and handling. To stay safe, cool it promptly, store it sealed, and reheat thoroughly. If you won’t use it soon, freezing is a better option.

25) Can I freeze marinara sauce?

Yes—marinara freezes very well. For easier thawing, freeze it in smaller portions. Then, reheat gently on the stove, adding a splash of water if it thickened too much in the freezer.

26) Why does my marinara sauce taste bitter?

Bitterness often comes from garlic browning too much or herbs scorching early in cooking. Next time, keep the heat gentler at the start and add basil closer to the end. Also, choose tomatoes you like, because some cans can taste more harsh than others.

27) Why is my marinara sauce watery even after simmering?

Watery marinara usually needs more uncovered simmering or a tomato product with less liquid. Therefore, let it reduce longer and stir occasionally. If you want faster results, start with crushed tomatoes or blend and then reduce briefly to tighten texture.

28) How do I fix marinara sauce that tastes too salty?

If the marinara tastes too salty, add more tomatoes or a small splash of water and simmer briefly to rebalance. Additionally, a bit of basil at the end can soften the overall perception. For the future, start with less salt and adjust only after the sauce reduces.

29) What is the best marinara sauce to buy if I don’t have time to cook?

If you’re buying instead of cooking, look for a jarred marinara with a short ingredient list: tomatoes, olive oil, garlic, basil, and minimal additives. Furthermore, avoid added sugars if you want a cleaner taste. Then, improve it at home by simmering briefly with basil or garlic.

30) Can I use marinara as a simple tomato pasta sauce for meal prep?

Absolutely. Because marinara reheats well and pairs with many proteins and vegetables, it’s one of the easiest sauces for meal prep. Moreover, you can cook one big batch and split it into variations—spicy, low sodium, or sugar free—so your meals don’t feel repetitive.

Posted on 19 Comments

10 Creative Chia Pudding Recipes for Every Taste

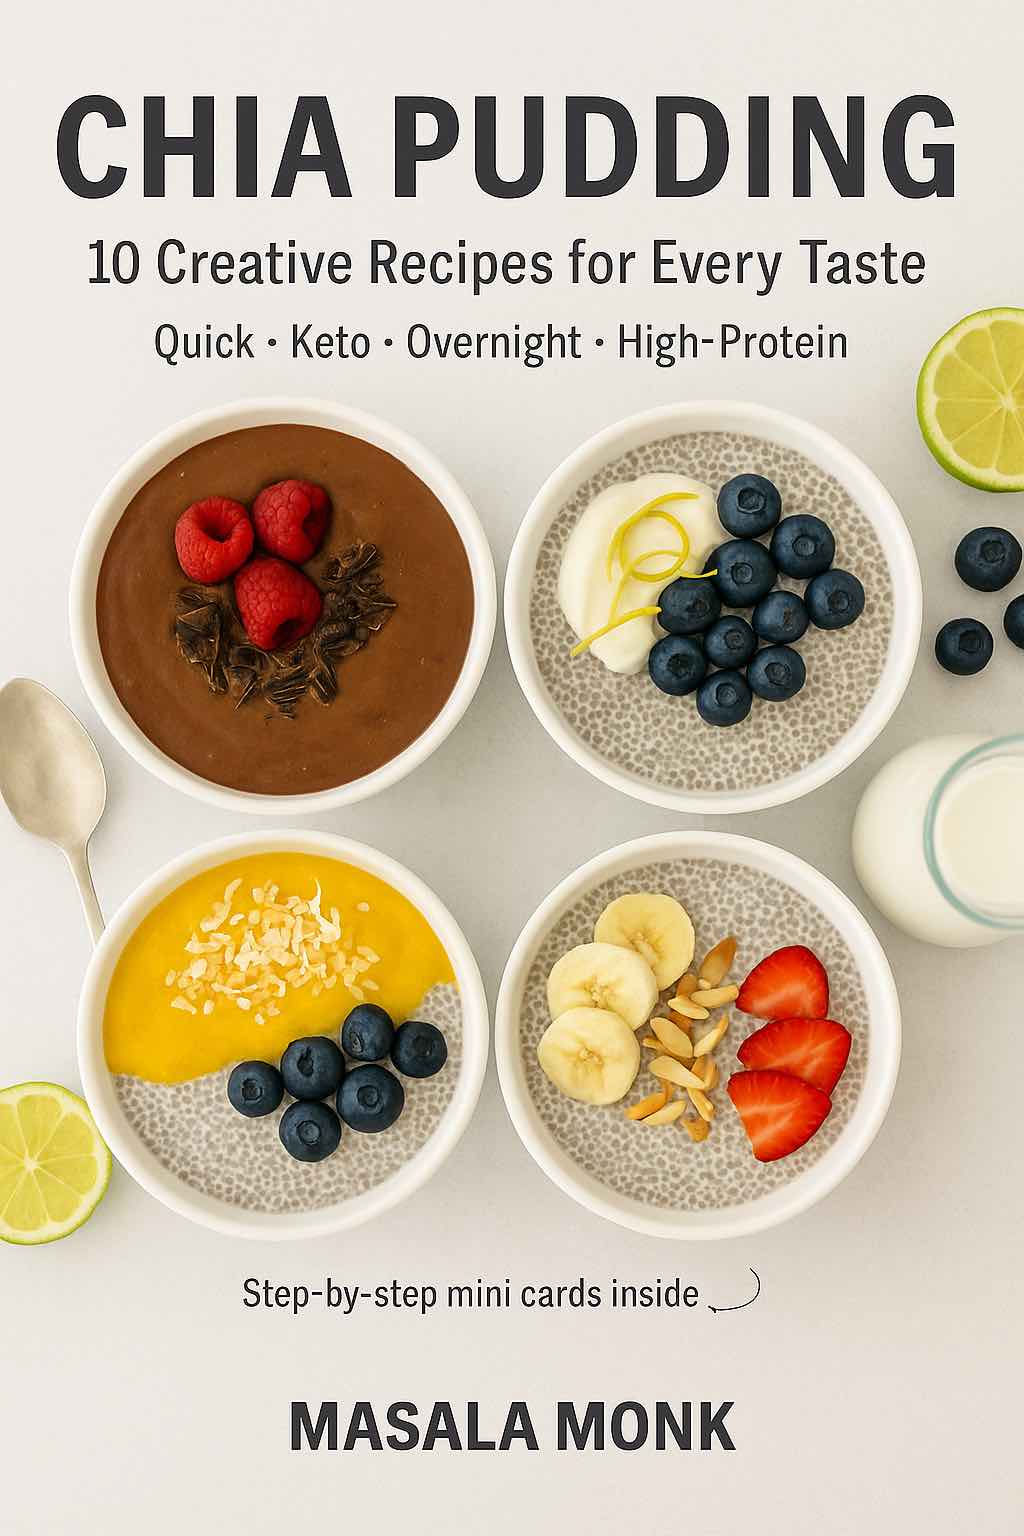
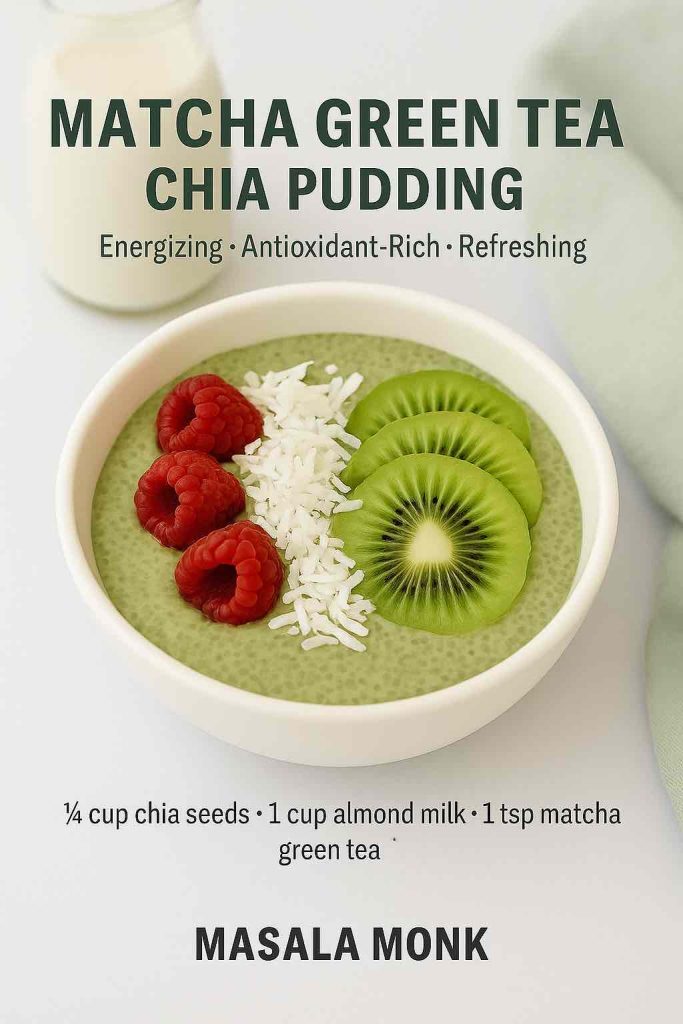
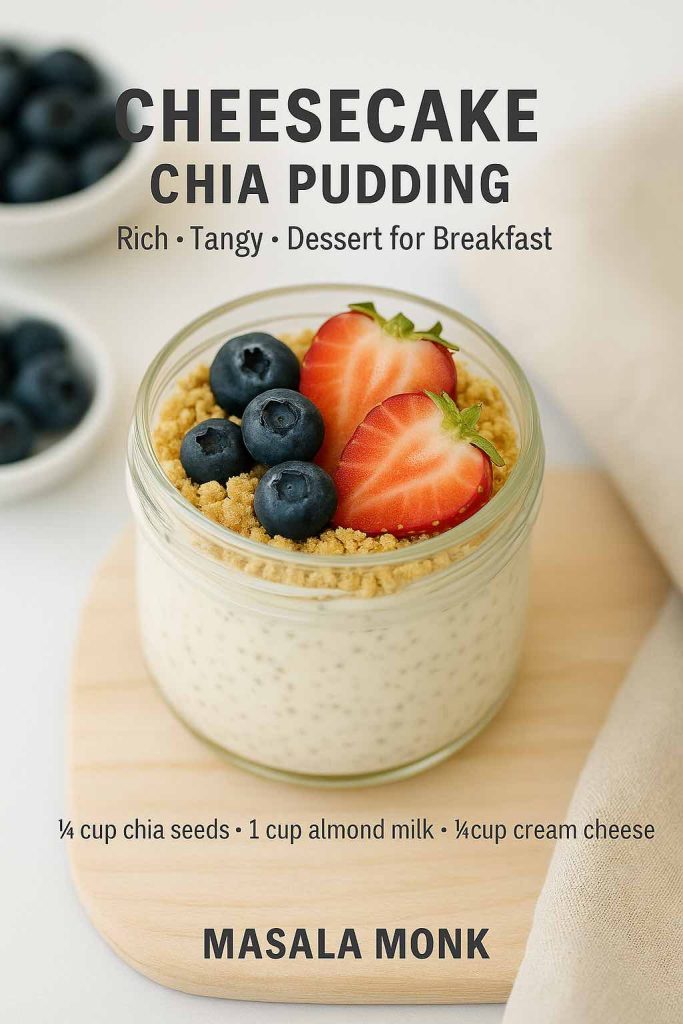
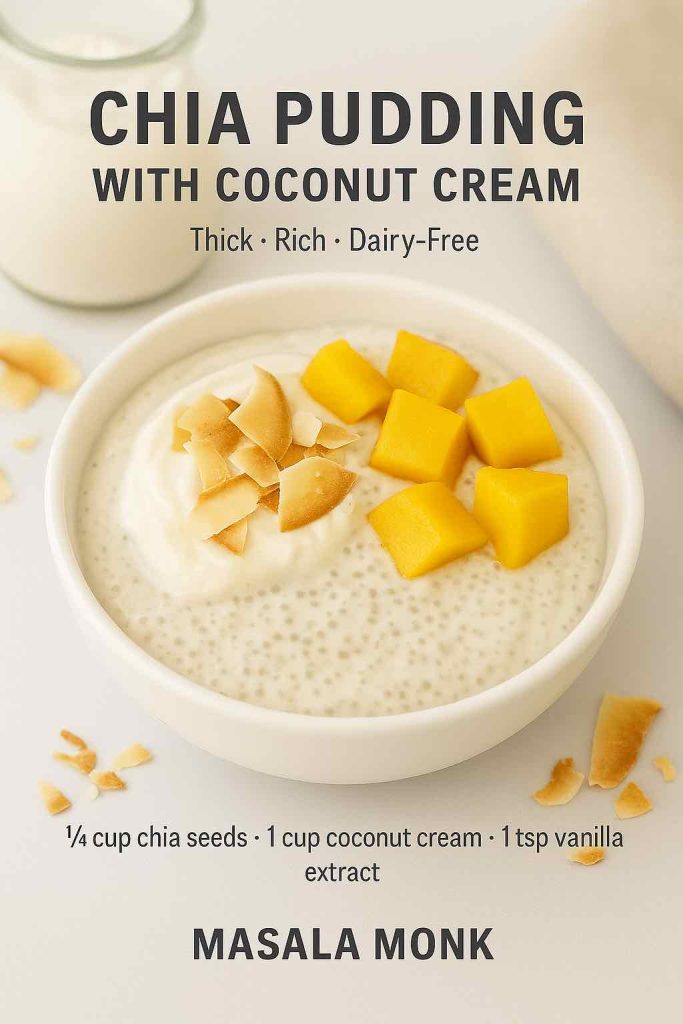
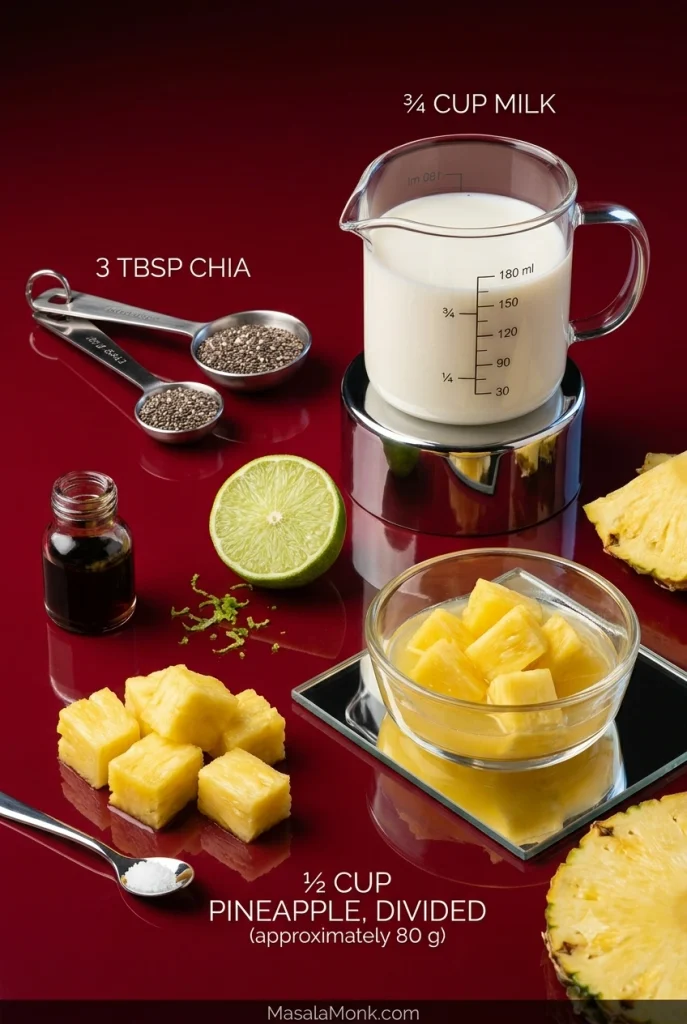
Food blog cover showing four different chia pudding recipes in jars.

The best chia pudding recipes look almost too easy: stir chia seeds into milk, chill, and eat. What makes the difference is the chia-to-liquid ratio — and knowing how to fix the pudding when it turns out too thin, too thick, or clumpy.

This guide gives you a dependable base recipe first, then 10 chia pudding recipes ranging from overnight and almond-milk versions to Greek yogurt, chocolate, mango, matcha, cheesecake, and coconut cream. You’ll also find a flavor chooser, storage guidance, and a troubleshooting table so you can adjust the pudding instead of starting over.

Quick answer: for a thick, spoonable chia pudding, start with ¼ cup chia seeds to 1 cup liquid. Stir once when you mix it, stir again after 5–10 minutes, then chill for at least 2 hours. If you prefer a slightly softer pudding, start with 3 tablespoons chia per cup and adjust after chilling.

In this guide


Basic Chia Pudding Recipe: The 2-Ingredient Base

Every flavor below starts with the same idea: chia seeds need enough liquid and enough time to hydrate. This version makes one generous breakfast serving or two smaller snack portions.

Prep time5 minutes
Chill time2 hours minimum; overnight works well
Cook timeNone
Yield1 large or 2 small servings
Starting ratio¼ cup chia seeds : 1 cup liquid

Ingredients

  • ¼ cup chia seeds
  • 1 cup milk or other liquid: dairy milk, almond milk, soy milk, oat milk, coconut milk beverage, or another option you enjoy

Method

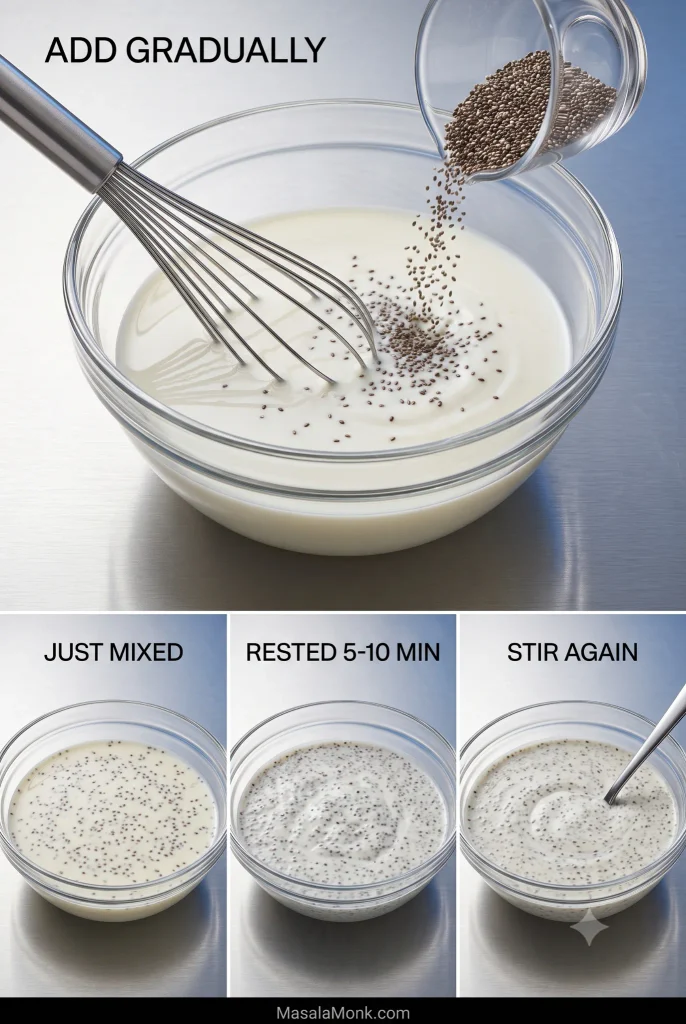
  1. Add the chia seeds and liquid to a bowl or jar and stir thoroughly, scraping the bottom so no dry seeds remain.
  2. Let the mixture stand for 5–10 minutes, then stir again. This second stir is the simplest way to prevent dense chia clumps.
  3. Cover and refrigerate for at least 2 hours. For a make-ahead breakfast, leave it overnight.
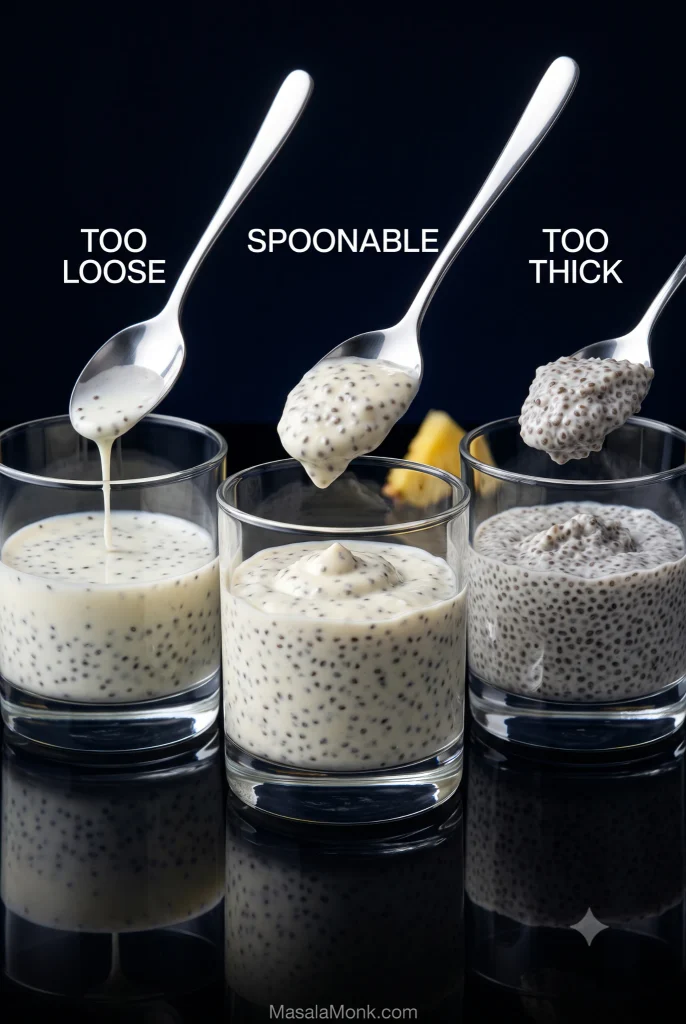
  4. Stir before serving. If it is thicker than you like, loosen it with a splash of milk; if it is still thin, use the troubleshooting guide below.

Vanilla, cinnamon, cocoa, fruit puree, nut butter, honey, maple syrup, jaggery, or another sweetener can all be added after you have the base texture right.


Which Chia Pudding Should You Make?

If you do not want to scroll through ten recipes before deciding, start here. Pick by texture, flavor, or what you already have in the fridge.

RecipeFlavor / textureBest for
Overnight chia puddingClassic, creamyEasy meal prep
Almond milk chia puddingLight, nuttyVegan / dairy-free
Greek yogurt chia puddingThick, tangyHigher-protein breakfast
Blueberry lemonBright, fruityFresh summer flavor
Chocolate chia puddingRich, cocoa-forwardDessert-style breakfast or snack
Mango chia puddingTropical, fruityMango season
Banana bread chia puddingCozy, cinnamon-bananaNaturally sweeter flavor
Matcha chia puddingEarthy, lightly bitterMatcha lovers
Cheesecake chia puddingRich, tangyBrunch or dessert
Coconut cream chia puddingVery thick, richDairy-free dessert

10 Chia Pudding Recipes to Try

1. Overnight Chia Pudding Recipe

If mornings are always rushed, this overnight chia pudding recipe is a lifesaver. With just 5 minutes of prep the night before, you can wake up to a ready-made, creamy, and satisfying breakfast. The chia seeds absorb the liquid overnight, creating a pudding-like texture without any effort.

Ingredients:

  • ¼ cup chia seeds
  • 1 cup almond milk (or coconut milk for richness)
  • 1 tsp vanilla extract
  • 1–2 tsp honey, maple syrup, or stevia (optional)

Instructions:

  1. Combine chia seeds, almond milk, vanilla, and sweetener in a jar.
  2. Stir well, wait 5 minutes, then stir again to prevent clumping.
  3. Cover and refrigerate overnight.
  4. Stir before serving and add toppings of choice.
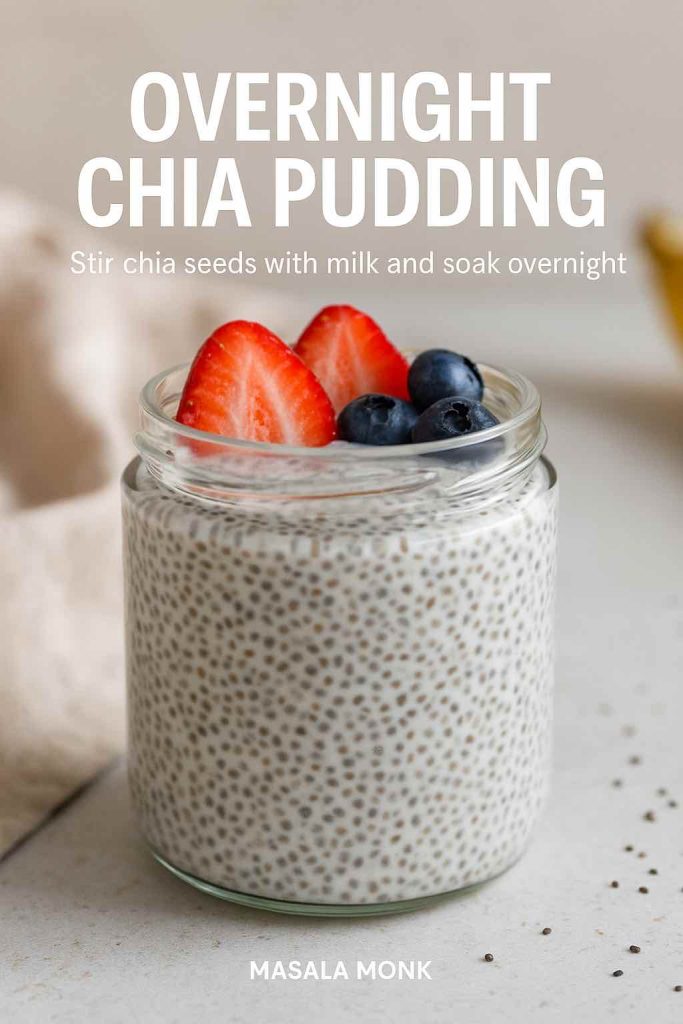
Overnight chia pudding recipe card with a jar topped with strawberries and blueberries.
The second stir after 5–10 minutes is what keeps this overnight chia pudding evenly set instead of clumping at the bottom.

Topping Ideas:

  • Fresh berries (blueberries, raspberries, strawberries)
  • Sliced banana
  • Granola or toasted nuts for crunch
  • A sprinkle of cinnamon or cocoa powder

Variations:

  • Make it keto-friendly by using unsweetened almond milk + stevia.
  • Blend the mixture before chilling for a smooth, mousse-like pudding.
  • Stir in cocoa powder for a chocolate overnight chia pudding.

If you like breakfasts you can prep the night before, compare this with our overnight oats recipe, which has its own ratio, storage, and texture-fix guide.


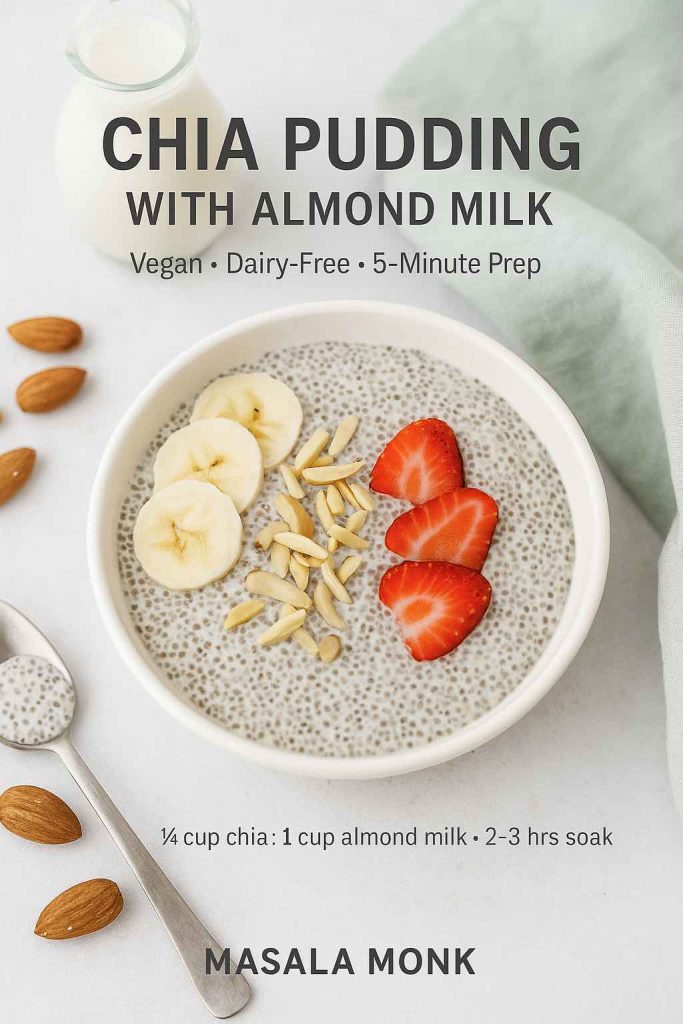
2. Chia Pudding with Almond Milk (Vegan-Friendly)

This chia pudding with almond milk is light, dairy-free, and endlessly versatile. Almond milk gives a subtle nutty flavor and pairs beautifully with fruit or nut butter. It’s the base recipe many vegans swear by.

Ingredients:

  • ¼ cup chia seeds
  • 1 cup unsweetened almond milk
  • 1 tbsp almond butter (optional, for richness)
  • 1 tsp vanilla extract
  • 1–2 tsp maple syrup or agave

Instructions:

  1. Mix chia seeds, almond milk, vanilla, and sweetener in a jar.
  2. Stir well and refrigerate for at least 2 hours (overnight preferred).
  3. Stir again before serving.
  4. Add toppings for extra texture.
Almond milk chia pudding recipe card with banana, strawberries, and slivered almonds.
Almond milk keeps the base light; banana, strawberries, and almonds add sweetness and crunch at serving time.

Topping Ideas:

  • Sliced bananas + almond butter drizzle
  • Fresh strawberries or blueberries
  • Chopped almonds or walnuts
  • Dark chocolate shavings

Variations:

  • Add cocoa powder for a chocolate almond chia pudding.
  • Blend in a handful of frozen berries for a fruity version.
  • Use flavored almond milk (like vanilla) for a natural twist.

Using almond milk often? You can also make almond milk at home and control the sweetness and thickness yourself.


3. Greek Yogurt Chia Pudding (High-Protein)

This Greek yogurt chia pudding recipe is creamy, tangy, and higher in protein than a milk-only version. With ¼ cup chia seeds plus ½ cup Greek yogurt, many combinations land around the 20 g protein range shown in the image, though the exact amount depends on the yogurt and milk you use. Greek yogurt also makes the pudding noticeably thicker; products with live cultures can provide probiotics too.

Ingredients:

  • ¼ cup chia seeds
  • ½ cup almond or dairy milk
  • 1 tbsp honey or stevia
  • ½ cup Greek yogurt
  • ½ tsp vanilla extract

Instructions:

  1. Mix chia seeds, milk, Greek yogurt, vanilla, and sweetener in a bowl.
  2. Stir well until combined.
  3. Refrigerate for at least 2 hours or overnight.
  4. Stir again and add toppings before serving.
Greek yogurt chia pudding recipe card with berries, granola, and honey drizzle.
Greek yogurt makes the base thicker and raises the protein; the exact protein amount depends on the yogurt and milk you choose.

Topping Ideas:

  • Granola or muesli
  • Fresh berries
  • Walnuts or pecans
  • A drizzle of nut butter

Variations:

  • Add a scoop of protein powder for an extra high-protein chia pudding.
  • Use flavored Greek yogurt for a fun twist.
  • Add a spoonful of fruit compote for tangy sweetness.

4. Blueberry Lemon Chia Pudding

This blueberry chia pudding gets its bright flavor from lemon zest and fresh or blended blueberries. The fruit can be layered over the set pudding or blended into the milk for a purple base, while a spoonful of yogurt adds a cheesecake-like tang.

Ingredients:

  • ¼ cup chia seeds
  • 1 cup almond milk
  • 1 tsp lemon zest
  • ½ cup fresh or blended blueberries
  • 1 tbsp honey or maple syrup

Instructions:

  1. Mix chia seeds, almond milk, lemon zest, and sweetener in a jar.
  2. Refrigerate for 2 hours or overnight.
  3. Layer pudding with blueberries before serving.
Blueberry lemon chia pudding recipe card with lemon zest, yogurt, and fresh blueberries.
The yogurt shown here is an optional topping; lemon zest goes into the chia base, while blueberries can be layered or spooned on top.

Topping Ideas:

  • Lemon zest curls
  • Blueberry compote
  • A dollop of Greek yogurt
  • Crushed graham crackers (for cheesecake vibes)

Variations:

  • Blend blueberries into the almond milk for a vibrant purple pudding.
  • Use kefir instead of almond milk for a probiotic-rich version.
  • Add vanilla protein powder for extra nutrition.

Blueberries work especially well here; if you use them often, our guide to the health benefits of blueberries goes deeper into the fruit itself.


5. Chocolate Chia Pudding

This chocolate chia pudding recipe turns the basic chia base into something richer and more dessert-like. The important step is whisking the cocoa into the milk before the chia goes in; that prevents dry cocoa pockets and gives the pudding a more even chocolate flavor.

Ingredients:

  • ¼ cup chia seeds
  • 1 cup milk (almond, coconut, or dairy)
  • 2 tbsp cocoa powder or cacao
  • 1–2 tbsp maple syrup, honey, or stevia
  • ½ tsp vanilla extract

Instructions:

  1. Whisk cocoa into the milk until smooth.
  2. Stir in chia seeds, vanilla, and sweetener.
  3. Refrigerate at least 2 hours or overnight.
  4. Stir well before serving.
Chocolate chia pudding recipe card with raspberries, coconut, and chocolate pieces.
Whisk cocoa into the milk before adding chia to avoid dry cocoa pockets; raspberries, coconut, and chocolate add contrast on top.

Topping Ideas:

  • Dark chocolate shavings
  • Fresh raspberries or strawberries
  • Coconut flakes
  • Peanut butter drizzle

Variations:

  • Add chocolate protein powder for a higher-protein chocolate chia pudding.
  • Use coconut cream instead of milk for a mousse-like texture.
  • Add espresso powder for a mocha chia pudding.

Want another chocolatey make-ahead idea? Our keto hot chocolate guide also shows how a cocoa mix can be repurposed into a chia pudding cup.


6. Mango Chia Pudding

This mango chia pudding recipe brings tropical vibes to your table. Sweet mango puree layered with creamy chia pudding makes a dessert-like breakfast that’s both refreshing and filling.

Ingredients:

  • ¼ cup chia seeds
  • 1 cup coconut milk
  • 1 ripe mango (pureed)
  • 1 tsp lime juice (optional, for tang)

Instructions:

  1. Mix chia seeds and coconut milk, then refrigerate overnight.
  2. Puree mango and layer it over the chia pudding.
  3. Garnish with extra mango or lime zest.
Glass of chia pudding layered with coconut milk and topped with mango purée and lime zest.
Set the coconut chia base first, then add the mango purée so the two layers stay distinct.

Topping Ideas:

  • Fresh mango chunks
  • Shredded coconut
  • Pistachios
  • A squeeze of lime juice

Variations:

  • Blend mango puree into the base for a smooth, golden pudding.
  • Mix with passionfruit for a tropical combo.
  • Use dairy milk + yogurt for a creamy mango lassi-style pudding.

If mango is the flavor you came for, go next to 5 creative mango chia pudding ideas for more tropical combinations.


7. Banana Bread Chia Pudding

Think of this banana chia pudding as banana bread flavors in a jar. Mashed banana, cinnamon, and vanilla go into the base, while walnuts and fresh banana on top add the contrast that makes the flavor feel more complete — with no baking required.

Ingredients:

  • ¼ cup chia seeds
  • 1 cup almond or dairy milk
  • 1 ripe banana (mashed)
  • ½ tsp cinnamon
  • ½ tsp vanilla extract
  • 2 tbsp chopped walnuts (optional)
Glass jar of chia pudding with bananas and walnuts on top, inspired by banana bread flavors.
Mashed banana and cinnamon flavor the base; fresh banana slices and walnuts are best added just before serving.

Instructions:

  1. Mash banana and whisk with milk, cinnamon, and vanilla.
  2. Stir in chia seeds.
  3. Refrigerate overnight.
  4. Add walnuts and extra banana slices before serving.

Topping Ideas:

  • Chopped walnuts or pecans
  • Raisins or dates
  • Banana slices
  • A dusting of cinnamon

Variations:

  • Add cocoa powder for a chocolate banana version.
  • Use Greek yogurt instead of milk for extra protein.
  • Stir in nut butter for a richer flavor.

For more banana-and-chia combinations, see these banana pudding breakfast twists.


8. Matcha Green Tea Chia Pudding

This matcha chia pudding recipe has the earthy, slightly bitter flavor and green color of matcha. Whisking the powder into the milk first keeps it smooth, and because matcha contains caffeine, this version makes more sense earlier in the day if you are sensitive to it.

Ingredients:

  • ¼ cup chia seeds
  • 1 cup warm almond milk
  • 1 tsp matcha green tea powder
  • 1 tsp honey, maple syrup, or stevia
Bowl of green matcha chia pudding with sliced kiwi, raspberries, and shredded coconut.
Whisk matcha into the milk before adding chia so the powder disperses smoothly without green clumps.

Instructions:

  1. Whisk matcha into warm almond milk until no lumps remain.
  2. Stir in chia seeds and sweetener.
  3. Refrigerate overnight.
  4. Stir before serving and add toppings.

Topping Ideas:

  • Fresh raspberries
  • Shredded coconut
  • Sliced kiwi
  • Granola clusters

Variations:

  • Blend banana into the base for natural sweetness.
  • Add vanilla protein powder for a high-protein matcha pudding.
  • Use coconut milk for a creamier, dessert-like version.

If you prefer a smoother texture, this matcha version also works well blended after it has set; the same technique is covered in the troubleshooting guide below.


9. Cheesecake Chia Pudding

Yes, you can have cheesecake for breakfast — with this cheesecake chia pudding recipe. Cream cheese (or Greek yogurt for a lighter version) makes the base rich and tangy, while crushed biscuits and berries give it that dessert feel.

Ingredients:

  • ¼ cup chia seeds
  • 1 cup almond or dairy milk
  • 1 tbsp honey or maple syrup
  • ¼ cup cream cheese (or Greek yogurt)
  • ½ tsp vanilla extract
  • 2 tbsp crushed biscuits or granola (for topping)
  • Fresh berries

Instructions:

  1. Blend milk, cream cheese, honey, and vanilla until smooth.
  2. Stir in chia seeds.
  3. Refrigerate overnight.
  4. Top with crushed biscuits and fresh berries.
Jar of cheesecake-style chia pudding with cream cheese base, graham cracker topping, strawberries, and blueberries.
Cream cheese gives the base its tang; graham crumbs and berries are added after chilling so the topping keeps its texture.

Topping Ideas:

  • Strawberries or blueberries
  • Graham cracker crumbs
  • Lemon zest
  • Berry coulis

Variations:

  • Use flavored yogurt for different cheesecake vibes.
  • Add cocoa powder for a chocolate cheesecake chia pudding.
  • Stir in lemon juice for a tangy New York-style cheesecake twist.

Love the berry-cheesecake direction? You may also like our no-bake blueberry cheesecake.


10. Chia Pudding with Coconut Cream

This chia pudding with coconut cream is thick, rich, and incredibly indulgent — almost like a mousse. It’s naturally dairy-free but tastes luxurious enough for dessert.

Ingredients:

  • ¼ cup chia seeds
  • 1 cup coconut cream
  • 1 tbsp honey, maple syrup, or stevia
  • 1 tsp vanilla extract

Texture note: coconut cream varies a lot by brand. If yours is spoon-thick straight from the container, whisk in a little coconut milk or another milk before adding the chia rather than waiting until the pudding becomes nearly solid.

Instructions:

  1. Mix coconut cream, chia seeds, vanilla, and sweetener.
  2. Stir well, let sit for 5 minutes, then stir again.
  3. Refrigerate overnight until thick.
  4. Garnish before serving.
Bowl of chia pudding with coconut cream, mango chunks, and toasted coconut flakes.
Coconut cream makes the richest, firmest pudding in the set; thin it with a little milk if your brand sets too densely.

Topping Ideas:

  • Toasted coconut flakes
  • Mango chunks
  • Dark chocolate drizzle
  • Crushed nuts

Variations:

  • Blend in cocoa for a chocolate coconut chia pudding.
  • Add pineapple for a pina colada-inspired pudding.
  • Use spiced jaggery syrup for an Indian twist.

For another tropical direction, try our pineapple chia pudding.


Chia Pudding Ratio, Texture & Troubleshooting

Most chia pudding problems are fixable. The important variables are the amount of chia, the thickness of your liquid, how well you stirred, and how long the mixture has had to hydrate.

Common Chia Pudding Problems and Fixes

ProblemLikely causeWhat to do
Too runnyNot enough chia, very thin liquid, or too little chill timeStir first. If it is still loose, add 1 teaspoon chia, wait 15–30 minutes, and check again. Next time, use slightly more chia or less liquid.
Too thickToo much chia or a thick base such as yogurt or coconut creamStir in milk 1 tablespoon at a time. Next time, reduce the chia or start with more liquid.
ClumpyThe seeds gelled together before they were evenly dispersedBreak up the clumps with a spoon or whisk and add a splash of milk if needed. Stir again 5–10 minutes after mixing next time.
Seeds still crunchyThe chia needs more hydration timeRefrigerate longer and check again. Two hours is a useful minimum; overnight is easier when you are meal-prepping.
Cocoa or matcha has lumpsDry powder was added directly to the chia mixtureWhisk or blend briefly now. Next time, whisk cocoa or matcha into the milk before adding chia.
Too dense with yogurtBoth yogurt and chia are thickening the mixtureLoosen it with milk. Half yogurt and half milk is a useful starting point.
Coconut cream version is almost solidCoconut cream is much thicker than a coconut milk beverageThin with coconut milk or another milk. Use coconut cream when you want a dessert-style result; use coconut milk beverage for a lighter pudding.
You dislike the seed textureThe pudding is set correctly, but you do not enjoy the tapioca-like textureBlend the chilled pudding until smooth and treat it as a chia mousse instead.

Adjust the Ratio to Your Ingredients

The ratio is a starting point, not a law. Different milks, yogurt, fruit puree, cocoa, protein powder, and coconut cream all change how thick the final pudding feels, so make small adjustments rather than doubling ingredients at once.


Milk, Protein & Dietary Swaps

BaseWhat it doesUseful for
Unsweetened almond milkLight, neutral, relatively thinEveryday dairy-free pudding
Soy milkCreamier than many nut milks and naturally contains more proteinVegan higher-protein base
Dairy milkClassic creamy textureGeneral-purpose pudding
Oat milkSoft, naturally sweeter-tastingFruit and cinnamon flavors
Coconut milk beverageLight tropical flavorMango, pineapple, chocolate
Canned coconut milk / coconut creamMuch richer and thickerDessert-style pudding
Greek yogurt + milkThickens the pudding and adds more proteinMore substantial breakfast

Vegan: use a plant milk and a plant-based sweetener such as maple syrup if you want one. For more protein: Greek yogurt, soy milk, or protein powder can help; because protein powder thickens as it sits, keep extra milk handy. Keeping it keto: choose unsweetened low-carb milk and sweetener, then watch fruit, granola, and other toppings; our dedicated keto chia pudding with almond milk goes deeper into that version.


How to Store Chia Pudding for Meal Prep

Meal prep is easiest when you portion the pudding into sealed jars or containers and refrigerate it. A plain chia base generally keeps well for about 4–5 days; fruit, yogurt, and other add-ins can affect the best storage window, so use your judgment and follow the storage guidance for those ingredients too.

  • Keep crunch separate: granola, toasted nuts, coconut chips, and similar toppings are better added right before eating.
  • Add delicate fruit later: fresh banana and very juicy fruit can soften or release liquid if they sit for several days.
  • Expect thickening: chia pudding often gets thicker as it sits. Stir in a splash of milk before eating if needed.
  • Freeze individual portions: a plain chia pudding can be frozen for about 1 month in an airtight container. Thaw it overnight in the refrigerator, stir well, and add fresh fruit or crunchy toppings after thawing; the texture may be slightly softer.
  • Batch in one bowl: when making several servings, mix the base in a large bowl first, do the second stir there, and then divide it into jars for more even texture.

If make-ahead breakfasts are a regular part of your week, the same topping-timing idea appears in our overnight oats storage and texture guide: soft mix-ins can go in early, while crunch usually belongs at serving time.


Chia Seed Nutrition: Useful Food, Not a Magic Ingredient

Nutritionally, chia seeds are dense for their size, but it is worth separating that from the bigger claims often made about “superfoods.” Harvard’s Nutrition Source notes that 2 tablespoons (about 28 g) of chia seeds provide roughly 140 calories, 4 g protein, 11 g fiber, unsaturated fat, calcium, and other minerals. They are also a plant source of the omega-3 fat ALA.

The practical reason chia works so well in pudding is its fiber and mucilage: when the seeds meet liquid, they form a gel that creates the familiar spoonable texture. That fiber can contribute to fullness as part of a meal, but chia by itself should not be treated as a weight-loss, blood-sugar, or heart-health treatment. Harvard’s review notes that controlled human studies have produced mixed results, while a 2024 systematic review of randomized trials found some modest changes in selected metabolic markers rather than a universal effect.

In other words: enjoy chia pudding because it is convenient, fiber-rich, flexible, and easy to build into a balanced breakfast or snack—not because one ingredient needs to carry the entire health story. If you are specifically interested in glucose, our separate guide looks at chia seeds and blood sugar in more detail.


Frequently Asked Questions About Chia Pudding

What is the best chia pudding ratio?

For a thick, spoonable pudding, start with ¼ cup chia seeds to 1 cup liquid. If you prefer a softer result, try 3 tablespoons per cup. The thickness of your milk and any yogurt, fruit puree, cocoa, or protein powder will also affect the final texture.

How long does chia pudding need to set?

Give it at least 2 hours in the refrigerator. Overnight is convenient and gives the seeds plenty of time to hydrate. Stirring again after the first 5–10 minutes helps the pudding set more evenly.

Why is my chia pudding still runny?

First stir it again—sometimes the seeds have settled instead of thickening evenly. If it is still thin after enough chill time, add about 1 teaspoon chia, mix well, and let it sit another 15–30 minutes. Very thin plant milks and watery fruit can also loosen the pudding.

Can you make chia pudding with yogurt?

Yes. Greek yogurt makes chia pudding thicker and usually raises the protein compared with a milk-only version. A simple starting point is half yogurt and half milk, then adjust with more milk if the mixture becomes too dense.

Can you add protein powder to chia pudding?

Yes. Whisk the protein powder into the milk before adding chia so it disperses more evenly. Because many powders thicken as they hydrate, check the pudding after chilling and add extra milk if it becomes stiff.

Is chia pudding keto-friendly?

It can be. Use an unsweetened low-carb milk, choose an appropriate sweetener if you want one, and be mindful of fruit, granola, and other toppings. For exact low-carb combinations, use the dedicated keto chia pudding recipe.

How long does chia pudding last in the fridge?

A plain chia pudding base generally keeps well for about 4–5 days in a sealed refrigerator container. Add crunchy toppings at serving time, and remember that fresh fruit, yogurt, or other perishable add-ins can change the practical storage window.

Can you freeze chia pudding?

Yes. Freeze plain chia pudding in individual airtight portions for about 1 month, then thaw it overnight in the refrigerator and stir before serving. Fruit, yogurt, and richer coconut versions can change texture more noticeably after freezing, so add fresh toppings after thawing.

Can you blend chia pudding?

Absolutely. Chill it until the seeds have hydrated, then blend until smooth. This turns the tapioca-like seed texture into something closer to a mousse and works particularly well with chocolate, banana, mango, and nut butter.

What is the best milk for chia pudding?

There is no single healthiest or best milk for everyone. Almond milk gives a lighter pudding, dairy or soy milk can add more protein, oat milk tastes naturally sweeter, and coconut milk makes tropical flavors richer. Choose based on texture, flavor, dietary needs, and the nutrition of the specific product you use.

Is chia pudding good for weight loss?

Chia pudding can fit into a weight-management eating pattern because chia contributes fiber and the recipe can be portioned easily, but it is not automatically low-calorie and chia seeds are not a weight-loss treatment. Milk, coconut cream, sweeteners, nut butter, granola, chocolate, and other toppings can change the energy content substantially.


The Takeaway

Start with the ratio, stir twice, and give the chia enough time to hydrate. Once the base is right, the rest is mostly preference: almond milk for something lighter, yogurt for more body, cocoa for dessert energy, mango or berries for fruit, or a quick blend when you want the texture completely smooth.

The ten recipes above are meant to be starting points rather than ten separate rules. Pick the version that sounds good, use the troubleshooting table if the texture needs adjusting, and change the toppings when you want the same basic jar to feel new again.

Posted on 4 Comments

Pineapple Chia Pudding Recipe: Creamy & Spoonable Every Time

Pineapple chia pudding in a clear glass, topped with juicy pineapple, lime zest and pistachio, with a spoon lifting a soft chia-filled bite.

This post was last updated on:

Pineapple chia pudding should be cold, creamy and bright with fruit. It should not have milk floating above a chia slab or be so thick you can stand a spoon in it.

Juicy pineapple, fresh lime and just enough vanilla make it taste like something you would actually look forward to finding in the fridge. Mixing it takes minutes. Getting that soft, spoonable texture is where most jars go sideways.

This pineapple chia seed pudding uses a slightly firmer base so there is room for the fruit’s moisture. Give it a second stir before it goes into the fridge, and by morning the work is done: stir, add cold pineapple and eat.

Quick Answer

For one breakfast jar, use 3 tablespoons / about 35 g chia seeds + ¾ cup / 180 ml / 6 fl oz milk + ½ cup / about 80 g pineapple, divided. Stir well, wait 5–10 minutes, stir again, fold in about half the fruit, then chill for at least 2 hours. Four hours or overnight gives the most dependable texture; save the remaining pineapple for serving.

It is ready when the chia holds softly on a spoon and there is no loose milk pooling around it.

Pineapple Chia Pudding Recipe

Start with plenty of pineapple, a creamy but not heavy base, and enough lime and vanilla to keep the fruit tasting fresh and lively.

  • Makes: 1 breakfast jar or 2 small snack portions
  • Prep: about 5 minutes
  • Second stir: after the brief initial rest
  • Minimum chill: about 2 hours
  • Best texture: about 4 hours to overnight
  • Cook time: none

A 16 oz / 475 ml jar leaves plenty of room to stir and add toppings. A 12 oz / 350 ml jar works if you mix in a bowl first.

Equipment: a bowl or wide jar, a whisk or spoon, measuring spoons and a lidded container. A small blender is optional for the smooth version.

Ingredients

  • Whole chia seeds: 3 tablespoons, about 35 g / 1.2 oz
  • Unsweetened almond or coconut drinking milk: ¾ cup / 180 ml / 6 fl oz; soy or dairy milk also works
  • Finely diced pineapple: ½ cup / about 80 g / 2.8 oz, divided
  • Vanilla extract: ½ teaspoon
  • Finely grated lime zest: ½ teaspoon
  • Fresh lime juice: ½–1 teaspoon / 2.5–5 ml
  • Fine salt: a small pinch
  • Sweetener: up to 1 teaspoon, if needed

Chia tablespoon weights vary slightly between brands and measuring styles, so the tablespoon measure is the main functional measurement here.

Store-bought unsweetened almond milk keeps things easy, but homemade almond milk works too. Homemade batches vary in richness, so you may need a little more or less milk at the end.

Using dairy milk? The recipe still works. When the jar will sit overnight, keep raw fresh or frozen pineapple separate and add it at serving; the reason is explained below.

Optional toppings: choose one or two so the pineapple still gets to be the point.

  • Toasted unsweetened coconut
  • Chopped pistachios
  • Plain Greek or plant-based yogurt
  • Granola
  • Extra lime zest or fresh mint
Measured chia seeds, three-quarter cup of milk and half a cup of pineapple divided into two portions, with lime, vanilla and salt.
The firmer base leaves room for pineapple’s juice. The goal is still a soft, spoonable pudding once the fruit is folded in.

Method

  1. Mix the base. Add the milk, vanilla, lime zest, lime juice, salt and any sweetener to a bowl or wide jar. With the whisk moving, sprinkle in the chia gradually and whisk for about 20–30 seconds. Scrape the bottom and corners so no dry pockets remain.
  2. Wait, then stir again. Leave it for 5–10 minutes, then scrape the bottom and sides and break apart any clusters. This is what prevents milk on top and a dense chia layer underneath.
  3. Add half the pineapple. Fold in about ¼ cup / 40 g well-drained diced pineapple. Very juicy fruit—and fruit going into jars for several days—is better kept separate until serving.
  4. Cover and chill. Refrigerate for at least 2 hours. Four hours gives a more dependable set; overnight is easiest. Still seeing the seeds settle—or making a large batch? Give it one more stir 30–60 minutes later. Most single jars will not need it.
  5. Check the texture. Give the pudding a good stir. The seeds should be evenly hydrated and the mixture should hold softly on a spoon without loose milk around it.
  6. Adjust only if needed. Too thick? Add milk 1 tablespoon / 15 ml at a time. Still clearly too thin after several hours? Add 1 teaspoon chia and wait another 15–30 minutes.
  7. Finish and eat. Add the remaining pineapple and any crunchy toppings. Taste it cold: if the pineapple seems muted, add a little extra lime zest; if the fruit is tart, add a touch more sweetener.

Why the Second Stir Matters

Four-step chia pudding process showing chia sprinkled into milk while whisking, then the mixture just mixed, rested for 5 to 10 minutes, and stirred again until evenly distributed.
The useful moment for the second stir is after hydration has started but before settling has fully taken hold. By then the seeds are tackier, so redistributing them now is more effective than trying to break up a compact layer later.

If your jar is already in the fridge, stop here—you have done everything you need. The rest is for choosing different pineapple or milk, making several breakfasts at once, or rescuing a jar that did not behave as expected.

Choose What You Need

The Chia-to-Liquid Ratio for Pineapple Pudding

Three tablespoons of chia per cup of liquid gives a softer pudding; four gives a noticeably firmer one. Pineapple adds its own moisture, so the main recipe starts toward the thicker end.

Chia seedsLiquidResult
3 tbsp1 cup / 240 mlSofter, looser pudding
4 tbsp1 cup / 240 mlFirmer, spoonable pudding
3 tbsp¾ cup / 180 mlThicker base with room for juicy fruit

A very ripe fresh pineapple can be surprisingly juicy, thawed fruit leaks water, and crushed pineapple carries more liquid than neat chunks. The main recipe’s 3 tablespoons chia to ¾ cup / 180 ml milk leaves room for that extra moisture.

More chia makes the pudding thicker. Yogurt or richer coconut milk makes it feel creamier. That distinction matters when you are chasing a lush café-style spoonful rather than simply trying to make the pudding stand up on the spoon.

The same basic method works with plenty of other flavors in our chia pudding guide.

What Should Properly Set Chia Pudding Look Like?

Whole-seed chia pudding is never quite as smooth as custard. Each seed develops a soft gel coating while the seed remains perceptible. The finished pudding lands somewhere between tiny tapioca and a soft seeded gel.

  • It should hold a soft mound on a spoon.
  • The seeds should look evenly hydrated.
  • There should be no pool of milk floating around it.
  • There should be no dense seed slab stuck underneath.
  • The overall texture should feel creamy rather than rubbery.

A little seed texture is normal. Dry, hard pockets are not.

Three glasses compare chia pudding textures: runny pudding dripping from a spoon, properly spoonable pudding holding a soft mound, and very thick pudding forming a dense stiff scoop.
After one good stir, watch what the spoon track does. A loose mixture flows closed, a ready pudding relaxes slowly around a soft scoop, and an over-thick jar leaves ridges that stay sharply defined.

Sometimes the pudding is exactly right and you still dislike the texture. That is allowed. Try the blended version. If that still does not appeal, there are plenty of good breakfasts in the world and no reason to force yourself into a chia habit.

Does your jar look different? Jump to Troubleshooting.

Fresh, Frozen or Canned Pineapple?

PineappleBest forWatch for
FreshBright flavor, topping, juicy piecesVariable juice
FrozenBlending into the baseThaw liquid
Canned in juiceEasy meal prepDrain well
CrushedFruit in every spoonfulExtra liquid
JuiceStronger pineapple flavorCounts as liquid

Fresh pineapple gives the brightest bite. For the sweetest jar, look for a clean sweet aroma at the base and a little give, then dice it fairly small.

Frozen pineapple is best when you want fruit through the base. Blend about ¼ cup / 40 g with the measured milk and keep the rest for serving. Drain thawed fruit before folding it into an already-set pudding.

Canned pineapple is easy for meal prep; choose fruit packed in juice and drain it well. Crushed pineapple spreads fruit through every spoonful but brings more liquid, so drain it or keep it as a separate layer.

Five pineapple forms labeled fresh, frozen, canned, crushed and juice, showing fresh pieces, frozen chunks, drained canned fruit, crushed pineapple in a strainer and pineapple juice.
A useful rule is to watch what escapes the fruit. If thawed, crushed or canned pineapple leaves noticeable liquid behind, drain it. Once that moisture starts pouring rather than clinging to the fruit, treat it as part of the liquid budget.

Pineapple Juice Changes the Ratio

Chia hydrates perfectly well in pineapple juice, but the juice has to come out of the liquid somewhere else. Add ¼ cup / 60 ml pineapple juice and reduce the milk by about the same amount.

Juice makes the pudding fruitier and sweeter; milk, coconut or yogurt supplies more of the creamy body. Diced fruit gives bite, purée makes a fruit layer, and fully blended pineapple behaves more like liquid. Once the fruit pours like juice, treat it like juice.

Using Yogurt? One Pineapple Quirk Matters

Fresh pineapple contains bromelain, an enzyme that breaks down milk proteins, and freezing raw pineapple does not reliably switch that enzyme off. Pineapple and yogurt are still perfectly normal foods to eat together. Odd bitterness or texture can show up when raw fresh or frozen pineapple sits in yogurt or skyr for hours.

For an overnight dairy-based jar, use canned or cooked pineapple, or add raw fresh or frozen fruit in the morning. With protein-rich soy yogurt, keeping raw pineapple separate until serving is a simple precaution when prepping well ahead.

Three pineapple and yogurt chia pudding examples: raw pineapple mixed in for eating soon, raw pineapple kept separate for overnight prep, and cooked or canned pineapple mixed into an overnight jar.
Keeping raw pineapple separate for an overnight yogurt jar has a sensory payoff too. Besides avoiding hours of enzyme contact, you preserve more of the fruit’s fresh aroma, brighter acidity and firmer bite for breakfast.

Using ordinary almond or coconut drinking milk and fresh pineapple? Follow the main recipe and move on.

Using yogurt for the base? Jump to the high-protein Greek yogurt version.

How to Make Pineapple Chia Pudding Creamier

Almond milk keeps the jar light, Greek yogurt makes it silkier, and coconut brings richness.

BaseResultBest move
Almond milkLight, cleanUse main ratio
Soy milkMore body, more proteinUse main ratio
Dairy milkRounder, creamierFresh pineapple at serving for overnight prep
Coconut drinkLight, tropicalUse main ratio
Canned coconut milkRich, denseDilute with lighter milk
Greek yogurt or skyrSilky, tangy, protein-richUse yogurt ratio below
Three close-up chia pudding textures compare a dense mixture with more chia, silky Greek yogurt chia pudding and glossy rich coconut chia pudding.
Look at the spoon tracks rather than the color. Extra chia creates tighter, more rigid grooves; Greek yogurt gives rounded silky folds; richer coconut shows more gloss and a fuller cold-set body.

Carton coconut drink, light canned coconut milk and full-fat canned coconut milk behave very differently once cold. Our guide to coconut milk types and nutrition goes deeper into those differences.

If you are happy with almond or coconut drinking milk and the main recipe, you do not need to change a thing. For a more café-style spoonful, Greek yogurt or skyr gives the base more body and a silkier feel. Let the pineapple do most of the flavor work, then add vanilla, lime and something crisp—perhaps toasted coconut, pistachios or a little granola.

Full-fat canned coconut milk can become surprisingly firm when it gets cold. A mixture that looked creamy at night may feel almost waxy by breakfast. Whisk a separated can smooth before measuring it, and combine rich canned coconut milk with a thinner drink rather than using it alone.

Pineapple Coconut Chia Pudding

Here the coconut softens pineapple’s sharper edges without burying the fruit.

Pineapple coconut chia pudding in a clear coupe with a pineapple layer, fresh pineapple, toasted coconut and lime zest.
The coconut blend is really a cold-texture decision. Lighter coconut drink provides most of the hydration. A smaller amount of canned coconut milk adds richness without letting chilled coconut fat dominate the finished pudding.
  • Chia seeds: 3 tbsp, about 35 g
  • Coconut drinking milk: ⅔ cup / 160 ml
  • Well-mixed canned coconut milk: ¼ cup / 60 ml
  • Pineapple: ½ cup / about 80 g, divided
  • Vanilla: ½ tsp
  • Lime zest: ½ tsp
  • Lime juice: ½–1 tsp
  • Salt: a pinch
  • Sweetener: only if needed

Use the same two-stir method as the main recipe. Fold about half the pineapple through and keep the rest for the top.

For a piña colada-style jar, pulse some of the pineapple into a thick purée. Layer it with the coconut chia so each spoonful gets a clearer hit of fruit.

That same pineapple-coconut-lime combination runs through our piña colada guide.

High-Protein Pineapple Chia Pudding with Greek Yogurt

Greek yogurt or skyr is the simplest way to add substantial protein while making the chia base silkier at the same time.

  • ½ cup plain Greek yogurt or skyr, about 120 g
  • ⅓ cup milk, about 80 ml
  • 2 tbsp chia seeds, about 24 g
  • ½ tsp vanilla
  • Lime zest to taste
  • Pinch of salt
  • Sweetener, if needed
  • ½ cup pineapple, about 80 g
Close-up of thick pineapple chia pudding made with Greek yogurt, with a spoon drawn through the creamy chia mixture and a piece of pineapple in the pudding.
The lower chia amount here is deliberate. Greek yogurt already supplies substantial body. Using 2 tablespoons instead of the master recipe’s 3 helps the high-protein pineapple chia pudding stay silky rather than crowded with seeds.

Whisk the yogurt, milk, vanilla, lime zest and salt first, then add the chia and follow the same two-stir method. Very thick Greek yogurt may need another tablespoon or two of milk so the chilled pudding stays silky rather than pasty.

For an overnight jar, heat-treated or canned pineapple can go straight into the pudding. Raw fruit, whether fresh or frozen, is better added in the morning.

For a plant-based version, use soy milk with a thick soy yogurt. Using protein powder? Start with about 1 tablespoon. Depending on the powder, you may need another 1–3 tablespoons / 15–45 ml milk to keep the pudding creamy rather than pasty.

Prefer It Smooth? Blend It After Chilling

Whole chia always keeps a tiny-seed texture. For something closer to mousse, let the pudding hydrate fully first and then blend it with the pineapple until creamy.

Smooth blended pineapple chia pudding in a glass coupe with fine chia flecks, a pineapple purée swirl and lime zest.
Blend this version to change mouthfeel, not to rescue a runny pudding. Fully hydrated chia becomes smoother and mousse-like after blending, but an under-set ratio still needs time or adjustment before the blender comes out.

Blending after the set usually gives a smoother result than grinding dry chia at the beginning. Ground chia can feel finer, but it can also turn gummy. Hydrating whole seeds first and blending later smooths out most of the seed texture, although chia’s natural gel-like feel will still be there.

Ready to make it? Back to the main recipe.

Lower-Carb Pineapple Chia Pudding

For a lower-carb jar, use a smaller amount of pineapple and let lime zest, vanilla and a pinch of salt make that fruit go further. The easiest way to lower the carb load is simply to use less pineapple.

  • 3 tbsp chia seeds, about 35 g
  • ¾ cup unsweetened almond milk, 180 ml
  • 2–4 tbsp finely diced pineapple, about 20–40 g
  • ½ tsp vanilla
  • Plenty of fresh lime zest
  • Pinch of salt
  • Optional monk fruit, stevia or another preferred non-sugar sweetener

With less pineapple in the jar, lime zest matters more. Start toward the upper end of the fruit range if flavor matters more than shaving off every possible gram of carbohydrate. There is little point making a pineapple pudding with two apologetic cubes of pineapple.

Watching added sugar? Ripe pineapple may be sweet enough on its own. Honey, maple syrup and agave still count as added sugars even when they are described as “natural” sweeteners.

For a stricter base, use our keto chia pudding with almond milk.

Meal Prep & Storage

Making four breakfasts at once? Do not stand there stirring four tiny jars separately. Mix one big batch, give it the second stir, then divide it up.

Four jars of pineapple chia pudding on a refrigerator shelf, with a hand reaching for one jar and a small container of pineapple nearby.
Before portioning a batch, give the bowl one last thorough stir so the first and last jars receive the same seed-to-liquid balance. Then divide promptly rather than letting the chia begin settling again while you fill containers.

Scaling the recipe is straightforward:

MakeChiaMilkPineapple
1 jar3 tbsp / ~35 g¾ cup / 180 ml½ cup / ~80 g
2 jars6 tbsp / ~70 g1½ cups / 360 ml1 cup / ~160 g
4 jars¾ cup / ~140 g3 cups / 720 ml2 cups / ~320 g

Mix all of the milk and chia in one large bowl, wait 5–10 minutes, and stir thoroughly again. If a large batch is still settling, keep it in the bowl for one more stir 30–60 minutes later; then divide it between containers. Use roughly half the pineapple in or alongside the jars and save the rest for serving. Keeping all of the fruit separate gives the most consistent texture over several days.

Keeping Meal-Prep Jars at Their Best

Crunchy toppings belong at the last minute. Granola, nuts, seeds and toasted coconut are much more enjoyable crisp than after three nights sitting in chia gel.

A jar that is just right on Monday can be noticeably thicker on Wednesday. Stir in 1–2 tablespoons / 15–30 ml milk and it usually comes straight back.

Three stages of stored chia pudding labeled Monday, Wednesday and add a splash of milk, showing a soft pudding, a firmer pudding two days later and milk being poured into the thicker jar.
Loosen the jar you are eating, not the entire batch in advance. Because stored chia keeps changing, adjusting each serving with a little milk preserves more control over tomorrow’s texture.

For the best fruit and texture quality, aim to eat prepared pineapple chia pudding within about 3–4 days. Keep it covered and refrigerated at 40°F / 4°C or below.

If you enjoy opening the fridge to find breakfast already handled, overnight oats work on much the same evening-prep rhythm with a completely different texture.

↑ Back to Recipe · ↑ Back to Top

Pineapple Chia Pudding Troubleshooting

Before fixing anything, check how long the pudding has actually been chilling. A jar that looks loose after 45–60 minutes may simply need more time.

Three clear glasses compare separated chia pudding with milk on top, evenly hydrated chia pudding, and a dense chia layer settled at the bottom beneath thinner liquid.
Treat separation as a distribution problem before treating it as a ratio problem. If milk is sitting above compacted chia, first break up and redistribute the seeds already there. Adding more chia immediately can make the bottom even heavier.

Setting and Texture Problems

My chia pudding is still watery. What now?

After several hours, excess liquid usually means the ratio was too loose or the pineapple brought more juice than expected. Stir first. If it is still clearly too thin, add 1 teaspoon chia, wait 15–30 minutes, then check again. Next time, drain the fruit more thoroughly or keep it as a topping.

Why is there milk on top and a solid chia layer underneath?

The seeds settled before they had hydrated enough to stay suspended. Break the layer apart vigorously if you still can. Next time, stir once when you mix the pudding and again 5–10 minutes later.

My pudding is much too thick.

Stir in milk 1 tablespoon / 15 ml at a time until the spoon moves through it comfortably again. Very thick yogurt, extra chia and rich coconut milk can all push a jar past creamy into dense.

Why are there dry or crunchy chia pockets?

The seeds clumped before enough liquid could reach them. Break up any pockets you can find. Next time, sprinkle the chia in while whisking and do not skip the second stir.

Pineapple, Coconut and Yogurt Problems

The pineapple made my pudding watery.

Very ripe, thawed, crushed or poorly drained pineapple can contribute much more liquid than neat fresh pieces. A teaspoon of extra chia can rescue a clearly loose batch. Draining the fruit or keeping it as a separate layer prevents the problem next time.

Why did the coconut version become firm or waxy?

Coconut fat firms when chilled. Loosen the pudding with a little thinner milk and stir well. Next time, combine rich canned coconut milk with coconut drink or another lighter milk instead of using only full-fat canned coconut.

Why did my pineapple-yogurt pudding turn bitter?

Uncooked pineapple—fresh or frozen—can still contain active bromelain, which breaks down milk proteins during a long rest. For overnight yogurt or skyr pudding, use canned or cooked fruit, or add the raw pineapple in the morning.

It set properly, but I still hate the texture.

You may dislike whole chia pudding. Try blending the fully hydrated pudding. If that still does not help, the texture simply is not for you.

If the Chia Barely Gels at All

Brands and batches can thicken at different speeds, so give a correctly measured pudding several hours—or overnight—before blaming the seeds. If a familiar recipe suddenly stops setting, mix 1 teaspoon chia with 2 tablespoons water. After about 10–15 minutes, you would normally expect a clear gel halo. Very little gel is a good reason to try fresher chia rather than adding more and more seeds.

Macro view of hydrated chia seeds in water, each surrounded by a translucent gel halo, with several gelled seeds overlapping in a small cluster.
Judge the gel test across several seeds rather than looking for one perfect specimen. Visible translucent mucilage around multiple chia seeds is the useful sign that hydration is happening, even when individual halos vary in size and shape.

↑ Back to Recipe · ↑ Back to Top

A Few Flavor Ideas

Pineapple, cardamom & pistachio: stir a scant ⅛ teaspoon ground green cardamom into the milk, then finish with pineapple and chopped pistachios.

Pineapple, ginger & lime: add about ¼ teaspoon finely grated fresh ginger to the base and finish with extra lime zest. Start small; ginger gets loud quickly.

For a softer, sweeter fruit direction, try mango chia pudding.

Warm pineapple over cold chia: cook diced pineapple over medium heat for about 5 minutes, until hot, glossy and softened. Add cardamom, ginger or cinnamon, then spoon it over the cold pudding.

Warm glossy pineapple being spooned onto cold chia pudding in a clear glass, with steam rising from the fruit and condensation visible on the chilled glass.
Add the warm pineapple only when you are ready to eat. The fruit stays glossy and aromatic, the chia stays properly cold, and the temperature contrast survives long enough to reach the first spoonful.

A Quick Nutrition Note

Chia contributes dietary fiber, plant protein, unsaturated fats and ALA omega-3 fatty acids. Harvard’s Nutrition Source has a fuller evidence-based overview. The rest of the jar matters too—Greek yogurt, coconut milk, sweeteners, granola and nuts can change the nutritional picture substantially.

Frequently Asked Questions

Can I make pineapple chia pudding overnight?

It works well overnight. Do the second stir, cover and refrigerate; the extra time gives the seeds plenty of time to hydrate.

Can I use pineapple juice instead of milk?

You can. Count pineapple juice as part of the measured liquid: add ¼ cup / 60 ml juice and reduce the milk by about the same amount.

Can I use fresh pineapple with Greek yogurt?

Fresh pineapple is fine for immediate serving. For an overnight yogurt jar, use canned or cooked pineapple, or add uncooked fruit in the morning.

Can I use ground chia seeds?

Yes, but ground chia can turn gummy. For a smoother result, hydrate whole chia first and blend the chilled pudding.

Why didn’t my chia pudding thicken?

Usually it needs more time, extra fruit liquid is involved, or the seeds clumped early. Check the troubleshooting section before adding more chia.

How long does pineapple chia pudding last?

Aim for 3–4 days refrigerated at 40°F / 4°C or below. Keep it covered and add crunchy toppings at serving.

When You’re Ready to Eat

Give the chilled pudding one good stir. Loosen it with a splash of milk if it needs it, then pile on the remaining pineapple, a little lime zest and something crunchy.

The best spoonful has soft, creamy chia, a juicy piece of pineapple and a little lime in the same bite. Cold, bright and ready when you open the fridge—not bad for five minutes the night before.

Did your jar behave differently? Tell us which milk and pineapple you used and how long it chilled; those details usually reveal what happened.

↑ Back to Recipe · ↑ Back to Top

Posted on Leave a comment

How to Make Banana Pudding? 5 Healthy Breakfast Twists

BANANA PUDDING TWISTS FOR YOUR MORNING BOOST

Banana pudding is more than just a Southern dessert classic. With the right ingredients and a little creativity, it can be transformed into a nourishing, energy-packed breakfast. Whether you’re rushing out the door or looking for a slow, satisfying morning, these five healthy twists on banana pudding bring all the comfort and sweetness you crave without the sugar crash.


1. Banana-Chia Power Pudding

Why it works: Packed with fiber, omega-3s, and antioxidants, chia seeds pair beautifully with bananas to create a naturally sweet, pudding-like breakfast that feels indulgent but is totally guilt-free.

Ingredients:

  • 2 ripe bananas (mashed)
  • 2 cups unsweetened almond or oat milk
  • 6 tbsp chia seeds
  • 1 tsp vanilla extract
  • Optional: pinch of cinnamon or nutmeg

Instructions:

  1. Mash bananas in a bowl until smooth.
  2. Stir in milk, chia seeds, and vanilla extract.
  3. Let sit for 15 minutes, stir again to prevent clumps.
  4. Cover and refrigerate overnight.
  5. Serve with berries or crushed nuts in the morning.

Prep Tip: Stir again after 30 minutes to help the chia gel evenly.

Nutrition Per Serving: Approx. 180 calories, 6g protein, 9g fiber


2. Banana Pudding Overnight Oats

Why it works: Oats make this a hearty, slow-digesting option that keeps you full all morning. The banana and vanilla combo adds natural sweetness, and layering gives it that pudding parfait feel.

Ingredients:

  • 1 ripe banana (mashed)
  • 1/2 cup rolled oats
  • 1/2 cup Greek yogurt or plant-based yogurt
  • 1/2 cup almond milk
  • 1 tsp vanilla extract
  • Optional: chopped walnuts, honey, or cinnamon

Instructions:

  1. Mix all ingredients together in a mason jar or container.
  2. Refrigerate overnight.
  3. In the morning, stir and add desired toppings.

Meal Prep Friendly: Make 2–3 jars ahead for the week.

Nutrition Per Serving: Approx. 250 calories, 10g protein, 5g fiber


3. High-Protein Cottage Cheese Banana Pudding

Why it works: This twist brings a creamy texture and a big protein punch. Perfect post-workout or when you’re craving something richer without being heavy.

Ingredients:

  • 1 cup low-fat cottage cheese
  • 1 ripe banana
  • 1/2 tsp vanilla extract
  • 1 scoop vanilla protein powder (optional)
  • Optional: sweetener of choice (e.g. maple syrup, stevia)

Instructions:

  1. Blend all ingredients until smooth.
  2. Chill for 30 minutes for a thicker consistency.
  3. Top with crushed whole-grain wafers, sliced bananas, or nuts.

Quick Hack: No blender? Just mash banana and stir in the rest.

Nutrition Per Serving: Approx. 300 calories, 20–25g protein


4. Vegan Cashew-Coconut Banana Pudding

Why it works: This creamy, dairy-free version uses healthy fats from cashews and coconut milk for richness and a subtle tropical flavor.

Ingredients:

  • 1/2 cup soaked cashews (4–6 hours)
  • 1 ripe banana
  • 1/2 cup coconut milk
  • 1 tbsp maple syrup
  • 1/2 tsp vanilla extract
  • 1 tsp lemon juice

Instructions:

  1. Blend all ingredients until creamy.
  2. Chill for 1 hour or overnight.
  3. Top with toasted coconut flakes or berries.

Vegan Delight: A crowd-pleaser for plant-based diets.

Nutrition Per Serving: Approx. 290 calories, 4g protein, healthy fats


5. Banana Pudding Breakfast Jars (5-Minute Meal Prep)

Why it works: The fastest, most customizable version. Use Greek yogurt or Skyr, banana, and crunchy toppings for a pudding-meets-parfait hybrid.

Ingredients:

  • 1/2 cup Greek yogurt or Skyr
  • 1 ripe banana (sliced or mashed)
  • 1 tbsp nut butter (optional)
  • Crushed whole-grain crackers, seeds, or granola

Instructions:

  1. Layer yogurt, banana, and crunch toppings in a jar.
  2. Eat immediately or refrigerate for up to 2 days.

On-the-Go Bonus: Great for kids and adults alike.

Nutrition Per Serving: Approx. 250–300 calories, depending on toppings


Final Thoughts

Banana pudding doesn’t need to be a sugar-laden dessert. With these five variations, you can turn this comforting favorite into a nutritious, protein-rich, and fiber-packed breakfast. From overnight oats to vegan delights, there’s a banana pudding twist for every palate and dietary need.

Tip: Always use ripe bananas—they’re sweeter and easier to digest. Add texture with nuts, seeds, and spices like cinnamon or cardamom.

Let breakfast be something you look forward to, not just another task. Try one of these banana pudding twists tomorrow morning—and fuel your day with something as good for your body as it is for your taste buds.


Have a favorite banana pudding recipe or twist? Share it in the comments below or tag us with your creations! #BananaPuddingBreakfast

FAQs

  1. Can I make these banana pudding breakfasts ahead of time?
    Yes! Most of these recipes (especially chia pudding and overnight oats) are ideal for meal prep. They stay fresh in the fridge for 3–5 days.
  2. Are these recipes suitable for kids?
    Absolutely. Kids love the natural sweetness of bananas. Just skip added sweeteners if desired and use nut-free toppings for school safety.
  3. Can I use frozen bananas?
    Yes, thaw them first. Frozen bananas work great for blended recipes like the cottage cheese or vegan cashew pudding.
  4. How ripe should the bananas be?
    Use ripe bananas with brown spots—they’re sweeter, easier to mash/blend, and better for digestion.
  5. What can I substitute for chia seeds if I don’t have them?
    You can use ground flaxseed or just skip them and increase oats or thick yogurt depending on the recipe.
  6. Are these recipes gluten-free?
    Most are naturally gluten-free—just ensure toppings (like granola or wafers) are certified gluten-free if needed.
  7. Which recipe is highest in protein?
    The Cottage Cheese Banana Pudding (with optional protein powder) and Greek Yogurt Jars offer 20g+ protein per serving.
  8. What non-dairy milk works best?
    Unsweetened almond, oat, or coconut milk are great options depending on your flavor preference.
  9. Can I use these recipes for weight loss?
    Yes. They are high in fiber, protein, and healthy fats—great for satiety. Portion control and balanced toppings help optimize them for weight goals.
  10. How can I add crunch or texture to these puddings?
    Add nuts, seeds (like pumpkin or sunflower), toasted coconut, granola, or crushed crackers for contrast and extra nutrients.