Posted on 3 Comments

New York Cheesecake Recipe

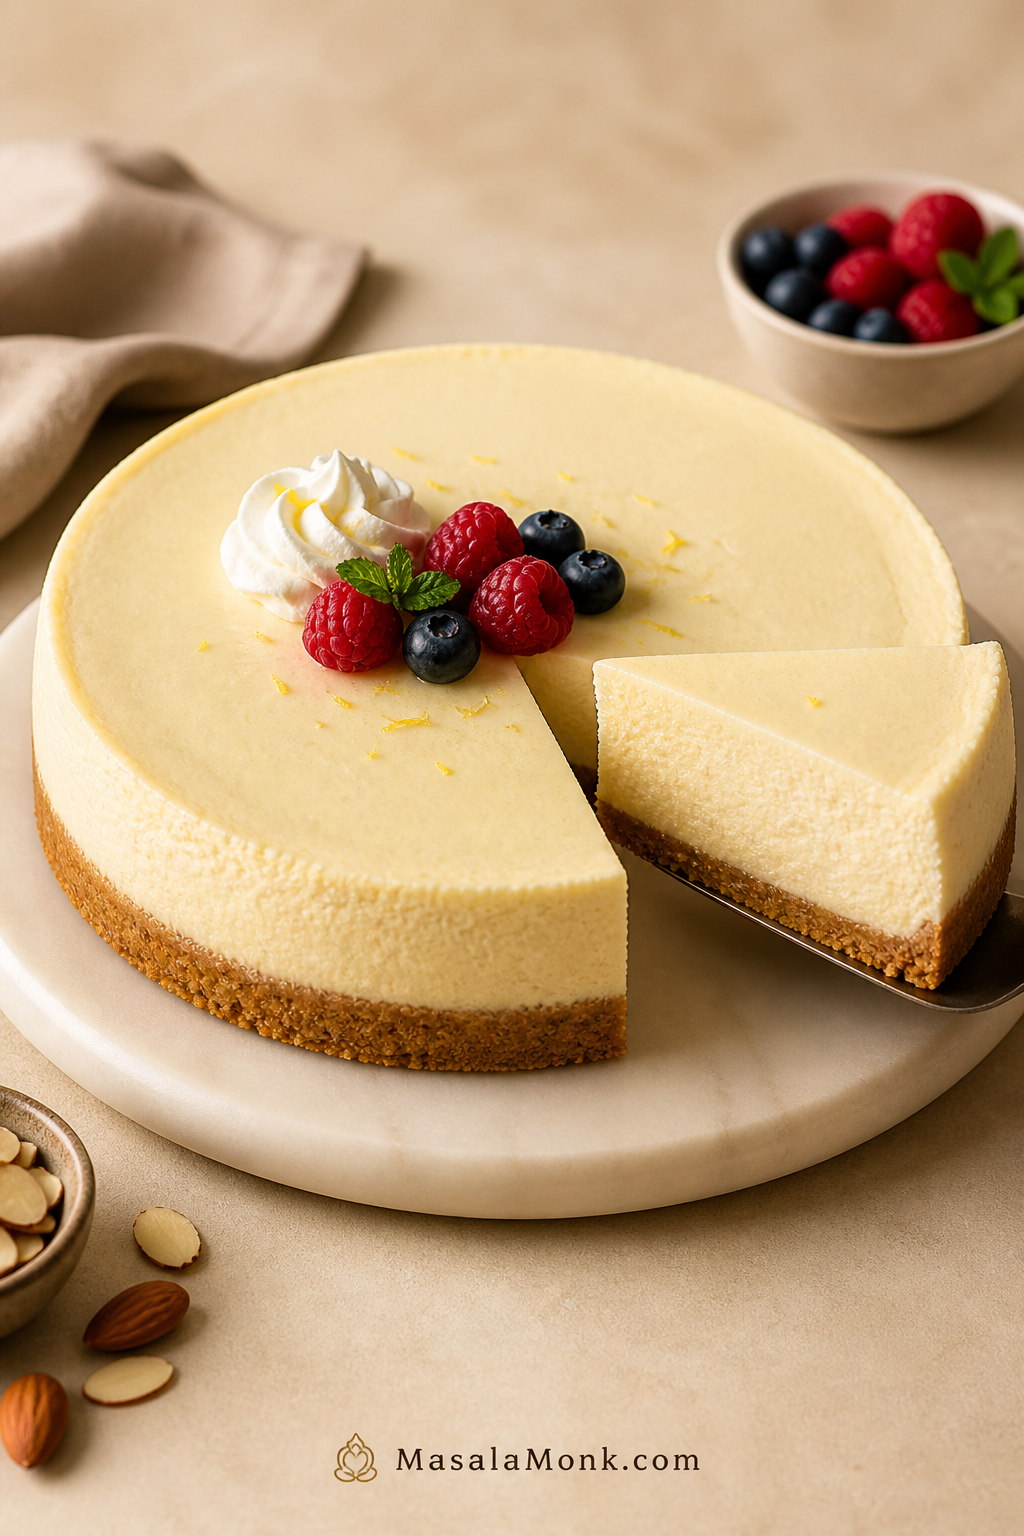
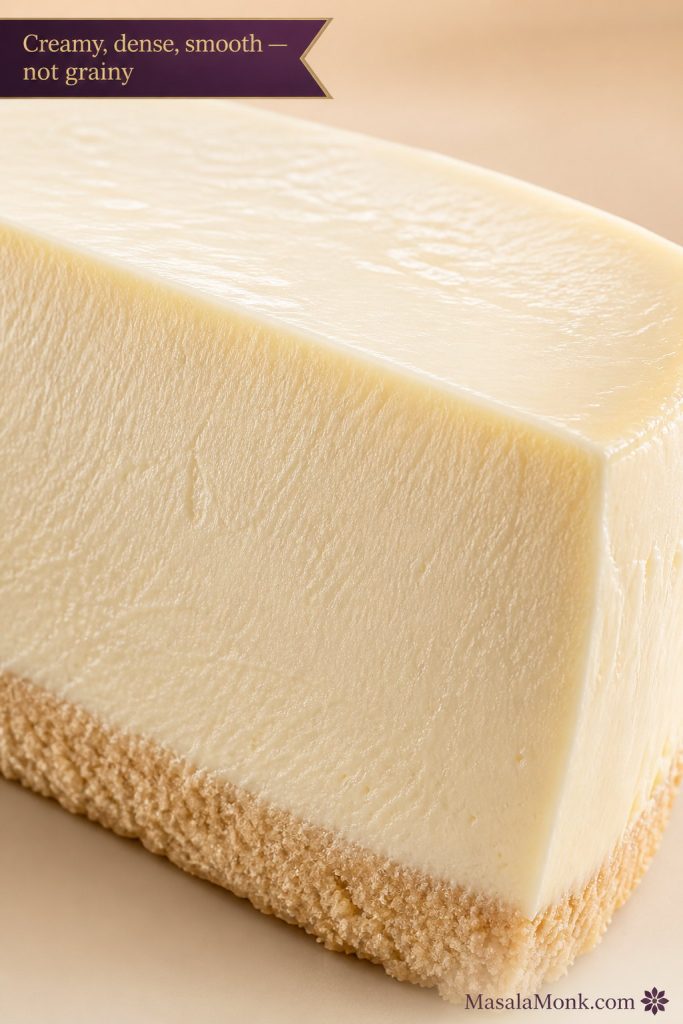
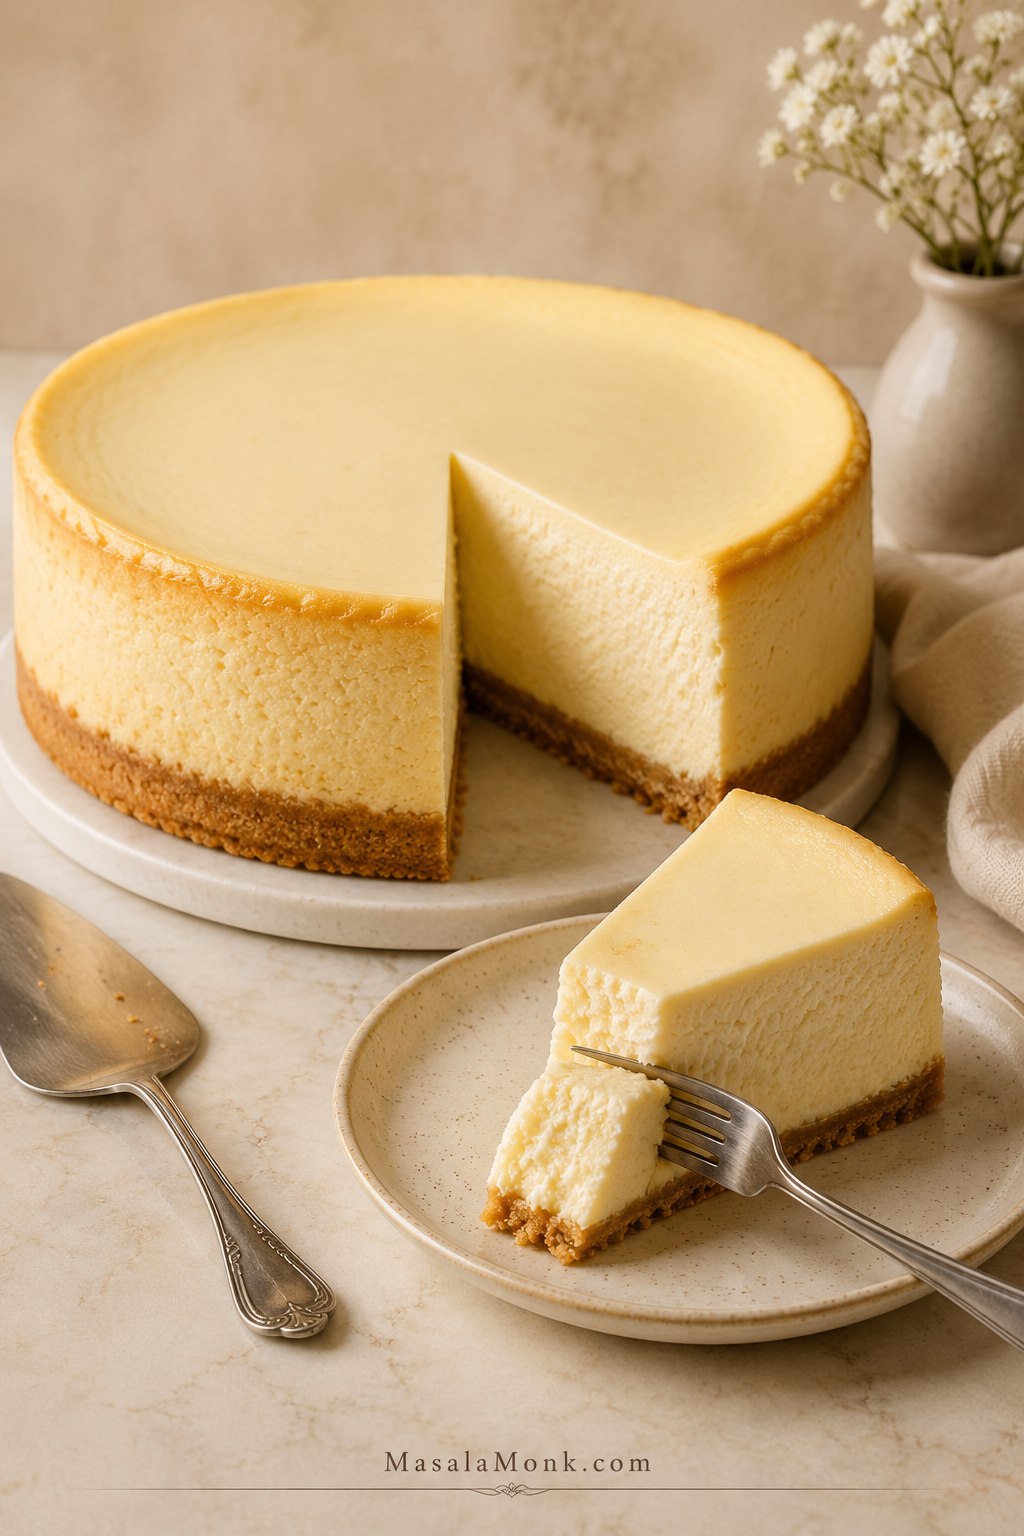
Tall New York cheesecake with one clean slice pulled forward, creamy ivory filling, smooth pale top, and golden crumb crust.

A proper New York cheesecake recipe should feel calm, classic, and worth the wait: a tall creamy slice, a buttery crumb crust, a dense but smooth center, and clean edges that hold when you lift the fork.

The part that makes people nervous is rarely the ingredient list. It is the moment when the cheesecake still wobbles, the water bath looks intimidating, or the top seems too delicate to touch. This guide walks you through those moments clearly, so you know when the cheesecake is done, how to cool it slowly, and how to slice it cleanly the next day.

This is a classic baked New York-style cheesecake with full-fat cream cheese, sour cream tang, a little heavy cream for smoothness, and a graham cracker or digestive biscuit crust. The main method uses a water bath for the safest creamy texture, but you will also find a steam-pan compromise and a no-water-bath option if you prefer not to place a springform pan directly in water.

Instead of relying only on a timer, this guide gives you visual cues, global ingredient swaps, and three baking paths: classic water bath, steam-pan compromise, and no-water-bath.

This New York cheesecake recipe is built for a tall, creamy, make-ahead slice that tastes even better after a full night in the fridge. It is the cheesecake you bake before a birthday dinner, a holiday table, or any night when you want dessert already waiting calmly in the fridge. The hard part is not the mixing; it is trusting the gentle wobble, cooling it gradually, and not cutting into it too soon.

Quick Answer: How to Make New York Cheesecake

To make New York cheesecake, press a buttery graham cracker or digestive biscuit crust into a 9-inch springform pan, pre-bake it briefly, then fill it with a smooth mixture of full-fat cream cheese, sugar, sour cream, heavy cream, eggs, vanilla, lemon, and a little cornstarch. Bake the cheesecake gently in a water bath at 325°F / 160–165°C until the edges are set but the center has a soft custard-like wobble. Then cool it slowly in the turned-off oven, bring it to room temperature, and chill it for at least 8 hours, preferably overnight.

The timer helps, but the texture cue matters more. A New York cheesecake should not look fully firm when it leaves the oven. The center should still move gently because it will continue setting as it cools and chills.

Best result: Use a 9-inch springform pan, full-fat cream cheese, room-temperature ingredients, a gentle water bath, gradual cooling, and an overnight chill.

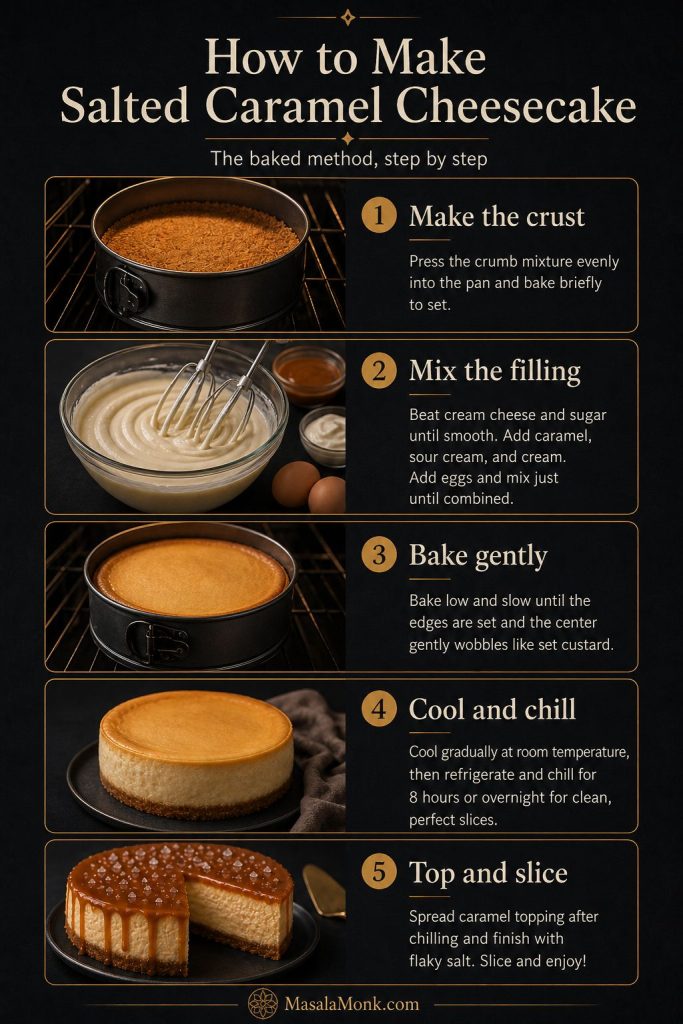
Start here: This overview shows the full cheesecake flow before the detailed method: crust, filling, gentle baking, and chilling.
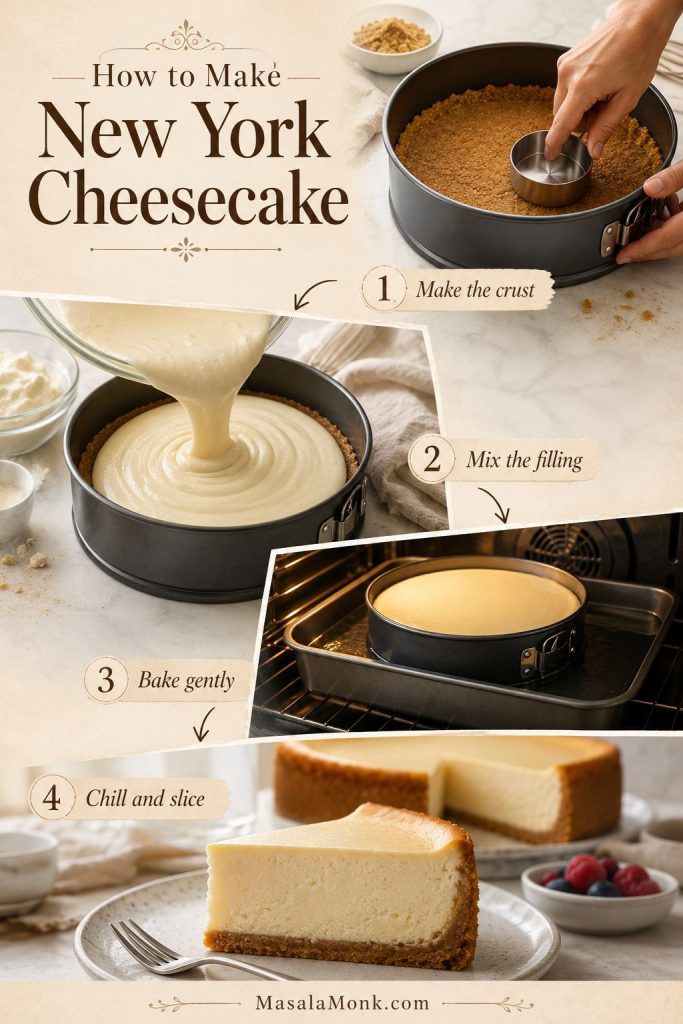
Four-stage overview showing cheesecake crust, smooth filling, water bath baking, and a chilled cheesecake slice.
This New York cheesecake recipe feels less intimidating once the process is broken into stages, because each step has a clear job before the next one begins.

What to watch for: The most useful cheesecake signs are texture-based, so watch the batter, the center movement, and the final slice.
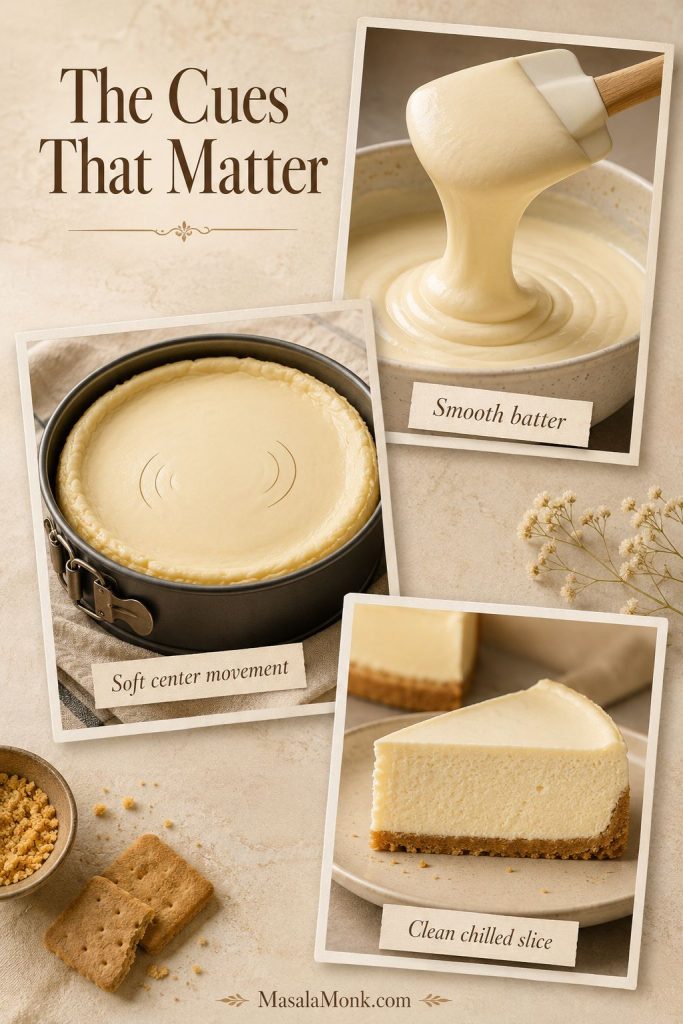
Visual cue guide showing smooth cheesecake batter, soft center movement, and a clean chilled slice.
Instead of trusting the timer alone, watch the batter texture, the center movement, and the way the chilled slice holds its shape.

Need the exact details? Jump to the recipe card, compare water bath options, or check the doneness cues before you bake.

New York Cheesecake at a Glance

Yield
1 tall 9-inch cheesecake

Servings
12–16 slices

Prep time
30–35 minutes

Crust bake
10 minutes

Cheesecake bake
75–90 minutes

Cooling time
2–3 hours total

Chill time
8 hours minimum; overnight best

Pan
9-inch / 23cm springform pan

Timing note: Use this timing and pan summary before you decide when to bake and serve the cheesecake.
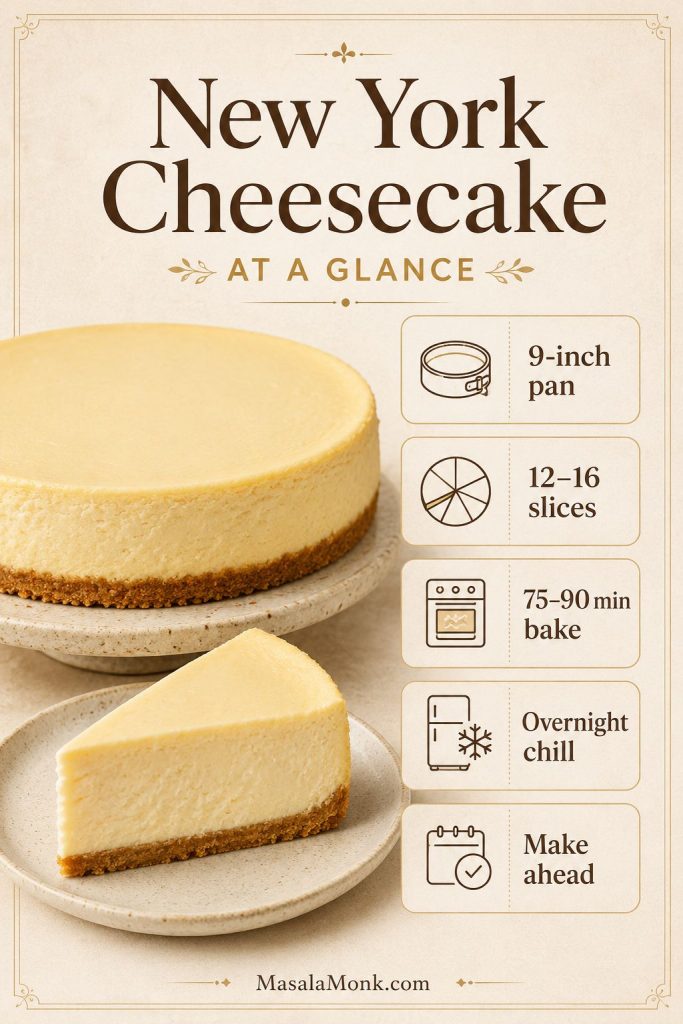
At-a-glance cheesecake guide with 9-inch pan, 12 to 16 slices, 75 to 90 minute bake, overnight chill, and make-ahead notes.
This New York cheesecake is a make-ahead dessert by design, so the timing card matters as much as the ingredient list.

Baking today? Keep the full recipe card open for measurements, then use the cue images below for batter texture, pan setup, doneness, cooling, and troubleshooting.

Why This New York Cheesecake Recipe Works

The key is to treat cheesecake like a custard, not a cake. Full-fat cream cheese gives the dense New York-style body, sour cream adds tang, heavy cream softens the texture, and a small amount of cornstarch helps the filling set smoothly without becoming heavy.

The water bath protects the edges from overbaking before the center is ready, while gradual oven cooling prevents the sudden temperature shock that often causes cracks. Finally, the overnight chill is where the cheesecake becomes itself: the soft baked custard settles into a cool, creamy slice that cuts cleanly and holds its shape on the plate.

You also get a little room to choose the baking method that feels least stressful. You can use the gentler classic bake, the steam-pan compromise, or the simpler low-and-slow route without losing sight of the same goal: a smooth filling, a steady set, and sliceable texture after chilling.

What Makes New York Cheesecake Different?

New York cheesecake is richer, denser, and more cream-cheese-forward than many lighter cheesecake styles. It is usually baked, set like a custard, and chilled until firm enough to slice cleanly. It should feel creamy and smooth on the fork, but it should not be airy like mousse or soft like a no-bake cheesecake.

The classic flavor comes from full-fat cream cheese, sugar, eggs, vanilla, and a little acidity. Some recipes lean on sour cream, some use heavy cream, and some use both. In this version, sour cream gives the cheesecake its gentle tang, while heavy cream rounds out the filling and keeps the texture smooth.

Think of regular cheesecake as flexible; New York cheesecake is specific. It should be rich, baked, cream-cheese-forward, and firm enough to cut into tall, clean slices. That is why a good New York cheesecake feels substantial without feeling heavy.

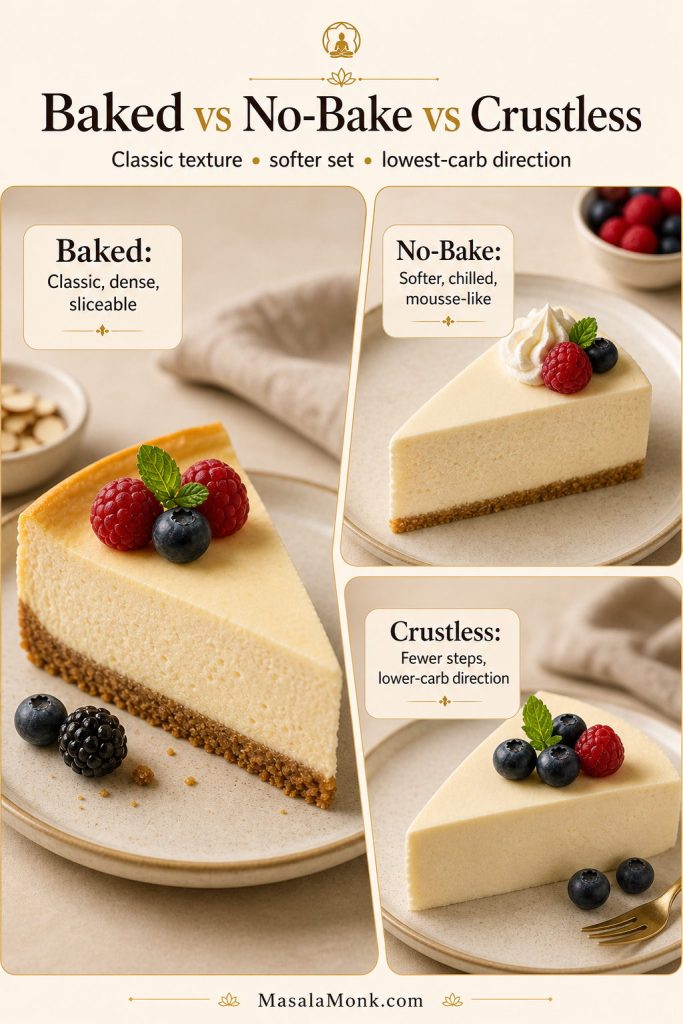
Cheesecake StyleTextureMethodBest For
New York cheesecakeDense, rich, cream-cheese-forwardBaked, then fully chilledTall classic slices
Regular baked cheesecakeCreamy, often lighterBakedFlexible flavors and toppings
No-bake cheesecakeSofter, mousse-likeChilled, not bakedEasy make-ahead dessert
Basque cheesecakeCustardy, deeply browned topHigh-heat bake, usually no crustRustic caramelized flavor

Style check: This is where New York cheesecake separates itself from lighter baked, no-bake, and Basque-style cheesecakes.
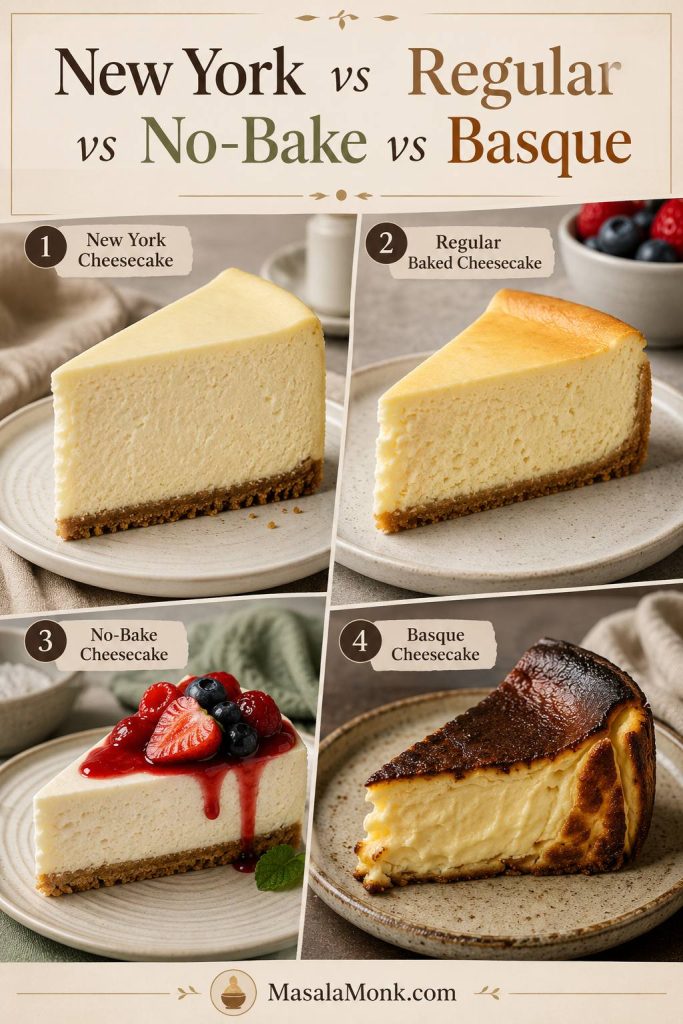
Comparison of New York cheesecake, regular baked cheesecake, no-bake cheesecake, and Basque cheesecake slices.
New York cheesecake is the dense, baked, cream-cheese-forward style, while no-bake and Basque cheesecakes rely on very different methods.

What This Cheesecake Should Taste and Feel Like

The finished cheesecake should be dense in the New York style, but not dry or heavy. A fork should slide through the filling smoothly, and each bite should feel cool, creamy, lightly tangy, and rich without tasting flat.

Texture target: Look for a slice that holds its shape but still feels creamy when the fork goes through it.
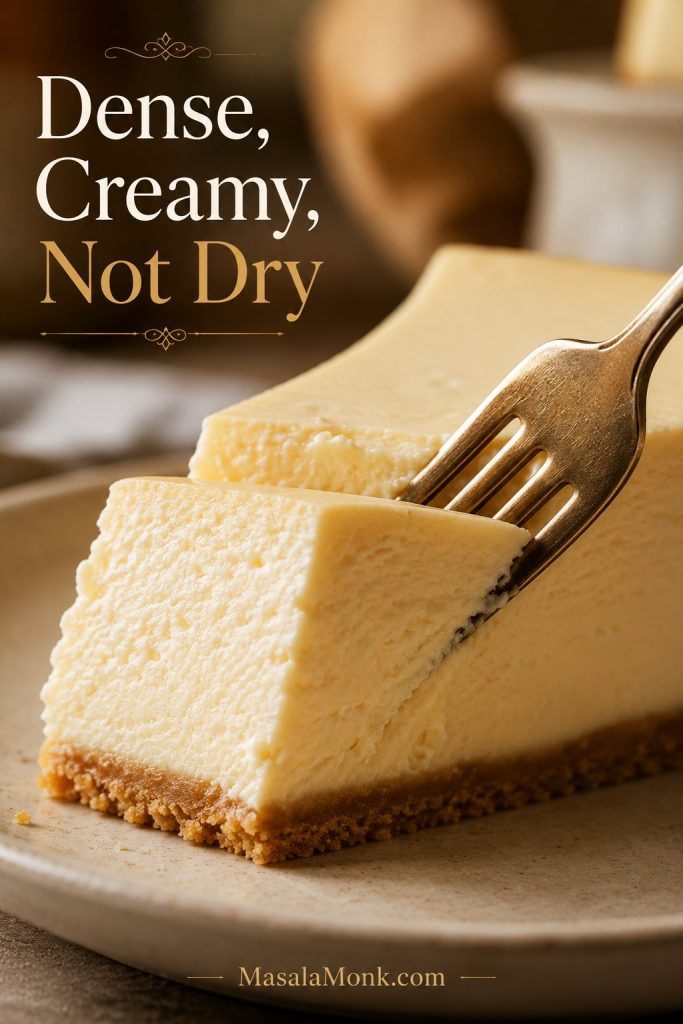
Close-up of a fork cutting into a creamy New York cheesecake slice with a golden crumb crust.
The texture of a New York cheesecake should be rich enough to hold a clean edge, yet soft enough for the fork to pass through without dragging.

The crust should give a gentle buttery crunch, not a hard snap. Meanwhile, the filling should taste mostly of cream cheese and vanilla, with sour cream and lemon quietly brightening the richness in the background.

If the slice stands tall, the center looks softly set, and the texture feels creamy rather than airy, you are exactly where this cheesecake is meant to be.

Slice target: A clean side profile helps you see the balance between pale top, creamy center, and sturdy crumb crust.
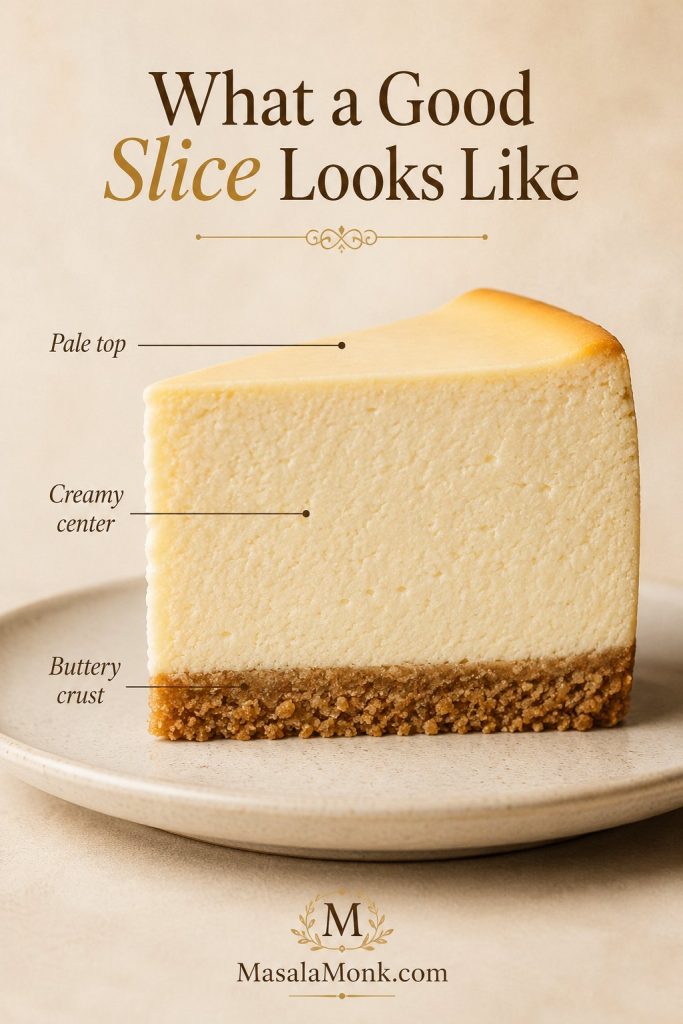
Side profile of a tall cheesecake slice labeled with pale top, creamy center, and buttery crumb crust.
A good slice holds clean edges from pale top to crumb crust, so the cheesecake feels creamy without collapsing on the plate.

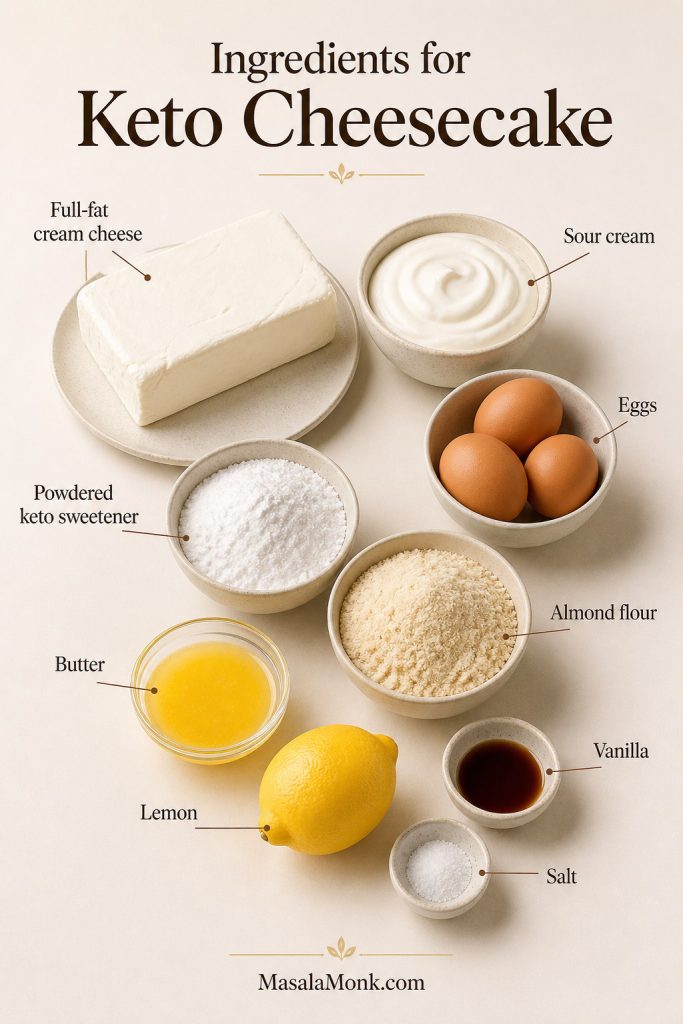
Ingredients for New York Cheesecake

The ingredient list is short, but the details matter more than they do in many cakes. Full-fat cream cheese, room-temperature dairy, and gentle mixing make the difference between a smooth bakery-style cheesecake and a lumpy, cracked, or grainy one.

Ingredient check: These are the ingredients that build the crust, body, tang, and smooth set of the cheesecake.
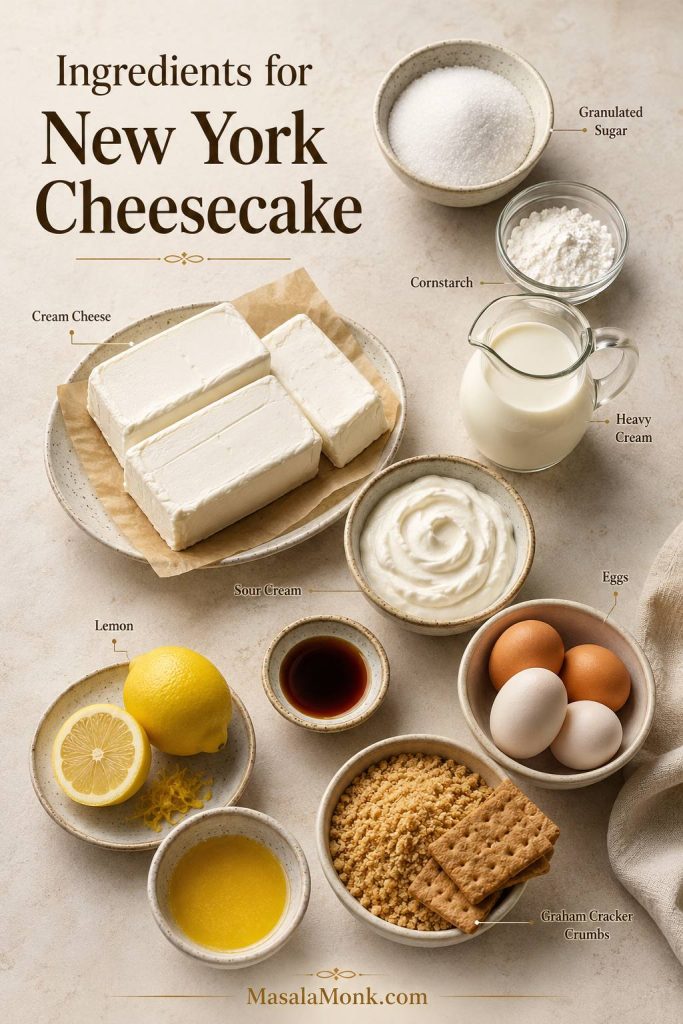
New York cheesecake ingredients including cream cheese, sour cream, heavy cream, eggs, lemon, vanilla, sugar, cornstarch, butter, and crust crumbs.
The ingredients are simple; however, full-fat dairy, room-temperature mixing, and the right crust crumbs do most of the heavy lifting.

Cream Cheese

Use full-fat cream cheese. For a tall 9-inch New York cheesecake, you need 32 oz / 907g. Brick-style cream cheese is ideal because it is firm, rich, and consistent.

Before you buy: The right cream cheese choice matters before you even start mixing, because it controls the body of the filling.
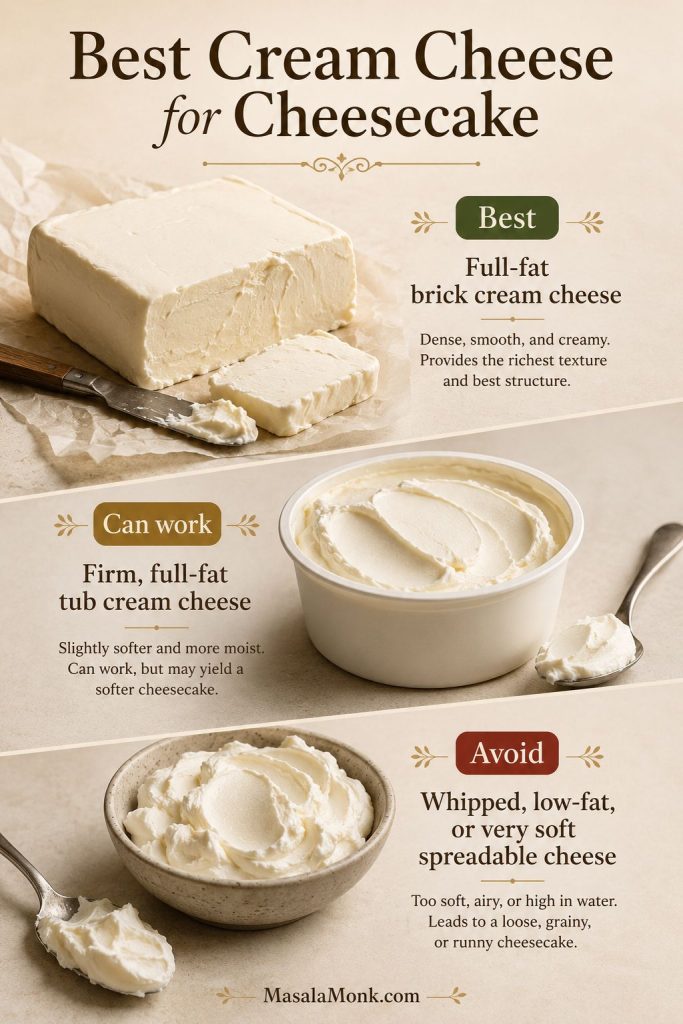
Cream cheese comparison showing full-fat brick cream cheese, firm tub cream cheese, and whipped or low-fat cream cheese to avoid.
Full-fat cream cheese gives New York cheesecake its dense body, while whipped or low-fat versions can make the filling loose, airy, or uneven.

Avoid whipped cream cheese, low-fat cream cheese, flavored cream cheese, and watery spreadable cheese. They can make the filling loose, airy, salty, or grainy. If you are using tub-style cream cheese outside the US, choose the firmest full-fat version you can find, and avoid sandwich spreads that are very soft, heavily salted, or already flavored.

Before mixing, the cream cheese must be at room temperature. It should feel soft enough to press with a finger, but not melted, greasy, or warm. Otherwise, cold cream cheese will not blend smoothly, and once the eggs go in, it becomes much harder to beat out lumps without overmixing the batter.

Timing tip: Take the cream cheese, sour cream, heavy cream, and eggs out of the fridge about 1–2 hours before mixing. If your kitchen is very warm, check sooner; the cream cheese should be soft, not oily or melted.

Room-temperature shortcut: Cut the cream cheese into cubes and leave it on the counter until softened. If your eggs are cold, place them in a bowl of warm water for 10 minutes before using.

Softness test: Room-temperature cream cheese should press easily, but it should still look creamy and stable rather than melted.
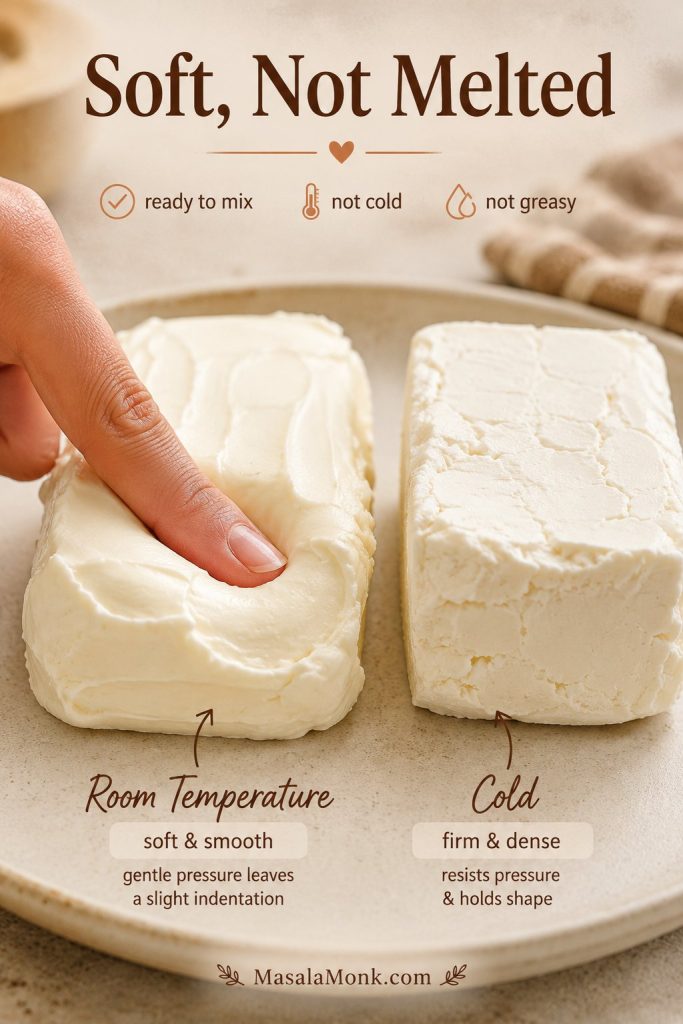
Finger pressing into softened cream cheese to show the correct room-temperature texture for cheesecake filling.
Cream cheese is ready when it presses easily; meanwhile, if it looks greasy or melted, it has gone too far.

Sour Cream and Heavy Cream

Sour cream gives New York cheesecake a gentle tang and helps balance the richness of the cream cheese. Heavy cream makes the filling a little silkier and softer without turning it into a no-bake style dessert.

Good to know: Sour cream and heavy cream do different jobs, so both help balance the rich filling.
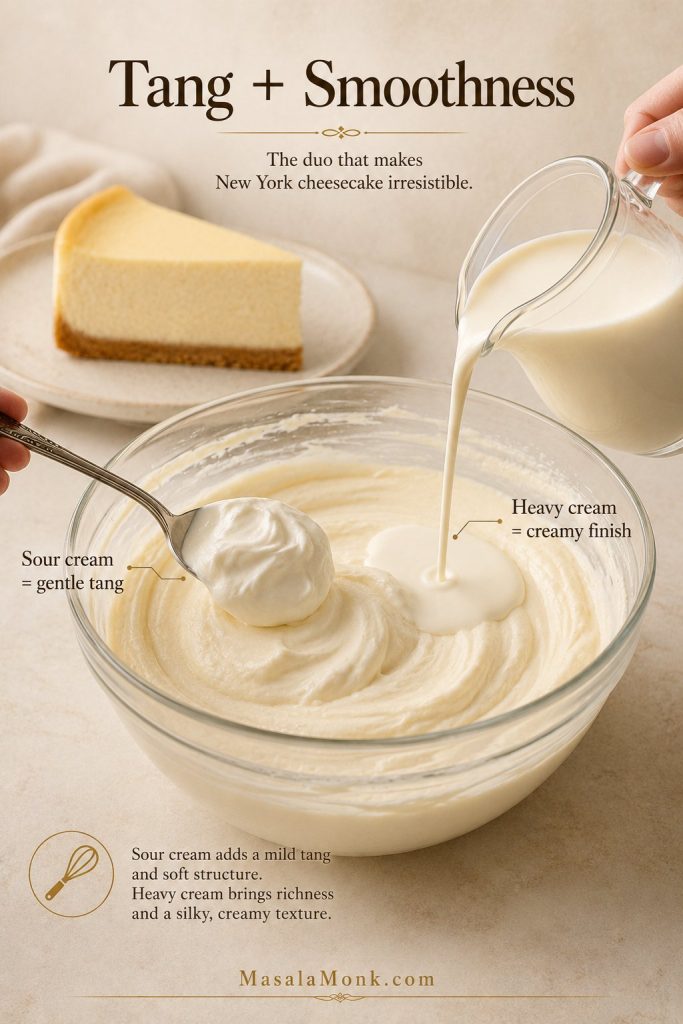
Sour cream and heavy cream being added to cheesecake filling to show tang and smoothness.
Sour cream sharpens the dairy richness, while heavy cream rounds it out so the finished slice tastes creamy rather than heavy.

If sour cream is not easy to find where you live, thick full-fat Greek yogurt is the closest practical swap. If the yogurt looks loose, strain it first. The flavor will be slightly different, but the cheesecake will still bake well if the texture is thick enough.

Swap smart: If you are using Greek yogurt, choose a thick full-fat version so the filling stays stable.
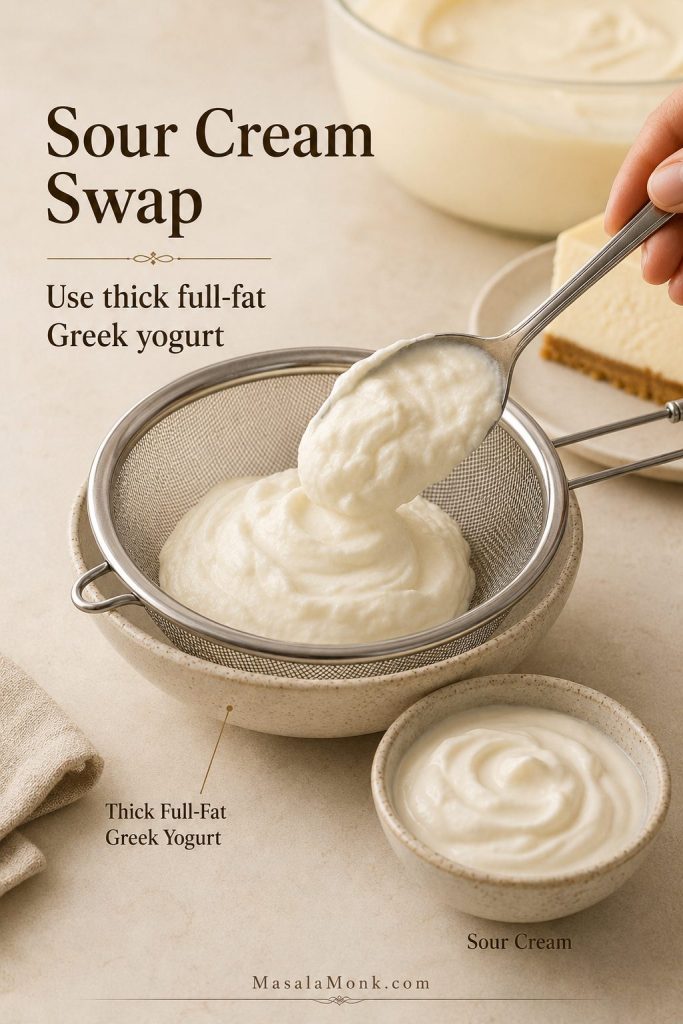
Thick Greek yogurt in a strainer beside sour cream as a substitute for cheesecake filling.
If sour cream is hard to find, thick full-fat Greek yogurt can work because it adds body without watering down the filling.

Eggs

Eggs set the cheesecake. They turn the cream cheese mixture into a baked custard, which is why overmixing after adding the eggs can cause problems. Too much air can make the cheesecake puff in the oven, then sink or crack as it cools.

Add the eggs one at a time on low speed, just until each one disappears into the batter. The filling should look smooth and creamy, not foamy.

Mixing note: Eggs should go in gently and late, because this is the stage where too much air causes trouble later.
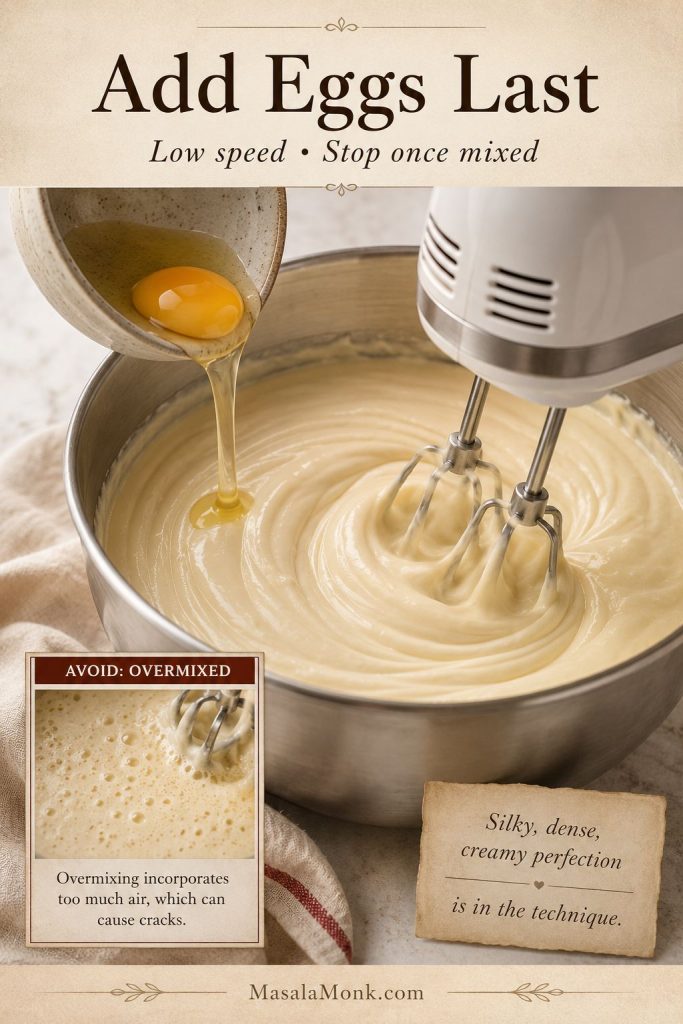
Egg being added slowly to cheesecake filling on low speed with a reminder to avoid overmixing.
Add eggs slowly and mix only until they disappear, because extra air can make the cheesecake puff, sink, or crack.

Cornstarch or Flour

A small amount of starch helps stabilize the filling. Cornstarch gives a smooth set and keeps the recipe more flexible for readers who avoid flour. All-purpose flour gives a slightly more classic dense structure. Use one or the other, not both.

For this recipe, cornstarch is the default. If you prefer flour, use 3 tablespoons / about 24g all-purpose flour instead of the cornstarch.

Texture choice: Cornstarch and flour both help the cheesecake set, but they nudge the final texture in slightly different directions.
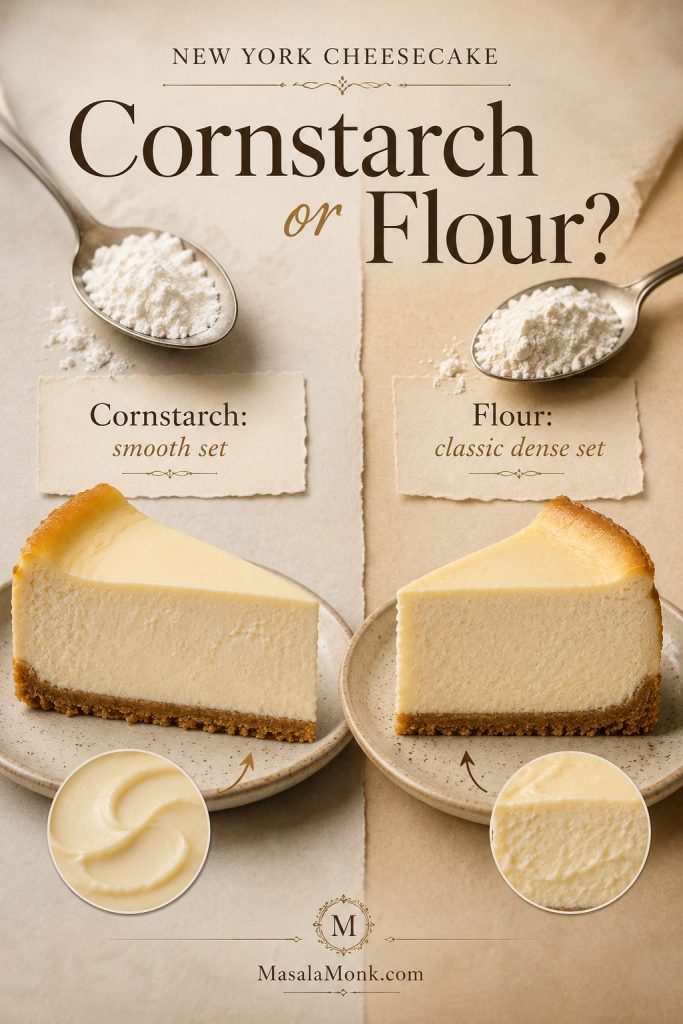
Cornstarch and flour comparison for cheesecake, showing cornstarch for a smooth set and flour for a classic dense set.
Cornstarch gives a smoother set, while flour creates a slightly denser classic texture; either works when used with a light hand.

Lemon and Vanilla

Vanilla gives warmth, and lemon brightens the filling. The lemon should not make this taste like lemon cheesecake. Instead, it should simply cut through the richness so the cheesecake tastes creamy rather than flat.

Global Ingredient Notes

Not every kitchen has the same cheesecake ingredients. Graham crackers, brick-style cream cheese, and sour cream are easy to find in some places and harder in others, so the notes below give you practical swaps without changing the spirit of the recipe.

IngredientPractical Notes
Graham crackersUse digestive biscuits if graham crackers are hard to find. Marie biscuits can work, but the crust will be lighter and less buttery.
Cream cheeseUse full-fat block or firm tub cream cheese. Avoid whipped, low-fat, flavored, salty, or very soft spreadable cheese.
Sour creamThick full-fat Greek yogurt can work if sour cream is unavailable. Strain it first if it looks watery.
Heavy creamUse heavy cream or whipping cream rather than very thin low-fat cream. A richer cream gives the filling a smoother, rounder texture.
Cornstarch vs flourCornstarch gives a smooth set. Flour gives a slightly denser classic set. Use one, not both.
Oven behaviorCheesecake prefers gentle heat. If your oven runs hot, browns quickly, or has strong top heat, check earlier and rely on the jiggle test rather than the timer alone.

Using digestive biscuits or a different pan? Check the crust guide and pan-size notes before mixing.

Graham Cracker Crust or Digestive Biscuit Crust?

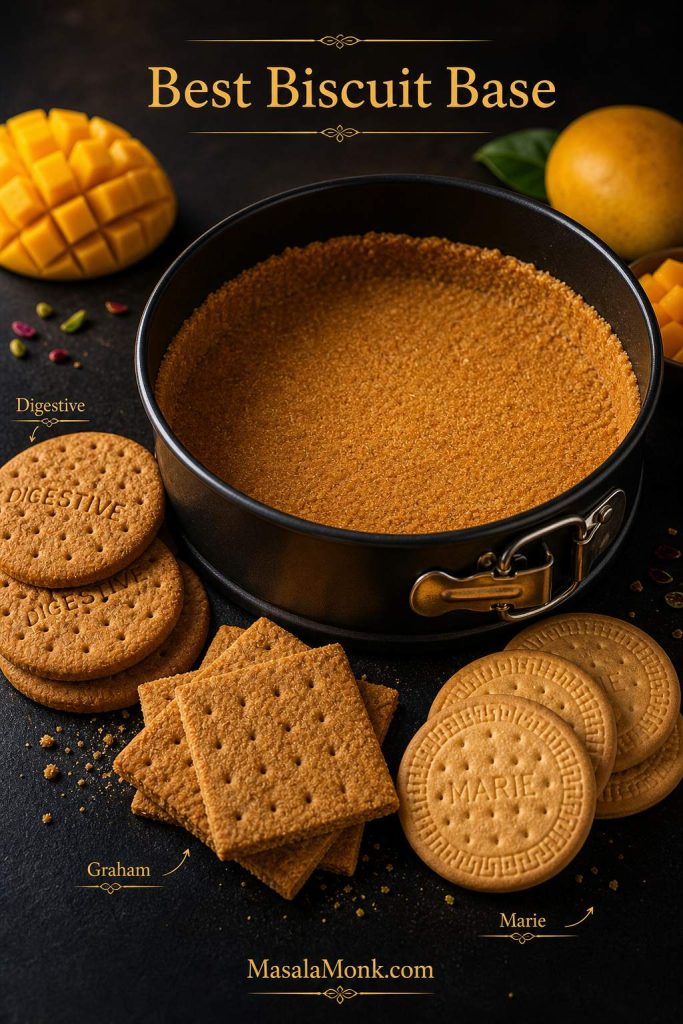
For a classic US-style cheesecake, use graham cracker crumbs. For UK, Indian, and many global kitchens, digestive biscuits are often easier to find and make an excellent crust. They are slightly more buttery and wheaty, which works beautifully with dense cheesecake filling.

Marie biscuits can also work, but they are usually lighter and less buttery, so the crust may taste milder. If using Marie biscuits, add a pinch of salt and make sure the crumbs are finely crushed so the base holds together.

Crust OptionUse This AmountNotes
Graham cracker crumbs1½ cups / about 180gClassic New York cheesecake crust.
Digestive biscuit crumbsAbout 200gGreat global substitute; use 75–85g butter depending on biscuit dryness.
Marie biscuit crumbsAbout 190–200gMilder flavor; add a pinch of salt and press gently.

How the Cheesecake Crust Should Look and Feel

Crust choice: Choose the crumb base that fits your kitchen, then adjust butter and sugar so the crust still holds together.
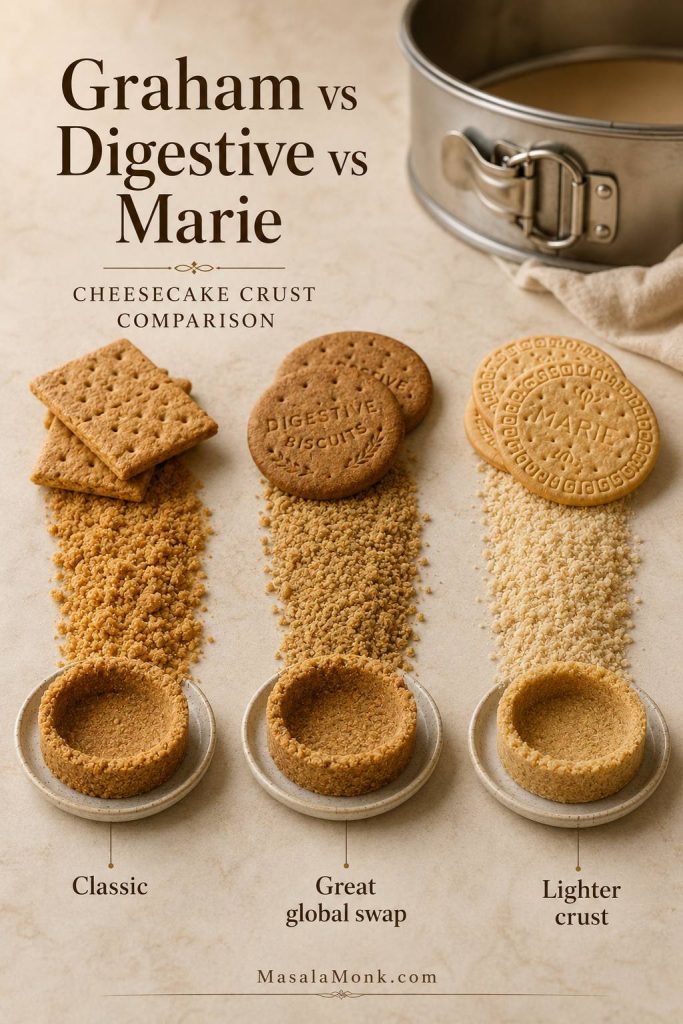
Graham cracker, digestive biscuit, and Marie biscuit crumb options for making a cheesecake crust.
Graham crackers are classic, but digestive biscuits are often the better global swap for New York cheesecake because they bring a buttery, wheaty crust.

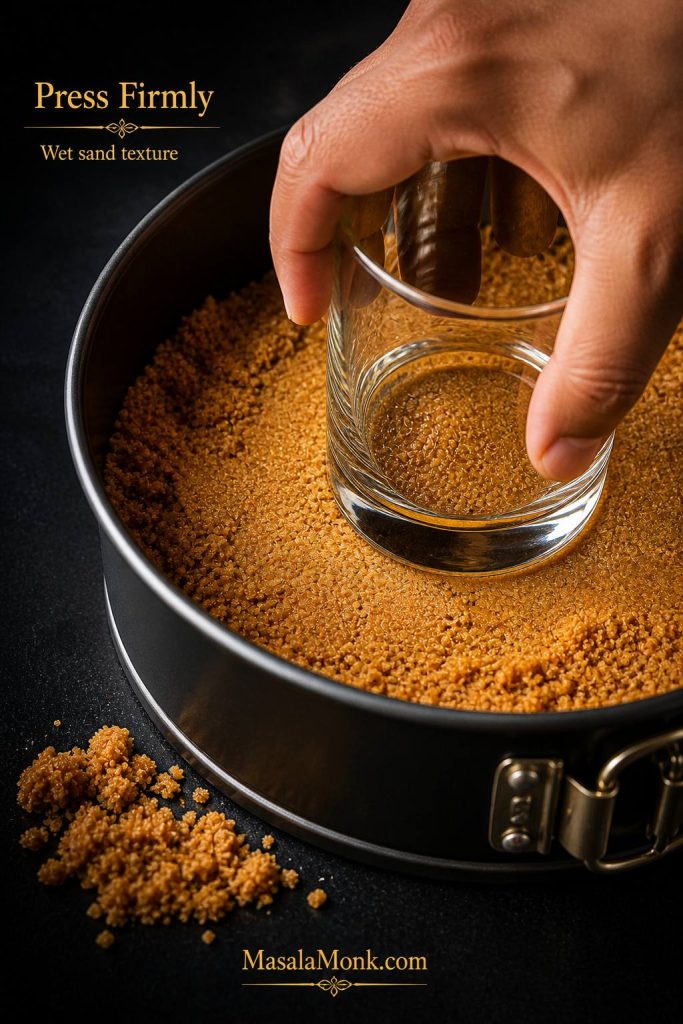
Whichever crust you choose, do not pack it too aggressively. A firm, even press is enough. If the crust is compressed too hard, it can become difficult to cut after chilling.

Before pressing: Before pressing the base, check that the buttered crumbs hold like damp sand without turning oily.
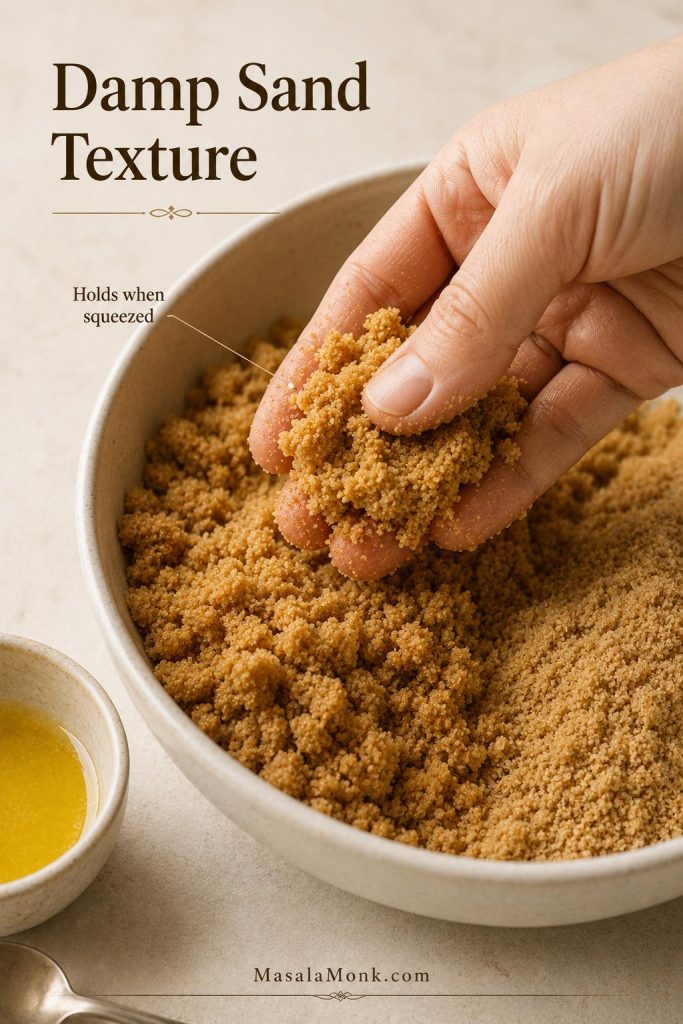
Hand squeezing buttered cheesecake crust crumbs to show damp sand texture before pressing into the pan.
The crumb mixture should hold when squeezed; however, if it looks wet or greasy, the crust may bake up heavy.

Pressing note: Even pressure gives the crust structure, while overpacking can make the chilled base too hard to cut.
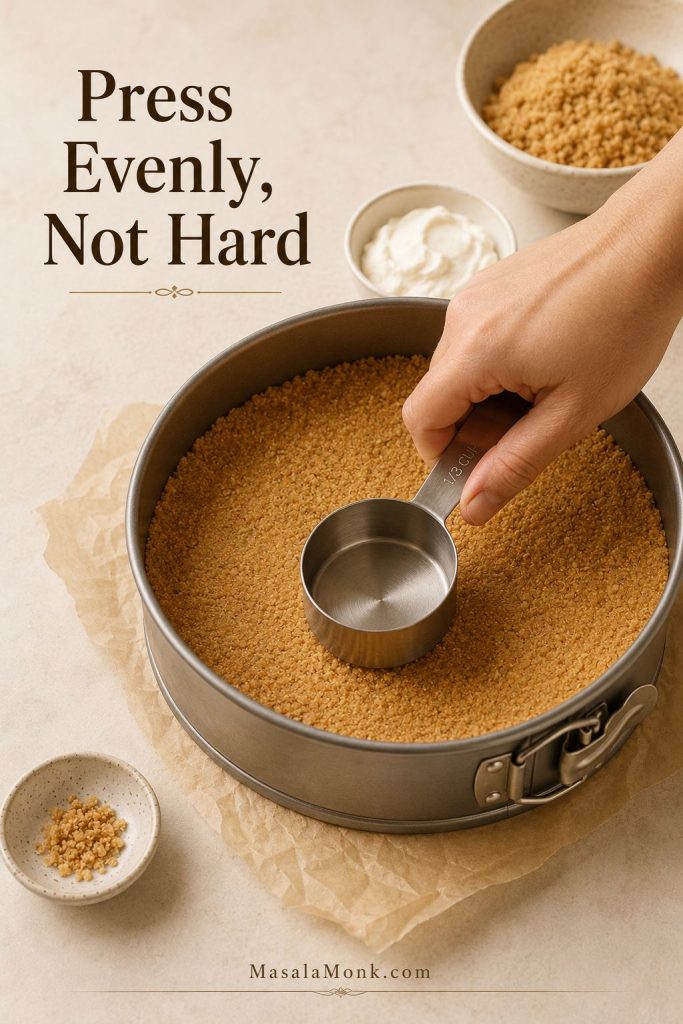
Hand pressing cheesecake crumb crust into a springform pan with a flat-bottom measuring cup.
Press the crust evenly, not aggressively, so it supports the filling without turning hard after chilling.

After pre-baking: The crust only needs to set before the filling goes in; deep browning is not the goal.
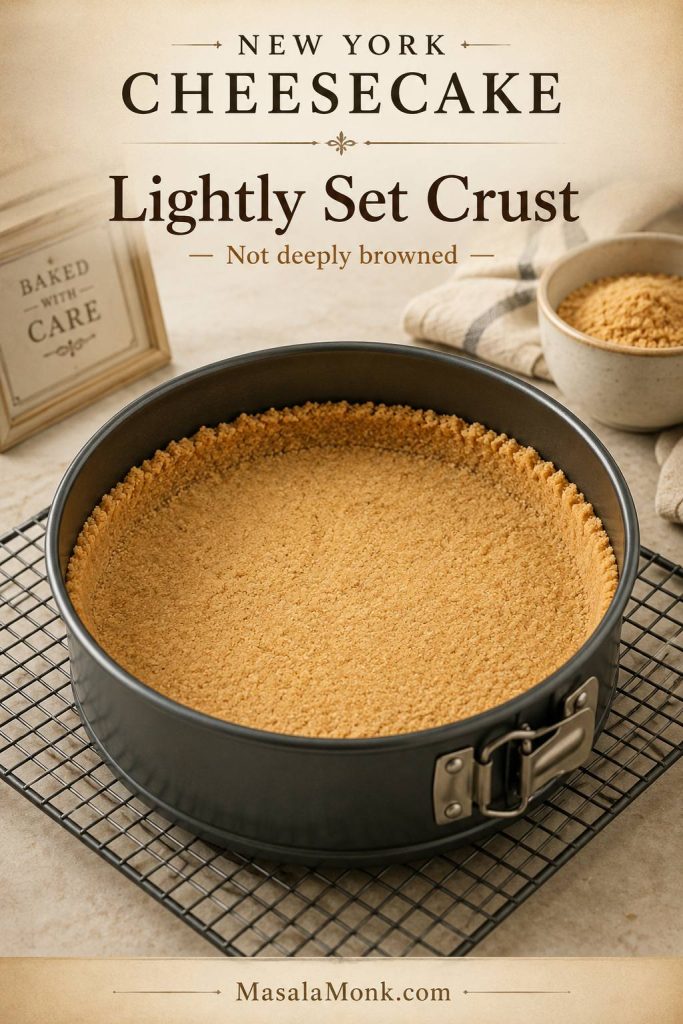
Lightly baked crumb crust cooling in a springform pan before cheesecake filling is added.
After a short bake, the crust should look lightly set and smell buttery, not dark, brittle, or deeply toasted.

Best Pan for New York Cheesecake

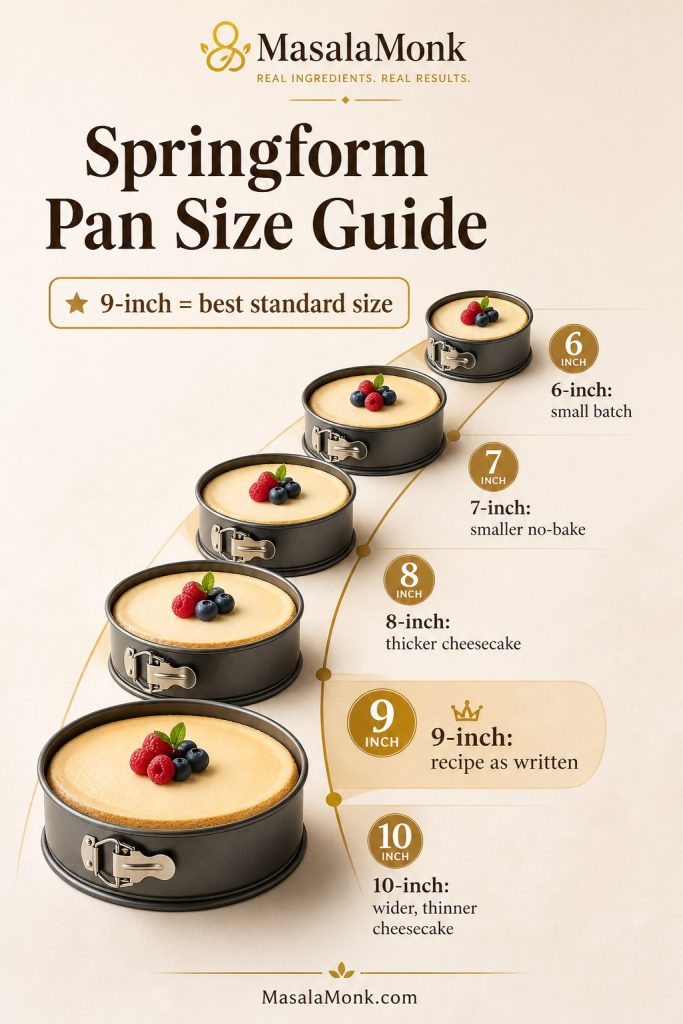
A 9-inch / 23cm springform pan is the best pan for this cheesecake. It gives enough height for a proper New York-style slice while still allowing the filling to bake evenly.

Pan check: The 9-inch springform is the safest default, but pan width changes height, timing, and doneness cues.
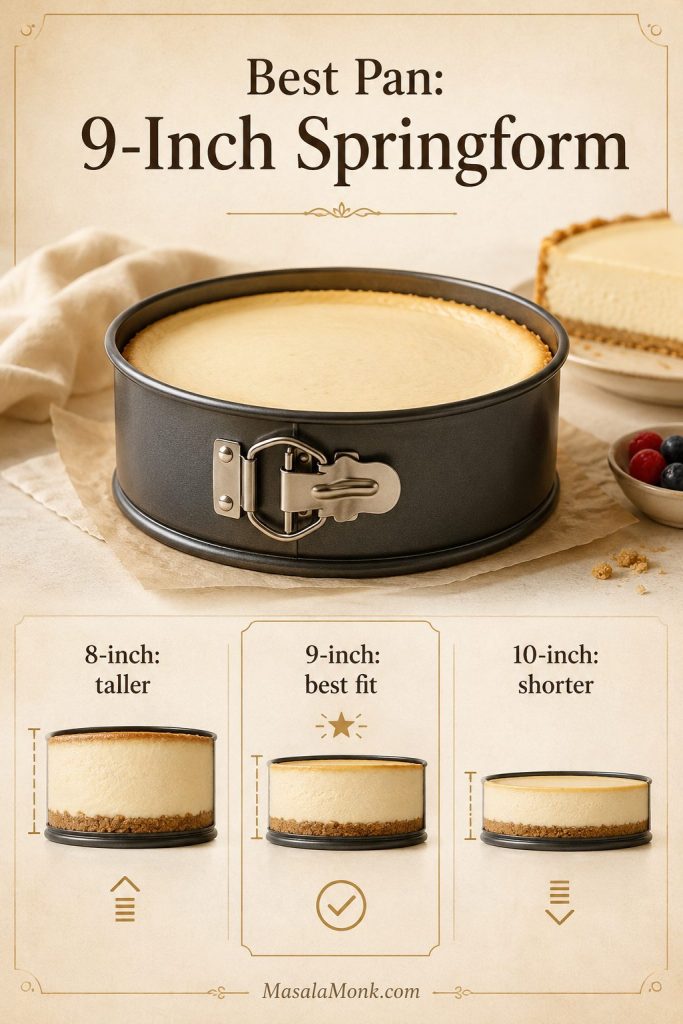
Pan size guide comparing 8-inch, 9-inch, and 10-inch springform pans for New York cheesecake.
A 9-inch springform pan gives the best balance of height and even baking; meanwhile, smaller or larger pans change timing and texture.

9-Inch Springform Pan

This is the main pan size for the recipe. A pan that is at least 2.5 inches deep is ideal because the filling is generous. If your springform pan is shallow, do not fill it to the very top. Reserve any extra filling for a small ramekin and bake it separately until just set.

Fill line: A deep pan should still have room at the top; if your pan is shallow, bake extra filling separately.
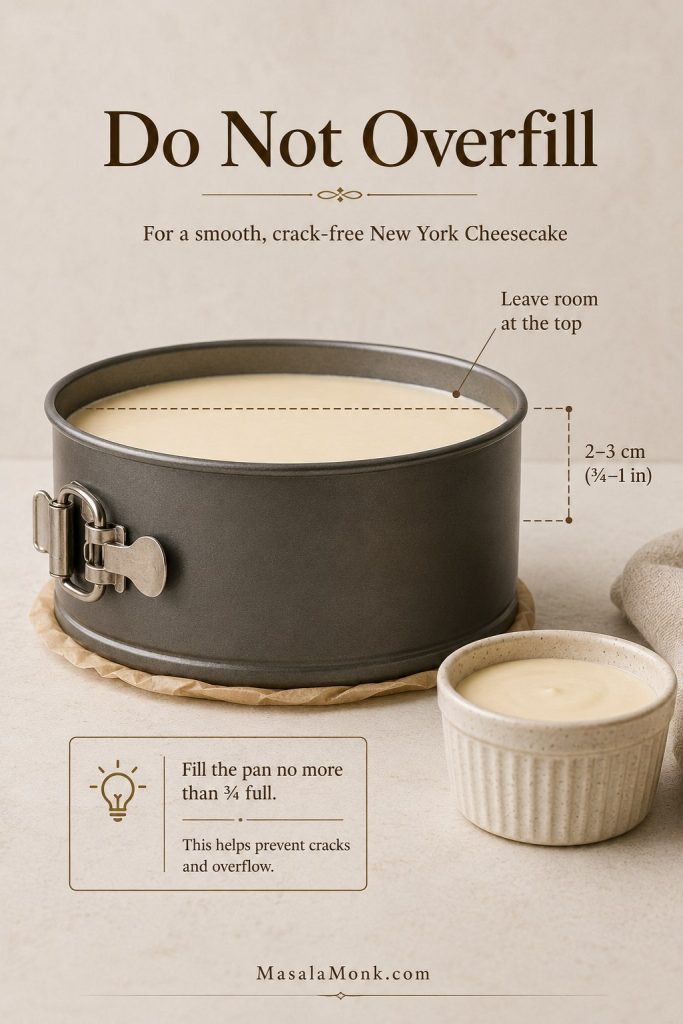
Side view of cheesecake batter in a springform pan with a safe fill line and extra batter in a ramekin.
Leave room at the top of the pan, because a tall cheesecake needs space to rise gently without crowding the rim.

Once your pan is sorted, move to the water bath options so the cheesecake bakes gently and evenly.

Using a 10-Inch Pan

A 10-inch pan works, but the cheesecake will be shorter and may bake faster. Therefore, start checking early because the center will set more quickly in a wider pan.

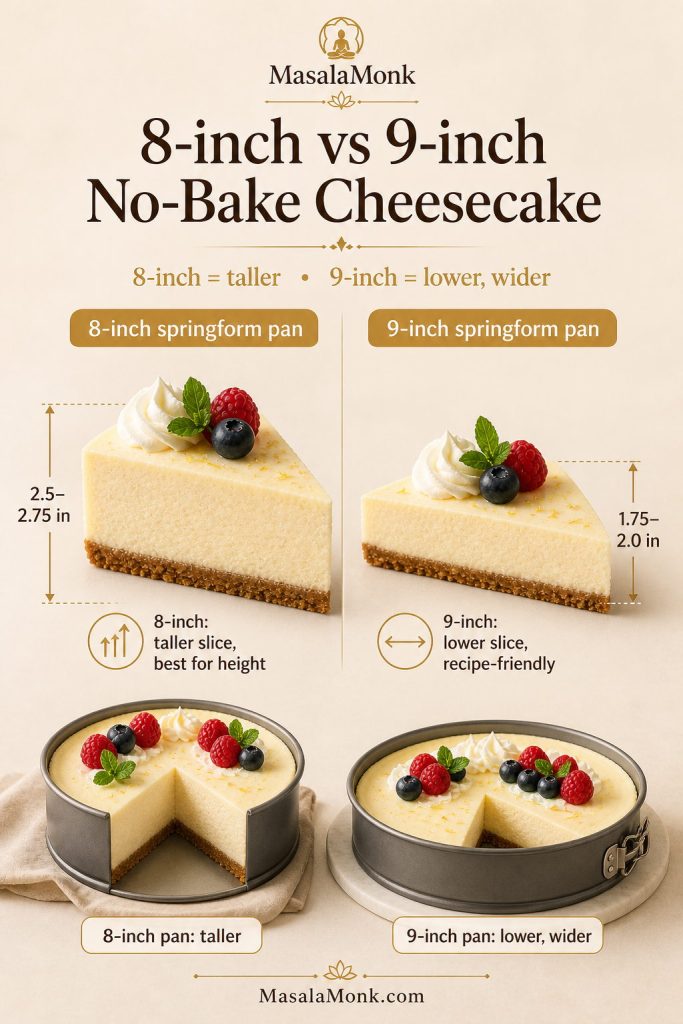
Using an 8-Inch Pan

An 8-inch pan is not a direct swap for the full amount of batter. The cheesecake will be taller, the filling may rise too close to the rim, and the bake time will change. If you only have an 8-inch pan, scale the recipe down or bake extra filling separately in ramekins.

Making Cheesecake Without a Springform Pan

A deep cake pan lined with parchment can work if you are comfortable lifting the chilled cheesecake out carefully. However, for the cleanest slices and easiest release, a springform pan is still the best choice.

Water Bath vs No Water Bath

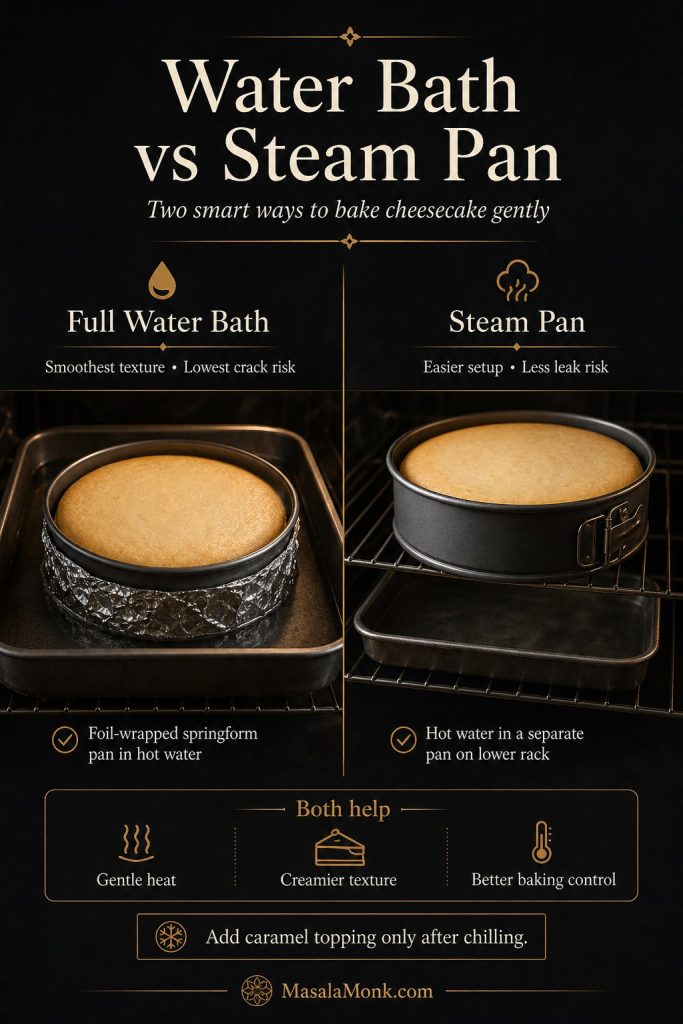
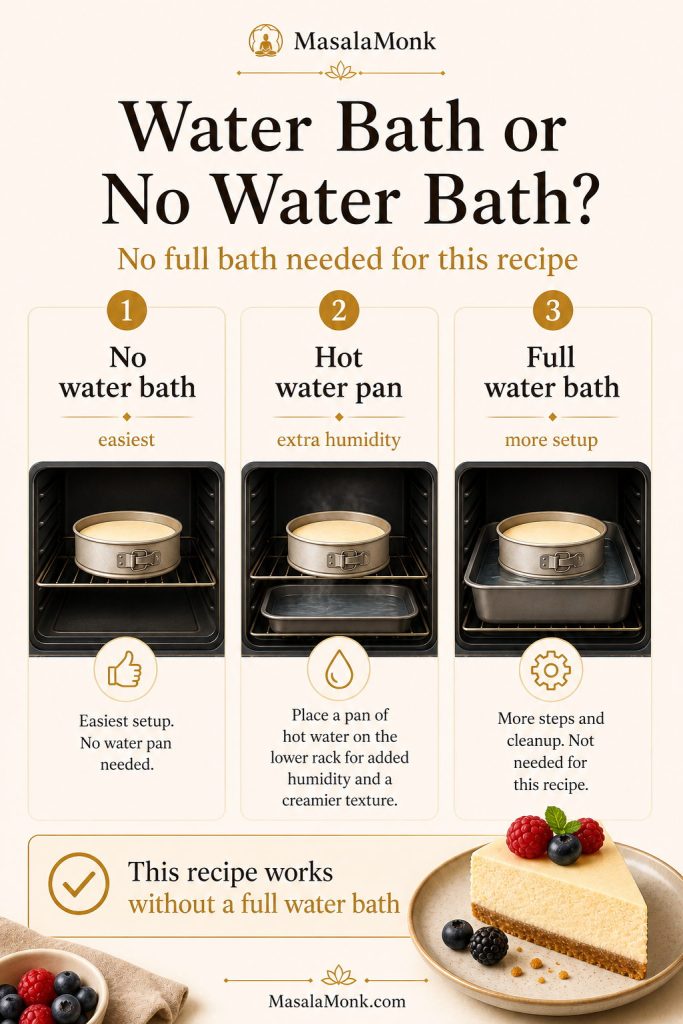
A water bath is the safest way to bake a creamy New York cheesecake with a pale top and fewer cracks. It surrounds the pan with gentle heat and steam, helping the filling bake slowly and evenly.

If the water bath is the part that makes you hesitate, you are not alone. The goal is not to make the process fussy; it is to protect the filling from harsh heat so the cheesecake bakes like a custard instead of drying at the edges.

That said, you may not want to put a springform pan directly into water. So this recipe gives you three paths: a classic water bath, an easier steam-pan compromise, and a no-water-bath option.

Choose your bake: Choose the classic water bath for the smoothest result, or use the steam-pan or no-water-bath paths when convenience matters more.
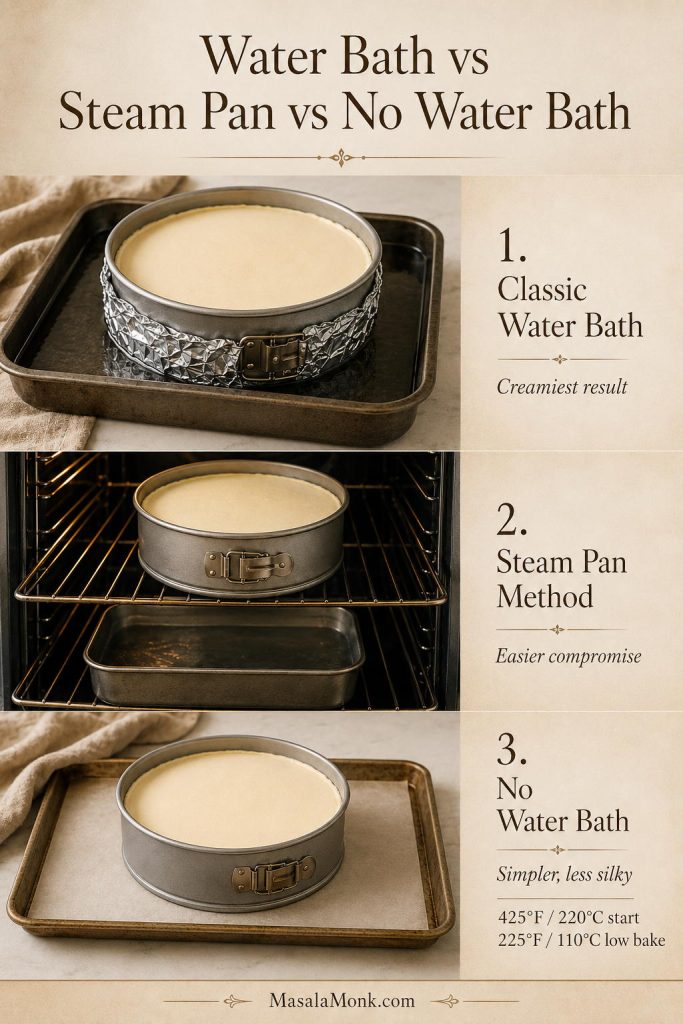
Comparison of water bath, steam pan, and no-water-bath methods for baking New York cheesecake.
A classic water bath gives the widest margin for a smooth New York cheesecake, while the steam-pan and no-water-bath methods trade some silkiness for convenience.
MethodBest ForTradeoff
Classic water bathCreamiest texture, pale top, fewer cracksRequires careful wrapping to prevent leaks.
Steam pan belowGentler oven moisture without placing the springform pan in waterHelpful, but not quite as protective as a true water bath.
No water bathSimpler baking and no leak riskTop may brown more and the texture may be slightly less silky.

Choosing your method? Read the leak-proof water bath setup, try the steam-pan method, or use the no-water-bath option.

Why Use a Water Bath?

A water bath helps prevent harsh oven heat from hitting the cheesecake too quickly. If the edges overcook before the center sets, the texture can become dry around the outside while the middle still looks loose. Because of that, the water bath gives you a wider margin of safety and keeps the texture smoother from edge to center.

How to Stop a Cheesecake Water Bath from Leaking

The most common water-bath problem is a soggy crust. To avoid that, wrap the outside of the springform pan with two layers of heavy-duty foil before placing it in the roasting pan. For extra insurance, place the springform pan inside an oven-safe roasting bag first, then wrap the outside with foil.

Leak protection: Wrap the pan before it goes near hot water, because leak protection is what keeps the crust from turning soggy.
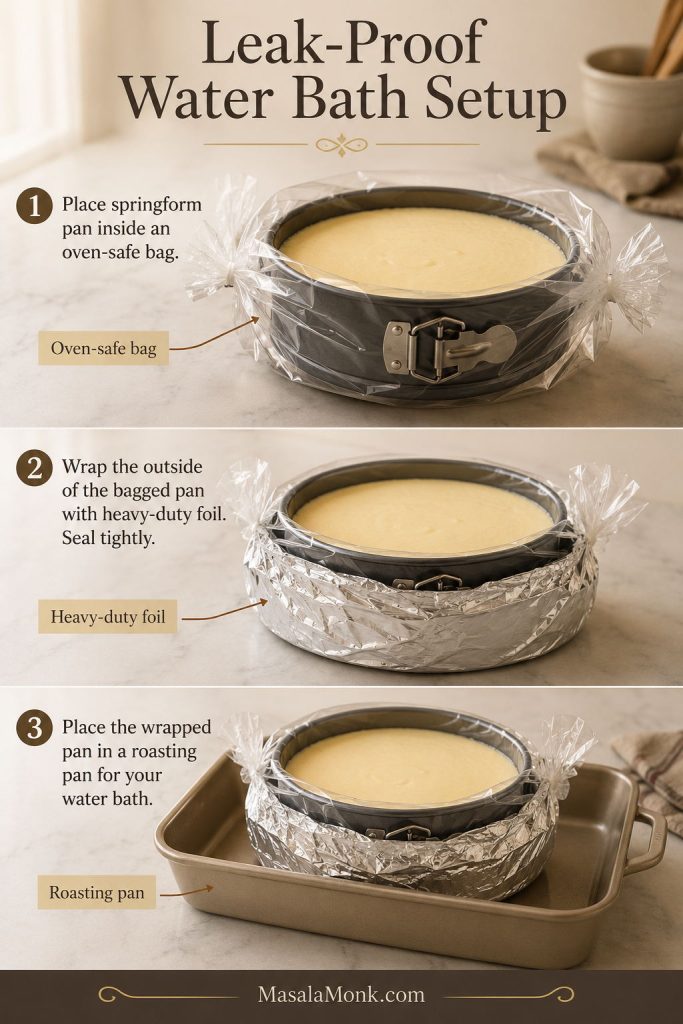
Step-by-step setup showing a springform pan inside an oven-safe bag, wrapped with foil, and placed in a roasting pan.
The extra wrapping is not fussy decoration; it is insurance against the soggy crust problem that makes water baths feel risky.

Use hot water, not cold water, and pour it into the roasting pan after the cheesecake is already sitting on the oven rack. The water should come about halfway up the sides of the springform pan, but it should not rise so high that it risks splashing into the cheesecake.

Water level: The water should come about halfway up the pan, not so high that it risks splashing into the cheesecake.
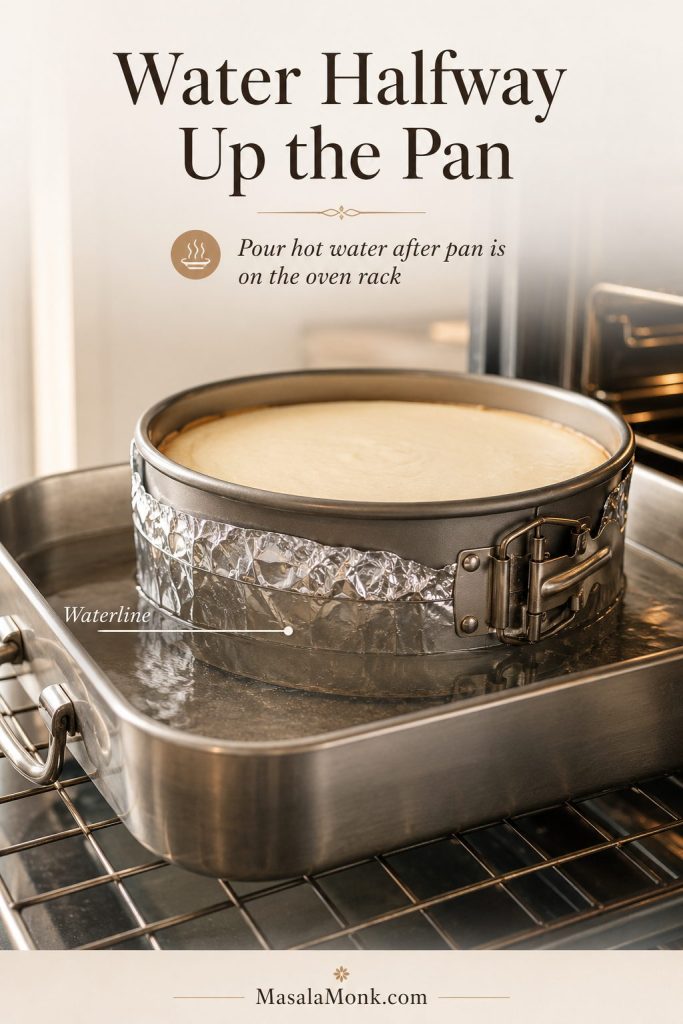
Wrapped springform pan in a roasting pan with water shown halfway up the side for a cheesecake water bath.
Pour hot water after the pan is on the oven rack, then stop around halfway up the springform pan for steady, gentle heat.

Steam-Pan Method: Easier Than a Full Water Bath

If you do not want to place the springform pan directly in water, place the cheesecake on the center rack and set a metal baking pan with boiling water on the lower rack. This adds steam to the oven and reduces harsh dry heat, so it is a useful middle path when you want crack protection without risking water leaking into the crust.

Middle path: This method keeps the cheesecake above the water while still adding moisture to the oven.
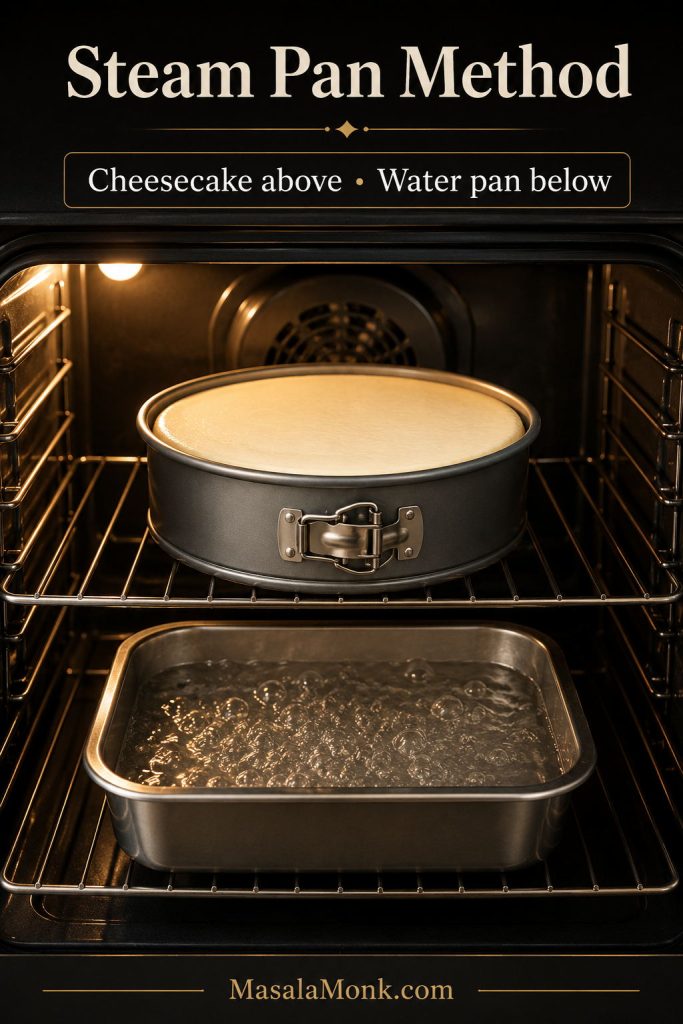
Cheesecake on the middle oven rack with a pan of hot water on the lower rack for the steam-pan method.
The steam-pan method adds moisture to the oven while keeping the springform pan out of the water.

No-Water-Bath Option

For a no-water-bath New York cheesecake, bake the crust as usual. Add the filling, place the pan on a baking sheet, and bake at 425°F / 220°C for 10 minutes. Without leaving the oven open for long, reduce the temperature to 225°F / 110°C and bake for about 60–80 minutes, or until the edges are set and the middle still moves like soft-set custard.

Skipping the bath: If you skip the water bath, rely on the high-heat start, low bake, and gradual cooling to protect the texture.
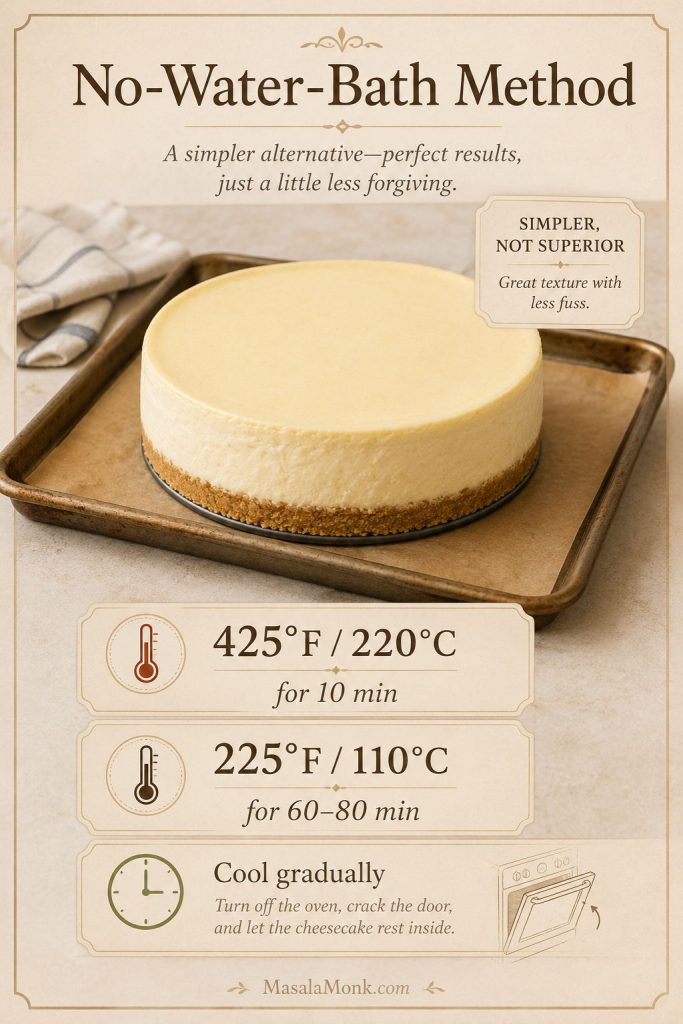
No-water-bath cheesecake method showing a high-heat start, low bake, and gradual cooling instructions.
Without a water bath, lower heat and gradual cooling become more important because the edges can brown or dry faster.

If you choose the no-water-bath method, the lower baking temperature and gradual cool-down become even more important. The method is easier and avoids leaks, but the top may brown slightly more and the texture may be a little less silky than the classic water-bath version.

Before You Start: The 5 Rules That Matter Most

  1. Soften the cream cheese first. Smooth cream cheese before the eggs go in is the easiest way to avoid lumps.
  2. Mix gently after adding eggs. Too much air can make the cheesecake puff, sink, or crack.
  3. Do not bake until firm. Pull it when the edges are set and the center still moves softly.
  4. Cool gradually. Sudden temperature changes are one of the biggest causes of cracks.
  5. Chill overnight if you can. The fridge finishes the texture and gives you sharp-edged slices.

What Each Stage Should Look Like

StageWhat You Should See
CrustDamp-sand crumbs pressed evenly, lightly set after baking, not deeply browned.
Cream cheeseSmooth, soft, and spreadable before the eggs are added.
BatterThick, glossy, and calm rather than foamy or full of bubbles.
Baked cheesecakeSet edges with a softly moving center.
Chilled cheesecakeFirm enough to slice cleanly, creamy through the middle, and not airy.

Before you start mixing, review the stage-by-stage cues or keep the recipe card open for measurements.

How to Make New York Cheesecake

The method is all about smooth mixing and gentle baking. Do not rush the room-temperature step, and do not beat the filling hard once the eggs are added.

Step 1: Make the Crust

Mix the graham cracker or digestive biscuit crumbs with melted butter, sugar, and a pinch of salt. The mixture should feel like damp sand and hold together when squeezed. Press it evenly into the bottom of a 9-inch springform pan. You can press it only across the base or bring it slightly up the sides.

Bake the crust at 350°F / 175°C for 10 minutes, then let it cool slightly while you make the filling.

At this stage, the crust should look lightly set and smell buttery. It does not need to brown deeply.

Step 2: Beat the Cream Cheese First

Add the room-temperature cream cheese to a large mixing bowl and beat until completely smooth. Scrape the sides and bottom of the bowl. This is the moment to remove lumps. Once the eggs are added later, you want to mix as little as possible.

Before moving on, the cream cheese should look smooth and spreadable, with no obvious cold lumps clinging to the paddle or beaters.

Before eggs: This is the moment to beat out lumps, because the batter should be handled gently once eggs are added.
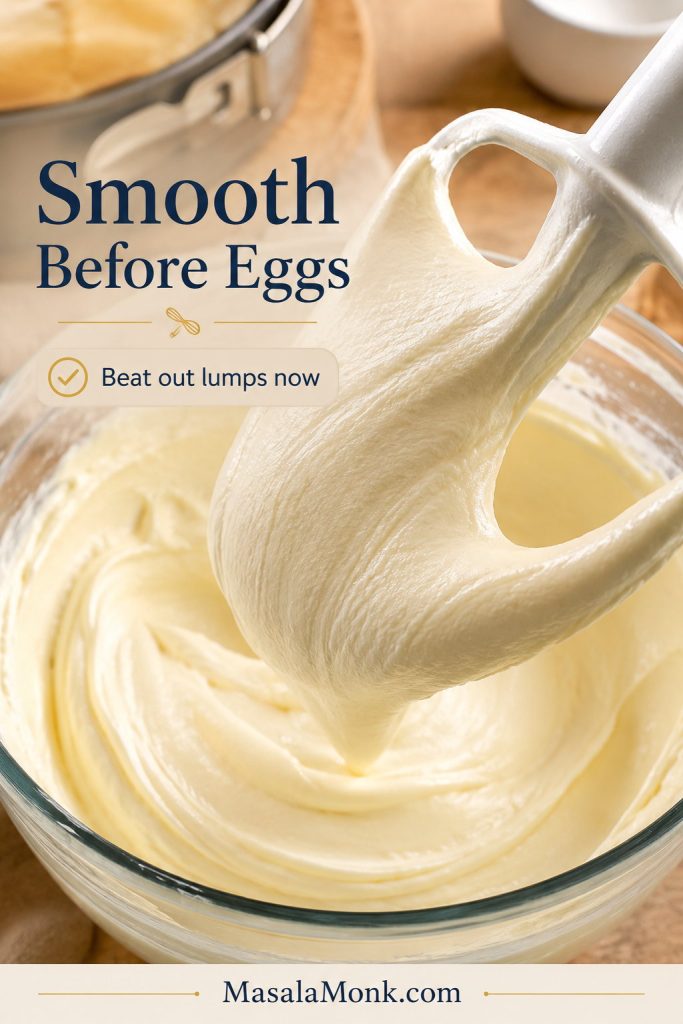
Smooth cream cheese mixture on a mixer paddle before eggs are added to the cheesecake filling.
Beat out lumps before the eggs go in; after that, the filling should be mixed gently rather than whipped.

Step 3: Add Sugar, Cornstarch, Sour Cream, Cream, Vanilla and Lemon

Add the sugar, cornstarch, and salt, then beat until smooth. Add the sour cream, heavy cream, vanilla, lemon juice, and lemon zest. Mix on low to medium-low speed until creamy, scraping the bowl once or twice so the filling is even.

Step 4: Add the Eggs Slowly

Add the eggs one at a time on low speed. Add the extra yolk last. Stop mixing as soon as the eggs are incorporated. The batter should look glossy and smooth, but not airy or bubbly.

Stop while the batter still looks thick, glossy, and calm. If it becomes foamy or full of tiny bubbles, it has likely been mixed longer than it needs.

After eggs: After the eggs are mixed in, the batter should look glossy and calm rather than aerated.
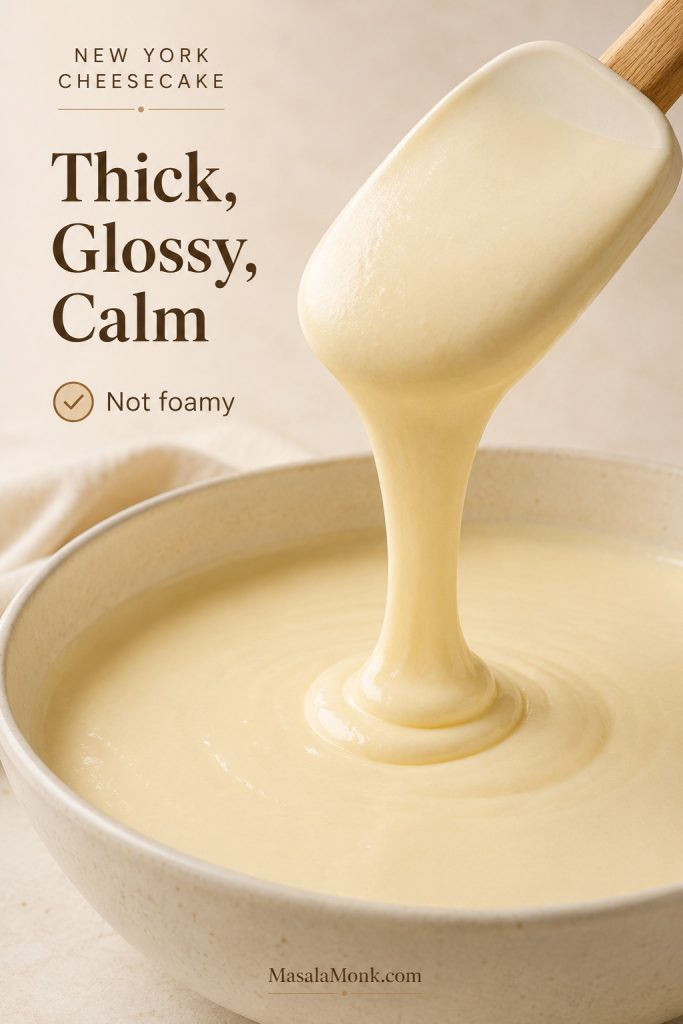
Thick glossy cheesecake batter falling from a spatula into a bowl after eggs have been mixed in.
Once the eggs are added, the batter should look thick, glossy, and calm instead of bubbly, foamy, or loose.

Step 5: Fill the Pan and Prepare the Water Bath

Pour the filling over the cooled crust and smooth the top. Tap the pan gently on the counter once or twice to release large air bubbles. Wrap the outside of the springform pan well, then place it in a large roasting pan.

Pouring stage: Let the crust cool before pouring so the base stays set under the creamy filling.
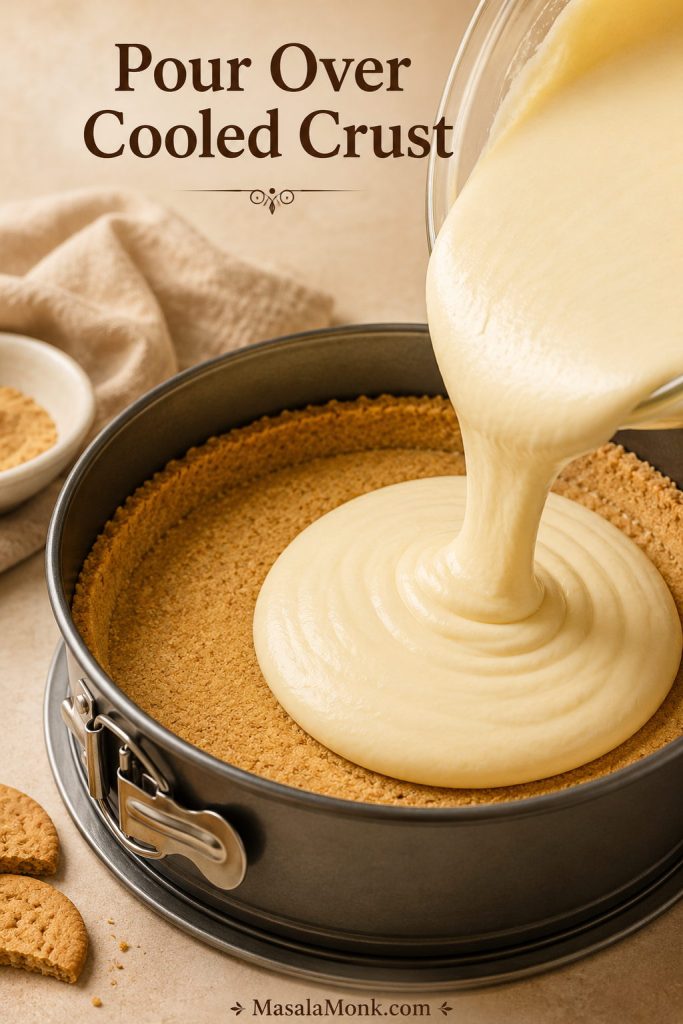
Smooth cheesecake filling being poured into a cooled crumb crust in a springform pan.
Pour the filling over a cooled crust so the base stays firm while the creamy layer settles evenly into the pan.

Transfer the roasting pan to the oven rack. Carefully pour hot water into the roasting pan until it reaches about halfway up the sides of the springform pan.

Bubble check: Tap gently only once or twice, because the goal is to release large bubbles without disturbing the filling.
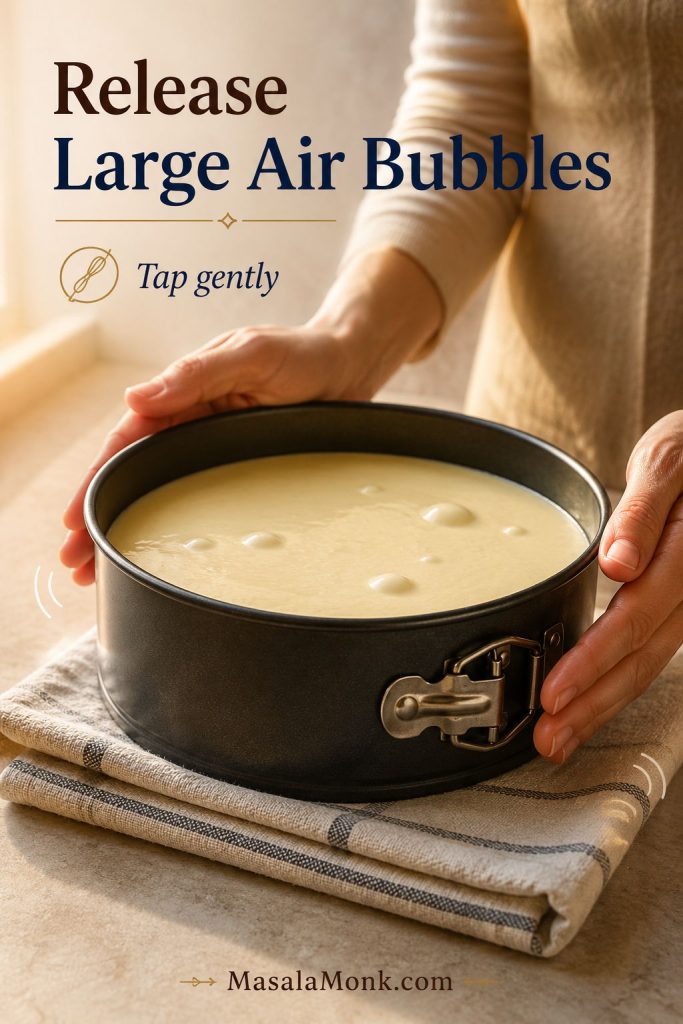
Hands gently tapping a filled cheesecake pan on a folded towel to release large air bubbles.
A gentle tap releases large air bubbles; however, heavy shaking can disturb the filling and create new texture problems.

Once the cheesecake is in the oven, the next important skill is knowing when the center is done.

Step 6: Bake Until the Edges Set

Bake at 325°F / 160–165°C for about 75–90 minutes. Start checking around 70 minutes. The edges should look set and slightly puffed, while the center should still have a gentle wobble.

Do not wait for the center to become firm in the oven. That usually means the cheesecake has gone too far.

Fan Oven and OTG Notes

If using a fan oven, reduce the main bake temperature slightly to about 150–155°C. In an OTG, bake on the middle rack and avoid placing the cheesecake too close to the top element. Cheesecake needs steady gentle heat, not aggressive browning, so use the rack position and temperature that give you the calmest, most even bake.

If your oven runs hot, the cheesecake may brown, crack, or set too quickly at the edges. An inexpensive oven thermometer is helpful for cheesecake because even a small temperature difference can change the texture.

Step 7: Cool Slowly

When the edges are set and the center still moves slightly, turn the oven off. Crack the door and let the cheesecake rest inside for 1 hour. After that, remove it from the water bath, unwrap the foil, and let it cool to room temperature. Chill for at least 8 hours, preferably overnight, before slicing.

Method checkpoints: Use these visual checkpoints as you move from crust to filling, oven, cooling, and slicing.
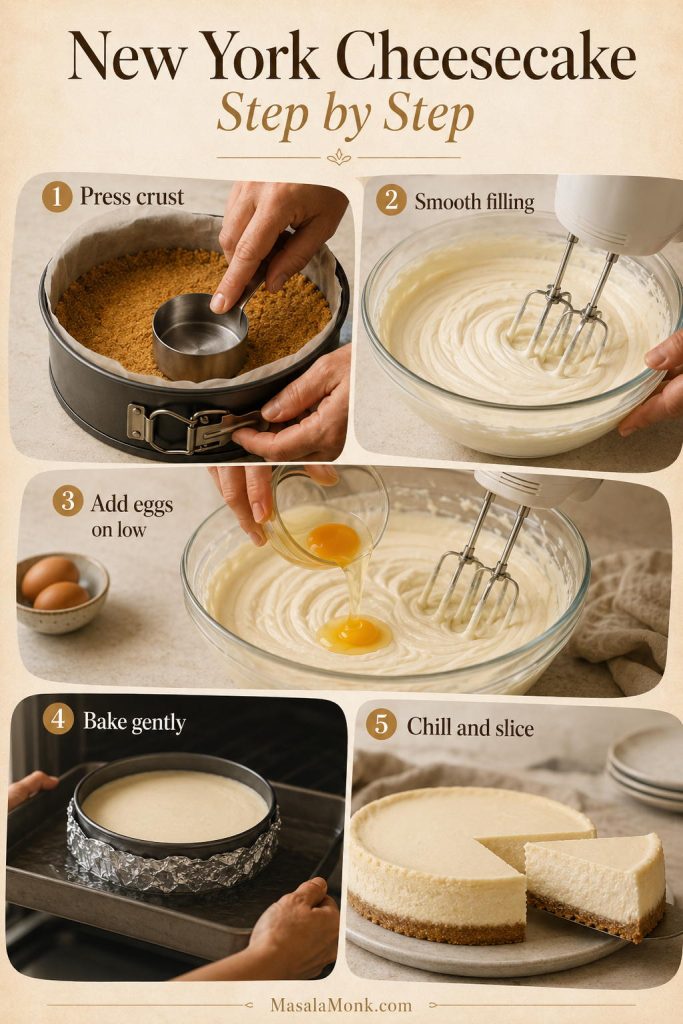
Five-step New York cheesecake process showing pressing the crust, smoothing filling, adding eggs, baking gently, and chilling before slicing.
This step-by-step view connects the small cues that matter most: even crust pressure, smooth filling, low-speed eggs, gentle heat, and a chilled set.

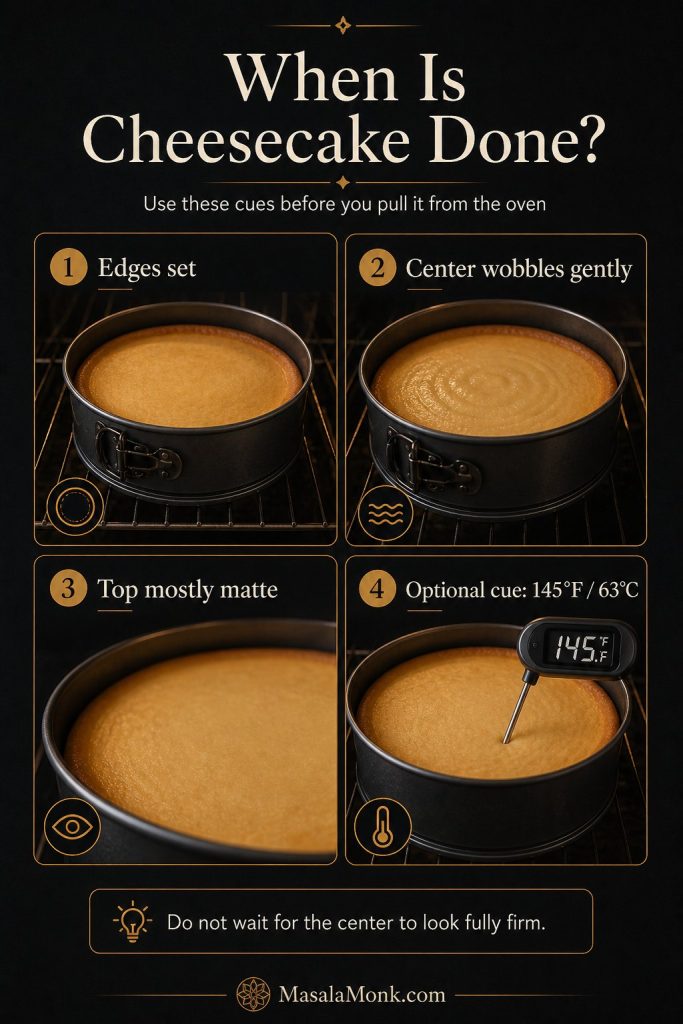
How to Know When New York Cheesecake Is Done

Cheesecake doneness can feel confusing because the center should not look fully set when you turn off the oven. A perfectly baked cheesecake still needs time to finish setting as it cools.

Jiggle check: Use this movement check when the edges look set but the center still looks slightly soft.
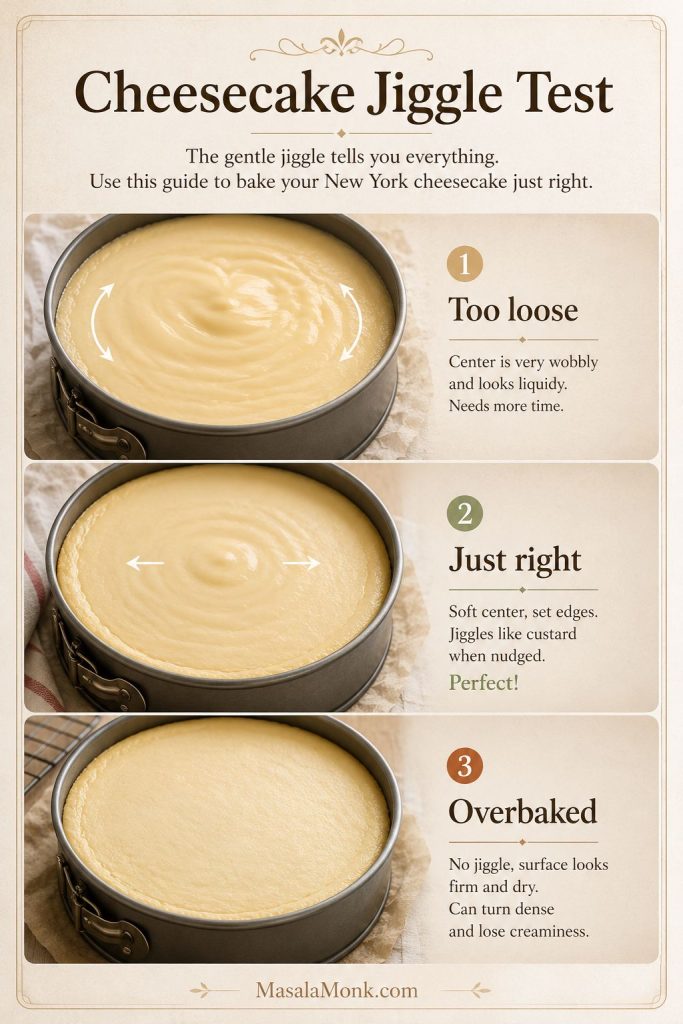
Cheesecake jiggle test comparing too loose, just right, and overbaked centers in springform pans.
The center should move like soft-set custard; if it sloshes, it needs more time, but if it does not move at all, it may be overbaked.

Look at the Edges

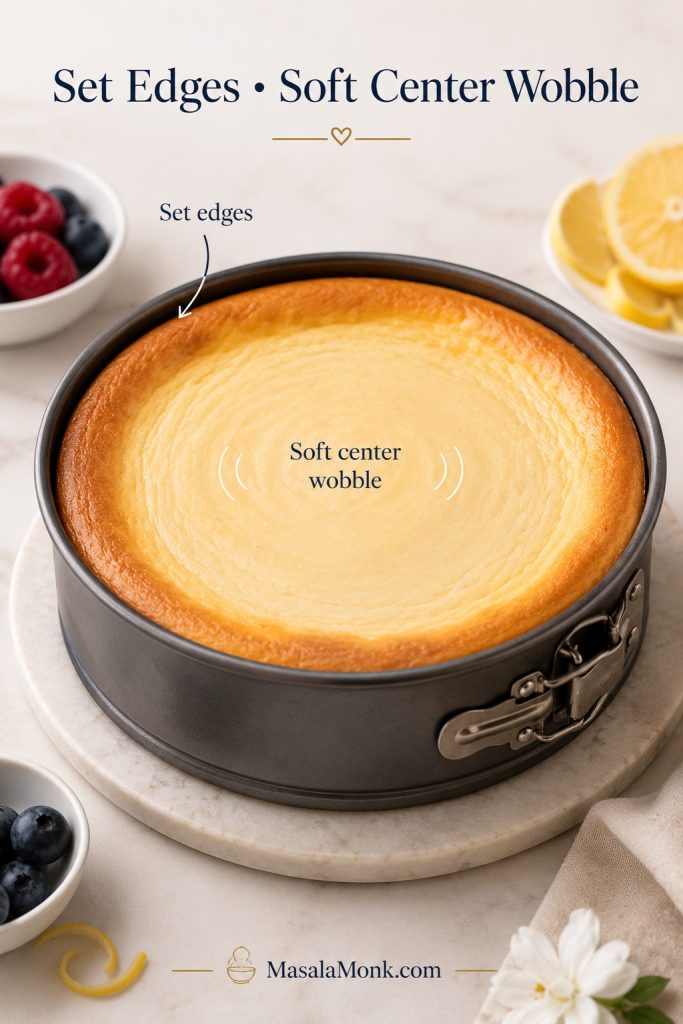
The outer edges should look set, slightly puffed, and no longer wet. The cheesecake may have a soft matte look around the edges while the middle still looks a little glossy.

Doneness target: The goal is set edges with a soft center, not a cheesecake that looks firm all the way through.
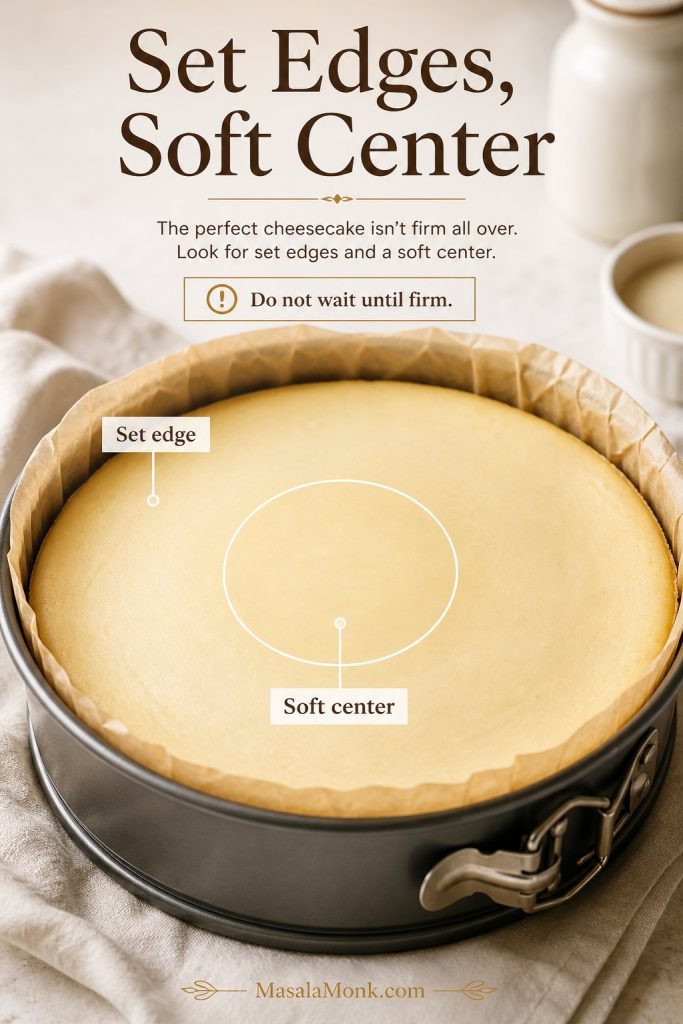
Baked cheesecake in a springform pan labeled with set edge and soft center doneness cues.
Look for set edges and a soft center, because cheesecake should not be fully firm when the oven turns off.

Use the Jiggle Test

Gently nudge the pan. The center should jiggle like soft set custard or Jell-O, not ripple like a loose wave. If the whole cheesecake sloshes or moves in a wide liquid motion, it needs more time. If nothing moves at all, it may already be overbaked.

Do not panic: A cheesecake that looks slightly soft in the center is usually doing exactly what it should. The filling keeps setting as it cools, and the overnight chill is what turns it into clean, sliceable cheesecake.

Do Not Use the Toothpick Test

Do not test cheesecake with a toothpick or knife the way you would test a cake. It can crack or mark the surface, and it does not tell you much about the final chilled texture. Use the edge-set cue, the gentle jiggle test, and overnight chilling instead.

Optional Thermometer Cue

An instant-read thermometer can help, but it should be a backup cue, not the only test. If you use one, aim for roughly 150°F / 65°C in the center, then stop checking. Cheesecake is delicate, and repeated poking can mark the surface, so the visual set and center movement still matter most.

Temperature backup: Use 150°F / 65°C as a backup check, while still judging the cheesecake by its edge set and center movement.
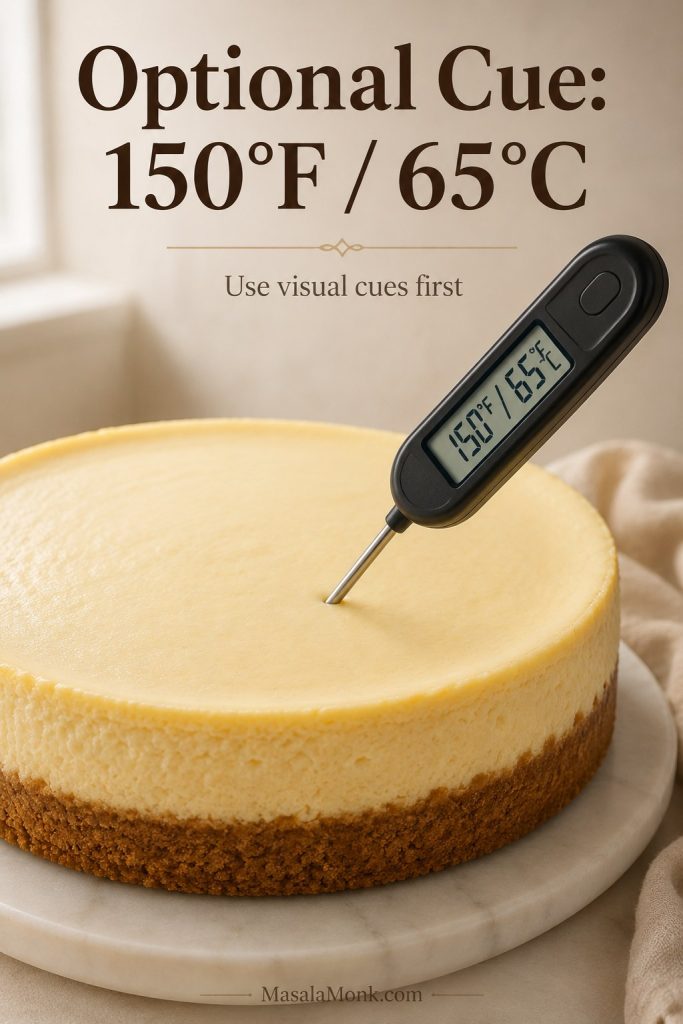
Instant-read thermometer inserted into a cheesecake showing an optional 150°F or 65°C doneness cue.
A thermometer can confirm New York cheesecake doneness, although the set edge and gentle center movement should still guide the final call.

After the center has the right movement, follow the cooling schedule so the surface settles without cracking.

For a deeper technical reference on cheesecake baking behavior, King Arthur Baking has a useful New York cheesecake guide here: King Arthur Baking’s NY Cheesecake Recipe.

How to Cool Cheesecake Without Cracks

Cracks usually happen because the cheesecake was overbaked, overmixed, or cooled too quickly. Sudden temperature changes make the surface contract before the inside has settled. Gradual cooling gives the custard time to relax and finish setting.

This is the quiet part of the recipe, but it is where many cracks are prevented. Use this cooling schedule:

  1. Turn the oven off when the edges are set and the center still has slight movement.
  2. Crack the oven door open.
  3. Leave the cheesecake inside for 1 hour.
  4. Remove it from the water bath.
  5. Cool to room temperature on a rack.
  6. Chill for at least 8 hours, preferably overnight.

Cooling stage: The oven-door rest is part of the recipe, because a sudden temperature change can crack the surface.
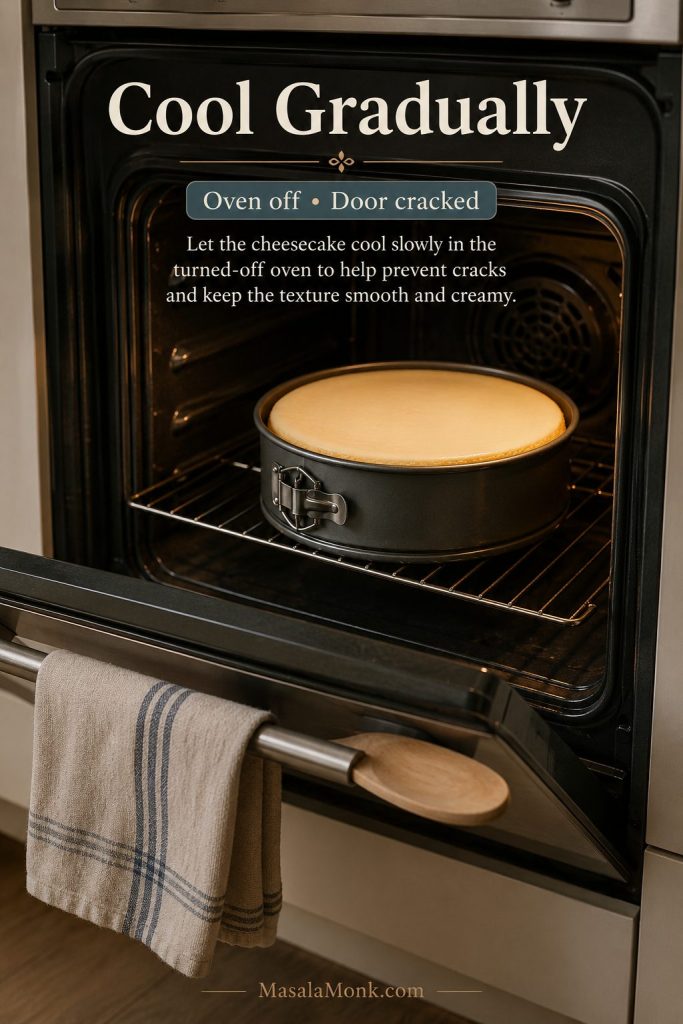
Cheesecake cooling slowly inside a turned-off oven with the door cracked open.
Cooling gradually lets the custard settle, so the surface is less likely to crack as the cheesecake comes down in temperature.

Fully chilled now? Use the clean slicing guide before releasing and cutting the cheesecake.

Finally, do not move a hot cheesecake straight to the fridge. That shock can cause condensation, cracks, and a less even texture.

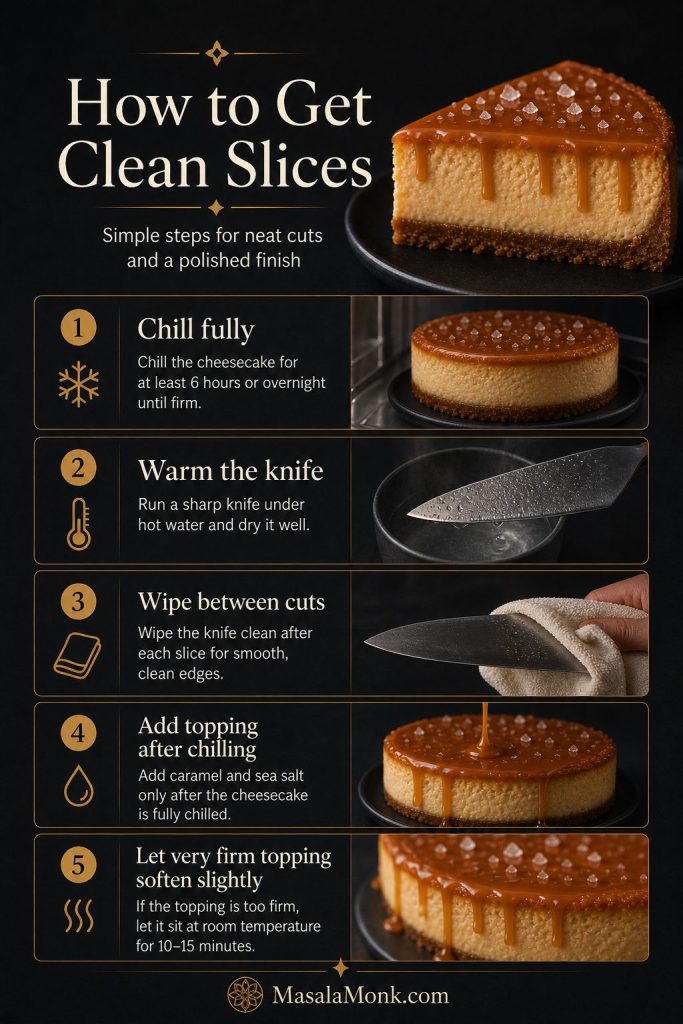
How to Slice New York Cheesecake Cleanly

Clean cheesecake slices come from patience as much as technique. The cheesecake must be fully chilled before cutting. If you slice it too soon, even a perfectly baked cheesecake can smear, sag, or look softer than it really is.

Before releasing: Wait until the cheesecake is fully chilled before removing the ring, so the sides stay neat and stable.
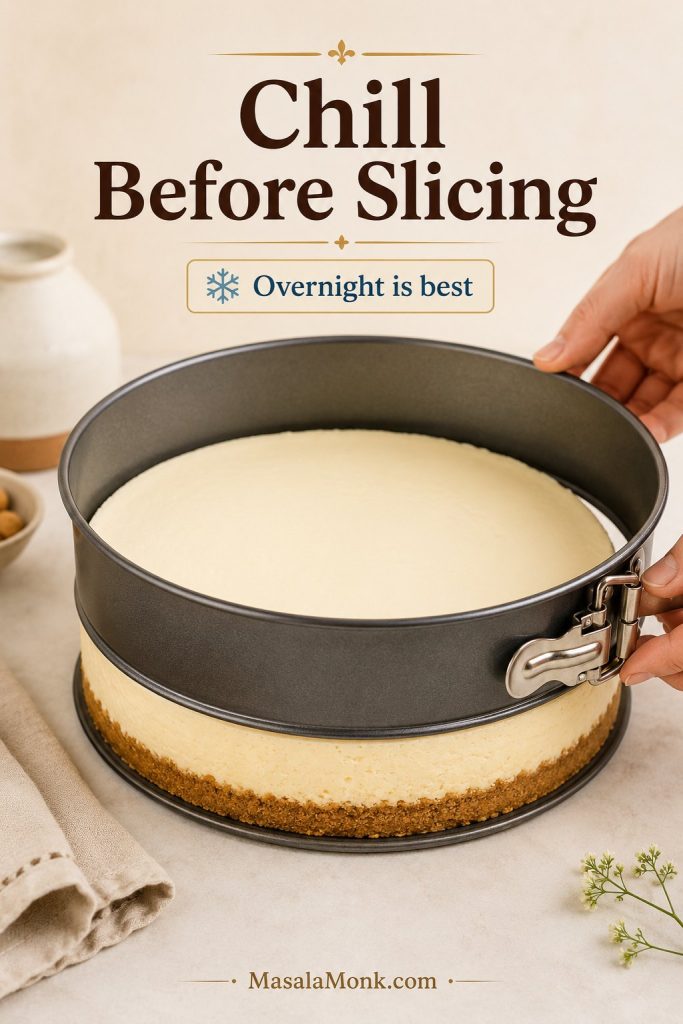
Chilled New York cheesecake in a springform pan being released before slicing.
Chill the cheesecake fully before releasing the ring, because the fridge finishes the texture and helps the slice hold clean edges.
  1. Chill the cheesecake overnight if possible.
  2. Run a thin knife around the edge before releasing the springform ring.
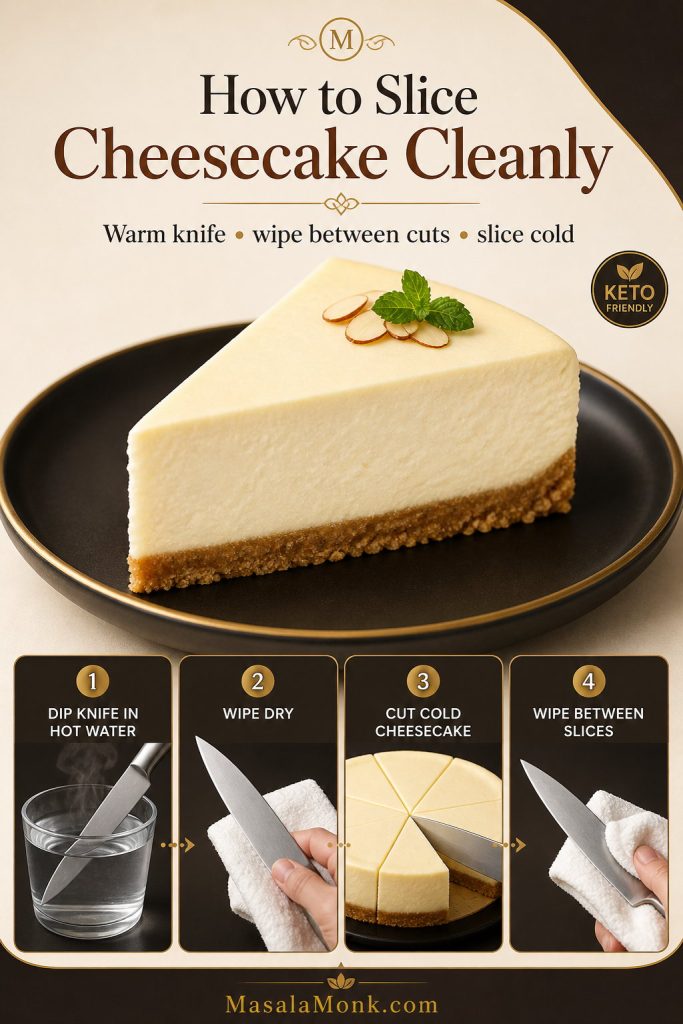
  3. Dip a sharp knife in hot water.
  4. Wipe the blade dry.
  5. Make one clean cut.
  6. Wipe and warm the knife again before the next cut.

Clean-cut method: Clean cuts come from a warm knife and a wiped blade, not from pressing harder.
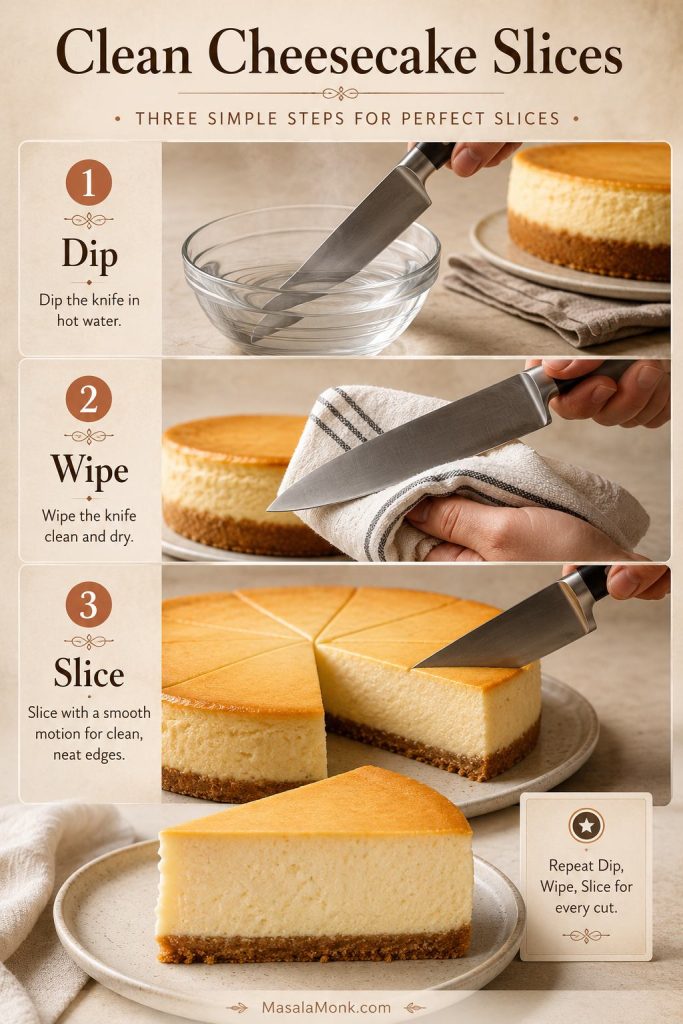
Three-step clean slicing guide showing a knife dipped in hot water, wiped dry, and used to cut cheesecake.
Dip, wipe, and slice for every cut; then the knife glides through the filling instead of dragging it through the crust.

This small step makes a big difference. That first clean slice is the payoff for the overnight wait. A hot, clean knife gives you smooth sides and neat slices instead of dragging creamy filling through the crust.

If you want to move the cheesecake off the springform base, do it only after it is fully chilled. Slide a thin offset spatula between the crust and the base, then transfer carefully to a flat serving plate. If the cheesecake feels delicate, serve it from the springform base instead.

Serving tip: Slice the cheesecake cold for the cleanest cuts. For the creamiest eating texture, let slices sit at room temperature for 10–15 minutes before serving.

Optional Sour Cream Topping

A sour cream topping is optional, but it is a lovely old-school finish if you like a tangier cheesecake. It gives the top a clean white layer, softens the richness, and quietly covers small cracks so the cheesecake still looks dinner-party ready.

To make it, stir together:

  • 1 cup sour cream / 240g
  • 2 tablespoons sugar
  • ½ teaspoon vanilla extract
  • Pinch of salt

After the main bake, while the cheesecake is still hot and before the long oven-cooling step, spread the topping gently over the surface. Return the cheesecake to the oven for 8–10 minutes, then turn the oven off, crack the door, cool slowly, and chill as usual. This topping is especially useful if you like a more old-school cheesecake flavor, want extra tang, or need a simple way to cover a small crack.

Topping finish: Spread the sour cream layer gently while the cheesecake is still warm, so it smooths the surface without feeling like frosting.
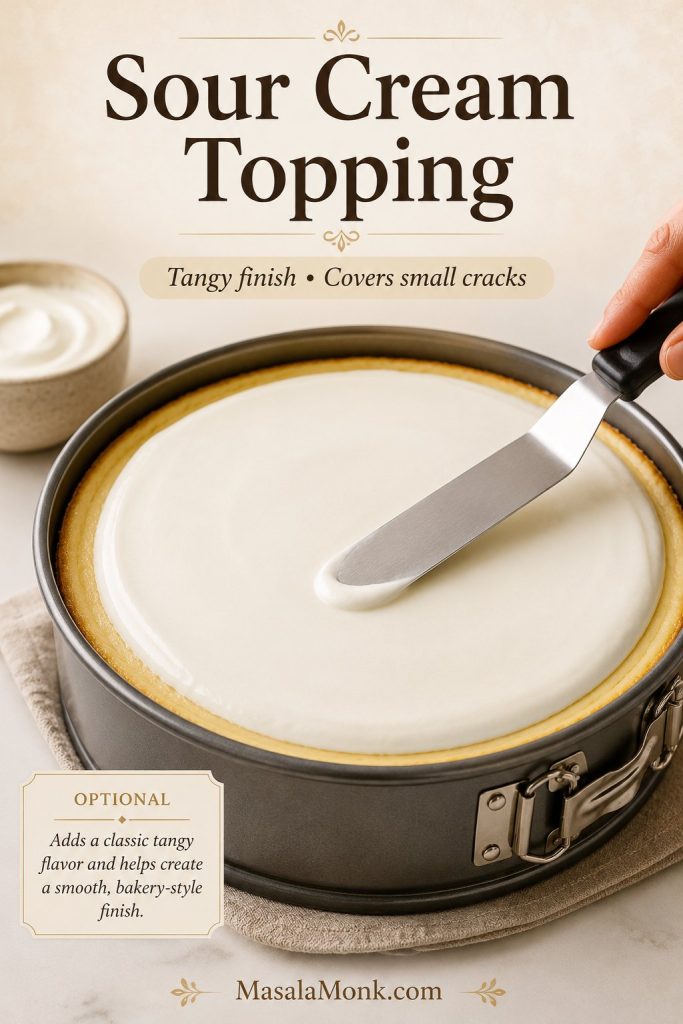
Sour cream topping being spread smoothly over a baked New York cheesecake with an offset spatula.
A sour cream topping adds tang and can cover small cracks, while still letting the classic New York cheesecake flavor stay in front.

Best Toppings for New York Cheesecake

New York cheesecake is rich enough to serve plain, but toppings can make it feel more special. Add fresh or cooked toppings after the cheesecake has chilled, not before baking, unless you are following a specific swirl recipe.

For the cleanest New York cheesecake flavor, serve the first slice plain. If the cheesecake tastes balanced on its own, toppings become a choice rather than a cover-up.

ToppingBest ForTip
Strawberry toppingClassic bakery-style servingUse a glossy cooked sauce or fresh berries with a little sugar.
Cherry toppingRetro New York cheesecake flavorKeep it lightly tart so the cheesecake does not become too sweet.
Blueberry toppingDeep fruit flavorA small amount of lemon juice keeps blueberry sauce bright.
Raspberry sauceSharper contrastStrain seeds if you want a smooth sauce.
Lemon curdBright, tangy finishUse a thin layer because lemon curd is intense.
Chocolate ganacheRicher dessert feelLet ganache cool slightly before pouring over chilled cheesecake.
Fresh berriesSimple, elegant servingAdd right before serving so the berries stay fresh.

Serving options: Plain cheesecake should taste complete first, and toppings should add contrast rather than cover a weak filling.
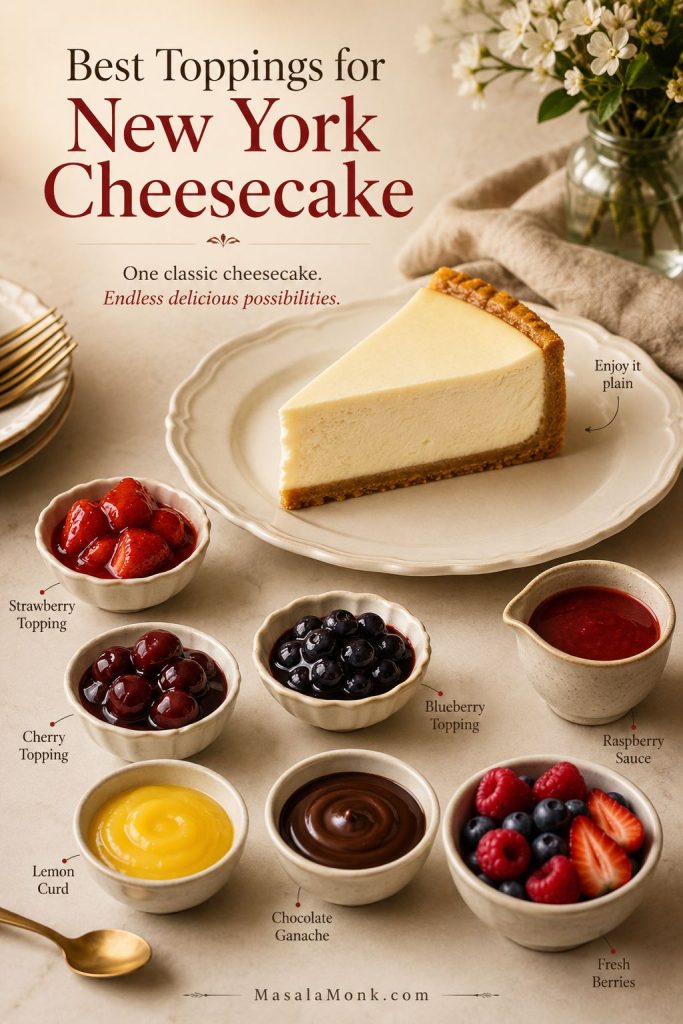
Plain New York cheesecake slice surrounded by strawberry, cherry, blueberry, raspberry sauce, lemon curd, chocolate ganache, and fresh berries.
Start with a plain slice to taste the cheesecake itself; then add fruit, curd, or ganache when you want a stronger finish.

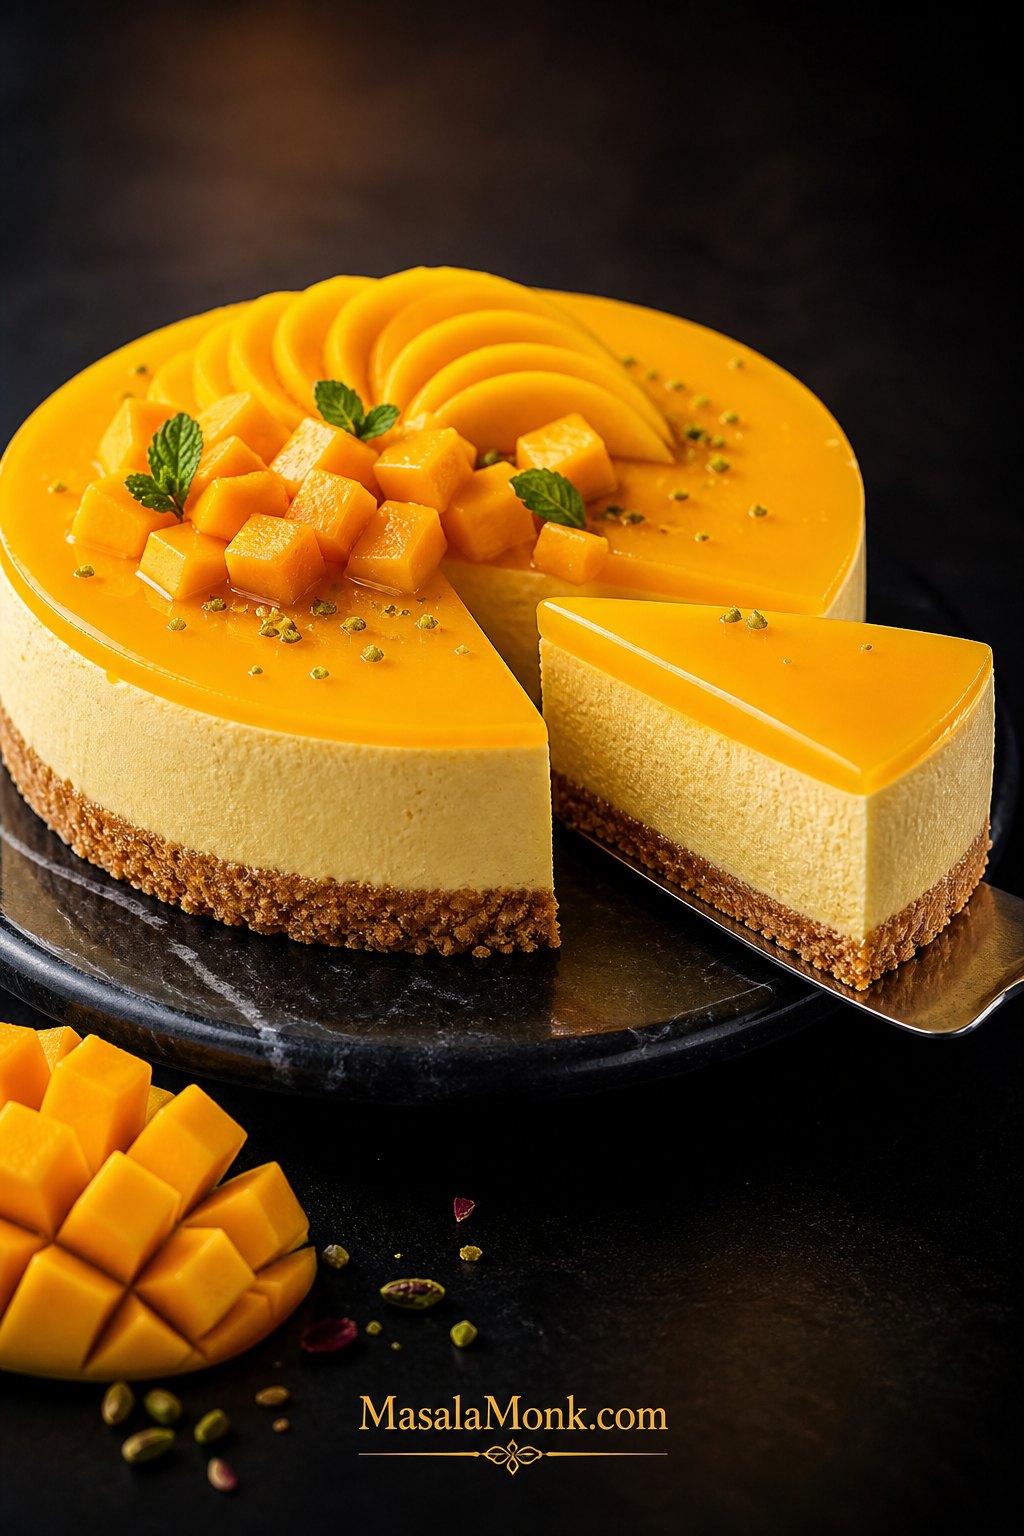
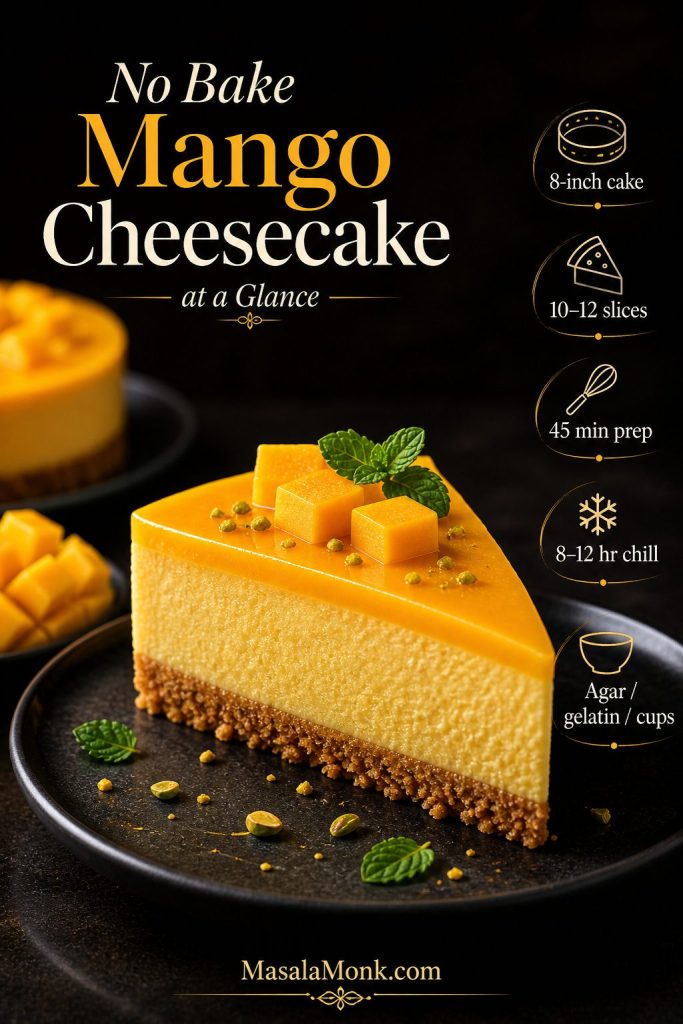
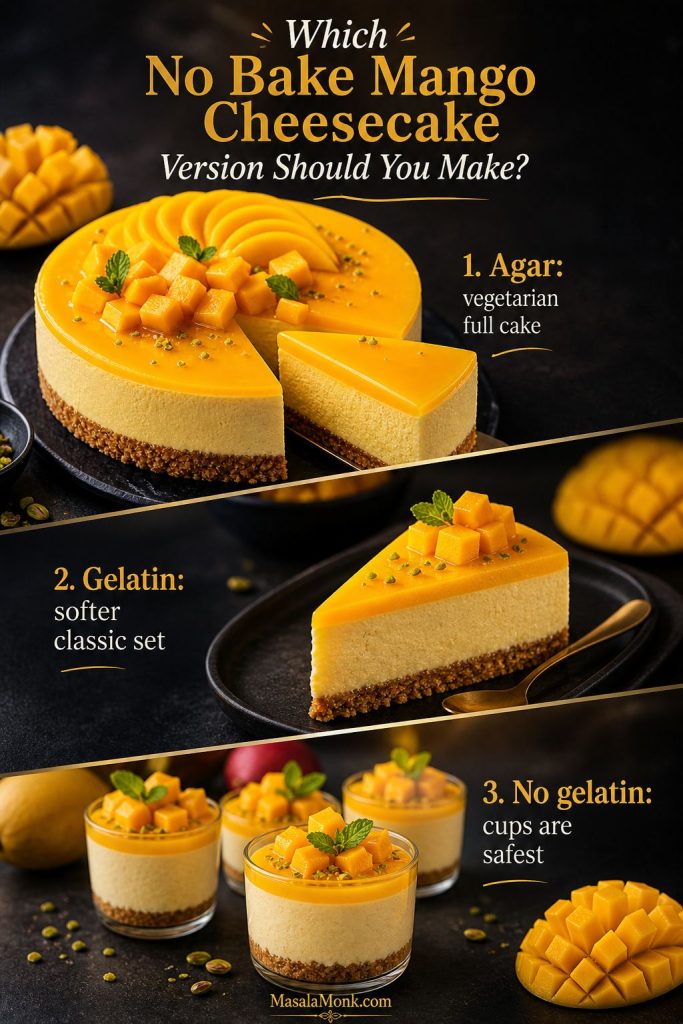
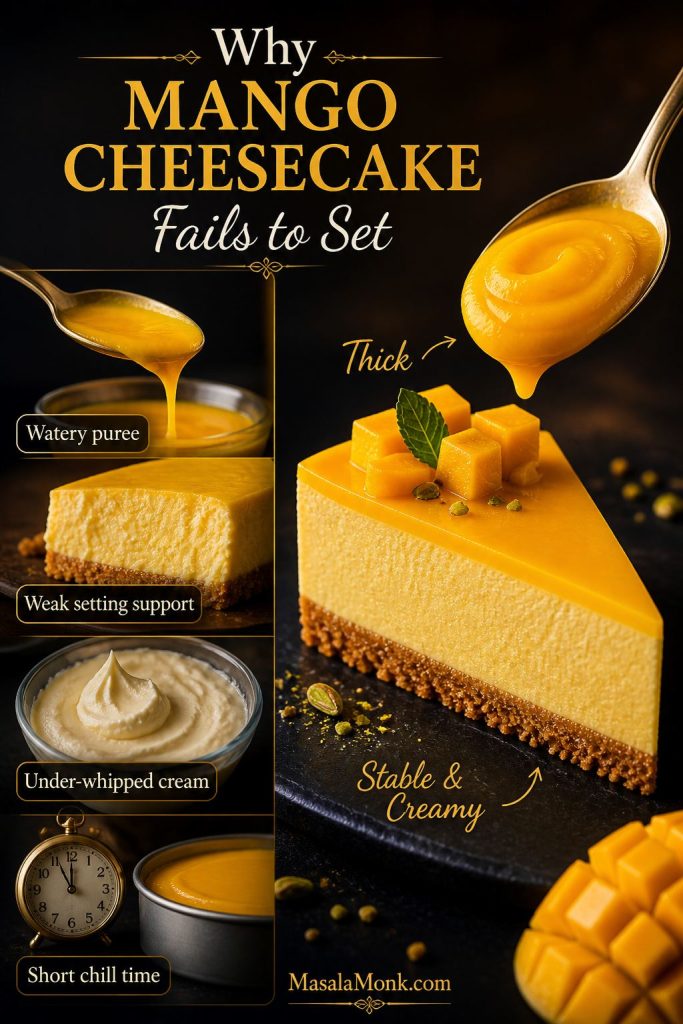
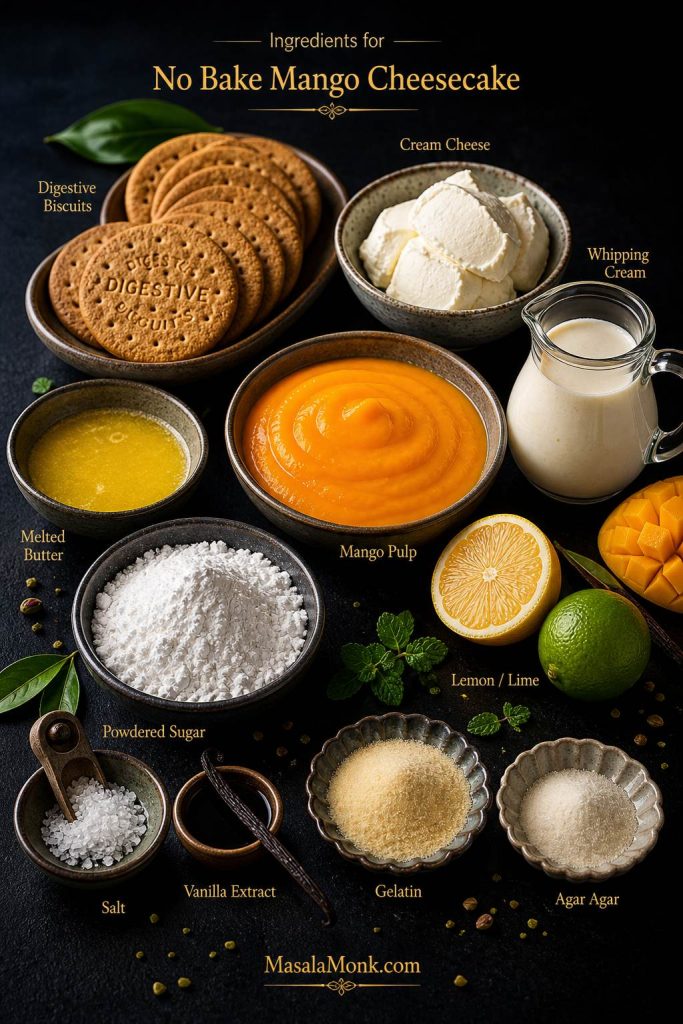
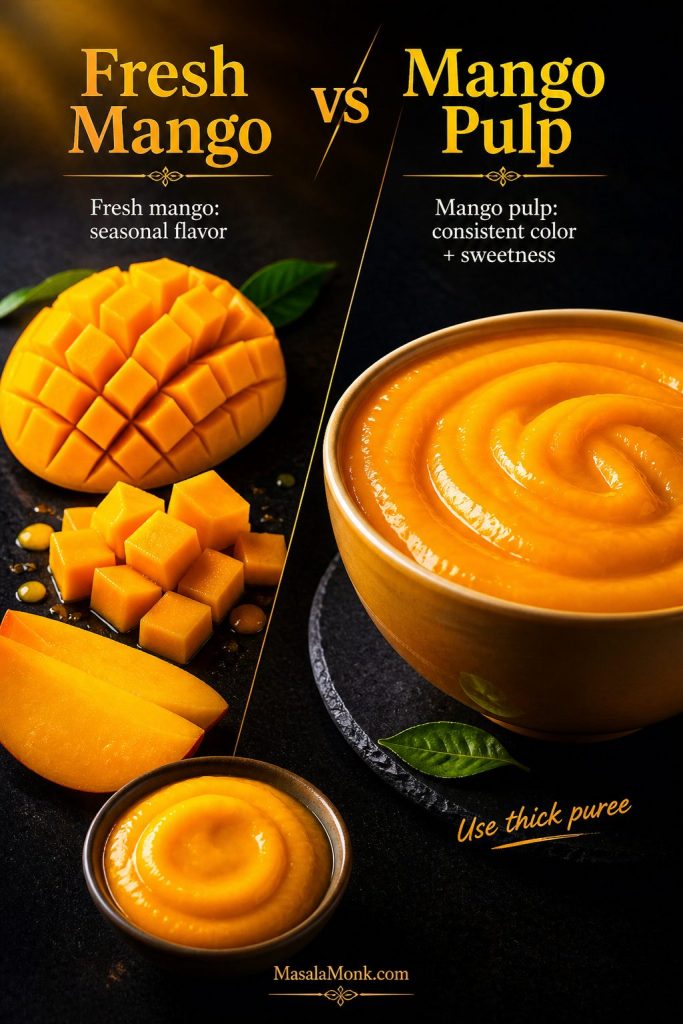
If you prefer fruit-forward cheesecakes, you may also like this No Bake Mango Cheesecake. For a lighter high-protein variation, see this Cottage Cheese Cheesecake Recipe.

Make Ahead, Storage and Freezing

This New York cheesecake recipe is best baked the day before serving because it actually improves after chilling. The texture becomes cleaner, the flavor settles, and the slices cut more neatly.

Best Make-Ahead Timeline

For the smoothest serving day, bake the cheesecake the day before you need it. Cool it slowly in the oven, let it come to room temperature, chill it overnight, then release, slice, and add toppings the next day.

Make-ahead note: Cheesecake is easier to serve when it has already chilled overnight and the slicing work is not rushed.
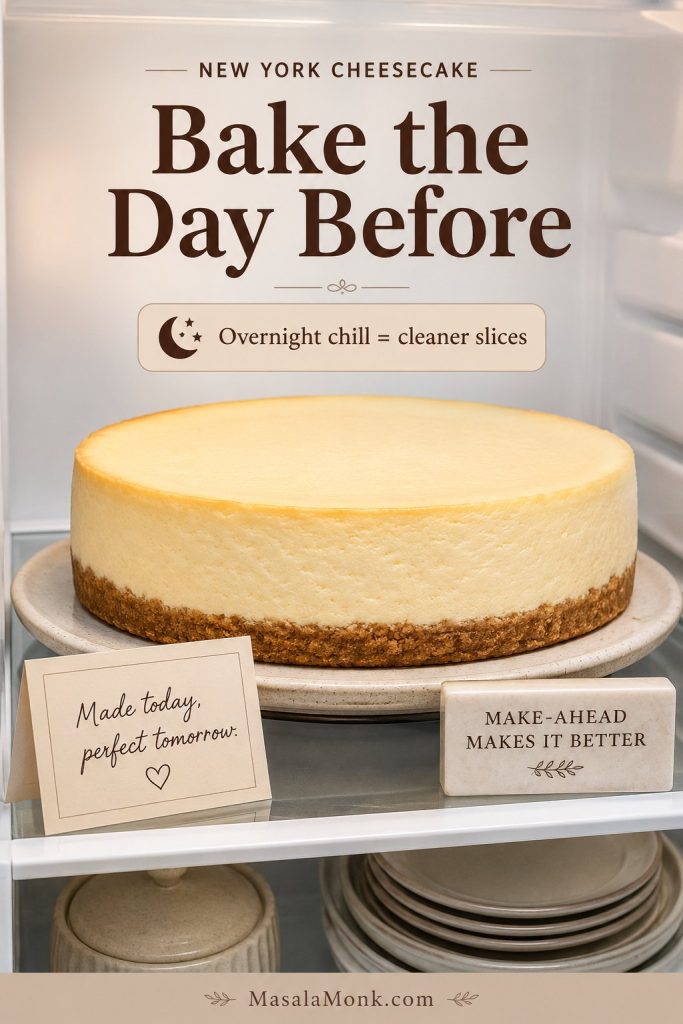
Whole New York cheesecake chilled in a refrigerator with a make-ahead reminder to bake the day before.
Baking ahead turns New York cheesecake into a calmer dessert: it has time to set, and you have time to serve it without rushing.

Fridge Storage

Store the cheesecake covered in the refrigerator for 4–5 days. Keep it in the pan until fully chilled if possible, then cover loosely once the surface is cold.

Freezing

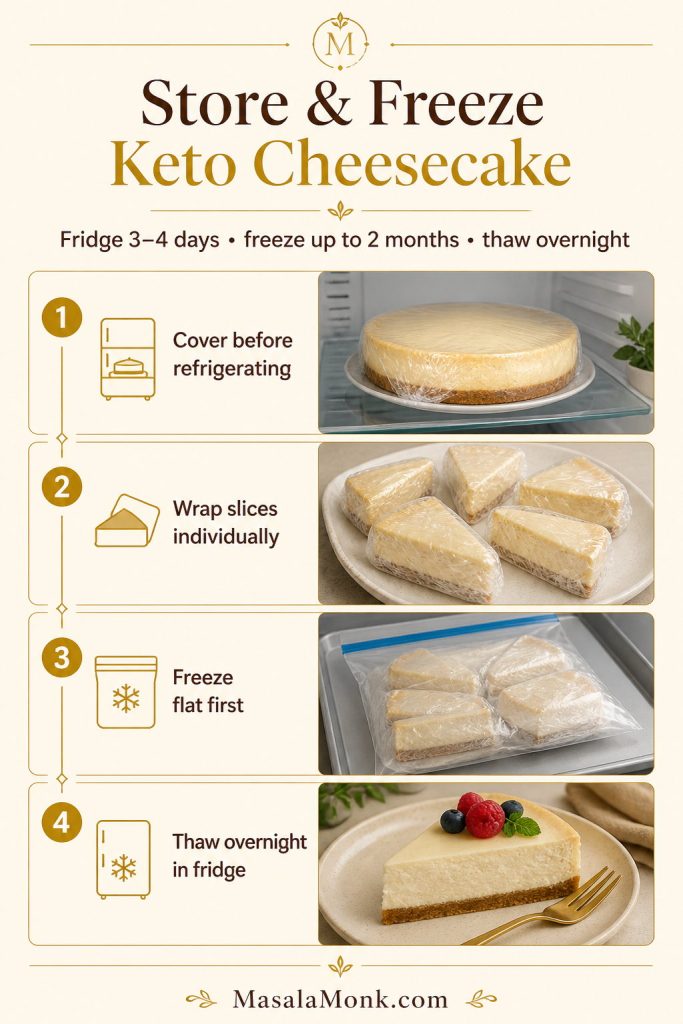
Cheesecake freezes well. Chill it completely first, then freeze whole or in slices. Wrap tightly in plastic wrap and foil, or use an airtight freezer-safe container. For best quality, use frozen cheesecake within 1–2 months. Thaw overnight in the refrigerator, then add fresh fruit or sauces after thawing.

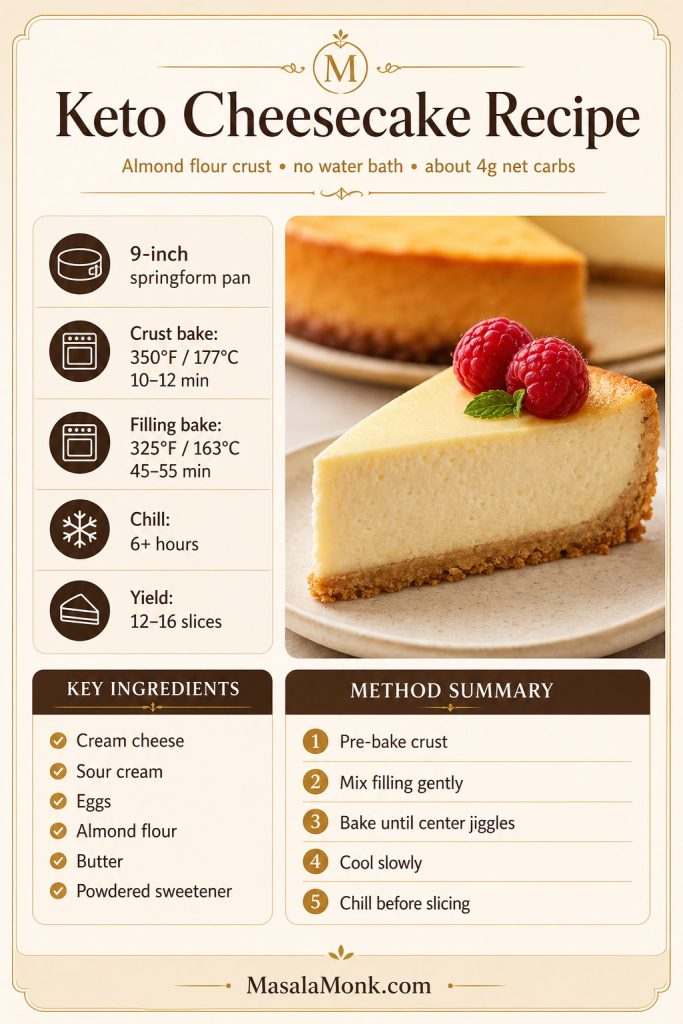
For a different make-ahead cheesecake style that does not require baking, see this No Bake Cheesecake Recipe. If you need a low-carb version, this Keto Cheesecake Recipe is the better fit.

New York Cheesecake Troubleshooting

Most cheesecake problems are fixable once you know what caused them. The most common issues come from one of four things: cold cream cheese, too much mixing after the eggs, baking until the center is firm, or cooling too quickly.

Trying to diagnose what happened? Most issues trace back to cream cheese texture, baking method, doneness, or cooling.

Fix-it guide: Use this section to decide whether to save the cheesecake now or adjust the method next time.
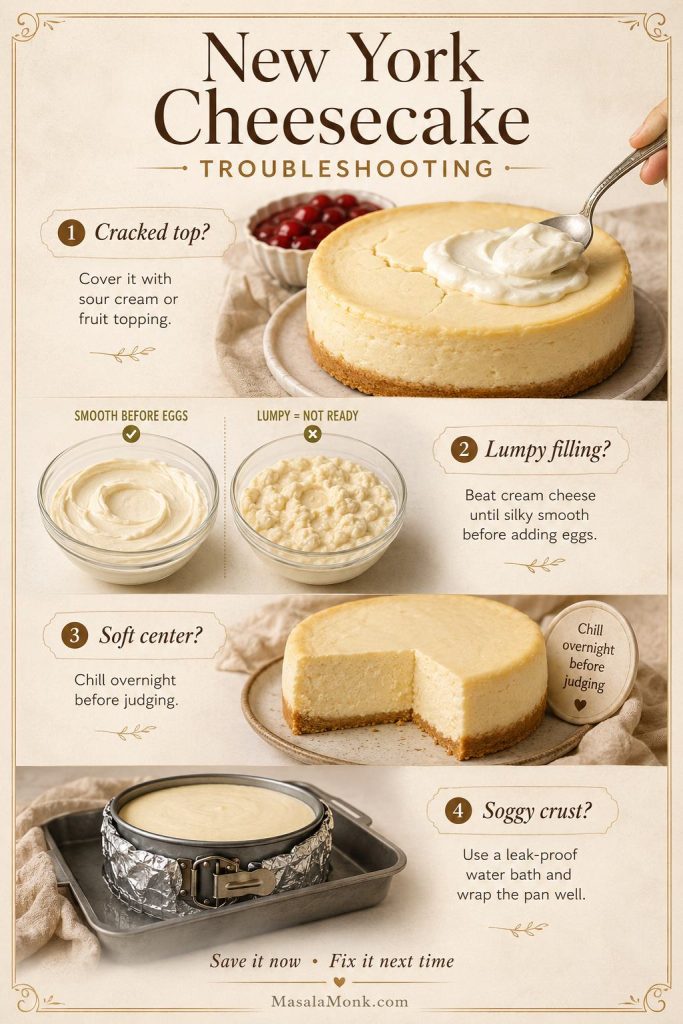
Troubleshooting guide showing cracked top, lumpy filling, soft center, and soggy crust fixes for New York cheesecake.
Most cheesecake problems are fixable, so use toppings, extra chilling, smoother mixing, or better pan wrapping depending on what went wrong.

Quick Fixes for the Cheesecake You Already Baked

First, do not judge the cheesecake while it is still warm. A center that looks slightly soft can firm up beautifully after an overnight chill. If the top cracked, browned, or dipped slightly, a topping can still make the cheesecake look polished and taste excellent.

What to Change Next Time

The table below gives you both kinds of help: how to save the cheesecake now, and what to adjust the next time you bake it.

ProblemSave It NowFix It Next Time
Cheesecake crackedAdd sour cream topping, fruit topping, chocolate ganache, caramel, or whipped cream.Pull it while the center still has movement, mix gently after adding eggs, and cool slowly in the oven.
Filling is lumpyServe with a fruit sauce or topping to distract from the texture.Use fully room-temperature cream cheese and beat it smooth before adding eggs.
Center seems softChill overnight before judging. Cheesecake firms dramatically in the fridge.Bake until the edges are set and the center moves softly, not loosely.
Texture is dry or chalkyServe with berry sauce, cream, caramel, or ganache.Start checking earlier and do not wait for the center to become firm in the oven.
Crust is soggyChill fully and serve carefully. A topping can shift attention away from the crust.Use two layers of heavy-duty foil or place the pan in an oven-safe bag before wrapping.
Top is too brownCover with sour cream topping, fruit topping, ganache, or powdered sugar.Bake on a lower rack and use a water bath for a paler top.
Cheesecake sankServe chilled with topping; slight sinking is usually cosmetic.Mix on low after adding eggs and use the slow oven-cooling method.
Crust is too hardLet slices sit at room temperature for a few minutes before serving.Press evenly but gently. Do not compact the crumbs aggressively.

Small Cheesecake Imperfections Are Normal

Small imperfections are normal with cheesecake, even when you do almost everything right. A slight dip, a tiny crack, or a darker edge does not mean the dessert failed. Once it is chilled, sliced, and served with a topping, most cosmetic flaws disappear.

For more detail on water baths and why they help cheesecakes bake gently, this Simply Recipes guide to cheesecake water baths is a useful technical reference.

By the time the cheesecake is fully chilled, the texture should feel completely different from the soft center you saw in the oven. That is the quiet magic of baked cheesecake: the fridge finishes what the oven starts.

Need a quick check before the recipe card? Review the 5 rules, doneness cues, or troubleshooting before you start baking.

New York Cheesecake Recipe Card

Here is the full New York cheesecake recipe in one place.

Description

A classic baked New York cheesecake with a buttery graham cracker or digestive biscuit crust, dense creamy cream-cheese filling, sour cream tang, gradual cooling, and clean-slice texture.

Prep Time
30–35 minutes

Cook Time
85–100 minutes including crust

Cooling + Chill Time
10–12 hours

Total Time
Overnight

Yield
1 9-inch cheesecake

Servings
12–16 slices

Equipment

  • 9-inch / 23cm springform pan, ideally at least 2.5 inches deep
  • Large roasting pan for water bath
  • Heavy-duty foil or oven-safe roasting bag
  • Stand mixer or hand mixer
  • Mixing bowls
  • Silicone spatula
  • Kettle or saucepan for hot water
  • Cooling rack
  • Sharp knife for slicing

Ingredients

For the Crust

  • 1½ cups graham cracker crumbs / about 180g
  • 5 tablespoons unsalted butter, melted / about 70g
  • 2 tablespoons granulated sugar / about 25g
  • Pinch of salt

Digestive biscuit option: Use about 200g digestive biscuit crumbs with 75–85g melted butter. Reduce or skip the sugar if the biscuits are already sweet.

For the Filling

  • 32 oz full-fat cream cheese / 907g, room temperature
  • 1¼ cups granulated sugar / 250g
  • 2 tablespoons cornstarch / about 16–18g
  • ¼ teaspoon salt
  • 1 cup sour cream / 240g, room temperature
  • ½ cup heavy cream / 120ml, room temperature
  • 4 large eggs, room temperature
  • 1 large egg yolk, room temperature
  • 2 teaspoons vanilla extract
  • 1 tablespoon lemon juice
  • 1 teaspoon finely grated lemon zest

Flour option: Use 3 tablespoons / about 24g all-purpose flour instead of cornstarch.

Optional Sour Cream Topping

  • 1 cup sour cream / 240g
  • 2 tablespoons granulated sugar
  • ½ teaspoon vanilla extract
  • Pinch of salt

Instructions

Prepare the Crust and Pan

  1. Bring ingredients to room temperature. Let the cream cheese, sour cream, heavy cream, and eggs come to room temperature before mixing. This helps the filling become smooth without overbeating.
  2. Prepare the pan. Heat the oven to 350°F / 175°C. Grease a 9-inch springform pan lightly and line the base with parchment if desired.
  3. Make the crust. Mix the crumbs, melted butter, sugar, and salt until the mixture resembles damp sand. Press evenly into the bottom of the pan. Bake for 10 minutes, then cool slightly.
  4. Lower the oven temperature. Reduce the oven to 325°F / 160–165°C.

Mix the New York Cheesecake Filling

  1. Beat the cream cheese. In a large bowl, beat the cream cheese until completely smooth. Scrape the sides and bottom of the bowl.
  2. Add sugar and starch. Add the sugar, cornstarch, and salt. Beat until smooth and creamy.
  3. Add dairy and flavorings. Mix in the sour cream, heavy cream, vanilla, lemon juice, and lemon zest. Scrape the bowl again.
  4. Add eggs on low speed. Add the eggs one at a time, mixing on low speed just until each egg is incorporated. Add the egg yolk last. Do not overmix.
  5. Fill the pan. Pour the filling over the cooled crust and smooth the top. Tap the pan gently once or twice to release large air bubbles.

Bake, Cool and Chill the New York Cheesecake

  1. Prepare the water bath. Wrap the outside of the springform pan with two layers of heavy-duty foil, or place it in an oven-safe bag and then wrap with foil. Set the pan in a large roasting pan.
  2. Bake. Place the roasting pan on the oven rack. Pour hot water into the roasting pan until it reaches about halfway up the springform pan. Bake for 75–90 minutes, or until the edges are set and the center still has a slight jiggle.
  3. Cool slowly. Turn the oven off, crack the door open, and leave the cheesecake inside for 1 hour.
  4. Cool to room temperature. Remove the cheesecake from the water bath, unwrap the foil, and cool completely on a rack.
  5. Chill. Refrigerate for at least 8 hours, preferably overnight.
  6. Slice and serve. Run a thin knife around the edge before releasing the springform ring. Slice with a hot, clean knife, wiping between cuts.

Steam-Pan Option

Place the cheesecake on the center rack and set a metal baking pan filled with boiling water on the lower rack. Bake as directed. This adds moisture to the oven without placing the springform pan directly in water, though it is not quite as protective as a full water bath.

No-Water-Bath Option

Bake the crust as written. Add the filling, then bake the cheesecake at 425°F / 220°C for 10 minutes. Reduce the oven to 225°F / 110°C and bake for 60–80 minutes, until the edges are set and the center moves like soft-set custard. Turn the oven off, crack the door, cool inside for 1 hour, then cool to room temperature and chill overnight.

This method is simpler and avoids water-bath leaks, but the classic water bath gives the smoothest texture and palest top.

Optional Sour Cream Topping Method

After the main bake, stir together sour cream, sugar, vanilla, and salt. Spread gently over the hot cheesecake, then return it to the oven for 8–10 minutes. Turn the oven off, crack the door, cool slowly, and chill as directed.

Fan Oven and OTG Note

For a fan oven, reduce the main water-bath bake temperature to about 150–155°C. In an OTG, bake on the middle rack and avoid strong top heat. Gentle, steady baking matters more than browning.

Notes

  • Do not use whipped or low-fat cream cheese.
  • Room-temperature ingredients are essential for a smooth filling.
  • Mix on low speed after adding eggs to avoid excess air.
  • Do not fill a shallow springform pan to the very top; bake any extra filling separately in a ramekin.
  • The center should still move slightly when the cheesecake leaves the oven; it will finish setting as it cools.
  • Do not use a toothpick test for cheesecake.
  • Overnight chilling gives the cleanest slices.
  • Slice straight from the fridge for neat cuts, then rest slices 10–15 minutes before serving.
  • Add fruit toppings after the cheesecake has chilled.

Storage

Store covered in the refrigerator for 4–5 days. To freeze, chill completely, wrap tightly, and freeze whole or in slices. For best quality, use within 1–2 months. Thaw overnight in the refrigerator.

How Did Yours Turn Out?

If you make this cheesecake, leave a comment with three details: which crust you used, whether you baked it in a full water bath, steam-pan method, or no-water-bath method, and how long it took for the center to reach the right wobble. If your oven ran fast or slow, mention that too. Those details help the next baker more than a simple “it worked.”

And if something went sideways — a crack, a damp crust, or a softer center than expected — share that too. Cheesecake is one of those recipes where real kitchen notes are genuinely useful.

Once you have made cheesecake this way, the process feels much less mysterious. The wobble makes sense, the gradual cool-down feels worth it, and the overnight wait becomes part of the recipe instead of a frustrating delay.

FAQs About New York Cheesecake

What is the difference between New York cheesecake and regular cheesecake?

New York cheesecake is usually denser, richer, taller, and more cream-cheese-forward than regular cheesecake. It is baked until just set, chilled thoroughly, and sliced cleanly. Regular cheesecake can be lighter, softer, whipped, or no-bake depending on the recipe.

Does New York cheesecake need a water bath?

A water bath is the safest path for a creamy texture, pale top, and fewer cracks, but it is not the only option. You can use the steam-pan compromise or the lower-temperature no-water-bath method, as long as you cool the cheesecake slowly.

What should I do if the water bath leaks?

Let the cheesecake chill fully before judging it. A slightly damp crust often firms up after refrigeration. Next time, use two layers of heavy-duty foil or place the springform pan inside an oven-safe bag before wrapping it in foil.

Why did my cheesecake crack?

Cracks usually come from overbaking, overmixing after the eggs go in, or cooling the cheesecake too quickly. Pull it from the oven while the center still moves slightly, mix gently, and let it cool slowly in the turned-off oven.

How can I save a cracked cheesecake?

A cracked cheesecake is usually a visual problem, not a flavor problem. Cover the top with sour cream topping, strawberry sauce, cherry topping, blueberry compote, chocolate ganache, caramel, or whipped cream.

How long should New York cheesecake chill?

Give it at least 8 hours in the refrigerator. Overnight is better because the filling firms up, the flavor settles, and the slices cut more cleanly.

What can I use instead of sour cream?

Thick full-fat Greek yogurt is the best substitute. If it looks watery, strain it first. You can also replace some sour cream with more heavy cream, but the cheesecake will taste less tangy.

Does this New York cheesecake recipe use both sour cream and heavy cream?

Yes, but they do different jobs. Sour cream adds the classic tang, while heavy cream softens and rounds out the filling so the cheesecake stays dense without feeling dry.

Do digestive biscuits work instead of graham crackers?

Digestive biscuits work very well for cheesecake crust. Use about 200g crumbs and 75–85g melted butter, depending on how dry the biscuits are. Reduce or skip the sugar if the biscuits are already sweet.

Will this recipe fit an 8-inch pan?

The full batter amount is too much for many 8-inch pans unless the pan is very deep. An 8-inch cheesecake will be taller and the bake time will change, so it is better to scale the recipe down or bake extra filling separately in ramekins.

How do I get clean cheesecake slices?

Chill the cheesecake overnight, then cut it with a sharp knife dipped in hot water. Wipe the blade clean between cuts so the creamy filling does not drag through the crust.

Does New York cheesecake freeze well?

It freezes well once fully chilled. Wrap the whole cheesecake or individual slices tightly, freeze, then thaw overnight in the refrigerator. For the best texture, serve within 1–2 months and add fresh fruit or sauces after thawing.
Back to top

Posted on 1 Comment

Cottage Cheese Cheesecake Recipe

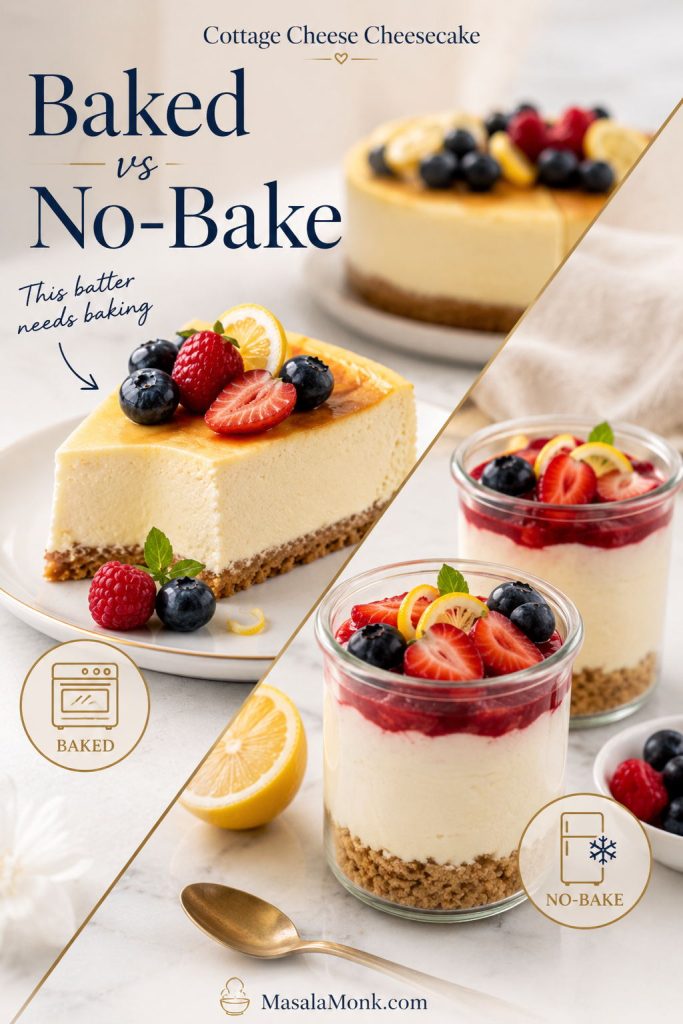
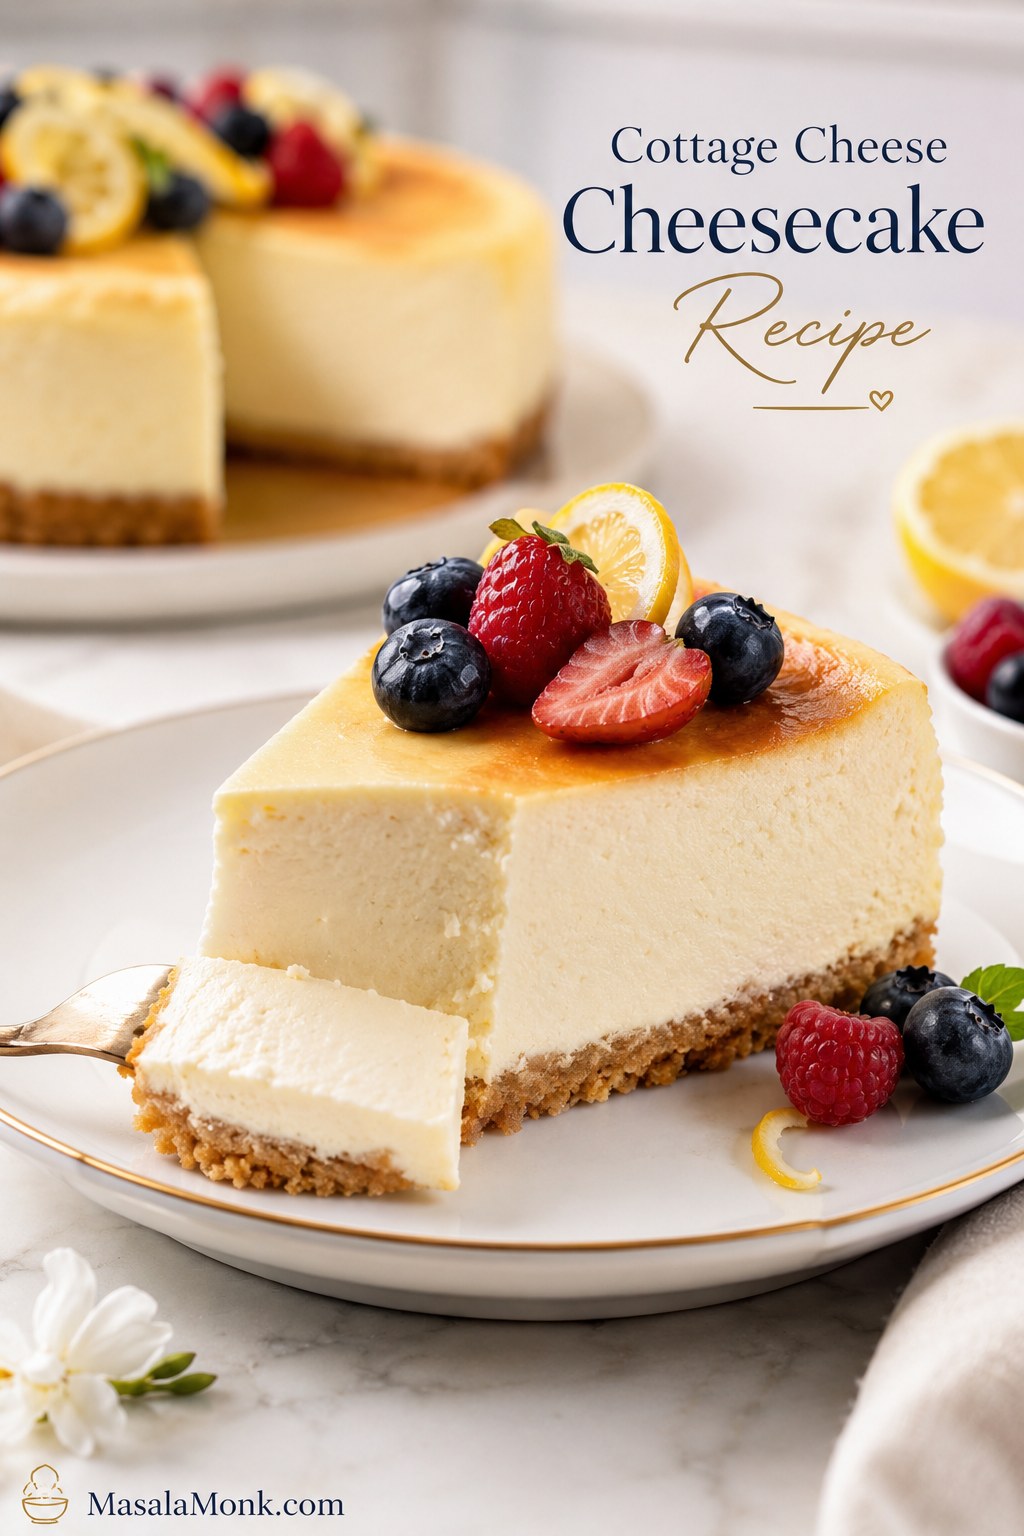
Finished cottage cheese cheesecake slice with creamy filling, crumb crust, berries, and lemon on a dessert plate

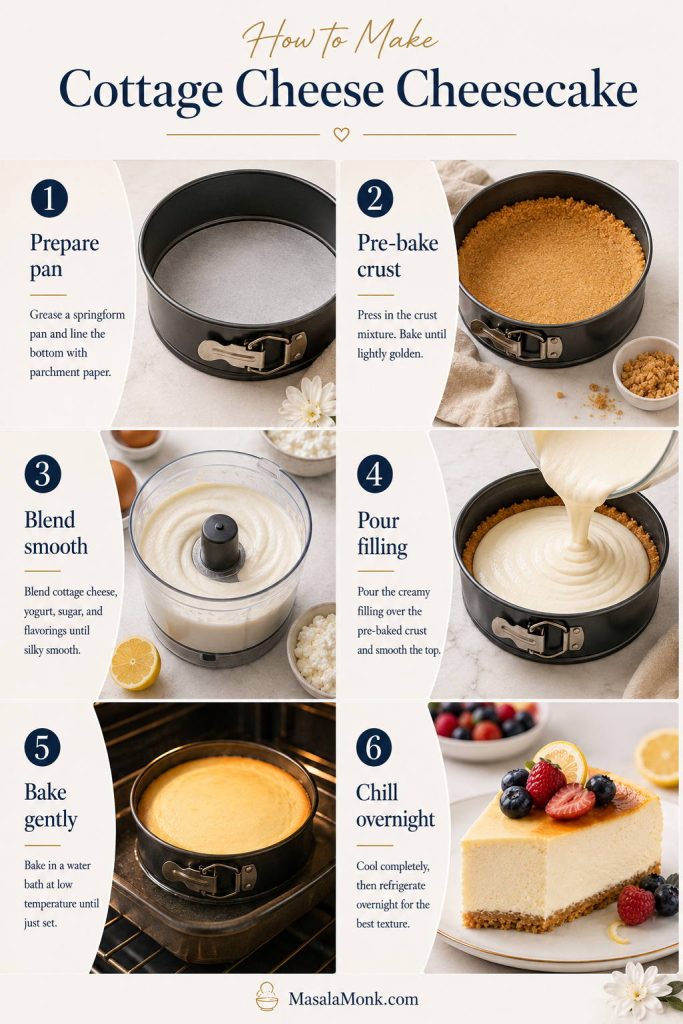
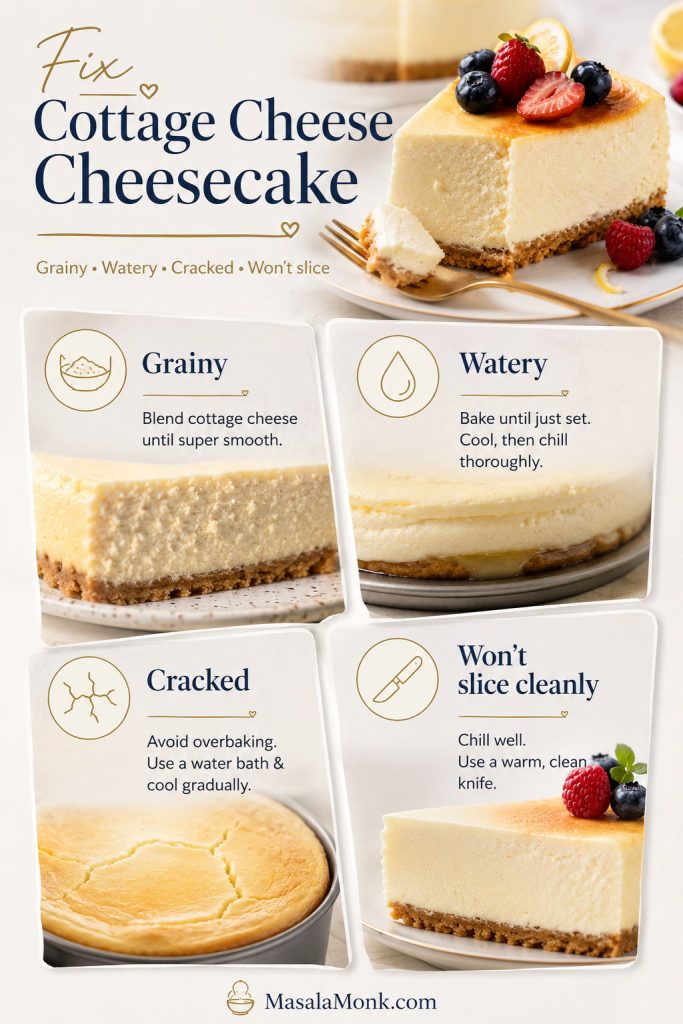
This cottage cheese cheesecake recipe is built for the two worries people usually have before they try it: grainy curds and a watery filling. The cottage cheese is blended until completely smooth, supported with thick Greek yogurt, eggs, vanilla, lemon, and a little cornstarch, then baked gently and chilled until creamy and sliceable.

It is lighter than a classic cream cheese cheesecake, but it still tastes like dessert. You can bake it with a buttery crumb crust, make it crustless, or add a little cream cheese when you want a richer, more traditional slice — no protein powder needed.

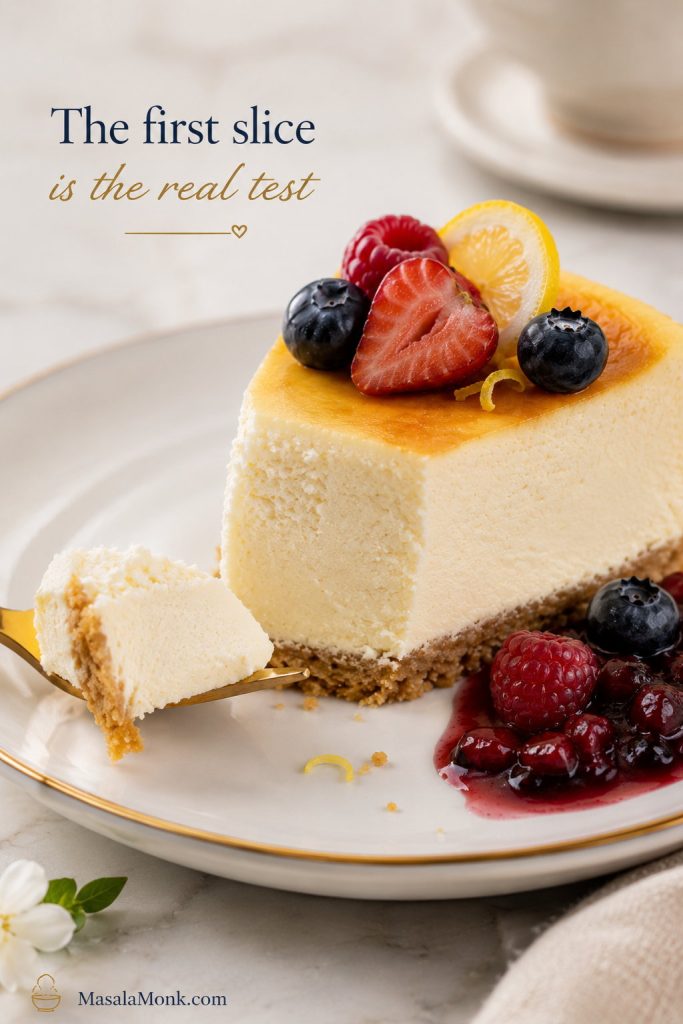
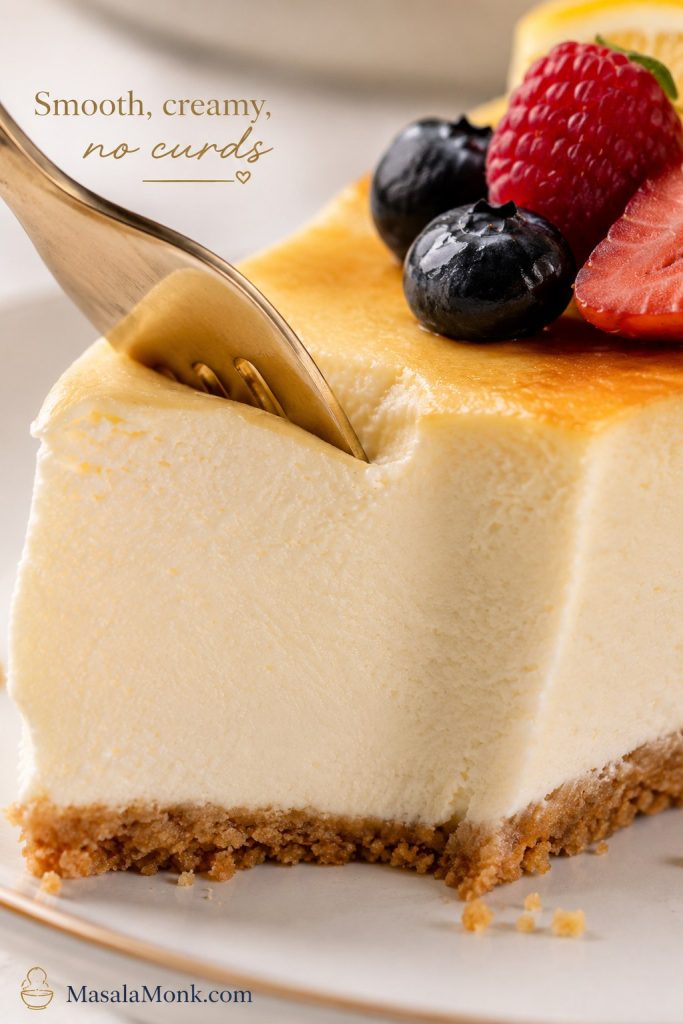
Close-up of a fork cutting into a smooth cottage cheese cheesecake slice with no visible curds
A clean fork cut should reveal a creamy interior — the first sign that the cottage cheese has blended fully into the filling.

Quick Answer: Can You Make Cheesecake with Cottage Cheese?

Yes, you can make cheesecake with cottage cheese. The key is to blend the cottage cheese until smooth before baking it with eggs, Greek yogurt, vanilla, lemon, and a little cornstarch. Once baked and chilled, the filling becomes creamy, lightly tangy, and sliceable.

The best version should not remind you of eating cottage cheese from a tub. Once blended, baked, and chilled, the cottage cheese melts into the filling and gives the cheesecake body, tang, and a lighter feel than a cream cheese-only base.

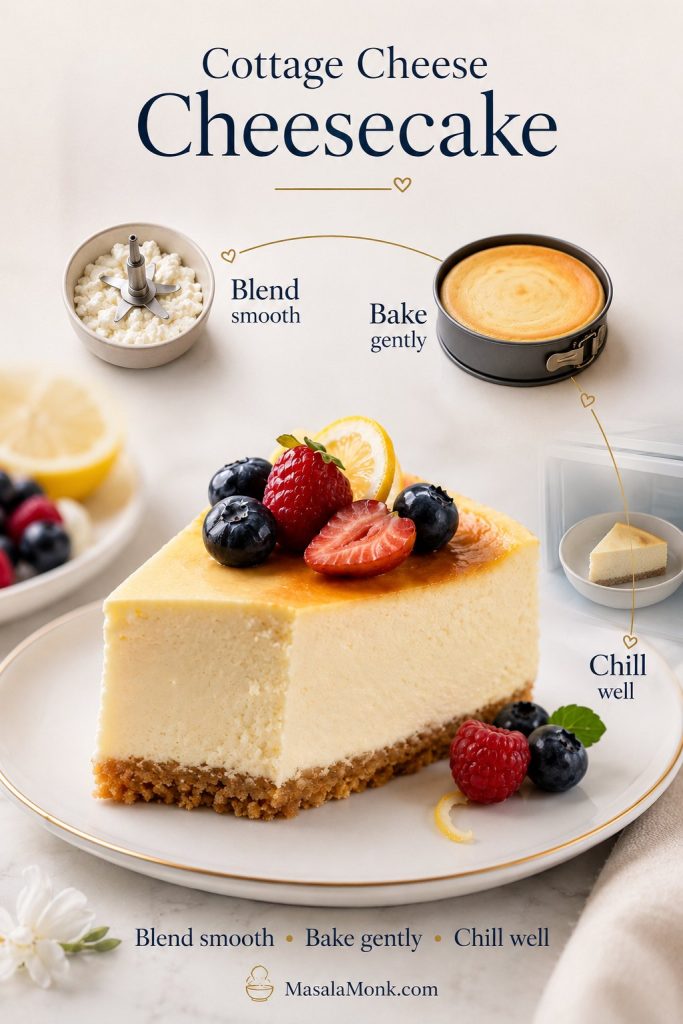
Cottage cheese cheesecake quick answer visual showing the blend, bake, and chill method
For a reliable result, think in three moves: smooth the dairy first, set the filling gently, then chill before slicing.

Before You Bake: Texture Rules and Timing

At a glance: This is a smooth baked cottage cheese cheesecake with Greek yogurt, vanilla, lemon, and an optional crumb crust. Bake it in an 8-inch springform pan at 325°F / 160°C until the edges are set and the center softly wobbles, then cool slowly and chill at least 4 hours or overnight.
Why you’ll love it:
  • It tastes like cheesecake, not cottage cheese. Blending smooths the curds into the filling.
  • It is lighter but still dessert-like. Greek yogurt adds tang without making the slice feel flat.
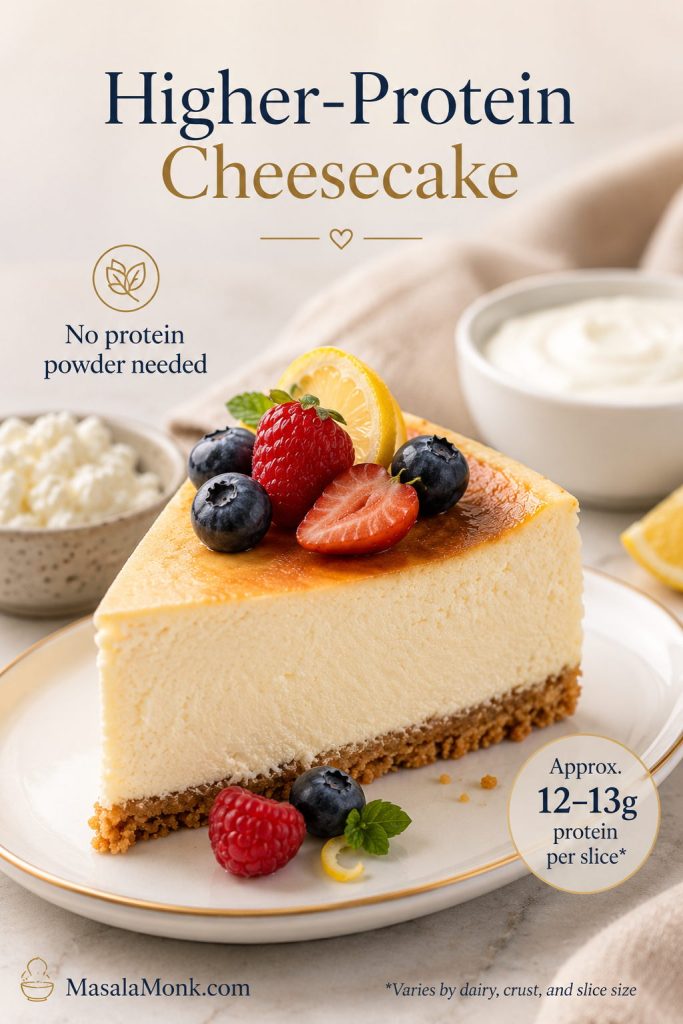
  • No protein powder needed. Cottage cheese and Greek yogurt give the filling its protein-rich base without making the cheesecake taste chalky.
  • It works with or without a crust. Make it classic, crustless, or low-carb.
  • It is better the next day. Overnight chilling gives the cleanest, creamiest slices.
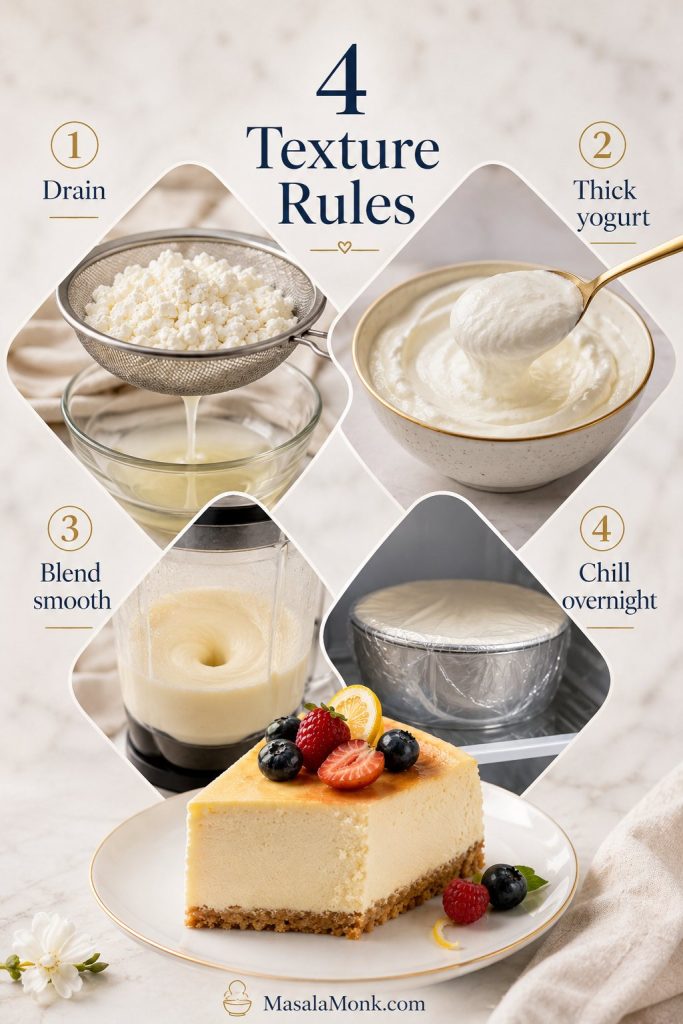
The 4 texture rules:
  • Drain cottage cheese when it looks watery.
  • Use thick Greek yogurt, not loose regular yogurt.
  • Blend the dairy completely smooth before adding eggs.
  • Chill the cheesecake overnight before judging the final texture.
Four cottage cheese cheesecake texture rules showing draining, thick yogurt, smooth blending, and overnight chilling
Before baking, these four rules matter most: control moisture, use thick yogurt, blend thoroughly, and give the cheesecake enough chill time.

Need the visual version? Jump to how to make the filling smooth or troubleshooting if your batter looks loose, grainy, or hard to slice.

What Does Cottage Cheese Cheesecake Taste Like?

A good cottage cheese cheesecake tastes creamy, lightly tangy, and familiar — closer to a lighter cheesecake than a cottage cheese dessert. The vanilla gives it warmth, the lemon adds classic cheesecake brightness, and the Greek yogurt rounds out the dairy flavor.

The texture is softer and a little lighter than a dense New York-style cheesecake, especially with the Greek yogurt version. The cream cheese variation makes it richer, denser, and closer to the classic slice many people expect.

The cottage cheese should not stand out. Once it is blended and chilled properly, it should support the cheesecake rather than announce itself.

For Cottage Cheese Skeptics

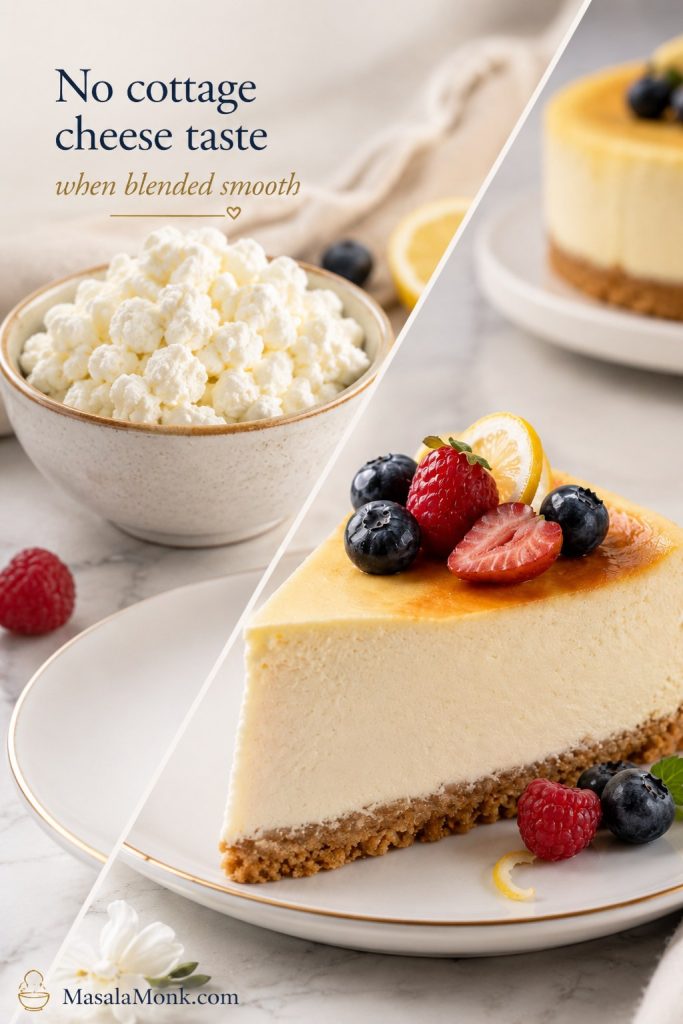
If the words cottage cheese cheesecake make you imagine curds in dessert, you are not alone. That is exactly what this recipe is designed to avoid. Once the filling is blended, baked, and chilled, the cottage cheese should disappear into the texture.

The goal is not a “healthy dessert” that tastes like a compromise. It should taste like a lighter, tangier cheesecake: cold, creamy, smooth, and familiar enough that nobody is thinking about cottage cheese curds.

Curdy cottage cheese transforming into a smooth cheesecake slice with no visible curds
If cottage cheese flavor worries you, this is the goal: the dairy disappears into the cheesecake instead of standing out.

Why This Cottage Cheese Cheesecake Works

Cottage cheese can make a beautiful cheesecake, but it needs the right support. This recipe is built around the two things that matter most: blending the curds completely smooth and keeping extra moisture under control.

The goal is not to hide cottage cheese under a pile of sugar. It is to make it behave like a cheesecake filling: smooth enough to slice, tangy enough to taste familiar, and rich enough that it still feels like dessert.

Cottage Cheese Adds Protein and Body

Cottage cheese gives the filling body, mild tang, and a naturally higher-protein foundation than a cream cheese-only filling. Full-fat cottage cheese gives the richest result, while 2% cottage cheese works well for a lighter slice that still tastes balanced.

Greek Yogurt Adds Tang and Creaminess

Greek yogurt keeps the filling from tasting flat. It brings the tang people expect from cheesecake, but it needs to be thick; loose yogurt can push the batter toward watery.

Eggs Help the Cheesecake Set

This version uses 4 large eggs for a reliable set. Add them last and blend briefly; too much air in the batter can make the cheesecake puff in the oven and crack as it cools.

Cornstarch Gives Extra Insurance

A small amount of cornstarch helps the filling hold together without making it heavy. It is especially useful when cottage cheese has a little extra liquid. All-purpose flour works too, but cornstarch keeps the texture softer and cleaner.

Low, Gentle Baking Prevents Cracks

This cheesecake bakes at 325°F / 160°C after the crust is pre-baked. The lower heat helps the filling set slowly, which reduces the chance of a cracked top, dry edges, or a firm, rubbery center.

Texture tip: Do not bake this cheesecake until the center looks completely firm. Pull it when the edges are set and the center still has a soft wobble. Warm cheesecake is supposed to look a little underdone; the refrigerator does the final work.

How to Avoid Grainy or Watery Cottage Cheese Cheesecake

This recipe is built around moisture control. Cottage cheese and Greek yogurt both bring liquid to the filling, so the best texture comes from using thick dairy, adding enough egg structure, and including a small amount of cornstarch.

Granulated sugar keeps the batter more predictable than liquid sweeteners. Watery cottage cheese should be drained before measuring. Eggs should go in last so the batter does not become over-aerated. After baking, the cheesecake may look softer than expected, but the texture changes as it cools and chills.

Ingredients for Cottage Cheese Cheesecake

This cottage cheese cheesecake uses familiar cheesecake ingredients, but the balance is slightly different from a classic cream cheese version. The goal is a filling that feels smooth and sliceable without losing the lighter character that makes cottage cheese useful in the first place.

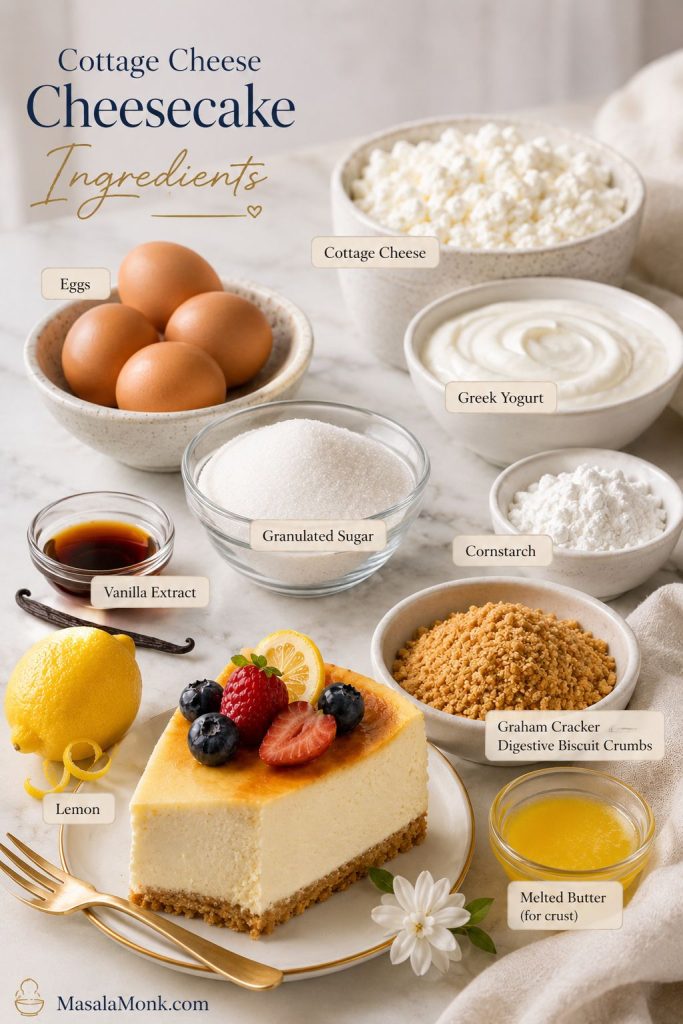
Cottage cheese cheesecake ingredients including cottage cheese, Greek yogurt, eggs, lemon, vanilla, cornstarch, and crumb crust
Each ingredient has a clear job: cottage cheese builds body, Greek yogurt adds tang, eggs set the filling, and cornstarch helps protect the structure.

Cottage Cheese

Use full-fat or 2% cottage cheese for the best balance of richness and structure. Small-curd cottage cheese is easiest to blend, but large-curd cottage cheese also works with a good blender or food processor.

Greek Yogurt

Plain Greek yogurt adds tang and keeps the cheesecake from tasting flat. Whole milk Greek yogurt gives the richest texture, while low-fat or nonfat Greek yogurt makes the cheesecake lighter. Avoid regular yogurt unless it has been strained until thick.

Eggs

Eggs help the filling set. Use room-temperature eggs so they blend evenly into the batter. The cheesecake should not taste eggy when it is baked gently and pulled while the center still has a soft wobble.

Sugar or Sweetener

Regular granulated sugar gives the cleanest cheesecake flavor. A cup-for-cup monk fruit blend or allulose can work for a lower-sugar version. For a fully low-carb cheesecake with a more classic structure, this keto cheesecake recipe goes deeper into almond flour crusts, sugar-free sweeteners, crustless cheesecake, and no-crack baking.

Cornstarch

Cornstarch helps the cottage cheese and yogurt filling bake into clean slices. Use 2 tablespoons of all-purpose flour instead when cornstarch is not available.

Vanilla and Lemon

Vanilla adds warmth. Lemon zest and a little lemon juice give the cheesecake its familiar brightness. The lemon does not need to make the cheesecake taste sharply lemony; it simply makes the dairy taste more like cheesecake.

Graham Cracker or Digestive Biscuit Crust

The crust is optional, but it makes the cheesecake feel more classic. Graham crackers, digestive biscuits, or similar plain sweet biscuits all work. Pre-baking the crust for a few minutes helps it hold together under the filling.

Best Cottage Cheese to Use

The cottage cheese you choose has a direct effect on texture. Since this is a blended cheesecake, you do not need perfect curds, but you do need cottage cheese that is not overly watery.

Cottage cheese comparison showing full-fat, two percent, and watery low-fat cottage cheese for cheesecake
Full-fat or 2% cottage cheese is usually the safest choice because it gives the filling more body and a smoother baked result.
Cottage Cheese Type Result in Cheesecake Best Use
Full-fat / 4% Richest, most forgiving texture Best overall choice
2% Still creamy, slightly lighter Best balance for a lighter cheesecake
Low-fat Can work, but may be thinner or tangier Use only when thick; drain when watery
Fat-free Least rich, more likely to taste tangy or thin Use only for a very lean version
Small-curd Blends easiest Best default
Large-curd Works when blended very well Use a strong blender or food processor

When to Drain Watery Cottage Cheese

When cottage cheese looks loose or has a lot of liquid in the container, drain it through a fine-mesh sieve before measuring. That one small step can prevent a watery cheesecake.

Watery cottage cheese draining in a fine-mesh sieve over a bowl before making cheesecake
Draining loose cottage cheese first removes extra moisture, which means the finished cheesecake is less likely to turn soft or watery.

Once you know which cottage cheese to use, the next important step is blending it smooth before the eggs go in.

For official nutrient data on different cottage cheese varieties, you can check USDA FoodData Central cottage cheese data.

How to Make Cottage Cheese Cheesecake Smooth

Graininess is what can ruin the illusion, so the blender step matters more than anything else. The dairy should look glossy and smooth before the eggs go in.

Use a Blender or Food Processor

A high-speed blender gives the silkiest filling. A food processor also works, especially when you scrape down the sides once or twice. An immersion blender can work in a pinch, but the finished texture may not be quite as polished.

Blend the Dairy Before Adding Eggs

Add the cottage cheese, Greek yogurt, sugar, vanilla, lemon zest, lemon juice, salt, and cornstarch to the blender first. Blend until the mixture looks glossy and even. Add the eggs only after that base is smooth.

Cottage cheese cheesecake filling being blended smooth in a blender before eggs are added
Blend the dairy before the eggs go in; this is the step that turns a curdy base into cheesecake-ready filling.

What the Batter Should Look Like

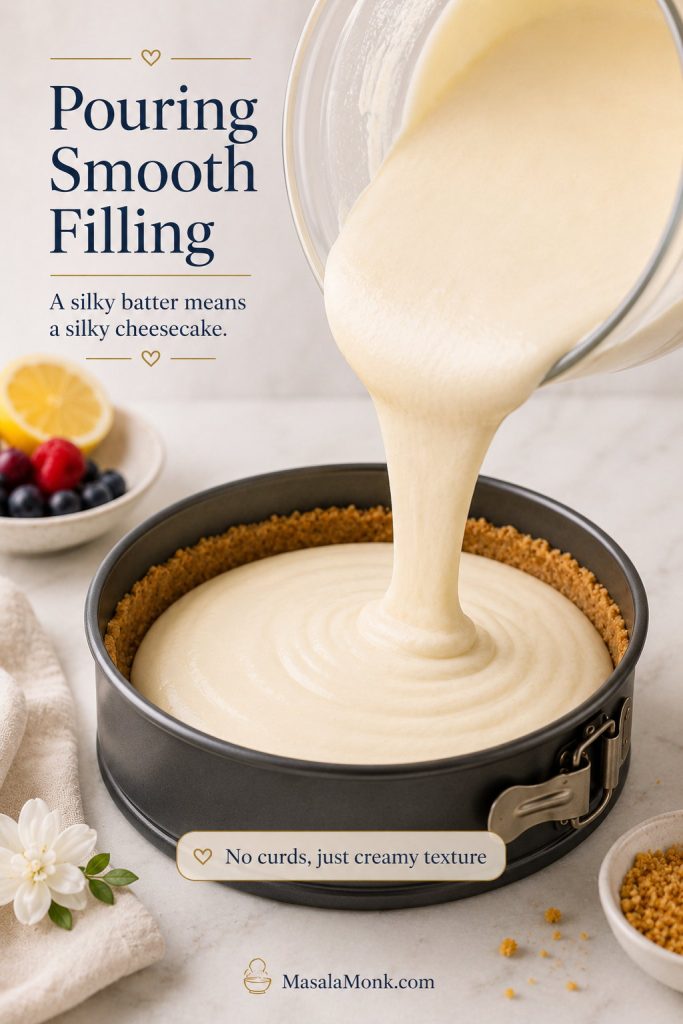
The batter should look glossy, smooth, and pourable before it goes into the crust. If it still looks grainy, blend again or strain it before baking.

Smooth cottage cheese cheesecake batter lifting from a spatula in a glossy ribbon
The batter should fall in a glossy ribbon, because a smooth pour now usually means a cleaner texture after baking.

Strain the Batter When Needed

When the blender is not very powerful and the batter still looks slightly grainy, pour it through a fine-mesh sieve before baking. It is an optional step, but it can rescue the texture.

After the batter looks glossy and pourable, move to the step-by-step method and then use the doneness cues before chilling.

How to Make Cottage Cheese Cheesecake

The method follows classic cheesecake logic: prepare the pan, pre-bake the crust, blend the filling, bake gently, cool slowly, and chill before slicing. Once the filling is smooth, the oven and refrigerator do most of the work.

Step-by-step cottage cheese cheesecake guide showing pan prep, crust, blended filling, pouring, baking, and chilling
The method stays simple: prepare the pan, pre-bake the crust, blend the filling, bake until just set, and chill for the cleanest slice.

Step 1: Prepare the Pan

Line the bottom of an 8-inch / 20cm springform pan with parchment paper. Lightly grease the sides. For a water bath, wrap the outside of the pan with heavy-duty foil or place the springform pan inside a larger oven-safe bag before setting it in the roasting pan.

Step 2: Make and Bake the Crust

Mix the graham cracker or digestive biscuit crumbs with melted butter, sugar, and a pinch of salt. Press the mixture firmly into the bottom of the pan. Bake at 350°F / 177°C for 8 to 10 minutes, then lower the oven temperature to 325°F / 160°C.

Step 3: Blend the Filling

Blend the cottage cheese, Greek yogurt, sugar, cornstarch, vanilla, lemon zest, lemon juice, and salt until completely smooth. Scrape down the sides, then blend again. Add the eggs and blend briefly, just until the batter is even.

Step 4: Pour the Filling and Bake Low and Slow

Pour the filling over the crust and smooth the top. Bake at 325°F / 160°C for 55 to 70 minutes, or until the edges are set and the center still has a soft wobble. The center should jiggle gently, not slosh.

Smooth cottage cheese cheesecake filling being poured from a blender into a prepared crumb crust
When the filling pours smoothly into the crust, it is a good sign that the blender has done its job.

Step 5: Cool Gradually

Turn off the oven, crack the door open, and let the cheesecake sit inside for 30 to 45 minutes. This gradual cooling helps prevent cracks. Then move it to the counter and let it cool to room temperature.

Step 6: Chill Before Slicing

Refrigerate the cheesecake for at least 4 hours. Overnight is better. Do not panic if it looks soft when it first comes out of the oven. Warm cheesecake is supposed to look a little underdone; the refrigerator does the final work.

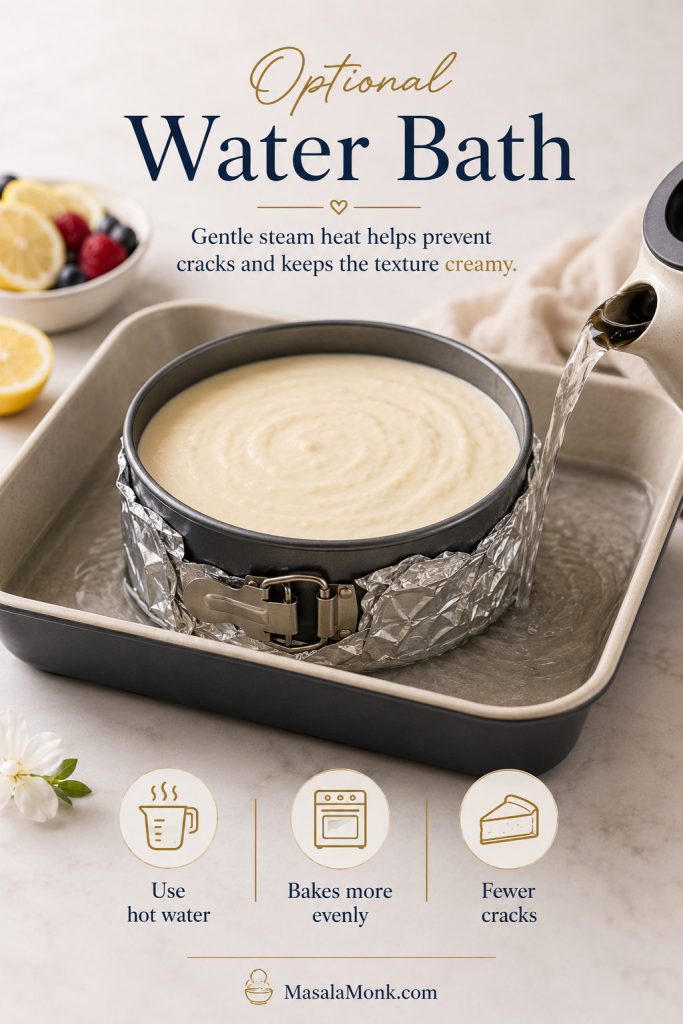
Do You Need a Water Bath?

A water bath is optional. Skip it for the easiest version; use it when you want the smoothest texture and the lowest chance of cracks.

To use one, wrap the springform pan well, set it in a roasting pan, and pour hot water around it until the water reaches about 1 inch up the side of the pan. Make sure the pan is protected so water cannot leak into the crust.

Wrapped springform pan sitting in a roasting pan with hot water for an optional cheesecake water bath
A water bath is optional; however, it can help the cheesecake bake more gently and reduce cracking on the surface.

A water bath usually pushes the cheesecake toward the longer end of the bake time. The texture is worth it when you want a cleaner, more classic cheesecake finish.

For more general cheesecake guidance, including room-temperature ingredients, water bath baking, and crack prevention, King Arthur Baking has a helpful guide to cheesecake tips.

Pan Size and Bake Time Guide

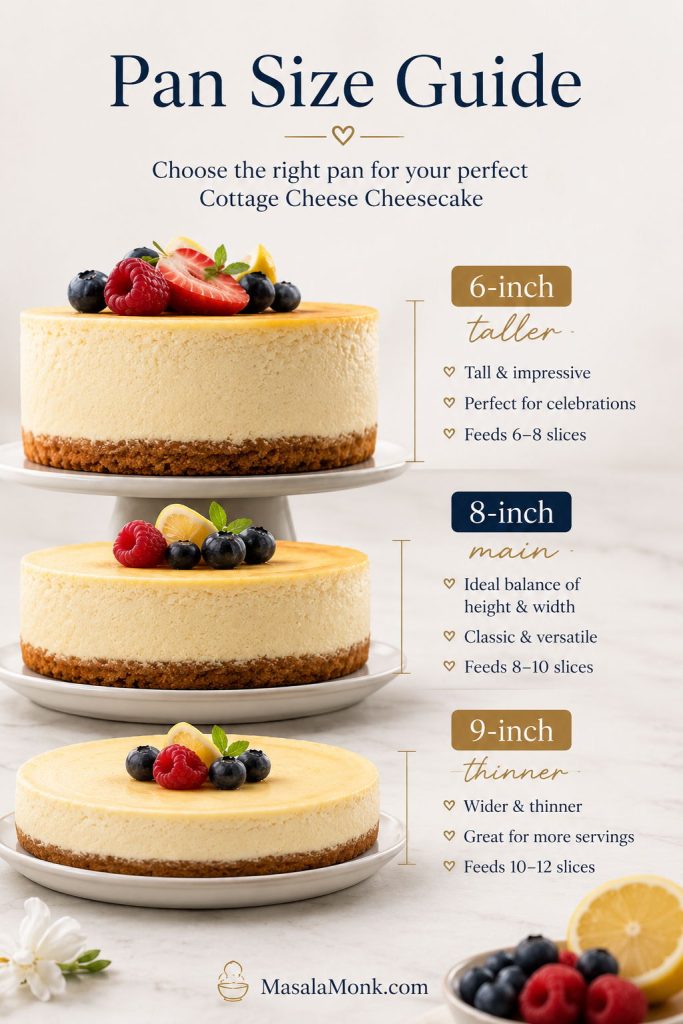
Cottage cheese cheesecake recipes often use different pan sizes, which can make bake times confusing. A smaller pan makes a taller cheesecake and usually needs more time. A larger pan makes a thinner cheesecake and may finish sooner.

Pan size guide comparing six-inch, eight-inch, and nine-inch cottage cheese cheesecakes with different heights
Pan size changes both height and bake time, so visual cues matter more than the timer when you move away from the 8-inch pan.
Pan or Format Best For Bake Guidance
6-inch springform Small-batch, taller cheesecake Use about two-thirds of the recipe or expect a deeper filling and longer bake time.
8-inch springform Main recipe Bake 55–70 minutes at 325°F / 160°C.
9-inch springform Thinner full-size cheesecake Start checking around 45–55 minutes.
Muffin tin Mini cheesecakes Bake about 16–22 minutes, depending on filling depth.
Ramekins Single-serve cheesecakes Bake about 20–30 minutes.

Use the visual cues more than the clock. Cheesecake does not care what the timer says when the center is still loose or the edges are already firm. A thin cheesecake in a 9-inch pan may be done before the timer says so, while a deep 6-inch cheesecake may need longer.

Changing pan size also changes doneness timing, so use the set-edge and soft-wobble cues before relying on the clock alone.

How to Know When Cottage Cheese Cheesecake Is Done

Cheesecake keeps setting after it leaves the oven. Baking until the center looks completely firm can leave you with a dry, cracked, or rubbery cheesecake after chilling.

The Edge Test

The outer 2 inches should look set. The edges may be slightly puffed, but they should not be deeply browned or pulling hard away from the pan.

The Center Wobble Test

Gently nudge the pan. The center should wobble softly like set custard. It should not ripple like liquid. A soft wobble is good; a loose slosh means it needs more time.

Baked cottage cheese cheesecake in a springform pan with set edges and a soft center wobble cue
Look for set edges and a soft center wobble, because the cheesecake will continue firming as it cools and chills.

Internal Temperature

For extra precision, check the center with an instant-read thermometer. The center should be around 155–160°F / 68–71°C. Insert the thermometer gently so you do not tear the top.

Why It Still Looks Soft

A warm cheesecake is not supposed to look like a fully chilled cheesecake. The filling firms as it cools and then tightens further in the refrigerator. That is why chill time is part of the recipe, not an optional waiting period.

If you like baked cheesecakes with clean slices and a slow-chilled texture, this salted caramel cheesecake recipe uses similar doneness cues: set edges, a softly wobbly center, and enough chill time before slicing.

Which Cottage Cheese Cheesecake Version Should You Make?

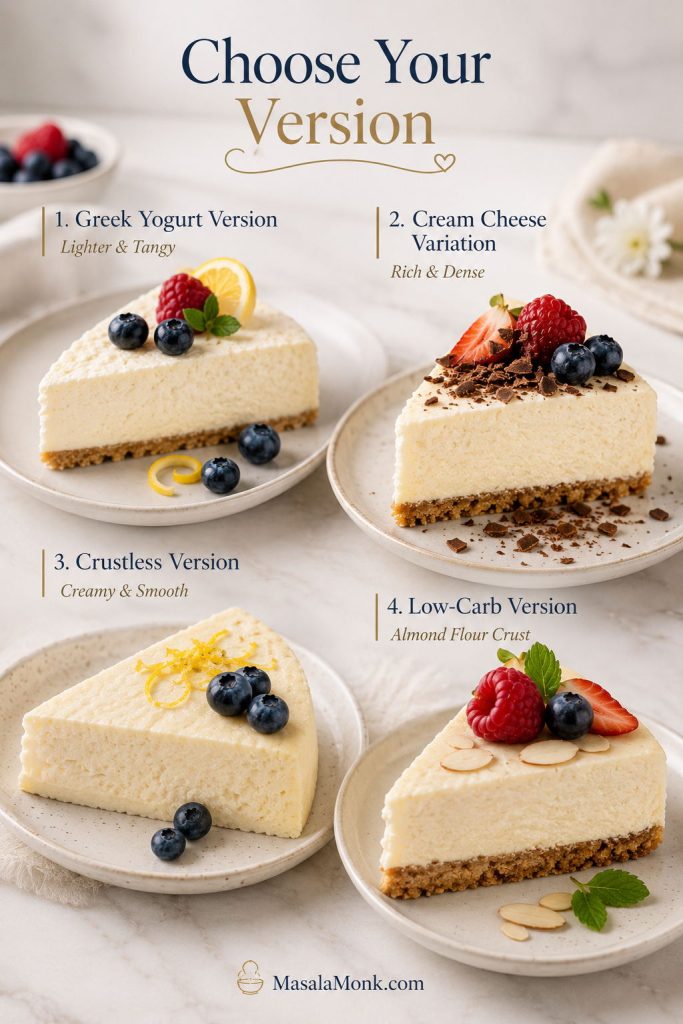
The right version depends on who you are serving and how close you want the slice to feel to classic cheesecake. Use the Greek yogurt base for the lighter, higher-protein style. Add cream cheese for something richer. Skip the crust when you want the easiest version.

If you are serving cottage cheese skeptics, the cream cheese variation is the safest first choice. If you are making it for yourself as a lighter dessert, start with the Greek yogurt version.

Four cottage cheese cheesecake versions showing Greek yogurt, cream cheese, crustless, and low-carb slices
Choose the version by the result you want: Greek yogurt for lighter tang, cream cheese for richness, crustless for ease, or almond crust for low-carb.
Craving or Need Make This Version Why It Works
The lightest higher-protein version Cottage cheese + Greek yogurt Best balance of protein, tang, and creamy texture.
The most classic cheesecake texture Cottage cheese + cream cheese Richer, denser, and closer to New York-style cheesecake.
The easiest version Crustless cottage cheese cheesecake No crumb crust, fewer steps, lighter slice.
The lowest-carb version Almond flour crust or crustless + low-carb sweetener Keeps the cheesecake closer to keto or low-carb needs.
The cleanest slices Crumb crust + overnight chill The crust gives structure and the long chill firms the filling.
The most dessert-like flavor Full-fat cottage cheese + vanilla + lemon + berry topping Richer dairy and bright toppings make it taste more like a classic dessert.

After choosing your version, go straight to the recipe card for the base formula and notes for cream cheese, crustless, and low-carb changes.

Cottage Cheese + Greek Yogurt

This is the main version of the recipe. It is lighter than a cream cheese cheesecake, with a tangy, creamy filling and a higher-protein dairy base. Use thick plain Greek yogurt for the best texture.

Cottage Cheese + Cream Cheese

For a richer cottage cheese cheesecake with a more classic texture, replace 1 cup / 225g of the cottage cheese with 8 oz / 225g softened cream cheese. Blend the cottage cheese first until smooth, then add the cream cheese and blend again before adding the eggs.

Crustless Cottage Cheese Cheesecake

For a crustless version, skip the crumb crust, line the bottom of the pan with parchment, and grease the sides well. Bake the filling directly in the pan and start checking 5 to 10 minutes earlier. Chill fully before releasing the pan, because a warm crustless cheesecake is more delicate than one with a crumb base.

Low-Carb Cottage Cheese Cheesecake

For a low-carb version, use an almond flour crust or skip the crust, then use a cup-for-cup low-carb sweetener in the filling. For more low-carb baking help, especially when an almond flour crust turns crumbly or soft, this keto-friendly flour guide explains how almond flour behaves and how to fix texture problems.

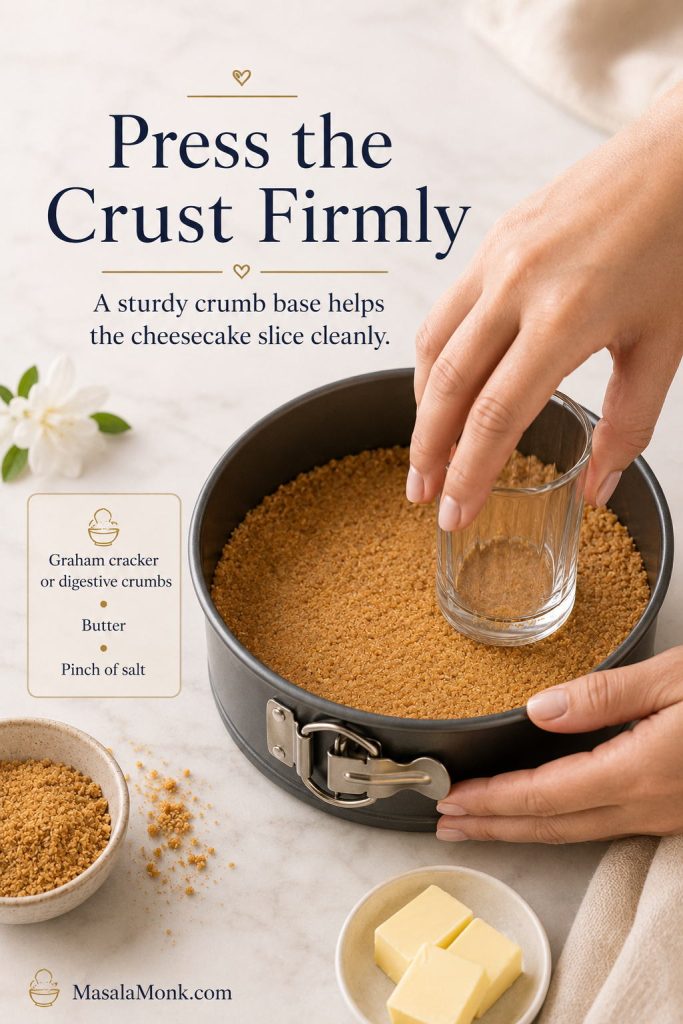
How to Make the Crust

The classic version uses a simple graham cracker or digestive biscuit crust. It gives the cheesecake a buttery base, a little crunch, and the familiar contrast people expect from a chilled cheesecake slice.

Hands pressing a graham cracker crumb crust firmly into a springform pan for cottage cheese cheesecake
A firmly packed crumb crust gives the creamy filling contrast, structure, and a more classic cheesecake feel.

Graham Cracker or Digestive Crust

This is the most classic option. Mix the crumbs with melted butter, a little sugar, and a pinch of salt, then press the mixture firmly into the bottom of the pan.

When to Pre-Bake the Crust

Pre-bake any crumb-style crust for 8 to 10 minutes before adding the filling. It helps the butter bind the crumbs and keeps the base from tasting raw. Let the crust cool slightly before pouring in the cottage cheese filling.

Is Cottage Cheese Cheesecake Healthy or High Protein?

This is still cheesecake, and that is the point. The goal is not to turn dessert into something joyless. It is to use cottage cheese and Greek yogurt in a way that gives you a cold, creamy, satisfying slice with a little more protein and a lighter feel.

You do not need protein powder for the main recipe. The higher-protein advantage comes from using cottage cheese and Greek yogurt as the main dairy base. If you already use vanilla whey and want a more macro-focused version, add one scoop and loosen the batter with 1 to 2 tablespoons of Greek yogurt or milk only if it becomes too thick.

The exact protein, calories, and carbs per slice will depend on your cottage cheese, Greek yogurt, crust, sweetener, and slice size. As a rough estimate, using full-fat or 2% cottage cheese, plain Greek yogurt, 4 eggs, and the crumb crust, a 10-slice cheesecake usually lands around 280–300 calories and 12–13g protein per slice. A crustless version will usually be lighter, while the cream cheese variation will be richer. For the most accurate number, calculate from the labels on your own ingredients.

Higher-protein cottage cheese cheesecake slice with cottage cheese, Greek yogurt, berries, and a protein estimate note
Cottage cheese and Greek yogurt give this cheesecake a higher-protein base without protein powder, though exact macros depend on your dairy, crust, and slice size.

For another higher-protein dessert, you may also like this protein ice cream recipe, which uses Greek yogurt, cottage cheese, and protein powder options without making the texture feel chalky.

The same idea works outside dessert, too: this high-protein oatmeal guide shows how simple add-ins like Greek yogurt and cottage cheese can make everyday recipes more filling.

Baked vs No-Bake Cottage Cheese Cheesecake

This recipe is baked because baking gives cottage cheese cheesecake the cleanest slices and the most reliable set. Eggs and gentle heat help the filling turn into a creamy custard.

A no-bake cottage cheese cheesecake needs a different setting system — usually gelatin, whipped cream, cashews, melted chocolate, or a very thick dairy base. This baked filling is not meant to be poured into a crust and chilled without baking.

Baked cottage cheese cheesecake slice compared with no-bake cheesecake cups in jars
This batter is built for baking because eggs help it set, while a no-bake version needs a different setting method.

For an oven-free cheesecake, start with this no bake cheesecake recipe. The method is different, but the setting logic will help you understand why no-bake cheesecakes need enough fat, air, structure, and chill time.

Best choice: Make this baked version when clean slices matter most. Save no-bake cottage cheese cheesecake for jars, cups, bars, or a separate recipe built with a proper setting method.

Flavor Variations

Once the base recipe works, cottage cheese cheesecake is easy to adapt. Keep the basic structure the same, then adjust flavor carefully so the filling does not become too loose.

Pumpkin Cottage Cheese Cheesecake

Add pumpkin puree, pumpkin pie spice, and a little extra cornstarch to help absorb the added moisture. Start with 3/4 cup pumpkin puree, reduce the Greek yogurt to 1/2 cup, add 1 extra teaspoon cornstarch, and bake until the center has the same soft wobble as the original version.

Chocolate Cottage Cheese Cheesecake

Add unsweetened cocoa powder or melted dark chocolate to the blended filling. Cocoa powder thickens the batter, so you may need a spoonful or two of extra Greek yogurt. Melted chocolate gives a richer texture but makes the cheesecake less light.

Lemon Cottage Cheese Cheesecake

Increase the lemon zest and add a little extra lemon juice. Do not add too much liquid or the filling may need longer to set. Lemon works especially well with a graham cracker crust and fresh berries.

Berry-Topped Cottage Cheese Cheesecake

Keep the filling plain and add berries after chilling. Fresh strawberries, blueberries, raspberries, or a spoonable berry compote all work. Avoid adding too much watery fruit directly to the batter unless you are making a tested swirl version.

Mini Cottage Cheese Cheesecakes

Use a lined muffin tin and bake until the centers are just set. Mini cheesecakes chill faster and are easier for parties, lunchboxes, or portioned desserts.

How to Serve Cottage Cheese Cheesecake

Serve this cheesecake cold, when the filling is fully set and the flavor has had time to settle. A plain slice is creamy and tangy on its own, but toppings make it feel more finished.

  • Fresh berries: Best when you want a lighter, brighter slice.
  • Berry compote: Best when you want it to feel like a classic dessert-table cheesecake.
  • Lemon zest: Best when you want more freshness and lift.
  • Honey drizzle: Best for a simple, soft sweetness.
  • Chocolate drizzle: Best with the cream cheese variation or a crustless slice.

For a dinner-party version, use the crumb crust and berry compote. For an everyday higher-protein dessert, keep it crustless and serve it with berries or a spoonful of Greek yogurt.

After a night in the refrigerator, the filling settles into a cold, creamy slice with a clean fork cut and a soft lemon-vanilla tang. The crumb crust adds contrast, but the filling should still be the point: smooth, cool, lightly tangy, and rich enough to feel like dessert.

Troubleshooting Cottage Cheese Cheesecake

Most cottage cheese cheesecake problems come from four things: watery dairy, not blending enough, overbaking, or cutting before the cheesecake has chilled.

Troubleshooting guide for cottage cheese cheesecake showing grainy, watery, cracked, and hard-to-slice problems
If the cheesecake turns grainy, watery, cracked, or hard to slice, start by checking moisture, blending, bake time, and chill time.
Problem Likely Cause Fix
Grainy texture Cottage cheese was not blended fully. Blend the dairy before adding eggs. Scrape down the sides. Strain the batter when needed.
Watery filling Cottage cheese or yogurt was too loose, or the cheesecake was underbaked. Drain watery cottage cheese, use thick Greek yogurt, bake until the edges are set, and chill overnight.
Cracked top Overbaking, too much air in the batter, or cooling too quickly. Add eggs last, do not over-blend, bake gently, and cool with the oven door cracked.
Rubbery texture Too much high-speed blending after eggs were added, or baking too long. Add eggs last, pulse briefly, and pull the cheesecake while the center still wobbles.
Tastes too much like cottage cheese Very lean cottage cheese, not enough vanilla/lemon/sweetener, or not enough chill time. Use 2% or full-fat cottage cheese, add lemon zest and vanilla, and chill overnight.
Soggy crust Crust was not pre-baked, filling was too wet, or water bath leaked into the pan. Pre-bake the crust and protect the pan well when using a water bath.
Won’t slice cleanly The cheesecake has not chilled long enough. Chill at least 4 hours. Overnight is best for clean slices.

For prevention before the next bake, return to the 4 texture rules or check the doneness cues again.

How to Store and Freeze Cottage Cheese Cheesecake

Cottage cheese cheesecake is a make-ahead dessert. In fact, it tastes better after a full night in the refrigerator because the filling has time to firm up and the flavor settles.

Cottage cheese cheesecake slices stored in a glass container with parchment for refrigeration or freezing
This works well as a make-ahead dessert because the filling firms, the flavor settles, and the slices cut cleaner after chilling.

Refrigerating

Store the cheesecake covered in the refrigerator for 4 to 5 days. Chill it uncovered until fully cold first, then cover it so condensation does not drip onto the surface. Once the cheesecake has cooled to room temperature, move it to the refrigerator rather than leaving it out for hours.

Freezing

You can freeze cottage cheese cheesecake, but the texture may soften slightly after thawing. Freeze individual slices on a tray first, then wrap and store them in an airtight container.
Thawing

Thaw frozen slices overnight in the refrigerator. Avoid thawing at room temperature for long periods, because the dairy filling should stay cold.

Cottage Cheese Cake vs Cottage Cheese Cheesecake

Cottage cheese cake and cottage cheese cheesecake are sometimes used to describe similar desserts, but they are not always the same thing. A cottage cheese cheesecake is usually a blended dairy custard made with cottage cheese, eggs, vanilla, lemon, and sometimes yogurt or cream cheese. It bakes gently, chills, and slices like cheesecake.

Cottage cheese cake can mean something different. Some versions are closer to a flour-based cake or snacking cake, while others are simple cottage-cheese-based cakes that taste cheesecake-like but use fewer ingredients. This version is a true cheesecake: a blended dairy filling that bakes gently, cools slowly, and chills into clean, creamy slices.

Cottage Cheese Cheesecake Recipe

This cottage cheese cheesecake recipe bakes into a creamy, higher-protein cheesecake with Greek yogurt, vanilla, lemon, and an optional graham cracker or digestive biscuit crust. Blend the cottage cheese until silky, bake gently, cool slowly, and chill well before slicing.

Yield10 slices
Prep Time20 minutes
Cook Time55–70 minutes
Chill Time4 hours minimum
Total TimeAbout 7 hours, mostly cooling and chilling
Pan8-inch springform
Oven325°F / 160°C
TextureCreamy, smooth, sliceable

Ingredients

For the crust

  • 1 1/4 cups / 135g graham cracker or digestive biscuit crumbs
  • 5 tbsp / 70g melted butter
  • 1 1/2 tbsp / 18g sugar or sweetener
  • Pinch of fine salt

For the filling

  • 3 cups / 680g / 24 oz full-fat or 2% cottage cheese, drained first when watery
  • 3/4 cup / 180g plain Greek yogurt
  • 4 large eggs, room temperature
  • 2/3 cup / 135g granulated sugar
  • 2 tbsp / 16g cornstarch
  • 2 tsp / 10ml vanilla extract
  • 1–2 tsp lemon zest
  • 1 tbsp / 15ml lemon juice
  • 1/4 tsp fine salt

Instructions

Prepare the Pan, Crust, and Filling

  1. Prepare the pan. Line the bottom of an 8-inch / 20cm springform pan with parchment paper and lightly grease the sides.
  2. Heat the oven. Preheat the oven to 350°F / 177°C for the crust.
  3. Make the crust. Mix the crumbs, melted butter, sugar, and salt until evenly moistened. Press firmly into the bottom of the pan.
  4. Pre-bake the crust. Bake for 8 to 10 minutes. Remove from the oven and reduce the oven temperature to 325°F / 160°C.
  5. Blend the dairy. Add cottage cheese, Greek yogurt, sugar, cornstarch, vanilla, lemon zest, lemon juice, and salt to a blender or food processor. Blend until completely smooth, scraping down the sides once.
  6. Add the eggs. Add the eggs and blend briefly, just until combined. Do not over-blend after the eggs are added.
  7. Check the batter. It should look smooth and pourable, but not watery. If it looks thin because the cottage cheese was loose, let it sit for 5 minutes before pouring so the cornstarch can hydrate slightly.

Bake, Cool, Chill, and Slice

  1. Fill the pan. Pour the filling over the crust and smooth the top.
  2. Optional water bath. For the creamiest texture, place the wrapped springform pan in a roasting pan and pour hot water around it until the water reaches about 1 inch up the side of the pan. Make sure the pan is well protected so water cannot leak into the crust.
  3. Bake. Bake at 325°F / 160°C for 55 to 70 minutes, until the edges are set and the center still has a soft wobble. If using a thermometer, the center should be about 155–160°F / 68–71°C.
  4. Cool slowly. Turn off the oven, crack the door open, and let the cheesecake sit inside for 30 to 45 minutes. Then move it to the counter and cool to room temperature.
  5. Chill. Refrigerate for at least 4 hours, preferably overnight.
  6. Slice and serve. Run a thin knife around the edge before releasing the springform pan. Slice with a clean, warm knife for neat pieces.

Notes

  • For a cream cheese version: Replace 1 cup / 225g cottage cheese with 8 oz / 225g softened cream cheese.
  • For a crustless version: Skip the crust, line the pan well, and start checking 5 to 10 minutes earlier.
  • For a low-carb version: Use an almond flour crust and a cup-for-cup low-carb sweetener.
  • If your cottage cheese is watery: Drain it before measuring.
  • With a water bath: Wrap the pan very well and expect the cheesecake to bake toward the longer end of the time range.
  • Without a water bath: The cheesecake still works, but the top may look a little more rustic.
  • For the smoothest filling: Blend the dairy fully before adding the eggs.

FAQs

Does cottage cheese cheesecake taste like cottage cheese?

Not when it is blended well and flavored properly. The finished cheesecake should taste creamy, tangy, lightly sweet, and cheesecake-like. Vanilla, lemon, sugar, and enough chill time help soften the cottage cheese flavor.

How do you make cottage cheese cheesecake smooth?

Blend the cottage cheese and Greek yogurt until glossy before adding the eggs. A high-speed blender gives the best texture, but a food processor can work if you scrape down the sides.

Why is my cottage cheese cheesecake watery?

Watery cheesecake usually comes from loose cottage cheese, thin yogurt, underbaking, or cutting before the cheesecake has chilled. Drain watery dairy, bake until the edges are set, and chill overnight.

Can I make cottage cheese cheesecake without cream cheese?

Yes. This main recipe uses cottage cheese and Greek yogurt without cream cheese. Add cream cheese only when you want a richer, more traditional cheesecake texture.

How much cream cheese should I add?

Replace 1 cup / 225g cottage cheese with 8 oz / 225g softened cream cheese for a richer version that tastes closer to classic cheesecake.

Can I make it crustless?

Yes. Line the pan with parchment, grease the sides well, skip the crumb crust, and bake the filling directly in the pan. Start checking a little earlier and chill fully before releasing it.

Is cottage cheese cheesecake high protein?

It is usually higher in protein than classic cream-cheese cheesecake because the main dairy base is cottage cheese and Greek yogurt. Exact protein depends on your brands, crust, and slice size.

Can I make it low carb or keto?

Use an almond flour crust or skip the crust, then replace the sugar with a low-carb sweetener such as allulose or a monk fruit blend. The final texture will depend on the sweetener and crust you choose.

How long should cottage cheese cheesecake chill?

Chill it for at least 4 hours. Overnight is best because the filling firms, the flavor settles, and the slices come out cleaner.

Can you freeze cottage cheese cheesecake?

Yes. Freeze it in slices, then thaw overnight in the refrigerator. The texture may be slightly softer after thawing, but it still works well for make-ahead servings.

Baked vs no-bake cottage cheese cheesecake: what changes?

A baked version sets with eggs and oven heat. A no-bake version needs a separate setting system, such as gelatin, whipped cream, cashews, melted chocolate, or a very thick dairy base.

Cottage cheese cake vs cottage cheese cheesecake: what is the difference?

A cottage cheese cheesecake is a blended dairy custard that bakes and chills like cheesecake. By contrast, cottage cheese cake is usually more cake-like, often made with flour, baking powder, and sometimes fruit.

The First Slice Is the Real Test

Final cottage cheese cheesecake slice with berries, lemon, berry sauce, and a forkful removed
The first slice is the real test: smooth texture, clean edges, and a cold creamy bite that tastes like cheesecake, not cottage cheese.

When the cheesecake is cold, creamy, and smooth enough that nobody stops to ask where the cottage cheese went, the recipe has done its job.

Try the Greek yogurt version first for a lighter cheesecake, and try the cream cheese variation when you want something closer to the classic. When you make it, I’d love to know which version won in your kitchen — the lighter Greek yogurt cheesecake, the cream cheese variation, the classic crust, or the crustless slice.

Posted on 2 Comments

Salted Caramel Cheesecake Recipe

Baked salted caramel cheesecake slice with caramel topping, flaky salt, crumb crust, and text reading Salted Caramel Cheesecake Recipe.

This salted caramel cheesecake recipe is for anyone who wants caramel in every bite, not just a sweet drizzle on top. The baked filling is creamy and caramel-flavored, the topping settles into a glossy layer, and the buttery crumb crust keeps each slice rich, balanced, and sturdy enough to cut cleanly.

This is a baked salted caramel cheesecake, so the filling has the structure to hold caramel without turning loose in the middle. A measured amount of cooled caramel goes into the batter for flavor, then more caramel is spread over the chilled cheesecake for a glossy finish. That gives you real caramel depth, clean slices, and a top that looks polished instead of messy.

You’ll also learn how thick the caramel should be, when to add it, how to tell when the cheesecake is done, and why overnight chilling makes such a difference. Once those details are right, this is a deeply creamy, sliceable salted caramel cheesecake with a clean finish of flaky sea salt.

Text-free editorial photo of a salted caramel cheesecake slice with glossy caramel topping, flaky salt, creamy filling, and crumb crust on a dark plate.
A properly chilled baked cheesecake should cut cleanly and still look creamy inside; meanwhile, the caramel topping should sit on the surface instead of disappearing into it.

Quick Answer: Salted Caramel Cheesecake Recipe

To make salted caramel cheesecake, bake a buttery biscuit or graham cracker crust, fill it with a smooth cream cheese batter flavored with brown sugar and cooled salted caramel, then bake it gently at 300°F / 150°C until the edges are set and the center still wobbles slightly. Cool it slowly, chill it for at least 6 hours, then finish with a glossy caramel layer and flaky sea salt.

The trick is to use caramel in the right places. A controlled amount goes into the filling for flavor, while the topping is added after chilling so it stays visible and neat. That way, the cheesecake tastes caramel-forward without turning loose in the middle.

Want the exact measurements? Jump to the recipe card. Unsure about caramel thickness? Go to the caramel guide.

Salted Caramel Cheesecake at a Glance

StyleBaked round salted caramel cheesecake
Pan9-inch / 23 cm springform pan
Yield12 slices
CrustDigestive biscuits, graham crackers, or Biscoff crumbs
TextureCreamy, set, and sliceable after chilling
Caramel textureCooled and thick enough for the filling, glossy and slow-moving for the top
Bake temperature300°F / 150°C after the crust is baked
Fan ovenAbout 285°F / 140°C
Chill time8 hours or overnight for the cleanest slices; 6 hours is the bare minimum
Best finishCaramel topping and flaky sea salt added after chilling
At-a-glance salted caramel cheesecake guide showing pan size, bake temperature, bake time, chill time, yield, and topping timing.
If you want the short version first, this at-a-glance guide covers the details that matter most: pan size, low baking temperature, chill time, yield, and when to add the caramel topping.

Why This Salted Caramel Cheesecake Recipe Works

Balance is the tricky part of caramel cheesecake. With too little caramel, the dessert tastes like plain cheesecake with sauce. Add too much, and the filling can turn soft, overly sweet, or difficult to slice. This version keeps the flavor deep without overloading the batter.

  • A controlled amount of caramel goes into the filling. It is enough to flavor the cheesecake, but not so much that the center turns loose.
  • Brown sugar supports the caramel flavor. It gives the filling a warmer, rounder sweetness than white sugar alone.
  • Sour cream balances the richness. That little tang keeps the cheesecake from tasting flat or cloying.
  • The topping goes on after chilling. The caramel sits as a glossy layer instead of melting into a warm surface.
  • A gentle bake protects the texture. The lower oven temperature gives the eggs time to set around the caramel-enriched filling.
  • Overnight chilling gives the cleanest slices. The cheesecake firms as it rests, and the caramel flavor becomes smoother.

Ready to make it? Skip to the step-by-step method. Prefer the short version? Go straight to the recipe card.

Before You Start This Salted Caramel Cheesecake

Cheesecake is not difficult, but it rewards patience. A few small details make the difference between a creamy slice and a soft, cracked, or lumpy one.

If you are still deciding between baked and chilled cheesecake styles, this no-bake cheesecake recipe explains the no-oven version in detail, including how cream cheese, whipped cream, and chill time create a sliceable texture.

Before you start: Bring the cream cheese, eggs, sour cream, and cream to room temperature. Use cooled caramel, not hot caramel. Mix gently after adding the eggs. Chill the cheesecake overnight if you want the neatest slices.

  • Use full-fat block cream cheese. Spreadable tub-style cream cheese can be softer and may not set as firmly.
  • Cool the caramel first. Warm caramel may seem easier to stir in, but it can soften the filling and make the cheesecake harder to bake evenly.
  • Scrape the bowl often. Cream cheese lumps like to hide at the bottom and sides of the bowl.
  • Mix on low after adding eggs. Too much air can make the cheesecake rise, fall, and crack.
  • Do not rush the chill. A caramel cheesecake needs time to firm up fully.

Salted Caramel Cheesecake Ingredients

This ingredient list is simple, but texture matters. Choose full-fat dairy, a sturdy crumb base, and caramel that is thick enough for cheesecake rather than a thin dessert syrup.

Ingredient board for salted caramel cheesecake showing crumbs, butter, brown sugar, cream cheese, sour cream, cream, eggs, caramel sauce, vanilla, cornstarch, and salt.
The best salted caramel cheesecake starts with a few texture-critical ingredients, so full-fat cream cheese, cooled caramel, and a firm crumb crust matter more than a long shopping list.

Buttery Crumb Crust

  • Digestive biscuits, graham crackers, or Biscoff crumbs: Digestives and graham crackers give the cheesecake a classic base, while Biscoff adds a deeper caramel-cookie flavor.
  • Melted butter: This binds the crumbs and helps the crust set firmly after baking.
  • Light brown sugar: A small amount adds a gentle caramel note to the base.
  • Fine salt: Salt keeps the crust from tasting flat underneath the sweet filling.
Crust options guide comparing digestive biscuit crust, graham cracker crust, and spiced cookie crust for salted caramel cheesecake.
Crust choice changes the whole dessert: digestive biscuits keep the flavor balanced, graham crackers feel classic, and spiced cookie crumbs push the cheesecake toward a deeper caramel-cookie profile.

Salted Caramel Cheesecake Filling

  • Full-fat block cream cheese: This gives the cheesecake its main structure. Let it come to room temperature before mixing so the batter turns smooth.
  • Light brown sugar: Brown sugar tastes warmer and more caramel-like than white sugar.
  • Sour cream: A little tang balances the caramel and keeps the filling from tasting too sweet.
  • Heavy cream or double cream: Cream adds richness and helps the texture feel smooth.
  • Eggs: These set the baked filling. Add them one at a time and mix gently.
  • Cornstarch or all-purpose flour: Either one gives the filling a little extra stability, which helps when caramel is involved.
  • Vanilla extract: Vanilla rounds out the dairy and caramel flavors.
  • Fine salt: This balances the sweetness inside the cheesecake, not just on top.
  • Cooled salted caramel sauce: Use caramel that is thick but stirrable, so it flavors the filling without making the batter too loose.

Salted Caramel Topping

  • Salted caramel sauce: Look for a sauce that falls from a spoon in a slow ribbon. Runny caramel is better saved for drizzling over individual slices.
  • Flaky sea salt: Sprinkle it on just before serving so it stays crisp and gives little salty pops against the caramel.

Need help with caramel texture before you start? See the caramel thickness guide. Ready to bake? Jump to the method.

Caramel for Cheesecake: Filling, Topping, and Drizzle

Caramel decides the texture here. A sauce that works beautifully over ice cream may be too thin for cheesecake. In this recipe, the caramel should be cool enough to protect the filling and thick enough to stay present in each slice.

The Spoon Test for Caramel Cheesecake Topping

Before adding caramel to the filling or spreading it on top, test it with a spoon. This is easier than guessing by color alone.

Caramel thickness guide showing too-thin caramel, pourable caramel, thick but stirrable caramel, and too-firm caramel for cheesecake.
Caramel thickness affects both texture and appearance; for that reason, thick but stirrable caramel works best in the filling, while slow-moving caramel is better for the top.
Caramel textureWhat it looks likeBest use
Too thinRuns off the spoon like syrupUse only as a serving drizzle
PourableCoats the spoon and falls in a slow ribbonBest for the top of the chilled cheesecake
Thick but stirrableA spoon dragged through it leaves a trail for 2–3 secondsBest for mixing into the filling or making a light swirl
Too firmClumps or spreads like cold fudgeWarm very briefly before using

Best Caramel Sauce for Salted Caramel Cheesecake

Best caramel sauce guide for cheesecake showing thick homemade caramel, good store-bought caramel, thin syrup, and cold firm caramel.
Not every caramel sauce belongs in cheesecake. Homemade or thick store-bought caramel works well in the batter, whereas thin syrup is better saved for drizzling over finished slices.

The best caramel sauce for salted caramel cheesecake is thick, glossy, and slow-moving. It should coat a spoon and fall in a ribbon rather than run like syrup. Homemade caramel gives you the most control, but store-bought salted caramel can work if it has enough body. Avoid thin ice cream-style caramel in the filling because it can make the cheesecake softer and harder to slice.

This same thick-caramel logic also matters in a banoffee pie recipe, where the caramel or dulce de leche needs enough body to sit under bananas and cream without turning the slices messy.

Homemade vs Store-Bought Caramel for Cheesecake

Homemade salted caramel gives you the most control because you can cook it to the right thickness. Store-bought caramel can still work, especially for the topping, as long as it is not watery. If your jarred caramel is thin and runny, keep it for a final drizzle instead of mixing it into the cheesecake batter.

For the filling, use caramel that has cooled completely. For the topping, choose a glossy sauce that moves slowly from the spoon. If it has been refrigerated and looks too firm, warm it for a few seconds at a time until it loosens, then let it cool slightly before spreading.

Quick Salted Caramel for This Cheesecake

If you do not already have caramel sauce, make a simple batch before you start the filling. It needs time to cool, so this is best done first.

  • 200 g granulated sugar, about 1 cup
  • 85 g unsalted butter, cubed, about 6 tbsp
  • 120 ml heavy cream or double cream, 1/2 cup
  • 1/2–1 tsp fine salt, to taste
  • 1 tsp vanilla extract, optional

This makes enough caramel for the filling and topping, with a little extra for drizzling depending on how thick you cook it.

Place the sugar in a heavy-bottom saucepan over medium heat and let it melt, stirring gently only as needed until it becomes a deep amber caramel. The sugar may clump at first. Keep the heat moderate and continue stirring gently until the clumps melt. If it darkens too fast, lower the heat.

Carefully whisk in the butter; the mixture will bubble. Slowly add the cream while whisking, then simmer for 1–2 minutes until smooth. Remove from the heat, stir in salt and vanilla, and let it cool until thick but still spoonable.

Caramel safety note: Hot caramel is much hotter than boiling water and bubbles aggressively when butter or cream is added. Use a deep pan, pour the cream slowly, and keep your hands clear of the steam.

When to Add Caramel Topping to Cheesecake

Add the topping after the cheesecake has chilled and set. If you add caramel while the cheesecake is warm, it can sink into the surface or slide toward the edges. If you are making the dessert ahead, bake and chill the cheesecake first, then add the caramel layer on the day you serve it.

Best result: Make the caramel first, bake the cheesecake the day before serving, chill it overnight, then add the caramel topping and flaky salt on the day you serve it.

If your caramel feels too thin or the topping keeps sliding, check the troubleshooting section. Want the full recipe in one place? Go to the recipe card.

Equipment for Baked Salted Caramel Cheesecake

  • 9-inch / 23 cm springform pan: A deeper pan is helpful because the filling rises slightly as it bakes.
  • Parchment paper: Makes it easier to release the cheesecake from the base.
  • Food processor or rolling pin: Use either one to make fine, even crumbs.
  • Stand mixer with paddle or electric hand mixer: Keep the speed gentle, especially after adding the eggs.
  • Roasting pan or deep baking tray: Helpful for a water bath or a steam-pan setup.
  • Heavy-bottom saucepan: Needed if making caramel from scratch.
  • Digital scale: Strongly recommended because small measurement changes affect cheesecake texture.
  • Offset spatula: Helpful for smoothing the batter and caramel layer.
  • Sharp knife: Warm and wipe it between cuts for neat slices.
  • Instant-read thermometer, optional: Useful if you want a precise doneness check.

Common Mistakes to Avoid

  • Do not add hot caramel to the filling. It can loosen the batter and make the cheesecake bake unevenly.
  • Do not use thin caramel syrup in the batter. Save runny caramel for drizzling over individual slices.
  • Do not overmix after adding eggs. Too much air can make the cheesecake rise, fall, and crack.
  • Do not bake until the center looks fully firm. The middle should still wobble gently when the cheesecake leaves the oven.
  • Do not add the caramel topping while the cheesecake is warm. Add it after chilling so the top stays glossy and neat.

How to Make Salted Caramel Cheesecake

The steps are straightforward, but the order makes a big difference. Bake the crust first, let the caramel cool, mix the filling gently, bake the cheesecake slowly, then give it enough time to chill before adding the topping.

Step-by-step board showing how to make salted caramel cheesecake by baking the crust, mixing the filling, baking gently, chilling, topping, and slicing.
To keep the cheesecake smooth and sliceable, follow the order carefully: bake the crust, cool the caramel, mix gently after the eggs go in, then bake, chill, and top only when fully set.

Step 1: Make the Crust

Heat the oven to 350°F / 175°C. Line the base of a 9-inch springform pan with parchment paper. Mix the biscuit crumbs, melted butter, brown sugar, and salt until the crumbs look evenly moistened, like damp sand.

Press the mixture firmly into the base of the pan. Bring the crumbs slightly up the sides to make a low edge, then bake for 8–10 minutes. Let the crust cool while you prepare the filling.

Step 2: Cool or Prepare the Caramel

If you are making caramel from scratch, make it now and let it cool. If you are using prepared caramel, check the texture with the spoon test. For the filling, the caramel should be cool and thick but still easy to stir.

Avoid adding hot caramel to the batter. It can soften the cream cheese mixture and make the cheesecake bake unevenly.

Step 3: Mix the Salted Caramel Cheesecake Filling

Lower the oven to 300°F / 150°C. If using a fan or convection oven, reduce the cheesecake baking temperature to about 285°F / 140°C. Beat the room-temperature cream cheese and brown sugar on low to medium speed until smooth. Stop and scrape the bowl a few times so no firm streaks of cream cheese remain.

Add the sour cream, heavy cream, vanilla, salt, cornstarch, and cooled caramel. Mix just until smooth. Add the eggs one at a time on low speed, mixing only until each egg disappears into the batter.

Mix gently once the eggs go in. Cheesecake batter should be smooth, not whipped. Too much air can make the cheesecake rise in the oven and crack as it cools.

Step 4: Bake the Salted Caramel Cheesecake Low and Slow

Pour the filling into the cooled crust and smooth the top. Bake at 300°F / 150°C for 70–80 minutes, using a water bath or steam pan if possible.

For a full water bath, wrap the outside of the springform pan well, place it in a roasting pan, and pour hot water around it until the water reaches about halfway up the sides. For the easier steam-pan method, place a tray of hot water on the lower rack and bake the cheesecake on the rack above.

The cheesecake is ready when the outer 2–3 inches look set and the center still has a soft wobble. It should move like set custard, not ripple like liquid. The top should look mostly matte rather than wet. If you are using a thermometer, the center should be around 145°F / 63°C; ThermoWorks uses the same internal temperature cue for cheesecake doneness.

Cheesecake doneness guide showing set edges, gently wobbling center, mostly matte top, and optional 145 degrees Fahrenheit or 63 degrees Celsius internal temperature cue.
Cheesecake is done before it looks fully firm, so look for set edges, a gentle center wobble, and a mostly matte top rather than waiting for a completely rigid middle.

Do not wait for the center to look completely firm in the oven. By that point, the cheesecake may be overbaked. It will continue to set as it cools and chills.

Step 5: Cool Gradually

Turn the oven off, crack the door open, and leave the cheesecake inside for 1 hour. After that, move it to the counter and cool for another 1 hour. This slow cooling helps prevent sudden sinking and cracking.

Step 6: Chill Until Fully Set

Refrigerate the cheesecake for at least 6 hours. Overnight is better, and 8 hours gives a more reliable set. The filling becomes smoother and firmer as it rests, and the caramel flavor settles into the cream cheese base.

Step 7: Add the Salted Caramel Layer and Flaky Salt

Once the cheesecake is cold and set, spread the caramel over the top. Let it settle naturally, or guide it gently with an offset spatula. Finish with flaky sea salt just before serving.

For tidy slices, dip a sharp knife in hot water, wipe it dry, cut one slice, then wipe the blade before cutting again.

Clean cheesecake slicing guide showing chilling, warming the knife, wiping between cuts, adding topping after chilling, and softening firm topping.
Clean cheesecake slices come from a few small habits that make a big difference: chill thoroughly, warm the knife, wipe between cuts, and let very firm caramel soften slightly before serving.

Need to store it or make it ahead? Jump to storage and freezing. Cheesecake not setting the way you expected? See troubleshooting.

Do You Need a Water Bath for Salted Caramel Cheesecake?

A water bath gives cheesecake the smoothest texture because it surrounds the pan with gentle, moist heat. That is especially helpful here because caramel adds sweetness and moisture to the filling.

If wrapping a springform pan makes you nervous, use a steam pan instead. Place a deep tray of hot water on the lower oven rack and bake the cheesecake on the rack above it. You still get extra moisture in the oven without risking water leaking into the crust.

Comparison board showing a foil-wrapped springform pan in a water bath and a cheesecake baked above a separate steam pan.
A water bath gives the smoothest baked cheesecake texture, but a steam pan is an easier alternative; either way, added moisture helps the cheesecake bake more gently and crack less.
MethodBest forWhat to expect
Full water bathSmoothest texture and lowest crack riskWrap the pan well and place it in hot water while baking.
Steam panEasier setup with less leak riskPlace hot water on the lower rack while the cheesecake bakes above it.
No water bathShortcut bakingThe cheesecake can still work, but cracks and firmer edges are more likely.

For another technical reference, Serious Eats also uses 145°F / 63°C as a cheesecake doneness target, which supports the thermometer cue in this recipe.

If you skip both the water bath and the steam pan, keep the oven temperature low and avoid overbaking. Any cracks can be covered with caramel, but the texture will be creamier if the cheesecake bakes gently.

Saveable salted caramel cheesecake recipe card with yield, prep time, bake time, chill time, ingredient groups, and brief method steps.
Use the recipe card when you want the method in one place, especially for checking the ingredient groups, baking time, chill time, and topping order without scrolling through the full guide.

Salted Caramel Cheesecake Recipe Card

This salted caramel cheesecake recipe makes a creamy baked cheesecake with caramel in the filling, a glossy caramel layer on top, buttery crumb crust, and a clean sliceable texture after chilling.

Yield
12 slices

Prep Time
35 minutes

Bake Time
1 hour 20–30 minutes

Chill Time
6 hours minimum, overnight best

Total Time: About 10 hours minimum including cooling and chilling; overnight chilling is best.

Pan: 9-inch / 23 cm springform pan

Before You Start

  • Bring cream cheese, eggs, sour cream, and cream to room temperature.
  • Use cooled caramel in the filling, not hot caramel.
  • Mix gently after adding eggs.
  • Chill overnight for the neatest slices.
  • Add the caramel topping after chilling.

Ingredients

Crust

  • 225 g digestive biscuits, graham crackers, or Biscoff crumbs, about 2 1/4 cups
  • 100 g unsalted butter, melted, about 7 tbsp
  • 25 g light brown sugar, about 2 tbsp
  • 1/4 tsp fine salt

Salted Caramel Filling

  • 680 g full-fat block cream cheese, room temperature, 24 oz
  • 150 g light brown sugar, about 3/4 cup packed
  • 120 g sour cream, room temperature, 1/2 cup
  • 60 ml heavy cream or double cream, 1/4 cup
  • 120 g cooled salted caramel sauce, about 1/3–1/2 cup
  • 1 tbsp cornstarch or all-purpose flour
  • 2 tsp vanilla extract
  • 1/4 tsp fine salt
  • 3 large eggs, room temperature

Topping

  • 160–200 g salted caramel sauce, slow-moving and pourable, about 1/2–2/3 cup
  • 1/2–1 tsp flaky sea salt, to finish

Optional Quick Caramel Sauce

  • 200 g granulated sugar, about 1 cup
  • 85 g unsalted butter, cubed, about 6 tbsp
  • 120 ml heavy cream or double cream, 1/2 cup
  • 1/2–1 tsp fine salt, to taste
  • 1 tsp vanilla extract, optional

Instructions

Make the Caramel and Crust

  1. If making the caramel sauce, melt the sugar in a heavy-bottom saucepan over medium heat until deep amber. Carefully whisk in butter, then slowly whisk in cream. Simmer for 1–2 minutes, remove from the heat, add salt and vanilla, and cool until thick but spoonable.
  2. Heat the oven to 350°F / 175°C. Line the base of a 9-inch springform pan with parchment paper.
  3. Mix the biscuit crumbs, melted butter, brown sugar, and salt until evenly moistened.
  4. Press the crumbs firmly into the base of the pan, bringing them slightly up the sides to make a low edge. Bake for 8–10 minutes, then cool.

Mix the Cheesecake Filling

  1. Lower the oven to 300°F / 150°C, or about 285°F / 140°C for a fan oven.
  2. Beat the cream cheese and brown sugar on low to medium speed until smooth, scraping the bowl as needed.
  3. Mix in sour cream, heavy cream, cooled caramel, cornstarch, vanilla, and salt.
  4. Add the eggs one at a time on low speed, mixing only until combined.
  5. Pour the filling into the cooled crust and smooth the top.

Bake, Cool, and Chill

  1. For a water bath, place the wrapped springform pan in a roasting pan and pour hot water around it until it reaches about halfway up the sides. For an easier steam-pan method, place a tray of hot water on the lower rack and bake the cheesecake on the rack above.
  2. Bake for 70–80 minutes, until the outer edges are set and the center wobbles gently like set custard.
  3. Turn off the oven, crack the door, and let the cheesecake cool inside for 1 hour.
  4. Move the cheesecake to the counter and cool for another 1 hour.
  5. Refrigerate for at least 6 hours, preferably 8 hours or overnight.

Finish and Slice

  1. Spread the caramel topping over the chilled cheesecake.
  2. Finish with flaky sea salt just before serving.
  3. Slice with a warm, wiped knife for the cleanest cuts.

Notes

  • If the caramel runs like syrup, use it as a serving drizzle instead of mixing it into the filling.
  • The cheesecake should not look fully firm when it leaves the oven. It will finish setting as it cools.
  • Do not add the caramel topping before baking.
  • Biscoff crumbs make the crust taste deeper and more caramel-like.
  • If using store-bought caramel, choose a thick sauce rather than a thin ice cream syrup.

Can You Make This as a No-Bake Salted Caramel Cheesecake?

Yes, but a no-bake salted caramel cheesecake needs a different filling. You cannot simply remove the eggs from the baked recipe and chill it. A no-bake version needs whipped cream or double cream for structure, and the caramel must be thick enough that it does not loosen the filling.

Comparison board showing baked salted caramel cheesecake and no-bake salted caramel cheesecake with notes about texture and best uses.
Baked and no-bake salted caramel cheesecake serve different goals. Baked cheesecake is the better choice for caramel in the filling and clean slices, whereas no-bake is softer and more forgiving.

Baked vs No-Bake: Which Version Should You Choose?

VersionBest forTexture
Baked salted caramel cheesecakeClean slices, richer texture, caramel in the fillingCreamy, set, and sliceable
No-bake salted caramel cheesecakeEasy chilled dessert, no oven, softer finishLighter and softer; best with full-fat dairy
Salted caramel cheesecake cupsMost forgiving no-bake optionSpoonable, neat, and party-friendly

No-Bake Salted Caramel Cheesecake Starting Formula

For a 9-inch no-bake version, use this as a starting point:

  • 250 g digestive biscuit or graham cracker crumbs
  • 100 g melted butter
  • 500 g full-fat cream cheese
  • 100–120 g powdered sugar or icing sugar
  • 1 tsp vanilla extract
  • 150 g thick salted caramel sauce
  • 300 ml cold heavy cream or double cream, whipped to soft peaks
  • Extra caramel and flaky salt for topping

How to Assemble the No-Bake Version

Press the crumb base into the pan and chill it while you make the filling. Beat the cream cheese, sugar, vanilla, and caramel until smooth, then fold in the whipped cream. Spoon the filling over the base and chill for at least 6 hours, preferably overnight. Add the caramel topping only after the filling has set.

If you want more detail on chilled cheesecake structure, the setting notes in this no-bake mango cheesecake recipe are helpful because they show how full-fat dairy, filling thickness, and chill time affect whether a no-bake cheesecake slices cleanly or works better in cups.

Why Cheesecake Cups Are Easier

If you want a more forgiving no-bake dessert, make salted caramel cheesecake cups instead of one large cheesecake. Cups set faster, serve neatly, and are less sensitive to a slightly softer filling.

Still deciding? See the baked method or jump to the main recipe card.

Salted Caramel Cheesecake Variations

The baked round cheesecake should stay the main version, but these variations are easy to adapt once you understand the caramel texture and chill time.

Salted caramel cheesecake variations board showing mini cheesecakes, cheesecake bars, chocolate salted caramel cheesecake, and spiced cookie crust.
Once the main recipe is working well, it becomes easy to branch out; for instance, mini cheesecakes bake faster, bars are easier to portion, and a spiced cookie crust adds extra caramel-style warmth.

Mini Salted Caramel Cheesecakes

Use a muffin tin lined with paper liners. Press a spoonful of crumb base into each cup, add filling, and bake until the centers are just set. Mini cheesecakes bake much faster than a full cheesecake, so start checking early. Add caramel after chilling.

Salted Caramel Cheesecake Bars

For bars, use a parchment-lined square or rectangular pan. Bars are easier to chill, transport, and cut for parties. Keep the caramel layer thin and add it after the cheesecake has set.

Chocolate Salted Caramel Cheesecake

Use chocolate biscuit crumbs for the crust and add a thin chocolate ganache layer before the caramel topping. Keep the filling caramel-forward rather than adding too much cocoa to the base.

Salted Caramel Pecan Cheesecake

Add toasted chopped pecans to the crust or scatter them over the caramel before serving. Pecans add crunch and a slight bitterness that works beautifully with the sweet caramel.

Biscoff Salted Caramel Cheesecake

Use Biscoff crumbs for the crust and keep the filling the same. This gives the cheesecake a spiced caramel-cookie base without needing extra flavorings. If you like thick, baked, sliceable desserts with cookie-style richness, this cookie pie recipe is another good dessert to explore.

Make Ahead, Storage, and Freezing Salted Caramel Cheesecake

Make-ahead and storage guide for salted caramel cheesecake showing refrigerator storage, freezing without topping, thawing, and serving with caramel.
This cheesecake is a strong make-ahead dessert, yet the best finish comes when you chill or thaw the cake first and add the caramel topping later so it stays glossy and neat.

Make Ahead

This is an ideal make-ahead dessert. Bake the cheesecake one day before serving, cool it gradually, and chill it overnight. Add the caramel topping the next day so it looks fresh and glossy.

Refrigerator Storage

Store the cheesecake covered in the refrigerator for up to 4 days. If possible, add flaky salt just before serving rather than before storing.

Freezing

You can freeze salted caramel cheesecake, but it is best to freeze it without the caramel topping. Wrap the fully chilled cheesecake tightly, freeze for up to 2 months, then thaw overnight in the refrigerator. Add caramel after thawing.
Serving After Chilling

Serve the cheesecake cold from the refrigerator for the neatest slices. If the caramel topping is very firm, let the cheesecake sit at room temperature for 10–15 minutes before cutting.

Close-up texture guide of a salted caramel cheesecake slice showing glossy caramel top, creamy set center, and buttery crumb crust.
This is the texture to aim for: a glossy caramel top, a creamy baked center that holds its shape, and a crumb crust firm enough to support the slice without crumbling apart.

What to Do With Extra Caramel

Extra salted caramel keeps well in the refrigerator and can be warmed gently for serving. Spoon it over homemade ice cream, drizzle it into coffee, or use it as a dip for crisp desserts like homemade churros.

Troubleshooting Salted Caramel Cheesecake

Most problems come from three places: caramel that is too thin, filling that was mixed too aggressively, or a cheesecake that was not chilled long enough. Here is how to fix or avoid the common issues.

Need to compare with the main method? Go back to the step-by-step instructions. Want the full measurements again? Open the recipe card.

Troubleshooting board for salted caramel cheesecake showing fixes for soft middle, runny caramel, cracks, messy slices, too-sweet flavor, and soggy crust.
When a salted caramel cheesecake goes wrong, the cause is usually technical rather than mysterious; for example, thin caramel, overmixing, rushed cooling, or too little chill time can all affect the final texture.

Why Is My Cheesecake Soft in the Middle?

It may be underbaked, under-chilled, or made with too much thin caramel. The center should wobble gently when it leaves the oven, but it should not look liquid. Chill for at least 6 hours, and overnight if possible.

Why Did My Caramel Run Off the Cheesecake?

The caramel was probably too thin, too warm, or added before the cheesecake had set. Use a slow-moving sauce for the top and add it only after the cheesecake is cold.

Why Did My Cheesecake Crack?

Cracks usually come from overmixing, overbaking, baking too hot, or cooling too quickly. Mix gently after the eggs go in, bake at a lower temperature, and let the cheesecake cool gradually in the turned-off oven.

Why Are My Slices Messy?

The cheesecake likely needs more chill time, or the knife is dragging through the caramel. Chill overnight, use a warm sharp knife, and wipe the blade between cuts.

Why Does My Cheesecake Taste Too Sweet?

Salted caramel is naturally sweet, so balance matters. Sour cream, fine salt in the filling, and flaky salt on top all help. A Biscoff crust will make the cheesecake taste sweeter, while a plain digestive or graham crust keeps it more balanced.

Why Is My Caramel Grainy?

Grainy caramel usually comes from sugar crystals forming while the caramel cooks. Use a clean heavy pan, melt the sugar evenly, and avoid splashing sugar crystals up the sides. If the caramel is already grainy, it is better mixed into the filling than used as the visible topping.

Why Did the Crust Get Soggy?

The crust may not have been baked long enough, or water may have leaked into the pan during a water bath. Bake the crust until it smells toasty, wrap the springform pan well if using a water bath, or use the steam-pan method instead.

Salted Caramel Cheesecake FAQs

What Makes This Salted Caramel Cheesecake Recipe Different?

This salted caramel cheesecake recipe uses caramel in the filling and on top, but keeps the amount controlled so the baked cheesecake still sets, chills, and slices cleanly.

Is Store-Bought Caramel Sauce Okay?

Yes, especially for the topping. Choose a thick caramel sauce that coats a spoon. Very thin caramel syrup is better for drizzling over slices than mixing into the cheesecake filling.

How Thick Should Caramel Be for Cheesecake?

For the filling, caramel should be thick but stirrable. For the topping, it should be glossy and slow-moving. If it runs off a spoon like water or syrup, it is too thin for the filling and better used as a serving drizzle.

Is a Water Bath Necessary?

No, but it helps. A water bath gives the smoothest texture, while a steam pan is an easier option. If you bake without either, keep the oven temperature low and avoid overbaking.

How Long Should Salted Caramel Cheesecake Chill?

Chill it for at least 6 hours. Overnight is best, and 8 hours gives more reliable clean slices because the caramel-enriched filling needs time to firm up fully.

Can This Cheesecake Be Made Ahead?

Yes. Bake and chill the cheesecake one day ahead, then add the caramel layer and flaky salt before serving. This gives the best texture and the freshest-looking topping.

Does Salted Caramel Cheesecake Freeze Well?

Yes, but freeze it before adding the topping if possible. Wrap the chilled cheesecake tightly, freeze for up to 2 months, and thaw overnight in the refrigerator. Add the caramel after thawing.
How Do You Make Mini Salted Caramel Cheesecakes?

Use a lined muffin tin and bake until the centers are just set. Mini cheesecakes bake much faster than a full cheesecake, so check them early and add caramel only after chilling.
How Do You Turn This Into Salted Caramel Cheesecake Bars?

Use a parchment-lined square or rectangular pan, bake until just set, chill well, then add caramel and cut into bars with a warm wiped knife.

What Is the Best Crust for Salted Caramel Cheesecake?

Digestive biscuits or graham crackers are the most classic choice. Biscoff crumbs make the crust taste more caramel-like, while a pretzel crust gives a saltier contrast.

Should Caramel Be Added Before or After Baking?

Add a controlled amount of cooled caramel to the filling before baking. Add the visible topping after the cheesecake has chilled. This gives flavor inside the cheesecake while keeping the top glossy and neat.
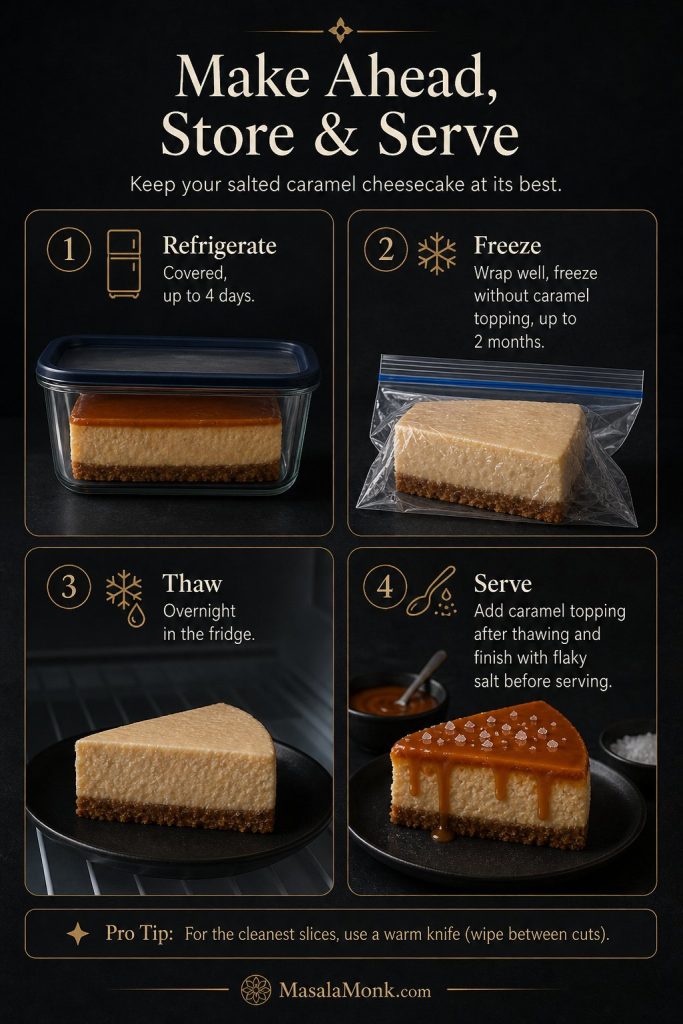
Back to top

Posted on 2 Comments

Keto Cheesecake Recipe

Finished keto cheesecake with one slice removed, showing creamy filling and a golden almond flour crust with berries nearby.

This keto cheesecake recipe gives you the kind of slice people actually want from cheesecake: cool, creamy, rich, smooth, and firm enough to cut cleanly. It has a buttery almond flour crust, a full-fat cream cheese filling, and a slow-cooling method that helps prevent cracks without needing a complicated water bath.

The flavor is classic first and keto second. You get the tang of cream cheese and sour cream, the warmth of vanilla, a little brightness from lemon juice, and a low-carb crust that feels much closer to a traditional cheesecake base than a dry “diet dessert” crust.

Use this as your classic baked cheesecake base. You will also find a crustless option, a no-bake option, sweetener guidance, pan-size help, storage tips, and fixes for common problems like cracks, grainy filling, soggy crust, and a runny center.

Quick Answer: The Best Keto Cheesecake Recipe

For the best keto cheesecake, make a baked full-fat cream cheese filling in a 9-inch springform pan with a pre-baked almond flour crust. Bake the crust at 350°F / 177°C for 10–12 minutes, then lower the oven to 325°F / 163°C and bake the cheesecake for 45–55 minutes, until the edges are set and the center still has a soft jiggle.

Let it cool slowly, then chill for at least 6 hours or overnight before slicing. A powdered allulose or monk fruit/allulose blend gives the smoothest texture because it dissolves better than coarse granulated sweeteners.
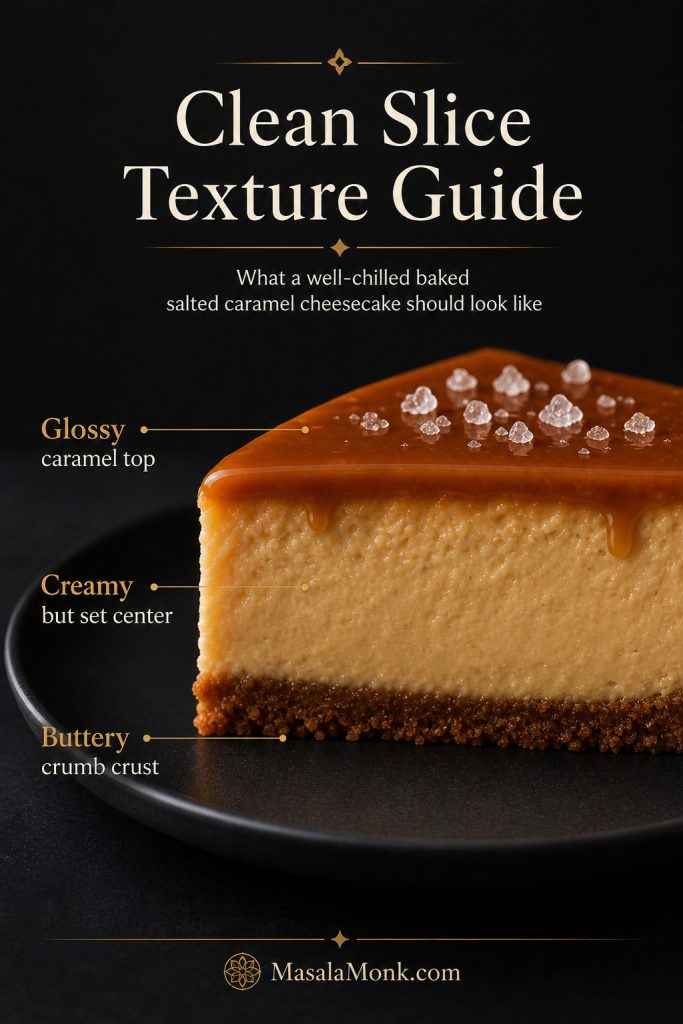
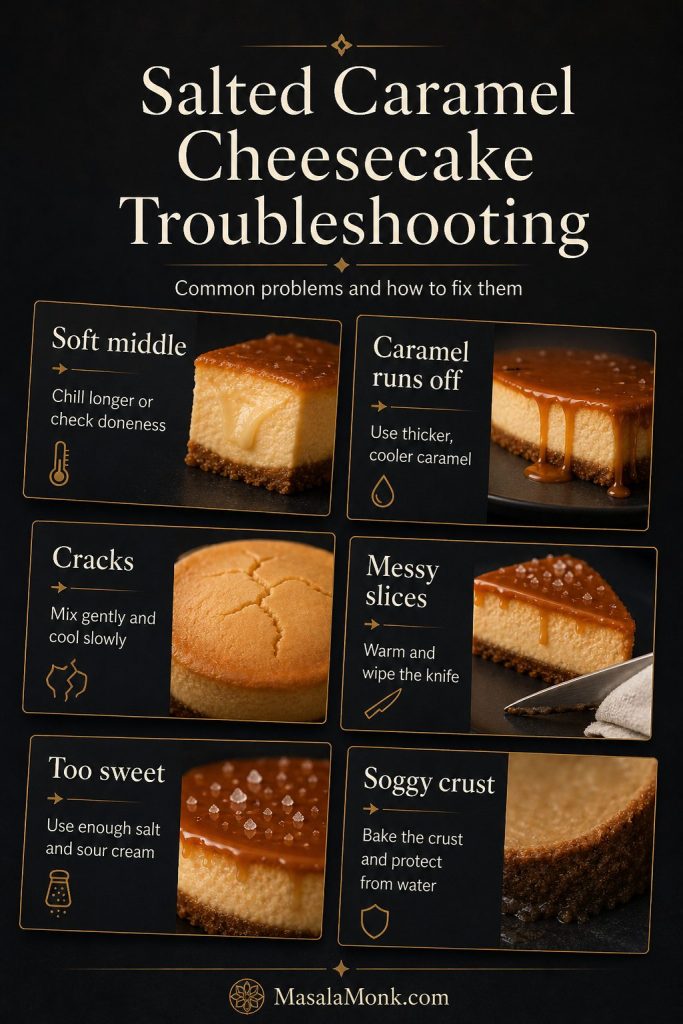
Pan 9-inch springform pan
Crust Almond flour crust
Crust Bake 350°F / 177°C for 10–12 minutes
Filling Bake 325°F / 163°C for 45–55 minutes
Chill Time 6 hours minimum, overnight best
Yield 12 generous or 16 smaller slices
Net Carbs About 4g per 1 of 16 slices
Water Bath Not required
Texture Cool, creamy, dense, and sliceable
Keto cheesecake quick guide showing a cheesecake slice with baking temperature, pan size, chill time, and net carb notes.
Start here if you want the main numbers before baking: pan size, oven temperature, chill time, and approximate net carbs all shape the final keto cheesecake texture.

Need the full formula? Jump to recipe card · Back to guide

Before you start: Soften the cream cheese fully, bring the eggs and sour cream to room temperature, line the springform pan with parchment, use powdered sweetener for the filling, and plan for at least 6 hours of chilling. These five details matter more than any fancy technique.
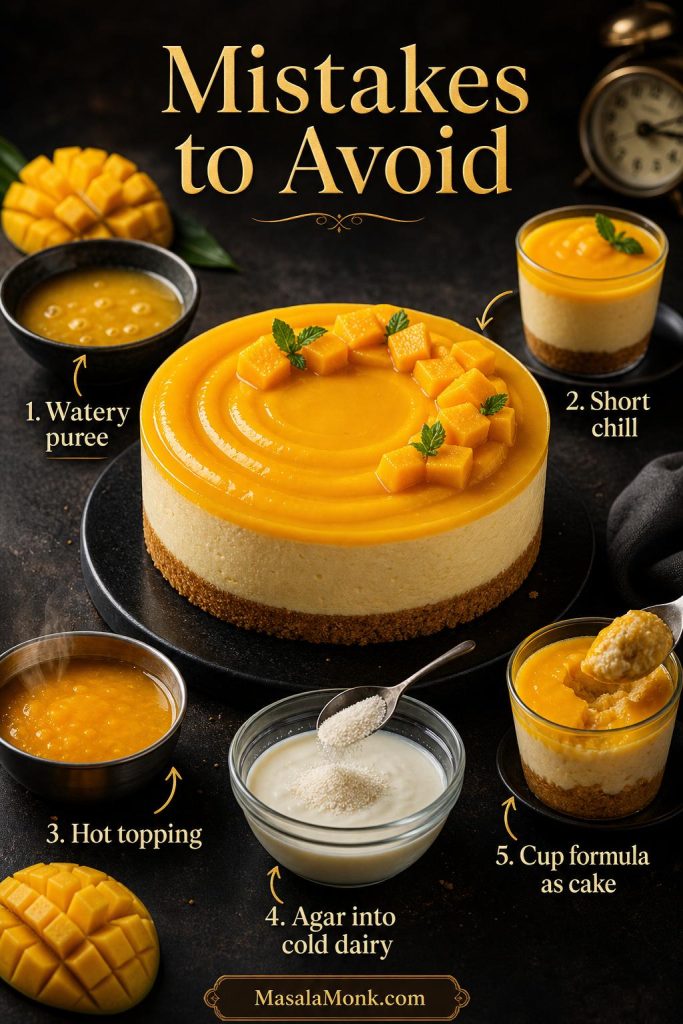
Texture tip: The cheesecake should not look fully firm when it comes out of the oven. If the center is completely set in the oven, it is more likely to be overbaked after chilling.
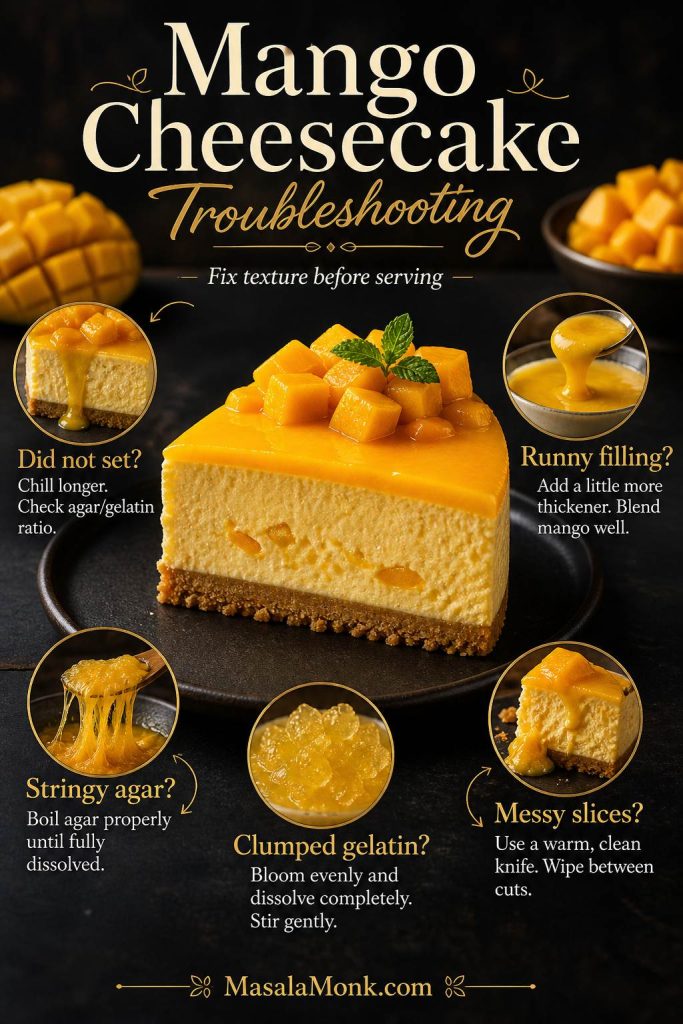
Why This Keto Cheesecake Works

A good keto cheesecake has to solve three problems at once: it needs to taste like classic cheesecake, avoid a gritty sweetener texture, and hold together without flour or sugar. This version uses full-fat brick cream cheese for structure, sour cream for a smooth tangy finish, eggs for setting, and powdered keto sweetener so the filling stays creamy.

The almond flour crust is pre-baked before the filling goes in. That gives it a warmer, nuttier flavor and helps it hold together under the cheesecake layer. The filling bakes low and slow at 325°F / 163°C, then cools gradually so the center can finish setting without a dramatic temperature shock.

That slow method is what makes this sugar free cheesecake more reliable. You do not need a full water bath, but you do need room-temperature ingredients, gentle mixing, and enough chill time.

Close-up of a creamy keto cheesecake slice with smooth dense filling and a visible almond flour crust.
This is the texture goal: creamy, dense, and cleanly cut. If the filling looks grainy, the issue usually starts with cold cream cheese or coarse sweetener.

Baked vs No-Bake vs Crustless Versions

Before you start, choose the right style. A baked cheesecake gives the most classic texture, a no-bake version is easier and lighter, and a crustless cheesecake is the simplest way to reduce carbs and skip the almond flour crust.

Comparison board showing baked keto cheesecake, no-bake keto cheesecake, and crustless keto cheesecake slices with texture notes.
Before choosing a method, decide what texture you want. Baked keto cheesecake is classic, no-bake cheesecake is softer, and crustless cheesecake keeps things simpler.
Version Best For Texture Main Watch-Out
Baked keto cheesecake Classic cheesecake flavor and clean slices Dense, creamy, rich Do not overbake; cool slowly to prevent cracks
No-bake keto cheesecake Easy summer dessert or oven-free prep Lighter, softer, mousse-like Needs enough chill time to set properly
Crustless keto cheesecake Lower carbs, fewer steps, no almond flour Creamy and simple Pan lining matters so it releases cleanly

The baked version is the focus here because it gives the most traditional cheesecake texture. The crustless and no-bake sections below show how to adapt the base without turning the main recipe into three different desserts at once.

Is Keto Cheesecake Low Carb or No Carb?

Keto cheesecake is low carb, but it is usually not truly zero carb. Cream cheese, sour cream, eggs, almond flour, lemon juice, and even some keto sweeteners can contribute small amounts of total carbs depending on the brands you use.

Think of this as a low carb cheesecake or sugar free cheesecake, not a misleading zero-carb dessert. If you want the lowest-carb version, make the crustless option and cut the cheesecake into 16 smaller slices. That gives you the creamy filling with fewer carbs from the almond flour crust.

Lowest-carb direction: Make it crustless, use a powdered sweetener that fits your carb target, and keep toppings simple. Fresh berries are usually a better choice than thick sauces if you are watching carbs closely.

If you like make-ahead low-carb desserts, this keto chia pudding with almond milk is another easy no-sugar option with simple net-carb math.

Equipment You Need

You do not need complicated bakery equipment, but a few tools make this cheesecake much easier and cleaner.

  • 9-inch springform pan: The best standard size for this recipe.
  • Parchment paper: Helps the crust release and makes slicing easier.
  • Mixing bowls: One for the crust and one large bowl for the filling.
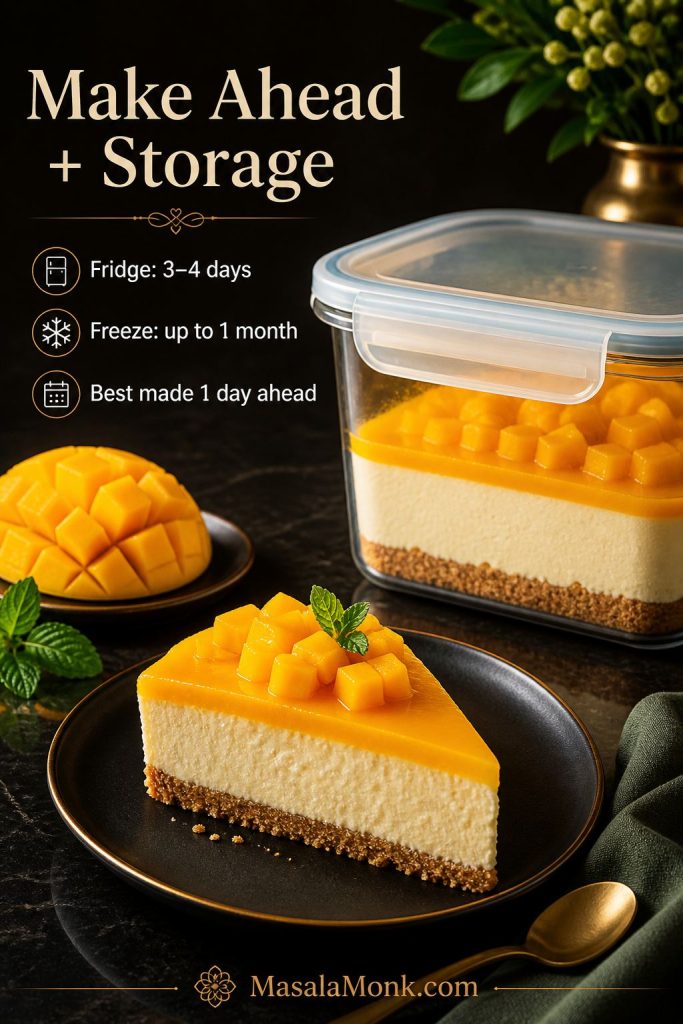
  • Hand mixer or stand mixer: Helps make the filling smooth without lumps.
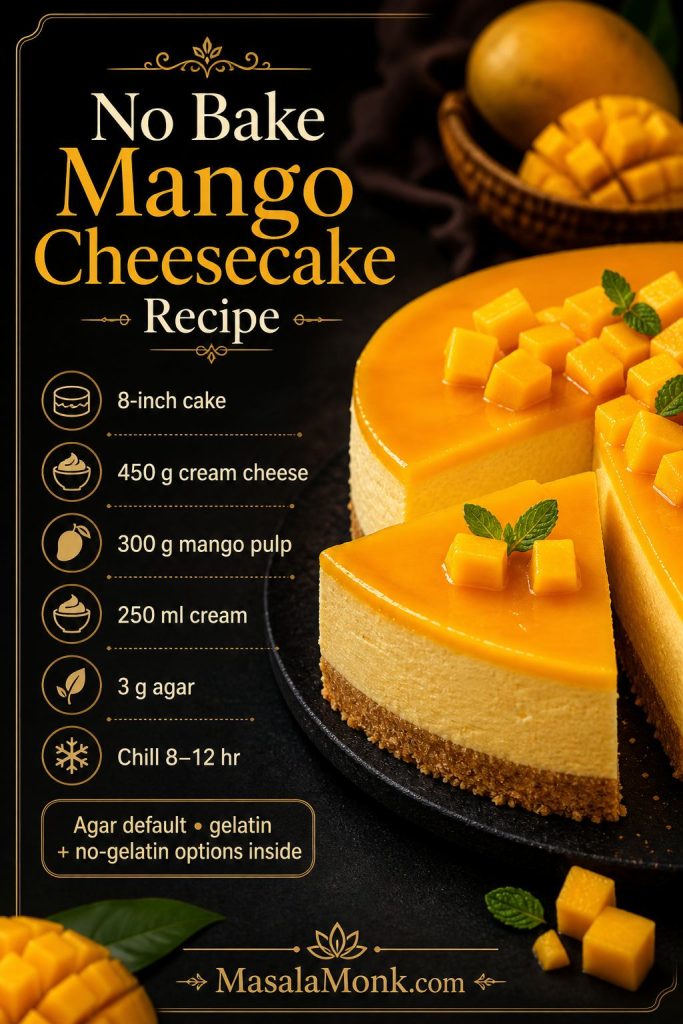
  • Rubber spatula: Useful for scraping the bowl and smoothing the top.
  • Flat-bottom cup or measuring cup: Presses the almond flour crust firmly into the pan.
  • Baking sheet: Makes the springform pan easier to move in and out of the oven.
  • Sharp knife: For clean slices after the cheesecake is fully chilled.
Optional but helpful: Place a pan of hot water on the lower oven rack while the cheesecake bakes. This is not a full water bath, but it adds a little humidity and can help the cheesecake bake more gently.

Ingredients for Keto Cheesecake

The ingredient list is simple, but the details matter. For the smoothest low carb cheesecake, use full-fat dairy, room-temperature ingredients, almond flour for the crust, and a powdered sweetener rather than a coarse granulated one.

Labeled keto cheesecake ingredients including cream cheese, sour cream, eggs, powdered sweetener, almond flour, butter, lemon, vanilla, and salt.
Keto cheesecake uses simple ingredients, but they need to behave well together. Therefore, full-fat dairy, powdered sweetener, and room-temperature eggs matter more than extra add-ins.

Next step: choose sweetener · make the crust

Cream Cheese

Use 32 oz / 907 g full-fat brick cream cheese, softened to room temperature. Brick-style cream cheese gives the cheesecake body and structure. Tub-style spreadable cream cheese is usually softer and can make the filling looser.

The cream cheese should be soft enough to beat smoothly, but not melted or oily. If it is too cold, the filling can turn lumpy. If it is too warm, the batter can become loose and overmixed.

Sour Cream

Sour cream adds a classic tang and softens the richness of the cream cheese. Use 1/2 cup / 120 g sour cream at room temperature. Full-fat sour cream works best here because low-fat versions can make the texture thinner and less creamy.

Eggs

Use 3 large eggs, also at room temperature. Eggs help the cheesecake set, but they should be mixed in gently. Once the eggs go in, do not whip the batter aggressively. Too much air can make the cheesecake puff up in the oven and crack as it cools.

Sweetener

Use 1 cup to 1 1/4 cups powdered keto sweetener. The exact amount depends on how sweet you like cheesecake and how sweet your specific sweetener tastes. A powdered allulose or monk fruit/allulose blend gives the smoothest texture.

If you use a strong erythritol-heavy sweetener, the cheesecake may have a cooling finish. If you use a coarse granulated sweetener, the filling can taste slightly grainy.

Lemon Juice, Vanilla, and Salt

Fresh lemon juice brightens the filling and makes the cheesecake taste more classic. Vanilla rounds out the sweetness, while salt keeps the flavor from tasting flat.

  • Lemon juice: 1 tablespoon fresh lemon juice
  • Vanilla extract: 2 teaspoons
  • Fine salt: 1/4 teaspoon

Best Sweetener for a Smooth Cheesecake Filling

The best sweetener for keto cheesecake is one that dissolves smoothly and does not leave the filling gritty. Powdered sweetener is usually better than granulated sweetener for the filling because it blends more evenly into the cream cheese. For a broader baking overview, this low-carb baking guide explains why ingredient choice can affect texture, browning, and aftertaste.

The sweetener matters even more after chilling. Some erythritol-heavy blends can recrystallize in cold desserts, which is why a cheesecake may taste smooth on day one but slightly gritty after a night in the fridge.

Keto cheesecake sweetener guide comparing powdered allulose, monk fruit allulose blend, erythritol blend, granulated sweetener, and liquid stevia.
The best sweetener for keto cheesecake is not only about sweetness. Powdered allulose or a monk fruit/allulose blend helps the filling stay smoother after chilling.

Using the right sweetener? Continue to crust · fix grainy texture

Sweetener Best Use What to Know
Powdered allulose Smoothest filling texture Less likely to taste grainy; may brown slightly faster in some baked goods
Powdered monk fruit/allulose blend Best all-round choice Good sweetness and smooth texture when powdered
Powdered erythritol blend Works if you like the taste Can leave a cooling effect or slight crystallized texture
Granulated keto sweetener Better for crust than filling Can make the filling grainy unless blended very well
Liquid stevia Small sweetness adjustment Does not add bulk; too much can taste bitter
Best choice for this recipe: Use powdered allulose or a powdered monk fruit/allulose blend in the filling. For the crust, powdered or finely granulated keto sweetener both work.

Almond Flour Cheesecake Crust

The almond flour cheesecake crust is one of the most important parts of this recipe. A good cheesecake crust with almond flour should still taste buttery, hold together under the filling, and slice cleanly after chilling.

It replaces the usual graham cracker crust with a gluten-free, low-carb base that still feels like a real cheesecake crust.

Pressed almond flour cheesecake crust in a springform pan with almond flour, melted butter, powdered sweetener, vanilla, and salt.
A good almond flour cheesecake crust should feel compact before it goes into the oven. Pressing firmly helps the low-carb crust bake into a sliceable base.

Need sizing help? See crust ratios · continue to method

For the crust, use:

  • 2 cups / about 224 g blanched almond flour
  • 1/3 cup / 75 g unsalted butter, melted
  • 2 tablespoons powdered keto sweetener
  • 1 teaspoon vanilla extract
  • 1/4 teaspoon fine salt

Mix everything until the almond flour looks evenly moistened. It should feel like damp sand and hold together when pressed. Press it firmly into the bottom of a parchment-lined 9-inch springform pan, then bake at 350°F / 177°C for 10–12 minutes, until lightly golden and fragrant.

Almond Flour Crust Ratio Guide

The same almond flour cheesecake crust does not behave the same in every pan. A smaller pan makes the crust feel thicker, while a wider pan spreads the mixture thinner and may need a little more butter to stay sliceable.

Use the 9-inch ratio for this keto cheesecake recipe as written. If you change pan size, press the crust firmly, pre-bake it until lightly golden, and let it cool before adding the filling.

Pan Size Almond Flour Butter Sweetener Best Use
8-inch 1 1/2 cups / about 168 g 1/4 cup / 57 g 2 tbsp Thicker cheesecake or smaller batch
9-inch 2 cups / about 224 g 1/3 cup / 75 g 2 tbsp This recipe as written
10-inch 2 cups / about 224 g 5–6 tbsp / 70–85 g 2–3 tbsp Thinner, wider cheesecake
Almond flour cheesecake crust ratio guide for 8-inch, 9-inch, and 10-inch pans with butter and sweetener amounts.
When making cheesecake crust with almond flour, pan size changes everything. As a result, the right butter-to-flour ratio keeps the crust from turning greasy or crumbly.

Crust ready? check pan size · start the method

Almond Flour vs Almond Meal

Blanched almond flour gives the neatest crust because it is finer and lighter. Almond meal can work, but it is usually coarser and may make the crust more rustic or crumbly. For a smooth, classic cheesecake look, use fine blanched almond flour.

If you are searching for an almond meal crust for cheesecake, the same basic idea works, but the texture will be darker, coarser, and more rustic. Fine blanched almond flour gives a smoother shortbread-style crust, while almond meal gives a nuttier, more graham-cracker-like look.

Comparison of almond flour cheesecake crust and almond meal cheesecake crust, showing a smoother lighter crust and a darker coarser crust.
Almond flour and almond meal are not identical in cheesecake crust. Almond flour gives a smoother finish, while almond meal creates a darker, more rustic bite.

Chosen your flour? Check crust ratios · jump to recipe

How to Keep the Crust from Crumbling

A crumbly keto cheesecake crust usually means one of three things: not enough butter, not enough pressing, or not enough baking. The crust should be pressed firmly with the bottom of a cup, especially around the edges. After baking, let it cool for a few minutes before adding the filling.

If the crust still seems loose, add 1 extra tablespoon melted butter next time. If it seems greasy, reduce the butter slightly or bake the crust a minute or two longer.

How to Avoid a Soggy Almond Flour Crust

Pre-baking is the easiest fix. A lightly golden crust holds up better under the filling than a raw almond flour crust. You should also avoid pouring very warm or loose filling onto the crust. The cream cheese filling should be smooth and room temperature, not runny.

Cheesecake Crust Without Almond Flour

You can make the crust without almond flour, but do not swap coconut flour 1:1. Coconut flour absorbs much more liquid and will make the crust dry and dense if used in the same amount.

For a nut-free direction, use a tested sunflower seed flour crust or skip the crust completely and make the crustless option below.

Springform Pan Size Guide

This recipe is designed for a 9-inch springform pan. Different pan sizes change the height, bake time, and texture, so use the table below if you need to adjust.

Springform pan size guide for keto cheesecake showing 6-inch, 7-inch, 8-inch, 9-inch, and 10-inch pan options.
A 9-inch springform pan is the safest standard for this keto cheesecake recipe. Smaller pans create more height, while larger pans bake thinner and faster.

Using a 9-inch pan? Start baking · see exact recipe

Pan Size Best Use What Changes
6-inch Small batch or shortcut cheesecake Use a scaled-down recipe; bake time will be shorter
7-inch Taller no-bake cheesecake Works well for smaller no-bake versions
8-inch Thicker baked cheesecake May need a little more bake time because the filling is deeper
9-inch Best standard size Use the recipe as written
10-inch Wider, slightly thinner cheesecake May bake faster; watch the center jiggle carefully

How to Make Keto Cheesecake

The method is simple, but the order matters. Make the crust first, reduce the oven temperature, mix the filling gently, then cool the cheesecake slowly.

Step-by-step keto cheesecake guide showing crust mixing, pre-baking, filling, baking, cooling, and chilling.
The best keto cheesecake method is not rushed. First build the crust, then mix the filling gently, bake until softly set, cool slowly, and chill before slicing.

Mixing the filling? check texture cues · see doneness

Step 1: Prepare the Pan

Line the bottom of a 9-inch springform pan with parchment paper. Lightly grease the sides. If your springform pan is older or tends to leak butter, place it on a baking sheet before it goes into the oven.

Step 2: Make the Almond Flour Crust

In a bowl, stir together almond flour, melted butter, sweetener, vanilla, and salt. The mixture should look like damp crumbs. Press it firmly into the bottom of the prepared pan. Use a flat-bottom cup to compact it evenly.

Bake the crust at 350°F / 177°C for 10–12 minutes, until it smells nutty and looks lightly golden at the edges. Remove it from the oven and let it cool slightly while you make the filling.

Step 3: Mix the Cheesecake Filling

Lower the oven to 325°F / 163°C. Beat the softened cream cheese on medium-low speed until smooth. Add the powdered sweetener and beat again until combined. Scrape the bowl well so no dense pockets of cream cheese remain.

Add the sour cream, lemon juice, vanilla, and salt. Mix until smooth. Add the eggs one at a time, mixing on low speed just until each egg disappears into the batter.

Keto cheesecake filling texture guide showing smooth batter, lumpy filling, and reminders to soften cream cheese and mix eggs gently.
Smooth cheesecake filling starts before the eggs are added. Once the cream cheese is fully beaten, switch to gentle mixing so the batter does not trap excess air.

Ready to bake? check doneness · avoid cracks

Do not overmix after adding eggs. Extra air can make the cheesecake rise too much in the oven and crack as it cools.

Step 4: Fill the Pan

Pour the filling over the cooled almond flour crust. Smooth the top with a spatula. Tap the pan gently on the counter once or twice to release large air bubbles, but do not bang it aggressively.

Step 5: Bake Low and Slow

Bake at 325°F / 163°C for 45–55 minutes. The edges should look set and slightly puffed, while the center should still wobble gently when the pan is nudged.

If the center looks liquid and sloshes, bake for another 5 minutes and check again. If the entire cheesecake looks fully firm in the oven, it is likely overbaked.

Step 6: Cool Slowly

Turn off the oven. Crack the oven door open and leave the cheesecake inside for 20–30 minutes. Then move it to the counter and let it cool to room temperature.

Once cool, cover and refrigerate for at least 6 hours. Overnight chilling gives the cleanest slices and best texture.

How to Know When the Cheesecake Is Done

The most reliable doneness cue is the jiggle test. The outer 2–3 inches should look set, while the center should still wobble like soft gelatin. It should not look wet, soupy, or liquid, but it should not be completely firm either.

Cheesecake keeps setting as it cools. That is why a slightly jiggly center is correct. If you bake until the center is completely firm, the final chilled cheesecake can turn dense, dry, or cracked.

Doneness guide showing underbaked, just right, and overbaked keto cheesecake centers with a soft jiggle cue.
A softly jiggly center is not a mistake. Instead, it means the cheesecake can finish setting as it cools, which helps prevent a dry or cracked texture.

Center still jiggly? cool without cracks · store it right

What You See What It Means What to Do
Edges set, center softly jiggles Done Turn off oven and begin slow cooling
Center sloshes like liquid Underdone Bake 5 more minutes, then check again
Top is puffed and fully firm Likely overbaked Cool slowly; serve with topping if cracked
Top has deep cracks before cooling Too much heat, air, or bake time Use troubleshooting tips next time

How to Prevent Cracks

Cracks do not ruin cheesecake, but they are easy to reduce. Most cracks come from cold ingredients, overmixing, overbaking, or cooling too quickly.

  • Use room-temperature ingredients: Cold cream cheese creates lumps, and cold eggs can make the batter harder to mix evenly.
  • Mix gently after adding eggs: Eggs trap air quickly. Too much air makes the cheesecake puff and collapse.
  • Do not overbake: The center should still jiggle softly when the cheesecake comes out.
  • Cool gradually: Leave the cheesecake in the turned-off oven with the door cracked before moving it to the counter.
  • Loosen the edge: After cooling slightly, run a thin knife around the edge so the cheesecake does not pull against the pan as it contracts.
No-crack keto cheesecake guide with a smooth cheesecake top and tips for room-temperature ingredients, low-speed mixing, and slow cooling.
No-crack keto cheesecake depends on temperature control. Room-temperature ingredients, low-speed mixing, and slow cooling give the filling a better chance to settle evenly.

Want extra insurance? compare water bath options · fix common issues

No water bath required: This recipe is written to work without a full water bath. If your oven runs hot or you want extra insurance, place a pan of hot water on the lower rack for gentle humidity.

Water Bath or No Water Bath?

You do not need a full water bath for this keto cheesecake recipe. The slow bake at 325°F / 163°C, room-temperature ingredients, gentle mixing, and gradual cooling are enough for a smooth cheesecake in most ovens.

A full water bath can help cheesecakes bake gently, but it also adds extra steps and can leak into a springform pan if the wrapping is not secure. King Arthur Baking explains that a water bath can help reduce cracks, but for this recipe the easier option is to place a pan of hot water on the lower oven rack. It adds a little humidity without putting the cheesecake pan directly in water.

Water bath comparison for keto cheesecake showing no water bath, hot water pan, and full water bath baking setups.
You can make this keto cheesecake without a full water bath. However, a hot water pan on the lower rack can add humidity if your oven tends to run dry.

No full bath needed? Use the recipe card · check doneness cues

Method Best For Downside
No water bath Simplest method; works well with slow cooling Needs careful bake time and cooling
Pan of hot water on lower rack Easy extra insurance against drying Still not a guarantee if the cheesecake is overbaked
Full water bath Very gentle baking More setup; springform pans can leak

Crustless Keto Cheesecake Option

You can make this cheesecake without the almond flour crust. A crustless keto cheesecake is slightly lower in carbs, simpler to prepare, and useful if you are avoiding nuts.

To make it crustless, skip the crust ingredients and line the bottom of the springform pan with parchment. Grease the sides well. Pour the filling directly into the pan and bake at 325°F / 163°C until the edges are set and the center still jiggles softly.

The bake time may be slightly shorter because there is no crust layer. Start checking around 40–45 minutes. Chill completely before slicing, because crustless cheesecake needs time to firm up for clean edges.

Crustless keto cheesecake with a clean slice removed, smooth filling, and notes for checking bake time and chilling.
Crustless keto cheesecake removes the almond flour base, so the pan matters more. Line it well, chill fully, and slice cold for the cleanest edges.

Skipping crust? adapt the recipe · chill and store properly

Best crustless tip: Do not skip the parchment. Without a crust, the filling sits directly against the pan, so lining and chilling are what help the slices release cleanly.

No-Bake Keto Cheesecake Option

A no-bake keto cheesecake is a different style of cheesecake. It is lighter, softer, and more mousse-like because it sets in the refrigerator instead of baking with eggs.

For a 9-inch no-bake keto cheesecake, use the almond flour crust as written, then chill or briefly bake the crust before adding the filling. For the filling, beat 24 oz / 680 g softened full-fat cream cheese with 3/4 to 1 cup powdered keto sweetener, 2 teaspoons vanilla, 1 tablespoon lemon juice, and a pinch of salt until smooth. In a separate bowl, whip 1 cup / 240 ml heavy cream to soft peaks, then fold it into the cream cheese mixture.

No-bake keto cheesecake slice with cream cheese, whipped cream, chilling time, and no-egg filling notes.
No-bake keto cheesecake is a separate style, not just an unbaked version of the main filling. It relies on whipped cream and long chilling instead of eggs.

Making it no-bake? choose pan size · compare with baked recipe

This makes a slightly lower 9-inch no-bake cheesecake. For a taller no-bake keto cheesecake, use an 8-inch springform pan and chill it overnight before slicing.

8-Inch vs 9-Inch No-Bake Keto Cheesecake

No-bake cheesecake height depends heavily on pan width because the filling sets in the refrigerator instead of rising or firming in the oven. An 8-inch pan gives a taller, more bakery-style slice, while a 9-inch pan gives a wider cheesecake with a slightly lower profile.

Both pan sizes work, but the chilling time matters more in the taller version. If you use an 8-inch pan, chill overnight before slicing so the center has enough time to set cleanly.

Comparison of 8-inch and 9-inch no-bake keto cheesecakes showing a taller cheesecake and a lower wider cheesecake.
For no-bake keto cheesecake, pan width changes the look of the slice. An 8-inch pan gives height, while a 9-inch pan gives a lower, wider cheesecake.

Picked your pan? return to no-bake method · see variations

Spread the filling over the crust, smooth the top, cover, and refrigerate for at least 6–8 hours. Overnight is better. If the cheesecake is sliced too soon, it can look soft or collapse at the edges.

Important: Do not use the baked filling from the recipe card for the no-bake version. The baked filling relies on eggs and oven heat to set. The no-bake version needs whipped cream and long chilling instead.

If you want the classic non-keto version with a sweeter filling and regular crumb crust, use this no bake cheesecake recipe instead.

Best use: Choose baked keto cheesecake when you want classic dense cheesecake texture. Choose the no-bake version when you want an easier, lighter, oven-free dessert.

Keto Cheesecake Variations

Once you understand the base, you can use it for other low carb cheesecake flavors. Keep the structure the same, then adjust carefully so the filling still sets properly. In most cases, toppings are safer than mix-ins because they add flavor without loosening the cheesecake.

Keto cheesecake variations board with pumpkin, chocolate, strawberry, blueberry, lemon, New York-style, mini, and no-bake cheesecake options.
Keto cheesecake variations work best when the base stays stable. Therefore, toppings and small flavor accents are safer than adding too much liquid to the filling.

Need a classic slice first? Jump to recipe · see New York-style

Keto Pumpkin Cheesecake

Pumpkin cheesecake needs pumpkin puree, pumpkin pie spice, and a little cinnamon in the filling. Since pumpkin adds moisture, it works better as a dedicated variation than as a casual stir-in. With this base cheesecake, a spoonful of pumpkin spice whipped cream on top gives you the flavor without changing the bake.

Keto Chocolate Cheesecake

A chocolate version works best with melted sugar-free chocolate or cocoa powder in the filling. Chocolate changes both sweetness and texture, so taste the filling before adding eggs and adjust the sweetener if needed. If you want a separate creamy chocolate dessert instead, this avocado chocolate mousse stays in the same rich, spoonable dessert lane.

Keto Strawberry Cheesecake

The cleanest strawberry version keeps the filling vanilla and adds a sugar-free strawberry topping after baking. Fresh berry toppings are easier to control than mixing watery fruit into the batter. Cooked and cooled strawberry sauce gives stronger flavor without making the cheesecake soft.

Keto Blueberry Cheesecake

A thick low-carb blueberry sauce works best as a topping or light swirl. If using a swirl, keep it concentrated and spoon it lightly over the top before baking. Too much fruit sauce can make the center loose.

Keto Lemon Cheesecake

To make the cheesecake brighter, add lemon zest to the filling. Zest gives strong lemon flavor without adding much liquid. Avoid adding too much extra lemon juice because excess liquid can soften the filling.

Mango Cheesecake and Keto Limits

Mango is not usually the easiest strict-keto cheesecake flavor because it brings natural sugar and extra moisture. If you are not keeping the dessert strictly keto and want a fruit-forward no-bake version, this no bake mango cheesecake recipe is the better fit.

Keto New York Cheesecake

For a New York-style keto cheesecake, keep the flavor simple and focus on a dense, creamy texture. Use full-fat brick cream cheese, sour cream, eggs, vanilla, lemon juice, and the almond flour crust. Avoid fruit puree or chocolate in the filling because those move it away from the classic New York-style profile.

The biggest difference is texture. A New York-style keto cheesecake should feel rich, smooth, and slightly dense rather than fluffy. Chill it overnight before slicing, and serve toppings on the side so the clean cheesecake flavor stays central.

Comparison of New York-style keto cheesecake and classic keto cheesecake slices, showing a denser plain slice and a berry-topped slice.
New York-style keto cheesecake should feel denser and cleaner, while classic keto cheesecake is more flexible. Keep toppings lighter if you want that rich bakery-style texture.

Prefer smaller portions? See mini cheesecakes · return to recipe

Keto Ricotta Cheesecake

Ricotta gives keto cheesecake a lighter, slightly more Italian-style texture. It is less dense than an all-cream-cheese filling and can taste a little grainier unless blended very smooth. Use full-fat ricotta, drain excess liquid if it looks wet, and blend it with cream cheese rather than using ricotta alone.

For the most reliable result, treat ricotta cheesecake as a separate variation rather than a direct one-for-one swap. If you are experimenting, replace only part of the cream cheese with smooth ricotta and keep the eggs, lemon, vanilla, and sweetener balanced so the cheesecake still sets.

High-Protein Keto Cheesecake

For a higher-protein direction, cottage cheese, Greek yogurt, ricotta, or protein powder can be used in separate cheesecake styles. For a breakfast-style version of that idea, these high-protein low-carb pancakes use similar cottage cheese and low-carb logic.

Protein powder needs care in cheesecake because it can make the filling dry, chalky, or rubbery if added casually. If using cottage cheese, blend it completely smooth before adding it to a cheesecake filling. A high-protein low carb cheesecake works best as its own tested variation rather than a direct swap inside this classic baked version.

Mini Keto Cheesecakes, Cups, and Bites

You can turn the same flavor idea into mini keto cheesecakes by baking the crust and filling in a lined muffin pan. Mini versions bake faster, chill faster, and are easier to portion for parties, lunch boxes, or meal prep.

Start checking mini cheesecakes around 15 minutes. They are done when the edges look set and the centers still have a slight wobble. Chill them fully before removing the liners. For true keto cheesecake bites or fat bombs, use a separate no-bake cream cheese mixture instead of this baked filling.

Mini keto cheesecakes in paper liners topped with berries, whipped cream, lemon zest, and chocolate shavings.
Mini keto cheesecakes are great for portion control, but they still need proper chilling. Since they bake faster, start checking early and let them set before serving.

Baking minis? use the same doneness cues · store leftovers

3 Ingredient Keto Cheesecake Shortcut

A 3 ingredient keto cheesecake is usually a no-bake shortcut made with cream cheese, keto sweetener, and another creamy ingredient such as whipped cream, Greek yogurt, or keto vanilla yogurt. It is useful for a quick dessert, but it will not have the same baked cheesecake texture as this full recipe.

Keto Cheesecake Troubleshooting

Most keto cheesecake problems are easy to diagnose. Use this table to fix the current cheesecake if possible and prevent the issue next time.

Keto cheesecake troubleshooting board showing cracked top, grainy filling, runny center, dry texture, stuck pan, and sweetener aftertaste fixes.
Troubleshooting keto cheesecake is easier when you match the problem to the cause. Cracks, graininess, runny centers, and stuck slices each need a different fix.

Need a crust fix too? See crust fixes · retry with recipe card

Problem Likely Cause Fix
Cracked top Overbaking, too much air, or fast cooling Cool slowly next time; serve current cheesecake with whipped cream or berry topping
Lumpy filling Cream cheese was too cold Use fully softened cream cheese and beat it smooth before adding eggs
Grainy texture Coarse sweetener or crystallizing sweetener Use powdered allulose or powdered monk fruit/allulose blend
Soggy crust Crust was not pre-baked enough or filling was too loose Pre-bake crust until lightly golden and let it cool before filling
Crumbly crust Not enough butter or not pressed firmly Add 1 extra tablespoon melted butter next time and press with a flat-bottom cup
Runny center Underbaked or sliced too soon Bake until softly jiggly, then chill at least 6 hours before slicing
Dry texture Overbaked cheesecake Pull it from the oven while the center still jiggles
Cheesecake stuck to pan No parchment or not enough chilling Line the pan and chill fully before removing the springform ring
Sweetener aftertaste Sweetener blend does not suit your taste Try allulose or a monk fruit/allulose blend; add lemon and vanilla for balance

Almond Flour Crust Fixes

Almond flour crust problems usually come from pressure, butter balance, or bake time. If the crust crumbles, it often needed firmer pressing or a touch more butter. If it turns soggy, it usually needed a longer pre-bake or more cooling time before the filling went in.

The goal is a crust that feels compact, lightly golden, and sturdy enough to lift with the cheesecake slice. Fixing the crust separately is useful because the filling can be perfect while the base still needs adjustment.

Almond flour crust fixes board showing crumbly, soggy, greasy, and sliceable cheesecake crust results with correction tips.
Almond flour crust problems usually come down to pressure, butter, or baking time. Press firmly, pre-bake until lightly golden, and cool before adding filling.

Crust sorted? continue method · jump to recipe

What the Finished Cheesecake Should Be Like

After chilling, the cheesecake should slice cleanly, hold its shape on a plate, and feel dense but creamy when you cut through it. The center should not be runny, the filling should not taste grainy, and the almond flour crust should stay firm enough to lift with the slice.

The flavor should be rich and tangy, not flat or overly sweet. If your cheesecake tastes slightly muted when cold, let slices sit at room temperature for 10–15 minutes before serving.

Storage and Freezing

Keto cheesecake is an excellent make-ahead dessert because the texture improves after chilling. Keep it covered in the refrigerator until ready to serve. For food safety, the USDA recommends using refrigerated leftovers within 3–4 days or freezing them for longer storage.

Storage guide showing covered keto cheesecake in the refrigerator, wrapped slices, frozen slices, and a thawed slice ready to serve.
Keto cheesecake is one of the better make-ahead desserts. For the best texture, refrigerate covered, freeze slices individually, and thaw overnight before serving.

Serving later? slice cleanly · add toppings

  • Refrigerator: Store covered for 3–4 days for the best balance of texture and food safety.
  • Freezer: Freeze slices or the whole cheesecake for up to 2 months for best quality.
  • Thawing: Thaw overnight in the refrigerator for the best texture.
  • Serving: Slice cold, then let slices sit at room temperature for 10–15 minutes if you prefer a softer texture.

For freezing, place chilled slices on a parchment-lined tray until firm, then wrap individually. This keeps the slices from sticking together and makes it easier to thaw only what you need.

How to Slice Cheesecake Cleanly

For clean slices, chill the cheesecake fully before cutting. Use a sharp knife, dip it in hot water, wipe it dry, then cut one slice. Wipe the knife between cuts so the filling stays smooth and the almond flour crust does not drag through the slice.

Clean cheesecake slicing guide showing a hot knife, wiping the blade, cutting cold cheesecake, and a neat slice on a plate.
Clean cheesecake slices come from cold cheesecake and a warm knife. Wipe between cuts so the creamy filling and almond flour crust stay neat.

Ready to serve? see toppings · save the recipe

Serving Ideas

This keto cheesecake is rich enough to serve plain, but toppings can make it feel more special without adding much sugar.

  • Fresh strawberries, raspberries, or blueberries
  • Sugar-free berry sauce
  • Unsweetened whipped cream
  • Shaved sugar-free chocolate
  • Lemon zest
  • Toasted sliced almonds
  • A light dusting of cinnamon for a warmer flavor
Keto cheesecake topping ideas with fresh berries, sugar-free berry sauce, whipped cream, shaved chocolate, lemon zest, toasted almonds, and cinnamon.
Low-carb toppings should support the cheesecake, not bury it. Fresh berries, whipped cream, lemon zest, shaved chocolate, toasted almonds, and cinnamon all keep the flavor balanced.

Want exact amounts? Jump to recipe card · check FAQs

Keep toppings simple if you want the cheesecake texture to stay the focus. Watery fruit sauces should be cooked down and cooled before adding.

For a cozy pairing, serve a small slice with keto hot chocolate instead of a sugary drink.

Keto Cheesecake Recipe Card

This creamy keto cheesecake has a buttery almond flour crust, smooth sugar-free cream cheese filling, and a slow-cooling method that helps prevent cracks. It is rich, low carb, gluten-free, and made without a water bath.

Prep Time 25 minutes
Crust Bake 10–12 minutes
Cheesecake Bake 45–55 minutes
Cooling Time 1½–2 hours
Chill Time 6 hours minimum, overnight best
Total Time About 9 hours, plus overnight chill if preferred
Yield 12–16 slices
Pan 9-inch springform
Net Carbs About 4g per 1 of 16 slices
Water Bath Not required
Method Baked cheesecake
Difficulty Easy with slow cooling

Ingredients

For the Almond Flour Crust

  • 2 cups / about 224 g blanched almond flour
  • 1/3 cup / 75 g unsalted butter, melted
  • 2 tablespoons powdered keto sweetener
  • 1 teaspoon vanilla extract
  • 1/4 teaspoon fine salt

For the Cheesecake Filling

  • 32 oz / 907 g full-fat brick cream cheese, softened
  • 1 cup to 1 1/4 cups powdered keto sweetener, preferably allulose or monk fruit/allulose blend
  • 1/2 cup / 120 g sour cream, room temperature
  • 3 large eggs, room temperature
  • 1 tablespoon fresh lemon juice
  • 2 teaspoons vanilla extract
  • 1/4 teaspoon fine salt

Instructions

  1. Prepare the pan. Line the bottom of a 9-inch springform pan with parchment paper and lightly grease the sides.
  2. Heat the oven for the crust. Preheat the oven to 350°F / 177°C.
  3. Make the crust. Stir almond flour, melted butter, sweetener, vanilla, and salt until the mixture looks like damp crumbs.
  4. Press and bake the crust. Press the crust firmly into the pan using the bottom of a cup. Bake for 10–12 minutes, until lightly golden. Let it cool slightly.
  5. Lower the oven temperature. Reduce the oven to 325°F / 163°C.
  6. Beat the cream cheese. In a large bowl, beat softened cream cheese until smooth. Scrape the bowl well.
  7. Add sweetener. Add 1 cup powdered keto sweetener and beat until smooth. Taste before adding eggs and add up to 1/4 cup more sweetener if you prefer a sweeter cheesecake.
  8. Add sour cream and flavorings. Mix in sour cream, lemon juice, vanilla, and salt until smooth.
  9. Add eggs gently. Add eggs one at a time on low speed, mixing only until each egg is incorporated. Do not overmix.
  10. Fill the pan. Pour the filling over the cooled crust and smooth the top.
  11. Bake. Bake at 325°F / 163°C for 45–55 minutes, until the edges are set and the center still jiggles softly.
  12. Cool slowly. Turn off the oven, crack the door open, and leave the cheesecake inside for 20–30 minutes.
  13. Cool at room temperature. Move the cheesecake to the counter and cool completely.
  14. Chill. Cover and refrigerate for at least 6 hours, preferably overnight.
  15. Slice and serve. Run a thin knife around the edge before releasing the springform ring. Slice cold with a sharp knife.

Recipe Notes

  • For the smoothest filling, use powdered sweetener rather than coarse granulated sweetener.
  • Do not overbake. The center should still wobble gently when the cheesecake comes out of the oven.
  • For a crustless version, skip the crust, line and grease the pan well, and start checking the bake around 40–45 minutes.
  • For a more New York-style texture, chill the cheesecake overnight and serve toppings on the side rather than mixing fruit into the filling.
  • For the lowest-carb version, make the cheesecake crustless and slice it into 16 smaller portions.
  • Nutrition will vary by brand of sweetener, cream cheese, sour cream, and almond flour.

Approximate Nutrition

Approximate per 1 of 16 slices: 330–360 calories, 7–9 g protein, 32–35 g fat, and about 4 g net carbs. For 12 larger slices, net carbs are closer to about 5 g per slice. Exact values depend on the brands used.

Keto cheesecake recipe card with a cheesecake slice, almond flour crust, no water bath note, baking temperatures, chill time, and key ingredients.
Save this keto cheesecake recipe card for the key numbers: almond flour crust, 9-inch pan, gentle bake, slow cooling, and at least 6 hours of chilling.

Still deciding? Read FAQs · Back to guide

FAQs

Is cheesecake keto?

Traditional cheesecake is usually not keto because the filling contains sugar and the crust is often made with graham crackers. This version uses an almond flour crust and keto sweetener to keep the carbs low.

Is keto cheesecake zero carb?

No. It is usually low carb, not zero carb. Dairy, eggs, almond flour, lemon juice, and some sweeteners can all add small amounts of carbs. For the lowest-carb version, make it crustless and keep toppings simple.

How many net carbs are in keto cheesecake?

This recipe has about 4 g net carbs per slice if cut into 16 slices, or about 5 g net carbs if cut into 12 larger slices. The exact number depends on the almond flour, cream cheese, sour cream, and sweetener brands you use.

What can I use instead of almond flour?

The easiest option is to make the crustless version. You can also use a tested nut-free crust, but coconut flour should not be swapped 1:1 for almond flour because it absorbs much more moisture.

How do I make keto cheesecake no crust?

For keto cheesecake no crust, skip the almond flour base, line the pan with parchment, grease the sides well, and pour the filling directly into the pan. Start checking the cheesecake a little earlier because there is no crust layer.

How is no-bake keto cheesecake different?

A no-bake version uses a different filling structure. It usually sets with whipped cream and long chilling instead of eggs and baking, so the texture is softer and more mousse-like.

Do I need a water bath for keto cheesecake?

A full water bath is not required. This recipe uses room-temperature ingredients, gentle baking at 325°F / 163°C, careful mixing after the eggs go in, and slow cooling. For extra insurance, place a pan of hot water on the lower oven rack.

What is the best sweetener for keto cheesecake?

Powdered allulose or a powdered monk fruit/allulose blend gives the smoothest filling. Coarse granulated sweeteners can taste gritty, and some erythritol-heavy blends can leave a cooling finish.

Why did my keto cheesecake crack?

Cracks usually happen because the filling was overmixed, the cheesecake was overbaked, or it cooled too quickly. Use room-temperature ingredients, mix gently after adding eggs, pull it from the oven while the center still jiggles, and cool it slowly.

Why is my cheesecake grainy?

Grainy cheesecake often comes from coarse sweetener or a sweetener that crystallizes as it chills. Use powdered sweetener in the filling and avoid overmixing once the eggs are added.

Does coconut flour work for the crust?

Not as a direct swap. Coconut flour is much more absorbent than almond flour, so it needs a different ratio of fat and liquid. For this recipe, almond flour is the better choice unless you are using a tested coconut flour crust.

Ricotta vs cottage cheese: do they work?

Both can work in separate cheesecake styles, but the texture will be different. Ricotta gives a lighter, slightly grainier cheesecake, while cottage cheese needs blending until completely smooth. For this classic version, brick cream cheese gives the best result.

How long do mini keto cheesecakes bake?

Mini cheesecakes usually bake faster than a full cheesecake, often around 15–22 minutes depending on size. Use a muffin pan with liners, watch for set edges and slightly wobbly centers, then chill well before serving.

How do you freeze keto cheesecake?

Freeze it only after the cheesecake has chilled completely. Wrap slices individually or freeze them on a parchment-lined tray first, then store them in an airtight container. Thaw overnight in the refrigerator for the best texture.

Posted on 2 Comments

No Bake Mango Cheesecake Recipe

Whole no bake mango cheesecake with one slice lifted, showing a biscuit base, creamy mango filling, and glossy mango topping on a dark surface.

This no bake mango cheesecake recipe is creamy, bright, and deeply mango-forward, with a buttery biscuit base and a glossy mango topping that makes it feel special without turning on the oven. Because mango can make no-bake cheesecake fillings loose, this recipe also shows you how to control the texture so the final dessert stays creamy, sliceable, and not watery.

Before you start, choose the right setting method. For a full sliceable cheesecake, agar agar or gelatin gives the cleanest result. However, for a softer mango cheesecake without gelatin, cups or jars are usually the safer and easier option. This no bake mango cheesecake recipe shows you all three routes, so you can make the version that fits your kitchen, diet, and serving style.

Quick Answer: How to Make No Bake Mango Cheesecake

To make no bake mango cheesecake, start with a biscuit base, a cream cheese and whipped cream filling, mango pulp or fresh mango puree, and a setting method such as agar agar or gelatin. For clean slices, use agar agar or gelatin and chill the cheesecake overnight. However, for a softer mango cheesecake without gelatin, make it in cups, jars, or bowls instead of relying on a full cake to slice neatly.

For the easiest version, use canned Alphonso or Kesar mango pulp because the flavor, color, and sweetness are consistent. Meanwhile, fresh ripe mangoes also work beautifully when they are sweet, smooth, and not watery. If you want the plain base formula first, start with this no-bake cheesecake guide, then come back to this mango version for the fruit, setting, and topping details.

Close-up slice of no bake mango cheesecake on a plate with a fork, showing the crumb crust, creamy mango cheesecake layer, and shiny mango topping.
This close-up shows the texture goal more clearly than words can: the slice is creamy and tender, yet stable enough to lift cleanly from the cake.

No Bake Mango Cheesecake at a Glance

Best pan 8-inch / 20 cm springform or loose-bottom pan
Best full-cake setting method Agar agar for a vegetarian cake; gelatin for a classic creamy set
Best no-gelatin format Cups, jars, or bowls
Best mango option Alphonso/Kesar mango pulp or ripe non-fibrous fresh mango
Chill time 8–12 hours for a full cake; at least 6 hours for cups
Texture goal Creamy, mango-forward, sliceable for a full cake; soft and spoonable for cups
Informational graphic with a slice of no bake mango cheesecake and text noting 8-inch cake, 10–12 slices, 45 minutes prep, 8–12 hours chill, and agar, gelatin, or cups.
Use this quick guide before starting so the pan size, yield, chill time, and setting options are clear from the beginning.

Which No Bake Mango Cheesecake Version Should You Make?

The best version depends on how you want to serve it. A full cake needs enough structure to unmold and slice. In contrast, cups and jars can stay softer, so they are more forgiving if you want a no-gelatin mango cheesecake. Therefore, this no bake mango cheesecake recipe gives you both the full-cake route and the easier cup-style option.

What you want Make this version Why
Clean full-cake slices Agar agar or gelatin full cake Both give enough structure for slicing.
Vegetarian full cake Agar agar version Agar is plant-based and sets firmly.
Classic creamy texture Gelatin version Gelatin gives a softer mousse-like set.
No gelatin and no agar Cups, jars, or bowls The filling can stay soft without needing to slice.
Richer shortcut Condensed milk version It adds sweetness and creaminess quickly.
Party-friendly servings Mini cheesecakes or cups They are easier to serve and more forgiving.
Comparison graphic showing three no bake mango cheesecake options: agar set full cake, gelatin set full cake, and no-gelatin cheesecake cups.
Choose the version before mixing the filling: agar agar is best for a vegetarian full cake, gelatin gives a softer classic set, and cups are the easiest no-gelatin option.
Best default version: Make the 8-inch agar agar version if you want an eggless, vegetarian-friendly cake that slices. Choose the gelatin version if you prefer a softer classic cheesecake texture. Choose cups if you want no gelatin and no agar.

Why This No Bake Mango Cheesecake Works

This mango cheesecake is built around the two things that matter most in a no-bake dessert: enough mango flavor and enough structure. Mango adds color, fragrance, and fruitiness, but too much watery puree can stop a no-bake cheesecake from setting properly. As a result, this recipe gives you a reliable full-cake method, plus clear adjustments for gelatin, agar agar, and no-gelatin cups.

Comparison graphic showing common reasons mango cheesecake fails to set, including watery puree, under-whipped cream, weak setting support, and short chill time.
Most setting problems begin before the cheesecake reaches the fridge; watery mango puree, weak structure, and rushed chilling can all lead to a loose filling.
  • No oven is needed. The cheesecake sets in the fridge, which makes it ideal for warm weather and make-ahead entertaining.
  • Mango is used in the filling and topping. This gives the cheesecake a stronger mango flavor than a plain cheesecake with fruit only on top.
  • The biscuit base is simple and sturdy. Digestive biscuits, graham crackers, or Marie biscuits all work.
  • The setting method is flexible. Use agar agar for a vegetarian full cake, gelatin for a classic creamy set, or cups for a softer no-gelatin version.
  • It works with fresh mango or mango pulp. The post explains how to adjust sweetness and texture for both.
  • It is make-ahead friendly. Overnight chilling gives the cleanest slices and the best flavor.

The key is not adding more mango puree than the filling can hold. Too much watery mango can give you stronger fruit flavor at first, but it can also stop the cheesecake from slicing cleanly after chilling.

The same thick-puree logic matters in homemade mango ice cream, where watery mango can weaken both flavor and texture. In cheesecake, the problem is even more obvious because the filling has to hold its shape once sliced.

Ingredients for No Bake Mango Cheesecake

Although the ingredient list is simple, the ratios matter. The filling needs enough cream cheese and whipped cream for body, enough mango for flavor, and the right setting method for the serving style you want. Otherwise, it can taste good but still fail to slice cleanly.

Ingredient spread for no bake mango cheesecake with biscuits, butter, cream cheese, cream, mango pulp, sugar, lemon or lime, agar agar, and gelatin.
These simple ingredients work best when each one has a clear job: cream cheese gives body, mango gives flavor, cream adds lightness, and agar or gelatin controls the final set.

Biscuit Base

  • Digestive biscuits, graham crackers, or Marie biscuits: these make the crumb base.
  • Melted butter: binds the crumbs and helps the base hold together.
  • Fine salt: balances the sweetness.
  • Sugar: optional, especially if the biscuits are already sweet.
  • Cardamom or cinnamon: optional, but useful if you want a warmer flavor.

Mango Cheesecake Filling

  • Full-fat cream cheese: gives the cheesecake structure and tang. Avoid low-fat cream cheese spread for a full cake.
  • Whipping cream or heavy cream: makes the filling lighter and creamier.
  • Mango pulp or mango puree: gives flavor, color, and sweetness.
  • Powdered sugar or caster sugar: sweetens the filling. Use weight when possible because cup measures vary by sugar type.
  • Lemon or lime juice: brightens the mango and balances the richness.
  • Vanilla: rounds out the flavor.
  • Agar agar or gelatin: helps a full cake slice cleanly.

Mango Topping

The topping can be a clean mango jelly, a softer mango coulis, or a simple layer of fresh mango. Choose mango jelly for a polished cake top, coulis for a spoonable finish, and fresh mango for the quickest decoration.

Fresh Mango vs Mango Pulp for No Bake Mango Cheesecake

In this recipe, mango quality can make or break the final texture. Sweet, smooth mango gives a bright filling, while watery or fibrous mango can make the cheesecake weak, bland, or difficult to set. Therefore, the safest choice is either thick mango pulp or ripe, non-fibrous fresh mango.

Comparison image showing fresh mango pieces and puree on one side and thick mango pulp in a bowl on the other side.
Fresh mango gives the brightest seasonal flavor, while mango pulp offers consistent sweetness and color; in both cases, thickness matters more than volume.
Mango option Best for Notes
Fresh ripe mango Best seasonal flavor Use sweet, non-fibrous mangoes. Blend smooth and sieve if needed.
Alphonso or Kesar mango pulp Strong color and consistent flavor Reduce sugar if the pulp is already sweetened.
Canned mango puree Easiest year-round option Check sweetness before adding the full amount of sugar.
Frozen mango Backup option Thaw and drain first so the filling does not become watery.
Watery mango puree Risky for a full cake Cook it down briefly or use a stronger setting method.
Mango tip: If your mango puree is thin, watery, or bland, do not add more and more puree to the filling. That can stop the cheesecake from setting. Use a thicker pulp, cook the puree down briefly, or add extra mango flavor through the topping instead.
Side-by-side comparison of thick mango puree coating a spoon and watery mango puree running off a spoon.
The spoon test is one of the easiest ways to judge mango puree: thick puree supports the filling, whereas watery puree can make the cheesecake too soft.

For a drinkable mango recipe where texture can stay softer, this mango smoothie is the better route; for cheesecake, the mango puree needs to be thicker and more controlled.

Best Biscuit Base for No Bake Mango Cheesecake

A good biscuit base should hold together without tasting greasy. After the melted butter is mixed in, the crumbs should look like wet sand. If the mixture is dry and dusty, the crust may crumble. On the other hand, if it looks shiny or oily, there may be too much butter.

  • Digestive biscuits: slightly malty and sturdy.
  • Graham crackers: classic for cheesecake and easy to use.
  • Marie biscuits: lighter and common in Indian kitchens.
  • Biscoff-style biscuits: sweeter and more caramel-like.
  • Plain cookies: useful when you want a softer dessert-style base.
Graphic showing a pressed crumb crust in a springform pan with digestive biscuits, graham crackers, and Marie biscuits nearby.
Digestive biscuits, graham crackers, and Marie biscuits all work, but the best biscuit base is the one that presses firmly and balances the sweet mango filling.
Base tip: Press the crumb mixture firmly with the bottom of a flat glass or measuring cup, then chill it for 30 minutes before adding the filling.

Similarly, if you like biscuit-base desserts, this Banoffee Pie uses the same no-bake crumb-base idea in a banana, caramel, and cream direction.

How to Make No Bake Mango Cheesecake

This no bake mango cheesecake recipe is written for an 8-inch / 20 cm full cake using agar agar as the default setting method. However, the gelatin and no-gelatin cup options are also included after the main method, so you can choose the version that suits your kitchen.

Step 1: Prepare the Pan

Line the base of an 8-inch / 20 cm springform or loose-bottom pan with parchment paper. For cleaner sides, line the inner wall with a strip of parchment or acetate.

Step 2: Make the Biscuit Base

Crush the biscuits into fine crumbs, mix with melted butter, salt, and any optional sugar or spice, then press the mixture firmly into the pan. Chill for 30 minutes.

Close-up of a glass pressing biscuit crumbs into a springform pan, with loose crumbs nearby showing a wet sand texture.
Once the crumbs look like wet sand, press them firmly into the pan so the base slices neatly instead of falling apart.

Step 3: Make the Mango Puree

If using fresh mango, blend until smooth and sieve if the mango is fibrous. If using canned mango pulp, stir it well and taste before adding sugar to the filling. For the agar version, the mango puree should be at room temperature, not fridge-cold.

Smooth mango puree being pushed through a sieve into a bowl, with mango pieces nearby on a dark surface.
Sieving the mango puree removes fibrous bits and gives the filling a smoother finish, especially when using fresh mango.

Step 4: Beat the Cream Cheese

Beat softened cream cheese with sugar, lemon or lime juice, vanilla, and salt until completely smooth. Do not add the mango puree yet. Keeping the mango separate makes it easier to mix in the agar without shocking it against cold dairy.

Bowl of cream cheese being mixed until smooth with a hand mixer, with citrus and sugar nearby.
Beat the cream cheese base until it is completely smooth first; after mango is added, small lumps become much harder to fix.

Step 5: Whip the Cream

Whip cold cream to medium-stiff or stiff peaks. In warm weather, chill the bowl and beaters first so the cream holds better.

Whipped cream forming medium-stiff peaks on a beater above a mixing bowl.
Medium-stiff whipped cream gives the filling lift and structure, while still keeping the mango cheesecake creamy rather than heavy.

Step 6: Activate the Agar Agar

Simmer the agar agar powder with water until it fully dissolves, then boil gently for about 60–90 seconds. Agar must be heated properly to activate. Let it cool slightly, but do not let it set.

Small saucepan with agar agar mixture simmering, with a bowl of mango puree and agar powder nearby.
Agar agar must be boiled properly before it can set the cheesecake, so this step is more important than simply stirring powder into the filling.

Step 7: Mix the Mango Filling

Whisk the warm agar mixture into room-temperature mango puree first. Then beat this mango-agar mixture into the cream cheese mixture until smooth. Fold in the whipped cream and pour the filling over the chilled biscuit base right away, because agar starts setting quickly.

Warm agar mixture being whisked into mango puree in a bowl on a dark counter.
Mixing warm agar into mango puree first helps prevent stringy agar and protects the cream cheese mixture from sudden heat.
Spatula folding whipped cream into mango cheesecake filling with visible pale and orange swirls.
Fold gently at this stage so the whipped cream lightens the mango filling without knocking out all the air.
Thick mango cheesecake filling being poured into a springform pan with a prepared biscuit crust.
The filling should pour in a thick ribbon, not run like juice; that texture is a good sign before the cheesecake goes into the fridge.

Step 8: Chill the Cheesecake Layer

Smooth the top, then chill the cheesecake layer for 60–90 minutes before adding a separate mango jelly or topping layer. The surface should feel lightly set before the topping goes on.

Step 9: Add the Mango Topping

Pour the mango topping gently and close to the surface so it does not disturb the cheesecake layer. A spoon can help soften the pour. The topping should be lukewarm, not hot.

Topping tip: Let the mango topping cool until lukewarm before pouring. If it is too hot, it can soften the cheesecake layer; if it is too cool, an agar-based topping may begin setting before it spreads evenly.
Mango topping being poured gently onto the surface of a chilled cheesecake layer in a pan.
Let the mango topping cool until lukewarm before pouring, because a hot topping can soften the cheesecake layer underneath.

Step 10: Chill Overnight

Chill the finished cheesecake for 8–12 hours, or overnight, before unmolding and slicing. Use a warm sharp knife and clean the blade between cuts for neater slices.

Finished mango cheesecake on a dark surface with one clean slice cut and lifted, showing defined layers and a glossy topping.
After an overnight chill, the cheesecake should release cleanly and show defined layers when sliced with a warm knife.

Gelatin vs Agar Agar vs No Gelatin for Mango Cheesecake

For this no bake mango cheesecake recipe, the setting method decides whether you get clean slices, a vegetarian full cake, or a softer cup-style dessert. In other words, this is the choice that matters most before you start mixing the filling.

Comparison image showing agar-set mango cheesecake slices, gelatin-set mango cheesecake slices, and a no-gelatin mango cheesecake cup.
This comparison shows why the setting method matters: agar gives cleaner vegetarian slices, gelatin gives a softer classic texture, and no-gelatin cups stay spoonable.
Why mango cheesecake can fail: Mango puree adds flavor, but it also adds moisture. If the puree is thin, the cream is under-whipped, or the setting method is weak, the cheesecake may taste good but refuse to slice cleanly.
Version Best for Texture Watch out for
Agar agar Vegetarian full cake Clean, sliceable, slightly firmer Must be boiled and sets fast
Gelatin Classic full cake Creamy, mousse-like Can clump and is not vegetarian
No gelatin/no agar Cups, jars, bowls Soft and creamy Usually too soft for clean full-cake slices
White chocolate Rich no-gelatin cake Firmer and sweeter Changes flavor and sweetness
Condensed milk Cups, jars, and richer shortcut versions Sweet, creamy, softer Does not set a full cake by itself

No Bake Mango Cheesecake Without Gelatin

You can make mango cheesecake without gelatin, but the final texture depends on the format. For the most foolproof result, use the no-gelatin version in cups, jars, or bowls. A full no-gelatin cake can work, but it needs thick mango puree, full-fat cream cheese, properly whipped cream, and an overnight chill.

Graphic showing no-gelatin mango cheesecake cups in the foreground and a softer no-gelatin cheesecake slice in the background.
A no-gelatin mango cheesecake is easiest in cups because the filling can stay creamy without needing to stand tall as a full cake.
  • Start with full-fat cream cheese, not low-fat spread.
  • Whip the cream properly so it gives the filling structure.
  • Choose thick mango pulp or puree instead of watery mango juice.
  • Chill overnight for the best texture.
  • Serve it in cups or jars if you want a fully no-gelatin, no-agar dessert.
  • For a firmer no-gelatin full cake, add melted white chocolate.
Best no-gelatin approach: Cups or jars are the most foolproof choice because the filling can stay creamy and spoonable without needing to stand tall. For a full no-gelatin cake, keep the puree thick and chill overnight.

No Bake Mango Cheesecake with Agar Agar

Agar agar is the best vegetarian setting option for a sliceable mango cheesecake. However, it sets more firmly than gelatin and starts setting quickly, so the method matters. As a result, you need to dissolve it fully and mix it into room-temperature mango puree before it reaches the dairy base.

Slice of mango cheesecake with agar agar powder and mango puree, labeled as a vegetarian full cake option.
Agar agar is the strongest choice for an eggless full cake, provided it is dissolved fully and mixed before it begins to set.
  • Choose agar agar powder for the easiest measuring.
  • Measure by weight when possible because agar strength and spoon volume can vary.
  • Boil agar with water until it fully dissolves.
  • Avoid adding hot agar directly into cold cream cheese.
  • Instead, mix agar into room-temperature mango puree first.
  • Work quickly once agar is added.
  • Use a light hand, because too much agar can make the texture too firm or jelly-like.
Agar tip: Do not mix hot agar into fridge-cold mango puree or cold cream cheese. The agar can seize, turn stringy, or set unevenly. Room-temperature mango puree is much safer.

For more background on how agar differs from gelatin, this guide to agar-agar explains why it needs boiling and why it sets firmer than gelatin.

No Bake Mango Cheesecake with Gelatin

Gelatin gives a classic creamy set and works well for a full mango cheesecake. However, it is not vegetarian. Compared with agar agar, it usually gives a softer, more mousse-like texture.

Slice of mango cheesecake with bloomed gelatin and mango puree, labeled as a softer gelatin-set version.
Gelatin works best when it is bloomed first, then dissolved gently, so it blends smoothly into the mango cheesecake filling.
  • For the filling, use 2¼–2½ tsp / about 7–8 g unflavored powdered gelatin with 60 ml / ¼ cup cold water.
  • First, sprinkle gelatin over cold water and let it bloom for 5–10 minutes.
  • After blooming, dissolve it gently without boiling it hard.
  • Then mix the dissolved gelatin into mango puree before adding it to the dairy base.
  • For the mango topping, use ¾ tsp / about 2–2.5 g gelatin with 30 ml / 2 tbsp cold water.
  • Finally, chill overnight for the cleanest slices.
Fresh mango and gelatin tip: If using fresh mango with gelatin, use thick puree, bloom the gelatin properly, and chill overnight. If your fresh mango puree is very thin, reduce it slightly before using it.

For a deeper general guide to blooming gelatin before using it in desserts, King Arthur Baking has a useful explainer on how to use gelatin in baking and desserts.

Full Cake vs Cups, Jars, and Mini Mango Cheesecakes

Format matters because the filling has to behave differently in each version. A full cake needs more structure because it has to unmold and slice. By comparison, cups and jars are more forgiving because they can stay soft and creamy. Therefore, choose the format before you choose the setting method.

Format Best setting method Best for
8-inch full cake Agar agar or gelatin Birthdays and clean slices
9-inch full cake Agar or gelatin, slightly flatter Larger gatherings
Mini cheesecakes Agar, gelatin, or firmer no-gelatin filling Parties and individual servings
Cups or jars No gelatin/no agar works well Easiest version
Bowls Soft-set no-gelatin filling Make-ahead dessert
Tray of layered mango cheesecake cups with crumb bases, creamy mango filling, and glossy mango topping.
Mango cheesecake cups are ideal for make-ahead serving because each portion has its own biscuit base, creamy filling, and glossy topping.
Several mini mango cheesecakes on a tray, each with a crumb base, creamy filling, and glossy mango topping.
Mini mango cheesecakes give the polish of a full cake in individual portions, which makes them especially useful for parties and dessert tables.

If you want an even softer mango dessert without worrying about clean slices, this quick mango pudding is a simpler spoonable option.

No Bake Mango Cheesecake with Condensed Milk

Condensed milk makes mango cheesecake sweeter, creamier, and richer. Because of that, it works especially well in cups, jars, and shortcut versions. However, if you use condensed milk, reduce the added sugar and keep the lemon or lime juice so the filling does not taste flat.

  • Replace part or all of the sugar with condensed milk.
  • Use 100–150 g condensed milk for a richer filling, then sweeten to taste.
  • Reduce sugar if using sweetened mango pulp.
  • Add lemon or lime juice for balance.
  • Use a setting method if making a full cake.
  • Use cups or jars for the easiest condensed milk version.
Condensed milk adjustment: For the full cake, start with 100–150 g condensed milk and reduce the added sugar to 0–30 g, depending on how sweet your mango pulp is.
Thick condensed milk being poured into mango cheesecake filling with citrus nearby.
Condensed milk adds richness and sweetness, so the filling usually needs less added sugar and a little citrus to stay balanced.

Mango Topping: Jelly, Coulis, or Fresh Mango

The topping can change both the look and texture of the cheesecake. For example, a mango jelly gives a polished top, while a mango coulis gives a softer sauce-like finish. Alternatively, fresh mango pieces give the fastest decoration.

Topping Best for Texture
Mango jelly Clean cake top and neat slices Set, smooth, glossy
Mango coulis Cups, jars, and softer cakes Spoonable and saucy
Fresh mango cubes Quick decoration Fresh and juicy
Mango passionfruit topping Tangier variation Bright, tropical, slightly tart
Graphic comparing three mango topping styles for cheesecake: jelly, coulis, and fresh mango cubes.
The topping changes the final style: mango jelly looks neat and sliceable, coulis feels softer, and fresh mango cubes add the quickest finish.

For a lighter fruit-first dessert, this mango sorbet keeps mango at the center without cream cheese or a biscuit base.

No Bake Mango Cheesecake Variations

These variations keep the same basic structure but adjust the flavor. However, avoid adding large amounts of extra liquid unless you also adjust the setting method. Otherwise, the filling may become too loose to slice.

Graphic showing four no bake mango cheesecake variations labeled passionfruit, lime, coconut, and graham.
Keep variations controlled so the filling does not loosen; passionfruit, lime, coconut, and graham all add flavor without changing the whole recipe.

Mango Passionfruit Cheesecake

For a sharper tropical flavor, add passionfruit to the topping or swirl it through a mango coulis. This is especially good if your mango pulp is very sweet.

Mango Lime or Key Lime Cheesecake

For a brighter version, use lime zest and a little extra lime juice. Keep the extra juice modest so the filling does not become too loose.

Mango Coconut Cheesecake

For a richer tropical variation, add coconut cream, coconut milk powder, or toasted coconut as a topping. Coconut milk powder can also add a little body to cup-style cheesecakes.

Mango White Chocolate Cheesecake

Melted white chocolate can help a no-gelatin cheesecake set more firmly, but it also makes the filling sweeter and heavier. Reduce sugar if you use it.

Melted white chocolate being added to mango cheesecake filling, with a finished mango cheesecake slice in the background.
White chocolate can help a no-gelatin filling firm up, but it also adds sweetness, so reduce the sugar before adjusting anything else.

Mango Graham Cheesecake

Use a graham cracker crust and a mango cream cheese filling for a classic mango graham cheesecake direction. This works especially well in cups or a 9-inch full cake.

Vegan No Bake Mango Cheesecake

A vegan version needs a different base formula, usually with cashews, coconut cream, vegan cream cheese, or another dairy-free structure. Treat it as a separate variation rather than a direct swap. For a naturally softer dairy-free mango dessert, this mango chia pudding is a better fit than trying to force a direct vegan cheesecake swap.

Mistakes to Avoid

  • Do not use watery mango puree. It can make the filling loose and bland.
  • Do not rush the chill time. A full cake needs overnight chilling for clean slices.
  • Do not pour hot topping over the cheesecake layer. It can soften or disturb the filling.
  • Do not add agar directly to cold dairy. Mix it with room-temperature mango puree first.
  • Do not use the no-gelatin cups formula as a full cake. It is meant to be soft and spoonable.
Graphic showing common mango cheesecake mistakes, including watery puree, short chill time, hot topping, agar added to cold dairy, and using a cup formula as a cake.
Avoiding watery puree, short chilling, hot topping, and the wrong setting method prevents most mango cheesecake problems before they happen.

Troubleshooting No Bake Mango Cheesecake

Most no bake mango cheesecake problems come from watery mango, weak setting, under-whipped cream, or not enough chilling time. Therefore, use this table before changing the whole recipe. In many cases, a longer chill or a cup-style serving can save the dessert.

Troubleshooting graphic for mango cheesecake with issues such as runny filling, stringy agar, clumped gelatin, messy slices, and cheesecake that did not set.
When a mango cheesecake does not set, check the puree thickness, agar or gelatin method, and chill time before deciding how to fix or serve it.
Problem Likely cause Fix
Cheesecake did not set Too much mango, weak setter, or not enough chill time Chill overnight, freeze briefly before slicing, or use cups next time.
Filling is runny Watery mango puree or under-whipped cream Reduce puree, whip cream properly, or add a setting method.
Agar turned stringy Agar was not dissolved or hit cold filling Boil fully and mix with room-temperature mango puree first.
Gelatin clumped Gelatin was not bloomed properly Sprinkle over cold water, let it bloom, then dissolve gently.
Topping is runny Too little agar or watery puree Cook down the puree or add the correct amount of setting agent.
Crust crumbles Too little butter or loose pressing Add enough butter and press the base firmly with a flat cup.
Cheesecake is too sweet Sweetened pulp or condensed milk Add lemon or lime and reduce sugar next time.
Mango flavor is weak Bland mango or too little puree Use Alphonso or Kesar pulp, or add a mango coulis layer.
Slices are messy Not chilled enough or no setter Chill overnight and wipe the knife between cuts.
Water on top Condensation Chill uncovered first, then cover loosely once set.

Make Ahead, Storage, and Freezing

No bake mango cheesecake is a make-ahead dessert. In fact, the texture is usually better after a full overnight chill because the filling firms up and the mango flavor settles into the cream cheese base. For best results, keep it cold until shortly before serving. Also, add fresh mango decoration closer to serving so it stays bright.

Storage method Time Notes
Fridge 3–4 days Keep covered after the cheesecake has fully set.
Freezer Up to 1 month Freeze without fresh fruit topping for the cleanest result.
Room temperature 30–45 minutes max Keep chilled as much as possible, especially in warm weather.
Make ahead 1 day ahead is ideal Overnight chilling gives the cleanest slices.
Mango cheesecake in a covered storage container with a plated slice nearby, plus text showing fridge and freezer storage times.
This dessert improves with planning: make it one day ahead, keep it chilled, and store leftovers covered so the layers stay fresh.

No Bake Mango Cheesecake Recipe Card

Because this no bake mango cheesecake recipe includes agar, gelatin, and no-gelatin cup options, read the notes once before starting so you do not mix the wrong setting method into the filling.

Default version: This recipe card uses agar agar for a vegetarian, eggless full cake. Use the gelatin option below if you prefer a classic mousse-like set, or the cup version if you want no gelatin and no agar.
Texture cue: The filling should be thick, smooth, and pourable when it goes into the pan. If it looks loose and watery before chilling, the mango puree may be too thin or the cream may not be whipped enough.
Recipe card graphic for no bake mango cheesecake showing an 8-inch cake formula with cream cheese, mango pulp, cream, agar, and 8 to 12 hours chill time.
This recipe card keeps the core formula easy to scan, while the full post explains when to use agar, gelatin, or no-gelatin cups.

No Bake Mango Cheesecake Recipe

This creamy no bake mango cheesecake recipe has a buttery biscuit base, mango cream cheese filling, and mango topping. The default version uses agar agar for an eggless, vegetarian-friendly full cake, with exact notes for gelatin and no-gelatin cups.

Yield10–12 slices
Pan8-inch / 20 cm
Prep Time45 minutes
Chill Time8–12 hours

Cook Time: 5 minutes
Total Time: 9–13 hours, including chilling
Best for: make-ahead dessert, summer dessert, eggless cheesecake, mango dessert

Equipment

  • 8-inch / 20 cm springform or loose-bottom pan
  • Parchment paper
  • Food processor, mixer-grinder, or rolling pin for crumbs
  • Blender, if using fresh mango
  • Electric hand mixer or stand mixer
  • Saucepan
  • Rubber spatula
  • Offset spatula or flat spoon
  • Fine sieve, optional
  • Digital scale, recommended

Biscuit Base

  • 200 g / 7 oz digestive biscuits, graham crackers, or Marie biscuits, about 2 cups crumbs
  • 80 g / 2.8 oz / about 5½ tbsp unsalted butter, melted
  • 1–2 tbsp sugar, optional
  • ¼ tsp fine salt
  • ¼ tsp cardamom or cinnamon, optional

Mango Cheesecake Filling

  • 450 g / 16 oz full-fat cream cheese, softened
  • 250 ml / 1 cup cold whipping cream or heavy cream
  • 300 g / 10.5 oz / about 1¼ cups mango pulp or thick mango puree, room temperature for agar version
  • 80–100 g powdered sugar or caster sugar, added to taste
  • 1½–2 tbsp / 22–30 ml lemon or lime juice
  • 1 tsp vanilla extract
  • ⅛ tsp fine salt
  • 3 g agar agar powder / about 1½ tsp
  • 100–125 ml / about ⅓–½ cup water, for agar

Mango Jelly Topping

  • 200–250 g / about ¾–1 cup mango pulp
  • 1–2 tbsp sugar, optional
  • 1–2 tsp lemon or lime juice
  • 1 g agar agar powder / about ½ tsp
  • 80–100 ml / about ⅓ cup water

Method

  1. Line the base of an 8-inch / 20 cm springform pan with parchment paper. Line the sides if you want a cleaner finish.
  2. Crush the biscuits into fine crumbs. Mix with melted butter, salt, and optional sugar or spice until the texture looks like wet sand.
  3. Press the crumb mixture firmly into the pan. Chill for 30 minutes.
  4. Blend fresh mango into a smooth puree, or stir canned mango pulp until even. For the agar version, keep the mango puree at room temperature rather than fridge-cold.
  5. Beat softened cream cheese with sugar, lemon or lime juice, vanilla, and salt until completely smooth. Keep the mango puree separate for now.
  6. Whip cold cream to medium-stiff or stiff peaks in a separate bowl.
  7. Simmer agar agar powder with water until fully dissolved, then boil gently for about 60–90 seconds. Let it cool slightly, but do not let it set.
  8. Whisk the warm agar mixture into the room-temperature mango puree first. Then beat this mango-agar mixture into the cream cheese mixture until smooth.
  9. Fold in the whipped cream and pour the filling over the chilled biscuit base right away.
  10. Smooth the top and chill for 60–90 minutes before adding the mango topping.
  11. For the topping, simmer the agar agar powder with water until fully dissolved, then whisk in the mango pulp, sugar, and lemon or lime juice. Simmer briefly until smooth, then cool until lukewarm.
  12. Pour the topping gently over the cheesecake layer.
  13. Chill for 8–12 hours, or overnight, before unmolding and slicing.

Gelatin Option for Full Cake

To make a classic gelatin-set version, replace the agar in the filling with 2¼–2½ tsp / about 7–8 g unflavored powdered gelatin and 60 ml / ¼ cup cold water. First, sprinkle gelatin over the cold water and let it bloom for 5–10 minutes. After that, dissolve it gently, then mix it into the mango puree before adding it to the cream cheese mixture. Do not boil gelatin hard.

For the mango topping, use ¾ tsp / about 2–2.5 g gelatin bloomed in 30 ml / 2 tbsp cold water instead of agar. Then, stir the dissolved gelatin into the warm mango topping, cool until lukewarm, and pour gently over the cheesecake layer.

No-Gelatin Mango Cheesecake Cups

To make 6–8 no-gelatin mango cheesecake cups, use 150 g biscuit crumbs, 60 g melted butter, 300 g full-fat cream cheese, 200 ml cold whipping cream, 200–225 g thick mango pulp, 50–70 g powdered sugar or 100–120 g condensed milk, 1 tbsp lemon or lime juice, 1 tsp vanilla, and a pinch of salt.

Press the biscuit base into cups or jars. Beat cream cheese with mango, sugar or condensed milk, lemon or lime, vanilla, and salt. Fold in whipped cream, spoon into cups, and chill for at least 6 hours, preferably overnight. This version is soft and creamy, not designed for clean full-cake slices.

Serve these directly from the cups with mango coulis, fresh mango cubes, or crushed biscuit crumbs on top.

Do not use this no-gelatin cups formula as a full cake unless you are comfortable with a soft, mousse-like texture that may not slice neatly.

Condensed Milk Adjustment

For a condensed milk full-cake version, start with 100–150 g condensed milk and reduce the added sugar to 0–30 g, depending on how sweet your mango pulp is. Keep the lemon or lime juice so the filling stays balanced.

Agar Note

Agar strength can vary by brand, so weight is more reliable than spoon measure. Start with 3 g for this 8-inch cake. If your agar is very strong or you prefer a softer texture, use the lower end next time.

Pan Notes

This recipe is best in an 8-inch / 20 cm pan. A 9-inch pan will work, but the cheesecake will be slightly flatter. For a taller 9-inch cheesecake, increase the filling and base by about 25%.

Slicing Note

For clean slices, chill overnight, loosen the sides gently, use a warm sharp knife, and wipe the blade between cuts.

Storage

Refrigerate for 3–4 days. Freeze for up to 1 month without fresh fruit topping. Keep chilled until serving.

FAQs About No Bake Mango Cheesecake

How do you make this no bake mango cheesecake recipe without gelatin?

The safest way is to make it in cups or jars. A full no-gelatin cake can be softer and may not slice as cleanly unless the filling is very thick or supported with another ingredient such as white chocolate.

Is agar agar a good substitute for gelatin in mango cheesecake?

Agar agar works well as a vegetarian setting option, but it behaves differently from gelatin. It must be boiled to activate, sets faster, and can become too firm if you use too much.

Why did my mango cheesecake not set?

The most common reasons are watery mango puree, too much mango, weak setting agent, under-whipped cream, or not enough chilling time. Before changing the recipe, chill it overnight and check the texture again.

What kind of mango pulp works best?

Canned Alphonso or Kesar mango pulp is one of the easiest options because it gives consistent sweetness, color, and mango flavor. However, if the pulp is already sweetened, reduce the sugar in the filling.

Fresh mango or canned mango pulp: which is better?

Both work. Fresh mango gives the best seasonal flavor when the fruit is ripe, sweet, and non-fibrous. Meanwhile, canned mango pulp gives more consistent color and sweetness throughout the year.

How does condensed milk change the filling?

Condensed milk makes the cheesecake sweeter, creamier, and richer. Therefore, reduce the added sugar and keep the lemon or lime juice so the filling stays balanced instead of flat.

How long should mango cheesecake chill?

A full cake should chill for 8–12 hours, or overnight, for the cleanest slices. Cups and jars usually need at least 6 hours, although overnight is still better for texture.

Does mango cheesecake freeze well?

It freezes best without fresh fruit topping. For the cleanest texture, freeze the whole cake or slices tightly wrapped, then thaw in the fridge before serving.

When should I make mango cheesecake cups instead of a full cake?

Cups are the better choice when you want a no-gelatin dessert, a softer texture, or easier party servings. They are also more forgiving because the filling does not need to unmold or slice cleanly.

Which biscuits are best for the crust?

Digestive biscuits, graham crackers, and Marie biscuits all work. Choose digestive biscuits for a sturdier base, graham crackers for a classic cheesecake flavor, or Marie biscuits for a lighter base.

Is this no bake mango cheesecake recipe eggless?

It is eggless because it is no bake and does not rely on eggs for structure. In addition, the default agar agar version is vegetarian-friendly.

Can I use paneer instead of cream cheese?

Paneer can work only if it is blended very smooth with a little cream, yogurt, or milk, but the flavor will be less tangy than cream cheese. For the most reliable cheesecake texture, full-fat cream cheese is still the better choice.

What happens if I skip cream cheese?

You can make mango mousse cups or mango dessert cups without cream cheese, but the result will not taste like classic cheesecake. For proper cheesecake flavor and structure, cream cheese is the best choice.

Why is my cheesecake too soft?

The filling may have too much mango, watery puree, under-whipped cream, or too little setting support. First, chill it longer. If it still does not slice cleanly, serve it as cups instead.

How do I get clean slices?

Chill the cheesecake overnight, use a warm sharp knife, and wipe the blade between cuts. Also, remember that agar agar or gelatin will give cleaner slices than a no-setter filling.

How far ahead should I make it for a party?

Make it one day ahead and keep it refrigerated. Finally, add fresh mango decoration closer to serving so the fruit stays bright and fresh.