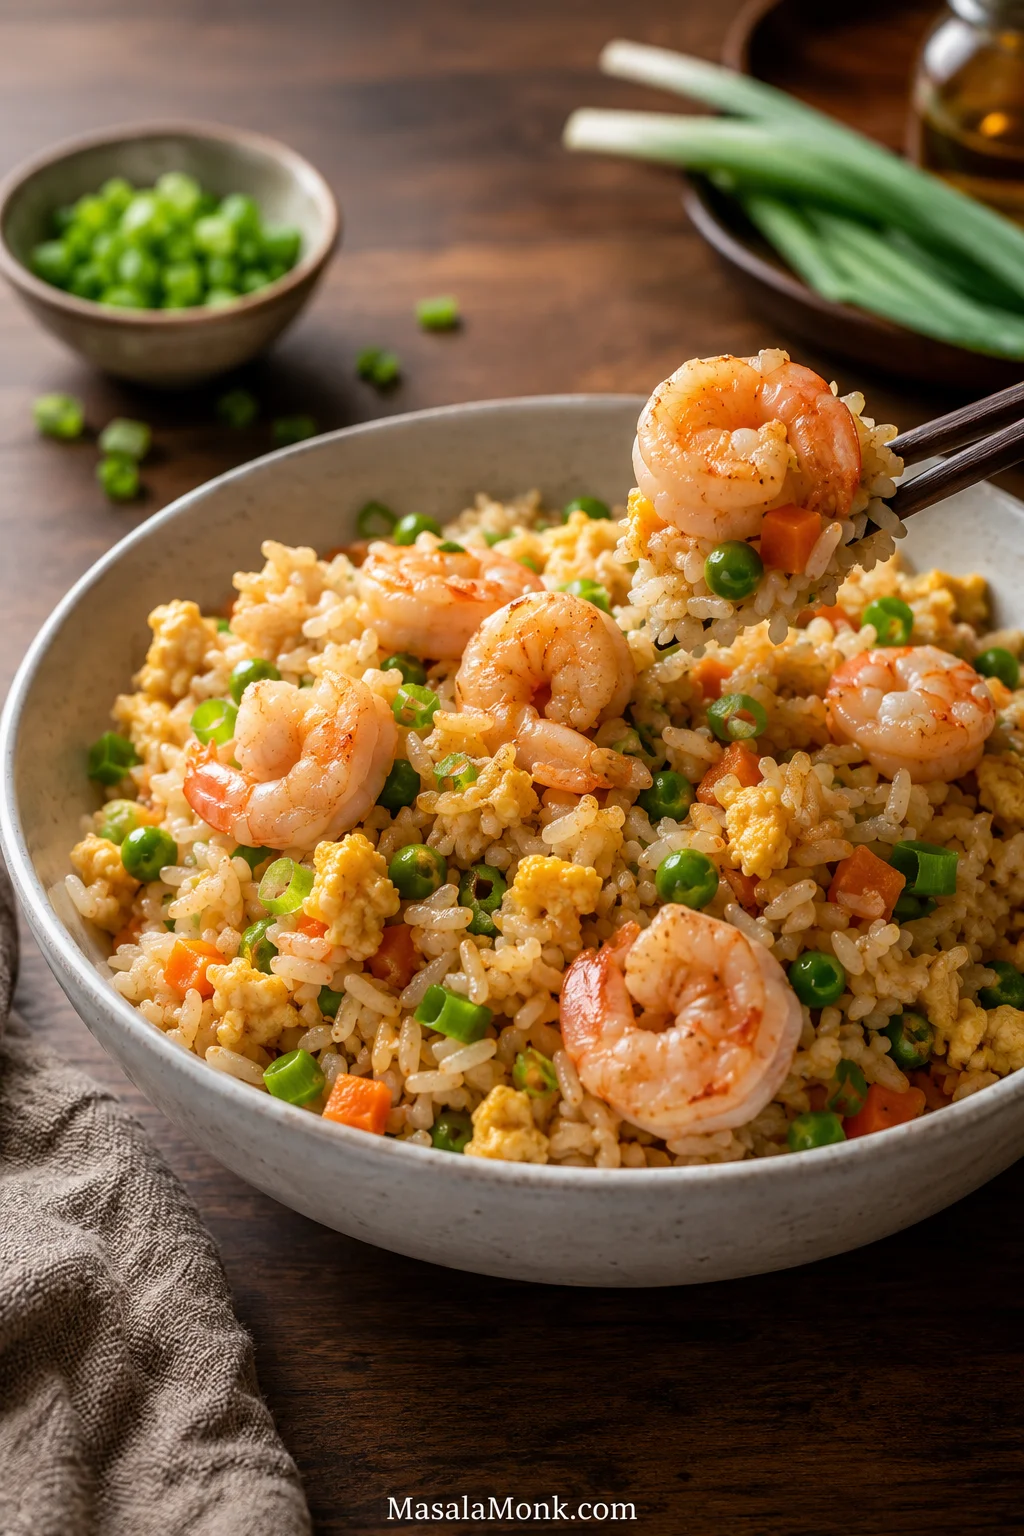
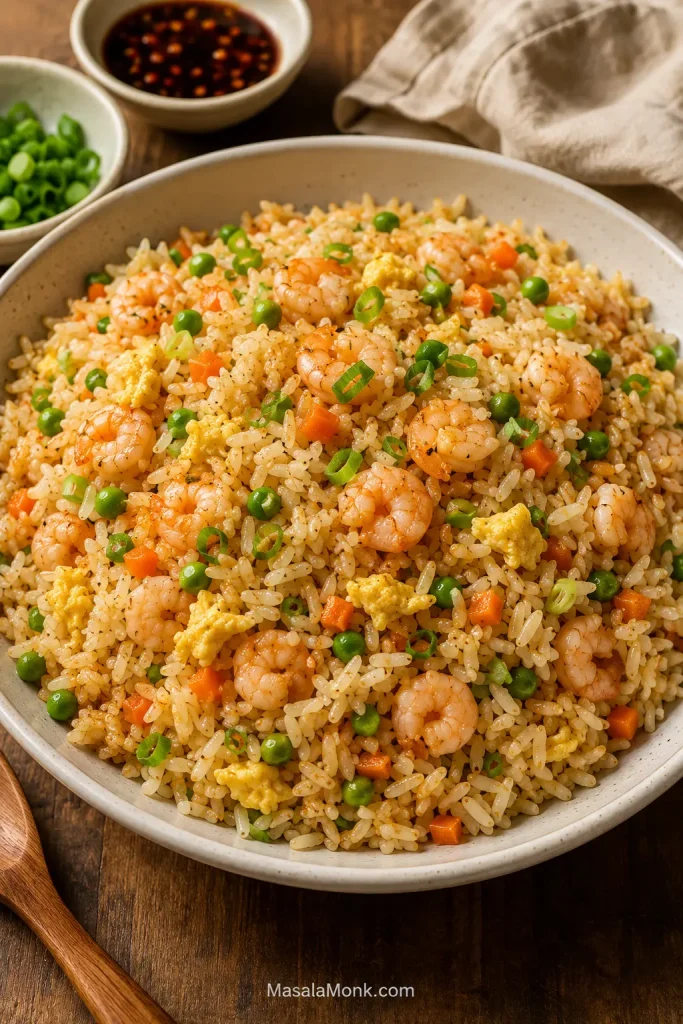
This shrimp fried rice recipe is for the night you open the fridge, see cooked rice, and realize dinner is almost already halfway done. A hot skillet turns yesterday’s rice into glossy, savory grains with juicy shrimp, soft egg, garlic, scallions, and vegetables — faster than takeout and fresher from the pan.
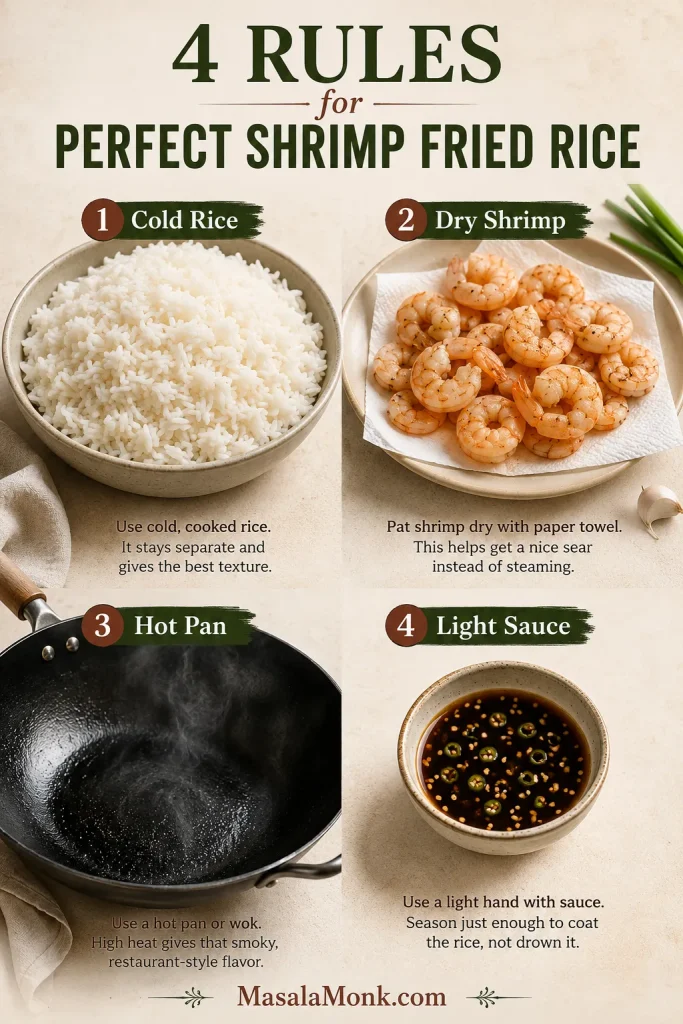
The goal is fluffy rice, tender shrimp, and a dinner that tastes planned, even when it started with leftovers. No restaurant burner needed. Just remember the four things that matter most: cold rice, dry shrimp, hot pan, light sauce.
What makes it better than takeout is control: more shrimp, less grease, tender egg, bright scallions, and rice that tastes soy-sesame savory without turning heavy.
Quick Answer: How to Make Shrimp Fried Rice
To make shrimp fried rice, start with cold cooked rice and break up the clumps. Pat raw shrimp dry, season lightly, then cook it quickly in a hot wok or large skillet until just opaque. Remove the shrimp, scramble the eggs, and cook the vegetables until the skillet looks dry again.
Stir-fry garlic, scallions, and rice, then add a small amount of soy-sesame sauce. Fold the shrimp and egg back in and serve while the rice is hot, loose, and glossy.
What is shrimp fried rice? It is a quick stir-fried rice dish made with cooked rice, shrimp, egg, vegetables, aromatics, and a savory soy-sesame sauce. In the best versions, cold rice and a hot pan keep the grains separate instead of soft or sticky.
Order matters because each ingredient behaves differently. Shrimp cooks fast, frozen vegetables can release water, and rice needs direct contact with heat before it gets sauced. When those pieces happen in the right order, the dish tastes fresh instead of heavy.
Already have cold rice and thawed shrimp? Jump straight to the recipe card. Need rice help first? See the best rice guide.
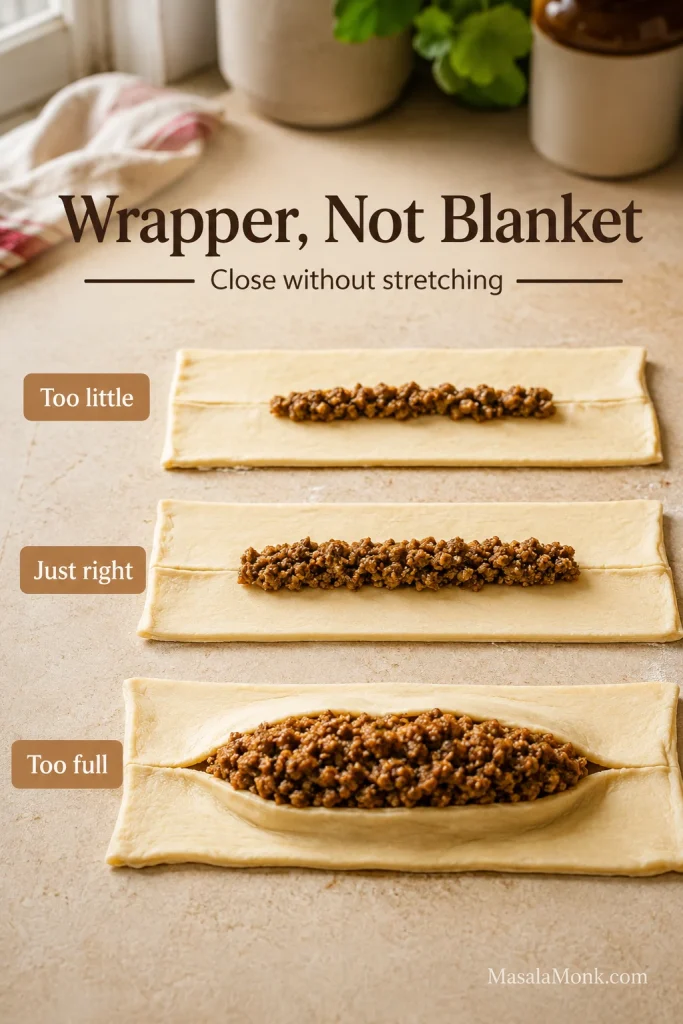
The 4 Rules for Fluffy Shrimp Fried Rice
Use this quick visual guide as the recipe’s safety net before you start cooking. Each rule protects the final texture in a different way.
Shrimp Fried Rice Recipe
This version is built for real weeknights: cooked rice from yesterday, shrimp from the fridge or freezer, a few vegetables, and a hot pan that makes it all feel deliberate. Leftover rice makes it easiest, but the fresh-rice workaround below gives you a path when you are starting from scratch.
| Prep Time | 10 minutes |
| Cook Time | 15 minutes |
| Total Time | 25 minutes |
| Yield | 4 servings |
| Course | Main dish, quick dinner |
| Style | Takeout-style shrimp fried rice |
Timing note: The 25-minute total assumes you already have cooked and chilled rice. Cooking rice from scratch adds cooling time before frying. Starting with fresh rice today? Use the fresh-rice workaround before heating the pan.
Before you turn on the stove: Have the rice loosened, shrimp dried, eggs beaten, vegetables ready, and sauce mixed. Fried rice is easy, but it does not wait once the pan is hot.
Equipment
- Wok or large 12-inch non-stick/heavy skillet
- Wide spatula
- Mixing bowl for shrimp
- Small bowl for sauce
- Sheet pan or wide plate if cooling fresh rice
Ingredients

| Ingredient | US Measure | Metric |
|---|---|---|
| Cold cooked rice | 4 cups | about 600–650 g |
| Raw peeled and deveined shrimp | 1 lb | 450 g |
| Large eggs, beaten | 3 | 3 |
| Frozen peas and carrots | 1 to 1 1/2 cups | 140–200 g |
| Garlic, minced | 3 cloves | 10–12 g |
| Scallions / green onions, sliced | 3–4 | 25–35 g |
| Neutral oil | 2 tbsp | 30 ml |
| Light soy sauce | 2 tbsp | 30 ml |
| Oyster sauce, optional | 1 tbsp | 15 ml |
| Toasted sesame oil | 1 tsp | 5 ml |
| White pepper | 1/4 tsp | about 0.5 g |
| Sugar | 1/4 tsp | about 1 g |
| Cornstarch | 1 tsp | about 3 g |
| Salt | 1/4 tsp for shrimp, then only more after tasting | about 1.5 g, then only more after tasting |
Ingredient note: This main method is written for raw shrimp. If you are using cooked shrimp, skip the searing step and add it at the very end just to warm through.
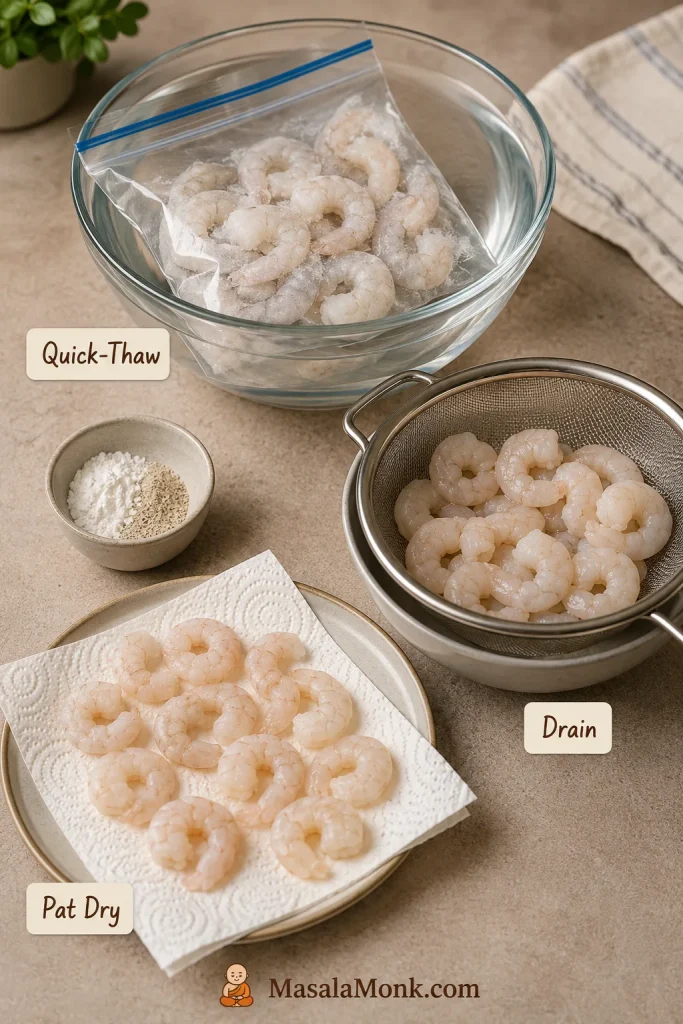
Frozen shrimp note: Frozen shrimp works well once fully thawed and patted dry. To quick-thaw, keep the shrimp sealed in a bag and place it in cold water until thawed, then drain and pat very dry before cooking. The skillet should sear the shrimp, not hiss with extra water. If you are unsure when to pull it from the pan, use the shrimp doneness cues.
Instructions
Prep the Rice and Sauce
- Break up the rice. Use your fingers or a fork to loosen cold cooked rice before it goes into the skillet. Clumps are easier to fix now than once the heat is on.
- Mix the sauce. In a small bowl, stir together soy sauce, oyster sauce if using, sesame oil, white pepper, and sugar. Keep it beside the stove so you are not measuring while the rice is cooking.
Season the Shrimp and Heat the Pan
- Season the shrimp. Pat shrimp very dry. Toss with salt, cornstarch, and a small pinch of white pepper. A dry surface helps the shrimp cook quickly instead of steaming.
- Heat the pan. Place a wok or large skillet over medium-high to high heat. Add 1 tablespoon oil and let the pan get properly hot.
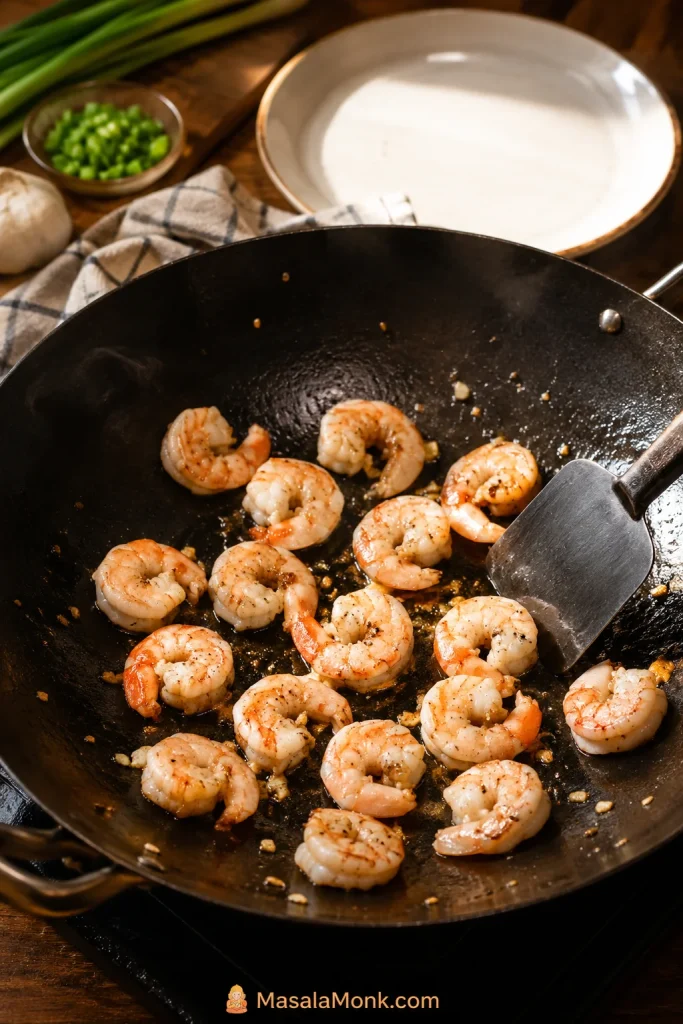
Cook Shrimp Separately So It Stays Tender
- Cook the shrimp. Add shrimp in a single layer. Cook for about 60–90 seconds per side, just until pearly, opaque, and lightly curled. Move it to a plate before it turns tight and firm.
- Scramble the eggs. Add 1 teaspoon oil if the pan is dry. Pour in the beaten eggs and scramble until just set. Move them to the plate with the shrimp; they will finish warming when they return to the rice.
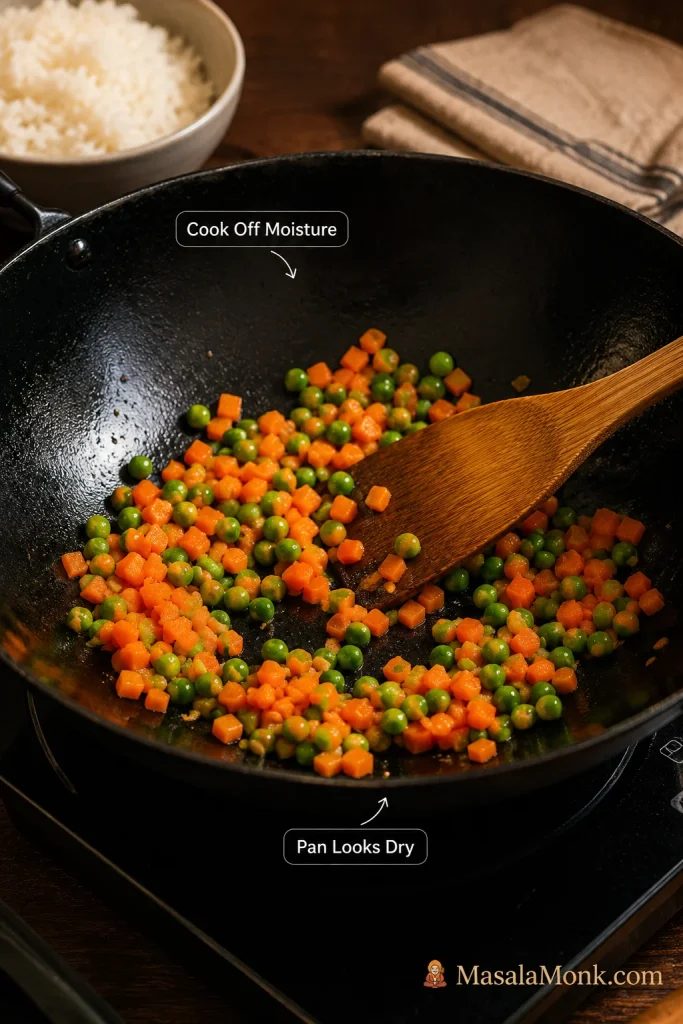
Cook the Vegetables Until the Pan Looks Dry
- Cook the vegetables. If needed, add the remaining oil, then stir in the peas and carrots. Cook until the skillet looks dry again so their sweetness and color stay bright without softening the rice.
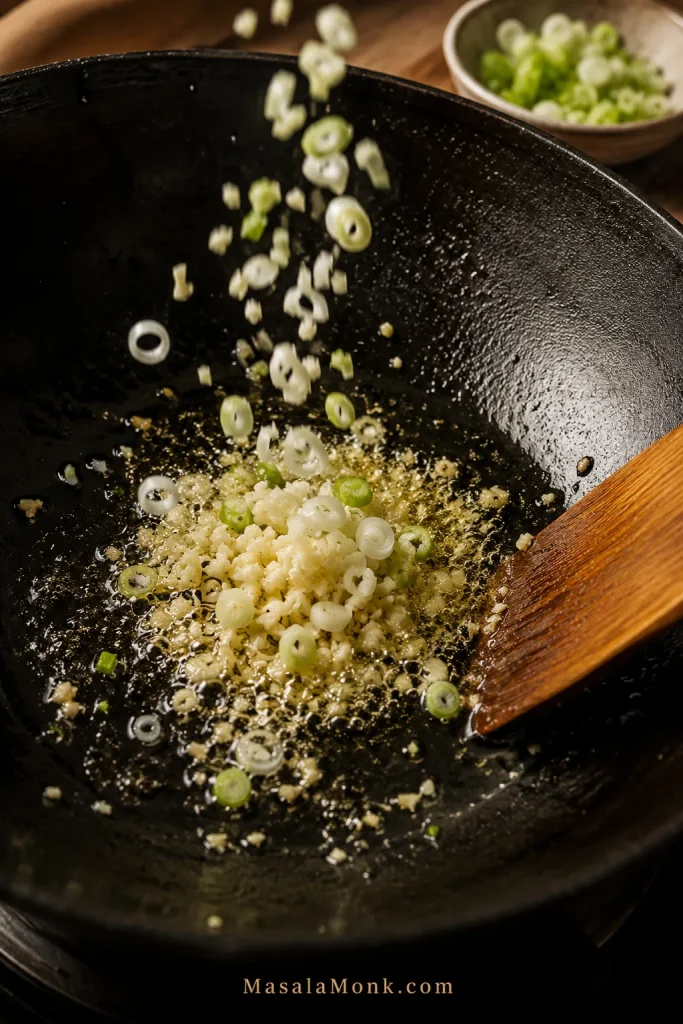
Garlic and Scallions Build the First Flavor Layer
- Add aromatics. Stir in garlic and the white/light parts of the scallions. Cook for 15–30 seconds, just until the pan smells garlicky and sharp. You want the garlic lively, not browned.
Fry the Rice Before Adding Sauce
- Fry the rice. Add the cold rice, spread it out, and let it sizzle before stirring. The rice should look separate before it looks glossy; sauce comes after the grains are hot, not before.
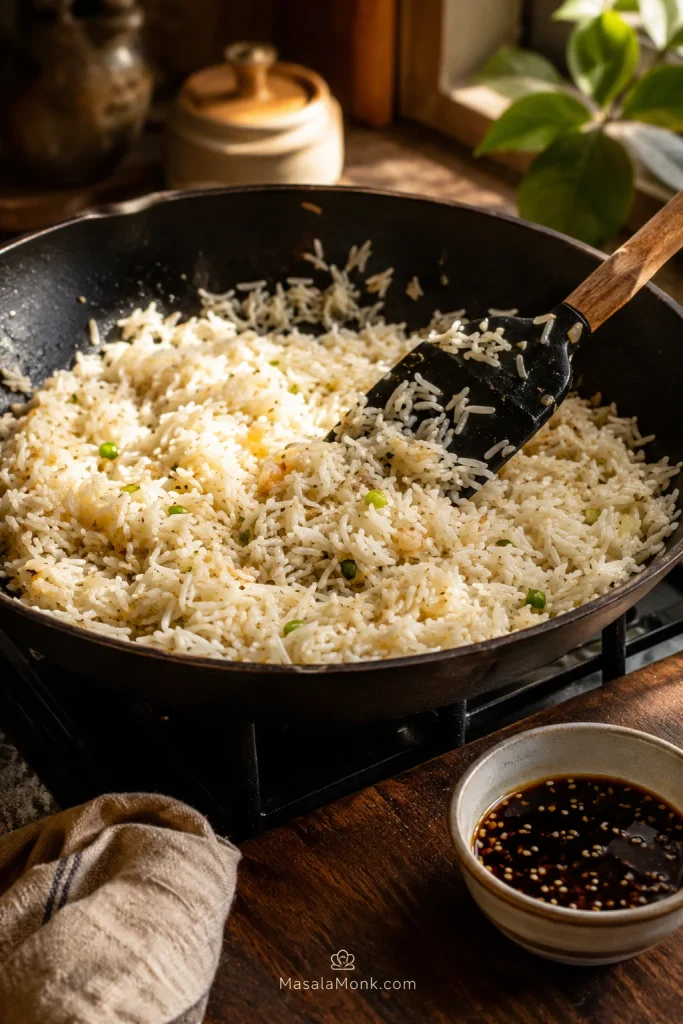
Add Sauce, Return Shrimp and Egg, Then Finish
- Add the sauce. Drizzle in the sauce and toss quickly. The rice should look glossy, separate, and evenly seasoned. Puddles mean keep tossing over heat until the grains absorb the seasoning.
- Return shrimp and egg. Add the seared shrimp and scrambled egg back to the pan. Toss for 30–60 seconds, just until everything is hot, the shrimp stays springy, and the egg is tucked through the rice.
- Finish and serve. Add the green parts of the scallions so the final pan tastes fresh, sharp, and a little sweet. Taste before adding more soy sauce. If it needs lift, try white pepper, scallion greens, or a tiny pinch of salt before adding more liquid.
Cook’s cue: The pan should sound lively. Quiet, steamy rice usually means the skillet is crowded or something brought in too much moisture. If the rice steamed, clumped, or turned salty, jump to troubleshooting before trying again.
This is the kind of dinner that feels bigger than the effort it asks from you: one hot pan, a bowl of leftover rice, a handful of shrimp, and a few minutes where garlic, scallions, soy, and sesame make the kitchen smell like you planned ahead.
Shrimp Fried Rice Success Formula
Once you know the basic order, the recipe becomes easy to adapt. This quick table helps you adjust for the rice, shrimp, vegetables, or pan you actually have, while still landing in the same place: loose rice, tender shrimp, soft egg, bright scallions, and sauce that clings instead of pools.
| If you have… | Do this |
|---|---|
| Day-old rice | Break it up and fry it cold. |
| Fresh rice | Spread, cool, and chill it until the surface feels dry. |
| Frozen shrimp | Thaw fully, pat dry, and cook briefly. |
| Cooked shrimp | Add it at the end just to warm through. |
| Frozen vegetables | Cook them until the skillet looks dry before adding rice. |
| A small skillet | Cook in batches instead of crowding the pan. |
| Flat flavor | Add white pepper, scallions, heat, or a tiny pinch of salt before adding more soy sauce. |
Why This Recipe Works
This recipe treats leftovers like an advantage. Cold rice is already drier and firmer, so the hot pan only has to wake it up.
The rest is order: shrimp cooks briefly and comes out, vegetables lose moisture before rice goes in, rice fries before sauce, and egg returns at the end for softness. That is how you get fried rice that tastes fresh instead of heavy.
If you like this leftover-rice style of cooking, MasalaMonk’s Spam fried rice recipe uses the same cold-rice logic with crispy Spam, egg, vegetables, and a quick savory sauce.
Ingredient Notes That Matter
The ingredient list is simple, which is part of the charm. A few ordinary things — cold rice, shrimp, egg, vegetables, garlic, scallions, and soy sauce — turn into a full dinner when the pan is hot and the moisture is under control.
Eggs
Egg makes the rice feel fuller and softer. Scramble it separately for the easiest method. Once you are comfortable, you can drizzle beaten egg over hot rice and stir quickly for a more golden restaurant-style effect. Try that only when the rice is already hot and loose; otherwise the egg can disappear into wet rice.
Soft egg gives the rice richness without needing extra sauce, which helps the whole pan stay savory instead of wet.
Vegetables
Frozen peas and carrots are classic because they are easy, colorful, and already cut small. Loose frozen vegetables can go straight into the hot skillet; just cook them until the pan looks dry again before adding rice. If they are icy or clumped together, thaw briefly and pat dry first.
No peas and carrots? Use corn, cabbage, bell pepper, mushrooms, green beans, or skip vegetables and add extra egg or shrimp. Small, quick-cooking add-ins give you color and texture without stealing heat from the rice.
Aromatics
Garlic and scallions are enough for a clean takeout-style flavor. For a deeper base, add 1/4 cup finely diced onion or 1 teaspoon minced ginger with the garlic. Keep the pieces small so they cook quickly and do not weigh down the rice.
Sauce and Seasoning
Light soy sauce gives salt and color. Oyster sauce adds a deeper takeout-style flavor, but it is optional. Low-sodium soy sauce gives you more control when your oyster sauce is already salty. Toasted sesame oil is strong, so use it sparingly. White pepper gives the rice a familiar restaurant-style warmth.
The goal is not dark, salty rice. Instead, aim for grains that taste seasoned all the way through — soy at the edges, sesame in the background, white pepper for warmth, and scallions keeping each bite fresh.
Want a warmer restaurant-style color? A tiny pinch of turmeric can add a light golden tint without needing food coloring. Use very little so it supports the rice instead of making it taste like turmeric.
For a broader sauce base you can use across vegetables, noodles, chicken, shrimp, tofu, and rice bowls, see this stir fry sauce recipe.
Best Rice for Shrimp Fried Rice
The rice matters, but the texture matters more. Choose a grain that can cool, separate, and move cleanly through a hot pan.
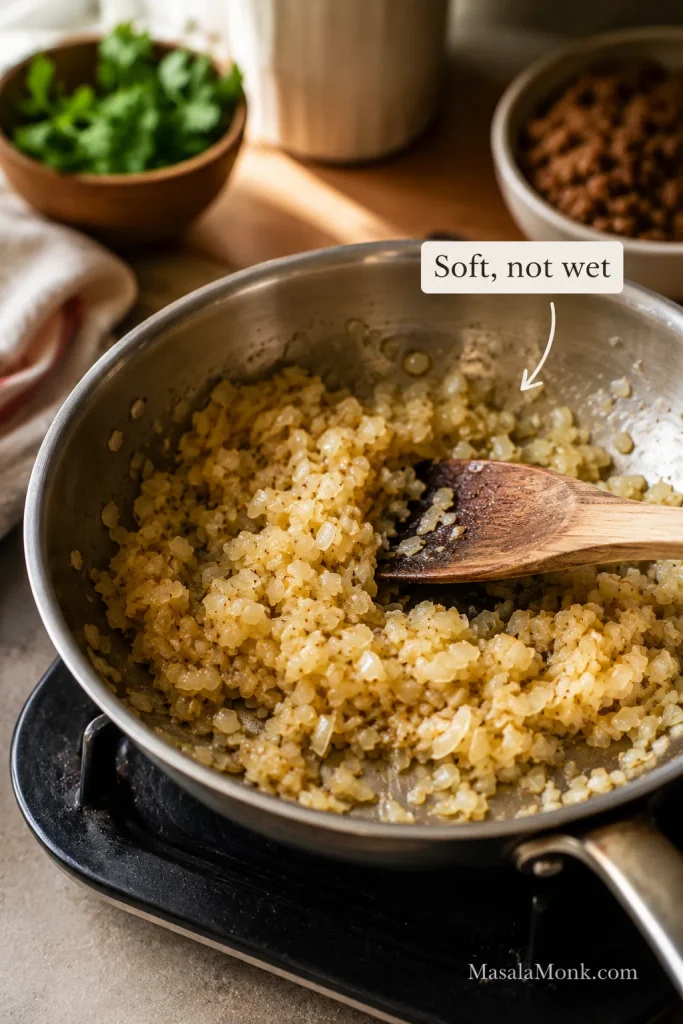
How Cold Rice Should Look Before Frying
Cold rice should feel firm enough to break apart easily. If the grains loosen before cooking, they have a better chance of frying evenly in the pan.
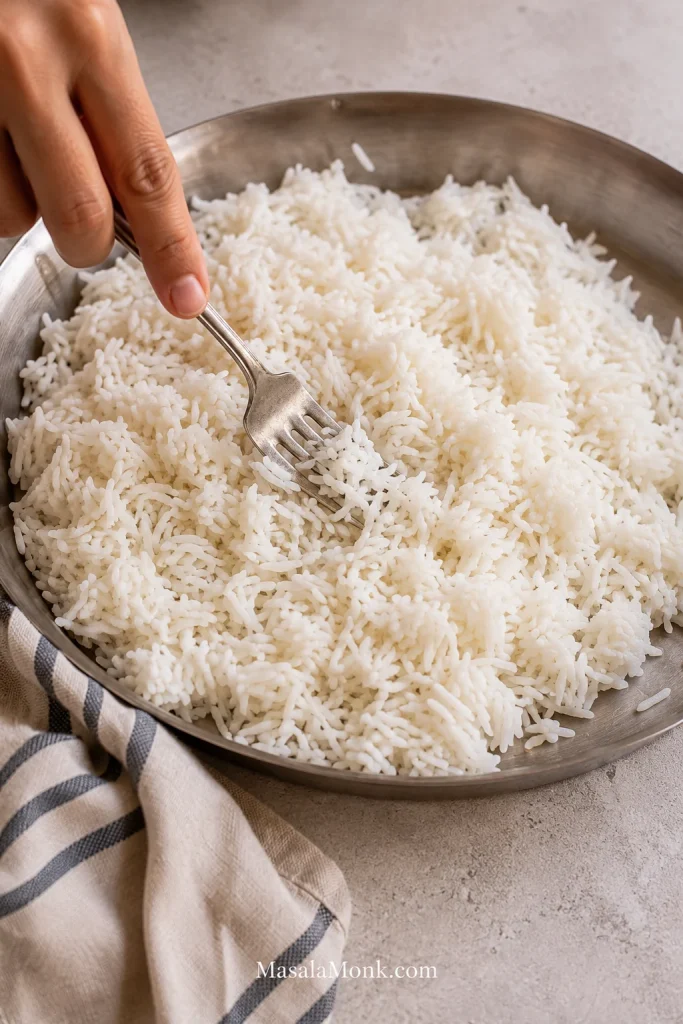
For the easiest fluffy texture, start with cold cooked rice that separates easily. Freshly cooked rice is usually too soft and steamy for direct frying, while chilled rice has enough structure to move cleanly through the skillet.
Choose jasmine rice for a takeout-style aroma, long-grain white rice for reliability, basmati rice if that is what you already cook, and brown rice if you want a firmer, nuttier version.
Not every rice behaves the same once it hits high heat, so use this as a quick guide.
Best Rice Types for Shrimp Fried Rice
| Rice Type | Good for Shrimp Fried Rice? | Notes |
|---|---|---|
| Jasmine rice | Yes | Aromatic and excellent for takeout-style fried rice. |
| Long-grain white rice | Yes | Reliable, fluffy, and easy to separate. |
| Basmati rice | Yes, if dry | Works well when cooked firm, cooled fully, and broken up before frying. |
| Brown rice | Yes | Firmer and nuttier; taste and adjust seasoning carefully. |
| Short-grain or sticky rice | Not ideal | Can clump and turn heavy unless you are making a different style intentionally. |

Best make-ahead move: Cook the rice the day before, spread it out so steam escapes, then refrigerate it once cool. The next day, break up the grains before frying. This gives you the easiest fluffy texture.
Do not rinse cooked rice before frying. If the grains are clumped, loosen them with your fingers or a fork; adding water brings back the moisture you are trying to avoid.
No Day-Old Rice? Fresh Rice Workaround
You can make shrimp fried rice with fresh rice, but not while it is hot and steamy. Cook it slightly firm, spread it on a sheet pan so steam escapes, then chill it until the surface feels cool and dry. Once the grains separate easily, it can fry like day-old rice.
- Cook the rice with slightly less water than usual so it finishes a little firmer.
- Spread the hot rice on a sheet pan or large plate.
- Let the steam escape for 10 minutes.
- Refrigerate the rice for 30–60 minutes, or freeze it for about 15 minutes if you are rushing.
- Break up the cooled rice before frying.
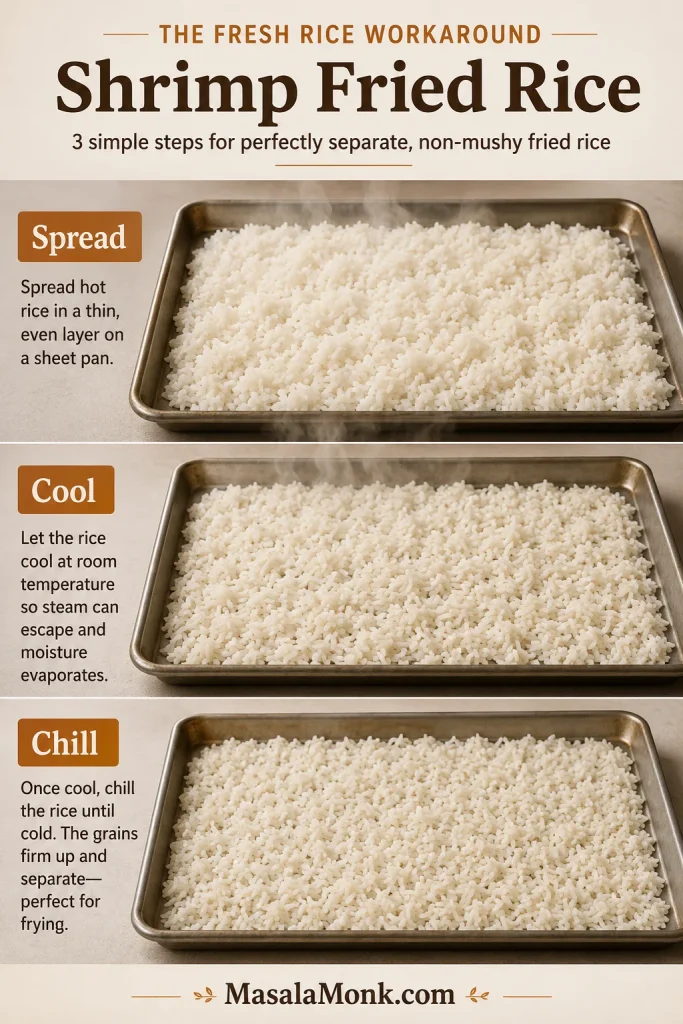
Fresh rice will not be quite as effortless as day-old rice, but it can still make good fried rice when you cool it properly. You are just trying to give it the same dry surface that leftovers already have.
Shrimp, Prawns, Frozen Shrimp, and Cooked Shrimp
Whether your market sells them as shrimp or prawns, cook them the same way here. Start with seafood that is dry on the surface, cook it briefly, and bring it back only after the rice has had time in the pan.
Size changes the way the fried rice eats, not just how it looks. Choose 26–30 count shrimp for a juicy home-style pan. For smaller restaurant-style pieces through every bite, use 51–60 count shrimp. Very large shrimp are best chopped into bite-size pieces so the rice eats evenly.
| Shrimp Size | Best Use |
|---|---|
| 51–60 count / small shrimp | Best for restaurant-style fried rice because shrimp pieces mix through every bite. |
| 26–30 count / medium shrimp | Best balance for home cooks; juicy but still easy to mix into rice. |
| 16–20 count / large shrimp | Looks generous, but may need chopping so the rice eats evenly. |
| Cooked shrimp | Use only in a pinch. Add at the end just to warm through. |
How to Thaw and Dry Frozen Shrimp
Frozen shrimp can work as well as fresh shrimp when it is thawed safely and dried thoroughly. The goal is to remove surface moisture before the shrimp hits the hot pan.
Shrimp Doneness: Loose C, Not Tight Curl
The best doneness cue is visual: shrimp should turn opaque and curl gently. When it tightens into a firm ring, it has usually cooked too long.

If you are using pre-cooked shrimp, do not sear it again. Add it near the end and toss only until warm. For shrimp that starts raw, a loose C-shape is usually a good cue; tight, firm curls usually mean it stayed on the heat too long.
When the shrimp is right, it should feel juicy and springy against the rice, not tight or chewy. That contrast is what makes the bowl feel generous.
The Sauce Ratio That Keeps Fried Rice Glossy, Not Wet
If your fried rice tastes salty but still flat, more soy sauce is usually not the answer. Try aroma, pepper, scallions, chili, or a tiny bit of sweetness before adding more liquid.
A balanced pan should taste savory all the way through, not sit in a puddle of sauce. For 4 cups cooked rice, this is enough to coat the grains without making them heavy:
- 2 tbsp / 30 ml light soy sauce
- 1 tbsp / 15 ml oyster sauce, optional
- 1 tsp / 5 ml toasted sesame oil
- 1/4 tsp white pepper
- 1/4 tsp sugar

Mix the sauce before you start cooking. Fried rice moves quickly, and stopping to measure sauces while the pan is hot can lead to overcooked shrimp or wet rice.
A small splash of dark soy sauce can add color, while light soy sauce stays the main seasoning. Too much dark soy can make the rice look heavy and taste overly salty.
Sauce Ratio by Rice Amount
Sauce is where fried rice can go from balanced to salty fast. Start with these amounts, then taste at the end.
| Cooked Rice | Soy Sauce | Oyster Sauce | Sesame Oil |
|---|---|---|---|
| 2 cups | 1 tbsp / 15 ml | 1 1/2 tsp / 7 ml | 1/2 tsp / 2.5 ml |
| 3 cups | 1 1/2 tbsp / 22 ml | 2 tsp / 10 ml | 3/4 tsp / 4 ml |
| 4 cups | 2 tbsp / 30 ml | 1 tbsp / 15 ml | 1 tsp / 5 ml |
If you skip oyster sauce, keep the soy sauce measured and build flavor with white pepper, scallions, heat, or a tiny pinch of sugar after tasting. If the rice tastes flat or salty, check the pan cues before adding more soy sauce.
Sauce Swaps
- No oyster sauce: Skip it, then taste for white pepper, scallions, heat, or a tiny pinch of sugar.
- Gluten-free: Use tamari instead of soy sauce and check the oyster sauce label.
- No soy sauce: Use coconut aminos, or season lightly with salt and a tiny splash of broth.
- No sesame oil: Skip it and finish with extra scallions for freshness.
- Spicy: Add chili crisp, sriracha, sambal, chopped green chili, or red pepper flakes.
Wok vs Skillet: Best Pan for Home Stoves
If you have ever made fried rice in a small pan and wondered why it steamed instead of fried, the pan size is probably the reason — not your cooking skill.
A wok is excellent for fried rice because it gives you room to toss and move ingredients quickly. But a large skillet is often better for home cooks than a small wok on a weak burner.
You do not need restaurant heat; you need restaurant order. A wide hot skillet, dry rice, and a little patience between stirs will get you much closer than a crowded wok on weak heat.
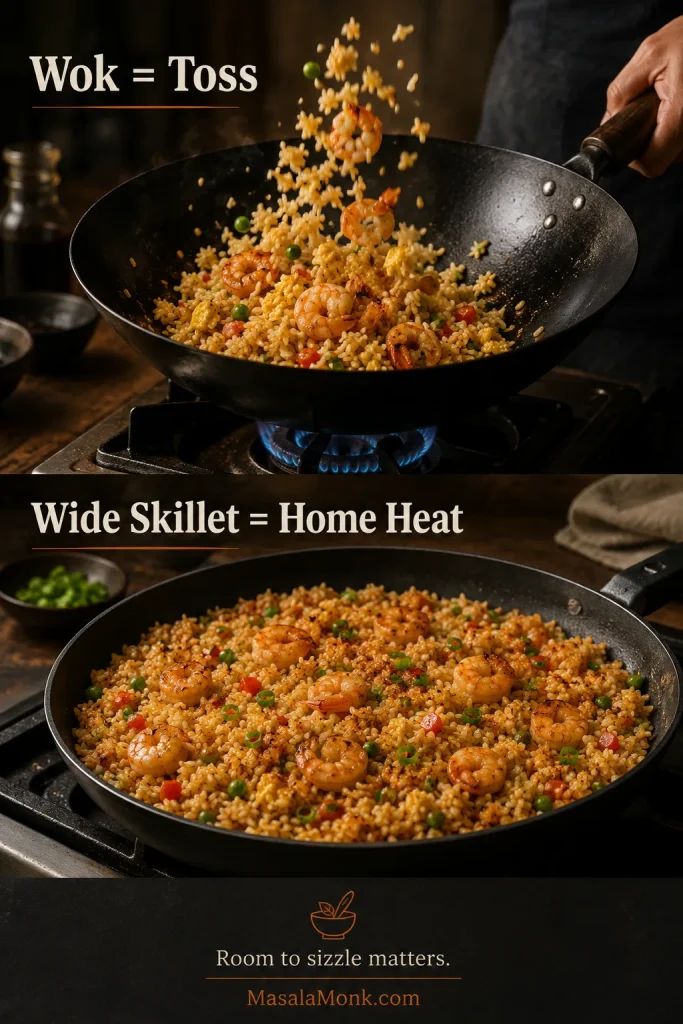
With less crowding, the rice has room to sizzle, which is where the better texture comes from. When the pan is too full, the vegetables leak water, the rice steams, and the sauce sits underneath instead of clinging to the grains.
- Use a wok if your stove gives strong heat and you can toss quickly.
- Choose a large non-stick skillet for the easiest beginner-friendly option.
- Try a heavy stainless or cast-iron skillet if it holds heat well and you are comfortable managing sticking.
- Cook in batches if your pan is small. A small pan can still make good fried rice — it just needs batches.
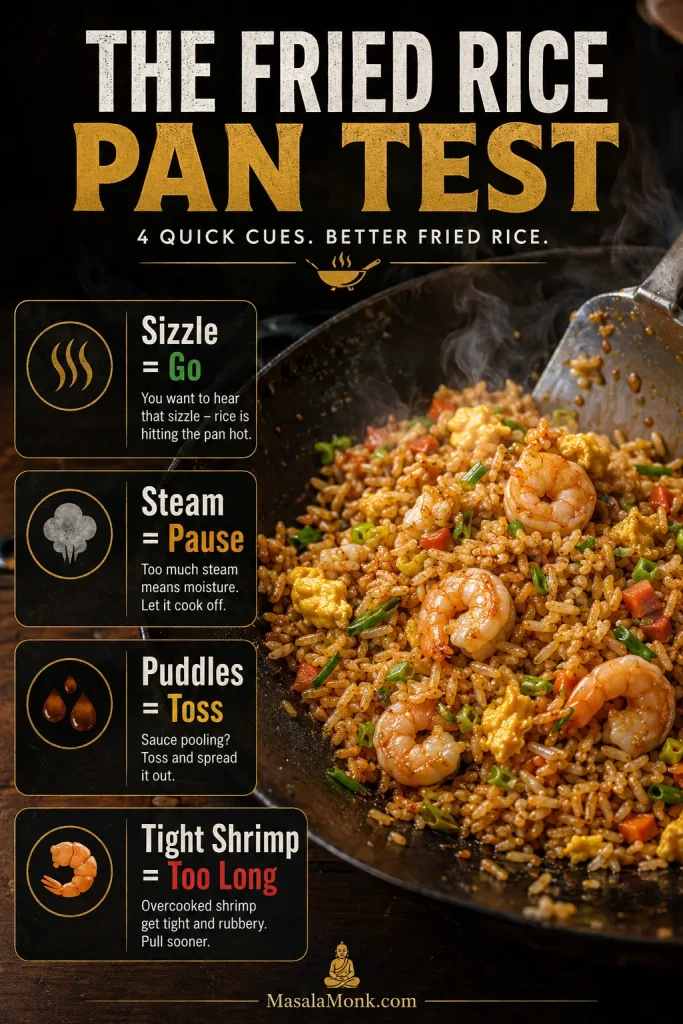
The Pan Cues That Matter Most
Use this while the rice is still in the pan. The troubleshooting table later is for fixing or understanding what went wrong; this section helps you catch problems before they become permanent.
Good fried rice gives you clear signs while it cooks. The pan tells you when to move forward and when to pause: steam, puddles, tight shrimp, or rice that sits in clumps instead of moving freely.
Think of it as the fried rice pan test: sizzle means go, steam means pause, puddles mean keep tossing, and tight shrimp means it cooked too long.
| Cue | What It Means | What to Do |
|---|---|---|
| Rice sizzles | The pan is hot enough and the grains are frying. | Let the rice get contact with the pan before adding sauce. |
| Rice steams heavily | The pan is crowded or there is too much moisture. | Spread the rice out or cook in batches. |
| Sauce pools underneath | Too much liquid was added or the rice was not hot enough. | Keep tossing over heat until the sauce clings to the grains. |
| Shrimp is tight and firm | It stayed on the heat too long. | Cook shrimp briefly next time and return it only at the end. |
| Flavor tastes flat | The rice may need lift, not more liquid. | Add white pepper, scallions, chili, or a tiny pinch of salt before more soy sauce. |
When it is ready, you should see loose grains, springy shrimp, soft egg, fresh scallions, and no sauce puddles.
Shrimp Fried Rice Variations
Once the base method works, you can take the same pan in a few different directions: brighter with pineapple and lime, hotter with chili crisp, fuller with chicken, lighter with cauliflower rice, or simpler without egg. Keep the rice dry and the sauce measured, and the texture stays in your control.
Looking for a specific version? Jump to restaurant-style, pineapple, or chicken and shrimp fried rice.
Prawn Fried Rice
Use prawns exactly the same way as shrimp. Medium prawns stay juicy and still mix well with the rice. Very large prawns are easier to eat when cut into bite-size pieces before cooking or after searing.
Restaurant-Style Shrimp Fried Rice
Use jasmine rice, white pepper, scallions, a little oyster sauce, and small shrimp pieces that mix through the rice. Drizzle the sauce around the edge of the hot skillet so it sizzles before coating the grains. Keep the sauce light so the rice tastes restaurant-style without turning dark, salty, or heavy.
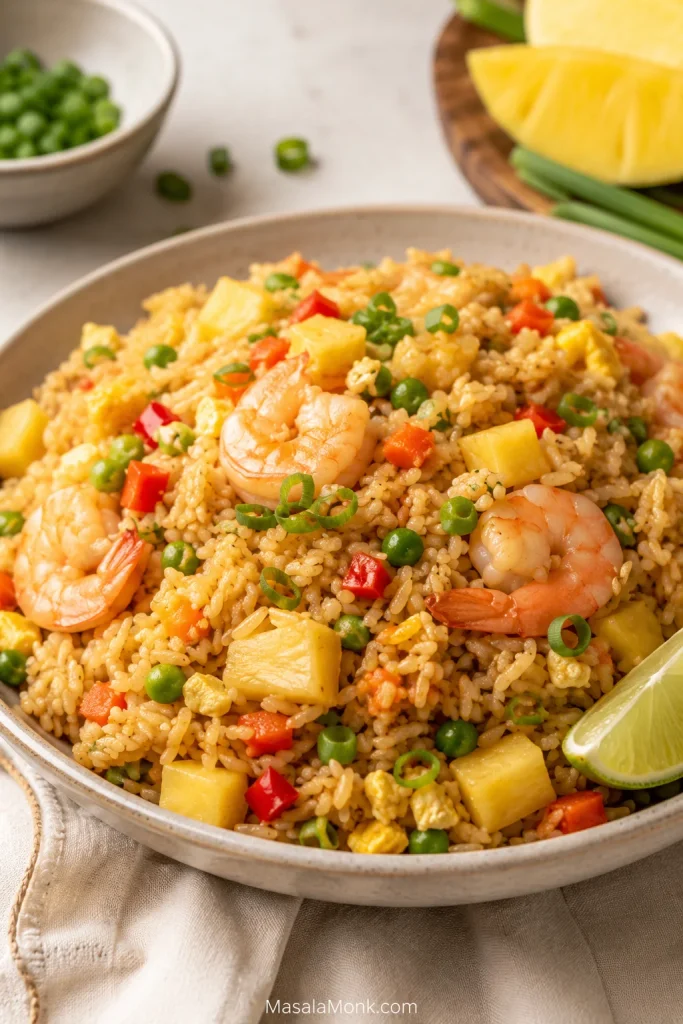
Pineapple Shrimp Fried Rice
Add 1/2 to 3/4 cup pineapple chunks, diced bell pepper, and a squeeze of lime at the end. Use less sugar in the sauce because pineapple brings sweetness. For a Thai-style direction, add a small splash of fish sauce, chopped chili, and extra scallions. Drain the pineapple well so the rice stays glossy instead of wet.
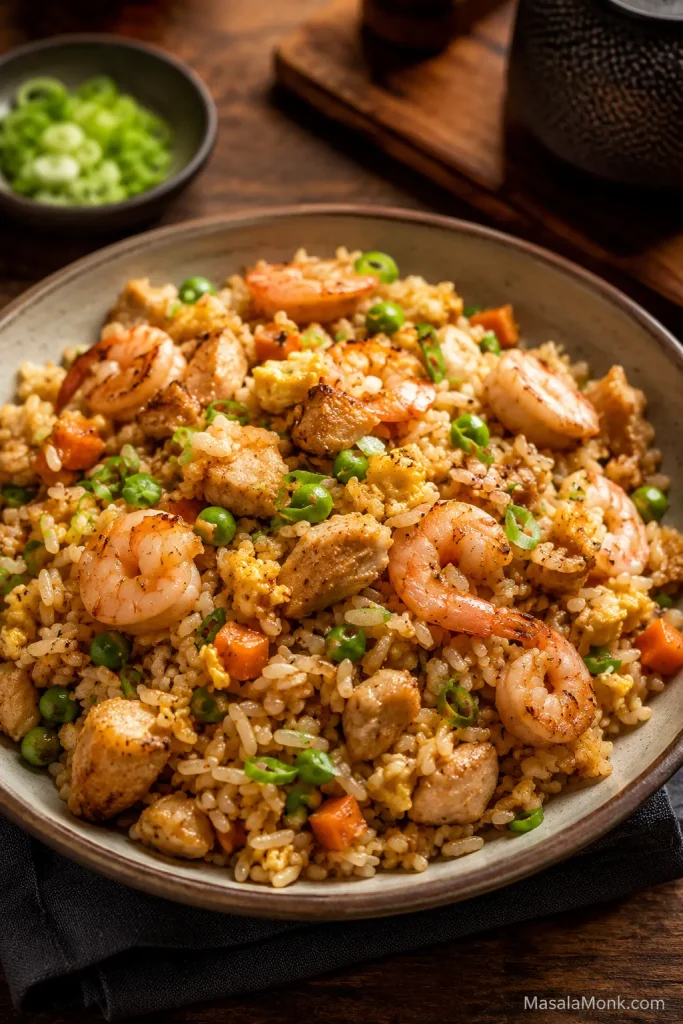
Chicken and Shrimp Fried Rice
Use small pieces of boneless chicken along with the shrimp. Cook the chicken first until done, remove it, then cook the shrimp briefly. Return both proteins near the end so neither overcooks.
Shrimp Fried Rice Without Egg
Skip the eggs and add more vegetables, tofu, or extra shrimp. Since egg adds richness, finish with scallions, white pepper, and a small amount of sesame oil to keep the rice flavorful.
Shrimp Fried Rice Without Soy Sauce
Use coconut aminos for a sweeter soy-free version, or season with salt, white pepper, sesame oil, and a tiny splash of broth. Add less liquid than you think you need, then taste after tossing.
Spicy Shrimp Fried Rice
Add chili crisp, sambal, sriracha, chopped green chili, or red pepper flakes. For the best texture, add chili oil or chili crisp near the end instead of flooding the rice early.
Cauliflower Shrimp Fried Rice
Use cauliflower rice instead of cooked rice for a lighter version. Frozen cauliflower rice should be thawed and squeezed dry first. Fry it in a wide skillet and leave it uncovered so it does not turn watery.
Why Fried Rice Turns Mushy — and How to Fix It
A difficult pan of fried rice is usually not a disaster. It is feedback: too much moisture, not enough heat, too much sauce, or shrimp that stayed in the pan too long.
Most fried rice problems are easy to diagnose once you know what to look for. Steam means moisture, puddles mean liquid, clumps mean the rice needed breaking up earlier, and tight shrimp means it stayed in the heat too long.
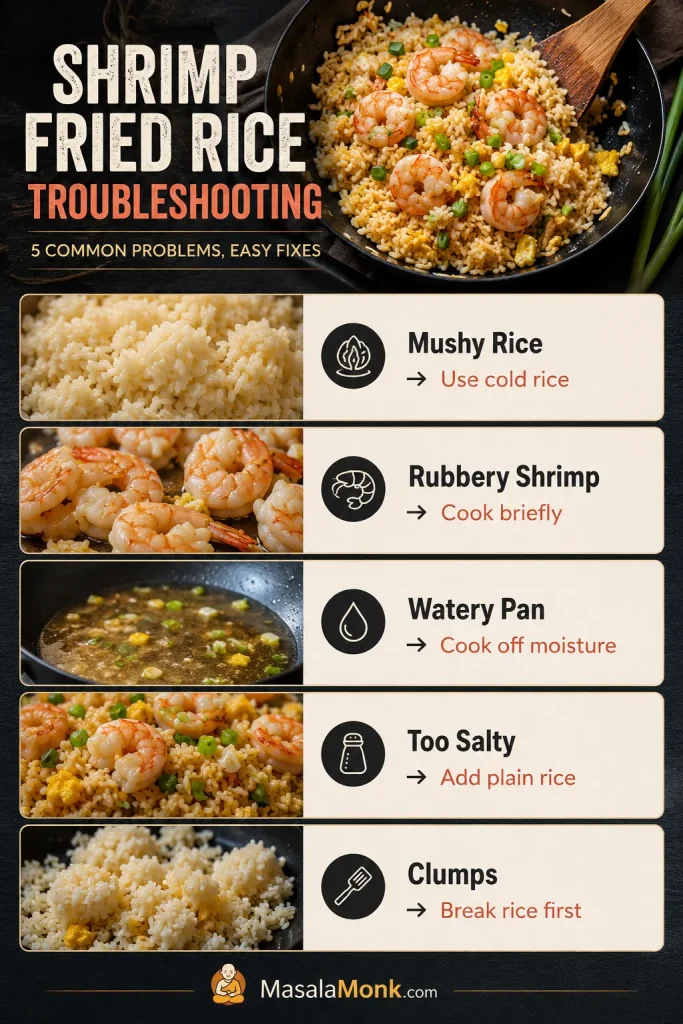
| Problem | Why It Happened | Fix |
|---|---|---|
| Rice is mushy | Rice was warm or wet, sauce was too heavy, or the pan was crowded. | Use cold rice, reduce sauce, use a wider pan, and cook in batches. |
| Shrimp is rubbery | Shrimp cooked too long or stayed in the pan while the rice finished. | Cook shrimp briefly, remove it, and return it at the end. |
| Rice tastes bland | Sauce was uneven or the rice was not seasoned enough. | Mix sauce before cooking and taste for salt, white pepper, scallions, and heat before adding more sauce. |
| Rice is too salty | Too much soy sauce, oyster sauce, or dark soy sauce was added. | Add plain rice, egg, or extra vegetables to balance it. |
| Rice is clumpy | Cold rice was added in large chunks. | Break rice apart before it goes into the pan. |
| Fried rice is watery | Frozen shrimp, frozen vegetables, or pineapple added too much moisture. | Dry shrimp well, cook off vegetable moisture, and drain pineapple before adding. |
| Egg disappeared into the rice | Egg was mixed into wet rice or over-stirred. | Scramble egg separately, then return it near the end. |
What to Serve with Shrimp Fried Rice
This can be dinner on its own, especially with egg and vegetables. Because the rice is savory and glossy, the best sides bring crunch, acidity, freshness, or heat.
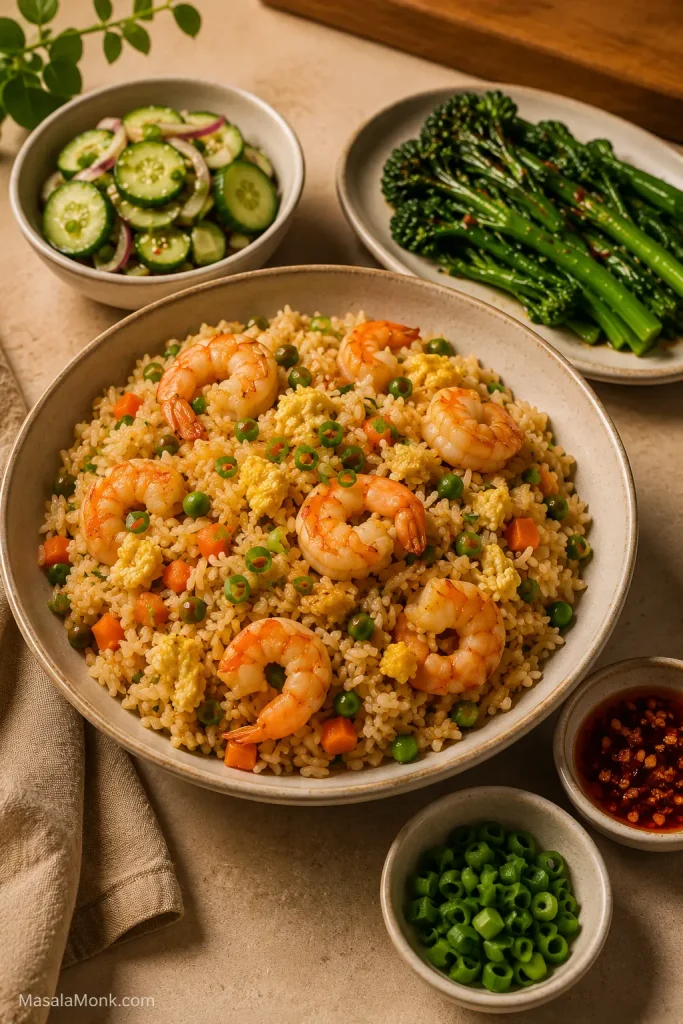
- Cucumber salad or quick pickled cucumbers
- Steamed or stir-fried greens
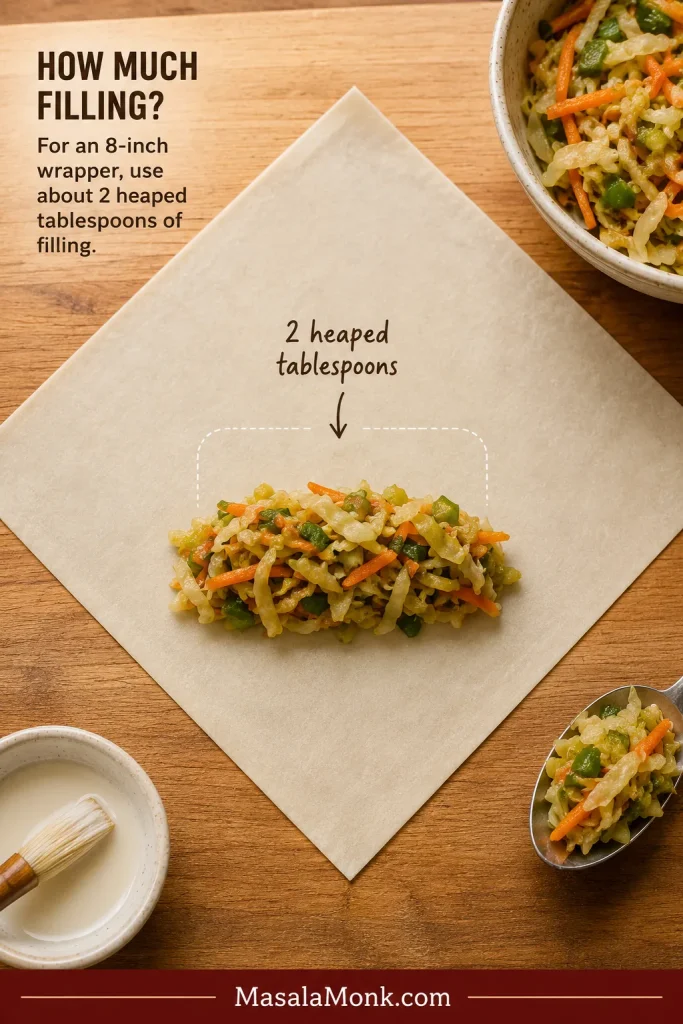
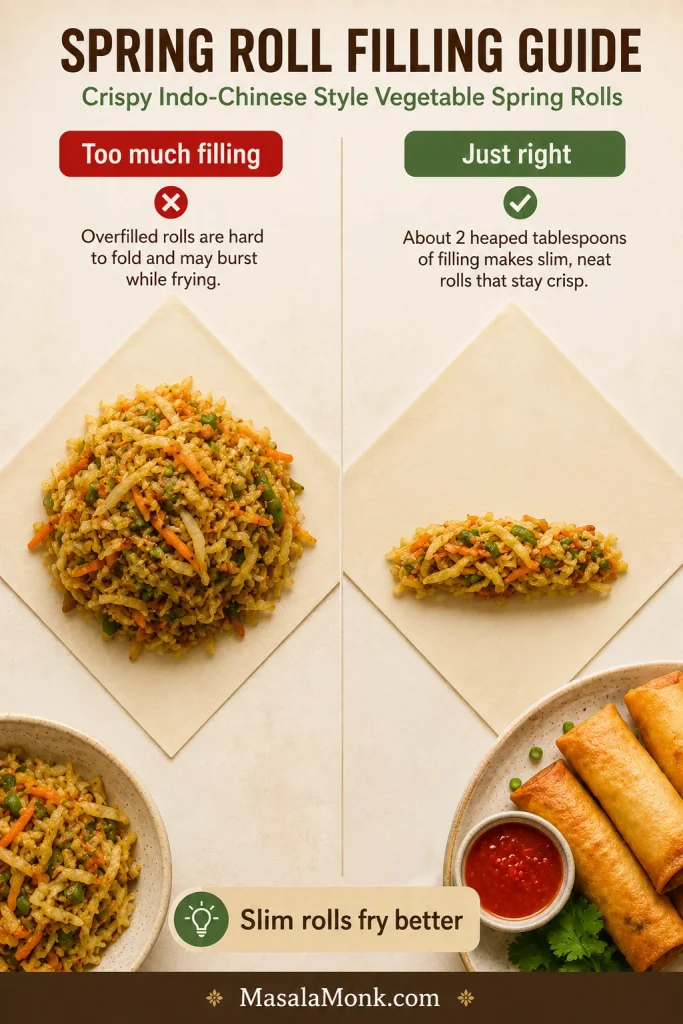
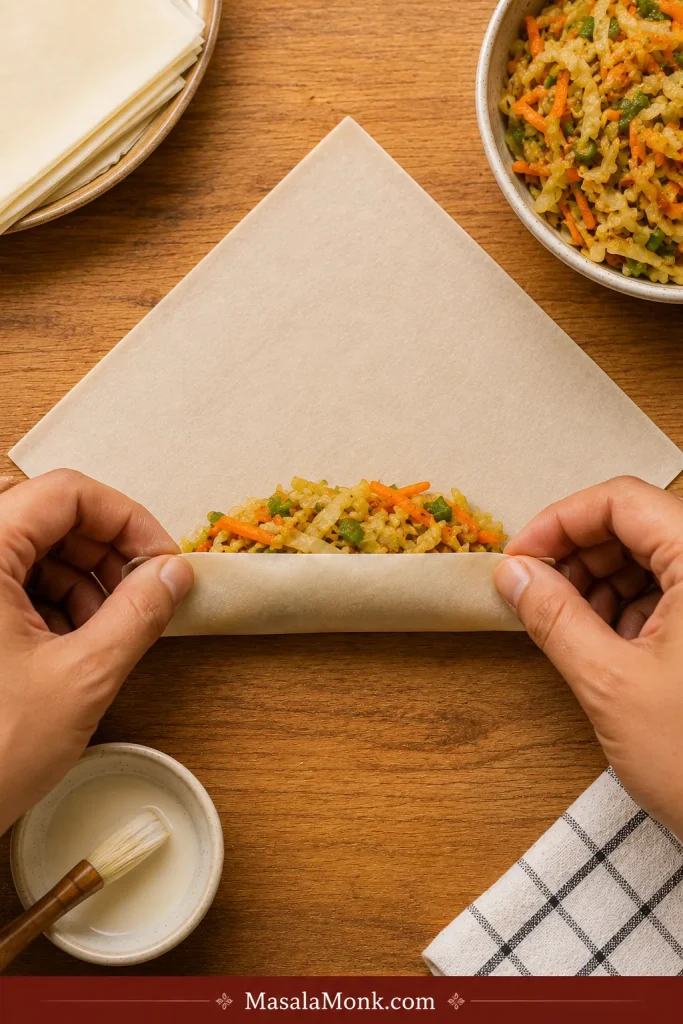
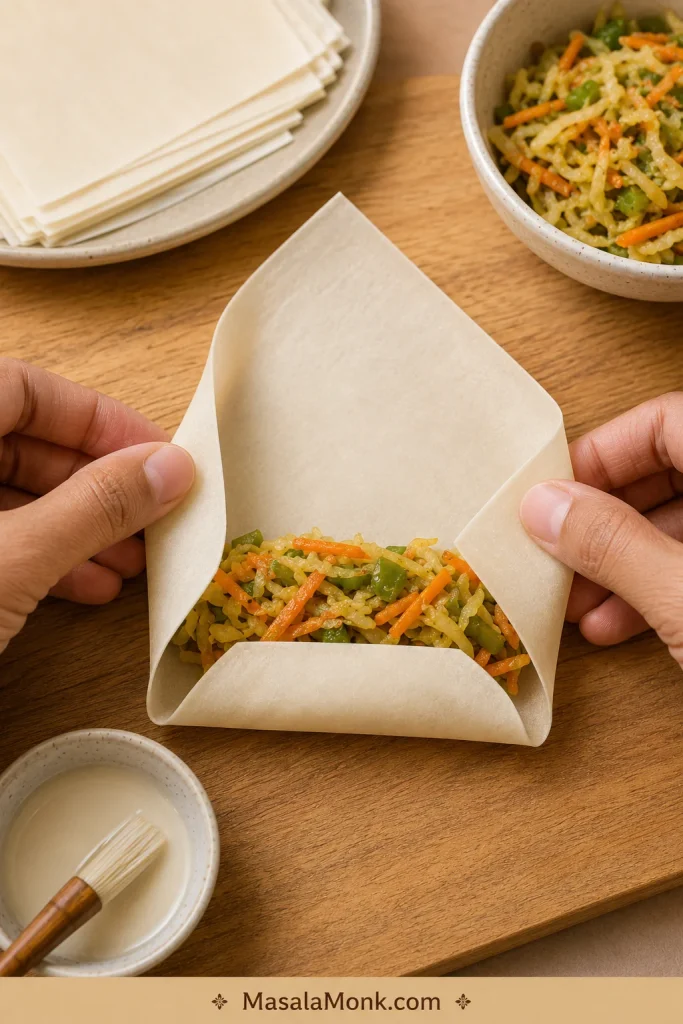
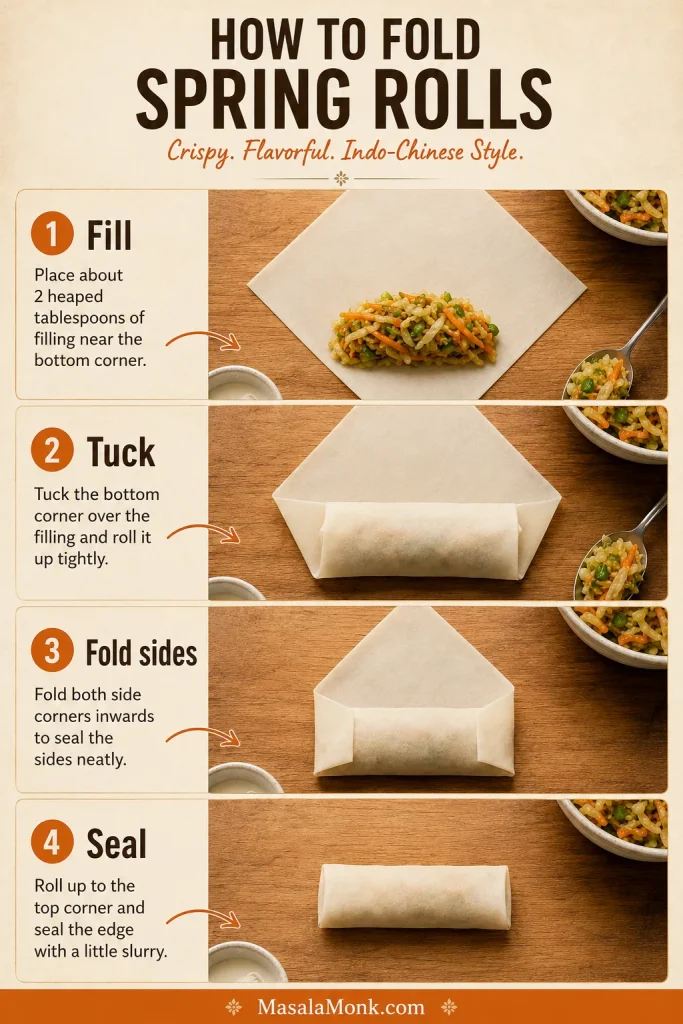
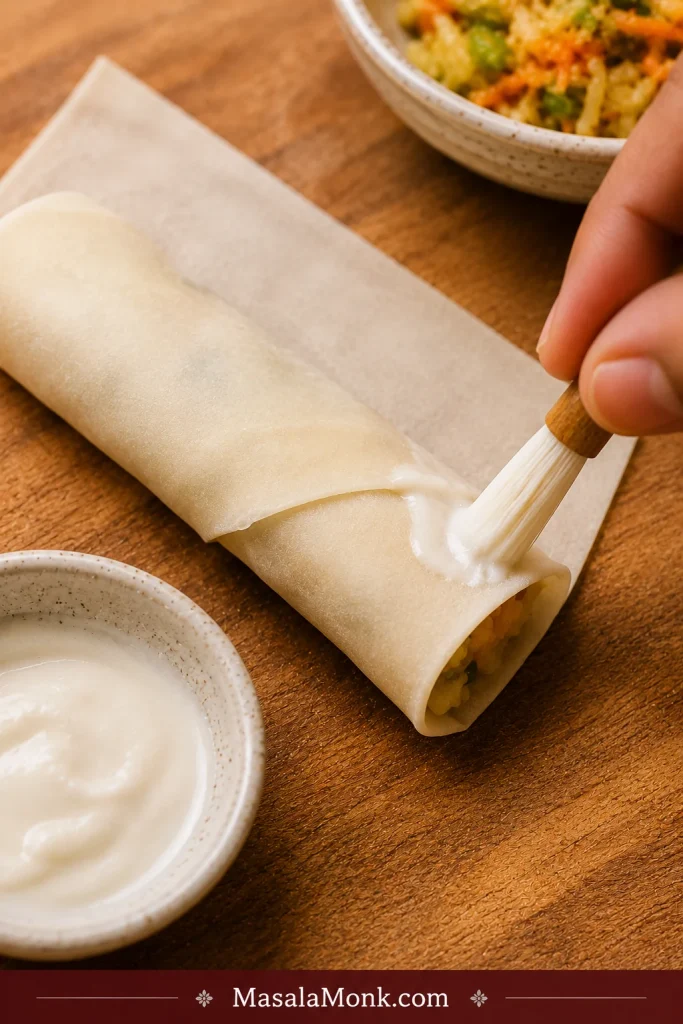
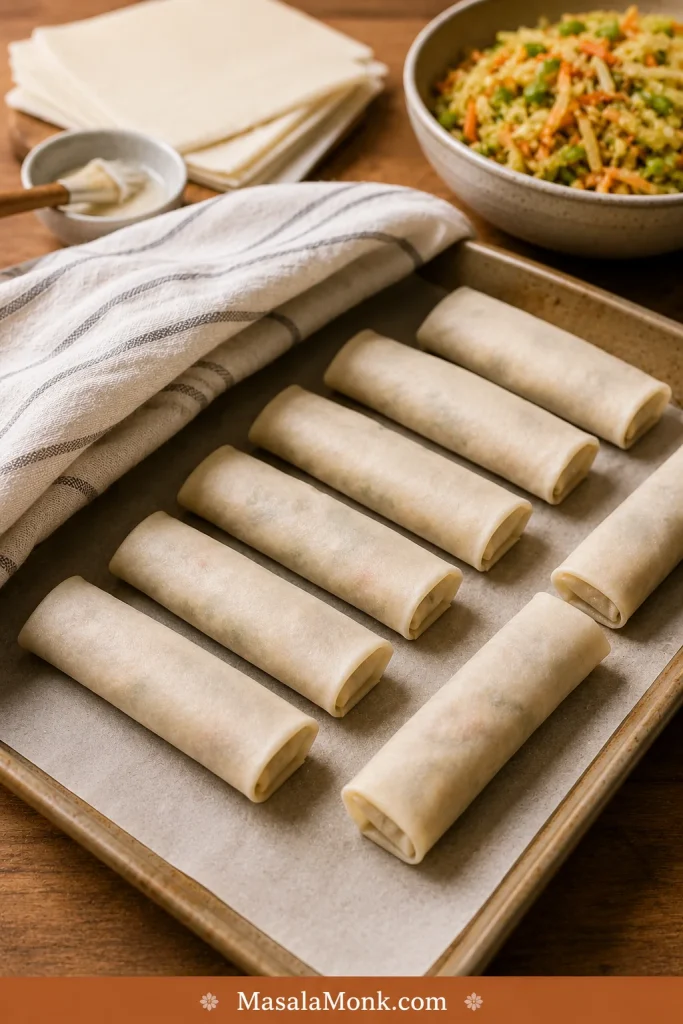
- Spring rolls or lettuce wraps
- Clear soup or hot and sour soup
- Chili oil, chili crisp, or extra scallions on top
For a cold, crisp contrast, MasalaMonk’s cucumber salad recipe works especially well beside salty, glossy rice. For another quick shrimp dinner in a different direction, the shrimp scampi recipe gives you garlic butter, lemon, and tender shrimp instead of soy-sesame rice.
Storage and Reheating
This dish tastes best fresh from the pan, but leftovers can still be good when they are cooled, stored, and reheated properly.
- Refrigerate: Store cooled shrimp fried rice in an airtight container for up to 3 days.
- Reheat in a skillet: Warm over medium heat with a few drops of oil or water. Stir gently until hot.
- Microwave carefully: Use short bursts and stop as soon as the rice is hot. Shrimp can get rubbery if overheated.
- Freezing: Freezing is possible, but the shrimp and egg texture may not be as good after reheating.
Leftover rice note: Because this recipe often starts with leftover rice, cooling and reheating matter. If you cook rice ahead for fried rice, cool it quickly in a shallow container and refrigerate it within 2 hours. Do not leave cooked rice sitting out for hours before chilling. Reheat shrimp fried rice until hot all the way through, and reheat only the portion you plan to eat. For more detail, see the USDA leftover food safety guidance.
FAQs About Shrimp Fried Rice
What is the best rice for shrimp fried rice?
Cold cooked jasmine or long-grain white rice is the easiest choice because the grains stay separate in a hot skillet. Dry basmati can also work well when it has been cooked firm and cooled fully.
Do you need cold rice for shrimp fried rice?
Cold rice is easiest because the grains are firmer and drier on the surface. Fresh rice can work too, but it needs cooling time first so it stops steaming.
Can you use freshly cooked rice for shrimp fried rice?
Yes, but not straight from the cooker. Cook it slightly firm, spread it out so steam escapes, then chill it until the surface feels dry. Break up the grains before adding them to the pan.
How do you make shrimp fried rice not mushy?
Use cold rice, a hot wide pan, and a measured amount of sauce. Pat shrimp dry, cook off moisture from frozen vegetables, and avoid crowding the pan.
What shrimp works best for fried rice?
Raw peeled and deveined medium shrimp is the easiest choice. Smaller shrimp give a more restaurant-style bite, while very large shrimp are better chopped.
Should shrimp be cooked before adding rice?
Yes. Cook shrimp briefly first, remove it from the pan, then return it after the rice is fried. This keeps the shrimp tender while the rice gets enough time on the heat.
How much sauce should you add to shrimp fried rice?
For 4 cups cooked rice, start with 2 tablespoons soy sauce, 1 tablespoon oyster sauce, 1 teaspoon sesame oil, white pepper, and a small pinch of sugar. Add more only after tasting.
Is oyster sauce necessary?
No. Oyster sauce gives a deeper takeout-style flavor, but the rice still works without it. Keep the soy sauce measured, then use white pepper and scallions for extra flavor.
How do you make shrimp fried rice with frozen shrimp?
Thaw frozen shrimp fully and pat it dry. Season it, cook it briefly in a hot pan, then remove it before frying the rice so it stays juicy and the skillet stays dry.
Do prawns work instead of shrimp?
Yes. Prawns work the same way in this recipe. Use raw peeled and deveined prawns, dry them well, cook them briefly, and return them at the end.
How do you make shrimp fried rice without egg?
Skip the egg and add more shrimp, vegetables, or tofu. Since egg adds richness, finish with scallions, white pepper, and a small amount of sesame oil.
How long does shrimp fried rice keep?
Shrimp fried rice keeps for up to 3 days in the refrigerator when stored in an airtight container. Cool it before storing and reheat only the portion you plan to eat.
What is the best way to reheat shrimp fried rice?
A skillet over medium heat gives the best texture. Add a few drops of oil or water and stir gently until hot. Use short microwave bursts if reheating quickly.
Back to recipe card · Back to quick answer
The Takeaway
Good shrimp fried rice is not about a long ingredient list. It is about giving the rice enough heat, keeping the shrimp tender, and using just enough sauce to season every grain.
Once you hear the rice sizzling instead of steaming, you are on the right track. Keep the shrimp brief, the sauce measured, and the pan wide, and this becomes the kind of fried rice you can repeat with whatever is already in the fridge.
The best version does not taste like leftovers. It tastes like a hot pan gave yesterday’s rice a second life.