Posted on 3 Comments

Best Apples for Apple Pie

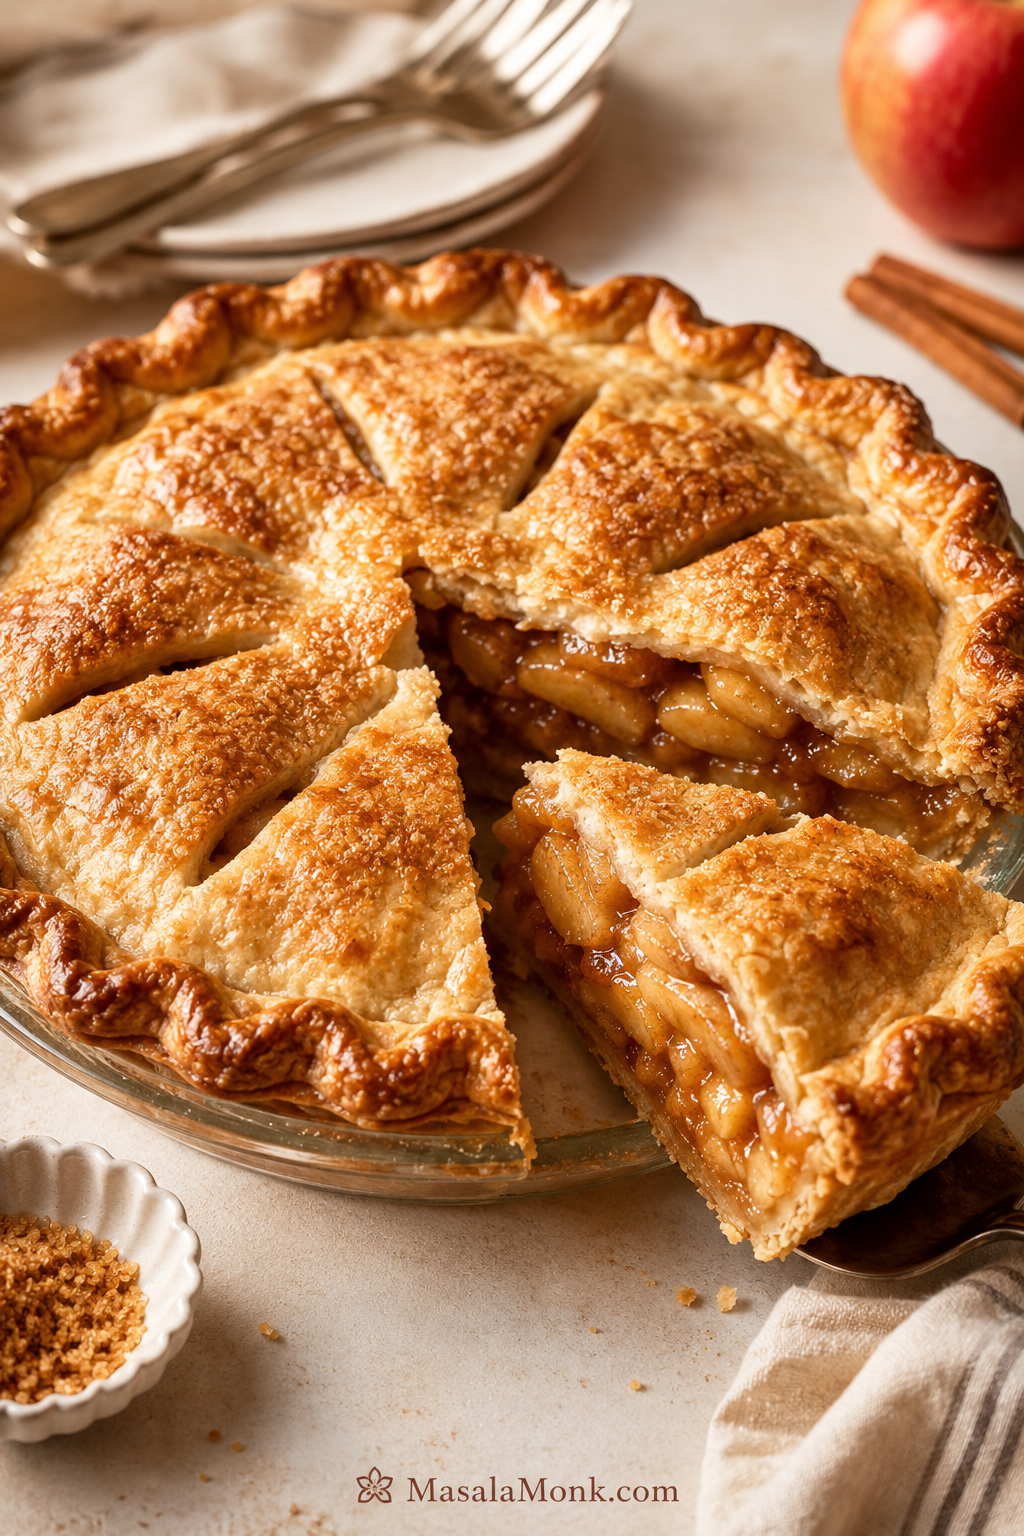
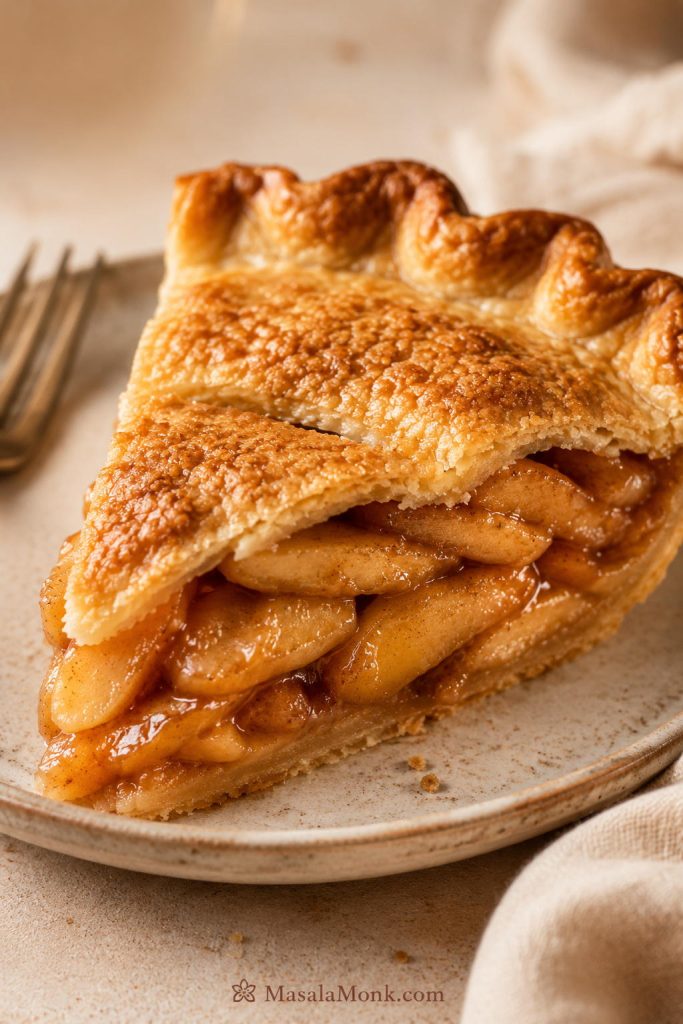
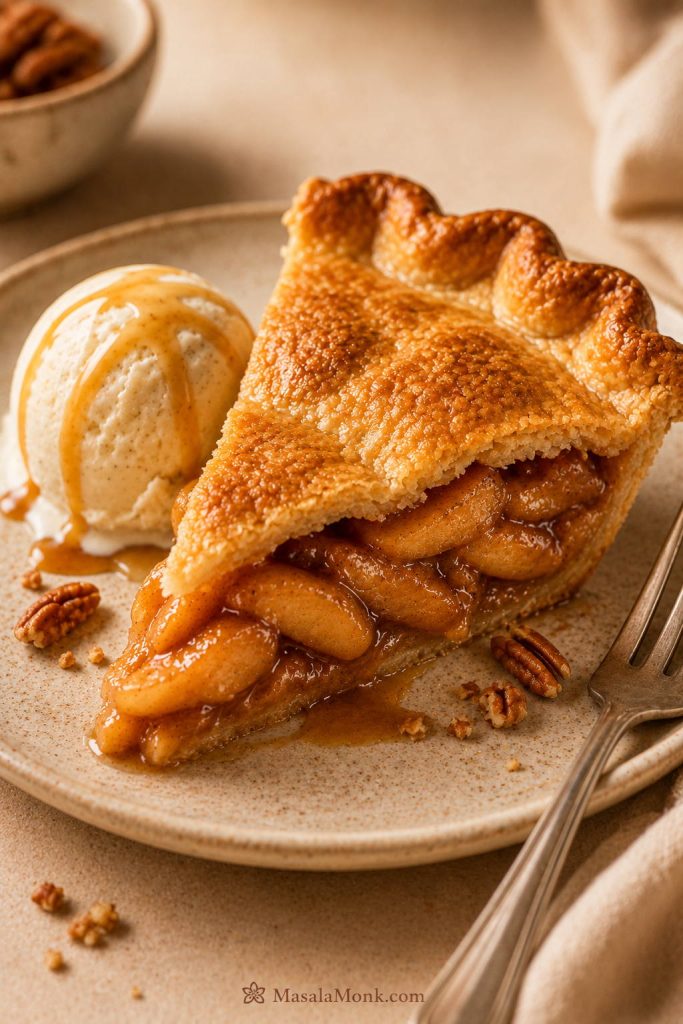
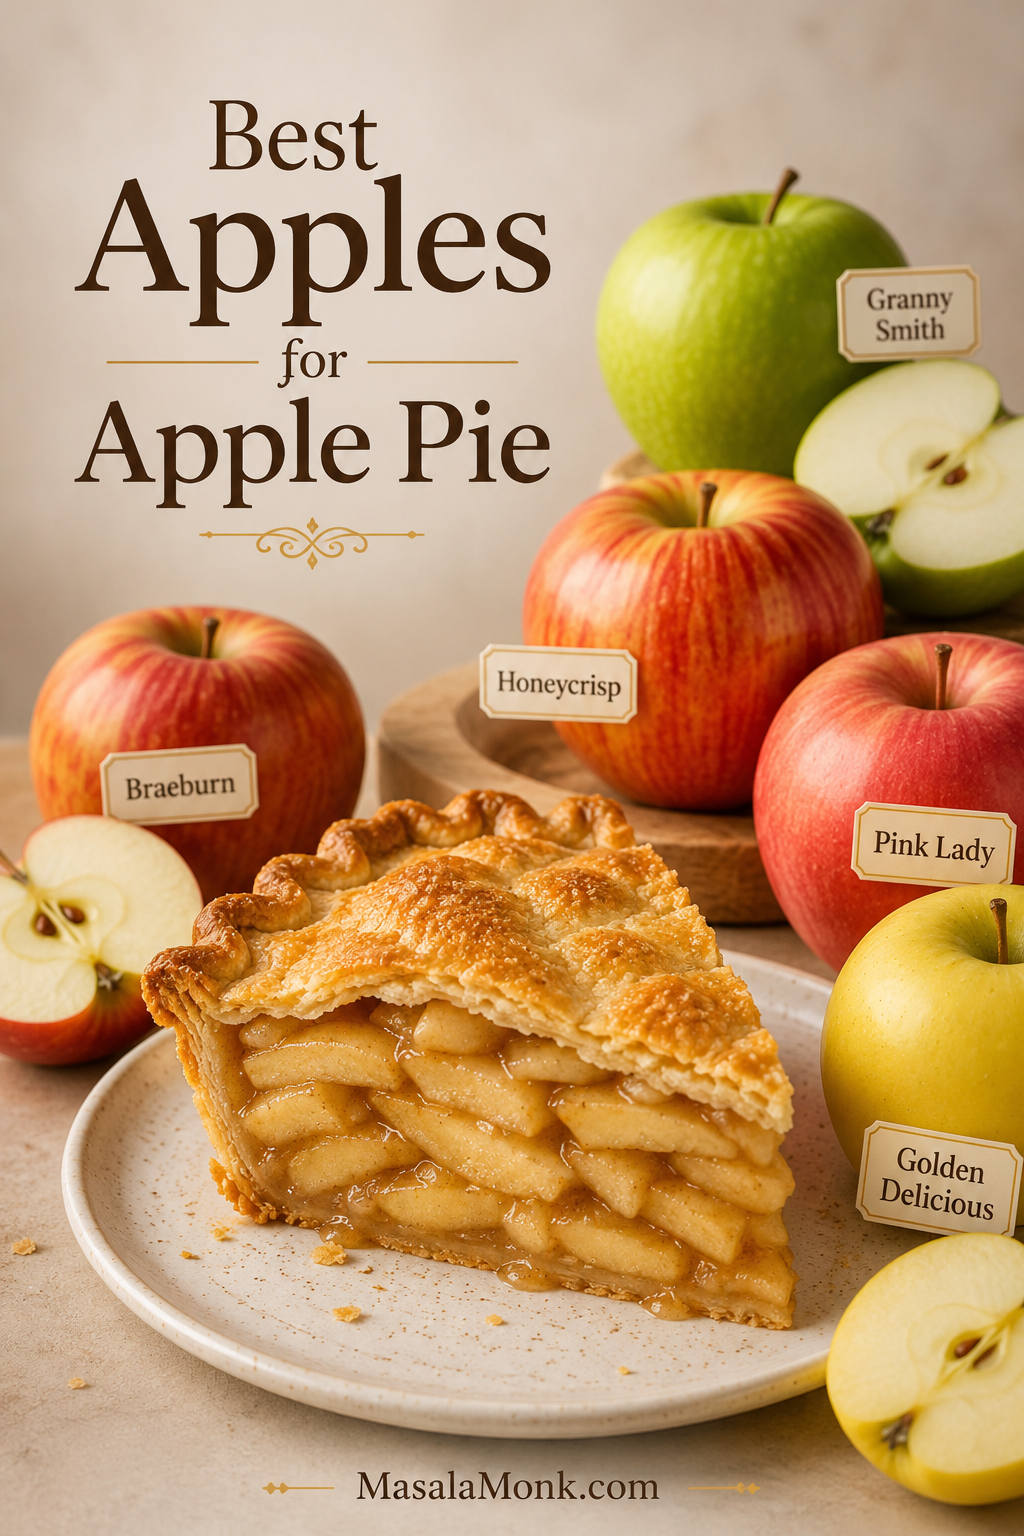
A slice of apple pie with layered apple filling beside Granny Smith, Honeycrisp, Braeburn, Pink Lady, and Golden Delicious apples.

The best apples for apple pie are not always the prettiest or sweetest apples in the bin. A good pie apple has a harder job: it needs to soften in the oven without collapsing, keep real apple flavor after baking, and balance the sugar, spice, butter, and crust around it.

The frustrating part is that apples can look perfect in the store and still bake into very different pies. Some stay firm, some turn saucy, some leak juice, and some taste bright when raw but disappear once cinnamon and sugar enter the picture.

That is why the safest answer is usually a blend. Granny Smith is the easiest tart anchor, but most homemade pies taste better when that tart apple is mixed with a sweeter, flavorful apple like Honeycrisp, Pink Lady, Braeburn, Jonagold, or Golden Delicious.

This guide is for the moment before you start peeling: which apples to buy, which ones to mix, which varieties to avoid, how thick to slice them, and what to do when you only have Gala, Fuji, McIntosh, Red Delicious, Honeycrisp, or Granny Smith at home.

Already know your apple variety? Jump straight to Using the Apples You Already Have. Still shopping? Start with the apple chart or the best apple blends.

Quick Answer: What Are the Best Apples for Apple Pie?

The best apples for apple pie are Granny Smith, Honeycrisp, Braeburn, Pink Lady, Golden Delicious, and Jonagold. For the easiest balanced pie, use Granny Smith with Honeycrisp. Granny Smith gives tartness and backbone, while Honeycrisp adds sweetness and fuller apple flavor.
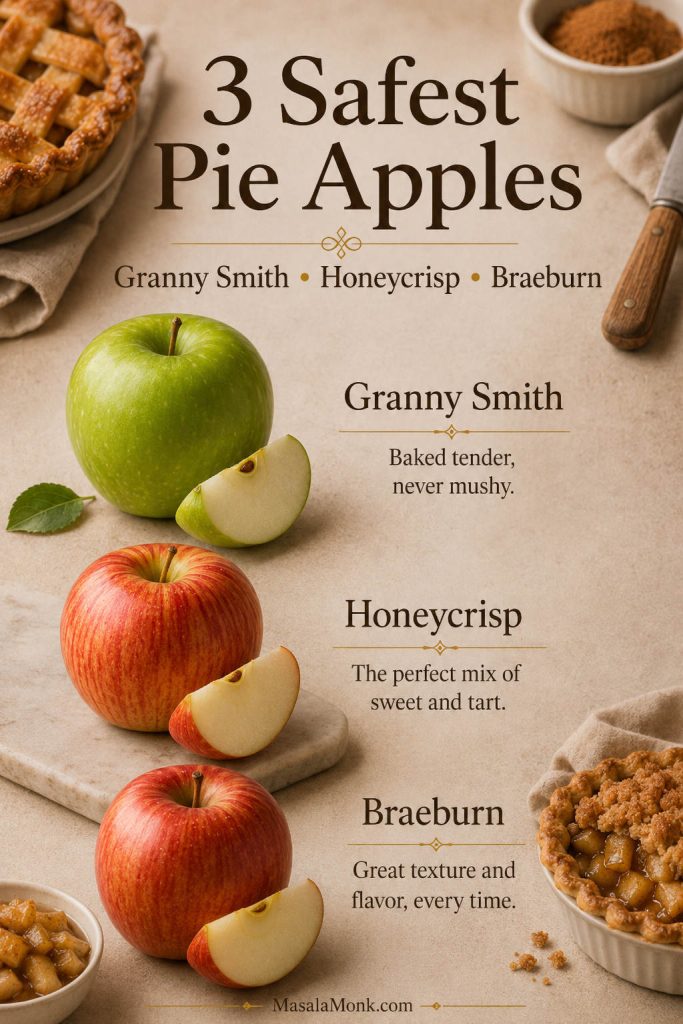
A quick-answer apple pie guide showing Granny Smith, Honeycrisp, and Braeburn as three reliable apples for pie.
If you want a fast starting point, begin with Granny Smith, Honeycrisp, or Braeburn. Together, these three cover the biggest pie needs: tartness, familiar sweetness, and stronger baked apple flavor.
The 3 safest apples for apple pie:
Granny Smith for tartness and backbone.
Honeycrisp for sweet-tart flavor and familiarity.
Braeburn for deeper baked apple flavor and good texture.

For a brighter pie, pair Granny Smith with Pink Lady. To build deeper apple flavor, bring in Braeburn, Golden Delicious, or another apple with rounded sweetness. And for neat slices instead of an applesauce-like filling, skip Red Delicious, overripe apples, and very soft apples that collapse quickly when baked.

Choosing apples in the store? Start with one tart apple and one apple you already like eating. That simple rule prevents most flat, mushy, or overly sharp pies before you even make the filling.

Best Pie Apples at a Glance

Best for Apple choice
Easiest balanced blend Granny Smith + Honeycrisp
Bright tart pie Granny Smith + Pink Lady
Deeper apple flavor Braeburn + Golden Delicious + Granny Smith
Firm, sliceable filling Granny Smith + Braeburn + Pink Lady
Better saved for other uses Red Delicious, very soft apples, bruised apples, overripe apples

The useful rule is simple: choose apples by job. One apple brings brightness, one keeps the filling sliceable, and one gives the pie a rounder apple flavor.

Best Apples for Apple Pie Chart

How to Use This Chart

Use this chart when you are standing in front of apples and trying to decide what to buy. Instead of memorizing every variety, look at the apple’s role: main pie apple, blending apple, saucy accent, or one to skip for classic pie.
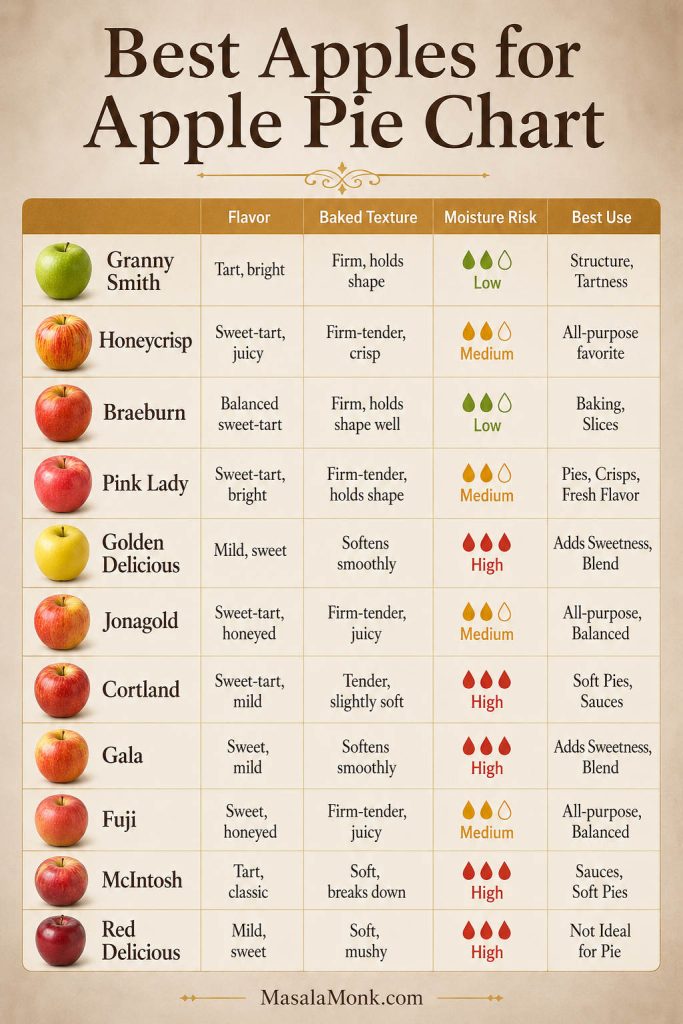
A comparison chart of apple varieties for pie, showing flavor, baked texture, moisture risk, and best use for each apple.
This chart helps you compare pie apples by the traits that matter most once they hit the oven. As a result, it is easier to see which apples are better for tartness, structure, softer filling, or a deeper apple flavor.
Apple Flavor Baked texture Moisture risk Best use Use alone or blend?
Granny Smith Very tart Firm Low Tart anchor Better blended
Honeycrisp Sweet-tart Holds well Medium Balanced pie Alone or blend
Braeburn Sweet-tart, complex Holds well Low-medium Serious baking apple Alone or blend
Pink Lady / Cripps Pink Bright, sweet-tart Firm Low-medium Fresh pie and filling Blend
Golden Delicious Mellow, sweet Softer Medium Flavor and depth Blend
Jonagold Sweet-tart Good Medium Balanced pie Blend
Cortland Aromatic, slightly tart Softer Medium Regional option Blend
Gala Sweet, mild Softens Medium Small amount only Blend only
Fuji Very sweet Can be juicy Medium-high With tart apples Blend only
McIntosh Sweet-tart Breaks down High Saucy component Small amount only
Red Delicious Mild/sweet Mealy or mushy High Avoid for pie Avoid

Why Apple Charts Can Disagree

Apple charts can disagree because freshness, storage, region, and ripeness change how each variety bakes. That is why this guide treats apples like Golden Delicious, Fuji, Gala, and McIntosh as role-based choices instead of universal best-or-worst answers.
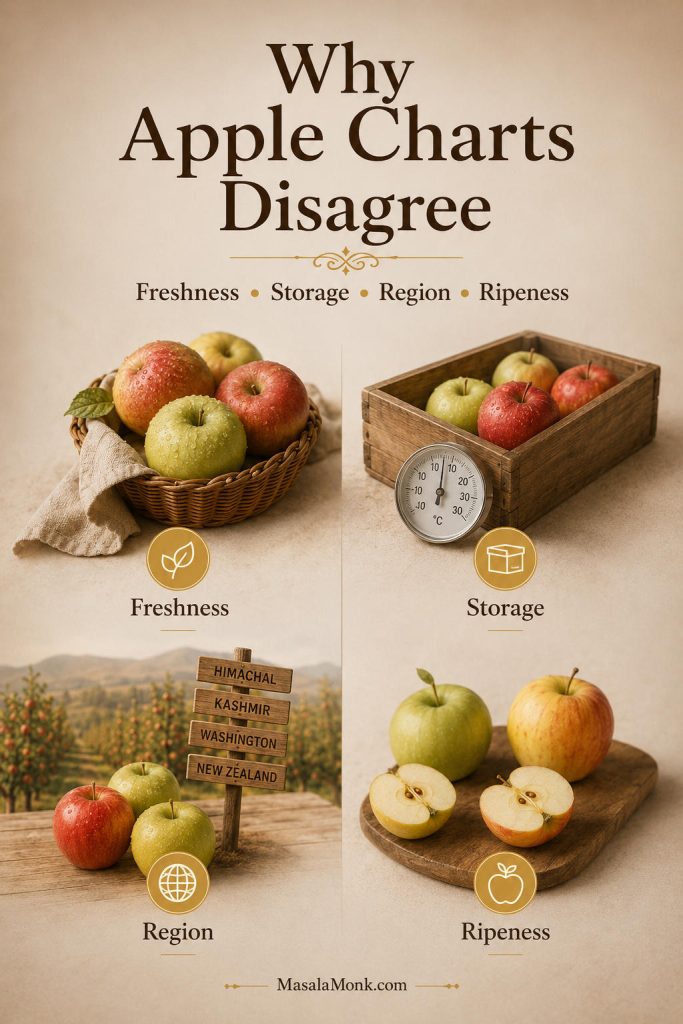
An explainer image showing that apple pie apple recommendations can vary because of freshness, storage, region, and ripeness.
Apple charts often disagree because the fruit itself changes. Freshness, storage time, growing region, and ripeness can all affect whether an apple stays firm, releases more juice, or tastes brighter after baking.

Still, the pattern is reliable: apples with body, acidity, and clear flavor are safer for pie than soft, mild, mealy, or overripe apples. Serious Eats has a useful baked-apple comparison showing why raw flavor is not enough; a good pie apple also has to keep pleasant texture once it is cooked.

In other words, the best baking apples for pie are not just apples that taste good raw. They need enough acidity, body, and flavor to survive a long bake.

Choosing apples for cooked filling rather than a fresh pie? Jump to best apples for apple pie filling. Because cooked filling simmers before it reaches the crust, the apples need to hold up twice: first in the pan, then in the pie.

Best Apple Combinations for Apple Pie

Before choosing a blend, think about the pie you want. Brighter pies need more tart apple, while mellow pies need a sweeter one. For a clean sliceable pie, choose apples that hold their shape; for a softer old-fashioned filling, include one apple that cooks down slightly.
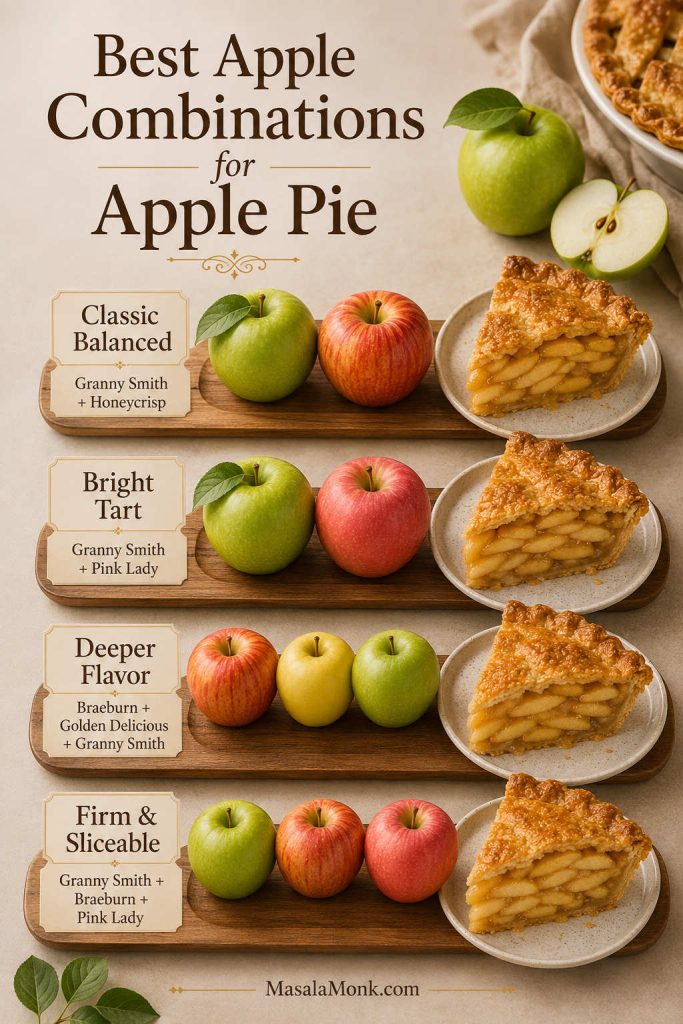
A guide to apple combinations for pie, showing blends for classic balanced, bright tart, deeper flavor, and firm sliceable fillings.
The best apple combinations for pie usually balance three jobs at once: tartness, sweetness, and structure. Instead of relying on one variety, blend apples so the filling tastes fuller and bakes more evenly.

Think of the apple blend like building a filling team. One apple brings tartness, another brings sweetness, and another keeps the slices from collapsing. You do not need a complicated mix, but you do need balance.

Best Blends by Pie Result

Pie result Apple combination Why it works
Classic balanced pie Granny Smith + Honeycrisp Tart backbone plus sweet-tart flavor.
Brighter tart pie Granny Smith + Pink Lady Sharp, lively, and good for people who like a less sugary pie.
Deeper apple flavor Braeburn + Golden Delicious + Granny Smith Complex flavor, mellow sweetness, and tart balance.
Firm, sliceable filling Granny Smith + Braeburn + Pink Lady Good bite with enough brightness.
Softer old-fashioned filling Golden Delicious + Jonagold Rounder flavor and a softer bite without going fully mushy.
Slightly saucier pie Golden Delicious + small amount of McIntosh + firm tart apple Soft apple depth, but still anchored by a sturdier variety.

Best Supermarket Apple Blend for Pie

If you are baking on a normal grocery run, do not overthink it. A two-apple blend is enough for most pies. Granny Smith and Honeycrisp are the easiest pair because they give you tartness, sweetness, and enough structure without making the filling too sharp or too soft.

A grocery-store apple selection scene showing Granny Smith and Honeycrisp apples as an easy supermarket blend for apple pie.
For an easy supermarket apple pie, start with Granny Smith and Honeycrisp. This pair is popular for a reason: it gives the filling brightness, balance, and enough structure without making the pie too sharp or too sweet.

Best One-Apple Choices

Blends are better, but sometimes you only want to buy one kind of apple. In that case, choose based on the pie you want.
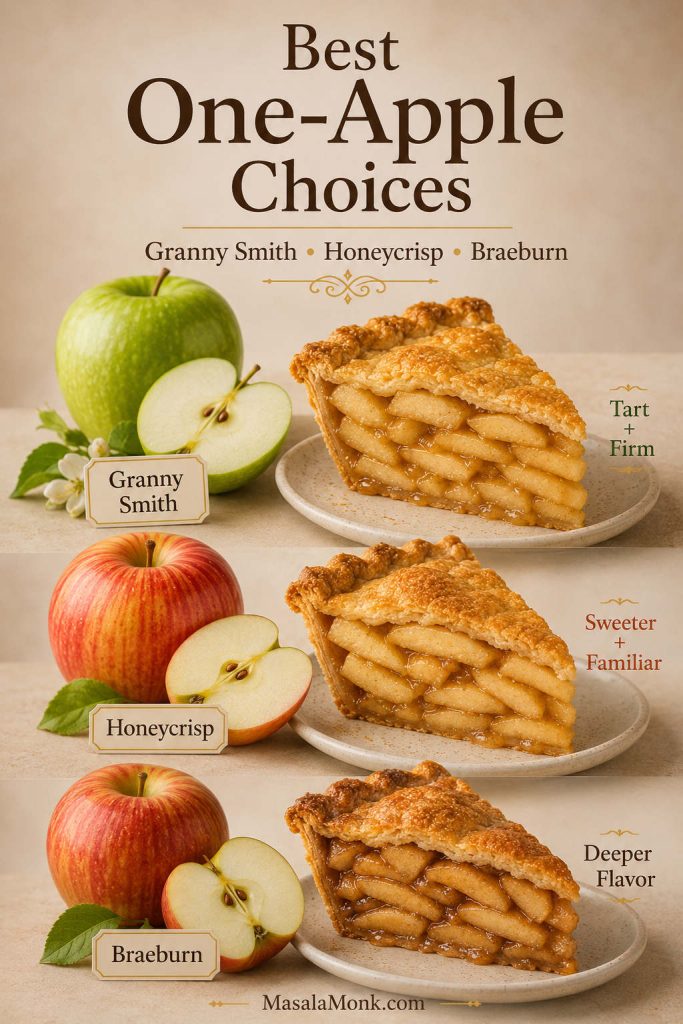
A one-apple choice guide for apple pie showing Granny Smith, Honeycrisp, and Braeburn as single-variety options.
A one-apple pie can still be good when you choose the variety with intention. Granny Smith gives a firmer tart pie, Honeycrisp makes a sweeter and more familiar filling, and Braeburn adds a deeper baked-apple note.
One-apple choice Best for
Granny Smith A tart, firm pie with strong structure.
Honeycrisp A sweeter, familiar pie with good flavor.
Braeburn A deeper, more apple-forward pie.

Choose Your Apple Blend by Pie Style

Pie style Best apple blend
Tart and bright Granny Smith + Pink Lady
Sweeter and family-friendly Honeycrisp + Golden Delicious + a little Granny Smith
Firm and sliceable Granny Smith + Braeburn
Softer and old-fashioned Golden Delicious + Jonagold, with a small amount of McIntosh if desired

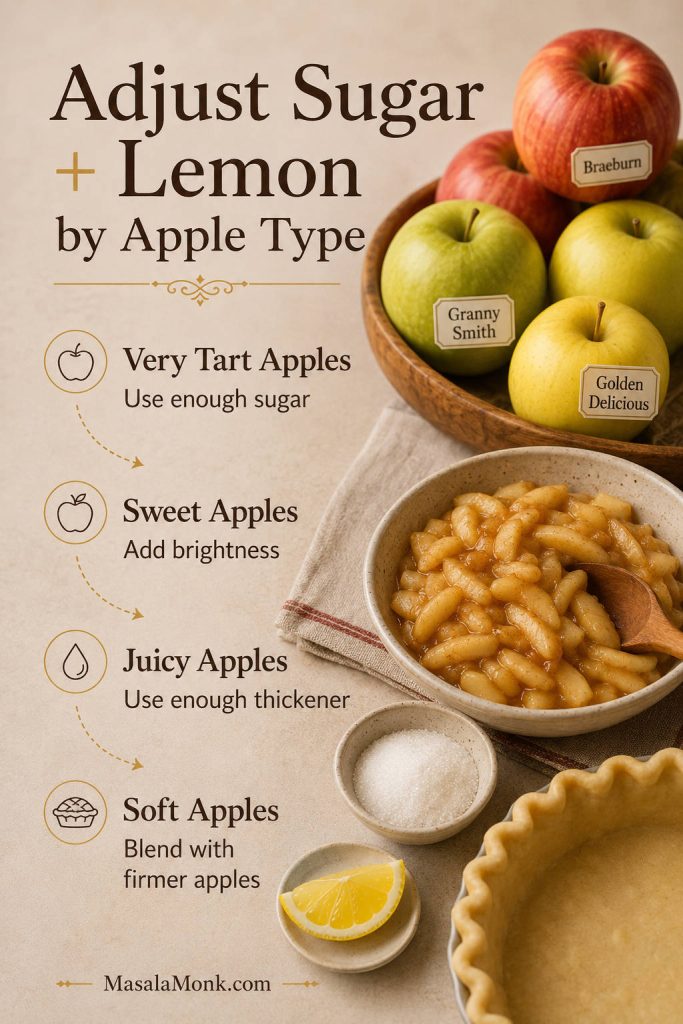
How to Adjust Sugar and Lemon by Apple Type

Apple mix What to adjust
Mostly Granny Smith or other very tart apples Use enough sugar and consider adding a sweeter apple for roundness.
Mostly Honeycrisp, Fuji, Gala, or other sweet apples Reduce sugar slightly and add lemon or a tart apple if the filling tastes flat.
Very juicy apples Use a recipe with enough thickener and bake until the filling bubbles.
Soft apples Expect a saucier filling or blend with sturdier apples for a neater slice.
A kitchen guide showing how to adjust sugar, lemon, thickener, or apple blending based on tart, sweet, juicy, or soft apples.
Not every apple needs the same filling treatment. Very tart apples usually need more sweetness, sweeter apples benefit from brightness, and juicy or soft apples need extra help from thickener or firmer partners.

The main thing to remember is that apples set the direction of the filling before sugar or spice does. Very tart apples need enough sweetness to round them out. Sweeter apples usually need brightness from lemon or a tart variety. Meanwhile, soft or juicy apples work better when they have a firmer partner in the bowl.

What Makes an Apple Good for Pie?

Think of this as the difference between a good snacking apple and a good pie apple. A snacking apple only has to taste good raw. A pie apple has to survive heat, sugar, spice, and time without losing itself.
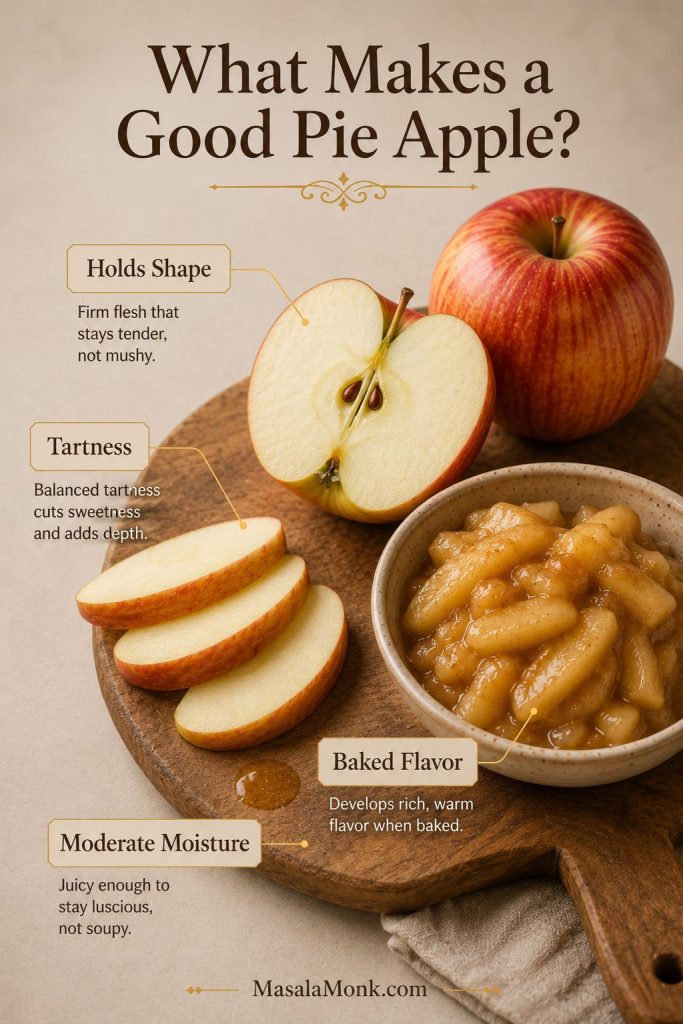
Sliced apples and cooked apple filling with callouts for holding shape, tartness, baked flavor, and moderate moisture.
A good pie apple should hold shape, keep flavor after baking, and release enough juice without flooding the filling. In other words, the best apples for pie are judged by the baked result, not just the raw bite.
How this guide chooses pie apples:
The apples here are judged by baked texture, flavor after cooking, moisture level, tart-sweet balance, and how easy they are to find. A good pie apple should soften without collapsing, taste like apple after baking, and help the filling set instead of turning watery.

Texture That Holds

The apple should soften, but it should not disappear. When the pieces collapse completely, the filling turns saucy or mushy instead of sliceable. Granny Smith, Braeburn, Pink Lady, and many orchard baking apples are useful because they keep more bite.

Enough Tartness to Balance Sugar

Apple pie needs contrast. All-sweet apples can taste flat once sugar and spice are added, while all-tart apples can make the pie taste sharp. That is why a balanced blend usually gives the filling a fuller flavor.

Flavor That Survives Baking

Some apples taste wonderful raw but become mild after baking. For that reason, flavor apples like Honeycrisp, Braeburn, Golden Delicious, Jonagold, and Pink Lady are useful in blends.

Moderate Moisture

Very juicy apples can make the filling loose when the pie is underbaked or sliced too soon. However, juicy apples are not useless. They simply need balance from firmer tart apples and a recipe that gives the filling enough time to bubble and set.

Freshness

Fresh, crisp apples bake better than apples that are soft, wrinkled, bruised, or tired. Look for fruit that feels lively in the hand, has some acidity, and still tastes like apple after baking.

Best Apple Varieties for Apple Pie

Use this section when you want to know what each apple actually does in a pie. The best choice depends on whether you want tartness, sweetness, a neater slice, or a softer old-fashioned filling.

Granny Smith

Best role: tart anchor for a balanced apple pie.

Granny Smith is the tart apple many bakers reach for first, and for good reason. It is widely available, keeps its shape well, and stands up to sugar, cinnamon, butter, and a long bake.

The only catch is flavor balance. A pie made with only Granny Smith can taste sharp or a little one-note. For better depth, use it as the tart anchor and pair it with Honeycrisp, Pink Lady, Braeburn, Golden Delicious, or Jonagold.

Honeycrisp

Best role: familiar sweet-tart apple for easy blends.

Honeycrisp is the apple many readers will recognize immediately, and that is part of its advantage. It is crisp, sweet-tart, easy to find, and friendly enough for bakers who do not want a very sharp pie.

It is also a good “safe” apple when you are baking for people who do not love a very tart filling.

Although it can work on its own when fresh and crisp, it becomes more balanced when mixed with Granny Smith, Pink Lady, or Braeburn.

Braeburn

Best role: deeper flavor with strong baked texture.

Choose Braeburn when you want the pie to taste more deeply apple-forward, not just sweet and cinnamon-spiced. It has enough acidity to stay lively and enough density to hold up well in the oven.

Use Braeburn alone if you like its flavor, or mix it with Granny Smith and Golden Delicious for a pie that has tartness, bite, and mellow apple depth.

Pink Lady

Best role: bright, crisp apple for lively filling.

Pink Lady, also sold as Cripps Pink, is bright, crisp, and sweet-tart. It is excellent when you want a filling that tastes lively rather than heavy.

Pair it with Granny Smith for a tart pie or with Honeycrisp for a slightly sweeter one. It is also a strong choice for cooked apple pie filling because it keeps more shape than softer apples.

Golden Delicious

Best role: mellow flavor apple for softer blends.

Golden Delicious brings mellow, classic apple flavor. It is softer than Granny Smith or Braeburn, but that softness can be a strength when you want a rounder, more old-fashioned filling.

Think of it as a rounding apple rather than the main structure of the pie.

Use it as a flavor apple in a blend, especially with Granny Smith or Braeburn. It gives the pie a gentler sweetness without making the whole filling taste flat.

Jonagold and Jonathan

Best role: sweet-tart supporting apples with character.

Jonagold and Jonathan are useful sweet-tart apples when you can find them. Jonagold brings sweetness and acidity, while Jonathan has a sharper, more old-school apple flavor.

Both are good supporting apples in a blend, especially when you want more character than a basic sweet apple gives.

Cortland

Best role: softer regional apple for blended pies.

Cortland has good apple flavor and can be useful when you like a slightly softer homemade filling. It is especially helpful when you want tenderness without turning the whole pie into sauce. Because it is not always as firm as Granny Smith or Braeburn, it works best with a stronger baking apple.

Northern Spy, Winesap, Mutsu, Gravenstein, and Bramley

Best role: orchard options when available.

These are the kinds of apples you may see at orchards, farmers’ markets, or specialty stores. Availability depends heavily on where you live, but many regional baking apples can be excellent in pie.

When buying directly from a grower, ask which apples hold their shape when baked and which ones cook down into sauce. That answer is more useful than chasing a variety name that may not be available in your area.

Already have apples at home? Skip to Using the Apples You Already Have for Gala, Fuji, McIntosh, Red Delicious, Granny Smith, Honeycrisp, green apples, and sweet apples.

Using the Apples You Already Have

This is the section to use when you are staring at the fruit bowl and wondering whether the pie can still happen. You may not have the ideal apples at home, but many common varieties can still work when you give them the right role.
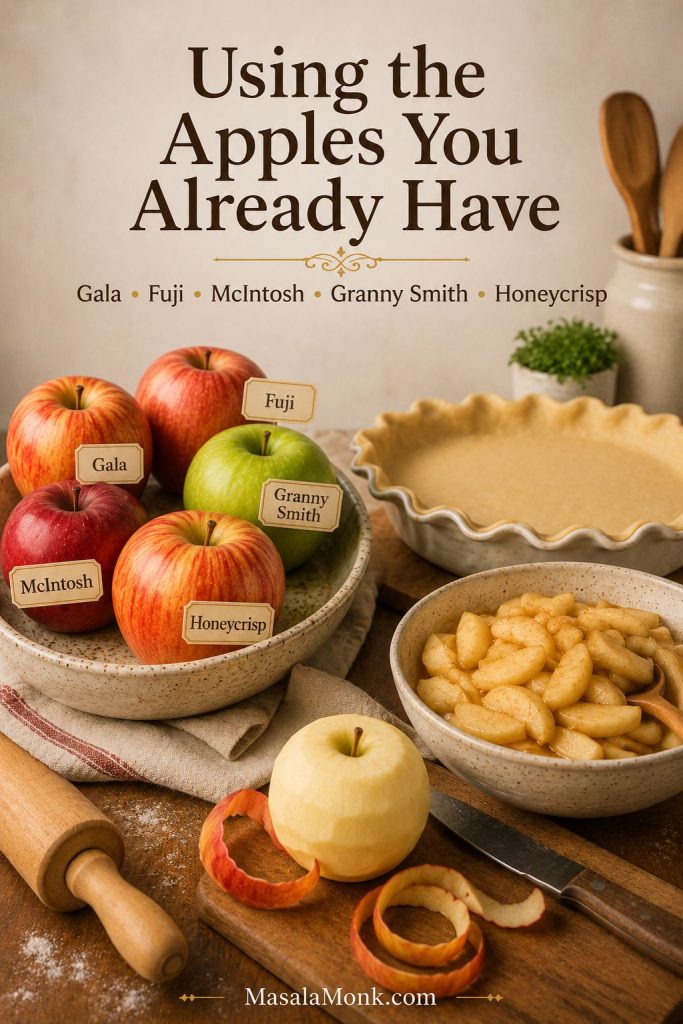
A kitchen counter with Gala, Fuji, McIntosh, Granny Smith, and Honeycrisp apples beside pie crust, sliced apples, and baking tools.
You do not need a perfect shopping trip to make pie happen. However, once you know whether your apples are best used as the main filling apple, a blending apple, or a softer support apple, the whole decision gets easier.
One-variety rescue guide:
Mostly Granny Smith? Keep the tartness, but add enough sweetness and consider pairing with a sweeter apple next time.
Mostly Honeycrisp? You can make a good pie, but add lemon only when the filling tastes too sweet or flat.
Mostly Gala or Fuji? Reduce sugar slightly and add a tart apple if you can.
Mostly McIntosh? Expect a softer filling, or use them for cooked apple pie filling, crisp, compote, or applesauce.

Gala Apples in Pie

Gala can work when it is what you have, especially in a blend. It is sweet and easy to find, but it can taste mild or bake softer than ideal in a full pie. Pair Gala with Granny Smith, Braeburn, or Pink Lady for better balance.

Fuji Apples in Pie

Fuji needs balance because it is naturally sweet and juicy. Pair it with Granny Smith or Pink Lady, then reduce the sugar slightly when the filling already tastes sweet.

McIntosh Apples in Pie

McIntosh is best when you like a softer, saucier filling. It breaks down quickly, so it should not be the main apple for a clean, sliceable pie. A small amount can add softness and flavor when balanced with apples that hold their shape.

Red Delicious Apples in Pie

Red Delicious is best avoided for pie. It often becomes mealy, mild, and weak after baking, so it is better as a fresh eating apple.

Using Only Granny Smith Apples

A pie made entirely with Granny Smith can work, but the filling may taste very tart and a little one-note. For better flavor, blend Granny Smith with Honeycrisp, Golden Delicious, Pink Lady, Braeburn, or Jonagold.

Using Only Honeycrisp Apples

Honeycrisp can make a good pie, especially when the apples are fresh and crisp. Because the filling may lean sweet, add Granny Smith or Pink Lady when you want more brightness.

Green Apples for Pie

In most grocery stores, “green apples” usually means Granny Smith, one of the most reliable tart apples for pie. Green apples are especially helpful when the rest of your apples are sweet or mild.

Sweet Apples for Pie

Sweet apples can work, but they need balance. Add a tart apple, a little lemon, or a less-sweet filling so the pie does not taste flat.

Worst Apples for Apple Pie

The worst apples for apple pie are not bad apples. They are just not the best choice for a clean, sliceable baked filling. Use them for snacking, applesauce, compote, cakes, or softer desserts instead.
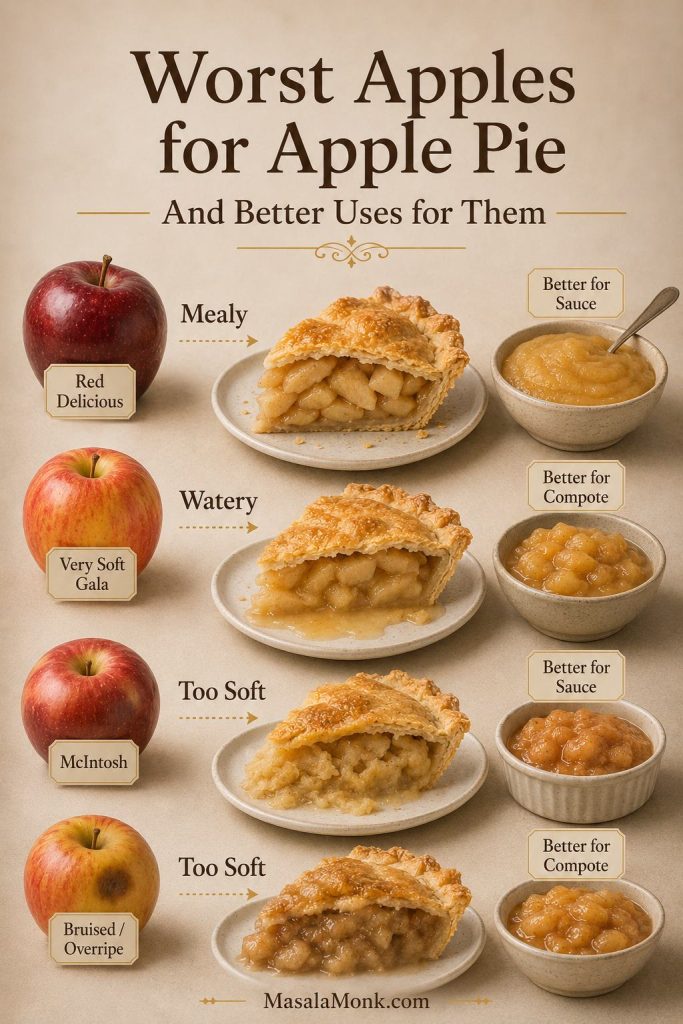
Less ideal apples for pie, including Red Delicious, very soft Gala, McIntosh, and bruised apples, with better uses such as sauce or compote.
The worst apples for apple pie are usually the ones that turn mealy, watery, or overly soft in the oven. Even so, that does not make them useless — they are often better suited to applesauce, compote, or crisp-style desserts.
Apple Why it is not ideal for classic pie Better use
Red Delicious Often mealy, bland, and weak after baking. Fresh eating.
Very soft Gala Can become too soft and mild in a full pie. Blend in small amounts, apple cake, quick desserts.
Fuji used alone Can make the filling too sweet or juicy. Blend with tart apples.
McIntosh used alone Breaks down into sauce. Applesauce, saucier filling, compote.
Old or wrinkled apples Weak texture and dull flavor. Cooked sauce if still usable and not spoiled.
Bruised apples Uneven texture and poorer storage quality. Trim and use only if fresh; avoid for clean pie slices.

If one of these apples is all you have, the answer is not always to abandon the pie. Use it in a blend, make a softer filling, or turn it into crisp, compote, or applesauce where a less sliceable texture is not a problem.

How to Choose Apples for Pie at the Store

When you are buying apples for pie, do not choose by color alone. Choose by texture, freshness, and role in the filling. A glossy red apple may look tempting, but an apple with brightness and flavor will usually bake better.
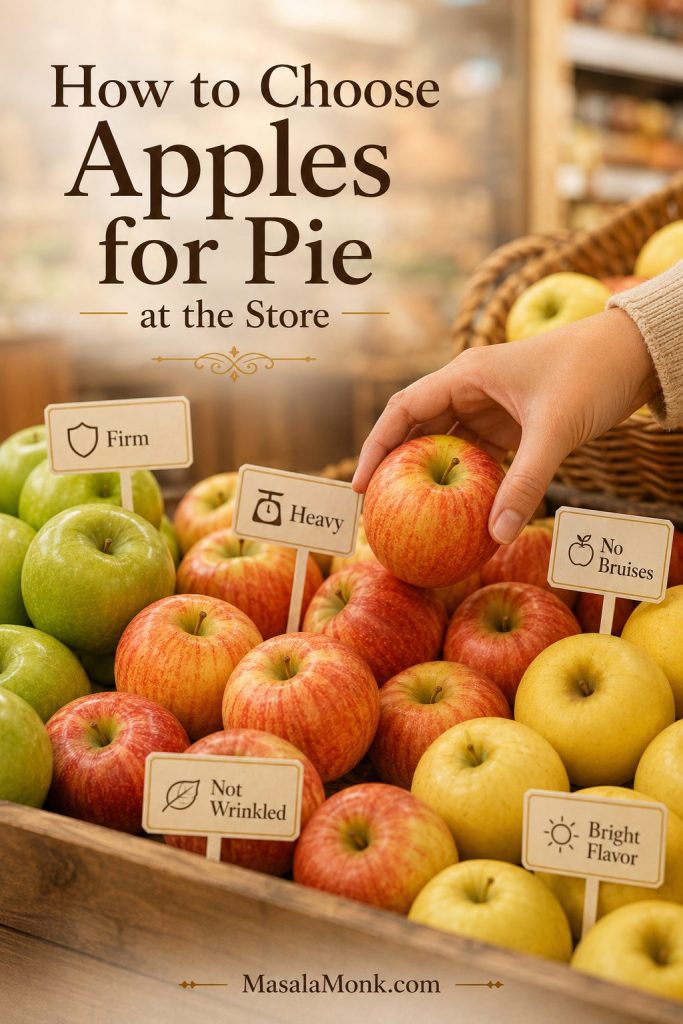
A hand choosing fresh apples from a store display with labels for firm, heavy, no bruises, not wrinkled, and bright flavor.
Before you think about variety names, check the fruit itself. Firm, heavy, bruise-free apples usually bake better, while older or wrinkled apples are more likely to give you flatter flavor and weaker texture.
Good pie apple checklist:
  • Firm when pressed
  • Heavy for its size
  • No bruises or soft spots
  • Not wrinkled
  • Balanced, tart, or sweet-tart flavor
  • At least one tart apple in the mix

For a grocery-store pie, buy at least two varieties. A simple mix of Granny Smith and Honeycrisp is enough. At a farmers’ market or orchard, ask for apples that hold their shape when baked, not just the sweetest apples on the table.

Once you have your apples, use the apple quantity guide to estimate how much to buy and the slice thickness guide before you start cutting.

How Many Apples Do You Need for Apple Pie?

Counting apples is useful in the store, but it is not perfect. Six huge Honeycrisp apples and six small Granny Smith apples will not fill a pie dish the same way, so use the count as a shopping shortcut and the sliced cups as the real guide.
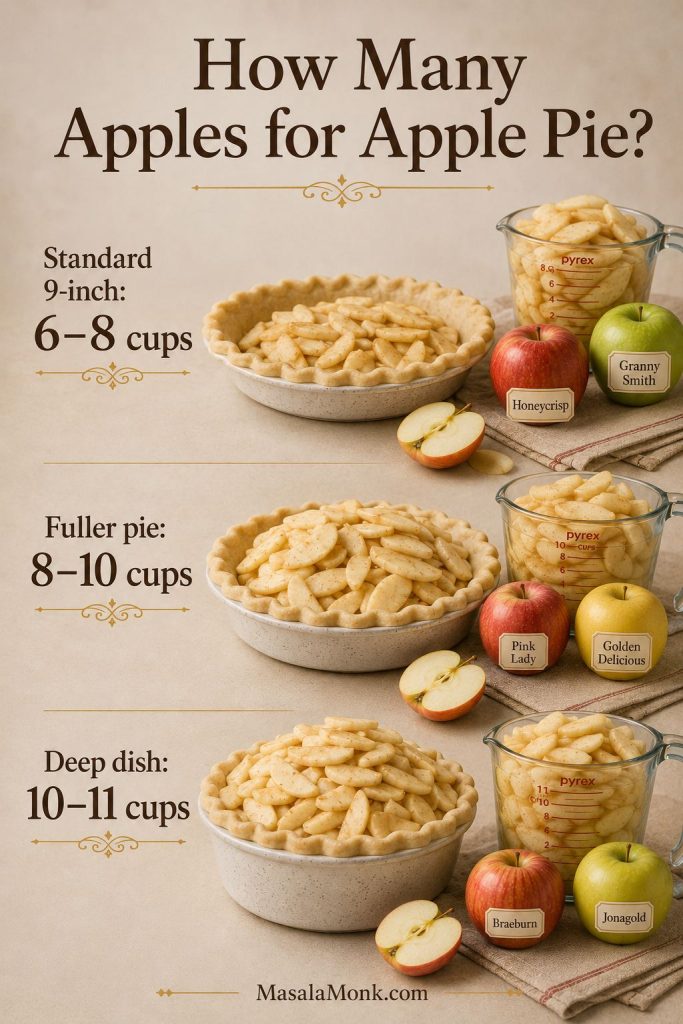
A quantity guide showing apple amounts for a standard 9-inch pie, a fuller pie, and a deep-dish apple pie.
How many apples you need depends on the pie dish and how full you want the filling. Because apple sizes vary so much, cups of sliced apples are more dependable than counting whole apples alone.
Pie style Amount of sliced apples Whole-apple shopping estimate
Standard 9-inch pie 6–8 cups sliced apples About 2½–3 lb whole apples
Fuller 9-inch pie 8–10 cups sliced apples About 3–3½ lb whole apples
Deep-dish pie 10–11 cups sliced apples About 3½–4 lb whole apples
Simple count estimate Varies by apple size Usually 6–8 large apples or 8–10 medium apples

These are whole-apple shopping weights before peeling and coring, so the final sliced amount will be lower. Thin slices pack down more tightly, while thick slices leave more air gaps in the pie dish. As a result, two pies can use the same weight of apples but look different before baking.

A deep pie dish, small apples, or a high mound of filling all call for buying extra. Any leftover sliced apples can go into oatmeal, pancakes, muffins, compote, or a small skillet crisp.

How Thin Should You Slice Apples for Pie?

For most homemade apple pies, slice apples about 1/4 inch thick. That is thick enough to keep some texture, but thin enough to soften before the crust overbrowns.
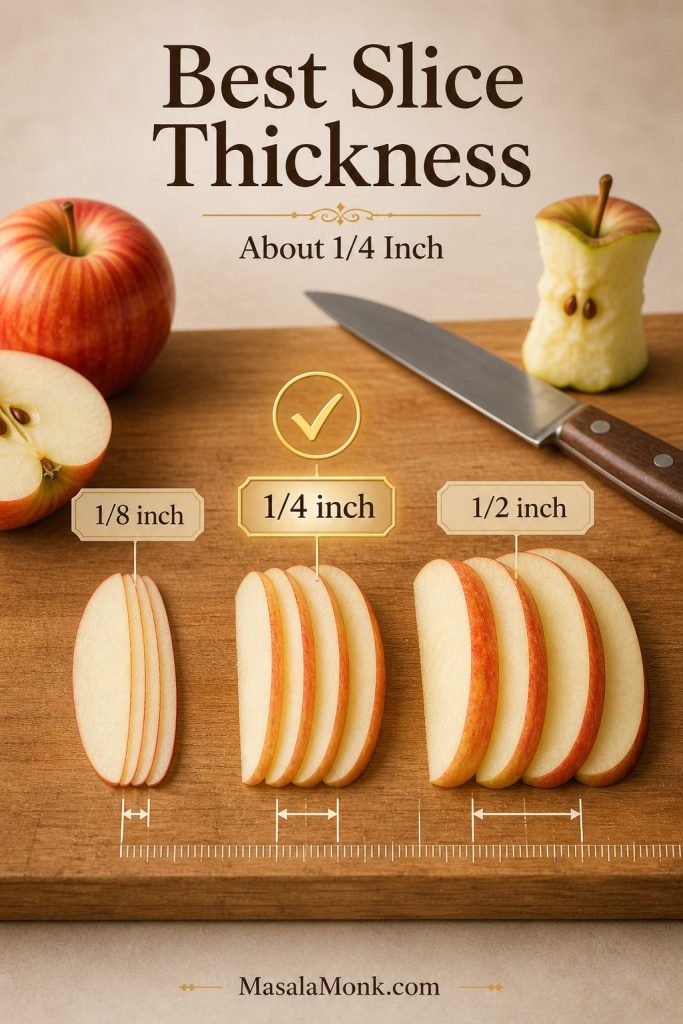
A cutting board guide comparing 1/8-inch, 1/4-inch, and 1/2-inch apple slices for pie, with 1/4 inch marked as the best default.
Slice thickness changes how the filling bakes just as much as apple choice does. Around 1/4 inch is the best all-purpose thickness because the slices soften well while still looking and tasting like real apple pieces.
Slice thickness Result in apple pie
1/8 inch Softer, more compact filling. Good when you like a tighter pie slice.
1/4 inch Best default for most pies. Softens well but still looks like apple slices.
1/2 inch Chunkier texture. Needs a longer bake, pre-cooking, or a recipe designed for thicker pieces.

Uneven slicing is worse than choosing the wrong exact thickness. Thin pieces can turn mushy while thick pieces stay crunchy. Because each apple variety softens at a slightly different rate, uniform slicing matters even more when you are using a blend.

Also, avoid very thick chunks unless your recipe calls for pre-cooking. Otherwise, the apple centers can stay firm while the crust is already browned.

Half-mushy, half-crunchy pies usually need more than a new apple variety. The texture troubleshooting table shows how apple choice, slicing, baking, and cooling work together.

Best Apples for Apple Pie Filling

The best apples for apple pie filling are apples that can simmer without falling apart. Granny Smith, Honeycrisp, Pink Lady, Braeburn, and Golden Delicious are safe choices. Softer apples can still help in small amounts when you want a saucier filling.
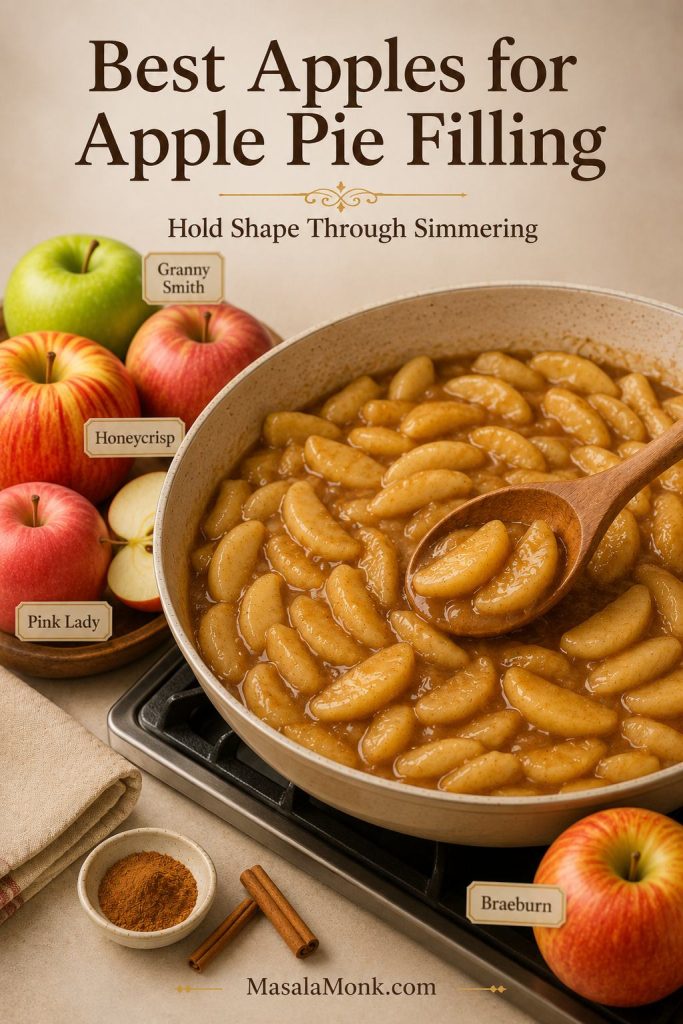
A pan of glossy cooked apple pie filling with apple slices holding their shape, shown with Granny Smith, Honeycrisp, Pink Lady, and Braeburn apples nearby.
The best apples for apple pie filling are the ones that can handle simmering without collapsing. Since cooked filling goes through more heat before it reaches the crust, firm apples are usually the safest choice.

Stovetop filling behaves differently from raw filling because the apples are cooked before they ever reach a crust. For visible slices in a cooked filling, avoid making the whole batch from McIntosh, soft Gala, or overripe apples.

For a full cooked version, use this apple pie filling recipe. If you are making a shortcut pie with prepared filling, the guide to apple pie with apple pie filling explains how to use homemade or canned filling in a crust.

How Apple Choice Changes Pie Texture

Many apple pie problems start before the pie goes into the oven. The apple variety, freshness, slice thickness, and blend all affect whether the filling turns sliceable, watery, mushy, flat, or crunchy.
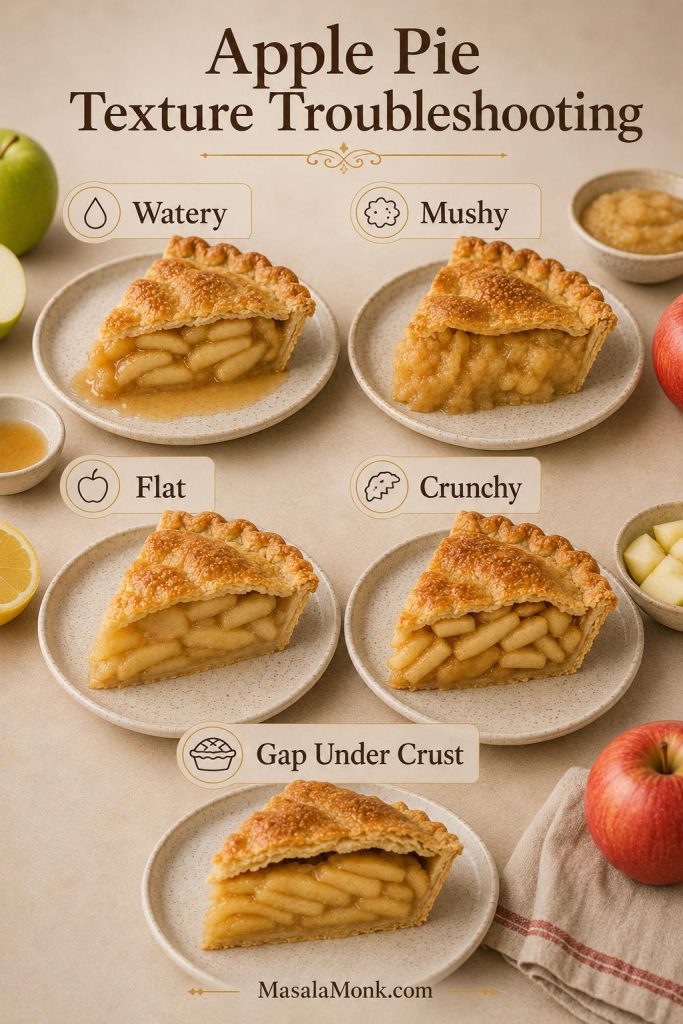
A troubleshooting guide showing apple pie slices with watery, mushy, flat, crunchy, and gap-under-crust texture problems.
When an apple pie turns watery, mushy, flat, or oddly crunchy, the apples are only part of the story. Slice thickness, freshness, bake time, and cooling all work together, so fixing the texture starts with looking at the full process.

Common Apple Pie Texture Problems

Cut into a pie and find crisp apples in one bite and applesauce in the next? The apple variety is only part of the problem. Slice thickness, apple freshness, bake time, and cooling time all matter too.

Pie problem Apple-related cause Better move
Mushy pie Soft or mealy apples, overripe fruit, or too many apples that break down quickly. Use Granny Smith, Braeburn, Pink Lady, or another crisp baking apple.
Watery pie Very juicy sweet apples used alone, underbaked filling, or slicing too soon. Add tart apples with more body and bake until the filling bubbles through the vents.
Flat flavor Only mild sweet apples, not enough acidity, or dull older apples. Add Granny Smith, Pink Lady, Braeburn, or a little lemon depending on the recipe.
Too tart All Granny Smith or another very tart apple without enough sweetness. Blend with Honeycrisp, Golden Delicious, or Jonagold.
Crunchy apples Slices too thick or pie underbaked. Slice evenly around 1/4 inch and bake until the apples are tender.
Gap under the top crust Apples shrink, slices are too thick, or the filling was not packed well. Pack apples tightly and use uniform slices.

Cooling Matters More Than It Seems

Do not judge the filling while the pie is still hot. Even a good apple blend can look loose when the pie is sliced too soon. Let apple pie cool for at least 2–3 hours before cutting; longer gives cleaner slices.

Finally, when the filling is good but the crust keeps turning soggy, apple choice is only one part of the problem. A properly chilled crust, enough venting, and a fully baked filling matter too. This apple pie crust recipe goes deeper into crust structure, chilling, and baking.

Farmers’ Market and Orchard Apples for Pie

Some of the best pie apples are not always sitting in a supermarket display. At orchards and farmers’ markets, you may find Northern Spy, Winesap, Gravenstein, Bramley, Jonathan, Cortland, Mutsu, Crispin, or other local baking apples.

However, do not assume an unfamiliar orchard apple is automatically better for pie. Some are wonderful for baking, while others are better for sauce, cider, or eating fresh.

When buying from a grower, ask a more specific question than “which apple is sweet?” Ask: Which apples hold their shape in pie, and which ones cook down into sauce? That answer is more useful than chasing a variety name that may not be available in your area.

Best Apples by Dessert Type

Different apple desserts need different textures. Crisps can forgive a slightly softer apple, hand pies need smaller and neater pieces, and double-crust pies need the most structure.

Dessert Best apple direction
Classic double-crust pie Use a tart apple plus a crisp flavorful apple, such as Granny Smith with Honeycrisp, Pink Lady, or Braeburn.
Dutch-style pie Choose apples that hold their shape under a rich crumb topping.
Crumb-topped pie Use tart apples plus one sweeter apple so the topping does not make the pie taste too sweet.
Crisp or crumble Crisp apples are safest, although slightly softer blends can work because the dessert does not need clean pie slices.
Cooked pie filling Use apples that can simmer without collapsing into sauce.
Mini pies Use firm apples diced small, or a cooked filling that will not leak.
Hand pies Use small diced apples or thick cooked filling so the pastry seals cleanly.
Applesauce Softer apples like McIntosh are useful because breakdown is the goal.

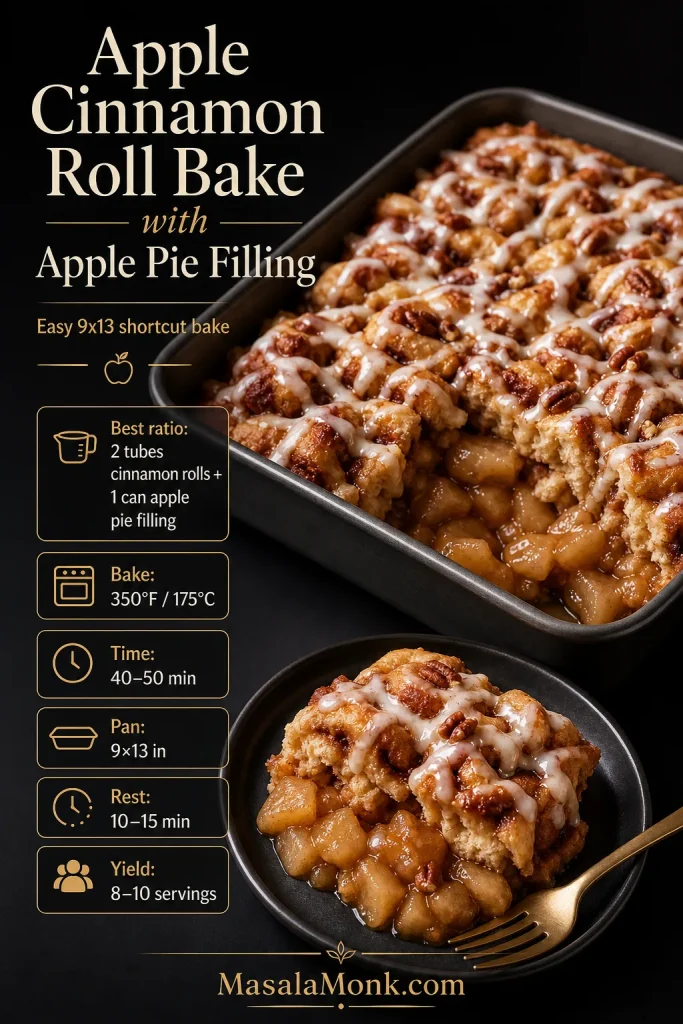
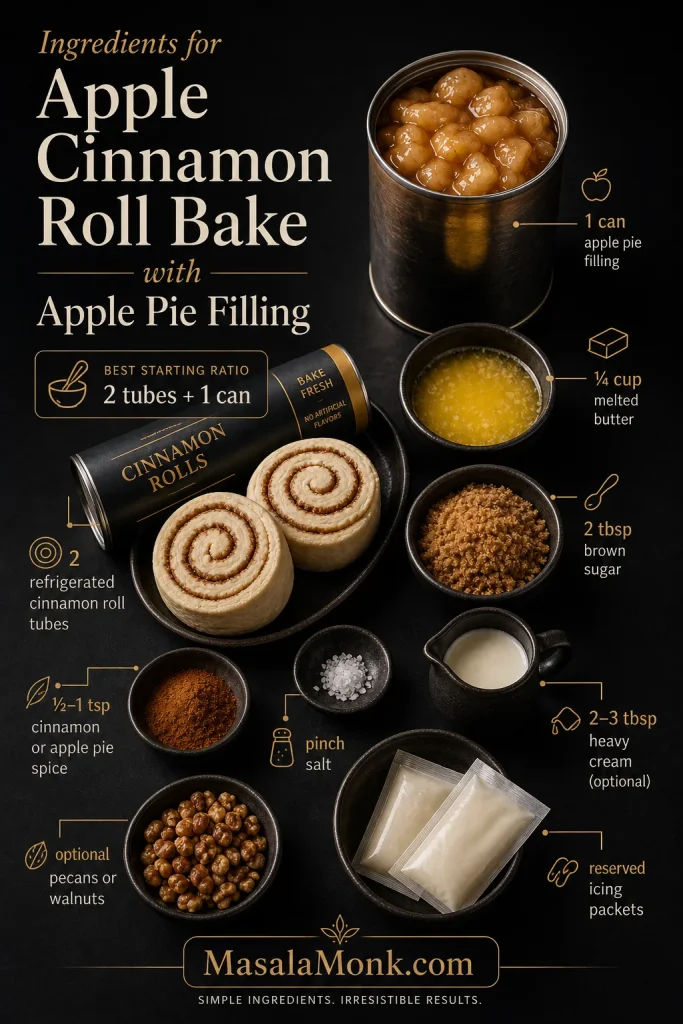
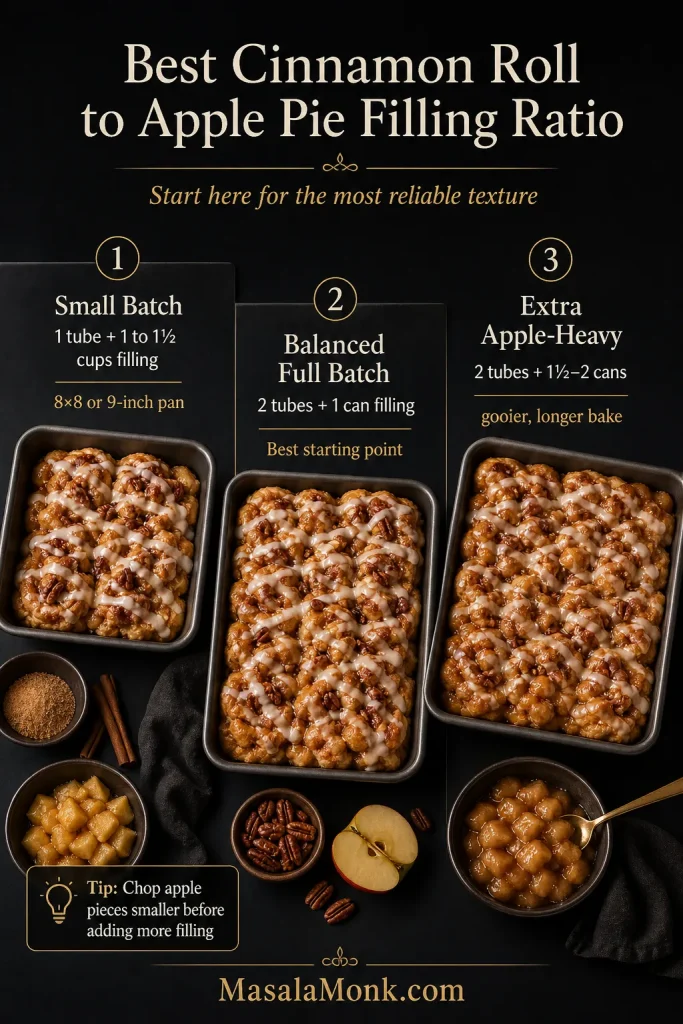
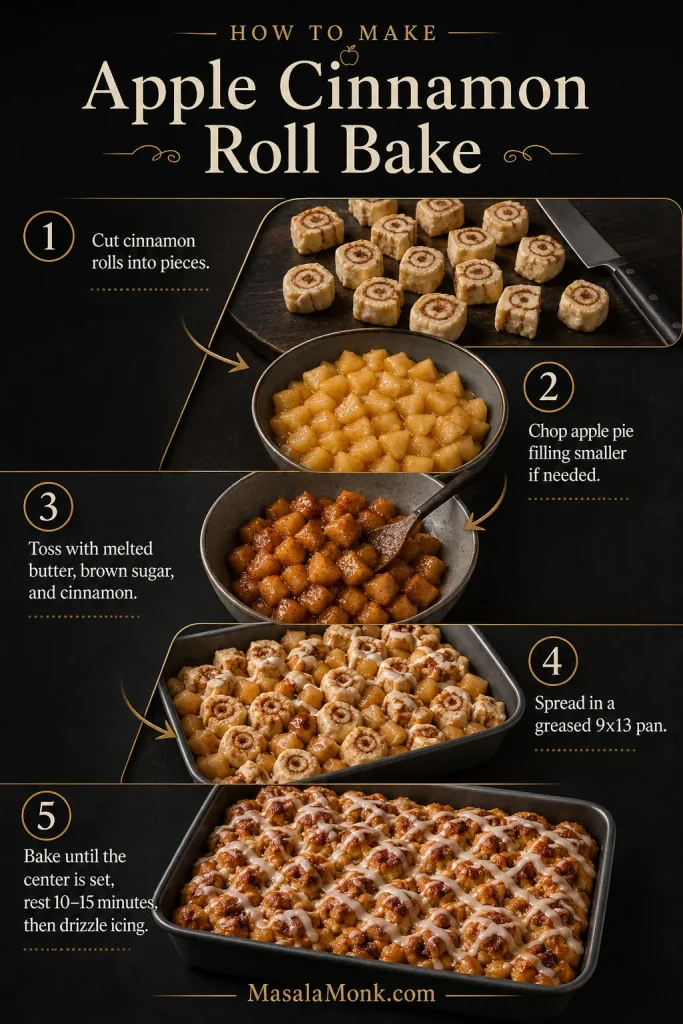
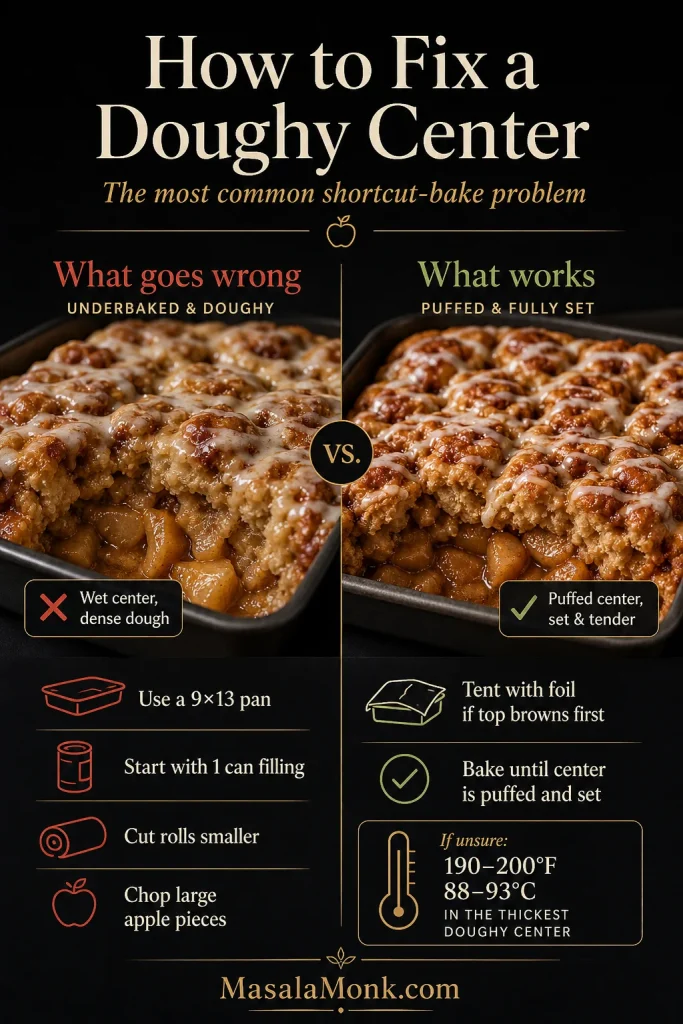
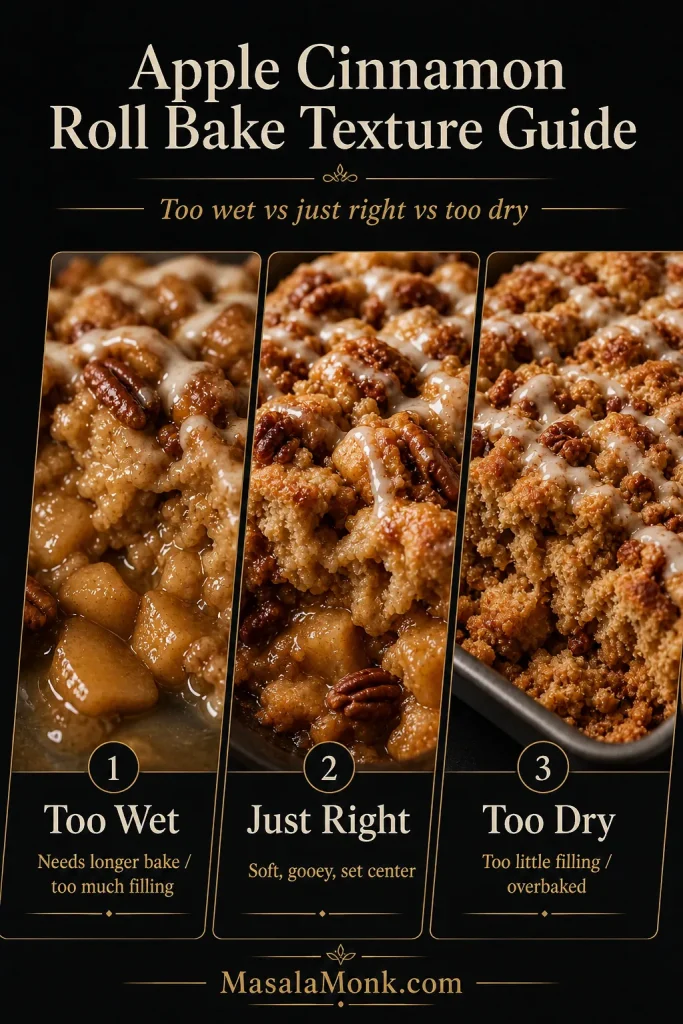
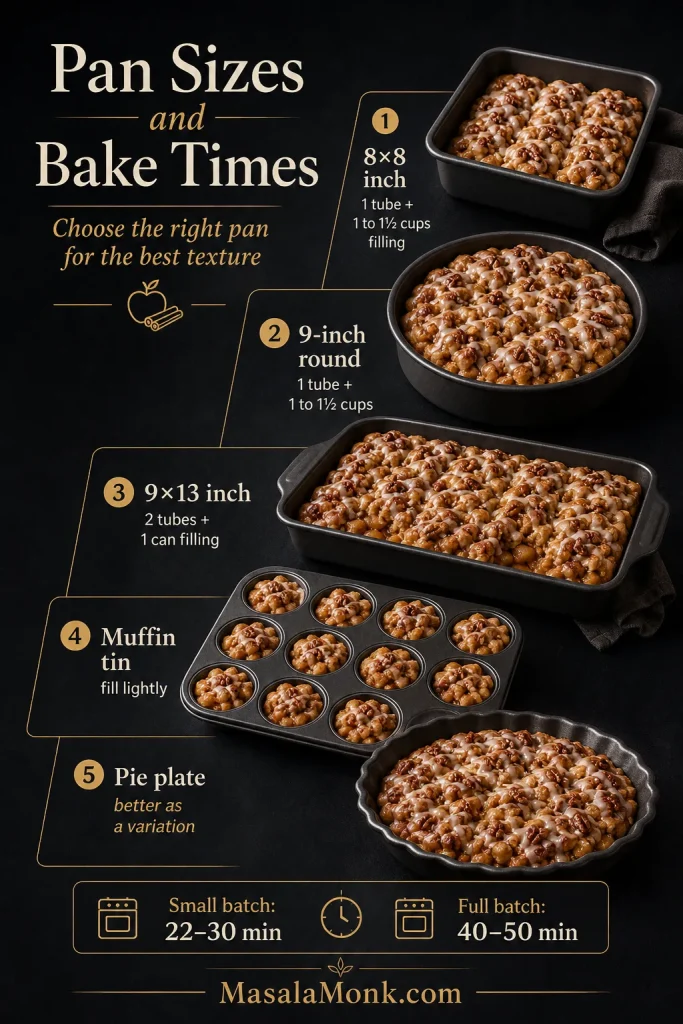
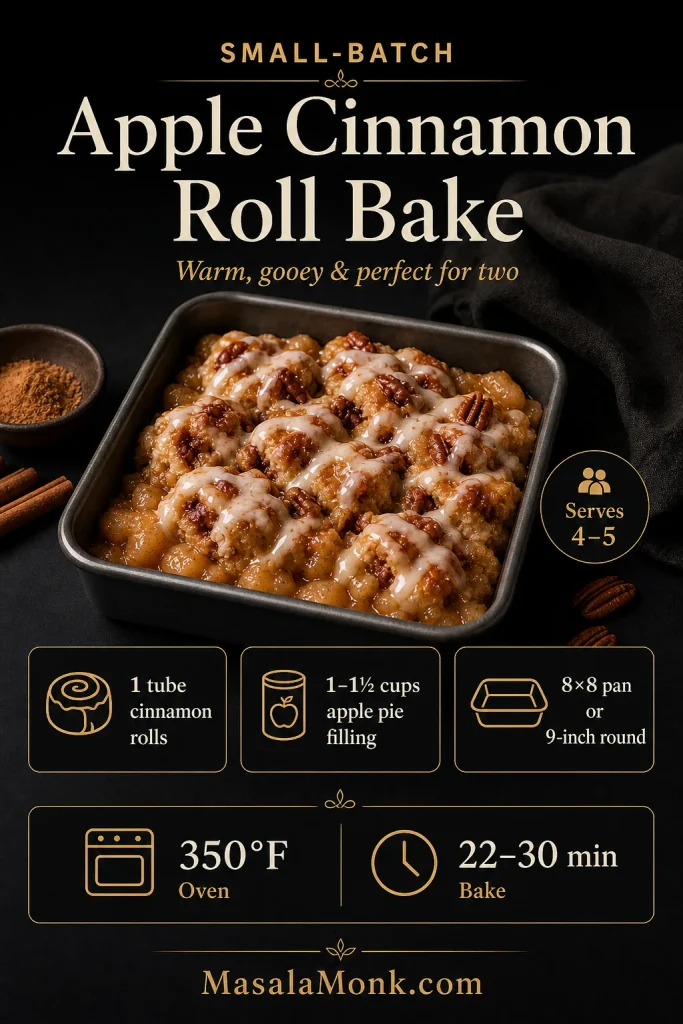
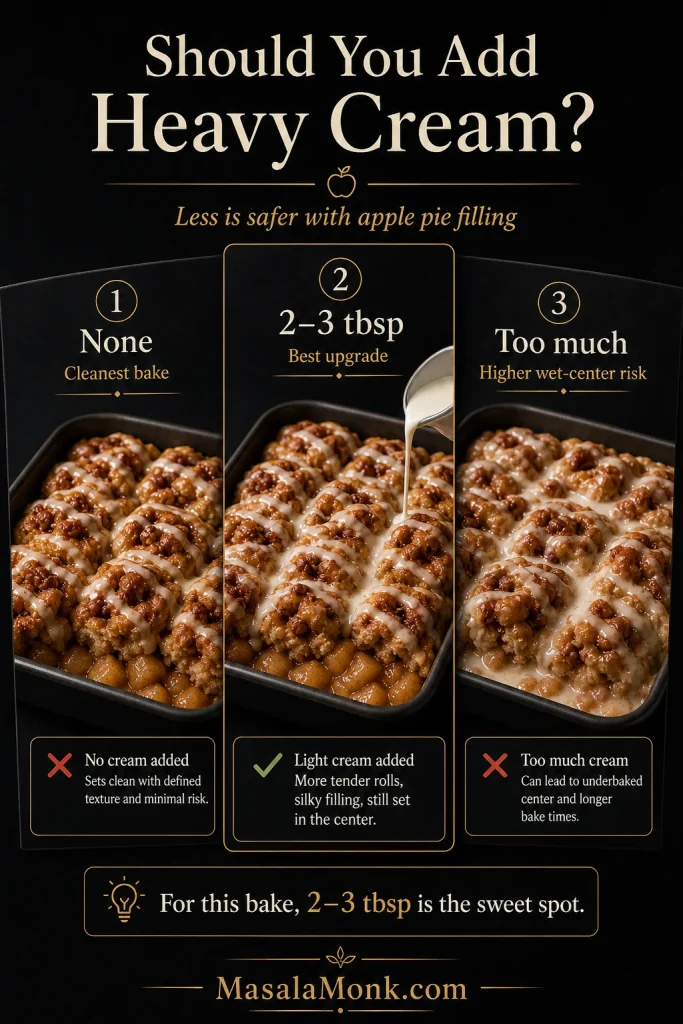
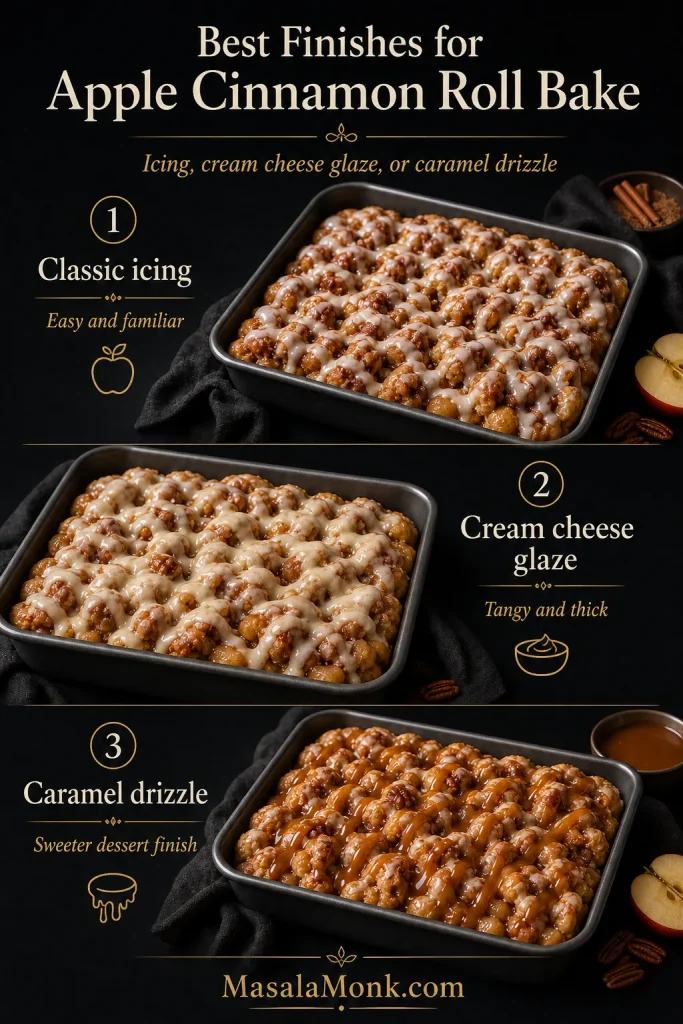
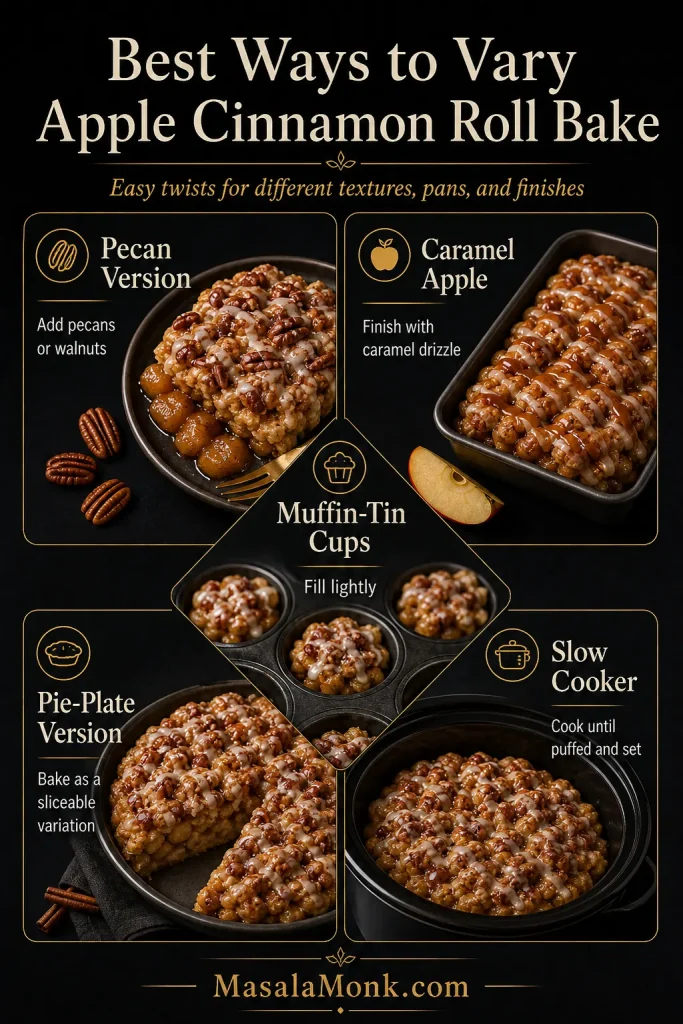
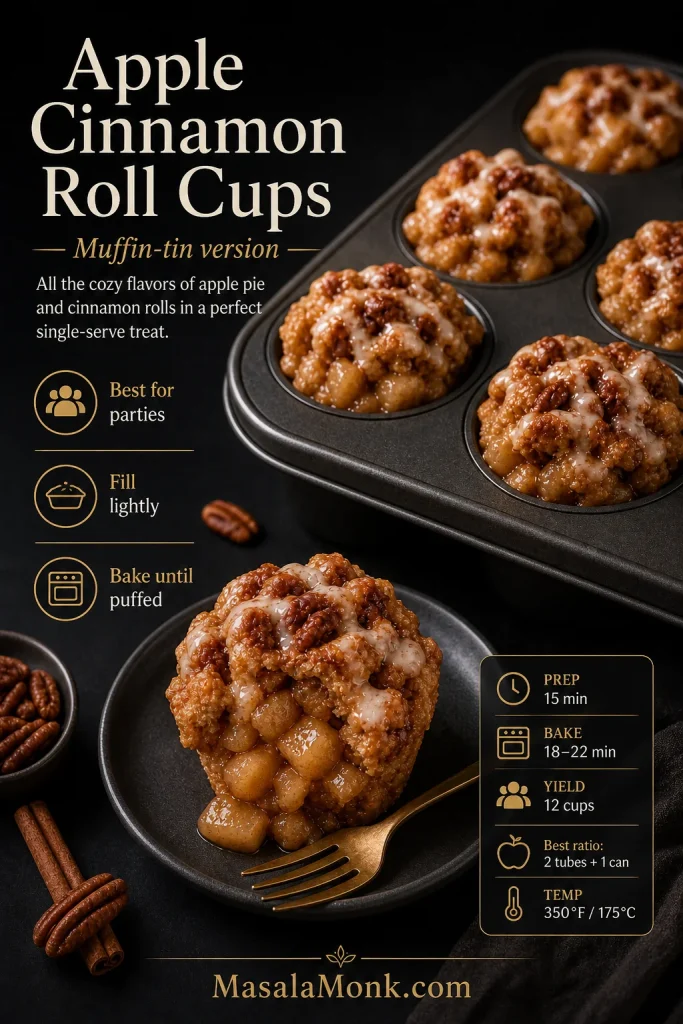
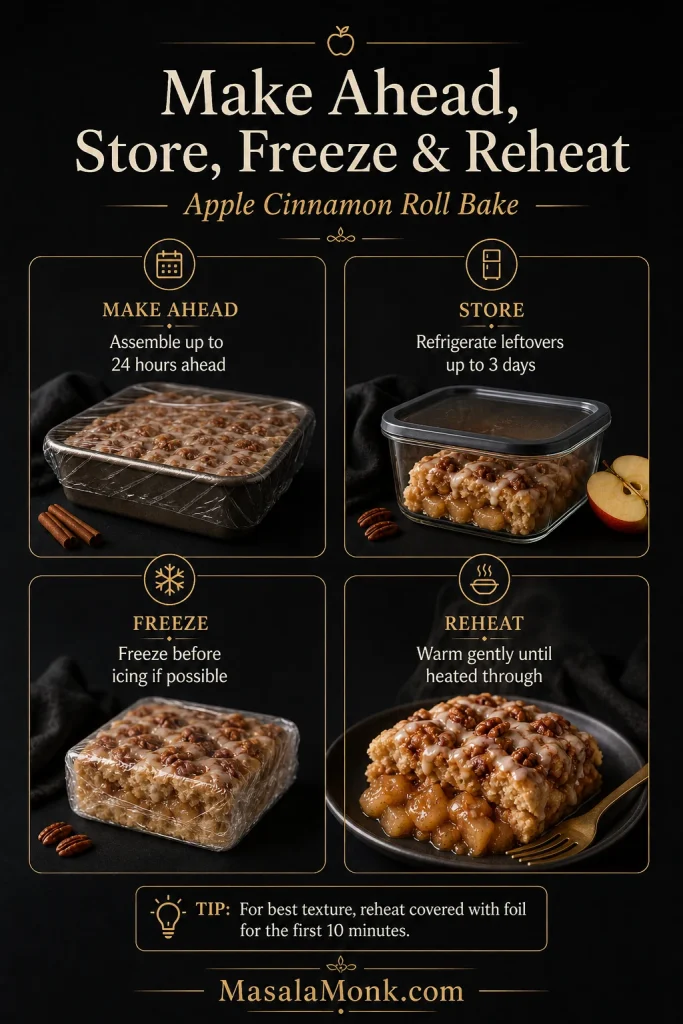
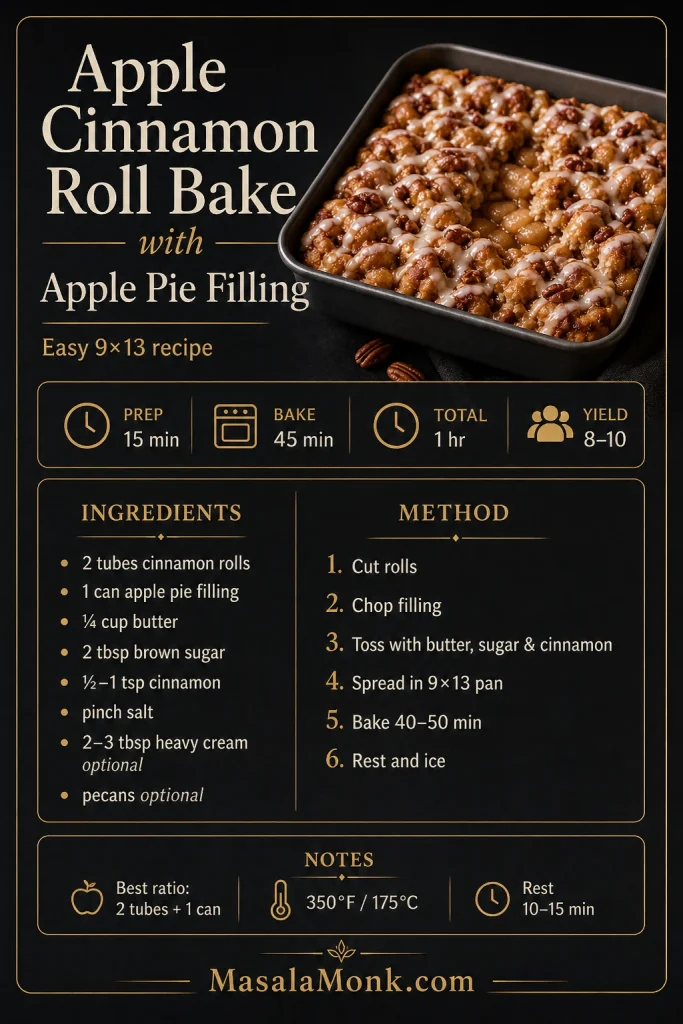
Cooked or prepared filling is also useful beyond pie. For a quick dessert that uses apple pie filling instead of fresh sliced apples, this apple cinnamon roll bake with apple pie filling is a good shortcut-style option.

Can You Freeze or Can Apples for Pie?

Freezing and canning are related to apple pie, but they behave very differently from choosing fresh apples for a same-day pie.

You can freeze apples for pie, but frozen apples release more liquid, so they work best in recipes that account for extra moisture. Frozen apples are usually better for cooked filling, crisps, or pies where the filling has enough thickener and bake time.

Canning is different. For shelf-stable filling, use a tested canning recipe and the proper canning thickener. The National Center for Home Food Preservation uses Clear Jel® in its tested apple pie filling method. Do not treat a regular cornstarch-thickened stovetop filling as shelf-stable.

FAQs

Still deciding between two apples? These quick answers cover the most common last-minute pie questions.

What are the best apples for apple pie?

The best apples for apple pie are crisp, sweet-tart apples such as Granny Smith, Honeycrisp, Braeburn, Pink Lady, Golden Delicious, and Jonagold. A blend usually gives better flavor and texture than one apple alone.

Can you make apple pie with one kind of apple?

You can make apple pie with one kind of apple, but a blend usually gives better flavor and texture. For one-apple pies, Granny Smith is the firmest tart choice, Honeycrisp is sweeter and familiar, and Braeburn gives deeper apple flavor.

Are green apples good for apple pie?

Green apples are usually good for apple pie when they are Granny Smith. They bring tartness and structure, which helps balance sweeter apples and keeps the filling from tasting flat.

Are McIntosh apples good for apple pie?

McIntosh apples are better for a softer, saucier pie than a clean, sliceable pie. They break down quickly, so use them in small amounts with firmer apples or save them for applesauce, compote, crisps, or cooked filling.

What is the best apple combination for apple pie?

The easiest apple combination for apple pie is Granny Smith plus Honeycrisp. Granny Smith adds tartness and backbone, while Honeycrisp adds sweetness and fuller apple flavor. For deeper flavor, try Braeburn, Golden Delicious, and Granny Smith together.

Are Granny Smith apples good for apple pie?

Granny Smith apples are very good for apple pie because they are tart and hold shape well. They are especially useful as the tart apple in a blend, but an all-Granny Smith pie can taste sharp unless balanced with enough sugar or sweeter apples.

Are Honeycrisp apples good for apple pie?

Honeycrisp apples work well in apple pie because they are crisp, sweet-tart, and flavorful. They pair nicely with Granny Smith, Pink Lady, or Braeburn when you want a more balanced filling.

Are Gala apples good for apple pie?

Gala apples can work in apple pie, but they are better in a blend than alone. Gala is sweet and mild, so pair it with a firmer tart apple like Granny Smith or Braeburn for better texture and flavor.

Are Fuji apples good for apple pie?

Fuji apples can work in apple pie, but they are very sweet and juicy. Use them with tart apples and reduce sugar slightly when your filling is Fuji-heavy.

What apples should you not use for apple pie?

Avoid Red Delicious, very soft apples, bruised apples, wrinkled apples, and McIntosh used alone when you want a clean, sliceable pie. These apples are more likely to turn mealy, watery, bland, or saucy.

How many apples do you need for apple pie?

For a standard 9-inch apple pie, plan on about 6–8 cups sliced apples, or about 2½–3 lb whole apples before peeling and coring. For a fuller pie, use 8–10 cups sliced apples.

How thin should you slice apples for pie?

For most homemade apple pies, slice apples about 1/4 inch thick. Thinner slices make a softer, compact filling, while thicker slices need a longer bake and can stay crunchy when the pie is underbaked.

Should you peel apples for apple pie?

Most classic apple pies use peeled apples because the filling bakes more evenly and the texture is smoother. You can leave the skins on for a more rustic pie, but use thin, tender-skinned apples and slice them evenly.

Should you pre-cook apples for apple pie?

You do not have to pre-cook apples for every apple pie, but it can help with very crisp apples, deep-dish pies, or fillings that tend to shrink. Pre-cooking gives you more control over moisture, although it also makes the filling softer.

What are the best apples for apple pie filling?

The best apples for apple pie filling are apples that can cook without falling apart, such as Granny Smith, Honeycrisp, Pink Lady, Braeburn, and Golden Delicious. Softer apples can be used in small amounts when you want a saucier filling.

Final Thoughts

You do not need a rare orchard apple to make a good pie. Start with one tart apple, add one crisp apple you actually enjoy eating, slice them evenly, and bake the filling until it has time to bubble and settle. That simple approach will beat a random bag of sweet apples almost every time.

For most home bakers, the best place to start is simple: Granny Smith + Honeycrisp. From there, use Pink Lady for brightness, Braeburn for bite and depth, Golden Delicious for mellow apple flavor, and softer apples only when you want a more saucy filling.

Still unsure at the store? Buy Granny Smith plus one crisp, flavorful apple you already enjoy eating. That simple two-apple blend will get you closer to a balanced pie than a full bag of the sweetest apples on display.
Back to top

Posted on Leave a comment

Pineapple Jam Recipe and Pineapple Preserves

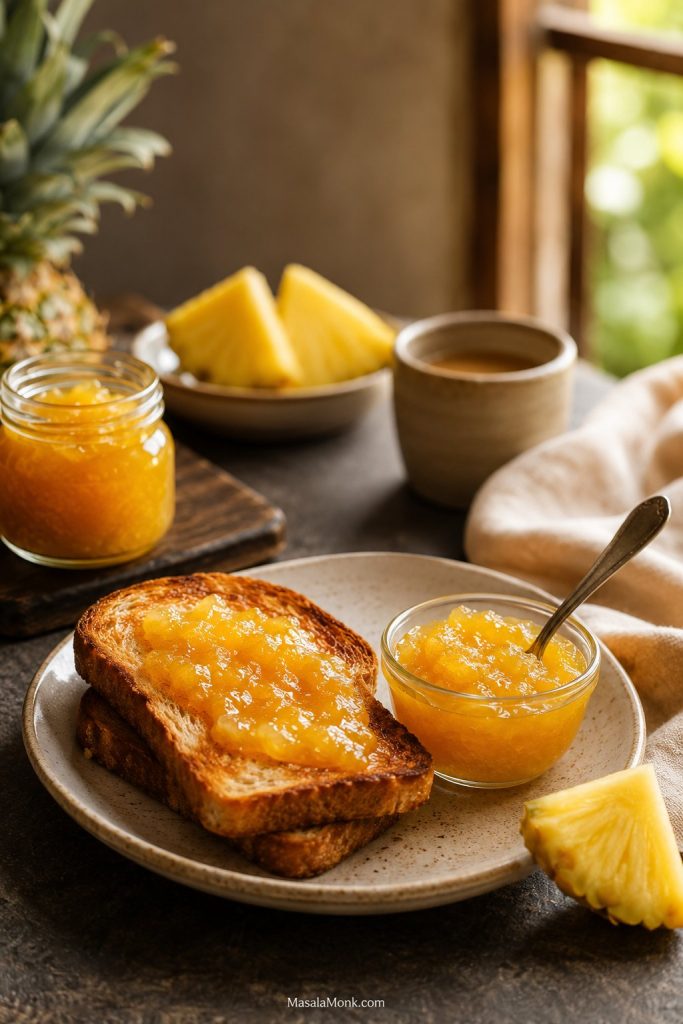
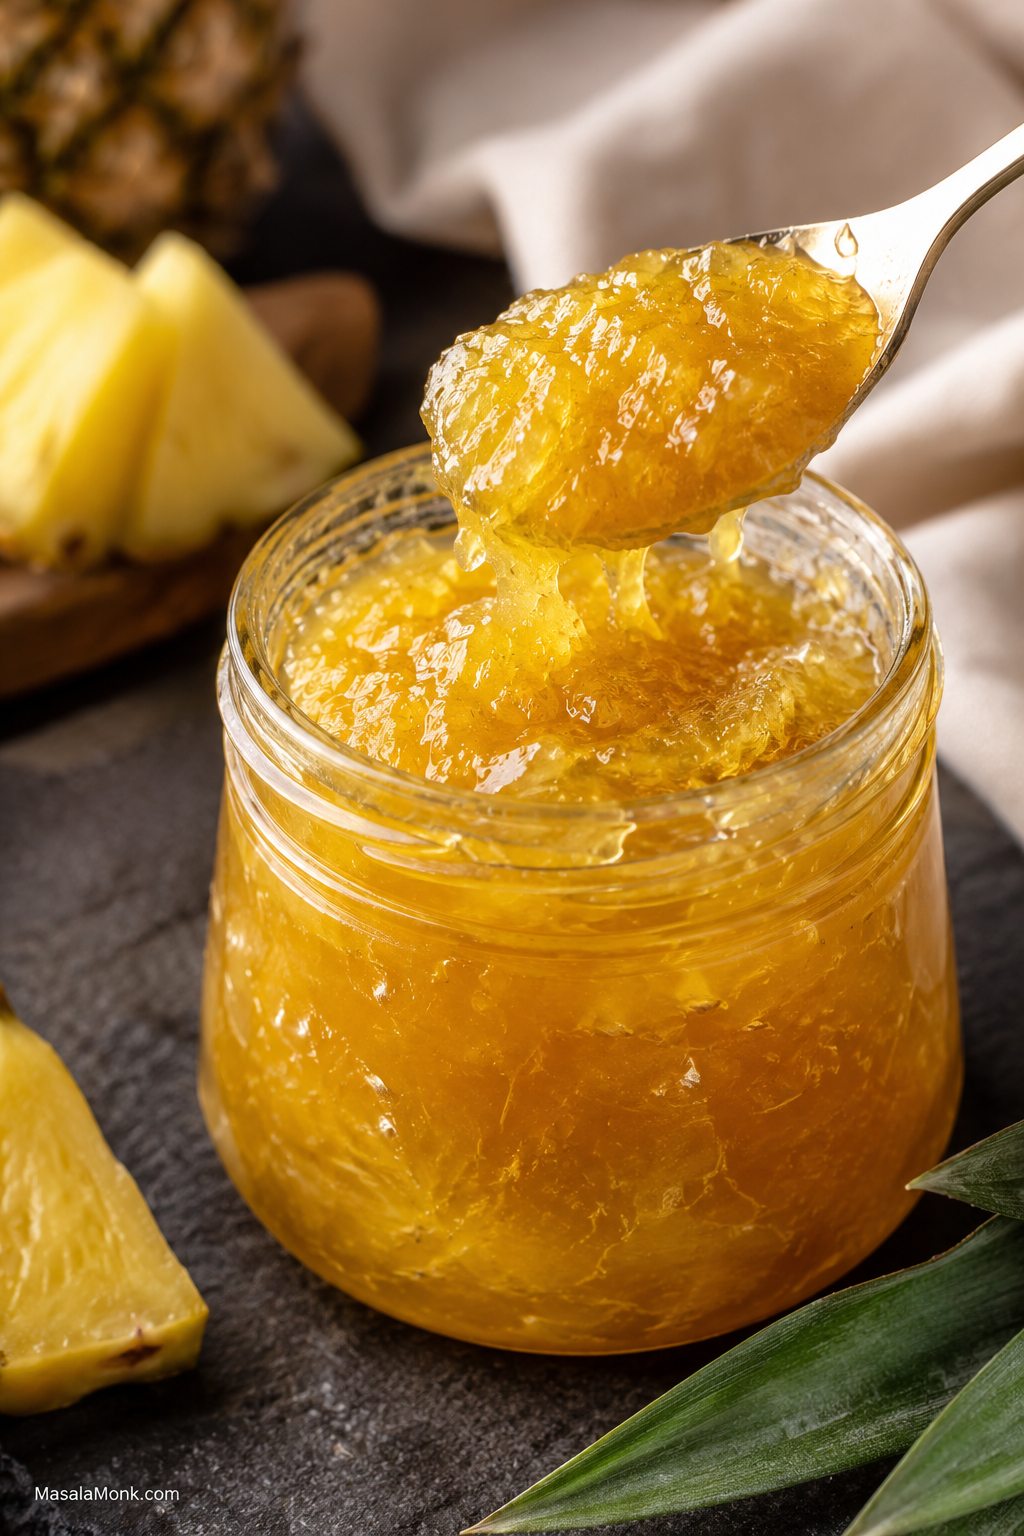
Open glass jar of glossy golden pineapple jam with a spoon lifting thick jam and fresh pineapple wedges behind it

This pineapple jam recipe turns fresh pineapple or canned crushed pineapple into a glossy, golden spread that tastes bright, tropical, and properly homemade. Make it smooth and spoonable for toast, leave it chunkier for pineapple preserves, or cook it down further when you need a thick filling for tarts, cookies, and pastries.

The main version is a simple no-pectin pineapple jam for the fridge or freezer. Pineapple, sugar, lemon or lime juice, and a pinch of salt cook down into a sweet-tart fruit spread that thickens as it cools and stays soft enough to spread.

Once you know what the bubbles, spoon trail, and cold-plate test should look like, the recipe becomes very forgiving. Use crushed pineapple for jam, diced pineapple for preserves, canned pineapple for a quick pantry batch, or a wider pan and longer cooking time for pineapple tart filling.

The best part is that the recipe does not fall apart if your pineapple is extra juicy, your can is a little watery, or you want a softer spoonable finish instead of a firm jar. The texture tests below will tell you when to stop.

Table of Contents

Use this guide to choose between smooth pineapple jam, chunkier pineapple preserves, a quick canned pineapple batch, or a thicker filling for tarts and pastries.

Quick Answer

For an easy pineapple jam recipe, simmer crushed pineapple with sugar, lemon or lime juice, and a pinch of salt until it turns shiny, golden, and thick enough to mound softly on a spoon. If you want pineapple preserves instead, use diced pineapple and stop cooking while the fruit pieces are still visible in a thick syrup.

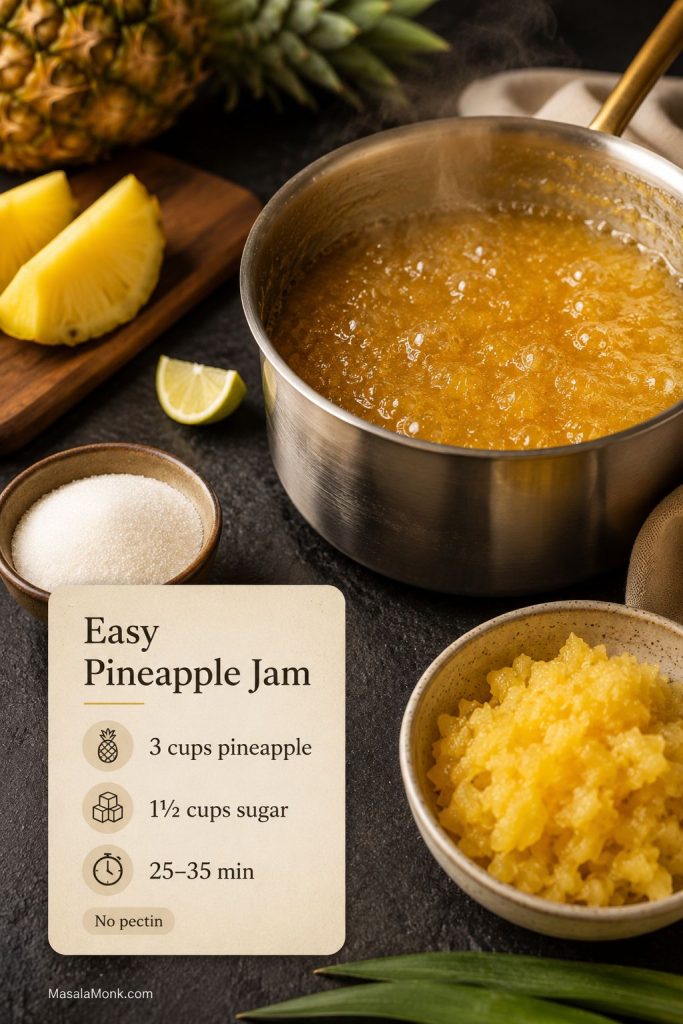
The easiest no-pectin ratio is 3 cups crushed pineapple, 1½ cups sugar, and 1–2 tablespoons lemon or lime juice. Cook for about 25–35 minutes. The jam is ready when it leaves a brief trail in the pan, passes the cold-plate test, or reaches about 220°F / 104°C at sea level.

However, do not worry if it looks a little loose while hot. Pineapple jam thickens as it cools, so the goal is glossy and spreadable rather than stiff or rubbery. For the safest first batch, make the crushed pineapple version and refrigerate it.

Best first batch: Start with the no-pectin pineapple jam made with crushed pineapple. After that, try diced preserves, canned pineapple jam, or a thicker filling for tarts and pastries.
Saucepan of bubbling pineapple jam with crushed pineapple, sugar, citrus, and a quick ratio guide
Start with the simple no-pectin pineapple jam ratio, then let the pan tell you when it is done. As the fruit reduces, the bubbles slow down and the mixture turns shiny instead of watery.

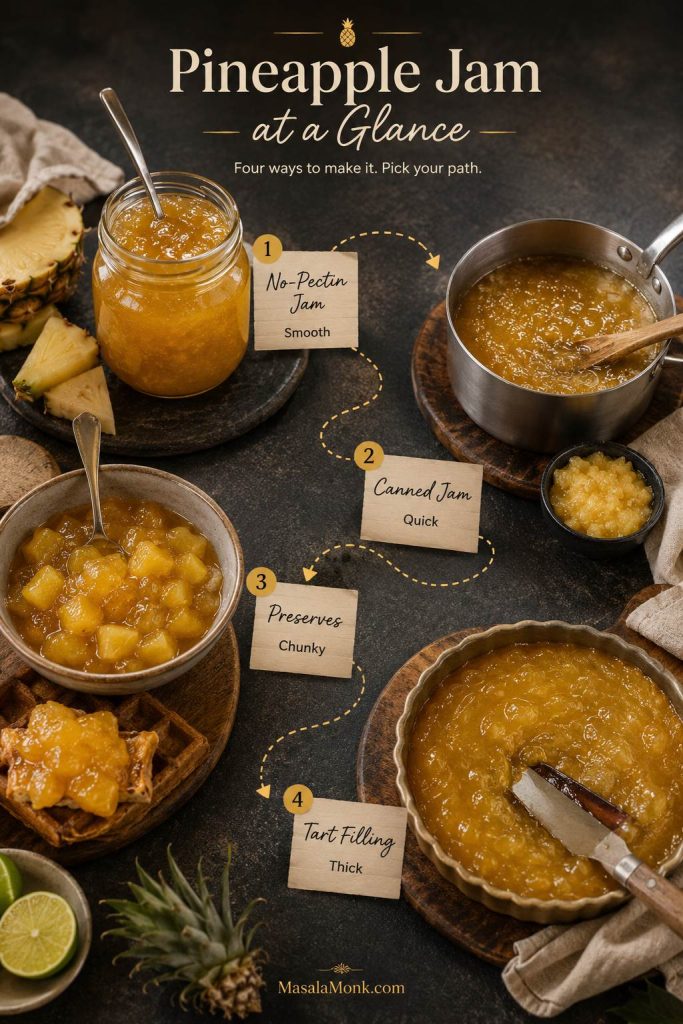
Pineapple Jam Recipe at a Glance

This pineapple jam recipe can go in four useful directions: soft-set jam, chunkier preserves, quick canned pineapple jam, or a much thicker tart filling. Start with the version that matches how you plan to serve it.

Pineapple jam at-a-glance guide showing no-pectin jam, canned jam, preserves, and tart filling routes
One pineapple jam recipe can become a breakfast spread, chunky preserve, canned-pineapple batch, or tart filling. As a result, choosing the route first helps you cook toward the right texture.
Version Pineapple Sugar Cook Time Best For
No-pectin pineapple jam 3 cups / about 680 g crushed pineapple 1½ cups / 300 g 25–35 minutes Toast, cookies, cakes, yogurt, everyday spreading
Canned pineapple jam 1 can / 20 oz / 567 g crushed pineapple in juice ¾–1 cup / 150–200 g 20–30 minutes Quick pantry batch, small jars, beginner version
Pineapple preserves 5½–6 cups diced pineapple ⅔–1 cup 30–40 minutes Biscuits, waffles, ice cream, cheese boards, glazes
Pineapple tart filling 4 cups grated or finely pulsed pineapple ½–¾ cup, then adjust 1–2½ hours Pineapple tarts, pastry filling, thumbprint cookies
Choose your version: Use crushed pineapple for soft, spreadable jam; diced pineapple for chunkier preserves; canned crushed pineapple for the quickest small batch; and finely pulsed pineapple cooked much longer for tart or pastry filling. For pantry storage, do not use the flexible recipe as written — follow a tested canning method instead.

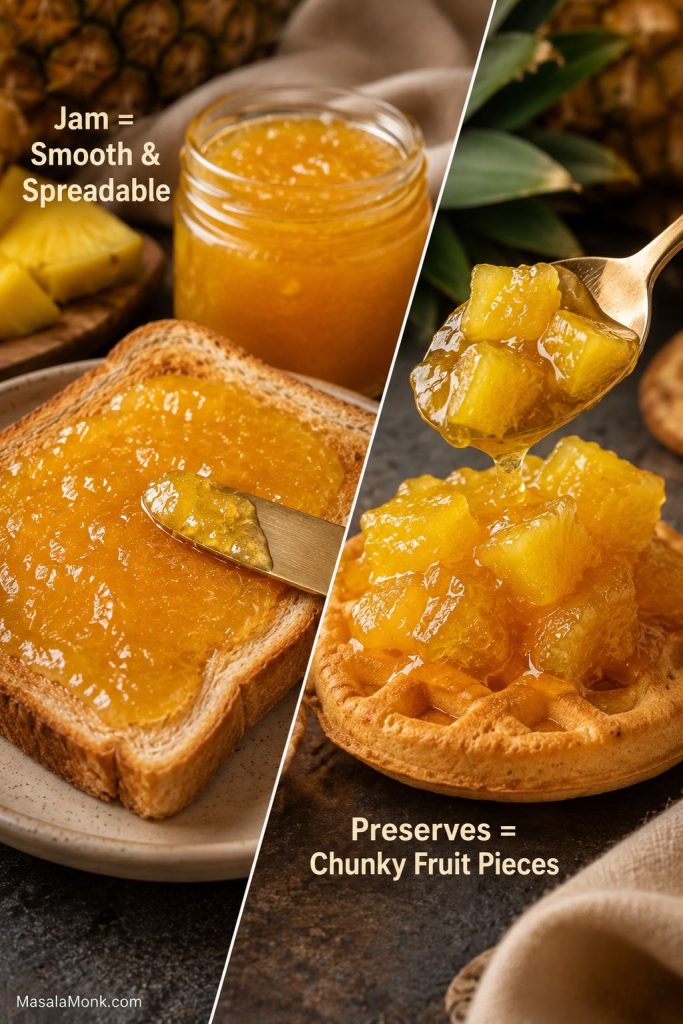
Pineapple Jam vs Pineapple Preserves

Although pineapple jam and pineapple preserves use similar ingredients, they do not eat the same way. This pineapple jam recipe gives you both paths, so you can choose the texture that fits how you plan to use it.
A smoother jam is easier to spread because the fruit is crushed, finely chopped, pulsed, or mashed as it cooks. Choose this version for toast, scones, thumbprint cookies, cake layers, yogurt bowls, and everyday spooning.

Meanwhile, preserves are chunkier. The fruit is usually diced into small, even pieces and cooked until tender in a thick syrup. Choose this version when you want visible pineapple pieces on biscuits, pancakes, waffles, cheesecake, ice cream, cheese boards, or savory glazes.

Another easy way to think about it: jam should glide across toast, while preserves should give you soft little pineapple pieces in each spoonful.

Diagonal comparison of smooth pineapple jam spread on toast and chunky pineapple preserves spooned over a biscuit or waffle
Pineapple jam and pineapple preserves are separated by texture more than ingredients. Crushed pineapple gives a smoother spread, while diced pineapple keeps soft fruit pieces in the finished preserve.
Version Fruit Cut Texture Best Uses
Pineapple jam Crushed, finely chopped, or pulsed Smoother, soft-set, glossy, spreadable Toast, scones, cookies, cake filling, yogurt, pastries
Pineapple preserves Small dice, about ¼–½ inch Chunkier fruit pieces in thick syrup Biscuits, waffles, ice cream, cheese boards, glazes
Pineapple tart filling Grated, finely pulsed, or cooked down further Very thick, sticky, paste-like Pineapple tarts, cookies, pastry filling, filled buns

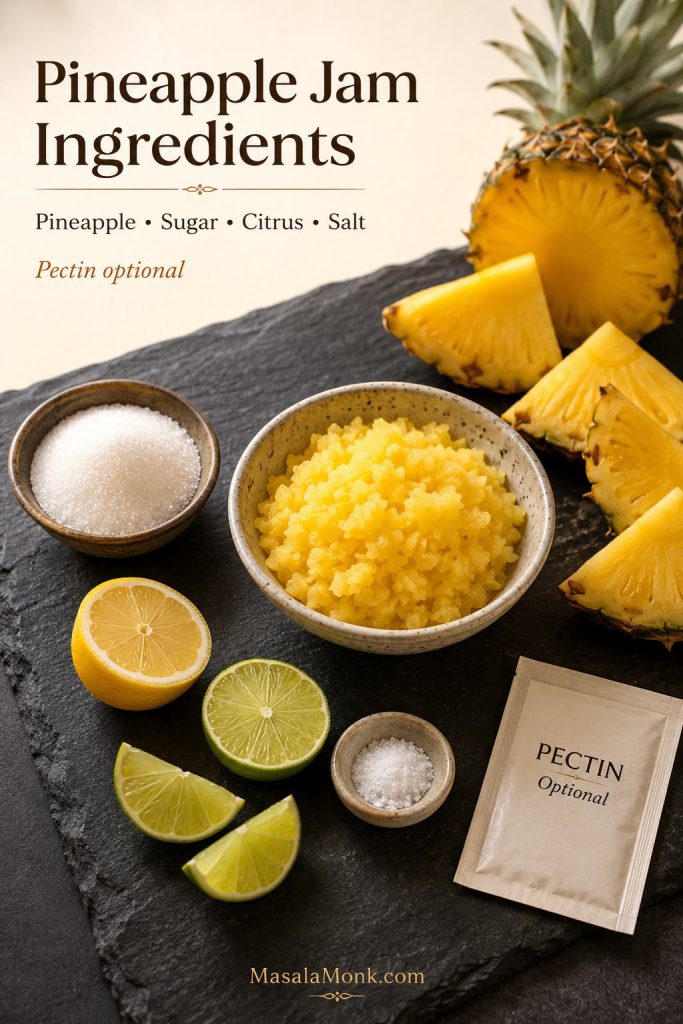
Ingredients for Pineapple Jam and Preserves

You only need a few ingredients, but each one has a job. Pineapple brings the fruit and acidity, sugar helps the mixture thicken and shine, citrus keeps the flavor lively, and salt balances the sweetness. Because this pineapple jam recipe is flexible, the fruit cut matters as much as the ingredient list.

Pineapple jam ingredients including fresh pineapple, crushed pineapple, sugar, lemon, lime, salt, and optional pectin
Pineapple, sugar, citrus, and salt are enough for a flexible refrigerator jam. However, pectin can help when you want a firmer set, a faster cook, or a tested canning-style formula.

Pineapple

Fresh ripe pineapple gives the brightest flavor and color. Canned crushed pineapple works well when you want a faster batch. For jam, crush or finely chop the fruit. For preserves, cut it into small even pieces so everything softens at the same rate.

Choose pineapple that smells sweet and fruity, not fermented. Very underripe pineapple can taste sharp, while overripe pineapple may make the jam darker and softer. A very sweet pineapple gives a rounder jam; a sharper one may need the higher end of the sugar range. If the fruit tastes flat, lime juice usually wakes it up better than more sugar.

Pineapple selection guide comparing underripe, ripe, and overripe pineapple for jam making
Ripe pineapple gives homemade pineapple jam the brightest color and flavor. Meanwhile, underripe fruit can taste sharp, and overripe pineapple may cook down darker and softer.

Sugar

Sugar does more than sweeten the jar. It helps create body, improves the glossy finish, and supports the spreadable texture. For the main no-pectin version, start with 1½ cups sugar for 3 cups crushed pineapple. Use up to 2 cups if you prefer a firmer, sweeter jam.

Lemon or Lime Juice

Lemon juice gives a clean, classic fruit-spread flavor. Lime juice tastes a little more tropical and works especially well if you plan to use the jam with coconut desserts, pineapple tart filling, or drink-inspired pairings.

Salt

A small pinch of salt will not make the jam salty. Instead, it rounds out the sugar and helps the pineapple taste brighter.
Pectin, Optional

You can make pineapple jam without pectin, but pectin is useful when you want a quicker set, a firmer jar, or a lower-sugar method designed for that purpose. Different pectin types need different sugar levels and cooking steps, so follow the instructions on the package if you use it.

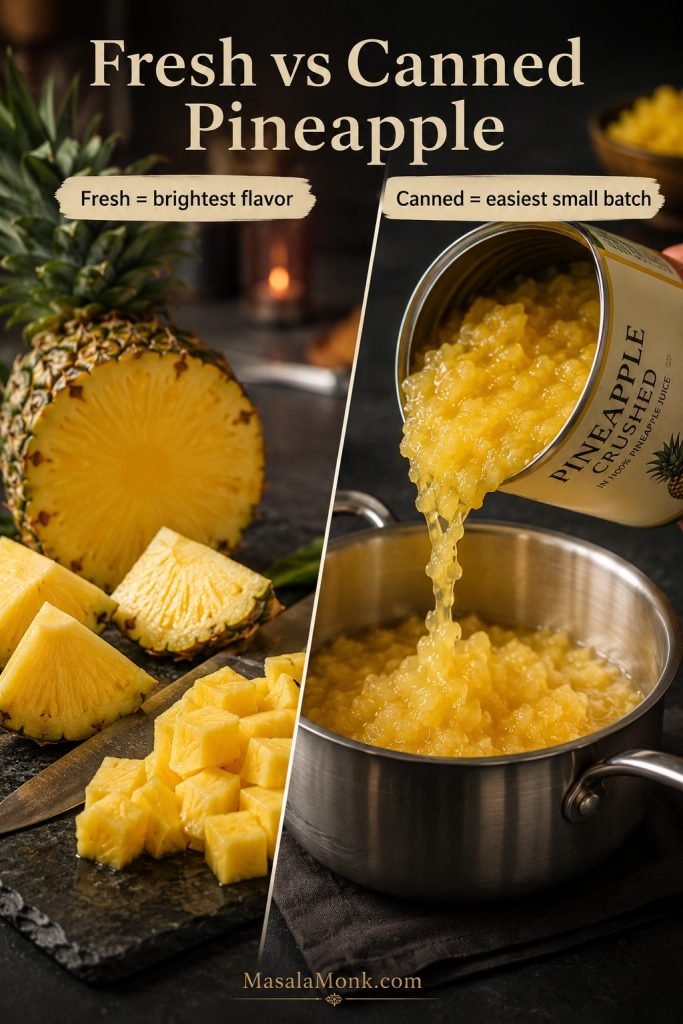
Fresh vs Canned Pineapple

Fresh pineapple gives the brightest aroma and color, but canned pineapple is not a failure shortcut. It is fast, consistent, available year-round, and especially useful for a small-batch pineapple jam recipe. In fact, canned crushed pineapple is the easiest beginner version because the fruit is already evenly cut. The only real adjustment is moisture: if the can looks watery, cook a few minutes longer before judging the set.

Fresh pineapple being chopped beside canned crushed pineapple being poured into a saucepan for jam
Fresh pineapple gives the most vivid aroma, but canned crushed pineapple makes the easiest small-batch pineapple jam. Since the fruit is already evenly cut, it reduces with less prep work.

How to Prep Fresh Pineapple for Jam

When using fresh pineapple, peel, core, and chop the fruit first. Then, pulse it in a food processor for jam or dice it by hand for preserves. Try not to leave large pieces of tough core in the mixture because they can stay fibrous even after cooking.

Best Canned Pineapple to Use

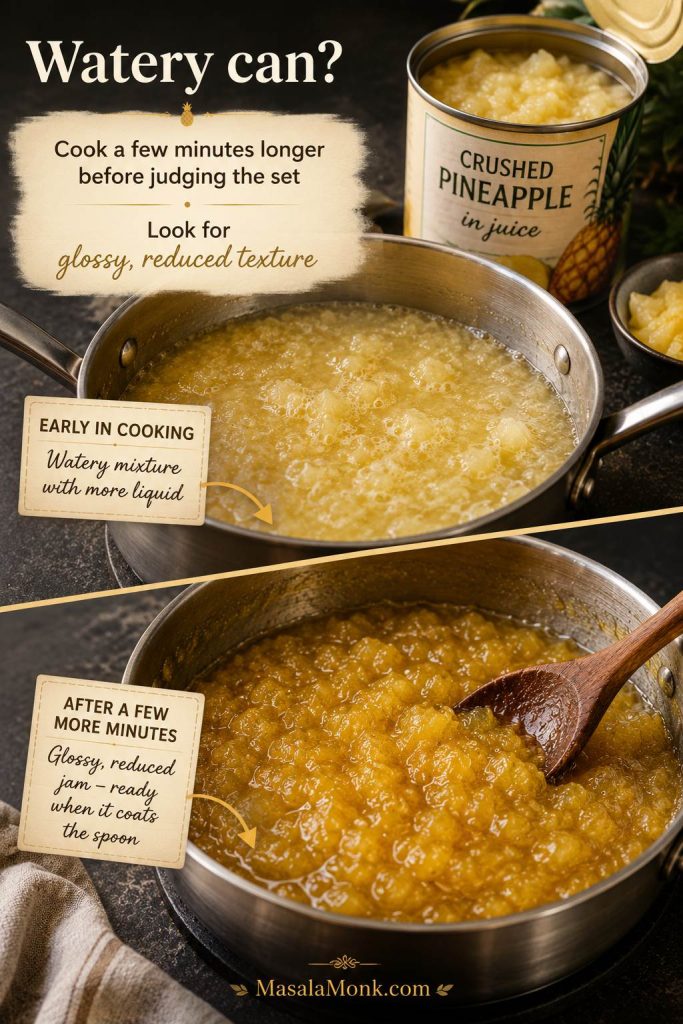
For canned pineapple jam, choose crushed pineapple or pineapple chunks packed in juice rather than heavy syrup. Drain only if the can is extremely watery. Some juice helps the fruit cook down evenly and keeps the sugar from catching too early.

Watery canned crushed pineapple in juice reducing into thicker glossy pineapple jam in a saucepan
Canned pineapple jam can look loose at first because some cans carry more juice than others. Instead of adding thickeners too soon, simmer a little longer and wait for a glossy, reduced texture.
Pineapple Type Best For How to Use It
Fresh pineapple Brightest flavor, best color, homemade preserves Peel, core, chop, then crush or dice depending on texture
Canned crushed pineapple in juice Quick pineapple jam, small batches, pantry version Use with juice unless very watery; simmer longer if needed
Canned pineapple chunks Preserves or jam after chopping Chop smaller or pulse briefly before cooking
Pineapple in syrup Last-resort option Reduce added sugar and expect a sweeter final jam

If you are working with extra pineapple juice, save it for drinks, smoothies, marinades, or a tropical party bowl like this punch with pineapple juice.

Small-Batch Pineapple Jam

A small batch is perfect when you have one can of pineapple or a little fresh fruit left after cutting a whole pineapple. Since this is a small flexible batch, keep it chilled instead of treating it as pantry-stable.

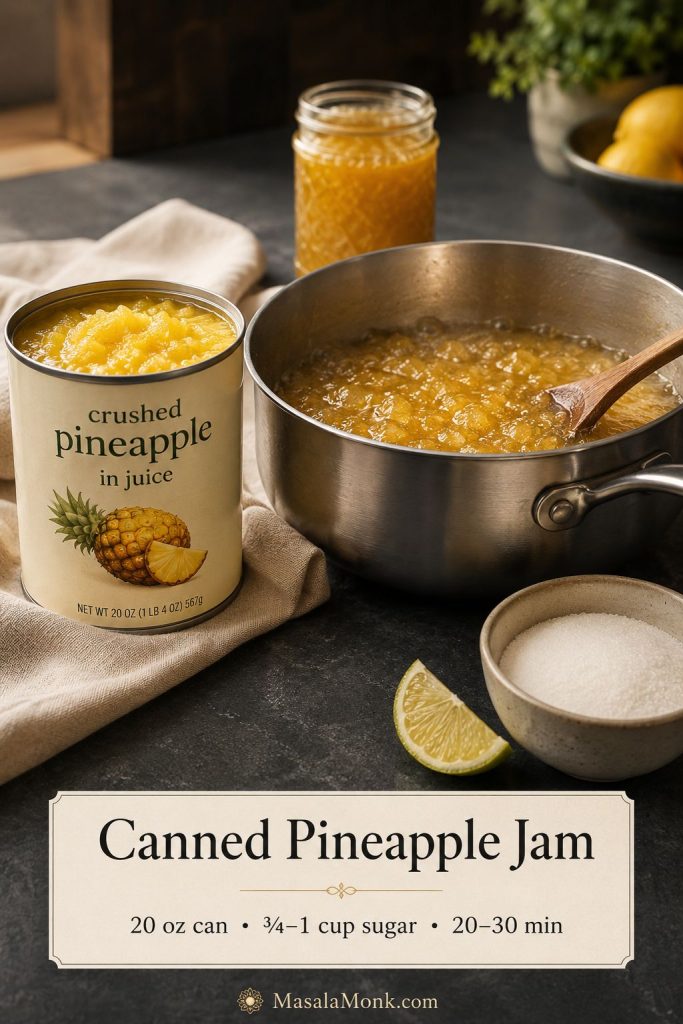
Small batches are also helpful when you are learning the texture cues. They reduce faster, are easier to stir, and give you a low-pressure way to understand how pineapple changes as it cooks. If you are standing in the kitchen with one 20-ounce can of crushed pineapple, this is the easiest place to start.

Small-batch canned pineapple jam setup with a 20-ounce can of crushed pineapple in juice, saucepan, sugar, citrus, and finished jar
A 20-ounce can of crushed pineapple is a practical shortcut for small-batch pineapple jam. Because the fruit is already crushed, the key is reducing the juice until the spread looks shiny and spoonable.

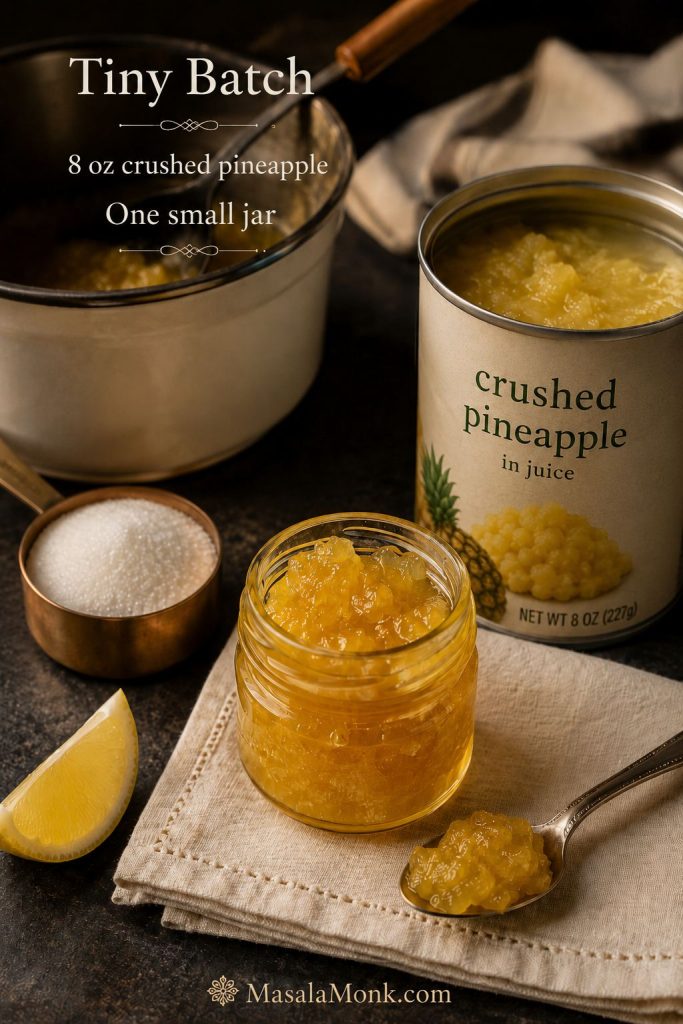
Tiny 8-Ounce Can Version

  • 1 can / 8 oz / 227 g crushed pineapple in juice
  • ⅓–½ cup / 65–100 g sugar
  • 1–2 teaspoons lemon or lime juice
  • Small pinch of salt

Simmer everything in a small saucepan for 15–25 minutes, stirring often, until shiny and jammy. This makes roughly one small jar, depending on how much you reduce it.

Tiny batch pineapple jam setup with an 8-ounce can of crushed pineapple in juice, small jar, lemon wedge, sugar, and saucepan
The 8-ounce can version is a smart tiny batch when you only want one small jar. It also gives you a low-risk way to practice the cold-plate test before making more.

20-Ounce Can Version

  • 1 can / 20 oz / 567 g crushed pineapple in juice
  • ¾–1 cup / 150–200 g sugar
  • 1 tablespoon / 15 ml lemon or lime juice
  • Pinch of salt

Cook for 20–30 minutes, or until the bubbles look slower and the fruit has reduced into a soft-set spread. If the canned pineapple is very juicy, the batch may need a few extra minutes.

Pineapple Jam Without Pectin

This no-pectin pineapple jam recipe is all about patience, not complicated technique. As the pineapple simmers, excess moisture cooks off, the sugar concentrates, and the mixture slowly changes from juicy fruit sauce into a glossy spread.

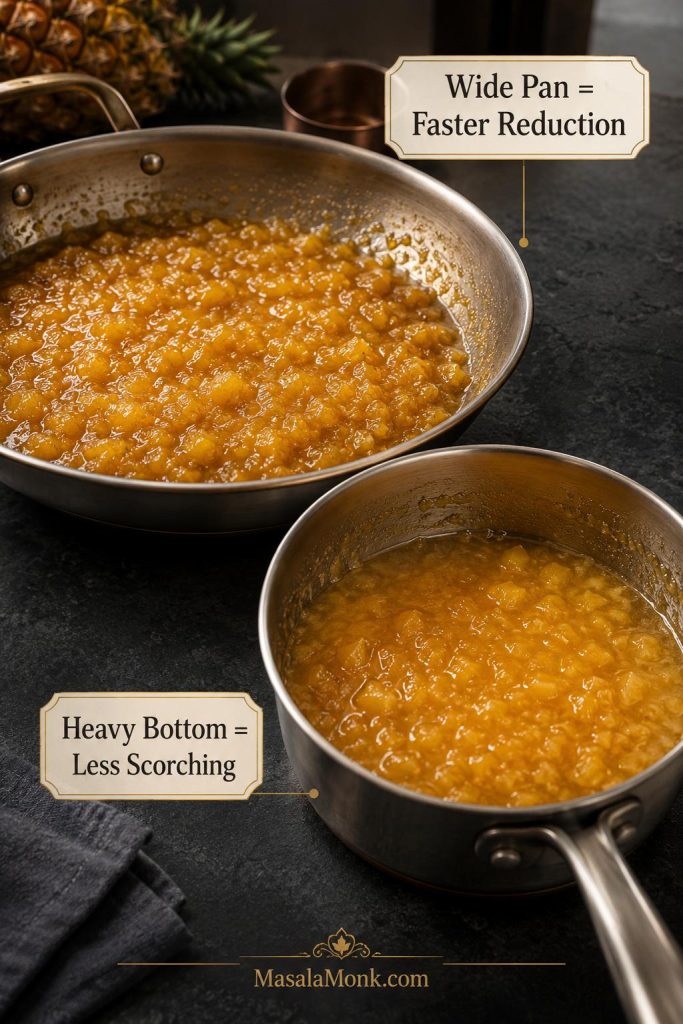
Because pineapple is not naturally high in pectin, the mixture needs enough time to reduce. A heavy-bottomed saucepan helps prevent scorching, while a wider pan speeds up evaporation.

Wide pan and heavy-bottom saucepan comparison for reducing pineapple jam without scorching
A wide pan speeds up pineapple jam because more surface area lets moisture evaporate. At the same time, a heavy bottom helps protect the sugar and fruit from scorching.

No-pectin pineapple jam sets by reduction rather than by a strong natural pectin gel. That means the finished texture is usually softer and more spoonable than commercial jam, but the flavor is more concentrated because the fruit cooks down slowly.

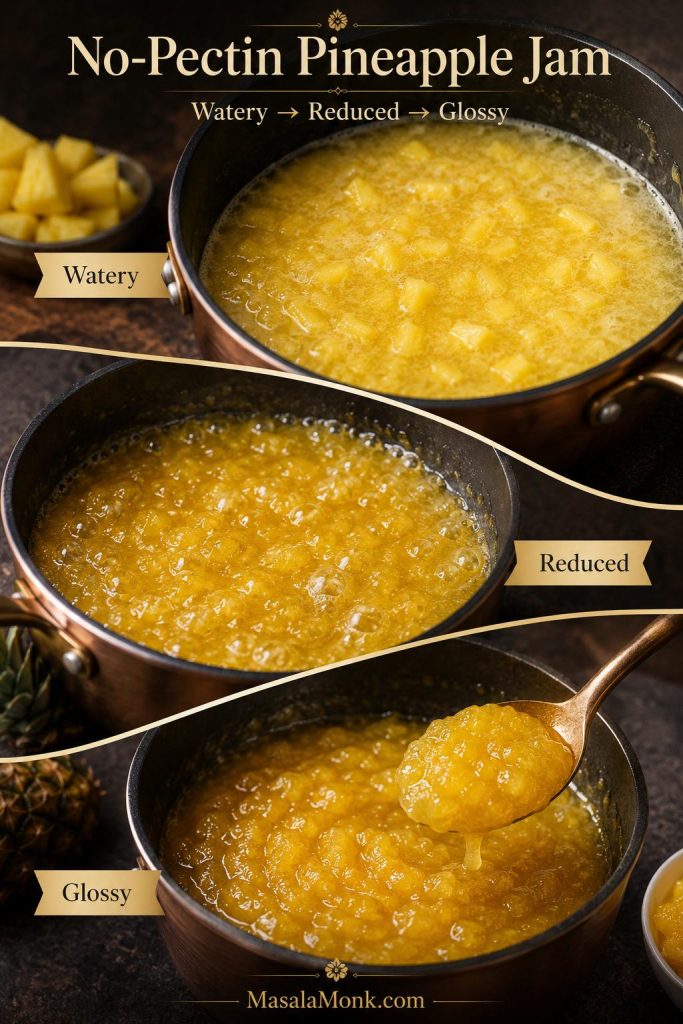
Three cooking stages of no-pectin pineapple jam changing from watery fruit to reduced sauce and glossy jam
No-pectin pineapple jam thickens by reduction rather than a strong commercial-style gel. Therefore, the texture should move from juicy fruit sauce to glossy spread as water cooks off.

The method is simple: combine crushed pineapple, sugar, lemon or lime juice, and salt. Bring the mixture to a boil, then simmer and stir often. As it cooks, the fruit will look less watery, the bubbles will become slower and shinier, and the jam will start leaving a brief trail when you drag a spatula across the bottom of the pan.

Texture tip: Pineapple jam thickens more as it cools. Therefore, stop when it is slightly looser than the final texture you want.

How to Make Pineapple Preserves

Make preserves when you want little golden pieces of pineapple in every spoonful. They are chunkier than jam, a little more syrupy, and especially good over biscuits, waffles, yogurt, ice cream, or cheesecake.

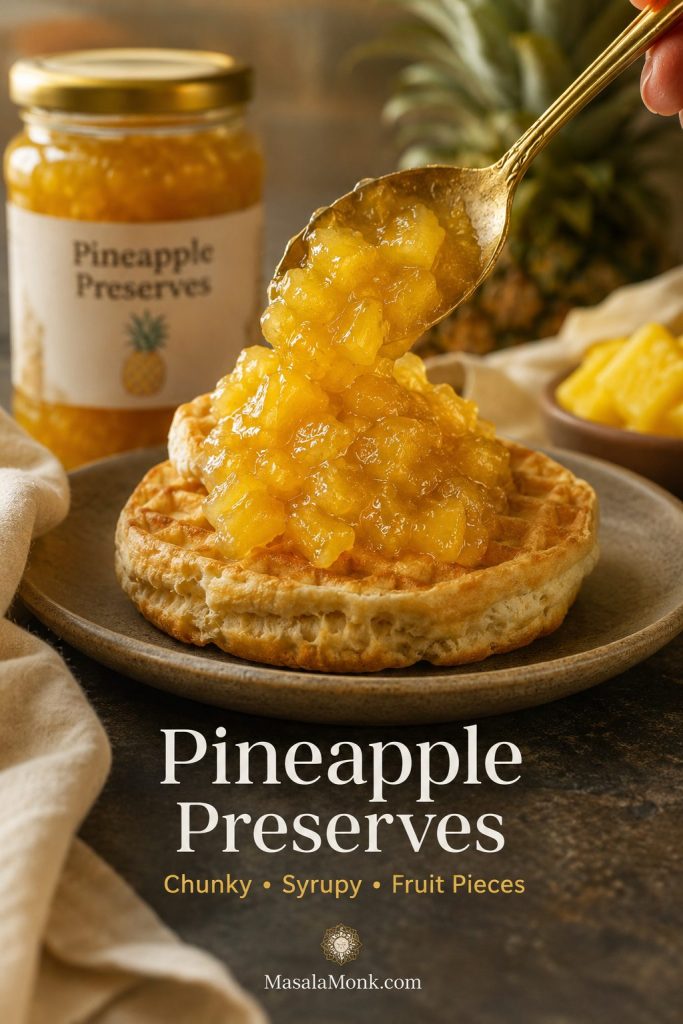
Chunky pineapple preserves being spooned over a waffle with visible pineapple pieces in glossy syrup
Pineapple preserves should keep visible fruit pieces in a thick syrup. For the best result, dice the fruit evenly and avoid mashing it so much that it turns into smooth jam.

Think of this as the pineapple preserve recipe path: diced fruit, less mashing, and a syrupy finish with visible golden pieces instead of a smoother spread.

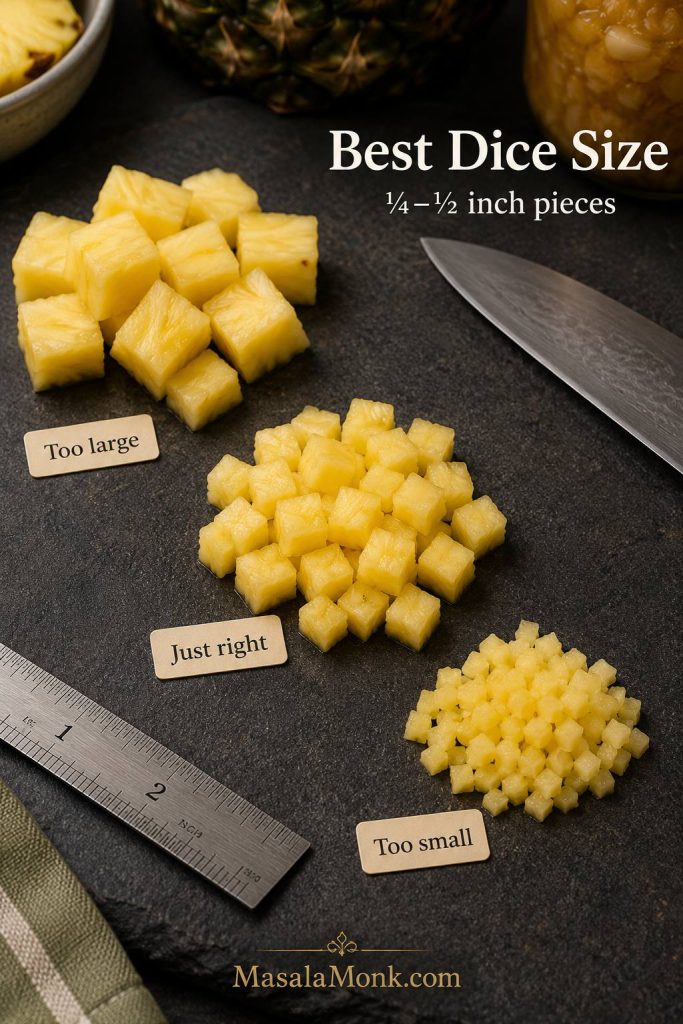
Then, cut the fruit into small pieces, about ¼–½ inch. Pieces that are too large can feel chewy or slide off toast; however, pieces that are too small will collapse into jam.

Pineapple dice-size guide with too-large, just-right, and too-small pieces for preserves
Even pineapple pieces cook more predictably. Aim for ¼–½ inch dice so the preserves stay spoonable, tender, and chunky without becoming chewy or collapsing completely.

Do not pulse preserves too finely unless you want jam. The whole point is to keep small pineapple pieces visible.

For a fruit-forward batch, use less sugar than the classic no-pectin jam. A good starting point is 5½–6 cups diced pineapple, ⅔–1 cup sugar, 2 tablespoons lemon juice, and a pinch of salt.

Cook the mixture in a wide pan for about 30–40 minutes, stirring often, until the pineapple turns tender and golden and the liquid reduces to a thick syrup. If the fruit starts breaking down too much, lower the heat and stir more gently.

For a middle texture, mash only part of the fruit. As a result, you get preserves with body: chunky enough for biscuits and waffles, but still thick enough to spoon over yogurt, cheesecake, or ice cream.

How to Tell When Pineapple Jam Is Done

Because hot jam looks looser than cooled jam, the most common mistake is stopping too early. Instead of relying only on the clock, use the texture cues below.

If this is your first time making pineapple jam, judge it by texture rather than time alone. Some pineapples are juicier than others, and canned pineapple can vary from can to can, so a batch may need a few extra minutes.

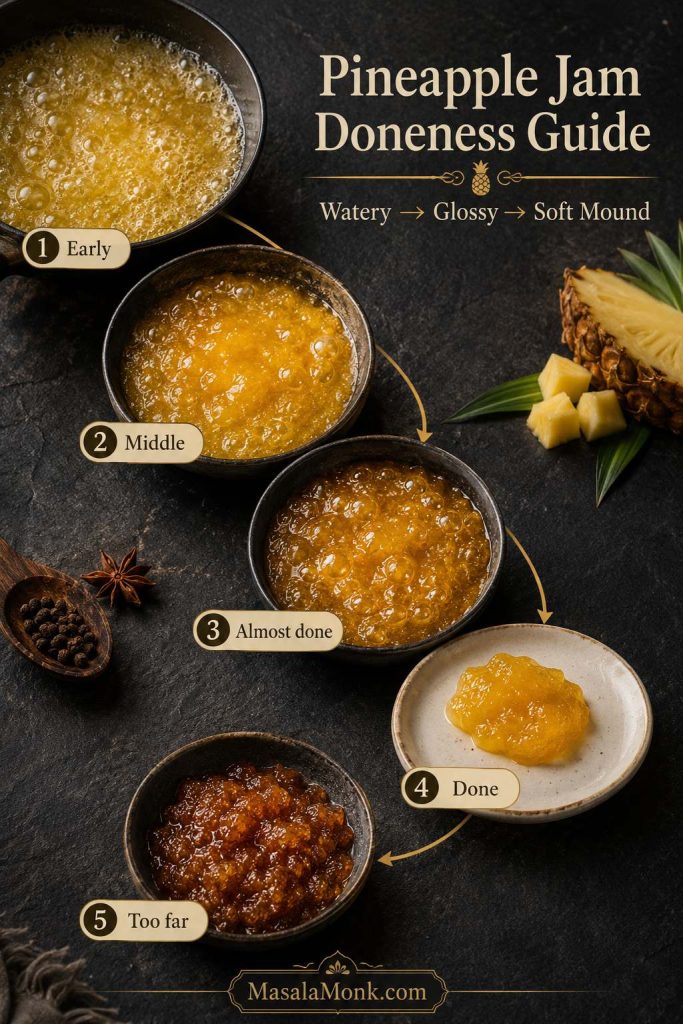
Doneness at a glance: Fast watery bubbles mean it is too early. Slower glossy bubbles mean it is close. A soft mound on a cold plate means it is ready. If the jam slides like syrup, cook it a few minutes longer.
Stage Visual Cue What It Means
Early Fast, watery bubbles Keep cooking; too much moisture remains
Middle Thicker fruit sauce Stir more often so the bottom does not catch
Almost done Slow, glossy bubbles Start testing with a spoon trail or cold plate
Done Soft mound on a cold plate Jar and cool; it will thicken more as it chills
Too far Sticky, dark, stiff texture Loosen gently with a splash of pineapple juice or water
Pineapple jam doneness guide showing early watery bubbles, thicker sauce, glossy bubbles, soft mound, and overcooked jam
Doneness is easier to judge by texture than by minutes alone. Watery bubbles mean keep cooking, slow glossy bubbles mean start testing, and a soft mound means the jam is ready.

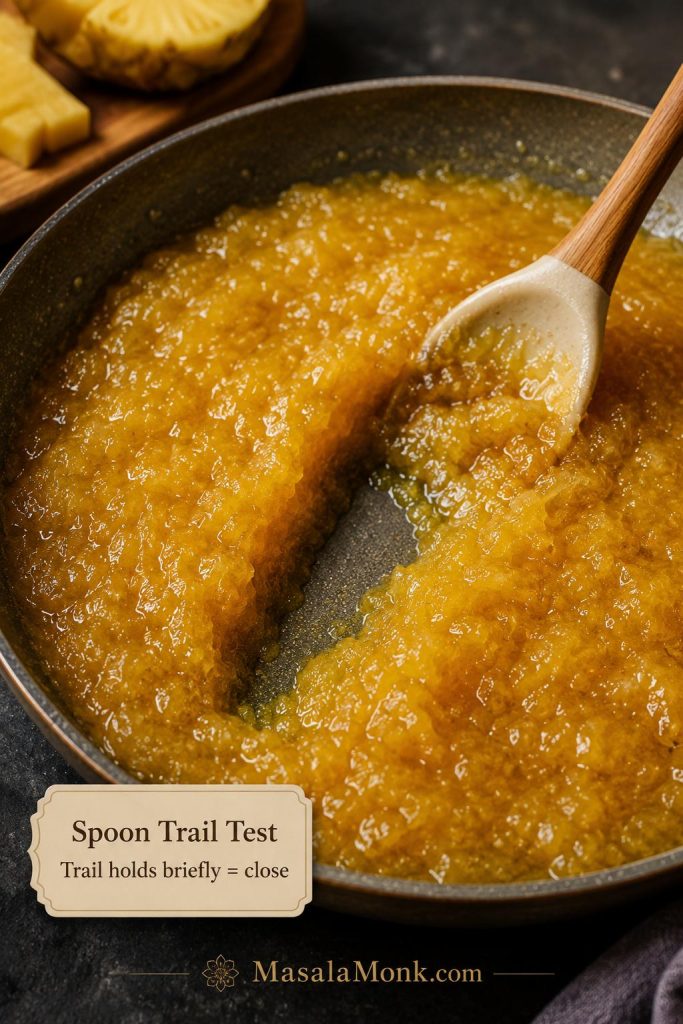
Spoon Trail Test

Drag a spatula or wooden spoon across the bottom of the pan. If the jam leaves a clean trail for a moment before slowly filling in, it is close. If liquid rushes back immediately, keep cooking.

Spoon trail test in a pan of thick pineapple jam with a spatula leaving a visible path through the jam
When a spoon or spatula leaves a brief trail across the pan, the pineapple jam is close. However, the mixture should still look glossy and spreadable, not dry or paste-like.

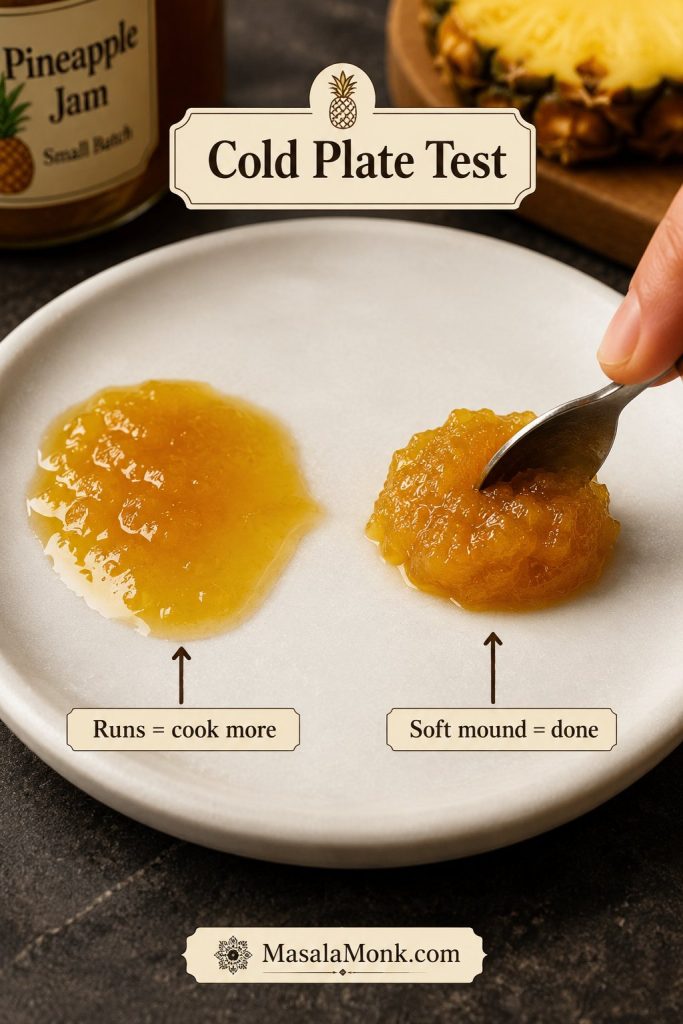
Cold Plate Test

Place a small plate in the freezer before you start cooking. When the jam looks thick, spoon a little onto the cold plate and wait 30–60 seconds. Then, push it with your finger. It should thicken, wrinkle slightly, or hold a soft mound instead of running like juice.

Cold plate test showing one runny pineapple jam sample and one soft mound sample being pushed with a spoon
The cold-plate test shows how pineapple jam will behave after cooling. If the sample runs like syrup, continue cooking; if it mounds softly, stop before it turns sticky.

Thermometer Cue

A classic jam-style set usually lands around 220°F / 104°C at sea level. This is a useful guide, but it should not be your only test. Pineapple type, pan width, sugar level, and altitude can all affect the final texture.

If you live at a higher elevation, the finishing temperature can be slightly lower. Therefore, use the cold-plate test and spoon trail along with the thermometer.

Bubble Cue

At the beginning, the mixture bubbles quickly and looks watery. Near the end, the bubbles become larger, slower, and glossier. The jam will look more like a thick fruit spread than a simmering fruit sauce.

Texture What It Looks Like What to Do
Too runny Liquid rushes back after stirring; cold-plate sample runs Cook 5–10 minutes longer, stirring often
Just right Shiny, soft-set, spoonable, gentle mound on cold plate Remove from heat and jar while warm
Too thick Stiff, sticky, hard to spread, darkening quickly Stir in 1–2 tablespoons water or pineapple juice and warm gently

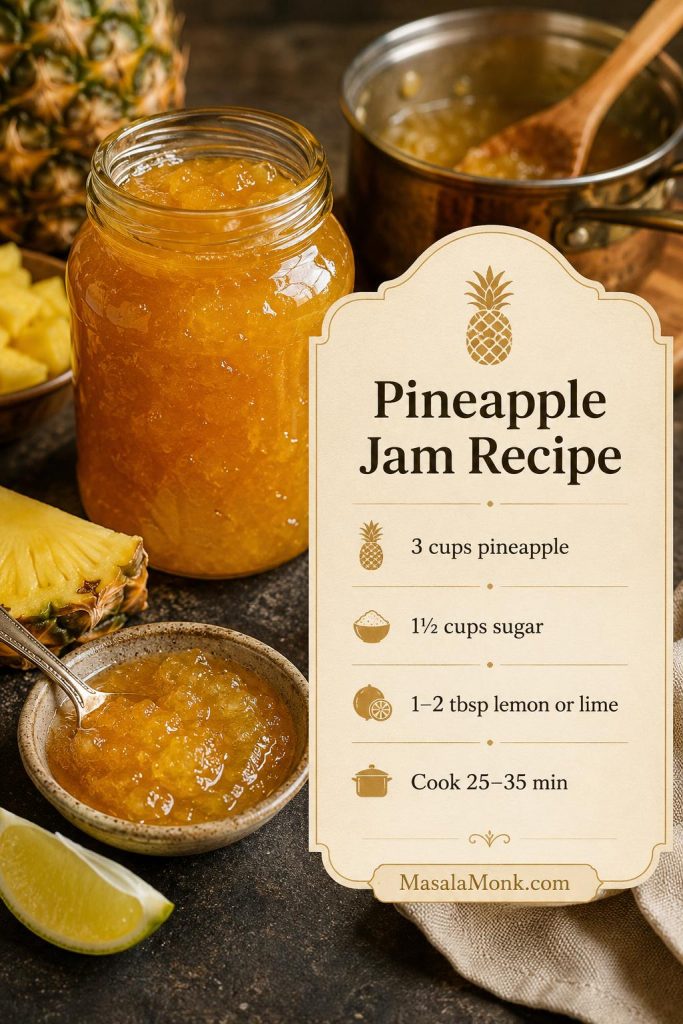
Use this quick visual recipe card as a saveable reminder before the full method below.

Saveable pineapple jam recipe card with pineapple, sugar, lemon or lime, cooking time, jar, saucepan, and pineapple pieces
Use the base pineapple jam recipe first, then adjust the fruit cut to match your final texture. Crushed pineapple gives a smooth spread, while diced pineapple creates chunkier preserves.

Pineapple Jam Recipe Card: No-Pectin Jam or Chunky Preserves

This base pineapple jam recipe makes soft-set no-pectin jam. Use crushed pineapple for jam or diced pineapple for chunkier preserves.

Prep Time10 minutes
Cook TimeJam: 25–35 minutes; preserves: 30–40 minutes
YieldJam: about 2½–3 cups / about three 8-ounce jars; preserves: about 3–4 cups
StorageFridge or freezer

Ingredients for Pineapple Jam

  • 3 cups / about 680 g crushed pineapple, fresh or canned in juice
  • 1½ cups / 300 g granulated sugar
  • 1–2 tablespoons / 15–30 ml lemon or lime juice
  • ⅛ teaspoon fine salt, or a small pinch

For a firmer, sweeter jam: increase sugar up to 2 cups / 400 g.

For Pineapple Preserves Instead

  • Use 5½–6 cups small diced pineapple, about ¼–½ inch pieces
  • Use ⅔–1 cup sugar, depending on sweetness
  • Use 2 tablespoons / 30 ml lemon juice
  • Add a pinch of salt

Equipment

  • Heavy-bottomed saucepan or wide pan
  • Food processor, blender, knife, or potato masher
  • Silicone spatula or wooden spoon
  • Measuring cups or digital scale
  • Jam thermometer, optional
  • Small freezer plate for testing
  • Clean jars with lids

Method

  1. Prepare the pineapple. For jam, crush or finely chop the pineapple. For preserves, dice it into small even pieces.
  2. Combine the ingredients. Add pineapple, sugar, lemon or lime juice, and salt to a heavy saucepan.
  3. Start cooking. Bring to a boil over medium-high heat, stirring often so the sugar dissolves evenly.
  4. Simmer and reduce. For jam, cook for 25–35 minutes, stirring frequently. For preserves, cook for 30–40 minutes, or until the pineapple pieces are tender and suspended in thick syrup. Scrape the bottom and sides of the pan so the mixture does not scorch.
  5. Check the texture. Jam is ready when it looks shiny, thickened, and spoonable. It should leave a brief trail in the pan, mound softly on a cold plate, or reach about 220°F / 104°C at sea level. Preserves should look syrupy with visible fruit pieces.
  6. Jar and cool. Spoon the hot jam or preserves into clean jars. Let cool, then cover and refrigerate. The mixture will thicken more as it chills.

Notes

  • This flexible no-pectin recipe is intended for refrigerator or freezer storage.
  • For shelf-stable canning, follow a tested preservation method and proper processing instructions.
  • If using canned pineapple packed in syrup, reduce the sugar and taste as it cooks.
  • For a smoother jam, use an immersion blender briefly before the jam gets too thick.
  • Avoid doubling the batch in the same pan the first time. Larger batches take longer to reduce and are easier to scorch, so make two separate batches if you need more.

Pineapple Jam With Pectin

If you want a firmer version of this pineapple jam recipe, pectin can help you get there without cooking the fruit as long. It can also help if you are using a lower-sugar method designed for pectin.

However, pectin is not one-size-fits-all. Regular powdered pectin, liquid pectin, low-sugar pectin, and calcium-activated pectin all behave differently. Some require a high sugar ratio, while others are designed for lower-sugar spreads.

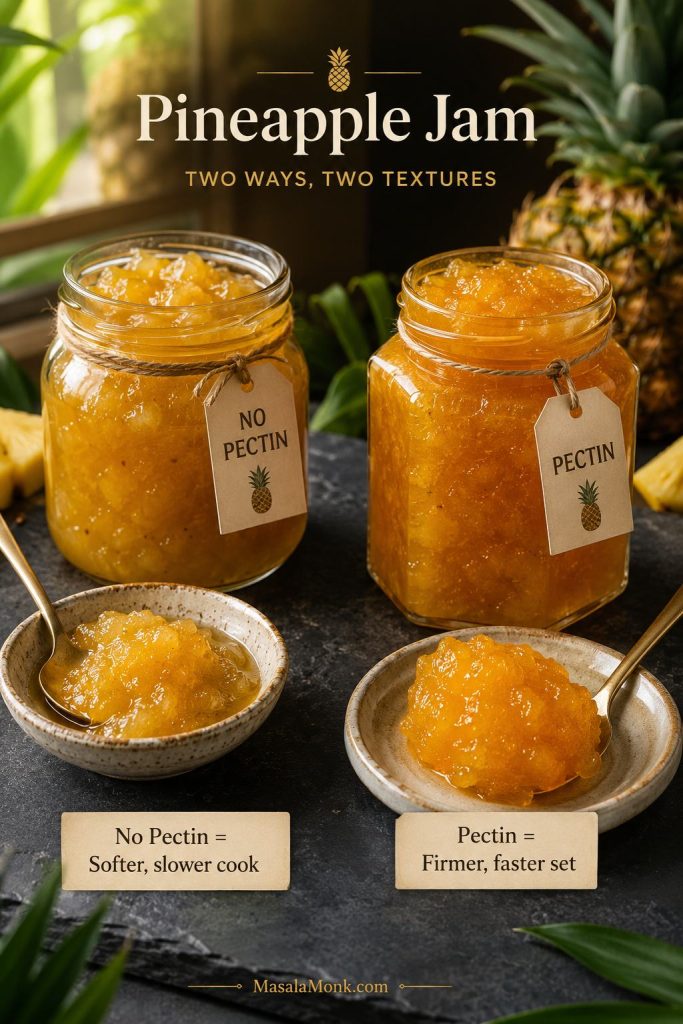
Two jars of pineapple jam comparing softer no-pectin jam with firmer pectin-set jam
Pectin is useful when you want a faster, firmer pineapple jam, but it is not always necessary. For a softer homemade spread, the no-pectin method gives a more spoonable finish.

Pectin versions are not automatically better; they are simply faster and firmer. If you use pectin, follow the specific package instructions for fruit amount, sugar amount, boiling time, and jar processing. Otherwise, the jam may turn too stiff, too loose, overly sweet, or unsuitable for pantry storage if you are trying to can it.

Fresh pineapple note: Some pectin methods recommend boiling fresh pineapple first because fresh pineapple contains enzymes that can interfere with gel formation. If your pectin brand gives pineapple-specific instructions, follow them.

Canning Pineapple Jam and Preserves Safely

Important: The recipe card above is written for refrigerator or freezer storage. Do not treat it as a shelf-stable canning recipe unless you switch to a tested canning formula and follow the exact fruit, acid, sugar, pectin, jar size, headspace, and processing time.

Pineapple jam can be canned, but pantry storage needs a tested method, not a flexible refrigerator-jam formula. The amount of sugar, acid, pectin, fruit, headspace, jar size, and processing time all matter.

Because this is a flexible pineapple jam recipe, treat the main batch as a refrigerator or freezer pineapple jam. If you want pantry storage, use a tested preservation method and follow the jar size, headspace, and processing time exactly.

For shelf-stable jars, Ball’s pineapple jam canning recipe is a useful reference. In addition, the National Center for Home Food Preservation guide to jams, jellies, and marmalades is a good place to check broader home-preservation safety guidance.

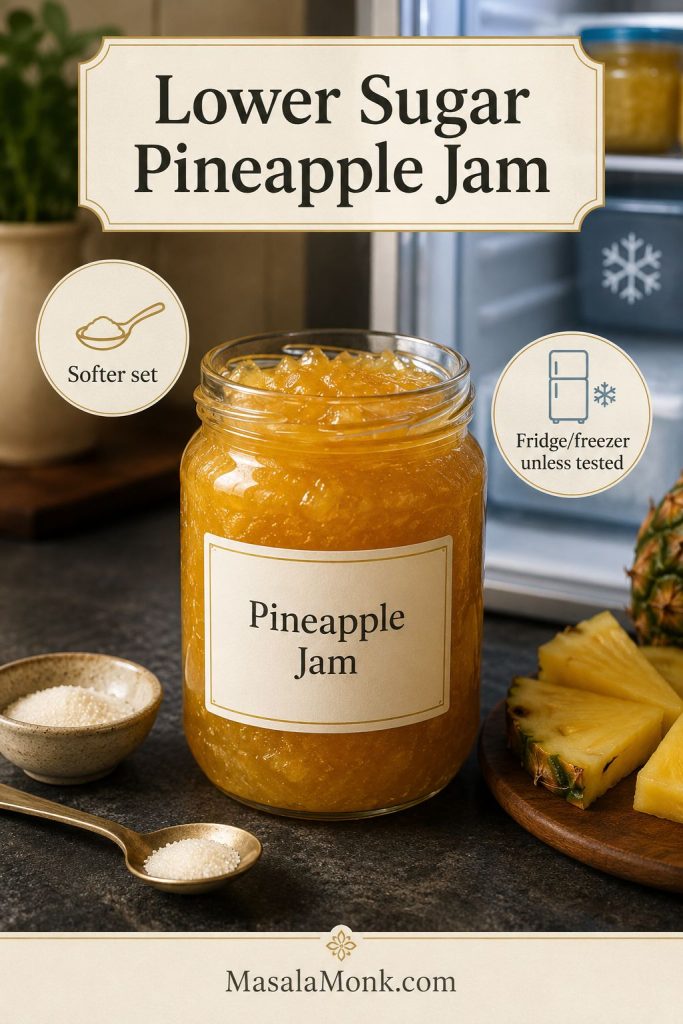
Be especially careful with low-sugar or sugar-free pineapple jam. Reducing sugar can affect set, texture, and storage safety. If you want a lower-sugar version, use a pectin and method designed for low-sugar jam, then refrigerate, freeze, or process only according to the instructions for that exact style.

Lower-sugar pineapple jam jar with small sugar cue and refrigerator-freezer storage reminder
Lower-sugar pineapple jam often sets softer because sugar helps with body and preservation. Unless you are using a tested low-sugar method, store it in the refrigerator or freezer.

Pineapple Jam for Tarts and Filling

You can also adapt this pineapple jam recipe into a thicker filling for tarts, cookies, and pastries. Unlike spreadable jam, tart filling cooks until most of the liquid evaporates and the mixture becomes sticky, concentrated, and paste-like.

Tart Filling Ratio

For a small tart-filling batch, start with about 4 cups finely pulsed or grated pineapple, ½–¾ cup sugar, 1 tablespoon lemon or lime juice, and a pinch of salt. Add sugar after some of the pineapple liquid has cooked off, then keep reducing until the filling is thick, sticky, and no longer watery.

How Thick Tart Filling Should Be

Cook it in a wide pan so moisture evaporates quickly. Then, continue cooking over medium-low heat until the mixture is darker, concentrated, and able to hold its shape when cooled.

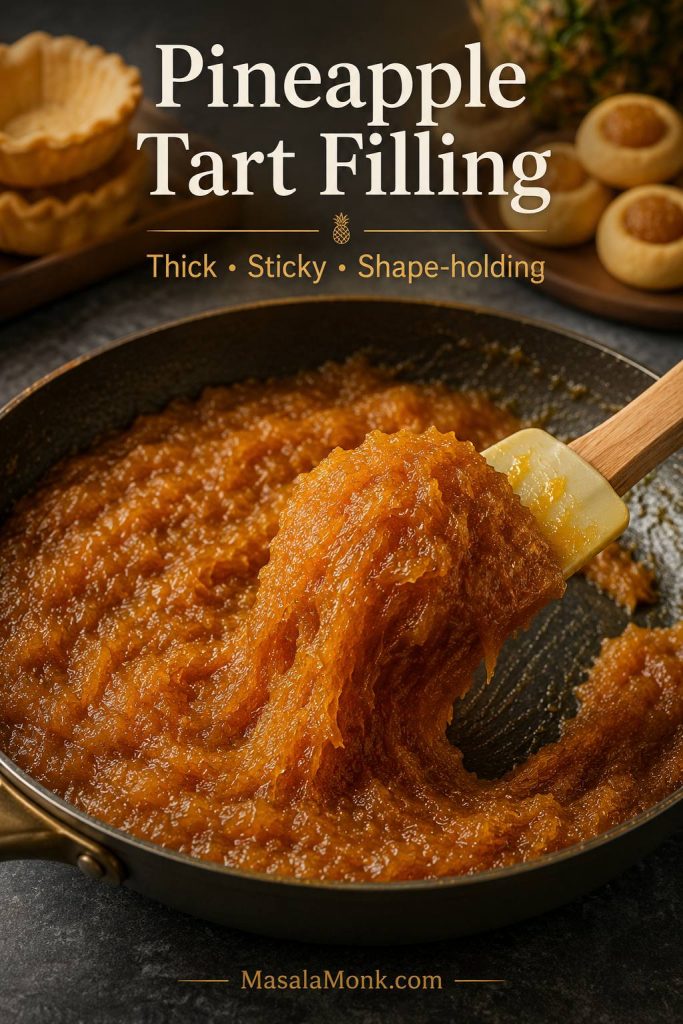
For tart filling, the mixture should not slide around the pan like jam. It should move as a sticky mass, leave the pan bottom visible for longer, and hold its shape once cooled.

Thick pineapple tart filling being lifted from a pan with a spatula while tart shells sit in the background
Pineapple tart filling needs to be thicker than breakfast jam. Cook it until it moves as one sticky mass, holds its shape, and no longer releases watery juice around the edges.

Near the end, stir more often and lower the heat if the filling starts catching on the bottom. Tart filling is ready when it looks darker, moves together as one sticky mass, and no longer releases watery juice around the edges.

This can take much longer than jam for toast. Depending on pineapple quantity and juiciness, tart filling may need 1–2½ hours. It is ready when a cooled spoonful holds its shape and does not leak liquid. For rolled pineapple tarts, the cooled filling should be thick enough to portion and shape.

Flavor Options for Pineapple Tart Filling

Finally, optional spices such as cinnamon, clove, star anise, ginger, or vanilla can make pineapple filling warmer and more dessert-like. Use them lightly so the fruit stays the main flavor.

How to Store Pineapple Jam and Preserves

After cooking, let the jam cool before sealing and storing. It will thicken as it cools, so do not judge the final texture while it is still boiling hot.

Because this pineapple jam recipe is written as a flexible refrigerator or freezer method, storage depends on sugar level, cleanliness, and how the jars are handled after cooling.

Storage Method How Long Best For
Refrigerator For best quality, use within about 2 weeks. Higher-sugar batches handled only with clean utensils may last longer. Everyday no-pectin pineapple jam and preserves
Freezer About 2–3 months for best texture Small batches, lower-sugar versions, extra jars
Shelf-stable pantry storage Only with a tested canning method Properly processed jam using safe canning instructions

Use clean jars and utensils every time. If the jam smells fermented, looks moldy, becomes fizzy, or changes in a way that feels off, discard it.

Ways to Use Pineapple Jam and Preserves

The fun of pineapple jam is that it moves easily between breakfast, dessert, and savory food. It can be the bright layer in a cake, the glossy topping on cheesecake, or the sweet-tart glaze that wakes up grilled chicken or pork.

Serving spread showing pineapple jam on toast, cheesecake, waffles, ice cream, and a savory glaze dish
Pineapple jam works beyond toast because its sweet-tart flavor cuts through rich foods. Try it with cheesecake, waffles, coconut ice cream, cheese boards, or a quick glaze for chicken, pork, shrimp, or tofu.
  • Spread on toast, biscuits, English muffins, or scones.
  • Spoon over pancakes, waffles, French toast, yogurt, or oatmeal.
  • Use as a filling for thumbprint cookies, sandwich cookies, cakes, cupcakes, or tart shells.
  • Spoon over chilled cheesecake, especially a simple no bake cheesecake where the bright pineapple cuts through the creamy filling.
  • Serve chunky pineapple preserves with vanilla ice cream, yogurt, or a scoop of homemade coconut ice cream.
  • Brush over grilled chicken, pork chops, ham, shrimp, or tofu as a sweet-tart glaze.
  • Pair with cream cheese, goat cheese, or brie for a quick appetizer.
  • Use a spoonful in tropical mocktails, cocktails, or fruit punches when you want pineapple sweetness and texture.

Best Version for Each Use

Use Best Version Why It Works
Toast, scones, biscuits Soft-set pineapple jam Spreads easily without large fruit pieces falling off
Waffles, pancakes, ice cream Pineapple preserves Chunky fruit pieces feel more generous as a topping
Thumbprint cookies or tart shells Thicker jam Holds better and does not run as much during serving
Pineapple tarts and pastry filling Tart filling Cooked longer until sticky, concentrated, and shape-holding
Pork, chicken, shrimp, or tofu glaze Preserves or looser jam Melts into a sweet-tart glaze with visible fruit if desired
Cheesecake or coconut desserts Jam or preserves Bright pineapple cuts through rich, creamy desserts

Troubleshooting Pineapple Jam

Pineapple jam is forgiving. However, the texture can shift depending on pineapple ripeness, water content, pan size, sugar level, and cooking time.

If your batch does not look right at first, do not panic. Most texture issues can be fixed by cooking a little longer, adding a splash of liquid, or balancing the sweetness with citrus and salt.

Quick Fixes for Common Problems

Problem Likely Cause Fix
Jam is runny Not cooked long enough, pineapple was very juicy, or sugar was reduced too much Return to the pan and simmer 5–10 minutes longer. Test on a cold plate before jarring again.
Jam is too thick Over-reduced or cooked at too high a heat Warm gently with 1–2 tablespoons water, pineapple juice, or lemon juice until spreadable.
Jam tastes too sweet Pineapple was very ripe or canned in syrup Add a little more lemon or lime juice and a tiny pinch of salt. Next time, reduce sugar slightly.
Jam tastes flat Not enough acid or salt Add lemon or lime juice in small amounts, then taste again.
Preserves are tough or chewy Pineapple pieces were too large or included too much core Chop smaller next time. For this batch, cook gently with a splash of water until softer.
Jam is browning too fast Heat is too high or pan bottom is too thin Lower the heat, stir more often, and use a heavier pan next time.
Canned pineapple flavor tastes dull Pineapple was packed in syrup or tasted muted from the can Add lime juice, lemon zest, ginger, or a small splash of pineapple juice to brighten it.
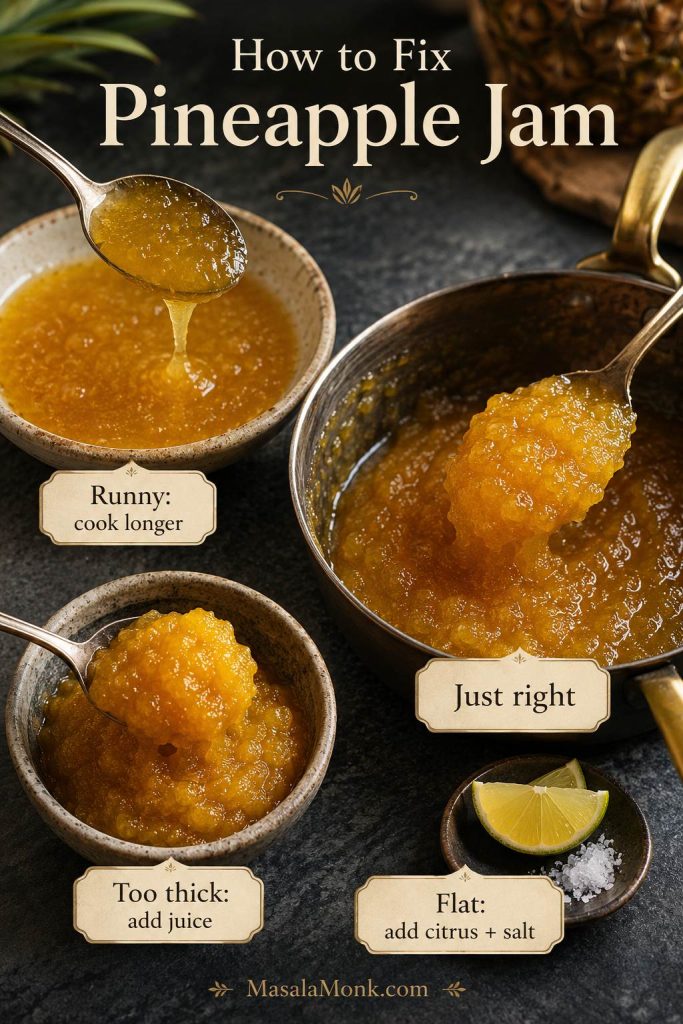
Troubleshooting guide showing runny pineapple jam, just-right jam, too-thick jam, citrus, salt, and fix labels
Most pineapple jam problems are fixable. Cook runny jam longer, loosen an overly thick batch with a splash of juice, and brighten flat flavor with citrus plus a tiny pinch of salt.

The Most Common Texture Mistake

The easiest mistake is judging the jam while it is still hot. If it slides across the cold plate like syrup, give it another few minutes. If it mounds softly and looks shiny, stop before it turns sticky or overly firm.

Pineapple Jam Variations

Once you have the basic method, this recipe is easy to adapt. Keep the first batch simple, then try one of these variations.

Pineapple Lime Jam

Use lime juice instead of lemon juice and add ½–1 teaspoon lime zest near the end. This gives the jam a brighter tropical finish.

Pineapple Ginger Jam

Add 1–2 teaspoons freshly grated ginger while the fruit cooks. Ginger works especially well if you plan to use the jam as a glaze for chicken, pork, shrimp, or tofu.

Pineapple Vanilla Jam

Stir in ½–1 teaspoon vanilla after removing the jam from the heat. This makes it softer and more dessert-like, especially for pancakes, yogurt, cakes, or thumbprint cookies.

Pineapple Coconut Jam

Add 2–4 tablespoons finely shredded coconut near the end of cooking, or stir in toasted coconut after the jam cools. This leans into a piña colada-style flavor, especially if you like the pineapple-coconut pairing in these piña colada variations.

Pineapple Jalapeño Jam

Add 1–2 tablespoons finely minced jalapeño for a sweet-hot condiment. This is excellent with cream cheese, grilled meats, tacos, sandwiches, and cheese boards. For a shelf-stable spicy jam, use a tested canning method rather than improvising the acid and pepper ratio.

Brown Sugar Pineapple Preserves

Replace 2–4 tablespoons of the white sugar with brown sugar for a deeper caramel flavor. This version works especially well as a glaze for ham, pork, or grilled pineapple desserts.

Thicker Pineapple Pastry Filling

Cook the jam longer over low heat until it is thick enough to hold its shape. This is the better version for pineapple tarts, filled cookies, pastry pockets, and cake layers that need a firmer filling.

FAQs

Jam or preserves: what is the real difference?

The difference is mostly texture. Pineapple jam is smoother because the fruit is crushed or finely chopped. Pineapple preserves are chunkier, with small pieces of fruit suspended in syrup.

Do you need pectin for pineapple jam?

No, not for a refrigerator or freezer version. Pineapple, sugar, and citrus can cook down into a soft-set jam on their own. However, pectin is helpful if you want a firmer set, a quicker recipe, a lower-sugar method, or a canning formula designed for that purpose.

When is pineapple jam safe for pantry storage?

Pineapple jam is safe for pantry storage only when you follow a tested canning method with the correct sugar, acid, pectin if required, jar size, headspace, and processing time. The flexible no-pectin recipe on this page should be treated as refrigerator or freezer jam unless you switch to a tested canning formula.

What is the safest way to make lower-sugar pineapple jam?

Use a lower-sugar pectin method or keep the jam refrigerated or frozen. Reducing sugar in a regular no-pectin batch can make the texture softer, and it should not be treated as shelf-stable unless the recipe is designed for that kind of storage.

What changes when you use canned pineapple?

Canned pineapple is usually softer and wetter than fresh pineapple, so it may cook down faster or need a few extra minutes depending on how much juice is in the can. Use pineapple packed in juice when possible, and simmer until it becomes shiny, reduced, and spoonable.

What is the best pineapple for jam?

Fresh ripe pineapple gives the brightest flavor. Canned crushed pineapple in juice is the easiest option and works well for small-batch pineapple jam. Avoid syrup-packed pineapple unless you are prepared to reduce the sugar.

Should you use crushed pineapple or chunks for preserves?

Use chunks or diced pineapple for preserves because you want visible fruit pieces. Crushed pineapple is better for a smoother jam. If using canned chunks, cut them smaller so they soften evenly and spoon easily over biscuits, waffles, yogurt, or ice cream.

Why is my pineapple jam runny?

Runny pineapple jam usually needs more cooking time. Pineapple can release a lot of liquid, especially if it is very ripe or canned with juice. Return the jam to the pan and simmer until it looks reduced, shiny, and spoonable. Then test it on a cold plate before jarring again.

How long does homemade pineapple jam last?

For best quality, use refrigerator pineapple jam within about 2 weeks. Higher-sugar batches handled only with clean utensils may last longer, but discard the jar if you see mold, fizzing, fermentation, off smells, or any change that feels unsafe.

How do you make pineapple jam thicker for tarts?

Cook it longer in a wide pan over medium-low heat until most of the moisture evaporates. Tart filling should be much thicker than spreadable jam. It should move as a sticky mass, leave the pan bottom visible for longer, and hold its shape once cooled.

Where does pineapple jam taste best besides toast?

Pineapple jam is excellent with biscuits, scones, pancakes, waffles, yogurt, ice cream, cheesecake, thumbprint cookies, cakes, pork, chicken, shrimp, cheese boards, and tropical desserts. Chunkier pineapple preserves are especially good when you want visible fruit pieces.

Final Thoughts

The best pineapple jam tastes like concentrated pineapple: bright, tropical, sweet-tart, and just thick enough to spoon generously over whatever needs a little sunshine. Start with crushed pineapple for the easiest jam, switch to diced fruit when you want preserves, and cook it longer when you need a sturdy filling for tarts or pastries.

Toast spread with homemade pineapple jam beside a small bowl of chunky preserves, pineapple wedges, spoon, and warm breakfast setting
Once you understand the texture cues, pineapple jam becomes easy to customize. Keep it smooth for breakfast toast, or leave it chunkier when you want a dessert-style preserve.

After one batch, the texture cues become much easier to recognize. The bubbles slow down, the color deepens, the spoon leaves a trail, and the jam turns shiny enough to jar. That is the moment to stop, cool it, and decide where the first spoonful is going.

If you make it, notice whether you preferred fresh pineapple, canned crushed pineapple, or diced preserves. That one choice changes the texture more than anything else, and it is usually the difference between a smooth breakfast jam and a chunkier dessert-style preserve.

Posted on 2 Comments

Rice Pudding with Cooked Rice

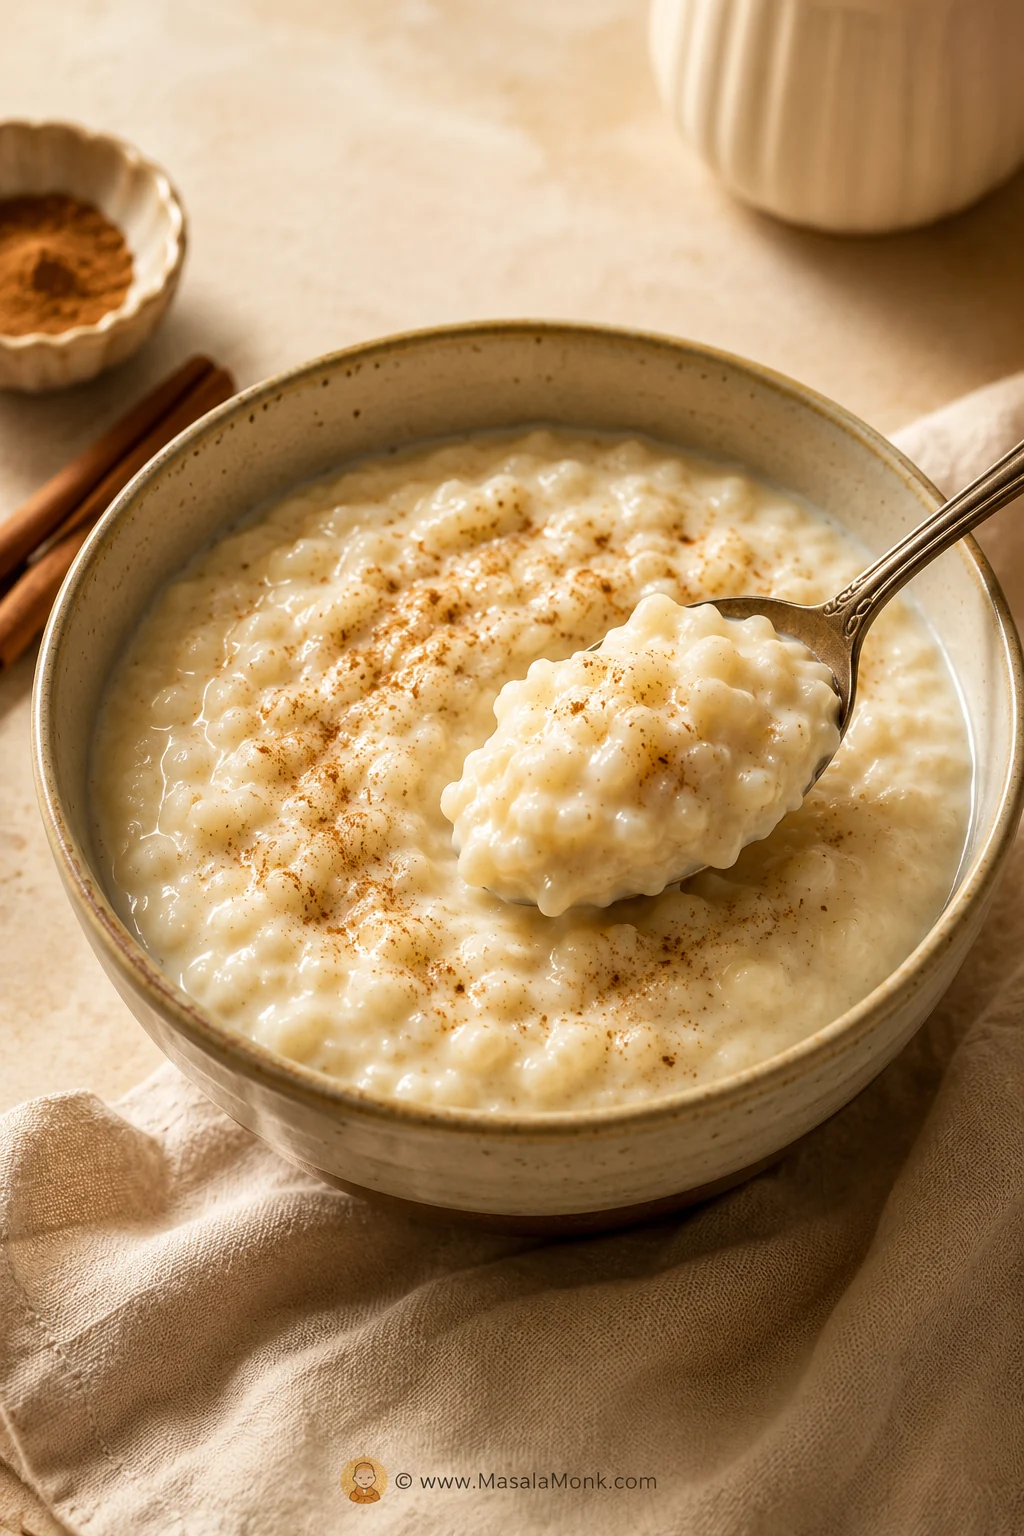
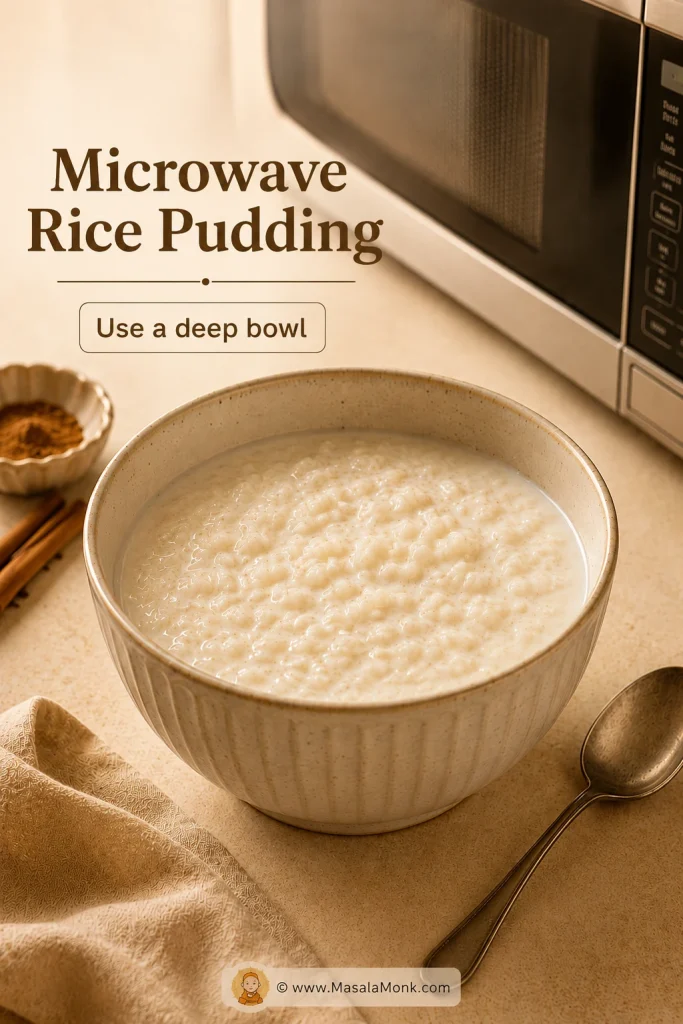
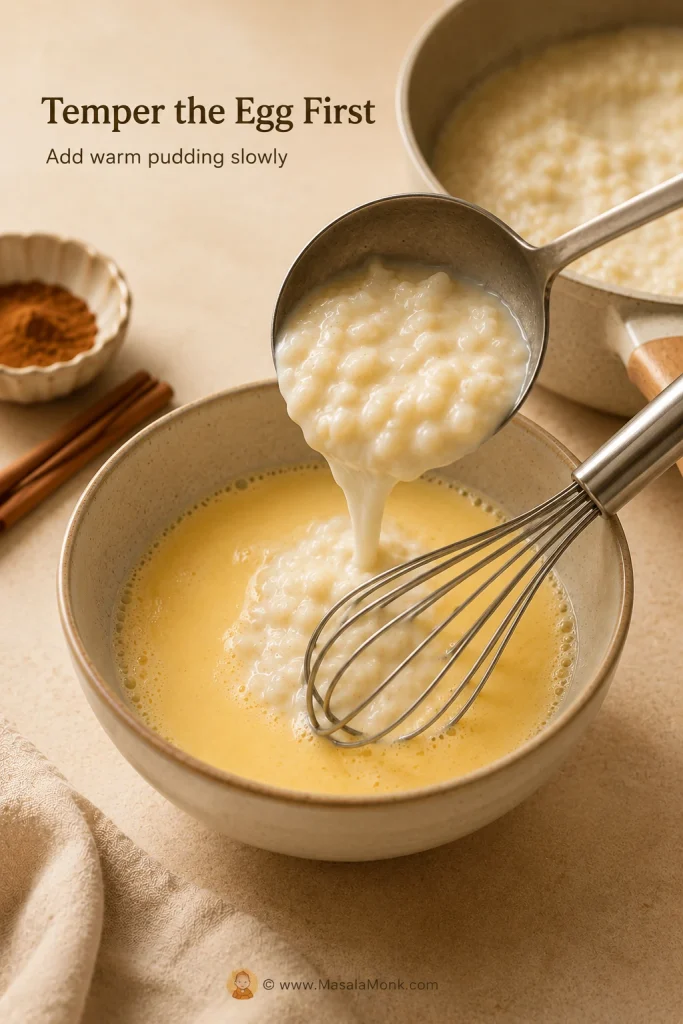
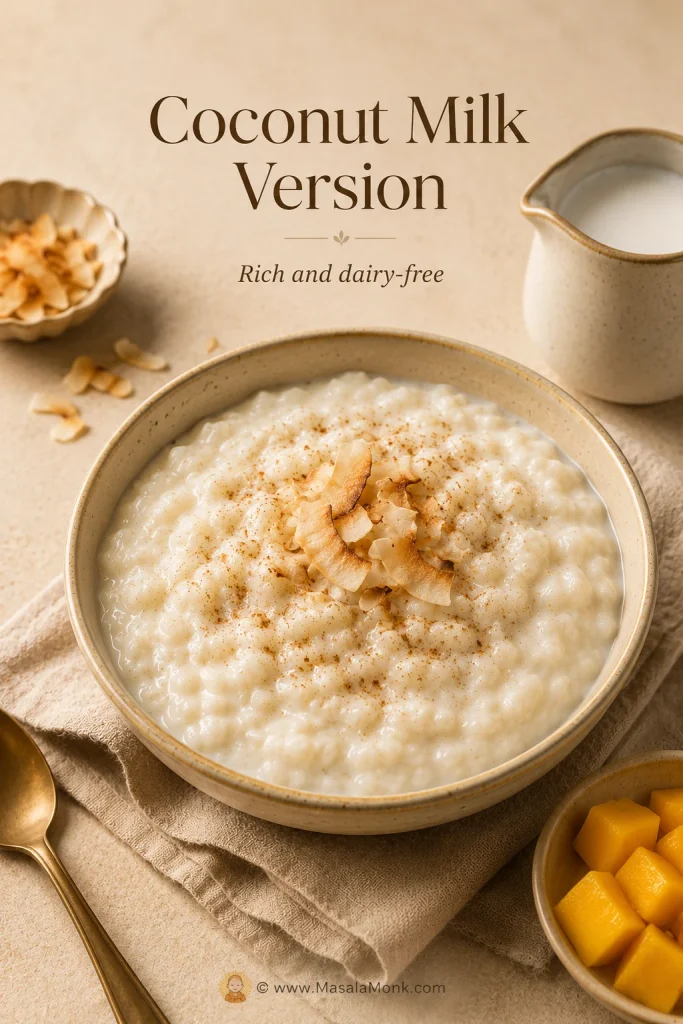
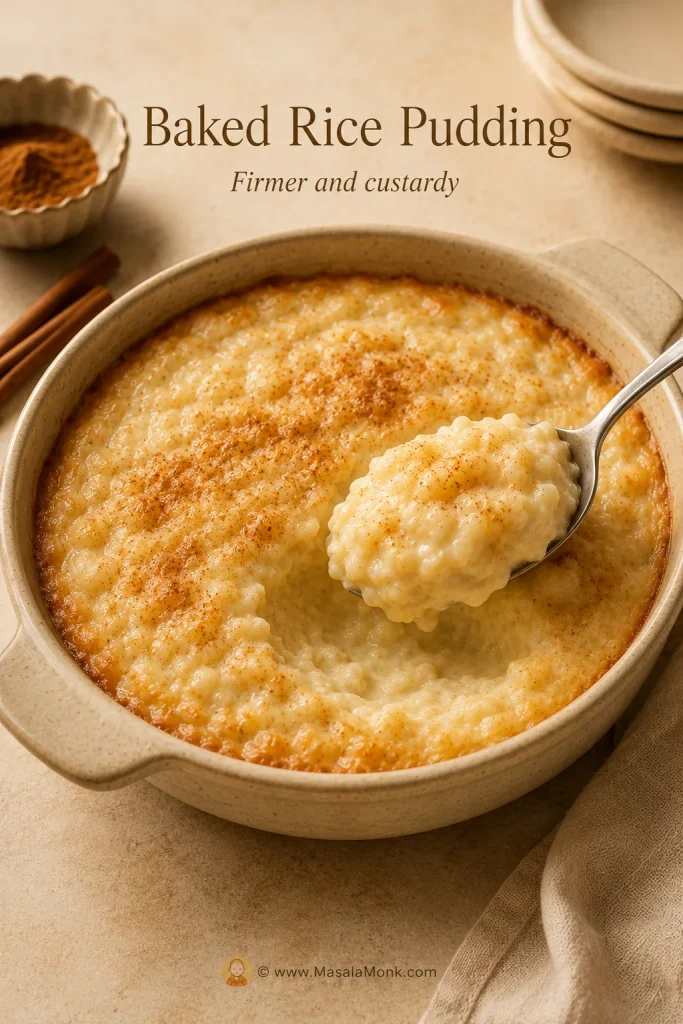
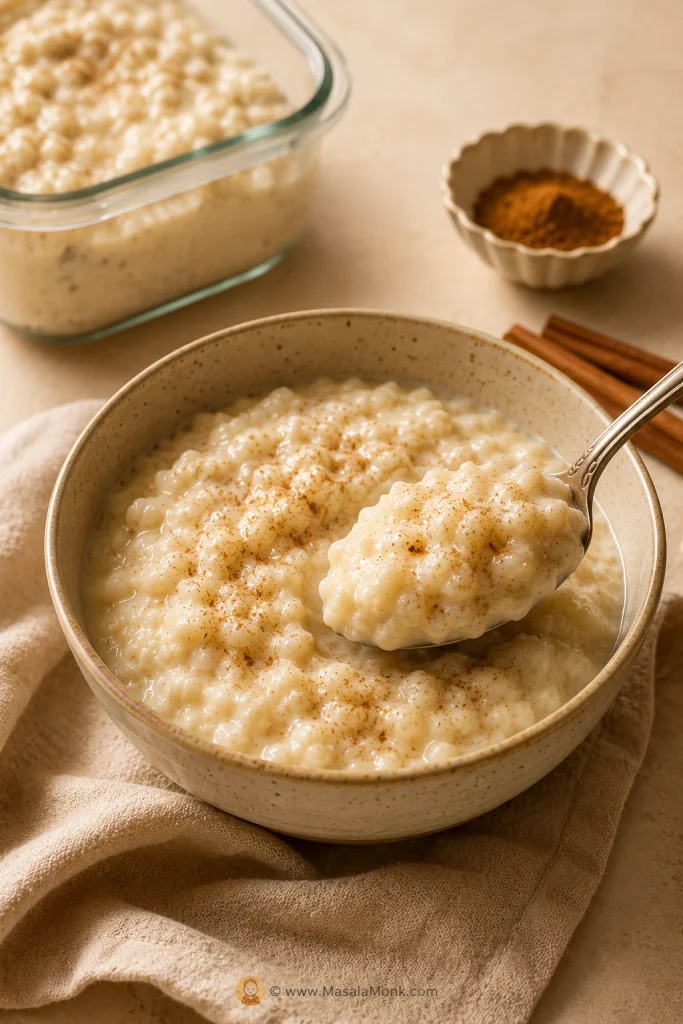
Creamy rice pudding made with cooked rice in a ceramic bowl, lightly dusted with cinnamon and served with a spoon.

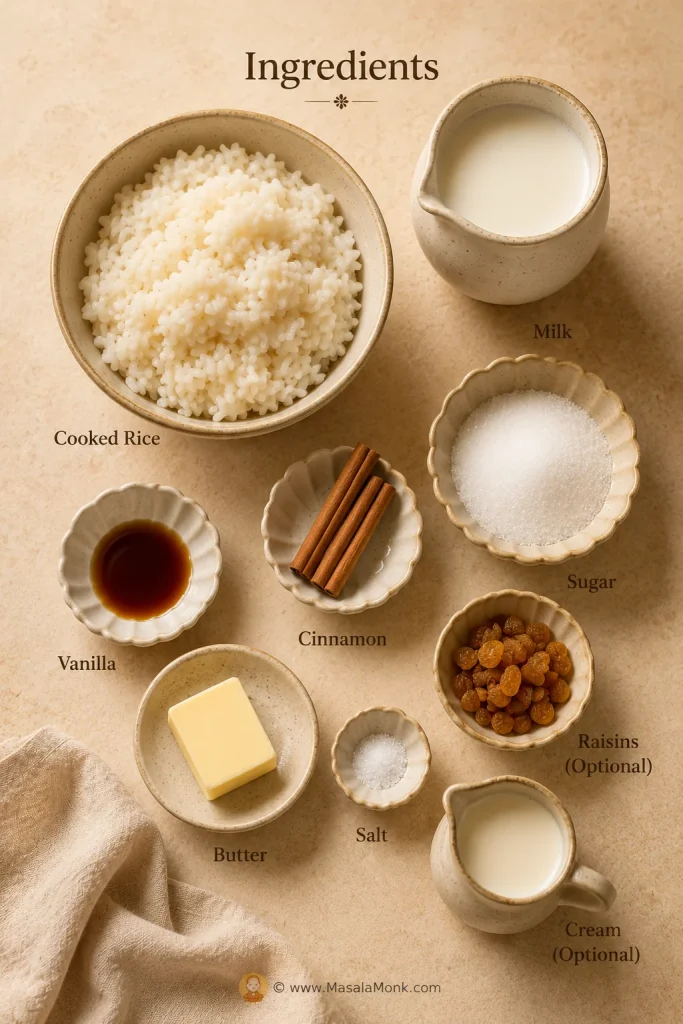
This rice pudding with cooked rice is the recipe to make when you have leftover rice in the fridge and want something warm, creamy, and comforting without starting from raw rice. You only need cooked rice, milk, sugar, vanilla, cinnamon, a little salt, and about 20 minutes on the stove.

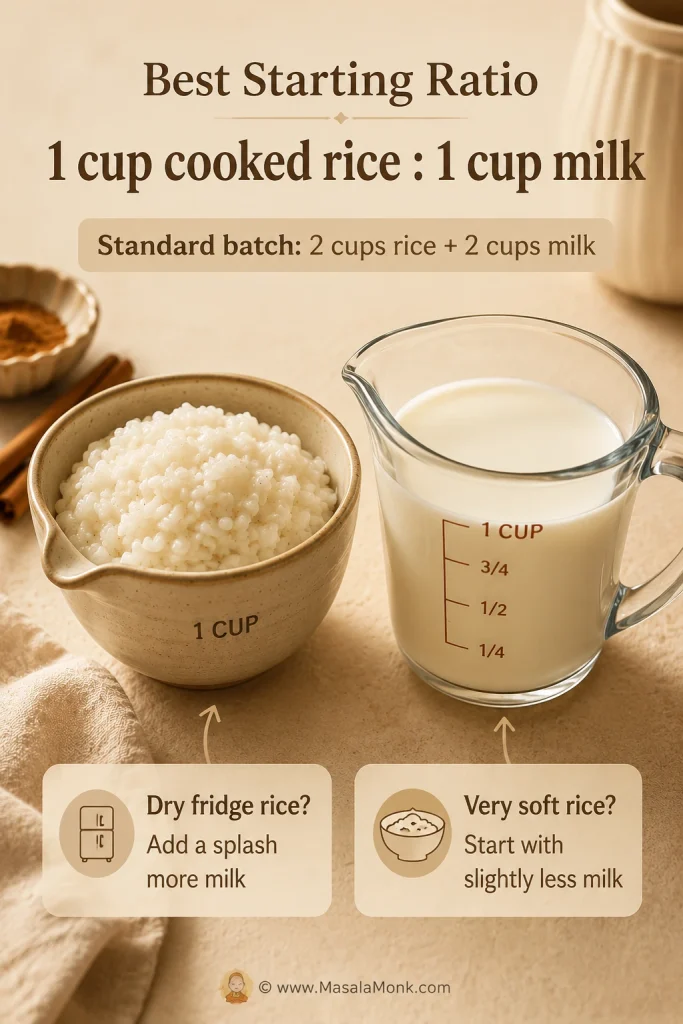
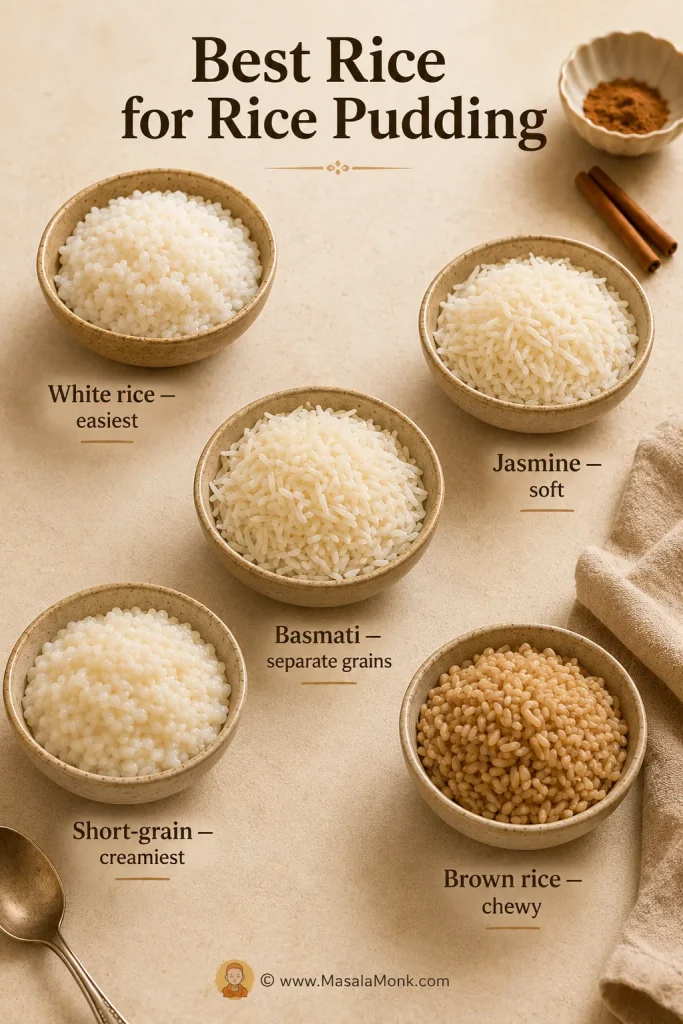
You can use leftover white rice, jasmine rice, basmati rice, short-grain rice, plain takeout rice, or any pre-cooked rice that has been stored safely. The real trick is the ratio: start with roughly equal parts cooked rice and milk, then adjust depending on how dry, soft, or separate the rice is.

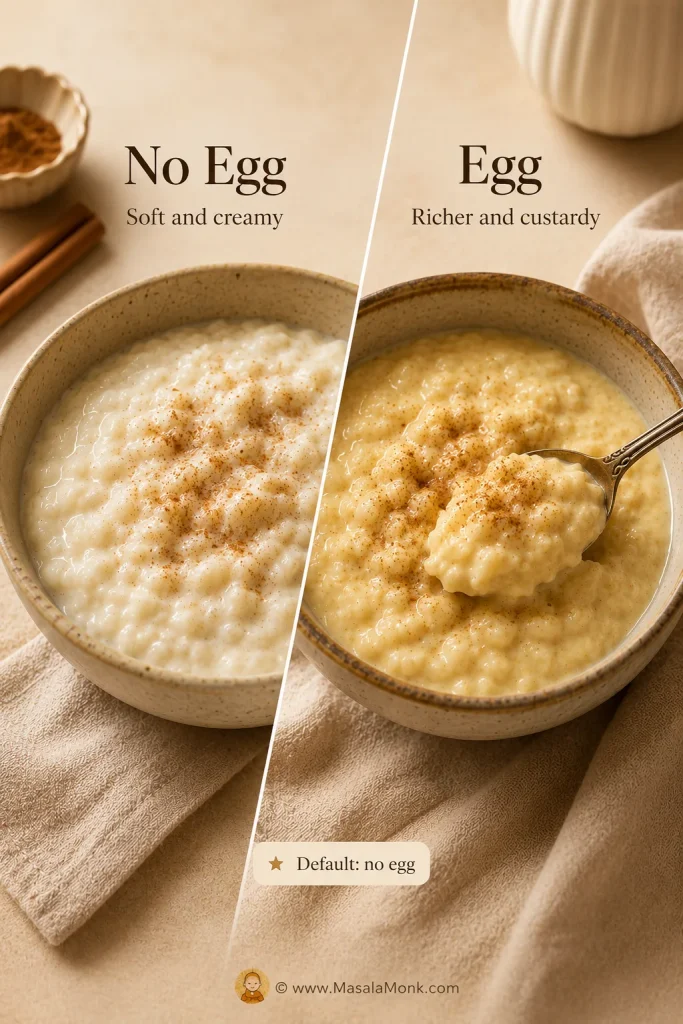
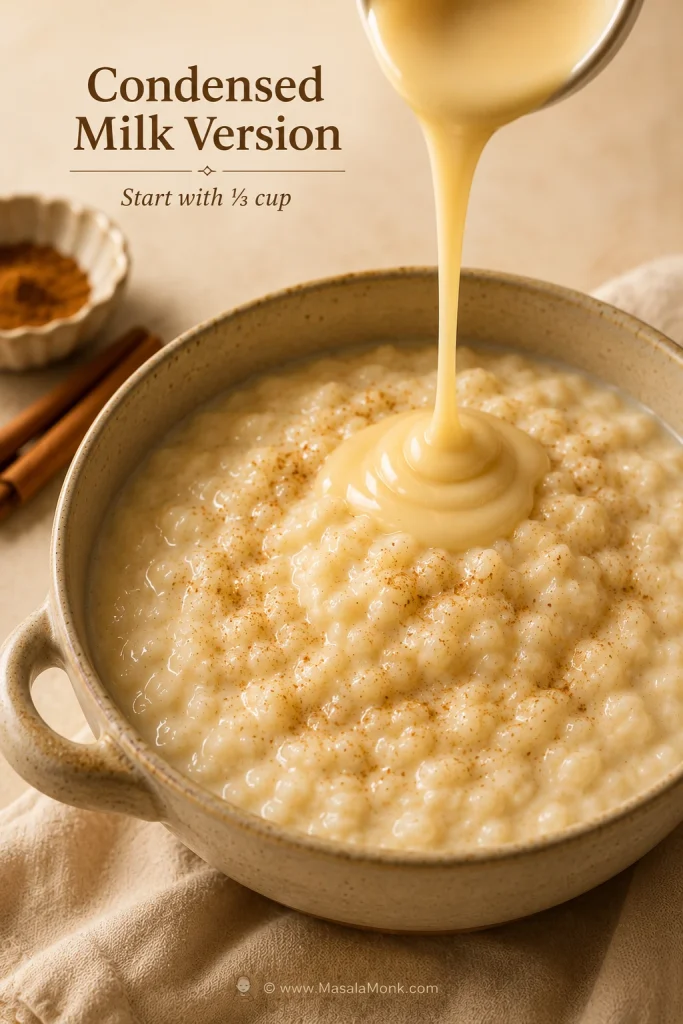
The main recipe is an easy no-egg stovetop version. Once you have that base down, you can make it more custardy with egg, richer with condensed milk or evaporated milk, or faster in the microwave. You will also find the small fixes that matter most, because cooked-rice pudding can go from too thin to too thick very quickly when the rice is especially dry or starchy.

Quick Answer: How to Make Rice Pudding with Cooked Rice

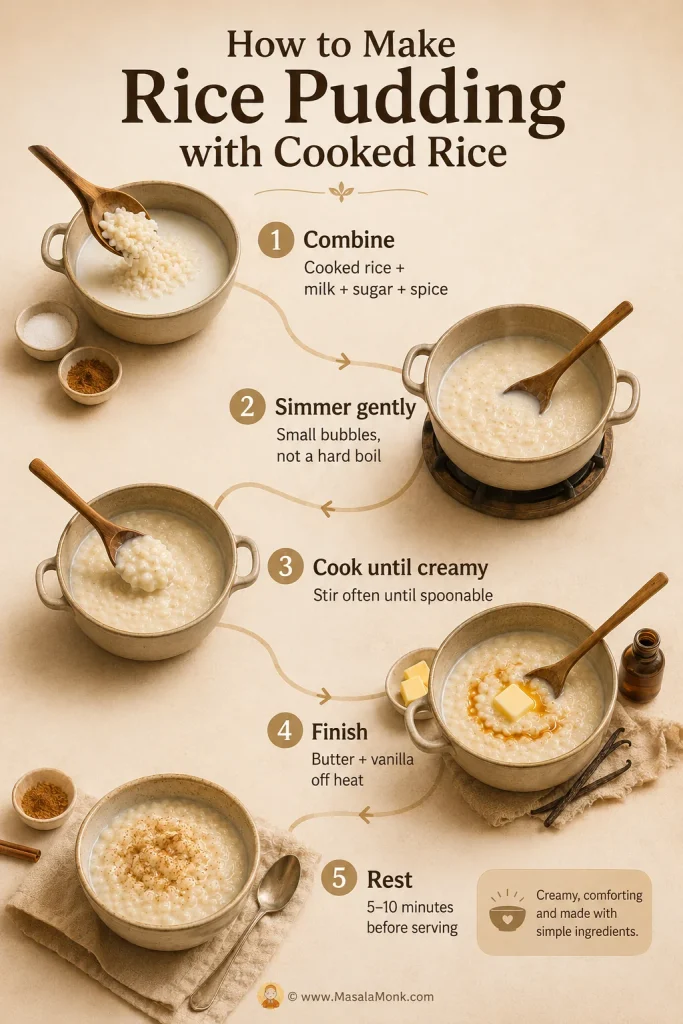
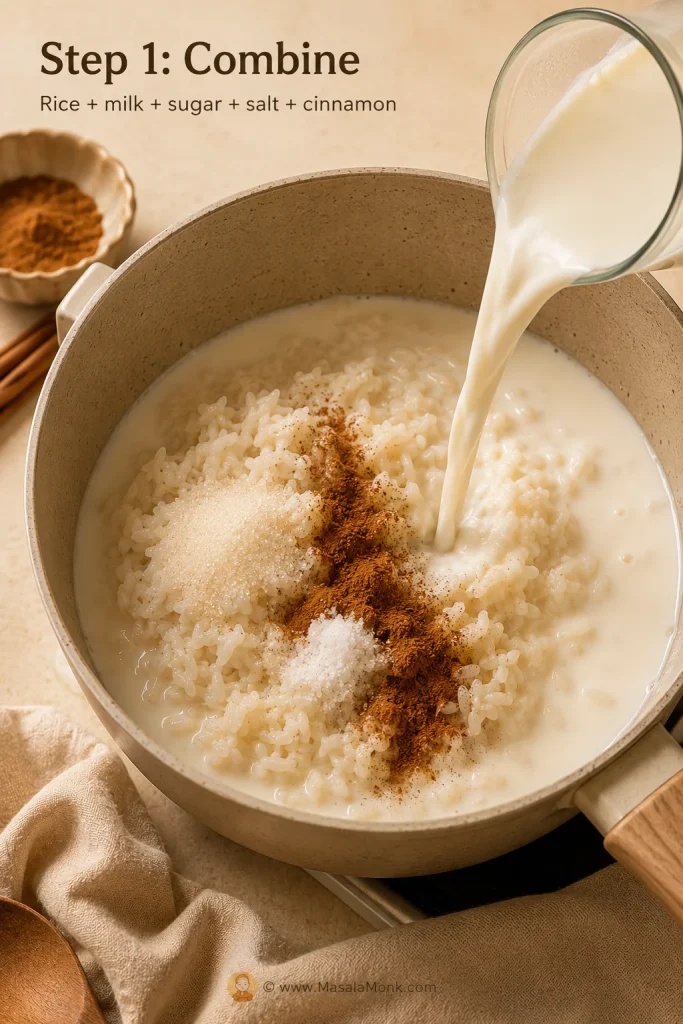
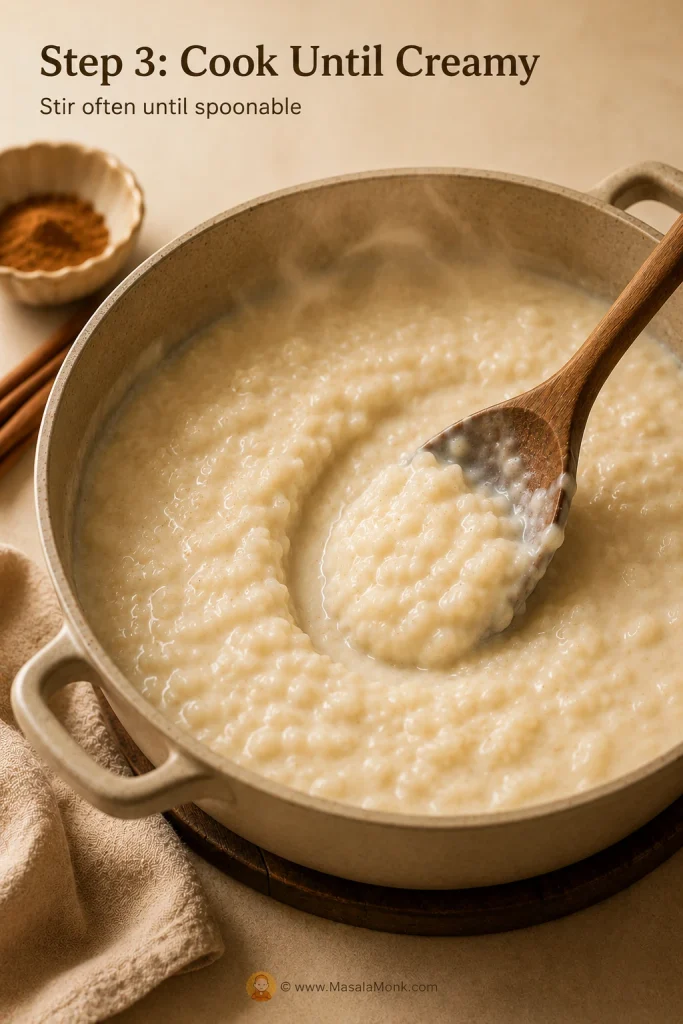
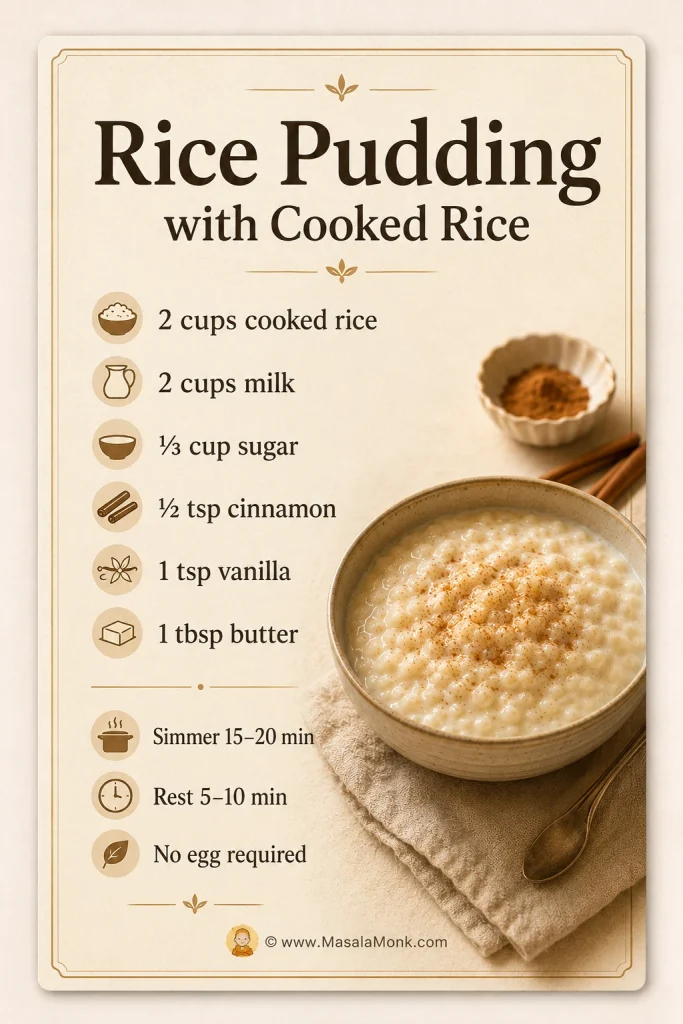
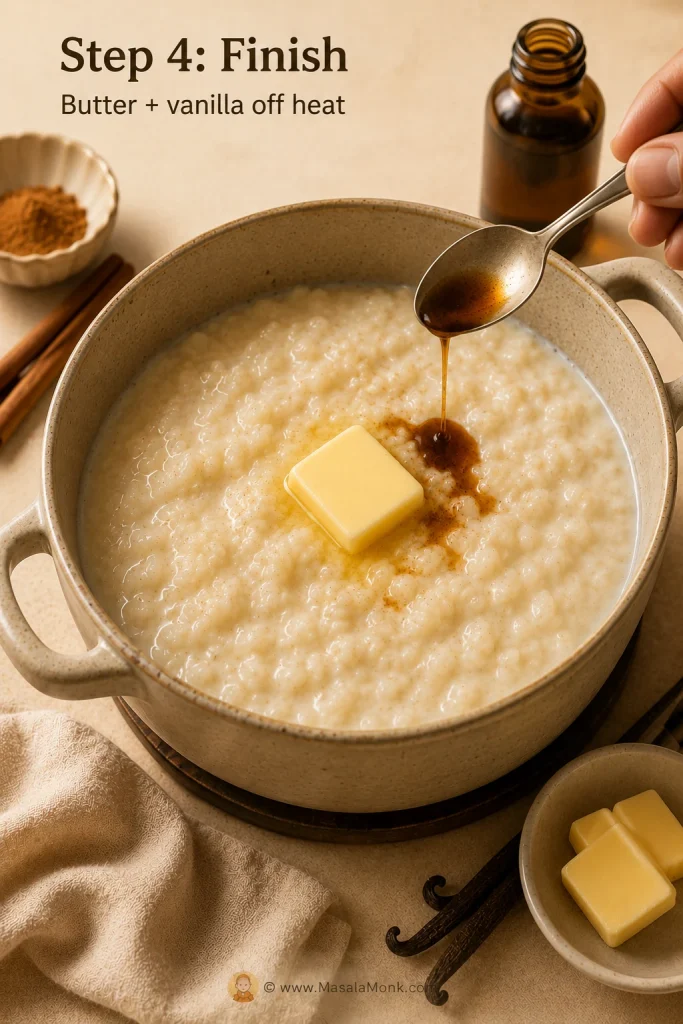
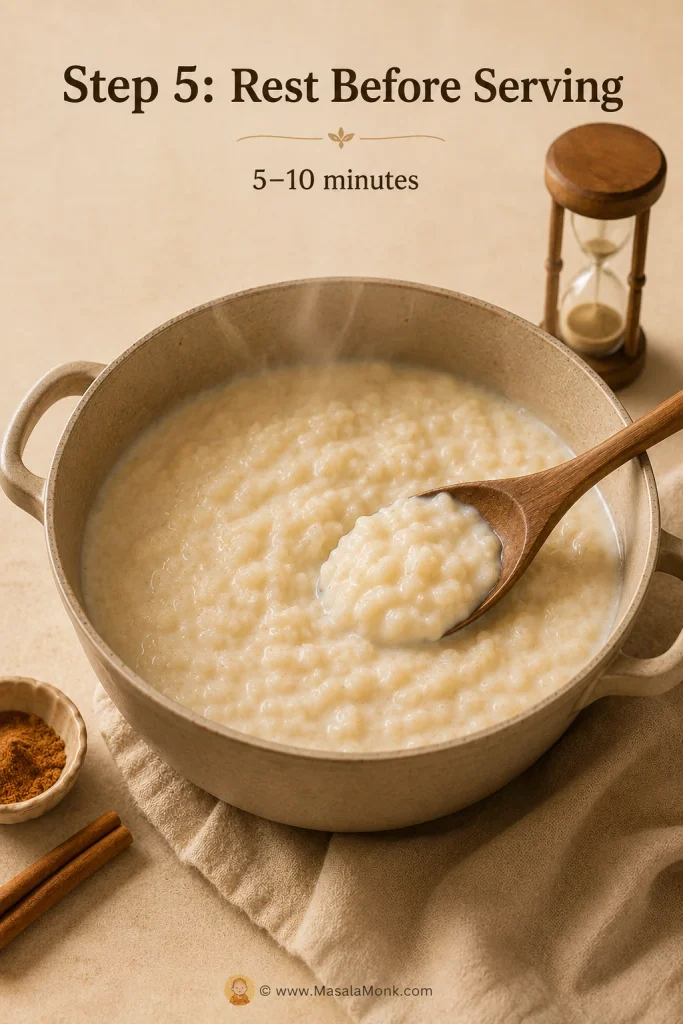
To make rice pudding with cooked rice, simmer 2 cups cooked rice with 2 cups milk, ⅓ cup sugar, ¼ teaspoon salt, and ½ teaspoon cinnamon over medium-low heat until creamy. Stir often, then finish with 1 tablespoon butter and 1 teaspoon vanilla. The pudding usually takes 15 to 20 minutes on the stove, plus a short rest so it thickens into a spoonable texture.

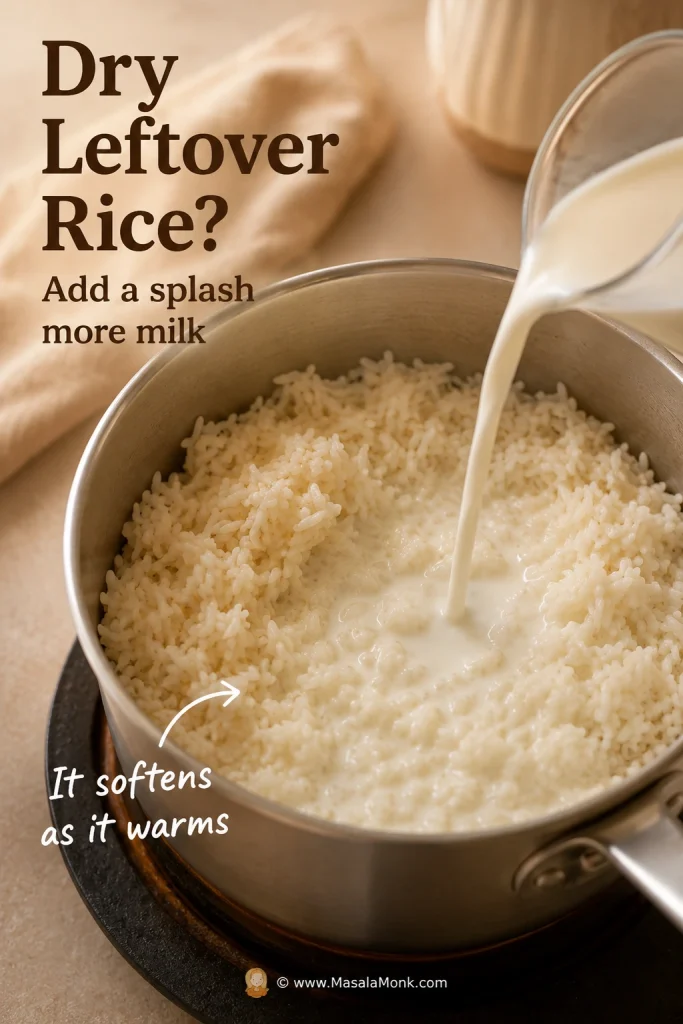
At a glance: use 2 cups cooked rice, 2 cups milk, ⅓ cup sugar, and 15–20 minutes on the stove. The best starting ratio is about 1 cup cooked rice to 1 cup milk; add a splash more milk for dry fridge rice or use slightly less for very soft rice.

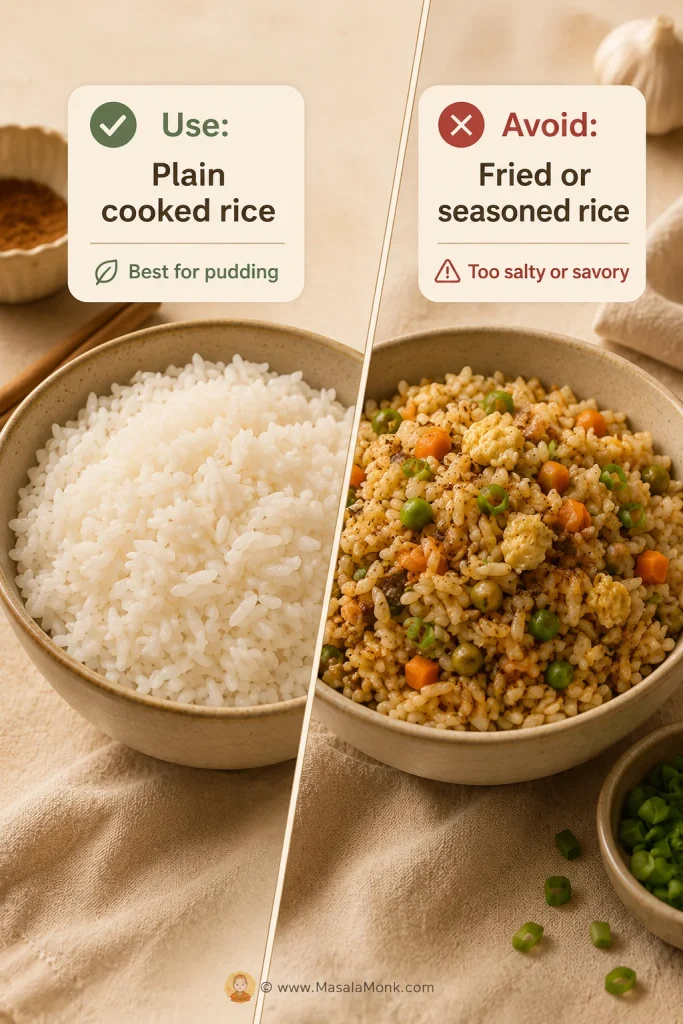
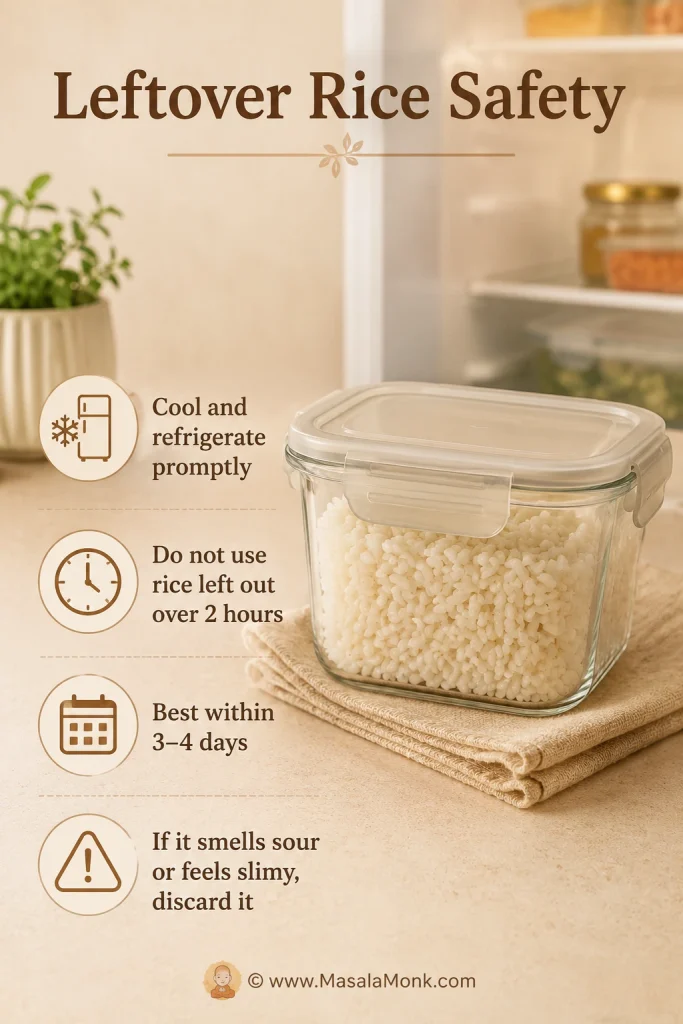
Leftover rice safety: only use rice that was cooled and refrigerated promptly. If it sat out for more than 2 hours, smells sour, feels slimy, or you are unsure how long it has been stored, skip it and start with a fresh batch of plain cooked rice.

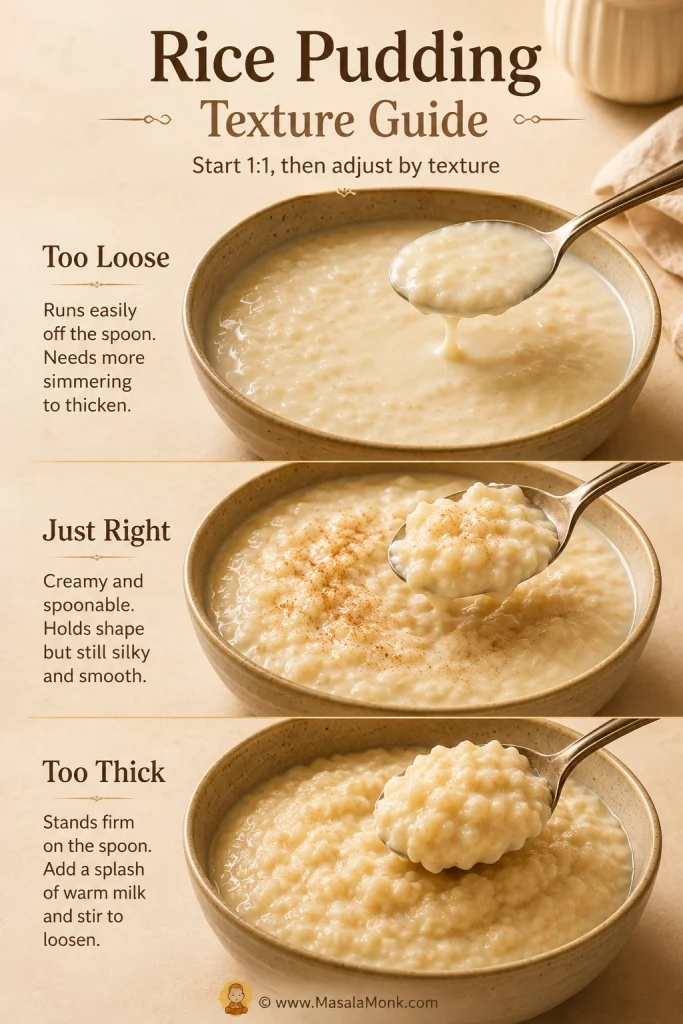
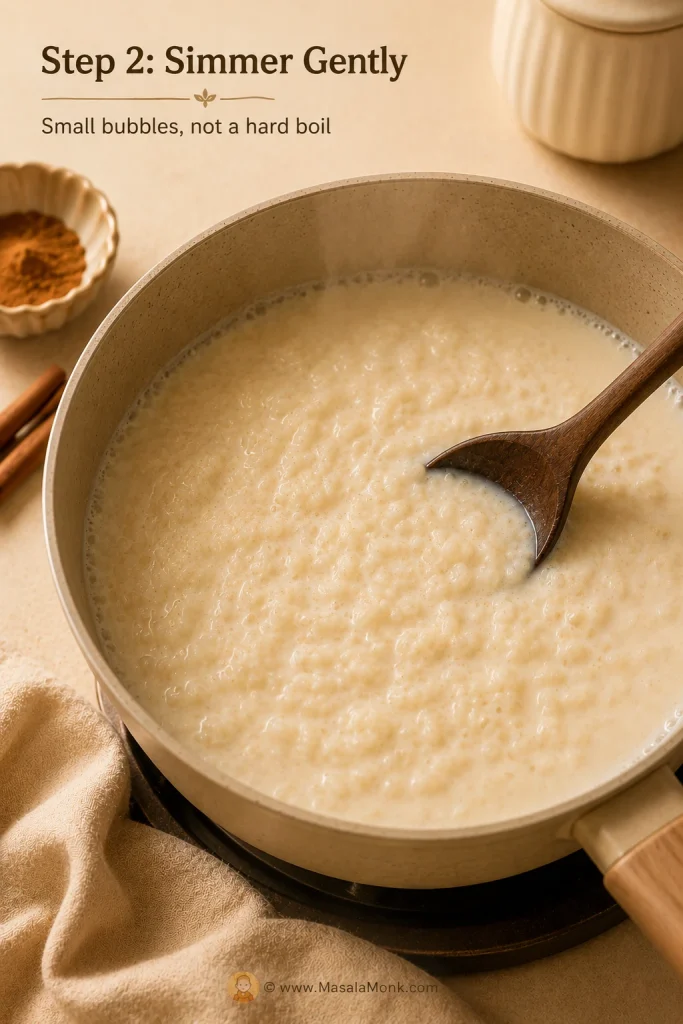
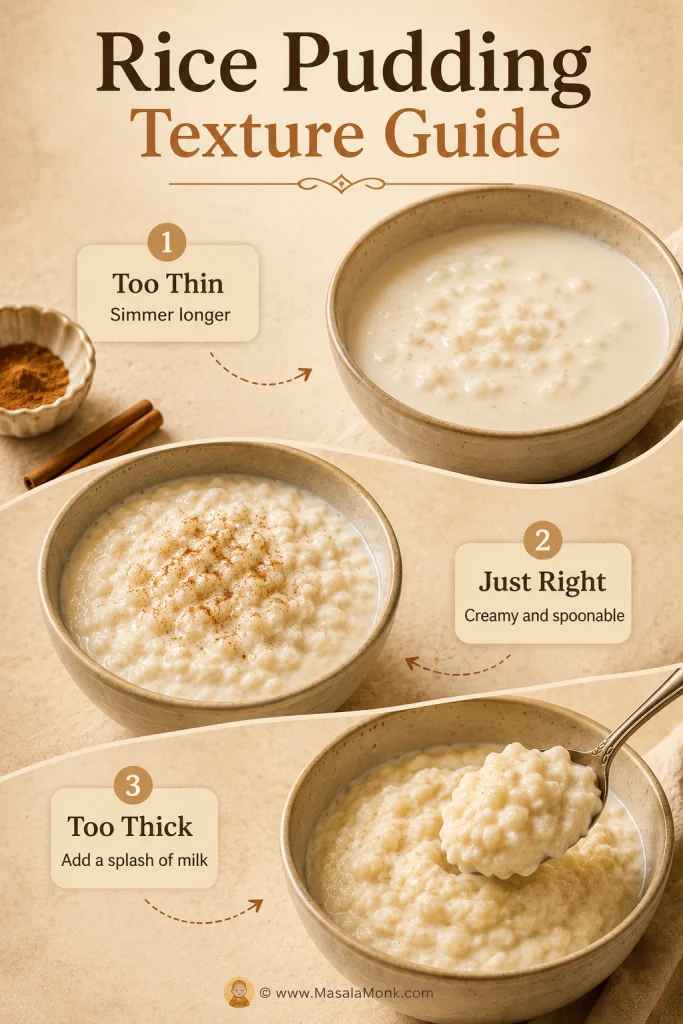
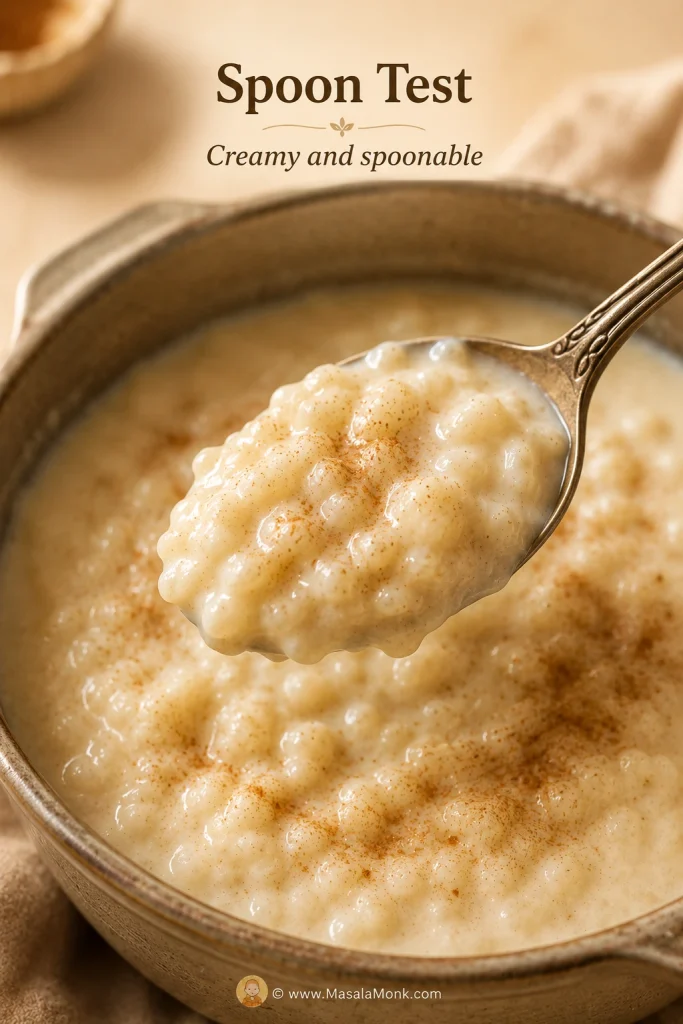
Don’t worry if it looks a little loose while it is still hot. Rice pudding thickens as it rests, and leftover rice keeps absorbing milk even after the heat is off.

Want the exact amounts? Go to the recipe card. Need to adjust for dry or soft rice? See the ratio guide.

Why This Recipe Works

Cooked rice pudding behaves differently from rice pudding made with raw rice. Raw rice needs time to absorb liquid and release starch. Cooked rice has already absorbed water, so the goal is not to cook the rice from scratch. Instead, you are softening it, loosening the grains, seasoning it properly, and simmering the milk until everything turns creamy.

That is why this recipe starts with a simple 1:1 ratio of cooked rice to milk. It gives the rice enough liquid to soften again without drowning it. As the mixture simmers, starch from the rice thickens the milk. Butter and vanilla go in at the end so the pudding tastes round, fragrant, and dessert-like instead of plain sweet rice.

The default version is made without egg because it is easier, smoother, and less likely to curdle or scramble. That said, a custardy egg version is included below for anyone who likes a more old-fashioned rice pudding.

The Best Ratio for Cooked Rice Pudding

The easiest way to avoid soupy or gluey pudding is to start with the right ratio. Think of this as a flexible starting point, not a strict rule, because leftover rice can be soft, dry, fluffy, sticky, or somewhere in between.

Ratio guide for rice pudding with cooked rice showing one cup cooked rice to one cup milk, with notes for dry and soft rice.
The easiest starting point is equal parts cooked rice and milk. From there, dry leftover rice may need an extra splash, while very soft rice usually needs a little less liquid to stay creamy instead of mushy.
Cooked Rice Milk Best For Texture Note
1 cup cooked rice 1 cup milk Small batch Good for 2 small servings.
2 cups cooked rice 2 cups milk Standard batch Best starting point for 4 servings.
3 cups cooked rice 3 cups milk Family batch Use a wider saucepan so it thickens evenly.
Dry leftover rice Equal milk plus 2–4 tbsp extra Cold fridge rice, basmati, takeout-style plain rice Add extra milk early so the grains soften.
Very soft cooked rice Start with 2–4 tbsp less milk Freshly cooked soft rice or short-grain rice Cook gently to avoid a mushy texture.

This ratio also makes the recipe easy to scale. If you have 1½ cups cooked rice, start with 1½ cups milk. If you have 4 cups cooked rice, start with 4 cups milk and use a large saucepan.

Three rice pudding textures in bowls, labeled too loose, just right, and too thick.
Texture is the real test, not just the timer. If the pudding runs like milk, keep simmering; if it mounds too heavily, loosen it with milk; if it coats the spoon softly, stop before it over-thickens.

Once the ratio makes sense, see how to make it. If your rice tends to turn dry, gummy, or too thick, keep the texture fixes handy.

Ingredients

The ingredient list is short, and that is part of the comfort of this recipe. Cooked rice, milk, sugar, salt, cinnamon, vanilla, and butter are enough to make a soft, creamy pudding. From there, you can make it richer with cream, more old-fashioned with egg, sweeter with condensed milk, or dairy-free with coconut milk.

Ingredients for rice pudding with cooked rice, including cooked rice, milk, sugar, cinnamon, vanilla, butter, salt, raisins, and cream.
Each ingredient has a job: milk loosens the cooked rice, sugar sweetens, salt sharpens the flavor, cinnamon adds warmth, and vanilla plus butter make the pudding taste finished instead of flat.

What Kind of Cooked Rice Works Best?

The rice you have will decide the final texture more than anything else. Basmati, jasmine, short-grain rice, and cold fridge rice all need slightly different handling, but plain cooked white rice is the easiest all-purpose choice.

Bowls of cooked white rice, jasmine rice, basmati rice, short-grain rice, and brown rice for making rice pudding.
The rice you start with changes the pudding you get. White rice is the easiest, jasmine turns soft and fragrant, basmati stays more separate, short-grain becomes thick and creamy, and brown rice gives a chewier bowl.

Cooked Rice Texture Guide

Cooked Rice Type Works? What to Expect
Plain cooked white rice Yes Best all-purpose choice. Creamy, neutral, and easy to season.
Jasmine rice Yes Soft and lightly fragrant. Good for a delicate pudding.
Basmati rice Yes Works well, but the grains stay more separate. Add 2–4 tbsp extra milk if it seems dry.
Short-grain rice or sushi rice Yes Thicker and creamier because it releases more starch. Watch the heat so it does not turn pasty.
Arborio rice Yes Very creamy, but it thickens quickly. Keep extra milk nearby.
Brown rice Sometimes Use only fully cooked, soft brown rice. The pudding will be chewier and nuttier, not classic and silky.
Plain takeout rice Sometimes Fine if it is plain, unsalted, and not oily. Avoid fried rice or seasoned rice.
Flavored rice packets No Usually too salty or savory for dessert.

How to Handle Dry Leftover Rice

Cold leftover rice can look dry and stiff at first, especially if it has been in the fridge overnight. Give it time and enough milk before judging the final texture.

Dry leftover cooked rice in a saucepan being loosened with milk for rice pudding.
Cold rice can look dry and stubborn at first. Give it milk and gentle heat before judging the texture; the grains usually relax as they warm and turn much creamier than they looked in the fridge.

Use Plain Rice, Not Seasoned Rice

Do not use fried rice, salty takeout rice, rice cooked in broth, seasoned rice packets, or rice with garlic, onion, soy sauce, curry, or savory seasoning. This pudding needs plain cooked rice.

Side-by-side comparison of plain cooked rice for pudding and seasoned fried rice that should not be used.
Use plain cooked rice so the milk, cinnamon, vanilla, and sugar can build the dessert flavor cleanly. Seasoned rice, fried rice, or rice cooked in broth will bring savory notes that are hard to hide.

If you need to make a fresh batch first, this guide to how to cook rice perfectly covers stovetop, rice cooker, and Instant Pot methods, so you can start with plain rice that is soft enough for pudding.

Using dry fridge rice or basmati? Go to the texture fixes if your pudding looks too loose, too separate, or too thick once it starts cooking.

Milk, Cream, Condensed Milk, and Dairy-Free Options

Whole milk gives the best everyday texture. It is creamy without being too heavy. For a richer pudding, replace 2 to 4 tablespoons of the milk with heavy cream, or stir a splash of cream into the pudding at the end.

Evaporated milk makes the pudding richer and slightly more old-fashioned. Use half evaporated milk and half regular milk. Sweetened condensed milk makes the pudding thicker and sweeter, so reduce or skip the sugar when using it.

For a dairy-free version, use full-fat coconut milk, oat milk, or almond milk. Coconut milk gives the richest result. Almond milk is lighter and may need a slightly longer simmer or a small cornstarch slurry to thicken.

Egg or No Egg?

Egg is not required here. The easiest version uses no egg and thickens through simmering, which gives you a soft, creamy pudding without the risk of scrambling.

An egg makes the pudding more custardy and old-fashioned. If you use one, temper it first with warm milk or warm pudding before adding it back to the saucepan. Then keep the heat gentle and do not boil the pudding hard after the egg goes in.

Comparison of no-egg rice pudding and egg rice pudding, showing a softer creamy version and a richer custardy version.
No egg keeps the recipe easier and softly creamy. However, if you want an old-fashioned custardy texture, egg works well as long as it is tempered before it goes back into the hot pudding.

Raisins, Cinnamon, Vanilla, and Add-Ins

Cinnamon and vanilla are the classic flavor base. A pinch of salt is just as important because it keeps the pudding from tasting flat. Raisins are optional. If you like soft raisins, add them while the pudding simmers. If you prefer them plumper, soak them in warm water for 10 minutes first, then drain and stir them in.

Other good additions include cardamom, nutmeg, orange zest, lemon zest, toasted coconut, chopped dates, chopped pistachios, jam, berry compote, caramel, or a spoonful of brown sugar on top.

For a more Indian-inspired direction, cardamom, saffron, pistachios, rosewater, and jaggery all work beautifully. MasalaMonk’s Indian-inspired pudding ideas include a cardamom rice pudding direction if you want a more fragrant variation.

How to Make Rice Pudding with Cooked Rice

This is the simple stovetop method. Use a heavy saucepan if possible. Thin pans scorch milk more easily, especially once the pudding begins to thicken.

Once you understand the ratio, the recipe is simple: keep the heat gentle, stir often, and stop while the pudding is still slightly loose. It will finish thickening as it rests.

Five-step overview for making rice pudding with cooked rice, from combining ingredients to resting before serving.
The best rice pudding texture comes from gentle stages, not speed. First loosen the rice, then simmer slowly, finish off heat, and rest before judging whether it needs more milk.

Step 1: Combine the Rice, Milk, Sugar, Salt, and Cinnamon

Add the cooked rice, milk, sugar, salt, and cinnamon to a 2- to 3-quart saucepan. Stir well so the rice loosens and the sugar begins dissolving into the milk.

Cooked rice, milk, sugar, salt, and cinnamon combined in a saucepan for the first step of rice pudding.
Stir the cooked rice well at the start so the milk can reach the grains evenly. This also prevents sugar, cinnamon, and salt from collecting in one spot while the pudding thickens.

Step 2: Bring It to a Gentle Simmer

Set the pan over medium heat until the milk begins to steam and small bubbles appear around the edges. Stay close at this stage because milk can boil over quickly.

Saucepan of cooked rice and milk simmering gently with small bubbles around the edge.
Keep the heat gentle once the milk starts bubbling at the edges. A slow simmer softens the rice and thickens the milk, while a hard boil can scorch the bottom or make the pudding gummy.

Step 3: Lower the Heat and Cook Until Creamy

Reduce the heat to medium-low. Simmer for 15 to 20 minutes, stirring often, until the rice softens and the milk thickens. The pudding should look creamy and spoonable, but still slightly loose.

Rice pudding thickening in a saucepan as a wooden spoon creates a creamy trail through the mixture.
When the spoon leaves a soft trail, the pudding is close. Stop while it still looks a little loose, because cooked rice continues to absorb milk after the heat is turned off.

Step 4: Finish with Butter and Vanilla

Turn off the heat. Stir in the butter and vanilla. If you want a richer pudding, stir in 2 to 4 tablespoons of cream at the end.

Butter melting into hot rice pudding while vanilla is added from a spoon.
Add butter and vanilla at the end for better flavor. The residual heat melts the butter and releases the vanilla aroma without cooking away the fragrance.

Step 5: Rest Before Serving

Let the pudding rest for 5 to 10 minutes before serving. This short rest helps the texture settle. Serve it warm, at room temperature, or chilled.

Rice pudding resting in a saucepan with a wooden spoon and timer after cooking.
A short rest gives the starch in the cooked rice time to finish thickening the milk. Before adding cornstarch or cooking longer, wait a few minutes and check the texture again.

Once you have made it once, you probably will not need to measure as carefully the next time. The pudding tells you what it needs: more milk if it tightens up, more simmering if it looks loose, and a short rest before you judge the final texture.

Spoon lifting creamy rice pudding with visible cooked rice grains and cinnamon on top.
A finished spoonful should look creamy, moist, and softly mounded. If it slides off like milk, simmer longer; if it holds like paste, stir in a little warm milk.

Ready for the exact measurements? Jump to the recipe card. If the texture does not look right yet, go to the fixes.

Recipe Card: Rice Pudding with Cooked Rice

This easy stovetop rice pudding uses already cooked rice, so it is faster than traditional rice pudding made from raw rice. The default version is egg-free, creamy, and flexible enough for leftover white rice, jasmine rice, basmati rice, or short-grain rice.

Prep Time5 minutes
Cook Time15–20 minutes
Rest Time5–10 minutes
Yield4 servings

Equipment

  • 2- to 3-quart heavy saucepan
  • Wooden spoon or silicone spatula
  • Measuring cups and spoons
  • Airtight container for leftovers

Ingredients

  • 2 cups cooked white rice, cold or room temperature, about 315–330 g / 11–12 oz
  • 2 cups whole milk, 480 ml / 16 fl oz
  • ⅓ cup granulated sugar, 65–70 g / about 2.3 oz, adjust to taste
  • ¼ teaspoon fine salt
  • ½ teaspoon ground cinnamon, plus more for serving
  • 1 tablespoon unsalted butter, 14 g / 0.5 oz
  • 1 teaspoon vanilla extract, 5 ml
  • 2–4 tablespoons heavy cream, optional, 30–60 ml
  • ⅓–½ cup raisins, optional, 50–75 g

Instructions

  1. Combine: Add cooked rice, milk, sugar, salt, and cinnamon to a heavy saucepan. Stir to loosen the rice.
  2. Simmer: Warm over medium heat until the milk begins to steam and gently bubble at the edges.
  3. Cook: Reduce heat to medium-low. Simmer for 15–20 minutes, stirring often, until the mixture is creamy and the rice is soft.
  4. Adjust: If the pudding looks too thick before the rice softens, add milk 1–2 tablespoons at a time. If it looks too thin, simmer uncovered for a few more minutes.
  5. Finish: Turn off the heat. Stir in butter, vanilla, and optional cream. Add raisins now if you want them less cooked, or add them earlier if you want them softer.
  6. Rest: Let the pudding rest for 5–10 minutes. Serve warm, room temperature, or chilled with extra cinnamon.

Notes

  • For dry leftover rice: add 2–4 extra tablespoons milk at the beginning.
  • For basmati rice: expect a looser, more separate-grain texture. Add a little extra milk if needed.
  • For short-grain rice: stir gently and watch the heat because it thickens faster.
  • For sweeter pudding: increase sugar to ½ cup. For a lightly sweet pudding, use ¼ cup.
  • For richer pudding: replace ¼ cup milk with cream, or stir cream in at the end.
Recipe card for rice pudding with cooked rice listing cooked rice, milk, sugar, cinnamon, vanilla, butter, simmer time, rest time, and no egg required.
The base formula is easy to remember: equal parts cooked rice and milk, then a gentle simmer and short rest. Once that works, condensed milk, egg, cream, or coconut milk become simple variations.

Leftover Rice Pudding: What to Know Before You Start

This recipe is ideal for leftover rice, but only use rice that has been handled safely. Cooked rice should be cooled and refrigerated promptly. If it has been sitting at room temperature for more than 2 hours, smells sour, feels slimy, or you are unsure how long it has been in the fridge, it is safer to discard it and start with a fresh batch.

Leftover rice safety guide with cooked rice in a covered container, refrigerator cue, and storage time reminders.
Before turning leftovers into dessert, make sure the rice was cooled and refrigerated properly. If it sat out too long, smells sour, feels slimy, or seems questionable, start fresh instead.

If your leftover rice is plain but you are not in the mood for dessert, you can also turn leftover rice into arancini balls instead. Use this rice pudding when you want something creamy and sweet; use arancini when you want a crisp, savory snack.

For general leftover storage guidance, FoodSafety.gov lists cooked leftovers at 3 to 4 days in the refrigerator. For reheating, FoodSafety.gov recommends reheating leftovers to 165°F / 74°C.

Leftover rice tip: cold rice may look dry and stiff at first. Give it time. As it warms in milk, the grains relax and the pudding turns creamier.

Variations

Once you know the base method, this is one of those forgiving desserts you can easily bend toward what you have. Keep the rice-to-liquid ratio in mind and adjust sweetness depending on the milk or add-ins you use.

Rice Pudding with Cooked Rice and Condensed Milk

Sweetened condensed milk gives the pudding a richer, sweeter, almost caramel-like finish. Because it already contains sugar, do not add the full amount of sugar from the main recipe. Start with ⅓ cup condensed milk, taste, then increase to ½ cup only if you want a sweeter pudding.

Condensed milk being poured into creamy rice pudding made with cooked rice.
Condensed milk adds sweetness and body at the same time. Start with ⅓ cup first; after the pudding thickens, taste before adding more so it stays creamy rather than overly sweet.
Ingredient Amount
Cooked rice 2 cups / about 315–330 g
Whole milk 1½ cups / 360 ml
Sweetened condensed milk ⅓–½ cup / about 100–150 g
Salt Pinch to ¼ teaspoon
Vanilla 1 teaspoon / 5 ml
Cinnamon ½ teaspoon

Simmer the rice, milk, condensed milk, salt, and cinnamon over medium-low heat for 12 to 18 minutes, stirring often. Finish with vanilla. If it becomes too thick, loosen it with a splash of milk.

Evaporated Milk Rice Pudding

Evaporated milk gives you a pantry-style pudding that tastes richer without becoming as sweet as condensed milk pudding. Use 1 cup evaporated milk and 1 cup regular milk for every 2 cups cooked rice. Then keep the sugar at ¼ to ⅓ cup and adjust at the end.

Microwave Rice Pudding with Cooked Rice

The stovetop version gives the best texture, but the microwave works for a small quick bowl. Use a deep microwave-safe bowl at least twice as large as the mixture, because milk can bubble up as it heats.

Deep microwave-safe bowl of rice pudding with cooked rice placed near a microwave.
A deep bowl matters because milk can rise quickly in the microwave. Heat in short bursts, stir between rounds, and stop while the pudding is still a little loose.
Ingredient Small Microwave Batch
Cooked rice 1 cup
Milk 1 cup
Sugar 2–3 tablespoons
Cinnamon ¼ teaspoon
Vanilla ½ teaspoon
Butter 1 teaspoon

Microwave on high for 1 minute, stir well, then continue in 30- to 60-second bursts, stirring each time, until creamy. Stop when the pudding is still slightly loose because it thickens as it sits.

Old-Fashioned Egg Rice Pudding

A custardy version starts with 1 large egg whisked with ½ cup milk. Cook the rice pudding as usual with the remaining milk, sugar, salt, and cinnamon. When the pudding is hot and creamy, slowly whisk a few spoonfuls of warm pudding into the egg mixture. Then stir the tempered egg mixture back into the pan and cook gently for 2 to 3 minutes. Do not boil hard after adding the egg.

Warm rice pudding being slowly added to a bowl of whisked egg and milk to temper the egg.
Tempering is the safeguard against scrambled egg. Add warm pudding to the egg mixture slowly, whisk as you go, and only then return it to the pan over gentle heat.

Coconut Milk Rice Pudding

Coconut milk is the richest dairy-free option. Use 2 cups cooked rice with 1½ to 2 cups full-fat coconut milk, then sweeten with sugar, maple syrup, or a small amount of coconut condensed milk. Cinnamon works, but cardamom, ginger, mango, toasted coconut, and lime zest also fit beautifully.

Coconut milk rice pudding made with cooked rice, topped with toasted coconut and served with mango nearby.
Coconut milk makes cooked-rice pudding rich without dairy, but it also thickens differently from regular milk. Stir gently and add a splash more liquid if the pudding tightens as it sits.

For another coconut-and-rice dessert, MasalaMonk’s mango sticky rice leans more tropical, chewy, and fruit-forward, while this cooked-rice pudding stays softer and creamier.

Baked Rice Pudding with Cooked Rice

Baked rice pudding has a firmer, more custardy texture. To make it, whisk milk, eggs, sugar, vanilla, cinnamon, and salt, then stir in cooked rice. Pour into a buttered baking dish and bake at 325°F / 162°C for about 45 to 50 minutes, or until just set.

Baked rice pudding in a ceramic dish with golden edges and a spoonful showing the custardy interior.
Baking changes the texture from loose and creamy to firmer and custardy. It is especially useful when you want a spoon-served dessert with golden edges and a more set center.

This gives you a different dessert from the stovetop version: more set at the edges, more custardy through the center, and less loose in the bowl.

How to Fix the Texture

Quick Texture Check

Cooked-rice pudding is forgiving, so don’t panic if it looks wrong halfway through. Most texture problems come down to the rice, the heat, or the amount of milk. A few small adjustments usually bring it back.

Rice pudding texture guide showing too thin, just right, and too thick pudding with simple fixes for each.
Use the texture guide before starting over. Thin pudding usually needs more simmering, thick pudding needs milk, and gummy pudding often means the heat was too high or the rice was overworked.

Common Rice Pudding Texture Problems and Fixes

Problem Likely Cause Fix
Rice pudding is too thin It has not simmered long enough, or there is too much milk. Simmer uncovered for 3–5 more minutes, stirring often.
Still thin after simmering The rice is low-starch or the batch has too much liquid. Mix 1 teaspoon cornstarch with 1 tablespoon cold milk. Stir it in and simmer 1 minute.
Rice pudding is too thick The rice absorbed more milk than expected. Add warm milk 1–2 tablespoons at a time until spoonable.
Dry after chilling Rice continues absorbing liquid in the fridge. Stir in a splash of milk before serving or reheating.
Rice is still firm The rice was undercooked before you started. Add ¼–½ cup milk and cook 5–8 minutes longer over low heat.
Pudding tastes bland Not enough salt, vanilla, spice, or sweetness. Add a tiny pinch of salt first, then adjust vanilla, cinnamon, or sugar.
Pudding turned gummy Heat was too high, rice was very starchy, or it was over-stirred. Loosen with milk and stir gently. Next time, use lower heat.
Egg scrambled The egg was added to very hot pudding too quickly. Use the no-egg method, or temper the egg slowly before adding it.
Milk scorched on the bottom Pan was too thin or heat was too high. Use a heavy saucepan and medium-low heat. Stir more often as it thickens.

Once the texture is fixed, let the pudding rest before judging the final thickness. Only need storage advice? Jump to storage and reheating.

How to Store, Freeze, and Reheat Rice Pudding

Let rice pudding cool, then transfer it to an airtight container and refrigerate. Because this recipe often starts with leftover rice, use conservative storage habits and do not keep it sitting at room temperature for long.

Rice pudding storage and reheating guide showing a fridge container, freezer portion, and milk being added while reheating.
Rice pudding usually thickens after chilling, so reheating with milk is the easiest way to revive it. Add a splash, warm gently, and stir until the texture turns creamy again.
Storage Method How Long Best Practice
Refrigerator Up to 3–4 days Store in an airtight container. Add milk before reheating if it thickens.
Freezer Best quality within 1 month Freeze in small portions. Texture may be softer or grainier after thawing.
Stovetop reheating 5–8 minutes Reheat gently with a splash of milk, stirring often.
Microwave reheating 30-second bursts Stir between bursts and add milk as needed.

Rice pudding thickens in the fridge. That does not mean it is ruined. Stir in a splash of milk before reheating, or loosen chilled pudding with a little cold milk if you prefer eating it cold.

What to Serve with Rice Pudding

Rice pudding is good plain, but toppings make it feel more finished. Try extra cinnamon, brown sugar, toasted nuts, raisins, chopped dates, berry compote, strawberry jam, mango, caramel, maple syrup, toasted coconut, pistachios, or a spoonful of cream.

Rice pudding toppings guide with cinnamon, brown sugar, berry jam, mango, pistachios, toasted coconut, caramel, and cream.
One basic rice pudding can lean classic, fruity, nutty, or richer depending on the topping. Cinnamon and brown sugar keep it familiar, while mango, jam, pistachios, coconut, caramel, or cream make it feel more finished.

If you like chilled spoon desserts, this quick mango pudding is another easy option for a softer, fruitier dessert table.

For a warmer dessert, serve this rice pudding just after resting. For a thicker make-ahead dessert, chill it and loosen with a little milk before serving. Either way, it is the kind of recipe that becomes easier every time you make it, because the texture tells you what it needs.

Warm rice pudding in a bowl compared with chilled rice pudding in a glass cup.
Serve it warm when you want a softer, cozier pudding. Chill it when you want a thicker make-ahead dessert, then loosen with a little milk if the rice absorbs too much liquid.

A finished bowl should feel like a real dessert, not just reheated rice. The best texture is creamy, spoonable, gently spiced, and soft enough to serve warm or chilled.

Finished bowl of leftover rice pudding with cinnamon and a spoonful lifted from the bowl, with a storage container in the background.
A good leftover rice pudding should still taste intentional: creamy milk, soft grains, warm spice, and enough rest time for the texture to settle. That is what turns plain cooked rice into dessert.

FAQs

What is the best rice for rice pudding with cooked rice?

Plain cooked white rice is the best all-purpose choice. Jasmine rice is soft and fragrant, basmati rice works but stays more separate, and short-grain rice makes the thickest pudding. Brown rice works only when it is fully cooked and soft.

How much milk do you need for 2 cups cooked rice?

Use 2 cups milk for 2 cups cooked rice as the starting point. Add 2 to 4 extra tablespoons of milk if the rice is dry, cold, or separate-grained.

Is egg necessary in rice pudding?

No. Egg is optional here. Rice pudding with cooked rice can turn creamy through gentle simmering alone. Egg gives a more custardy old-fashioned texture, but the no-egg version is easier and less likely to scramble.

Why is my rice pudding runny?

It probably needs more simmering time. Cook it uncovered over medium-low heat for a few more minutes, stirring often. If it still stays thin, add a small cornstarch slurry made from 1 teaspoon cornstarch and 1 tablespoon cold milk.

Why did my rice pudding get too thick?

Cooked rice keeps absorbing liquid as it sits, especially in the refrigerator. Stir in milk 1 to 2 tablespoons at a time until the texture becomes creamy again.

Does basmati rice work for rice pudding?

Yes, basmati rice works, but it gives a looser pudding because the grains stay separate. Add a little extra milk and simmer gently so the rice softens without breaking down too much.

Does leftover takeout rice work?

Plain takeout rice works if it is unsalted, not oily, and has been refrigerated safely. Do not use fried rice, seasoned rice, or rice with savory sauces for dessert pudding.

How do you make rice pudding with cooked rice and condensed milk?

Use 2 cups cooked rice, 1½ cups milk, and ⅓ to ½ cup sweetened condensed milk. Skip the regular sugar at first, simmer until creamy, then adjust sweetness at the end.

What is the best way to reheat rice pudding?

Reheat it gently with a splash of milk. Use low heat on the stove or short microwave bursts, stirring between each burst. The pudding should loosen as it warms.

Can you freeze rice pudding?

You can freeze rice pudding, but the texture may become softer or slightly grainy after thawing. Freeze it in small portions for best quality, thaw in the refrigerator, then reheat gently with a splash of milk.

How long does rice pudding last in the fridge?

Keep rice pudding in an airtight container in the refrigerator and use it within 3 to 4 days. Since this version may start with leftover rice, it is better not to stretch the storage time.

Made it with leftover rice? Share what kind you used — jasmine, basmati, short-grain, brown rice, or plain takeout rice — and whether you liked the pudding warm, chilled, with raisins, or without. It helps other readers adjust the texture before they start.

Posted on 1 Comment

Apple Pie with Apple Pie Filling: Easy Canned or Homemade Filling Pie

Whole apple pie with apple pie filling and one slice removed, showing thick cinnamon apple filling and a golden flaky crust.

This apple pie with apple pie filling is for the moment when you want real apple pie without peeling, slicing, simmering, and starting from scratch. Use canned filling for the fastest version, or homemade apple pie filling if you already have a batch ready. Premade crust keeps it easy; homemade crust makes it feel more from-scratch.

The trick is not just spooning filling into crust. A little lemon, spice, salt, butter, and enough cooling time can turn a shortcut pie into something golden, cozy, and sliceable, with flaky pastry, warm cinnamon-apple filling, and pieces that feel like dessert instead of a last-minute fix.

Below, you will find the easy no-par-bake method, a better-bottom-crust option, exact filling amounts, canned filling upgrades, premade crust tips, and fixes for the common problems: runny filling, pale crust, soggy bottoms, and slices that fall apart when you cut them.

Quick Answer

For a 9-inch apple pie with apple pie filling, use 2 cans of 20–21 oz filling or about 5–6 cups homemade apple pie filling. Add it to a chilled bottom crust, top with a second crust or lattice, vent well, brush with egg wash, and bake at 400°F / 200°C for 40–45 minutes, until the crust is deeply golden and the filling bubbles through the vents.

For the fastest version, skip par-baking and keep the crust cold before filling. For the crispest bottom crust, par-bake the base first. Either way, let the pie cool for at least 2 hours before slicing. The hardest part is waiting, but it is what helps the filling settle instead of running all over the plate.

Quick answer guide for apple pie with apple pie filling showing two cans or 5 to 6 cups of filling, a 400 degree Fahrenheit bake temperature, and a cooling time of at least 2 hours.
For a regular 9-inch pie, two cans of apple pie filling are usually the safest shortcut, while 5–6 cups works better when you are using homemade filling and want a fuller pie.

Need the exact amounts? Go to the recipe card, or check the filling amount guide first if you are using one can, two cans, or homemade filling.

Fastest version: canned filling + refrigerated pie crust.
Most homemade flavor: homemade filling + homemade pie crust.
Most reliable crust fix: par-bake the bottom crust before adding the filling.

What the Finished Apple Pie Slice Should Look Like

A well-rested pie should slice cleanly without looking dry or stiff. The filling can be glossy and soft, but it should still hold together enough to sit on the plate instead of spreading into a puddle.

Single slice of apple pie with apple pie filling on a plate, showing glossy apple filling and a flaky golden crust.
A clean slice tells you the filling has set properly; in other words, it should look soft and glossy, yet still hold its shape on the plate.

Why This Easy Apple Pie Works

A prepared-filling apple pie can taste flat or turn soggy when the filling is too sweet, the crust is too warm, or the pie is sliced before it has time to set. However, this version fixes those problems without making the recipe complicated.

  • Two cans give the pie enough body. One can usually makes a shallow pie, while two cans work better for most regular 9-inch pies.
  • Small upgrades do the heavy lifting. Lemon, salt, spice, vanilla, butter, and an optional tart apple make canned filling taste brighter and less one-note.
  • Cornstarch helps loose filling set. This is especially useful when canned filling looks syrupy.
  • Egg wash improves premade crust. It helps the top bake golden instead of pale.
  • Cooling gives cleaner slices. Even a properly baked pie needs time before cutting.

Apple Pie with Apple Pie Filling at a Glance

Detail Good Default
Pie size Standard 9-inch pie
Filling amount 2 cans for most regular 9-inch pies; 5–6 cups for a fuller homemade-filling pie
Crust Double crust, lattice, or crumb topping
Oven temperature 400°F / 200°C for the easy method
Bake time 40–45 minutes, or until the crust is fully golden and the filling bubbles
Cooling time 2 hours minimum; 3–4 hours for cleaner slices
Fastest version Canned filling + premade crust
Most homemade-style version Homemade apple pie filling + homemade crust
Crispest bottom Par-bake the bottom crust and use cooled filling

Ingredients for Apple Pie with Apple Pie Filling

This recipe can be as simple as crust, filling, and egg wash. Still, a few small additions make a big difference. Lemon juice keeps the pie from tasting overly sweet, salt wakes everything up, warm spices make the apples taste more homemade, and a little cornstarch helps loose filling set as the pie cools.

Ingredients for apple pie with canned filling arranged on a work surface, including pie crust, apple pie filling, lemon, cinnamon, nutmeg, salt, vanilla, cornstarch, butter, egg, and a tart apple.
These ingredients keep the recipe simple; however, the lemon, spice, vanilla, butter, and cornstarch are what help canned apple pie filling taste more balanced and bake more neatly.

For the Crust

  • 1 box refrigerated pie crusts, 14.1 oz / about 400 g, usually 2 crusts
  • Or 1 homemade double pie crust
  • 1 large egg, for egg wash
  • 1 tablespoon / 15 ml water or milk, for egg wash
  • 1–2 teaspoons coarse sugar or granulated sugar, optional, for sprinkling

For the Filling

  • 2 cans apple pie filling, 20–21 oz / 567–595 g each
  • 1 teaspoon ground cinnamon
  • ¼ teaspoon ground nutmeg
  • ⅛ teaspoon salt
  • 1 tablespoon / 15 ml lemon juice
  • 1 teaspoon / 5 ml vanilla extract, optional
  • 1 tablespoon / about 8 g cornstarch, or 2 tablespoons / 16 g if the filling looks loose
  • 1 tablespoon / 14 g butter, cut into small pieces
  • 1 small tart apple, optional, peeled and thinly sliced, about 100–120 g

The tart apple is optional, but it is one of the most useful upgrades if your canned filling tastes soft or flat straight from the can. A little fresh apple gives the pie more bite and makes the texture feel less processed.

Slice the fresh apple very thinly. Since canned filling is already cooked, thick fresh apple slices may stay too firm by the time the crust is done.

To avoid cornstarch clumps, mix the cornstarch with the cinnamon, nutmeg, and salt first, then fold that mixture into the filling. If the canned filling is very thick and gelled, loosen the cornstarch mixture with the lemon juice before stirring it in.

Using canned filling? The canned filling upgrade guide shows exactly how to fix filling that tastes too sweet, flat, runny, or overly gelled.

How Much Apple Pie Filling for One Pie?

One can looks tempting, but it usually makes a shallow pie. For most standard 9-inch pies, 2 cans of 20–21 oz apple pie filling work well, especially if you are using a regular pie plate. However, if you want a fuller, more generous pie, add one thinly sliced tart apple or use about 5–6 cups homemade filling.

Measurement guide showing how much apple pie filling to use for one pie, including one can, two cans, fuller 9-inch pie, and deep-dish pie amounts.
If you want to know how much apple pie filling for one pie, think beyond the can count: a standard 9-inch pie usually needs enough filling to look full before baking, but not so much that it bubbles over.

If you want to make the filling from scratch ahead of time, use this homemade apple pie filling recipe. It is cooked until glossy and spoonable, then cooled before going into pie crust.

Pie or Filling Use Amount to Use
1 can apple pie filling About 2–2½ cups; usually too shallow for a full 9-inch double-crust pie
2 cans apple pie filling About 4½–5 cups; enough for most regular 9-inch pies
Fuller 9-inch pie 5–6 cups filling, or 2 cans plus 1 small sliced tart apple
Shallow 9-inch pie 4–5 cups filling
Deep-dish 9-inch pie 6–7 cups filling
Homemade filling replacement Use 5–6 cups for one generous 9-inch pie

One Can vs Two Cans of Apple Pie Filling

One can may work for a shallow pie, small pie, or tart-style dessert. However, two cans usually give a regular 9-inch pie the fuller slice most people expect from a classic double-crust apple pie.

Comparison image showing a shallow apple pie made with one can of filling and a fuller apple pie made with two cans of filling.
This comparison shows why one can vs two cans of apple pie filling matters: one can often looks sparse, whereas two cans give the pie the fuller slice most readers expect.
Simple rule: use 2 cans for a regular 9-inch pie, or 5–6 cups if you are using homemade filling and want a fuller pie.

Leave a little headroom once the filling is in the crust. A pie that is packed all the way to the rim may look generous before baking, but it is more likely to bubble over in the oven.

Once you know how much filling you need, go straight to the step-by-step method.

Canned Apple Pie Filling vs Homemade Apple Pie Filling

Both work. The better choice depends on whether you want speed or texture. Canned filling is fast and reliable, but it often needs a little balancing. Meanwhile, homemade filling gives you more control over the apples, sweetness, and spice; however, it should be cooled before it goes into the crust.

Comparison of canned apple pie filling, homemade apple pie filling, and canned apples for use in apple pie.
Canned apple pie filling is the fastest option, homemade apple pie filling gives more control, and canned apples sit in between only if you are willing to season and thicken them first.
Filling Type Best For What to Know
Canned apple pie filling Fastest version Add lemon, salt, cinnamon, vanilla, and butter for better flavor.
Homemade apple pie filling Better texture and fresher apple flavor Use 5–6 cups and cool it before adding it to the crust.
Canned apples A separate shortcut when you do not have pie filling Usually need sugar, spice, lemon, and thickener because they are not already prepared as pie filling.
Fresh apples Best for a full from-scratch apple pie Use only a small amount here as a texture upgrade; a full fresh-apple filling needs a different method.

The most important difference is thickness. Apple pie filling is already sweetened and thickened. Canned apples are usually just apples in liquid or syrup, so they need more help before they behave like pie filling.

How to Make Canned Apple Pie Filling Taste Homemade

Canned filling is convenient, but it can taste too sweet, too soft, or a little flat. Do not panic if it tastes unimpressive straight from the can. That is exactly what the lemon, salt, spice, butter, and optional tart apple are here to fix.

Guide showing how to make canned apple pie filling taste homemade with lemon, salt, cinnamon, nutmeg, vanilla, butter, tart apple, and cornstarch.
To make canned apple pie filling taste homemade, focus on balance rather than sweetness: acid, spice, butter, and a little fresh apple texture usually do more than extra sugar.
Filling Problem What to Add Why It Works
Overly sweet filling 1 tablespoon lemon juice + ⅛ teaspoon salt Balances the syrupy sweetness and makes the apples taste brighter.
Flat flavor Cinnamon, nutmeg, and vanilla Adds warmth and makes the filling taste more like homemade apple pie.
Soft apple texture 1 small tart apple, very thinly sliced Adds fresh apple texture and a little bite.
Runny or loose filling 1–2 tablespoons cornstarch Helps syrupy filling set as the pie bakes and cools.
Canned flavor Butter, lemon, spice, and vanilla Rounds out the flavor and softens the processed taste.
Thick or gelled filling Stir gently; add a tiny splash of apple juice only if needed Loosens the texture without making the pie watery.

Cornstarch and Thin Apple Fixes for Canned Filling

These two small fixes solve different problems. Cornstarch helps loose filling set, while very thin tart apple slices add fresher texture without staying hard after the crust is baked.

Two-panel guide showing cornstarch mixed with spices and thin tart apple slices being added to canned apple pie filling.
These two small fixes help more than they seem: cornstarch improves structure, while very thin tart apple slices add fresher texture without staying hard after baking.

Taste the filling before it goes into the crust. If it tastes dull, add a little more lemon. If it tastes sharp, leave it alone; the crust and butter will soften the edges as it bakes.

Go easy on extra sugar. Most canned filling is already sweet enough. If you want a deeper flavor, use only 1–2 tablespoons brown sugar. If the filling already tastes very sweet, lemon and salt will help much more than more sugar.

Already happy with your filling? Skip ahead to the baking method, or use the soggy-bottom fixes if crust texture is your main worry.

Premade Pie Crust vs Homemade Crust for Apple Pie

For the fastest version, refrigerated premade crust is the easiest choice. It usually comes as a two-crust pack, so you can make a classic double-crust pie, a lattice top, or cutout shapes without mixing dough from scratch.

For better flavor and flake, use homemade crust. If you want a buttery crust that works for apple pie, lattice, and double-crust bakes, use this apple pie crust recipe as the base.

Comparison of premade pie crust and homemade pie crust for apple pie, showing packaged crust on one side and rolled homemade dough on the other.
Choose premade pie crust when speed matters most; meanwhile, homemade pie crust is worth the extra work if you want a flakier, more buttery finish.
  • Refrigerated pie crust: fastest and easiest. Let it soften just enough to unroll, then keep it cold once it is in the plate.
  • Homemade pie crust: better flavor and flake. Keep the dough cold and do not stretch it into the pie plate.
  • Frozen pie shell: useful for crumb-topped versions, but less flexible for a full double-crust pie.
  • Graham cracker crust: not ideal here. It is better for chilled or biscuit-base desserts, like banoffee pie, than bubbling apple filling.

Worried about the bottom crust? Read the soggy-bottom fixes before you bake.

How to Make Apple Pie with Apple Pie Filling

There are two good ways to make this pie. The fast method is for the easiest possible bake. The par-baked method is for anyone who wants more protection against a soft bottom crust.

No-Par-Bake vs Par-Bake Apple Pie

Use the no-par-bake route when speed matters most. However, if you care more about bottom-crust texture, par-baking gives the crust a head start before the prepared filling goes in.

Comparison guide showing no-par-bake and par-bake methods for apple pie, with a raw chilled crust on one side and a par-baked crust on the other.
Use the no-par-bake route for the easiest apple pie, but switch to par-bake when bottom-crust texture matters more than speed.

Fast Apple Pie with Canned Filling Method

This is the simplest route when you want a low-stress holiday dessert or a quick pie that still feels homemade.

Step-by-step guide showing the fast method for making apple pie with canned filling, including filling the crust, topping the pie, venting, baking, and cooling.
This fast method keeps the recipe approachable, yet the order still matters: fill the pie, vent the top, bake until bubbling, and then cool long enough for the filling to settle.

Choosing the Right Pie Plate: Metal vs Glass

Pie plate material changes how the crust bakes. A metal pan usually browns faster, while glass lets you see the crust but needs gentler handling around sudden heat changes.

Comparison guide showing a metal pie plate on a hot sheet pan and a glass pie plate on a room-temperature sheet pan for baking apple pie.
A metal pie plate usually promotes stronger bottom browning; by contrast, a glass pie plate gives visibility but needs gentler handling around heat changes.
  1. Heat the oven. Preheat to 400°F / 200°C. If using a metal pie plate, you can preheat a rimmed baking sheet and bake the pie on it for better bottom browning. If using a glass pie plate, avoid sudden temperature changes and use a room-temperature sheet pan underneath to catch drips.
  2. Prepare the crust. Fit one pie crust into a 9-inch pie plate without stretching it. Chill the crust while you mix the filling.
  3. Mix the filling. In a small bowl, mix the cornstarch with the cinnamon, nutmeg, and salt. Gently fold that mixture into the filling with the lemon juice, vanilla, and optional sliced tart apple.
  4. Fill the pie. Spoon the apple mixture into the chilled bottom crust, then dot the top with small pieces of butter.
  5. Add the top crust. Cover with the second crust, make a lattice, or add cutouts. Seal and crimp the edges.
  6. Vent and wash. Cut steam vents if using a full top crust. Whisk the egg with water or milk, brush lightly over the crust, and sprinkle with sugar if using.
  7. Bake. Start at 400°F / 200°C for 20 minutes. Then, tent the edges or top lightly with foil if browning too fast and continue baking for 20–25 minutes more.
  8. Cool. Let the pie rest for at least 2 hours before slicing. For the cleanest slices, cool 3–4 hours.

How to Tell When the Pie Is Done

For fruit pies, visual cues matter more than the timer. A properly baked pie should show active bubbling through the vents or lattice, and the crust should be fully golden, not pale. For another helpful bake-doneness cue, King Arthur Baking recommends waiting until the filling shows vigorous bubbling.

Close-up of a baked apple pie showing bubbling filling through the vents and a fully golden crust.
A pie is not done just because the timer says so; instead, look for active bubbling through the vents and a crust that has moved past pale beige into real golden brown.

If your filling looks loose or your pies often have a soft base, use the soggy-bottom guide or the par-baked crust option.

Better Bottom Crust Method

Use this method if your filling looks loose, your pie plate is deep, or you have had wet-bottom pies before. It adds time, but it gives the base a head start before the filling goes in.

  1. Fit and chill the bottom crust. Place the bottom crust in a 9-inch pie plate and chill for 20–30 minutes.
  2. Par-bake. Line the crust with parchment and fill with pie weights, dried beans, or rice. Bake at 375°F / 190°C for 15–18 minutes.
  3. Set the base. Remove the weights and parchment. If the crust looks damp, bake for another 2–3 minutes. For extra protection, brush the bottom lightly with egg wash and bake 2–3 minutes more.
  4. Add filling and top crust. Spoon in the upgraded filling, dot with butter, add the top crust or lattice, and seal the edges.
  5. Bake the filled pie. Increase the oven to 400°F / 200°C and bake for 35–45 minutes, until the top is golden and the filling bubbles through the vents.
  6. Rest before slicing. Let the pie settle fully so the filling holds better when cut.

A lattice or crumb topping is easiest with a par-baked bottom crust. If using a full top crust, brush the par-baked rim lightly with egg wash or water, press gently to seal, and shield the edges if they brown too quickly.

Good to know: you do not have to par-bake every time. But if your main worry is a soft bottom crust, par-baking is the most reliable fix.

How to Stop the Bottom Crust from Getting Soggy

A soggy bottom usually happens when the filling is too wet, the crust is too warm, the pie is underbaked, or the pie is sliced before the filling has settled. This version is especially vulnerable if the canned filling is soft and syrupy.

Guide showing how to avoid soggy bottom apple pie crust with cooled filling, cold crust, thickener, sheet pan guidance, par-baking, and resting time.
Preventing a soggy bottom crust starts before baking: use cold dough, avoid overly loose filling, and give the pie enough bake time and resting time to finish setting.
  • Use cooled filling. If using homemade filling, let it cool before adding it to the crust.
  • Thicken loose filling. Add 1 tablespoon cornstarch for normal canned filling or 2 tablespoons if it looks runny.
  • Keep the crust cold. Chill the bottom crust after fitting it into the pie plate.
  • Use a glass or metal pie plate. These usually brown the bottom crust better than flimsy disposable foil pans.
  • Use a sheet pan wisely. A hot sheet pan can help bottom browning with a metal pie plate. With glass, use a room-temperature sheet pan to avoid sudden temperature changes.
  • Do not underbake. Look for a deeply browned crust and active bubbling through the vents, not just the timer.
  • Par-bake when needed. This is the safest option when crust texture matters most.
  • Give the pie time to settle. This matters especially if you want neat pieces instead of a loose filling spill.

If you are making this for a holiday table, bake it earlier than you think. Apple pie slices better after it rests, and individual slices can always be warmed gently before serving.

Top Crust Options

A full top crust is the classic choice, but a lattice, cutout crust, or crumb topping can work beautifully too. Since the filling is already prepared, the top is mostly about texture, looks, and steam release.

Apple pie top crust options showing full crust, lattice crust, cutout crust, and crumb topping.
Each top crust changes the pie a little: a full crust feels classic, lattice vents more easily, cutouts add style, and crumb topping gives a softer Dutch-style finish.
  • Full top crust: classic apple pie look. Cut several vents so steam can escape.
  • Lattice crust: pretty, traditional, and naturally well-vented.
  • Cutout crust: great for holiday pies. Leave enough gaps for steam.
  • Crumb topping: easier than a top crust and gives the pie a Dutch-style feel. This is the direction to take if you want more buttery crumble than pastry.
  • No top crust: not ideal for this exact recipe unless you reduce the filling or turn it into a tart-style dessert.

If you use a full top crust, vents are not optional. Prepared filling still bubbles as it heats, and steam needs a place to escape.

Troubleshooting Apple Pie with Apple Pie Filling

Troubleshooting guide for apple pie with apple pie filling covering runny filling, soggy bottom, pale crust, bubbling over, overly sweet filling, and thick or gelled filling.
Most apple pie with apple pie filling problems are fixable; for example, runny filling usually needs more structure or more cooling time, while pale crust simply needs better browning.
Problem Likely Cause Fix
Bottom crust is soggy Filling was too wet, crust was warm, or pie was underbaked Use cooled filling, thicken loose filling, chill the crust, and par-bake next time.
Filling runs everywhere Pie was sliced too hot Let the pie rest fully before cutting; warm filling will always look looser.
Filling tastes canned Not enough acid, salt, spice, or fresh texture Add lemon juice, cinnamon, vanilla, salt, butter, and optional tart apple.
Pie is too sweet Canned filling is already sweet Add lemon juice and a tart apple. Avoid extra sugar unless the filling truly needs it.
Top crust browns too fast Edges are exposed to direct heat Tent loosely with foil or use a pie shield.
Pie bubbles over Too much filling or not enough headroom Bake on a sheet pan and avoid overfilling the crust.
Crust tastes bland Plain premade crust did not brown enough Use egg wash, a little sugar, and bake until deeply golden.
Filling is too thick or gelled Canned filling texture is very firm Stir gently before filling the pie and add only a tiny splash of apple juice if needed.

Ready to bake? Use the recipe card for the exact amounts, timing, and optional par-bake method.

How to Serve This Apple Pie So It Feels Homemade

This pie is best when it has cooled long enough to slice cleanly, then served slightly warm. If the pie has fully cooled, warm individual slices gently in the oven so the crust perks back up and the filling softens. Then, serve it with something creamy, crunchy, or caramel-like to make the shortcut feel more special.

Warm slice of apple pie with apple pie filling served on a plate with vanilla ice cream and a light caramel drizzle.
Serve the pie slightly warm rather than piping hot, because the crust stays neater, the filling tastes more rounded, and the slice still feels fresh from the oven.
  • Vanilla ice cream: the classic pairing, especially with a warm slice.
  • Whipped cream: lighter than ice cream and good when the pie is already sweet.
  • Caramel drizzle: great for a sweeter, holiday-style dessert, especially if you want the pie to lean more caramel-apple.
  • Toasted pecans or walnuts: add crunch if the filling is very soft.
  • Extra cinnamon sugar: sprinkle lightly over the crust before baking for a more bakery-style finish.

For the nicest serving moment, warm the slice instead of the whole pie. The crust stays neater, the filling softens gently, and the slice still holds its shape on the plate.

Make-Ahead, Storage, Freezing, and Reheating

This is a good make-ahead pie because it needs time to cool anyway. Bake it earlier in the day, let it rest fully, then warm slices before serving if you want that fresh-from-the-oven feeling.

  • Make ahead: bake the pie several hours before serving so the filling has time to settle.
  • Room temperature: for best crust texture, keep loosely covered the day it is baked. Fruit pies made with sugar are commonly kept at room temperature for up to 2 days, but refrigerate sooner if your kitchen is warm.
  • Refrigerator: store covered for 3–4 days.
  • Freezer: freeze baked pie or slices tightly wrapped. The filling freezes well, but the crust may soften slightly after thawing.
  • Reheating slices: warm in a 325°F / 160°C oven until heated through. An air fryer also works well for individual slices.
  • Microwave note: the microwave is fast, but it softens the crust.

For a deeper food-safety note, Iowa State Extension has a helpful guide to fruit pie storage.

More Desserts with Apple Pie Filling

If you have extra filling, you can use it in more than pie. For an easy breakfast-style dessert, try this apple cinnamon roll bake with apple pie filling. It uses the same shortcut idea but turns the filling into a soft, gooey cinnamon roll casserole.

Prepared apple filling also works well in crisps, dump cakes, hand pies, mini pies, turnovers, and puff pastry desserts. Once you know the right amount and texture, it becomes much easier to use across different apple desserts without making them watery or overly sweet.

Apple Pie with Apple Pie Filling Recipe Card

Recipe card image for apple pie with apple pie filling showing yield, filling amount, oven temperature, bake time, and cooling time.
Use this apple pie with apple pie filling recipe card as a quick memory aid: enough filling, a properly heated oven, full bake time, and cooling before slicing are the four details to remember.

Apple Pie with Apple Pie Filling Recipe

This easy apple pie uses canned or homemade filling, premade or homemade crust, and a few simple upgrades for better flavor, cleaner slices, and a golden crust.

Yield1 9-inch pie, 8 slices
Prep Time15 minutes
Cook Time40–45 minutes
Total TimeAbout 3 hours minimum

Equipment

  • 9-inch pie plate
  • Mixing bowl
  • Small bowl
  • Rimmed baking sheet
  • Pastry brush
  • Foil or pie shield
  • Cooling rack
  • Pie weights, dried beans, or rice if par-baking

Ingredients

  • 1 box refrigerated pie crusts, 14.1 oz / about 400 g, 2 crusts, or 1 homemade double pie crust
  • 2 cans apple pie filling, 20–21 oz / 567–595 g each
  • 1 teaspoon ground cinnamon
  • ¼ teaspoon ground nutmeg
  • ⅛ teaspoon salt
  • 1 tablespoon / 15 ml lemon juice
  • 1 teaspoon / 5 ml vanilla extract, optional
  • 1 tablespoon / about 8 g cornstarch, or 2 tablespoons / 16 g if the filling is loose
  • 1 tablespoon / 14 g butter, cut into small pieces
  • 1 small tart apple, peeled and very thinly sliced, optional
  • 1 large egg
  • 1 tablespoon / 15 ml water or milk
  • 1–2 teaspoons coarse sugar or granulated sugar, optional

Instructions

  1. Preheat the oven to 400°F / 200°C. If using a metal pie plate, preheat a rimmed baking sheet and bake the pie on it for better bottom browning. If using glass, use a room-temperature sheet pan underneath to catch drips and avoid sudden temperature changes.
  2. Fit one pie crust into a 9-inch pie plate. Do not stretch the dough. Chill the crust while you prepare the filling.
  3. In a small bowl, mix the cornstarch with the cinnamon, nutmeg, and salt. In a larger bowl, gently fold that mixture into the apple pie filling with the lemon juice, vanilla, and optional sliced tart apple.
  4. Spoon the filling into the chilled bottom crust. Dot the top with small pieces of butter.
  5. Add the second crust as a full top crust, lattice, or cutouts. Seal and crimp the edges. Cut vents if using a full top crust.
  6. Whisk the egg with water or milk. Brush lightly over the top crust and sprinkle with sugar if using.
  7. Bake at 400°F / 200°C for 20 minutes. If the edges brown quickly, cover them loosely with foil or a pie shield.
  8. Continue baking for 20–25 minutes more, until the crust is golden and the filling bubbles through the vents.
  9. Move the pie to a cooling rack. Cool at least 2 hours before slicing, or 3–4 hours for cleaner slices.

Optional Par-Baked Bottom Crust Method

  1. Fit the bottom crust into the pie plate and chill for 20–30 minutes.
  2. Line with parchment and fill with pie weights, dried beans, or rice.
  3. Bake at 375°F / 190°C for 15–18 minutes.
  4. Remove the weights and parchment. Bake 2–3 minutes more if the crust looks damp.
  5. For extra protection, brush the bottom lightly with egg wash and bake another 2–3 minutes.
  6. Add the filling and top crust, then bake at 400°F / 200°C for 35–45 minutes, until the pastry is golden and the filling is actively bubbling.

Notes

  • Two cans of apple pie filling work well for most regular 9-inch pies.
  • For a fuller pie, use 5–6 cups homemade apple pie filling, or add 1 small very thinly sliced tart apple to 2 cans of filling.
  • Before adding cornstarch, mix it with the cinnamon, nutmeg, and salt so it folds in more evenly.

  • If the filling looks loose, increase the cornstarch from 1 tablespoon to 2 tablespoons.

  • After baking, let the pie cool before slicing. Cutting too early is the most common reason the filling runs.
  • When crust texture matters most, use the par-baked method for a crisper bottom.

Storage

Cool completely before covering. Store leftovers in the refrigerator for 3–4 days. Reheat slices in a 325°F / 160°C oven for the best crust texture.

If you try this with a favorite canned filling brand, a crumb topping, or homemade apple pie filling, make a note of what worked best. Small changes in filling thickness can make a real difference in how neatly the pie slices.

FAQs

How much apple pie filling goes in a 9-inch pie?

A regular 9-inch pie usually works with 2 cans of 20–21 oz apple pie filling. For a fuller pie, use about 5–6 cups filling or add one small thinly sliced tart apple to the canned filling.

One can or two cans: which makes a better apple pie?

Two cans make a better standard 9-inch apple pie. One can may work for a shallow pie, small pie, or tart-style dessert, but it usually does not give enough filling for a classic double-crust pie.

What is the best way to thicken canned apple pie filling?

Use 1 tablespoon cornstarch for normal canned filling or 2 tablespoons if the filling looks loose. Mix the cornstarch with the cinnamon, nutmeg, and salt first so it does not clump when folded into the filling.

How do you make canned apple pie filling taste homemade?

Add lemon juice, a pinch of salt, cinnamon, nutmeg, vanilla, and a little butter. For fresher texture, stir in one small tart apple that has been peeled and thinly sliced.

Should the bottom crust be baked before adding apple pie filling?

It does not have to be baked first, but par-baking helps prevent a soft bottom crust. For the fastest version, chill the bottom crust and bake the pie fully. For the crispest base, par-bake before adding the filling.

How long should apple pie cool before slicing?

Cool apple pie for at least 2 hours before slicing. For cleaner slices, especially with canned filling, cool it for 3–4 hours. Slicing too early makes the filling run even if the pie was baked properly.

What is the difference between canned apples and canned apple pie filling?

Canned apple pie filling is already sweetened, spiced, and thickened. Canned apples are usually just apples in liquid or syrup, so they need sugar, spice, lemon, and thickener before they work like pie filling.

Is homemade apple pie filling better for this recipe?

Homemade filling usually gives better texture and fresher flavor, but canned filling is faster. If using homemade filling, cool it before adding it to the crust and use about 5–6 cups for one 9-inch pie.

What top crust works best for apple pie with filling?

A full top crust gives the most classic look, while a lattice crust vents steam better and looks more decorative. A crumb topping also works well if you want a Dutch-style pie.

How should leftover apple pie be stored?

Cool the pie completely, then cover and refrigerate leftovers for 3–4 days. Reheat slices in the oven for the best crust texture. The microwave works, but it softens the crust.

Posted on 2 Comments

Apple Cinnamon Roll Bake with Apple Pie Filling

Apple cinnamon roll bake with apple pie filling in a dark 9x13 pan, topped with icing, pecans, and glossy apple pieces.

Apple cinnamon roll bake with apple pie filling is the shortcut dessert you make when you want warm apple pie flavor without rolling pie crust, peeling apples, or making cinnamon roll dough from scratch.

At its simplest, this can be a 2-ingredient apple cinnamon roll bake made with refrigerated cinnamon rolls and apple pie filling. This version keeps that easy shortcut, then adds a few small upgrades — butter, brown sugar, cinnamon, optional cream, and better ratio guidance — so the pan tastes more finished and bakes more evenly.

If you are looking for apple cinnamon rolls with apple pie filling, this is the easy bake-style version: soft cinnamon roll pieces, warm apple filling, sticky icing, and clear fixes for the common problem of wet or doughy centers.

Quick Answer: Apple Cinnamon Roll Bake with Apple Pie Filling

Cut refrigerated cinnamon rolls into pieces, toss them with melted butter, cinnamon, brown sugar, and apple pie filling, then bake everything in a greased 9×13 inch pan at 350°F / 175°C until the center is puffed and cooked through. For the most reliable texture, use 2 tubes of cinnamon rolls with 1 can of apple pie filling. Use 1½ to 2 cans only if you want a very gooey, apple-heavy bake and are comfortable baking it a little longer.

This is not a from-scratch cinnamon roll recipe. It is the easy refrigerated cinnamon roll bake, and the best way to make it taste more homemade is to upgrade the filling first. Diced homemade apple pie filling gives better texture without turning the recipe into a full dough project.

Best default ratio: 2 large tubes refrigerated cinnamon rolls, about 35 oz / 990 g total, plus 1 can apple pie filling, 21 oz / 595 g. This gives you a soft, gooey bake without overloading the pan.

Quick guide for apple cinnamon roll bake with apple pie filling showing a 9x13 pan, 350°F bake temperature, 40 to 50 minute time, and 2 tubes to 1 can ratio.
For the safest first version, use this starting formula: 2 tubes of cinnamon rolls, 1 can of apple pie filling, a 9×13 pan, and enough bake time for the middle to set before icing.

Need exact amounts? Jump to the recipe. Still choosing filling amount? Check the ratio guide.

Apple Cinnamon Roll Bake at a Glance

Best pan9×13 inch / 23×33 cm baking dish for a full batch
Oven temperature350°F / 175°C
Best cinnamon rollsRefrigerated cinnamon rolls, cut into quarters; jumbo rolls can be cut into 6 pieces
Best filling ratio2 tubes cinnamon rolls + 1 can apple pie filling
Homemade filling replacementUse 2 to 2½ cups homemade apple pie filling to replace one 20–21 oz can
Bake timeUsually 40–50 minutes for a 9×13 pan
Center cueThe middle should be puffed, set, and no longer wet or raw
Rest time10–15 minutes before adding icing
Yield8–10 servings

Why This Apple Cinnamon Roll Bake Works

This recipe works because it treats the filling ratio as the main decision, not an afterthought. Apple pie filling is sweet, saucy, and heavy, so using too much can keep the cinnamon roll pieces from baking evenly in the center. Starting with 1 can of filling for 2 tubes of cinnamon rolls gives you enough apple flavor without turning the middle wet.

Cutting the rolls into smaller pieces also matters. Smaller pieces bake through faster, hold the apple filling better, and give you more soft edges for the icing to settle into. A wide 9×13 pan helps the dough spread instead of steaming in a deep pile.

The result is still gooey, cozy, and generous, but the center cooks through properly.

Before mixing the pan, compare the best filling ratios and choose the right version for your pan.

Ingredients You Need

This recipe starts with the easy version: refrigerated cinnamon rolls and apple pie filling. The small upgrades — butter, brown sugar, cinnamon, salt, and optional cream — make it taste more like a finished bake and less like two packaged ingredients stirred together.

Ingredients for apple cinnamon roll bake including cinnamon roll tubes, apple pie filling, butter, brown sugar, cinnamon, salt, cream, pecans, and icing.
The shortcut comes from refrigerated cinnamon rolls and apple pie filling, but the small upgrades matter. Butter adds richness, brown sugar deepens the flavor, cinnamon reinforces the apple-pie taste, and a pinch of salt keeps the bake from tasting flat.

Using smaller tubes or extra filling? Check the filling ratio before mixing the pan.

Refrigerated Cinnamon Rolls

Use 2 tubes of refrigerated cinnamon rolls for a full 9×13 pan. Large tubes are often about 17.5 oz / 496 g each, giving you about 35 oz / 990 g total dough. If your tubes are smaller, use the ratio guide below instead of guessing.

Use any brand of refrigerated cinnamon rolls you like. The important part is the total dough weight, not the brand name. If your tubes are smaller than the large 17.5 oz / 496 g size, reduce the filling slightly or use the small-batch guide.

Reserve the icing packets. Drizzle the icing after the bake has rested, not before it goes into the oven.

Apple Pie Filling

Use 1 can of apple pie filling, usually 21 oz / 595 g, for the most reliable full-pan bake. If the apple slices are large, chop them into smaller pieces before mixing. Smaller apple pieces distribute better and reduce wet pockets in the center.

You do not need to drain the apple pie filling. If the can looks extremely saucy, spoon off a little excess gel, but do not strain it dry. The sauce is part of what makes the bake soft and gooey.

You can also use homemade apple pie filling. For this recipe, diced apple pie filling works better than long slices because it spreads evenly between the cinnamon roll pieces.

Butter, Brown Sugar and Cinnamon

Melted butter coats the dough pieces and helps the edges bake up richer. Brown sugar adds a light caramel note, while cinnamon or apple pie spice reinforces the apple-pie flavor.

  • Melted butter: ¼ cup / 4 tablespoons / 57 g
  • Light brown sugar: 2 tablespoons / about 25 g
  • Cinnamon or apple pie spice: ½ to 1 teaspoon
  • Fine salt: a small pinch, optional but useful

Heavy Cream, Optional

Heavy cream can make the bake softer and more gooey, but too much can slow down the center. For this recipe, use only 2–3 tablespoons / 30–45 ml if you want the cream upgrade.

Icing or Cream Cheese Glaze

The easiest option is the icing that comes with the cinnamon rolls. For a thicker finish, make the quick cream cheese glaze in the recipe card. Add icing while the bake is warm, not piping hot, so it melts slightly without disappearing completely.

Pecans or Walnuts, Optional

Chopped pecans or walnuts add crunch and make the bake feel more holiday-ready. Use about ½ cup / 55–60 g, and sprinkle some inside the bake or over the top before baking.

Best Ratio of Cinnamon Rolls to Apple Pie Filling

This is where many apple cinnamon roll bakes go wrong. One version may call for two cans of apple pie filling, while another uses one can for the same amount of dough. Both can work, but they do not give the same result.

For the most reliable center, use 1 can of apple pie filling with 2 large tubes of cinnamon rolls. If you want a wetter, cobbler-style bake, increase the filling and bake longer.

If you want visible apple pieces in every bite, chop the filling smaller before adding a second full can. Smaller pieces distribute better without flooding the center.

Ratio guide comparing small batch, balanced full batch, and extra apple-heavy apple cinnamon roll bake with apple pie filling.
The filling ratio changes the whole texture of the bake. One can gives a safer, more evenly baked center, while extra filling creates a gooier dessert-style pan that usually needs more time in the oven.
VersionCinnamon rollsApple pie fillingPanBake time
Small batch1 tube / 12–17.5 oz / 340–500 g1 to 1½ cups8×8 inch or 9-inch round22–30 minutes
Balanced full batch2 large tubes / about 35 oz / 990 g total1 can / 21 oz / 595 g9×13 inch / 23×33 cm40–50 minutes
Extra apple-heavy2 large tubes / about 35 oz / 990 g total1½ to 2 cans / 31–42 oz / 880–1190 g9×13 inch / 23×33 cm45–55 minutes
Homemade filling version2 large tubes2 to 2½ cups homemade filling per can replacement9×13 inch / 23×33 cm40–50 minutes

One Can vs Two Cans of Apple Pie Filling

If you are making this apple cinnamon roll bake for the first time, one can of apple pie filling is the safer starting point. Two cans can taste extra gooey, but the added sauce makes the center slower to bake and easier to undercook.

One can versus two cans of apple pie filling comparison for apple cinnamon roll bake, showing balanced and extra-gooey versions.
One can is the best default for a balanced apple cinnamon roll bake. Two cans can be deliciously gooey, but the center needs more attention because extra sauce slows down the bake.

Want the simplest shortcut? See the 2-ingredient version. Ready to bake? Jump to the method.

Small-roll note: If your cinnamon roll tubes are smaller than 17.5 oz / 496 g each, do not automatically use a full can of filling for every tube. Smaller tubes need less filling, or the pan can turn wet before the dough cooks through.

Can You Make This with Just 2 Ingredients?

Yes. You can make a 2-ingredient apple cinnamon roll bake with only refrigerated cinnamon rolls and apple pie filling. Cut the rolls, fold them with the filling, bake until the center is cooked through, then drizzle with the icing. The butter, brown sugar, cinnamon, and salt in this recipe are small upgrades that make the bake taste more finished, but they are not required.

Comparison of 2-ingredient apple cinnamon roll bake and upgraded version with butter, brown sugar, cinnamon, and optional cream.
The 2-ingredient version works when you need the fastest shortcut. However, the upgraded version adds better flavor balance and a softer, more bakery-style finish without turning this into a from-scratch cinnamon roll recipe.

Which Version Should You Make?

The best version depends on what you want from the pan. If this is your first time making it, start with the balanced 9×13 bake. Once you know how your oven, pan, and cinnamon rolls behave, you can make it more apple-heavy or richer with cream.

Choose this versionUse it whenWhat to expect
Balanced 9×13 bakeYou want the safest first trySoft rolls, clear apple flavor, less risk of a doughy center
Extra apple-heavy bakeYou want a gooier dessert-style casseroleMore filling, more sauce, longer bake time
Small batchYou are using 1 tube of cinnamon rollsBetter for an 8×8 pan or 9-inch round pan
Homemade filling versionYou want better apple texture and less canned sweetnessBest flavor, especially with diced apple pie filling

Canned vs Homemade Apple Pie Filling

Canned apple pie filling is the fastest option, and it works well for this recipe. Homemade filling gives you better control over sweetness, apple texture, and spice. The best homemade version for this bake is diced or chopped, not long slices.

Canned and homemade apple pie filling comparison for apple cinnamon roll bake, showing canned filling and diced homemade filling in bowls.
Canned apple pie filling is the fastest option, but homemade diced filling gives better control over sweetness and texture. For this bake, small apple pieces distribute more evenly than long slices.
FillingBest forHow much to use
Canned apple pie fillingFastest shortcut bake1 can / 21 oz / 595 g for a balanced 9×13 bake
Homemade diced apple pie fillingBetter texture and less canned sweetness2 to 2½ cups to replace one can
Extra saucy fillingGooey casserole-style bakeUse carefully; too much sauce can delay the center
Fresh raw applesNot the best direct swapCook them first or use a proper apple pie filling method

If you want to make the filling from scratch, use this apple pie filling recipe and dice the apples for this bake. Use about 2 to 2½ cups homemade filling for every 20–21 oz can you are replacing.

Long Slices vs Diced Apple Pie Filling

For this bake, diced or chopped apple pie filling works better than long slices. Smaller pieces spread between the cinnamon roll pieces more evenly, which gives you apple flavor throughout the pan without creating wet pockets.

Comparison of long apple slices and diced apple pie filling for apple cinnamon roll bake, showing diced filling as the better choice for even distribution.
Long apple slices can look beautiful, but they may leave wet pockets between the dough pieces. Diced or chopped apple pie filling spreads more evenly, which helps the center bake through cleanly.

Filling ready? Go to the step-by-step method. Worried about the center? Check the doughy-center fixes.

How to Make Apple Cinnamon Roll Bake with Apple Pie Filling

The goal is simple: keep the dough pieces small, spread the filling evenly, and give the center enough time to bake through. The apple filling should sit around and between the cinnamon roll pieces rather than forming one thick layer over the top.

Step-by-step apple cinnamon roll bake method showing cut cinnamon rolls, chopped apple filling, seasoned dough, unbaked 9x13 pan, and iced baked rolls.
Cutting the rolls smaller and chopping the apple filling before baking helps every bite cook more evenly. As a result, you get soft cinnamon roll pieces with apple flavor throughout instead of wet pockets in the middle.
  1. Preheat the oven. Heat oven to 350°F / 175°C. Grease a 9×13 inch / 23×33 cm baking dish.
  2. Reserve the icing. Open the cinnamon roll tubes and set the icing aside for later.
  3. Cut the cinnamon rolls. Cut regular rolls into quarters. If using jumbo rolls, cut each roll into 6 pieces.
  4. Chop the apple filling. If the apple slices are large, chop them into roughly ½-inch / 1.25 cm pieces.
  5. Season the dough. In a large bowl, toss the cinnamon roll pieces with melted butter, brown sugar, cinnamon or apple pie spice, and a small pinch of salt.
  6. Add the apple pie filling. Fold in the filling gently so the dough pieces are coated but not crushed.
  7. Spread in the pan. Transfer the mixture to the baking dish and spread it in one even layer.
  8. Add cream, if using. Drizzle 2–3 tablespoons / 30–45 ml heavy cream over the top. Keep it light so the center still bakes through cleanly.
  9. Bake. Bake for 40–50 minutes, checking the center around 35–40 minutes. Tent loosely with foil if the top browns before the middle is done.
  10. Rest and ice. Let the bake rest for 10–15 minutes, then drizzle with the reserved icing or cream cheese glaze.

Center still looks soft? Use the doughy-center checklist. Different pan size? Check pan sizes.

Common Mistakes to Avoid

  • Using too much filling the first time. Two cans can work, but 1 can is the better starting point for a full 9×13 bake.
  • Leaving the cinnamon rolls too large. Big pieces brown on the outside before the middle cooks through.
  • Using a deep pan for a full batch. A deep dish traps steam and slows the center.
  • Adding icing too early. If the pan is piping hot, the icing melts away instead of sitting on top.
  • Judging only by the edges. The edges cook first. Always check the center before pulling the pan from the oven.

How to Keep Apple Cinnamon Rolls from Staying Doughy

A doughy center is the most common problem with this kind of shortcut bake. It usually happens because the dough pieces are too large, the pan is too deep, or there is too much wet filling sitting over the middle.

Troubleshooting guide for fixing a doughy center in apple cinnamon roll bake, comparing a wet underbaked center with a puffed and set center.
A doughy center usually means the pan was too deep, the filling was too heavy, or the roll pieces were too large. If the top browns first, tent it with foil and keep baking until the middle is set.
  • Use a wide pan. A 9×13 pan is safer for a full batch than a deep round dish.
  • Cut the rolls small enough. Quarter regular rolls; cut jumbo rolls into 6 pieces.
  • Start with 1 can of filling. Two cans can work, but the bake becomes wetter and needs more time.
  • Chop large apple slices. Big apple pieces create wet pockets around the dough.
  • Spread everything evenly. Avoid leaving a mound of filling in the center.
  • Tent with foil if needed. If the top is browning but the center is not done, cover loosely and keep baking.
  • Check the middle, not just the edges. The center should be puffed and no longer raw or collapsed.
  • Use a thermometer if unsure. The thickest doughy part should be about 190–200°F / 88–93°C, a helpful doneness range for soft baked dough.
  • Rest before icing. Resting helps the filling settle and keeps the icing from disappearing into the hottest parts of the pan.

Glass and ceramic pans: These may need a little longer than metal pans. If the edges look done but the middle is still soft, tent with foil and continue baking in 5-minute intervals.

For other texture issues, see the taste and texture fixes. For pan-specific help, check the pan guide.

How to Fix the Taste and Texture

If the first pan is not exactly how you like it, the fix is usually simple. Adjust the filling, pan, or bake time rather than changing the whole recipe.

Texture Guide: Too Wet, Just Right or Too Dry

The texture should be soft and gooey, but the center should still look set. Use the visual cues below to decide whether the bake needs more time, less filling next time, or a little more moisture.

Texture guide for apple cinnamon roll bake showing too wet, just right, and too dry examples with apple filling and icing.
The ideal texture is soft, gooey, and set in the center. If the bake looks loose or sunken, give it more time; if it looks dry and crumbly, use a little more filling or check it earlier next time.
ProblemWhy it happenedFix it next time
Center is doughyToo much filling, large dough pieces, or deep panUse a 9×13 pan, cut rolls smaller, start with 1 can filling
Top is too brownTop cooked before the center finishedTent loosely with foil and keep baking
Bake is too wetToo much apple filling or heavy creamUse less filling or skip cream next time
Rolls feel dryToo little filling or baked too longUse the balanced ratio and check earlier
Too sweetSweet filling plus icing plus caramel or extra sugarSkip caramel, reduce brown sugar, or use homemade filling
Not enough apple flavorFilling pieces were too sparse or too largeChop the apples smaller and spread them evenly

Pan Sizes and Bake Times for Apple Cinnamon Roll Bake

The pan changes everything. A full batch needs room to spread. A smaller batch can work beautifully in an 8×8 pan, but a full 2-tube recipe crowded into a deep dish is more likely to stay doughy.

Pan size guide for apple cinnamon roll bake showing 8x8 pan, 9-inch round pan, 9x13 pan, muffin tin, and pie plate options.
A full batch spreads and bakes best in a 9×13 pan, while one tube works better in an 8×8 pan or 9-inch round dish. In other words, matching the pan to the batch size is one of the easiest ways to avoid a doughy center.
PanBest forSuggested amountBake cue
8×8 inch / 20×20 cmSmall batch1 tube rolls + 1 to 1½ cups fillingCenter puffed and no raw dough
9-inch / 23 cm roundSmall pull-apart style bake1 tube rolls + 1 to 1½ cups fillingKeep the dough in an even layer
9×13 inch / 23×33 cmFull batch2 tubes rolls + 1 can fillingBest all-around option
12-cup muffin tinApple cinnamon roll cupsFlatten rolls into cups and fill lightlyDo not overfill
9-inch pie plateCinnamon roll apple pie variationPressed cinnamon roll crust + fillingBetter as a separate pie-style version

Small-Batch Apple Cinnamon Roll Bake

A small batch is best when you only have one tube of cinnamon rolls or do not want a full 9×13 pan. Use an 8×8 pan or 9-inch round dish so the dough sits in an even layer and bakes through cleanly.

Small-batch apple cinnamon roll bake in an 8x8 pan with 1 tube cinnamon rolls, 1 to 1.5 cups apple pie filling, and 22 to 30 minute bake time.
A small-batch apple cinnamon roll bake is the better choice when you only have one tube of cinnamon rolls or do not want a full 9×13 pan. Because the layer is smaller, it also bakes faster and is easier to monitor.

Making the full version instead? Return to the ratio guide. Need exact amounts? Jump to the recipe card.

Should You Add Heavy Cream?

Heavy cream is optional. It can make cinnamon rolls softer and richer, but it also adds moisture. For this apple filling version, a small amount is enough.

Heavy cream guide for apple cinnamon roll bake comparing no cream, 2 to 3 tablespoons of cream, and too much cream.
Heavy cream can make the rolls more tender, but apple pie filling already adds moisture. Therefore, 2–3 tablespoons is the safest upgrade if you want a softer bake without risking a wet center.
Heavy cream amountResultBest use
NoneCleanest, most reliable bakeBest default if you worry about a doughy center
2–3 tbsp / 30–45 mlSofter, slightly gooierBest controlled cream option
⅓ cup / 80 mlRicher and wetterWorks, but watch the center carefully
½ cup / 120 ml or moreVery gooey, casserole-likeHigher risk of a wet center with apple filling

If you use extra apple pie filling, skip the heavy cream the first time. The filling already brings moisture and sauce.

Not sure about texture yet? Compare the texture fixes. Ready to bake? Go to the recipe card.

Icing, Cream Cheese Glaze and Caramel Drizzle

The icing packet that comes with refrigerated cinnamon rolls is the easiest finish. Let the bake rest first, then drizzle the icing over the top while the rolls are still warm.

Three finish options for apple cinnamon roll bake: classic icing, cream cheese glaze, and caramel drizzle.
Choose the finish based on how sweet and rich you want the bake to feel. Classic icing is the simplest, cream cheese glaze adds tang, and caramel drizzle pushes the pan further toward dessert.

For a thicker glaze, stir together:

  • 2 oz / 55 g softened cream cheese
  • 1 tablespoon / 14 g softened butter
  • ½ cup / 60 g powdered sugar
  • 1–2 tablespoons / 15–30 ml milk
  • ½ teaspoon vanilla extract
  • Small pinch of salt

Caramel drizzle also works well, especially if you are making a fall dessert or holiday brunch bake. Use it lightly so the pan does not become too sweet.

Variations

Once the basic method is clear, you can change the finish, pan, or serving style without changing the whole recipe. These variations are useful when you want more crunch, more caramel flavor, or a portioned version for guests.

Variation guide for apple cinnamon roll bake showing pecan, caramel apple, muffin-tin cups, pie-plate version, and slow cooker options.
Once the basic apple cinnamon roll bake works for you, choose a variation based on how you want to serve it. Muffin cups are better for portions, pecans add crunch, caramel makes it more dessert-like, and a pie plate gives a more sliceable bake.

Apple Cinnamon Roll Casserole with Pie Filling

Use the same 9×13 method, but make it extra gooey with 1½ cans of apple pie filling and a slightly longer bake. Tent with foil if the top browns too quickly.

Caramel Apple Cinnamon Rolls

Drizzle caramel sauce over the rested bake after icing. Add chopped pecans for a caramel-apple-pie flavor.

Apple Pie Cinnamon Roll Bake with Pecans

Fold ½ cup chopped pecans or walnuts into the mixture before baking, or scatter them over the top for crunch.

Cinnamon Roll Apple Pie Cups

For a portioned version, flatten individual cinnamon rolls into a greased muffin tin, add a spoonful of chopped apple pie filling, and bake until puffed and golden. Keep the filling light so the cups rise properly instead of bubbling over.

Apple cinnamon roll cups made in a muffin tin with apple pie filling, icing drizzle, pecans, and a plated single-serving cup.
Muffin-tin cinnamon roll cups are a good variation for parties or portioned desserts. Even so, fill them lightly because apple pie filling expands and bubbles as the dough bakes.

Prefer the main 9×13 version? Use the recipe card. Looking for serving ideas? See how to serve it.

Cinnamon Roll Apple Pie Crust

For a pie-style variation, flattened cinnamon rolls can be pressed into a pie plate and filled with apple pie filling. If you want a classic pie instead, use this apple pie crust recipe.

Apple Cinnamon Roll Monkey Bread

Use smaller pieces of cinnamon roll dough, toss with butter and cinnamon sugar, and layer with chopped apple pie filling in a Bundt pan. This is a separate bake style and usually needs careful timing so the center cooks.

Crock Pot Apple Cinnamon Roll Bake

A slow cooker version can work, but the top will not brown the same way. Use less filling, line or grease the cooker well, and cook until the dough is fully set in the center.

How to Serve This Apple Cinnamon Roll Bake

Serve this warm while the icing is still soft. It works as a sweet brunch bake, a holiday breakfast, or an easy apple dessert with very little prep.

Close-up serving of apple cinnamon roll bake with glossy apple filling, icing drizzle, pecans, and a fork on a dark plate.
Let the bake rest briefly before serving so the filling thickens slightly and the scoops hold together better. Then serve it warm, when the icing is still soft and the apple filling tastes richest.
  • For breakfast or brunch, serve it with coffee, tea, fresh fruit, or something salty like eggs or breakfast potatoes.
  • For dessert, add vanilla ice cream, whipped cream, or a light caramel drizzle. Keep the topping light if your bake is already extra apple-heavy or very sweet.
  • For a holiday table, sprinkle chopped pecans over the top and serve it straight from the baking dish.

Make Ahead, Storage, Freezing and Reheating

Because this bake is soft and saucy, the best make-ahead approach is to keep the icing separate and reheat gently. That way, the rolls stay tender instead of drying out or turning overly sticky.

Make ahead, storage, freezing, and reheating guide for apple cinnamon roll bake with covered pan, storage container, wrapped portion, and warm serving.
For make-ahead baking, assemble the pan up to 24 hours ahead and keep the icing separate. Later, reheat leftovers gently so the rolls warm through without drying out.

Can You Make It Ahead?

Yes. Assemble the bake up to 24 hours ahead, cover tightly, and refrigerate. For the most even bake, let the pan sit at room temperature for 20–30 minutes while the oven preheats. If baking straight from the fridge, add a few extra minutes.

When Should You Add the Icing?

Add icing after baking, not before. If you are making the bake ahead, keep the icing separate until the pan is baked and rested.

How Long Do Leftovers Keep?

Store leftovers covered in the refrigerator for up to 3 days. This fits within the USDA’s 3-to-4-day leftover storage guidance. The rolls will soften as they sit because of the apple filling, but they reheat well.

How Do You Reheat It?

Reheat individual portions in short microwave bursts until warm. For a larger portion, cover loosely with foil and warm in a low oven until heated through.

Can You Freeze Apple Cinnamon Roll Bake?

You can freeze it, but the texture is best fresh. If freezing, freeze before icing. Thaw overnight in the refrigerator, reheat gently, and add icing after warming.

Making it now? Return to the recipe card. Need quick answers? Jump to FAQs.

Apple Cinnamon Roll Bake with Apple Pie Filling Recipe

Saveable recipe card for apple cinnamon roll bake with apple pie filling listing prep time, bake time, yield, ingredients, and basic method.
Use this saveable recipe card when you want the full bake in one glance. It keeps the key numbers together, so you do not have to scroll back for the filling ratio, oven temperature, or bake time.

Prep Time
15 minutes

Cook Time
45 minutes

Total Time
1 hour

Yield
8–10 servings

Description: Easy apple cinnamon roll bake made in a 9×13 pan with refrigerated cinnamon rolls, apple pie filling, optional heavy cream, and icing drizzle. The recipe uses a reliable filling ratio so the rolls stay soft and gooey without leaving the center raw.

Equipment

  • 9×13 inch / 23×33 cm baking dish
  • Large mixing bowl
  • Knife or kitchen shears
  • Spatula or large spoon
  • Foil for tenting, if needed
  • Optional instant-read thermometer

Ingredients

  • 2 tubes refrigerated cinnamon rolls, about 17.5 oz / 496 g each, about 35 oz / 990 g total, icing reserved
  • 1 can apple pie filling, 21 oz / 595 g, chopped if slices are large
  • ¼ cup / 4 tablespoons / 57 g unsalted butter, melted
  • 2 tablespoons / about 25 g light brown sugar
  • ½ to 1 teaspoon ground cinnamon or apple pie spice
  • Small pinch fine salt, optional
  • 2–3 tablespoons / 30–45 ml heavy cream, optional
  • ½ cup / 55–60 g chopped pecans or walnuts, optional

Homemade filling option: Replace one 20–21 oz can with 2 to 2½ cups homemade diced apple pie filling.

Optional Cream Cheese Glaze

  • 2 oz / 55 g cream cheese, softened
  • 1 tablespoon / 14 g butter, softened
  • ½ cup / 60 g powdered sugar
  • 1–2 tablespoons / 15–30 ml milk
  • ½ teaspoon vanilla extract
  • Small pinch salt

Instructions

  1. Preheat oven to 350°F / 175°C. Grease a 9×13 inch / 23×33 cm baking dish.
  2. Open the cinnamon roll tubes and reserve the icing for later.
  3. Cut regular cinnamon rolls into quarters. If using jumbo rolls, cut each roll into 6 pieces.
  4. Chop large apple slices in the apple pie filling into smaller pieces, about ½ inch / 1.25 cm.
  5. In a large bowl, toss cinnamon roll pieces with melted butter, brown sugar, cinnamon or apple pie spice, and salt.
  6. Fold in the apple pie filling gently until the dough pieces are evenly coated.
  7. Spread the mixture in one even layer in the prepared baking dish.
  8. Drizzle 2–3 tablespoons heavy cream over the top, if using. Sprinkle with nuts, if using.
  9. Bake for 40–50 minutes, checking the center around 35–40 minutes. Tent loosely with foil if the top browns before the center is done.
  10. The bake is ready when the center is puffed, set, and no longer wet or raw. If using a thermometer, the thickest doughy center should be about 190–200°F / 88–93°C.
  11. Let the pan rest for 10–15 minutes.
  12. Drizzle with reserved icing or cream cheese glaze. Serve warm.

Notes

  • For the most reliable texture, start with 1 can of apple pie filling for 2 large tubes of cinnamon rolls.
  • For an extra apple-heavy bake, use 1½ to 2 cans filling and bake longer.
  • Glass and ceramic pans may need extra time compared with metal pans.
  • If the top browns too quickly, tent with foil and continue baking until the center is done.
  • Add icing after the bake rests, not immediately out of the oven.

FAQs

Can I use homemade apple pie filling?

Yes. Use 2 to 2½ cups homemade apple pie filling to replace one 20–21 oz can. Diced filling works best because it spreads evenly between the cinnamon roll pieces.

Should I use one can or two cans of apple pie filling?

Use one can for the most reliable 9×13 bake. Use 1½ to 2 cans if you want a very gooey, apple-heavy version, but expect a longer bake time and check the center carefully.

Can I make this with only cinnamon rolls and apple pie filling?

Yes. You can make a 2-ingredient version with only refrigerated cinnamon rolls and apple pie filling. The butter, brown sugar, cinnamon, and salt are optional upgrades that make the bake taste richer and more balanced, but the shortcut version still works without them.

Why are my cinnamon rolls doughy in the middle?

The most common reasons are too much filling, dough pieces that are too large, a pan that is too deep, or not enough bake time. Use a wide 9×13 pan, cut the rolls smaller, spread the filling evenly, and bake until the center is puffed and set.

Can I make this with one tube of cinnamon rolls?

Yes. Use an 8×8 inch pan or 9-inch round pan with 1 tube of cinnamon rolls and about 1 to 1½ cups apple pie filling. Bake until the center is cooked through, usually 22–30 minutes depending on the dough size and pan.

Can I use jumbo cinnamon rolls?

Yes. Cut jumbo rolls into 6 pieces instead of quarters so the center cooks more evenly. Jumbo rolls often need a longer bake time.

Do I need heavy cream?

No. Heavy cream is optional. Use 2–3 tablespoons if you want a softer, richer bake. Skip it if you are using extra apple pie filling or if you are worried about a wet center.

Can I make apple cinnamon rolls with apple pie filling overnight?

Yes. Assemble the pan, cover it tightly, and refrigerate for up to 24 hours. Let it sit at room temperature for 20–30 minutes while the oven heats, or bake straight from chilled with a little extra time.

Can I make this in a muffin tin?

Yes. Flatten individual cinnamon rolls into greased muffin cups, spoon in chopped apple pie filling, and bake until puffed and cooked through. Keep the filling light so the cups do not overflow.

Can I use fresh apples instead of apple pie filling?

Fresh raw apples are not the best direct swap because they release moisture and may not soften enough before the dough bakes. For better results, cook the apples into a quick apple pie filling first.

Can I freeze apple cinnamon roll bake?

Yes, but the texture is best fresh. Freeze before icing if possible. Thaw overnight in the refrigerator, reheat gently, and add icing after warming.

Back to top