Posted on — 16 Comments

Crispy Homemade French Fries From Fresh Potatoes (Recipe Plus Variations)

Woman frying crispy homemade French fries in a pan on the stove, lifting golden fries from hot oil for a MasalaMonk recipe guide.

There’s a special kind of joy in biting into crispy homemade french fries that you made yourself. The outside is shatteringly crisp, the inside is fluffy and hot, and you can taste actual potato instead of just salt and grease. Once you learn how to do diy french fries at home, it becomes hard to go back to limp, lukewarm fast-food versions.

In this guide, we’ll walk through:

  • A straightforward french fries ingredients and procedure section you can follow every time
  • The best way to cook fries using a classic double-fry method
  • Easier options like oven fries at 425°F and air fryer frozen french fries
  • Fun variations: seasoned fries, garlic parmesan french fries, chili cheese french fries, truffle fries, and more
  • Smarter choices for healthy potato fries, from oil selection to veggie alternatives

The aim is simple: by the end, you’ll be able to make perfect french fries in several styles, whether you’re cooking for movie night, a party tray of loaded fries, or just a snack for one.

Also Read: Simple Bloody Mary Recipe – Classic, Bloody Maria, Virgin & More


Why Bother Making Crispy French Fries at Home?

At first glance, buying a bag of frozen fries or grabbing a portion from a takeaway seems easier. However, at home french fries come with a few big advantages.

To begin with, you control the ingredients. You choose the potatoes, the oil, and the salt level. You can keep things minimal for a simple fries recipe, or go wild with flavors like cajun french fries or cheese french fries. When you’re in charge, “quality fries” actually means something.

Moreover, you get to decide how indulgent you want your fries to be. Potatoes themselves are not villains. According to Potatoes USA’s nutrition overview, a medium potato has around 110 calories, zero fat, and offers vitamin C, potassium, and fiber when you keep some peel on. Deep frying adds fat and energy, of course, but with homemade fries, you can:

  • Use better oils
  • Fry at the right temperatures
  • Or choose oven fries potatoes and air fryer french fries most of the time

A typical restaurant portion of fries can be high in fat and sodium. Overviews like Verywell Fit’s french fries nutrition facts break down just how quickly calories add up when fries are cooked in old oil and then heavily salted. Making real potato fries at home lets you adjust all of that.

Finally, the flavor is simply better. Fresh potato fries have a clean, sweet, potato-forward taste that frozen fries rarely match. Once you’ve had real french fried potatoes straight from your own kitchen, it’s hard not to feel a tiny bit smug.

Also Read: Homemade Hot Chocolate with Cocoa Powder Recipe


Best Potatoes for Crispy Homemade French Fries

The heart of any good potato french fries recipe is, unsurprisingly, the potato. Not all varieties behave the same in hot oil or a hot oven, so it’s worth thinking about the type you buy.

Starchy vs “gold” potatoes

For classic crispy fries with fluffy interiors, starchy potatoes are ideal:

  • Russet / Idaho potatoes: High starch and low moisture. These are perfect for french fries from russet potatoes if you want that restaurant-style contrast between crisp outside and soft inside.
  • Yukon Gold and other yellow potatoes: Slightly waxier, with more moisture, but very creamy. These are excellent for gold potato fries or yukon gold french fries when you want a rich, buttery interior and deep golden exterior.

Side-by-side comparisons, like this piece on Russet vs Yukon Gold, point out that Russets crisp up more dramatically than yellows because of their starch and lower moisture, whereas Yukon Golds keep their shape and feel denser and creamier. That matches what you’ll see in your pan: Russets are your friend for the crispiest french fries, while golds are great when you lean toward golden potato french fries that feel more substantial.

In short:

  • For extra crispy french fries or skinny fries → choose Russet/Idaho.
  • For rich, slightly softer thick cut fries or steak fries → try Yukon Gold or another yellow potato.

You can mix them too, especially if you like serving a variety of textures on one platter.

Also Read: Mimosa Recipe: 10 Easy Versions from Classic to Caramel Apple


Oils, Heat, and Tools for Homemade French Fries that are Crispy

Once you’ve got your potatoes sorted, the next question is: what do you fry them in, and how?

Oils that work well for fries

When you’re deep-frying, you want oils that can handle high temperatures and stay reasonably stable:

  • Refined peanut or sunflower oil
  • Canola or rapeseed oil
  • Rice bran oil
  • High-oleic vegetable blends
  • Light or refined olive oil (for fries in olive oil, not extra virgin)

Articles on the healthiest oils for cooking and frying highlight avocado, refined olive, peanut, and similar oils because they combine decent smoke points with more monounsaturated fats. They’re not magic health potions, but they’re a smarter choice than repeatedly overheated, low-quality oils.

For full-on indulgence, some people love beef tallow fries or duck fat french fries. Both fats give incredible flavor, but they are obviously richer and make the most sense for occasional “wow” dinners. On the other end of the spectrum, you can choose very light oil coatings in the oven or air fryer for healthier french fries.

Helpful tools (and what you can skip)

You do not need a dedicated “french fry fryer” to make excellent fries. You can absolutely make french fries at home using basic tools:

  • A heavy pot or deep frying pan
  • A thermometer (to manage that best way to fry fries temperature window)
  • A large bowl for soaking
  • A colander or sieve
  • A clean towel for drying
  • A wire rack and tray for draining cooked fries

A dedicated fryer can make things more convenient if you make home made fries often, but it’s not a requirement. A sharp knife is also plenty for cut fries, although a mandoline or fry cutter can be fun if you often crave french fries shoestring, crinkle cut french fries, or thick cut french fries.

Also Read: French 75 Cocktail Recipe: 7 Easy Variations


Ingredients for Classic French Fries

The nice part about a simple french fries recipe is how short the shopping list is. Here’s a good base for four people.

Core ingredients

  • 1 kg (about 2.2 lb) potatoes (Russet for crispiest; Yukon Gold for creamier)
  • Oil for frying (enough to fill your pot 5–7 cm / 2–3 inches deep)
  • 2–3 teaspoons fine salt

That’s your essential french fries ingredients list: nothing fancy, just the basics that define fresh french fries.

Optional extras for crunch and flavor in Crispy Homemade French Fries

If you’d like to push things toward the crunchy fries recipe end of the spectrum or turn out seasoned fries, keep these on hand:

  • Cornstarch or rice flour (for french fries with crispy coating)
  • Garlic powder, onion powder, smoked paprika, chili powder (for seasoned french fries or cajun french fries)
  • Grated Parmesan, cheddar, or other cheese (for parmesan french fries or cheesy french fries)
  • Truffle oil and fresh parsley (for truffle french fries recipe)
  • Fresh garlic and butter or olive oil (for garlic french fries recipe)

With these extras, the same basic batch of fries can become restaurant style fries, garlic parmesan fries, or loaded french fries without much extra effort.

Also Read: Tres Leches – Mexican 3 Milk Cake Recipe


Step-by-Step Crispy Homemade French Fries (Stovetop)

Let’s start with the classic version: crispy homemade french fries cooked in oil on the stove. This method gives you extra crispy fries if you follow the temperatures and timing closely.

Recipe card showing classic crispy homemade French fries on a plate with ketchup and text for serves, prep time, and cook time.
Classic crispy homemade French fries – a MasalaMonk recipe card with serving size and cook times, perfect for pinning or saving for later.

Step 1: Cut and soak the potatoes

First, scrub your potatoes well. You can peel them if you prefer, but leaving the skins on makes more rustic real potato fries and adds a touch of fiber.

Cut the potatoes into sticks about 8–10 mm thick. For skinny french fries or french fries shoestring, go thinner; for steak fries or thick cut fries, cut chunky batons or wedges.

As soon as you cut them, drop the sticks into a big bowl of cold water. This rinses away surface starch and stops oxidation. Swish them around, then drain and refill with fresh cold water. If you like, add a spoonful of vinegar or lemon juice; it can help them hold their structure during cooking.

Soaking for 20–30 minutes helps prevent the outside from turning gummy and gives you a better chance at truly crispy french fries rather than soggy ones. Once you’re done soaking, drain the potatoes thoroughly and spread them out on a clean towel. Pat them dry until they feel matte. Water on the surface is the enemy here: it lowers oil temperature and encourages splattering.

Step 2: First fry (par-cooking)

Heat your oil to around 150–160°C (300–320°F). At this stage, the goal is to cook the potatoes through without browning them much. For deep frying, a two-stage cook—first at a lower temperature, then at a higher one—is key to combining a fluffy interior with crisp exterior.

Working in small batches, gently lower the dried potato sticks into the hot oil. Fry for about 4–6 minutes. They should turn from opaque to slightly translucent and feel tender if you poke them with a knife, but they should not yet be golden.

Lift them out with a slotted spoon and place them on a rack set over a tray. Repeat with the remaining batches. At this point, you have par-cooked fries: soft, pale, and flexible. You can pause here, cool them, and even refrigerate for several hours if you want to fry just before serving. That’s how many restaurant style french fries are prepped.

Step 3: Second fry (crisping and coloring)

For the second fry, raise the oil temperature to 185–190°C (365–375°F). That hotter environment is where you’ll develop the golden crust that makes crispiest french fries such a pleasure.

Again in small batches, slide the par-cooked fries back into the oil. Fry for 2–4 minutes, until they’re uniformly golden, with little blistered areas and crisp edges. Keep an eye on their color; you’re aiming for golden potato french fries, not dark brown or burnt ones.

There’s a health reason for that, too. When starchy foods like potatoes are fried or baked at high heat, they can form acrylamide, a compound that health agencies monitor. The US FDA’s guidance on acrylamide in foods suggests aiming for light golden colors and avoiding burnt bits whenever possible. The National Institute of Environmental Health Sciences also notes that french fries and similar foods can be significant acrylamide sources when heavily browned. So, aim for gold, not mahogany.

Once the fries are ready, lift them onto the rack or a paper-towel-lined tray. Immediately sprinkle them with salt while they’re still sizzling, so the crystals cling. If you like seasoned fries, this is the moment to toss with paprika, garlic powder, or any spice mix you enjoy.

And just like that, you’ve completed the core french fries procedure: cut, soak, dry, par-fry, then finish hot.

Also Read: High Protein Overnight Oats | 5 Recipes (Low Calorie, Vegan, Bulking & More)


Slightly Smarter, Still Crispy: Health Notes and Oil Choices

Even though fried fries recipes are not exactly health food, you can still make better choices without losing all pleasure.

First, use fresh or properly filtered oil and avoid letting it smoke. Overheated, repeatedly reused oil isn’t just unpleasant in flavor; it can contribute to off flavors and degraded fats. A thermometer makes it much easier to maintain that best way to fry french fries temperature range, whether you’re in a pot or a countertop fryer.

Second, consider how often you go for fully deep-fried crispy french fries versus lighter versions. You might save deep-fried extra crispy french fries for weekends, while turning to oven fries or air fryer homemade fries on busy weeknights.

Third, balance your plate. Fries alongside grilled chicken, salad, or roast vegetables feel different from fries plus more fried items. That’s where side dishes and smarter recipes around your fries come in—and we’ll circle back to those in a bit.

Also Read: 10 High Calorie Protein Shakes & Smoothie Recipes for Healthy Weight Gain


Oven Fries at 425°F: Baked, Seasoned, and Easy

When you’d rather not deal with a pot of hot oil, oven fries 425°F are a great compromise. They won’t be identical to deep-fried fries, yet you can get delicious baked seasoned fries with crisp edges and tender middles.
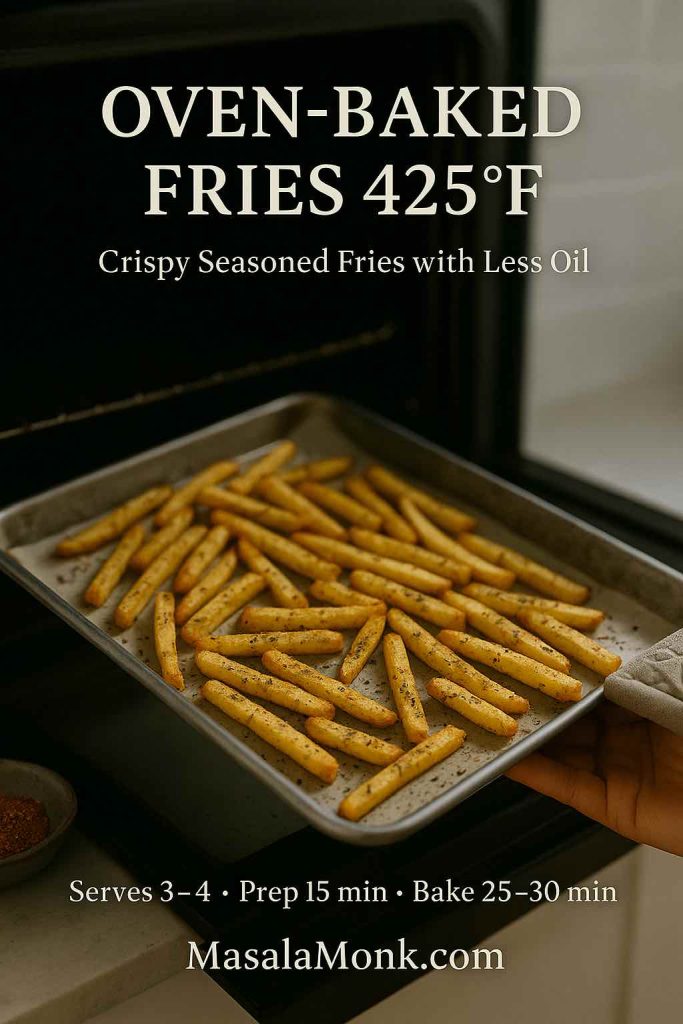
Recipe card showing a tray of oven-baked seasoned fries at 425 degrees, held with an oven mitt, with serving size and baking time details.
Oven-baked fries at 425°F – crispy seasoned fries with less oil, with prep and bake times highlighted so you can see the whole MasalaMonk method at a glance.

Basic oven fries method

  1. Preheat your oven to 220°C / 425°F.
  2. Cut your potatoes into wedges or sticks, just as before.
  3. In a bowl, toss them with 1–2 tablespoons of oil—this can be olive, avocado, or any neutral oil you like.
  4. Season generously with salt, pepper, and any spices you enjoy: garlic powder, smoked paprika, dried thyme, or a ready-made seasoning blend.
  5. Spread the fries out in a single layer on a baking sheet, leaving a bit of space between pieces. Crowding leads to steaming rather than crisping.
  6. Bake for about 20–25 minutes, turning once halfway through, until the edges are golden brown and the fries are tender inside.

At this point, you’ve made seasoned oven fries that work beautifully with the same sauces and toppings you’d use for deep-fried versions. They’re particularly nice as a side to oven-baked mains or as part of a lighter tray meal.

If you’re planning a party spread that doesn’t revolve solely around fries, you can point guests toward other potato-centric snacks too. A collection like MasalaMonk’s potato appetizers fits naturally alongside oven fries on a buffet table, giving people more variety while still leaning into that potato comfort.

Also Read: How to Cook Perfect Rice Every Time (Recipe)


Air Fryer Fries: Crispy Homemade French Fries With Less Oil

Next, let’s move to fries airfryer style. Air fryers circulate very hot air around food, using far less oil than deep frying. Comparative work on deep-fried vs air-fried potatoes has shown that air-fried samples can have dramatically less fat and slightly fewer calories per serving, which makes them a handy tool when you’d like healthier french fries more often.
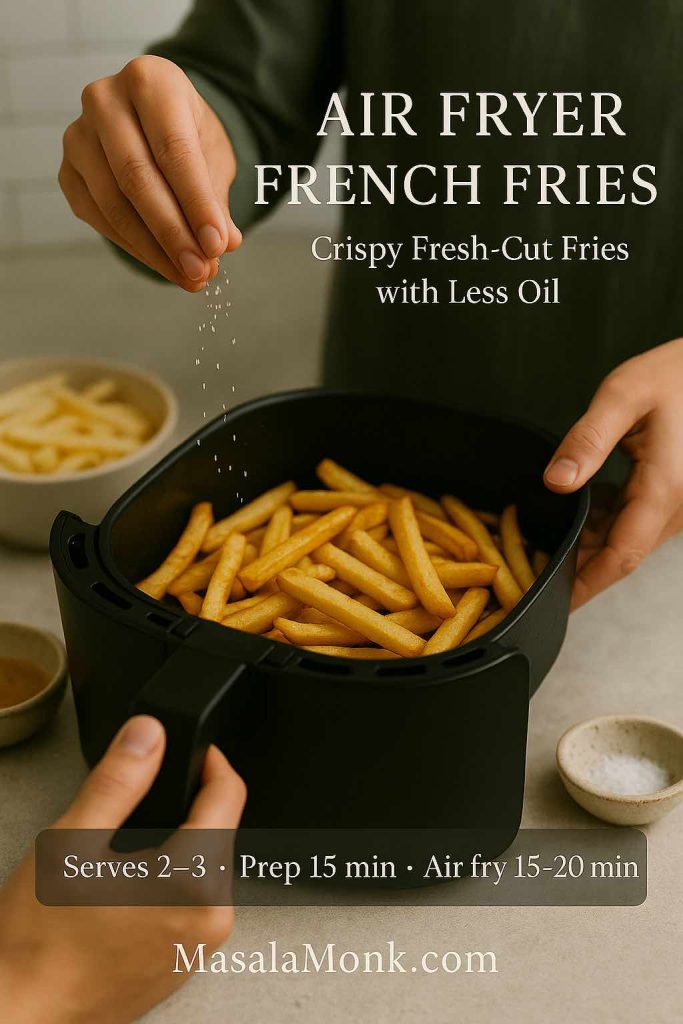
Recipe card showing air fryer French fries made from fresh-cut potatoes, with seasoning sprinkled over the basket and serving and cook times displayed.
Air fryer French fries made from fresh-cut potatoes – a MasalaMonk recipe card that highlights how to get crispy fries with less oil, plus prep and air-fry times at a glance.

Fresh potato fries in the air fryer

For easy french fries recipe done in the air fryer:

  1. Cut your potatoes into sticks and soak them as you would for deep frying.
  2. Drain and dry thoroughly.
  3. Toss with 1–2 teaspoons of oil, salt, and seasonings.
  4. Place them in the air fryer basket in a loose, even layer.
  5. Cook at 190°C / 375°F for 15–20 minutes, shaking every 5 minutes so they brown evenly.
  6. For extra crispy french fries, finish with a final 3–5 minutes at 200°C / 400°F.

This method gives you healthy potato fries that still feel indulgent. They’re especially good as skinny fries, where the higher surface area means lots of crunchy bits.

Frozen Crispy Homemade French Fries in the air fryer

For those nights when you want the best frozen fries for air fryer with minimal fuss:

  1. Preheat the air fryer to 200°C / 400°F.
  2. Tip frozen shoestring fries, straight cut fries, frozen waffle fries, or other shapes into the basket. Try not to overstack them.
  3. Air fry for 10–18 minutes depending on thickness, shaking halfway through.
  4. Season as soon as they come out of the basket.

Most brands are already partially fried in oil, so you often don’t need extra. However, a light spray of oil can help paler brands crisp a little better. This technique works well if you want to focus your kitchen time on main dishes but still end up with crispy fries recipe results.

If you’re fond of multitasking with your air fryer, ideas like air fryer hard-boiled eggs fit nicely into the same workflow. You might prepare homemade fries for dinner and a batch of eggs for breakfast with very little extra effort.

Also Read: Béchamel Sauce for Lasagna: Classic, Vegan & Ricotta Sauce Recipe


Playing With Shapes: Shoestring, Thick Cut, Steak, and Crinkle

Once you have a reliable french fries recipe, the next step is having fun with shapes. Different cuts give you different textures and cooking times.

Skinny and shoestring fries

Thin skinny fries or french fries shoestring are all about extreme crispness:

  • Cut the potatoes into matchsticks.
  • Soak, dry, and fry exactly as for the classic recipe.
  • Shorten the par-fry to keep them from overcooking, and watch carefully during the second fry—they go from golden to too dark very quickly.

Shoestring fries are fantastic when you’re making loaded french fries recipe variations like chile-topped fries, because so many edges catch sauce and cheese.

Thick cut fries and steak fries

On the opposite end, thick cut french fries and steak fries are all about a soft, potato-y center:

  • Cut the potatoes into chunky batons or wedges.
  • Lengthen the par-fry slightly or start them in the oven with a bit of water in the pan, then finish in hot oil or under the broiler.
  • Because there’s more potato in each piece, they stay creamy inside even when the exterior is thoroughly crisp.

Thick cut fries shine alongside robust dishes: grilled steak, roasted chicken, or as part of a plate with gravy and vegetables.

Crinkle cut and waffle fries

For crinkle cut french fries, fries crinkle cut, or french fries crinkle, you’ll need a crinkle cutter or a mandoline that makes ridges. The technique stays the same—soak, dry, par-fry, then crisp—but the ridges create extra surface area. That means more crunch, and it also means they hold onto seasonings and sauces really well.

Similarly, frozen waffle fries from the store become great canvases for fancy fries toppings. Their lattice structure acts like a little basket for cheese, carne asada, or creamy sauces.

Also Read: Peanut Butter Cookies (Classic Recipe & 3 Variations)


Veggie Fries: Sweet Potato, Yuca, Jicama, and Rutabaga

While classic french fries from white potatoes are iconic, you can also explore veggie french fries when you’re craving variety or want to shift the nutrition profile a bit.

Sweet potato fries

Sweet potato french fries deserve their own shout-out. They bake and air fry beautifully, and they pair well with both sweet and savory seasonings, from cinnamon and chili to garlic and smoked paprika. You can even make crinkle cut sweet potato fries for added texture.

Sweet potatoes tend to be softer and more prone to burning at high heat, so a light coating of cornstarch and oil, plus slightly lower temperatures, often work best. For more detail on how sweet potatoes differ nutritionally from white potatoes, you might enjoy MasalaMonk’s sweet potato nutrition breakdown and their piece on the potato debate: white vs sweet. Those articles go into fiber, vitamins, and even blood sugar considerations in a way that helps you decide when to reach for which.

Recipe card showing crispy spiced sweet potato fries in a round tray with dipping sauce, lime, and sweet potato pieces, plus serving and cook time details.
Crispy, spiced sweet potato fries with a creamy dip – a MasalaMonk recipe card that highlights this naturally sweet, oven or air-fried alternative, complete with prep and cook times.

Yuca, jicama, and rutabaga fries

Beyond sweet potatoes, you can experiment with:

  • Yuca french fries: dense, starchy, and very satisfying. They need peeling and careful boiling before frying, but the final texture is almost creamy.
  • Jicama french fries: lower in carbs, with a fresh crunch and a subtle sweetness. These are typically best baked or air fried with strong seasonings.
  • Rutabaga french fries: slightly earthy and sweet, good roasted until caramelized and then tossed with spices.

These alternatives work well when you want healthy potato fries style sides on repeat without always using white potatoes. They’re also fun for guests who’ve never tried such variations.

Also Read: Chicken Alfredo Pasta, 5 Ways (Classic to Cajun, Veg, 15-Minute Jar, Healthy)

Four glasses lined up on a board, each filled with a different veggie fry—sweet potato, yuca, jicama and rutabaga—with a hand picking up one fry and dipping sauces blurred in the background.
Veggie fries medley: sweet potato, yuca, jicama and rutabaga, for nights when you want all the crunch of fries with a little extra colour and variety on the MasalaMonk table.

Seasoned, Spiced, and Coated Fries

Once you’ve mastered the basics, it’s time to play with seasoned fries, homemade seasoned french fries, and light coatings for texture.

Basic seasoned Crispy Homemade French Fries

For a straightforward seasoned fries recipe, start with fresh, hot fries and toss them with:

  • Fine salt
  • Garlic powder
  • Onion powder
  • Smoked paprika
  • A pinch of black pepper or chili powder

This base mix instantly transforms simple french fries into something closer to best seasoned fries, and you can adjust the heat level to taste.
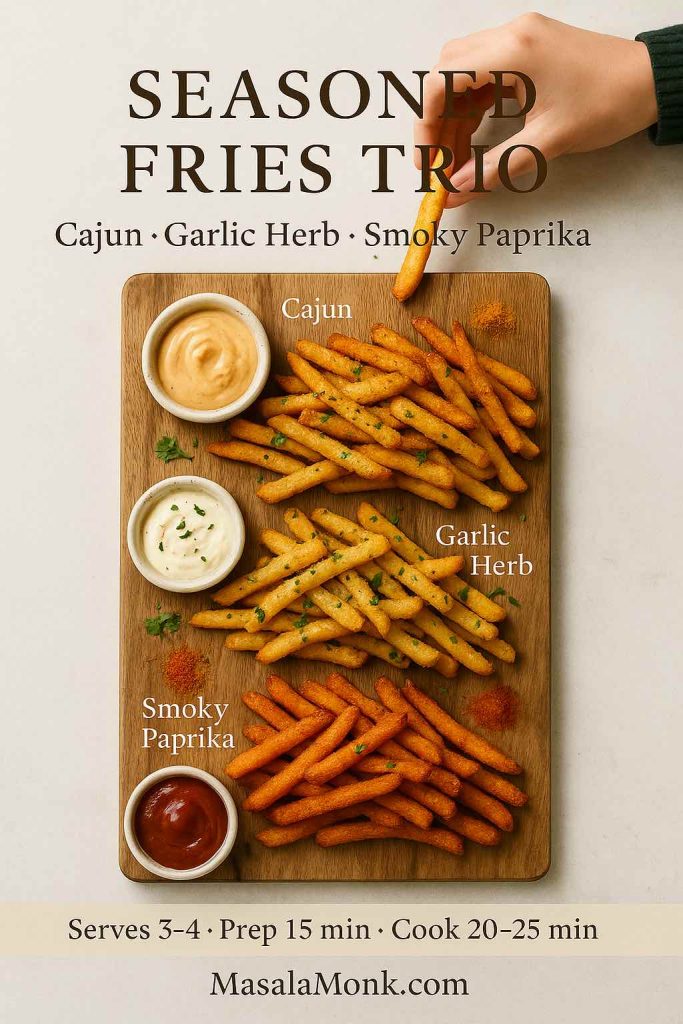
Top-down view of a wooden board with three piles of seasoned fries labeled Cajun, Garlic Herb and Smoky Paprika, each with a matching dipping sauce and a hand picking up a fry.
Seasoned fries three ways – Cajun, garlic herb and smoky paprika – so you can turn one batch of MasalaMonk fries into a full flavour tasting board.

Cajun and herby variations

To steer your fries toward cajun french fries, blend:

  • Paprika
  • Cayenne
  • Garlic powder
  • Oregano
  • Thyme
  • A bit of brown sugar and black pepper

Toss this through hot fries and you’ll have spicy, deeply flavored seasoned homemade fries that go especially well with tangy dips like tzatziki or yogurt-based sauces.

Alternatively, if you’d rather lean into herbs, use rosemary, thyme, cracked black pepper, and flaky salt. These herby seasoned french fries feel more rustic and pair beautifully with roast meats and vegetables.

Crispy coatings for Homemade French Fries

If you want french fries with crispy coating without turning them into full battered french fries, a light dusting of starch can help. After soaking and drying, toss the raw potato sticks in a spoonful of cornstarch or rice flour, shake off the excess, and then fry as usual. The coating makes subtle bubbles and ridges on the surface, giving you extra crispy fries that stay crunchy a little longer.

Also Read: Crock Pot Lasagna Soup (Easy Base + Cozy Slow-Cooker Recipes)


Cheesy, Loaded, and Fancy Fries

Now comes the most playful part: turning a bowl of fries into a full meal or an irresistible shareable plate.

Garlic parmesan fries

To create garlic parmesan french fries, start with a batch of hot, freshly fried fries.

  1. In a small pan, gently warm a bit of butter or olive oil with minced garlic until fragrant, not browned.
  2. Toss the hot fries with this garlic mixture.
  3. Add a handful of grated Parmesan and chopped parsley.
  4. Season with salt and pepper as needed.

This same approach also works for simple parmesan french fries if you skip the garlic or for sweet french fries if you play with honey and chili flakes instead.
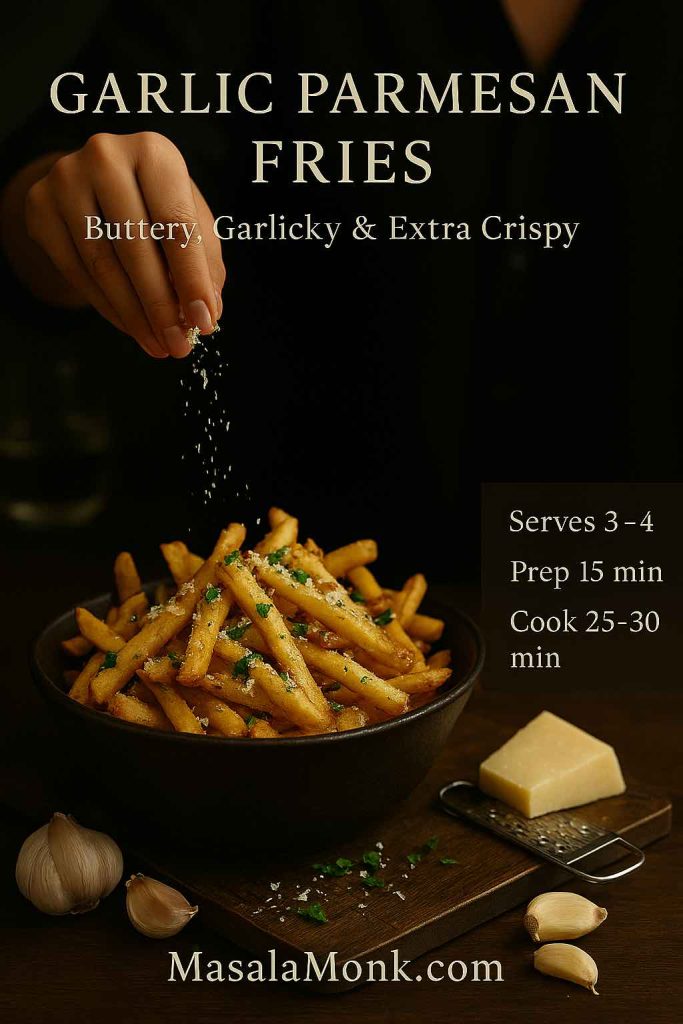
Recipe card showing garlic parmesan fries in a bowl with cheese being sprinkled on top, surrounded by garlic cloves and a parmesan wedge, plus serving and cook time details.
Buttery, garlicky parmesan fries piled high in a bowl – a MasalaMonk recipe card that highlights this extra-crispy variation, complete with prep and cook times for easy reference.

Chili cheese and carne asada fries

For fully loaded chili cheese french fries, layer:

  • A bed of crispy fries
  • A ladle of hot chili (vegetarian or meaty)
  • Grated cheddar or Monterey Jack
  • Jalapeños, scallions, maybe a drizzle of sour cream

Slide the whole thing under the broiler for a minute until the cheese melts. Suddenly, your crispy fries have become serious comfort food.

Recipe card showing chili cheese loaded fries in a cast iron skillet, topped with chili, melted cheese, jalapeños and sour cream, with serving and bake time details
Chili cheese loaded fries served in a cast iron skillet – a MasalaMonk recipe card for the ultimate comfort fry platter, complete with prep and bake times for easy game-night planning.

Similarly, carne asada french fries combine:

  • Fries
  • Chopped grilled steak
  • Pico de gallo or salsa
  • Guacamole
  • Sour cream or crema
  • Fresh coriander

They’re messy, delicious, and perfect for sharing.
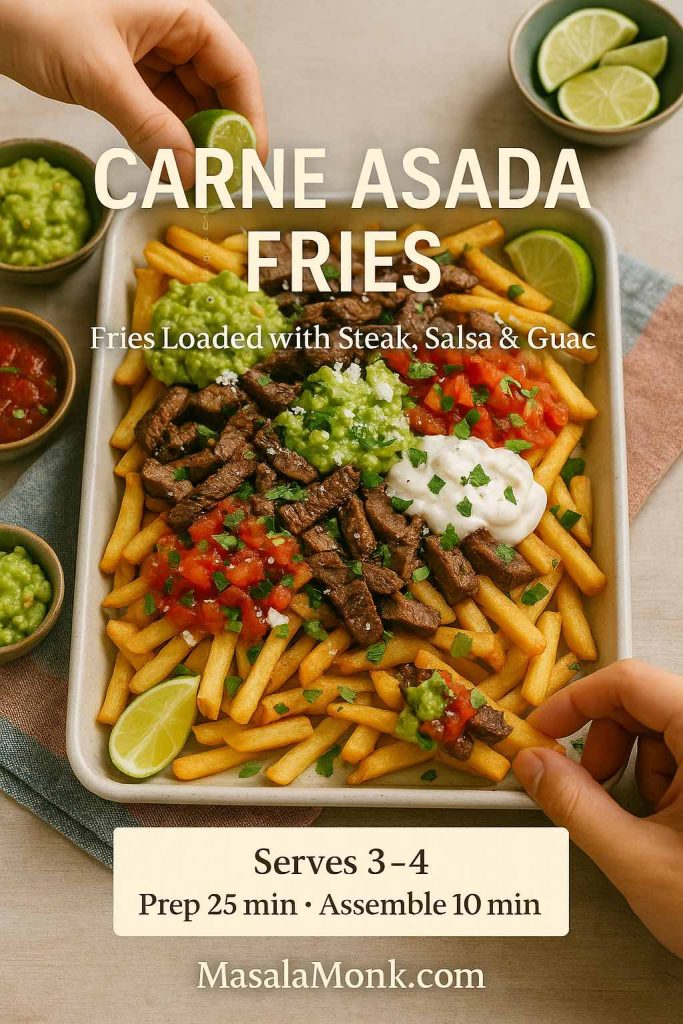
Carne asada fries on a rectangular tray topped with grilled steak strips, guacamole, salsa, sour cream and cilantro, with hands squeezing lime and reaching for a fry.
Carne asada fries loaded with steak, salsa, guacamole and sour cream – a MasalaMonk feast that turns a simple tray of fries into a full-on meal.

Truffle and “fancy” fries

When you want fancy fries without too much effort, truffle french fries recipe style toppings make a big impression.

  • Toss hot fries with a little truffle oil (a few drops go a long way).
  • Add grated Parmesan and parsley.
  • Season with salt and cracked pepper.

Because truffle oil can dominate, it’s best used with neutral, simply salted fries rather than heavily seasoned ones.

If you’d like more ideas for dips and cheesy sides that pair well with loaded fries, MasalaMonk’s spinach dip collection and their buffalo chicken dip recipes offer plenty of inspiration. Both kinds of dip are excellent alongside loaded french fries or even spooned over the top.

Tall metal cup filled with truffle fries topped with parmesan and herbs, served on a dark plate with aioli, styled like an elegant restaurant snack.
Skinny truffle fries finished with parmesan, herbs and a side of aioli – a simple MasalaMonk twist that turns fries into a wine-bar style treat.

Sauces and Dips for Crispy Homemade French Fries

Good fries deserve good sauces. Beyond ketchup, you can easily mix and match flavors for your own french fry dip recipe collection.

Creamy dips

For creamy dipping sauce for french fries, try ideas like:

  • A simple garlic mayonnaise with lemon juice
  • A smoky paprika mayo
  • A yogurt-based dip with herbs and garlic

These work especially well with seasoned fries and cajun fries, where the spices already bring a lot of personality.

If you want to branch out further, the cool, garlicky punch of tzatziki is a great contrast to hot fries. A guide like MasalaMonk’s Greek tzatziki sauce recipes shows how versatile that sauce can be across different herbs and add-ins, and every version is happy to share a plate with crispy fries.

Four quick fries dipping sauces – garlic mayo, smoky ketchup, spicy mayo and herb yogurt – so you can switch up the flavour of every MasalaMonk fries night in minutes.

Cheesy and baked dips for Crispy Homemade French Fries

Meanwhile, cheesy dips make perfect companions to french fries loaded with toppings. Spinach and artichoke dip, hot cheese dips, or buffalo chicken dip can all sit in the center of a platter surrounded by straight cut french fries, curly french fries, or crinkle cut fries for dipping.

Because fries and rich dips can be quite substantial, you may find it useful to round out your menu with lighter but still indulgent favorites. Dishes like classic deviled eggs with variations or high-protein snacks and breakfasts, such as overnight oats recipes, help keep things balanced over the course of a day, even if dinner is definitely in “treat” territory.


What to Serve With Crispy Homemade French Fries

Rather than thinking of fries as an afterthought, you can build entire meals around them in a way that feels intentional and satisfying.

Classic comfort plates

On one hand, there’s the timeless pairing of chicken and french fries:

  • Grilled or fried chicken
  • Homemade fries (deep-fried, oven-baked, or air fried)
  • Coleslaw or a fresh salad

You can also swap chicken pieces for sandwiches. A platter of fries next to juicy sandwiches from a range like MasalaMonk’s chicken sandwich recipe collection makes a complete, crowd-pleasing spread.

For full comfort food mode, consider serving fries alongside creamy classics:

Those casseroles and bakes give you vegetables and dairy in forms people love, while the fries bring crunch and a salty edge to balance the creaminess.

Party spreads and grazing boards

For parties or movie nights, a fries-centric board can be a huge hit. You might:

  • Offer multiple shapes: thick cut fries, skinny fries, crinkle cut fries
  • Provide several seasonings: plain salted, cajun, garlic herb
  • Add bowls of dips: tzatziki, spinach dip, buffalo chicken dip, ketchup, mustard-based sauces

Alongside that, including a few extra nibbles from potato-focused ideas like MasalaMonk’s potato appetizers roundup keeps everyone happy without making fries the sole attraction.


Leftovers, Crispy Homemade French Fries, and Casseroles

Every now and then, you might find yourself with cooked fries left over. They won’t be as crisp the next day, but they are far from useless.

Turning fries into home fries

One option is to make a sort of shortcut home fries recipe:

  1. Chop leftover fries into bite-sized pieces.
  2. Heat a skillet with a spoon of oil or butter.
  3. Add onions or peppers if you like, then the chopped fries.
  4. Cook over medium-high heat until the edges crisp and the pieces heat through.
  5. Season again and serve with eggs for breakfast.

These cooking home fries from leftover fries are especially good with runny yolks or as part of a brunch plate.

Cast iron skillet filled with breakfast home fries made from chopped leftover fries, peppers and three fried eggs, served with coffee, toast and salsa
Turn last night’s fries into this cosy breakfast home fries skillet, topped with sunny-side eggs and peppers for an easy MasalaMonk-style brunch.

Casseroles with Crispy Homemade French Fries

Another route is to layer leftover fries into a bake:

  • Assemble a cheeseburger casserole with french fries: fries on the bottom, cooked ground meat or meat alternative, cheese, and pickles or onions, then bake until bubbly.
  • Create a riff on shepherd’s pie using fries as a topping instead of mashed potatoes.

These dishes aren’t traditional, but they’re a fun way to avoid waste and to reimagine fries in a new context.

Also Read: Coconut Water Cocktails: 10 Easy, Refreshing Drinks


Bringing It All Together

To sum everything up, making french fries at home doesn’t need to be complicated. You start with good potatoes, a sensible approach to oil and heat, and a simple french fries recipe that you can repeat without thinking too hard. From there, the world opens up: you can lean toward healthy potato fries most days, then indulge in deep-fried extra crispy french fries when the mood hits.

You’ve seen how to:

  • Choose between Russet and Yukon Gold for the best french fry potato
  • Use soaking, drying, and double frying to achieve reliably crispy homemade french fries
  • Swap in oven fries, air fryer fries, or veggie french fries like sweet potato, yuca, jicama, and rutabaga
  • Turn plain fries into seasoned fries, garlic parmesan fries, chili cheese fries, carne asada fries, and truffle fries
  • Build full meals and snack boards around fries with dips, casseroles, sandwiches, and brunch ideas

Whether you keep it simple with a plate of lightly salted fresh french fries, or go all out with a giant platter of loaded french fries recipe piled high with cheese and toppings, you now have the tools to make them taste the way you want, every time you crave them.

Also Read: Cottage Cheese Lasagna Recipe | Chicken, Spinach, & Ricotta

FAQs about Crispy Homemade French Fries

1. What is the best potato for crispy homemade french fries?

For truly crispy homemade french fries, starchy potatoes work best. Russet or Idaho potatoes are usually considered the best french fry potato because they have a high starch, low moisture content that turns fluffy inside and crisp outside after frying. Yukon Gold or other “gold” potatoes also make excellent golden potato french fries, although they come out a little creamier and denser. If you prefer extra crunch and light interiors, reach for Russets; if you like a richer bite, go for Yukon Golds.


2. How do I keep fries crispy and not soggy?

To keep fries crunchy instead of limp, several small steps matter. Dry the potatoes thoroughly after soaking so you’re not dropping water into the oil. Then, cook them twice: a gentle first fry to cook the potato through, followed by a hotter second fry that creates the crisp crust. Avoid crowding the pan, since too many fries at once will cool the oil and make everything greasy. Salt and season fresh french fries right after the second fry while they are still hot, and serve them soon so the crust stays crisp.


3. Why do recipes tell me to soak potatoes before frying?

Soaking sliced potatoes in cold water helps pull out surface starch, which can otherwise form a gummy coating and prevent crispy fries from developing. A soak of 20–30 minutes is usually enough for a simple french fries recipe. After soaking, draining and drying thoroughly is just as important. When excess starch and moisture are removed, the fries brown more evenly and stay crisp longer, which is essential for the crispiest french fries.


4. Can I make crispy homemade french fries without a deep fryer?

Yes, you absolutely can make homemade fries without a dedicated fryer. A deep, heavy pot or a sturdy frying pan works fine as long as you use enough oil to submerge the potatoes and maintain consistent heat. A thermometer helps you hit the right temperature range. In addition, you can make oven fries and air fryer fries with just a thin coating of oil if you’d rather skip deep-frying altogether. The technique changes slightly, yet you still end up with easy french fries that taste fantastic.


5. What is the best way to fry french fries for perfect results?

A classic double-fry method is often considered the best way to fry french fries. First, fry the potatoes at a lower temperature so they cook through without much color. Then, after a short rest, fry them again at higher heat so the outside turns crisp and golden. During both steps, keep the oil temperature steady and avoid crowding the pan. Using this approach, even a beginner can turn out perfect french fries from a straightforward easy french fries recipe.


6. How hot should the oil be for french fries?

For the first fry, aim for oil around 150–160°C (300–320°F). This lets the interior of the potato cook gently without the outside browning too quickly. For the second fry, raise the temperature to about 185–190°C (365–375°F). At this higher heat, the surface dries out and browns into a crisp shell. Keeping the oil in this range is one of the main secrets behind extra crispy french fries and prevents the fries from soaking up too much oil.


7. Can I make french fries without oil?

You can make french fries without oil in the strict sense by baking or air frying plain potato sticks, though they will taste more like roasted potatoes than true fries. More realistically, very small amounts of oil—just enough to lightly coat the potatoes—create healthy potato fries that still feel indulgent. Oven-baked oven fries 425 and air-fried potatoes both work well with only a teaspoon or two of oil per serving, especially when you add bold seasonings.


8. Are homemade fries healthier than fast food fries?

While fries are still an occasional treat, homemade fries can be a better option than many fast-food versions. You decide the portion size, which oil to use, and how much salt to add. You can also make french fries from fresh potatoes instead of relying on heavily processed products. If you alternate deep-fried batches with oven fries or air fryer homemade fries, and you pair them with protein and vegetables, french fry meals can fit more comfortably into a balanced way of eating.


9. What’s the difference between shoestring, thick cut, steak fries, and crinkle cut?

All these names refer mainly to shape and thickness. Shoestring fries and skinny fries are very thin and cook quickly, giving you lots of crunchy texture. Thick cut fries and steak fries are chunkier sticks or wedges with a soft, fluffy center. Crinkle cut french fries have wavy ridges that increase surface area and help hold onto sauce and seasoning. You can use the same basic french fries recipe for each style; just adjust cooking time so the inside cooks before the outside browns too much.


10. How do I make seasoned fries at home?

To make a seasoned fries recipe at home, start with freshly cooked, hot fries. Immediately toss them with salt, then add your favorite flavors. A simple mix might include garlic powder, onion powder, smoked paprika, and black pepper. For cajun french fries, you can add cayenne, oregano, and thyme. If you prefer herby seasoned homemade fries, try rosemary, thyme, or mixed Italian herbs. Because you apply the spices while the fries are hot, they cling well and create deeply flavorful seasoned french fries.


11. How can I make fries extra crispy with a coating?

For french fries with crispy coating, a light starch layer helps. After soaking and drying the potatoes, toss them in a spoonful of cornstarch or rice flour until just lightly dusted. Shake off the excess, then fry using the usual two-step method. The starch forms tiny bubbles and ridges on the surface, leading to extra crispy fries. You still get the flavor of real potato fries, but with a more pronounced crunch that holds up better under sauces and toppings.


12. Can I make french fries in the air fryer from frozen?

Yes, air fryer frozen french fries are one of the easiest weeknight options. Place frozen fries in air fryer—whether they are shoestring, waffle, or steak-cut—in a single layer, set the temperature around 200°C / 400°F, and cook until they’re crisp and hot, shaking the basket once or twice. Many people look for the best frozen fries for air fryer because par-fried frozen fries crisp quickly and take well to extra seasonings. With this method, you still get satisfying crunch without using much additional oil.


13. Can I microwave french fries?

You can microwave fries, yet they rarely come out crisp. Microwave french fries tend to steam rather than brown, so they soften instead of staying crunchy. If you want to use the microwave, you can briefly pre-cook thick wedges or steak fries, then finish them in a hot oven, pan, or air fryer to reintroduce crispness. For reheating leftovers, a skillet or air fryer generally gives better results than the microwave alone.


14. How do I reheat leftover fries so they don’t turn floppy?

To revive fries, spread them in a single layer in a hot pan with a thin film of oil, or place them in a preheated air fryer basket. Heat until the outside becomes crisp again and the centers are warmed through. This method works for frozen fried potatoes, french fries and chips, or leftover home made fries from the day before. Reheating on a baking sheet in a hot oven also helps, though it may take slightly longer to recapture the original crunch.


15. How can I make fries healthier without losing too much flavor?

If you want healthier french fries without giving them up entirely, there are several strategies. Bake or air fry potato sticks with just a small amount of oil instead of deep-frying. Switch between white potatoes and alternatives like sweet potato french fries, yuca french fries, jicama french fries, or rutabaga french fries for more variety in fiber and nutrients. Additionally, serve your crispy homemade french fries as a side with lean protein, salads, or vegetable-rich dishes rather than pairing them only with other heavy foods.


16. What sauces go well with homemade fries?

Although ketchup is classic, homemade fries welcome a wide range of sauces. Garlic mayonnaise, mustard-based dips, smoky paprika mayo, yogurt-and-herb sauces, and spicy chili dips all pair beautifully with crispy fries. Cheese-based sauces turn simple fries into french fries loaded with flavor, while lighter dips like tzatziki give a refreshing contrast. By keeping a few favorite sauces on hand, you can turn one basic easy fries recipe into many different experiences just by changing what you serve alongside.

Posted on — 17 Comments

10 Spinach Dip Recipes: Cold, Baked, Artichoke & More

Woman dipping bread into a creamy spinach dip recipe surrounded by colorful veggie sticks, bread cubes, and small bowls of dip on a wooden table.

Some recipes feel trendy for a season and then vanish. A really good spinach dip recipe is the opposite. It shows up at potlucks, game nights, Diwali parties, Christmas dinners, and casual Friday evenings, and somehow the bowl is always scraped clean.

This long, cozy guide gathers several kinds of spinach dip recipes into one place: classic cold party dip, ranch-style, vegetable soup mix in a bread bowl, two versions of spinach artichoke dip (cold and baked), a lighter yogurt-based dip, a cheesy queso-style dip, plus a few ultra-simple three- and five-ingredient options. Along the way, you’ll find ideas for what to serve with them, how to handle fresh versus frozen spinach, and a little bit of context about spinach itself.

If you’d like to nerd out on the health side later, you can always read more about spinach nutrition and weight loss benefits on MasalaMonk or check the nutrient breakdown on Healthline’s spinach nutrition page. For now, though, let’s get straight into creamy bowls and warm bread.


Why spinach makes such a good dip base

Before diving into the first spinach dip recipe, it helps to quickly appreciate why spinach works so well in dips.

Spinach has a fairly mild, earthy flavor that doesn’t overpower other ingredients, yet it adds a lovely deep green color and just enough personality. Because it shrinks dramatically when cooked or thawed, a small amount of raw spinach turns into a concentrated, almost buttery pile of greens that blends beautifully into sour cream, yogurt, mayonnaise, and cheese.

Nutritionally, spinach is one of those leafy greens that keeps turning up in research. It’s naturally low in calories yet high in vitamins A, C, K, several B vitamins including folate, and minerals such as iron and potassium. If you want to dig into the numbers, the USDA’s FoodData Central database lists exact values for fresh and cooked spinach. Spinach also contains plant compounds like carotenoids and nitrates, which are frequently associated with heart and eye health in studies cited by major nutrition sources.

Of course, the creamy parts of a spinach dip recipe still make this more of a treat than a salad. However, it’s a treat with at least some leafy-green goodness baked in, which is a nice bonus.

Also Read: How to Cook Bacon in the Oven (Crispy, No-Mess, Crowd-Ready Recipe)


Fresh, frozen, or canned spinach: choosing the right one

A question that comes up surprisingly often is whether fresh, frozen, or canned spinach is “best” for a spinach dip recipe. The honest answer is that all three can work, as long as you handle them properly.

Frozen spinach

Frozen chopped spinach is usually the easiest option for dips. It’s already blanched and chopped, so the main task is thawing and squeezing.

  • Thaw overnight in the fridge or quickly in the microwave.
  • Squeeze out as much water as possible.
  • For most recipes here, one 10 oz / 280 g packet of frozen spinach is perfect.

Because it’s blanched soon after harvest, frozen spinach keeps much of its nutritional value. If you like numbers, both Healthline and similar sources note that cooked or frozen spinach often contains more concentrated amounts of certain vitamins and minerals per serving than raw spinach, simply because the volume shrinks.

Fresh spinach

Fresh spinach is fantastic when you already have a big bag in the fridge.

  • Rinse and dry the leaves.
  • Wilt them in a pan with a splash of water or a tiny amount of oil.
  • Once cool, squeeze out the liquid and chop.

You’ll need more fresh spinach by weight than frozen, because it shrinks significantly. Roughly 300–350 g of raw leaves will give you a similar amount of cooked spinach to one frozen packet.

Canned spinach

Canned spinach is less common, yet it can absolutely stand in when that’s what you have.

  • Pour it into a sieve and rinse briefly.
  • Press firmly with the back of a spoon or your hands to remove excess liquid.
  • Measure out about 1½ cups of firmly packed, drained spinach for one batch of dip.

As long as you treat any of these options like a sponge that needs wringing out, your spinach dip recipe will be thick and creamy instead of runny.

Also Read: How to Make Churros (Authentic + Easy Recipe)


Classic cold spinach dip recipe (your party-style base)

This is the backbone of everything that follows. Once you can make this classic cold spinach dip recipe with your eyes closed, you can riff on it endlessly.

Ingredients (about 3 cups)

  • 1 packet (10 oz / 280 g) frozen chopped spinach, thawed
  • 1 cup (240 ml) sour cream
  • 1 cup (240 ml) mayonnaise
  • ½ cup (about 50 g) finely grated hard cheese (parmesan or similar, optional but delicious)
  • 2–3 tablespoons finely minced onion or 2 teaspoons dried minced onion
  • 1–2 cloves garlic, finely minced or ½ teaspoon garlic powder
  • ½–1 teaspoon salt, to taste
  • ¼–½ teaspoon black pepper
  • Optional mix-ins
    • ½ cup finely chopped water chestnuts for crunch
    • ¼–½ cup sliced green onions
    • ¼ cup finely diced bell pepper or pimentos
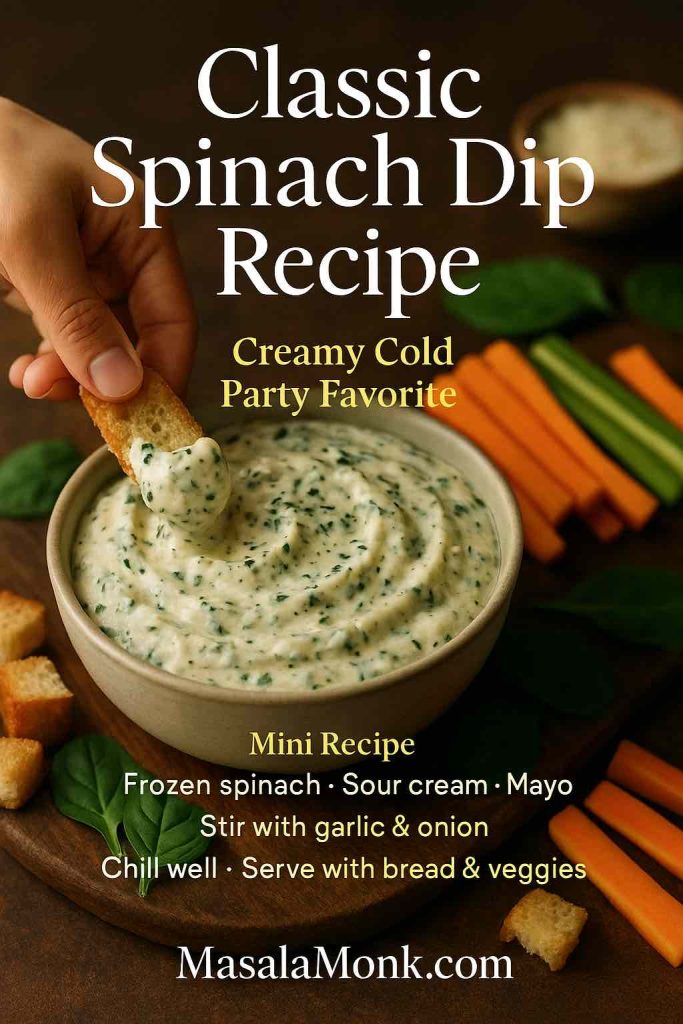
Classic spinach dip in a ceramic bowl with a hand dipping crusty bread, surrounded by carrot and cucumber sticks on a wooden board, with mini recipe text overlay.
Classic cold spinach dip recipe – a creamy party favorite made with frozen spinach, sour cream and mayo, served with crusty bread and fresh veggie sticks.

Step-by-step Recipe – How to make a Spinach Dip

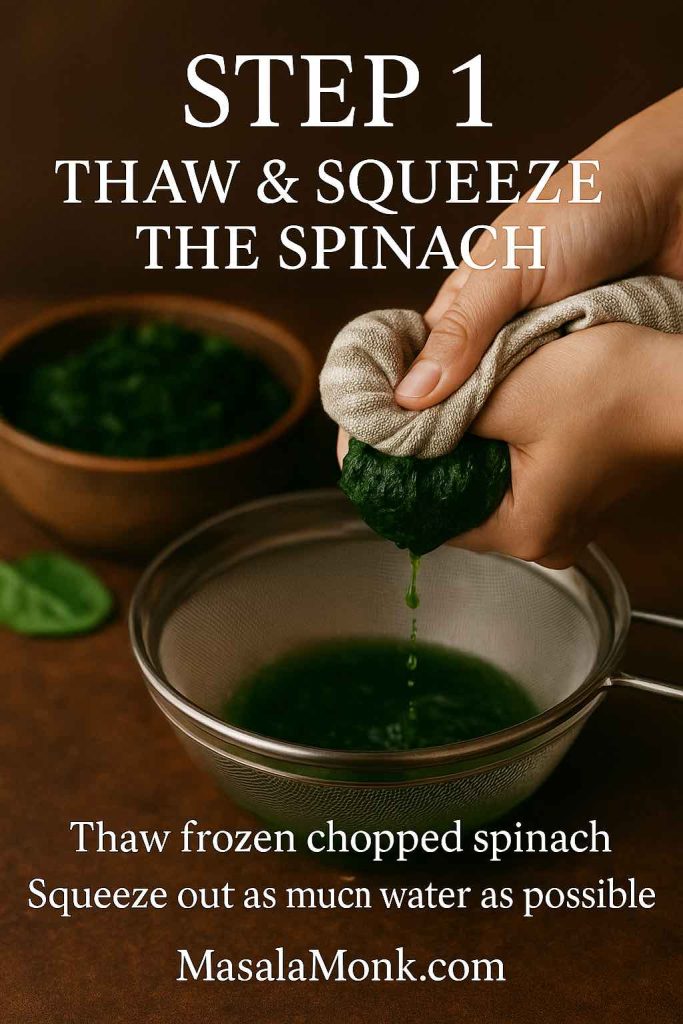
1. Thaw and squeeze the spinach

Start by thawing the frozen chopped spinach. You can do this overnight in the fridge, in a bowl of cold water, or quickly in the microwave. Once thawed, gather the spinach in your hands or in a clean kitchen towel and squeeze firmly over the sink. Quite a lot of liquid will come out; keep going until it feels as dry as you can manage.

This part might seem fussy, yet it makes all the difference between a thick, scoopable spinach dip recipe and a watery one.

Step 1 of classic spinach dip recipe showing hands squeezing thawed chopped spinach in a towel over a sieve, with green liquid dripping into a bowl.
Step 1 – Thaw and squeeze the spinach: thaw frozen chopped spinach, then squeeze out as much water as possible so your spinach dip stays thick and creamy.

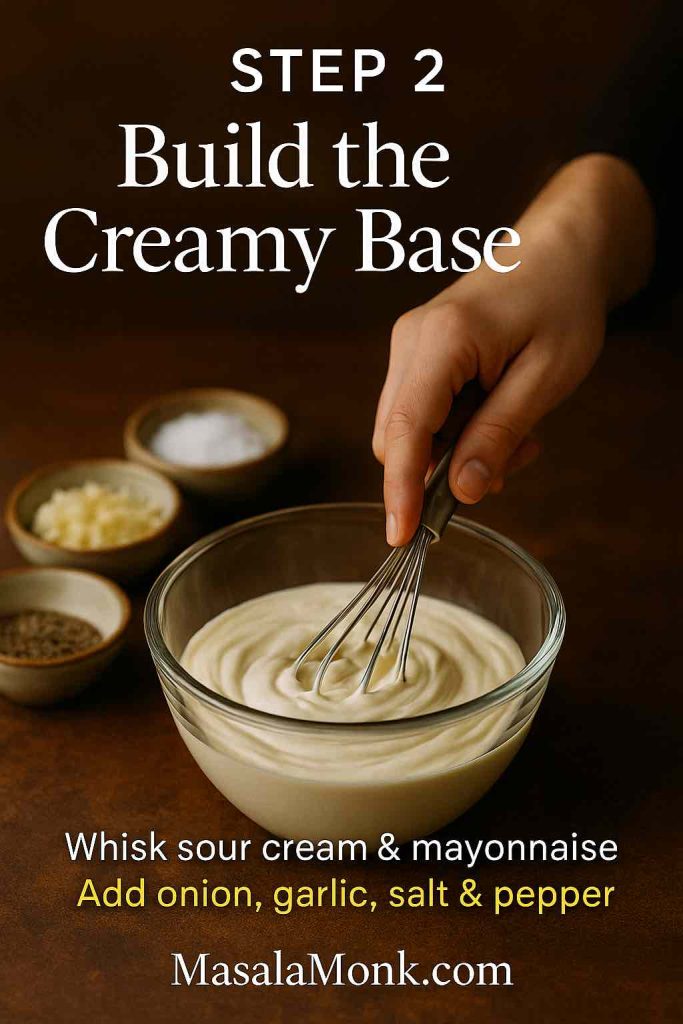
2. Build the creamy base

In a medium mixing bowl, whisk together the sour cream and mayonnaise until smooth. Add the onion, garlic, salt, and pepper. Give it another good stir so the seasonings are nicely dispersed.

If you’re one of those people who likes a mild onion flavor, start with the lower end of the onion amount and adjust later. It will intensify as the dip rests.

Step 2 of classic spinach dip recipe showing a hand whisking sour cream and mayonnaise in a glass bowl with small bowls of onion, garlic, salt and pepper on a wooden surface.
Step 2 – Build the creamy base: whisk sour cream and mayonnaise together, then add onion, garlic, salt and pepper to create the smooth foundation for your spinach dip.

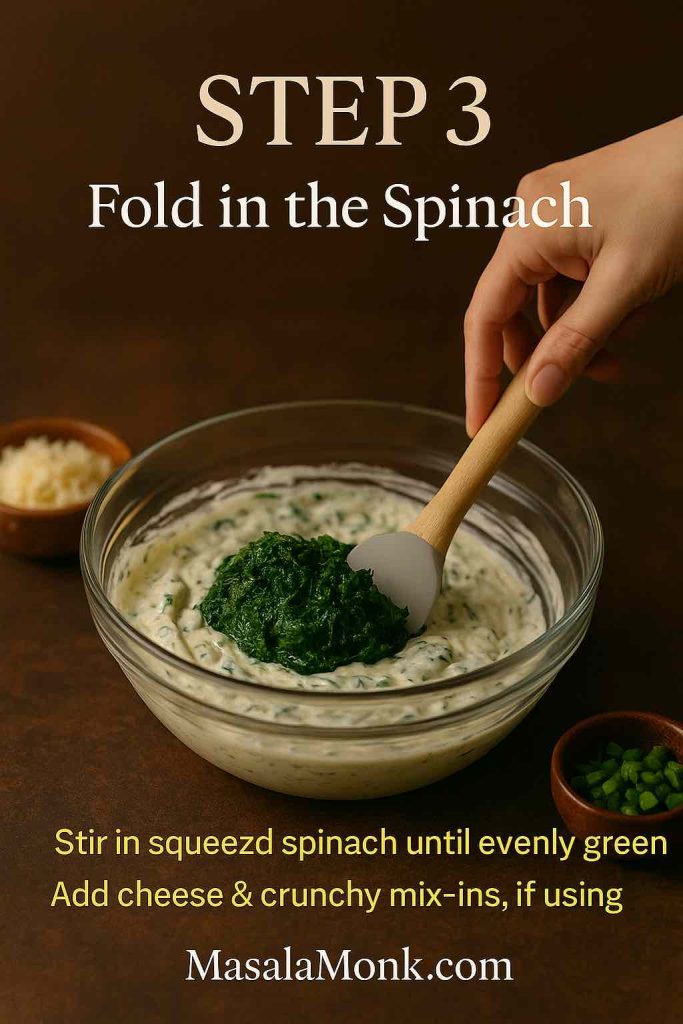
3. Fold in the spinach

Next, add the squeezed spinach to the bowl. Use a spoon or spatula to fold it into the creamy base, breaking up any clumps so the greens are evenly moved through the mixture. At this stage you can also sprinkle in parmesan (or another hard cheese) if you’re using it, along with optional water chestnuts, green onions, or bell peppers.

Step 3 of classic spinach dip recipe showing a hand using a spatula to fold a mound of squeezed spinach into a creamy dip base in a glass bowl, with grated cheese and green onions in small bowls nearby.
Step 3 – Fold in the spinach: stir the squeezed spinach into the creamy base until evenly green, then add parmesan and any crunchy mix-ins like water chestnuts or green onions.

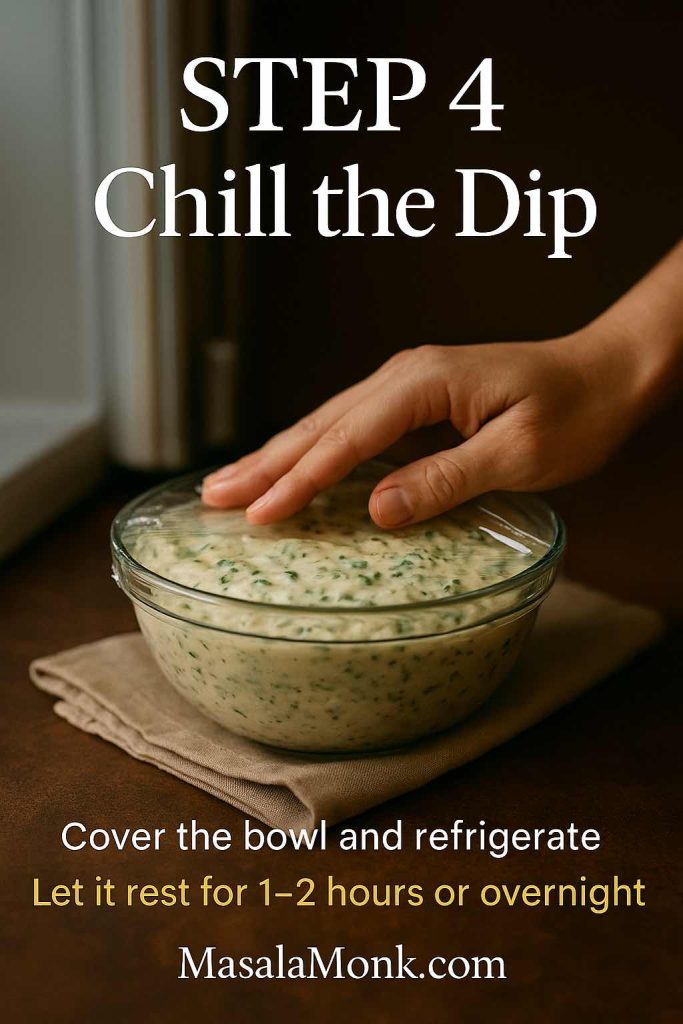
4. Chill to develop flavor

Cover the bowl and refrigerate for at least 1–2 hours. If you can, prepare this spinach dip recipe the day before and let it rest overnight. The onion softens, the garlic mellows, and the spinach flavor infuses into the creamy base in a way that simply doesn’t happen if you eat it right away.

Step 4 of classic spinach dip recipe showing a hand pressing plastic wrap over a bowl of creamy spinach dip on a wooden surface before refrigerating.
Step 4 – Chill the dip: cover the bowl and refrigerate, letting the spinach dip rest for 1–2 hours or overnight so the flavors deepen and the texture thickens.

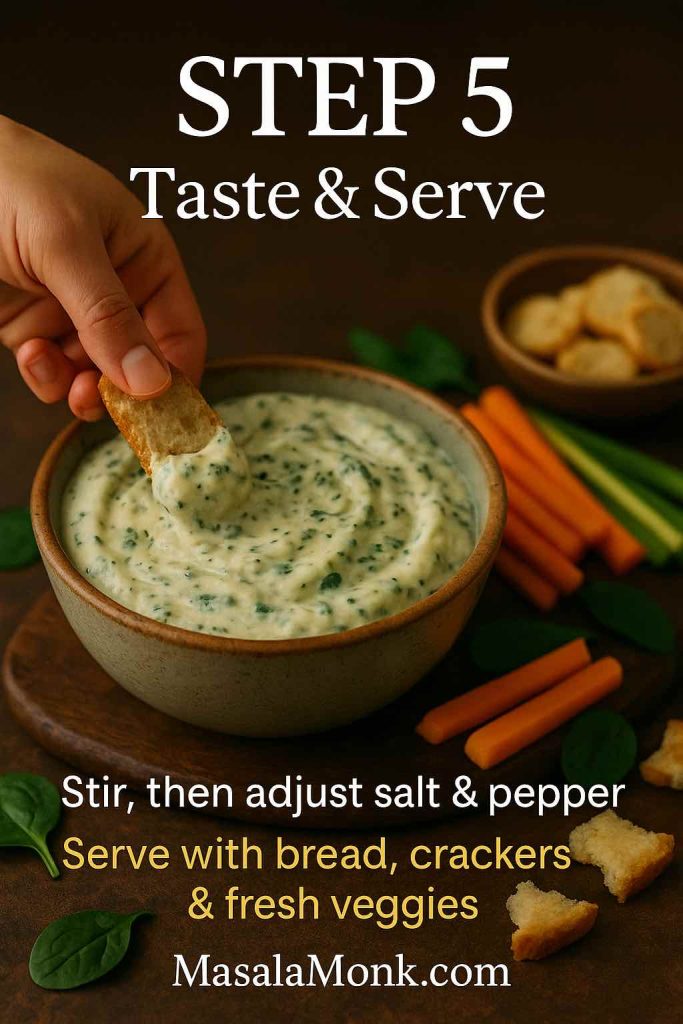
5. Taste and serve

Just before serving, give the dip a stir, then taste it. Adjust the salt and pepper if needed. If it feels a little too thick, you can loosen it with a tablespoon or two of milk, cream, or yogurt.

Step 5 of classic spinach dip recipe showing a hand dipping toasted bread into a bowl of creamy spinach dip, surrounded by carrot sticks, celery sticks, spinach leaves and bread cubes.
Step 5 – Taste and serve: give the spinach dip a final stir, adjust the salt and pepper, then serve it with bread, crackers and fresh veggies for dipping.

Spoon into a serving bowl and surround it with sliced bread, vegetables, or any dippers you like. Later in this post we’ll get into detailed serving ideas; for now, you’ve just made a classic cold spinach dip recipe that can stand on its own at any gathering.

If this made you fall in love with the creamy-spinach combo, you might also enjoy the Indian-inspired spinach raita (palak raita), which takes similar flavors in a lighter, yogurt-based direction.


Ranch spinach dip recipe variation

Once you’ve mastered the base, the next easy twist is a ranch spinach dip recipe. Ranch seasoning brings herbs, garlic, onion, and a slight tang, turning the classic dip into something just a little more familiar and “snacky”.

What you’ll need

  • 1 batch classic cold spinach dip base
  • 1 packet ranch-style seasoning mix (about 1 oz)
    or 3–4 tablespoons thick ranch dressing
  • A splash or two of milk or yogurt if the dip ends up too thick
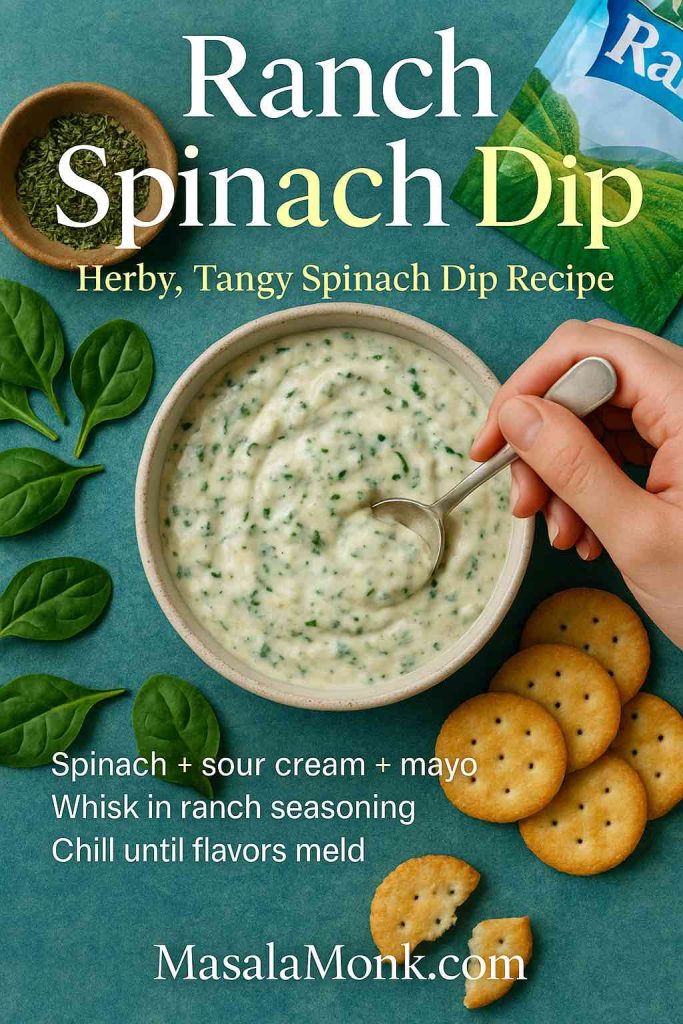
Top-down view of a bowl of ranch spinach dip with a hand holding a spoon, surrounded by spinach leaves, crackers, and ranch seasoning on a teal background with mini recipe text overlay.
Ranch spinach dip recipe – a herby, tangy twist on classic spinach dip made with sour cream, mayo, ranch seasoning, and plenty of spinach, perfect with crisp crackers or veggies.

How to make ranch spinach dip

To keep things simple, start by mixing the ranch with the creamy ingredients before adding spinach:

  1. In a clean bowl, whisk together the sour cream and mayonnaise from the base recipe with the ranch seasoning mix until it’s completely blended.
  2. Add the squeezed, chopped spinach and fold it through.
  3. Taste before adding extra salt; most ranch mixes bring plenty of salt on their own.
  4. Chill the ranch spinach dip recipe for at least an hour, then adjust the seasoning once more if needed.

This version is excellent with crunchy vegetable sticks, but it really shines next to potatoes. For a full party-snack spread, you can pair it with some of these easy potato appetizers, which range from crispy bites to cheesy loaded options.


Vegetable soup mix spinach dip recipe in a bread bowl

For many people, the most nostalgic spinach dip recipe involves a packet of vegetable soup mix and a big round loaf of bread. It’s the kind of thing that appears on buffet tables surrounded by chunks of bread and vanishes within an hour.

Ingredients

  • 1 batch classic spinach dip recipe base, without onion and garlic added yet
  • 1 packet dry vegetable soup and dip mix
  • ½ cup finely chopped water chestnuts
  • ½ cup chopped green onions or sautéed leeks
  • 1 large round loaf of bread (sourdough, rye, or pumpernickel all work)
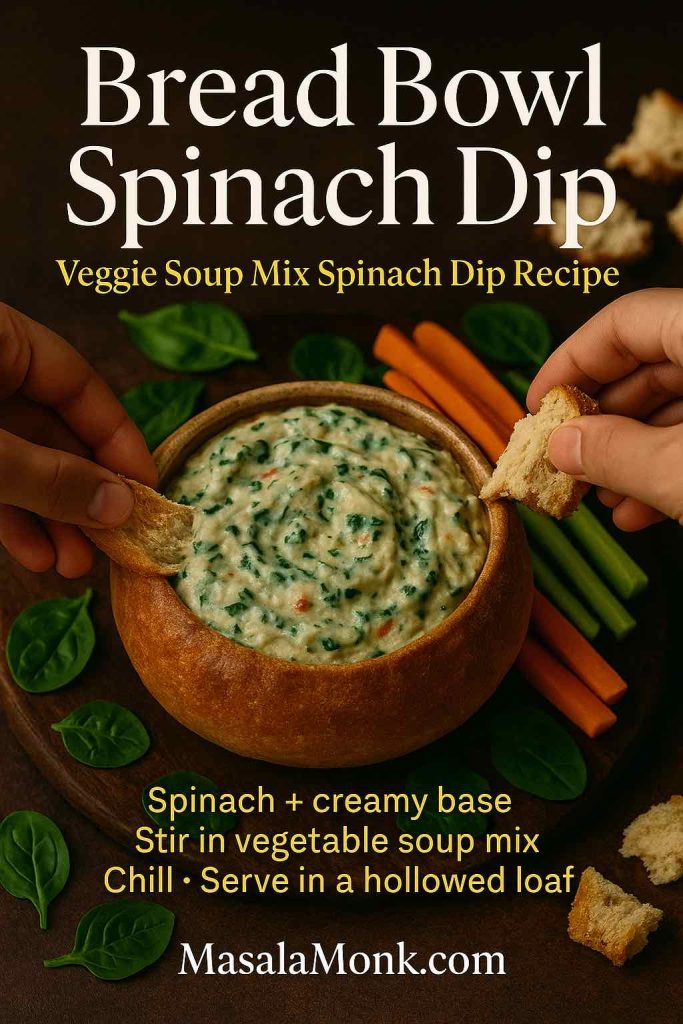
Bread bowl filled with creamy spinach dip made with vegetable soup mix, surrounded by carrot and celery sticks and torn bread pieces, with mini recipe text overlay.
Bread bowl spinach dip – a crowd-pleasing veggie soup mix spinach dip recipe served in a hollowed loaf with crunchy vegetables and rustic bread for dipping.

Method

1. Stir the soup mix into the base

Whisk together sour cream and mayonnaise in a large bowl. Sprinkle in the dry vegetable soup mix and stir well. Let this sit for 5–10 minutes so the dehydrated vegetables can soften slightly.

2. Add spinach and mix-ins

Fold in the drained, chopped spinach. Stir through the water chestnuts for crunch and the green onions or leeks for a sweet onion note.

3. Chill thoroughly

Because the soup mix needs a little time to hydrate, this version benefits from at least 2 hours in the fridge, and overnight is even better.

4. Turn it into a bread bowl

While the dip chills, prepare your bread:

  1. Slice off the top of the loaf like a lid.
  2. Hollow out the center with your hands, leaving a good 2–3 cm wall so the dip bowl is sturdy.
  3. Cut the removed bread into rough bite-sized cubes.

Just before serving, spoon the dip into the hollowed loaf and arrange the bread cubes around it on a platter. Add some fresh vegetables for color and extra crunch.

If you’d like an even more indulgent bread pairing another time, consider baking a homemade garlic bread loaf and cutting it into chunks for dipping. On days when you want something heartier but still relatively wholesome, slices of quick and healthy oatmeal bread also make a great base for spinach dip.

To turn the whole setup into a full grazing platter, you can borrow some ideas from the guide on assembling charcuterie boards using the 3-3-3-3 rule, then tuck this bread-bowl dip right into the center.


Spinach artichoke dip recipes: cold and baked

Whenever people talk about restaurant-style spinach dip, they’re usually imagining spinach artichoke dip. The artichokes add a tangy, tender bite that cuts through the richness. It’s worth having both a cold version and a baked one in your personal spinach dip recipe collection.

Cold spinach artichoke dip

This version is brilliant when you need something make-ahead that can sit on a buffet.

Ingredients

  • 1 batch classic cold spinach dip recipe
  • 1 cup chopped marinated artichoke hearts, drained
  • ½ cup shredded mozzarella or mild cheese blend (optional)
  • 2–3 tablespoons lemon juice
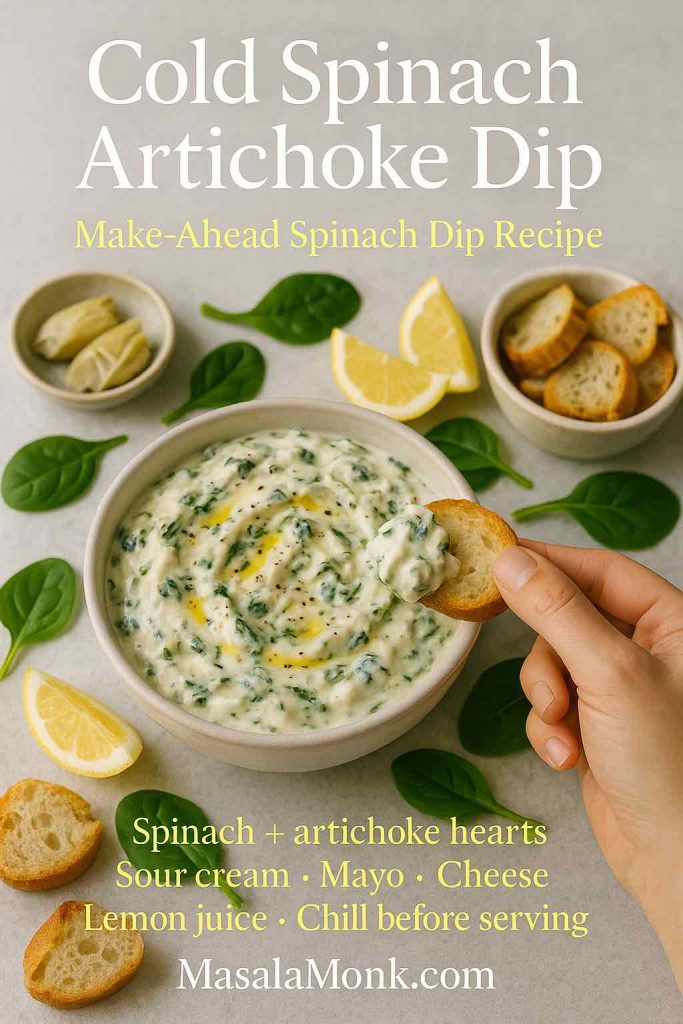
Cold spinach artichoke dip in a light ceramic bowl with a hand holding a crostini scoop, surrounded by lemon wedges, spinach leaves, artichoke hearts, and toasted baguette slices on a pale stone surface, with mini recipe text overlay.
Cold spinach artichoke dip – a make-ahead spinach dip recipe with sour cream, mayo, cheese, lemon and plenty of artichoke hearts, perfect for serving with crisp crostini or vegetables.

Directions

  1. Prepare the classic spinach dip base and let it chill for at least an hour.
  2. Stir in the chopped artichoke hearts and shredded cheese, if using.
  3. Add lemon juice a tablespoon at a time, tasting as you go, until it feels bright but not sour.
  4. Chill for another hour so the flavors mingle.

Serve with crackers, toasted bread slices, or vegetable sticks. The artichokes make this spinach dip recipe feel more complex, even though the method stays very simple.

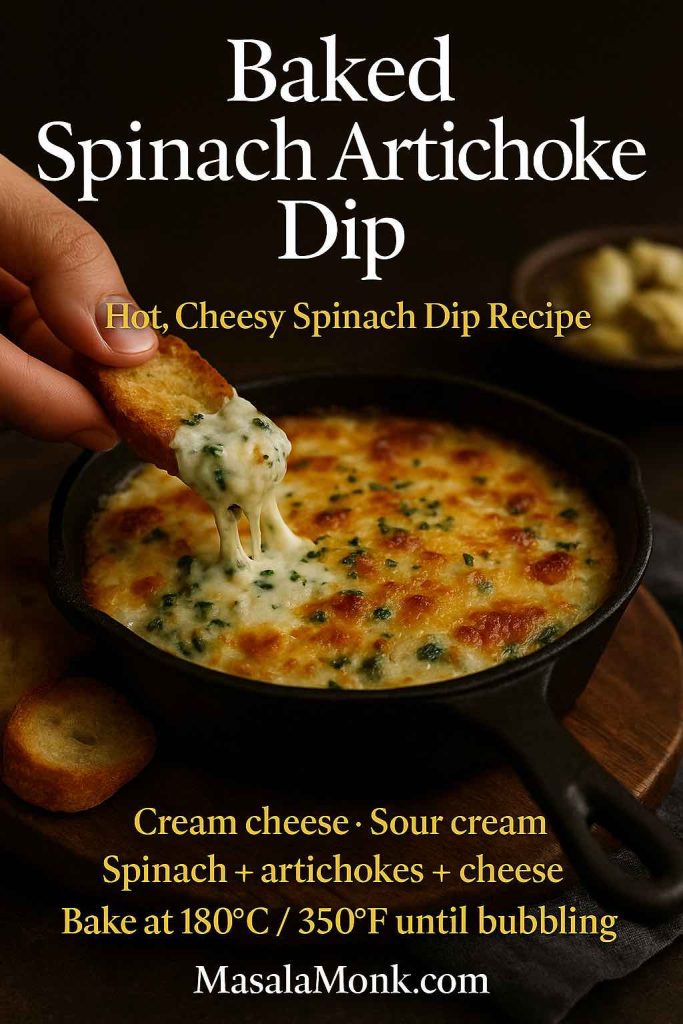
Baked spinach artichoke dip (hot and bubbly)

For a cozier option, especially in cooler months, a baked spinach artichoke dip recipe gives you that golden top and stretchy cheese pull.

Ingredients

  • 1 block (8 oz / 225 g) cream cheese, softened
  • ½ cup sour cream
  • ½ cup mayonnaise
  • 1 cup shredded mozzarella
  • ½ cup grated parmesan or similar hard cheese
  • 1½ cups cooked, chopped spinach (frozen and thawed, or sautéed fresh)
  • 1 cup chopped artichoke hearts
  • 2 cloves garlic, minced
  • Salt and pepper, to taste
Baked spinach artichoke dip in a cast-iron skillet with a hand lifting a cheesy scoop on toasted bread, the golden bubbling top surrounded by extra crostini, with mini recipe text overlay.
Baked spinach artichoke dip – a hot, cheesy spinach dip recipe made with cream cheese, sour cream, spinach and artichokes, baked until golden and bubbling and served straight from the skillet with crisp toasted bread.

Instructions

  1. Preheat your oven to 180°C / 350°F. Lightly grease a small baking dish.
  2. Beat the cream cheese in a mixing bowl until smooth. Add the sour cream and mayonnaise and blend again.
  3. Stir in mozzarella, parmesan, garlic, spinach, and artichokes. Season with a small pinch of salt and pepper; the cheeses are salty, so it’s easy to overdo it.
  4. Spread the mixture into the baking dish in an even layer.
  5. Bake for 20–25 minutes, until hot and bubbling at the edges.
  6. For a browned top, switch to the broiler for 2–3 minutes at the end, watching carefully to avoid burning.

Place the hot dish on a board surrounded by baguette slices, breadsticks, and roasted vegetables. If you’re planning a fuller meal, this cheesy, comforting bowl sits nicely beside cozier dishes like cottage cheese lasagna with spinach or green bean casserole recipe ideas for holiday or Sunday dinners.


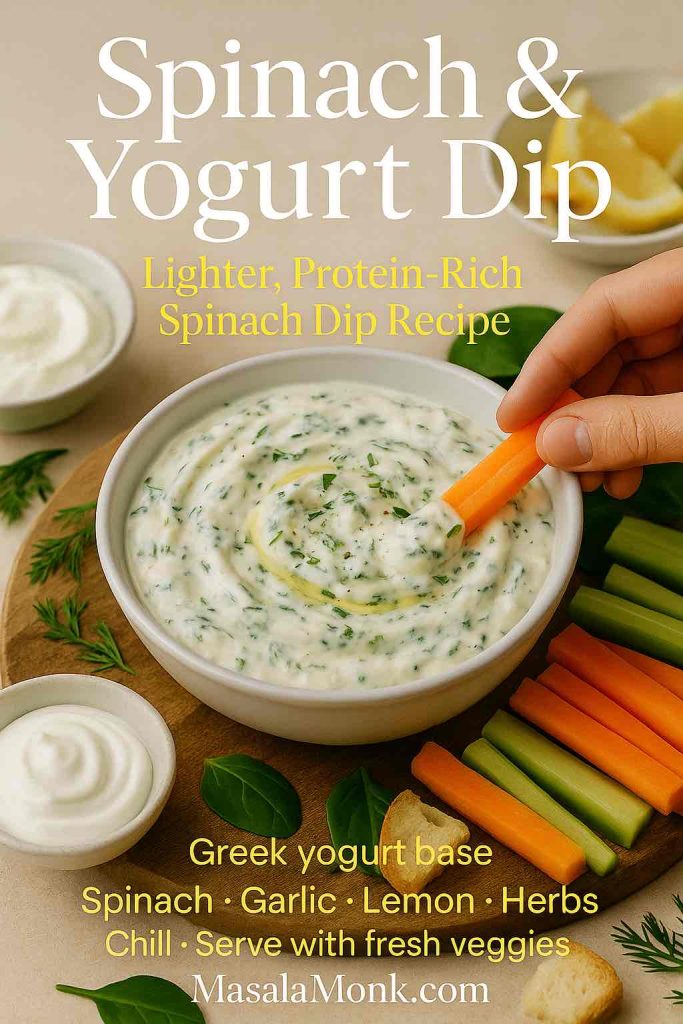
Lighter spinach and yogurt spinach dip recipe

Sometimes you want the flavor of a spinach dip recipe without quite so much heaviness. A yogurt-forward version keeps everything creamy but brings in more protein and a pleasant tang.

Ingredients

  • 1 cup thick Greek yogurt or hung curd
  • ½ cup light mayonnaise or additional yogurt
  • 1 packet (10 oz) frozen chopped spinach, thawed and squeezed dry
  • 2 cloves garlic, minced
  • 2–3 tablespoons lemon juice
  • 2–3 tablespoons chopped fresh herbs (dill, parsley, coriander – choose your favorite)
  • Salt and pepper, to taste
Spinach and yogurt dip in a white bowl with a hand dipping a carrot stick, surrounded by fresh veggie sticks, lemon wedges, herbs and small bowls of Greek yogurt, with mini recipe text overlay.
Spinach & yogurt dip – a lighter, protein-rich spinach dip recipe made with Greek yogurt, spinach, garlic, lemon and fresh herbs, served with crunchy vegetable sticks.

Directions

  1. In a bowl, whisk together the yogurt and mayonnaise until smooth.
  2. Add garlic, lemon juice, salt, and pepper, and whisk again.
  3. Fold in the spinach and chopped herbs.
  4. Chill for at least 1 hour so the garlic and herbs soften and flavor the yogurt.
  5. Taste, then adjust salt, pepper, and lemon juice.

This lighter spinach dip recipe pairs wonderfully with fresh vegetables and seeded crackers. Because yogurt plays the starring role, it feels especially at home next to Indian-leaning dishes. If you enjoy this style, you might also like the creamy spinach raita mentioned earlier or the hung curd spinach cheese sandwich, which uses strained yogurt in a protein-rich filling.

For a completely different spin, check out the idea of lentil-and-green dips like the lentil and spinach hummus. It’s another clever way to bring spinach into snack time, this time with extra fiber and plant protein from pulses.


Simple 3-ingredient and 5-ingredient spinach dip recipes

On some days, there’s time to shop and prep; on others, you want a spinach dip recipe that works almost like a magic trick. That’s where minimalist versions come in handy.

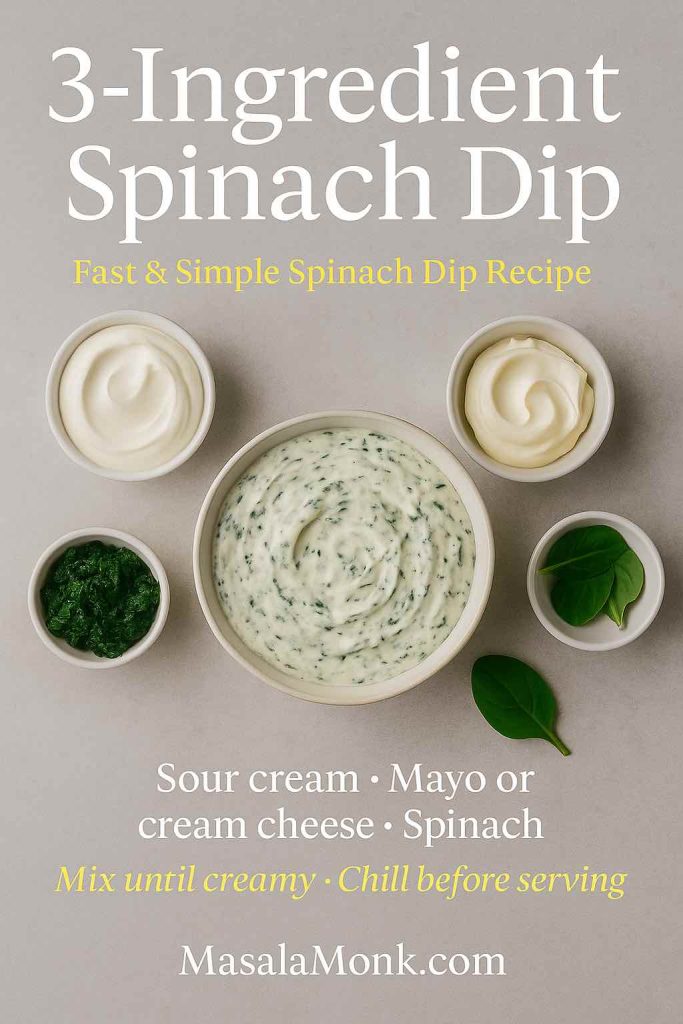
3-ingredient spinach dip

For a basic three-ingredient bowl:

  • 1 cup sour cream or thick Greek yogurt
  • 1 cup mayonnaise or softened cream cheese
  • 1 packet (10 oz) frozen chopped spinach, thawed and squeezed dry
Top-down view of a 3-ingredient spinach dip in a bowl surrounded by small bowls of sour cream, mayonnaise or cream cheese, and spinach on a light surface, with mini recipe text overlay.
3-ingredient spinach dip – a fast and simple spinach dip recipe made with sour cream, mayo or cream cheese, and spinach, just mix until creamy and chill before serving.

Stir everything together, season lightly with salt and pepper, and chill. If you’d like more flavor without technically adding a “fourth ingredient”, you can use a seasoned cream cheese or a flavored mayonnaise to sneak in herbs and spices.

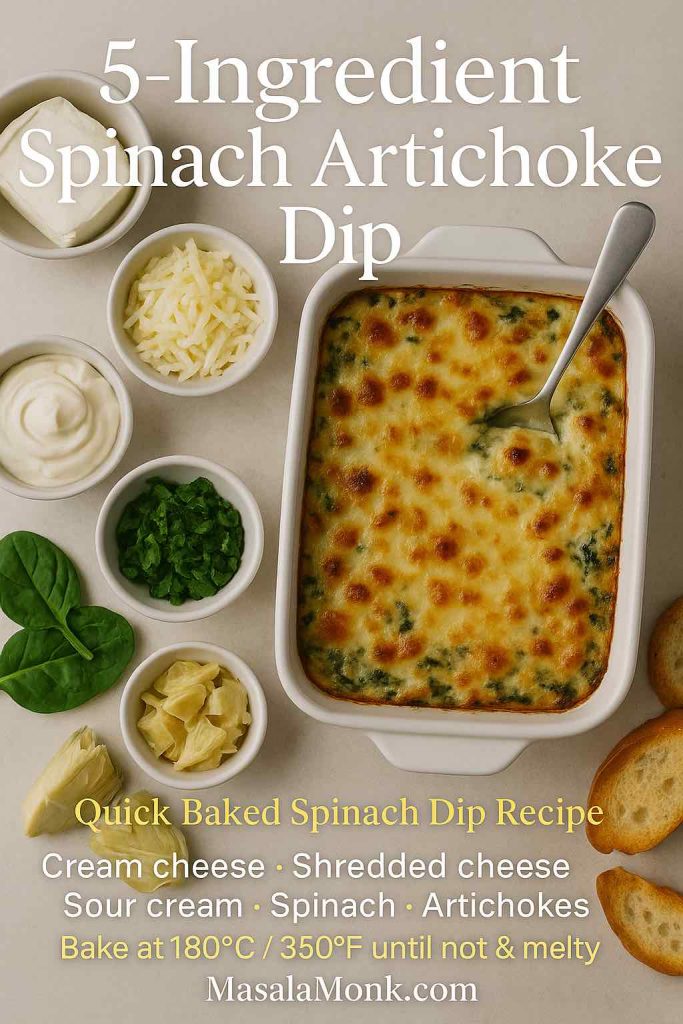
5-ingredient baked spinach artichoke dip

Another shortcut version keeps the ingredient list short but still gives you an impressive baked dish:

  • 1 block (8 oz) cream cheese
  • 1 cup shredded cheese (mozzarella or a blend)
  • ½ cup sour cream or yogurt
  • 1 cup chopped spinach
  • 1 cup chopped artichoke hearts
5-ingredient spinach artichoke dip baked in a white dish with a spoon, surrounded by small bowls of cream cheese, shredded cheese, sour cream, spinach and artichokes, with mini recipe text overlay.
5-ingredient spinach artichoke dip – a quick baked spinach dip recipe using just cream cheese, shredded cheese, sour cream, spinach and artichokes, baked at 180°C / 350°F until hot and melty.

Beat the cream cheese until smooth, then stir in sour cream, cheese, spinach, and artichokes. Spread into a small baking dish and bake at 180°C / 350°F for 20 minutes or so, until everything is hot and melty.

These versions are especially useful when you already have something like baked jalapeño poppers or cheese balls with Indian-inspired flavors in the oven and just want one more dish without adding much work.


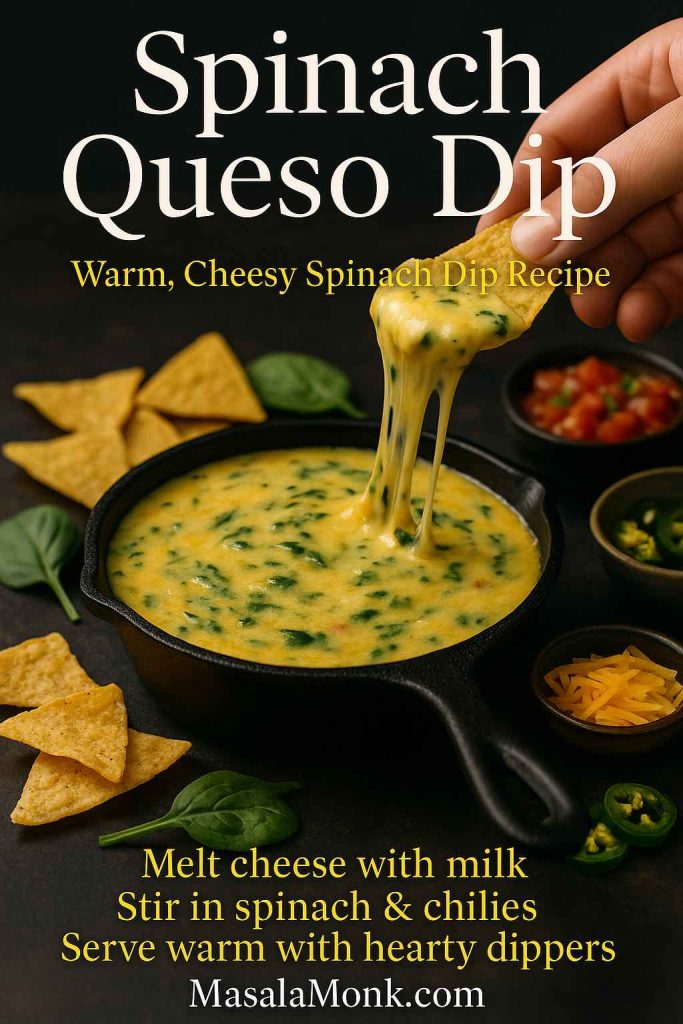
Warm cheesy spinach queso dip

If you’re hosting game night or movie night, a spinach dip recipe with a queso twist always gets attention. It’s stretchy, melty, and perfect with crunchy sides.

Ingredients

  • 250 g processed melting cheese or cheese loaf, cubed
  • ½ cup milk or cream
  • 1 cup cooked, chopped spinach
  • Optional:
    • ½ cup diced tomatoes with green chilies, drained
    • 1 jalapeño, finely chopped
    • ½ teaspoon onion powder or garlic powder
Spinach queso dip in a cast-iron skillet with a tortilla chip lifting a stretchy cheesy scoop, surrounded by tortilla chips, salsa, jalapeños and shredded cheese, with mini recipe text overlay.
Spinach queso dip – a warm, cheesy spinach dip recipe made by melting cheese with milk, stirring in spinach and chilies, and serving hot with crunchy tortilla chips and hearty dippers.

Method

  1. Add the cheese cubes and milk to a small saucepan or deep skillet.
  2. Warm over low heat, stirring often, until the cheese melts into a smooth sauce.
  3. Stir in spinach and any optional add-ins.
  4. Keep over very low heat, just enough to keep the queso fluid, not boiling.

Serve this warm spinach dip recipe in a heat-safe bowl. Although tortilla chips are a classic pairing, it’s also fun with toasted bread fingers, roasted potato wedges, and even vegetable sticks for contrast.

Also Read: Air Fryer Chicken Wings (Super Crispy, No Baking Powder)


What to serve with your favorite spinach dip recipe

Once you’ve chosen which spinach dip recipe to make, the next question is what to put around the bowl. The possibilities are genuinely endless, but a few categories cover most occasions.

Breads and crackers

Bread and spinach dip are such a natural pairing that it’s easy to build a whole platter around them.

  • Cubes of crusty bread or baguette
  • Slices of homemade garlic bread loaf for extra flavor
  • Toasted slices of oatmeal bread when you want something a little heartier
  • Pita chips, breadsticks, or crispbread
  • Seeded crackers for crunch

If you enjoy assembling boards, you can place the dip as the centerpiece of a small grazing board. Surround it with breads, crackers, nuts, and fruit, taking cues from the charcuterie tips in the 3-3-3-3 rule guide.

Vegetables

Creamy dips always benefit from fresh, crisp vegetables as dippers. They add color, crunch, and a lighter option for guests who don’t want too much bread.

Try:

  • Carrot and cucumber sticks
  • Bell pepper strips
  • Cherry tomatoes
  • Blanched broccoli or cauliflower florets
  • Snap peas or green beans

Spinach is already part of the leafy-greens family that many nutrition experts say we should eat more of; adding assorted vegetables around the bowl brings you even closer to that goal. If you ever want to zoom out and read more about the role of vegetables and fruits in healthy eating patterns, Harvard’s Nutrition Source has an accessible overview.

Other appetizers for a full spread

For a larger gathering, it’s nice to add a few more bite-sized dishes so your spinach dip recipe shares the table with other flavors and textures.

Some options that work beautifully alongside dip include:

Together with one or two spinach dips, these give you an appetizer table that feels far more elaborate than the actual work involved.


Drinks that pair well with spinach dips

Because most spinach dip recipes are rich and creamy, they pair best with drinks that either cut through that richness or wrap around it in a cozy way.

For a sparkling, citrusy option, a French 75 cocktail is a classic choice. The combination of gin, lemon, a touch of sugar, and sparkling wine feels bright and celebratory, and the bubbles help refresh the palate between bites of dip.

If you prefer something on the slightly bitter side, you might like the balance of a Negroni with variations, while fans of shaken sour cocktails can explore the classic whiskey sour recipe with its sharp lemon edge. On evenings when you’d rather keep things non-alcoholic or cozy, mugs of homemade hot chocolate with cocoa powder feel surprisingly right next to hot spinach artichoke dip and roasted potatoes.

If you’re in the mood to experiment further, a roundup of creative gin cocktail recipes or playful ideas like the green tea shot with Jameson can help you match your drinks to the energy of the evening.


Storing spinach dips safely

Finally, because most versions of a spinach dip recipe are built on sour cream, yogurt, mayonnaise, and cheese, it’s worth paying attention to storage.

A few simple guidelines go a long way:

  • Keep spinach dips refrigerated in a covered container.
  • Try to eat them within 3–4 days for the best quality and safety.
  • During gatherings, avoid letting the dip sit out at room temperature for more than 2 hours. If the weather is very hot, aim for 1 hour. After that point, it’s safer to discard leftovers that have been sitting out.

If you’d like specific, broader advice beyond dips, the general recommendations on FoodSafety.gov are a useful reference for how long different chilled foods can safely stay out and how long they should be stored in the fridge.

For long parties, a good strategy is to serve half the dip at a time and keep the rest chilled. When the bowl runs low, swap in fresh, cold dip rather than topping up what’s been sitting out for hours.

Also Read: 6 Wellness Shot Recipes to Boost Your Immune System

Overhead view of four leftover spinach dip ideas including creamy spinach pasta, a skillet of baked dip, stuffed mushrooms and a stuffed baked potato, with text suggesting ways to use leftover spinach dip.
Leftover spinach dip ideas – turn extra dip into creamy pasta sauce, a cheesy pizza or toast topping, or use it to stuff mushrooms, baked potatoes and sandwiches so every last spoonful gets enjoyed.

Bringing it all together

By now, you’ve walked through a whole mini-universe of spinach dip recipes: the classic cold party version, ranch and vegetable soup mix twists, spinach artichoke variations (both cold and baked), lighter yogurt-based dips, shortcut three- and five-ingredient bowls, and a cheesy queso option for game day. You’ve also seen how to adapt fresh, frozen, or canned spinach, how to build a simple but impressive appetizer table around your dip, and how to think about drinks and storage.

You don’t have to make all of them at once. Instead, treat this as your personal spinach dip recipe toolbox. Pick one for a quiet evening with toasted bread and a movie, another for a big holiday meal with green bean casserole and lasagna, and keep the quickest versions in mind for those nights when someone messages, “We’re stopping by in 20 minutes,” and you still want to put something homemade on the table.

Also Read: What to Eat with Hummus for Weight Loss 🏋️‍♀️

FAQs

1. Can I make a spinach dip recipe ahead of time?

Yes, a spinach dip recipe actually tastes better when made ahead. Firstly, mixing everything together and letting it sit in the fridge for a few hours allows the onion, garlic, herbs, and spinach to fully flavor the creamy base. Secondly, the texture improves as the dip thickens slightly while it chills. Ideally, make your spinach dip 8–24 hours in advance, then give it a good stir and a quick taste before serving. If it feels too thick after chilling, you can gently loosen it with a tablespoon or two of milk, cream, or yogurt. In short, “make ahead” is not just okay; it is one of the secrets to a truly delicious spinach dip recipe.


2. Should I use fresh, frozen, or canned spinach for spinach dip?

All three can work in a spinach dip recipe; they simply need slightly different handling. Frozen chopped spinach is the most convenient option because it is already blanched and finely cut. After thawing, you only have to squeeze out as much water as possible. Fresh spinach is lovely when you already have it at home; just wilt it in a pan, cool it down, squeeze well, and chop. Canned spinach is the least common, yet it is still usable if you drain it thoroughly and press out the extra liquid. Overall, the most important step—no matter which kind you choose—is removing excess moisture, so the spinach dip stays thick and creamy instead of watery.


3. How do I stop my spinach dip recipe from being watery?

Excess water in the spinach is almost always the culprit. Therefore, the first step is to squeeze the spinach very well, whether it is frozen, fresh, or canned. Additionally, avoid adding watery ingredients like tomatoes or cucumbers directly into the dip; serve them on the side as dippers instead. If you accidentally end up with a loose spinach dip, you can stir in a bit of extra cream cheese, sour cream, or grated hard cheese to help thicken it. Another simple trick is to chill the dip for a longer time, since it tends to firm up as it rests in the refrigerator. Ultimately, good draining plus proper chilling are the best defenses against a runny spinach dip recipe.


4. What is the best base for a cold spinach dip recipe—sour cream, mayo, or cream cheese?

Each base creates a slightly different personality for your spinach dip recipe. Sour cream gives a tangy, smooth texture and classic “party dip” flavor. Mayonnaise adds richness and a glossy mouthfeel, making the dip feel more luxurious. Cream cheese, on the other hand, produces a thicker, spreadable consistency that is excellent for bread and crackers. Very often, the tastiest dips use a combination of these: for example, half sour cream and half mayonnaise, or sour cream with a portion of cream cheese for extra body. As a general guideline, use more sour cream and yogurt if you want a lighter dip, and more mayonnaise or cream cheese if you prefer something richer and denser.


5. Can I make a healthier spinach dip recipe with yogurt?

Absolutely, you can create a lighter spinach dip recipe by replacing part or even all of the sour cream and mayonnaise with thick yogurt or hung curd. To begin, choose a full-bodied yogurt like Greek yogurt so the dip does not become too runny. Then mix it with a smaller amount of mayonnaise or olive oil for smoothness and flavor. Moreover, you can lean on garlic, lemon juice, herbs, and black pepper to make the dip exciting without needing loads of fat. Over time, you can adjust the ratio in favor of yogurt as your taste buds get used to a tangier, fresher flavor. This kind of spinach and yogurt dip works wonderfully with raw vegetables and whole-grain crackers, and it still feels indulgent even though it is a bit kinder to your daily calories.


6. How can I turn a basic spinach dip recipe into a spinach artichoke dip?

Transforming a classic spinach dip recipe into a spinach artichoke dip is surprisingly straightforward. Simply fold in chopped artichoke hearts—marinated or canned both work—after you have mixed the base. As a starting point, add about one cup of chopped artichokes to a standard batch of dip. Additionally, consider including shredded mozzarella and a little extra parmesan if you are aiming for that familiar restaurant-style flavor. If you want a cold dip, you can serve it immediately after chilling. Conversely, for a baked spin on the same idea, spread the mixture into an oven-safe dish, sprinkle more cheese on top, and bake until it is hot and bubbling. In either case, the artichokes add a lovely tang and texture that makes the spinach dip feel even more special.


7. What is the difference between a cold spinach dip recipe and a baked one?

A cold spinach dip recipe is usually based on sour cream, mayonnaise, and sometimes yogurt, and it relies on chilling time to thicken and develop flavor. It stays soft and scoopable straight from the refrigerator and is perfect for bread, chips, and raw vegetables. A baked spinach dip, in contrast, features more cheese—especially mozzarella, parmesan, and cream cheese—and is heated in the oven until hot and gooey. As a result, it has a stretchy, melty texture and a lightly browned top. Because of that, baked versions feel cozier and more suited to winter dinners, holiday parties, and game nights. Cold dips, meanwhile, are especially refreshing for warm-weather gatherings but also hold their own at any buffet table.


8. Can I make a spinach dip recipe without mayonnaise?

Yes, you can absolutely create a spinach dip recipe without mayonnaise. One straightforward option is to replace mayonnaise entirely with sour cream, Greek yogurt, or a blend of both. Cream cheese also works well as a base; it produces a thick, spreadable dip when combined with sour cream or yogurt. Furthermore, seasonings like garlic, onion, lemon juice, pepper, and herbs will provide plenty of flavor so you do not miss the mayonnaise at all. If you want even more richness without mayo, you can add a small splash of olive oil or a bit of grated cheese to round out the taste. In the end, the structure of the dip comes from something creamy plus the spinach, while the flavor comes mainly from aromatics and spices, so you have lots of freedom.


9. How can I make a gluten-free spinach dip recipe?

A spinach dip recipe is often naturally close to gluten-free, but there are a few details to check. Firstly, the core ingredients—spinach, sour cream, yogurt, mayonnaise, cream cheese, and most cheeses—do not contain gluten. The potential issues usually come from packets of soup mix, seasoning blends, and certain processed cheeses. Therefore, you need to read the labels on any mixes or flavored ingredients to ensure they are certified gluten-free. Instead of using packaged vegetable or onion soup mix, you can season your dip with plain dried herbs, garlic powder, onion powder, smoked paprika, and salt. As for serving, choose gluten-free dippers such as rice crackers, corn chips labeled gluten-free, sliced vegetables, or gluten-free bread. Once you take these simple steps, your spinach dip recipe can be enjoyed safely by guests who avoid gluten.


10. Can a spinach dip recipe be made vegan or dairy-free?

Yes, with a few strategic swaps you can create a dairy-free or even fully vegan spinach dip recipe. To begin, replace sour cream and yogurt with plant-based alternatives made from coconut, soy, or almonds. Next, swap out cream cheese and other cheeses for vegan cream cheese or shredded plant-based cheese. In addition, use a vegan mayonnaise made from vegetable oils instead of eggs. As you adjust these ingredients, you might need to rely more heavily on garlic, lemon juice, nutritional yeast, and herbs to build up a satisfying savory flavor. For a thicker texture, you can blend in a small amount of soaked cashews or silken tofu. When everything is combined and chilled, you will have a creamy, scoopable spinach dip that fits into a dairy-free or vegan lifestyle while still feeling indulgent.


11. How long does a homemade spinach dip recipe last in the fridge?

As a general guideline, a homemade spinach dip recipe keeps well in the refrigerator for about three to four days. The ingredients—especially sour cream, yogurt, mayonnaise, and cheeses—are all perishable, so they need to be stored in a covered container at a consistently cold temperature. Try not to leave the dip out at room temperature for more than two hours during parties; if it has been sitting out for longer than that, it is safer to discard the remainder. One practical approach is to serve part of the dip in a bowl and keep the rest chilled, refilling as needed. In this way, the majority of your spinach dip remains at a safe temperature while guests are enjoying the portion on the table.


12. Can I freeze leftover spinach dip?

Freezing a spinach dip recipe is possible, although the results depend on the ingredients. Dips that are mostly cream cheese and shredded cheese tend to freeze and thaw better, because they have less water. On the other hand, dips with a high proportion of sour cream or yogurt can sometimes become grainy or separated after freezing. If you choose to freeze spinach dip, place it in an airtight container, leaving a little room for expansion. When you want to use it again, thaw it slowly in the refrigerator, then stir it thoroughly. If the texture feels slightly broken, you can try whisking in a spoonful of fresh cream cheese or yogurt to smooth it out. Even so, for the very best texture and flavor, it is usually preferable to enjoy a spinach dip recipe freshly made or only chilled in the fridge.


13. What can I do with leftover spinach dip besides serving it with bread or crackers?

Leftover spinach dip is surprisingly versatile, so you do not have to keep eating it in exactly the same way. Firstly, you can transform it into a pasta sauce by thinning it with a little milk or pasta cooking water, then tossing it with hot pasta and extra parmesan. Secondly, you can spread it over pizza dough as a “white” sauce base for a spinach dip pizza topped with mozzarella and vegetables. Additionally, it works well as a filling in stuffed mushrooms or as a layer inside baked sandwiches and wraps. You can even spoon a thicker spinach dip recipe into baked potatoes or use it as a topping for grilled chicken or fish. With just a bit of imagination, the leftovers become an ingredient rather than a problem.


14. How can I add more flavor to a basic spinach dip recipe?

If your basic spinach dip recipe tastes a little flat, you have lots of options for boosting flavor. Garlic and onion are the first and most obvious helpers; you can use them fresh, sautéed, or in powdered form. Beyond that, herbs like dill, parsley, coriander, basil, and chives add freshness. Spices such as smoked paprika, cayenne, black pepper, and mustard powder introduce warmth and complexity. A squeeze of lemon juice or a splash of vinegar brightens everything, especially in richer dips. Grated parmesan or another sharp cheese can also deepen the savory notes. Finally, a pinch of salt added after chilling can tighten the flavors, since cold food often needs slightly more seasoning than warm dishes. Bit by bit, these small additions turn a simple spinach dip recipe into something truly memorable.

Posted on — 3 Comments

Indian Falafel: 6 Masala, Palak, Aloo, Paneer & Curry Leaf Twists

Six Indian falafel variations including Masala Chana, Methi-Palak, Aloo Tikki Chaat, Paneer Bhurji-Stuffed, Curry Leaf and Daal Bati Falafel.

At its most familiar, falafel starts with soaked chickpeas, herbs and spices, pulsed to a coarse crumb and cooked until the outside turns crisp while the middle stays tender. That basic idea fits surprisingly well into an Indian kitchen, where cumin, coriander, green chilli, ginger, amchur, chaat masala and chutneys already feel at home.

The recipes here take that starting point in six different directions. Masala Chana stays closest to classic falafel; Methi-Palak goes greener and softer; Aloo Tikki turns flat and chaat-ready; Paneer Bhurji becomes a filling rather than part of the shell; Curry Leaf brings mustard, ginger and coconut chutney into the picture; and Daal Bati deliberately leaves chickpea falafel furthest behind.

You do not need to cook them all the same way, either. Some want hot oil, one wants the broad crust of a frying pan, two sit happily in an appe/paniyaram pan, and the Daal Bati version belongs in the oven.

Table of Contents

Choose Your Indian Falafel

If you already know what sounds good, use the first column to jump straight to that recipe. If not, the texture and cooking method usually make the decision easier.

FalafelWhat it is likeBest methodBest with
Masala ChanaWarm, tangy and crisp, with a coarse chickpea centreFry or air-fryGreen chutney, cumin yogurt, pav or pita
Methi-PalakGreen, herbaceous and tender with a sesame crustAppe/paniyaram pan or air fryerCreamy dip, beet-carrot salad
Aloo TikkiCrisp outside, soft inside and built for chaatShallow-fryYogurt, green chutney, tamarind, sev
Paneer Bhurji-StuffedCrisp chickpea shell with a soft spiced paneer centreFryKachumber, pickled onion, roti
Curry LeafFragrant, peppery and coarse, with ginger and mustardFry or appe/paniyaram panCoconut-coriander chutney
Daal BatiEarthy, firm and rustic with a cracked bati-like crustBakeGreen chutney, onion, lemon, ghee

What Makes a Good Falafel Base?

For the Masala Chana, Methi-Palak, Paneer-Stuffed and Curry Leaf recipes, begin with dried chickpeas soaked in plenty of cold water for 8–12 hours or overnight in the refrigerator. Drain and rinse well before using. The Aloo Tikki version is different on purpose: cooked chickpeas suit the softer potato-based texture we want there.

Dry ingredients before adding more flour. Wet chickpeas or greens lead to more besan, and more besan can make falafel dense. This matters most with spinach: squeeze blanched palak until it feels almost surprisingly dry.

Pulse; do not purée. Falafel mixture should resemble coarse crumbs rather than hummus. A small handful may look loose in the bowl but should hold when firmly compressed.

Add besan cautiously. Start small and adjust only when the mixture genuinely needs help holding together.

For traditional falafel technique, classic serving ideas, baking and deeper air-fryer guidance, see our complete homemade falafel recipe.


1. Masala Chana Falafel

Masala Chana stays closest to familiar falafel: crisp outside, coarse within, but warmer with garam masala and cumin and a little sharper from amchur. Keep the garam masala measured so the chickpeas, coriander and garlic still come through.

Golden Masala Chana falafel balls with green chutney and cumin yogurt

Yield: about 14–16 falafel
Soaking: 8–12 hours or overnight in the refrigerator
Active prep: about 20 minutes
Chilling: 30 minutes
Cooking: about 15 minutes total, 4–5 minutes per fried batch

Ingredients

  • 1 cup (about 200 g) dried chickpeas
  • ½ medium onion, roughly chopped
  • 3 garlic cloves
  • ¾ cup loosely packed fresh coriander
  • 1 green chilli
  • 1 teaspoon ground cumin
  • 1 teaspoon ground coriander
  • ¾ teaspoon garam masala
  • ½ teaspoon amchur
  • ¼ teaspoon Kashmiri chilli powder, optional
  • 1 teaspoon fine salt, or to taste
  • 1 tablespoon besan, plus more only if needed
  • ½ teaspoon baking powder
  • Neutral oil, for frying

Method

  1. Soak the chickpeas as described above, then drain, rinse and pat away obvious surface moisture.
  2. Add chickpeas, onion, garlic, coriander and green chilli to a food processor. Pulse in short bursts until the mixture resembles coarse crumbs.
  3. Transfer to a bowl and mix in cumin, ground coriander, garam masala, amchur, chilli powder if using, salt and 1 tablespoon besan.
  4. Squeeze a spoonful firmly in your palm. It should hold together. If it is genuinely wet or still breaks after compression, add a little more besan.
  5. Cover and refrigerate for 30 minutes.
  6. Stir in the baking powder, then shape into 14–16 compact balls.
  7. Heat frying oil to about 170–175°C / 340–350°F. Fry one test falafel first. If it holds, cook the remaining falafel in small batches for about 4–5 minutes, until deeply golden and crisp.

Air-Fryer Option

Shape the falafel slightly flatter than perfect spheres, brush or spray the surfaces with oil and air-fry at 190°C / 375°F for about 12–15 minutes, turning halfway. Start checking early toward the end rather than relying only on the clock.

Serve with: coriander-mint green chutney and cumin yogurt. These also work beautifully in pav, pita or on a mezze plate with homemade hummus.


2. Methi-Palak Falafel with Mint & Coriander

Spinach turns these falafel unmistakably green, but methi is what gives them character. Mint and coriander keep the flavour fresh, while sesame adds nuttiness and a light crust around the outside.

The important step is simple: squeeze the spinach properly dry. Not casually dry. Not “I shook the colander twice” dry. Properly dry.

Green Methi-Palak falafel balls with sesame seeds, beetroot and carrot salad

Yield: about 14 small falafel
Soaking: 8–12 hours or overnight in the refrigerator
Active prep: about 25 minutes
Chilling: 30 minutes
Cooking: about 12 minutes

Ingredients

  • 1 cup (about 200 g) dried chickpeas
  • 60 g fresh spinach
  • ½ cup loosely packed fresh methi leaves
  • ½ cup fresh coriander
  • ¼ cup mint leaves
  • ¼ small onion
  • 2 garlic cloves
  • 1 green chilli
  • ¾ teaspoon ground cumin
  • ½ teaspoon ground coriander
  • ½ teaspoon amchur
  • Tiny pinch of nutmeg, optional
  • 1 teaspoon fine salt
  • 1 tablespoon besan, plus more only if required
  • ½ teaspoon baking powder
  • 2 tablespoons white sesame seeds
  • Oil, for cooking

Method

  1. Soak, drain and rinse the chickpeas as described above.
  2. Blanch the spinach for about 30–60 seconds, just until wilted. Cool immediately, then squeeze firmly until very little liquid comes out.
  3. Add chickpeas, squeezed spinach, methi, coriander, mint, onion, garlic and green chilli to a food processor. Pulse to a coarse green mixture rather than a paste.
  4. Mix in cumin, ground coriander, amchur, nutmeg if using, salt and 1 tablespoon besan.
  5. Chill for 30 minutes, then stir in the baking powder. Add a little more besan only if a firmly compressed portion will not hold.
  6. Shape into small round falafel and lightly roll or press each one in sesame seeds.

Appe/Paniyaram Pan Method

Brush the cavities lightly with oil. Add one falafel per cavity and cook over medium to medium-low heat, rotating as each surface firms. Cook until the falafel feels firm through the centre and no longer looks wet or pasty when one is broken open, usually around 10–12 minutes for small falafel.

Air-Fryer Option

Brush or mist lightly with oil and air-fry at 190°C / 375°F for about 12–14 minutes, turning once. Check early toward the end: small green falafel can dry out quickly.

Serve with: a creamy yogurt or coconut-yogurt dip, shredded beetroot, shredded carrot, coriander and lemon. That presentation also stays true to the vivid green falafel already shown in the article.


3. Aloo Tikki Falafel Chaat

Aloo tikki pulls this variation away from classic falafel in exactly the right direction. Cooked chickpeas keep the connection, potato gives the centre its softness, and ajwain, cumin, amchur and chaat masala take it straight toward North Indian street food.

Aloo Tikki falafel chaat with yogurt, green chutney, sev and pomegranate

Yield: 8 medium tikkis
Prep: about 25 minutes
Optional chilling: 20–30 minutes
Cooking: about 16 minutes total, around 8 minutes per batch

Ingredients for the Tikkis

  • 300 g boiled potatoes, cooled completely
  • 150 g cooked chickpeas, drained and dried well
  • 1 green chilli, finely chopped
  • 3 tablespoons chopped fresh coriander
  • ¾ teaspoon roasted cumin powder
  • ½ teaspoon ground coriander
  • ¾ teaspoon chaat masala
  • ½ teaspoon amchur
  • ¼ teaspoon ajwain, lightly crushed
  • ¼–½ teaspoon Kashmiri chilli powder, optional
  • ¾ teaspoon salt, or to taste
  • 2 tablespoons cornflour/cornstarch or rice flour
  • 1–2 tablespoons besan only if additional binding is needed
  • Oil, for shallow-frying

Method

  1. Use completely cooled potatoes. Coarsely crush the cooked chickpeas and mash the potatoes until mostly smooth but not gluey.
  2. Combine potatoes and chickpeas with green chilli, coriander, cumin, ground coriander, chaat masala, amchur, ajwain, chilli powder if using, salt and cornflour.
  3. Mix gently until the mixture holds together. Divide into eight portions and shape into broad patties about 1.5 cm thick.
  4. If the tikkis feel very soft, refrigerate for 20–30 minutes. If they are still too fragile after chilling, work a small amount of besan into the mixture.
  5. Heat a thin layer of oil in a heavy frying pan over medium heat.
  6. Cook the tikkis for about 3–4 minutes on the first side without constantly moving them. Flip once a proper crust has formed, then brown the second side.

Turn Them into Falafel Chaat

For all eight hot tikkis, have ready:

  • 1 cup plain yogurt, whisked smooth
  • 6 tablespoons green coriander-mint chutney
  • 4–6 tablespoons tamarind chutney
  • ½ small red onion, finely chopped
  • 4–6 tablespoons fine sev
  • 4 tablespoons pomegranate arils
  • Chaat masala
  • Chopped coriander

Arrange the hot tikkis on a plate, spoon over yogurt, then add green chutney and tamarind chutney. Finish with onion, sev, pomegranate, chaat masala and coriander. Serve immediately, while the tikki is still hot and crisp underneath the cool, tangy toppings.

Air-fryer option: brush both sides with oil and air-fry at 190°C / 375°F, turning once, until browned and firm. Start checking around 12 minutes. Shallow-frying still gives the more characteristic tikki crust.


4. Paneer Bhurji-Stuffed Falafel

Paneer works better here as a surprise in the centre than blended through the chickpea mixture. Keep the shell coarse and chickpea-heavy, then tuck a dry, fragrant paneer bhurji inside so the contrast is obvious when you cut one open.

Paneer bhurji-stuffed falafel cut open to show the spiced paneer filling

Yield: about 10–12 stuffed falafel
Soaking: 8–12 hours or overnight in the refrigerator
Active prep: about 30 minutes
Chilling: 30 minutes
Cooking: about 12 minutes total, 5–6 minutes per fried batch

For the Falafel Shell

  • 1 cup (about 200 g) dried chickpeas
  • ½ small onion
  • 3 garlic cloves
  • ½ cup fresh coriander
  • 1 green chilli
  • ¾ teaspoon ground cumin
  • ½ teaspoon ground coriander
  • ½ teaspoon garam masala
  • ¾ teaspoon fine salt
  • 1 tablespoon besan, plus more only if required
  • ½ teaspoon baking powder

For the Paneer Bhurji Filling

  • 100 g paneer, finely crumbled
  • 1 teaspoon oil or ghee
  • 1 teaspoon finely grated ginger
  • ½ green chilli, finely chopped
  • ¼ teaspoon turmeric
  • ½ teaspoon garam masala
  • ½ teaspoon kasuri methi, crushed
  • Small pinch of salt
  • 1 teaspoon lemon juice

Method

  1. Heat 1 teaspoon oil or ghee in a small pan. Add ginger and green chilli and cook briefly until aromatic.
  2. Add paneer, turmeric, garam masala, kasuri methi and salt. Cook for a few minutes until fragrant and deliberately fairly dry. Remove from the heat, stir in lemon juice and cool completely.
  3. Soak, drain and rinse the chickpeas as described above. Pulse them with onion, garlic, coriander and green chilli until coarse and crumbly.
  4. Mix in cumin, ground coriander, garam masala, salt and 1 tablespoon besan. Refrigerate for 30 minutes.
  5. Stir in the baking powder. If the shell mixture will not hold when firmly compressed, add a little more besan.
  6. Take roughly 2 tablespoons of falafel mixture and flatten it in your palm. Put about 1½–2 teaspoons of cooled paneer filling in the middle.
  7. Bring the chickpea mixture completely around the filling. Pinch any cracks closed and shape into a thick ball or slightly flattened oval. Keep the paneer completely enclosed.
  8. Fry at about 170–175°C / 340–350°F for roughly 5–6 minutes, until the shell is deeply golden and crisp.

Serve with: soft whole-wheat roti, kachumber, pickled red onion, coriander and lemony yogurt. If you want to make the filling from scratch, our guide to making paneer at home is useful here.


5. Curry Leaf Falafel with Mustard, Ginger & Green Chilli

Curry leaves change the aroma immediately. Ginger and green chilli bring a very different sort of heat from garam masala, while cumin, coriander and a small mustard tempering push the flavour toward South Indian pulse snacks without turning the recipe into a renamed vada.

Curry leaf falafel with crisp curry leaves, mustard seeds and coconut-coriander chutney

Yield: about 14 falafel
Soaking: 8–12 hours or overnight in the refrigerator
Active prep: about 20 minutes
Chilling: 30 minutes
Cooking: about 10 minutes total, 4–5 minutes per fried batch

Ingredients

  • 1 cup (about 200 g) dried chickpeas
  • ½ small onion
  • 3 garlic cloves
  • 2.5 cm / 1 inch fresh ginger
  • 1–2 green chillies
  • 15 fresh curry leaves
  • ½ cup fresh coriander
  • ½ teaspoon cumin seeds
  • ½ teaspoon coriander seeds
  • ¼ teaspoon black mustard seeds
  • 1 teaspoon neutral oil, for tempering the mustard
  • ¼ teaspoon freshly ground black pepper
  • Small pinch of hing, optional
  • 1 teaspoon fine salt
  • 1 tablespoon besan, plus more only if needed
  • ½ teaspoon baking powder
  • 2 tablespoons desiccated coconut, optional
  • Neutral oil, for cooking

Method

  1. Soak, drain and rinse the chickpeas as described above.
  2. Toast the cumin and coriander seeds briefly in a dry pan until aromatic. Cool, then crush roughly.
  3. Heat 1 teaspoon neutral oil in the same small pan. Add the mustard seeds and let them crackle. Remove from the heat and cool.
  4. Add chickpeas, onion, garlic, ginger, green chilli, curry leaves and coriander to a food processor. Pulse until coarse.
  5. Mix through the toasted spices, cooled mustard tempering, black pepper, hing if using, salt, 1 tablespoon besan and desiccated coconut if using.
  6. Chill for 30 minutes, then stir in baking powder. Add a little more besan only if a compressed portion will not hold.
  7. Shape into about 14 compact falafel.
  8. Fry at 170–175°C / 340–350°F for about 4–5 minutes, until golden and crisp.

Appe/paniyaram pan option: oil the cavities lightly and cook over medium to medium-low heat, rotating the falafel as each side firms and browns.

Serve with: coconut-coriander chutney, lemon and a few crisp fried curry leaves. The creamy coconut softens the chilli and mustard without hiding the curry-leaf aroma.


6. Daal Bati Falafel

Daal Bati is the outlier of the six, and it should be. Instead of copying the coarse chickpea interior of classic falafel, it leans into lentils, atta, ajwain and ghee. The result is firmer and more rustic, with the cracked golden surface of a tiny bati.

Baked Daal Bati falafel with cracked golden crust, green chutney and onion salad

Yield: about 10–12 small bites
Prep: about 25 minutes
Resting: 15 minutes
Baking: about 25 minutes

Ingredients

  • ½ cup total dry dal, using roughly equal amounts moong dal, masoor dal and urad dal; cook and drain well, then measure 1 cup for the dough
  • 1 cup (about 120 g) whole-wheat flour, plus more if required
  • 2 tablespoons fine semolina/sooji
  • 2 tablespoons melted ghee or mustard oil
  • ½ teaspoon ajwain, lightly crushed
  • ¼ teaspoon cumin
  • Small pinch of hing
  • 1 green chilli, very finely chopped
  • ½ teaspoon grated ginger
  • ¼ teaspoon turmeric
  • ¾ teaspoon salt, or to taste
  • Water only if required
  • A little additional ghee for brushing, optional

Method

  1. Cook the ½ cup mixed dry dals until tender but not watery. Drain very thoroughly, then measure 1 cup of cooked dal for the dough. Reserve any extra.
  2. Mash the drained dal coarsely.
  3. Add whole-wheat flour, semolina, ghee or mustard oil, ajwain, cumin, hing, green chilli, ginger, turmeric and salt.
  4. Bring everything together into a firm dough. If sticky, add whole-wheat flour 1 tablespoon at a time. If too dry to hold, add water 1 tablespoon at a time.
  5. Rest for 15 minutes while the oven heats to 200°C / 400°F.
  6. Divide into 10–12 small balls. Leave a slightly rugged surface rather than smoothing every crack away.
  7. Arrange on a baking tray, brush lightly with ghee or oil and bake for 22–28 minutes, turning once, until browned and firm outside.
  8. If desired, brush the hot bites very lightly with ghee as soon as they leave the oven.

Serve with: green chutney, sliced onion, carrot or cucumber and lemon wedges. Because this recipe contains atta, it is not gluten-free. If finished with ghee, it is not vegan either; mustard oil keeps the bites themselves plant-based.


Which Cooking Method Works Best?

The best cooking method changes with the mixture. A chickpea ball wants something different from a soft potato tikki or an atta-and-dal bite.

MethodBest forWhat to expect
Deep-fryingMasala Chana, Paneer-Stuffed, Curry LeafDeepest colour and crispest falafel-style crust
Shallow-fryingAloo TikkiBroad golden crust with a soft potato-chickpea centre
Air fryerMasala Chana, Methi-Palak, Aloo TikkiGood browning with less oil; slightly drier than frying
Appe/paniyaram panMethi-Palak, Curry LeafSmall rounded bites with low oil and good support while cooking
OvenDaal BatiFirm, rustic, bati-like crust rather than a fried falafel shell

For the chickpea-heavy versions, frying gives the clearest contrast between crisp exterior and coarse interior. For Aloo Tikki, broad contact with a hot pan is the point. Methi-Palak benefits from the support of an appe/paniyaram pan, while Daal Bati belongs in the oven. Use the method that suits the texture of each variation rather than forcing every recipe into every appliance.

More Indian Ways to Serve Falafel

Falafel Chaat

Put several hot Masala Chana or Methi-Palak falafel on a plate and lightly crack them open. Add whisked yogurt, green chutney, tamarind chutney, finely chopped red onion, chaat masala, sev, pomegranate and coriander. Assemble just before eating so the base keeps some crunch.

Falafel Pav

Split and toast pav with a little butter or oil. Spread one side with green chutney and the other with tamarind chutney. Add a slightly flattened Masala Chana Falafel, sliced onion and something crisp such as cucumber or cabbage. A little chaat masala over the filling ties it together.

Paneer-Stuffed Falafel Roti Roll

Warm a soft roti and add sliced Paneer Bhurji-Stuffed Falafel, kachumber, pickled onion, coriander and lemony yogurt. Because the paneer is already inside, the wrap does not need another heavy filling.

Indian-Style Mezze Plate

Try Masala Chana Falafel with hummus, cucumber, kachumber, pickled onions, green chutney, lemon and warm flatbread. If you are making the bread too, use our homemade pita bread recipe. For a sharper mango-pickle note, a spoonful of amba sauce fits naturally beside falafel and hummus.

Falafel Bowl

Start with rice, millet, couscous or chopped salad. Add falafel, cucumber, tomato, onion and something creamy such as hummus or yogurt. Then choose one strong Indian accent—green chutney, tamarind, achar, chaat masala or coconut chutney—rather than using every condiment at once.

Fixing These Indian Falafel Variations

ProblemLikely causeFix
Masala or Curry Leaf falafel breaks in oilMixture too wet, too loose or oil too coolDrain thoroughly, compress firmly, fry one tester and add a little besan only if needed
Methi-Palak falafel is soggySpinach retained too much waterSqueeze blanched spinach much more thoroughly before processing
Paneer falafel cracks openWet filling, too much filling or paneer too close to the surfaceCook bhurji drier, cool completely and use a smaller amount
Aloo Tikki sticks or breaks when flippedTurned before the crust formedLeave it undisturbed longer and flip only when it releases more easily
Air-fried green falafel is dryToo little surface oil or too much cooking timeLightly oil and begin checking earlier
Daal Bati mixture is stickyCooked dal retained too much waterDrain longer and add atta gradually rather than dumping in a large amount

If the first chickpea falafel disintegrates, stop there. One tester is enough to tell you whether the mixture needs drying, firmer shaping or hotter oil.

Make Ahead, Store & Freeze

Masala Chana and Curry Leaf: the mixture can be prepared ahead and refrigerated, with baking powder stirred in shortly before shaping and cooking.

Methi-Palak: shorter holding is better because fresh greens continue releasing moisture as they sit.

Paneer-Stuffed: prepare the dry paneer bhurji and chickpea shell mixture separately, refrigerate them, then stuff closer to cooking.

Aloo Tikki: shape the patties, freeze in a single layer until firm, then transfer to a freezer-safe container with parchment between layers if stacking.

Daal Bati: bake, cool and refrigerate. Reheat in a hot oven or air fryer to restore the firmer exterior.

For broader freezing and reheating guidance for classic chickpea falafel, see the full falafel guide.

Indian Falafel FAQs

Can you put garam masala in falafel?

Yes. Classic falafel already uses spices such as cumin and coriander, so a restrained amount of garam masala fits naturally. In the Masala Chana version, it adds an Indian finish without masking the chickpeas and fresh herbs.

Which Indian chutney goes best with falafel?

Coriander-mint green chutney is the most versatile choice for Masala Chana, Methi-Palak and Paneer-Stuffed Falafel. Tamarind works particularly well with Aloo Tikki Falafel Chaat or falafel pav, while coconut chutney makes the most sense beside Curry Leaf Falafel.

Can I make falafel in an appe or paniyaram pan?

Yes. It is particularly useful for Methi-Palak and Curry Leaf Falafel because the cavities support the mixture while each surface cooks. Brush the cavities with a little oil and rotate the falafel as they firm and brown.

Why is my spinach falafel soggy?

Usually because the spinach contains too much water. After blanching, cool it and squeeze aggressively before adding it to the chickpeas. Removing moisture is preferable to compensating later with a large amount of besan.

Can falafel be made with moong dal?

Yes, but replacing chickpeas with another pulse changes both texture and technique. Whole or split moong can make excellent falafel-inspired fritters and patties, but it should be treated as its own formulation rather than a blind one-for-one substitution.

How do you make falafel chaat?

Put hot falafel or Aloo Tikki Falafel on a plate and add whisked yogurt, green chutney, tamarind chutney, onion, chaat masala, sev, pomegranate and coriander. Assemble just before serving so some of the crust stays crisp.

Can paneer be added to falafel?

Yes. Stuffing works particularly well because the paneer remains a distinct soft centre rather than changing the texture of the entire chickpea mixture. Keep the bhurji fairly dry and cool it completely before stuffing.

Which Indian falafel works best in an air fryer?

Masala Chana is the easiest starting point. Methi-Palak also works well, but check it early because small green falafel can dry out. Aloo Tikki can be air-fried, although shallow-frying gives the more characteristic crust. Daal Bati belongs in the oven, and frying remains the most reliable method for the stuffed paneer version.

Posted on — 2 Comments

5 Sweet Potato Appetizers Ideas to Inspire the Chef in You

SWEET POTATO APPETIZERS

Sweet potatoes have officially moved beyond the Thanksgiving table and into the culinary spotlight as a versatile, healthful, and flavor-packed ingredient. Whether you’re a home chef or running a professional kitchen, the latest trends in sweet potato appetizers are all about global flavors, striking visuals, and creative textures.

In this post, we dive deep into five trending sweet potato appetizers for 2025, blending research from top food publications, chef menus, and recent product innovations. Each idea is presented with a chef’s rationale, practical how-to guidance, and tips for home and pro kitchens alike.


1. Grilled Purple Sweet Potato Salad Bites

Why It’s Trending:
Purple sweet potatoes are a visual knockout and rich in antioxidants. Recently featured by Bon Appétit (July 2025), grilling intensifies their natural sweetness while adding smokiness—a modern update for plant-forward appetizers.

How to Make It Practical:

  • Slice purple sweet potatoes into ½-inch rounds.
  • Toss with olive oil, salt, and pepper.
  • Grill on high heat until blistered and tender (about 4 minutes per side).
  • Dress with a creamy sesame-mayo or a lemony vinaigrette.
  • Top with scallions, toasted sesame seeds, and microgreens.

Pro Tip:
For parties, skewer grilled rounds and serve with the dressing on the side for dipping. The color and char will stand out on any appetizer tray.


2. Nashville-Spiced Sweet Potato Balls

The Inspiration:
A twist on classic croquettes, these crispy, spice-laden balls are inspired by the hot chicken craze, but made for vegetarians and flexitarians. Recent recipes (Cherry on My Sundae, June 2025) blend sweet potato with smoky paprika, cayenne, and a crunchy coating.

How to Make Them Practical:

  • Roast and mash sweet potatoes.
  • Mix with breadcrumbs, Nashville-style spices, finely diced green onions, and (optional) shredded cheese or bacon bits.
  • Form into balls; dredge in flour, egg, and panko.
  • Fry or bake until golden and crisp.
  • Serve with a creamy ranch or tangy comeback sauce.

Pro Kitchen Variation:
Pipe spiced sweet potato puree into mini choux pastry shells for an upscale passed hors d’oeuvre.


3. Roasted Sweet Potato “Crostini” with Guacamole & Corn

Why Chefs Love It:
Bread-free “crostini” are trending among gluten-free diners and those seeking lighter fare. Roasted sweet potato rounds are the perfect vehicle for colorful, bold toppings. This concept is popular with food bloggers and professional caterers alike (A Couple Cooks, Jan 2025).

How to Make at Home or Work:

  • Slice sweet potatoes into thick rounds (about ½ inch).
  • Roast with olive oil, cumin, and smoked paprika at 425°F until caramelized (20–25 minutes).
  • Top each round with a dollop of guacamole, roasted corn kernels, diced red onion, and chopped cilantro.
  • Finish with lime juice and a sprinkle of cotija cheese.

Chef’s Tip:
Try different toppings, such as whipped feta with pomegranate seeds or spicy black bean mash with pickled jalapeños.


4. Loaded Sweet Potato with Maple-Sriracha Yogurt & Crispy Chickpeas

On the Cutting Edge:
Loaded sweet potatoes are evolving, now being downsized into appetizer “boats” for maximum flavor and visual impact. The latest takes layer sweet, spicy, tangy, and crunchy elements for a full flavor experience (Good Mood Food, April 2025).

How to Make Them Practical:

  • Halve small sweet potatoes lengthwise; roast until just soft.
  • Scoop out a little center to make a well (save the scooped flesh for another use).
  • Fill with maple-sriracha Greek yogurt, crispy roasted chickpeas, crumbled feta, and pickled onions.
  • Drizzle with almond salsa verde (blend toasted almonds, parsley, lemon, olive oil, and a pinch of chili).

Meal Prep Friendly:
Both the yogurt sauce and chickpeas can be made days in advance, making this ideal for parties.


5. Tempura Sweet Potato Rounds with Flavored Salt

The Industry Insight:
Pre-cooked, tempura-battered sweet potato slices are gaining traction in restaurant and catering sectors for their crispness and convenience (US Foods Chef’s Line, 2025). This idea translates well to home kitchens using basic tempura batter.

How to Bring to Your Table:

  • Cut sweet potato into ½-inch thick rounds.
  • Dip in a simple tempura batter (flour, cornstarch, cold seltzer).
  • Fry in hot oil until golden and crispy.
  • Sprinkle immediately with flavored salt (smoked paprika, garlic powder, or furikake).
  • Serve with a dipping sauce—try spicy mayo, ponzu, or garlic aioli.

Entertaining Tip:
Offer a trio of dips and salts, and let guests mix and match.


Expert Tips for Sweet Potato Appetizer Success

  • Visual Appeal: Use a mix of purple, orange, and white sweet potatoes for color contrast.
  • Batch Prep: Many components (roasted rounds, sauces, toppings) can be made ahead for fast assembly.
  • Texture Matters: Combine creamy, crunchy, and chewy elements for memorable bites.
  • Global Flavors: Don’t be afraid to borrow from global cuisines—sriracha, gochujang, furikake, and curry powder all pair beautifully with sweet potatoes.

Final Thoughts

From smoky grilled salads to street-food-inspired croquettes, sweet potato appetizers are having a major moment in 2025. They’re healthy, photogenic, endlessly adaptable, and equally at home at a casual party or a fine-dining table. Whether you’re looking for a new plant-based favorite or a show-stopping party snack, these ideas bring the best of today’s trends straight to your kitchen.

Ready to experiment? Which idea will you try first? Let us know in the comments or share your own sweet potato creations!


FAQs

1. Can I use regular potatoes instead of sweet potatoes in these recipes?

Answer:
Yes, you can substitute regular potatoes for sweet potatoes in most appetizer recipes, but you’ll lose the characteristic sweetness and vibrant color. Adjust seasonings to balance flavors accordingly.


2. How do I keep sweet potato rounds from getting soggy when roasting or grilling?

Answer:
Slice rounds evenly (about ½ inch), don’t overcrowd the pan, and roast or grill at high heat (425°F/220°C) to encourage caramelization. Let them cool on a wire rack to preserve crispness.


3. Can I make sweet potato appetizers ahead of time?

Answer:
Yes! Many components (roasted rounds, dips, toppings) can be made a day ahead. Store separately and assemble just before serving for best texture and flavor.


4. What are some gluten-free options for breading or crisping sweet potatoes?

Answer:
Use gluten-free panko, crushed rice crackers, or cornmeal for coating. Tempura batter can be made with rice flour and cornstarch.


5. How do I make sweet potato appetizers vegan?

Answer:
Omit dairy (cheese, yogurt) and use plant-based alternatives like cashew cream, vegan cheese, or dairy-free yogurt. Use aquafaba or flaxseed “egg” for binding in fritters or balls.


6. What’s the best oil for frying sweet potato appetizers?

Answer:
Use oils with a high smoke point like canola, peanut, or avocado oil. For added flavor, try a touch of sesame oil in the batter or as a finishing drizzle.


7. Can I air-fry sweet potato appetizers instead of deep frying?

Answer:
Absolutely! Air frying is a healthier alternative and works well for rounds, wedges, and even “balls.” Toss lightly in oil, arrange in a single layer, and cook at 375°F/190°C, flipping halfway.


8. How do I add more flavor to plain sweet potato appetizers?

Answer:
Experiment with spice blends (cajun, za’atar, curry powder), citrus zest, fresh herbs, or flavored salts. Don’t be afraid to use bold, global-inspired dips.


9. Are these sweet potato appetizers suitable for kids?

Answer:
Yes! They’re naturally sweet and can be made mild by adjusting spices. Offer a range of dips and let kids assemble their own bites for fun.


10. How should I store leftovers, and can I reheat sweet potato appetizers?

Answer:
Store leftovers in an airtight container in the fridge for up to 3 days. Reheat in a hot oven or air fryer to restore crispness; avoid microwaving as it makes them soggy.

Posted on — 5 Comments

Best Blue Cheese Dip for Wings: Top 10 Recipes & Expert Tips

a dish of glazed chicken wings with a dip

Introduction:

Blue cheese dip and wings – a pairing as iconic as peanut butter and jelly, or wine and cheese. The tangy, creamy richness of blue cheese dip perfectly complements the spicy kick of buffalo wings, making it a must-have at game nights, parties, or any occasion that calls for finger-licking goodness. In this guide, we delve deep into the world of blue cheese dips, bringing you top-rated videos, expert articles, and the secret to crafting the perfect dip. Whether you’re a blue cheese aficionado or a curious newbie, this guide has something for everyone.


1. The Art of the Perfect Blue Cheese Dip:

Origins and Popularity:

The love affair between blue cheese and wings began in the 1960s in Buffalo, New York. Since then, this creamy concoction has become a staple in American cuisine, gracing the tables of countless gatherings and events. Its popularity isn’t just confined to the U.S.; the blue cheese dip has fans worldwide, each bringing their unique twist to this classic.

Key Ingredients:

  • Blue Cheese: The star of the show. It brings a sharp, tangy flavor that’s unmistakably rich. Opt for high-quality blue cheese for the best results.
  • Sour Cream & Mayonnaise: These ingredients add creaminess to the dip. While mayonnaise brings a slight tang, sour cream balances out the flavors with its mild taste.
  • Lemon Juice: A dash of freshness! Lemon juice brightens up the dip and adds a zesty kick.
  • Garlic: For that extra punch. A hint of garlic can elevate the flavors, making the dip even more irresistible.
  • Seasonings: Salt, pepper, and sometimes a dash of hot sauce or Worcestershire sauce for added depth.

Texture Matters:

The perfect blue cheese dip can be chunky or smooth, depending on personal preference. Chunky lovers enjoy the bits of blue cheese in every bite, while smooth aficionados prefer a dip that’s creamy and well-blended. Whichever camp you belong to, the key is to achieve a consistency that’s neither too thick nor too runny.

Homemade vs. Store-Bought:

While store-bought blue cheese dips offer convenience, nothing beats the freshness and flavor of a homemade dip. With homemade, you have the freedom to adjust ingredients to your liking, ensuring a dip that’s tailor-made for your taste buds.

2. Top 5 YouTube Recipes for Blue Cheese Dip:

In the digital age, visual learning has taken center stage. What better way to master the art of the perfect blue cheese dip than by watching experts do it? Here, we’ve curated the top 5 YouTube recipes that have garnered rave reviews and massive views. Let’s dive in!


1. “Blue Cheese Dressing – Chunky or Smooth” by Poor Man’s Gourmet Kitchen

  • Views: 94,177
  • Duration: 3:08
  • Unique Point: This video offers viewers a choice – chunky or smooth. The host emphasizes the importance of using homemade mayonnaise for an unbeatable flavor.
  • Watch & Learn: Link to the video

Insight: Homemade mayonnaise can elevate the flavor profile of your blue cheese dip, making it richer and more authentic.


2. “BLUE CHEESE DIP – For Buffalo Wings” by Steve Owens

  • Views: 215,137
  • Duration: 4:13
  • Unique Point: Steve brings a touch of the Australian spirit to this classic American dip, adding a spicy buffalo twist that’s hard to resist.
  • Watch & Learn: Link to the video

Insight: Experimenting with spices and flavors can give your blue cheese dip a unique twist, setting it apart from the usual.


3. “How to make Blue Cheese Dip” by We Like Food

  • Views: 75,733
  • Duration: 1:04
  • Unique Point: A quick and straightforward guide for those on the go. This video focuses on the essentials, ensuring a delicious dip in record time.
  • Watch & Learn: Link to the video

Insight: Even with limited time, you can whip up a blue cheese dip that’s flavorful and creamy. It’s all about using the right ingredients.


4. “The Best Blue Cheese Dressing Ever!” by Cooking with Shotgun Red

  • Views: 139,649
  • Duration: 5:13
  • Unique Point: This recipe swaps out mayonnaise for Greek yogurt, adding a tangy twist to the traditional dip. The host also emphasizes the balance of flavors without the need for added lemon juice.
  • Watch & Learn: Link to the video

Insight: Substituting ingredients, like Greek yogurt for mayonnaise, can offer a healthier alternative without compromising on taste.


5. “CRISPY OVEN BAKED BUFFALO CHICKEN WINGS WITH HOMEMADE BLUE CHEESE DRESSING” by NOT ANOTHER COOKING SHOW

  • Views: 456,284
  • Duration: 9:36
  • Unique Point: This video offers a complete package – from baking crispy buffalo wings to crafting the perfect blue cheese dressing. It’s a one-stop-shop for all wing enthusiasts.
  • Watch & Learn: Link to the video

Insight: Pairing your blue cheese dip with the right kind of wings can enhance the overall dining experience. It’s a match made in culinary heaven!


Engaging with the Experts:

Engaging with these videos not only equips you with recipes but also with techniques, tips, and tricks that can only come from seasoned experts. Whether you’re a novice looking to make your first blue cheese dip or a pro seeking to refine your skills, these videos offer a wealth of knowledge.


In the next section, we’ll delve into expert articles and blog posts, extracting nuggets of wisdom and presenting them in an easily digestible format. Stay tuned!

3. Expert Articles and Blog Posts on Blue Cheese Dip:

The written word has its own charm and depth, providing insights that are often missed in videos. In this section, we explore articles and blog posts penned by culinary experts, food bloggers, and blue cheese enthusiasts. Each article is a treasure trove of tips, recipes, and unique perspectives. Let’s get started!


1. “Blue Cheese Dip – Chicken Wing Dip” by Fifteen Spatulas

  • Source: Fifteen Spatulas
  • Key Takeaway: The article emphasizes the importance of letting the ingredients meld for a few hours before serving. It also recommends using homemade mayonnaise for the best flavor.

Insight: Patience is key. Allowing the ingredients to meld enhances the flavors, making your blue cheese dip a hit at any gathering.


2. “Fried Buffalo Wings With Blue Cheese Dip Recipe” by Food Network

  • Source: Food Network
  • Key Takeaway: The article suggests using a food processor to achieve a chunky yet well-blended texture. It also adds garlic and milk to the traditional ingredient list.

Insight: A food processor can be your best friend when aiming for a specific texture in your blue cheese dip.


3. “Quick Blue Cheese Dip for Wings and More!” by Kitchen Divas

  • Source: Kitchen Divas
  • Key Takeaway: The blog post offers a perspective on personal preferences, mentioning that while the author is a ranch lover, her husband swears by blue cheese dip.

Insight: Blue cheese dip is versatile and caters to different taste buds, making it a crowd-pleaser at any event.


4. “Blue Cheese Dip (Chicken Wing Dip)” by Kevin Is Cooking

  • Source: Kevin Is Cooking
  • Key Takeaway: The article introduces a healthier alternative by using Greek yogurt instead of mayonnaise. It also adds celery salt for an extra flavor kick.

Insight: Healthy alternatives like Greek yogurt can still deliver on flavor while cutting down on calories.


5. “Chicken Wings with Blue Cheese Dip” by Food & Wine

  • Source: Food & Wine
  • Key Takeaway: This article provides a complete package, from the wing recipe to the blue cheese dip, and even suggests a wine pairing.

Insight: A well-thought-out pairing can elevate your blue cheese dip and wings to a gourmet experience.


Why Articles Matter:

Reading these articles gives you a well-rounded understanding of blue cheese dip. They offer different perspectives, from the choice of ingredients to the preparation techniques, and even how to serve and enjoy the dip. It’s like having a panel of experts guiding you through your culinary journey.


Up next, we’ll consolidate all these golden nuggets into a section filled with unique tips and tricks for making the ultimate blue cheese dip. Stay tuned!

4. Unique Tips for the Perfect Dip:

Every culinary masterpiece has its secrets, and the blue cheese dip is no exception. Drawing from the insights of experts and the nuances of various recipes, we’ve curated a list of unique tips that can elevate your blue cheese dip to perfection. Whether you’re a seasoned chef or a home cook, these tips are sure to add a touch of magic to your dip.


1. The Right Blue Cheese:

  • Quality Matters: Opt for a high-quality blue cheese. The flavor and texture of your dip heavily depend on the cheese’s quality.
  • Crumble vs. Creamy: Depending on your preference for a chunky or smooth dip, choose between crumbled blue cheese or a creamier variant.

2. Balancing Act:

  • Tang vs. Creaminess: The interplay between sour cream, mayonnaise, and lemon juice determines the dip’s tanginess. Adjust these ingredients to find your perfect balance.
  • Greek Yogurt Alternative: As seen in Kevin’s recipe, Greek yogurt can be a healthier alternative to mayonnaise, adding a tangy twist without the added calories.

3. Texture Secrets:

  • Food Processor Magic: For a dip that’s chunky yet well-blended, a food processor can be your best ally. Pulse the ingredients to achieve your desired consistency.
  • Melding Time: As suggested by Fifteen Spatulas, letting the dip sit for a few hours allows the flavors to meld, enhancing its overall taste.

4. Flavor Enhancements:

  • Garlic Punch: A hint of garlic can elevate the dip’s flavor profile. However, ensure it’s finely minced or use garlic powder to avoid overpowering the dip.
  • Spice It Up: A dash of hot sauce, Worcestershire sauce, or even celery salt can add depth to your blue cheese dip.

5. Serving Suggestions:

  • Chilled vs. Room Temperature: While some prefer their blue cheese dip chilled, others love it at room temperature. Experiment to find what works best for you.
  • Pairing Ideas: Beyond wings, consider fresh vegetables like celery sticks, carrot sticks, or bell pepper strips. The dip’s creaminess complements the crunch of fresh veggies.

6. Personal Touch:

  • Experiment: The beauty of cooking lies in experimentation. Don’t hesitate to tweak recipes based on your preferences. Maybe you’d like to add some fresh herbs or a different type of cheese?
  • Feedback Loop: Always taste as you go. Adjusting ingredients in real-time based on taste can lead to a more refined end product.

The journey to the perfect blue cheese dip is one of exploration and creativity. With these tips in hand, you’re well-equipped to craft a dip that’s not only delicious but also uniquely yours. Remember, the best recipes are those that resonate with your taste buds and bring joy to those you share them with.

In the next section, we’ll explore the world beyond wings, suggesting other delightful pairings for your blue cheese dip. Stay with us for more culinary adventures!

5. Pairing Your Blue Cheese Dip: Beyond Wings:

While buffalo wings and blue cheese dip are a match made in culinary heaven, the versatility of this creamy concoction extends far beyond. Its rich, tangy flavor profile makes it an excellent companion for a variety of dishes. Let’s embark on a gastronomic journey, exploring the myriad ways you can enjoy your blue cheese dip.


1. Fresh Vegetables:

  • Crunchy Companions: The creamy texture of blue cheese dip pairs beautifully with the crunch of fresh vegetables. Consider:
    • Celery Sticks: A classic pairing with a refreshing bite.
    • Carrot Sticks: Their natural sweetness complements the tang of the dip.
    • Cucumber Slices: A cool, crisp contrast to the rich dip.
    • Bell Pepper Strips: Colorful and crunchy, they add a vibrant touch to your platter.

2. Meats & Grilled Delights:

  • Steak Bites: Tender pieces of steak dipped in blue cheese is a gourmet treat.
  • Grilled Chicken Strips: A leaner alternative to wings but equally delicious.
  • Bacon-Wrapped Asparagus: The smokiness of bacon combined with the freshness of asparagus, all enhanced by the blue cheese dip.

3. Seafood:

  • Shrimp Cocktail: Swap out the traditional cocktail sauce for blue cheese dip for a delightful twist.
  • Grilled Calamari: The charred flavors of calamari find a creamy counterpart in the dip.

4. Breads & Crackers:

  • Toasted Baguette Slices: The soft insides and crispy crust of a baguette make it a perfect vessel for the dip.
  • Crackers: From whole grain to water crackers, they all pair wonderfully with blue cheese dip.
  • Pretzel Sticks: The salty crunch of pretzels meets the creamy tang of the dip for a match made in snack heaven.

5. Fruits:

  • Apple Slices: The tartness of green apples or the sweetness of red ones, both work beautifully with the rich dip.
  • Pears: Sliced pears with blue cheese dip is a sophisticated pairing that’s sure to impress.

6. Diverse Cuisines:

  • Tacos: Drizzle some blue cheese dip over your tacos for a fusion of flavors.
  • Pizza: Especially on a buffalo chicken pizza, the dip can replace the traditional tomato sauce or be used as a drizzle on top.

The world of blue cheese dip pairings is vast and varied. Whether you’re hosting a sophisticated soirée or a casual game night, there’s a pairing to suit every occasion. The key is to experiment and find combinations that resonate with your palate. After all, the joy of food lies in exploration and discovery.


Up next, we’ll wrap up our guide with a conclusion and some personal recommendations. Whether you’re a blue cheese novice or a seasoned aficionado, we’ve got some final tips to enhance your culinary journey. Stay tuned!


6. Conclusion & Personal Recommendations:

As we wrap up this comprehensive journey into the world of blue cheese dip, it’s evident that this creamy delight is more than just a side dish. It’s a culinary experience, a bridge between flavors, and a testament to the magic that simple ingredients can create when combined with passion and expertise.


The Magic of Blue Cheese Dip:

From its humble origins in Buffalo, New York, to its global acclaim, blue cheese dip has captured the hearts and palates of many. Its versatility is its strength, making it a favorite across diverse cuisines and cultures. Whether paired with the spicy kick of buffalo wings, the refreshing crunch of fresh veggies, or the subtle flavors of seafood, it never fails to impress.


Personal Recommendations:

  1. Experiment with Cheese Varieties: While blue cheese is the star, consider blending it with other cheeses like gorgonzola or feta for a unique flavor profile.
  2. Herbal Touch: Fresh herbs like dill, chives, or parsley can add a refreshing twist to your dip. They not only enhance the flavor but also add a pop of color.
  3. Heat It Up: If you’re a fan of spicy flavors, consider adding a dash of chili flakes or a splash of hot sauce to your dip. The heat contrasts beautifully with the creamy coolness of the dip.
  4. Presentation Matters: Serve your blue cheese dip in a beautiful bowl, garnished with some crumbled cheese and fresh herbs. Remember, we eat with our eyes first!
  5. Pair with Wine: For a sophisticated touch, pair your blue cheese dip with a glass of crisp white wine or a light red. The flavors complement each other, elevating the dining experience.

Final Thoughts:

Crafting the perfect blue cheese dip is a journey of exploration, taste, and creativity. With the insights from top YouTube recipes, expert articles, and unique tips, you’re well-equipped to embark on this culinary adventure. Remember, the best dishes are those crafted with love, passion, and a touch of personal flair. So, don your apron, gather your ingredients, and let the magic unfold.

Thank you for joining us on this flavorful journey. Here’s to many delightful dips and memorable meals!


With this, we conclude our ultimate guide to blue cheese dip. Whether you’re hosting a party, enjoying a quiet meal, or simply indulging in a snack, may your blue cheese dip always be creamy, tangy, and absolutely delicious. Cheers!


FAQ (Frequently Asked Questions):


1. What is the origin of blue cheese dip?

Blue cheese dip traces its origins back to Buffalo, New York, in the 1960s. It quickly gained popularity as the perfect accompaniment to buffalo wings and has since become a staple in American cuisine, with variations and adaptations seen worldwide.


2. Can I make a vegan version of blue cheese dip?

Absolutely! There are many vegan blue cheese alternatives available in the market. Combine them with vegan sour cream or yogurt, lemon juice, and your choice of seasonings. Adjust the ingredients to your taste, and you’ll have a delicious vegan blue cheese dip ready to serve.


3. How can I achieve a chunky texture in my blue cheese dip?

For a chunky texture, opt for crumbled blue cheese and gently fold it into your mixture. Using a food processor? Just pulse a few times to ensure you retain those delightful cheese chunks.


4. What other dishes pair well with blue cheese dip besides wings?

Blue cheese dip is incredibly versatile. It pairs wonderfully with fresh vegetables like celery and carrots, grilled meats, seafood like shrimp cocktail, and even breads and crackers. For a unique twist, try it on tacos or drizzled over pizza.


5. How long can I store blue cheese dip in the refrigerator?

Blue cheese dip, when stored in an airtight container, can last in the refrigerator for up to a week. However, it’s always best to consume it within the first few days for optimal freshness and flavor.


6. Can I use other cheeses in my blue cheese dip?

Certainly! While blue cheese is the traditional choice, you can experiment with other cheeses like gorgonzola or feta. Mixing cheeses can result in a unique and delightful flavor profile.


7. I’m not a fan of mayonnaise. Can I replace it in the recipe?

Yes, you can. Greek yogurt is a popular alternative to mayonnaise, offering a tangy flavor and creamy texture. Sour cream or cream cheese can also be used as replacements, depending on your preference.


8. How can I add a spicy kick to my blue cheese dip?

For those who love a bit of heat, adding a dash of hot sauce, chili flakes, or even diced jalapeños can give your blue cheese dip that spicy kick. Adjust the level of spiciness to your liking.


9. Are there any wines that pair well with blue cheese dip?

Blue cheese dip pairs beautifully with wines that offer a contrast to its rich and tangy flavor. Consider a crisp white wine, a light red, or even a sparkling wine to complement the dip’s creamy texture.


10. Can I freeze blue cheese dip for later use?

While freezing is possible, it may affect the texture of the dip once thawed. It’s recommended to consume the dip fresh or refrigerated for the best flavor and consistency.


Blog Tags for the Post:

Blue Cheese Dip, Buffalo Wings, Creamy Dips, Party Snacks, Gourmet Dips, Homemade Dips, Dip Recipes, Wing Pairings, Culinary Tips, Cheese Varieties, Food and Wine Pairings, Vegan Blue Cheese Alternatives, Spicy Dips, Gourmet Snacks, American Cuisine, Dip Origins, Food FAQs.