Posted on — 10 Comments

Sheet Pan Chicken Fajitas Recipe (Easy One-Pan Oven Fajitas)

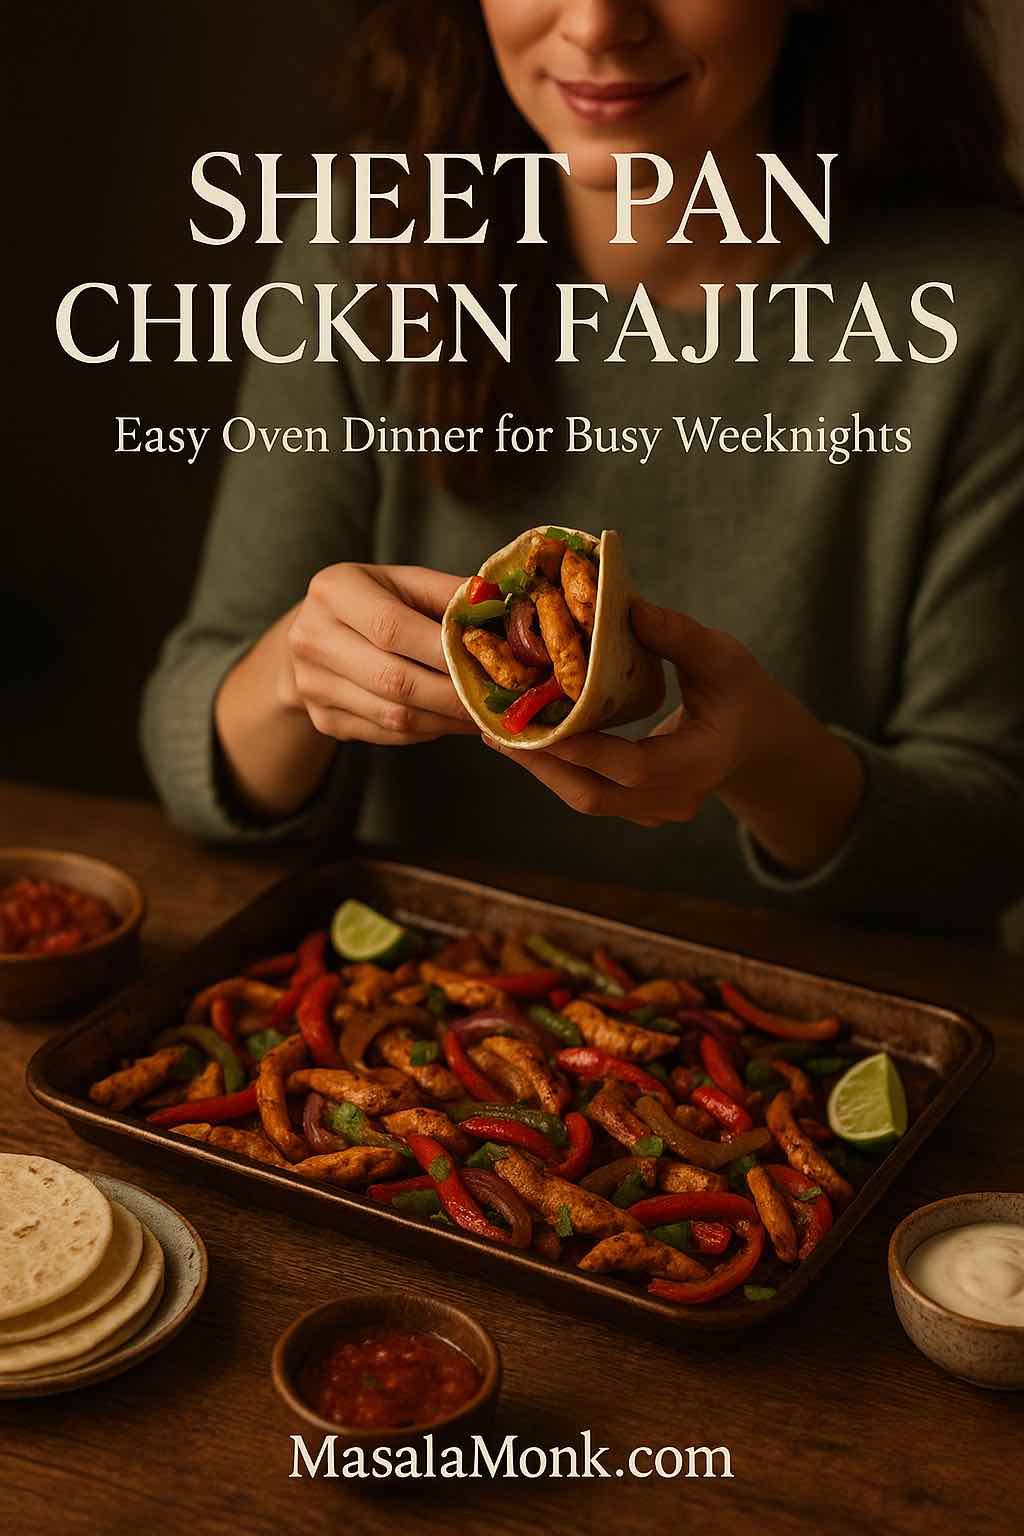
Woman holding a warm flour tortilla filled with sheet pan chicken fajitas above a tray of oven-baked chicken, bell peppers, and onions on a rustic wooden table.

Sheet pan chicken fajitas are one of those meals that feel like a tiny miracle. You get juicy chicken, caramelised onions, and colourful peppers, all sizzling with smoky fajita spices, but instead of juggling three pans on the stove, everything happens together on one tray in the oven. It’s the kind of recipe that works on frantic weeknights, lazy Sundays, game days, and everything in between. This sheet pan chicken fajitas recipe is all about ease.

You toss strips of chicken and vegetables in a bold spice blend, spread them over a pan, and let the oven transform them into tender, slightly charred perfection. While your oven fajitas roast, you can warm tortillas, mix a simple sauce, or just sit down for a minute and breathe. By the time the timer rings, the kitchen smells like your favourite Tex-Mex spot, and you’ve got a full chicken fajita sheet pan dinner ready to slide onto the table.


Why Sheet Pan Fajitas Chicken Recipe Beats Skillet Fajitas

Traditional skillet fajitas chicken has its charms: a screaming-hot skillet for fajitas, that dramatic sizzle as the pan hits the table, the cloud of steam scented with lime and chili. Yet there’s a reason sheet pan fajitas have become such a staple in modern kitchens.
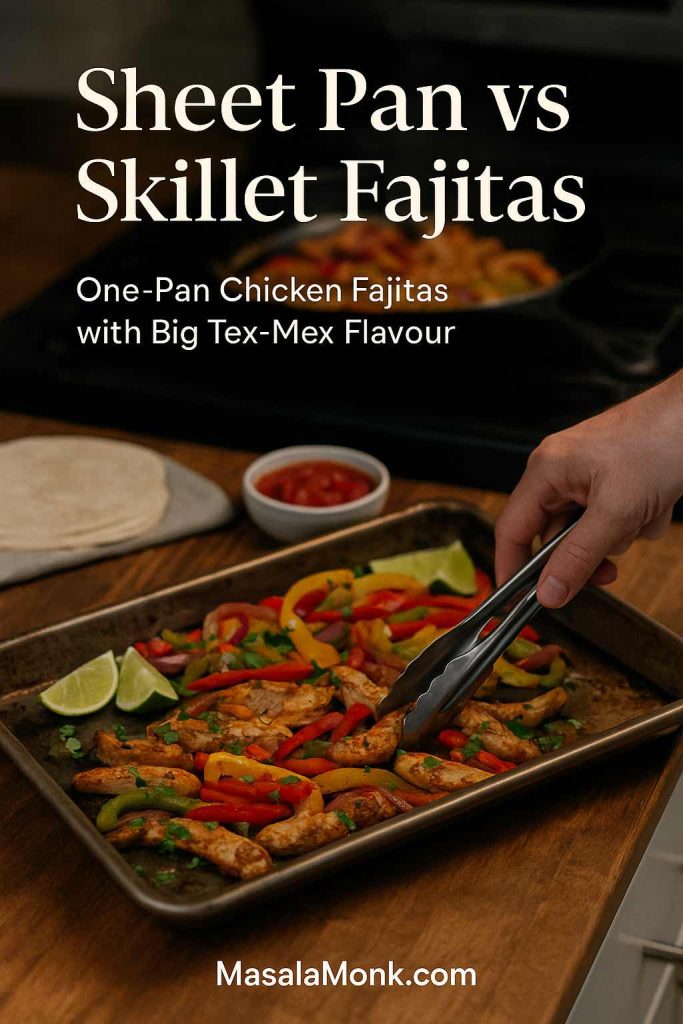
Hand using tongs over a tray of sheet pan chicken fajitas on a wooden counter, with a skillet of fajitas blurred on the stovetop in the background and text reading Sheet Pan vs Skillet Fajitas.
Sheet pan chicken fajitas in the spotlight, skillet fajitas in the background – same Tex-Mex flavour, but the one-pan oven method keeps dinner simpler and cleaner.

First, there’s the simplicity. With this easy sheet pan chicken fajitas method, you’re making a true one pan chicken fajita dinner. Instead of cooking in batches, then keeping everything warm, the meat and vegetables roast together. That means less hovering, fewer dishes, and more time to deal with everything else calling your name.

Second, the texture is fantastic. High oven heat encourages the peppers and onions to soften while still keeping a bit of bite, and the chicken picks up lovely browned edges. When you spread everything out properly on the tray, your baked chicken fajitas end up tasting like you fussed far more than you did.

Finally, this style is incredibly flexible. You can turn it into a chicken fajita tray bake for a crowd, scale down to chicken fajitas for one, make it extra spicy, keep it mild for kids, or adapt the marinade for pork, shrimp, or vegetables. Once you’ve learned the rhythm of cooking chicken fajitas in the oven, you’ll find yourself using the same technique for other dishes too.

Also Read: 10 Best Espresso Martini Recipe Variations (Bar-Tested)


Understanding Fajitas (and Why They Love the Oven)

Before diving into the nuts and bolts of this sheet pan chicken fajitas recipe, it helps to know what fajitas actually are. Traditionally, fajitas started as strips of grilled skirt steak served with onions and peppers in tortillas as part of Tex-Mex cooking, and the name itself comes from “faja,” meaning “strip” or “belt.” Over time, the concept expanded to include chicken fajitas, shrimp, and even all-vegetable versions, all built around that core idea of savoury strips tucked into warm tortillas.

Because fajitas are usually cooked hot and fast, transferring that method to the oven makes a lot of sense. When you cook fajitas in oven, you’re essentially recreating the high heat of the grill or stovetop, just with a different heat source. The key difference is that instead of shaking a pan throughout the cooking process, you let the oven do most of the work and just give your sheet pan fajita chicken a stir once or twice.

Stovetop chicken fajitas in a pan are still wonderful when you’re in the mood to stand and cook, but making fajitas in the oven is the move when life is hectic. You end up with the same satisfying flavours in a more forgiving, lower-effort format.

Also Read: Katsu Curry Rice (Japanese Recipe, with Chicken Cutlet)


Ingredients for Sheet Pan Chicken Fajitas Recipe

You don’t need anything fancy for baking sheet fajitas—just everyday staples that work incredibly well together.
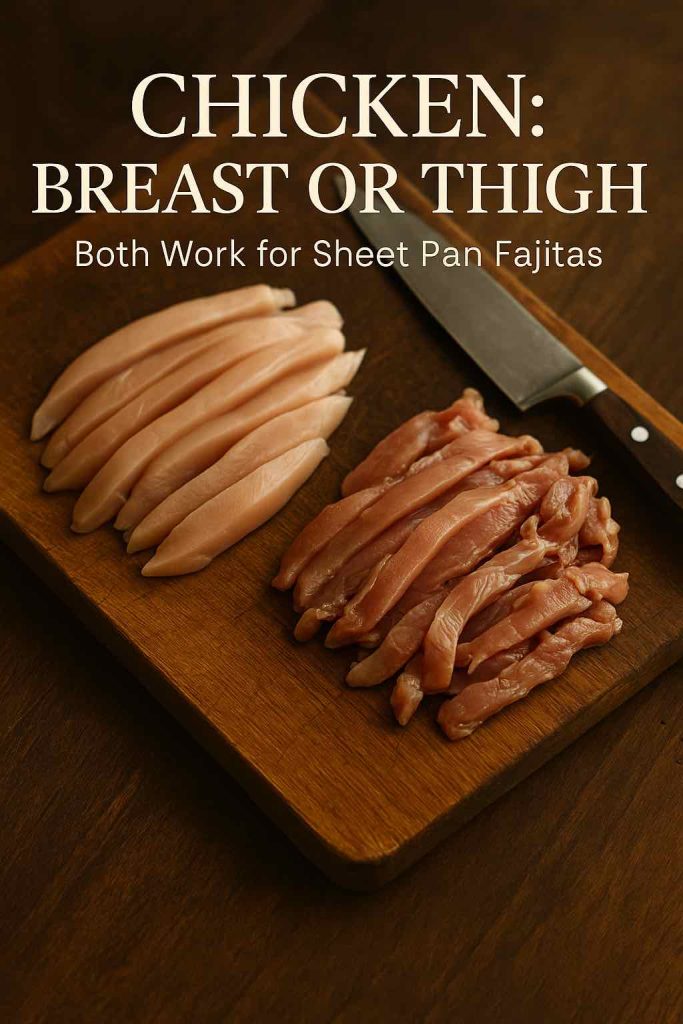
Thinly sliced chicken breast and chicken thigh strips on a wooden cutting board with a chef’s knife, labeled as breast or thigh for sheet pan chicken fajitas.
Chicken breasts stay lean and tidy, chicken thighs stay extra juicy—both cuts slice into perfect strips for sheet pan chicken fajitas.

Chicken: breast or thigh

Start with about 700–900 g (1½–2 lb) of boneless, skinless chicken. Both options work:

  • Chicken breasts give you leaner chicken breast fajitas oven style fajitas. They cook quickly and slice neatly, which is useful if you’re building bowls or meal-prep boxes.
  • Chicken thighs stay juicy even if they roast a little longer, making them ideal for a slightly more forgiving chicken thigh fajitas oven version.

Slice the chicken into thin strips across the grain. Thin, even strips are crucial for chicken fajitas baked in oven because they cook at roughly the same time as the vegetables.
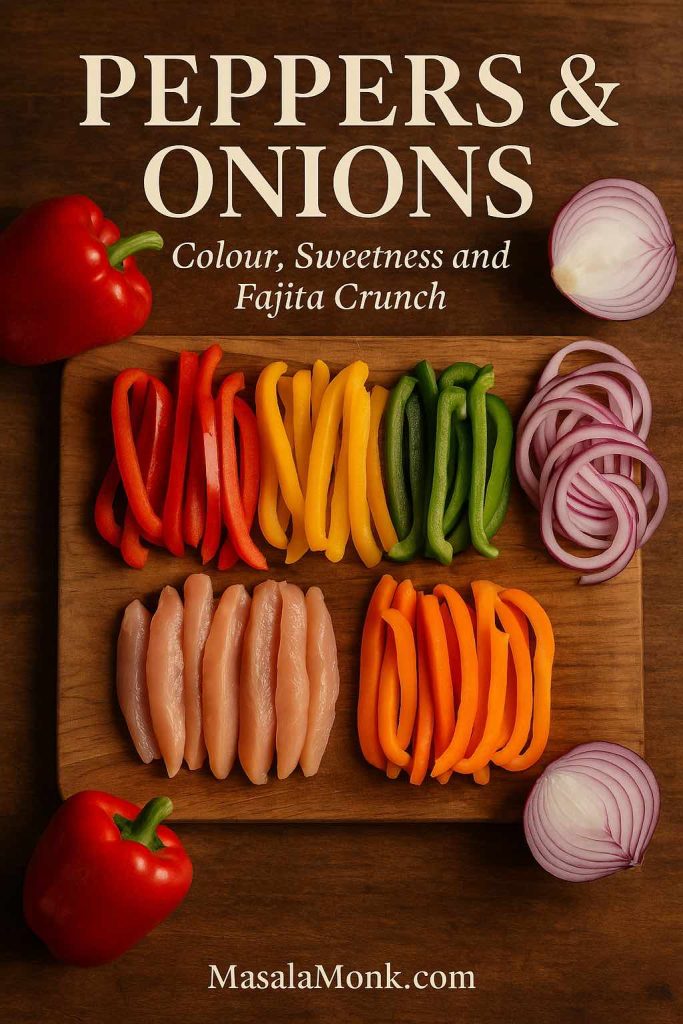
Sliced red, yellow, green and orange bell peppers with red onion rings and chicken strips arranged on a wooden board under the title Peppers and Onions for sheet pan chicken fajitas.
Colourful strips of peppers and onions, cut to match the chicken, give sheet pan chicken fajitas their sweetness, crunch and even roasting.

Peppers and onions

Next, grab your vegetables:

  • 3 bell peppers (red, yellow, orange, or green)
  • 1–2 medium onions

Bell peppers are naturally sweet and full of vitamin C and antioxidants, so they’re one of the reasons these healthy sheet pan chicken fajitas feel as nourishing as they do. Thin slices roast quickly and tuck perfectly into tortillas or bowls. Onions bring savoury depth and a touch of natural sweetness as they caramelise, turning the entire fajita sheet pan dinner into something rich and comforting.

Slice both peppers and onions into strips that mirror the size of your chicken pieces. Matching everything like this makes your one sheet chicken fajitas cook more evenly.
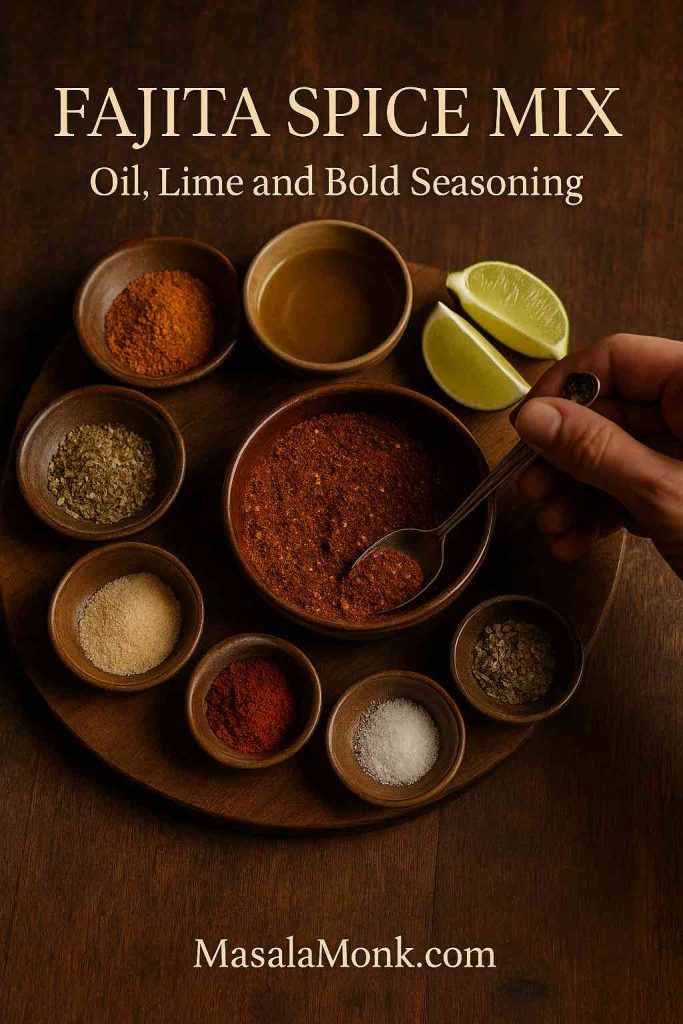
Small bowls of chili powder, cumin, paprika, garlic, oregano, salt, oil and lime wedges arranged around a central bowl of fajita spice mix, with a hand scooping seasoning for sheet pan chicken fajitas.
A simple fajita spice mix of chili, cumin, paprika, garlic, oregano, oil and lime is all you need to turn basic chicken and peppers into bold sheet pan chicken fajitas.

Oil, lime, and spice mix

For that signature fajita flavour, you’ll need:

  • Neutral oil (or mild olive oil)
  • Fresh lime juice
  • Chili powder
  • Ground cumin
  • Paprika (regular or smoked)
  • Garlic powder or minced garlic
  • Dried oregano
  • Salt and black pepper
  • Optional cayenne for heat

This blend turns basic chicken and peppers into full-on fajita chicken sheet pan magic. As the tray roasts, the spices toast and cling to every piece, giving your sheet fajitas their unmistakable colour and aroma.
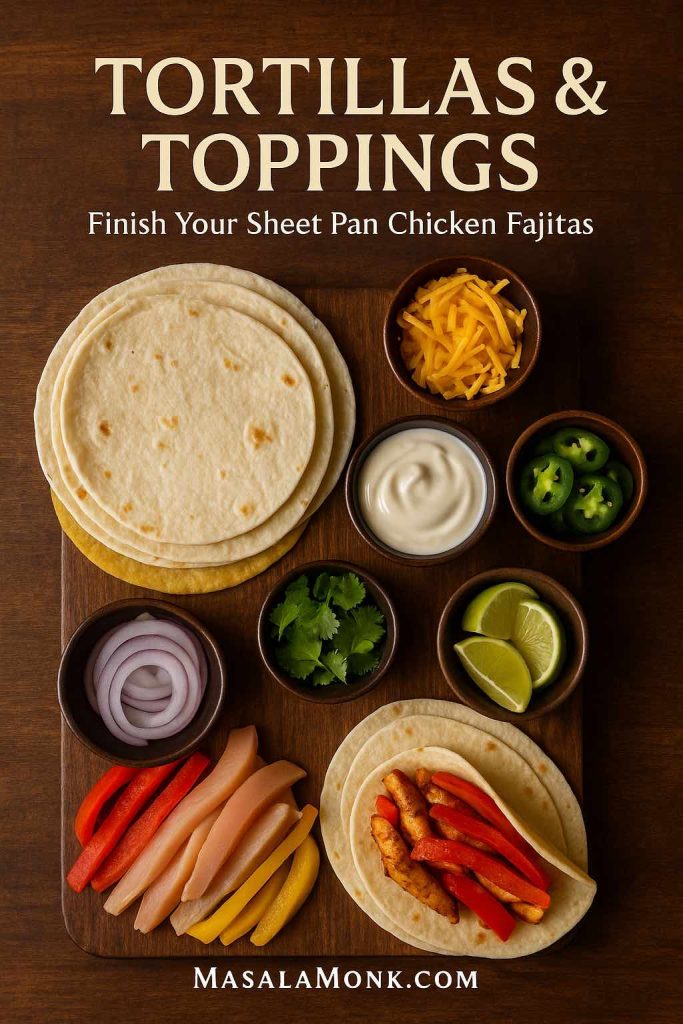
Stack of flour and corn tortillas surrounded by bowls of cheese, sour cream, jalapeños, cilantro, lime wedges, onions and fajita filling on a wooden board for sheet pan chicken fajitas.
Soft tortillas, fresh jalapeños, lime, cheese and creamy toppings turn simple sheet pan chicken fajitas into a build-your-own fajita bar everyone can customise.

Tortillas and toppings

Once your chicken fajitas in the oven recipe comes out bubbling and browned, you’ll want a few extras to round things out:

  • Flour or corn tortillas
  • Grated cheese
  • Sour cream or thick Greek yogurt
  • Sliced jalapeños
  • Fresh coriander
  • Extra lime wedges

If you’d like a lighter, more refreshing topping, a bowl of cool Greek tzatziki sauce is a beautiful alternative to sour cream. It brings creaminess, garlic, cucumber, and herbs that play wonderfully with spicy chicken fajita oven tray flavours.


Choosing the Best Sheet Pan for Recipe of Chicken Fajitas

Because this recipe hangs on your pan, it’s worth a quick look at equipment. The same mixture of chicken and peppers behaves differently in a cast-iron chicken fajita pan, a light cookie sheet, and a heavy-duty baking tray.

Sheet pan vs skillet

If you’ve always made skillet fajitas chicken, shifting to the oven might feel like a big step. In reality, each method has its niche:

  • A cast-iron skillet for fajitas is unbeatable when you want dramatic sizzle and dark char. You get those hot spots that bring extra browning, and it’s fun for smaller batches you want to serve right away.
  • A sturdy sheet pan is better when you need 1 pan chicken fajitas for four people (or more) without hovering. You get more surface area, so your pan sheet chicken fajitas can spread out and roast instead of steaming.

For this recipe, a rimmed, heavy-duty baking sheet is ideal. It’s stable under high heat and holds onto some of that warmth, helping the edges crisp up.

Cast iron skillet, heavy rimmed sheet pan with chicken and peppers, and an empty silver cookie sheet arranged side by side under the title Choosing the Best Pan for Fajitas.
A cast iron skillet, cookie sheet and heavy rimmed sheet pan side by side—showing why the sturdy sheet pan is the best choice for oven-baked chicken fajitas.

Cookie sheet vs baking sheet

You can absolutely use a cookie sheet if that’s what you have; a lot of people make cookie sheet fajitas and cookie sheet chicken fajitas successfully. Just keep these points in mind:

  • Thin pans may warp at high temperatures, which can cause the oil to pool and parts of your pan sheet fajitas to brown faster.
  • Darker pans brown more aggressively, which can be great for extra char but requires closer watching at the end.

If you’re shopping with fajitas in mind, look for something marketed as a half-sheet pan or roasting tray. That’s essentially the best pan to cook fajitas in when you’re leaning into the baked fajitas style.

Also Read: Vegan French Toast: 6 Easy Recipes (Pan, Air Fryer, GF & High-Protein)


Step-by-Step: Making Chicken Fajitas in the Oven

Now that your ingredients and pan are ready, it’s time to make easy oven baked chicken fajitas from start to finish.

Sheet pan lined with parchment holding sliced bell peppers and red onions while a hand holds a bowl of raw chicken strips beside it for step one of sheet pan chicken fajitas.
Step 1 – Prep the tray: line the pan, scatter peppers and onions, then add the sliced chicken so everything is ready to roast together.

1. Preheat and prep the tray

Begin by preheating your oven to around 220°C (425°F). This high heat is what makes fajitas baked in oven taste similar to grilled versions. While the oven heats, line your pan with parchment or lightly brush it with oil.

Scatter your sliced peppers and onions across the tray. This base layer becomes the foundation of your sheet pan chicken and peppers, catching juices and seasonings as everything cooks.

Arrange the sliced chicken on top. You’re building your chicken sheet pan fajitas right on the tray, so there’s no need for extra bowls once you get the hang of it.

Hands tossing raw chicken strips, bell peppers and onions on a sheet pan with tongs while a spoonful of fajita seasoning is sprinkled over the top for step two of sheet pan chicken fajitas.
Step 2 – Season and toss: drizzle on oil and lime, sprinkle over the fajita spice mix, then toss everything together until the chicken and veggies are coated.

2. Mix and add the seasoning

Drizzle oil and lime juice over the chicken and vegetables. Sprinkle over your spice mix, making sure every strip has a little colour. Then, use your hands or tongs to toss everything together directly on the pan until the entire chicken fajita sheet pan recipe looks well coated.

At this point, the mixture already resembles a fajita tray bake: vibrant, glossy, and promising. Make sure nothing is piled too high; for the best sheet pan fajitas, you want most pieces in a single layer, or as close as you can get.
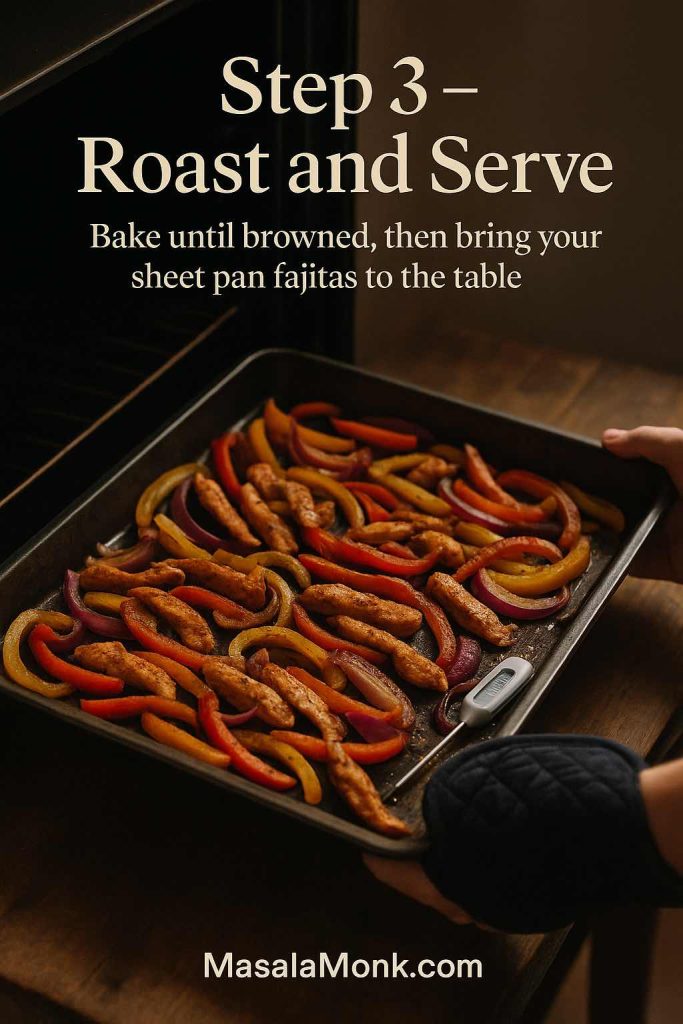
Baked sheet pan chicken fajitas with browned chicken strips and peppers being pulled from the oven with an oven mitt while a thermometer checks the chicken’s temperature.
Step 3 – Roast and serve: bake the chicken and peppers until lightly charred, check that the chicken is cooked through, then bring the sizzling sheet pan fajitas straight to the table.

3. Roast until juicy and slightly charred

Slide the pan into the hot oven and roast for about 18–22 minutes:

  • Stir once halfway through to make sure your pan fajita mix cooks evenly.
  • Keep an eye on smaller pieces; they might brown a bit faster at the edges.
  • If you’d like a darker finish, you can increase the heat slightly or use the broiler for the last few minutes for broiled chicken fajitas.

For safety, aim for an internal temperature of 165°F (74°C) in the thickest pieces of chicken. A small instant-read thermometer takes the guesswork out of this part and guarantees fully cooked baked chicken fajitas every time.

When the chicken is opaque and tender and the vegetables have softened and picked up browned spots, your oven baked chicken fajita recipe is ready.

Also Read: Baked Jalapeño Poppers (Oven) — Time, Temp & Bacon Tips


Getting the Texture Just Right

Good chicken fajitas baked in oven are all about balance. You want soft onions, tender peppers, and juicy chicken, but you also want enough colour and char to bring depth.

Sheet pan of chicken fajitas divided in half, with crowded pieces on one side and well-spaced, deeply browned chicken and peppers on the other to show how spreading out gives better char.
Crowded fajitas steam, but when you spread the chicken and peppers out in a single layer you get the charred, deeply flavoured sheet pan chicken fajitas everyone loves.

Here are a few small tweaks that make a big difference:

  • Spread the mixture out. Crowding the tray makes fajitas bake tray style dishes steam. If things are piled high, use two pans.
  • Rotate the pan halfway through if your oven runs hot in certain spots. This simple step can turn a decent fajita sheet pan recipe into the best sheet pan fajitas your oven can produce.
  • Stir gently. Flipping everything once in the middle helps both sides brown without shredding the chicken.

If you love the seared edges you get from cooking fajitas in a pan, you can always transfer a portion of the roasted fajita chicken sheet pan mix to a hot cast-iron chicken fajita pan for a minute or two before serving. It’s the best of both worlds: low-effort cooking plus that restaurant-style finish.

Also Read: Vodka with Lemon: Easy Cocktails, Martini Twist & DIY Infusion


Turning One Recipe into Many: Variations on Sheet Pan Chicken Fajitas

A good sheet pan fajita chicken base opens up a lot of possibilities. Once you’ve mastered the classic version, you can start playing with different combinations.
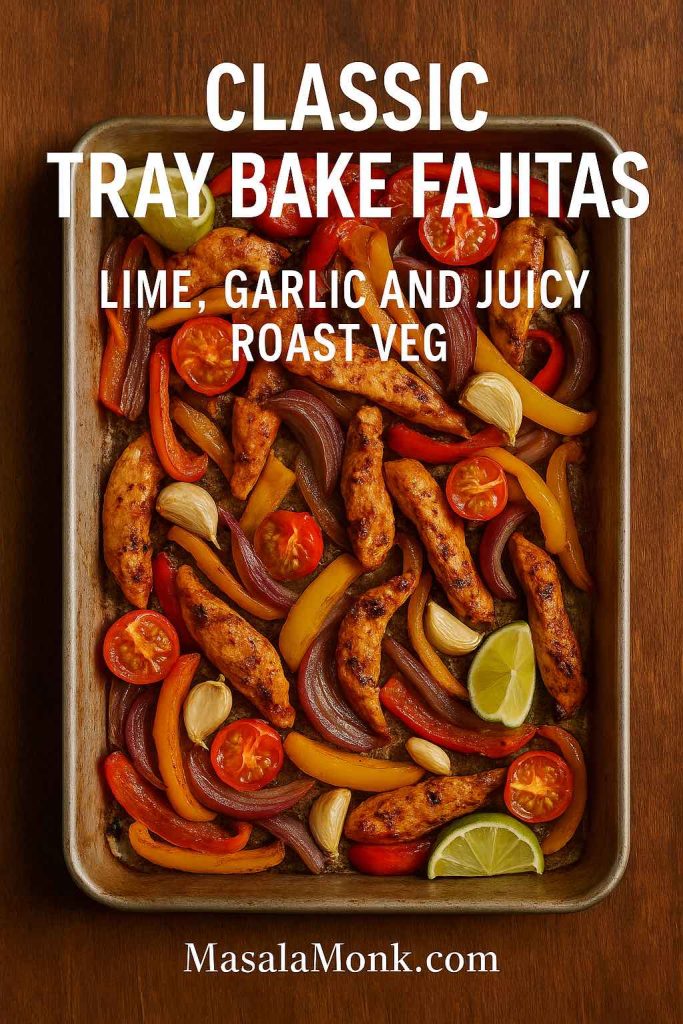
Classic tray bake sheet pan chicken fajitas with roasted chicken strips, bell peppers, onions, blistered cherry tomatoes, garlic cloves and lime wedges on a metal pan.
Classic tray bake fajitas with roasted garlic, burst cherry tomatoes and lime wedges turn simple sheet pan chicken fajitas into a full, juicy one-pan dinner.

Classic tray bake fajitas

You can lean harder into the chicken fajita tray bake idea by nestling lime wedges, whole garlic cloves, and even halved cherry tomatoes around the pan before roasting. As the tomatoes burst and the garlic softens, they create pockets of extra flavour that melt into the juices and coat the chicken.

For a slightly heartier fajita chicken tray bake, try adding:

  • Drained black beans or chickpeas
  • Frozen corn (no need to thaw)
  • Diced sweet potato or small potato cubes for a more substantial baked fajitas recipe

These additions make your chicken fajita sheet pan meal feel more like a complete tray dinner that can be served as is, without many extra sides.

Sheet pan of extra-charred broiled chicken fajitas with blistered bell peppers and onions being pulled from under the oven broiler with tongs.
Extra-charred, broiled sheet pan chicken fajitas with blistered peppers and smoky edges for anyone who loves that grilled, restaurant-style flavour at home.

Extra-charred and broiled fajitas

If you lean towards the smoky, charred edges you get from grilling or pan fajita recipe styles, the broiler is your friend. Once the chicken is cooked through, slide the pan under the broiler for two to three minutes, watching closely. The vegetables will blister in places, and you’ll end up with something closer to restaurant-style oven fajitas.

Some cooks like to marinate the chicken first, inspired by recipes like sheet pan chicken fajitas from Serious Eats, then finish under the broiler for a deep, roasty flavour. Others love the simplicity of budget-friendly oven fajitas where you just toss everything and bake. Both approaches fit happily within this chicken fajita recipe sheet pan framework; feel free to adapt.

Hand lifting a soft taco filled with shredded sheet pan chicken, peppers, cheese and salsa from a wooden board, with the roasted chicken fajitas still on the sheet pan below.
Turn one tray of sheet pan chicken fajitas into easy chicken tacos by shredding the baked chicken, piling it into warm tortillas and topping with cheese, salsa and herbs.

Sheet pan taco chicken and chicken tacos

Sometimes you’re craving tacos rather than classic fajitas. Luckily, the same sheet pan chicken fajitas mixture doubles as sheet pan taco chicken with almost no changes.

Once your easy sheet pan fajitas come out of the oven:

  • Shred a portion of the chicken with two forks.
  • Spoon the shredded pieces into small tortillas with extra cheese and salsa.
  • Keep some of the sliced version for traditional fajitas.

You’ve just transformed easy baked chicken fajitas into both fajitas and tacos, using one tray and one round of cooking.

Small sheet pan of chicken fajitas beside a single plate with a tortilla being filled, napkin and glass of water on a wooden table for a fajitas for one or two serving.
A mini sheet pan of chicken fajitas with a single plate and tortilla shows how easy it is to scale this recipe down for one or two people without losing the one-pan simplicity.

Small-batch fajitas for one or two

The beauty of this method is how easy it is to scale down. For chicken fajitas for one, just cut the amounts to a single chicken breast, one pepper, and half an onion. You’ll still spread everything out so it roasts properly, and you’ll still be rewarded with a personal-sized chicken fajita sheet pan dinner without leftovers, if that’s what you prefer.

On evenings when you want leftovers on purpose, doubling the recipe turns the same base into meal prep gold.

Also Read: Coconut Water Cocktails: 10 Easy, Refreshing Drinks


Serving Ideas: Toppings, Sides, and Full Fajita Nights

Once your best sheet pan chicken fajitas are out of the oven, you can serve them simply or turn them into an entire feast.

Classic fajita spread

Lay out warmed tortillas, your sheet pan chicken fajitas, and bowls of toppings:

  • Grated cheese
  • Sour cream or Greek yogurt
  • Salsa or pico de gallo
  • Avocado slices or guacamole
  • Fresh coriander and lime wedges

If you’d like something a bit different from sour cream, spoon some Greek tzatziki sauce into a bowl and let people drizzle it over their baked chicken fajitas. The cool yogurt, cucumber, and herbs bring a wonderful contrast to the spicy, smoky chicken.

Sheet pan chicken fajitas surrounded by tortillas, cheese, sour cream, guacamole, salsa, fries, dips and drinks on a wooden table with the text Build Your Own Fajita Night.
Build your own fajita night with sheet pan chicken fajitas in the centre, surrounded by tortillas, toppings, fries, dips and drinks so everyone can customise their perfect plate.

Party platters and game-day food

For gatherings, you can use your one pan fajita recipe as the centrepiece of a game-day spread. Arrange the tray bake fajitas on a board with bowls of tortilla chips, crunchy vegetables, and a few dips. A bubbling Buffalo chicken dip on the side adds creamy heat, while a selection of spinach dips brings extra richness.

If you want something on the side that everyone loves, a tray of crispy homemade French fries turns fajita night into a full-on comfort feast. You can even add a platter of lemon pepper chicken wings so guests can load their plates with wings, fries, and sheet pan chicken fajitas pioneer woman–style trays of sizzling chicken and peppers.

Bowls, salads, and low-carb options

On nights when you’re craving something lighter, skip the tortillas and build fajita bowls:

  • Spoon your fajitas in oven chicken over shredded lettuce, rice, quinoa, or cauliflower rice.
  • Add beans, corn, chopped tomatoes, and avocado.
  • Finish with lime juice and a spoonful of yogurt or tzatziki.

If you’re exploring lower-carb eating, you might enjoy browsing plant-powered keto Mexican recipes for inspiration. You’ll find ideas there for vegetable-based fillings that pair nicely with this fajita oven recipe, especially when you’re using the same spices in creative ways.

Drinks that pair beautifully with this Recipe of Sheet Pan Chicken Fajitas

Fajitas are festive by nature, so they love good drinks. For brunch-style spreads or weekend dinners with friends, a pitcher of Bloody Marys or colourful mimosas fits right in with fajitas, nachos, and dip.

If you’re more in the mood for something sweet after dinner, a slice of tres leches cake or another dessert brings everything to a gentle close after the warm spice of your fajita sheet pan chicken.


Leftovers, Meal Prep, and Next-Day Ideas

One of the nicest things about easy oven baked sheet pan chicken fajitas is how gracefully they turn into other meals.

Storing and reheating

Let leftovers cool slightly, then pack them in airtight containers. They’ll keep well in the fridge for three days or so. Reheat gently in a skillet, in the oven, or even in the microwave, though a quick blast in a pan or oven helps revive those tasty browned edges.

Because the vegetables hold up, easy baked chicken fajitas make excellent lunches. Tuck them into tortillas, spoon them over rice, or toss them through salads for quick meals that still feel satisfying.
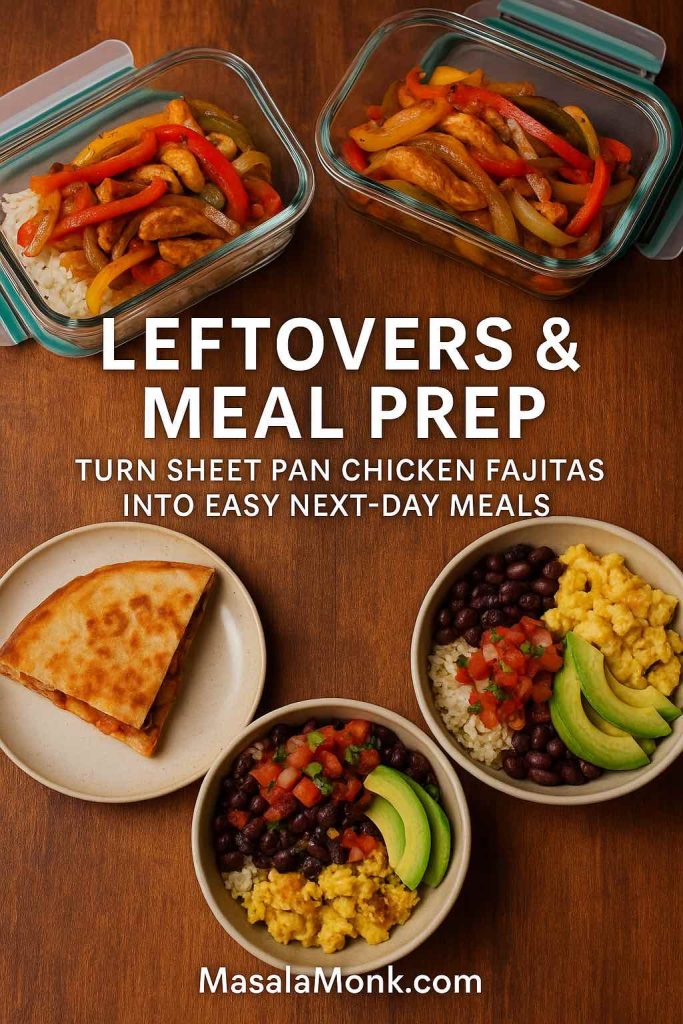
Glass containers of leftover sheet pan chicken fajitas above plates with a quesadilla, burrito bowls and scrambled eggs made from the fajita filling, showing easy next-day meal ideas.
Leftover sheet pan chicken fajitas slip easily into glass containers, then reappear as quesadillas, burrito bowls and even a quick fajita-style breakfast the next day.

Fresh ways to use leftovers from Sheet Pan Chicken Fajitas Recipe

Leftover sheet pan fajita chicken doesn’t have to be eaten in exactly the same format. You can:

  • Turn it into quesadillas by folding the chicken and peppers into tortillas with cheese and crisping them in a pan.
  • Build burrito bowls or burritos with rice, beans, and whatever else you have around.
  • Add it to omelettes or scrambled eggs for a fajita-style breakfast.
  • Stir it through a simple pasta with a bit of cream or yogurt and extra lime juice for a fajita-inspired pasta night.

If you’re looking for more easy chicken ideas to keep in your weekly rotation, recipes like whole chicken in crock pot or cheesy chicken broccoli rice fit right alongside this easy chicken fajitas sheet pan method. They all deliver that same comforting feeling with minimal fuss.


Are Sheet Pan Chicken Fajitas Healthy?

Because this sheet pan fajita recipe leans heavily on chicken and vegetables, it’s simple to tweak it towards your own idea of “healthy.”

Protein and vegetables

You’re getting a good dose of protein from the chicken, plus fibre and vitamins from peppers and onions. Bell peppers are rich in vitamin C and antioxidants, while onions contribute their own unique compounds and prebiotic fibre. When you serve this chicken fajita one pan meal with extra vegetables or a salad, you’re building a plate that’s both satisfying and colourful.

Sheet pan chicken fajitas in the background with a healthy bowl of chicken, black beans, avocado and salad on one side and cheesy chicken fajita tacos with tortilla chips on the other, showing how toppings change the balance.
The base of sheet pan chicken fajitas is all about lean protein and colourful vegetables, while your choice of tortillas, beans, salad, cheese or chips is what tips the meal lighter or more indulgent.

Choices that change the balance

The health profile of easy fajitas in the oven depends heavily on what you serve alongside them. Flour tortillas, cheese, sour cream, and chips will make it more indulgent; lettuce, salsa, yogurt, and beans keep it feeling a bit lighter.

You can also swap chicken for vegetables entirely. Jackfruit, mushrooms, and tempeh can all stand in for meat while keeping the spirit of sheet pan fajitas alive. For inspiration, you might enjoy jackfruit-based meal ideas or tempeh “beef” style fillings, both of which adapt beautifully to fajita spices.

If you’re curious about how onions fit into a low-carb or keto approach, you can also explore a gentle breakdown of onions and keto to see how they can still have a place in a mindful diet.


Comparing Sheet Pan Chicken Fajitas Recipe to Stovetop Fajitas

It’s natural to wonder how chicken fajitas in oven recipe versions stack up against the classic pan fajita recipe cooked on the stove.

Stovetop fajitas

With cooking fajitas in a pan, you get:

  • A bit more control over individual pieces as you stir and flip.
  • Very quick cooking, which is great for small batches.
  • That sizzle and sear you might associate with restaurant fajitas.

However, you also get more active time at the stove, and if you’re making a large batch of pan fajitas chicken, you may need to cook in rounds.
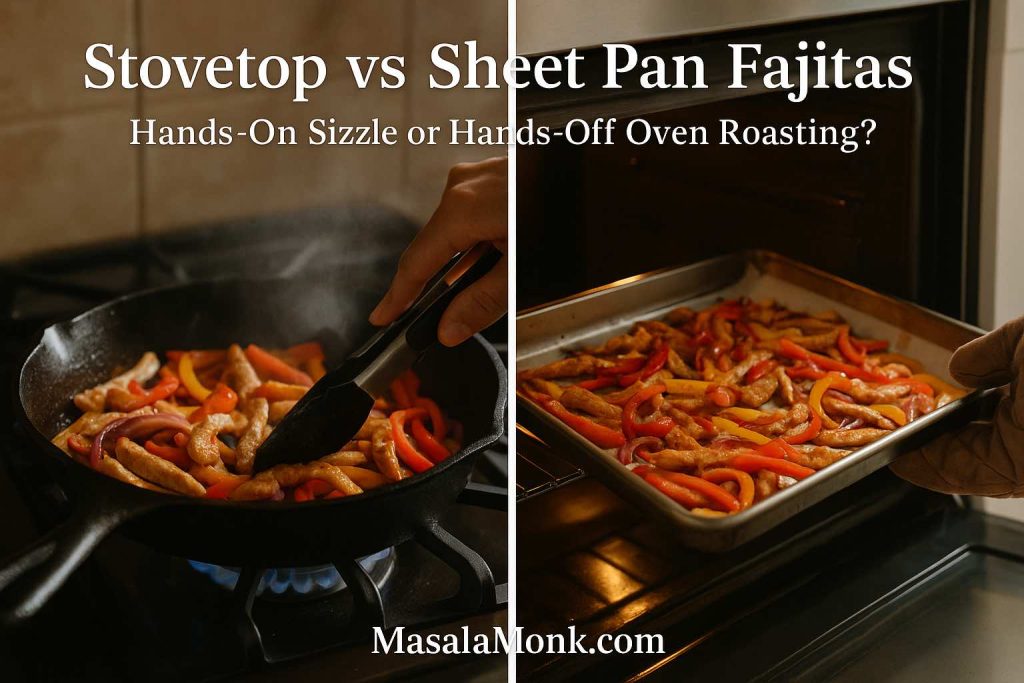
Side-by-side photo showing chicken fajitas cooking in a sizzling cast iron skillet on the stovetop on the left and a sheet pan of chicken fajitas being pulled from the oven on the right, with text Stovetop vs Sheet Pan Fajitas
Stovetop fajitas bring hands-on sizzle in a cast iron skillet, while sheet pan chicken fajitas offer the same flavours with an easier, hands-off oven approach.

Oven fajitas

With fajitas baked in oven, you enjoy:

  • A mostly hands-off experience: toss, spread, roast.
  • The ability to cook a lot at once, ideal for families or leftovers.
  • Easy cleanup, because you’ve truly made 1 pan fajitas.

There’s no wrong answer here. Many people use oven methods during the week for easy sheet pan fajitas and save skillet or grilled versions for weekends when they feel like cooking in a more leisurely way. You can even move between methods in the same meal: roast most of the fajita sheet pan bake in the oven, then finish a portion in a hot skillet if you’re craving that extra sear.

Also Read: Whiskey Sour Recipe: Classic Cocktail, Best Whiskey & Easy Twists


A Short Fajita Story to Serve with Dinner

When you bring a tray of sheet pan chicken fajitas to the table, you’re not just serving dinner; you’re offering a tiny piece of culinary history, adapted to modern life. Fajitas may have started as grilled strips of beef cooked over open flames and served to hungry ranch workers, but they’ve travelled a long way from those early days.

Now, they show up as restaurant sizzlers, street food, skillet suppers, and, increasingly, as fajitas in oven chicken dinners pulled from home ovens around the world. Recipes like classic grilled chicken fajitas keep the outdoor tradition alive, while damn delicious sheet pan fajitas and similar recipes prove that you can get big flavour from a humble baking tray.

Your own chicken fajita sheet pan pioneer woman moment might look like a pan pulled from the oven on a Wednesday night, kids spooning sheet pan fajita chicken into tortillas at the counter, someone mixing drinks in the corner, and everyone leaning over the table to build their perfect bite. It doesn’t have to be dramatic; it just has to taste good and feel welcoming.

Sheet pan chicken fajitas on a wooden table with three hands building tortillas, squeezing lime and spooning filling, with the text Sheet Pan Chicken Fajitas Any Night of the Week and MasalaMonk.com
Sheet pan chicken fajitas at the centre of the table, with everyone reaching in to build their own tortillas – an easy any-night-of-the-week dinner straight from one pan.

Bringing It All Together

In the end, this sheet pan chicken fajitas recipe is really an invitation. It invites you to trade a little stovetop juggling for the convenience of easy oven baked fajitas, to let the oven carry more of the load while you use the extra time however you need.

Whether you’re serving classic baked chicken fajitas with warm tortillas, building low-carb bowls from a fajita oven tray, or turning leftovers into quesadillas and tacos, you’re working with a method that’s endlessly adaptable. One night you might pair your pan sheet fajitas with tzatziki and salads; another night you might bring out dips, fries, and wings and turn it into a party.

However you choose to plate them, these best sheet pan chicken fajitas are there to make dinner easier, a little brighter, and a lot more satisfying—one tray at a time.
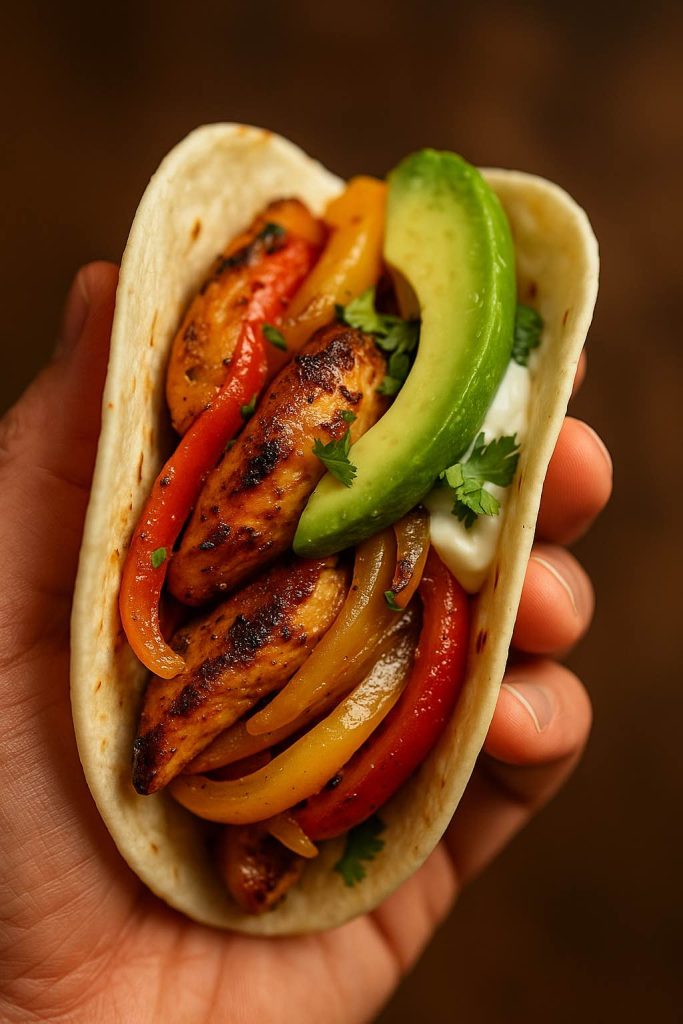
Close-up of a chicken fajita held in one hand, filled with charred chicken strips, red and yellow peppers, avocado slice, cilantro and a dollop of white sauce in a soft tortilla.
A warm, handheld chicken fajita loaded with charred chicken, sweet peppers, avocado and a touch of creamy sauce—everything you love about sheet pan chicken fajitas in a single perfect bite.

FAQs about Sheet Pan Chicken Fajitas Recipe

1. Can I use chicken breasts or thighs for sheet pan chicken fajitas?

You can use either, and both work beautifully in a sheet pan chicken fajitas recipe. Chicken breasts give leaner baked chicken fajitas, while thighs stay extra juicy and forgiving if they roast a little longer. As long as you slice them into similar strips, your chicken sheet pan fajitas will cook evenly.


2. How thick should I slice the chicken and vegetables?

Aim for strips about 1–1.5 cm thick so everything in your sheet pan fajitas roasts at roughly the same pace. Thin slices of chicken, peppers, and onions give you tender pieces with nicely browned edges. When the sizes match, your one sheet chicken fajitas are much less likely to end up with overcooked chicken and underdone veg.


3. What oven temperature works best for baking sheet fajitas?

A hot oven is ideal; most oven fajitas turn out best around 220°C / 425°F. That higher heat lets the sheet pan fajita chicken caramelise instead of steaming. Once the chicken is cooked through and the vegetables are lightly charred, your chicken fajitas baked in oven are ready to serve.


4. How long do sheet pan chicken fajitas usually take to cook?

For a typical oven baked chicken fajita recipe, the tray needs about 18–22 minutes, depending on your oven and how crowded the pan is. Stir once halfway so the chicken fajita in oven mix colours on all sides. When the chicken is opaque and the vegetables look glossy and tender, your baked fajitas are done.


5. How do I stop my sheet fajitas from going soggy?

Give everything room to breathe on the tray. If your chicken fajita sheet pan is piled too high, the juices collect and you get more steam than roast. Spreading the mixture into a shallow layer—or using two pans for pan sheet chicken fajitas—helps you get those tasty browned edges instead of soft, wet vegetables.


6. What’s the best pan for fajitas in the oven?

A sturdy rimmed baking sheet is usually the best pan for fajitas when you’re using this method. It’s big enough for easy sheet pan chicken fajitas and strong enough not to warp at high heat. You can still make cookie sheet fajitas, but a heavy tray tends to give more even browning.


7. Can I use a non-stick or glass dish for this sheet pan fajita recipe?

You can, although the results change slightly. Non-stick trays make clean-up easier but may brown sheet pan chicken fajitas a little less. Glass dishes hold heat differently, so your chicken fajita one pan dinner might need a few extra minutes; simply watch for colour and doneness rather than relying only on the clock.


8. Can I cook fajitas in the oven if I’m used to making them in a skillet?

Yes, you can easily move from skillet fajitas chicken to a chicken fajitas in the oven recipe. The ingredients stay almost the same; only the technique changes. Instead of tossing everything in a chicken fajita pan on the stove, you toss on a tray, roast, and stir once, letting the heat build flavour while you step away.


9. Are sheet pan chicken fajitas spicy?

They’re usually moderately spiced rather than extremely hot. Most sheet pan fajita recipes rely on chili powder, cumin, and paprika for warmth, then add cayenne or fresh chili for extra kick. If you like mild baked chicken fajitas, simply skip the hotter spices; if you love heat, sprinkle more over your pan fajita before roasting.


10. How can I adjust the heat level in my baked fajitas recipe?

You control the spice level with your seasoning. To keep easy oven baked chicken fajitas gentle, use mild chili powder and no cayenne. On the other hand, if you want fiery sheet pan fajitas, add extra cayenne, fresh jalapeños, or a hotter chili powder to the sheet pan fajita chicken mix before cooking.


11. Can I prepare the chicken fajitas ahead of time?

You can slice the chicken and vegetables and mix them with oil and spices a few hours ahead. Keep the chicken fajita sheet pan mixture covered in the fridge until you’re ready to bake. When it’s time for dinner, spread everything out and roast, turning marinated one pan chicken fajita components into a flavourful tray with very little effort.


12. Is it okay to use frozen vegetables for sheet pan fajitas?

Frozen peppers and onions can work in a pinch, though the texture will be softer. If you scatter them straight onto the tray for baking sheet fajitas, expect less char and more moisture. Fresh vegetables give crisper edges and brighter colour, but frozen still make decent oven fajitas when you’re short on time.


13. How do I keep the chicken from drying out?

Don’t overcook it and avoid very tiny pieces. Cutting even strips, using enough oil, and pulling the chicken fajita in oven tray out as soon as the meat is just done all help keep your chicken fajita pan recipe juicy. Thighs are especially forgiving in a chicken fajita tray bake because they stay tender even if they roast a bit longer.


14. Can I make sheet pan fajitas for one or two people?

Definitely. For chicken fajitas for one or a small household, simply reduce the quantities and use a smaller tray. You’ll still enjoy one sheet fajitas with the same flavour and texture, just in a more manageable size that doesn’t leave you with too many leftovers.


15. Do I need to line the pan when I make sheet pan chicken fajitas?

Lining the pan with parchment makes clean-up easier but isn’t compulsory. If you skip lining, lightly oil the surface so your chicken sheet pan fajitas don’t stick. Either way, the sheet pan chicken and peppers will still roast nicely and pick up plenty of flavour.


16. Can I cook these fajitas under the broiler instead of just baking?

Yes, the broiler can give you extra char. Many people bake the chicken fajita sheet pan dinner until almost done, then move it under the broiler for a couple of minutes for lightly blackened edges. This approach gives broiled chicken fajitas that look close to grilled ones, while still using a single pan.


17. Are baked chicken fajitas healthier than fried versions?

Baked chicken fajitas generally use less oil than deep-fried options, and they’re built around lean protein and vegetables. Because you’re roasting the chicken fajita oven tray rather than frying, the meal often feels lighter. The overall balance still depends on your tortillas, toppings, and portion sizes, but the base of baked chicken fajita recipe is a wholesome starting point.


18. Can I double the recipe for a crowd?

You can absolutely scale this sheet pan chicken fajitas recipe up. For a large group, divide the mixture between two trays so the pan sheet fajitas still roast instead of steaming. Rotate the pans halfway through, and you’ll end up with a big batch of best sheet pan chicken fajitas ready at the same time.


19. What other meats can I use for a sheet pan fajita tray bake?

Chicken is classic, yet the same method works with beef strips, pork, or even shrimp. If you use quicker-cooking proteins like prawns, add them later in the baking time so they don’t overcook. No matter which protein you choose, the basic pan fajita pattern—strips, spices, and high heat—stays the same.


20. Can I make a vegetarian version of sheet pan fajitas?

Yes, it’s simple to adapt this into a vegetable-only fajita sheet pan recipe. Swap the chicken for mushrooms, tofu, paneer, jackfruit, or a mix of hearty vegetables and keep the same seasoning and roasting method. The result still feels like easy sheet pan fajitas, just without the meat.


21. How should I reheat leftover sheet pan chicken fajitas?

Leftover baked chicken fajitas reheat well in a hot skillet or in the oven. Spread the chicken fajita tray bake mixture in a single layer and warm it just until hot, so the chicken doesn’t dry out. A quick reheat brings your pan sheet chicken fajitas back to life for tacos, bowls, or wraps the next day.


22. What’s the difference between sheet pan fajitas and baked chicken tacos?

Sheet pan fajitas focus on strips of chicken and vegetables that you stuff into tortillas right at the table. Baked chicken tacos usually have the filling tucked inside the shells before going into the oven. Nevertheless, the same sheet pan fajita chicken can be used for both; you just decide whether to assemble first or after roasting.


23. Can I make this recipe milder for kids?

Yes, you can easily keep easy sheet pan chicken fajitas gentle enough for younger eaters. Use mild chili powder, skip the cayenne, and maybe add a bit more paprika for colour. Then, if adults want extra heat, they can sprinkle chili or hot sauce over their own chicken fajita sheet pan meal.


24. Do I need special fajita seasoning packets for this recipe?

Packets are convenient, but they’re not required for an easy sheet pan fajita recipe. A simple mix of chili powder, cumin, paprika, garlic, salt, and pepper gives the same character. Once you’ve tasted your homemade seasoning on a chicken fajita in oven tray, you may not feel the need to buy packets again.


25. Can I use this method for a chicken fajita pan on the stovetop?

You can borrow the same spice mix and proportions when you’re cooking chicken fajitas in a pan. Simply sear the chicken and vegetables in a hot skillet for fajitas instead of on a tray. That way, you can enjoy both skillet fajitas chicken and easy oven baked chicken fajitas using one familiar flavour base.

Posted on — 14 Comments

Whole Chicken in Crock Pot Recipe (Slow Cooker “Roast” Chicken with Veggies)

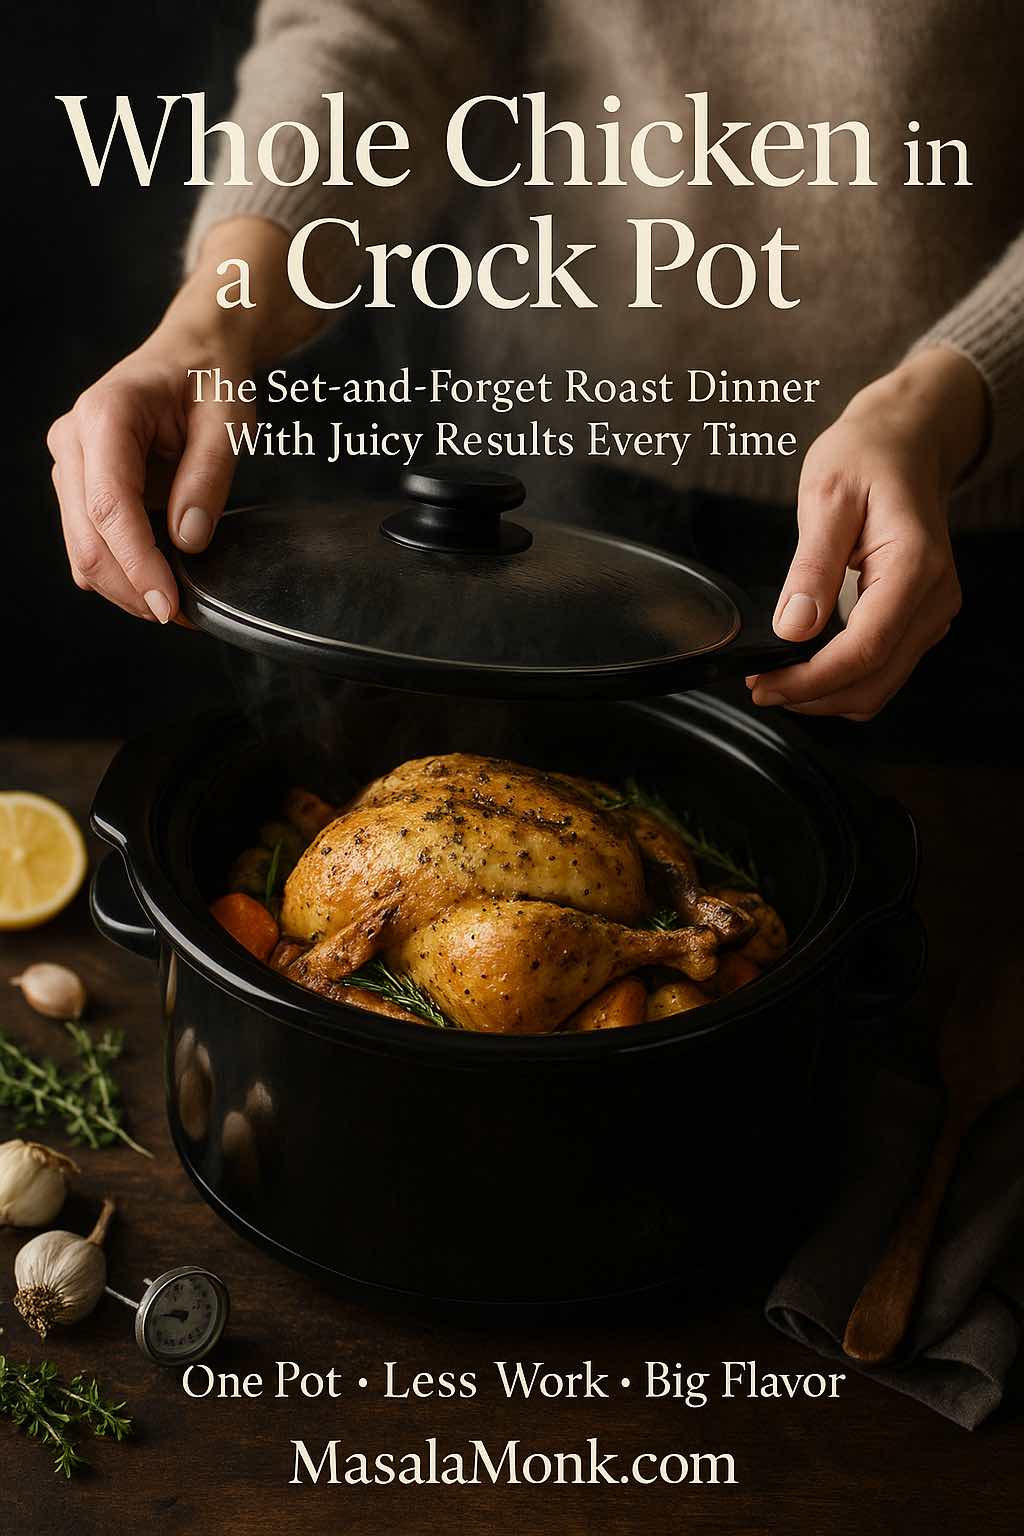
Hands lifting the lid off a black slow cooker revealing a golden whole chicken in a crock pot with potatoes and carrots, styled like a premium magazine cover with the title Whole Chicken in a Crock Pot and MasalaMonk.com at the bottom.

There’s something quietly luxurious about dropping a whole chicken in a crock pot, flicking a switch, and knowing dinner is basically taking care of itself. No wrestling with hot roasting pans, no constant basting, no stressing over oven timings. Just a pot humming away in the background while your house slowly fills with the smell of slow cooker roast chicken.

This method gives you everything people love about a Sunday roast—tender meat, rich juices, soft potatoes and vegetables—without demanding your full attention. It also turns one affordable bird into several meals, from roast-style dinners and chicken pot roast to leftovers for sandwiches, pasta and soups.

What follows is a complete guide to cooking a whole chicken in the slow cooker, turning it into a one-pot meal, adapting the technique for thighs and drumsticks, playing with BBQ and rotisserie-style variations, and making the most of every last scrap.


Why Cook a Whole Chicken in a Slow Cooker (Crock Pot)?

Before getting into the nuts and bolts, it’s worth pausing on why a whole chicken in crock pot is so useful to have in your regular rotation.

Whole roast chicken served with potatoes, shredded meat and sides in front of a crock pot, showing how a whole chicken in a crock pot makes three easy meals.
One seasoned bird, a slow cooker and a few vegetables – this whole chicken in a crock pot quietly turns into juicy roast-style dinners plus leftovers for days.

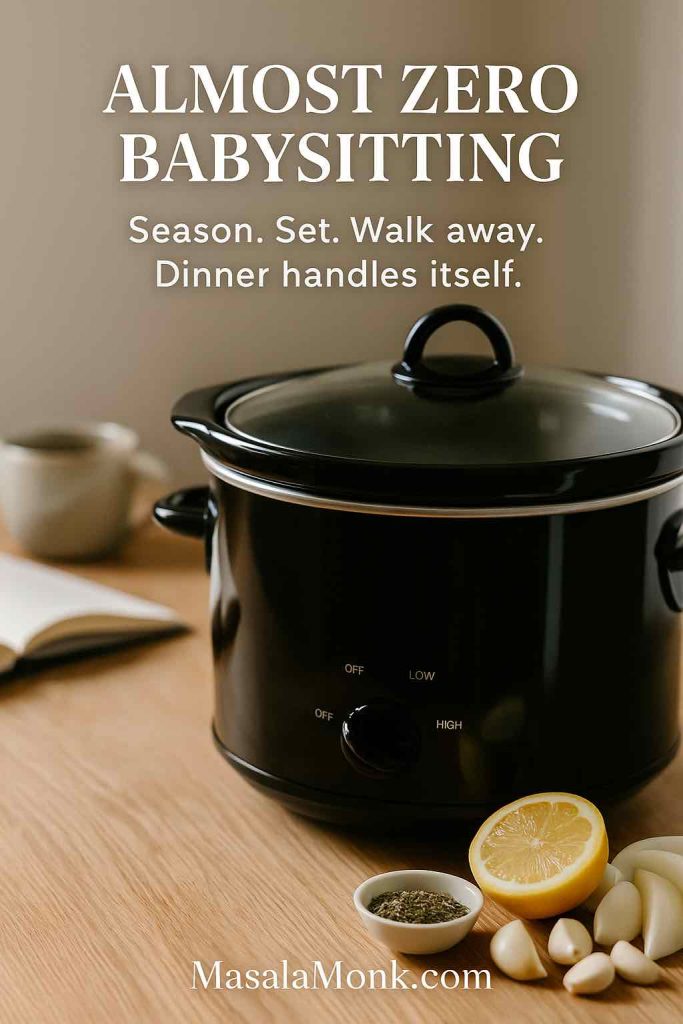
Almost zero babysitting

Traditional roast chicken is wonderful, but it wants attention: preheating, timing, checking, basting, turning, and making sure nothing dries out. With a whole chicken in a slow cooker, you do a little work up front and then the machine does the rest.

You:

  • Season the bird
  • Sit it on a bed of onions or vegetables
  • Add a splash of liquid
  • Put the lid on and walk away

Hours later, you lift the lid on a complete chicken crock pot roast. You don’t have to be home to keep an eye on it; the slow cooker hums along steadily while you’re at work, wrangling kids, or just enjoying your day.

Black crock pot set to low on a wooden counter with lemon, garlic and herbs, illustrating the hands-off prep for a whole chicken in a slow cooker.
Season the chicken, set the crock pot to LOW and get on with your day—this slow cooker whole chicken recipe barely needs five minutes of attention.

Incredibly forgiving texture

Because slow cookers use gentle, moist heat, the meat stays juicy far more easily than in a hot, dry oven. When you slow cook a whole chicken, the connective tissues in the thighs and wings slowly melt, turning everything silky and tender.

You can carve it neatly if you cook for less time, or leave it longer for that “fall-apart shredded chicken” effect. Recipes like this lemon garlic slow cooker roast chicken show the same idea: shorter cooking gives a firmer, carve-able bird; longer cooking gives something you barely need a knife for.

One bird, several meals

A single chicken, cooked well, goes surprisingly far:

  • Night one: whole chicken in crock pot with potatoes and vegetables
  • Night two: leftovers in chicken Alfredo pasta or stuffed into sandwiches
  • Night three: stock and soup made from the bones

When you combine that with the hands-off nature of slow cooking, it’s easy to see why whole chicken recipes slow cooker crock pot approaches are favourite “Sunday prep” moves for busy weeks.

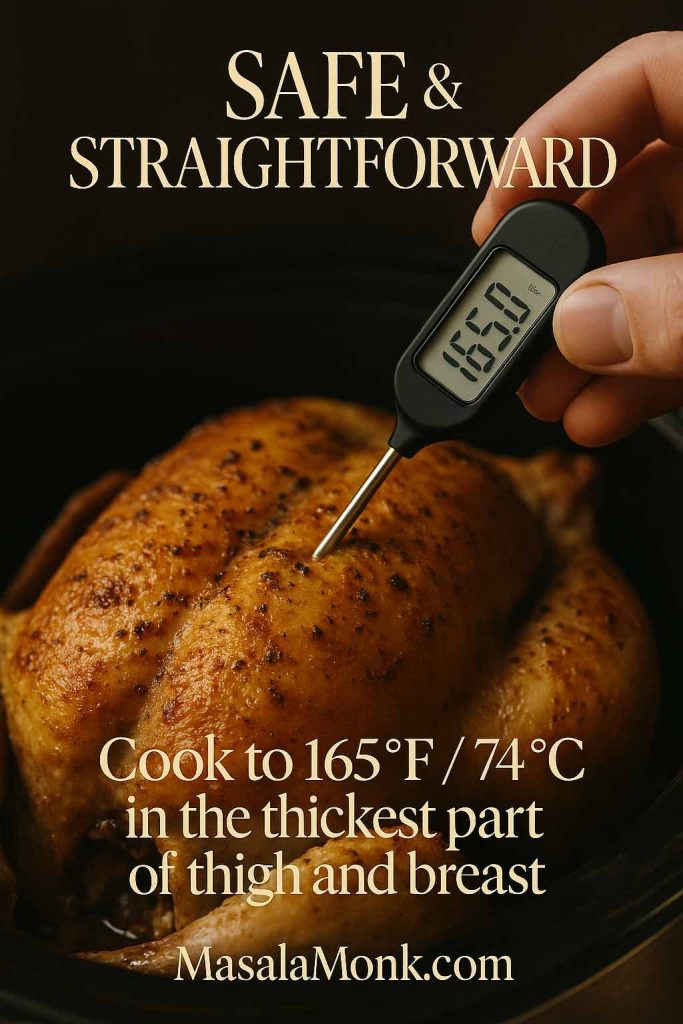
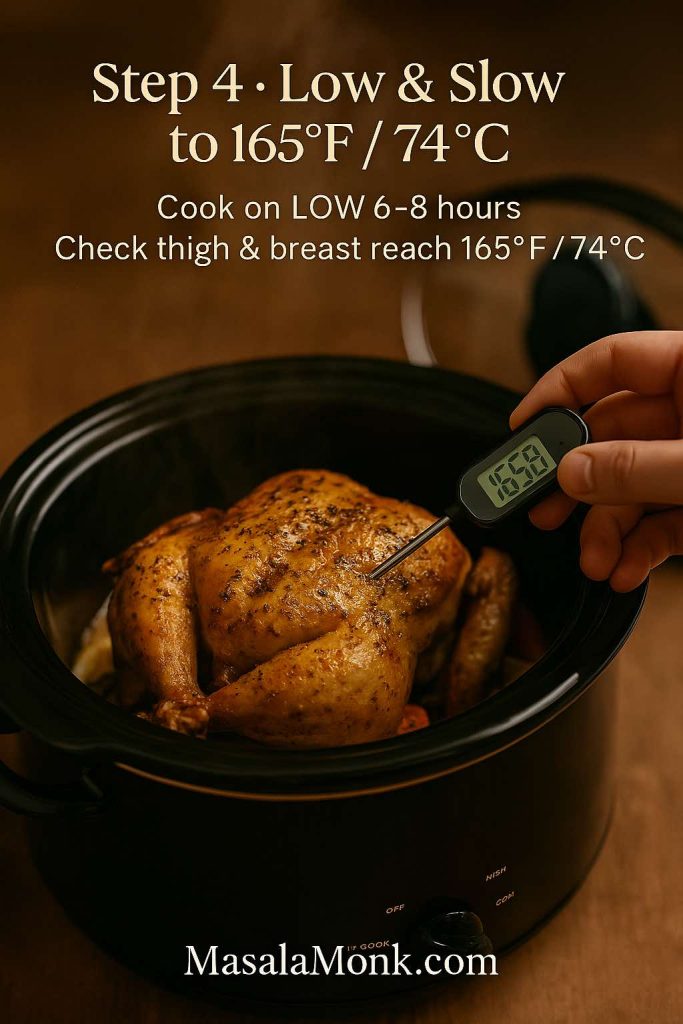
Hand checking a whole roasted chicken with a digital thermometer reading 165°F, demonstrating the safe internal temperature for slow cooker roast chicken.
For perfectly cooked, safe slow cooker roast chicken, aim for 165°F / 74°C in the thickest part of the thigh and breast before you lift it out of the crock pot.

Safe and straightforward

Poultry always raises food-safety questions, and rightly so. Fortunately, the rules are simple:

  • Start with a thawed chicken, not a frozen one
  • Keep the lid on so the crock pot can heat efficiently
  • Cook until the thickest parts of the meat reach 165°F / 74°C

That 165°F number isn’t random. It’s the same temperature recommended on the FoodSafety.gov safe minimum cooking temperature chart for all poultry, including whole chicken. It applies whether you use an oven, grill, Instant Pot, or slow cooker.

A basic digital thermometer is enough to keep your slow cooker roast chicken both tender and safe.


Choosing the Chicken and the Crock Pot

A little thought up front about bird size and slow-cooker capacity makes everything smoother.

What size chicken works best?

Most whole chicken in crock pot recipes shine when you use birds that:

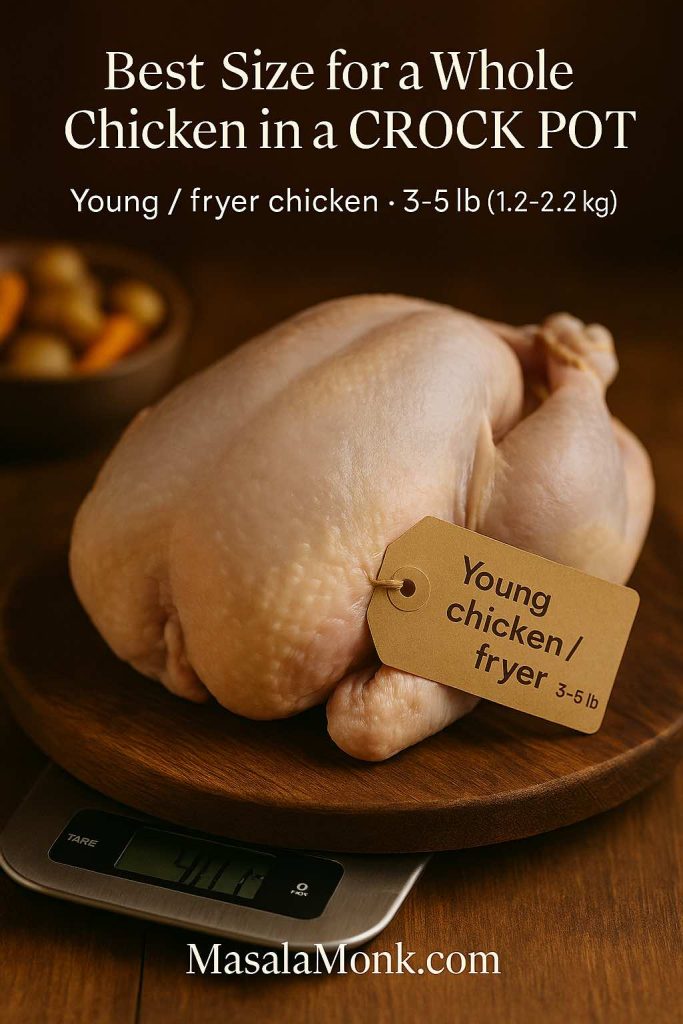
  • Weigh between 1.2–2.2 kg (around 3–5 lb)
  • Fit comfortably in the crock with the lid closing fully
  • Leave a little space around the sides for heat to circulate
Overhead shot of a young whole chicken on a board next to a kitchen scale reading about 4 pounds, showing the best 3–5 lb size range for a whole chicken in a crock pot.
For most slow cooker whole chicken recipes, a young “fryer” bird in the 3–5 lb (1.2–2.2 kg) range cooks evenly, stays tender and leaves enough space in the pot for heat to circulate.

A small whole chicken in slow cooker (3–3½ lb) is perfect for two or three people, especially if you add potatoes and other vegetables underneath. For families or planned leftovers, aim nearer 4½–5 lb.

You’ll sometimes see “young chicken” or “fryer chicken” on the label. These tend to be more tender, which is ideal for slow cook whole chicken recipes. If you’re always feeding a crowd, you can also combine one small whole bird with extra thighs or drumsticks, which we’ll get to later.

Matching it to your slow cooker

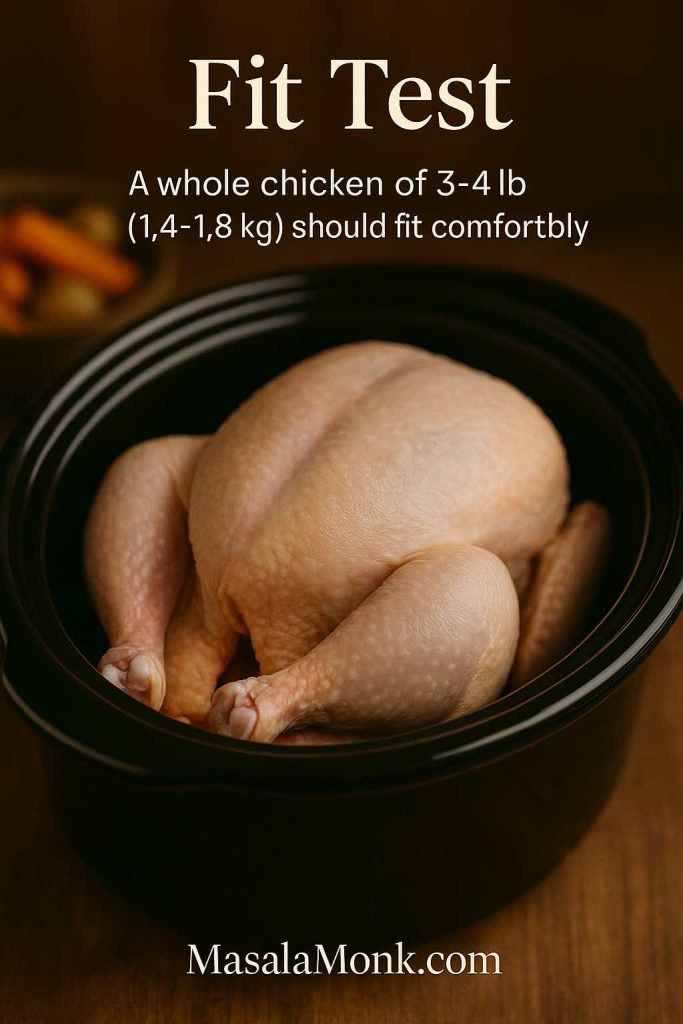
A quick test before you start:

  1. Put the wrapped chicken into your cold slow cooker.
  2. Close the lid.

If you have to press hard or the lid doesn’t sit flat, the chicken is too big for that cooker. For reliable results with whole chicken recipes slow cooker crock pot, it helps to follow the usual slow-cooker guideline of filling the pot roughly halfway to two-thirds full. That leaves room for circulation and keeps the heating even.

Wrapped whole chicken placed inside a slow cooker with the lid resting flat, illustrating how to check that a whole chicken fits properly and only fills about half to two-thirds of the crock.
Drop the wrapped chicken into the cold slow cooker before you start—if the lid doesn’t sit flat or the pot feels crammed, the bird is too big. Aim to fill the crock about halfway to two-thirds full for even, safe cooking.

For most people:

  • A 5–6 quart crock pot is perfect for a medium or large whole chicken plus vegetables.
  • A 3.5–4 quart slow cooker works well for a smaller bird without many extras.

The USDA’s advice on slow cooker safety also mentions not overfilling and keeping the lid on as much as possible, which lines up neatly with what you’re doing here.


The Core Recipe: Whole Chicken in Crock Pot, Step by Step

This is the backbone of everything that follows. Once you nail this simple whole chicken in a crock pot method, variations are easy.

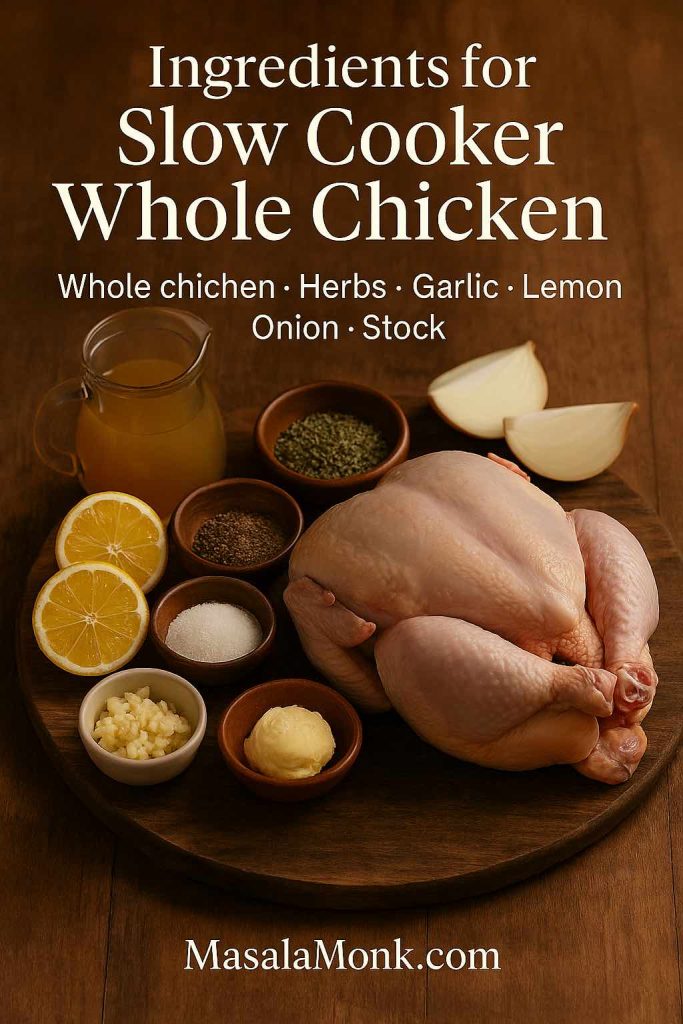
Ingredients for a Whole Chicken in Crock Pot (Slow Cooker Roast)

  • 1 whole chicken (about 3–5 lb / 1.2–2.2 kg), fully thawed
  • 2–3 teaspoons fine salt
  • 1–1½ teaspoons black pepper
  • 2–3 teaspoons dried herbs
    • thyme, oregano, rosemary, Italian seasoning, or a mix
  • 4–6 cloves garlic, crushed or finely minced
  • 2–3 tablespoons softened butter or olive oil
  • 1 lemon, halved (optional)
  • 1 large onion, peeled and thickly sliced or cut into wedges
  • ¼–½ cup (60–120 ml) chicken stock or water

These simple ingredients create a very flavourful slow cooker roast chicken with barely any fuss.

Ingredients for slow cooker whole chicken laid out on a wooden board: raw whole chicken, lemon slices, garlic, salt, pepper, dried herbs, butter and a jug of chicken stock.
These simple pantry ingredients—whole chicken, herbs, garlic, lemon, onion and a splash of stock—are all you need for a rich, roast-style whole chicken in the crock pot.

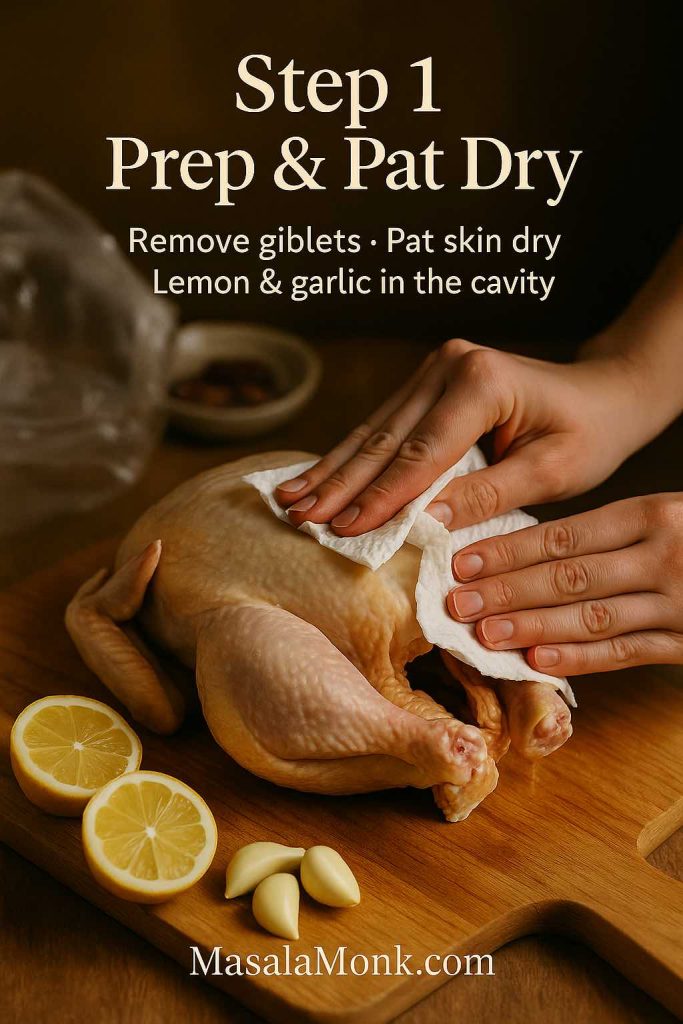
Step 1: Prepare and dry the chicken

Remove the chicken from its packaging. Check inside the cavity for giblets and remove them if present. You can reserve these for stock if you like.

Pat the whole bird dry with paper towels. This step matters more than it seems: drying the skin encourages roasting rather than steaming, and is one reason this feels like a baked chicken crock pot recipe rather than boiled chicken.

Sprinkle a small pinch of salt and pepper inside the cavity. If you’re using lemon, tuck the halves inside along with a clove or two of garlic. It smells like a proper chicken pot roast before you even start cooking.

Hands patting a raw whole chicken dry with paper towels on a wooden board, with lemon halves and garlic cloves nearby, showing step 1 of preparing a slow cooker whole chicken.
Drying the skin thoroughly and tucking lemon and garlic into the cavity is what gives this slow cooker whole chicken a roast-style flavour and keeps it from turning out soggy.

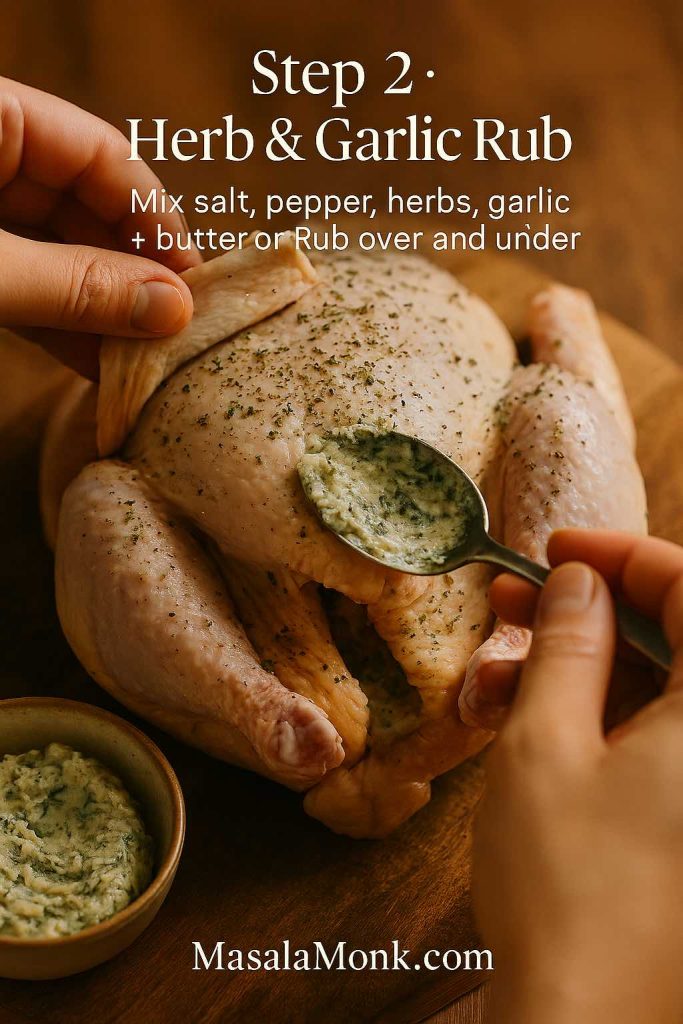
Step 2: Mix the herb and garlic rub

In a small bowl, stir together:

  • The remaining salt
  • The remaining black pepper
  • Your chosen dried herbs
  • Crushed garlic
  • Butter or olive oil

You want a soft paste that’s easy to spread. Rub this all over the chicken, including:

  • Over the breast, thighs, wings, and legs
  • Under the skin on the breast if you can loosen it gently with your fingers

The more of the surface you cover, the more flavour your whole chicken in crock pot will have.

If you like, you can customise the rub:

  • Add smoked paprika and a pinch of chili for something closer to BBQ or paprika chicken.
  • Use extra rosemary, lemon zest, and garlic if you’re aiming for a very classic roast chicken recipe rosemary vibe.
Hands lifting the skin of a raw whole chicken and spreading a creamy herb and garlic butter underneath, showing step 2 of seasoning a slow cooker whole chicken.
Rubbing a herb and garlic butter under the skin as well as on top seasons the meat all the way through and gives this crock pot whole chicken that rich, roast-style flavour.

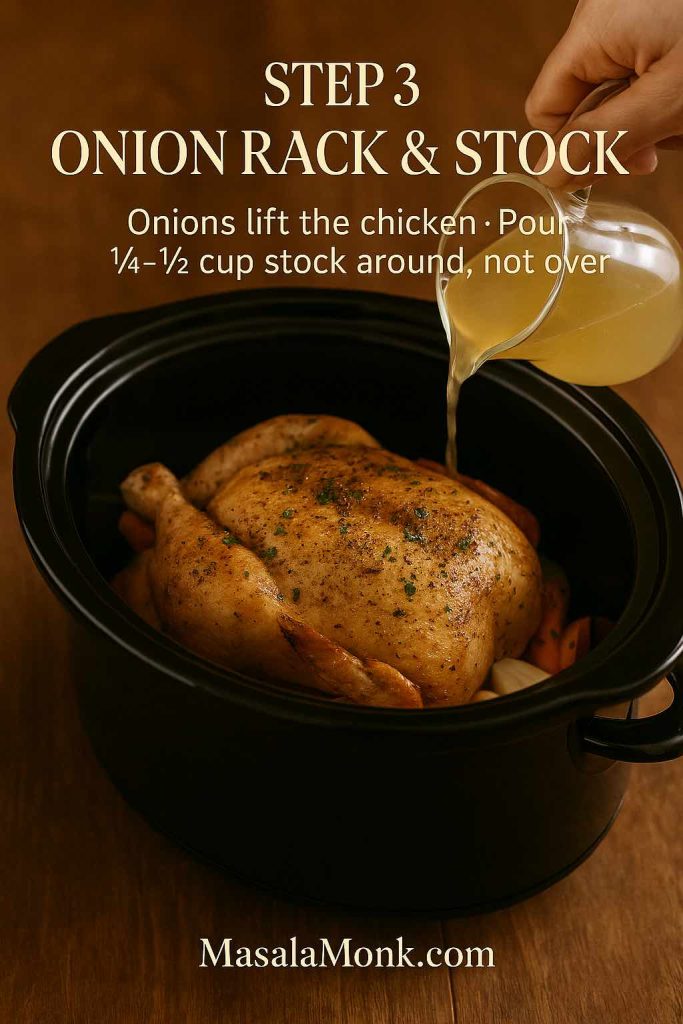
Step 3: Build an onion “rack”

Scatter the onion slices or wedges evenly across the bottom of your slow cooker. They’ll act as a makeshift rack, lifting the chicken slightly so it doesn’t sit in the liquid the whole time.

Place the seasoned chicken breast-side up on top of the onions.

Pour the stock or water around the bird, not over it. Slow cookers generate plenty of moisture on their own—this small amount of liquid just helps everything get started and leaves you with good pan juices in the end.

Seasoned whole chicken sitting on a bed of onions and vegetables in a slow cooker while chicken stock is poured around it, illustrating step 3 of the crock pot whole chicken recipe.
Resting the chicken on a bed of onions and pouring just ¼–½ cup of stock around it keeps the meat lifted out of the liquid, so you get roast-style flavour and rich pan juices instead of a watery boil.

Step 4: Cook on LOW until tender and safe

Put the lid on, set the crock pot to LOW, and leave it to work. As a general guide for this whole chicken recipes slow cooker crock pot method:

  • A smaller chicken (around 3–3½ lb) usually needs about 6 hours on LOW
  • A larger bird (around 4½–5 lb) often takes 7–8 hours on LOW

Every slow cooker heats slightly differently, though, so these are starting points, not commandments. The real test is internal temperature and feel.

About an hour before you expect it to be done, start checking. Insert a digital thermometer into:

  • The thickest part of the thigh, avoiding the bone
  • The thickest part of the breast

Both should read at least 165°F / 74°C. That’s the same number you’ll see in the FoodSafety.gov temperature chart and USDA guidelines, and it’s what turns raw chicken into safe, succulent slow cooker roast chicken.

If the reading is a little low, put the lid back on and cook longer, checking every 20–30 minutes. When the chicken is ready:

  • The legs will move easily in the sockets
  • Juices will run clear, not pink
  • The meat will feel soft and ready to fall from the bone
Cooked whole chicken in a slow cooker with a hand checking the thickest part of the thigh using a digital thermometer reading 165°F, showing step 4 of the crock pot whole chicken recipe.
After 6–8 hours on LOW, confirm your slow cooker whole chicken is ready by checking the thigh and breast reach 165°F / 74°C—the sweet spot for juicy meat and safe cooking.

Step 5: Rest and optionally crisp the skin

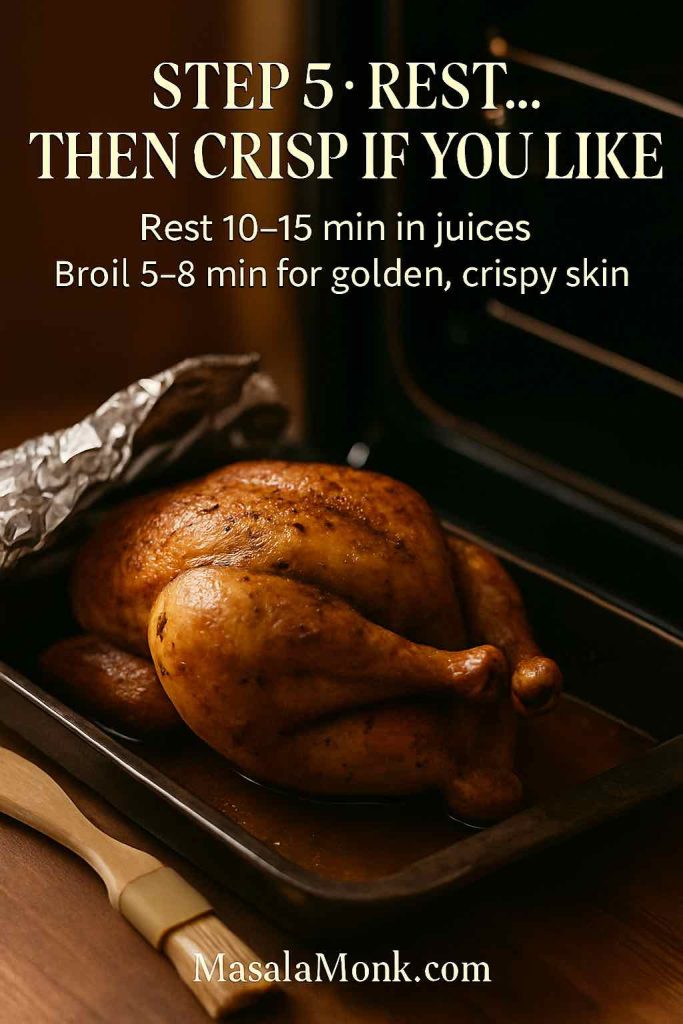
Turn the slow cooker off and let the chicken rest in the hot juices for about 10–15 minutes. This gives the meat time to relax and reabsorb some of the juices, so it slices or shreds more cleanly.

For many people, that’s enough. The meat is tender, the onions and juices are delicious, and you can go straight to carving and serving.

If you’d like something that looks more like a traditional baked chicken crock pot hybrid, though, you can quickly crisp the skin:

  1. Heat your oven’s grill or broiler to high.
  2. Carefully lift the chicken out of the slow cooker and onto a roasting pan. It will be delicate, so use two spatulas or a big spoon under the cavity plus tongs for support.
  3. Spoon or brush a little of the fat from the crock pot over the skin.
  4. Grill or broil for about 5–8 minutes, until the skin is golden and crisp in spots.

This trick is very similar to what you see in recipes like this slow cooker whole chicken: cook low and slow in the crock, then finish under heat for colour. It’s a lovely way to get the best of both worlds.

Roasted whole chicken resting in a pan with foil pulled back, next to an open oven, showing step 5 of letting a slow cooker whole chicken rest and then crisping the skin under the broiler.
Let the chicken rest for 10–15 minutes in its juices, then slide the pan under a hot grill for 5–8 minutes—this quick step turns slow cooker tenderness into full-on crispy roast chicken vibes.

Whole Chicken in Crock Pot with Potatoes and Vegetables (One-Pot Roast Dinner)

The base recipe already gives you a delicious slow cooker whole chicken with plenty of juices. However, you can easily turn it into a complete chicken pot roast recipe by adding potatoes and vegetables under the bird.

Choosing vegetables that can handle long cooking

Because a whole chicken in crock pot spends many hours simmering, you want vegetables that won’t completely disintegrate. Good choices include:

  • Baby potatoes or chunks of regular potatoes
  • Carrots, cut into thick pieces
  • Onion wedges or thick slices
  • Parsnips, chopped
  • Celery sticks, cut into 3–4 cm sections

These vegetables soak up the flavour from the chicken and aromatics, turning into soft, savoury little flavour bombs.

Slow cooker filled with seasoned baby potatoes, carrot sticks and onion wedges, showing the vegetable bed that goes under the whole chicken for a one-pot roast dinner.
Build a sturdy veggie bed of potatoes, carrots and onions under the bird—these soak up the chicken juices as it cooks, so you get buttery, flavour-packed vegetables ready at the same time as your slow cooker roast chicken.

Building the One-Pot Layer for a Whole Chicken in Crock Pot

To make a full roast chicken one pot meal:

  1. Toss the potatoes and carrots in a bowl with a little oil, salt, pepper and herbs.
  2. Spread them in an even layer on the bottom of the slow cooker.
  3. Add onion wedges and any parsnips or celery on top.
  4. Place your seasoned whole chicken on this vegetable bed.

Everything else stays the same: a splash of liquid around the sides, lid on, cook on LOW until your whole chicken in a crock pot is done.

By the end, you get:

  • Soft potatoes infused with chicken juices
  • Sweet carrots and onions
  • A pool of savoury liquid at the bottom acting as a light gravy

This is exactly the “veggie nest” approach you’ll see in recipes like this slow cooker whole chicken with vegetables, and it’s ideal when you want dinner to be more or less ready straight from one pot.

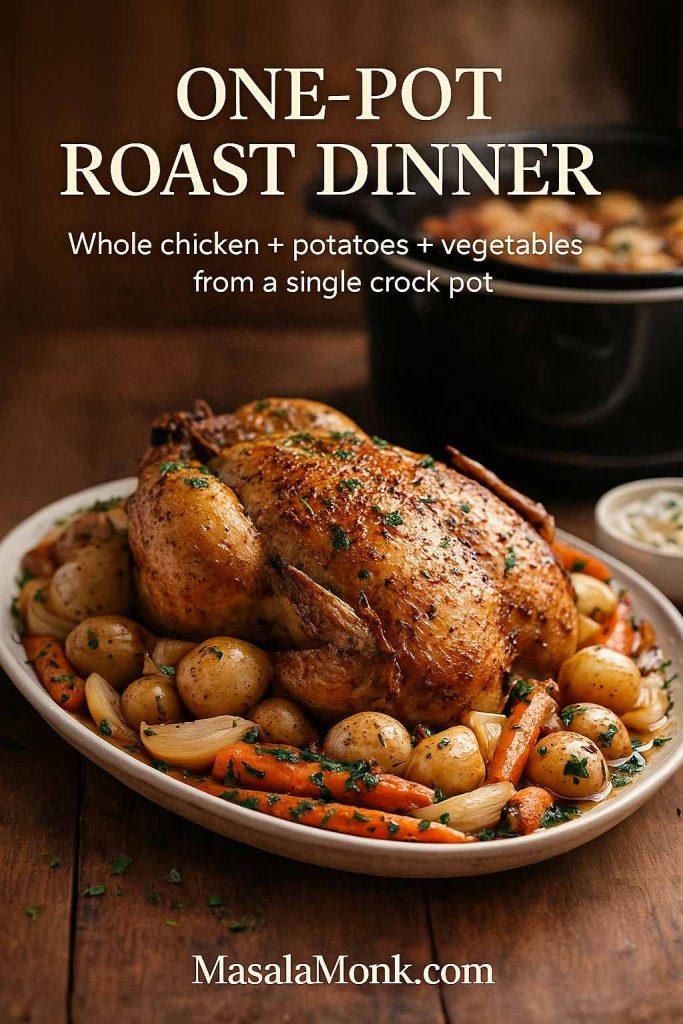
Whole roasted chicken served on a platter surrounded by potatoes, carrots and onions, with a slow cooker in the background, showing a complete one-pot roast dinner made in a crock pot.
Layer potatoes, carrots and onions under the chicken in your slow cooker and you’ll lift out a full one-pot roast dinner—tender meat on top, buttery vegetables and savoury juices all from the same crock pot.

How to Serve Your Whole Chicken in Crock Pot with Vegetables

When the chicken is cooked:

  1. Transfer it gently to a carving board and let it rest.
  2. Use a slotted spoon to lift out potatoes and vegetables onto a warm platter.
  3. Arrange the chicken on top or beside them.
  4. Spoon some of the juices over everything.

A sprinkle of chopped parsley or chives brightens it up visually and adds a fresh note. For extra contrast, adding a small bowl of Greek tzatziki sauce on the table gives you something cool, creamy, and garlicky to swipe chicken and potatoes through.


“Baked” Whole Chicken in Crock Pot: Roast Feel Without the Oven

Many people ask specifically for baked chicken crock pot or baked chicken crock pot slow cooker ideas because they want the taste and look of roast chicken without managing oven time. The good news is your base method is almost there already.

To push the “baked” vibe further:

  • Use butter rather than oil in the herb rub
  • Keep the chicken lifted up well on onions or potatoes
  • Only add a small amount of liquid
  • Always finish under the grill or broiler for crisp skin
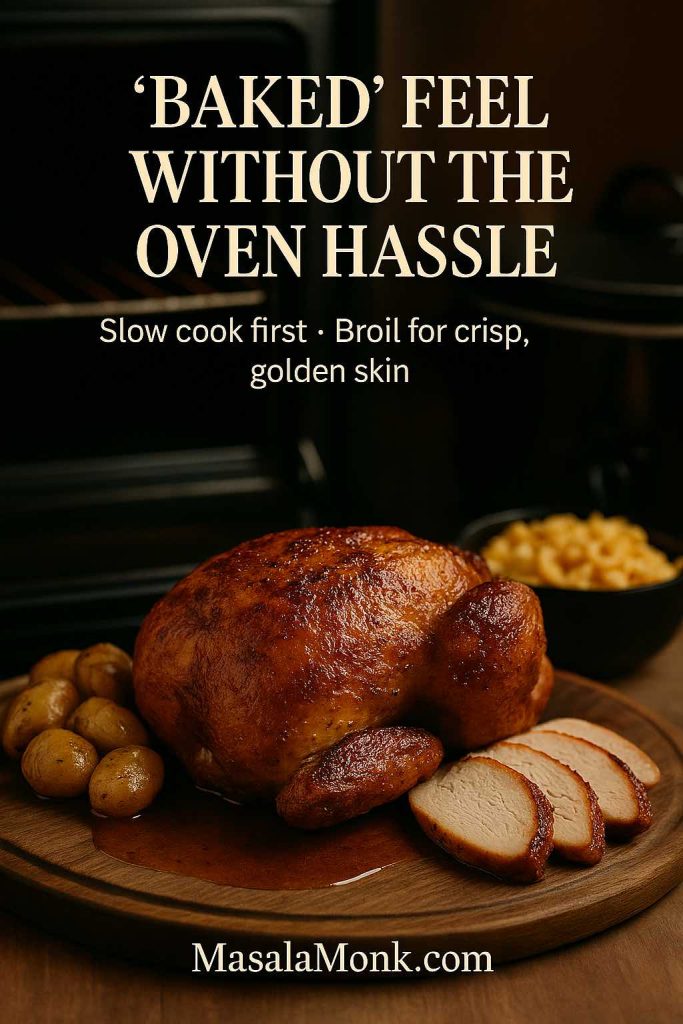
Whole roasted chicken with crisp golden skin on a wooden board, served with potatoes and macaroni and cheese in front of an oven, illustrating the baked-style finish for crock pot whole chicken.
For that baked-chicken feel, slow cook the bird until tender, then slide it under a hot grill for 5–8 minutes—crispy, golden skin on the outside, slow-cooker juiciness on the inside.

In practice, that means you follow the same steps as the core whole chicken recipes slow cooker crock pot method, then:

  • Lift the cooked chicken out
  • Pop it under a hot grill for a few minutes
  • Carve it on a board so slices still have crispy bits on top

Serve this “baked” style crock pot chicken with soft potatoes from the pot and a simple salad. For full comfort-food mode, it’s hard to beat a slab of macaroni and cheese on the same plate, or even a side of crispy homemade French fries if you want that roast-chicken-and-chips feeling.


Beyond a Whole Chicken in Crock Pot: Thighs, Quarters and Drumsticks in the Slow Cooker

So far, everything has centred on a full whole chicken in crock pot. However, the same approach works beautifully with chicken pieces, which is handy if:

  • You prefer dark meat
  • Only thighs or drumsticks were on sale
  • You want quicker cook times
Slow cooker filled with golden, herb-seasoned chicken thighs and leg quarters sitting on potatoes and carrots, showing the easy dark-meat version of the crock pot whole chicken recipe.
If you love dark meat or just found thighs and quarters on sale, use the same crock pot method—season well, cook 4–6 hours on LOW, and let the rich leg juices soak into the potatoes and carrots underneath.

Basic method for thighs and quarters

For chicken quarters in crock pot or bone-in thighs:

  1. Pat the pieces dry with paper towels.
  2. Season them generously with salt, pepper, herbs, garlic and a little oil or butter.
  3. Arrange them in a single layer in the crock pot, skin-side up.
  4. Pour in a small splash of stock or water—around ¼ cup is still enough.
  5. Cook on LOW until tender:
    • Thighs and drumsticks: about 4–5 hours
    • Leg quarters: about 5–6 hours

You can tuck potatoes and carrots underneath to create a dark-meat version of chicken pot roast in slow cooker. The juices from thighs and legs are particularly rich, so the vegetables turn out very flavourful.

Black slow cooker filled with paprika and garlic rubbed chicken drumsticks and potatoes, showing the slow cooked drumstick variation of the crock pot chicken recipe.
A smoky paprika and garlic rub turns simple drumsticks into slow cooker gold—cook them on LOW for about 4 hours, until the meat pulls back from the bone and the potatoes underneath are coated in rich, spicy juices.

Slow cooked drumsticks

For slow cooked chicken drumstick recipes, you can lean into paprika and garlic:

  • Season drumsticks heavily with salt, pepper, smoked paprika, garlic, and a bit of oil.
  • Cook on LOW with a splash of liquid until the meat pulls back from the bone and feels tender, usually around 4 hours.

This creates something like slow roasted chicken legs without the oven, ideal for a casual, hands-on dinner.

Black slow cooker filled with a small whole roasted chicken surrounded by extra thighs and drumsticks over potatoes and carrots, showing how to stretch a crock pot whole chicken with additional pieces.
When you’re feeding a crowd, nestle a small whole bird on top of your veggie bed and pack thighs and drumsticks all around it—the same slow cooker method gives you a mix of white and dark meat without any extra fuss.

Stretching a Whole Chicken in Crock Pot with Extra Pieces

If you want the presentation of a whole chicken in crock pot but need more portions, you can combine both approaches:

  • Place a small whole bird on your vegetable bed.
  • Nestle seasoned thighs or drumsticks around the sides.

Everything cooks together in the same slow cooker roast chicken environment, and you end up with a mixture of white and dark meat to serve.


Frozen Whole Chicken in Crock Pot? Why Thawing Matters

It’s tempting, especially on busy days, to think, “I’ll just put a frozen whole chicken in the crock pot and let it go all day.” It sounds convenient, but it’s not a great idea.

Slow cookers heat food gently over a long period. If you start with a solid frozen block, the centre of the chicken can sit for too long at temperatures where bacteria thrive before it finally reaches 165°F. That’s why official advice from sources like FoodSafety.gov is clear: thaw meat and poultry safely in the refrigerator before putting them into a slow cooker.

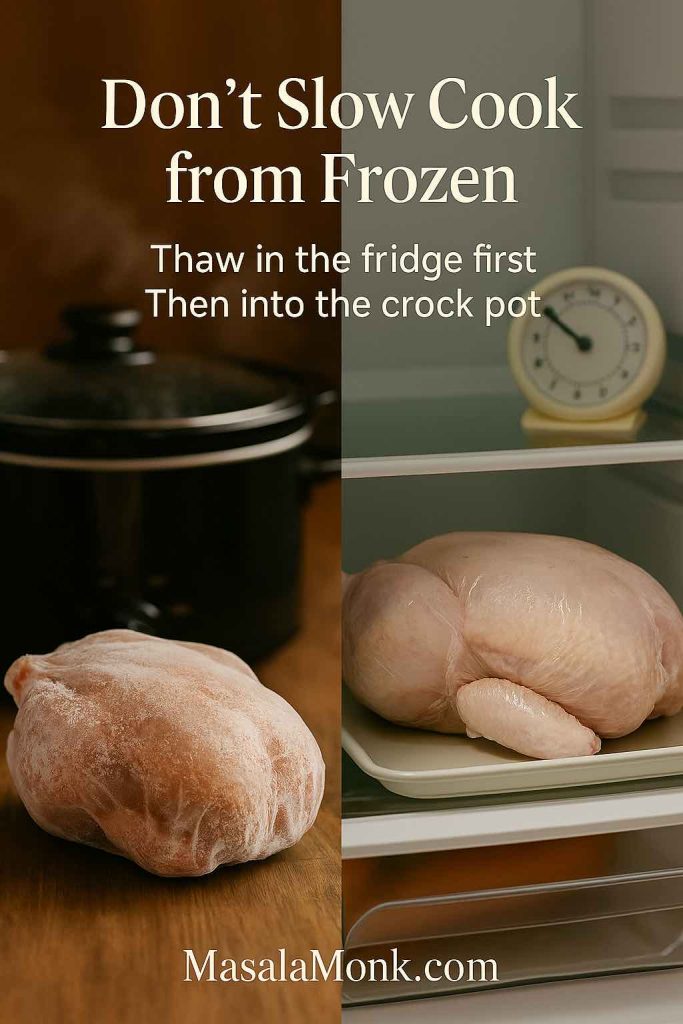
Split image showing a frozen whole chicken on the counter next to a slow cooker on one side and the same chicken thawing on a tray in the fridge with a timer on the other side, explaining that you should thaw chicken before cooking it in a crock pot.
Skip the temptation to drop a frozen bird straight into the crock pot—thaw it in the fridge first, then slow cook, so the chicken moves quickly through the “danger zone” and reaches a safe 165°F / 74°C all the way through.

So instead of chasing crockpot frozen whole chicken shortcuts, it’s much safer to:

  1. Thaw the chicken fully in the fridge.
  2. Pat it dry and follow the whole chicken in crock pot method.
  3. Check the internal temperature to confirm it’s reached the safe zone.

If you often forget to thaw and find yourself in a rush, it’s better to lean on a pressure cooker or Instant Pot recipe designed for frozen poultry. Something like this Instant Pot rotisserie-style chicken shows how quickly a pressure cooker can handle a whole bird, including from frozen, without the drawn-out lukewarm phase a slow cooker would go through.


BBQ, Stuffed and Rotisserie-Style Slow Cooker Chicken

Once you’re confident with the basic whole chicken recipes slow cooker crock pot format, you can start changing the flavours and finishing touches.

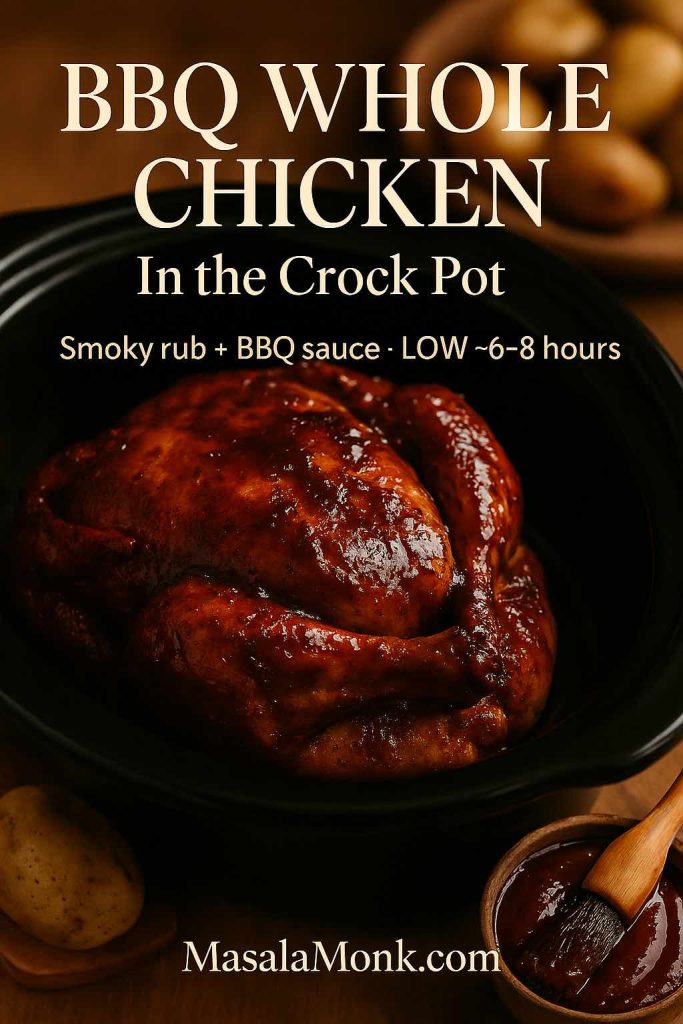
Whole chicken coated in glossy BBQ sauce sitting in a black crock pot with a bowl of extra sauce and a brush beside it, showing a BBQ-style slow cooker whole chicken.
Rub the bird with a smoky spice mix, nestle it into the crock pot and finish with a glossy BBQ sauce—this version is perfect shredded into buns or carved like a sticky, crowd-pleasing roast.

BBQ whole chicken

For a crock pot whole chicken BBQ feel:

  • Stir together salt, pepper, smoked paprika, garlic powder, onion powder, and a little brown sugar.
  • Rub this spice mix all over the chicken.
  • Sit the bird on onions in the crock pot.
  • Pour a small amount of stock and a few tablespoons of BBQ sauce around the base.
Cook on LOW until done. At the end, you can:

  • Brush the top with extra BBQ sauce and crisp it under the grill, or
  • Shred the meat in the crock and add more sauce for a pulled-chicken style dish

Pile it onto buns, add slaw, and dinner becomes a casual BBQ sandwich night. If you want fresh ideas for sandwich fillings, the collection of chicken sandwich recipes offers everything from classic combos to spicy twists.

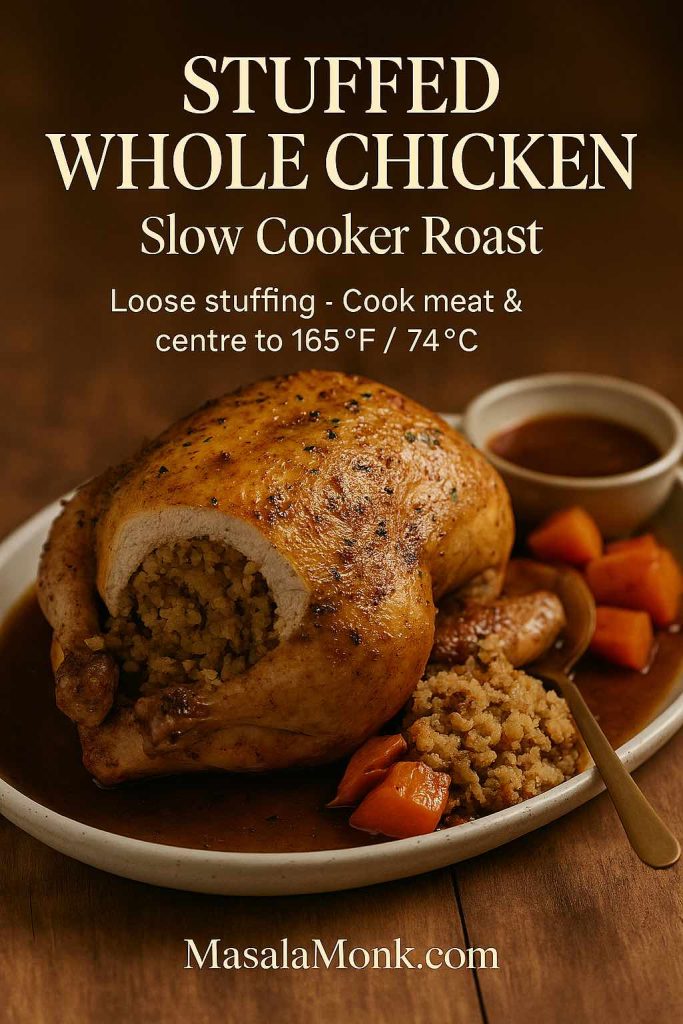
Slow cooker stuffed whole chicken on a platter, sliced open to show loose bread and rice stuffing with carrots and rich juices, illustrating a stuffed crock pot roast chicken.
Keep the stuffing loose and always check that both the meat and the very centre hit 165°F / 74°C—this way your slow cooker stuffed chicken turns out moist, flavourful and safely cooked all the way through.

Stuffed whole chicken in the crock pot

A stuffed whole chicken crock pot feels very special, but the method is familiar:

  • Assemble a loose bread-based or rice stuffing.
  • Spoon it gently into the chicken’s cavity—it should be comfortably filled, not tightly packed.
  • Season the outside as usual and cook on LOW.

Because stuffing is dense, you need to make sure:

  • The thickest parts of the meat reach 165°F
  • The centre of the stuffing also reaches 165°F

It’s the same principle you’d follow for stuffed roast chicken in the oven; using a thermometer for both meat and stuffing keeps this cosy version of chicken pot roast safely on track.

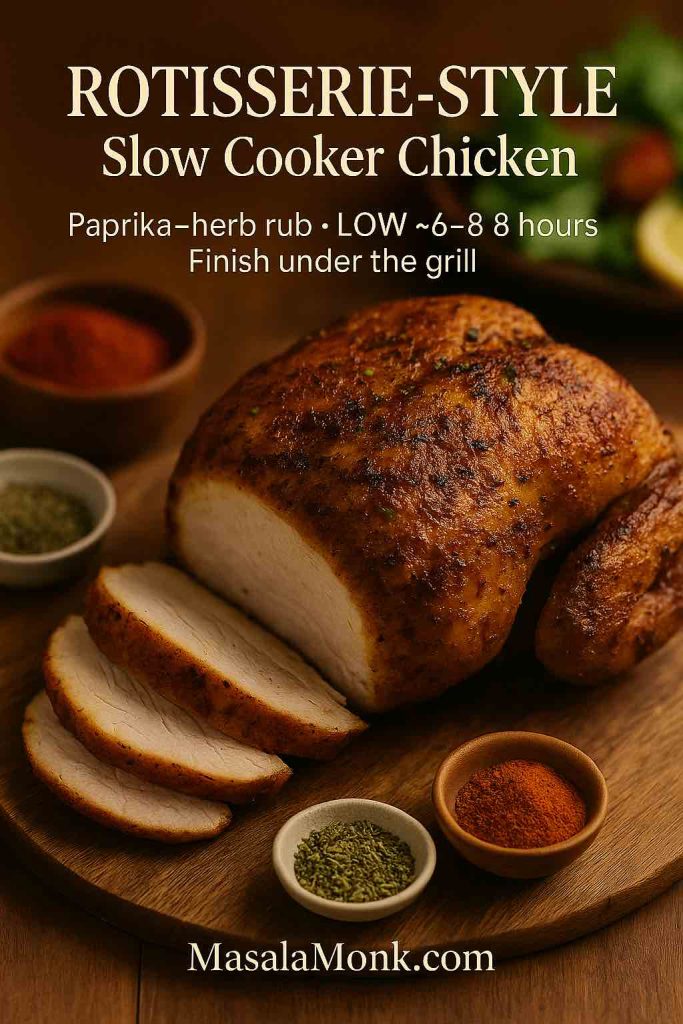
Rotisserie-style slow cooker chicken with golden paprika and herb crust sliced on a wooden board, surrounded by small bowls of paprika and dried herbs.
A simple paprika–herb rub plus a quick blast under the grill turns slow cooker chicken into a rotisserie-style roast—slice it up for salads, wraps, grain bowls or easy weeknight plates.

Rotisserie-style slow cooker chicken

When people talk about a crockpot rotisserie chicken recipe, they usually mean slow-cooked chicken with that familiar rotisserie-spice flavour and slightly crisp skin.

To approximate that:

  • Make a rub with salt, pepper, paprika, garlic powder, onion powder and dried thyme.
  • Rub it thoroughly over the chicken, including under the skin where possible.
  • Use enough onion or potato underneath to keep the chicken lifted above the liquid.
  • Cook on LOW until fully done.
  • Finish under a grill for rotisserie-like colour and texture.

From there, you can slice the meat neatly like a store-bought rotisserie chicken, or shred it to use in things like chicken Alfredo pasta, quesadillas, tacos, or a bubbling buffalo chicken dip for parties.


What to Serve with Whole Chicken in Crock Pot Dinners

Once your whole chicken in crock pot is done, the fun part begins: putting everything on the table.

Bright and fresh sides

Slow-cooked chicken and potatoes are rich and comforting, so something fresh and tangy on the side keeps the plate lively:

  • A crisp green salad with lemony dressing
  • Sliced cucumbers and tomatoes tossed with olive oil and vinegar
  • A bowl of Greek tzatziki sauce for dipping chicken and vegetables

These light sides work particularly well if you’ve made a chicken pot roast recipe with lots of potatoes and carrots underneath the bird.

Plate of sliced crock pot chicken with roast potatoes surrounded by green salad, cucumber and tomato salad, tzatziki, mashed potatoes, macaroni and cheese and fries, showing fresh and comfort side dishes to serve with slow cooker chicken.
Pair your crock pot chicken with bright salads and tzatziki when you want something light, or lean into full comfort mode with mashed potatoes, mac and cheese and fries—the same slow cooker roast works with both kinds of plates.

Classic comfort sides

On cold evenings or when you just want maximum comfort:

  • Spoon the chicken pot roast in slow cooker over buttery mashed potatoes or rice. If rice sometimes trips you up, the detailed guide on how to cook rice walks through several foolproof methods.
  • Add a baking dish of macaroni and cheese for a rich, indulgent side.
  • Fry up a batch of homemade French fries if your household loves the roast-chicken-and-fries combination.

If you’re feeding a crowd, you can also serve the shredded chicken as part of a “build your own plate” spread: rolls or flatbreads, pickles, raw vegetables, dips like spinach dips and buffalo dip, plus bowls of roasted vegetables from the crock. Everyone assembles their own perfect plate.


Making the Most of Leftover Whole Chicken from the Crock Pot

One of the best things about a whole chicken in crock pot is how generous the leftovers are.

Storing safely

As soon as dinner is over and the chicken has cooled slightly:

  1. Pull off any remaining meat from the bones.
  2. Chop or shred it into bite-size pieces.
  3. Store the meat in an airtight container in the fridge for up to 3–4 days.

Strain the cooking juices into a jar. Once chilled, you’ll see a layer of fat on top and rich jelly-like stock underneath. Both are useful:

  • Use the fat for frying onions or potatoes.
  • Use the stock as a base for soups, sauces, or to cook rice and grains.
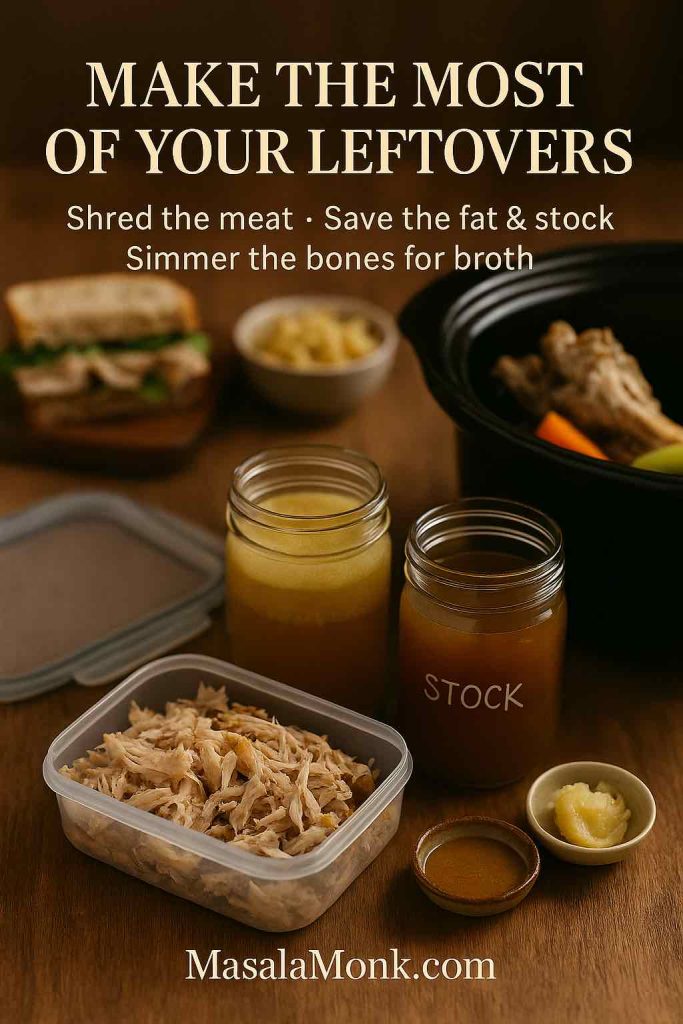
Container of shredded leftover chicken, jars of chilled chicken stock with a fat layer on top, and a slow cooker insert filled with bones and vegetables, showing how to save and use every part of a crock pot whole chicken.
Shred the meat for easy meals, pour the fat into a small dish for frying, and turn the bones plus cooking juices into homemade stock—one slow cooker chicken quietly sets you up for several more dinners.

Leftover meal ideas

There are endless ways to use leftover slow cooker roast chicken. A few easy ones:

  • Stir shredded chicken into chicken Alfredo pasta for a quick, creamy dinner.
  • Stuff it into sandwiches or wraps with ideas borrowed from the chicken sandwich recipes collection—BBQ, cheesy melts, buffalo style and more.
  • Toss it into salads with crisp lettuce, cucumber, cherry tomatoes and a sharp dressing.
  • Fold it into soups or stews, using the crock pot juices as part of the broth.
  • Combine it with cooked vegetables and gravy, then top with pastry or mashed potatoes to make comforting chicken pies.

Meanwhile, the bones can go right back into the slow cooker with fresh water, an onion, a carrot and a stick of celery. Let them simmer overnight on LOW and you’ll wake up to a simple homemade stock, ready to be strained, cooled and frozen in portions.


Pulling It All Together

When you step back, a whole chicken in crock pot is one of those quiet kitchen skills that makes life easier without a lot of fanfare. With one method, you can:

  • Make a complete slow cooker roast chicken with very little hands-on time
  • Turn it into a one-pot dinner with potatoes and vegetables
  • Adapt it for thighs, quarters and drumsticks
  • Explore BBQ, stuffed and rotisserie-style variations
  • Stretch leftover meat and bones into several more meals
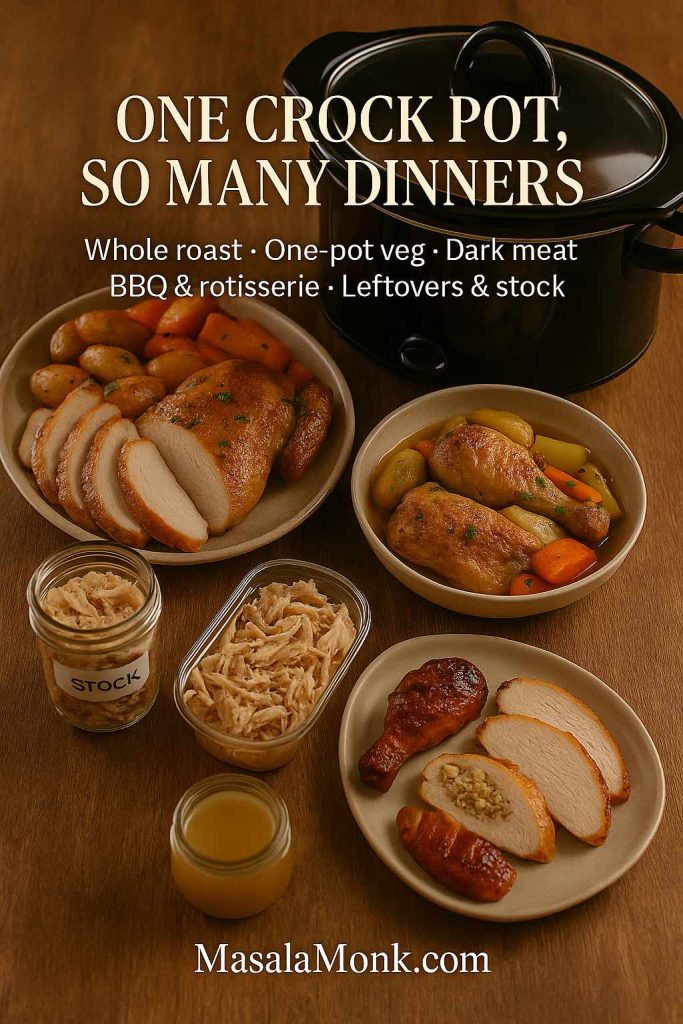
Black crock pot surrounded by plates of sliced roast chicken with vegetables, dark meat pieces, BBQ and stuffed chicken, plus jars of shredded meat and stock, showing how one slow cooker whole chicken can make many different meals.
One slow cooker method gives you it all—classic roast chicken, one-pot veg, juicy dark meat, BBQ and rotisserie-style twists, plus leftover meat and homemade stock for easy meals later in the week.

It’s also a technique that fits easily inside good food-safety practice: thaw the chicken first, keep the lid on, cook on LOW until a thermometer reads 165°F in the thickest parts, just as guides like FoodSafety.gov’s slow cooker safety article recommend.

Once you’ve cooked a couple of whole chicken recipes slow cooker crock pot style, you’ll probably start tweaking them instinctively—extra garlic one week, more lemon the next, maybe a smoky paprika-heavy rub after that. The beauty is that the core never really changes: a seasoned bird, a gentle heat, a few hours of patience, and you’re rewarded with a pot full of tender meat, vegetables, and aroma that makes your kitchen feel like home long before anyone sits down to eat.

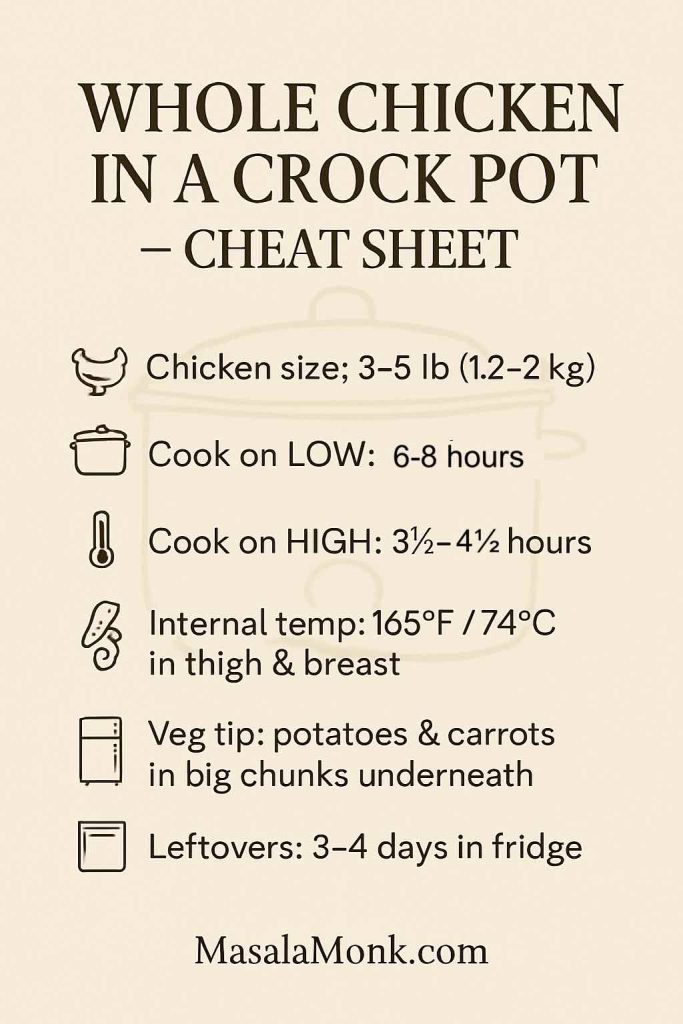
Infographic cheat sheet for cooking a whole chicken in a crock pot, showing recommended chicken size, LOW and HIGH cooking times, safe internal temperature of 165°F / 74°C, vegetable tip and how long leftovers keep in the fridge.
Save or pin this whole chicken in a crock pot cheat sheet so you don’t have to rethink the basics—size, timing, temperature and leftovers—every time you set up your slow cooker.

FAQs

1. How long does it take to cook a whole chicken in crock pot on LOW?

For a 3–5 lb bird, a whole chicken in crock pot usually takes about 6–8 hours on LOW. Smaller chickens finish closer to six hours, while larger ones need nearer eight. Always check that the thickest part of the breast and thigh reaches 165°F / 74°C before serving.


2. Can I cook a whole chicken in crock pot on HIGH instead of LOW?

Yes, you can cook a whole chicken in crock pot on HIGH if you’re short on time. In that case, expect roughly 3½–4½ hours of cooking. However, LOW gives a more tender, juicy result, so use HIGH only when you really need to speed things up.


3. What size bird is best for whole chicken in crock pot recipes?

Most whole chicken in crock pot recipes work best with birds between 3 and 5 lb (1.2–2.2 kg). That size usually fits comfortably in a standard slow cooker and cooks evenly. If the chicken barely fits or pushes the lid up, it’s better to choose a smaller one.


4. Do I need to add liquid for a slow cooker whole chicken?

You only need a small amount of liquid for a slow cooker whole chicken recipe. About ¼–½ cup of stock or water is enough to get things going and prevent scorching. The chicken releases plenty of juices as it cooks, so too much liquid can make the flavour watery.


5. Can I cook potatoes and vegetables with my whole chicken in crock pot?

Absolutely. A whole chicken in crock pot with potatoes and vegetables is one of the easiest one-pot dinners. Place sturdy vegetables like potatoes, carrots and onions under the chicken so they soak up the juices while everything cooks together.


6. Will the vegetables get mushy in a chicken pot roast in slow cooker?

If you cut them too small, they can. For a chicken pot roast in slow cooker, keep potatoes and carrots in larger chunks. That way they become soft and flavourful, but still hold their shape by the time your slow cooker whole chicken is done.


7. Is it safe to cook a frozen whole chicken in a slow cooker?

No, it’s not recommended to put a frozen whole chicken in slow cooker. The centre takes too long to heat up, which can keep it in the “danger zone” for bacteria. Always thaw the chicken in the fridge first, then follow your favourite whole chicken slow cooker recipe.


8. How can I get crispy skin on a whole chicken slow cooker recipe?

A slow cooker makes meat tender but doesn’t crisp the skin. To mimic a baked chicken crock pot result, transfer the cooked chicken to a roasting pan and put it under a hot grill or broiler for a few minutes. The skin will brown and crisp while the inside stays juicy.


9. How do I know when my whole chicken in crock pot is done?

The best way is to use a thermometer. For a safe whole chicken in crock pot, the thickest part of the breast and thigh should read 165°F / 74°C. The legs should also move easily and the juices should run clear, not pink.


10. Can I stuff a whole chicken for a crock pot chicken roast?

Yes, but you have to be careful. For a stuffed crock pot chicken roast, keep the stuffing loose rather than packed, and check the temperature in the centre of the stuffing as well as in the meat. Both should reach 165°F / 74°C before you serve.


11. Do I have to brown the chicken before putting it in the slow cooker?

No, you don’t have to brown the chicken first for a whole chicken in slow cooker. The recipe works perfectly well without that extra step. If you want a deeper flavour, you can brown it in a pan first, but it’s optional rather than essential.


12. Can I cook just chicken thighs or drumsticks instead of a whole chicken in crock pot?

Definitely. The same method works for slow cook whole chicken recipes and for pieces. Bone-in thighs, drumsticks and leg quarters cook faster—usually in 4–6 hours on LOW—so they’re a good option when you don’t need a full bird.


13. How should I store leftover slow cooker whole chicken?

Once your slow cooker whole chicken has cooled slightly, remove the meat from the bones and store it in an airtight container in the fridge. It keeps well for about 3–4 days. You can also freeze leftover chicken for easy future meals.


14. What can I make with leftover whole chicken from the crock pot?

There are lots of options. Shredded meat from a whole chicken in crock pot is perfect for sandwiches, wraps, quesadillas, pasta, fried rice, and soups. You can also use the carcass to make homemade stock for the next batch of chicken pot roast or soup.


15. Is a whole chicken in crock pot healthier than fried chicken or takeout?

Generally, yes. A whole chicken in crock pot uses simple ingredients and doesn’t require deep frying. You control the amount of salt, fat and seasoning, and you can pair it with plenty of vegetables, which usually makes it lighter than most takeout options.


16. Can I use boneless chicken for this slow cooker whole chicken style recipe?

You can adapt the flavours, but it won’t really be a whole chicken in crock pot recipe anymore. Boneless chicken cooks faster and can dry out more easily. If you want the same juicy, roast-style result, bone-in and skin-on pieces are a better substitute.


17. Why does my whole chicken in crock pot fall apart when I lift it out?

That’s usually a good sign. A very tender whole chicken in crock pot can be hard to move because the meat is so soft. Use two large spatulas or a slotted spoon plus tongs, or simply carve and serve it directly from the slow cooker instead of lifting it whole.


18. Can I prepare the chicken the night before and start the crock pot in the morning?

Yes, as long as you handle it safely. You can season your whole chicken in crock pot the night before, cover it and keep it in the fridge. In the morning, place it into the slow cooker insert, add vegetables and liquid, then start cooking immediately.

Posted on — 11 Comments

Cheesy Chicken Broccoli Rice – 4 Ways Recipe (One Pot, Casserole, Crockpot & Instant Pot)

Person holding a cast-iron pan of cheesy chicken broccoli rice, highlighting one-pot, casserole, crockpot and Instant Pot versions from MasalaMonk

There are days when you crave something fresh and bright, and there are days when only a deep, steaming bowl of cheesy chicken broccoli rice will do. The kind of bowl you scoop out in generous portions, where the rice is soft and creamy, the chicken is tender, the broccoli is still a little green and crisp, and melted cheese ties everything together in comforting, stretchy strands.

This is that kind of dinner.

And instead of giving you a single rigid recipe, this guide walks you through four different ways to make cheesy chicken broccoli rice:

  • a quick stovetop one-pot version,
  • an oven-baked casserole,
  • a crock pot version that minds itself, and
  • an Instant Pot method for when time is tight.

All four are built from the same simple ingredients. Once you understand that base, you can slide the dish toward lighter, richer, more veggie-packed, or more indulgent, depending on the day.


Why Cheesy Chicken Broccoli Rice Works So Well

How cheesy chicken broccoli rice hits every craving

Cheesy chicken broccoli rice works because it brings a bit of everything your body and brain like in one spoonful:

  • lean or juicy chicken for protein and savoriness,
  • comforting rice for bulk and softness,
  • bright, crunchy broccoli for freshness and nutrients,
  • melty cheese for salt, richness, and that “ahh, that’s better” feeling.
Portrait hero image of cheesy chicken broccoli rice in a bowl, with skillet, casserole and slow cooker in the background, plus text overlay showing four ways to cook the recipe.
Cheesy chicken broccoli rice made four ways — skillet, casserole, crock pot and Instant Pot — so you can pick the method that fits your time, mood and appetite.

Broccoli isn’t just filler here. It comes with fiber, vitamins C and K, folate, and plenty of antioxidants. Guides to broccoli nutrition and health benefits highlight its potential role in supporting heart, gut, and immune health.

Rice brings comfort and structure. Long-grain white rice is soft and neutral. Brown rice offers a nutty chew and more fiber. Harvard’s comparison of brown rice versus white rice explains how brown rice keeps its bran and germ, which means extra minerals and fiber, while white rice is milled for softness and speed.

Cheese is the glue. Sharp cheddar gives that familiar broccoli-and-cheddar flavor. Mozzarella adds stretch. Gruyère or fontina deepen the taste. Cottage cheese can even sneak in a bit of extra protein, a trick you see in dishes like MasalaMonk’s cottage cheese lasagna, where creamy doesn’t have to mean heavy.

Put together, you get cheesy chicken broccoli rice: simple ingredients that feel like a hug in a bowl.


Core Ingredients for Cheesy Chicken Broccoli Rice

Flatlay of core ingredients for cheesy chicken broccoli rice—bowls of diced chicken, uncooked rice, broccoli florets, shredded cheddar, stock, cream, garlic, onion, salt and pepper—with text ‘The Base Formula: Chicken + Rice + Broccoli + Cheese’.
This is the base formula every version uses—chicken, rice, broccoli, cheese, stock and aromatics—so you can swap rice, tweak cheese or change cooking method without changing the heart of the recipe.

Choosing chicken

You can use either:

  • Chicken breasts – lean, tidy cubes, mild flavor.
  • Chicken thighs – a little more fat, more flavor, extra juiciness.

Both work in every method here. Just remember one simple safety rule: cooked chicken should reach 165°F (74°C) in the thickest part. That number shows up again and again in official food-safety charts for poultry and casseroles.

Picking rice

You have options:

  • Long-grain white rice for classic, soft comfort.
  • Basmati if you like distinct, fragrant grains.
  • Brown rice when you want more chew and more fiber.

Harvard’s overview of rice and glycemic index explains how different rice types affect blood sugar. Brown rice usually sits lower on the glycemic index than white, which can be useful if you’re watching energy spikes.

If you want to understand water ratios and cooking times a bit better before you start, it’s worth skimming through a practical guide like how to cook rice perfectly, which covers stovetop, cooker, and Instant Pot methods.

Why broccoli belongs in cheesy chicken broccoli rice

Broccoli brings:

  • color and freshness,
  • a slight crunch if you time it right,
  • and a serious nutrient boost.

It is rich in fiber and vitamins, and it’s easy to work with fresh or frozen. If you enjoy exploring broccoli beyond florets, you might like reading about broccoli’s benefits and weight-loss uses or even this guide to broccoli sprouts, which concentrates many of the same helpful compounds in tiny shoots.

Cheese and sauce

Most versions in this guide use:

  • cheddar as the base cheese,
  • stock and a bit of milk or cream for richness,
  • and sometimes cream of chicken soup for a shortcut sauce.

You can keep things lighter with a simple milk-based sauce or go all-in with extra cheese, a spoonful of cream cheese, or even a bit of cottage cheese blended into the sauce.

Also Read: Easy Lemon Pepper Chicken Wings (Air Fryer, Oven & Fried Recipe)


One-Pot Cheesy Chicken Broccoli Rice (Stovetop Skillet)

The skillet version is the one to choose when you’re tired, hungry, and not in the mood to wash more than a single pan. Yet, despite its simplicity, it still delivers all the things you want: tender chicken, soft rice, pockets of green broccoli, and cheese melted into a creamy, spoon-coating sauce.

What makes this one-pot cheesy chicken broccoli rice special

You cook the chicken, rice, and broccoli in the same pan. Every grain of rice sits in flavorful stock. The broccoli steams gently so it stays bright. Cheese goes in at the end and melts into a silky sauce.

It’s fast enough to make after work yet cozy enough to eat slowly on the sofa.

One-pot skillet of cheesy chicken broccoli rice with broccoli and melted cheese, a wooden spoon lifting a portion, plus text overlay showing a four-step skillet cheat sheet.
The one-pot skillet method takes you from browning chicken to stirring in cheese in about 30–35 minutes, so you get creamy cheesy chicken broccoli rice with just a single pan to wash.

Steps for one-pot cheesy chicken broccoli rice

Step 1: Sear the chicken for flavor

Set a wide, heavy pan over medium heat. Add a little butter or oil. Drop in diced chicken and season it with salt and pepper. Let the pieces sit long enough to brown lightly on one side before you stir them. You want a bit of color; that means flavor.

Add chopped onion and a clove or two of garlic. Stir until the onion softens and you can smell the garlic.

Step 2: Toast the rice in the same pan

Pour the rice straight into the pan. Stir for a minute or two so each grain gets coated in the flavored fat. The rice will look slightly glossy. That quick toast gives your cheesy chicken broccoli rice better texture and taste.

Step 3: Add stock and simmer

Pour in chicken stock. If you like the dish extra creamy, add a small splash of milk or cream. Scrape the bottom of the pan with a spoon to loosen any browned bits. Bring the liquid to a light simmer, then cover the pan and lower the heat.

Let the rice cook gently. If you are not sure about the water-to-rice ratio for the rice you use most often, check the proportions in this rice cooking guide and adjust your stock to match.

Step 4: Steam broccoli on top of the rice

When the rice is almost tender, lift the lid and scatter broccoli florets evenly over the surface. Fresh or frozen both work. Replace the lid and let the steam inside finish cooking the broccoli while the rice absorbs the last of the liquid.

Step 5: Stir in cheese off the heat

Turn off the heat. Sprinkle shredded cheese over the chicken, rice, and broccoli. Fold gently until everything is coated in a smooth, thick sauce. If the cheesy chicken broccoli rice looks a little tight, stir in a spoonful of hot stock or milk. If it seems loose, let it sit uncovered for a few minutes.

Spoon the one-pot cheesy chicken broccoli rice straight from the pan into bowls. On nights when you crave an entire week of cozy dishes, you can plan this skillet dinner one day and MasalaMonk’s macaroni & cheese recipe another day for a double hit of cheese and comfort.


Cheesy Chicken Broccoli Rice Casserole (Oven-Baked)

Sometimes you don’t just want a bowl; you want a casserole you can slice into, a dish that feels festive enough for Sunday lunch or company but still easy enough for a weeknight. That’s where the oven-baked cheesy chicken broccoli rice casserole comes in.

Here, instead of cooking everything in one pot, you assemble cooked components into a baking dish, smother them in a creamy sauce, shower them with cheese, and let the oven do the last stretch of work.

Why bake cheesy chicken broccoli rice as a casserole

Baking turns the same ingredients into a structured dish:

  • the rice forms a soft base,
  • the chicken and broccoli stay tender in the sauce,
  • the top becomes a golden, bubbly crust of cheese and crumbs.

It’s ideal for potlucks, Sunday lunches, or any evening when you want leftovers that reheat beautifully.

Oven-baked cheesy chicken broccoli rice casserole in a white ceramic dish with a golden bubbly cheese topping, one square being lifted out on a spatula, with text overlay explaining the casserole method steps.
The oven-baked cheesy chicken broccoli rice casserole starts with cooked rice and chicken, then bakes under a golden cheese crust—perfect when you want a crowd-pleasing main that freezes and reheats beautifully.

Steps for cheesy chicken broccoli rice casserole

Step 1: Cook rice, chicken, and broccoli separately

Cook your rice until just tender. It should still have a little bite, because it will bake further in the oven.

Cook the chicken in a pan or in the oven until the pieces reach 165°F. That way you know they are safe before you tuck them into a creamy sauce.

Blanch or steam the broccoli. Aim for bright green florets that are just tender.

Step 2: Make a creamy sauce

In a saucepan, melt butter. Whisk in flour to form a paste, then slowly pour in stock and milk while whisking. The sauce should thicken enough to coat the back of a spoon.

Season with salt, pepper, and perhaps a pinch of mustard powder. For a shortcut version, you can use stock plus a can of cream of chicken soup instead.

If you like the idea of lighter creaminess, stir in some cottage cheese, just as it is used in MasalaMonk’s cottage cheese lasagna.

Step 3: Combine everything with cheese

Tip your cooked rice, chicken, and broccoli into a large bowl. Pour the sauce over them. Add a generous amount of shredded cheddar and gently fold until everything is coated.

Taste a spoonful. This is your chance to fix the seasoning before you bake.

Step 4: Add a cheesy topping

Spread the mixture into a buttered baking dish. Sprinkle more cheese over the top. If you enjoy crunch, add breadcrumbs stirred with melted butter.

Step 5: Bake until bubbling and golden

Bake the cheesy chicken broccoli rice casserole until you see bubbles peeking around the edges and the top turns golden brown. Let it rest briefly when it comes out of the oven so it sets enough to slice.

This kind of casserole feels right at home beside another classic oven dish like MasalaMonk’s green bean casserole recipe ideas, which explores different twists on that holiday favorite.


Crock Pot Cheesy Chicken Broccoli Rice

There are also days when the idea of standing at the stove sounds exhausting. You still want cheesy chicken broccoli rice, but you need it to be the kind of meal that minds itself while you work, ferry people around, or just rest. That’s when the slow cooker shines.

Unlike the other versions, this one welcomes a bit of imprecision. It won’t be as meticulously layered or as neatly sliceable as the baked casserole, yet the payoff in ease is immense.

Why crock pot recipe is so forgiving

You add most of the ingredients to the pot, turn it on, and let time do the work. The rice absorbs stock slowly. The chicken turns tender. You finish with broccoli and cheese near the end, and you’re done.

It’s an ideal recipe for busy days, long afternoons, or times when you simply don’t want to hover around the stove.

Crock pot full of cheesy chicken broccoli rice being stirred with a wooden spoon, creamy rice with chicken and broccoli visible, with text overlay explaining slow cooker steps and benefits for busy days.
In the crock pot version, everything goes in together—rice, raw chicken, stock and aromatics—then broccoli and cheese are stirred in at the end, making it the easiest way to get cheesy chicken broccoli rice on truly busy days.

Steps for crock pot cheesy chicken broccoli and rice

Step 1: Add rice, chicken, and stock to the slow cooker

Grease the slow cooker lightly. Add uncooked rice, raw chicken pieces, stock, and any chopped onion or garlic you like. Stir well to make sure the rice is submerged.

Step 2: Cook on Low until tender

Cover and cook on Low. The exact time depends on your slow cooker and how hot it runs. You want chicken that pulls apart easily with a fork and rice that is soft, not chalky.

Step 3: Stir in broccoli near the end

About 20 to 30 minutes before you plan to eat, stir in broccoli florets. Put the lid back on and let them soften gently in the hot liquid. Fresh broccoli will cook quickly. Frozen florets will need a bit more time.

Step 4: Finish with plenty of cheese

Switch the slow cooker to Warm. Add shredded cheese and stir until it melts. If the cheesy chicken broccoli rice looks a little thick, add a splash of stock or milk. If it seems thin, let it sit uncovered for a short while.

Because slow cookers keep food warm for a long time, be mindful about leftovers. Articles on reheating rice safely explain why cooked rice should be cooled and refrigerated promptly and not left out for hours.

If you enjoy this hands-off style of cooking, there is a good chance you will also appreciate MasalaMonk’s crock pot lasagna soup, which uses the same “dump and simmer” approach with pasta, tomato, and cheese instead of rice.


Instant Pot Cheesy Chicken Broccoli Rice

Then there are nights when you walk into the kitchen, realize it’s late, and everyone is already asking when dinner will be ready. In those moments, the Instant Pot version of cheesy chicken broccoli rice is a lifesaver.

Here, the pressure cooker cooks the rice and chicken together rapidly, then you add the broccoli and cheese at the end to keep them fresh and melty.

How Instant Pot cheesy chicken broccoli rice saves time

Pressure cooking allows rice and chicken to cook quickly in the same pot. You then stir in broccoli and cheese at the end to keep them bright and melty. The whole process takes less active time than the oven, yet still gives you a comforting, filling bowl.

Instant Pot filled with cheesy chicken broccoli rice, a ladle lifting a creamy cheesy scoop with broccoli, with text overlay showing the pressure cooker plan for the recipe.
The Instant Pot version cooks the rice and chicken together under pressure, then uses the residual heat to soften broccoli and melt cheese—your fastest route to a bowl of cheesy chicken broccoli rice on late nights.

Steps for Instant Pot cheesy chicken broccoli rice

Step 1: Sauté onion, garlic, and chicken

Turn the cooker to Sauté. Add oil or butter, then soften chopped onion and garlic. Add chicken pieces and cook until they lose their raw color and pick up a hint of browning.

Step 2: Add rice and stock and deglaze

Stir the rice into the pot so each grain is coated. Pour in stock. Scrape the bottom of the pot with a spoon to loosen any stuck bits. This helps prevent burn warnings later.

Step 3: Cook under pressure

Seal the lid and set the cooker to High Pressure. Cook for a short time, adjusting for the type of rice you’ve chosen. White rice cooks quickly. Brown rice takes longer. When the timer ends, allow a brief natural release, then carefully vent the remaining steam.

If you are new to pressure cooking, the official Instant Pot guide to pressure cooking for beginners explains sealing, venting, and safety steps in a calm, clear way.

Step 4: Use residual heat to cook broccoli

Open the lid and stir in broccoli florets right away. Close the lid again (without turning the cooker back on) and let the trapped heat soften the broccoli for a few minutes.

Step 5: Stir in cheese and season

Open the lid once more. Add shredded cheese and stir until it melts into a thick sauce. Taste and adjust seasoning.

Because everything cooks together, it’s worth checking that the chicken pieces have reached 165°F in the center before serving.

Also Read: Greek Tzatziki Sauce Recipe (1 Master Sauce + 10 Easy Variations)


Lighter and Heartier Twists on Cheesy Chicken Broccoli Rice

Once you’ve made cheesy chicken broccoli rice a few times, you may start thinking about how to bend it to fit different kinds of days.

Two bowls of cheesy chicken broccoli rice side by side, the left bowl lighter with extra broccoli and greens and the right bowl richer and more cheesy, with text overlay reading ‘Lightened-Up vs Loaded-Up’ and notes on veggies and sauce.
Use the same cheesy chicken broccoli rice base, then go light with more veg and a thinner sauce—or load it up with extra cheese when you’re in full comfort-food mode.

Lighter cheesy chicken broccoli rice ideas

On days when you want the comfort but not quite as much heaviness, you can:

Use more vegetables

  • Increase the amount of broccoli.
  • Add peas or corn to the rice.
  • Stir a handful of spinach into the hot rice just before serving.

Side dishes help too. A bright salad piled with greens, cucumber, and lemony dressing cuts through the richness without much effort.

Switch up the rice

Swapping in some brown rice or mixing white and brown gives more fiber and texture. Tips on reducing the glycemic impact of rice explain how cooling and reheating rice and choosing different varieties can change how it affects blood sugar.

Balance rich meals with lighter days

If you enjoy big, cheesy dinners some days and lighter eating on others, homemade drinks can help. Instead of packaged sports drinks, you might make your own homemade electrolyte drink with mineral salts and citrus. Or, on fasting days, you can try one of the zero-calorie electrolyte recipes that support hydration without adding calories.

Heartier and extra-cheesy twists

On other days, comfort is the goal, and you’re not worried about keeping things light. On those evenings, you could:

Enrich the sauce

  • Use full-fat cheese and be generous.
  • Stir a spoonful of cream cheese into the sauce.
  • Add a splash of cream instead of some of the milk.

Add crispy toppings

For baked version of this dish, buttery breadcrumbs or crushed crackers on top turn the casserole into something that crackles lightly as you cut into it.

These richer versions sit nicely alongside other favorites such as macaroni & cheese and green bean casserole, letting you build full menus around cozy, baked dishes when the weather or your mood calls for it.


Leftovers, Meal Prep, and Second-Day Magic

Big pans of cheesy chicken broccoli rice often mean leftovers, which is a gift on busy days. However, they need a little care.

How to cool and store cheesy chicken broccoli rice

Once you’ve finished eating, transfer the leftovers into shallow containers. This helps them cool more quickly. Refrigerate as soon as they are no longer steaming.

Guides on storing and reheating rice safely explain that cooked rice should not stay at room temperature for long, because a bacteria called Bacillus cereus can grow and cause food poisoning.

Aim to eat refrigerated leftovers within a few days. When you reheat them, bring the center to a piping-hot temperature again, around 165°F, so both the chicken and the rice are back in the safe zone.

Glass meal prep containers labeled Monday and Tuesday filled with cheesy chicken broccoli rice next to a plate of crispy cheesy rice patties with dipping sauce, under text ‘Leftovers & Meal Prep Magic’ with storage and reheating tips.
Cheesy chicken broccoli rice keeps 3–4 days in the fridge and reheats best with a splash of stock or milk—and when you’re bored of bowls, you can turn the cold rice into crispy cheesy patties for lunches and snacks.

Reheating cheesy chicken broccoli rice so it stays nice

Cold cheesy rice turns firm in the fridge. That’s normal. To bring it back to creamy:

On the stovetop

Place the leftovers in a pan. Add a splash of stock or milk. Warm gently while stirring until the mixture loosens and heats through.

In the oven

Spread the casserole in an oven-safe dish. Cover with foil. Reheat until hot in the center. You can remove the foil for a few minutes at the end to crisp the top again.

In the microwave

Add a spoonful of liquid. Cover loosely. Heat in short bursts, stirring between them so the rice heats evenly and doesn’t dry out at the edges.

Turning leftovers into something new

Leftover cheesy chicken broccoli rice can transform into snacky, fun dishes.

Cheesy rice bites

Chill the mixture until firm. Scoop it into small balls, roll in breadcrumbs, and pan-fry or air-fry until crisp. They make great little appetizers or sides, especially with a simple yogurt dip or tomato sauce.

For more detailed shaping and frying inspiration, you can look at how MasalaMonk turns cold rice into gourmet arancini balls.

Crispy rice squares

Press the leftover rice into a greased dish. Chill until set. Cut into squares and sear them in a little oil until crisp on both sides. Serve with salad for a different take on the same flavors.

If you find you have extra broccoli on its own, not just in the rice, a batch of broccoli, potato & corn tater tots turns it into a playful, kid-friendly side the next day.


Serving Ideas to Go With Cheesy Chicken Broccoli Rice

Simple sides that love cheesy chicken broccoli rice

Cheesy chicken broccoli rice can absolutely stand alone. Still, a few easy sides make the meal feel more complete:

  • A crunchy salad with lettuce, cucumber, and lemon vinaigrette.
  • Roasted carrots or roasted Brussels sprouts.
  • Sliced tomatoes with a pinch of salt and a drizzle of olive oil.

These add freshness and texture without much work, and they help balance the richness in the bowl.

Cozy table setting with a bowl of cheesy chicken broccoli rice, a side bowl of green salad, and a mug of hot chocolate with a cookie, with text overlay suggesting serving ideas and pairings.
For a full cozy-night meal, pair your cheesy chicken broccoli rice with something crisp like a simple green salad, plus garlic bread or a hot-chocolate-and-cookie treat on the side.

Drinks and desserts for a full cozy night

After a comforting meal like this, it’s nice to linger a bit.

On cold evenings, a mug of homemade hot chocolate with cocoa powder hits the same cozy note as the main dish. That recipe uses simple ingredients to create a rich, velvety drink that feels far more special than a packet.

On nights when you’re hosting and want something playful and bright, a lemon drop martini adds a citrusy, sparkling contrast to the creamy main.

If you decide you do want dessert, homemade churros with a chocolate sauce or caramel dip turn dinner into a full comfort-food celebration. That guide covers shaping, frying, and even some gluten-free ideas if you’re cooking for different needs.

On a different night, you might skip dessert and plan another chicken-and-carb comfort for later in the week, such as chicken katsu curry with rice. With its crisp cutlets, rich curry sauce, and fluffy rice, it belongs to the same cozy universe as cheesy chicken broccoli rice, just with a Japanese twist.


However you choose to cook it—stirred together in one pot, baked into a bubbling casserole, left to simmer in a slow cooker, or rushed through an Instant Pot—cheesy chicken broccoli rice is one of those recipes you can return to over and over. You can keep it simple, you can dress it up, you can stretch it into lunches and leftovers, and you can bend it to fit however you are eating this week.

Most of all, it stays what it has always been: chicken, rice, broccoli, and cheese, turned into something that makes the world feel a little softer for a while.

Also Read: Simple Bloody Mary Recipe – Classic, Bloody Maria, Virgin & More

FAQs About Cheesy Chicken Broccoli Rice

1. How do I make cheesy chicken broccoli rice from scratch?

Start by browning bite-sized chicken pieces with onion and garlic. Then stir in rice and toast it briefly. Next, add broth and let the rice simmer until almost tender. After that, fold in broccoli florets and cook until just soft. Finally, remove from the heat and stir in plenty of shredded cheese until the dish turns creamy and thick.

2. What is the difference between the skillet version and cheesy chicken broccoli rice casserole?

The skillet version cooks everything in one pot on the stove. It stays looser and spoonable. In contrast, the casserole version uses pre-cooked rice and chicken mixed with sauce and cheese, then baked in a dish. The casserole sets up more, slices neatly, and develops a golden, bubbly top.

3. Can I use instant rice in a chicken broccoli rice casserole?

Yes, you can use instant rice in a chicken broccoli rice casserole with good results. Just reduce the liquid slightly because instant rice absorbs less water. In addition, shorten the baking time so the grains do not become mushy. Keep an eye on the texture and remove the casserole once the cheesy chicken broccoli rice looks set and hot in the center.

4. How can I make crock pot cheesy chicken broccoli and rice?

For crock pot cheesy chicken broccoli and rice, place raw chicken, uncooked rice, broth, and seasonings in the slow cooker. Stir everything well and cook on Low until the rice is tender and the chicken shreds easily. Later, add broccoli during the last 20–30 minutes so it stays bright and not overcooked. Right before serving, stir in shredded cheese until the slow cooker cheesy broccoli chicken rice turns smooth and creamy.

5. How do I make Instant Pot cheesy chicken broccoli rice?

To prepare Instant Pot cheesy chicken broccoli rice, first sauté onion, garlic, and chicken in the pot. Then stir in rice and broth, scraping the bottom to remove any browned bits. Cook on high pressure for a short time, using more minutes for brown rice and fewer for white. Once the pressure releases, mix in broccoli and let it steam in the residual heat. Lastly, stir in cheese until the Instant Pot cheesy chicken broccoli rice is thick and velvety.

6. Can I use cream of chicken soup in cheesy chicken broccoli rice?

Absolutely. Cream of chicken soup makes the dish richer and quicker. You can whisk it into the broth for a skillet version or use it as the main sauce for a cheesy chicken broccoli rice casserole recipe. Just remember that the soup is already salty, so taste before adding extra salt.

7. How can I make cheesy chicken broccoli rice healthier?

There are several easy tweaks. First, swap some or all of the white rice for brown rice in your chicken broccoli rice recipe one pot style. Second, increase the amount of broccoli or add extra vegetables like peas or carrots. Third, use a little less cheese in the base and rely on a sharp cheddar on top for strong flavor. With these changes, cheesy chicken broccoli rice still tastes indulgent but feels lighter.

8. Can I freeze cheesy chicken broccoli rice casserole?

Yes, cheesy chicken broccoli rice casserole usually freezes well. Let the casserole cool completely, then portion it into airtight containers. Label and freeze for up to two or three months. When you want it again, thaw in the fridge overnight and reheat in the oven until piping hot and the cheese is melting again.

9. How long do leftovers of cheesy chicken broccoli rice last, and how should I reheat them?

Leftovers of cheesy chicken broccoli rice keep well in the refrigerator for about three to four days. Store them in shallow, sealed containers. For reheating, add a splash of milk or broth and warm gently on the stove or in the microwave, stirring once or twice. In the case of leftover cheesy chicken broccoli rice casserole, cover the dish with foil and reheat in the oven until the center is hot and the top is soft and bubbly again.

10. Can I make cheesy chicken broccoli rice ahead of time for meal prep?

Yes, this dish is excellent for meal prep. You can cook a big batch of one pot cheesy chicken broccoli rice or bake a full casserole, then divide it into containers. Allow it to cool before sealing. During the week, reheat single portions with a spoonful of liquid so the chicken and rice stay moist. This way, you get a ready-to-go cheesy chicken broccoli rice meal that still tastes fresh.

Posted on — 16 Comments

Classic vs. Authentic Alfredo: 5 Essential Recipes

Classic vs authentic Alfredo: glossy fettuccine lifted from a black plate, showing the silky emulsion of butter, Parmigiano, and pasta water.

When classic fettuccine alfredo is done well, the sauce doesn’t merely coat the noodles; it becomes them. The ribbons look lacquered, not drowned. The cheese tastes like satin, not grit. And as you twirl, a glossy ribbon trails off the fork and back into the bowl. That’s the bowl we’re chasing—one that balances richness with clarity, and comfort with control.

There are two equally valid roads to that shine. First, the Roman original: pasta, cold butter, and finely grated Parmigiano, brought together with starchy water into a supple emulsion. Second, the American route: a little cream, a whisper of garlic, and a steadier, plush result that holds on the plate (and in the fridge) a touch longer. Once you can move easily between them, you can steer classic fettuccine alfredo toward your life—weeknight-swift, restaurant-creamy, or bright and “better-for-you” without losing the soul of the dish.

Along the way, you’ll find a few quiet helpers. For instance, when you want aromatic detours that still respect the sauce, see our Indian-inspired Alfredo twists. When you need a lighter night, lean on low-carb pasta alternatives for timings and textures that won’t compromise that signature gloss.


The Small Choices That Make Classic Fettuccine Alfredo Shine

Before we cook, a few principles elevate both authentic alfredo and the creamy style.

  • Grate Parmigiano ultra-fine. A microplane turns it snow-soft so it melts into a seamless sauce instead of speckling it. (If you care about buying the real thing, the official rind markings are explained by the consortium here: Parmigiano Reggiano – seals & marks.)
  • Work warm-to-warm. A warmed bowl keeps the Roman emulsion supple; a wide, preheated skillet steadies the cream-based version; warm plates prevent the sauce from tightening prematurely.
  • Save and use pasta water deliberately. Add it like a seasoning—first to form the emulsion, then to tune the texture. For a crisp explanation of why this matters, see how pasta water helps sauce emulsify and cling.
  • Keep heat gentle. Cheese wants warmth, not aggression. Cream wants a soft simmer, not a boil. This is how classic fettuccine alfredo stays glossy rather than greasy.

1) Authentic Roman Fettuccine Alfredo (No Cream)

This is the minimalist master class; it’s also your fastest route to dinner.

Serves: 4 Time: 20 minutes

Authentic Roman Alfredo without cream—fettuccine tossed with butter, Parmigiano and hot pasta water, top-down on travertine.
Roman minimalism: warm the bowl, whisk butter with very hot pasta water, then add ultra-fine Parm in waves. The sauce should become the pasta—glossy, elastic, and light.

Ingredients

  • 12 oz (340 g) fresh fettuccine (or excellent dry)
  • 6 Tbsp (85 g) cold unsalted butter, cut into small cubes
  • 1¼ cups (300 ml) very hot pasta water (reserved)
  • 1¼ cups (100–120 g) very finely grated Parmigiano Reggiano
  • Fine sea salt
  • Black pepper (optional, not traditional)

Method

  1. Bring a large pot of well-salted water to a rolling boil. Add fettuccine and cook until just shy of al dente. Meanwhile, warm a wide mixing bowl with hot water; dry it thoroughly.
  2. Slip the butter into the warmed bowl and add about ½ cup of the hottest pasta water. Whisk until the mixture looks pale and slightly creamy—this is your emulsion base.
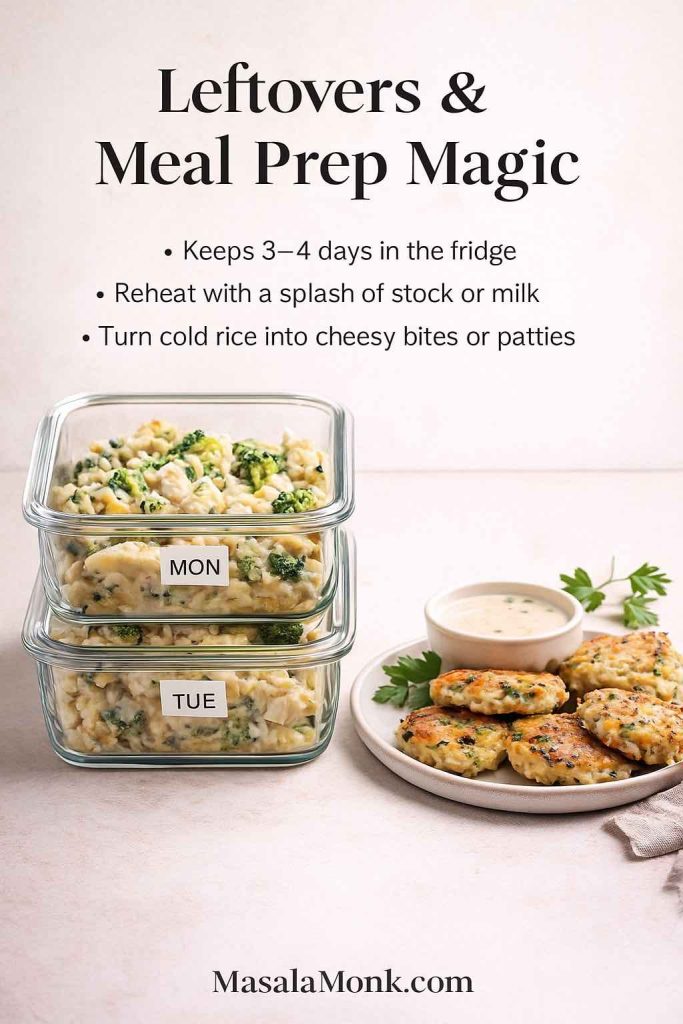
  3. Lift the pasta directly from the pot into the bowl so a little water clings to the noodles. Toss steadily with tongs so the heat stays in the bowl and the butter doesn’t firm up.
  4. Sprinkle in the Parmigiano in three or four delicate additions, tossing after each until it melts. If the mixture tightens, spoon in more hot pasta water; if it feels slack, pause and keep tossing as the cheese hydrates and thickens.
  5. Taste and season with salt; add pepper only if you like.

Texture Cues (for quick fixes)

  • Too thick? Add 1 Tbsp hot pasta water and toss vigorously for 10 seconds.
  • Too thin? Toss off heat for 20–30 seconds; the sauce will tighten as the cheese absorbs moisture.
  • Grainy? The cheese may be too coarse or the bowl too cool; add a splash of hot water and toss briskly to smooth it.

Benchmark for pace and feel: the Roman no-cream method captures the texture you’re aiming for.


2) Classic Creamy Fettuccine Alfredo (With Cream)

This is the dependable crowd-pleaser—still elegant, just a touch more plush.

Serves: 4 Time: 25 minutes

Classic fettuccine alfredo on white marble—pale-gold creamy sauce with parsley, bright brasserie light.
For dependable classic fettuccine alfredo, simmer cream and butter gently, whisk in Parm off a low flame, then tune with pasta water until each ribbon shines. Reheat slowly with a splash of water, not more cream.

Ingredients

  • 12 oz (340 g) fettuccine
  • 2 Tbsp unsalted butter
  • 1 cup heavy cream
  • 1 small garlic clove, finely grated (or ½ tsp garlic powder)
  • 1 cup (85–100 g) finely grated Parmigiano Reggiano
  • ¼ tsp kosher salt, plus more to taste
  • A pinch of black or white pepper
  • 2 Tbsp chopped parsley (optional)

Method

  1. Cook the pasta in generously salted water until al dente; reserve ¾ cup pasta water.
  2. In a wide skillet over medium-low heat, melt the butter. Stir in the cream and garlic; bring to a gentle simmer for 2–3 minutes so the flavors meet without boiling.
  3. Lower the heat and whisk in the Parmigiano until the sauce turns smooth and satiny.
  4. Add the pasta and toss, loosening with spoonfuls of pasta water until every ribbon shines and the sauce clings lightly.
  5. Taste for salt; finish with pepper. Add parsley if you like a little green.

Make-It-Yours Notes

  • Lighter night? Swap in some vegetables for part of the pasta—the timings in low-carb pasta alternatives are dependable.
  • Why pasta water still matters: serious but approachable science here—saucing pasta the right way—which explains why even creamy sauces benefit from pasta water’s starch.

3) Creamy Garlic Alfredo (Restaurant-Style, with Bright Finish)

This version is about aroma and lift; it’s the one that impresses without shouting.

Serves: 4 Time: 25 minutes

Creamy garlic Alfredo in moody trattoria light—chives and a hint of chili on a warm stoneware plate.
Bloom garlic just to blond, add cream, and keep the simmer soft. Finish with Parm for velvet; a touch of lemon zest or chives lifts the richness without stealing the spotlight.

Ingredients

  • 12 oz (340 g) fettuccine (or spaghetti for a silkier twirl)
  • 2 Tbsp unsalted butter
  • 3–4 garlic cloves, minced
  • 1 cup heavy cream
  • ¾ cup (60–70 g) finely grated Parmigiano
  • ½ tsp kosher salt
  • ¼ tsp black pepper
  • Optional finishes: pinch red pepper flakes, zest of ½ lemon, or 1 Tbsp chopped chives

Method

  1. Boil the pasta; reserve 1 cup pasta water.
  2. In a skillet over medium heat, melt the butter until foamy. Stir in the garlic and cook to just-blonde—about 45 seconds—so it smells sweet, not sharp.
  3. Pour in the cream and let it simmer softly for 2 minutes.
  4. Drop the heat, add the Parmigiano, and stir until perfectly smooth.
  5. Fold in the pasta with a modest splash of pasta water; toss until the sauce clings with a gentle sheen.
  6. Taste; then decide whether your bowl wants warmth (pepper flakes), lift (lemon zest), or a cool green edge (chives).

For aromatic detours that still respect the sauce, explore our Indian-inspired Alfredo twists—they’re playful yet weeknight-friendly.


4) Lighter Alfredo (Lower Butter/Cream, Still Silky)

Here the trick is body without weight; starch does the quiet heavy lifting.

Serves: 4 Time: 25 minutes

Lighter Alfredo overhead in a sun-washed kitchen—half-and-half, tiny slurry cup, lemon micro-zest on blond wood.
Body without weight: half-and-half plus a teaspoon of slurry, then fine Parm for sheen. Use pasta water as your texture dial; chickpea or lentil pasta adds protein without heaviness.

Ingredients

  • 12 oz (340 g) fettuccine
  • 1 Tbsp unsalted butter
  • 1 tsp olive oil
  • 1 garlic clove, minced (optional)
  • 1¼ cups half-and-half (or ¾ cup milk + ½ cup cream)
  • 1 tsp cornstarch mixed with 1 Tbsp cold water
  • ¾ cup (60–70 g) finely grated Parmigiano
  • ½ tsp kosher salt
  • Black pepper
  • A bare pinch of nutmeg (optional)

Method

  1. Cook the pasta; reserve 1 cup pasta water.
  2. Warm the butter and oil in a skillet; soften the garlic for 30 seconds without browning.
  3. Add the half-and-half and bring it to the quiet edge of a simmer. Whisk in the slurry; let it thicken lightly—about a minute.
  4. Lower the heat, then stir in the Parmigiano until smooth.
  5. Add the pasta and loosen with small spoonfuls of pasta water until the sauce slides silkily over the noodles. Season; nutmeg if it suits.

Smart Swaps (that still look great in snippets)


5) Better-for-You Alfredo (Choose Greek Yogurt or Cauliflower)

Different evenings call for different comforts; both paths feel bright and modern while staying recognizably Alfredo.

Greek Yogurt Alfredo

Serves: 4 Time: 25 minutes

Greek-yogurt Alfredo on cool terrazzo—lemon and herbs in soft focus, bright daylight.
Temper yogurt with hot broth off heat to prevent curdling, then fold in Parm. Toss with pasta, loosen lightly, and finish with a fragrant hint of lemon for a lively, lighter bowl.

Ingredients

  • 12 oz (340 g) pasta (fettuccine or penne)
  • 1 Tbsp olive oil
  • 1 small shallot, minced (optional)
  • ¾ cup hot low-sodium broth
  • ¾ cup plain Greek yogurt (whole-milk for best texture)
  • ½ cup (40–45 g) finely grated Parmigiano
  • ½ tsp kosher salt
  • Black pepper
  • A small squeeze of lemon (optional)

Method

  1. Cook the pasta; reserve ¾ cup pasta water.
  2. Soften the shallot in the oil for 2–3 minutes.
  3. Take the pan off the heat; whisk in the hot broth, then the yogurt—tempering prevents curdling.
  4. Return to low heat; whisk in the Parmigiano until smooth.
  5. Add the pasta; relax with pasta water to a satin finish, and season. A dot of lemon brightens without turning it into “lemon Alfredo.”

Cauliflower Alfredo

Serves: 4 Time: 30 minutes

Cauliflower Alfredo on matte black plate—blender jar and steamed florets, overhead on charcoal slate.
Blend cauliflower longer than you think for a restaurant-smooth puree; warm with garlic, add Parm, then gloss with pasta water. Season assertively—salt and pepper wake the sweetness.

Ingredients

  • 12 oz (340 g) pasta
  • 2 cups cauliflower florets
  • 1 Tbsp butter or olive oil
  • 1 garlic clove, minced
  • ¾ cup milk (dairy or unsweetened plant milk)
  • ½ cup (40–45 g) finely grated Parmigiano (or nutritional yeast for a dairy-lighter profile)
  • ½ tsp salt
  • Black pepper

Method

  1. Steam the cauliflower until very tender.
  2. Blend with the milk and butter until completely smooth—really let the blender run; the silk is in the blending.
  3. Warm the garlic for 30 seconds; pour in the puree and stir in the Parmigiano. Let it barely simmer for a minute.
  4. Toss with the pasta, loosen with pasta water, and season.

Plant-leaning tonight? There’s a clever tofu-based idea tucked into our tofu meal-prep guide. And if shellfish is off the table, vegan substitutes for shrimp keep texture and satisfaction in play.


What to Serve Alongside Your Classic Fettuccine Alfredo

  • Greens that cut through: lemony arugula, roasted asparagus, or shaved fennel.
  • Proteins that tuck in neatly: sautéed shrimp, grilled chicken, or seared mushrooms; when seafood’s a no-go, those vegan shrimp alternatives above are convincing.
  • Bread, judiciously: warm focaccia fingers or slender garlic toasts—enough to swipe the plate, not enough to steal the show.

Quick Answers (the kind readers actually need)

  • How do I keep classic fettuccine alfredo from clumping? Work warm-to-warm; add finely grated cheese gradually over low heat; and loosen with small spoonfuls of hot pasta water while tossing.
  • How can I reheat Alfredo without breaking it? Warm gently over low heat with a splash of hot water or milk, stirring until glossy again; reheat only what you’ll eat. For safety, follow USDA leftover guidance via Leftovers & Food Safety.
  • Is authentic alfredo really made without cream? Yes—Roman style is pasta, butter, Parmigiano, and pasta water; the cream-based version is the American adaptation.
  • Which cheese should I buy? Look for Parmigiano Reggiano with PDO markings; the consortium’s page on seals & marks helps you spot the real thing.

A Graceful Ending: Choosing the Right Alfredo Tonight

For weeknights that still feel like an occasion, authentic alfredo offers speed and purity; for company dinners, classic fettuccine alfredo brings plush comfort and a steady hold. Meanwhile, the garlic version provides aroma and lift, the lighter one slides into the week without effort, and the Greek yogurt or cauliflower paths keep the spirit of Alfredo while trimming weight. Then, as always, twirl. If the ribbons shine and the fork draws a clean line through the bowl, you’ve done exactly enough—and not a bit more.

More from MasalaMonk (to explore after you plate up)

If you’re in the mood to wander a little, these pieces extend the same spirit as your classic fettuccine alfredo—just in different directions.

  • Indian-inspired Alfredo riffs: curious about warmth and perfume? This guide layers gentle spice and aromatics into Alfredo so the sauce stays silky while the flavor blooms.
  • Low-carb pasta alternatives: when dinner needs to feel lighter, this walkthrough shows how to time zoodles, squash noodles, and other swaps so the sauce still clings.
  • High-protein pasta ideas: if you’d rather finish satisfied than stuffed, these pairings help you build more staying power into an Alfredo night.
  • Lentil pasta guide: meanwhile, if you want extra fiber without losing that glossy finish, this primer explains how lentil shapes behave in creamy sauces.
  • Vegan shrimp substitutes: no shellfish? No worries—this list offers convincing stand-ins that play beautifully with Alfredo’s texture.
  • Tofu Zoodle Alfredo idea: finally, if you prefer a lighter, plant-leaning bowl, this tidy idea folds tofu and zoodles into a sauce that still feels luxurious.

Quiet, trustworthy sources (for the cooks who like to know why)

Because technique is half the pleasure, these references offer calm, useful context—nothing fussy, just the right details at the right moment.

  • Roman no-cream method: for pace, heat, and the feel of the toss, this is a clear baseline when you’re aiming for authentic Alfredo.
  • Why pasta water matters: moreover, if you’ve ever wondered how a ladle of starchy water can transform a sauce, this explainer shows the chemistry in plain language.
  • Parmigiano markings — how to spot the real thing: before you shop, look here; the PDO seals and dotted rind tell you you’re buying cheese that will melt cleanly and taste bright.
  • USDA leftovers & reheating: finally, when you save a portion, reheat gently and, for safety, follow this straightforward guidance.

FAQs

1) What exactly is “authentic Alfredo,” and how is it different from classic fettuccine alfredo?

Authentic Alfredo (the Roman style) is simply hot pasta tossed with cold butter and finely grated Parmigiano, brought together with starchy pasta water—no cream, no garlic. By contrast, classic fettuccine alfredo uses a little cream (and sometimes garlic) for extra plushness and stability. For a clear technique template, see this Roman no-cream method from Serious Eats.

2) How do I keep classic fettuccine alfredo from clumping or turning grainy?

First, grate Parmigiano ultra-fine so it melts instantly; then, work warm-to-warm and add cheese gradually over gentle heat. If it tightens, loosen with a spoonful of hot pasta water and toss until glossy. If you want the “why,” this primer on how pasta water helps sauce emulsify and cling is excellent.

3) What pasta shape works best—and can I swap in others without ruining the texture?

Although fettuccine is the namesake, spaghetti, tonnarelli, penne, and even farfalle all work. However, you may need a touch more pasta water with ridged or tubular shapes to keep that silk. If you’re reducing carbs, consider the timings and textures in low-carb pasta alternatives.

4) Which cheese should I buy for the smoothest Alfredo?

Use real Parmigiano Reggiano and grate it very fine. Moreover, look for PDO seals and dotted rind marks so you know it’s authentic; the Parmigiano consortium’s guide to seals & marks shows exactly what to spot.

5) Can I make a lighter Alfredo that still feels luxurious?

Yes—absolutely. You can use half-and-half plus a tiny slurry, or go brighter with our Greek-yogurt or cauliflower approaches in the post. If you’d like even more staying power (without heaviness), skim our high-protein pasta ideas and the lentil pasta guide for easy pairings.

6) Is there a plant-forward or dairy-lighter way to enjoy Alfredo?

Certainly. Try the Greek-yogurt version, a cauliflower-based sauce, or (when you want a playful detour) the Tofu Zoodle Alfredo idea tucked inside our tofu meal-prep guide. And if shellfish is off the table, these vegan shrimp substitutes keep texture and satisfaction in play.

7) Do I salt the pasta water heavily for authentic alfredo—and how much should I save?

Yes—season the water so the noodles taste good on their own (think “well-seasoned soup”). Then, before draining, reserve at least 1 cup of very hot pasta water. Add it gradually: first to jump-start the emulsion, then to fine-tune the gloss. Here’s the science-backed explanation of why pasta water matters.

8) How do I reheat leftovers without breaking the sauce?

Gently does it. Warm the pasta over low heat with a splash of hot water or milk, stirring until glossy again. Reheat only what you’ll eat; for safety, follow the USDA’s leftovers & reheating guidance (aim for 165°F).

9) When should I choose authentic Alfredo over the creamy version?

Choose authentic Alfredo when you want weeknight elegance with minimal ingredients and maximum cheese clarity. Alternatively, choose the creamy route when you need a steadier sauce that travels well to the table and reheats more predictably. If you’re feeling adventurous, drift toward Indian-inspired Alfredo riffs for aromatic warmth.

10) What’s the single most common mistake home cooks make?

Too much heat, too little patience. Instead, keep the flame gentle, add cheese gradually, and use pasta water as your texture dial. With that rhythm, classic fettuccine alfredo stays glossy rather than greasy.

11) Can I add chicken, shrimp, or vegetables without losing that silky finish?

Yes—add quickly cooked proteins (grilled chicken or sautéed shrimp) and blanched vegetables (broccoli, asparagus) at the toss stage, then adjust with pasta water until the sauce re-coats everything. When shrimp isn’t an option, lean on vegan shrimp alternatives that mimic the bite without the shellfish.

12) I love Alfredo but prefer a fresher, spiced profile—any ideas that still respect the sauce?

Try a garlic-forward base finished with lemon zest and chives, or (for something playful yet balanced) explore our Indian-inspired Alfredo twists. They keep the silky core intact while the aromatics bloom around it—perfect for dinner guests who want familiar comfort with a graceful nudge.

Posted on — Leave a comment

Keto Butter Chicken Recipe: Rich, Silky Murgh Makhani

Bowl of keto butter chicken with browned boneless chicken pieces in glossy orange-red makhani gravy, finished with a little kasuri methi.

This post was last updated on:

A good butter chicken has contrast, and keto doesn’t change that.

The chicken should have browned, sometimes lightly charred edges. The gravy should cling to those pieces and still move around them, with a soft butter sheen. Tomato gives the sauce its backbone, cream smooths the acidity, and crushed kasuri methi leaves the aroma that makes the finished curry recognizably butter chicken.

If butter chicken is one of the dinners you’ve been missing since cutting back on carbs, most of what makes it worth eating can stay. Or maybe you’ve already tried a low-carb version and ended up with perfectly decent creamy tomato chicken that somehow never quite became butter chicken. This recipe is meant to solve both problems.

This version is savory and tomato-deep, with browned chicken, a smooth orange-red gravy, moderate cream and kasuri methi still noticeable after the bite. A favourite takeaway may be much sweeter or richer. If yours is, this will taste different—and nothing has gone wrong.

Butter chicken—murgh makhani—already starts with plenty of ingredients that fit naturally into a lower-carb meal. Most of the carb difference comes from added sugar, how much tomato and onion go into the gravy, cashews or starches, prepared sauces and, very often, the rice and naan served with it.

Keep the butter chicken. Change the carbs that matter.

Jump to: Recipe · The 5 Changes · Troubleshooting · Low-Carb Sides · Nutrition · Restaurant Butter Chicken

Quick Answer: Is Butter Chicken Keto-Friendly?

Yes. Homemade butter chicken can be keto-friendly. This version comes to roughly 7g net carbs per serving, with no added sugar, cashews or flour-based thickener.

Chicken, butter, ghee, cream and spices contribute relatively little carbohydrate in the amounts used here. Tomato, onion and plain yogurt contribute some. Restaurant and packaged gravies may add sugar, ketchup, flour, cornstarch, cashews or simply a much larger amount of sauce.

Homemade is easier to calculate because you know what went into the pan. Whether roughly 7g net carbs fits your day depends on the carbohydrate target you’re following.

Ready to cook? Jump to the keto butter chicken recipe →

The 5 Changes That Matter

  1. Skip the added sugar. Give the tomato enough time to lose its raw, sharp edge before deciding the sauce needs sweetness.
  2. Keep the yogurt-and-lemon marinade. Leave only a light coating on the chicken before browning so the spices stay with the meat without flooding the pan.
  3. Let the gravy thicken through cooking. Tomato reduction and blending give this sauce plenty of body. Flour and specialty keto thickeners are unnecessary.
  4. Measure the onion; skip the cashews in this version. A modest amount of onion still gives the gravy body and sweetness, while the tomato, butter and cream supply enough richness.
  5. Look at the whole plate. Jeera cauliflower rice, greens and something crisp can save more carbohydrates than stripping character out of the curry itself.

That’s most of the keto work. From here, cook it like butter chicken.

Butter chicken surrounded by visual cues for no added sugar, a light yogurt marinade, reduced tomato gravy, measured onion and cauliflower rice.
No specialty keto thickeners are needed here: reduction, measured gravy ingredients and the plate do the work.

Keto Butter Chicken Recipe

The ingredient list looks long, but the cooking itself is straightforward. Most of the work is measuring, browning the chicken and giving the tomato enough time.

If other people at the table aren’t eating low-carb, you do not need a second curry. Put rice or naan on their side of the table and cauliflower rice or vegetables on yours.

At a Glance

DetailWhat to expect
Serves4 generous main-course portions
Chicken700g / 1½ lb boneless skinless thighs
PrepAbout 15 minutes
Marinating30 minutes minimum; 2–4 hours is better
CookAbout 30–40 minutes
Minimum elapsed timeAbout 1¼–1½ hours
Pan11–12in / 28–30cm wide, reasonably deep skillet or sauté pan
Heat levelMild to medium
Estimated net carbsAbout 7g per serving, before sides

Equipment

  • 11–12in / 28–30cm wide, reasonably deep skillet or sauté pan
  • mixing bowl
  • knife and cutting board
  • instant-read thermometer
  • immersion blender, recommended for a smoother gravy
  • digital kitchen scale, useful but not essential

A countertop blender works too. If the gravy is too shallow for an immersion blender to stay submerged, transfer it to a tall heatproof jug. Let very hot gravy settle briefly and follow your blender manufacturer’s guidance for hot liquids. A fine-mesh strainer is optional.

Overhead arrangement of chicken thighs, yogurt, passata, onion, cream, butter, ghee, ginger-garlic paste and spices for keto butter chicken.
For carb tracking, weigh the tomato and onion first; tiny spice differences matter far less.

Chicken and Marinade

  • 700g / 1½ lb boneless, skinless chicken thighs, cut into roughly 3cm / 1¼-inch pieces
  • 80g / ⅓ cup thick plain full-fat yogurt or dahi; mild full-fat Greek yogurt also works
  • 15ml / 1 tbsp lemon juice
  • 15g / 1 tbsp ginger-garlic paste
  • 1 tsp Kashmiri red chilli powder
  • 1 tsp garam masala
  • ½ tsp ground cumin
  • 4g / about ¾ tsp fine sea salt

Makhani Gravy

  • 14g / 1 tbsp ghee, for browning the chicken
  • 14g / 1 tbsp ghee or butter, for the gravy
  • 50g / roughly ½ small onion, finely chopped
  • 15g / 1 tbsp ginger-garlic paste
  • 1 tsp ground coriander
  • ½ tsp ground cumin
  • ½ tsp garam masala
  • ¼ tsp ground turmeric
  • ¼–½ tsp Kashmiri red chilli powder
  • 225g / 8oz / scant 1 cup plain passata or strained tomatoes, with no added sugar
  • 60ml / ¼ cup hot water or unsalted/lightly salted chicken stock, plus more if needed
  • 3g / about ½ tsp fine sea salt

To Finish

  • 120ml / ½ cup heavy or whipping cream
  • 14g / 1 tbsp butter
  • 1 tsp dried kasuri methi
  • fresh coriander/cilantro, optional

A fresh cream around 25% milk fat works too. The gravy will be slightly lighter and looser and may need another minute of gentle reduction. The nutrition estimate later in the post assumes heavier cream in roughly the 30–36% range.

Kashmiri chilli is being used mainly for colour and gentle warmth. Add cayenne or a hotter Indian chilli powder separately when you want more heat. For a mixed table, keeping the main pan mild and sharpening individual portions at the end is usually easier.

1. Marinate the Chicken

Mix the yogurt, lemon juice, ginger-garlic paste, Kashmiri chilli, garam masala, cumin and salt. Add the chicken and turn until every piece carries a light coating.

Cover and refrigerate for at least 30 minutes. Two to four hours works particularly well, and overnight is fine when that suits your schedule.

Before cooking, lift the chicken from the bowl and scrape or shake away the heavy excess marinade. Discard what remains after contact with the raw chicken. A little yogurt-spice coating should stay on the meat, but there should not be enough to form a puddle in the pan.

2. Brown the Chicken

Heat the pan over medium-high heat and add the ghee. If you’re cooking in two batches, divide that tablespoon between them. Arrange the chicken in a single layer with some room around the pieces.

At first you’ll hear a damp hiss as moisture leaves the surface. As the pan dries, the sound becomes sharper and the yogurt-spice coating begins catching and darkening around the edges. Give the first side roughly 2–3 minutes before checking it. Chicken that still grips the pan usually needs another few moments; once the surface has browned properly, it releases more easily.

Turn and colour the second side briefly, then transfer the chicken to a plate while the centre is still underdone. A few uneven dark patches are exactly what you want. The pieces do not need to look identical.

Pan filling with water? Stop adding chicken. Remove the pieces if necessary, let the excess liquid evaporate, add a touch of ghee once the pan is dry again and continue in smaller batches.

Step-by-step comparison showing lightly marinated chicken becoming damp, drying and browned, plus an overcrowded pan filled with excess moisture.
Between batches, let the pan get hot and dry again before adding more yogurt-marinated chicken. Otherwise, the next batch inherits the moisture from the last one.

For stronger tandoori-style edges, the marinated chicken can go under a very hot broiler/grill until a few spots blister, then finish cooking in the gravy.

3. Build the Makhani Base

Lower the heat to medium and add the second tablespoon of ghee or butter. Add the onion and measured salt and cook for about 4–6 minutes, until the onion softens and loses its sharp raw smell. A little gold around the edges is welcome.

Add the ginger-garlic paste and cook for roughly 30 seconds, until its raw aroma mellows. Stir in the coriander, cumin, garam masala, turmeric and Kashmiri chilli for another 20–30 seconds. Lower the heat if the spices begin sticking or darkening quickly.

4. Give the Tomato Enough Time

Pour in the passata and scrape the bottom of the pan to release the browned chicken and spice residue. Cook uncovered over medium to medium-low heat, stirring regularly.

Expect roughly 8–15 minutes, sometimes longer. Tomato products vary, and so do burners and pans. If yours needs 18 minutes, nothing has gone wrong.

The sauce starts bright and loose. As water cooks away, the colour deepens, the texture tightens and the obvious bottled-tomato smell fades. Draw a spoon through the pan: the trail should remain visible briefly before the sauce flows back. Small beads or streaks of fat may appear near the edges; you do not need a dramatic oil layer.

Taste a little. A sharp, raw tomato flavour means it needs more cooking. Extra tomato paste makes the colour stronger, but it can push the gravy towards a concentrated pasta-sauce flavour. Use it only when the tomato product itself is unusually pale or weak.

Four stages of tomato gravy labeled raw, reducing, developed and ready, ending with thick orange-red sauce that holds a spoon trail.
A wide pan speeds evaporation, concentrating passata without flour, cornstarch or another gravy thickener.

5. Blend the Gravy, Then Finish the Chicken

Pour in 60ml / ¼ cup hot water or stock and remove the pan briefly from the heat. Blend until smooth. For an especially silky gravy, strain it before returning it to the pan. Leaving it a little rustic is fine too.

Return the blended gravy to medium-low heat for 2–3 minutes, stirring as it comes back together and thickens slightly. Tiny beads of fat may appear around the edge.

Add the browned chicken and the juices collected on the plate. Simmer gently until the largest piece reaches 165°F / 74°C, generally another 4–7 minutes at this size. The USDA recommends 165°F as the safe minimum internal temperature for poultry.

If the gravy tightens before the chicken is ready, add hot water or stock 1 tbsp / 15ml at a time.

6. Finish With Cream, Butter and Kasuri Methi

Reduce the heat to low and let hard bubbling settle. Stir in the cream, then crush 1 teaspoon kasuri methi between your palms over the pan and add it with the finishing butter. Warm everything gently for another minute.

Cream being poured into butter chicken as butter melts and dried kasuri methi is crushed over the pan.
Once the cream is in, keep the heat gentle. A hard boil can split the dairy, while prolonged cooking also softens the fresh aroma of butter and kasuri methi.

Taste and check the salt first. After that, make only the adjustment the gravy needs: another ¼ teaspoon methi, a touch more heat, a small finishing pinch of garam masala, a spoonful of water or perhaps one more spoonful of cream.

If the tomato is still sharply acidic after it has cooked fully and the salt, butter and cream are in place, a very small amount of your preferred low-carb sweetener can help. Add it only at the end and only if the sauce genuinely needs it.

Turn off the heat and let the curry rest for about 5 minutes.

The Finished Butter Chicken

Some of the yogurt-spice coating should have darkened around the chicken while the centre stays juicy. The gravy should settle naturally around the pieces, with no watery pool underneath. The raw tomato edge should be gone, but you should still taste tomato, ginger, chilli and spice after the cream goes in.

Kasuri methi should be easy to notice when you lean over the pan. Drag a spoon through the gravy; the line should stay open for a moment and then slowly close. Lift the spoon and the sauce should cling before falling back in a slow ribbon.

Too thick? Stir in 1 tbsp / 15ml hot water. Too loose? Give it another minute or two uncovered.

Spoon lifting a browned piece of butter chicken with thick glossy sauce clinging and dripping back into the pan in a slow ribbon.
Perfect texture can still mean too much sauce. Fix the ratio, not the chicken.

Then stop adjusting.

Spoon it over hot jeera cauliflower rice and get some browned chicken and gravy in the first bite. At that point, nobody needs to be thinking about what was removed.


If dinner is already on the table, stop here and eat. Everything below is for the question that comes next: why another recipe claims fewer carbs, why a gravy tastes wrong, what changes at a restaurant or how to make the next batch easier.

Need something specific? Troubleshoot the gravy · Build the low-carb plate · Order butter chicken at a restaurant

What Makes Butter Chicken Taste Like Butter Chicken?

The hardest butter chicken to diagnose is the one that isn’t bad. The chicken is tender, the sauce is creamy and the seasoning seems reasonable, yet the first bite still tastes like generic tomato curry.

Usually there isn’t one secret ingredient missing. Tomato that has cooked far enough, properly browned chicken, enough salt and a sensible amount of cream all matter. Kasuri methi adds one of the most recognizable aromas in the finished gravy, and even a small amount can change the character of the sauce.

If the curry tastes seasoned but still smells anonymous, smell the kasuri methi before reaching for another spoonful of spice.

Butter chicken shown with developed tomato gravy, browned chicken, dried kasuri methi and a small bowl of cream as key flavour elements.
When butter chicken tastes almost right, change one variable at a time: check salt first, then char and kasuri methi before adding more cream or another spoonful of spice.

Where the Carbs in Butter Chicken Come From

Two bowls of butter chicken can look nearly identical and still produce very different nutrition numbers. Much of that variation comes from the gravy and from what somebody has decided counts as one serving.

VariableLower-carb directionHigher-carb direction
TomatoMeasured tomato baseLarge tomato-heavy gravy
OnionSmall measured amountOnion-heavy base
Added sweetnessNoneSugar, honey or ketchup
CashewsNone or a littleCashew-rich gravy
YogurtPlain and measuredSweetened or larger amounts
ThickeningReductionFlour or cornstarch
Prepared saucePlain/no-added-sugarSweetened commercial gravy
Serving sizeClearly definedTiny or vague
The plateVegetables or cauliflower riceRice plus naan

For this recipe, one serving means one-quarter of the finished curry.

The 225g / 8oz tomato gives the gravy enough acidity and fruitiness without making tomato the whole story. Once properly cooked, it tastes much less dominant than it does straight from the bottle.

Some butter chicken is sweet and some isn’t. This version starts without added sugar because cooked tomato, salt, butter and cream usually provide enough balance.

The 50g onion contributes body and natural sweetness while keeping the quantity predictable. Cashew paste can make a lovely rich butter chicken gravy, but this sauce does not need it.

Two butter chicken meals compared side by side, one with basmati rice and naan and the other with cauliflower rice, greens and cucumber.
Same curry, different plate: hold the portion steady and let the sides change the carb load.

Ingredient Notes That Change the Result

Thick yogurt helps the seasoning cling to the chicken, and lemon adds brightness. Moisture is the part to watch during browning: a heavy yogurt coating cools the pan, releases water and can leave pale coagulated clumps. Plain unsweetened yogurt or dahi works well. A particularly tangy Greek yogurt can make the finished curry noticeably more sour.

Chicken thighs are more forgiving through browning and the final simmer. Breast works too; keep the pieces evenly sized and avoid cooking them through during the first sear. MasalaMonk’s baked chicken breast recipe goes deeper into thickness, temperature and keeping lean breast meat juicy.

For the tomato, smooth plain passata is the easiest choice. Finely crushed tomatoes can be used too and may need more cooking and blending. Sweet pasta sauce, ketchup and seasoned marinara change the flavour substantially. Tomato paste is far more concentrated, so save it for the rare batch where the tomato itself seems unusually pale or weak.

Spices, Kasuri Methi and Cream

Kashmiri chilli gives deep colour with moderate heat. Paprika can provide much of that colour when Kashmiri chilli is unavailable, with stronger chilli added separately. Garam masala varies considerably from brand to brand, so a small finishing pinch can help when its aroma seems muted.

Kasuri methi is dried fenugreek leaf. Fenugreek seed and ground fenugreek are much stronger and should not replace it measure-for-measure. Start with 1 teaspoon of the leaves and increase in ¼-teaspoon steps only after tasting. If you cannot find kasuri methi, leaving it out is safer than substituting the same quantity of seed or powder.

Spice guide showing Kashmiri chilli, garam masala and kasuri methi, with dried fenugreek leaves compared with fenugreek seeds and powder.
At the shop, look for “kasuri methi” or “dried fenugreek leaves” on the packet. Then crush the leaves just before finishing the gravy to release more of their aroma.

The 120ml / ½ cup cream used here softens the tomato and carries the spices through the gravy. Add much more and the curry can turn pale while the ginger, chilli and methi recede into the background.

Want a Smoother, More Restaurant-Style Finish?

Restaurant butter chicken is not one fixed flavour. Some gravies are sweeter, some tangier and some substantially richer with cream or cashew. You can reproduce much of the char, silkiness and aroma at home, but a particular restaurant may still taste quite different.

A very hot broiler or grill gives the chicken darker blistered edges than most home pans can manage when they are full. A few charred spots are enough.

For the gravy, thorough blending makes the biggest difference. Straining takes the texture one step further when you specifically want the very smooth finish found in many restaurant versions.

Keep the butter and kasuri methi for the end so their aroma stays fresh. A brief dhungar smoke can add another layer when that is a technique you already use comfortably. Good chicken char gets you a long way without it.

Three identical bowls of orange butter chicken gravy labeled rustic, blended and strained, showing progressively smoother texture.
Blending gets you most of the silkiness; straining is optional polish.

Fix Your Butter Chicken

Butter chicken problems often sound alike. “Too tomatoey,” “bland” and “thin” can each describe more than one failure, and throwing more cream or spice at a confused gravy rarely helps. Work out what is actually wrong first.

ProblemLikely causeFirst move
Raw or harsh tomatoTomato base undercookedKeep reducing
Tastes like pasta sauceToo much concentrate or underdeveloped gravyCook the base further
BlandSalt, char or finishing aroma lackingCheck salt first
Too sourAcidic or undercooked tomatoCook, then balance
Too sweetToo much sweetenerRestore salt and spice balance
Generic creamy curryWeak char, little methi or rushed tomatoCorrect those elements
WateryToo much liquidRemove chicken and reduce
PastyOver-reducedAdd hot water 15ml at a time
Too much gravySauce volume drifted upwardRemove some sauce
Chicken released lots of waterWet coating, cool pan, crowding or high-water chickenDry the pan and brown smaller batches
White yogurt clumpsWet marinade or crowded/cool panLess coating, more heat, smaller batches
Greasy or splitExcess fat or hard boiling after dairyLower the heat
Dry chickenOvercooked during both stagesBrown first; finish only to 165°F / 74°C
Bitter methiToo much kasuri methiDilute if possible
Too spicyExcess hot chilliAdd a little cream
Too paleToo much creamUse less next time
Four butter chicken problems shown side by side: watery gravy, split greasy sauce, pale over-creamed curry and chicken with wet yogurt clumps.
Read the pan before changing the seasoning. Pooling liquid, separated fat, pale gravy and yogurt clumps describe four different failures—and therefore four different fixes.

Too Tomatoey or Too Sour

Bright, raw tomato needs more cooking. A heavy concentrated-tomato flavour is different and often comes from too much tomato paste. For sourness, make sure the tomato is fully cooked and then check the salt. Butter or a little more cream can soften what remains; sweetener comes last.

Bland—or Just Not Tasting Like Butter Chicken?

Flat flavour usually calls for salt first. A curry that is already seasoned but still tastes generic needs a different diagnosis: check the chicken browning, tomato development and kasuri methi. Smell the garam masala and methi straight from their containers too. Old spices can be present in the recipe and almost absent in the bowl.

Watery Sauce

Once the chicken reaches temperature, take it out. Reduce the gravy uncovered and return the chicken only long enough to coat and warm through.

Great Sauce, Wrong Ratio?

Sometimes the gravy is perfectly thick and there is simply too much of it. An oversized onion, extra tomato or accidentally scaled-up sauce can do that. Remove some and save it for another meal instead of continuing to cook the chicken.

White Yogurt Clumps

The pan was probably too cool, too crowded or carrying too much wet marinade. The curry is still edible. Next time, leave only a light coating on the chicken and give the pieces more space.

Bitter Kasuri Methi

Once too much methi is in the sauce, there is no clean way to remove it. Extra unsweetened gravy or a little cream can dilute the bitterness. Starting with the first teaspoon and increasing slowly is much easier than rescuing an over-methi’d pan.

← Back to the recipe · Build the low-carb dinner →

Build a Low-Carb Butter Chicken Dinner

A lower-carb butter chicken dinner does not need to look like curry surrounded by substitutes you’re merely tolerating. Give the gravy something warm to sit on, something green to cut through the richness and something cold and crisp beside it.

Jeera Cauliflower Rice

Cumin makes cauliflower rice feel like part of dinner.

Serves 4

Ingredients: 600g / about 6 cups cauliflower rice, 1 tbsp ghee or butter, 1 tsp cumin seeds, ½–¾ tsp salt, plus coriander and a small squeeze of lemon if you like.

Heat a wide pan over medium heat and add the ghee. Let the cumin seeds sizzle for 20–30 seconds, until fragrant, then add the cauliflower rice and salt. Increase the heat to medium-high and cook uncovered for about 5–7 minutes.

There will be plenty of steam at first. As it eases, the cauliflower should become tender while the small grains remain separate. Stop before it turns soft and wet.

For more ways to use it, MasalaMonk’s guide to using cauliflower on keto goes beyond cauliflower rice.

Something Green

Garlic spinach is especially good here because its slight bitterness cuts through the buttery gravy. Roasted cauliflower, cabbage, broccoli and green beans are easy alternatives.

Something Cold and Crisp

Cucumber, coriander, mint and lemon bring crunch and acidity. MasalaMonk’s cucumber salad recipe gives you several ways to build that fresh side.

If You Miss Naan

A low-carb naan or roti can make the meal feel much closer to the dinner you were craving. With packaged low-carb breads, check the actual carbohydrate amount and serving size on the label.

Cauliflower rice, one green vegetable and something cold already make a generous plate.

Low-carb butter chicken dinner with jeera cauliflower rice, dark green spinach and cucumber salad on a jewel-toned table.
Put the hot jeera cauliflower rice under the curry so it catches the makhani gravy; keep cucumber alongside it so the crunch, acidity and temperature contrast stay intact.

Is Restaurant Butter Chicken Keto?

Restaurant butter chicken is harder to calculate because the gravy has usually made most of its decisions before you sit down.

It may contain sugar or honey, ketchup, more onion, cashew paste, flour or cornstarch, sweetened tomato products or a premade curry base. Because that gravy is often prepared in a large batch, asking for “no sugar” may not change what is already in the pot.

The most useful question is simple: Does the butter chicken gravy contain added sugar or flour/cornstarch?

Can’t get a clear answer? Simpler grilled dishes are easier to judge when you’re keeping carbohydrates particularly low: tandoori chicken, chicken tikka, kebabs, grilled fish and some dry-style meat preparations. MasalaMonk’s green chutney recipe is a natural partner for those dishes.

Then look at the rest of the order. Rice, naan and sweet chutneys can change the meal far more than a measured amount of tomato in the curry.

Your favourite takeaway may taste quite different from this recipe even when both are good butter chicken. Some house gravies are much sweeter, saltier or richer. If that is exactly the butter chicken you love, a different result at home does not mean the recipe failed; you’re simply aiming at another style.

Butter chicken on a restaurant table beside a menu, with prompts asking about added sugar, flour or cornstarch, and side dishes.
Batch gravy may already contain sugar or starch; when it does, a simpler grilled dish is easier to estimate.

← Back to the recipe · Make ahead and reheat →

Shortcuts and Appliance Notes

A jarred butter chicken sauce can make dinner much faster. Check the total carbohydrates, added sugars, flour or starch, stated serving size and how much sauce you will actually use. A sauce that fits your numbers but tastes flat can often be improved with a little butter, cream and crushed kasuri methi.
The full recipe takes roughly 45–55 minutes of active work plus at least a short marinade. For a quicker weeknight, marinate the chicken first and use those 20–30 minutes to chop and measure everything else. Smooth passata and skipping the optional straining save time without giving up the chicken browning or tomato reduction.
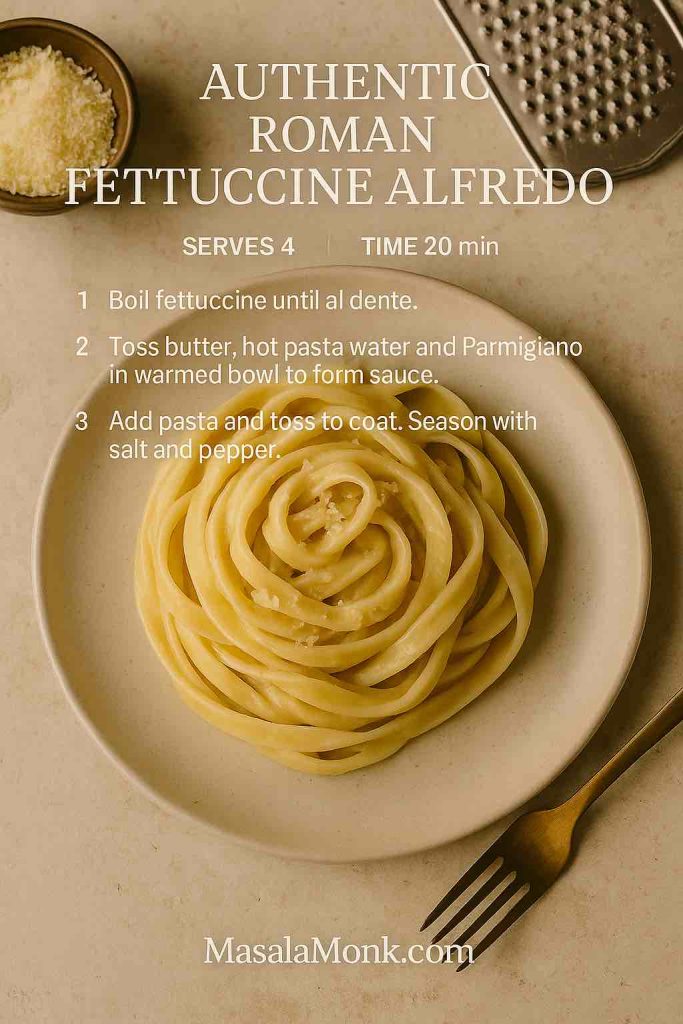
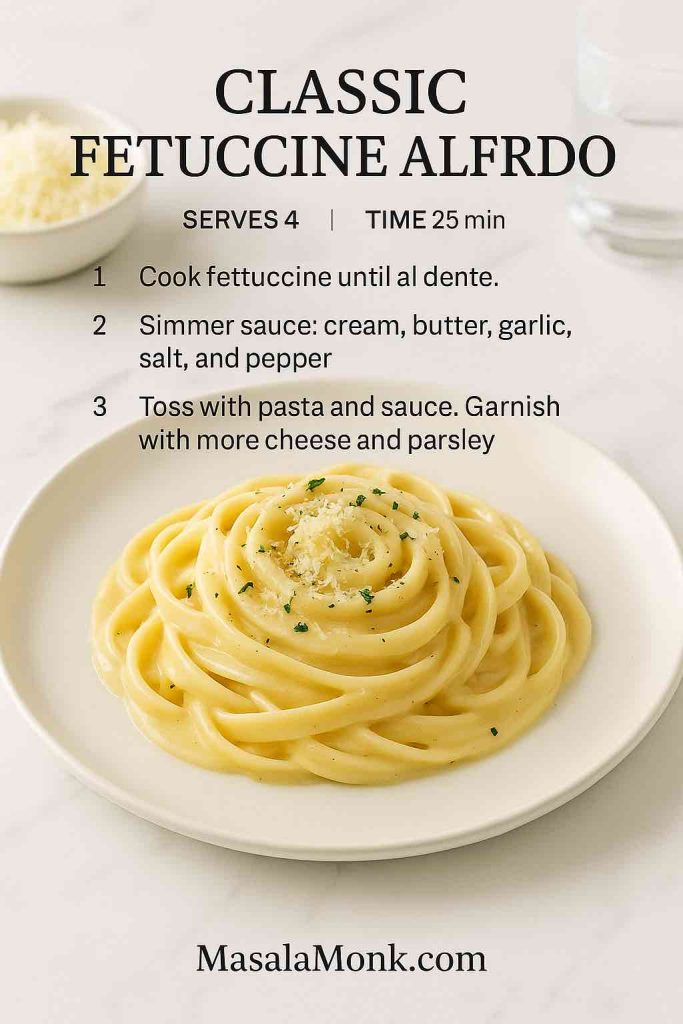
For nights when fifteen minutes really is the limit, MasalaMonk’s 15-minute sesame ground chicken works well over cauliflower rice, sautéed cabbage or lettuce.

Instant Pot

Pressure cooking traps moisture, so the finished gravy tends to be thinner. Use Sauté for the aromatics, deglaze the pot thoroughly and follow the minimum-liquid requirement for your cooker. Once the chicken is cooked, remove it and reduce a loose sauce with Sauté uncovered before adding the chicken back with the cream, butter and kasuri methi.

Slow Cooker

Slow cooking gives tenderness but very little browning, so sear the marinated chicken first when you can. For boneless pieces, 2–3 hours on High or 4–6 hours on Low is a reasonable starting range; the chicken still needs to reach 165°F / 74°C. Add the cream and finishing butter near the end, and reduce a thin gravy separately.

Make Ahead, Store and Reheat

The chicken can be marinated the day before. The blended tomato gravy can also be cooked ahead. If dinner is for tomorrow, refrigerate the gravy before adding the final cream, butter and kasuri methi, then add those as you reheat it.

Cool leftovers promptly and refrigerate them in a covered container. Use them within 3–4 days, in line with USDA leftover-storage guidance.

Cold butter chicken will look much thicker after a night in the refrigerator. That is normal. Warm it gently and add a splash of water or stock as the gravy loosens. Bring reheated leftovers back to 165°F / 74°C.

Butter chicken freezes well too. Portion it before freezing and aim to use it within about 3 months for best quality.

Three stages labeled make ahead, chilled and reheated, showing butter chicken gravy becoming thick when cold and looser again after reheating.
Reheat first, then thin only if needed; melted fats loosen chilled gravy naturally.

Keto Butter Chicken Nutrition

Based on typical nutrition values for the ingredients listed, one-quarter of the finished curry is approximately:

Per servingEstimated amount
CaloriesAbout 500 kcal
ProteinAbout 36g
FatAbout 36g
Total carbohydratesAbout 9g
FiberAbout 2g
Estimated net carbohydratesAbout 7g

Here, net carbs means total carbohydrate minus fiber. The estimate assumes full-fat plain yogurt and heavy/whipping cream in roughly the 30–36% fat range; a lighter fresh cream will lower the fat and calorie numbers somewhat.

The calculation includes the chicken, yogurt, lemon, onion, tomato, ginger, garlic, ghee, butter, cream and measured spices. It does not include cauliflower rice, bread, optional sweetener, extra cream at serving or other sides.

1 serving = ¼ of the finished curry. If you track carbohydrates closely, the labels on the ingredients in your own kitchen are the most relevant numbers.

Frequently Asked Questions

Does Butter Chicken Usually Contain Sugar?

Sometimes. Some home and restaurant versions add sugar or honey to soften tomato acidity; many others don’t. It isn’t required here. Cook the tomato fully and balance the gravy before deciding it needs sweetness.

Do I Really Need Kasuri Methi?

You can make good creamy tomato chicken without it, but kasuri methi contributes an aroma closely associated with butter chicken. Use dried fenugreek leaves, not the same quantity of fenugreek seed or powder. If the leaves are unavailable, omission is safer than an equal substitution.

Can I Make This Dairy-Free?

Yes, although the flavour will shift. Use plain unsweetened dairy-free yogurt in the marinade and full-fat coconut cream in the gravy, along with a suitable non-dairy cooking fat. The finished sauce becomes more coconut-forward and moves away from classic murgh makhani.

If you’re avoiding dairy because of a milk allergy, don’t assume ghee is automatically suitable.

Is This Butter Chicken Gluten-Free?

The recipe itself doesn’t use wheat flour. Stocks, packaged spice blends and prepared sauces can vary, so check labels when avoiding gluten strictly.

Can I Make It Without a Blender?

Absolutely. Use smooth passata, chop the onion finely and leave the gravy a little more rustic. You lose some silkiness, not dinner.

Keep the Butter Chicken

Once the bowl reaches the table, “keto” shouldn’t be the first thing you notice.

There should be a browned edge on the chicken and enough gravy to drag through whatever is underneath it. The tomato should taste deep and fully cooked, the cream should leave the spices easy to taste, and the butter should give the sauce a soft sheen.

The kasuri methi lingers after the bite.

Close-up spoonful of browned butter chicken, glossy orange-red gravy, cumin-speckled cauliflower rice and a small piece of spinach.
Cauliflower rice does not need to impersonate basmati. Here its job is simpler: catch the silky makhani gravy and bring toasted cumin into the same bite as the charred chicken.

Keep the butter chicken. Change the carbs that matter.

← Back to the recipe · ↑ Back to top