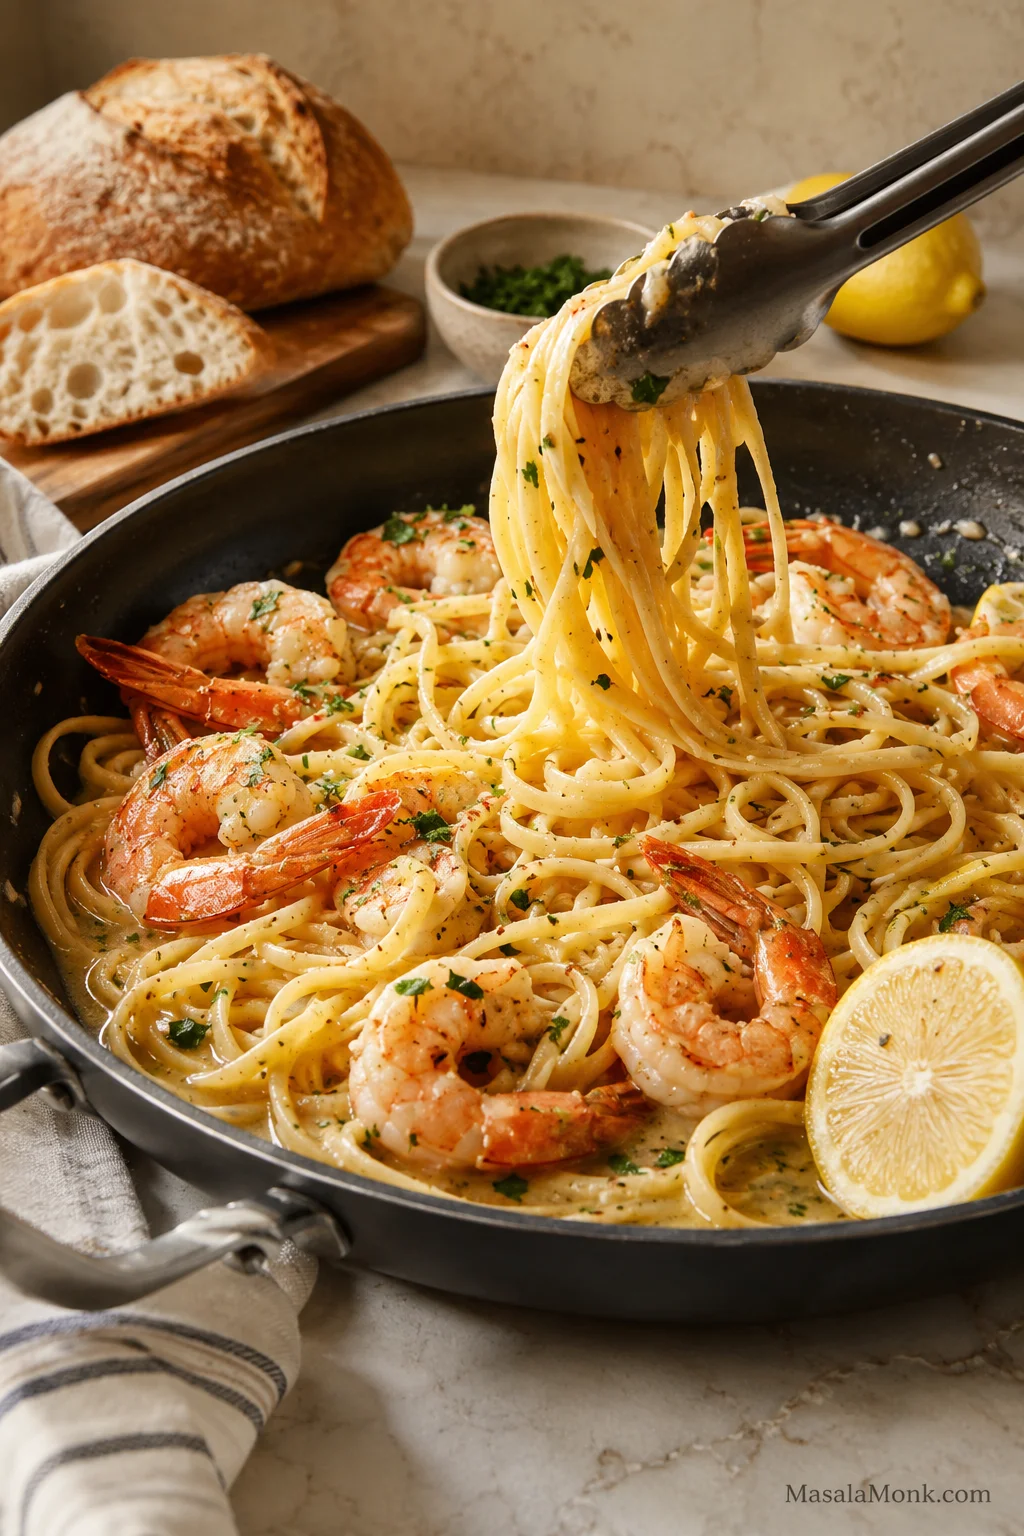
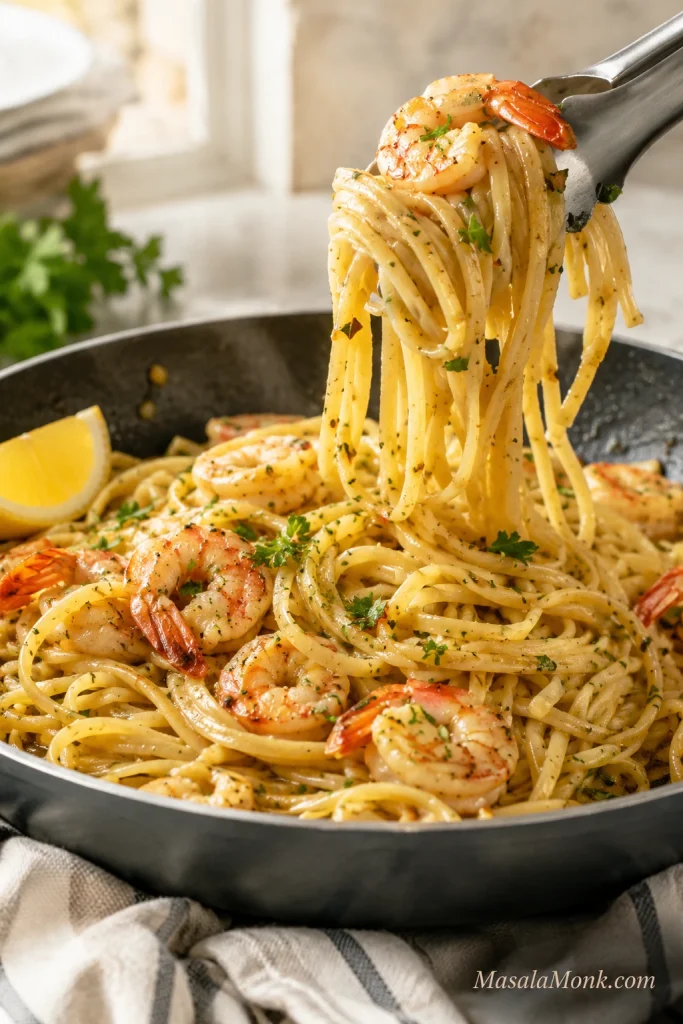
This shrimp scampi recipe gives you tender shrimp or prawns in a silky garlic butter lemon sauce, with enough sauce to toss through pasta or drag a piece of crusty bread through at the end.
It feels like you did more than you did: shrimp sizzling in garlic butter, lemon cutting through the richness, parsley going in at the end, and a skillet that makes a weeknight dinner feel a little restaurant-style. It also keeps real-life scampi problems covered, whether you are using shrimp or prawns, wine or stock, pasta or bread, fresh or frozen shrimp.
The quick answer: shrimp scampi is shrimp cooked quickly in garlic, butter, olive oil, lemon, parsley, and white wine or stock. Serve it with pasta for dinner or with bread for a lighter skillet meal. The key is to pull the shrimp while it is still tender, build the garlic butter in the pan, then return the shrimp just long enough to finish.
Making the pasta version? Go straight to shrimp scampi pasta. Skipping alcohol? Use the no-wine shrimp scampi method.
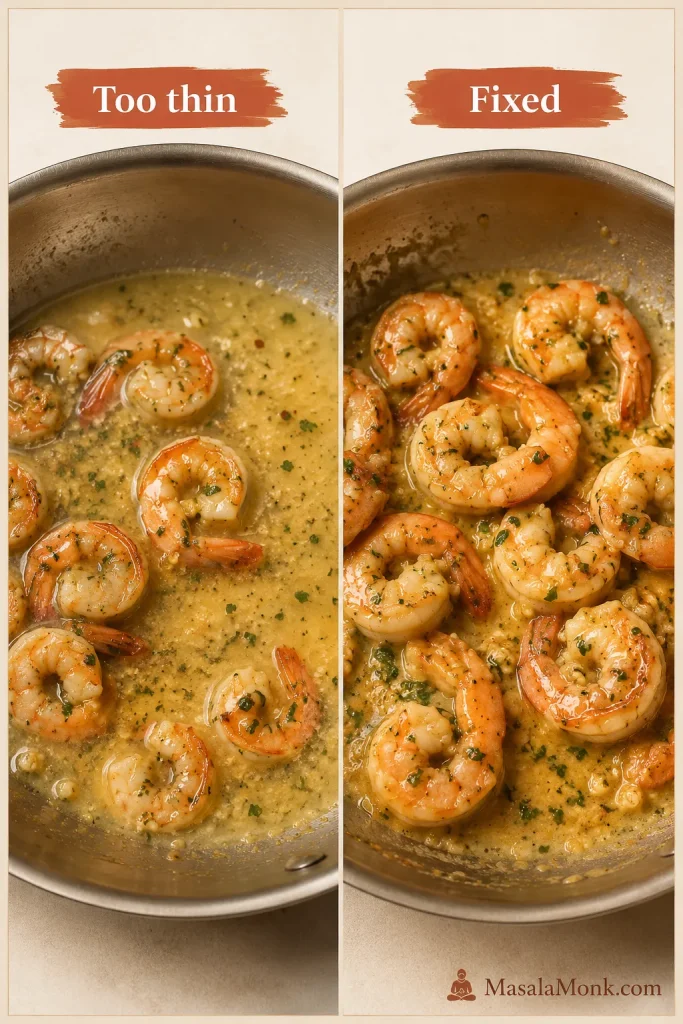
If the pan juices turn thin, oily, flat, salty, or split, this guide shows you how to bring them back.
Recipe at a Glance
| Prep time | 10 minutes |
| Cook time | 10 minutes |
| Total time | 20 minutes |
| Servings | 4 |
| Main ingredient | 500g / 1.1 lb large shrimp or prawns |
| Best shrimp size | Large shrimp or prawns, about 16–20 or 21–25 count per pound |
| Pasta amount | 225g / 8 oz for a saucy shrimp scampi pasta |
| No-wine option | Low-sodium seafood stock, chicken stock, or vegetable stock |
| Main cooking cue | Shrimp should be pink, opaque, and curled into a loose C |
Choose Your Shrimp Scampi Path
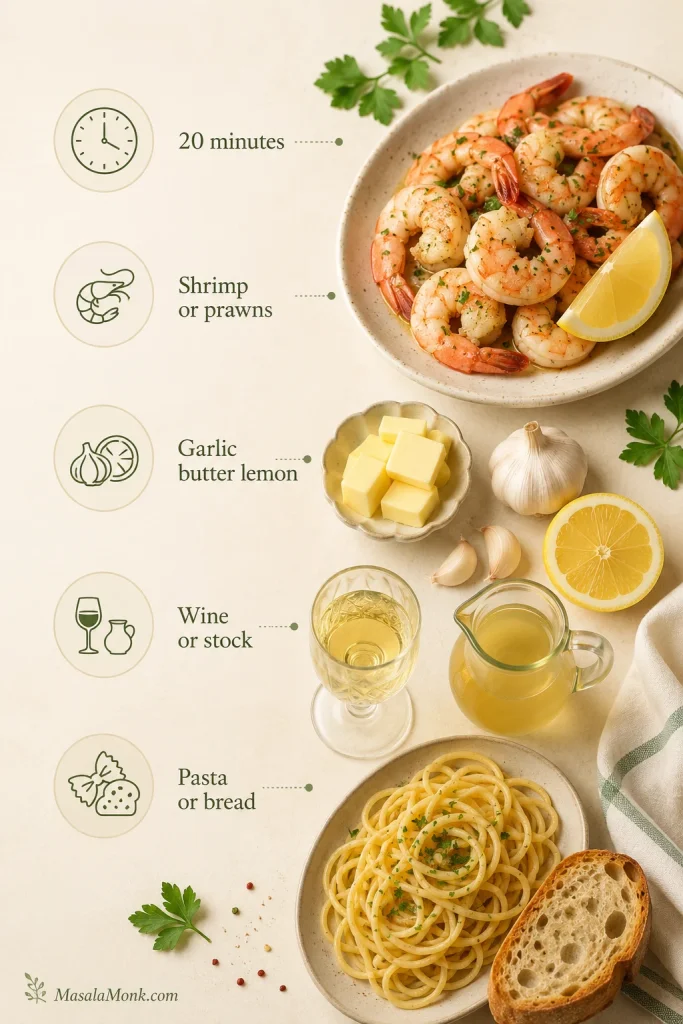
Use this as the quick choice point before cooking: pasta or bread, wine or stock, shrimp or prawns.
In This Recipe Guide
Use this guide by need
Choose your version
Before You Start
Shrimp scampi moves quickly once the pan is hot, so keep the shrimp dry, the garlic minced, the lemon ready, and the wine or stock measured before you start. Once those are ready, the cooking is simple: sear, simmer, swirl, toss, serve.
Using frozen shrimp, cooked shrimp, prawns, or king prawns? Check the shrimp type guide before the skillet gets hot.
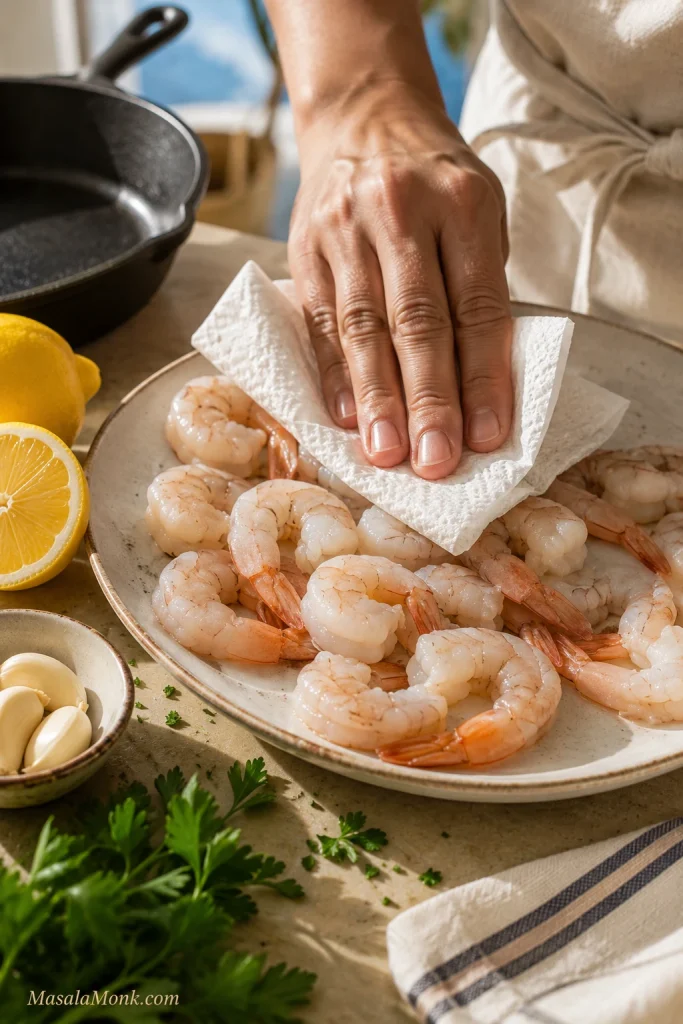
Dry the Shrimp Before Cooking
This is the prep check that keeps the skillet from filling with excess moisture.
- Use a wide skillet. An 11–12 inch pan gives shrimp room to sear. If the shrimp do not fit in one layer, cook in batches.
- Dry the shrimp well. Wet shrimp steam in the pan and can make the pan juices thin.
- Pull the shrimp early. It should be almost done before it goes back into the sauce.
- Keep the finish light. You want the garlic butter to lightly coat the shrimp and pasta, not turn thick like gravy or pool underneath.
You are aiming for shrimp that is just opaque, garlic that smells sweet and fragrant, and a buttery lemon coating that clings lightly to whatever you serve it with.
How to Make Shrimp Scampi
The actual cooking is fast. The shrimp should sizzle when it hits the pan, the garlic should stay pale and fragrant, and the finished pan should smell like garlic and lemon first, then butter and sweet shrimp.
- Prepare the shrimp. Thaw if frozen, drain well, pat dry, then season with salt and black pepper.
- Cook the pasta, if using. Cook pasta 1–2 minutes less than the package directions. Reserve 1 cup / 240ml pasta water before draining.
- Sear the shrimp. Heat a wide skillet over medium-high heat. Add olive oil and 1 tablespoon butter. Add shrimp in one layer and cook large shrimp for about 60–90 seconds per side, or up to 2 minutes per side for very large prawns. Transfer to a plate when almost cooked through.
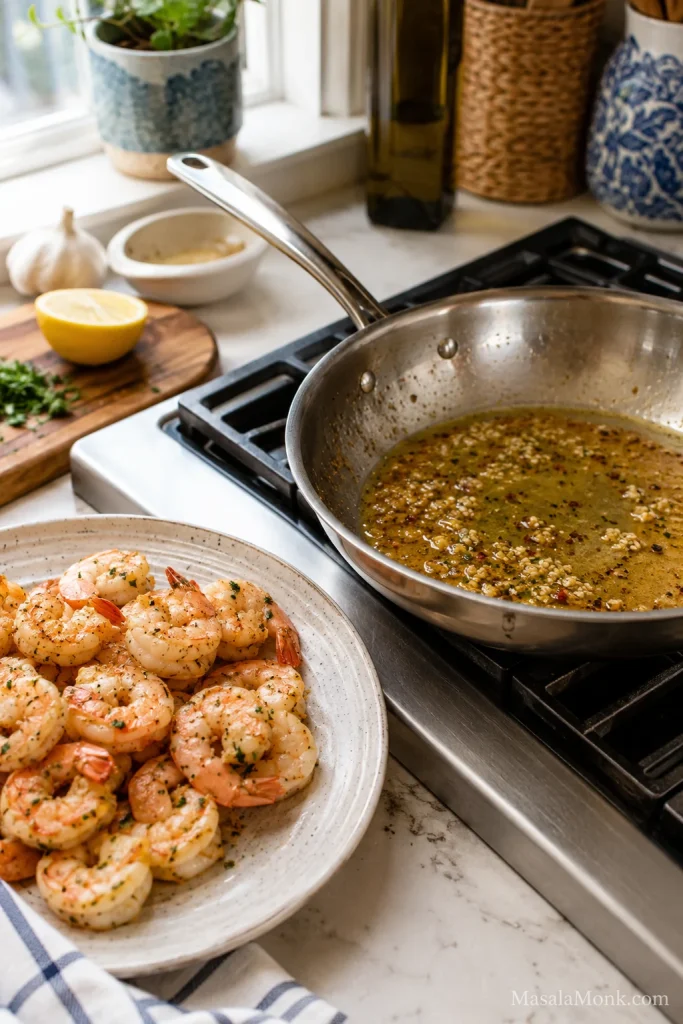
- Cook the garlic. Lower heat to medium. Add minced garlic and red pepper flakes. Cook for 30–45 seconds, stirring constantly, until fragrant but not browned.
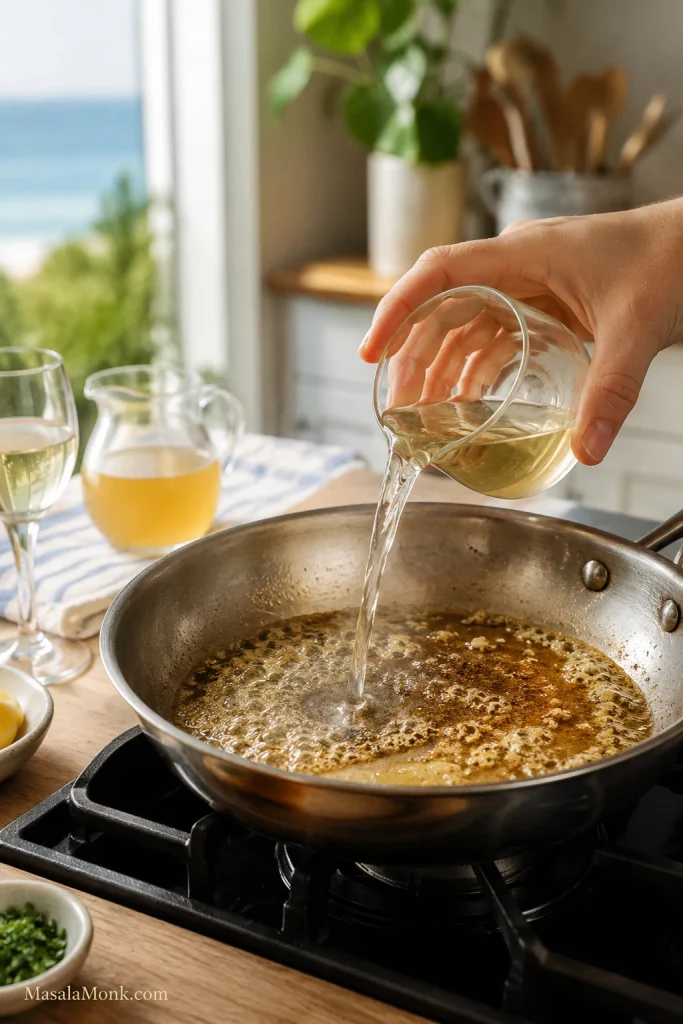
- Build the sauce. Add wine or stock and simmer for 2–3 minutes, scraping up any flavorful bits from the pan.
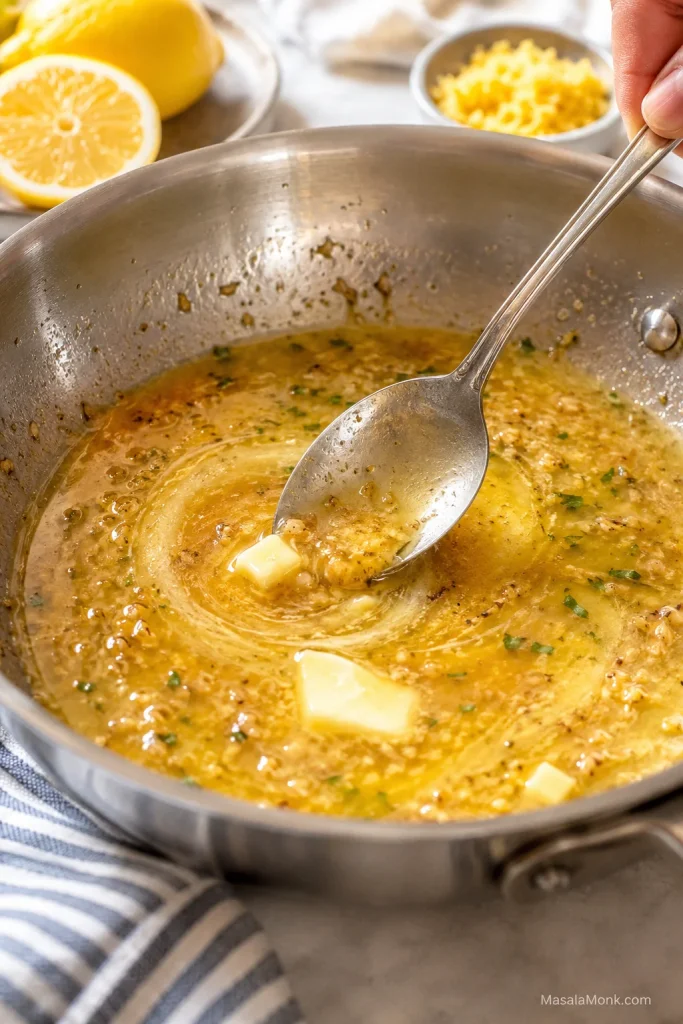
- Finish the sauce. Add lemon juice, lemon zest, and the remaining butter. Swirl until the butter melts into the wine or stock and the pan juices look silky.
- For pasta scampi, add pasta before the shrimp. Toss drained pasta in the sauce first, adding pasta water 2–3 tablespoons at a time until the noodles look loose, shiny, and lightly coated.
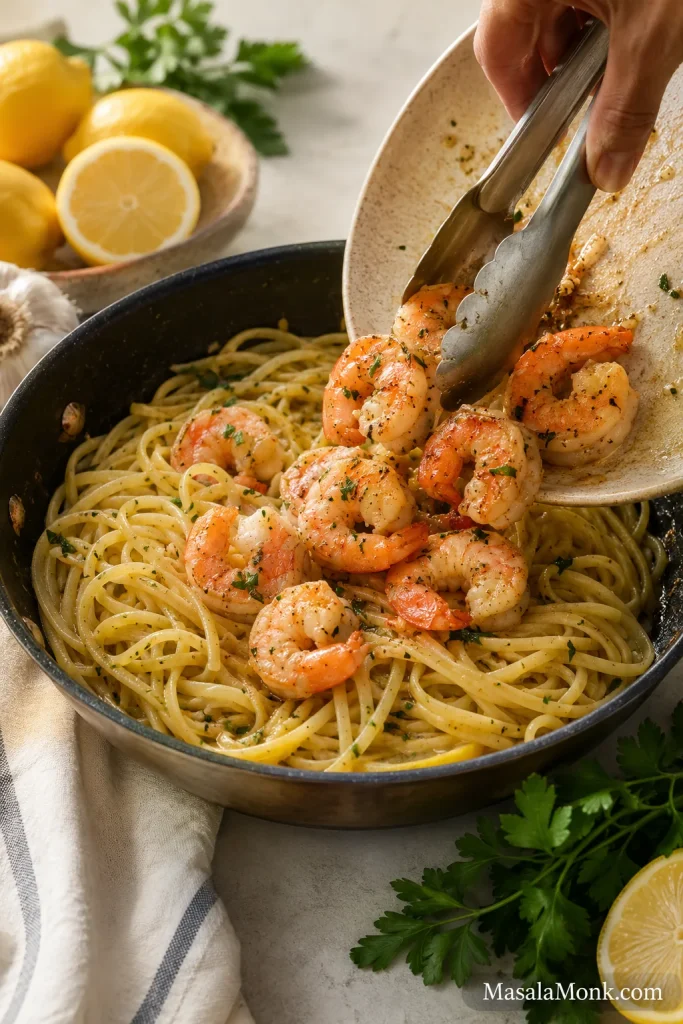
- Return the shrimp at the end. Add the shrimp back to the skillet and toss for 30–60 seconds, just until fully cooked. If you are not using pasta, return the shrimp directly after finishing the sauce.
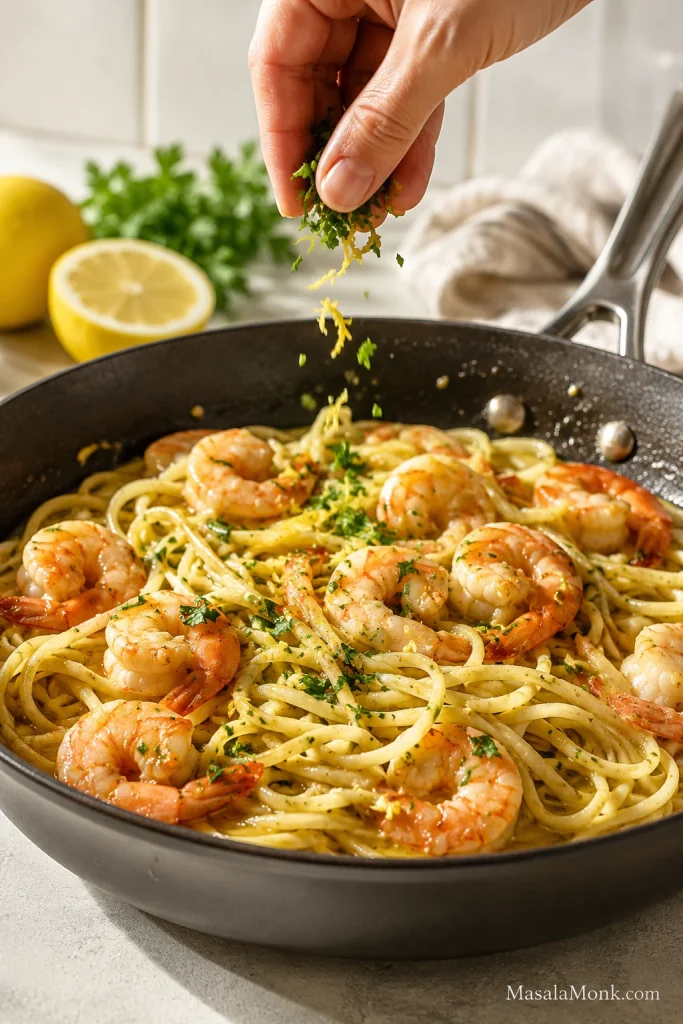
- Finish and serve. Turn off the heat, stir in parsley, taste for salt, pepper, and lemon, and serve immediately.
Making this with pasta? Use the shrimp scampi pasta method next. If the pan juices look thin, oily, or split, jump to how to fix the sauce.
Visual Cues for the Skillet
Use these quick checks while cooking so the skillet cues match what you see in front of you.
Sear the shrimp in hot butter and oil. The first contact with the pan should be quick and active, not slow and watery.
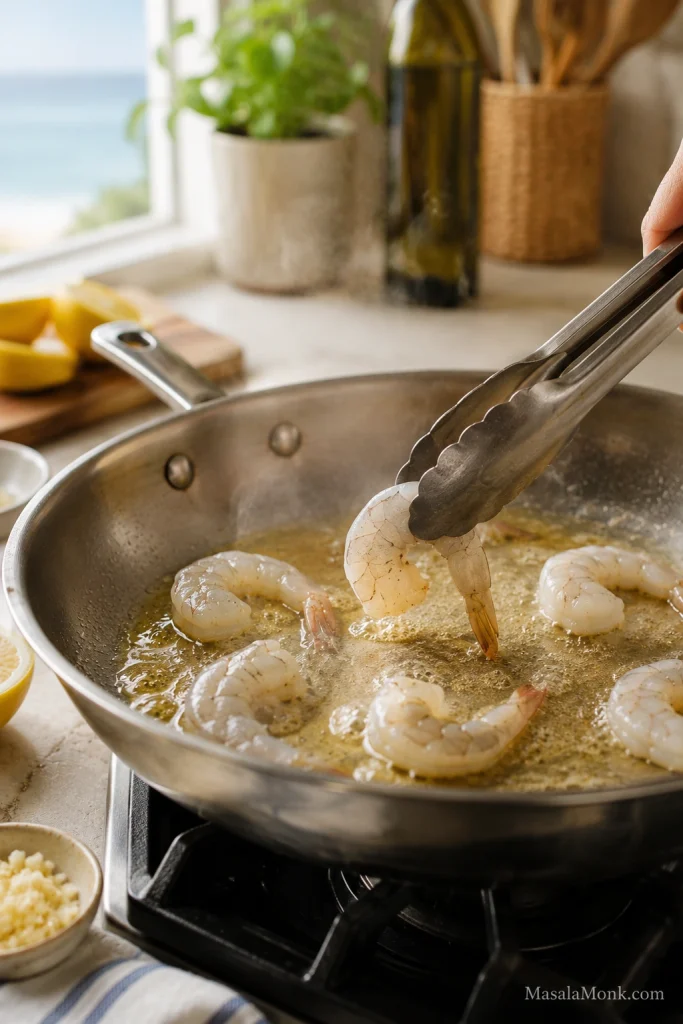
Give the shrimp room in the skillet. A single layer keeps each piece in direct contact with the hot pan instead of steaming in its own moisture.
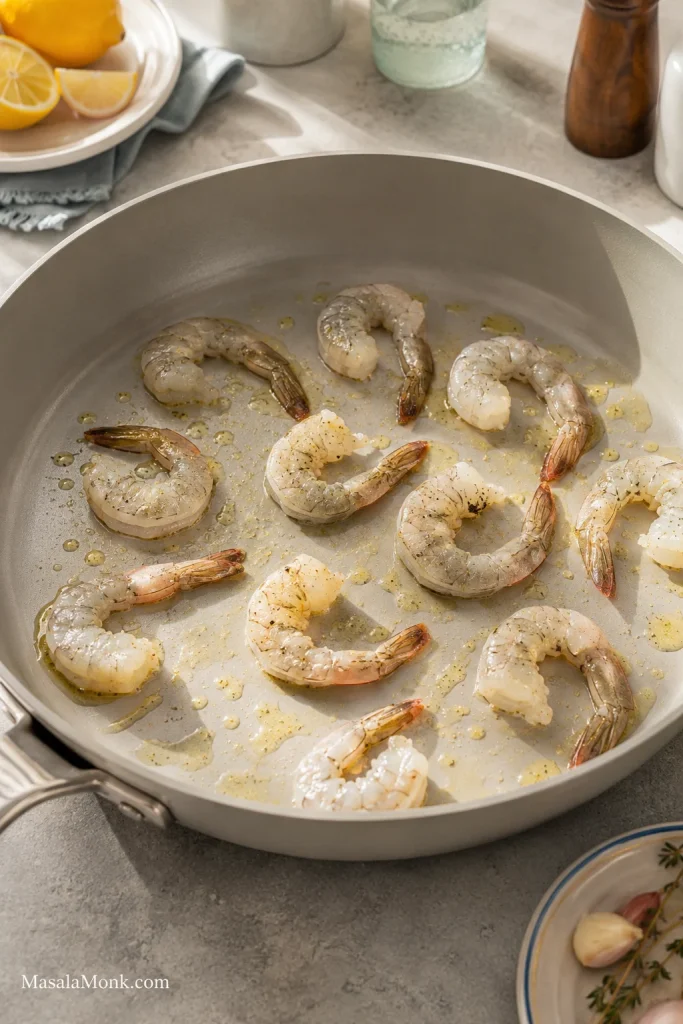
Remove the shrimp before building the sauce. This short plate rest protects the shrimp texture while the pan flavor turns into sauce.
Keep the garlic pale. Garlic is the backbone of the sauce, but it needs gentle heat.

Deglaze with wine or stock. This is where the browned shrimp and garlic flavor lift from the skillet.
Swirl butter into the pan juices. The sauce should come together as a glossy coating rather than a heavy gravy.
Return the shrimp at the end. The shrimp goes back only long enough to finish and coat.
Finish with parsley and lemon. Fresh herbs and lemon zest belong at the end, where they stay bright.
Doneness cue: shrimp are done when they turn pink, opaque, and curl into a loose C shape. If they curl tightly into an O, they are usually overcooked. If using a thermometer, shrimp should reach 63°C / 145°F; that matches the USDA safe minimum temperature chart for fish and shellfish.
Use the Loose C Doneness Cue
This visual check is faster than guessing by time, especially when shrimp sizes vary.
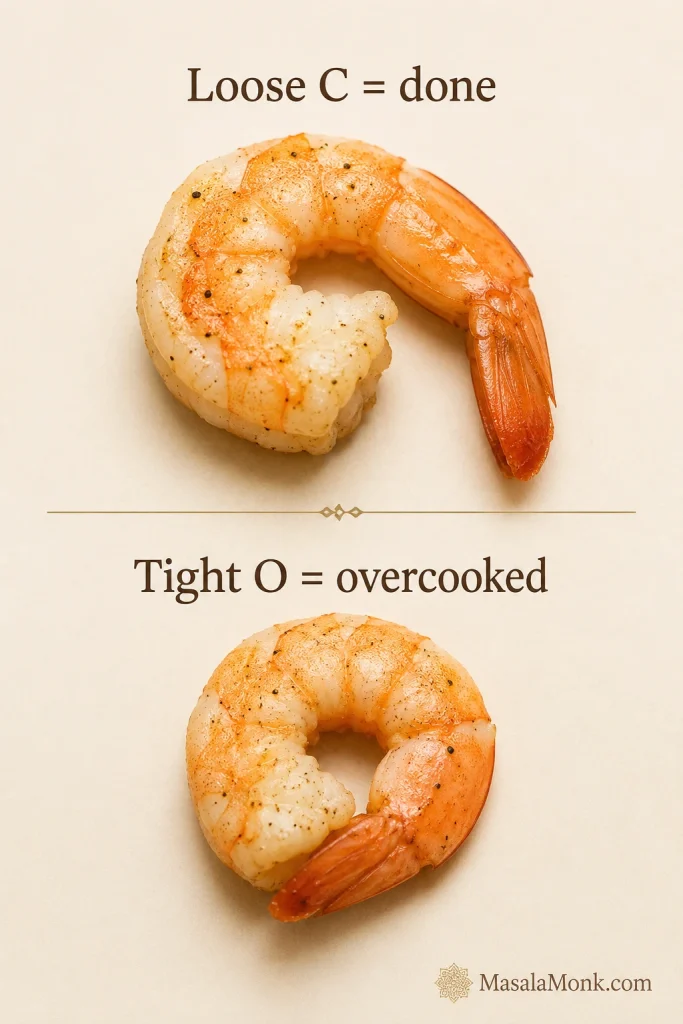
Shrimp timing rule: pull shrimp when it looks almost done, not fully done. It will continue cooking from residual heat and again when it returns to the sauce.
Back to top · Back to recipe guide
How to Make Shrimp Scampi Pasta
For shrimp scampi pasta, toss the pasta directly in the skillet instead of spooning sauce over it later. This helps the garlic butter cling to the noodles.
If the noodles look dry, sticky, or oily while tossing, the sauce fixes will help before the shrimp overcooks.
- Use 225g / 8 oz linguine, spaghetti, angel hair, or capellini for the sauciest version.
- Cook the pasta 1–2 minutes shy of done and reserve 1 cup / 240ml pasta water.
- Build the sauce after removing the shrimp from the pan.
- Add the pasta to the sauce before returning the shrimp.
- Add pasta water 2–3 tablespoons at a time until the pasta looks loose and lightly coated.
- Return the shrimp only at the end and toss briefly.
Add Pasta Before the Shrimp Returns
This is the order that keeps the noodles saucy and the shrimp tender.
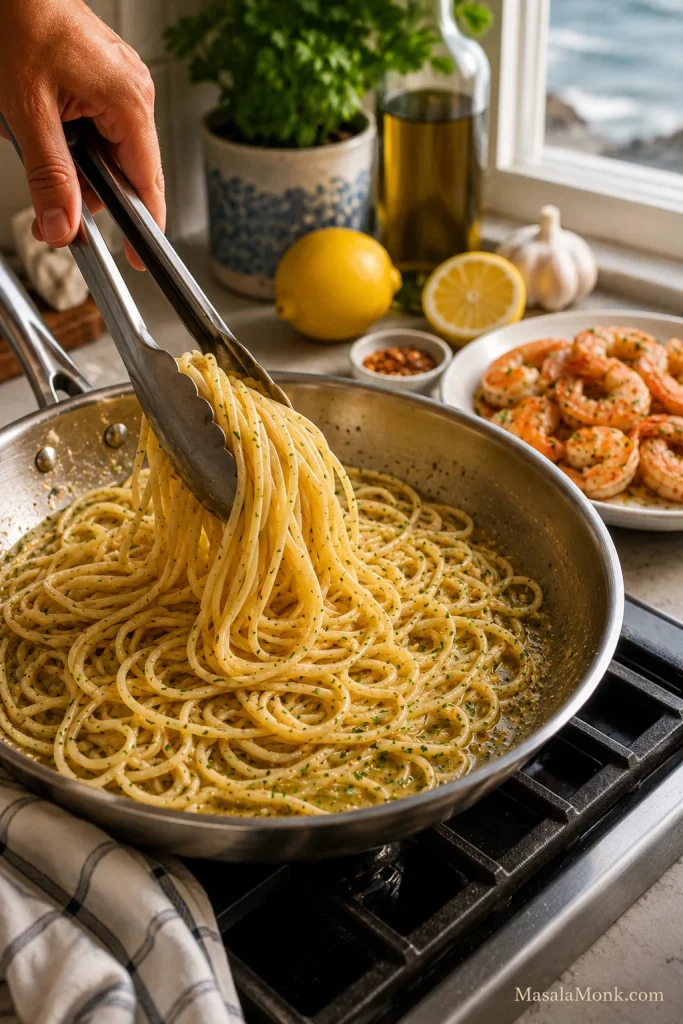
When the pasta is right, it should look shiny and loose, with little flecks of garlic, parsley, and lemon zest clinging to the noodles. That is the moment where the dish stops being shrimp plus pasta and becomes shrimp scampi pasta.
Check the Pasta Texture Before Serving
This is the texture cue to look for before you turn off the heat.
Pasta ratio rule: 225g / 8 oz pasta gives you saucy, shrimp-forward scampi. A full 450g / 1 lb pasta box needs double the sauce, or the shrimp will get lost in the noodles.
Back to top · Back to recipe guide
Shrimp Scampi Without Wine
You can make shrimp scampi without wine. No wine does not mean less flavor; it just means you need body from stock and lift from lemon.
For the best no-wine shrimp scampi, use ½ cup / 120ml low-sodium seafood stock or chicken stock, then adjust acidity at the end. Vegetable stock works too, but it gives a lighter finish. Add up to ½ teaspoon white wine vinegar only if the sauce tastes flat after the lemon.
Wine vs Stock in Shrimp Scampi
This comparison is useful when you want the classic flavor or a no-wine version with enough body.
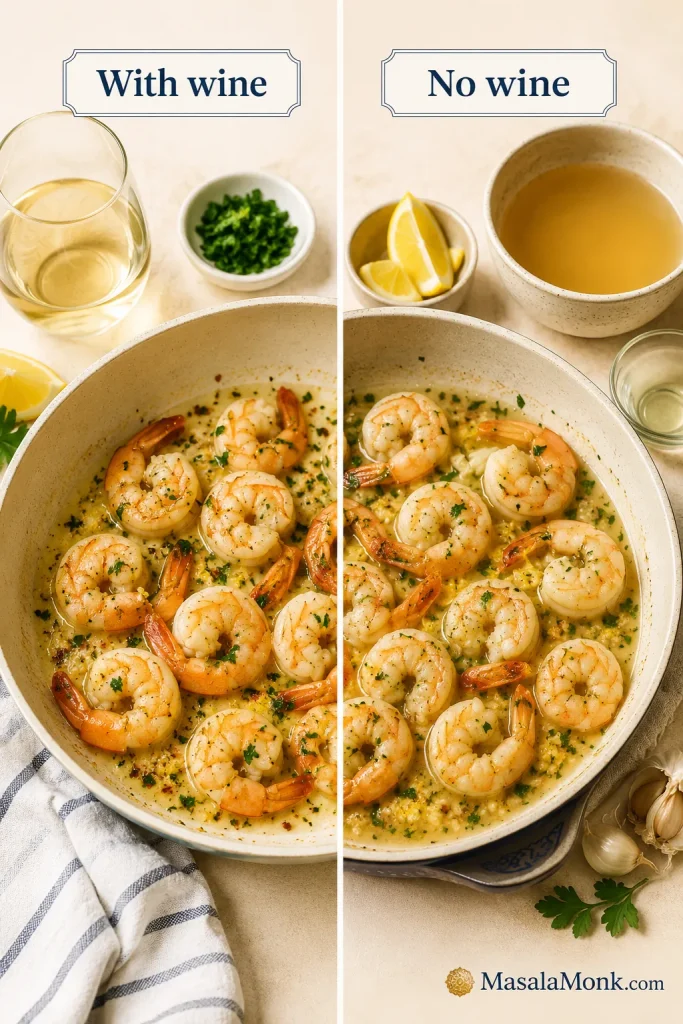
Avoid sweet juices, too much vinegar, and salty cooking wine. Plain water can loosen the skillet juices in a pinch, but stock gives much better flavor.
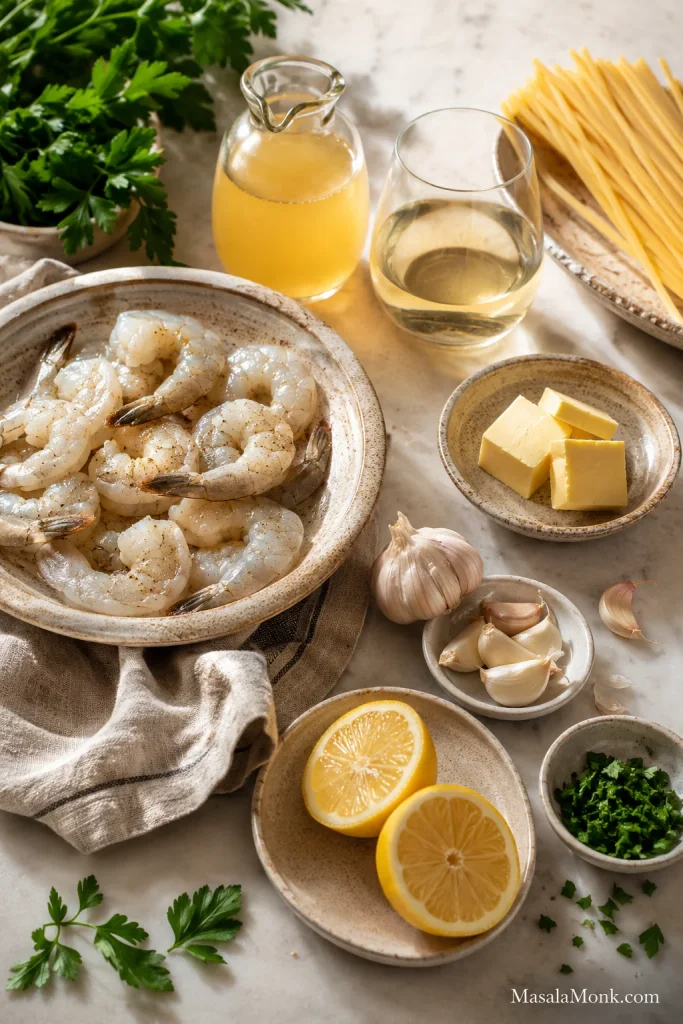
Ingredients You Need
The ingredient list is short, which is part of the charm: shrimp, garlic, lemon, butter, parsley, and a pan sauce that tastes bigger than the effort.
Still choosing between shrimp, prawns, fresh, frozen, or cooked shrimp? Jump to the shrimp type guide before buying or thawing.
Shrimp Scampi Ingredients at a Glance
Use this image as the shopping and prep check before cooking.
- Shrimp or prawns: Use 500g / 1.1 lb large shrimp or prawns, peeled, deveined, and patted dry. A 450g / 1 lb pack also works. The shrimp should smell clean, not fishy.
- Pasta: Use 225g / 8 oz linguine, spaghetti, angel hair, or capellini if making shrimp scampi pasta.
- Unsalted butter: 3 tablespoons / 42g gives the sauce richness. If using salted butter, reduce the added salt.
- Olive oil: 2 tablespoons / 30ml helps sauté the shrimp and garlic without the butter burning too quickly.
- Garlic: Use 5–6 medium cloves, finely minced, or about 18–25g minced garlic. Fresh garlic is best here.
- Dry white wine: Use ½ cup / 120ml for the classic version.
- Stock: Use ½ cup / 120ml low-sodium seafood stock, chicken stock, or vegetable stock for the no-wine version.
- Lemon: Use 2 tablespoons / 30ml fresh lemon juice plus 1 teaspoon lemon zest. Zest before juicing.
- Parsley: ¼ cup chopped fresh parsley adds color and freshness at the end.
- Red pepper flakes: ¼ teaspoon is optional, but it gives gentle heat.
- Salt and pepper: Start with ½ teaspoon fine salt for the shrimp, plus more for pasta water and final adjustment.
- Pasta water: Reserve 1 cup / 240ml before draining pasta if making the pasta version.
Back to top · Back to recipe guide
What Is Shrimp Scampi?
Shrimp scampi is a quick shrimp dish made with garlic, butter, olive oil, lemon, white wine, parsley, and sometimes red pepper flakes. Many American versions serve it with pasta, especially linguine, spaghetti, angel hair, or capellini.
Across the US, this dish is usually called shrimp scampi. In India, Australia, and many other places, readers may also think of it as prawn scampi, king prawn scampi, tiger prawn scampi, or garlic butter prawns. UK readers may know “scampi” as langoustine tails, often breaded; this recipe is the American-style garlic butter shrimp or prawn scampi.
The sauce should be light and silky, not thick like Alfredo and not thin like soup. You are making a bright garlic butter sauce that coats the shrimp and clings to pasta if you use it.
Shrimp vs Prawns
You can use shrimp or prawns in this recipe. The method stays the same: cook them quickly, remove them from the pan, build the sauce, then return them briefly at the end.
Large shrimp or prawns give the best texture. Shrimp labeled 16–20 or 21–25 count per pound are ideal. Smaller shrimp cook faster, while very large king prawns or tiger prawns may need 30–60 seconds more.
Tail-on shrimp look good and can add a little extra flavor, especially if serving the scampi with bread, rice, or vegetables. Tail-off shrimp are easier to eat with pasta.
Fresh, Frozen, Raw, or Cooked Shrimp?
Raw shrimp or prawns give the best texture, but frozen raw shrimp is often the most practical choice. Avoid freezer-burned shrimp, thaw gently, drain well, and pat dry before cooking.
| Shrimp type | How to use it |
|---|---|
| Raw frozen shrimp | Thaw fully, drain well, and pat very dry before cooking. |
| Fresh raw shrimp | Use if clean-smelling and truly fresh. Cook the same way as thawed frozen shrimp. |
| Cooked shrimp | Add only at the end for 30–60 seconds, just to warm through. |
| Frozen cooked shrimp | Thaw fully, pat dry, and warm gently in the finished sauce. |
| Shell-on shrimp | More flavor but more work. Better for baked versions or homemade stock. |
Choose the Right Shrimp or Prawns
The timing changes depending on whether the seafood is raw, frozen, cooked, or extra large.
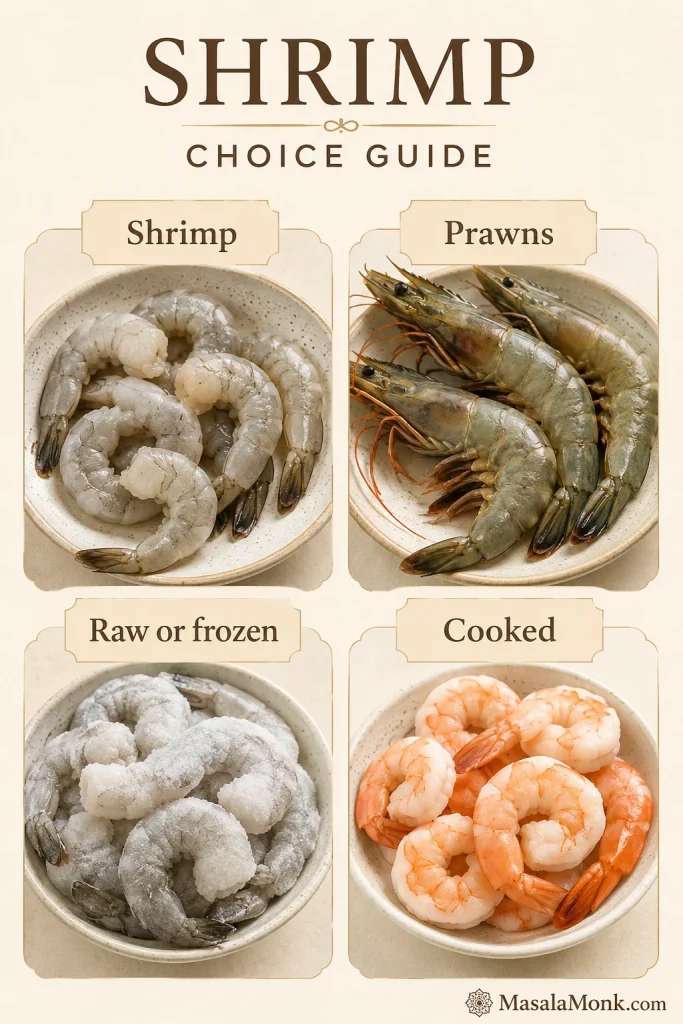
For thawing, use the fridge overnight or place the sealed shrimp bag in cold water. Cooked shrimp needs the lightest touch because it has already been cooked once.
Best Pasta to Use
Long, thin pasta works best because it catches the garlic butter sauce without overpowering the shrimp.
- Linguine: classic and restaurant-style.
- Spaghetti: easy, familiar, and reliable.
- Angel hair: delicate and quick-cooking.
- Capellini: light and excellent with this sauce.
- Fettuccine: works if you increase the sauce.
- Zucchini noodles: useful for a low-carb scampi-style bowl.
This recipe uses less pasta than some versions because the goal is a shrimp-forward, saucy skillet, not a big pot of noodles with a little shrimp scattered through it. For another seafood pasta with lemon, garlic, Parmesan, and pasta-water control, try this creamy salmon pasta.
The Garlic Butter Sauce
The sauce is why people come back to shrimp scampi. It should be buttery enough to feel special, lemony enough to stay fresh, and loose enough to coat instead of sit heavily underneath.
A good scampi sauce has three parts in balance: butter for richness, lemon for lift, and garlic for warmth. Wine or stock gives the sauce body, parsley freshens the finish, and pasta water helps everything cling if you are adding noodles.
When it lands right, the shrimp stays tender, the garlic tastes warm instead of sharp, and the last bit of lemon butter is exactly what the bread is for.
The sauce is right when the shrimp looks shiny and the pasta looks lightly coated. If there is a puddle underneath, it needs a little more tossing, reducing, or pasta-water control.
Best Wine for Shrimp Scampi
Use a dry, crisp white wine. The wine should brighten the garlic butter sauce, not make it sweet. Use something you would drink with lemony seafood; if it tastes sweet in the glass, it will taste sweet in the skillet.
Skipping alcohol entirely? Go back to the shrimp scampi without wine section and use stock instead.
- Sauvignon Blanc
- Pinot Grigio
- Dry unoaked Chardonnay
- Dry vermouth
Save sweet wine for sipping or dessert; scampi wants something crisp and dry. Skip salty cooking wine because it can make the sauce harsh.
Back to top · Back to recipe guide
How to Fix the Sauce
Most scampi problems are easy to fix if you catch them early.
| Problem | Fix |
|---|---|
| Too thin | Simmer for 1–2 minutes, then swirl in a little butter. Next time, dry the shrimp better. |
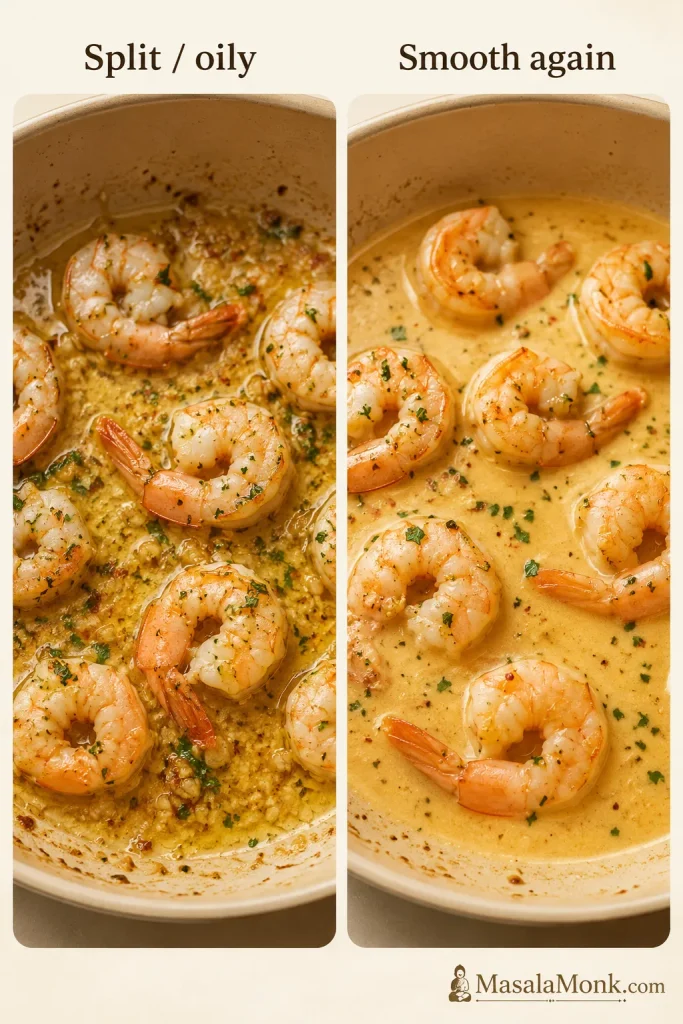
| Greasy or split | Add 1–2 teaspoons pasta water or warm water and swirl hard until shiny and smooth. |
| Too sharp | Add a little more butter or a splash of pasta water. |
| Flat flavor | Add lemon zest, parsley, or a tiny splash of white wine vinegar. |
| Bitter garlic | The garlic probably burned. Start the garlic again if possible. |
| Tough shrimp | It was overcooked. Next time, remove it earlier and finish briefly in the sauce. |
| Dry pasta | Add reserved pasta water a little at a time and toss well. |
| Too salty | Add unsalted butter, pasta water, or more pasta. Use low-sodium stock next time. |
Fix Thin Shrimp Scampi Sauce
This is the rescue when the pan juices look loose instead of glossy.
Fix Split or Oily Scampi Sauce
This is the rescue when butter separates from the wine, stock, or pasta water.
Back to top · Back to recipe guide
Variations
Use these when you want the same garlic-lemon-butter idea in a different mood: creamier, baked, low-carb, air-fried, or more like a restaurant pasta.
Creamy Shrimp Scampi
Add ¼ to ½ cup / 60–120ml heavy cream after the wine or stock has reduced. Add 2–4 tablespoons Parmesan if you want a richer pasta-style sauce. Keep the heat low after adding cream so the sauce does not split.
Baked Shrimp Scampi
Arrange shrimp or prawns in a shallow baking dish with garlic butter, lemon, white wine or stock, salt, pepper, and parsley. Add panko and Parmesan if you want a crisp finish. Bake at 220°C / 425°F for 8–12 minutes, just until the shrimp are pink, opaque, and loosely curled.
If you want another lemon-garlic seafood dinner that cooks quickly, this baked tilapia keeps the same easy weeknight feel.
Air Fryer Shrimp Scampi
Toss shrimp with melted butter, olive oil, garlic, lemon juice, salt, pepper, and red pepper flakes. Air fry at about 190°C / 370°F for 5–6 minutes, shaking or turning once, just until the shrimp are pink, opaque, and loosely curled. Use a small oven-safe dish if you want to keep more sauce.
Restaurant-Style Shrimp Scampi Pasta
For restaurant-style shrimp scampi pasta, angel hair or linguine gives the cleanest finish. Add asparagus tips or cherry tomatoes if you want color, then finish with parsley, lemon, and Parmesan. Increase the sauce if you cook more than 225g / 8 oz pasta.
Low-Carb Shrimp Scampi
Skip the pasta and serve the shrimp with zucchini noodles, roasted vegetables, cauliflower rice, or a green salad. Keep the sauce slightly more concentrated because vegetables can release moisture.
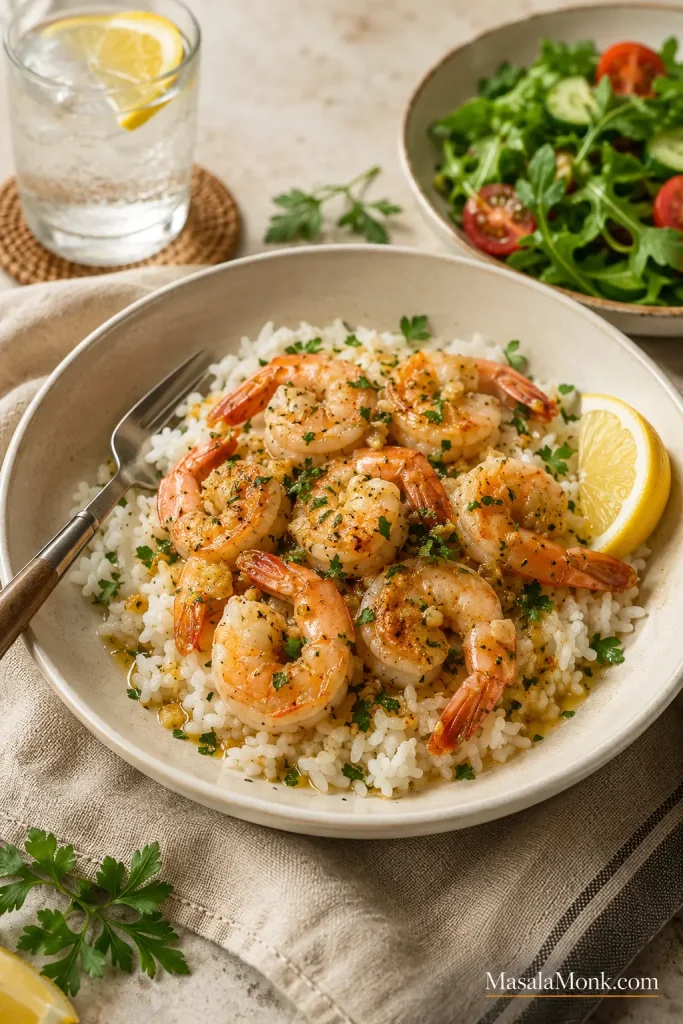
Shrimp Scampi With Rice
Serve the shrimp and sauce over plain rice, rice pilaf, or lightly seasoned basmati rice. For a more generous seafood-and-rice dinner, this home-style paella is another natural place to go.
For a brighter plate, keep the rice simple and let the lemony shrimp and crisp salad do the work.
For another fast shrimp dinner with a completely different mood, these shrimp tacos with slaw and creamy cilantro-lime sauce are easy, bright, and weeknight-friendly.
What to Serve With It
The side you choose changes the mood of the meal. Pasta makes it dinner, bread makes it casual, rice keeps it simple, and salad keeps it light.
| If you want… | Serve shrimp scampi with… |
|---|---|
| Something to soak up sauce | Crusty bread, garlic bread, toasted baguette |
| A classic pasta dinner | Linguine, spaghetti, angel hair, capellini |
| A simple non-pasta meal | Rice, rice pilaf, or orzo |
| A lighter plate | Green salad, zucchini noodles, roasted vegetables |
| A vegetable side | Asparagus, broccoli, zucchini, green beans, cherry tomatoes |
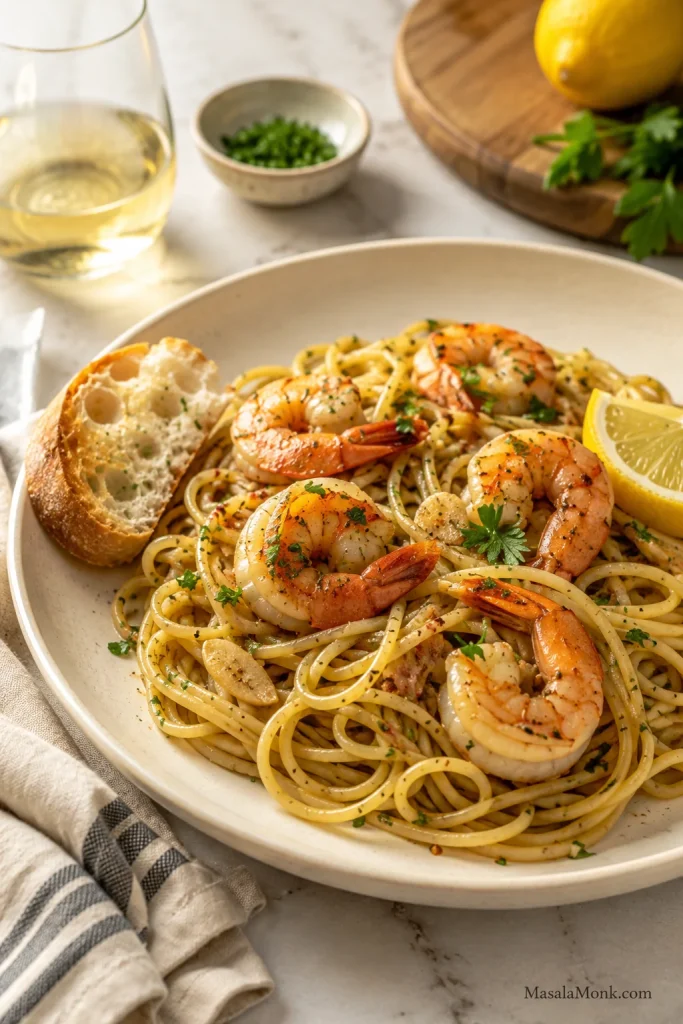
Serve Shrimp Scampi With Crusty Bread
Bread turns the pan sauce into part of the meal instead of something left behind.
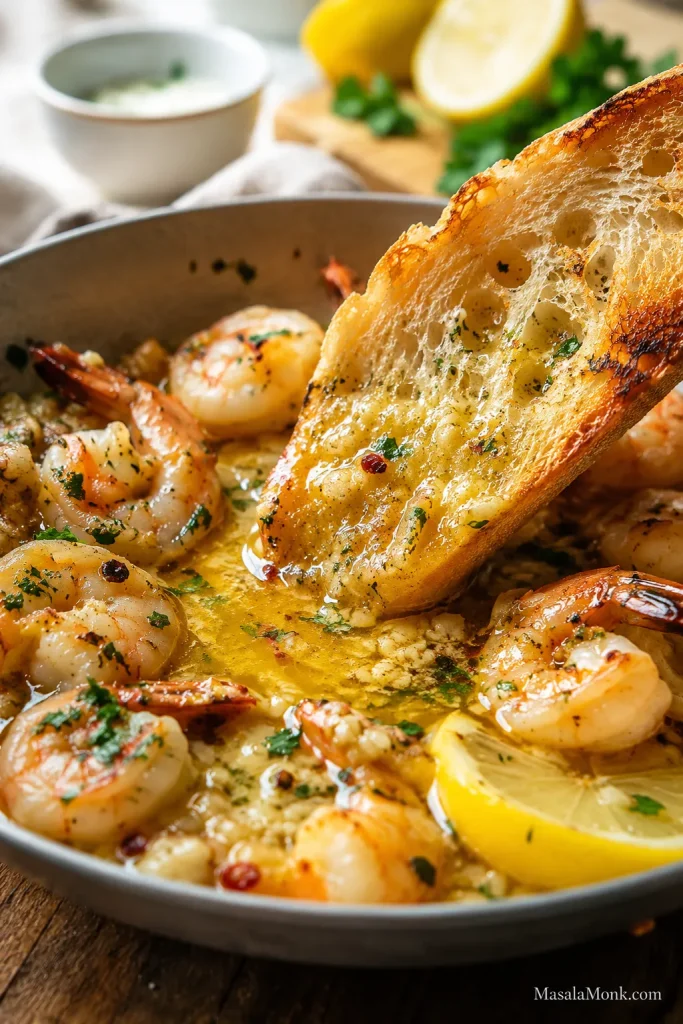
A crisp wedge salad keeps the plate cool and crunchy, while a homemade garlic bread loaf is the move when you want every bit of sauce gone. Plates are optional; bread is not.
If you make it, note how you served it — pasta, bread, rice, or vegetables — because that changes how much sauce you may want next time. The last spoonful of sauce is the point.
Back to top · Back to recipe guide
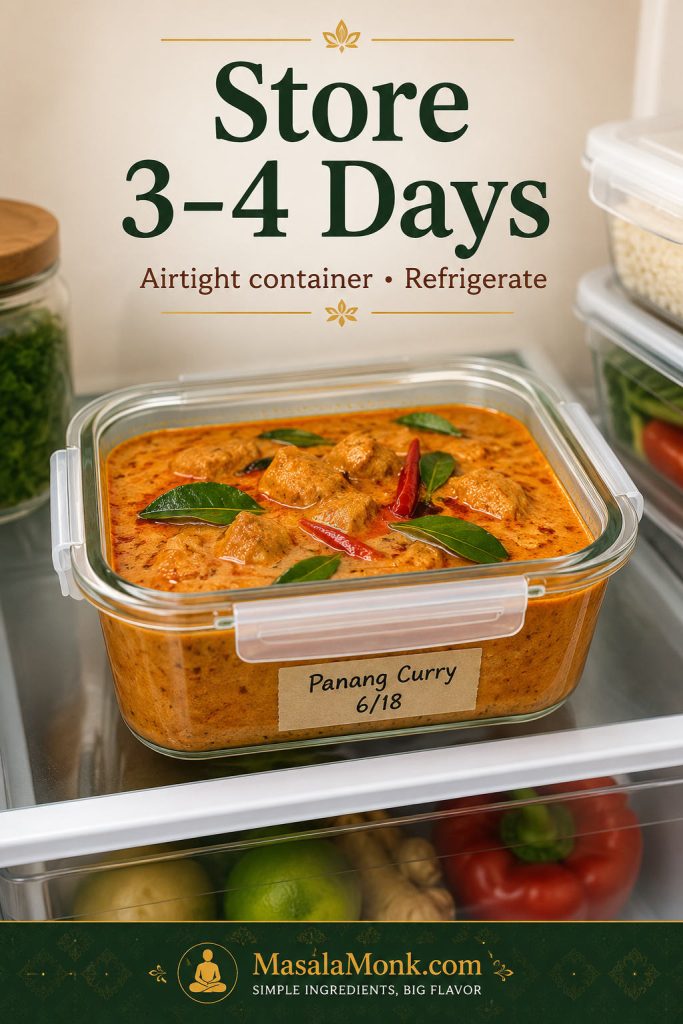
Storage and Reheating
Shrimp scampi is best eaten fresh because shrimp can toughen when reheated. Leftovers can be refrigerated in an airtight container for up to 2 days.
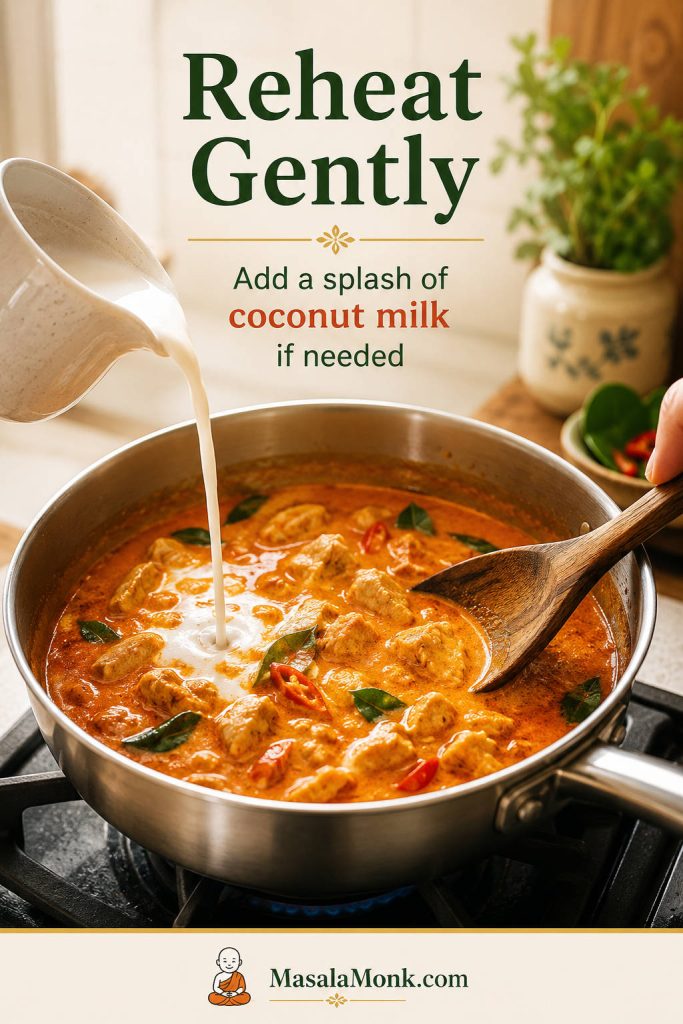
Reheat gently in a skillet over low heat with a splash of water, stock, or pasta water. Warm just until the shrimp is heated through. If storing shrimp scampi pasta, add a splash of liquid while reheating because the pasta will absorb sauce.
Freezing cooked shrimp scampi is not ideal. For prep ahead, clean and dry the shrimp, mince the garlic, chop the parsley, zest the lemon, and measure the sauce ingredients before cooking.
The best shrimp scampi feels simple at the table: tender shrimp, warm garlic, lemony butter, and just enough sauce left behind for bread or one last forkful of pasta.
Back to top · Back to recipe guide
Final Shrimp Scampi Texture Check
Right before the recipe card, this is the finished look to aim for: tender shrimp, bright lemon, loose pasta, and a clean buttery finish.
Shrimp Scampi Recipe
Here is the clean skillet version to cook from when you want tender shrimp, lemony garlic butter, and enough sauce for pasta or bread.
Description: Tender shrimp or prawns in a silky garlic butter lemon sauce, with a white wine or no-wine option and instructions for serving with pasta.
| Prep Time | 10 minutes |
| Cook Time | 10 minutes |
| Total Time | 20 minutes |
| Servings | 4 |
| Method | Skillet / sauté |
| Course | Dinner, Main Course, Seafood |
| Equipment | Wide skillet, pasta pot if using pasta, tongs, colander, zester, measuring cup |
Ingredients
- 500g / 1.1 lb large shrimp or prawns, peeled, deveined, and patted dry
- ½ teaspoon fine salt, plus more for pasta water and final adjustment
- Freshly ground black pepper, to taste
- 225g / 8 oz linguine, spaghetti, angel hair, or capellini, optional
- 3 tablespoons / 42g unsalted butter, divided
- 2 tablespoons / 30ml olive oil
- 5–6 medium garlic cloves, finely minced, or about 18–25g minced garlic
- ½ cup / 120ml dry white wine, or low-sodium seafood stock, chicken stock, or vegetable stock
- 2 tablespoons / 30ml fresh lemon juice
- 1 teaspoon lemon zest
- ¼ teaspoon red pepper flakes, optional
- ¼ cup chopped fresh parsley
- 1 cup / 240ml reserved pasta water, if using pasta
Instructions
- Prepare the shrimp. If using frozen shrimp, thaw fully. Drain well and pat dry with paper towels. Season with ½ teaspoon fine salt and black pepper.
- Cook the pasta, if using. Bring a large pot of salted water to a boil. Cook pasta 1–2 minutes less than the package directions. Reserve 1 cup / 240ml pasta water, then drain. Leave the pasta unrinsed.
- Sear the shrimp. Heat a wide skillet over medium-high heat. Add olive oil and 1 tablespoon butter. Add shrimp in one layer. Cook large shrimp for about 60–90 seconds per side, or up to 2 minutes per side for very large prawns. Transfer to a plate when almost cooked through. Cook in batches if needed.
- Cook the garlic. Lower heat to medium. Add minced garlic and red pepper flakes. Cook for 30–45 seconds, stirring constantly, until fragrant but not browned.
- Reduce the pan liquid. Add dry white wine or stock and simmer for 2–3 minutes, scraping the pan gently.
- Finish the sauce. Add lemon juice, lemon zest, and the remaining 2 tablespoons butter. Swirl or stir until the sauce comes together.
- Add pasta first, if using. Toss the drained pasta in the sauce. Pour in reserved pasta water a few tablespoons at a time until the noodles look loose, shiny, and lightly coated.
- Return the shrimp at the end. Add the shrimp back to the skillet and toss for 30–60 seconds, just until fully cooked. If not using pasta, return the shrimp directly after finishing the sauce.
- Finish and serve. Turn off the heat. Stir in parsley. Taste and adjust salt, pepper, and lemon. Serve immediately.
Notes
- Success cue: shrimp should be just opaque, garlic should be fragrant, and sauce should lightly coat rather than pool.
- For no-wine shrimp scampi, use low-sodium stock instead of wine and add up to ½ teaspoon white wine vinegar only if the sauce tastes flat.
- Use 225g / 8 oz pasta for a saucy shrimp scampi pasta. A full 450g / 1 lb pasta box needs double sauce.
- Smaller shrimp may cook in under 60 seconds per side. Very large prawns may need closer to 2 minutes per side.
- Cooked shrimp should go in only at the end and warm for 30–60 seconds.
- A split sauce can usually be saved with 1–2 teaspoons pasta water or warm water.
- When shrimp, stock, butter, or Parmesan is salty, start with less salt and adjust at the end.
- This dish is best served immediately. Leftovers can be refrigerated for up to 2 days, but reheating should be gentle.
Back to top · Back to recipe guide
FAQs
What is shrimp scampi?
Shrimp scampi is shrimp cooked quickly in garlic, butter, olive oil, lemon, white wine or stock, parsley, and sometimes red pepper flakes. It is often served with pasta or crusty bread.
Is prawn scampi the same as shrimp scampi?
For this recipe, yes. Shrimp and prawns can be cooked the same way, though very large prawns may need slightly more time.
What is scampi sauce made of?
Scampi sauce is usually made with butter, olive oil, garlic, dry white wine or stock, lemon juice, lemon zest, parsley, salt, pepper, and sometimes red pepper flakes.
Can I make shrimp scampi without wine?
Yes. Use low-sodium seafood stock, chicken stock, or vegetable stock, then add lemon and a tiny splash of white wine vinegar only if the sauce tastes flat.
What can I use instead of white wine?
Seafood stock gives the most natural flavor, chicken stock is the easiest pantry option, and vegetable stock keeps the sauce lighter.
What is the best wine for shrimp scampi?
Use a dry white wine that tastes crisp rather than sweet, such as Sauvignon Blanc, Pinot Grigio, dry unoaked Chardonnay, or dry vermouth.
Can I use frozen shrimp?
Yes. Thaw fully, drain well, and pat dry. Wet shrimp steam in the pan and can make the sauce thin.
Can I use cooked shrimp?
Yes, but add cooked shrimp only at the end for 30–60 seconds. It only needs to warm through.
What pasta goes best with shrimp scampi?
Linguine, spaghetti, angel hair, and capellini work best because they catch the light garlic butter lemon sauce.
How much pasta should I use?
Use 225g / 8 oz pasta for a shrimp-forward, saucy pasta. Use 450g / 1 lb only if you double the sauce.
Why is my shrimp rubbery?
Shrimp becomes rubbery when overcooked. Pull it when it is almost done and finish it briefly in the sauce.
Why is my shrimp scampi sauce thin?
The most common reason is wet shrimp. Simmer the sauce briefly, swirl in a little butter, and dry the shrimp better next time.
Why did my scampi sauce split?
The butter and liquid may have separated. Add 1–2 teaspoons pasta water or warm water and swirl until smooth again.
Can I make shrimp scampi ahead of time?
It is best cooked fresh, but you can prep the shrimp, garlic, parsley, lemon, and measured sauce ingredients ahead so the skillet cooking takes only minutes.
Can I make creamy shrimp scampi?
Yes. Add ¼ to ½ cup / 60–120ml heavy cream after reducing the wine or stock, then keep the heat low so the sauce does not split.
Can I bake shrimp scampi?
Yes. Bake shrimp with garlic butter, lemon, wine or stock, and optional breadcrumbs at 220°C / 425°F for 8–12 minutes, just until pink, opaque, and loosely curled.
Can I make shrimp scampi in the air fryer?
Yes. Air fry seasoned shrimp with butter, olive oil, garlic, and lemon at about 190°C / 370°F for 5–6 minutes, just until pink, opaque, and loosely curled.
What do you serve with shrimp scampi?
Serve it with pasta, crusty bread, garlic bread, rice, orzo, roasted vegetables, zucchini noodles, or a green salad.