Posted on 2 Comments

Creamy Cauliflower Soup—Keto-Friendly, Ultra-Comforting (Vegan Option)

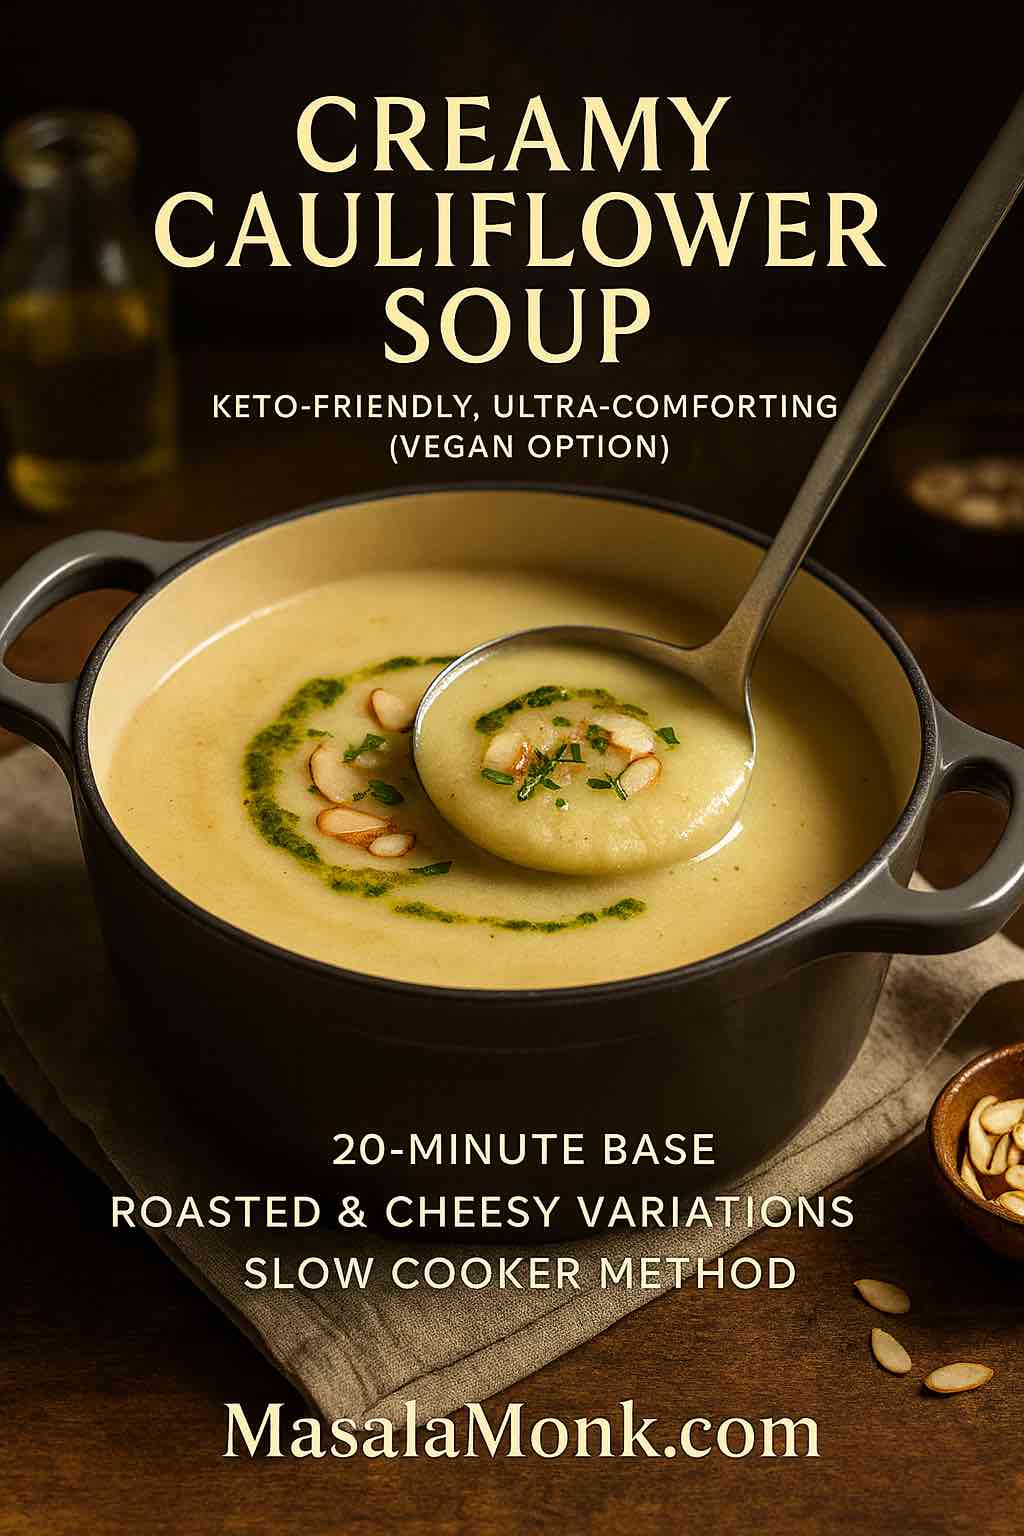
Portrait cover of creamy cauliflower soup in a charcoal Dutch oven, a ladle lifting a silky spoonful; topped with herb oil, toasted almonds, and chives—keto-friendly with a vegan option.

Some soups do their job and move along. However, this one lingers—in the best way. Creamy Cauliflower Soup has a quiet kind of confidence: a short ingredient list, a steady method, and that velvety finish that makes a bowl feel like a small kindness. Moreover, it’s an easy weeknight recipe you can cook on a Tuesday and still be proud to serve on a Sunday. The base method is simple and reliable; then, with just a few tweaks, you can nudge it cheesy, roast-forward, leek-fragrant, broccoli-green, slow-cooker mellow, minimalist, or gently spicy.

Meanwhile, we’ll keep the tone warm and the directions practical. You’ll see clear steps, small tips that make a big difference, and smooth transitions so the post reads like a conversation in your kitchen. Most importantly, you’ll get a flexible, delicious Creamy Cauliflower Soup blueprint that adapts to keto, vegetarian, and vegan tables without losing its creamy heart.

If you are curious to know more about Cauliflower in Keto, and what other ways you can use it, do read our post : Incorporating Cauliflower into Your Keto Diet: A Guide to Low-Carb Deliciousness. For a quick nutrition snapshot, see cauliflower nutrition facts (USDA).


Why Creamy Cauliflower Soup Works (and When)

First, cauliflower is a naturally mild vegetable that welcomes flavor—from onions and leeks to herbs, spices, and good stock. Second, blending transforms humble florets into something silky and soothing. Third, the method is forgiving: even if you skip the cream, Creamy Cauliflower Soup still tastes luxurious if you blend thoroughly and season with intention. Consequently, it’s a recipe that fits early fall cozy nights, deep winter meal prep, and even quick spring dinners when you want comfort without heaviness. For the technique behind that silkiness, here’s how to make creamy soups without flour.

Additionally, this soup scales beautifully. You can double it for gatherings, halve it for a solo supper, or batch it for lunch all week. Finally, it holds up to different eating styles with minimal changes—so the whole table can eat happily together.


Ingredients for Cauliflower Soup

Here are the ingredients for cauliflower soup most home kitchens already have:

  • 2 tablespoons olive oil or butter
  • 1 medium onion, diced (or 2 leeks, white and light green parts only)
  • 3 garlic cloves, minced
  • 1 medium head cauliflower (about 700–800 g), cut into florets
  • 3 cups unsalted vegetable or chicken stock (plus a splash to thin)
  • ½ to ¾ cup heavy cream or coconut milk (optional, for extra silk)
  • ½ teaspoon freshly ground black pepper, and salt to taste
  • 1 lemon wedge, to finish

In addition, if you prefer a vegetarian bowl, choose vegetable stock. Alternatively, if you’re making a fully plant-based version, use olive oil and coconut milk (or cashew cream) instead of dairy for a vegan Creamy Cauliflower Soup. For low-carb readers, this naturally leans toward a keto approach—if you’re curious to learn more about keto, so browse our post Keto Diet: Most Frequently Asked Questions.


The Base: Easy, Creamy Cauliflower Soup

Serves: 4 bowls
Active Time: 15–20 minutes
Total Time: 20–30 minutes

  1. Soften the Aromatics. Warm olive oil or butter over medium heat. Next, add the onion with a pinch of salt and cook, stirring now and then, until translucent and sweet, 3–4 minutes. Add the garlic and cook just 30 seconds—enough to wake it up.
  2. Simmer the Cauliflower. Add the florets and stock. Bring to a boil, then lower to a lively simmer. Cook until a knife slides through the stems easily, about 10–12 minutes.
  3. Blend to Silk. Turn off the heat. Use an immersion blender to puree until completely smooth. (If using a stand blender, vent the lid and blend in batches.)
  4. Enrich and Balance. Stir in cream or coconut milk if you’re using it. Afterward, taste and season with salt and plenty of black pepper. Finish with a squeeze of lemon to brighten. Thin with a splash of stock to your perfect consistency.
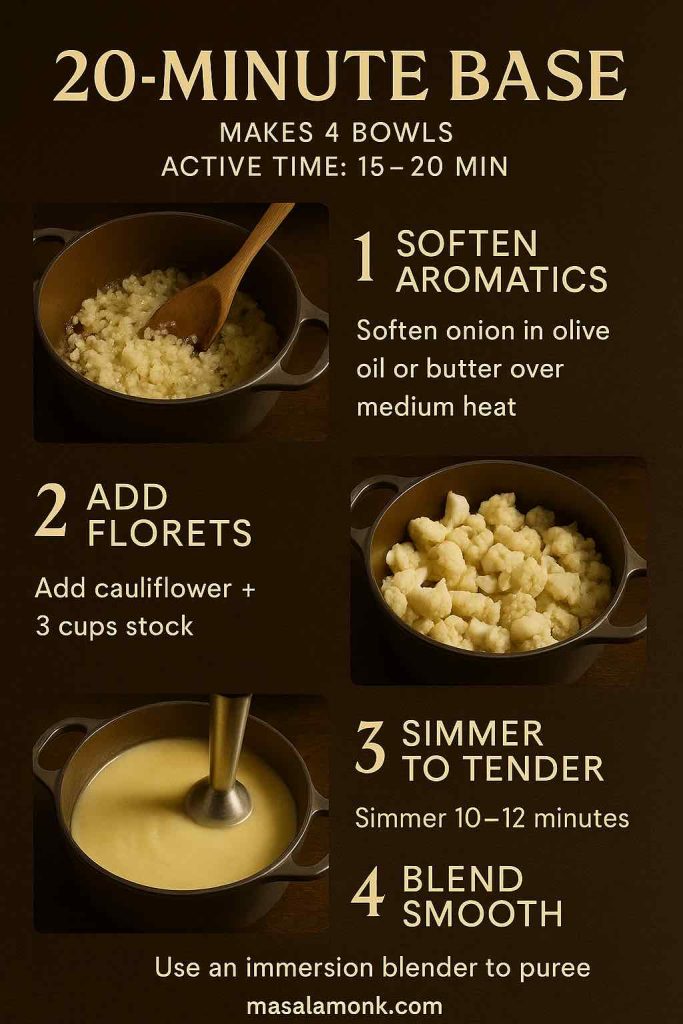
Four-step 20-minute creamy cauliflower soup—soften aromatics, add florets and stock, simmer 10–12 minutes, blend smooth.
Weeknight blueprint: four quick steps to a silky base you can spin into roasted, cheesy, spicy, or vegan versions.

Texture Tip: For that restaurant-smooth Creamy Cauliflower Soup, blend a full minute longer than you think, then pass the soup through a fine mesh sieve. Admittedly, it’s optional; nevertheless, the result is luxurious.

Basic Cauliflower Soup Shortcut: If you’re in a minimalist mood, skip the cream and keep the texture slightly rustic. Even so, once blended, it still reads as a simple cream of cauliflower soup—light yet satisfying.


Flavor Fundamentals (So Small Moves Taste Big)

To begin with, sweat aromatics gently; browned onions or leeks can turn bitter in a delicate puree. Furthermore, season in layers: a pinch early to draw out sweetness, another check after blending, and a final brightening with lemon. Similarly, blend longer than you think you need—texture carries aroma to your palate. Finally, garnish for contrast: something crisp (nuts or seeds), something green (herbs), and a little shine (olive oil or chili oil). Altogether, these moves make every bowl of Creamy Cauliflower Soup feel complete.


Roasted Cauliflower Soup

When you want deeper, toastier notes, roast the florets first. Toss with olive oil, salt, and pepper; spread on a sheet pan and roast at 220°C / 425°F for 25–30 minutes, until the edges are well browned. Meanwhile, make the base as written. Then, blend the roasted florets into the stock, onion, and garlic. The color leans golden-beige, the flavor turns nutty, and the whole bowl feels weekend-special. For a primer on browning and tray spacing, see how to roast vegetables well.
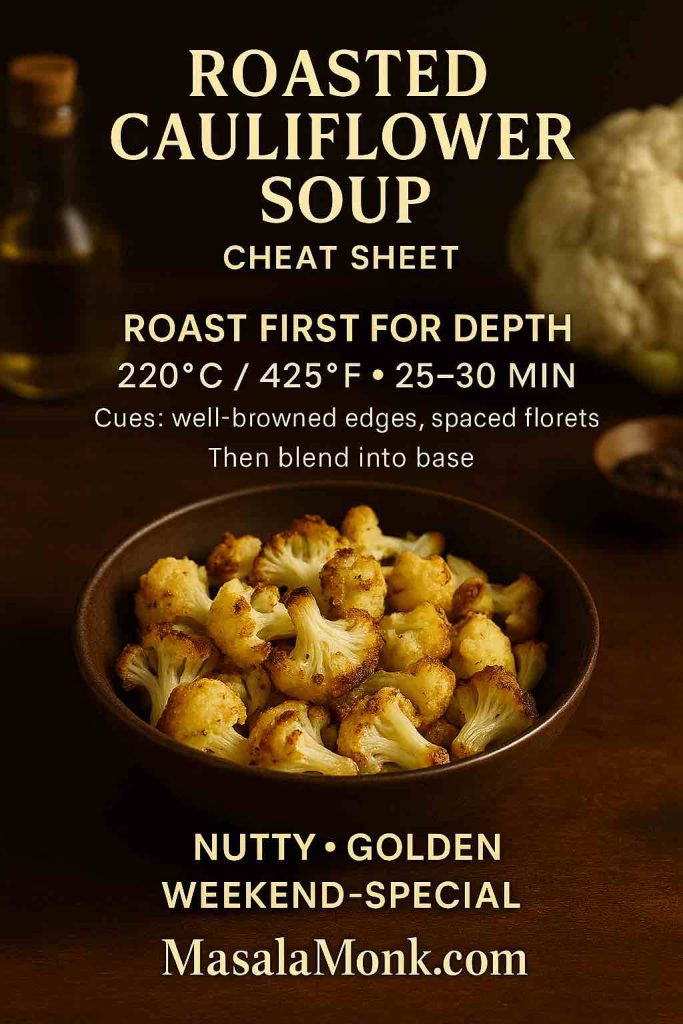
Roasted cauliflower soup guide showing roast-first cues—220°C/425°F for 25–30 minutes, well-browned edges, spaced florets.
Roast florets hot and spaced for nutty depth; then blend into the base for a golden, weekend-special bowl.

Finishing Move: Drizzle each serving with a teaspoon of rosemary-infused olive oil (warm oil with a sprig, cool, then strain) and add a pinch of flaky salt. Additionally, hold back a few roasted florets as garnish so every spoonful gets silky base plus a little texture.


Cauliflower & Cheese Soup

Cheese brings nostalgic comfort. Therefore, once your base is blended and back over low heat, stir in 1 to 1½ cups grated sharp cheddar until fully melted and smooth. For depth, add 2 tablespoons finely grated Parmesan. Importantly, keep the heat gentle and avoid a simmer so the cheese stays glossy.
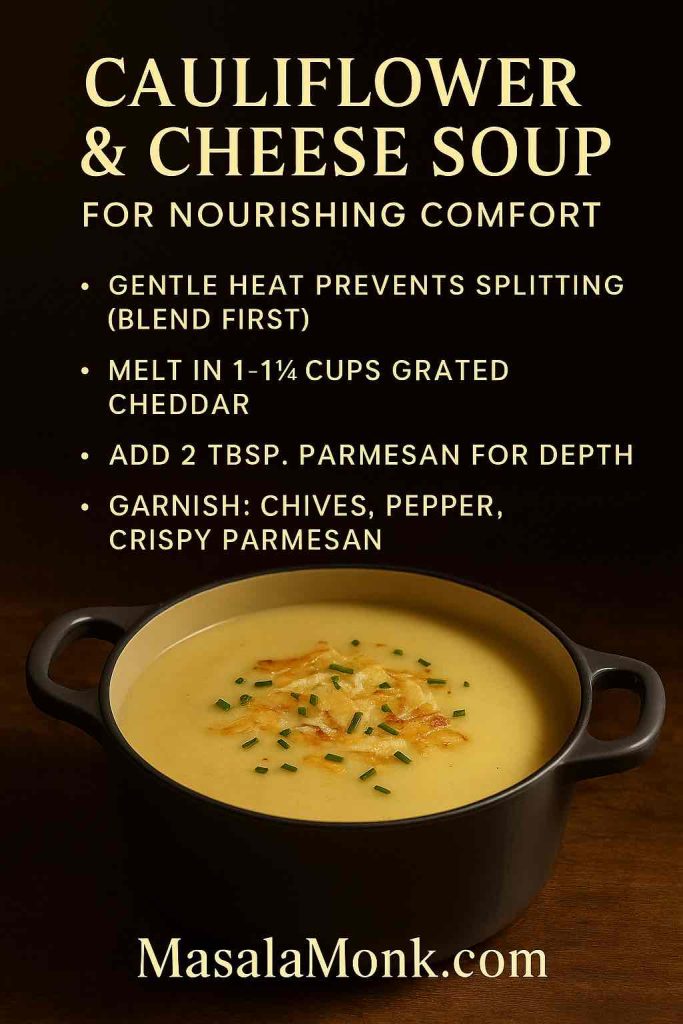
Creamy cauliflower and cheese soup card—blend first, melt in 1–1½ cups cheddar with 2 tbsp Parmesan over gentle heat.
Add grated cheese after blending and keep heat low for a glossy, restaurant-smooth finish.

Make It Extra: A handful of chives, a twist of pepper, and a few shards of crisped Parmesan on top. For a lower-carb crunch, toasted almonds or seed crackers work beautifully. If you’re tracking carbs in dairy, this quick guide can help you choose wisely: Carbs in Cheese (Keto Perspective).


Cauliflower & Leek Soup

Leeks have a soft perfume that suits creamy soups. Accordingly, swap onion for 2 leeks, sliced thin and rinsed well. Cook them slowly in olive oil with a pinch of salt until tender but pale; browning makes leeks a bit assertive for this style. After that, proceed with the base method. The result is a pale, elegant Cauliflower & Leek Soup—or, as some home cooks say, a comforting cauli and leek soup.

Optional Finish: A spoon of crème fraîche (or coconut cream) right before serving, plus dill or chives. Alternatively, a little lemon zest brightens beautifully.


Broccoli & Cauliflower Soup

For a heartier green bowl, use about half broccoli, half cauliflower. To keep the color bright, add the broccoli a couple of minutes after the cauliflower. Then, blend smooth for a familiar Broccoli & Cauliflower Soup that eats like a sweater-weather staple. If you’d like extra body, add a small peeled potato to the simmer (skip if you’re keeping it very low-carb).
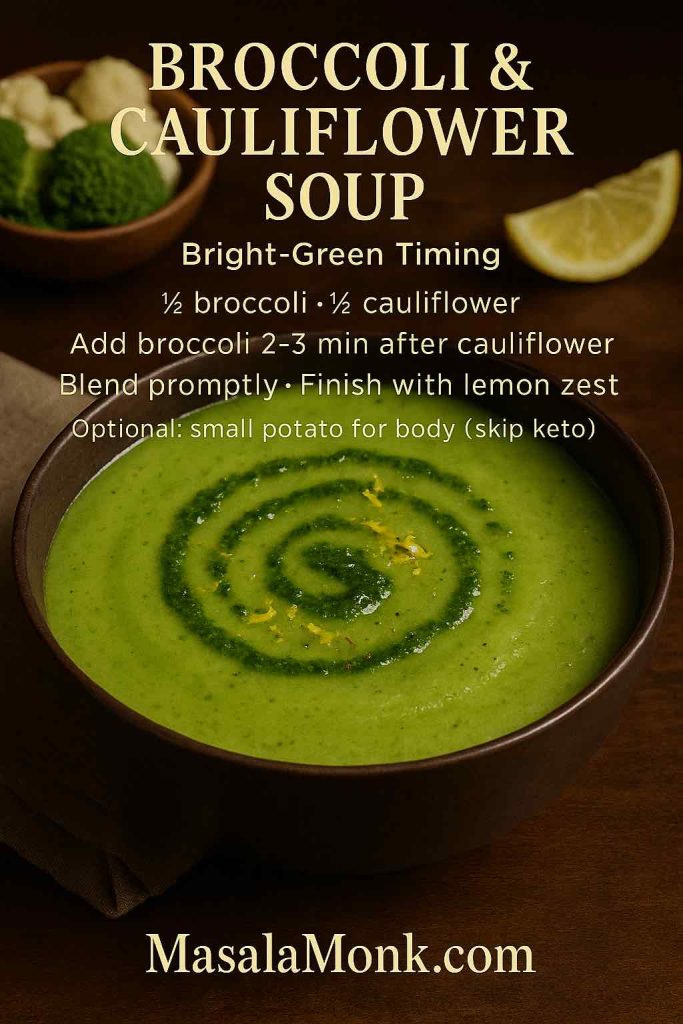
Bright-green broccoli and cauliflower soup with pesto swirl; card notes to add broccoli 2–3 minutes after cauliflower and blend promptly.
For vivid color, add broccoli late and blend right away; finish with lemon zest for lift.

Serving Idea: Lemon zest and shaved Parmesan lift the green notes without getting in the way. Alternatively, swirl in a spoon of pesto for a leafy accent.

Read more about: <strong>The Broccoli – Nutrition, Benefits, and 5 Practical Ways for Weight Loss.


Slow Cooker Cauliflower Soup (Crockpot)

Some days, dinner needs to take care of itself. In that case, add everything except the cream to the slow cooker and cook on LOW for 4–6 hours or HIGH for 2–3 hours, until the florets are soft. Blend right in the crock if your stick blender fits; otherwise, carefully transfer to a blender and puree in batches. Afterward, stir in cream or coconut milk, season, and finish with lemon. This slow cooker cauliflower soup—also known as cauliflower soup crockpot in some kitchens—tastes like you worked all afternoon, even if you didn’t. If you are looking to amp up your plant based protein game while meal prepping, have a look at 10 Delicious Plant-Based Protein Sources for High-Protein Meal Prep.
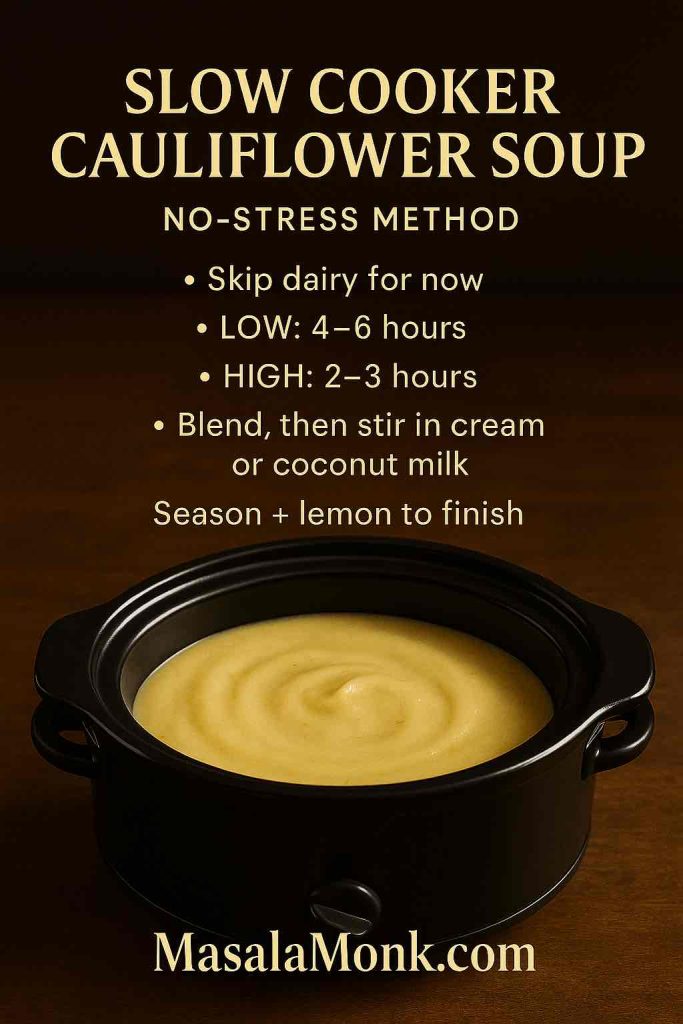
Slow cooker cauliflower soup instructions—LOW 4–6 hours or HIGH 2–3 hours; blend, then stir in cream or coconut milk; season with lemon.
Hands-off meal prep: load the crock, cook, blend silky, and finish with dairy and lemon at the end.

20-Minute, 3-Ingredient, and 5-Ingredient Options

20-Minute Cauliflower Soup: Cut florets small, keep the simmer lively, and blend hot with an immersion blender. Additionally, warm your bowls with hot water beforehand; that small step makes weeknight Creamy Cauliflower Soup feel special.

3-Ingredient Cauliflower Soup: Cauliflower + good stock + olive oil. That’s it. Even with so little, blend very smooth, season assertively, and finish with lemon. This minimalist path yields a lovely healthy cauliflower soup that still tastes complete.

5-Ingredient Cauliflower Soup: The minimalist version plus onion for sweetness and cream (or coconut milk) for silk. Consequently, it reads simple, but the mouthfeel feels restaurant-worthy.


Spicy Cauliflower Soup

For gentle heat, bloom ½ to 1 teaspoon chili flakes and ½ teaspoon smoked paprika in the oil before you add the onion. Then, proceed with the base. After blending, taste and add a tiny splash of apple cider vinegar to bring the flavors forward. Finally, finish each bowl with a light swirl of chili oil. If the spice edges sharper than you planned, simply round it out with a tablespoon of cream or coconut milk. Either way, the result is a lively interpretation of Creamy Cauliflower Soup that still comforts.
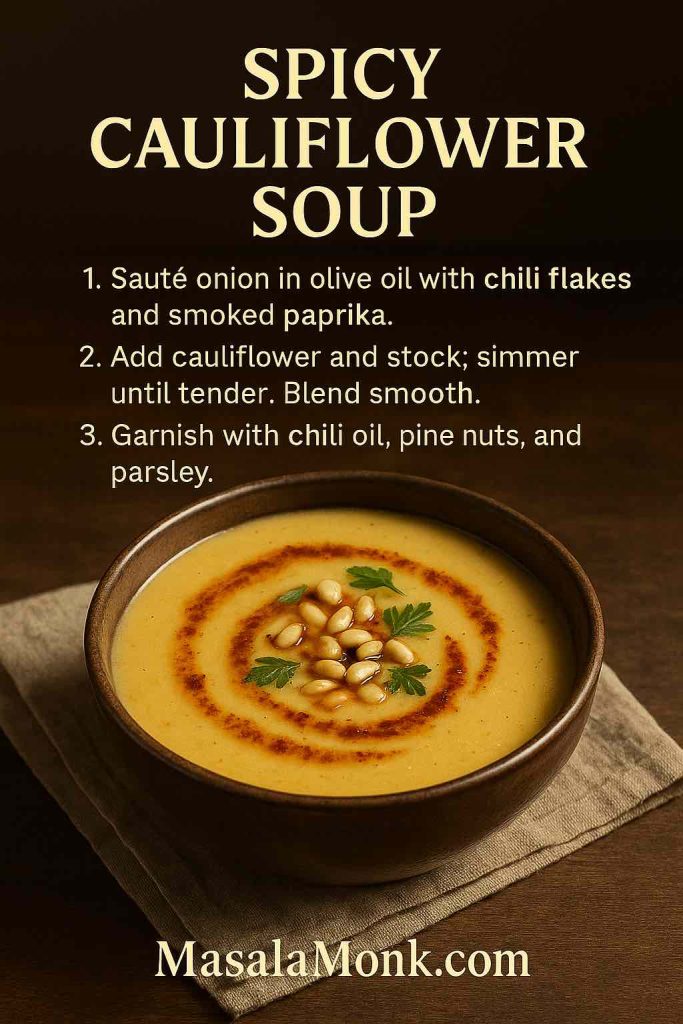
Spicy cauliflower soup card—bloom chili flakes and smoked paprika, blend smooth, garnish with chili oil, pine nuts, and parsley.
Gentle heat, big flavor: bloom spices first, then balance with a swirl of chili oil and a pinch of acid.

Carrot & Cauliflower Soup (Optional)

Add 2 cups chopped carrots with the florets and proceed with the base. As a result, you’ll get a sunny, orange-gold bowl with quiet sweetness. A spoon of crème fraîche or coconut milk ties it together; a little cumin warms it without turning the soup into something entirely different.


Cauliflower Bisque (Optional)

If you like a classic cauliflower bisque, enrich the blended soup with a splash of cream and the gentlest whisper of dry sherry. Keep it subtle; the bisque should still taste like cauliflower first. To finish, try chives and a touch of white pepper. Altogether, it feels like a dinner-party first course that’s secretly easy.


Eating Styles: Keto, Vegetarian, and Vegan

Keto Cauliflower Soup: Start with butter or olive oil, then enrich with heavy cream. Keep stock unsweetened, skip flour or starch, and finish with a little cheddar or Parmesan if cheese fits your plan. Additionally, if cheese is your topping of choice, this helpful reference on dairy macros can guide your picks: Carbs in Cheese (Keto Perspective).
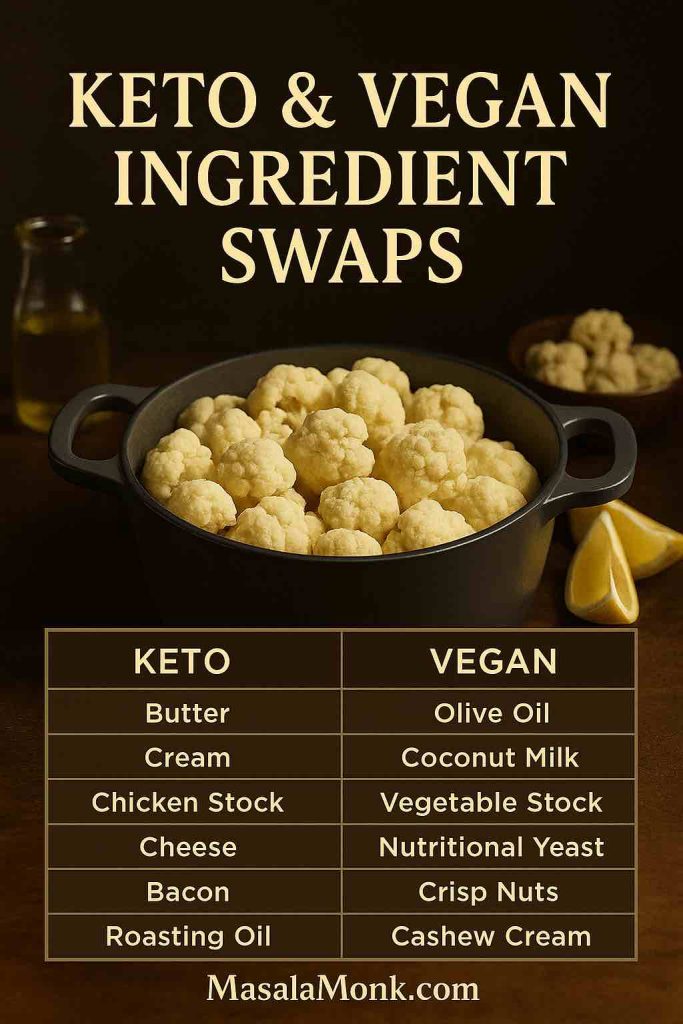
Ingredient swap chart for cauliflower soup—keto (butter, cream, chicken stock, cheese, bacon) vs vegan (olive oil, coconut milk, veg stock, nutritional yeast, crisp nuts, cashew cream).
Choose your lane in seconds—simple swaps keep the method the same while matching keto or vegan goals.

Vegetarian Cauliflower Soup: Use vegetable stock and finish with cream, milk, or a swirl of olive oil. That way, it stays silky and satisfying without chicken stock.

Vegan Cauliflower Soup: Use olive oil. Replace cream with coconut milk or cashew cream (blend soaked cashews with hot water until perfectly smooth). Notably, nutritional yeast can add a gentle “cheesy” note; lemon and herbs brighten beautifully. And if you’re in a plant-based groove, these soup ideas are a great next stop: Vegan Lentil Soup Recipes.


Serving Ideas and Toppings

Little finishes make a puree feel complete. Therefore, mix and match:

  • Herb Oils: Rosemary or thyme gently infused into olive oil, then drizzled over each bowl.
  • Crisp and Crunchy: Toasted almonds, hazelnuts, pine nuts, or seed crackers.
  • Cheese Shower: Parmesan or Pecorino for savoriness; cheddar shards for comfort.
  • Green Notes: Snipped chives, parsley, dill, or a handful of baby spinach blended in for color.
  • Hold-Back Roasted Florets: If you made the roasted version, save a few for garnish—soft base, crisp top.
  • Bright Finishes: Lemon juice and zest lift every version, especially vegan bowls.

Side Ideas: For low-carb nights, consider a cucumber–dill salad or roasted mushrooms with thyme. Alternatively, if your table isn’t strictly low-carb, a warm loaf or garlic croutons makes dunking irresistible. Moreover, if celery comes up as a crunchy add-in or side, this friendly overview answers the usual questions: Celery on Keto.


Ingredient Swaps and Pantry Notes

  • Onion vs. Leek: Onion gives sturdy sweetness; leek brings delicate perfume. Either way, both are right—choose your mood.
  • Stock Choices: Vegetable stock keeps things vegetarian/vegan; chicken stock tilts toward Sunday-supper richness. For control, low-sodium helps you stay in charge of seasoning.
  • Creamy Elements: Heavy cream is plush, coconut milk adds gentle sweetness, and cashew cream is a vegan power move.
  • Cheese Options: Cheddar melts smoothly; Parmesan adds umami; Gruyère feels a little fancy.
  • Aromatics: A stick of celery, a bay leaf, or a sprig of thyme can join the simmer and hop out before blending.
  • Add-Ins: A spoon of pesto, a dusting of smoked paprika, or a few sweet peas (skip peas if you’re very low-carb). For thickness on the fly, adding riced cauliflower to soup works beautifully. Plus, if you’re bulking soups while keeping carbs in check, see these smart ideas: Keto Beans: 5 Varieties That Won’t Ruin Your Diet.

Make-Ahead, Storage, and Freezing

  • Chill: Cool, then refrigerate in a sealed container for up to 4 days.
  • Freeze: For the smoothest thaw, freeze without dairy, then stir in cream or coconut milk after reheating. Additionally, freeze up to 2 months in flat, labeled bags—they stack neatly and thaw faster. Here’s how to freeze soup flat for easy storage.
  • Reheat: Warm gently on the stovetop. If the soup thickens, loosen with a splash of stock or water and re-season with salt and pepper.

For authoritative guidance, see USDA: Freezing and Food Safety and the Cold Food Storage Chart.

Meanwhile, if you’re batch-cooking for variety, pair this with something hearty and plant-based from our Red Lentil Soup Collection. That way, the week feels diverse without complicating your shopping list.


Troubleshooting and Tiny Adjustments

  • Too Thin? Simmer 3–5 minutes to reduce, or add a small handful of grated cheddar if you’re steering cheesy.
  • Too Thick? Add hot stock a splash at a time and blend back to silky.
  • Needs “Something”? It’s usually acid and salt. Therefore, try lemon, then a pinch of salt, then a grind of pepper.
  • Cheese Split? Take the pot off heat and whisk in a spoon of cream or coconut milk. Generally, gentle heat keeps cheese emulsified.
  • Want Extra Body Without Cream? Blend in a few cauliflower florets reserved from the pot or a spoon of cashew cream; both boost creaminess while keeping flavors clean.

A Gentle Cooking Plan That Actually Happens

Monday: Pick up a cauliflower, an onion or leeks, garlic, and stock.
Tuesday: Make the base—20 minutes, tops—and portion half for lunch.
Wednesday: Rewarm part of the base and whisk in cheddar for Cauliflower & Cheese Soup.
Weekend: Roast a fresh batch of florets and turn the rest into Roasted Cauliflower Soup with an herby oil drizzle. In short, one pot, two moods, very little effort.


More Cauliflower You’ll Love

When people fall for Creamy Cauliflower Soup, they often want another classic. Accordingly, you can browse these:


Printable Core Recipe (Reader-Friendly Summary)

Creamy Cauliflower Soup (Keto, Vegetarian, and Vegan Options)

  • 2 tbsp olive oil or butter
  • 1 onion (or 2 leeks), 3 garlic cloves
  • 1 medium cauliflower (700–800 g), florets
  • 3 cups unsalted vegetable or chicken stock
  • ½–¾ cup cream or coconut milk (optional)
  • Salt & black pepper, lemon to finish

Method:

  1. Soften onion in oil, 3–4 min; add garlic 30 sec.
  2. Add cauliflower + stock; simmer 10–12 min until very tender.
  3. Blend completely smooth.
  4. Stir in cream or coconut milk (if using). Season and finish with lemon.

Variations:

  • Roasted Cauliflower Soup: Roast florets 25–30 min at 220°C/425°F, then proceed.
  • Cauliflower & Cheese Soup: Stir in 1–1½ cups grated cheddar + 2 tbsp Parmesan off heat.
  • Cauliflower & Leek Soup: Swap onion for 2 leeks; sweat gently without browning.
  • Broccoli & Cauliflower Soup: Use half broccoli; add a couple of minutes after cauliflower.
  • Slow Cooker Cauliflower Soup: Everything except dairy, LOW 4–6 h or HIGH 2–3 h; blend; add dairy.
  • Spicy Cauliflower Soup: Bloom chili flakes + smoked paprika; finish with chili oil.
  • 3-Ingredient: Cauliflower + stock + olive oil; blend and season.
  • 5-Ingredient: Add onion + cream (or coconut milk).

Closing Notes (and a Gentle Nudge)

Ultimately, the secret to Creamy Cauliflower Soup isn’t a long ingredient list; instead, it’s attention in the right places: softly sweated aromatics, patient blending, layered seasoning, and a bright finish. Because of that, even a minimalist bowl feels generous. So, keep riced cauliflower in the freezer, stash a carton of good stock in the pantry, and give yourself permission to cook simply. Before long, you’ll have a dependable, cozy staple that adapts to every season and every table.


FAQs

1) What makes Creamy Cauliflower Soup so silky without flour?

Because cauliflower blends beautifully, the puree turns naturally velvety. Moreover, when you sweat the onions or leeks gently, blend a bit longer than you think, and finish with a splash of cream or coconut milk, the result is a luxurious Creamy Cauliflower Soup—no flour or starch required.

2) Can I make Creamy Cauliflower Soup dairy-free or vegan?

Absolutely. Simply use olive oil instead of butter and, additionally, swap cream for coconut milk or cashew cream. As a result, you’ll keep the same cozy texture while the soup stays fully plant-based.

3) How do I keep it keto-friendly without losing the creamy vibe?

It’s already low in carbs, so you’re close. Then, for extra richness, finish with heavy cream and a sprinkle of cheese if you like. Meanwhile, avoid flour or potatoes, and taste for salt and lemon so the flavors stay bright.

4) What are the essential ingredients for cauliflower soup?

You’ll need olive oil or butter, onion or leeks, garlic, cauliflower, stock, pepper, salt, and a lemon wedge. Additionally, cream or coconut milk is optional; however, it does add that signature silk to Creamy Cauliflower Soup.

5) How can I make it in 20 minutes on a busy weeknight?

First, cut florets small. Next, bring the pot to a lively simmer and cook until the stems are easily pierced. Finally, blend right in the pot with an immersion blender. Consequently, you’ll have Creamy Cauliflower Soup on the table fast.

6) What’s the difference between the basic soup and a true “cream of cauliflower” version?

The basic version is blended and naturally creamy; however, the cream of cauliflower soup includes an enriching step with cream or coconut milk. In short, both are silky—one is simply richer.

7) How do I make Roasted Cauliflower Soup for deeper flavor?

Toss florets with oil, salt, and pepper; then roast at 220°C / 425°F until golden at the edges. Meanwhile, build the base with onion and garlic, and finally blend in the roasted florets. As a result, you’ll get a nutty, weekend-special bowl.

8) What’s the best way to make Cauliflower & Cheese Soup without it splitting?

Keep the pot over low heat and add grated cheese after blending. Additionally, avoid boiling once the cheese goes in. This gentle approach keeps the soup glossy, smooth, and wonderfully cheesy.

9) Can I use leeks instead of onions?

Yes, and they’re lovely. Leeks bring a softer aroma; therefore, sweat them slowly without browning. After that, proceed as usual and you’ll get an elegant Cauliflower & Leek Soup with a calm, café-style vibe.

10) How do I make Broccoli & Cauliflower Soup that stays bright green?

Add broccoli two to three minutes after the cauliflower so it doesn’t overcook. Then, blend promptly and finish with lemon zest. Consequently, the color stays vivid and the flavor remains fresh.

11) Is there a slow-cooker (crockpot) method that still tastes rich?

Definitely. Place everything except dairy in the slow cooker and cook on LOW 4–6 hours or HIGH 2–3 hours. Then blend, stir in cream or coconut milk, and, finally, brighten with lemon. Meanwhile, the hands-off approach makes meal prep effortless.

12) What are easy minimalist options—3-ingredient or 5-ingredient?

For 3-ingredient, use cauliflower, good stock, and olive oil; blend and season assertively. For 5-ingredient, simply add onion and cream (or coconut milk). Even so, both taste pleasantly complete.

13) How can I adjust the spice without overpowering the soup?

Bloom chili flakes and smoked paprika in the oil at the start. After blending, taste and, if needed, balance with a tiny splash of apple cider vinegar. Alternatively, soften heat with a tablespoon of cream or coconut milk.

14) What’s the easiest way to fix texture—too thick or too thin?

If it’s too thick, add hot stock a splash at a time and blend again. Conversely, if it’s too thin, simmer briefly to reduce or melt in a small handful of cheese (for a cheesy path). Either way, season again at the end.

15) Can I freeze Creamy Cauliflower Soup?

Yes. For best results, freeze it without dairy, and then stir in cream or coconut milk after reheating. Additionally, cool completely first and freeze flat in labeled bags; this method stacks neatly and thaws quickly.

16) How long does it keep in the fridge, and how should I reheat it?

It keeps up to 4 days chilled. When reheating, warm gently over medium-low heat. Moreover, if the soup has thickened, loosen it with a splash of stock or water; then taste and adjust salt and lemon.

17) Which garnishes make Creamy Cauliflower Soup feel restaurant-worthy?

Think contrast. For instance, add herb oil, toasted nuts or seeds, a cheese shower, and fresh herbs. Additionally, holding back a few roasted florets for the top gives every spoonful a little texture.

18) How do I boost protein without changing the flavor too much?

Stir in shredded rotisserie chicken after blending, or, alternatively, top each bowl with a soft-boiled egg. Meanwhile, keep the seasoning balanced so the soup still tastes like cauliflower first.

19) Can I make a lighter bisque-style version?

Certainly. Enrich the blended soup with a modest splash of cream and, optionally, a whisper of dry sherry. Consequently, you’ll get a classic cauliflower bisque that feels dinner-party elegant yet remains simple.

20) What’s the single most important step for the best flavor?

Blend thoroughly and finish bright. In other words, pureeing until silky and adding lemon at the end—plus a pinch of salt—turns a good Creamy Cauliflower Soup into a truly memorable one.
Posted on 2 Comments

Hearty and Nourishing: 5 Vegan Lentil Soup Recipes for Weight Loss

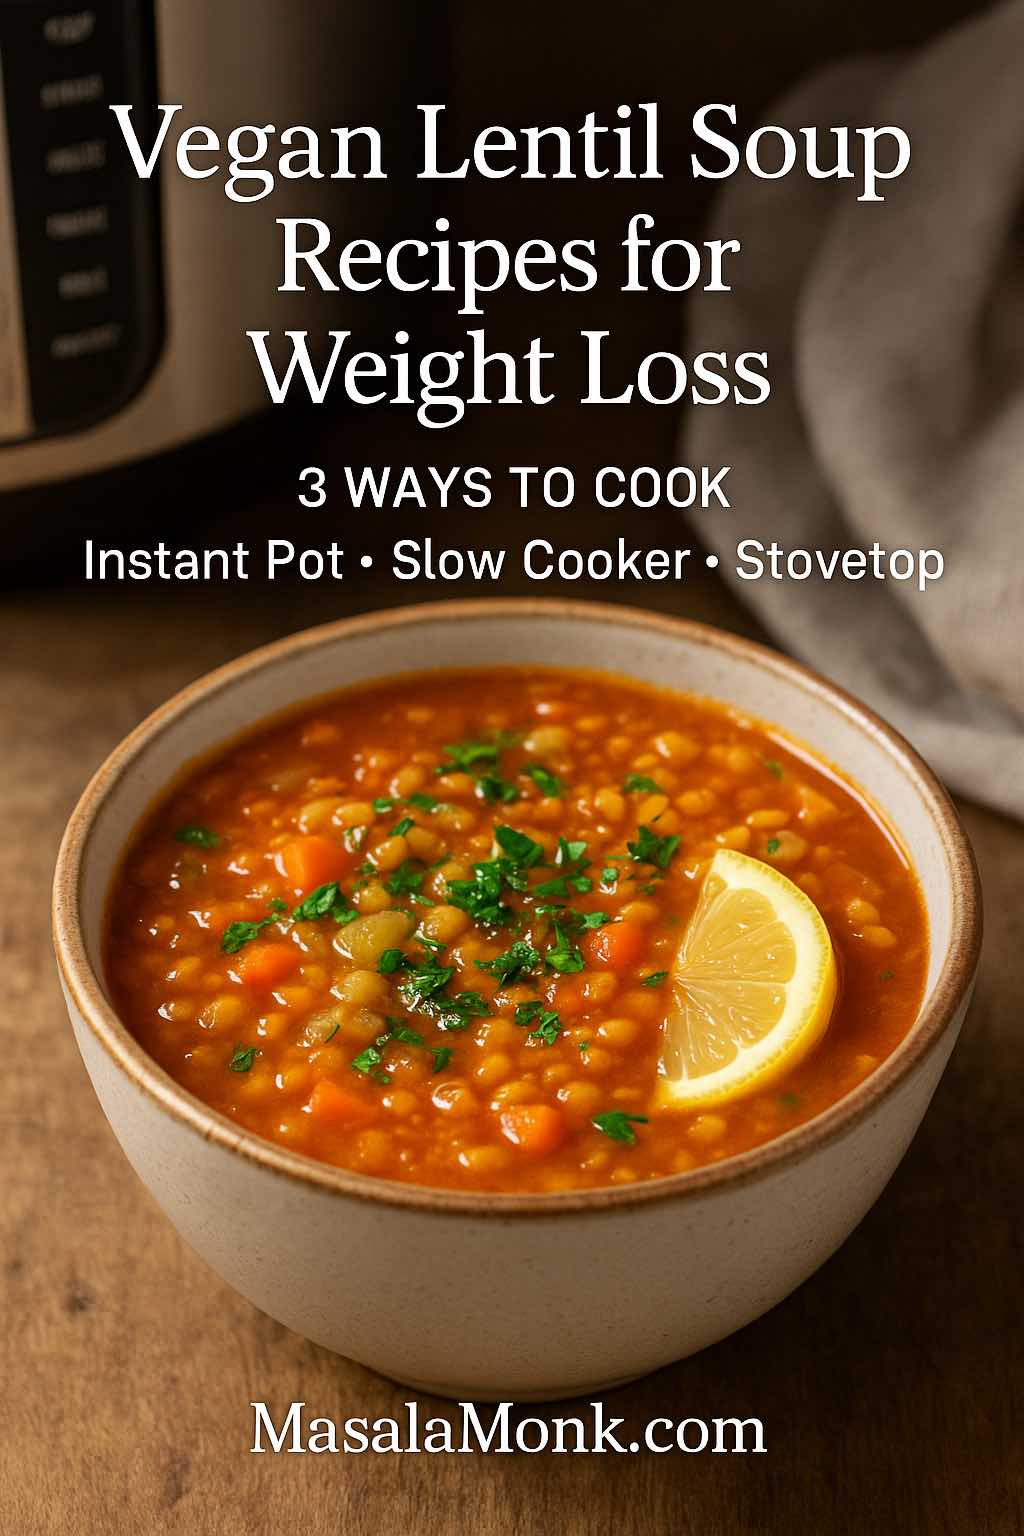
Vegan Lentil Soup Recipes for Weight Loss 3 WAYS TO COOK Instant Pot • Slow Cooker • Stovetop

There’s something deeply comforting about a bowl of warm soup — especially when it’s both delicious and good for you. That’s why vegan lentil soup recipes for weight loss have become a favorite among health-conscious eaters, busy families, and anyone craving a wholesome, satisfying meal. For a quick primer on why lentil soup fits weight-loss goals, see this overview from Healthline on lentil soup and weight management: Lentil Soup for Weight Loss: Does It Help?. (Healthline)

Unlike many “diet foods” that leave you hungry an hour later, lentil soups are hearty, nourishing, and full of flavor. They give you the best of both worlds: comfort food that feels indulgent, and nutrition that supports your goals. Moreover, lentils are incredibly versatile — they pair beautifully with Mediterranean spices, creamy coconut curry flavors, or simple garden vegetables.

In the recipes below, you’ll find five variations designed to keep your meals exciting: from a quick Instant Pot red lentil detox soup to a slow-cooked coconut curry green lentil soup, and even a Mediterranean-style vegetable-packed version. Each one is completely plant-based, loaded with protein and fiber, and thoughtfully crafted to be filling yet light.

While you are here, also have a look at our detailed post: Are Lentils Good for Weight Loss? Benefits, Recipes, and Science Explained

So, if you’re ready for meals that will warm your body, nourish your soul, and help you on your weight-loss journey, let’s dive into the wonderful world of lentils.


Why Vegan Lentil Soup Recipes for Weight Loss Really Work

Lentils are often described as a “superfood,” and for good reason. One cup of cooked lentils provides roughly 18g protein and 15–16g fiber—a combo linked with fullness and steady energy. Source: University of Rochester Medical Center (nutrition table): Lentils, cooked, 1 cup. (University of Rochester Medical Center)

In addition, lentils are naturally low in fat and cholesterol-free, making them heart-friendly as well as waistline-friendly. The Cleveland Clinic notes that the soluble fiber in lentils can help lower LDL cholesterol, support blood-sugar control, and enhance satiety—key reasons they work so well in weight-management meals: Health Benefits of Lentils. (Cleveland Clinic)

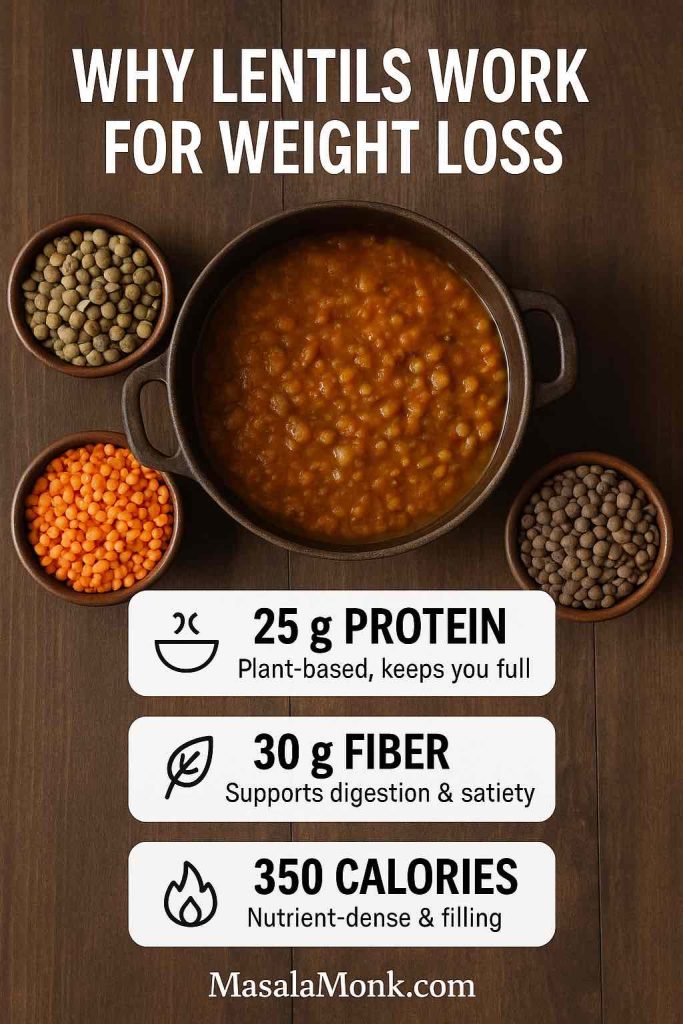
Nutritional benefits of lentils for weight loss – high protein, high fiber, and low-calorie.
Because lentils are packed with protein and fiber while staying low in calories, they naturally keep you full and energized. That’s why, when you’re building meals for weight loss, lentils transition beautifully into hearty soups that satisfy both body and soul.

Another reason vegan lentil soup recipes are ideal for weight loss is their adaptability. For example, if you want a light detox-friendly meal, red lentils with turmeric and ginger work beautifully – see our primer on red lentils for weight loss. If you prefer something more hearty, green or brown lentils hold their shape well and can turn a simple vegetable broth into a full meal.

Moreover, lentil soups are perfect for meal prep – for planning help, tap our post – plant-based high-protein meal-prep ideas using lentils. You can cook a big batch, store it in the fridge, and reheat portions throughout the week. This makes it easier to stay on track with healthy eating, because a nourishing option is always ready when hunger strikes. In short, lentil soup is one of the most practical, filling, and budget-friendly meals you can add to your weight-loss routine.


🍲 Cooking Lentil Soup 3 Ways – Instant Pot, Slow Cooker & Stovetop

One of the best things about lentil soup is how forgiving and flexible it is. No matter your cooking style, you can make it work for you. Here are three easy methods to try:

  • Instant Pot Lentil Soup
    If you’re pressed for time, the Instant Pot is a lifesaver. It cooks lentils quickly and evenly, turning what would normally take 30–40 minutes on the stove into a hearty soup in under 15 minutes of pressure cooking. In addition, you don’t have to babysit the pot — just set it and let the pressure do the work. This method is ideal for busy weeknights or anyone who wants maximum flavor with minimal effort. For a pressure-cooker friendly template, see our curried lentil soup workflow inside this Lentils instead of chicken meal-prep post.
  • Slow Cooker Lentil Soup
    On the other hand, if you like coming home to a kitchen filled with the aroma of simmering spices, the slow cooker is your best friend. You simply toss in your lentils, veggies, and broth in the morning, and by evening you’ll have a deeply flavorful, ready-to-eat soup. The long cooking process allows the flavors to meld together beautifully. This method is perfect for weekends, meal prep, or when you just want the comfort of knowing dinner is waiting for you.
  • Stovetop Lentil Soup
    Of course, the classic stovetop method has its own charm. It gives you the most control — you can taste, adjust seasonings, and tweak as you go. Moreover, stovetop cooking is great for those times when you want to be hands-on in the kitchen and enjoy the process of creating something wholesome. With this method, you can easily experiment by adding more vegetables, spices, or finishing touches like a squeeze of lemon or a swirl of coconut milk. If Mediterranean flavors are your thing, this Guide to the Mediterranean Diet shows why lentil soups fit the pattern perfectly.

In short, whether you’re an Instant Pot enthusiast, a slow-cooker devotee, or someone who loves the simplicity of stovetop cooking, there’s a Vegan Lentil Soup Recipes for Weight Loss – that fits seamlessly into your routine.


🍵 5 Hearty Vegan Lentil Soup Recipes for Weight Loss

Now that we’ve explored why lentils are such a powerhouse for health and weight management, let’s get into the heart of this post: the recipes. These soups are more than just meals — they’re nourishing bowls of comfort designed to keep you full, energized, and satisfied.

Each recipe highlights a different cooking method, flavor profile, or health benefit. You’ll find everything from a quick Instant Pot detox soup to a slow-cooked coconut curry and even a Mediterranean-inspired vegetable mix. In addition, every recipe is vegan, high in protein, and naturally supportive of weight loss.

So, whether you’re cooking for busy weeknights, prepping for the week ahead, or simply craving something cozy, these five soups will give you plenty of variety without complicating your kitchen routine.


1. 🥣 Instant Pot Red Lentil Detox Soup (Vegan & Low Sodium)

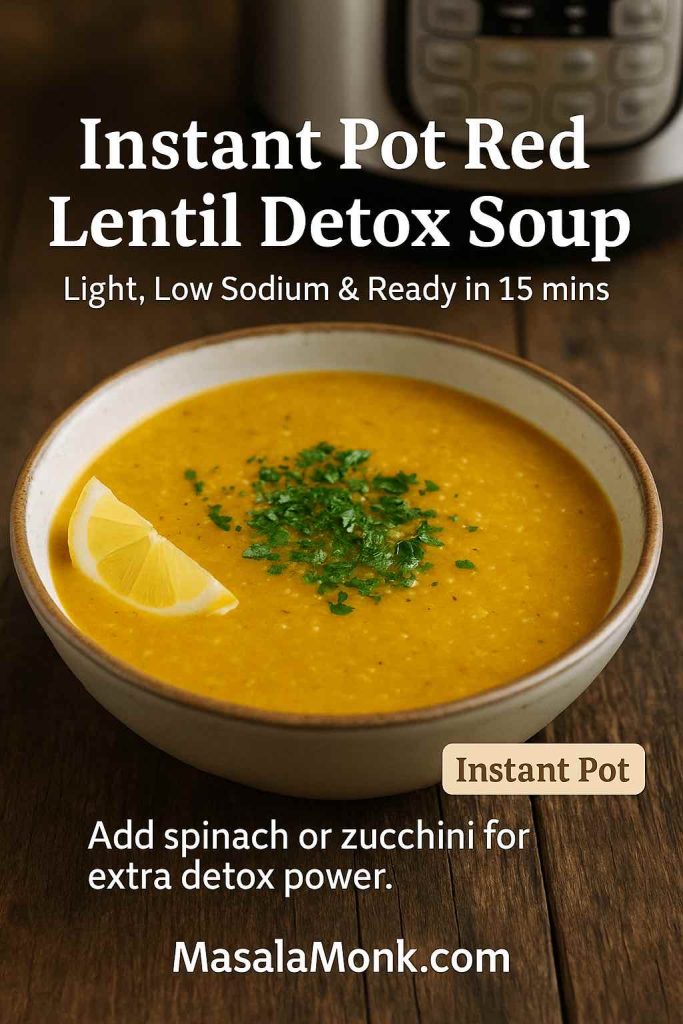
There’s nothing quite as comforting — or as quick — as a bowl of red lentil soup made in the Instant Pot. This version is light yet hearty, packed with warming spices like turmeric and ginger, which not only give it a golden glow but also boost its detox benefits. For more on using masoor for weight management, see Red Lentil Recipes for Weight Loss.

Instant Pot red lentil detox soup – vegan, light, and ready in 15 minutes.
For busy days when you still want something nourishing, this Instant Pot red lentil detox soup comes together in just 15 minutes. And since it’s light, low in sodium, and naturally creamy, it becomes the perfect transition into a week of clean eating.

Because it’s made with red lentils, this soup cooks down to a silky texture without the need for cream or thickeners. It’s also naturally vegan, low in sodium, and perfect for weight loss since it’s filling while staying low in calories.

🛒 Ingredients

  • 1 cup red lentils, rinsed
  • 1 medium carrot, diced
  • 1 stalk celery, diced
  • 1 small onion, chopped
  • 3 garlic cloves, minced
  • 1 tsp turmeric
  • 1 tsp cumin
  • 1 tsp grated fresh ginger
  • 4 cups low-sodium vegetable broth
  • Juice of ½ lemon
  • Salt & pepper (to taste, optional)
  • Fresh parsley or cilantro for garnish

👩‍🍳 Instructions

  1. Add the onion, carrot, celery, garlic, and spices (turmeric, cumin, ginger) into the Instant Pot with a splash of broth. Sauté for 2–3 minutes.
  2. Stir in the rinsed lentils and the remaining broth.
  3. Lock the lid and cook on High Pressure for 10 minutes.
  4. Let the pressure release naturally for 5 minutes, then do a quick release.
  5. Stir in the lemon juice, taste, and adjust seasoning.
  6. Ladle into bowls, garnish with parsley or cilantro, and serve warm.

🌱 Options & Tweaks

  • For Detox: Add extra ginger and turmeric, or a pinch of cayenne for metabolism support.
  • For Extra Veggies: Toss in spinach, zucchini, or bell peppers just before serving.
  • For Meal Prep: Double the recipe and freeze in portions — it reheats beautifully.
  • For More Creaminess: Blend half the soup and stir it back in for a silky finish.
  • For Slow Cooker: Cook on low for 6–7 hours or high for 3–4 hours.

2. 🥥 Golden Coconut Curry Green Lentil Soup (Slow Cooker or Instant Pot)

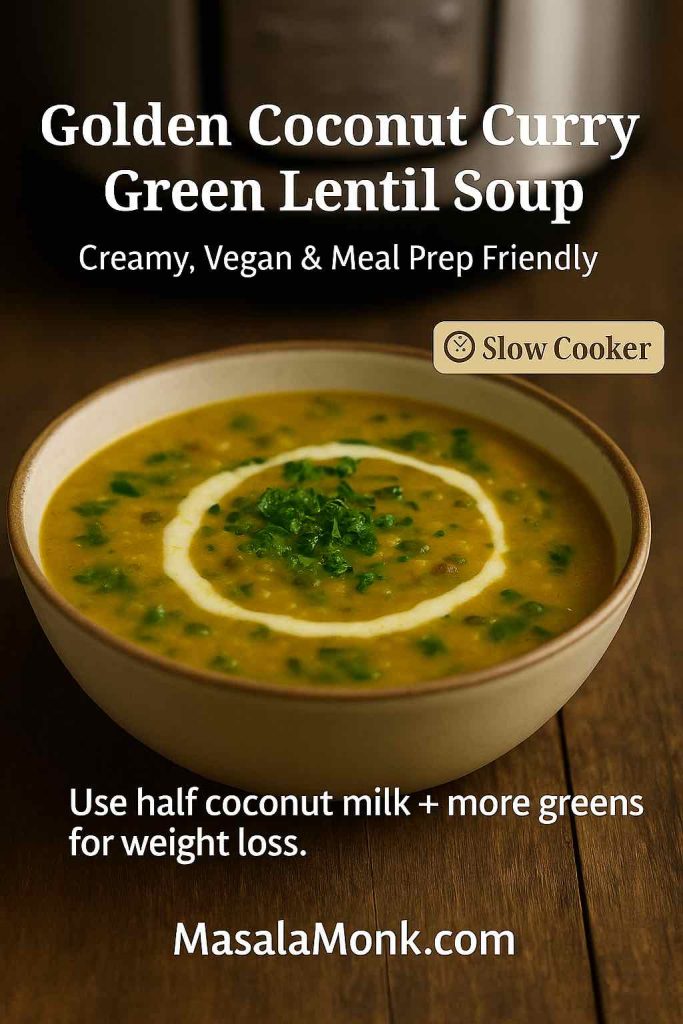
If you love soups that feel creamy and indulgent yet remain completely plant-based, this coconut curry green lentil soup will quickly become a staple in your kitchen. The coconut milk gives it a luscious texture, while curry powder, turmeric, and garlic infuse it with warming spice.

Golden coconut curry green lentil soup – vegan slow cooker meal prep recipe.
Here’s proof that comfort food and healthy eating can go hand in hand: this golden coconut curry green lentil soup is creamy, vegan, and meal-prep friendly. Moreover, the gentle heat of curry spices and the richness of coconut milk turn your slow cooker into a wellness powerhouse.

Moreover, green lentils hold their shape beautifully, making this soup hearty enough for a main meal. It’s versatile too — cook it low and slow in the crock pot, or whip it up in the Instant Pot when you need dinner fast. Best of all, it’s naturally vegan, gluten-free, and weight-loss friendly when made with light coconut milk.

🛒 Ingredients

  • 1 cup green lentils, rinsed
  • 1 medium sweet potato, peeled & cubed
  • 1 cup spinach or kale (add at the end)
  • 1 small onion, diced
  • 2 garlic cloves, minced
  • 1 tbsp curry powder
  • 1 tsp turmeric
  • 1 can (400 ml) light coconut milk
  • 3 cups vegetable broth (low sodium, if preferred)
  • 1 tbsp olive oil
  • Fresh cilantro or parsley for garnish
  • Juice of ½ lime (optional, for brightness)

👩‍🍳 Instructions

Instant Pot Method:

  1. Set the Instant Pot to sauté mode. Add olive oil, onion, garlic, curry powder, and turmeric. Cook for 2–3 minutes until fragrant.
  2. Add green lentils, sweet potato, and vegetable broth. Stir to combine.
  3. Seal lid and cook on High Pressure for 12 minutes. Allow natural release for 10 minutes.
  4. Stir in coconut milk and greens. Cook on sauté mode for another 2–3 minutes.
  5. Adjust seasoning, add lime juice if desired, garnish with cilantro, and serve.

Slow Cooker Method:

  1. Add all ingredients (except coconut milk, greens, and lime) to the slow cooker.
  2. Cook on Low for 7–8 hours or High for 4 hours.
  3. Stir in coconut milk and greens just before serving. Garnish and enjoy.

🌱 Options & Tweaks

  • For Weight Loss: Use ½ can of light coconut milk and increase greens or zucchini.
  • For Extra Protein: Add chickpeas or quinoa.
  • For More Heat: Stir in chili flakes, cayenne, or harissa paste.
  • For Creamier Texture: Purée half the soup before serving.
  • Make Ahead: This soup thickens beautifully the next day, making it great for meal prep.

3. 🍅 Mediterranean Lentil & Vegetable Soup (Healthy & Easy)

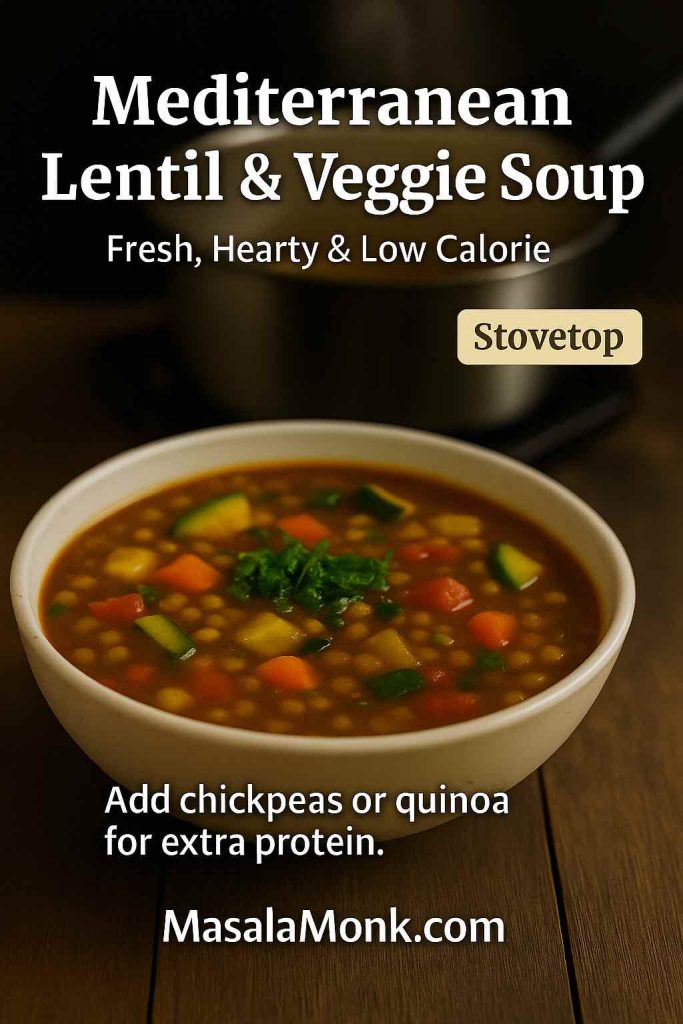
This Mediterranean-inspired lentil and vegetable soup is light, vibrant, and full of garden-fresh flavors. Think of it as sunshine in a bowl: olive oil, ripe tomatoes, zucchini, carrots, celery, and a sprinkle of herbs that make the broth fragrant and refreshing.

Mediterranean lentil and vegetable soup – fresh, hearty, and vegan.
Brimming with zucchini, carrots, and tomatoes, this Mediterranean lentil and veggie soup feels like sunshine in a bowl. And because it’s light yet hearty, it creates the perfect balance — fresh enough for weight loss, yet satisfying enough for family dinners.

What makes this soup special is its balance — it’s hearty enough to be filling, yet light enough for those focusing on weight loss. Moreover, it’s a flexible recipe: you can make it on the stovetop for a classic feel or in a pressure cooker when you’re short on time. Either way, it’s a wholesome, vegan lentil and vegetable soup that fits perfectly into a healthy lifestyle.

🛒 Ingredients

  • 1 cup brown or green lentils, rinsed
  • 1 medium zucchini, diced
  • 1 medium carrot, diced
  • 1 stalk celery, diced
  • 1 small onion, diced
  • 3 garlic cloves, minced
  • 1 can (400 g) diced tomatoes
  • 2 tbsp olive oil
  • 1 tsp smoked paprika
  • 1 tsp oregano (or Italian herbs mix)
  • 4 cups vegetable broth (low sodium preferred)
  • Salt & pepper, to taste
  • Fresh parsley or basil for garnish
  • Optional: juice of ½ lemon for brightness

👩‍🍳 Instructions

Stovetop Method:

  1. Heat olive oil in a large pot. Add onion, carrot, celery, and garlic; sauté until softened.
  2. Stir in smoked paprika, oregano, and lentils. Mix well.
  3. Add diced tomatoes and broth. Bring to a boil, then reduce to simmer.
  4. Cook for 30–35 minutes, until lentils are tender.
  5. Stir in zucchini during the last 10 minutes of cooking.
  6. Finish with lemon juice and garnish with parsley or basil before serving.

Pressure Cooker Method:

  1. Sauté onion, garlic, carrot, and celery in olive oil.
  2. Add spices, lentils, tomatoes, and broth.
  3. Seal and cook on High Pressure for 15 minutes.
  4. Quick release, then stir in zucchini and simmer on sauté mode for 5 minutes.

🌱 Options & Tweaks

  • For Low Sodium: Use fresh herbs and lemon juice instead of extra salt.
  • For More Protein: Stir in cooked chickpeas or quinoa.
  • For Extra Veggies: Add spinach, kale, or bell peppers at the end.
  • For a Creamier Soup: Blend half the mixture before serving.
  • Meal Prep Friendly: Stores well in the fridge for 4–5 days, flavors deepen with time.

If you want to build a full Mediterranean plate around it, do read What is the Mediterranean Diet? Free PDF Meal Plan Inside and add a crisp side from Wholesome and Nutritious: 5 Lentil Salad Recipes to Support Your Weight Loss Goals.


4. 🥕 Classic Brown Lentil Soup (Homemade & Weight Loss Friendly)

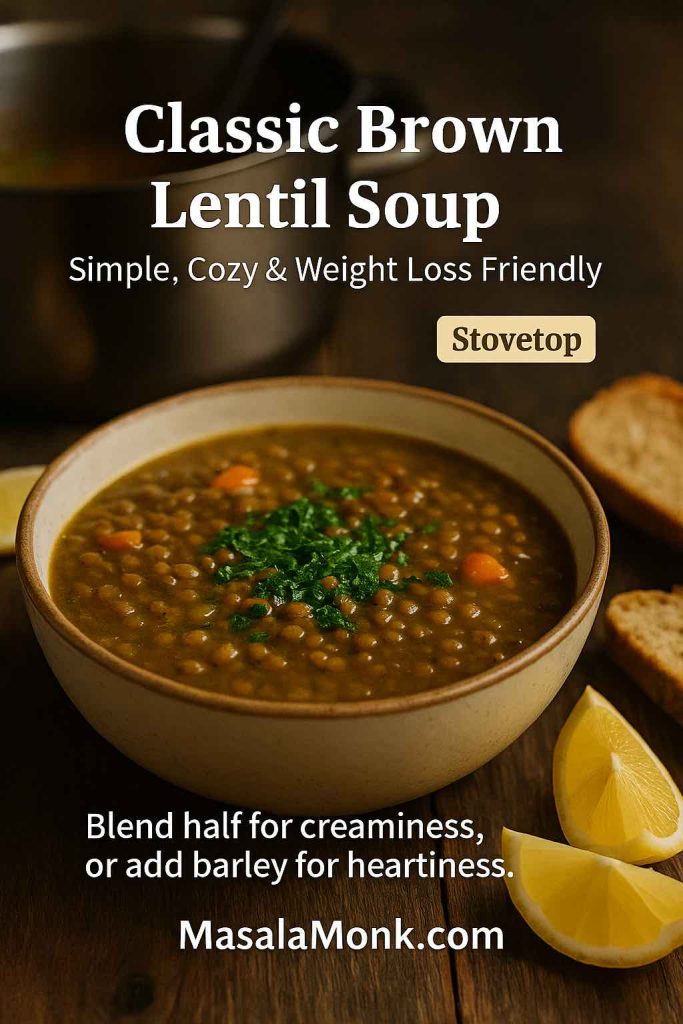
Sometimes, the simplest recipes are the most satisfying. This classic brown lentil soup is a homemade staple that feels cozy and familiar, like something you’d want on a chilly evening. It’s rich in flavor thanks to onions, garlic, carrots, and celery, yet light enough to be part of a weight loss-friendly meal plan.

Classic brown lentil soup – simple, cozy, and weight-loss friendly.
Sometimes the simplest meals are the most comforting. This classic brown lentil soup is cozy, affordable, and endlessly adaptable — blend half for creaminess or add barley for extra heartiness. Either way, it shows how small tweaks can transform a humble bowl into a nourishing delight.

What makes this recipe stand out is its versatility. You can keep it plain and rustic, or enhance it with lemon juice, fresh herbs, or even a touch of cumin for an earthy note. Moreover, it’s one of the most budget-friendly vegan lentil soups you can make — a pot of this soup stretches into several hearty servings that taste even better the next day.

🛒 Ingredients

  • 1 cup brown lentils, rinsed
  • 1 medium onion, diced
  • 1 medium carrot, diced
  • 2 stalks celery, diced
  • 2 garlic cloves, minced
  • 1 tsp ground cumin
  • ½ tsp black pepper
  • 4 cups low-sodium vegetable broth
  • 2 tbsp lemon juice
  • 1 tbsp olive oil
  • Salt, to taste
  • Fresh parsley for garnish

👩‍🍳 Instructions

Stovetop Method:

  1. Heat olive oil in a pot. Add onion, carrot, celery, and garlic. Cook until softened.
  2. Stir in cumin, pepper, and lentils. Mix well to coat.
  3. Add broth and bring to a boil. Reduce heat and simmer for 35–40 minutes, until lentils are tender.
  4. Stir in lemon juice before serving. Adjust seasoning and garnish with parsley.

Pressure Cooker Method:

  1. Sauté onion, garlic, carrot, and celery in olive oil.
  2. Add cumin, lentils, broth, and pepper. Stir well.
  3. Seal and cook on High Pressure for 12 minutes.
  4. Natural release for 5 minutes, then quick release. Stir in lemon juice and serve.

🌱 Options & Tweaks

  • For Weight Loss: Skip the olive oil and cook veggies in a splash of broth.
  • For More Protein: Add cooked quinoa or barley.
  • For Extra Veggies: Mix in spinach, kale, or diced tomatoes.
  • For a Creamy Version: Blend part of the soup for a thicker texture.
  • For Meal Prep: Stores well in the fridge for 4 days and freezes for up to 3 months.

Sometimes, the simplest recipes are the most satisfying. If you like a firmer bite, try French green (Puy) lentils — here’s How to Cook Puy Lentils for Weight Loss: Tips and 5 Flavorful Ideas. Or bulk it out with grains using our quinoa + lentil meal-prep ideas in 10 Plant-Based Meal Prep Ideas: Using Quinoa as a Protein Source.


5. 🌶 Moroccan Spiced Red Lentil Soup (Vegan & Detox-Friendly)

If you’re craving bold flavors with a nourishing base, this Moroccan-inspired red lentil soup is just the thing. Fragrant spices like cumin, coriander, cinnamon, and turmeric create a warm, slightly sweet depth of flavor that pairs beautifully with the creaminess of red lentils.

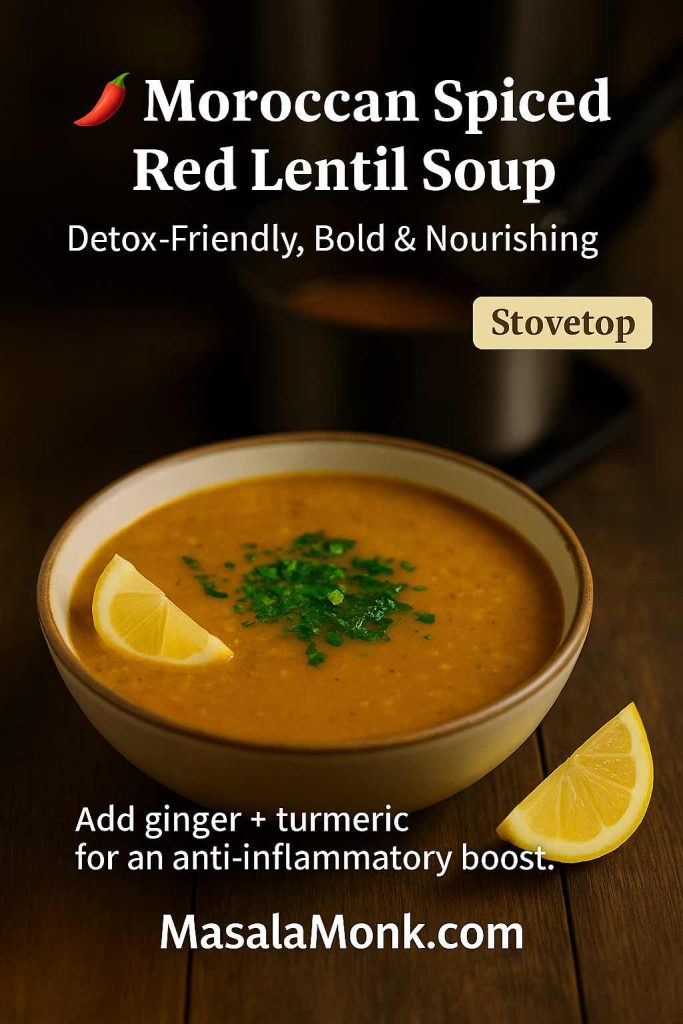
Moroccan spiced red lentil soup with turmeric and ginger – detox-friendly vegan recipe.
With warming spices like cumin, coriander, and turmeric, this Moroccan spiced red lentil soup proves healthy food can also be bold and exciting. And when you add ginger for an anti-inflammatory boost, every spoonful becomes both detox-friendly and deeply satisfying.

Because red lentils cook quickly and break down into a velvety texture, this recipe is ideal when you want a detox-friendly, vegan soup that feels indulgent yet is naturally light. Moreover, with its anti-inflammatory spices and plant-based protein, it’s a fantastic option for both weight loss and overall wellness.

🛒 Ingredients

  • 1 cup red lentils, rinsed
  • 1 medium carrot, diced
  • 1 small onion, diced
  • 3 garlic cloves, minced
  • 1 tsp ground cumin
  • 1 tsp ground coriander
  • 1 tsp turmeric
  • ½ tsp cinnamon
  • 1 can (400 g) diced tomatoes
  • 4 cups vegetable broth (low sodium preferred)
  • 1 tbsp olive oil
  • Salt & pepper, to taste
  • Fresh cilantro or parsley, for garnish
  • Optional: juice of ½ lemon

👩‍🍳 Instructions

Stovetop Method:

  1. Heat olive oil in a pot. Add onion, carrot, and garlic. Cook until softened.
  2. Stir in cumin, coriander, turmeric, and cinnamon. Cook for 1 minute until fragrant.
  3. Add red lentils, tomatoes, and broth. Bring to a boil.
  4. Reduce heat and simmer for 20–25 minutes, until lentils are soft and soup thickens.
  5. Stir in lemon juice, season to taste, and garnish with cilantro.

Pressure Cooker Method:

  1. Sauté onion, garlic, and carrot in olive oil. Stir in spices.
  2. Add lentils, tomatoes, and broth. Mix well.
  3. Cook on High Pressure for 10 minutes.
  4. Quick release, stir, and finish with lemon juice and herbs.

🌱 Options & Tweaks

  • For Extra Detox: Add grated ginger and extra turmeric.
  • For Creaminess: Blend part of the soup and stir it back in.
  • For More Heft: Add diced sweet potato or butternut squash.
  • For a Spicy Kick: Toss in cayenne or chili flakes.
  • For Freezer Meals: This soup freezes beautifully for make-ahead portions.

For more lentil varieties to play with, meet Beluga (black) lentils in Boost Weight Loss with Beluga Lentils: Benefits and 5 Savory Recipes — sturdy, protein-dense, and great in stews if you want to swap.


Serving Ideas for Vegan Lentil Soup Recipes for Weight Loss

By now, you’ve seen just how versatile lentil soups can be. However, a soup rarely has to stand alone. In fact, pairing these hearty bowls with the right sides can turn them into complete, balanced meals that are satisfying without being heavy.

For example, a slice of warm whole-grain bread or a piece of naan can soak up the broth and make the meal feel extra cozy. Alternatively, a crisp green salad with lemon vinaigrette adds freshness and crunch, creating a lovely balance against the warmth of the soup. If you want something heartier, roasted vegetables or even a small serving of brown rice or quinoa on the side will round out the dish while keeping everything plant-based. For a deeper dive into lentil nutrition (fiber, folate, polyphenols), Harvard’s Nutrition Source has an excellent explainer: Lentils – The Nutrition Source. (The Nutrition Source)

Moreover, these Vegan Lentil Soup Recipes for Weight Loss are wonderful for family dinners or gatherings because they’re naturally gluten-free, vegan, and adaptable. With just a few tweaks, you can please everyone at the table while staying aligned with your weight-loss goals.

Get some salad ideas Wholesome and Nutritious: 5 Lentil Salad Recipes to Support Your Weight Loss Goals or pair get Quinoa inspiration from 10 Plant-Based Meal Prep Ideas: Using Quinoa as a Protein Source.


Meal Prep & Storage for Vegan Lentil Soup Recipes

One of the best things about vegan lentil soup recipes for weight loss is how meal-prep friendly they are. Unlike some soups that lose flavor over time, lentil soups actually taste better the next day as the spices and aromatics meld together.

If you plan to enjoy them throughout the week, simply let the soup cool completely, then store it in airtight containers in the fridge. For food-safe storage, USDA/FSIS guidelines state most cooked leftovers can be refrigerated 3–4 days and frozen 3–4 months. Practical tip: cool soups in shallow containers for faster chilling, then reheat gently with a splash of water/broth if thickened. Reference: Leftovers and Food Safety. (Food Safety and Inspection Service)

When reheating, you can warm the soup gently on the stovetop, stirring occasionally, or pop it into the microwave for a quick meal. If it thickens during storage (which is common with lentils), just add a splash of water or broth to bring it back to the perfect consistency.

In addition, these soups are excellent for batch cooking. Making a double batch and freezing half ensures that you’ll always have a healthy, high-protein, and fiber-rich meal ready to go — a lifesaver on busy days. For step-by-step planning (portioning, reheating, macro ideas), see our Plant-Based High-Protein Meal Prep Ideas: Using Lentils Instead of Chicken and 10 Vegetarian And High Protein Meal Prep Ideas from Indian Cuisine.


Variations of Vegan Lentil Soup Recipes for Weight Loss

While we’ve shared five of our favorite recipes, the beauty of lentil soup lies in how endlessly customizable it is. In other words, you can adapt these soups to suit your taste buds, your pantry, and even the season. Prefer a firmer texture? Try Puy (French green) lentils. Craving pasta night without derailing macros? Our Lentil Pasta for Weight Loss guide keeps the vibe but ups the protein.

For extra bulk, try adding grains such as quinoa, barley, or brown rice. This not only stretches the soup further but also makes it even more filling — great for active days when you need sustained energy. If you prefer creamier soups, stir in a swirl of coconut milk, cashew cream, or blend a portion of the soup for a velvety finish.

Smiling woman enjoying a warm bowl of vegan lentil soup for health and weight loss.
Transforming your health doesn’t require complicated diets — sometimes, it begins with a single cozy bowl. A warm lentil soup is not just food; it’s comfort, nourishment, and a gentle reminder that healthy eating can be joyful.

Spices are another way to transform a simple pot of lentils into something extraordinary. For instance, Mediterranean herbs like oregano and basil create a light and fresh profile, while Moroccan spices such as cumin, coriander, and cinnamon add depth and warmth. Alternatively, if you love bold flavors, go for Indian-inspired seasonings like curry powder, garam masala, or turmeric.

Moreover, you can make your soups more veggie-packed by tossing in seasonal produce. Spinach, kale, zucchini, bell peppers, and even sweet potatoes can all find a home in these bowls. Not only does this keep things interesting, but it also boosts the nutritional value and variety of your meals.


🌱 Final Thoughts: Why Lentil Soups Deserve a Spot in Your Routine

At the end of the day, these vegan lentil soup recipes for weight loss are more than just dishes — they’re tools for building a healthier, more balanced lifestyle. They’re easy to make, budget-friendly, and incredibly forgiving in the kitchen. And yes, as far as lentils go – they’re backed by nutrition science on protein, fiber, and heart health (Ref: Cleveland Clinic and Harvard). (Cleveland Clinic, The Nutrition Source)

Unlike fad diets or complicated meal plans, soups like these make healthy eating sustainable. They allow you to nourish your body while still enjoying the comfort of a warm, hearty bowl. In short, they’re proof that wholesome food can also be deeply satisfying.

So, whether you’re on a weight-loss journey, looking to add more plant-based meals to your diet, or simply craving something cozy and flavorful, these lentil soups are here to support you. Try one, try them all, and don’t be afraid to make them your own.

👉 If you enjoyed this collection, share it with a friend, or let us know in the comments which recipe you’re trying first. After all, food is always better when it’s shared.

❓ Frequently Asked Questions About Vegan Lentil Soup

1. Is lentil soup good for weight loss?

Yes! Lentil soup is excellent for weight loss because it’s high in plant-based protein and fiber, both of which help keep you full for hours. Moreover, it’s naturally low in fat and calories, making it a nourishing, satisfying option without feeling heavy. Read more: Are Lentils Good for Weight Loss? Benefits, Recipes, and Science Explained


2. Which type of lentils is best for soup?

It depends on the texture you prefer. For example, red lentils cook quickly and create a creamy soup, while green or brown lentils hold their shape for chunkier, more rustic bowls. In short, all types of lentils can work — you just need to choose the style you enjoy most.


3. Can I make lentil soup in an Instant Pot?

Absolutely! In fact, lentil soup is one of the easiest Instant Pot meals. Simply add your ingredients, set it to high pressure, and let it cook for about 10–12 minutes. As a result, you’ll have a hearty, flavorful soup in less time than it takes on the stovetop.


4. How do I make lentil soup low sodium but still tasty?

Great question. Instead of relying on salt, focus on flavor boosters: garlic, onion, herbs, lemon juice, and warming spices like cumin or turmeric. In addition, cooking with low-sodium broth allows you to control seasoning without sacrificing taste.


5. Can I freeze vegan lentil soup?

Yes, and it freezes beautifully! First, let the soup cool completely, then portion it into freezer-safe containers. Moreover, frozen lentil soup will last up to 3 months. When you’re ready to enjoy it again, thaw overnight in the fridge or reheat gently on the stovetop.


6. How long does lentil soup last in the fridge?

Lentil soup will keep for 4–5 days in the refrigerator when stored in an airtight container. Furthermore, the flavors often deepen the next day, making it even more delicious as leftovers.


7. How can I make lentil soup creamier without dairy?

It’s simple! Blend a portion of the soup and stir it back in for natural creaminess. Alternatively, add a splash of coconut milk or cashew cream for a rich, velvety texture that stays 100% vegan.


8. Can I add extra protein to vegan lentil soup?

Of course. In addition to the protein already in lentils, you can stir in quinoa, barley, or chickpeas. As a result, your soup becomes even more filling and perfect for post-workout meals or active days.


9. What spices go well in lentil soup?

Lentil soup is a blank canvas for flavors. For instance, Mediterranean herbs like oregano and basil create a light, fresh taste, while Moroccan spices such as cumin, coriander, and cinnamon add warmth. Alternatively, curry powder and turmeric bring an Indian-inspired twist.


10. Can I use cooked lentils in soup?

Yes — if you already have cooked lentils, simply shorten the cooking time. In fact, just simmer them with vegetables, broth, and spices for 10–15 minutes. This method is a great way to use leftovers while still enjoying a hearty, homemade soup.

Posted on 9 Comments

10 Examples of Egg Dishes, with 2 Eggs

10 Irresistible Egg Dishes With Just 2 Eggs

Let’s be honest: Sometimes, the most magical things in the kitchen happen when you have just a couple of eggs left in the fridge, a growling stomach, and a spark of curiosity. Eggs are like little edible treasures—packed with protein, affordable, and capable of starring in dishes from every corner of the world.

But what if you only have two? Is that enough? The answer: Absolutely! From quick weekday breakfasts to cozy solo dinners, here are 10 detailed, creative ways to transform just two eggs into something wonderful. We’ll sprinkle in tips, flavor twists, and point you to more deep-dives on MasalaMonk.com along the way!


1. Creamy Classic Scrambled Eggs

There’s a reason every culture has its own version of scrambled eggs. They’re soothing, reliable, and quick to make—plus, they’re a blank canvas for your favorite flavors.

How to Make (the Right Way):
Crack 2 eggs into a bowl, add a generous pinch of salt, a grind of black pepper, and just a tiny splash of milk or cream (totally optional, but adds a lovely softness). Whisk with a fork or small whisk until everything is smoothly combined and a little frothy.

Classic Scrambled Eggs
Fluffy scrambled eggs made with just 2 eggs, butter, and a hint of chives—perfect for a quick, protein-packed breakfast or brunch.

Melt a pat of butter in a nonstick pan over gentle heat (don’t rush it—good scrambled eggs are all about patience). Pour in your eggs, and with a silicone spatula, slowly stir from the edges to the center, letting soft curds form. The moment they look barely set, remove from heat—they’ll keep cooking from residual warmth.

Flavor Upgrade:
A handful of chopped chives or coriander, a sprinkle of grated cheddar, or a dusting of smoked paprika can work wonders. For even more ways to amp up your eggs, visit Egg-cellent Seasoning Options for Flavorful Eggs.

Personal Touch:
Serve with buttered sourdough or even spoon them onto hot rice, Japanese-style. Some days, it’s the simplest things that feel like a big, warm hug.


2. Soft or Hard-Boiled Eggs (the Anytime Snack)

Eggs don’t need much to be a satisfying snack or lunch. Boiled eggs are portable, filling, and can be dressed up in countless ways.

How to Make (Foolproof):
Place 2 eggs in a saucepan, cover with cold water by about an inch, and bring to a gentle boil. For soft-boiled (runny yolk, firm white), cook for 6-7 minutes. For hard-boiled (set all the way through), go for 10-12 minutes. Immediately transfer eggs to a bowl of ice water (or run under cold water) to stop cooking and make peeling a breeze.

Perfect Boiled Eggs
Soft or hard-boiled eggs done right—enjoy these easy, protein-rich boiled eggs on toast, salads, or as a healthy snack.

Slice them over salads, nestle into a bento box, or sprinkle with flaky salt and a little chili powder for a quick snack.

Egg Nutrition:
Curious about how much nutrition you’re actually getting? Check out How Much Protein in Two Boiled Eggs? for the details on protein, calories, and why boiled eggs are a dietitian’s favorite.

Pro Tip:
Experiment with flavor: Try marinating peeled eggs in soy sauce and garlic for “ramen eggs,” or toss slices with a bit of chaat masala for an Indian twist.


3. Masala Omelette (Spicy Indian Comfort Food)

If you’ve ever visited an Indian railway station or a roadside dhaba, you’ve probably spotted someone expertly flipping a masala omelette on a sizzling tawa. Two eggs, a few chopped veggies, and a handful of spices make for a breakfast that’s bursting with flavor and memories.

How to Make:
Whisk 2 eggs with salt. Add finely chopped onion, tomato, green chili, and fresh coriander. Toss in a pinch each of turmeric, red chilli powder, and black pepper. Heat oil or ghee in a pan, pour in the mixture, and cook on medium heat, swirling to spread evenly. Flip to brown both sides, then serve hot.

Masala Omelette
Spicy Indian masala omelette loaded with onions, tomatoes, green chilies, and fresh coriander—ready in minutes with just 2 eggs.

Level It Up:
Stuff with cheese, leftover sabzi, or even crumbled paneer for extra richness. For a truly “desi” twist, pair with pav or tuck inside buttered bread for a street-style sandwich.
Want to explore even more Indian-inspired egg fusion? Head over to Eggs Benedict: Desi Twist Challenge.


4. Shakshuka (Eggs Poached in Spicy Tomato Sauce)

Shakshuka is the kind of breakfast (or dinner!) that makes you want to mop the bowl clean with a hunk of bread. Originating from North Africa and wildly popular across the Middle East, it’s a celebration of eggs and bold, tangy-sweet flavors.

How to Make:
In a skillet, sauté chopped onion, bell pepper, and garlic in olive oil until soft. Add a can of diced tomatoes (or fresh if you have), a teaspoon of cumin, paprika, and a pinch of cayenne. Simmer until thickened, then make two small wells and gently crack your eggs into them. Cover and cook on low heat until the whites are set but yolks remain runny.

Shakshuka
A single-serve shakshuka with two eggs poached in a flavorful tomato and pepper sauce—bring Middle Eastern breakfast to your table.

Serving Suggestion:
Finish with a sprinkle of feta, a handful of parsley, and serve straight from the pan with toasted sourdough or warm pita.

Want to know where this dish fits into Mediterranean mornings? See 10 Most Popular Mediterranean Breakfasts.


5. Cloud Eggs (For When You Feel Fancy)

Cloud eggs are part breakfast, part magic trick. They’re fluffy, photogenic, and taste like a cross between a soufflé and a poached egg. Perfect for impressing guests—or just brightening a grey morning.

How to Make:
Separate your 2 eggs, placing whites and yolks in different bowls. Whip the whites until stiff peaks form (electric beaters are your friend). On a lined baking tray, dollop the whipped whites into two mounds and create a small nest in each. Bake at 190°C (375°F) for 3 minutes, then add a yolk to each nest and bake for another 2 minutes until just set.

Cloud Eggs
Whip up Instagram-worthy cloud eggs with just two eggs—fluffy whites, golden yolks, and a sprinkle of herbs for a show-stopping brunch.

Science Corner:
Curious why egg whites whip so dramatically? Find out in Can You Really Not Whip Egg Whites if There’s Yolk in Them? Let’s Crack This Myth.

Garnish:
A little parmesan, chives, or smoked paprika on top and you’re set for an Instagram post.


6. Mini Frittata (Eggs for Dinner, or Anytime)

A frittata is essentially an Italian open-faced omelette—thick, fluffy, and endlessly adaptable. With two eggs, you can create a mini version perfect for solo meals or meal prep.

How to Make:
Beat 2 eggs with salt, pepper, and a tablespoon of milk or cream. Pour into a small, greased oven-safe dish or a muffin tin. Scatter over whatever you have: sautéed spinach, chopped tomatoes, cooked potato, cheese, or herbs. Bake at 180°C (350°F) until puffed and golden, about 12–15 minutes.

Mini Frittata
Easy mini frittata baked with vegetables and cheese—healthy, customizable, and perfect for meal prep or quick dinners with 2 eggs.

Why You’ll Love It:
Frittatas are brilliant for using up leftovers and sneaking extra veggies into your diet. Serve warm or at room temperature with a fresh salad.


7. Egg Drop Soup (For Rainy Evenings or Sick Days)

Egg drop soup is Chinese comfort in a bowl—warm, soothing, and ready in minutes. If you love silky, ribbon-like egg textures, this one’s for you.

Egg Drop Soup
Classic Chinese egg drop soup made from scratch with two eggs—silky egg ribbons in savory broth, ideal for a light meal or appetizer.

How to Make:
Bring 2 cups of chicken or vegetable broth to a gentle simmer. Beat 2 eggs in a small bowl. With a fork or chopsticks, swirl the broth in one direction, then slowly drizzle in the eggs. Watch as soft egg “ribbons” form instantly. Add a splash of soy sauce, white pepper, and finish with chopped scallions.

Plant-Based Twist:
Eggs not your thing today? Try a tofu scramble instead—see Tofu Instead of Eggs: 5 High-Protein Plant-Based Breakfast Ideas.

Optional:
Toss in a handful of spinach or a few drops of sesame oil for depth.


8. Classic Egg Salad (Perfect for Sandwiches and Snacks)

Egg salad is a retro lunchbox hero and comes together in no time with just two eggs. It’s creamy, tangy, and perfect for spreading on toast or spooning into lettuce wraps.

How to Make:
Boil 2 eggs until firm, peel, and chop them up. In a bowl, mix with a spoonful of mayonnaise, a dash of mustard, salt, pepper, and fresh herbs like dill or parsley. Want to spice it up? Add a little chopped celery, onion, or even a pinch of curry powder.

Egg Salad
Creamy, tangy egg salad made from just two eggs—great for sandwiches, wraps, or as a low-carb, protein-rich lunch.

Health Note:
Egg yolks are packed with nutrients and healthy fats. If you’re curious about what makes them so good for you, read Egg Yolks or Yellow: Nutritional & Protein Profile.

Serving Suggestion:
Slather on toast, stuff into pita bread, or serve as a dip with crackers.


9. Mini Spanish Tortilla (Tortilla Española)

Don’t let the name fool you—a Spanish tortilla is not a wrap, but a tender, thick omelette loaded with potatoes and onions. Making a mini version with just two eggs is perfect for a hearty meal-for-one.

How to Make:
Thinly slice a small potato and half an onion. Sauté in olive oil over low heat until golden and soft (patience pays off here). Beat 2 eggs, season, and combine with the veggies. Pour back into the pan, smooth the top, and cook gently until the bottom is golden. Carefully flip (use a plate if you must) and finish cooking the other side.

Mini Spanish Tortilla
Spanish tortilla for one: thin-sliced potato and onion cooked with two eggs for an authentic, satisfying tapa or breakfast.

Variations:
Try adding red peppers, cooked chorizo, or a sprinkle of smoked paprika for a twist. Serve warm or at room temperature with a tomato salad.


10. Eggs Kejriwal (Mumbai’s Spicy Toasted Egg & Cheese)

Eggs Kejriwal is a cult favorite from Mumbai’s old Irani cafés—a spicy, cheesy open-faced sandwich that’s so much more than “egg on toast.”

How to Make:
Toast a slice of bread, slather with a little butter, then add grated cheese (cheddar works well) and a finely chopped green chilli for heat. Place under the broiler or in a hot pan until the cheese bubbles. Then, top with a fried egg (or even a soft-boiled one split open) and a sprinkle of black pepper.

Eggs Kejriwal
Iconic Mumbai-style Eggs Kejriwal—crisp toast topped with cheese, green chilies, and a runny fried egg for a spicy, satisfying treat.

Pro Tip:
Serve with ketchup, chutney, or a cup of strong chai for the full experience.


Final Thoughts: Two Eggs, Endless Possibilities

Next time you peer into your fridge and see just two eggs, remember this list. Whether you’re feeling classic, creative, healthy, or indulgent, there’s a two-egg recipe waiting to make your day better.
Experiment, taste, and make it your own—eggs are forgiving and open to nearly infinite flavor combinations.

Eggs are also a nutritional powerhouse:
Rich in protein, vitamins, and healthy fats, they’re ideal for building muscle, fueling your brain, or simply starting your day on a happy note.


Pro Tips for the Best Egg Dishes

  • Always season eggs before cooking—it makes a world of difference in texture and flavor.
  • Cook on low heat for tender results—high heat toughens eggs.
  • Get creative with toppings and sides: Chutneys, salsas, and pickles all love eggs.
  • Don’t waste the yolk! That’s where much of the nutrition and flavor live.

For more tips, inspiration, and the latest egg trends, keep browsing MasalaMonk.com. Your kitchen, your rules—happy cooking!

FAQs for 10 Egg Dishes with 2 Eggs

1. Can I double these recipes if I have more eggs?

Absolutely! Each recipe is designed for two eggs but can be scaled up easily. Just multiply the ingredient quantities by the number of eggs you’re using, and adjust the pan size and cooking time as needed.


2. What are the health benefits of eating two eggs a day?

Two eggs provide about 12–14 grams of high-quality protein, healthy fats, vitamin D, choline, and a host of other nutrients. They keep you full, support muscle health, and are generally considered safe for most people as part of a balanced diet. For more on nutrition, see How Much Protein in Two Boiled Eggs?.


3. Can I use egg substitutes in these recipes?

Yes! For plant-based options, use tofu scramble in place of scrambled eggs, or try commercially available vegan egg replacers for frittatas and omelettes. For more ideas, check Tofu Instead of Eggs: 5 High-Protein Plant-Based Breakfast Ideas.


4. How do I keep my scrambled eggs soft and creamy, not rubbery?

Cook on low heat, stir gently, and remove the eggs from heat just before they’re fully set. They’ll finish cooking with residual warmth. Adding a splash of milk or cream helps too.


5. What are some good side dishes to serve with these egg recipes?

Pair eggs with toasted bread, parathas, rice, sautéed greens, roasted potatoes, or fresh salads. Chutneys, salsas, and pickles also make excellent accompaniments.


6. Are brown eggs healthier than white eggs?

No—brown and white eggs have virtually the same nutritional value. The color difference comes from the breed of chicken, not the nutritional content.


7. Can I prepare these egg dishes ahead of time?

Some dishes, like boiled eggs, egg salad, and mini frittatas, store well in the fridge for up to 3 days. Scrambled eggs and omelettes are best enjoyed fresh.


8. What’s the best way to peel hard-boiled eggs?

Cool eggs in ice water immediately after boiling. Crack the shell all over and peel gently under running water. Older eggs often peel more easily than very fresh ones.


9. How can I make my egg dishes more flavorful?

Use fresh herbs, spices, or seasoned salts. Try flavor boosters like garlic, onions, cheese, or even a drizzle of chili oil. For more ideas, read Egg-cellent Seasoning Options for Flavorful Eggs.


10. Can I make these dishes if I don’t have a nonstick pan?

Yes. Use a well-seasoned cast iron pan or a stainless steel pan with enough oil or butter to prevent sticking. For oven-baked dishes like frittatas, line your baking dish with parchment or grease it well.

Posted on 3 Comments

Indian Falafel: 6 Masala, Palak, Aloo, Paneer & Curry Leaf Twists

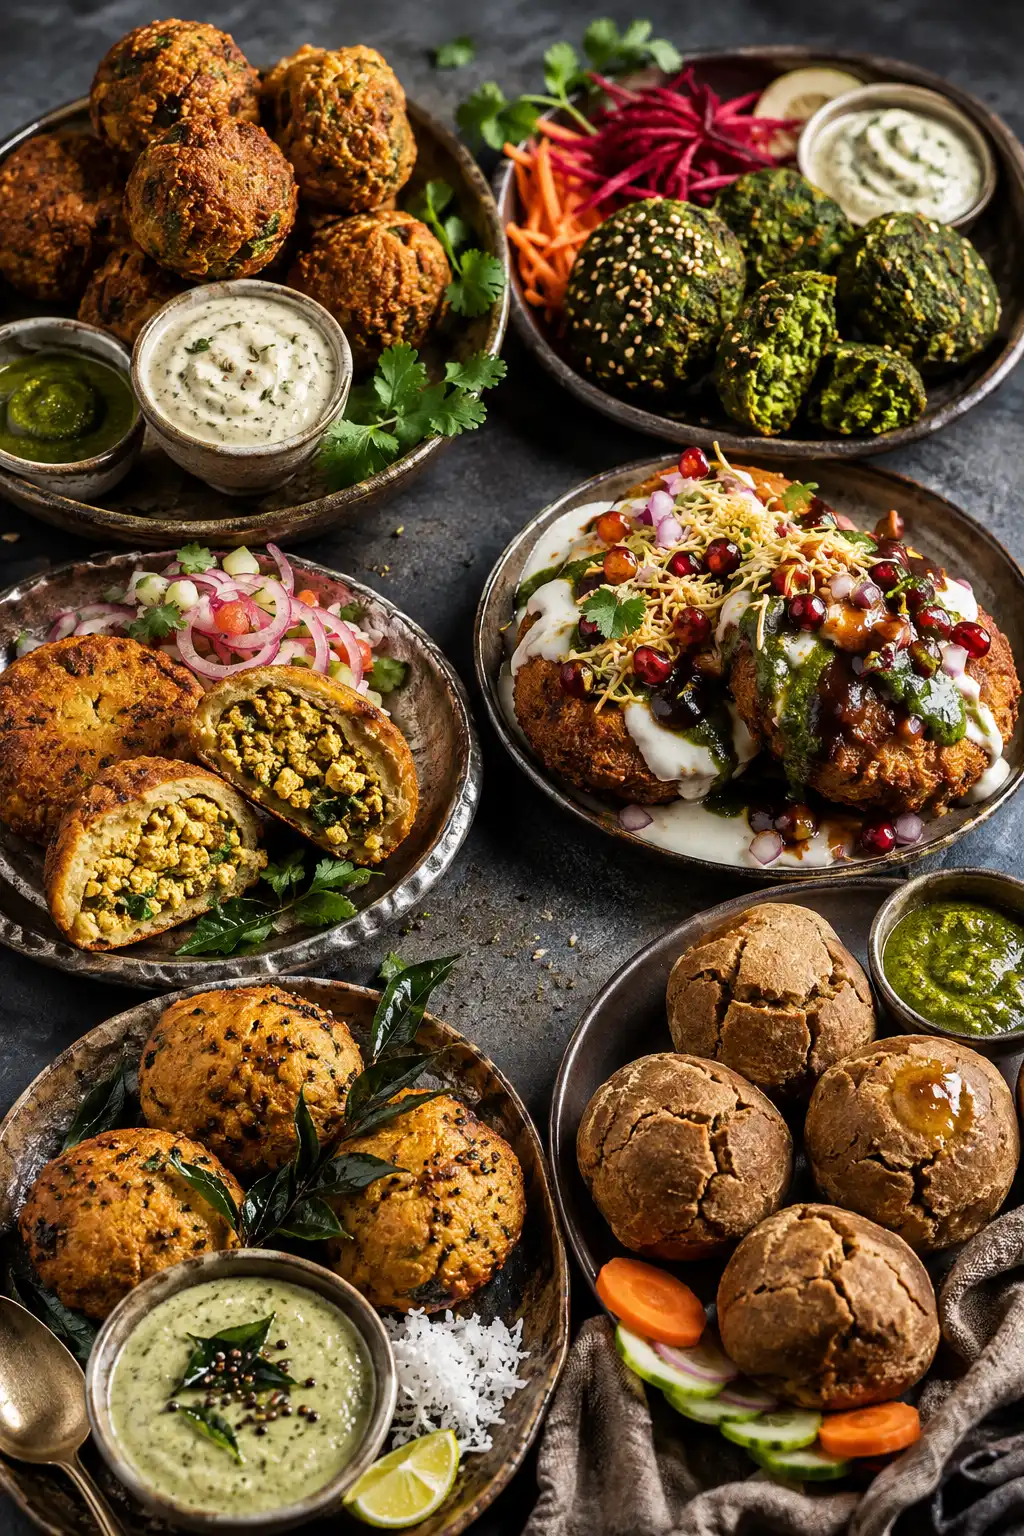
Six Indian falafel variations including Masala Chana, Methi-Palak, Aloo Tikki Chaat, Paneer Bhurji-Stuffed, Curry Leaf and Daal Bati Falafel.

At its most familiar, falafel starts with soaked chickpeas, herbs and spices, pulsed to a coarse crumb and cooked until the outside turns crisp while the middle stays tender. That basic idea fits surprisingly well into an Indian kitchen, where cumin, coriander, green chilli, ginger, amchur, chaat masala and chutneys already feel at home.

The recipes here take that starting point in six different directions. Masala Chana stays closest to classic falafel; Methi-Palak goes greener and softer; Aloo Tikki turns flat and chaat-ready; Paneer Bhurji becomes a filling rather than part of the shell; Curry Leaf brings mustard, ginger and coconut chutney into the picture; and Daal Bati deliberately leaves chickpea falafel furthest behind.

You do not need to cook them all the same way, either. Some want hot oil, one wants the broad crust of a frying pan, two sit happily in an appe/paniyaram pan, and the Daal Bati version belongs in the oven.

Table of Contents

Choose Your Indian Falafel

If you already know what sounds good, use the first column to jump straight to that recipe. If not, the texture and cooking method usually make the decision easier.

FalafelWhat it is likeBest methodBest with
Masala ChanaWarm, tangy and crisp, with a coarse chickpea centreFry or air-fryGreen chutney, cumin yogurt, pav or pita
Methi-PalakGreen, herbaceous and tender with a sesame crustAppe/paniyaram pan or air fryerCreamy dip, beet-carrot salad
Aloo TikkiCrisp outside, soft inside and built for chaatShallow-fryYogurt, green chutney, tamarind, sev
Paneer Bhurji-StuffedCrisp chickpea shell with a soft spiced paneer centreFryKachumber, pickled onion, roti
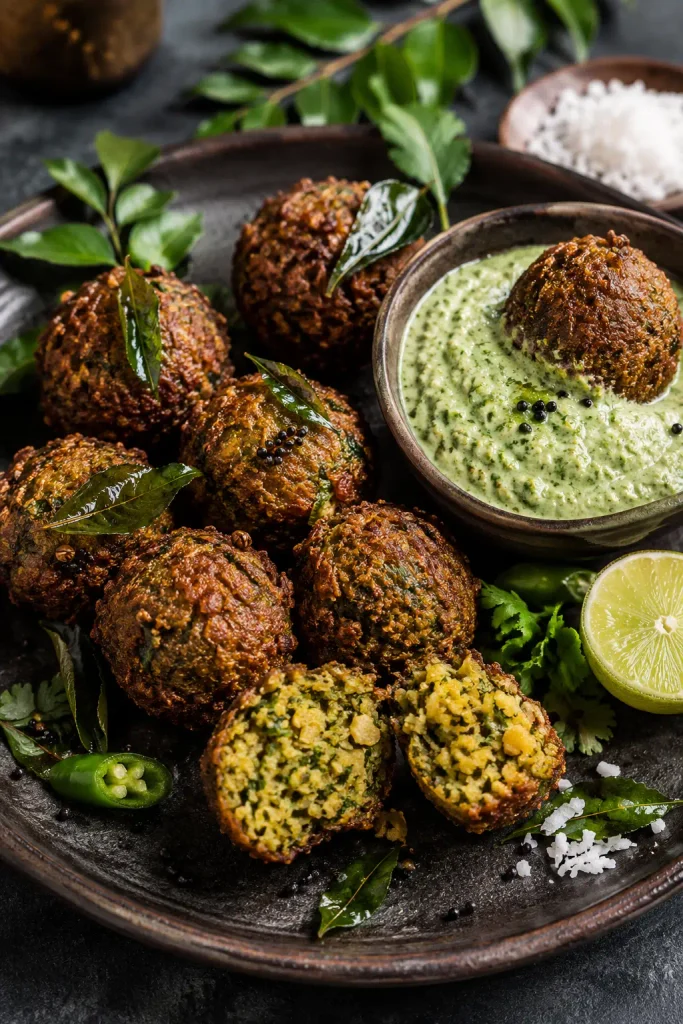
Curry LeafFragrant, peppery and coarse, with ginger and mustardFry or appe/paniyaram panCoconut-coriander chutney
Daal BatiEarthy, firm and rustic with a cracked bati-like crustBakeGreen chutney, onion, lemon, ghee

What Makes a Good Falafel Base?

For the Masala Chana, Methi-Palak, Paneer-Stuffed and Curry Leaf recipes, begin with dried chickpeas soaked in plenty of cold water for 8–12 hours or overnight in the refrigerator. Drain and rinse well before using. The Aloo Tikki version is different on purpose: cooked chickpeas suit the softer potato-based texture we want there.

Dry ingredients before adding more flour. Wet chickpeas or greens lead to more besan, and more besan can make falafel dense. This matters most with spinach: squeeze blanched palak until it feels almost surprisingly dry.

Pulse; do not purée. Falafel mixture should resemble coarse crumbs rather than hummus. A small handful may look loose in the bowl but should hold when firmly compressed.

Add besan cautiously. Start small and adjust only when the mixture genuinely needs help holding together.

For traditional falafel technique, classic serving ideas, baking and deeper air-fryer guidance, see our complete homemade falafel recipe.


1. Masala Chana Falafel

Masala Chana stays closest to familiar falafel: crisp outside, coarse within, but warmer with garam masala and cumin and a little sharper from amchur. Keep the garam masala measured so the chickpeas, coriander and garlic still come through.

Golden Masala Chana falafel balls with green chutney and cumin yogurt

Yield: about 14–16 falafel
Soaking: 8–12 hours or overnight in the refrigerator
Active prep: about 20 minutes
Chilling: 30 minutes
Cooking: about 15 minutes total, 4–5 minutes per fried batch

Ingredients

  • 1 cup (about 200 g) dried chickpeas
  • ½ medium onion, roughly chopped
  • 3 garlic cloves
  • ¾ cup loosely packed fresh coriander
  • 1 green chilli
  • 1 teaspoon ground cumin
  • 1 teaspoon ground coriander
  • ¾ teaspoon garam masala
  • ½ teaspoon amchur
  • ¼ teaspoon Kashmiri chilli powder, optional
  • 1 teaspoon fine salt, or to taste
  • 1 tablespoon besan, plus more only if needed
  • ½ teaspoon baking powder
  • Neutral oil, for frying

Method

  1. Soak the chickpeas as described above, then drain, rinse and pat away obvious surface moisture.
  2. Add chickpeas, onion, garlic, coriander and green chilli to a food processor. Pulse in short bursts until the mixture resembles coarse crumbs.
  3. Transfer to a bowl and mix in cumin, ground coriander, garam masala, amchur, chilli powder if using, salt and 1 tablespoon besan.
  4. Squeeze a spoonful firmly in your palm. It should hold together. If it is genuinely wet or still breaks after compression, add a little more besan.
  5. Cover and refrigerate for 30 minutes.
  6. Stir in the baking powder, then shape into 14–16 compact balls.
  7. Heat frying oil to about 170–175°C / 340–350°F. Fry one test falafel first. If it holds, cook the remaining falafel in small batches for about 4–5 minutes, until deeply golden and crisp.

Air-Fryer Option

Shape the falafel slightly flatter than perfect spheres, brush or spray the surfaces with oil and air-fry at 190°C / 375°F for about 12–15 minutes, turning halfway. Start checking early toward the end rather than relying only on the clock.

Serve with: coriander-mint green chutney and cumin yogurt. These also work beautifully in pav, pita or on a mezze plate with homemade hummus.


2. Methi-Palak Falafel with Mint & Coriander

Spinach turns these falafel unmistakably green, but methi is what gives them character. Mint and coriander keep the flavour fresh, while sesame adds nuttiness and a light crust around the outside.

The important step is simple: squeeze the spinach properly dry. Not casually dry. Not “I shook the colander twice” dry. Properly dry.

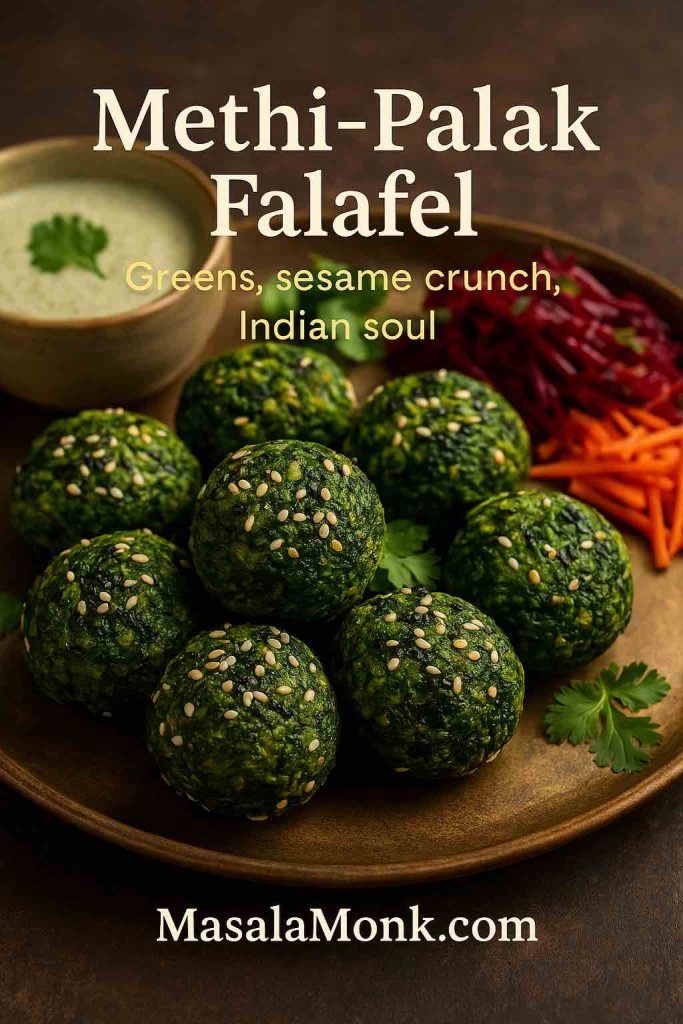
Green Methi-Palak falafel balls with sesame seeds, beetroot and carrot salad

Yield: about 14 small falafel
Soaking: 8–12 hours or overnight in the refrigerator
Active prep: about 25 minutes
Chilling: 30 minutes
Cooking: about 12 minutes

Ingredients

  • 1 cup (about 200 g) dried chickpeas
  • 60 g fresh spinach
  • ½ cup loosely packed fresh methi leaves
  • ½ cup fresh coriander
  • ¼ cup mint leaves
  • ¼ small onion
  • 2 garlic cloves
  • 1 green chilli
  • ¾ teaspoon ground cumin
  • ½ teaspoon ground coriander
  • ½ teaspoon amchur
  • Tiny pinch of nutmeg, optional
  • 1 teaspoon fine salt
  • 1 tablespoon besan, plus more only if required
  • ½ teaspoon baking powder
  • 2 tablespoons white sesame seeds
  • Oil, for cooking

Method

  1. Soak, drain and rinse the chickpeas as described above.
  2. Blanch the spinach for about 30–60 seconds, just until wilted. Cool immediately, then squeeze firmly until very little liquid comes out.
  3. Add chickpeas, squeezed spinach, methi, coriander, mint, onion, garlic and green chilli to a food processor. Pulse to a coarse green mixture rather than a paste.
  4. Mix in cumin, ground coriander, amchur, nutmeg if using, salt and 1 tablespoon besan.
  5. Chill for 30 minutes, then stir in the baking powder. Add a little more besan only if a firmly compressed portion will not hold.
  6. Shape into small round falafel and lightly roll or press each one in sesame seeds.

Appe/Paniyaram Pan Method

Brush the cavities lightly with oil. Add one falafel per cavity and cook over medium to medium-low heat, rotating as each surface firms. Cook until the falafel feels firm through the centre and no longer looks wet or pasty when one is broken open, usually around 10–12 minutes for small falafel.

Air-Fryer Option

Brush or mist lightly with oil and air-fry at 190°C / 375°F for about 12–14 minutes, turning once. Check early toward the end: small green falafel can dry out quickly.

Serve with: a creamy yogurt or coconut-yogurt dip, shredded beetroot, shredded carrot, coriander and lemon. That presentation also stays true to the vivid green falafel already shown in the article.


3. Aloo Tikki Falafel Chaat

Aloo tikki pulls this variation away from classic falafel in exactly the right direction. Cooked chickpeas keep the connection, potato gives the centre its softness, and ajwain, cumin, amchur and chaat masala take it straight toward North Indian street food.

Aloo Tikki falafel chaat with yogurt, green chutney, sev and pomegranate

Yield: 8 medium tikkis
Prep: about 25 minutes
Optional chilling: 20–30 minutes
Cooking: about 16 minutes total, around 8 minutes per batch

Ingredients for the Tikkis

  • 300 g boiled potatoes, cooled completely
  • 150 g cooked chickpeas, drained and dried well
  • 1 green chilli, finely chopped
  • 3 tablespoons chopped fresh coriander
  • ¾ teaspoon roasted cumin powder
  • ½ teaspoon ground coriander
  • ¾ teaspoon chaat masala
  • ½ teaspoon amchur
  • ¼ teaspoon ajwain, lightly crushed
  • ¼–½ teaspoon Kashmiri chilli powder, optional
  • ¾ teaspoon salt, or to taste
  • 2 tablespoons cornflour/cornstarch or rice flour
  • 1–2 tablespoons besan only if additional binding is needed
  • Oil, for shallow-frying

Method

  1. Use completely cooled potatoes. Coarsely crush the cooked chickpeas and mash the potatoes until mostly smooth but not gluey.
  2. Combine potatoes and chickpeas with green chilli, coriander, cumin, ground coriander, chaat masala, amchur, ajwain, chilli powder if using, salt and cornflour.
  3. Mix gently until the mixture holds together. Divide into eight portions and shape into broad patties about 1.5 cm thick.
  4. If the tikkis feel very soft, refrigerate for 20–30 minutes. If they are still too fragile after chilling, work a small amount of besan into the mixture.
  5. Heat a thin layer of oil in a heavy frying pan over medium heat.
  6. Cook the tikkis for about 3–4 minutes on the first side without constantly moving them. Flip once a proper crust has formed, then brown the second side.

Turn Them into Falafel Chaat

For all eight hot tikkis, have ready:

  • 1 cup plain yogurt, whisked smooth
  • 6 tablespoons green coriander-mint chutney
  • 4–6 tablespoons tamarind chutney
  • ½ small red onion, finely chopped
  • 4–6 tablespoons fine sev
  • 4 tablespoons pomegranate arils
  • Chaat masala
  • Chopped coriander

Arrange the hot tikkis on a plate, spoon over yogurt, then add green chutney and tamarind chutney. Finish with onion, sev, pomegranate, chaat masala and coriander. Serve immediately, while the tikki is still hot and crisp underneath the cool, tangy toppings.

Air-fryer option: brush both sides with oil and air-fry at 190°C / 375°F, turning once, until browned and firm. Start checking around 12 minutes. Shallow-frying still gives the more characteristic tikki crust.


4. Paneer Bhurji-Stuffed Falafel

Paneer works better here as a surprise in the centre than blended through the chickpea mixture. Keep the shell coarse and chickpea-heavy, then tuck a dry, fragrant paneer bhurji inside so the contrast is obvious when you cut one open.

Paneer bhurji-stuffed falafel cut open to show the spiced paneer filling

Yield: about 10–12 stuffed falafel
Soaking: 8–12 hours or overnight in the refrigerator
Active prep: about 30 minutes
Chilling: 30 minutes
Cooking: about 12 minutes total, 5–6 minutes per fried batch

For the Falafel Shell

  • 1 cup (about 200 g) dried chickpeas
  • ½ small onion
  • 3 garlic cloves
  • ½ cup fresh coriander
  • 1 green chilli
  • ¾ teaspoon ground cumin
  • ½ teaspoon ground coriander
  • ½ teaspoon garam masala
  • ¾ teaspoon fine salt
  • 1 tablespoon besan, plus more only if required
  • ½ teaspoon baking powder

For the Paneer Bhurji Filling

  • 100 g paneer, finely crumbled
  • 1 teaspoon oil or ghee
  • 1 teaspoon finely grated ginger
  • ½ green chilli, finely chopped
  • ¼ teaspoon turmeric
  • ½ teaspoon garam masala
  • ½ teaspoon kasuri methi, crushed
  • Small pinch of salt
  • 1 teaspoon lemon juice

Method

  1. Heat 1 teaspoon oil or ghee in a small pan. Add ginger and green chilli and cook briefly until aromatic.
  2. Add paneer, turmeric, garam masala, kasuri methi and salt. Cook for a few minutes until fragrant and deliberately fairly dry. Remove from the heat, stir in lemon juice and cool completely.
  3. Soak, drain and rinse the chickpeas as described above. Pulse them with onion, garlic, coriander and green chilli until coarse and crumbly.
  4. Mix in cumin, ground coriander, garam masala, salt and 1 tablespoon besan. Refrigerate for 30 minutes.
  5. Stir in the baking powder. If the shell mixture will not hold when firmly compressed, add a little more besan.
  6. Take roughly 2 tablespoons of falafel mixture and flatten it in your palm. Put about 1½–2 teaspoons of cooled paneer filling in the middle.
  7. Bring the chickpea mixture completely around the filling. Pinch any cracks closed and shape into a thick ball or slightly flattened oval. Keep the paneer completely enclosed.
  8. Fry at about 170–175°C / 340–350°F for roughly 5–6 minutes, until the shell is deeply golden and crisp.

Serve with: soft whole-wheat roti, kachumber, pickled red onion, coriander and lemony yogurt. If you want to make the filling from scratch, our guide to making paneer at home is useful here.


5. Curry Leaf Falafel with Mustard, Ginger & Green Chilli

Curry leaves change the aroma immediately. Ginger and green chilli bring a very different sort of heat from garam masala, while cumin, coriander and a small mustard tempering push the flavour toward South Indian pulse snacks without turning the recipe into a renamed vada.

Curry leaf falafel with crisp curry leaves, mustard seeds and coconut-coriander chutney

Yield: about 14 falafel
Soaking: 8–12 hours or overnight in the refrigerator
Active prep: about 20 minutes
Chilling: 30 minutes
Cooking: about 10 minutes total, 4–5 minutes per fried batch

Ingredients

  • 1 cup (about 200 g) dried chickpeas
  • ½ small onion
  • 3 garlic cloves
  • 2.5 cm / 1 inch fresh ginger
  • 1–2 green chillies
  • 15 fresh curry leaves
  • ½ cup fresh coriander
  • ½ teaspoon cumin seeds
  • ½ teaspoon coriander seeds
  • ¼ teaspoon black mustard seeds
  • 1 teaspoon neutral oil, for tempering the mustard
  • ¼ teaspoon freshly ground black pepper
  • Small pinch of hing, optional
  • 1 teaspoon fine salt
  • 1 tablespoon besan, plus more only if needed
  • ½ teaspoon baking powder
  • 2 tablespoons desiccated coconut, optional
  • Neutral oil, for cooking

Method

  1. Soak, drain and rinse the chickpeas as described above.
  2. Toast the cumin and coriander seeds briefly in a dry pan until aromatic. Cool, then crush roughly.
  3. Heat 1 teaspoon neutral oil in the same small pan. Add the mustard seeds and let them crackle. Remove from the heat and cool.
  4. Add chickpeas, onion, garlic, ginger, green chilli, curry leaves and coriander to a food processor. Pulse until coarse.
  5. Mix through the toasted spices, cooled mustard tempering, black pepper, hing if using, salt, 1 tablespoon besan and desiccated coconut if using.
  6. Chill for 30 minutes, then stir in baking powder. Add a little more besan only if a compressed portion will not hold.
  7. Shape into about 14 compact falafel.
  8. Fry at 170–175°C / 340–350°F for about 4–5 minutes, until golden and crisp.

Appe/paniyaram pan option: oil the cavities lightly and cook over medium to medium-low heat, rotating the falafel as each side firms and browns.

Serve with: coconut-coriander chutney, lemon and a few crisp fried curry leaves. The creamy coconut softens the chilli and mustard without hiding the curry-leaf aroma.


6. Daal Bati Falafel

Daal Bati is the outlier of the six, and it should be. Instead of copying the coarse chickpea interior of classic falafel, it leans into lentils, atta, ajwain and ghee. The result is firmer and more rustic, with the cracked golden surface of a tiny bati.

Baked Daal Bati falafel with cracked golden crust, green chutney and onion salad

Yield: about 10–12 small bites
Prep: about 25 minutes
Resting: 15 minutes
Baking: about 25 minutes

Ingredients

  • ½ cup total dry dal, using roughly equal amounts moong dal, masoor dal and urad dal; cook and drain well, then measure 1 cup for the dough
  • 1 cup (about 120 g) whole-wheat flour, plus more if required
  • 2 tablespoons fine semolina/sooji
  • 2 tablespoons melted ghee or mustard oil
  • ½ teaspoon ajwain, lightly crushed
  • ¼ teaspoon cumin
  • Small pinch of hing
  • 1 green chilli, very finely chopped
  • ½ teaspoon grated ginger
  • ¼ teaspoon turmeric
  • ¾ teaspoon salt, or to taste
  • Water only if required
  • A little additional ghee for brushing, optional

Method

  1. Cook the ½ cup mixed dry dals until tender but not watery. Drain very thoroughly, then measure 1 cup of cooked dal for the dough. Reserve any extra.
  2. Mash the drained dal coarsely.
  3. Add whole-wheat flour, semolina, ghee or mustard oil, ajwain, cumin, hing, green chilli, ginger, turmeric and salt.
  4. Bring everything together into a firm dough. If sticky, add whole-wheat flour 1 tablespoon at a time. If too dry to hold, add water 1 tablespoon at a time.
  5. Rest for 15 minutes while the oven heats to 200°C / 400°F.
  6. Divide into 10–12 small balls. Leave a slightly rugged surface rather than smoothing every crack away.
  7. Arrange on a baking tray, brush lightly with ghee or oil and bake for 22–28 minutes, turning once, until browned and firm outside.
  8. If desired, brush the hot bites very lightly with ghee as soon as they leave the oven.

Serve with: green chutney, sliced onion, carrot or cucumber and lemon wedges. Because this recipe contains atta, it is not gluten-free. If finished with ghee, it is not vegan either; mustard oil keeps the bites themselves plant-based.


Which Cooking Method Works Best?

The best cooking method changes with the mixture. A chickpea ball wants something different from a soft potato tikki or an atta-and-dal bite.

MethodBest forWhat to expect
Deep-fryingMasala Chana, Paneer-Stuffed, Curry LeafDeepest colour and crispest falafel-style crust
Shallow-fryingAloo TikkiBroad golden crust with a soft potato-chickpea centre
Air fryerMasala Chana, Methi-Palak, Aloo TikkiGood browning with less oil; slightly drier than frying
Appe/paniyaram panMethi-Palak, Curry LeafSmall rounded bites with low oil and good support while cooking
OvenDaal BatiFirm, rustic, bati-like crust rather than a fried falafel shell

For the chickpea-heavy versions, frying gives the clearest contrast between crisp exterior and coarse interior. For Aloo Tikki, broad contact with a hot pan is the point. Methi-Palak benefits from the support of an appe/paniyaram pan, while Daal Bati belongs in the oven. Use the method that suits the texture of each variation rather than forcing every recipe into every appliance.

More Indian Ways to Serve Falafel

Falafel Chaat

Put several hot Masala Chana or Methi-Palak falafel on a plate and lightly crack them open. Add whisked yogurt, green chutney, tamarind chutney, finely chopped red onion, chaat masala, sev, pomegranate and coriander. Assemble just before eating so the base keeps some crunch.

Falafel Pav

Split and toast pav with a little butter or oil. Spread one side with green chutney and the other with tamarind chutney. Add a slightly flattened Masala Chana Falafel, sliced onion and something crisp such as cucumber or cabbage. A little chaat masala over the filling ties it together.

Paneer-Stuffed Falafel Roti Roll

Warm a soft roti and add sliced Paneer Bhurji-Stuffed Falafel, kachumber, pickled onion, coriander and lemony yogurt. Because the paneer is already inside, the wrap does not need another heavy filling.

Indian-Style Mezze Plate

Try Masala Chana Falafel with hummus, cucumber, kachumber, pickled onions, green chutney, lemon and warm flatbread. If you are making the bread too, use our homemade pita bread recipe. For a sharper mango-pickle note, a spoonful of amba sauce fits naturally beside falafel and hummus.

Falafel Bowl

Start with rice, millet, couscous or chopped salad. Add falafel, cucumber, tomato, onion and something creamy such as hummus or yogurt. Then choose one strong Indian accent—green chutney, tamarind, achar, chaat masala or coconut chutney—rather than using every condiment at once.

Fixing These Indian Falafel Variations

ProblemLikely causeFix
Masala or Curry Leaf falafel breaks in oilMixture too wet, too loose or oil too coolDrain thoroughly, compress firmly, fry one tester and add a little besan only if needed
Methi-Palak falafel is soggySpinach retained too much waterSqueeze blanched spinach much more thoroughly before processing
Paneer falafel cracks openWet filling, too much filling or paneer too close to the surfaceCook bhurji drier, cool completely and use a smaller amount
Aloo Tikki sticks or breaks when flippedTurned before the crust formedLeave it undisturbed longer and flip only when it releases more easily
Air-fried green falafel is dryToo little surface oil or too much cooking timeLightly oil and begin checking earlier
Daal Bati mixture is stickyCooked dal retained too much waterDrain longer and add atta gradually rather than dumping in a large amount

If the first chickpea falafel disintegrates, stop there. One tester is enough to tell you whether the mixture needs drying, firmer shaping or hotter oil.

Make Ahead, Store & Freeze

Masala Chana and Curry Leaf: the mixture can be prepared ahead and refrigerated, with baking powder stirred in shortly before shaping and cooking.

Methi-Palak: shorter holding is better because fresh greens continue releasing moisture as they sit.

Paneer-Stuffed: prepare the dry paneer bhurji and chickpea shell mixture separately, refrigerate them, then stuff closer to cooking.

Aloo Tikki: shape the patties, freeze in a single layer until firm, then transfer to a freezer-safe container with parchment between layers if stacking.

Daal Bati: bake, cool and refrigerate. Reheat in a hot oven or air fryer to restore the firmer exterior.

For broader freezing and reheating guidance for classic chickpea falafel, see the full falafel guide.

Indian Falafel FAQs

Can you put garam masala in falafel?

Yes. Classic falafel already uses spices such as cumin and coriander, so a restrained amount of garam masala fits naturally. In the Masala Chana version, it adds an Indian finish without masking the chickpeas and fresh herbs.

Which Indian chutney goes best with falafel?

Coriander-mint green chutney is the most versatile choice for Masala Chana, Methi-Palak and Paneer-Stuffed Falafel. Tamarind works particularly well with Aloo Tikki Falafel Chaat or falafel pav, while coconut chutney makes the most sense beside Curry Leaf Falafel.

Can I make falafel in an appe or paniyaram pan?

Yes. It is particularly useful for Methi-Palak and Curry Leaf Falafel because the cavities support the mixture while each surface cooks. Brush the cavities with a little oil and rotate the falafel as they firm and brown.

Why is my spinach falafel soggy?

Usually because the spinach contains too much water. After blanching, cool it and squeeze aggressively before adding it to the chickpeas. Removing moisture is preferable to compensating later with a large amount of besan.

Can falafel be made with moong dal?

Yes, but replacing chickpeas with another pulse changes both texture and technique. Whole or split moong can make excellent falafel-inspired fritters and patties, but it should be treated as its own formulation rather than a blind one-for-one substitution.

How do you make falafel chaat?

Put hot falafel or Aloo Tikki Falafel on a plate and add whisked yogurt, green chutney, tamarind chutney, onion, chaat masala, sev, pomegranate and coriander. Assemble just before serving so some of the crust stays crisp.

Can paneer be added to falafel?

Yes. Stuffing works particularly well because the paneer remains a distinct soft centre rather than changing the texture of the entire chickpea mixture. Keep the bhurji fairly dry and cool it completely before stuffing.

Which Indian falafel works best in an air fryer?

Masala Chana is the easiest starting point. Methi-Palak also works well, but check it early because small green falafel can dry out. Aloo Tikki can be air-fried, although shallow-frying gives the more characteristic crust. Daal Bati belongs in the oven, and frying remains the most reliable method for the stuffed paneer version.

Posted on Leave a comment

Garlic Bread Reimagined: Elevating the Classic with a Keto Twist and Irresistible Variations!

KETO GARLIC BREAD

Few foods captivate the senses quite like garlic bread. The golden, crusty exterior, the rich aroma of garlic butter, the indulgent chew — it’s an iconic comfort food that’s universally loved.

But if you’re following a keto or low-carb lifestyle, traditional garlic bread is a problem: loaded with refined carbs and wheat flour, one slice can easily contain more carbs than your entire daily allowance.

Thankfully, the world of keto innovation has transformed garlic bread into something not only possible but better — deeply flavorful, indulgent, and entirely macro-friendly. This comprehensive guide walks you through everything you need to master keto garlic bread, offering multiple variations, practical recipes, expert techniques, ingredient science, and flavor innovations.


🌟 Why Reinvent Garlic Bread for Keto?

Let’s start with the problem.

Traditional garlic bread:

  • Made from French bread or Italian loaf
  • Typically 25-30g carbs per slice
  • Refined flour, no fiber, spikes blood sugar

The keto lifestyle requires:

  • 20-30g carbs total per day
  • Higher fat, moderate protein
  • Minimal sugars and refined starches

The goal: capture the same satisfying taste, texture, and mouthfeel of garlic bread while staying true to keto macros. This is absolutely achievable — once you understand the building blocks.


🧬 The Science of Keto Bread: Replacing Gluten & Carbs

Traditional bread owes its structure to gluten, which creates the elastic network that traps air bubbles, giving bread its signature chew.

Keto bread replaces gluten structure by manipulating:

  • Protein matrices (from cheese, eggs, or whey protein)
  • Fiber binders (psyllium husk, xanthan gum)
  • Fat emulsifiers (cream cheese, sour cream, ghee)

The result: chewy, satisfying bread analogs that hold together, brown beautifully, and offer complex flavor.


🍞 The Best Keto Garlic Bread Bases

Here’s a complete breakdown of your options — each with its strengths, trade-offs, and ideal use cases.


1️⃣ Fathead Dough (The Keto Classic Workhorse)

Core Ingredients:

  • Shredded mozzarella (protein matrix)
  • Cream cheese (fat and tenderness)
  • Almond flour (structure)
  • Egg (binding)
  • Baking powder (lift)
  • Psyllium husk (for elasticity and chew)

Why it’s fantastic:

  • Excellent bread-like chew
  • Flexible for loaves, rolls, sticks, or pull-apart bread
  • Freezes well for make-ahead batches

Pro Tip:
Use block mozzarella shredded at home for best melt and elasticity. Pre-shredded often contains anti-caking agents that affect dough texture.


2️⃣ Air Fryer Cheese Wrap Garlic Bread (The Ultra-Fast Version)

Core Ingredients:

  • Store-bought keto cheese wraps (e.g. egg-thin wraps, almond flour wraps)
  • Butter + garlic mixture
  • Parmesan or shredded mozzarella

Why it’s fantastic:

  • Lightning-fast — ready in under 10 minutes
  • Air fryer gives crispy edges and gooey centers
  • Great for quick snacks or appetizers

Method:

  • Brush wrap with garlic butter
  • Sprinkle cheese generously
  • Air fry at 375°F for 5-7 minutes

3️⃣ Cloud Bread (The Fluffy, Light Option)

Core Ingredients:

  • Egg whites (foaming structure)
  • Cream cheese or mascarpone
  • Cream of tartar (stabilizes meringue)
  • Garlic powder or fresh garlic

Why it’s fantastic:

  • Virtually zero carbs
  • Extremely light and airy — almost melts in your mouth
  • Perfect paired with lighter dishes like soups or salads

Limitation:
It lacks the chewiness of regular bread but delivers a wonderfully light texture that works for those preferring softer bites.


4️⃣ Almond Flour Loaf (The Sliceable, Bread-Like Classic)

Core Ingredients:

  • Almond flour (main structure)
  • Baking powder (leavening)
  • Eggs (binding)
  • Crème fraîche or sour cream (moisture, tenderness)
  • Mozzarella or Parmesan (depth of flavor)
  • Garlic and herbs

Why it’s fantastic:

  • Slices like traditional bread
  • Stores well, easy for batch baking
  • Holds up to slicing, spreading, and toasting

Pro Tip:
Use blanched almond flour for finer texture and less grittiness.


🧄 The Flavor Centerpiece: Keto Garlic Butter

No matter which base you choose, garlic butter is what transforms keto bread into garlic bread.

Essential Garlic Butter Formula:

  • ½ cup unsalted butter (softened)
  • 3-5 cloves minced or roasted garlic
  • 1 tbsp chopped fresh parsley
  • 1 tsp salt
  • 1 tsp lemon juice or apple cider vinegar (optional, balances richness)

Flavor Variations:

Add-OnFlavor Benefit
Truffle oilDeep, earthy luxury
Chili flakesSpicy heat
Smoked paprikaSubtle smoky depth
Bacon bitsSalty, meaty crunch
Pesto drizzleFresh herbal brightness
Fresh rosemaryMediterranean savory notes

Pro Tip:
Roasting your garlic beforehand makes it milder, sweeter, and more complex.


🔥 Cooking Techniques to Perfect Keto Garlic Bread

Both traditional ovens and air fryers can deliver exceptional results — depending on your base and goal.

MethodBest ForCook Time
Air FryerWraps, quick bakes, smaller portions5-7 minutes at 375°F
Oven BakeLoaves, pull-apart bread, rolls15-25 minutes at 350-375°F
Broiler/Blow TorchFinal blistering, golden finish1-2 minutes

Pro Tip:
For pull-apart bread, baste with garlic butter both before and after baking to lock in moisture and create rich layers of flavor.


🧮 Macronutrient Breakdown (Sample — Fathead Version)

NutrientPer Serving
Net Carbs2-3g
Fat16-20g
Protein8-10g
Calories200-250

Perfectly aligned with standard keto macros, allowing you to indulge without guilt.


🍳 Complete Keto Garlic Bread Recipe (Highly Practical Guide)

Ingredients (Makes 8 servings)

For the dough:

  • 1 ½ cups shredded mozzarella
  • 2 tbsp cream cheese
  • ¾ cup almond flour
  • 1 egg
  • 1 tbsp psyllium husk
  • 1 tsp baking powder

For the garlic butter:

  • ½ cup unsalted butter, softened
  • 4 cloves roasted garlic, mashed
  • 2 tbsp fresh parsley, chopped
  • 1 tbsp grated Parmesan
  • Salt, to taste

Directions

Step 1 — Make the Dough:

  1. Melt mozzarella and cream cheese together in microwave-safe bowl (90 seconds).
  2. Stir thoroughly until smooth.
  3. Add almond flour, psyllium husk, baking powder, and egg.
  4. Knead mixture until a uniform dough forms.

Step 2 — Shape the Bread:

  • Roll into loaf shape, pull-apart rolls, or flatbread depending on your preference.

Step 3 — Bake:

  • Preheat oven to 375°F.
  • Bake for 15-20 minutes until golden and set.

Step 4 — Prepare Garlic Butter:

  • Mix softened butter with roasted garlic, parsley, Parmesan, and salt.

Step 5 — Finish:

  • Brush garlic butter over hot bread.
  • Optional: broil for 1-2 minutes to achieve a gorgeous golden blister.

🍽 Serving Suggestions

  • Dipping Sauces: Low-sugar marinara, garlic aioli, pesto, or keto ranch.
  • Main Pairings: Keto pasta alternatives (zucchini noodles, shirataki), grilled meats, hearty stews.
  • Appetizers: Slice into sticks or knots for party platters.
  • Meal Prep: Make ahead, refrigerate for up to 3 days, reheat in air fryer for maximum crisp.

💡 Creative Variations to Explore

VariationHighlight
Pull-Apart Garlic Bread BitesEntertaining crowd-pleasers
Truffle Butter Garlic KnotsGourmet dinner parties
Air Fryer Garlic Bread ChipsKeto snacking
Bacon & Jalapeño Garlic BreadSmoky-spicy indulgence
Dairy-Free Almond Cheese VersionPlant-based option

🚀 Pro Tips for Success

  • Use parchment paper for easier handling of sticky dough.
  • Always cool slightly before slicing to maintain structure.
  • Don’t skip roasting garlic — it’s a game changer.
  • For ultra-soft texture, add 1 tbsp sour cream or crème fraîche to dough.

🔍 Why Keto Garlic Bread Is Worth Mastering

  • Satisfies intense bread cravings.
  • Customizable to every flavor preference.
  • Fits seamlessly into keto macros.
  • Impressive for entertaining — your guests may not realize it’s keto!
  • Easy to batch-cook and store for busy weeks.

Final Thought:
With the power of keto recipe science and a little creativity, you can enjoy garlic bread that’s not just “good for keto” — it’s outstanding, period.

You don’t need to compromise flavor, texture, or indulgence to stay on track. Mastering keto garlic bread might just become one of your most satisfying keto cooking achievements.


Ready to bake? Pick your base, prep your garlic butter, and elevate your keto comfort food game to delicious new heights.

🔎 10 FAQs and Answers for Keto Garlic Bread


1️⃣ Can I make keto garlic bread without almond flour?

Yes. You can substitute coconut flour (using about ¼ the amount of almond flour) or use fathead variations that rely more heavily on cheese. Cloud bread is also entirely almond flour-free. Each option gives a different texture, so choose based on your preference.


2️⃣ What’s the lowest-carb version of keto garlic bread?

The cloud bread version typically has less than 1g net carb per serving, making it the lowest-carb option. Air fryer cheese wraps are also extremely low-carb and fast to prepare.


3️⃣ Can I freeze keto garlic bread?

Absolutely. Fathead-based or almond flour loaves freeze very well. Cool completely, slice, and store in freezer bags for up to 3 months. Reheat directly from frozen in the oven or air fryer for best texture.


4️⃣ Is dairy-free keto garlic bread possible?

Yes, but more challenging. Substitute dairy-free mozzarella (almond or coconut-based) and use vegan cream cheese. The structure may be softer, but it’s achievable with some recipe adjustments.


5️⃣ Why does my fathead dough feel too sticky or oily?

This usually happens if:

  • The cheese wasn’t melted evenly.
  • The almond flour wasn’t fully incorporated.
  • The dough wasn’t allowed to cool slightly before kneading.

Knead with lightly oiled hands or chill for a few minutes to firm it up before shaping.


6️⃣ What’s the best type of mozzarella for fathead dough?

Use low-moisture, full-fat block mozzarella. Avoid pre-shredded varieties, as anti-caking agents prevent smooth melting and elasticity.


7️⃣ Can I make keto garlic bread in the air fryer?

Yes, very successfully! Cheese wraps, fathead dough mini-loaves, or garlic butter-topped chaffles work beautifully in the air fryer. Typical air frying time is 5–7 minutes at 375°F.


8️⃣ How do I make garlic bread more fluffy and less dense?

  • Add 1–2 tablespoons of sour cream or crème fraîche to the dough.
  • Do not overmix.
  • Use fresh baking powder for maximum lift.
  • Allow the dough to rest before baking.

9️⃣ Can I make pull-apart or party versions?

Definitely. Roll the fathead dough into small balls, arrange them close together, brush with garlic butter, and bake. This creates shareable pull-apart garlic bread that’s perfect for parties.


🔟 How do I prevent keto garlic bread from being too “eggy”?

Use only the required amount of egg — don’t add extra. For stronger garlic butter flavors, roast your garlic beforehand to help balance any remaining egg taste.