Some days call for a clean, straight cup of coffee. Other days beg for hot chocolate—thick, sweet, and unapologetically comforting. Then there are the in-between days, when you want both: the aroma and edge of coffee plus the soft, chocolatey warmth of cocoa. That’s where hot chocolate coffee earns its place.
Hot chocolate coffee is simple in concept—coffee and chocolate together in one drink—but it’s surprisingly flexible in practice. You can make it bold or mellow, intensely chocolatey or lightly kissed with cocoa. You can go fast with a packet, slow with a real cocoa paste, or café-style by adding espresso to a proper hot chocolate base. And when the weather refuses to match your cravings, you can even pivot into a chilled version—hot cocoa cold brew—so you still get chocolate comfort without the steam.
This is a reader-first guide built to be genuinely useful. You’ll get three reliable methods (each with clear steps), the small decisions that make the difference between “fine” and “I’m making this again,” a set of ratios you can memorize, variations that taste distinct (not like the same drink in a new outfit), plus a crowd-friendly approach for gatherings that won’t punish your equipment.
If you want a stronger foundation for choosing a coffee base—because strength matters when chocolate enters the picture—this guide to coffee brewing methods is a helpful companion.
Hot chocolate coffee at a glance
If you want the “what should I do today?” answer before you read a word more:
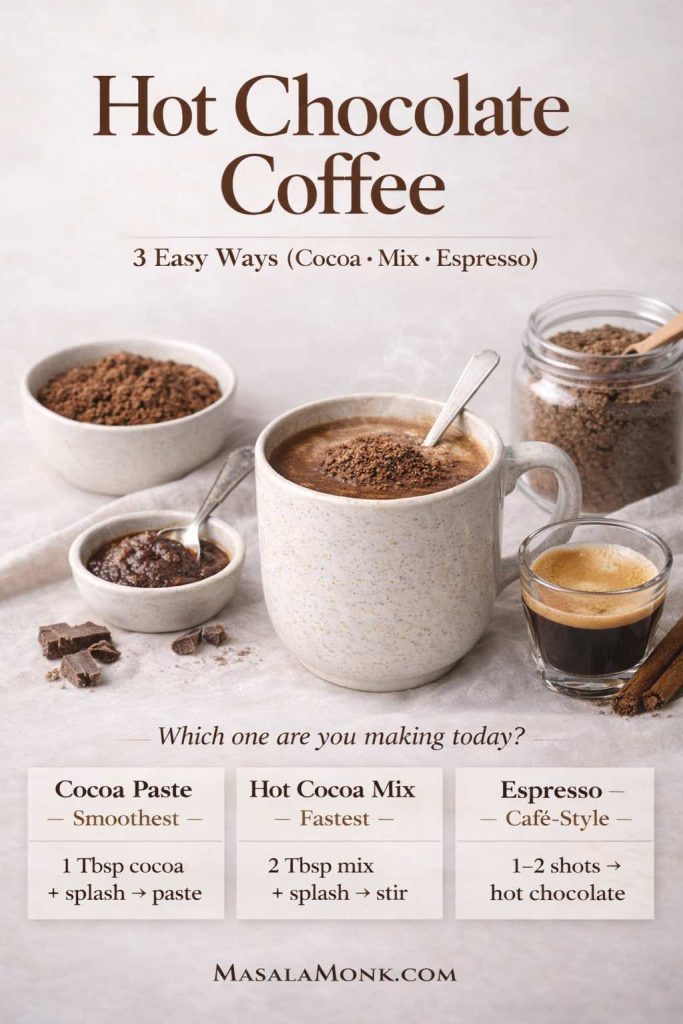
- Best everyday version: cocoa paste + strong brewed coffee + milk
- Fastest version: hot chocolate mix in coffee (two-minute comfort)
- Most café-like version: espresso added to hot chocolate (deep, dessert-forward, bold)
Each method works. The difference is mood, time, and whether you want coffee leading or chocolate leading.
Also Read: Cold Brew Espresso Martini: How to Make It (Step-by-Step Recipe)
Coffee and hot chocolate: what it is, and why it works
At its heart, hot chocolate coffee is exactly what it sounds like: coffee combined with chocolate in one drink. The chocolate might come from cocoa powder, from hot chocolate mix, from chocolate syrup, or from a full hot chocolate base made with milk. The coffee might be brewed coffee, espresso, moka pot concentrate, instant coffee, or cold brew.
The reason it works is beautifully simple: coffee brings bitterness, roastiness, and aroma; chocolate brings richness, sweetness, and body. When the balance is right, the mug feels cohesive—like one drink that happens to have two kinds of comfort, instead of coffee and cocoa competing for attention.
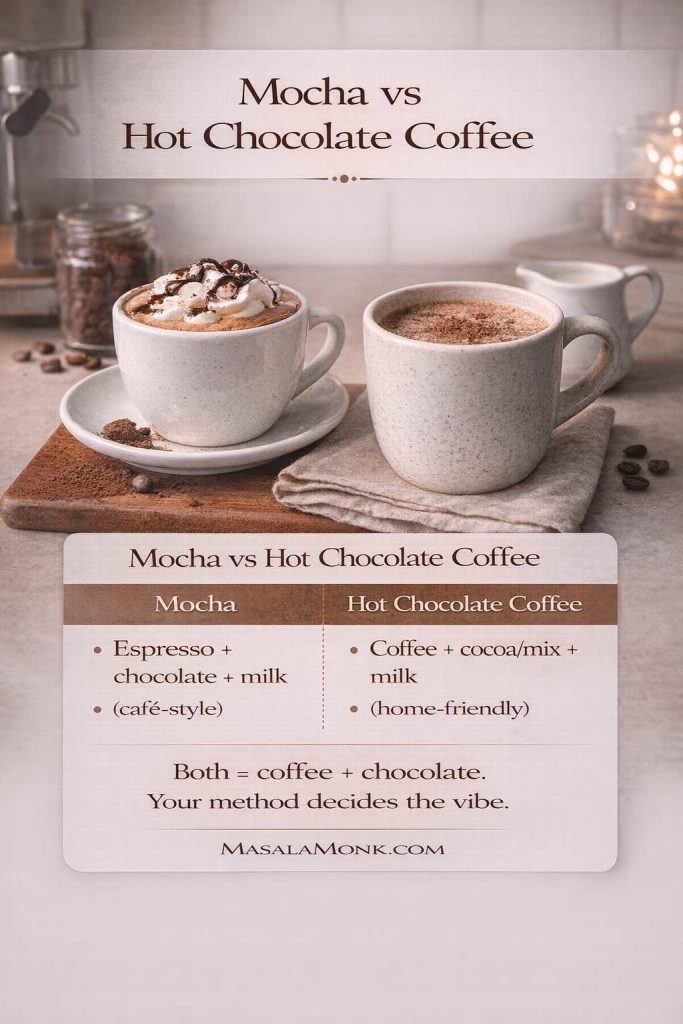
You’ll often hear people call this a “mocha.” In most cafés, a mocha usually means espresso + chocolate + milk (often with foam). Definitions support the same idea; you can see it in the Cambridge Dictionary’s mocha entry and Merriam-Webster’s mocha definition. Still, you don’t need the label to enjoy the mug. If anything, thinking in terms of “hot chocolate coffee” helps because it keeps the drink flexible—you can go coffee-forward, chocolate-forward, or right down the middle.
And that’s the magic: you decide what the drink becomes, every single time. One day you’re adding hot chocolate to coffee for a quick cozy upgrade. Another day you’re adding coffee to hot chocolate because you want chocolate to lead and caffeine to quietly support. Both are valid. Both are delicious. And both can happen at home, without a café line or a complicated setup.
Also Read: Cranberry Moscow Mule Recipe: A Festive Holiday Cocktail With Easy Variations

The two decisions that change everything
Before we jump into the methods, two small choices matter more than people expect:
- How strong your coffee is
- How you introduce cocoa
These aren’t fussy details. They’re the difference between “a little watery” and “exactly what I wanted.”
1) Coffee strength: don’t let chocolate bully your coffee
Chocolate has a surprisingly loud voice. If your coffee is weak, the drink can drift into “sweet cocoa with a faint coffee memory.” Sometimes that’s fine. Often, it’s not what you were craving—especially if you wanted coffee aroma and a bit of roast edge.
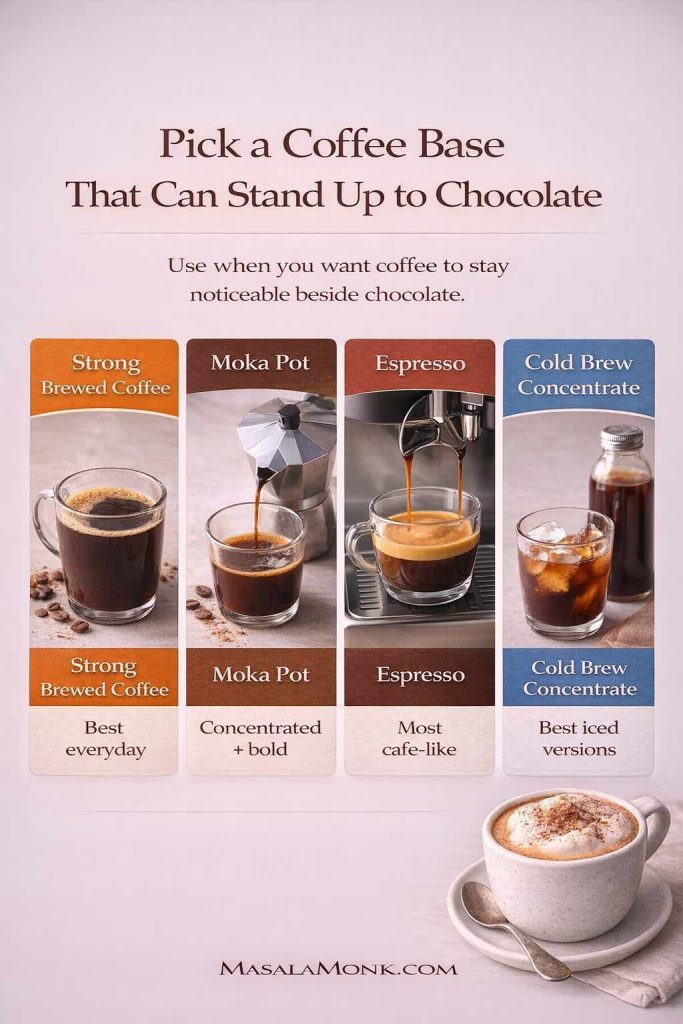
So aim for a base that can hold its own:
- Robust brewed coffee (slightly stronger than your usual cup)
- Moka pot coffee (concentrated and bold)
- Espresso (one or two shots)
- Cold brew concentrate (for iced versions)
If you want to sharpen your moka pot technique, this moka pot mastery guide is a great refresher. And if you want clarity on espresso—especially outside café contexts—this quick espresso guide is a useful primer.
2) Cocoa clumps: always give cocoa a head start
Cocoa powder doesn’t dissolve like sugar. If you toss cocoa into a full mug of coffee, it tends to float, clump, and form dry pockets that never fully integrate. That’s why so many people conclude that coffee with hot chocolate powder “always turns gritty.” It doesn’t have to.
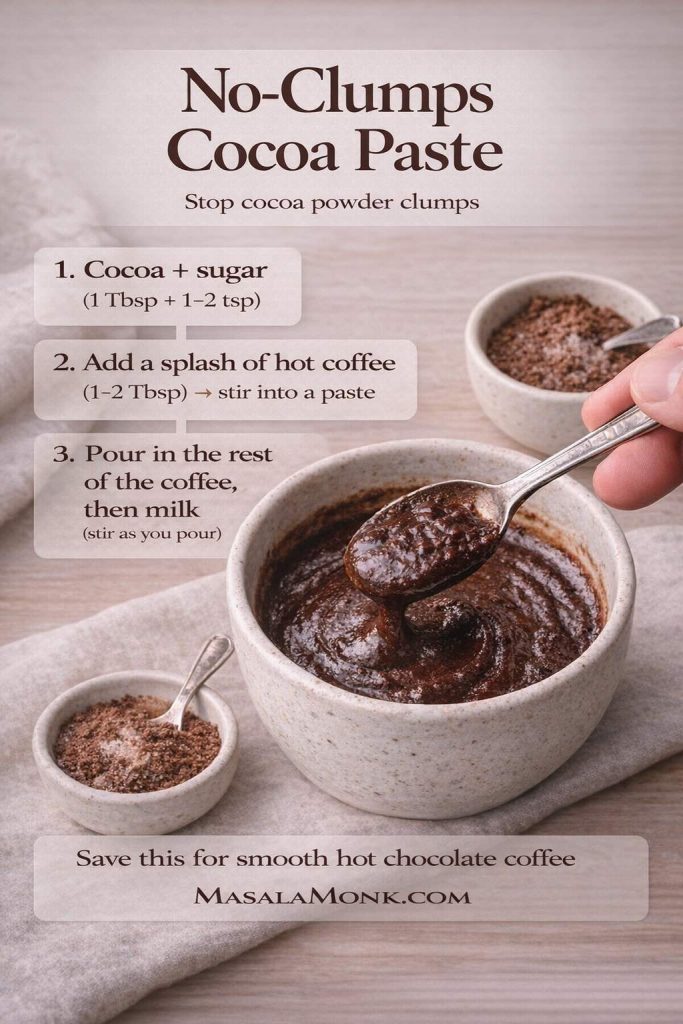
The fix is simple: make a paste first. Cocoa + sweetener + a small splash of hot coffee, stirred until smooth and glossy. Once the cocoa is hydrated, it blends beautifully.
This one habit turns hot chocolate coffee from a gamble into a repeatable ritual.
Also Read: Baked Ziti Recipe Collection: 15 Easy Variations
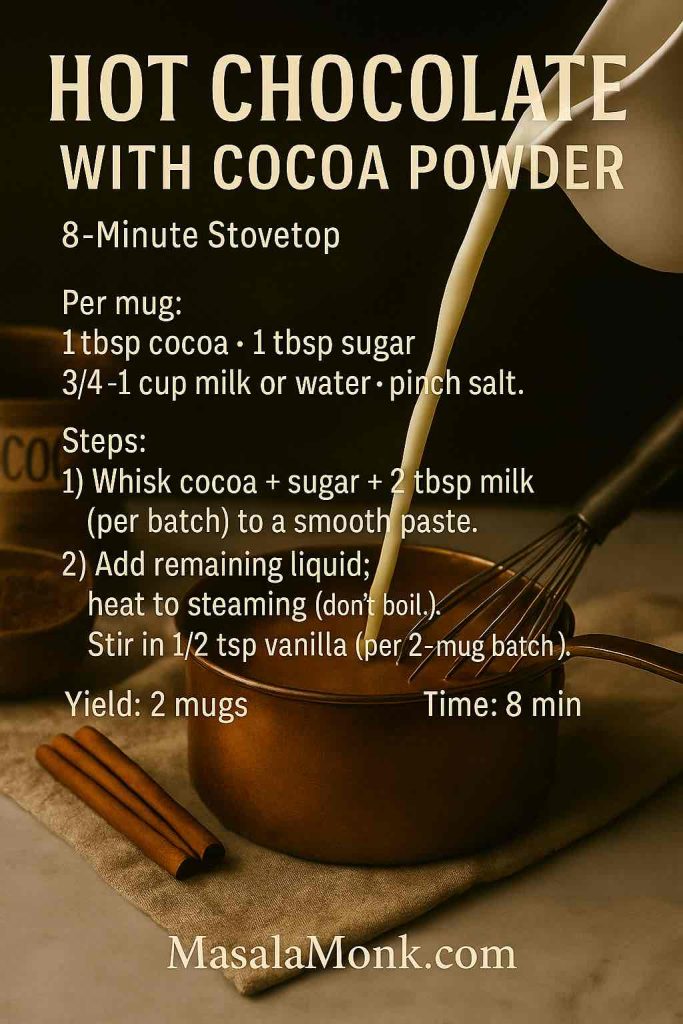
Method 1: Hot chocolate coffee with cocoa powder (the best everyday version)
If you want the version you’ll come back to again and again, start here. This method is controllable, consistent, and easy to personalize. It also scales well—once you learn it, you can adjust sweetness, intensity, and texture without needing a new recipe every time.
Time: 3–5 minutes
Difficulty: Easy
Best for: Balanced mugs that taste intentional
Ingredients (one generous mug)
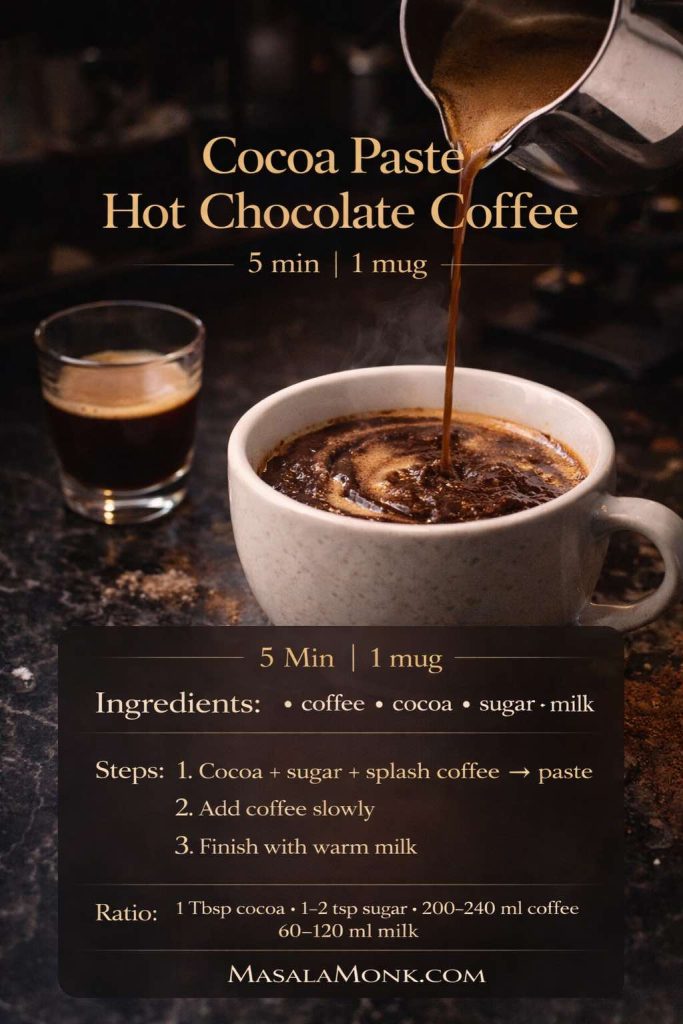
- 200–240 ml hot brewed coffee (strong is best)
- 1 tablespoon unsweetened cocoa powder
- 1–2 teaspoons sugar (or jaggery powder), to taste
- 60–120 ml milk (dairy, oat, soy—whatever you like)
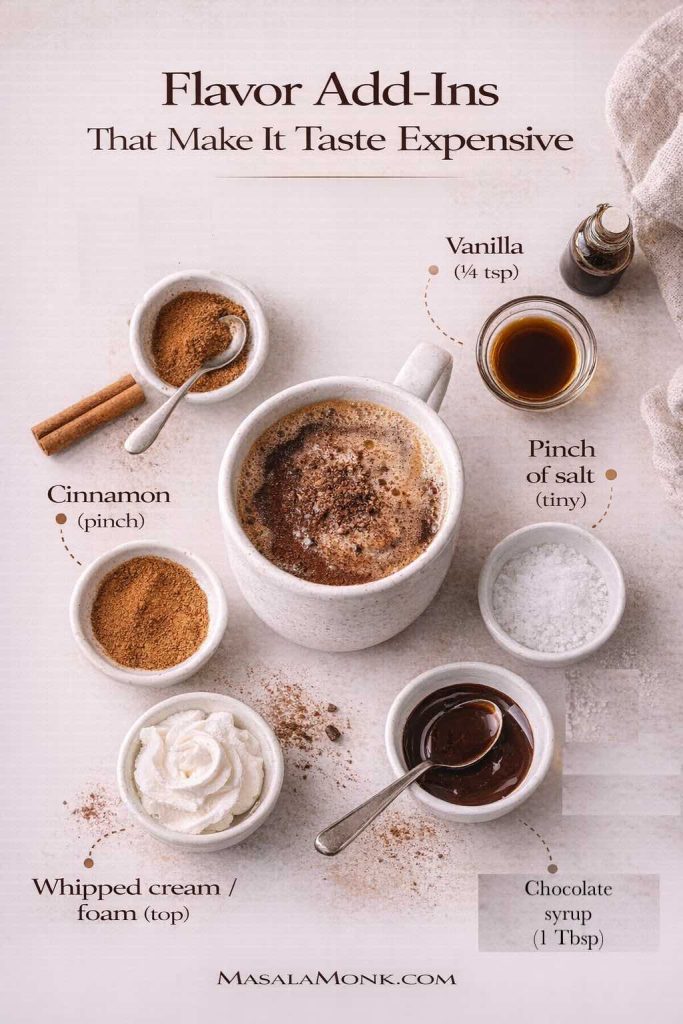
- ¼ teaspoon vanilla (optional)
- Tiny pinch of salt (optional, but genuinely helpful)
Step-by-step method
Step 1: Make the cocoa paste (this is the whole trick)
Add cocoa powder and sugar to your mug. Pour in 1–2 tablespoons of hot coffee (hot matters; lukewarm coffee makes cocoa harder to smooth). Stir until you have a glossy paste—no visible dry cocoa, no gritty pockets.
Think of this as a miniature chocolate “starter.” Once it’s smooth, the rest is easy.
Step 2: Build the drink gradually
Add the remaining coffee slowly, stirring as you go. This keeps the drink silky and prevents cocoa from clumping. It also helps the chocolate flavor distribute evenly so you don’t get “chocolate at the bottom, coffee at the top.”
Step 3: Soften with milk
Add warm milk until the mug feels balanced. More milk makes it gentler and creamier; less milk keeps it coffee-forward. If you like your coffee bold, start with a small splash and adjust. If you want a softer, rounder drink, be generous.
Step 4: Finish thoughtfully (optional, but worth it)
A little vanilla can make chocolate taste rounder and more dessert-like, even if you don’t add much sugar. A tiny pinch of salt can make chocolate taste deeper without making the drink taste salty. It’s subtle, but it works.
How to tune it without overthinking
This is where the method becomes yours:
- Too intense? Add milk before adding sugar. Milk changes both texture and flavor balance.
- Too bitter? Increase sugar slightly or reduce cocoa by ½ teaspoon next time.
- Too mild? Add ½ teaspoon more cocoa and stir briskly (or use a stronger coffee base next time).
- Too sweet? Reduce sugar, then add a pinch of salt or a touch more cocoa to deepen chocolate flavor without leaning on sweetness.

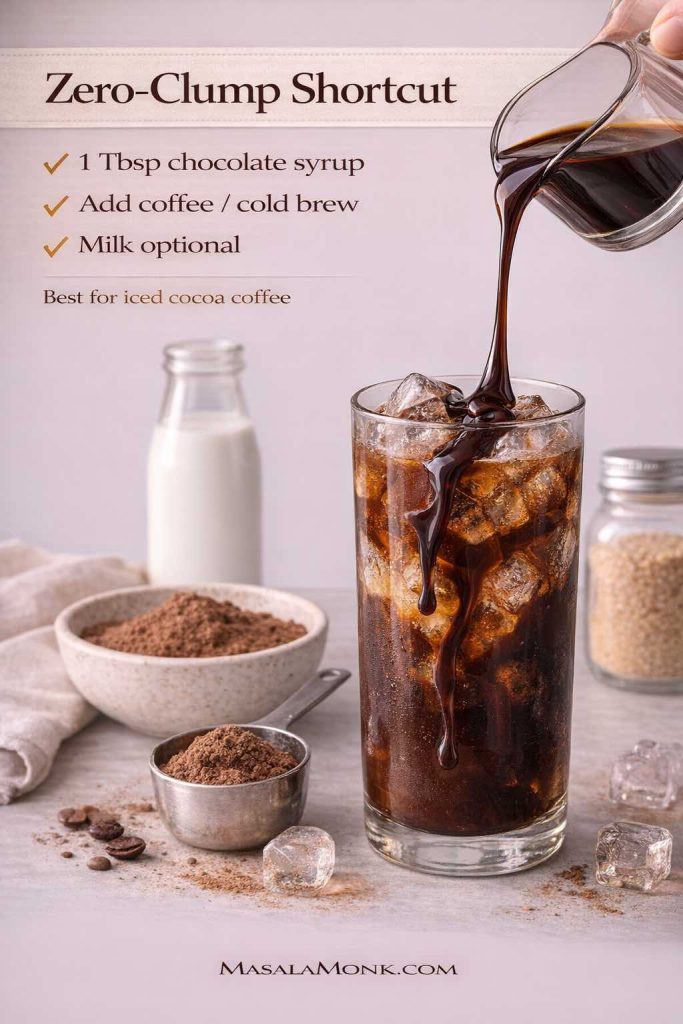
A smoother shortcut: chocolate syrup
If you want something that blends instantly—especially for iced versions—chocolate syrup can deliver a seamless chocolate base with minimal effort. If you like making your own, this quick homemade chocolate syrup is fast enough to feel practical.
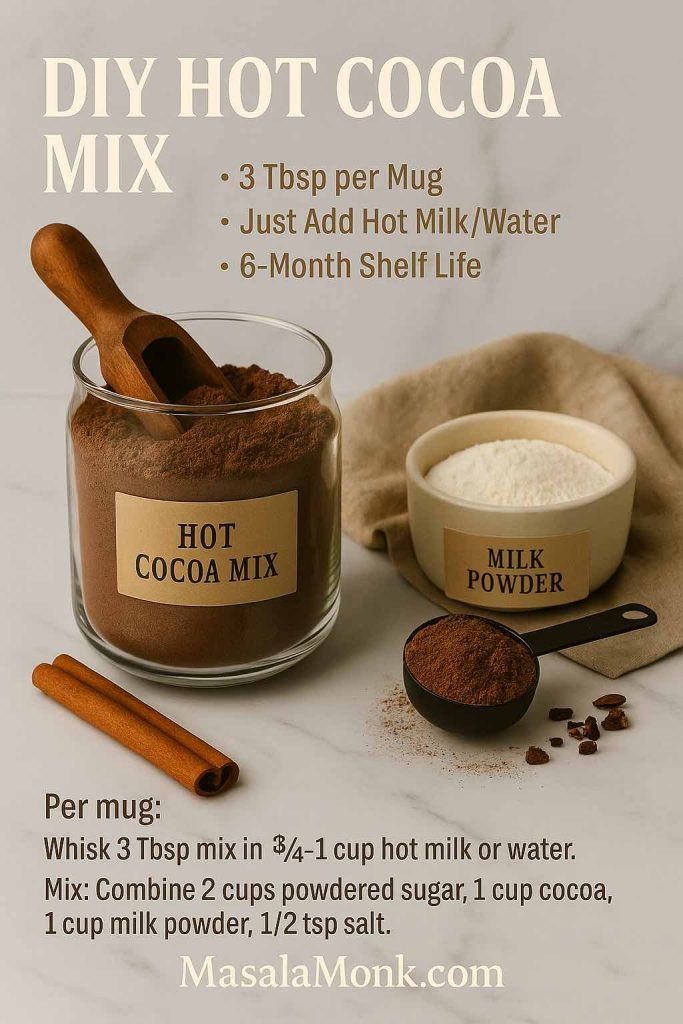
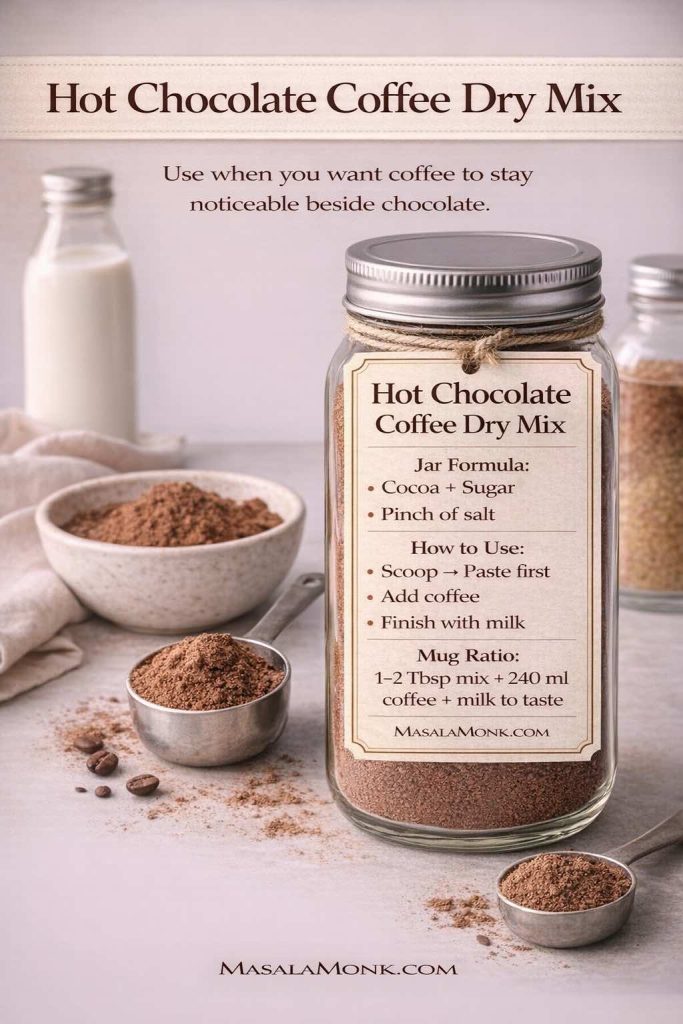
A DIY “hot chocolate coffee mix” you can keep in a jar
If you like the convenience of packets but want a homemade approach, make a small jar of dry blend: cocoa + sugar + a pinch of salt. Then you can make hot chocolate coffee in seconds—just scoop your mix, add a splash of coffee to form a paste, and build the mug.
If you want a deeper ingredient lens (and why cocoa type changes flavor), this cacao vs chocolate guide is worth reading.
Also Read: Green Chutney Recipe (Coriander–Mint / Cilantro Chutney)
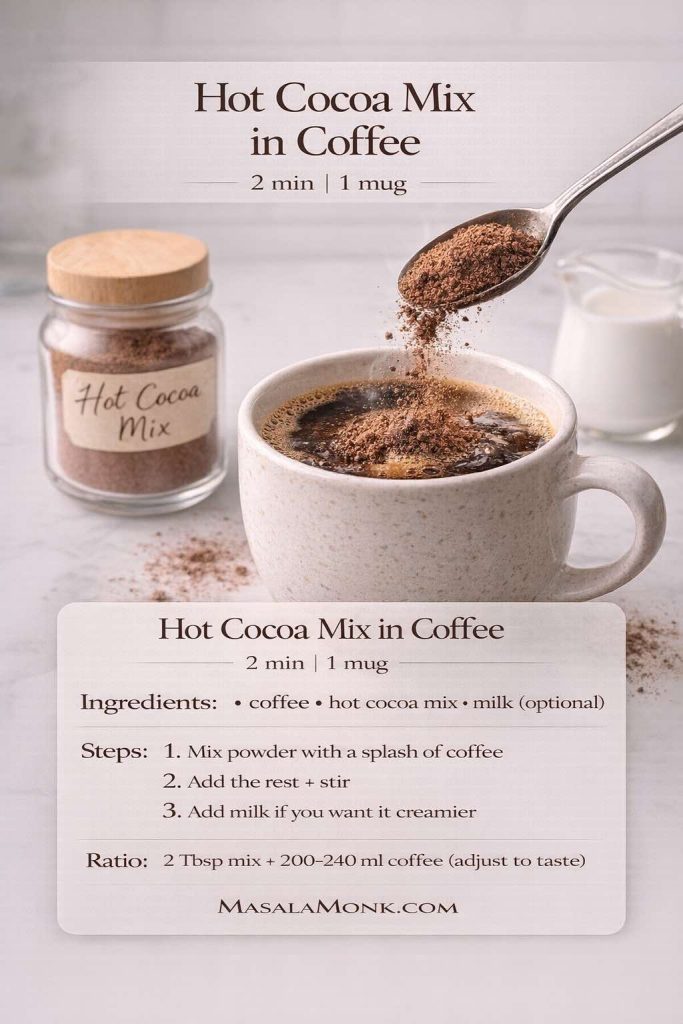
Method 2: Hot cocoa mix in coffee (the quickest mug you’ll ever love)
Some days don’t invite ceremony. They demand speed, comfort, and a clean path from “not awake” to “functioning.” This is where hot chocolate mix shines.
Yes—adding hot cocoa mix to coffee can taste genuinely good. The key is not dumping powder into a full mug and hoping for the best. The “smooth way” takes about ten extra seconds and saves the whole drink.
Time: 2 minutes
Difficulty: Easiest
Best for: Quick comfort, minimal cleanup
Ingredients (one mug)
- 200–240 ml hot coffee
- 2 tablespoons hot chocolate mix (start here)
- Optional: 30–90 ml milk
Step-by-step method
Step 1: Start with the mix
Add your hot chocolate mix to the mug.
Step 2: Add a small splash of coffee and stir smooth
Pour in just a little hot coffee and stir until the powder is fully moistened and smooth. This is the same logic as the cocoa paste method, only you’re working with a sweeter, pre-blended powder. It prevents the classic “powdery pockets” problem.
Step 3: Add the rest of the coffee and stir again
Now build the mug with the remaining coffee. Stir well.
Step 4: Add milk if you want it creamier
A splash of milk rounds everything out. If your hot chocolate mix includes powdered milk, you might not need much. If it’s a dark or intense mix, milk can help balance it without adding more sugar.
How to make it taste less “packet-like”
Some mixes lean very sweet. That’s not always bad, but if you want more depth:
- Use 1 tablespoon of mix + 1 teaspoon cocoa powder
- Add a small splash of milk
This gives you more real cocoa flavor without overloading the mug with sugar.
When you want a “real” hot chocolate baseline
It’s helpful to know what truly rich hot chocolate tastes like, even if you don’t make it every time. A straightforward, dependable reference is this homemade hot chocolate recipe. Once you have that flavor in your mind, it becomes easier to adjust your coffee-and-chocolate balance: you’ll know when you want coffee to lead versus when you want chocolate to lead.
Also Read: Paper Plane Cocktail Recipe + Best Amaro Substitutes & Tips
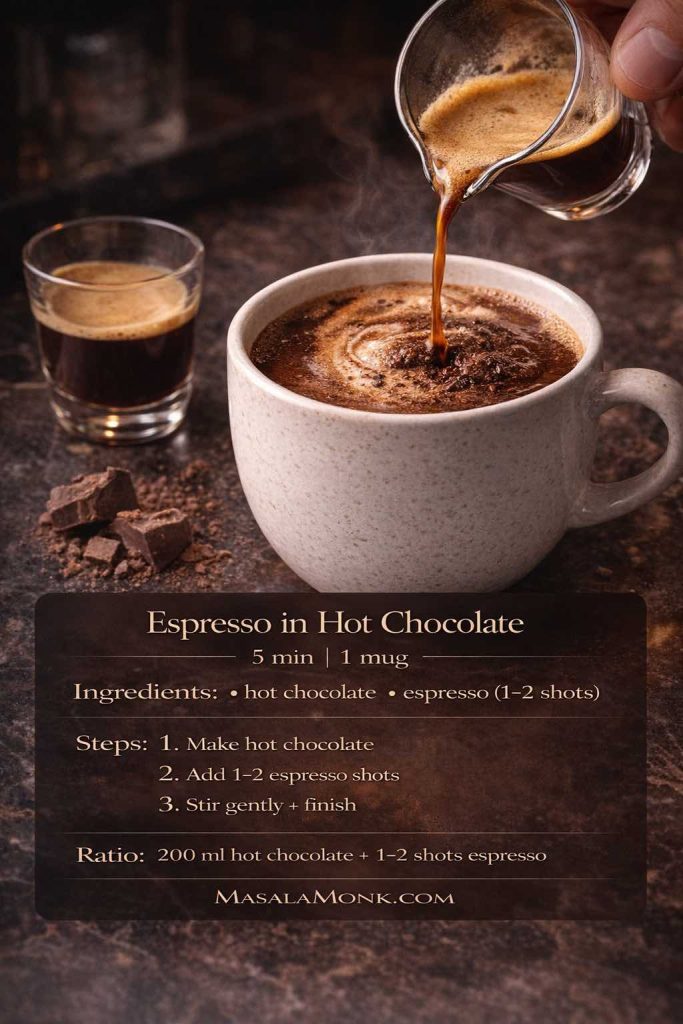
Method 3: Espresso in hot chocolate (café-style, deeply satisfying)
If you want the chocolate to feel like a true base—rich, thick, and cozy—then espresso in hot chocolate is your move. Instead of adding cocoa to coffee, you’re adding coffee to cocoa. That sounds like a small change, but the result often feels dramatically more indulgent.
This is also the method that most closely resembles what cafés serve when you order a mocha: espresso + chocolate + milk, balanced and bold.
Time: 5–7 minutes
Difficulty: Easy–Medium
Best for: Dessert-forward mugs that still feel like coffee
Option A: Espresso hot chocolate (classic café direction)
Ingredients
- 1–2 espresso shots
- 200 ml hot chocolate (milk-based cocoa, or mix made with milk for body)
- Optional: foam, whipped cream, or shaved chocolate
Method
- Make your hot chocolate in your preferred style. Milk-based versions taste richer and help everything integrate.
- Pull 1–2 espresso shots.
- Pour espresso into the hot chocolate and stir gently. (Adding espresso into the chocolate base helps it integrate smoothly.)
- Finish with foam or whipped cream if you want the full café mood.
Option B: “Espresso-style” hot chocolate coffee without a machine (moka pot version)
No espresso machine? You can still create a concentrated coffee that behaves beautifully in chocolate using a moka pot. Brew a strong moka coffee, make your hot chocolate base, and combine them the same way.
If you want a step-by-step refresher, this moka pot mastery guide is a great companion. And if you want clarity on espresso as a concept—strength, concentration, and what “one shot” means—this espresso guide helps.
Make it feel even more café-like: foam, texture, balance
If you love that cappuccino texture—foam, warmth, airy lift—borrow technique from this cappuccino recipe guide. Then you can build a chocolate-leaning drink that feels like a mocha cappuccino: espresso (or moka concentrate) + cocoa base + foamed milk.
Also Read: Manhattan Cocktail Recipe (Classic + 6 Variations)
The ratios that make hot chocolate coffee feel intentional
Once you know the methods, ratios become your quiet superpower. They help you get exactly what you’re craving without needing a full recipe every time. Think of these as flexible defaults rather than rigid rules.
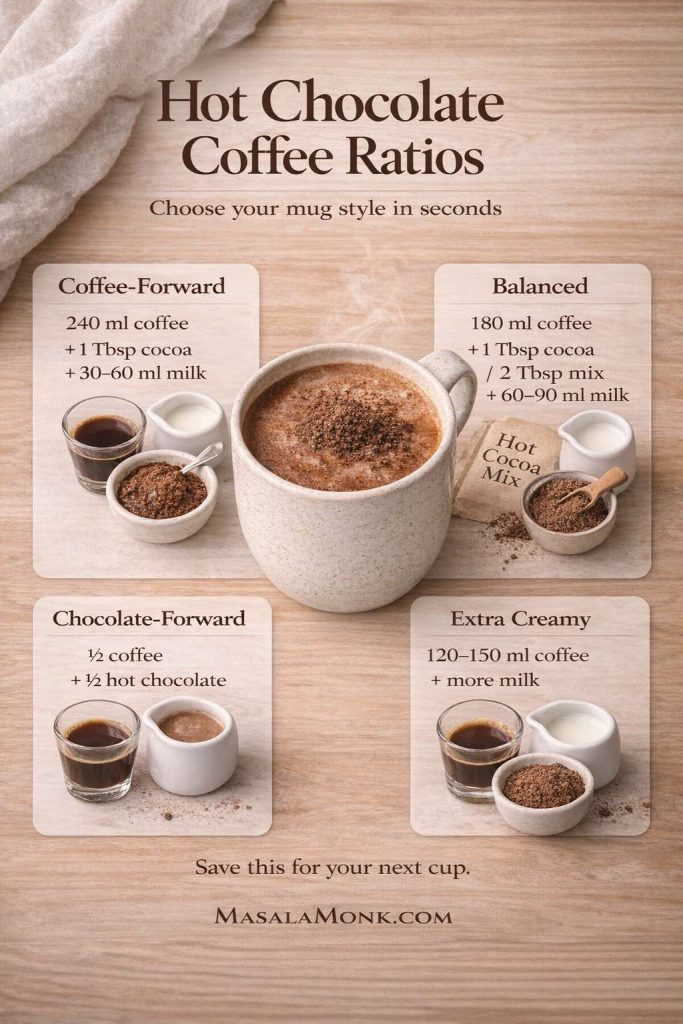
Coffee-forward (for “I want coffee, but make it cozy”)
- 240 ml coffee
- 1 tablespoon cocoa
- 1–2 teaspoons sugar
- 30–60 ml milk
This reads as coffee first, with chocolate acting like a warm accent.
Balanced (for “I want a chocolate-coffee café drink”)
- 180 ml coffee
- 1 tablespoon cocoa or 2 tablespoons hot chocolate mix
- 60–90 ml milk
This lands in the middle—neither too dark nor too sweet.
Chocolate-forward (for “dessert in a mug”)
- Half coffee + half hot chocolate
Make hot chocolate first (milk-based is best), then add coffee until it tastes right. This approach works especially well when you want body, richness, and a cozy thickness.
Extra creamy (for “soft, rounded, lingering”)
- Use more milk than usual and slightly less coffee
- Keep cocoa steady, let milk carry the chocolate flavor
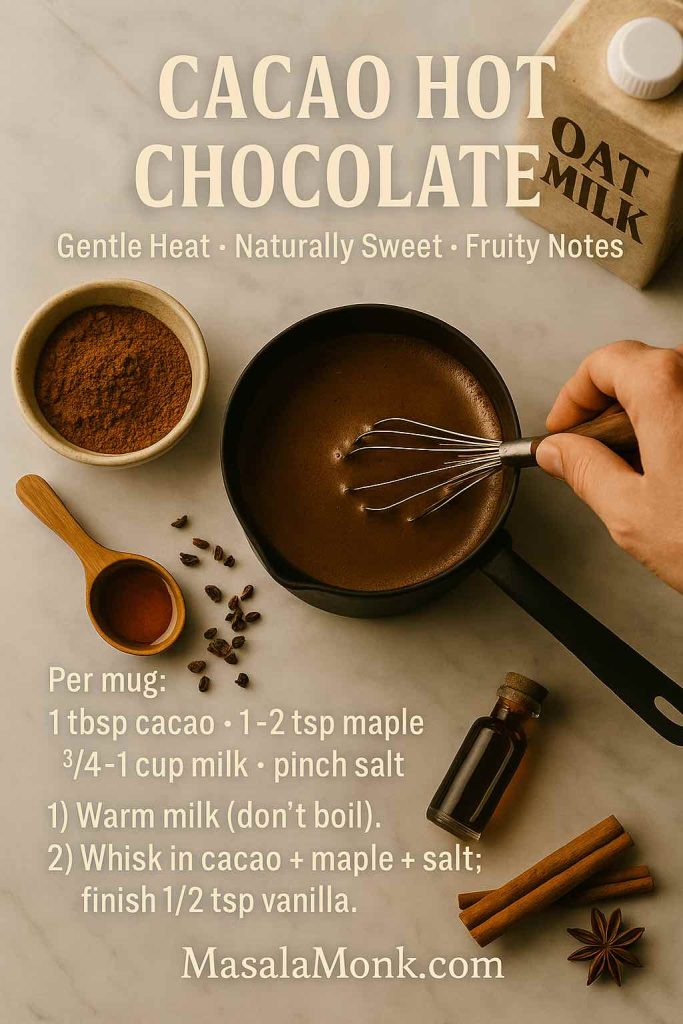
Oat milk is especially good here because it naturally reads sweet and creamy.
Also Read: Strawberry Smoothie Recipes (12 Easy Blends + Bowls & Protein Shakes)
Hot chocolate coffee variations you’ll want to repeat
The three methods cover most moods. Still, the fun starts when you make small changes on purpose. The goal with variations is not novelty for its own sake—it’s creating mugs that feel genuinely different, so you don’t get bored after three days.
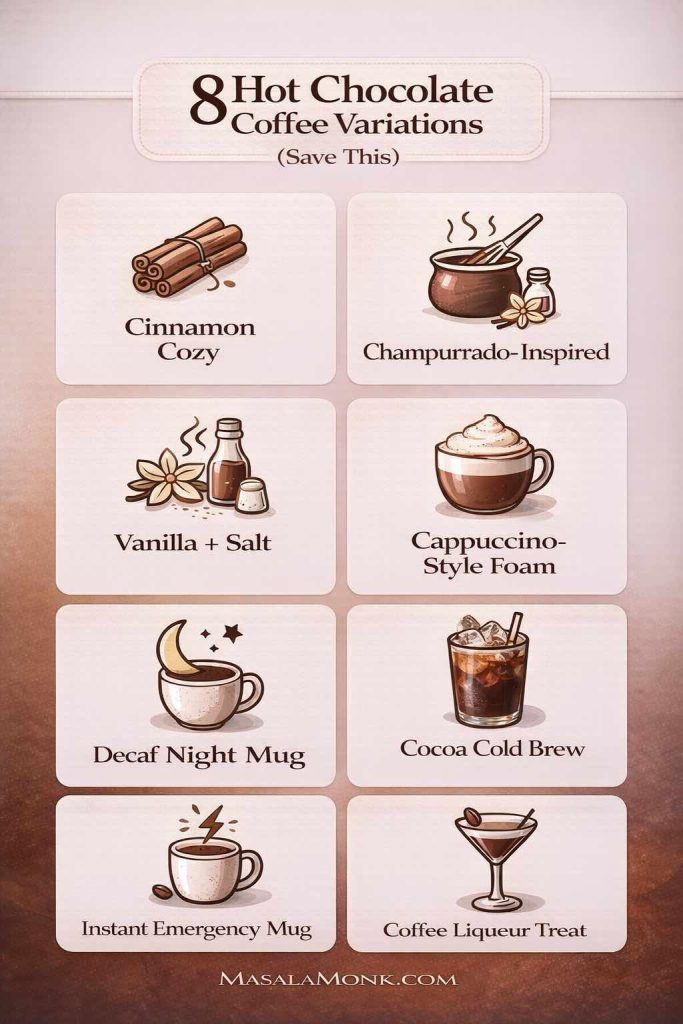
1) Coffee and hot cocoa with cinnamon (cozy without being spicy)
Cinnamon makes chocolate feel warmer and more aromatic. Instead of adding a lot, keep it light.
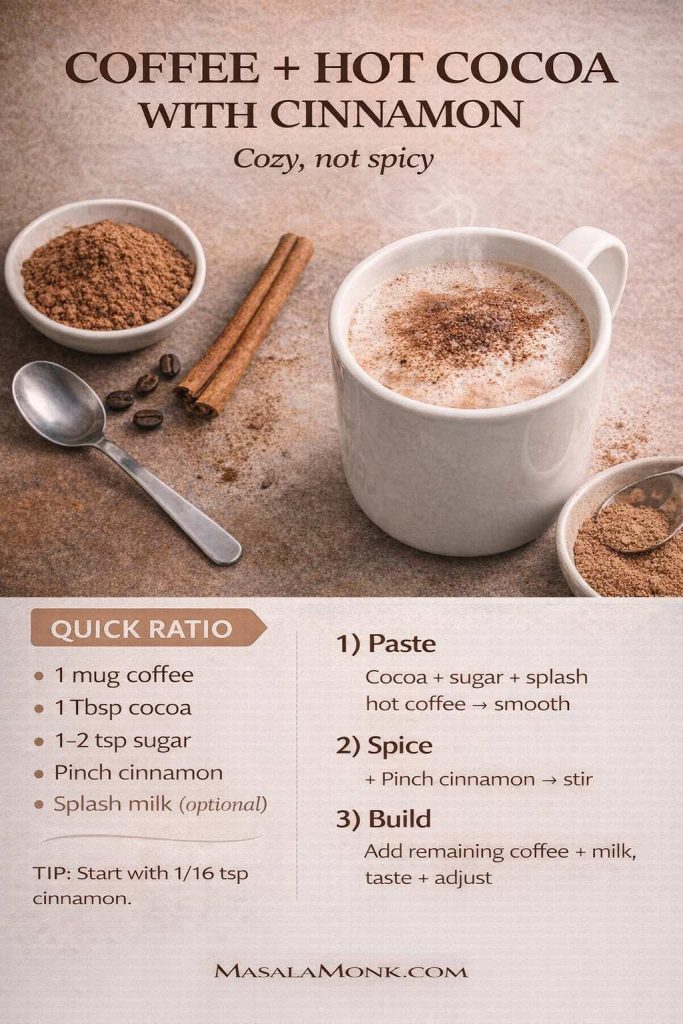
How to do it:
- Make the cocoa paste (cocoa + sugar + splash of coffee)
- Add a pinch of cinnamon to the paste
- Build the drink as usual, then taste before adding more spice
If you like the idea of spicing coffee more broadly, this cardamom-in-coffee guide is a lovely rabbit hole.
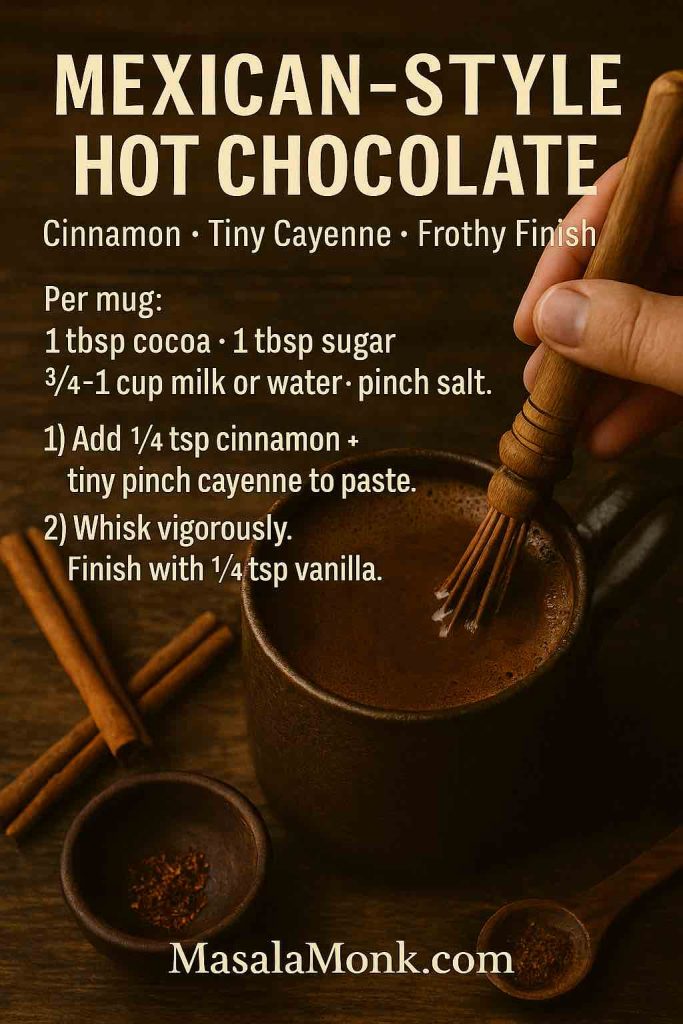
2) Champurrado-inspired coffee (Mexican-style comfort in a coffee mug)
Champurrado is traditionally a thick chocolate drink often made with masa and warming spices. This version borrows the vibe—deep cocoa, cozy body, aromatic spice—without requiring a full traditional setup.
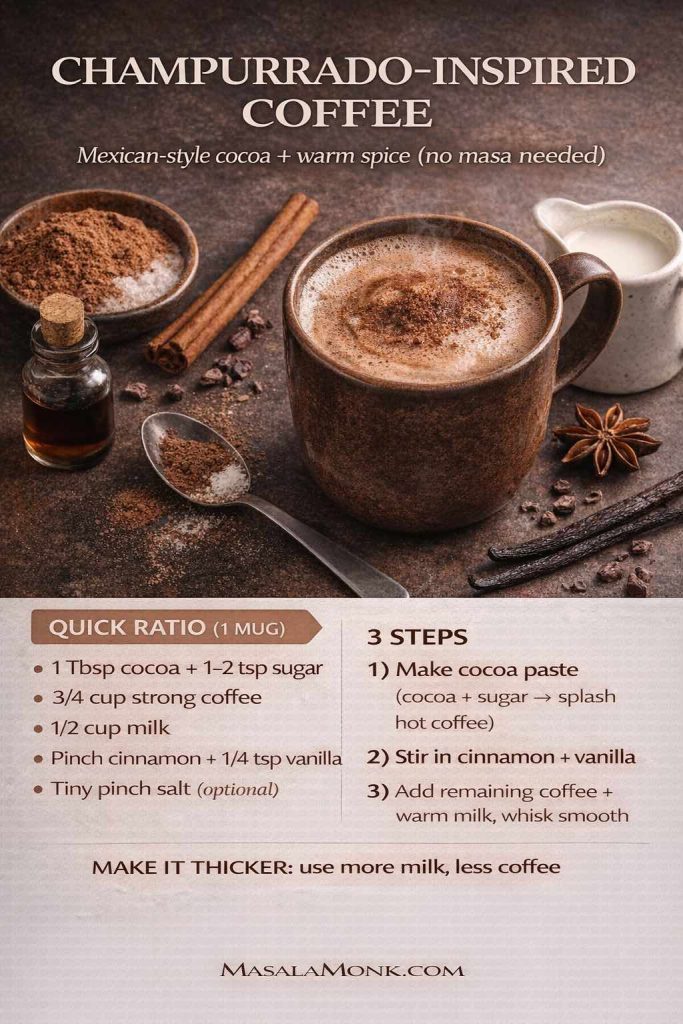
How to do it:
- Use the cocoa paste method as your base
- Add cinnamon and vanilla
- For extra body, use a bit more milk and slightly less coffee
For a deeper ingredient lens that helps you choose between cacao and chocolate, this cacao vs chocolate guide is worth reading.
3) Vanilla + a tiny pinch of salt (the “richer than it should be” trick)
This doesn’t look different. It just tastes more expensive.
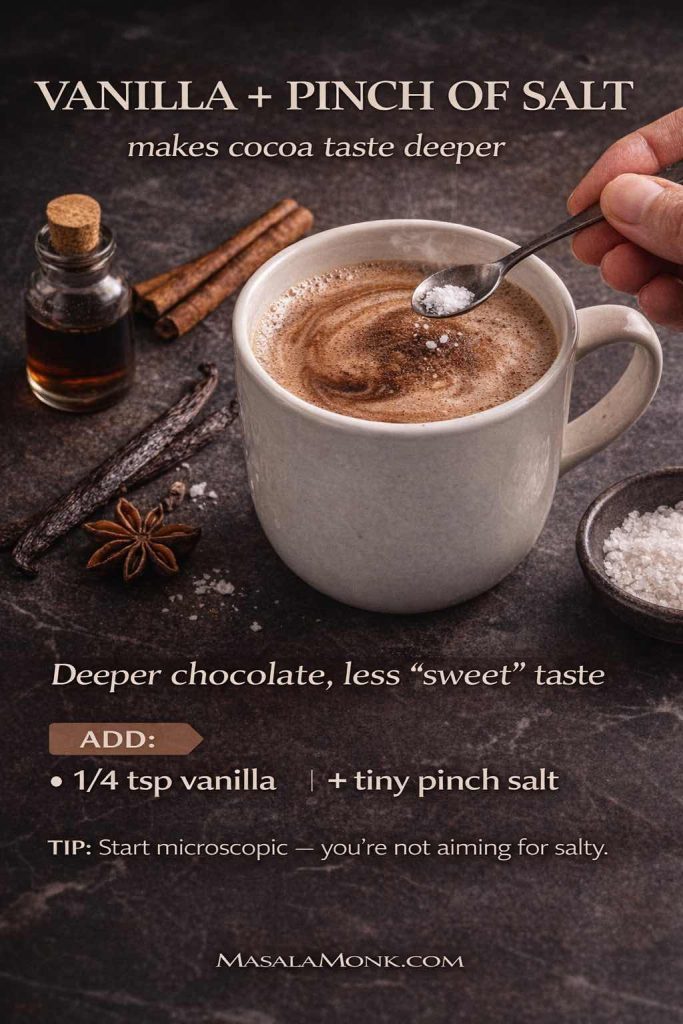
How to do it:
- Add ¼ teaspoon vanilla
- Add the tiniest pinch of salt
If you’re skeptical, start microscopic. You’re not aiming for “salty.” You’re aiming for depth.
4) Cappuccino-style hot chocolate coffee (foam-forward, café-like)
This one is a joy when you want texture. The trick is building chocolate flavor without crushing the foam.
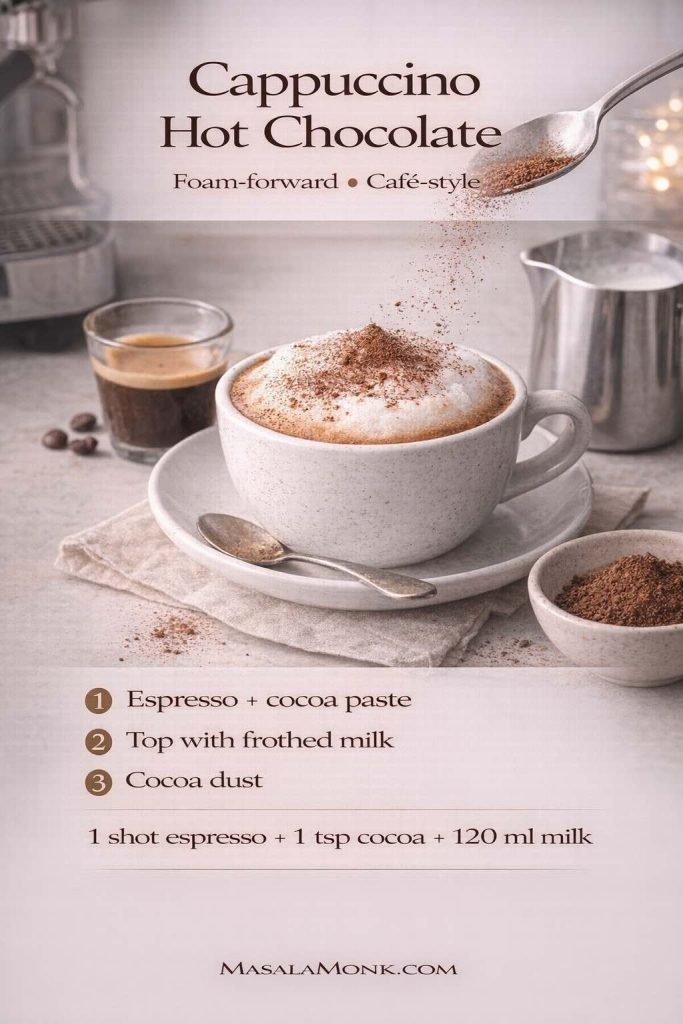
How to do it:
- Stir cocoa paste into espresso (or moka concentrate)
- Add steamed or frothed milk
- Finish with cocoa dusting or shaved chocolate
For foam technique and proportions, this cappuccino guide is your friend.
5) Decaf hot chocolate coffee (comfort without the buzz)
Perfect for evenings when you want a warm mug without the same caffeine lift.
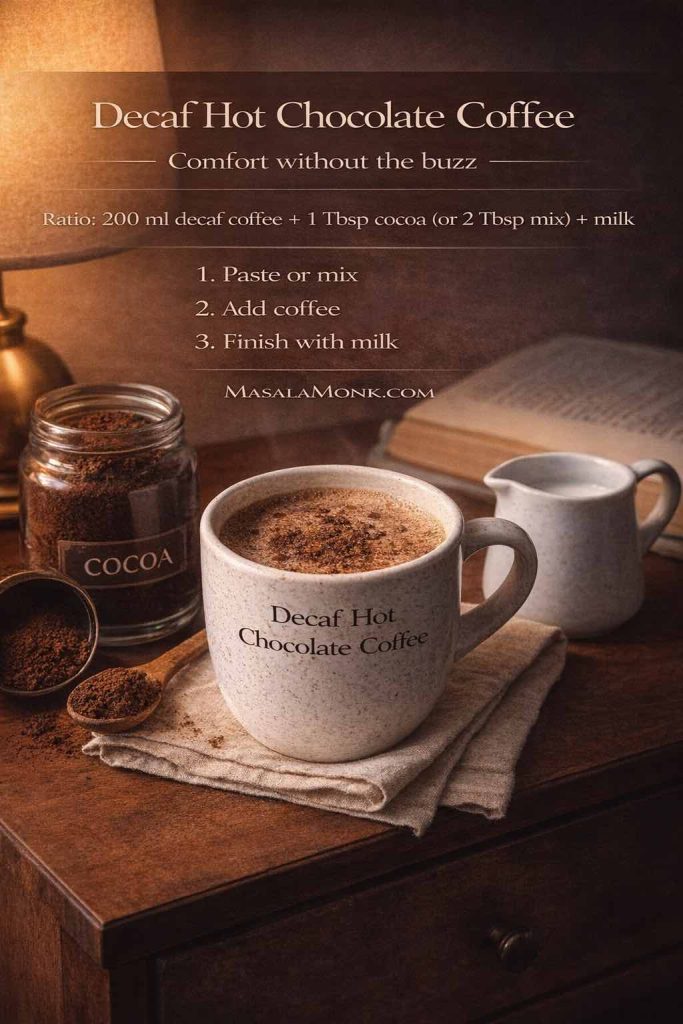
How to do it:
- Use decaf brewed coffee (or decaf instant)
- Make any version you like—cocoa paste, mix-in-coffee, or espresso-style with decaf shots
If you want general caffeine context, the FDA’s overview Spilling the Beans: How Much Caffeine Is Too Much? is a clear reference point.
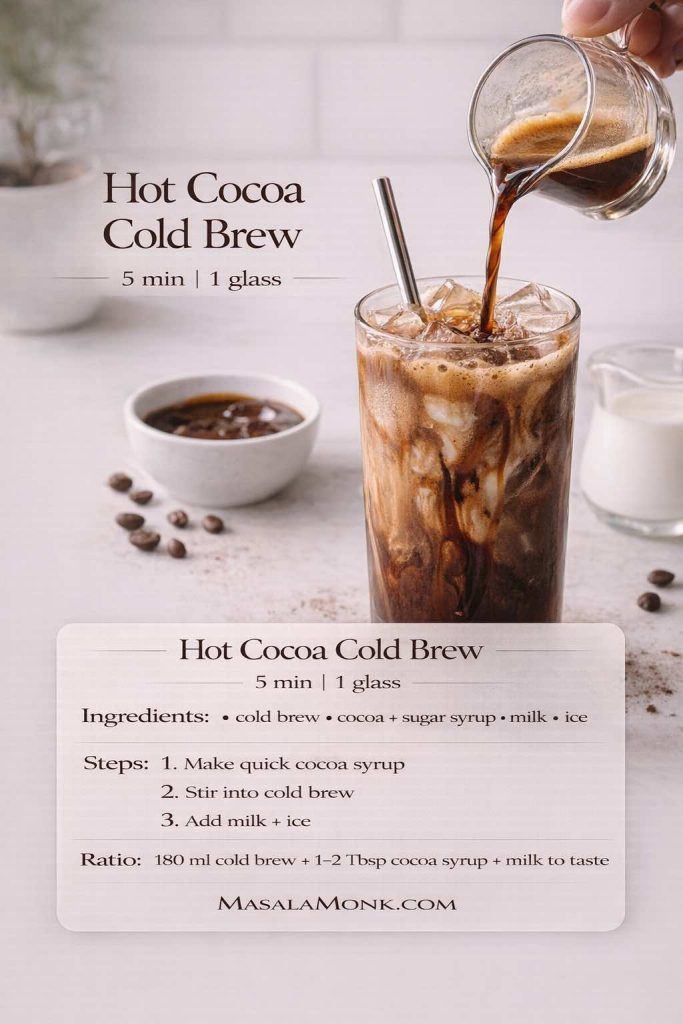
6) Hot cocoa cold brew (summer comfort that still tastes like chocolate)
Chocolate and coffee can feel refreshing when the structure is right. Cold brew concentrate gives you strength; a quick cocoa syrup keeps everything smooth.
How to do it:
- Start with cold brew concentrate or very strong chilled coffee
- Make a quick cocoa syrup: cocoa + sugar + a spoon of warm water (or warm coffee), stirred smooth
- Stir syrup into cold brew
- Add milk and ice
If you want more iced directions beyond this one mug, these internal guides are great companions: iced coffee recipes and cold brew vs iced latte vs frappe.
7) Instant coffee + cocoa (a surprisingly good emergency mug)
When brewed coffee isn’t happening, instant coffee can still make a satisfying hot chocolate coffee if you treat it kindly.
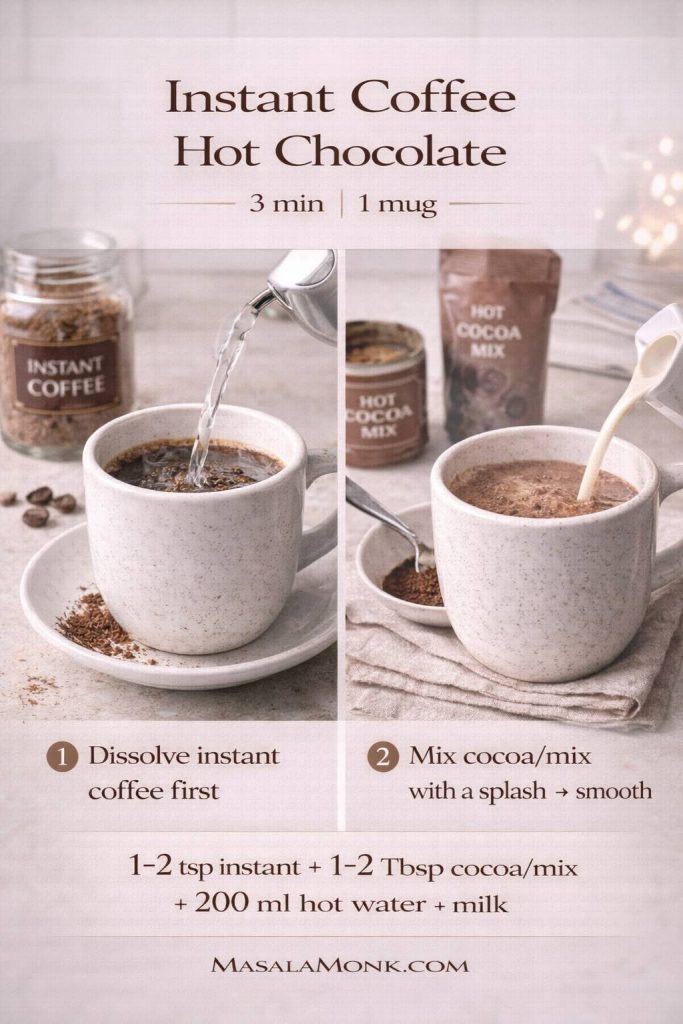
How to do it:
- Dissolve instant coffee fully in a small amount of hot water first
- Make a cocoa paste in the mug (cocoa + sugar + a splash of the hot coffee)
- Add remaining liquid and milk, then adjust
Same rule, different day: don’t dump powders into a full mug and expect silk.
8) Hot chocolate coffee with coffee liqueur (optional, festive, dessert-forward)
This one is optional, but undeniably festive. Coffee liqueur brings sweetness and a roasted note that pairs naturally with cocoa. If you’re using a well-known coffee liqueur like Kahlua, remember it already leans sweet—so dialing back sugar in your base keeps the mug balanced rather than syrupy.
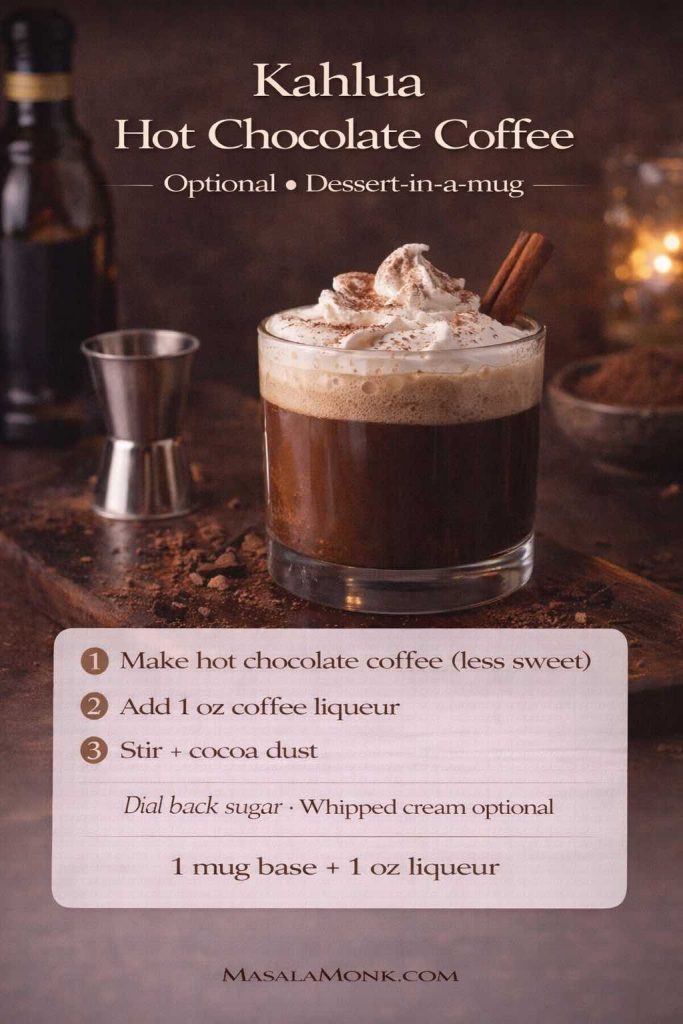
How to do it:
- Make your base slightly less sweet than usual
- Add a small pour of coffee liqueur at the end and stir
- Finish with cocoa dusting or shaved chocolate
Also Read: Sandwich for Breakfast: Breakfast Sandwich Recipe + 10 Variations
Making hot chocolate coffee for a crowd (without wrecking your equipment)
A cozy chocolate-coffee drink feels even better when it’s shared—winter evenings, family gatherings, holiday brunches, or a casual “come over” moment that turns into an unplanned hangout. But scaling up changes the rules.
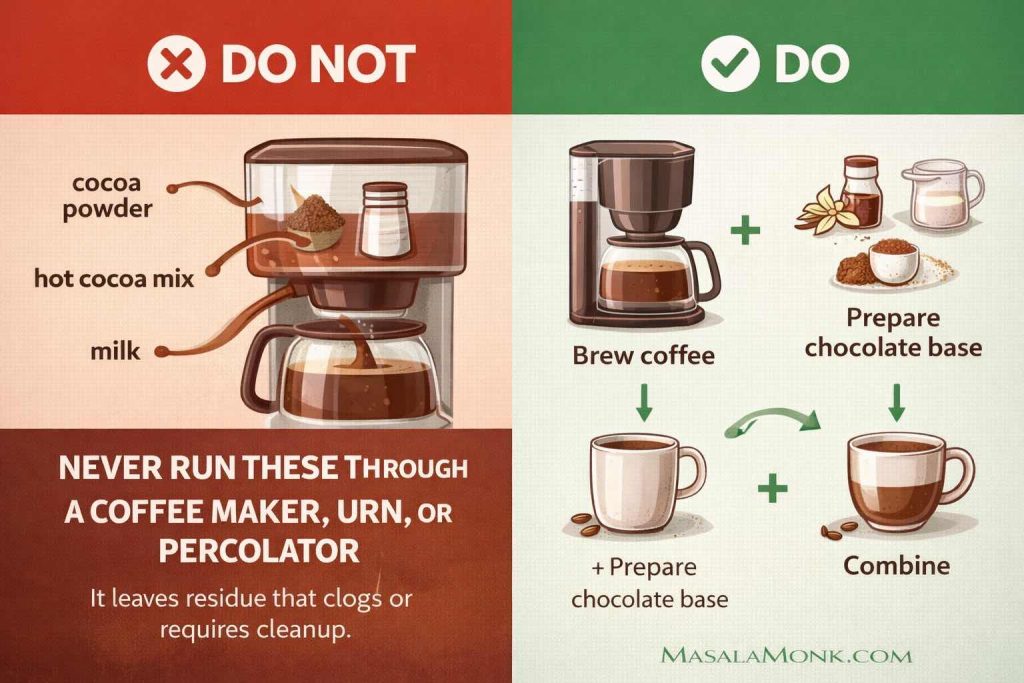
In general, it’s best not to run cocoa powder, hot chocolate mix, chocolate syrup, or milk-based mixtures through brewing systems. Doing so can leave residue, affect taste, and make cleanup much harder—especially in percolators and urn setups that aren’t designed for chocolate or dairy.
So if someone asks, “Can we brew hot chocolate in a coffee maker?” the most reliable answer is: brew coffee in the coffee maker, then mix it with a hot chocolate base afterward. You get the same result—coffee and hot chocolate together—without turning your machine into a sticky project.
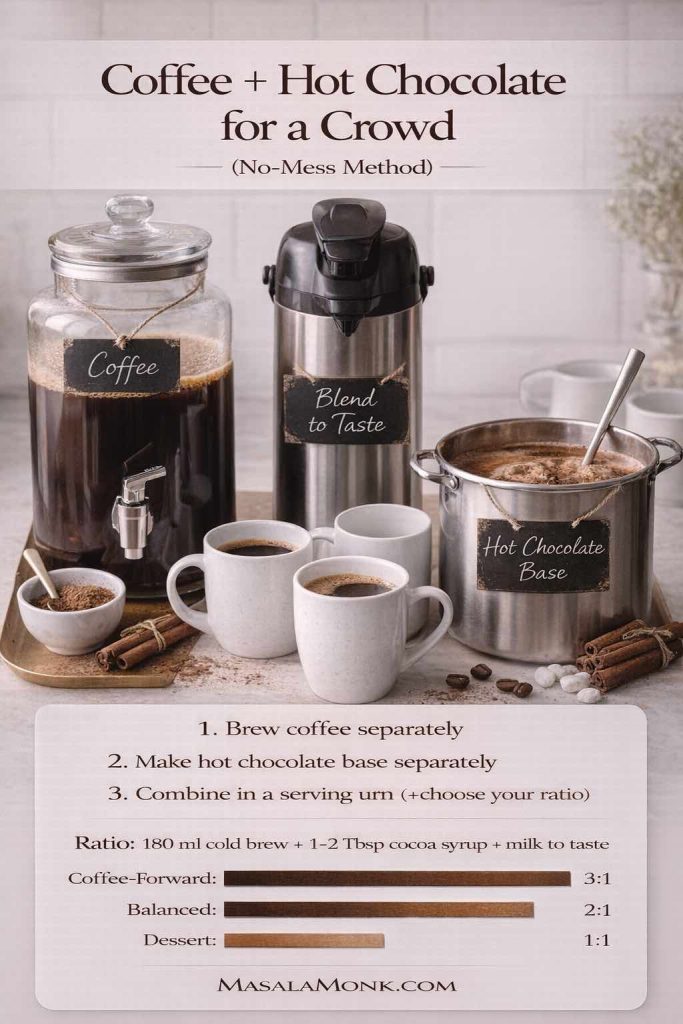
The reliable large-batch method (best for most homes)
- Brew coffee normally using your coffee maker or brewer (coffee only).
- Make a concentrated hot chocolate base separately in a pot: warm milk + cocoa + sugar stirred smooth (or hot chocolate mix made with milk for body).
- Combine in a serving vessel—a large pot, dispenser, or insulated carafe—then adjust to taste.
- Keep it gently warm, not boiling. Milk-based mixes can scorch if held too hot for too long.
If you want a dependable hot chocolate base that scales cleanly, this homemade hot chocolate recipe is a solid anchor.
Hot cocoa in a coffee maker: the “yes, but not through the machine” version
People often mean one of two things when they say “hot cocoa in a coffee maker”:
- They want to use the coffee maker to heat and mix everything (not ideal)
- Or they want a way to serve hot cocoa and coffee together for a group (very doable)
The safe approach:
- Brew coffee in the coffee maker
- Make cocoa or mix separately with milk (stovetop is easiest)
- Combine in a pot or dispenser
This gives you a crowd-friendly hot chocolate coffee without chocolate residue in your machine.
Coffee percolator for hot chocolate: keep cocoa out of the brew chamber
Percolators are great for coffee. They’re not designed for cocoa powder or milk-based mixes circulating through the system. If you’re tempted to try “coffee percolator for hot chocolate,” treat the percolator as a coffee-only brewer:
- Percolate coffee
- Mix hot chocolate separately
- Combine afterward in a serving vessel
You’ll protect your equipment and preserve flavor.
Hot cocoa urn setup: build the chocolate base first
A hot cocoa urn is often the right tool for events—easy serving, steady warmth, familiar setup. But the same logic applies: don’t treat the urn like a brewer for cocoa powder. Instead:
- Make a milk-based hot chocolate base in a stockpot
- Brew coffee separately
- Combine in the hot cocoa urn using your preferred ratio
- Hold at gentle heat to avoid scorching
For events, it can be helpful to offer two profiles:
- Coffee-forward (for people who want “coffee, but cozy”)
- Dessert-forward (for people who want “hot chocolate, but energized”)
Add a toppings station—cocoa dusting, cinnamon, shaved chocolate, whipped cream—and suddenly the drink feels like an experience, not just a beverage.
Also Read: Waffle Recipe Without Milk: Fluffy, Golden, and Crisp
A deeper hot chocolate base (when you want chocolate to lead)
Sometimes you don’t want “coffee with cocoa.” You want hot chocolate with coffee energy. In those moments, start with a real hot chocolate base, then add coffee to taste. This keeps the chocolate rich and structured while still giving you the lift you’re after.
If you prefer a guided approach to a cocoa-and-milk base, this homemade hot chocolate with cocoa powder recipe is an excellent internal companion.
Once your hot chocolate is ready:
- Add brewed coffee little by little
- Stop at a whisper of coffee, or push toward a bolder, mocha-like finish
- If you want the simplest “dessert mug” rule, try half coffee and half hot chocolate, then adjust
This is one of the easiest ways to make the drink feel deliberate, indulgent, and café-adjacent—without needing equipment beyond a pot and a mug.
Also Read: Vodka Pasta (Penne alla Vodka) + Spicy Rigatoni, Chicken, and Gigi Recipes
Flavor directions that keep the drink from feeling repetitive
After a few mugs, you might crave variety without changing the entire routine. That’s when choosing a direction helps more than looking for a totally new recipe.
The warm-spice lane
Cinnamon, cardamom, nutmeg—these make hot chocolate coffee feel seasonal even when it’s not a holiday. If you want a cozy entry point, cardamom in coffee is a wonderful starting place.
The dessert lane
Chocolate syrup, whipped cream, shaved chocolate, extra milk—this makes the mug feel like a treat. If you like making syrup quickly, this 3-minute chocolate syrup keeps it practical.
The café lane
Espresso in hot chocolate, foam on top, balanced sweetness. If foam is part of the vibe you’re chasing, this cappuccino guide is the technique bridge that makes your home mug feel more like a café cup.
The chilled lane
Cold brew meets cocoa in a way that can be refreshing rather than heavy. For more iced directions, explore these iced coffee recipes and this guide comparing cold brew vs iced latte vs frappe.
Also Read: 7 Pizza Sauce Recipes | Marinara, White Garlic, Alfredo, Buffalo, BBQ, Vodka & Ranch
A seasonal twist (when you want it to taste like “winter” even if it isn’t)
There’s a flavor mood that shows up every year—warm spice, soft sweetness, cozy nostalgia. If you love that, you can borrow the vibe of spiced lattes and apply it to hot chocolate coffee without turning every mug into a production.
A gentle version:
- Vanilla + cinnamon (subtle, comforting, easy)
A bolder version:
- Borrow pumpkin spice energy
If that’s your lane, you’ll probably enjoy this sister drink: healthy pumpkin spice latte.
Having one “winter mode” mug you can make on autopilot is surprisingly satisfying. It’s the beverage equivalent of throwing on a warm hoodie.
Also Read: Pumpkin Spice, Your Way: Master Blend, Variations & Real-World Recipes
Small finishing touches that make the mug feel special
Sometimes you don’t need a new recipe. You need a small ending—something that makes the mug feel like you meant it.
- A dusting of cocoa powder makes it smell like chocolate before you sip
- Grated dark chocolate melts into the surface and tastes richer than it looks
- A spoon of foam (even shaken milk) changes mouthfeel dramatically
- A cinnamon stick scents the mug in a quiet, cozy way
- A tiny pinch of salt turns “sweet cocoa” into “deep chocolate”
None of these are mandatory. Still, they’re the difference between “I mixed something” and “I made something.”
Also Read: How to Cook Tortellini (Fresh, Frozen, Dried) + Easy Dinner Ideas
Putting it all together: choose your mug today
When you want hot chocolate coffee, you have options that match the day you’re having.
- If you want the most reliable everyday version, go with the cocoa paste method. It’s quick, flexible, and consistently smooth.
- If you want speed above all else, use hot chocolate mix in coffee, but stir the powder with a small splash of coffee first so it dissolves properly.
- If you want café depth, make espresso in hot chocolate (or use a moka concentrate). It’s the most dessert-forward approach, and it still feels unmistakably like coffee.
From there, you can tilt coffee-forward or chocolate-forward, warm it with spice, cool it into hot cocoa cold brew, or add a foamy café finish. Whether you’re adding hot chocolate to coffee or adding coffee to hot chocolate, the best cup is the one you’ll actually make again.
Also Read: How to Make Churros (Authentic + Easy Recipe)
FAQs
1) What is hot chocolate coffee?
Hot chocolate coffee is a single drink that blends coffee with chocolate flavor. Depending on how you make it, the chocolate can come from cocoa powder, hot chocolate mix, chocolate syrup, or a prepared hot chocolate base, while the coffee can be brewed coffee, espresso, moka pot coffee, instant coffee, or cold brew.
2) Is coffee and hot chocolate the same as a mocha?
In many cases, yes—at least in flavor and concept. Generally, a mocha refers to coffee (often espresso) combined with chocolate and milk. However, “coffee and hot chocolate” can be looser and more flexible, because you can build it with cocoa powder, hot chocolate mix, or a full hot chocolate base.
3) How do I make hot chocolate coffee at home?
You can make hot chocolate coffee in three straightforward ways: (1) mix cocoa powder and sweetener into a smooth paste, then add coffee and milk; (2) stir hot chocolate mix into coffee; or (3) add espresso to hot chocolate for a café-style result.
4) Can I put hot chocolate powder in coffee?
Yes, you can. To avoid gritty clumps, first stir hot chocolate powder with a small splash of hot coffee until smooth, and only then add the rest of the coffee. As a result, the drink blends more evenly and tastes less “powdery.”
5) Can I add cocoa powder to coffee?
Absolutely. In fact, cocoa powder is one of the easiest ways to control sweetness and chocolate intensity. To keep it smooth, make a quick cocoa paste with sugar and a little hot coffee before topping up the mug.
6) Why is my cocoa powder clumping in coffee?
Cocoa powder tends to clump because it doesn’t dissolve like sugar. When it hits liquid all at once, dry pockets form and float. Instead, mix cocoa and sweetener with a small splash of hot coffee first, then add the remaining liquid gradually.
7) How much hot chocolate mix should I add to coffee?
A practical starting point is 2 tablespoons of hot chocolate mix for one mug of coffee (around 200–240 ml). If it turns out too sweet, reduce to 1 tablespoon and deepen the chocolate flavor with a teaspoon of cocoa powder.
8) What’s the best ratio for coffee and hot chocolate?
It depends on the experience you want. For a coffee-forward mug, use a full mug of coffee with about 1 tablespoon cocoa and only a small splash of milk. For a dessert-like version, go half coffee and half hot chocolate. Meanwhile, for a balanced café-style drink, aim for roughly 3 parts coffee to 1 part milk or chocolate base.
9) What’s the difference between hot cocoa coffee and hot chocolate coffee?
In everyday use, they often mean the same thing: coffee combined with chocolate flavor. Still, “hot cocoa” commonly suggests cocoa powder or a cocoa mix, whereas “hot chocolate” can imply a richer base made with milk and sometimes melted chocolate. Even so, both can land in a very similar place once blended with coffee.
10) Can I add espresso to hot chocolate?
Definitely. Espresso in hot chocolate is one of the most café-like methods. Simply add 1–2 espresso shots to prepared hot chocolate and stir gently until the flavor is integrated.
11) How many espresso shots are best for espresso hot chocolate?
Usually, 1 shot gives a softer coffee note, while 2 shots create a more pronounced coffee presence. If your hot chocolate is especially sweet, 2 shots often balance it better.
12) How can I make espresso hot chocolate without an espresso machine?
Instead of espresso, you can use a concentrated coffee base. For example, moka pot coffee behaves similarly in hot chocolate because it’s stronger than standard drip coffee. After brewing, mix it into hot chocolate the same way you would with espresso.
13) Can I make hot chocolate with coffee instead of water?
Yes. For a creamier result, prepare hot chocolate with milk first, then add brewed coffee to taste. This approach keeps the chocolate base rich while still delivering clear coffee aroma.
14) Can I mix hot cocoa mix with coffee and milk?
Yes, and it often tastes smoother than coffee plus mix alone. In addition, milk rounds the edges and makes the drink feel more like a hot chocolate coffee drink rather than simply sweetened coffee.
15) What coffee works best for hot chocolate coffee?
Typically, medium to dark roast works best because it stays noticeable beside chocolate. Likewise, brewing the coffee slightly stronger than usual helps prevent the drink from tasting like cocoa first and coffee second.
16) How do I make coffee with cocoa powder taste less bitter?
First, add more milk to soften the bitterness before adding more sugar. Next, reduce cocoa slightly if the mug feels too intense. Finally, a touch of vanilla or a tiny pinch of salt can make the chocolate taste rounder and less sharp.
17) How do I make hot chocolate coffee less sweet?
Start by using unsweetened cocoa powder instead of a sweet mix, or cut the amount of mix in half. Then increase milk slightly for a gentler profile. Alternatively, add a bit more coffee to balance sweetness without losing chocolate flavor.
18) Can I make hot cocoa in a coffee maker?
You can brew coffee in a coffee maker and combine it with hot chocolate afterward. However, it’s usually better not to run cocoa powder or hot chocolate mix through the machine because it can leave residue and complicate cleaning.
19) Can I brew hot chocolate in a coffee maker?
If by “brew” you mean running cocoa or milk through the machine, that’s not recommended. Instead, brew coffee normally, then stir it into a hot chocolate base made separately. That way, you get the same flavor outcome with much easier cleanup.
20) Can I make hot cocoa in a coffee percolator?
It’s best to use the percolator for coffee only, then mix hot chocolate separately and combine afterward. Otherwise, cocoa powder and milk-based mixes can create buildup and affect performance over time.
21) What is a hot cocoa urn and can I make a coffee-and-cocoa mix in it?
A hot cocoa urn is a large dispenser used for serving warm drinks at gatherings. Yes, you can serve a coffee-and-cocoa blend in it—however, it works best when you prepare hot chocolate and coffee separately, then combine them in the urn and keep the heat gentle to avoid scorching.
22) How do I make coffee and hot chocolate for a crowd?
For consistent results, brew a large batch of coffee separately and make a concentrated hot chocolate base in a pot. Then combine them in a serving vessel and adjust the ratio based on whether you want a coffee-forward or dessert-forward drink.
23) Can I make half coffee half hot chocolate taste balanced?
Yes. Start with equal parts and then adjust. If it tastes too sweet, add more coffee. Conversely, if it tastes too strong or bitter, add more hot chocolate or a splash of milk.
24) Can I make hot cocoa cold brew?
Yes. Use cold brew concentrate or strong chilled coffee, then mix in a cocoa syrup (cocoa + sugar + a small splash of warm water or warm coffee stirred smooth). After that, add milk and ice for a refreshing chocolate-coffee drink.
25) Does hot chocolate coffee work with instant coffee?
Yes. Dissolve instant coffee fully in hot water first so it’s smooth, then combine it with cocoa paste or hot chocolate mix. That extra step helps avoid grittiness and improves texture.
26) Can I make a decaf hot cocoa coffee?
Absolutely. Use decaf brewed coffee (or decaf instant), then follow any method you like. Consequently, you get the flavor and comfort of a chocolate-coffee mug without the same caffeine lift.
27) Can I make coffee liqueur hot chocolate?
Yes, if you want an adult, dessert-style version. Make the base slightly less sweet, then add a small pour of coffee liqueur at the end and stir. That way, the final drink tastes balanced rather than overly sugary.
28) What’s the difference between chocolate hot coffee and hot chocolate coffee?
They’re often used interchangeably in casual searches. Generally, “hot chocolate coffee” suggests coffee mixed with a cocoa or hot chocolate base, while “chocolate hot coffee” can imply coffee flavored with chocolate notes. Either way, the result is a warm chocolate-coffee drink—your method determines whether coffee or chocolate leads.