Set a bowl of bright green, frothy punch on a Christmas table and it rarely goes unnoticed for long. Lime sherbet floats across the top, bubbles gather around the scoops, and the kids are often lining up with cups before anyone has even asked what is in the bowl.
This non-alcoholic Grinch Punch is the family-friendly version: lime sherbet, green fruit punch, pineapple juice and lemon-lime soda. Four main ingredients, one punch bowl and about five minutes to put it together.
Combine 4 cups green fruit punch with 1 cup pineapple juice, add 1 quart lime sherbet, then slowly pour in 4 cups very cold Sprite or 7Up. Give the punch one or two gentle folds and serve while the soda is fizzy and the sherbet is floating on top.
Active prep: about 5 minutes
Alcohol: none
Best vessel: a roomy open punch bowl
Best timing: assemble shortly before serving
You may also see this same style of kid-friendly green Christmas drink called Grinch Juice.
Make this for: Christmas parties, Grinch movie nights, classroom celebrations, holiday buffets and family gatherings where one playful drink needs to work for both children and adults.
Grinch Punch Recipe
This recipe makes one standard party-bowl batch. Halve the quantities for movie night or repeat the standard batch when you need more.
Ingredients
1 quart (32 fl oz / 946 mL) lime sherbet, cold and scoopable
4 cups (32 fl oz / 946 mL) green fruit punch, preferably Hawaiian Punch Green Berry Rush
1 cup (8 fl oz / 237 mL) 100% pineapple juice, chilled
4 cups (32 fl oz / 946 mL) Sprite or 7Up, very cold
Red sanding sugar, as needed, optional
Lime wedges or maraschino cherries, as needed, optional
Shopping shortcut:
Lime sherbet: 1 quart, or about two-thirds of a 48-fl-oz tub.
Green punch: 32 fl oz, or one-quarter of a gallon jug.
Soda: 32 fl oz, just under half of a 2-liter bottle.
One 48-fl-oz sherbet tub covers a standard batch, but two full batches need another 16 fl oz of lime sherbet.
You’ll need: a large punch bowl, ladle, ice cream scoop and long spoon.
Instructions
Chill the liquids. Keep the green punch, pineapple juice and soda refrigerated until needed. Leave the sherbet frozen until shortly before assembly.
Get the sherbet scoopable. If it is rock-hard, leave it at room temperature for about 5 minutes—just long enough to scoop cleanly without becoming soft or slushy.
If the sherbet is still too hard after a few minutes, warm the scoop under hot water, dry it, then scoop.
Build the base. Pour the green fruit punch and pineapple juice into the punch bowl.
Add the sherbet. Scoop it across the surface rather than dropping one solid block into the middle.
Spread smaller sherbet scoops across the surface so they soften gradually instead of melting from one large block.
Add the fizz. Slowly pour the Sprite or 7Up around the bowl, letting some run over the sherbet for froth. If the foam climbs quickly, pause and let it settle before continuing.
Move the soda stream around the bowl; spreading the first burst of froth helps prevent one tall foam mound.
Finish gently. Give the punch one or two slow folds with a long spoon, then ladle it into cups and serve.
Check the Finished Punch
What should it look like? A bright green bowl with a loose frothy top, visible sherbet scoops and lively bubbles gathering around the edges.
Serve while green punch, pale sherbet and loose froth still look distinct instead of blending into one creamy layer.
In the cup, the first sip is fizzy and citrusy. As the sherbet softens, the drink becomes creamier, while the pineapple rounds out the fruitiness without taking over.
Sherbet-heavy pours drink creamier, while mostly liquid servings stay lighter and fizzier—so cups naturally vary a little.
Optional Grinch Garnish
For cups you are serving right away, rub a lime wedge lightly around the rim and dip it into red sanding sugar. Preparing the cups a few hours ahead? A very thin coat of corn syrup holds the sugar more securely. Test one disposable cup first, because some plastic rims are stubborn.
Coat only the cup’s outer edge; red sanding sugar stays decorative instead of dissolving into the first sip.
A maraschino cherry adds a simple red accent if you want a touch of Grinch-heart contrast without turning every glass into a craft project.
Lime sherbet. This gives the punch its citrus flavor, creamy body and floating green scoops. Very soft sherbet disappears into the drink quickly; very hard sherbet is awkward to portion.
Sherbet contains some dairy, which is part of what makes it creamier than sorbet. If the freezer-case labels blur together, our guide to sherbet vs sorbet explains the difference. For school parties, check the sherbet label and your school’s allergy rules before serving.
Lime sherbet can be surprisingly hard to find around Christmas, so buy it when you see it rather than leaving it to the day of the party.
Green fruit punch. When recipes call for “green Hawaiian Punch,” Hawaiian Punch Green Berry Rush is the bright-green drink to look for. It supplies much of the color, fruit flavor and sweetness. Another green fruit punch works when Green Berry Rush is unavailable.
Sprite or 7Up. Lemon-lime soda brings the fizz. Use it straight from the refrigerator and open it close to serving so those bubbles end up in the bowl.
Pineapple juice. One cup adds fruitiness and some tartness without taking over the lime. Use ordinary 100% pineapple juice from a bottle or can, not frozen concentrate. If pineapple is a flavor you particularly enjoy, these punch recipes with pineapple juice explore it more fully.
For a three-ingredient version, replace the pineapple juice with another cup of green fruit punch. The result is sweeter and more straightforward.
Sherbet punch has an unmistakably old-school feel: a bright, bubbling bowl that somehow looks familiar before anyone has taken a sip. Turning it Grinch green simply gives that familiar party drink a Christmas twist.
Can’t Find Lime Sherbet or Green Berry Rush?
These are the two ingredients most likely to send you back around the supermarket. Both have workable substitutes.
If you can’t find…
Try…
What changes
Lime sherbet
Another citrus sherbet
Closest overall style; color may change
Lime sherbet
Pineapple sherbet
More tropical but still bright and fruity
Lime sherbet
Lime sorbet
Usually dairy-free; icier, lighter and less creamy or frothy. Check the label if dairy must be avoided
Lime sherbet
Vanilla ice cream
Creamier and sweeter, with much less lime flavor and a paler top
Green Berry Rush
Same amount of another green fruit punch
Usually the simplest swap; sweetness varies
Green Berry Rush
Prepared green lemon-lime Kool-Aid or a similar drink mix
More citrus-forward; mix it as directed for drinking before using
Any green drink
Light-colored fruit drink plus green food coloring
Gets you the color; taste before adjusting sweetness
Another sherbet keeps the familiar body; sorbet turns icier, while vanilla ice cream pushes Grinch Punch toward a float.
When you change the green punch, taste the cold fruit-punch and pineapple mixture before adding the sherbet and soda. Some replacements are much sweeter than others.
Start with one drop of green food coloring, stir, and add more only if the bowl needs it.
Compare green drink bases before adding sherbet; melting sherbet lightens the color and makes opacity differences harder to judge.
Want Grinch Punch with no sherbet at all? That works better as a different punch formula because removing the sherbet also removes much of the body, citrus flavor and volume. This easy Christmas Punch uses cranberry, pineapple, orange, ginger ale and sparkling water instead.
Sprite, 7Up or Ginger Ale?
Sprite or 7Up: the familiar sweet lemon-lime version used in the main recipe.
Ginger ale: still fizzy, with a gentle ginger note in the background.
Sparkling water: useful for dialing back the sweetness.
Zero-sugar lemon-lime soda: reduces the sugar coming from the soda, although the sweetener flavor will be different.
For a less-sweet bowl, use 3 cups Sprite or 7Up plus 1 cup plain sparkling water. You keep most of the fizz while bringing the sweetness down a notch.
Sparkling water reduces sweetness without changing the fruit-base or lime-sherbet ratio, so the punch keeps its balance.
Another kid-friendly fizzy option is a classic Shirley Temple, which uses grenadine and cherries with Sprite, 7Up or ginger ale.
How to Control the Foam
The froth is part of the fun. The foam climbing over the rim is not.
What separates a bubbly Grinch bowl from a green foam eruption mostly comes down to how the soda goes in. Start with well-chilled fruit punch and pineapple juice, add the sherbet, then pour the soda slowly around the bowl.
Foam steals headroom quickly, so a comfortably underfilled punch bowl can become crowded as soon as soda hits sherbet.
If the foam begins climbing too quickly, stop pouring and give it a moment to settle. There is no prize for emptying the whole bottle into the bowl in one go.
For more froth at the end, save a small splash of soda and pour it gently over a few sherbet scoops. A loose bubbly layer is plenty; the sherbet should still be visible underneath.
The scoops naturally soften as the punch sits and gradually make the drink creamier. That is normal. The distinct floating scoops are simply the freshest-looking stage.
As the sherbet softens, the punch becomes creamier and more even in color while the floating scoops gradually disappear.
“Serves 12” does not tell you much when one person is picturing a small punch cup and another is filling an eight-ounce glass.
Sherbet contains air, so the amount you can ladle into cups varies by brand and by how much sherbet lands in each serving. Use these as party-planning ranges.
How Many Cups Will One Batch Pour?
Pour size
Best for
Planning range
4 oz / 118 mL
Kids’ party, classroom, large buffet
Roughly 22–26 small pours
6 oz / 177 mL
Normal punch cup
Roughly 15–17 pours
8 oz / 237 mL
Full drink
Roughly 11–13 pours
Moving from a 6-ounce to 8-ounce cup costs roughly four servings from a standard batch, so cup size matters.
Pours are not the same as guests. At a kids’ party, four-ounce first pours often make more sense. Anyone who wants more can come back, and you are less likely to collect half-full cups from every table afterward.
Planning for 20 people? One standard batch can cover one small first pour per guest. Keep ingredients ready for another batch when this is the main drink or you expect plenty of refills.
Small, Standard and Double Batches
Ingredient
Small Batch
Standard Batch
Double Batch
Lime sherbet (volume)
2 cups / 473 mL
1 qt / 946 mL
2 qt / 1.89 L
Green fruit punch
2 cups / 473 mL
4 cups / 946 mL
8 cups / 1.89 L
Pineapple juice
½ cup / 118 mL
1 cup / 237 mL
2 cups / 473 mL
Sprite or 7Up
2 cups / 473 mL
4 cups / 946 mL
8 cups / 1.89 L
Remember 4:4:1:4 by cups—sherbet, green punch, pineapple juice and soda—to keep scaled batches balanced.
The small batch is plenty for movie night or a few people when the punch is part of the fun rather than the whole event. At most home parties, two standard batches made at different times are easier to manage than one enormous double batch.
For a very large crowd, buy enough ingredients for several standard batches and make them in rounds. Later batches stay fizzier, and you avoid committing everything to one bowl at the start.
Keep extra soda cold and unopened until the next round so every fresh batch starts with maximum fizz.
What Size Punch Bowl?
A bowl around 6 quarts / 5.7 liters or larger gives the standard batch useful headroom. Sherbet floats above the liquid and soda can build a temporary layer of foam, so the empty space matters.
With a smaller bowl, make the half batch or serve the punch in two rounds.
A wide bowl adds surface area, making floating sherbet and rising foam easier to manage than in a narrow vessel.
Keep It Cold and Fizzy
You can do nearly everything before the doorbell starts ringing. The only jobs worth saving for the end are putting the bowl together and opening the soda.
Prepare ahead, assemble late.
What to Prep Ahead
Earlier in the day, refrigerate the green punch, pineapple juice and soda, prepare the garnishes or sugar-rimmed cups, and put the bowl, ladle and glasses where you can find them. For a crowd, you can also pre-scoop the sherbet onto a lined tray or into a chilled muffin pan and return it to the freezer.
Leave space between pre-scooped portions; separate lime-sherbet scoops refreeze cleanly instead of joining into one awkward slab.
Once that is done, you are not wrestling with a frozen tub or hunting for the ladle while guests are walking through the door.
When to Assemble a Fresh Round
Put the punch together when people are beginning to gather around the drinks. That is a better cue than the clock—and certainly better than assembling it when you start setting up the buffet an hour earlier.
For a longer party, put out only part of the punch at first. Keep the remaining fruit base refrigerated, the sherbet frozen and the extra soda cold and unopened. When the first bowl runs low, make another. The bubbles are fresher, and there is usually less punch left sitting around at the end of the party.
Keep It Cold and Easy to Serve
Properly chilled ingredients usually make loose ice unnecessary, and melting ice dilutes the drink. For longer service, set the punch bowl inside a larger bowl or tray of ice. You can also freeze some green fruit punch into cubes if you want ice inside the bowl without adding plain water.
Because sherbet contains dairy, do not leave the finished punch at room temperature for more than 2 hours, or more than 1 hour when the temperature is above 90°F / 32°C. The USDA food-safety guidance has more detail.
A punch bowl is the easiest vessel because the sherbet and froth have room to float. For a small batch, a wide pitcher works. With a spigot dispenser, run only the chilled fruit base through the dispenser; add sherbet and soda to the cups or serving bowl so pieces do not interfere with the spout.
At a mixed-age party, keep the shared bowl alcohol-free so everyone can reach for the same festive drink. A fully alcoholic Grinch Punch is better treated as its own recipe instead of adding spirits to the family batch.
Fix a Problem
Sherbet punch is forgiving, but it can still become too sweet, too foamy, too flat or simply too large for the bowl you grabbed. Most problems can be fixed without dumping the bowl and starting over.
Problem
Fix Now
Next Time
Too sweet
Add cold sparkling water
Use 3 cups soda plus 1 cup sparkling water
Foam is overflowing
Stop pouring and let the foam settle
Chill the liquids well, pour the soda more slowly and leave more bowl headroom
Hardly any froth
Pour a small final splash of soda over a few scoops
Let some soda run directly over the sherbet during assembly
Punch went flat
Refresh it with newly opened cold soda
Open the soda close to serving and stir gently
Sherbet disappeared quickly
Add a few fresh frozen scoops if you have them
Keep the sherbet frozen until shortly before assembly
Punch is separating
Give the bowl one slow sweep with the ladle
Avoid vigorous stirring that knocks out carbonation
Bowl is too full
Remove some liquid before adding the rest of the soda
Use a larger bowl or serve two rounds
Dispenser is clogging
Move the punch to an open bowl if possible
Run only the fruit base through a dispenser
Tastes sweet and one-note
Add a small squeeze of fresh lime
Use the lighter soda mix or taste the fruit base before finishing the bowl
Change one variable at a time—sweetness, fizz, sherbet or volume—so a quick rescue does not create another problem.
Leftovers
Grinch Punch does not store especially well once assembled.
Refrigerate leftovers promptly if you want to keep them. By the next day, the bubbles are gone and the frothy top has disappeared, so expect a creamy fruit drink rather than freshly made punch.
The Final Ladle
Grinch Punch does not need a complicated ingredient list to make a Christmas table feel more fun. A vivid green bowl, a few lime-sherbet scoops and that first rush of bubbles already do most of the work—especially once someone comes back carrying an empty cup and asks for another.
That is the charm of this punch: it looks like a celebration without becoming another hosting job. It gives the table color, gives the kids something to get excited about, and still leaves the person who made it free to enjoy the party.
Cold bubbles climbing around orange slices and ruby-red cranberries. Tart enough to cut through a rich Christmas dinner, fruity enough that people come back carrying an empty glass. That is the kind of Christmas punch worth putting in the middle of the table.
The trouble is that Christmas punch can go wrong surprisingly easily. Too sweet and the first glass feels like dessert. Too flat and it tastes like mixed fruit juice. Add alcohol carelessly and a drink that tastes gentle can become much stronger than anyone expected.
The idea here is simple: the recipe starts as a non-alcoholic Christmas punch, with ginger ale plus sparkling water so not all the fizz comes from sweet soda. Vodka or rum can be added where you want them, while brut Prosecco or Champagne can replace the ginger ale for a drier version.
Everyone gets the festive glass. Once the bowl is on the table, the host should be able to leave it there and get on with Christmas.
This easy Christmas punch combines cranberry, pineapple and orange juice with ginger ale and sparkling water. It takes about five minutes to mix once everything is cold, makes about 1 US gallon / 128 US fl oz / 3.8 L, and can be served alcohol-free or spiked by the glass with vodka or rum.
The rule worth remembering is shorter than the ingredient list:
Chill first. Balance before bubbles. Carbonate last.
Choose Your Version
Mixed family gathering? Keep the bowl alcohol-free so children and adults can share the same festive punch. Adults who want vodka or rum can add it to their own glasses.
Adults only? Add a measured amount of vodka, light rum or gold rum to the whole bowl. The whole-bowl amounts below let you choose the strength without relying on guesswork.
Want a drier sparkling-wine version? Replace the ginger ale with brut Prosecco or Champagne.
Making your first batch? Keep the bowl alcohol-free and spike individual glasses. It gives you the most control without committing the whole gallon to one choice.
Keep the main bowl alcohol-free for mixed gatherings; place a spirit and jigger beside it for adults who want to spike their own glass.
Christmas Punch Recipe
The full batch makes about one gallon before optional lemon or alcohol. The scaling section below includes ready-made amounts for a single glass, pitcher and half batch.
Recipe at a Glance
Prep
About 5 minutes
Yield
About 1 US gallon / 128 US fl oz / 3.8 L
Small party pours
About 21 × 6 fl oz / 180 ml
Generous servings
About 16 × 8 fl oz / 240 ml
Best bowl size
6 qt / 5.7 L for most full batches
Flavor
Cranberry-forward, lightly sweet and sparkling
Alcohol
Optional
Serving sizes: 6 fl oz / 180 ml is a small party pour; 8 fl oz / 240 ml is a generous serving. The 12 fl oz / 355 ml figure used later is a shopping allowance per guest, including refills—not one glass.
Ingredients
The punch itself uses five main liquids. Optional lemon juice, sliced fruit and ice are finishing touches.
Three juices build the flavor; ginger ale and sparkling water supply the lift. Chill all five before mixing.
8 cups / 64 fl oz / 1.9 L 100% cranberry juice blend, well chilled — not pure unsweetened cranberry juice
3 cups / 24 fl oz / 710 ml 100% pineapple juice, well chilled
1 cup / 8 fl oz / 240 ml 100% pulp-free orange juice, well chilled
3 cups / 24 fl oz / 710 ml ginger ale, very cold
1 cup / 8 fl oz / 240 ml plain sparkling water, very cold; club soda also works
Fresh lemon juice: 1–2 tbsp / 15–30 ml, only if the juice mixture needs more brightness after tasting
Orange: 1, thinly sliced
Up to 1 cup fresh or frozen cranberries, optional garnish
Large punch ice, an ice ring or ice for individual glasses, as needed
If you bought pure cranberry juice or cranberry juice cocktail instead, don’t swap it cup-for-cup. The cranberry guide below shows where to start.
How to Make Christmas Punch
Once everything is cold, the actual mixing takes about five minutes.
Chill everything first. Start with refrigerator-cold juices and mixers so the ice is not doing all the chilling.
Mix the juices. Pour the cranberry, pineapple and orange juice into the bowl and stir gently.
Taste before the bubbles. Look for cranberry up front with enough fruit sweetness behind it that the mixture does not feel aggressively tart. If it feels heavy or sweeter than you want, try 1 tablespoon / 15 ml lemon juice. If it is unusually sharp, check the cranberry label first.
For a single serving with ice or alcohol, use a 10–12 fl oz / 300–355 ml glass. For the small batch, choose a pitcher larger than 1 L. Don’t fill it to its advertised capacity when fruit or ice is going inside.
An 8-ounce serving is the cheapest place to test a new cranberry juice, mixer or substitution before a party.
Use the Ratio for Odd-Sized Batches
If your pitcher or dispenser does not match one of the sizes above, use 8 parts cranberry : 3 pineapple : 1 orange : 3 ginger ale : 1 sparkling water. Keep the same measure for every part.
For odd-sized vessels, 8:3:1:3:1 works with any consistent measure—ounces, milliliters, cups or a small jug.
Jump to What You Need
For a small gathering, everything you need is already above. The rest is here when you need help with cranberry labels, ingredient swaps, alcohol, crowd quantities, serving, ice or troubleshooting.
Cranberry leads. It gives the punch its tart backbone, deep red color and unmistakable holiday character. Because it makes up half the alcohol-free drink, choosing the right cranberry product matters far more than adding another handful of decorative fruit.
Pineapple brings body and fruit sweetness into the middle of the drink. Three cups are enough to soften cranberry without pulling everything too far into tropical-punch territory.
A smaller amount of orange connects cranberry’s tart edge with pineapple’s sweetness without taking over the color or flavor.
Ginger ale brings fizz, sweetness and a gentle ginger note. Sparkling water adds more bubbles without another full measure of sweet soda.
Together, those ingredients are meant to keep cranberry in front, soften its tartness with pineapple and citrus, and leave enough fizz that the punch feels refreshing rather than syrupy. Once the main ingredients are doing their jobs, adding more things rarely makes it better.
The target is cranberry-forward, bright and fizzy—not simply sweet.
Cranberry Juice: Read the Label Before You Pour
For the recipe as written, use 100% cranberry juice blend—not pure unsweetened cranberry juice and not automatically cranberry juice cocktail.
“Cranberry juice” sounds like one ingredient. At punch-bowl scale, the label can change the entire drink.
If the label says 100% juice but lists apple, grape or pear too, you are likely looking at a cranberry juice blend.
What you bought
What to do
100% cranberry juice blend Cranberry blended with naturally sweeter apple, grape or pear juice
Use 8 cups / 1.9 L as written. This is the intended version.
Pure unsweetened cranberry juice
Do not use it cup-for-cup. For the 8-cup cranberry portion, begin cautiously with about 2½–3 cups pure cranberry and enough apple or white grape juice to bring the total to 8 cups. Mix in the pineapple and orange, then taste.
Cranberry juice cocktail
Use 8 cups / 1.9 L, but begin the fizzy portion with roughly equal parts ginger ale and sparkling water. Add more ginger ale only if the punch needs more sweetness.
If You Bought Pure Cranberry or Cranberry Cocktail
Start there, then taste. The difference between brands is large enough that one fixed number will not suit every bottle.
If the pure-cranberry version is still too sharp after the pineapple and orange are in, add a little more apple or white grape juice. If it only needs a small sweetness correction, cold simple syrup gives you finer control; add it 1 tablespoon / 15 ml at a time.
Cranberry cocktail can create the opposite problem. When the juice mixture is already sweet enough, plain sparkling water is more useful than another sweet mixer.
Fix the 8-cup cranberry portion first; once it tastes balanced, let pineapple, orange and fizz return to their normal jobs.
Before the Bubbles
Too tart? Add a sweeter complementary juice or cold simple syrup in small measured amounts.
Too sweet? Add fresh lemon a tablespoon at a time and lean more heavily on sparkling water when you finish the bowl.
Already good? Stop adjusting it.
Make one correction, taste again, then decide whether the punch needs anything else.
Keep dry granulated sugar out of an already fizzy bowl. If the finished punch genuinely needs sweetness, cold simple syrup dissolves more easily and is much less likely to produce a sudden cap of foam.
Once the juice tastes right, you can stop thinking about cranberry labels. From there, the variations are mostly about the kind of punch you want.
Ingredient Swaps: What Changes
Ginger beer, Sprite, sparkling water and Prosecco all add bubbles, but they do very different things to the punch.
Use sparkling water to pull sweetness back, ginger ale for sweetness plus lift, and ginger beer for a sharper ginger edge.
Change
What happens
Replace some ginger ale with ginger beer
More ginger bite and a sharper finish
Use Sprite or 7Up instead of ginger ale
Sweeter and more lemon-lime forward, without the ginger character
Replace some ginger ale with sparkling water
Less sweetness while keeping the punch fizzy
Replace part of the cranberry with pomegranate
Deeper fruit flavor and a more red-purple color
Replace some pineapple with orange or apple juice
Less pineapple body and a different kind of fruit sweetness
If the stronger ginger version is what appeals to you, a Cranberry Moscow Mule takes cranberry, lime, vodka and ginger beer into an individual cocktail rather than a punch-bowl variation.
Make It Alcoholic: Vodka, Rum or Sparkling Wine?
If the alcohol-free glass already tastes good, you can stop there. What matters is how much you want the alcohol to change the punch. Vodka stays mostly out of the fruit’s way; rum becomes more noticeable; sparkling wine changes the style of the drink altogether.
Test a spirit in one measured glass before committing it to the whole bowl.
Alcohol
What changes
Vodka
Clean and neutral; the fruit remains in front
Light or gold rum
Rounder and warmer without a heavy molasses flavor
Dark or spiced rum
More obvious rum, vanilla and spice; easier to overpower the fruit
Brut Prosecco or Champagne
Drier, lighter and more sparkling
Bourbon
Oak, vanilla and a richer cranberry-orange profile
Gin
Sharper and botanical; changes the character much more noticeably than vodka
Vodka is the easiest choice when you want the punch to keep tasting primarily of fruit. Light or gold rum adds more warmth, while coconut rum only makes sense when coconut is genuinely part of the flavor you want.
If cranberry and vodka are your favorite part of the punch, a classic Cosmopolitan takes that combination into a sharper lime-and-orange cocktail.
Spike Individual Glasses
For a 6 fl oz / 180 ml pour, start with 1 fl oz / 30 ml spirit. From there, move lighter or stronger depending on the glass you want.
Lighter: ¾ fl oz / 22 ml
Balanced: 1 fl oz / 30 ml
More cocktail-like: 1½ fl oz / 45 ml
With a typical 40% ABV spirit, the 1-fl-oz version is roughly 5.7% ABV before ice dilution; the 1½-fl-oz version is around 8%. Use a 10–12 fl oz glass so there is room for the spirit and ice.
Measure punch and spirit separately. A jigger keeps one party pour from quietly becoming a different drink.
Spike the Whole Bowl
40% spirit added to one full batch
Approx. ABV*
375 ml
About 3.6%
500 ml
About 4.7%
750 ml
About 6.6%
*Calculated before ice dilution.
Serving several alcoholic batches? Record the first measured spirit amount and repeat it instead of matching later bowls by taste.
Cold fruit and carbonation can make alcohol seem gentler than it is. Measure how much went into the bowl instead of judging strength only by taste. The NIAAA guide to standard drinks is useful for comparing those pours with familiar servings of spirits and wine.
Adding the full 750 ml of spirit brings the total liquid to roughly 4.5 L before ice and garnish. Do not use a 5-quart bowl for that version; the bowl-size guide below shows the practical headroom for larger batches.
Prosecco or Champagne Version
Replace the 3 cups / 710 ml ginger ale with one chilled 750 ml bottle of brut Prosecco or Champagne. Keep the sparkling water. With a typical 12% sparkling wine, the finished bowl is roughly 2.4% ABV before ice dilution.
For a stronger sparkling version, about 375 ml vodka brings the bowl into roughly the mid-5% ABV range, depending on the bottles used.
If sparkling wine is really the main event, the Mimosa guide includes a cranberry version for individual Christmas-brunch glasses.
Christmas Punch for a Crowd: How Much Per Person?
For a party, recipe yield and shopping quantity are not quite the same thing. Nobody is thinking about the yield printed on the recipe once people start coming back for refills.
As a generous planning rule, allow about 12 fl oz / 355 ml of punch available per guest when punch is an important drink option. For planning, one gallon therefore covers roughly 10 people. Make less when beer, wine, cocktails, soft drinks and other beverages are also being served.
This is a shopping allowance, not a serving size. The extra volume simply gives people room to come back for another glass.
Round the total up by whole batches. A little cold reserve is easier to manage than running out mid-party.
How Many Batches for 10–80 Guests?
For a quick planning rule, think roughly one gallon for every ten guests. That turns a large guest count into repeatable batches before you start shopping.
Treat these as planning milestones, not fixed drinking quotas; some guests will refill and others will barely touch a glass.
Guests
Punch to have available*
1-gallon batches
10
About 1 gallon
1
20
About 2 gallons
2
30
About 3 gallons
3
40
About 4 gallons
4
50
About 5 gallons
5
80
About 8 gallons
8
*A generous planning amount. Reduce it when plenty of other beverages are available.
Shopping Math for 40 Guests
Every full batch needs roughly 2 qt / 1.9 L cranberry juice, 3 cups / 710 ml pineapple juice, 1 cup / 240 ml orange juice, 3 cups / 710 ml ginger ale and 1 cup / 240 ml sparkling water.
For 40 guests / four batches, shop for approximately:
Cranberry juice: 2 gal / 7.6 L
Pineapple juice: 3 qt / 2.8 L
Orange juice: 1 qt / 950 ml
Ginger ale: 3 qt / 2.8 L
Sparkling water: 1 qt / 950 ml
Round up to the carton and bottle sizes actually available where you shop.
For multiple batches, smaller bottles of fizzy mixers can keep later refills sealed, cold and lively until needed.
Don’t Carbonate Everything at Once
The shopping is handled. Now the job is making gallon four taste as lively as gallon one.
Prepare the cranberry-pineapple-orange mixture ahead and keep most of it covered in the refrigerator. Finish the first bowl with ginger ale and sparkling water when guests arrive; carbonate the next batch only when you need it.
The second half of the party gets fresh punch instead of whatever bubbles survived from the first half.
Label each chilled reserve base with the exact ginger ale and sparkling water it still needs.
The best vessel depends on how people are drinking. A pitcher suits a smaller seated dinner—especially beside something rich such as honey glazed ham—while a bowl or dispenser makes more sense when guests are serving themselves.
Pitchers suit smaller seated meals; bowls and dispensers make self-service easier when guests are circulating.
By the Glass
This is easiest for a small group or when everyone is choosing their own alcohol. Use the 8-fl-oz / 240-ml single-serving formula from the scaling section, then add spirit and ice separately.
Pitcher
A pitcher makes more sense than a punch bowl for a smaller dinner. Don’t fill it to its advertised capacity, especially when fruit or ice is going inside.
What Size Punch Bowl Do You Need?
A 6-quart / 5.7-L bowl is the best default for one full batch. It leaves useful room for fruit, ice and the ladle instead of filling the bowl almost to the rim.
Tight fit — 5 qt / 4.7 L: workable for the alcohol-free gallon with modest garnish and no large ice ring, but fairly full.
Best default — 6 qt / 5.7 L: the better choice for most full batches, especially with fruit or large ice.
Most forgiving — 7 qt / 6.6 L: preferable when adding a substantial amount of spirit plus an ice ring or generous punch ice.
A one-gallon bowl is not a sensible home for exactly one gallon of liquid plus an ice ring.
Six quarts is the practical default for a one-gallon batch; substantial ice or spirit may justify more headroom.
Beverage Dispenser
A dispenser is excellent for a larger group because guests can serve themselves without a ladle. Leave a little space at the top rather than filling it to the brim.
If the dispenser will be out for much of the party, let guests add ice to their own glasses instead of filling it with cubes that slowly weaken every remaining serving.
Test the empty dispenser with water and an actual serving glass before filling it with punch.
Can You Make Christmas Punch Ahead of Time?
Yes. Mix and chill the cranberry, pineapple and orange juices the day before, but keep the ginger ale and sparkling water separate until serving time.
Before guests arrive, taste the cold juice mixture and make any final sweetness or acidity adjustment. Add whole-bowl alcohol now if you’re using it.
Then, just before serving, add the ginger ale and sparkling water.
Juices can wait overnight. Bubbles and garnish are serving-time jobs.
If someone else may finish the punch while you’re dealing with dinner, stick a note on the chilled juice mixture: “Add ginger ale + sparkling water just before serving.” That note is easier than trying to explain the punch from across the kitchen.
If someone else may finish the punch, leave only one decision: add the chilled fizzy mixers just before serving.
Use the Right Ice
Small cubes chill quickly and melt quickly. A large block or ice ring is better suited to a bowl that will sit out for a while.
For less flavor dilution, freeze cranberry juice or diluted punch mixture instead of plain water.
Small cubes chill fast; a ring melts slower; frozen punch protects flavor as it melts.
One tiny check can save a ridiculous problem later: put the empty Bundt pan or ring mold inside the actual punch bowl before freezing anything. Make sure the finished ring will fit and that the ladle still has room beside it.
A slightly smaller ice ring leaves room for the ladle to dip, turn and actually collect punch.
Set It Up So You Don’t Have to Babysit It
The real luxury of party punch is not that it takes five minutes to mix. It is that you can stop making drinks once the guests arrive.
Put everything people will need within reach before the first glass is poured:
Punch bowl, pitcher or dispenser
Ladle and a small plate or spoon rest
Glasses or cups
Ice and an ice scoop if guests add their own
Vodka or rum plus a small measure when alcohol is optional
A cold reserve of juice mixture and fizzy mixers for refills
Arrange the station in use order: glasses, ice, punch, then optional spirit and measure.
If you’re serving two bowls, label the alcoholic one clearly. “The adult punch is on the left” stops being useful the moment somebody rearranges the table.
A self-serve snack can work on the same principle as the drinks station. An easy cheese ball can sit beside crackers and vegetables without needing somebody to manage it.
Garnish for the Vessel, Not Just the Photograph
Red cranberries and thin orange wheels are enough to make the bowl look unmistakably festive. You do not need to turn the punch into a floating fruit basket.
A punch bowl can comfortably carry orange wheels and a restrained scattering of cranberries. A pitcher needs less fruit so it still pours cleanly. In a beverage dispenser, larger citrus slices are safer than tiny fruit pieces, loose herbs or clusters of berries that can drift toward the spigot.
Save a little fresh orange and cranberry garnish for refills so later bowls still look newly made.
For cups going to young children, leave the whole cranberries in the bowl rather than ladling them into the drink.
Christmas Punch Troubleshooting
Punch is forgiving. The quickest rescue usually comes from figuring out what actually changed instead of adding a little of everything.
Watery is usually dilution, flat is carbonation timing, and foaming during adjustment is a mixing problem.
Flavor, Sweetness & Fizz Problems
Problem
Likely cause
Fix now
Way too tart
Pure unsweetened cranberry or very dry ingredients
Check the cranberry label, then add a sweeter complementary juice or cold simple syrup gradually.
Too sweet
Sweetened cranberry, sweet soda and sweet fruit stacked together
Add fresh lemon and/or plain sparkling water.
Tastes like ordinary juice
Not cold enough, bright enough or freshly carbonated
Chill it, add a little lemon if needed and finish with fresh bubbles.
Watery
Warm punch plus lots of fast-melting small ice
Stop adding plain ice. Chill the vessel externally if practical.
Flat
Carbonation went in too early
Refresh one pitcherful at a time with a little very cold ginger ale or sparkling water, tasting as you go.
Rum dominates
Too much spirit or a very assertive dark/spiced rum
Dilute with reserved alcohol-free juice mixture.
Doesn’t taste alcoholic
Cold fruit and fizz are masking the alcohol
Do not keep adding spirit based on taste. Check how much actually went into the bowl.
Foamed while sweetening
Dry sugar went directly into carbonated punch
Let it settle and use cold simple syrup for any further adjustment.
Cloudier than expected
Pulp-heavy orange juice or cloudy citrus
Harmless. Use pulp-free orange next time for a clearer ruby color.
Serving & Setup Problems
Problem
Likely cause
Fix now
Ice ring blocks the ladle
The mold was too wide for the bowl
Use a smaller ring next time and test the empty mold first.
Dispenser stops flowing
Small fruit or herbs collected around the spigot
Clear the outlet and keep small garnish out of the dispenser.
Running out too quickly
Recipe servings were mistaken for total party consumption
Finish the next cold batch and allow for refills when shopping next time.
Storage & Leftovers
For best quality, drink finished Christmas punch the day it is made or the next day. Refrigerate leftovers promptly and remove old citrus and floating garnish before storing.
The flavor may still be pleasant after refrigeration, but carbonation fades steadily. A little fresh ginger ale or sparkling water can brighten an individual leftover glass; it will not completely recreate a newly mixed batch.
If leftovers are likely, hold back some of the cranberry-pineapple-orange mixture before adding the fizzy ingredients, then carbonate only what you need.
If the night moves from cold drinks to something warm, a Hot Toddy takes Christmas in the opposite direction with whiskey, honey and lemon in one warm glass.
The Final Pour
There is a nice moment when punch stops being a recipe and becomes part of the party: the bowl is glowing red on the table, the ice is still solid, orange slices are moving slowly between the bubbles, and somebody comes back carrying an empty glass.
An empty glass is useful feedback: the punch looked inviting, tasted refreshing and earned another pour.
You should not have to leave the conversation to start mixing another drink.
Make enough, keep the next batch cold, then leave the punch bowl to do its job. Christmas is happening somewhere other than the drinks table.
A great mojito recipe has a particular kind of clarity. The lime feels bright rather than sharp, the mint smells fresh instead of tasting bitter, and the fizz lifts everything so the drink stays light on its feet. When a mojito is made well, it doesn’t just taste “refreshing.” It tastes clean, cold, and intentional—like you meant to make it that way all along.
And yet, plenty of home mojitos miss the mark for reasons that have nothing to do with skill. Often, the sweetener wasn’t dissolved fully. Sometimes the mint was crushed like it was being punished. Other times, soda got stirred until the drink went flat. In contrast, once you understand how a classic mojito is built—order, pressure, and timing—you can make a mojito drink that tastes consistently good in any kitchen, with any glass, and with minimal tools.
Designed to be “learn it once, reuse it forever”, this guide will share:
A proper classic mojito recipe with exact measurements
A dependable mojito ratio you can memorize and scale
A party-ready mojito pitcher recipe that stays fizzy
A satisfying mojito mocktail and virgin mojito recipe that still tastes like a mojito
Fully measured variations: strawberry mojito recipe, watermelon mojito recipe, cranberry mojito, pomegranate mojito recipe, coconut mojito recipe, pineapple mojito, peach mojito recipe, plus a few more from the flavor universe that shows up again and again (cucumber mint, blueberry, passion fruit, orange, and a fun “blue” virgin option)
Along the way, you’ll also see how to troubleshoot watery drinks, harsh lime, and bitter mint without throwing the whole glass away. Finally, you’ll get easy food pairings and a simple hosting plan, because a mojito night feels better when the table feels complete.
If you enjoy the idea of building one reliable base and then changing the finish, you’ll recognize the same logic in other crowd-friendly drinks—build the flavor core first, then finish fresh for the best texture. That’s exactly why a make-ahead drink like Rum Punch Recipe can be such a natural companion when you’re hosting: it’s a different profile, yet it rewards the same “core first, finish last” approach.
Mojito Recipe: Classic Mojito Drink (Exact Measurements, No Guessing)
The best mojito cocktail recipe is mostly technique disguised as simplicity. To begin with, you dissolve sweetness before ice. Next, you treat mint gently so it stays fragrant instead of bitter. Then you add soda at the end to protect the fizz. Finally, you stir less than you think, because over-stirring turns sparkle into flatness. Taken together, those four habits solve almost everything.
As a helpful baseline, the International Bartenders Association lists the mojito as a Contemporary Classic with a core structure of mint, lime, sugar, white rum, and soda water. You can treat that as your “north star” for what classic means, and then adjust within that framework to match your taste and your glass size. (IBA Mojito)
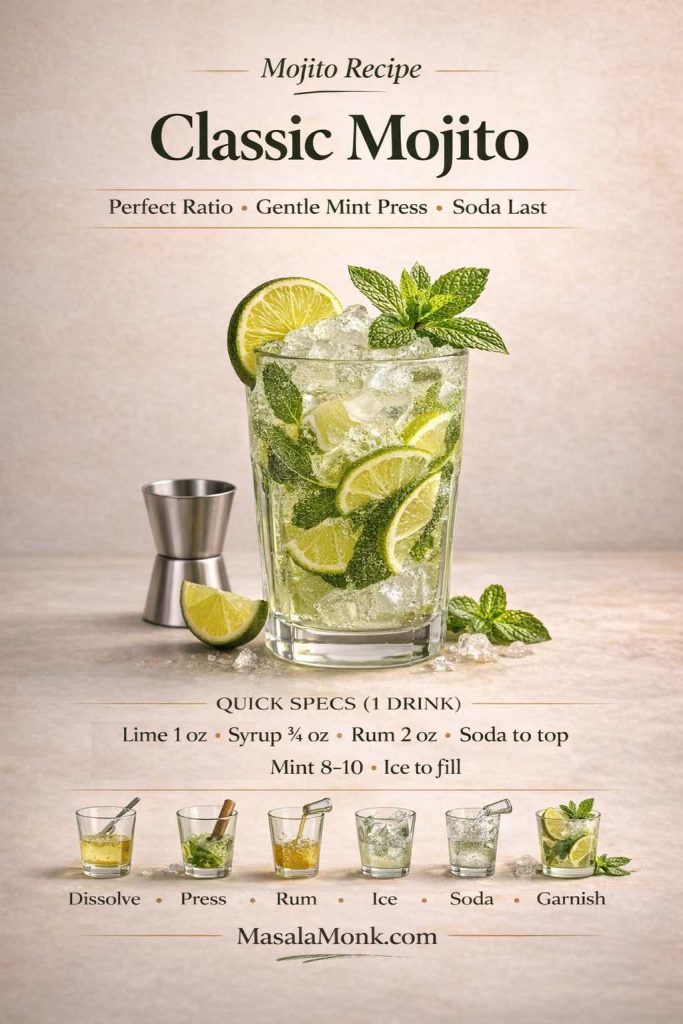
Classic Mojito Recipe at a glance: use the perfect ratio (1 oz lime, ¾ oz syrup, 2 oz rum), press mint gently, pack the glass with ice, and add soda last—then garnish. This quick card is the easiest way to make a crisp, not-watery mojito every time.
Classic Mojito Recipe Ingredients (1 Drink)
Makes: 1 mojito Glass: Highball or Collins (12–14 oz / 350–415 ml is ideal) Ice: Enough to fill the glass completely (this matters)
Mint leaves: 8–10 leaves, plus 1 large mint sprig for garnish
Fresh lime juice: 1 oz (30 ml)
Simple syrup (1:1): ¾ oz (22 ml)
or substitute2 tsp granulated sugar (about 10 g)
White rum: 2 oz (60 ml)
Soda water / club soda: 2–4 oz (60–120 ml), to top
Garnish: lime wheel or wedge + mint sprig
Why these measurements work: the lime stays bright without turning harsh, sweetness rounds the edges without becoming syrupy, rum feels present without getting sharp, and soda provides lift without washing out flavor.
How to Make a Mojito (Classic Method)
Step 1: Start by dissolving the sweetener
Add 1 oz (30 ml) lime juice and ¾ oz (22 ml) simple syrup to your glass. Stir for 10–15 seconds until the base looks uniform. If you’re using granulated sugar instead, stir a little longer. You don’t need it to vanish completely; however, you do want most of it melted before ice goes in.
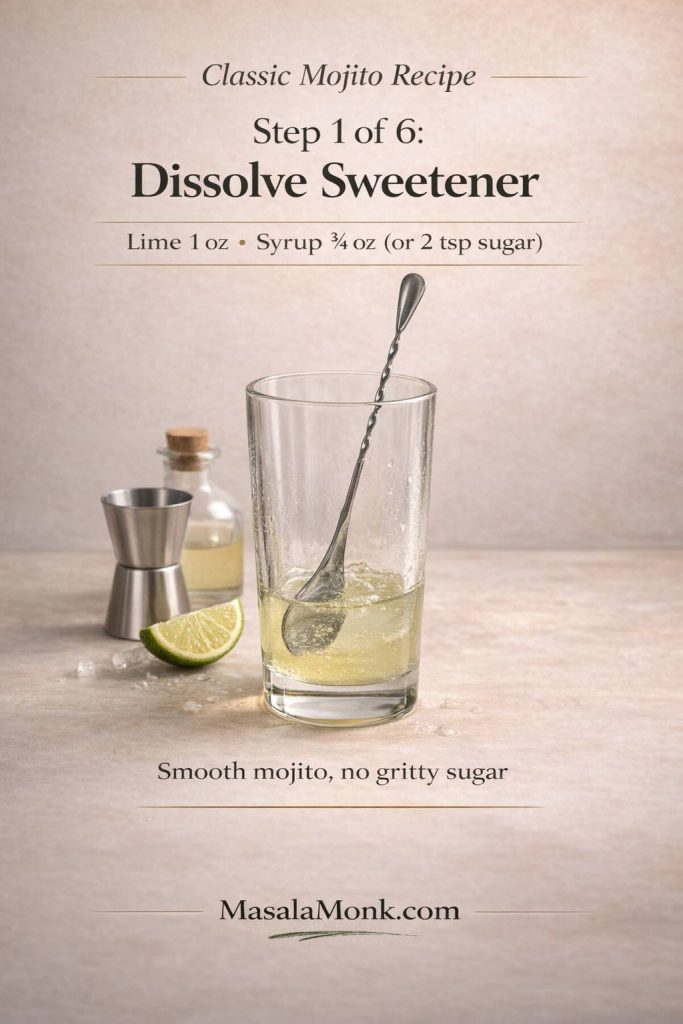
Classic Mojito Recipe — Step 1: dissolve lime and syrup (or sugar) first. This small step keeps your mojito smooth from the first sip and prevents gritty sugar later—so you can add ice and soda without over-stirring.
Step 2: Add mint gently—press, don’t pulverize
Add 8–10 mint leaves. Press them lightly 3–5 times with a muddler or the back of a wooden spoon. Then stop while the leaves still look intact. In other words, you’re releasing aroma—not making green debris.
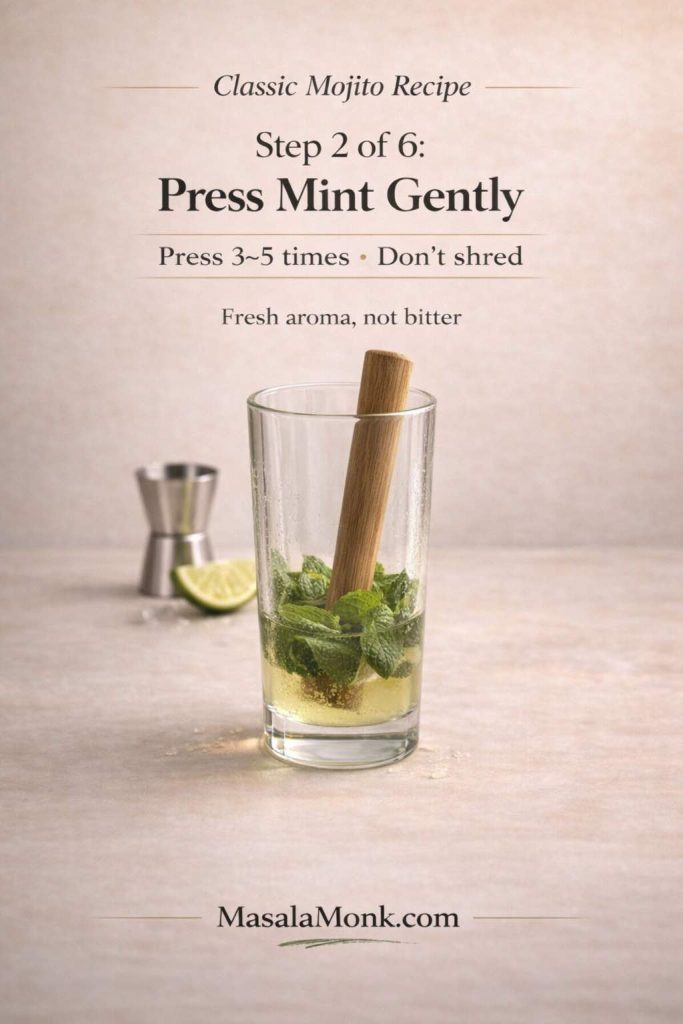
Classic Mojito Recipe — Step 2: press mint gently (3–5 light presses) to release aroma without turning the drink bitter. This is the key difference between a clean, bar-style mojito and a grassy one.
Step 3: Add the rum and blend quickly
Pour in 2 oz (60 ml) white rum, then stir once or twice so it merges with the lime-sweet base. At this point, the drink should smell bright and minty already.
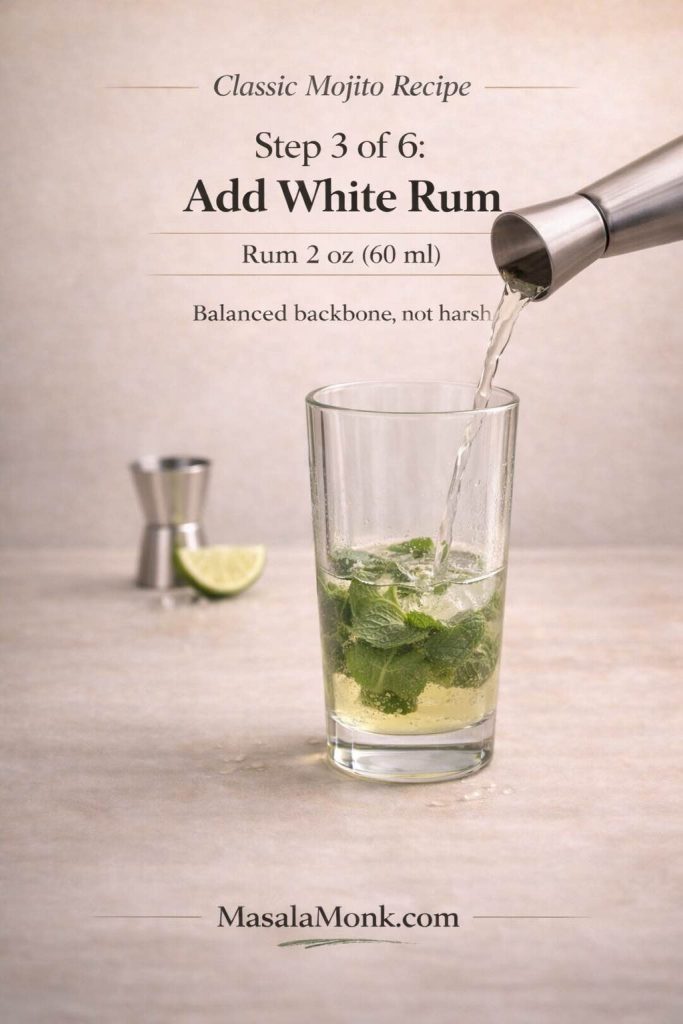
Classic Mojito Recipe — Step 3: add 2 oz (60 ml) white rum for a clean, balanced backbone. This keeps the mojito bright and crisp while letting lime and mint stay in the spotlight.
Step 4: Pack the glass with ice
Fill the glass all the way to the top. It feels backwards, yet more ice usually keeps the drink colder longer, which means it dilutes more slowly over the time you’re drinking it.
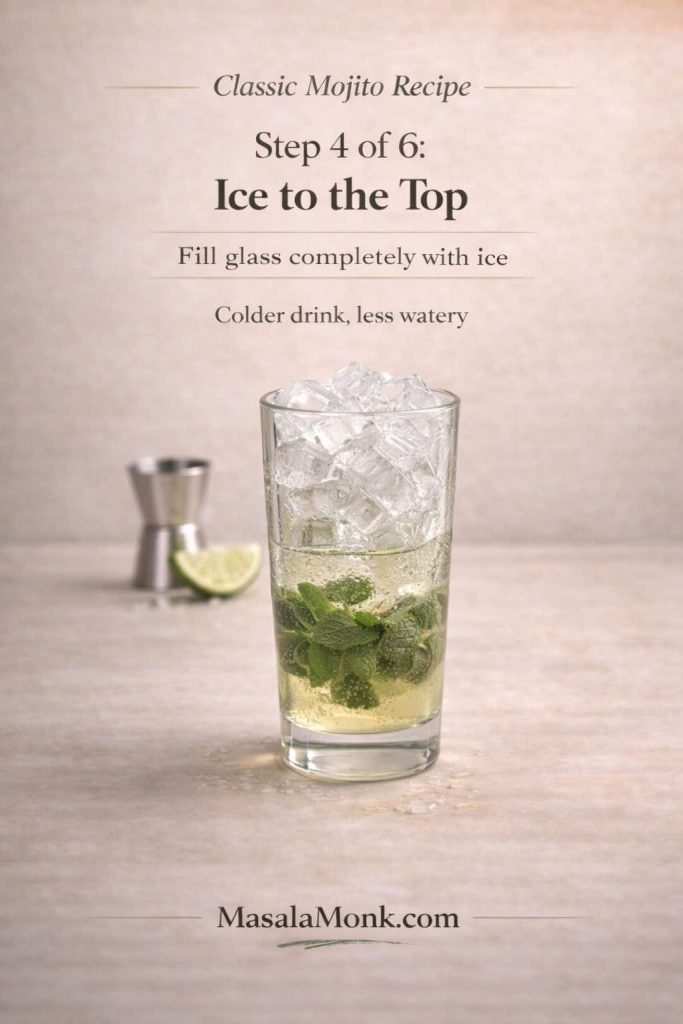
Classic Mojito Recipe — Step 4: fill the glass completely with ice. A full ice column keeps your mojito colder for longer, slows dilution, and helps prevent that watery, flat finish.
Step 5: Top with soda water and barely stir
Add 2–4 oz (60–120 ml) soda water. Then do one gentle lift-stir from the bottom to the top—just enough to pull that lime base upward. After that, leave it alone so the fizz stays lively.
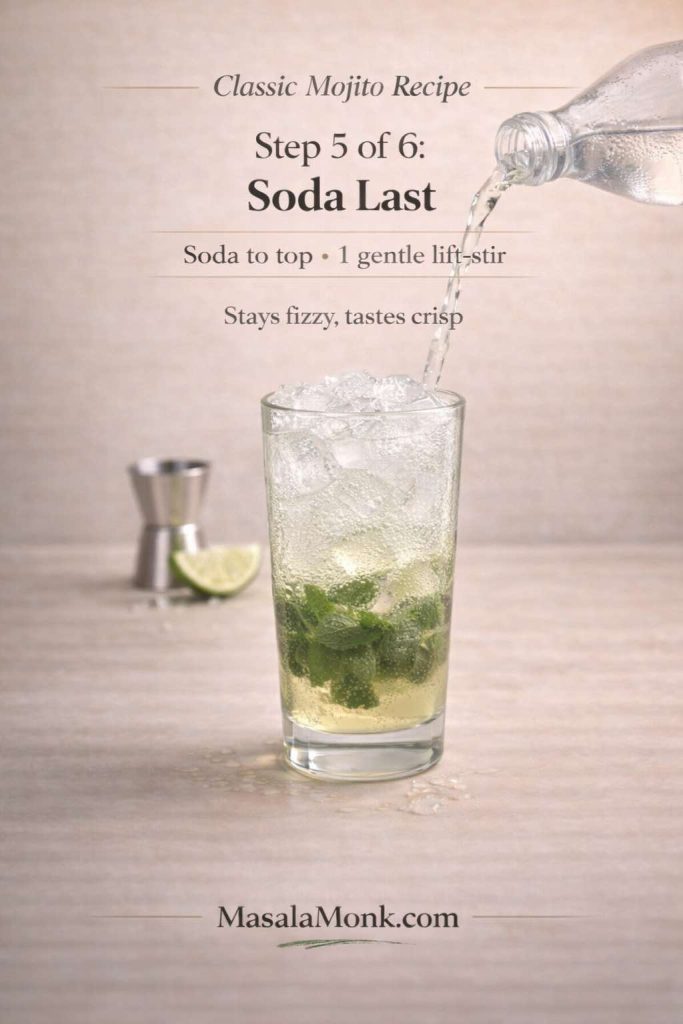
Classic Mojito Recipe — Step 5: add soda last and do just one gentle lift-stir. This keeps the mojito crisp and fizzy instead of flat and watery—especially when you’re making more than one drink.
Step 6: Garnish for aroma, not decoration
Clap your mint sprig between your palms (one firm clap is enough), then tuck it near the straw. Add a lime wheel or wedge. Now the drink smells like mint before it tastes like lime, which makes the whole thing feel fresher and more “complete.”
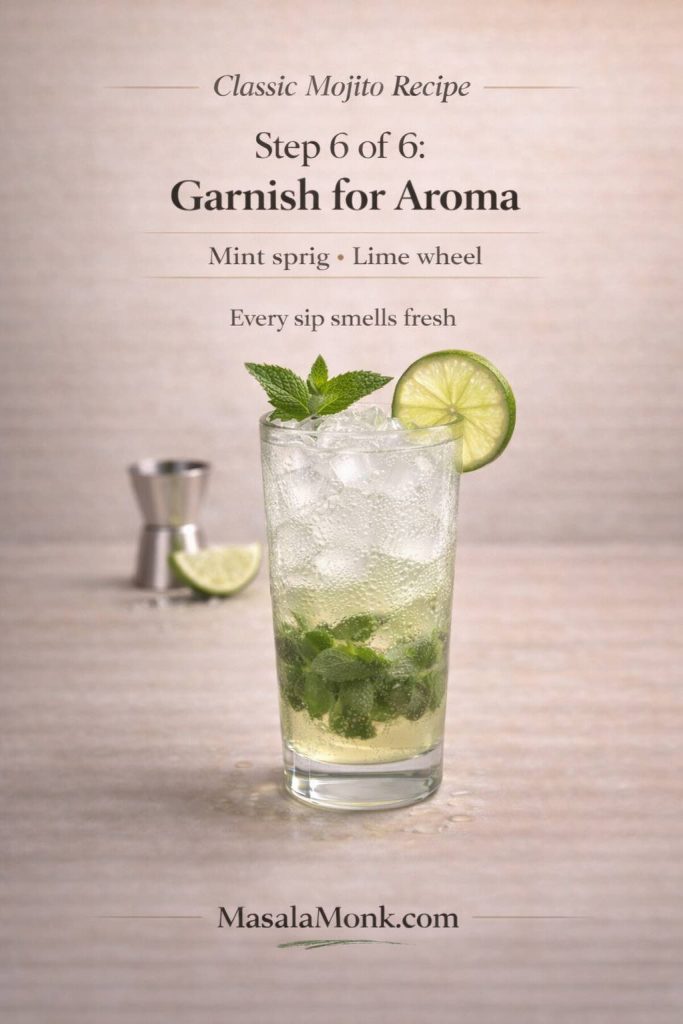
Classic Mojito Recipe — Step 6: garnish with a fresh mint sprig and a lime wheel. The mint aroma hits before the first sip, making the mojito taste brighter and more refreshing without needing to crush extra mint into the drink.
That’s the classic mojito drink. Make it once, then make it again. Before long, the method stops feeling like steps and starts feeling like a rhythm.
Mojito Ratio: The Classic Mojito Formula You Can Remember
A lot of people know the ingredient list and still wonder how do you make a mojito that tastes balanced every time. The answer is a ratio you can trust.
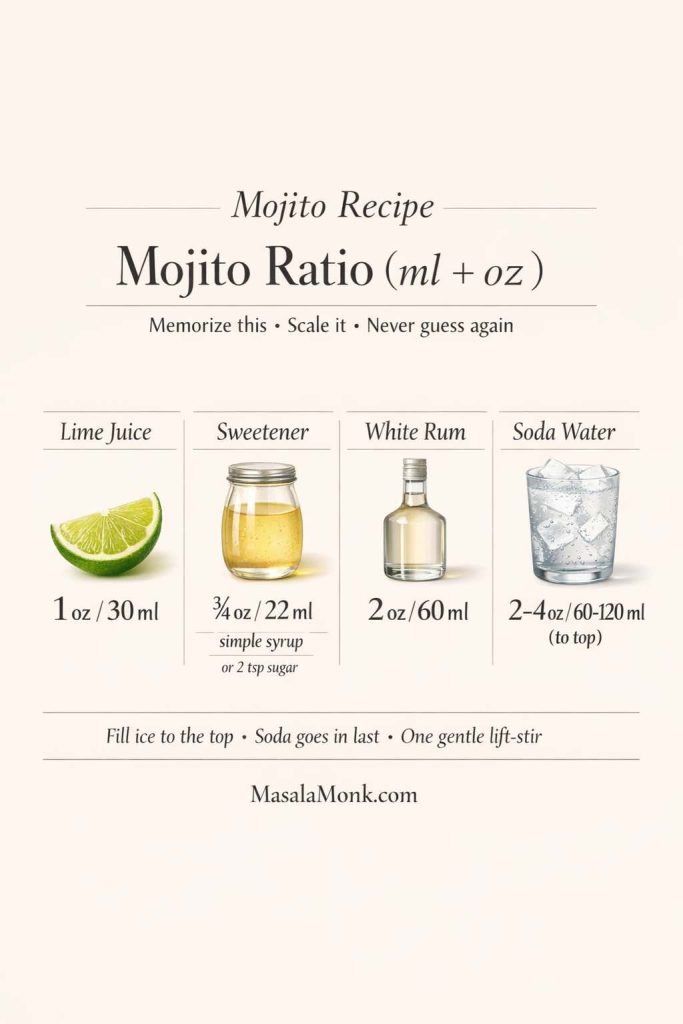
Classic Mojito Ratio (ml + oz): Use 30 ml lime, 22 ml syrup (or 2 tsp sugar), 60 ml white rum, then top with 60–120 ml soda. For the cleanest mojito, fill the glass with ice, add soda last, and do one gentle lift-stir.
A practical mojito ratio (lime : sweet : rum : soda)
Lime: 1 oz (30 ml)
Sweetener: ¾ oz (22 ml) simple syrup or 2 tsp sugar
Rum: 2 oz (60 ml)
Soda: top to taste (usually 2–4 oz / 60–120 ml)
In “parts,” you can think:
1 part lime : ¾ part sweet : 2 parts rum : top with soda
Once you internalize that relationship, you can make a home mojito in any glass and keep it balanced. Just as importantly, you can scale it into a mojito pitcher recipe without guessing, because you’re multiplying a pattern rather than reinventing the drink.
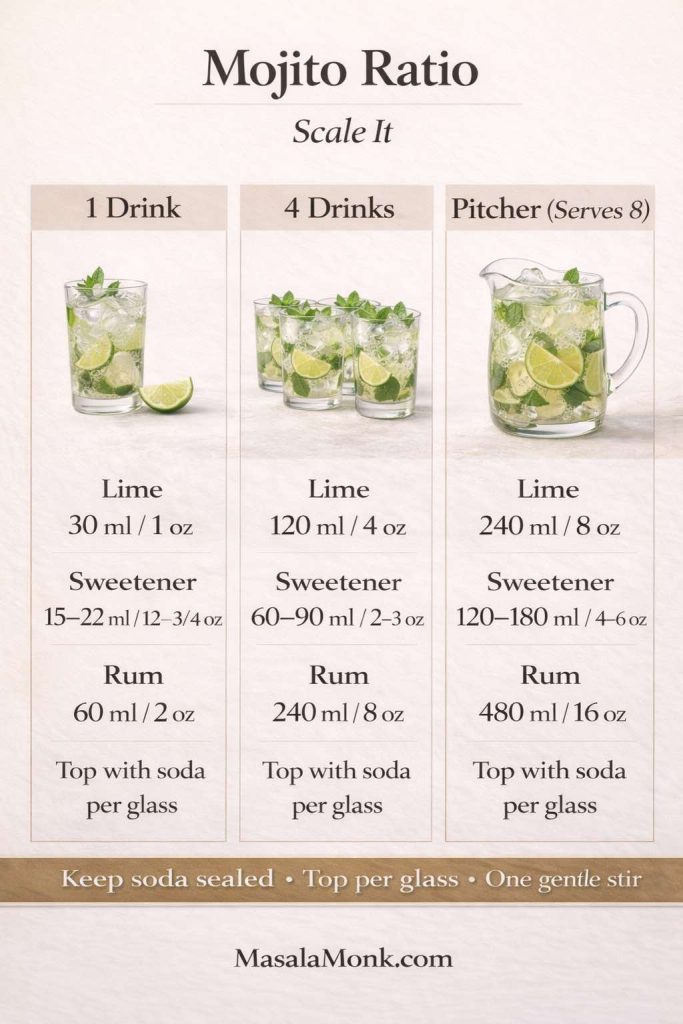
Mojito ratio, scaled: Use this cheat sheet to make one mojito, a small round, or a full mojito pitcher (serves 8) with consistent balance. Mix lime + sweetener + rum ahead, then top with soda per glass so batched mojitos stay fizzy.
Why this formula works
Lime is the brightness. Sweetener is the smoothing force. Rum is the backbone. Soda is the lift. Mint, meanwhile, is the aroma that makes the drink feel like a mojito rather than a generic lime highball. If one element gets loud—too much soda, over-muddled mint, excessive syrup—the drink stops tasting crisp.
So even though the mojito is simple, it’s still a system. Treat it like a system and it becomes easy.
Mojito Ingredients (and Why Technique Matters More Than Fancy Tools)
Because mojitos use very few ingredients, each one carries more responsibility. Still, you don’t need a full bar setup. You need freshness, restraint, and timing.
Mint for mojito drink: keeping it fragrant, not bitter
Mint bitterness usually comes from over-muddling. When mint gets shredded, you extract more of the bitter, planty notes. On the other hand, gentle pressing releases aroma without turning the drink green.
Mint rule:Press lightly and stop early. Then let a strong mint sprig garnish provide aroma through every sip.
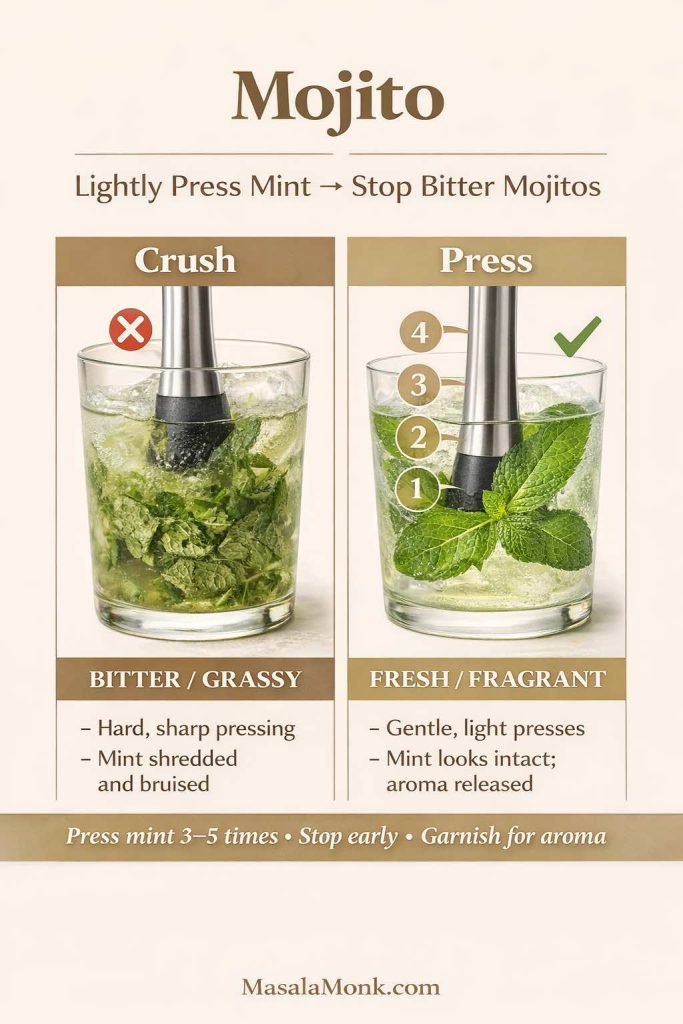
Mojito mint tip: For a fresh mojito (not bitter), press mint gently 3–5 times—don’t crush or shred it. Intact mint releases aroma, keeps the drink clear, and makes your classic mojito taste clean and “bar-style.”
If you want the drink to smell more minty, don’t muddle harder—garnish smarter. Clap the sprig before adding it. That tiny move can make your mojito feel “bar-like” without increasing bitterness.
Lime juice: fresh vs bottled
Fresh lime juice is the cleanest way to get a bright mojito. Bottled lime can work in a pinch, especially for a party base, but it often tastes slightly muted. If you use bottled, compensate by keeping everything colder and leaning on fresh lime garnish and strong mint aroma.
White rum for mojitos: what “white” really means
White rum isn’t one flavor. It’s a style. For a classic mojito recipe, you want rum that reads clean rather than oaky, so lime and mint stay in the spotlight. Lightly aged rum can be delicious too, but it shifts the drink warmer and richer.
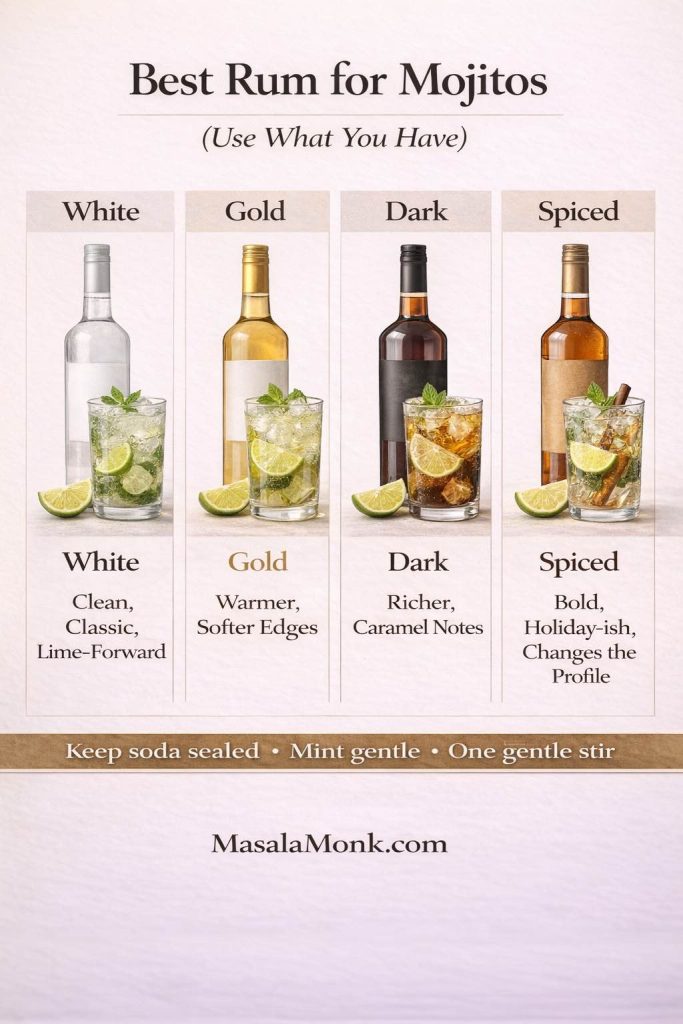
Best rum for mojitos: White rum gives the clean, classic lime-forward mojito, while gold rum makes it warmer, dark rum makes it richer, and spiced rum turns it bold and more “holiday-ish.” Use what you have—just keep lime bright, mint gentle, and add soda at the end.
If you’ve ever thought, “white rum for mojitos—what should I use?” the most practical answer is: use a clean white rum you enjoy in simple drinks. The mojito doesn’t hide rum; it frames it.
Soda water: protecting the fizz
Soda is fragile. Warm soda goes flat faster. Aggressive stirring knocks out bubbles. Accordingly, keep soda cold, add it last, and stir gently once. That’s the fizz insurance policy.
How to Make a Mojito Cocktail That Stays Crisp (Not Watery)
Watery mojitos don’t happen because someone lacks talent. They happen because the drink warms quickly and melts quickly.
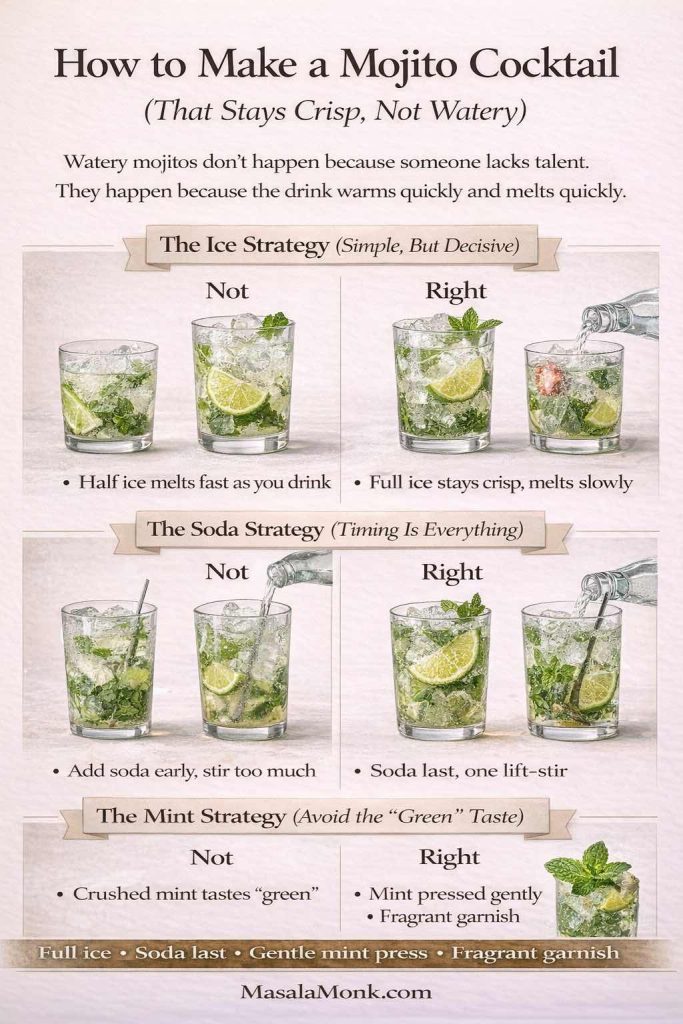
How to make a mojito that stays crisp: Fill the glass with ice (more ice melts slower), add soda last and stir only once, and keep mint gentle so the drink stays fresh instead of “green.” These three small moves prevent watery mojitos and keep the fizz lively.
The ice strategy (simple, but decisive)
A glass that’s half ice warms faster. A glass that’s full of ice stays cold. As a result, it melts more slowly over the time you’re drinking. Counterintuitively, more ice often means less dilution over time.
The soda strategy (timing is everything)
If you add soda and then stir a lot, you flatten the drink and accelerate dilution. Instead, add soda at the end and stir minimally. One lift-stir is usually enough.
The mint strategy (avoid the “green” taste)
Mint should smell like mint. It shouldn’t taste like bruised salad. Gentle pressing keeps the flavor clean. A fragrant garnish does the rest.
Mojito Mistakes + Fixes (So You Can Rescue the Glass)
Even with a good mojito recipe, a drink can drift. Fortunately, mojitos are forgiving if you know which lever to pull.
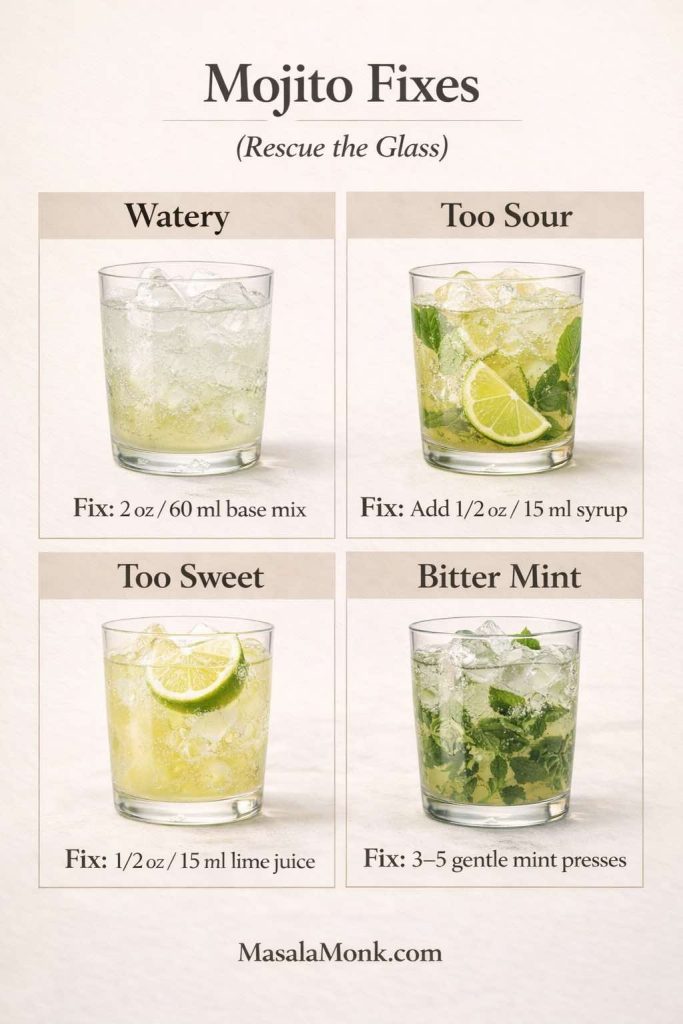
Mojito mistakes + fixes: If your mojito tastes watery, too sour, too sweet, or bitter from mint, you can rebalance it fast—add a little base, syrup, or lime as needed, and keep mint gentle. This quick guide helps you rescue the glass without starting over.
Watery mojito: what happened and how to fix it
Common causes: not enough ice, too much soda, soda stirred too much, or the drink sat warm.
Fix in the glass: Add more ice. Then add ½ oz (15 ml) rum and a small splash of soda. Stir once. If it still tastes thin, add a quick squeeze of lime (start with about ¼ oz / 7 ml).
Prevent next time: Fill the glass with ice and keep soda as the final step.
Mojito too sour: how to rebalance
Some limes are sharper than others.
Fix: add ¼ oz (7 ml) simple syrup, stir gently, taste again. Repeat once if needed. Sweetness rounds acidity faster than adding more rum.
Mojito too sweet: how to rebalance
Too sweet often comes from heavy syrup or fruit additions.
Fix: add ½ oz (15 ml) lime juice (or a generous squeeze), then refresh fizz with soda water.
Bitter mint: how to prevent it completely
If mint tastes bitter, it’s usually overworked.
Fix now: stretch the drink with more ice and a small splash more soda to soften bitterness. Fix next time: fewer muddle presses, gentler pressure, stronger garnish sprig.
Simple Syrup for Mojitos (and Why It Makes Everything Easier)
If you make mojitos even semi-regularly, simple syrup is the upgrade that makes the whole process smoother. It dissolves instantly, which means you don’t have to over-stir and destroy fizz just to avoid gritty sugar.
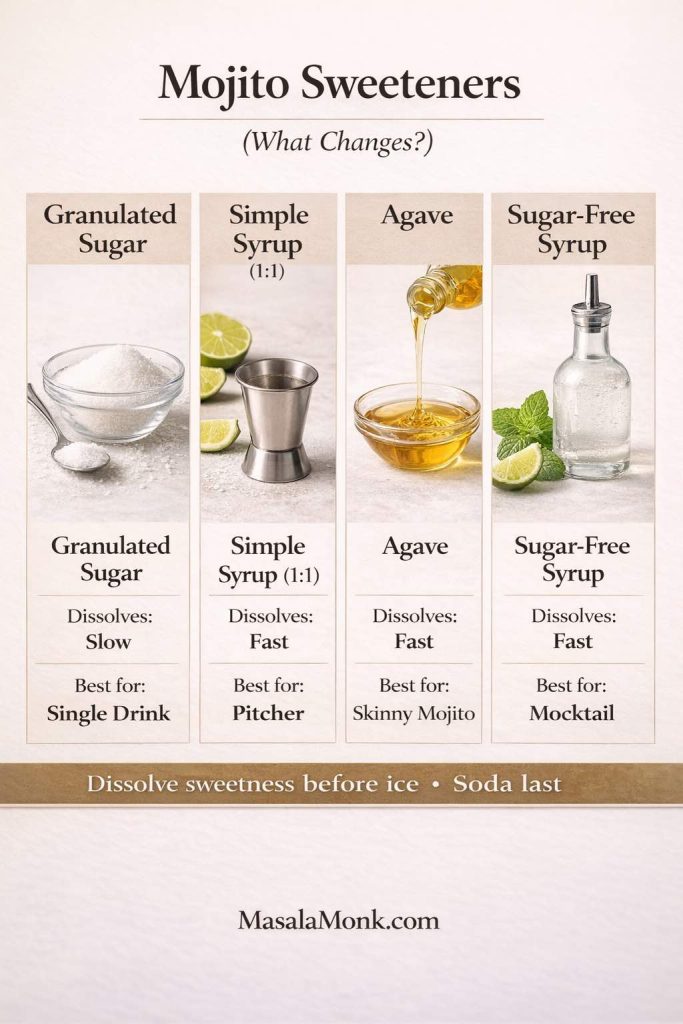
Mojito sweeteners, simplified: Sugar can stay gritty unless you stir longer, while simple syrup (1:1) dissolves fast and keeps mojitos crisp. Agave adds a slightly warmer sweetness, and sugar-free syrup helps make a lighter mojito mocktail or low-sugar mojito—just keep lime bright and add soda last.
1:1 simple syrup recipe (makes about 1 cup / 240 ml)
1 cup (200 g) granulated sugar
1 cup (240 ml) water
Stovetop method: Warm gently in a small saucepan, stirring until fully dissolved. Cool completely, then refrigerate.
No-stove method: Combine sugar and warm water in a jar and shake until dissolved.
Once you have syrup, a mojito recipe easy version becomes genuinely easy: lime + syrup, gentle mint press, rum, ice, soda, garnish.
Mojito Mix: A Shortcut That Still Tastes Fresh (Homemade, Not Bottled)
“Mojito mix” often means a store-bought bottle that’s sweet-heavy and mint-light. It can be convenient, but it rarely tastes as crisp as fresh lime and mint. However, you can make a homemade mix-style base that’s actually useful for hosting.
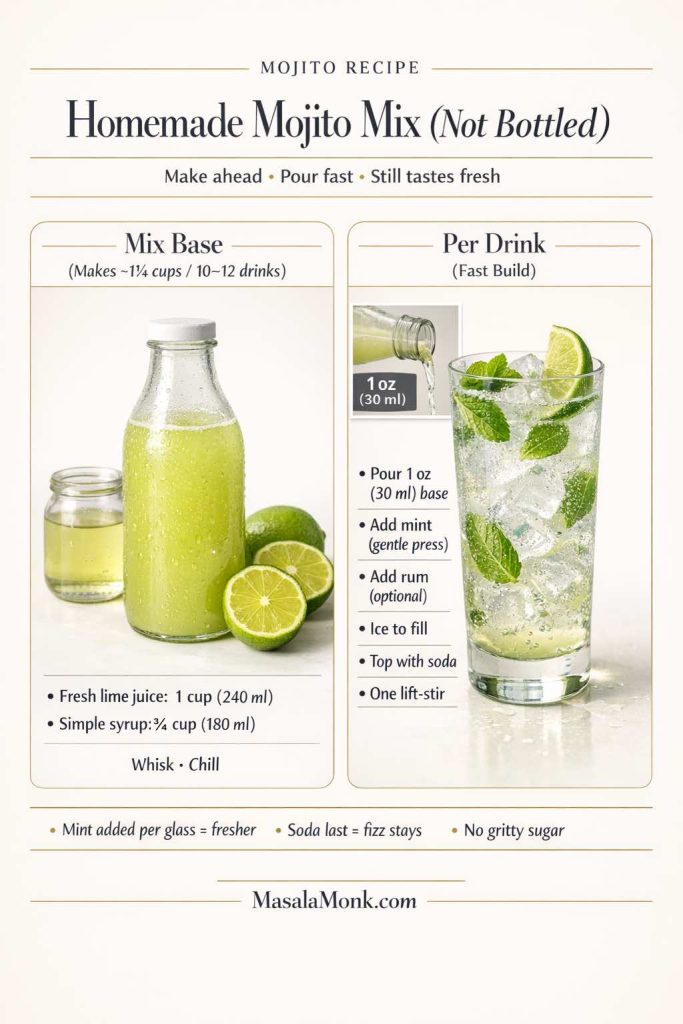
Homemade mojito mix (lime + syrup base): Whisk 240 ml fresh lime juice with 180 ml simple syrup, chill, then pour 30 ml per drink and finish like a real mojito—mint gently, ice to the top, soda last. It’s the fastest way to serve mojitos that still taste bright and fresh (without bottled mix flavor).
Mojito mix recipe (homemade lime-syrup base)
Makes: about 1¾ cups (enough for 10–12 drinks)
Fresh lime juice:1 cup (240 ml)
Simple syrup:¾ cup (180 ml)
Whisk together and chill. Then, for each mojito:
Use 1 oz (30 ml) of this base
Add mint, rum (or omit for mocktail), ice, soda, garnish
This doesn’t replace the mojito method—it simply speeds up the measuring so you can pour drinks faster without sacrificing brightness.
Mojito Pitcher Recipe (Batch Mojitos Without Flat Drinks)
A pitcher of mojitos sounds like the ultimate party move—right up until you remember the fizz problem: soda in a pitcher goes flat quickly. Meanwhile, mint left to sit too long can drift from fresh and fragrant into grassy and dull. Because of that, the best pitcher plan comes down to one simple rule:
Make a chilled base. Top each glass with soda at serving time.
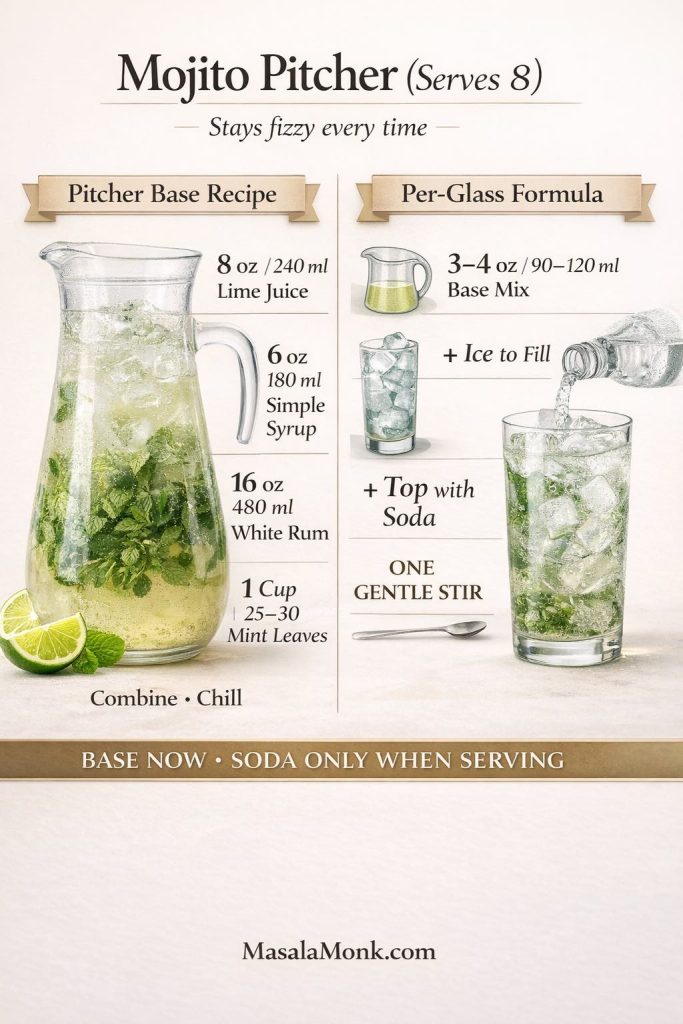
Mojito pitcher recipe (serves 8): Make a chilled base with lime, simple syrup, white rum, and mint—then top each glass with soda only when serving. This keeps batched mojitos bright and fizzy instead of turning into flat mint lemonade.
In other words, you build flavor ahead, then you finish with sparkle at the last moment. That single switch is the difference between bright and lively and flat mint lemonade.
Best Mojito Pitcher Recipe (Serves 8)
Pitcher base (make ahead):
Fresh lime juice: 8 oz (240 ml)
Simple syrup (1:1): 6 oz (180 ml)
White rum: 16 oz (480 ml)
Mint leaves: 30–40 leaves (about 1 packed cup, loosely)
To serve (finish fresh):
Soda water: 24–32 oz (720–960 ml), kept cold and unopened
Ice: plenty
Garnish: mint sprigs + lime wheels
How to Make a Pitcher of Mojitos (Step-by-Step Recipe)
Step 1: Stir lime and syrup first
In a pitcher, combine 8 oz (240 ml) lime juice and 6 oz (180 ml) simple syrup. Then stir until the mixture looks completely blended. This matters because an evenly mixed base pours consistently into every glass—so your first mojito and your last mojito taste the same.
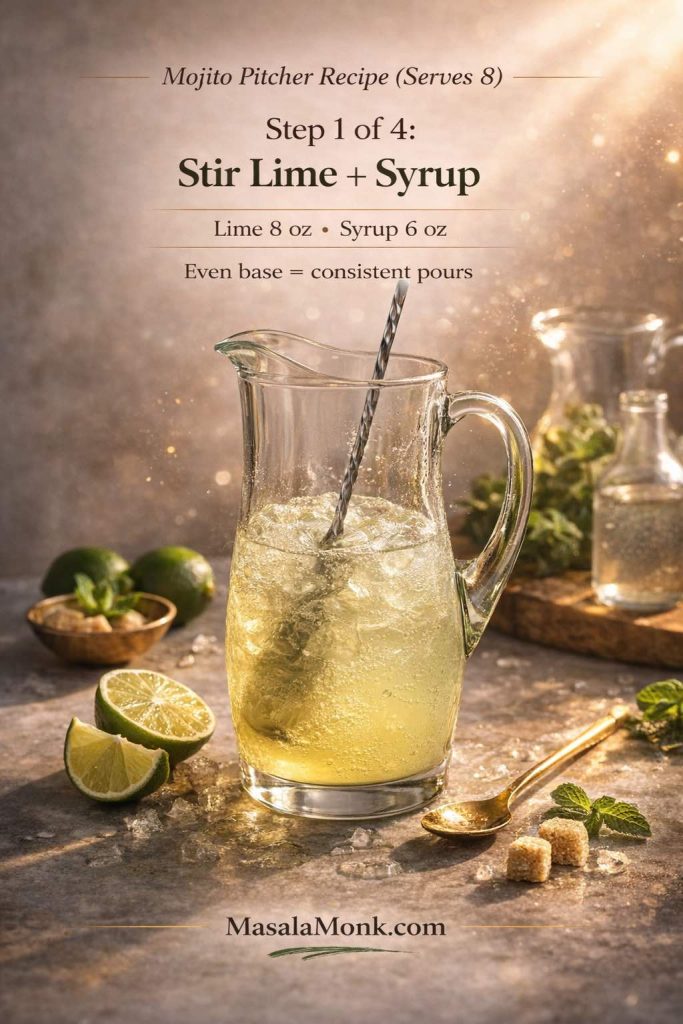
Mojito Pitcher Recipe — Step 1: stir 8 oz lime juice with 6 oz simple syrup until fully blended. A smooth, even base is what makes every glass taste the same—from the first pour to the last.
Step 2: Add mint and press gently
Next, add 30–40 mint leaves. Using a spoon (or muddler), press the leaves lightly a few times—just enough to release aroma. Then stop while the mint still looks intact. You’re aiming for fragrance, not green foam, and you want the base to stay bright rather than turning “leafy.”
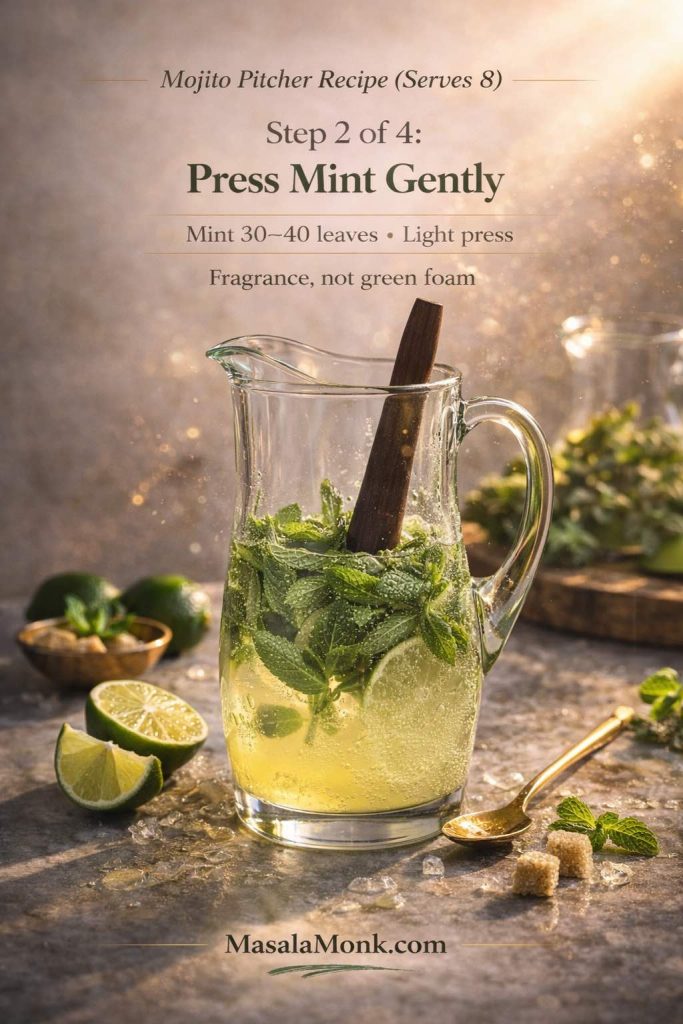
Mojito Pitcher Recipe — Step 2: add 30–40 mint leaves and press lightly just to release aroma. Keeping mint intact prevents grassy “green foam” flavors and makes your batched mojitos taste fresh instead of muddled.
Step 3: Add rum and chill hard
Now pour in 16 oz (480 ml) white rum. Give the pitcher one quick stir, then refrigerate until very cold. The colder the base, the better it behaves at serving time—less melt, better balance, and a cleaner finish.
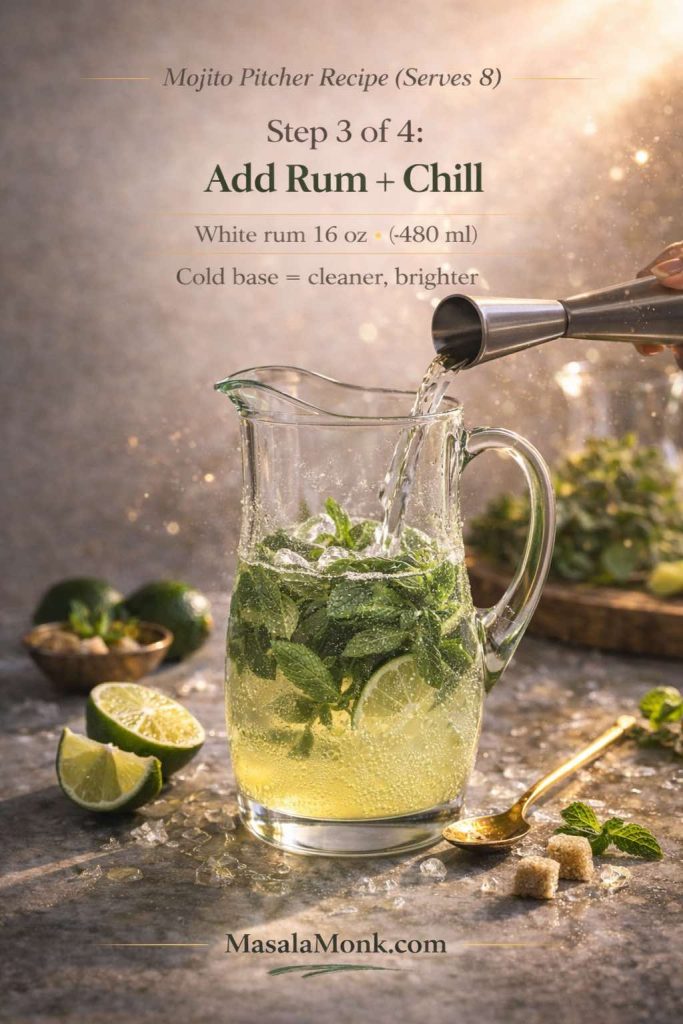
Mojito Pitcher Recipe — Step 3: add 16 oz (480 ml) white rum, stir once, then chill hard. A cold mojito base pours cleaner, tastes brighter, and stays balanced when you serve it over ice.
Step 4: Serve over ice and top with soda per glass
When you’re ready to serve, fill each glass with ice. Pour 3–4 oz (90–120 ml) of the chilled mojito base into the glass. After that, top with cold soda water, then give it one gentle stir—just enough to combine without flattening the drink. Finally, garnish with a mint sprig and a lime wheel so each glass smells fresh as soon as it’s picked up.
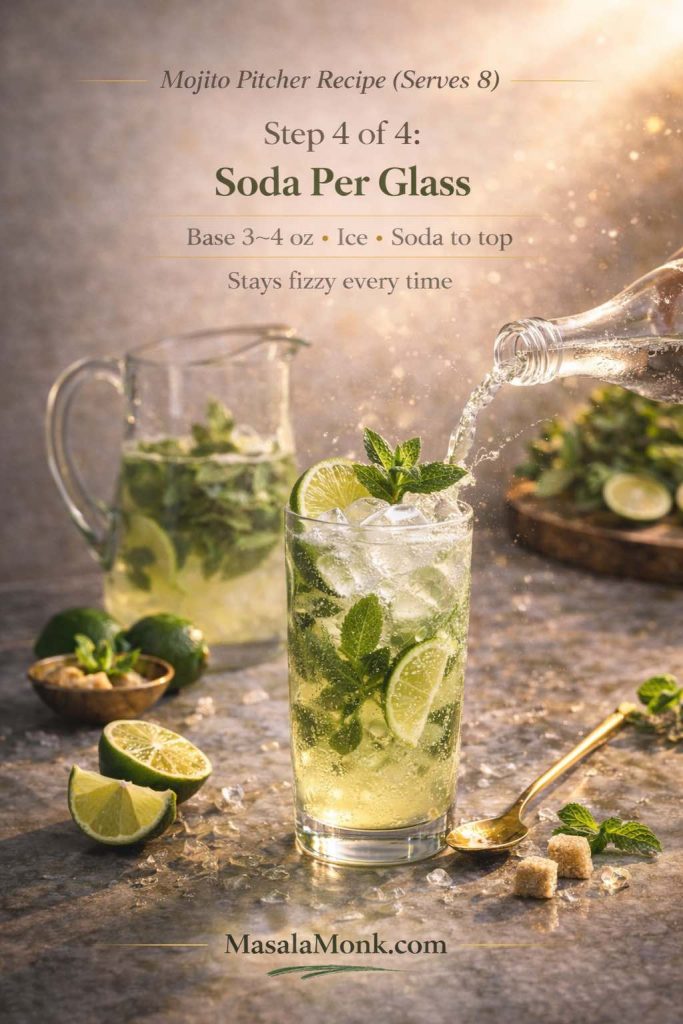
Mojito Pitcher Recipe — Step 4: pour 3–4 oz of the chilled base over ice, then top with soda in each glass. This “base now, fizz later” method keeps batch mojitos sparkling and fresh instead of flat.
This “base now, fizz later” approach is the same logic that makes make-ahead party drinks work so well. If you’re building a bigger drink table and want a second crowd drink you can prep in advance, Rum Punch Recipe fits perfectly alongside pitcher mojitos because it follows that same “core first” philosophy.
Make-ahead timing (to keep it fresh)
Mix lime + syrup + rum earlier in the day and refrigerate.
Add mint closer to serving, or add it earlier but remove leaves after 20–30 minutes if you’re holding a long time.
Keep soda sealed until the last moment.
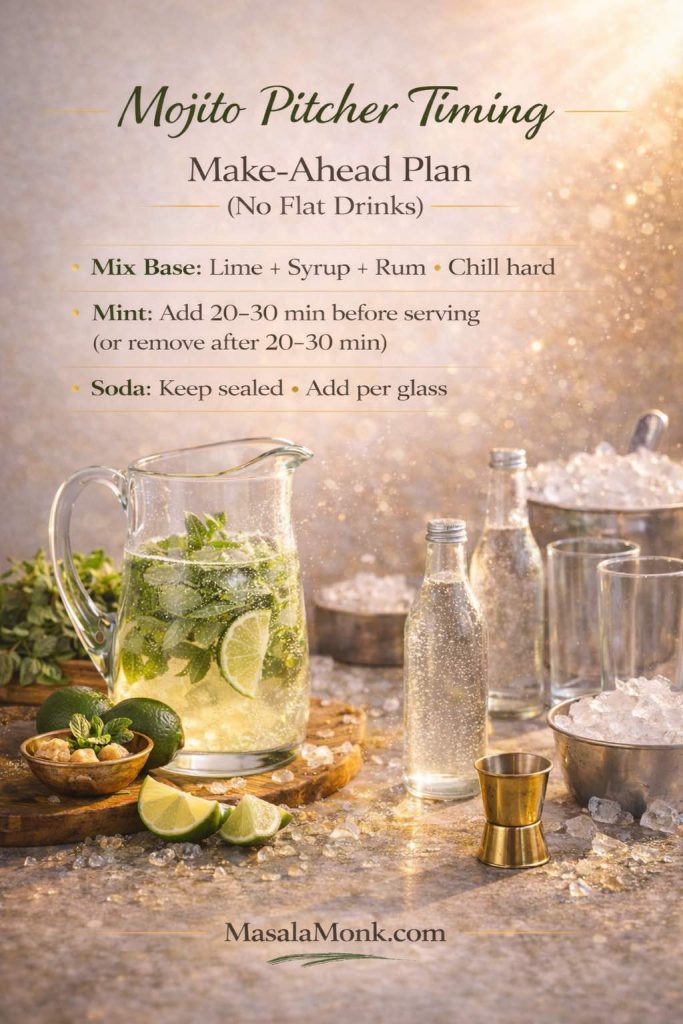
Mojito Pitcher Timing (Make-Ahead Plan): mix the lime–syrup–rum base and chill hard, add mint only 20–30 minutes before serving (or remove it after 20–30 minutes), and keep soda sealed until you top each glass. This is the easiest way to batch mojitos that stay fizzy.
That way, your pitcher tastes bright rather than dull, and each glass gets real fizz.
Mojito Mocktail and Virgin Mojito Recipe (Alcohol-Free, Still Satisfying)
A virgin mojito recipe works best when it doesn’t try to replace rum with extra sugar. Instead, it leans into what makes mojitos great in the first place: lime brightness, mint aroma, and sparkling lift.
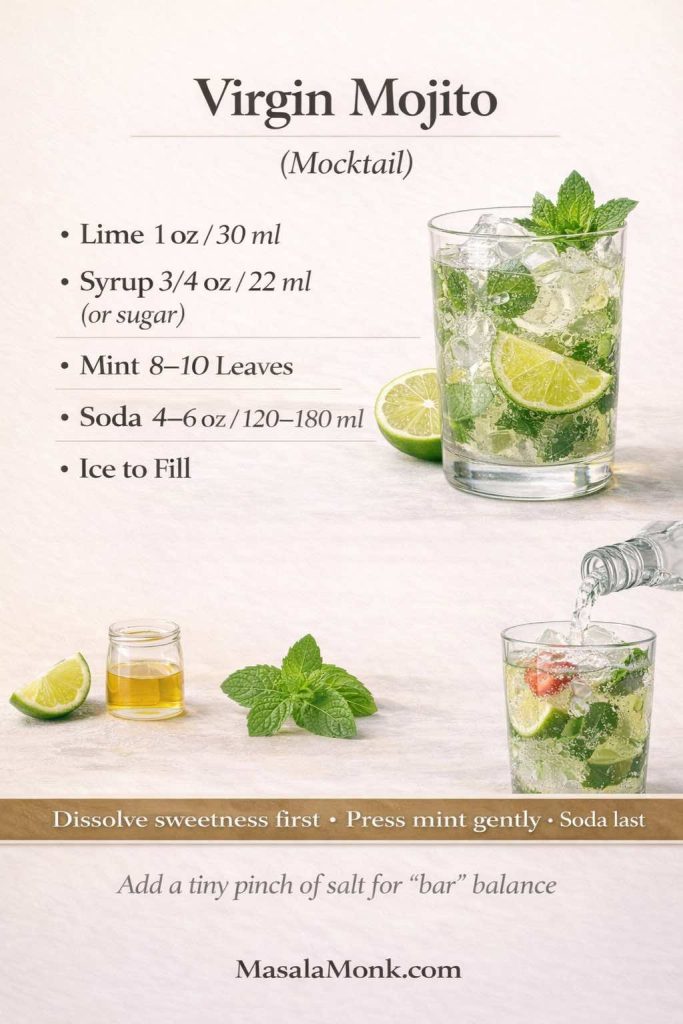
Virgin mojito recipe (mocktail): Build it like a real mojito—lime + sweetener first, gentle mint press, ice to the top, then soda last. A tiny pinch of salt can make a mojito mocktail taste more “bar-balanced” without making it salty.
Virgin mojito recipe (1 drink)
Mint leaves: 8–10 leaves + garnish sprig
Fresh lime juice:1 oz (30 ml)
Simple syrup:¾ oz (22 ml)or 2 tsp sugar
Soda water:4–6 oz (120–180 ml)
Ice: fill the glass
Garnish: mint sprig + lime
Method: Stir lime + syrup, press mint gently, add ice, top with soda, stir once, garnish.
If you’re putting together a drinks table where not everyone wants alcohol, it’s useful to have more than one alcohol-free option so nobody feels stuck with “the one mocktail.” That’s why Keto Mocktails is such a natural companion for a mojito night: it gives you a whole set of alternatives while keeping the same “fresh and festive” feeling.
Virgin mojito pitcher (serves 8)
Fresh lime juice:8 oz (240 ml)
Simple syrup:6 oz (180 ml)
Mint leaves: 30–40 leaves
Soda water:40–48 oz (1.2–1.4 L), topped per glass
Ice + garnish: plenty
Build and chill the base, then top each glass with soda right before serving.
A few mocktail-friendly flavor directions
If you want your mojito mocktail to feel more “crafted,” introduce one flavor note while keeping lime and mint obvious:
Cucumber mint mojito mocktail (cool and crisp)
Blueberry mojito mocktail (soft berry with bright lime)
Passion fruit mojito mocktail (tropical tang)
Elderflower mojito mocktail (floral lift)
You’ll find measured versions below, so you can make them without turning your drink into syrupy fruit soda.
Mojito Variations (Measured, Balanced, Still a Mojito)
Fruit mojitos are where people get excited and where drinks sometimes become sugar bombs. The key is simple: fruit should complement the base, not replace it. Lime and mint should still read clearly. Soda should still provide lift. Rum should still feel present but not harsh.
Below are measured variations built on the classic framework. Each one starts with the same base logic: dissolve sweetness, treat mint gently, pack ice high, add soda last, stir minimally.
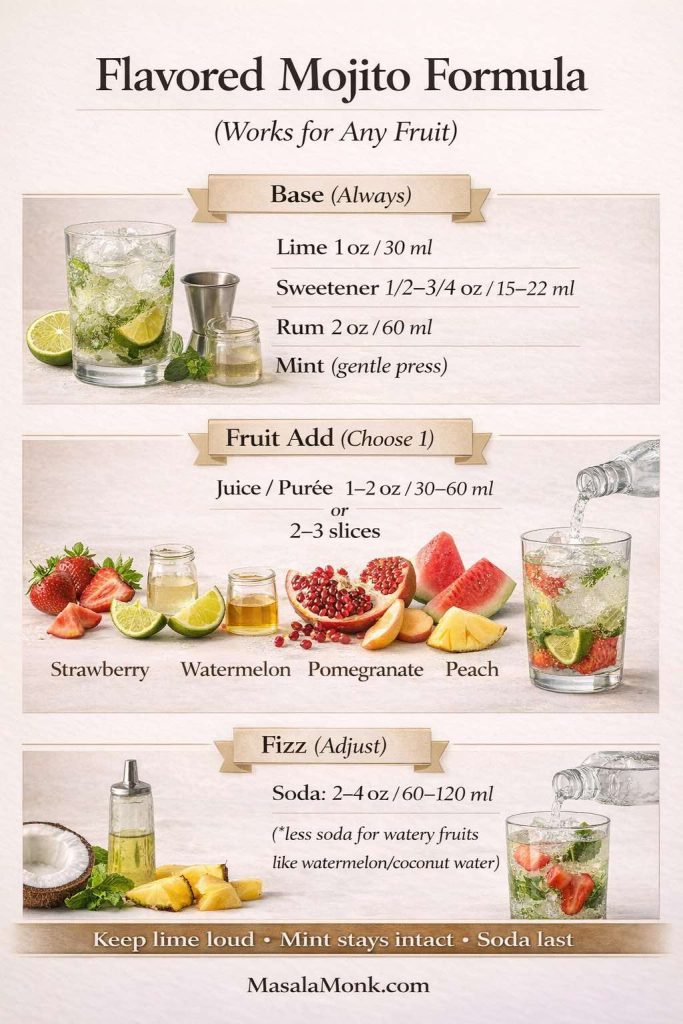
Flavored mojito formula: Keep the classic mojito base the same (lime + sweetener + rum + gentle mint), then add 1–2 oz fruit juice/purée or a few slices, and adjust soda to stay crisp. Use less soda for watery fruits like watermelon or coconut water so your fruit mojito still tastes like a mojito—not fruit soda.
Strawberry mojito recipe (1 drink)
Strawberries: 2 medium strawberries, sliced (or 1 oz / 30 ml puree)
Mint leaves: 8–10
Fresh lime juice:1 oz (30 ml)
Simple syrup:½–¾ oz (15–22 ml)
White rum:2 oz (60 ml)
Soda water:2–4 oz (60–120 ml)
Ice + garnish: mint sprig + strawberry slice (optional)
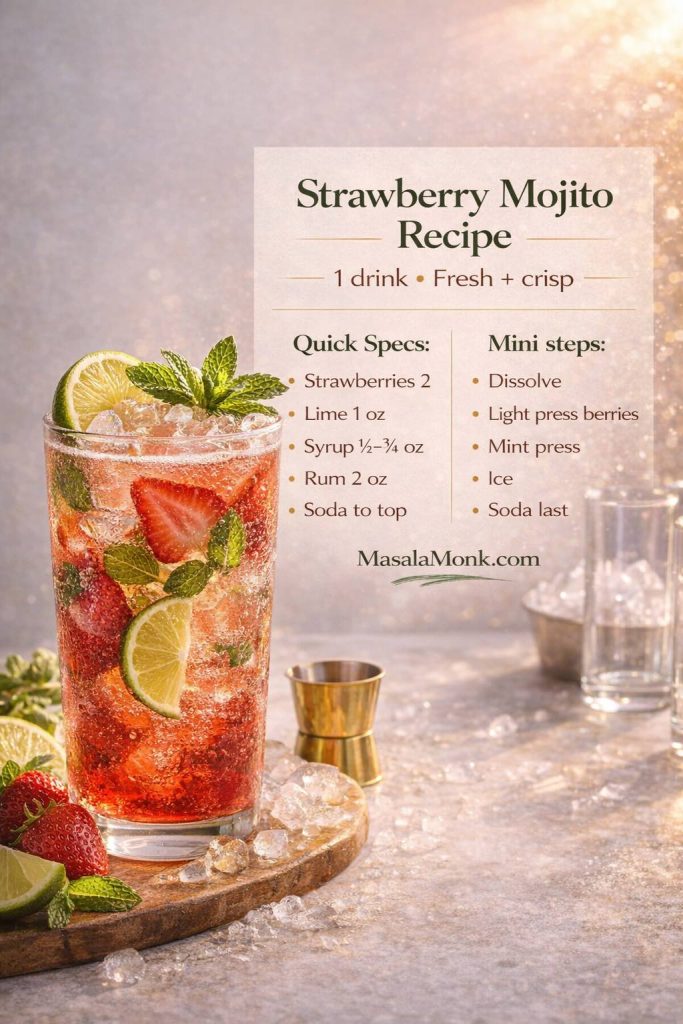
Strawberry Mojito Recipe (1 drink): a fresh, crisp twist on the classic mojito—lightly press the berries, keep mint gentle, and add soda last so the drink stays bright and fizzy instead of turning watery.
Method: Stir lime + syrup first. Add strawberries and press lightly once or twice. Then add mint and press gently (3–4 light presses). Add rum, fill with ice, top with soda, stir once.
This approach keeps the strawberry flavor fresh rather than jammy, while the drink still tastes like a mojito first.
Watermelon mojito recipe (1 drink)
Watermelon juice/puree:2 oz (60 ml)
Mint leaves: 8–10
Lime juice:1 oz (30 ml)
Simple syrup:½ oz (15 ml)
White rum:2 oz (60 ml)
Soda water:2–3 oz (60–90 ml)
Ice + garnish: mint sprig + lime wheel
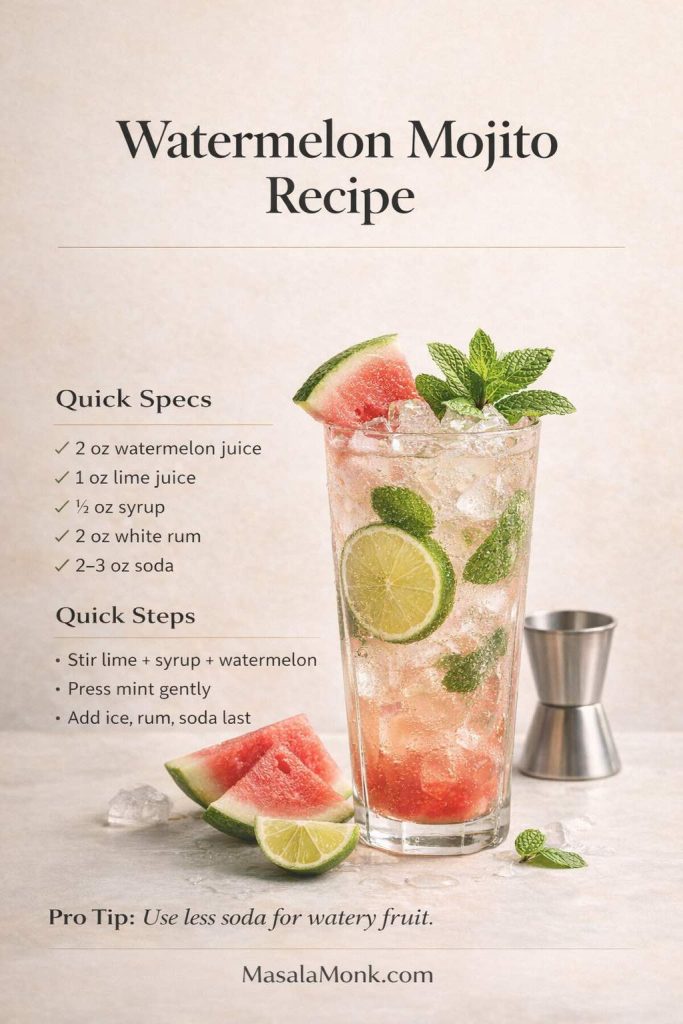
Watermelon Mojito Recipe (1 drink): keep it crisp by stirring lime, syrup, and watermelon first, pressing mint gently, then adding rum, ice, and soda last—plus the key pro tip: use less soda for watery fruit so your mojito stays bright, not thin.
Method: Stir lime + syrup + watermelon. Add mint gently. Add rum. Pack with ice. Top with soda. Stir once.
Watermelon is mostly water, so it dilutes easily. That’s why the soda range is slightly smaller here: you want sparkle without turning the drink thin.
If you’re offering a second summer drink that feels different without leaving the “bright and fun” lane, Watermelon Margarita Variations can be a natural addition to the table.
Cranberry mojito recipe (1 drink)
Cranberry juice:1 oz (30 ml)
Mint leaves: 8–10
Lime juice:1 oz (30 ml)
Simple syrup:¾ oz (22 ml)
White rum:2 oz (60 ml)
Soda water:2–4 oz (60–120 ml)
Ice + garnish: mint sprig + lime wheel
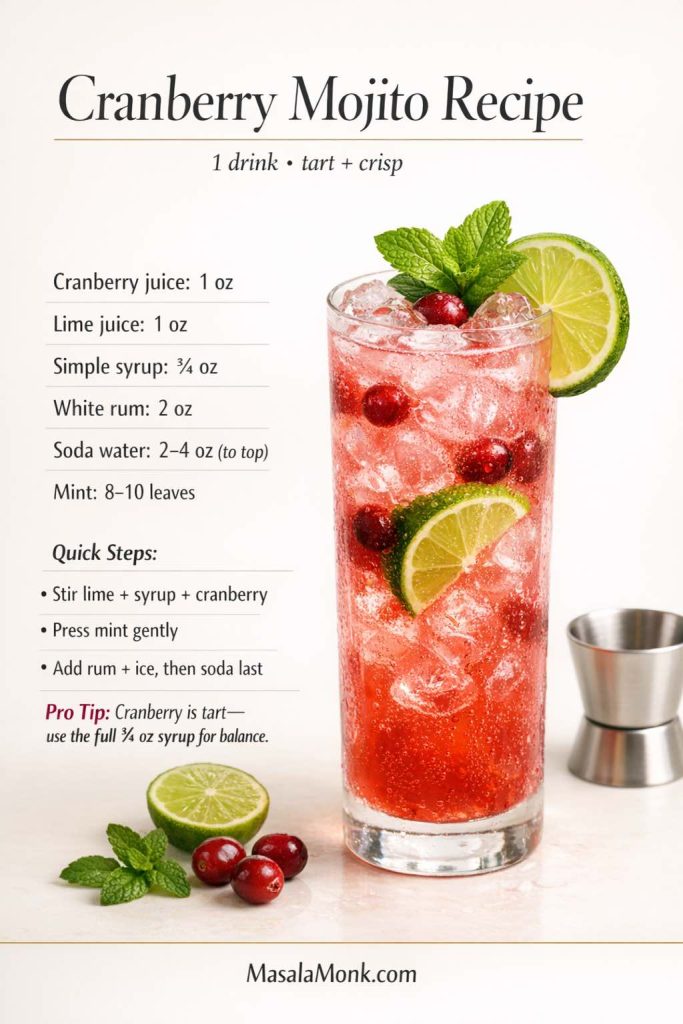
Cranberry Mojito Recipe (1 drink): tart, crisp, and bright—stir lime, syrup, and cranberry first, press mint gently, then add rum, ice, and soda last. The pro move is using the full ¾ oz syrup so cranberry stays refreshing instead of puckering.
Cranberry is tart, so it benefits from the full syrup amount. If you like that sharp, fizzy direction, Cranberry Moscow Mule Recipe is another internal drink that keeps the “cold and crisp” feel while switching flavor families.
Pomegranate mojito recipe (1 drink)
Pomegranate juice:1 oz (30 ml)
Mint leaves: 8–10
Lime juice:1 oz (30 ml)
Simple syrup:¾ oz (22 ml)
White rum:2 oz (60 ml)
Soda water:2–4 oz (60–120 ml)
Ice + garnish: mint sprig + lime wheel
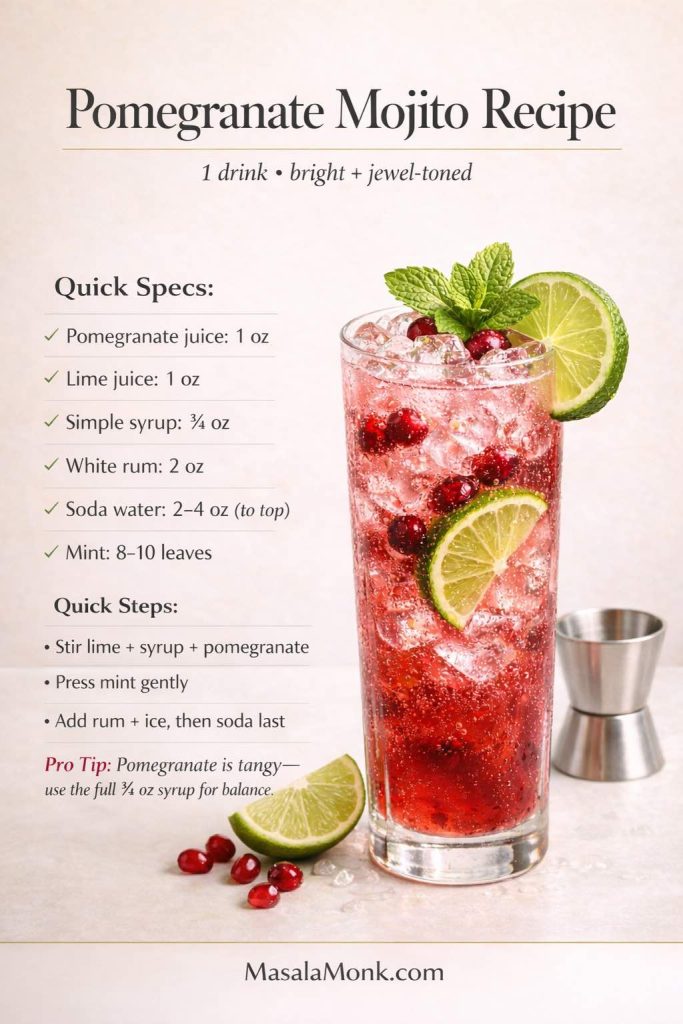
Pomegranate Mojito Recipe (1 drink): bright, jewel-toned, and crisp—stir lime, syrup, and pomegranate first, press mint gently, then add rum, ice, and soda last. Using the full ¾ oz syrup keeps the tang balanced so every sip stays refreshing.
Method: Stir lime + syrup + pomegranate. Add mint gently. Add rum. Ice. Soda. One lift-stir.
Pomegranate adds a deeper fruit tang, so the drink feels a little more “evening” than “afternoon.” For a virgin pomegranate mojito, simply omit rum and top with extra soda.
Coconut mojito recipe (1 drink)
Coconut water:2 oz (60 ml)(or coconut-flavored sparkling water)
Mint leaves: 8–10
Lime juice:1 oz (30 ml)
Simple syrup:½ oz (15 ml)
White rum:2 oz (60 ml)
Soda water:2–3 oz (60–90 ml)
Ice + garnish: mint sprig + lime wheel
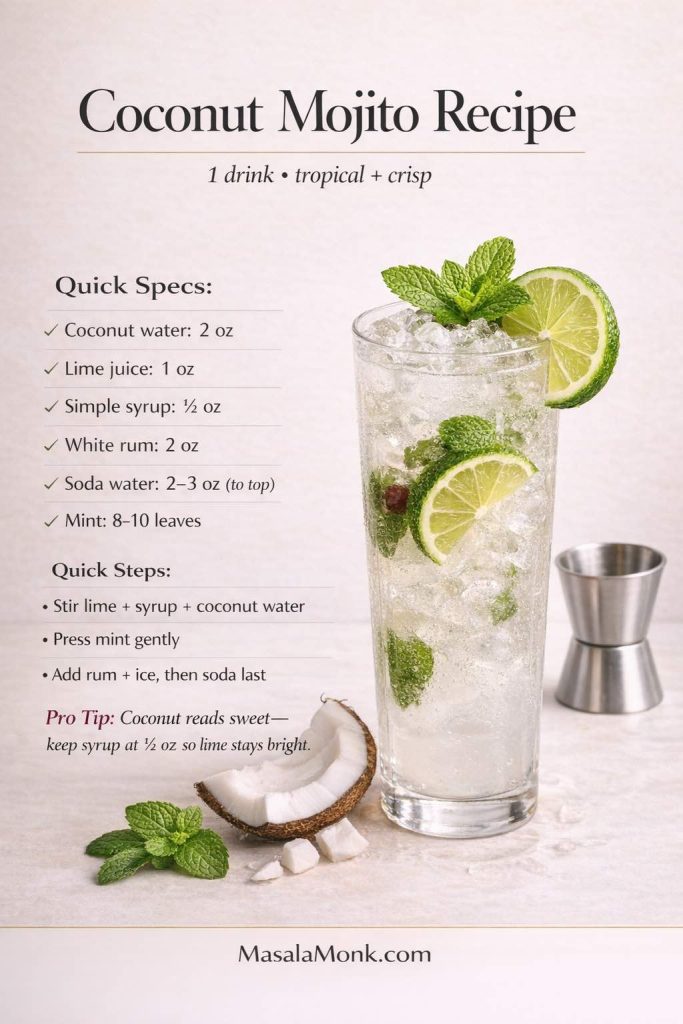
Coconut Mojito Recipe (1 drink): tropical but still crisp—stir lime, syrup, and coconut water first, press mint gently, then add rum, ice, and soda last. Keeping syrup at ½ oz prevents coconut from tasting too sweet and keeps the mojito bright.
Coconut can feel creamy or sweet quickly. Keeping lime loud and syrup restrained keeps the drink crisp rather than dessert-like. If you want more tropical hosting ideas beyond mojitos, Coconut Water Cocktails fits naturally as a “next read.”
Pineapple mojito (1 drink)
Pineapple juice:1½ oz (45 ml)
Mint leaves: 8–10
Lime juice:1 oz (30 ml)
Simple syrup:½ oz (15 ml)
White rum:2 oz (60 ml)
Soda water:2–3 oz (60–90 ml)
Ice + garnish: mint sprig + pineapple wedge (optional)
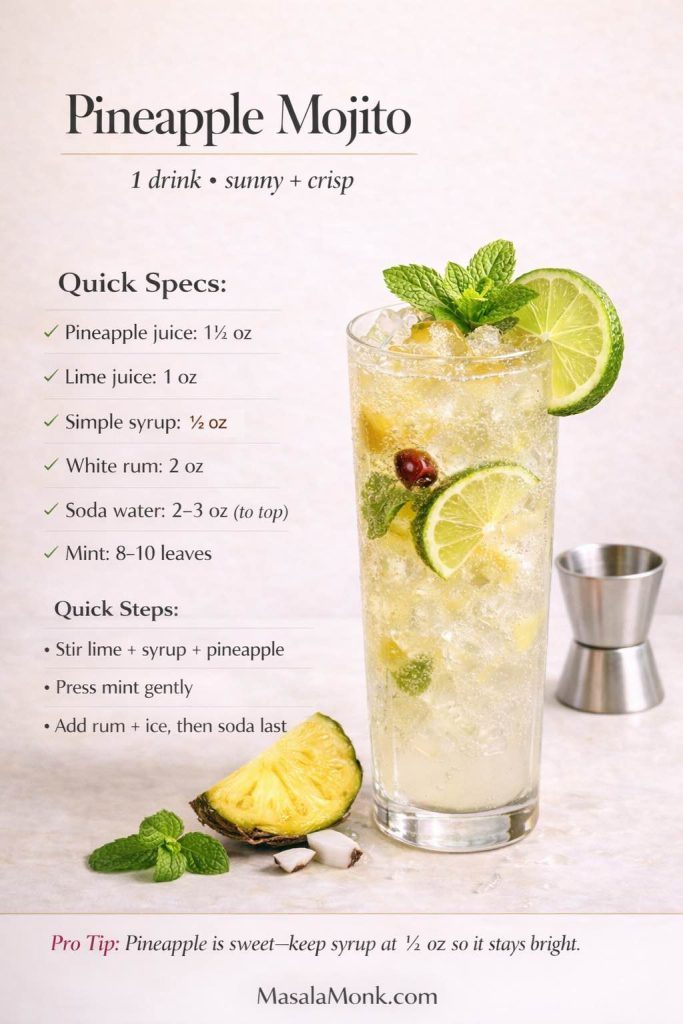
Pineapple Mojito (1 drink): sunny, crisp, and not too sweet—stir lime, syrup, and pineapple first, press mint gently, then add rum, ice, and soda last. Keeping syrup at ½ oz lets pineapple shine while the mojito stays bright and fizzy.
Method: Stir lime + syrup + pineapple. Add mint gently. Add rum. Ice. Soda. One lift-stir.
Because pineapple is naturally sweet, the syrup is intentionally lighter. If you’re serving non-alcoholic guests too, Pineapple Mojito Mocktail Recipes makes a great internal companion.
Ice + garnish: mint sprig + peach slice (optional)
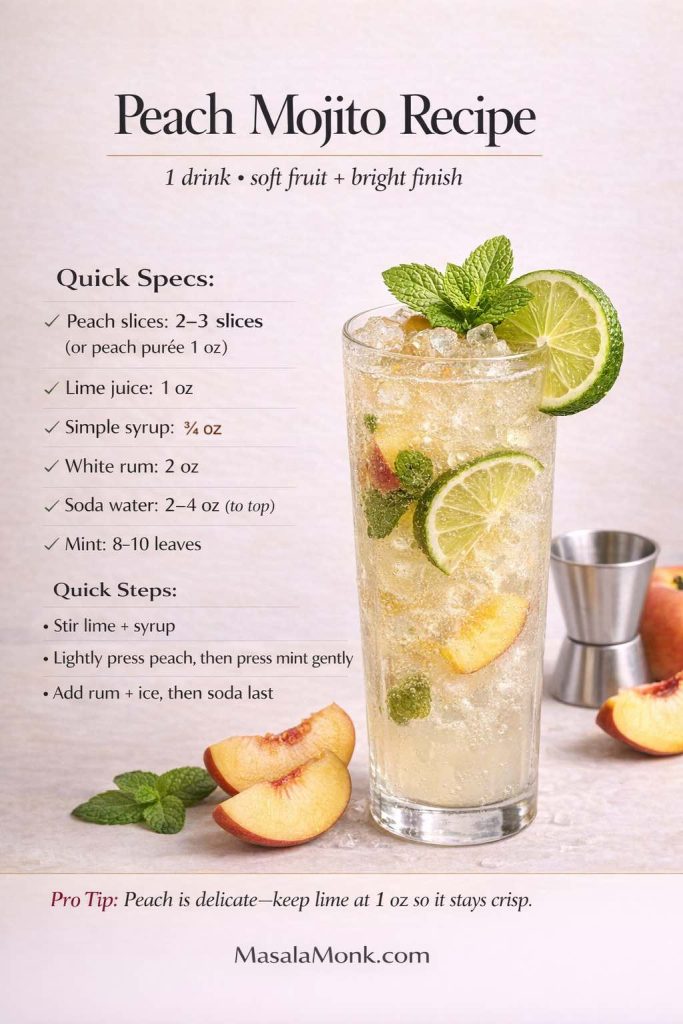
Peach Mojito Recipe (1 drink): soft fruit, bright finish—stir lime and syrup first, lightly press peach, press mint gently, then add rum, ice, and soda last. Keeping lime at 1 oz makes the peach taste fresh and crisp instead of flat.
Method: Stir lime + syrup first. Add peach and press lightly once or twice. Add mint gently. And then add rum. Ice. Soda. Minimal stir.
Peach is gentle, so lime brightness is what keeps it refreshing rather than perfumey. If you want a “frozen peach mojito,” blend peach slices with ice first, then build a lighter version with a small splash of soda at the end.
At this point, you have multiple recipes. Now let’s make sure they all taste sharp and fresh.
Method 1: The “gentle press” mint method (best for clean flavor)
Stir lime + syrup first
Add mint
Press lightly 3–5 times
Stop early
Garnish strongly
This method keeps the drink crisp and prevents bitterness.
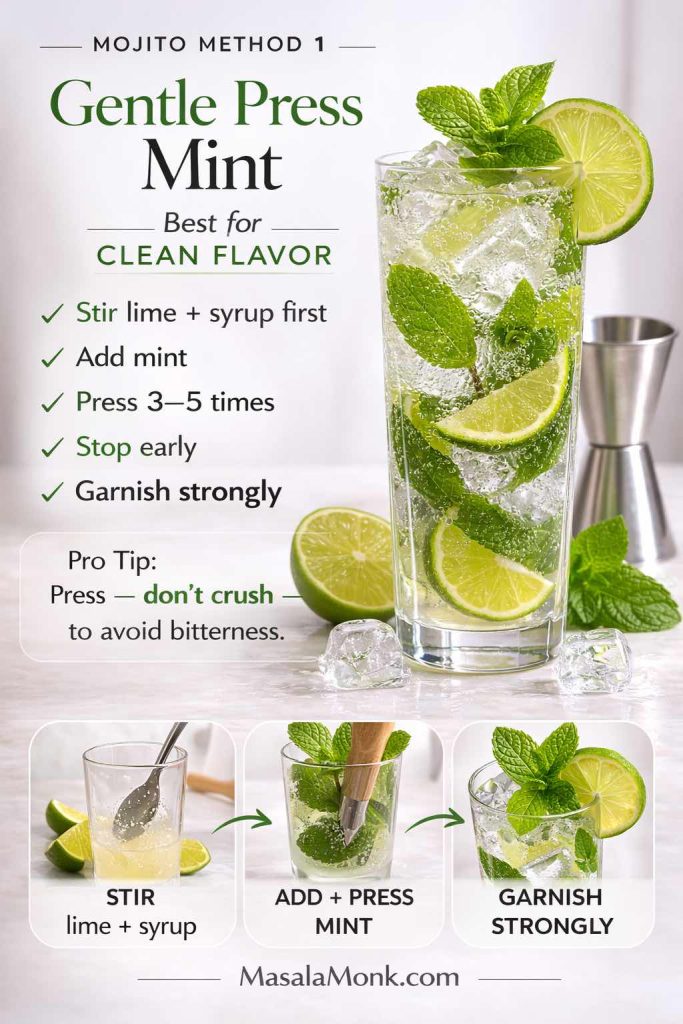
Gentle Press Mint Method for a classic mojito: stir lime + syrup first, press mint lightly 3–5 times, then stop early and garnish strongly. This simple technique keeps your mojito recipe crisp, aromatic, and free of bitter, grassy mint.
Method 2: The “fruit-first” method (best for strawberry, peach, blueberry)
Stir lime + syrup
Add fruit
Press fruit lightly just to release juice
Add mint after fruit
Press mint gently (less than you think)
Continue with rum, ice, soda
Putting fruit before mint reduces the temptation to smash everything together, which keeps mint cleaner.
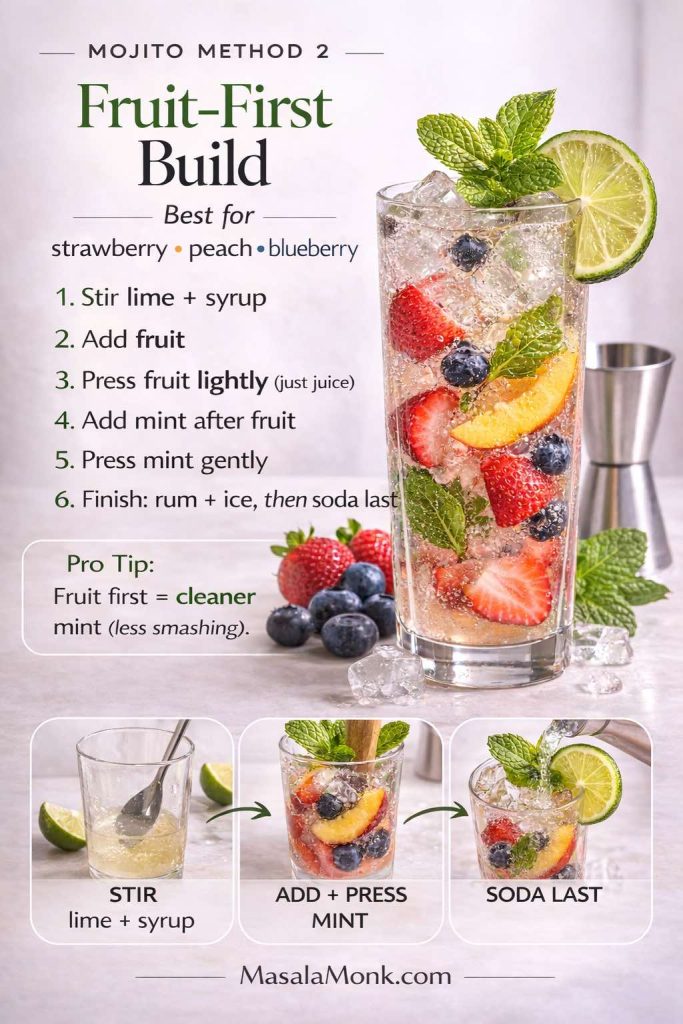
Mojito Method 2 (Fruit-First Build): the clean way to make strawberry, peach, or blueberry mojitos—stir lime + syrup, lightly press fruit for juice, add mint after fruit, then finish with rum + ice and soda last so the drink stays bright and the mint stays fresh.
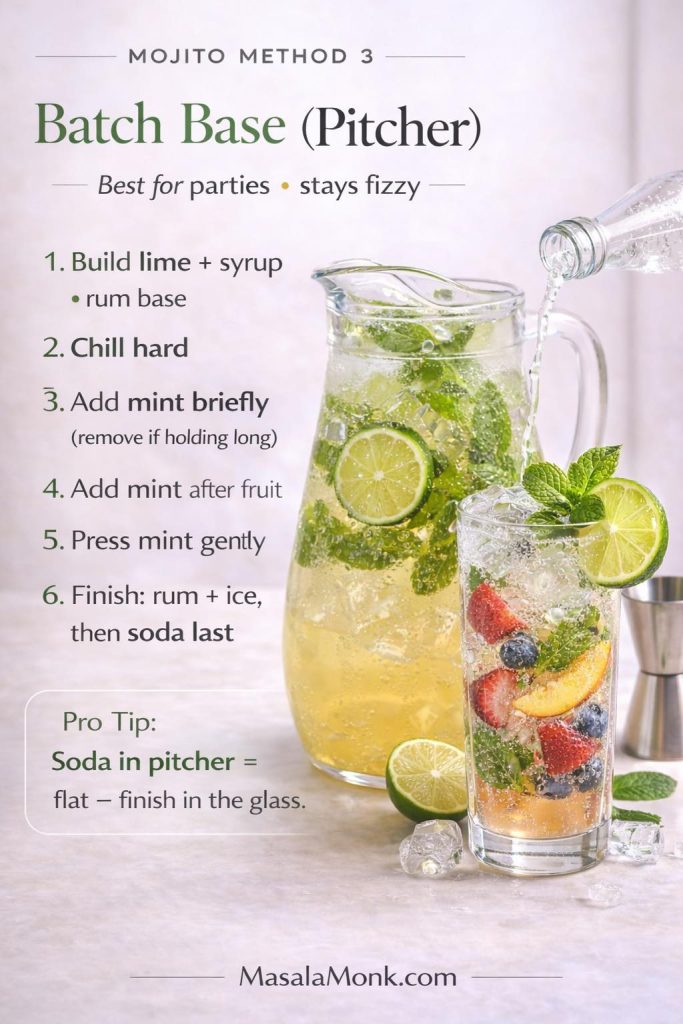
Method 3: The “batch base” method (best for a pitcher of mojitos)
Build lime + syrup + rum base
Chill hard
Add mint briefly, then remove if holding long
Top with soda per glass
Photoreal instructional card titled “Mojito Method 3: Batch Base (Pitcher)” showing a chilled mojito pitcher with lime and mint and a finished mojito glass, with text overlay explaining the batch base method (build lime + syrup + rum, chill hard, add mint briefly, soda per glass) plus a pro tip that soda in the pitcher goes flat and MasalaMonk.com in the footer.
Cucumber Mint Mojito (and Cucumber Mojito Mocktail)
Cucumber is a quiet ingredient, which makes it perfect for drinks that should feel crisp rather than sweet. It also pairs beautifully with mint and lime.
Cucumber mint mojito recipe (1 drink)
Cucumber: 3–4 thin slices
Mint leaves: 8–10
Lime juice: 1 oz (30 ml)
Simple syrup: ¾ oz (22 ml)
White rum: 2 oz (60 ml)
Soda water: 2–4 oz (60–120 ml)
Ice + garnish (mint sprig + cucumber ribbon if you want)
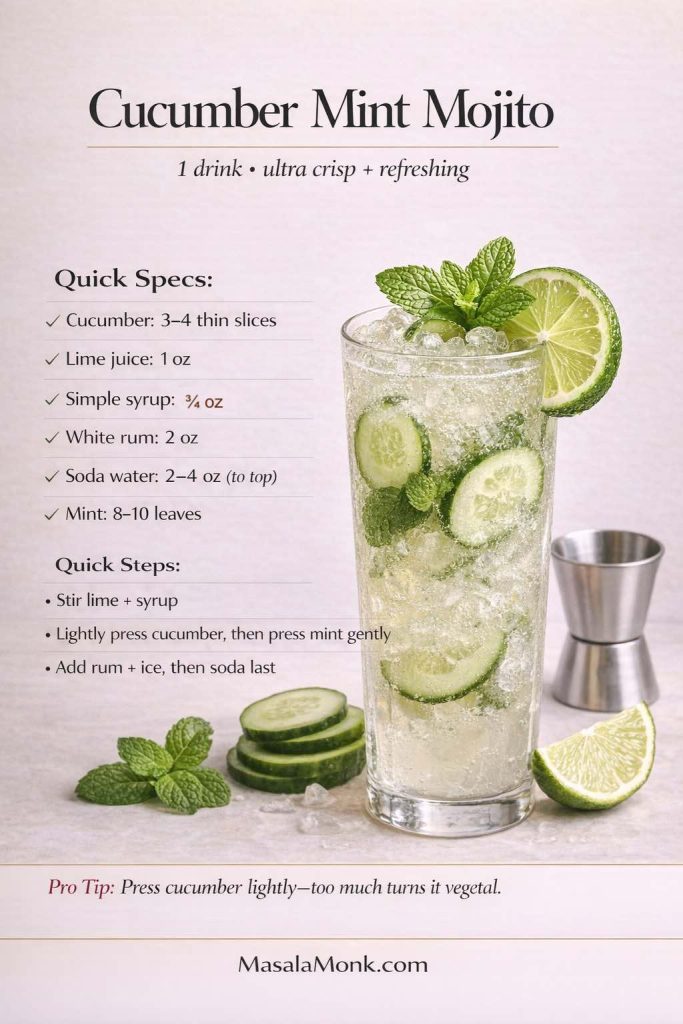
Cucumber Mint Mojito (1 drink): ultra crisp and refreshing—stir lime + syrup first, lightly press cucumber, press mint gently, then add rum, ice, and soda last. The pro tip matters here: too much cucumber press can turn the drink vegetal, so keep it light.
Method: Stir lime + syrup. Add cucumber and press lightly once or twice to release freshness. Add mint and press gently. And then add rum, ice, soda, giveit minimal stir.
Cucumber mojito mocktail (1 drink)
Use the same recipe, but omit rum and increase soda to 4–6 oz (120–180 ml). The result is a cucumber mint mojito mocktail that tastes clean and grown-up, especially when served very cold.
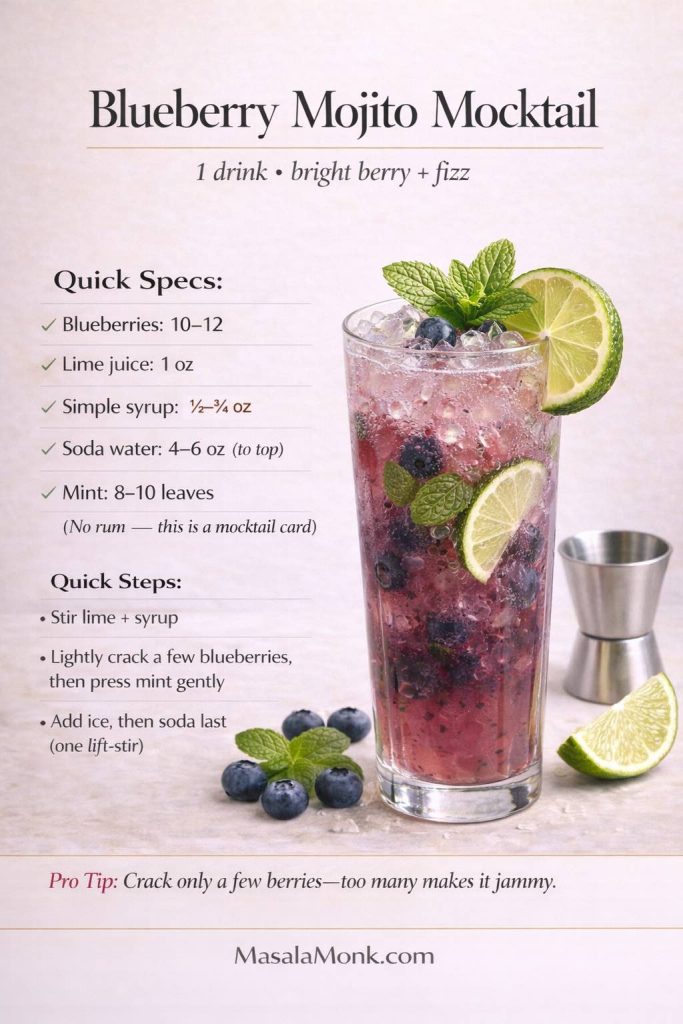
Blueberry Mojito Mocktail (and a Light Blueberry Mojito)
Blueberries bring a soft fruit sweetness that can become heavy if you overdo it. For that reason, the best blueberry mojito direction is measured and bright, with lime leading.
Blueberry mojito mocktail recipe (1 drink)
Blueberries: 10–12 berries
Mint leaves: 8–10
Lime juice: 1 oz (30 ml)
Simple syrup: ½–¾ oz (15–22 ml)
Soda water: 4–6 oz (120–180 ml)
Ice + garnish
Blueberry Mojito Mocktail (1 drink): bright berry + fizz—stir lime and syrup first, crack only a few blueberries, press mint gently, then add ice and soda last for a clean, sparkling finish that doesn’t turn jammy.
Method: Stir lime + syrup. Add blueberries and press lightly (just enough to crack a few berries). Add mint and press gently. Ice. Soda. Minimal stir.
Blueberry mojito (with rum)
Add 2 oz (60 ml) white rum and reduce soda to 2–4 oz (60–120 ml). Keep it bright, not jammy.
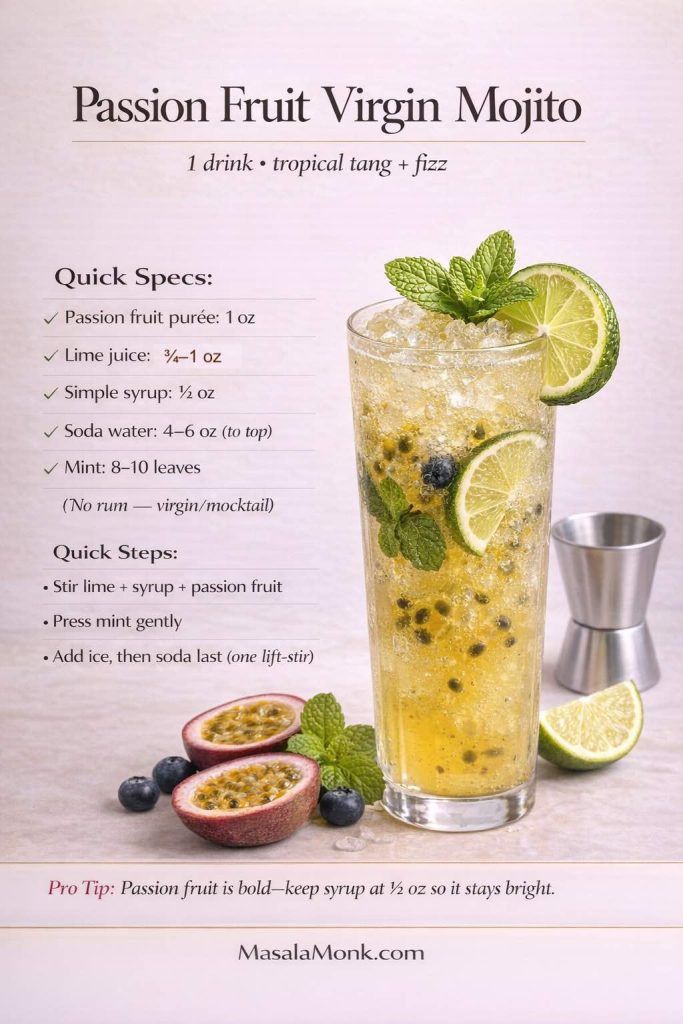
Passion Fruit Virgin Mojito (and Passion Fruit Mojito Mocktail)
Passion fruit tastes bold and tangy, so it plays beautifully with lime. Nevertheless, it can overpower mint if you use too much. The fix is easy: keep passion fruit measured and let mint be the aroma rather than the main flavor.
Passion fruit virgin mojito recipe (1 drink)
Passion fruit puree: 1 oz (30 ml)
Mint leaves: 8–10
Lime juice: ¾–1 oz (22–30 ml)
Simple syrup: ½ oz (15 ml)
Soda water: 4–6 oz (120–180 ml)
Ice + garnish
Passion Fruit Virgin Mojito (1 drink): tropical tang + fizz—stir lime, syrup, and passion fruit first, press mint gently, then add ice and soda last for a bright, sparkling mocktail that tastes clean (not sugary).
Method: Stir lime + syrup + passion fruit first. Then add mint gently. Ice. Soda. Minimal stir.
If you prefer it boozier, add 2 oz rum and reduce soda to 2–3 oz.
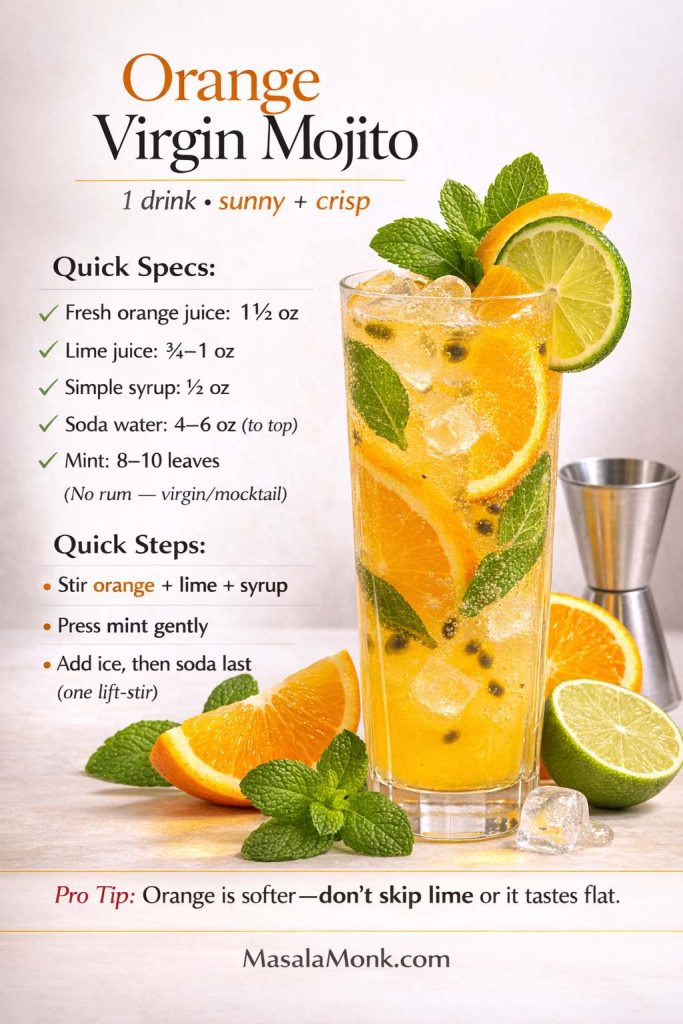
Orange is softer than lime, so an orange virgin mojito should still include lime for structure. Otherwise, it tastes like orange soda with mint.
Orange virgin mojito (Recipe for 1 drink)
Fresh orange juice: 1½ oz (45 ml)
Lime juice: ¾ oz (22 ml)
Mint leaves: 8–10
Simple syrup: ½ oz (15 ml)
Soda water: 4–6 oz (120–180 ml)
Ice + garnish
Orange Virgin Mojito (1 drink): sunny + crisp—stir orange, lime, and syrup first, press mint gently, then add ice and soda last for a bright mocktail that tastes fresh (not flat). The lime is the secret: don’t skip it.
Method: Stir juices + syrup. Then add mint gently. Ice. Soda. Minimal stir.
This one is especially good for daytime gatherings because it feels sunny without being sugary.
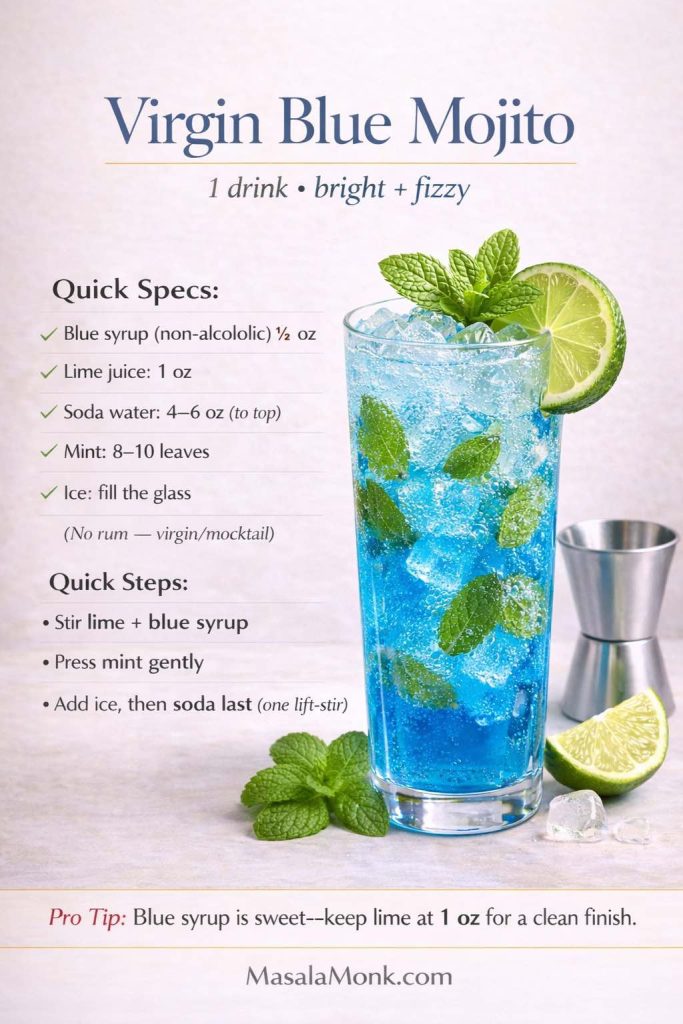
Virgin Blue Mojito Recipe (Fun Color, Same Mojito Logic)
A “blue mojito” is usually about color, not tradition. Even so, it can still be built like a proper mojito so it tastes clean rather than artificial.
Virgin blue mojito (Recipe for 1 drink)
Blue syrup (non-alcoholic): ½ oz (15 ml)
Lime juice: 1 oz (30 ml)
Mint leaves: 8–10
Soda water: 4–6 oz (120–180 ml)
Ice + garnish
Virgin Blue Mojito (1 drink): bright + fizzy—stir lime and blue syrup first, press mint gently, then add ice and soda last for a clean, sparkling finish. The key balance is lime: keeping it at 1 oz stops the drink from tasting overly sweet.
Method: Stir lime + blue syrup first. Add mint gently. Ice. Soda. Minimal stir.
If the syrup is very sweet, reduce it slightly and keep lime full-strength. That keeps the drink crisp.
Sometimes you want a classic mojito cocktail that feels tighter—less casual, more “this tastes like it came from a bar.” The ingredients don’t change. The technique does.
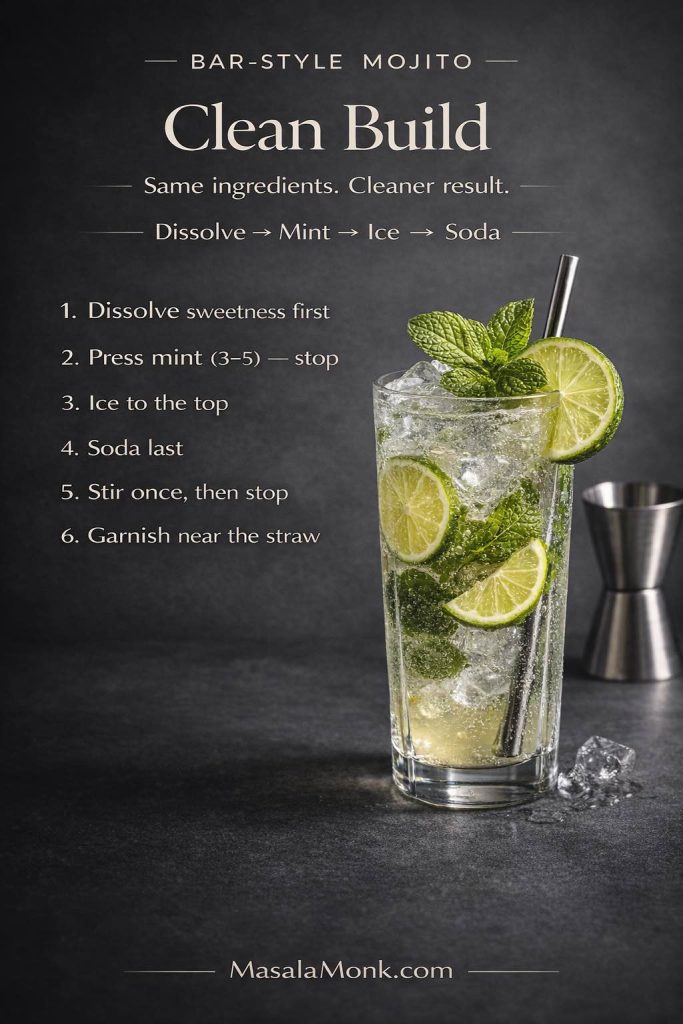
Bar-Style Classic Mojito (Clean Build): same ingredients, cleaner result—dissolve sweetness first, press mint lightly (3–5) and stop, pack ice high, add soda last, then stir once and quit. Finish with mint near the straw so every sip tastes fresh and “bar-level.”
Here’s the bar-clean approach:
dissolve sweetness thoroughly before mint
press mint lightly and briefly
pack ice high
add soda last
stir once, then stop
garnish aggressively for aroma
It’s not complicated; it’s controlled. And once you do it this way a few times, it becomes your default method because it’s hard to go back to muddled chaos.
Cuban Mojito Recipe Notes (Mojito Cubano, Traditional Cuban Mojito)
You’ll see terms like cuban mojito recipe, mojito cubano recipe, and authentic cuban mojito recipe. In practice, the “traditional” vibe is mostly about keeping things straightforward—mint, lime, sugar, rum, soda—with a simple build.
If you want a Cuban-leaning feel, the easiest change is using granulated sugar rather than syrup:
Swap ¾ oz (22 ml) syrup for 2 tsp sugar
Stir longer at the beginning to dissolve
Keep everything else the same
That yields a drink that feels classic without adding fuss.
What to Serve With Mojitos (Food Pairings That Make the Drink Pop)
A mojito shines next to salty, crispy, spicy food because that lime-mint sip resets your palate between bites. Meanwhile, very heavy creamy dishes can sometimes make the drink feel sharper than you want. So, when in doubt, go for snacks and finger foods.
Crispy party pairings
If you want one pairing that almost always works, it’s wings—especially when you want a drink that cuts through salty, saucy bites.
A Brief, Clear Note on Strength (Comfortable Pacing)
Servings can vary because pours vary. Still, it can be helpful to understand what a “standard drink” means when you’re measuring spirits. In the U.S., a standard drink contains 0.6 ounces (14 grams) of pure alcohol, and the actual serving size depends on ABV. (CDC)
That’s not here to interrupt the fun. Rather, it’s simply useful context when you’re hosting or when you want to keep servings consistent.
A Mojito Night Plan That Feels Effortless (Not Like You’re Bartending All Night)
If you’re making one drink, the classic method is quick. If you’re serving a group, a small setup makes everything smoother.
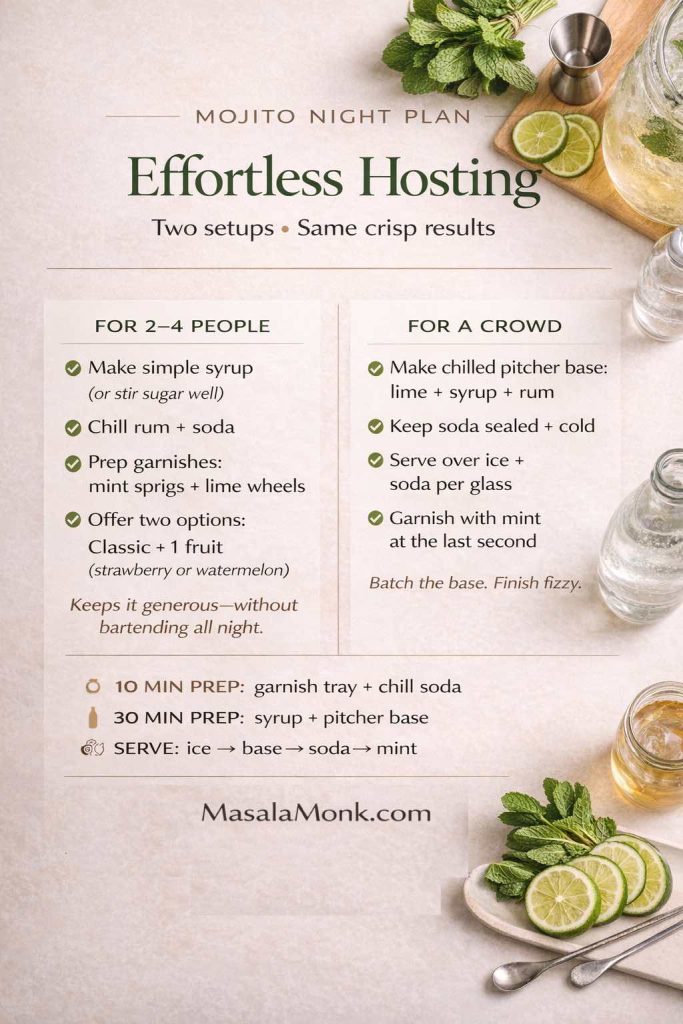
Mojito Night Plan (Effortless Hosting): a simple setup for 2–4 people or a crowd—prep syrup and garnishes, keep soda cold, and remember the big trick for parties: batch the base, then add soda per glass so every mojito stays crisp and fizzy.
For 2–4 people
Make simple syrup (or use sugar and stir well)
Chill rum and soda
Prep garnishes: mint sprigs + lime wheels
Offer two options: classic mojito + one fruit variation (strawberry or watermelon)
This keeps the vibe generous without turning you into a full-time bartender.
For a crowd
Make the chilled pitcher base (lime + syrup + rum)
Keep soda sealed and cold
Serve over ice and top with soda per glass
Garnish each glass with mint at the last second
If you want a second crowd drink that feels completely different yet still party-friendly, Rum Punch Recipe is a natural companion because it’s easy to prep ahead and serve smoothly.
More Drinks to Keep the Table Interesting (Same Refreshing Energy)
Once someone likes mojitos, they often enjoy other bright, fizzy drinks too. So if you want a few natural “next drinks” on your site that fit the same hosting mood, these are easy internal hops:
A mojito doesn’t need to be complicated to be excellent. It just needs a few decisions made with care: dissolve sweetness early, treat mint gently, use plenty of ice, add soda last, and stir lightly. Once you do that, your mojito recipe becomes reliable—whether you’re making one classic mojito drink for yourself, scaling a mojito pitcher recipe for guests, building a virgin mojito recipe for an alcohol-free option, or rotating through variations like strawberry, watermelon, cranberry, pomegranate, coconut, pineapple, peach, cucumber mint, blueberry, passion fruit, orange, and a fun “blue” virgin version.
After a few rounds, the mojito stops being “a recipe you follow” and starts becoming something you can make on instinct. And when that happens, mojitos stop being occasional. They start becoming a favorite you can pull off anytime—quiet evening, hot afternoon, or crowded table.
If you’re starting out, the best mojito recipe is the classic build: dissolve lime and sweetener first, press mint gently (don’t crush it), add rum, pack the glass with ice, then finish with soda water. That order keeps the drink crisp, prevents bitter mint, and protects the fizz.
2) How do you make a mojito that doesn’t taste watery?
Most watery mojitos come from too little ice or too much soda. Instead, fill the glass completely with ice, add soda last, and stir only once. If the drink still tastes thin, reduce soda slightly and keep the lime and rum at full strength.
3) What is the classic mojito ratio?
A reliable classic mojito ratio is: 1 oz lime juice, 3/4 oz simple syrup (or 2 tsp sugar), 2 oz white rum, then top with soda water. After that, adjust soda to taste rather than changing the core ratio.
4) How much mint should I use for a mojito drink?
Typically, 8–10 mint leaves are enough for a minty aroma without bitterness, especially when you garnish with a fresh mint sprig. If you want more mint impact, add more garnish rather than muddling harder.
5) Why does my mint mojito recipe taste bitter?
Usually, the mint was over-muddled or stirred too aggressively after bruising. To avoid that, press mint lightly a few times, then stop. Also, add soda at the end and stir minimally so the mint doesn’t get churned through the drink.
6) Can I make a mojito without a muddler?
Yes. You can use the back of a wooden spoon or the handle end of a rolling pin. The key is gentle pressure—think “press to release aroma,” not “smash to extract juice.”
7) Can I use bottled lime juice in a mojito recipe at home?
You can, particularly for batching a pitcher base, although fresh lime tastes brighter. If you use bottled lime juice, keep the drink extra cold and use a fresh lime garnish so the aroma stays lively.
8) What’s the best white rum for mojitos?
For a classic mojito drink, choose a clean, light white rum that doesn’t taste overly oaky or spiced. Since the mojito is a delicate cocktail, smoother rums tend to let the lime and mint shine.
9) How strong is a mojito cocktail?
A standard mojito is typically built with around 2 oz rum, then diluted with ice melt and topped with soda. As a result, the strength depends on how much soda you add and how long the drink sits, but it usually drinks lighter than straight spirits.
10) How do I make a mojito pitcher recipe that stays fizzy?
Instead of adding soda to the pitcher, make a chilled base (lime + syrup + rum + mint briefly), then top each glass with soda at serving time. That way, every mojito stays sparkling and doesn’t go flat in the pitcher.
11) Can I make mojitos ahead of time?
Yes—partially. You can prep the mojito base (lime juice, sweetener, rum) and chill it. However, for the best taste, add mint shortly before serving and add soda only when pouring each glass.
12) What is a mojito mocktail and how do you make it taste like the real thing?
A mojito mocktail (or virgin mojito) uses the same structure—lime, sweetener, mint, ice, soda—just without rum. To keep it “cocktail-like,” focus on balance and aroma: dissolve the sweetener fully, press mint gently, and garnish generously.
13) How do you make a virgin mojito recipe for a crowd?
Make a chilled pitcher base using lime juice and simple syrup, add mint briefly for aroma, then pour over ice and top each glass with soda water. This approach keeps the mocktail fresh and fizzy for guests.
14) What’s the difference between a Cuban mojito recipe and a regular mojito?
A Cuban mojito recipe is usually very close to the classic build, often using granulated sugar rather than syrup and keeping the method simple. Even so, the same principles apply: gentle mint, bright lime, and soda added at the end.
15) How do I make a strawberry mojito recipe without it tasting like fruit soda?
Use a small amount of fresh strawberry (or puree), keep lime prominent, and don’t over-sweeten. Then build the drink like a classic mojito—mint gently pressed, ice packed, soda added last—so it still tastes like a mojito first.
16) What’s the best method for a watermelon mojito recipe?
Because watermelon is mostly water, use measured watermelon juice/puree, keep lime at full strength, and use slightly less soda than usual. That prevents the drink from turning thin while still staying sparkling.
17) Can I make a cranberry mojito or pomegranate mojito that isn’t too tart?
Yes. Start with the classic mojito ratio, then add cranberry or pomegranate juice in a controlled amount. Afterward, adjust with a small splash of syrup if needed, and finish with soda to keep it light.
18) What should I serve with mojitos?
Mojitos pair well with salty, crispy, and spicy foods because lime and mint refresh your palate. For example, wings, fries, croquettes, or cheesy finger foods all work well alongside a classic mojito cocktail.
Sometimes you crave a mug that’s pure comfort—nothing fancy, nothing fussy—just deep chocolate flavor, gentle sweetness, and the kind of steam that fogs the window while you stir. This hot chocolate with cocoa powder takes you there in minutes. It’s pantry-friendly, it scales for a crowd, and it’s endlessly adaptable for darker, milkier, lighter, or dairy-free moods. Along the way, you’ll see exactly how to dial in the texture, choose between natural and Dutch-process cocoa, and even shake up a cold chocolate milk for warmer days—without losing the spirit of a classic stovetop cup.
Before we heat anything, here’s the single biggest secret to café-smooth results: start with a paste. Cocoa powder (especially unsweetened) doesn’t want to dissolve right away. Whisking it with a splash of milk and sugar first means every sip turns out silky, never gritty.
Ingredients for the best hot chocolate with cocoa powder (2 mugs)
2 tbsp unsweetened cocoa powder (natural or Dutch-process)
2 tbsp sugar (or 1–2 tbsp maple or honey, to taste)
Pinch of fine salt
1 cup (240 ml) milk of choice, plus ½ cup (120 ml) water
½ tsp vanilla extract (optional, but lovely)
Want a quick refresher on cocoa styles and why one might taste smoother or darker than the other? King Arthur’s plain-English guide to Dutch-process vs natural cocoa is a great starting point. For an overview of other cocoa types in baking and drinks, their types of cocoa, explained expands the nuance even further.
Recipe: classic stovetop hot chocolate with cocoa powder
Make the paste. Off the heat, whisk the cocoa, sugar, and salt with 2 tablespoons milk until the mixture is glossy and lump-free. This takes 15–30 seconds and makes all the difference.
Heat gently. Whisk in the rest of the milk and the water. Set the pan over medium heat and warm until steaming and hot—but not at a rough boil. Gentle heat keeps the mouthfeel creamy and prevents “cooked” flavors.
Finish with fragrance. Take the pan off the heat and stir in the vanilla. Froth briefly with a whisk or handheld frother for that café-style lightness. Pour into warm mugs.
How to make Hot chocolate with cocoa powder—per mug: 1 tbsp cocoa, 1 tbsp sugar, 3/4–1 cup milk or water, pinch of salt. Whisk a paste, heat to steaming (don’t boil), stir in 1/2 tsp vanilla. MasalaMonk.com
While that first sip is still hugging your hands, you might be wondering about cacao versus cocoa. They’re related, of course, yet not identical in processing or flavor. For a practical, balanced read on how cacao differs from cocoa (and why cacao can taste fruitier while cocoa blends more smoothly), see this explainer on MasalaMonk and the concise overview from Healthline on cacao vs cocoa.
Texture, temperature, and the power of a whisk
Even excellent cocoa powder needs a little help to bloom. The paste stage hydrates the particles so they disperse evenly when you add more liquid. Beyond that, moderate heat (think “steaming” rather than turbulent simmer) coaxes out chocolate aromas without pushing milk proteins too far. If you’ve ever had a cup that felt thin, chalky, or strangely “cooked,” it likely skipped one or both steps.
For extra lift, whisk in quick, tight circles right after you add vanilla. Just 10–15 seconds can transform the surface from flat to glossy with a delicate foam. If you own a small frother, this is its moment to shine. Otherwise, a sturdy balloon whisk is more than enough.
Sugar sweetens, yes, but it also rounds the cocoa’s bitter edges so the flavor reads chocolaty rather than merely “cocoa-y.” Start with the 2 tablespoons in the base recipe and adjust a teaspoon at a time next time you make it. Maple and honey add their own accents—maple gives a caramelly finish; honey feels floral—so you can tune the personality of your mug without changing the core ratio.
Don’t skip the pinch of salt. It’s not about making a “salty” drink; it’s about focus. That tiny amount tightens the flavor so the chocolate tastes bolder at the same sweetness.
A lot of classic hot cocoa recipes use a mix of milk and water. There’s a reason. Milk gives body and richness; water lightens the profile and lets the chocolate notes pop. This base splits the difference—1 cup milk plus ½ cup water per two mugs—so you get a creamy backbone without heaviness. Prefer extra body? Go all milk (1½ cups / 360 ml). Want something lighter after dinner? Use more water and finish with a splash of cream to restore a silky finish.
If you’re making this dairy-free, barista-style oat milk drinks especially well, as do cashew and soy. Almond milk stays thinner but tastes clean and toasty, which some people adore in a nighttime cup.
Let’s talk flavor and feel. Natural cocoa is lighter in color and usually tastes a touch brighter, sometimes with a hint of fruit or acidity. It makes a classic, snappy-tasting hot chocolate with cocoa powder—the kind you might remember from childhood, just elevated by technique.
Dutch-process cocoa has been alkalized to tame acidity. In the cup, it reads darker, smoother, and often creamier at the same ratio. Because the edges are softer, many people find it dissolves more easily and gives a rounded finish. If your top priority is silky texture and a deep color, Dutch is the move. If you love lively, punchy chocolate, natural sings.
Curious which to stock? For a quick reference beyond this recipe, King Arthur’s types of cocoa, explained lays out how different powders behave in both baking and drinking.
Make-it-yours: small tweaks that change the whole cup
Extra-dark hot chocolate with cocoa powder: Add 1–2 teaspoons more cocoa during the paste stage. You can nudge sweetness up by ½–1 teaspoon if needed, or keep it punchy.
Lower sugar: Swap in allulose or erythritol. Because these sweeteners taste slightly cooler and less rounded than sugar, add a drop of vanilla or a tiny extra pinch of salt to keep the flavor full.
Dairy-free richness: Barista oat, soy, and cashew milk foam beautifully. For even more body, whisk in 1–2 teaspoons coconut cream at the finish.
Mocha moment: Stir in 1–2 teaspoons strong coffee or a splash of espresso. The coffee doesn’t steal the show; it just deepens the chocolate.
Finishing swirl: A ribbon of homemade chocolate syrup turns a simple mug into something that feels café-made—perfect when you want a quick flourish without melting chocolate.
Keep the base the same, but in the paste stage whisk in ¼ teaspoon ground cinnamon and the tiniest pinch of cayenne. As the mixture warms, the cinnamon blooms and the heat lingers, not as a burn but as a gentle hum under the chocolate. Finish with vanilla, then whisk vigorously or use a frother to aerate the surface. If you’re going for a cozy dessert board, dunking something crisp is half the fun—homemade churros are a nostalgic, wildly satisfying pairing.
Mexican-style hot chocolate Recipe—per mug: 1 tbsp cocoa, 1 tbsp sugar, 3/4–1 cup milk or water, pinch of salt. Add 1/4 tsp cinnamon and a tiny pinch of cayenne to the paste, whisk vigorously, and finish with 1/4 tsp vanilla. MasalaMonk.com
Cold spin: chocolate milk with cocoa powder (no syrup, no sludge)
Not every craving arrives with a cold night. For summer afternoons or quick post-workout comfort, make a cold chocolate milk that dissolves fully and tastes balanced:
In a tall glass or a lidded jar, combine 1 tablespoon cocoa, 1–1½ tablespoons sweetener, a pinch of salt, and 1–2 teaspoons milk. Stir or shake into a silky paste.
Add 1 cup cold milk gradually, whisking (or shaking) until smooth. The paste method saves you from floating clumps and gives a glossy finish.
If you like make-ahead chocolate treats with a lighter footprint, chia pudding recipes can lean cocoa-rich, dessert-ish, or breakfast-bright—handy when you want chocolate without the stovetop.
Heat, hold, and reheat: the practical bits
Heating: Keep it to medium. You want steam, not aggressive bubbles. Harsh boiling can press the proteins too far and leave a grainy impression even if you made a great paste.
Holding: If you’re hosting, keep hot chocolate warm on the lowest heat with a lid slightly ajar and whisk briefly every 10 minutes to keep it silky.
Reheating: Gentle is again the rule. If you’ve made a larger batch, rewarm on low and whisk as you go. A splash of fresh milk can refresh the body after prolonged holding.
Serving ideas, garnishes, and textures for Hot Chocolate with Cocoa Powder
Classic marshmallow cap: Homemade or store-bought, marshmallows soften into a creamy top layer that acts like a flavor filter—each sip pulls through vanilla sweetness.
Light whipped cream: Soft peaks add air without weight. Dust the top with a whisper of cocoa for a café finish.
Citrus twist: A tiny strip of orange zest rubbed over the cup perfumes the steam.
Spice dust: A little cinnamon or nutmeg on the foam moves the aroma forward as you lift the mug.
Cocoa-nib crunch: For a fun contrast, float a pinch of cocoa nibs; they’ll soften at the edges but keep a little bite.
White hot chocolate—per mug: 3 tbsp white chocolate powder or 1/4 cup chips, 3/4–1 cup milk, pinch of salt. Heat to steaming, whisk in, finish with 1/4 tsp vanilla. MasalaMonk.com
Troubleshooting Hot Chocolate with Cocoa Powder
Gritty sip: The paste likely wasn’t fully smooth. Next time, whisk the cocoa and sugar with a larger splash of milk until glossy before adding the rest.
Too thin: Use all milk (1½ cups total) or whisk in ½–1 teaspoon cornstarch while cold, then heat gently until lightly thickened.
Too sweet or flat: Add a pinch of salt, then nudge sweetness down next round. Cocoa flavor wakes up when the sweet–salty balance clicks.
Dairy-free but watery: Try a barista-style oat or soy, or add 1–2 teaspoons coconut cream off heat.
Lacks depth: Fold in a teaspoon of instant espresso powder or a few drops of vanilla. Tiny adjustments go a long way.
If you drink hot chocolate with cocoa powder even a few times a month, keeping two cocoas on hand is a clever move:
Everyday natural cocoa for a bright, classic cup and baking.
A Dutch-process cocoa for company or nights when you want a deep, plush mug.
This way, you can lean one direction or blend them. Many home cooks discover a 50/50 mix hits their sweet spot: vibrant yet smooth, dark yet lively.
For flavor clarity, sift your cocoa into a jar when you first open it—this breaks early clumps and keeps it ready for paste-making. Store in a cool, dry cabinet away from the stove so heat and steam don’t encourage caking.
Cacao powder is less processed than typical cocoa and often tastes fruitier and more delicate. If you prefer a “healthy-leaning” cup with a lighter body, warm your milk gently (hot but not boiling), then whisk in cacao, sweetener, and salt.
Cacao hot chocolate—per mug: 1 tbsp cacao, 1–2 tsp maple, 3/4–1 cup milk, pinch of salt. Warm (don’t boil), whisk in cacao + maple + salt; finish with 1/2 tsp vanilla. MasalaMonk.com
Because cacao’s edges are softer, it can feel more transparent in milk—some people love that, especially with maple syrup. If you’d like context on how cacao relates to chocolate and dark chocolate more broadly, this MasalaMonk guide maps the landscape in everyday language, while Healthline’s overview covers processing differences without getting fussy.
Nutrition whisper: perspective without the lecture
Cocoa powder brings a small amount of minerals to the party, including magnesium. That doesn’t turn a mug into a supplement, of course, but it’s a pleasant bonus. If you’re curious about broader wellness angles that include cocoa or dark chocolate in a wider diet, you might enjoy MasalaMonk’s look at magnesium-rich foods. For technical nutrition data per serving, the USDA’s FoodData Central is the neutral reference many dietitians use; search their database for “cocoa powder, unsweetened” to compare brands and serving sizes.
Scaling up: a crowd-pleasing pot of Hot Chocolate with Cocoa Powder
When you’re pouring for a game night or movie marathon, multiply everything and grab a heavier pot (4–5 liters for 8–10 servings). The method stays the same: paste first, gentle heat, vanilla off heat, quick whisk for foam. Here are a few patterns that work well:
If you want to cut prep to practically zero, you have two low-effort options:
Dry base mix: In a small jar, combine cocoa, sugar, and salt for 4–6 servings. When you’re ready, scoop out what you need, add milk+water, and go straight to the heat step.
Syrup shortcut: Keep a jar of 3-minute chocolate syrup in the fridge. Stir a spoonful into hot milk for an on-the-fly cup, or drizzle the finished mug for a café look without extra tools.
Either way, you retain control over quality and sweetness while shaving prep down to the whisking.
DIY hot cocoa mix—combine 2 cups powdered sugar, 1 cup cocoa, 1 cup milk powder, and 1/2 tsp salt. To serve, whisk 3 Tbsp mix into 3/4–1 cup hot milk or water. Stores airtight up to 6 months. MasalaMonk.com
Seasonal riffs that keep Hot Chocolate with Cocoa Powder interesting
Peppermint steam: Add 1–2 drops peppermint extract at the finish.
Orange glow: Infuse the milk with a strip of orange peel while heating; remove before serving.
Ginger warmth: Simmer thin slices of fresh ginger with the milk and water, then strain.
Nutty whisper: A teaspoon of hazelnut or almond extract can evoke chocolate-hazelnut vibes without turning the cup into dessert.
Rotate these through the colder months and your “same” hot chocolate with cocoa powder never feels repetitive.
Freshness matters: If your cocoa has been open for a year and lives near the stove, the aroma might have faded. Move it to a cool cabinet and refresh the supply every few months if you make cocoa often.
Sifted and ready: Pre-sifting into a jar means paste-making is quick and clump-free.
Vanilla restraint: Vanilla is beautiful here, but it’s a supporting actor. Go light so it frames the chocolate rather than masking it.
Chocolate-forward pairings
Hot chocolate practically begs for a snack to dunk. Crisp-edged churros are a classic. If you’d like something lighter, cocoa-leaning chia puddings deliver chocolate notes in an entirely different texture—cool, spoonable, and meal-prep-friendly. Meanwhile, if you’re curious about broader chocolate and cacao territory (bars, bakes, and the space between), this MasalaMonk cocoa/cacao explainer is a handy compass.
Why this ratio works (and when to break it)
Per mug, this recipe lands at roughly 1 tablespoon cocoa : 1 tablespoon sugar : ¾–1 cup liquid. That’s the sweet spot for most palates—enough cocoa to read as chocolate rather than faintly flavored milk; enough sugar to polish the edges; enough liquid to feel sippable, not heavy. Nevertheless, ratios are invitations, not rules. If you adore a darker profile, lift the cocoa and reduce the sugar slightly. If you’re serving kids, tipping the sweetness up a teaspoon can feel more familiar. You can shift the milk-to-water balance too: all milk for a plush nightcap; all water with a splash of cream for something featherlight yet still cozy.
Once you dial in hot chocolate with cocoa powder, you’ve effectively cracked a handful of other winter comforts:
Mocha oatmeal: Stir a teaspoon of cocoa and a little sugar into hot oats; finish with a splash of milk and vanilla.
Quick chocolate sauce: Whisk cocoa, sugar, a pinch of salt, and hot water into a thick drizzle; enrich with a knob of butter or a splash of cream. Or, take the faster route with this three-minute chocolate syrup.
Hot cocoa base for bakes: The paste technique is the backbone of cocoa glazes and certain stovetop frostings; once you see how smoothly cocoa bloomed in milk behaves, you’ll start applying it elsewhere.
Cold weather ritual, warm weather habit
In winter, this recipe is ritual: steam curling, cinnamon nearby, a soft blanket waiting. In summer, the cold chocolate milk variation takes over—we shake, we pour over ice, we sip on the balcony. Either way, it’s still the same foundation: a quick paste, gentle heat (or no heat at all), and a minute of whisking to make it feel special.
If you’re exploring further
For clear, non-technical answers about cocoa styles, King Arthur’s guides on Dutch vs. natural cocoa and cocoa types are reader-friendly.
For a grounded look at cacao versus cocoa and where chocolate sits in that spectrum, try MasalaMonk’s explainer, and for broader processing context, Healthline’s cacao vs cocoa piece is a good supplement.
If nutrition tables help you calibrate your own serving, the USDA’s FoodData Central is a straightforward database—useful if you compare brands or track macros.
One last mug
The difference between a forgettable cup and a memorable one almost always comes down to the same simple moves: bloom the cocoa in a paste, warm gently, finish with something fragrant, and whisk for a breath of foam. From there, you can veer darker or lighter, dairy-rich or dairy-free, spiced or straight, hot or ice-cold. That’s the charm of hot chocolate with cocoa powder—it gives you a classic to return to and endless little detours to enjoy along the way.
Absolutely. Baking cocoa is simply unsweetened cocoa powder, so it’s perfect for hot chocolate with cocoa powder. First, whisk it into a smooth paste with a little milk and sugar, then add the remaining liquid and heat gently.
2) What’s the best cocoa powder for drinking?
Generally, Dutch-process gives a darker color and smoother taste, while natural cocoa delivers a brighter, classic chocolate snap. For everyday hot chocolate with cocoa powder, either works; choose Dutch for silkiness or natural for lively flavor.
3) How do I make hot chocolate with cocoa powder extra creamy?
Use all milk instead of milk + water, keep the heat moderate, and finish with a quick whisk or frother. Optionally, add a teaspoon of cream or coconut cream at the end.
4) Can I make hot chocolate with cocoa powder without sugar?
Yes. Swap sugar for allulose, erythritol, or a liquid sweetener like maple. Because some alternatives taste less rounded, balance with a tiny pinch of salt and a drop of vanilla.
5) Does milk type matter for hot chocolate with cocoa powder?
Definitely. Whole dairy milk gives the richest body; barista-style oat, cashew, and soy foam well and taste silky. Almond reads lighter and toasty; coconut adds tropical richness.
6) How do I stop cocoa from clumping?
Begin with a paste: whisk cocoa, sugar, and a spoon or two of milk until glossy, then add the rest of the liquid. This quick step prevents gritty, floating specks.
7) What ratio should I use per mug?
A reliable baseline is 1 tbsp cocoa : 1 tbsp sugar : ¾–1 cup milk (or milk + water) with a pinch of salt. Adjust darker by adding ½–1 tsp extra cocoa, or sweeter by 1–2 tsp sugar.
8) Can I make low-carb hot chocolate with cocoa powder?
Certainly. Use unsweetened almond or cashew milk, choose a zero-calorie sweetener, and keep the classic ratio. For body, whisk a splash of cream or a bit of coconut cream after heating.
9) How do I make Mexican-style hot chocolate with cocoa powder?
Stir ¼ tsp ground cinnamon and a tiny pinch of cayenne into the paste. Warm gently, finish with vanilla, then whisk vigorously for a frothy top.
10) Is cacao powder good for hot chocolate?
Yes—cacao tastes fruitier and more delicate. Heat your milk just to hot (not boiling), then whisk in cacao and sweetener. Expect a lighter body than typical hot chocolate with cocoa powder.
11) Can I prepare hot chocolate ahead of time?
You can. Mix the dry base (cocoa, sugar, salt) in a jar and store airtight. When ready, add milk and heat. If holding a cooked batch, keep it warm on low and whisk occasionally.
12) How do I reheat leftover hot chocolate?
Warm on low heat until steaming, not boiling. If it thickened or sat for a while, whisk in a splash of fresh milk to restore creaminess.
13) What’s the difference between hot cocoa and drinking chocolate?
Hot cocoa uses cocoa powder and is lighter; drinking chocolate melts real chocolate, so it’s richer and thicker. Choose based on mood—weeknight comfort or decadent treat.
14) Can I make hot chocolate with cocoa powder using water only?
Yes. Water highlights the chocolate notes and keeps things lighter. For a silkier finish, add a small splash of milk or cream after heating.
15) How can I boost chocolate flavor without extra sugar?
Add a pinch more salt, a few drops of vanilla, or ½–1 tsp instant espresso powder. These amplify chocolate depth without increasing sweetness.
16) What’s the ideal temperature for hot chocolate with cocoa powder?
Aim for “steaming hot” rather than a rolling boil. Gentle heat preserves a smooth mouthfeel and prevents a cooked-milk aftertaste.
17) Can I scale this recipe for a crowd?
Definitely. Multiply the ratio, use a heavy pot, and still start with a paste. Keep warm on low and whisk every 10–15 minutes to maintain a silky texture.
18) Why does my hot chocolate taste thin?
Use all milk instead of part water, increase cocoa by ½–1 tsp per mug, or add ½–1 tsp cornstarch while the mixture is cold and then heat until lightly thickened.
19) How can I make hot chocolate with cocoa powder more “dark chocolate” forward?
Increase cocoa by 1–2 tsp per mug, reduce sugar slightly, and finish with a tiny pinch of salt. For extra depth, add a touch of espresso powder.
20) What toppings work best without overpowering the drink?
Softly whipped cream, a dusting of cocoa or cinnamon, micro-grated orange zest, or a few cocoa nibs. Keep the layer light so the chocolate remains the star.