Posted on — 19 Comments

10 Creative Chia Pudding Recipes for Every Taste

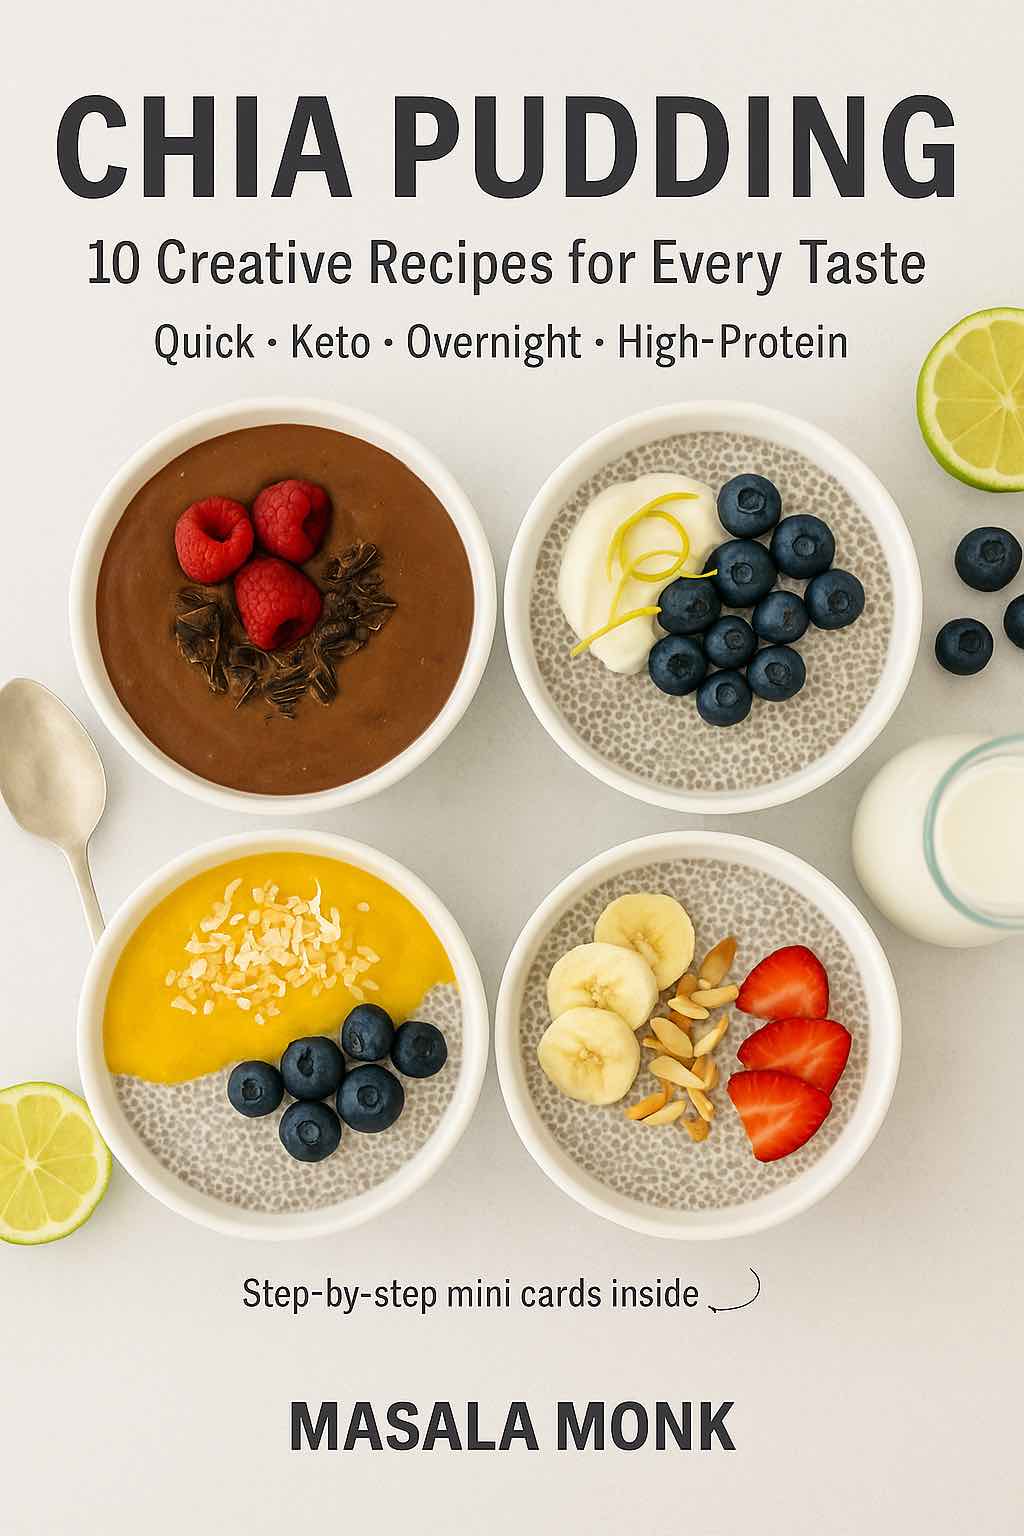
Food blog cover showing four different chia pudding recipes in jars.

The best chia pudding recipes look almost too easy: stir chia seeds into milk, chill, and eat. What makes the difference is the chia-to-liquid ratio — and knowing how to fix the pudding when it turns out too thin, too thick, or clumpy.

This guide gives you a dependable base recipe first, then 10 chia pudding recipes ranging from overnight and almond-milk versions to Greek yogurt, chocolate, mango, matcha, cheesecake, and coconut cream. You’ll also find a flavor chooser, storage guidance, and a troubleshooting table so you can adjust the pudding instead of starting over.

Quick answer: for a thick, spoonable chia pudding, start with ¼ cup chia seeds to 1 cup liquid. Stir once when you mix it, stir again after 5–10 minutes, then chill for at least 2 hours. If you prefer a slightly softer pudding, start with 3 tablespoons chia per cup and adjust after chilling.

In this guide


Basic Chia Pudding Recipe: The 2-Ingredient Base

Every flavor below starts with the same idea: chia seeds need enough liquid and enough time to hydrate. This version makes one generous breakfast serving or two smaller snack portions.

Prep time5 minutes
Chill time2 hours minimum; overnight works well
Cook timeNone
Yield1 large or 2 small servings
Starting ratio¼ cup chia seeds : 1 cup liquid

Ingredients

  • ¼ cup chia seeds
  • 1 cup milk or other liquid: dairy milk, almond milk, soy milk, oat milk, coconut milk beverage, or another option you enjoy

Method

  1. Add the chia seeds and liquid to a bowl or jar and stir thoroughly, scraping the bottom so no dry seeds remain.
  2. Let the mixture stand for 5–10 minutes, then stir again. This second stir is the simplest way to prevent dense chia clumps.
  3. Cover and refrigerate for at least 2 hours. For a make-ahead breakfast, leave it overnight.
  4. Stir before serving. If it is thicker than you like, loosen it with a splash of milk; if it is still thin, use the troubleshooting guide below.

Vanilla, cinnamon, cocoa, fruit puree, nut butter, honey, maple syrup, jaggery, or another sweetener can all be added after you have the base texture right.


Which Chia Pudding Should You Make?

If you do not want to scroll through ten recipes before deciding, start here. Pick by texture, flavor, or what you already have in the fridge.

RecipeFlavor / textureBest for
Overnight chia puddingClassic, creamyEasy meal prep
Almond milk chia puddingLight, nuttyVegan / dairy-free
Greek yogurt chia puddingThick, tangyHigher-protein breakfast
Blueberry lemonBright, fruityFresh summer flavor
Chocolate chia puddingRich, cocoa-forwardDessert-style breakfast or snack
Mango chia puddingTropical, fruityMango season
Banana bread chia puddingCozy, cinnamon-bananaNaturally sweeter flavor
Matcha chia puddingEarthy, lightly bitterMatcha lovers
Cheesecake chia puddingRich, tangyBrunch or dessert
Coconut cream chia puddingVery thick, richDairy-free dessert

10 Chia Pudding Recipes to Try

1. Overnight Chia Pudding Recipe

If mornings are always rushed, this overnight chia pudding recipe is a lifesaver. With just 5 minutes of prep the night before, you can wake up to a ready-made, creamy, and satisfying breakfast. The chia seeds absorb the liquid overnight, creating a pudding-like texture without any effort.

Ingredients:

  • ¼ cup chia seeds
  • 1 cup almond milk (or coconut milk for richness)
  • 1 tsp vanilla extract
  • 1–2 tsp honey, maple syrup, or stevia (optional)

Instructions:

  1. Combine chia seeds, almond milk, vanilla, and sweetener in a jar.
  2. Stir well, wait 5 minutes, then stir again to prevent clumping.
  3. Cover and refrigerate overnight.
  4. Stir before serving and add toppings of choice.
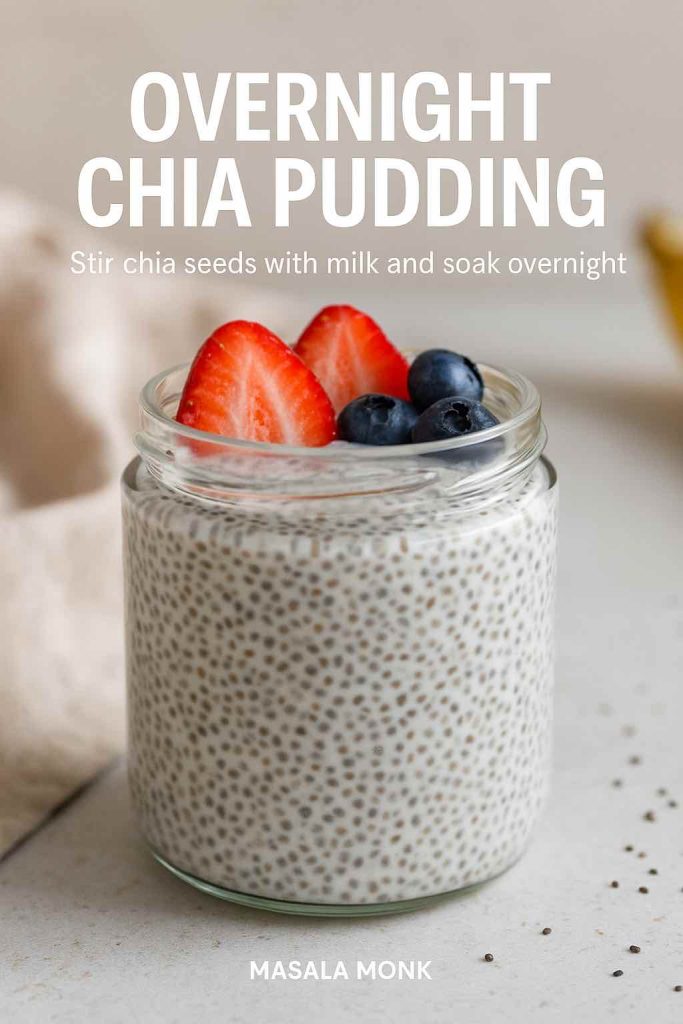
Overnight chia pudding recipe card with a jar topped with strawberries and blueberries.
The second stir after 5–10 minutes is what keeps this overnight chia pudding evenly set instead of clumping at the bottom.

Topping Ideas:

  • Fresh berries (blueberries, raspberries, strawberries)
  • Sliced banana
  • Granola or toasted nuts for crunch
  • A sprinkle of cinnamon or cocoa powder

Variations:

  • Make it keto-friendly by using unsweetened almond milk + stevia.
  • Blend the mixture before chilling for a smooth, mousse-like pudding.
  • Stir in cocoa powder for a chocolate overnight chia pudding.

If you like breakfasts you can prep the night before, compare this with our overnight oats recipe, which has its own ratio, storage, and texture-fix guide.


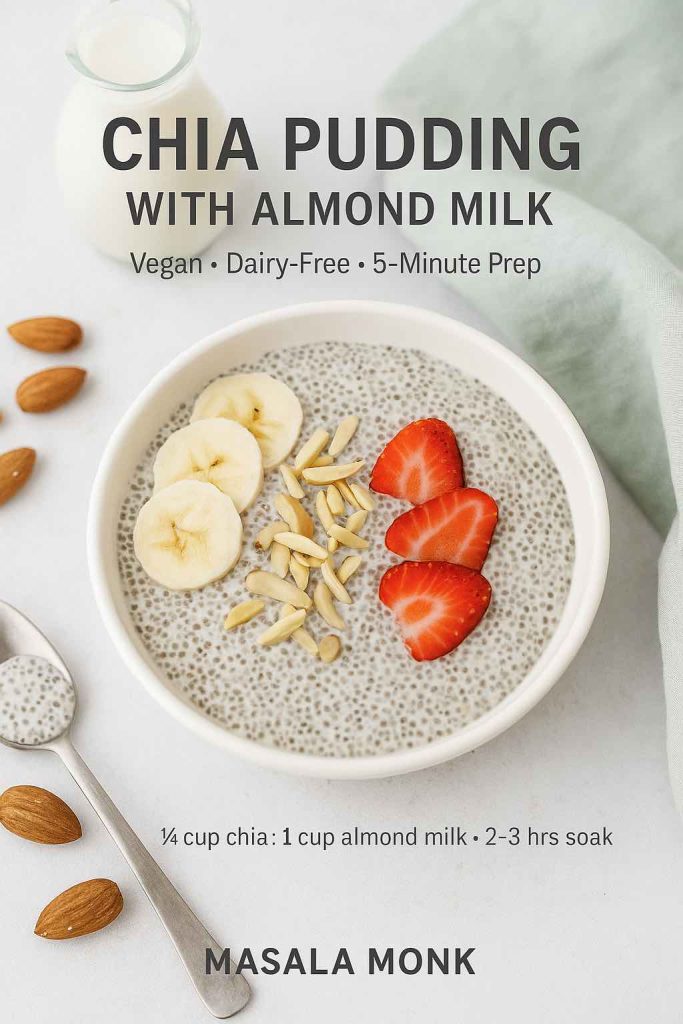
2. Chia Pudding with Almond Milk (Vegan-Friendly)

This chia pudding with almond milk is light, dairy-free, and endlessly versatile. Almond milk gives a subtle nutty flavor and pairs beautifully with fruit or nut butter. It’s the base recipe many vegans swear by.

Ingredients:

  • ¼ cup chia seeds
  • 1 cup unsweetened almond milk
  • 1 tbsp almond butter (optional, for richness)
  • 1 tsp vanilla extract
  • 1–2 tsp maple syrup or agave

Instructions:

  1. Mix chia seeds, almond milk, vanilla, and sweetener in a jar.
  2. Stir well and refrigerate for at least 2 hours (overnight preferred).
  3. Stir again before serving.
  4. Add toppings for extra texture.
Almond milk chia pudding recipe card with banana, strawberries, and slivered almonds.
Almond milk keeps the base light; banana, strawberries, and almonds add sweetness and crunch at serving time.

Topping Ideas:

  • Sliced bananas + almond butter drizzle
  • Fresh strawberries or blueberries
  • Chopped almonds or walnuts
  • Dark chocolate shavings

Variations:

  • Add cocoa powder for a chocolate almond chia pudding.
  • Blend in a handful of frozen berries for a fruity version.
  • Use flavored almond milk (like vanilla) for a natural twist.

Using almond milk often? You can also make almond milk at home and control the sweetness and thickness yourself.


3. Greek Yogurt Chia Pudding (High-Protein)

This Greek yogurt chia pudding recipe is creamy, tangy, and higher in protein than a milk-only version. With ¼ cup chia seeds plus ½ cup Greek yogurt, many combinations land around the 20 g protein range shown in the image, though the exact amount depends on the yogurt and milk you use. Greek yogurt also makes the pudding noticeably thicker; products with live cultures can provide probiotics too.

Ingredients:

  • ¼ cup chia seeds
  • ½ cup almond or dairy milk
  • 1 tbsp honey or stevia
  • ½ cup Greek yogurt
  • ½ tsp vanilla extract

Instructions:

  1. Mix chia seeds, milk, Greek yogurt, vanilla, and sweetener in a bowl.
  2. Stir well until combined.
  3. Refrigerate for at least 2 hours or overnight.
  4. Stir again and add toppings before serving.
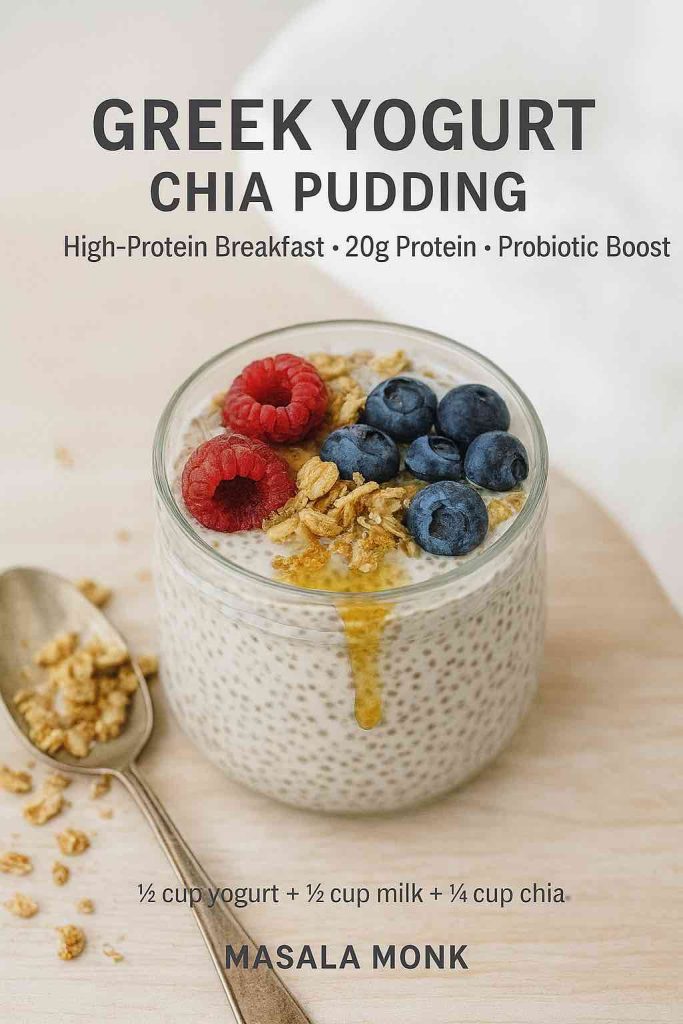
Greek yogurt chia pudding recipe card with berries, granola, and honey drizzle.
Greek yogurt makes the base thicker and raises the protein; the exact protein amount depends on the yogurt and milk you choose.

Topping Ideas:

  • Granola or muesli
  • Fresh berries
  • Walnuts or pecans
  • A drizzle of nut butter

Variations:

  • Add a scoop of protein powder for an extra high-protein chia pudding.
  • Use flavored Greek yogurt for a fun twist.
  • Add a spoonful of fruit compote for tangy sweetness.

4. Blueberry Lemon Chia Pudding

This blueberry chia pudding gets its bright flavor from lemon zest and fresh or blended blueberries. The fruit can be layered over the set pudding or blended into the milk for a purple base, while a spoonful of yogurt adds a cheesecake-like tang.

Ingredients:

  • ¼ cup chia seeds
  • 1 cup almond milk
  • 1 tsp lemon zest
  • ½ cup fresh or blended blueberries
  • 1 tbsp honey or maple syrup

Instructions:

  1. Mix chia seeds, almond milk, lemon zest, and sweetener in a jar.
  2. Refrigerate for 2 hours or overnight.
  3. Layer pudding with blueberries before serving.
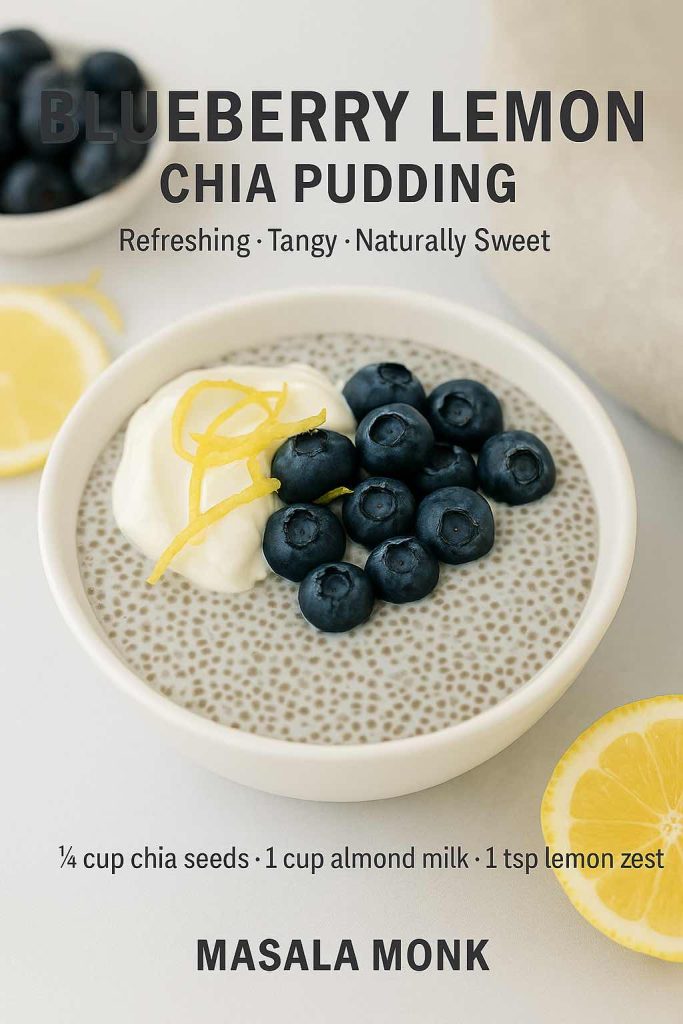
Blueberry lemon chia pudding recipe card with lemon zest, yogurt, and fresh blueberries.
The yogurt shown here is an optional topping; lemon zest goes into the chia base, while blueberries can be layered or spooned on top.

Topping Ideas:

  • Lemon zest curls
  • Blueberry compote
  • A dollop of Greek yogurt
  • Crushed graham crackers (for cheesecake vibes)

Variations:

  • Blend blueberries into the almond milk for a vibrant purple pudding.
  • Use kefir instead of almond milk for a probiotic-rich version.
  • Add vanilla protein powder for extra nutrition.

Blueberries work especially well here; if you use them often, our guide to the health benefits of blueberries goes deeper into the fruit itself.


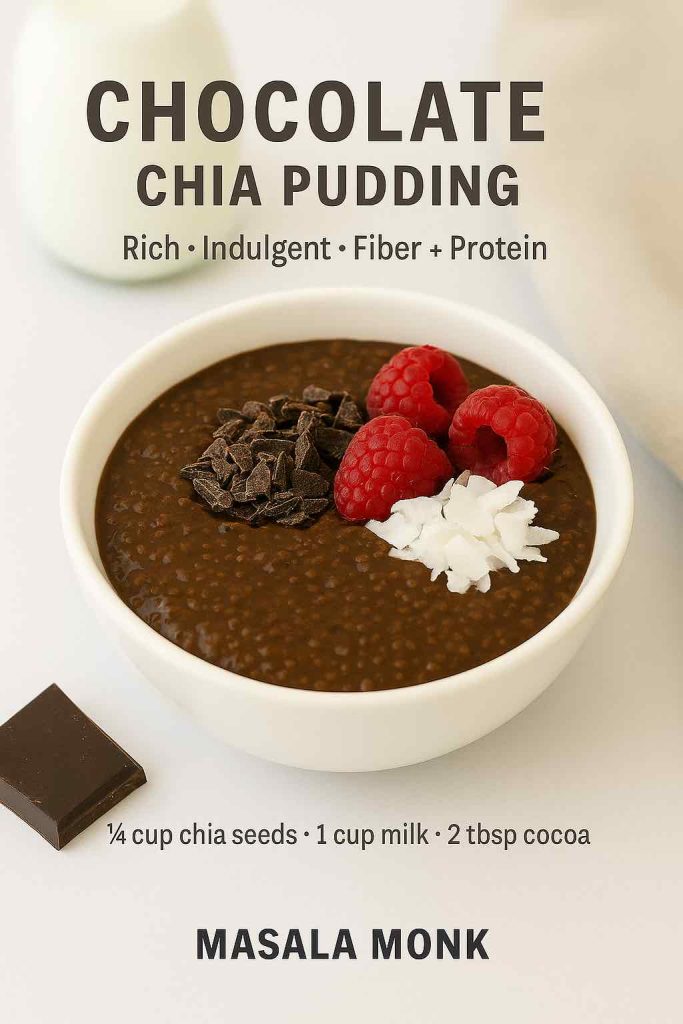
5. Chocolate Chia Pudding

This chocolate chia pudding recipe turns the basic chia base into something richer and more dessert-like. The important step is whisking the cocoa into the milk before the chia goes in; that prevents dry cocoa pockets and gives the pudding a more even chocolate flavor.

Ingredients:

  • ¼ cup chia seeds
  • 1 cup milk (almond, coconut, or dairy)
  • 2 tbsp cocoa powder or cacao
  • 1–2 tbsp maple syrup, honey, or stevia
  • ½ tsp vanilla extract

Instructions:

  1. Whisk cocoa into the milk until smooth.
  2. Stir in chia seeds, vanilla, and sweetener.
  3. Refrigerate at least 2 hours or overnight.
  4. Stir well before serving.
Chocolate chia pudding recipe card with raspberries, coconut, and chocolate pieces.
Whisk cocoa into the milk before adding chia to avoid dry cocoa pockets; raspberries, coconut, and chocolate add contrast on top.

Topping Ideas:

  • Dark chocolate shavings
  • Fresh raspberries or strawberries
  • Coconut flakes
  • Peanut butter drizzle

Variations:

  • Add chocolate protein powder for a higher-protein chocolate chia pudding.
  • Use coconut cream instead of milk for a mousse-like texture.
  • Add espresso powder for a mocha chia pudding.

Want another chocolatey make-ahead idea? Our keto hot chocolate guide also shows how a cocoa mix can be repurposed into a chia pudding cup.


6. Mango Chia Pudding

This mango chia pudding recipe brings tropical vibes to your table. Sweet mango puree layered with creamy chia pudding makes a dessert-like breakfast that’s both refreshing and filling.

Ingredients:

  • ¼ cup chia seeds
  • 1 cup coconut milk
  • 1 ripe mango (pureed)
  • 1 tsp lime juice (optional, for tang)

Instructions:

  1. Mix chia seeds and coconut milk, then refrigerate overnight.
  2. Puree mango and layer it over the chia pudding.
  3. Garnish with extra mango or lime zest.
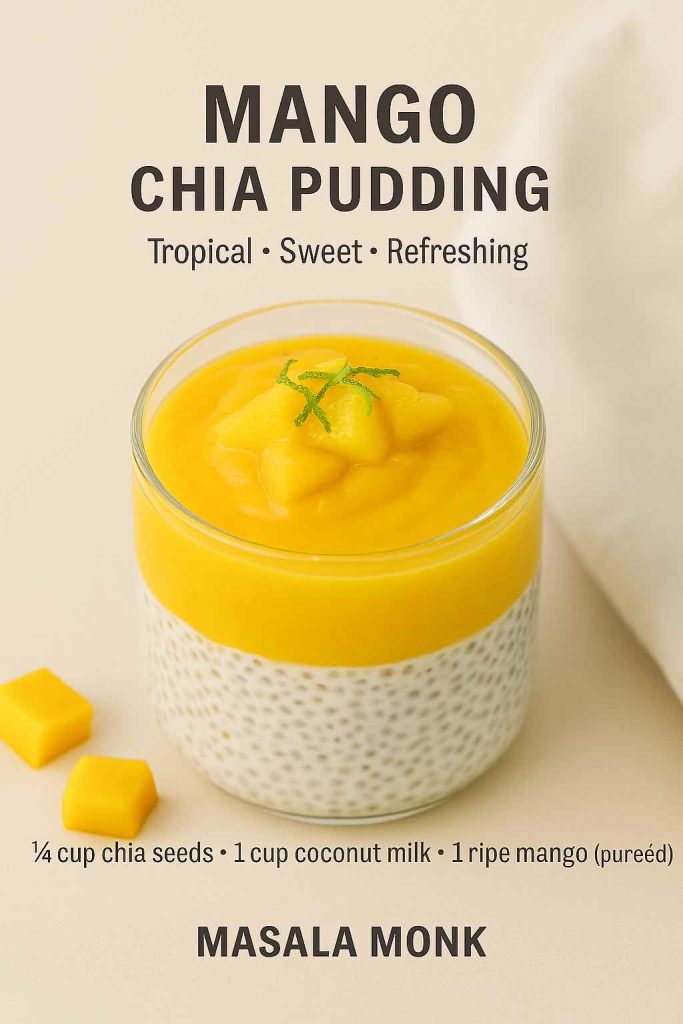
Glass of chia pudding layered with coconut milk and topped with mango purée and lime zest.
Set the coconut chia base first, then add the mango purée so the two layers stay distinct.

Topping Ideas:

  • Fresh mango chunks
  • Shredded coconut
  • Pistachios
  • A squeeze of lime juice

Variations:

  • Blend mango puree into the base for a smooth, golden pudding.
  • Mix with passionfruit for a tropical combo.
  • Use dairy milk + yogurt for a creamy mango lassi-style pudding.

If mango is the flavor you came for, go next to 5 creative mango chia pudding ideas for more tropical combinations.


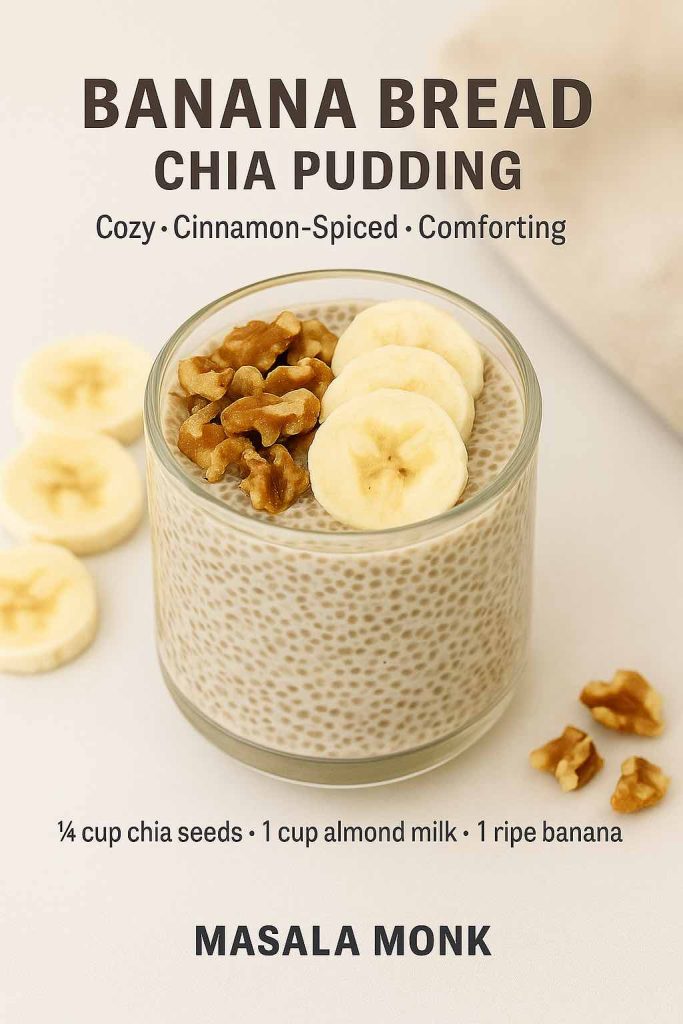
7. Banana Bread Chia Pudding

Think of this banana chia pudding as banana bread flavors in a jar. Mashed banana, cinnamon, and vanilla go into the base, while walnuts and fresh banana on top add the contrast that makes the flavor feel more complete — with no baking required.

Ingredients:

  • ¼ cup chia seeds
  • 1 cup almond or dairy milk
  • 1 ripe banana (mashed)
  • ½ tsp cinnamon
  • ½ tsp vanilla extract
  • 2 tbsp chopped walnuts (optional)
Glass jar of chia pudding with bananas and walnuts on top, inspired by banana bread flavors.
Mashed banana and cinnamon flavor the base; fresh banana slices and walnuts are best added just before serving.

Instructions:

  1. Mash banana and whisk with milk, cinnamon, and vanilla.
  2. Stir in chia seeds.
  3. Refrigerate overnight.
  4. Add walnuts and extra banana slices before serving.

Topping Ideas:

  • Chopped walnuts or pecans
  • Raisins or dates
  • Banana slices
  • A dusting of cinnamon

Variations:

  • Add cocoa powder for a chocolate banana version.
  • Use Greek yogurt instead of milk for extra protein.
  • Stir in nut butter for a richer flavor.

For more banana-and-chia combinations, see these banana pudding breakfast twists.


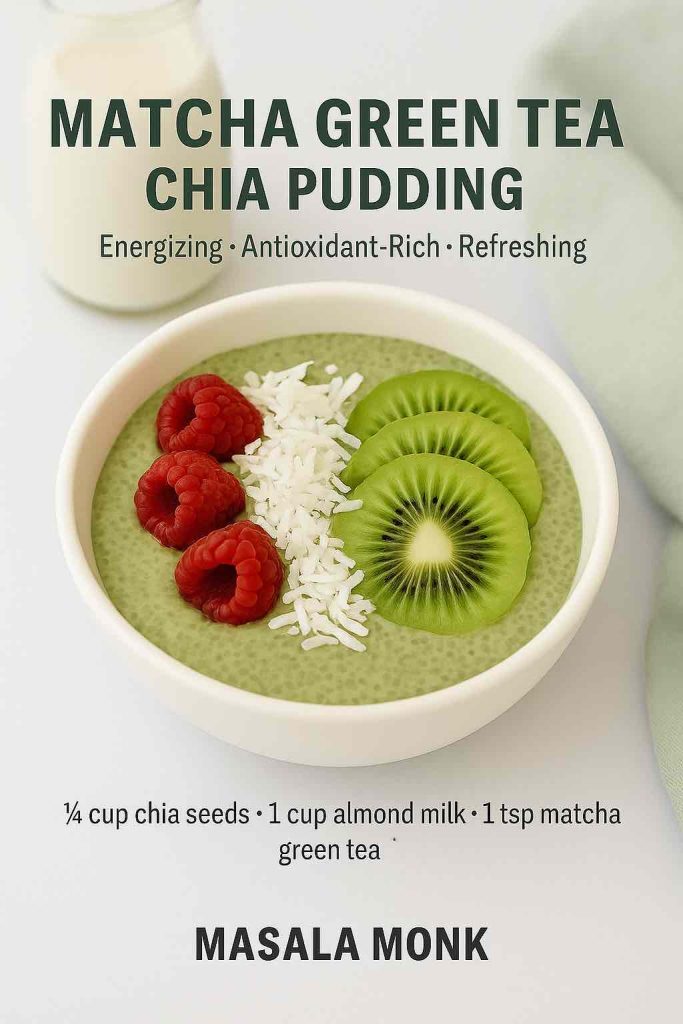
8. Matcha Green Tea Chia Pudding

This matcha chia pudding recipe has the earthy, slightly bitter flavor and green color of matcha. Whisking the powder into the milk first keeps it smooth, and because matcha contains caffeine, this version makes more sense earlier in the day if you are sensitive to it.

Ingredients:

  • ¼ cup chia seeds
  • 1 cup warm almond milk
  • 1 tsp matcha green tea powder
  • 1 tsp honey, maple syrup, or stevia
Bowl of green matcha chia pudding with sliced kiwi, raspberries, and shredded coconut.
Whisk matcha into the milk before adding chia so the powder disperses smoothly without green clumps.

Instructions:

  1. Whisk matcha into warm almond milk until no lumps remain.
  2. Stir in chia seeds and sweetener.
  3. Refrigerate overnight.
  4. Stir before serving and add toppings.

Topping Ideas:

  • Fresh raspberries
  • Shredded coconut
  • Sliced kiwi
  • Granola clusters

Variations:

  • Blend banana into the base for natural sweetness.
  • Add vanilla protein powder for a high-protein matcha pudding.
  • Use coconut milk for a creamier, dessert-like version.

If you prefer a smoother texture, this matcha version also works well blended after it has set; the same technique is covered in the troubleshooting guide below.


9. Cheesecake Chia Pudding

Yes, you can have cheesecake for breakfast — with this cheesecake chia pudding recipe. Cream cheese (or Greek yogurt for a lighter version) makes the base rich and tangy, while crushed biscuits and berries give it that dessert feel.

Ingredients:

  • ¼ cup chia seeds
  • 1 cup almond or dairy milk
  • 1 tbsp honey or maple syrup
  • ¼ cup cream cheese (or Greek yogurt)
  • ½ tsp vanilla extract
  • 2 tbsp crushed biscuits or granola (for topping)
  • Fresh berries

Instructions:

  1. Blend milk, cream cheese, honey, and vanilla until smooth.
  2. Stir in chia seeds.
  3. Refrigerate overnight.
  4. Top with crushed biscuits and fresh berries.
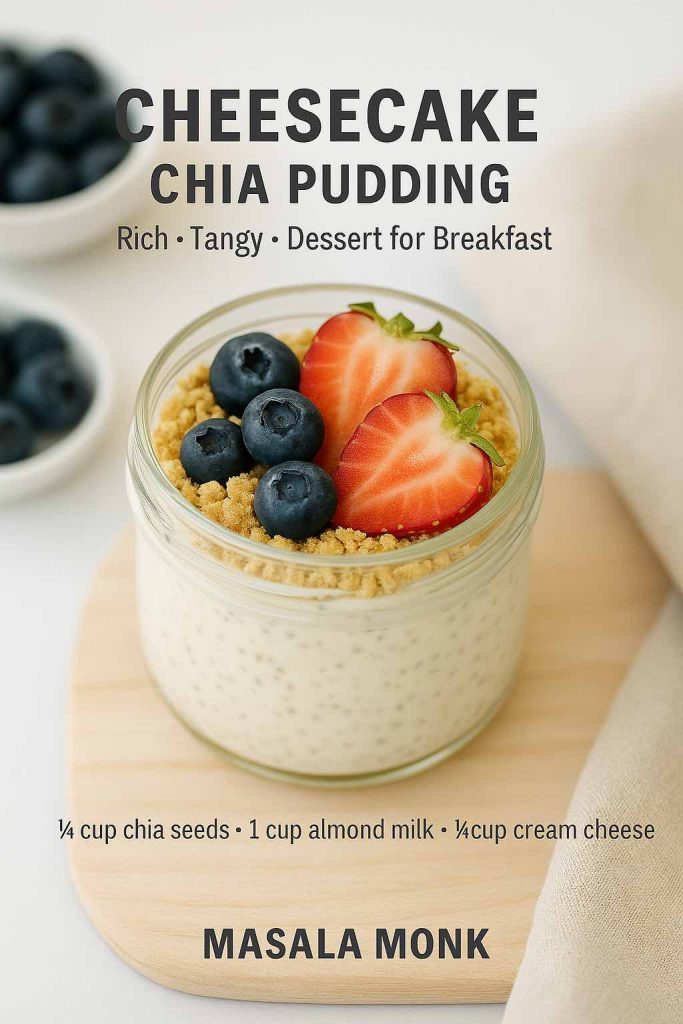
Jar of cheesecake-style chia pudding with cream cheese base, graham cracker topping, strawberries, and blueberries.
Cream cheese gives the base its tang; graham crumbs and berries are added after chilling so the topping keeps its texture.

Topping Ideas:

  • Strawberries or blueberries
  • Graham cracker crumbs
  • Lemon zest
  • Berry coulis

Variations:

  • Use flavored yogurt for different cheesecake vibes.
  • Add cocoa powder for a chocolate cheesecake chia pudding.
  • Stir in lemon juice for a tangy New York-style cheesecake twist.

Love the berry-cheesecake direction? You may also like our no-bake blueberry cheesecake.


10. Chia Pudding with Coconut Cream

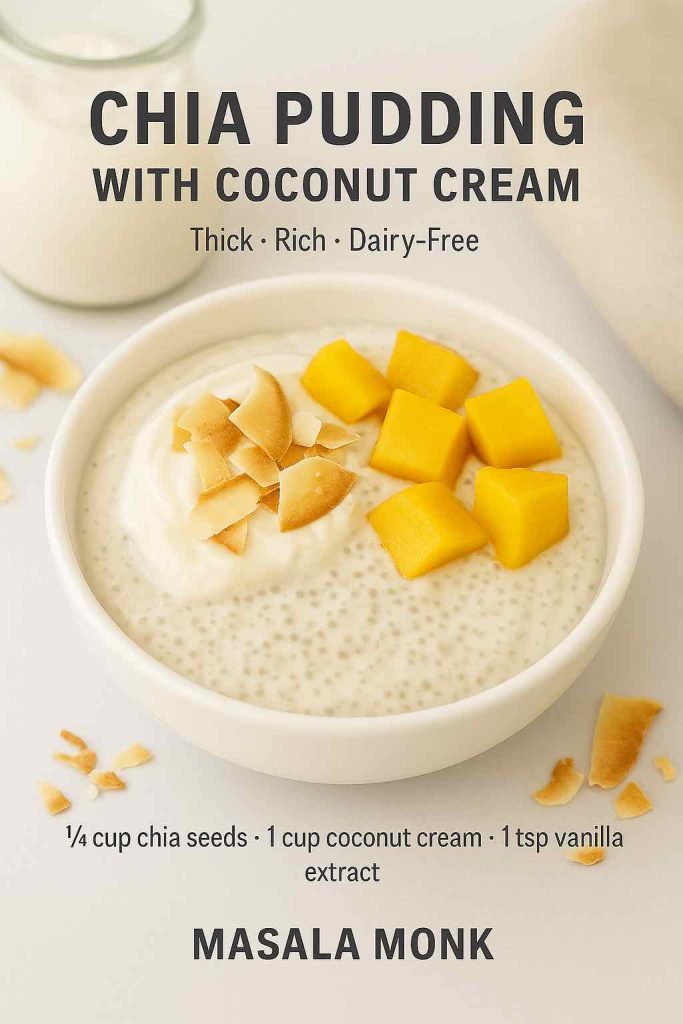
This chia pudding with coconut cream is thick, rich, and incredibly indulgent — almost like a mousse. It’s naturally dairy-free but tastes luxurious enough for dessert.

Ingredients:

  • ¼ cup chia seeds
  • 1 cup coconut cream
  • 1 tbsp honey, maple syrup, or stevia
  • 1 tsp vanilla extract

Texture note: coconut cream varies a lot by brand. If yours is spoon-thick straight from the container, whisk in a little coconut milk or another milk before adding the chia rather than waiting until the pudding becomes nearly solid.

Instructions:

  1. Mix coconut cream, chia seeds, vanilla, and sweetener.
  2. Stir well, let sit for 5 minutes, then stir again.
  3. Refrigerate overnight until thick.
  4. Garnish before serving.
Bowl of chia pudding with coconut cream, mango chunks, and toasted coconut flakes.
Coconut cream makes the richest, firmest pudding in the set; thin it with a little milk if your brand sets too densely.

Topping Ideas:

  • Toasted coconut flakes
  • Mango chunks
  • Dark chocolate drizzle
  • Crushed nuts

Variations:

  • Blend in cocoa for a chocolate coconut chia pudding.
  • Add pineapple for a pina colada-inspired pudding.
  • Use spiced jaggery syrup for an Indian twist.

For another tropical direction, try our pineapple chia pudding.


Chia Pudding Ratio, Texture & Troubleshooting

Most chia pudding problems are fixable. The important variables are the amount of chia, the thickness of your liquid, how well you stirred, and how long the mixture has had to hydrate.

Common Chia Pudding Problems and Fixes

ProblemLikely causeWhat to do
Too runnyNot enough chia, very thin liquid, or too little chill timeStir first. If it is still loose, add 1 teaspoon chia, wait 15–30 minutes, and check again. Next time, use slightly more chia or less liquid.
Too thickToo much chia or a thick base such as yogurt or coconut creamStir in milk 1 tablespoon at a time. Next time, reduce the chia or start with more liquid.
ClumpyThe seeds gelled together before they were evenly dispersedBreak up the clumps with a spoon or whisk and add a splash of milk if needed. Stir again 5–10 minutes after mixing next time.
Seeds still crunchyThe chia needs more hydration timeRefrigerate longer and check again. Two hours is a useful minimum; overnight is easier when you are meal-prepping.
Cocoa or matcha has lumpsDry powder was added directly to the chia mixtureWhisk or blend briefly now. Next time, whisk cocoa or matcha into the milk before adding chia.
Too dense with yogurtBoth yogurt and chia are thickening the mixtureLoosen it with milk. Half yogurt and half milk is a useful starting point.
Coconut cream version is almost solidCoconut cream is much thicker than a coconut milk beverageThin with coconut milk or another milk. Use coconut cream when you want a dessert-style result; use coconut milk beverage for a lighter pudding.
You dislike the seed textureThe pudding is set correctly, but you do not enjoy the tapioca-like textureBlend the chilled pudding until smooth and treat it as a chia mousse instead.

Adjust the Ratio to Your Ingredients

The ratio is a starting point, not a law. Different milks, yogurt, fruit puree, cocoa, protein powder, and coconut cream all change how thick the final pudding feels, so make small adjustments rather than doubling ingredients at once.


Milk, Protein & Dietary Swaps

BaseWhat it doesUseful for
Unsweetened almond milkLight, neutral, relatively thinEveryday dairy-free pudding
Soy milkCreamier than many nut milks and naturally contains more proteinVegan higher-protein base
Dairy milkClassic creamy textureGeneral-purpose pudding
Oat milkSoft, naturally sweeter-tastingFruit and cinnamon flavors
Coconut milk beverageLight tropical flavorMango, pineapple, chocolate
Canned coconut milk / coconut creamMuch richer and thickerDessert-style pudding
Greek yogurt + milkThickens the pudding and adds more proteinMore substantial breakfast

Vegan: use a plant milk and a plant-based sweetener such as maple syrup if you want one. For more protein: Greek yogurt, soy milk, or protein powder can help; because protein powder thickens as it sits, keep extra milk handy. Keeping it keto: choose unsweetened low-carb milk and sweetener, then watch fruit, granola, and other toppings; our dedicated keto chia pudding with almond milk goes deeper into that version.


How to Store Chia Pudding for Meal Prep

Meal prep is easiest when you portion the pudding into sealed jars or containers and refrigerate it. A plain chia base generally keeps well for about 4–5 days; fruit, yogurt, and other add-ins can affect the best storage window, so use your judgment and follow the storage guidance for those ingredients too.

  • Keep crunch separate: granola, toasted nuts, coconut chips, and similar toppings are better added right before eating.
  • Add delicate fruit later: fresh banana and very juicy fruit can soften or release liquid if they sit for several days.
  • Expect thickening: chia pudding often gets thicker as it sits. Stir in a splash of milk before eating if needed.
  • Freeze individual portions: a plain chia pudding can be frozen for about 1 month in an airtight container. Thaw it overnight in the refrigerator, stir well, and add fresh fruit or crunchy toppings after thawing; the texture may be slightly softer.
  • Batch in one bowl: when making several servings, mix the base in a large bowl first, do the second stir there, and then divide it into jars for more even texture.

If make-ahead breakfasts are a regular part of your week, the same topping-timing idea appears in our overnight oats storage and texture guide: soft mix-ins can go in early, while crunch usually belongs at serving time.


Chia Seed Nutrition: Useful Food, Not a Magic Ingredient

Nutritionally, chia seeds are dense for their size, but it is worth separating that from the bigger claims often made about “superfoods.” Harvard’s Nutrition Source notes that 2 tablespoons (about 28 g) of chia seeds provide roughly 140 calories, 4 g protein, 11 g fiber, unsaturated fat, calcium, and other minerals. They are also a plant source of the omega-3 fat ALA.

The practical reason chia works so well in pudding is its fiber and mucilage: when the seeds meet liquid, they form a gel that creates the familiar spoonable texture. That fiber can contribute to fullness as part of a meal, but chia by itself should not be treated as a weight-loss, blood-sugar, or heart-health treatment. Harvard’s review notes that controlled human studies have produced mixed results, while a 2024 systematic review of randomized trials found some modest changes in selected metabolic markers rather than a universal effect.

In other words: enjoy chia pudding because it is convenient, fiber-rich, flexible, and easy to build into a balanced breakfast or snack—not because one ingredient needs to carry the entire health story. If you are specifically interested in glucose, our separate guide looks at chia seeds and blood sugar in more detail.


Frequently Asked Questions About Chia Pudding

What is the best chia pudding ratio?

For a thick, spoonable pudding, start with ¼ cup chia seeds to 1 cup liquid. If you prefer a softer result, try 3 tablespoons per cup. The thickness of your milk and any yogurt, fruit puree, cocoa, or protein powder will also affect the final texture.

How long does chia pudding need to set?

Give it at least 2 hours in the refrigerator. Overnight is convenient and gives the seeds plenty of time to hydrate. Stirring again after the first 5–10 minutes helps the pudding set more evenly.

Why is my chia pudding still runny?

First stir it again—sometimes the seeds have settled instead of thickening evenly. If it is still thin after enough chill time, add about 1 teaspoon chia, mix well, and let it sit another 15–30 minutes. Very thin plant milks and watery fruit can also loosen the pudding.

Can you make chia pudding with yogurt?

Yes. Greek yogurt makes chia pudding thicker and usually raises the protein compared with a milk-only version. A simple starting point is half yogurt and half milk, then adjust with more milk if the mixture becomes too dense.

Can you add protein powder to chia pudding?

Yes. Whisk the protein powder into the milk before adding chia so it disperses more evenly. Because many powders thicken as they hydrate, check the pudding after chilling and add extra milk if it becomes stiff.

Is chia pudding keto-friendly?

It can be. Use an unsweetened low-carb milk, choose an appropriate sweetener if you want one, and be mindful of fruit, granola, and other toppings. For exact low-carb combinations, use the dedicated keto chia pudding recipe.

How long does chia pudding last in the fridge?

A plain chia pudding base generally keeps well for about 4–5 days in a sealed refrigerator container. Add crunchy toppings at serving time, and remember that fresh fruit, yogurt, or other perishable add-ins can change the practical storage window.

Can you freeze chia pudding?

Yes. Freeze plain chia pudding in individual airtight portions for about 1 month, then thaw it overnight in the refrigerator and stir before serving. Fruit, yogurt, and richer coconut versions can change texture more noticeably after freezing, so add fresh toppings after thawing.

Can you blend chia pudding?

Absolutely. Chill it until the seeds have hydrated, then blend until smooth. This turns the tapioca-like seed texture into something closer to a mousse and works particularly well with chocolate, banana, mango, and nut butter.

What is the best milk for chia pudding?

There is no single healthiest or best milk for everyone. Almond milk gives a lighter pudding, dairy or soy milk can add more protein, oat milk tastes naturally sweeter, and coconut milk makes tropical flavors richer. Choose based on texture, flavor, dietary needs, and the nutrition of the specific product you use.

Is chia pudding good for weight loss?

Chia pudding can fit into a weight-management eating pattern because chia contributes fiber and the recipe can be portioned easily, but it is not automatically low-calorie and chia seeds are not a weight-loss treatment. Milk, coconut cream, sweeteners, nut butter, granola, chocolate, and other toppings can change the energy content substantially.


The Takeaway

Start with the ratio, stir twice, and give the chia enough time to hydrate. Once the base is right, the rest is mostly preference: almond milk for something lighter, yogurt for more body, cocoa for dessert energy, mango or berries for fruit, or a quick blend when you want the texture completely smooth.

The ten recipes above are meant to be starting points rather than ten separate rules. Pick the version that sounds good, use the troubleshooting table if the texture needs adjusting, and change the toppings when you want the same basic jar to feel new again.
Posted on — 4 Comments

Pineapple Chia Pudding Recipe: Creamy & Spoonable Every Time

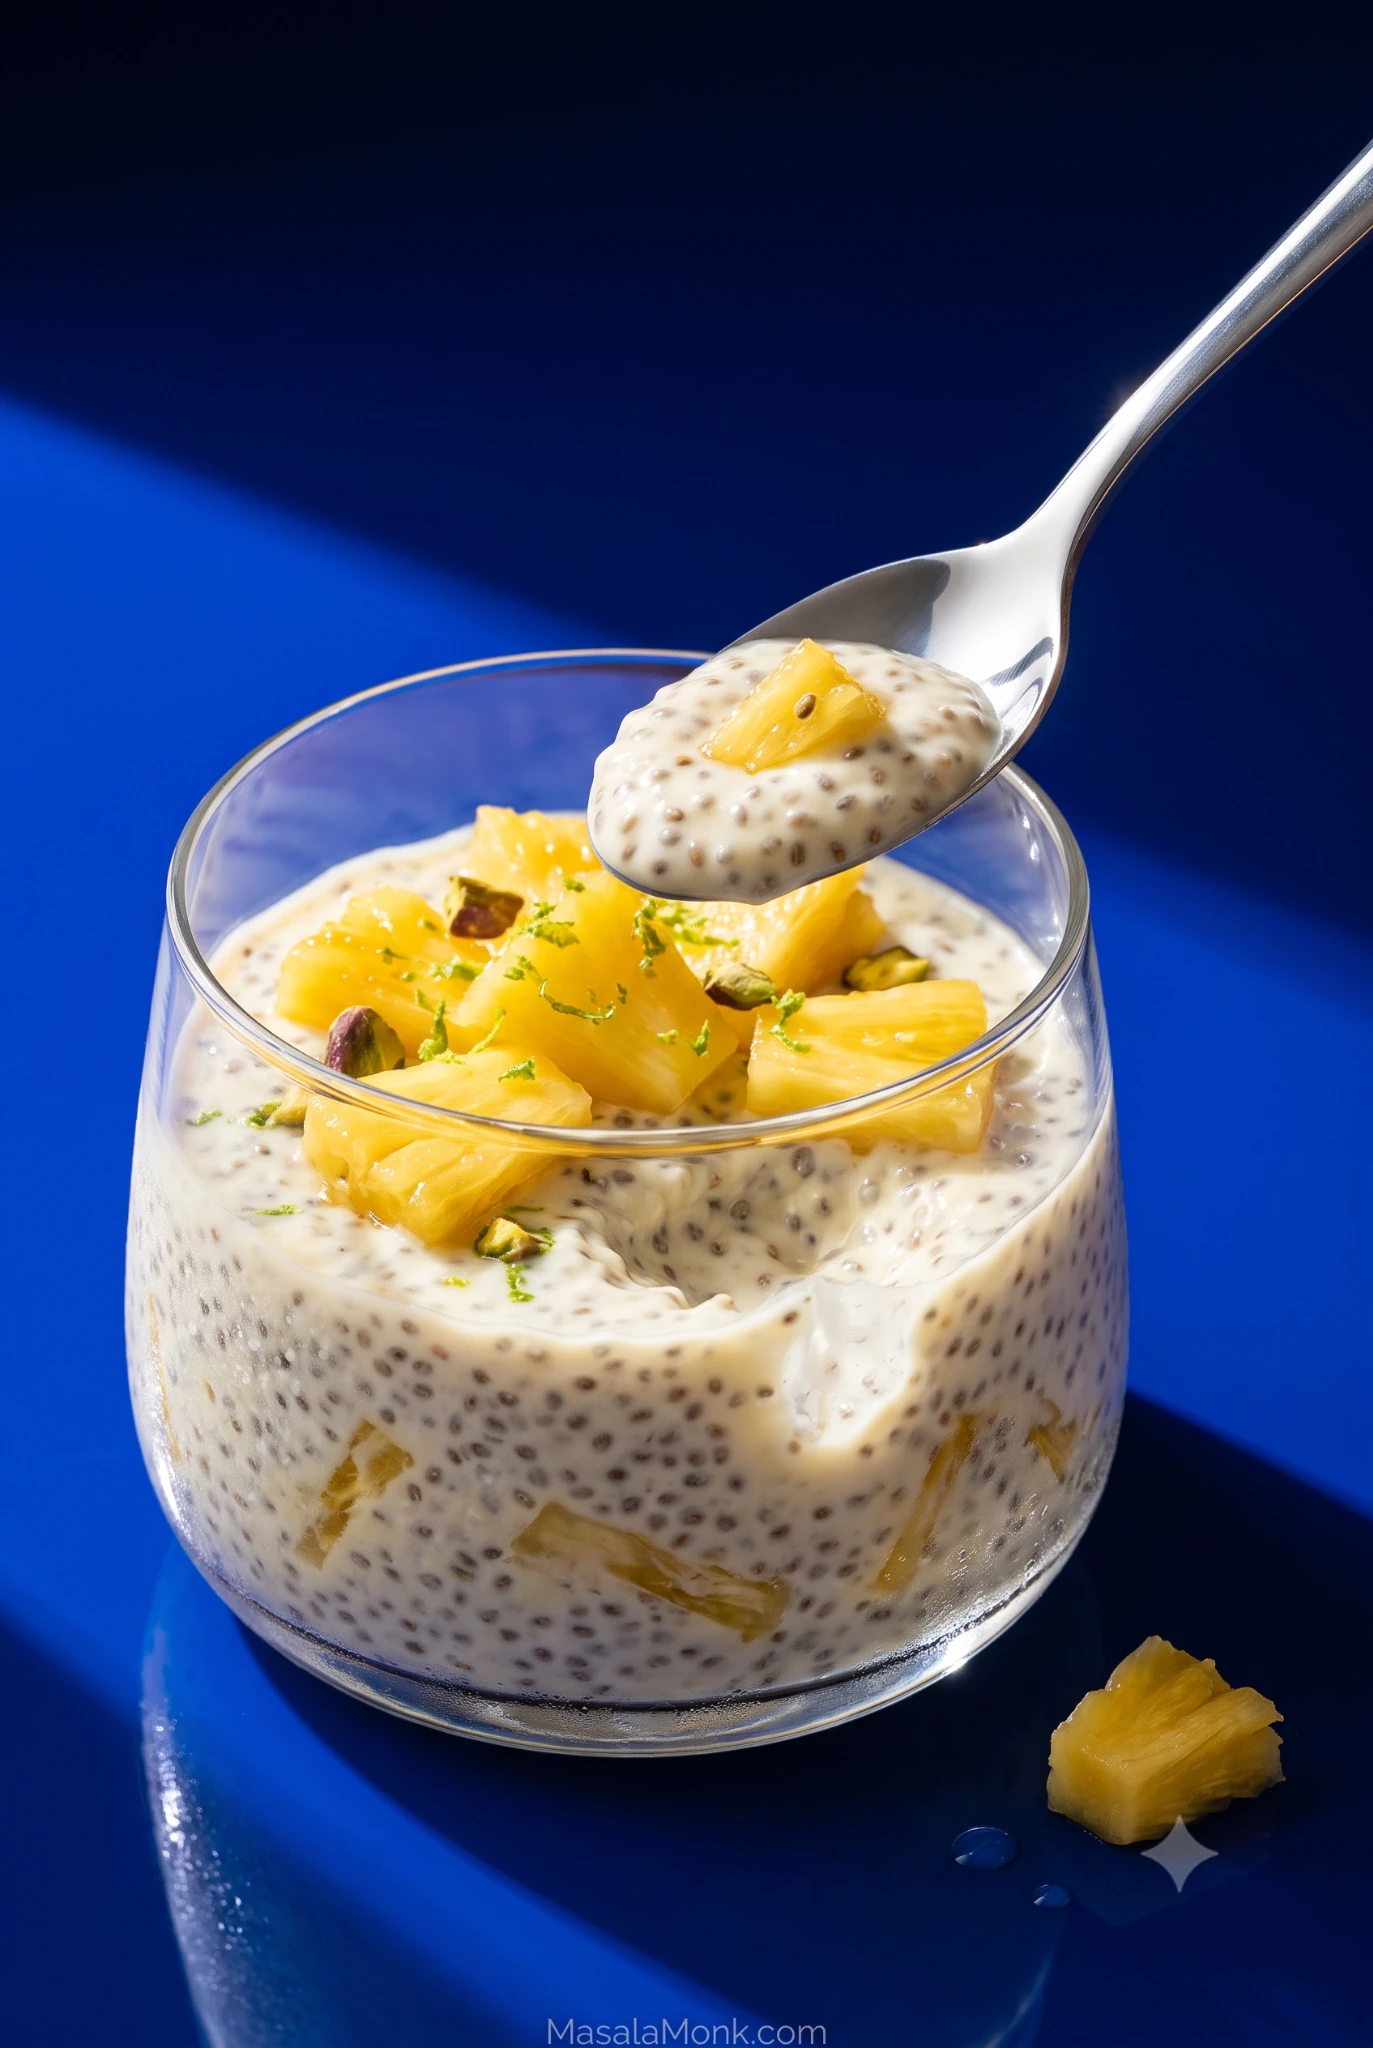
Pineapple chia pudding in a clear glass, topped with juicy pineapple, lime zest and pistachio, with a spoon lifting a soft chia-filled bite.

This post was last updated on:

Pineapple chia pudding should be cold, creamy and bright with fruit. It should not have milk floating above a chia slab or be so thick you can stand a spoon in it.

Juicy pineapple, fresh lime and just enough vanilla make it taste like something you would actually look forward to finding in the fridge. Mixing it takes minutes. Getting that soft, spoonable texture is where most jars go sideways.

This pineapple chia seed pudding uses a slightly firmer base so there is room for the fruit’s moisture. Give it a second stir before it goes into the fridge, and by morning the work is done: stir, add cold pineapple and eat.

Quick Answer

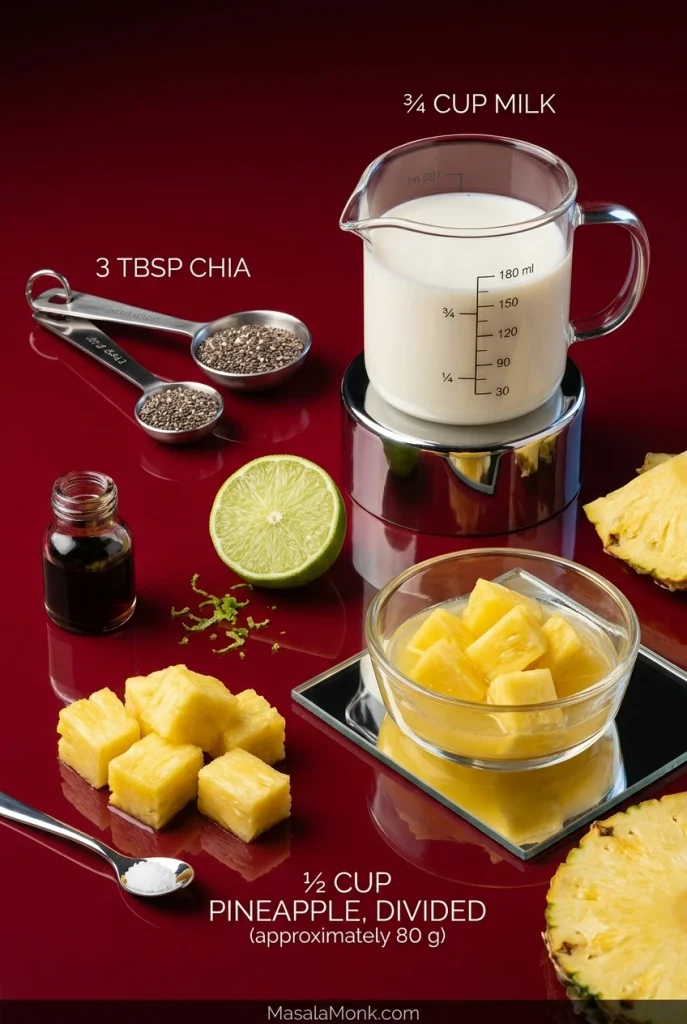
For one breakfast jar, use 3 tablespoons / about 35 g chia seeds + ¾ cup / 180 ml / 6 fl oz milk + ½ cup / about 80 g pineapple, divided. Stir well, wait 5–10 minutes, stir again, fold in about half the fruit, then chill for at least 2 hours. Four hours or overnight gives the most dependable texture; save the remaining pineapple for serving.

It is ready when the chia holds softly on a spoon and there is no loose milk pooling around it.

Pineapple Chia Pudding Recipe

Start with plenty of pineapple, a creamy but not heavy base, and enough lime and vanilla to keep the fruit tasting fresh and lively.

  • Makes: 1 breakfast jar or 2 small snack portions
  • Prep: about 5 minutes
  • Second stir: after the brief initial rest
  • Minimum chill: about 2 hours
  • Best texture: about 4 hours to overnight
  • Cook time: none

A 16 oz / 475 ml jar leaves plenty of room to stir and add toppings. A 12 oz / 350 ml jar works if you mix in a bowl first.

Equipment: a bowl or wide jar, a whisk or spoon, measuring spoons and a lidded container. A small blender is optional for the smooth version.

Ingredients

  • Whole chia seeds: 3 tablespoons, about 35 g / 1.2 oz
  • Unsweetened almond or coconut drinking milk: ¾ cup / 180 ml / 6 fl oz; soy or dairy milk also works
  • Finely diced pineapple: ½ cup / about 80 g / 2.8 oz, divided
  • Vanilla extract: ½ teaspoon
  • Finely grated lime zest: ½ teaspoon
  • Fresh lime juice: ½–1 teaspoon / 2.5–5 ml
  • Fine salt: a small pinch
  • Sweetener: up to 1 teaspoon, if needed

Chia tablespoon weights vary slightly between brands and measuring styles, so the tablespoon measure is the main functional measurement here.

Store-bought unsweetened almond milk keeps things easy, but homemade almond milk works too. Homemade batches vary in richness, so you may need a little more or less milk at the end.

Using dairy milk? The recipe still works. When the jar will sit overnight, keep raw fresh or frozen pineapple separate and add it at serving; the reason is explained below.

Optional toppings: choose one or two so the pineapple still gets to be the point.

  • Toasted unsweetened coconut
  • Chopped pistachios
  • Plain Greek or plant-based yogurt
  • Granola
  • Extra lime zest or fresh mint
Measured chia seeds, three-quarter cup of milk and half a cup of pineapple divided into two portions, with lime, vanilla and salt.
The firmer base leaves room for pineapple’s juice. The goal is still a soft, spoonable pudding once the fruit is folded in.

Method

  1. Mix the base. Add the milk, vanilla, lime zest, lime juice, salt and any sweetener to a bowl or wide jar. With the whisk moving, sprinkle in the chia gradually and whisk for about 20–30 seconds. Scrape the bottom and corners so no dry pockets remain.
  2. Wait, then stir again. Leave it for 5–10 minutes, then scrape the bottom and sides and break apart any clusters. This is what prevents milk on top and a dense chia layer underneath.
  3. Add half the pineapple. Fold in about ¼ cup / 40 g well-drained diced pineapple. Very juicy fruit—and fruit going into jars for several days—is better kept separate until serving.
  4. Cover and chill. Refrigerate for at least 2 hours. Four hours gives a more dependable set; overnight is easiest. Still seeing the seeds settle—or making a large batch? Give it one more stir 30–60 minutes later. Most single jars will not need it.
  5. Check the texture. Give the pudding a good stir. The seeds should be evenly hydrated and the mixture should hold softly on a spoon without loose milk around it.
  6. Adjust only if needed. Too thick? Add milk 1 tablespoon / 15 ml at a time. Still clearly too thin after several hours? Add 1 teaspoon chia and wait another 15–30 minutes.
  7. Finish and eat. Add the remaining pineapple and any crunchy toppings. Taste it cold: if the pineapple seems muted, add a little extra lime zest; if the fruit is tart, add a touch more sweetener.

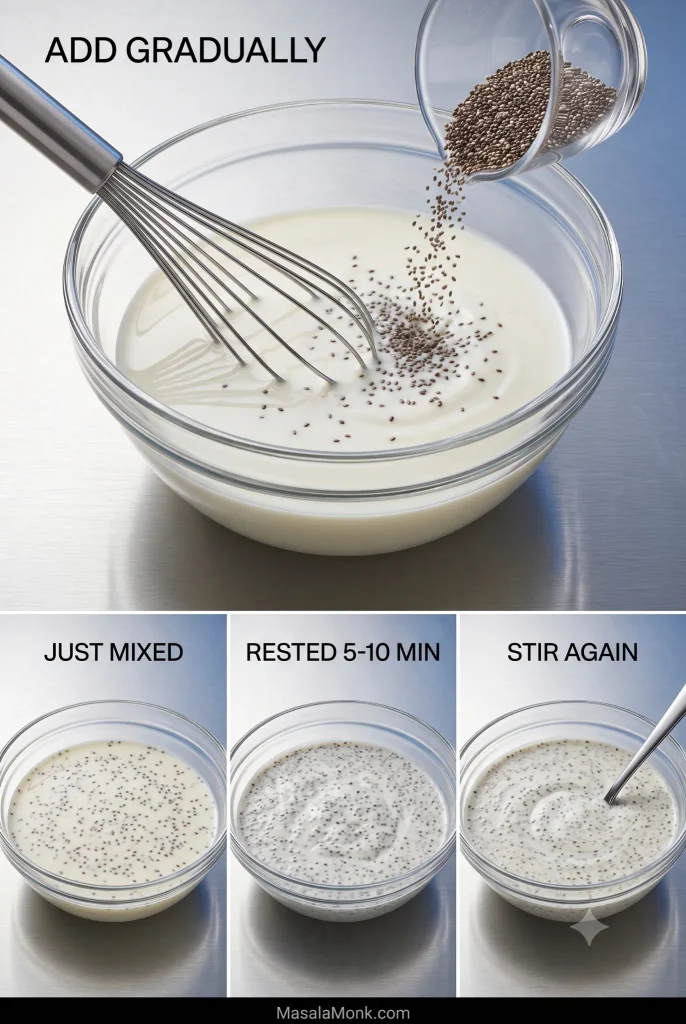
Why the Second Stir Matters

Four-step chia pudding process showing chia sprinkled into milk while whisking, then the mixture just mixed, rested for 5 to 10 minutes, and stirred again until evenly distributed.
The useful moment for the second stir is after hydration has started but before settling has fully taken hold. By then the seeds are tackier, so redistributing them now is more effective than trying to break up a compact layer later.

If your jar is already in the fridge, stop here—you have done everything you need. The rest is for choosing different pineapple or milk, making several breakfasts at once, or rescuing a jar that did not behave as expected.

Choose What You Need

The Chia-to-Liquid Ratio for Pineapple Pudding

Three tablespoons of chia per cup of liquid gives a softer pudding; four gives a noticeably firmer one. Pineapple adds its own moisture, so the main recipe starts toward the thicker end.

Chia seedsLiquidResult
3 tbsp1 cup / 240 mlSofter, looser pudding
4 tbsp1 cup / 240 mlFirmer, spoonable pudding
3 tbsp¾ cup / 180 mlThicker base with room for juicy fruit

A very ripe fresh pineapple can be surprisingly juicy, thawed fruit leaks water, and crushed pineapple carries more liquid than neat chunks. The main recipe’s 3 tablespoons chia to ¾ cup / 180 ml milk leaves room for that extra moisture.

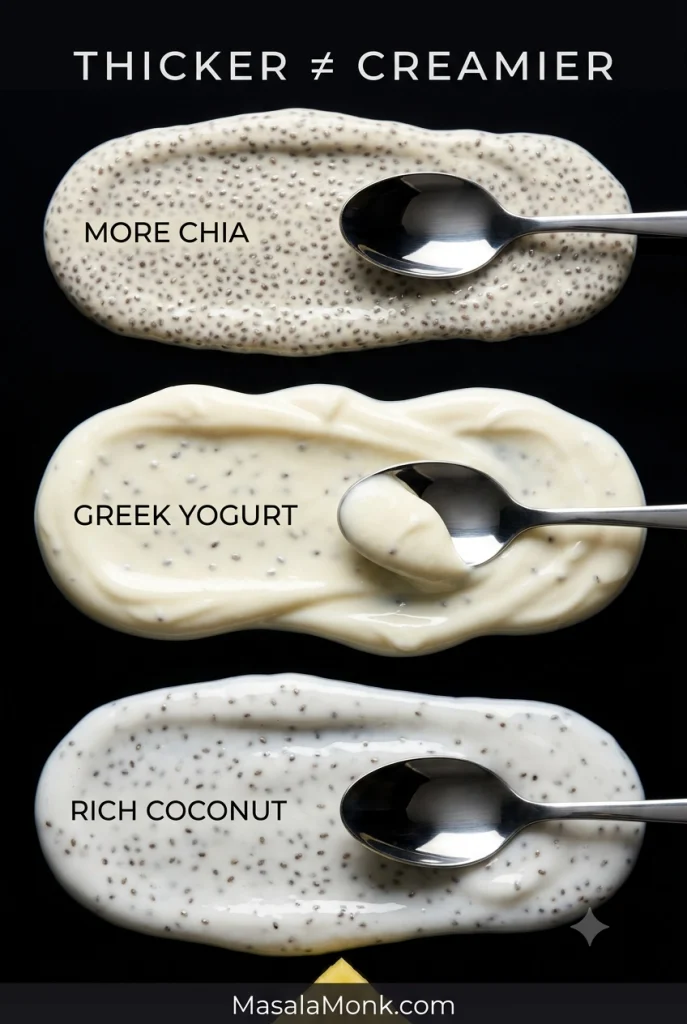
More chia makes the pudding thicker. Yogurt or richer coconut milk makes it feel creamier. That distinction matters when you are chasing a lush café-style spoonful rather than simply trying to make the pudding stand up on the spoon.

The same basic method works with plenty of other flavors in our chia pudding guide.

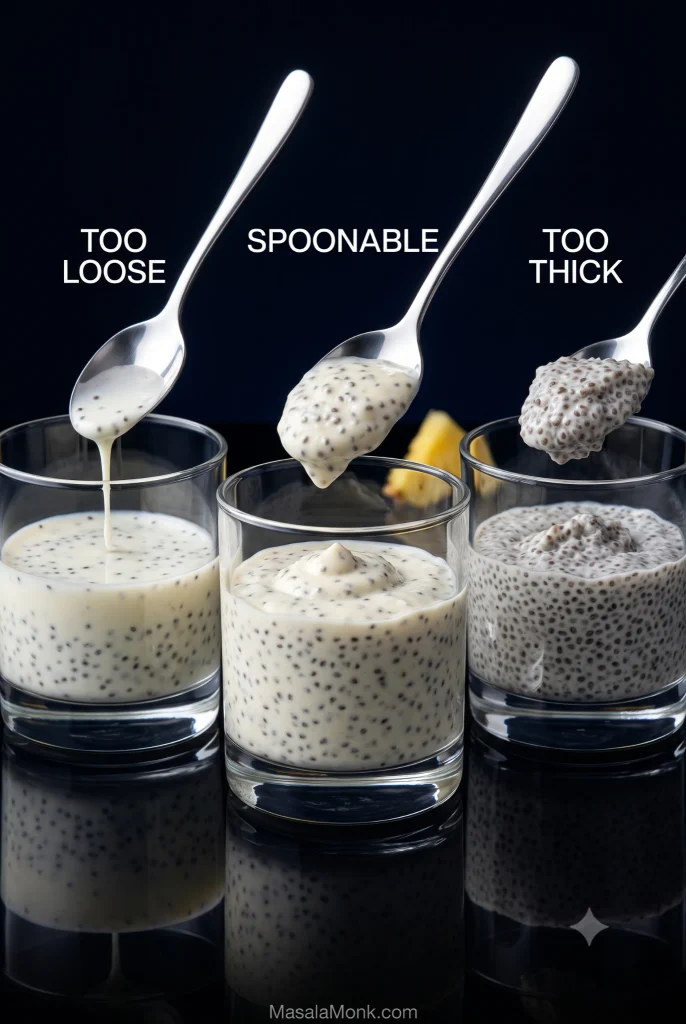
What Should Properly Set Chia Pudding Look Like?

Whole-seed chia pudding is never quite as smooth as custard. Each seed develops a soft gel coating while the seed remains perceptible. The finished pudding lands somewhere between tiny tapioca and a soft seeded gel.

  • It should hold a soft mound on a spoon.
  • The seeds should look evenly hydrated.
  • There should be no pool of milk floating around it.
  • There should be no dense seed slab stuck underneath.
  • The overall texture should feel creamy rather than rubbery.

A little seed texture is normal. Dry, hard pockets are not.

Three glasses compare chia pudding textures: runny pudding dripping from a spoon, properly spoonable pudding holding a soft mound, and very thick pudding forming a dense stiff scoop.
After one good stir, watch what the spoon track does. A loose mixture flows closed, a ready pudding relaxes slowly around a soft scoop, and an over-thick jar leaves ridges that stay sharply defined.

Sometimes the pudding is exactly right and you still dislike the texture. That is allowed. Try the blended version. If that still does not appeal, there are plenty of good breakfasts in the world and no reason to force yourself into a chia habit.

Does your jar look different? Jump to Troubleshooting.

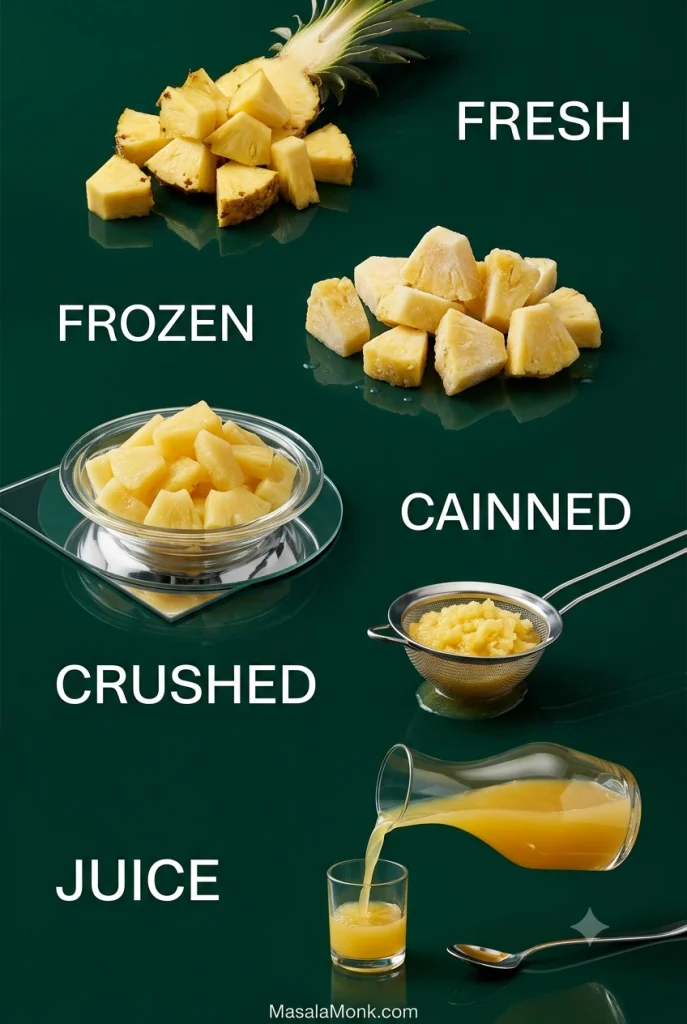
Fresh, Frozen or Canned Pineapple?

PineappleBest forWatch for
FreshBright flavor, topping, juicy piecesVariable juice
FrozenBlending into the baseThaw liquid
Canned in juiceEasy meal prepDrain well
CrushedFruit in every spoonfulExtra liquid
JuiceStronger pineapple flavorCounts as liquid

Fresh pineapple gives the brightest bite. For the sweetest jar, look for a clean sweet aroma at the base and a little give, then dice it fairly small.

Frozen pineapple is best when you want fruit through the base. Blend about ¼ cup / 40 g with the measured milk and keep the rest for serving. Drain thawed fruit before folding it into an already-set pudding.

Canned pineapple is easy for meal prep; choose fruit packed in juice and drain it well. Crushed pineapple spreads fruit through every spoonful but brings more liquid, so drain it or keep it as a separate layer.

Five pineapple forms labeled fresh, frozen, canned, crushed and juice, showing fresh pieces, frozen chunks, drained canned fruit, crushed pineapple in a strainer and pineapple juice.
A useful rule is to watch what escapes the fruit. If thawed, crushed or canned pineapple leaves noticeable liquid behind, drain it. Once that moisture starts pouring rather than clinging to the fruit, treat it as part of the liquid budget.

Pineapple Juice Changes the Ratio

Chia hydrates perfectly well in pineapple juice, but the juice has to come out of the liquid somewhere else. Add ¼ cup / 60 ml pineapple juice and reduce the milk by about the same amount.

Juice makes the pudding fruitier and sweeter; milk, coconut or yogurt supplies more of the creamy body. Diced fruit gives bite, purée makes a fruit layer, and fully blended pineapple behaves more like liquid. Once the fruit pours like juice, treat it like juice.

Using Yogurt? One Pineapple Quirk Matters

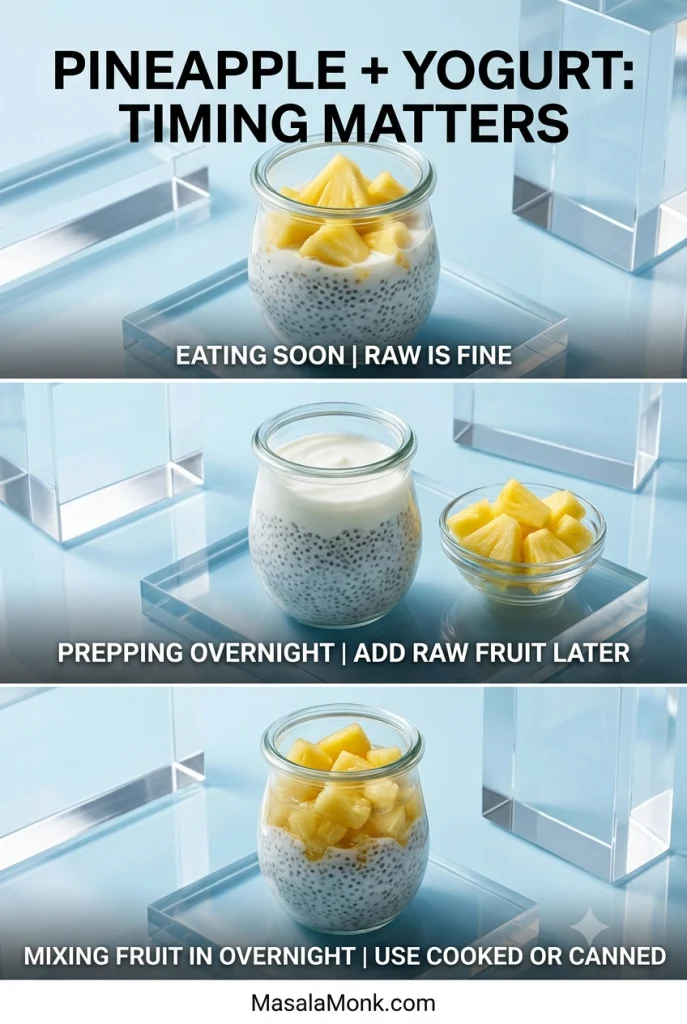
Fresh pineapple contains bromelain, an enzyme that breaks down milk proteins, and freezing raw pineapple does not reliably switch that enzyme off. Pineapple and yogurt are still perfectly normal foods to eat together. Odd bitterness or texture can show up when raw fresh or frozen pineapple sits in yogurt or skyr for hours.

For an overnight dairy-based jar, use canned or cooked pineapple, or add raw fresh or frozen fruit in the morning. With protein-rich soy yogurt, keeping raw pineapple separate until serving is a simple precaution when prepping well ahead.

Three pineapple and yogurt chia pudding examples: raw pineapple mixed in for eating soon, raw pineapple kept separate for overnight prep, and cooked or canned pineapple mixed into an overnight jar.
Keeping raw pineapple separate for an overnight yogurt jar has a sensory payoff too. Besides avoiding hours of enzyme contact, you preserve more of the fruit’s fresh aroma, brighter acidity and firmer bite for breakfast.

Using ordinary almond or coconut drinking milk and fresh pineapple? Follow the main recipe and move on.

Using yogurt for the base? Jump to the high-protein Greek yogurt version.

How to Make Pineapple Chia Pudding Creamier

Almond milk keeps the jar light, Greek yogurt makes it silkier, and coconut brings richness.

BaseResultBest move
Almond milkLight, cleanUse main ratio
Soy milkMore body, more proteinUse main ratio
Dairy milkRounder, creamierFresh pineapple at serving for overnight prep
Coconut drinkLight, tropicalUse main ratio
Canned coconut milkRich, denseDilute with lighter milk
Greek yogurt or skyrSilky, tangy, protein-richUse yogurt ratio below
Three close-up chia pudding textures compare a dense mixture with more chia, silky Greek yogurt chia pudding and glossy rich coconut chia pudding.
Look at the spoon tracks rather than the color. Extra chia creates tighter, more rigid grooves; Greek yogurt gives rounded silky folds; richer coconut shows more gloss and a fuller cold-set body.

Carton coconut drink, light canned coconut milk and full-fat canned coconut milk behave very differently once cold. Our guide to coconut milk types and nutrition goes deeper into those differences.

If you are happy with almond or coconut drinking milk and the main recipe, you do not need to change a thing. For a more café-style spoonful, Greek yogurt or skyr gives the base more body and a silkier feel. Let the pineapple do most of the flavor work, then add vanilla, lime and something crisp—perhaps toasted coconut, pistachios or a little granola.

Full-fat canned coconut milk can become surprisingly firm when it gets cold. A mixture that looked creamy at night may feel almost waxy by breakfast. Whisk a separated can smooth before measuring it, and combine rich canned coconut milk with a thinner drink rather than using it alone.

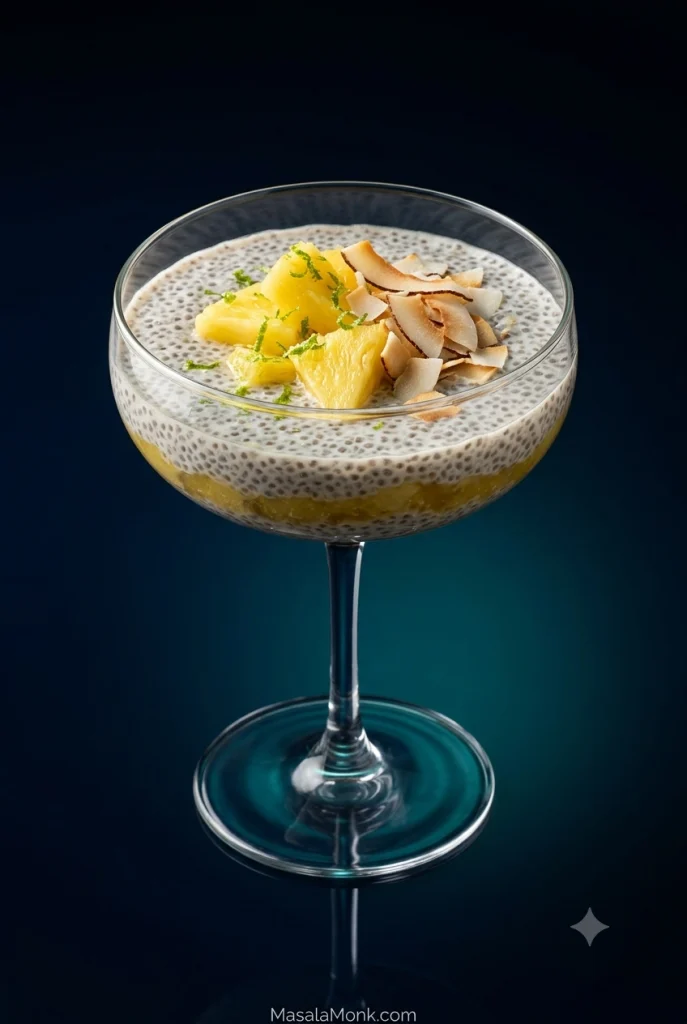
Pineapple Coconut Chia Pudding

Here the coconut softens pineapple’s sharper edges without burying the fruit.

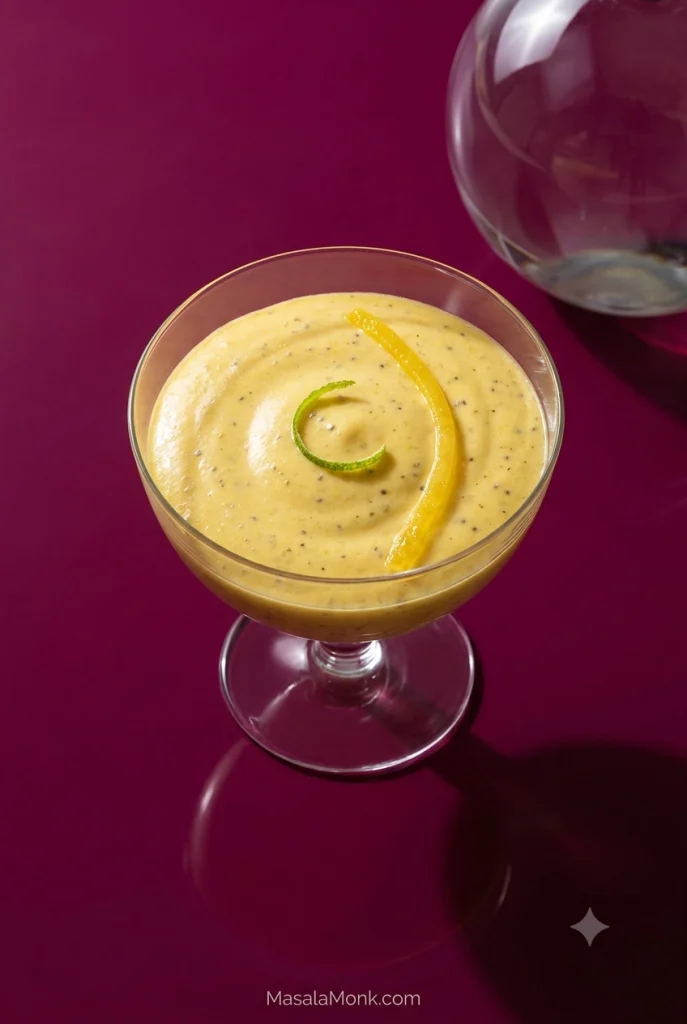
Pineapple coconut chia pudding in a clear coupe with a pineapple layer, fresh pineapple, toasted coconut and lime zest.
The coconut blend is really a cold-texture decision. Lighter coconut drink provides most of the hydration. A smaller amount of canned coconut milk adds richness without letting chilled coconut fat dominate the finished pudding.
  • Chia seeds: 3 tbsp, about 35 g
  • Coconut drinking milk: ⅔ cup / 160 ml
  • Well-mixed canned coconut milk: ¼ cup / 60 ml
  • Pineapple: ½ cup / about 80 g, divided
  • Vanilla: ½ tsp
  • Lime zest: ½ tsp
  • Lime juice: ½–1 tsp
  • Salt: a pinch
  • Sweetener: only if needed

Use the same two-stir method as the main recipe. Fold about half the pineapple through and keep the rest for the top.

For a piña colada-style jar, pulse some of the pineapple into a thick purée. Layer it with the coconut chia so each spoonful gets a clearer hit of fruit.

That same pineapple-coconut-lime combination runs through our piña colada guide.

High-Protein Pineapple Chia Pudding with Greek Yogurt

Greek yogurt or skyr is the simplest way to add substantial protein while making the chia base silkier at the same time.

  • ½ cup plain Greek yogurt or skyr, about 120 g
  • ⅓ cup milk, about 80 ml
  • 2 tbsp chia seeds, about 24 g
  • ½ tsp vanilla
  • Lime zest to taste
  • Pinch of salt
  • Sweetener, if needed
  • ½ cup pineapple, about 80 g
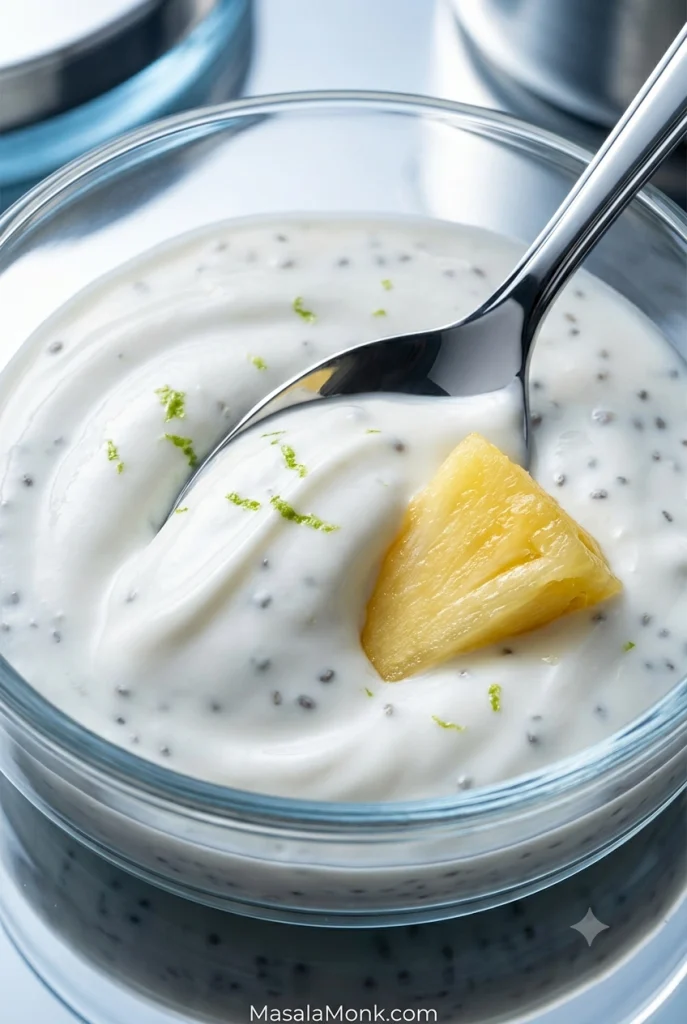
Close-up of thick pineapple chia pudding made with Greek yogurt, with a spoon drawn through the creamy chia mixture and a piece of pineapple in the pudding.
The lower chia amount here is deliberate. Greek yogurt already supplies substantial body. Using 2 tablespoons instead of the master recipe’s 3 helps the high-protein pineapple chia pudding stay silky rather than crowded with seeds.

Whisk the yogurt, milk, vanilla, lime zest and salt first, then add the chia and follow the same two-stir method. Very thick Greek yogurt may need another tablespoon or two of milk so the chilled pudding stays silky rather than pasty.

For an overnight jar, heat-treated or canned pineapple can go straight into the pudding. Raw fruit, whether fresh or frozen, is better added in the morning.

For a plant-based version, use soy milk with a thick soy yogurt. Using protein powder? Start with about 1 tablespoon. Depending on the powder, you may need another 1–3 tablespoons / 15–45 ml milk to keep the pudding creamy rather than pasty.

Prefer It Smooth? Blend It After Chilling

Whole chia always keeps a tiny-seed texture. For something closer to mousse, let the pudding hydrate fully first and then blend it with the pineapple until creamy.

Smooth blended pineapple chia pudding in a glass coupe with fine chia flecks, a pineapple purée swirl and lime zest.
Blend this version to change mouthfeel, not to rescue a runny pudding. Fully hydrated chia becomes smoother and mousse-like after blending, but an under-set ratio still needs time or adjustment before the blender comes out.

Blending after the set usually gives a smoother result than grinding dry chia at the beginning. Ground chia can feel finer, but it can also turn gummy. Hydrating whole seeds first and blending later smooths out most of the seed texture, although chia’s natural gel-like feel will still be there.

Ready to make it? Back to the main recipe.

Lower-Carb Pineapple Chia Pudding

For a lower-carb jar, use a smaller amount of pineapple and let lime zest, vanilla and a pinch of salt make that fruit go further. The easiest way to lower the carb load is simply to use less pineapple.

  • 3 tbsp chia seeds, about 35 g
  • ¾ cup unsweetened almond milk, 180 ml
  • 2–4 tbsp finely diced pineapple, about 20–40 g
  • ½ tsp vanilla
  • Plenty of fresh lime zest
  • Pinch of salt
  • Optional monk fruit, stevia or another preferred non-sugar sweetener

With less pineapple in the jar, lime zest matters more. Start toward the upper end of the fruit range if flavor matters more than shaving off every possible gram of carbohydrate. There is little point making a pineapple pudding with two apologetic cubes of pineapple.

Watching added sugar? Ripe pineapple may be sweet enough on its own. Honey, maple syrup and agave still count as added sugars even when they are described as “natural” sweeteners.

For a stricter base, use our keto chia pudding with almond milk.

Meal Prep & Storage

Making four breakfasts at once? Do not stand there stirring four tiny jars separately. Mix one big batch, give it the second stir, then divide it up.

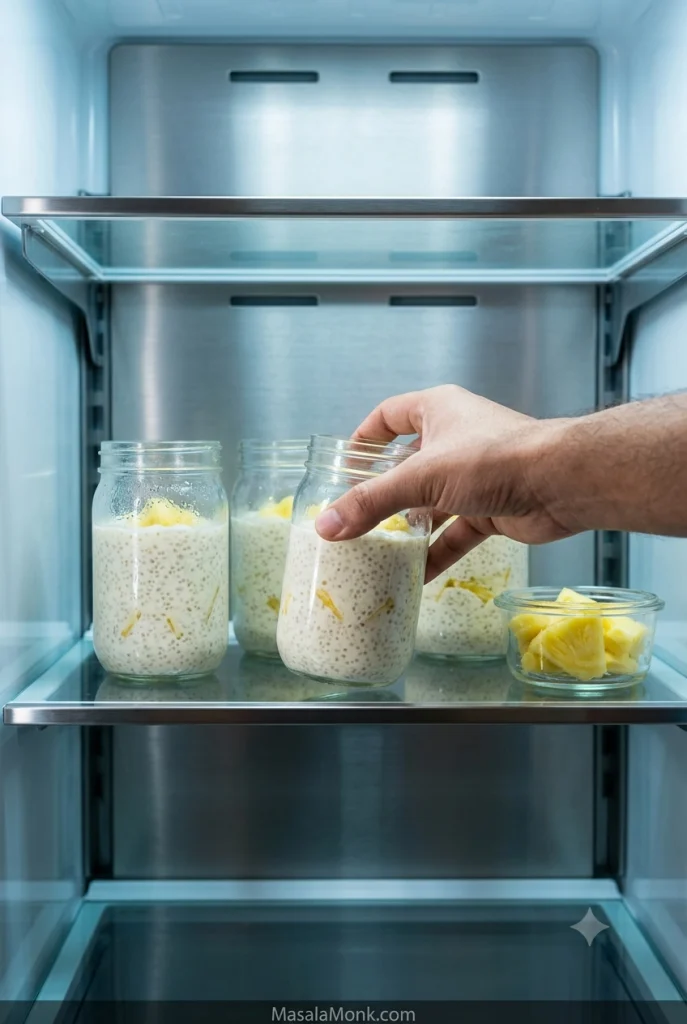
Four jars of pineapple chia pudding on a refrigerator shelf, with a hand reaching for one jar and a small container of pineapple nearby.
Before portioning a batch, give the bowl one last thorough stir so the first and last jars receive the same seed-to-liquid balance. Then divide promptly rather than letting the chia begin settling again while you fill containers.

Scaling the recipe is straightforward:

MakeChiaMilkPineapple
1 jar3 tbsp / ~35 g¾ cup / 180 ml½ cup / ~80 g
2 jars6 tbsp / ~70 g1½ cups / 360 ml1 cup / ~160 g
4 jars¾ cup / ~140 g3 cups / 720 ml2 cups / ~320 g

Mix all of the milk and chia in one large bowl, wait 5–10 minutes, and stir thoroughly again. If a large batch is still settling, keep it in the bowl for one more stir 30–60 minutes later; then divide it between containers. Use roughly half the pineapple in or alongside the jars and save the rest for serving. Keeping all of the fruit separate gives the most consistent texture over several days.

Keeping Meal-Prep Jars at Their Best

Crunchy toppings belong at the last minute. Granola, nuts, seeds and toasted coconut are much more enjoyable crisp than after three nights sitting in chia gel.

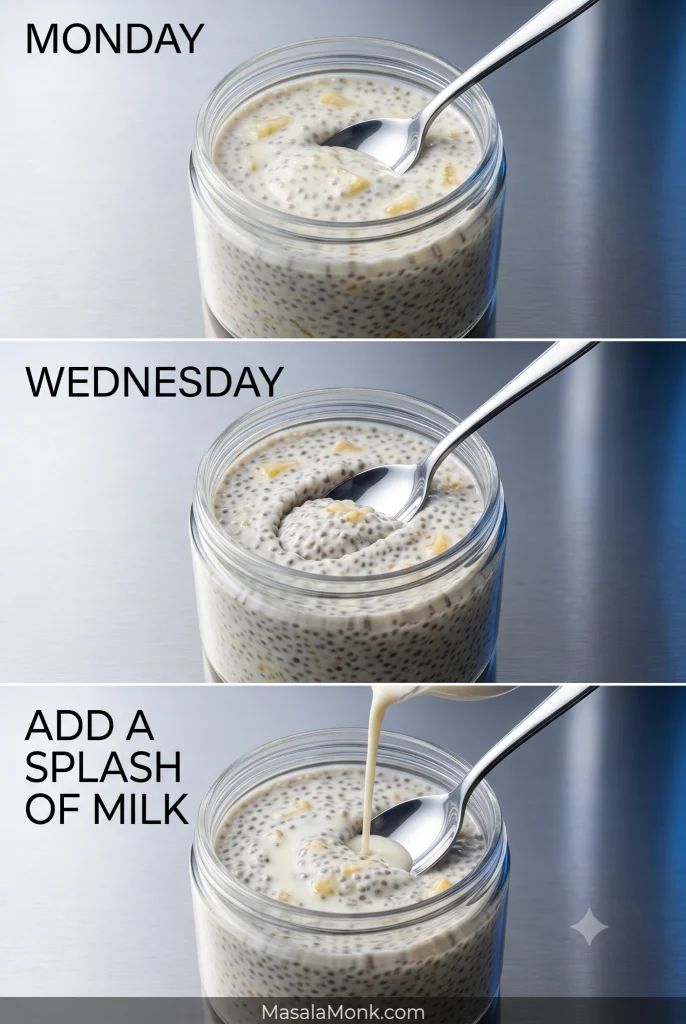
A jar that is just right on Monday can be noticeably thicker on Wednesday. Stir in 1–2 tablespoons / 15–30 ml milk and it usually comes straight back.

Three stages of stored chia pudding labeled Monday, Wednesday and add a splash of milk, showing a soft pudding, a firmer pudding two days later and milk being poured into the thicker jar.
Loosen the jar you are eating, not the entire batch in advance. Because stored chia keeps changing, adjusting each serving with a little milk preserves more control over tomorrow’s texture.

For the best fruit and texture quality, aim to eat prepared pineapple chia pudding within about 3–4 days. Keep it covered and refrigerated at 40°F / 4°C or below.

If you enjoy opening the fridge to find breakfast already handled, overnight oats work on much the same evening-prep rhythm with a completely different texture.

↑ Back to Recipe · ↑ Back to Top

Pineapple Chia Pudding Troubleshooting

Before fixing anything, check how long the pudding has actually been chilling. A jar that looks loose after 45–60 minutes may simply need more time.

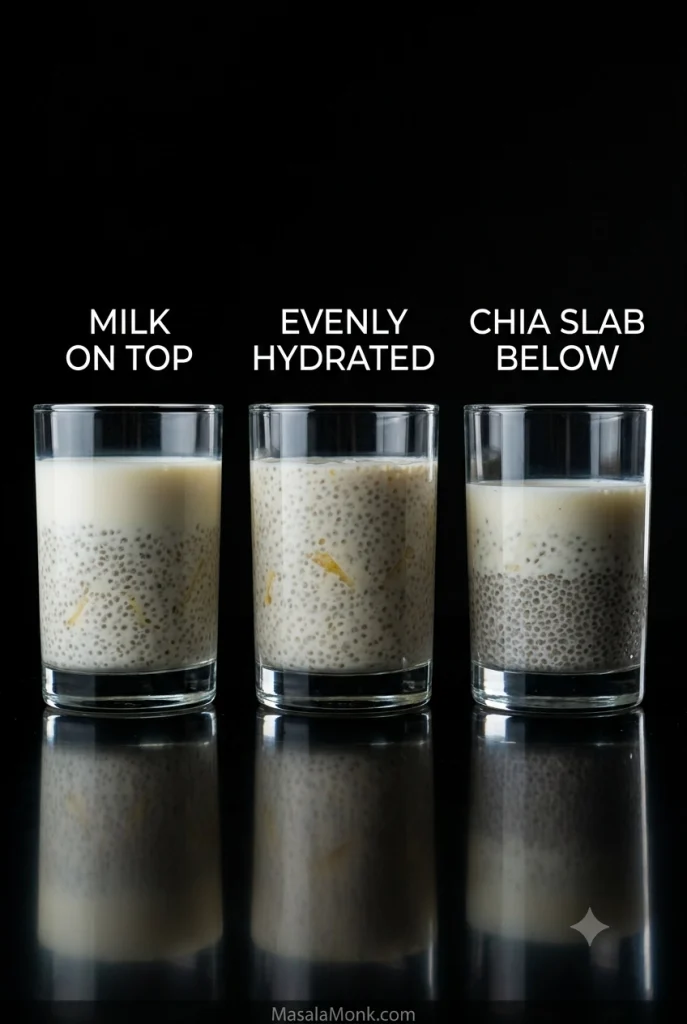
Three clear glasses compare separated chia pudding with milk on top, evenly hydrated chia pudding, and a dense chia layer settled at the bottom beneath thinner liquid.
Treat separation as a distribution problem before treating it as a ratio problem. If milk is sitting above compacted chia, first break up and redistribute the seeds already there. Adding more chia immediately can make the bottom even heavier.

Setting and Texture Problems

My chia pudding is still watery. What now?

After several hours, excess liquid usually means the ratio was too loose or the pineapple brought more juice than expected. Stir first. If it is still clearly too thin, add 1 teaspoon chia, wait 15–30 minutes, then check again. Next time, drain the fruit more thoroughly or keep it as a topping.

Why is there milk on top and a solid chia layer underneath?

The seeds settled before they had hydrated enough to stay suspended. Break the layer apart vigorously if you still can. Next time, stir once when you mix the pudding and again 5–10 minutes later.

My pudding is much too thick.

Stir in milk 1 tablespoon / 15 ml at a time until the spoon moves through it comfortably again. Very thick yogurt, extra chia and rich coconut milk can all push a jar past creamy into dense.

Why are there dry or crunchy chia pockets?

The seeds clumped before enough liquid could reach them. Break up any pockets you can find. Next time, sprinkle the chia in while whisking and do not skip the second stir.

Pineapple, Coconut and Yogurt Problems

The pineapple made my pudding watery.

Very ripe, thawed, crushed or poorly drained pineapple can contribute much more liquid than neat fresh pieces. A teaspoon of extra chia can rescue a clearly loose batch. Draining the fruit or keeping it as a separate layer prevents the problem next time.

Why did the coconut version become firm or waxy?

Coconut fat firms when chilled. Loosen the pudding with a little thinner milk and stir well. Next time, combine rich canned coconut milk with coconut drink or another lighter milk instead of using only full-fat canned coconut.

Why did my pineapple-yogurt pudding turn bitter?

Uncooked pineapple—fresh or frozen—can still contain active bromelain, which breaks down milk proteins during a long rest. For overnight yogurt or skyr pudding, use canned or cooked fruit, or add the raw pineapple in the morning.

It set properly, but I still hate the texture.

You may dislike whole chia pudding. Try blending the fully hydrated pudding. If that still does not help, the texture simply is not for you.

If the Chia Barely Gels at All

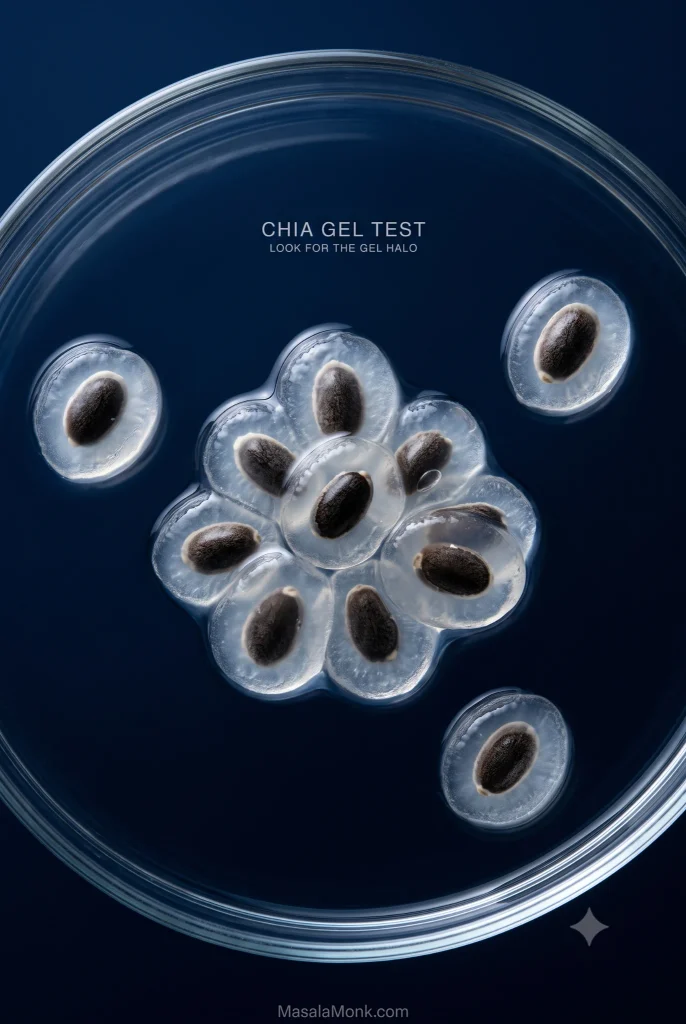
Brands and batches can thicken at different speeds, so give a correctly measured pudding several hours—or overnight—before blaming the seeds. If a familiar recipe suddenly stops setting, mix 1 teaspoon chia with 2 tablespoons water. After about 10–15 minutes, you would normally expect a clear gel halo. Very little gel is a good reason to try fresher chia rather than adding more and more seeds.

Macro view of hydrated chia seeds in water, each surrounded by a translucent gel halo, with several gelled seeds overlapping in a small cluster.
Judge the gel test across several seeds rather than looking for one perfect specimen. Visible translucent mucilage around multiple chia seeds is the useful sign that hydration is happening, even when individual halos vary in size and shape.

↑ Back to Recipe · ↑ Back to Top

A Few Flavor Ideas

Pineapple, cardamom & pistachio: stir a scant ⅛ teaspoon ground green cardamom into the milk, then finish with pineapple and chopped pistachios.

Pineapple, ginger & lime: add about ¼ teaspoon finely grated fresh ginger to the base and finish with extra lime zest. Start small; ginger gets loud quickly.

For a softer, sweeter fruit direction, try mango chia pudding.

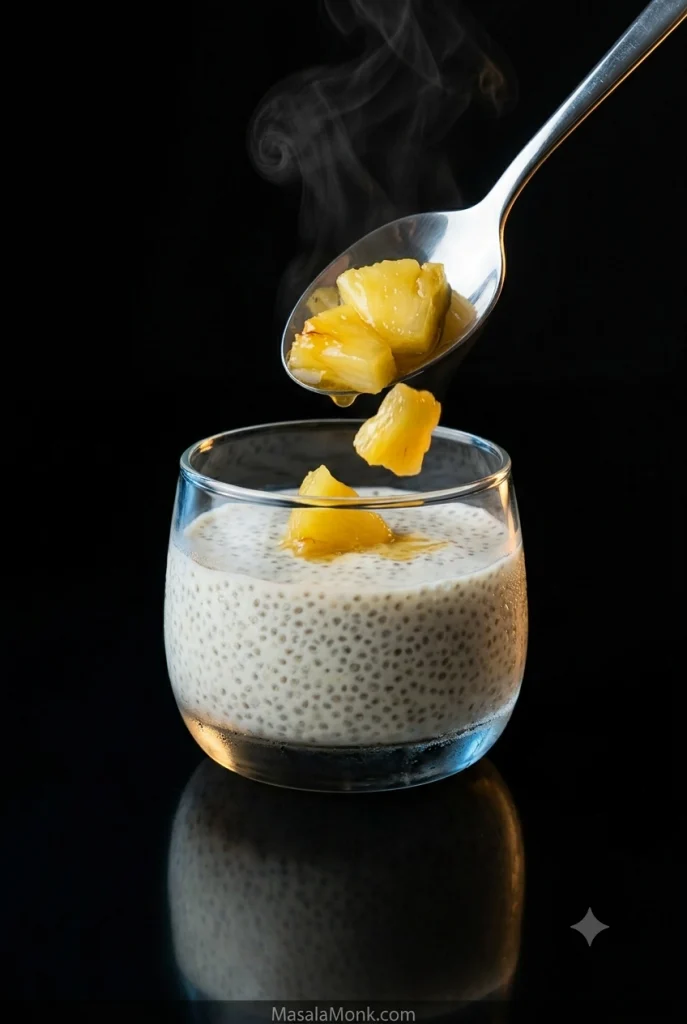
Warm pineapple over cold chia: cook diced pineapple over medium heat for about 5 minutes, until hot, glossy and softened. Add cardamom, ginger or cinnamon, then spoon it over the cold pudding.

Warm glossy pineapple being spooned onto cold chia pudding in a clear glass, with steam rising from the fruit and condensation visible on the chilled glass.
Add the warm pineapple only when you are ready to eat. The fruit stays glossy and aromatic, the chia stays properly cold, and the temperature contrast survives long enough to reach the first spoonful.

A Quick Nutrition Note

Chia contributes dietary fiber, plant protein, unsaturated fats and ALA omega-3 fatty acids. Harvard’s Nutrition Source has a fuller evidence-based overview. The rest of the jar matters too—Greek yogurt, coconut milk, sweeteners, granola and nuts can change the nutritional picture substantially.

Frequently Asked Questions

Can I make pineapple chia pudding overnight?

It works well overnight. Do the second stir, cover and refrigerate; the extra time gives the seeds plenty of time to hydrate.

Can I use pineapple juice instead of milk?

You can. Count pineapple juice as part of the measured liquid: add ¼ cup / 60 ml juice and reduce the milk by about the same amount.

Can I use fresh pineapple with Greek yogurt?

Fresh pineapple is fine for immediate serving. For an overnight yogurt jar, use canned or cooked pineapple, or add uncooked fruit in the morning.

Can I use ground chia seeds?

Yes, but ground chia can turn gummy. For a smoother result, hydrate whole chia first and blend the chilled pudding.

Why didn’t my chia pudding thicken?

Usually it needs more time, extra fruit liquid is involved, or the seeds clumped early. Check the troubleshooting section before adding more chia.

How long does pineapple chia pudding last?

Aim for 3–4 days refrigerated at 40°F / 4°C or below. Keep it covered and add crunchy toppings at serving.

When You’re Ready to Eat

Give the chilled pudding one good stir. Loosen it with a splash of milk if it needs it, then pile on the remaining pineapple, a little lime zest and something crunchy.

The best spoonful has soft, creamy chia, a juicy piece of pineapple and a little lime in the same bite. Cold, bright and ready when you open the fridge—not bad for five minutes the night before.

Did your jar behave differently? Tell us which milk and pineapple you used and how long it chilled; those details usually reveal what happened.

↑ Back to Recipe · ↑ Back to Top

Posted on — 2 Comments

is Greek Yogurt A Healthy Choice for People with Diabetes?

Greek Yogurt in Diabetes

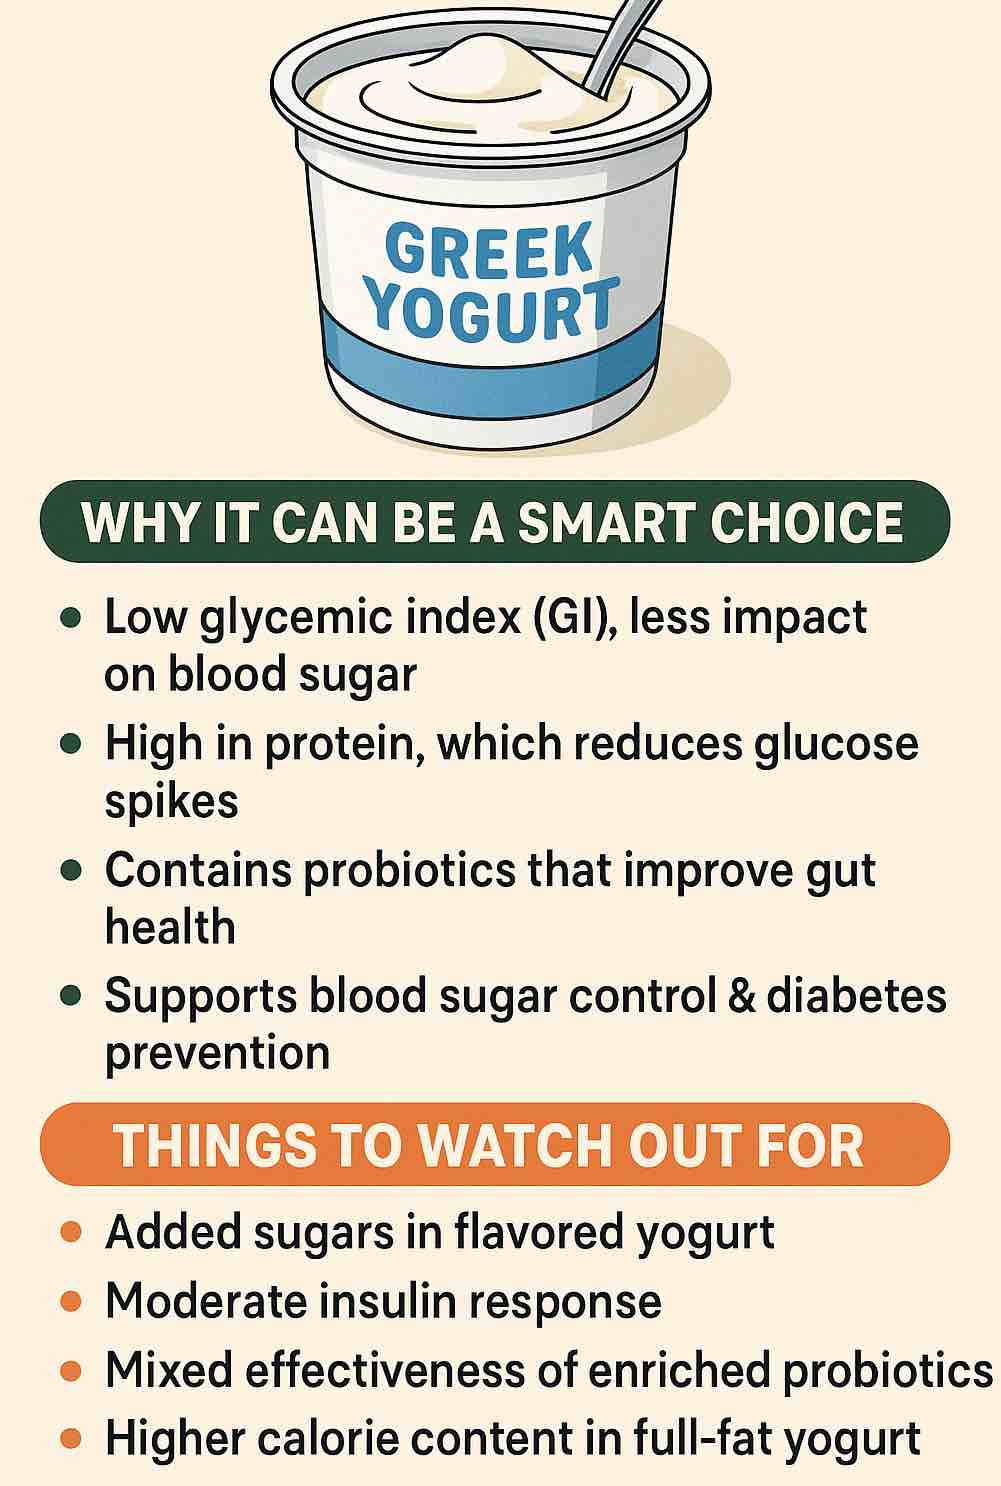
Greek yogurt has taken grocery store shelves by storm over the last decade, marketed as everything from a high-protein breakfast to a gut-friendly snack. But is Greek yogurt really a smart choice if you have diabetes—or are at risk for it?

Let’s dig into the science, compare types of yogurt, and give you practical tips on how to include Greek yogurt in your diabetes-friendly meal plan.


🥄 What Makes Greek Yogurt Different?

Greek yogurt is strained to remove much of the liquid whey, resulting in a thick, creamy texture. This process makes it:

  • Higher in protein (about twice that of regular yogurt)
  • Lower in carbohydrates (because some lactose is strained away)
  • Denser in nutrients like calcium, potassium, and B-vitamins

But that’s not the whole story: Whether Greek yogurt is healthy for people with diabetes depends on what kind you choose, how much you eat, and what you pair it with.


🧬 What Does the Latest Research Say?

🔬 Prevention: Greek Yogurt Lowers Risk of Diabetes

  • Recent reviews (2024, Critical Reviews in Food Science and Nutrition) show:
    Regular yogurt eaters (at least 80–125 g per day—about half a cup) have a 14% lower risk of developing type 2 diabetes compared to non-yogurt eaters.
  • Mechanisms at play:
    • Probiotics (live “good” bacteria) in yogurt help reduce inflammation and improve insulin sensitivity.
    • High protein slows digestion and reduces blood sugar spikes after meals.

🩺 Management: Better Blood Sugar Control in Diabetics

  • Clinical trials (2025, ScienceDirect):
    People with type 2 diabetes who added full-fat Greek yogurt (200 g daily, about ¾ cup) saw improved fasting glucose and lower HbA1c after just 12 weeks.
  • The power of probiotics:
    Yogurt enriched with Lactobacillus and Bifidobacterium species provided extra benefit in blood sugar and gut health.

🏛️ Official Guidance: FDA Allows Diabetes Health Claim

In 2024, the U.S. FDA approved a qualified health claim:

“Eating at least 2 cups of yogurt per week may reduce the risk of type 2 diabetes.”
Note: Applies to all yogurts, but especially those without added sugars.


🥗 How Greek Yogurt Supports People With Diabetes

1. Low Glycemic Index (GI)

  • Plain Greek yogurt has a GI of 27–41 (low is <55), so it won’t spike your blood sugar like white bread or sugary snacks.

2. High in Protein

  • 15–20 g protein per cup keeps you full, curbs appetite, and slows sugar absorption.

3. Source of “Good” Fats

  • Full-fat versions help you feel satisfied and may offer extra blood sugar benefits—just be mindful of portion size and total daily calories.

4. Packed With Probiotics

  • “Live and active cultures” support gut health, which new research links to better blood sugar regulation and reduced inflammation.

5. Easy to Pair for Balanced Meals

  • Pairs perfectly with berries, nuts, and seeds for a nutrient-dense, filling, and low-GI meal.

⚠️ What to Watch Out For

  • Hidden Sugars: Flavored yogurts often have 2–4+ teaspoons of added sugar per serving—stick to plain!
  • Read the Label: Aim for ≤15 g carbs and ≤10 g sugar per serving.
  • Fat Content: Full-fat is fine for most, but check with your doctor if you have heart disease or are watching saturated fat.
  • Individual Response: Test your blood sugar after eating new foods—everyone’s body is a little different.

🛒 How to Shop for the Best Greek Yogurt

  1. Choose Plain, Unsweetened Greek Yogurt
    Look for “live and active cultures” on the label.
  2. Pick Your Fat Level
    • Full-fat (whole milk): Creamiest, most satisfying—may be best for blood sugar control.
    • Low-fat or nonfat: Lower in calories, but still high in protein.
    • Your best choice depends on your overall eating pattern and health profile.
  3. Watch the Ingredients List
    • Should be short: Milk, cream, live cultures.
    • Avoid: Sugar, syrup, “fruit on the bottom,” artificial sweeteners if possible.

🥣 Smart Ways to Enjoy Greek Yogurt If You Have Diabetes

  • Breakfast Bowl:
    Top ½–1 cup plain Greek yogurt with a handful of berries, a tablespoon of chia seeds or nuts, and a sprinkle of cinnamon.
  • Savory Snack:
    Stir in lemon juice, garlic, and fresh herbs—use as a veggie dip or sandwich spread.
  • Smoothie Base:
    Blend with unsweetened almond milk, spinach, berries, and a scoop of protein powder.
  • Swirl into Soups and Stews:
    Adds creaminess without the carbs of flour or cornstarch.
  • Dessert Fix:
    Mix with a little vanilla extract and serve with a few fresh strawberries.

🏁 Bottom Line: The Verdict on Greek Yogurt for Diabetes

Plain Greek yogurt—with live cultures, minimal added sugar, and your choice of fat level—is one of the most diabetes-friendly foods out there.
It’s backed by new research for prevention, helps manage blood sugar, and has an FDA health claim to boot. Enjoy it regularly as part of a healthy, balanced diet.


Ready to give it a try?
Start with small servings, see how your body responds, and get creative with your add-ins. Your gut, your blood sugar—and your taste buds—will thank you.


References & Further Reading


Always consult your healthcare provider or registered dietitian before making major changes to your meal plan.

🧠 FAQs: Quick Answers

1. Is Greek yogurt safe for people with diabetes?

Yes. Plain Greek yogurt is low in carbohydrates, high in protein, and has a low glycemic index, making it safe and supportive for people managing diabetes when eaten in moderation.


2. Does Greek yogurt raise blood sugar levels?

Not significantly. Unsweetened Greek yogurt causes a much smaller rise in blood sugar compared to sweetened yogurts or high-carb snacks, thanks to its low carbohydrate and high protein content.


3. Is full-fat or nonfat Greek yogurt better for diabetes?

Both can be healthy choices. Recent research suggests full-fat Greek yogurt may have extra benefits for blood sugar control and satiety, but choose what fits your nutrition and heart health goals.


4. How much Greek yogurt can I eat per day if I have diabetes?

A typical serving is ½–1 cup (100–200 g) per day. This amount fits well within most diabetes meal plans and matches the intake seen in studies showing benefits.


5. Should I avoid flavored Greek yogurts?

Yes, in most cases. Flavored varieties often contain significant added sugars that can spike blood sugar. Choose plain Greek yogurt and add your own fresh fruit or flavorings.


6. What should I look for on the Greek yogurt label?

Check for:

  • Carbohydrates: ≤15 g per serving
  • Sugars: ≤10 g per serving
  • Ingredients: Milk, cream, and live cultures (avoid added sugars, syrups, artificial flavors)

7. Can Greek yogurt help prevent type 2 diabetes?

Yes. Studies show regular yogurt consumption (including Greek yogurt) is linked to a lower risk of developing type 2 diabetes, especially when combined with a healthy lifestyle.


8. Is Greek yogurt a good source of probiotics?

Absolutely. Most Greek yogurts contain live cultures that promote gut health and may help improve insulin sensitivity and inflammation.


9. Can I eat Greek yogurt if I am lactose intolerant?

Possibly. Greek yogurt contains less lactose than regular yogurt, and many people with lactose intolerance can tolerate small servings. Try a small amount to see how you react.


10. What are healthy ways to enjoy Greek yogurt with diabetes?

Top with fresh berries, nuts, seeds, or cinnamon for a satisfying, balanced snack. Use as a base for dips, sauces, or smoothies—always avoid adding sugar or sweet syrups.

Posted on — 5 Comments

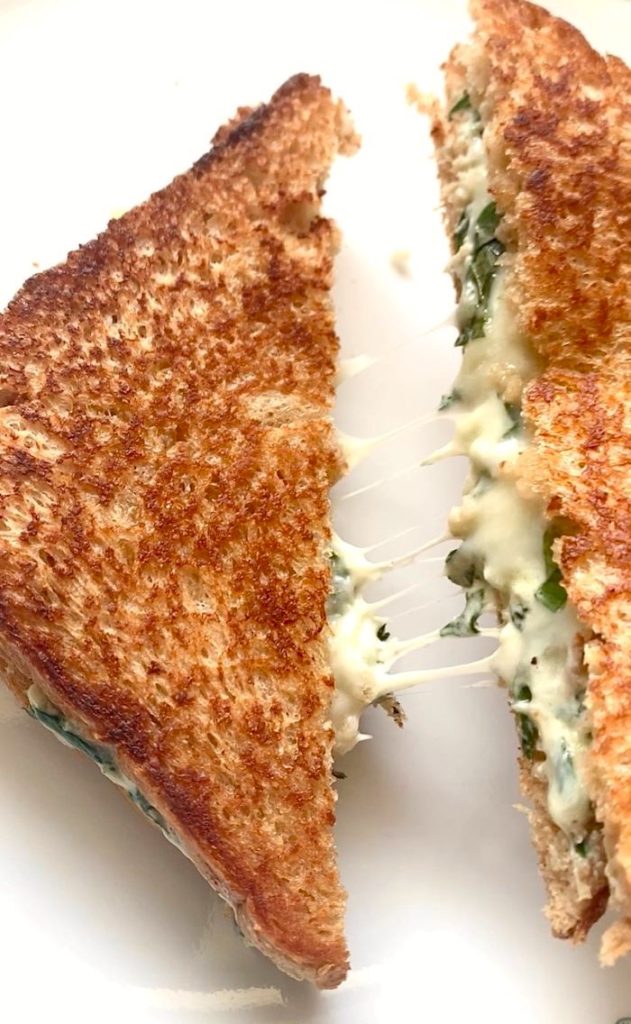
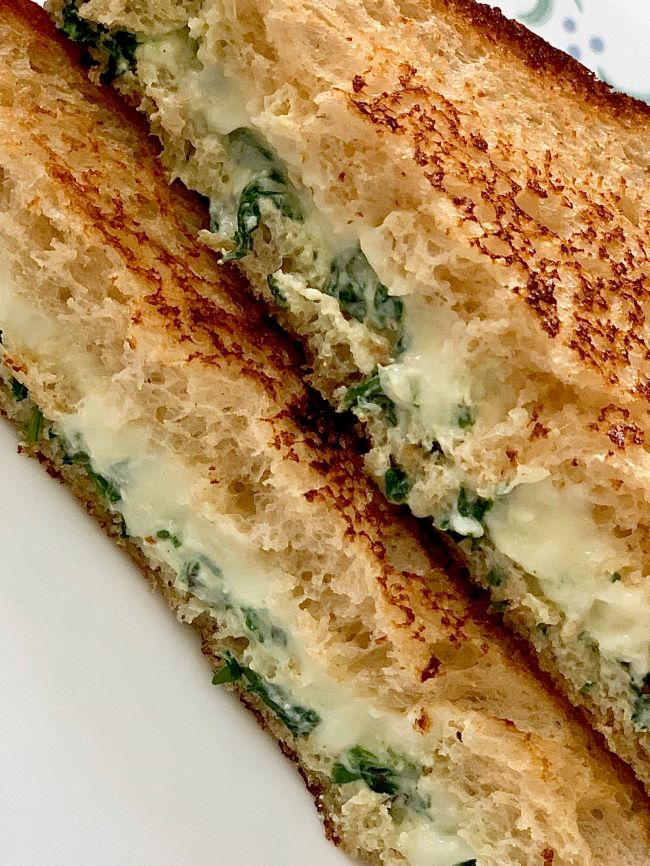
Healthy Hung Curd Spinach Cheese Sandwich- Easy Vegetarian Protein Recipe

I normally avoid having commercial bread loaves on a regular basis. But once in every few days, we all crave for sandwiches. They are so versatile that everyone loves them. So, when that craving strikes, I try my best to add as much nutrition as I can.

I still remember when my child was 5 years old, he asked me before bedtime, if he can have cheese sandwich with 5 leaves of spinach for breakfast. 😄 The request was made so sweetly, I had to oblige. This was the time he tasted his first hung curd sandwich. He is 10 now and these are still his all time favourite.

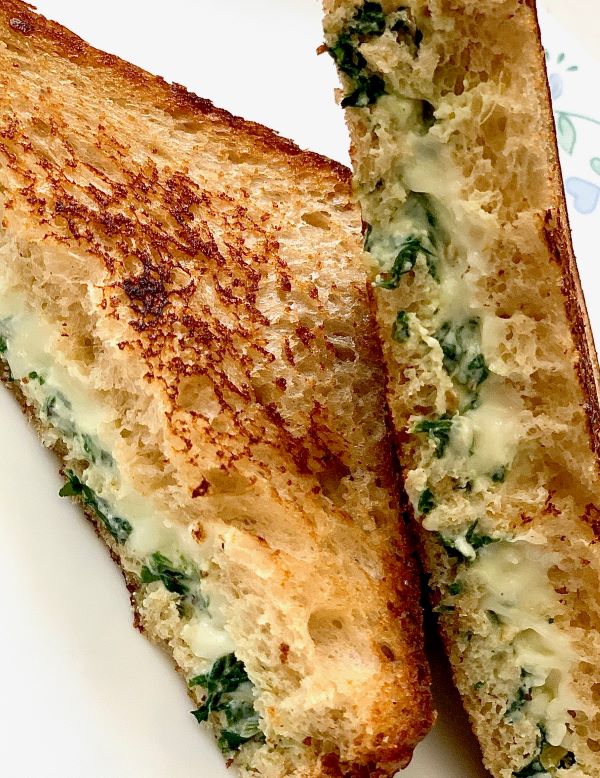
This can be your easy peasy laid back weekend breakfast. Hung curd sandwiches are so easy to whip up. If you are looking for a veg sandwich recipe with high protein without mayonnaise, try these – a healthier take with the same creaminess level. These yogurt sandwiches are packed with probiotics from the curd & essential fiber, vitamins and minerals from spinach & herbs.

This recipe is very basic & is vegetarian but you can easily transform it to egg or chicken yogurt sandwich for more protein. 

Greek yogurt also known as Hung curd is nothing but strained yogurt. It is simply homemade yogurt that has been strained off the whey to get a thick and creamy product.

Hung curd can be a great healthy, low calorie substitute for mayonnaise, cream cheese or sour cream. 

I have made it using just spinach. You can use other finely chopped fresh vegetables like carrots, cabbage, onions, capsicum. Use herbs of your choice- mint, coriander, parsley, sweet basil. Sky is the limit! Customise this Yogurt Sandwich Recipe the way you want it.

Recipe

Prep time: 10 minutes Cook time: 5 minutes 
Serving: 5

Ingredients

  • 1 cup Hung curd
  • 1 cup tightly packed Spinach
  • 10 slices Bread (I used wholewheat bread)
  • 1 tbsp Butter 
  • 1 tsp Olive oil
  • Salt and pepper to taste
  • 5 cloves, chopped of garlic
  • 1/4th tsp Oregano 
  • Red Chilli flakes to taste
  • 3/4th cup Mozzarella cheese (optional)

Instructions

  • In a pan, heat butter & olive oil.  Add chopped garlic. Sauté till rawness goes. Now add roughly chopped spinach leaves. Sprinkle a pinch of salt and cook till spinach shrinks and water evaporates. 
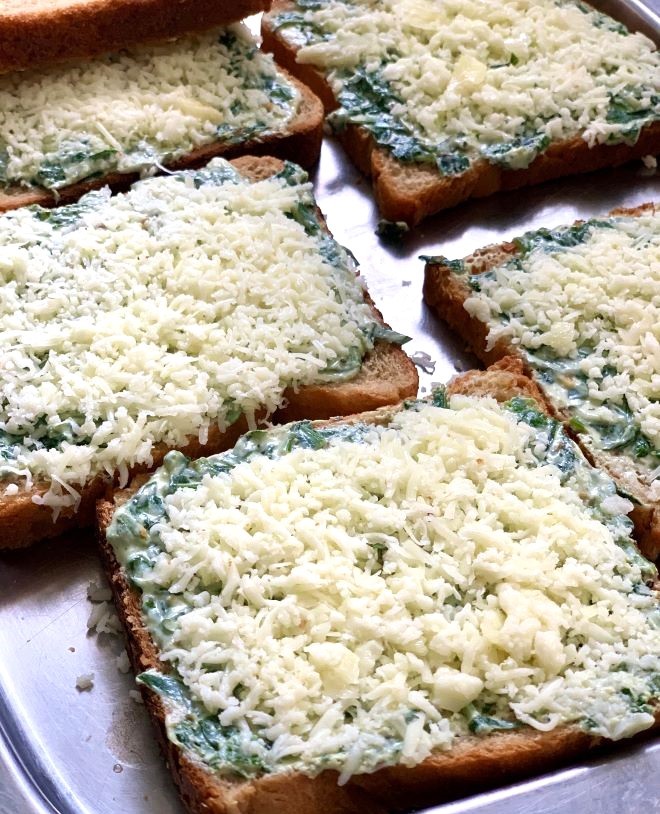
  • Allow it to cool a little. Add spinach in hung curd and mix well. Add black pepper, oregano, salt & chilli flakes. Give a good mix. 
  • Take 2 bread slices. Spread hung curd mix generously on one slice. Add some mozzarella cheese on it and top it with another slice. 
  • You can either grill it in a griller or cook it in a pan using a little butter. If cooking in a pan/griddle, cook on a low flame so that the cheese melts. 
  • If using an air fryer, place the prepared sandwich in the air fryer basket or rack. Brush it with some butter. Air fry for 2 to 3 mins at 360 F or 180 C.

Notes:

If you do not have Greek Yogurt/ hung curd, add regular curd to a cheese/ muslin cloth and squeeze it gently to remove excess whey. You can do this the previous night and also hang it in the refrigerator.

Enjoy 😊

Posted on — Leave a comment

Savor Your Keto Lunch: 5 Macadamia Nut, Flax Seed, and Greek Yogurt Shake Recipes for a Nutritious Meal Replacement

🥗🌰 Indulge in Delicious and Nutritious Keto Lunch Shakes with the Richness of Macadamia Nuts, Flax Seeds, and Creamy Greek Yogurt! 🌱💪

Are you tired of the same old lunches on your keto journey? It’s time to shake things up and savor your midday meal with a variety of keto lunch shake recipes featuring the goodness of macadamia nuts, flax seeds, and creamy Greek yogurt. These shakes are not only satisfying and flavorful but also packed with essential nutrients to keep you energized and nourished throughout the day. Get ready to transform your lunchtime routine with these delicious and nutritious shake ideas! 🥗🌰🌱💪

The Benefits of Macadamia Nuts, Flax Seeds, and Greek Yogurt

Macadamia nuts are not only delicious but also a great addition to your keto lunch shakes. They are rich in heart-healthy monounsaturated fats, which help promote cardiovascular health and provide sustained energy. Macadamia nuts are also a good source of fiber, vitamins, and minerals such as magnesium and potassium. Adding macadamia nuts to your shakes lends a creamy texture and a subtle nutty flavor while providing essential nutrients.

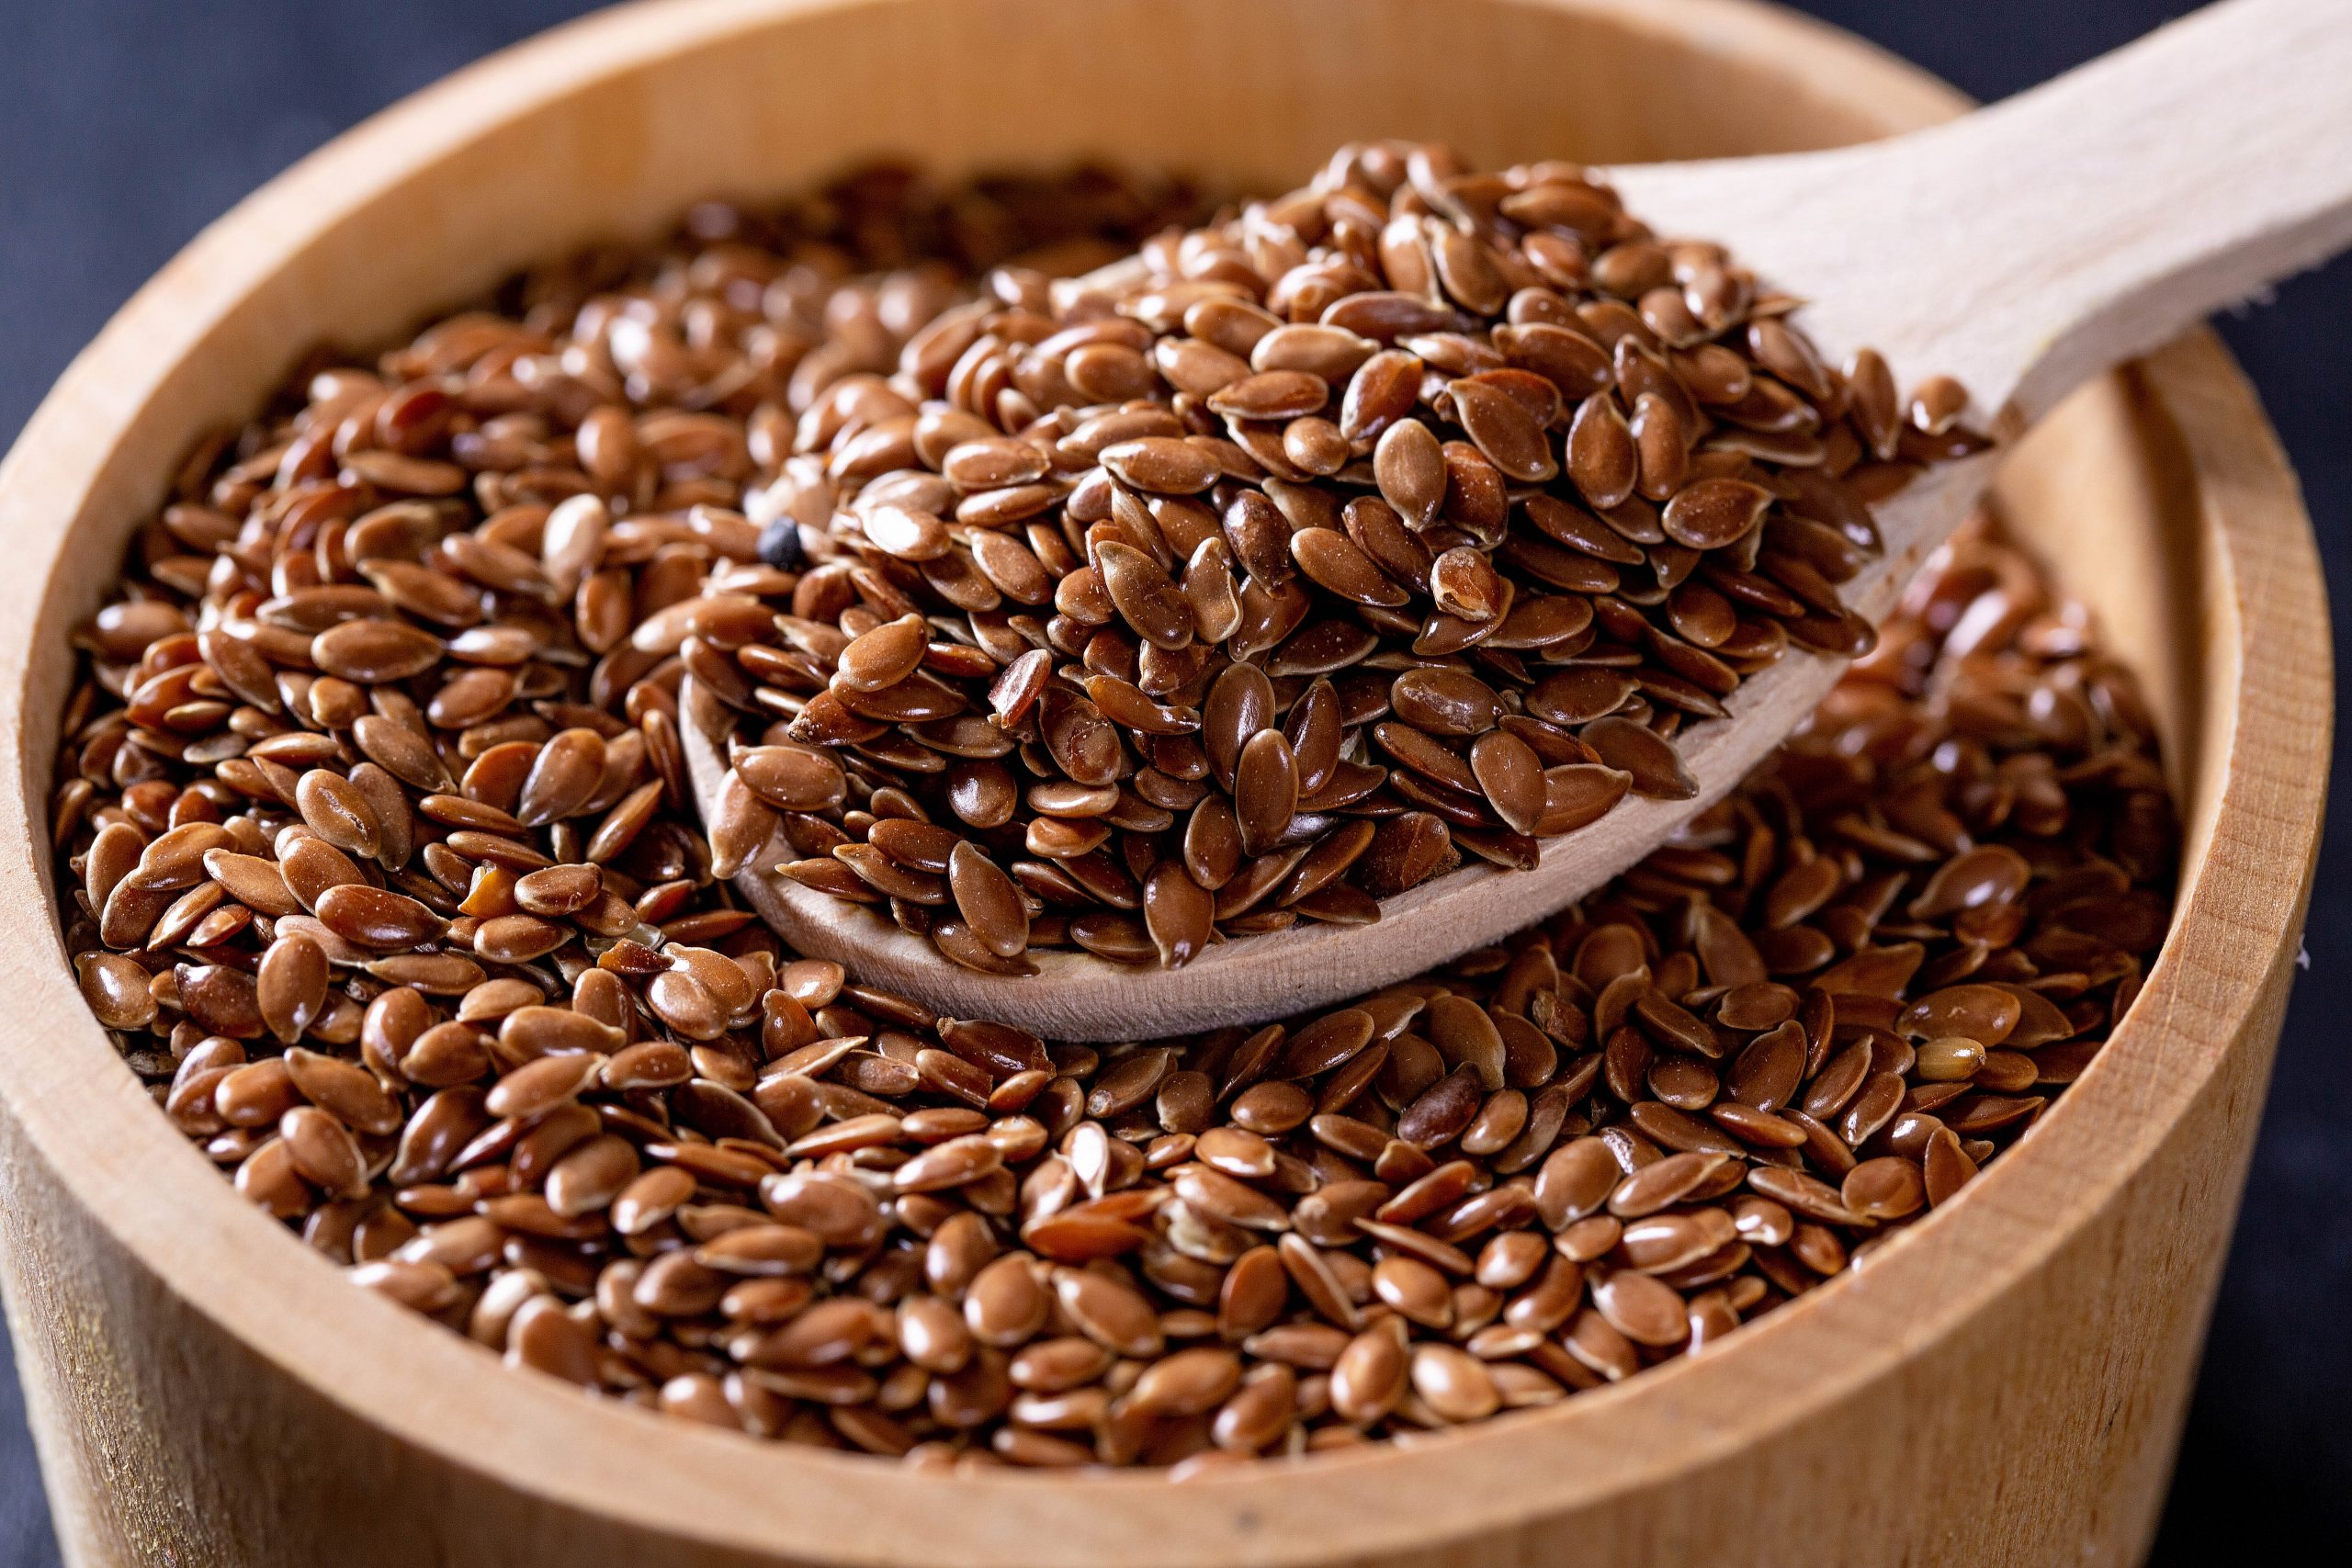
Flax seeds are a nutritional powerhouse that offers numerous health benefits. They are rich in omega-3 fatty acids, which are beneficial for heart health and reducing inflammation. Flax seeds are also an excellent source of dietary fiber, which aids in digestion and supports overall gut health. Incorporating flax seeds into your keto lunch shakes adds a dose of healthy fats, fiber, and a slightly nutty taste.

Greek yogurt is a fantastic ingredient to include in your keto lunch shakes. It is rich in protein, which helps to keep you full and satisfied throughout the day. Greek yogurt also contains probiotics, which support gut health and aid in digestion. The creamy and tangy nature of Greek yogurt adds a delightful texture and flavor to the shakes.

Recipe Ideas:

  1. 🌰 Creamy Macadamia Vanilla Shake: Blend together unsweetened almond milk, a handful of macadamia nuts, a scoop of vanilla protein powder, a spoonful of Greek yogurt, a drizzle of sugar-free sweetener, and a dash of pure vanilla extract. This shake offers a velvety smooth texture with a delicate macadamia flavor and a hint of sweetness from the vanilla. Adjust the sweetness and thickness to your liking. For an extra touch of indulgence, you can top the shake with a sprinkle of chopped macadamia nuts.
  2. 🌱 Flax Seed Green Goddess Shake: Combine unsweetened coconut milk, a tablespoon of ground flax seeds, a handful of spinach or kale, a scoop of vanilla protein powder, a spoonful of Greek yogurt, a squeeze of lemon juice, and a pinch of sea salt in a blender. Blend until smooth and well combined. This vibrant green shake is packed with essential nutrients from the greens and flax seeds. The Greek yogurt adds creaminess, while the lemon juice provides a refreshing tang. Adjust the thickness and flavor by adding more coconut milk or water.
  3. 💪 Protein-Packed Greek Yogurt Shake: Blend together unsweetened almond milk, a scoop of vanilla protein powder, a spoonful of Greek yogurt, a tablespoon of ground flax seeds, a drizzle of sugar-free sweetener, and a pinch of cinnamon. This shake offers a creamy and protein-rich base with a touch of nuttiness from the flax seeds. The cinnamon adds warmth and depth of flavor. Adjust the sweetness and thickness to your liking. You can also add a handful of ice cubes for a chilled and refreshing shake.
  4. 🍓 Macadamia Berry Blast Shake: In a blender, combine unsweetened coconut milk, a handful of macadamia nuts, a scoop of vanilla protein powder, a spoonful of Greek yogurt, a handful of mixed berries (such as strawberries, blueberries, or raspberries), and a drizzle of sugar-free sweetener. Blend until smooth and well combined. This shake is a burst of fruity flavors with the added creaminess of macadamia nuts and Greek yogurt. The mixed berries provide natural sweetness and antioxidants. Adjust the sweetness by adding a natural sweetener if desired.
  5. 🥥 Coconut Flax Delight Shake: Blend together unsweetened coconut milk, a tablespoon of ground flax seeds, a spoonful of Greek yogurt, a scoop of vanilla protein powder, a tablespoon of unsweetened coconut flakes, and a drizzle of sugar-free sweetener. This shake offers a tropical twist with a combination of coconut and flax seeds. The Greek yogurt adds a creamy texture, while the coconut flakes provide an extra touch of flavor and texture. Adjust the sweetness and thickness to your liking.

Feel free to get creative and experiment with these recipes. You can add a handful of your favorite leafy greens, a tablespoon of nut butter for extra creaminess, or a dash of your preferred keto-friendly spices to customize the shakes to your liking. Enjoy the process of creating delicious and nutritious keto lunch shakes that will keep you fueled and satisfied throughout the day! 🥗🌰🌱💪

Don’t forget to share your delightful keto lunch shake creations with us on social media by tagging @Masala.Monk and using the hashtag #MasalaMonk. We can’t wait to see your inventive recipes and inspire others on their keto journey! 📸✨