Posted on — Leave a comment

Cherry Jam Recipe That Sets

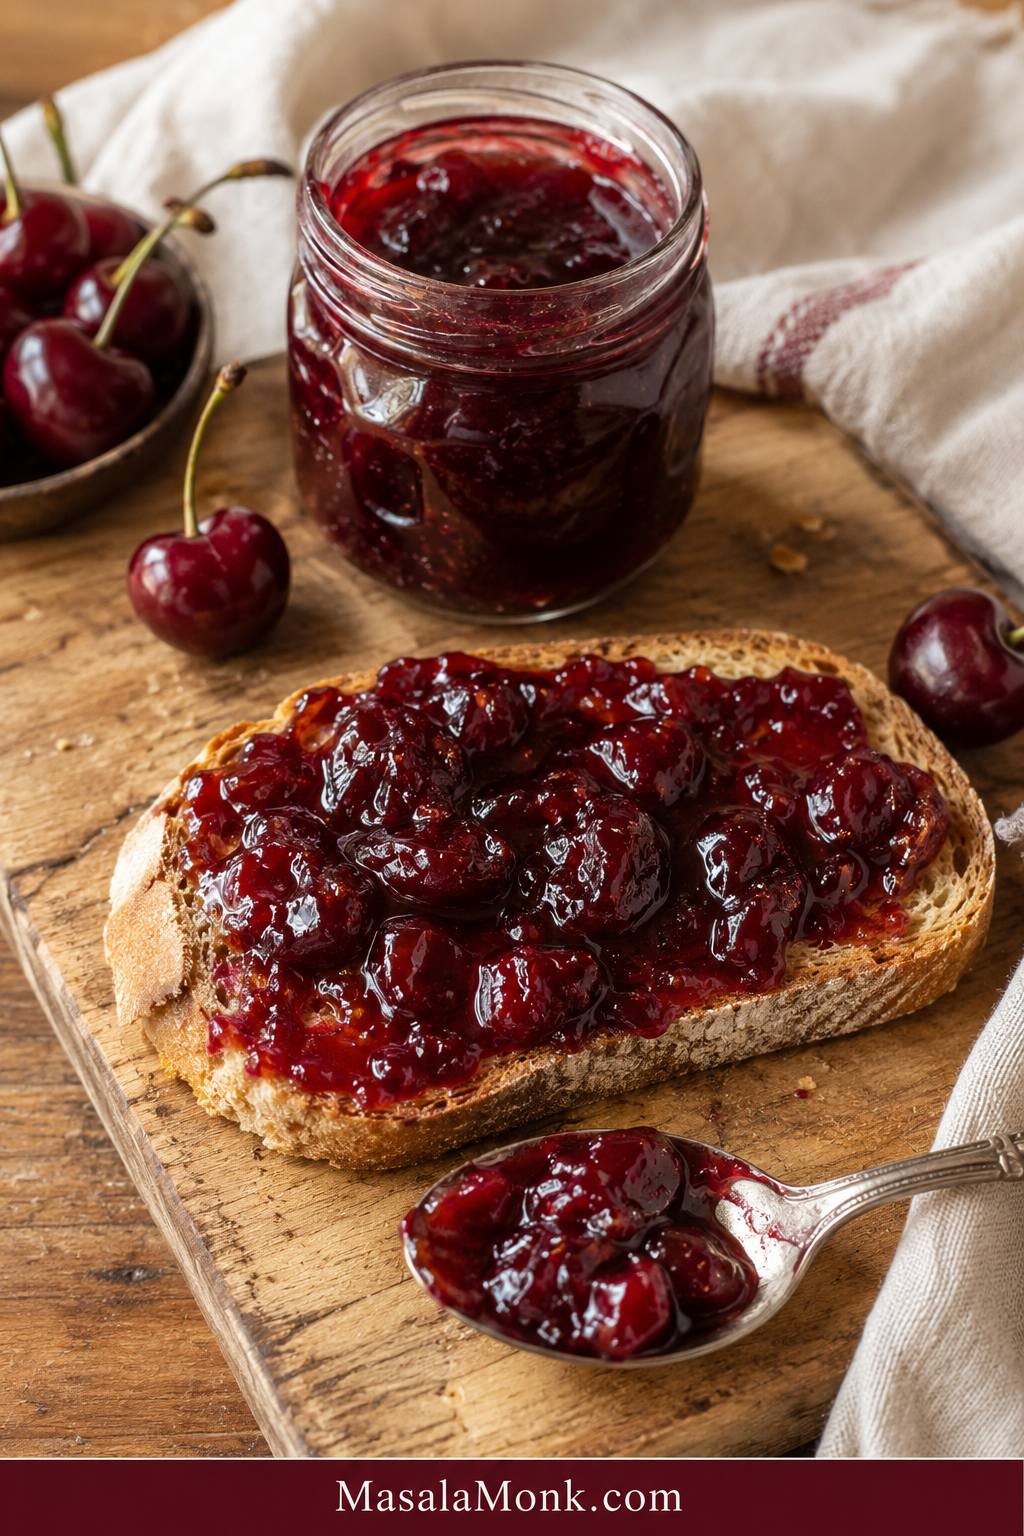
Glossy homemade cherry jam with visible cherry pieces spread on toast beside an open jar and spoon.

Cherry jam is one of those recipes that feels easy until the pot starts asking questions. Is it thick enough? Will it set after cooling? Should you add pectin? Can frozen cherries work? What if you want less sugar? And if the jar is going into the pantry, is the recipe actually safe for canning?

This cherry jam recipe is built to answer those questions before they ruin a batch. The main method is a small-batch, no-pectin cherry jam for the refrigerator or freezer: glossy, spoonable, fruit-forward, and bright enough to taste like cherries instead of cooked sugar.

Once you know what ready jam looks and feels like, the whole process becomes much calmer. The bubbles get heavier, the spoon leaves a little trail, the fruit looks glossy, and the jam starts moving more slowly in the pan. That is the moment you are looking for.

The goal is not a stiff, factory-style jam. The goal is a soft, beautiful cherry spread that tastes fresh, sets enough to spoon and spread, and does not leave you guessing. This recipe is flexible where a refrigerator jam can be flexible, and strict where safety needs it.

Jump to Recipe · Make It Now · Set Tests · Fix Runny Jam · Canning Notes

Quick Answer: How Do You Make Cherry Jam That Sets?

To make a simple cherry jam without pectin, combine 500 g / about 3 cups pitted cherries, 200 g / about 1 cup sugar, and 2 tablespoons / 30 ml lemon juice in a wide pan. Cook until the cherries soften and the syrup turns glossy, then use the Glossy-and-Wrinkle Method: cook until the bubbles look slow and shiny, then confirm the set with a cold plate wrinkle test.

The jam usually reaches this stage around 220°F / 104–105°C. Temperature helps, but the cold plate test tells you how the jam will behave once cooled.

You will usually need about 600–700 g / 1 1/3–1 1/2 lb whole cherries to get around 500 g / about 3 cups pitted cherries, depending on cherry size and pit weight.

This gives you a soft-to-medium set cherry jam for the refrigerator or freezer. It should be thick enough to spread on toast, but still soft enough to spoon over pancakes, yogurt, cheesecake, ice cream, or rice pudding.

Storage note: Keep this no-pectin version chilled or frozen. Pantry jars need a canning-tested cherry jam recipe with proper processing.

Make It Now

If you are standing in front of a bowl of cherries and just want jam today, start here. Use 500 g pitted cherries, 200 g sugar, and 2 tablespoons lemon juice. Cook in a wide pan until the jam looks glossy, thickened, and heavy-bubbled, then confirm the wrinkle on a cold plate. Cool, cover, and refrigerate.

The rest of the guide is there for the moments when the pot starts looking confusing: frozen cherries releasing extra juice, sugar changes, pectin questions, loose jam, texture choices, or pantry storage.

Cherry Jam Recipe Card: No-Pectin Cherry Jam

This is the small batch to make when you want cherry jam today without turning the kitchen into a full canning project. It cooks on the stovetop, uses no boxed pectin, and sets into a soft, glossy spread once chilled.

Keep the heat lively but not wild. You want steady bubbling, not angry splattering. Near the end, slow down and test instead of rushing the jar.

Prep time15 minutes
Cook time25–35 minutes
Total time40–50 minutes
YieldAbout 1 1/2 cups / 360 ml
MethodStovetop
StorageRefrigerator 2–3 weeks or freezer up to 3 months

Ingredients

  • 500 g / about 3 cups pitted cherries, fresh or thawed frozen, chopped or halved
  • 200 g / about 1 cup granulated sugar
  • 2 tablespoons / 30 ml lemon juice
  • 1 small pinch salt, optional
  • 1/8 to 1/4 teaspoon almond extract, optional
  • 1 teaspoon vanilla extract, optional
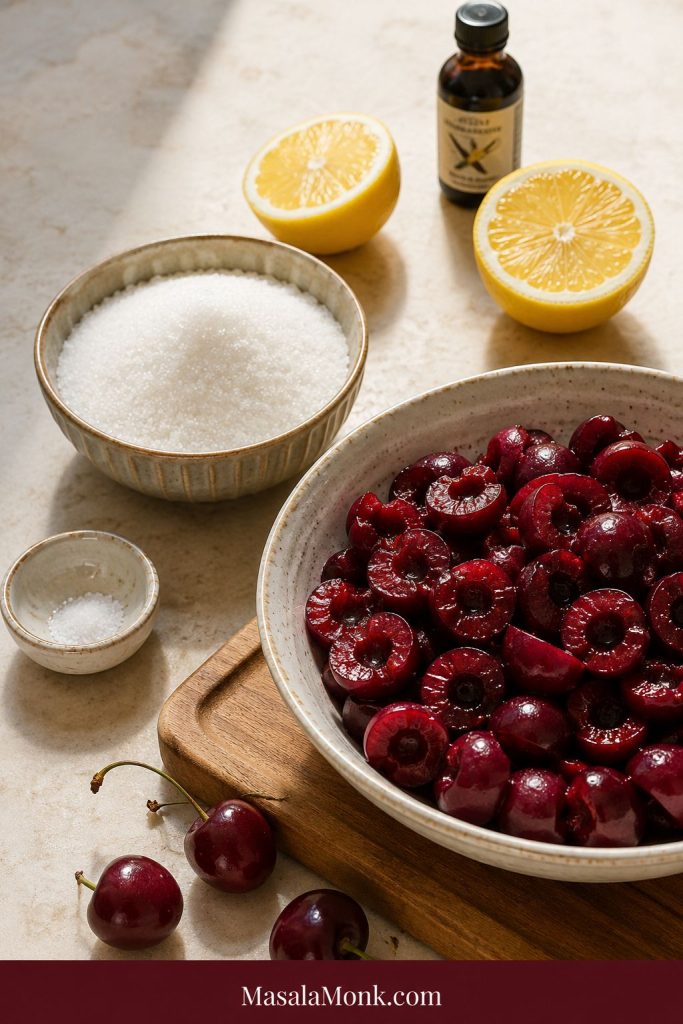
Pitted cherries in a bowl with sugar, lemon halves, salt, and a small flavoring bottle on a light surface.
Cherries give the jam body, sugar helps it thicken, and lemon juice adds the brightness and acidity a no-pectin batch needs.

Whole cherry note: Buy about 600–700 g / 1 1/3–1 1/2 lb whole cherries to get around 500 g / about 3 cups pitted cherries. The exact yield depends on cherry size, pit weight, and how much you trim.

Instructions

  1. Prepare the cherries. Pit the cherries and chop them roughly. Chop smaller for smoother jam or leave some halves for a chunkier preserve-style texture.
  2. Combine. Add cherries, sugar, lemon juice, and salt to a wide heavy-bottomed pan. Stir well.
  3. Rest briefly. Let the cherries sit for 15–30 minutes if you have time. This draws out juice and helps the sugar dissolve.
  4. Heat gently. Cook over medium heat until the sugar dissolves and the cherries release more liquid.
  5. Mash for texture. Use a potato masher or spoon to break down the fruit lightly. For smoother jam, mash more; for chunkier jam, leave more pieces intact.
  6. Boil and reduce. Increase the heat to medium-high and cook, stirring often, until the bubbles become slower, glossier, and heavier.
  7. Test the set. Aim for about 220°F / 104–105°C, then check with a cold plate test. If the cooled sample wrinkles gently and does not run like syrup, it is ready.
  8. Finish the flavor. Turn off the heat. Stir in almond extract or vanilla, if using. Start small, especially with almond extract.
  9. Jar and cool. Rest the jam for 5 minutes, spoon into clean jars, cool, cover, and refrigerate. For longer storage, freeze in freezer-safe containers with a little headspace.

What Success Looks Like

The finished jam should be glossy, deep red, spoonable, and slightly loose while warm. It should not look stiff in the pan. Once cooled, it should thicken into a soft spread that holds on toast but still falls easily from a spoon.

It helps to test on a cold plate even when the thermometer says 220°F, because cherry batches vary. If the spoon trail closes immediately, keep cooking. If it pauses for a second before filling in, you are close.

And if it cools softer than you hoped, you have not wasted the cherries. Reboil it for a thicker set, or use it as a cherry sauce over breakfast and desserts. A loose cherry jar can still be wonderful.

Need visual help before you jar? Jump to Set Tests · check if it is runny or just hot

Why You’ll Love This Cherry Jam

The best part is the first cooled spoonful: deep red, glossy, sweet-tart, and still tasting like cherries. This small batch is not for a huge pantry project. It is for toast tomorrow, yogurt tonight, cheesecake on the weekend, and the quiet satisfaction of saving good cherries before they disappear.

  • Simple ingredients: cherries, sugar, lemon, and optional flavoring.
  • Fresh or frozen cherries both work.
  • A soft, glossy, spreadable set without boxed pectin.
  • Visual cues show when the jam is ready, so you are not relying only on a timer.
  • The small-batch method keeps the process manageable.
  • Clear help is included for loose jam, frozen cherries, pectin, sugar changes, and canning boundaries.
  • Use it as jam, dessert topping, breakfast swirl, cake filling, or cheese board spooning sauce.

In This Guide

The recipe above is the simple path. The guide below is grouped by what you need in the moment.

Make the jam: Why It Works · Ingredients · Equipment · Step-by-Step Cues

Choose your method: Fresh, Frozen, or Canned · Sweet vs Sour · Method Choice · Pectin vs No Pectin · Scaling · Low Sugar

Fix the set: Set Tests · Runny or Just Hot? · Fix Runny Jam · Canning Notes

Use and store: Texture · Adjustments · Variations · Uses · Storage · Mistakes · FAQs · Final Thoughts

Why This Cherry Jam Works

This recipe works because it asks you to watch the jam, not just the timer. Some cherries are juicy, some are firm, some are sweet, and frozen cherries often release more liquid than fresh ones. The clock helps, but the pan tells the truth.

  • A wide pan helps water evaporate. More surface area means the jam thickens faster and tastes fresher.
  • Sugar builds body. It sweetens the fruit, but it also helps with shine, texture, and set.
  • Lemon juice keeps the flavor awake. Sweet cherries especially need acidity so the finished spread does not taste flat.
  • Small batches are easier to control. The fruit cooks down faster and is less likely to set unevenly.
  • Set tests prevent guessing. A thermometer, cold plate, spoon trail, and cooled texture matter more than the exact minute count.

No-pectin jam gives a concentrated, cooked-fruit flavor because it thickens by reduction. Pectin-set jam usually cooks faster and can keep a fresher fruit note, but the texture and sugar formula are more exact.

The same texture-first thinking also helps in a fig jam recipe, where the fruit thickens into a rustic spread instead of a clear jelly.

Ingredients for Cherry Jam

Cherry jam is simple, but it is not random. Each ingredient has a job: cherries bring the fruit, sugar helps the texture and shine, lemon keeps the flavor bright, and a small pinch of salt makes the sweetness taste rounder.

Cherries

Fresh cherries give the best texture, but frozen cherries are often easier and work very well. Sweet cherries make a deep, mellow jam. Sour cherries make a brighter, tangier batch. If using frozen fruit, thaw and drain it first so the extra juice does not stretch the cooking time too far.

Whole Cherries to Pitted Cherries

This yield check is useful before you cook, because cherries lose weight to pits, stems, and trimming.
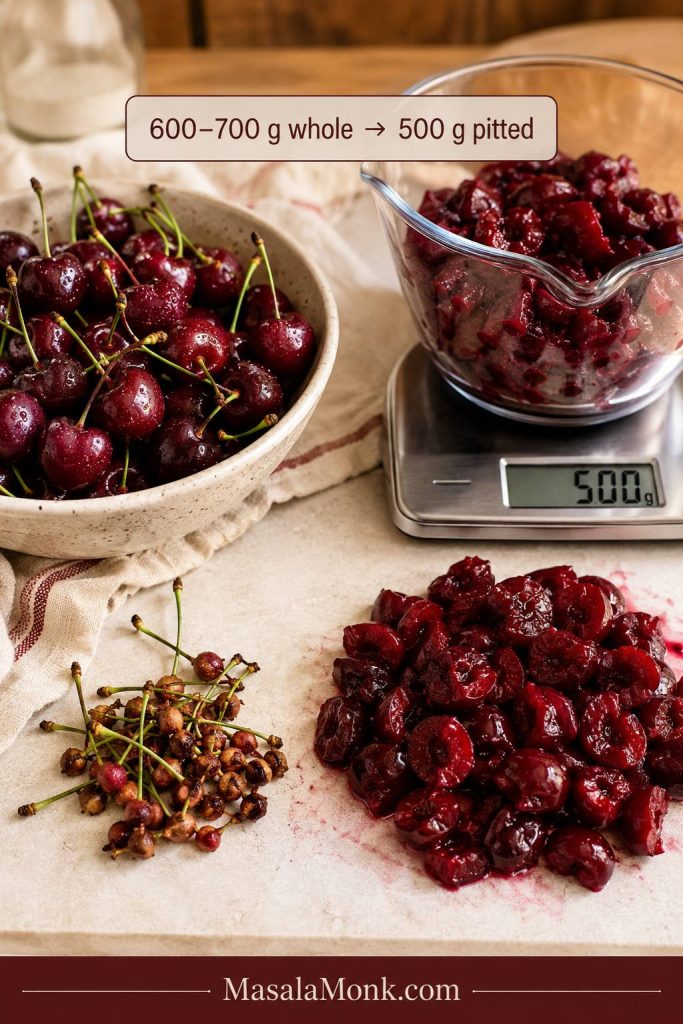
Whole cherries, pitted chopped cherries, cherry pits, stems, and a kitchen scale showing 500 grams.
Before pitting, plan for the weight loss: 600–700 g whole cherries usually gives about 500 g pitted fruit for one small batch.

Bing and other dark sweet cherries make a rich, dark red jam. Rainier cherries can work too, but the color will be lighter and the flavor softer. Sour cherries, tart cherries, pie cherries, and Morello cherries make a brighter spread with more tang and may need slightly more sugar depending on taste. For a broader look at the fruit itself, this guide to the benefits of cherries explains sweet and tart cherries in a more general way.

Sugar

Sugar is not only a sweetener. In jam, it helps the mixture thicken, shine, and hold a spreadable texture. You can reduce it slightly for a softer refrigerated batch, but do not heavily cut sugar in any recipe you plan to can.

Lemon Juice

Lemon juice gives the jam brightness and balance. It is especially important with sweet cherries, which can taste heavy once cooked. For a fridge batch, fresh lemon juice is fine. For canning, follow the tested recipe exactly, especially if it asks for bottled lemon juice.

If you enjoy citrusy preserves, the peel-and-acid balance in this orange marmalade recipe is a useful next read.

Salt, Almond, and Vanilla

A small pinch of salt is optional, but useful. It should not make the jam salty; it simply helps the cherry flavor taste fuller. Almond extract gives a classic cherry-almond note, but it can take over quickly, so start with 1/8 teaspoon. Vanilla is gentler and gives the jam a rounder finish.

Equipment You Need

For refrigerator cherry jam, the most important tool is a wide heavy-bottomed pan. It helps extra cherry juice evaporate before the fruit tastes overcooked.

  • Cherry pitter, sturdy straw, or chopstick
  • Wide heavy-bottomed pan
  • Wooden spoon or silicone spatula
  • Potato masher
  • Thermometer, optional but helpful
  • Two chilled plates for set testing
  • Clean jars or freezer-safe containers

No cherry pitter? Push a sturdy straw or chopstick through the stem end and pop the pit out over a bowl. It is slower than a pitter, but it works well for a small batch.

For shelf-stable canning, use a canning-tested recipe and proper water-bath equipment, not just clean storage jars.

How to Make Cherry Jam Step by Step: What to Watch For

Once the cherries are in the pan, the recipe becomes less about exact minutes and more about watching the fruit change. The recipe card gives the practical steps. This section slows them down so you know what to look for.

1. Pit and Chop the Cherries

Remove every pit before cooking. Then chop the cherries roughly. Smaller pieces give a smoother jam that spreads easily. Larger pieces give a chunkier preserve-style texture with visible fruit.

2. Mix With Sugar and Lemon, Then Rest

Add the cherries, sugar, lemon juice, and optional salt to a wide pan. Stir until the cherries are coated. If you have time, let the mixture sit for 15–30 minutes so the fruit releases juice and the sugar begins to dissolve.
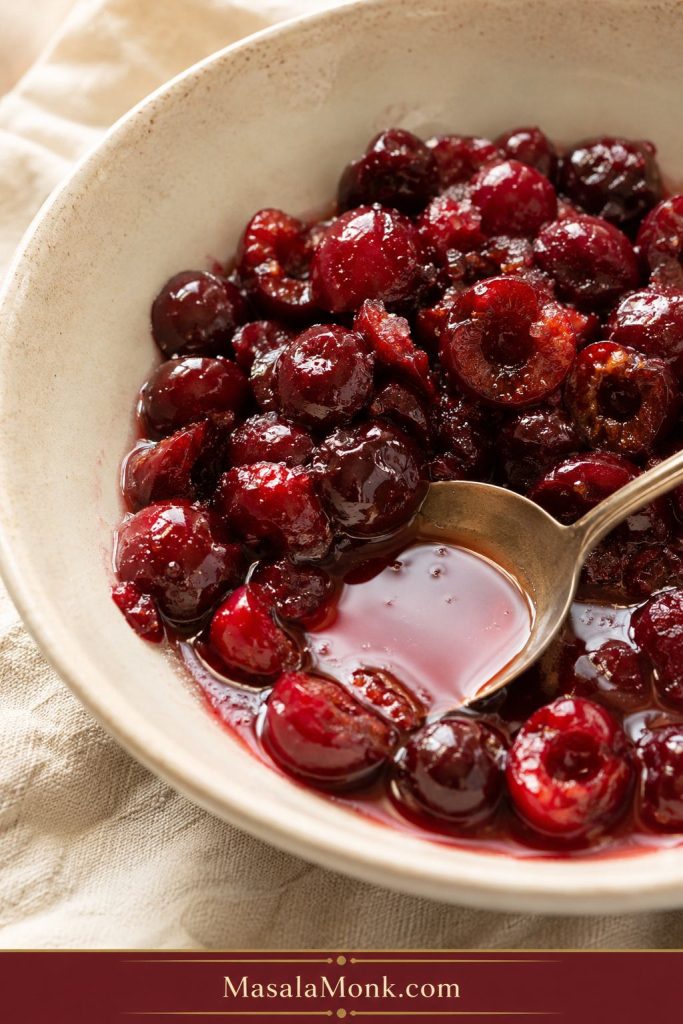
Pitted cherries mixed with sugar and lemon juice in a bowl with red syrup pooling around a spoon.
After resting with sugar and lemon, the cherries release ruby syrup, so the fruit softens more evenly when cooking begins.

3. Start Gently

Cook over medium heat at first. This lets the sugar dissolve without catching on the bottom. Stir often, especially once the mixture starts to bubble and the kitchen begins to smell like warm cherries.
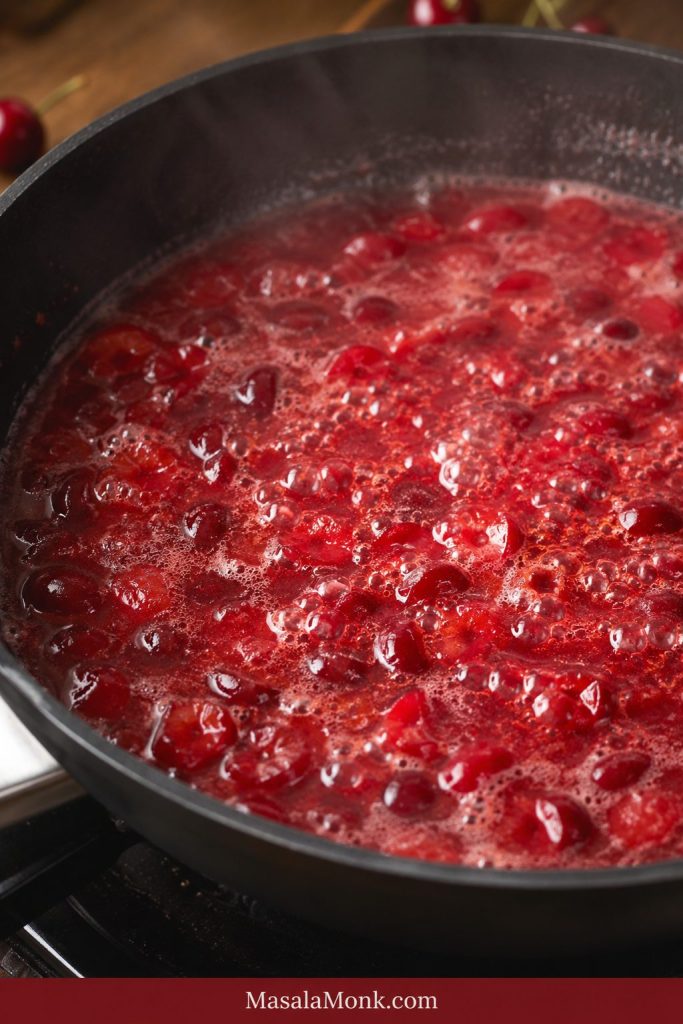
Cherry mixture boiling in a dark pan with thin red liquid, small bubbles, steam, and visible fruit pieces.
At first, the mixture may look thin, foamy, and watery; however, that loose boil is normal before the syrup concentrates.

4. Mash for Texture

When the cherries soften, use a potato masher or spoon to break them down lightly. You do not have to turn them into puree. For a smoother jam, mash more; for a chunkier preserve-style texture, leave some larger fruit pieces.

5. Boil Until Glossy

Increase the heat and let the jam bubble steadily. At first, the bubbles will look thin and watery. As moisture evaporates, they become slower, glossier, and heavier. Stir more often near the end because the sugar is more concentrated. The jam should smell fruity and bright, not caramelized.

A little foam is normal while the jam boils. Stir through it, then skim near the end only if you want a clearer-looking jar.
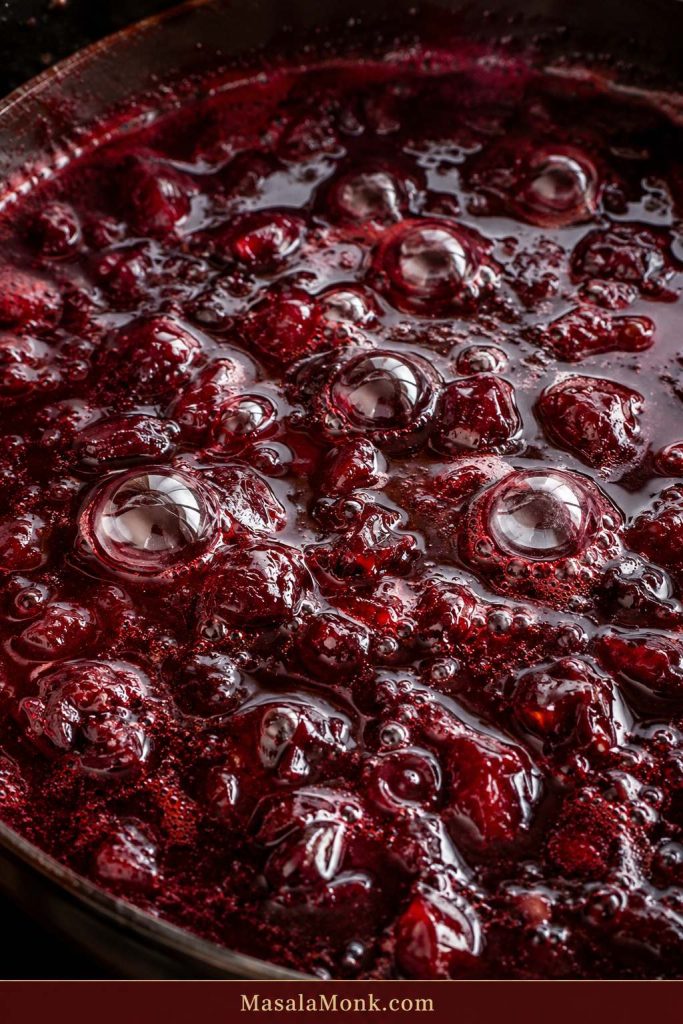
Close-up of thick dark ruby cherry jam bubbling in a pan with shiny syrup and pieces of cherry.
As moisture cooks off, the bubbles slow down and turn glossy, giving you the first clear sign that the jam is close.

6. Test Before You Jar

Do not judge the jam only while it is hot. Hot jam always looks looser than cooled jam. Use a thermometer, cold plate, spoon test, or pan trail test before you stop cooking.

Once the jam starts looking glossy, stop watching the clock and start watching the texture.
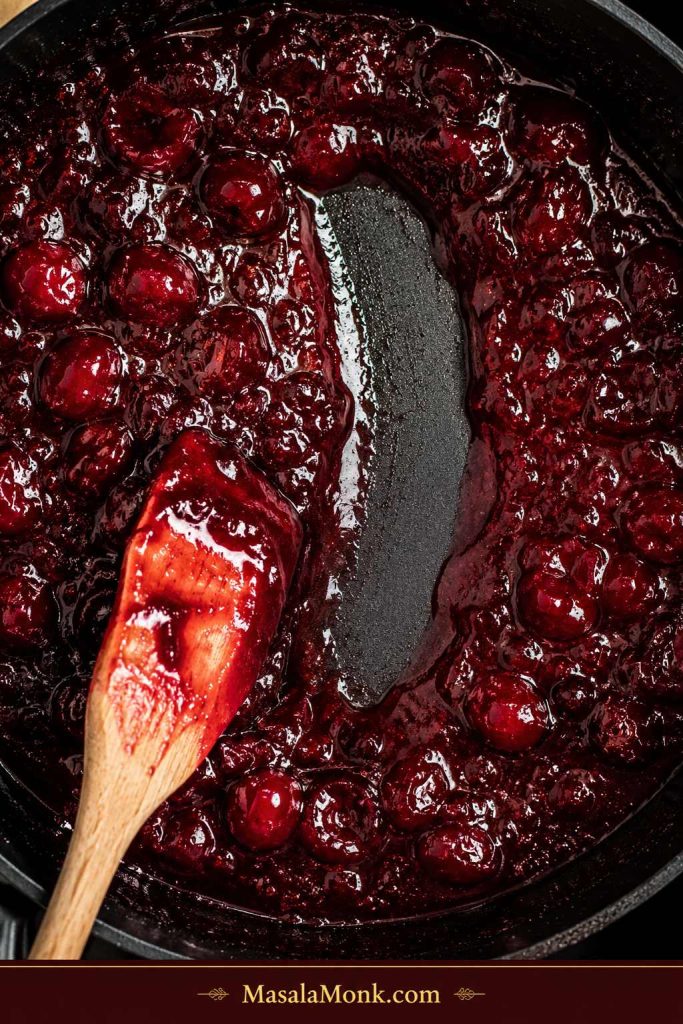
Spoon pulled through thick cherry jam in a dark pan, leaving a clear trail through the jam.
Next, pull a spoon through the pan; if the trail pauses before closing, the texture is ready for the cold plate test.

7. Finish the Flavor

Once the set is right, turn off the heat before adding almond extract or vanilla. Starting with a small amount keeps the cherry flavor in charge.

8. Jar and Cool

Let the jam settle for a few minutes, then spoon it into clean jars. Cool it before covering tightly, then refrigerate or freeze according to the storage notes.

Before you stop cooking: use the set tests · see the cold plate test

Fresh, Frozen, or Canned Cherries: What Works Best?

Frozen cherries work well for jam if you thaw, drain, and add back only enough juice to keep the pan from drying out. Fresh and canned cherries can work too, but they need different handling.

Fresh vs Frozen Cherries for Jam

This visual comparison helps explain why thawed frozen cherries often need drainage before they go into the pan.
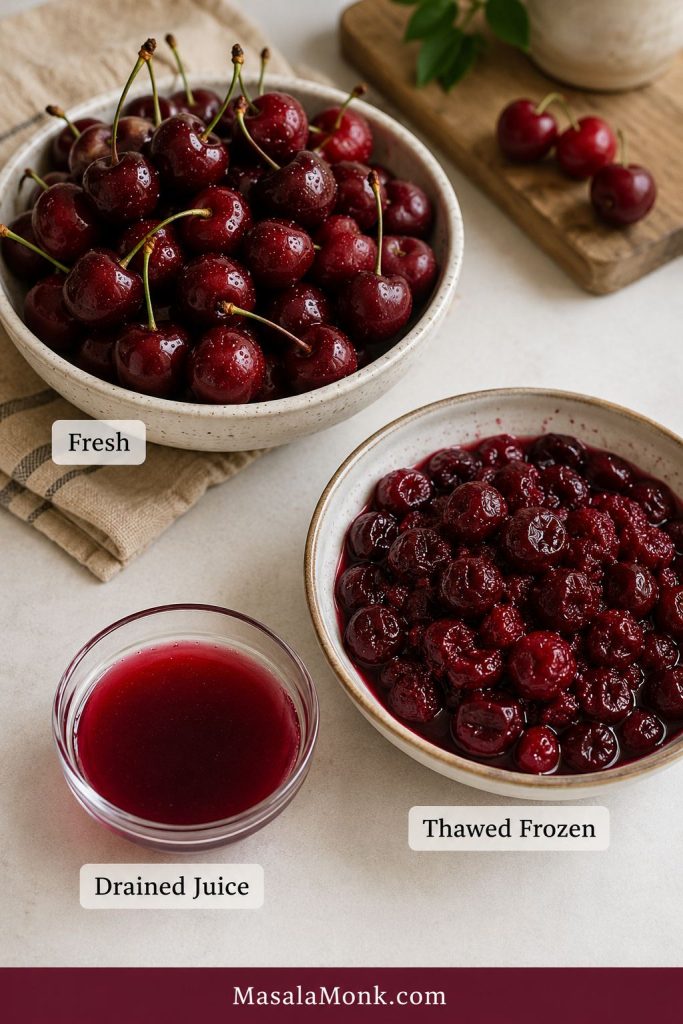
Fresh cherries, thawed frozen cherries, and a small bowl of drained red cherry juice arranged with labels.
Frozen cherries work well, but thawing and draining them first prevents extra juice from stretching the cooking time.
Cherry typeHow to use itWhat to watch
Fresh cherriesPit, chop, and macerate with sugar and lemonBest texture and cleanest fruit flavor
Frozen cherriesThaw, drain, reserve the juice, then cookThey release more water, so cooking may take longer
Canned cherriesDrain well before cookingTexture is softer and flavor depends on syrup or packing liquid
Sour cherriesTaste before adjusting sugar and lemonBright, tart, excellent for jam
Sweet cherriesUse lemon juice for balanceCan taste flat if cooked without enough acidity

How to Make Cherry Jam From Frozen Cherries

Thaw the cherries first, then drain them well. Start the jam with the drained fruit, sugar, and lemon juice. Keep the reserved juice nearby and add back only a splash if the pan looks dry. If you add all the thawed juice at once, the jam may take much longer to thicken.

Frozen cherries are not a problem. They simply bring more water to the pan, so the fix is patience and drainage, not panic. If you are using frozen cherries, notice how much juice they release after thawing; that one detail explains a lot about cook time and final set.

For another quick fridge-friendly fruit spread, this strawberry and apple preserve keeps the same simple, small-batch spirit.

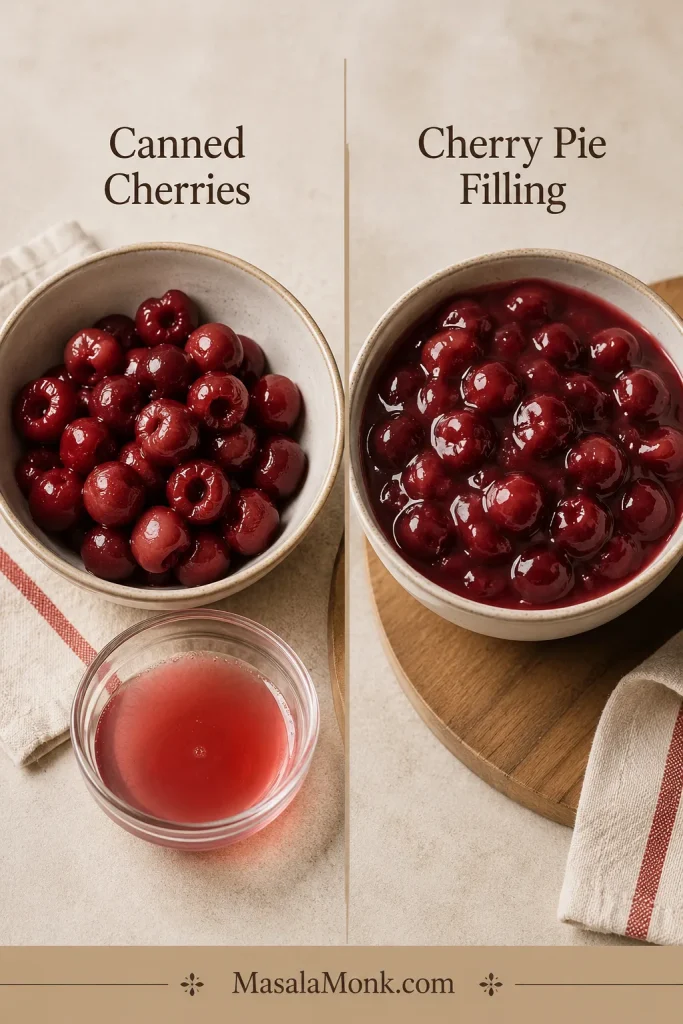
Canned cherry note: Use plain canned cherries packed in juice, water, or syrup, and drain them well. Do not use cherry pie filling as a direct substitute. Pie filling already has sugar, starch or thickener, and flavoring, so it cooks and sets differently from plain cherries.

If frozen cherries made the jam look loose: compare warm vs cooled texture · see the reboil fix

Sweet Cherry Jam vs Sour Cherry Jam

Sweet cherry jam and sour cherry jam have different personalities. Sweet cherries give a dark, mellow, rounded result. Sour cherries, tart cherries, pie cherries, and Morello cherries give a brighter batch with sharper fruit flavor.

If you are using sweet cherries, lemon juice is important because it keeps the jam from tasting heavy. If you are using sour cherries, taste the fruit first. Some need a little more sugar, while others are tart in a way that makes the finished jar more exciting.

Which Cherry Jam Method Should You Use?

The easiest way to avoid confusion is to choose the goal before choosing the method. A fridge jar can be flexible. A pantry jar needs rules.

  • Jam today: use the no-pectin refrigerator recipe.
  • Firmer classic jam: use a pectin method.
  • Less sugar: choose low/no-sugar pectin or a reduced-sugar method.
  • Pantry jars: use a canning-tested recipe.
  • Quick topping: stop softer and use it as cherry sauce.

This is not meant to scare you away from canning. It is meant to keep the two projects separate: a quick cherry jam for the fridge today, and a tested pantry-safe recipe when you want jars for the shelf.

Cherry Jam With Pectin or Without Pectin?

You do not need pectin for soft-set refrigerator cherry jam, but pectin is useful when you want a firmer set, a lower-sugar structure, or a canning-safe formula. Pectin is not cheating; it is just a different kind of jam.

Think of pectin as a different route, not a shortcut. No-pectin jam gives you a soft, reduced-fruit spread. Pectin gives you more structure and predictability, especially when sugar or pantry storage matters.

Pectin types are not casual swaps. Powdered pectin, liquid pectin, and low/no-sugar pectin are built for different methods, and each one has its own sugar, acid, and boiling expectations.

MethodBest forWhat to expect
No pectinSimple small-batch refrigerator or freezer jamSoft, concentrated, fruit-forward
Powdered pectinFirmer jam and many canning formulasMore predictable, but method matters
Liquid pectinSpecific jelly, jam, or freezer jam recipesNot a direct swap for powdered pectin
Low/no-sugar pectinReduced-sugar jamBest route when sugar is reduced heavily

Because cherries are naturally lower in pectin, a no-pectin batch sets mainly by reduction. The water cooks off, the sugar concentrates, the lemon sharpens the flavor, and the mixture thickens into a soft spread as it cools.

What Changes When You Use Pectin?

A classic pectin cherry jam is more exact than this flexible fridge recipe. It usually starts with prepared cherries, lemon juice, and a setting aid. The mixture is brought to a full rolling boil, sugar is added, and then the jam returns to a hard boil for the time stated in the tested recipe or package instructions.

For shelf-stable jars, follow a tested canning source rather than improvising. The National Center for Home Food Preservation’s cherry jam with pectin method uses prepared cherries, powdered pectin, sugar, hot jars, 1/4 inch headspace, and boiling-water processing with altitude guidance.

Changing sugar or storing jars on the shelf? read the low-sugar notes · check the canning boundary

Can You Scale This Cherry Jam Recipe?

The easiest ratio for a small no-pectin cherry jam is about 5 parts pitted cherries to 2 parts sugar by weight, plus enough lemon juice to brighten the fruit and help the mixture behave in the pan.

Batch sizePitted cherriesSugarLemon juiceNotes
Very small test batch250 g / about 1 1/2 cups100 g / about 1/2 cup1 tbsp / 15 mlGood for testing sweetness and set
Standard small batch500 g / about 3 cups200 g / about 1 cup2 tbsp / 30 mlBest starting point for this recipe
Double batch1 kg / about 6 cups400 g / about 2 cups4 tbsp / 60 mlBetter made as two separate batches

For best results, do not begin with the double batch. This jam sets more predictably when the fruit cooks down quickly in a wide pan. Two smaller batches are easier than one overloaded pot.

Choose Your Cherry Jam Texture

Now that the method is clear, texture is the fun part. You can make this jam smoother, chunkier, looser, or thicker depending on how you plan to use it.

  • Smoother jam: chop the cherries small and mash them well as they cook.
  • Chunky jam: leave some cherry halves or larger pieces so the fruit stays visible.
  • Sauce-like topping: stop a little softer and use it over pancakes, yogurt, ice cream, or rice pudding.
  • Preserve-style jar: mash less and let some fruit pieces stay large enough to spoon.
  • Cake filling: cook a little thicker and always confirm the set on a cold plate.

Can You Use This Cherry Jam as Cake Filling?

Yes, but cook it slightly thicker than a spooning sauce and let it cool completely before using. For layer cakes, spread a thin barrier of frosting around the edge of the cake layer before adding jam so it does not slide out. If the jam is very loose, use it as a topping instead of a filling.

Substitutions and Adjustments

Flavor has room to play. Set and storage are less casual. Before you adjust sugar, acid, or pectin, decide where the jar is going to live: refrigerator, freezer, or pantry.

  • Less sugar: works in a modest way for a softer refrigerated jam, but the set will be looser.
  • Honey or maple syrup: possible in small amounts for fridge jam, but the texture and flavor will change.
  • Lime instead of lemon: fine for flavor in a fridge batch, but follow canning-tested recipes exactly for pantry jars.
  • Vanilla or almond: add after cooking, and start small so the cherry flavor stays clear.
  • Double batch: not recommended for your first try. Make two small batches for better control.

How to Know Cherry Jam Is Set

This is the moment most homemade jam goes wrong: the jam looks too loose while it is hot, so you keep boiling, and then it cools into something sticky and overcooked. Cherry jam should leave the pan looking glossy and slightly softer than your final goal.

The easiest way to remember it is the Glossy-and-Wrinkle Method: cook until the bubbles turn slow and glossy, then confirm the set with the cold plate wrinkle test.

If you only remember one thing, remember this: hot jam lies. It moves more freely in the pan than it will after cooling. Give it a proper test before deciding it needs more time.

Glossy-and-Wrinkle Method

This three-part cue keeps the process practical: look for glossy bubbles, check the spoon trail, then confirm the set with a chilled plate.
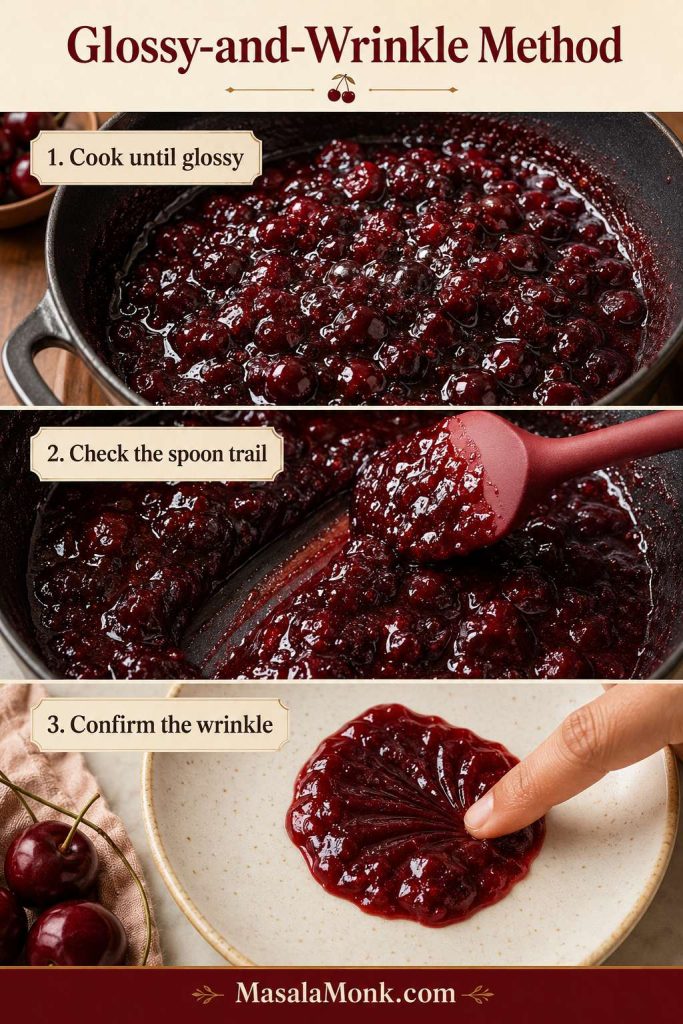
Three-step cherry jam method board showing glossy bubbles, a spoon trail, and jam wrinkling on a plate.
For a reliable no-pectin set, follow the Glossy-and-Wrinkle Method: glossy bubbles, spoon trail, then a cold plate wrinkle.

You Are Close When…

  • The bubbles look slower, heavier, and glossier.
  • The jam looks shiny instead of watery.
  • A spoon trail pauses before closing.
  • A cold plate sample wrinkles gently when pushed.
  • The smell is fruity and bright, not caramelized.

The goal is not to boil the jam into submission. Once it is glossy, heavy-bubbled, and passing the cold plate test, stop.

Set testHow to do itWhat you want
Thermometer testCook until the jam reaches about 220°F / 104–105°CJam is near the setting stage
Cold plate testDrop jam on a chilled plate, wait, then push itThe surface wrinkles slightly and does not run like syrup
Spoon testLift a spoon and let the jam fall backIt falls in thicker drops or sheets instead of thin drips
Pan trail testDrag a spatula through the jamThe trail briefly holds before filling in

Cold Plate Test: Not Ready vs Ready

Use this test after the bubbles turn glossy, because a cooled sample shows the final texture more honestly than the hot pan.
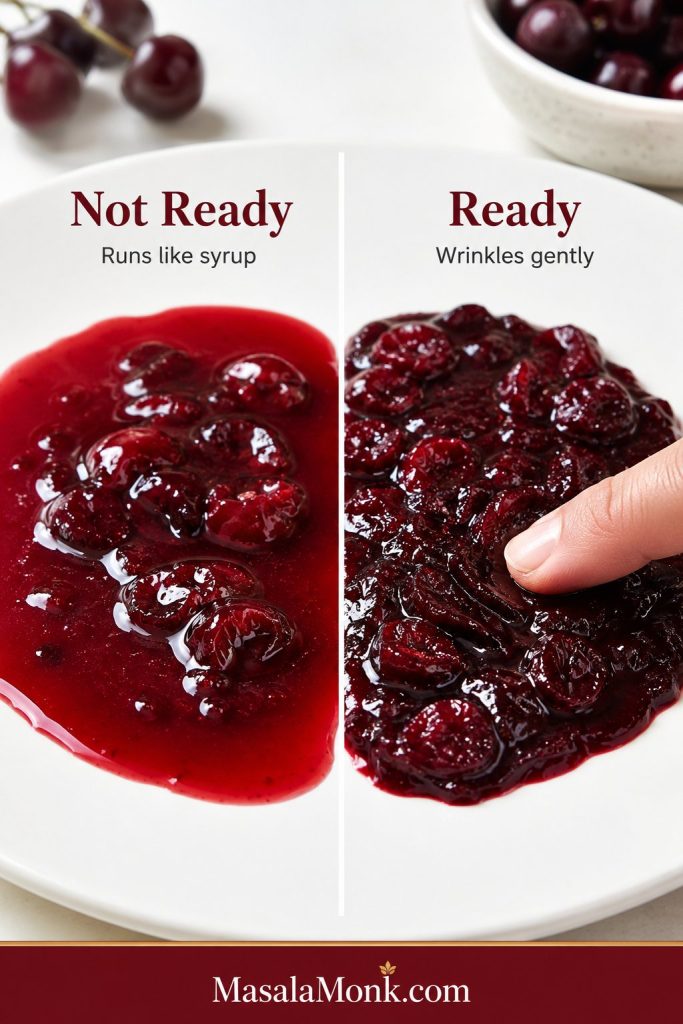
Split comparison of cherry jam on a white plate, with runny jam labeled Not Ready and wrinkled jam labeled Ready.
Finally, the cold plate test gives the clearest answer: syrupy jam needs more time, while a gentle wrinkle means it is ready.

For the cold plate test, keep two small plates in the freezer before you start cooking. When the jam looks close, spoon a little onto a chilled plate, wait 30–60 seconds, then push it. A gentle wrinkle means it is ready. When the sample runs quickly, cook for a few more minutes and test again.

When your first batch sets softer than expected, write down the cook time and texture. The second batch is usually much easier because you already know how your pan and cherries behave.

Still not sure? compare warm and cooled jam · fix a truly runny batch

Is It Actually Runny, or Just Hot?

Before fixing cherry jam, let it cool completely. Warm jam can look thin even when it is going to set. After cooling, check the texture with a spoon.

Warm Jam vs Cooled Jam

This is the check that prevents overcooking: judge a cooled spoonful, not the bubbling jam in the pan.
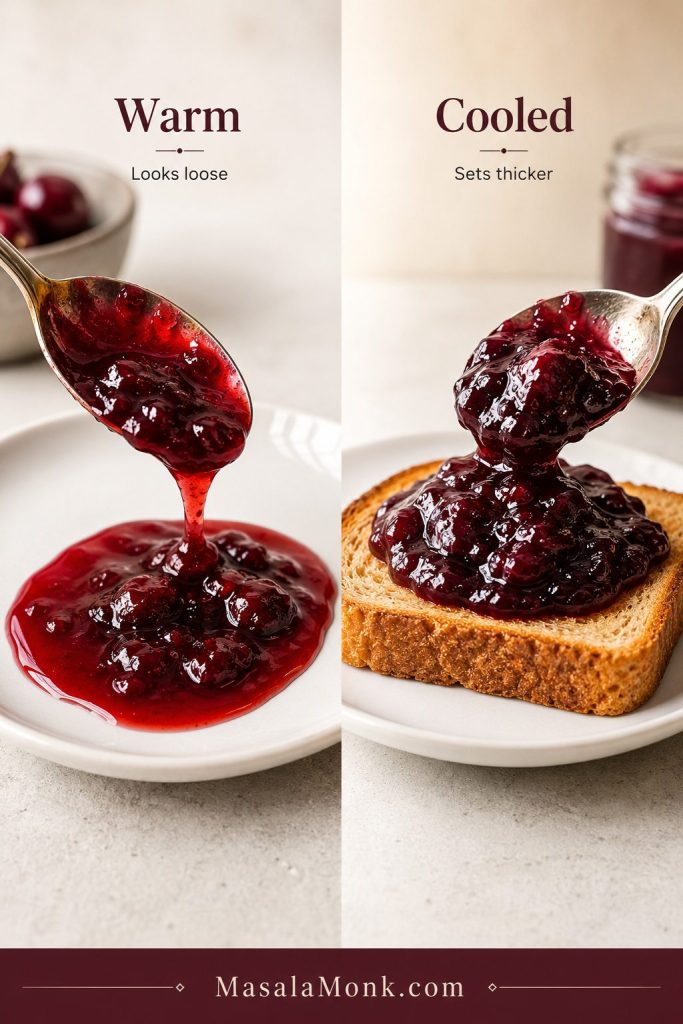
Side-by-side comparison of warm cherry jam dripping from a spoon and cooled cherry jam holding thicker on toast.
Hot jam always looks looser than the finished set, so judge the texture only after a cooled spoonful has thickened.
  • Runs like syrup: it probably needs more cooking.
  • Slowly slides from the spoon: it may be a soft-set jam, not a failed batch.
  • Holds softly on toast: it is set enough for fridge jam.
  • Feels sticky or chewy: it may be overcooked.

Most jam panic happens too early, while the jar is still warm. A soft set is not a mistake. It is the style of this jam.

Why Your Cherry Jam Did Not Set

Cherry jam is usually runny because it was undercooked, made with too much liquid, cooked in too large a batch, reduced too heavily in sugar, or made with the wrong pectin method. Most of the time, the jar is not ruined.

Runny, Soft-Set, or Overcooked?

A visual texture check helps you decide whether the batch needs more cooking, has reached a soft fridge set, or went too far.
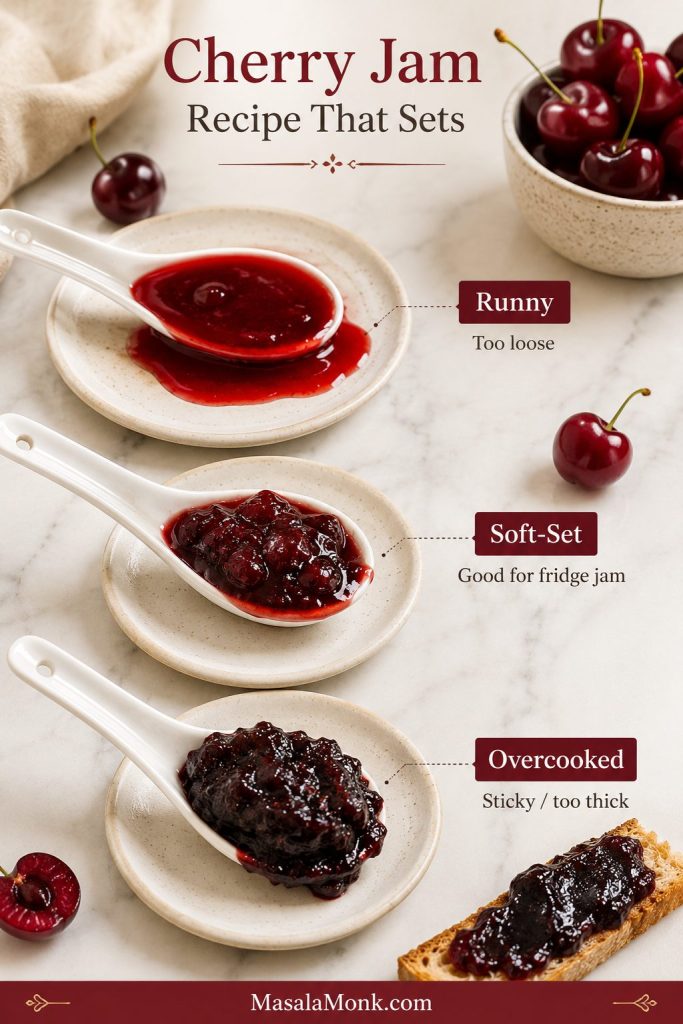
Three labeled cherry jam samples showing runny jam, soft-set jam, and overcooked jam on white spoons.
Soft-set jam should be glossy and spoonable; by contrast, runny jam spreads too fast and overcooked jam turns stiff.
ProblemLikely causeWhat to do nowNext time
Very runnyToo much liquid or undercookingReturn to a wide pan and simmer longerDrain frozen cherries and test the set
Syrupy after coolingDid not reach setting stageReboil and use cold plate testCook to texture, not only time
Weak set with pectinWrong pectin method or old pectinFollow the pectin brand’s remake instructionsUse fresh pectin and exact boil timing
Loose low-sugar jamToo much sugar reductionUse as sauce or remake with low-sugar pectinUse pectin made for reduced sugar
Too thickOvercookingLoosen warm jam with a little hot water or lemon juiceStop when glossy and softly set
Flat flavorNot enough acidAdd lemon juice a teaspoon at a timeUse enough lemon with sweet cherries

How to Fix Runny Cherry Jam

Let the jam cool completely before you fix it. If you used pectin, wait up to 24 hours because some pectin jams continue to set after jarring. If it is still too loose, choose the fix based on the style you made.

For No-Pectin Cherry Jam: Reboil and Retest

Use a wide pan so extra water can evaporate quickly without flattening the cherry flavor.
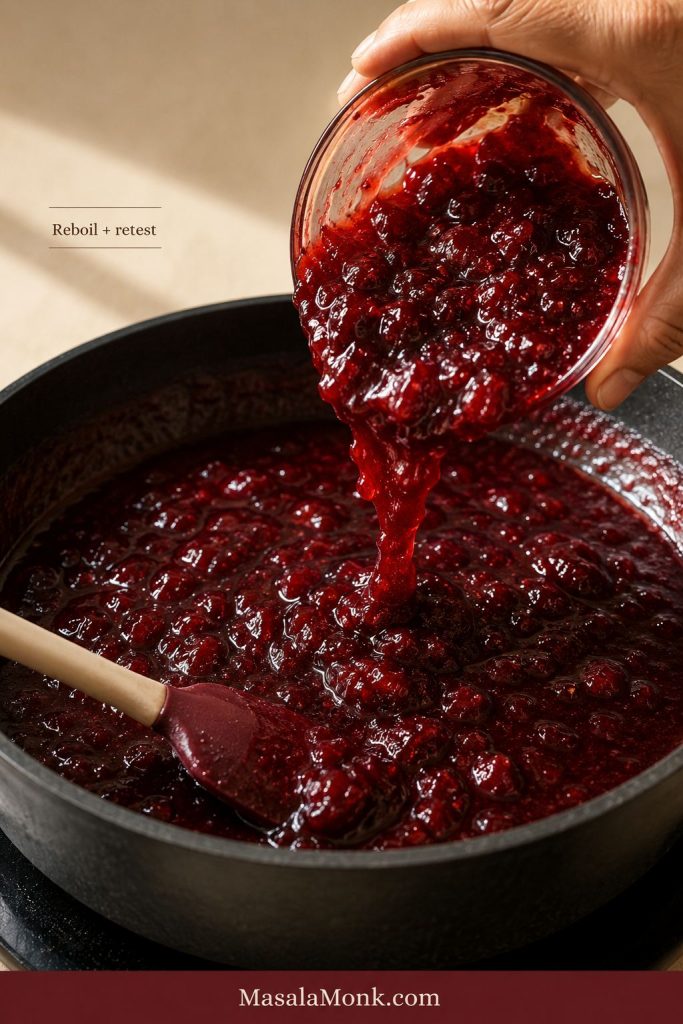
Runny cherry jam being poured from a jar into a wide dark pan with a spatula for reboiling.
If the cooled batch is truly too loose, pour it back into a wide pan, simmer briefly, and retest before the fruit overcooks.
  1. Pour the loose jam back into a wide pan.
  2. Bring it to a steady boil over medium-high heat.
  3. Cook for a few minutes, stirring often.
  4. Test on a chilled plate.
  5. Stop when the jam wrinkles slightly or sheets from the spoon.

Do not boil it endlessly. A longer boil is not always better; sometimes it just cooks away the fresh cherry flavor.

For Pectin Cherry Jam

If you used packaged pectin, follow that pectin brand’s remake instructions. Pectin formulas vary, and adding more pectin without the correct sugar, acid, and boiling method can make the texture gummy or uneven.

For Jam That Will Not Set Firmly

Use it as cherry sauce. This is not a failure if the flavor is good. A loose cherry jam can be better than stiff jam on pancakes, yogurt, ice cream, cheesecake, waffles, oatmeal, and desserts.

Once the texture is right: return to the recipe card · see ways to use cherry jam

Can You Can This Cherry Jam?

The main no-pectin recipe in this post is written for the refrigerator or freezer. It is not a shelf-stable canning recipe.

This does not mean canning is difficult. It only means pantry storage needs a recipe built for pantry storage. The recipe card version is flexible because it stays cold; a pantry recipe has to be exact because it is stored at room temperature.

The difference is the whole formula: sugar level, acid, jar size, headspace, processing time, and altitude. For shelf-stable jars, use a canning-tested cherry jam recipe and follow the exact instructions. The National Center for Home Food Preservation’s cherry jam with pectin method is a better reference point for pantry jars than a flexible fridge-jam recipe.

Fridge Jam vs Pantry Canning

The safest way to think about storage is simple: chilled jars can stay flexible, but pantry jars need a tested process.
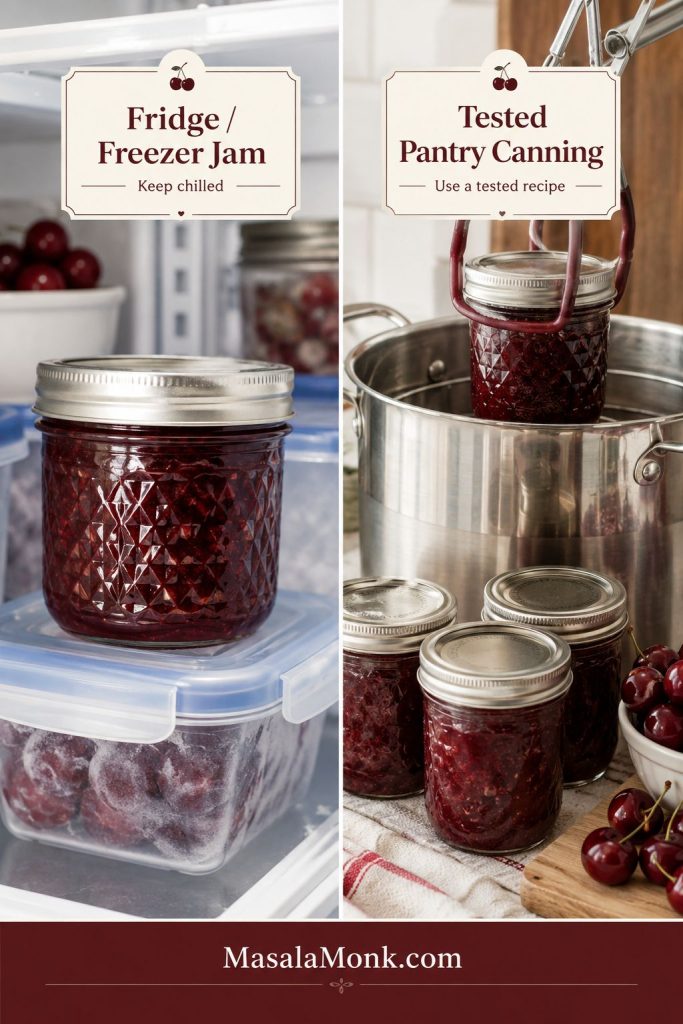
Split image showing cherry jam stored in a refrigerator on one side and jars processed in a water-bath canner on the other.
For safe storage, keep this small-batch jam in the fridge or freezer; shelf-stable jars need a tested canning recipe.

What Changes for Canned Cherry Jam?

  • The recipe usually uses pectin for a reliable set.
  • The sugar level is part of the pantry-safe formula, not just a taste choice.
  • Jam jars need correct headspace, often 1/4 inch / about 6 mm.
  • Filled jars need boiling-water processing for the correct time.
  • Processing time may change with altitude.
  • Jar inversion is not a substitute for proper water-bath processing.
  • Low-sugar canning needs a reduced-sugar canning route or low/no-sugar pectin system.

Think of this as two different goals: a chilled homemade jar today, or a pantry-safe jar for later. Make the recipe card version when you want a quick homemade spread. Use a water-bath canning route when you want pantry jars.

Keeping this as a chilled batch? jump to storage · see serving ideas

Can You Make Low Sugar Cherry Jam?

Low sugar cherry jam can be lovely, especially when the cherries are flavorful. Just do not treat sugar like decoration. Sugar does more than sweeten the fruit; it helps the jam set, shine, and store properly.

Reducing sugar for a fridge jar is a taste choice. Reducing sugar for a pantry jar is a preservation change. That is why low-sugar cherry jam should not come from cutting sugar from a regular recipe at the end.

For a softer refrigerated batch, you can reduce sugar modestly and accept a looser finish. For a more reliable low-sugar set, use pectin designed for low-sugar or no-sugar jam and follow that pectin’s instructions. Oregon State University Extension explains why reduced-sugar fruit spreads need different handling here: Low-Sugar Jams and Jellies.

  • Slightly less sweet fridge jam: reduce sugar modestly and expect a softer set.
  • Firm low-sugar jam: use low/no-sugar pectin.
  • Sugar-free jam: use a tested sugar-free pectin method.
  • Low-sugar canned jam: use a canning-safe recipe designed for reduced sugar.

Cherry Freezer Jam Is Different

Freezer jam is its own style, not just cooked jam stored cold. It often uses fresh crushed fruit, sugar, and pectin, then sets in the fridge or freezer without water-bath processing. It is fresh-tasting and easy, but it still belongs in the freezer or refrigerator, not the pantry.

Cherry Jam, Jelly, Preserves, Compote, and Chia Jam

If you are comparing cherry jam with jelly, preserves, compote, or chia jam, here is the quick difference.

NameWhat it meansTexture
Cherry jamChopped or crushed cherries cooked with sugarSpreadable with fruit texture
Cherry preservesLarger cherry pieces in syrupy jamChunkier and fruitier
Cherry jellyStrained cherry juice set with sugar and pectinClear and smooth
Cherry compoteFruit cooked briefly with sugar or syrupLoose sauce
Cherry chia jamQuick fridge spread thickened with chia seedsSoft and seedy

If you want fruit pieces, make cherry jam or preserves. If you want a clear, smooth spread, cherry jelly is the better recipe. If you only need a quick topping, compote or chia jam may be enough.

Cherry Jam Flavor Variations

Plain cherry jam is the best first batch because it teaches you the set and sweetness. After that, small flavor changes can make the same base recipe feel completely different.

  • Vanilla cherry jam: add 1 teaspoon vanilla extract after cooking.
  • Cherry almond jam: add 1/8 to 1/4 teaspoon almond extract at the end.
  • Amaretto cherry jam: stir in a small splash of amaretto after cooking for a dessert-style jam.
  • Black forest cherry jam: pair cherry jam with chocolate desserts instead of adding too much cocoa to the jar.
  • Lemon cherry jam: add lemon zest for a brighter finish.
  • Jalapeño cherry jam: add finely chopped jalapeño for a sweet-savory cheese board jam.
  • Mixed berry cherry jam: replace part of the cherries with raspberries, strawberries, or blueberries.
  • Rhubarb cherry jam: add tart rhubarb for a sharper preserve.

When adding extracts, start small. Cherry jam has a delicate fruit flavor, and almond or alcohol-based flavors can take over quickly. If you want the chocolate-cherry direction, pair the jam with chocolate cream cheese frosting instead of adding too much cocoa to the jar.

How to Use Cherry Jam

A spoonful of cherry jam can make a plain breakfast feel like something you planned. It is especially good anywhere you want a dark, sweet-tart spoonful against something creamy, buttery, or crisp.

Serving Ideas for Cherry Jam

The best uses pair the jam with creamy, buttery, or lightly crisp foods so the cherry flavor stays bright.
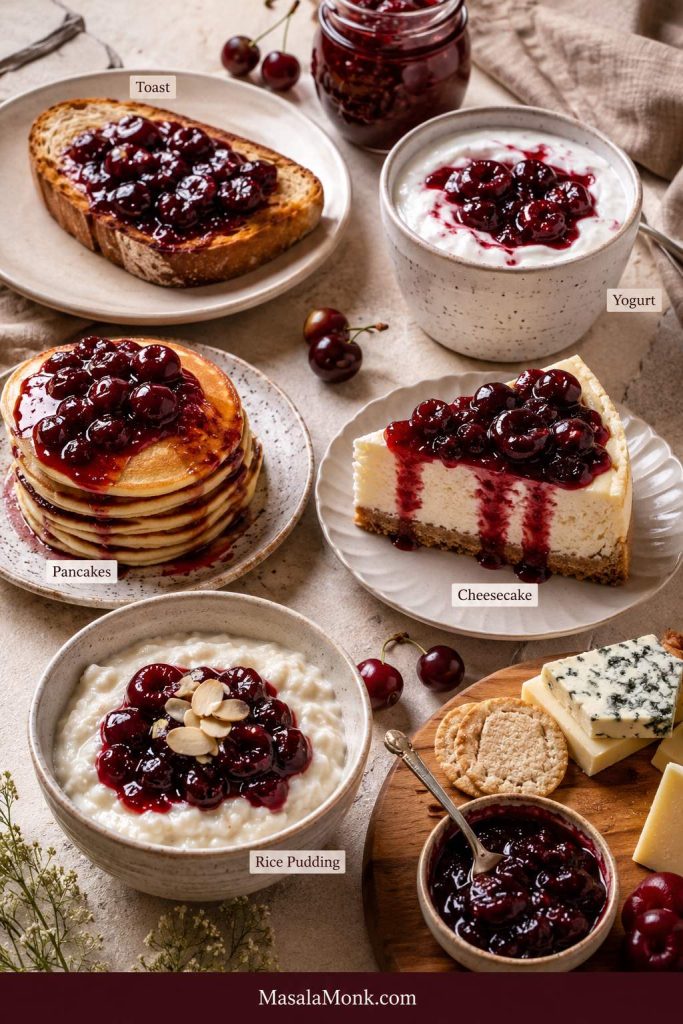
Cherry jam served with toast, yogurt, pancakes, cheesecake, rice pudding, and a small cheese board.
Once set, the jam adds a bright fruit finish to toast, yogurt, pancakes, cheesecake, rice pudding, and cheese boards.
  • Spread on toast, sourdough, biscuits, croissants, or English muffins.
  • Spoon over protein-rich cherry pancakes for a double-cherry breakfast.
  • Swirl a spoonful into overnight oats for a cherry-yogurt breakfast jar.
  • Spoon it over a no bake cheesecake for an easy cherry cheesecake topping.
  • Spread between cake layers with whipped cream, buttercream, or cream cheese frosting.
  • Fill thumbprint cookies, sandwich cookies, hand pies, or pastries.
  • Serve with brie, cream cheese, goat cheese, or a cheese board.
  • Warm slightly and brush over chicken, pork, or ham as a glaze.
  • Spoon a loose batch over rice pudding with cooked rice, vanilla ice cream, or pound cake.

How to Store Cherry Jam

Once the jar is cool, the storage choice matters more than the jar itself. A refrigerated jam, freezer jam, and properly canned jam should not be treated the same way.

Storage methodHow longNotes
Refrigerator2–3 weeksBest for the no-pectin recipe in this post
FreezerUp to 3 monthsUse freezer-safe containers and leave headspace
Properly canned jarsFollow tested canning guidanceOnly for correctly processed shelf-stable recipes
Opened canned jarRefrigerate after openingUse as you would regular jam

Always use clean utensils when scooping jam from the jar. If jam smells fermented, grows mold, becomes fizzy, or looks unusual, discard it.

Common Cherry Jam Mistakes to Avoid

Most cherry jam problems come from the same few moments: too much liquid, not enough testing, too much heat, or treating a fridge jar like a pantry jar. Watch for these and the whole batch becomes much easier to control.

  • Using a deep narrow pot. A wide pan helps extra water evaporate faster.
  • Skipping lemon juice with sweet cherries. Sweet cherries need acidity for a brighter flavor.
  • Adding all the thawed frozen cherry juice. Too much liquid makes the jam take longer to set.
  • Using cherry pie filling as the fruit. Pie filling already contains sugar and thickeners, so it is not the same as plain cherries.
  • Reducing sugar randomly. Sugar affects texture, shine, set, and storage.
  • Doubling the batch without adjusting technique. Larger batches take longer to reach the setting stage.
  • Boiling too long. Overcooked jam can become sticky, dull, and too firm.
  • Judging set while hot. Jam thickens as it cools.
  • Using expired pectin. Old pectin can lead to a weak set.
  • Swapping pectin types without checking the method. Powdered, liquid, and low/no-sugar pectin behave differently.
  • Treating cold-storage jam like pantry jam. Fridge and freezer jams stay chilled; shelf-stable jars need a canning-tested method.

Cherry Jam Recipe FAQ

Why is my cherry jam runny?

Cherry jam is usually runny because it was undercooked, made with too much liquid, cooked in too large a batch, reduced too heavily in sugar, or made with the wrong pectin method. Let the jam cool fully before deciding it failed, because jam thickens as it cools.

Does cherry jam need pectin?

No. Cherry jam does not need pectin for a soft refrigerator set, but pectin helps when you want a firmer jam, reduced-sugar structure, or pantry-safe canning recipe. For the no-pectin version here, cook the fruit down properly and test it on a cold plate.

What cherries are best for jam?

Sweet cherries make a deep, mellow jam, while sour cherries make a brighter and tangier jam. Bing cherries, dark sweet cherries, tart cherries, pie cherries, and Morello cherries can all work. Rainier cherries are fine too, but the jam will be lighter in color and softer in flavor.

How many cherries do I need for this recipe?

You need 500 g / about 3 cups pitted cherries for this recipe. Start with about 600–700 g / 1 1/3–1 1/2 lb whole cherries to allow for the pits and stems.

Do frozen cherries work for cherry jam?

Yes. Frozen cherries work well for cherry jam if you thaw and drain them first, then add back only a splash of reserved juice if the pan looks dry. They often release more liquid than fresh cherries, so the jam may take a little longer to thicken.

Can I make cherry jam with canned cherries?

Yes, but use plain canned cherries and drain them well before cooking. Cherries packed in syrup, juice, or water can work, but cherry pie filling is not a direct substitute because it already contains sugar, thickeners, and flavoring.

How much sugar do I need for cherry jam?

For the no-pectin fridge jam in this post, use 200 g / about 1 cup sugar for 500 g / about 3 cups pitted cherries. That gives a balanced soft-to-medium set. Less sugar can work for a softer fridge jam, but the texture will be looser. Pectin canning recipes often use more sugar because the sugar level is part of the formula.

Is lemon juice necessary in cherry jam?

Lemon juice is strongly recommended, especially with sweet cherries. It brightens the flavor and helps the jam set better. Without lemon, sweet cherry jam can taste flat or overly heavy after cooking.

What temperature should cherry jam reach?

Cherry jam usually sets around 220°F / 104–105°C. At higher altitudes, the setting point may be closer to about 8°F above your local boiling point of water. Temperature is helpful, but it should be used with a cold plate test instead of replacing it.

Can this cherry jam recipe be canned?

The main no-pectin recipe is for refrigerator or freezer storage. For shelf-stable pantry jars, use a canning-safe recipe with proper boiling-water processing, correct headspace, and altitude adjustments.

Is low-sugar cherry jam safe for canning?

Only when the recipe is designed for that. Low-sugar cherry jam can be canned when you use a tested reduced-sugar canning recipe or a low/no-sugar pectin method designed for canning. Do not simply cut sugar from a traditional recipe and store the jars in the pantry.

What is the difference between cherry jam and cherry jelly?

Cherry jam is made with chopped or crushed cherries, so it has fruit texture. Cherry jelly is made from strained cherry juice, so it is smooth and clear. Jelly usually needs a different method and often uses pectin for a firm set.

Can I make cherry jam without a thermometer?

Yes. Use the cold plate test. Place a small plate in the freezer before cooking, spoon a little jam onto it, wait briefly, then push the jam with your finger. If it wrinkles and does not run like syrup, the jam is ready.

Can I double this cherry jam recipe?

It is better to make two small batches instead of one large batch. Small batches cook faster, evaporate more evenly, and are easier to set. Large batches can stay watery longer and may overcook before they thicken properly.

Did you make this with sweet cherries, sour cherries, or frozen cherries? Tell us which one you used, whether you used pectin, and whether your jam set soft, medium, or firm. Your note can help the next person decide how long to cook their batch.

Final Thoughts

That is the real point of jam: catching fruit at its best and giving it a second life in a jar. A good cherry jam does not have to be perfect like store-bought jelly. It should taste bright, look glossy, spread easily, and remind you why cherries were worth saving in the first place.
Posted on — Leave a comment

Cherry Pie Recipe That Sets | Fresh, Frozen, Canned, or Shortcut Filling

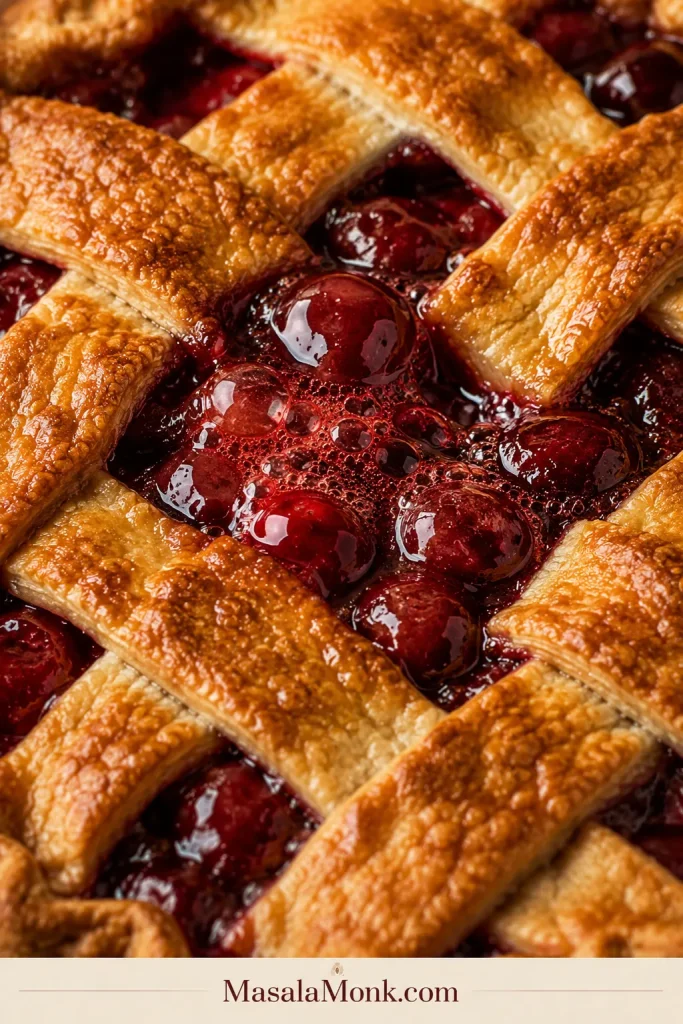
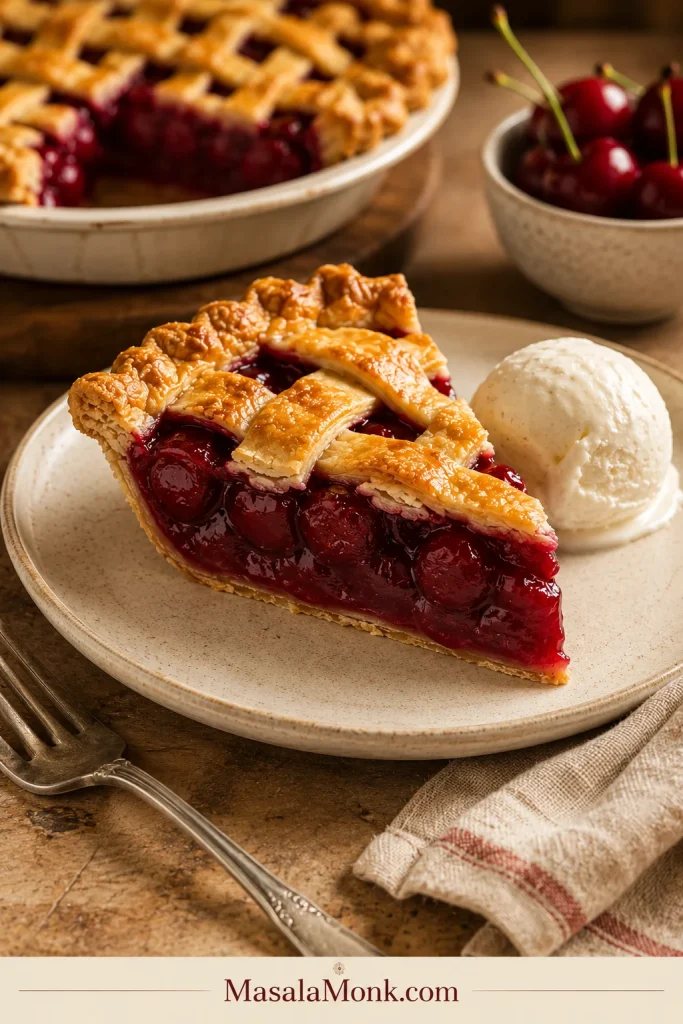
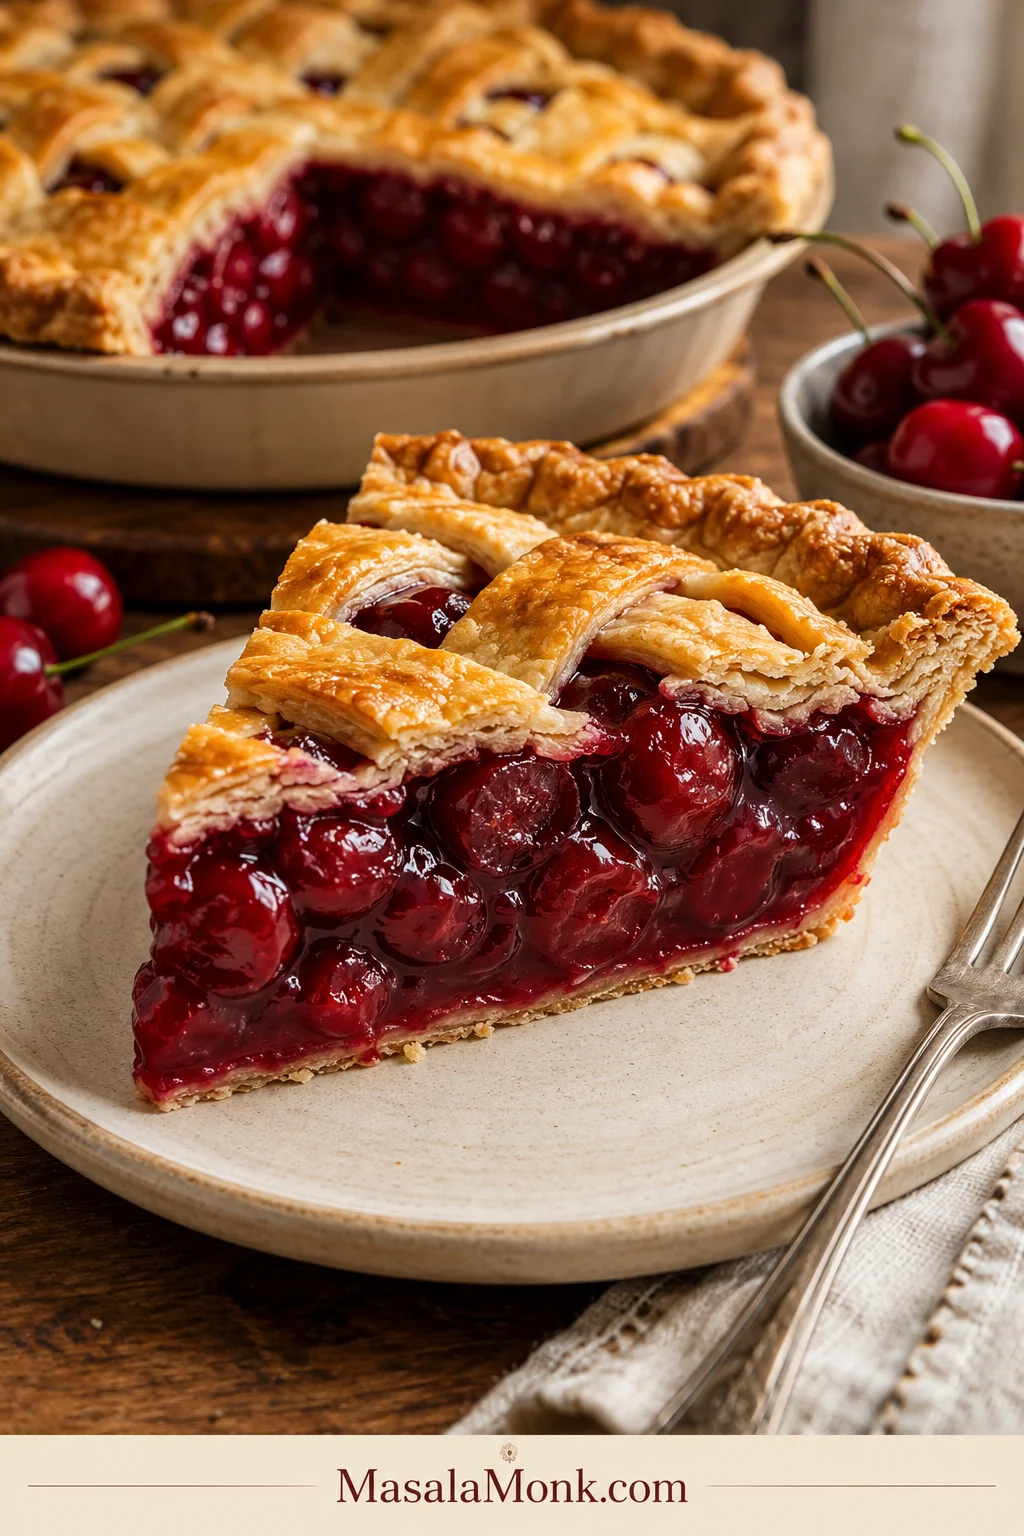
A thick slice of cherry pie on a cream plate with ruby cherry filling holding together inside a golden flaky crust.

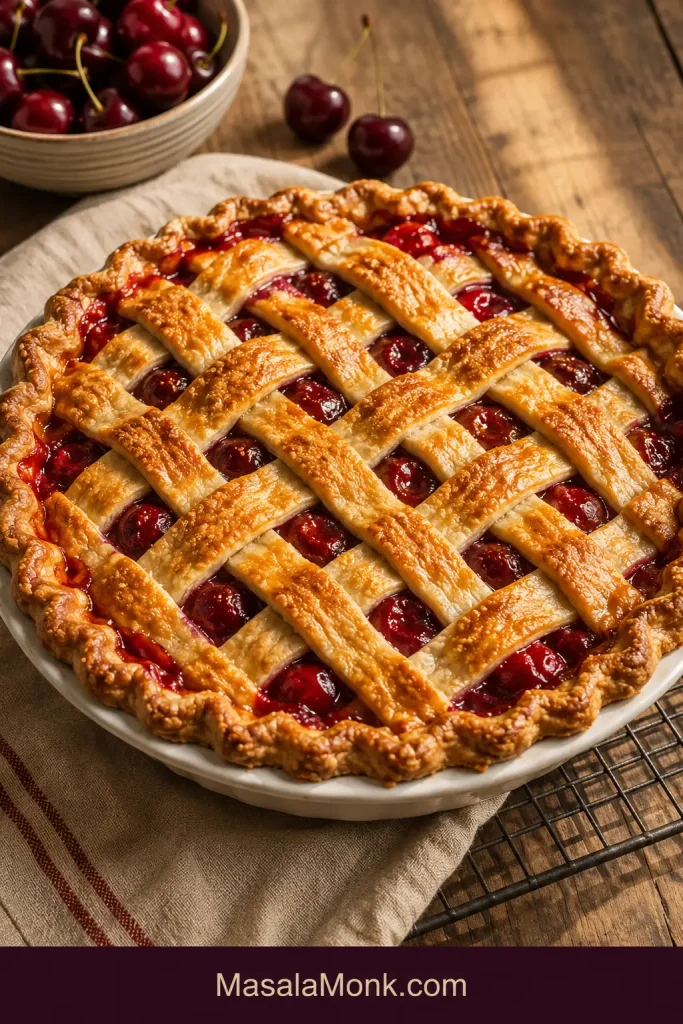
A good cherry pie should slice into deep ruby filling, not collapse into a puddle the moment the knife goes in. This cherry pie recipe is built around that exact problem: flaky golden crust, bright cherry flavor, and a thick filling that holds together after cooling.

You do not need perfect fresh cherries to make it work. This guide gives you a clear path for fresh cherries, frozen cherries, canned cherries, sweet cherries, sour cherries, and even a shortcut version with canned cherry pie filling. You can make the crust from scratch or use store-bought pie dough. The filling is where the confidence matters most.

If pie crust is the part that makes you hesitate, this flaky homemade pie crust guide has the same cold-dough, lattice, and no-soggy-bottom logic you need here.

Cherry pie asks for a little patience, but not guesswork. Once you know how to manage the juice, thicken the filling, bake until the center is active, and let the pie cool before slicing, the whole thing becomes much easier. The hardest part is not the lattice. It is leaving the pie alone when the kitchen already smells like dessert.

Quick Answer: How to Make Cherry Pie That Sets

To make cherry pie that sets, use about 5 1/2 cups pitted cherries, enough sugar for the type of cherries you have, lemon juice for brightness, and cornstarch to thicken the juices. Let the cherries sit with sugar and lemon first so they release some liquid, then reduce that liquid briefly and whisk in the cornstarch before adding it back to the fruit.

This small juice-control step keeps the filling from turning loose. The cherries still taste fresh and juicy, but the syrup starts in a more controlled place before the pie goes into the oven.

Bake at 425°F / 220°C for 20 minutes, then reduce the oven to 375°F / 190°C and bake for another 35 to 45 minutes. The pie is done when the crust is deep golden and the center filling bubbles through the lattice or vents for at least 5 minutes. Cool for at least 3 hours, ideally 4 hours, before slicing.

Want the full method? Jump to the recipe card. Still choosing fruit? Start with the cherry guide.

Cherry pie rules that matter most:

  • Keep loose cherry liquid out of the crust until it has been reduced or thickened.
  • Bake until the center bubbles, not just the edges.
  • Cool the pie before slicing.
  • Taste canned filling before adding anything sweet.
  • Fix the filling first; the lattice can be simple.

What a properly baked cherry pie should show

Use this as the visual goal after the quick method: deep color on the crust and filling activity in the center, not only at the edges.

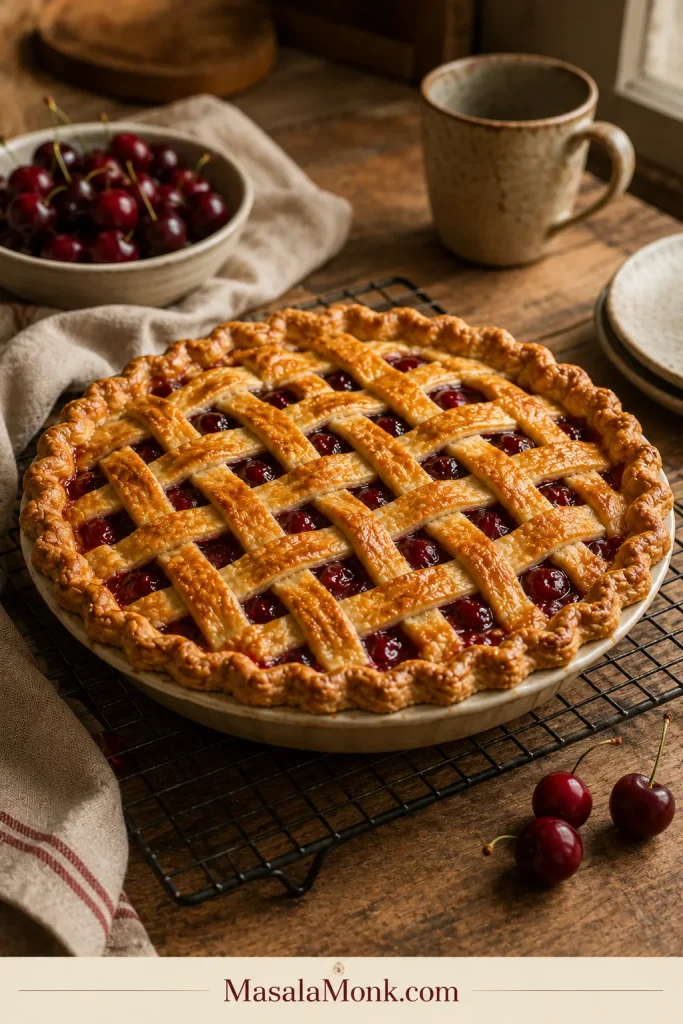
Whole homemade lattice cherry pie in a pie dish with a deep golden crust and glossy cherry filling visible between the pastry strips.
A golden lattice looks beautiful, but the real doneness cue is cherry filling that bubbles through the center openings before the pie comes out.

Cherry Pie at a Glance

Pie sizeStandard 9-inch pie
Cherries5 1/2 cups pitted cherries, about 800–850g / 28–30 oz
Fresh cherries to buyAbout 2 to 2 1/4 lb / 900g to 1kg whole cherries before pitting
Best default thickenerCornstarch
Oven temperature425°F / 220°C first, then 375°F / 190°C
Bake time55–65 minutes total
Done cueCenter filling bubbles through lattice or vents for at least 5 minutes
Cooling time3 hours minimum; 4 hours for cleaner slices
Fastest versionTwo 21-ounce cans cherry pie filling with store-bought crust

Choose Your Cherry Pie Path

Before you start measuring, choose the version that matches the cherries in your kitchen. A fresh summer pie, a frozen cherry pie, and a canned-filling shortcut can all work. They just need different handling.

If this is your first cherry pie, start with the parts that matter most: active filling, a golden crust, and enough cooling time. A neat lattice is lovely, but it is not what makes the slice hold.

What You WantBest PathWhy It Works
Best classic flavorUse sour/tart cherries or a sweet-tart mixBright, old-fashioned pie flavor.
Fresh summer pieUse fresh sweet cherries, less sugar, and extra lemonSweet cherries need brightness more than extra sugar.
Easiest homemade versionUse frozen cherries and cook the filling brieflyCooking controls the extra liquid.
Fastest pieUse canned cherry pie filling and store-bought crustAlready thickened; needs flavor balance.
Cleanest slicesReduce or cook the filling and cool for 4 hoursThickening and cooling both help the slice hold.
Least crust stressUse store-bought crust or a crumb toppingFilling matters most.

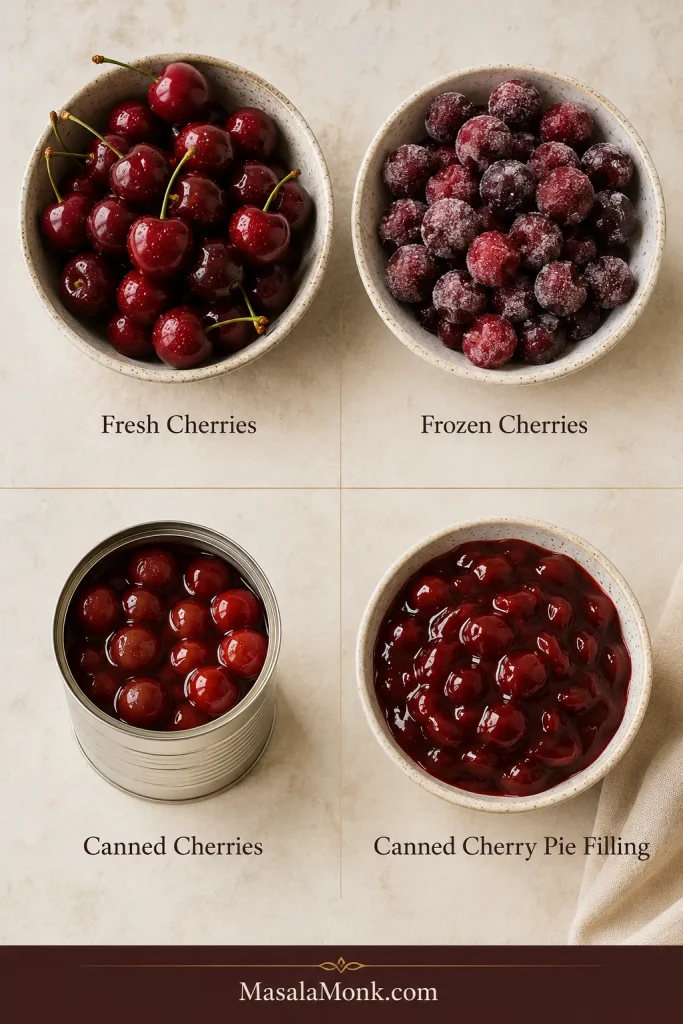
Choose the cherry path before you measure

The right method depends on whether your cherries are fresh, frozen, canned in liquid, or already made into pie filling.

Four-part comparison showing fresh cherries, frozen cherries, canned cherries, and canned cherry pie filling arranged in separate bowls.
Start by matching the method to the cherries you have, because fresh cherries, frozen cherries, canned cherries, and canned cherry pie filling all behave differently in a pie.

Already know what you have? Go to fresh cherries, frozen cherries, canned cherries, or the canned filling shortcut.

If you are nervous, choose the path that gives you the most control: use fresh or frozen cherries, reduce the juice, and give the pie the full cooling time. A slightly messy edge is not a failed pie. A watery filling is what disappoints people, and this recipe is built to avoid that.

Back to top · Jump to recipe

The Recipe: Thick, Sliceable Cherry Pie

Cherry Pie Recipe

This classic cherry pie has a flaky double crust and thick, ruby-red cherry filling. The main method works with fresh or frozen cherries, with notes below for canned cherries and canned cherry pie filling. It is intentionally built to show you the juice before it goes into the crust, so you are not guessing once the pie is already baking.

Yield1 9-inch pie, about 8 slices
Prep Time35 minutes
Bake Time55 to 65 minutes
Cooling Time3 to 4 hours
Total TimeAbout 4 1/2 to 5 1/2 hours
DifficultyModerate, but beginner-friendly with the notes

Ingredients

  • 1 double pie crust, homemade or store-bought, enough for a 9-inch pie
  • 5 1/2 cups pitted cherries, about 800 to 850g / 28 to 30 oz
  • Granulated sugar: use 2/3 cup / 135g for sweet cherries, or 3/4 to 1 cup / 150 to 200g for sour or tart cherries
  • 1/4 cup cornstarch, about 30 to 32g
  • 2 to 3 tablespoons cold water, for making the cornstarch slurry
  • 1 to 2 tablespoons lemon juice, 15 to 30ml
  • 1 teaspoon vanilla extract, 5ml
  • 1/4 teaspoon almond extract, optional but recommended
  • 1/4 teaspoon fine salt
  • 1 to 2 tablespoons unsalted butter, 14 to 28g, cut into small pieces
  • 1 egg, for egg wash
  • 1 tablespoon milk or water, for egg wash
  • 1 tablespoon coarse sugar, optional, for sprinkling

Almond note: Almond extract is optional. Skip it for nut allergies or replace it with a little extra vanilla.

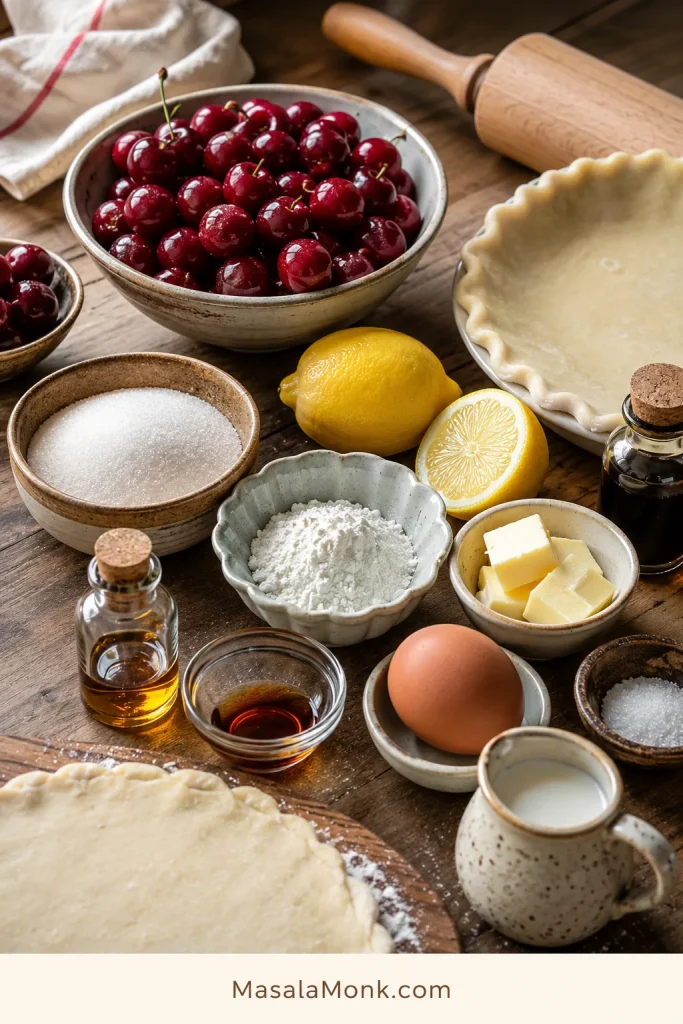
The ingredients that make the filling work

The filling depends on balance: fruit for body, sugar for sweetness, lemon for brightness, cornstarch for set, butter for richness, and cold dough for a flaky crust.

Cherry pie ingredients arranged on a wooden table, including cherries, sugar, cornstarch, lemon, butter, egg, extracts, and pie crust.
Each ingredient has a job: lemon keeps the cherries bright, cornstarch helps the juices set, butter adds richness, and cold dough protects the crust.

Instructions

Release and separate the cherry juice

1. Prepare the bottom crust. Roll out the bottom pie crust and fit it into a 9-inch pie plate. Leave a little overhang around the edge. Keep the lined pie plate chilled while you make the filling. A standard or slightly deep 9-inch pie plate is easiest; a very shallow plate may overflow.

2. Mix the cherries. In a large bowl, combine the pitted cherries, sugar, lemon juice, vanilla extract, almond extract, and salt. Use the lower sugar amount for sweet cherries and the higher amount for sour or tart cherries.

3. Let the cherries rest. Set the bowl aside for 10 to 15 minutes. The fruit will release juice. This short rest shows you how much liquid you are dealing with before anything goes into the crust.

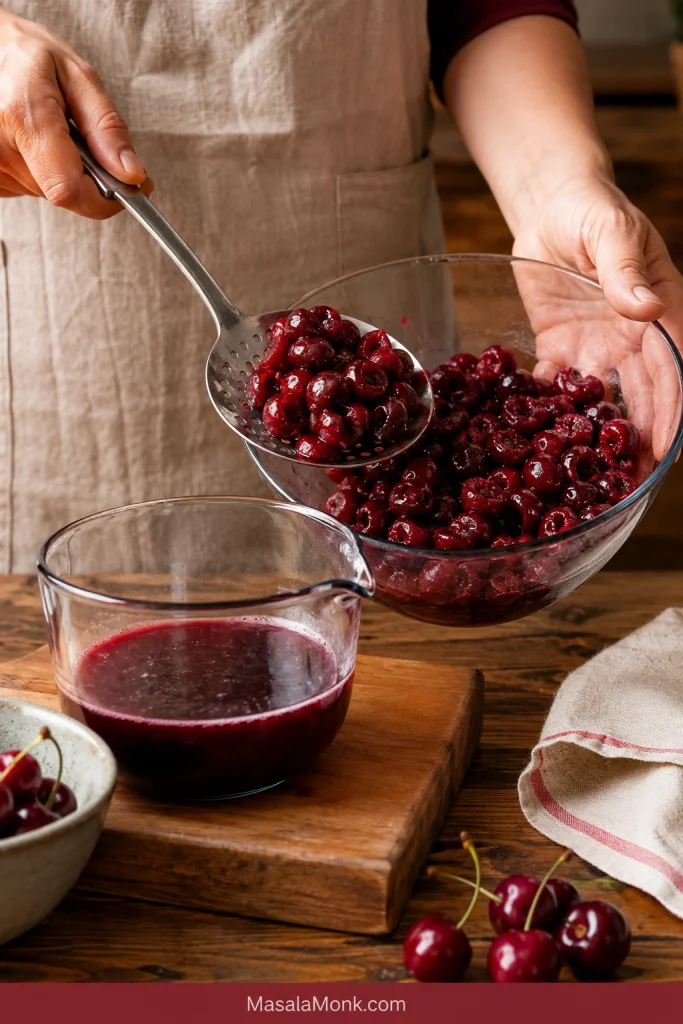
4. Separate the juice. Use a slotted spoon to lift the cherries into another bowl, leaving the collected juice behind. Pour the juice into a small saucepan.

Reduce and thicken the filling

5. Reduce the juice. Simmer the cherry juice for 3 to 5 minutes, stirring often, until it looks slightly syrupy and more concentrated. When the cherries release less than 1/2 cup juice, keep the reduction brief. For much more than 3/4 cup, simmer until it is closer to 1/2 cup before thickening.

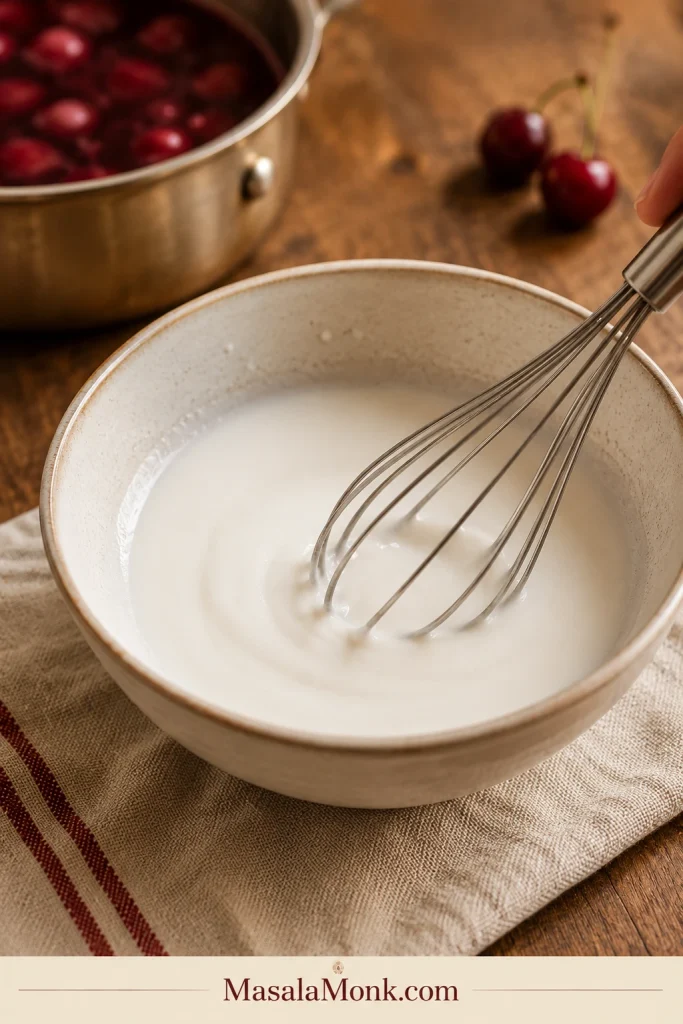
6. Make the slurry. In a small bowl, whisk the cornstarch with 2 to 3 tablespoons cold water until smooth. A slurry blends into hot juice more smoothly than dry cornstarch.

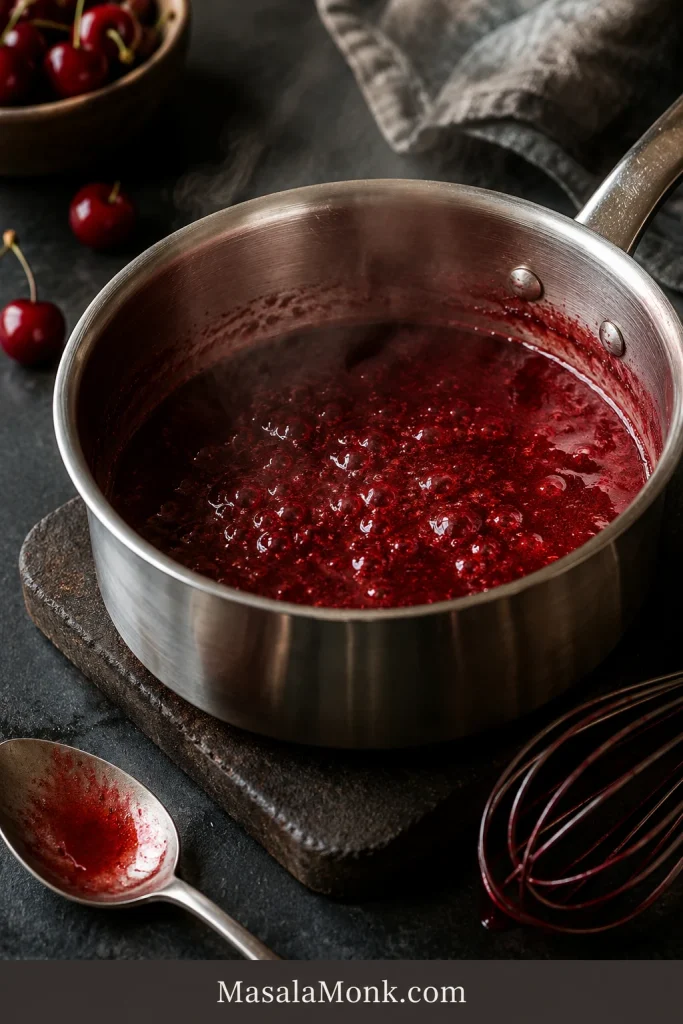
7. Thicken the juice. Whisk the cornstarch slurry into the simmering cherry juice. Cook for 30 to 60 seconds, stirring constantly, until the mixture looks shiny, thickened, and no longer cloudy. If it tightens too much, stir in a spoonful of cherry juice or water to loosen it.

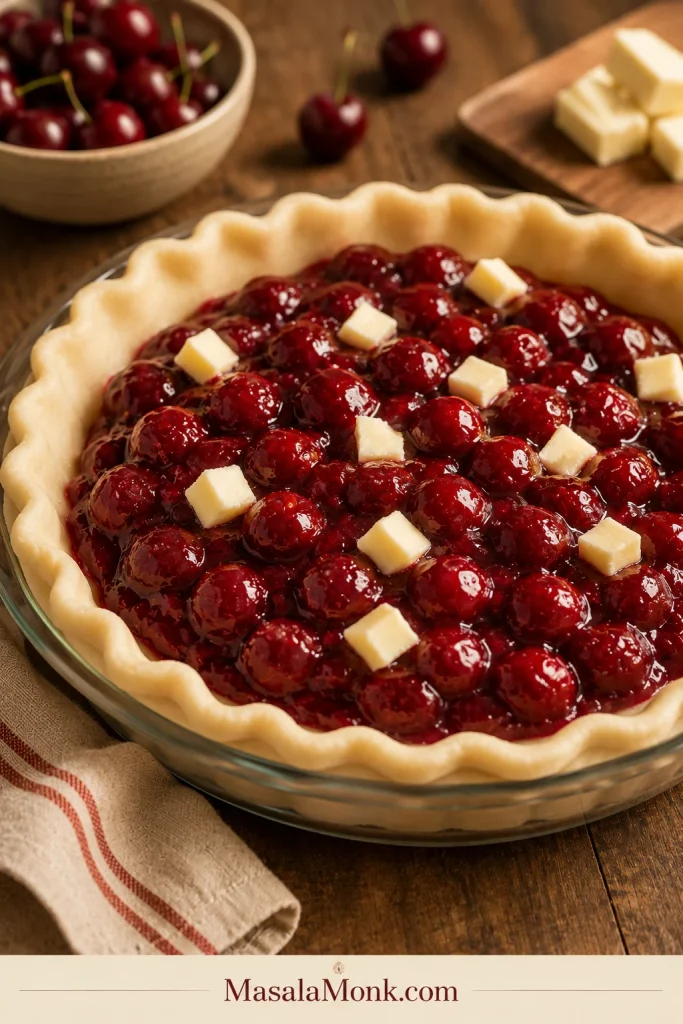
8. Finish the filling. Pour the thickened cherry syrup back over the cherries and stir gently. The fruit should look coated, not soupy. Let the filling cool for a few minutes if it feels very hot.

Assemble the pie

9. Fill the pie. Spoon the cherry filling into the chilled bottom crust. Dot the top with small pieces of butter.

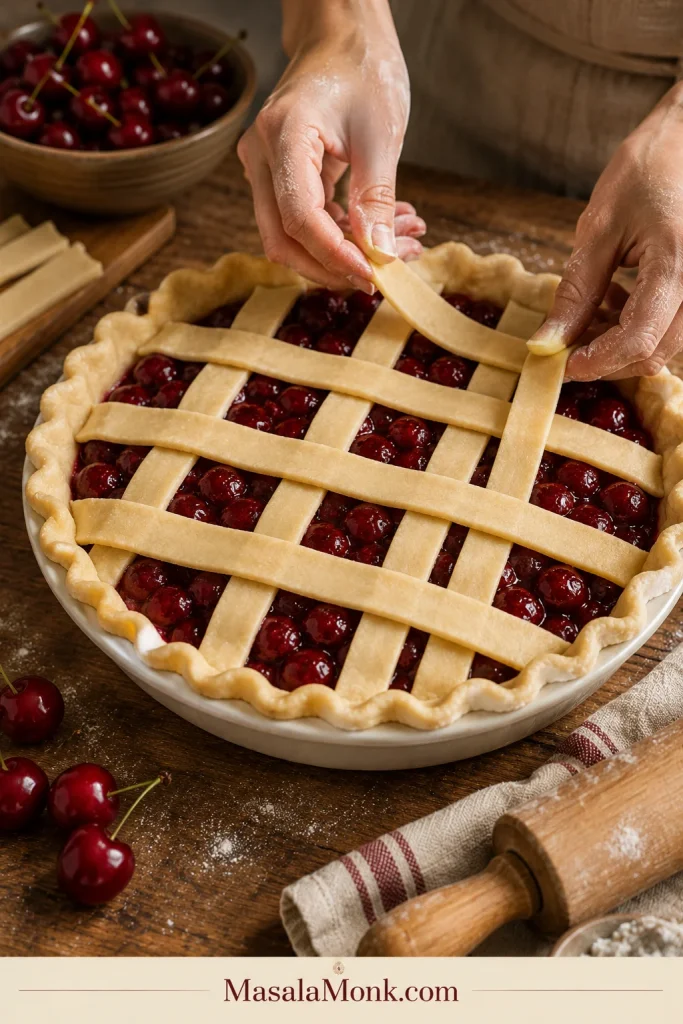
10. Add the top crust. Roll out the second crust and cut it into strips for a lattice, or place it over the pie as a full top crust. If using a full top crust, cut several vents in the center so steam can escape.

11. Seal and chill. Trim, fold, and crimp the edges. Chill the assembled pie for 15 to 20 minutes while the oven heats.

12. Heat the oven. Preheat the oven to 425°F / 220°C. Place a rimmed baking sheet on the lower-middle rack to catch drips and help the bottom crust bake well.

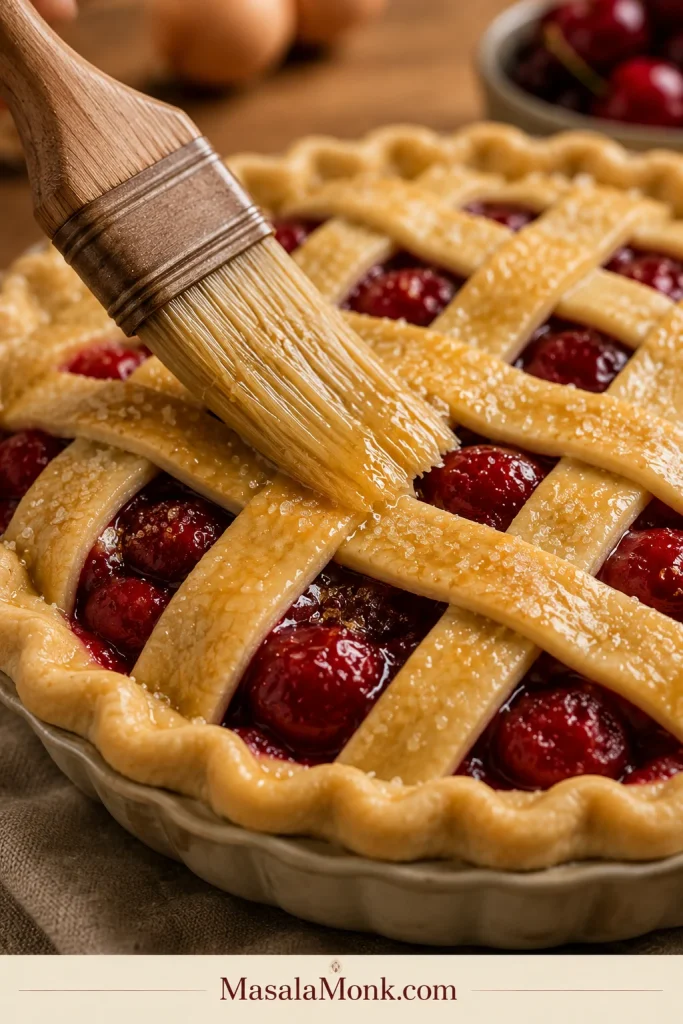
13. Brush the crust. Beat the egg with 1 tablespoon milk or water. Brush lightly over the top crust and sprinkle with coarse sugar if using.

Bake and cool

14. Start hot. Place the pie on the hot baking sheet and bake at 425°F / 220°C for 20 minutes.

15. Lower and finish. Reduce the oven temperature to 375°F / 190°C. Bake for another 35 to 45 minutes, until the crust is deep golden and the center filling bubbles through the lattice or vents for at least 5 minutes. If the crust edges brown too quickly, cover them with foil or a pie shield.

16. Cool before slicing. Transfer the pie to a cooling rack. Cool for at least 3 hours, ideally 4 hours, before slicing.

Cherry Notes

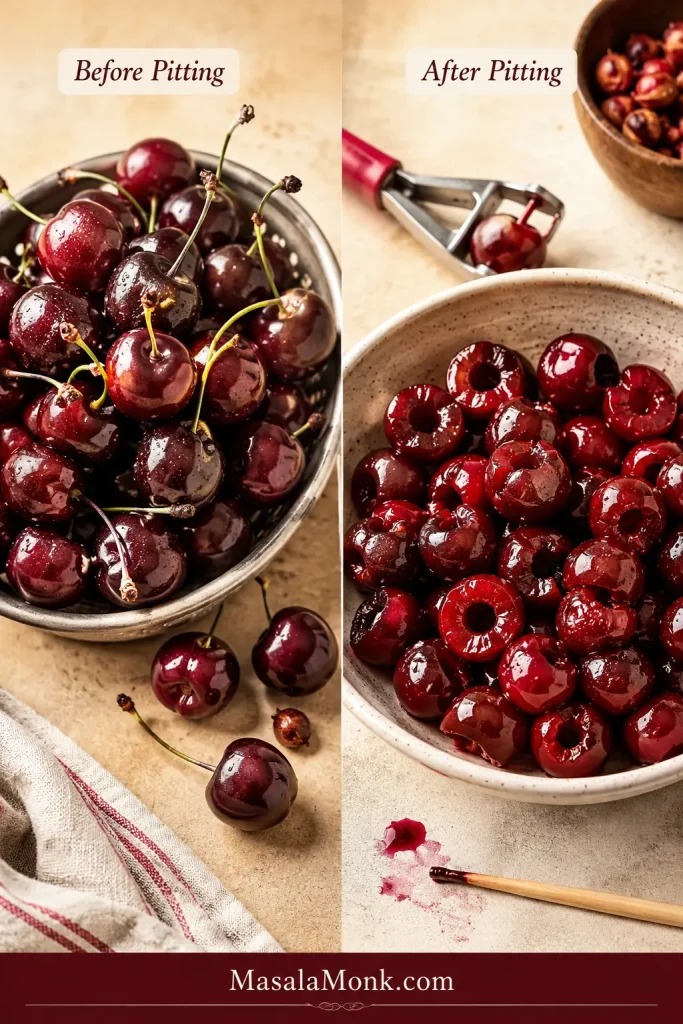
  • Fresh cherries: If buying whole cherries, start with about 2 to 2 1/4 lb / 900g to 1kg so you have enough after pitting.
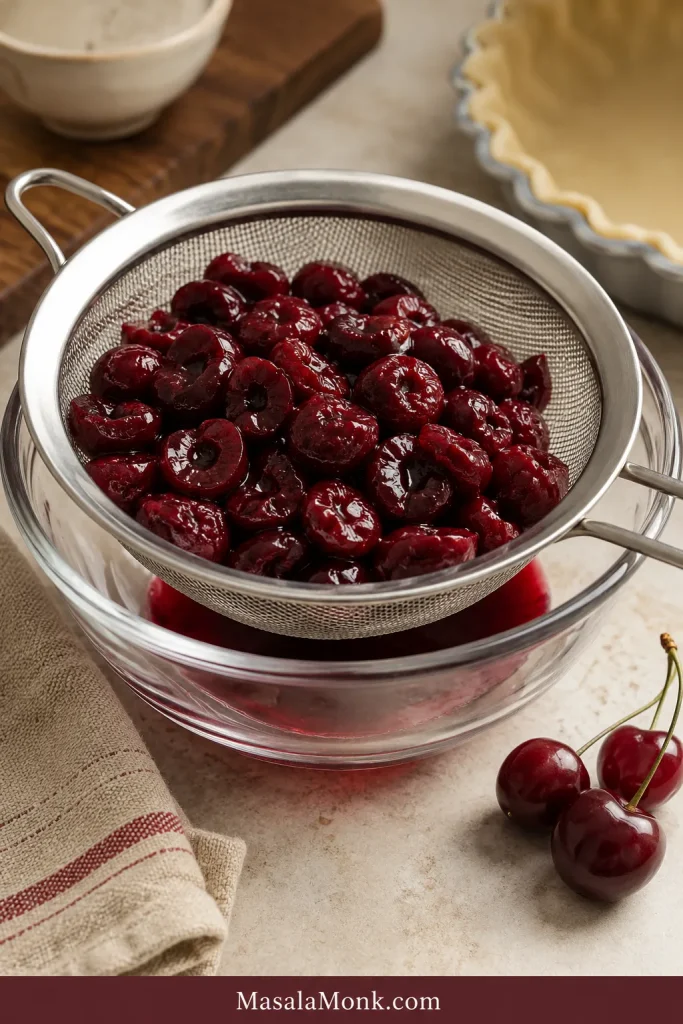
  • Frozen cherries: Measure after thawing and draining. You want about 5 1/2 cups drained fruit, not 5 1/2 cups including a lot of thawed liquid.
  • Canned cherries: If using canned cherries that are not already pie filling, aim for about 5 1/2 cups drained cherries. Reserve 1/2 to 3/4 cup of the canning liquid to reduce and thicken. If you come up short, combine canned cherries with thawed frozen cherries rather than adding extra liquid to fill the pie.

The same thickened-sauce idea works for other fruit fillings too. This apple pie filling recipe shows how a cooked fruit filling thickens with a cornstarch slurry before it goes into pies, crisps, or freezer desserts.

Back to top · Jump to recipe

Why This Cherry Pie Works

This recipe works because it manages the part that usually causes trouble: the cherry juice. Cherries are naturally juicy, and that syrup needs enough thickener, enough oven heat, and enough cooling time to become sliceable.

The short resting step lets the fruit release juice before it goes into the crust. Reducing that juice concentrates the flavor. Whisking the cornstarch into a slurry gives the filling a smooth, thickened start instead of a lumpy one.

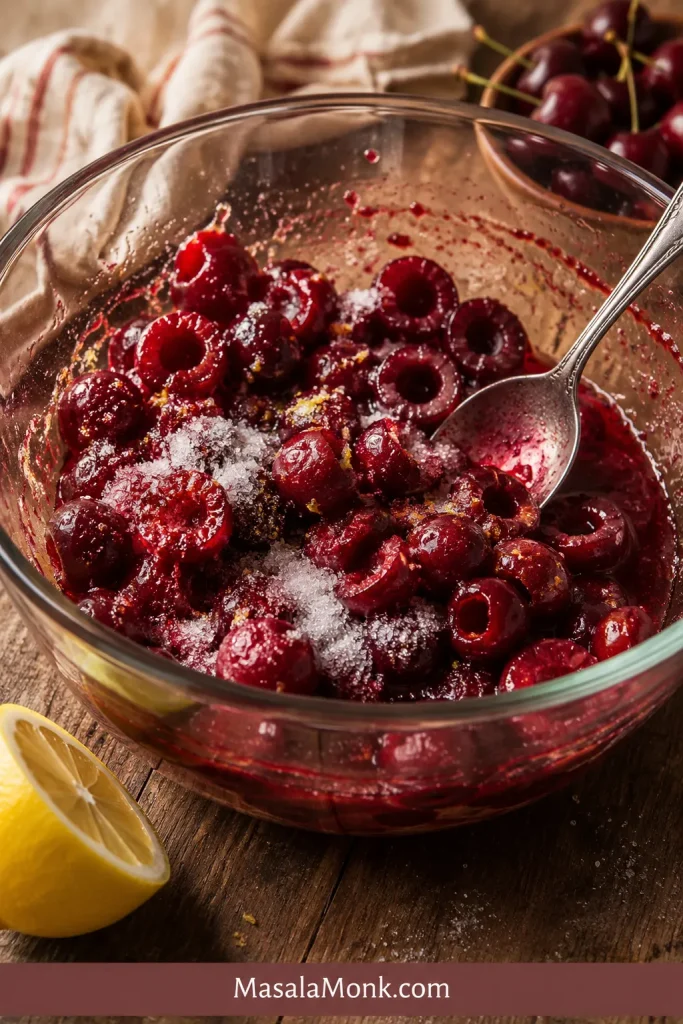
Let the cherries show you their juice first

This step turns guesswork into a visible cue. Once the cherries release liquid, you know what needs reducing or thickening.

Pitted cherries mixed with sugar and lemon in a clear glass bowl, with cherry juice beginning to collect at the bottom.
Once cherries sit with sugar and lemon, the juice collects in the bowl, showing exactly how much liquid needs to be managed before baking.

Separate the fruit before thickening the syrup

Keeping the cherries out of the pan for this step helps the fruit stay plump while the extra juice becomes a controlled filling base.

Hands lifting cherries with a slotted spoon from a glass bowl while red cherry juice remains below.
Next, lift the cherries out before thickening the syrup so the fruit stays plump while the loose juice becomes filling.

Reduce the cherry juice for stronger flavor

A short simmer concentrates the juice before thickening, which helps the pie taste more like cherries and less like sweet liquid.

Ruby cherry juice simmering in a small saucepan with steam rising and a spoon resting nearby.
As the juice simmers, it becomes more concentrated and flavorful, giving the cornstarch slurry a stronger base to thicken.

The lemon juice keeps sweet cherries from tasting flat, the almond extract adds a classic cherry-pie aroma, and the hot-start bake helps the crust set before the filling can make it soggy. Even then, the pie still needs to cool. It smells finished long before the filling has settled.

Why this method is safer: Raw cherry filling can work, but very ripe, frozen, or canned cherries often release more liquid than expected. Fully cooking the filling gives more control, but it can soften the fruit. This recipe uses a middle path: the cherries stay plump and juicy, while the extra liquid is reduced and thickened before it reaches the crust. It is built for the messy middle most home bakers actually face — cherries that are juicy, uneven, frozen, canned, or sweeter than expected.

What good filling looks like: Before baking, the cherries should look shiny and coated, not dry and not swimming. After baking, the bubbles should look thick and slow, not thin and watery.

Which Cherries Should You Use?

Fresh, frozen, canned, sweet, and tart cherries can all make good pie. The difference is how much liquid they release and how much sugar or lemon they need.

Cherries You HaveHow to Use Them
Fresh sweet cherriesUse less sugar, add lemon juice, and keep the full thickener amount.
Fresh sour or tart cherriesUse more sugar and keep the filling bright and thick.
Frozen cherriesThaw and drain them, or cook down the extra liquid before filling the pie.
Cherries packed in juice or waterDrain the cherries, reserve some liquid, and thicken the liquid into a filling.
Syrup-packed cherriesDrain well, reduce the sugar, and add lemon juice to balance the sweetness.
Prepared cherry pie fillingUse as a shortcut, but improve the flavor with lemon, vanilla or almond extract, salt, and butter.
Mixed sweet and tart cherriesUse them together for deeper flavor. Start with moderate sugar and adjust to taste.

Best Cherries for Cherry Pie

Sour or tart cherries give the most classic flavor. They are bright, sharp, and strong enough to stand up to sugar, crust, and baking. Frozen tart cherries or canned tart cherries are often excellent when fresh sour cherries are hard to find.

Sweet cherries are easier to find and still make a beautiful pie, especially with less sugar and a little extra lemon juice. A mix of sweet and tart cherries gives some of the best flavor: round, juicy, and lively without tasting flat.

Best first choice: If you are not sure what to buy, frozen tart cherries or fresh sweet cherries are both good starting points. Frozen tart cherries give a more classic pie flavor; fresh sweet cherries are easier to find and need a little extra lemon to stay bright.

Fresh, Frozen, Canned, or Canned Filling?

This is where the recipe becomes flexible. The method stays mostly the same, but the way you handle the fruit changes. Cherry pie usually goes wrong not because it is hard, but because cherries look harmless while they are quietly releasing a lot of juice.

Fresh Cherries

Fresh cherries give the pie a juicy fruit texture. Pit them first, then taste them. Sweet fresh cherries usually need less sugar and more lemon juice. Sour fresh cherries need more sugar but bring that classic cherry-pie brightness.

Very ripe fresh cherries can release a lot of juice. Letting them rest with sugar and lemon shows you how much syrup is in the bowl before the filling goes into the oven.

Fresh cherries: pit before measuring

Fresh cherries give the pie a juicy bite, but measuring them after pitting keeps the fruit amount honest and easier to thicken.

Whole fresh cherries shown beside pitted cherries in a bowl with a cherry pitter on a kitchen prep surface.
For fresh cherry pie, measure the fruit after pitting so the filling has enough cherries without overloading the center of the crust.

Frozen Cherries

Frozen cherries are not second-best. They are often the calmer choice because they are already pitted and ready. The tradeoff is extra liquid, and that liquid needs somewhere to go before the fruit lands in the crust.

Keep the thawed liquid out of the crust until you know how much you need. Good-tasting liquid can be reduced and used. Watery liquid is better partly discarded.

Frozen cherries: thaw and drain first

Frozen cherries are convenient, but they often release extra liquid. Draining them first keeps that liquid from flooding the crust.

Thawed frozen cherries draining in a metal strainer over a glass bowl with red cherry liquid collected underneath.
Meanwhile, thawed frozen cherries often release extra juice, so draining them first helps prevent watery filling and gives you better control.

Canned Cherries

Canned cherries are different from canned cherry pie filling. If the cherries are packed in juice, water, or syrup, drain them first. Reserve some of the liquid and cook it with sugar and cornstarch slurry to make a thick filling before adding the cherries back.

Cherries packed in syrup may already be quite sweet. Taste first, then decide how much sugar the filling really needs. Most syrup-packed fruit benefits more from lemon than from extra sweetness.

Canned Cherry Pie Filling

Canned filling is not cheating. It is just already sweetened and thickened, which means the job changes from “make the filling” to “make the filling taste brighter.” Lemon juice, vanilla or almond extract, a pinch of salt, and a little butter do that better than extra sugar.

Canned Cherries vs Canned Cherry Pie Filling

This is one of the most common cherry pie mix-ups. Canned cherries and canned cherry pie filling are not the same product, and using them the same way can make the pie too watery, too sweet, or too flat.

How the shortcut products differ

This is the shortcut decision that matters most. One product still needs a filling made from its liquid; the other is already thickened.

Side-by-side bowls showing drained canned cherries with reserved liquid and thick canned cherry pie filling.
Canned cherries still need a thickened syrup, while canned cherry pie filling already has one; that difference changes how much sugar and lemon you add.

How to read the can label

Label on the CanWhat It MeansWhat to Do
Pitted tart cherries in waterCherries only, not fillingDrain, reserve liquid, add sugar, and thicken.
Cherries in juiceCherries with usable liquidReserve some juice, reduce it, and thicken it.
Cherries in syrupSweeter canned cherriesUse less sugar and add lemon.
Dark sweet cherriesMilder, sweeter fruitUse less sugar, more lemon, and full thickener.
Cherry pie fillingAlready sweetened and thickenedUse as a shortcut. Add flavor, not more sugar.
More-fruit cherry pie fillingShortcut filling with more cherriesBest canned-filling option for better texture.

Quick label check: If the can lists cherries in water, juice, or syrup, you still need to make a filling. If it says cherry pie filling, it is already thickened and sweetened.

If you plan to preserve cherry pie filling in jars rather than bake this pie right away, follow tested home-canning guidance such as the National Center for Home Food Preservation cherry pie filling guide.

Shortcut rule: For a 9-inch pie, use two 21-ounce cans of cherry pie filling. Stir in 1 tablespoon lemon juice, 1 teaspoon vanilla extract or a few drops of almond extract, and a small pinch of salt. Dot with 1 tablespoon butter before adding the top crust.

Back to top · Jump to recipe

Ingredients and Why They Matter

Once the fruit is chosen, the rest of the pie becomes much simpler. The next job is keeping that cherry flavor in the slice instead of on the plate.

Cherries

Use about 5 1/2 cups pitted cherries for a 9-inch pie. That usually means around 800 to 850g after pitting. Slightly more or less is fine, but avoid piling in so much fruit that the center cannot heat and bubble properly.

Sugar

Sugar is not one-size-fits-all here. Sweet cherries usually need restraint; sour cherries need enough sugar to taste bright instead of sharp. Taste the fruit before you choose the final amount.

Cherry TypeSugar Starting PointBest Adjustment
Sweet cherries2/3 cup / 135gAdd 1 to 2 tablespoons lemon juice.
Very sweet cherries1/2 cup / 100gUse more lemon and a pinch of salt.
Sour or tart cherries3/4 to 1 cup / 150 to 200gTaste and adjust before filling the crust.
Mixed sweet and tart cherries2/3 to 3/4 cup / 135 to 150gUsually the most balanced option.
Syrup-packed cherriesStart lowerDrain well and add lemon first.
Prepared cherry pie fillingNo extra sugarAdd lemon juice and salt instead.

Cornstarch

For most home bakers, cornstarch is the easiest way to turn cherry juice into a sliceable filling. It gives the filling a clear, shiny set, but it needs enough heat to activate. That is why center bubbling matters.

Make a slurry before the starch hits heat

Cornstarch thickens cleanly when it is mixed with cold water first, then whisked into the hot cherry juice.

A small whisk stirring a smooth white cornstarch slurry in a ceramic bowl on a kitchen towel.
For smoother cherry pie filling, mix cornstarch with cold water first so it blends into the hot syrup without clumps.

Lemon Juice

Lemon juice makes the cherries taste brighter. Use less with sour cherries and more with sweet cherries. The goal is not to make the pie taste lemony; it is to make the cherry flavor feel awake.

Vanilla and Almond Extract

Vanilla makes the filling round and warm. Almond extract is classic with cherries, but it is strong, so use only a little. A quarter teaspoon gives that bakery-style cherry aroma without making the pie taste artificial.

Butter

A few dots of butter melt into the filling and add richness. Butter will not thicken the pie, but it makes the cherry syrup taste fuller and softer.

Pie Crust

Homemade pie crust is lovely, but store-bought crust is absolutely acceptable here. Keep it cold, handle it gently, and focus on getting the filling right. A good cherry filling can make even a simple crust feel special.

Best Thickener for a Sliceable Cherry Pie

Once the fruit and sugar are sorted, the next job is simple: hold the juice in place without turning the filling stiff. The pie should not feel jammy or tight. It should still look generous and juicy, just not loose enough to run.

ThickenerBest ForWatch Out For
CornstarchClear, shiny fillingNeeds the filling to bubble fully.
Tapioca starch or tapioca flourVery juicy cherriesCan become gummy if overused.
Quick-cooking tapiocaFrozen cherriesGranules can show if not softened.
All-purpose flourEmergency pantry optionMakes the filling cloudier and softer.

For this recipe, stick with cornstarch unless you already know you prefer tapioca. The more important detail is not just which thickener you use, but whether the center gets hot enough to activate it.

Crust color is only half the cue; the center bubbling matters just as much. You want visible, active bubbling through the lattice or vents before you call the pie done.

How to Make Thick Cherry Pie Filling Without Lumps

Good filling should feel generous, not controlled to the point of being stiff. You still want juicy cherries. You just want loose juice to become filling before it can run under the crust.

The safest method is to let the cherries release juice first, reduce that juice, then thicken it with a cornstarch slurry. This avoids the common problem of dry cornstarch hitting hot liquid and turning lumpy.

For frozen or canned cherries, you can cook the filling a little more fully. Warm the fruit with sugar and lemon, reduce the extra liquid, whisk in the slurry, and cook until the mixture looks clear, red, and slow-moving. Let it cool slightly before adding it to the crust so it does not soften the dough too quickly.

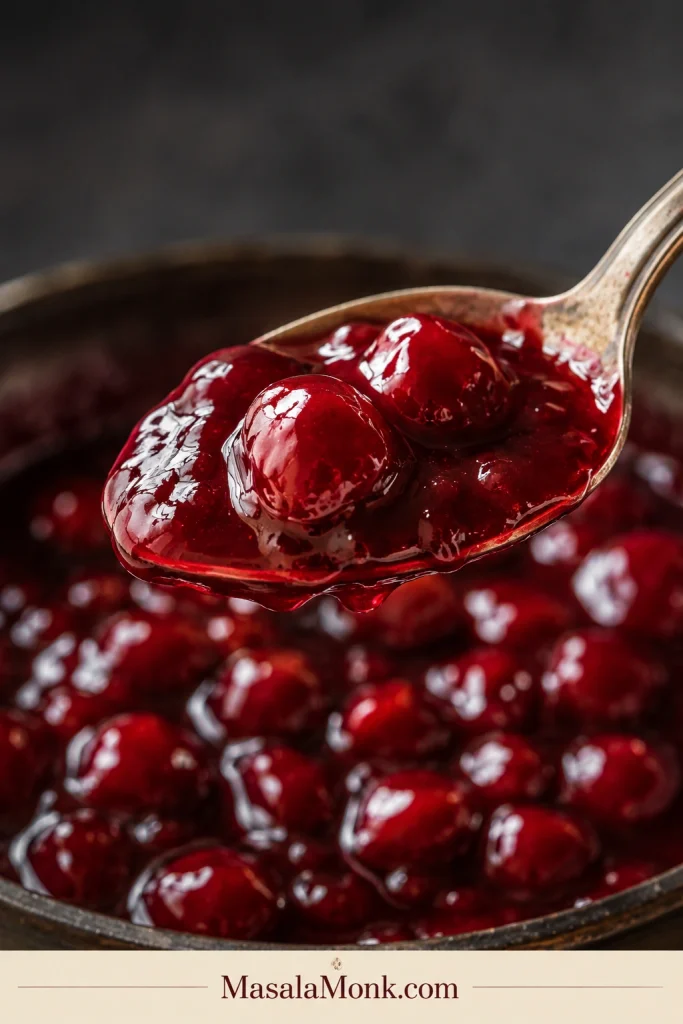
Filling cue: Wondering if it is thick enough? Look for syrup that clings to the cherries instead of pooling at the bottom of the bowl. If it looks cloudy, keep stirring and cooking briefly. If it looks shiny, red, and slow-moving, it is ready for the crust.

Use the spoon test for thickened syrup

The spoon gives a quick visual check before the filling goes into the crust: thin syrup runs away, while thickened syrup clings.

A spoon lifted from thick cherry syrup with glossy ruby filling clinging to the spoon and cherries below.
At the spoon-test stage, the syrup should coat the spoon instead of dripping away like thin juice.

The filling should coat the cherries, not flood them

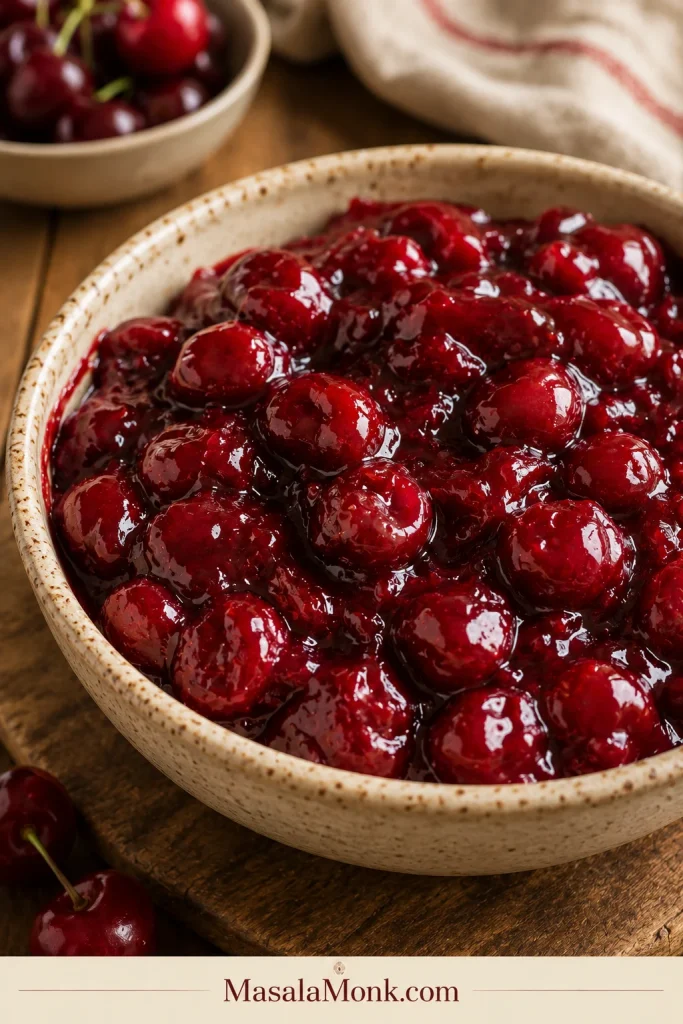
Right before baking, look at the bowl. A controlled cherry pie filling should cling to the fruit with little loose liquid underneath.

Cherries coated in thick glossy red syrup in a bowl, with no loose watery liquid pooling at the bottom.
Before baking, look for cherries that are coated and shiny, with syrup clinging to the fruit instead of pooling underneath.

Still unsure? Compare the spoon test, coated filling cue, and center bubbling cue.

What the Filling Should Look Like at Each Stage

Cherry pie becomes easier when you know what to look for. Use these visual cues as you move from juicy fruit to a sliceable pie.

StageWhat to Look For
After resting cherriesJuice collected at the bottom of the bowl.
After reducing juiceSlightly syrupy, not thin or watery.
After adding slurryGlossy, red, and free of cloudy streaks.
Before bakingCherries coated, not swimming.
Done bakingThick bubbles in the center, not only around the edges.
After coolingFilling moves slowly when sliced.

Raw vs Cooked Cherry Filling: Which One Sets Better?

Both raw and cooked cherry fillings can work. Raw filling gives a fresher fruit texture, but it can be risky when the cherries are very juicy. Cooked filling gives more control, especially with frozen cherries, canned cherries, or very ripe fruit.

  • Raw cherries with reduced juice: best for fresh cherries when you want a fresher fruit texture.
  • Lightly cooked filling: best for frozen, canned, or very juicy cherries when you want more control.
  • Canned pie filling shortcut: best for a fast pie, especially when you brighten the flavor first.

The hybrid method in this recipe gives you the best of both: fresh cherry texture with less risk of a runny pie. You are not making the pie less homemade by choosing the safer filling method.

How to Assemble Cherry Pie Without Making the Crust Soggy

Now that the filling is under control, the crust only has one job: stay cold until it hits the oven. Start with a chilled bottom crust in a 9-inch pie plate. Add the cherry filling, dot it with butter, then cover it with lattice strips or a full top crust.

Lattice is beautiful, but it is not the test of a good pie. Steam needs a way out, and the filling needs to bubble. A full crust with vents can do that perfectly well.

After the top crust is in place, trim and crimp the edges. Chill the assembled pie for 15 to 20 minutes before baking. Cold dough goes into the oven with a better chance of turning flaky instead of slumping.

Add thick filling to a chilled crust

Once the filling is under control, the crust has a better chance of staying flaky instead of soaking up loose juice.

Thick cherry pie filling spooned into an unbaked pie crust with small cubes of butter dotted across the top.
Once the filling looks controlled, add it to the chilled crust and dot with butter for richness without making the pie wetter.

A lattice top helps steam escape

The lattice does not need to be perfect. Its real job is to vent steam and let you see the filling bubble.

Hands placing strips of pie dough over cherry filling to form a lattice top crust.
Then add a simple lattice or vented top so steam can escape and the center filling can show when it starts bubbling.

Finish the crust before baking

Egg wash and coarse sugar are small steps, but they help the top crust look golden, crisp, and bakery-style.

A pastry brush spreading egg wash over lattice pie crust with coarse sugar crystals visible on the dough.
After assembly, egg wash and coarse sugar help the top crust bake glossy, crisp, and deeply golden.

Want an Easier Topping?

Use a crumb topping instead of a top crust. Keep the bottom crust and cherry filling the same, then cover the filling with a buttery crumble. This turns the recipe into more of a cherry crumb pie and removes the pressure of making lattice strips.

For a full crumb-topped pie example, this Dutch apple pie recipe shows how a buttery crumb topping can replace a second crust while still giving the fruit filling enough structure underneath.

Store-bought crust is also fine here. A homemade crust is wonderful, but a properly thickened cherry filling in a ready-made crust is still a pie worth serving.

Back to top · Jump to recipe

Cherry Pie Bake Time and Temperature

The oven step is where patience matters more than the timer. The pie needs enough heat to set the crust and enough time for the center filling to bubble. A hot start followed by a lower finish gives you both.

StepTemperatureTime
Start baking425°F / 220°C20 minutes
Finish baking375°F / 190°C35 to 45 minutes
CoolingRoom temperature3 to 4 hours

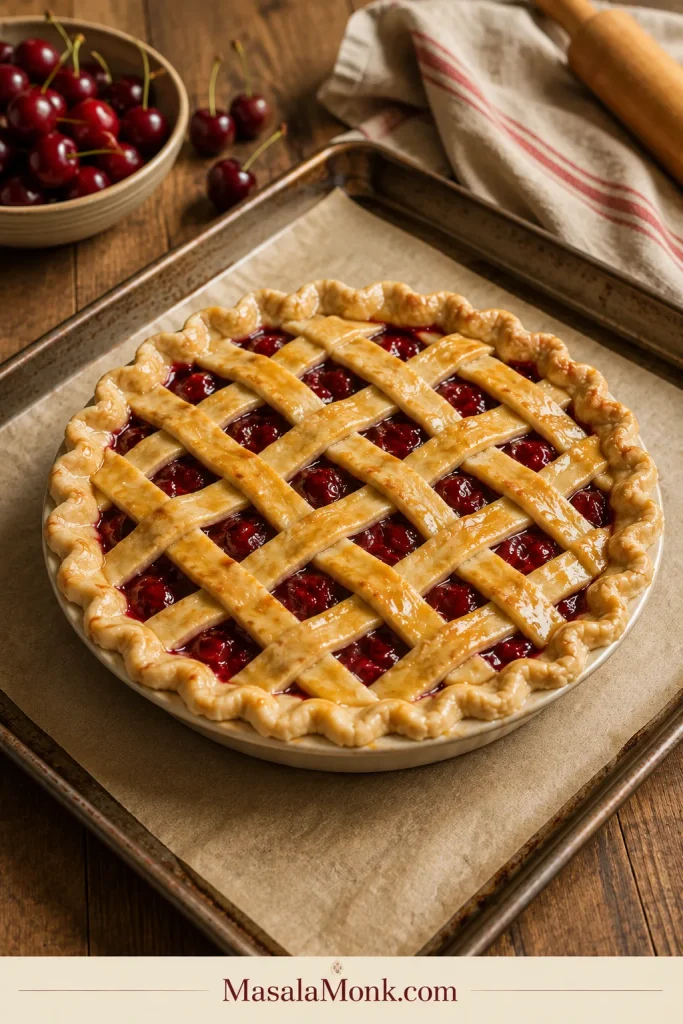
Bake on a parchment-lined rimmed baking sheet. Cherry filling can bubble over even when everything is done right. That is not disaster; that is cherry pie being cherry pie, and it is why the baking sheet is there.

Bake on a rimmed sheet pan

A sheet pan catches sticky cherry drips and helps the bottom crust get steady heat as the pie bakes.

An unbaked lattice cherry pie sitting on parchment paper inside a rimmed baking sheet before going into the oven.
Before baking, set the pie on a rimmed sheet pan to catch cherry drips and give the bottom crust steady heat.

Use a pie shield or foil only when you need it. When the edges are browning before the center has bubbled, cover the edges and keep baking. The filling needs time, not just a golden border.

The Doneness Cue That Prevents Runny Cherry Pie

Look for two signs before pulling the pie from the oven: a deep golden crust and thick bubbling in the center. A bubbling pie can look a little dramatic in the oven. That is fine. Thick cherry bubbles are a sign that the filling is finally doing what it needs to do.

Check the center for thick bubbles

The edge can bubble before the middle is ready. The center openings are where you confirm the filling has heated enough.

Close-up of thick cherry filling actively bubbling through the center of a golden lattice pie crust.
During the final bake, check the center openings; thick active bubbles there mean the filling has heated enough to set.

Check the middle, not just the edges. Let the filling bubble for at least 5 minutes before removing the pie from the oven. The bubbles should look thick and slow, not thin and watery.

Using a full top crust and cannot see the filling clearly? An instant-read thermometer inserted into the center should read about 213°F / 100°C. You do not need a thermometer, but it is helpful if you want a more exact doneness cue.

How Long Cherry Pie Must Cool for Clean Slices

Cool the pie for at least 3 hours before slicing. Four hours is better if you want the neatest slices. This waiting step is what turns hot cherry syrup into pie filling.

Cut too soon, and the filling will flood the plate. Wait long enough, and it will move slowly with the knife instead of chasing it across the dish.

Cooling is part of the recipe

The pie may smell ready as soon as it leaves the oven, but the filling needs time to settle before slicing.

A whole baked lattice cherry pie cooling on a wire rack beside cherries, a mug, and a linen towel.
After baking, let the pie rest until the hot syrup settles, because slicing too soon is the fastest way to lose the filling.

If your pie usually runs after slicing, check the runny cherry pie fixes before changing the recipe.

Serving cue: If you want slightly warm pie, let it cool completely first, then gently rewarm individual slices. That gives you warmth without sacrificing the set filling.

Why Is My Cherry Pie Runny?

Runny pie is usually not a mystery or a failure. Most runny cherry pies come down to one of three things: too much liquid went into the crust, the center did not bubble long enough, or the pie was sliced before the filling cooled.

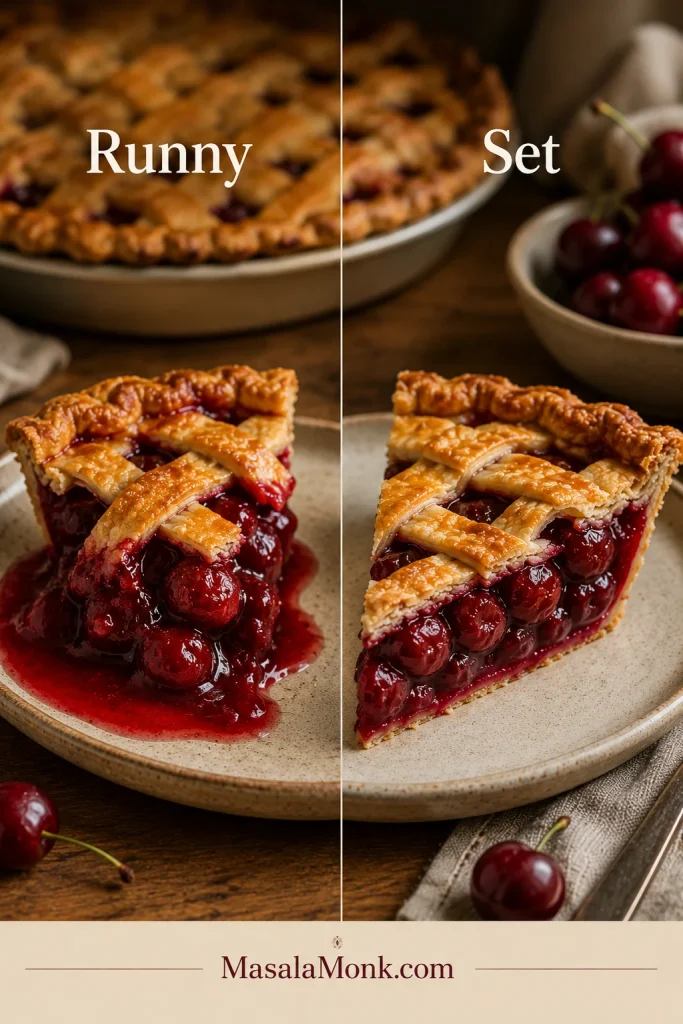
Compare runny filling with a set slice

This visual troubleshooting cue shows the difference between a filling that spills and one that moves slowly after cooling.

Split comparison of a runny cherry pie slice with filling spreading on the plate and a set cherry pie slice holding its shape.
If the filling runs across the plate, check the three usual causes: too much liquid, not enough center bubbling, or not enough cooling time.
ProblemLikely CauseFix
Filling runs across the plateSliced too warmCool for 3 to 4 hours before slicing.
Filling is thinNot enough thickenerUse the full cornstarch amount.
Filling stayed looseUnderbaked centerBake until the center bubbles for 5 minutes.
Frozen cherry pie is wateryExtra thawed liquidThaw, drain, or cook down the liquid first.
Canned cherry pie is too sweetSyrup or canned filling already had sugarAdd lemon and salt; skip extra sugar.
Bottom crust is soggyWet filling or low starting heatReduce extra juice and bake on a hot sheet.
Filling is gummyToo much cornstarch or tapiocaMeasure thickener carefully.
Pie tastes flatNot enough lemon or saltAdd lemon juice and a small pinch of salt.
Crust browns before filling bubblesEdges exposed too longShield the crust and keep baking.

The most common mistake is slicing too soon. It feels unfair because the pie looks finished and smells finished, but the filling is still settling. Give it time and the same pie will slice much more cleanly.

Back to top · Jump to recipe

Shortcut Cherry Pie With Canned Filling

You can make cherry pie with canned cherry pie filling. It will not have the same fresh fruit texture as homemade filling, but it can still bake into a satisfying pie when you brighten the flavor first.

For a 9-inch pie, use two 21-ounce cans of cherry pie filling. Stir in 1 tablespoon lemon juice, 1 teaspoon vanilla extract or a few drops of almond extract, and a small pinch of salt. Spoon the filling into the crust, dot with 1 tablespoon butter, cover with lattice or a top crust, and bake until the crust is golden and the filling bubbles.

Mostly gel and very few cherries? Fold in 1 cup drained canned cherries or thawed frozen cherries. That small addition makes the pie taste fruitier and less flat.

Taste canned filling first. Most cans need brightness, not more sweetness. Lemon, salt, vanilla, almond, and butter do more for the flavor than extra sugar.

Simple Tools That Make Cherry Pie Easier

You do not need a drawer full of pastry tools for this pie. The helpful tools are the ones that keep the crust cold, the juice controlled, and the oven mess contained.

  • 9-inch pie plate: A standard or slightly deep pie plate gives the filling room to bubble.
  • Rimmed baking sheet: Catches sticky drips and helps the bottom crust bake better.
  • Cherry pitter, chopstick, or sturdy straw: Useful for pitting fresh cherries without crushing them.
  • Small saucepan: Needed for reducing and thickening the cherry juice.
  • Slotted spoon: Helps separate cherries from the collected liquid.
  • Pie shield or foil strips: Protects crust edges if they brown too quickly.
  • Cooling rack: Helps the pie cool evenly before slicing.
  • Instant-read thermometer: Optional, but helpful if you are using a full top crust.

Make Ahead, Storage, Freezing, and Reheating

Making Cherry Pie Ahead

This is a good make-ahead dessert because it needs time to cool. Bake it earlier in the day or the night before serving. Once fully cool, keep it loosely covered. The waiting time works in your favor here; the filling becomes cleaner and calmer as it rests.

Room Temperature and Refrigeration

Cherry pie can sit loosely covered at room temperature for up to 2 days if your kitchen is cool. For longer storage, refrigerate it for 4 to 5 days. The crust will soften slightly in the refrigerator, but the filling will stay set.

For food-safety guidance, Illinois Extension’s pie storage guidance notes that fruit pies without dairy can be stored loosely covered at room temperature for up to two days, while pies with dairy or eggs need refrigeration.

Freezing Cherry Pie

Baked cherry pie can be frozen for up to 3 months. Cool it completely, wrap it well, and freeze. Thaw overnight in the refrigerator, then reheat in the oven until warmed through.

Freezing Cherry Pie Filling

Cooked cherry pie filling also freezes well for up to 3 months. Cool it completely before freezing. After thawing, warm it in a saucepan for a few minutes if it looks loose.

Reheating Slices

For the best crust, reheat slices in a 325°F / 160°C oven or air fryer until warm. The microwave works for speed, but it softens the crust.

Cherry Pie Variations

Once you understand the filling, cherry pie becomes easy to adapt. Keep the same method in mind: bright fruit, controlled juice, enough oven heat, and enough cooling time for the slice to hold.

  • Sweet cherry pie: Use fresh sweet cherries, less sugar, and extra lemon juice for a softer summer flavor.
  • Sour cherry pie: Use tart cherries and increase the sugar for a bright, old-fashioned pie.
  • Homemade cherry pie filling: Make just the filling for cakes, cheesecakes, bars, pancakes, or ice cream.
  • Shortcut canned cherry pie: Use canned filling and store-bought crust for the fastest version.
  • Crumb-topped cherry pie: Use a bottom crust and add a buttery, crisp crumble topping instead of lattice.
  • Cherry almond pie: Keep the almond extract and add sliced almonds for a bakery-style aroma.
  • Vanilla cherry pie: Skip almond extract and use a little extra vanilla for a softer, rounder flavor.
  • Mixed berry cherry pie: Replace 1 to 2 cups cherries with blueberries, raspberries, or blackberries for a deeper, jammy fruit flavor.
  • Mini cherry pies: Use the filling in muffin-pan pie crusts for small, party-friendly pies.
  • Cherry hand pies: Use a thicker cooked filling so the pies are easier to seal and share.

Whichever version you make, the same rule applies: keep the cherry flavor bright, give the juice somewhere to go, and let the filling settle before you ask it to hold a slice.

Serving Ideas

Serve cherry pie plain, with vanilla ice cream, or with softly whipped cream. It works beautifully as a summer dessert, a holiday pie, a potluck dessert, or a weekend bake when you want something classic but still bright and fruit-forward.

If you want a homemade topping, this whipped cream recipe gives you soft, fluffy cream that works well with pies, fruit desserts, and chilled sweets.

Serve after the filling has set

Once the pie has cooled, the slice can handle a simple topping while keeping the ruby cherry filling visible.

A slice of cherry pie with thick ruby filling served on a cream plate with vanilla ice cream beside it.
Finally, serve the cooled pie with vanilla ice cream or whipped cream beside the slice so the cherry filling stays visible.

The only real serving rule is to let it cool first. Warm cherry pie sounds tempting, but a properly set slice is much more satisfying than a hot slice that loses all its filling on the plate.

FAQ

If you are still second-guessing the cherries, thickener, or cooling time, these are the questions that usually come up right before baking.

Do frozen cherries work for cherry pie?

Yes. Thaw and drain them first, or cook them until the extra liquid reduces and the filling starts to thicken.

Should frozen cherries be thawed before baking?

Thawing gives you more control because you can drain or reduce the extra juice. For a cooked filling, you can start from frozen and simmer until the juices thicken.

What cherries make the best cherry pie?

Sour or tart cherries give the most classic flavor. Sweet cherries also work well, especially with lemon juice for balance. A sweet-tart mix gives excellent depth.

Why did my cherry pie turn runny?

Usually, too much fruit liquid went into the crust, the center did not bubble long enough, or the pie was sliced too warm.

How do you keep cherry pie from being watery?

Reduce extra cherry juice, thicken it with a cornstarch slurry, bake until the center bubbles, and cool the pie fully before slicing.

Cornstarch or tapioca: which is better?

Cornstarch is easiest for most home bakers and gives a clear, shiny filling. Tapioca also works, but it can become gummy if overused.

How do you make canned cherry pie filling taste better?

Add lemon juice, vanilla or almond extract, a pinch of salt, and a few small pieces of butter. If the can is mostly gel, fold in extra drained cherries.

What is the easiest shortcut version?

Use two 21-ounce cans of cherry pie filling and a store-bought double crust. Brighten the filling with lemon, vanilla or almond extract, salt, and butter.

Are canned cherries the same as canned cherry pie filling?

No. Canned cherries are whole cherries packed in water, juice, or syrup. Canned pie filling is already sweetened and thickened.

How long should cherry pie cool before slicing?

Cool it for at least 3 hours, ideally 4 hours. Slicing too soon is one of the main reasons the filling runs across the plate.

How do you know when cherry pie is done?

The crust should be deep golden and the center filling should bubble thickly for at least 5 minutes. With a full top crust, the center should be about 213°F / 100°C.

Should cherry pie be refrigerated?

It can sit loosely covered at room temperature for up to 2 days if your kitchen is cool. Refrigerate for longer storage.

Can cherry pie be frozen?

Yes. Cool it completely, wrap it well, and freeze for up to 3 months. Thaw overnight in the refrigerator and reheat in the oven for the best crust texture.

Before You Slice: The Cherry Pie Rule Worth Remembering

Cherry pie does not need perfect lattice or bakery-sharp edges to feel special. What matters is the moment the knife goes in and the filling stays ruby-red, generous, and slow-moving instead of running across the plate.

Give the cherries a little control, give the crust enough heat, and give the pie enough time to settle. That is the difference between a good-tasting pie and a cherry pie people remember by the slice.

Back to top · Jump to recipe

Posted on — Leave a comment

Pecan Pie Bars Recipe with Easy Shortbread Crust

Clean-cut pecan pie bars with glossy pecan topping and pale shortbread crust arranged on parchment paper.

These pecan pie bars are for the moment when pecan pie sounds perfect, but rolling dough, lifting wedges, and hoping the center has set all feel like too much. You still get the glossy pecan top, the buttery base, and the soft caramel-like filling — just in a pan you can cool, lift, cut, and carry.

The promise here is simple: no rolling, no runny middle, no nervous first slice. A press-in shortbread crust makes the bars sturdy, while maple syrup and brown sugar bake into a warm, glossy pecan filling that stays gooey without turning into syrup on the plate.

This version uses maple syrup, so it works for pecan pie bars without corn syrup. Prefer the classic glossy filling? Use light corn syrup instead. Either way, the method stays simple: prebake the crust, bake until the edges bubble and the center softly wobbles, then cool completely before slicing.

Quick Answer: What Are Pecan Pie Bars?

Pecan pie bars are dessert bars with a buttery crust and a gooey pecan pie-style filling baked on top. They taste like pecan pie, but they are easier to make, easier to slice, and easier to serve to a crowd. Instead of baking one round pie, you bake the recipe in a rectangular pan and cut it into squares.

A good pan comes down to three things: a firm crust, a filling that sets without turning hard, and enough cooling time before cutting. Prebaking protects the crust, bubbling edges show the filling got hot enough, and cooling turns the gooey layer into bars you can lift.

Close-up of a pecan pie bar showing glossy pecans, soft brown filling, and a pale shortbread base.
Look at the layer contrast: the pecan filling stays glossy and soft, while the shortbread crust holds firm enough for a clean bite.

Pecan Pie Bars Recipe

These pecan pie bars bake into a buttery shortbread base with a glossy maple-brown sugar pecan layer on top. One 9×13 pan gives you 24 rich bars or 36 smaller dessert-table squares.

What success looks like: the crust is pale golden at the edges, the pecan layer is glossy, the sides bubble before the pan comes out, and the center still has a soft wobble. After cooling, the bars should lift cleanly but bite like soft pecan pie filling, not syrup and not candy. One small square should feel satisfying, with a buttery bottom, sticky pecan top, and the best part of pecan pie in the middle.

Recipe Details

Prep Time20 minutes
Crust Bake Time18 to 20 minutes
Filling Bake Time25 to 30 minutes
Cooling TimeAt least 2 hours
Optional Chill Time30 to 60 minutes for sharper cuts
Total TimeAbout 3 hours 10 minutes, plus optional chilling
Oven Temperature350°F / 177°C
Pan Size9×13 inch / 23×33 cm
Yield24 rich bars or 36 small squares

Equipment

  • 9×13 inch / 23×33 cm baking pan
  • Parchment paper
  • Large mixing bowl
  • Whisk
  • Pastry cutter, fork, or food processor for the crust
  • Rubber spatula
  • Wire cooling rack
  • Sharp knife
  • Optional kitchen scale
  • Optional oven thermometer

A metal pan is best for even browning and tidy edges. Glass works too, but it holds heat longer, so start checking a few minutes early near the end.

Ingredients

For the Shortbread Crust

  • 2 cups all-purpose flour / 250 g
  • 1/2 cup powdered sugar / 60 g
  • 1 tablespoon cornstarch / 8 g, optional but helpful for tenderness
  • 1/2 teaspoon fine salt
  • 1 cup cold unsalted butter, cut into small cubes / 226 g / 8 oz

If measuring flour by cups, spoon it into the cup and level it instead of scooping directly from the bag. Too much flour can make the crust dry or crumbly.

For the Pecan Filling

  • 3 cups chopped pecans / about 300 to 330 g / 10.5 to 12 oz
  • 1 cup packed light brown sugar / 200 g
  • 3/4 cup pure maple syrup / 180 ml, or light corn syrup for a classic version
  • 1/2 cup unsalted butter, melted and slightly cooled / 113 g / 4 oz
  • 3 large eggs, at room temperature / about 150 g without shells
  • 2 tablespoons heavy cream / 30 ml
  • 2 teaspoons vanilla extract / 10 ml
  • 1/2 teaspoon fine salt
  • Flaky salt, optional, for finishing

Chopped pecans are better than pecan halves here because they spread evenly and slice more easily. Pecan halves look pretty, but they can drag the knife through the topping.

Instructions

Make and Prebake the Crust

  1. Prepare the pan. Preheat the oven to 350°F / 177°C. Line a 9×13 inch / 23×33 cm baking pan with parchment paper, leaving overhang on the long sides so you can lift the bars out later.
  2. Make the crust mixture. In a large bowl, whisk together the flour, powdered sugar, cornstarch if using, and salt. Add the cold cubed butter. Cut it into the flour mixture with a pastry cutter, fork, or your fingertips until it looks like damp crumbs and holds together when squeezed.
  3. Press the crust into the pan. Tip the crust mixture into the prepared pan. Press it firmly into an even layer, especially in the corners and along the edges.
  4. Prebake the crust. Bake for 18 to 20 minutes, until the surface looks set and the edges are just beginning to turn pale golden.

Add the Filling, Bake, and Slice

  1. Make the filling. While the crust bakes, whisk the brown sugar, maple syrup, melted butter, eggs, heavy cream, vanilla, and salt until smooth and glossy. Stir in the chopped pecans.
  2. Pour over the warm crust. Remove the crust from the oven and carefully pour the pecan filling over it. Spread the pecans evenly so every piece gets a good nutty layer.
  3. Bake the bars. Return the pan to the oven and bake for 25 to 30 minutes, until the edges bubble, the top looks glossy and set, and the center wobbles slightly like soft custard. It should not ripple like liquid.
  4. Cool completely. Place the pan on a wire rack and let the bars cool completely, at least 2 hours. Do not judge the final texture while the bars are hot; the filling will continue to set as it cools.
  5. Sharper cuts. Chill the cooled slab for 30 to 60 minutes before cutting if you want the neatest pieces.
  6. Slice and serve. Use the parchment overhang to lift the slab out of the pan. Cut into 24 rich bars or 36 smaller squares with a sharp knife, wiping the blade between cuts.

Recipe Notes

  • Classic pecan pie bars: replace the maple syrup with the same amount of light corn syrup. The filling will taste sweeter and look a little glossier.
  • Stronger maple flavor: use dark maple syrup and finish the baked bars with a little flaky salt.
  • Slightly firmer set: leave out the heavy cream. The cream gives the filling a softer, richer bite, but the bars still work without it.
  • Deeper pecan flavor: lightly toast the pecans before adding them, but watch the final bake closely so the nuts do not over-brown.
  • Sharper edges: cool completely, then chill before cutting.
  • Better sweetness balance: cut smaller squares and use flaky salt instead of reducing the sugar heavily.
  • Storage: cool uncovered first, then cover and refrigerate if you are not serving them the same day.

Need more visual help? See the step-by-step cues, doneness guide, or clean-cutting tips before you start.

The 5 Rules for Pecan Pie Bars That Slice Cleanly

These bars are simple, but they do ask for patience. Most problems come from skipping one of two things: giving the crust a head start, or giving the filling time to cool.

  1. Prebake the crust until it looks set, not brown. This gives the filling a dry, sturdy base to sit on.
  2. Look for bubbling edges. If the edges never bubble, the filling probably did not get hot enough to set.
  3. Trust a soft wobble, not a liquid ripple. A little movement is fine. Waves across the pan mean more oven time.
  4. Cool before judging. Hot pecan filling can fool you. The real texture shows after cooling.
  5. Chill before clean cuts. Room-temperature bars taste softer, but chilled bars slice better.
Five-panel guide for pecan pie bars labeled Prebake crust, Bubbling edges, Soft wobble, Cool fully, and Chill to cut.
This visual checklist keeps the recipe on track: prebake the crust, look for bubbling edges, accept a gentle wobble, cool fully, and chill before slicing.

If you remember only one thing, remember this: judge the bars after cooling, not straight from the oven.

Make These When

These are the bars to make when the dessert table is crowded, the pie server is missing, and nobody wants to be responsible for the first messy slice. They feel festive without needing last-minute attention.

  • Pecan pie flavor sounds good, but rolling pie crust does not.
  • A Thanksgiving or Christmas dessert needs to serve a crowd.
  • Make-ahead baking would make the meal feel calmer.
  • The dessert has to travel well to a potluck or office party.
  • Smaller squares would fit a cookie box or mixed dessert spread.
  • Sturdy bars sound better than soft pie wedges.
  • You have pecan pieces and want a dessert where they work better than perfect halves.

You can bake them the day before, chill them overnight, and stop worrying about dessert while the rest of the meal comes together. For a cozy fall table, they sit nicely beside soft bakes like apple cake. You can save the day-of baking energy for something fresh, like homemade cinnamon rolls.

More Help If You Need It

Why This Recipe Works

This recipe works because each part has a clear job. Prebaking helps the shortbread crust hold the sticky filling. Eggs and brown sugar give structure, not just sweetness. Chopped pecans spread through the pan so every square cuts cleanly.

Shortbread is sturdier than pie dough under a gooey pecan filling. It gives the bars a firm, buttery base without asking you to roll dough, chill dough, or worry about a fragile bottom crust. After cooling, the center should bite like soft caramel custard — not syrup, not candy.

Ingredient Notes

The ingredient list is simple, but the choices matter. Butter keeps the crust tender, while the filling needs enough structure to set after cooling.

Ingredients for pecan pie bars arranged on linen, including chopped pecans, butter, flour, powdered sugar, brown sugar, eggs, maple syrup, vanilla, cream, salt, and cornstarch.
Gather the crust and filling ingredients before you start so the filling can be mixed while the crust prebakes.

Shortbread Crust

This shortbread crust is made with flour, powdered sugar, salt, cold butter, and a little cornstarch. When you squeeze a handful, the sandy mixture should clump like damp shortbread crumbs.

  • All-purpose flour gives the crust structure.
  • Powdered sugar keeps the crust tender and lightly sweet.
  • Cornstarch is optional, but it helps make the crust a little more delicate.
  • Cold butter creates a shortbread texture instead of a greasy base.
  • Salt balances the sweet pecan filling.

For bars, shortbread has one big advantage over pie crust: it holds its shape when you lift and cut it. If you are comparing this with a traditional pastry base, MasalaMonk’s apple pie crust guide explains cold butter, chilling, and rolling — but for these bars, shortbread is the sturdier choice.

Pecan Filling

Most of the pecan pie character comes from the filling. It should be glossy and pourable before baking, with the pecans suspended through the mixture instead of sitting in one dry pile.

  • Pecans: chopped pecans are easier to slice through than large halves.
  • Brown sugar: gives the filling a deeper caramel flavor.
  • Maple syrup: works as the main syrup for a no-corn-syrup-friendly version.
  • Butter: adds richness and helps the filling taste rounded.
  • Eggs: help the filling set as it bakes and cools.
  • Heavy cream: gives a softer, richer bite. Leave it out if you want a slightly firmer set.
  • Vanilla and salt: keep the flavor warm, balanced, and not flat.

You do not need perfect pecan halves for this recipe. Pecan pieces are often the smarter choice because the nuts need to be distributed through the filling rather than arranged on top of a pie.

Should You Toast the Pecans First?

You do not have to toast the pecans first because they will toast as the bars bake. Lightly toasting them before mixing can deepen the flavor, but keep an eye on the final bake so the nuts do not get too dark on top.

Step-by-Step Cues for Better Pecan Pie Bars

Use this section when the timer is not enough. These are the visual cues that tell you the crust, filling, and finished pan are on track.

1. Crust Mixture: Damp Crumbs, Not Smooth Dough

The crust mixture should look crumbly, not creamy. When you squeeze a small handful, it should hold together. If it stays powdery, the butter may not be worked in evenly.

Hand squeezing crumbly shortbread crust mixture in a bowl to show damp crumbs holding together.
Instead of a smooth dough, aim for buttery crumbs that clump when squeezed; that texture presses evenly and bakes into a tender shortbread crust.

2. Pressed Crust: Compact and Even

Press the crust firmly into the pan, especially in the corners and along the edges. Thin corners can overbake, while thick patches can stay soft.

Hands pressing shortbread crust evenly into a parchment-lined rectangular baking pan.
Once the crumbs are ready, press them firmly into the parchment-lined pan, especially around the edges, so every bar has a steady base.

3. Prebaked Crust: Set and Pale Golden

The crust does not need to turn deeply brown. It only needs to look set with pale golden edges. That head start keeps the sticky filling from sinking into a soft base.

Prebaked shortbread crust in a parchment-lined metal pan with a set surface and lightly golden edges.
The prebaked crust should look set with pale golden edges; it still needs to bake again under the sticky pecan filling.

4. Filling Pour: Glossy, Even, and Ready to Bake

Whisk the sugar, syrup, butter, eggs, cream, vanilla, and salt until smooth before the pecans go in. Once the pecans are stirred through, pour the filling over the warm crust and guide the nuts toward the corners.

Glossy maple pecan filling being poured over a prebaked shortbread crust in a parchment-lined baking pan.
After the crust is prebaked, pour the glossy maple pecan filling over the warm base and guide the nuts toward the corners.

5. Before Baking: Even Pecan Coverage

Before the pan goes back into the oven, nudge the pecans into an even layer so the corners are not bare and the center does not bake as one thick nut pile.

Unbaked pecan pie bars in a parchment-lined pan with glossy filling and evenly spread chopped pecans.
Before the pan returns to the oven, check for even pecan coverage; this helps the bars bake evenly and gives each square enough topping.

6. After Baking: Bubbling Edges and Soft Center Wobble

Edges should bubble before the pan comes out. A glossy, set-looking top is good, but the center should still move gently. Soft wobble is fine. Liquid ripple means more oven time.

Baked pecan pie bars in a pan with bubbling edges, glossy pecan topping, and a golden crust.
As the filling bakes, watch the edges first: steady bubbling around the pan is a better doneness clue than waiting for a stiff center.

7. After Cooling: Liftable Slab, Soft Bite

Once cool, the bars should lift from the pan as one slab. The top may still be slightly tacky, but it should not look wet. Center texture should bite like soft pecan pie filling, not run like syrup.

Cooled slab of pecan pie bars being lifted from a metal baking pan using parchment paper.
After cooling, use the parchment overhang to lift the slab out cleanly, then cut on a board instead of fighting the pan.

Still worried about the filling? Go straight to the doneness guide, or return to the recipe card.

How to Tell When Pecan Pie Bars Are Done, Not Runny

This is the part where pecan pie bars make people nervous, because done does not mean stiff. You want gooey, not raw; soft, not sloshy; rich, not hard like candy.

Soft Wobble vs Liquid Ripple

Split comparison guide showing pecan pie bars labeled Soft Wobble on one side and Liquid Ripple on the other, with the title Done, Not Stiff.
Gentle movement is fine, but a loose ripple means the filling still needs more time before it can set into clean pecan pie bars.

If you wait until the center looks completely firm in the oven, the filling can cool into something too hard or sticky-chewy. The edges matter more than the exact minute on the timer: look for bubbling sides, a glossy top, and a center that moves gently without sloshing.

Look for these signs before removing the pan from the oven:

  • Edges are bubbling around the pan.
  • A glossy, set-looking top covers the filling.
  • Pecans look toasted, not burnt.
  • Crust edges are lightly golden.
  • The center has a slight custard-like wobble.
  • Gentle pan movement does not create a liquid ripple or slosh.
  • No wet or raw-looking patch remains in the middle.

Slight movement in the center is fine because the filling keeps setting as it cools. A liquid wave means the bars need more time. Add 3 to 5 minutes, then check again.

If using a thermometer, these bars are usually set around 185°F / 85°C in the center, but do not chase the number alone. The better test is the full set of cues: bubbling edges, a glossy top, and a center that wobbles softly without rippling like liquid.

That visual cue makes the pan much less intimidating.

After baking, the next move is cooling and cutting cleanly. If the pan looks off, use troubleshooting.

How to Cool, Chill, and Cut Clean Squares

This is where the recipe stops being about skill and starts being about patience. Hot bars smear. Cold bars slice.

  • Cool the pan completely on a wire rack.
  • Chill the slab for 30 to 60 minutes if you want sharper edges.
  • Lift the bars out using the parchment overhang.
  • Use a long, sharp knife.
  • Wipe the knife between cuts.
  • Trim the outer edges if you want a polished party platter.
  • Cut 24 larger bars or 36 smaller squares.
Sharp knife cutting chilled pecan pie bars into neat squares on parchment paper.
Slice the bars cold for sharp edges; chilled filling resists smearing and the shortbread base stays steadier under the knife.

For the neatest look, cut the bars cold and then let them sit at room temperature before serving. A chilled slab is easier to cut than a room-temperature one, even if you plan to serve the bars softer.

For serving, smaller pieces usually work better than large ones because the bars are rich. Coffee, unsweetened tea, lightly sweetened homemade whipped cream, or a little flaky salt all help balance the sweetness.

That is the difference between a delicious pan and a dessert tray that looks intentional.

How to Make Them Gooier, Firmer, or Cleaner-Cut

Once the base recipe is clear, you can steer the bars a little softer, a little firmer, or cleaner-cut without changing the whole formula.

Texture control guide for pecan pie bars with sections labeled Gooier, Firmer, Cleaner-cut, Less sweet, and More pecan flavor.
Use this guide to choose a softer center, firmer set, cleaner cuts, less sweetness, or deeper pecan flavor.
Desired ResultWhat to Do
Gooier centerUse maple syrup as written, keep the cream, and do not overbake.
Firmer barsSkip the cream and chill before slicing.
Cleaner cutsChill the slab, use a sharp knife, and wipe between cuts.
Less sweet feelCut smaller squares and finish with flaky salt.
Stronger pecan flavorLightly toast the pecans before adding them to the filling.

You are not locked into one texture; you just need the right small adjustment. Do not reduce the sugar heavily to make the bars less sweet, because sugar helps the filling set. Better balance comes from smaller pieces, flaky salt, coffee, tea, or lightly sweetened cream.

Pan Size Guide

For holiday baking, a 9×13 inch pan is the calm choice. It gives you enough bars to share without making the filling so thick that the center struggles to set.

Pan size guide for pecan pie bars showing 9x13 best, 9x9 thicker, 8x8 half batch, and sheet pan thinner.
Changing pan size changes thickness, timing, and texture; the 9×13 pan is the safest fit, while smaller pans need scaling and sheet pans bake thinner.
Pan SizeBest ForWhat to Know
9×13 inch / 23×33 cmHoliday trays, potlucks, partiesBest default. Makes 24 rich bars or 36 smaller squares.
9×9 inchSmaller batchBars will be thicker. They may need a little more time to set.
8×8 inchSmall batchUse a scaled-down recipe rather than baking the full amount in this pan.
Jelly roll pan or sheet panLarge thin barsNot a direct swap. The bars will be thinner and may bake faster.
Metal baking panClean edges and even browningBest choice if available.
Glass baking dishHome bakingWorks, but glass holds heat longer. Check early near the end of baking.

Can I Make a Smaller Batch?

Yes, but use a true half batch for an 8×8 pan rather than pouring the full 9×13 mixture into a smaller dish. The bake time will usually be shorter for a scaled-down batch, but use the same doneness cues: bubbling edges, glossy top, and a soft wobble in the center.

Best Syrup for Pecan Pie Bars: Maple vs Corn Syrup

Syrup changes both flavor and texture. Corn syrup gives the classic glossy sweetness; maple brings a warmer flavor and a slightly softer bite.

Split image comparing maple syrup and corn syrup with pecan pie bars and spoonfuls of pecan filling.
Maple syrup brings a warmer, deeper flavor, while corn syrup gives pecan pie bars the more traditional glossy set.
SweetenerBest ForTexture and Flavor
Maple syrupNo-corn-syrup pecan pie barsWarm, deep, slightly caramel-like flavor.
Light corn syrupClassic pecan pie barsGlossy, sweet, familiar, and reliable.
HoneyHoney-forward barsSticky and floral, with a stronger flavor.
Golden syrupCaramel-style sweetnessRich, buttery, and slightly toasty.
Brown sugar onlyDeeper caramel flavorNot always a direct syrup replacement because syrup helps texture.

Use the syrup listed in the recipe card for the most reliable result. Swapping sweeteners can change the sweetness, set, and sliceability.

Can You Make Pecan Pie Bars Without Corn Syrup?

Yes. These pecan pie bars can be made without corn syrup by using maple syrup. Maple brings more flavor and a slightly softer bite, so this recipe does not ask maple to do all the structural work alone. The eggs, brown sugar, bubbling edges, and full cooling time all help the filling set into bars instead of staying loose.

So yes, you can skip corn syrup here — just do not treat maple syrup like a magic swap. The bars still need the eggs, sugar, bake time, and cooling time to become sliceable.

For a more classic version, replace the maple syrup with the same amount of light corn syrup. Honey can work for a stronger natural-sweetener flavor, but it will taste noticeably like honey.

Make-Ahead Holiday Timeline

This is why these bars belong on a holiday table: they let you finish dessert before the kitchen gets chaotic. By the next day, the filling is settled, the cuts are cleaner, and one dessert is already off your list.

Best Plan for Thanksgiving or Christmas

  • One day before serving: bake the bars, cool completely, cover, and refrigerate.
  • Serving day: lift the slab from the pan and cut while chilled.
  • Before serving: let the bars sit at room temperature briefly for a softer, gooier bite.
  • Trays or boxes: place parchment between layers so the tops do not stick.

Thanksgiving plan: bake the bars on Wednesday, chill overnight, slice Thursday morning, and serve later in the day. On a busy holiday morning, already-cut bars feel much calmer than a pie that still needs a clean first slice.

  • Chill before packing so the pieces hold their shape.
  • Cut smaller squares for dessert trays and cookie boxes.
  • Use parchment between layers so the tops do not stick.
  • Keep the top layer flat instead of pressing bars together.
  • Do not pack warm bars; the filling needs to be fully cooled first.
  • Add flaky salt after cutting if the tops are no longer tacky.
Pecan pie bars packed in a shallow box with parchment paper between layers and a coffee mug nearby.
Packing for potlucks, dessert trays, or cookie boxes works best when the bars are cold and the glossy tops are protected with parchment.

Picture the pan on a crowded Thanksgiving counter: bars already cut, parchment between layers, no pie server required. Small squares are often the smartest choice for a mixed dessert table because they feel generous without making the plate too heavy.

Storage and Freezing

Let the bars cool completely at room temperature so the filling can set. Leave them uncovered while they cool, then cover once they are no longer warm. The safest make-ahead approach is to treat them like pecan pie and refrigerate after cooling, especially because this version contains eggs and cream.

For a cautious storage approach, Iowa State University Extension and Outreach recommends refrigerating homemade pecan and pumpkin pies made with fresh ingredients after baking and cooling unless they are served within the safe room-temperature window.

They are also forgiving in the fridge, which is exactly what you want from a holiday dessert.

Storage MethodHow LongBest Practice
Cooling after bakingAbout 2 hours, or until fully cooledCool uncovered so the filling can set before chilling or slicing.
Room-temperature servingUp to 2 hours after coolingGood for dessert tables, especially in a cool room.
Refrigerator3 to 4 daysStore airtight, with parchment between layers if stacked.
FreezerUp to 3 months for best qualityFreeze sliced bars with parchment between layers.

To freeze, cool the bars completely, cut them into squares, and freeze in an airtight container. Place parchment between layers so the tops do not stick. Thaw overnight in the refrigerator, then let them sit at room temperature briefly before serving if you want a softer texture.

Variations

Some changes are easy because they only adjust flavor. Others change the structure of the filling, and that is where pecan pie bars stop being casual.

Easy Flavor Changes

  • Chocolate pecan pie bars: sprinkle 1/2 to 3/4 cup chocolate chips over the crust before adding the filling, or drizzle melted chocolate over the cooled bars. For a true chocolate-square dessert instead, try fudgy brownies.
  • Bourbon pecan pie bars: add 1 to 2 tablespoons bourbon to the filling. It works especially well with maple syrup and brown sugar.
  • Salted pecan pie bars: finish the baked bars with flaky salt while the top is still slightly tacky.
  • Brown butter pecan bars: brown the butter first, then cool it slightly before whisking it into the filling.
  • Maple spice pecan bars: use maple syrup as written and add a small pinch of cinnamon or a little apple pie spice. Keep it light so the pecans, brown sugar, and maple stay in front.

Bigger Changes

  • Pecan pie cheesecake bars: add a cheesecake layer only if you are using a version built for that extra layer.
  • Pumpkin pecan pie bars: use a purpose-built pumpkin version because pumpkin changes the moisture, filling thickness, and bake time.
  • Vegan pecan pie bars: use a recipe designed without eggs and butter rather than swapping them casually here.
  • Keto or sugar-free pecan pie bars: use a dedicated low-carb version because sugar and syrup help this filling set.

Can You Use Pie Crust, Cookie Dough, or Cake Mix?

The shortbread crust gives the best balance of buttery flavor, strength, and tidy slicing. Shortcuts can work, but they will change the final texture.

  • Store-bought pie crust: softer and more pie-like, but less sturdy than shortbread.
  • Sugar cookie dough: sweeter and softer, more like a cookie bar.
  • Cake mix crust: cakier and less classic.
  • Crescent roll dough: very soft and quick, but not traditional.
  • Graham cracker crust: sweeter and more crumbly unless packed firmly.

Dietary Notes

These bars depend on butter, eggs, sugar, and syrup for structure, so small swaps are safer than big ones. A 1:1 gluten-free flour blend is the easiest likely swap for the crust, though the base may be more delicate. Vegan, keto, and sugar-free versions need separate formulas because they change how the filling sets. When the bars need to feel less sweet, cut smaller pieces and add flaky salt instead of reducing the sugar heavily.

Troubleshooting Pecan Pie Bars

A pan that looks wrong is usually not a disaster. Most problems come from one of four places: bake time, cooling time, crust pressure, or filling changes.

Troubleshooting guide for pecan pie bars with labeled sections for runny center, hard filling, crumbly crust, sticky knife, and burned pecans.
Use the cue first: runny centers need more baking, sticky cuts need more chilling, and dark tops need gentler heat protection.

Quick Fix Table

ProblemLikely CauseFix
Bars are runnyUnderbaked, cut too soon, or filling ratio changedBake until edges bubble and center is set with only a slight wobble. Cool completely before cutting.
Filling is too hardOverbaked or baked too long after the filling was already setCheck earlier next time. Remove when the center is just set, not dry.
Crumbly crustCrust was not pressed firmly enough or flour was overmeasuredPress the crust tightly into the pan and measure flour carefully.
Soggy crustCrust was not prebaked enoughPrebake until set and lightly golden at the edges before adding filling.
Filling leaked under the crustCrust had cracks or was pressed unevenlyPress the crust firmly and evenly, especially along the edges.
Pecans burnedBars baked too long or oven runs hotCheck earlier and use an oven thermometer if needed.
Too sweetPecan pie filling is naturally richCut smaller squares, add flaky salt, and serve with coffee or lightly sweetened whipped cream.
Sticky knifeBars are too warm or the knife is stickyChill before cutting and wipe the knife between slices.
Falling apart when cutNot cooled enough or crust too looseCool fully, chill briefly, and use a sharp knife.
Center still jigglesCould be normal or underbaked depending on movementA soft wobble is fine. A liquid ripple means it needs more time.

Problem solved? Return to the recipe card, or review the doneness cues before your next batch.

FAQ

What is the difference between pecan pie and pecan pie bars?

Pecan pie is usually baked in a round pie crust and cut into wedges. By contrast, pecan pie bars are baked in a rectangular pan with crust on the bottom and pecan filling on top, then cut into squares. The flavor is similar, but bars are easier to serve, pack, and share.

Are pecan pie bars easier than pecan pie?

Yes. The crust is pressed instead of rolled, and the slab cuts into squares instead of fragile wedges.

Why did my pecan pie bars turn out runny?

Runny bars are usually underbaked, cut too early, or made with changed filling ratios. If the edges did not bubble before you removed the pan, the filling probably did not get hot enough to set.

How long should pecan pie bars cool before cutting?

Give them at least 2 hours, or until the pan is completely cool. For sharper cuts, chill the cooled slab for 30 to 60 minutes before slicing.

Do pecan pie bars need to be refrigerated?

Refrigeration is the safest choice after they cool, especially if you are making them ahead. Cool them uncovered first, then cover and store leftovers in an airtight container in the fridge.

Can pecan pie bars be frozen?

They freeze well once the filling has cooled and set. Slice before freezing, place parchment between layers, seal tightly, and freeze for up to 3 months. Thaw in the refrigerator before serving.

Can maple syrup replace corn syrup in pecan pie bars?

Maple syrup can replace corn syrup in this recipe. The flavor becomes deeper and slightly more caramel-like. Maple bars may be a little softer than classic corn syrup bars, so let them cool fully before cutting.

Should I use pecan halves or chopped pecans?

Chopped pecans work better because they spread evenly and do not drag the knife through the topping. Pecan halves look attractive, but they can make the top harder to slice neatly.

Can I make pecan pie bars ahead for Thanksgiving?

Yes. Bake them a day ahead, cool completely, chill overnight, slice cold, and bring them closer to room temperature before serving.

Final Thoughts

Pecan pie bars are the dessert to make when you want all the glossy, nutty comfort of pecan pie without the pressure of carving out the first fragile wedge. Give the crust its head start, let the filling bubble, and cool the pan completely. The reward is a quiet holiday win: buttery bars that cut cleanly, travel easily, and still taste like the center of a pecan pie.

Back to quick answer · Back to recipe card

Posted on — Leave a comment

Lemon Curd Recipe: Silky, Tart, Easy & Perfect for Cakes, Tarts and Desserts

A glass jar of glossy homemade lemon curd with fresh lemons, lemon zest, and a spoonful lifted above the jar.

Lemon curd looks fancy, but the whole trick is gentle heat and knowing when to stop. When it works, it is glossy, buttery, tart-sweet, and bright enough to make cakes, tarts, toast, cheesecake, cookies, yogurt, pancakes, scones, and quick desserts feel finished.

It can feel risky because the same few ingredients can turn silky or stressful depending on heat and timing. This recipe is built around the real questions that come up at the stove: why is it runny, will the eggs scramble, is it thick enough, and can it actually work as a cake filling or tart filling?

The goal is not just to make lemon curd. It is to know whether your jar is soft enough for scones, thick enough for tarts, and stable enough for the cake, cookie, or dessert you actually want to make.

Quick Answer: How to Make Lemon Curd

Lemon curd is a smooth lemon custard-style spread made with lemon juice, lemon zest, sugar, eggs, and butter. Whisk everything together before heating, cook gently over low to medium-low heat until it coats the back of a spoon or reaches about 170°F / 77°C, then strain and chill until thick and glossy.

For tarts, mini tarts, cookies, or simple cake filling, cook a little closer to 175°F / 79–80°C without letting the mixture boil. It always looks softer while warm, so judge the final texture after it has cooled properly.

The flavor lands bright and lemony, but not harsh: tart enough to cut through cream and cake, smooth enough to spoon over scones or pancakes.

Recipe at a Glance

DetailBest answer
YieldAbout 1 1/4 cups / 20 tablespoons
Main methodStovetop, low heat, constant whisking
Best temperatureAbout 170°F / 77°C
Thicker target175°F / 79–80°C, without boiling
Active timeAbout 20 minutes
Chill time2 hours minimum
Make-ahead timingMake 1 day ahead for cakes, tarts, cookies, and neat dessert layers
Lemons neededUsually 2 to 3 medium lemons for 1/2 cup / 120 ml juice
Egg ratio1 large whole egg + 3 large egg yolks
Finished textureGlossy, spoon-coating, thick after chilling

Recipe Card

Recipe type: Dessert spread, filling, and sauce

Yield: About 1 1/4 cups / 20 tablespoons lemon curd

Prep time: 10 minutes
Cook time: 8 to 10 minutes
Chill time: 2 hours minimum
Total time: About 2 hours 20 minutes, including chilling

Best for: toast, scones, tarts, mini tarts, cake filling, cupcakes, cookies, cheesecake, yogurt, pancakes, crepes, pavlova, ice cream, and quick desserts

Ingredients

IngredientAmount
Fresh lemon juice1/2 cup / 120 ml / 4 fl oz
Finely grated lemon zest1 tablespoon, from about 2 lemons
Granulated sugar1/2 cup / 100 g for tart curd, or 2/3 cup / 135 g for sweeter curd
Large whole egg1
Large egg yolks3
Unsalted butter, cold and cubed6 tablespoons / 85 g / 3 oz
Fine salt1/8 teaspoon

Lemon note: You will usually need 2 to 3 medium lemons for 1/2 cup / 120 ml juice. Zest the lemons before juicing them.

Sugar note: Choose the lower amount if the curd will be paired with frosting, cream, meringue, or sweet cake. Go higher if you want a softer, sweeter spread for toast, scones, or pancakes.

Method

  1. Zest the lemons first, then juice them. Measure out 1/2 cup / 120 ml lemon juice.
  2. Add the zest and sugar to a small heavy-bottom saucepan. Rub them together with your fingertips for about 30 seconds, until the sugar smells fragrant and lemony.
  3. Whisk in the whole egg, egg yolks, lemon juice, and salt before turning on the heat.
  4. Place the pan over low to medium-low heat. Cook while whisking constantly, scraping the base and corners of the pan.
  5. Continue for 8 to 10 minutes, until the mixture coats the back of a spoon. Aim for about 170°F / 77°C, or closer to 175°F / 79–80°C for a thicker curd. Do not boil.
  6. Remove from the heat. Whisk in the cold cubed butter, a few pieces at a time, until glossy and smooth.
  7. Strain through a fine mesh sieve into a heatproof bowl or jar.
  8. Press parchment or plastic wrap directly onto the surface. Cool slightly, then refrigerate for at least 2 hours, or until thick.

Recipe note: The pan gets the curd most of the way there, but the refrigerator finishes the texture. Judge the final thickness after chilling.

Visual cue: A balanced batch starts with fresh lemon juice, fragrant zest, rich yolks, butter, sugar, and salt.

Measured lemon curd ingredients arranged in bowls, including lemon juice, lemon zest, sugar, one whole egg, egg yolks, butter, and salt.
A short ingredient list leaves nowhere for weak flavor to hide, so fresh lemon juice, fragrant zest, rich yolks, butter, sugar, and salt all matter.

Cooking now? Check doneness cues · choose the right texture · fix common problems

After chilling, the finished curd mounds softly on a spoon, shines on top, and tastes bright first, then buttery and smooth at the end.

Most Useful Sections

Why This Works

This recipe uses one whole egg plus three yolks. The whole egg gives structure, while the extra yolks make the texture rich, smooth, and thick enough for more than just spreading on toast.

Fresh lemon juice gives sharp brightness, but zest gives the deeper citrus aroma that makes the flavor pop. Rubbing zest into sugar releases lemon oils before the mixture reaches the stove.

The 170°F / 77°C target gives the eggs enough heat to thicken the curd without pushing the mixture into boiling or scrambling. Cold butter added off the heat makes it glossy, and straining catches zest, tiny egg bits, or any uneven texture so the finished batch tastes silky.

Ingredients and Why They Matter

Fresh Lemon Juice

This is one of those recipes where fresh lemons really earn their place. Bottled lemon juice can taste flat, bitter, or harsh because there is nowhere for that flavor to hide.
Measure the juice after squeezing. Lemons vary in size and sharpness, and too much juice can make the batch loose or overly sour.

Lemon Zest

The zest is where the curd gets its real lemon perfume. Grate only the yellow outer skin and avoid the white pith underneath, which can taste bitter.

Always zest before juicing. Then rub the zest into the sugar so the fragrant oils spread through the whole batch.

Sugar

Sugar balances the acidity of the lemons and helps the eggs cook into a smooth custard-like texture. Choose the lower amount for a sharper curd and the higher amount for a sweeter dessert-style spread.

Whole Egg and Egg Yolks

Eggs thicken the mixture. The whole egg gives structure, while the yolks give richness, color, and a smoother set. Large eggs work best here; smaller eggs can make the finished batch set a little softer.

Butter

Butter turns the sharp lemon custard into something glossy, rounded, and spoonable. Add it cold and cubed after the pan comes off the heat so it melts in smoothly.

Salt

You should not notice the salt; it simply makes the lemon taste cleaner and more complete.

Whole Eggs vs Yolks in Lemon Curd

Different recipes use different egg ratios. The right choice depends on whether you want a soft spread, a rich tart filling, or an all-purpose curd that can do both.

Egg choiceTextureBest for
Whole eggs onlyLighter, softer, slightly looserToast, scones, yogurt, pancakes
Egg yolks onlyRicher, thicker, more custardyTarts, fillings, layered desserts
Whole egg + yolksBalanced, silky, stableBest all-purpose lemon curd

The whole egg plus yolk combination gives this recipe its useful texture: rich enough for desserts, but still soft enough to spread after chilling.

Helpful equipment: A fine zester, citrus juicer, heavy-bottom saucepan, whisk, silicone spatula, fine mesh sieve, and heatproof bowl or jar make the process easier. An instant-read thermometer is optional, but helpful for precise doneness.

Choose a nonreactive pan, such as stainless steel or enamel-coated cookware. Avoid uncoated aluminum or copper, which can react with acidic lemon juice and affect the flavor.

Stovetop vs Double Boiler

A double boiler is the gentlest method because the bowl is heated by steam instead of direct contact with the burner. It is helpful if you are nervous about scrambling the eggs, but it is slower.

A heavy-bottom saucepan is faster and works well when the heat stays low and the whisk keeps moving. This recipe uses the saucepan method because it is practical, quick, and reliable once you know the doneness cues.

MethodBest forWatch out for
Heavy-bottom saucepanFast, everyday lemon curdNeeds low heat and constant whisking
Double boilerBeginners, nervous cooks, gentle cookingTakes longer to thicken
MicrowaveSmall quick batchesUneven heat; higher risk of curdling if rushed

How to Make Lemon Curd

1. Zest and Juice the Lemons

Zest the lemons before cutting them. Once lemons are juiced, they become harder to hold and zest cleanly. Use a fine grater and stop as soon as you reach the white pith.

After juicing, measure out 1/2 cup / 120 ml juice. Measuring matters because extra juice can make the curd too loose or too sharp.

2. Rub the Zest Into the Sugar

Add the zest and sugar to the saucepan. Use your fingertips to rub them together until the sugar smells strongly of lemon. This takes less than a minute and makes the final flavor brighter.

Visual cue: Rub the zest into the sugar before heating so the citrus oils flavor the whole batch.

Fingers rubbing finely grated lemon zest into sugar in a bowl before making lemon curd.
Rubbing lemon zest into sugar wakes up the citrus oils and gives homemade lemon curd a fuller aroma before any heat is added.

3. Whisk Before Heating

Add the whole egg, egg yolks, lemon juice, and salt. Mix until smooth before the pan goes on the stove. Starting with an even mixture helps the eggs cook evenly.

Visual cue: Whisk the mixture smooth before it goes on the stove.

Lemon curd ingredients whisked smooth in a stainless steel saucepan before cooking.
Whisk before heating so the eggs thicken evenly instead of forming streaks or small cooked bits.

4. Cook Low and Slow

Place the pan over low to medium-low heat. Whisk constantly, making sure to reach the edges and bottom of the pan. At first, the mixture will look thin and loose.

Visual cue: The pan should look calm, not boiling; steady whisking is what thickens the curd safely.

Lemon curd being whisked in a saucepan on a stovetop over gentle heat.
Gentle heat is your safety net: slow cooking gives the eggs time to thicken the lemon curd without scrambling.

Do not worry if it feels like nothing is happening for the first few minutes. That is normal. The change usually comes near the end, when the mixture turns glossier, feels heavier on the whisk, and starts leaving soft trails.

Visual cue: Watch the curd turn from loose and thin to glossy with soft whisk trails.

Two pans of lemon curd showing an early thin mixture beside a thicker glossy curd with whisk trails.
Watch the body of the mixture, not just the clock: it moves from loose and thin to glossy, heavier, and able to leave soft whisk trails.

This is the moment to slow down, not turn up the heat. If the curd looks almost right but not quite there, give it another minute over gentle heat.

5. Stop at the Right Texture

The curd is ready when it coats the back of a spoon and holds a clean line when you run a finger through it. If you are using a thermometer, aim for about 170°F / 77°C.

What the spoon test should show

A finger dragging through lemon curd on the back of a spoon, leaving a clean line that holds.
Use the spoon test when the curd is close; if the path stays open, it has enough body to finish setting as it cools.

For tart shells, mini tarts, cookies, or simple cake filling, you can cook it a little closer to 175°F / 79–80°C. Keep the heat gentle and do not let it boil.

The thermometer is a guide, not the only test. If the mixture has reached temperature but still looks watery, keep it over gentle heat a little longer until it coats the spoon.

6. Add Butter Off the Heat

Remove the pan from the heat. Whisk in the cold butter cubes a few pieces at a time. The curd turns glossy, smooth, and slightly richer as the butter melts in.

7. Strain the Lemon Curd

Pour the warm curd through a fine mesh sieve into a clean heatproof bowl or jar. The sieve is your safety net: it catches zest, tiny egg bits, and any uneven texture so the finished batch still tastes silky.

Texture cue: Straining while warm catches zest and tiny cooked bits before the curd goes into jars.

Warm lemon curd being pushed through a fine mesh sieve into a bowl, with small bits caught in the sieve.
The sieve is final texture insurance, catching zest and tiny cooked bits before the curd goes into cakes, tarts, or jars.

8. Cover and Chill

Press parchment or plastic wrap directly against the surface so a skin does not form. Chill for at least 2 hours before judging the final thickness.

Visual cue: The cover should touch the surface so a skin does not form as the curd cools.

Fresh lemon curd in a bowl covered with plastic wrap pressed directly against the surface.
Protect the surface while it cools; direct contact keeps the top smooth, especially when the curd will be used as a filling or topping.

How to Know It Is Done

Doneness is the part that makes lemon curd feel risky. Look for texture first: it should coat a spoon, fall in a thick ribbon, and move like warm loose pudding when you tilt the pan.

Doneness cueWhat to look for
Spoon testIt coats the back of a spoon and holds a clean line when you run a finger through it.
Whisk trailThe whisk briefly leaves trails before the mixture settles back in.
TextureGlossy, slightly heavier on the whisk, and no longer watery.
TemperatureAbout 170°F / 77°C for smooth curd; up to 175°F / 79–80°C for thicker curd.
After chillingIt mounds softly before slowly relaxing.

How to use temperature with texture

Thick lemon curd falling in a ribbon from a spatula while a thermometer in the curd reads about 170 degrees Fahrenheit.
Pair temperature with texture: near 170°F is helpful, but the curd should also fall in a slow, glossy ribbon.

Underdone curd looks shiny but thin and slips off the spoon quickly. Overheated curd may bubble hard, smell eggy, or show tiny cooked-egg specks.

How to tell runny curd from thick curd

A comparison of runny undercooked lemon curd and properly thickened lemon curd dripping from spoons into bowls.
If lemon curd seems runny, watch how it moves: thin curd races off the spoon, while properly cooked curd drops slowly and settles into soft folds.

This is the point where many people stop too early. Give it the extra minute it needs, but keep the heat gentle.

7 Rules That Prevent Lemon Curd Failure

  • Keep the heat gentle; high heat can scramble the eggs before the mixture thickens.
  • Do not let it boil. Hard bubbling is a sign to lower the heat.
  • Measure the lemon juice so the balance stays right.
  • Trust texture as much as temperature.
  • Let the refrigerator finish the set before judging thickness.
  • Use a thin layer inside a frosting dam for cakes.
  • Treat homemade curd as a refrigerator recipe, not a shelf-stable preserve.

Not sure where the curd is going? Match thickness to use · use it in cake · fix runny or lumpy curd

Once the curd is cooked and chilled, the next question is where it is going. Cakes, tarts, cookies, and spoonable desserts all need slightly different handling.

How Thick Should Lemon Curd Be?

Warm lemon curd is ready when it coats a spoon and looks glossy; after chilling, it thickens into a soft mound. Before you judge the batch, decide where it is going: a soft curd is perfect for toast, scones, and yogurt, while cakes, tart shells, cookies, and clean slices need a curd that sets thicker after chilling.

Which lemon curd texture works for which use

A lemon curd texture guide showing soft spread, spoonable topping, tart filling, and cake filling textures with bowls, spoons, and dessert examples.
The right lemon curd texture depends on the job: looser for spreading, spoonable for toppings, thicker for tarts, and cold and stable for cake filling.
UseBest textureWhat to do
Toast, scones, pancakesSoft and spreadableThe standard recipe works well once chilled.
Yogurt or ice creamGlossy and spoonableStir before spooning over.
Tart shellsSmooth and sliceableCook slightly thicker and strain well.
Mini tartsThick and neatFill once the curd has set.
Cake fillingThick, cold, stableMake ahead, then use inside a frosting dam.
CupcakesSpoonable but not runnyFill only after cupcakes are completely cool.
CookiesThick and jammyA set, spoonable batch works best for thumbprints or sandwich cookies.
Cheesecake toppingSmooth and spreadableStir gently before spreading.

For a classic tea-table pairing, a soft spoonful belongs beside easy English scones, where the tender crumb gives the tart filling somewhere to settle without turning heavy.

Visual cue: A softer lemon curd is ideal for scones, toast, pancakes, and yogurt.

A split English scone topped with soft lemon curd, with cream and a jar of curd nearby.
On scones and toast, softness is a strength; this spreadable lemon curd gives bright flavor without needing the firmness required for tarts or cake layers.

Choose your dessert path: cake filling · tarts and mini tarts · cheesecake, cookies, and quick desserts

Lemon Curd Cake Filling

Cake is where lemon curd needs the most boundaries. Spread thinly, it is beautiful. Treated like frosting, it can slide.

Yes, lemon curd works as cake filling when it is fully chilled, spread thinly, and held inside a frosting dam.

This curd works well with vanilla cake, lemon cake, coconut cake, almond cake, sponge cake, white chocolate frosting, cream cheese frosting, or buttercream frosting. The rule is simple: keep it cold, keep the layer thin, and keep it inside the frosting border.

Pipe a ring of buttercream, cream cheese frosting, or whipped ganache around the edge of the cake layer. Spread the curd inside that border. This keeps the filling from squeezing out when the cake is stacked.

How to hold lemon curd inside cake layers

A cake layer filled with lemon curd inside a piped frosting dam, with an offset spatula smoothing the curd.
Inside a layer cake, remember the visual rule: frosting around the edge, curd inside the border, and only a thin layer between cake layers.

If the cake has more than two layers, soft frosting, warm weather, or a long travel time, treat lemon curd as a flavor layer, not the structural filling. When lemon needs to be the main support in a tall cake, use a dedicated lemon filling instead.

How Much to Use in Cake

Cake sizeApproximate amount per filling layerNote
6-inch cake1/4 to 1/3 cupUse a thin layer inside a frosting dam.
8-inch cake1/3 to 1/2 cupKeep the layer even and away from the edge.
9-inch cakeAbout 1/2 cupBest with a sturdy frosting border.
Cupcakes1 to 2 teaspoons eachFill only after the cupcakes are fully cool.

These amounts are guides, not strict rules. Softer cakes and softer frostings need a thinner layer.

Visual cue: In cake, a thin chilled layer gives flavor without making slices slide.

A slice of layer cake with white frosting and a thin yellow lemon curd layer between the cake layers.
A clean cake slice shows why restraint matters: a thin chilled layer adds lemon flavor while cake and frosting keep the structure.

Lemon Curd vs Lemon Filling

Lemon curd is a buttery egg-thickened lemon custard; lemon filling is usually thicker, more stable, and often starch-thickened. The difference matters most when you need structure.

If you need a pipeable filling, a tall cake filling, or a dessert that must sit out longer, choose a starch-stabilized lemon filling instead of classic curd.

NeedBetter choiceWhy
Toast, scones, yogurt, pancakesLemon curdSoft, glossy, and spreadable
Tart shellsThicker lemon curdBright flavor with a smooth, sliceable texture
CupcakesChilled curd or lemon fillingBoth can work if the texture is thick enough
Layer cakeThick curd inside a frosting damWorks when used cold and not overfilled
Tall celebration cakeStable lemon fillingBetter structure for height and clean slices
Warm-weather cakeStable lemon fillingLess likely to soften or slide
Pipeable bakery-style fillingLemon fillingUsually thicker and more controlled

When to use curd and when to use filling

A side-by-side guide comparing smooth lemon curd with thicker lemon filling in bowls and tart shells.
Choose by function: lemon curd brings buttery brightness, while lemon filling is better when height, travel, or sharp slices matter.

Think of curd as flavor and silk; think of filling as structure. In a simple home cake, chilled curd can work beautifully inside a frosting dam. For a tall cake, wedding-style cake, or dessert that needs very sharp slices, use a dedicated lemon filling instead.

Using It in Tarts and Mini Tarts

Lemon curd is excellent in tart shells because it gives you a bright, creamy filling without making a separate pastry cream. Strain it well for the glossiest finish.

Start with fully baked and fully cooled tart shells. Fill them while the curd is cooled but still spreadable, or spoon in chilled curd and smooth the top with an offset spatula.

Mini tarts work best once the filling has set because it spoons or pipes more neatly. For a tart that slices cleanly, cook the curd slightly thicker and chill the filled tart before serving.

Visual cue: A slightly thicker, fully chilled curd gives cleaner tart tops and slices.

Mini lemon curd tarts and a clean slice of lemon tart with glossy yellow filling on a light stone surface.
In lemon tarts and mini tarts, the curd needs more set than a breakfast spread; that thicker chill gives neat tops and cleaner slices.

If you are comfortable with simple tart assembly, the same crisp-base thinking appears in this apple tart recipe: keep the pastry base crisp, the filling controlled, and the final texture clean.

Pie, Cheesecake, Cookies and Desserts

Once the texture is right, lemon curd can become a layer, topping, swirl, filling, or quick dessert shortcut.

Pie

Use lemon curd as a tart-sweet layer in cream pies, no-bake pies, or layered desserts. It works beautifully as a flavor layer, but a classic lemon meringue pie usually needs a dedicated pie filling because it has to slice cleanly and hold under meringue.

Cheesecake

Spread it over cheesecake as a topping, swirl it lightly into the filling, or use it as a thin layer between cheesecake and whipped cream. It works especially well with a no bake cheesecake, where the bright curd cuts through the creamy filling and keeps each bite from feeling too heavy.

Cookies

For thumbprint cookies, sandwich cookies, or shortbread cookies, use a thicker batch. Filled cookies look cleanest when the curd is added after baking unless the cookie recipe is designed to bake with a filling. For a gluten-free cookie base, almond flour cookies are a natural direction because their tender, nutty texture pairs well with sharp lemon.

Quick Desserts

Spoon it into yogurt parfaits, fold a little into homemade whipped cream, layer it with crushed cookies, drizzle it over pound cake, or serve it with pavlova and berries. A small amount adds brightness, creaminess, and that sharp lemon finish.

What to Make With Lemon Curd

Once the jar is chilled, it becomes a shortcut to brightness: breakfast, cake, cream, cookies, and simple desserts all get a sharper finish.

CategoryIdeas
BreakfastToast, scones, pancakes, waffles, yogurt, crepes
CakesLayer cake, lemon cake, vanilla cake, cupcakes, loaf cake, sponge cake
Tarts and piesMini tarts, tart shells, lemon tart, cream pie layers
CookiesThumbprint cookies, sandwich cookies, shortbread bars
No-bake dessertsParfaits, cheesecake topping, whipped cream layers, ice cream topping
Plated dessertsPavlova, pound cake, angel food cake, crepes, meringues

Visual cue: One chilled jar can brighten cheesecakes, cookies, parfaits, pancakes, yogurt, and whipped cream.

Lemon curd served with cheesecake, thumbprint cookies, a whipped cream parfait, pancakes, and yogurt.
Once chilled, one jar can work across desserts: sharpen cheesecake, fill cookies, layer parfaits, brighten pancakes, swirl yogurt, or lift whipped cream.

For a fruit-and-cream dessert, borrow the same assemble-at-serving idea used in classic strawberry shortcake: keep the base, fruit, cream, and curd separate until the last minute so nothing turns soggy.

With breakfast, a spoonful of chilled curd is excellent over almond flour pancakes, especially when you want something brighter than syrup.

Microwave Lemon Curd Shortcut

The stovetop method gives the best control, especially the first time you make lemon curd. The microwave can work for a quick small batch, but it asks for patience in short bursts.

Microwave timing varies by wattage, so texture matters more than exact minutes. Use the spoon test instead of trusting the clock alone.

  1. Start with a large microwave-safe glass bowl because the mixture can rise as it heats.
  2. Whisk the lemon juice, zest, sugar, eggs, and salt together until smooth.
  3. Microwave in 30-second bursts, whisking well after each burst.
  4. Once the mixture begins to thicken, switch to 10 to 15-second bursts.
  5. Stop when it coats a spoon. Do not let it boil over or scramble.
  6. Whisk in the butter, strain through a fine mesh sieve, then chill.

The microwave method is fast, but less forgiving because the heat is uneven. For the smoothest, most controlled result, use the stovetop method.

Vegan, Eggless, Dairy-Free and Gluten-Free Notes

Classic lemon curd is made with eggs and butter, so vegan and eggless versions need a different method. They are not just a simple egg swap.

  • Dairy-free: plant-based butter can work, but flavor and texture may change depending on the brand.
  • Eggless: usually needs cornstarch or another thickener to replace the eggs.
  • Vegan: usually uses lemon juice, zest, sugar, plant milk, starch, and plant butter or coconut-based fat.
  • Gluten-free: classic curd is usually naturally gluten-free, but check all ingredients and avoid cross-contact if needed.
  • Sugar-free or keto: needs separate testing because sweeteners behave differently from sugar.

If you need a vegan or egg-free version, choose a recipe designed for that method. The texture, thickening system, and cooking behavior are different from classic curd.

Troubleshooting Lemon Curd

Most lemon curd problems look worse than they are. The fix depends on whether the batch is undercooked, overheated, or simply not chilled yet.

How to diagnose lemon curd problems

A lemon curd troubleshooting guide showing runny curd, lumpy curd, egg specks in a sieve, and a stainless steel pan for avoiding metallic taste.
Most lemon curd problems point back to heat, timing, chilling, or cookware, so diagnose the texture before giving up on the batch.

Fix Texture Problems First

ProblemWhy it happenedWhat to do
Runny curdIt was undercooked or has not chilled long enough.Reheat gently and cook until it coats a spoon or reaches about 170°F / 77°C. Chill fully.
Runny after chillingIt was undercooked, even if it looked slightly thick while warm.Reheat gently, cook to spoon-coating texture, then chill again.
Lumpy textureThe eggs cooked too quickly or the heat was too high.Strain immediately through a fine mesh sieve. Use lower heat next time.
Eggy tasteThe eggs overheated or cooked too aggressively.Strain well. Next time, cook lower and whisk constantly.
Grainy textureThe sugar did not dissolve evenly or the heat was uneven.Rub zest into sugar, whisk well before heating, cook gently, and strain after cooking.
Split curdThe heat was too high or the butter did not emulsify smoothly.Whisk vigorously off heat, then strain. Next time, add butter gradually off heat.

Fix Flavor, Skin, and Cookware Issues

ProblemWhy it happenedWhat to do
Too tartThe lemons were very sharp or the lower sugar amount was used.Use the sweeter sugar amount next time. Serve this batch with cream, yogurt, cake, or meringue.
Too sweetThe lemons were mild or the higher sugar amount was used.Add more zest next time for stronger lemon flavor instead of adding too much extra juice.
Skin on topIt cooled uncovered.Press parchment or plastic wrap directly onto the surface while cooling.
Metallic tasteA reactive pan or bowl may have affected the flavor.Use stainless steel, enamel-coated cookware, or heatproof glass.

Even if the batch is not perfect, do not throw it away too quickly. A slightly thin curd can often be cooked a little longer, and a slightly lumpy one can often be rescued with a sieve.

Batch rescued? Recheck doneness cues · store the finished curd · return to the recipe card

Storage and Freezing

Homemade lemon curd is a refrigerator recipe, not a shelf-stable preserve. Store it in a clean airtight jar or container and keep it chilled.

Think of it like a chilled custard-style spread: clean jar, cold fridge, clean spoon.

How to store lemon curd safely

Two jars of homemade lemon curd labeled fridge and freezer, with blank date lines, a lemon, linen, and a spoon nearby.
Date the jar and keep it cold; homemade lemon curd behaves like a custard-style spread, so clean handling matters as much as flavor.

If you want tested preservation guidance, the National Center for Home Food Preservation has specific lemon curd freezing and canning guidance.

  • Refrigerator: keep for about 1 to 2 weeks, depending on freshness and handling.
  • Freezer: freeze in an airtight freezer-safe container for longer storage.
  • Thawing: thaw overnight in the refrigerator.
  • After thawing: stir gently before using.
  • Serving: always use a clean spoon so the curd stays fresh longer.

Let the curd cool slightly before sealing the jar fully, so condensation does not collect inside. For food-safety storage temperatures, use a refrigerator at 40°F / 4°C or below; FoodSafety.gov’s cold food storage chart uses that same refrigerator temperature benchmark.

Keep it chilled until serving, especially because it contains eggs and butter.

FAQ

Why did my lemon curd turn runny?

It was probably undercooked or not chilled long enough. Reheat gently until it coats a spoon, then chill again.

How do you thicken lemon curd?

Cook it gently until it coats the back of a spoon. For a thicker texture, cook closer to 175°F / 79–80°C without boiling, then chill until fully set.

What temperature should lemon curd reach?

A good target is about 170°F / 77°C. For tarts or cake filling, cook closer to 175°F / 79–80°C without letting it boil.

How many lemons do you need?

Usually 2 to 3 medium lemons for 1/2 cup / 120 ml juice. Zest them before juicing so they are easier to handle.

Do you need a double boiler?

No. A double boiler gives extra protection, but a heavy-bottom saucepan works well with low heat and constant whisking.

Whole eggs or egg yolks: which is better?

Use whole eggs for a lighter curd and yolks for a richer, thicker one. This recipe uses both for a balanced all-purpose texture.

Should lemon curd be strained?

Yes. Straining while warm is the easiest way to remove zest, tiny egg bits, and uneven texture.

How long does homemade lemon curd last?

It usually keeps for about 1 to 2 weeks in the refrigerator in a clean airtight container.

Can you freeze lemon curd?

Yes. Freeze it in an airtight freezer-safe container, thaw overnight in the refrigerator, then stir gently before using.

Is lemon curd the same as lemon filling?

Not always. Lemon curd is buttery and custard-like, while lemon filling is often thicker, more stable, or starch-thickened.

Does lemon curd work as cake filling?

Yes, if it is cold, thick, and used thinly inside a frosting dam. For tall cakes or very clean slices, use a more stable lemon filling.

Why does lemon curd taste metallic?

A metallic taste can come from reactive cookware. Use stainless steel, enamel-coated cookware, or heatproof glass.

Final Tips for Smooth Lemon Curd

  • Zest before juicing.
  • Measure the lemon juice.
  • Rub zest into sugar for stronger lemon flavor.
  • Cook gently and whisk constantly.
  • Stop when it coats a spoon and looks glossy.
  • Use temperature as a guide, not the only test.
  • Strain warm, then chill before using as filling.

Good lemon curd should taste bright, smooth, and alive with lemon. Keep the heat gentle, trust the spoon test, and let the refrigerator finish the texture. Once you know what properly thickened curd looks and feels like, it stops being fussy and becomes one of the easiest ways to make toast, cakes, pancakes, cookies, whipped cream, and simple desserts taste finished.

Make it now: jump back to the recipe card · back to top

Posted on — Leave a comment

Key Lime Pie Recipe

A pale yellow baked key lime pie in an ivory ceramic dish with whipped cream, lime garnish, and one slice removed from a graham cracker crust.

A good key lime pie should feel cold, creamy, tart, and clean from the first forkful. The crust should cut without collapsing into crumbs, the filling should hold a soft wedge without turning stiff, and the lime flavor should taste bright instead of sugary, bitter, or artificially green.

This version is built for the little worries that make key lime pie stressful: a loose filling, a soggy or brittle graham cracker crust, weak lime flavor, too much sweetness, and slices that slump because the pie was cut before it had fully chilled.

Unlike no-bake cheesecake-style pies, this is a baked bakery-style key lime pie with sweetened condensed milk, egg yolks, lime juice, zest, and a graham cracker crust. A short bake, a gently set center, and enough fridge time give you a taller pie that serves beautifully without becoming heavy.

The actual work is simple: press the crust, whisk the filling, bake briefly, and chill. It is especially good after food with heat or spice, when the first cold bite resets the table: sharp lime, soft cream, buttery crumbs, and no heavy frosting.

Make this pie first: use a 9-inch pie plate, pre-bake the graham cracker crust, bake the filling at 350°F / 177°C until the edges are set and the center moves gently, then chill for at least 4 hours. Overnight chilling gives the neatest wedges.

Quick Answer

Key lime pie is a chilled lime custard pie made with sweetened condensed milk, egg yolks, lime juice, and a graham cracker crust. This easy baked key lime pie bakes briefly at 350°F / 177°C, then rests in the refrigerator until the filling becomes creamy and sliceable.

Use fresh key limes for aroma, bottled key lime juice for ease, or regular limes with zest when that is what you have. The real win is a pie that bakes gently, chills fully, and cuts into a clean, creamy wedge.

The cold-wedge test: a good key lime pie should be cold all the way through, hold its shape when sliced, cut through a buttery crumb crust, and still taste creamy instead of stiff. For the bake, use visual cues: set edges, a softly moving center, no slosh, and no browning.

A tall slice of pale yellow key lime pie on a cream plate with smooth filling, graham cracker crust, whipped cream, and lime garnish.
After a long chill, a tall key lime pie slice should stand cleanly while still looking creamy, not stiff or dry.

Ready to bake now? Jump to the recipe card, or keep reading if you want the visual cues that make the pie easier to judge.

Key Lime Pie Recipe Card

Description

Make this easy baked key lime pie when you want a buttery graham cracker crust, tart condensed-milk filling, a softly set center, and a slice that holds without turning stiff.

Prep time25 minutes
Bake time26 to 30 minutes total
Cooling time30 to 45 minutes
Chill timeAt least 4 hours
Total timeAbout 5 hours 30 minutes, including cooling and chilling
YieldOne 9-inch pie, about 8 slices
Oven350°F / 177°C
Doneness cueSet edges, softly moving center

Why two cans? This taller 9-inch pie uses a deliberate ratio: 2 cans sweetened condensed milk, 1 cup lime juice, and 4 egg yolks. The extra volume gives you a higher bakery-style slice, but it also means a deeper pie plate and full chill time matter. If your pie plate looks close to full before all the filling is added, stop pouring and bake any extra filling separately in a small ramekin.

Equipment

  • 9-inch pie plate, preferably at least 1¼ inches deep
  • Mixing bowls
  • Whisk
  • Food processor, blender, or rolling pin for crushing crackers
  • Measuring cup or flat-bottomed glass for pressing the crust
  • Citrus zester
  • Citrus juicer
  • Wire rack

Ingredients

For the Graham Cracker Crust

  • 1½ cups graham cracker crumbs, about 150g
  • ¼ cup granulated sugar, 50g
  • 6 tablespoons unsalted butter, melted, 85g
  • Pinch of fine salt

For the Key Lime Filling

  • 2 cans sweetened condensed milk, 14 ounces each, 28 ounces total / about 793g
  • 4 large egg yolks
  • 1 cup key lime juice, 240ml
  • 1 tablespoon finely grated lime zest
  • Pinch of fine salt

For the Whipped Cream Topping

  • 1 cup cold heavy cream, 240ml
  • 1 to 2 tablespoons powdered sugar, 8 to 16g
  • ½ teaspoon vanilla extract
  • Extra lime zest or thin lime slices, optional

For a deeper guide to soft peaks, sweetness, and keeping the topping fluffy, use MasalaMonk’s whipped cream recipe before finishing the pie.

Instructions

Crust

1. Heat the oven. Preheat the oven to 350°F / 177°C. Place a rack in the center of the oven.

2. Make the crust mixture. Stir the graham cracker crumbs, sugar, melted butter, and salt together until the mixture looks like damp sand. When you squeeze a little in your hand, it should hold together.

3. Press the crust. Tip the crumbs into a 9-inch pie plate. Press the crumbs up the sides first, then press the remaining crumbs across the base. Use the bottom of a measuring cup or glass to even it out, but avoid packing it so hard that it becomes dense.

4. Pre-bake the crust. Bake for 8 to 10 minutes, until the crust smells toasted and looks slightly dry. Set it on a wire rack while you make the filling.

Filling, Bake, and Chill

5. Mix the filling. In a medium bowl, whisk the egg yolks and lime zest for about 1 minute, until slightly lighter and fragrant. Add the sweetened condensed milk, key lime juice, and salt. Whisk until smooth and slightly thickened. The filling should look glossy and pour slowly, not thin like milk.

6. Fill the crust. Pour the filling into the warm crust and smooth the top gently. Tap the pie plate once or twice on the counter to release large air bubbles. If your pie plate is shallow, hold back extra filling rather than overfilling.

7. Bake the pie. Bake for 18 to 20 minutes, until the edges look set and the middle moves gently when you nudge the pan. The filling should not slosh, the top should not brown, and the pie should smell like warm lime and toasted crumbs rather than browned custard.

8. Cool, then chill. Let the pie cool on a wire rack until it is no longer hot, about 30 to 45 minutes. Refrigerate for at least 4 hours, or overnight for the best texture.

9. Make the whipped cream. Before serving, beat the cold heavy cream, powdered sugar, and vanilla until soft or medium peaks form.

10. Finish and serve. Spread or pipe the whipped cream over the chilled pie. Add lime zest or thin lime slices if you like. Slice with a sharp knife, wiping the blade between cuts for tidy pieces.

Success Notes

  • Use sweetened condensed milk, not evaporated milk.
  • Use the full 1 cup / 240ml lime juice for a properly tart pie. If your bottled juice tastes extremely sharp, use ¾ cup / 180ml for a softer flavor.
  • A deeper 9-inch pie plate gives this bakery-style filling enough room. With a shallow plate, hold back extra filling.
  • A center that moves softly is not automatically underdone. That movement helps protect the filling from turning rubbery after chilling.
  • Add whipped cream after chilling for the freshest texture and neatest top.

That taller slice comes from the two-can filling ratio. The extra volume gives the pie height, while the full chill gives it the clean cut.

Two cans of sweetened condensed milk, one cup of lime juice, four egg yolks, and lime zest arranged for key lime pie filling.
Because this is a two-can condensed milk filling, the pie bakes taller than a classic version and needs both a deeper plate and patient chilling.

If this is your first key lime pie, do not judge it by how it looks hot from the oven. Judge it after it has cooled and chilled.

Key Lime Pie Cues at a Glance

Once the pie is in motion, these are the small signs that tell you everything is going right.

CueWhat to Look For
Crust mixtureDamp sand that holds when squeezed
Baked crustLightly dry, fragrant, and not dark
Filling before bakingSmooth, glossy, and slightly thickened
DonenessSet edges, softly moving center, no slosh
ColorPale yellow, not bright green
ChillCold all the way through before slicing
SliceHolds shape but still tastes creamy

Why This Recipe Works

The filling works because the ingredients do more than add flavor. Lime juice thickens the sweetened condensed milk mixture and cuts through its sweetness. Egg yolks add custard structure. Gentle oven heat finishes the set, and chilling gives the pie time to become cleanly sliceable.

The crust has a different job: it needs to stay crisp under a cold filling. Pre-baking dries and toasts the graham crumbs, while a little salt keeps the condensed milk filling from tasting flat.

That is why this pie does not need extra food coloring, complicated flavorings, or a long list of add-ins. The flavor comes from contrast: buttery crumbs, smooth lime custard, a little salt, and a cool cream finish.

That contrast is the whole charm: the pie tastes rich for a second, then the lime pulls it back into something clean and refreshing.

Ingredients for Key Lime Pie

The ingredient list is short, so every item matters. The filling should taste bright and balanced, not heavy, harsh, or candy-sweet.

Why no sour cream, Greek yogurt, or cream cheese? Those ingredients can make a delicious softer or tangier pie, but they move the texture toward cheesecake or cream pie. This version stays in the baked custard-style lane, using sweetened condensed milk, egg yolks, lime juice, and chill time for body.

Graham Cracker Crumbs

Fine graham cracker crumbs make the crust easier to press and slice. A few slightly larger crumbs are fine, but avoid a mix that is half powder and half chunks. The crust should feel sandy and buttery, not dry.

Outside the US, digestive biscuits or plain tea biscuits can work in the crust. Use the same crumb weight and adjust the butter only if the mixture does not hold when squeezed.

A store-bought 9-inch graham cracker crust works for a shortcut, but check the depth before filling. This is a generous bakery-style filling, so use a deep-dish crust if available, or hold back a little filling instead of overfilling.

Sweetened Condensed Milk

Sweetened condensed milk gives the filling its creamy body, sweetness, and smooth texture. Evaporated milk is not a good swap because it does not have the same thickness, sugar, or structure. It is what makes the filling feel lush instead of watery.

If you like condensed milk desserts, MasalaMonk’s banoffee pie recipe is another rich, chilled pie-style dessert to try.

Egg Yolks

Egg yolks help the filling cut like custard instead of spooning like pudding. They also give the pie its natural pale yellow color.

The same gentle-heat logic shows up in MasalaMonk’s crème brûlée recipe, where the custard should set softly instead of turning firm.

Key Lime Juice

Key lime juice gives the pie its sharp, bright flavor. Fresh key limes have a fragrant, floral tartness, but bottled key lime juice is useful and reliable when fresh key limes are hard to find. Regular limes can also work, especially when you use enough zest.

Lime Zest

Zest is what makes the pie smell like lime before the first bite even lands. Grate only the colored outer layer of the lime; the white pith underneath can taste bitter in a smooth custard filling.

Zest the limes before you juice them. Whole limes are easier to hold, and you are less likely to scrape into the bitter white pith.

Salt

A small pinch of salt keeps the filling from tasting flat. It should not make the pie taste salty; it simply sharpens the lime and balances the condensed milk.

Whipped Cream

Lightly sweetened whipped cream softens the tartness of the pie and gives each slice a cool finish. Heavy cream, a little powdered sugar, and vanilla are enough.

Once the basics are set, the lime choice is where most bakers hesitate. That is also where this recipe is more flexible than it may seem.

Fresh Key Limes, Bottled Juice, or Regular Limes?

Fresh key limes give the most aromatic version, but they are not the only way to make a good pie. Bottled key lime juice is useful when fresh key limes are hard to find, and regular Persian limes work well when you use enough fresh zest.

Fresh key limes, regular Persian limes, and bottled key lime juice arranged as options for making key lime pie.
For lime flavor, think in layers: fresh key limes bring aroma, bottled key lime juice brings consistency, and regular limes need zest for brightness.

For 1 cup / 240ml juice, expect about 20 to 30 small key limes, sometimes more if they are dry. Regular Persian limes are much larger, so 6 to 8 may be enough. Zest before juicing so the fruit is easier to hold.

Fresh key limes are lovely, but they are not a test you have to pass. The better test is the bite: clean, tart, aromatic, and balanced against the condensed milk.

No Key Limes? Use Regular Limes This Way

Regular limes work best when you treat zest as part of the flavor, not just a garnish. The juice brings tartness; the zest brings back the lime aroma.

A regular Persian lime being zested with a microplane, with fine green lime zest visible on a light surface.
When zesting regular limes, stop at the colored peel so the pie gets fragrance without the bitterness of the white pith.

Choose Your Lime Path

What You HaveWhat to DoBest Sign
Fresh key limesUse them for the most aromatic versionExpect a tart, floral filling
Bottled key lime juiceUse ¾ to 1 cup depending on sharpnessTaste first; it should be clean and tart
Regular limesUse the juice plus plenty of fresh zestZest gives back aroma
Very sharp bottled juiceStart closer to ¾ cup / 180mlUse zest for lime fragrance
Mild or weak limesUse the full juice amount and extra zestChill overnight for better flavor

With regular limes, fresh zest matters even more because it brings back the citrus aroma. With bottled key lime juice, taste it before mixing. It should be tart and clean, not stale or bitter.

A natural key lime pie is usually pale yellow because of the egg yolks and lime juice. Bright green pie may look playful, but it is not a sign of better lime flavor. Skip green food coloring unless you specifically want that look; it does not improve the pie.

A natural pale yellow key lime pie slice compared with an artificial neon green pie slice.
Instead of judging by green color, look for a soft pale yellow filling; that is the natural look of lime juice, yolks, and condensed milk.

Classic vs Bakery-Style Key Lime Pie

This is a taller bakery-style key lime pie, but the flavor stays classic: condensed milk, egg yolks, lime juice, zest, and a graham cracker crust. The difference is volume. A taller filling gives you a more generous slice, but it also needs a deeper 9-inch pie plate, careful doneness cues, and enough chill time to cut cleanly.

A classic-style key lime pie slice compared with a taller bakery-style key lime pie slice on cream plates.
A bakery-style key lime pie slice gets its height from extra filling volume, but the clean cut comes from proper baking and chilling.

Bakery-style does not mean greener, sweeter, or heavier. The pie should still taste tart, creamy, pale yellow, and balanced.

Key lime pie is also Florida’s official state pie, but that does not change the home-baking test: crisp crust, pale lime filling, and a chilled slice that holds. Florida Senate official state pie reference.

After the filling style, the crust is what makes the slice feel complete.

Graham Cracker Crust for Key Lime Pie

You are looking for a crust that is crisp, buttery, and strong enough to hold the chilled filling. It should not crumble into dust when sliced, but it should not be so tightly packed that it turns hard.

Crust Texture

The best cue is texture. Once the crumbs, sugar, butter, and salt are mixed, the crumbs should look like damp sand. Squeeze a small amount in your hand. If it holds together, the crust has enough butter. If it falls apart immediately, it may need a little more melted butter.

A hand squeezing graham cracker crumb mixture over a glass bowl to show the damp sand texture for key lime pie crust.
Before the crust goes into the dish, squeeze the crumbs once; they should clump lightly without leaving butter on your fingers.

Pressing and Pre-Baking

When pressing the crust into the pie plate, build the sides first. Then press the base flat. This gives you a more even edge and helps prevent the sides from collapsing. A measuring cup or flat-bottomed glass makes the job easier.

Hands pressing graham cracker crumbs up the sides of an ivory pie dish with a measuring cup to form the crust wall.
Next, press the sides before the base so the crust wall can support the taller lime filling instead of collapsing.

The crust is not just a container; it is the buttery, salty crunch that keeps the lime filling from tasting one-note. The best bite should give you a little sandy crunch before the lime custard melts.

A lightly pre-baked graham cracker crust in an ivory ceramic pie dish resting on a cooling rack.
Once pre-baked, the graham cracker crust should smell toasted and feel dry on top, which helps prevent a soggy chilled slice.

You see the same crust logic in MasalaMonk’s salted caramel cheesecake recipe, where the base has to stay crisp under a rich filling.

Crust ProblemLikely ReasonFix
Crust crumblesToo little butter or not pressed enoughAdd a little more butter next time and press firmly
Crust is too hardPressed too aggressivelyPress firmly, but do not crush it into a compact shell
Crust tastes flatNo saltAdd a small pinch of salt
Crust gets soggyNot pre-baked or filling added to a weak crustPre-bake until lightly dry and fragrant
Sides slump downLoose crumbs or thin sidesPress the sides first and make them even

Method Overview: How to Make Key Lime Pie

Think of the method in four stages: set the crust, thicken the filling, bake only until the center moves softly, then let the refrigerator finish the texture.

The crust gets a short pre-bake so it smells toasted and feels lightly dry. The filling should look smooth, glossy, and slightly thickened before it goes into the crust. After baking, the pie should cool at room temperature before it chills deeply in the refrigerator.

Pale yellow key lime pie filling in a bowl with a whisk trail, showing a smooth glossy texture with tiny lime zest flecks.
When the filling turns glossy and leaves soft whisk trails, the condensed milk, egg yolks, lime juice, and zest are blended enough to bake smooth.

Once the filling looks glossy and slow-pouring, add it to the warm crust gently so the surface stays smooth.

Pale yellow key lime pie filling being poured from a bowl into a pre-baked graham cracker crust in an ivory ceramic dish.
If the filling pours slowly rather than splashing thin, it has the body needed for a creamy baked key lime pie.

How to Know Key Lime Pie Is Done

Key lime pie is done when the edges look set and the center has a soft wobble. It should not slosh like liquid, but it should not look firm like a cheesecake either. Think of the center as gently jiggly, not loose.

A baked key lime pie in an ivory dish with labels pointing to set edges, a soft center, and no browning.
Pull the pie when the edges are set and the center still wobbles softly; the custard finishes as it cools and chills.

Keep the top pale; browning is a sign the pie has gone too far. A few tiny bubbles near the edges are fine, but a browned surface usually means the oven was too hot or the bake went too long.

A split image comparing a correct pale key lime pie top with an overbaked browned and cracked top.
Browning, puffing, or cracking are warning signs that the key lime custard has moved past creamy and into overbaked.

Done means: for this pie, your eyes are more helpful than a thermometer: set edges, a center that still moves softly, no slosh, no large bubbling, and a pale top with no browning.

After the bake, the next useful checks are chilling time and clean slicing.

How Long to Chill Key Lime Pie

Chill key lime pie for at least 4 hours before slicing. Overnight is better if you want the smoothest texture and the neatest wedges. The filling needs time to firm all the way through, not just cool on the surface.

Let the pie cool at room temperature first, then refrigerate it. If the pie is still warm, avoid sealing it tightly right away because condensation can drip onto the filling. Once cold, cover it loosely or place it in an airtight container.

When it is right, the fork should slide through cold lime custard, hit the buttery crumb crust, and bring up a bite that is tart first, creamy second, and sweet only at the end.

How to Get Clean Slices

For tidy wedges, use a sharp knife and cut straight down through the custard and crust. Wipe the blade between slices so each piece lifts cleanly.

A clean slice of key lime pie being lifted with a pie server while a hand wipes a sharp knife nearby.
For clean slices, chill first, cut with a sharp knife, and wipe between cuts so graham crumbs do not streak the filling.
  • For extra-clean cuts, dip the knife in hot water and dry it before slicing.
  • Add whipped cream after chilling, especially if you want a neat top.
  • Use a thin pie server instead of a spoon to lift each piece.

If the first piece comes out messy but the rest of the pie looks set, the pie is probably fine. Slices that slump across the whole pie usually needed more fridge time or a slightly longer bake.

When the pie still looks loose after slicing, check the troubleshooting table before changing the recipe.

How to Make It Less Sweet or More Tart

Key lime pie should be sweet, but it should not taste flat or sugary. The best balance comes from enough lime juice, fresh zest, a little salt, and a simple topping.

The best version should make your mouth water a little before the sweetness catches up. That is the difference between a pie that tastes bright and one that only tastes sweet.

A four-part board showing lime juice, lime zest, salt, whipped cream, and a key lime pie slice for flavor balance.
To make the pie taste brighter without breaking the filling, adjust zest, salt, and topping before changing the condensed milk ratio.
What You WantWhat to Adjust
Less sweetUse lightly sweetened whipped cream and avoid adding extra sugar to the filling
More tartUse the full 1 cup / 240ml lime juice
More lime aromaAdd a little extra zest, avoiding the white pith
Softer flavorUse ¾ cup / 180ml lime juice instead of 1 cup / 240ml
Better balanceAdd a pinch of salt and chill the pie overnight

Sweetened condensed milk is not only a sweetener; it also gives the filling its body. For a less sweet result, adjust the lime, zest, salt, and topping before changing the structure of the filling.

Whipped Cream, Meringue, or Plain?

Whipped cream is the easiest and most balanced topping for key lime pie. It softens the tartness of the filling and gives each slice a creamy finish without making the pie feel heavy.

Whipped cream should feel like a soft finish, not a second dessert on top of the pie. A little sweetness is enough because the filling already has condensed milk.

Soft whipped cream being piped onto a pale yellow key lime pie in an ivory dish with lime zest on top.
A light whipped cream finish softens the tart lime edge, while a little zest keeps the flavor fresh instead of heavy.

Meringue is more dramatic and can be beautiful, especially if lightly toasted. It also uses the egg whites left over from the filling. The tradeoff is that meringue needs more care, and it can weep if stored too long.

Serving the pie plain is also completely fine. If you want the lime flavor to feel sharper and cleaner, skip the topping or add only a small spoonful of whipped cream on each slice.

After topping, the other big choice is texture: classic baked custard or a softer no-bake pie.

Baked vs No-Bake Key Lime Pie

Baked and no-bake key lime pies both have their place. Choose baked when you want a classic chilled custard slice; choose no-bake when you want something softer, creamier, and closer to cheesecake or icebox pie.
A split comparison showing baked key lime pie as custardy and no-bake key lime pie as softer.
Choose baked key lime pie for a custardy slice; choose no-bake when you want a softer chilled dessert with a creamier set.
TypeTextureBest ForMain Caution
Baked key lime pieCustardy, creamy, sliceableClassic flavor and tidy wedgesDo not overbake
No-bake key lime pieCreamy, soft, cheesecake-likeHot weather and no-oven dessertsNeeds enough chill time
Frozen key lime pieFirm, cold, refreshingSummer serving and make-ahead dessertsNeeds thawing time before slicing

This recipe is baked because it gives the most reliable classic texture. The bake is short, and the oven does not need to stay on for long. Most of the total time is chilling time, not active cooking time.

If you want the same chilled-dessert comfort without turning on the oven, MasalaMonk’s no-bake mango cheesecake recipe is a natural next stop because it also focuses on clean setting, chill time, and a creamy fruit filling.

Key Lime Pie Variations

Make the baked pie once as written, then use these ideas when you want the same tart-creamy flavor in a different shape.

Mini key lime pies and square key lime pie bars arranged on light boards with pale yellow filling and graham crusts.
For parties or trays, mini pies and bars keep the same graham crust and lime filling but make serving cleaner and easier.

Mini Key Lime Pies

Mini key lime pies are great for parties and individual servings. Use a muffin tin or mini graham cracker crusts, press the crust firmly, and reduce the bake time because smaller pies set faster.

Key Lime Pie Bars

For bars, use a square pan lined with parchment so the slab lifts out cleanly. Bars need a slightly sturdier structure because they are cut into handheld pieces.

Gluten-Free Key Lime Pie

The filling is naturally gluten-free as long as your ingredient labels are safe. Use gluten-free graham crackers or gluten-free digestive-style biscuits for the crust, then follow the same butter, sugar, pressing, and pre-baking method.

Dairy-Free or Vegan Key Lime Pie

A dairy-free or vegan key lime pie needs a dedicated formula. Sweetened condensed milk and egg yolks are structural ingredients in this baked version, so simple one-for-one swaps can turn the filling loose or grainy.

For a coconut-based frozen dessert comparison, MasalaMonk’s coconut ice cream recipe is useful because it separates coconut milk, coconut cream, and texture control clearly.

Regular Lime Pie

Regular limes make a bright, delicious pie. The flavor is slightly different from fresh key limes, but fresh zest brings back more citrus aroma.

No-Bake Key Lime Pie

No-bake key lime pie usually uses cream cheese, whipped cream, whipped topping, or another chilled structure instead of egg yolks. It is useful when you want a cold summer dessert without turning on the oven, but it is not the same texture as this baked custard-style pie. For the no-oven setting logic, see MasalaMonk’s no-bake cheesecake recipe.

Master the baked version first; it is the one that rewards a night in the fridge.

Make-Ahead Key Lime Pie

Key lime pie is one of the easiest desserts to make ahead because it needs refrigerator time anyway. Make the pie the day before you plan to serve it, chill it overnight, and add the whipped cream close to serving time.

That is the quiet advantage of this pie: dessert is already finished before anyone sits down to eat. All that is left is cream, a clean knife, and cold slices on plates.

If you are making the pie ahead for guests, bake and chill the pie the day before, but whip and add the cream on the day you serve it.

For a summer dessert table, this pie also sits well beside something cold and fruit-forward like MasalaMonk’s homemade mango ice cream.

Best make-ahead plan: bake and chill the pie one day ahead, keep it covered in the refrigerator, then whip the cream and garnish the pie shortly before serving.

A chilled key lime pie in an ivory dish inside a refrigerator with limes, a covered slice, and whipped cream nearby.
For the best make-ahead result, chill the pie deeply first, then add whipped cream close to serving so the topping stays fresh.

Storage and Freezing

Because this is a dairy-and-egg dessert, it belongs in the refrigerator whenever it is not being served. Keep it cold, slice it cold, and return leftovers to the fridge once everyone has had a piece.
Storage MethodHow LongBest Practice
Refrigerator3 to 4 daysCover after fully chilled
Freezer, if you choose to freeze1 to 2 months for best textureFreeze fully chilled pie tightly wrapped; thaw in the refrigerator
Room temperatureUp to 2 hours while servingReturn leftovers to the refrigerator promptly

For refrigerator timing, FoodSafety.gov’s cold food storage chart lists custard and chiffon-style pies at 3 to 4 days refrigerated. Treat freezing as a texture-quality choice for this pie rather than a refrigerator-storage guideline. If you freeze it, wrap it tightly, thaw it in the refrigerator, and expect the crust or filling to be slightly softer after thawing.
A key lime pie storage guide showing fridge for 3 to 4 days, serving up to 2 hours, and freezer for 1 to 2 months with texture softening.
Refrigerate for the best texture, serve briefly at room temperature, and freeze only when planning ahead because thawing can soften the filling.

If possible, add whipped cream after thawing rather than before freezing. Fresh whipped cream has the best texture.

Troubleshooting Key Lime Pie

Most key lime pie problems come from three places: the wrong milk, too little bake time, or not enough chill time. Use the table below to fix the most common issues.

Loose or Runny Filling

If the pie is already baked but still looks loose, chill it longer before cutting. A slightly underbaked pie may firm up with extra refrigerator time. After overnight chilling, liquid filling usually points to the wrong milk type or a changed filling ratio.

Most key lime pie failures are not disasters; they are timing problems. More fridge time fixes more pies than people think, and a little patience can turn a nervous-looking pie into a slice you are happy to serve.

A troubleshooting board showing correct key lime pie texture beside runny, cracked, curdled, and crumbly crust examples.
Use the problem panels as diagnosis: runny needs more bake or chill, cracked needs gentler heat, and crumbly crust needs better binding.

Common Problems and Fixes

ProblemLikely ReasonFix Next Time
Pie did not setUnderbaked, sliced too soon, or wrong milk usedBake until edges set, chill fully, and use sweetened condensed milk
Filling is runnyPie was warm inside or filling ratio changedChill at least 4 hours and avoid reducing structural ingredients
Filling tastes harshBottled juice was bitter, stale, or too sharpUse a cleaner bottled key lime juice, reduce to ¾ cup / 180ml, or add more fresh zest
Filling looks curdled or grainyOverbaked, oven too hot, or acidic filling cooked too aggressivelyPull the pie while the center still moves softly and avoid browning or large bubbling
Pie tastes too sweetNot enough lime, zest, or saltUse the full lime juice amount, add zest, and include a pinch of salt
Pie tastes bitterToo much white pith in the zestZest only the colored outer layer
Crust crumblesToo little butter or not enough pressureUse enough melted butter and press the crust firmly
Crust is too hardCrust was overpackedPress evenly but not aggressively
Filling crackedPie was overbaked or cooled too aggressivelyRemove it while the center still moves softly; cover small cracks with whipped cream
Top brownedOven too hot or bake time too longBake just until set; the filling should stay pale
Slices are messyPie was not fully chilledChill overnight and wipe the knife between cuts

Need exact amounts again? Return to the recipe card, or continue to the FAQs for quick answers.

Key Lime Pie FAQs

What is key lime pie made of?

Key lime pie is made with a graham cracker crust, sweetened condensed milk, egg yolks, key lime juice, and lime zest. It is baked briefly, chilled until set, and often topped with whipped cream or meringue.

What temperature do you bake key lime pie?

Bake key lime pie at 350°F / 177°C. In this recipe, the crust bakes first for 8 to 10 minutes, then the filling bakes for 18 to 20 minutes.

How do you know when key lime pie is done?

Key lime pie is done when the edges are set and the center has a soft wobble. It should not slosh, brown, or look completely firm. Visual cues are more useful than temperature for this pie.

Why is my key lime pie runny?

Key lime pie can be runny if it is underbaked, sliced before it is fully chilled, or made with evaporated milk instead of sweetened condensed milk. Chill it for at least 4 hours before slicing.

How long should key lime pie chill before slicing?

Chill key lime pie for at least 4 hours. Overnight is better if you want the smoothest texture and neatest slices.

Fresh key limes or bottled key lime juice: which is better?

Fresh key limes are best for aroma, but bottled key lime juice works well in baked key lime pie. Choose a bottled juice that tastes clean and tart, not bitter or stale.

Do regular limes work in key lime pie?

Yes, regular Persian limes work in key lime pie. Use fresh zest along with the juice so the filling tastes bright and aromatic instead of flat.

What can I use instead of graham crackers?

Digestive biscuits or plain tea biscuits can work instead of graham crackers. Use the same crumb weight, then adjust the butter only if the crumb mixture does not hold when squeezed.

Can I use a store-bought graham cracker crust?

Yes. Use a deep-dish 9-inch graham cracker crust if possible. This recipe has a generous filling, so hold back a little filling if the packaged crust is shallow.

Can I make this with one can of sweetened condensed milk?

Not with the same measurements. This taller bakery-style pie is built around two cans of sweetened condensed milk. For a one-can pie, use a smaller filling formula.

Should key lime pie be green or yellow?

Key lime pie should usually be pale yellow, not bright green. The yellow color comes from egg yolks and lime juice; green color usually comes from food coloring.

Why did my key lime pie crack?

Key lime pie usually cracks when it is overbaked or cooled too aggressively. Pull it when the edges are set and the center still moves softly. A cracked pie is usually still edible; cover it with whipped cream and chill fully before slicing.

How far ahead can you make key lime pie?

You can make key lime pie one day ahead. Bake it, cool it, chill it overnight, and add whipped cream shortly before serving.

Does key lime pie need to be refrigerated?

Yes. Key lime pie needs to be refrigerated because it contains a dairy-and-egg-based filling. Keep it cold until serving and refrigerate leftovers promptly.

Can you freeze key lime pie?

You can freeze key lime pie for texture-quality convenience, but the crust and filling may soften slightly after thawing. Freeze it fully chilled and tightly wrapped, then thaw in the refrigerator. Add whipped cream after thawing.

How do you get clean slices?

Chill the pie thoroughly, preferably overnight. Cut straight down with a sharp knife, wipe the blade between slices, and add whipped cream after chilling for the neatest top.

Whipped cream or meringue: which is better?

Whipped cream is best for an easy key lime pie because it is soft, creamy, and reliable. Meringue is more dramatic, but it needs more care and can weep during storage.

What is the difference between baked and no-bake key lime pie?

Baked key lime pie is custardy and sliceable because it uses egg yolks and condensed milk. No-bake key lime pie is softer and more cheesecake-like, often using cream cheese or whipped cream.

Final Thought

The best key lime pie gives you contrast in one clean forkful: cold lime custard, buttery crumbs, a little salt, a little cream, and enough tartness to wake everything up.

Once you know the cues, it stops feeling risky and becomes the dessert you make ahead, chill deeply, and bring to the table already calm, cold, and ready to slice.